
Leaderboard


Popular Content
Showing content with the highest reputation on 08/03/17 in all areas
-
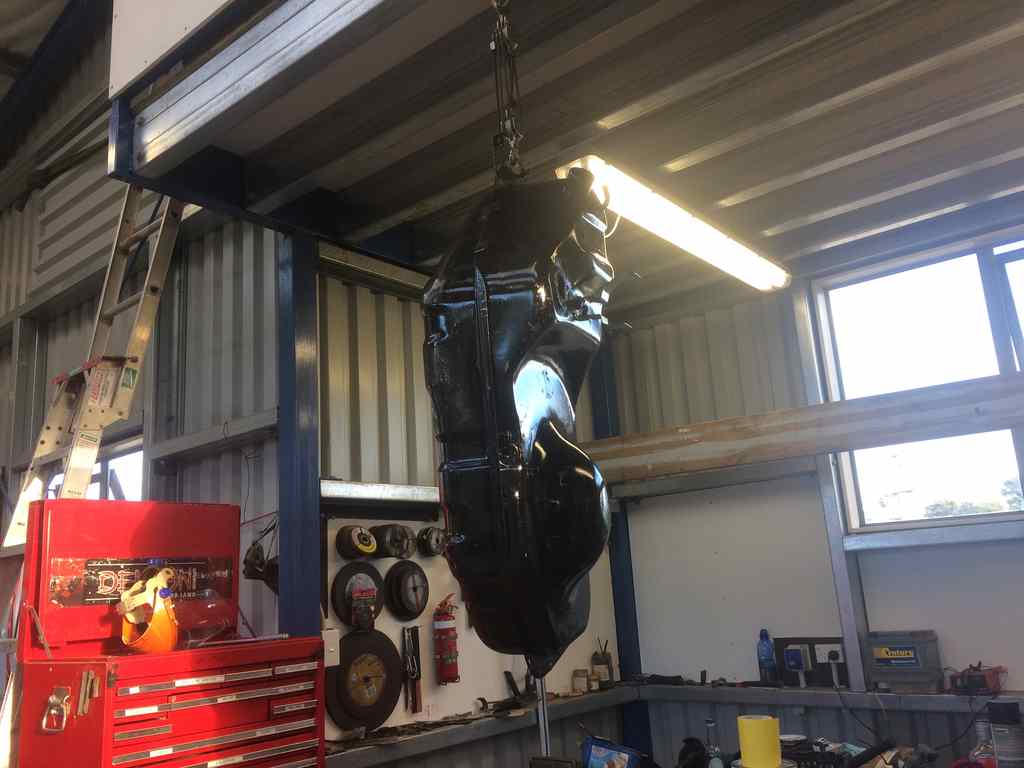
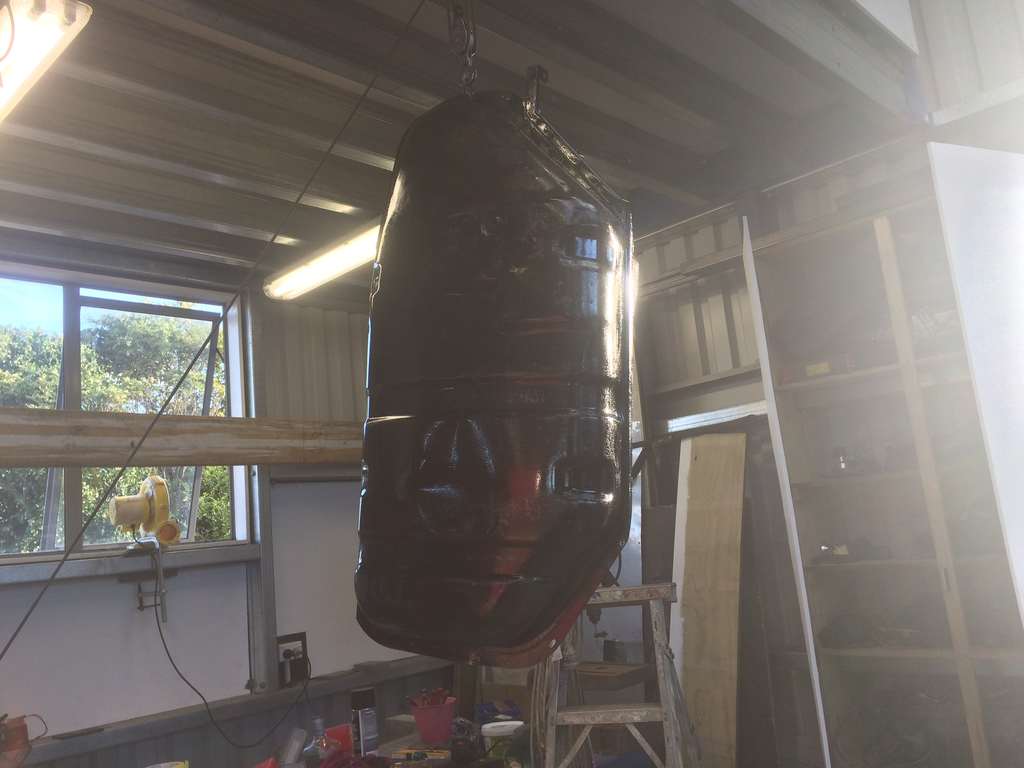
So Summer has officially ended and still no red paint on this thing! But never fear, I'm on it!! I've been spending what feels like every waking moment and many when I should be sleeping working on this thing, I'm beginning to understand why car paint jobs are so flippin expensive!Time, lots and lots of time.So after giving the shed a mighty clean up and tidy, thinning out the heard of pushbikes down to a manageable number and shoving anything unneeded under the house, I began with dressing down the old welds on the sunroof graft.and then the bog.So much sanding.then decided to bare metal the dash and tidy up the rest of the inside.check out the factory spot welds.the reason for this was to remove all the shitty old glue that I had spread about holding the carpets in place, as I wanted to get a nice coat of paint every where.looking much better after some etch.I even managed to get a couple days off work as I was on a roll!moved onto the underside, which apart from the bottom corners on the front firewall, needed no bog at least!also heaps and heaps of tiny small things like bogging up the spot welds under the engine air vents, smoothing out the welds where I grafted said vent panel into the roof and the front scuttle graft aswell, the A pillars, the front wheel wells...... At this point my fingers are numb and my skin feels like 180T sandpaper, are we having fun yet?!But seeing it all coming together in one colour.that is pretty cool.fantastic motivation.You gotta keep on pushin, you gotta keep on pushin!time to crank up the beast!this side was tricky, the hood release tube is right smack in the way.got it stick in place evenchually.and then the one on the scuttle.spot welder was making a bit of a mess out of this one(it may have been the operator) so I had to MIG up a few wee holes here and there.and bog and sand and etch.....another chunk done.need to start seam sealing but it would appear that the tube I used on the chassis has seam sealed its self inside the tube, fuck it, I'd only used a quarter of the fucking thing!I cut the tube open and did the under side bits here.not very pretty, but it will keep out the weather.seams about right, I went to paint the gray primer on the inside of the trunk, got half way and ran out of air, went to finish it tonight and I'd run out of thinners, and now the seam sealer. Ah well, I've been meaning to update you guys so there you are.11 points
-
Small update. Massive thanks to old man KY for sending up a camshaft (thats not in two bits). Whacked that in and chucked the belt back on, engine turns over by hand with no odd noises or oddities (such as sudden loss in compression) which is a good start. I was hoping to compression test it but turns out its not really practical to do out of the car (cant bolt up starter etc without bell housing). Although might see if I can find a rb bellhousing for a loan as it will likely bolt up. Recent trip to Japan sourced a few goodies (crystal shifter, lace seat covers, stickers etc), and got my pine back on for some nice wheels so spent last night browsing yahoo japan. Also found a mooneyes visor haha https://wing-auctions.c.yimg.jp/sim?furl=auctions.c.yimg.jp/images.auctions.yahoo.co.jp/image/dr000/auc0212/users/7/0/8/5/mackys_1-img383x263-14818565326td6al22809.jpg&dc=1&sr.fs=20000 Need wof for nats so thats the primary goal (booked in for next weekend). Have done some work already that needed sorting so shoudl be straight forward.9 points
-
I managed to wrangle the diff into the car over the weekend and now it’s sitting on the ground/bricks on its own weight. There would have been jack removal issues without the bricks. I will hoon it on the garage floor soon. Engine bay is done and all that’s required now is a buff. I’m happy how the sunrise red has darkened and the clear has really made it pop. It should make a nice contrast to the huckery exterior haha Next is engine and box, front struts etc.9 points
-
Success, coupla sockets, bit of scrap steel for a spacer/brace and into the shop press. Pump, pump, pu...BANG...! Fuck I love hydraulics...5 points
-
Now that some of the old crap is off the rear its time to start the cutting and welding madness! God damn but i am excited! So as you can gather from the above posts the springs etc have all been ripped on out. I chose a RideTech Triangulated 4Link to take its place. Must say im happy with the product. 5.6mm(0.219inch) wall thickness tubing and 4.8mm(0.188inch) laser CNC brackets – included is brackets for the shockwaves. It just feels sturdy and built right. Ridetech sales reps are great to deal with and more than happy to go over everything making sure the right product was ordered for the car, weight, ride height and driving style. I chose triangulated for a few reasons. One being no panhard being needed to free up room with luck for the exhaust as not much room under the Hudson for two pipes. Another was i could get tighter wheel to fender clearances due to less or no side to side play compared to a parallel 4link. They should give a much better ride quality than springs whilst being able to cope with rising and lowing the car better as well with bags. Anyway a refresher of how it was once the big stuff at back was stripped off: Below you can see the old brace and spring mounts. Flockie dealt to these. And then fabricated a Hudson bracket kit & pipe support to replace original chassis brace for each side. Good thick 5mm plating. Welded the four brackets to the car along with the ride tech one. Everything is rust killed and sealed up under the plates. With bottom bar attached. Bottom bar & mount. Right hand side bottom bar done. Left hand side bottom bar. And done! Bottom two bars attached to car via with some nice brackets. Next is notching the chassis to allow diff, rising the unscraped section of trunk floor a bit and attaching the top triangulated bars. Flockie just sees the gear and the car, visualizes so quickly how it will go together, quick glance at the NZ certification rule book to make sure its good then attacks it.5 points
-
Monster Garage Factoid - the 71 stands for 71mm between centres of the main and lay shaft in the gearbox. (just like the 63 in 63a means it is 63mm from centre to centre)4 points
-
Eastbourne?4 points
-
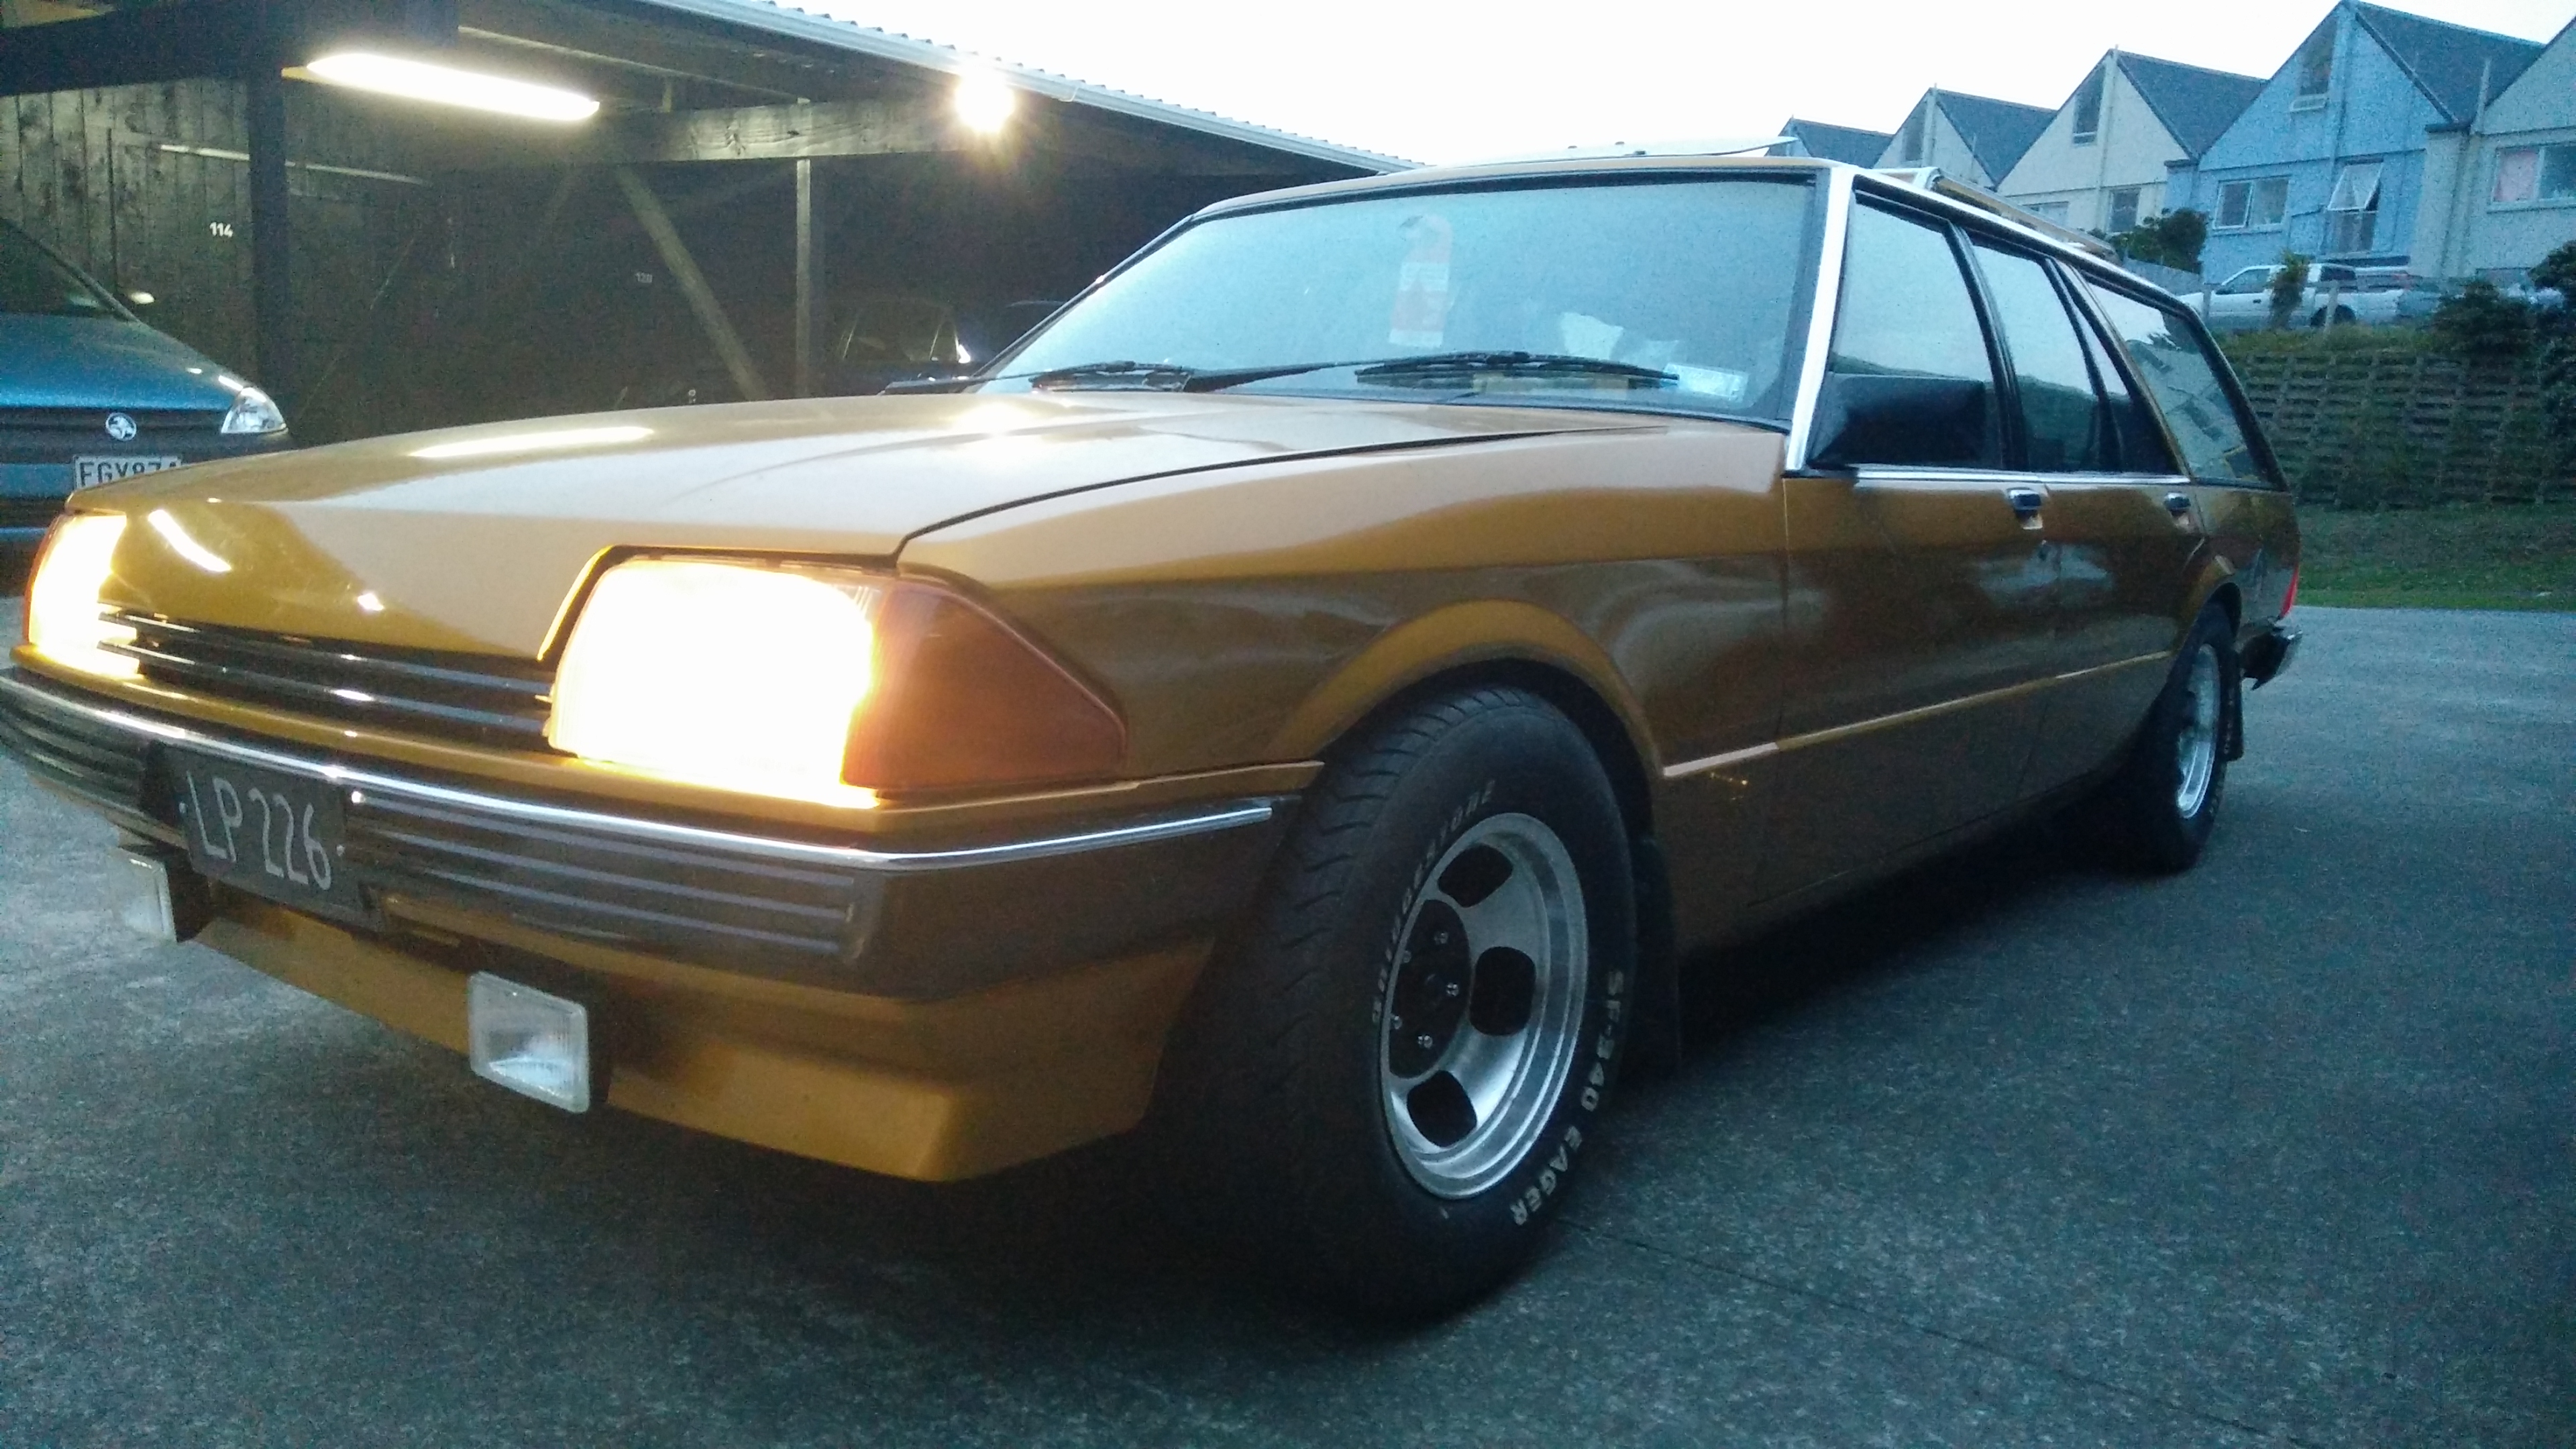
Some people know, even though I've been all about keeping this on the downlow, but it's now time to make it official. I swing both ways, in fact I am properly batting for the other team now, well at least until I rekindle my old relationship... ...behind the wheel of my Commy. That's right, I've bought a Ford. Gah the shame of it all. So, after pulling apart the Commy last year for rust and consequently fucking around for the entire Wag-off season, I realised in November that it just wouldn't be right to turn up to Wagnats in a non-wag of the olden days variety. So I begun the search for an XD Wagon which frankly has always been a dream to own. I found a good looking beast (although it was an XE) in Gore, so I got our friendly southern gentleman Mr Old Man Southern himself @kyteler to take a lazy look for me. He came back with a reasonably positive report and heck I went for it. A few phonecalls, emails and PM's later and it was on a transporter to me in Wellington, turning up right before I went away for New Years. But still I was trying to keep it quiet until Wagnats for a surprise wagcessory. I was pretty successful at keeping it quiet, except for a drunken moment with a couple of jokers where I spilled the beans out of sheer excitement but I kept a lid on it, at least until @Aladdin drove past my lockup for the 30 seconds I had the door open to roll inside my new wheels and the bugger saw it. Luckily he didn't quite grasp the gravity and the rumours didn't go very far. So I bought it and while it was on it's way up to me I snaffled me up a set of Tridents from Hawera and picked them up when I went that way for Bizzo and Lozza's "engagement" party. Got them back to Wellington and the next weekend I excitedly tried them on - but to my dismay they ended up being Holden stud pattern. Even thought they were sold as "Falcon wheels" With Wagnats looming fast, I got out the oversized and seriously depleted chequebook and bought a brand new set of 8" Tridents off the Tard. A few days later I had them and some tyres mounted up and the car was finally rolling (oh yeah the guy sold it sans wheels and had sent it up on 4 different wheels, some held on with barely a thread holding the wheel on. They ranged from a 8"wide 12 slot to a stock Hiace 14" rim and a 16" EF Falcon XR6 mag wheel. Anywho, the car was now rolling and a week before Wagnats I snuck the car under the cover of darkness to my wheel alignment man, I hid it at his workshop for a couple of days and then stashed it at my house, away from prying eyes (my lockup is the entire other side of town) Wagnats rolled around and it had it's debut. Won "Mintest Wag" and Strokers Choice. Both of which I was pretty fucking stoked to win. I've done fuck all to it other than give it a bit of a birthday in the servicing department, got all the wheels pointing mostly the same direction and threw on a set of 14x8" Tridents. It is a solid 7.5-8 out of ten in the body (had a bare metal respray a year or so back) and looks like they did a good job, including all the shuts etc. Running gear and suspension etc is a really good 8-8.5 out of ten, very very little in the way of bangs and knocks when driving along. The motor goes grouse now and the transmission does what it needs to do (oh yeah - this wee puppy is bench seat & column shift.. shit yes!) Where it all falls down is the interior. I give it a 3-3.5 out of ten. It's all there (mostly) but half the trim has been broken or screwed back together with wood screws and what have you. The front bench is pretty fucking poked too and is supported by a towel or two wedged into the exposed springs - nothing a car seat cover won't hide for now. That's OK though, I can slowly accumulate all the stuff I need to renew the interior at not too great of a cost and then once I have it I can chuck it all in for hopefully a nice tight insides. It was hilarious getting rid of the rubbish all through the inside when I got it, an empty bottle of classy Chardon was jammed under the seat and random Waikato and Speights bottle caps strewn throughout. Good ol Gore pisswagon living up to it's heritage. I don't even remember doing it but managed to drunkenly procure a set of 9" Tridents one night recently. So those will be tidied up and go on the back, then I want to find a pair of 245-50-14 Eagers for the front and drop the front spring an inch or so too and add an 1-2 inch lowering block in the rear and I reckon she'll look the part for a bit. Anyhow enough numbers and letters. Here is a couple of snaps I took tonight after the monthly meet. It's still filthy from Wagnats and the back has some freight I picked up tonight. But it gives a nice start to the project. I reckon it can only get better. Your pal Seedy.
 3 points
 -
So gearbag got back into the car today, still a few things to sort out under there, but atleast the cunty part of trying to install a heavy gearbox under a car on axle stands by your self is done and dusted. So tomorrow it might be driveable again, however, there are some other jobs that really need to be done also. One is to swap out the very noisy fuel pump. Not sure its because its a cheap item, or because I possibly didnt prime it correctly when I first started it, but either way, it sounds like there is a coffee grinder going constantly under the car. kinda gay! and want to change the spark plugs, because I didnt ages ago, and it seemed a bit missy. once those are done, its dash and exhaust time. Pics of some crap. Front Bearing all swapped over. Helicoiled selector thread. And two very different clutch forks. The more I look at the difference in these, the more I can only feel this is why I have had so much issue with clutches in this thing so far. Correct fork is longer at both ends, which probably means my release bearing has been acting a bit funny on the pressure plate. Hopefully no more! Rad and stuff3 points
-
We can see if our parts dock nicely3 points
-
I think if you asked 10 people this question you will get 10 different answers. The height I have the impala at is different depending on who is in the car, where I am going or what mood I am in. If you are setting the cars suspension up now, my advice is to set it up so it lays frame. The only way is up from there My car has about 150mm of adjustment which is high enough to attempt some rock walking...3 points
-
3 points
-
FS5W71C Floor Shift 5 speed Warner synchros 71mm between shafts centers C revision box. (Larger countershaft front bearing, larger 1st/2nd synchros+ selector) R4W71B Remote (column) 4 speeds B revision. Etc FS5C71B Same but the C stands for Porsche type steel servos(synchros) I have found these in random zed's but in no particular pattern. RFB twenny debt and 25 no debt and s13/14 have the C type box with the 6 bolt plate at the back holding the shifter. The bellhousings are mostly interchangeable. If you try to run a C onwards gearset in a B housing you will need to machine a bit of clearance for the larger counter gear and bearing, and drill out the 1st/2nd selector rod hole from 14 to 16mm. The B gearset goes straight into the C housing with the C bearing, but you need to sleeve the selector hole down to 14mm. The gearbox revisions went all the way to H. The later ones had synchros on reverse and double synchros on 2nd. I have a good selection of boxes, parts, new synchros etc in stock if you need bits. Barry out...2 points
-
Lol, so oil pump has turned up, bought via rock autos. look at box, oh yeah, some sort of brand. Open box, well well, what have we got here, genuine Aisin oil pump with the Toyota symbol ground off haha. Score in my books. Now I just hope it fits, as its for a cressida and all Anyway, not sure when thats going to make it into the car. busy this weekend, possibly busy the weekend after. and somewhere is nats and then I'm away the weekend after nats also. Such a busy time. Plus I need to get other crown on a hoist to do exhaust, So, kinda stuck in between both, as they both need to get on a hoist really. Not keen for removing sumps on the ground haha. Anyway heres some pictures of the turd. Seedy Al2 points
-
Uncaptive springs aren't legal for wof, so i'd go ahead and get that fixed with some 'V8 Falcon coils' before you take it for a wof.2 points
-
My life is spiralling out of control... So, ended up with 4 wagons, three sets of tyres and one set of rims so far. I have cleaned one wagon up and sold it for triple what I paid so that will contribute to the steel purchase. Will likely try and sell another wagon and one of the sets of tyres to contribute to another set of rims and hubs. Catching up with a mate who has a kart tyre bead breaker next weekend and chassis building will start the following weekend if all goes to plan. Still aiming to be ready for the Nostalgia Drags here in Perth this April2 points
-
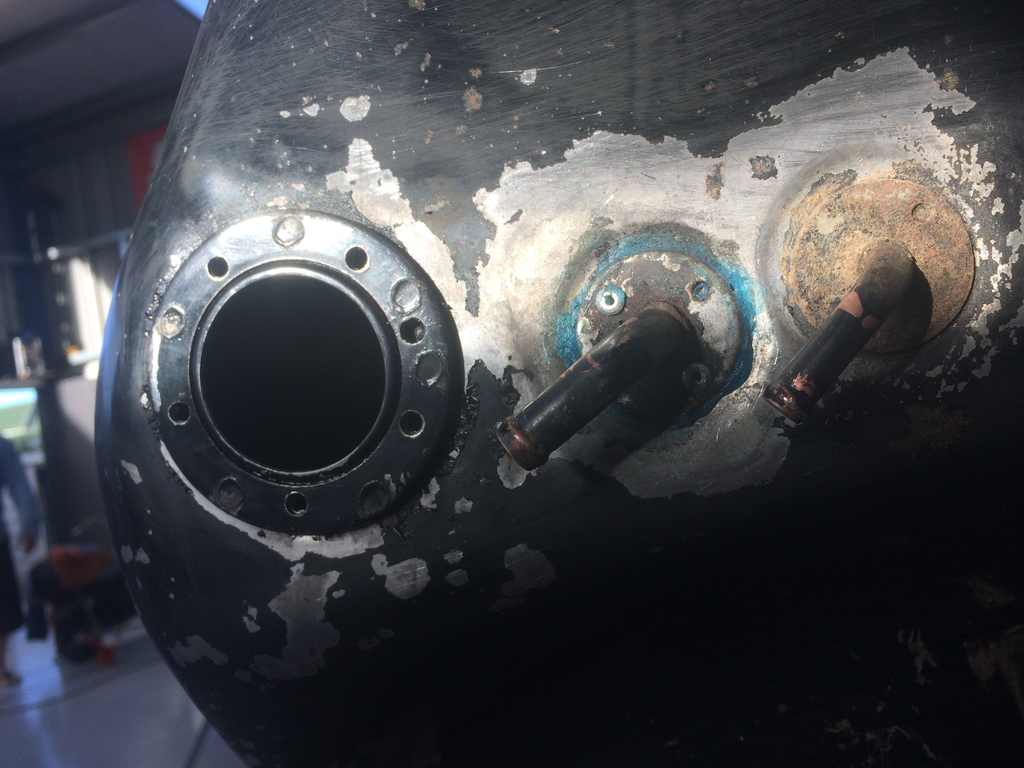
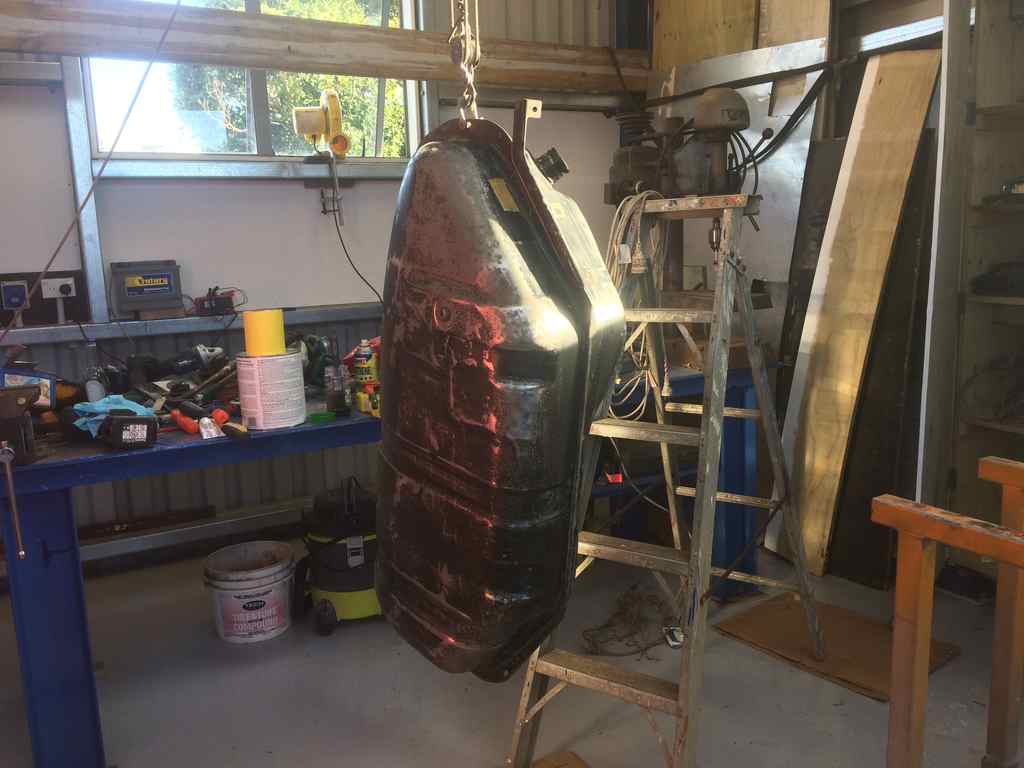
Right with the rust patches all done the next step was to put the fuel tank back in Easy job right! Well heres where the next job started opon removing one of the fuel hoses off the tank fitting the fitting come off the reason this had happend is that the tank had a dent on the bottom which had pushed the fuel pickup tube so it wasnt left with much strength to hold it in place. A few hits with the handle of a hammer sorted most of the tank dent issue so now i needed a way to fix it welding wasn't really an idea we wanted to do as fuel vapors etc so we went with the idea of a fuel sealant and some pop rivets to hold it down with that done i figured with the tank having some surface rust in places i should give it a lick of paint gave it the hand sand treatment as it didnt need much sanding one coat done Number two coat Also got my fan setup going on in the background which is a blower pump for a bouncy castle etc blows hard for what it is ended up coating the tank in POR 15 found it a great product as only used a brush to apply and when it dried the brush marks didn't come through only in a few places it did where i didn't do a great job with the brush just don't get the shit on your hands took me about 7 days to get it all off And that's when the tank went in also gave the tank straps a coat also along with cleaning all of the breather box and hoses then bumper went on afterwards
2 points
-
Spent some time on this over the weekend between jobs. Kayne came over on friday to fit panels and will align when the bonnet goes on next week. All the lights are now fitted and now working on the inside which is almost done. My dads been pining pretty hard and has detailed the badges which is pretty sweet. I will get pics of the exhaust while im fitting the gas tank as thats next.
2 points
-
Well, unproductive weekend. Have a new front bearing for gearbox, a new clutch fork on its way, and a new rear main seal Non of which have been fit yet unfortunantly Will make a stab at gearbox tomorrow. So yeah, looks something like this in the engine bay now2 points
-
Finally finished the cavity, got the last of the closer on yesterday and had a flashing made up to go under the existing slider. Also got a power point now so I don't have to scrounge of my extremely accommodating neighbour. Talked to my engineer about why I failed my preline inspection, emailed him my bracing plan and he came back saying that with the external walls I've braced plus the addition of my structural cavity, 12mm ply and the number of walls on the inside that are in good condition, makes the internal bracing plan almost obsolete. Gary also knows the boss of the inspections department well so is going to have a word with him. So all going to plan, by the end of the month she should be clad and plastered which means I can paint, sand the floor and do the deck.. These are the flashings I had made up, the tuck up inside the bottom of the slider and drop/extend out to where the cladding starts, had to extend the original reveal down to close the cavity, hopefully the inspectors happy with it..2 points
-
Which is great when you can adjust the spring rate, but seeings as this is "airbag chat" and an airbags spring rate is dependant on pressure, which also happens to be dependant on height, then you realise that slammed = low spring rate, hence the question to other airbag users...2 points
-
An older guy I work with runs a 302 with 289 heads. Reckons it was a pretty standard thing to do for gaining a few extra horsepower back in the day. Not related to your timing question but you may find it useful.1 point
-
A good baseline setup is 10-12 degrees with the vacuum disconnected or 30-32 degrees all in - (which is probably about 2500rpm) Depending on what fuel you run and how much compression you have, you may need to tweak it a little from there.1 point
-
Mine is a 71, so prob bit different by the sounds of it, but engine # at back of block behind manifold, circled in red here... and timing plate front lower left on mine, no idea where it will be if water pump outlet on left sorry... They are a sweet wee motor once sorted, heaps of info online, I generally use 289 as a search term as the 302 went thru heaps of variations. Good luck...1 point
-
could be in for a laugh. probably coming down Saturday (weather dependant, still re-roofing house) and could easily stay in either Cromwell or another fine location slightly north or east.1 point
-
https://www.facebook.com/events/139750353213667/ 19th of March Autocross/Grasskhana - I think this is the same place as Marahau Nats...Beagle will be there racing!1 point
-
First thing is 302 and 351 have different firing order. You can fit 351 cam's into 302 and vice versa so you will need to know what cam you have. Also figure out TDC with a screwdriver down the #1 spark plug hole. Once you have that then figure out what diameter damper you have and buy some MSD timing tape and fit it to the pulley.1 point
-
hard to say. dont think so. but he did say he keeps most of his fleet on hold1 point
-
Are the cars outside reg on hold?1 point
-
just been going through all my old photos i took last time i visted. i am probably gonna walk away with a motorcycle/princess or 71 point
-
The fan knob has a wee pin you need to depress, then pull it off the shaft. (lol, knob and shaft). Then undo the bezel nut and it moves out the back. Take ciggy lighter out of socket, then undo the back of the ciggy lighter barrel and remove. Undo choke cable at the carbs, and proceed to pull the entire cable out from the inner from inside the cabin. Undo bezel nut on the choke slider thing and remove from the back. You may not have luck gluing, I've tried it in the past and it doesn't stay put, ever.1 point
-
Entry packs arrived.1 point
-
I built my own 4-link rear suspension, including the links themselves, and didn't need to get it crack tested.1 point
-
Totally in for the 18th, at this stage I'm not working and the Crown is wof'd reg'd and running sweet. I'll head up to the old man's on Friday and meet everyone in Oturehua, I'll see if JVB is keen too. Easy to avoid the gravel road to St Bathans just adds a little extra time. There are some other sweet gravel roads in that area too, I pulled my 230 out for the day to film this on the back road up the hill behind St Bathans1 point
-
well, after a successful brew i was in no fit state to go for a ride on any bike, order of the day was a drunken lunch time nap, last batch of hops added to the mash ton. doesnt look very appetising i admit but sunday was a good day, first i took pinky (b120) for a ride to find it was running out of gas at full throttle, so pulled the carb and adjusted the float, another spin and she was bang on, even managed to get to 55mph on the flat hehe next on the cards was wee red (bridgestone) had to replace a buggered exhaust gasket, then decided id take her for a spin with out the seat, ran like a champ!! managed 80mph on the clocks and pulled pretty well getting there, big red (vtr) got a start up a wee run, as well, just because it'd been such a fruitful day blacky (bandit) didnt get any love pics for thread1 point
-
Took her out at Mere Mere on Friday night. she bested a 13.232 at 108.5mph1 point
-
Pined over the other british junk that I forgot to take any photos of the OS cars... Oops. Hope someone did. Album link: A couple of stand out images: @Tumeke & @Threeonthetree are secret Rover 75 piners. Tow trucks literally lurking behind trees & doing laps of the park. @MichaelJFox foaming over the Citroen display. Not as committed as this fella though.1 point
-
There was tension between the two Vauxhall groups. The offical "Owners Club" and the DTV guys. The official guys don't like the "modern and modified" Victors and Vivas of the DTV group. Barrys getting political. Bunch of 80 year olds telling those boy racers in their 50s and 60s what for.1 point
-
Yeah this was great. I took some photos, will post them tonight. Loved how the OS display was almost the outcast group of cars that weren't quite good enough for single make clubs.1 point
-
Do this one instead.1 point
-
That's a pretty intense earthquake that flips the house while you're doing the brakes.1 point
-
If you do it anything like me, you might as well just let it run out on the floor as that's where most of it will end up when the house flips out of the container or I knock it over.1 point
-
I will possibly be towing the vw over in the valiant if I can sort out its minor problem1 point
-
Summer is mint1 point
-
He'll yeah ill be there with the world hating on my beetle. It's going to be great. Can Not Wait1 point
-
Yep, pretty frigging happy with it, paint could be nicer, more stainless/polish/chrome etc would be cool, but at the end of it, no one is really going to see it are they!?Bonus shots.bolted in the shocks, painted the white front ones matt black like the rears.thought I may have a problem here. actually about 1cm away from the shock, should be okay? would be much eaier to change it now than when it's full of fluid.other random pics.this thing was super handy for bending up the brake lines.1 point
-
So christmas came a little late this year.who am I kidding, this was better!Mark at the Metric Nut sent me up pretty much everything I'd need to get this thing on the road.I wasn't going to bother with the shift rod seal but after cleaning up the gearbox, I'd found one small tear in one of the axle boots, so while it's apart we might as well stick one in, never had one before, fancy!got the front brakes back together.had to get the rear oil seals pressed in by the local shop (cheers frank and co) I tried doing my self but just mangled it. nearly didn't do that either as I read the seals don't work without the drums torqued up, again, glad I did as this was inside the leaking one.took the pedals apart, cleaned, painted, greased and reassembled.pretty much every part of the throttle linkage was all bent to hell.new bumpstopstwin circuit master with fluid res on top, started running new stainless brake lines that I brought ages ago.pedals installed.ran clutch and throttle cables, forgot how much of a ass hooking up the clutch cable was who designed that fucking thing!got the rear brakes back in along with the bearing seals, handbrake cables run and hooked up.cleaned up the tie rods and installed new inner ends, the outer one have been replaced in the last decade or so.I was going to polish up those stainless brake lines but I had run out of autosol and wanted to get it done, I've also realized how little things like a tube of this, a can of that, soon adds up, I needed rubber grommets for the brake line, some else this car has never had, and bugger me if stupercheap wanted over eight bucks for two.this shit adds up man!ah, forgot the lube!never forget the lube.then I came up with this genius way of getting it inside the steering box.and paint bla bla.front drums on, with new locking tabs for the bearings.rears all jammed on.and holy shit balls! it's on it's wheels!1 point
-
Spent most of the last week of holidays in the shed, cleaning and painting the beam, brakes and gearbox, so i could get it back on its wheels and get back to the shell.Everything was covered in grease,rust,dirt and paint, so the process was dowse in turps, scrape and wipe as much grease and muck off, wire wheel, degrease, brake cleaner, sand, acid etch and or paint. Filthy work.I ended up getting two cans of POR15 in rattlecans, which saved a bit of time painting.trying to keep track of all the partswhen I first got the car the front was sitting pretty high, and the front bump stops were under the rear seat with the battery, when I installed them I found out why. One side went on fine, the other fowled the shock.Whoever build this beam, had cut and turned the bump stop horns and had welded on crooked, so all I had to do was cut and reweld, matching it to the good side, easy! except when I removed the rubber off the good one, the horn came off in my hand, that's some good welding!you can see the gap were the weld missed.also found this tiny blob of weld on the edge of the beam bearing, has not made friends with the trailing arm over the years, I'm sure someone will be posting up all my mistakes on this car one day.like the shitty huge welds that now hold the horns on. acid is a hell of a drug!but it sure does make POR stick well.cleaned up my oddball drums.smashed on some matt blackFirst part installed on the pan.Filled the tunnel up with Rustroy, that shit stinks!Darrell helped me bolt up the gearbag and beam.matty b on the box.Now I bought these grease seals for the beam about 15 years ago and never got around to installing them.until now.gearbox is matt black, axle tubes are Gloss Black POR, backing plates are grey.I've started cleaning up the brake parts, shoes etc, just need new cylinders (wheel and master) reinstall cables and paint pedals and steering stuff, feels like a major milestone!1 point
-
Discussion //oldschool.co.nz/index.php?/topic/20603-muzzies-1961-mk2-ford-zephyr/?hl=zephyr I think I might be bordering on obsession here now lol. Yet another car joins the stables. Named Maxine after my mother who sadly passed away Dec 10. Runs a 3 on the tree box with no synchro on first or reverse, hydraulic clutch thats fucking heavy connected to a meaty Straight 6 with a reasonably straight through exhaust. Sounds grunty. Even if it aint lol. Has millions of receipts for vast amounts of mechanical work done to it over the past decades. And it even has the original dealer warranty papers. Apparently, some guy in Papatoetoe bought it new. 4 wheel drums. Its the flash version with the heater and fan and variable wipers lol. Done a genuine 43,000miles. Picked it up today with a brand new WOF & 12 months reg courtesy of old owner. Just some pics of how it was when I bought it. Suggestions? It's 100% original currently so would like to keep it looking that sorta way.1 point
-
Radio for the world!! Contemplated pulling out the radio for a while, see if I can get it going. Well, as luck would have it I pulled it out, discovered it was still wired for positive earth. *cue sad face* Not looking good for it working then since car been converted to Negative earth. Prodded around a bit and got a hint of a click from the audio stage. OOOOOOOOO! But wait! Switch has blown and saved the radio, so jimmy rigged a little click switch on wires and mounted it under the dash. Lubricated all the dial cords and pulleys, and got the light bulb working too. Also removed the aerial, freed up the 4 sections and lubricated them, couple of kinks so it won't fully de-extend, but fully extended it's a massive 1.8metres high Can't ask for better reception than that! But anyways, got me an original working VALVE car radio And pics....... (for those of you who don't know what valves are, they are the glass tubes in the picture, they were around before transistors - I collect valve radios (home ones) with my dad so had a fair amount of prior knowledge to get Zephs radio going) Crocodile clips and some poking and prodding gave promising results! Sockets where the valves plug into. Alot more wiring and generally more messy than todays modern transistors as you can see. The important bit, the valves! Those ones aint terribly impressive, they're little ones and the heaters use low voltage. Can get some much bigger ones that get very hot and can get some interesting electrical shorts inside for a nice show.1 point


.jpg.02619e79ee9573cd1b2017da062586aa.jpg)


This leaderboard is set to Auckland/GMT+12:00