
Leaderboard


Popular Content
Showing content with the highest reputation on 05/08/16 in all areas
-
fuck this thing is lush as fuck to drive. i don't know what it is about it but its fucking cool fun to hoon around in it. anywho, Richard (new owner) came over today and gave me a hand and we got heaps done. radio install is now complete. made a mounting plate thingo, ran the wires and installed she 6" speakers in the rear shelf. it all works and sounds mint. the other thing that got done today is we removed some height from the rear by removing the rubber spring seats from the top and bottom of the rear springs. and because i had them we put some 20mm spacers on the back to stick the wheels out more. its rubbing a tiny bit because of the ballon spec sidewalls. 225's on an 8" rim gives a pretty 32 ford spec tyre bulge. if it was running the same tyre on a 9 it would be sweet. or a 205 on this rim with the spacer. whatever. anywho. pixxx 2016-05-07_05-23-03 by sheepers, on Flickr 2016-05-07_05-24-01 by sheepers, on Flickr 2016-05-07_05-18-48 by sheepers, on Flickr 2016-05-07_05-23-10 by sheepers, on Flickr 2016-05-07_05-19-37 by sheepers, on Flickr7 points
-
Thought I had pretty prove that progress is actually getting made here. The following photos are the before and after of the last patch repaired on the body. Which was around the boot lip, quite cunty areas to repair and most corners being made from multiple steel patches. Being hidden I was a bit on the rough side here but it will be functional and not rusty and leaky. Welded Who am I kidding? I'll end up cleaning that up more.5 points
-
Alas, the KP got stood up4 points
-
No updates for 2 years, this is where its at now:3 points
-
I started cutting out the rust and replacing that shit. Now I weld all day err day but have very little experience with panel work so let me know if you see something stupid Left side if windscreen before Patch 1 Patch 2 Patch 3 And patch 4 I killed the rust before each patch went on and have finished it off with an etch primer. Just needs a touch of spray filler before I paint. I then did the same with the left rear wheel arch Before. After. Basically the same to do on the opposite side, then alot of repair needed around the boot seal part. I've also realized that I'm totally not rich enough to bag it this time round. So that will have to wait. Chur3 points
-
Spent some time liberating the rear screen from the green turd yesterday. I suspect the green one was a low spec model compared to the orange GSR as it doesn't have rear demister. Spent a bit of time with some window cleaner and a razor blade to remove the lichen and funk. Perfect. And so the green one was parked in an open yard next to SH3 since the year 2000 it would seem. Subsequently anything easily removed like lights, trim and badges has been. Funnily enough, this pair of badges don't appear to be worth stealing. May order some window rubber I think matches from Basis' selection this week if credit card says yes. Tell me stuff about window demister kits and tetanus here. //oldschool.co.nz/index.php?/topic/22150-waimaks-gsr/page-192 points
-
Corner weigh session suggests heavy stuff is heavier than light stuff. This is 1/3 tank of fuel. To make me feel better we put my evo on the scales, and managed to bust one of the castors on my jack..2 points
-
The sill step panels are now tack-welded into place (no pics - sorry!) which will allow me to position the body on the chassis (when I've got some extra muscles). Then, moving around the back I was struck with a dilemma. I want a bootlid in the car, and was going to make up a smooth, flat one (like Prefects have) until my petrol-head daughter insisted that I keep the 'spare wheel' moulding on the back. So starting with this - the place the spare wheel mounted: I carefully cut around the perimeter which left me with a hole: And if i then invert the panel I've just cut out, I end up with a very slick, 1938 made bootlid which looks as it should: I'll cut it along the bottom swage and put hinges at that level, remove the reinforcement strut to smooth it out, and there will be a bonnet-style spring catch hidden beneath the top of the curve. So I made up this hinge panel. Panel is 2mm steel, and the actual hinge brackets are in 3mm: Which is then (tack) welded into the wheelwell: Bearing in mind that this is now the INSIDE of the boot. The hinge panel and lower part of the 'wheel' will be welded back into the body, and the top cut carefully along the hinge panel and made into the hinged lid panel. Stay tuned!2 points
-
Copper shrimp I made from 45mm copper pipe and other copper scrap2 points
-
Build Thread Oh my god...what a beautiful find!1 point
-
so i bought this from mega GC Tim off of here, when it popped up cheap i had to snap it up -jap import -1800 8v (G60?) -auto -boat spec body is fairly straight, little bit of rust creeping underneath the windscreen, and some poor attempts at rust repairs on the rear hatch. the engine performs okay considering its size and spec, however it leaks oil out the engine/crankcase breather? i assume built up pressure in the crank, or a line somewhere is blocked. if anyone knows more info on these and how to remedy would love to hear. plans are to give it a well needed cut and polish, give the springs a bosch haircut, fellow golf foamers let me know your thoughts on suitable adjustable suspension for these. from what ive seen Raceland ones seem to be pretty good. acquire wide 13s from japans and perhaps a manwell box later on. inspiration1 point
-
So I've had a bit of a nerd-on regarding fuel economy etc recently, Was reading about that guy that whale tailed his civic (which looks utterly rediculous) However he now gets 2.8l per 100km What the fuck!! I didnt even think that it would be possible to improve by that much. I want to keep this car looking standard, but there's some low hanging fruit in the aero department because the front of a the car, from underneath, is a frigging mess. Gonna have some side sections sealing off radiator entry so it uses the fan less. Then try get a flat tray underneath the front of the radiator area and a short distance behind it too. Might be worth a few KPH at the far end of the straight at Hampton. Found this cool excel sheet, will give this a go before and after and see if there's any difference. Not expecting miracles but I do think there will be at least some quantifiable change for the better by attempting reducing drag a little. If not, as usual, will chuck it in the bin. www.iwilltry.org/b/wp-content/uploads/2010/05/Drag_Coefficient.xls Made a start on some side panels for radiator, just corflute for starters. Will check with pressure sensor for before/after and see if it makes any difference. "When you've got carbon fibre taste, but a real estate sign budget"1 point
-
Seriously?! So It was all organized and shit and she just didn't turn up?1 point
-
Abit of an update since its been 6months.Life has changed a tad for me now with having a baby on the way. The crowns have had to take a back seat as i renovate the house and get baby things,but it is a boy!!! so i may need to order a small tig torch so he can help dad finish his cars.I have been hording more bits,manged to score complete front and rear disc brakes off a ms112,it came with brake booster/cylinder and powersteer setup too,unsure if i should run it yet tho.Also have load adjusting shocks on the way for the front,should calm the whale down.Managed to get that factory black hood lining up,30mins in the sun to soften and work quickly to stretch it into place.so now the interior is all factory black and should be rolling in Japanese mafia spec fashion when its all done.have sussed a shorter shifter position and notched sump (from MATTTS crown) as the jz was too far foward,so when all the bits are here i can finally mount the thing. oh and the wagon,thats just awaiting its turn,i am on a hunt to find parts,proving to be a challenge.all i have scored is a 'custom' badge1 point
-
That won't be helping. Looks like we need to source a new block unless that's fixable? I doubt it though.1 point
-
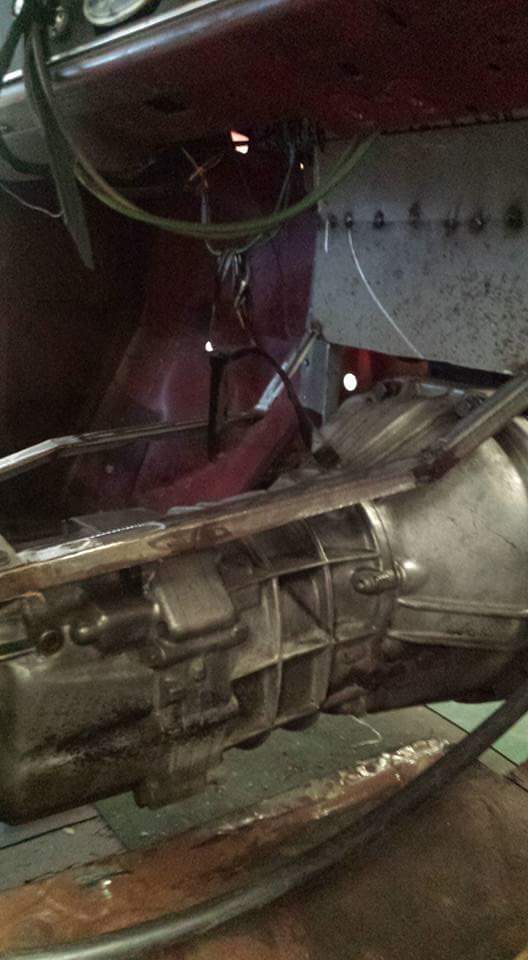
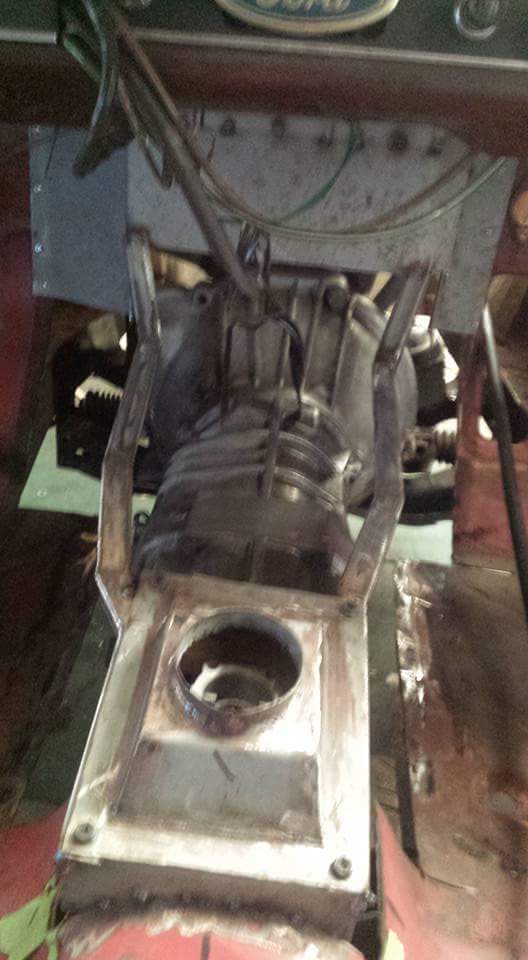
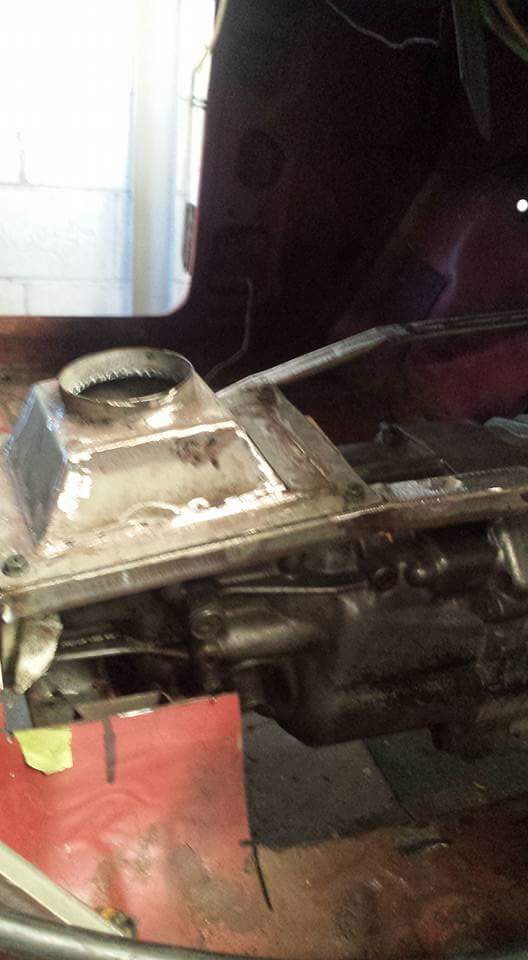
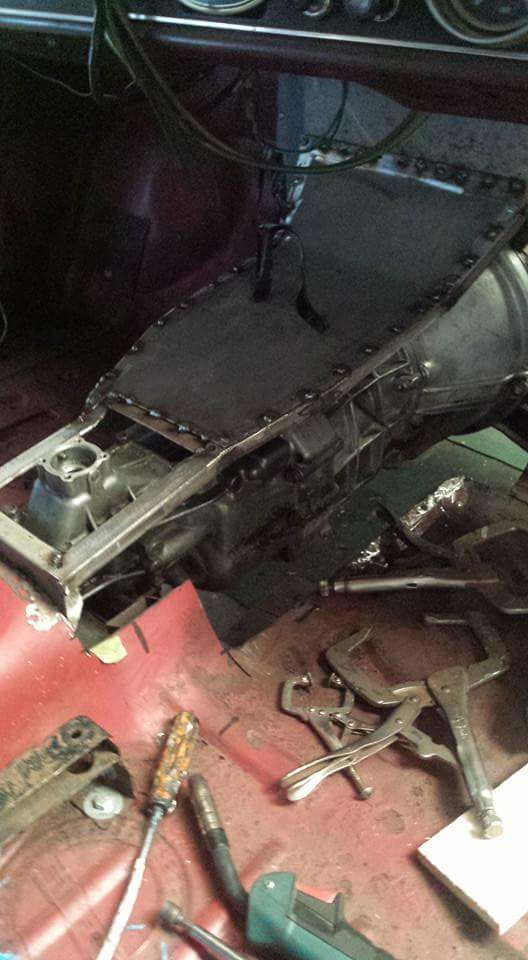
Started on the gearbox tunnel today... I wanted to keep as much rooms s possible and its a pretty big arse box.. So I started with some 25mm bix section and cut it down to angle. Then just cut and twisted it into the shape I wanted. Then started on the panel Might get some more done tomorrow
 1 point
 -
Carefully removed the plates from this (last) panel, I'm going to try find the worlds smallest pop riveter to put them back on, the panels with a small piece of glass behind them really concern me though. The the front of the base I had previously left on the plate with the serial number deciding I didn't want to damage it butt his panel was in too bad of condition to not attend to or to try work around the plates left on. There is two of these (bakerlite?) panels on the cash register one of the front of the draw the other where you hand rests while using the machine, both were full of filth I've cleaned one so far it its been the most time consuming job so far. I tried using wax and grease remover as well as thinners to try just lift of the gunk but it wasn't working so I took to it with a razor blade and pick to help clean it out between the grooves then again cleaned it with thinners. These are going to be painted black but I thought it was important to clean them out properly because the tread isn't very deep and I didn't want to lose that look when they are primed then painted.1 point
-
fuck hayhole damn fine work! fuck I wish I had spare time for bikes lol they are so much easier to deal with1 point
-
You've changed1 point
-
2016- 2016-04-26_05-47-04 by sheepers, on Flickr1 point
-
yea, hes on here.1 point
-
Nz v12 mx41 Cressida? https://www.facebook.com/1GZFE-V12-MX41-Toyota-build-233920976966715/1 point
-
Damn look at the size of that motor!1 point
-
you should paint the headlights body colour1 point
-
Righto, here is a summary of the last few weeks of dicking around. The arse end has sagged a bit over the years as you can see, so I thought I would lower the front first, then the back to suit. The front has these convenient spring platforms, spacing those off will lower it somewhat; So I made some things out of high tensile steel; The flat is so I can wind them on to the studs in the lower A arm, they are threaded all the way through with a 3/8th 24t thread. The spacers are 30mm long, which by my back of the envelope calculations would give a 50mm drop. So all that took a bit of dicking around over the last few weeks, the main holdup was the lack of motor in the lathe, making it extremely difficult to turn things. And today I had all these things together - including some high tensile bolts to suit. The spring platform dropped with very little fuss, I was a bit worried about it pinging out, but it was easy. Then wind on the spacers and bolt the plates back up - this was tedious, getting the bolts aligned was way harder than it should have been. Drop that fucker back on the ground, and whaddayaknow 50mm worth of drop, bang on the money. Fuck its a weird looking wagon from some angles... So that is the front, I will see how much drop it needs in the back by getting your mum to sit in the boot puhuhuhu! Also here is the first cookup on my outdoor cooking setup, this will get some use this summer I reckon; Fuck yea.1 point
-
Small progress lately.Mounts are getting sorted.Motor is going to be a tight fit all round as i want the shifter to line up in the factory hole so no cutting of the interior has to happen.a slight sump mod may be needed and swap bar will have to change.Also complete dash out of a ms75sl Japan only turned up from Japan.so now i have nice round gauges and a factory rev gauge.Re-painted the dash and have it fitted,just need to change the plug to suit. Old square style dash,found in most 60 series crowns New much rarer dash Also i am changing the headlining to a mint condition factory black as mine is stained and gray.Also likes to pop down when going over 100km Might try get that in next weekend.The sides of the headlining are glued,under the trim edging.Will Ados be ok to re glue or is there a better glue? Thanks matt1 point
-
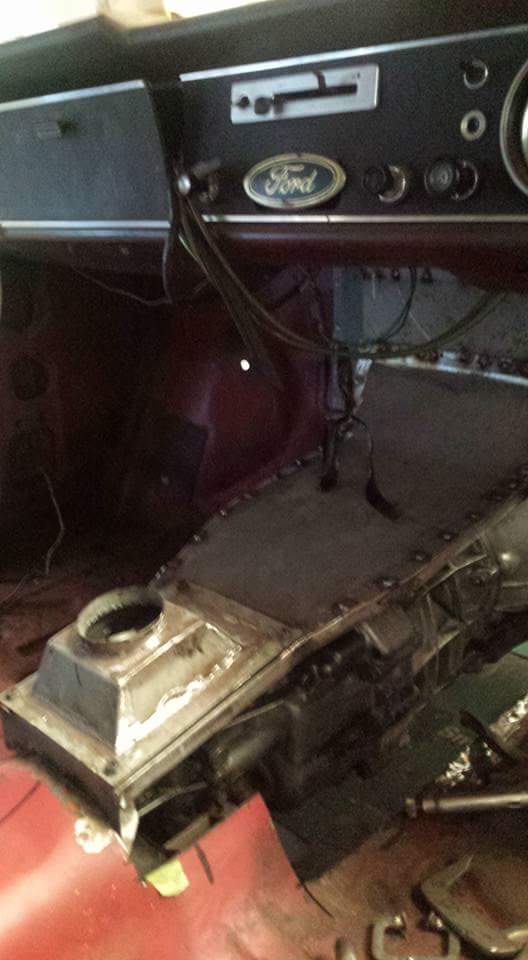
Alright so... I've pretty much stripped the whole thing out now. Yes there is areas that need attention but nothing that I didn't know about so she really is still a solid old whale. pics Pulled the engine and gearbox out. Wouldn't surprise me if its the first time the gearbox has seen daylight since being fitted! Good times!1 point
-
yea im also a big fan of the 3M look a like. it looks like an M but its not a huge pile of shit.1 point
-
Making your 2J look like a 3T is an awesome idea! You've pulled it off really well.1 point
-
I had to have a high stop light in my 240z when It got registered. I Still have it around somewhere if you want it? I took it out after getting registered and wofd.. Three wofs so far and no one had asked.1 point
-
Not entirely correct. The high-stop rule is in regards to the date of registration into the country as opposed to the actual date of the car. So if an old car has had to be re-registered or is newly imported into NZ (after, 1990, I think) then it requires a high-stop. Because you have the original ownership papers, you might well be able to swing it through without doing one.1 point
-
You wont need a high stop light because it is over a certain age went through the same thing with my car.1 point
-
Oh right, I forgot do do one of these discussion things. Cheers, I'm so so happy with her1 point
-
Hi everyone. I own an '84 Bluebird which currently has a FWD CA18E Auto in it. I really want to convert this to a manual, but unsure whether to buy a manual gearbox if possible to fit it to the current motor, or buy an already manual motor. So a couple of questions: Which method will be the easiest/most cost effective? If I were to buy another whole motor, what models would bolt straight in? Would converting to manual be worth it? Cheers1 point
-
Just get a manual box, flywheel and clutch, gearbox mount, clutch pedal and clutch master cylinder. I have done it on a couple of U12's and it's pretty easy if you have the parts. Easiest would be to buy a damaged or rusty manual one and have it beside your car so you can just swap all the parts that are different. Also you will have to short out the park/neutral switch from the auto gearbox so it will start.1 point
-
So I have been driving this basically nonstop, It has made me question why I spent so much time with small old fords and toyotas etc. So smooth to drive and I get such good vibes driving it. But these are the hubbys I have 2 of and want two more I have the 4 hubcap clip lump things, like runamuck said I think they are vg wheels And I have 2 of these if someone wants to swap or just needs some. They only fit my spare so I have no use at the moment Shameless beauty shot Thanks for the good advice and answers chaps, I havn't really asked many q's on this forum until now but this is new territory for me and your help is really appreciated1 point
-
The plan at this stage is to try and hock the complete running gear from radiator to diff and include stuff like the fuel pump if anyone is considering a repower of a kit car or maybe something os and lightweight?? also discovered a bit of a weakness in the front swaybar mounting with the uprated bar in there so will re-engineer something a little meatier for that.. I have no idea around the compatibility of the cas / coils sorry...1 point


This leaderboard is set to Auckland/GMT+12:00