
Leaderboard


Popular Content
Showing content with the highest reputation on 02/06/16 in all areas
-
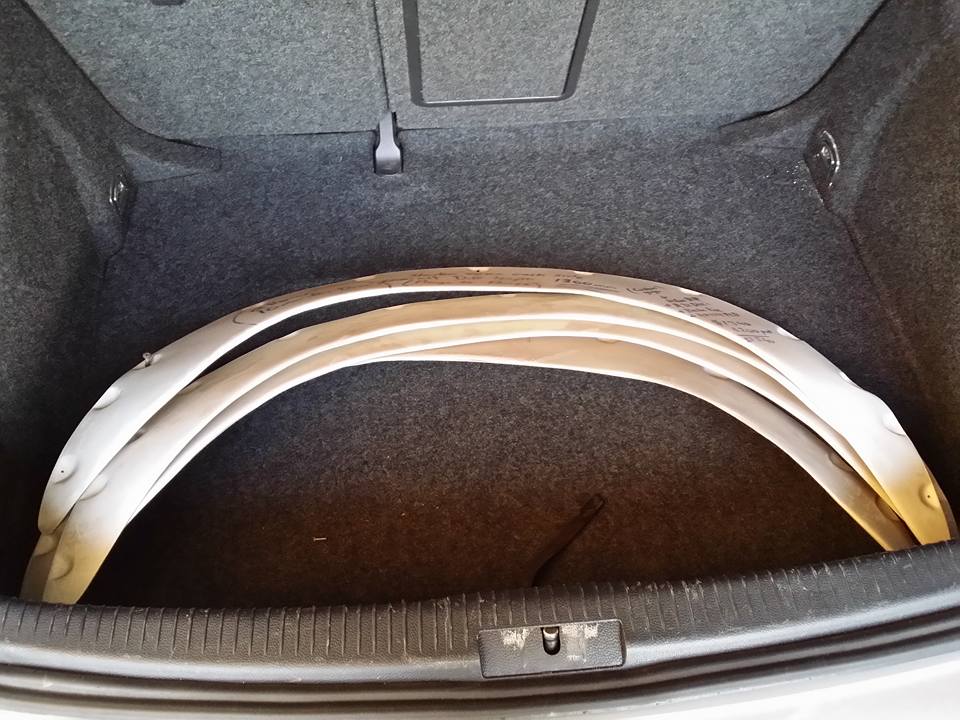
It's only been 3 months of no progress, whoops. Oh well, back into it now. Decided against trying to make it out of round tubing so just used some 30x30x2mm RHS as it's much easier. More updates over the next couple of days hopefully.6 points
-
Another moment of stupidity and I'm now the owner of a 32 channel Calrec S analog mixing desk. I figured it's a winter project with the assumption that it's going to freeze over for the next decade and I'll then emerge with a 3ft beard and a completed desk. The unit came with tons of spares, reportedly cost upwards of $750k when purchased in the early 2000's and there won't be a person here that hasn't heard the results of this desk. Its both a bit of NZ broadcasting history and also an interesting project to add to the collection and help to kit out my retro analog sound room/studio when it's completed. In it's current naked state What it's supposed to look like. It takes a truckload of cards like this6 points
-
oh shit so i havnt updated this thread since oldschool helped sus out my running issues, in the megasquirt questions thread. i need to buy you all a beer! this is now running super sweet, need to replace the inlet manifold gasket after the fire but thats no big deal/was a gamble so see if i needed to do it or not. The throtle cable was pretty fucked and i hated the TPS mount/linkage abortion so had a good think about the setup and came up with this solotion. Honda CB360 throttle cable which splits, and i made this cable actuated TPS mount at work with ali offcuts ewhich i am super proud of, looks far more professional than anything else ive ever fabricated, and having no real training in fab work im super happy with it. needs a real return spring, the pen spring was just a proof of concept thing. the loose cable end will go to the carbs and the tps will be pulled open at the same rate as the carbs. all with adjustable tensions etc. once this is installed (im going to need to re jig the pedal end some how but shoulnt be too hard. it can go for a wof as everything else i want to do doesnt affect legal things. really looking foward to seeing the difference full digital ignition has made.3 points
-
So. It seems I really only update this thread like once every year... Holy shit I am slack... Anyway, this update sucks. For the last year, the car has sat in the garage in Auckland. I was really hoping that due to the proximity (it's in the same fucking house as me!) that I would be able to crack into the bitch and get it all ready for assembly this summer. Well, summer has come and it's far from ready. I've finished off welding on the sills (need to trim off excess), and finished all the firewall fabrication - It just needs some sort of underseal or something to make it look less shit-house: I have tried and failed multiple methods of actually mounting the engine now, and just can't seem to get it right. It's a combination of having an utterly shit welder, BEING utterly shit at welding and not being strong enough to wrangle the engine into position for measuring and fabbing. The sad reason for this is that over the last few months I have had monumental health fuck ups. Initially some sort of infection, then essentially flu symptoms (all-over aching and weakness etc) that have lasted for weeks on end. At one point, also was hospitalised by the pain, which turned out to be kidney swelling and tissue damage from this mystery illness. The latest, is that I have something wrong with my head. Now we all already knew that based on my choice of engine and car, but jokes aside, I've been having some rather interesting experiences, including Hallucinations, Synesthesia, paralysing headaches and constant nausea/ dizziness, in addition to a whole bunch of odd mood swings and anxiety. This has all obviously meant that working on the car has been VERY difficult. I managed to get mounts welded up and the engine in the hole, but then for some reason, after a bout of tears and weird paranoia, I cut it all off!! (seriously, I kind of came to my senses, hacking up the hours of welding I'd just done and muttering to myself all sorts of weird shit.) Pic here: The latest development is that after multiple visits to the doctors, (one of them seriously just googled my symptoms!) I have been referred for a CAT scan, but my work-perk health insurance just changed due to me getting a promotion at work (yay) unfortunately meaning that the policy restarts from the 12th and I am unable to make claims etc until then. I will have to wait it out until then to find out if I am growing a second brain, or have that psychokinesis tumor thing that John Travolta got in that 90s movie. My suspicion and hope is that it has to do with some sort of fucked-up sinus shape in my skull. My little sister had similar but much more mild (and less fun, if you enjoy seeing people that aren't there!) symptoms and ended up needing surgery to shave some of the bone away in her sinus cavity as it was putting pressure on her brain. Anyway, it all sort of sucks, so I have contacted a few fabricators around the city to get quotes for mounting the engine and trans up and therefore not having to worry about this bullshit. Failing that, or if my head stuff turns out to be worse than I hope, then I will look at selling the car. It does still have a rego on hold and I imagine with a shit-ton of work, someone could reverse all the blasphemic butchery that I have done to the car (or be awesome and actually carry on with this engine conversion!) I will let you all know if it has to be sold - and of course you motherfuckers will have first option! Anyway, wish me luck!3 points
-
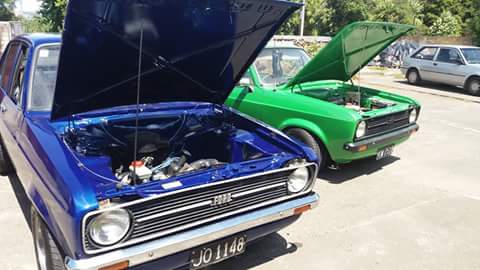
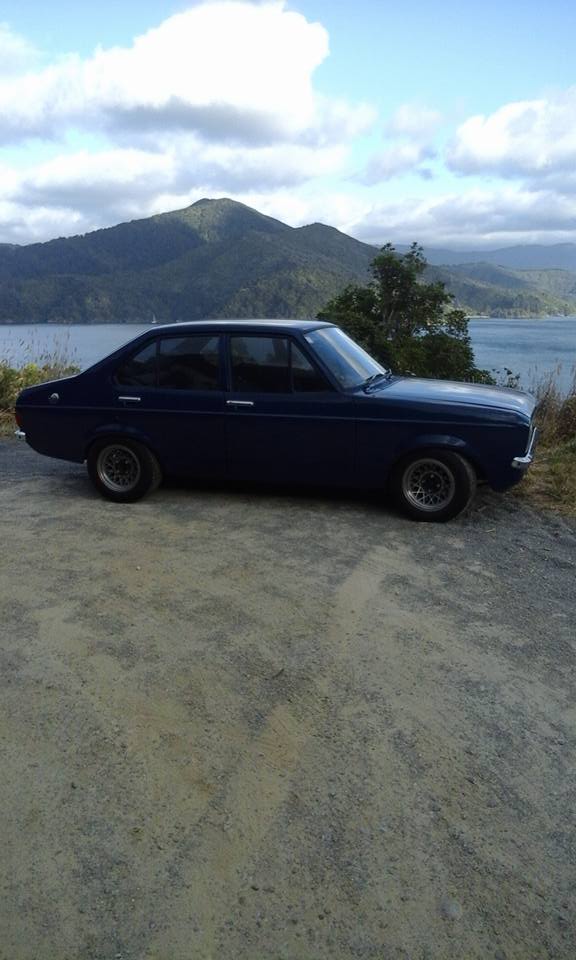
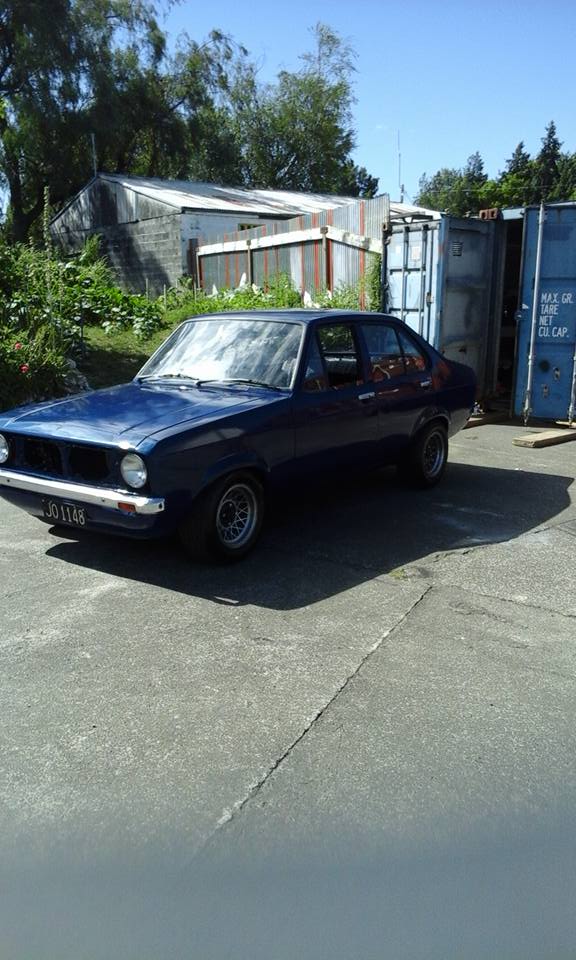
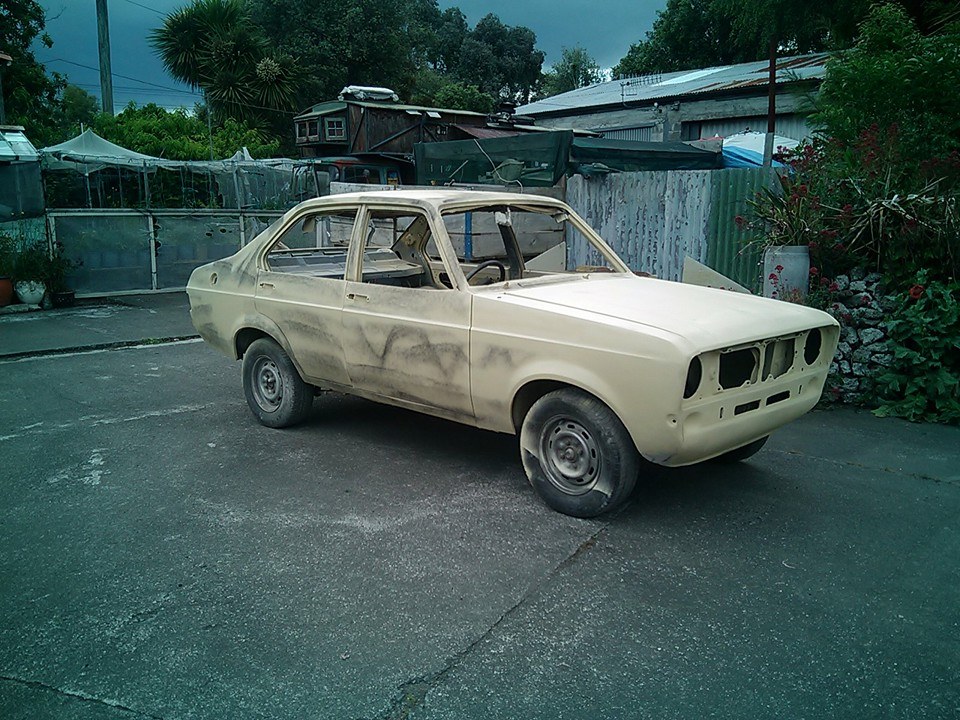
so did she pass, you bet she passed after the wof dude gave her box a true smashing like I mean I was cringing she was legal once again after four years of hard work, Have a few photos I will share, it even made the journey of 1200km to nelson and tiki touring without any to major hickups, not bad for a engine that was sitting for four years, So yes I defied all the odds people where saying "you cant build a car in under a month" well guess what your wrong because I did plus some Here are some pictures from along the way from getting stuck in a reserve to scenic views
 2 points
 -
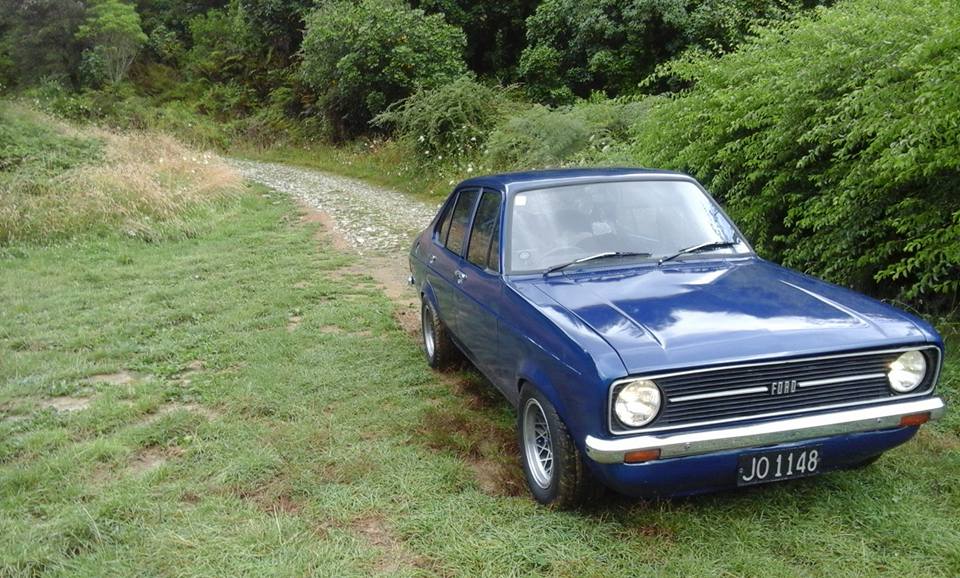
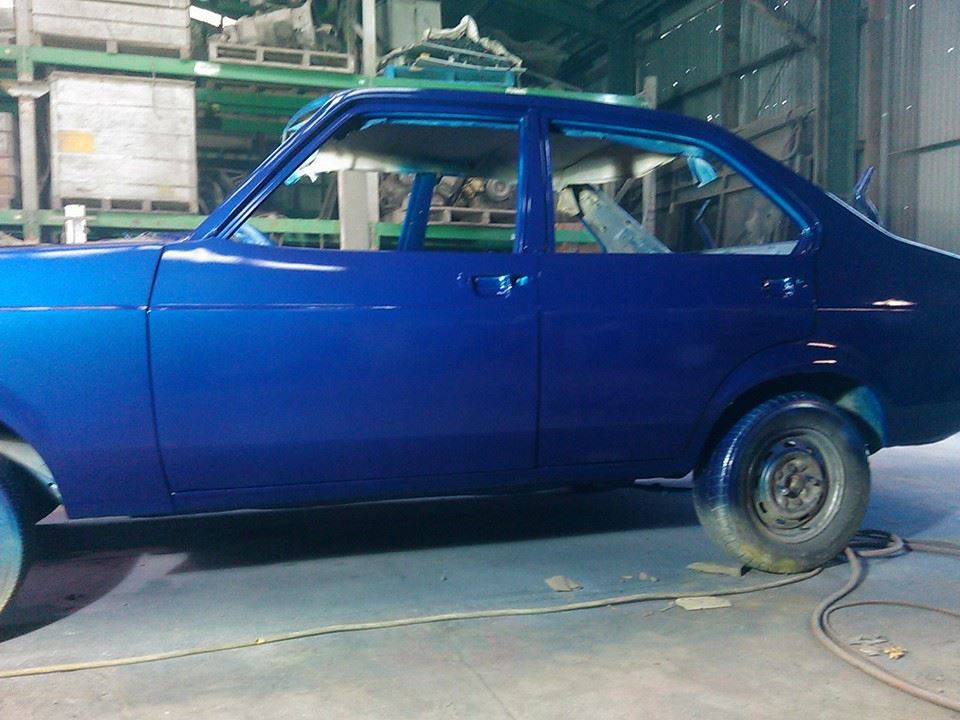
Now I didn't get many photos on finishing as I had two weeks before I had to be on a boat with this car, due to holiday period everyone was in a go slow and panic was setting in, however with a week to go she was ready for a wof these are a few photos before the wof, 2months work is now depending on how well I built this car.
2 points
-
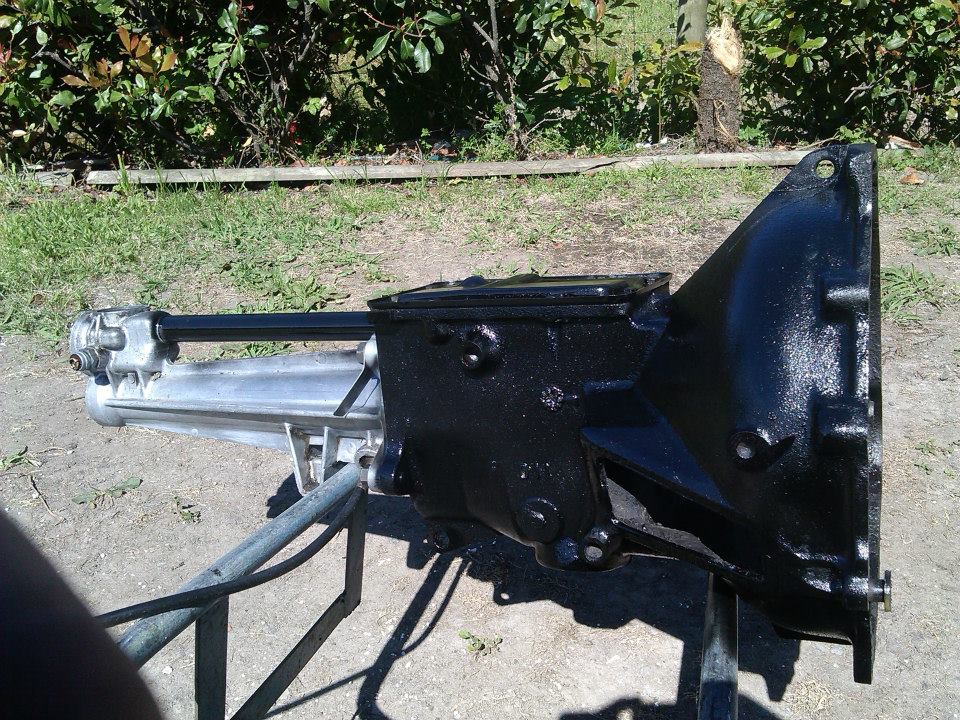
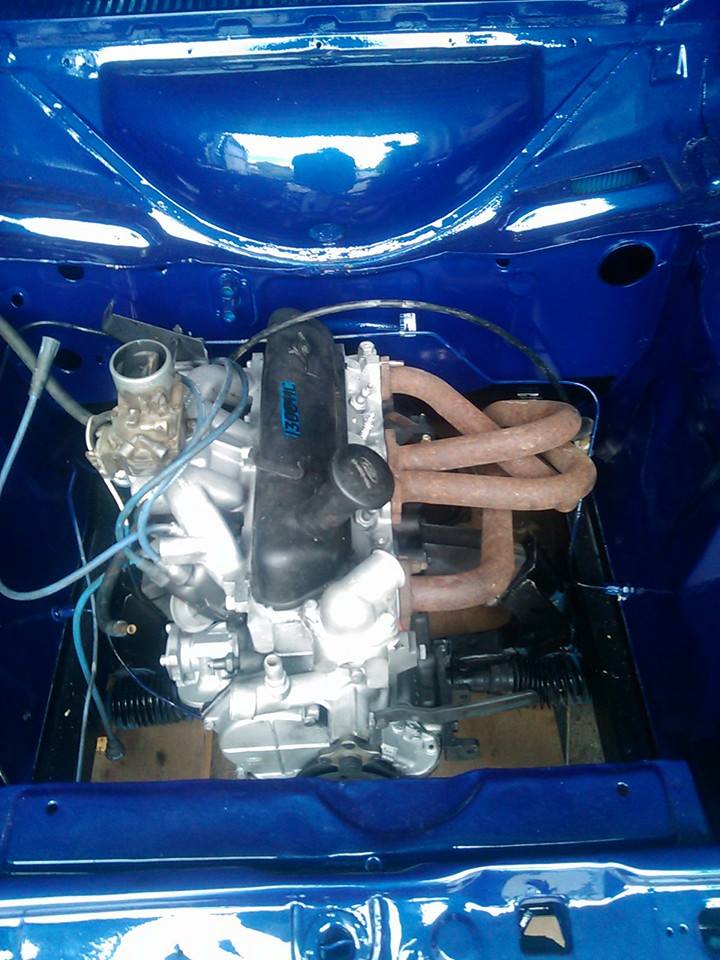
Next order of business was a engine, I pulled out the orginal 1300 from its resting place after four years put new plugs, electronic ignition extractors that was about it, was a strong motor when I pulled it out. I clean the gearbox and engine and proceeded to slip it back to where it belongs I installed a new clutch while I was at it aswell
2 points
-
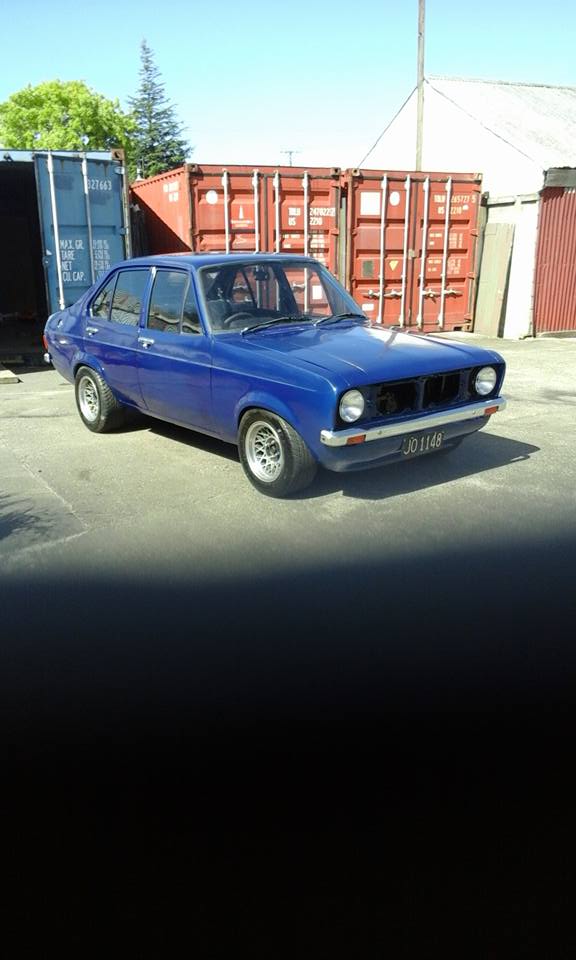
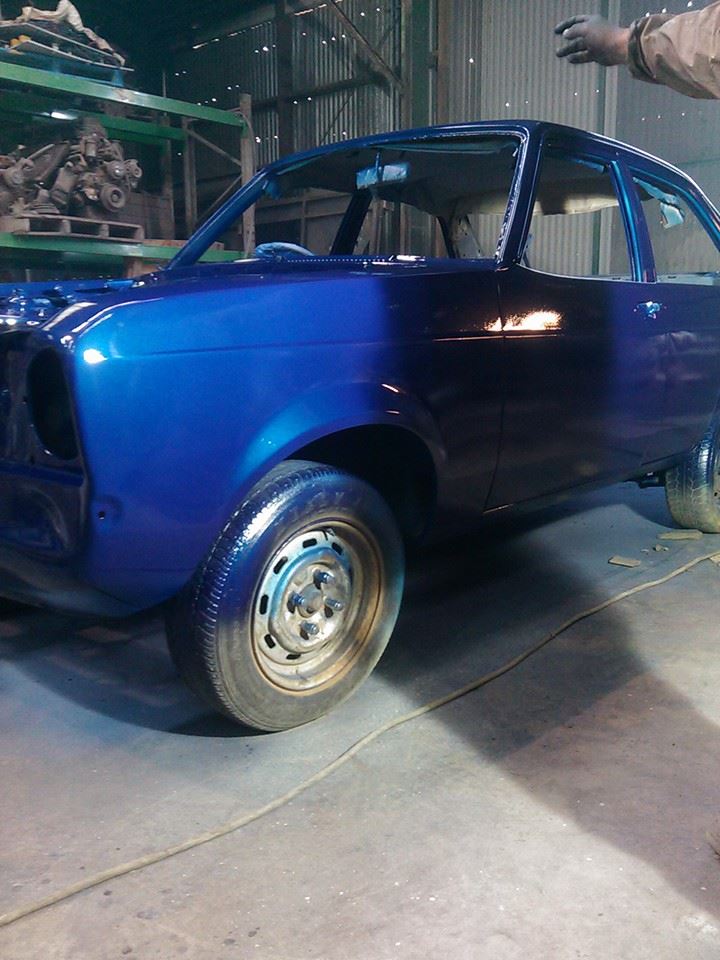
Right so into the paint shop First photo shows the first spray going on The paint is a pearl blue with a metallic absolutely love this colour Lets say everyone was very happy after this haha Ive added a few photos to show the pearl in action
2 points
-
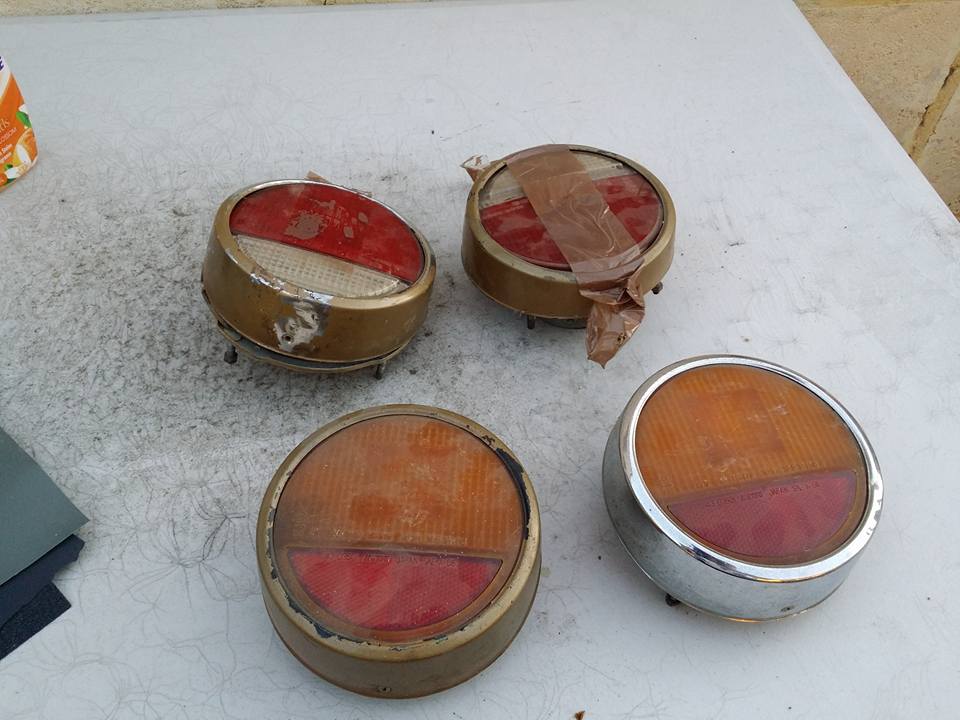
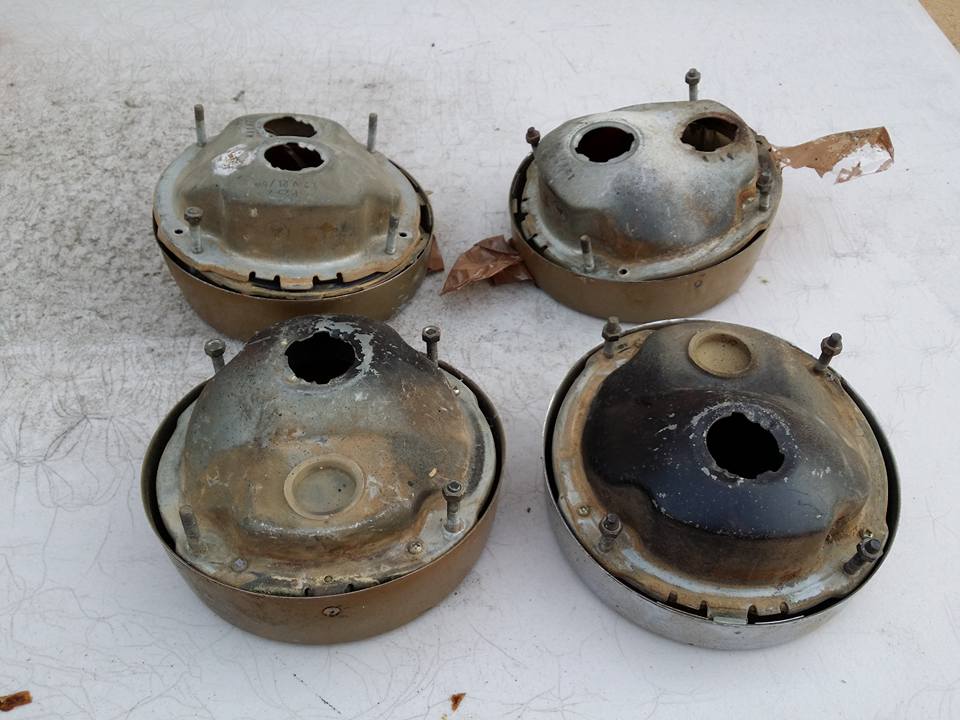
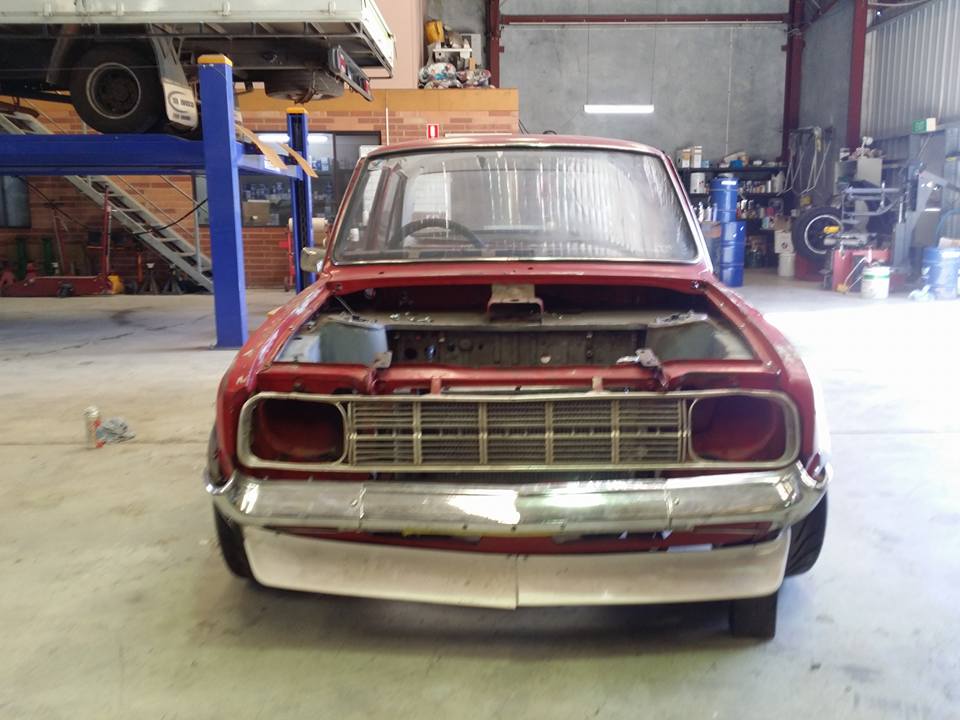
Stephen the GC has also kindly enough given me (yes, free) a set of Aussie spec r100 taillights. They are in need of restoration though and i'm in no rush to get these so wont be doing anything to the for a while yet but going to eventually bead blast then and may even get the rings straightened out and rechromed (will probably just paint/powder coat them black as chroming is so fucking expensive). Will also try hunt down some Jap spec lenses. Oh yeah, here's a pic of the front end mocked up again (with the old grille though). With the new flares fitted they fowl with the front lip, looks like we will be trimming the front of the flares slightly, may even notch them to make fit up all gravy (shit picture sorry). Talk shit get hit here //oldschool.co.nz/index.php?/topic/44085-tai-scamps-mazda-1300/page-2. Tell me what I'm doing wrong. Chur, Tai
2 points
-
Then while I had space in the shed, I thought I'd mount the engine on a stand and tackle the stuck drain plugs... First one was textbook, welded on a large nut, and the heat and something to grip let me twist it out no bother. Fuck I'm good (I thought)... The other one however was a right crunt. Welded nut after nut onto it, and the metal of the plug kept fracturing as I tried to take it out... Tried upping the current for more penetration but it seemed the plug metal was pretty brittle... When there was fuck-all to weld to I ended up grinding it flat and punching it to try to drill it out... Drilled it through (fuckin hard stuff, whatever it was) and upped the drill size till I could try an ezy-out. I've had mixed results with these, so hit it with more heat to try to avoid snapping the hardened tool... But still no go. Ended up drilling it right out and tapping it inwards with a centre punch to crack the thread... and finally got the fucker... So here's me at the puter now having a well deserved dram... and yes, that bottle's empty so just cracked an Ardmore single malt...2 points
-
The chassis is now fully welded. It is so much stronger now, hardly twists at all. This is the design I've come up with so far. I was thinking of using 1.25 inch round tubing and getting it all cut out on the tube laser we have at work. It will be double layer like the last image, so there's room for the exhaust etc to go through. In-between will be hoops for the drive shaft as well. Does it sound like a good idea?2 points
-
With the board unsolder-ed from the transformers, I can now start the re-capping process. First up will be the black "Hunts" capacitors as I have suitable replacements in stock. I'm lucky to have a good stock of old "mullard "capacitors to replace them with, they hardly ever fail and are hard to get, also quite desirable to guitar amp builders. They are also can be named "Mustard " capacitors because of their colour. I'm using them as they don't look out of place unlike the new yellow ones either side of them. last one for tonight, Here's the "Hunts" capacitors removed. You can see from the picture that some look a bit worse for wear, they also fail testing on my ESR meter.2 points
-
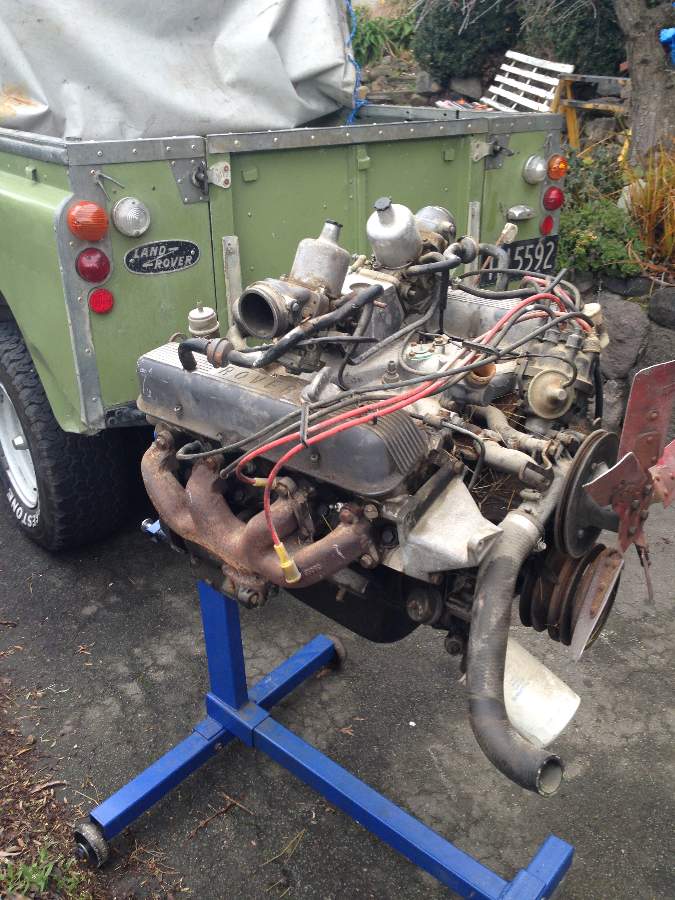
Beginning to feel like that guy with a few projects all of which are unfinished, but there is no way in hell any of them are ending up on trademe. I have mentioned my landy a few times on my other thread and now it's about to get a rebuild it deserves considering it's 10 years of service. I bought the car with my father 10 years ago, and as a 12 year old it was pretty much the coolest thing in the world. Needless to say my lifetime of saving coins and doing odd jobs paid off in the end. This car has been my daily driver since I got my restricted up until the beginning of this year, when I realised the joys of a radio and a heater that wasn't like an asthmatic blowing at you through a drinking straw. Needless to say It's a lovely old thing and well deserving of a full rebuild. I bought it from a man in Timaru however the car spent most of it's life in Central Otago- and guess what that means oldschool lovers? No rust in this one praise the lord. It still has the original running gear, the standard bulletproof massive lump of iron 2286cc petrol- while I have got to the point where it is reliable and hasn't let me down for the last 6 or so years it is getting a bit tired. Improvements I've made over the years include a high ratio transfer box for better road speed and fuel economy (HA). I've also got a full canvas roof for it, it has parabolic springs front and rear, plus the new 15x8 wheels. Numerous fixes have been done to the engine over the years. The rear diff is making some pretty terrible noises and I suspect that the crownwheel has seen better days. At this point I feel that fixing just the diff isn't an economical decision and I have an opportunity to take the car off the road for a few months I may as well do a proper job. So the plan is to do a repower... with a Rover V8 I bought last weekend. Conversion kits come out of the UK for this however I doubt it'll be a bolt in job. Will possibly investigate higher ratio diffs from a rangerover or similar. The new engine This is what it has been used for the most- carting around the lotus 7 throughout that build. I will probably take the body off... considering doing a galv chassis for future proofing. I wouldn't call it a resortation but more a rebuild. I won't bother doing any bodywork, it's as straight as a landy should be and any knocks all add to the character. It will still afterall be a workhorse. Worth saying I'm not going for stupid power otherwise it'll just break axles. It will be more for the torque and towing ability... and who doesn't love a Rover V8. It will drink gas, but probably not as bad as the original unit... it's thirsty as. Discussion or comments are welcome... no doubt someone on oldschool will have done one before. I'll set up discussion on next post so link is available. Cheers
1 point
-
Day 1! 21st November 2014 Picked up this little beautie for $3200 NZD. The local mini club owner who was selling it gave me a $400 discount purely for my squeeling on arrival, I'd never seen so many mini's in my life! First thing i brought - new gear knob! Cheers Aliexpress! Got central locking for a Christmas gift with the key remotes installed! Accidentally locked the keys and remote in the car.... Took 5 people to break into my tiny car! Central locking sadly didn't get re connected after painting of the car... but hasn't been anymore lock outs since! She turned out to be suuuuuper rusty! Time for some repairs.. and a broken windscreen. "No don't take it out yourself you'll break it!" "No I promise I won't!" ...20 minutes later see my ex boyfriend post on the NZ mini facebook group that he's looking for a replacement windscreen. Damn it. Thank god for insurance! Hello kitty hanging in there during my repairs. 1 floor pan and new windscreen later... it was time to get ready for a new colour! Colour! I literally took in my nail polish and a picture to the paint shop for inspiration and walked away with this! We have some paaaaint! Need to get some better pictures in the light.. or not use my phone camera! She's feeling a little blue Picked her up some new bits in exchange for a box of bourbons hahaha. Goodbye ugly rice steering wheel that someone has friggin welded in place! More new editions? HAHA Interior battles Thought i'd get all fancy and refurbish my door cards with some vinyl and fabric. The door cards that came with my mini were horrible to say the least!! Refurbishing them didn't turn out much better. Manged to make some back ones but have given up on front and dash and thinking of getting some laser cut and then powder coated the same color as little blue! Sitting a bit crooked but will sort it out! I've fallen in love with another mini... I hope this guy doesn't mind me sharing his pics but I found this little beauty on Instagram! https://www.instagram.com/jacktubbsey/ Really want black flares now!! What I really love is the headlights! Found some tint off ebay here super cheap and now just waiting for it to arrive! Totally illegal here in New Zealand but i'm sure i'll be okay with all the cars with blacked out ones I see driving around Some treats for little blue! The sound system in her wasn't that bad when I got her but the speakers were literally put into plastic containers from the warehouse ($6.99 price tag still attached omfg) that you take your lunch in HAHA. Then covered in vinyl!! Kiwi ingenuity. Thinking of doing some colour changing led rings around the speakers like this: Will update once I've finished it! Also wanting to replace the switches inside with illuminated push button type switches. Here's some examples: First pic is a pre made one that is sold by Marcos Controls if anyones after some! Second some switches on Aliexpress I like. Just put in my new brake hose, got my new headunit & sub going. 2016: Finally got a WOF and current rego! But also feeling lazy, need to CAD up my dash and door cards to get laser cut already! Discussion Thread: //oldschool.co.nz/index.php?/topic/51794-samanthamannells-1978-mini/1 point
-
This Sunday 7th Feb, at Western Springs. 800 cars entered all ready. Run by New Lynn Lions, usually a good show, lots of British foamers. I see on the facebook page, there will be the last ever Chrysler Charger made on display. Good swap meet, cheap to get a site. Last year I saw some nice 70s Honda CB350s, Ford Escorts and Transits, hotrods etc. 8am to 3pm.1 point
-
You should hide that fender mount under the seat bro . Would look tidier with everything you've already done1 point
-
Was a quiet turnout but a good one ! Cheers Ben Wayne & Anton. Was good yarns and good racing . How about them F5000s aye1 point
-
The big race prize day is Sunday, for the Yetchh and Felix among us. I won't be there, but plenty of cool cars will.1 point
-
Long whistle1 point
-
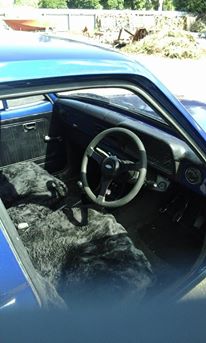
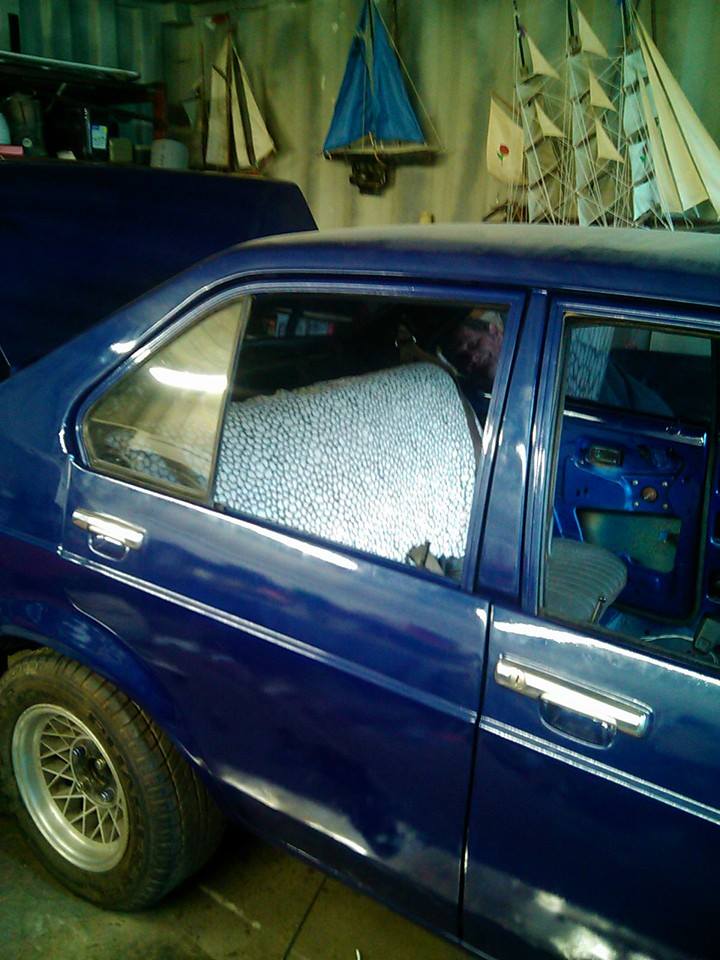
I got gifted a original rug from my granddad and it goes perfect on the back seat to hide the shitty seat (he calls it a struggle rug, says you put it down to stop her knees getting dirty) , spot the perve
1 point
-
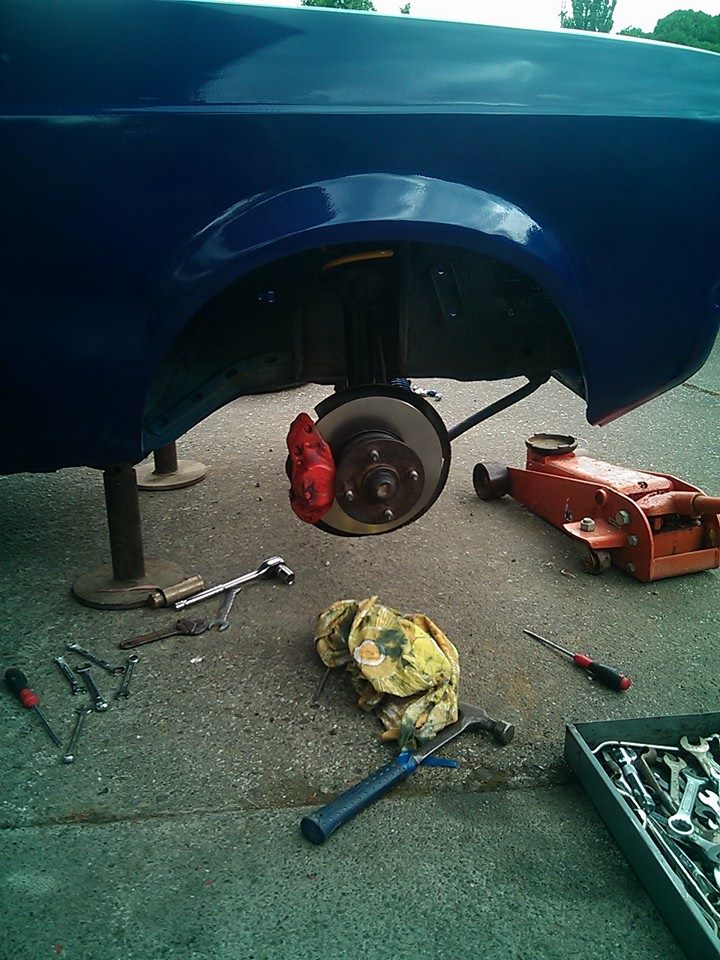
Right so now I had a month left to build a whole car, the list was huge as it was not just all put back how it come from factory, I had to reout all the loom extend the loom and locate battery and washer in the boot aswell as reconstructing the front suspension the list went on First order of business was the front struts, I put new inserts new 2 inch lower springs new bearings, new rotors and new pads.
1 point
-
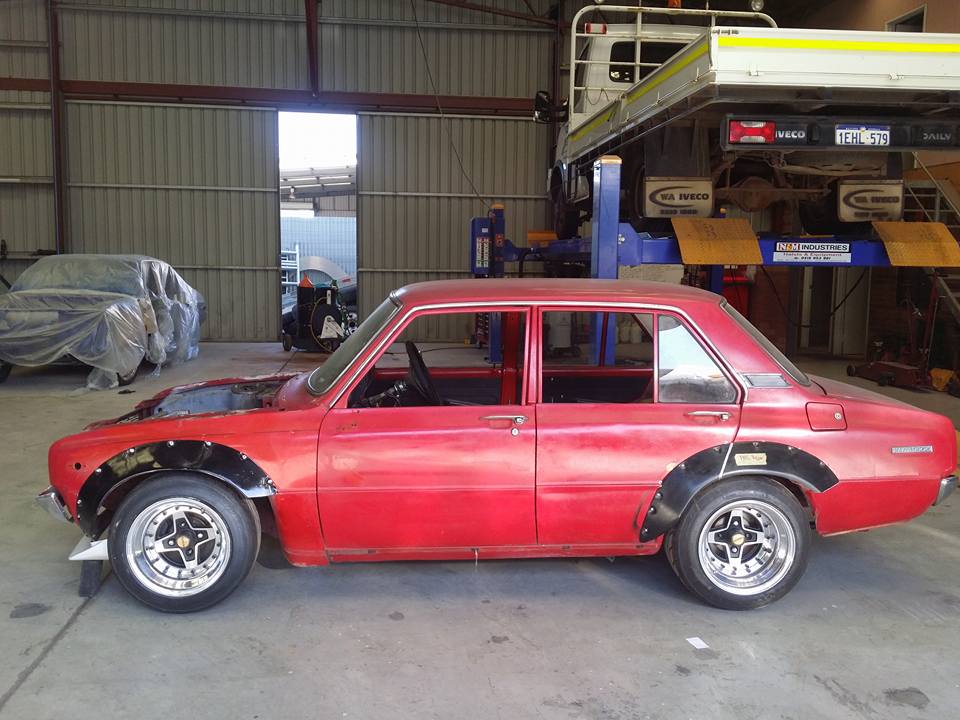
last photo of drivers side
1 point
-
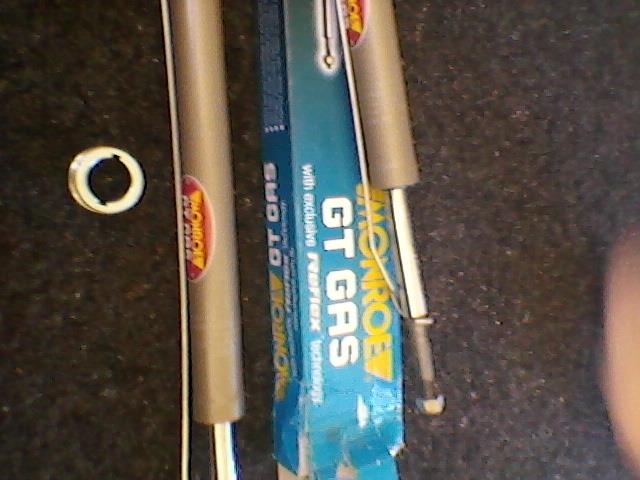
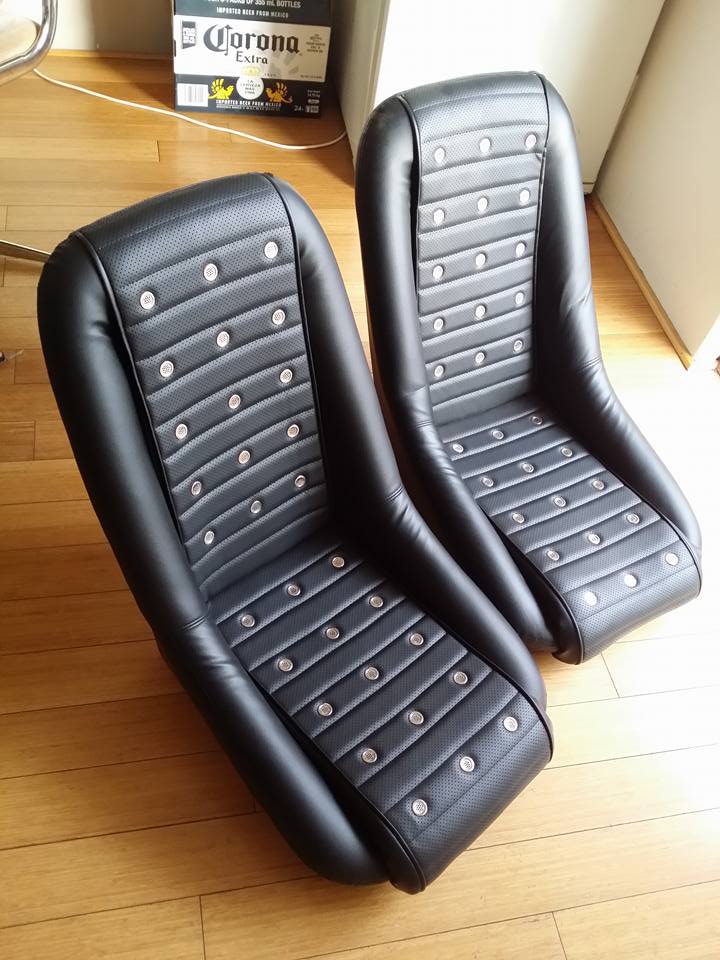
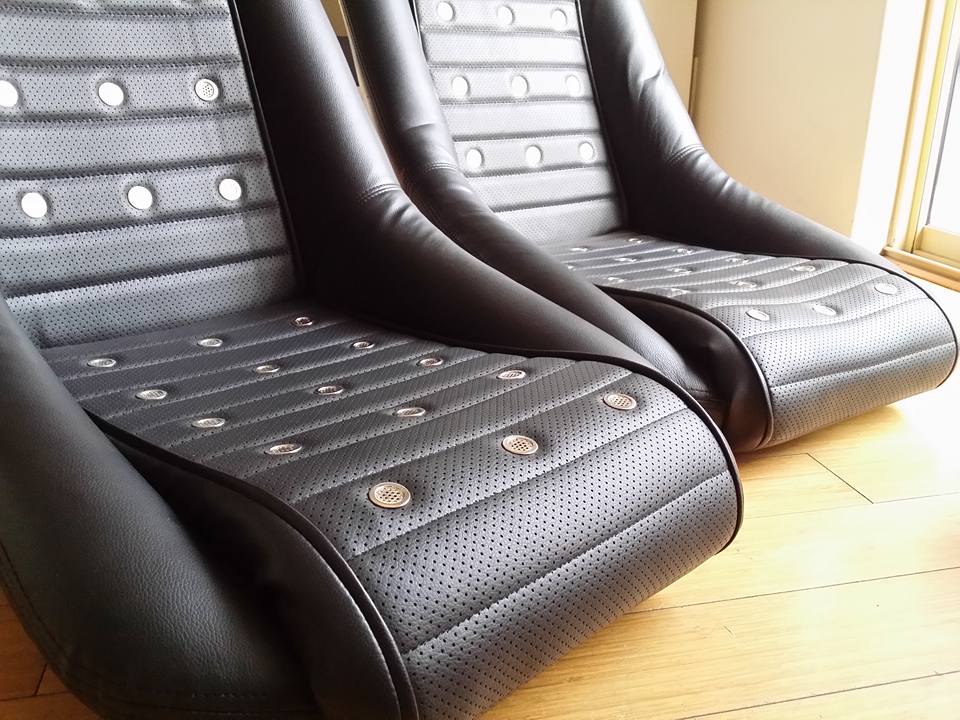
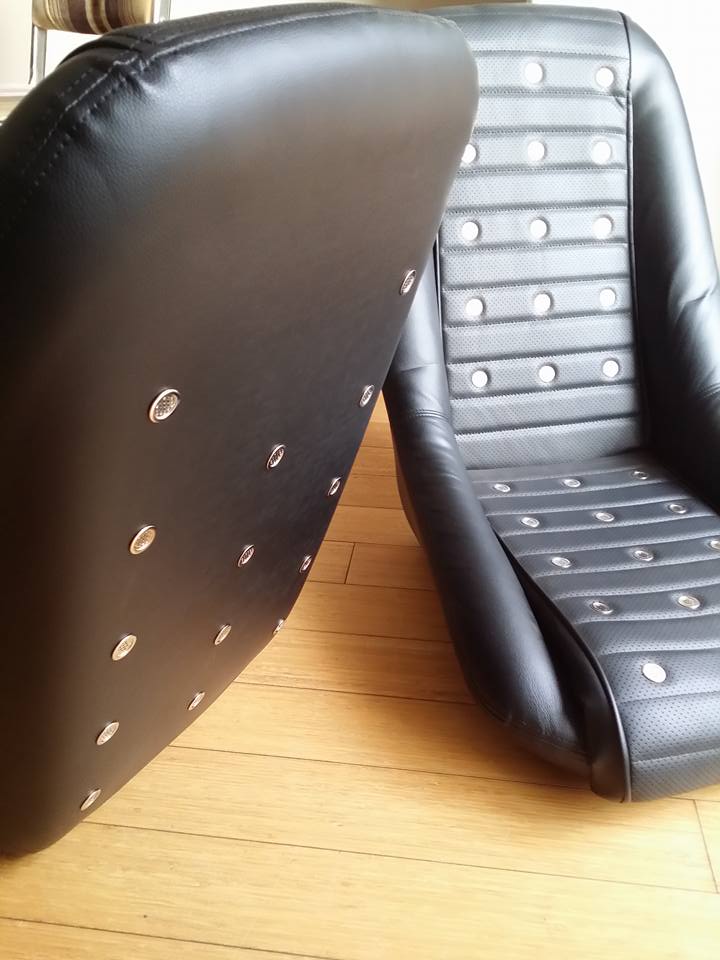
I've also picked up these sweet retro racing seats. Luckily they happened to pop up on Gumtree (Aussie Trademe) just 10mins away from where I live. Paid an arm and a leg for them but still much cheaper than getting something similar out of Japan or America. They're a similar style to the optioned Hakosuka Skyline/Datsun 240z seats. They are a very small frame so once again I only just squeeze into them - means I cant get fat and fat cunts wont be able to ride shot gun so no biggy. They also came with one headrest so will need to get another made up as I doubt i'd be able to hunt one down online. Have also hunted down a replacement rear seat as my original was stolen. They will be getting retrimmed at some stage to match the fronts .
1 point
-
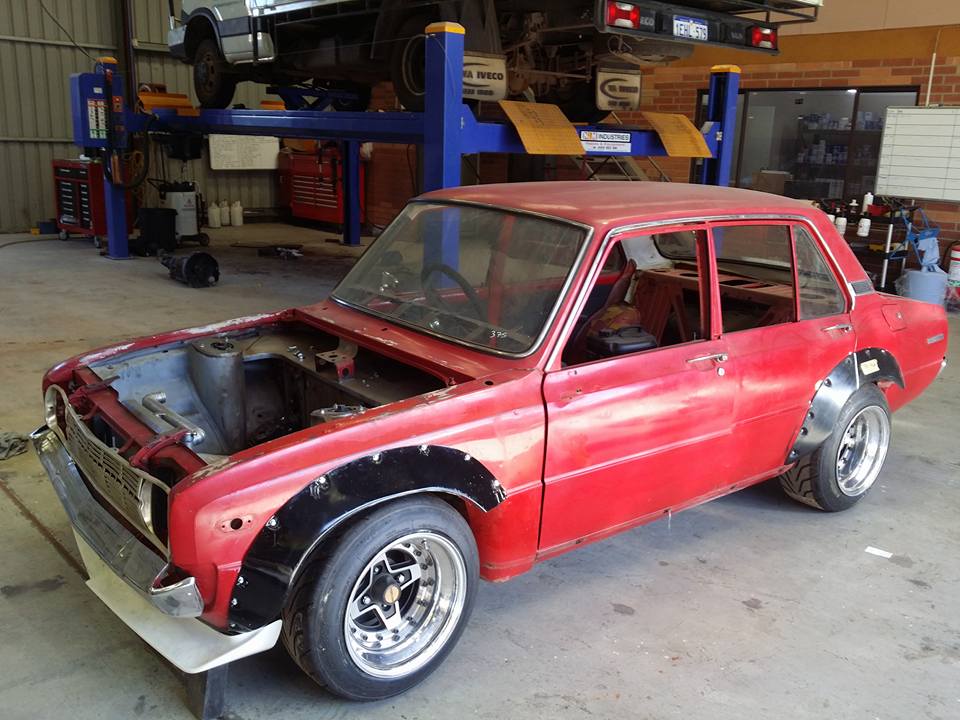
OK so it's about time I update this thing. There was very slow progress over the xmas/nye period but now things have got a back on track. Onc again we have had more fucking around issues with the guards but it looks like it's all going to work out. Going from the previous post we could only adapt the rear flares to suit as the fronts were too askew to fit up half decent. I was able to sort out another set of flares for a very good price from GC Stephen (hooked me up with the first set) however even though they were based off the same Group C Mazda RX3, these ones had come from a different company (fibremaster in Aus), whereas the first set were out of Japan. If you look closely at the picture (sorry shit picture) you will see that the dont have the little lip at the bottom, they are also of much poorer quality and are a bit more warped. When we first tried to match them up to the car we were thinking about getting rid of them and getting a full custom set moulded up by a local fibreglass champ but after umming and ahhing and some more stuffing around we were able to trim them back and get them mounted. As they are slightly smaller in profile they have been fitted to the front and the originals have been changed to the rear.
1 point
-
Finished the amp today and it works. Stoked. I have a metal enclosure that I'll put it in tomorrow and see where I can hide it. Might need a small pre amp for A ipod or similar as its a bit quiet. It gets plenty loud when plugged into the computer. I will see if I can trace the AM tuner output in the factory radio and tap into that and use this amp Edit: While doing the seat cover I felt what I thought was a tissue but it was worse
1 point
-
Nothing to sell but I should be there 8ish for a nosey.1 point
-
:shock: :shock: I'm sure any of you still reading this thread is sick of my long posts, so I'll try to make this somewhat to the point! Shot down to BNT and grabbed a colder plug (BPR7HS vs the stock BPR6HS), went to my workshop and fitted the CDI and plug Slightly bigger than the stock one, fits nice and snug. Also one of the old owners has trimmed up the battery compartment and managed to fit a much bigger battery than the stock one. I needed to go up a couple jet sizes, but decided I should made sure it at least started first, it fired up better than the stock CDI, mint! Tacho didn't work, not mint! Changed tacho input signal from positive pulse to negative, tacho now works, mint! Changed the main jet and spark plug, tested it, hanging a touch on decel, raised the needle and went to take it for a test run. Opened it up, clutch engaged at about 5500, OMG WHEELIE!!!! Rode around a bit, seemed to be pretty sweet! Needs slightly heavier rollers and a heavier contra spring. Then found a closed road on private property... and attempted to open it up Turns out that at 80k I chicken out and decide trying to ride one handed is not such a great idea!!! Next run hit 93k at about 9600rpm and it was still pulling :shock: But there is a nasty sounding vibration after about 88k so didn't push it any harder as I was worried it was the crank eating itself! Hard to ride at legal speed too, the throttle is only just open at 50k! Of course that's all a big story and I've set the speedo to read really high, it's still limited to 50k max... Lol and it still ended up a long, hopefully somewhat entertaining post1 point
-
hahaha so i chucked the windows back in for a mate of 10/5 and just pulled them back out again tonight. the gearbox is now really bad and clutch has a rather bad shutter as well. so il send an old clutch away tomorrow to be rebuilt all new again. pulled the top off the gear boxes to see what the look like on the inside came across this. WTF they are different what the actual!!! so a post on a ap5/5/vc face book page later turns out they will both fit in. one has a reverse under the last gear (left hand side gearbox) and the right hand one also has synchros. cheers crazy ozzy guys that problem sorted i hit the roof with a grinder until noise control set in (my mum telling me to shut up) started out side like this and ended up like this will continue to strip the roof tomorrow and drop it off at the painters late tomorrow. hes going to do his majic over the weekend so i get it back like wednesday so i can chuck headlining, windows and a gearbox as well as a clutch in and then clean it ready for a wedding on friday haha nothing like dead line.1 point
-
So i've been incredibly slack at updating this, but have been busy with the car. The meet last year told me stuff that i already knew. Suspension was far too hard and I needed seat time. I made the decision to do things properly with the rear shocks first time so I spent my money on a set of QA1 double adjustable coilovers with spherical bearings top and bottom, and also some 12" 110lb springs to go with them. Putting them in wasnt super hard, had to drill out the bottom mount to 1/2" and had to ditch the tophat and weld on some brackets for the bearing as below. I had to add some 5mm spacers as the tires were very close to the spring platform. Next was the front. The brakes had a bit of a wobble when i had it at the strip last year and i decided that they were still far too big for drag racing so I bought another set of front struts and the stock brake setup and started over with the front suspension. I decided to go 110lb in the front as well as in a drag car its really just holding the front up and the more weight transfer to the rear the better, so i ended up with the same as the rear, 12" 110lb springs. I bought a coilover sleeve kit and put together a pretty simple setup with a bit of pipe sleeved over the strut and plug welded in place for the threaded sleeve to sit on. I reconditioned the stock calipers and put it all back together. I forgot how crazy tiny the stock brakes are but I only have to stop once, plus I saved quite a bit of weight. A few driveway launches confirmed that it had made a huge difference to the setup, the front was lifting up as I had hoped and it had heaps more grip on the drive way as it had previously. Off to the first meet of the season I went, first run was a pretty soft run but felt pretty good except it was till pulling to the right a bit as it had at the last meet, brakes worked fine. Gave it a bit more on the next run off the line and it went straight down to a 12.2. Still pulling to the right so went and asked a couple of the on to it guys what they thought and they suggested preloading the right rear spring more to counteract the body twisting up on the launch. I wound the platform up 10mm and went out for another run which was much straighter and ran a 12.04@119mph. i wound another 5mm into the platform and next run was 12.03 and the car felt like it went pretty much dead straight. Played with the damper settings on the shocks for the next run and went 11.88@119. Needless to say I was stoked to be in the 11's so quickly! Discussion - http://oldschool.co....983-5efte-kp60/1 point
-
Looking more "straya cunt" with them 16's on it. You'll have a 2ft bug catcher/supercharger combo and a white leather interior in no time,1 point
-
Holy shit, I've got a running Bulldozer here! It was too dark to take any action shots, tomorrow.1 point
-
more wires. the end result of which is more things work now. 2016-01-30_09-19-23 by sheepers, on Flickr 2016-01-30_09-19-32 by sheepers, on Flickr Nicks hands were just a blur with activity and he did activities that resulted in the engine starting. so it goes now. it starts and idles without having to pour a whole bunch of fuel down the intake. it also works the fuel pump relay properly off the air flow meter trigger (if the motor stops the pump stops). it has a fuel pump relay (there were no relays or fuses anywhere). and it has many things which it never had before. like adequate size power feeds to everything. some wires which make the gauges work and many other things. so now that it all works we can tidy up the loom and tidy it all away and its done.1 point
-
Burnouts on his sausage1 point
-
I had made a list of jobs that I needed to carry out on the Blue SD1, but I hadn't driven the car let alone worked on it for at least a month. I fired it up, fixed a fuel leak and drove it to the Oldschool Meet on Wednesday. I then spent a bit of time working on it yesterday and managed to complete a few jobs: - Cleaned the car properly (and then messed it up again by cutting wires, throwing tool around and eating my lunch and dinner in it) - Replaced the broken wiper stalk - Replaced the broken buttons on the instrument cluster - Sorted out the flickering oil pressure light (Pressure is fine, the sender was at fault) - Sorted out the red temperature light (used to illuminate at random, again a sender fault) - Fixed the buttons on the trip computer. They're pretty good now, I just push them at random for the hell of it because I'm an 80s Executive etc. Just need a car phone now. I'm putting some rear tyres on it today and possibly sorting out the horn. I removed the Air horn setup and am going back to twin electric shell horns for that low tone. Here's a shot from South Auckland Bristol with another English car: 603 by Neal OnTheTree IMG_3948 by Neal OnTheTree No more airhorns. They weighed an absolute tonne. It's a good thing I removed them though, as the car is such a lightweight performance vehicle where every kilogram helps... IMG_3951 by Neal OnTheTree Disconnected the alarm and associated wiring. I kicked the siren away in triumph but it speared off the side of my shoe and landed back in the car (sunroof was open). IMG_3953 by Neal OnTheTree IMG_3955 by Neal OnTheTree IMG_3956 by Neal OnTheTree All fixed: IMG_3958 by Neal OnTheTree1 point
-
Sure is the flashiest long drop I've ever seen.1 point
-
Wow. Crikey. Its been a while aint it. July was the last post. A few things have been done since then so I better get typing. First off. Come February we will have owned the land for two years and it will be 14 months since we moved out to it. Its settled in nicely and we are getting a good feel for the seasons and all the little things that happen out here when they change. Starting to get to know the locals quite well and have had lots of work coming into the workshop from just word of mouth which is awesome. Hannah is working a summer season job down at the beach front and when thats over we will be doing a flyer drop around the valley and surrounding areas to put out to people that they can get many sorts of engineering/repairs/bike repairs/advice on cats/great coffee from us* *my coffee aint that great.. In the start of spring I spent a morning going about the land taking photos. I tried to compose them as close as I could to the original photos we took as we cleared the land. Some are ever so slightly off. This was because things have changed so much that even I struggled to work out where the original photos were taken! I'm pretty happy with the resulting before and after collection so I'll put them right here. I have tried to list them from the drive way entrance and then heading down the drive to the north end of the property. The driveway entrance.. heading up the drive.. The highest point of the driveway.. I like this one.. looking down the driveway. Such a difference. Next up- one of the 5 old caravans that got taken away. This one was surrounded by lots of junk/scrap steel etc. Now just trees and some sweet old gates we saved. The mountain bike track I started heads in just around there. These next ones are looking out from about where the cabin veranda is.. Looking back towards where the cabin is now. Thats my brother duncan trying to locate where the Gravely mowers might be. We found them a few months later. and now.. Hannah wondering WTF... This next one is from the first night we stayed over to check the land out. We had pushed the driveway gorse down by throwing the van into 4wd and just driving over the top. Here down at the north end I was just laying back in the grass chilling and imagining what the area could be like. There is now a bit more parking area.. The following morning of the first night Hannah chilling in the morning sun with a coffee. We didnt really know what this area was going to be like in two years time.. This is it. you can see we kept the little Kanuka to the left. Its thriving now! The main yard was not much of a yard back then.. This is better !... Our first morning.. two years later.. I'm really glad I took so many photos before we cleared it all. Its great to look back at. Moving on to recent times. Not long before xmas this happened.. https://youtu.be/uaAHS96LGP4 We had been wanting rid of that 70 plus year old bugger for ages and its so good to see it gone. Shane (sideways sickness) and Greg (64Valiant) came round and got to see some of it heading to earth. Then we had a nice BBQ. Big thanks goes out to Shep for chopping it down. No way would I be doing that job. For starters I dont have chainsaw with a metre long bar! Nor the skill or experience. It was great fun just helping out and watching. We have many more big pine trees to come down over the next couple of years but this one was the one I wanted gone now. The view afterwards is heaps better!!!. Plus we now have a sweet as 8 metre high trunk to build a cool viewing platform on one day Before.. After.. Then for the end of the year we thought we had better crack on and finish the bathroom before my brother came over to stay. We needed the shower going for him so we got stuck in and finished it just before xmas eve. It still has some little finshing touches like light switches, extra lights, better prettier shower head, hand rail up the steps etc but its pretty much done. It works really well however I reckon we'll get a new califont for winter as the old Palomar is a bit small on heating capacity. We'll see. The compost toilet is working really well and still doesn't smell. Ive not yet even wired in the fan. Happy with that. Its taking about 3-4 months to fill a bin. Will put in a third bin soon and then start a secondary outside composting area away up under the eucalyptes just to be safe. The bathroom lights and shower pump are running off the cabin solar panel setup too and we have run wires to add a couple of outside lights to light up the pathway from the cabin to the bathroom. I just have to make some lights yet. Anyway.. some photos of the new bathroom ... We moved all the various piles of gorse and Kanuka into one place to chop too. Here you can get an idea of the amount of Gorse we cleared.. We have also started a vege garden and although a bit late its going well. Its certainly not a massive affair like our neighbours but we'll learn and it'll get bigger/better. The strawberries all going mental and its great to have 4 or 5 fresh strawberries on the cereal in the morning. Our fruit orchard trees are growing well and seem pretty happy. We'll plant heaps more this winter. The olive tree seems happy as so we'll plant more of them along the driveway. Finally Hannah spotted an old picnic table offered for free down at someones holiday home so we grabbed that. I told the owner we had been after one for ages so he was stoked it was going to be used. It looks the part and is an ideal little spot to chill. Thats it for now. I hope you enjoyed it. Im pretty damn happy with it all and now the rush is sort of over (for a bit) we have both finally been enjoying more of a summer recently of just swimming and cycling. Next big plan is the mezzanine floor in the workshop but that will be a winter thing. Then more cabins! Oh and bike tracks. Oh and spa pool. Damn...1 point
-
the other day i painted the C pillar trims and the panel that goes between the tail lights. I'm sold on this colour so tomorrow ill get a liter of it mixed and that should be more than enough to paint the few remaining bits. didn't get much done today. i did a few little things yesterday like paint all the headlight buckets and the grill support brackets for the front. i put it together today and stuck the grill and bumper fill panels on to trial fit them and see how they look. its pretty good, ill chuck the bumper on tomorrow and just check how well it all fits together but so far so good. 2016-01-17_04-21-47 by sheepers, on Flickr 2016-01-17_04-21-59 by sheepers, on Flickr1 point
-
A length of rusty chain. A grease gun that doesn't work. A large D shackle missing it's pin And a rusty old hammer.1 point
-
Got most of the top welded up and a little bit of the bottom done. It didn't really take as long as I thought it would. Can probably flip it over now to weld the rest of it. Need to also start designing the crossmembers sometime soon.1 point
-
Cut up some plates to fit up to the front crossmember, drilled some holes for the bolts that the front end mounts with. Close-tacked all along the top and down the joins, just need to tack along the bottom. Then I can start the long process of tig welding it all together.1 point
-
Next job is to dismantle the amps without damaging it further. The knobs are a snug press fit and the front is easily scratched, so a bit of thin plastic to slide under and pull works well. Front and knobs off The main offenders are the 2 large aluminium can type capacitors, the black plastic looking capacitors and the smaller aluminium type capacitors on the board However to do this I need to unsolder the capacitors from the other side of the board and to do this I have ti unsolder all of the wires going to the 2 transformers on the other side of the chassis. Here's one of the offenders They're a brand of capacitors made in the UK back in the 50's and 60's called "Hunts", most technicians renamed them by removing the "H" and replacing it with a "C", sums it up pretty well..1 point
-
Here's another little project on the burn, I found 2 Pye Mozart amps a while ago and it's time to bring them back to life. They are what is called an integrated amplifier which means the pre-amp (volume/tone/input selectors) is integrated in the same chassis as the Amp. When they were sold in 1958 they retailed for approx. 33 pounds each. I was lucky enough to find a pair of them in reasonable condition Here's a rear view of the amp, plenty of dust from 50+ years of life in shelves and sheds. If you take a close look you'll see 1 large valve ( Vacuum Tube) lying on it's side, the model is what is called a "single Ended" amplifier. What does single ended mean? Strange that you should ask, but ok, I'll try to explain. I'll do my best to without making too many eyes glaze over , single ended means that the one tube is biased to the mid point (with no input) and it performs the whole output section with one tube instead of 2, sound confusing? Lets look at a normal situation using a complimentary pair of output devices, I'll use an example most can relate to; Car Batteries! If we had 2 x 12v batteries and we connect a volt meter lead to the jumper lead that connects the two batteries together, in this specific example that connection point is called the mid point or "0v". - [12v batt A]+ --- 0v --- - [12v batt B] + If we connect the other meter lead across bat "A" then it would read -12v If we connect the other meter lead across batt "B", then it would read +12v (if we put a meter across the 2 batteries (end to end) we would get 24v) The same logic applies to an amplifier, If I had 2 output tubes (or Transistors) 1 tube would handle the -V side of the sine wave, the other would handle the +V side on the sine wave, with them both connecting to each other at the "0v "point, put in a complimentary pair they do the job nicely and allow for very high outputs if reqd. However for a single ended tube we have only 1 output device, so if the maximum output swing was 24v, we artificially "bias" the tube so it sits at the mid point (0v in our battery example), and it can swing up or down 12v to make it do the job Hope that wasn't too confusing. The output tube is an EL34 and this model about 9 watts output at 0.3% distortion @1Khz, which was pretty good for back then. Here's another view with the cover off and the output tube removed, and a quick wipe1 point
-
8 track machines I picked up 4 machines recently, 3 that can record and one that is play only, in addition to this there were several boxes of tapes including some still in box new tapes. 2 of the machines were working, but again they were a mess and covered in nicotine residue. Internally they are all pretty good and most of the work required was just cleaning, lube, removing labels that had come of tapes and munched up in the mechanism and a couple of dodgy capacitors The exterior of all 4 were sticky Buttons needed a good scrubbing with Jif All clean and ready to go. One is an older version and still needs a bit of work, the bottom 2 are going sweet.1 point
-
The motor pooed its pants. I drove it to Aucks and back, and noticed a funny sound it was making (I guessed the timing gear was falling off) had got a shit load louder and more horrid sounding ...... so I ignored it. Drove it to work for a few days and it died on the way home, just lost power, and then semi seized, wound erratically for a while, then jammed solid. So, got a new motor and box for four boxes of flame (around $60). Cleaned it up, swapped over all the shit (clutch/fuel pump/dizzy/pipes/carb and so on), and slapped it in, to find the sump hit a steering arm, so ripped it out, changed the sump and slapped it back in. Old motor on its way out, BAM, and the engines gone, New old motor (its from a 77 lux) cleaned up. (note the top of a radiator + cap that had been soldered onto the oil filler hole, not sure why?) Hilux party! 12R party! Dr J5 doing the autopsy on the old motor, We found it had no oil in it, so it burnt 4.5L of oil in around 800km? I was expecting to see destroyed rings or something, but they were all fine, the bearings were less fine, And I was kinda rite about the timing pulley falling off, the bolt had come undone and was rubbing on the housing, So, not 100% sure why the oil consumption sky rocketed, but thats what killed it in the end. Also, the intake/exhaust gasket was rooted, and there was none in town, so we went for a road trip to Rotorua to pick one up from repco, so a 2 hour trip to get a $12 gasket, puhuhuhu. We also had burger fuel, smallest OS BF meat ever? Got home, slapped it all back together, started it up, new motor runs sweet as, runs smoother and quieter than the last one, so pretty happy, just needs a light tune. Oh, and I also now have a sweet coffee table! Regards, VG.1 point


.thumb.jpeg.384ff72c8d2b0ee0d34a7bdedb55bdcf.jpeg)
This leaderboard is set to Auckland/GMT+12:00