
Leaderboard


Popular Content
Showing content with the highest reputation on 10/26/15 in all areas
-
made some chassis connectors and glued them in. 75x40x4 was the nearest size to the rear bit of chassis rail i could get, made some gussets so it spans the height of the rail at the front part. my other car i put some 50x 5 round pipe in and it made a big difference in stiffness, the 2 door body obviously has no b pillar and is slightly longer so it probably needs all the help it can10 points
-
Put ply on the tray, then got it stuck in a mud hole poser. hellaflush8 points
-
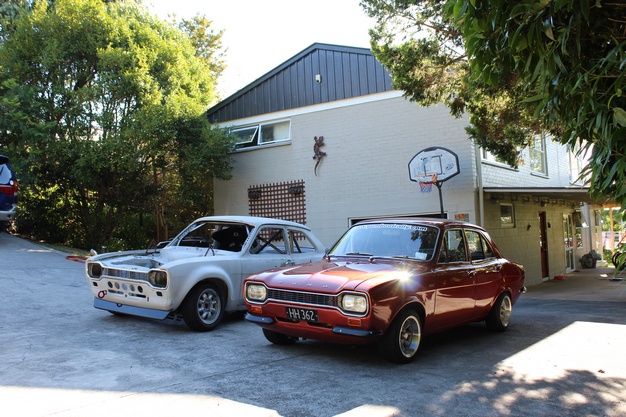
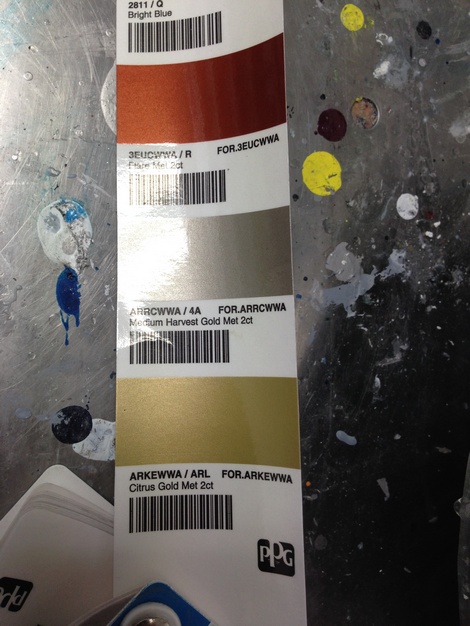
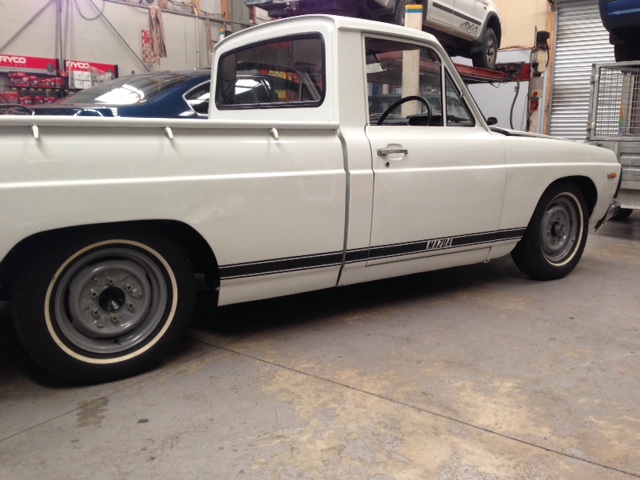
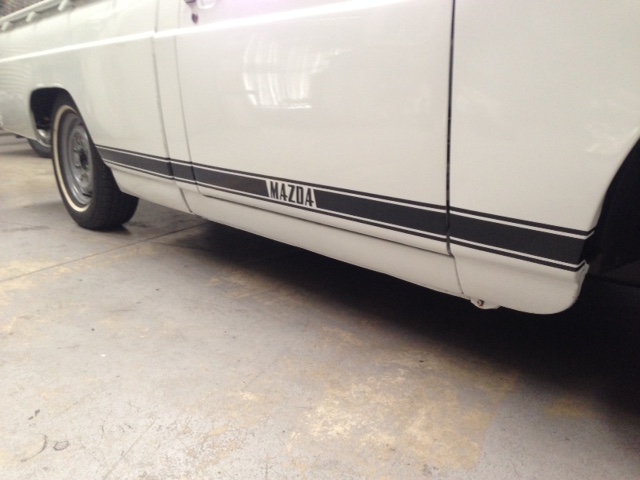
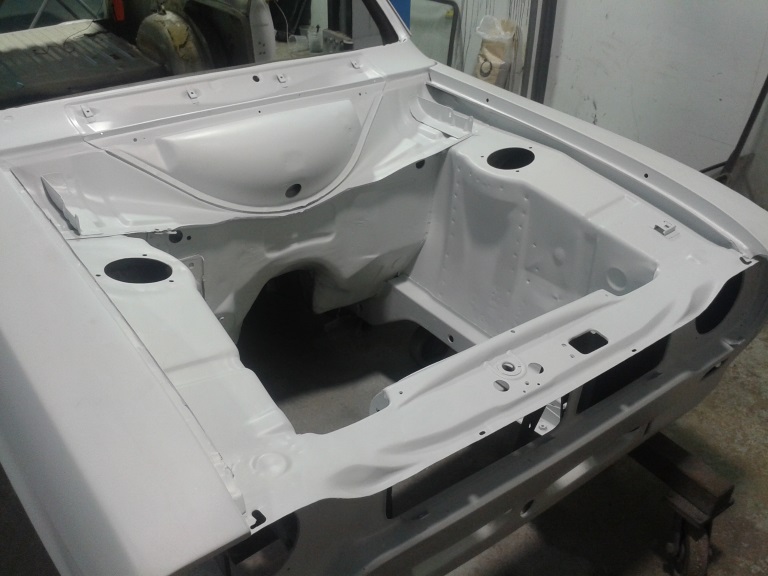
A few photos before it goes back into the garage playing with Some test colours for the alan mann paint scheme
 7 points
 -
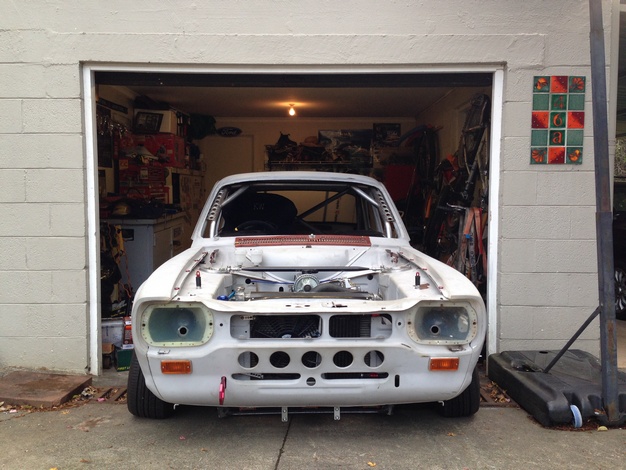
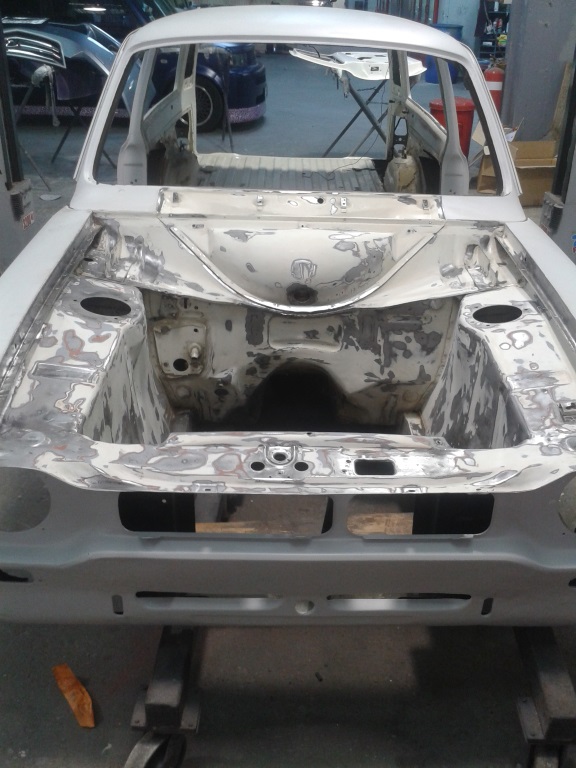
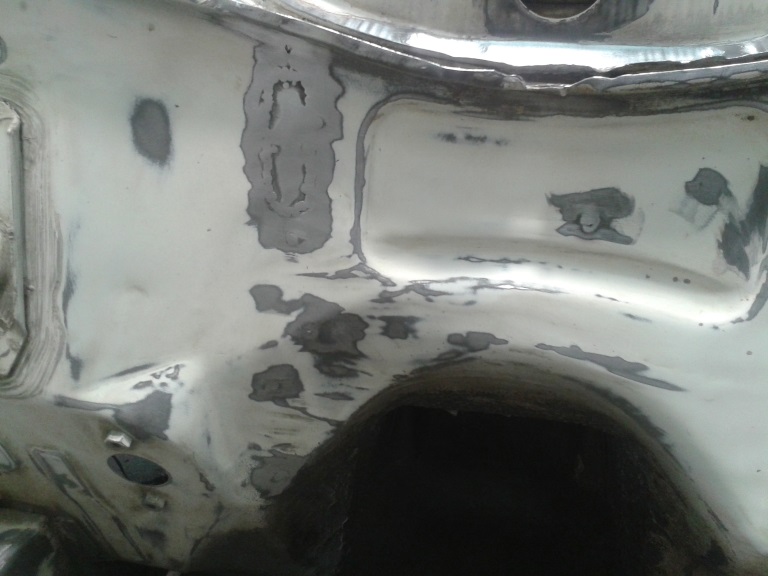
and now the final battle begins. the roof. so they cut off the drip rails and welded the roof back on along the bottom edge for reasons which escape me. there were a couple of very (typically) nasty repairs on the sides of the roof and i was unsure about how best to fix it. after discussions with Peter about making new drip rails and the cons and cons of attaching them externally we decided the only to way to fix it properly was to fix it properly. so we are recreating the drip rails and the roof sides back to how it would have been factory. this requires a few bis to be made on the folder and a few other tricks to get the curve into them but the best thing about doing it this way is that it means i can cut the sides of the roof off and get in there to fix the rust properly. so i cut the sides off the roof. 2015-10-26_01-04-00 by sheepers, on Flickr 2015-10-26_01-04-17 by sheepers, on Flickr you can see theres a bit of rust in there that needs fixing and once thats done i can weld in the new parts. heres a drawing of how it was factory and this is how ill repair it. 2015-10-26_01-03-18 by sheepers, on Flickr so this week ill be up at Peters shop each night after work folding new drip rails and making new roof sides. then weld it all back together. how hard can it be?5 points
-
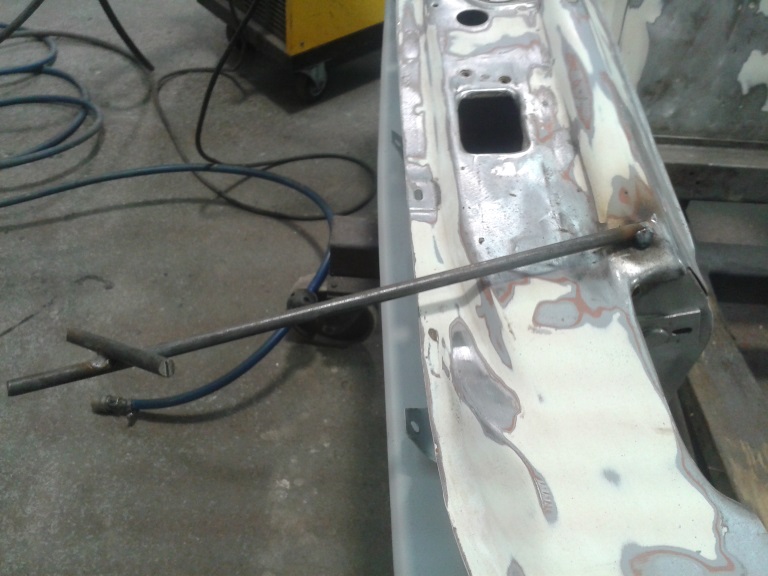
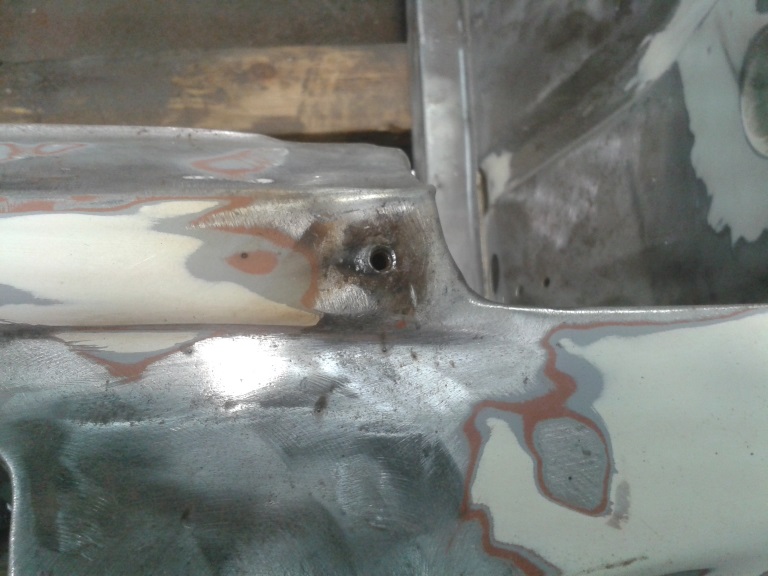
Got most of the top welded up and a little bit of the bottom done. It didn't really take as long as I thought it would. Can probably flip it over now to weld the rest of it. Need to also start designing the crossmembers sometime soon.5 points
-
I dug the engine and box out of the hole today. Manual says box out first, so thats what i did 50 years of leaky gearbox sorted with 20 minutes of waterblaster engine bay ready for stripping looks quite bad but its not really, the RH side paint has been affected by leaky batteries, + brake and clutch fluid which has lifted the paint but not rusted very much at all. In contrast the LH side is very good. I thought the gearbox might have been stuffed, as I had not been able to get the box into gear since ive had the car, but once the box was removed it went into gear fine - ive traced the issue to one of the linkages being seized on its shaft, so thats easily sorted and i will be able to keep the column change. I had been investigating, and i think a Lada 5 speed box could work, but thats one less faff around i dont need to do. In other news i have managed to not only find but purchase a parts 2300 wagon and I will collect it some time in the next couple of weeks That means i will have in my possession 20% of all the 2300 wagons that ever existed in new zealand.5 points
-
So i brought this 1967 HR special station wagon about a month ago now to use for the summers events and general crusing.. it runs a 186 and three on the tree the motor has had a "bit" of a overhaul by previous owner with all the work competed by marsh motorsport in auckland including new hi comp pistons a pretty reasonable cam Yella terra head msd ignition and all the other bits that go with a full rebuild.. they had for some reason also decided to run the factory single barrel stromberg and cast manifold (maybe for fuel economy????) the body work is pretty tidy for its age and had full repaint 4 or 5 years ago but as usual now has shopping centre battle scars interior wise was not too bad for its age with only the usual ripped seat covers and worn carpets lucky i know a guy who is pretty good with that stuff plan is to keep it looking as stock as a rock with a few extras such as sunvisor,venetian blinds and maybe a set of hotwires and widened standard rims hubcaps and dress rings.along with the usual tidy up work re cover seats new carpets paint up engine bay and detail motor etc etc etc4 points
-
Righto so fabrication is finished bar final welds when frame is stripped down again and the rear calliper mount. Made a start on the wiring today. Gonna buy some micro switches and a new speedo with warning lights in it this week. Getting it done!4 points
-
Bro's vid from Saturday : more flex pics sorry.. but got it to go full skitz today. just need to put a bail of hay and a dog on the back instead of the muds3 points
-
Float level wrong3 points
-
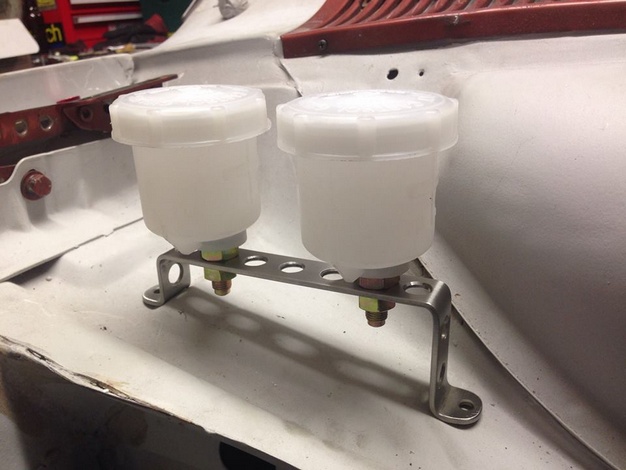
Bracket and Brake Reservoirs Fitted Engine Back in Syntec Historic Linkage arrived and Fitted
3 points
-
Minor update. Every year I have wanted to take this car to Kumeu just to do a little bit of cruising in and to also try and extract some information and possibly parts sources from people who walk past and see it. It will need to be taken there on a trailer which means that I have a small list of things to sort before I can take it up. First of all, I needed to sort out the crusty old rocker cover seals which were dripping oil over the hot exhaust manifolds: With that sorted, I degreased and cleaned the exhaust manifolds and any other oil residue I could find. I then ran the engine for a while to burn off whatever else was left on there. So with that taken care of the list is now this; - Replace transmission filter and gasket, replace fluid and get the car to shift gears properly. - Drain differential oil and replace with new oil - Remove and test starter motor (possibly replace?) - Get the drivers' power window working. Maybe even the other three if I have time - Pull the wheels off and check the suspension and bearings - Give it a good clean inside and out, remove the bootload of spares. And all of the spares inside the cabin.2 points
-
first thing i done was gave it a wash to see what i had looks good here
2 points
-
Yep but we have that covered with some black plates for cars for the set.2 points
-
Fuel line done, brake line done, battery cable almost done. Figured the thing to do next was to get it out of the garage and get some pics to help with my motivation and this is how the bonnet sits if I leave the current filter on, it actually sits a bit lower as it wasn't pushed down all the way. The back of the filter just sticks out above the bonnet when it is down. I am still undecided if I will go this way or put a shorter filter on and have it sit under the bonnet2 points
-
well it's been outside under it's own power...2 points
-
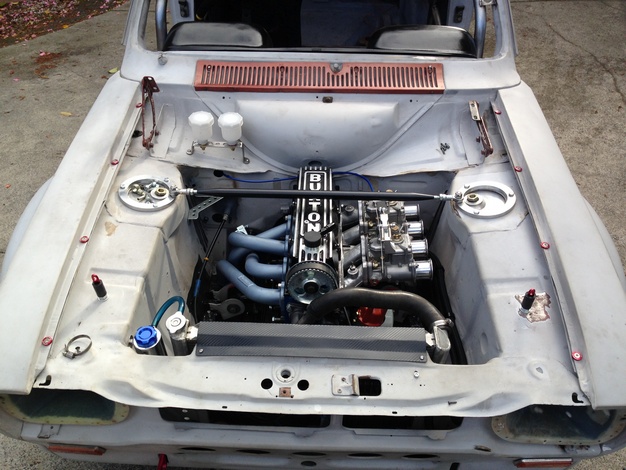
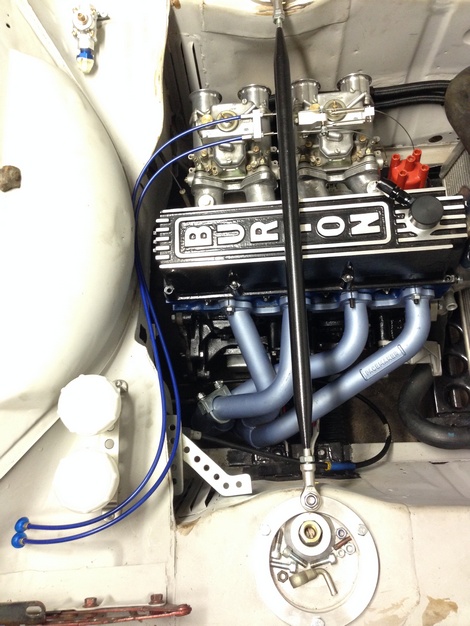
managed a couple more hours in the garage today so got some more things done First up was the coils, I made this bracket a while back when I was going to mount the coils on the side of the motor but when I put the oil cooler thermostat in they wouldn't fit any more, however the bracket was about perfect for mounting the coils to the inner wing so I went with that. Coil bracket and coils fitted A while back I bought a fan controller as I wanted to have the fans turn on automatically, I bought one of these from Summit Racing thing is it is such an ugly switch and the wire to the temperature probe isn't long enough to fit under the dash so after a bit of head scratching I decided to mount it up the front behind the radiator support panel. And as I was uploading this photo I noticed the rust hole to the right of the control knob, I am a bit gutted about that, can't believe I missed it..... Anyway the last thing for today was to get the wheels back on, I am hoping that tomorrow if I get the brake and fuel lines finished then I can drop it off the stands and roll it out for some decent pictures, but for now this will have to do I still prefer the old wheels2 points
-
Sorry for potato phone pics camera is buried in uni shit that got seconded to trumph So got to have a good look at this today A shit tonne of useful and valuable parts with the car things that will be helpful, can redo the fuel system twice. Still have another van trip to go and get all the subframes extra gearboxes and other engine... Have pulled the fuel system apart checked over it to make sure all is well, it was. We pulled the gas tank out to make sure it was clean. We also Converted the car to electronic distributor. The unit was fried, so we converted back to points... First on the list is a rotor arm and new distributor cap for the engine thats in the car to get it running, which we will do tomorrow. Next is order an engine rebuild kit from rimmer bros for the cars original engine which has the tr6 cam. While I am waiting for this we will go get this thing wofed and rego'd hopefully without a hitch. Biggest problem is crazy cracking which covers the whole roof, around the fuel cap and the bonnet. This will get done when roof rack is removed and filled... Car is insanely tidy a small bit of surface rust has come up in stonechips on the roof this will get fixed with crazy cracking, but can't really find any other cancer at all Hopefully we can have it running tomorrow!! Am after a steel grill and pre facelift bumpers in goodish condition too if you know of anything!! Discuss: //oldschool.co.nz/index.php?/topic/49975-connors-pi-wag/#entry15827742 points
-
Proof:2 points
-
so after tracing an alternator fault in the HR not long after i got it and also on the way home from picking up a spare 202 to raid the standard rocker covers side plates and air cleaner from... we came across some not so shit hot wiring... infact the wiring loom had at one stage caught fire melted together and as a short term fix had been patched up using bits of a house hold extension cord!, so no time better to strip the car of all its wiring and start again thanks to a sparky mate its now got all new fuse boxes relays wiring and all done very neat and tidy, while it was getting that done the seats are off down to Gregs for a re trim and new carpets. also used this time to paint the engine bay detail the engine and add the few extras of a cain manifold, webber carb and set of extractors to help the poor thing breath... with just a few bits to go should be back driving by thursday for the hamilton oldschool meet , here are a few pics of the last few weeks work1 point
-
^concur - that hole is for air in only. use a 7mm drill bit and set it so the float just touches the needle valve without pushing the spring/ball thing in Ive got a manometer for balancing these too. I need a favour from Chris - you are just round the corner right?1 point
-
Quoted for awesome What are your paint plans for the sporty?1 point
-
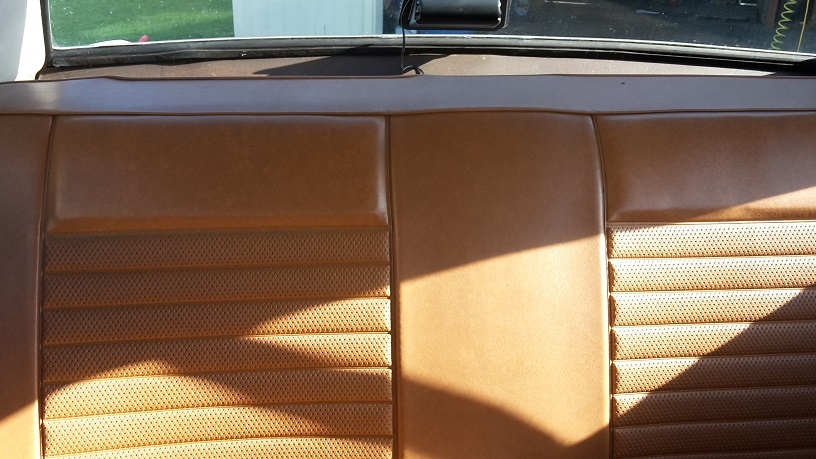
dosnt even look like the back seat has been sat in what a score So the deal is 3 owner car first owner from 1970 1973 mileage 25000 mls 2nd owner from 1973 to 1994 mileage 81000mls 3rd owner from 1994 to 2015 mileage 81600 has been parked since they bought it about 22 years in a dry shed. it has a few little bumps and scapes but overall very tidy and original. So got it home and washed it drained all the rank as rotten fuel out (that shit smells bad) cleaned out the fuel lines replace perished fuel line. Added water in the top which in turn all fell out the bottom radiator is rotten as well. but anyway fitted 2nd hand dissy and coil that i knew were good as it had no spark cranked for a bit and away she went sounded like a tight little engine under all the exhaust noise that is also rotten. but progress. So the bad thing are the shocks are stuffed the bushes have all perished and the brakes are siezed but as ive been collecting ford parts for a long time i have most of the bits requred to fix it so all in all i think i have a real sound project.
1 point
-
I agree. Keep it sleeper spec and surprise a few at the lights. You could always get a spare bonnet later on and cut a hole in that eh? Those wheels.... so big. Those tyres... so... rubberband spec. I figure its due to brake clearances needed?.. Engine bay looks so choice. Rotaries.. so cool. They always look great when simple like that. Man I cant wait to see this on the road and also along at some Nelson OS meets. You make sure you book off next years Hanmer meet too! For extra spark and smooth running you could get one extra coil, buy three bosch ignitors and run two of the coils for the leading plugs bypassing the dizzy cap but using the pick up inside to trigger the ignitors. You'll be running those two coils as a wasted spark setup direct from coil to plug. You then run the third coil via the trailing trigger but run the leads via the now redundant old leading lead positions on the dizzy cap. This means the trailing spark now only jumps one gap in the dizzy rather than two. I did this with the 12A in my Viva and it made a very noticeable difference to the idle and general smoothness, especially about town and under light loads. Well worth doing. There is a very good thread about it all here... http://www.ausrotary.com/viewtopic.php?f=16&t=96724&start=01 point
-
extra day off for Labour Day today, put to good use busting my ass in the shed for way less than minimum wage phosphoric acid rust eater has done its thing its magical stuff, rinse/wipe, then a coat of rust converter to stop it coming back, and then ready for primer set up the paint gun on the underside of the bonnet - its been a while! i had to put a patch in the battery tray (you might be able to spot it as its smooth) and the rear of the RH headlight bucket, fix up all the masking i missed/had come loose and then: first coat of primer! yay - looks way better already1 point
-
Cheers Pete, yeah i am headed that way I think1 point
-
Look into where you can have that tuned also. Because chances of a pretuned ECU also being the best tune for your engine is low.1 point
-
It was nothing like that, it was way more high tec than the one in the video, it was done with the engine running1 point
-
When the engine was running you could see the 4 cylinders changing,1 point
-
^ starter motor load not alternator1 point
-
Awesome! is it possible to put the spring onto the clutch lever directly as a fail safe? if it all goes west the clutch is depressed and the car stops rather than drives on1 point
-
Look what I picked up today Just got home from a ten hour trip from Wellington to Tauranga via New Plymouth to pick the thing up More pictures in morning1 point
-
Talent/lack of common sense. Turns out I should have driven faster only got 9th http://www.mgclub.org.nz/includes/download.aspx?ID=1415021 point
-
Some of you may be interested in this. For $120 it is pretty cool. http://speeduino.com/wiki/index.php/Speeduino1 point
-
Insulator survived perfectly, Interior shot, considering the shenanigans the young put their cars through I'm amazed how it held up. I did clean it a lot. Some clothing brand apparently. These euro spec cars are quite different from the Japanese ones, 3.5 8in LSD, ABS 132kw. Advertised as fastest 2L on the road (lol)1 point
-
So instead of doing what I needed to do I started something else. Fan swap. After a quick measure I found that the Volvo fan shroud is a pretty good fit for the Cedric radiator, with a bit of trimming I ended up with this. The rad core is only marginally bigger, about 15mm left to right and 5mm top to bottom. It's tight but it fits. And the dual temp switch and housing1 point
-
hah was waiting for you to correct the terminology what about on a bucket/shim direct actuation setup. some people wang on about it on the fiat twincams that regrinds are rubbish because of making the vase circle small or something. I remember you did tell me that it wasnt a real deal or something/cant remember exactly why. I can kinda visulise that if you make the circle smaller the size of the bit dictating the acceleration part of the cam gets smaller and you would lose "resolution" in that section so it would make it would require more accuracy in the grinding process as the diameter/radius gets smaller since 0.1mm (or whatever yours +/- is) difference becomes a bigger % of the total. writing that just makes me think its rubbish full stop because that radius is going to be tiny anyway and the whole thing just goes whack whack valve you be open whack valve you be close.1 point
-
thanks man. i reckon its worth doing the best you can no matter what.1 point
-
So just to clarify - if changing from carb to EFI, a cert would be required, or in fact if the engine makes more power at all. In particular, changing from a 4AF (95HP supposedly) to a 4AGE - this would legally need a cert, yes?1 point
-
cheers to archetype
1 point
-
got new adaptor plate and this time it fits both the manifold and the superdupercharger at the same time. 2015-09-02_05-08-45 by sheepers, on Flickr 2015-09-02_05-08-03 by sheepers, on Flickr 2015-09-02_05-05-45 by sheepers, on Flickr so there you have it. all the mechanical parts are made and I've bought almost everything i need to do the conversion, just need a new clutch and to get my gearbox fixed when its out of the car. but, the end of the year is coming at me like fat woman approaches the buffet so i gotta get the other car done. this means this will be on hold until i get the TA23 a whole bunch further along. i dunno, January?1 point
-
Pulled the cab off the chassis today. Flipped the chassis upside down so I can finish welding the c-notch. Once that's done it can probably go to get sandblasted. Heaps of room under the bonnet for a supercharger1 point
-
Because he's an actual real life Indian?1 point
-
Last of the long overdue updates, some work on the engine bay. There was a broken off bolt at the front of the engine bay, it had been there for as long as I could remember I thought about just cutting it off and welding over it but I thought I'd be mega angry and past Matt if it turned out I wanted to used the hole further down the track so I welded a rod to it so I could wind it out. Success one extracted broken thread from a bolt. I finished feathering some edges and sanding off anymore signs of rust I could find, the engine bay then recieved a metal prep Followed by a couple coats of epoxy primer
1 point
-
Trying to get this junk ready for next weekend. Put new springs in, 200-100-20lbs. sits a bit high still, but seems to work good otherwise. maybe shocks are a little hard. built new exhaust. put on trail gear transfer case e brake, which was a big heap of shit tbh. still need to get cable shortened or get later model cable. mounted recovery point. then got bored and drove over shit1 point
-
safe as mate just dont get under it getting it up onto the rotisserie was a bit of a mission, was probably the sketchiest thing ive done in a while. jack it up as high as possible, stands under it, make extension for jack, jack up as high as it goes, attach ratchet tie downs to roof of shed and pull it up last 100mm, bolt rotisserie on, all the time ready to bolt in case it all came crashing down1 point
-
Brown on Brown1 point
-
Update time. Found some headlight surrounds. Were the only main trim piece missing so pretty happy. They also have a sweet patina that suits the car. My Dad has an Austin Healey Sprite project car so I borrowed the twin 1.25" SU's off it. Quick pull down, clean and new gaskets. Throttle spindles are a bit worn but should be okay. Open trumpets? Hmm. Been collecting some parts. Sweet oldschool oil pressure gauge. If anyone has a sweet old temp gauge they want to sell let me know, these things don't have temp gauge from factory! Fully reconditioned mk2 A40 Farina front uprights/brakes. Have had new king pin bushes, brake cylinders, shoes, seals, bearings etc. They are the later Sprite/Midget sized spindle so that's good, I can convert to Disc brakes without needing the full uprights. Imported some 600lb race springs, Nylatron negative camber trunion bushes, poly wishbone bushes and complete pins/nuts/bolts/washer kit to rebuild the whole front end. Will rebuild to standard for revin then fit the good parts. Stupid flood this week mean't I had to work this weekend and miss out on Nats. Figured I should get this thing going for the next big meet (to show off the beard), so got it up on the hoist and got the exhaust made between grinding cams. Tucked up as far as I can over the diff, not 100% happy with it but will do for now. Will likely have to go under the diff when it gets boned anyway. Here you can see the totally sweet lever arm rear dampers & mechanical brakes. Sweet stinger. Should have it running this week, just waiting on some hardware to fit the Oil pressure gauge. Need to fit the wideband o2 sensor, wrap the exhaust manifold & Wendy is going to have a go at finishing welding the exhaust up today. Chur.1 point
-
this is the article from NZPC. ill post it in both build threads just because.1 point


This leaderboard is set to Auckland/GMT+12:00