
Leaderboard


Popular Content
Showing content with the highest reputation on 08/04/15 in all areas
-
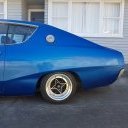
This is how its looking so far
 30 points
 -
Coffee time so update time. Floor all welded up and feeling a lot more solid Next up the passenger side sill. Before I cut it out I thought Id show you all what a truly wonderful bit of filling work had been attempted to hide the rot. I think whoever did this had slapped the filler on and just gave up. I thought I might cut a section from the spare sill I had. But no. Its been attacked before and the old man who had owned that car obviously didnt have a welder but certainly had a pop riveter... Hopefully it will all go OK. Im hoping the rot has not extended right up the top as I want something to weld to. If it has I will just have more sections to make. Will report back later with my findings. I will have to do it in 600mm long repairs whatever as that is the length my folder will take.21 points
-
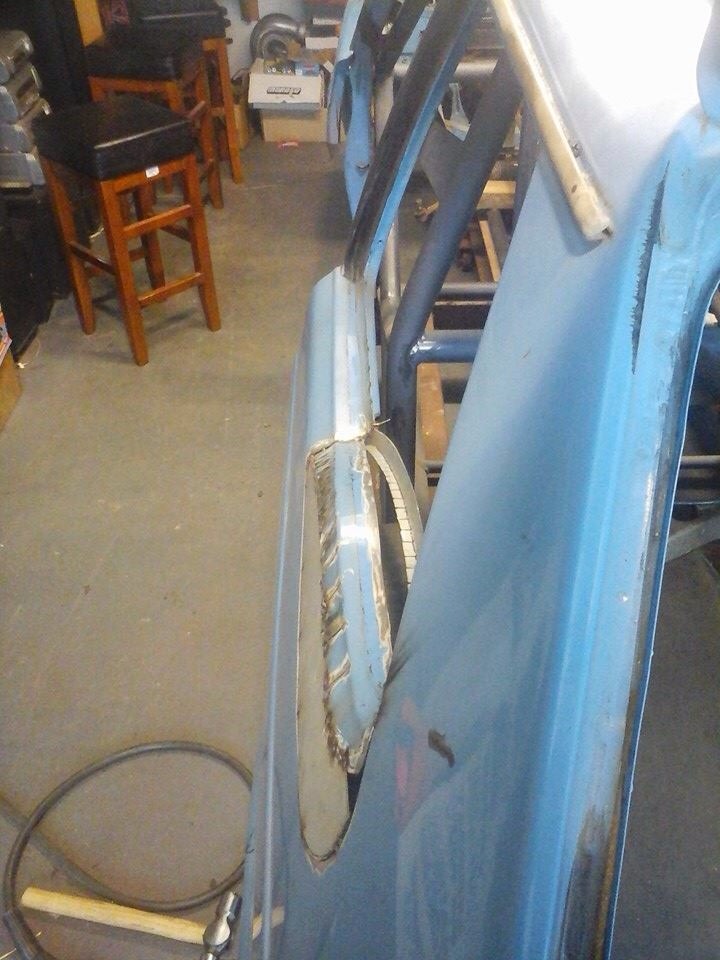
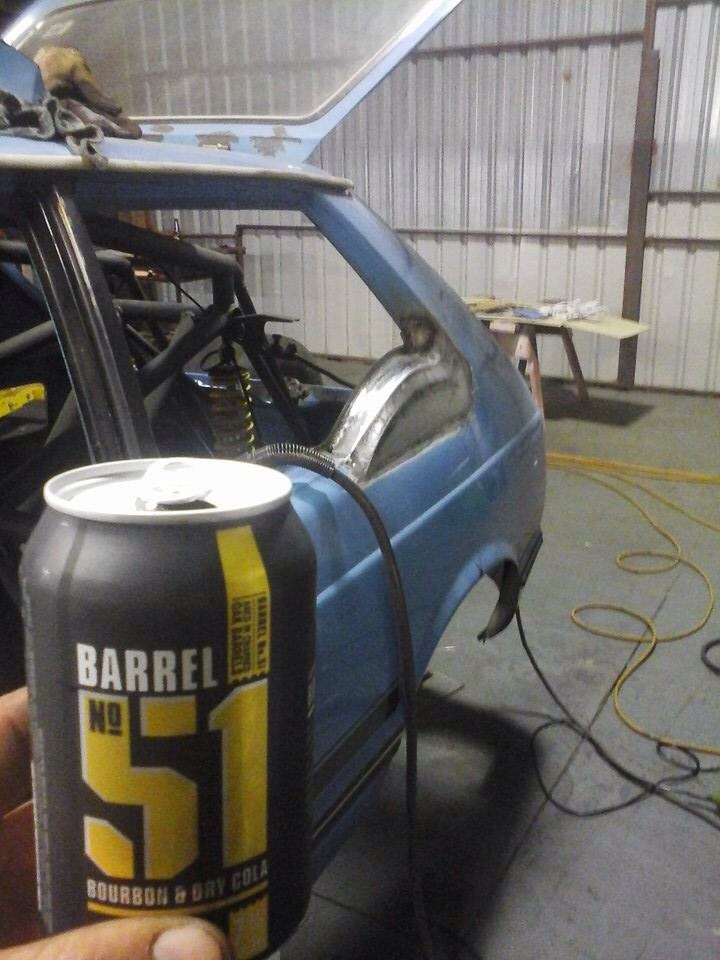
And done. smoothed out nice. no one will ever know! sept yous guys. So that's the channel nearly done, not sure if I'll do the A pillar or the end cap/fire wall next? are my pics richy von snoozin quality yet? my old point and shot died awhile ago and now I have to use this massive DLSR thing.14 points
-
11 points
-
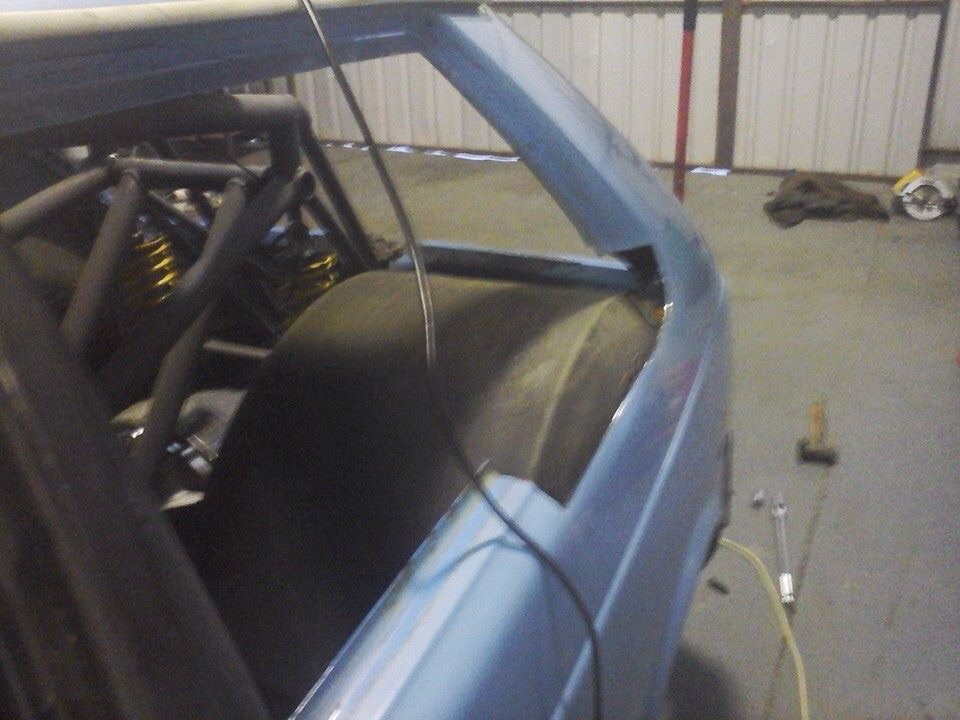
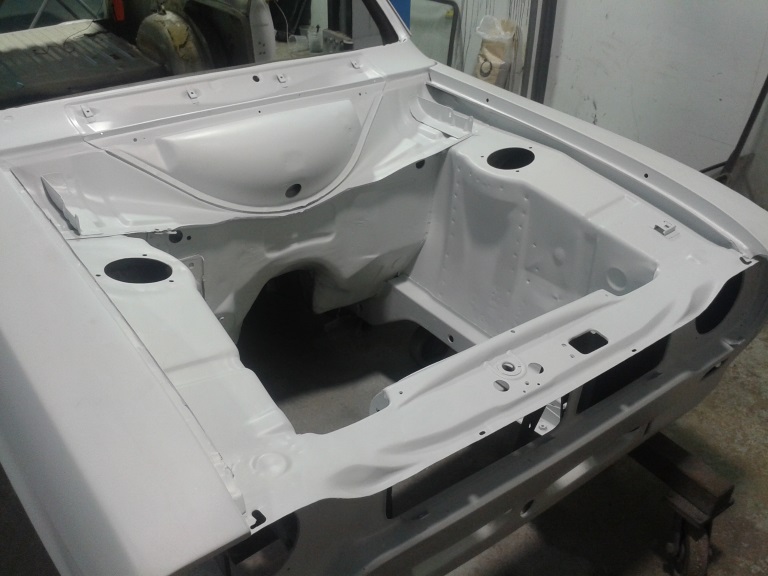
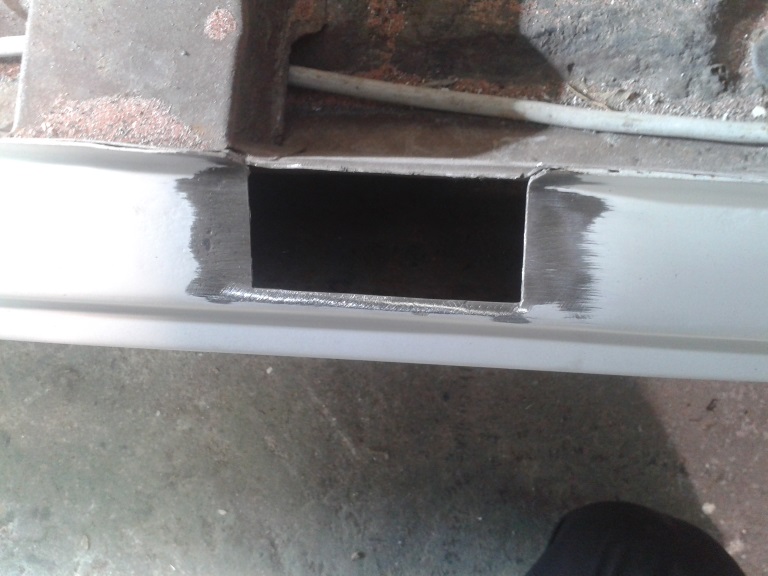
Today in pictures. With some text. So I finished welding up the floor and inner sill then tidied up some other frilly bits in there near the front. There are more little holes in the floor here and there but I will leave all the little bits for later once the big yucky stuff is done. This mudguard... I normally don't like them. But it seems to tie in well with the car in that utilitarian sort of way. So I carefully removed it. Then I cut away what was left of the outer sill.. Here's a bit of the sill.. ..and here is most of the sill... I was hoping that more of the top of the outside face of the sill would be solid but upon closer inspection it look like this wagon has had a replacement sill already. You can just make out on this section I cut off where they had blended the new sill in just below the corner and then ground it back. So I cut the sill top back further and will butt weld the new sill on the top face. Speaking of butt welding... this is my preferred method for all joins where ever possible. My several reasons why.. Firstly - it means that there will never be a overlap of steel. No matter what you seal it with its always a place where rust will begin because moisture creeps. Even if one uses a seam sealer its not perfect because usually one panel is corroded and if sealed up against another fresh bit of panel it can still continue to corrode. If you butt weld panels together you can prep them properly both sides and paint them properly. The join will last. No collection point. Secondly- both panels are flush so once the weld is ground back you get a neat flat surface that should hopefully require the bare minimum of filler (if one is bothered). Butt welding is a lot trickier especially with one panel usually being thinner and rusty. But if the welder is set up just right then by carefully zapping the join and getting just the right heat in the weld will go right through and create a good solid join.I like to see the weld coming through the other side. If the steel is thick enough, like say 0.8 ~1mm, then a very small gap will fuse together with the wire melting in and leaving very little proud. If I do have to do a lap joint somewhere I will always have the overlap facing down so moisture cant enter from above. However if its done without the use of a Joggler to put a step in one panel so the panel faces end up flush I think it always looks a bit messy plus will need more filler to smooth it off. I suppose it all just depends on what the repair is for and how much bother one wants to take. Areas that get the most moisture and you want to last I reckon it makes sense to avoid any extra traps. Enough blabbing. Photos. I was also foolishly hoping the lowest parts on the inner sills would be ok to re-use. I started to grind back what was left of the outer and it was shit. So I just cut the lot off back to good solid steel and welded in fresh sheet. This actually took less time then it would have to try to clean up what was there. Here's what I chopped off.. New steel in place.. Now onto folding up some new sill outers. I can only do 600mm at a time so I had to take time and try to do each half evenly so they would match. I had made a little gauge based off the old sill as a pattern. The sills turned out OK. Not as neat as if I had some rollers because you can see the gentle ridges where I did all the little folds. But they'll most likely get covered with underseal and hell- look at the rest of the car... Folding.. Cut, bend, tweak and generally shape the front end where I will be rebuilding the bottom of the A pillar.. Oh shit- is that the time? Decide I need to eat but on a roll so just quickly bbq some sausages and drink some beer.. Treat the inside of the sills while I can.. This is pretty much where I'm up to now... Hopefully the other side wont be as bad but I am expecting it will be.8 points
-
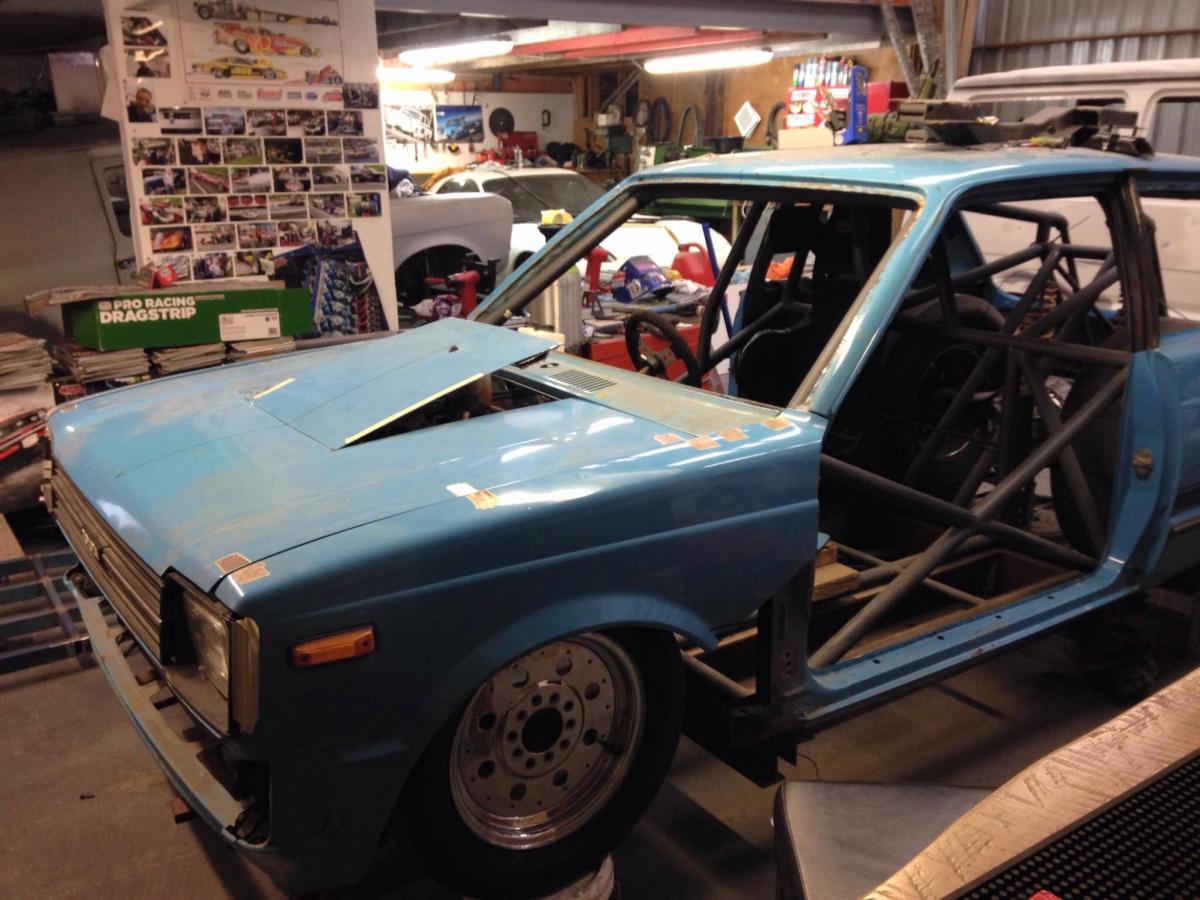
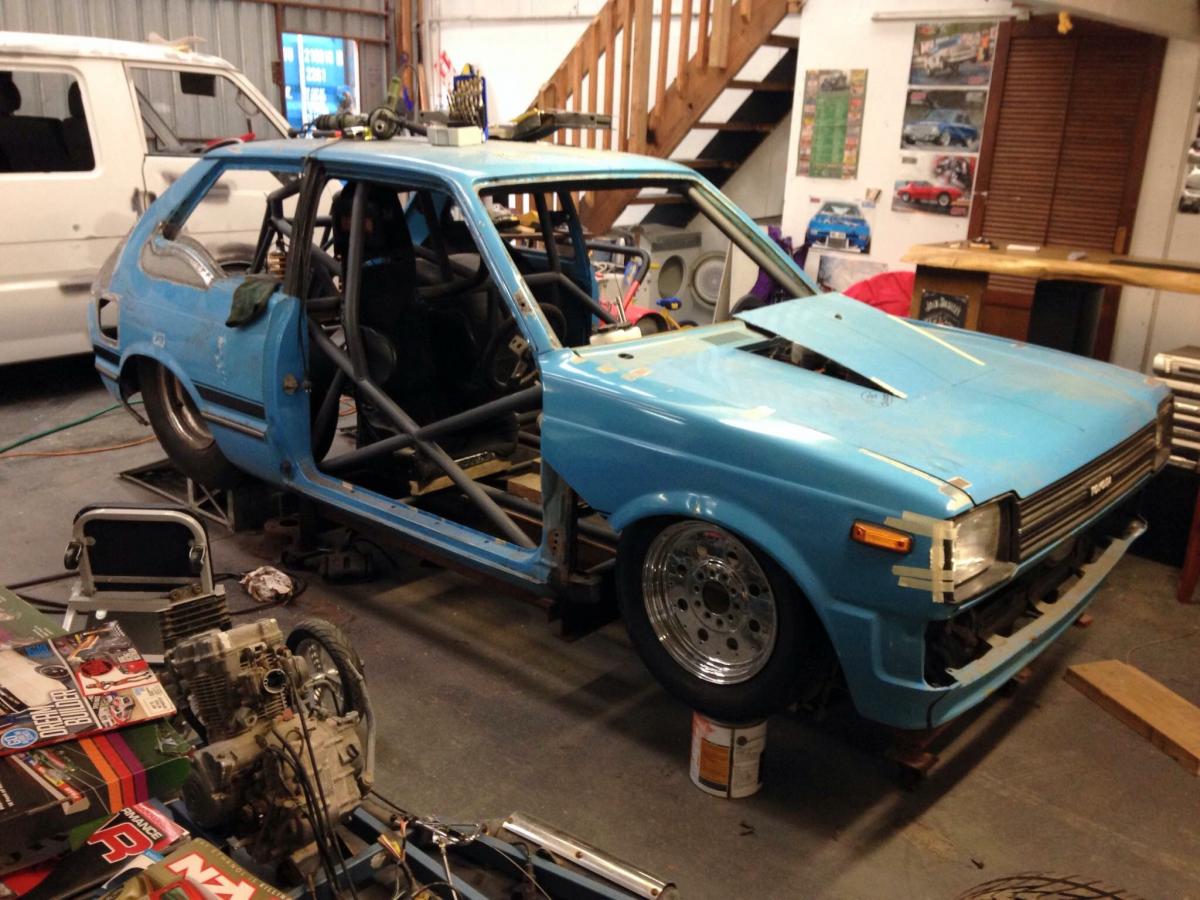
trial panel fit. everything looks pretty good. i haven't lined everything up perfectly, more fitting things close to where they should be so i can see if i can get it right without any major surgery. looks like its all going to come together without to much hassle which is nice. the only issue really is the bottom of the passengers door where it meets the front guard. its to far out so i might have to elongate the holes in the hinge to get it to sit in better. everything else looks pretty good, gaps and flatness across the joints looks workable from here. what to do next? probably do the bonnet and fix the hinges because they're fucked. Untitled by sheepers, on Flickr8 points
-
man this is wicked. much excitement about been a dad this is kinda what i want to build wheel barrow up side down8 points
-
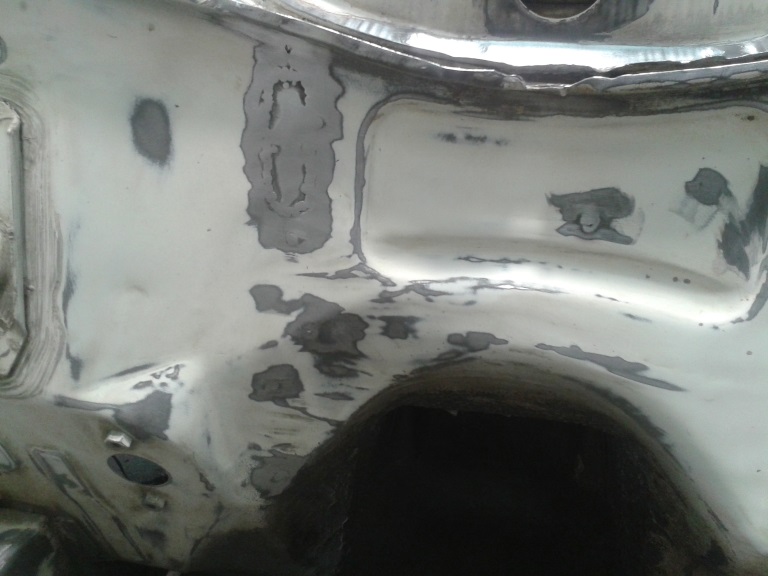
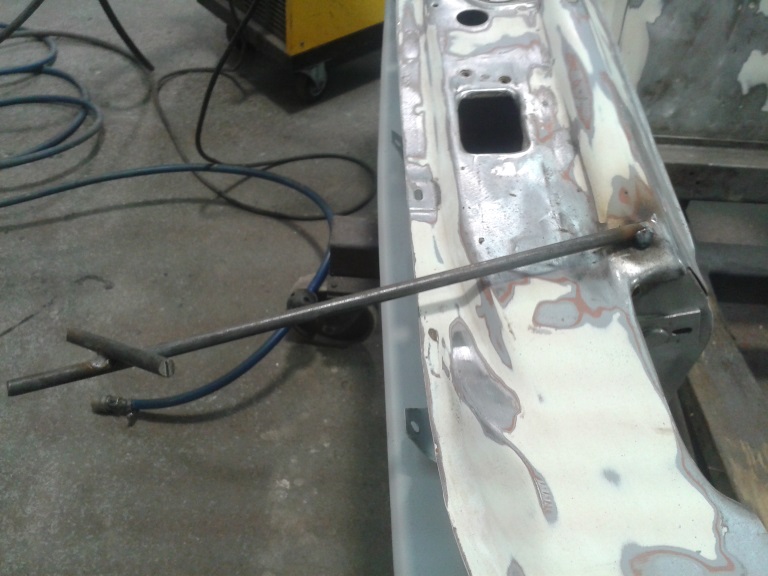
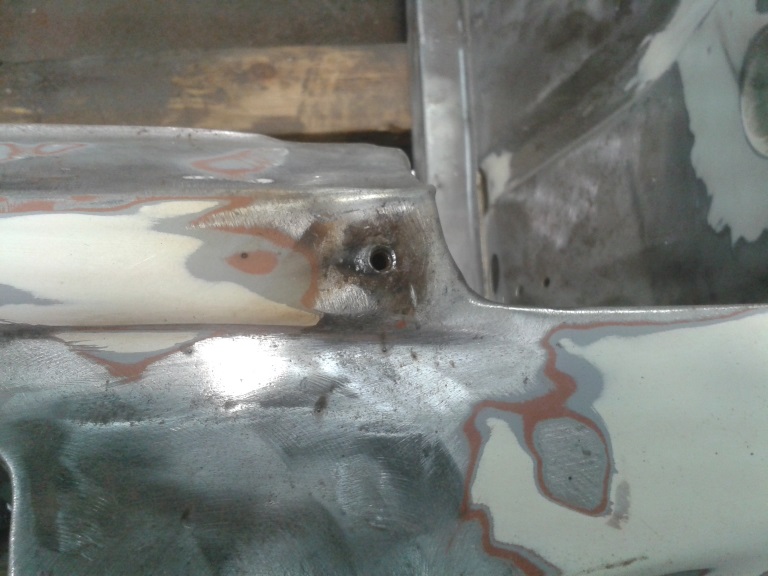
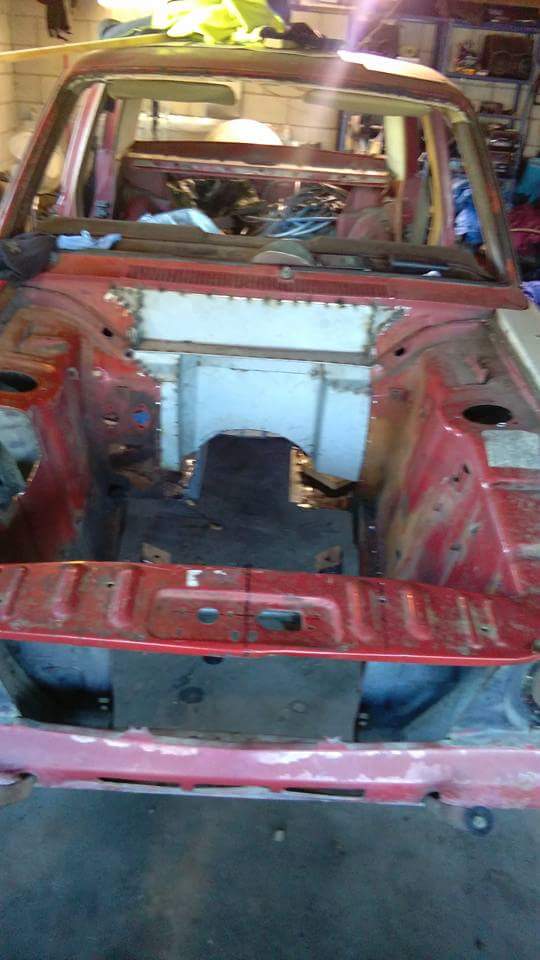
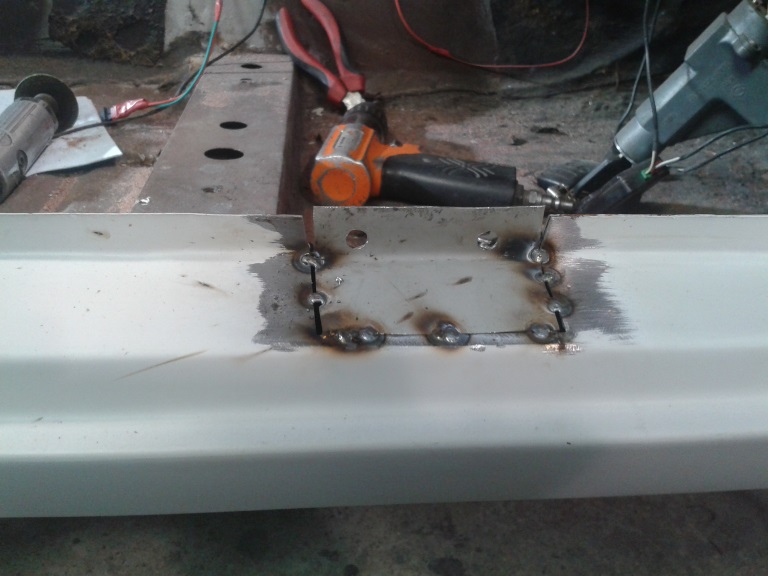
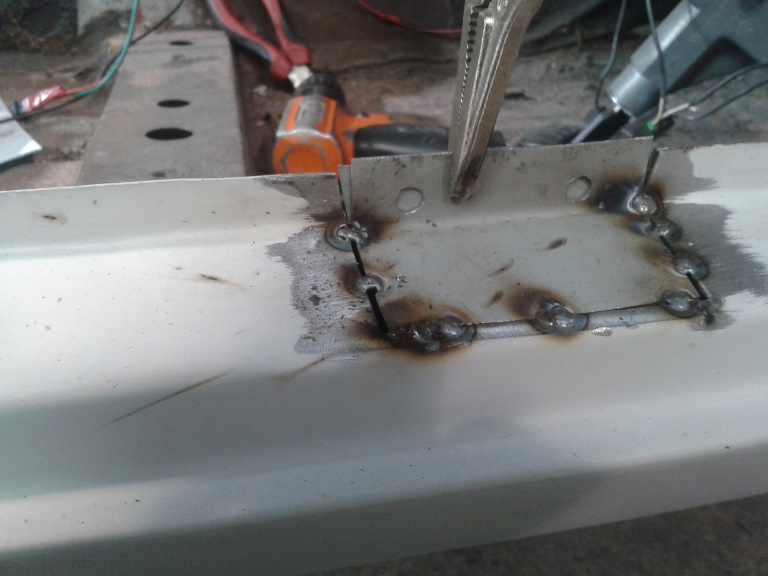
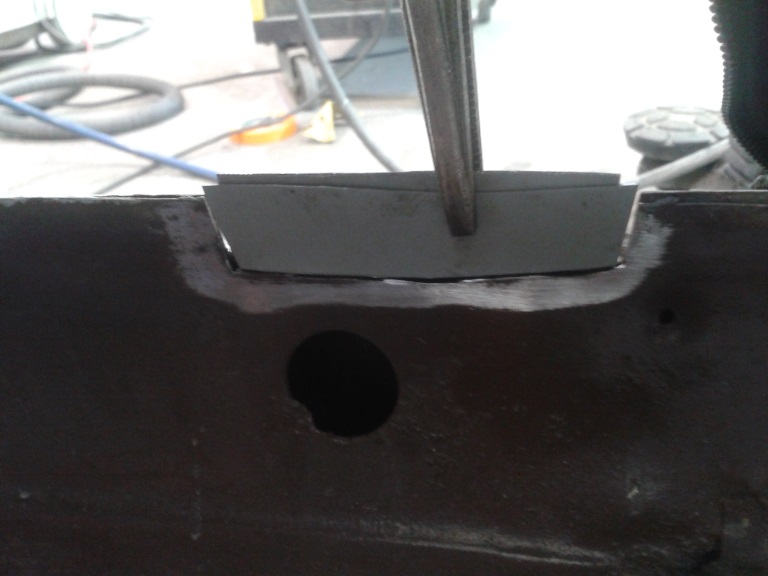
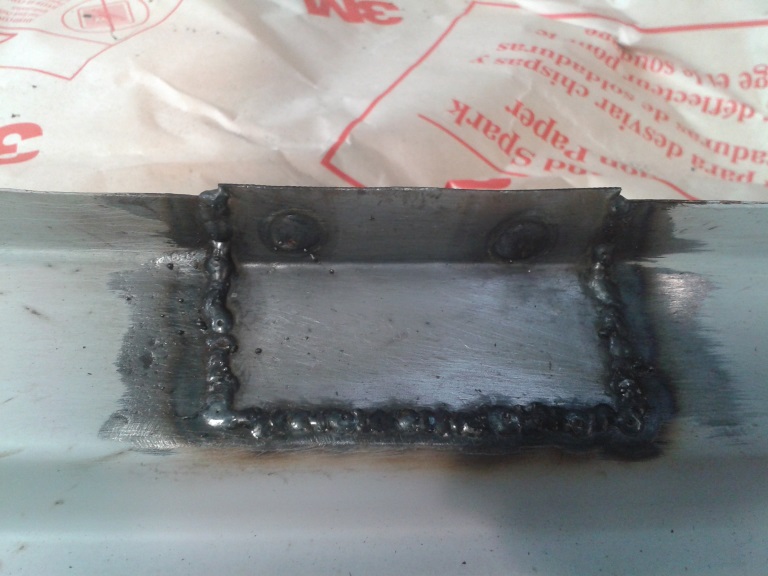
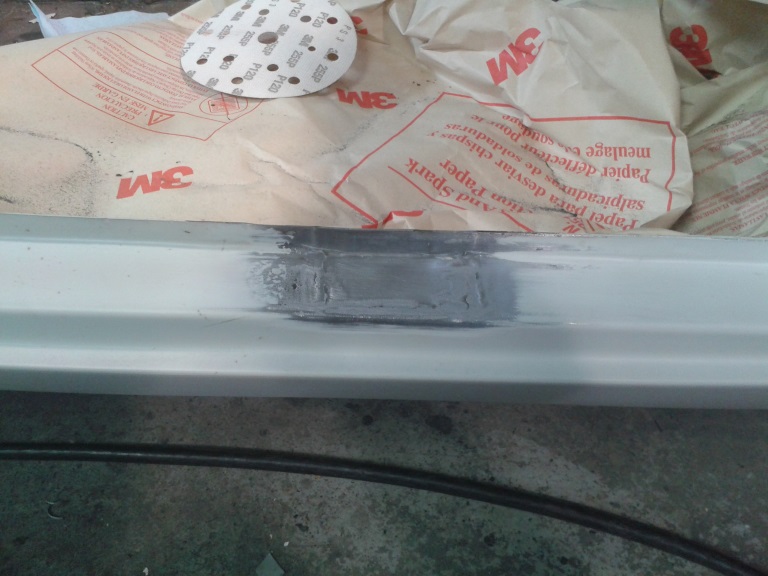
Photo time now I have showered off a heap of rust dust and grinding dust. Im pretty happy with how far I got today. First off, a photo of some of the patina I would really like to keep. I would like to treat the rusty scrapes and surface rust with something that keeps the colour but stops it getting worse? All the rust neutralisers I know of turn the rust black which wont look so good. Ideas? Clear coating it is an option. It doesnt have to last for ages because after a while Im sure I'll want to paint it but for at least first year or so would be good. I was going to remove the windscreen to avoid getting grinding sparks marking the glass on the inside. But I didnt. Three reasons; the rubber will disintegrate and I dont want to fork out $100 for new stuff right now, the glass is scratched already so might as well wait till later when the car is insured and then has a random stone hit it...., I like the moss. It adds character. I took on the worst area, the passenger floor and inner sill, which is also the area which dealt with first because it will put some strength back into the shell. The steel on these HB Vivas is actually quite good quality and quite thick. It certainly knocks cut off discs down quickly. I picked my way out to good steel and chopped away. First off this bit.. I am not really fussed about trying to piece this back together the way it was from the factory. If its strong and lasts Im happy. But I want to keep things like the channels in the floor because it will leak and they do help let water out. Plus they keep the flat bits of steel from being wobbly. So I whipped up a jig the right size and hammered the channels into the steel.. Now the nasty bit. The inner sill was beyond patching. But I am very very lucky that the top of the sill is rust free and solid which meant I could happily chop out this lot and not have the door aperture move on me. Also helped by the fact that Vivas have nice substantial chassis rails too. Not that the inner sill, or what was left, was doing much. It pretty much fell out. Next job was to cut out what I needed from the spare sill/floor pan I had been given. I think its about here that we should give a few seconds silence for the little Viva that sacrificed its life for this part. Not my choice- it was chopped up by a man in christchurch who insists that every Viva he kills makes his worth more. But at least I got something from it. Poor viva. The piece I required was cut out.. Then heatgun and scrape the underseal off.. Followed by lots of chopping, measuring, trimming, measuring and finally in place ready to be welded. Which is about where I finished off today. My bin of rust is filling up.. Tomorrow I'll weld that bit in place and start on the outer sill and sill ends. I'd love to put it up on the hoist to do that but then I think I would be risking things moving out of place. So I'll continue kneeling on my 5 layers of carpet off cuts and persevere.8 points
-
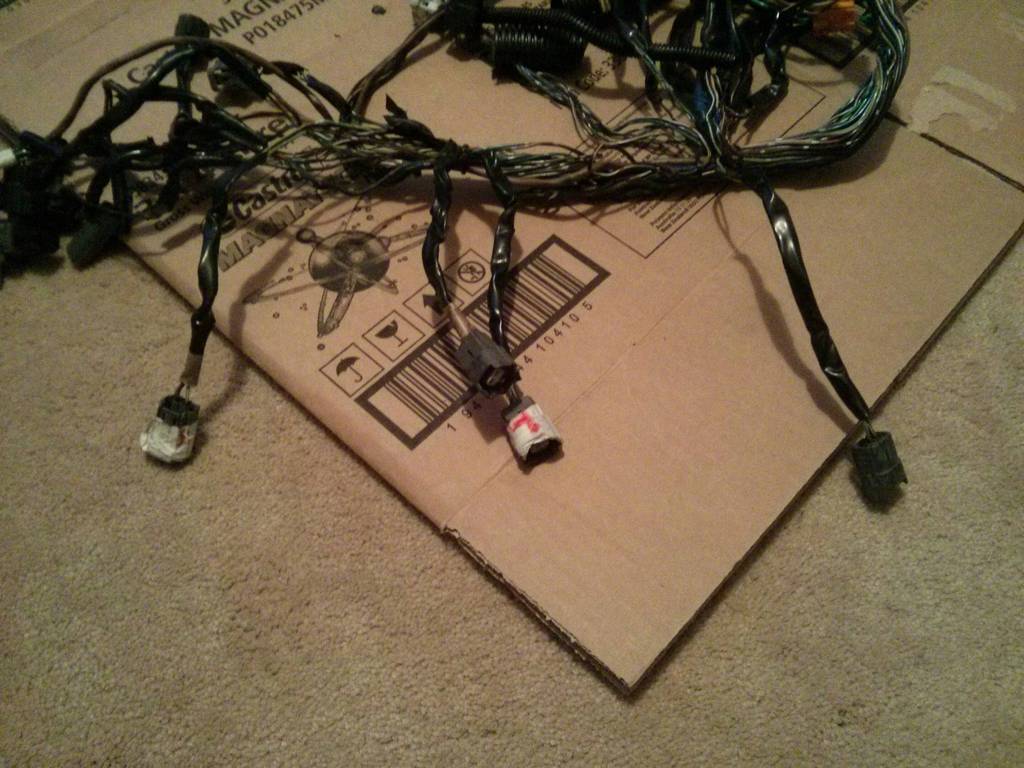
Got the loom out last night, while procrastinating about writing this report. I also did the dishes, two loads of laundry, and vacuumed. I'm sure any other students out there can relate. The covering was in a real state, super brittle and cracked, oil soaked and pretty stuffed. The actual loom itself underneath isn't in bad shape though, and will repair up nicely. Looks like quite a mess eh? It's not actually that bad, pretty simple as far as modernish looms go really. I also found something... Those are the four injector plugs, from right to left being Front Secondary, Front Primary, Rear Primary and Rear Secondary. I've confirmed this by matching the wiring colours, and toning the wires back to the ECU plug. I'm sure that when I pulled them off, the two with tape on them were on secondary injectors. Thus the two without tape were on the primary injectors, meaning the Rear Secondary injector was being fired instead of the Rear Primary, it supplies almost twice as much fuel, so it was never going to run right. It's possible the two with the tape were on the Primary injectors, not the secondaries I'm not 100% sure which way around it was, but they were definitely a pair, this would give the same result, but on the front rotor. ? I won the auction on a series 7 solenoid block, will grab it this week and try to get it apart without fucking it. Will tone out the rest of the loom too and figure out which solenoid is which . Now I might have to actually continue on with this report. Stink.
7 points
-
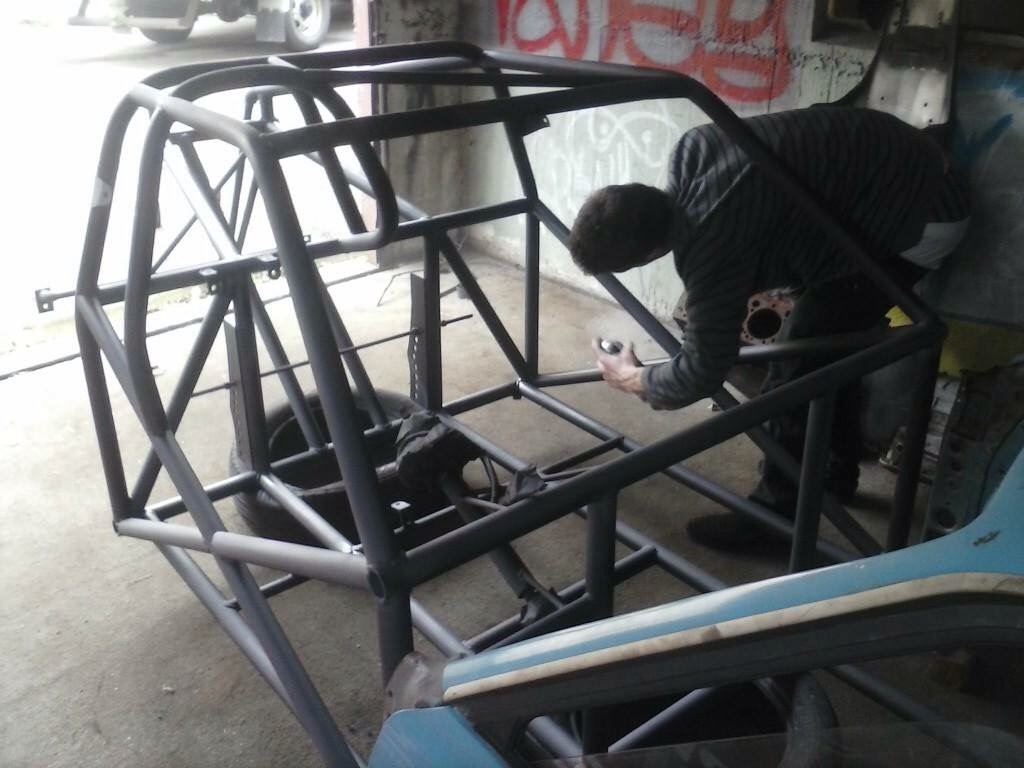
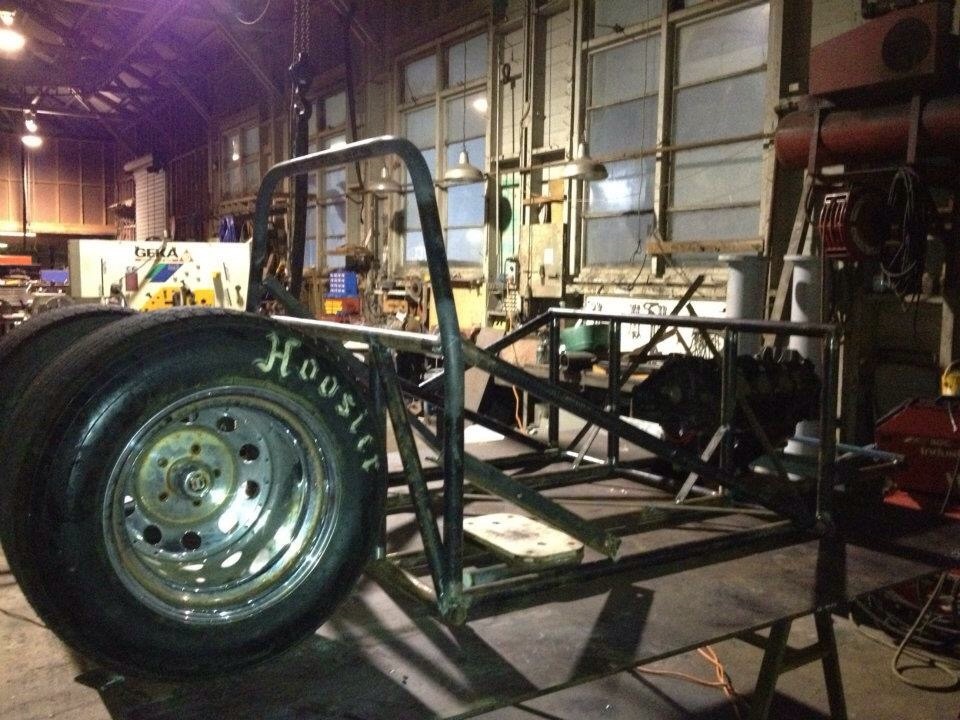
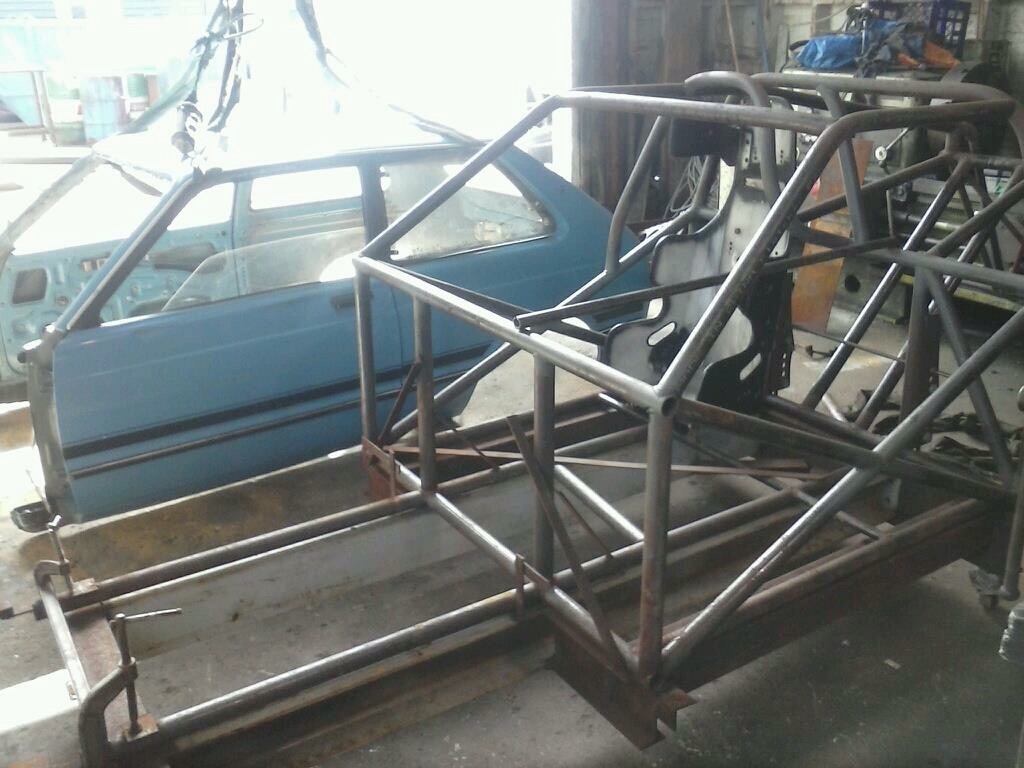
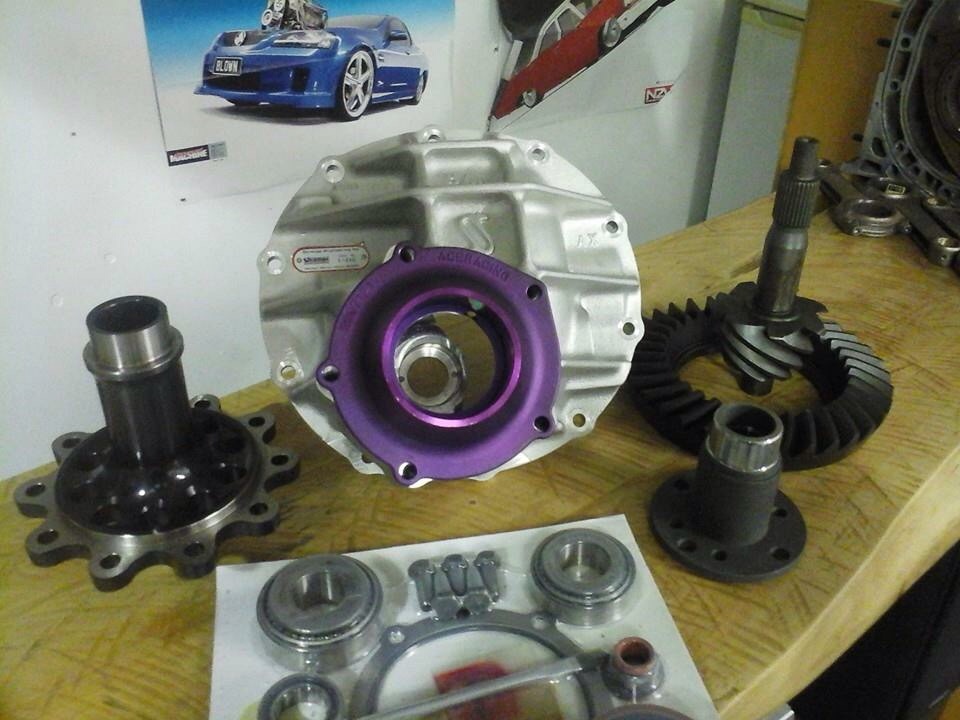
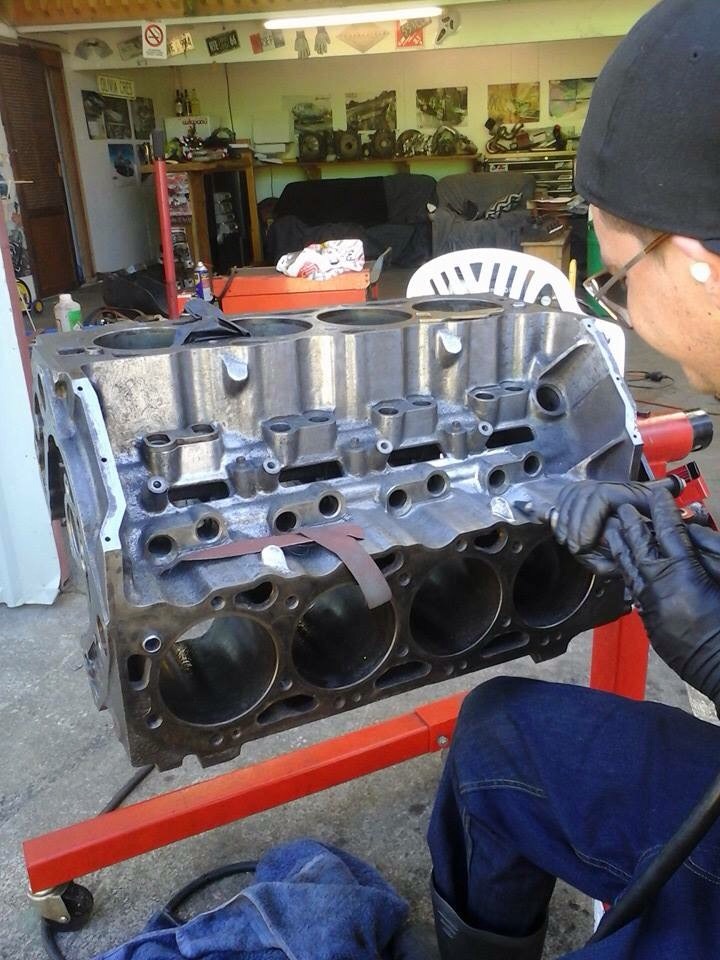
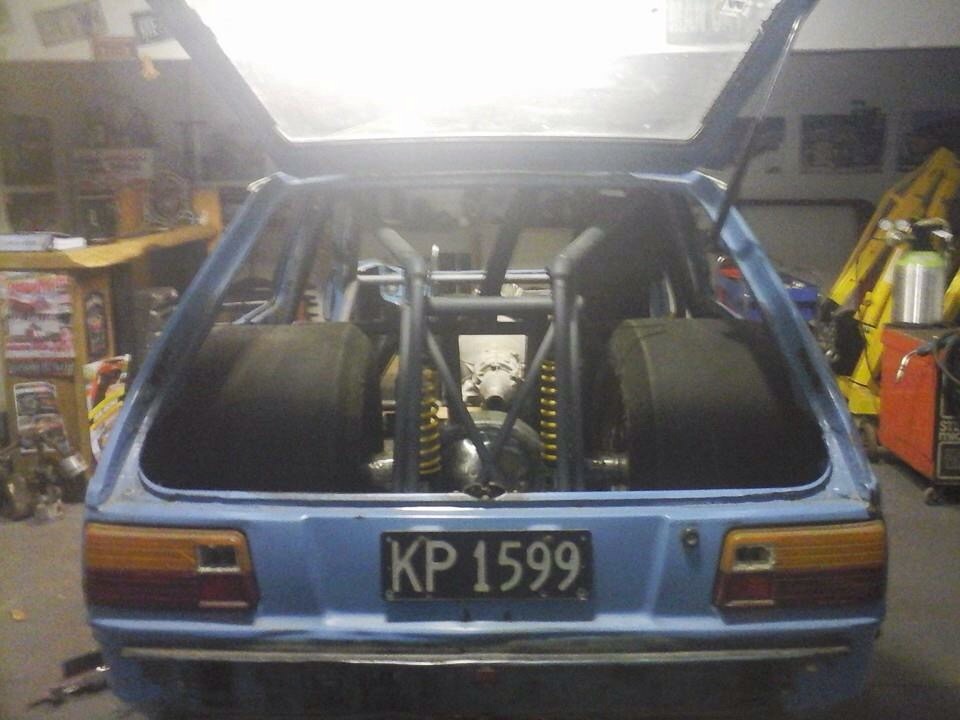
Hi , started building this around 5 years ago, originally was going to Just have a cage, hilux diff and run a mild 350 chev, but like all projects Its progressed and ideas changed so now it is a full tube chassis running A 454 chev big block turbo with a powerglide. Its got a very short 9' diff behind all of that spinning 15x15s wrapped in 31x16.5x15 slicks. The last couple of years nothing much has been done on it but i have Been working on it over the last few months so now have all the small, Tricky bits to do ha. Hopeing to have it running end of this year fingers crossed. Below is a bit of timeline pics from the build so far. Cheers for looking Chris
7 points
-
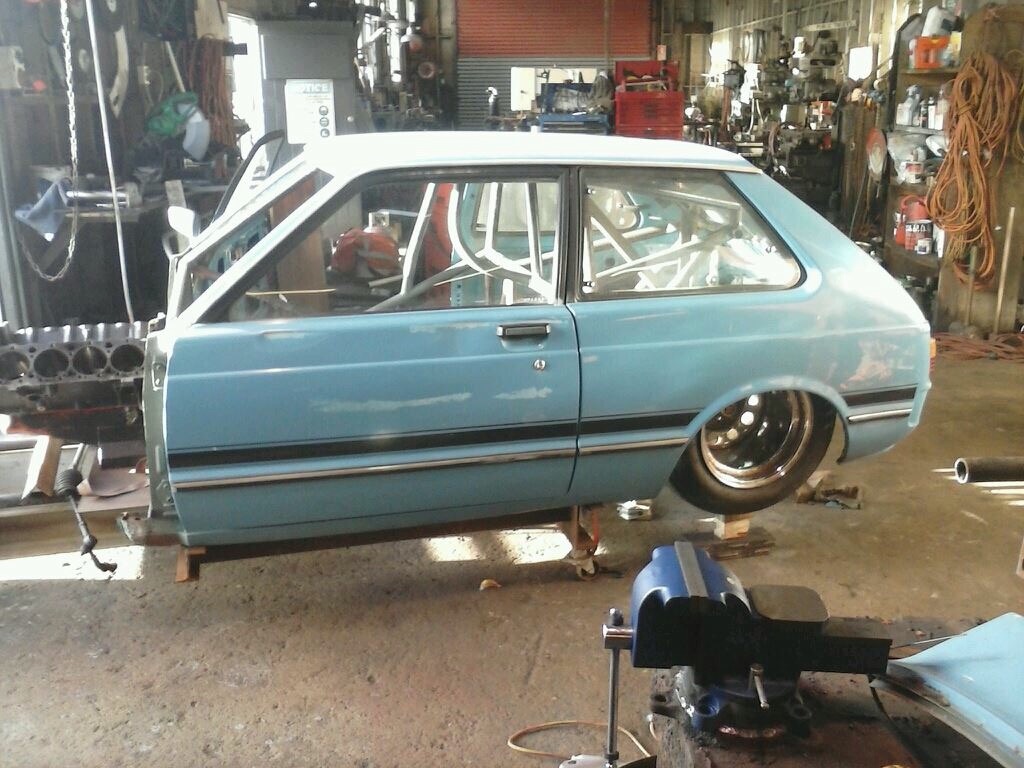
More pics
7 points
-
Turns out the suspected rust hole in the C-pillar vent wasn't actually a rust hole, but instead a patch of grime-encrusted flaking clearcoat. Quite relieved actually. The clearcoat will need to be removed then reapplied in that area, ahead of the final repair cert inspection. My opinion of the car's quality has improved considerably from my initial assessment. Discuss: //oldschool.co.nz/index.php?/topic/49412-80s-kid-part-ii-eds-aw11-sc-chit-chat/6 points
-
6 points
-
Hay have you checked the plugs on the primary and secondary injectors...they may be swapped over.. Yip I'm that guy.5 points
-
One teaspoon of Raro in a one litre jug of water. Asian parents-spec cordial.4 points
-
I bought this radio about 2 years ago with the intention of replacing the non-working radio innards with something more modern. It has sat pretty much untouched until today. I have bought a few things during that time for the conversion like a TA2020 amp and a couple rotary switches, I already had the component speakers so will use them. I also picked up a little bluetooth unit, which works quite well. In order to use the amps 12V supply as well as avoiding ground loop issues I have a dc-dc isolating converter which will knock the voltage down to 5v. This will help keep cords to a minimum which is good as it's such a nice looking radio, there will still be a 3.5mm jack in the back though. After gluing the base up as it was coming apart slightly, first up today was getting the speakers mounted, I used some old mdf speaker mounts I made for a different project long ago and screwed them in using little brackets. Then I made a plate for the rotary switches and amp volume dial to secure to. Luckily the old knobs fit the new switches so they will be reused. Tomorrow I'll hopefully do a bit of wiring and make a support for the amp and the old radio dial I intend to put back in.3 points
-
Yum. A nice refreshing brew.3 points
-
I did not like that welcome. not at all.3 points
-
filled my first few holes, only 999 to go... bit of a bugger to weld due to all the fish oil and/or waxoyl all through it but its in good nick for a 50 year old tail gate so glad its in there. Also my plan to 'keep the patina' got overridden (on this panel) by my inability to stop picking scabs. woops!3 points
-
head set, water pump, cam belt and tensioners. all genuine toyota thanks to Mark at Manawtu Toyota. i need to figure out what coils I'm going to use then i can make some mounting brackets for them. i need to make a few more bits but i might get excited and take the motor out soon. Untitled by sheepers, on Flickr3 points
-
Last of the long overdue updates, some work on the engine bay. There was a broken off bolt at the front of the engine bay, it had been there for as long as I could remember I thought about just cutting it off and welding over it but I thought I'd be mega angry and past Matt if it turned out I wanted to used the hole further down the track so I welded a rod to it so I could wind it out. Success one extracted broken thread from a bolt. I finished feathering some edges and sanding off anymore signs of rust I could find, the engine bay then recieved a metal prep Followed by a couple coats of epoxy primer
3 points
-
Also bought a R32 GTR front lip through Alex/Moonlight racing. My inspiration2 points
-
Nice even spacing on the rivets there. Looks like someone took the time to bodge that properly2 points
-
Im impressed with your cuppa to work ratio in one day, id still be on the second mug browsing future projects i miggt like - waiting for the welds to cool/paint to dry ect2 points
-
I see pros and cons for the idea. If it was a real good bunch of mates it would work best. If I was involved I would have to trust all the others. But then like the others on here I would only really be interested if I got access to big equipment that I just can't fit - hoist, lathes etc. Personal experience tells me it was hard enough having to manage a workshop with staff who were being paid to use the supplied tools. but even then (and I am sure others who have worked in a workshop or own rental properties will attest) some people just don't give a shit about other peoples things or milk privelages to the maxxx. Common issues; Shit gets broken and no one owns up Shit gets left in a mess People "borrow" stuff that never shows up again People hog time at certain things to do work for everyone else (perkies for their mates.) As I am writing this I am convincing myself it won't work without the right people. As I said before the difference between supplied tools, paid to use them and supplied tools paying to use them is going to lend people to have some sense of entitlement to do more with them for longer.2 points
-
havn't attended a meet in an old car for several months and cordia is closest to running2 points
-
Hi Alex in order to keep the rust and paint i suggest parking this at the local sheep farm for a week. Failing that just rub some lanolin on everynow and tgen. Rust will stay a nice rust colour i like tye lanocote spray. Its half fish oil and smells fantastic2 points
-
nice work Mr Alex, at this rate you'll be pickin the mrs up at the airport in the "hackback"2 points
-
Much love. Will hopefully see a bunch of you cats there!2 points
-
This now has a pair speakers in the rear, in a custom made tray, with deadening underneath, it's painted black for now, and then added a pair of 4inches in the front, all nicely tucked into a little mount i made. And then i figured why not chuck a sub in the boot, so i did. And all the wiring is tucked under the carpet, which meant seats out. First thing I listened to: 2001, because masterpiece. I need to figure out how to set up the eq because so far it's under-fucking-whelming. Also metalflaked the spare wheel because I could. And took out all the door panels and lubed all the windows. Bumper still off; keep breaking bolts. Oh, I never updated with pics of the masked and resprayed checker things in the tail trim. Suffice to say it was a shit of a job, but now it's done and I felt happy until I found more things in the process that need fixing. That is all for now.2 points
-
Finally some progress! The starion has a WOF & Rego. I'm picking it up from the garage tomorrow afternoon, and will be able to drive it legally for the first time in 2 years, it's so sad that it has taken me this long. In October last year, I took it in for a WOF inspection, hoping to get it fixed up in time for summer. The list of failed items is in my previous post. The garage replaced the worn steering bits, while I went on a bit of a shopping spree: New rear shocks from Mookeeh in the US Tokico front inserts from Amazon.com New rear brake disks, pads and wheel bearings from Ebay Sway bar bushings (SuperPro) I wasn't 100% sure that the struts would fit, but the rear ones matched up perfectly, slightly shorter to match my springs also: The front ones however caused all kinds of drama. I pulled out one of the old oil shocks, and test fitted a new insert. It fitted the strut, but the gland nut was the wrong size. The factory gland nuts were far too thick for the new inserts. I checked with autolign and they confirmed that the shocks were the right kind, but I tested with another pair of struts (thanks to oldschool member 'dave' from Whangarei), and finally saw the error - one of the Tokicos had the correct nut, and the other (which I had been test fitting with) was too small. After some trial and error autolign came through with a KYB gland nut that would fit the strut, it just needed a spacer to fit the top of the insert. So I got out my grinder & hand files and 'machined' a spacer from the not-fitting nut, which slotted in perfectly for a nice tight fit (here's a shot halfway through - once it was the right diameter I sliced off the plate at the top and ground down to fit, measuring as I went to keep it all flat and smooth): And then installed the inserts: By now I had moved house and given up on the original garage. I rebooked with another place nearer my current house for a new inspection. They said the rear bearings and brake discs didn't need replacing after all, so now I have a spare set of each for the future. All that was needed now was: New clutch master & slave cylinder New drivers side seatbelt Power steering hose remanufactured and reinstalled as it was leaking, and my spare one leaked even worse. Those are now all sorted, and we are ready to go, can't wait for tomorrow2 points
-
Wow. This thread reminds me why I've always been drawn to old shit. You obviously have lots of smarts about these modern machines Zac. I would be holding my head, and rocking back and forth in the corner by now......2 points
-
Nice work. Glad to see fellow BMC sickos at work.2 points
-
So I went to make the down pipe form the turbo and ran into a wee bit of a problem..... Not much room. So I had to take the motor and box out and will now have to fast track the making of the steering .just so I know where the exhaust will run. On a plus side it means I can make the cross member and also I managed to take the motor and box out from the top like you would with a normal car so that made me happy. Also new gasket set turned up and managed to get my hands on some 1ggze dizzys and 7mgte coil pack , igniter ,plug leads. Pulled the motor down to the long block and gave it a Clean.
2 points
-
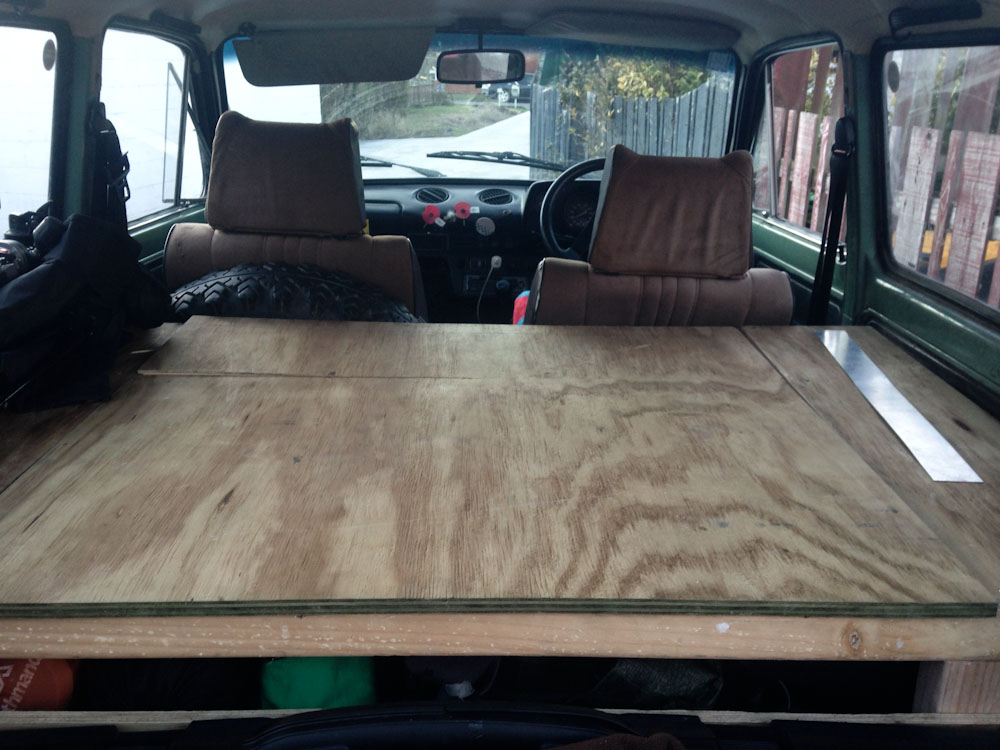
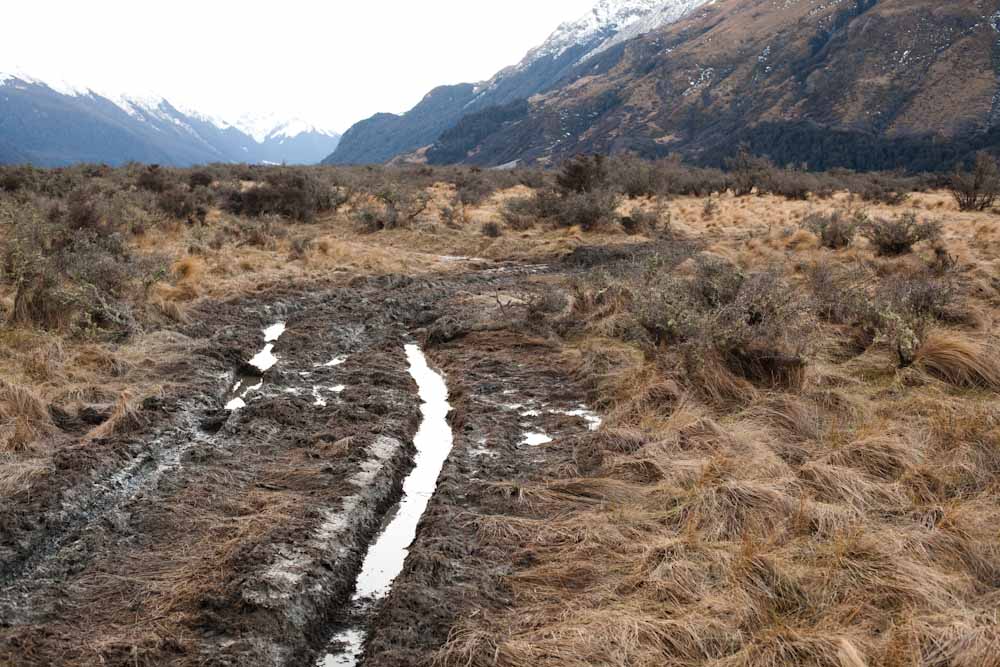
Well got the wof and celebrated with a big drive up the Hopkins, for those of you not familiar with the south island you head to lake Ohau, drive past the skifield turn off and from there the road turns to a track with vehicle access almost all the way to the main devide, its a great spot, our plan was for a spot of hunting but the weather played against us, snow to the valley floor and a nasty southerly, we made it to the ridgeline but the temps didn't allow us to hang out too long! For the trip I finished off a longstanding mission, a plywood platform in the back to keep my gear organised, also has a compartment for the second battery to calm my fear of returning from a mission in the hills to a flat battery! not quite wired up yet but its there with jumper leads attached if needed! This mudhole claimed the niva, with armfulls of river stones and my high lift I managed to dig myself out, all alone because the plan was to meet a mate up there late in the evening, I made the call to drive out and wait for him, saving further troubles and of course we both drove back in without incident! I also had the first test of the light bar, its the best thing ever for night trips, perfect view of the dark track ahead. Happy Niva Stoked as I replaced the bald tyre with another mud grip, going cheap could have been a disaster! I was pleasantly surprised with the performance of the engine, in low first she happily idled across rough sections and had enough poke to get off the idle and climb out of creekbeds. Back in the city she's been dormant but I take her out to the farm now and then, until last week I left her to warm up and got distracted by a phone call, with a change of plans she never left the house and sat for a few days, when I tried to start her up again, no dice, not a pop, thinking it would be the points I pulled out the distributor and gave it a tickle but still no life, checking the plugs they had a solid layer of carbon! idiot! so quickly stealing the 2105 plugs she roared into life, lesson learnt, choke is wholesale pouring in fuel and should only be used to start, not idle!
2 points
-
To the british the chassis and body are as consumable as oil2 points
-
IMG_8854 by GuyWithAviators, on Flickr Testing it's off road capabilities.2 points
-
Yup. The tape and conduit they used sure does like to get all brittle and shit. The series 7 blocks come apart. I can send you some pics tomorrow if you like?1 point
-
there was one in Napier basicly rent the workshop type deal it failed epicly1 point
-
Im not sure if you can get it in NZ but in AUS there is a product called Morris Ankor Wax Its pretty sweet as can just rub it on with a rag and leave it for a matt finish or polish it for more shine. Lots of VW guys use it for their patina.1 point
-
I would hazard a guess that this guy is on to something.1 point
-
Molasses is apparently good for getting rid of surface rust1 point
-
See you guys there.1 point
-
OK so super busy with extra work and birthday shenanigans so hadn't got round to sorting photos and doing a update, there isn't too much progress due to massive amount of extra work done over the last week or so but there's basically a rust patching montage.
1 point
-
Thanks. I need all the help I can get haha.1 point
-
Have continued to strip this thing down, unfortunately most of the surprises have not been good ones. Not too many photos tho. All the interior, bumpers and lights are off, and a coat of rust kill on the floor, and and ive got the tailgate off and dissasembled and a tarp over the back end- will sort out a few holes to get into the swing of things and see how we go from there. I took a load of interior parts etc up to the storage unit just before, so i will be able to get it into the garage and start filling holes. Tidied up all the front chrome and lights so they are ready to go back on, pretty happy with how everything cleaned up Put new tyres on the original rims but thought id better have a motivational first: Check out where the hubs are presently thats actually the present ride hight, so a looong way to go yet! And in other news, the Ive been put in touch with a guy in wellington with a Wagon and he has pretty much everything I think i might need as far as non-consumable parts go, might even be able to wrangle a parts (sedan) car if its not just as bad in all the places i need rust cuts.1 point
-
Small update. Lowered the back of the car a while back by a notch. Sits much better now, much more even. Today, after many, many hours of sanding and spending a few hours polishing today, I finished my intake manifold: Will try put it on within the next week. More to come. Also, my front tyres are almost bald.1 point
-
And let me know cause I'll come help (acquire parts of my own)1 point
-
Finished trans tunnel and firewall: Goddamn the original steel in the floor was shit - kept blowing holes, no matter how low I set the MIG. Hence all the blobs of weld. When welding the new steel together, it was so refreshingly easy! Ah well - ugly but tough as fuck. Just bought a few parts from Ebay so waiting for that shit before I can mount the shifter etc. Gonna re-do engine mounts - make them bushing style mounts off chassis rail a la this:1 point


(Custom).thumb.jpg.50cbfadc2369f551fe14d9ec26aac0d5.jpg)


This leaderboard is set to Auckland/GMT+12:00