
Leaderboard


Popular Content
Showing content with the highest reputation on 06/21/15 in all areas
-
Ok so over the week, the stubs received the tick from the NDT guys (recommend X-Ray Laboratories on Leonard Rd, Penrose for this kind of work if you need it, very fast turnaround and a good price) and then I ambled across to Clint and received a frowny cert-man approval for them after examination and photos. So, then they got painted in gloss black and reunited with their shocks. I didn't take any pictures of that finished article because I was pretty excited and impatient to put them in the car. So here's this. IMG_3138 by Richard Opie, on Flickr IMG_3160 by Richard Opie, on Flickr IMG_3170 by Richard Opie, on Flickr Oh and the Streets are now polished and with Levi for a dab of paint between the spokes and on the inner barrels. Plenty of room in a single piece 13" wheel vs the 3 piece for the brakes too. IMG_3205 by Richard Opie, on Flickr IMG_3218 by Richard Opie, on Flickr Cheers for having a nosy, if you want to discuss anything the link is below!22 points
-
Roughly threw on fuel tank (Stu my good friend says hes gonna make me a sweet ali one... ) and some other bits together, so could test a few things. Seems to be working well apart from a few drama's. Brakes don't work, need bigger master cylinder im thinking. and the spring situation. some soft 10" springs should fix that. Droped the clutch with a few rev's, and the ass didn't jump up in the air or squat from what i could see. so the 4 link angles must be pretty close! Extra light weight version. / Show us your 4age17 points
-
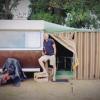
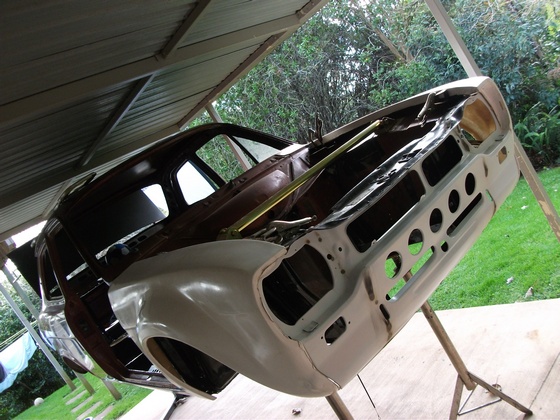
safe as mate just dont get under it getting it up onto the rotisserie was a bit of a mission, was probably the sketchiest thing ive done in a while. jack it up as high as possible, stands under it, make extension for jack, jack up as high as it goes, attach ratchet tie downs to roof of shed and pull it up last 100mm, bolt rotisserie on, all the time ready to bolt in case it all came crashing down12 points
-
Done heaps on this, but not a lot exciting update wise. All the suspension pickup points are welded on properly, diff is finished. Added limit straps and another cross brace. brakes. Having a bit of mare with springs. tried to cheap out and use some i had hanging around, but didnt go to plan. still gotta get more springs andchange it around, but how it is below should be ok for a test run10 points
-
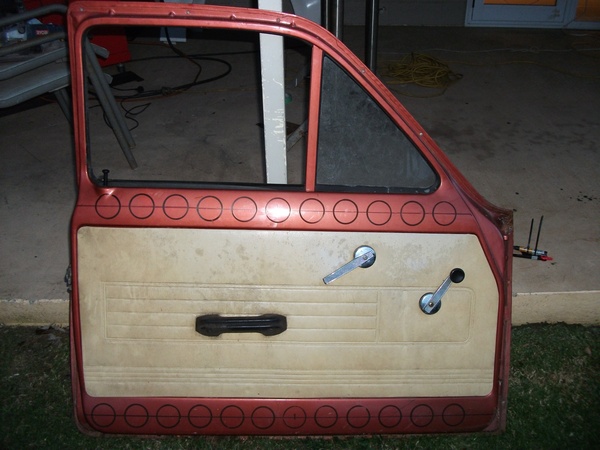
This is my recently acquired KP60. Its has a 2K and 4 speed, will probably give her an upgrade soon. Only mod it has is some cobra lowering springs, other than that it's all fairly standard. Need to get a new windscreen rubber in there asap, since it's leaking. Short term plan is to tidy her up a bit more - paint bumpers, grill and wheels etc. Are the bumpers and grill/headlight surrounds meant to be black or dark grey? Not sure what paint to use. Might be pretty slow progress. One day.... //oldschool.co.nz/index.php?/topic/48889-matts-81-kp60-starlet-discussion/7 points
-
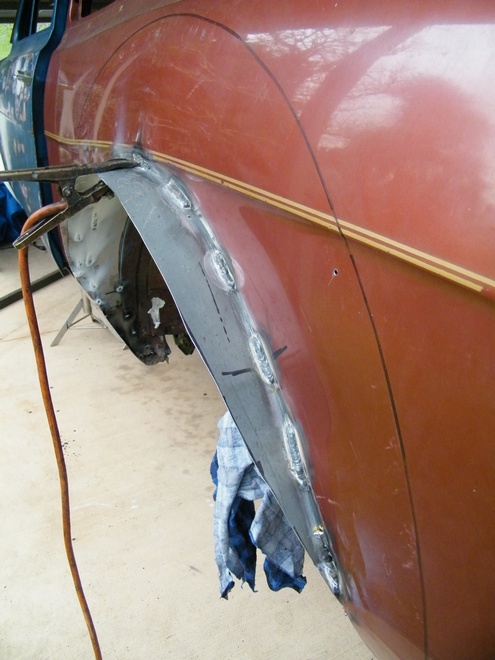
dang I have been slack in updating this build thread Since the last update I have fitted the pedal box, played around with the tune alot and get the car running pretty good. I have raced it around hamptons a couple of times and broken lots of things I can even remember. It has a locked diff now which is actually super great. Actually I broke all the flywheel bolts off at around 7500rpm, they were brand new oem bolts done up to spec, it is quite unusual for this to happen I am lead to believe. Amazingly it did no damage, so I fitted a new set of ARP bolts and I havent had any problems since I took the car to nats and raced around a bit. During this time a 'tappet' noise would not go away and the drivers footwell flooded pretty good while driving through the rain. The exhaust headers also broken after being re welded while driving back along the gravel road to thames. I will take the engine out as I think I know what the noise is. I saw some material missing off one of the cam lobes when I put the engine back together after checking for engine damage when the flywheel broke off. I took a pic as per below but I was in a rush to get racing again so I left it. Pretty much all the welds looked like this before being re welded. now they look like this again. The main flange is mild steel and the pipes are very thin SS. I have the thing braced to the gearbox and it still breaks!!! they cost alot of money but they are fairly well trash if they keep breaking In the mean time though I thought I would check out where all the water was coming from. I found a previous fix which I had no noticed before which had rust through. The previous fix hadnt really sealed the problem so water had been getting in and sitting between several layers and caused a bit of damage. The drivers floor was also full of holes being held together with paint and underseal. I have now re sealed the interior of the car and now I am in the process of remaking the bits on the outside to refit/reweld the lower part of the gaurd back on hmm hmmmmm I also partied with dane in the middle. dont worry his gf was cool with it I am yet to remake this retarded peice, so much of it has rusted I am not really sure how it fits together and some fancy conveyors that will be conveying all of your sour cream products in the near future but dont forget7 points
-
Spent a large amount of time getting these closer to ready this weekend. The wheel centre's took the longest. Removed old clear and hand sanded them to mirror finish. Very happy with the results. Going to look into coating them with something (ideas?) to keep them from oxidising. Yarns -> //oldschool.co.nz/index.php?/topic/47514-ants-tc24-gx71/5 points
-
I'll do a write up of how to convert your old car to micro squirt one day if anyone is keen but its not a super cheap solve all but definitely worthwhile5 points
-
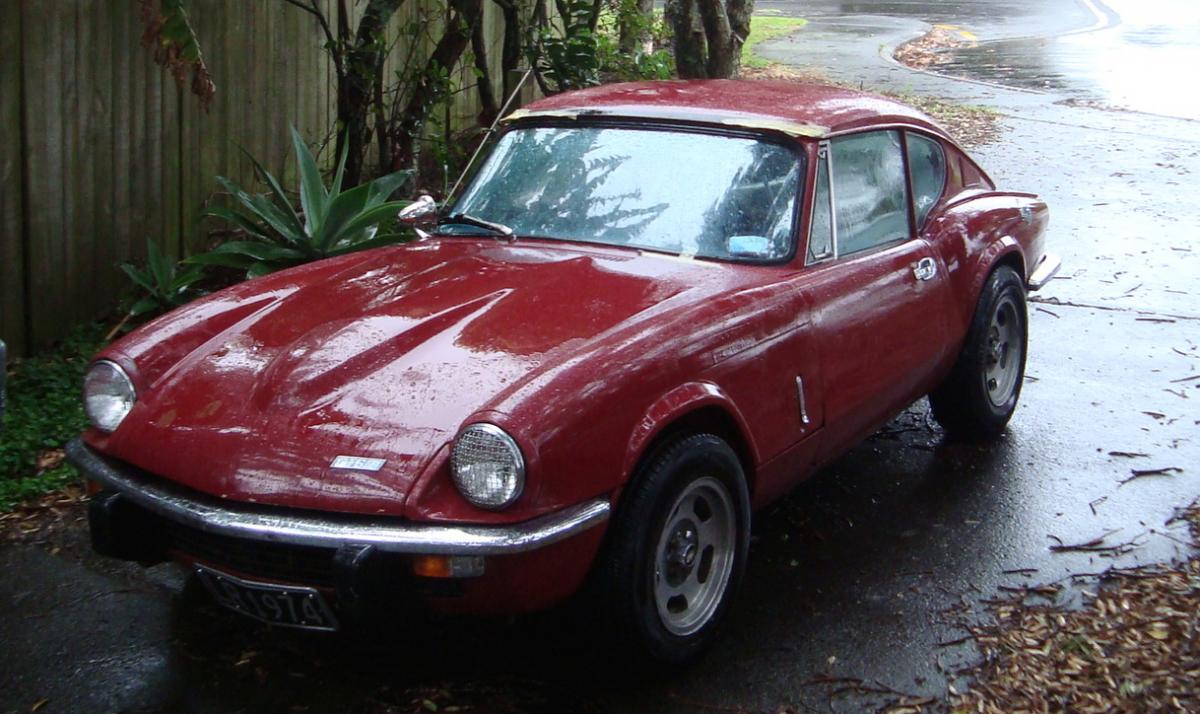
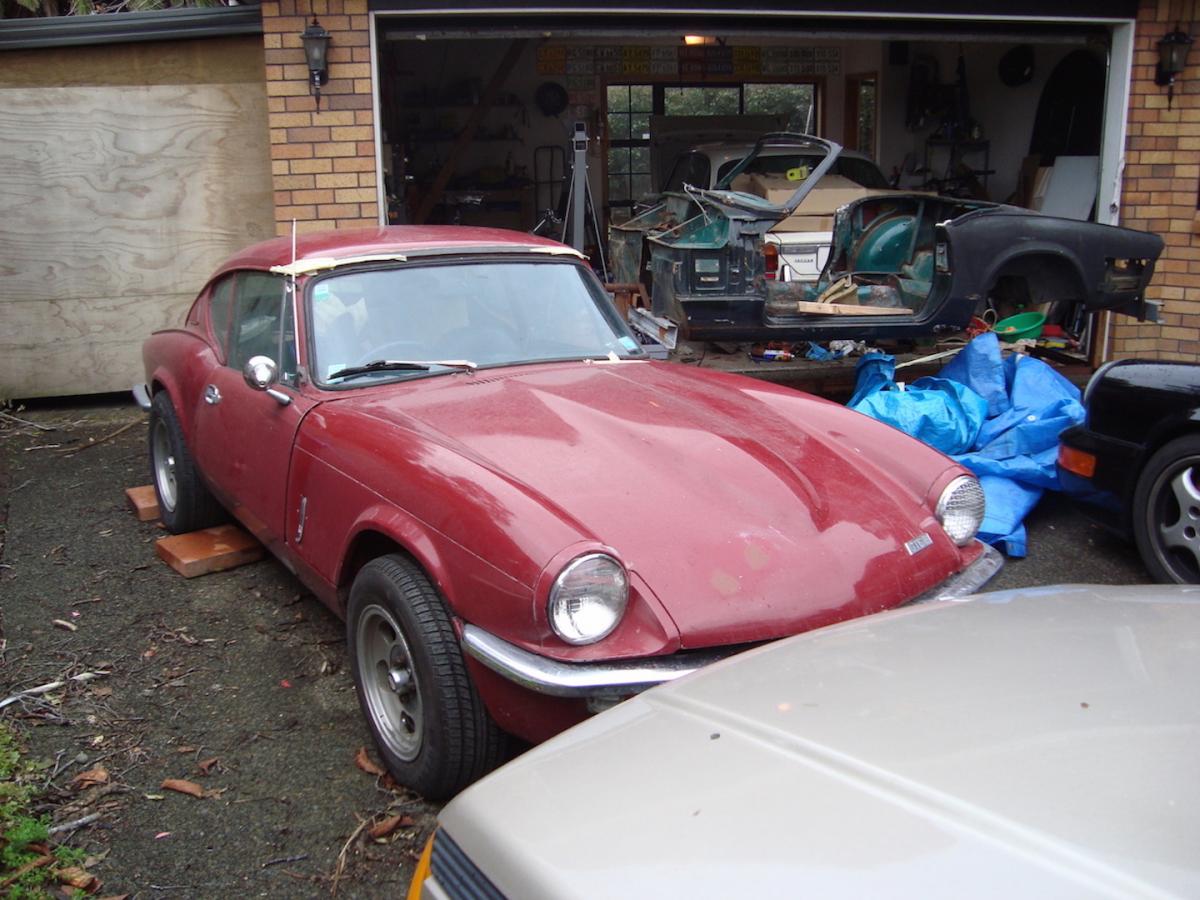
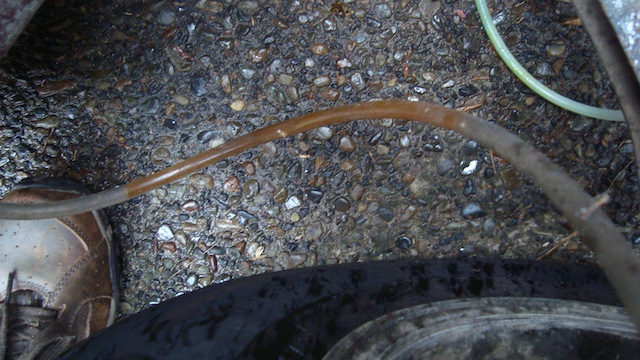
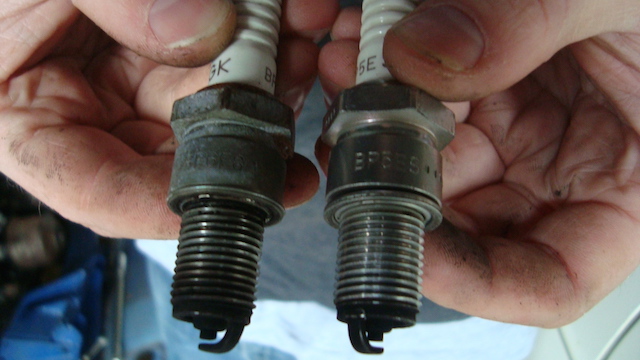
Our new Gt6 It came up for sale in specialist cars on TradeMe for a reasonable price. We already have a project (or two) car so why not another The Lancia Gamma was sold so we have some money and space in the driveway. The universe doesn't like a vacuum. I put an autobid on it up to $5005 and decided if it went higher than that, then I would miss out. Its reserve was $5K and I won it. I was surprised there weren’t more bids but it was listed in specialist cars and not the cars for sale so maybe not many people saw it. I organised getting it shipped to Auckland from Napier which turned out to be a hassle because it wasn't running. It would have much more fun to go down there and do a road trip with a trailer…..or even maybe getting it mobile and drive it home. I just didn't have the time to spare and the buyer wanted it gone. It arrived during the week while I was in OZ so today my son turned up and we decided to get into it and have a look. It turned out to be better than we expected. No brakes Paint is all cracked and faded Rust at the top of the windscreen. Rust in the B pillar Engine didn't start Clutch pedal went to the floor and didn't come back up Hood lining was ripped and had pieces missing Seats were just sitting loose Windscreen wiper was missing (in fact the whole mechanism was gone) Engine numbers didn't match (original engine long gone and who knows what put in its place) More parts in the back hatch than on the car No original wheels So….to sum it up……. it was perfect. So Perfect that Ethan named it Vyvyan from the young ones. First Job… Get engine running. It had a good battery so that went on charge. It had no gas so we went up the road to get some fuel (no 91 for this baby) Dropped in the battery and filled her up Cranked it over and it started after 30 seconds of cranking. https://www.youtube.com/watch?v=qPzWs1kgZog Little worried……its only running on three. Give it a rev…….now its running on 4.5 Rev really hard…..running on some weird combination of cylinders but not all at once. https://www.youtube.com/watch?v=wkwQRi80b1k We decided to investigate the misfire. It seemed to be coming from only two or three cylinders at the back of the engine so we tried swapping the leads and still it was there. We were beginning to worry that it may be low compression so …out with the compression tester….they checked OK….phew. So the next idea was it must be the plugs. They are BP5ES so we went to one of our other engines and checked what was in that. Turns out it had a whole mix of them but we found 4 BP6ES and chucked them in. That fixed the problem and it now runs semi OK so I will get a new set of 6 BP6ES for it and fit them tomorrow. https://www.youtube.com/watch?v=USYK_lOpssA Time for a tea break and to look up the engine and head numbers. Turns out it has a high compression PI 2.5 saloon motor in it……..nice! 132hp stock….150 with PI and a tr6 cam. Next I jumped in and tested the clutch again. First I pulled it off the floor and pumped and push it down and lifted back. After a couple of these I managed to get it working. The only problem is that when I started it up I could hear a noisy thrust bearing….when I pressed the clutch it went away…damn. Looks like the engine will be out over the next couple of weeks. Next job….The brakes go straight to the floor. When we opened the reservoir it had that nice black oxidised fluid that a car siting for 5 years get. The best thing about a tilt front car is that we could bleed the front brakes without taking off the wheel or lying on the ground (as it had started to rain) . We bleed out all the brown/black fluid and air in the front. We couldn't be bothered doing the back as that would mean taking the wheels off and getting on the ground in the rain. Ethan said the pedal felt average but OK so we decided it was good enough to take to a drive. https://www.youtube.com/watch?v=EmRYXpeCHlw Fun…. Enough work for today…..tomorrow we will bleed the brakes better and bolt the seats in and look at the rust a little closer.
 4 points
 -
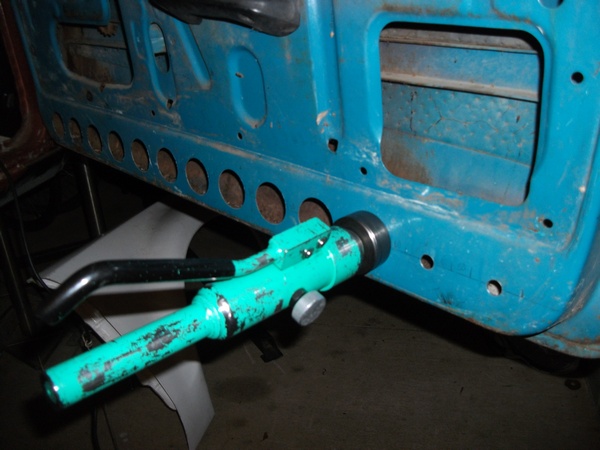
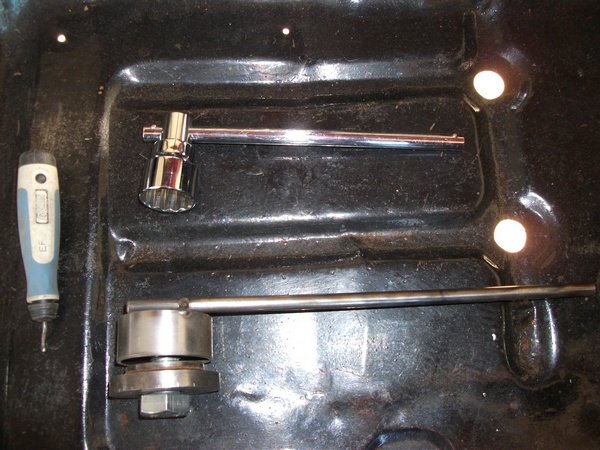
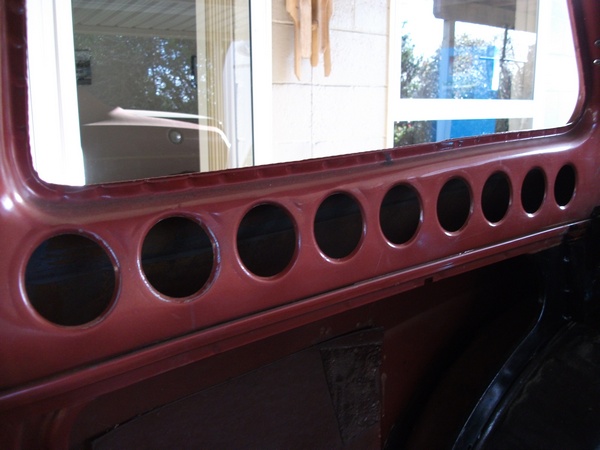
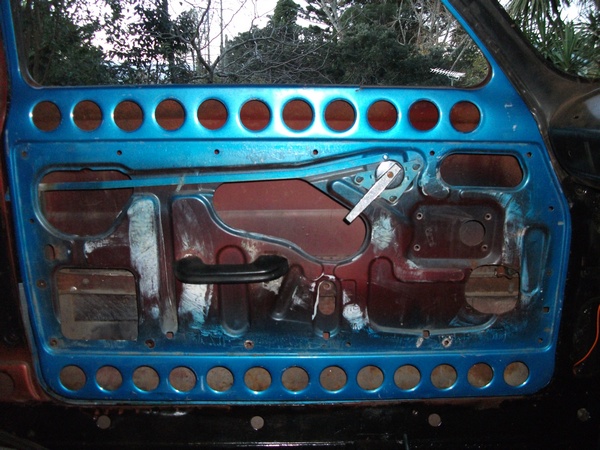
Going to swiss cheese the inside panels Chassis Punch Made another 2" hand swage tool rear quarters swaged Doors Done
4 points
-
yeh it feels like a rice rocket after driving the dually. yeh id suspect most people would like a c10 more then a dually i just like duallys for some strange reason lol but im pretty stoked with how much less fuel the c10 uses which means i can drive it more often for maximum profit4 points
-
Had car back for a week now, lobbed the restrictor fully and haven't had any issues, going strong. Today I did this It's oddly smooth, must need some duct tape added for grip!4 points
-
new page, new happenings. mainly this. Untitled by sheepers, on Flickr Untitled by sheepers, on Flickr Untitled by sheepers, on Flickr many thanks to Dan (ta63-1uzze) for the dummy engine. with it i have been able to see that the manifold i made actually fits the motor and also that i should be able to get the whole shebang under the bonnet. using science (taping a crown horn button to the front of the motor and closing the bonnet) i have calculated that i should have about 10mm gap between the bonnet and the pulley. pretty happy about this. Untitled by sheepers, on Flickr Untitled by sheepers, on Flickr other things that have come to light, i should be able to get the pulley forward enough by making a new one with a slightly different offset. i had previously thought that id have to make a new snout but a pulley should do the trick to get the belt drives to line up. gotta make an adaptor plate to bolt the superdupercharger to the manifold. I've done most of the work for this so that shouldn't take to long. excitement!!!!!4 points
-
Update time. Wow! I thought this would be a quick little write up but actually turned into an essay length spiel. Best you put the kettle on... So a fair bit has been going on in our little valley. I've been trying to remember to take photos but usually get carried away and have finished whatever before I remember. I did go up to the ridge a wee while back and take a pretty photo or two of the sunrise. Very nice up there. Cant wait to build a cabin for that place! Coming back down to the truck via the ridge track- Tuis playing morning tunes in the Lucerne tree next to truck. Since getting that lathe in place the shed has been getting used and sort of just evolving in doing so. Things/tools have found a place. With the winter weather it feels cosy- especially in heavy rain. Really needs a wood burner or waste oil burner for the colder days because man can it be chilly in the evening. I will make something but accept that it will only heat up a little area and be hugely inefficient trying to heat it all. Maybe something arond the main bench/lathe area would be good. One thing that we are both stoked with getting is the hoist. We could only afford it because we bought the secondhand lathe instead of a new chinese lathe. The bank balance is getting low as and we ummed a bit about spending the coin on a hoist but so glad we bought it instead of waiting because man its useful! I ordered it from trademe and had it delivered to a Nelson depot. Just managed to squeeze it in the van for a slow trip home which saved on the silly rural delivery charges. Shane came round the next day and helped put up the main structure. It went up pretty fuss free and seems fine for a cheaper chinese hoist. I can see where the costs are cut when compared to a Heshbon etc but its strong and well built where it needs to be. Currently we just plug the hoist into extension cord. Must order appropriate lecky supplies and lights then wire up shed! It dwarfs the Viva. Oh yeah- also note the steel rack we recently built. Was great to get all the steel we have found while clearing the block out of the rain and inside. Stepping away from the workshop we have been busy with many other things. First off we needed to get the ever growing piles of firewood out of the coming winter rains. Into our pile of telephone poles and old iron and we built this. I also nabbed some old wooden shed doors left outside a nelson garage doorplace. Free to take- i like. These I turned into a storage bin for all them little offcuts of wood that are a pain to stack. So now we have some storage but will need more. We have at least 50 pine trees big and small to chop down over next few years. Some in the gullies will just rot or be made into north shore style bike trails. Many we can use to keep us warm. Then that little sailing boat. The sun and the rain wont help it at all plus it was in the way- taking up space I could fill with another old car. So more telepoles and the 6m lengths of NEW iron that had been left in the bush edge by previous land owner came in handy. We built this... (turns out to be also very handy for lawnmower, old pushbikes and bike trailer storage) Meanwhile our neighbour has offered us her field which was overgrown with gorse and blackberry for the past 20 years. We wanted to clear it out so our view was nicer and had been intending to ask her if that was cool. Then she just said one day- hey how about we make it into a fruit orchard. OK ! So it was out with the scrub cutter and chainsaw and with a couple of days hard graft we had it all clear. It looks so much better and the soil is amazing as it originally had two pigs there then getting nitrogen fixed by gorse for past two decades. Next step is to plant it out but for now its just great the have a view with out gorse and masses of blackberry. Before.. During.. After... That little fence we have left up to plant grapes and kiwis on. We are both still very much newbies when it comes to growing things but no being stressy types what grows will grow etc etc Our neighbour- well shes very green fingered and will help us out heaps. Plus there's the nerd net for info. Main thing is I'm enjoying this whole land thingee and planting stuff way more that I thought I would Then there is the track up to our ridge. We had been planning to clear it for ages so a day or so with the scrubcutter and now its way nicer to walk up. Horse and Jen happened to turn up one day whikle there were up here for holiday so they got a tour of our freshly cleared track. We have now almost cleared out the building site at the top where we are planning another cabin build. Not photos of the now cleared track but I did take this one the other evening when we went up to watch the sunset and drink beer. When we got to the ridge a huge deer went storming away from us over the gully. Quite a sight ! What is cooler was the picture on my beer bottle... Speaking of tracks.. Hannah went away on a few days trip with her sister who was visiting. While they were gone I hooked into the start of our first mtb track. We have always planned the first track to head as gently as possible up to the ridgetop- a gentle enough gradient for an easy ride or walk. I really wanted to get something done while hannah was away as a surprise. I cut, dug, raked, carted, stacked, walked, toiled, bashed a track through the Kanuka grove just behind the cabin over two days and built whole first track. I really enjoyed it and worked through till it was almost dark. I was knackered at the end of the second day. Hannah got back from the tramp and I surprised them both with my new track. Its still a touch too steep to ride up easily up so Ive worked out a path for a track that seperates off where it gets steeper and will head back towards the truck then back again. Pretty much..more hairpins = more track = easier gradient (but also = more work....) Big thing getting built right now is our outside bathroom. We have had this planned ever since first viewing the property but had not yet decided on where, what and how. The 'what' bit we have sort of picked away at since before moving here. Discussed over coffee or beer (but not both) we have gone over ideas that have come about from years of using various homemade showers and dealing with a variety of toilets. Fascinating stuff. The 'where' bit sort of just fell in place once the cabin was up in its new location. Its on a slope backed with bush which is ideal for what we envisaged. Situated halfway between the cabin and the back of the shed its in a handy location for us and the cabin and its private with lovely views. The 'how' bit is just evolving as we build. Its an elevated building over composting toilet system. For now its the well proven batch type setup with wheelie bins. Rotated as they fill with a minimum of 1 year composting in the bins before going into a seperate compost area up off the driveway for another 6 months. Then the compost can be used in places like the fruit orchard and areas we are building the native bush back up. From all the reading we have done this is total overkill as far as dealing to any pathogens but hey. No harm there. Its going to be awesome having a decent setup that has a minimum amount of moving shit about, he he, and not have to pay or worry about involving outside services like septic systems. In the future Id like to build our own 'Clivus multrum' style system, a setup that uses a sloped bottom vessel and is continuous in operation. You can buy 1 m3 capacity units made in plastic if you have a spare $4000...which is an absurd price considering our 25000 litre tank cost $2600. I'll use stainless steel to make the structure. But that still involves more pingas and time which we dont have- the latter due to the longdrop filling fast. The grey water will be treated using a reed bed system. This is pretty easy espicially on our type of land because of the clay below. The water will only go down so far and then move along. Moving water through soil is the quickest way of treating it. It does not take many meters before any nasties are dealt to. First off we dug out the bank. This did take quite a while. I had to take breaks and sit down to sip at beer while looking at the mountains. We would take turns at this after Hannah saw how nice that looked. Eventually a large 'void'? was created and funny enough a hill appeared somewhere else. Much of this hill appeared next to the graden because there's some very lush dirt with some mighty fine looking well fed worms in it. Kevin just watched or chased clods down the slope. We also had this fella stroll out of the dirt where we had sadly destroyed his underground lair. What a huge bugger he (or she) is. I released him later further up in the bush but not until Id worked out what brand he was.. Turns out he's of the 'Stanwellia' species- related to trapdoor spiders and quite rarely seen as usually underground. His burrow was massive and we had sliced right through it with the spade. See here for another one.. http://www.nzherald.co.nz/nz/news/article.cfm?c_id=1&objectid=11307026 Then we planted four H5 treated poles set well down into the granity clay below. A thick plastic groundsheet runs up past the decking and right up the walls sealing in the treated plywood clad basement. The decking is insulated below with 40 mm thick insulation and the inside has reflective foil insulation. We want to create a heat trap to keep the interior as hot as possible so promoting a decent heat in the compost. Inbetween building we cleared out the bush around that area. When intially clearing the land last year of gorse we worked up to the bush edge and only so far in. We had left the gorse hiding within because its dying back anyway. But this area was still pretty bad so a few hours and we not only had a lovely little spot but yet heaps more firewood. Some of the old gorse was huge! So much more light into that area and on the bathroom. The pile on the left is gorse from just that little area. Above this we've built a nice solid little bathroom that measures 4 m2. It'll contain sssb - the shitter, a shower, a sink and a bench. Then we built steps using some more of the telephone poles. Its quite high up and we have to allow for our olds etc when they visit so easy to climb steps they had to be. Must build a rail soon because man I'd hate to go trippin off that ledge... We have made a little track through the bush and once tidied up will be a sweet way to walk to the bathroom from the truck. The steps come right down to this track. We picked through our pile of Rimu, picked out some possibly nice bits- possibly because you really cant tell until it goes through the planer. These became window and door frames plus some rafters. When the main shed was delivered the piles of sheets were protected some extra packing sheets in a dark grey colour. There were just enough of them to clad the roof with a decent overhang. Sweet! We still have a little left over for another wood shed too My old boss gave us a whole heap of wood leftover from his house build. All Cedar, Macrocarpa and some Douglas fir. Ideal timbers for building things with! So the Douglas fir we ripped down and planed then made doors with. They are barn style doors and Hannah has oiled them. They look nice. Photos later of them completed but heres a action shot.. Hannah painted the outside of the window frames with paint left over from the housetruck. Then I scored 4 litres of 'mist green' paint from nelson house parts. Its the same colour as the water tank and similar too the main shed. It should help the building blend into the bush nicely. I have a neat idea on an overlay method using random wood to break up what will other wise look like a tall painted ply building. I think it will work well. We will see. Here is the building so far with the primer coat on...4 points
-
So.. Bike is complete.. For the time being. Off to see Jonny next week to tune her up + Pick up Rickees old Yamaha F5 to add to my collection.3 points
-
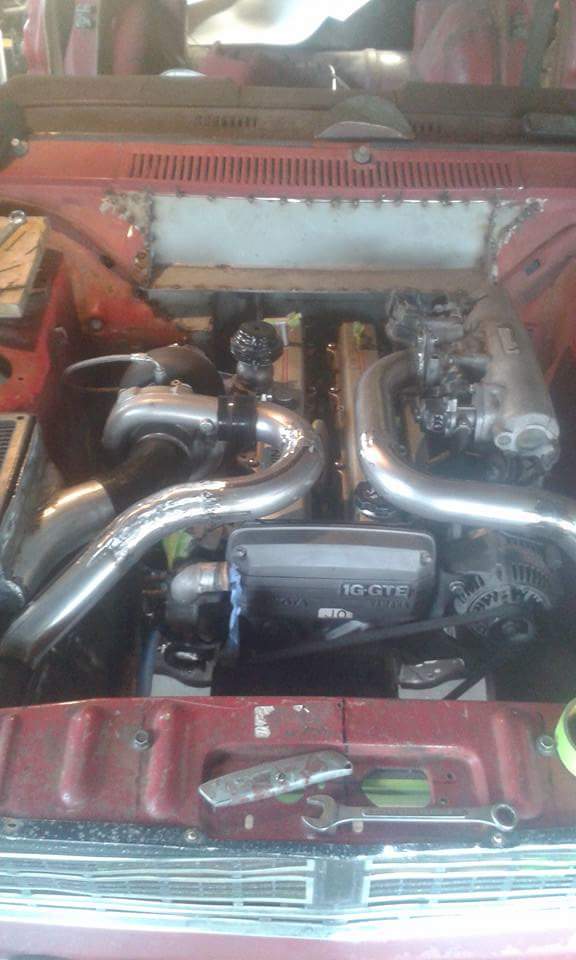
All 4 silicon joiners in place and that's the air system all sorted from air box to intake manifold.
3 points
-
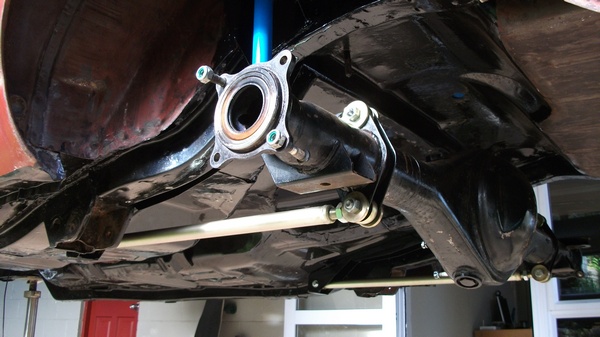
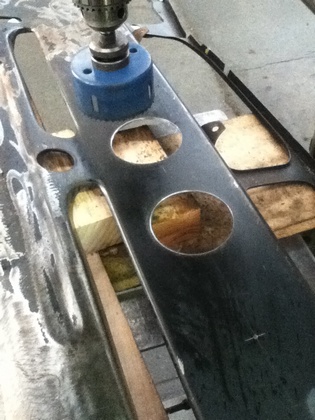
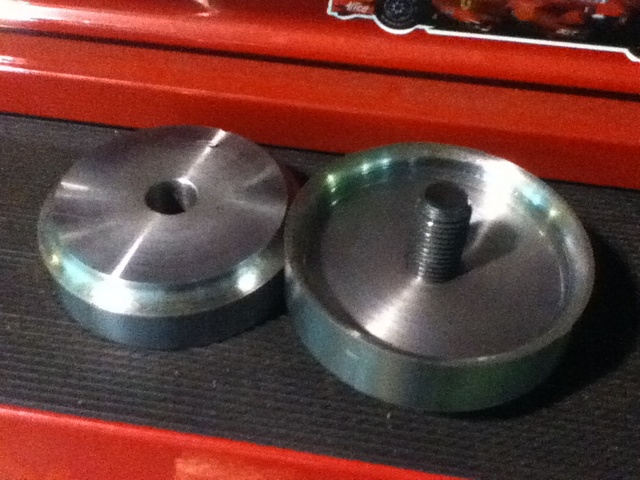
four link from underneath hole sawing front panel to add 3" swaged holes Made a press tool at work In the press Panel done and ready to weld on
3 points
-
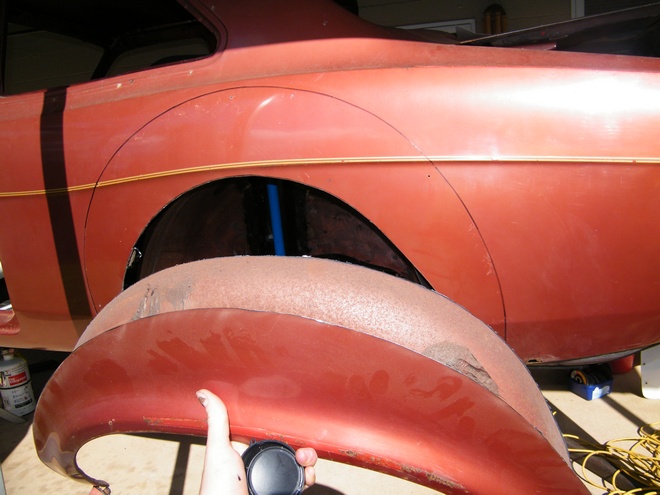
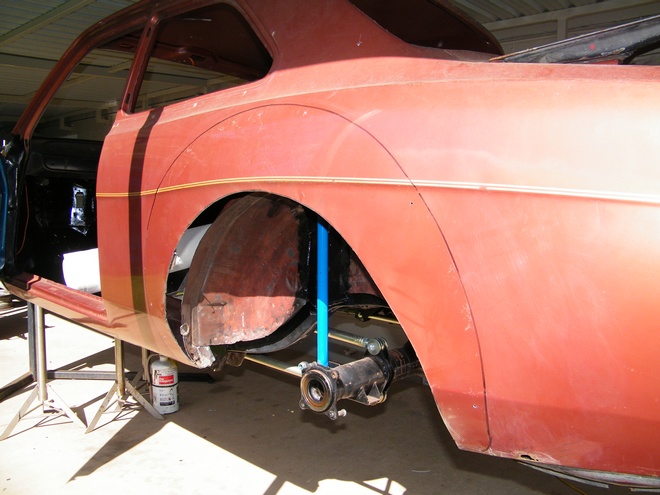
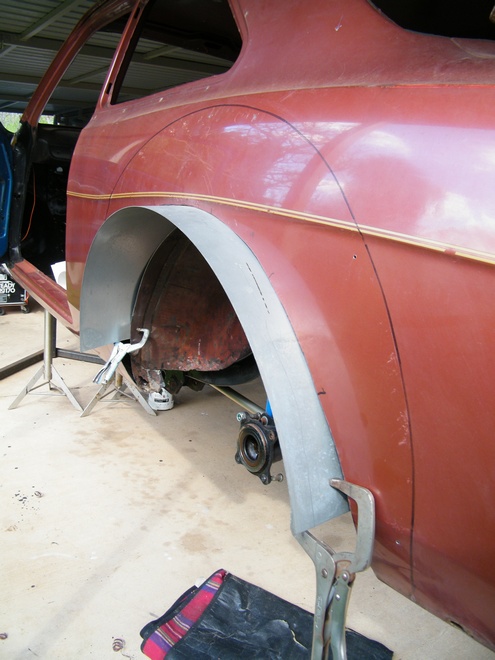
Bubble arch Fitting Time marked and measured this 100 times before cutting One cut off wheel later new tub ready to weld in
2 points
-
Ever have one of those days where you have an epic post with photos and blood and awesomeness and dragons, and then the internet takes a giant shit and you lose the lot? Hello You... And Welcome to Starship Cortina. This week. Grinders suck. My thumbs hurt. My wrists ache. I'm still pulling wire bristles out of my dreads. There was some of this... Followed by some of this... (When they disintergrate they really actually do disintergrate huh?) Then there was some of this... Found some swiss cheese in the boot. And a small hole just breaking through in the tire well. still really happy with the condition of the car in general especially since now I figure all the rust is exposed. Remember how I stored all those bolts and shit together for future me... Took me 2 days find the box with all the bolt bags... Fail. Finding the missing seat runner nut right where it should be... WIN! Next on the cards is to do the panel beating on the underside. Being really anal retentive about it. There's a couple of dings to smooth out. And those couple of patches to do. Seaming up all the factory stuff and smoothing it all off. Ready for new seal next week.2 points
-
Waterblasted the whole car, removed all the moss, did the door shuts etc. Greased all the latches along with wd40 in the locks. Fuel pump is dead, so pulled that out - replacement on its way. Replaced distributor rotor and cap -but still no spark as of yet. Oil & Filter have also been replaced. Had it cranking, and have cleaned the plugs up. Nastiness.. If you look closely here, you can see someone had done a bodge repair - hadn't cut the rust out, rather just overlapped with tin (not even panel steel) - Which no doubt caused sweating and further rusting.. Made a big hole All done, its sitting in primer now. Fully welded, Seam sealed, Fish Oiled, Etch primered and have undersealed the underside. Didn't have a chance to photograph the primer whilst I was packing up - and the weather packing in! Need to let the paint dry, sand back the inside - Will get a can paint matched with the fuel flap and finish it this week - weather permitting Discuss; //oldschool.co.nz/index.php?/topic/48778-chriss-1987-mkii-golf-eurocup-racer-car-with-added-moss/2 points
-
Sorry for the posts but it's a pain in the ass to load all at once... I blasted the RX3 cross member engine plate and headlight buckets the other day. I couldn't be bothered zinc coating them so just etch primed and I will paint them later. I need to see BNT for some new headlights too as my USA ones won't do. I used an IDA throttle linkage bracket as a template to knock a few out at the same time. I need to trim them slightly to make them all square etc but I'm happy with my efforts. I'm keen to do as much as I can myself to get this car on the road.2 points
-
So what was in the boxes... IMAG0203 Now I just have to find time to start some real work on it.2 points
-
so ive just spent the last couple of days flying to wellington getting a ride from Steelies to the train station getting the train to masterton picking up the C10 and driving home to Auckland stopping by Sparkles pad catching up with him and blizzo and then on to Testaments place in taupo and then finally home this morning. the trucks pretty sweet just needs a bit of TLC getting it back to a decent standard again since the last owner didnt really look after it all to well everything just a bit fucked like the brake boosters leaking the seat has a tear in it carpet needs replacing starter motor and flex plate are eaten out a bit so starts with alot of grinding. but motor seems to run at a nice temp and shifts gears nice motor idles good so its a good start shouldnt take too much work to make it a minter plans are fix all slightly fucked things also relplace the bonnet since someones done a shit rust job on it and it doesnt sit right so easier just replace it and paint it yellow rather then the white. and basically drive it around heaps1 point
-
So, been driving past this example for the past 3 years on my way home, got turned around once, and was under covers for most of the time, but one day the cover blew up, spied the corner showing the 16v Badging, so naturally I burned that into my brain. Fast forward another year and the cover disappeared. Been trying off and on for the last 6 months when time allows to get this.. South African Assembled, GTI 16v - thats the twincam rather than Povo spec 8v GTI - just that little more special. 105,000km Full leather interior. Comes with a small selection of spare parts - Including spare flares. Rego on hold so no tough compliance this time! Has already had the bumpers swapped out for the "Big Bumpers" Small amount of rust on one inner guard which I need to attend to. Plans? - See how well it goes and how reliably, but if its any good I have had thoughts of weekend/motorkhana car. Lower + 15" wheels (BBS or similar) and sticky tyres..1 point
-
50mm itb's and big cams roman1 point
-
This is The Little Caravan called Daphne! It came about as we planned for our wedding and had a similar one booked but changed the date then the caravan couldn't make the new date. We then decided we liked the idea so much to build our own. Essentially the caravan is made to serve drinks at any special occasion or event. The person hiring it supplies the alcohol and we keep it cool and flowing to the guests. So we found a caravan brought it home and stripped it out. It had leaks and rotten framing to be expected from a 60's (we think) caravan. The building side was abit beyond my skill level and tools available so I searched and found a guy perfect for the job. He replaced all the rotten framing and lined it all with ply to strengthen what was quite a wobbly old girl Next was make an install cabinets for bench top to sit on Next was install bench top and the big one was custom make the Windows which took the builder many hours but using rimu did an amazing job and came better than we could of imagined. We used perpsex to keep the weight down. Next was my turn to tackle the outside and respray. Every trim had to be removed and resealed and countless hours went into getting it painted. Also our wedding date was approaching quick so pressure was on. So now all painted it was time to tidy up the inside, install sinks, finish Lighting and seal up joinery and benchtop. Me and my brother were still working on it at 11 the morning of the wedding....last minute but we made it...just! Now open for business! We have Facebook page active and the website is getting done as we speak. Enjoy1 point
-
Great car great colour correct amount of doors and a solid plan I love it.1 point
-
yea that could happen. TBH the 122 is running at the edge of its efficiency with the pulley its got on it. it would really only make more heat and fuck all else with a smaller pulley. should do some proper calks i suppose because I'm going to be making a new pulley so if it could be smaller…….1 point
-
Wouldn't it be a shame if the supercharger pulley hit the bonnet and you had to use a smaller one1 point
-
yea i modeled it all from scratch. took a while to get it right. i basically measured a stock manifold to get the hole spacings then cut 1mm templates of the mating faces to match up with the stock manifold. with the templates i could see which holes didn't line up and move them around. once id got the left and right side right then i made templates of the manifold holes both left and right side together to get the offsets between left and right correct. then once id done that i went about doing flow analysis on different internal shapes to try to get it to flow evenly across all the ports. then i machined it. easy.1 point
-
The Gamma was cool...but we want something we can thrash like we stole it without panicing at every sound coming from the engine. Say what you will about British engines they can take more abuse than Italian ones. Do you have the Injection still on the engine? We are thinking of putting back to mechanical injection....1 point
-
"Put a rotary in it" I'll get my hat.....1 point
-
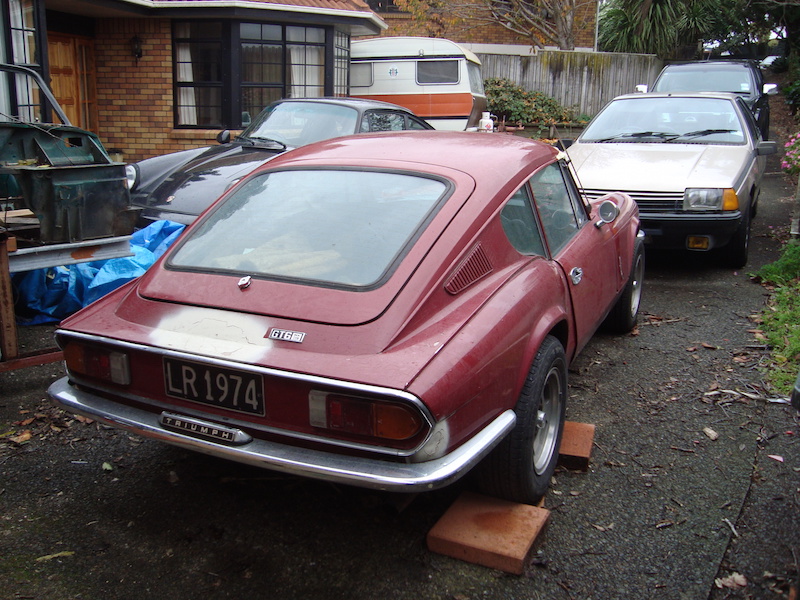
Discussion Thread //oldschool.co.nz/index.php?/topic/48880-vidars-1974-gt6/ More photo's of bleeding the front brakes. And plugs and rust above windscreen
1 point
-
yeh exactly i thought id buy one before the price of them sky rockets like the auckland housing market1 point
-
finally got a chance to go poke around pick a part today. in the rain no less! settled on this bmw e36 TPS. nice and small and doesnt look ugly, and dime a dozen, they also have a very nice plug and locking system, plus i used to work for bmw parts, so if i ever need a brand new one i should be able to swing a deal!1 point
-
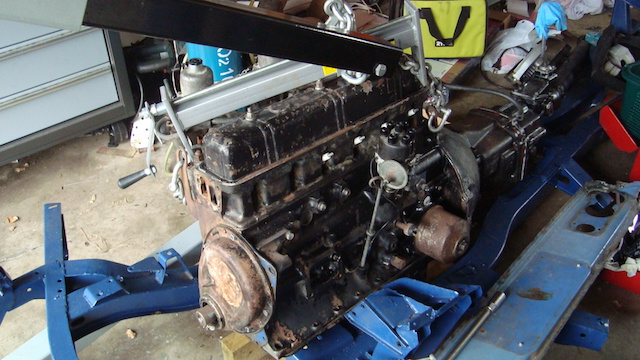
Got the replacement motor, nearly in.... The rain has beaten me today. Another hour or 2 and its a runner.1 point
-
Bit of an update. Spoiler is now on, good ol' Carbond to glue it on. New turbo arrived this week, is in extremely good condition so all that needs to be done really is get a big fuck off pair of circlip pliers, remove the compressor housing and give it a bit of the clean n polish goodness. . 4" downpipe! damnn Now awaiting for inlet manifold to be fabricated, using a company that hasn't been around long called MAXFab, his skills are excellent as a fabricator so have given him the business. Also waiting for a M10x1.5 to an4 adaptor and braided oil line+ fittings to arrive.1 point
-
Ay bay bay bei. I live off welcome bay rd bei1 point
-
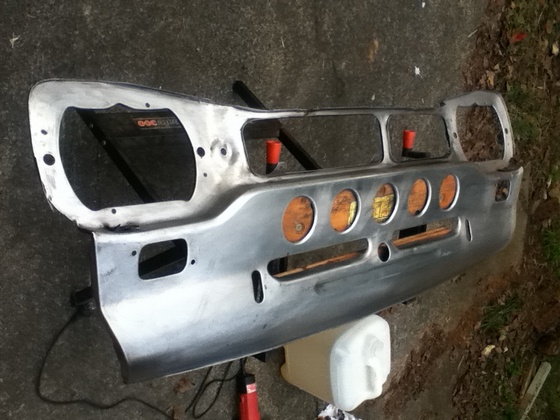
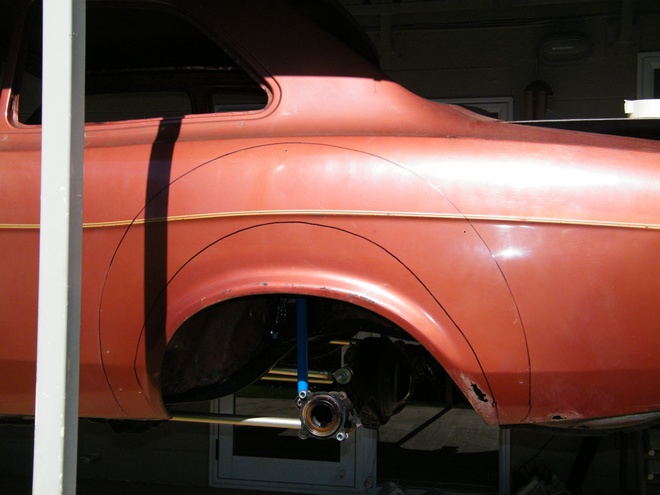
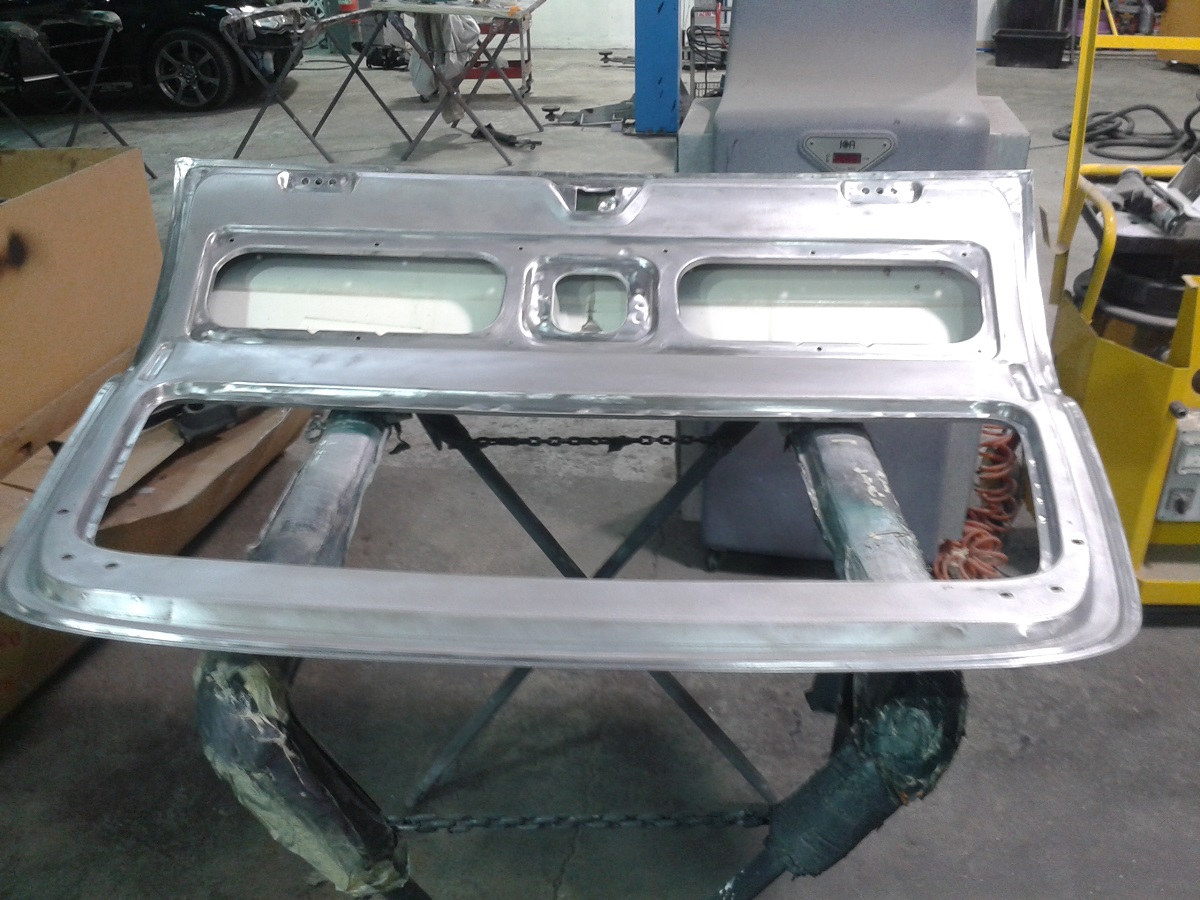
Also the tail gate got the same treatment at the same time I rounded the top edges of the tail gate with a body file and file to remove some of the sharper edges which were there from factory where the edges had been folded over. I also welded up the badge holes of the tail gate just like the bonnet. Paint Strip While the main surfaces I used paint striper on I was careful not to use or get any around any seams just incase some made its way into the seam and didn't come out till after the paint had been put on, I used sand paper, a small wire wheel and a strip disc to do all the areas I wasn't happy using the the paint striper. Then the metal prep (close up this time) again very happy with this result, I think the key was just keeping everything clean (throwing away well used water, rags and scotches etc) Here it is in Epoxy A big thanks to Hayden who actually primed this for me as he's the man at painting!
1 point
-
Grant from GT Refinishers asked if I would have my car in his stand for the 4nR nationals, engine was back in and going through the running in process so I figured why not. Turns out the judges deemed it worthy enough to award me the Best Toyota trophy. Here's few photos from the 4 and Rotary Show and Shine With the car back home, and the running in process almost done after a couple open days at Pukekohe, I decided there was a few things I was gonna change before it went for its final tune. Picked up a new steering wheel (obviously doesnt effect the tune but trying to keep a constant timeline happening) to replace the bent 330mm wheel. 330mm always felt a little too small so went with a 350mm dia 90mm offset wheel from Velo so its all matchy matchy with the harnesses. Bought a new G4+ Atom ECU and NZEFI wiring kit/bracket. While there was nothing wrong with the G1 ECU, figured it was time for some new technology and now was the time to do it seeing as I will need to retune the engine since the rebuild. Got a 2.5bar MAP sensor, Bosch IAT sensor and a boost control solenoid also. The NZEFI mounting bracket is a neat bit of kit, Id say its worth paying the extra few dollars to have all the relays and fuses already wired, sensor wires twisted and labeled, makes the installation that much neater and easier. I really wanted to go for a full Mil-Spec loom with all the fancy Autosport connectors and Raychem DR-25 heat shrink, but after pricing up a few of the items, it was going to cost me what I spent on the ECU alone... So went for Mil-Spec "inspired" loom instead, seeing as none of the automotive plugs Id be using for injectors, coils etc arent up to MIL spec anyway. Put an order through Jaycar for a few metres of each size of their heatshrink (seems to be the better stuff without breaking the bank), along with some switches and crimping pliers. Coolant temp sensors, Injectors, TPS, IAT sensor all done, with just the CAS and coil wiring that need to be finished off to complete the engine bay side of things. Also picked up some 1NZFE coils to replace the dated distributor setup. Purchased a bunch of Deutsch connectors for various things, mostly so I didnt have to cut and solder old plugs back on etc, and to make the engine and chassis loom independent of each other, something that always bugged me was not being able to remove a section of wiring without having to remove everything. DT 4 way connector terminated to the CAS and trigger wiring. Also in the picture are the sensor grounds and oil pressure sender which makes the engine side of things complete minus the coil wiring which I was still waiting for connectors to finish. Moving to the interior, it has been looking like a bit of a mess lately with wires going everywhere. Here are a few more of the Deutsch connectors on the chassis side of the engine loom. You can see one of the mating connectors in the background. These have the fuel pump/fan wiring, dash sensors, boost switch, ECU supply etc going through them. Got this neat little switch from Jaycar, illuminates red when switched on. This will be used for activating the boost control solenoid to switch between high and low boost. There was already a switch mounted there so I used that hole rather drill another, I think it was originally for the fuel pump when I first brought the car. Also when I bought the car a few years back now, it had an Isolation switch mounted in the dash like this pretty much. I removed it when I re-routed the power wiring because it wasnt installed properly, so alot of the electrics still worked with it off... Ended up putting it back in, as I can have my main battery wire attached to one side, with the starter, alternator and chassis power wires on the other terminal so it should work as it suppose to, and eliminates the use for a distribution block to feed power where it needs to go. Tidied up the battery wiring a little with some heat shrink instead of the split corrugated tubing. The coil pack plate and distributor blanking cap arrived, spent a few minutes and got those installed. Got all the wiring done for the ECU, but I left it disconnected and started to check through all the chassis wiring making sure all my lights and wipers etc still worked. I did have an issue where the head lights have been intermittent and I have had no dash lights aswell. Started at the headlights working my way back checking all the components, and after several hours of fault finding I had found nothing out of the ordinary and I was only left with the switch on the dash to check. Grabbed the light switch out of my brothers Notchback and plugged it in mine... Sure enough everything worked as it should. So pulled my light switch apart to find some broken solder joints, easy fix with the soldering iron, was pretty stoked to have all that working again! Started running the G4+ Atom through the configuration. The ECU has a feature to test all your circuits to make sure they work before the first start up, so went through that and seems my wiring was spot on as the fuel pump, fan, injectors, coil packs, boost solenoid etc all works perfectly. So with the new ECU all wired up and working, but still yet to start the engine, there was a couple more things I decided I could do before the tune... My brother had decided he would turbo his Notchback Levin, I figured he could have my old turbo manifold and Ill fabricate a new one for myself. As usual, started to take some pictures at the beginning, got involved and forgot to take any more. Here is the start of the merge collector after the first cut on each tube. After that, I tacked a pair of the tubes together as above, and made another cut, then tacked the pairs together to form the merge collector. This one has a nice shallow angle for a smooth merge into the turbo. Several hours later I had 3 runners tacked up, all equal length, with just cylinder 1 to finish. Looking back at this now, I should have had the runners enter the collector in firing order, but it was going to be a little more difficult having to overlap runners and still clear everything, and I really liked the almost symetrical look. Anybody done any back to back testing with merge collectors to see if entering the collector in firing order matters or not? Anyway, I've positioned the turbo in a better place with this manifold. I originally made the first manifold for the T25 turbo, but with the T28 being a little bit bigger it ended up sitting up higher and closer to the strut tower than I wanted, so I have dropped it down about 45mm, moved it forwards and away from the strut tower 20mm. Finished off tacking up the last runner, machined up a new flange as that one on the manifold I basically just use for setting up so I can tack and cut as I need to without worrying about cutting into the flange with the grinder etc. Same deal as the last one with the 30 to 35mm port taper and a 1mm recess which makes locating the runners concentric with the ports a lot easier. Added a 2 braces between the runners and collector, aswell as the wastegate port and flange and then finished in the same high temp flat black Dulux paint. Seems to be the best paint out of all the VHT and other "high temp" paints I have used. Got the turbo bolted on with new studs and lock nuts, but something I had been fearing for a while had finally become a reality... There are 3 bolts and 2 studs which seal the exhaust manifold to the head, and since Ive owned the car, 2 of the holes/threads in the head have been a little iffy and Ive always taken extra care to do them up. When bolting this new manifold up, they've finally given up and wiped the thread out completely, which was gut wrenching. Purchased a Helicoil kit from Trade Tools, they're not cheap as I found out, but everything worked out perfectly in the end. Was pretty stoked! With the manifold and turbo now bolted up for good, I made the wastegate pipe. Ended up being pretty funky! Fabbed up a new down pipe, pretty much the same as the old one which my brother is going to be using, just a few different bojangles as I cut and rewelded a section of the down pipe to make room for the wastegate pipe. Machined up an o2 bung, welded it onto the bottom of the down pipe, and said cut and welded section. That basically wraps up the exhaust side of things, just need to make a few changes to the intercooler piping on the turbo side.1 point
-
It's a 2 dayer? Audiodude, you can bring your stuff to show off in my shed. getting it back may be a different story1 point
-
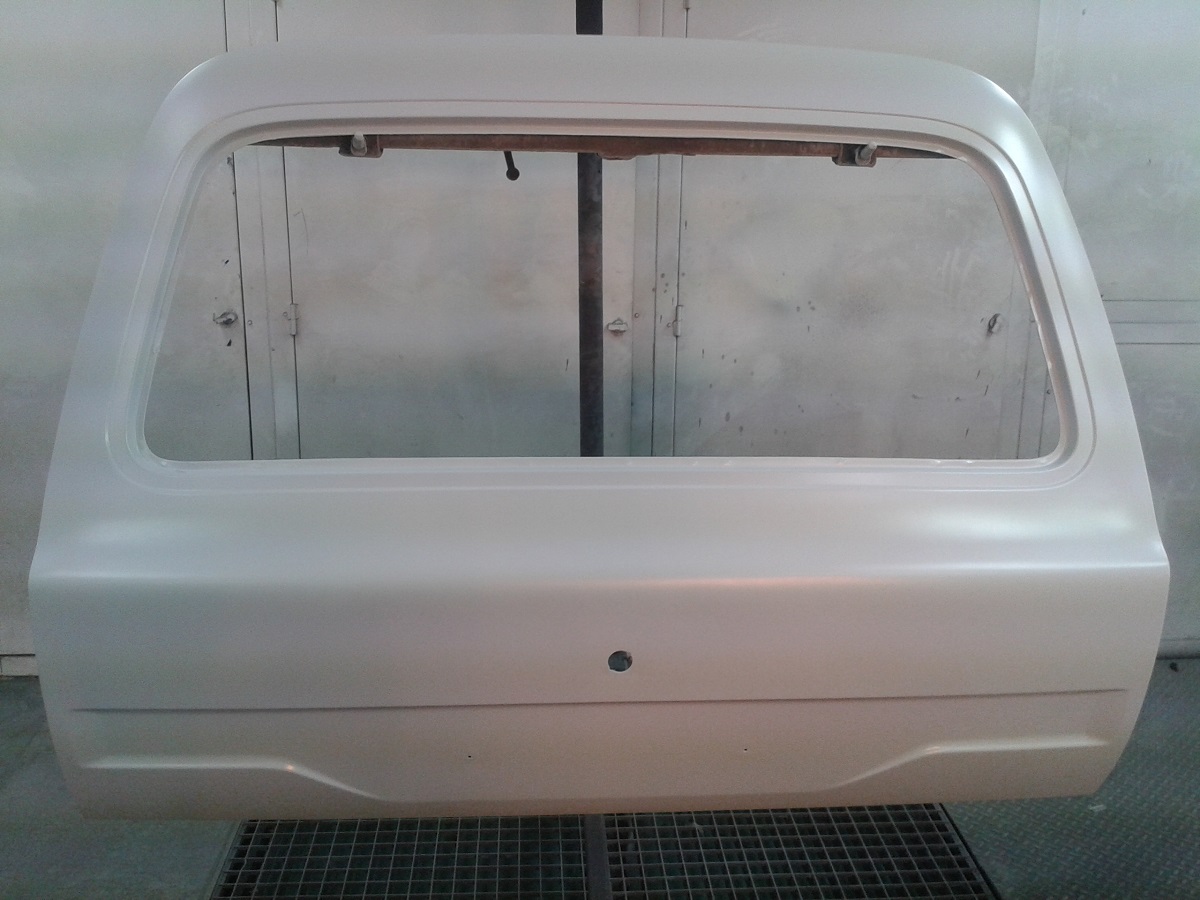
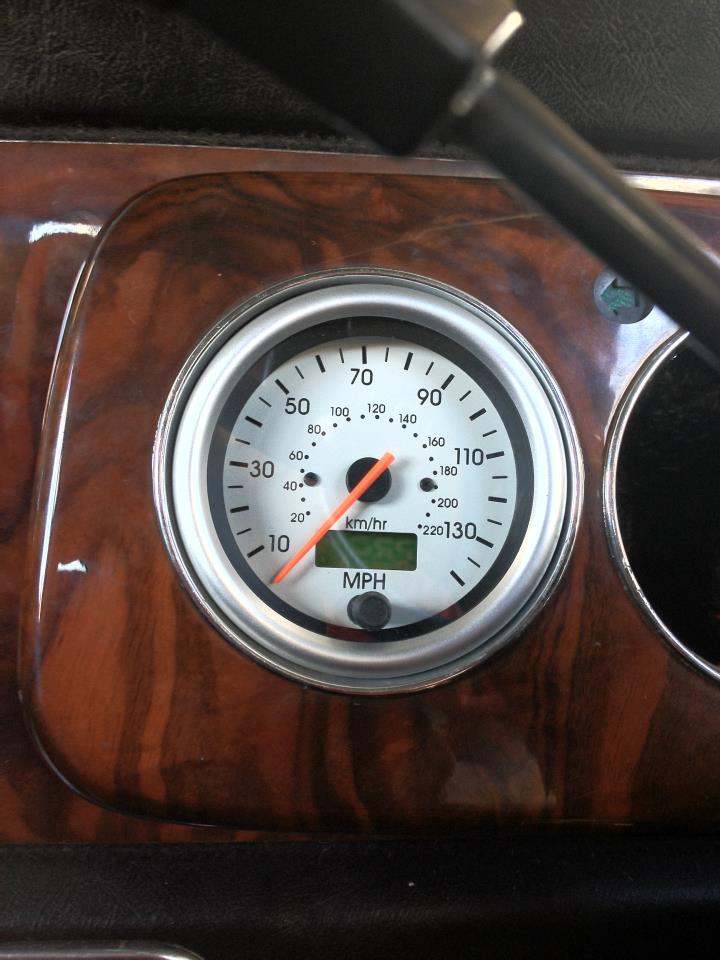
I've fitted a Smiths Telemetrix electronic speedo and am in the throes of fitting an electronic speedo which is working out to be a bit of a pain to figure out what to take the speedo pickup off. Apparently you can take a pickup off the driveshaft bolts however I've got the later model pot joints so not sure what to do - I'm thinking I may just fit a hose clip onto one of the driveshafts and pint the pickup at that.
1 point
-
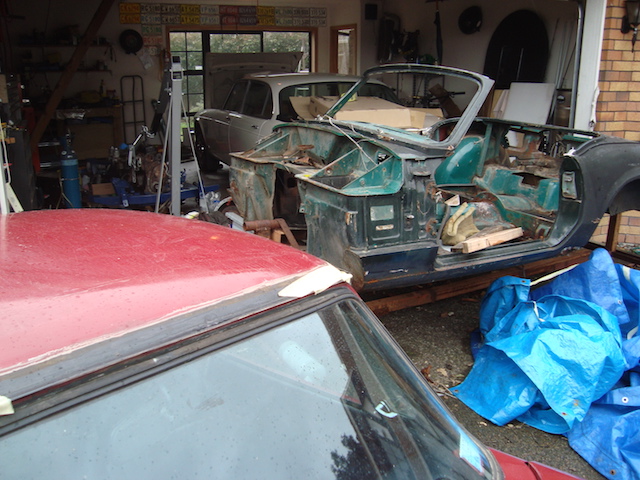
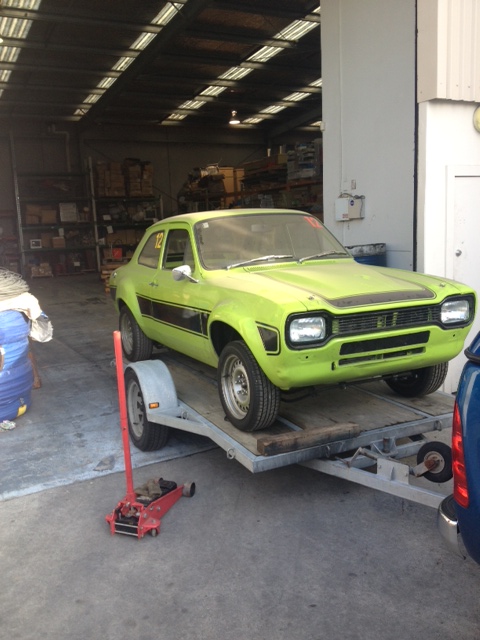
Another minor moment of progress. With the sad sale of Geisha I could finally get the green one back home. Dragged out into daylight for the first time in far too long. How can a car get so dirty at the back of a clean storage unit...??
1 point
-
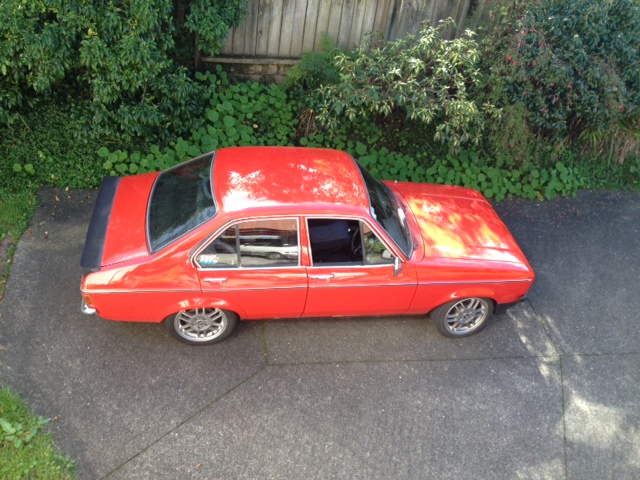
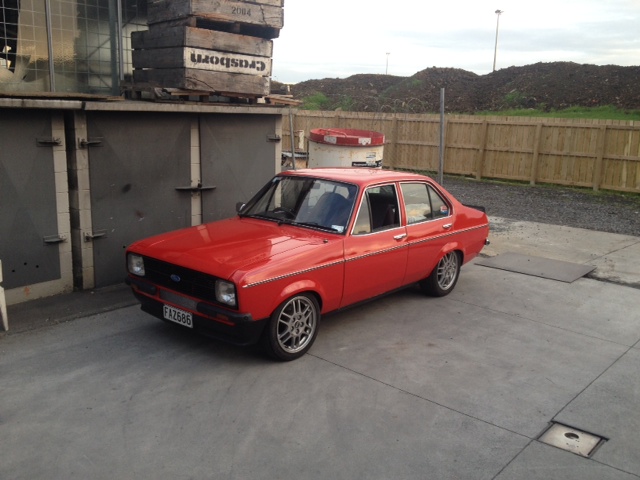
Geisha is gone. Long Live Geisha. She will be missed. For assorted reasons I decided to sell my beloved Geisha girl and let someone else have an obscene amount of fun in her. A last minute tour of duty. Family trip to parents. First time we had all been in car and needed to be done. Pretending to be a work hack picking up parts on her last morning. And driving away. Headed to CHC with Russ. Decent guy who races a per '65 Anglia and will be a good caretaker. Look for her boosting up a passing lane or hillclimb near you.
1 point
-
Moving on After motor was in took care of the radiator and plumbing, jammed an electric fan in there etc, got it to a point where i could run it. Next was the wiring - bribed my mate with beer and promises of work done to his own carina, he came and worked his magic on the, pretty haggard loom that came with the motor. Had it running by that evening, after a couple of small hiccups along the way. After that, I went through and cleaned up some of the looms dodgy bits, an example; Got some wheels, ssr casablancas, 14x7 -1. Wouldn't mind them being wider, but for the moment they're pretty good Rolled around the garage floor for a weekend and made an exhaust, went with 2.5" and a couple of straight throughs. Left the end like that until enough people made fun of me and I cut it shorter Tied up a few more loose ends, then gave it a few easy drives. The tune on the link seemed pretty reasonable, and the cooling arrangement appeared to be working, so moved on to the extremely factory suspension. Scabbed some sleeved front struts, and changed over to mx73 calipers and rotors cause mine were a both bit stuffed. Picked a set late model suzuki swift adjustables off trademe for not much, mainly for the rear shocks - they were nice and short kyb adjustables, bolted straight in. As a bonus the fronts had the same diameter strut body, so harvested the threaded sleeves and perches, etc off those. Just running some dirty ol' trimmed falcon springs in the rear at the moment, they aren't too bad but were only ever a stopgap Was pretty happy about the way it was running so took it away to coromandel over christmas. Was most excellent, but made a several things pretty clear, the stock seats are total poo and cheap tires bought in a hurry suck, so bought some direzzas (would recommend) and chucked in the sparco out of my soarer (probably the best thing i've done to the car) Not a lot has changed since then, tidied up a the rest of the body loom in the engine bay and put a bit more thread on the castor arms and wound them up - a lot better but needs a wheel alignment/shorter steering arms. Looks a bit like this at the moment1 point
-
Here she is, arived in my new garage, packed full of parts and tools Wheels are takechi project racing hart 7G7 in 15x6.5j Engine is z20e(+)t1 point
-
Another awesome weekend courtesy of the OldSchool crew organizing a great Xmas Drags day. Bonnets up for pre run sledging in the Excort SubCommittee. Jeff, you may want to get Mel to do that side of your car too… Stu’s sister made my car look shiny shiny! Who parked a blimmin Holden in the Escort parking? Ah well, it can almost be forgiven as it was a V8 and towing the minty silver Escort. I will admit to a few butterflies playing before the first run down the strip. Hmmm, wonder how this is going to end? 1600cc of force fed fake BDA vs Thom’s tunnelrammed 302 cubes. Pretty happy to run a 14.65 at 99mph on the lowest boost and first time ever on the strip. What a great day!1 point
-
Finally got some actual work done on Felicity! Inelegant pose with bum in air attempting to drain all coolant out. When does this man look so happy…? Engine outed. Has been sold to good guy who will rebuild it before dropping it into his Mk1 2dr Escort road car. Nice! Car will now sit for a while so I clear some other projects and get TripleR going again. Looking forward to shouty 48’s!!!!1 point
-
Seen this beast on turbosport a shit tonne of work put into it! Your more door was in classic car a while ago wasent it?1 point


.thumb.jpg.15c677d415425adb10b50de5cdc53bcd.jpg)

This leaderboard is set to Auckland/GMT+12:00