
Leaderboard


Popular Content
Showing content with the highest reputation on 09/09/14 in all areas
-
Installed some driveable low and stripes. Lowered the back 1inch since the picture. Drove it to hamner for Hamnats was a good weekend!11 points
-
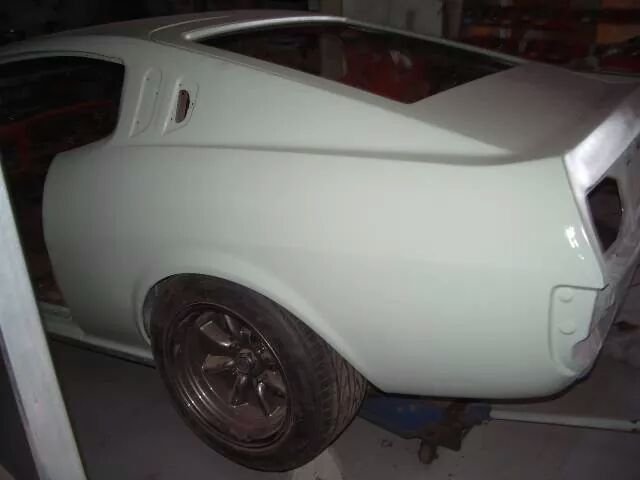
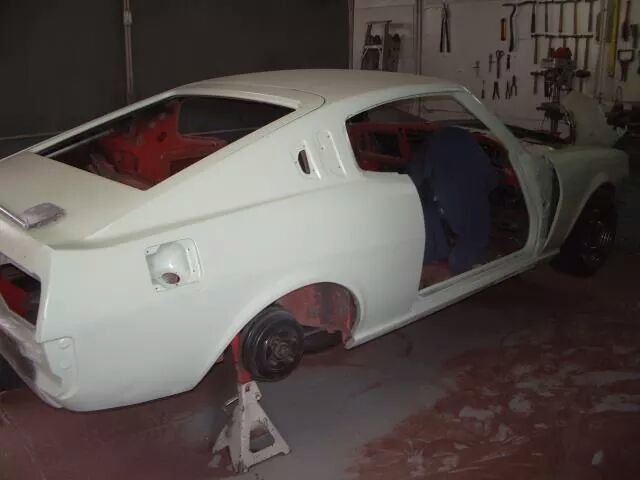
Took the car to a panel beater friend to get some work done. Very pleased with the results, Got the rear guards redone as I ruined the last ones trying to get the wheels to fit. More clearance under the rear doors and a slight flare. Gets pretty low now with only slight rub on one side. Got the front valance put in again, this was always missing to allow room for the fans, the fans are now on the engine side of the radiator. And a wee diff bump to stop my big dick diff hitting the floor.9 points
-
Bought this recently as a bit of a cruiser. Genuine matching number GT built in San Jose January '68. 302 with C4. Interior needs a lot of work but CJ Pony parts in the states are awesome. Picture makes it look better than it really is as it hasn't been looked after the last few years.7 points
-
So despite the KE having problems and getting towed down to CHCH, there still wasn't anything 'bad' about what happened. Of all the people I encountered in CHCH (sparky, Glenn, guy who I bought the alternator off, guy who bought my 4K a couple of months ago) they were all really helpful and made it all an awesome experience in the end. Honestly big thanks to Glenn for bringing me down to CHCH in the Anglia and lending me his legendary glenn-mobile scooter for the few days (sorry about the kickstart, not sure why the tensioner fell off) also to the welly lads for giving it a crack to get going. Also in the end, I DIDN'T CHECK THE CONTINUITY OF THE FUEL PUMP! Alternator packed a foul, overcharged and blew up all the relays, RPM gauge, fuse in the radio, flasher relay. Fixed sort of, pump now runs continuously when ignition is on instead of off the crank sensor as sparky couldn't find why it wasn't working. Currently in process of getting the sparkys who wired up to begin with to see what happened. Awesome drive down, awesome drive up (apart from the 3 hours delay of the ferry) 10/10 will come next year. Will probably be with my KE20 too, hopefully anyway. 3SGE goodness Also, Kicker I have your yellow pliers. They will be kept safe till we next meet!6 points
-
5 points
-
Took it for a WOF this weekend just been (6/9/14). This is it leaving the shed on it's maiden voyage. Borrowed a set of wheels as I don't have tyres yet. Took it to a good chap who knows his VW's. Ended up failing on 3 things; front wheel bearing, door hinge is dodgy as it's rusted out where it goes into the door (I missed that) and the brakes are a bit too spongy and pull to one side. I left it with him as after I hire a welder again it'd get quite pricey anyway and I can't get the hub not off. With things like brakes I'd rather leave it with someone who knows what they're doing. Not that I don't, but it's one of the only things I don't mind paying someone with experience to do. The car outside the workshop: Hopefully get it back in the next couple of days with a WOF on it. Today I got some 165/45/15's fitted to the front wheels, they're fuckin' tiny, I think I might have gone too small. Will know when I get the car back, if they're too tiny I'll flick them and get some 145/65's.3 points
-
You should weld your container doors together, and then hinge them from the top so they pop open like a van boot with big gas struts. Would get them out of the way of your deck.3 points
-
Wouldn't be OS without car trouble haha..3 points
-
if the boss won't let you take the car, take the boss2 points
-
Another tiny update guys, don't mean to sound like a wanker, but I'm pretty flippin pleased with this wee thing! remember this? even though I had it sandblasted so all the rust was gone, this left the metal pretty thin in places. And as this is a strengthening panel I thought it best to put it right. So I cut it back to were it was solid and had a go at metal origami. test fitting the rear fender so I get the stud in the right spot, also checking the quarter panel would fit back on top of it, so many layers of metal in this bloody spot. like so and welding it together, there is also a wee patch at the top, were it was damaged when I removed(ripped) it. tidied up very happy with the fit, took alot of bending and hammering to get this back were it should, I made a bit of a mess of the shape when I pulled it off. yeah the stud I used is just a old bolt I welded to the back of the panel and then ground the head down as it was to big. hope you like?2 points
-
About time someone on here got a muzzy! I had a 68 notch as well, sold it to my old man when i went to Uni and now i have an 04 Mach 1. The Mach is for sale now though so I can get my 68 back Cool car!2 points
-
Cam may have been around while you were out2 points
-
Hey Manu , i think you might have a drainage issue chap.2 points
-
Hey guys, thought I'd copy and paste my build thread over to here from another forum I frequent. I'll do one post per update as the other one is so it's easier to load. Discussion here: //oldschool.co.nz/index.php?/topic/45059-damos-67-bug-discussion/ So as of late I've been trying to find myself a suitable project I can keep myself occupied with over the following few months and get ready for summer. I've always liked the old bugs, and one popped up for a reasonable price so I decided I would jump at it. The plan is to get it back on the road, and set around slamming it to a point that I am happy with. Without too much further chatter here are some pics of the progress so far. It's a 1967 Australian assembled Beetle, with a 1300 engine. Picked it up from Tauranga 3 weeks ago. What a mission; my good friend Phillip and I used his non turbo diesel Hilux, a ute that is built to traverse steep hills and clamber through mud. It is not designed to tow cars over the Kaimais; it took 4 hours to get back to Auckland, being passed by trucks and bicycles. Car on the trailer. As you can probably imagine there are a few things that need attention before it can go for a warrant. Biggest issue by far is the rust, which is not too bad considering the state that some of these can get into. Other things that I've initially seen need fixing: - Front wheel cylinders are fucked - Front seat belts (original ones are missing the stalks, and won't do a good job in the event of a crash anyway so I'm going to put new ones in) - Indicators and brake lights not working - Tires are terrible, will be getting new ones to suit the new height and wider wheels anyway - Link pins and king pins have play - V belt has seen better days; if this breaks then the fan stops working, and in an air cooled car this is less than ideal So started tackling these. Pictures of the rust: Front wheel arch: Inside the rear quarter B Pillar A Pillar: We're not here to fornicate arachnids, so made a trip to Hirepool for a welder (I really need to buy one) and got the grinder out to make a start. Cut out the A pillar section and set about welding the new piece in. You can buy panel repair parts from Qualitat and they are cheap as chips; this A pillar section was less than $40 and included provisions for the door hinge bolts. New section in the wheel arch If I tried to do all this myself I would fuck something up big time as my welding skills leave a bit to be desired, so here's a credit picture of Phillip the metal magician at work. The floors in this car are really good, which is one of the reasons I went for it. Inside there was just a bit of surface rust and battery acid residue so got all that cleaned up, zinc'd and painted. I'll get some more pictures of the progress on the other sections but there should be about 1 day and 3 boxes of piss in it until the rust work is done, hopefully next Saturday should be the go. Got stuck into the other stuff also, brakes apart and ready for new cylinders. The shoes are fairly new but I'll get the drums skimmed also. Not going to put them back together as the front beam will come out this week and get sent off, more on this shortly. Indicator problem resolved by actually putting a flasher unit in. I installed some plugs so that I can take the fenders off, the headlight loom was all one piece previously. It's hard to get a good photo as the lighting in my garage is crap and my phone has been through the wars. This week I'll be taking the front beam out to get adjusters welded in. It's one of those things I'd rather pay a professional to do, and while they're at it they're going to replace the link and king pins also which I can't do myself. Beam adjusters will allow the front height to be adjustable, the rear already is (it is a cunt of a job, need to re spline the spring plates but doable). Rear wheels will also be getting sent off to be widened a few inches. Watch this space!1 point
-
Rear shock diff mounts cnc'd and rear to weld on.. IMG_1455 by postlematt, on Flickr IMG_1459 by postlematt, on Flickr Welded on.. IMG_1461 by postlematt, on Flickr IMG_1501 by postlematt, on Flickr Also welded on the extra bracing for the towers.. IMG_1507 by postlematt, on Flickr IMG_1505 by postlematt, on Flickr1 point
-
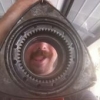
Hey everyone been real busy lately doing a couple of repaints for some people to get a bit of cash in the back pocket for the cortina so finally heres a update. So im still doing the panel work slowly but decided to make a start on the engine for something a lil different. Sent my cylinder head off and got some 1600 valves installed and new valve seats put in too. I put the block on the stand and pulled that all apart. Im glad I did because the camshaft and bearings were screwed but the crank is in great condition which is fab. Its my first engine rebuild but im having some fun doing it. Im replacing all bearings and gaskets etc. If you have any tips pm me any lil help is appreciated. Thats my update for now enjoy.1 point
-
This week's been a good one for progress. Last night was a late one, up late figuring out the guts with the front beam adjusters. It didn't take long to realize I hadn't set them up properly; not in terms of height, but pre-load. You need to set them up so the torsion leaves in the one beam are effectively fighting the other. Went around re-doing that first off, hit a snag not far in to it. Because the top adjuster was going to need to end up pointing upwards, it meant that the spots of weld that the $&((@ who installed them splattered over the teeth were going to get in the way. Fuel tank came out again and I took to it with a die grinder (honestly the best tool I have in my shed, has come in handy so many times, would definitely recommend buying one). Got that set up so that there's enough pre-load against the bottom torsion beam. Next up was the brakes; the car was having an issue pulling to the right under braking. Re-bled them all round. The problem was I can't for the life of me get the hub not off one of the rear drums so I can take apart the brakes and free up the adjusters. Tried the works, including a gas torch and a 2.5" iron bar with a welded socket on it, ended up bending the fucking bar. Also got this special piece of kit which acts as a torque converter, that didn't work either (before you ask, yes I am going the right way) Gave up on that one, so adjusted the handbrake proportion so that the handbrake works evenly on them. It's helped it heaps and it only really pulls a little to one side under quite heavy braking. I'm not going to be able to pull the rear drums off without getting a electric / pneumatic / hydraulic torque converter on it so that'll have to do for now. Hopefully once I get a WOF I can head round to my old work to use some of their gear. It's getting close now! I popped into Qualitat today to get a couple bits and bobs, ended up walking out a couple hundred dollars later with a new exhaust. It was always on the cards, but I had put it off for a little while after buying flights to Thailand whilst drunk on the weekend because of the $ situation but #YOLO. Got home and got stuck into that. Pulling the old exhaust off was a cunt, rusted bolts in shitty locations aren't fun. Here's the old one all off. There's a lot to it as the bugs uses the exhaust gases for the in-cabin heater (safe, yea, I know). New one below. Shit for these cars are super reasonably priced. This exhaust was $200 and is of solid build, all lines up well, good welds, and looks the part. Installed it, went on a whole lot easier than the old one came off I took a video to try and show the sound, it doesn't really demonstrate it well at all as the microphone in my phone is SHIT and it was in the garage, but here it is anyway. http://vid227.photobucket.com/albums/dd267/spankbutt_2003/20140903_211346_zps03a26ba6.mp4 Basically it's all go for the WOF I've booked in for Saturday. Following that, I need to source smart car tyres for the front (135/70r15 ideally, otherwise 165/45r15). These will look better, will lower the front about 20mm further and also give me guard clearance which I don't have when turning on these balloons. Once I get the fronts on there, I will be able to have a measure of the height difference front to rear and then figure out the size tyre I need to run on the rear. The rear guards are going to need massaging and bogging. They're 9" wide. Once I have the tyres on the rear and have checked that there are no leaks on the widening welds at 35 PSI so they don't have to get re-welded, the wheels all round will be getting paint and that will signal the beginning of the first home stretch with this thing. Many plans to potentially come, but I'm beginning to reach the end of the first chapter of this book!1 point
-
Really want to see this thing get on the road and looking sweet for a meet in October, so my mate Jase and myself got into the shed tonight and set about lowering the rear. I got quite caught up with it all and forgot to take photos, so for those interested take a look here - http://mechdb.com/index.php/VW_Beetle_Ghia_%26_type_3_68_or_earlier_-_lowering_the_rear for a explanation on how you lower the rear. Basically the hub is connected to the suspension by means of a spring plate, which you can re-spline to adjust the height of the car. The spring plates in mine were all quite stiffly stuck together and I ended up accidentally pulling the inner spline shaft out so it's not quiiiite even on each side but it's close enough for now. If I can be bothered I'll re-do one side later, it's a bit of a cunt of a job to do. Anyway, just a couple of pics.. Behind that plate is where the spring plate comes out. Bump stops got the hacksaw treatment, no I am not going to take them out completely because A) if it bottoms out the spring plate could warp, and the ride will probably be shitty enough. This is where it sits at the moment. From here the front wheels will be getting the tyres removed and smaller smart car tyres installed to give it further drop and allow for turning clearance as well as looks. The rear wheels will be getting widened 3-4 inches (haven't decided yet, need to do some more research) and get new tyres on them. Tyre size on the back will be critical; They will need to be the right size to sit at the right height and clear the guards but I can't stretch them too much. This is because it cambers like hell on the rear when lowered and if they're too stretched I'll be driving on the sidewall which isn't ideal. After the tyres are sorted and I'm happy with the ride height, the wheels will be prettied up and painted. Following that I'll be getting new seat belts installed and it's WOF time!1 point
-
Never mind the first sentence in the post above, missed it in the copy / paste The crowd that I got to install the beam adjusters took their sweet time doing so, what was originally going to be a turn around time of a few days turned into 7 weeks. Not impressed, but that's a story for a different day I guess. Back into the shed! Finally got the beam back anyway, with the adjusters put in, see below.. these contraptions allow you to change where the torsion leaves reset back to, effectively lowering the front of the car. So it's time to put the front end back together. Installed the beam, and re-attached the end of the sway bar that had to be disconnected in order to pull the leaves out so that the adjusters could be put in. They attach by these clamps which are a bit of a cock to put on, you slip them over and hold the ends together while you whack on the retainers. Once that was on I put the hubs back on to the link ends, these attach by link pins (which I replaced). When you install them you have to measure the offset between the 2 link pin ends and consult a chart to find out how many shims you put in between the link pin ends and the hub, this sets up the camber for the car. Once it's going I'm going to have to take it for an alignment and re-do it all again I'd say. The shoes were like new so I put them back in for now, replaced the wheel cylinders and got the drums skimmed. Also got new bearings as the ones in there were fairly toasted, so re-assembled those in the drums and put it all back together. The old hammer and wood trick worked a treat So once that was all together we bled the system, did a brake check all round and found the passenger side wasn't retracting. A little investigation deemed the rubber hose wasn't allowing fluid back which was keeping the wheel cylinder open. A bit of soldering wire through it brought out the grease that was jamming it up and she was all good. Following that I set the beam adjusters about 40-50% down off adjustment and put the car back on it's wheels. It doesn't look low in the following pics, and that's because it's not! Haha. The rear still needs lowering, that's this week's goal. Once the rear is lowered to where I want it, I will send the wheels off to get widened before painting. The front wheels can't turn as they are, they hit the guard. Will be getting low profile tyres for the fronts to fix that problem, which will also help the height situation quite a bit. You can't go suuuuuper low on these unless you get the front beam narrowed because the wheels hit the guards, but you can definitely go quite low. Hopefully get some indicative pics in the next few days. Sorry for the crappy pic quality! Also got a new bonnet latch so the bonnet closes now. All the old ones get bent up and they don't locate into the locator thing. Also installed a B18C into it. Hopefully get some pics of the rear lowered this week!1 point
-
^ You can fund it, and live vicariously through me? So I got some time this afternoon and myself and the neighbor pulled the front beam out to get the beam adjusters welded in, and the king and link pins replaced. The only thing that I can say pisses me off is that a lot of the bolts are held in by these cunting lock tabs, and when they've been on there for close to 50 years and also covered in grime it can prove quite a mission to get them of..! Fuel tank out, 4 bolts and 90 seconds Steering box disconnected And front beam assembly out. This thing comprises pretty much the entire front end of the car. Attacked it with a couple of cans of degreaser and a high pressure blaster to try and get some grime off, I'm dutch so anything I can do to minimize labor charges on the invoice is favorable. And strapped to the roof of another beetle to get down to Platinum. Should have it back next week some time.1 point
-
im so going to find that card at your house russel and take a human bite out of it that should creat some lols hey manu Good job!1 point
-
Small update it's half way though the panel work and looking good cant wait to get it back The plan is to lower it quick tidy up and keep the rattie aged look with some nice signage where the windows where1 point
-
Nice! Good luck with the beast1 point
-
if i find enough dead ones i dont need to buy a new mattress1 point
-
IT ARRIVED YAY1 point
-
haha! nah i'll see if i can burn over at lunchtime and get some pics. just more stuff disappearing underground and shower area changes. spent some time on saturday fist fighting rat gangs to try minimise the eating of new mains cable that runs through the garage.1 point
-
1 point
-
Now look what you've done Daves1 point
-
still plugging away to get it back on the road for Matts wedding on the 18th of this month. thats right, the 18th which is 10 days away. still to do, get sway bar back from manufacture and fit it (im told ill have it in my hand this Thursday) get drive shaft back and fit it (should get it back tomorrow night) finish re-wire of front end - headlights, horns, indicators etc tidy all the under dash wiring and put the dash back in tune it. so not to much to do but there are still some major items which are out of my control and i get nervous with relying on suppliers to do as they say they will do. anywho, time will tell. here's where its at as of Sunday night. engine bay is pretty much finished, just need to tidy up the wires under the intake and fit the air cleaner. Untitled by sheepers-ra28, on Flickr front end. loom needs extending on the passengers side and then its finished and can be fully re-assembled. Untitled by sheepers-ra28, on Flickr gear lever, short shifter made and fitted and new blank off plate made for the old hole in the floor (the stick is now further back than it was) Untitled by sheepers-ra28, on Flickr lossa wires to tidy/sort out. Untitled by sheepers-ra28, on Flickr1 point
-
Woah. Calm down Dave. You need to contain yo self. Fuck you Manu where are some fucking pictures you asshole.1 point
-
god damn do some work on this and post pictures for fuck sake. or ill send you to manu island.1 point
-
Lice Lice Baby?1 point
-
yeah bby. A lot of bog work ahead...1 point
-
Fuckin Animal! Here are some pics of our adventure. Wagon went pretty well considering what could have happened, did 2500 miles in it over th 3 weeks.1 point
-
To all engineers; sorry for the over simplification The way the tachos work that are driven from the negative of the coil is as follows; the coil connects to the 12V supply, and to the points in your dizzy. When the points close, it connects the neg of the coil to ground which gets current flowing. When the points open again a split second later, the coil will do its thing where it tries to keep the same power flowing through it, and to do that it manages to create a massive high voltage as the current backs off (google "how inductors work" if you wanna know how/why, but for now just accept that it does) When the points open, the coil negative is essentially not connected to anything, so its free to generate whatever voltage it likes. so with the voltage of the primary coil rising, it also induces a current flow in the secondary winding in the coil, which gets even higher voltage, so high that it can bridge the spark gap of the spark plug. back to the coil so the voltage rises on the primary winding, and the tacho input uses that high voltage to trigger the tacho. If you just connect a 5V square wave into the input (like from an ECU) then it will just ignore that as its too low for the tacho to consider a valid trigger. To create a valid trigger, we need a higher voltage, so basically what we are going to do, is put a little tiny coil in the car that will also generate a high voltage to trigger the tacho. A relay has a coil inside it. It works by energising the coil, which creates a magnet and pulls the switch inside (as a simple way of explaining it) So to get a relay coil to generate a high voltage, we need to energise it. An output from an ECU will NOT be able to drive a relay directly, as a small 12V relay will draw ~200mA and the pin from the ECU is probably only good for 5-20mA or so, plus we need to recreate the points opening as we need the coil to be not connected to anything after energising it so it will generate a high voltage. To do this, we need something called an open drain driver, meaning it is either open (not connected) or it 'drains' current (making a connection between a device and a ground) A transistor is basically an amplifier. you put some current into the input, and it will drive the output with 100x as much current AND it can be turned off, and when its off, it is completely open, like the points in a dizzy! so not only can we use it to make the open drain driver, but it also amplifies and drives the coil with lots of current even though we only draw a little bit from the ECU. So we now have a coil and a transistor and are nearly done! a transistor is a funny beast, and the input of it wont actually go above 0.6V. This means that we cant just connect a 12V or 5V signal directly to the input because you cant connect 12V to 0.6V. That would be like connecting your battery terminals together, and you would let the magic smoke out. to connect the 5V or 12V signal to the transistor input, you need to use a resistor. A resistor is happy for one side to be 12V and the other side to be 0.6V. When that happens, current flows through the resistor. The more current, or the higher the voltage, the hotter it gets. To make sure thats all ok, you get to use Ohms Law. V = I x R and P = V x I are the two you want to remember. Voltage (V) = Current (I) x Resistance ® and Power (P) = Voltage (V) x Current (I) remember how the coil was going to draw 200mA and the transistor will amplify the input current by 100x? those were example values. The actual value could be different, especially for the coil of the relay, but when you go to jaycar, the relay will say if its 200mA or 400mA or whatever, so just re-do the calcs. The transistor will normally be 100-300x amplification, so just stick to the 'normal' ones like a BC337 or 2n2222 or something. If you're not sure if what you have is legit, just google it and see what the datasheet says for DC Current Gain or Hfe. so to drive the transistor, we need to drive it with 200mA (0.2A) / 100x amplifcation = 2mA (0.002A) and the ECU pin would be good for 5-20mA, so 2 is def under that. To get 2mA of current to flow, we need to flow 2mA of current through the resistor. So using ohms law to figure out the value resistor, we get the voltage across the resistor, which we know as its 12V-0.6V=11.4V or 5V-0.6V=4.4V and we know the current (0.002A). so if V=IxR, then R=V/I. Plugging in the stuff we know, 11.4/0.002=5700 and 4.4/0.002=2200 so the resistors we need are 2200Ohm for 5V and 5700Ohm for 12V They dont actually make a 5700, but they do make a 2200. If you get a value thats not quite right, go for one thats lower by up to 1/2. Halving the resistor value, will double the current you draw from the ECU and will double the heat the resistor generates though, but 4mA is still safe. So a good value for 12V would be 5600, or even 4700. For 5V 2200 is pretty good, but you could go to 1800 or 1500 if you want. Resistors that size are defined as K though, so 1K5 for a 1500, or 2K2 for a 2200, so get a 1K8 for 5V and a 4K7 for 12V Now to see what physical size you need to get. Use the chosen resistor value to work out what the new current will be. 4.4V/1K8=2.4mA and 11.4V/4K7=2.4mA as well (accident, i promise). With those new values, we can use P=VxI to get power dissipation. 4.4V*0.0024A=0.010Watts and 11.4*0.0024A=0.027W Most normal through hole resistors you're all used to are 1/4W, so all those values are WELL below that, so a 1/4W resistor is fine. If your values dont work out, you will have to go for a physically bigger resistor that can handle more heat before it blows up. So this is the way you wanna hook it all up, and use the math above to calculate the correct values of resistor etc so have fun1 point
-
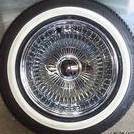
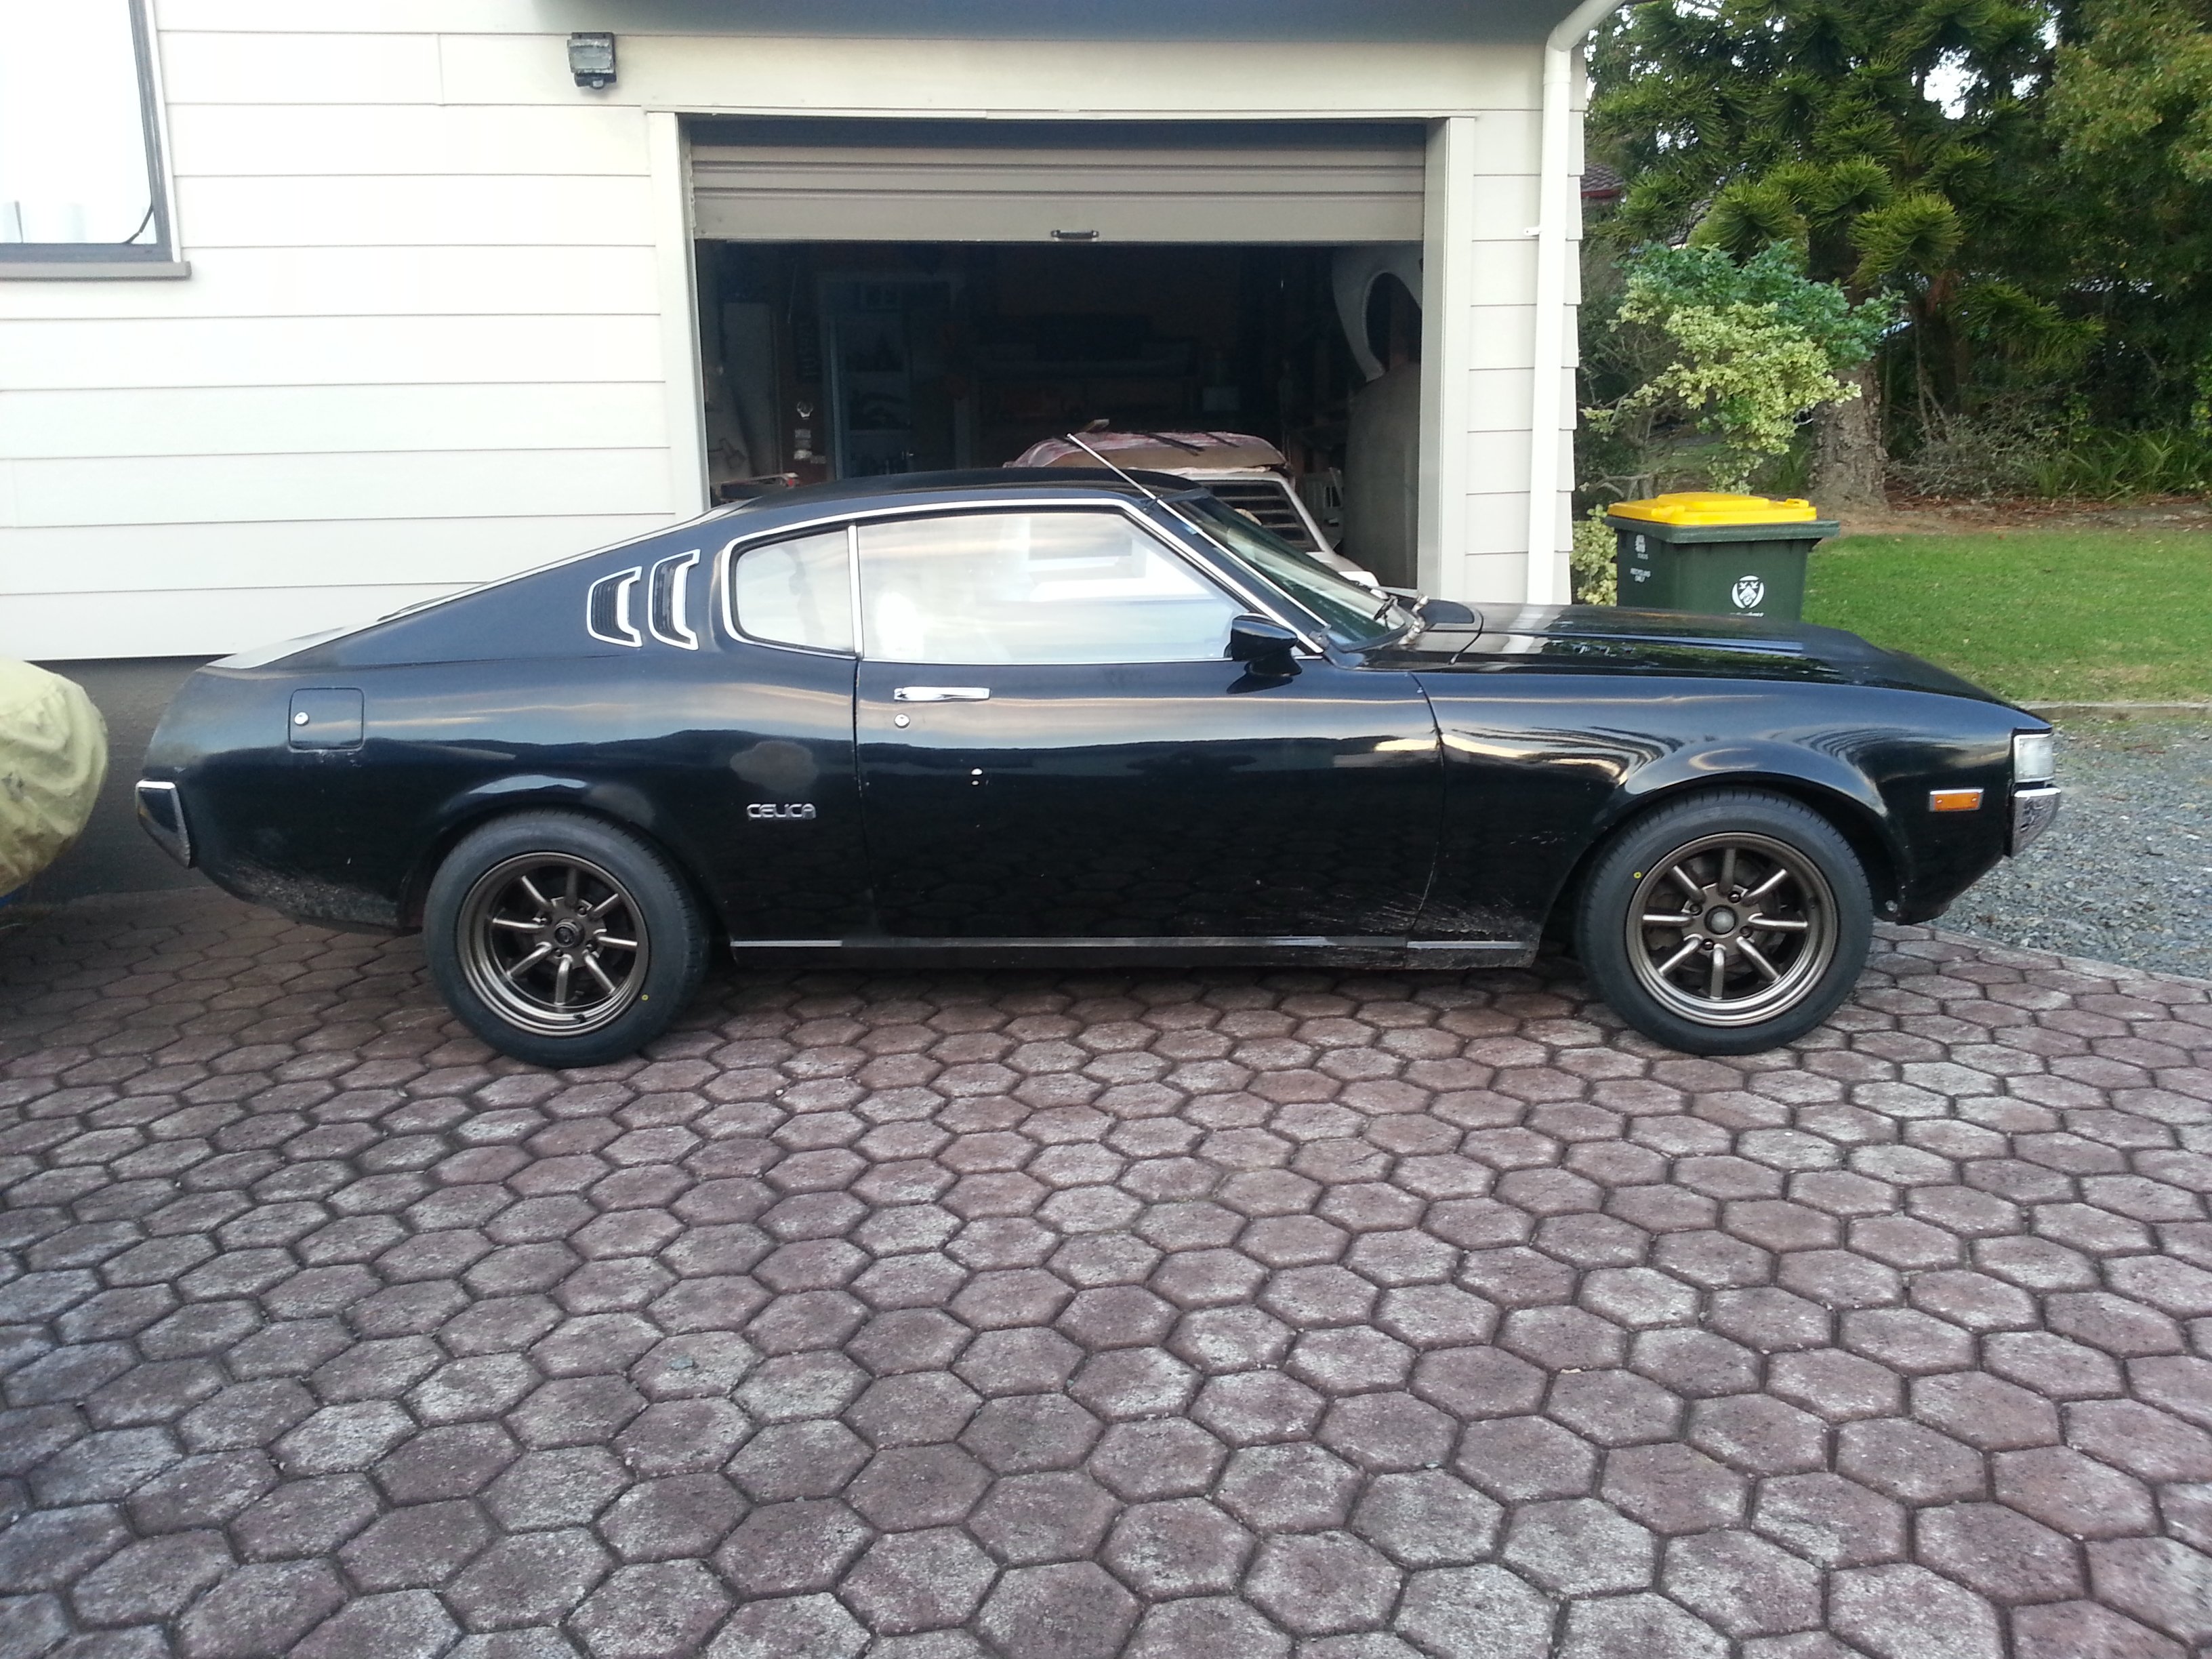
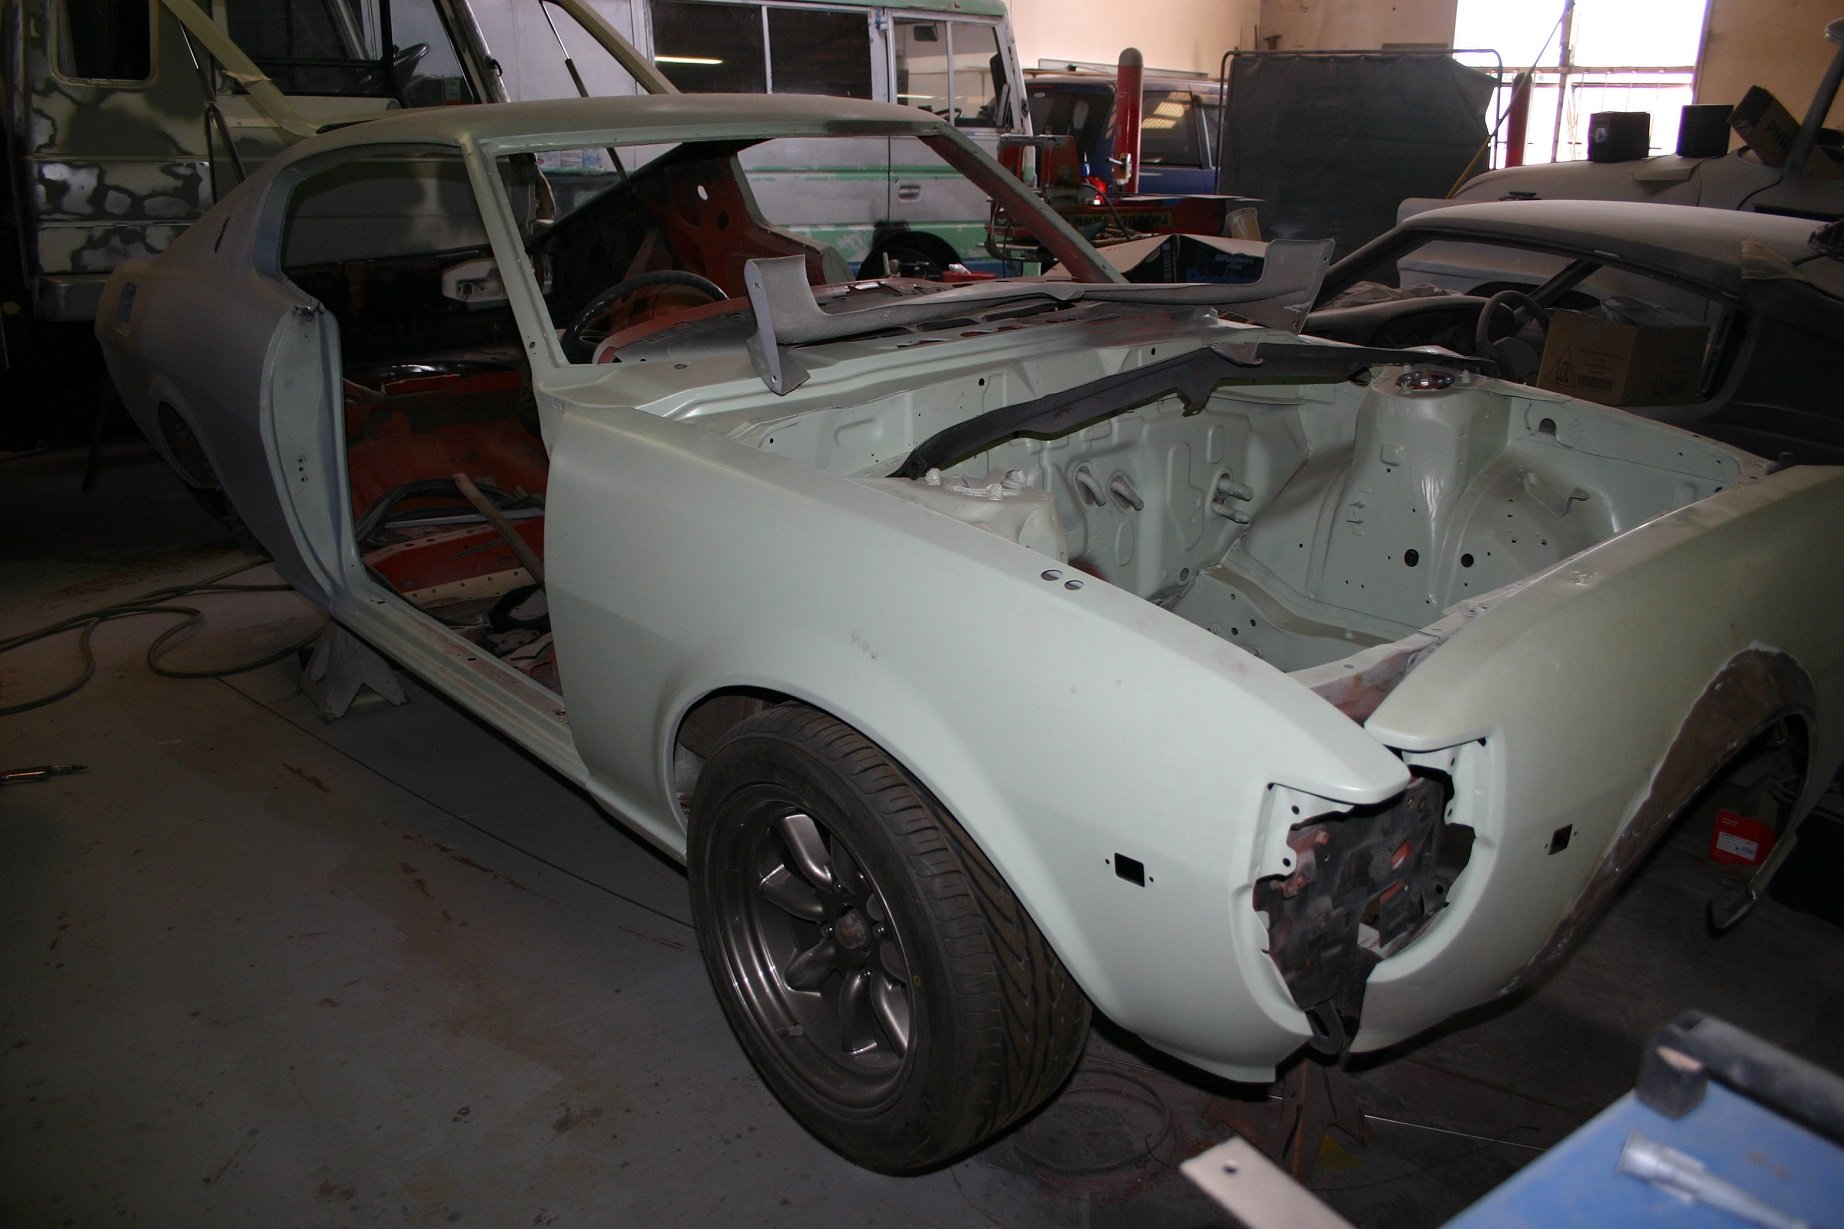
continued... Fixing it bit by bit wasn't really working so i bit the bullet in May this year and stripped it down and sent it to a panel shop to be fixed. (6 1/2 hours drive to drop it off) New wheels 1st - to get the body massaged to make them fit Dropped off at BigA's dads shop to get all fixed up. Nice to have 2 Celica liftback's together (BigA's RA25 in the background) Some of the work done - very pleased
 1 point
 -
Got into my old mans work before football this arvo and drilled the valve stem holes. GetInline by postlematt, on Flickr GetInline-1 by postlematt, on Flickr Went for the stealth look and put them in the back lip of the rim, 45 degree bend with an extension. GetInline-4 by postlematt, on Flickr GetInline-3 by postlematt, on Flickr GetInline-5 by postlematt, on Flickr1 point
-
Just wang a carbed 350 in there or something. Go super mongrel. Cheap to make power too.1 point
-
got motivated after yesterday so i lowered it to the height i would like it at. cannot wait for the new wheels to arrive! Before After. Can still turn in full lock. Rear doesnt need any work, Front i am getting some coil overs made up so this is the mock height for that.1 point


This leaderboard is set to Auckland/GMT+12:00