Leaderboard
Popular Content
Showing content with the highest reputation on 06/09/24 in all areas
-
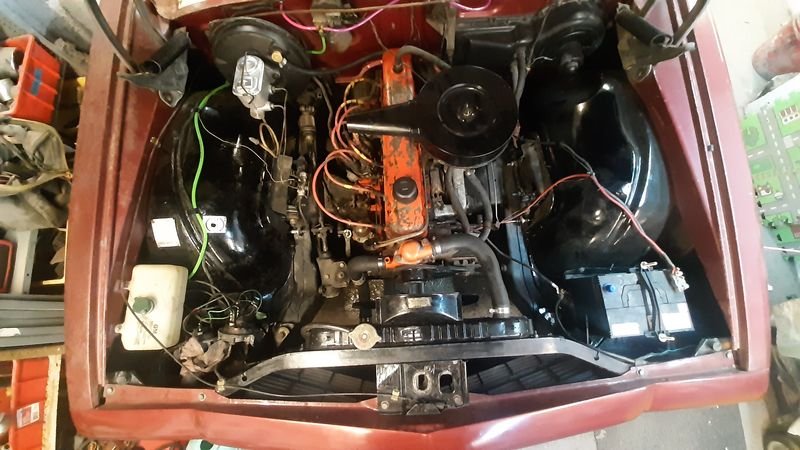
In the other Hako news.... Stupid leaky, pedal to the floor, crunchy gears, nearly through the back of the barn quitter. Yay shiny new different bore/ bit longer/ works just fine shiny Ebay thing. Good enough for a country job. Have been thinking a repaint might be fun either in that factory red or the original dark green metallic, but seeing what happened to @mlracing.co.nz's Hako, I think I'll carry on in blissful white ignorance. / not racially.15 points
-
Front bumper beam is completed, took a little more than expected as it has some slight curve in it but that's all done now. The next thing that was completed is the bumper irons mounting points as one side was bent up so that was repaired. Aside from the final preparation of welding roof and rear all together there was some little repairs done around the gas filler and rear windscreen filler panel which need cleaning up. Also a weird drain hose that maybe was put in after the fact? Looks like some kind of previous repair that was botched in.9 points
-
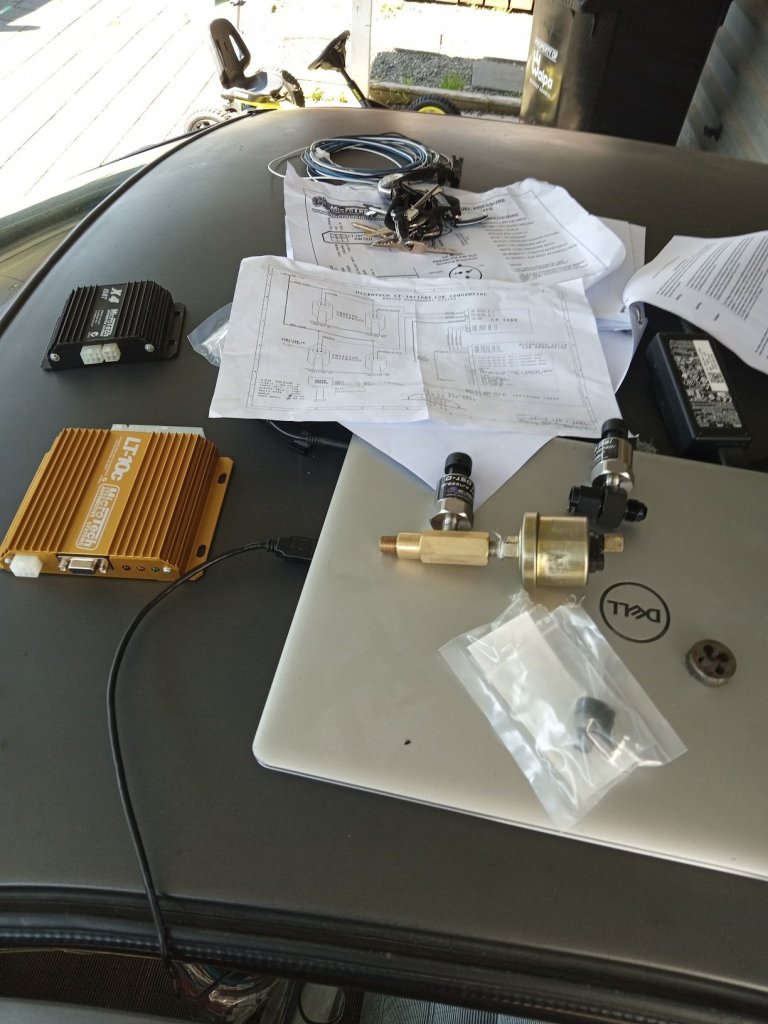
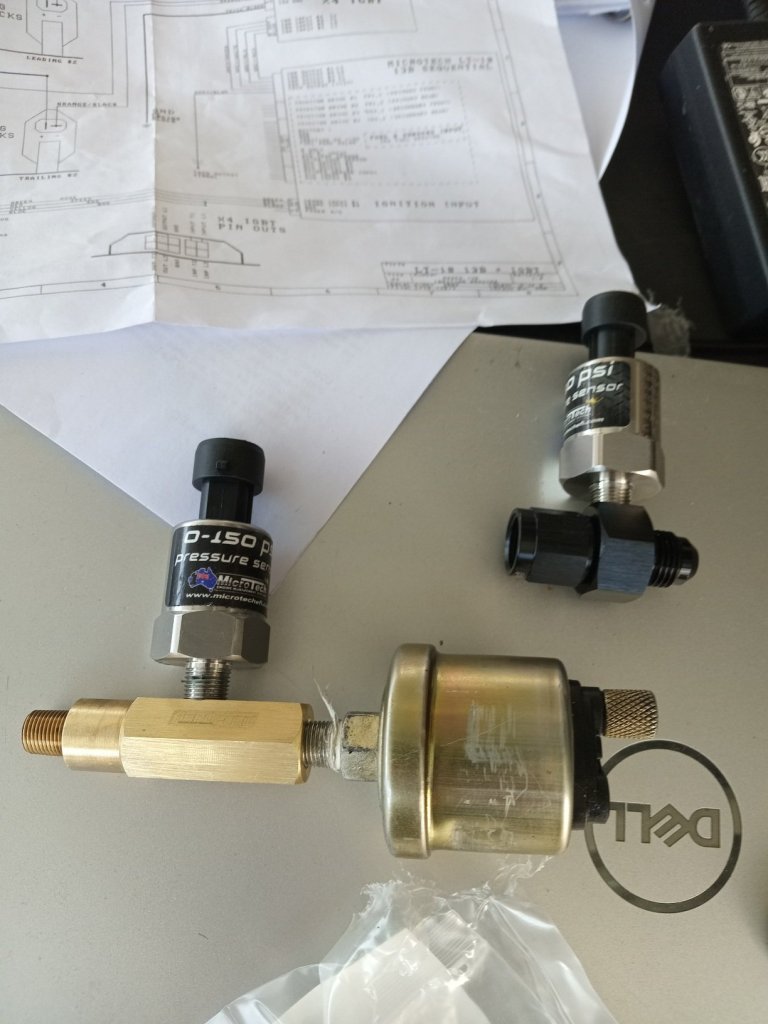
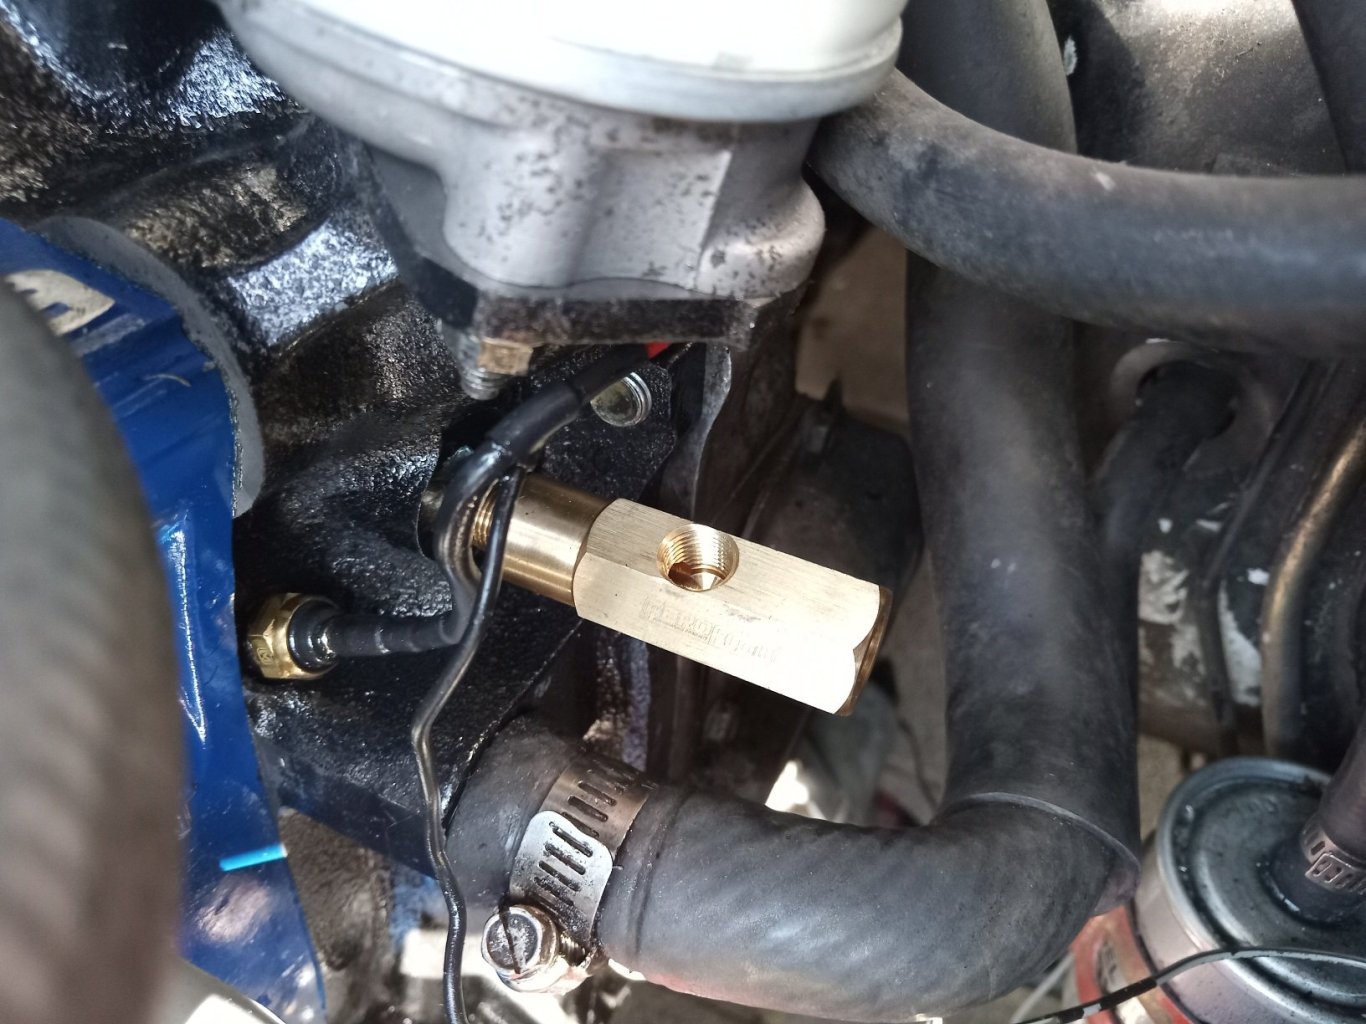
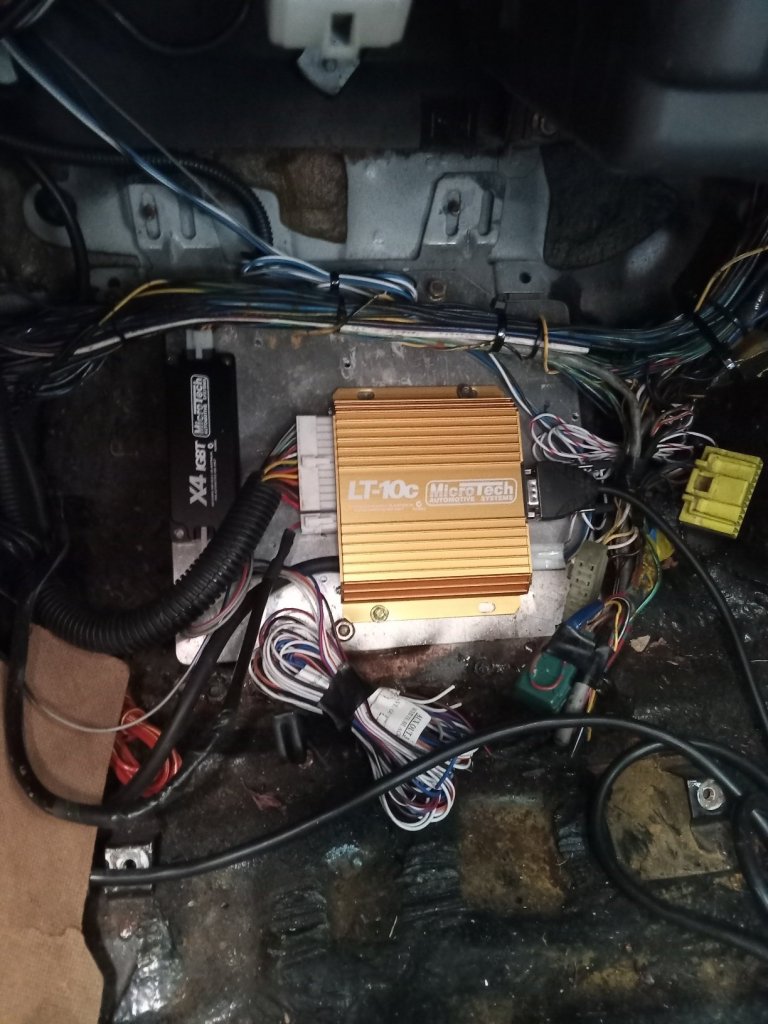
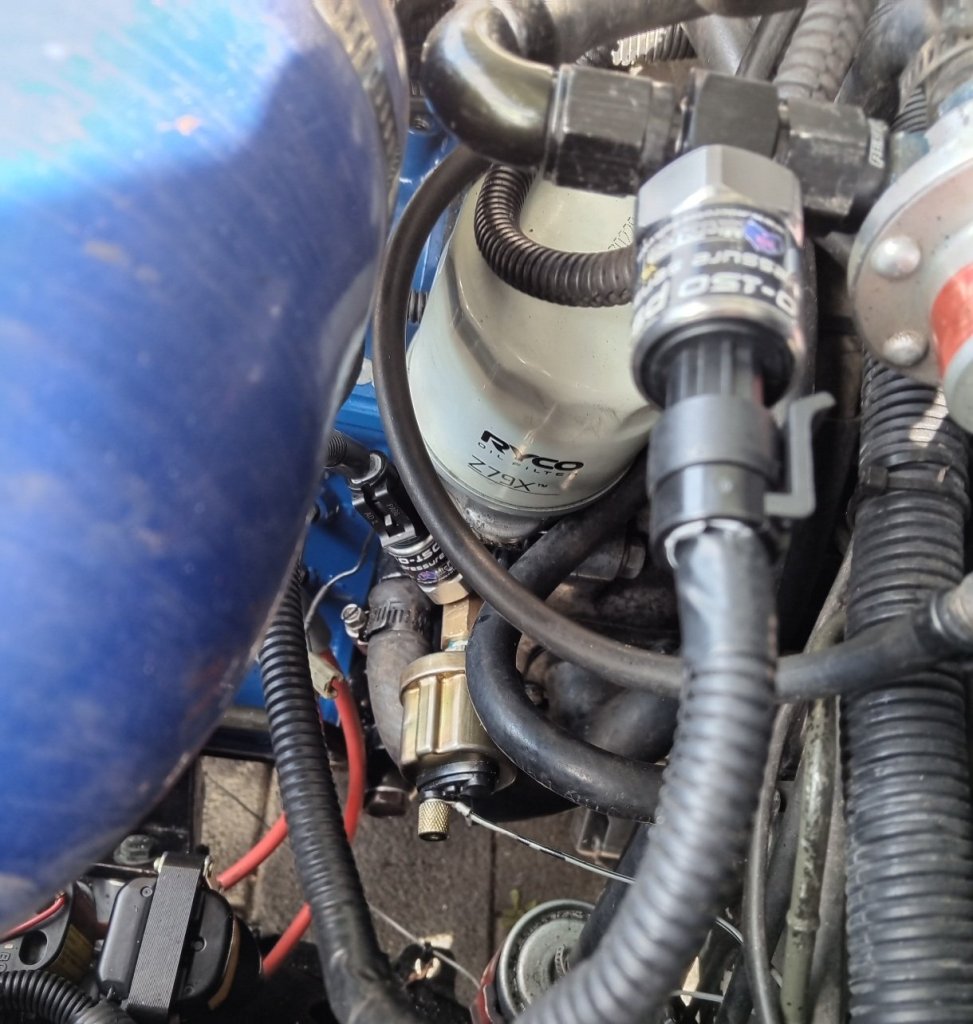
Well i bit the bullet after no luck in getting my old ecu checked, i kind of liked the idea of having some upgrades at the same time and brought a microtech lt10c, with optional fuel and oil pressure sensors to be tuned in for safety and a new ignition box..some adaptors from aeroflow to adapt the sensors into the system, and i get to keep my oil pressure and temperature gauges for keeping an eye on things easily . moving away from gull force 10 ethanol it used to be tuned to, because its no longer available, so going to run bp98 and motul 800 premix .i ended up wiring the sensors in myself because it was easy enough, and all went well there, still a bit rough and ready but once everything is confirmed to work right ill re install and tidy things up. Ready for tuning soon...8 points
-
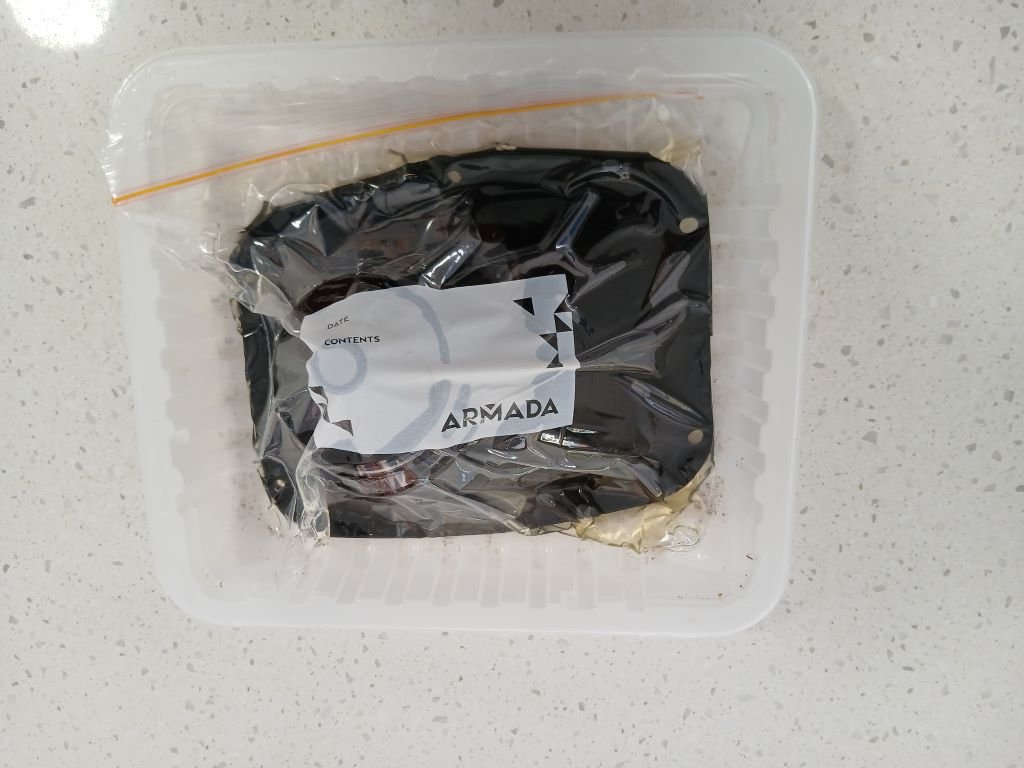
Many moons have passed since my last Thames related catch up, so I guess it's time that I updated you all on the latest happenings. Over the past few months we have been driving the van heaps, but to take full advantage of the cooler months all of our spare time has been focused on getting some things done around the house and garden. The result has been no time to tinker on the van, but I have been adding a few items to my "to do" list. Now that the days are starting to warm up, it's time to start executing some automotive related activities. First major thing on the list is to deal with cabin temps and some of you who spotted my posting under the tech forum a few months back will have already heard this story, but for those who haven't here is a repeat: The short story goes as follows. On hot starts I would need to crank the engine for a good 20 to 30 seconds before the engine would fire. After eventually firing into life the engine would stumble along for a few minutes before settling down. I suspected that we were experiencing fuel vaporization and started a tech topic to gather suggestions on possible cures. As is always the case a number of wise old schoolers provided some suggested solutions which I gave due consideration. At the end of the day I took the lazy way out and have now wired the main thermo fan switch to permanent power. The result is a thermo fan that now runs independent of ignition power. Not only has this solved our fuel vaporization issue but it has also decreased the air temperature in the cabin when parked up after a long run and the strong aroma of "hot engine" inside the cabin has also gone. I'm thinking that the mighty 3Y and its mechanical fuel pump was unhappy with the coziness created by the miniscule engine box that the Thames is blessed with. This fix has been in place for a few months now and is working well so I'm going to leave well alone for now. The next major item is to sort out our a/c related issues and this is getting critical now that the weather is warming up. So when I last talked about the a/c I was experiencing excessive drag on the drive belt which was shedding rubber flakes like confetti and was needing adjusted after almost every drive. I eventually ended up removing the drive belt and we have been without a/c through the winter. I suspect I've either got an issue with the tensioner pulley or the pulley on my second hand compressor. I did ask the opinion of my a/c guy and he immediately said a/c compressor but I'm hoping this isn't the case as that is an expensive fix. Anyhoo the only way to get to the pulleys is to remove the radiator so I made a start on that today. With the wind deflector under the engine removed I started off by draining the radiator and while that was happening I took the opportunity to unbolt the gear shift cover which can only be done from underneath with the wind deflector removed. The reason I wanted to remove this is to solve another irritating issue which is a creaking sound that comes from the rubber gear shift gator which is especially bad in colder weather. The gator is an old Cortina MK1 that my mate Grant donated to the cause, but the rubber is pretty hard and I suspect that is half the problem. Did a bit of googling and a NOS rubber goes for over $300.... yikes, so I started looking up some old wive's cures and one suggestion is to soak the rubber in WD40 to soften it up. So after pulling it off I popped it in one of those zip lock sandwich bags and sprayed a whole heap of WD40 into the bag. Google says to remove as much air as possible from the bag and to then let the rubber marinade for a few days, so I was able to squeeze out quite a bit air before sealing the bag. Looks like so: Over the weekend I'll get some time on the a/c and will keep you all updated on my findings. Thanks for reading.6 points
-
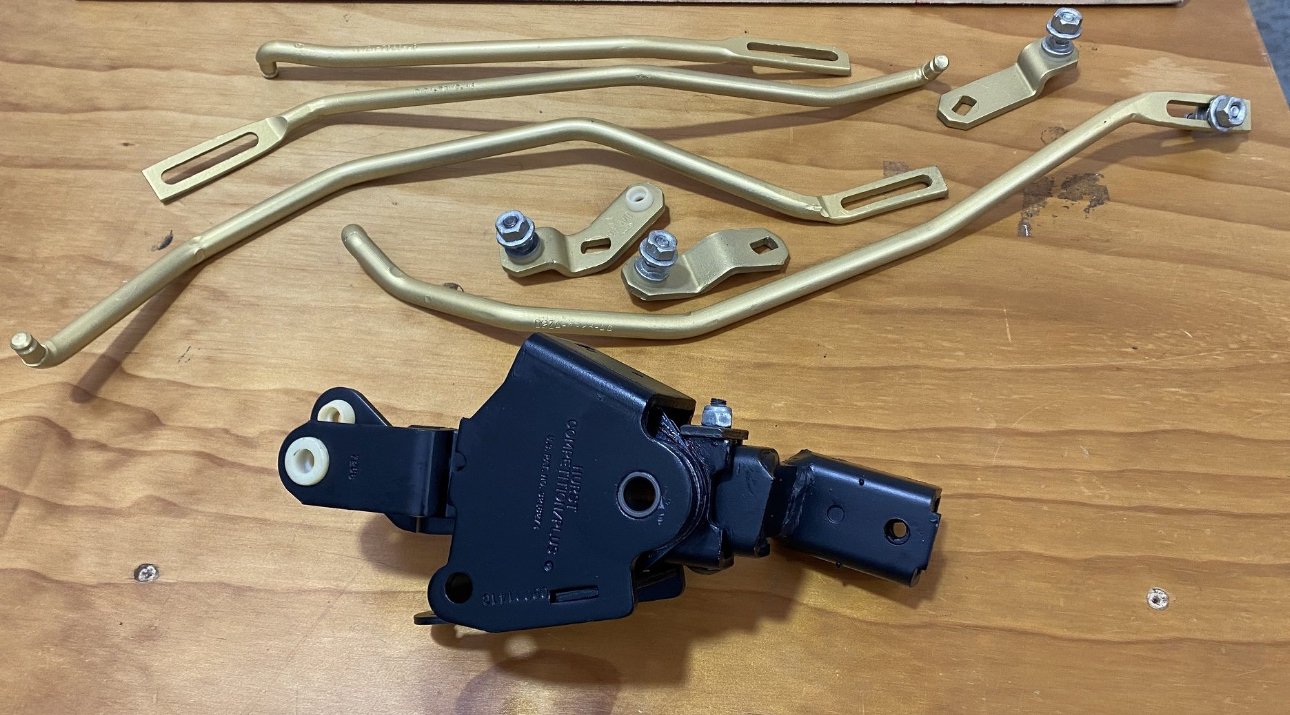
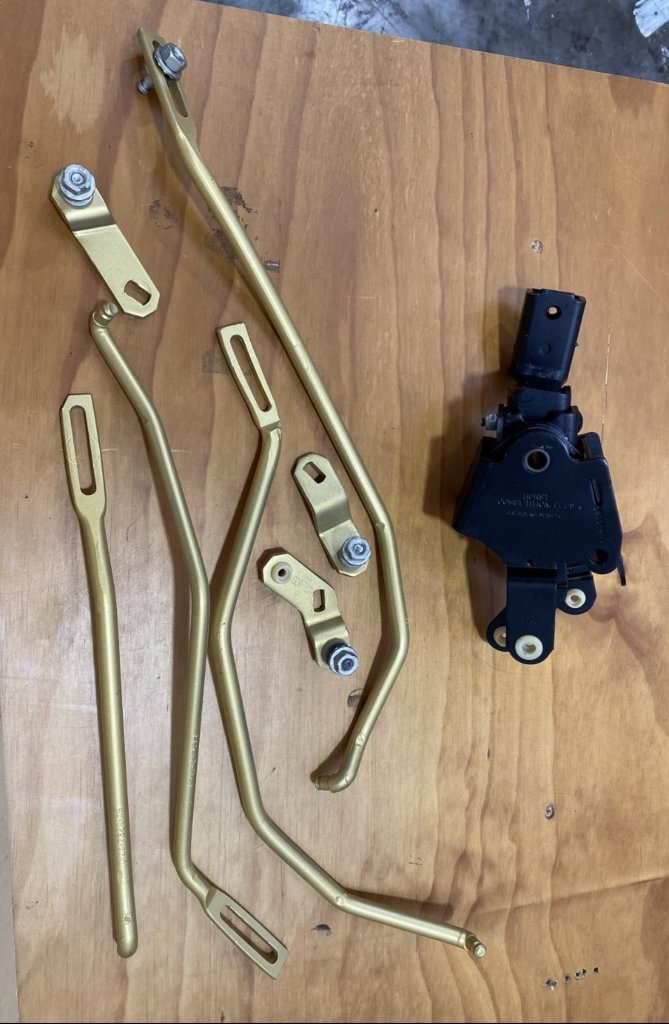
This Hurst shifter popped up suited for a 1971 Mustang Toploader. Hoping like hell it suits my loader and it appears that it should. Looks to be an extra linkage arm included too. excellent price so had to get it - mate wants my xa shifter and linkage set up for his xa hardtop Toploader. word on the street is that Hurst shifters are a game changer on an old Toploader. Time will tell.5 points
-
Yes, the house has gas, I want to change to gas cooktop So we got induction5 points
-
4 points
-
While rules like that seem a bit dumb especially if you're not an imbecile, after the week I've had, there definitely needs to be someone checking that things have been done correctly. basic instructions are beyond the capabilities of a large percentage of the population4 points
-
Technically no In the threshold it mentions that spring seats must be oem unmodified The circlip adjustable bilsteins have always required cert, unless they were factory fitted in that specific vehicle when manufactured However they are often one of those things that gets wofs without cert, usually because the wof guy doesn't notice or read the rules properly A guy I know had some in a falcon and that got wofs because the circlip fell down into the lowest position so the other slots were not visible any more A person could be a criminal and remove the adjustableness and paint them black or something and try their luck I guess but that would be illegal technically so I would never suggest that you might get away with that I have heard stories of other criminals that just swap suspension once a year to get wofs and they say that's pretty easy to do and then they don't have to damage their bilsteins3 points
-
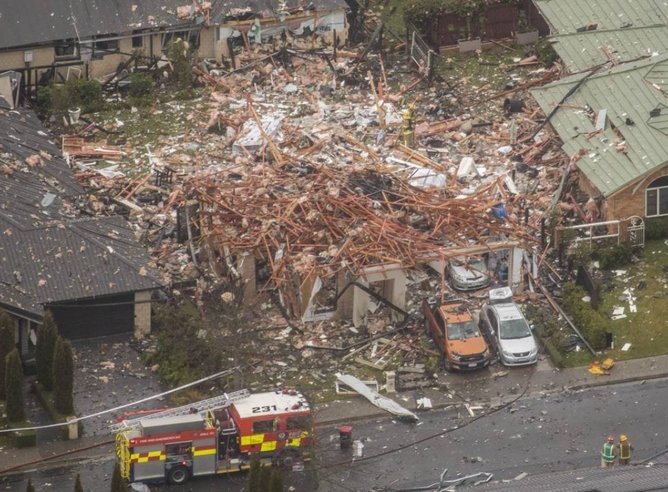
Not biased at all, but there is more to gasfitting than jamming some pipes together and bubble testing it. Plenty of people think they are smart enough to do it though and they end up killing (innocent to the install) people. It just doesn't make the news. Not directed at anyone, but generally people who say they can do it because it's easy are the ones who should not be touching it. It applies to all trades really, every diddle-fingers think they are smarter with zero education. Ignorance is bliss till a kid suffocates in your DIY'd shower install. As you say too, too many imbeciles out there really.2 points
-
Yeah don't do it! The only reason my car is where it is happens to be because of stupid NZ law.. and me thinking it would be a much easier job than it actually was. Given the chance to do-over I would not do the restore lol2 points
-
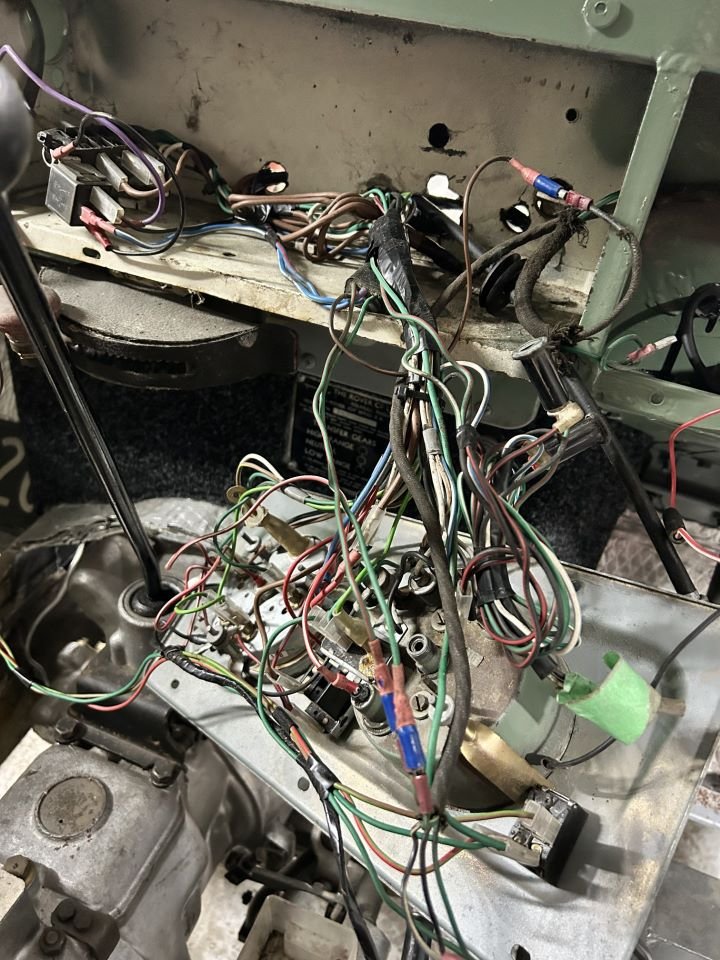
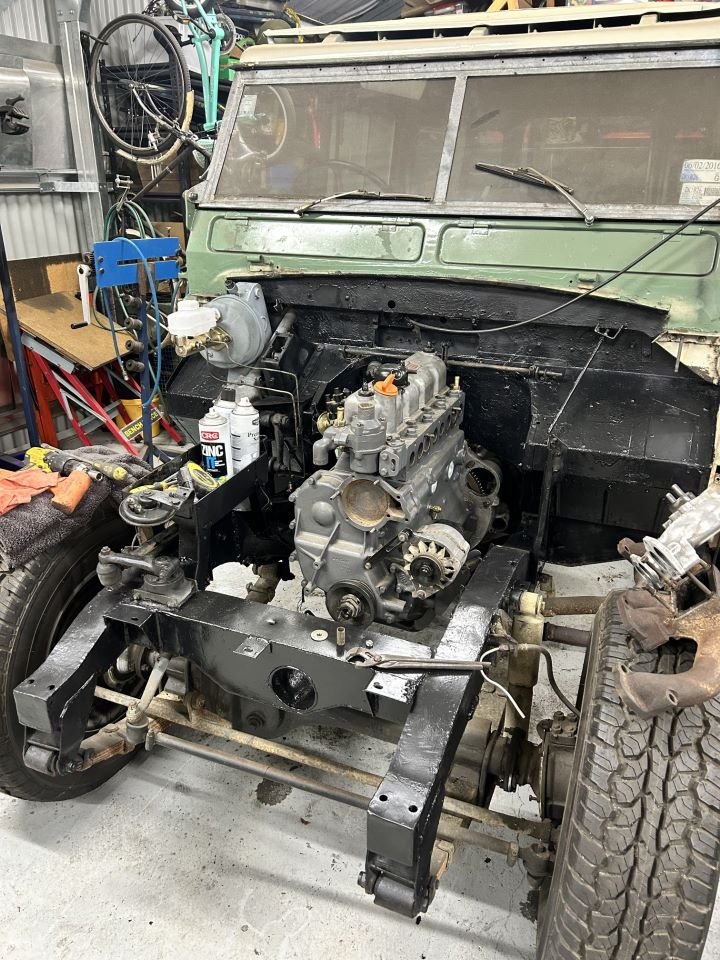
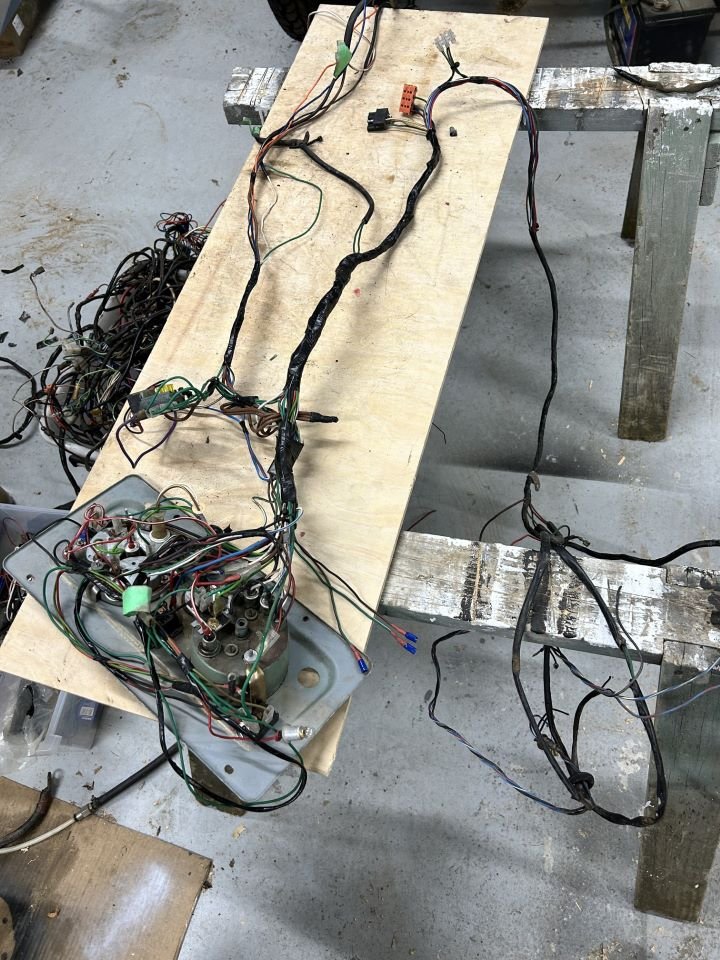
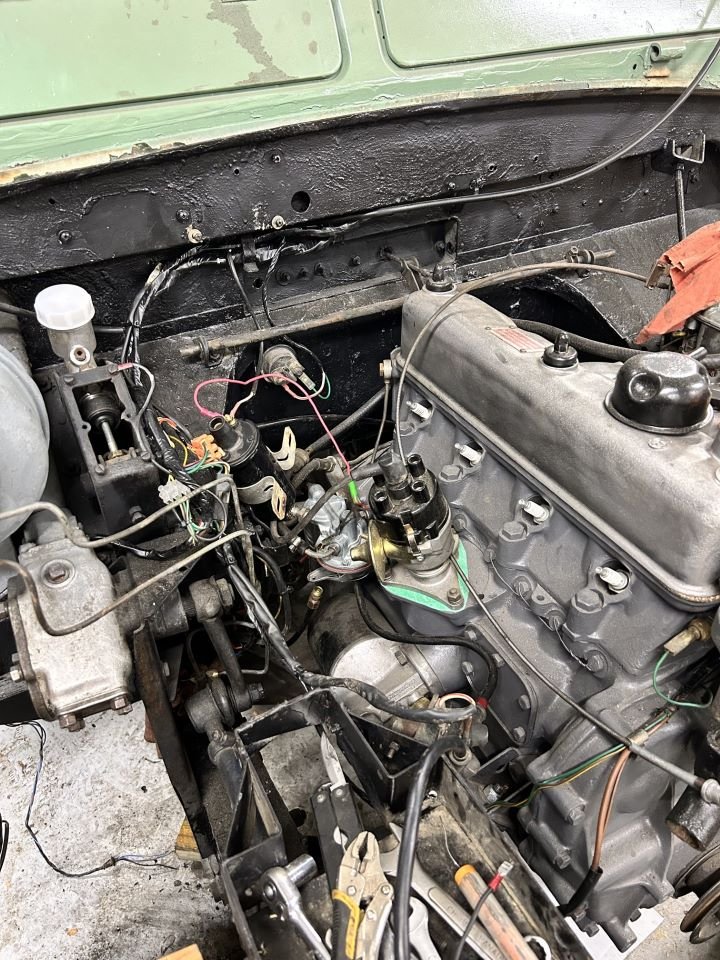
Progress is slow, but I am getting there... Engine slotted in and getting the ancillaries on, because this is an SII engine (not an SIIa or later) its a bit of an odd duck and aftermarket parts arent a straight swap. Have replaced the brake/clutch masters and run a few new lines where needed. Been spending the last week on constructing a new wiring loom - ended up making one good one out of 3x hacked ones. Its mostly an SIII loom which I've adapted to the SIIa facia and run a few extra wires for the floor mounted dip switch and remote starter etc... May not look like much, but its nicer and tidier than what replaced it, and I can go to a proper fuse box etc. Should be ready for fire up soon and we can see if this thing can move under its own power again...2 points
-
1 point
-
Gasfitter came to check our hob, ended up having to replace regulator and relocate the gas bottle as existing install was illegal. Still waiting for the account for that one.1 point
-
9KG install still requires gasfitter fee, $25+GST for that piece of advice, cheers.1 point
-
As long as there's iron in them (stainless steel is fine, glass, aluminium, copper doesn't work)1 point
-
Gasket goo applied Will test tomorrow. Then hopefully chain goes on. I got a new front sproket (15tooth, old one was 13 tooth) and chain. Check over front brakes and im off!1 point
-
1 point
-
Sadly no, he's had his wife and his secretary search high and low and all they have is a couple of grainy photo's that do not show the number plate. Bugger! (Thanks for the offer mate, this forum rocks).1 point
-
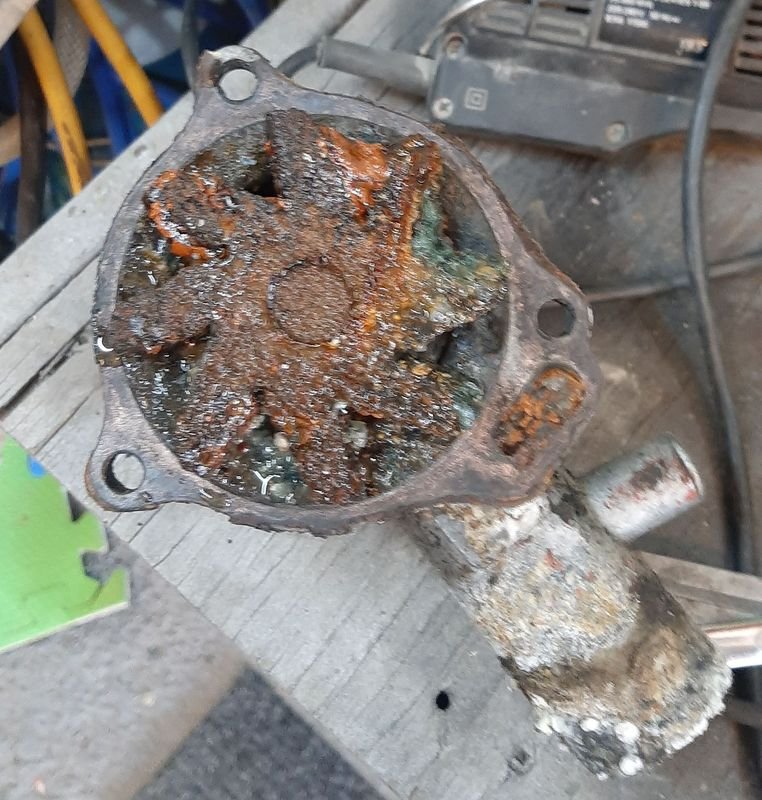
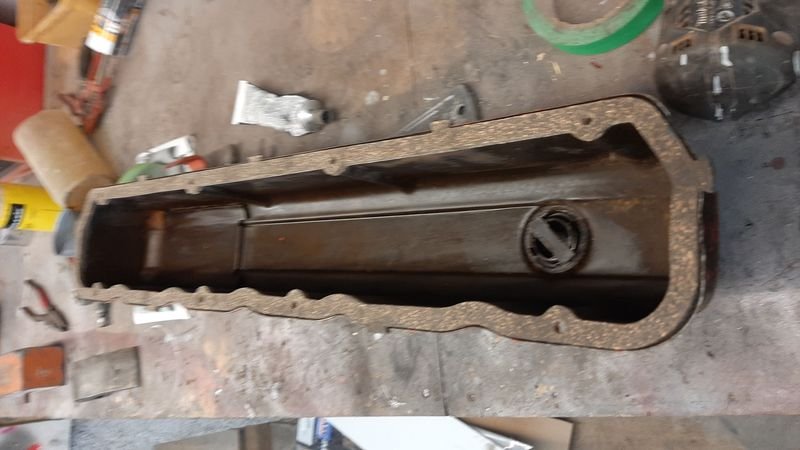
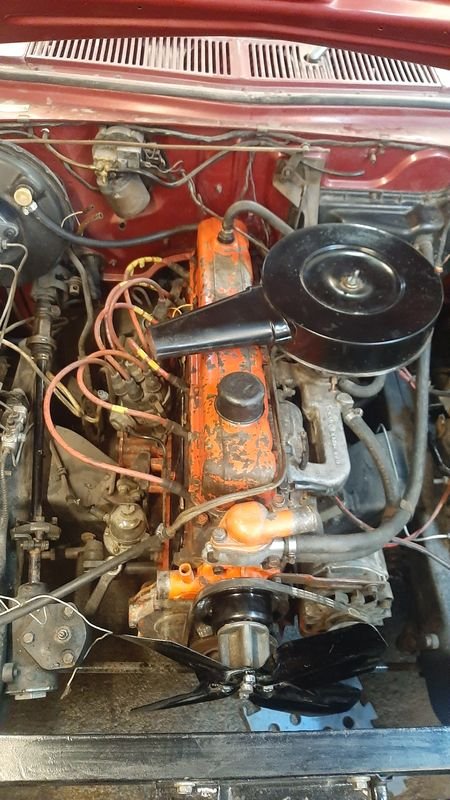
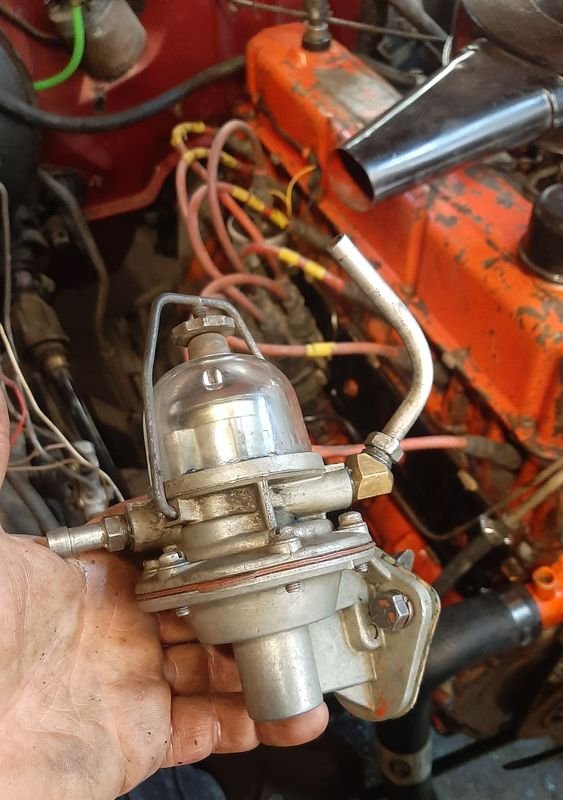
With a known good fuel tank in place time to sort the other end out. Previously we were running the engine off a boat tank in the passenger seat and a clicketyclack electric pump. Dirty ol 173 New valve cover and lifter cover gaskets Water pump replaced with a unused one that came with a $50 FBMP pile of bits (also came with a thermotstat housing that was much better, a fan extension thing that we needed, a valve cover (later model so didnt use), rocker covers and a fan that i painted,, and a sump we will probably use eventually too, so pretty stocked with that score! Cooling system got a wash out too and a new thermostat from my stash (same size as Fiat ) Fuel pump gasket set from Butler Auto Mart, and freshly cleaned Fan pulley, fan extension, fan, and lifter covers And finally new radiator hoses and clamps Unfortunately i had to take the rad out again to solder up a big crack under the top hose but alls well now1 point
-
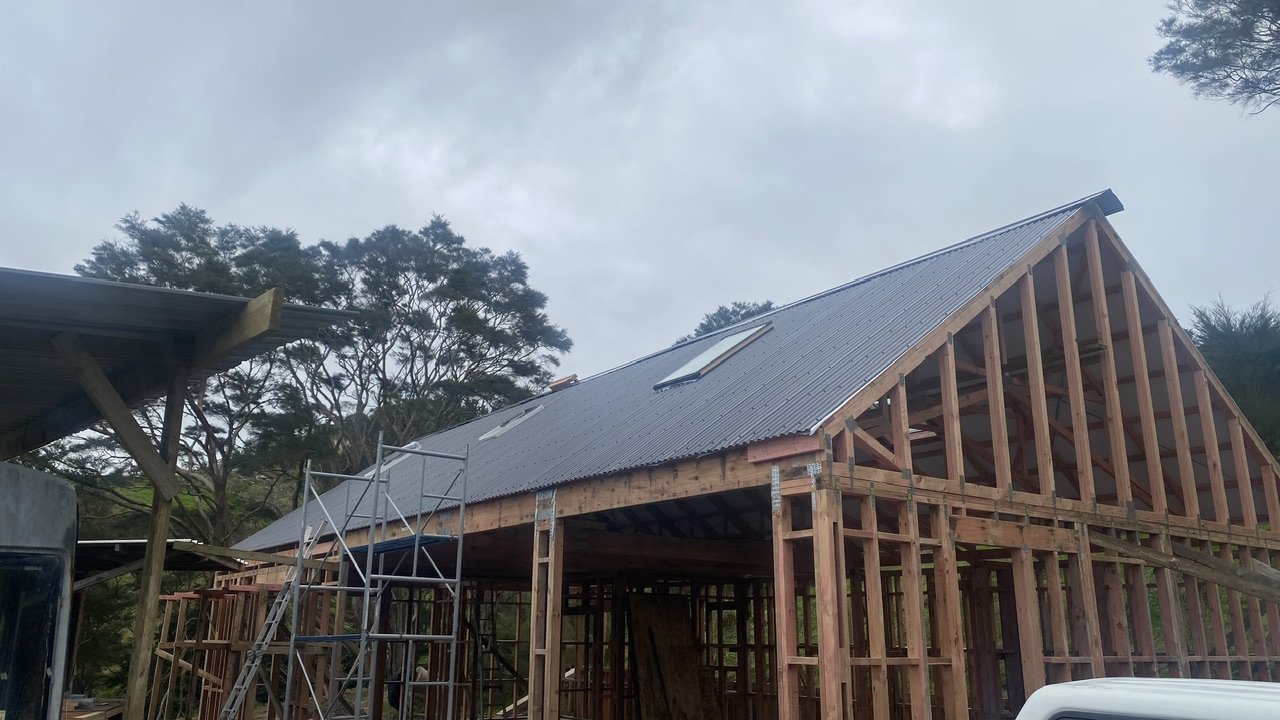
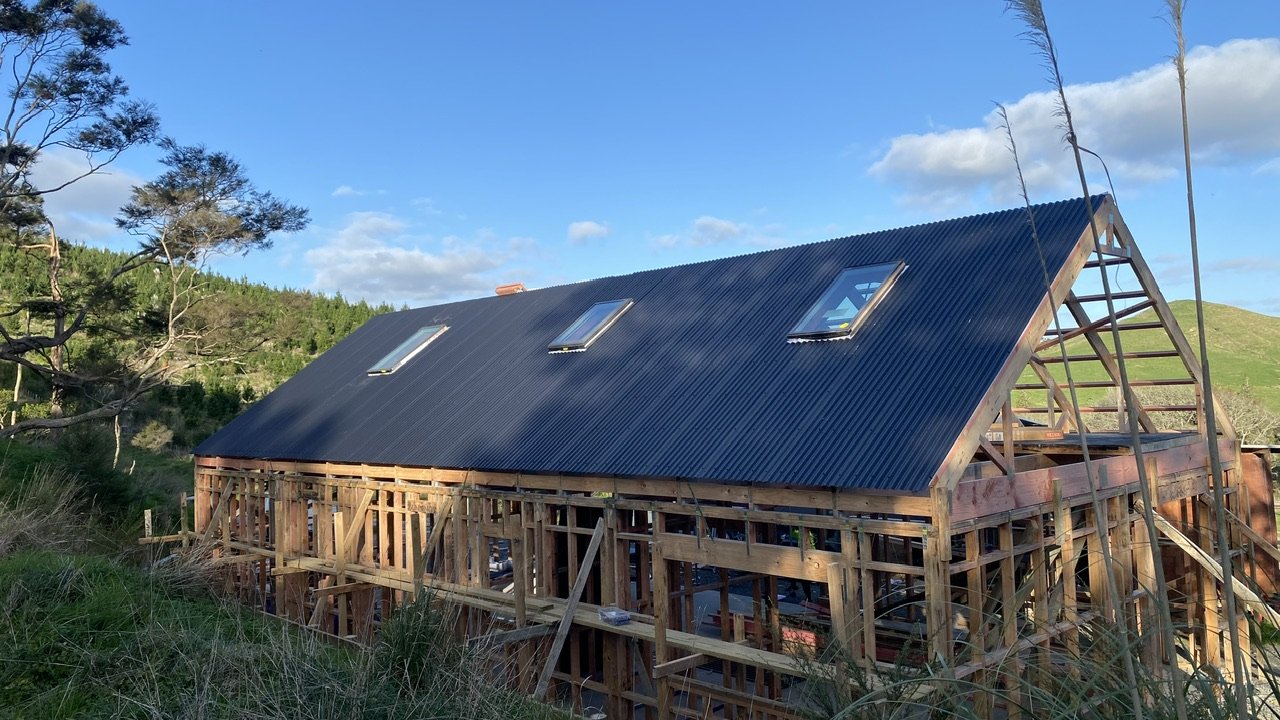
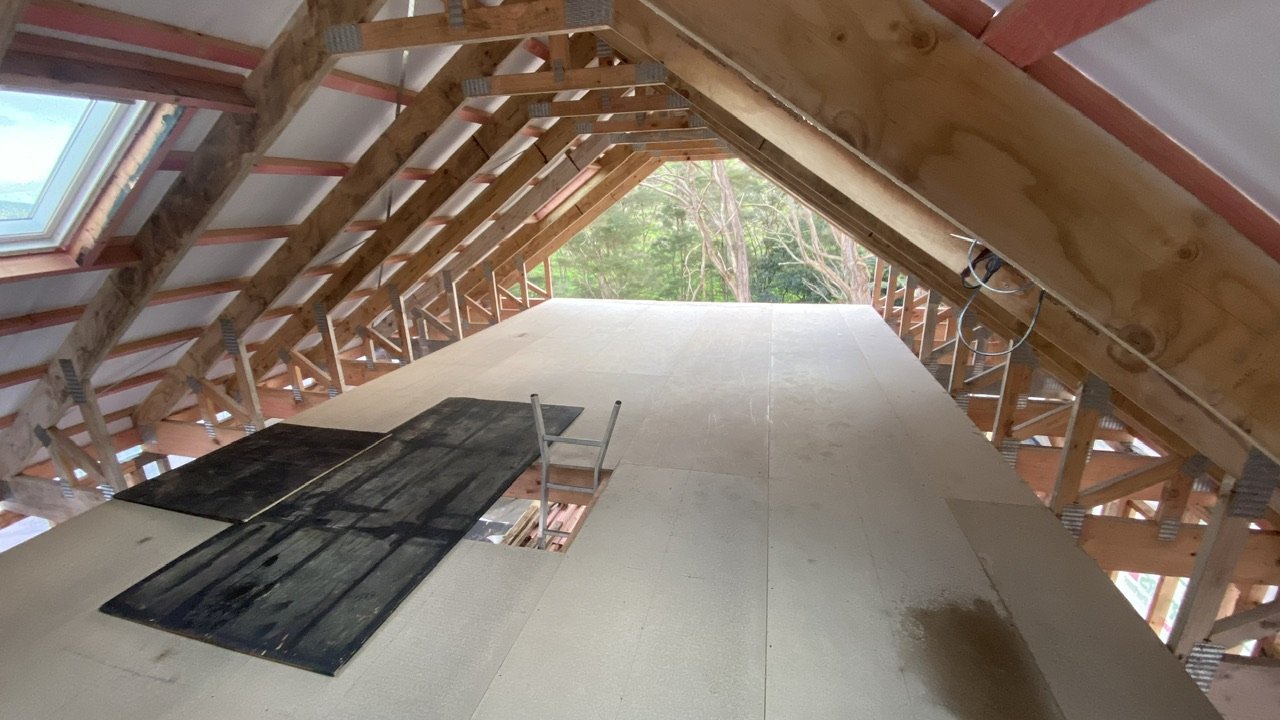
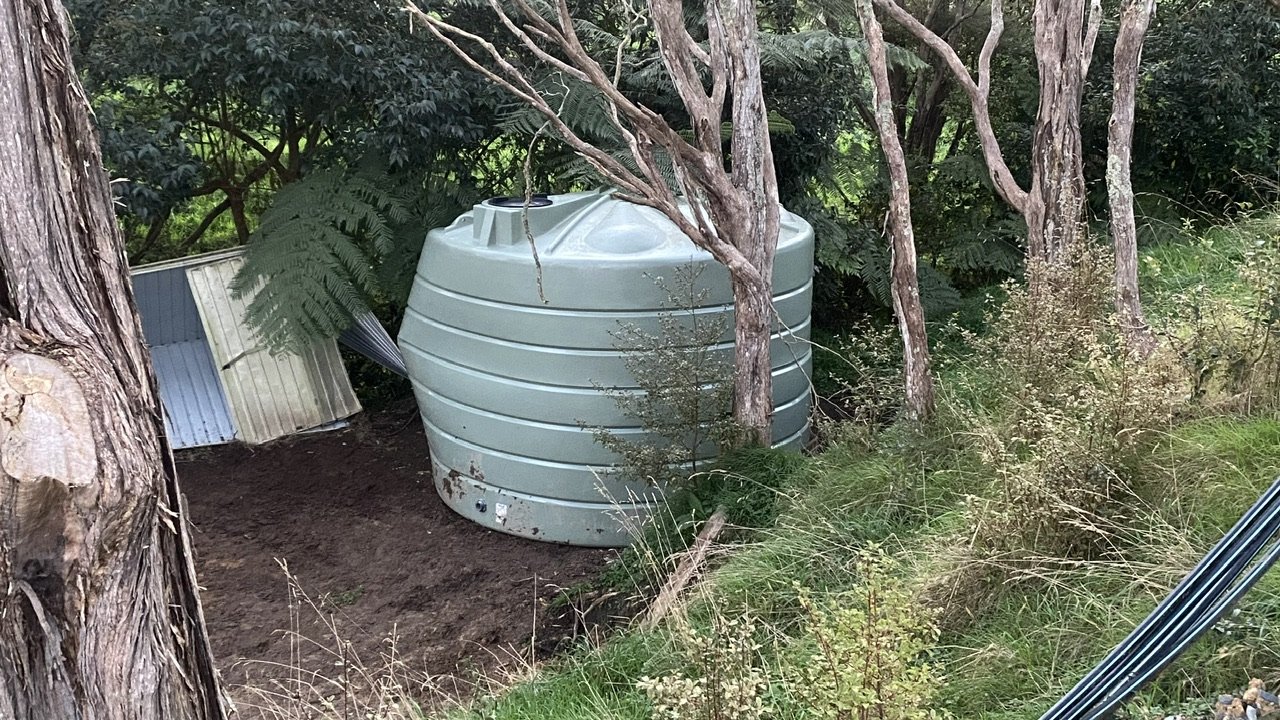
Monthly update.. Got the roof on. What a drama. Thought I would be saving time/money getting the flashing kits with the Velux skylights.. nope. Unless I was planning on doing the roof myself, no roofer wants to use these and would rather install a custom flashing. Oh well, roof is on, just need to order the skylight and barge flashings which will be done when I’m ready to order the sill and fascia flashings in a few days. Shed is all wrapped and cavity battened.. due to going with metal cladding the battens need to be separate from the steel due to the CCA treatment, so we stapled a strip of DPC to every batten. Got flooring down in the attic storage space.. And moved the water tank to its spot.. Cladding inspection passed today, so another big few days coming up soon.1 point
-
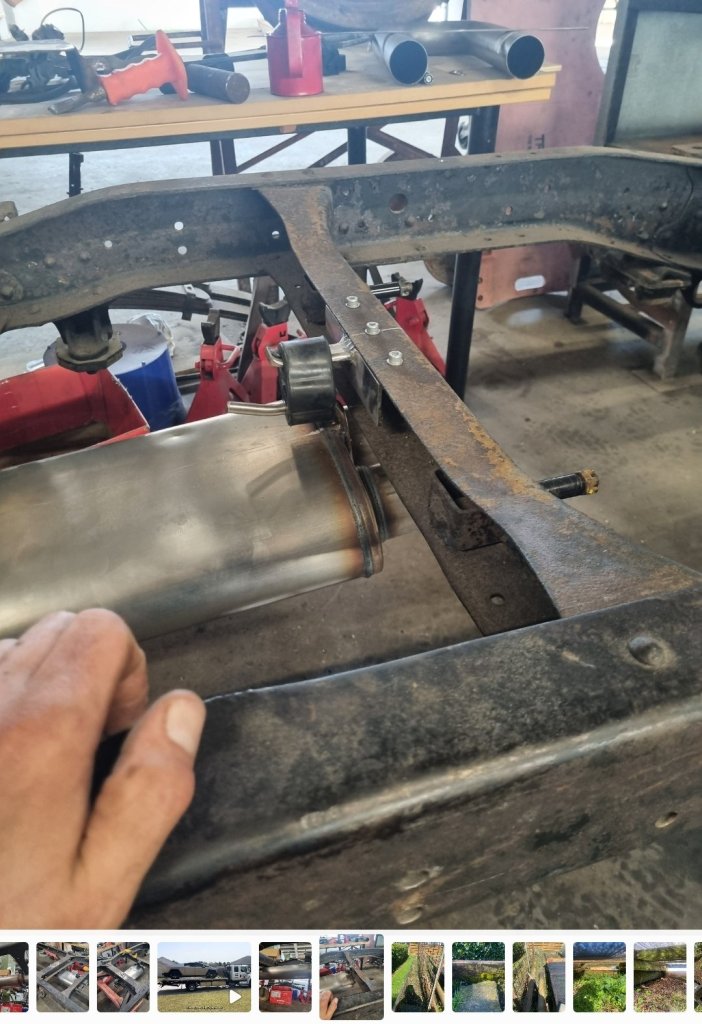
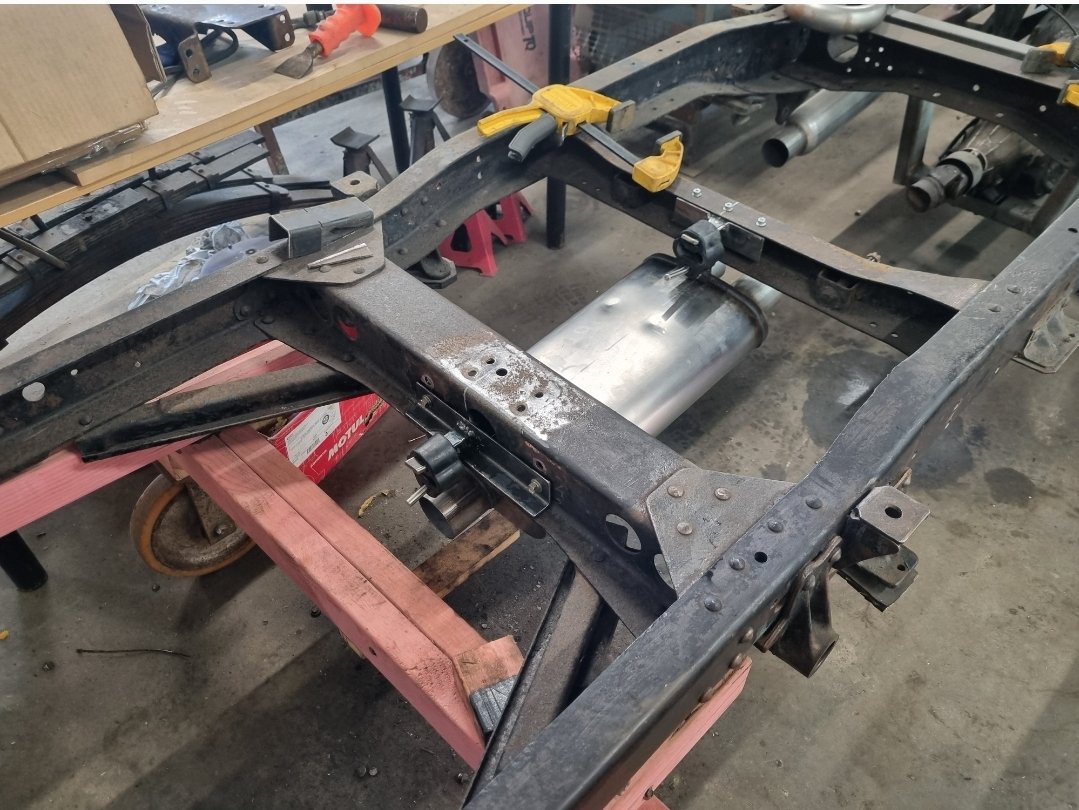
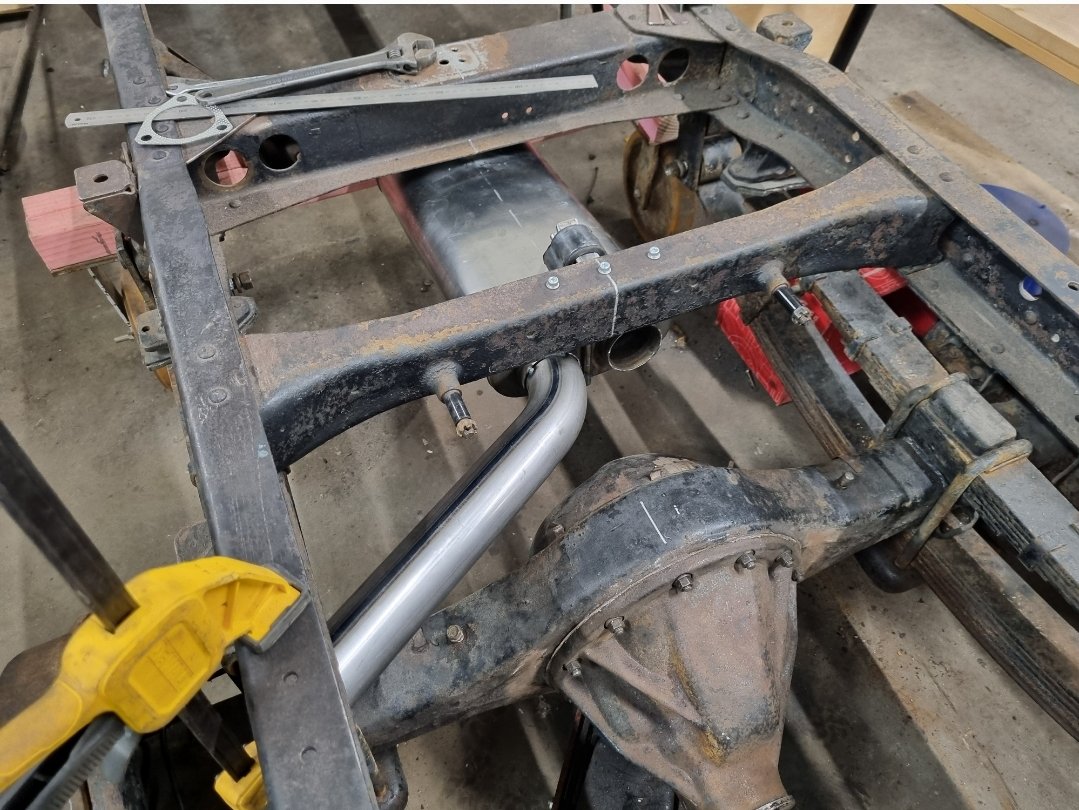
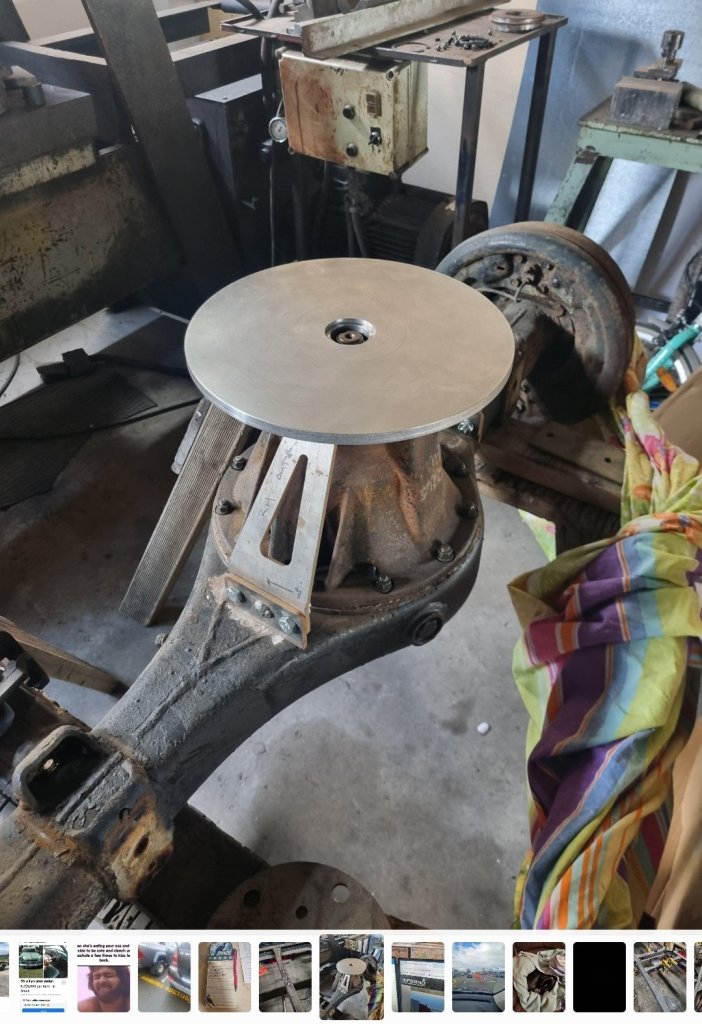
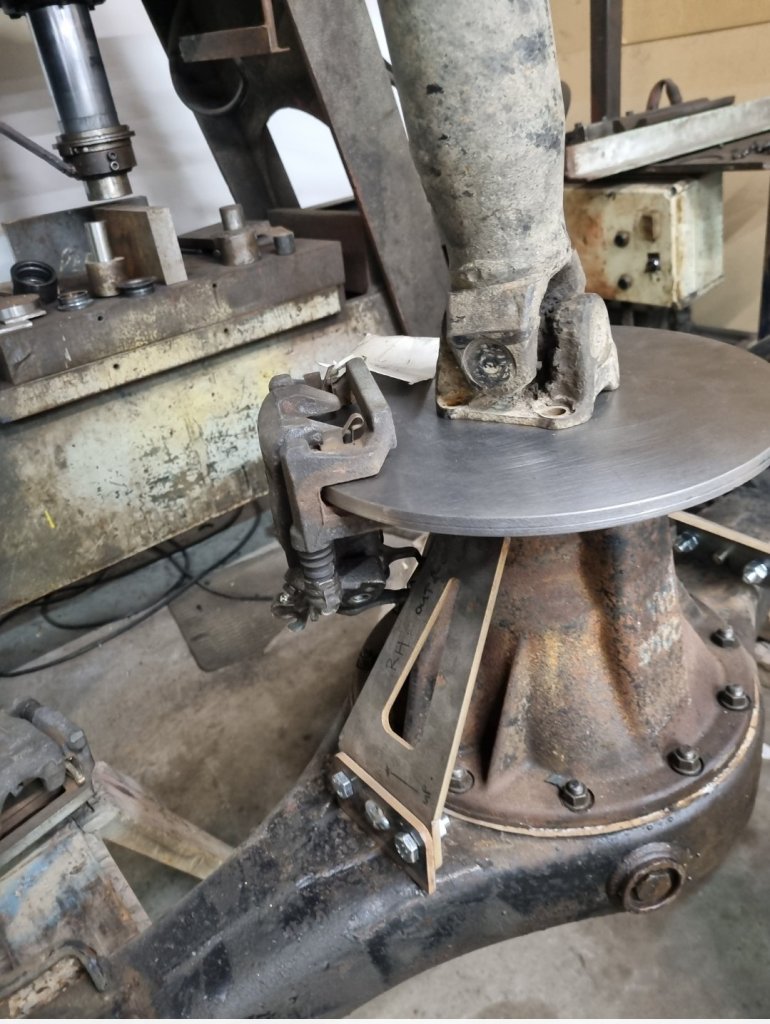
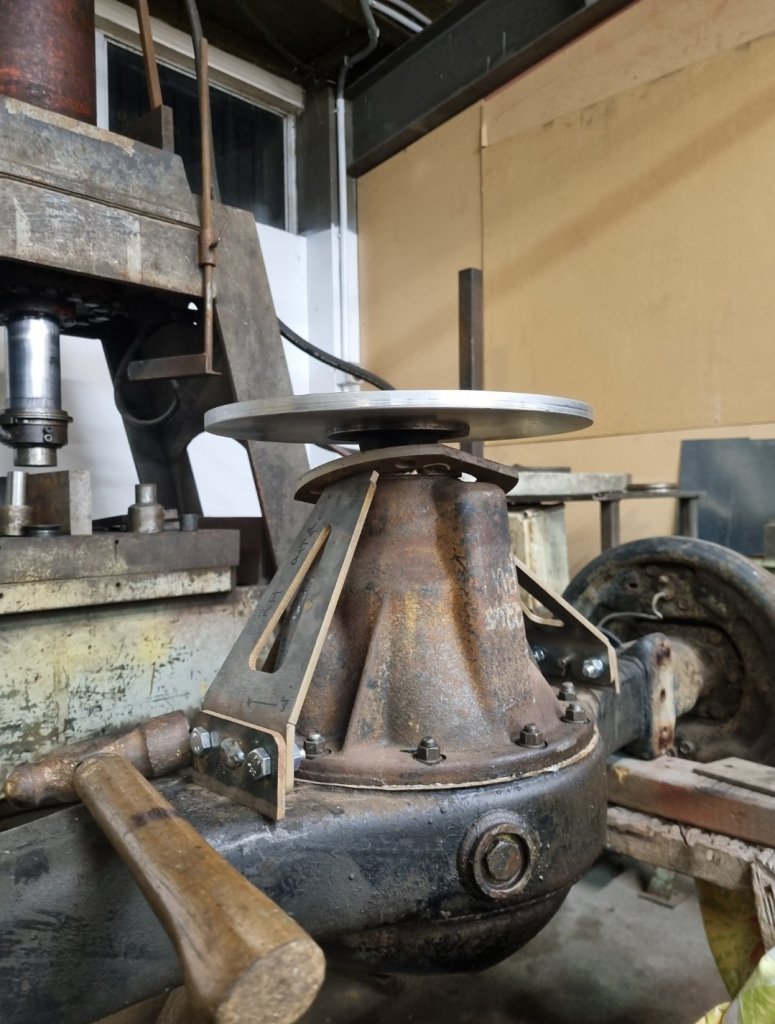
As promised, time to start making headway again after far too many distractions. Had a good couple nights on this over the weekend in pursuit of exhaust nirvana. Of course, ran out of/underestimated bends needed. So will grab another 2.5" this week some time. Made a couple of brackets to sling the main muffler off the xmembers. The trainspotters will notice I bent a prong the wrong way. It made sense in my head. Bending it back is probably not going to happen, I'm comfortable with accepting my failures. I also dropped the muffler at least twice. Dents upwards it is.. Started putting tube on, need to go up and out rather than just coming out at the 45. It would prob be ok but I don't want to risk diff head vs exhaust. This angle is a bit tight as it runs close to the shock so need to massage a little more along with deviating upwards. Will sling resonator next then connect the dots. Exhaust systems are harder than they look to get nice, muchos respect. Furthermore, cut my handbrake disk on the plasma and owing to selling my big lathe, I had the shop that brought it spin the necessary detail in to it to spigot between driveshaft and pinion flange. Need to chuck it on the mill and pitch out to holes, then set it up properly to start mounting calipers and weld mounts to diff housing.1 point
-
I've always used a razor blade (double edged, shaving one, zero safety just hold the blade)1 point
-
The headers decided to start leaking at Teretonga, which probably explains all the flames out the rear end Pulled them off to inspect, and there was a decent sized hole in #3. It would have been pretty thin from port matching and must have cracked and blown out. @eke_zetec_RWD made these headers for me back in 2010, so they've done pretty well! I was planning to give them a. cleanup anyway. They came up pretty good after a quick sand blast: Welded up the affected area and tried to use as little heat as possible: And a quick lick of high temp paint: Then I spent this afternoon wrapping the headers (another job I've been planning to do for over a decade). I won't be in a rush to do another set.... It's a fiddly job. Should help with under bonnet temps a lot, so it'll be worth it. Back on the car:1 point
-
I have managed to get the rest of the exhaust mainly sorted out now. It probably would have been easier and a bit tidier if I had used a muffler with an offset inlet outlet, but I decided to use what I have. I still need to make up the rest of the mounts to finish it off. It's all in 2 1/2" and needed to be a bit of a serpent to go over the rear axle to miss everything with reasonable clearance. I think a donut would have helped a bit there. It may need a resonator in the tail pipe as well one day. I will see how it sounds for first.1 point
-
This month's car budget activities: -Ordered extra pipe for manifold as I've run out of long enough straights. -Ordered wideband bungs. -2nd wideband controller ordered so I can monitor each bank. -2nd Collector is still being manufactured, hopefully here soonish. My weekends and evenings have been busy making stuff for goats over the last few weeks, but I think I'm still on a good timeline to get to drags. I've been going back and forth between dreading moving the alternator, and dreading making an equalish length manifold where I cant have U bends in it. However I had a bit of a breakthrough. I realized that my 90 degree bends are a much tighter turn than the 180s that I was using on the other side. This means all of the pipes can still go as far forward as they like under the alternator, and there's still plenty of room. So I've copied the dimensions of the bends and length of stuff back into the computer to get an idea of what to do with the 2nd and 3rd runner to get them fitting okay and about equal. Once again with a 180 degree bend in the shape makes it a piece of cake compared to having to rejig the angle of every single part to adjust it. It looks like this should all fit up and as it sits those are within 5mm length of each other. If some pipes turn up tomorrow (probably not) will hopefully make some progress over the weekend. But it feels good to have a workable plan now. Might cause some other issues but these are future Dave's problem1 point
-
1 point
-
Part of the roof attachment mech is two hooks that are steel bits covered in rubber. After 40+ years this falls/wears off and the roof rattles like fuck. There are many fixes that involve packing shit with tape etc, but as I have the technology I thought I would solve it. First I just drew the boys up and printed them in PLA with carbon fiber, these looked pretty schmick. However the originals have a steel backbone and this was always going to be stronger. So I had the idea to trim all the old rubber off the originals and print a TPU sleeve to replace it. I gooped these on with some leftover windscreen glue, they are working well. The international X1/9 community got pretty fizzed about that let me tell you. I then printed some more plus some of the plastic pads that fit on the car in the same junction for the black X/Elliot. And while I am on a massive printing bender I modded the heater control faceplate by adding some lever detents to keep the levers in position, then drew up some vaguely factory looking knobs to interface with this detail. I made the top layer of the print a Hilbert curve, it gave it an interesting texture; And finally the rattle. More investigation found more shit in there in a completely inaccessible place; So I dumped a shitload of cavity wax (actually a bitumen ish thing) down there to glue it in place, and it kinda worked but not 100%. Shits quieter but still there. Sigh.1 point
-
Sorry for bit a of a punishing non-update, been a bit spammy lately and no cool stuff happening. However it's exciting to feel like I'm close to getting the motor going again. I got all of the timing cover and sump back on, which honestly takes hours to do. So much gasket goo to scrape off and reapply! And find all of the right bolts gain, ha. Then I managed to get my drivers side manifold all welded up properly. Some pooey welds but seems strong and doesnt leak so calling it a win. I ended up completely redoing the 2nd runner, as I burned a hole that I ended up chasing around the place. Just seemed to get worse and worse! So restarted with fresh bits and it went together a lot easier. Maybe there was still some oil on the inside of the pipe or something. But the 3d printed part welded up fine, it was easier than welding the pipes. Super happy with the decision to print the collector. I might add some extra bracing to hold the three pipes together before they start diverging. The flange is welded on from the back, so it should be really strong. As it's not hanging the pipes just from the weld. The tight fit of the flange can hang the weight no problem. My scheme of welding a little triangle bit on the inside between the pipes, then just welding full around the outside looks to have worked well. Hopefully no leaks and no breakages! Should look good once it starts getting some colour into it once it's heated up. However I will likely heat wrap them anyway once I've confirmed there's no leaks. I've been thinking about moving the alternator somewhere else, so I could have the same design manifold on both sides. But there really is nowhere else to put it, even if I flip it around so it's mounted backwards somehow. Not quite sure how that side is going to work yet. But here's an artist's concept drawing of how my manifolds might end up looking:1 point
-
1 point
-
I thought it might be the clutch line running front to back, so I damped it out and today went for a spin - no, not that. So I spent some time grovelling around underneath tapping things, and found a spot under the central tunnel that definitely had something bouncing around. I invesigated with the endoscope and what do you know! And after a ridiculous amount of fucking around with first a magnet taped to a bit of welding wire and then a bit of welding wire with wet silicone blobbed on the end to act as sticky because the second thing wasnt ferrous; I then tested it to be 100% sure and do you know what? It didnt fucking fix the rattle1 point
-
Another lot of exhaust bends and tube arrived this morning which was great as I was hoping they would arrive before the weekend. I also called into a local wrecker's yard and searched around for a remote power steering reservoir and came away with the one pictured plus it's bracket which I had to modify mostly. At least it gave me the dovetail part the bottle slides into. So, this afternoon I started back on the headers and have it fairly well sorted now, I think. I will try it back on tomorrow and see how it fits.1 point
-
Well you would not believe it, but it has not fixed the rattle. It has however, improved the feel of the gearshift quite a bit. Still.1 point
-
Plenty more to do on the Skyline while we are waiting for the other parts to be shipped over. As mentioned earlier the front had suffered some crash damage from it's previous life and this meant that the front panel mounting needs repair. As the original panel was quite nailed and rusted it was just easier to make another one. You can see how it connects to the rear front panel to mount it up. The bumper mounts have seen better days too so they will need attention. Looks more complete every post.1 point
-
I'm guessing most everyone is bored with this by now, but it turns out the Skellerup Master Blaster hose nozzle is 'taxing' the system by 19 litres a minute. There's nothing wrong with the nozzle. It's just designed for more pressure than I'm delivering it. I've settled on a smallish, lightish, petrol powered pump to alleviate the symptom. A bigger bore (140lm long) underground pipe would have made all the difference... but I didn't do my research properly before buying pipe and TBH the cost of a petrol pump is less than replacing the pipe... so that's the plan. Tomorrow I'll start back-filling all the trenches. After that it's too late to turn back... and I'm OK with that. Thanks everyone for the advice. Now onto the next drama! EDIT: I looked at lots of minor brand ~$450 pumps and decided a new Honda from a reputable supplier (who's experienced in sending stuff to Chatham Island) was worth double the money. Consequently the Christchurch Stihl shop got an order for a really light-weight Honda WX15 tonight. The dudes from that store come over here annually to shake hands and peddle their wares so it'll be easier to sort spare parts etc. when things go bad. I'm also guessing the Honda will be quieter than the Xlyongikin/Vellisuckymota equivalents, and at only 10kgs the Honda should cost less than $60 in freight and may be here on Thursday. TBC https://www.hondaoutdoors.co.nz/wx15-portable-pump1 point
-
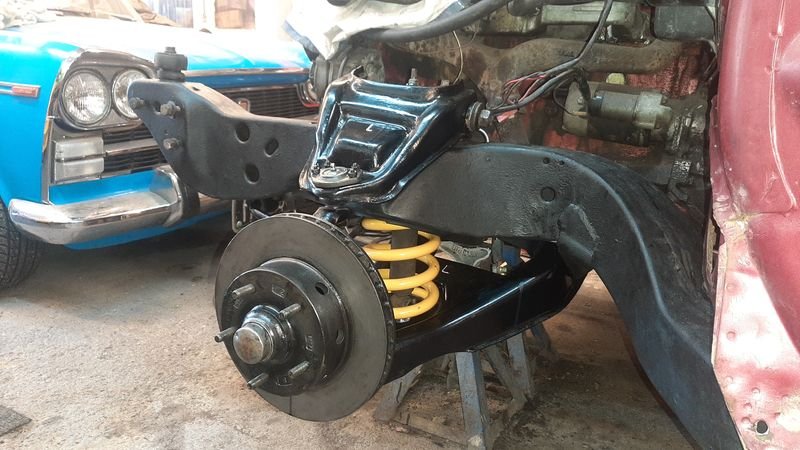
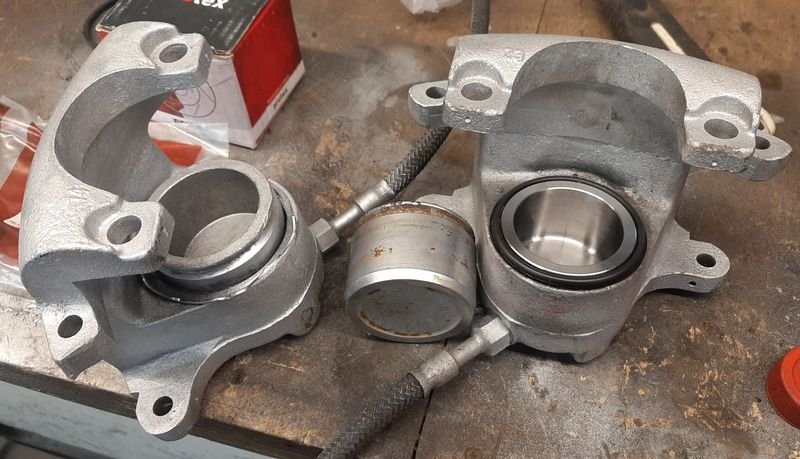
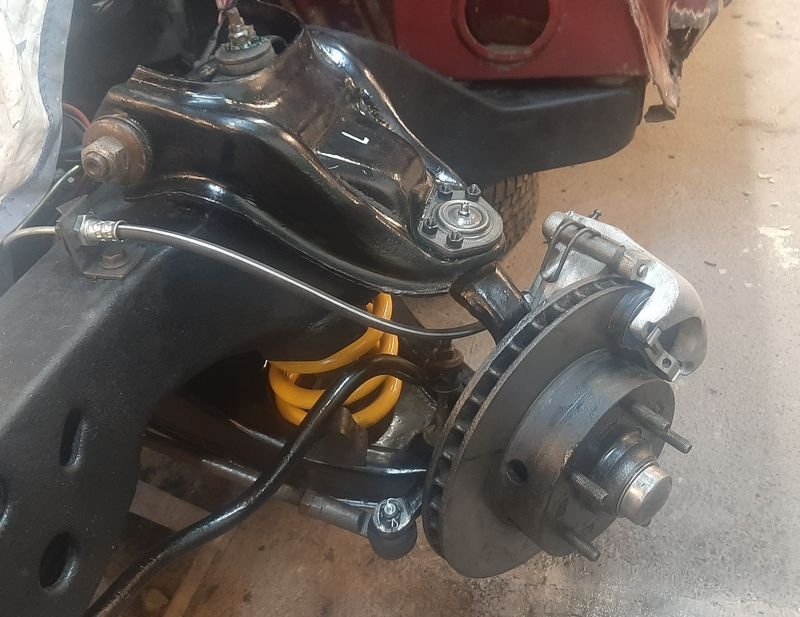
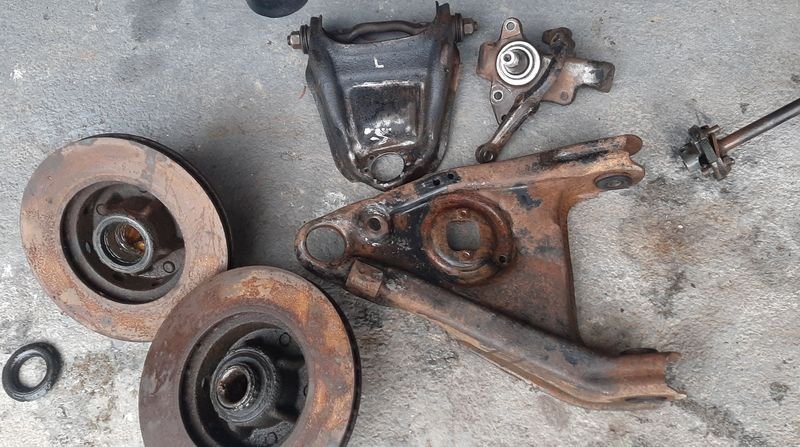
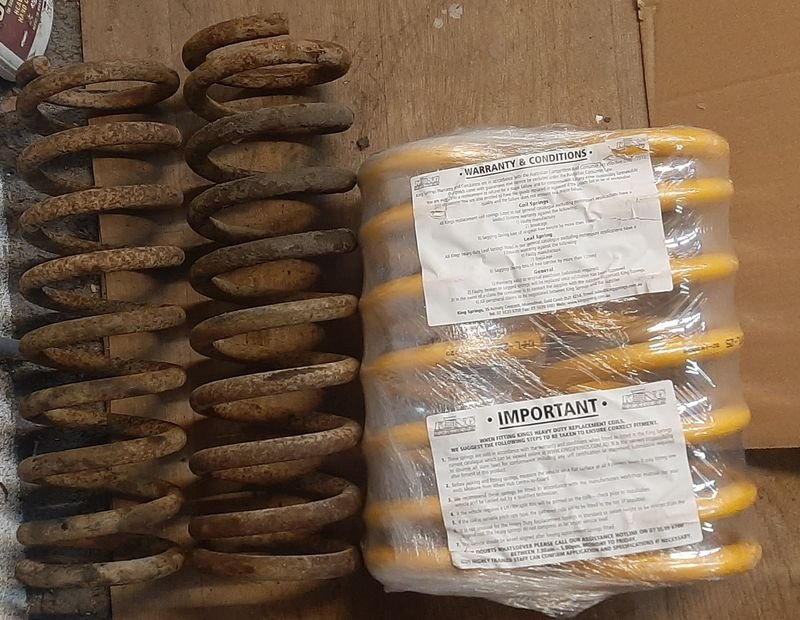
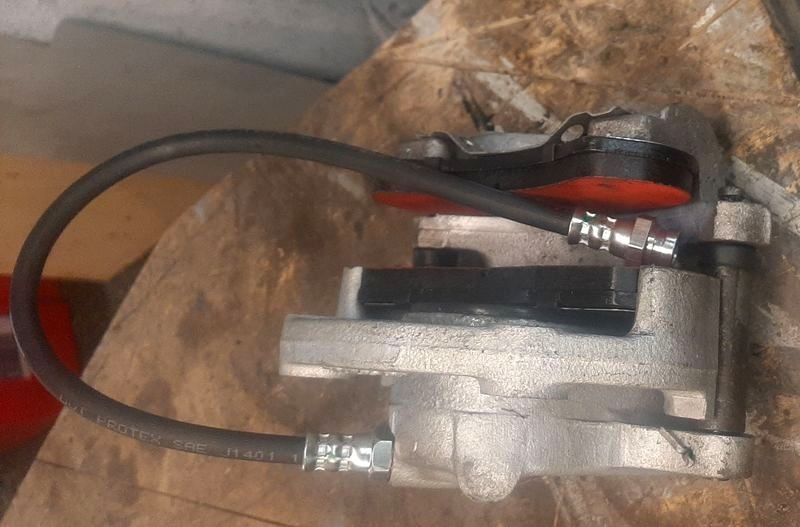
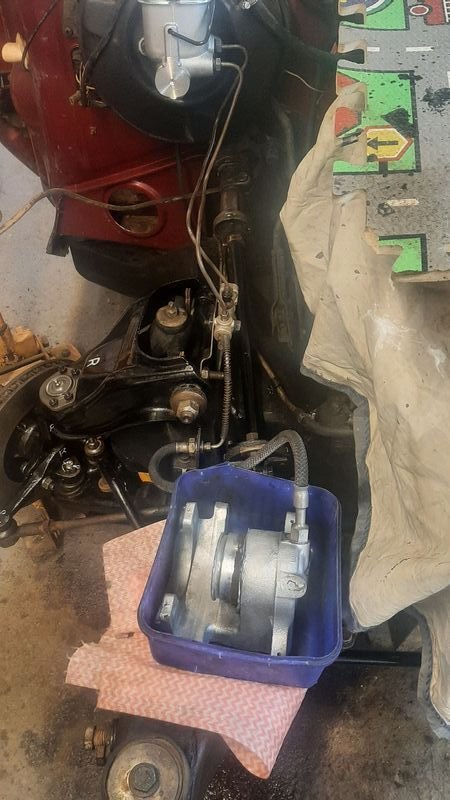
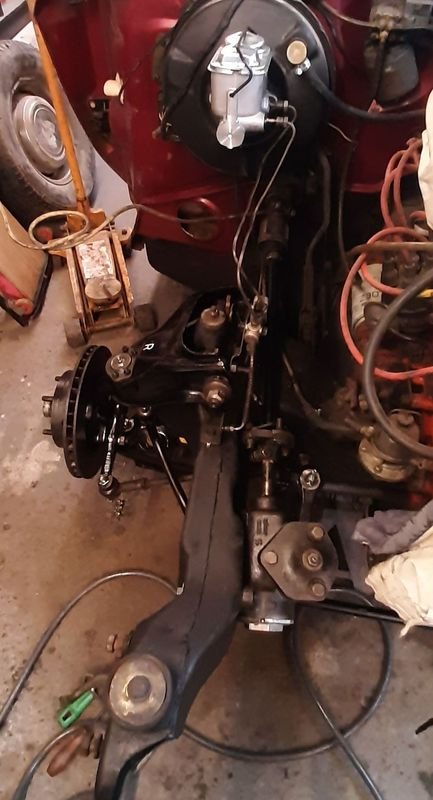
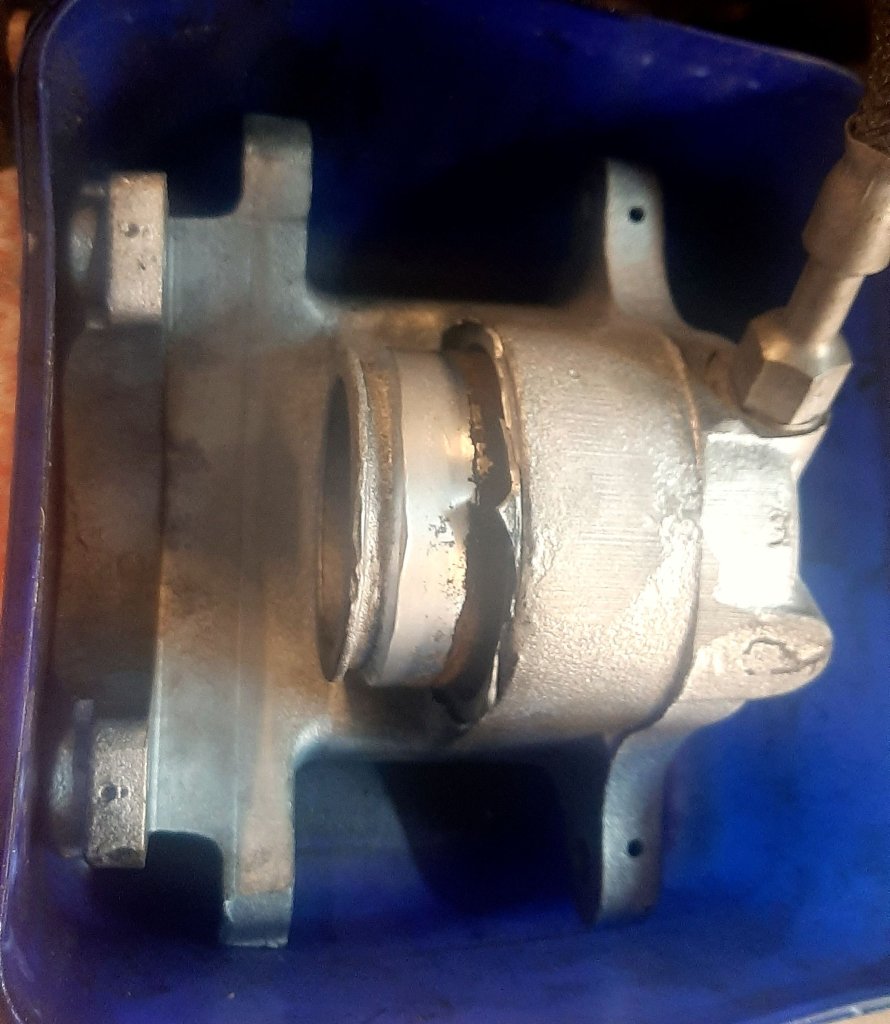
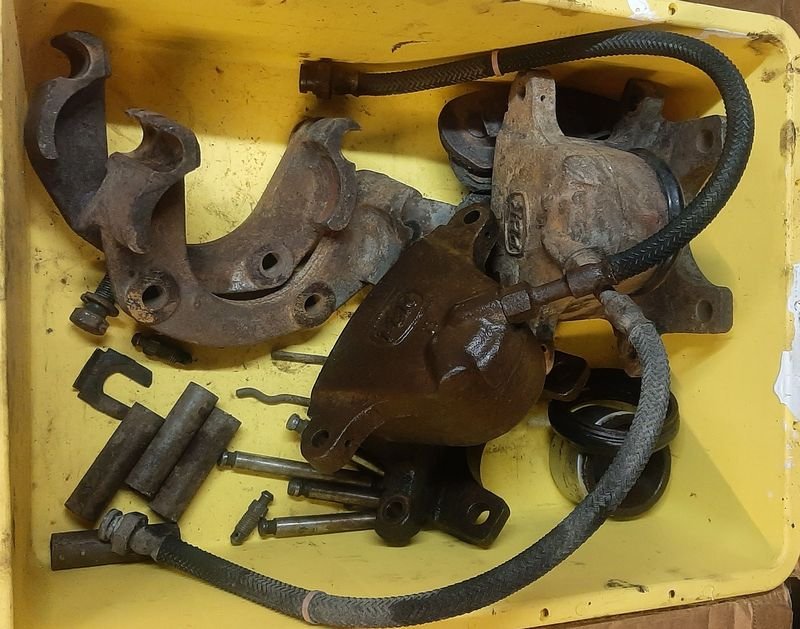
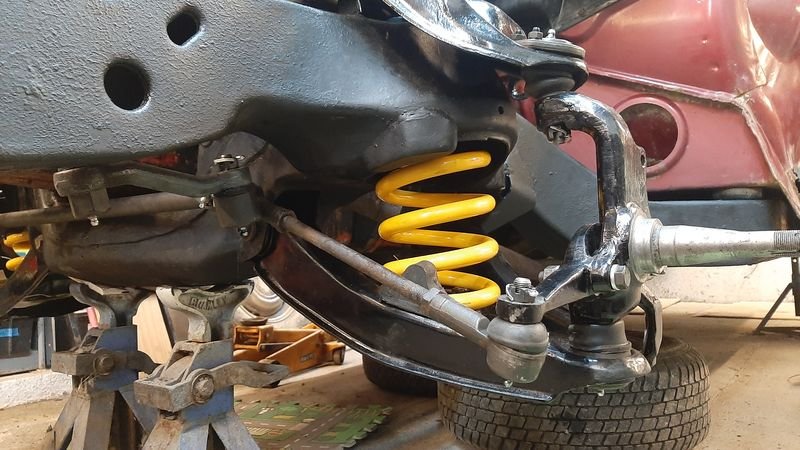
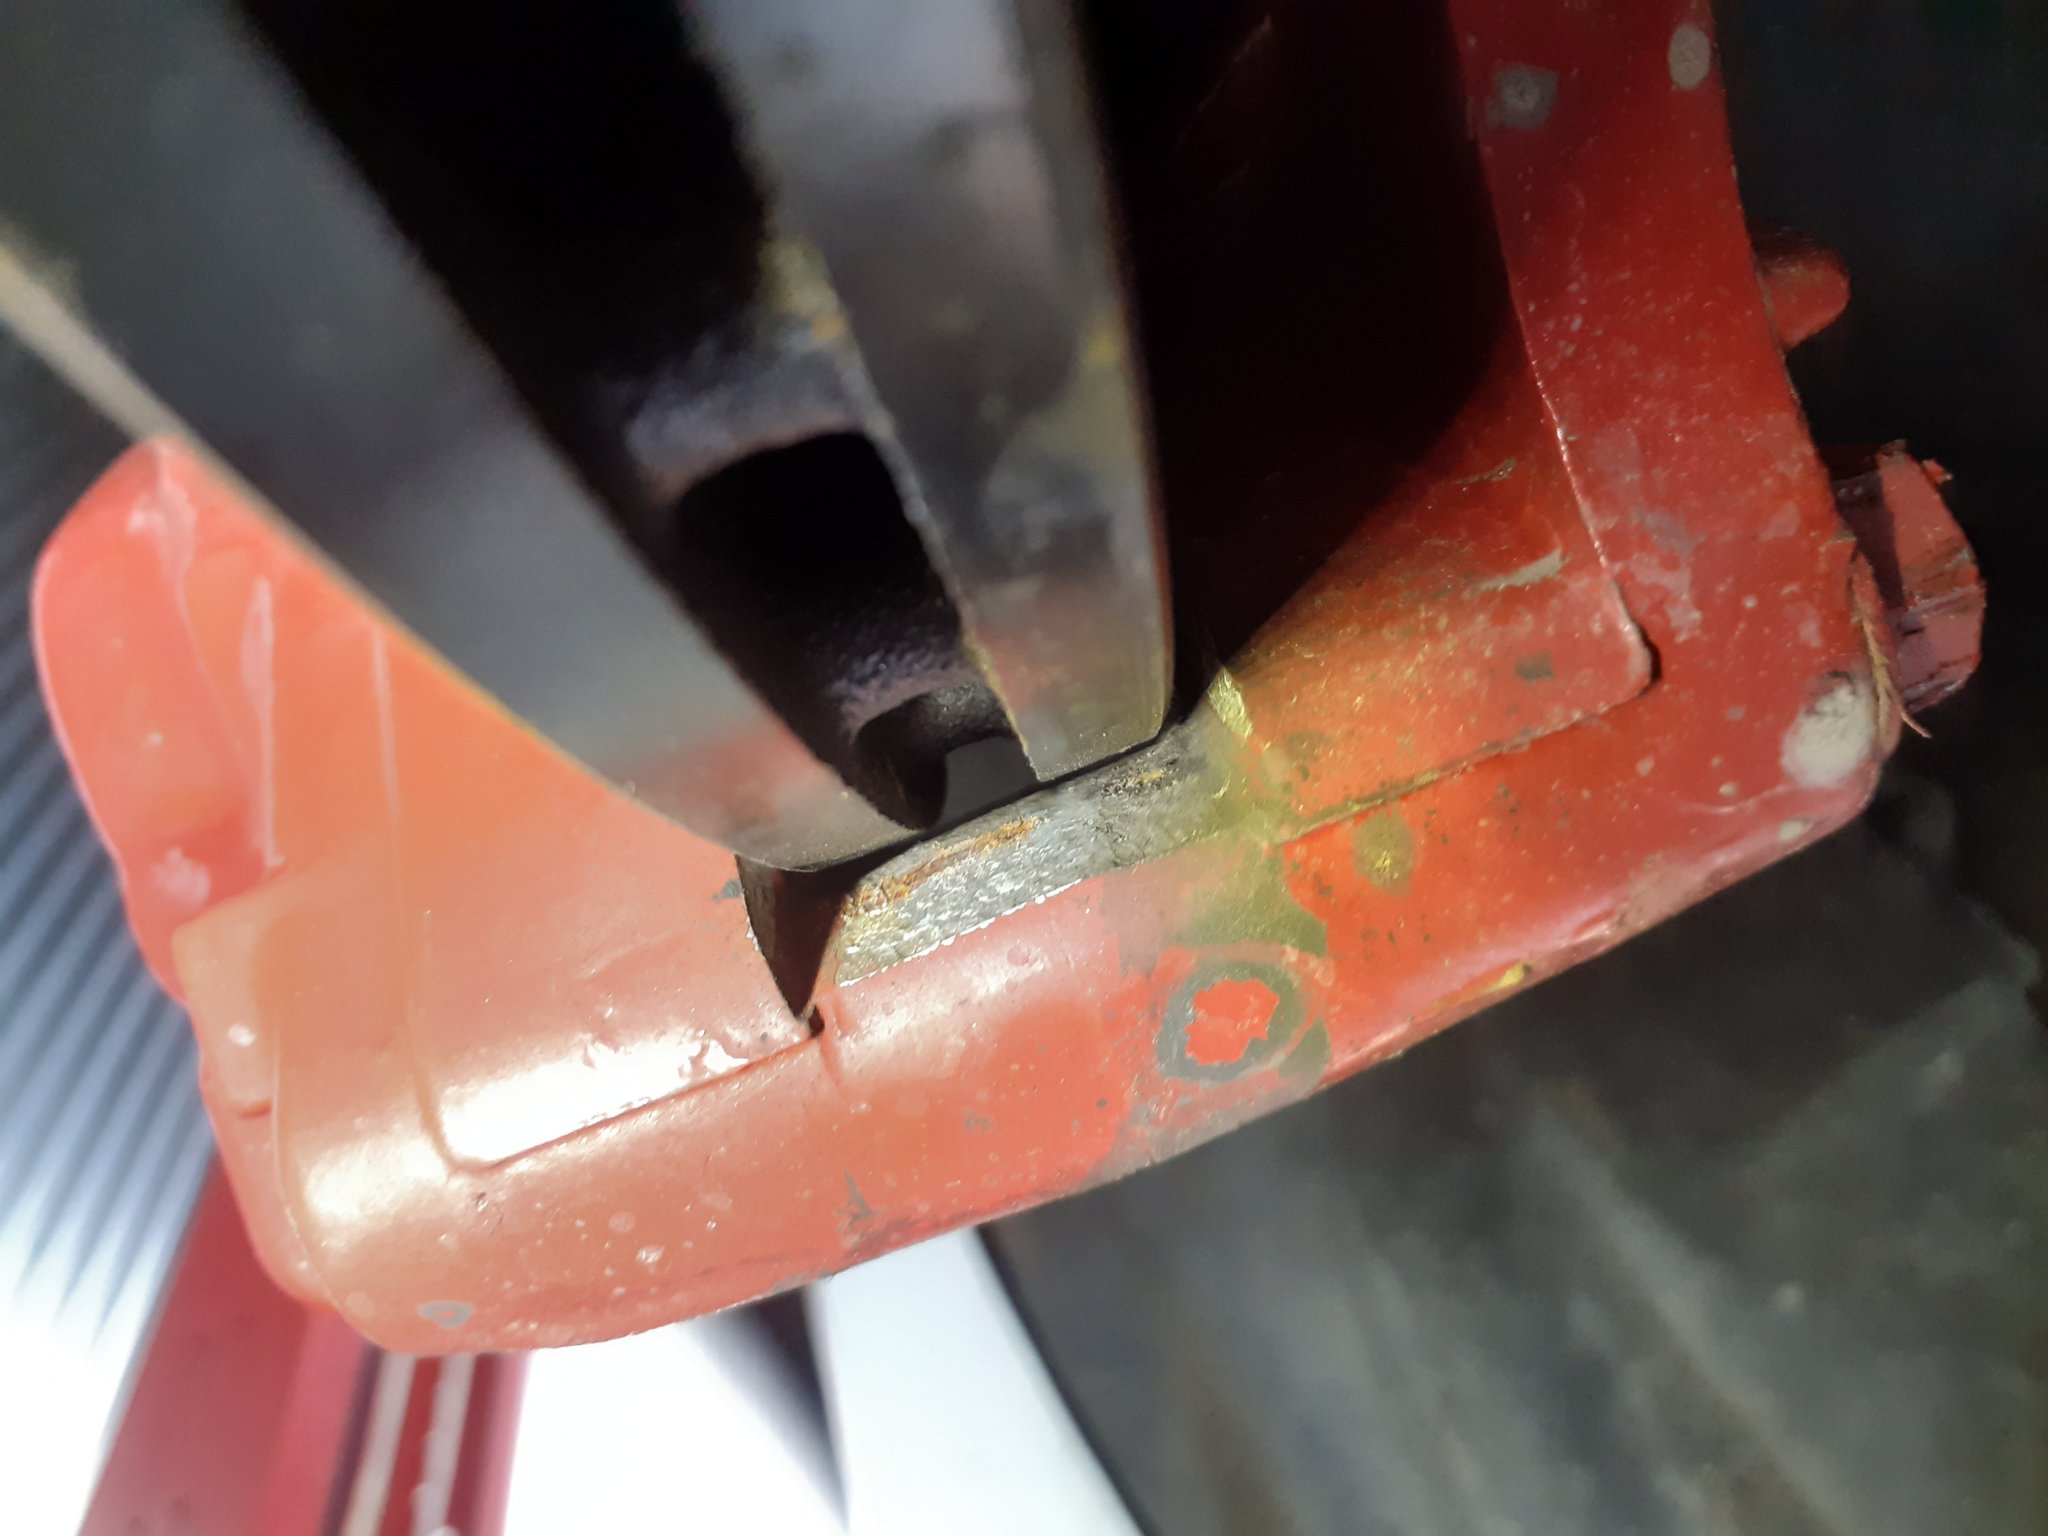
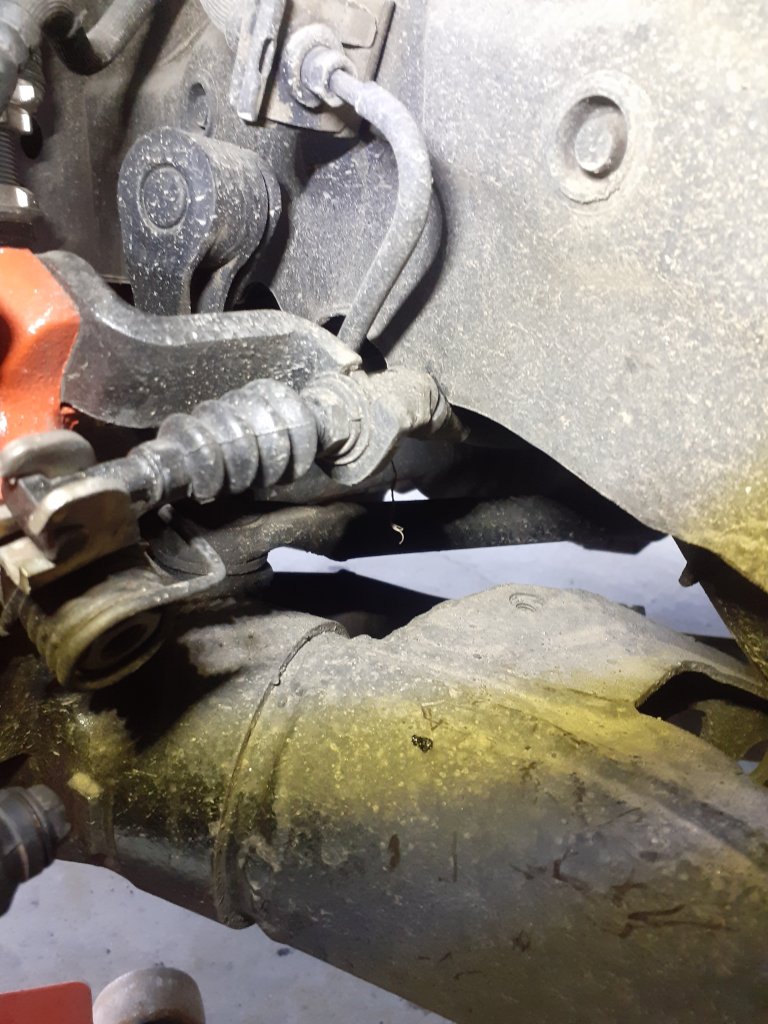
More reassembly and torqueing - its turning out so good! Next was to do much the same to the other side (so we didnt get the parts mixed up) and brakes. Despite the pad wear, the rotors look nearly brand new. I cleaned them up and also regreased the bearings which also seemed fine (made in japan so probably not original) and put new rear bearing seals on that are basically a big shaped o-ring. Not seen that style before. Im assuming they leak grease everywhere, along with the ball joints and tierods. (TADTS) Finally, onto the calipers. PBR, cast iron, single piston. Everything was stuck but after a week in the exoff bath most of it came apart, though not without some persuasion. Much swearing and beating was employed but it all cleaned up nice and went back together smoothly However, both pistons were stuck. One eventually came out with the air hose (always put a block in to catch the piston!), after a week in evaporust. Bore was ok so i rebuilt it, new seals and piston, flexi and pads. One done one to go. The other one wouldn't budge, not even trying to push it in a little bit on the press worked. Basically needed more pressure so we reassembled the brake system, including a new master and i bent a new hard line that goes under the engine. The line looked a bit rusty, but on inspection was probably fine from that perspective but, glad i did anyway as it had been dented and pinched quite badly, but that damage was hidden by grease and grime and the tabs, all on on the back of the crossmember, maybe it had been backed into a log or a plank or something. Anyway, new hard line made reusing the old nuts and line left over from the 1100T van. All the steering bits back in too, hooked everything up on the other side, and half bled the master, then the lines, then the other caliper, and then after a few pumps by the lovely pedal assistant, the piston began to move out! YUS. Yep, that will hold it. Doesn't take much rust in tight tolerance to freeze things, and that's quite a lot more than not much. However most of it wiped off, and didn't look much different from the other old piston above, but all new bits for this side of course as well. And new front springs while we are there, we went with Superlow for 6 cylinder cars, figure we can add spring mount pads to get a bit of lift if we need it, but its a bit harder to go lower if its not low enough... And all new front end. Need to remember to find at least a pair (a top and bottom) of the thick wire caliper slider clip things for the drivers side, (i think they are more anti rattle than structural) and to tighten the control arm bolts once its on the ground.1 point
-
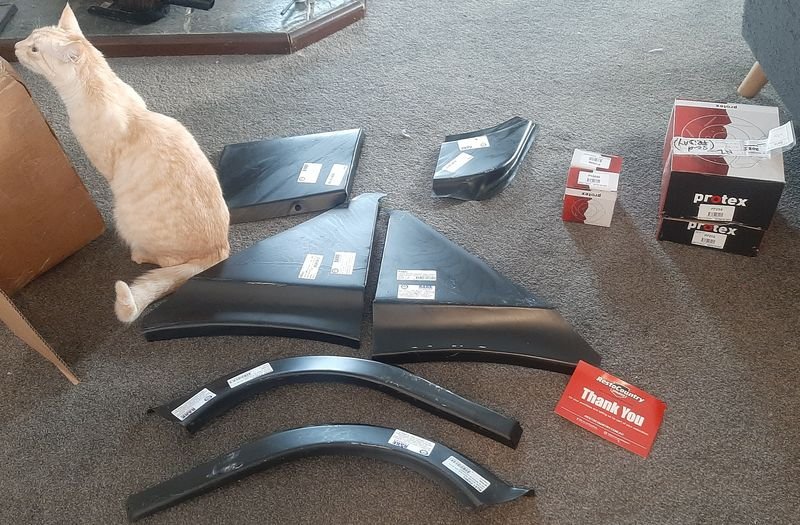
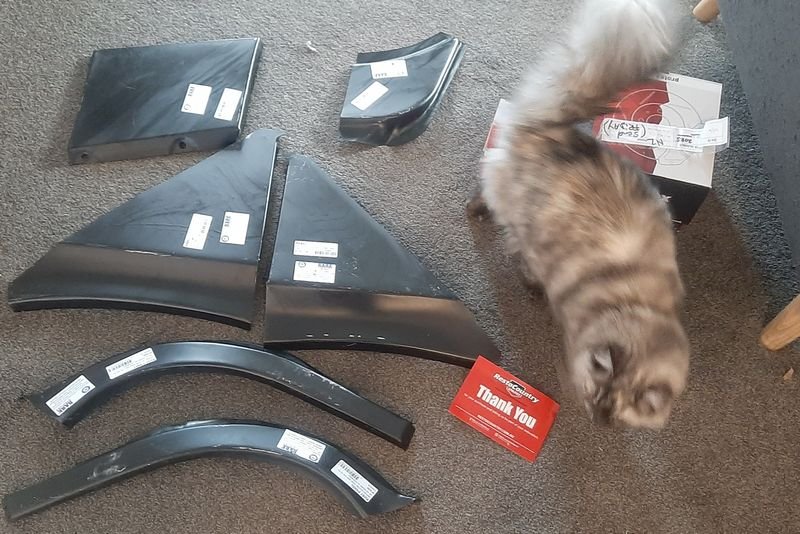
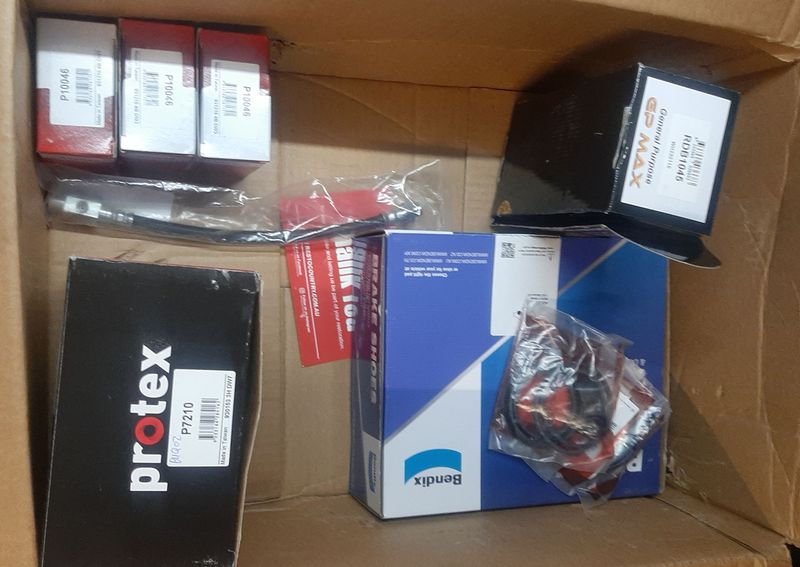
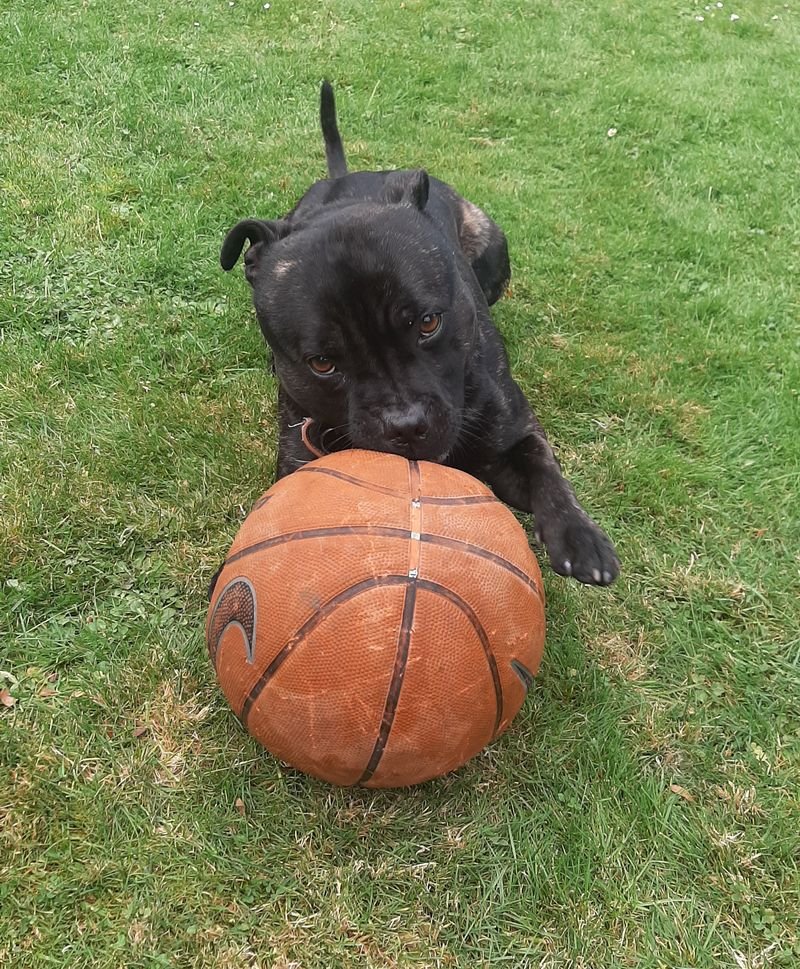
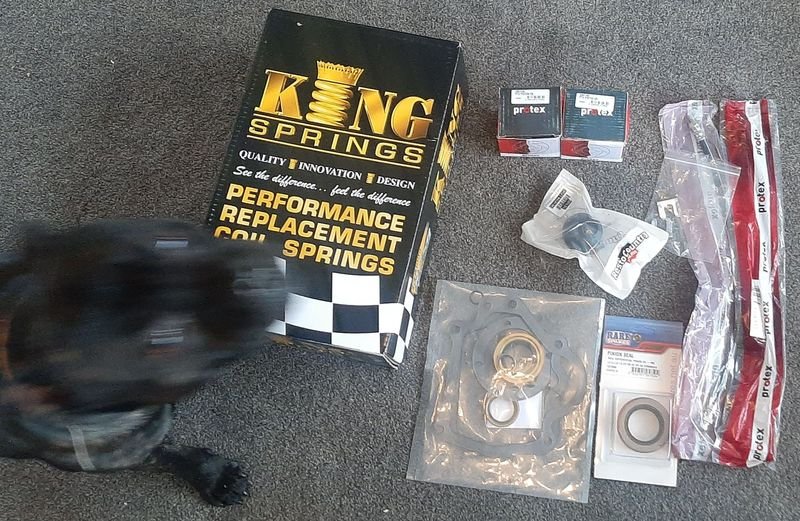
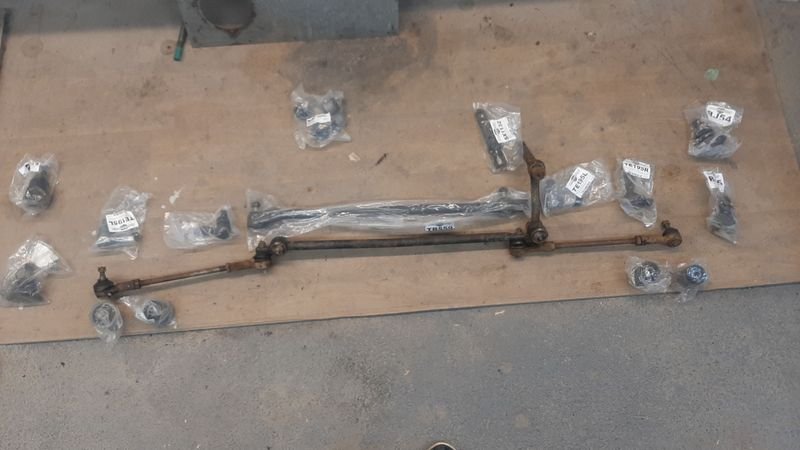
As mentioned upthread, Kirsty had been ordering parts and these had started trickling in, They of course needed to be inspected and signed off before use. A bunch of repair sections A bunch of Brake stuff More Brake stuff and some front lowering springs, some seals for the gearbox and diff Buddy was just staying temporarily, the cats graciously allowed him to think he was capable of signing things off, but to be honest he was more interested in inspecting his ball(s): also got a full front end kit with all the ball joints and tie rods and what not And, cleared out @nzstato back shelf of the last of his HQ bits (chur bo!)1 point
-
A bit more progress on the headers. With the engine back in the car the header as I had it was not going to work of fit even. There just is not enough space to get the tubes down in front of the engine mount. I had to re-design it with two in front and two behind. Still not a lot of room for them at that. They are going to have to have long primary tubes before I merge them 2 into 1 but I did read somewhere that it's better to have long primary tubes than short. I have run out of material now but at least I know it will work now and I can order what I need. Next it's back onto the fuel system which has taken a change in direction. Some of us just like doing everything twice. Of course that's so we can have twice as much fun. Yeah right.1 point
-
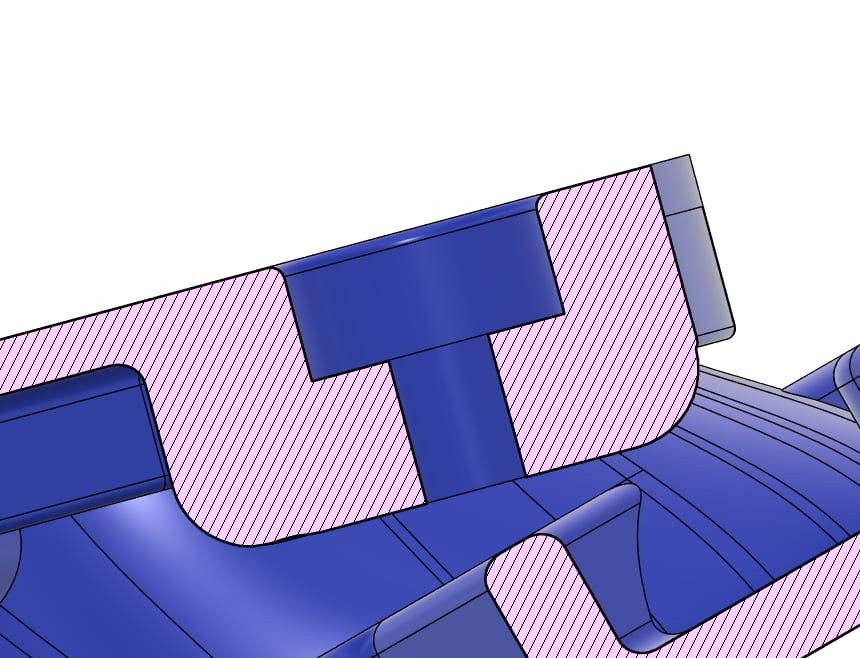
Alright so a few things learned from the printed manifolds. The throttles are held on with M6 bolts, and an M6 metric thread needs a 5mm hole to tap the thread into. So I made these holes 5mm diameter in the model, and had it printed that way. Unfortunately though I ended up fully stripping one of the threads out while being a noob tapping it. Thanks @flyingbrick for helping to do the rest, after I lost my tap before getting to the 2nd manifold... I've been a bit concerned that given the way these are printed. Any outside surface of the part is right on on the border of "stuck together" or not. Any surface layer might be a little weaker than the inside of the print that is fully printed on all sides of that material. So when I have a 5mm hole printed, 5.25mm or 5.5mm might be "weak" material because it's close to the edge/surface. (Not actually sure if this is true, speculating) But if that is the case, it's horrible news for tapping into a hole that's already the right size. So next time I will print the holes at only say 2.5mm or 3mm. Then drill to tap size, then tap. Also, although my flange is fairly thick at the point where the throttles bolt on. Which is good for overall strength. Since there are recess needed for the dowels in the throttles, the actual threaded portion is only about 5mm thick / half way down. Which I dont think is enough for aluminium that is going to have bolts winding in and out of it, on a semi regular basis. For the sake of a few extra bucks, next time I will run any threaded sections for as long as possible, ideally right through the model. To put my mind at ease for these existing manifolds, I've loctited in some threaded rod, and have added a nut to the underside to add a little more stability to the thread. Yes I will tidy up the cut ends... I still need to get the fuel rails machined. We can use the same programming that was loaded onto Dad's CNC for the previous rails we drilled. However the CNC is out of action at the moment, some sort of power supply problem which is a pain. I also almost forgot that I had printed a little throttle cable bracket as well. I nearly threw out the box while it was still in it. With everything all together, I think its looking a bit better. that before. Definitely need to swap out the black trumpets though. Oldschool drag day is 144 days away, and I'm determined to make it this time. Need to get some of the critical remaining parts (like the firewall) started/finished before then! And hopefully no more engine blow ups... Will most likely be taking it to get tech inspected, it's unlikely I'll have a wof/reg/cert by then.1 point
-
16 month update. As mentioned elsewhere, gave it a wash and went for a blast. Thought I'd better do a bit more cleaning,which, as you may have guessed over the years, is not exactly my "thing" but I pulled the interior out and scraped some crap off if. Also, the parcel shelf has been bugging me as it is cardboard & has mostly not been in the car. I got some vinyl & El Danny's Trim Shop was open for 15 minutes. Not much of leap forward, but it all helps. It's at the front of the barn so I'm going to use it as much as poss this summer. Thinking about cutting a coil out of the springs which will drop it about 40mm & putting a big single back-box on. We'll see.1 point
-
Helped a mate make his tiny house, when you plan your cutouts if you care what it looks like see if you can terminate the cut on the same part of the profile on each side. We use shs welded in for framing windows and doors etc. It all went pretty smoothly except for him being the most accident prone person on the planet. Kept him clear of power tools, welder etc and he fell off the ladder whilst brush painting the frames after I had welded them in. His forehead no match vs the corner of the floor. Cue trip to A&E and some explaining to his wife.1 point
-
1 point
-
Mean, in a kayak + lab? thats him, hopefully you get in touch, really nice guy and good for a yarn or two. Spam sharns: He is bit of a humble legend of the area, years ago there was this thing called the World Heli Challenge, where snowsports folk would hang out in Wanaka to do silly things on helicopter accessed terrain. Rip Curl was key sponsor so for shits and giggles they added a surf day into the schedule, most of the crew were pretty accomplished surfers along with some token pros they brought over, it wasn't a token bunch of kooks being let loose on a gnarly west coast break, was lining up to be a pretty impressive day. We convoyed over to mussel point near Haast where a decent shore break was guarding access to the waves, a number of the crew got pretty beaten up just paddling out with the lucky few having a good time out the back. Without much fuss, Mark wanders off solo down the beach, few of the crew picked up and started asking what the old fella was up to so a few eyes were in his direction, he casually climbed out along the rocks, with precision timing slid into the water past the shore break and paddled out for a pretty decent wave, zero stress and effort as expected on his home break. Some pretty capable pro surfers got schooled hard and were left asking who the old guy was, good laugh for the locals when the reply was just some tradey who followed us here.1 point
-
1 point
-
Yeah, I've got an update for this old crate too. Got some overnight parts from Japan. All new water hoses ( except the rad hoses coz I'm a dork) & new strut top mounts. I made up the rad hoses out of bends & also had the rad re-cored because leaky. And, it turned out, blocked solid. So all fitted & it now stays cool, doesn't leak & doesn't crash around at the front. I have plans for it though & I intend to implement them before a couple of local car shows in the spring. I've told Mrs Shuzz she's driving it coz I'm driving the Chevy. She looked worried. / pics of rad & Hako for Fred.1 point
-
@kyteler, thanks man. Brave pills swallowed, went for it. I found a little bit more filler in the lid than I would like but meh. / Never looked better.1 point
-
DREDGE.... It's finally made it down south. Now, where'd I put that bloody boot lid badge ?1 point
-
Morning campers. I had got to the point where I was pretty sure I wanted a Sedan more than a Coupe. I then asked David to send me some pics of the one at Classic Car Nagoya. This was the first, slightly underwhelming one he sent.. After that he sent me about a hundred more from every possible angle. It was a very solid looking but rather stock 2000 GT with a GT-X (twin carb) engine, and the 'wrong' type of Watanabe's. The price ? A very reasonable 1,300.000 Yen. I decided that at the price I couldn't really go wrong, I was still struggling a bit with the whole Sedan/ Coupe thing and that's where the name Betty came from. Please watch this.... Coupe's are Wilma Flintstone, Sedan's are Betty Rubble. David then sent me an email that would make my mind up. They had just got this in.... SSR's, L26 with triples, a bit scabby but as far as he could tell pretty solid. They wanted 1,800,000 Yen but I'd have to be quick. Nope, didn't want a Coupe. Looked like Betty was the one. Thankfully a couple of days later a hipster came in with a pocket full of cash and bought the coupe. Over the months I had got a good relationship going with David but still fancied getting an independent inspection done. Earlier I had spoken to a well known Import firm in the UK and the guy had said he would be happy to inspect a car for me. I emailed him about CCNagoya and Betty, said I was aware it would cost a couple of quid but could he go and have a look at it for me. This was his reply. Hi Dan, Japan’s a very expensive place to travel in, cost of a train there and back is roughly 350 GBP’s worth plus a day’s time and other expenses. TBH I’m probably not the right person to go see it as my time isn’t cheap for this sort of thing. Especially with Sterling being so weak right now it could get pretty expensive. If it were an order for a car it would be different as the whole package includes all of my time & travel to select a car, plus other associated work, but to look at a car alone – it’s probably not worthwhile in terms of total costs, especially if the car turns out to not be right. You’d then spend a lot of money for nothing. A 4 door’s not nearly as desirable BTW. Can’t fit the longer 2.8 6 cyl engines into those I believe… engine bay’s too short. Best ask ***** he’d know more of course, but I’d go for a 2 door if I were you… Best wishes, Oh well, thanks for that. At least I hadn't sent him all my money before to get a car. Gawd knows what would have turned up. At this point I decided to take a risk, trust in human nature and buy the bloody car. I sent Eleven British Grand half way round the world to a bunch of people I'd never met, only one of whom could understand me for a car I'd never seen and I still had no idea how I would get it home. Couldn't lose, eh ? More pics ! Next time.... Getting it back to Blighty. Prepare for high jinx on the ocean waves.1 point
This leaderboard is set to Auckland/GMT+12:00















.thumb.jpg.570970b401ac8d26ce9af7c1bf2bd8cd.jpg)

sm.thumb.jpg.5334c75b1841839b87699f22a92d95db.jpg)


