
Leaderboard


Popular Content
Showing content with the highest reputation on 04/13/24 in Posts
-
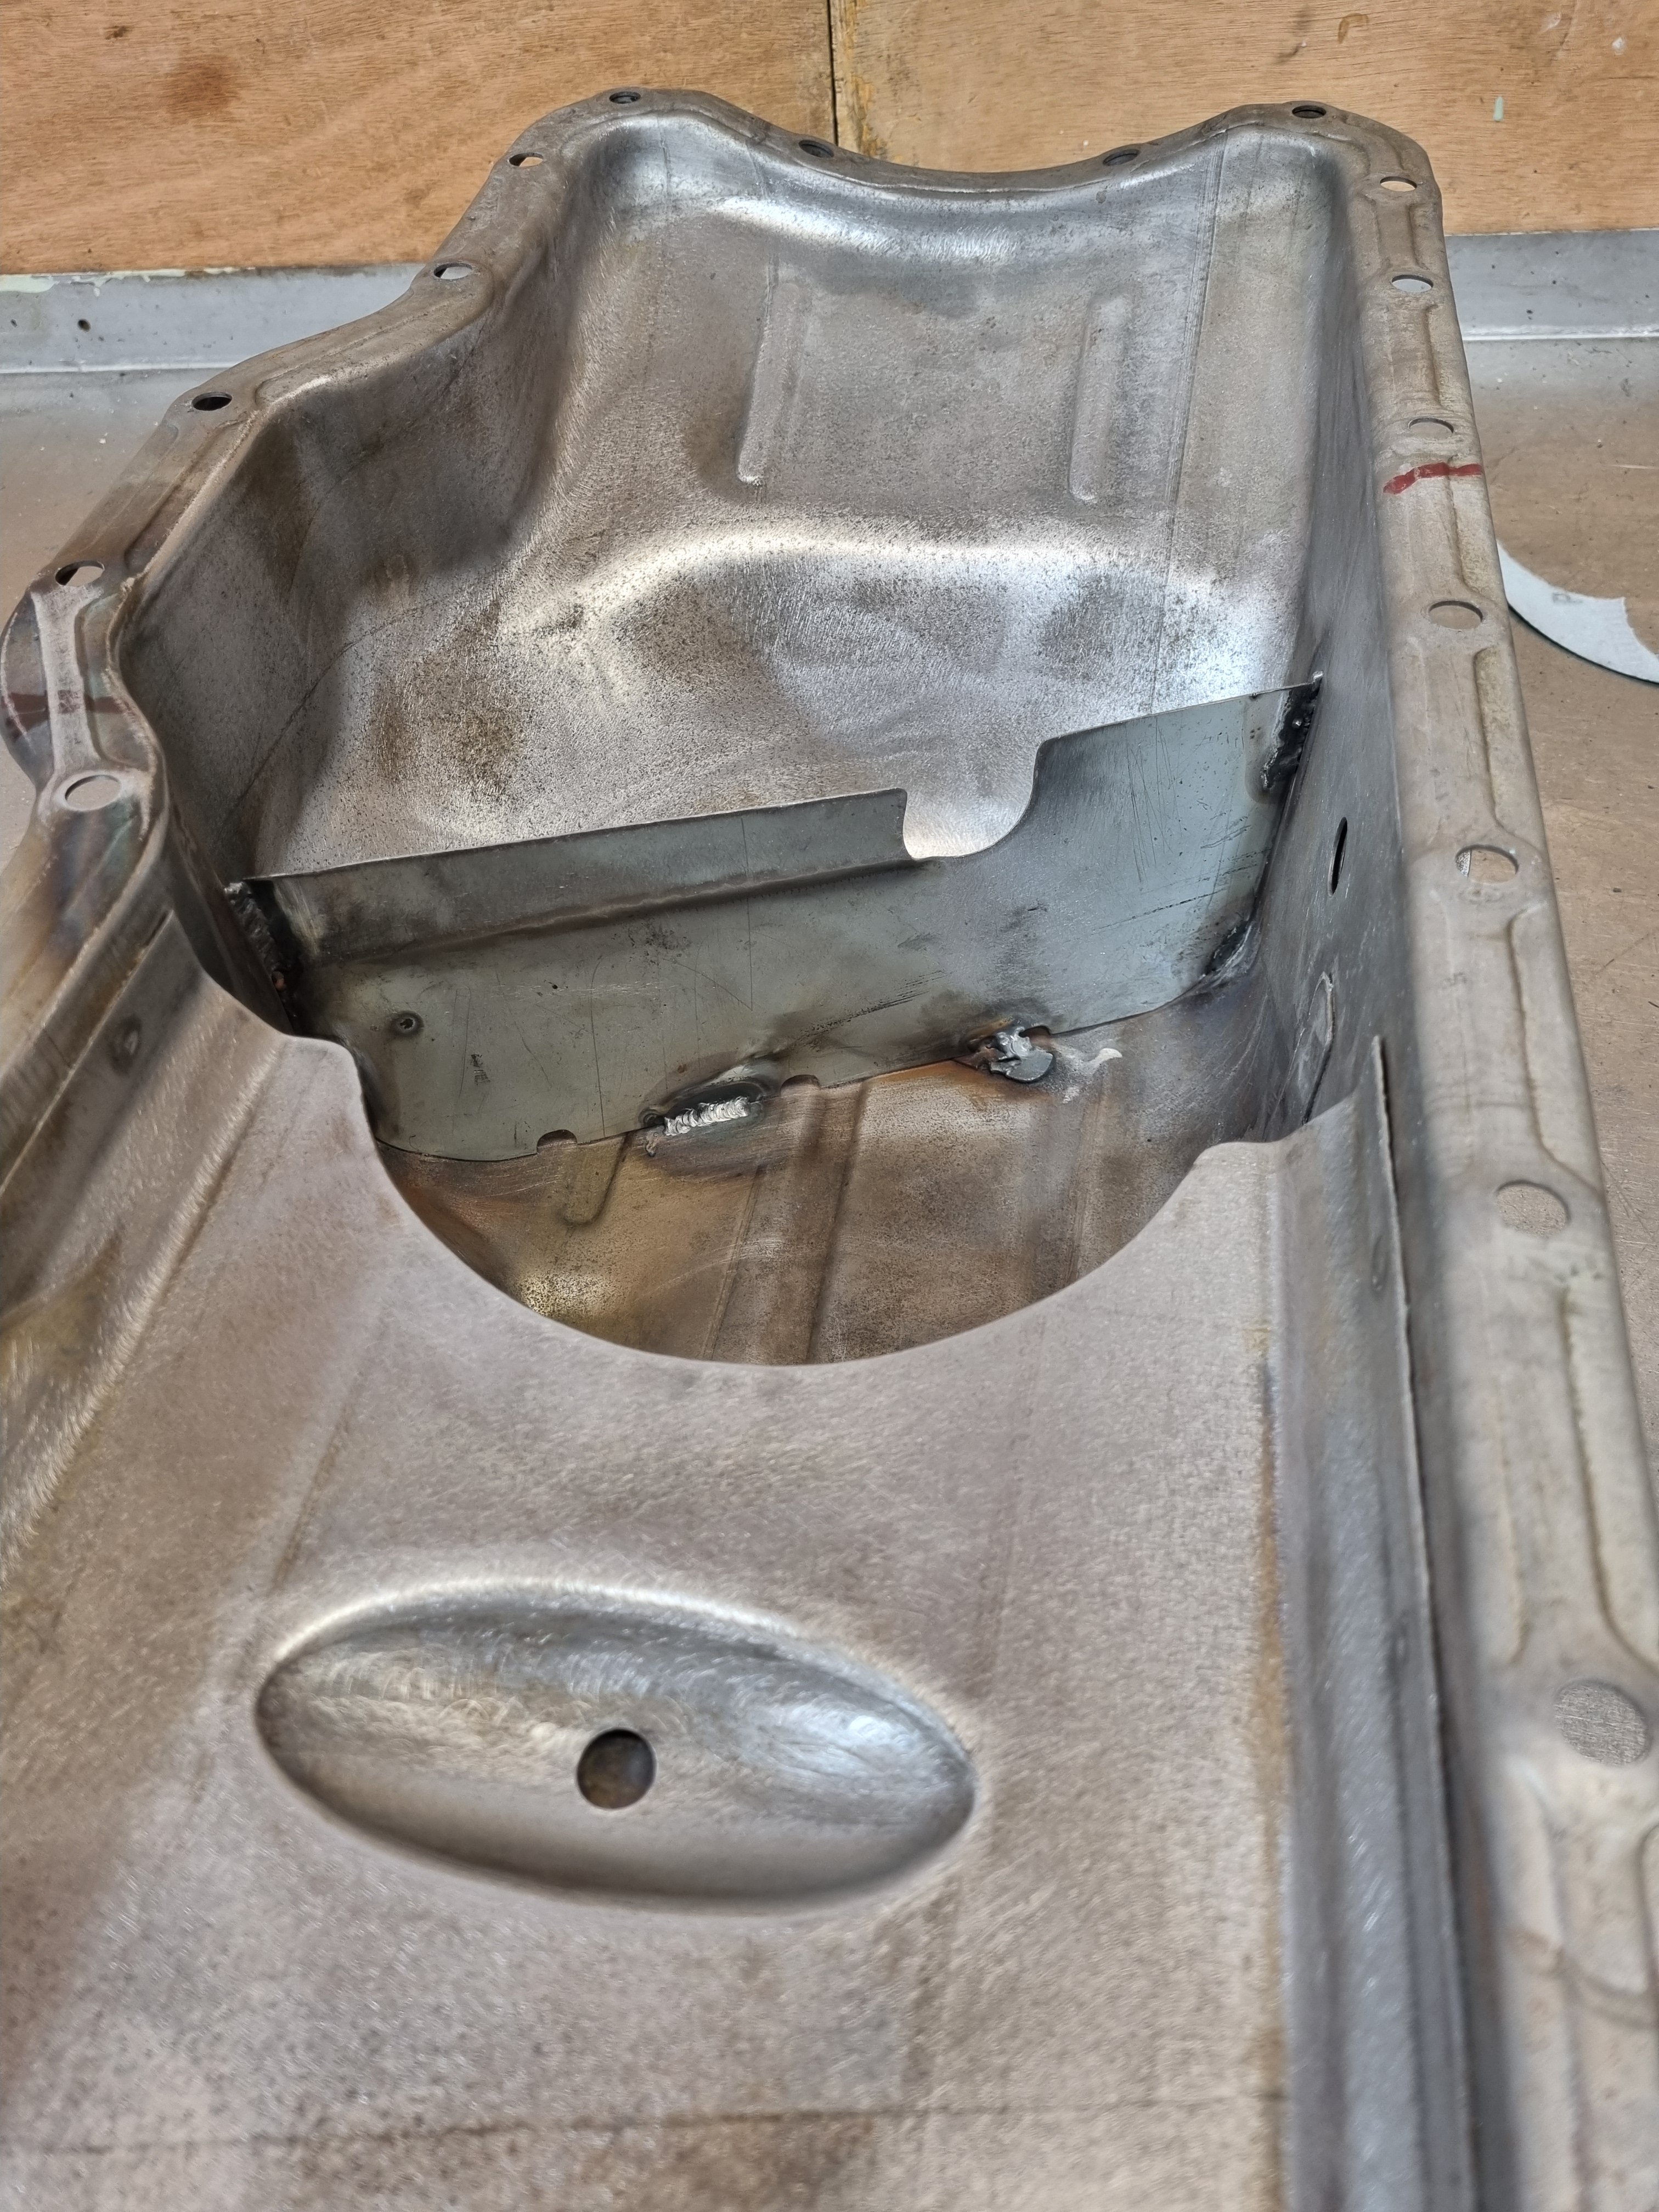
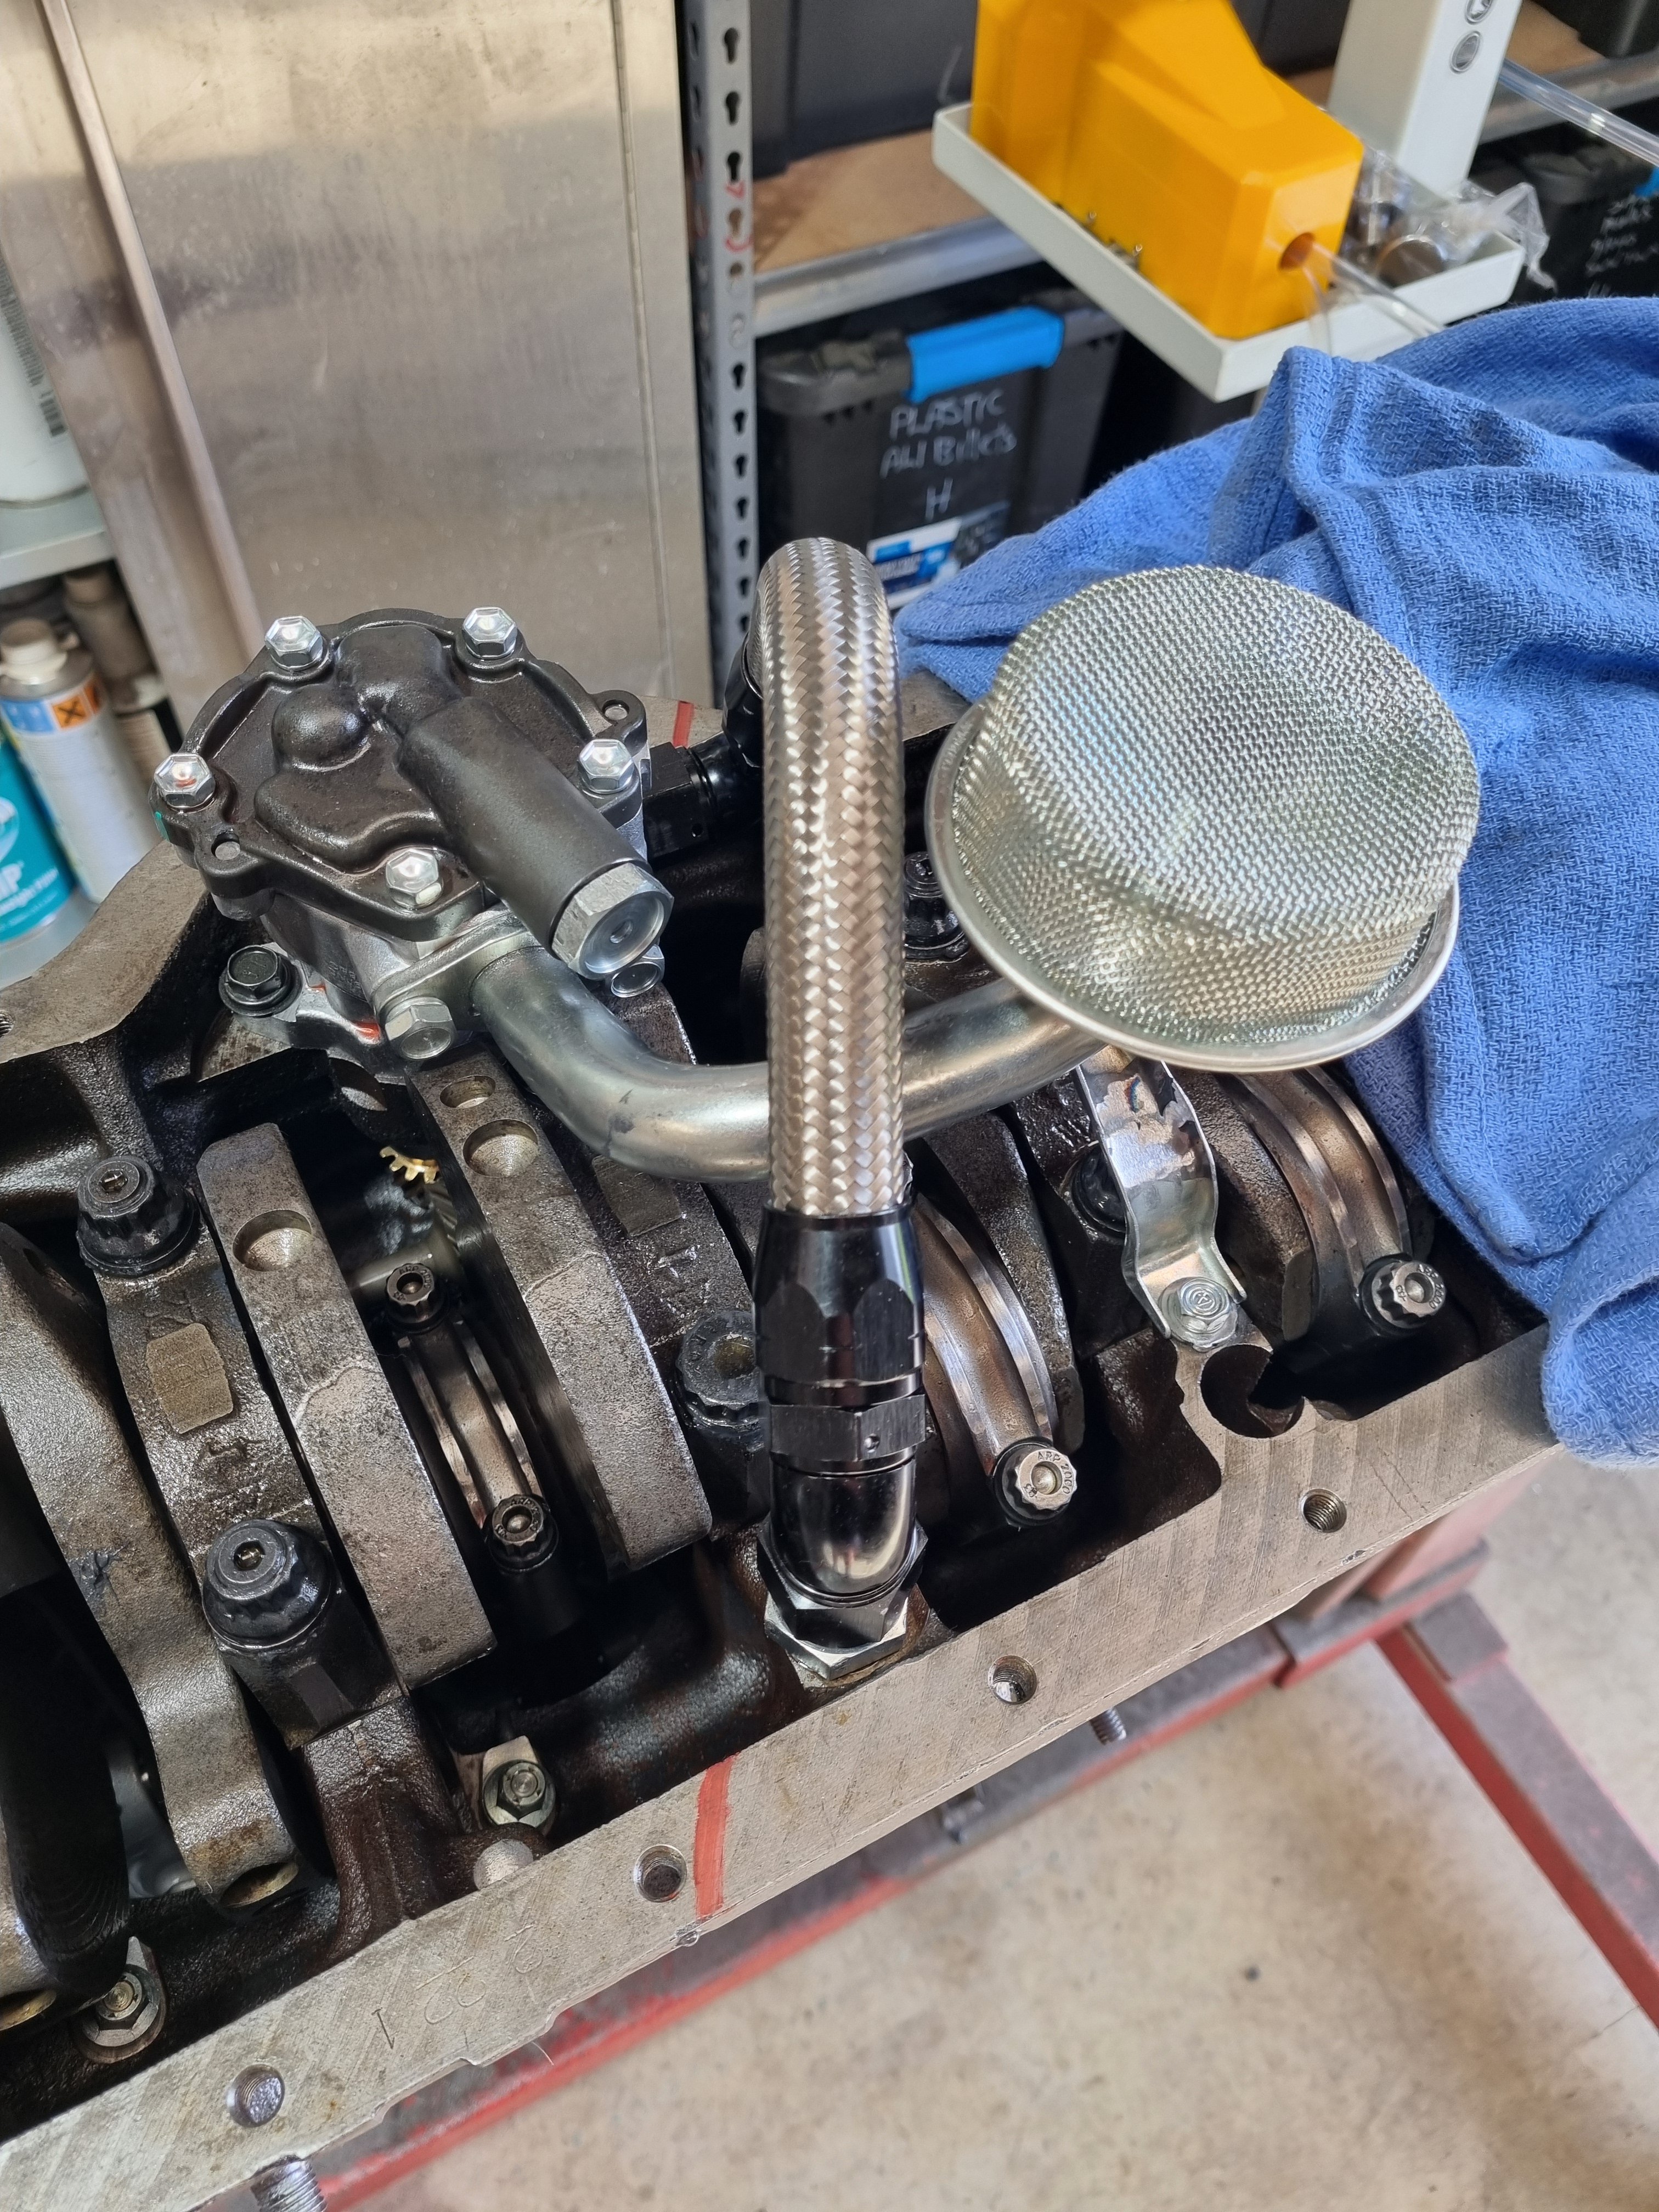
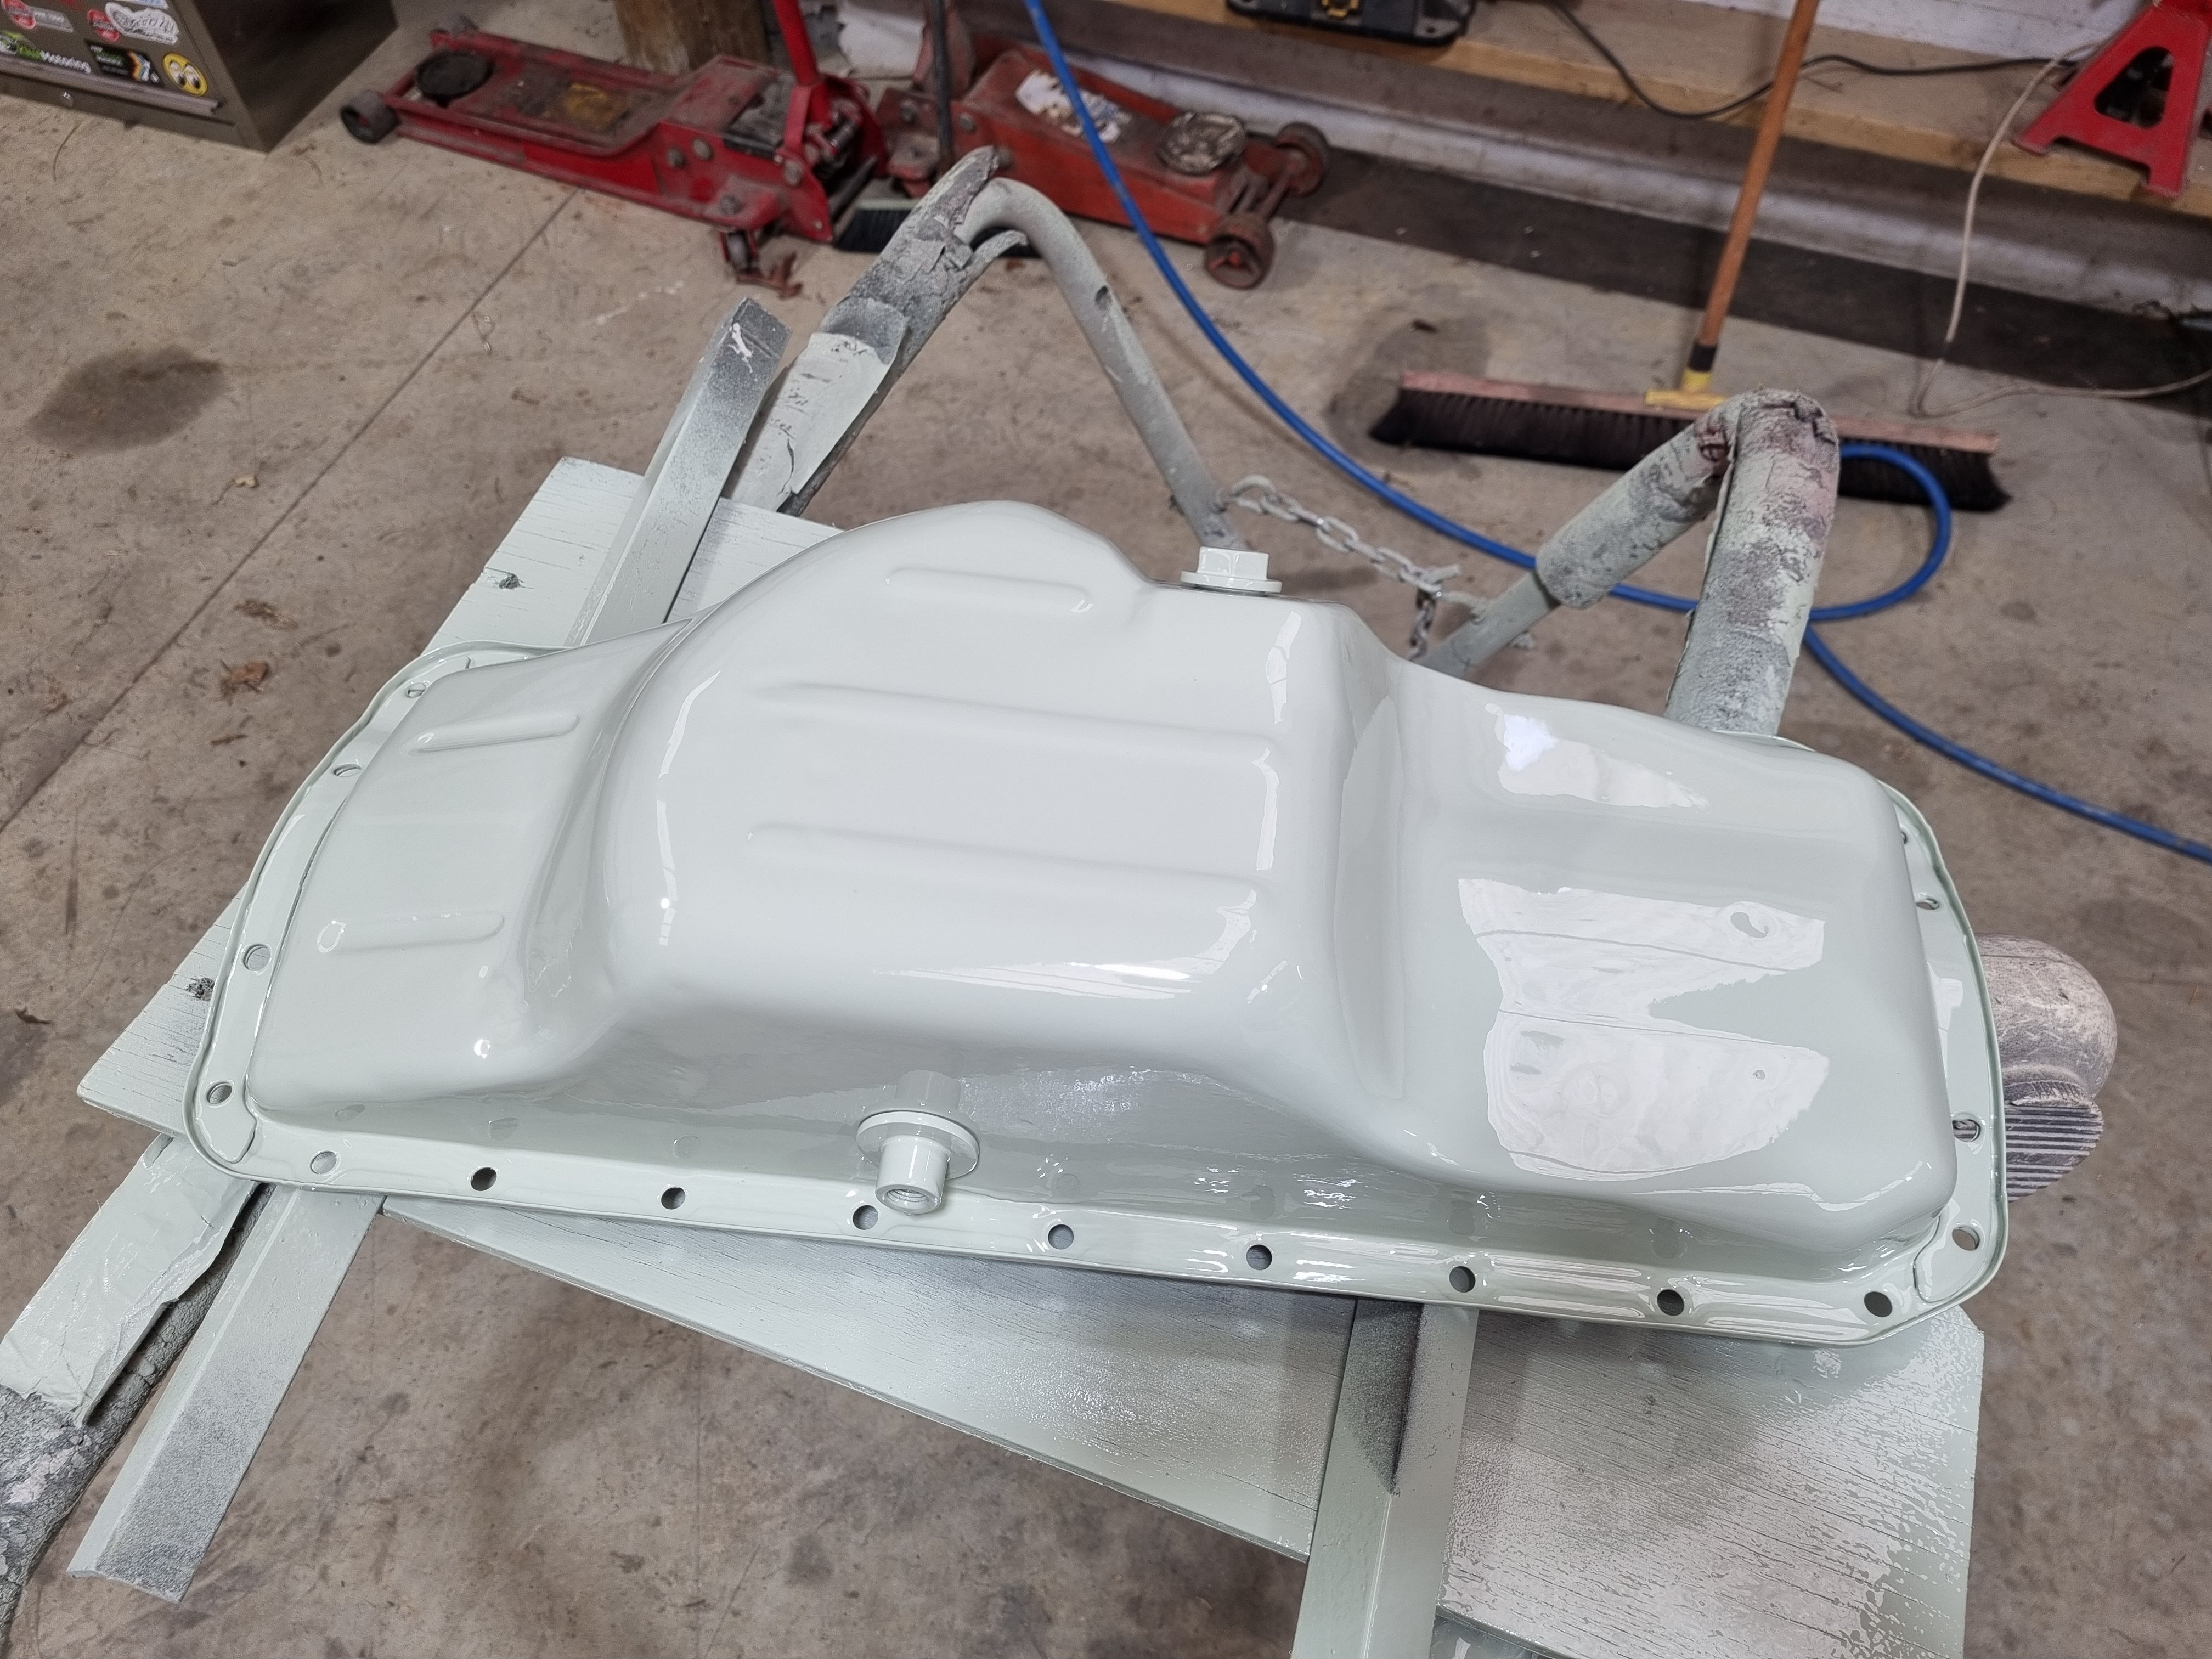
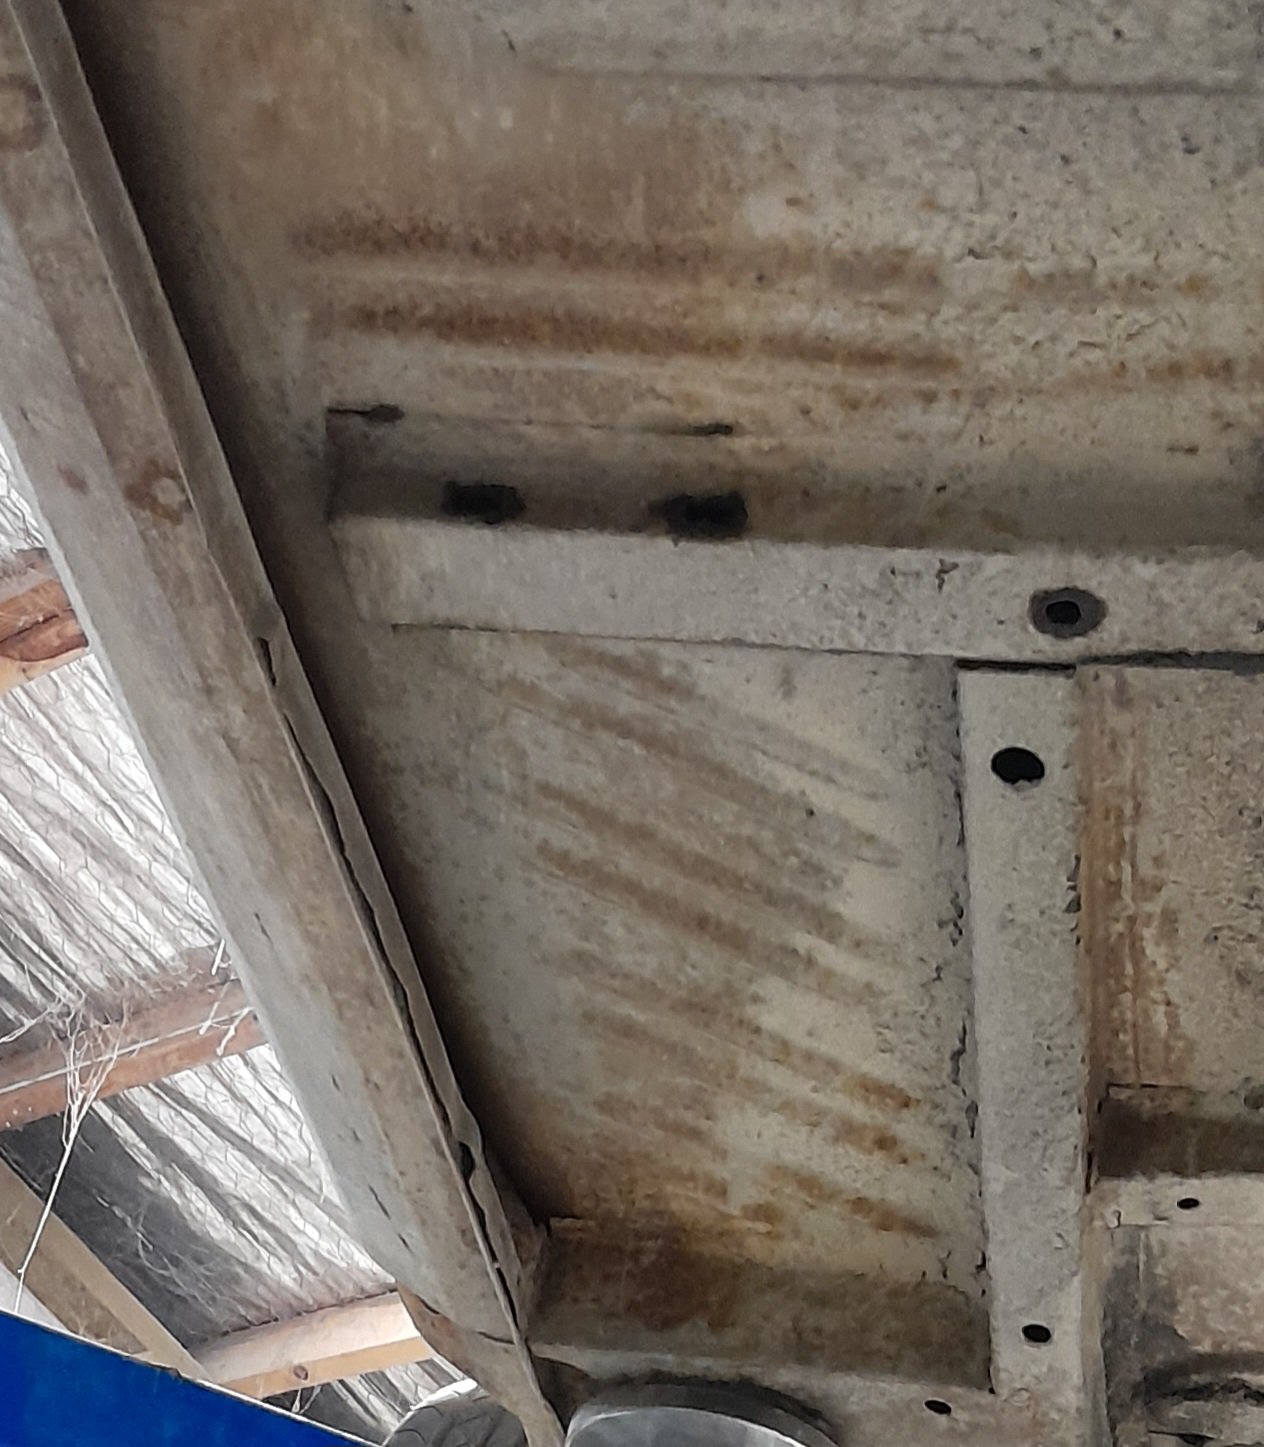
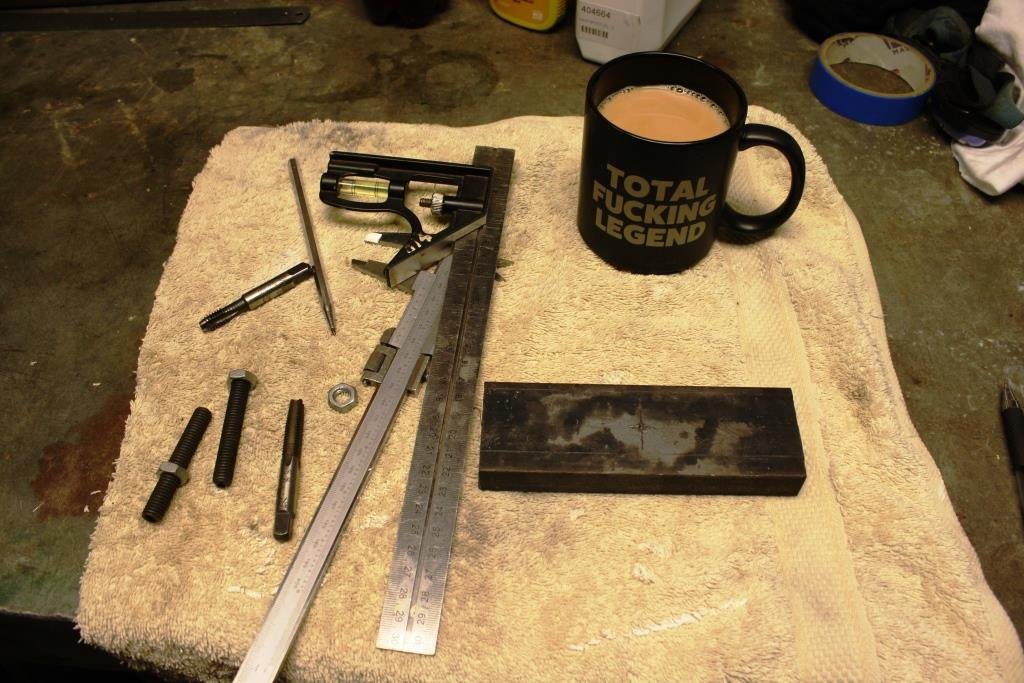
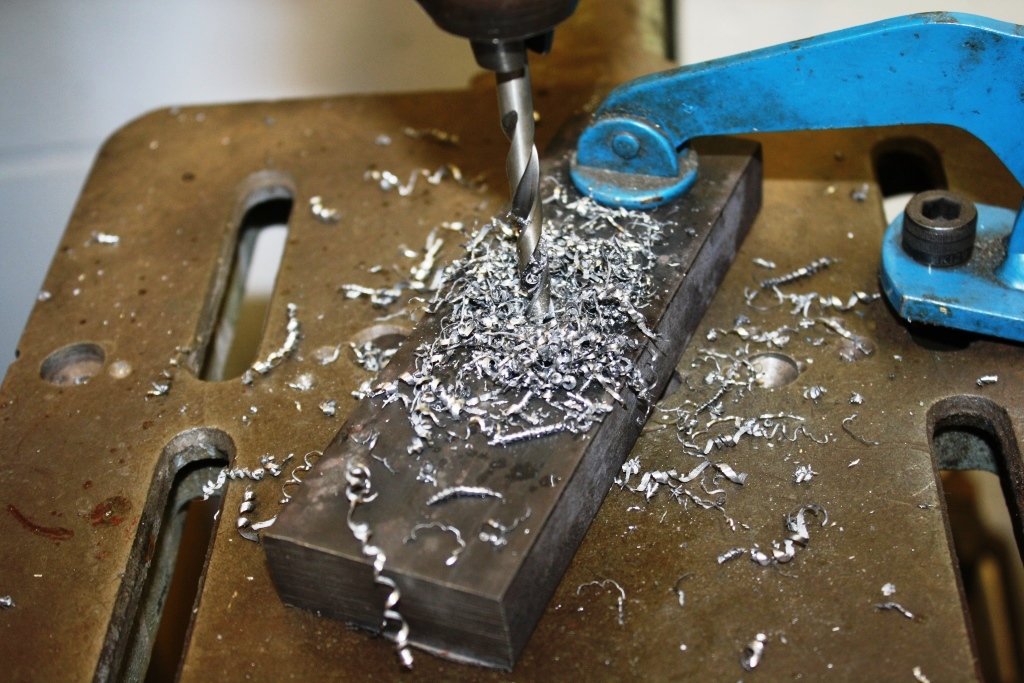
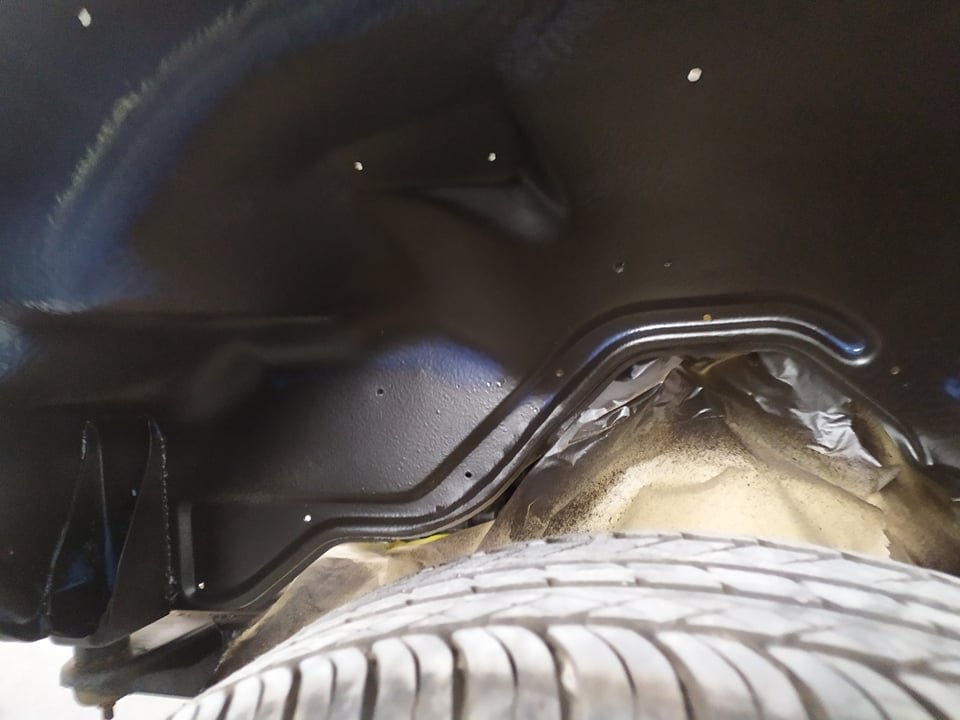
Sump baffle. Anyone who's driven the misery Inducing stock 4M will know that the stock sump baffle setup is a bit shit. You don't even have to be hard on the brakes to get the oil light to flicker on. And besides all that the stock baffle wouldn't fit now anyway. So I made a new one that might work a bit better to keep some oil around the pickup under braking. Let's not kid ourselves and think that acceleration is going to be an issue. It won't. The baffle sits across between the pump and the pickup. The red lines on the block indicate where it sits. Now I'm going to paint it
 11 points
 -
Been getting a bit done, cbf smacking out a big update right now. Couple weeks ago we got the bitch fired up. Thanks to the GC @fletch for his exceptional trouble shooting abilities.And timing light. Working on water pipes now so will hopefully be on to diff next Chur https://youtube.com/shorts/loj9hqDgwQE?si=C8Xhtq75FGZGLL2j10 points
-
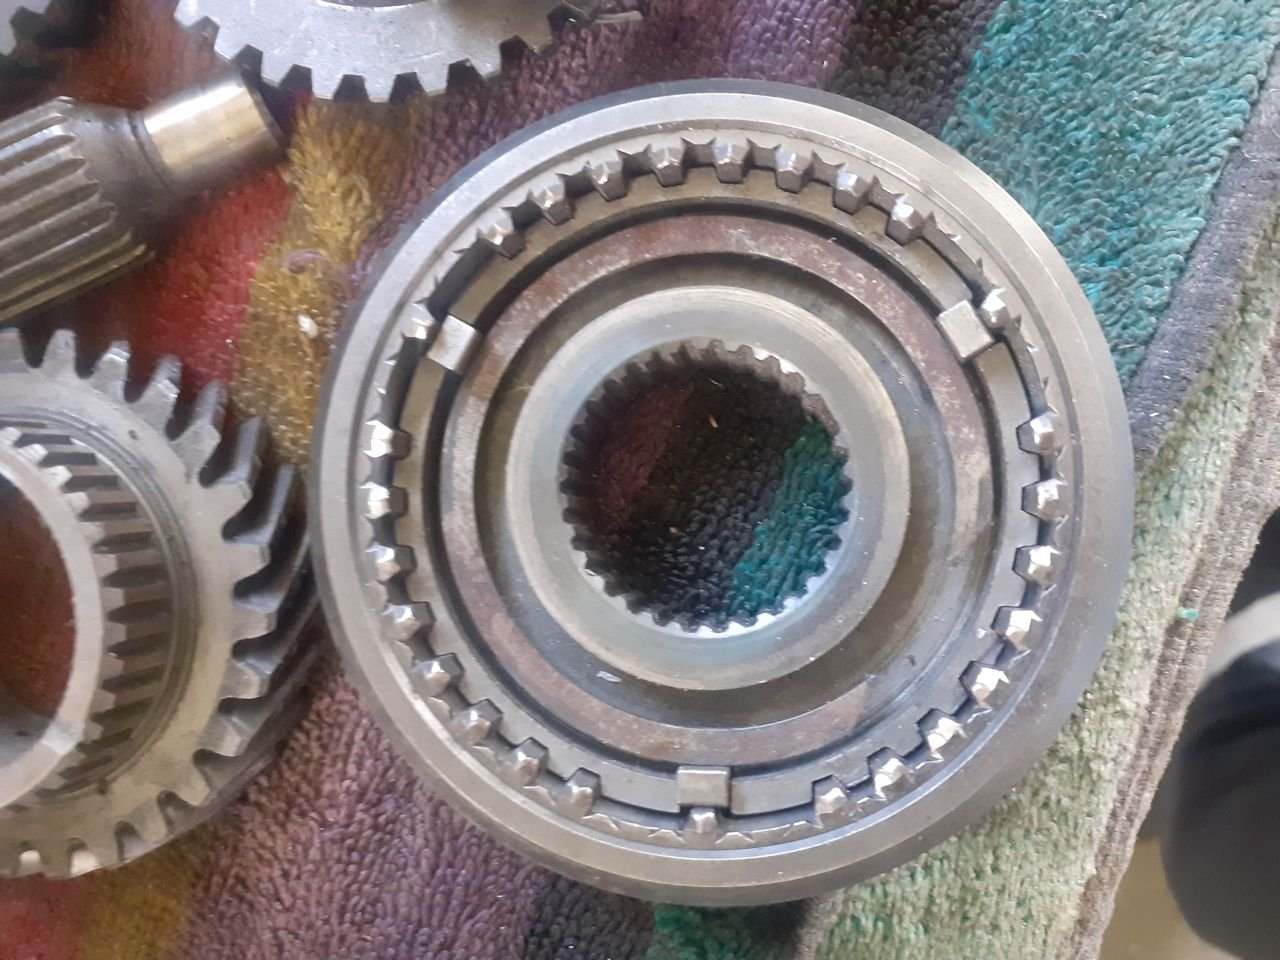
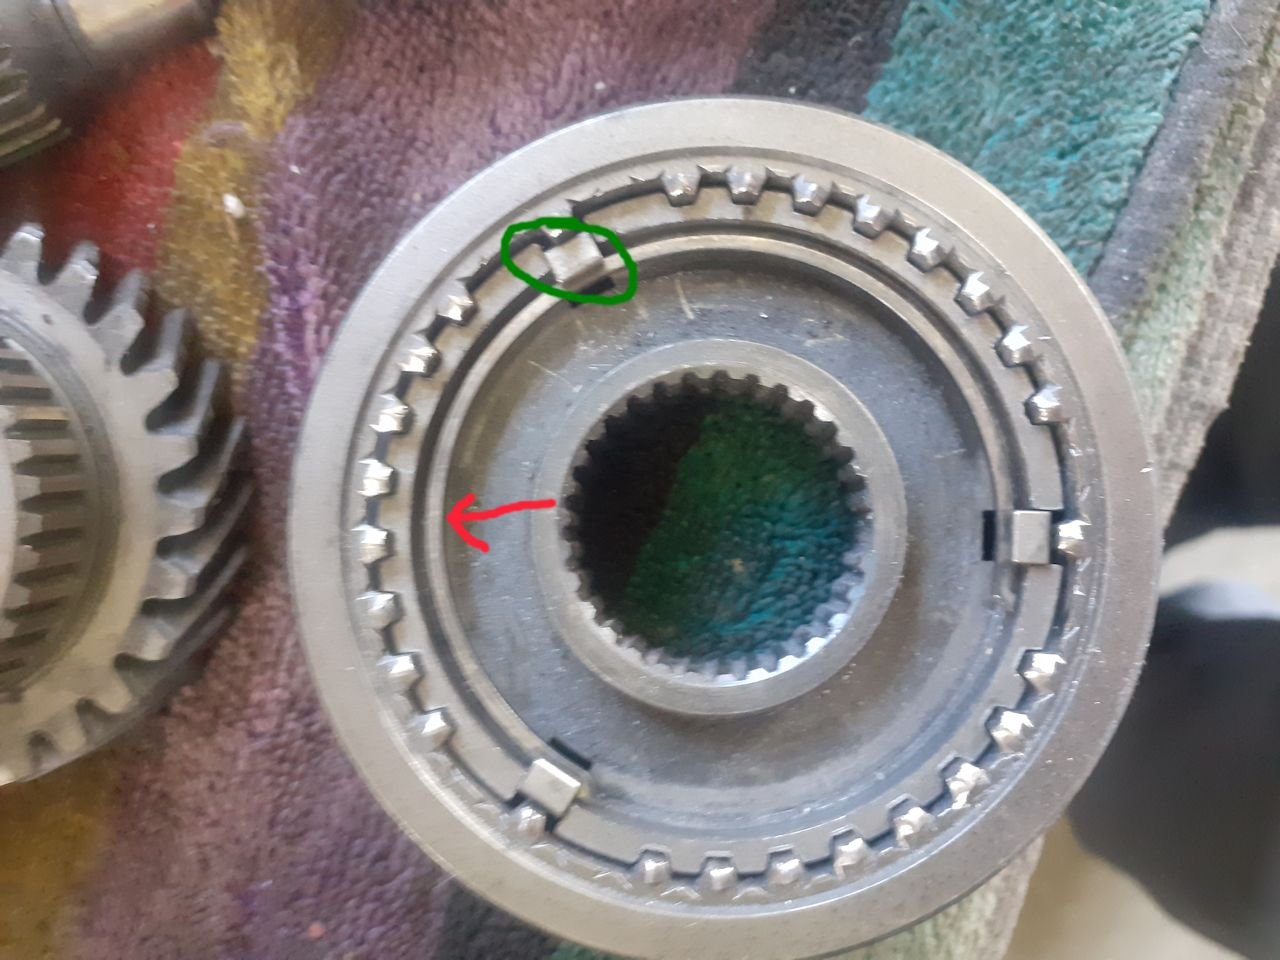
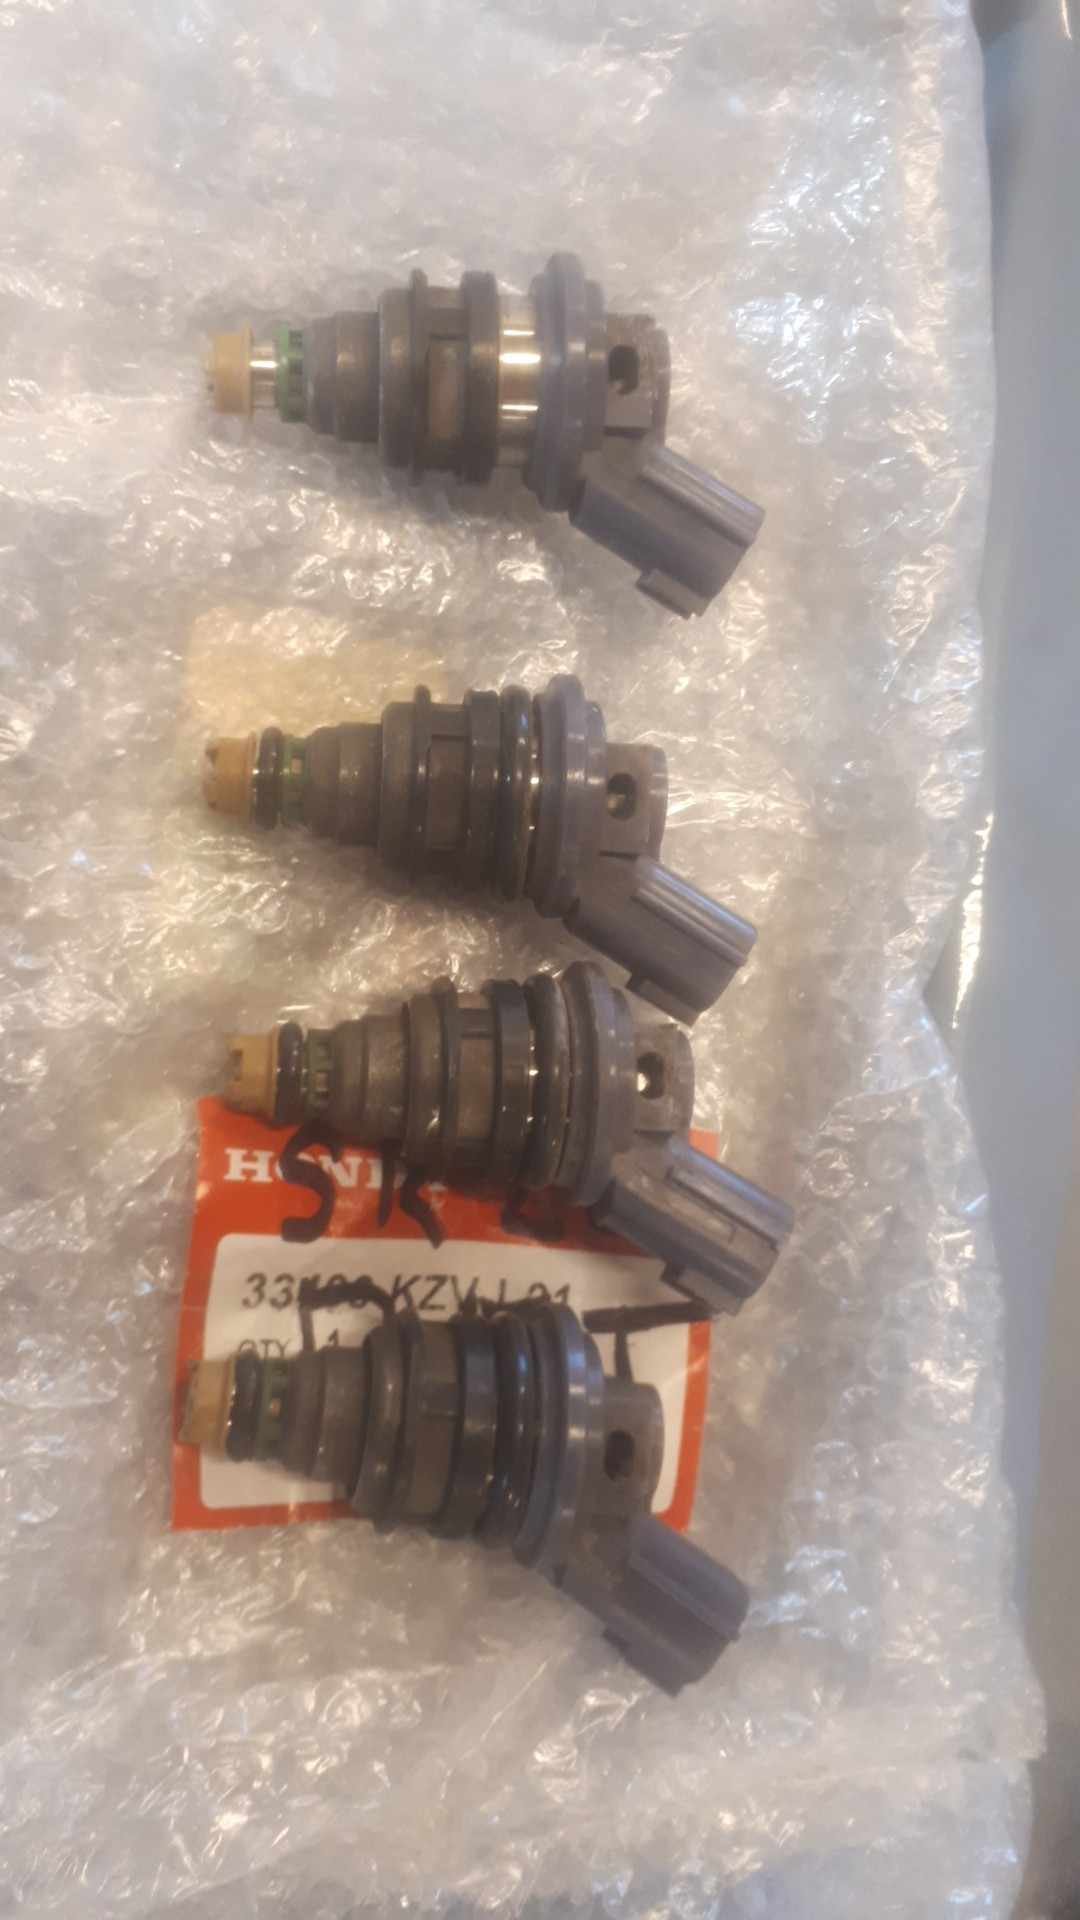
Some years later, seems i have a solution. if it doesn't break; I ended up making the gearbox better replacing a lot of parts, but was never amazing at high rpm. had to shift pretty slow so didn't grind. recently tried some thinner mt-lv redline oil, in an attempt to get the syncro's to grip some more. Yeah it made it worse over the castrol vmx. After sifting through the internet and finding not much other than the old grind some teeth off the synchro. Found a comment saying something along the lines of; "putting double springs in the selector may help with high rpm changes" The spring being what red arrow is pointing at below. Yeah you cant put 2 in there, but some have a coil spring the sits in the middle of the hub so maybe that's what they meant. After looking how it actually works, rather than just replacing parts. The spring presses up against the little keys in green. they have a raised section that sits in a recess in the selector hub(outer part) Now when you go to change gears the selector hub pushes the 3 keys up against synchro ring, which pushes the synchro ring onto the cone, slowing the gearbox down. Until you put enough pressure on the shifter/selector hub, the selector hub cams over the keys and selects the gear. So having a stronger spring on the keys will put more force on the synchro ring before it trys to select the gear. which means it should slow the gearbox down more before it tries to change gears, cool. Will it work who knows. sifting though my pile of gearbox parts I found some bearing retainer spring clips that would work for 1/2 gears. 3rd/4th found some that would work out of some hilux front hubs I dont have any pictures of what it looked like once i modified it them. but ground them down to similar shape as the factor ones as above, just thicker, so more spring pressure. I ground a few teeth off some of the synchro rings also, but i dont this would have changed things much. All this went into my spare t50, with the best selection of 2nd hand junk i could find. So worse base than the one in the car. Result. It amazingly works, can throw it through the gears at 10k easy, haven't been super rough with it yet, but changing pretty fast no crunches, changes nice. only side effect, is its a bit more notchy selecting gears, but not terrible at all. I even used the same oil that come out of the gearbox in the car, for a fair test.
9 points
-
Alright alright alright! So I pushed the car outside this afternoon so I could reach some wiring inside to try fire it up. I filled the car up with coolant, by which I mean water because I was expecting things to leak. Sure enough each head had a hole up the front where water started leaking out. I couldnt remember what these were for, then found out that they are like an air bleed channel that goes back to the thermostat housing. So, these seem to have gone AWOL when moving house so I'll need to pickapart some more. I must have removed them when taking the heads off to clean them. Easy fix. Then I got the fuel pump working and fixed a few fuel leaks. It turns out that AN fittings arent very good at sealing if you havent tightened them up? Crazy. Then I got my tune somewhat sorted, and tried cranking the motor over.... and the bloody battery died! Ugh. I mucked around to get another battery, it sort of spluttered a few times but not quite. I had a look through the tune settings. Engine size was still set to 1500cc from using this ECU in the Echo - woops. I needed to disable the fuel pressure sensor allocation. As since this isnt wired in yet, it took 0v to believe that the motor had zillions of psi worth of fuel pressure. Then when I cranked the motor it was registering the crank trigger, but not cam trigger. Checked the settings, had this wrong. Both were set to VR sensors, but the crank is VR and the cams are hall effect. So once that was fixed... Bam! We are running. It was absolutely awesome to reach this point. So whats next? Lots. Get the coolant system functioning properly. Make an exhaust for it. A lot of wiring work, get the fusebox setup all connected nicely and mount all of the wiring nicely. Need to put some gearbox oil in the box, will do this before running the engine any longer. Pull the fuel rails off, and do tests to work out the CC rating and deadtimes for the injectors. Calibrate all of the sensors Mount a radiator fan Check intake for leaks (I think all of the air bypass screws are currently all the way out) Install the wideband Finish wiring up the alternator And a bunch of other little similar jobs. Most of these I can peck away at over winter with limited space. Making an exhaust will be difficult when weather starts getting darker and wetter and I can only really work outside. Will push ahead as best I can. Super excited for first start though!
9 points
-
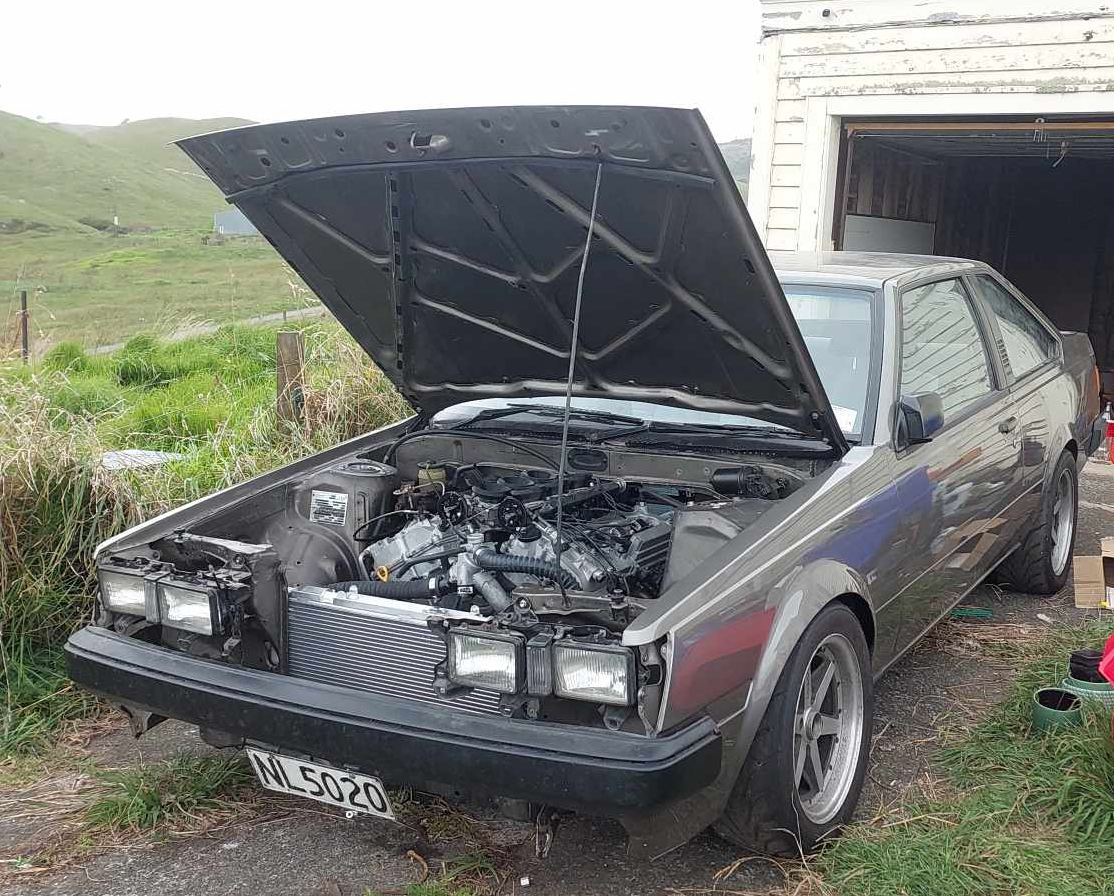
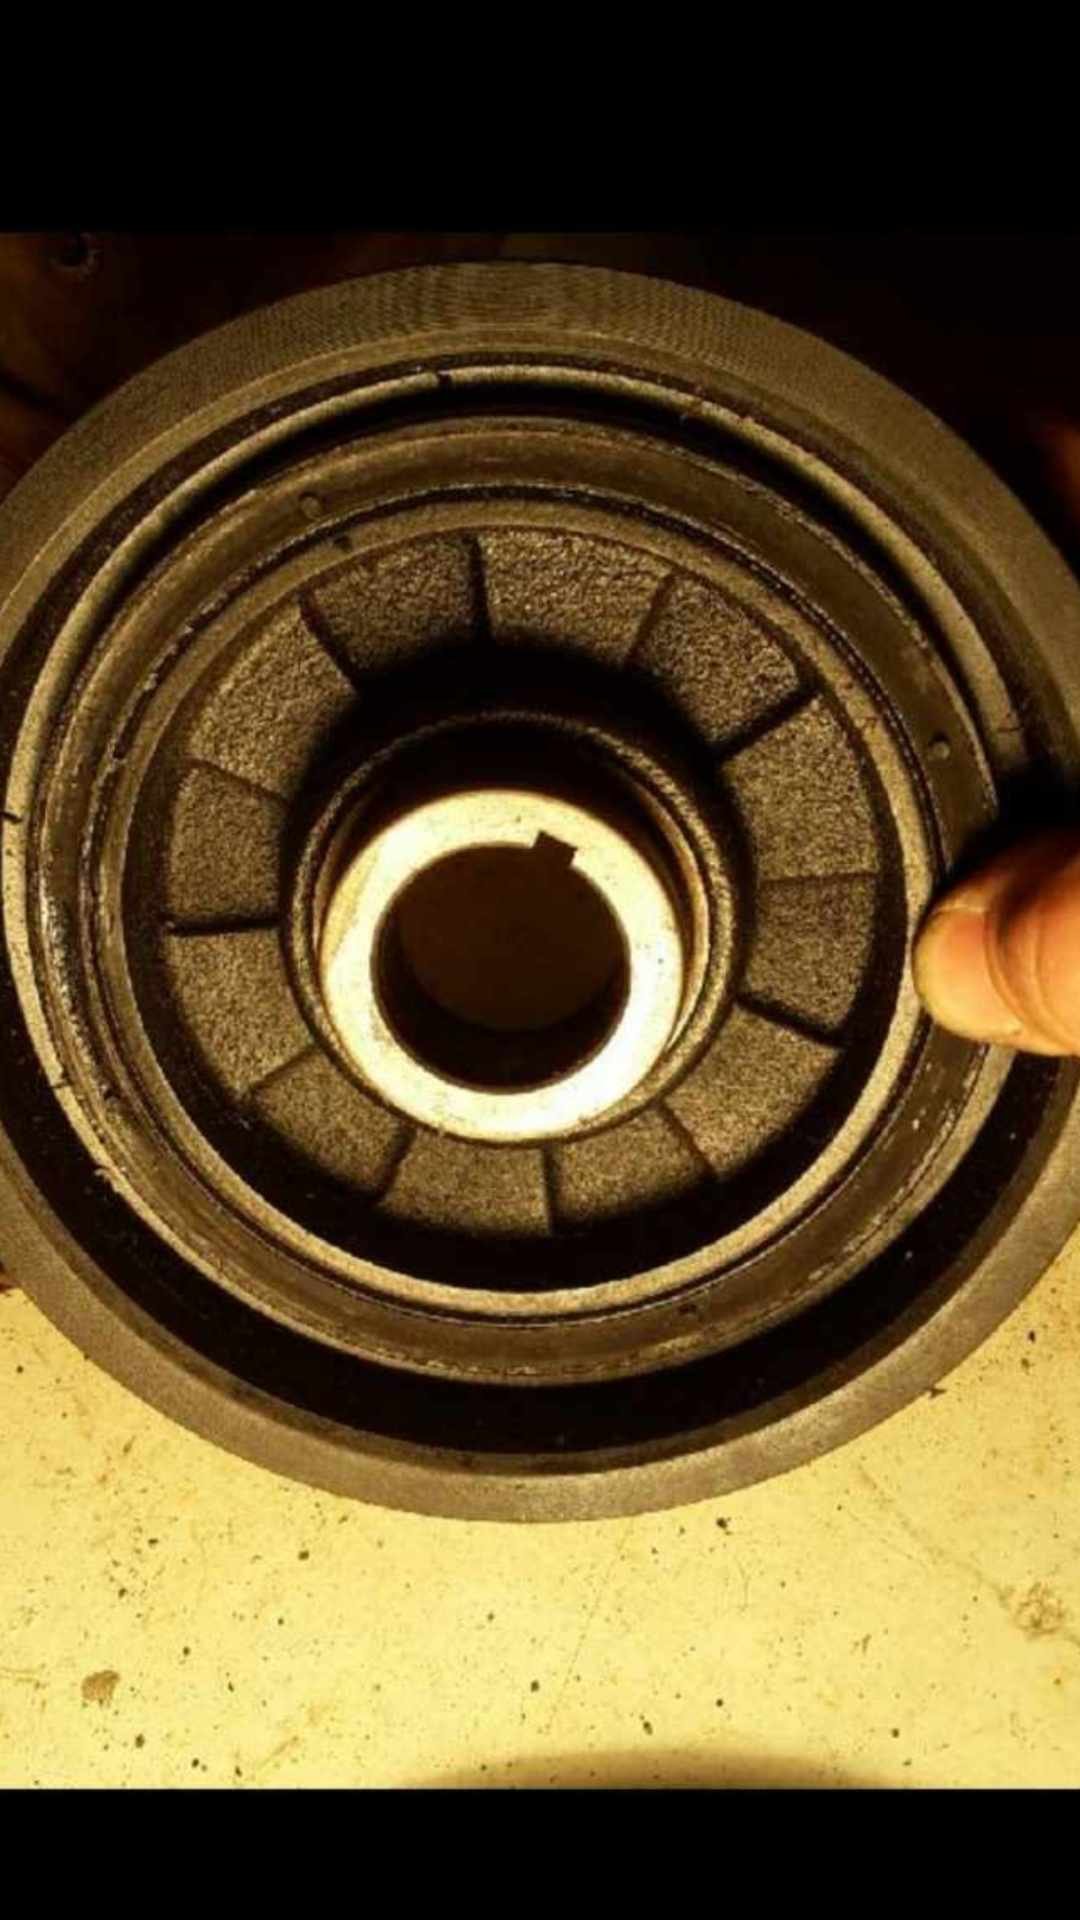
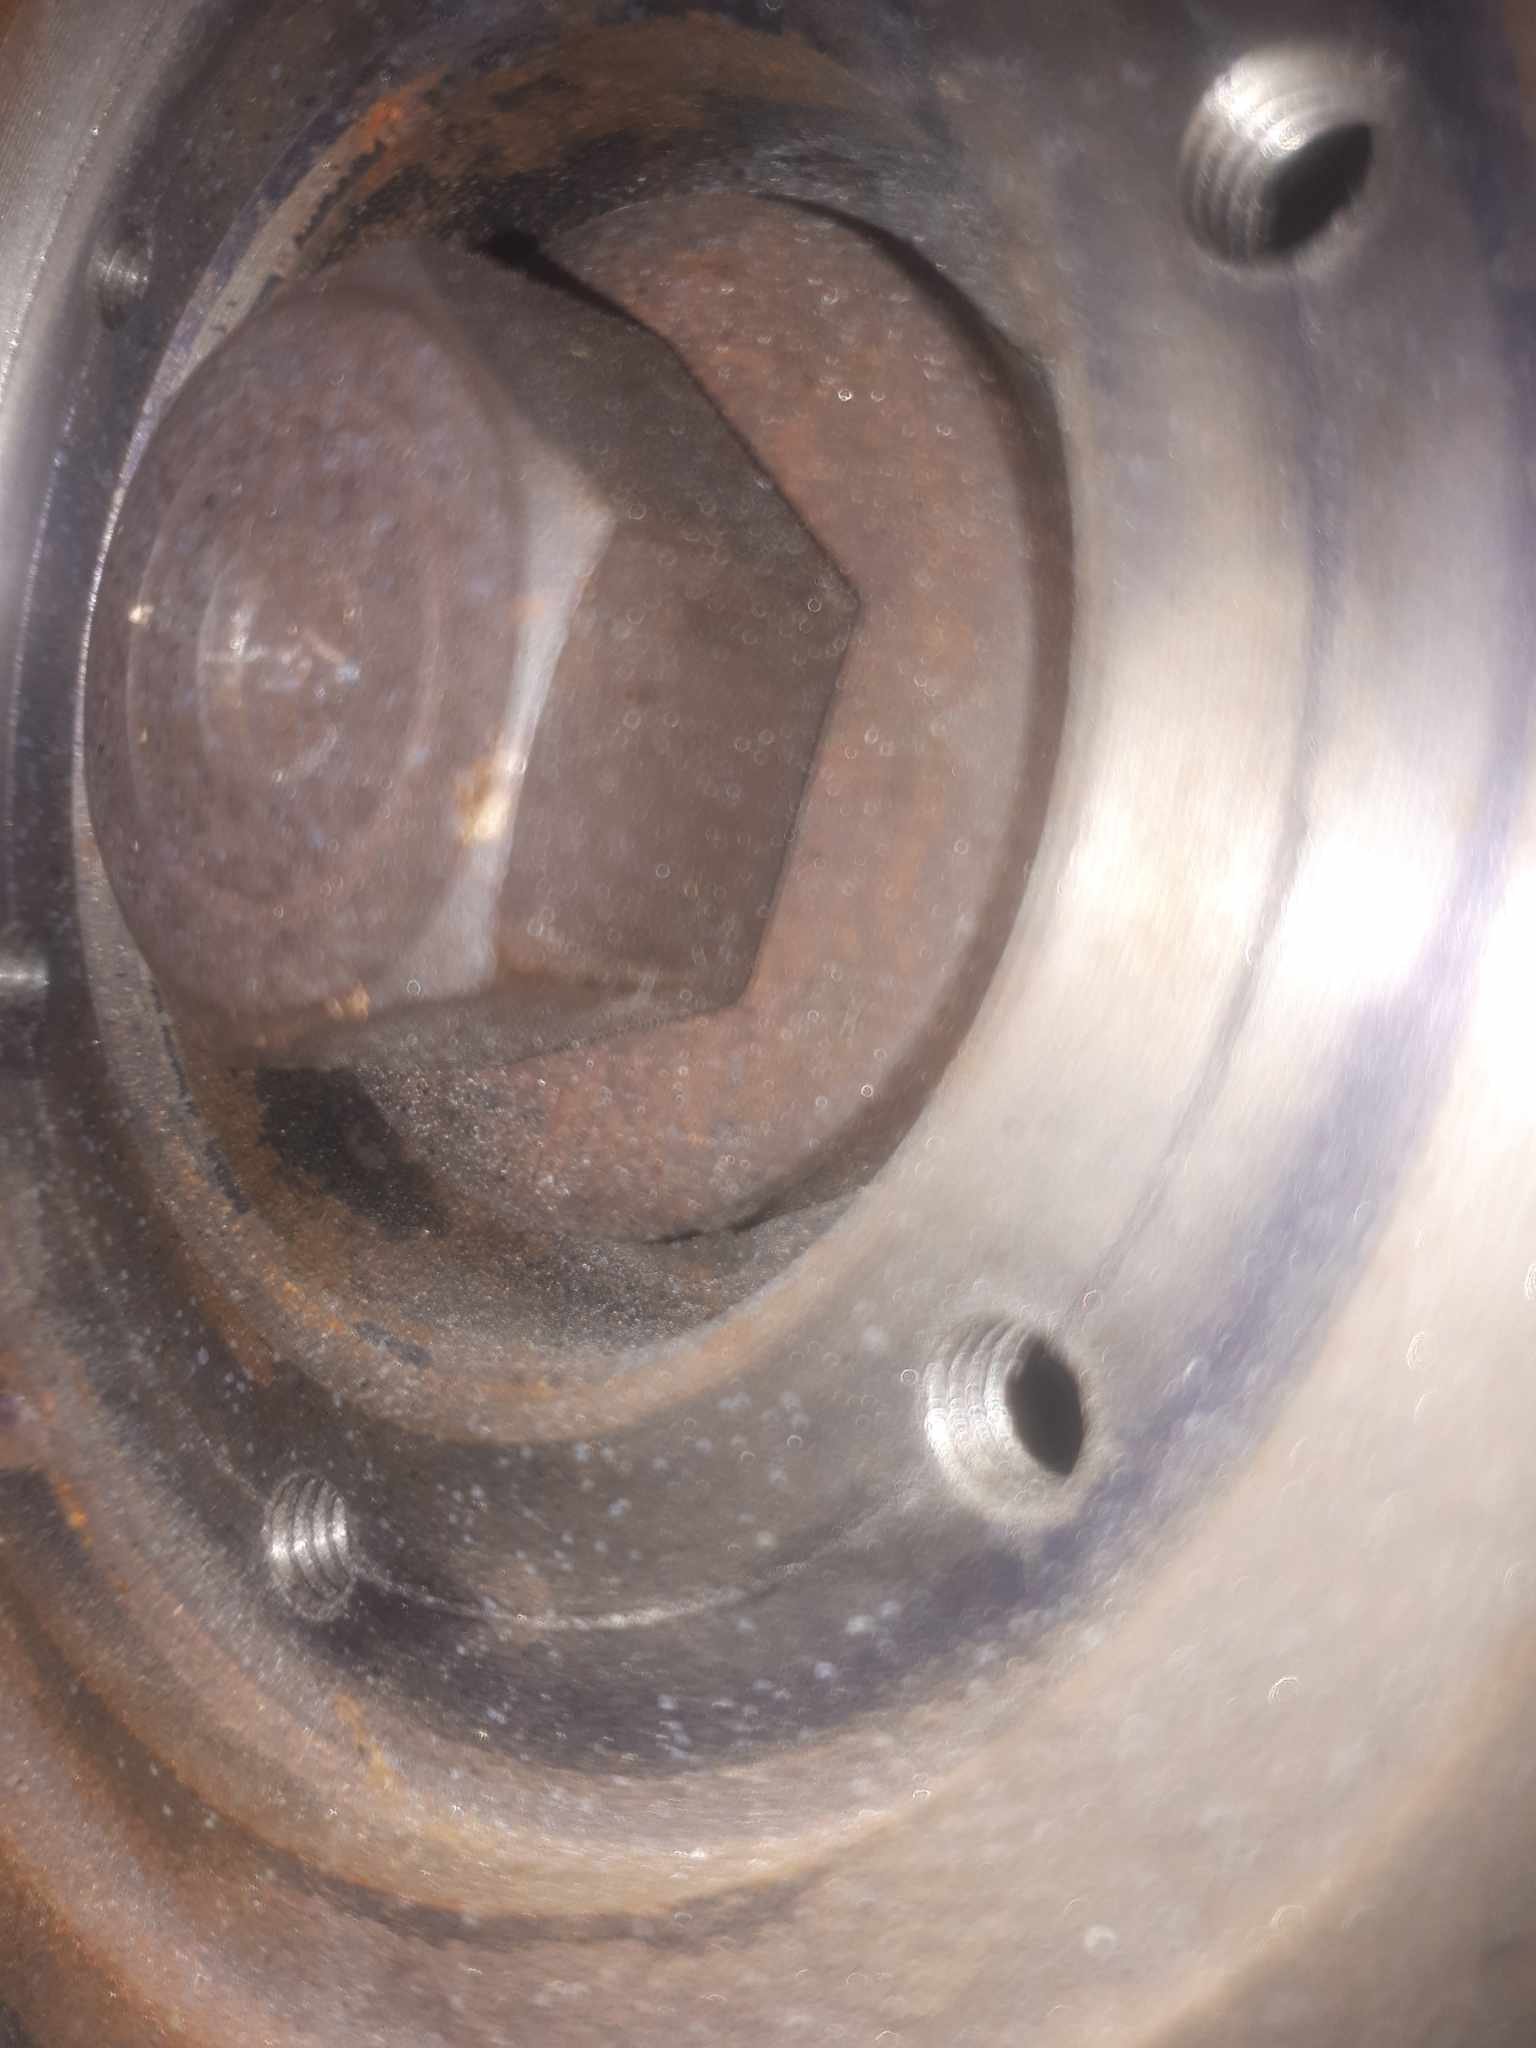
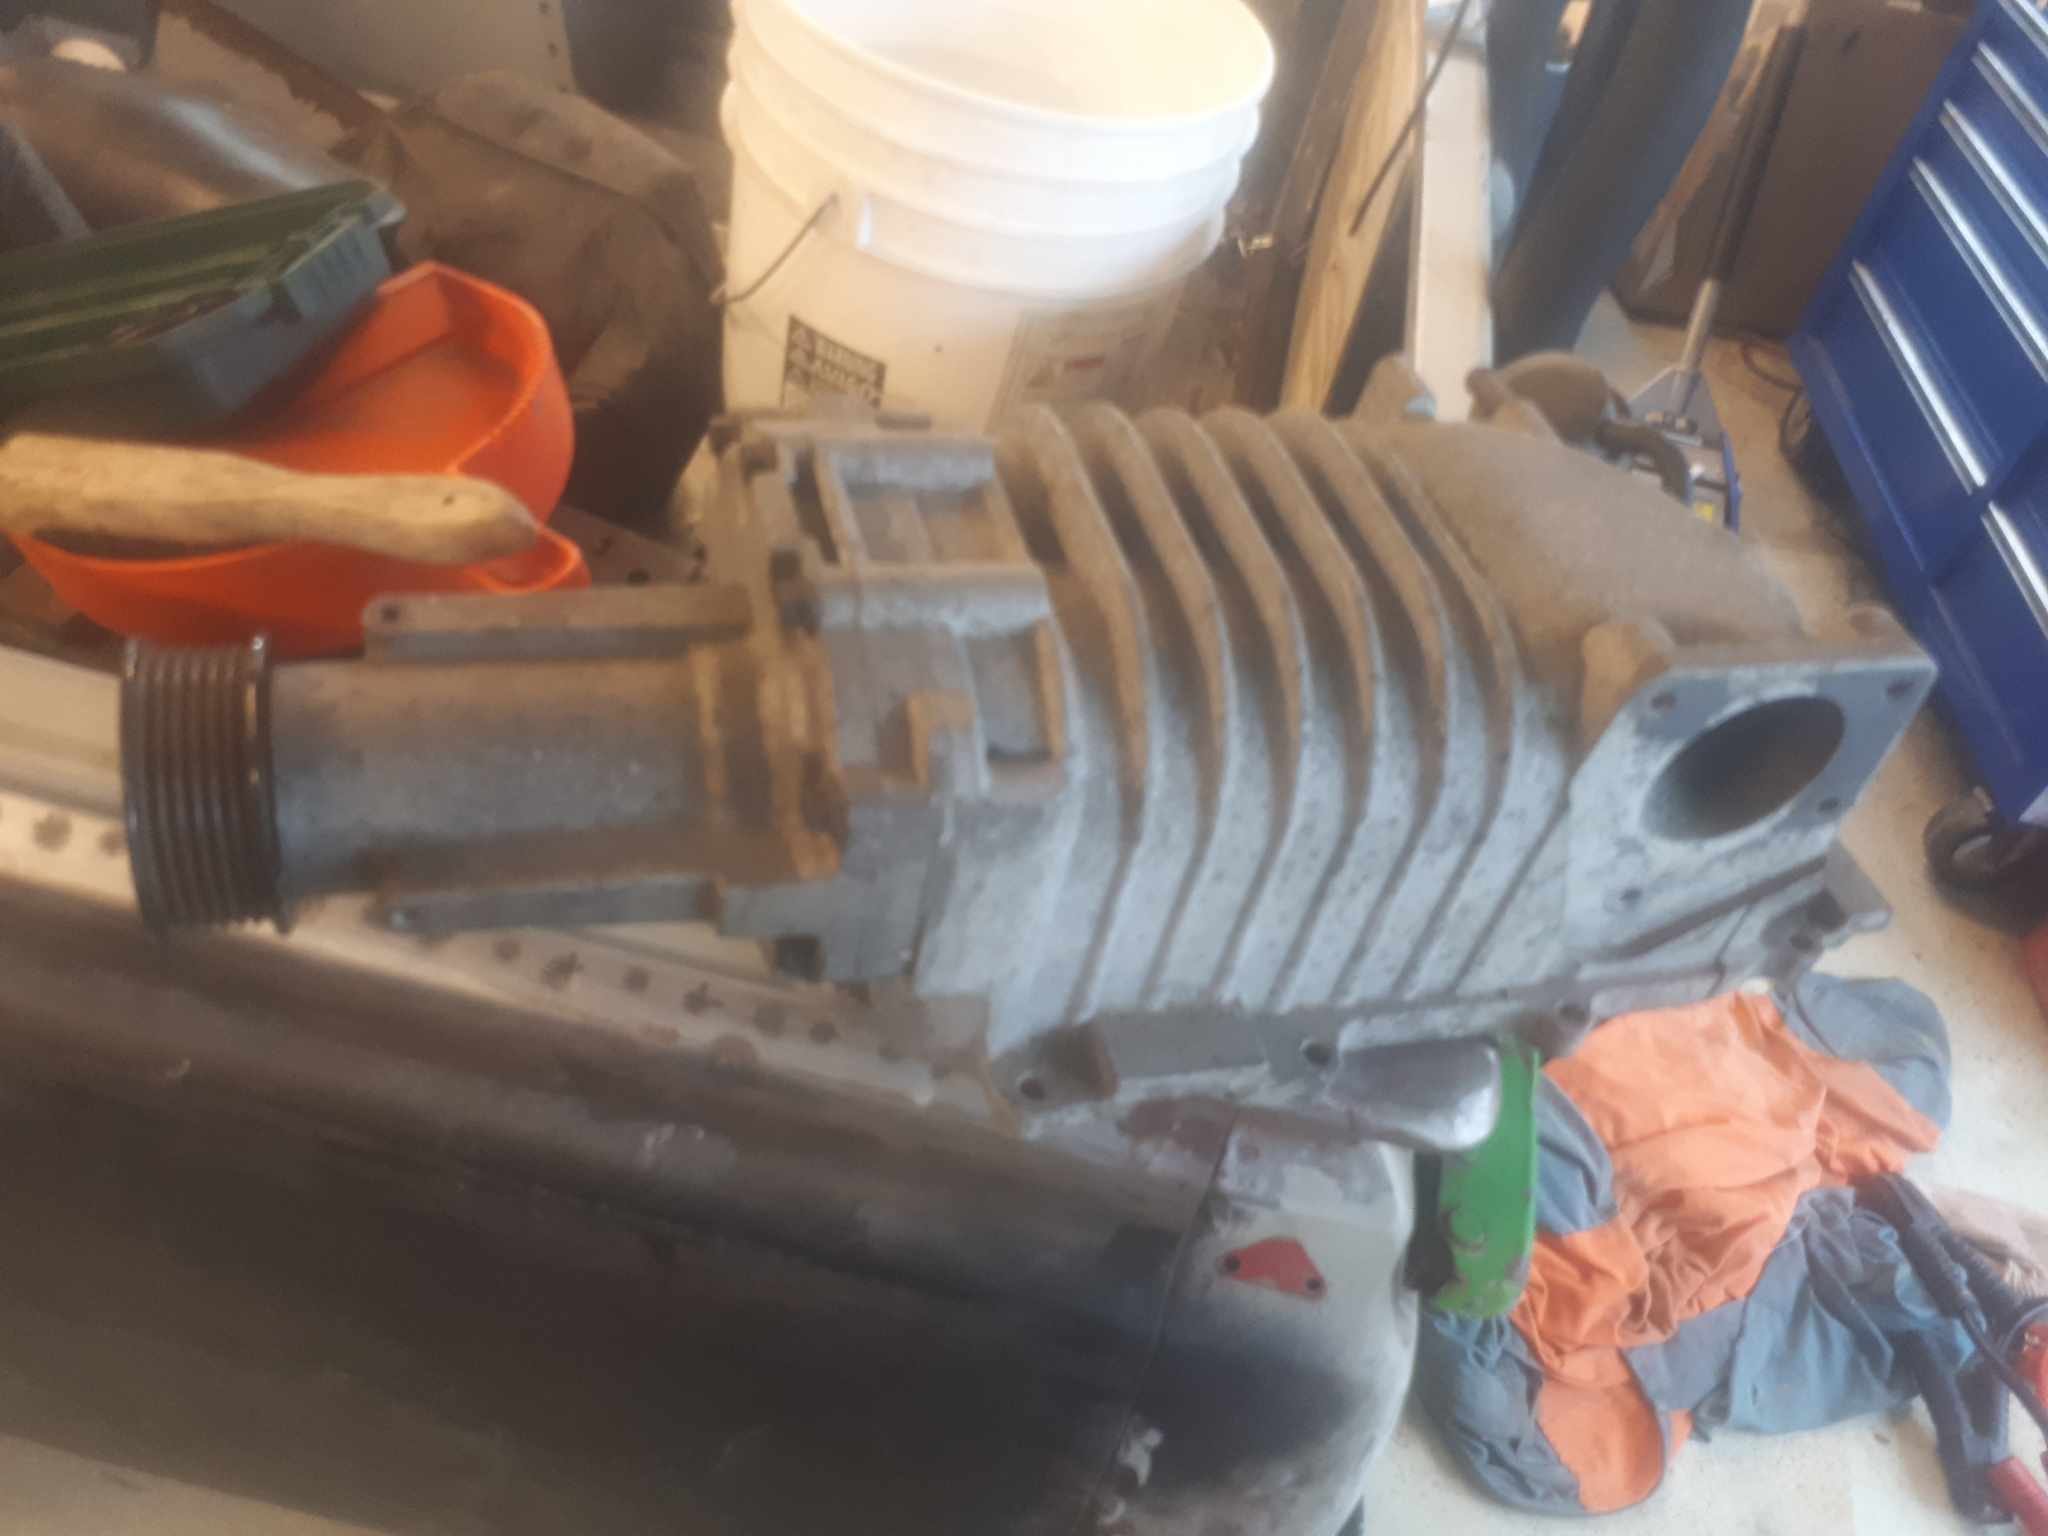
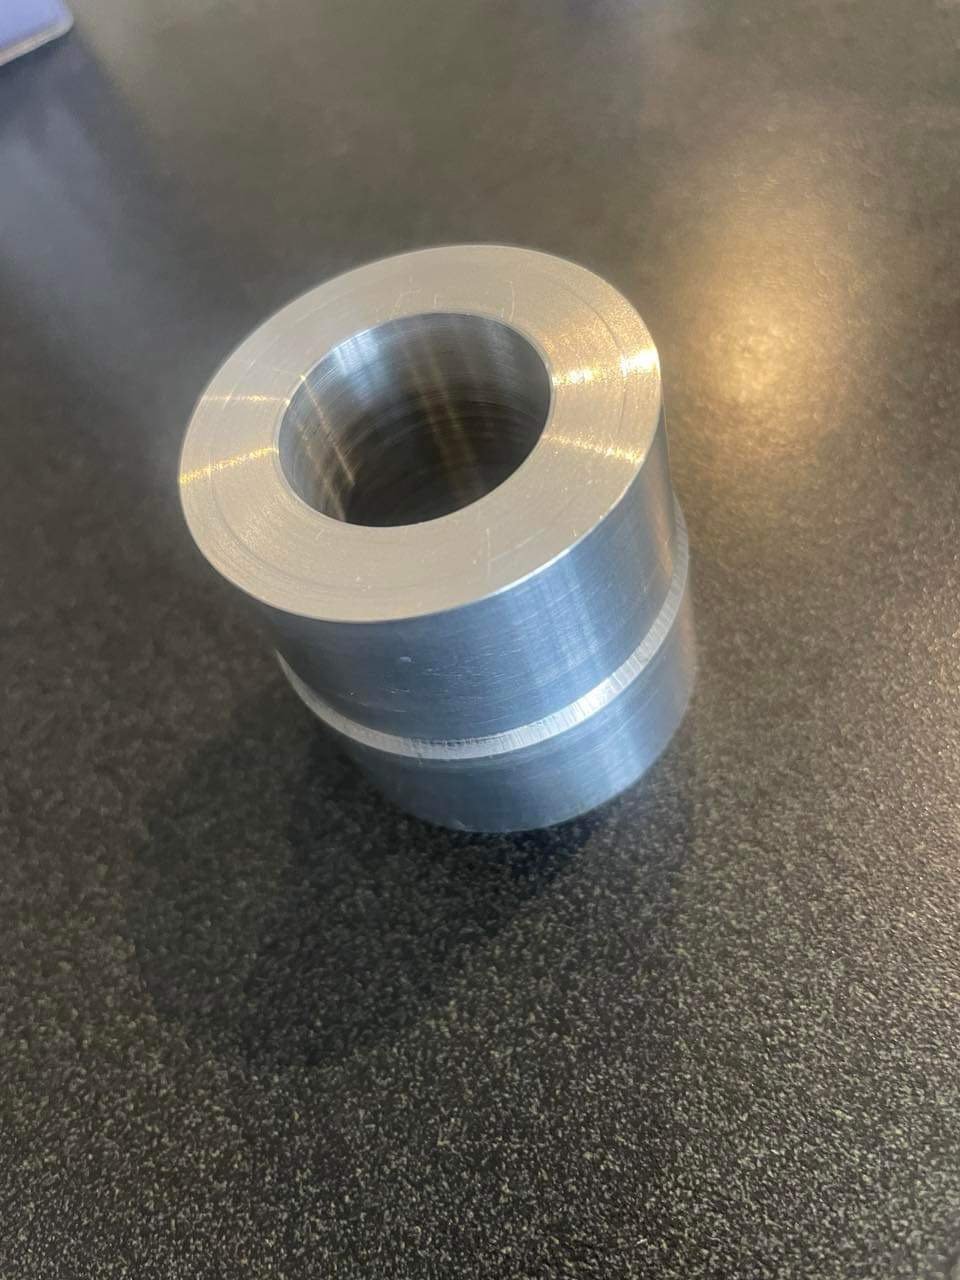
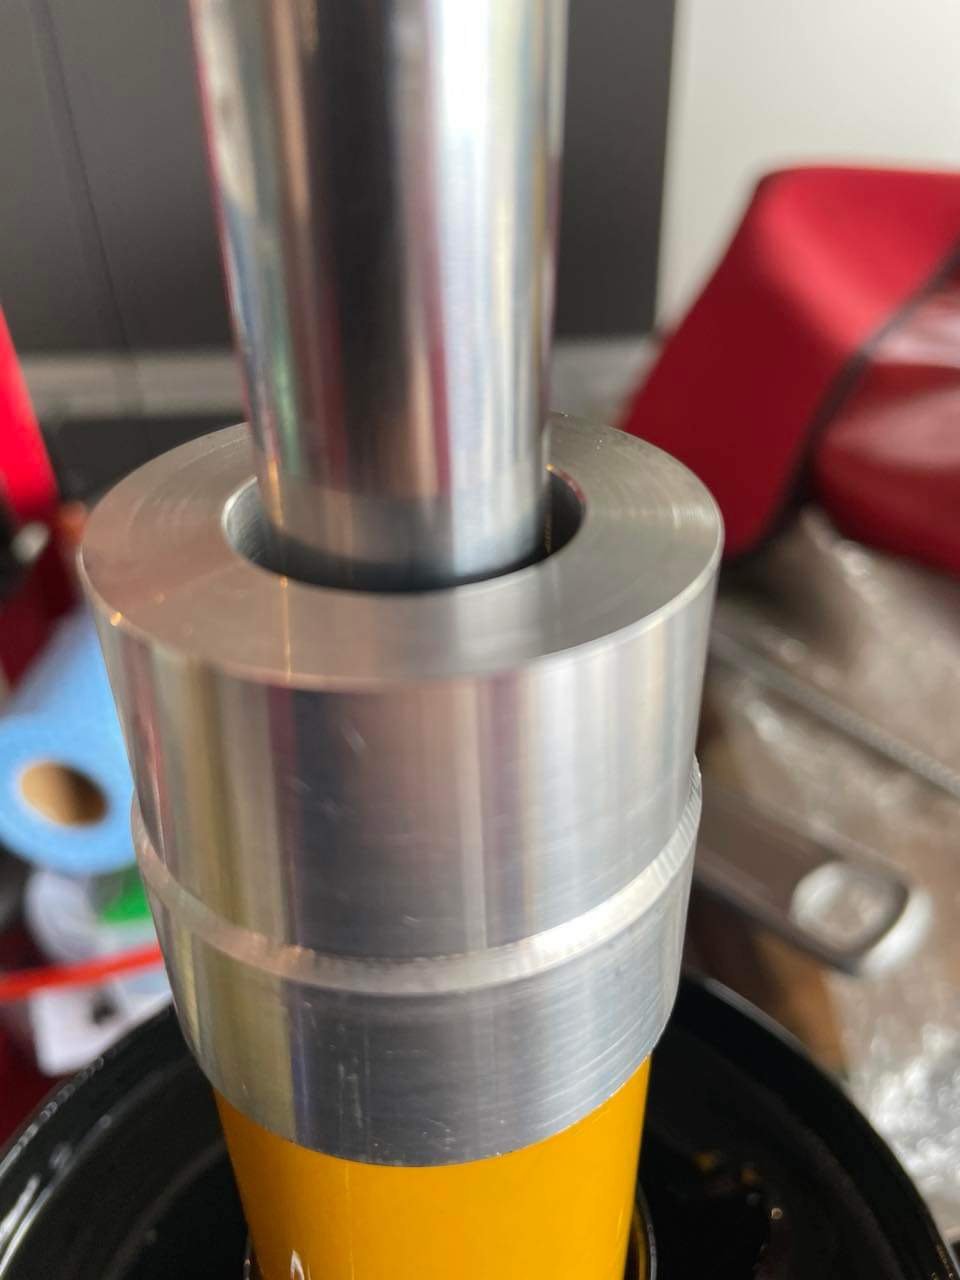
PNot an update as such, more a musing/potential future upgrade. Upon procuring the engine, id noted the front crank seal had been leaking. I whipped the crank pulley off, and much like the pinion seal on the diff, the seal journal was quite rutted/cut into. A speedy sleeve put this back to new. While i had the crank pulley off, i noticed an interesting shape was present. So i figured while it was off, it would be a travesty not to machine off the power steering pump pulley, (these are attached to the main hub, not the dampered pulleys that drive the water pump/alternator/AC) A nice spigot was machined on, and some holes drilled and tapped to correspond with those nice bosses. This is very hard to photograph in the car. Quite a while ago, the old boy picked up an Eaton M62 supercharger off Ebay. It came off a USDM nissan frontier truck, with the nissan VG33ER. (The larger version of the single can VG30 which were once common here) i basically told him, i was commandeering it. And back when @Vintage Grumblewas a cool kid, he had some SR20det injectors which he kindly gifted to me. So in the unlikely event 5his wreck ever sees the road, it wont be too big of a stretch to turn the wick up.
8 points
-
Oh man I have some embarrassing shit to divulge. I talked to Palmside today about getting some jets and during the conversation I mentioned that it was running rich and that it was weird cos making the air corrector bigger would make them much bigger than most of the setups specs I had collected. The dude asked me what I had seen on the AFR so far and I said like 16 or so. He said that that is lean..... And of course I actually thought about that for more than two seconds which is longer than I ever had, and fucking of course that is lean... What a cunt I am, I obviously had some preconceived notions and hadn't actually thought about what that reading meant. Oh man I can never talk to Palmside again, the dude clearly and rightly thought I was a fucking idiot. So having gone through that self slapdown I will probably put some smaller air correction jets in, and maybe some bigger idle jets.8 points
-
After much head scratching and thinking about the radiator situation I listened to Koro @sheepers and just got a radiator that fits. Using the telstar rad as a template as its the perfect size I went down a rabbit hole of radiator websites to look up dimensions, turns out the perfect fit while fitting the criteria of cooling a forced induction 2L engine is a EVO 1-3 unit but i wasnt going to drop $500 on a brand new one incase it wasnt going to fit so haggled a deal on marketplace for this Fenix unit with electric fan for $150, few bent fins to straighten and a rattle can overhaul but im not complaining for the price. Yeah it just fits but I couple of quick mods will give me as much room as im going to get without hacking the whole front of the ute to bits. Water outlets will be easy to run with a few bends and straight sections but glad to have that headache sorted. Just the loom to sort out and mount an external fuel pump somewhere then il be close to firing it up7 points
-
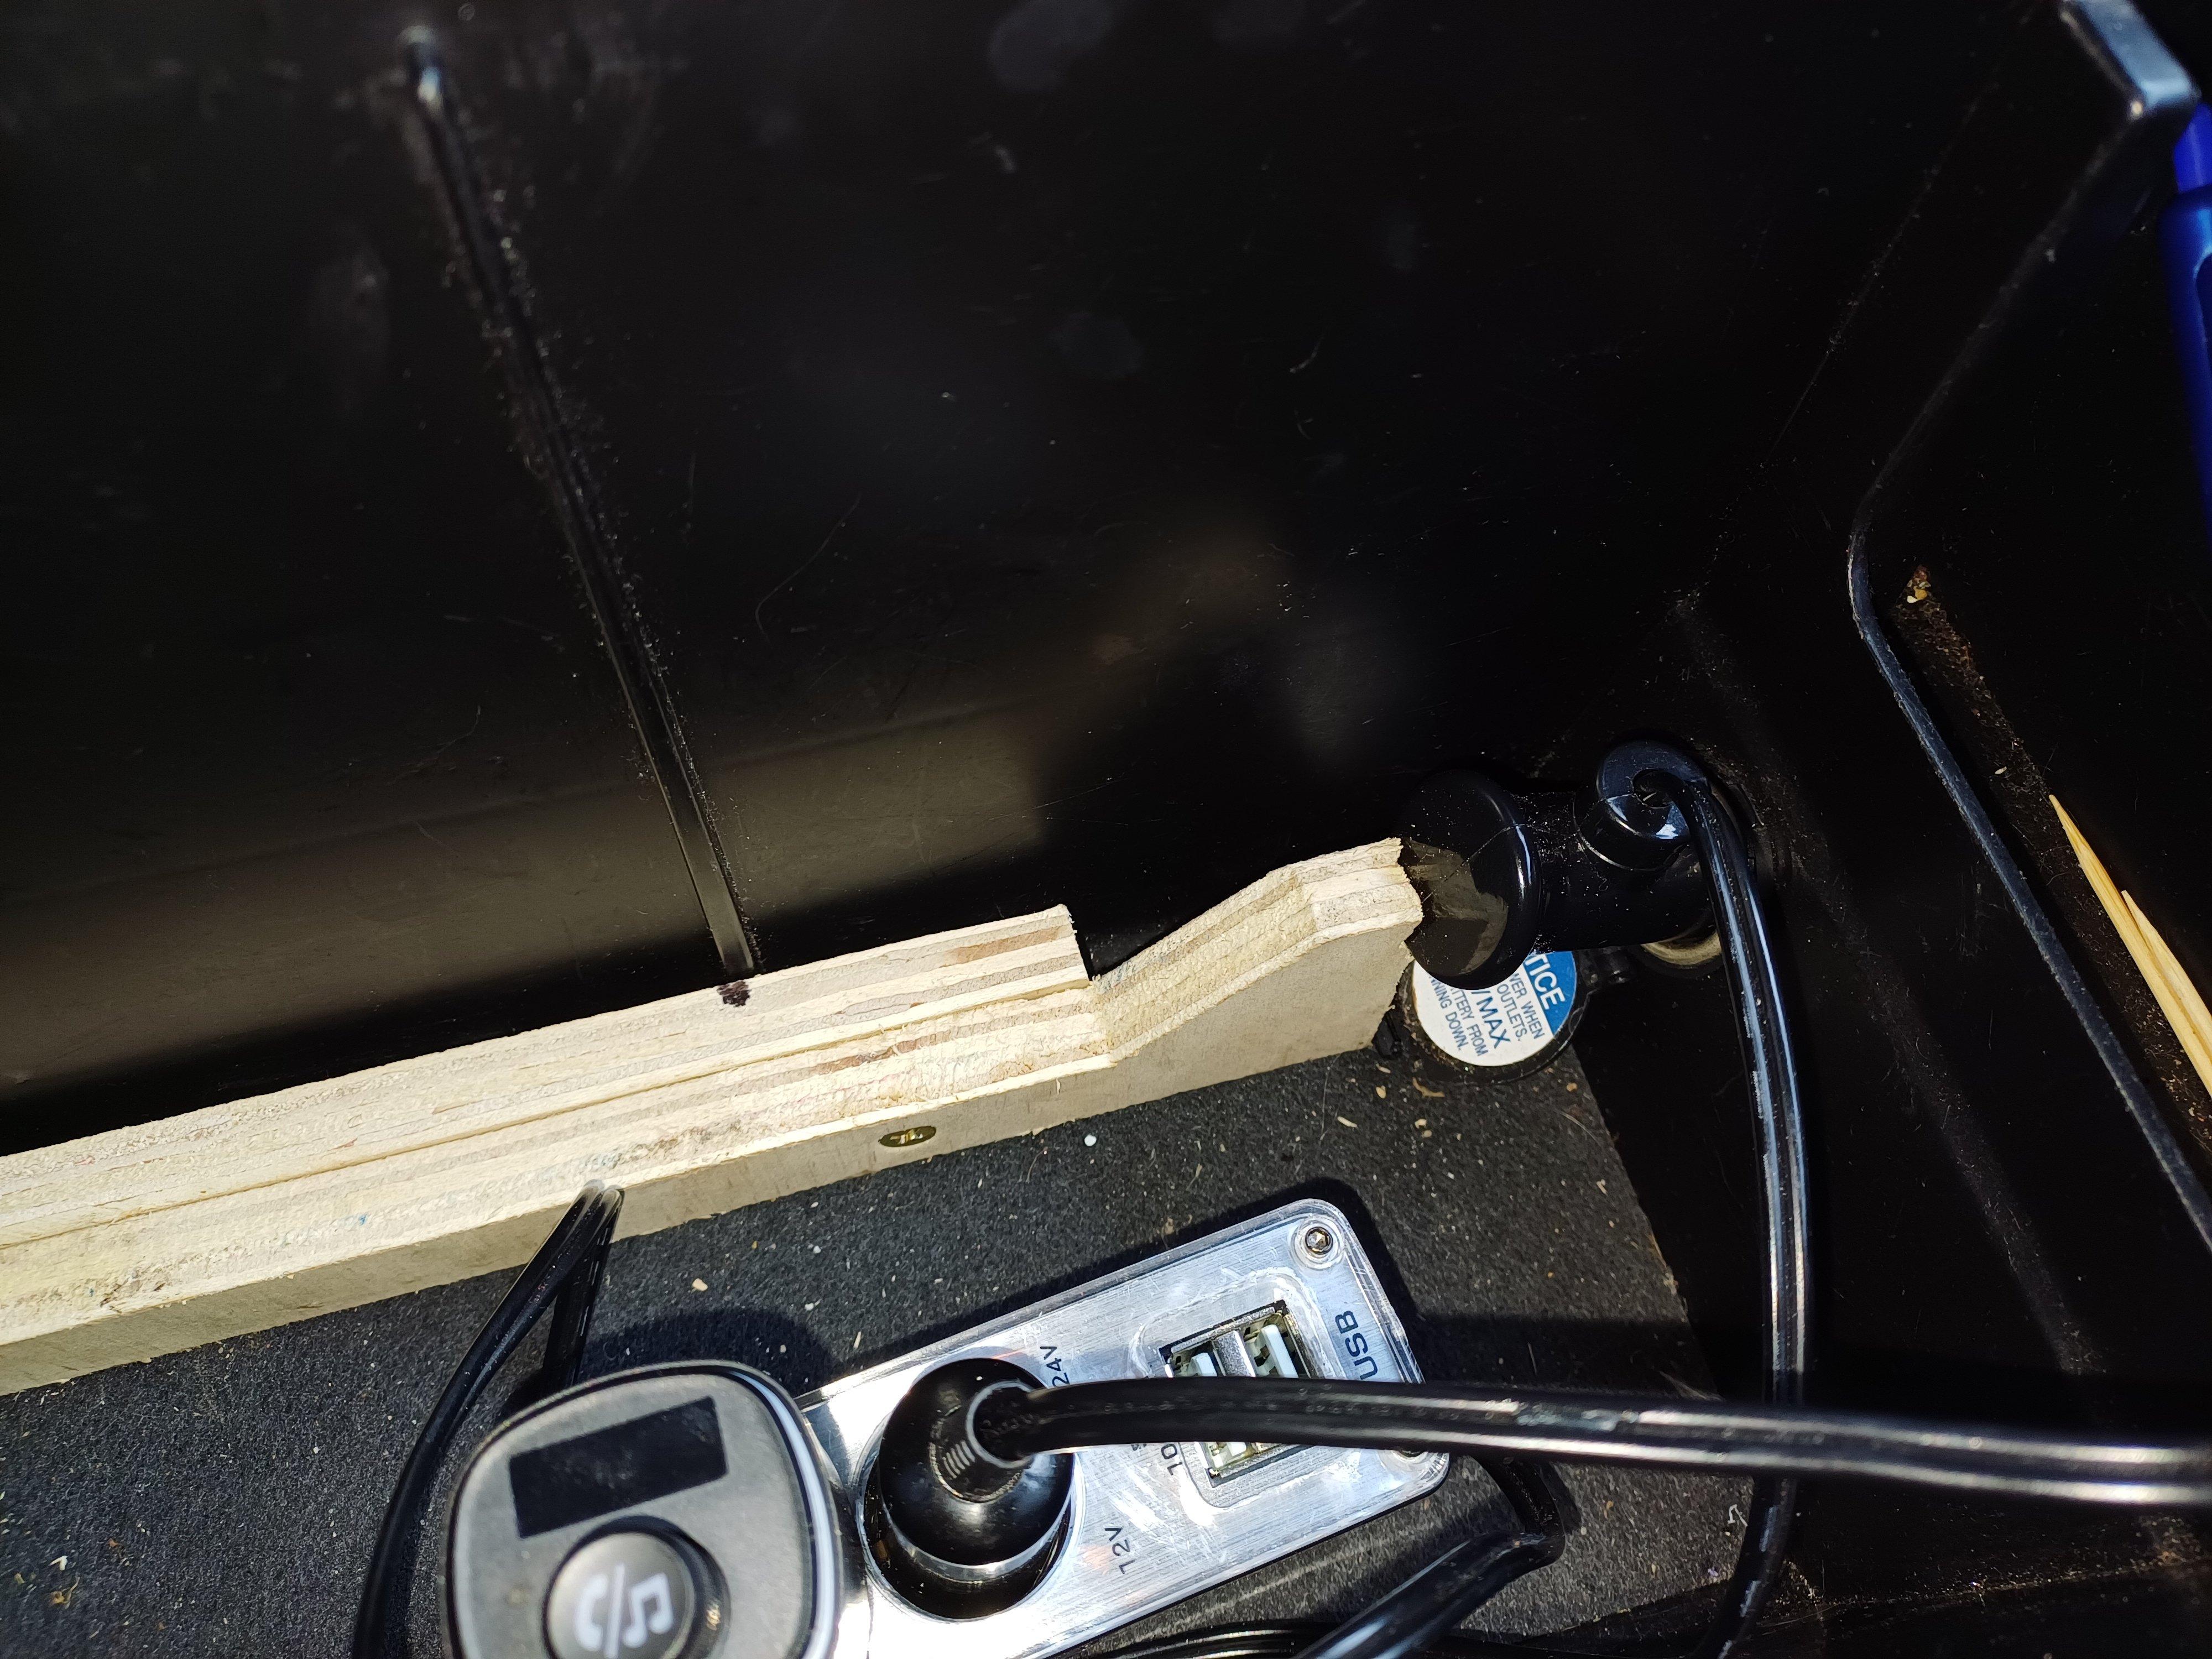
Middy's phone has a soggy battery, and she's complained it doesn't always charge in the car. The cig plug was coming out of the socket, so Now I can go back to ignoring the phone battery
6 points
-
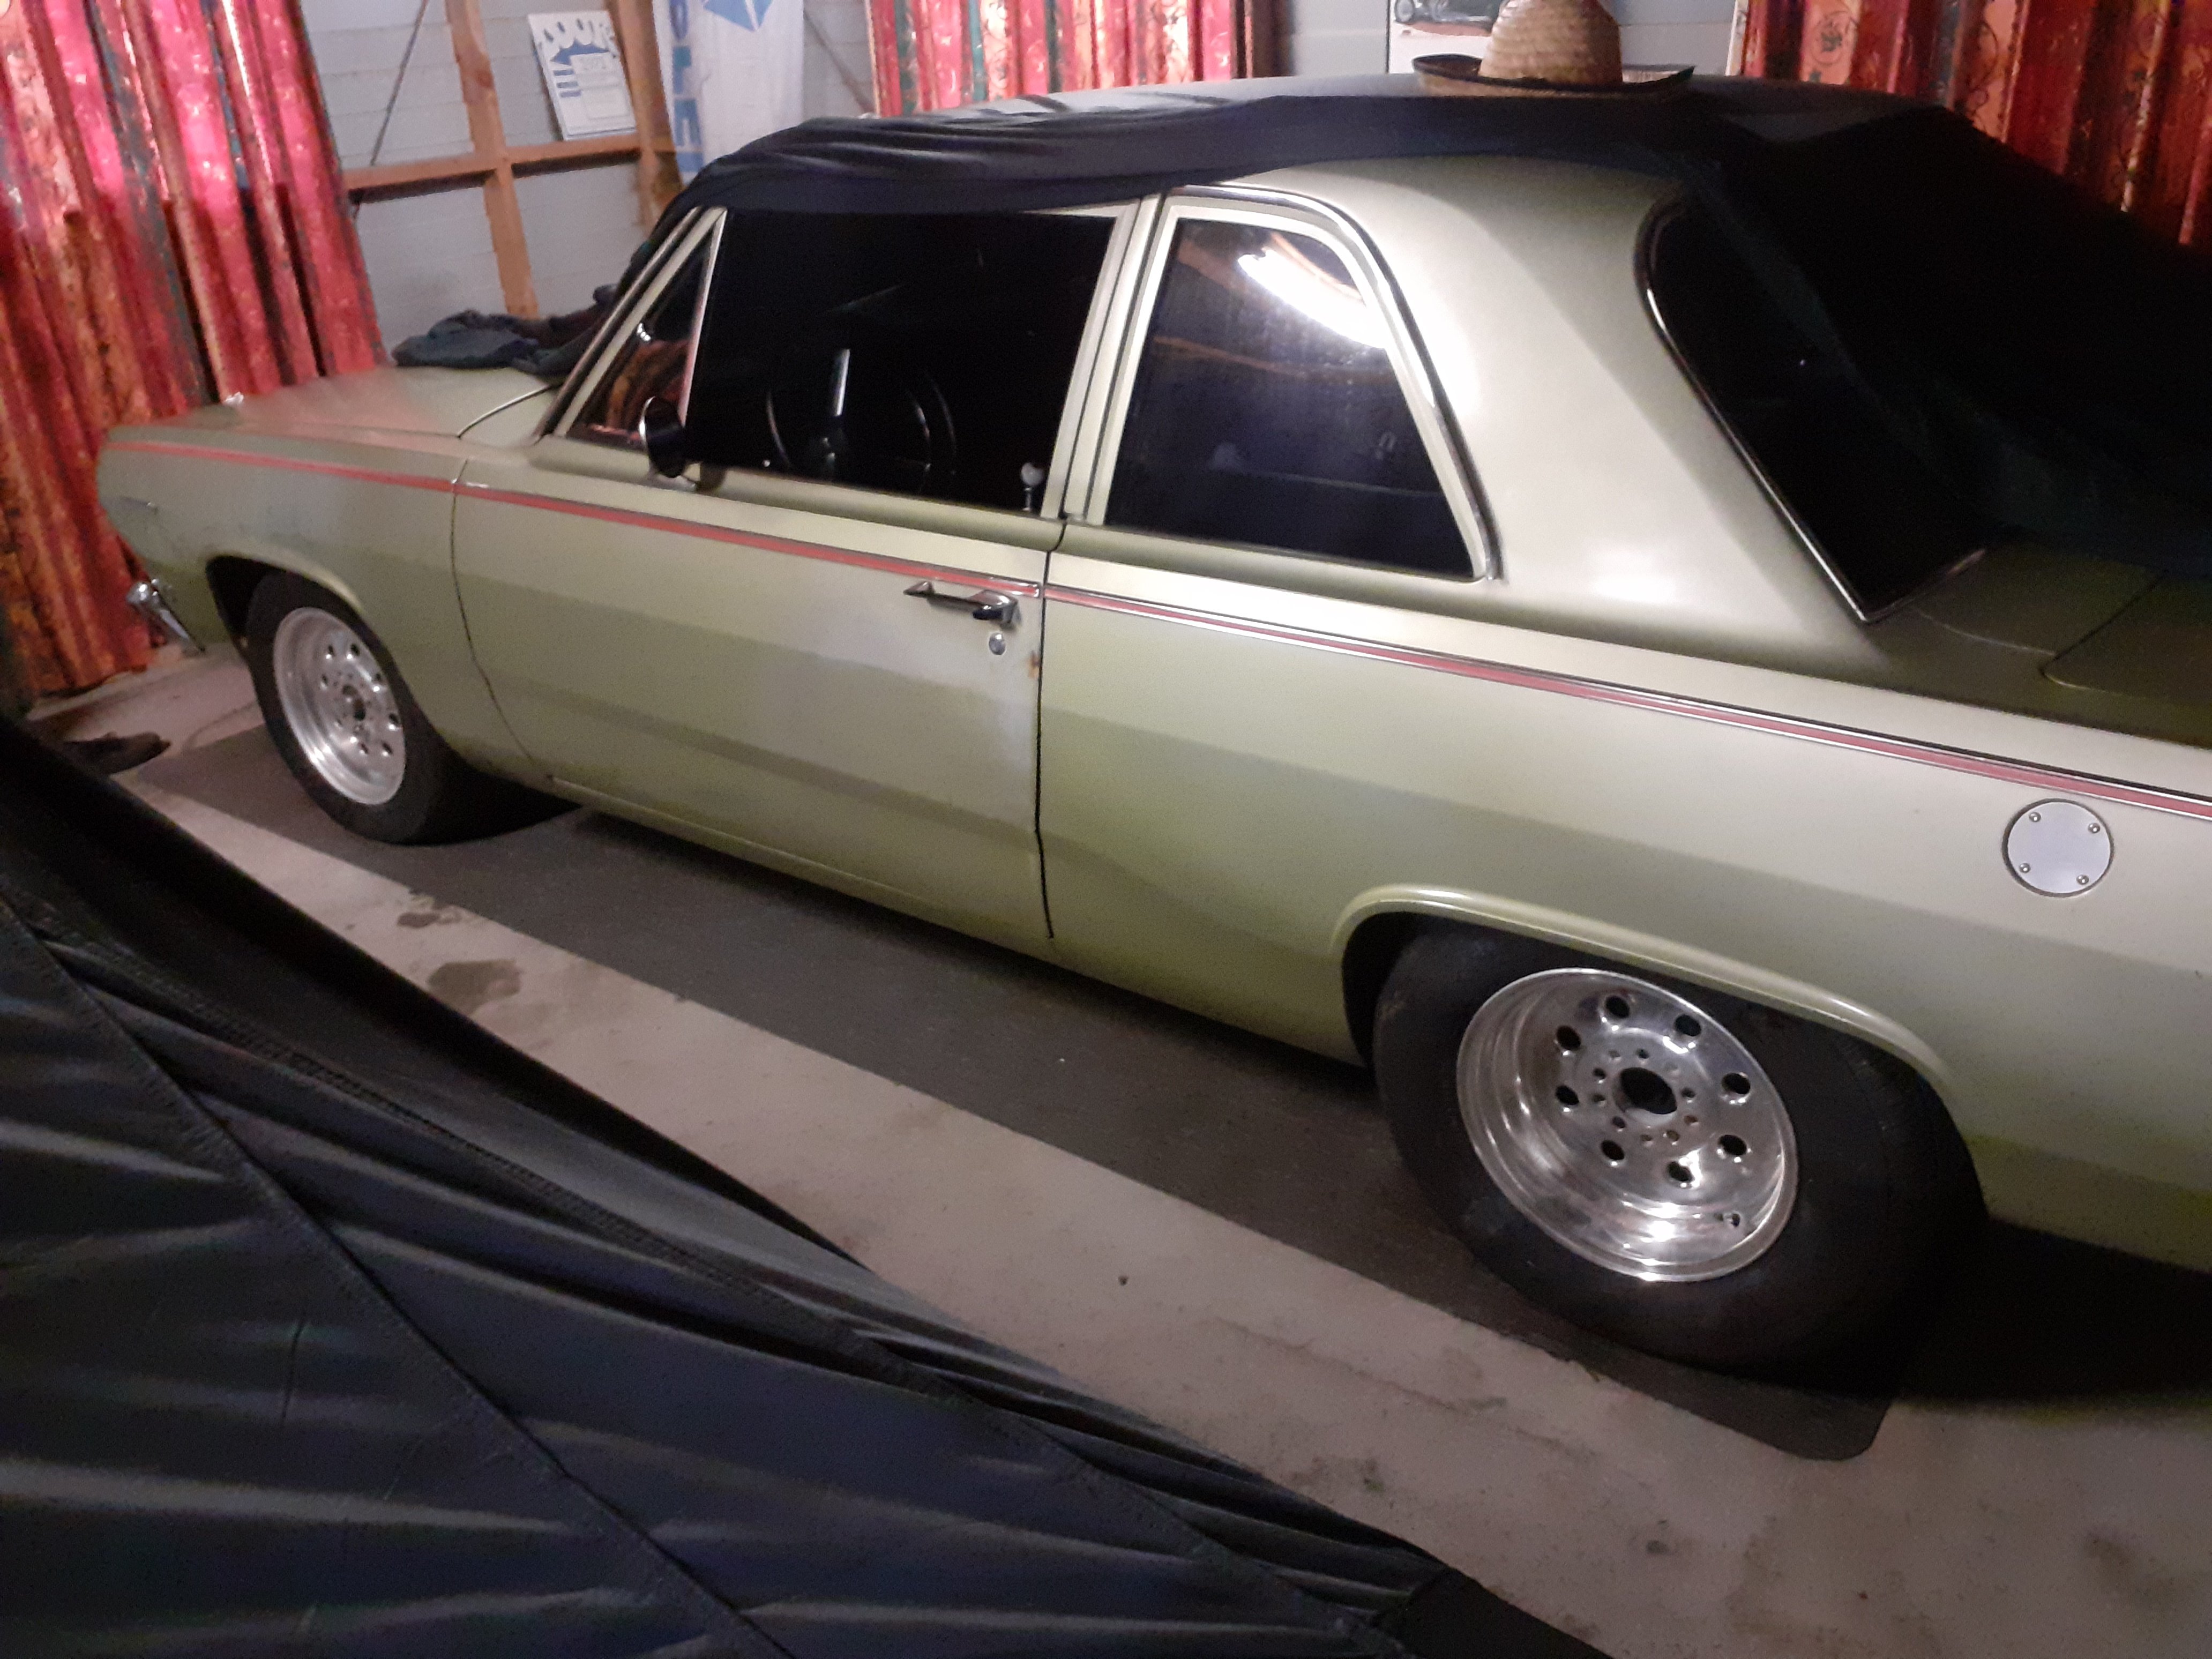
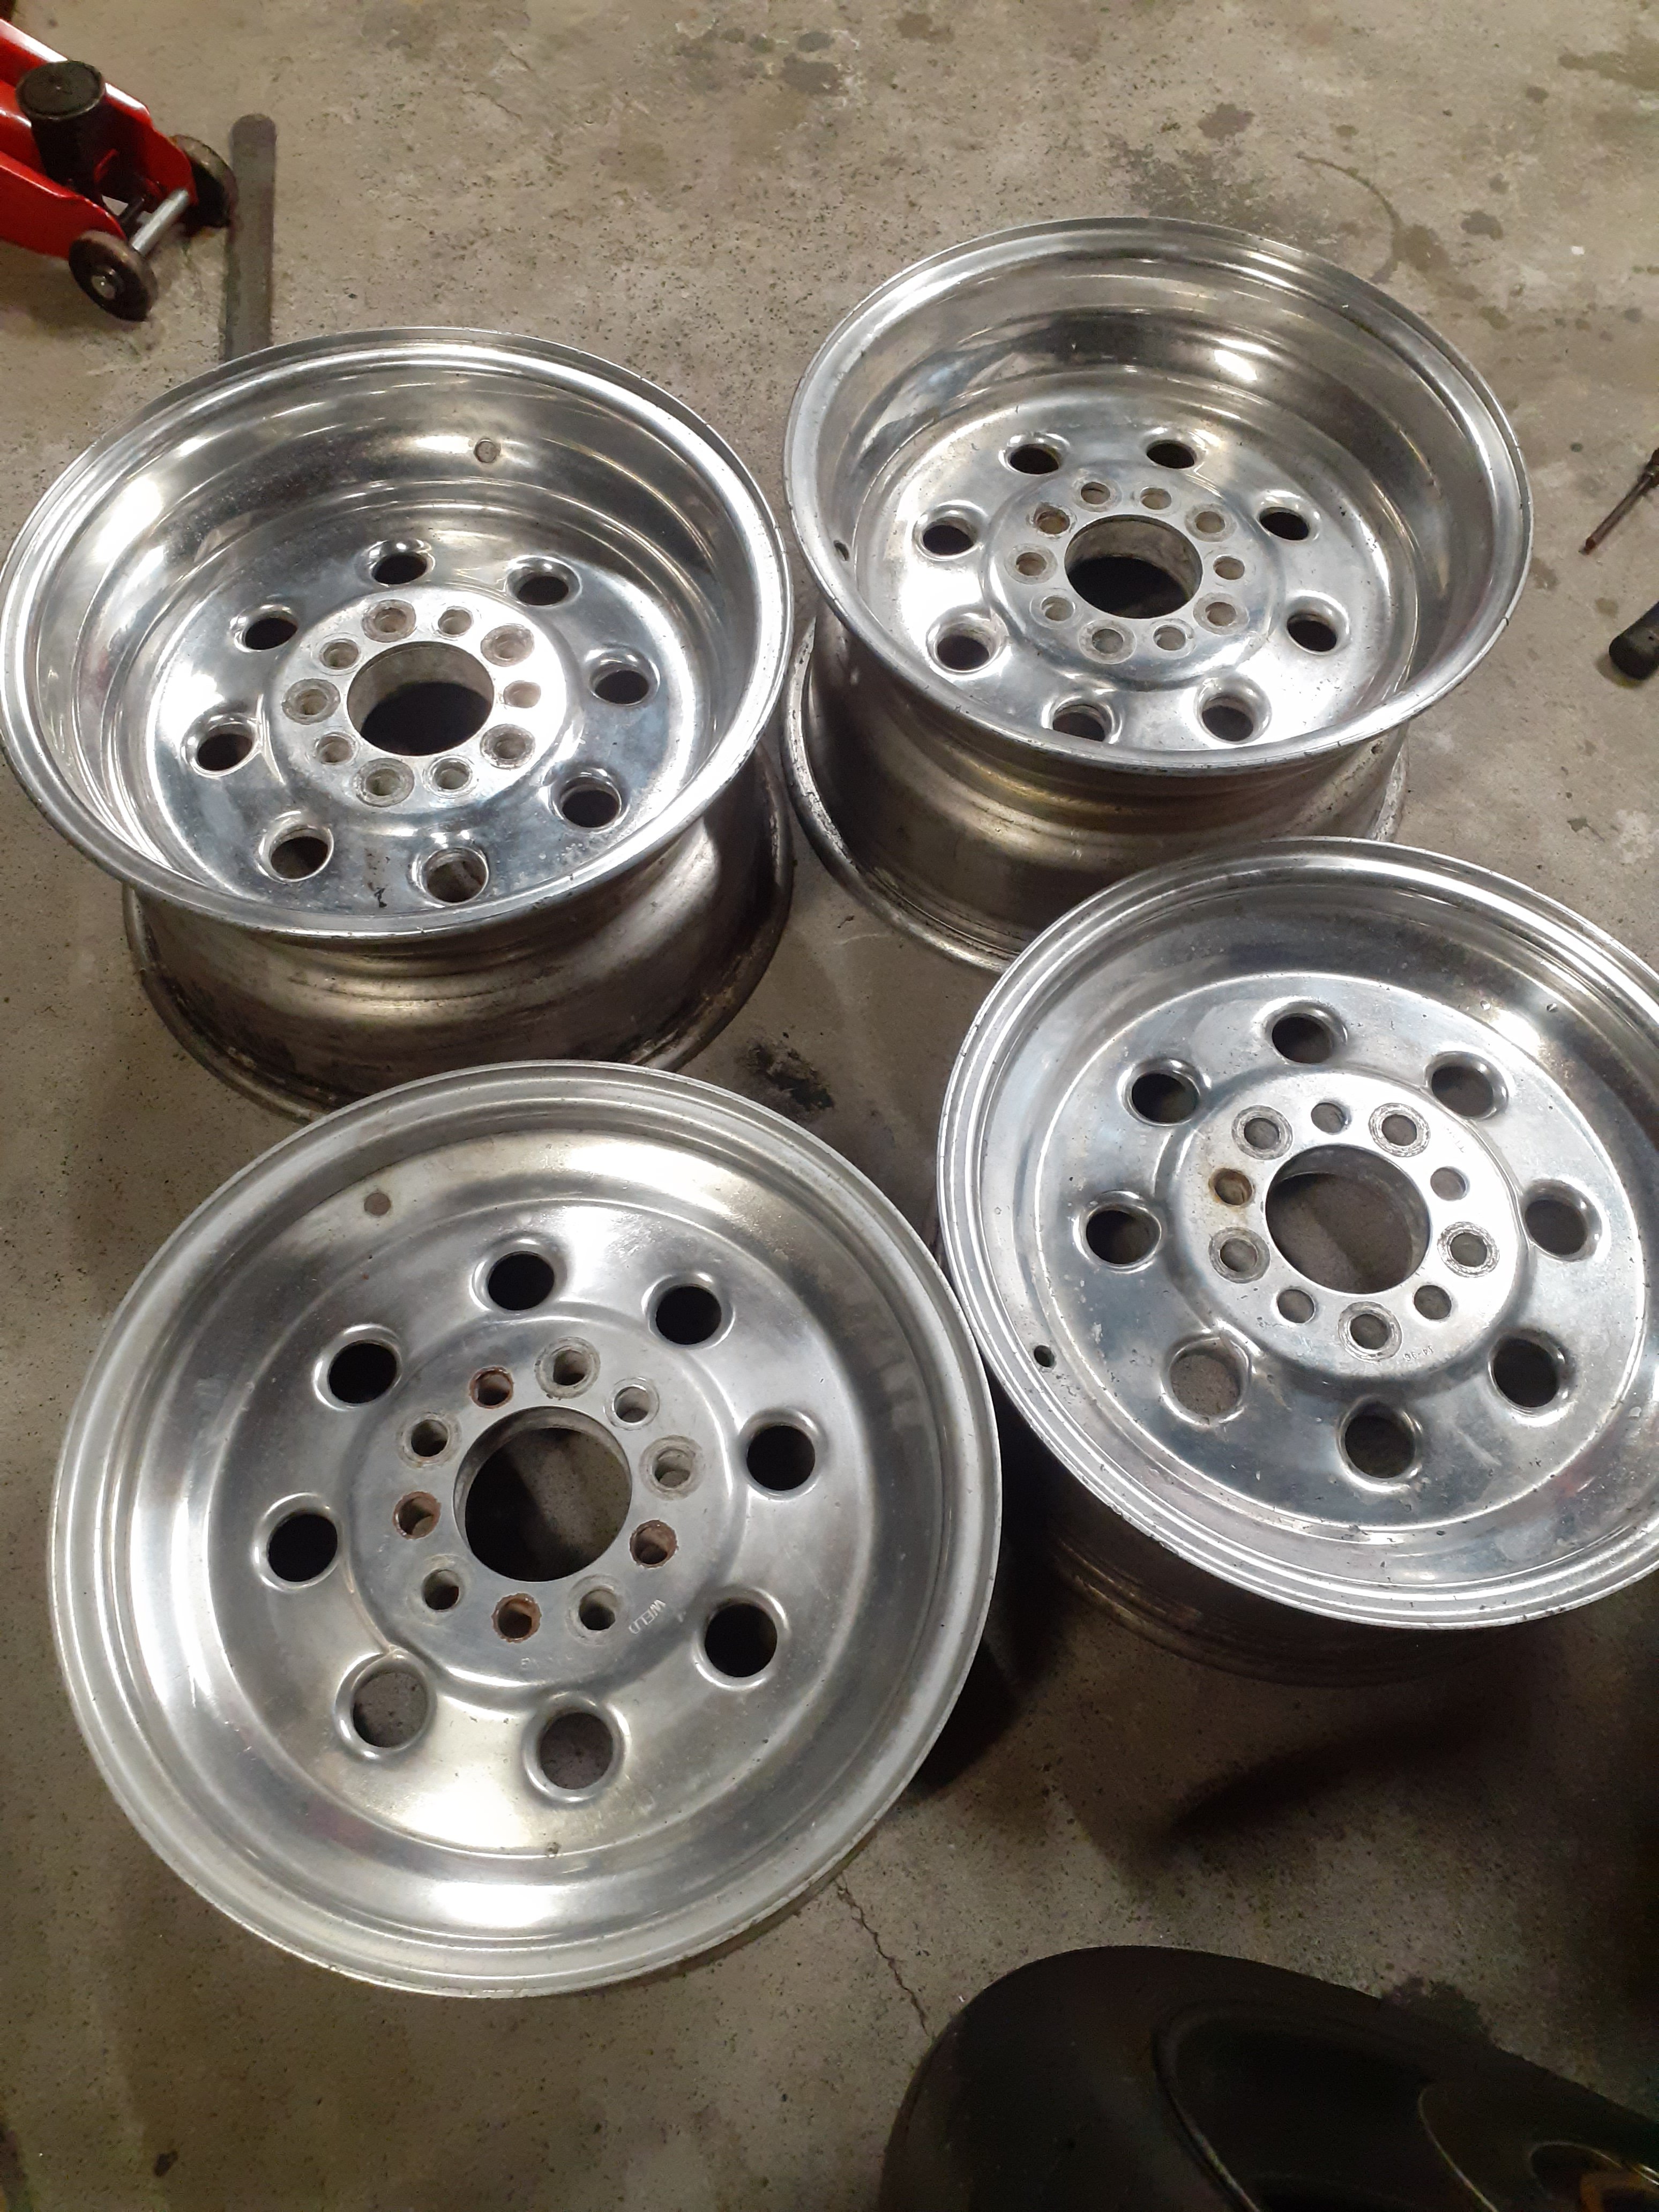
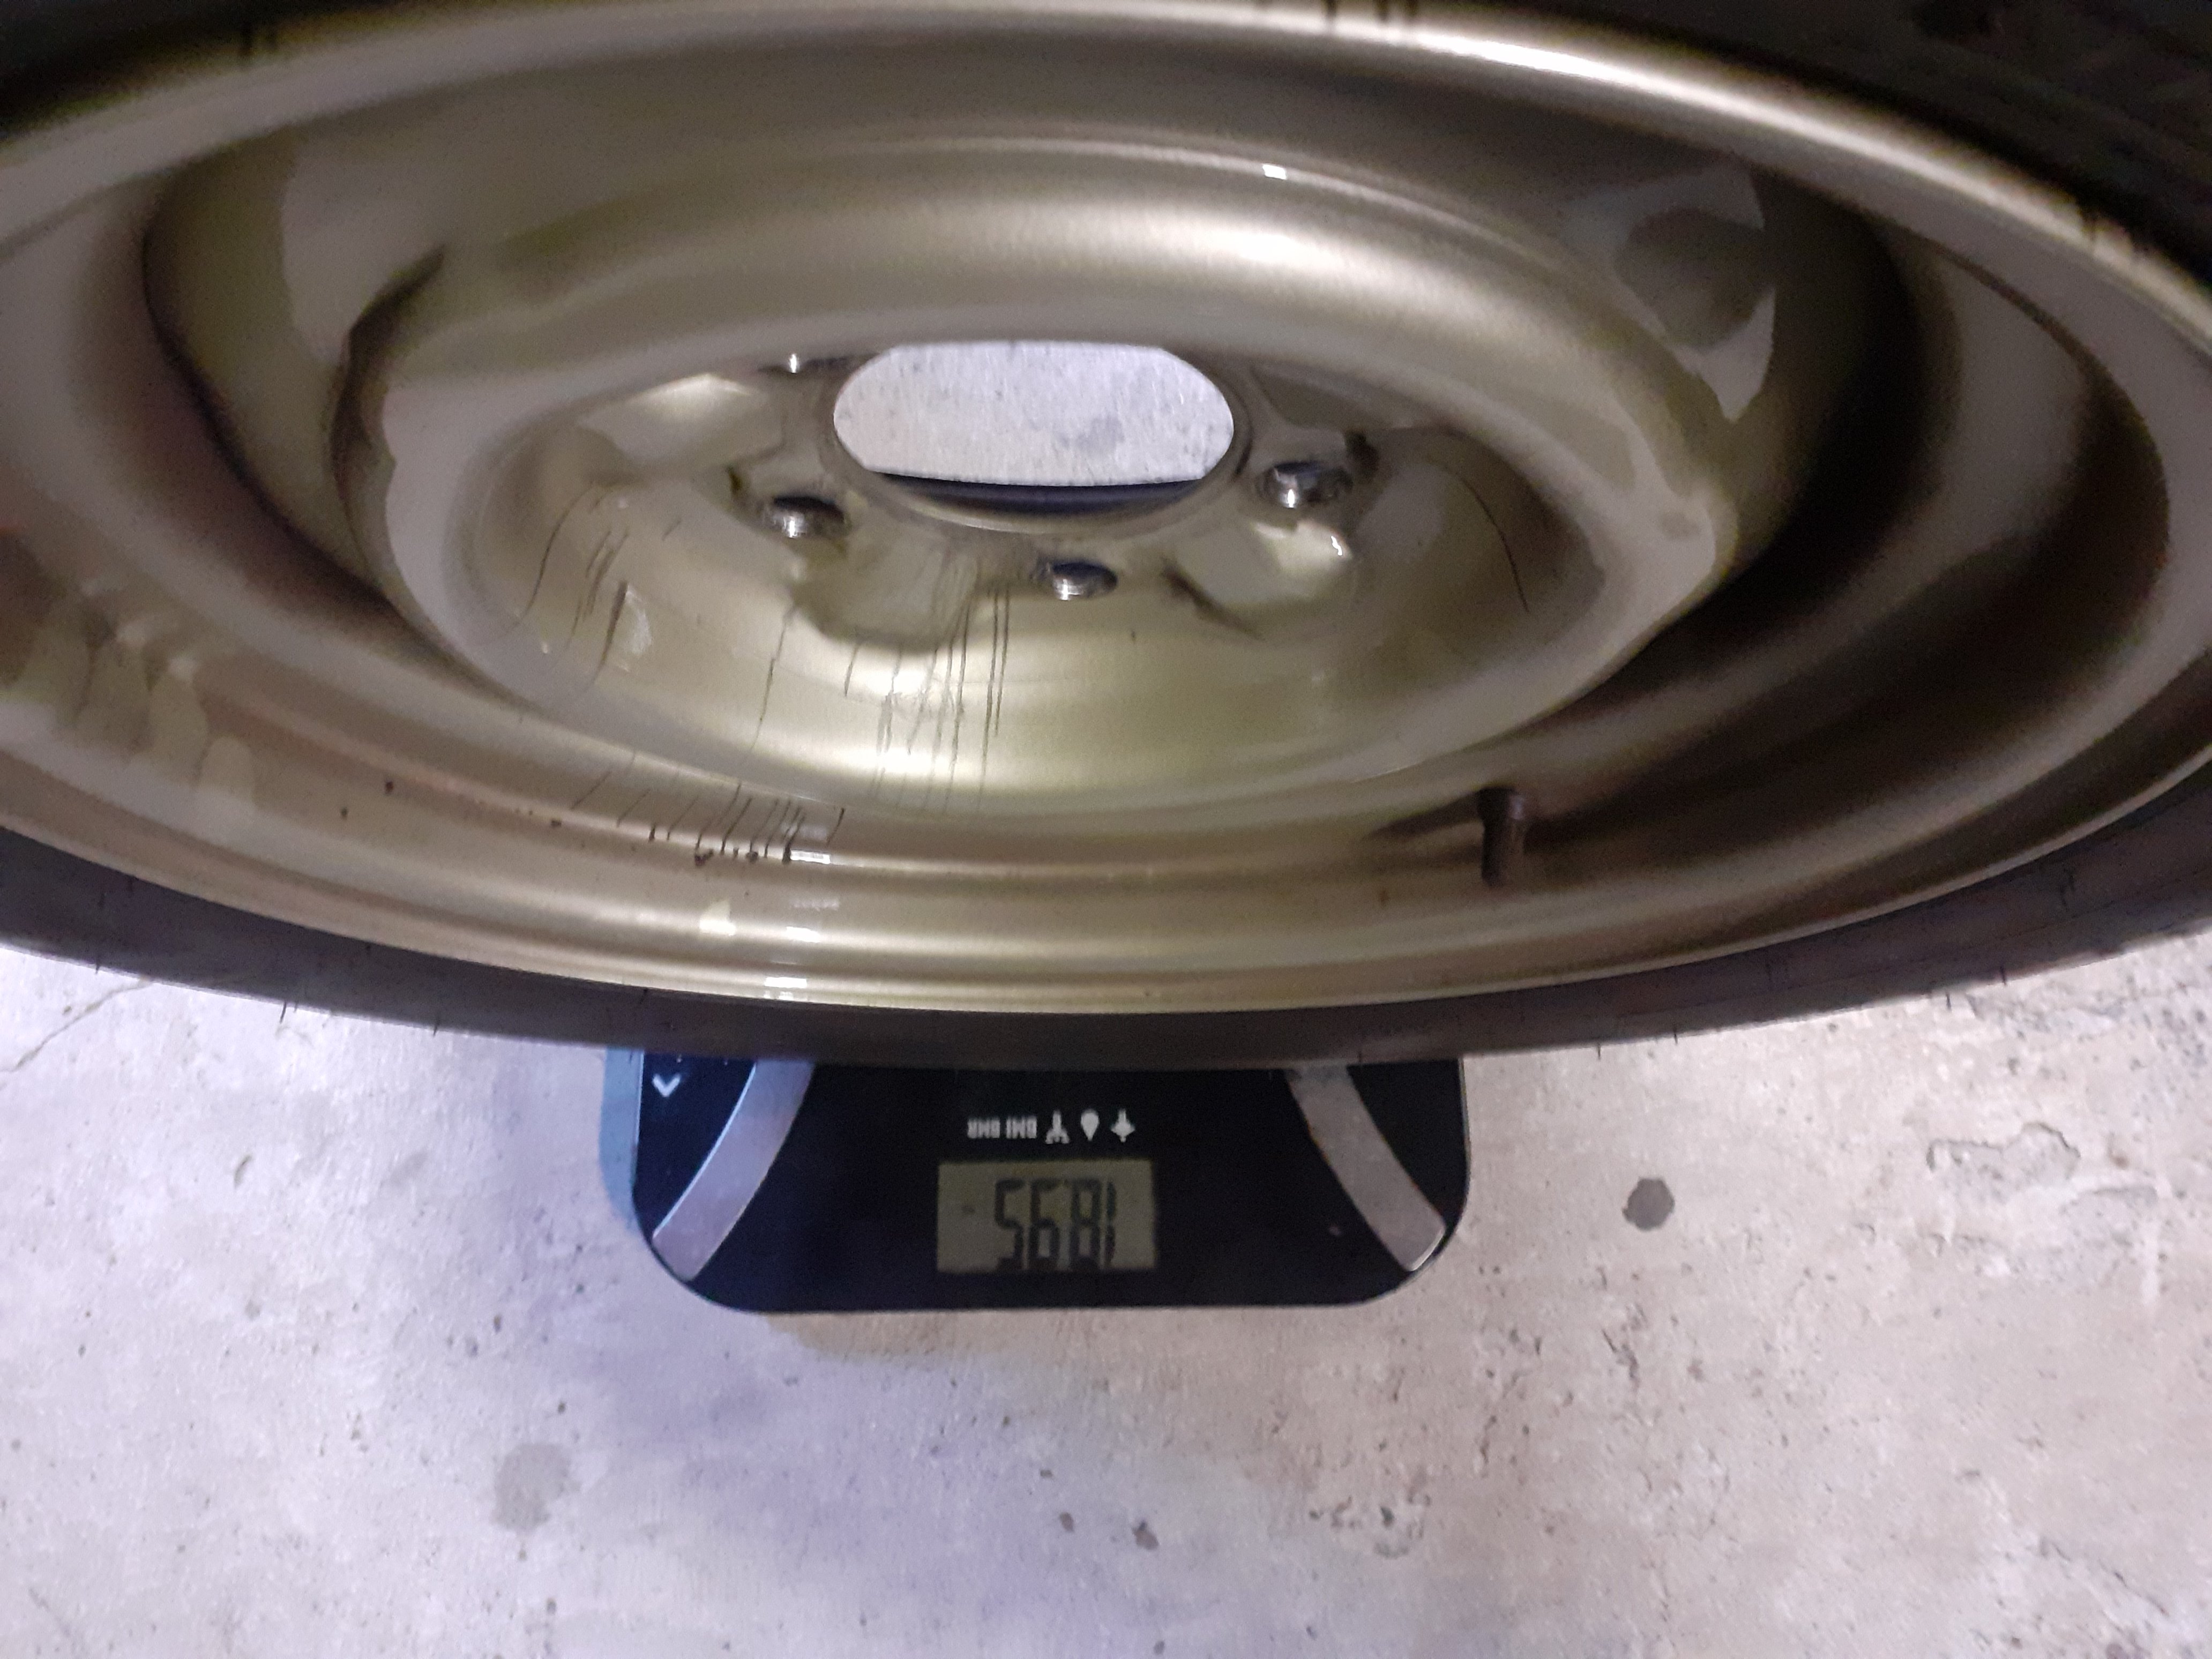
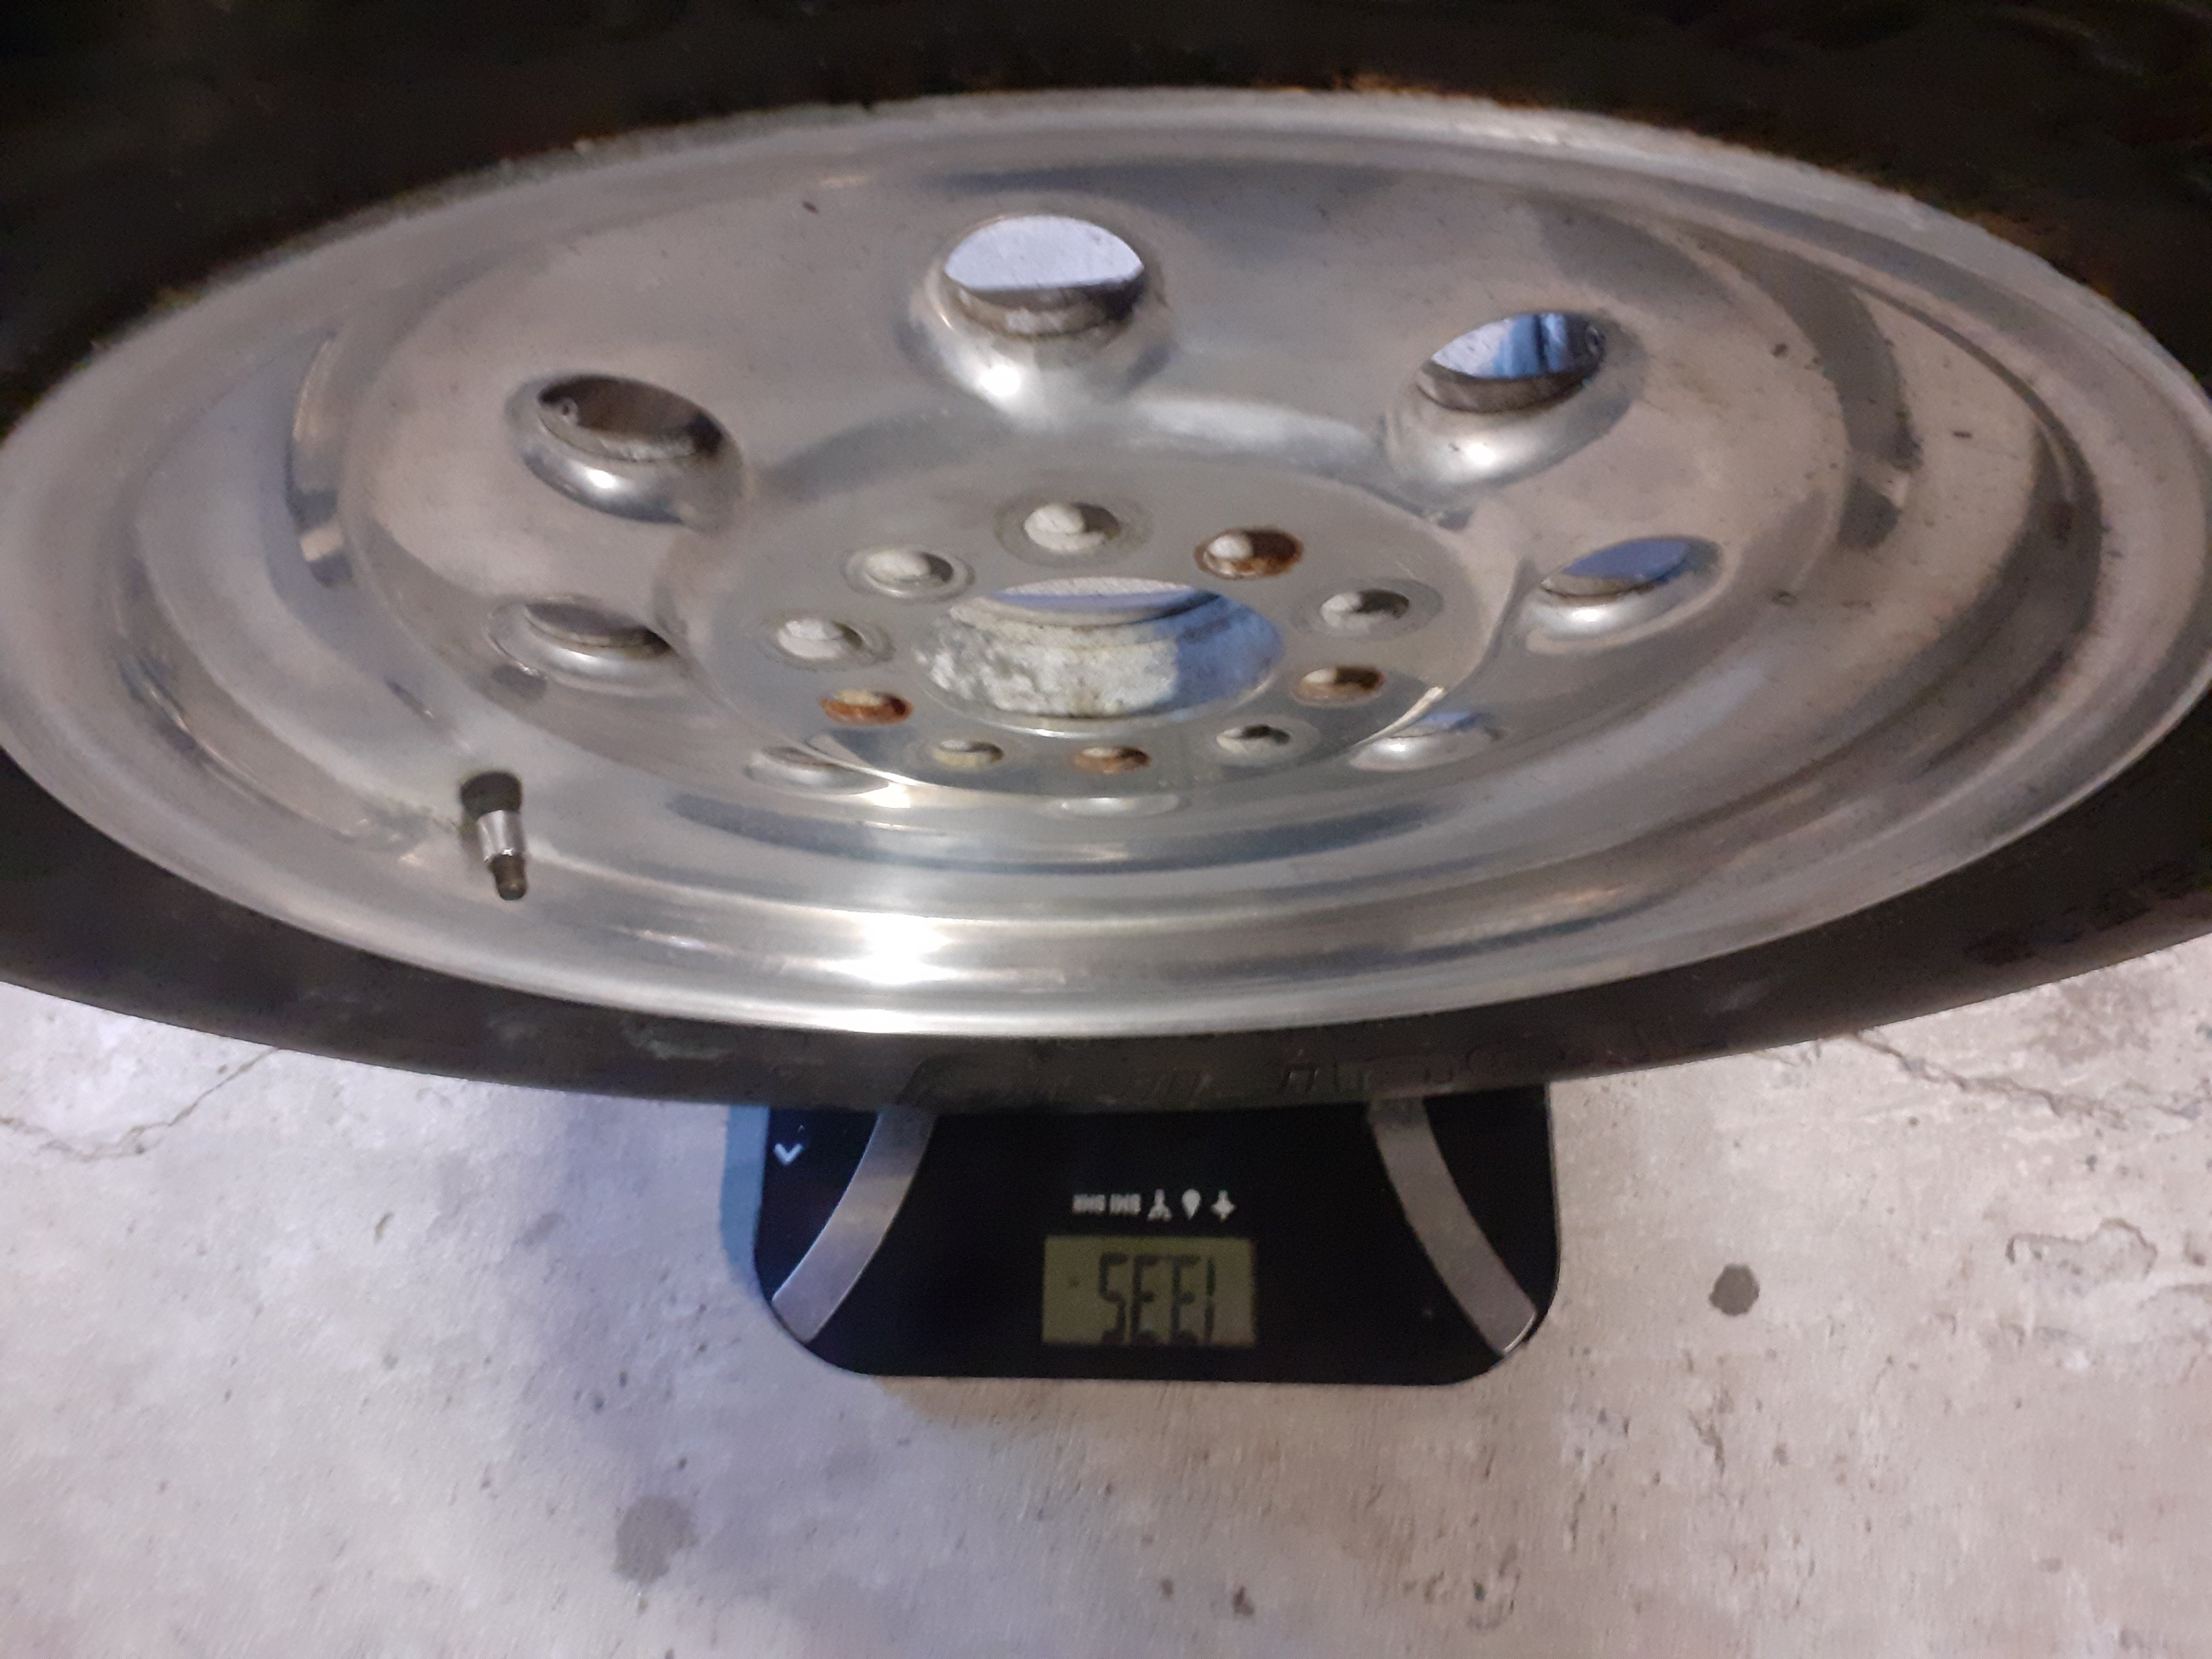
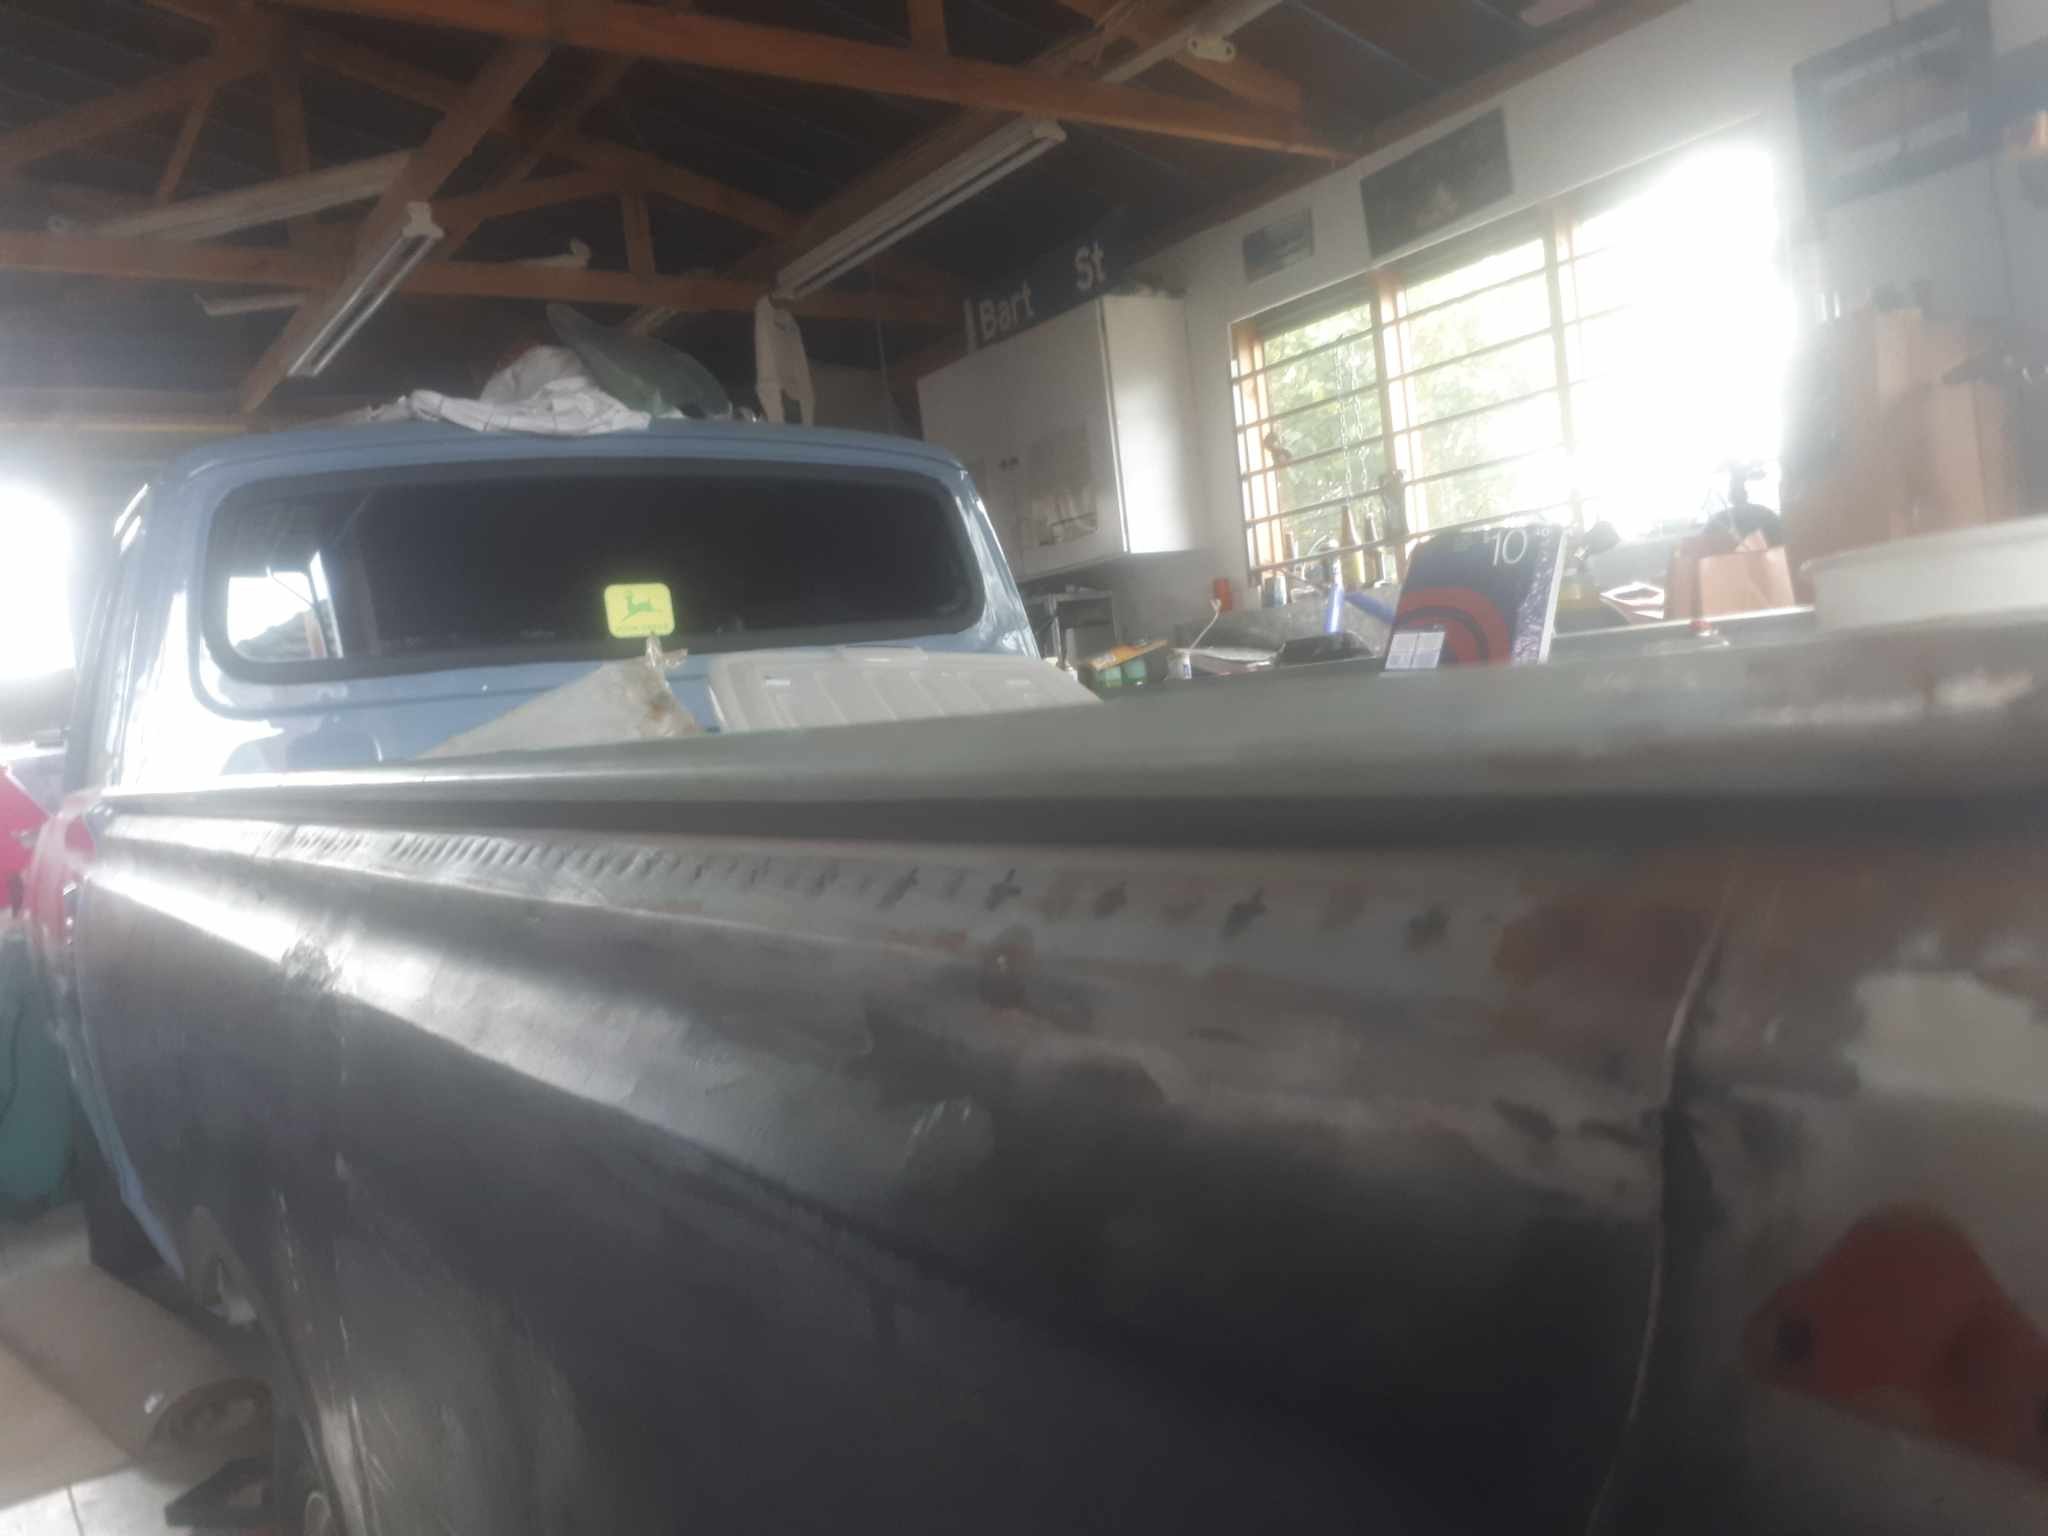
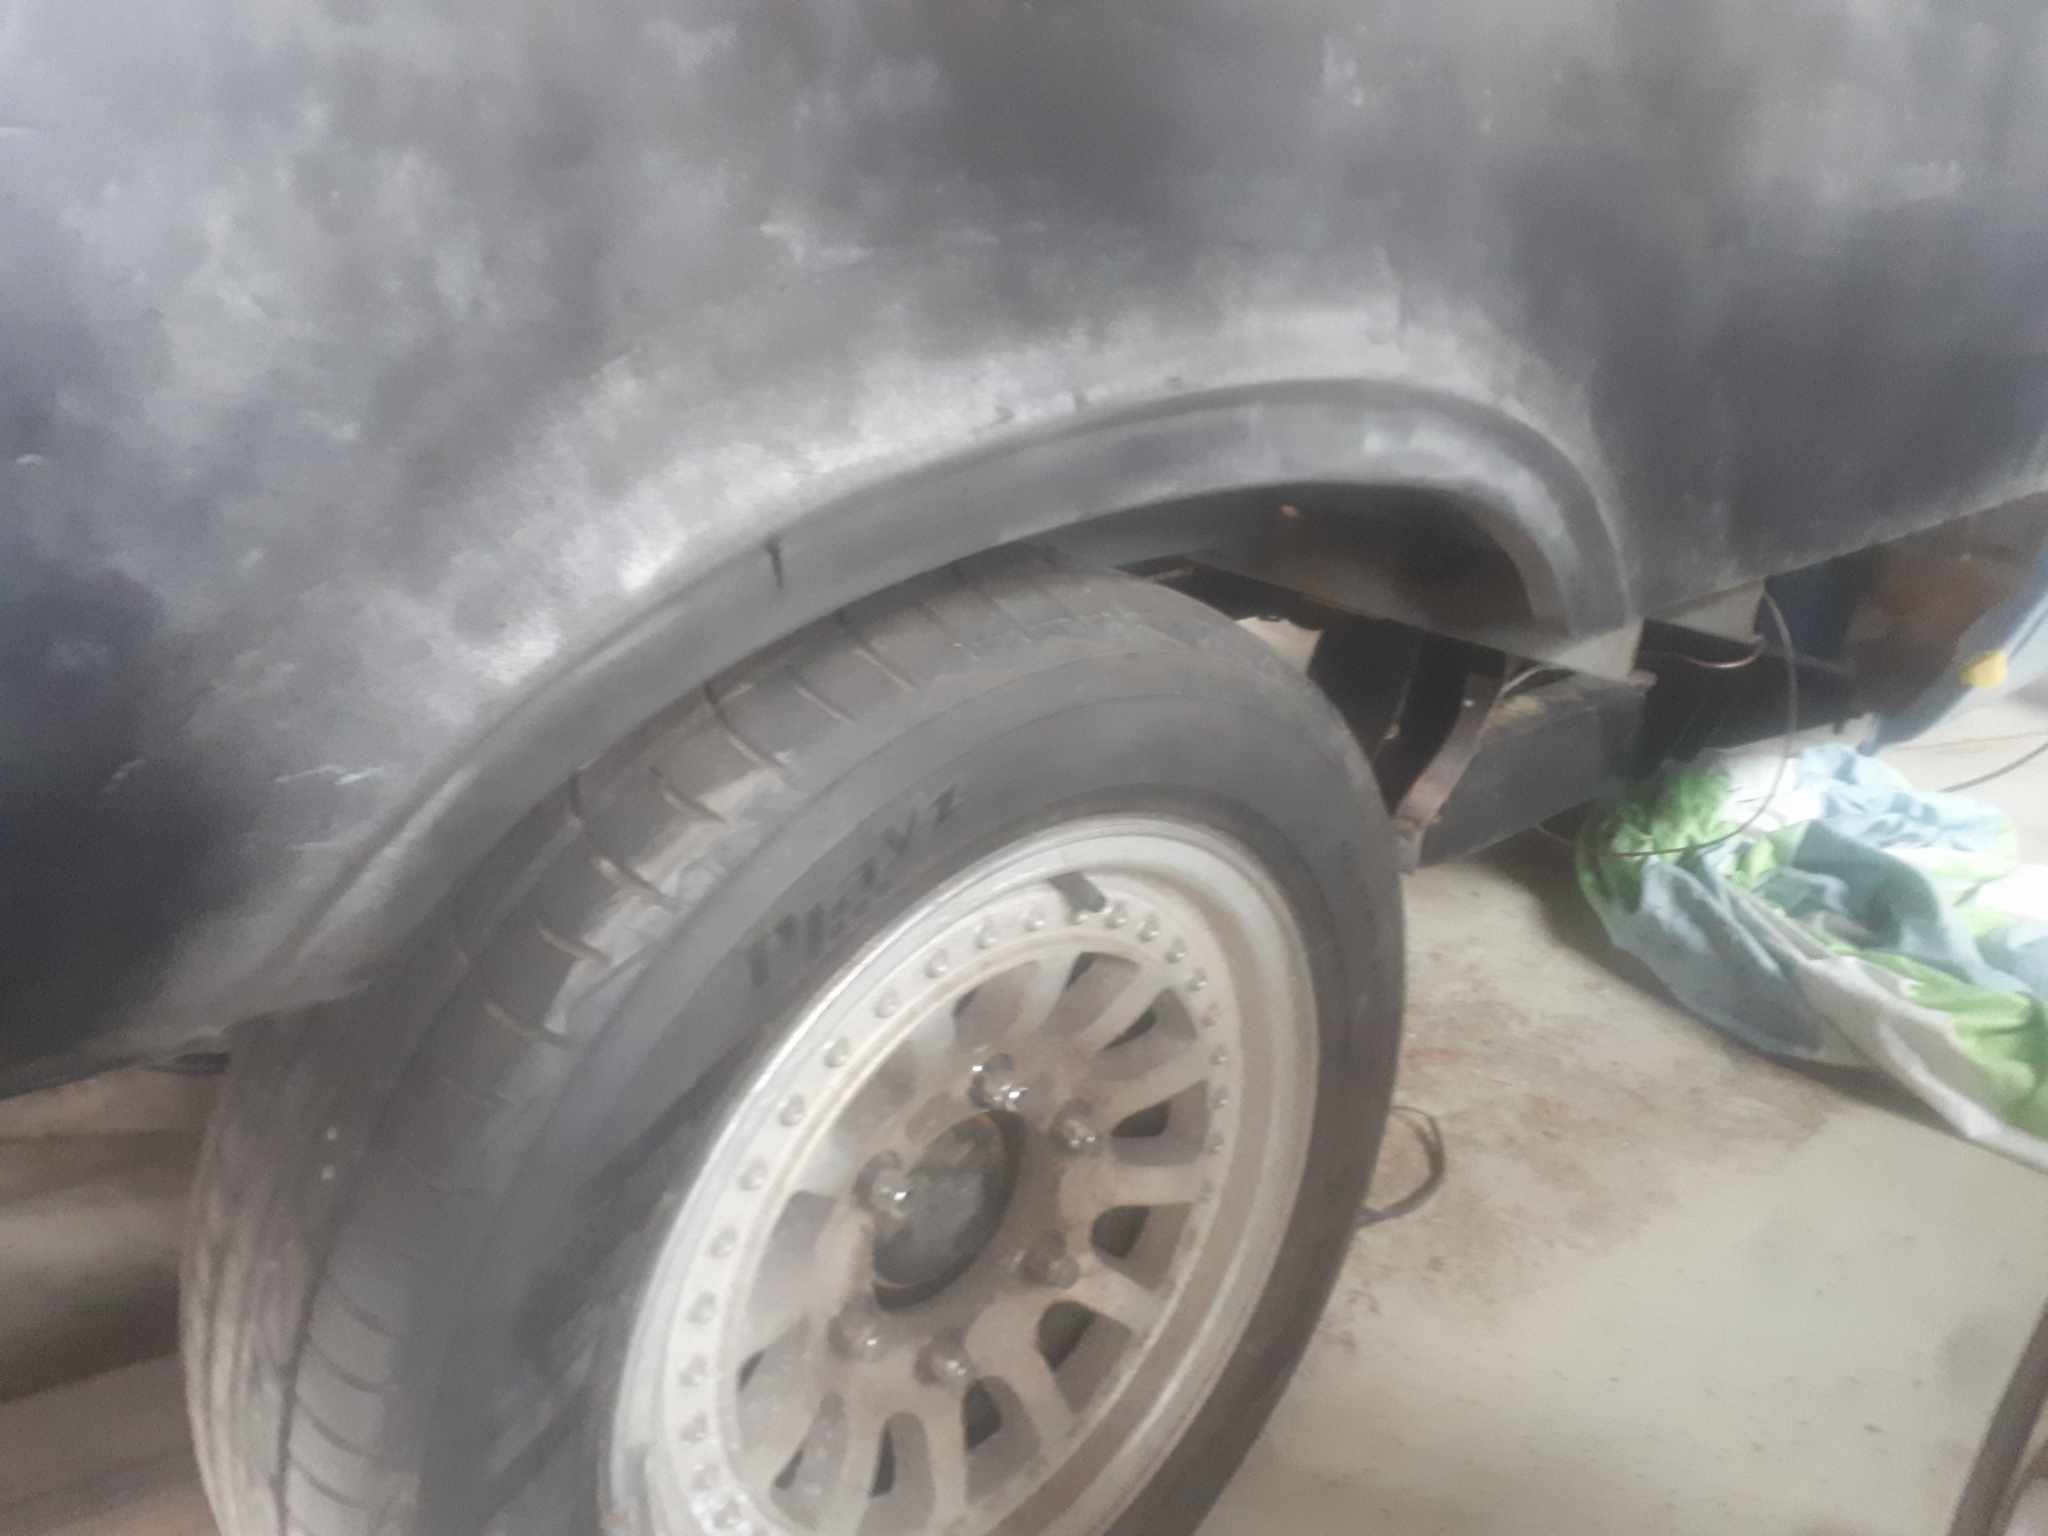
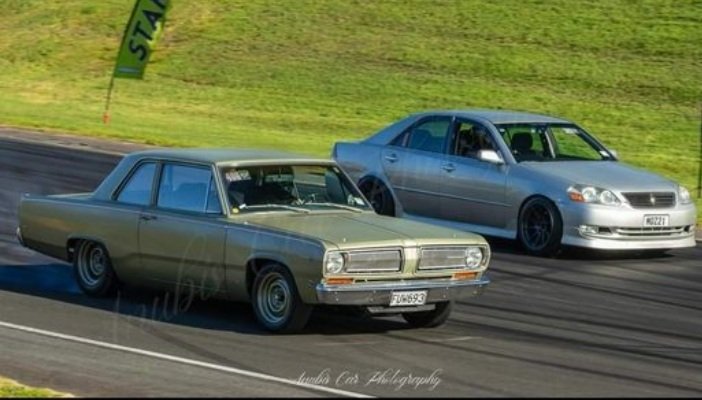
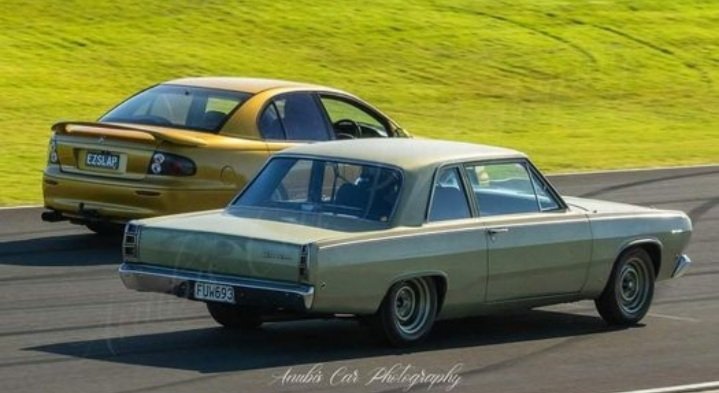
The steel wheels on it are very heavy. When it did its quickest time it had some very light cragar super tricks on the front. They were popular in the 70s but the internet reckons there's not many around these days because they were prone to failure. I bought them ages ago from a guy who took them off his car because they made creaking noises when doing tight turns, they were very cheap. They weigh as much as a bag of chips and are a bit sketchy, also the tyres were right on the limit speed rating and load rating wise. Plus I had to run a 5mm spacer which I did not like. I only did 2x passes with them on and didn't like it So I've had my eye out for a second set of wheels suitable for drag racing Being an impressionable teenager in the 90s who read street machine magazine a lot I've always wanted a set of weld draglites. They don't come up often second hand, I found a set a while ago but they were not wide enough. You can still buy them new but they are pricey Picked these up today, 15x5 and 15x8. Tried them on then got the tyres off, they are very fucked. They need a polish but should tidy up well Anybody know a good polishing place in south auckland?
5 points
-
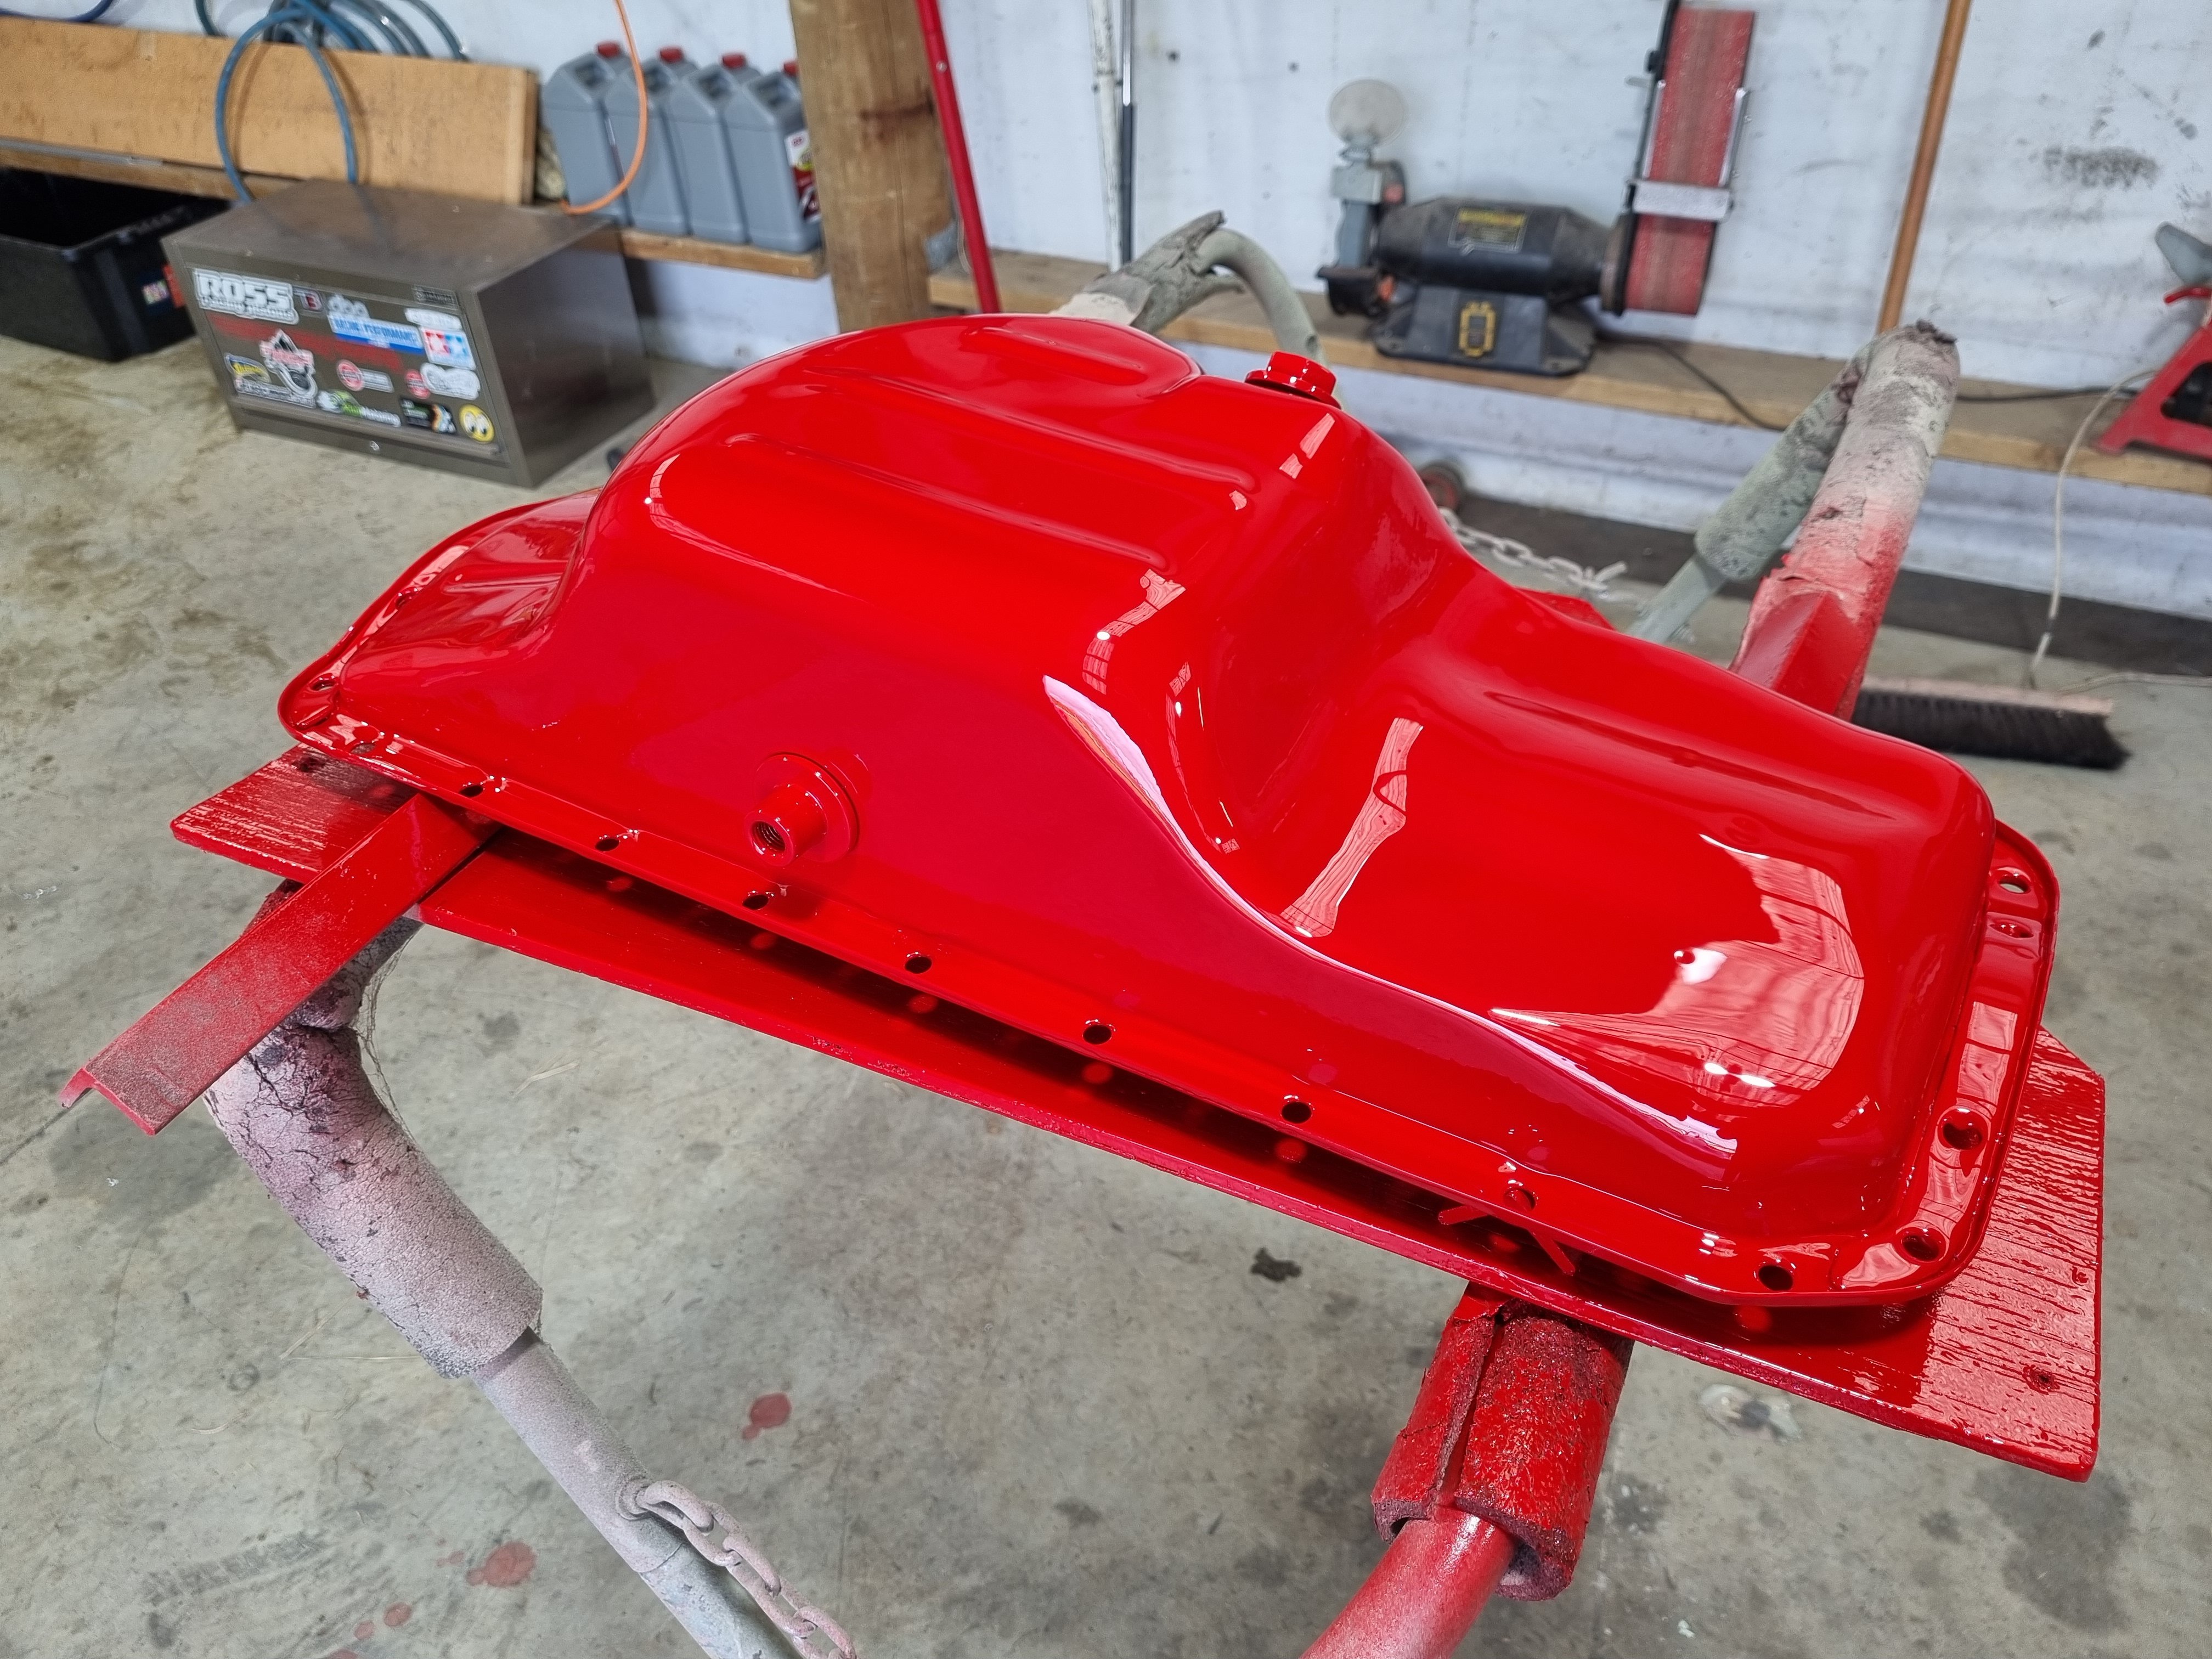
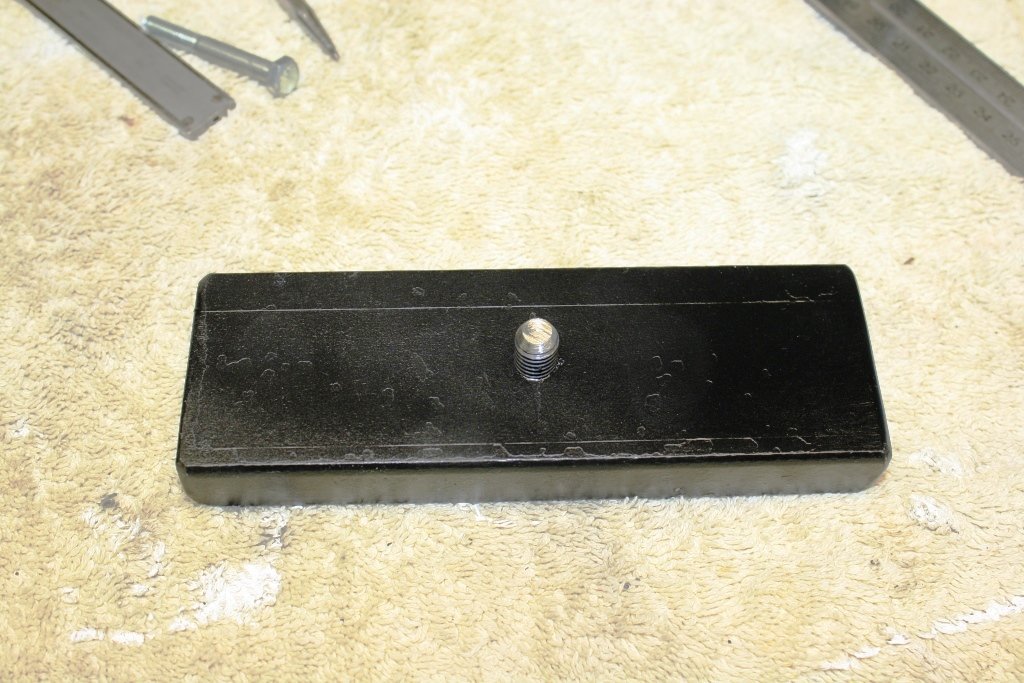
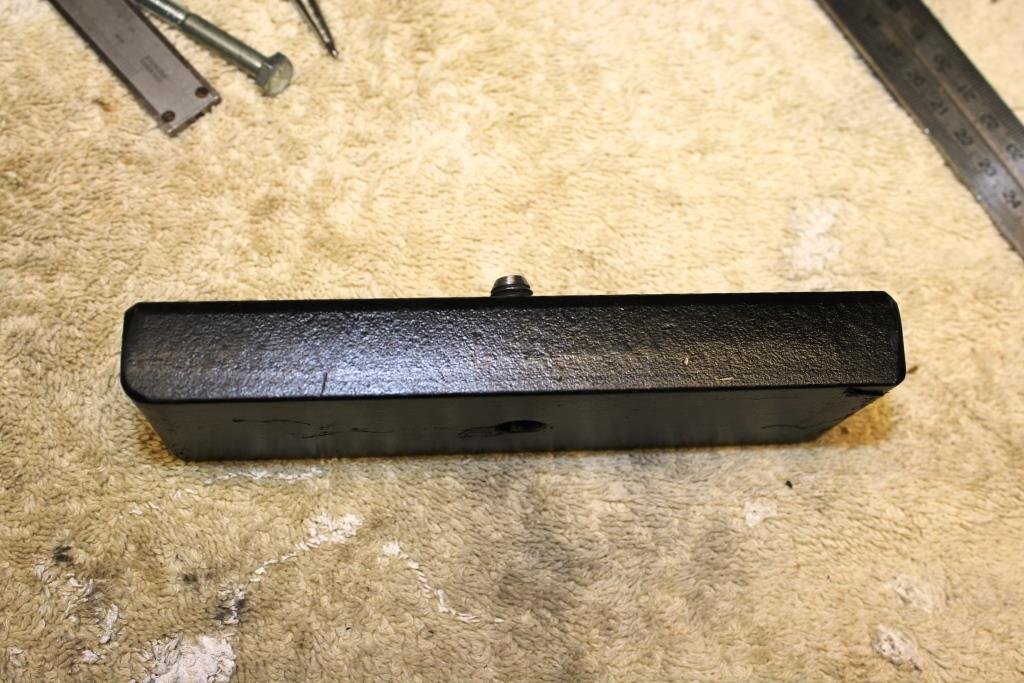
Then I painted it red because that's the first tin of colour I pulled out of the cupboard.
5 points
-
Oh yeah, and @governorsam gave me a Jaffle iron yonks ago, I finally put handles on it for holiday beach fire eating
5 points
-
After a bit of messing around I've got the flywheel, clutch and master cylinder sorted. I was looking into the different types of sound deadening, Dynamatt seems to be the go to but fuck it's spendy. Just to do the front half of the interior it was going to cost about $450. I went the cheap Chinese route instead. I bought enough to do almost the entire inside of the car and it was $45 including shipping. Time will tell if it's any good, but it seems about right. I pulled the dash and trim parts out from under the bench and gave them a clean up. It was the first time I've seen them in about 16 years. The stored really well. I have had the instrument cluster in at Parrot and son to have a little work done, the main thing was having the tacho modified to suit the 6 cylinder and they fixed a couple of small issues. I've wired the engine up more or less. I'm waiting on the electronic ignition to arrive, I'm going to run some hard fuel lines, install a fuel pump, regulator and make some new brake lines. The drive shaft is being built and should be ready in a week or so. Hopefully not too much longer until she's running. The interior is mint apart from the front seats, they need recovering and probably some new padding. Does anyone have any recommendations for someone in Christchurch? Cheers.4 points
-
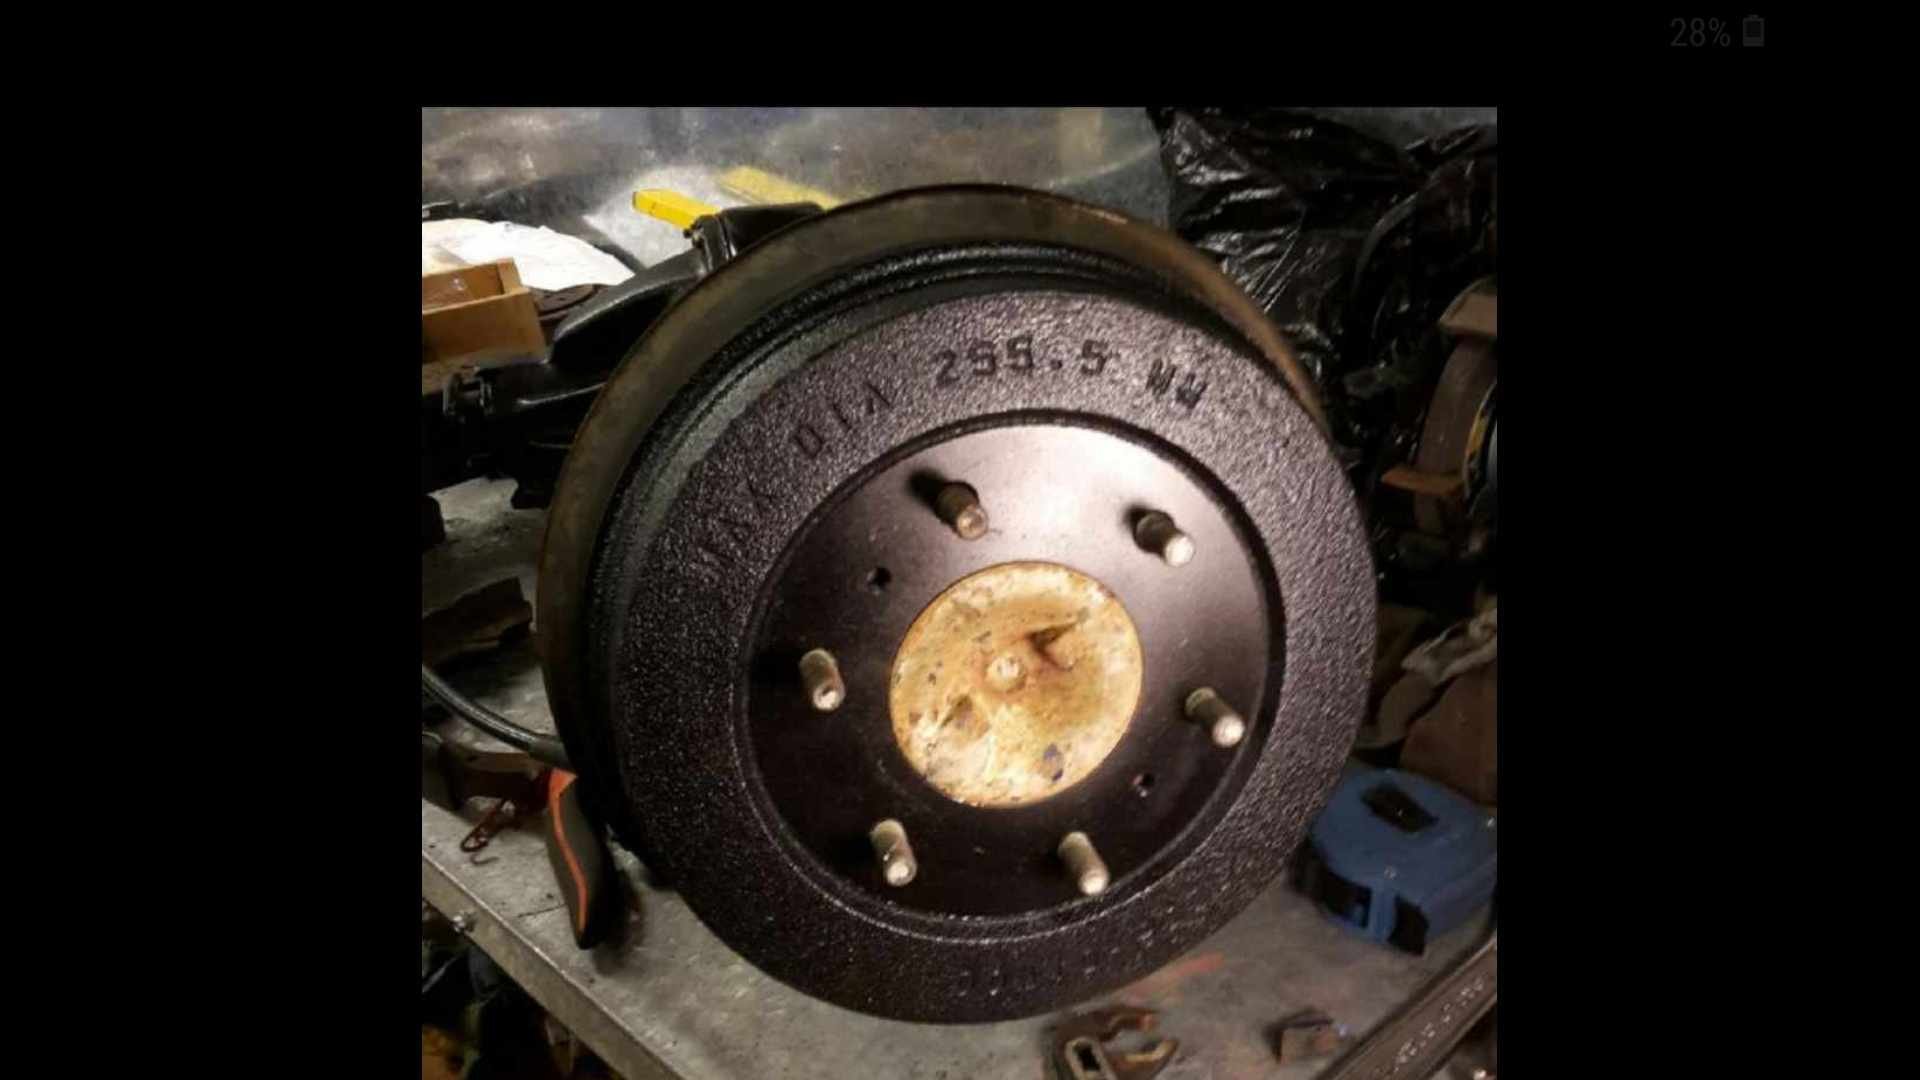
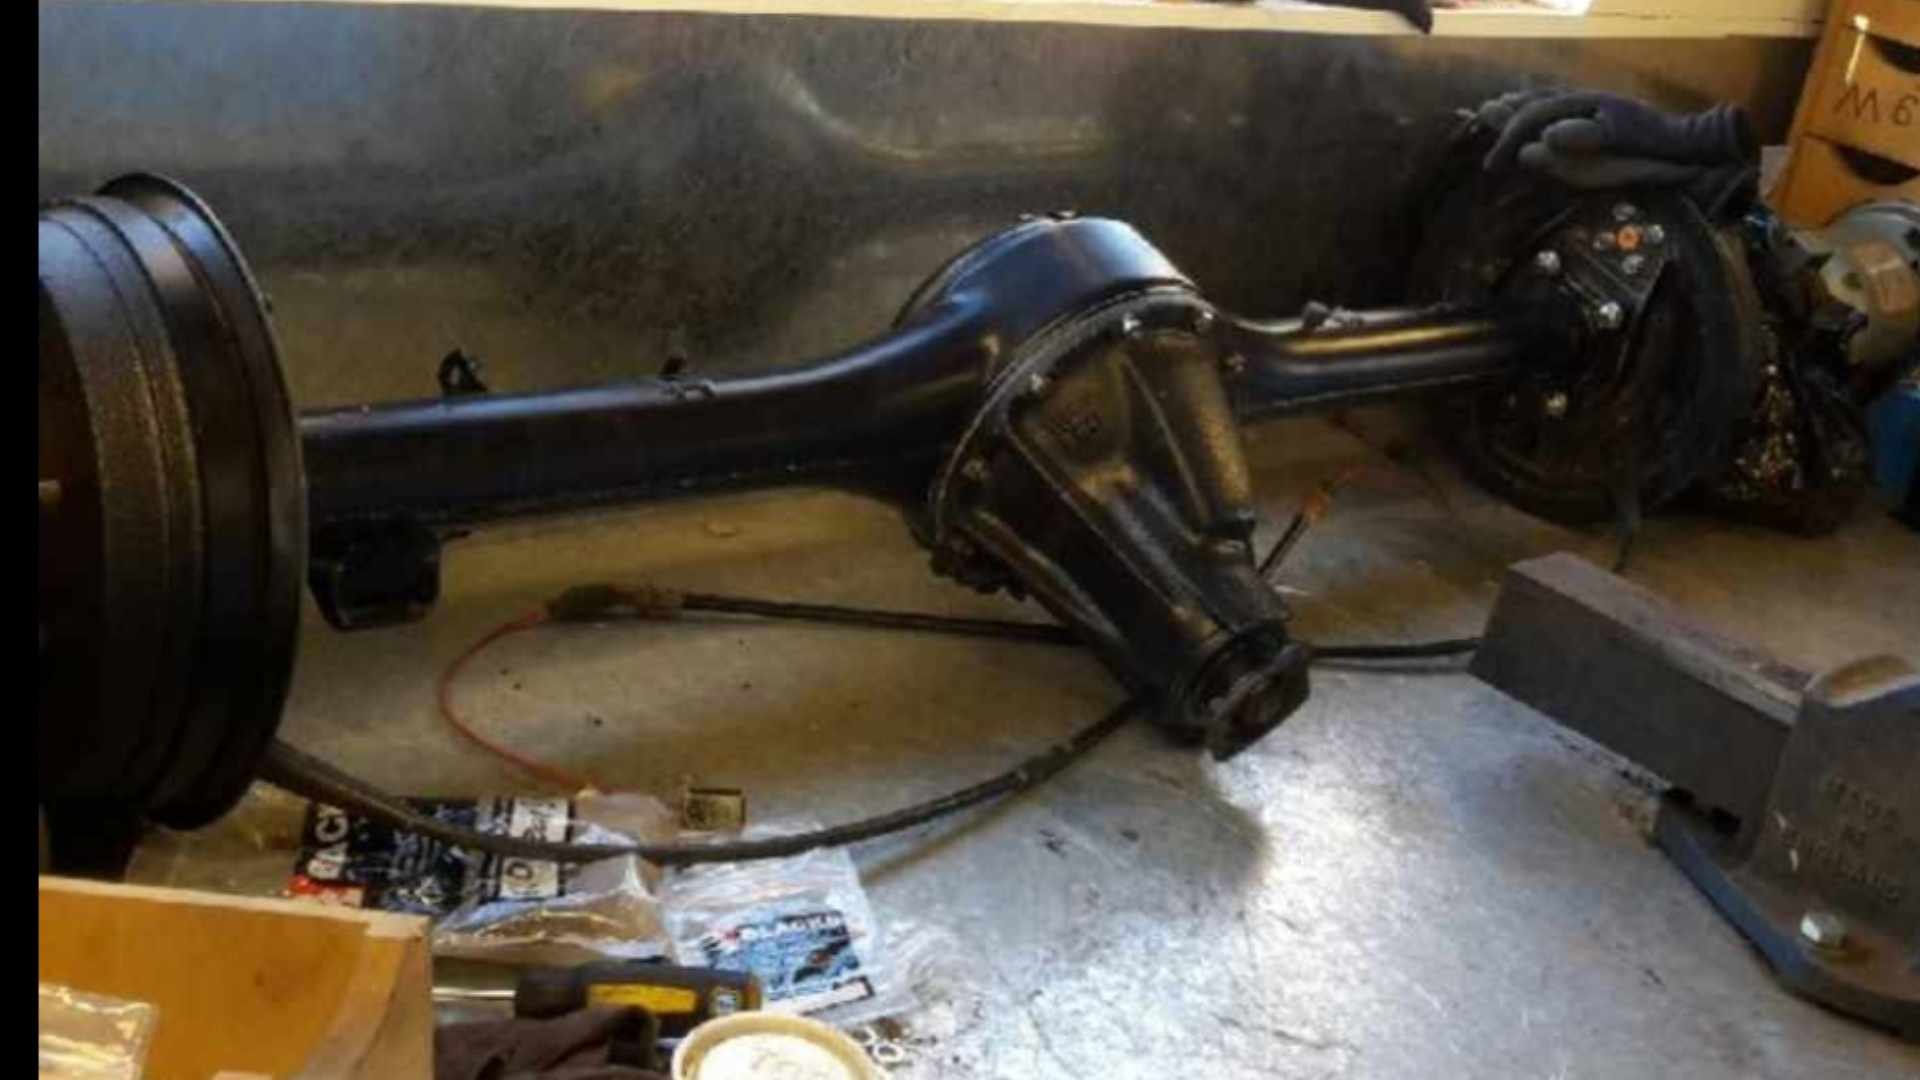
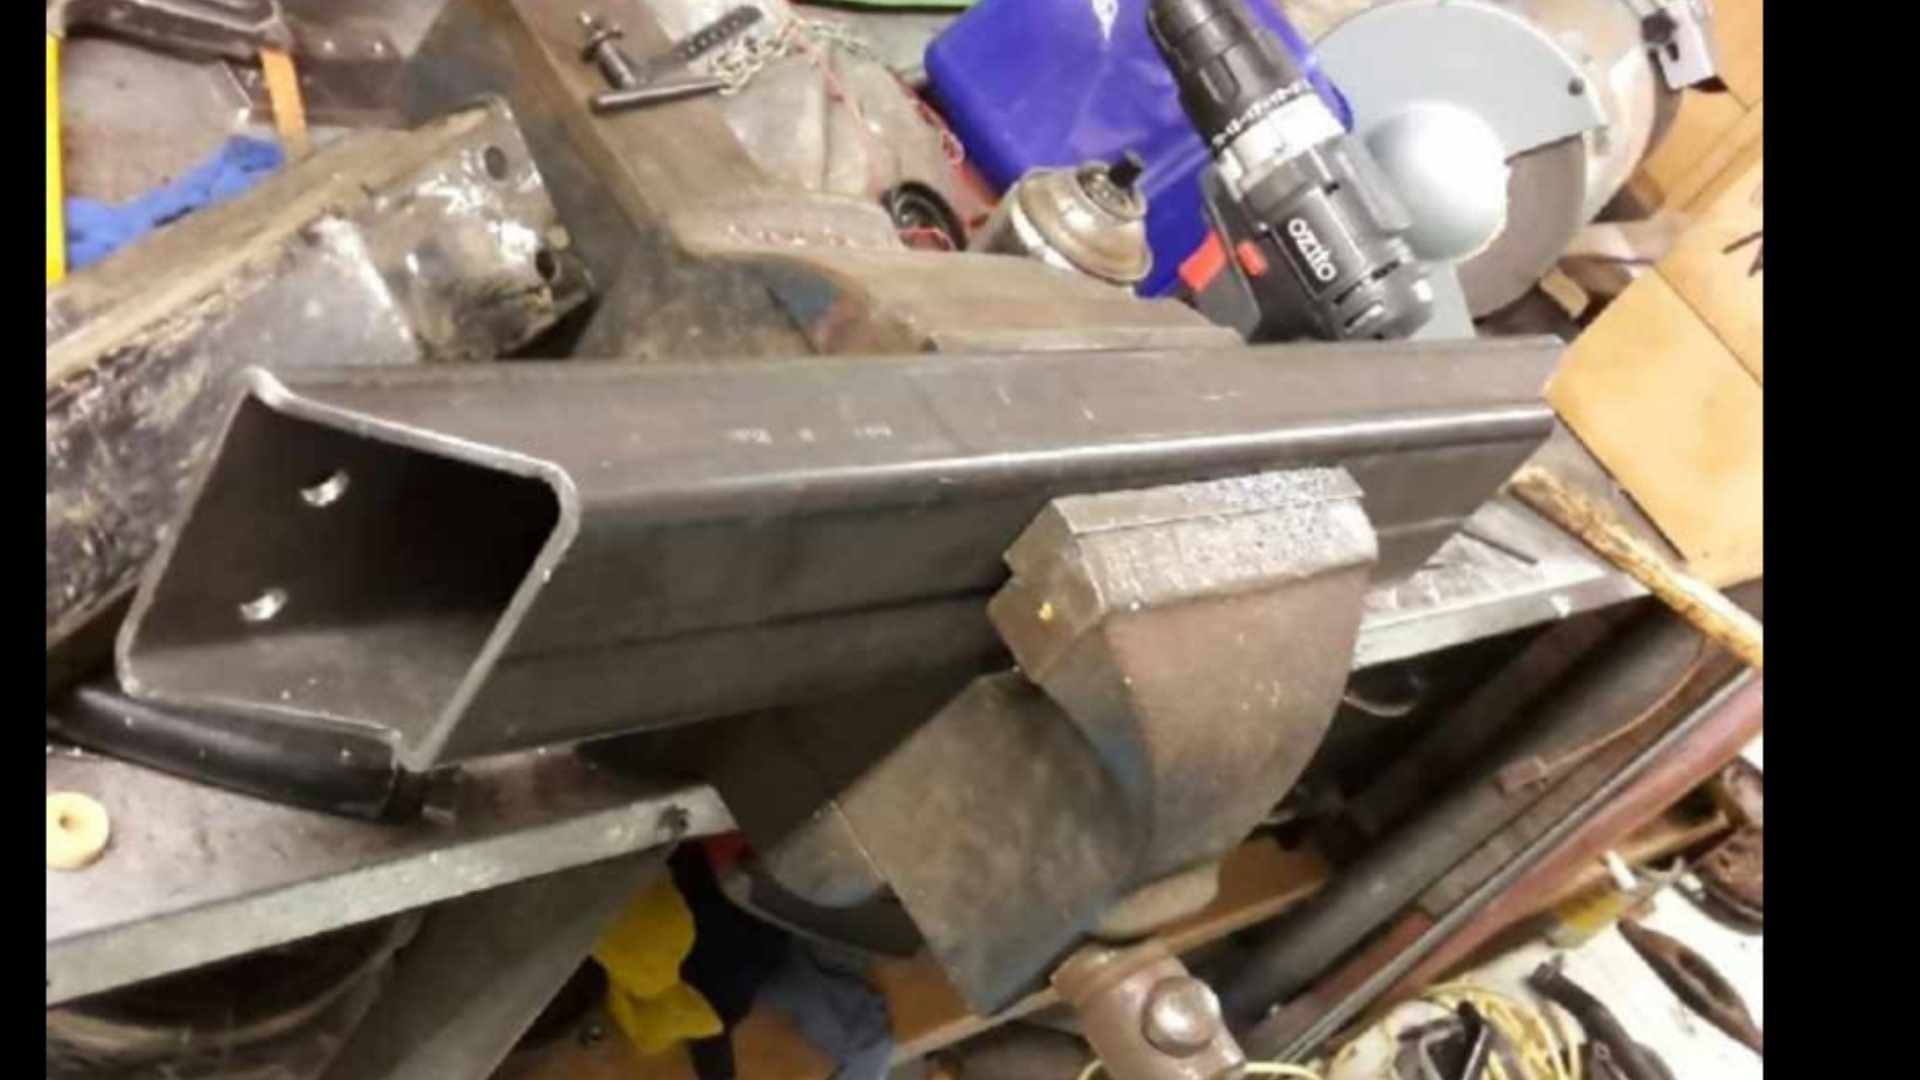
Id made a bet with @Luke that id have this thing drivable in time for an event aaages ago. I lost miserably. Id been sending him pictures of my progress at the time. (Before i had messenger, so by txt at fantastic cost) talking to him the other day, he still had them, and sent a few back to me. I manages to squeeze an Ebay special fan between the custom radiator and the front panel. And i got some pics of the diff too. 620s run an H190 diff, with an aluminium centre housing. However because they were an underpowered light comercial vehicle, they run a 4.6:1 ratio. Great for rally driving, or farm duties. But and absolute fucking nightmare for open road driving. I found a 3.9:1 head somewhere in Hamilton. @mark105 kindly delivered it to camp Rangiwoods for Old school nats 2013. (I might have had the yellow truck that far back) since we were only rolling in a dastun 1200, @Gomaxgo kindly dragged it back down to Christchurch for me in his 6cyl KE70 ' goon. Because reasons, i finished up using the axle out of the one i parted out for the front cut. As i mixed and matched a few bits, (my handbrake cables were fucked) i discovered this axle was ~15-20mm narrower each side. I had the housing blasted by Blain at FastBlast. And @LowTech powder coated the housing back when he had a powedercoating booth. I swapped the pinion flange over. This also required a hefty sleeve be fitted. Both because the seal journal was bady cut/worn, and because the seal journal was considerably bigger on the 3.9 diff. A lick of paint on the head, and it was glued in. Absolutely nobody had a listing for new brake drums. And all of mine were worn out of spec. ROCK AUTO to the rescue. (For all the parts your car will ever need) they were something stupid like $20 each. I gave the backing plates a brush up and paint. And rebuilt the brakes/ew cylinders and shoes. (My bench hasnt been that clear for a looooong ass time) I dont have any pictures, but these diffs use a turbo gay cup and cone arrangement on the axle bearings. You have to set the axle bearing preload by changing shims. (Theres a thrust block in the centre of the side gears that the tip of the axle runs in permanent contact) i fucked these off, and replaced them with deep groove bearings. The deep groove bearing was a few mm narrower than the Cup of the cup and cone. So i had to make a spacer ring as insurance that the bearings could never migrate in and out within that pocket. The other picture i found was of the gearbox X member i made. Its nothing fancy. The material was kindly donated by @Chris.QCR
4 points
-
3 points
-
So anyway I did a bit of testing. At idle I have tweaked the mixes to give about 13:1. The idle circuit (which controls things up to about 3000rpm) is basically running at 12:1. So could probably do with a lean out. Running at higher revs is a bit leaner, it moves around a bit but is basically sitting at 13-14. Any acceleration at all gives a little bit of hesitation and when it picks up it leans it out to 15.5 or 16. I have not checked the float levels, but I found some info on the right height, so I'll probably dick with this a little bit to make sure there is enough fuel to feed the accelerator pump etc.. Slowly getting my head into it properly now3 points
-
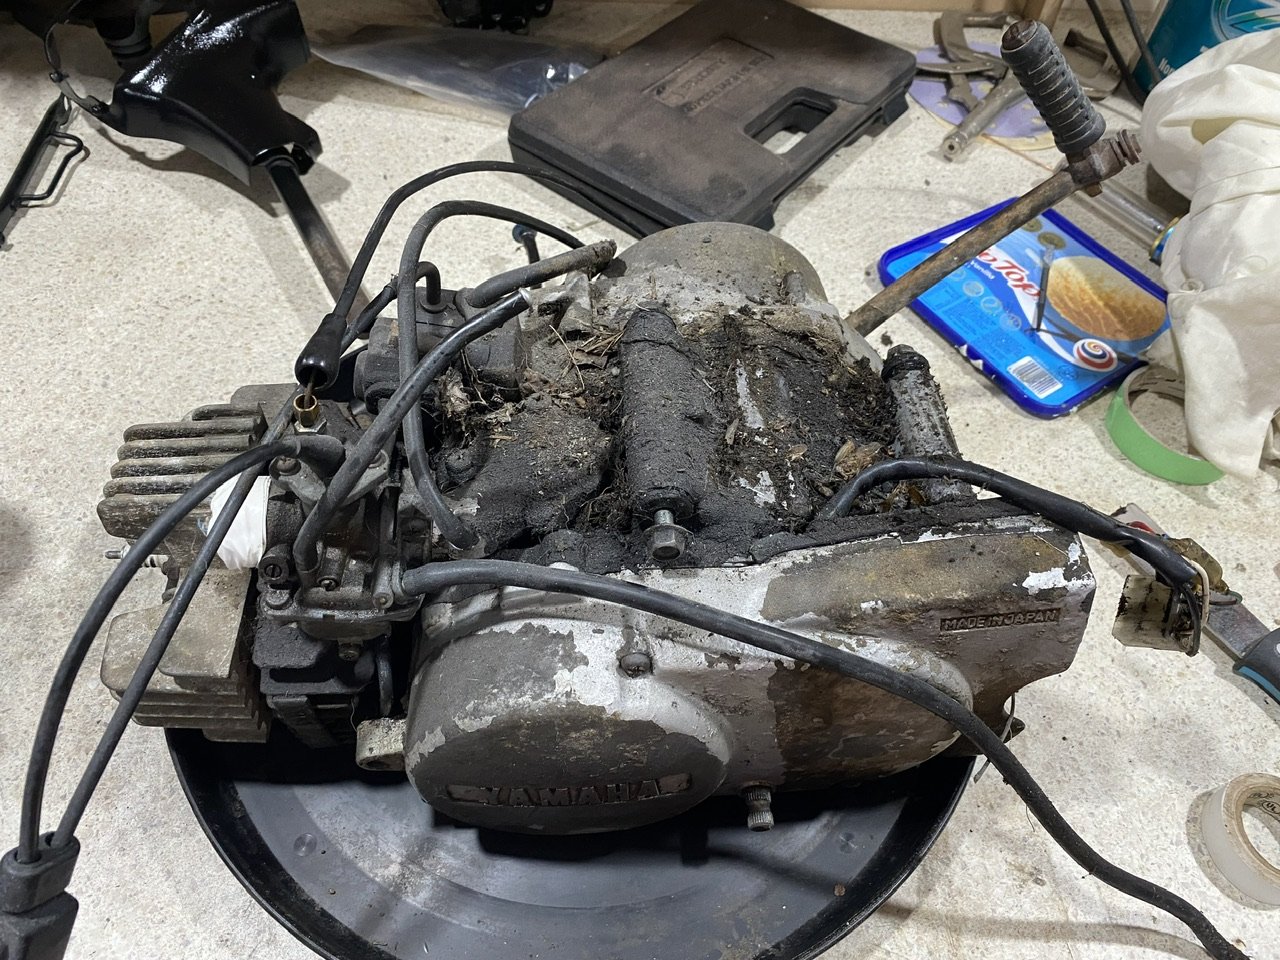
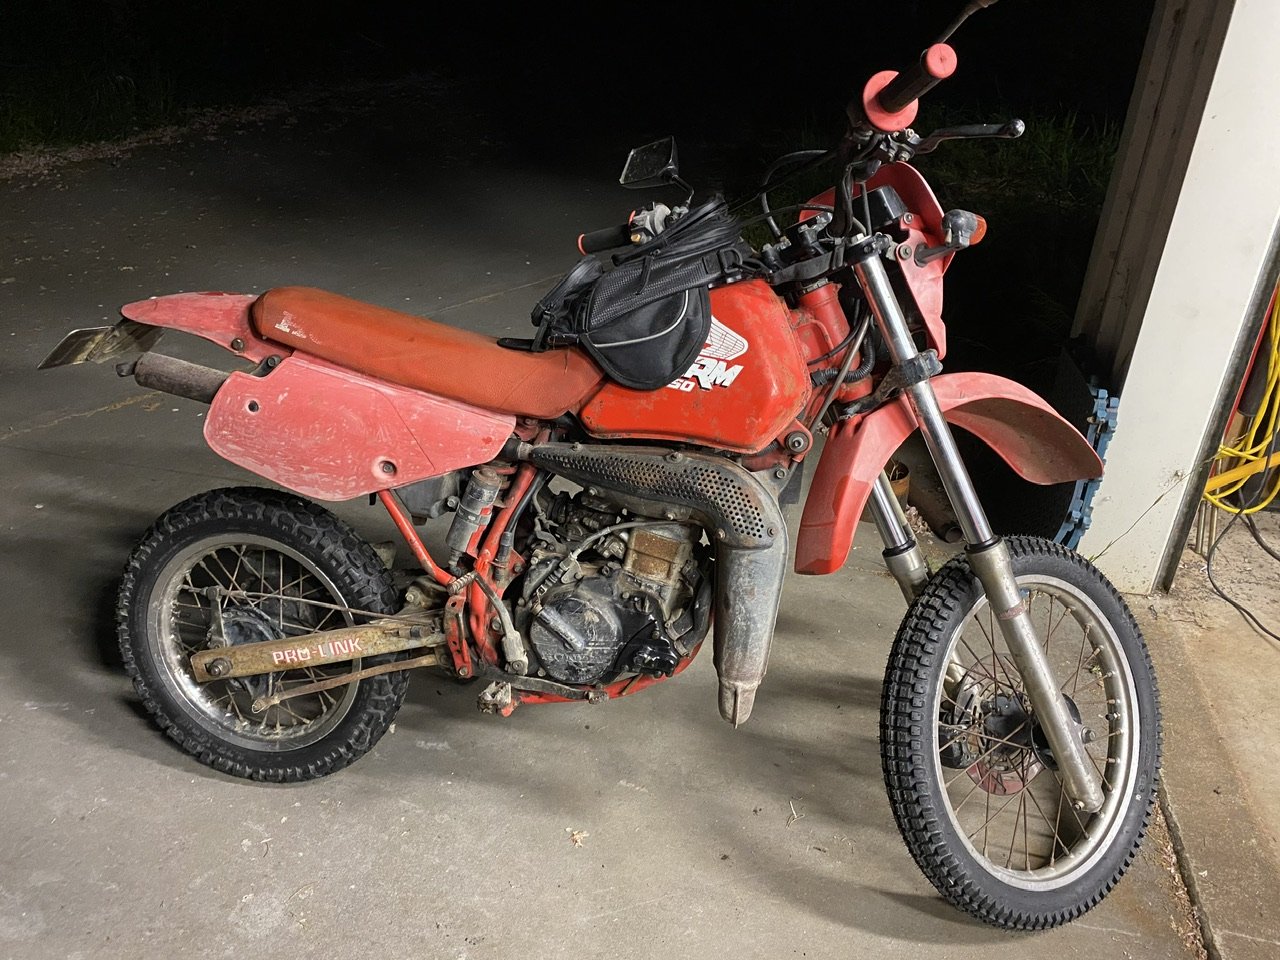
Slower than I’d like progress last night. I cleaned all the gunge off the engine and got that installed. But then went to fit the foot pegs, I have 3 sets… the one which was originally on it, which is broken and has had multiple dodgey repairs. The next I brought off trademe is twisted and bent in multiple planes. The third I brought off trademe turned out to be a home made replica, which I was planning on using but it must have been made around a different engine as it doesn’t fit…
3 points
-
It's not particularly difficult It is intended to be used by people modifying cars, to help them with their projects. there is a range of people with different abilities sending applications through and they all get looked at, they are not viewed as wasting anyone's time. Some are hundreds of pages long with cad drawings and FEA paperwork, and some are literally hand sketched drawings. Photos are very helpful in an application You will probably struggle to find someone to teach you how to do your particular project as it's quite different , so there isn't going to be anyone with a recipie for exactly what needs doing. Certifiers can guide you along the way but, time is money, if the certifier is willing to help design the car/mods you're wanting to do, it gets expensive quickly Time is the biggest factor when getting people to help you. It's not uncommon for me to spend 2-3 hours a day on the phone, talking to people about their projects, emailing , looking at parts etc etc. This ends up eating into the time I have to do work I can actually charge out- there has to be a balance and this is why it can be hard to find people who can help you lvvta.org.nz you can download a design approval application from there There are also infosheets on design approval https://lvvta.org.nz/documents/infosheets/LVVTA_Info_11-2012_LVVTA_Approval_Application_Guide.pdf https://lvvta.org.nz/documents/infosheets/LVVTA_Info_01-2016_LVV_Custom_Independent_Front_and_Rear_Suspension_Approval_Application_Guide.pdf2 points
-
I like this guys whiteboard explanation (skip to 5.42) After watching that listening to David Vizard blab on makes a bit more sense2 points
-
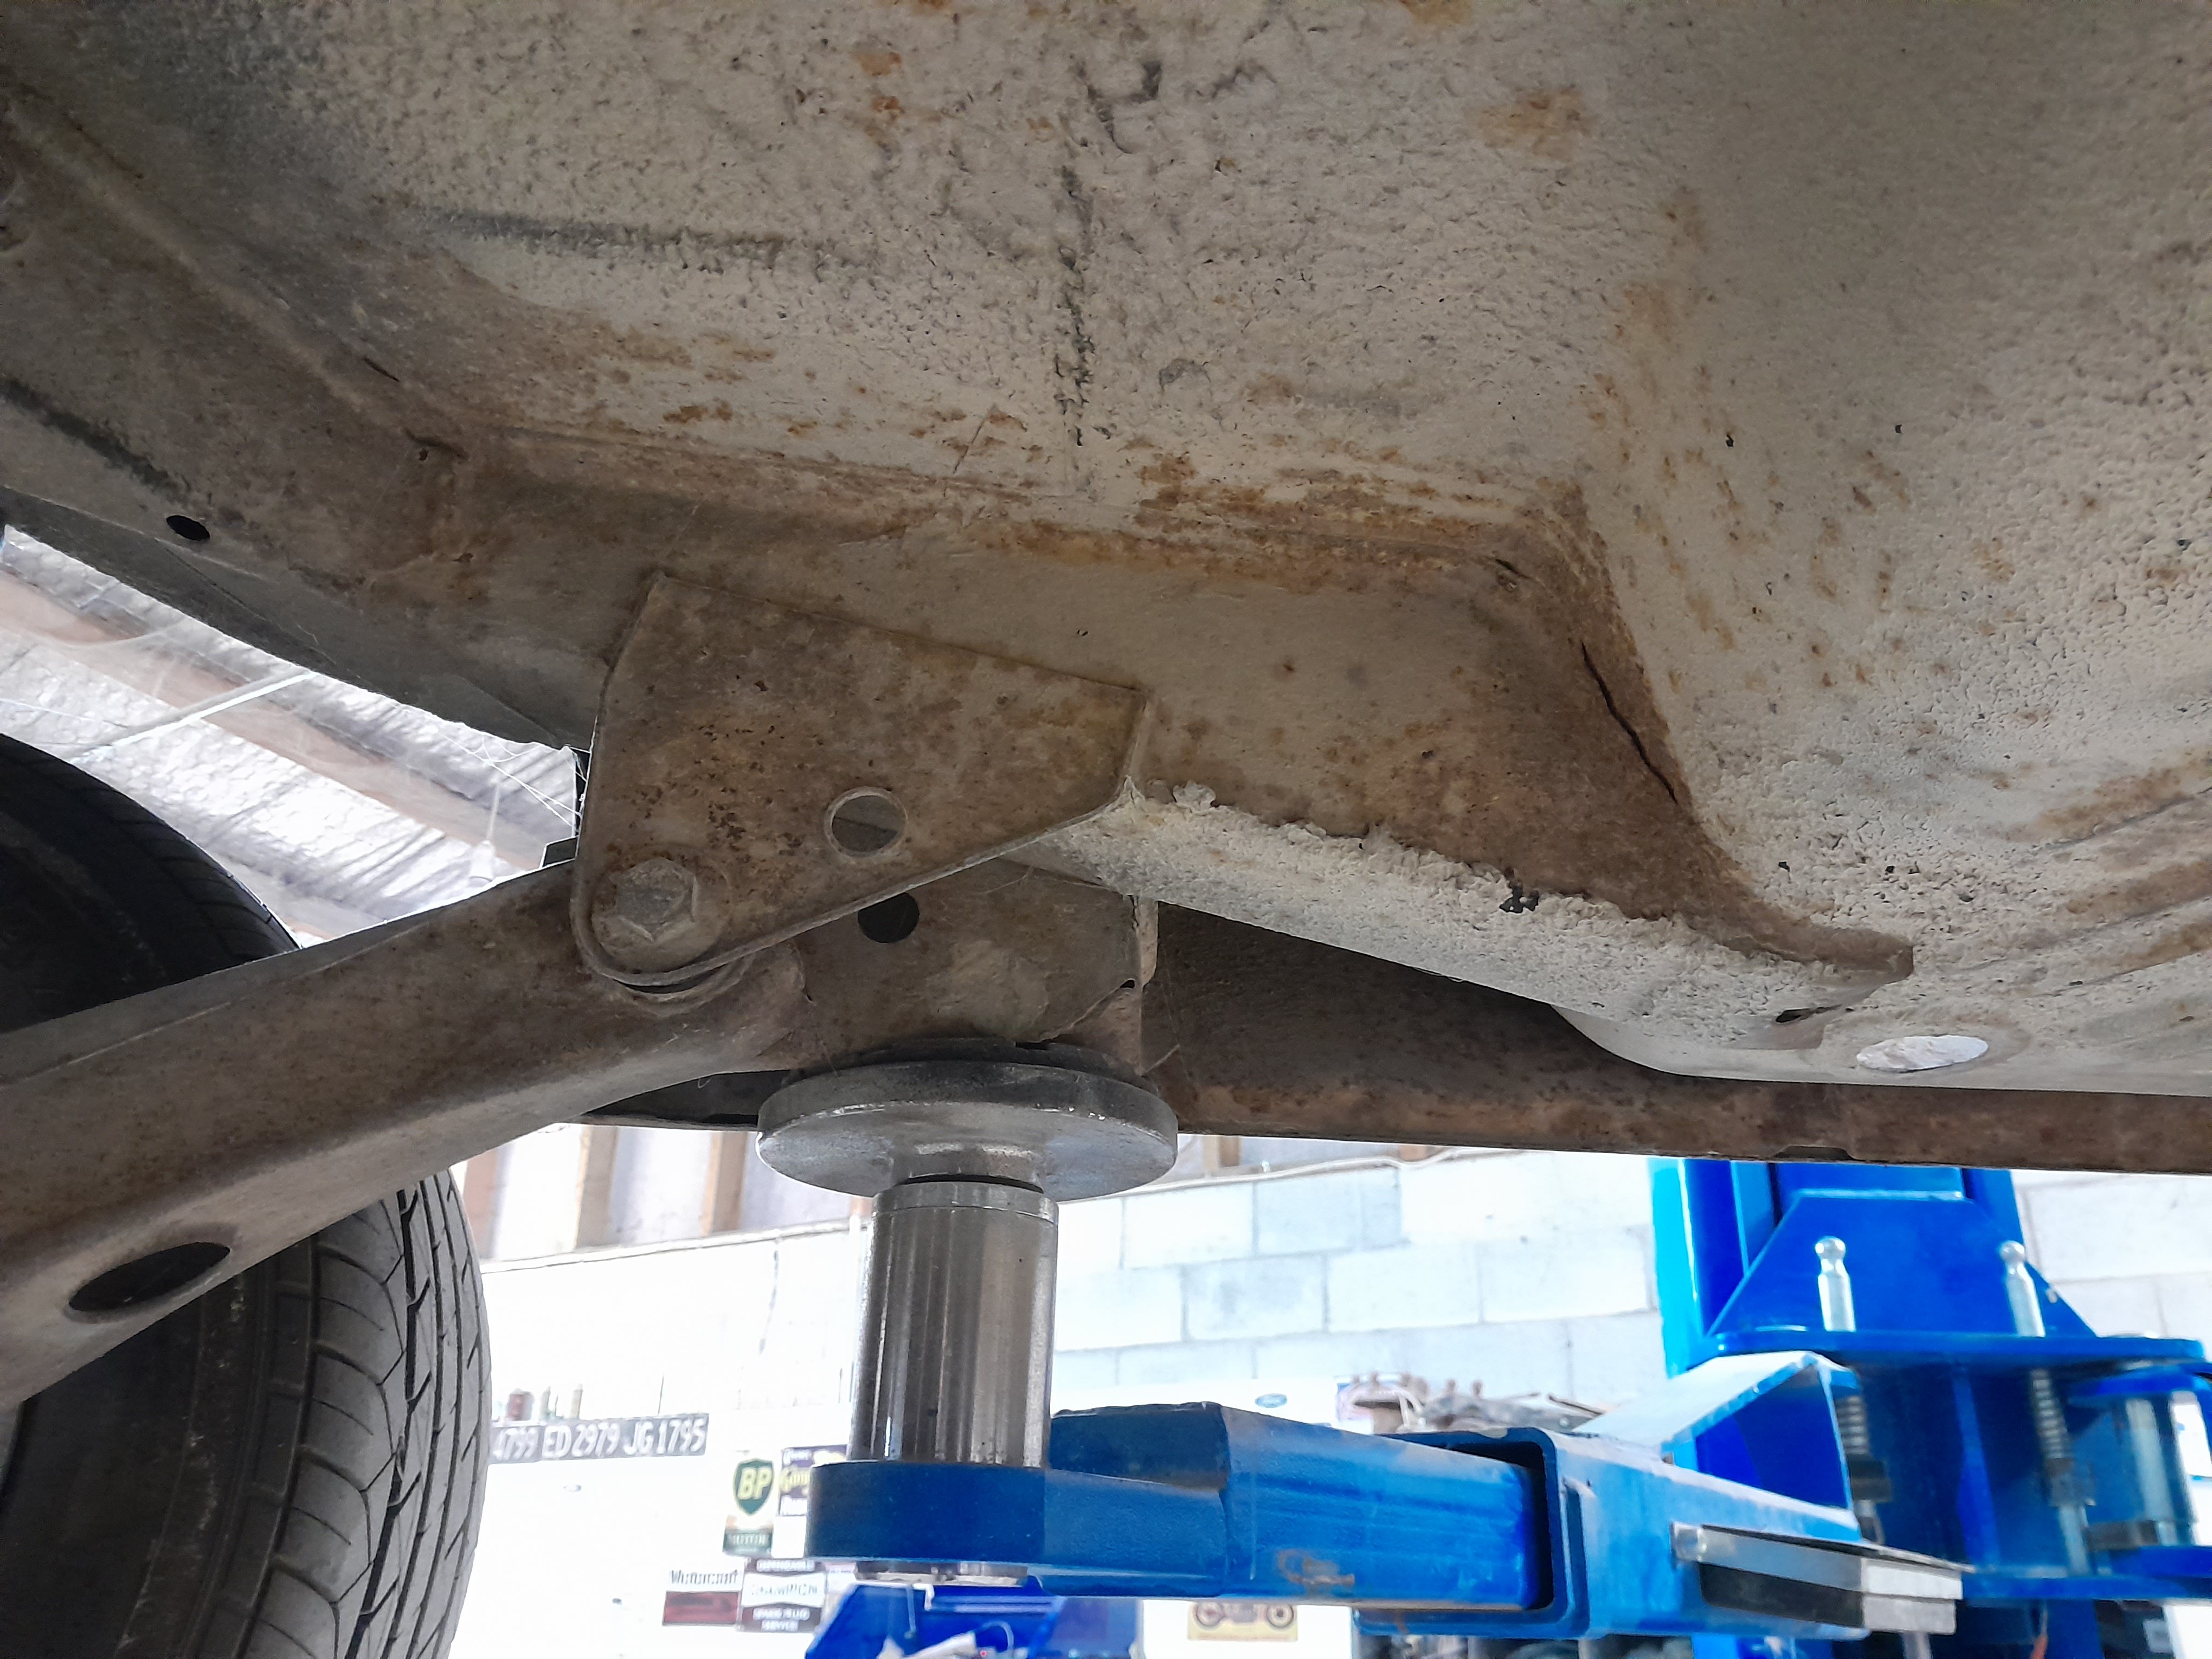
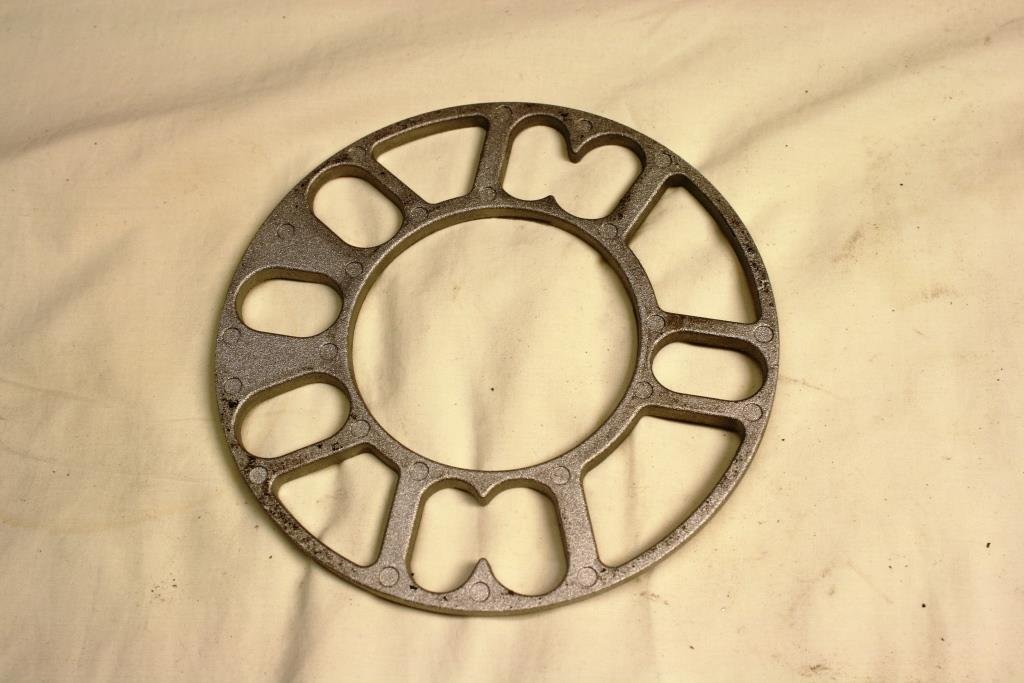
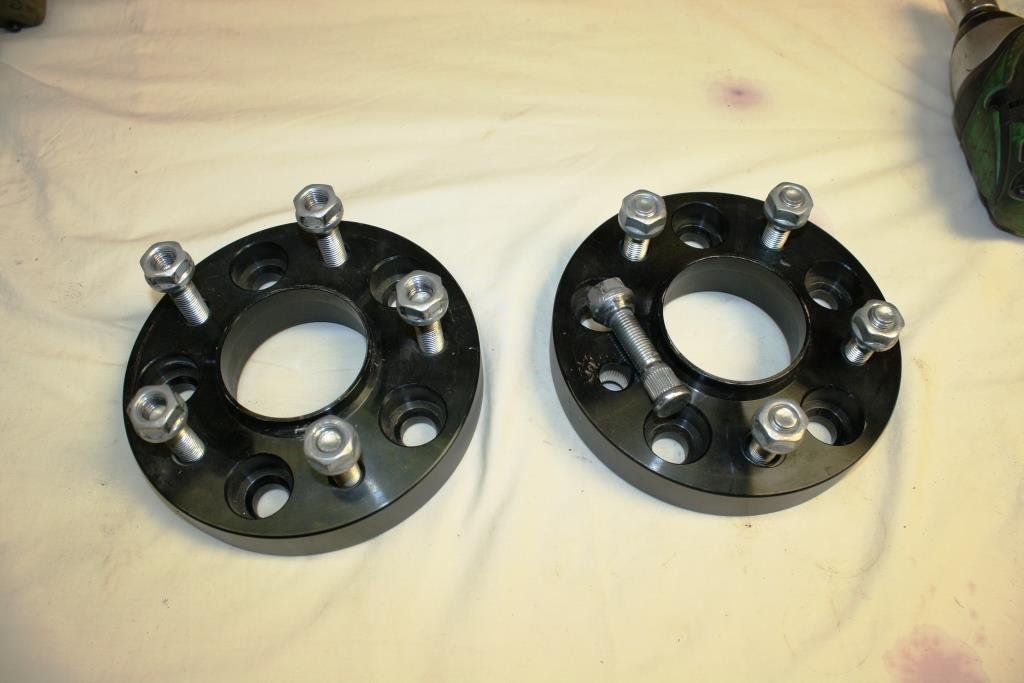
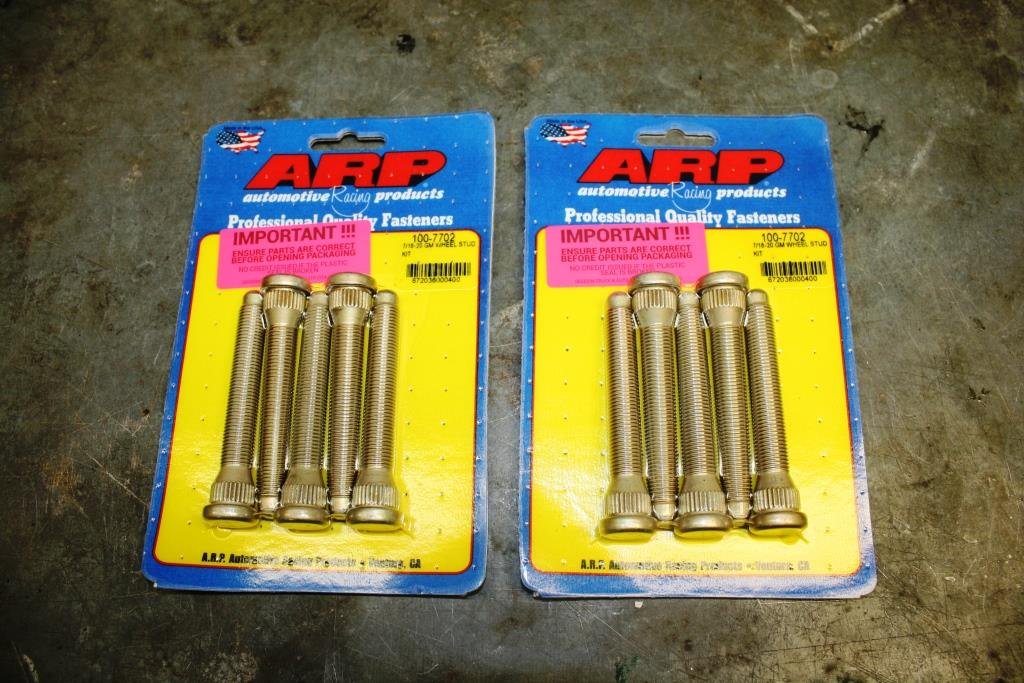
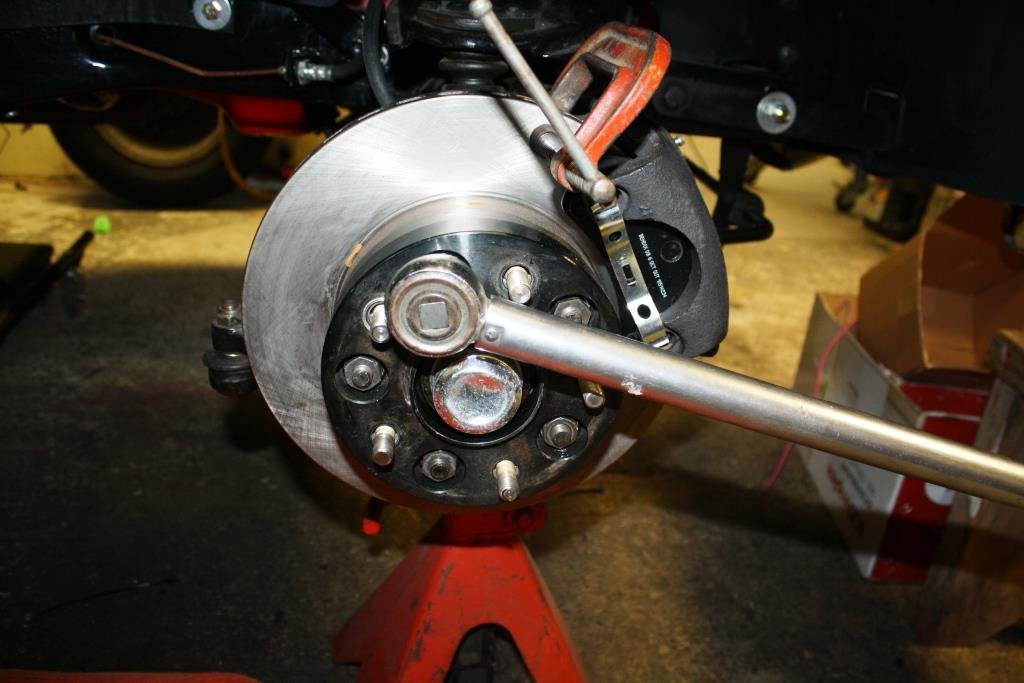
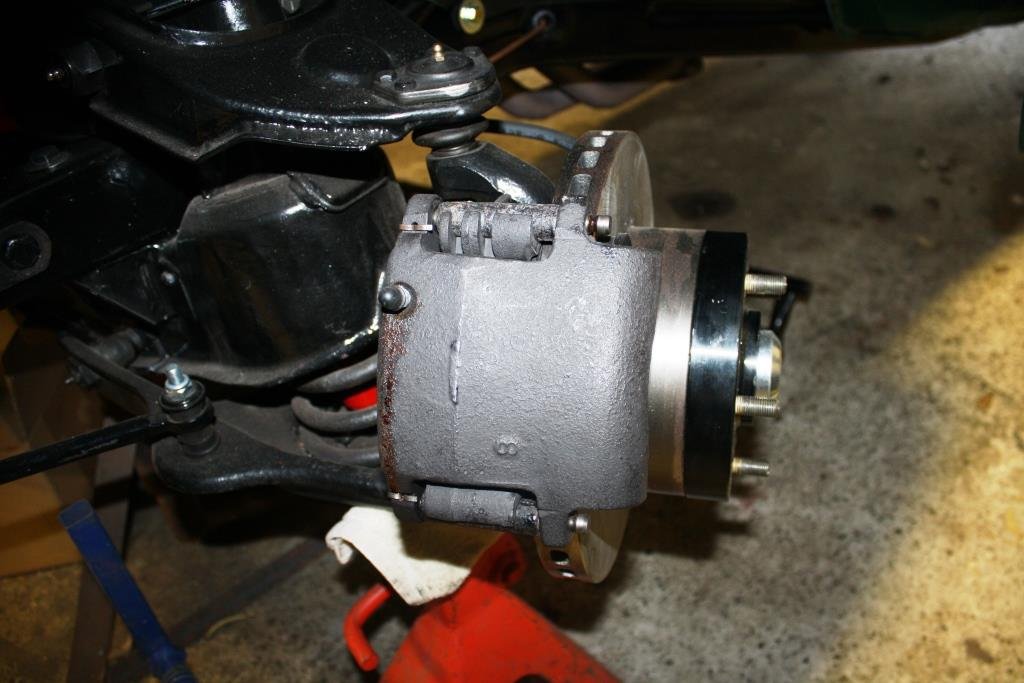
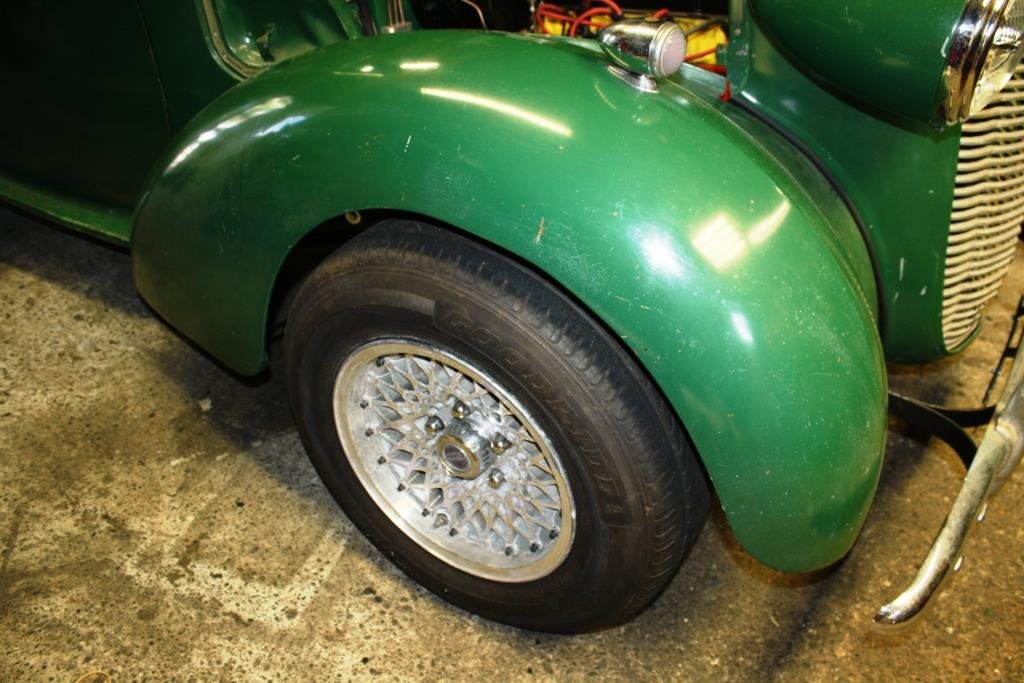
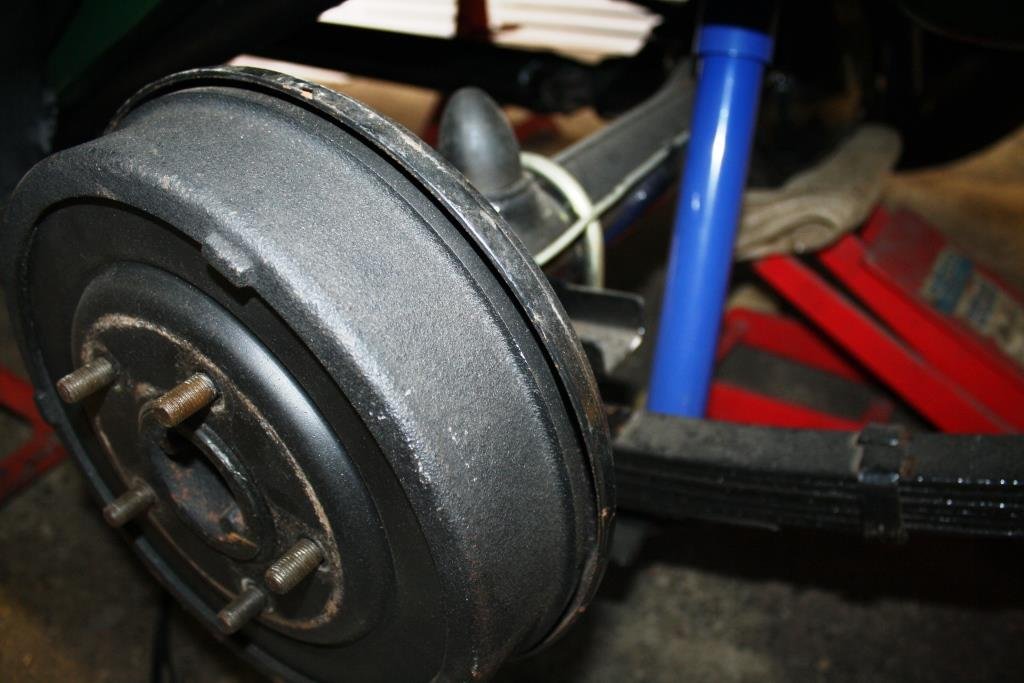
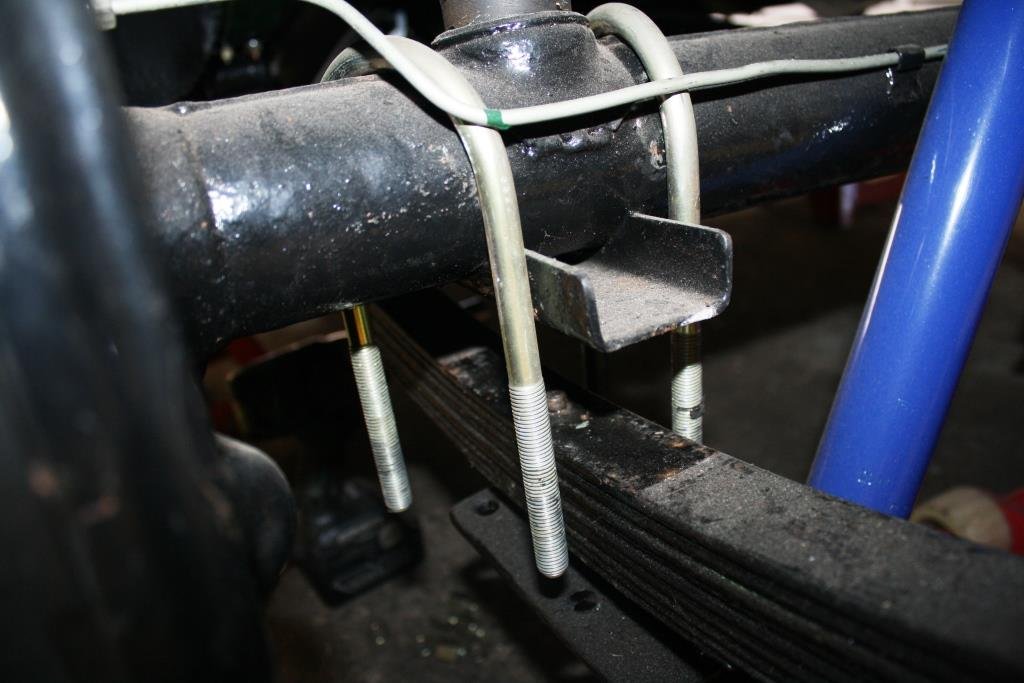
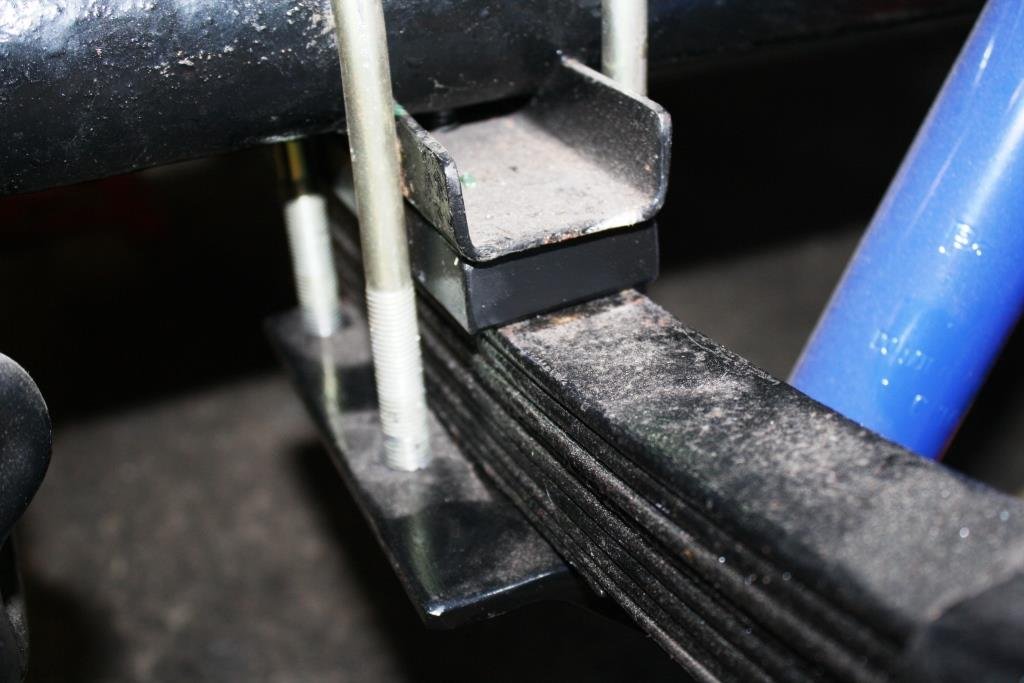
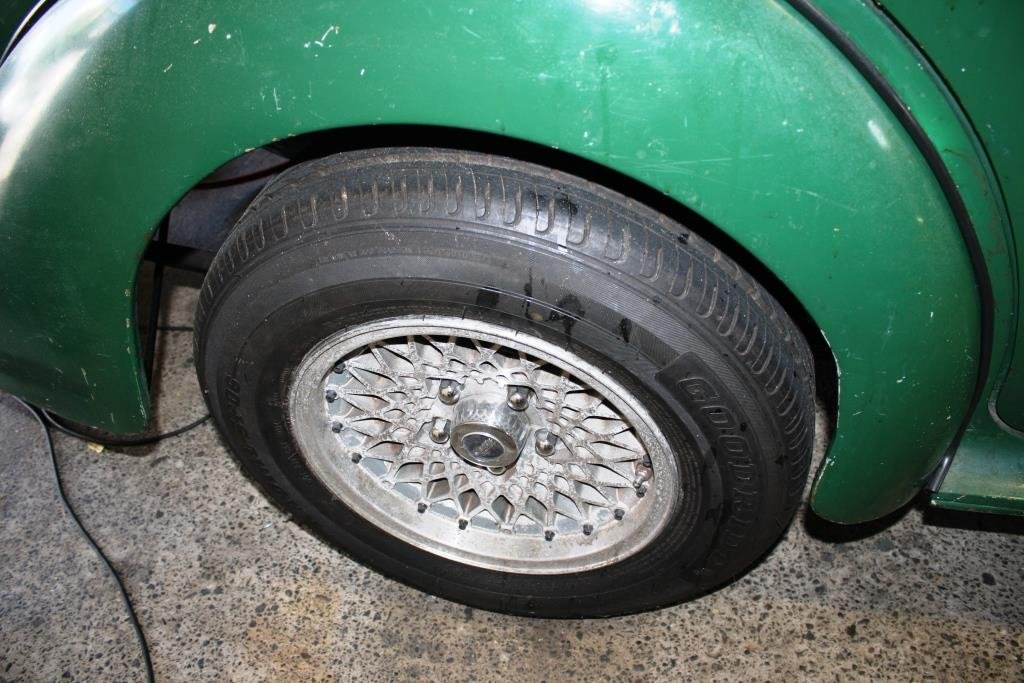
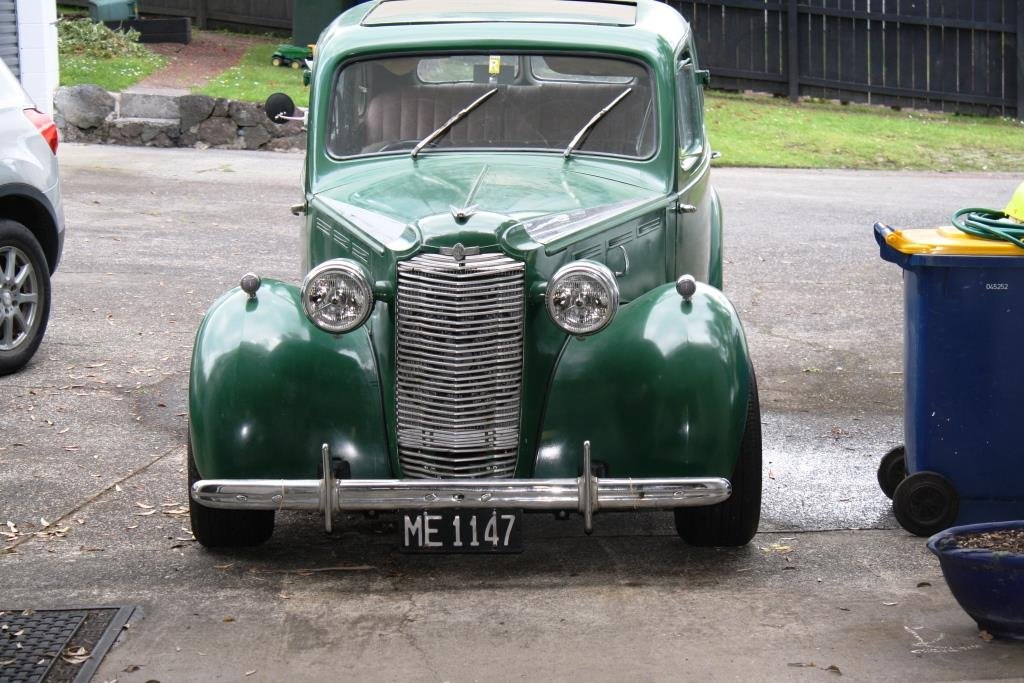
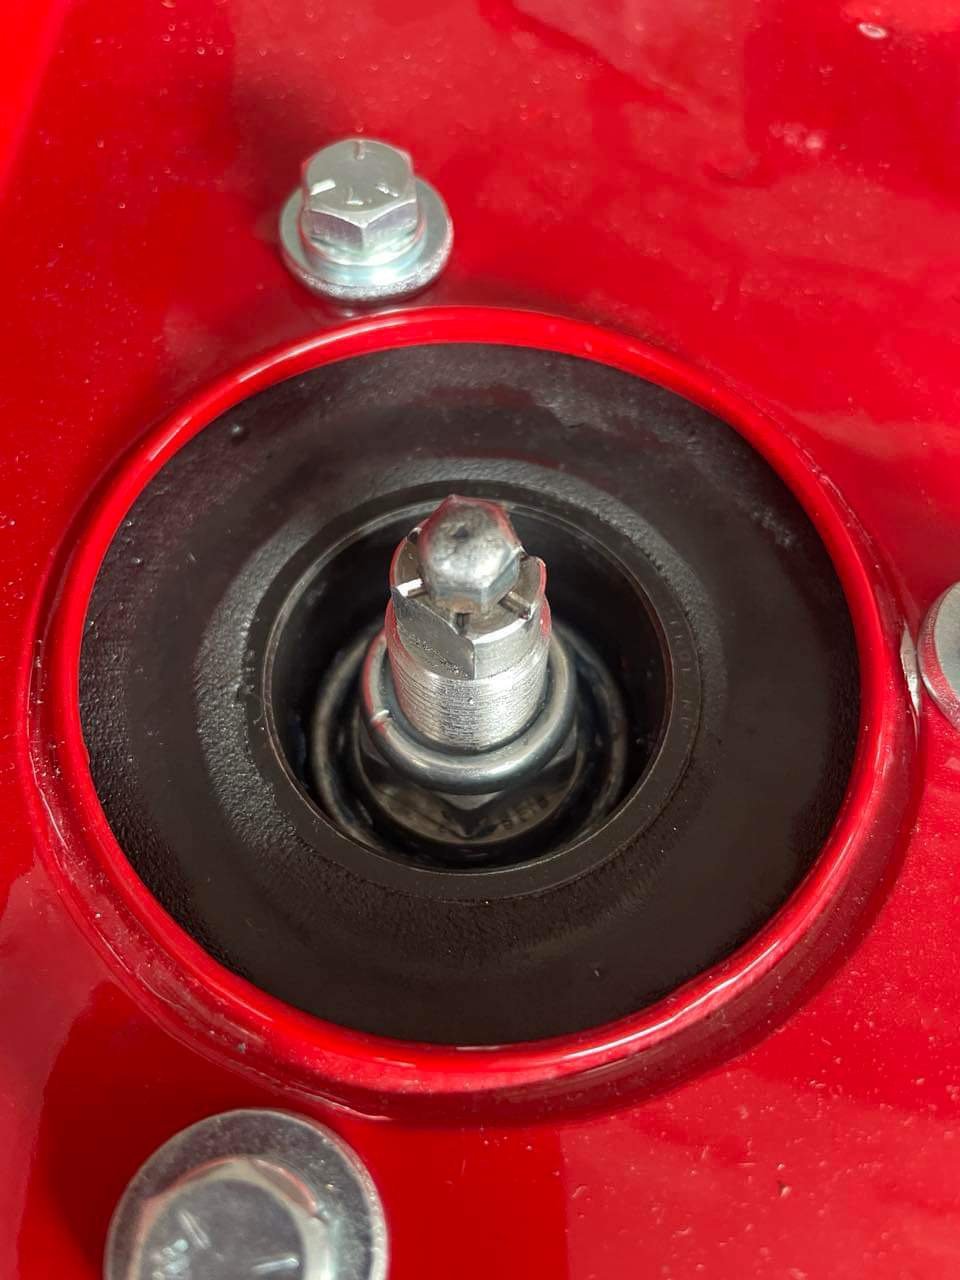
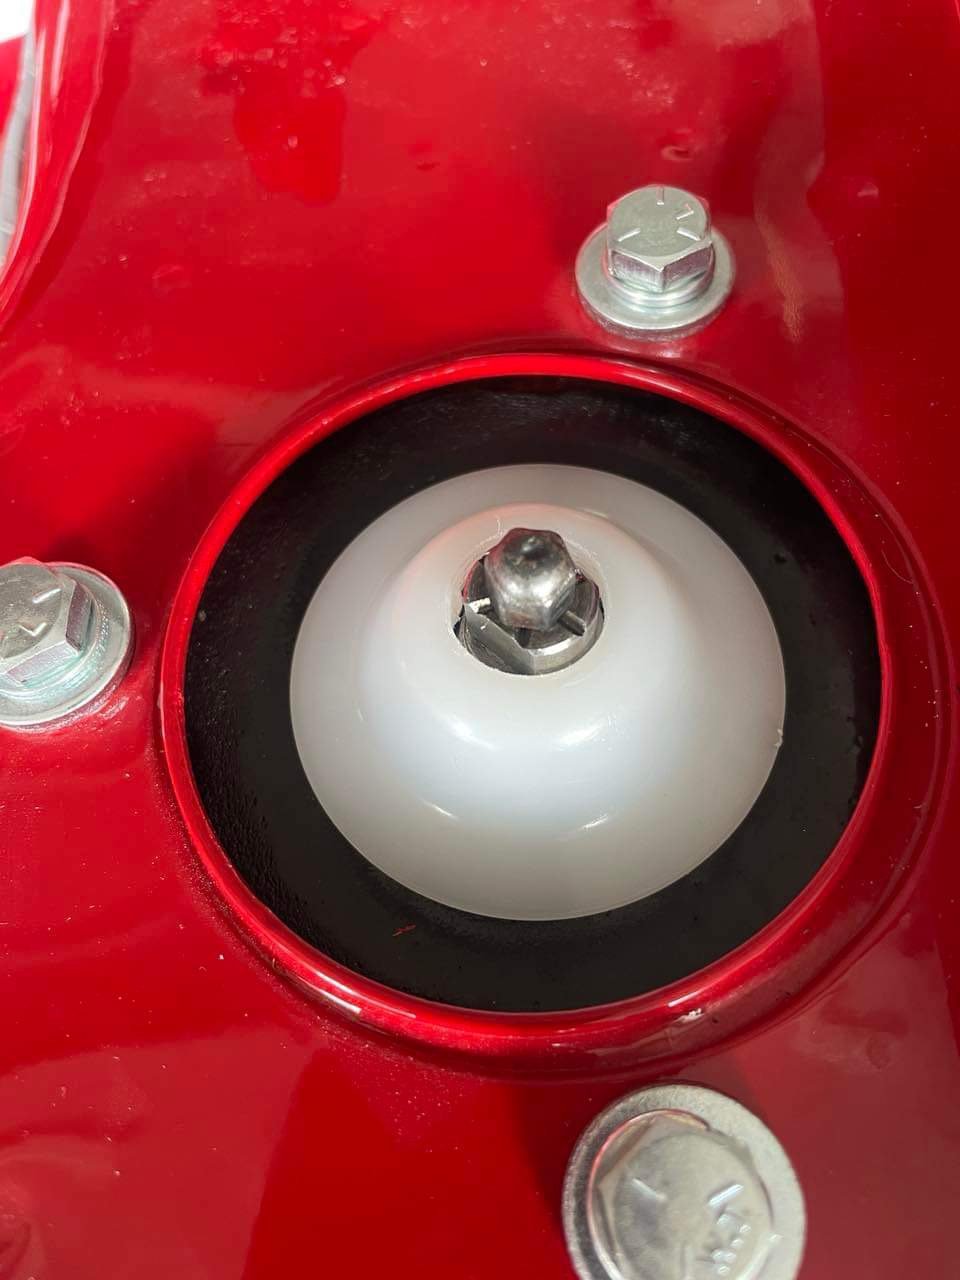
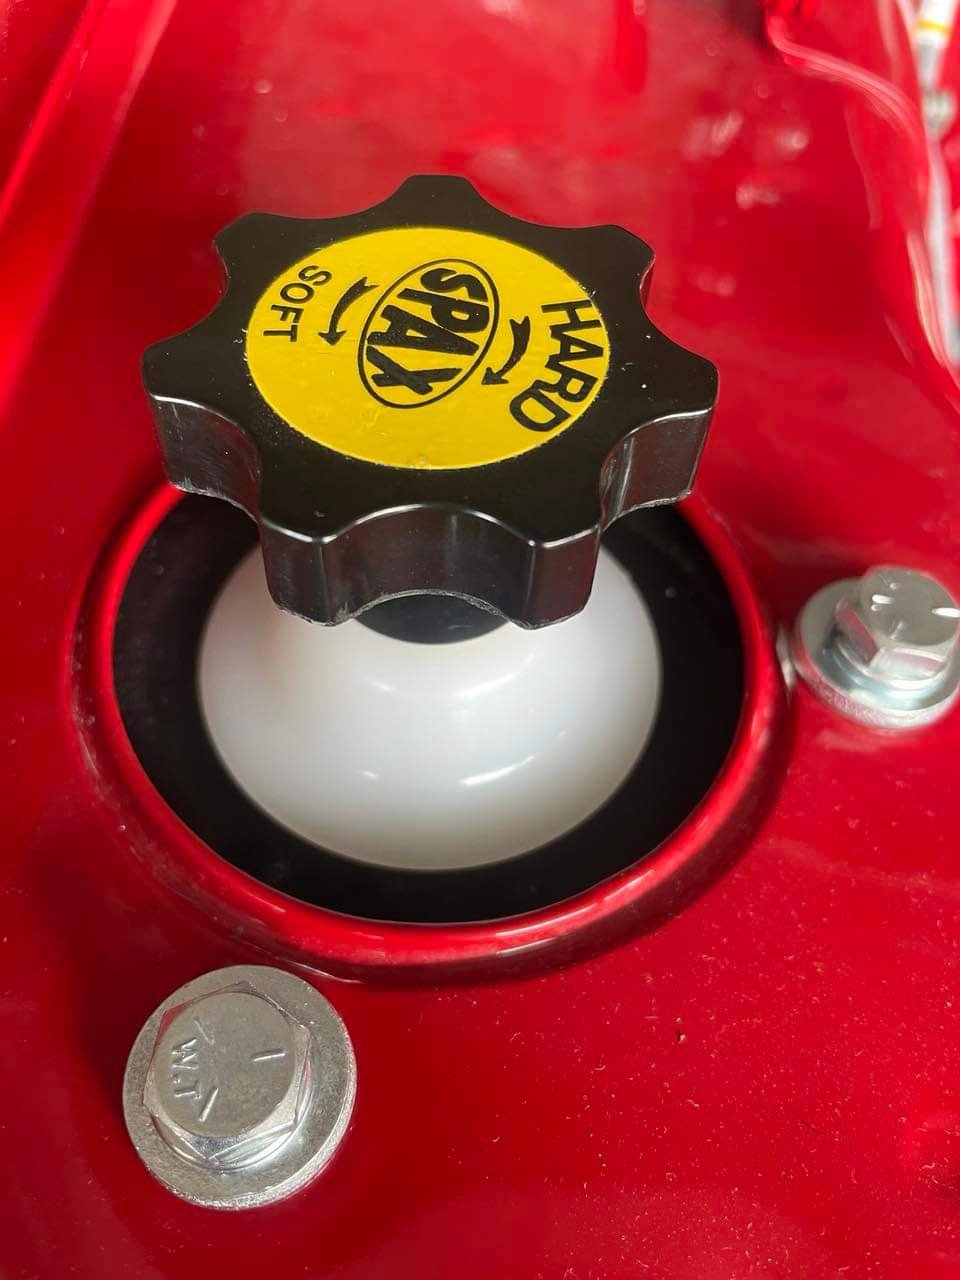
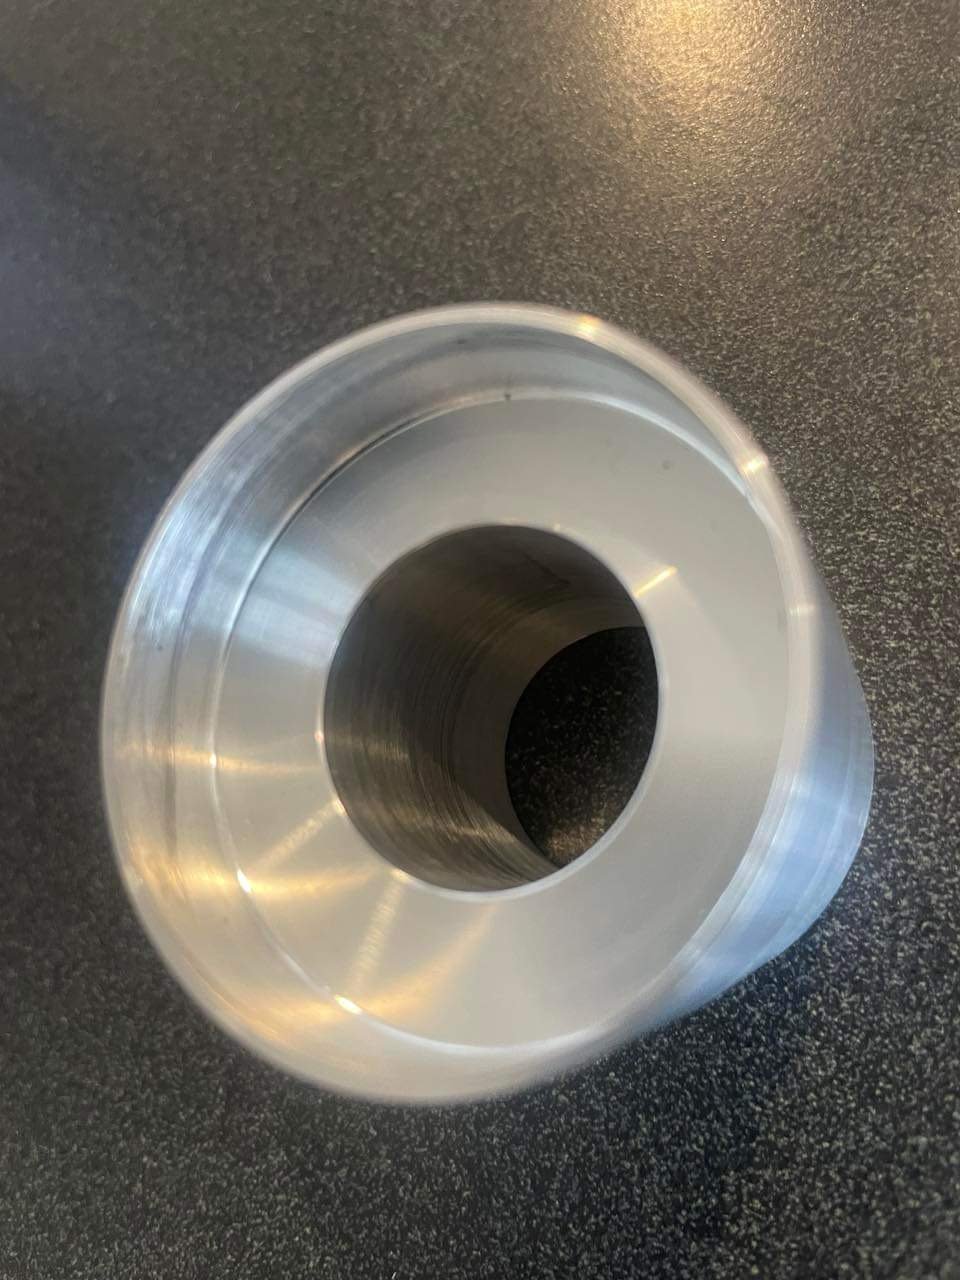
One of Rigamortice’s dirty little secrets was a set of these little shockers hidden behind the front wheels! I found a pair of proper hub-centric spacers on Trademe for a very reasonable price. I then upgraded to some ARP studs at a very unreasonable price. (Talk about charging like a friggin wounded bull!). All torqued up with a snug fit on the hub and wheel. Finally got the front ride height and wheel track just where I want it. Decided the rear needed a tweak, so I backed off the rear U bolts…. …and figured out how much I could safely lower the rear. I ended up using solid bar for the spacers I’m expecting the rear springs to settle with a little use….. Have to say I’m finally happy with the old girls stance.
2 points
-
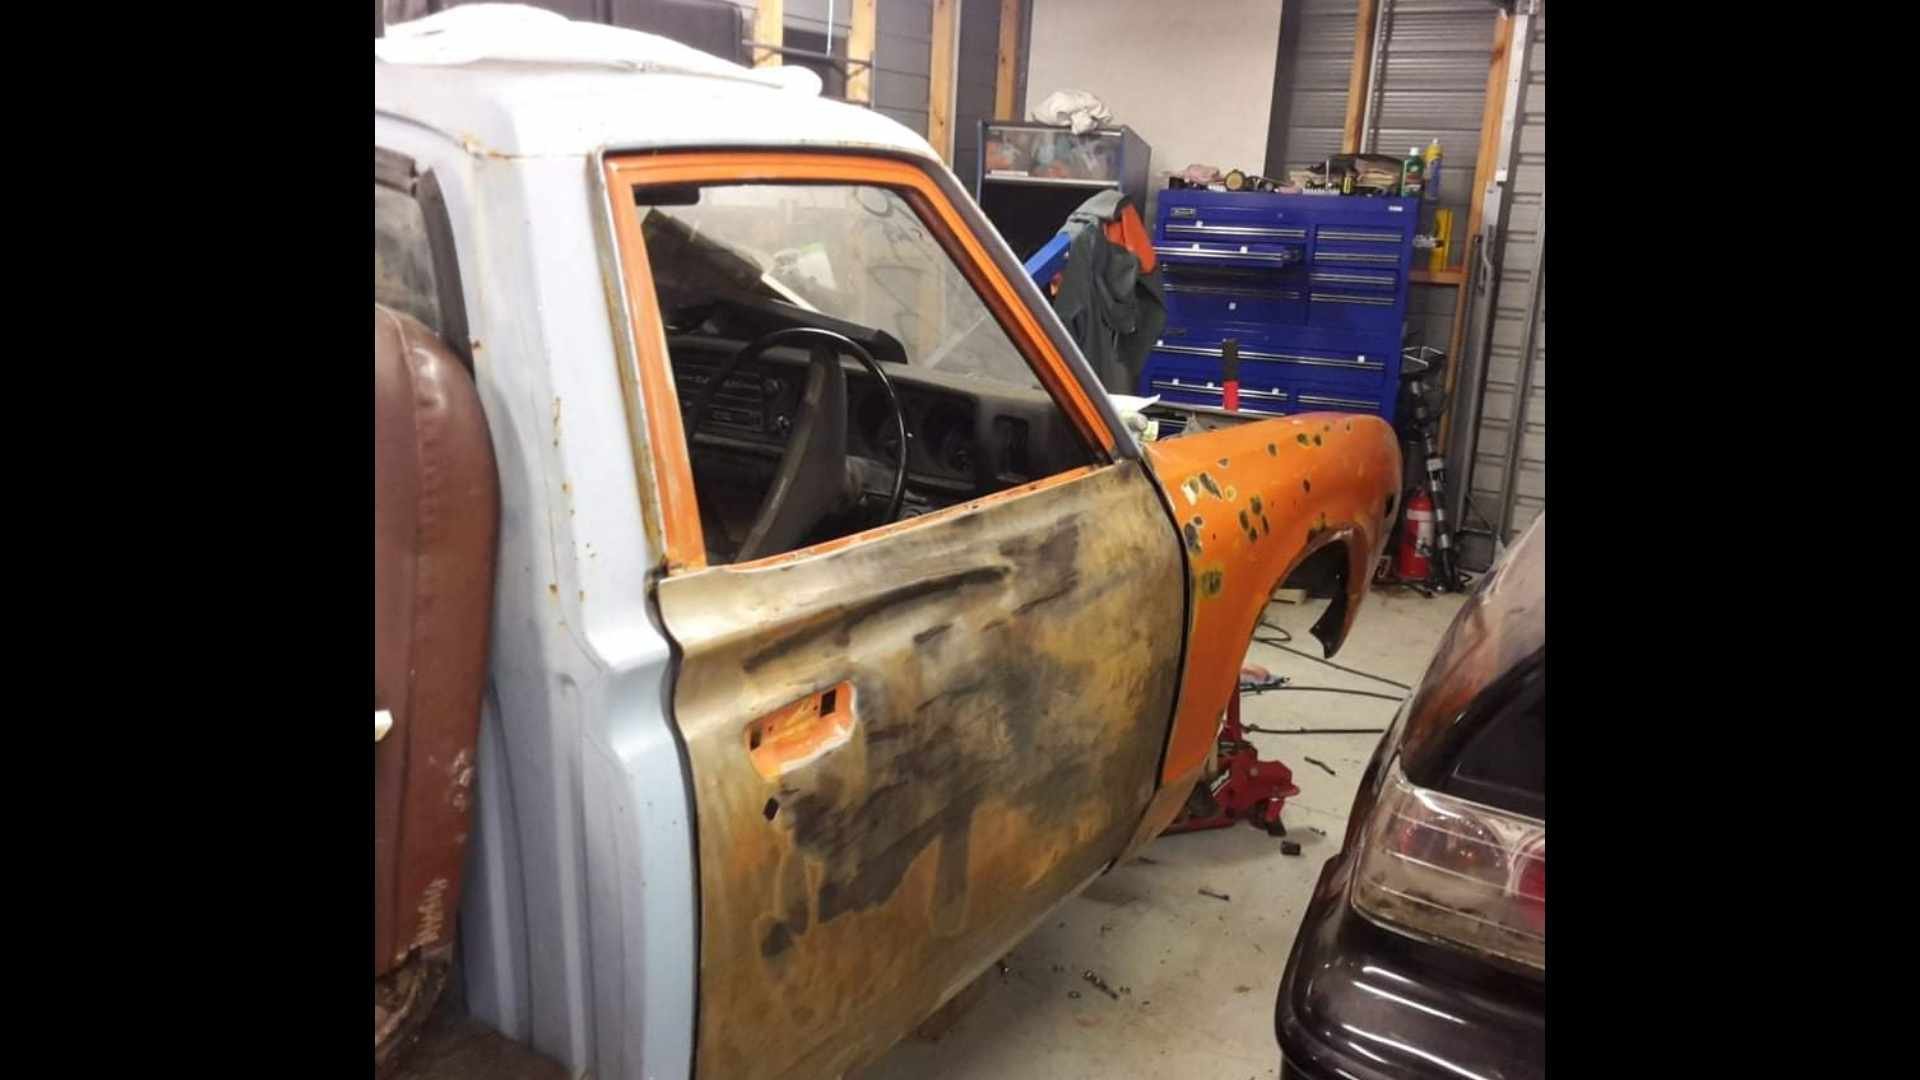
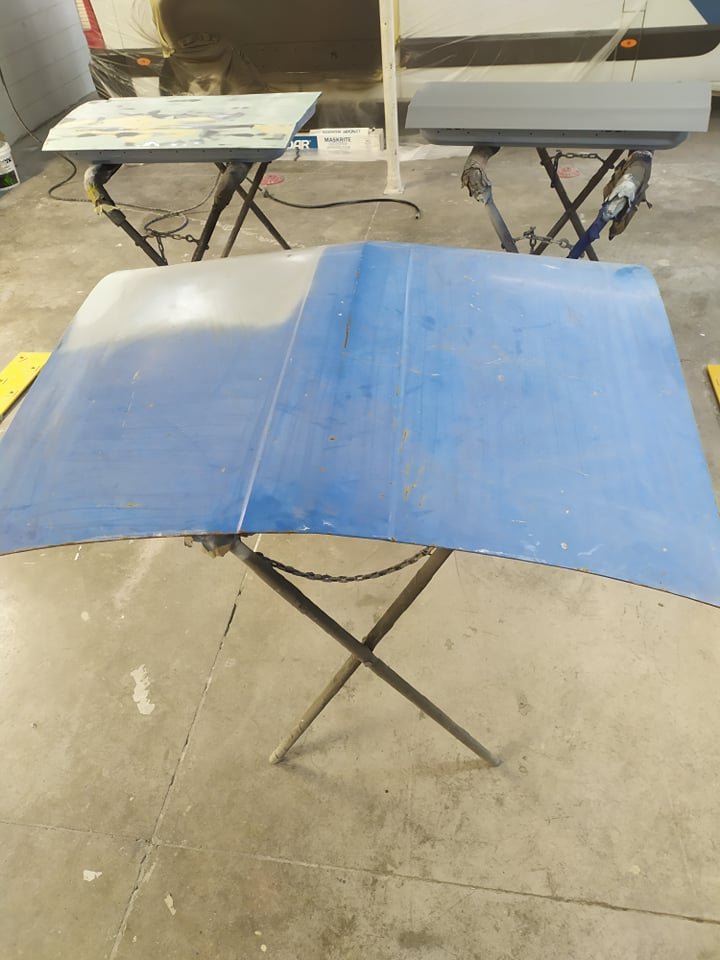
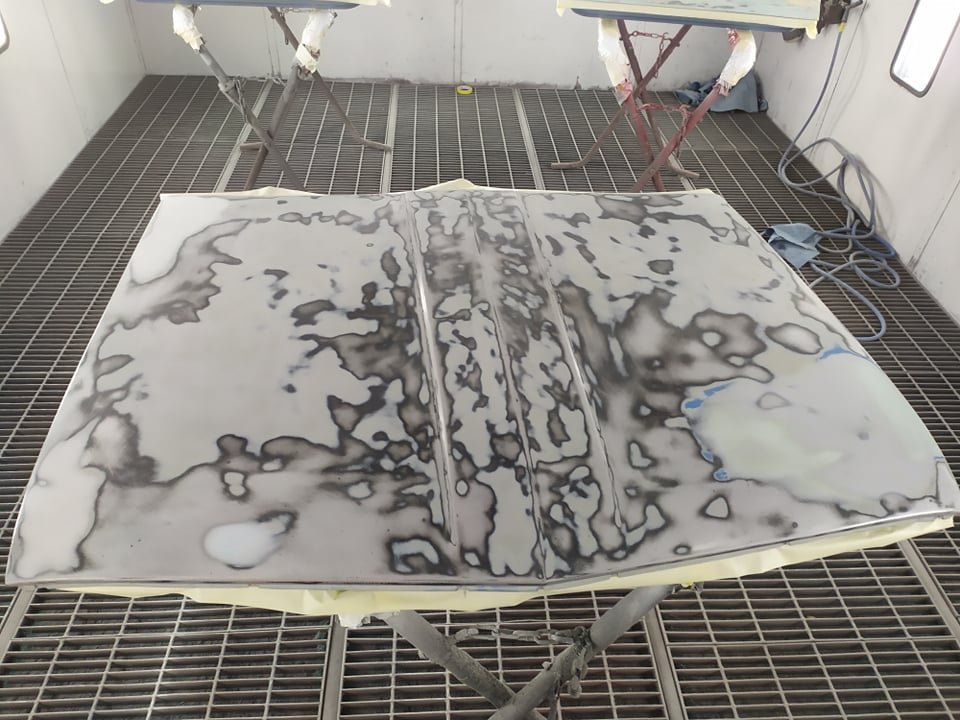
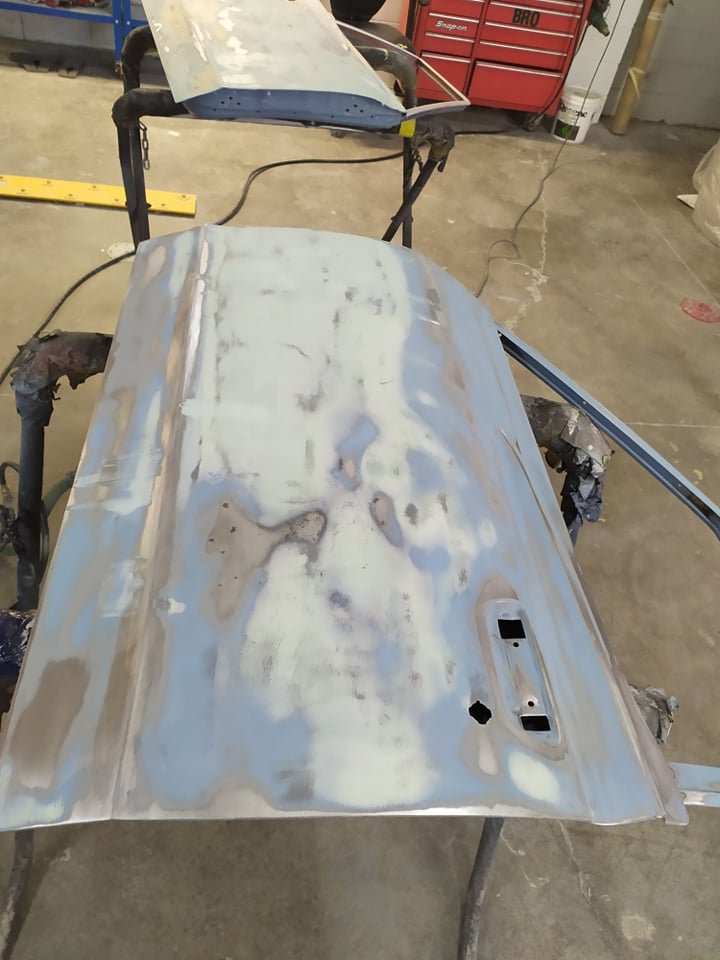
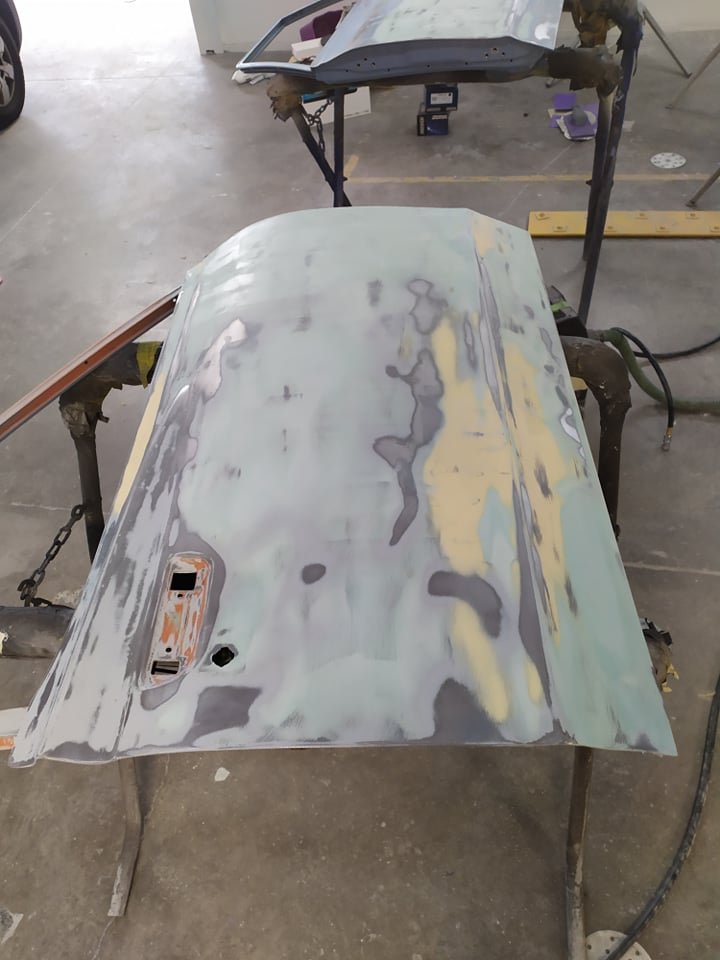
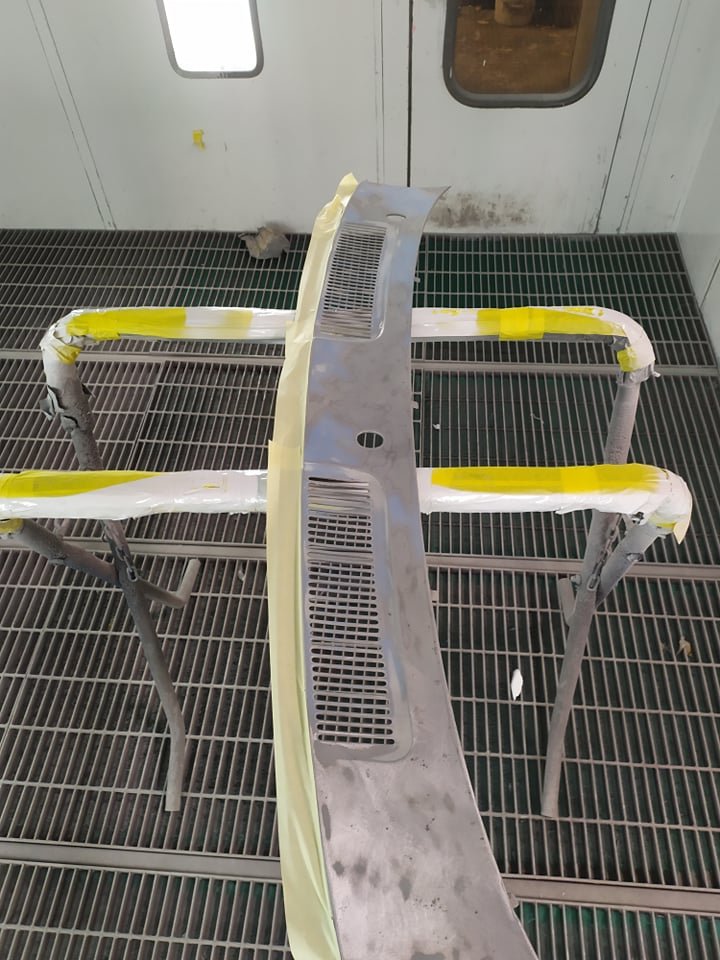
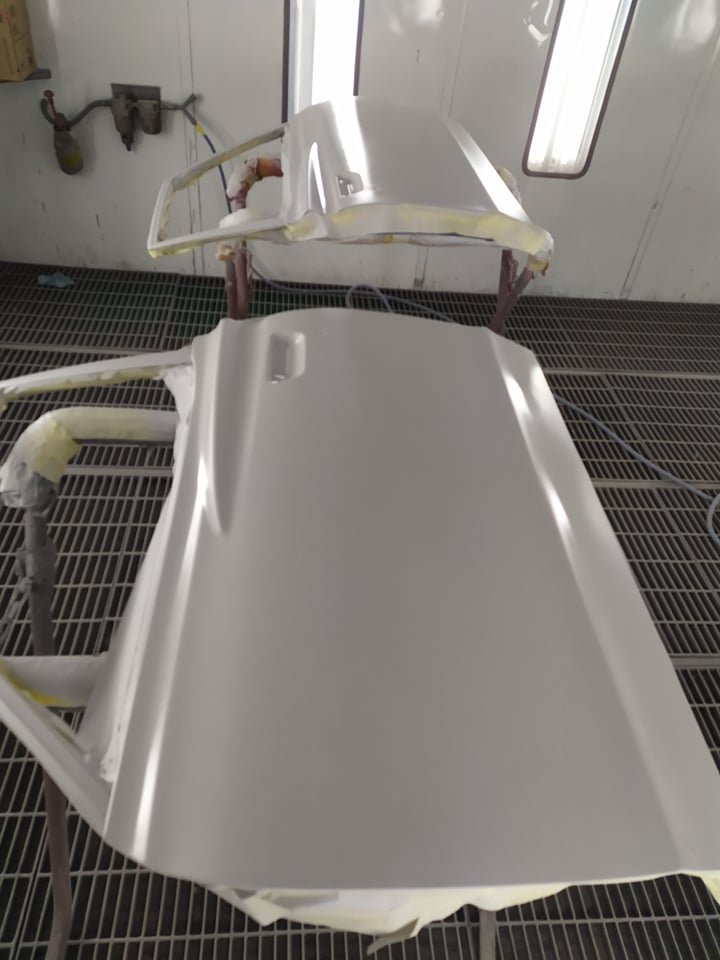
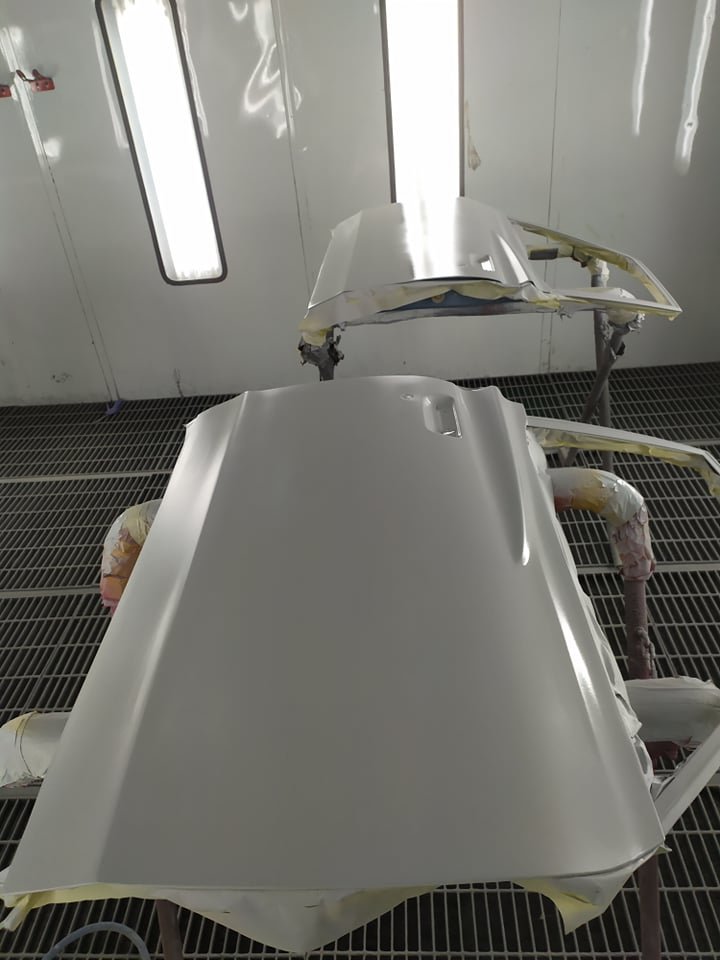
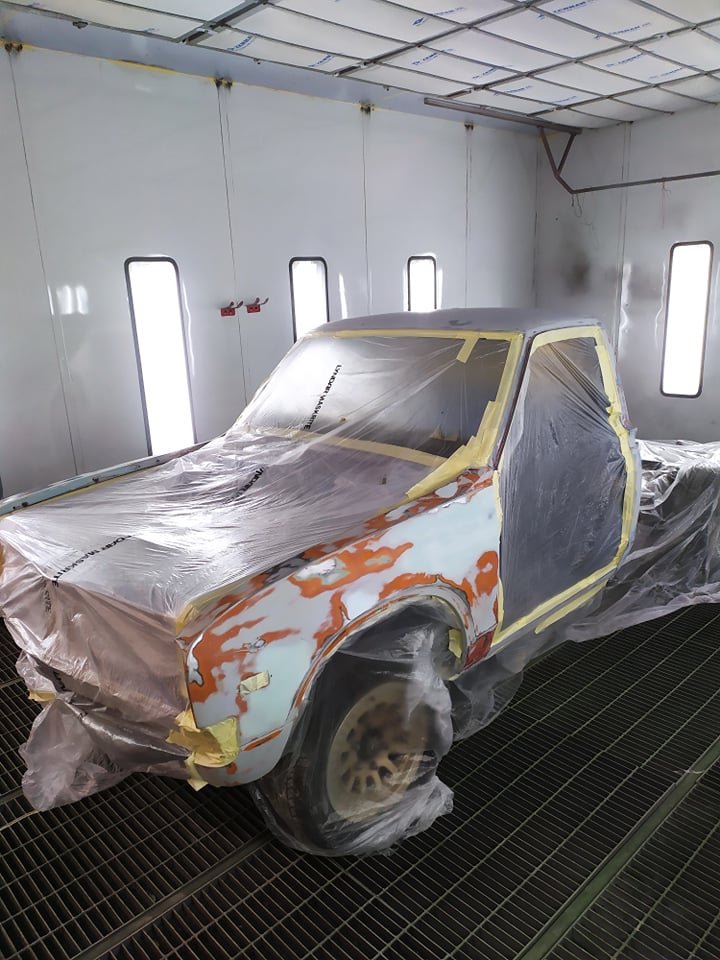
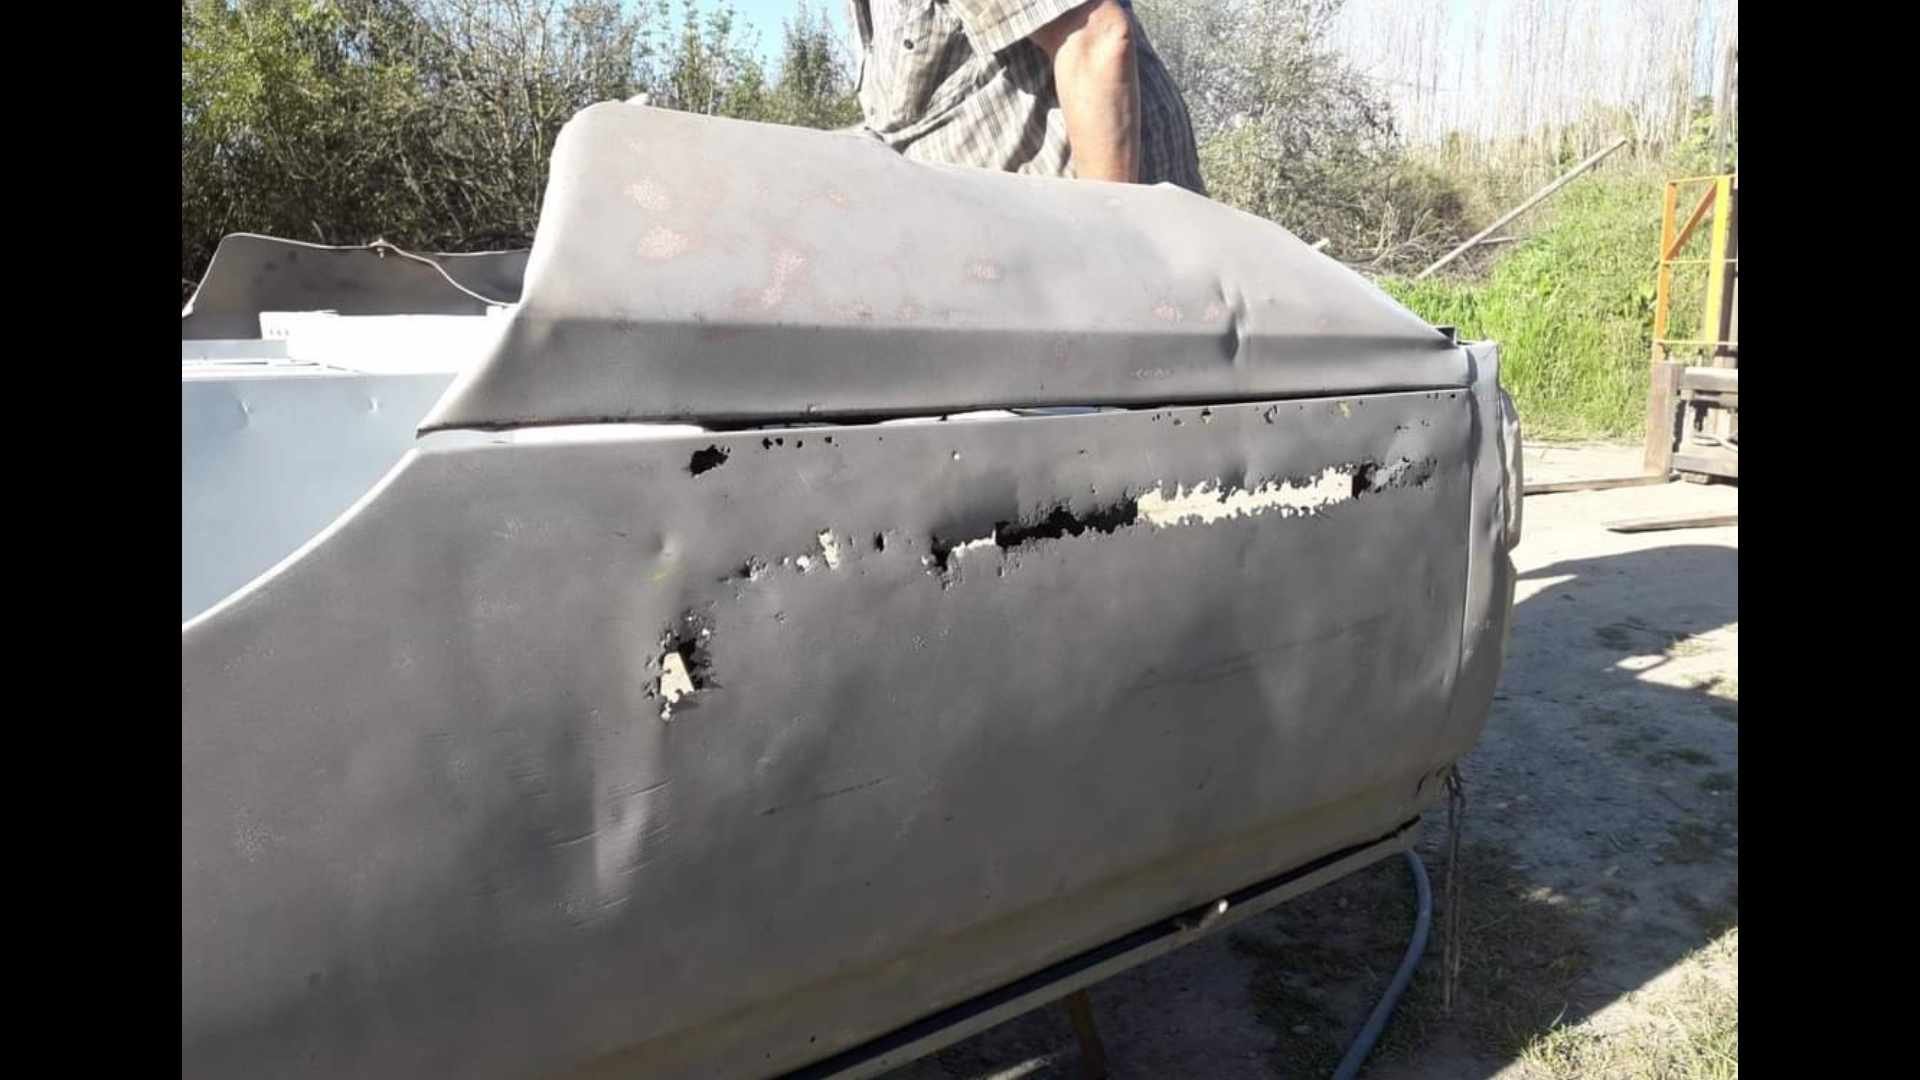
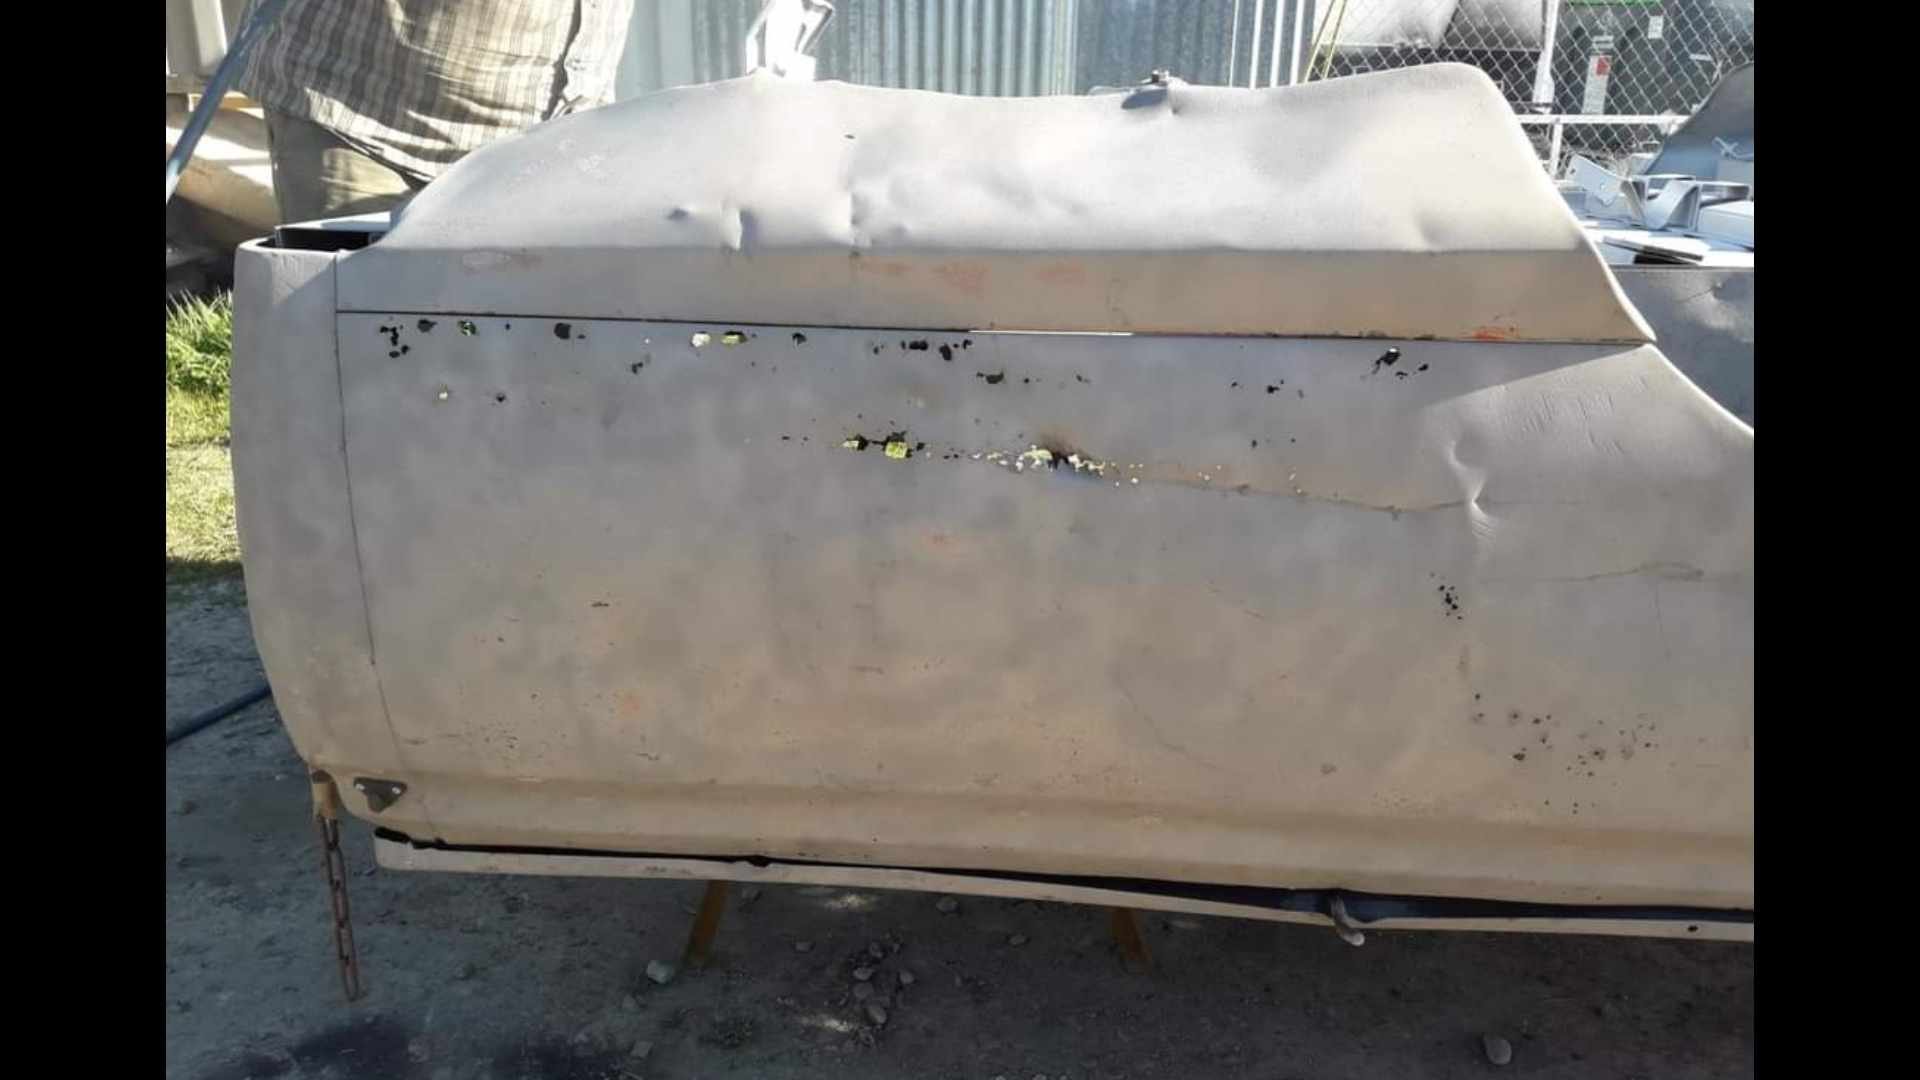
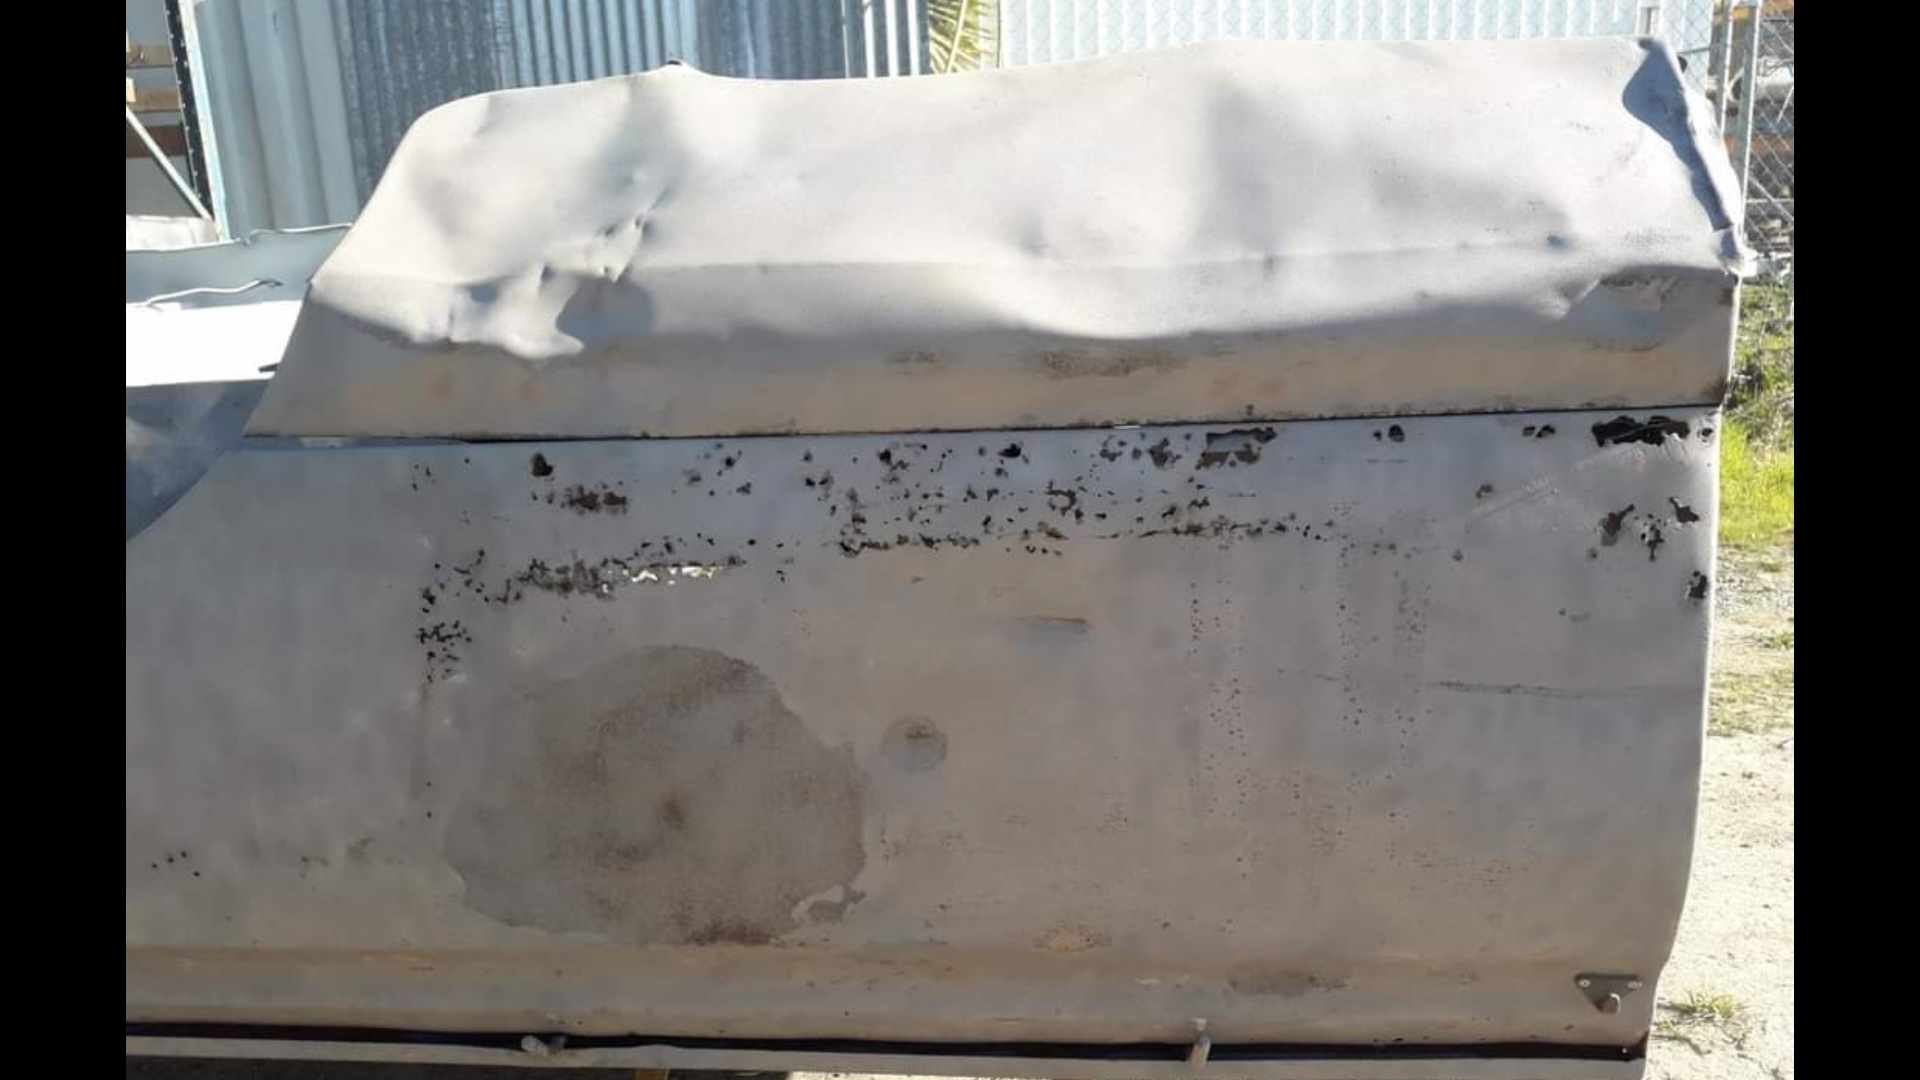
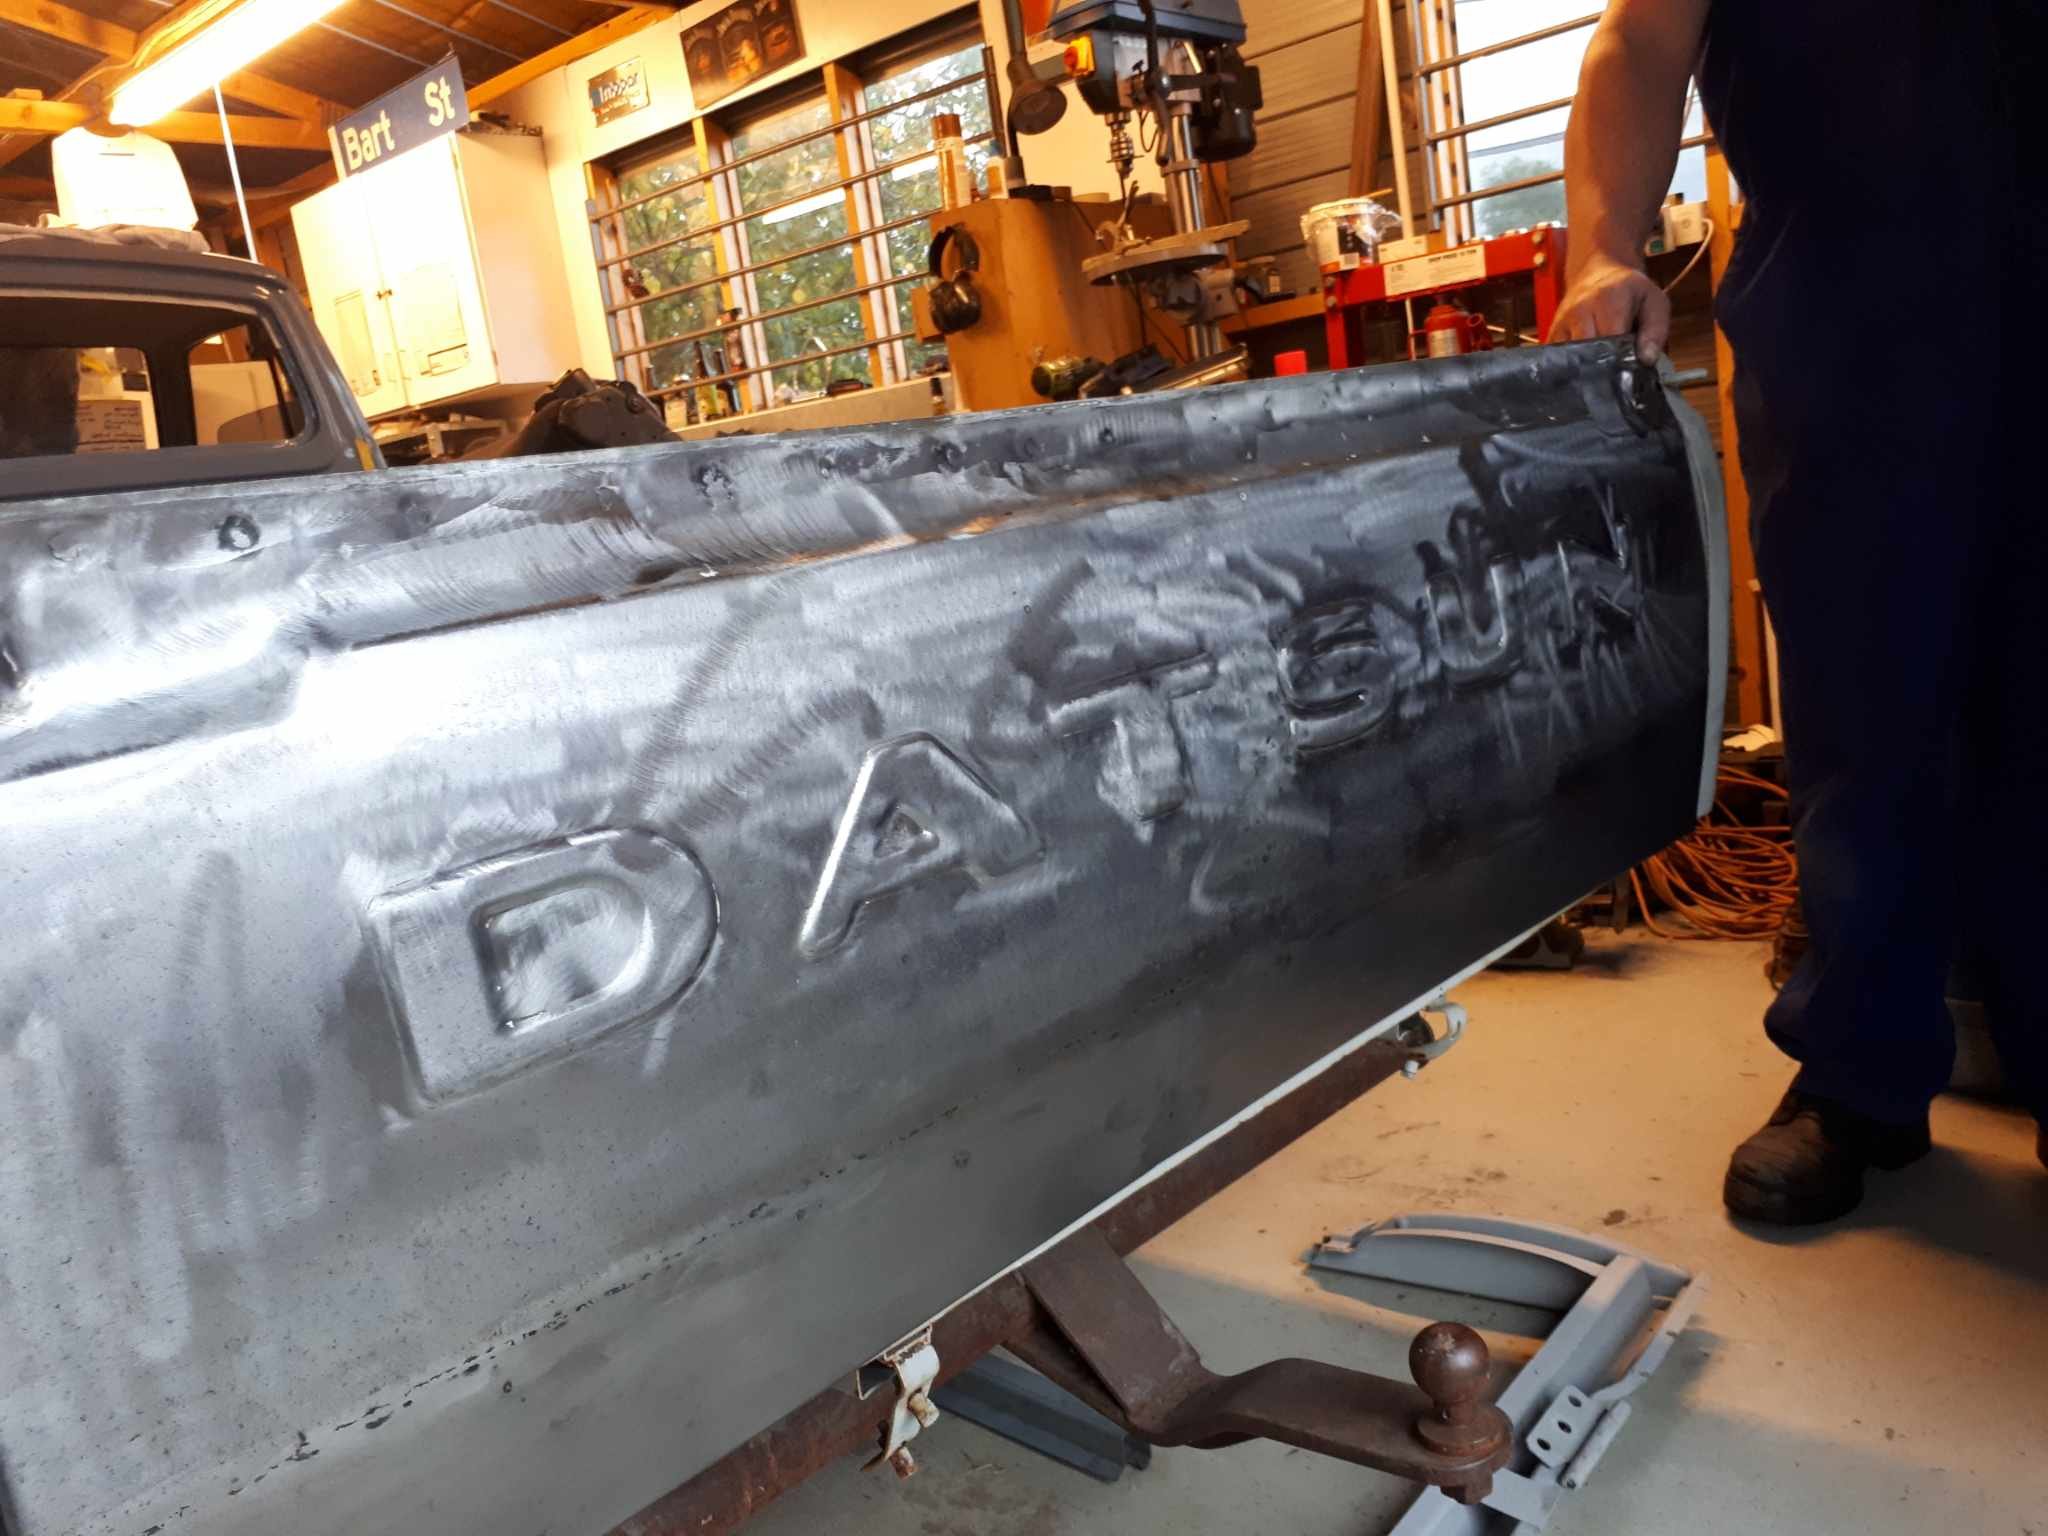
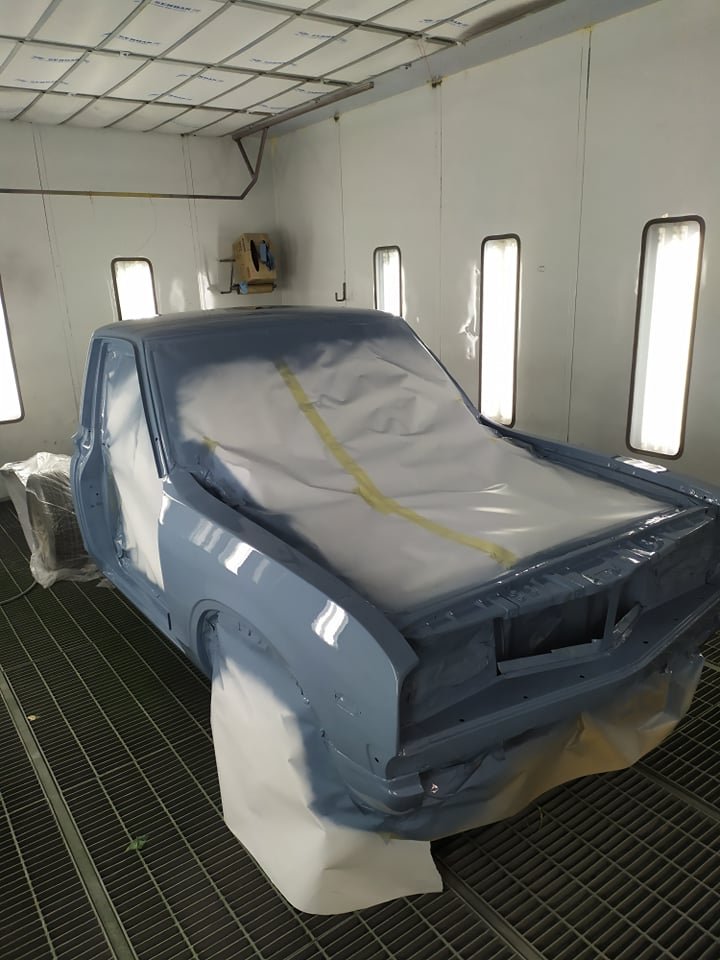
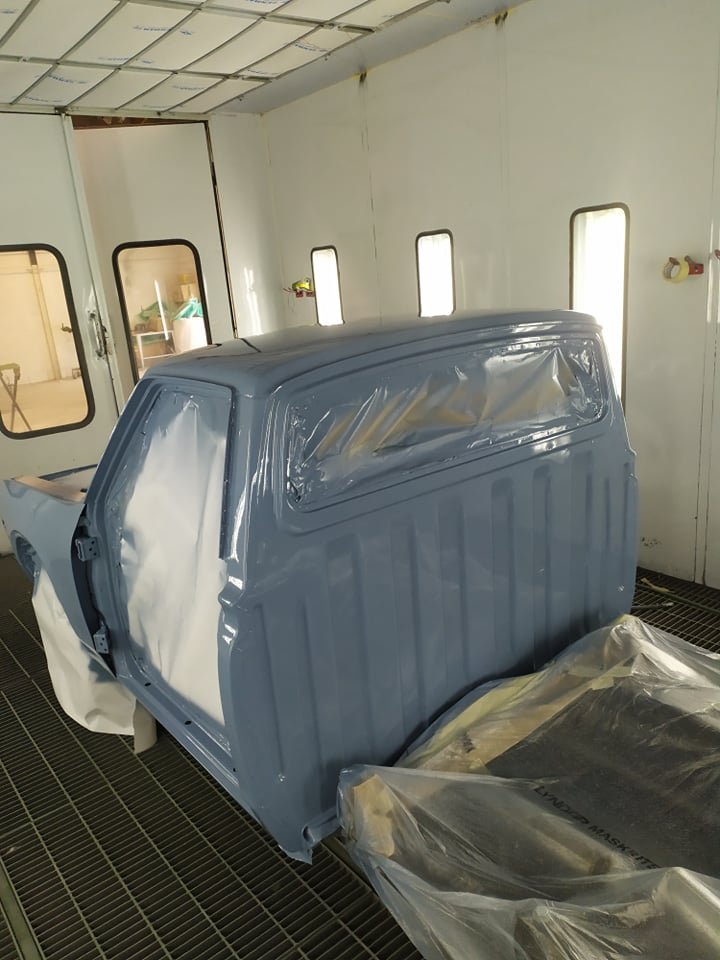
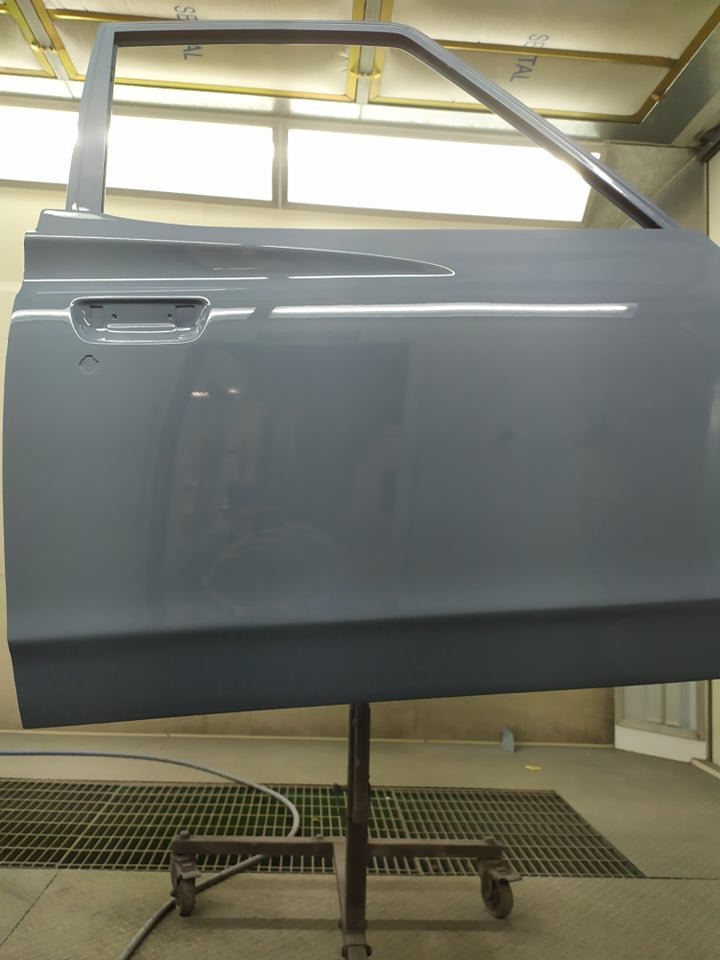
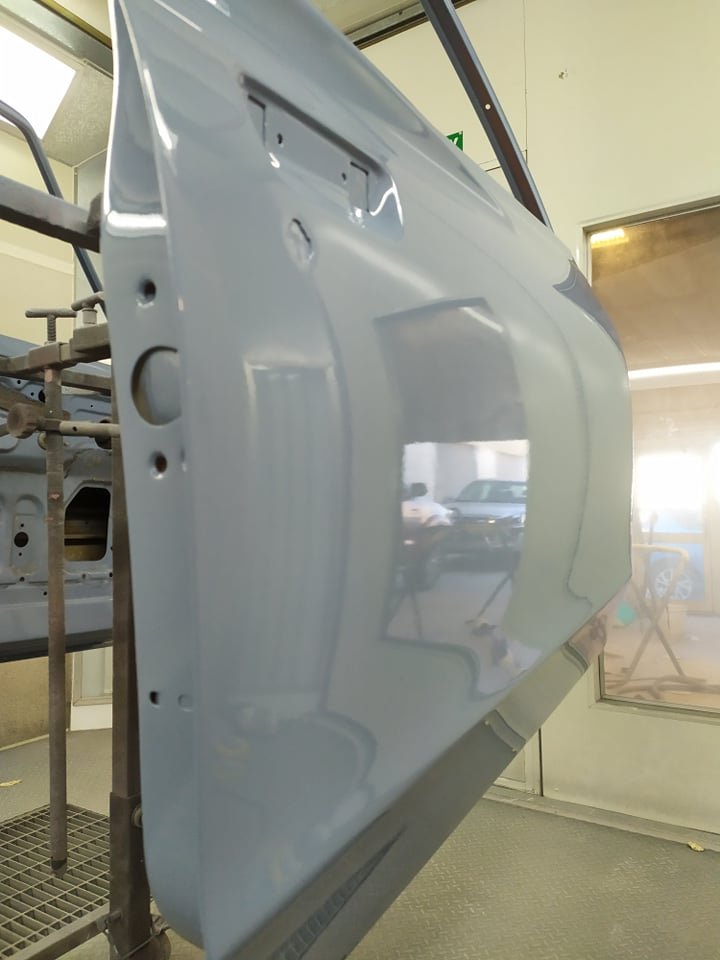
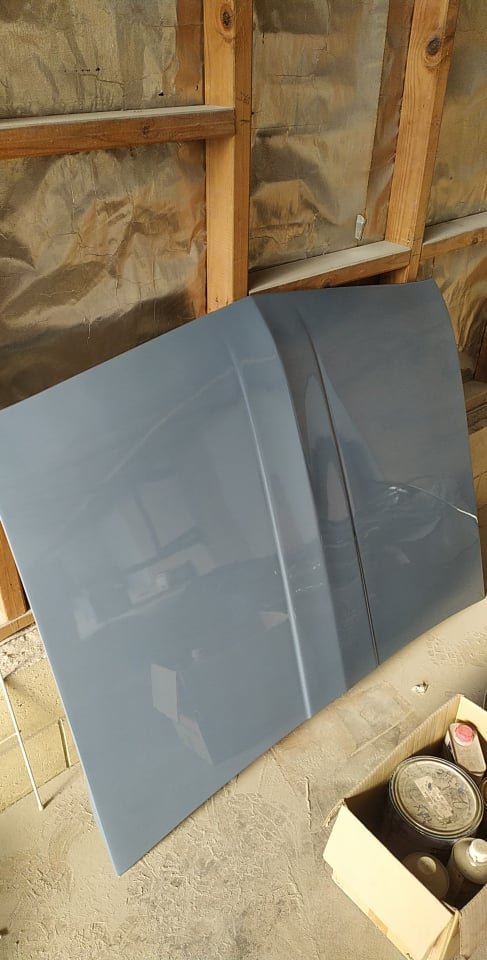
Then theres the body work, So it began pretty rust free. But sitting around outside in Christchurch, a bit of cancer began to show. My coarch builder mate fabricated me a new drivers side sill, and @governorsam grafted it in for me. (As well a couple of other small bits) i dont have any pictures of this either. And one of the gaurds needed a patch too. Again no pics, but i got a panel smasher to come weave his magic. Id fitted the front guards, and they did not match the shape of the doors at all. Also i found that old repairs etc meant that the drivers door was beyond economic repair. And needed to be replaced too. So mister panel smasher had the guards fiting beautifully afternonly a couple of hours. I removed rhe back window, and dropped the headlining down so he could pop some dents out of the roof. (It had been a working truck in its former life) he did a bloody good job all told too. I told him, im not some file finish fuckwit. Its a datsun, and its a ute. You can use as much filler as you need to. Because i knew he wont use more than is necessary. I also said, u donr expect a show car result. If its good enough fo you, its good enough for me too. But as a tradesman, i also knew he would do a good job. The last car he did for me came out really really nice. After the panel smashing was done, a mate brought over one of those paint spectro camera thingos. We took a picture of the paint on the underside of the roof skin. This gave me the colour the trauck was when new. Most of the rest of it had suffeeed 40+ years of central otago UV degradation. Some paint was procured, and it was sent into @I'm new here work on a long weekend. Hamish really pushed the boat out with stopping all the repairs, before paint
2 points
-
Yep. You would likely need to add something back in to make it strong enough/roughly the same strength as it was. Wouldn't need anything complicated1 point
-
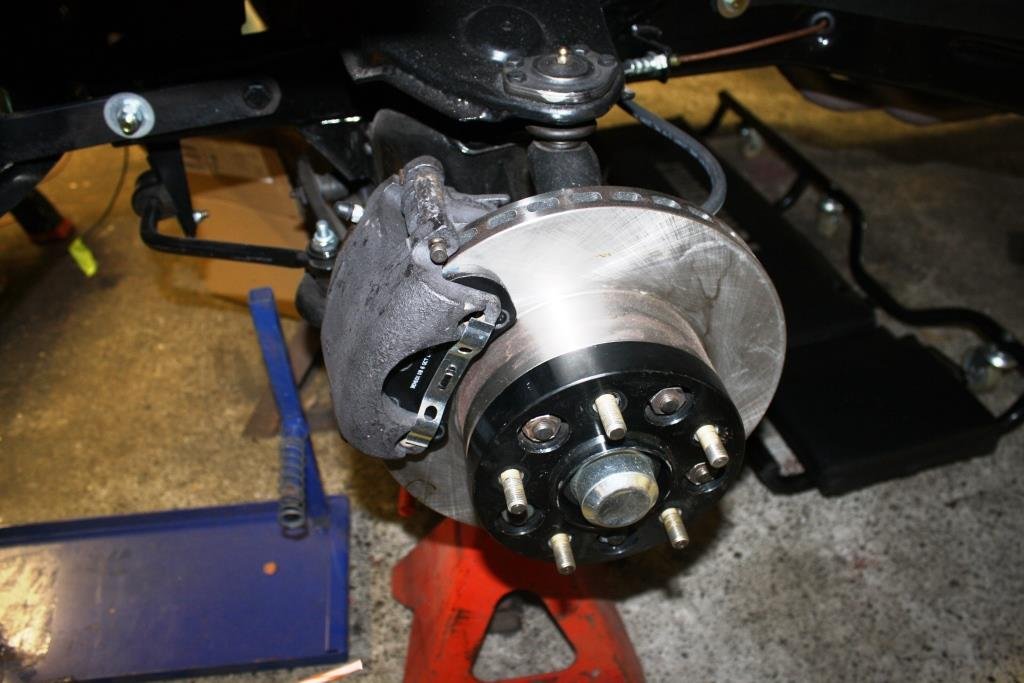
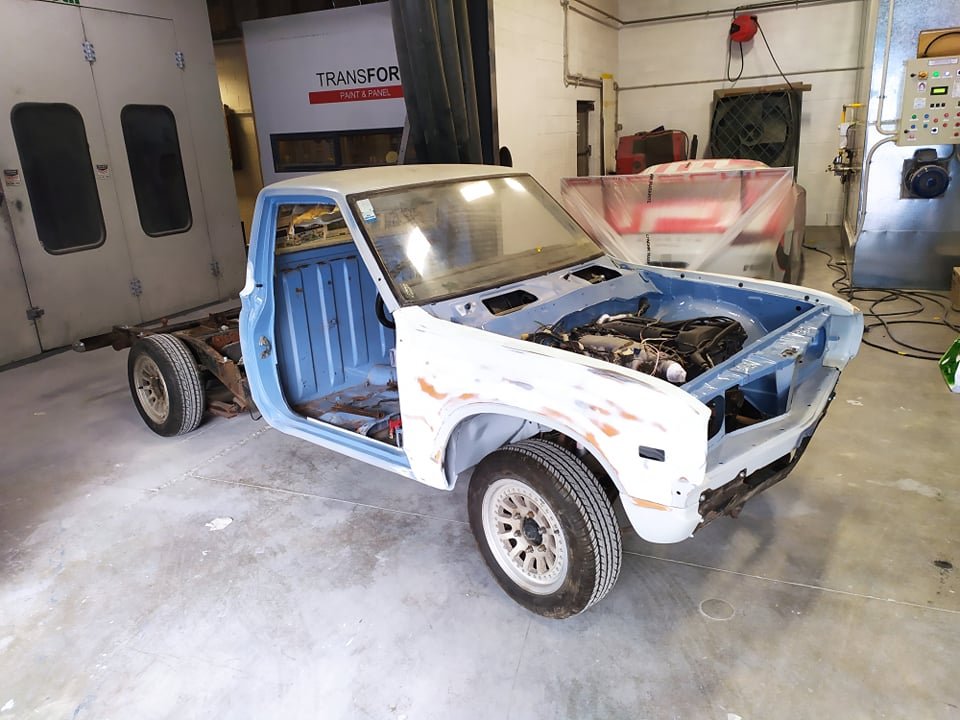
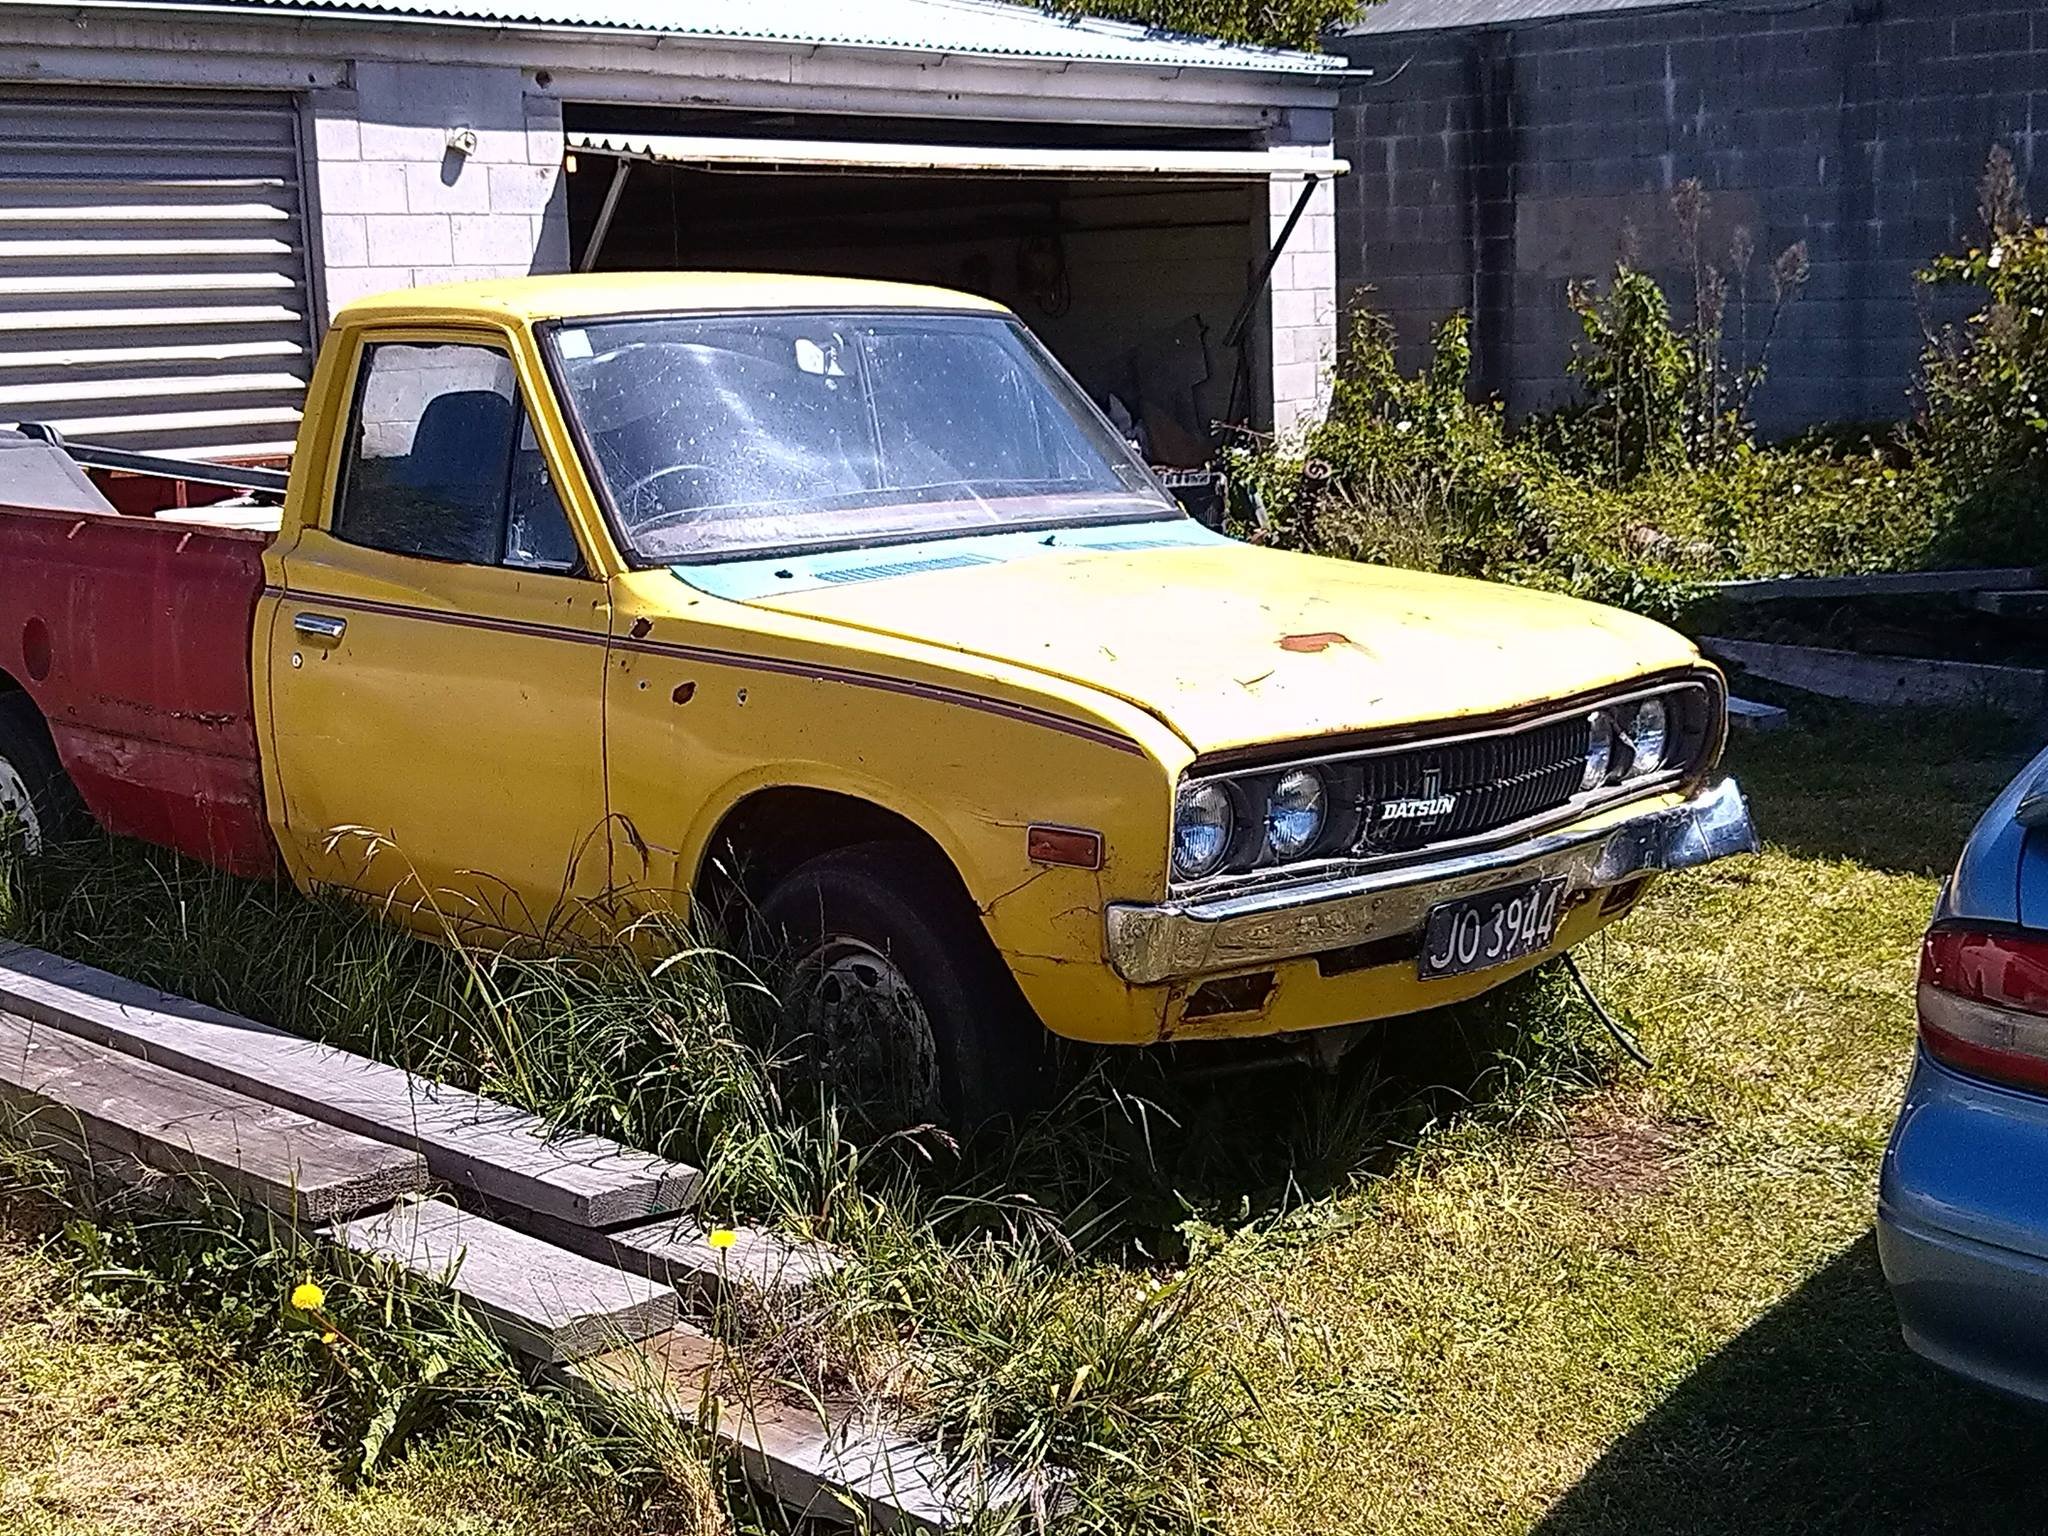
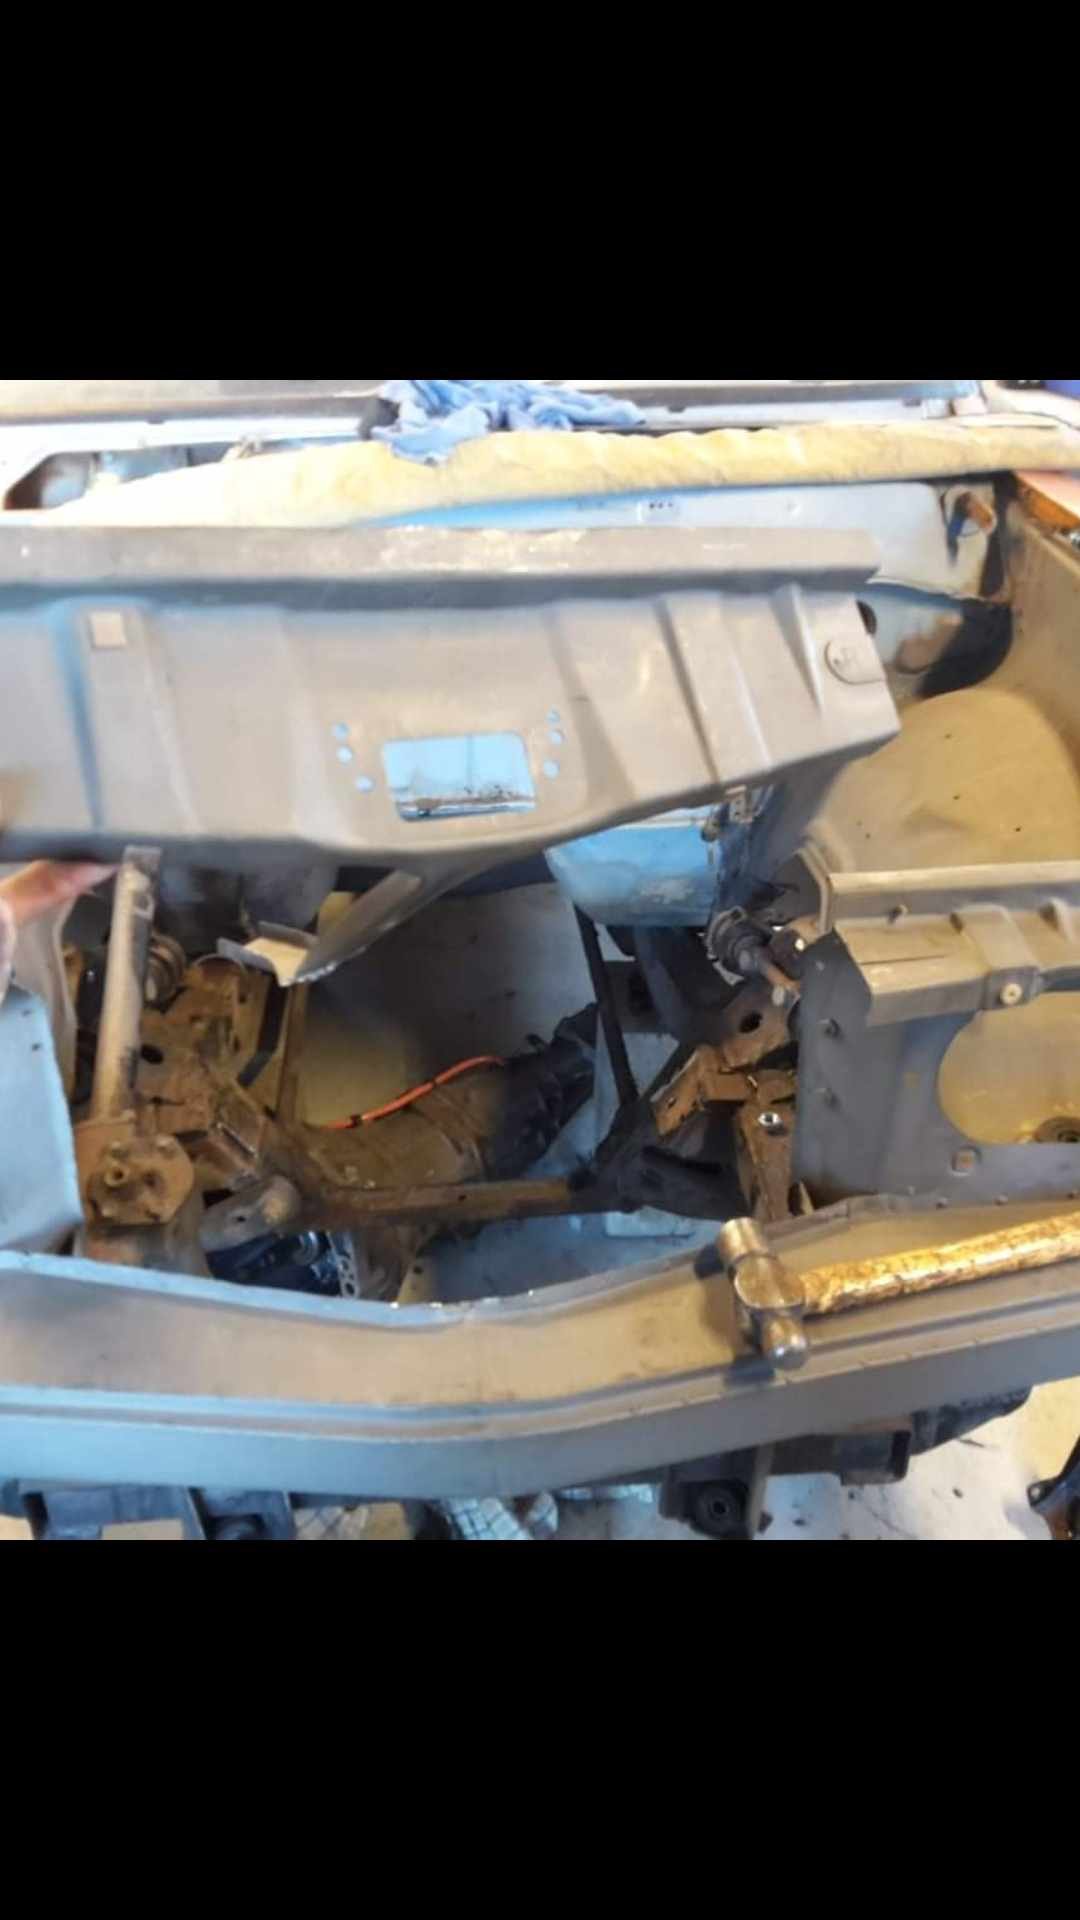
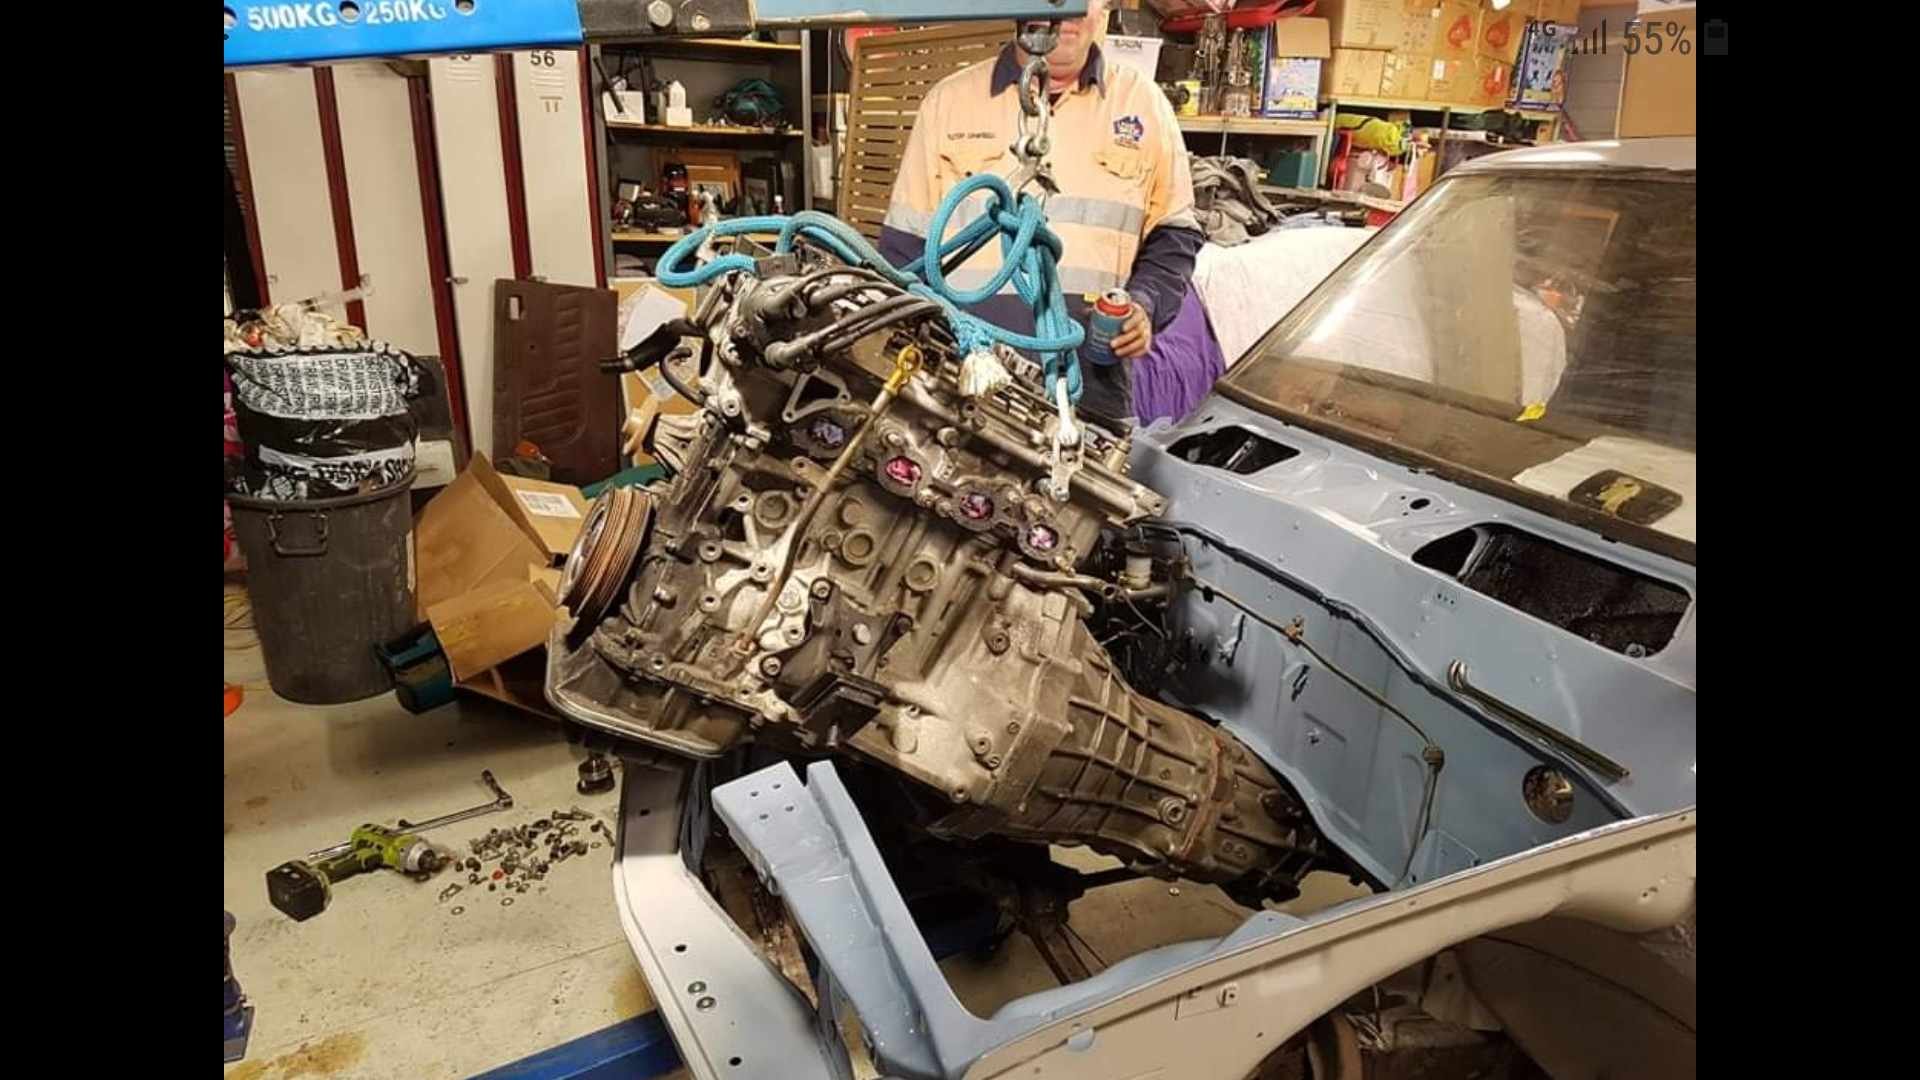
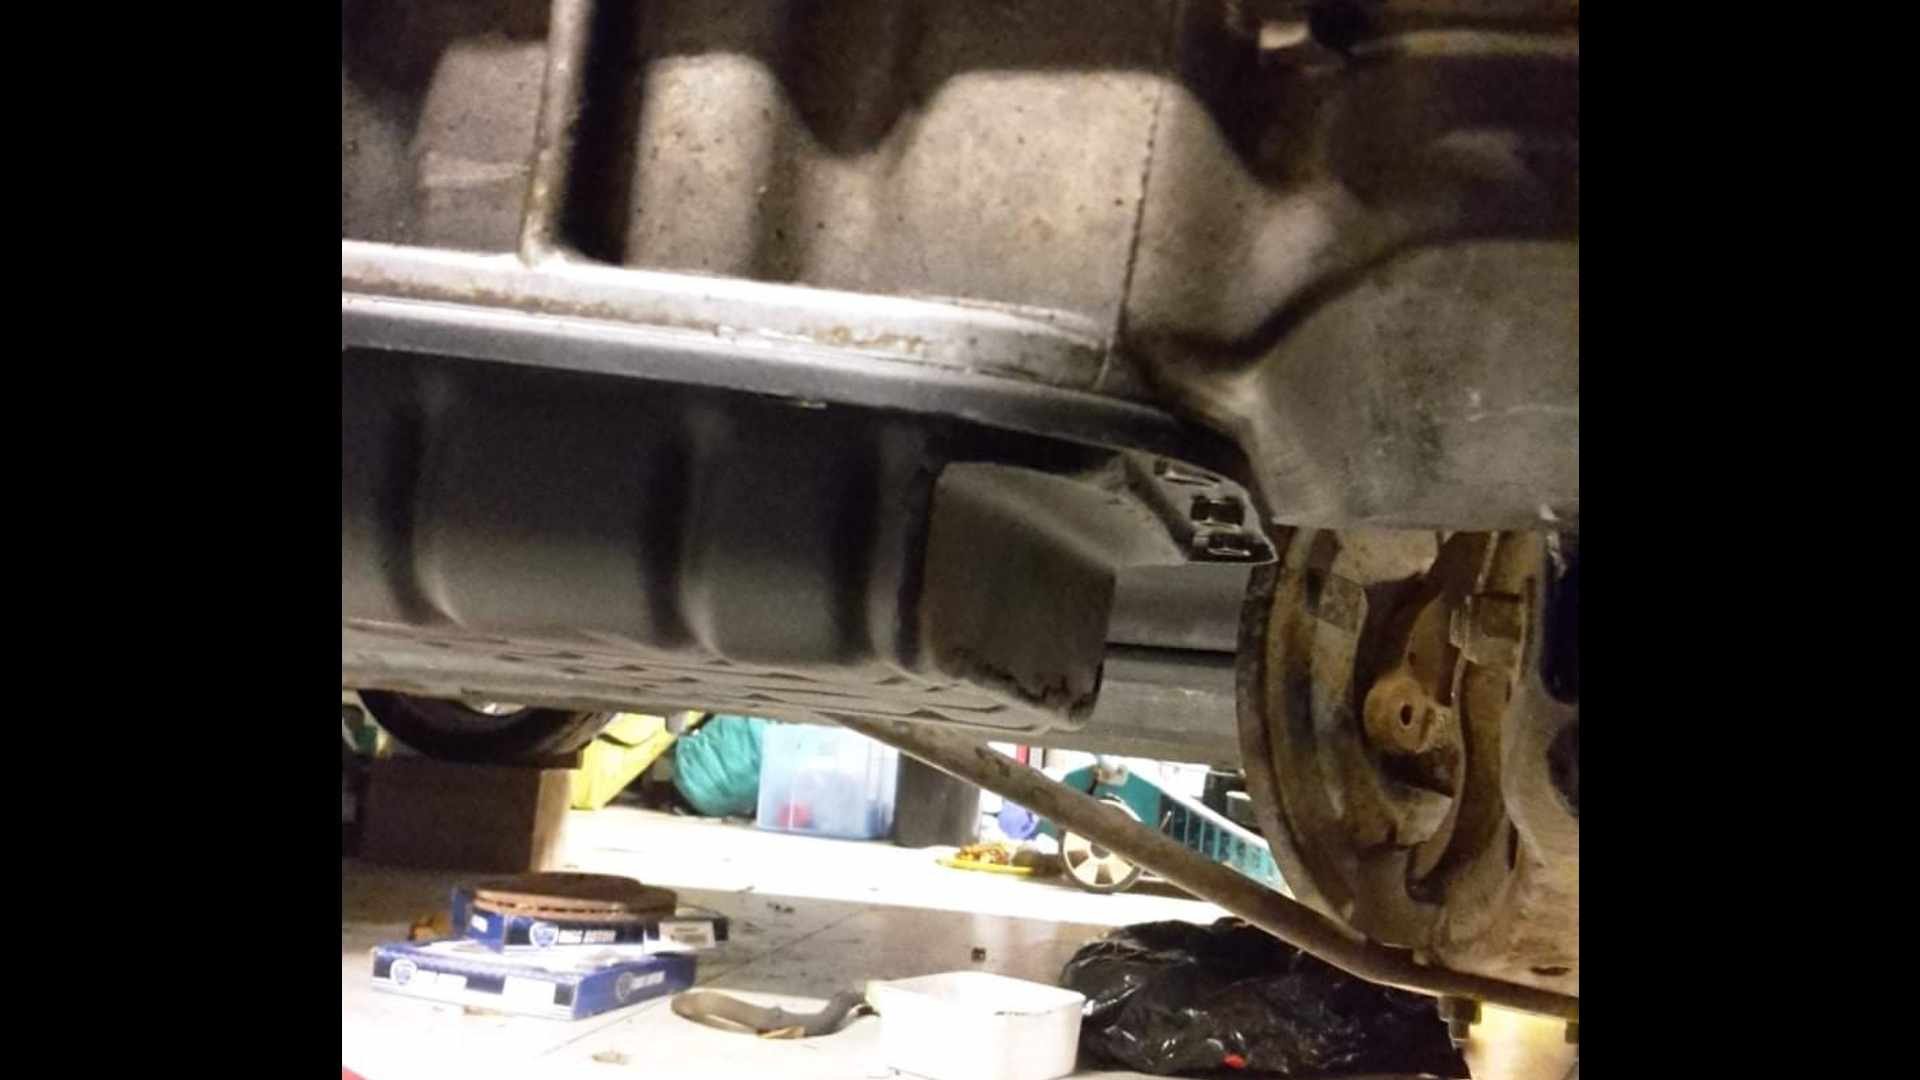
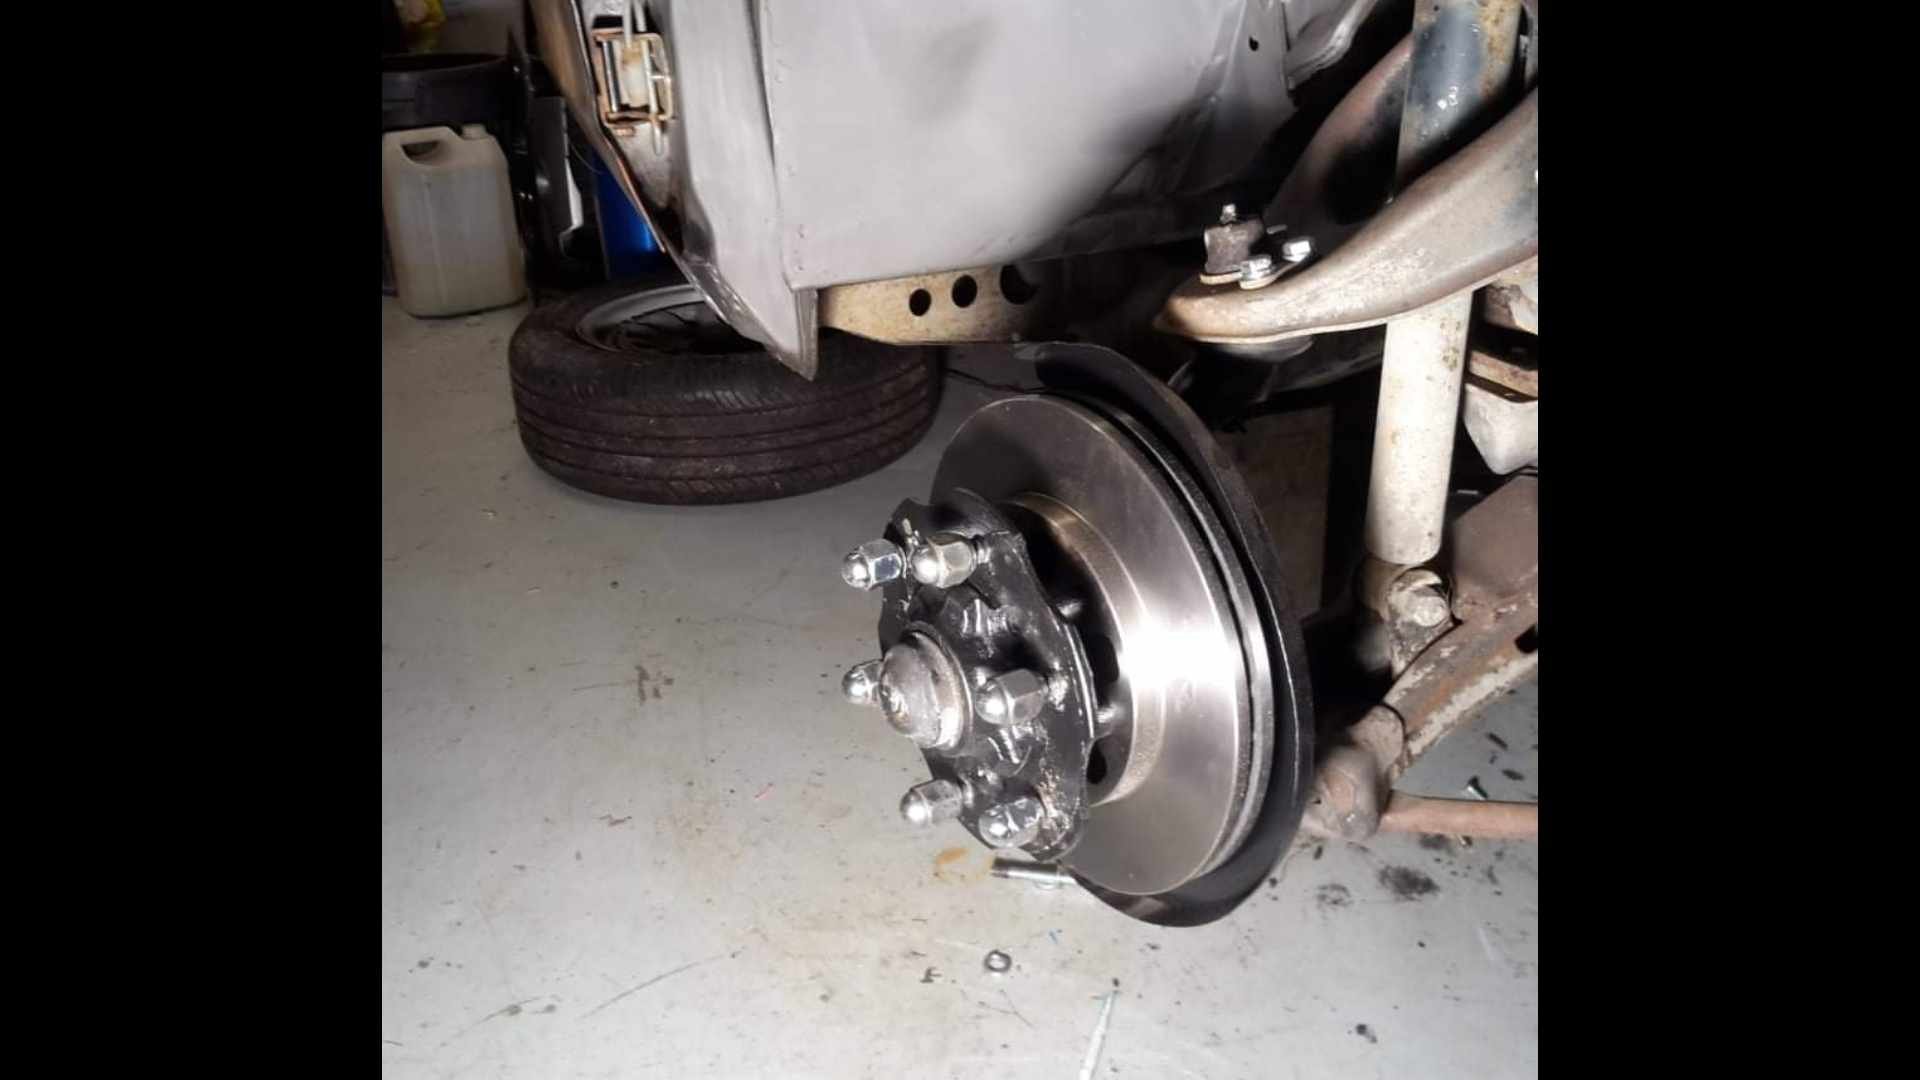
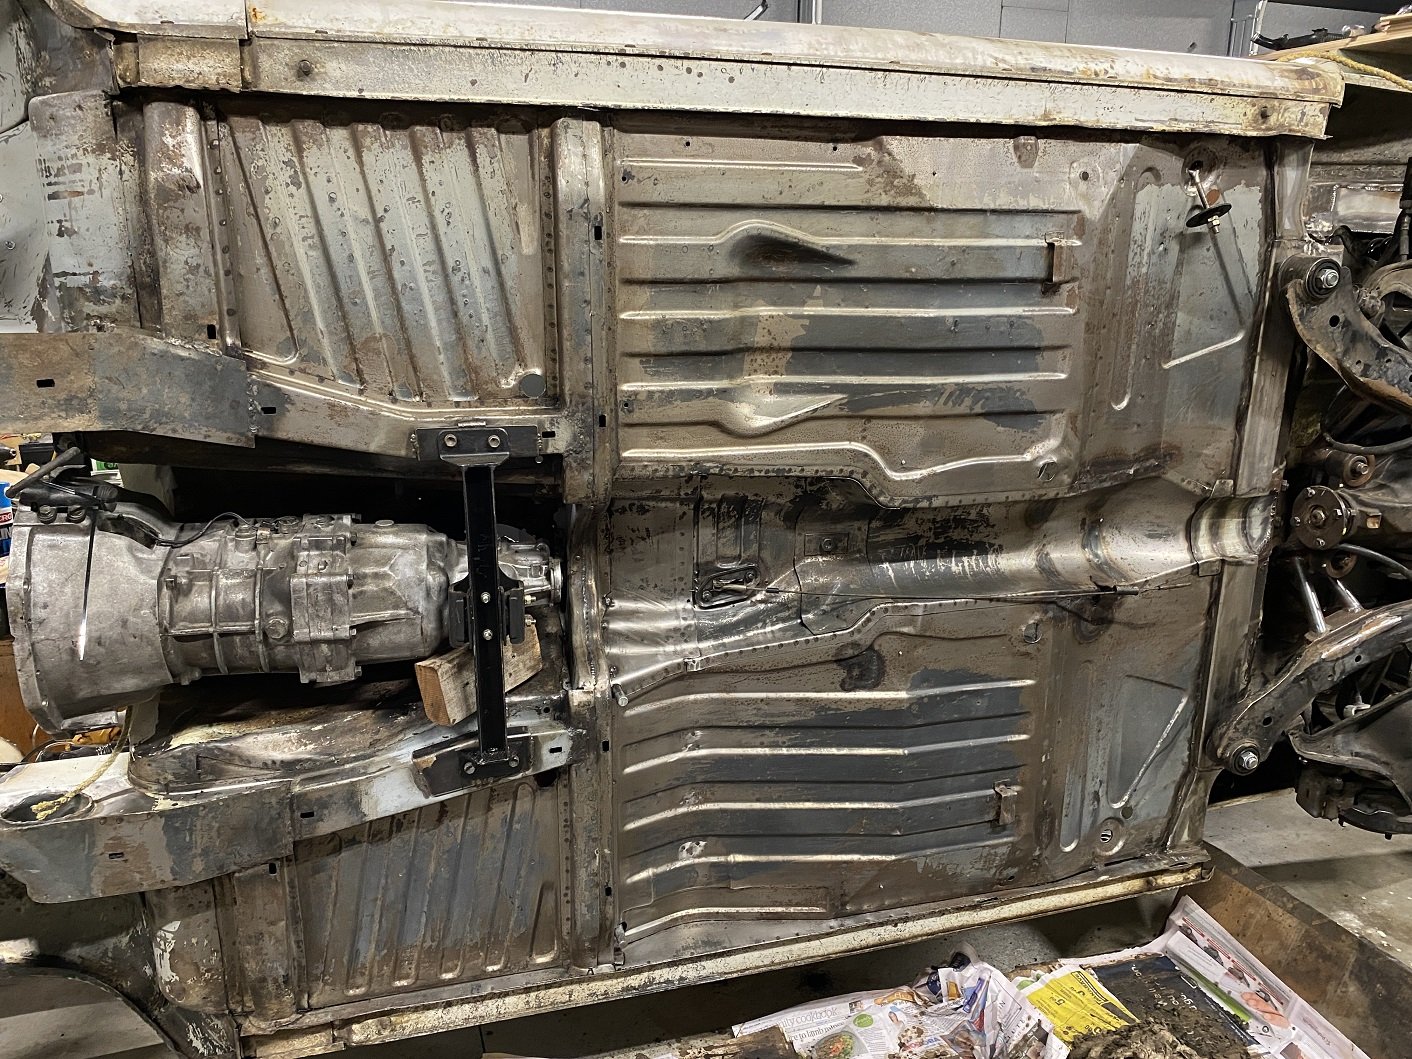
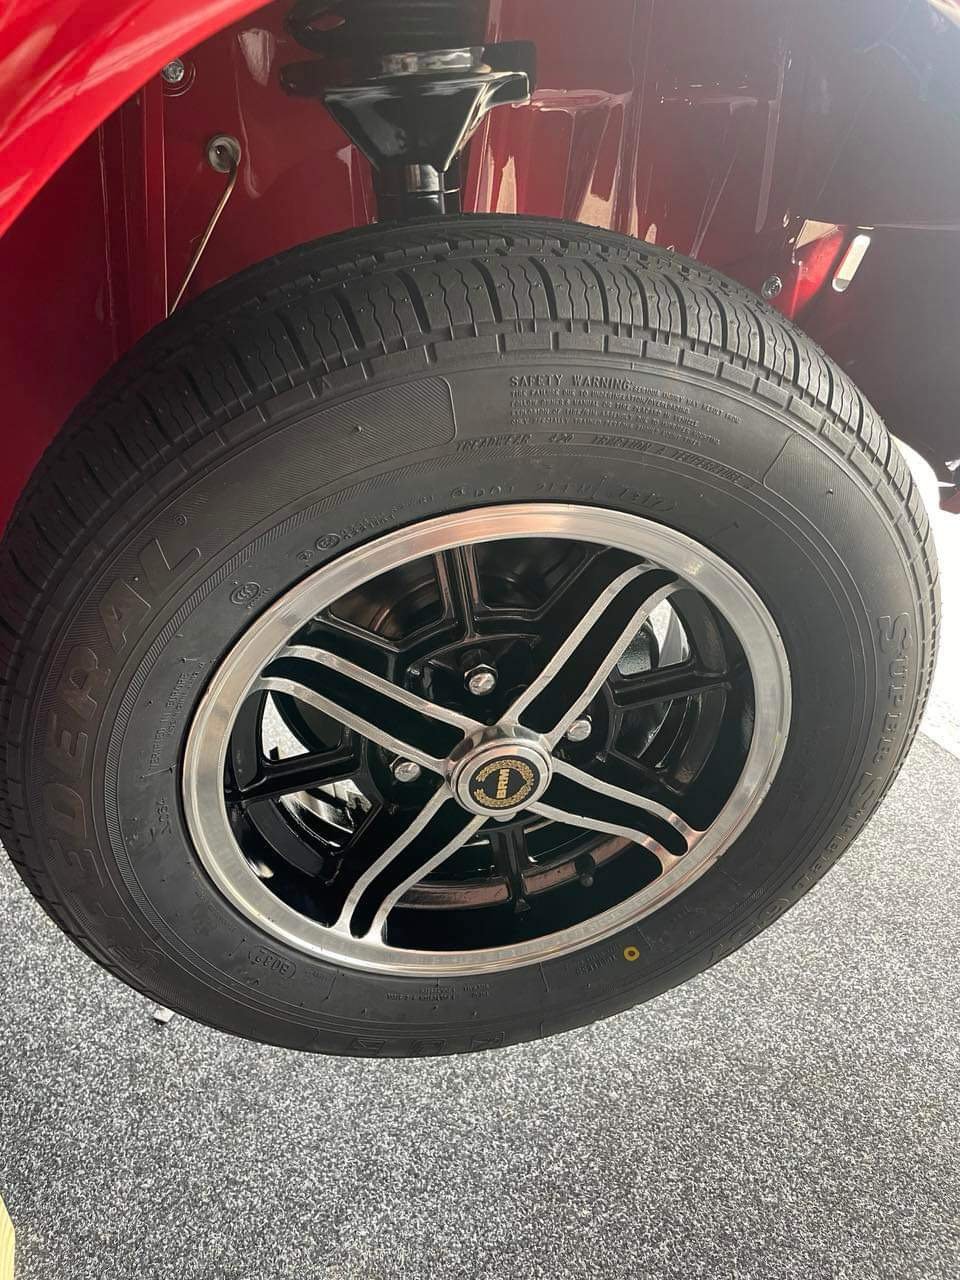
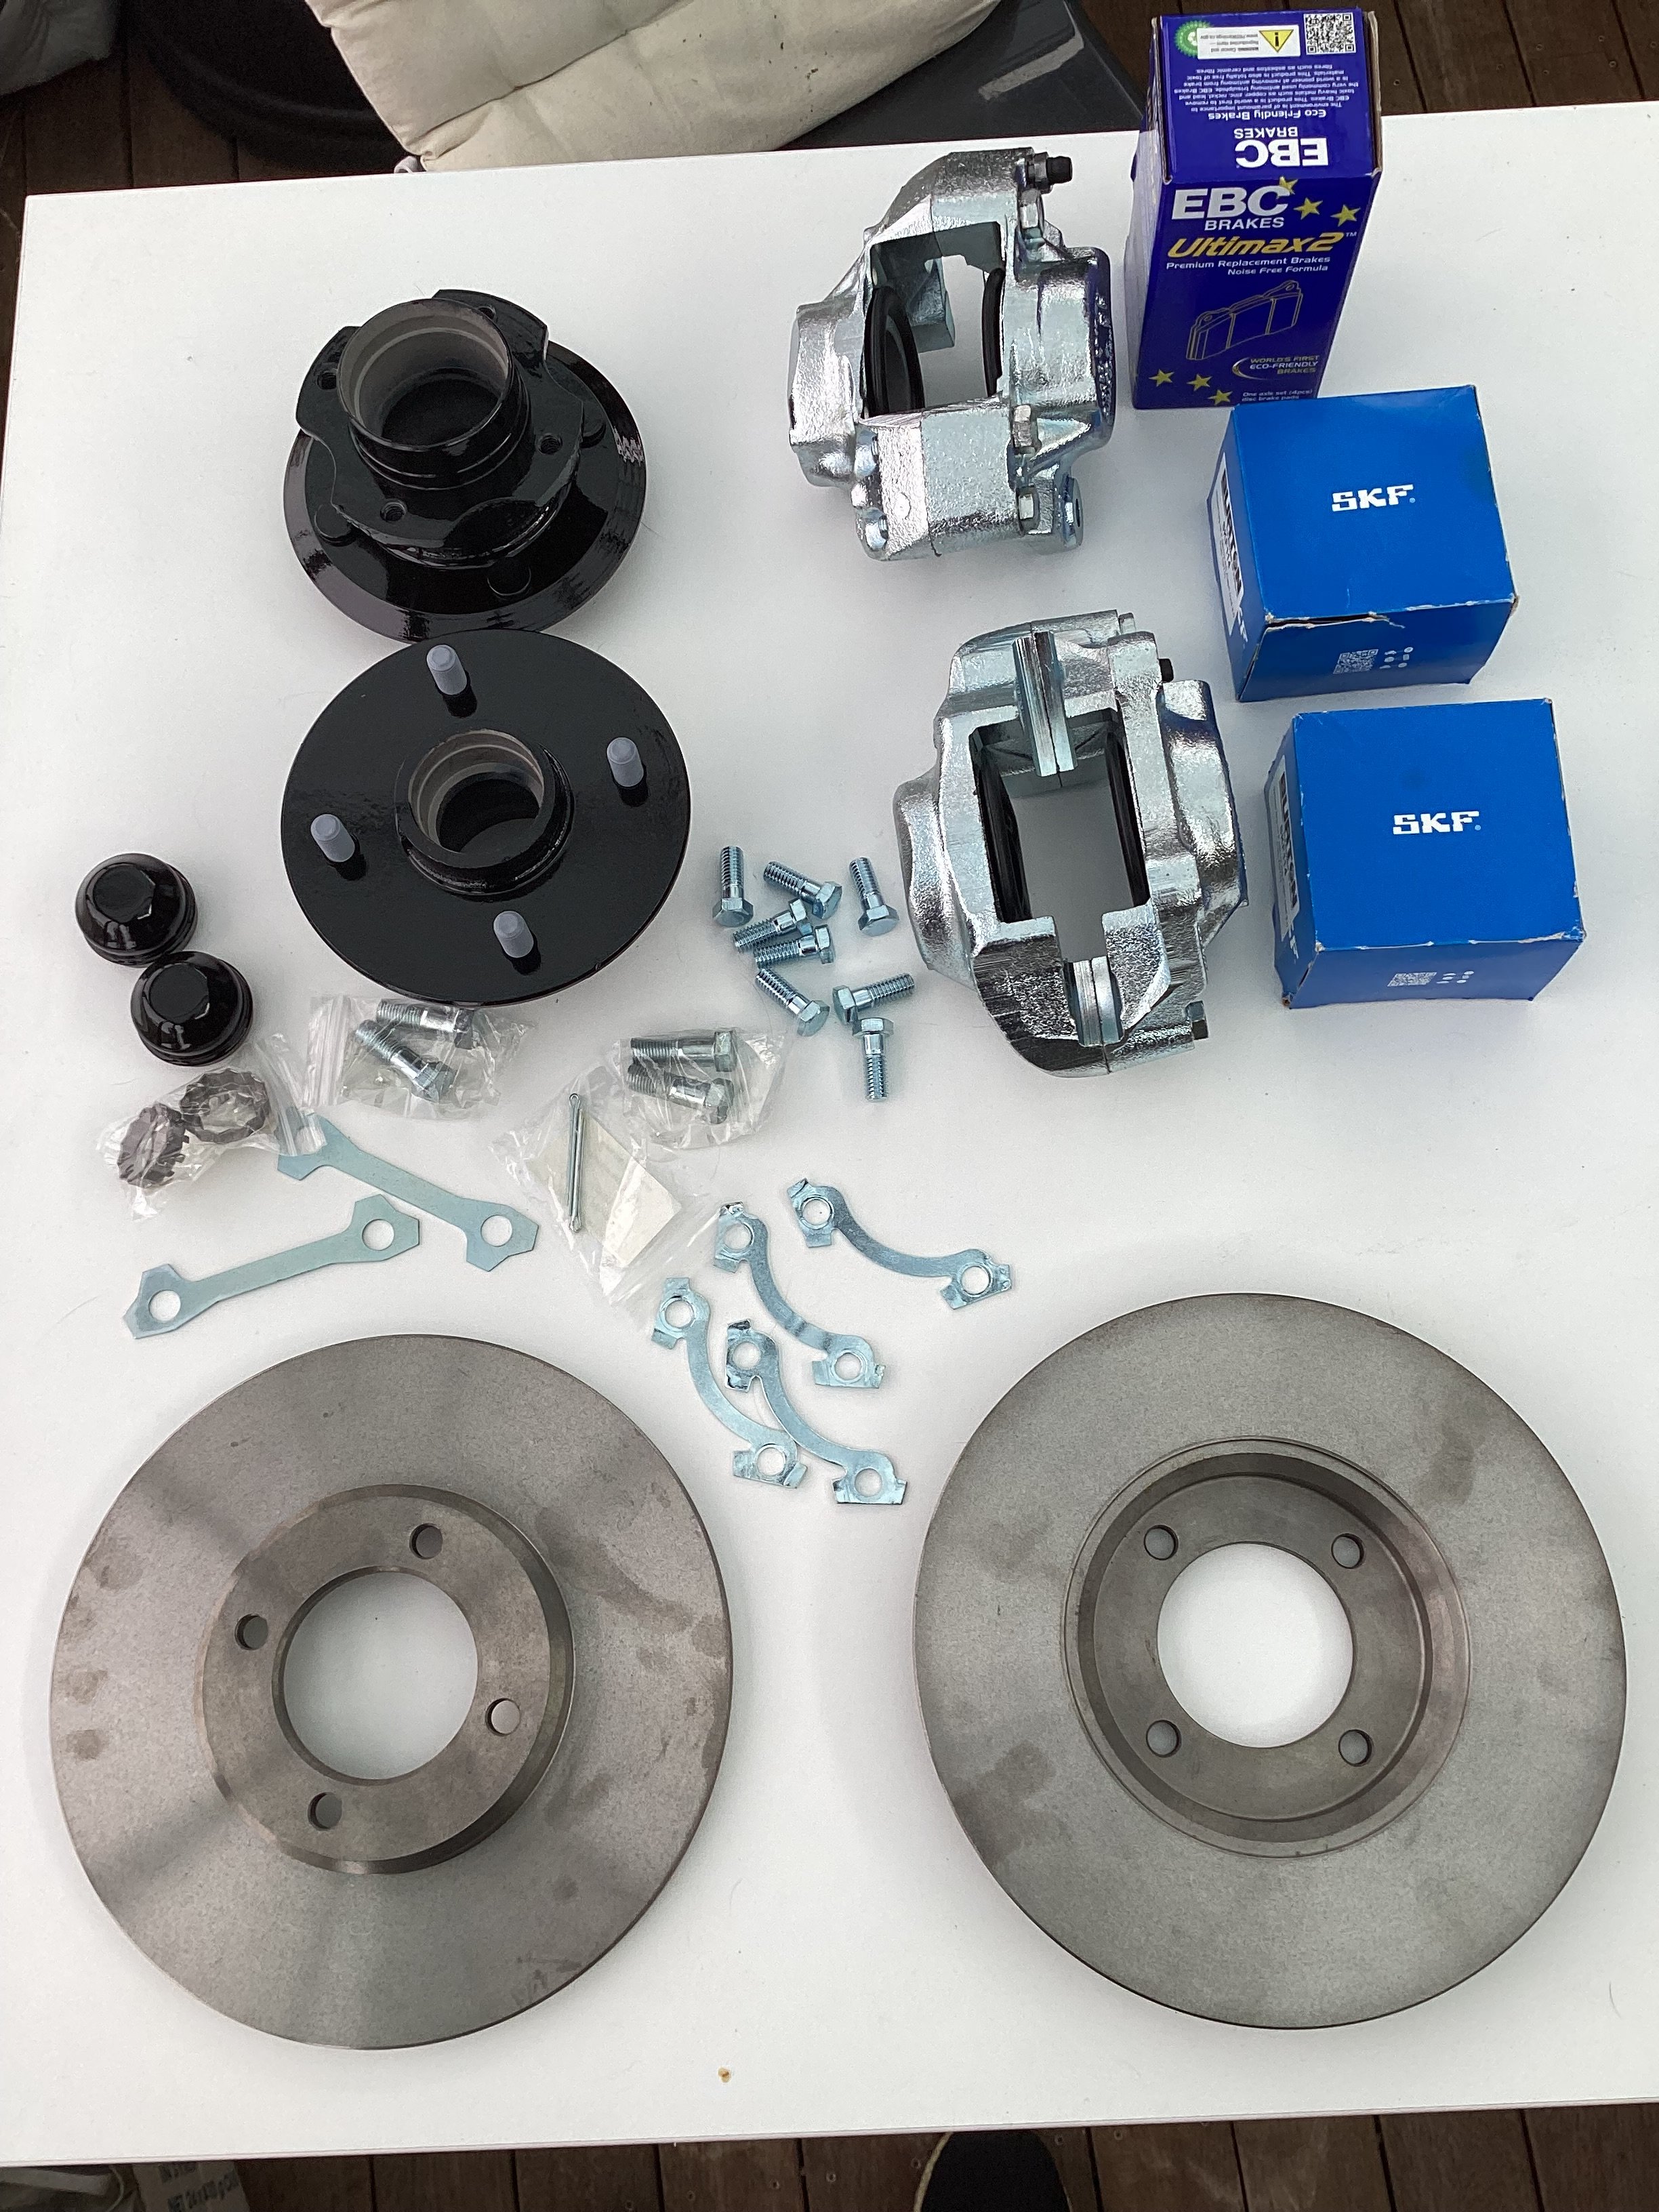
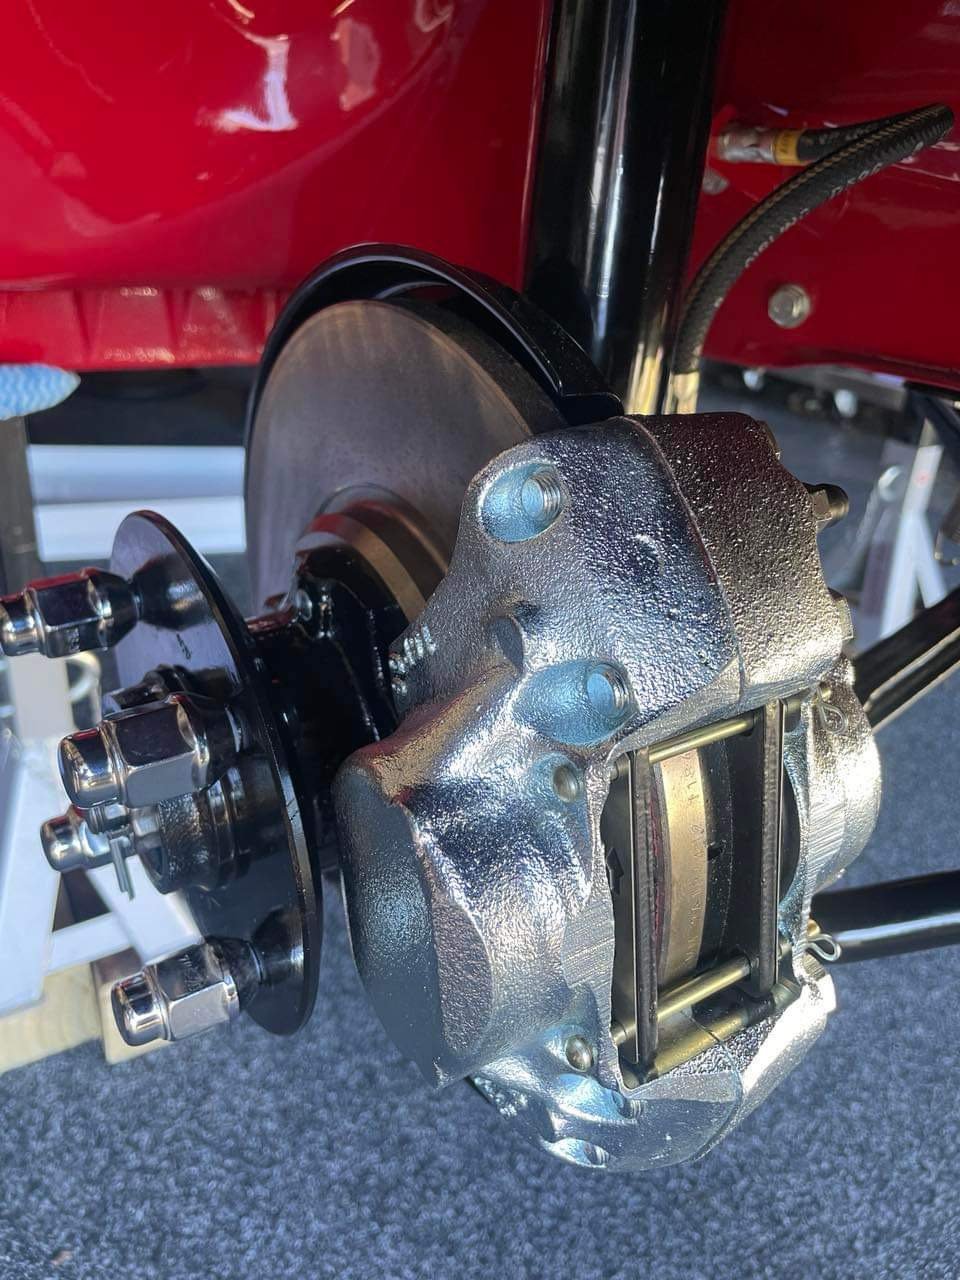
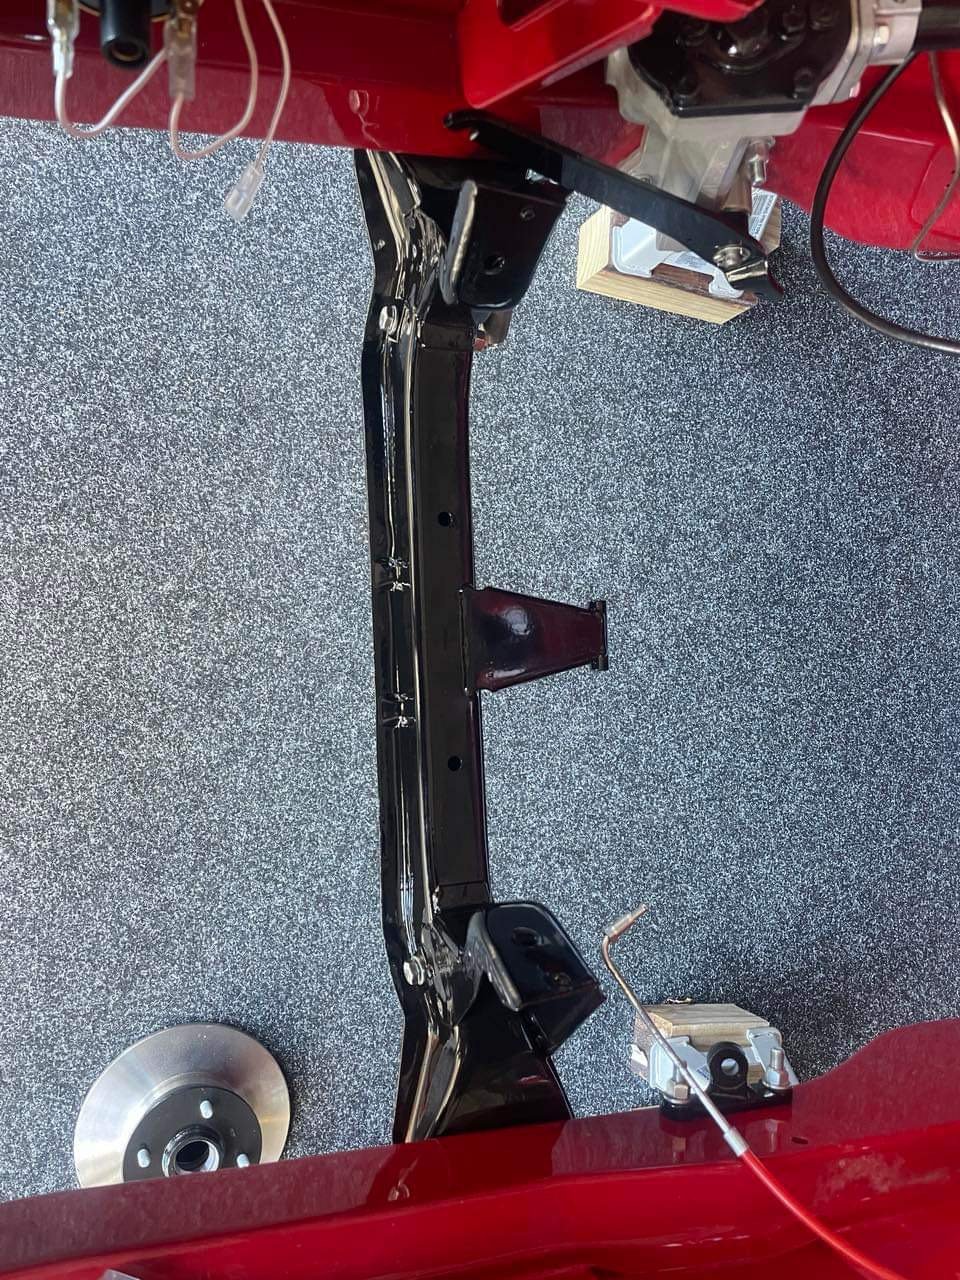
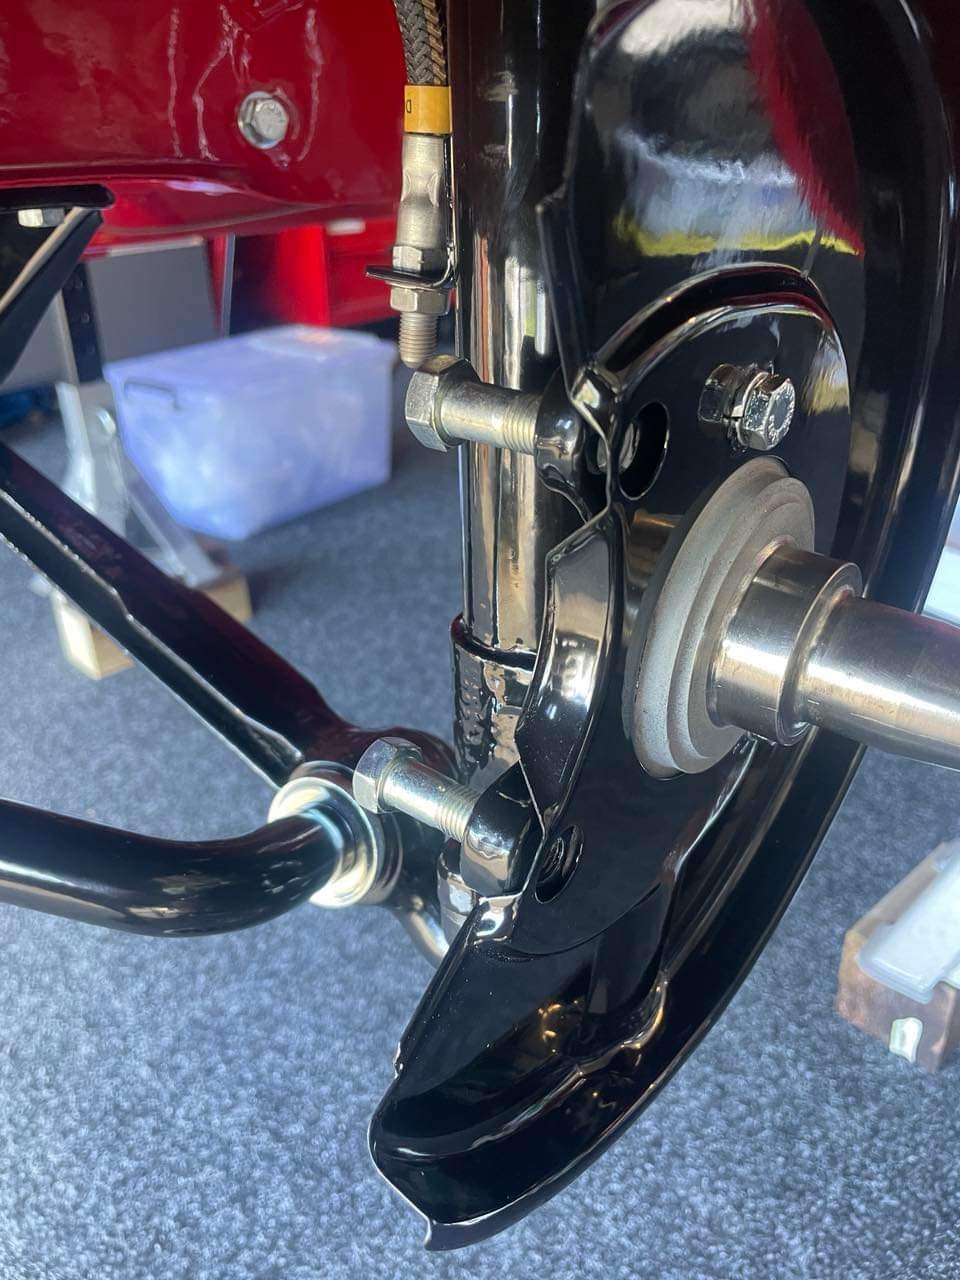
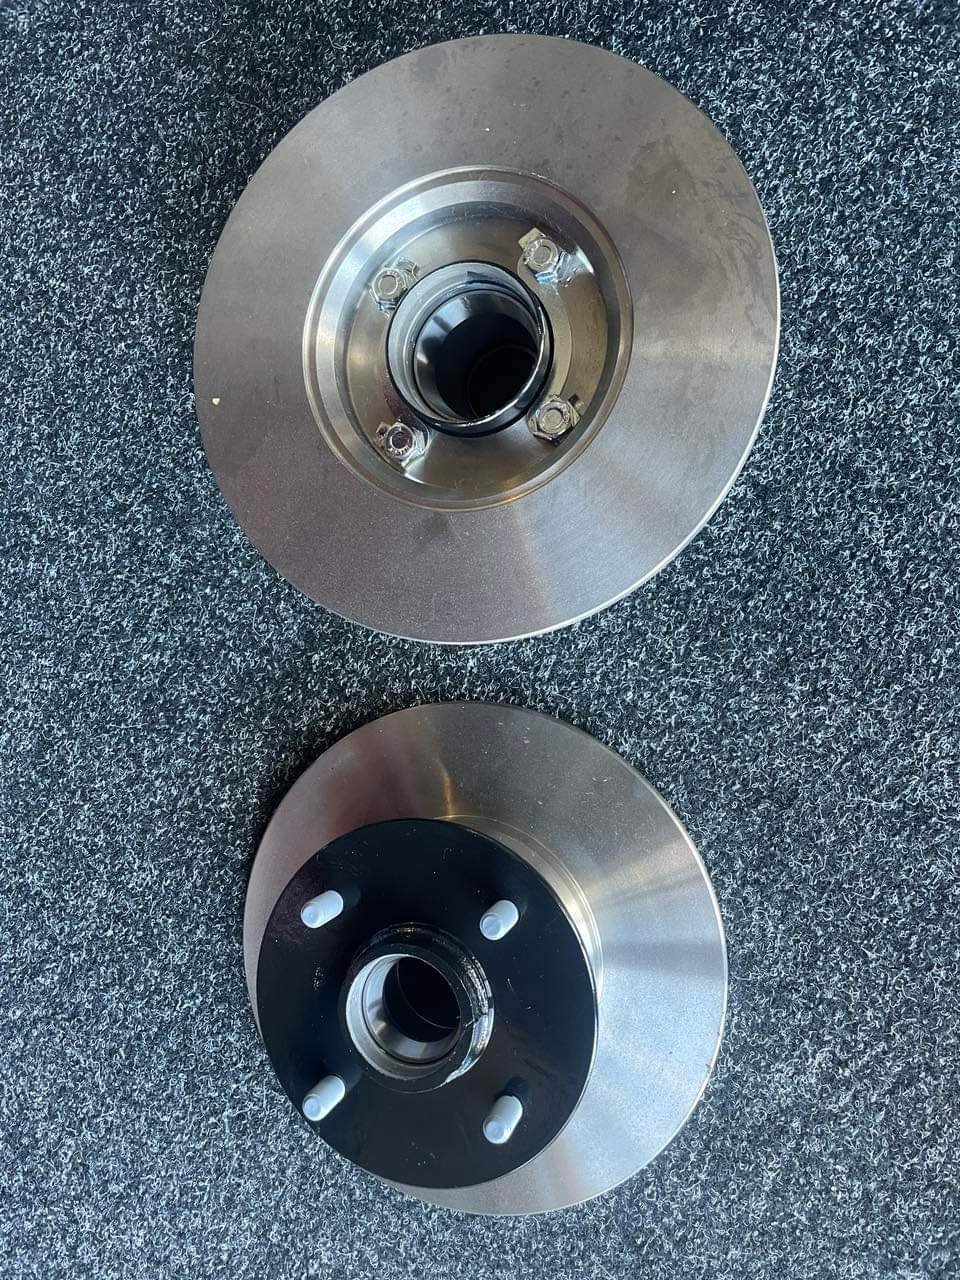
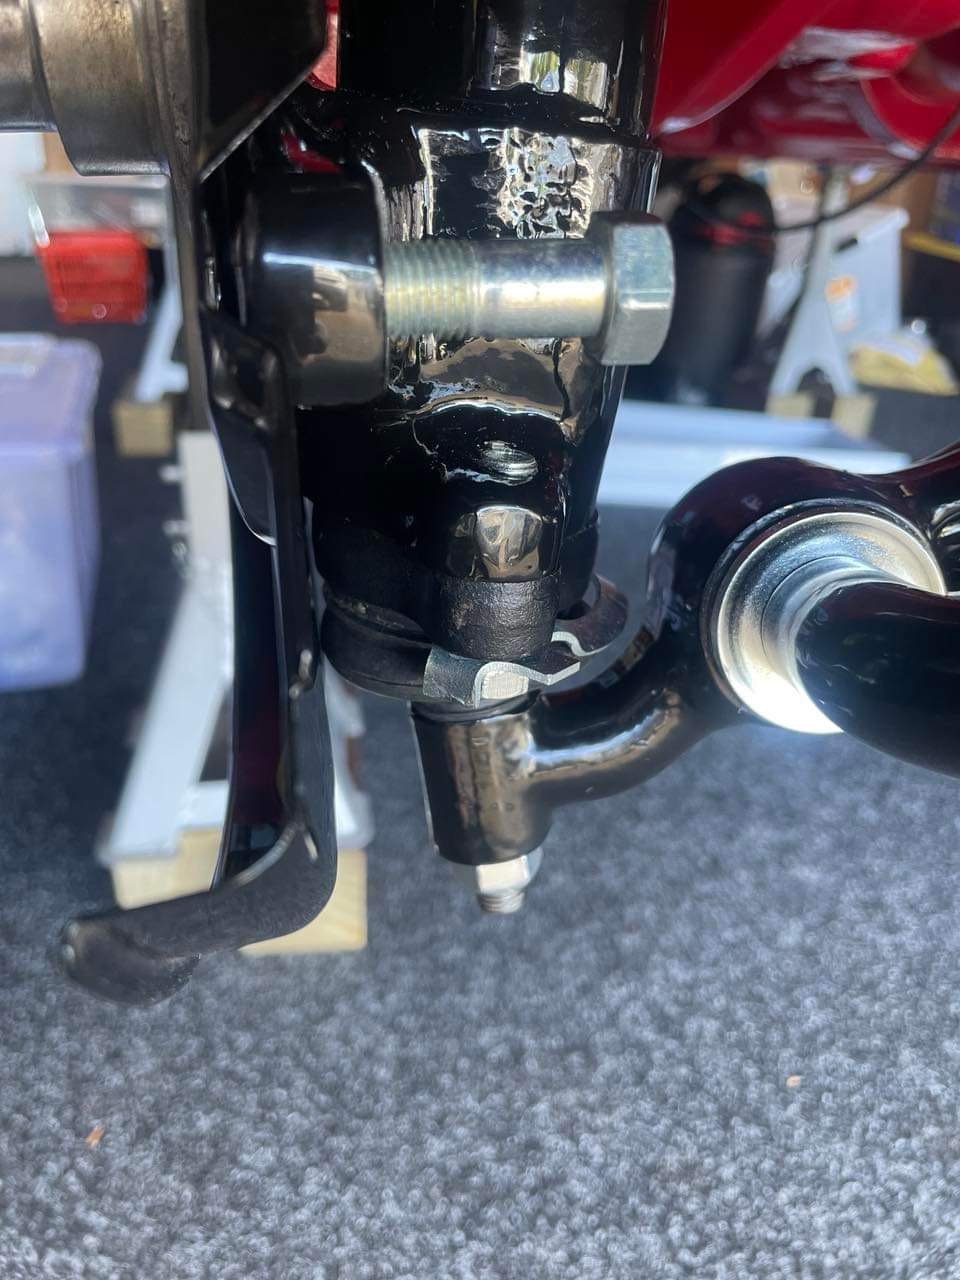
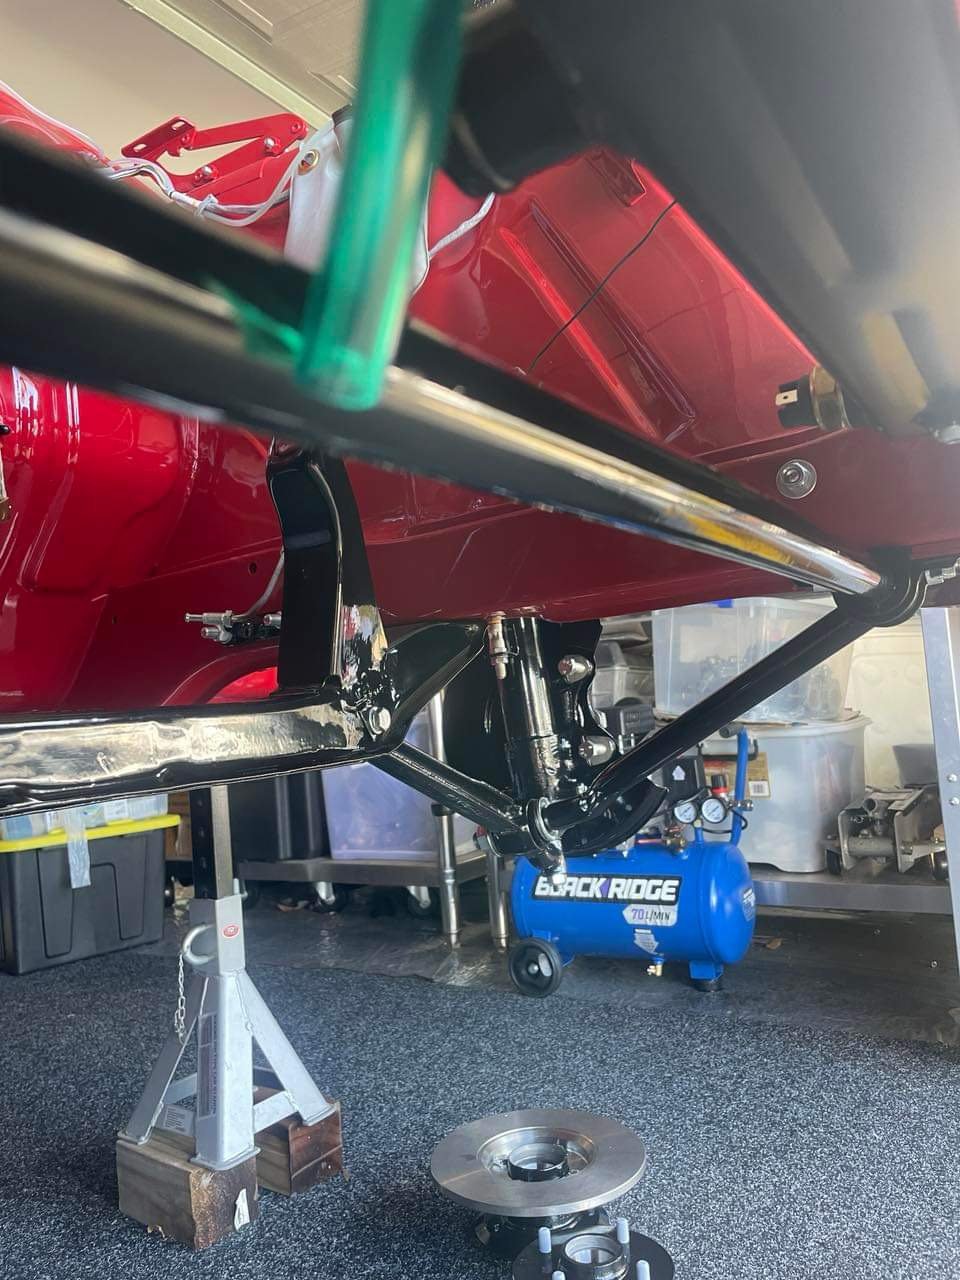
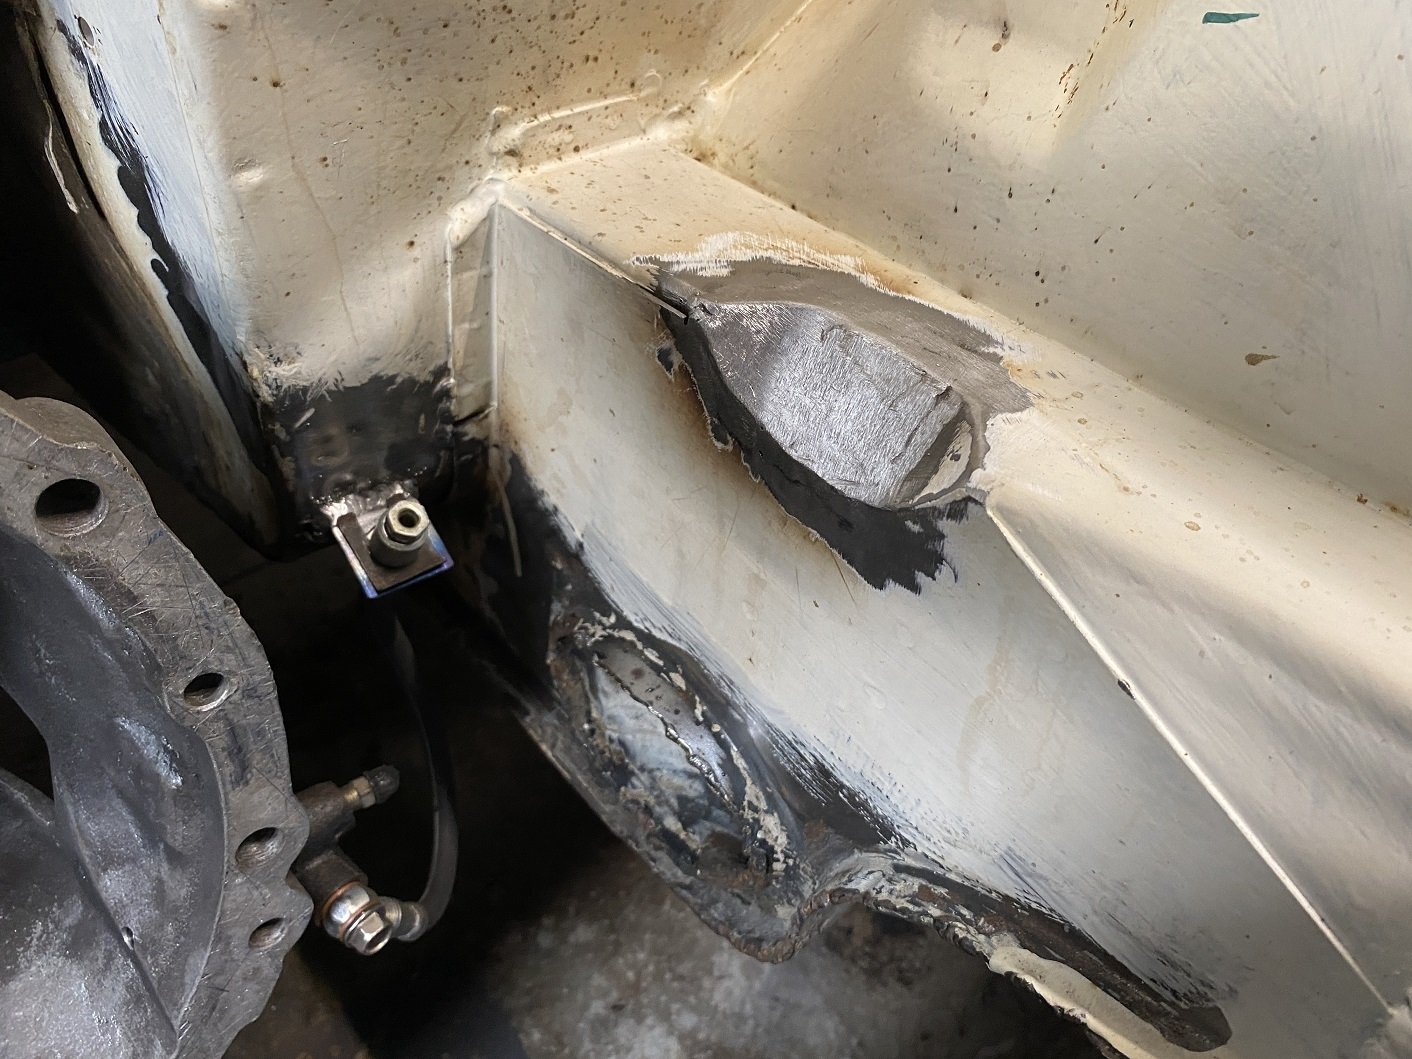
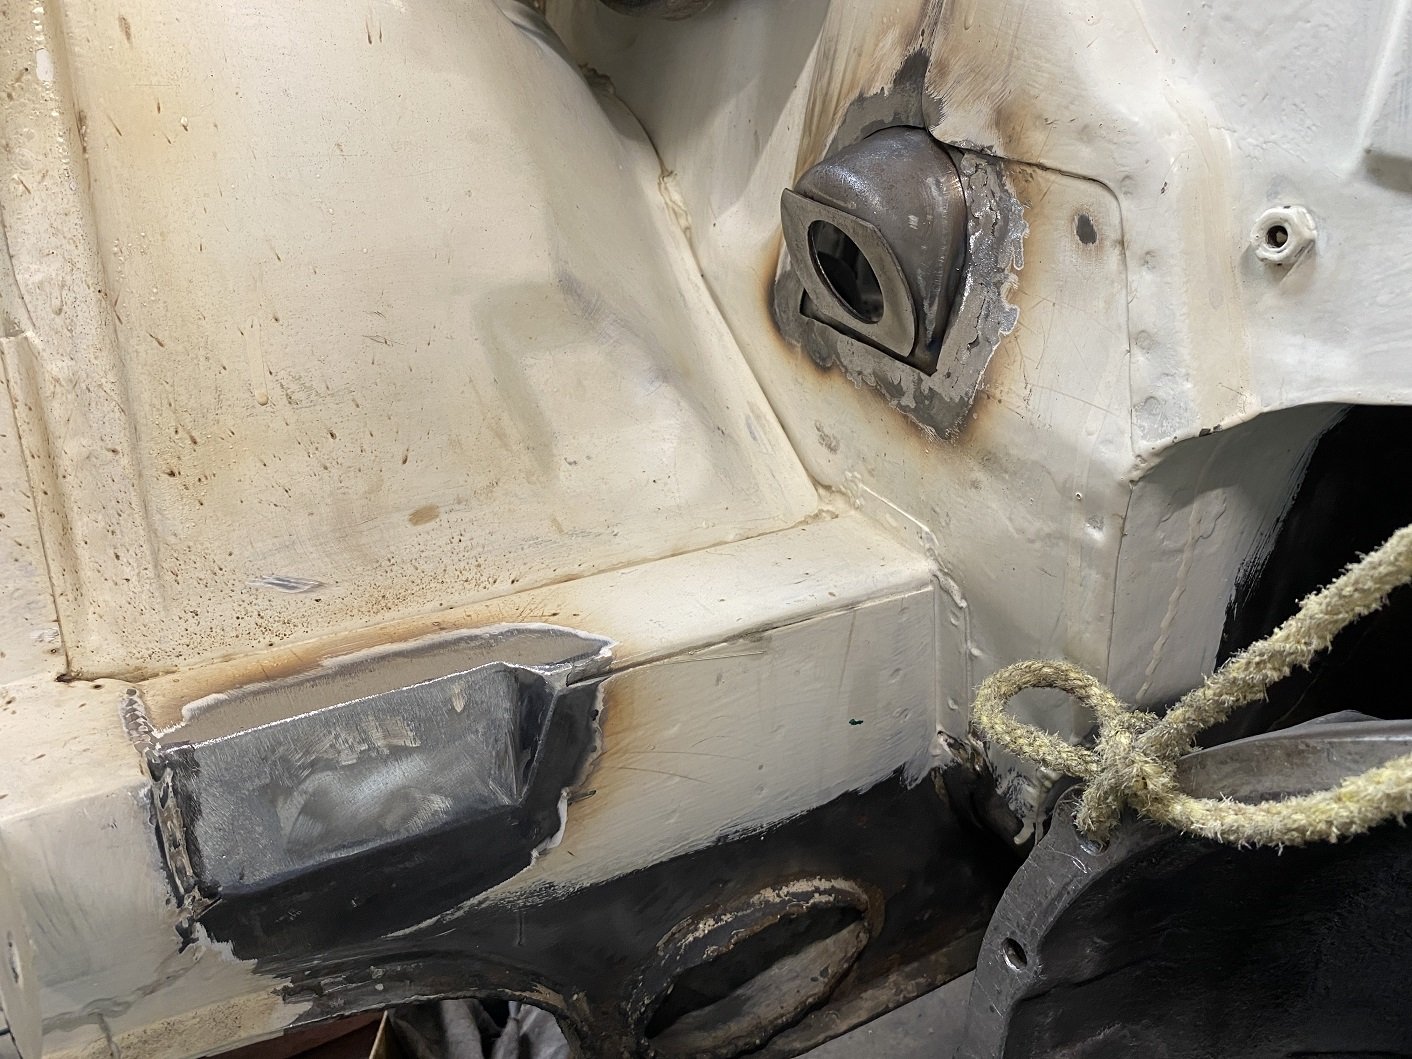
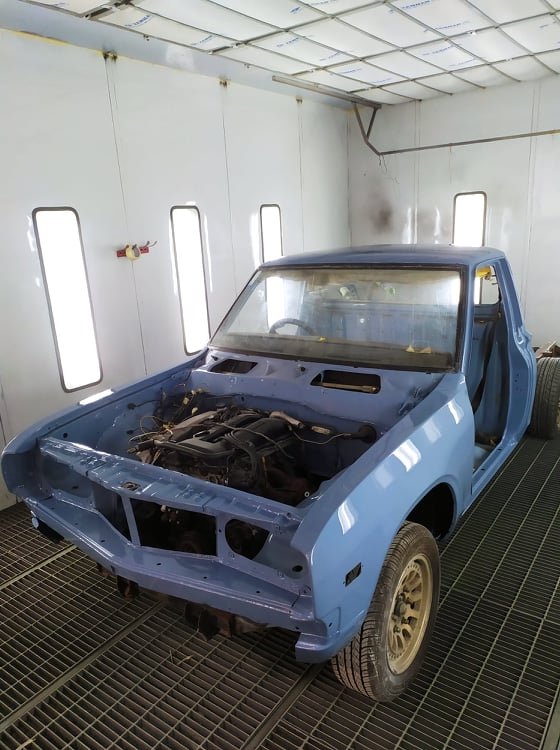
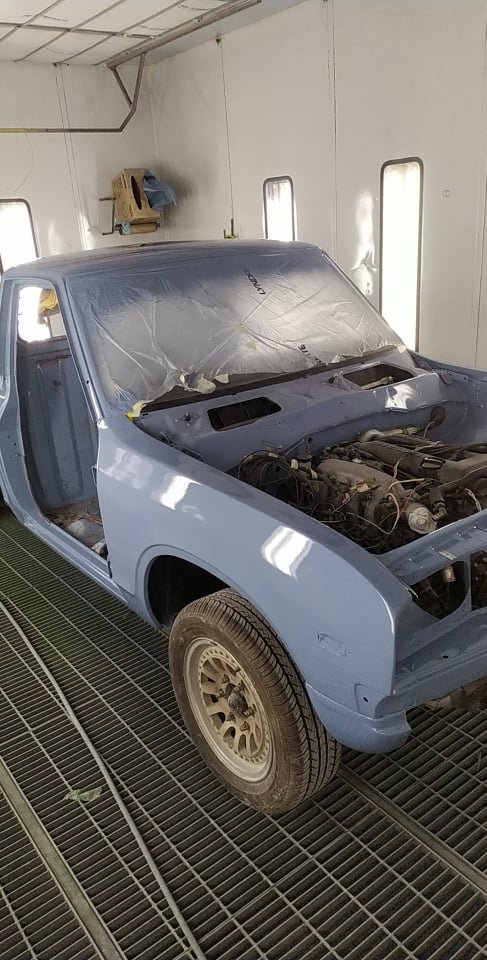
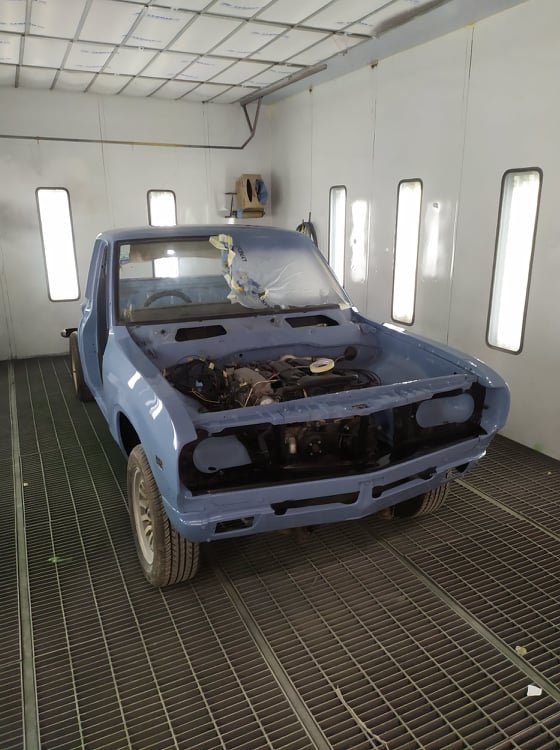
A few people have asked why theres no thread for this vehicle. (Because the owner is so useless tbh) i showed some pictures on my phone to some people at Garlic nats. And one of them convinced me i should post them up. (Thanks @Sungai Sungai) The story begins quite some years ago when i bought a datsun 620 ute of @Mr.Mk1. He'd rescued it from scrap. He also found a pretty fucked wellside tray for it. (Which is also rockinghorse shit 8n terms of rarity) it would seem i only have one picture of that truck. It needed plenty of work, but the rego was on hold, and it was (mostly) complete. When josh and i did the mission down to Alexandra to collect it, he showed me another 620 ute. It belonged to the landlord from whom his brother rented his business premesis from. Daily driven, and a real sweet honey. Because Alexandra is as dry as fuck with no foreplay, it was completely rust free too. (For what its worth, 620 are without a doubt the most rust prone vehicles on planet earth) Some time later, i learned that the elderly gentleman who owned that truck stacked it. And some time later it popped up as wrecking in Christchurch. Hoping to get some parts, i shot around there. Where i met @Agent75. The truck was still pretty rust feee. But unfortunately Shane had cut the radiator support panel off to make removing the engine easier. The inner gaurds were a little bit puckered, but it could have been straightened out. A deal was struck, and i dragged it home. Another mate had another 620 he wanted ro move on. ( @I'm new here) it had been completely dismantled. And had some prettt cunty rust. So i bought that, and had a coachbuilder mate graft the inner gaurds and rad support panel off that cab onto this one. Unfortunately i have no pictures of this. I also picked up a pair of front guards off another mate. As i didnt get the nasty, underpowered, leaky, J15 with the truck, i opted for an S14 SR20 that i bought off @mint16. With the gearbox attached, i had to make the centre of the rad support panel removeable. After id painted the engine bay, @fletch have me a hand to do the final engine installation. Because id slung the engine so low, and so far back, the sump had to be notched to clear the drag link. Seeing as this chassis is the later model/last iteration of the 620, it was fitted with ball joints, rather than king pins. This is a wicked bonus, because i learned that if the top ball joint is swapped over, that D21 navara hubs and stubs are a bolt in affair. No more gawdaful drum brakes. Best of all, a mate gave me a set for free. (Less calipers, which i then sourced of marketplace) because im not a total broken arse any more, i threw on a pair of new rotors too. Discussion,
1 point
-
More likely Honda or Kawasaki1 point
-
shit that looks good with the v6 in there...1 point
-
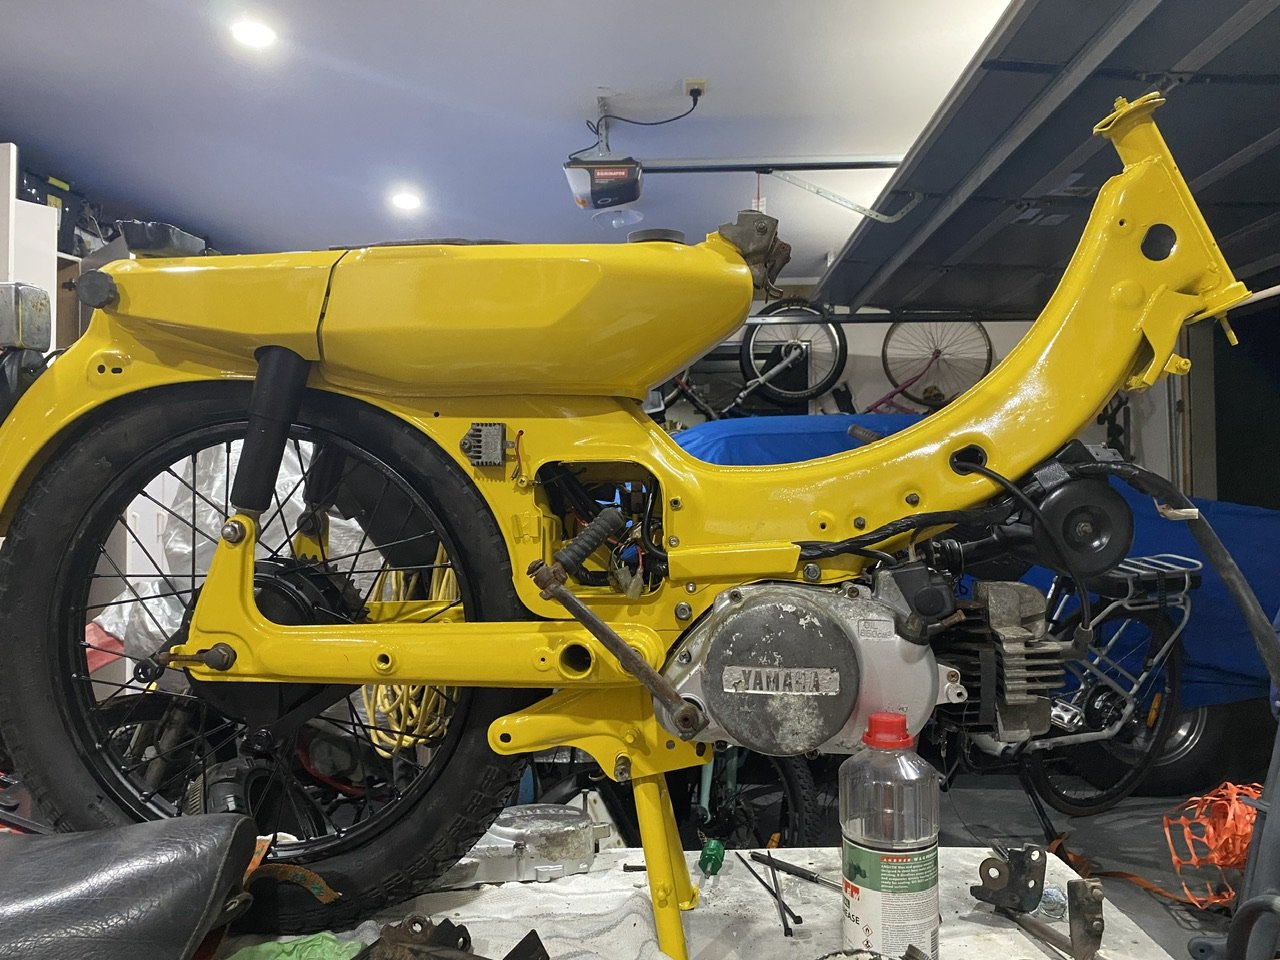
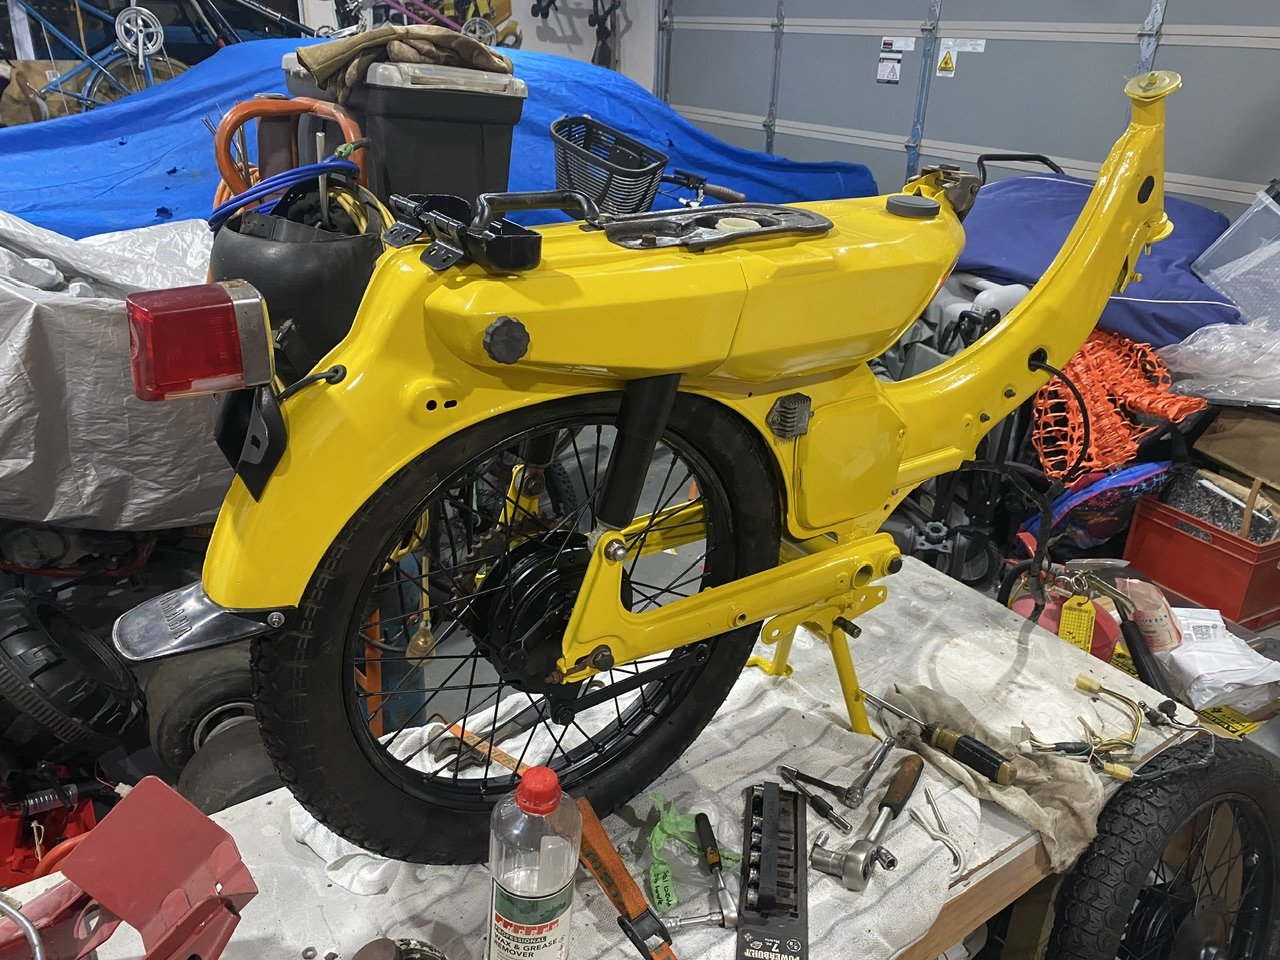
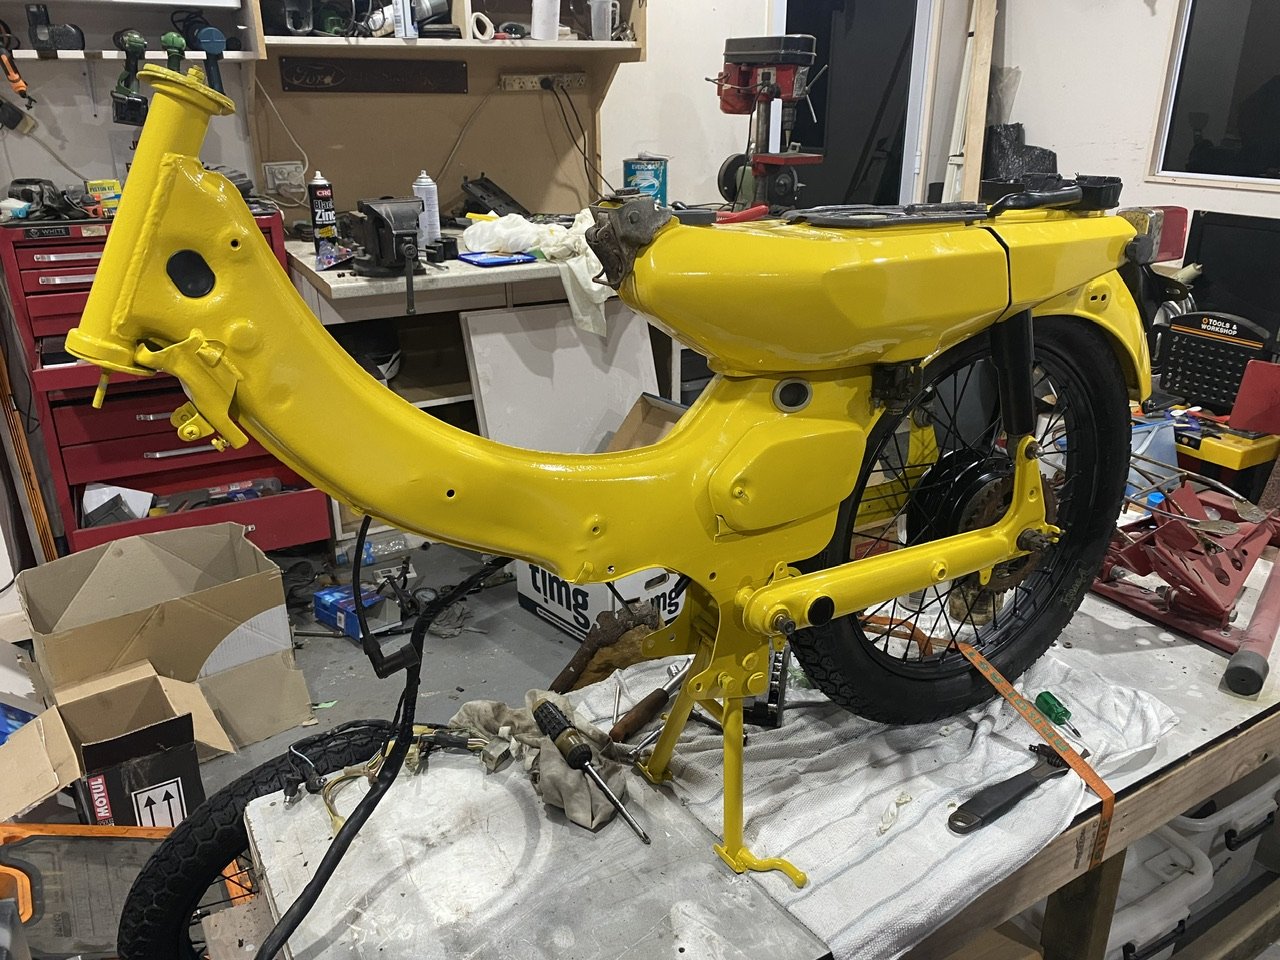
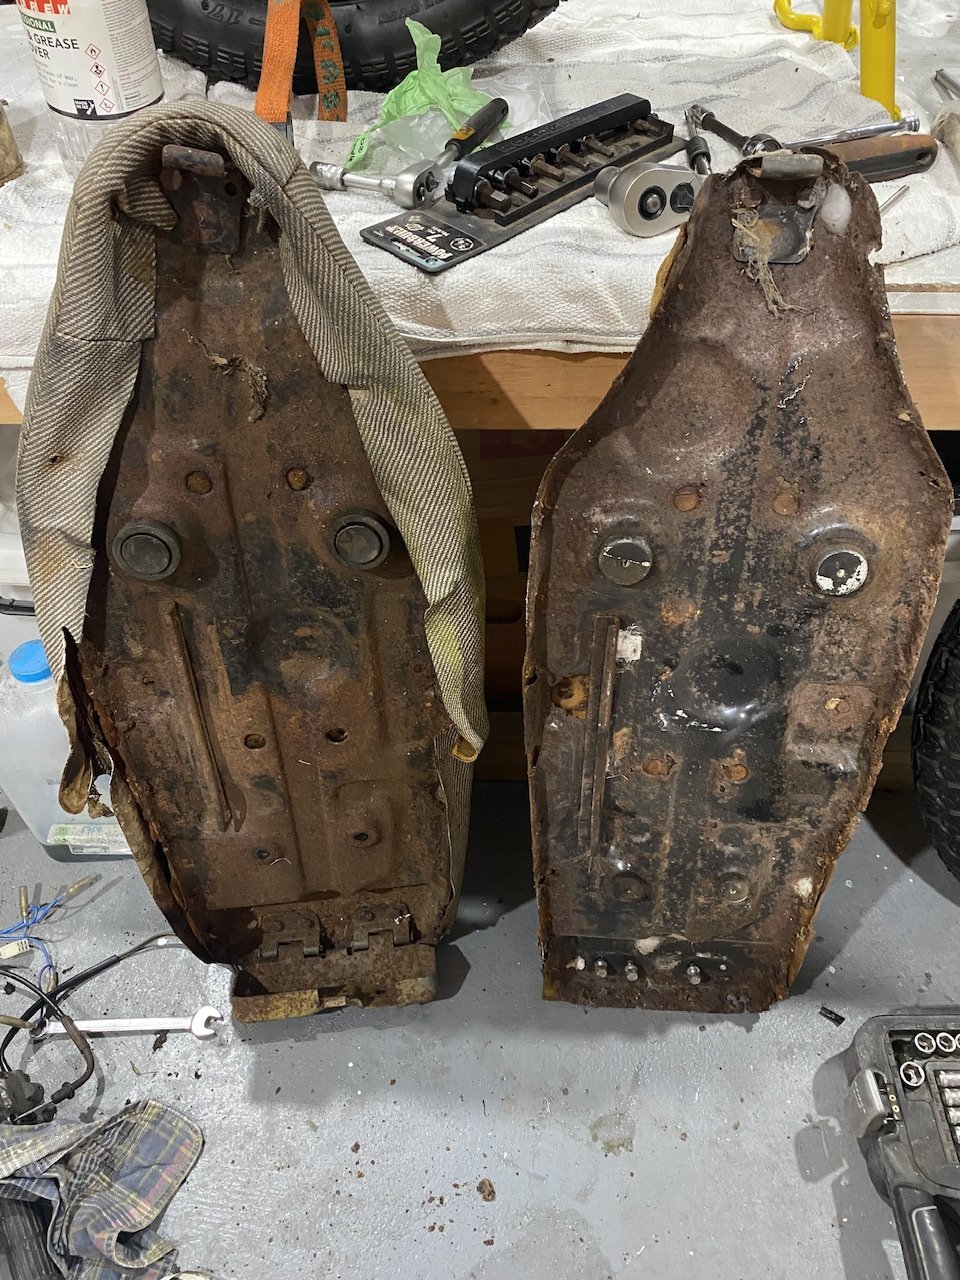
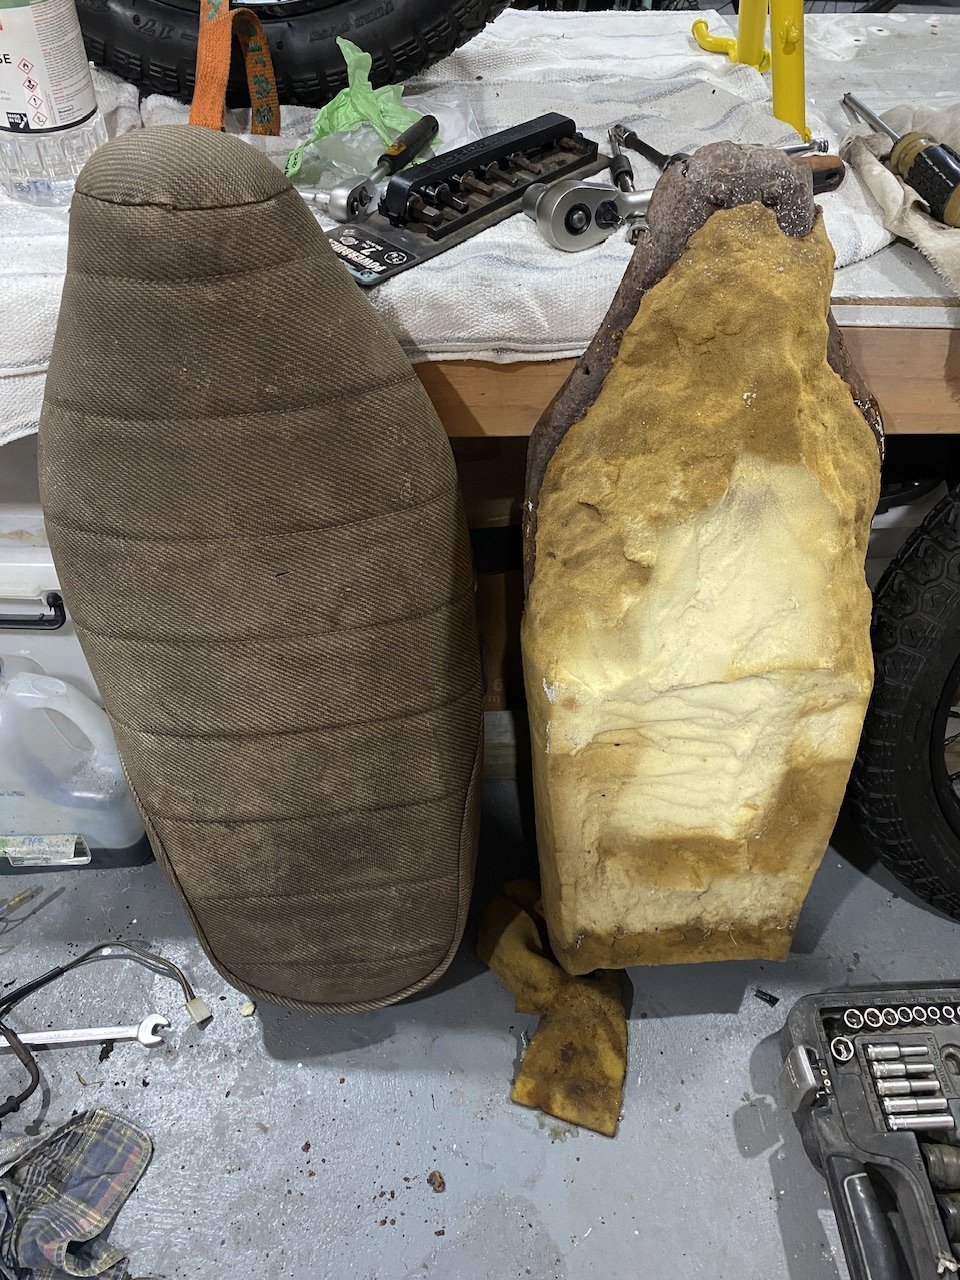
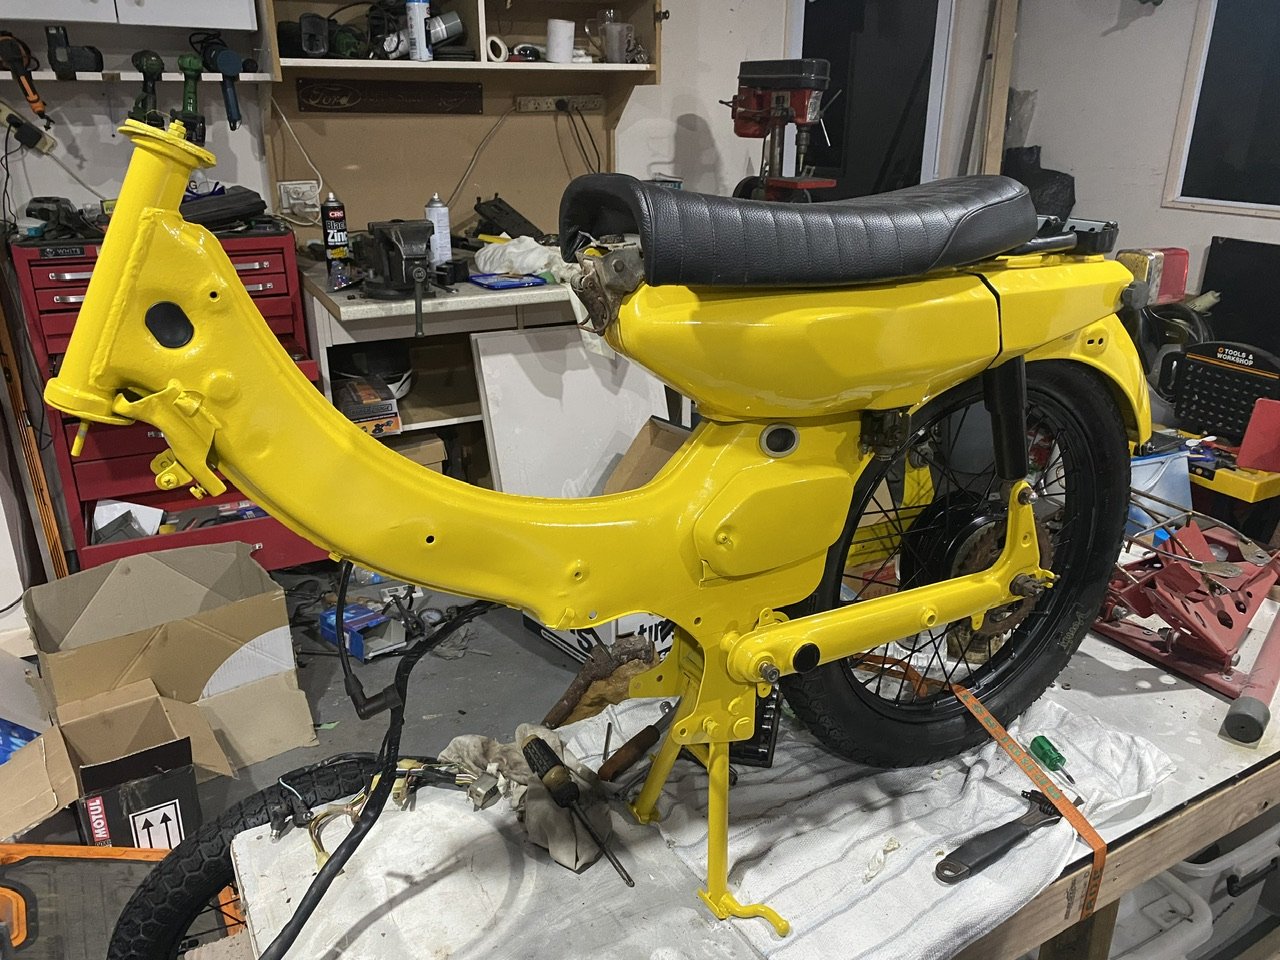
Got some work done last night. It’s hard to get a decent photo of it since my shed is such a mess at the moment. i need to come up with a seat solution. I’ve got 2 x V50 seats that are varying levels of fucked. I think I could make another seat pan but that would take time… I do have a generic china cafe seat that might adapt without too much effort to get me going. In a wee hurry as I want to be riding this next week. im loving all the black and yellow. I’ll get a leg shield for it and I think I’m going to need to paint that black too!
1 point
-
Yeah I bought a delorian in another 10 years time. Ive had it for ages1 point
-
Was each side of the floorpan designed by people in different rooms who refused to talk to each other? The raised sections of floor are not visible inside, there is a second 'floor' that the seat bolts to. Those are pretty much identical. WHY the different shapes?! Is the floorpan also used in the Stag? Is there something there in the Stag?
1 point
-
1 point
-
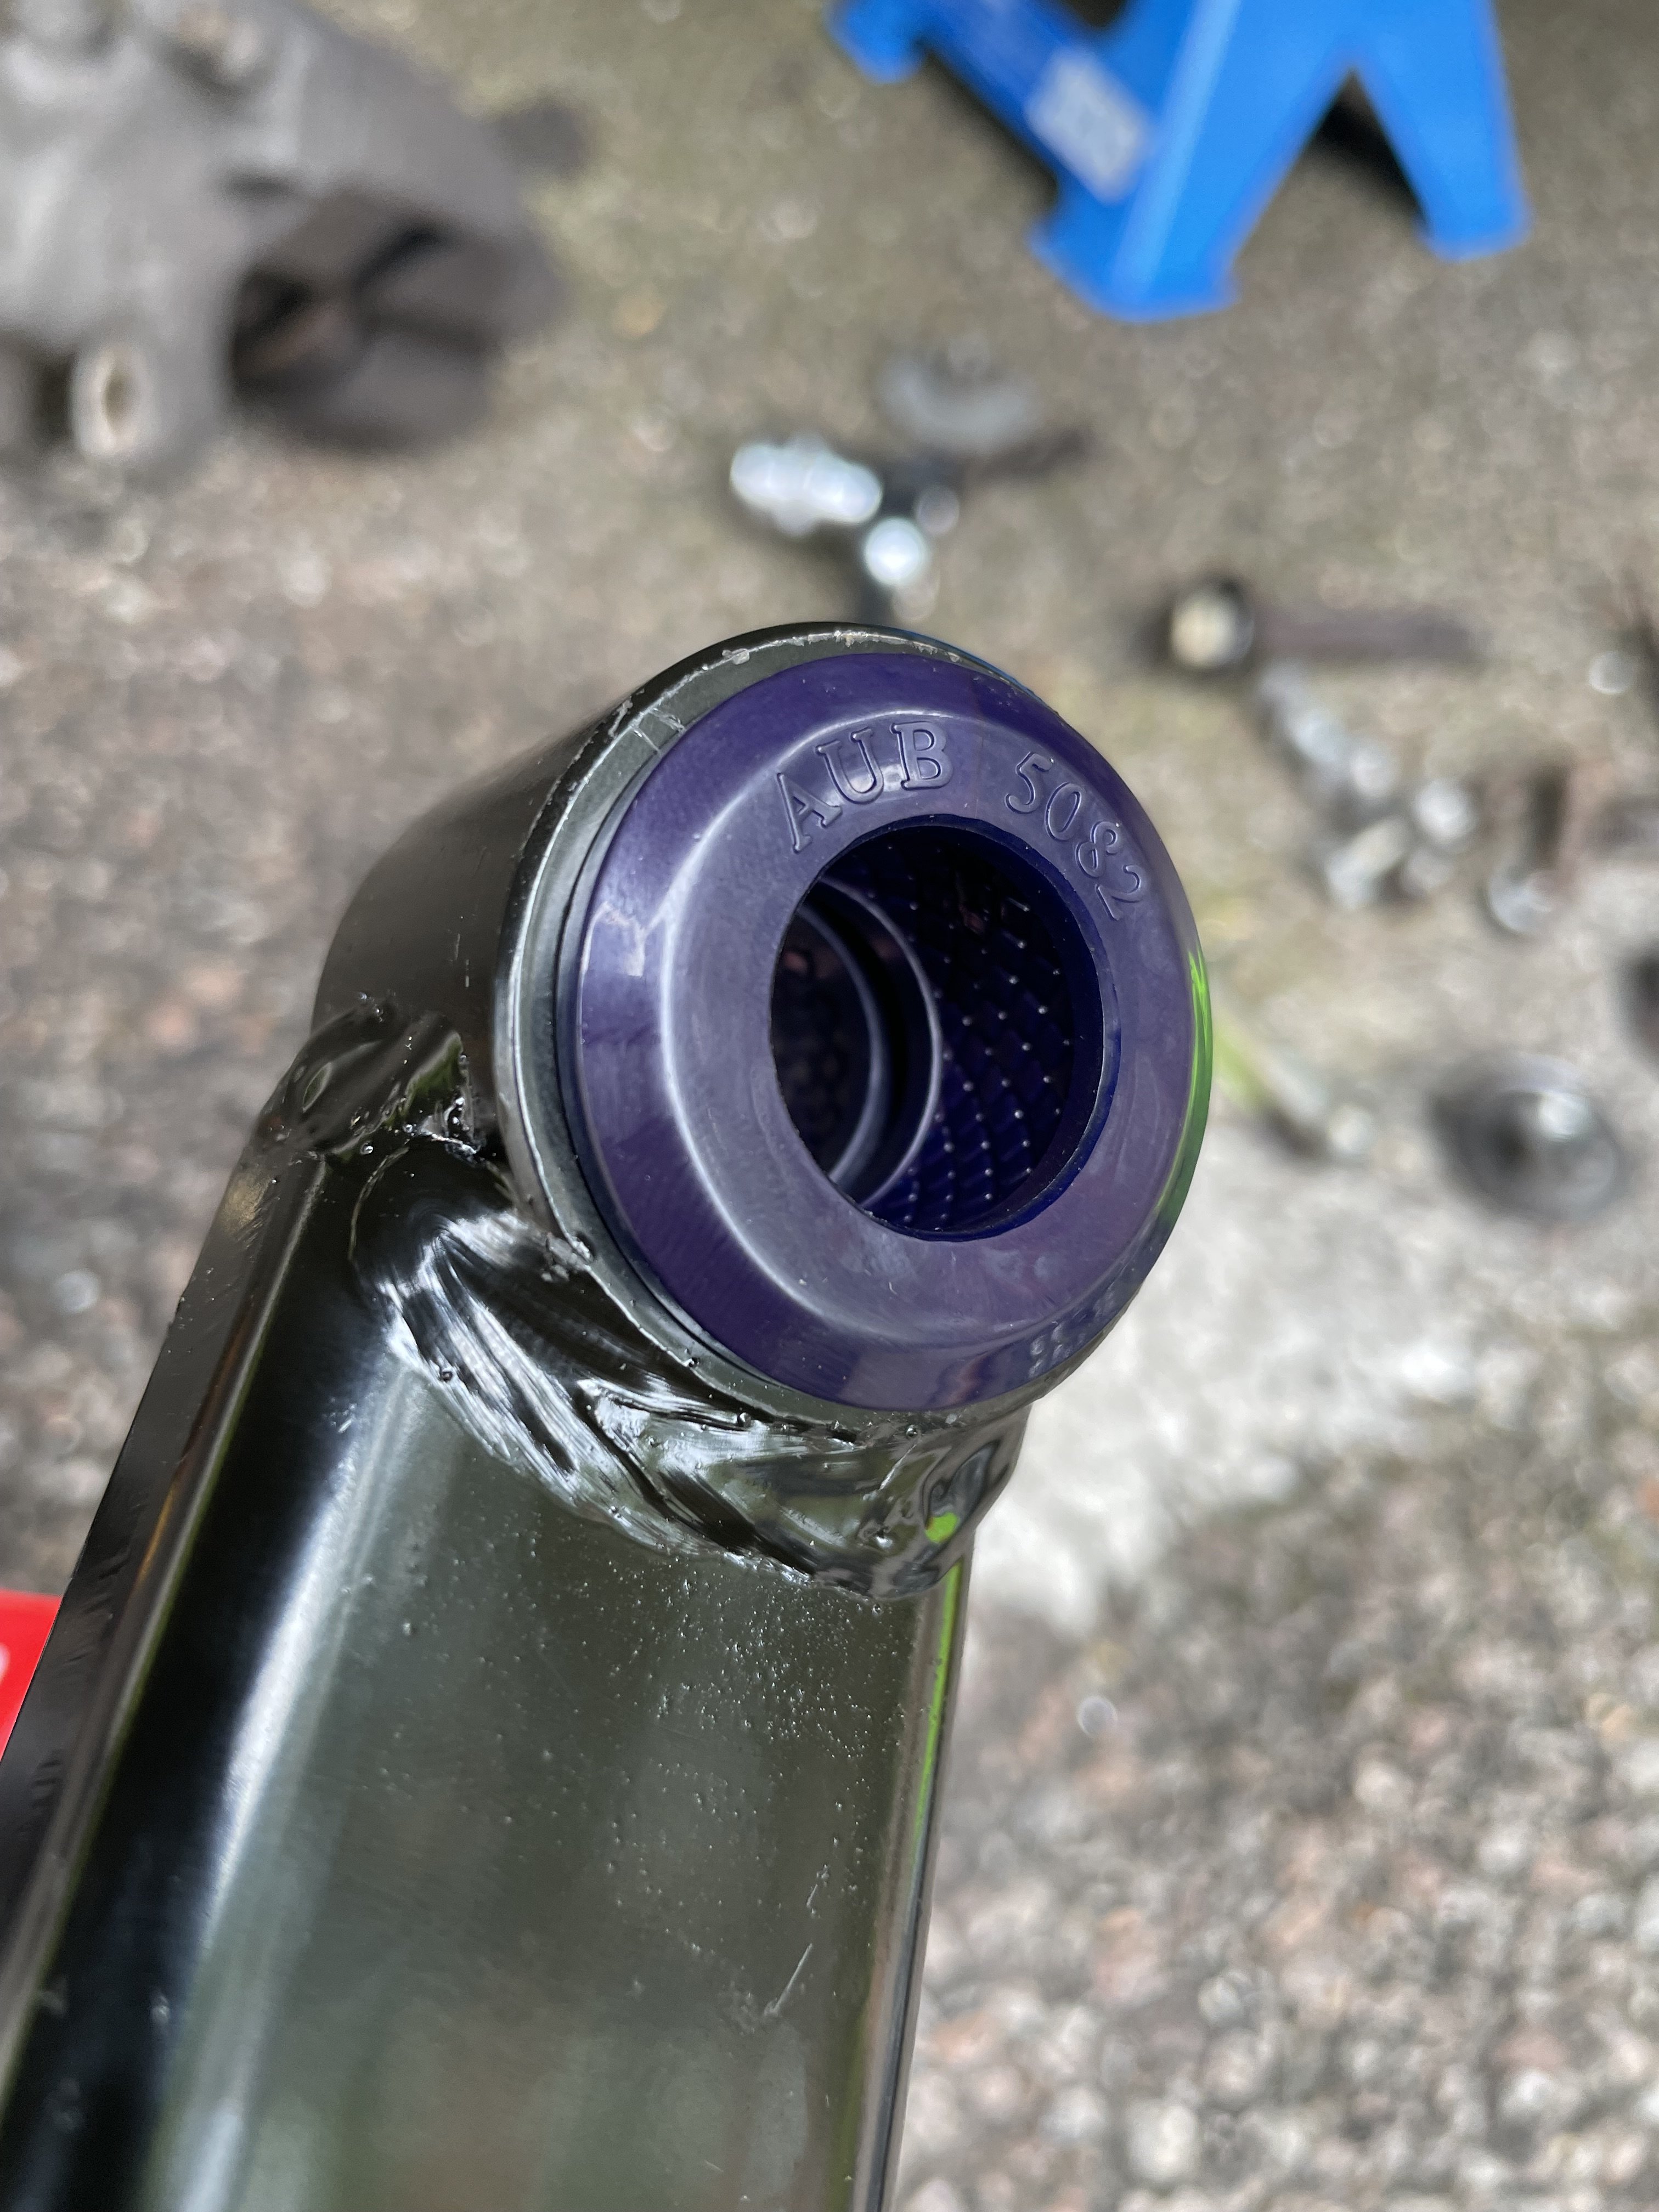
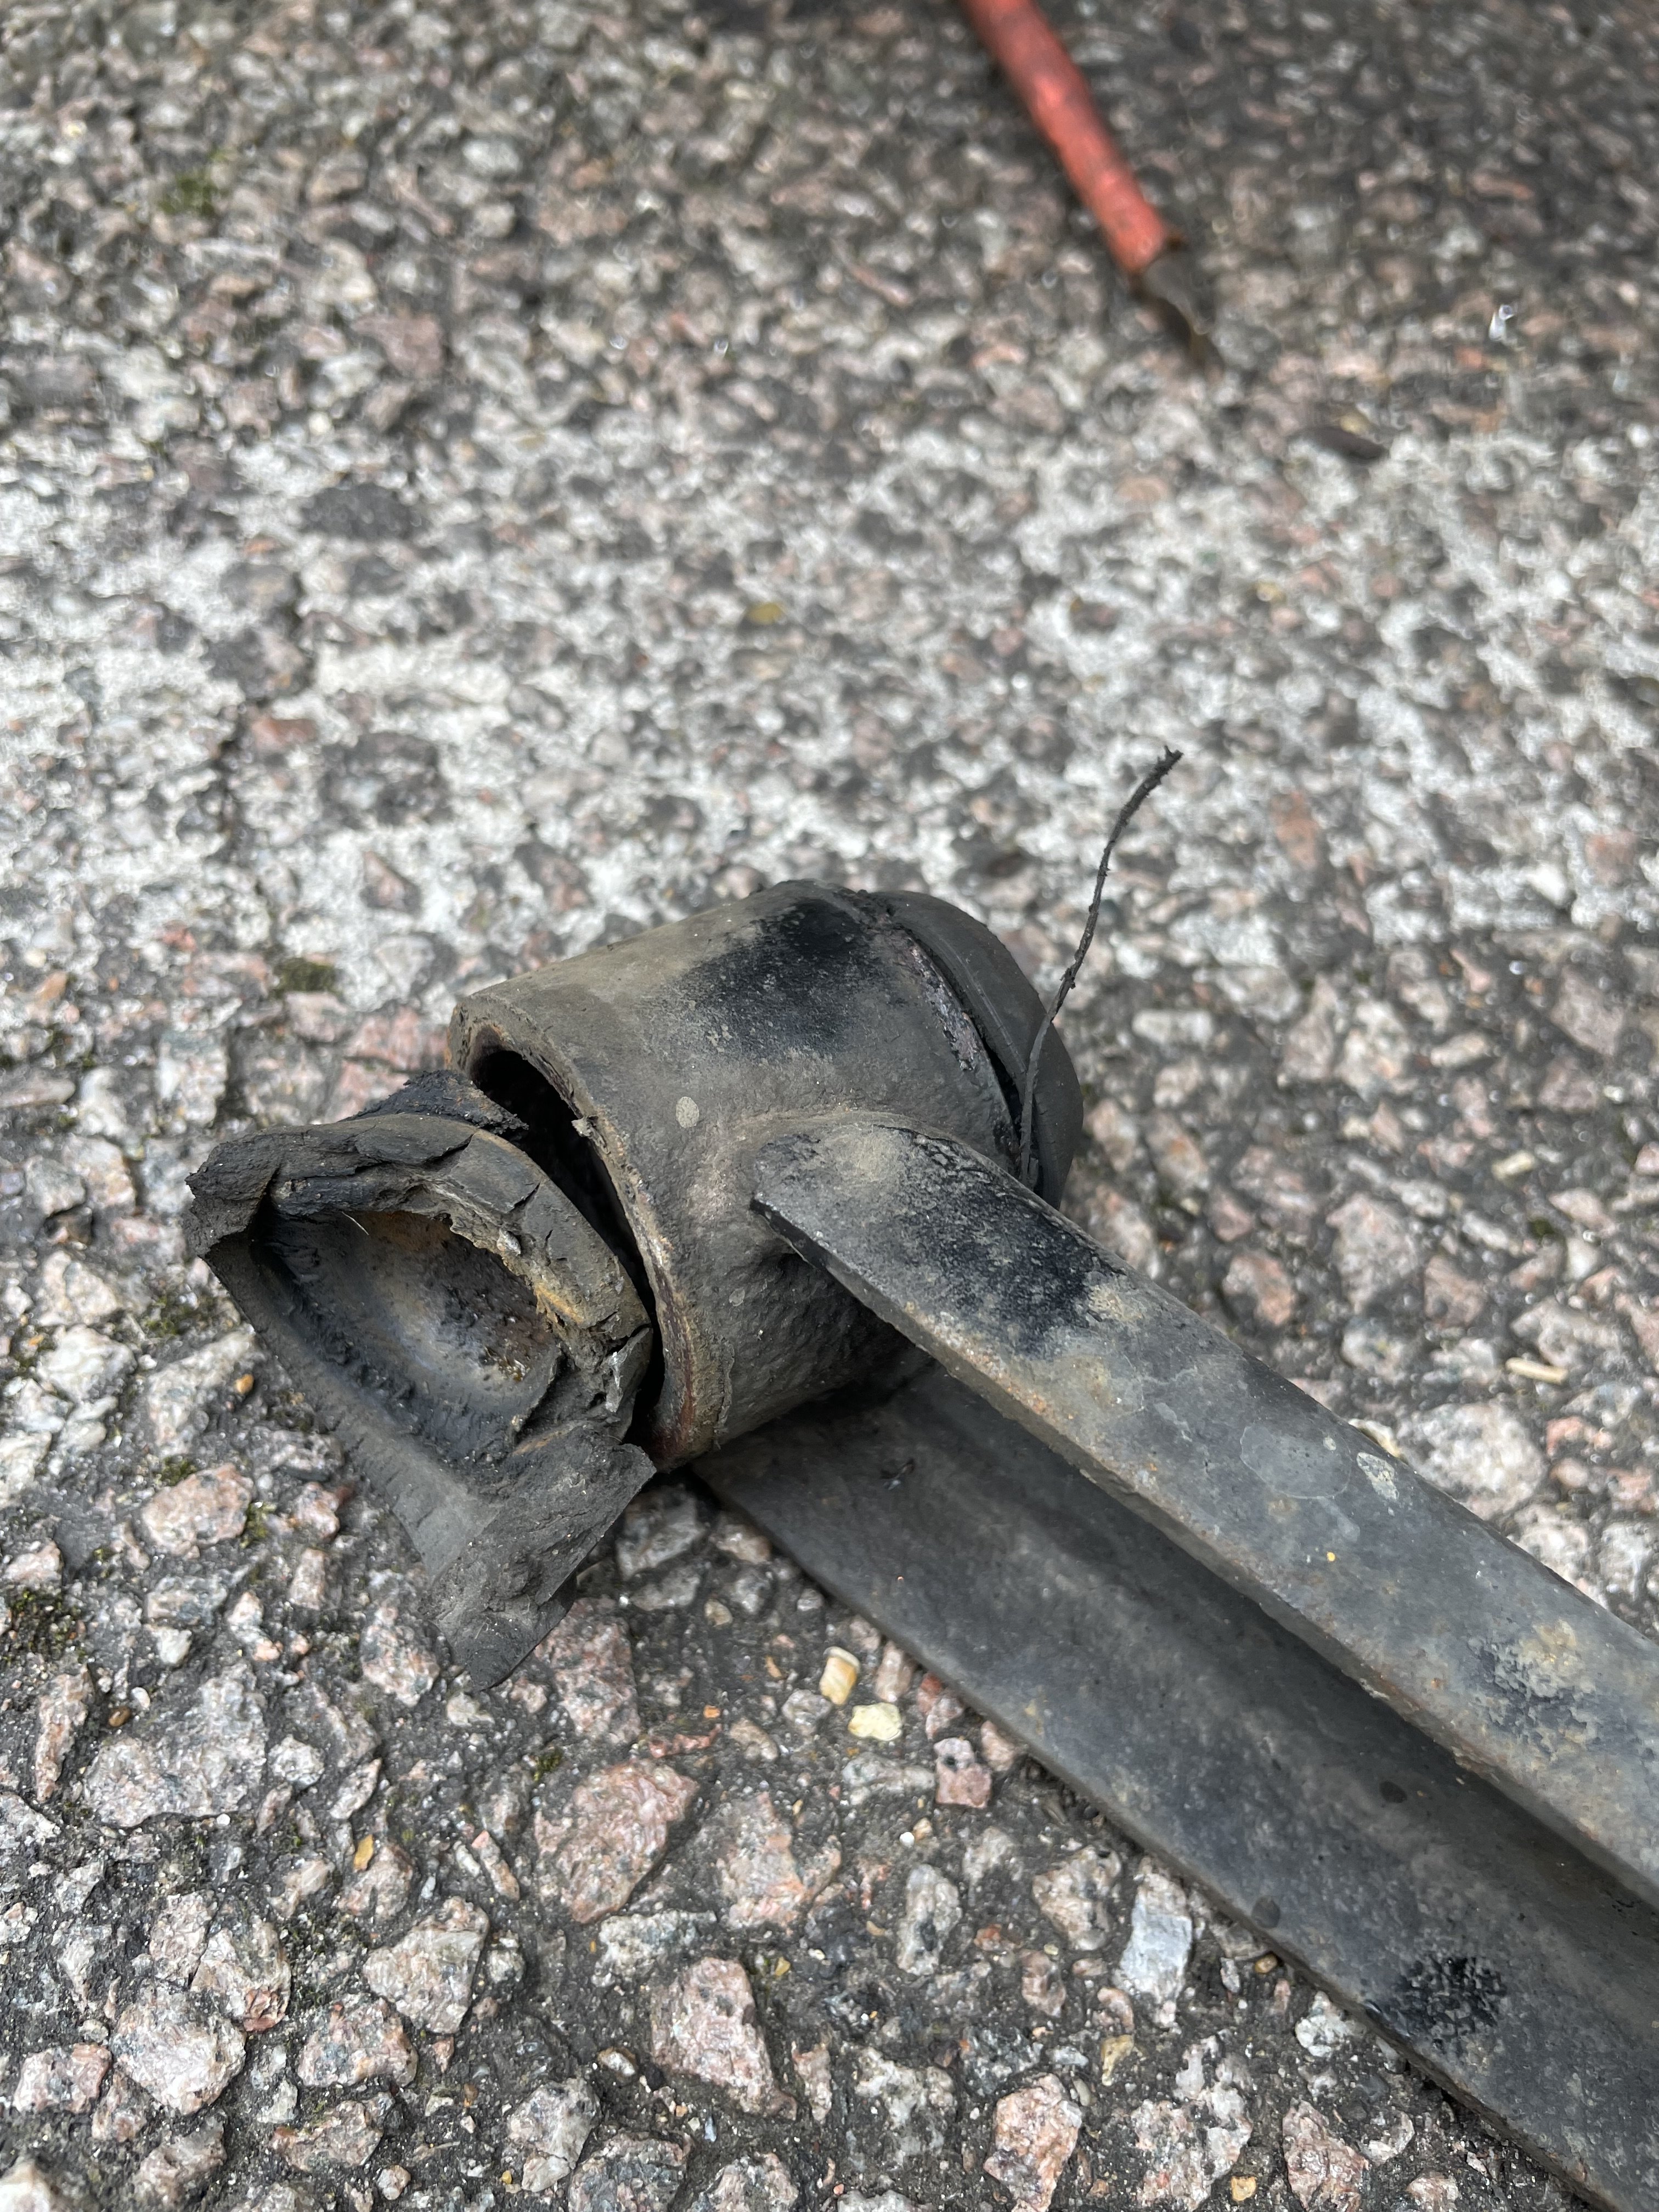
Would not recommend mg rubber bushes - they only lasted 6 months… would recommend greasing your stub axles though…. new poly bushes and axles installed this weekend with the help of @Sambo
1 point
-
My brother had a GTI as his first car, must have been nearly 25 years ago. He crashed it on the harbour bridge once Another time he shot a rod out the block doing 180 on a back road After that he replaced it with a 4WD turbo familia, he paid $6000 at the time. No idea if that was a lot of money or not back then. That was a fun car to ride in1 point
-
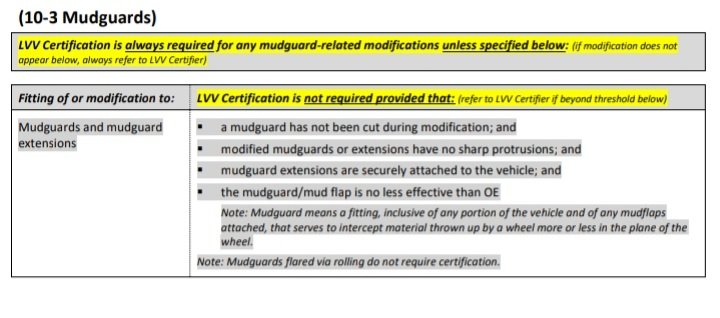
Modification threshold specifies guard rolling as not needing cert. That fb lvv unofficial questions page is full of misinformation and people who will do anything but read what the rules are
1 point
-
Wiper switch turned up today. All 5 points select solidly, they are pretty bulletproof so no further testing will be done until i fit it and it doesn't work. And that could be years away.1 point
-
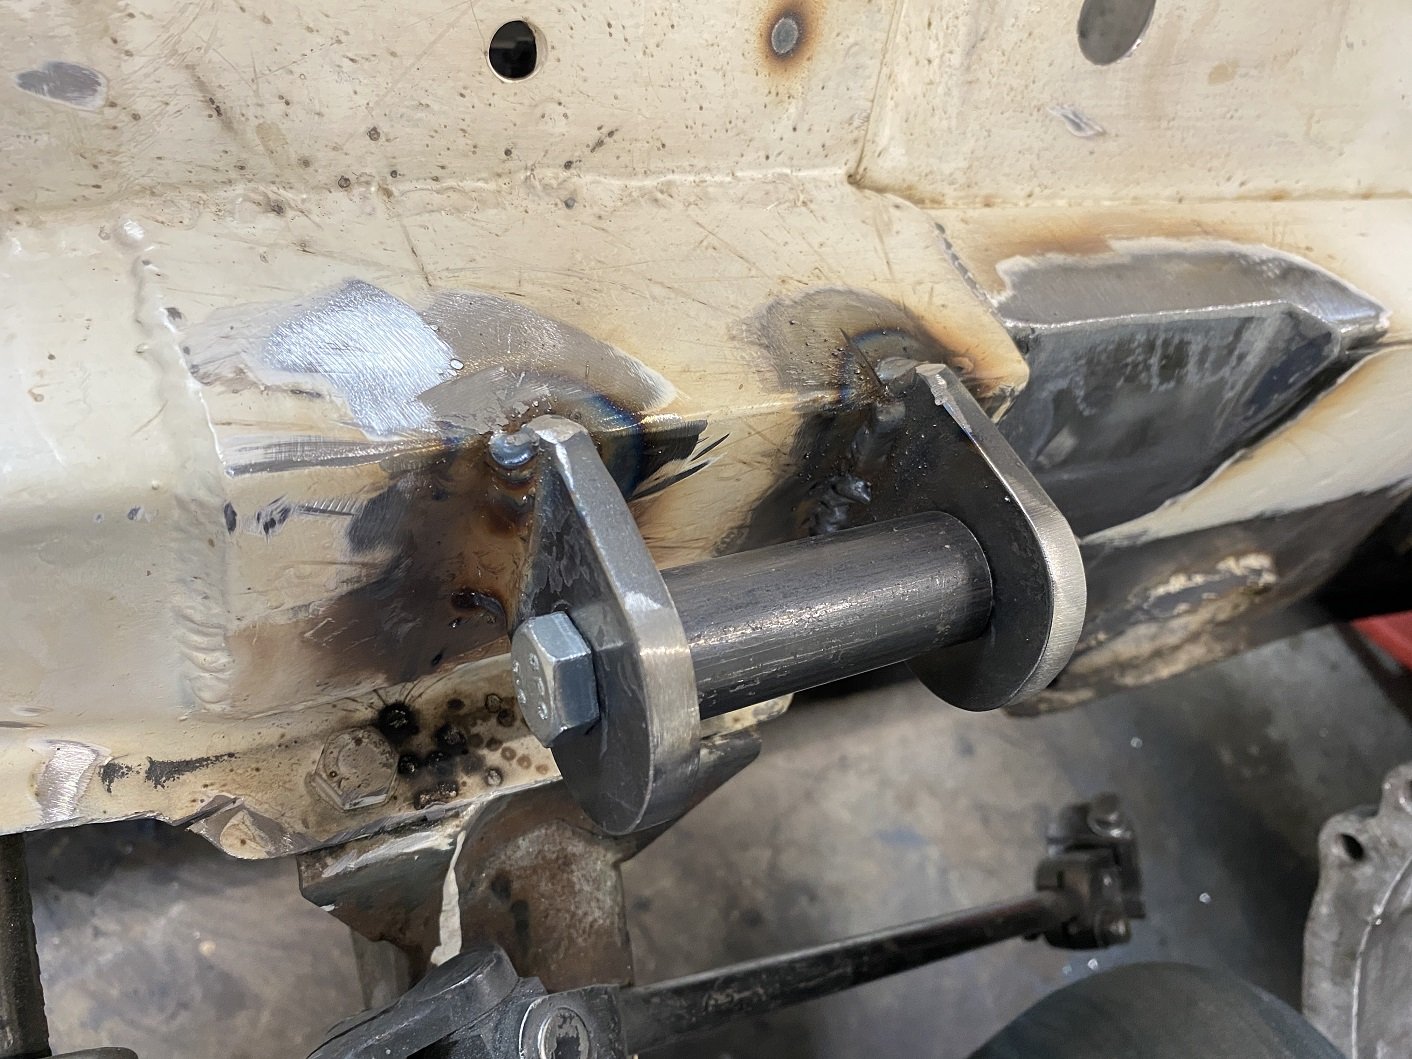
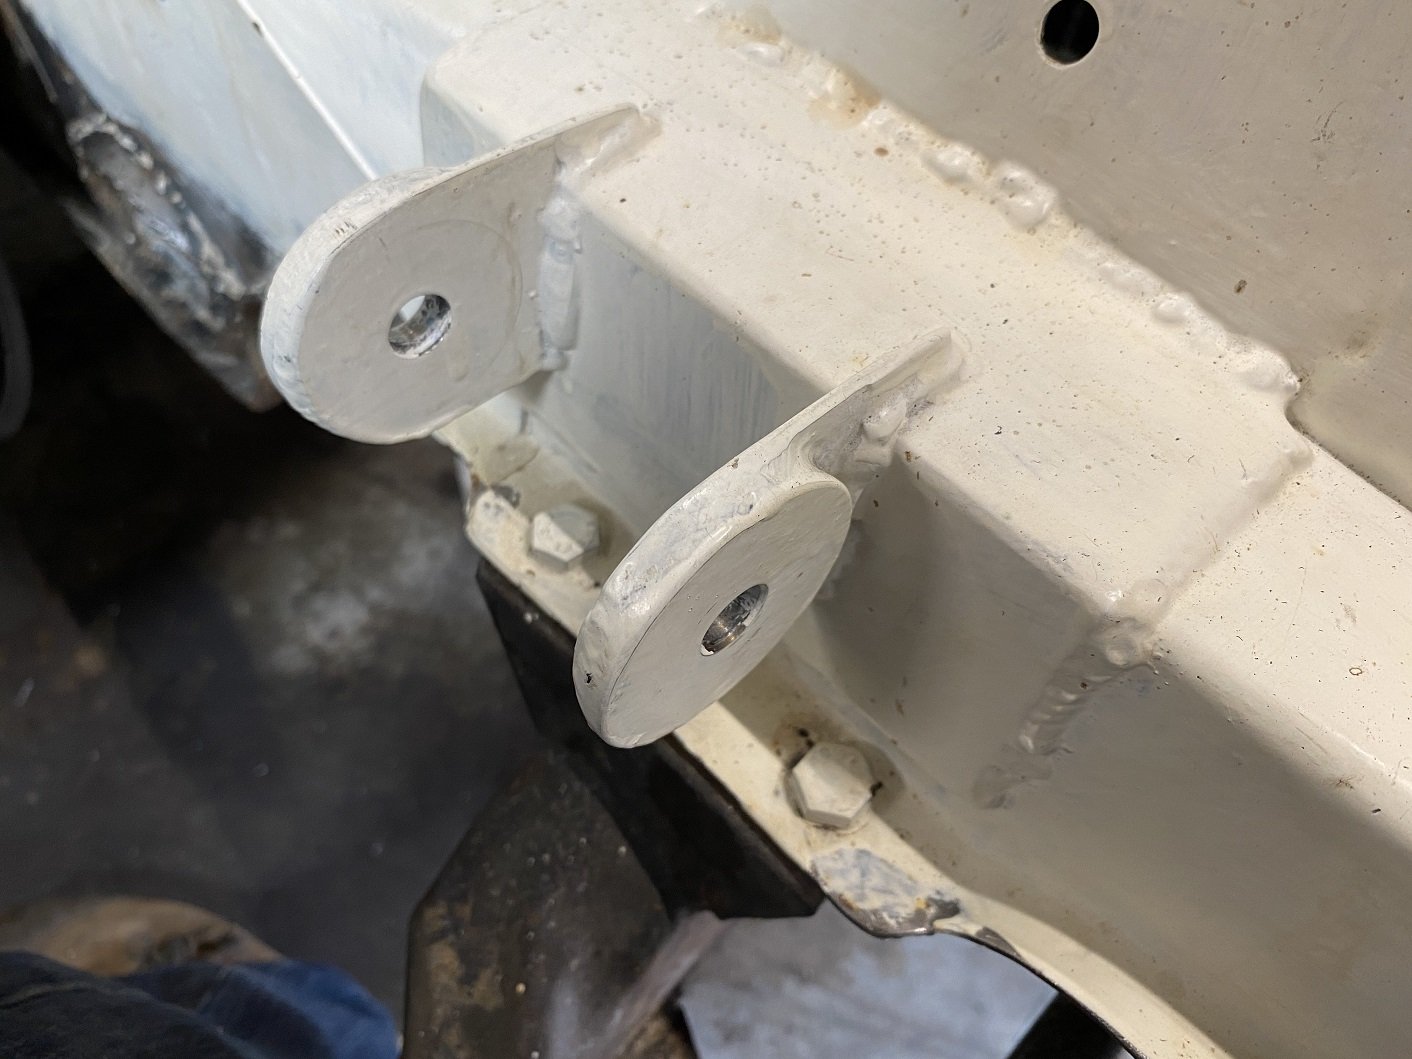
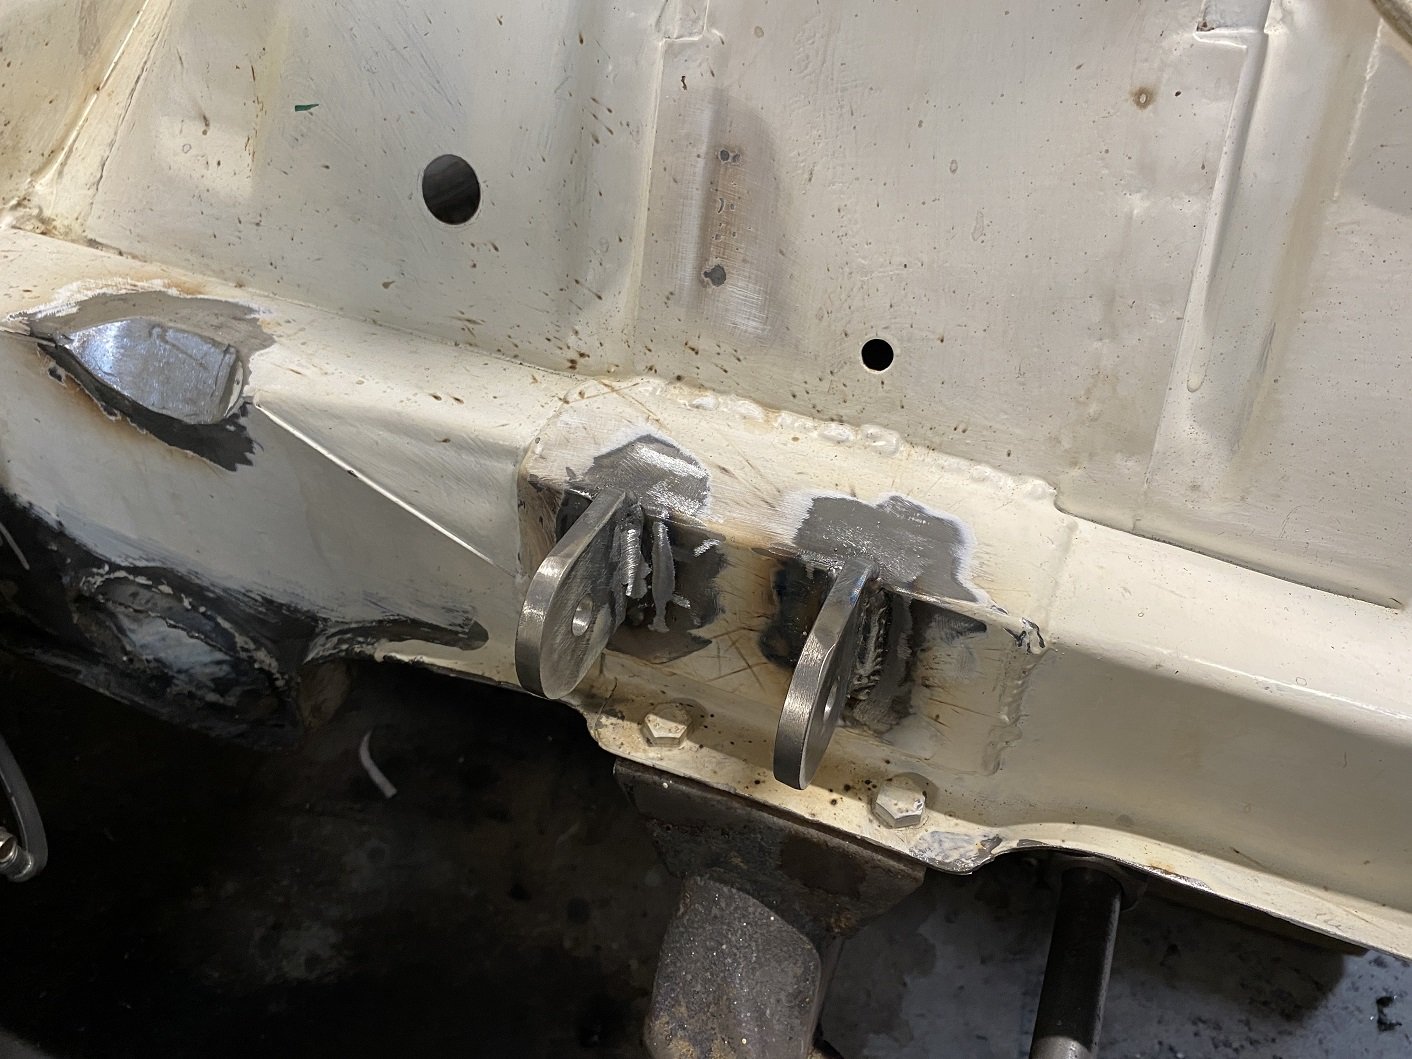
Engine mounts redone in thicker material as advised by the man. 8mm should do it. I machined up a spacer and did half at a time so I could use the original half to keep the alignment. But I also added a 4mm spacer when welding on the first new half to shift the engine back a tiny bit and give me just a little more clearance between the cross member and the sump. I hope that doesn't come back to bit me in the arse later. When welding in the second half of each mount I replaced the 4mm spacer with a fibre washer as a shim so it's not such an uber tight fit to get the bush/sleeve in there.
1 point
-
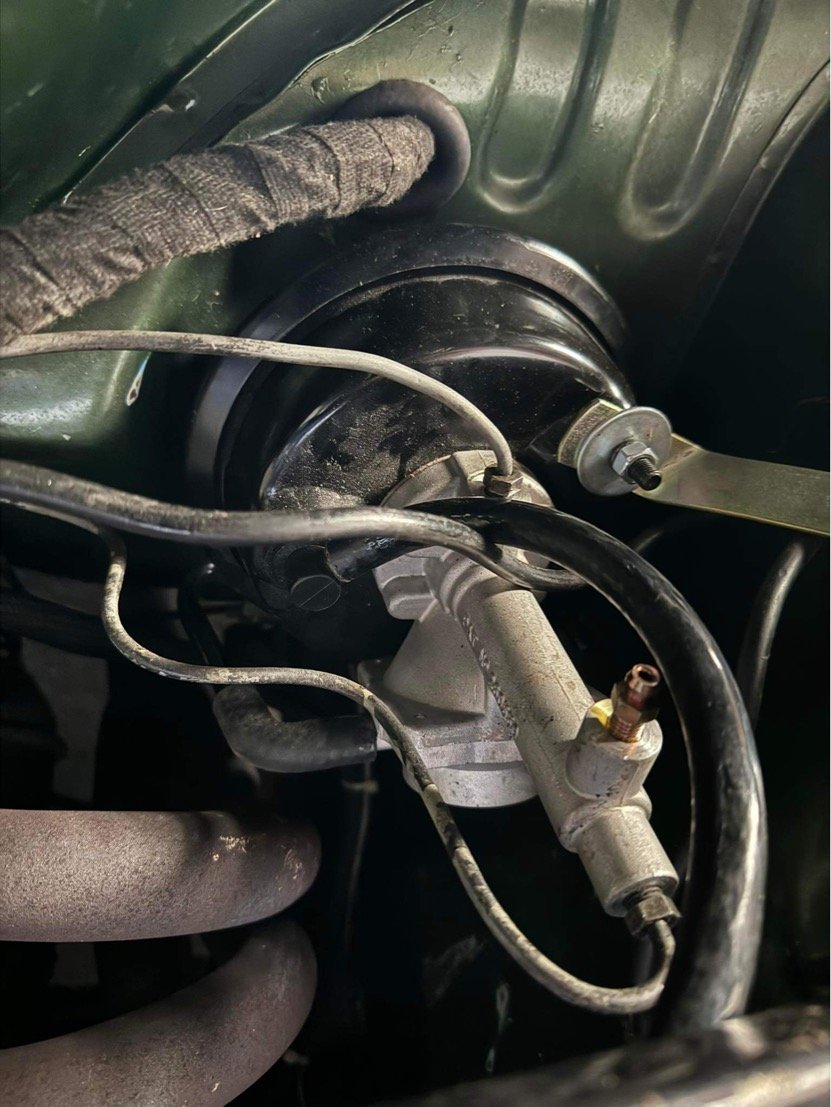
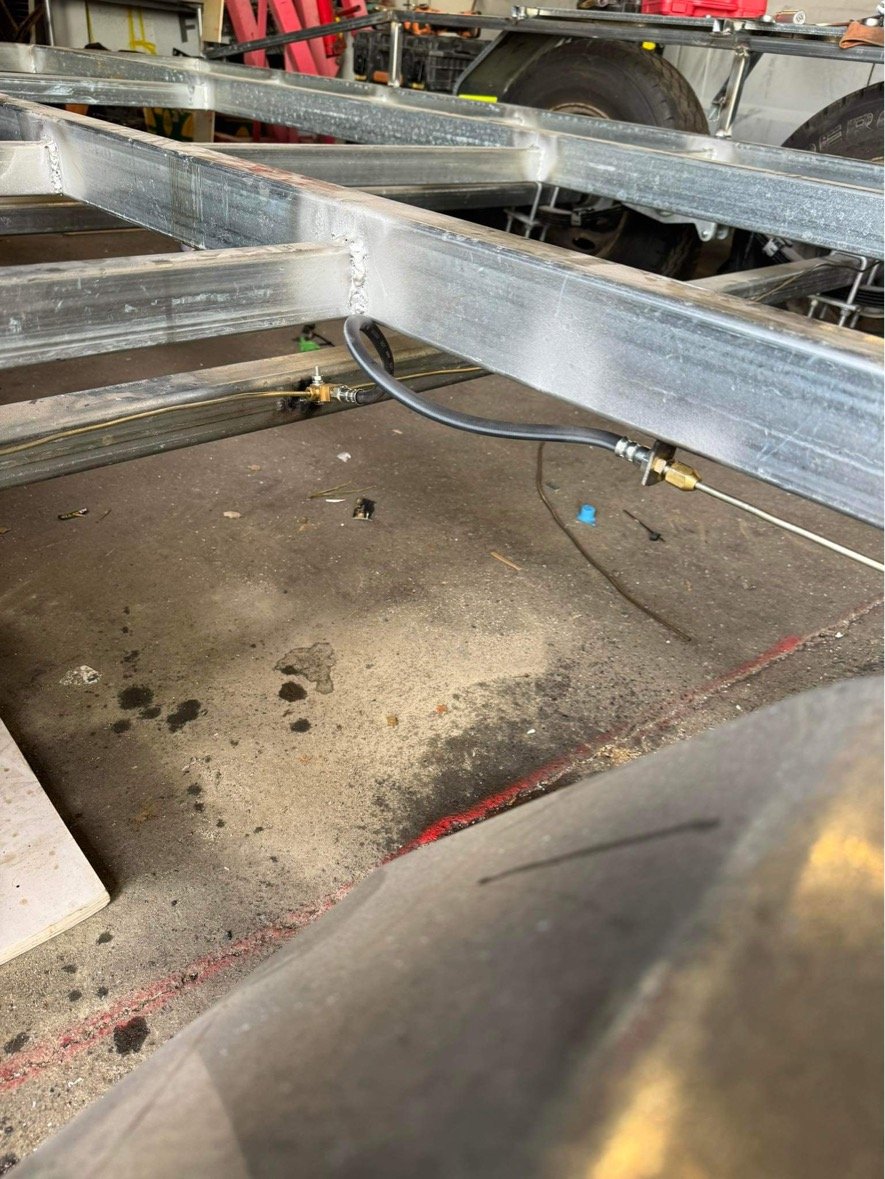
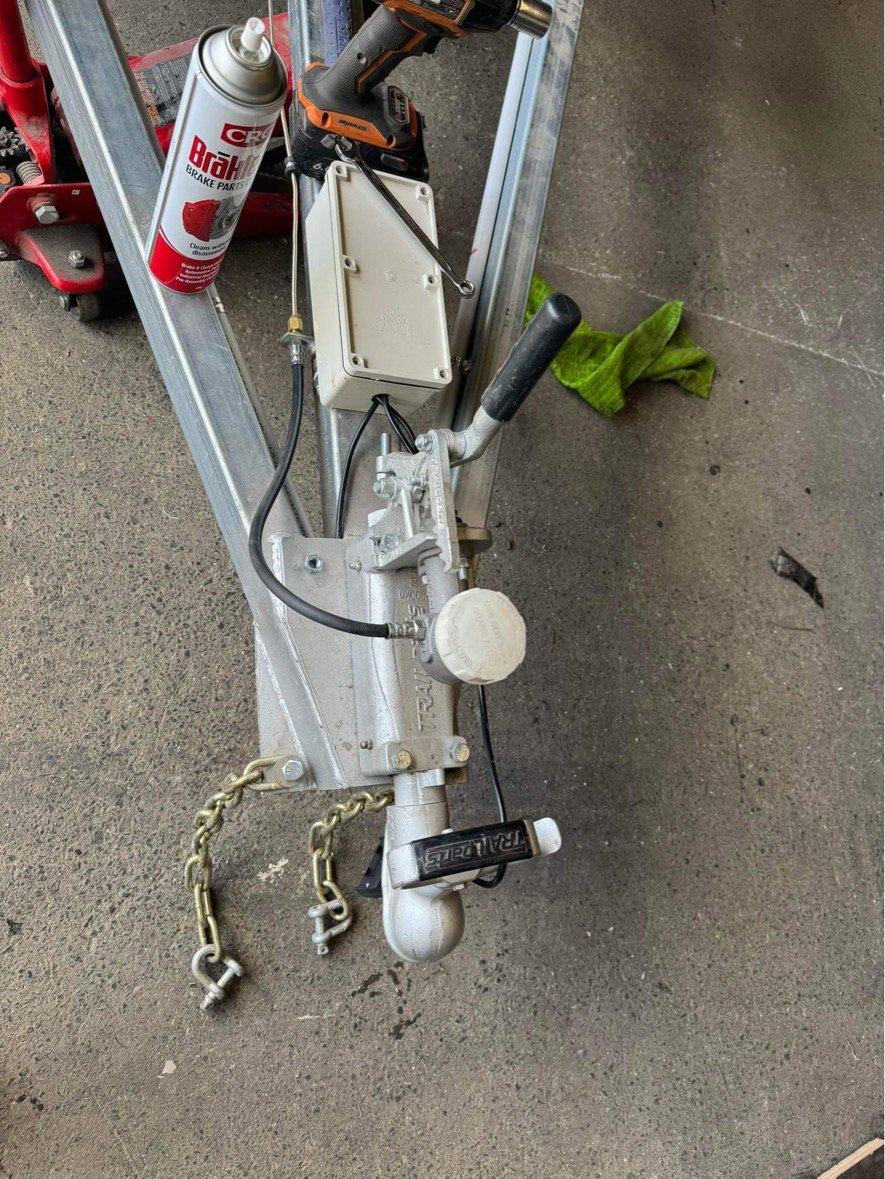
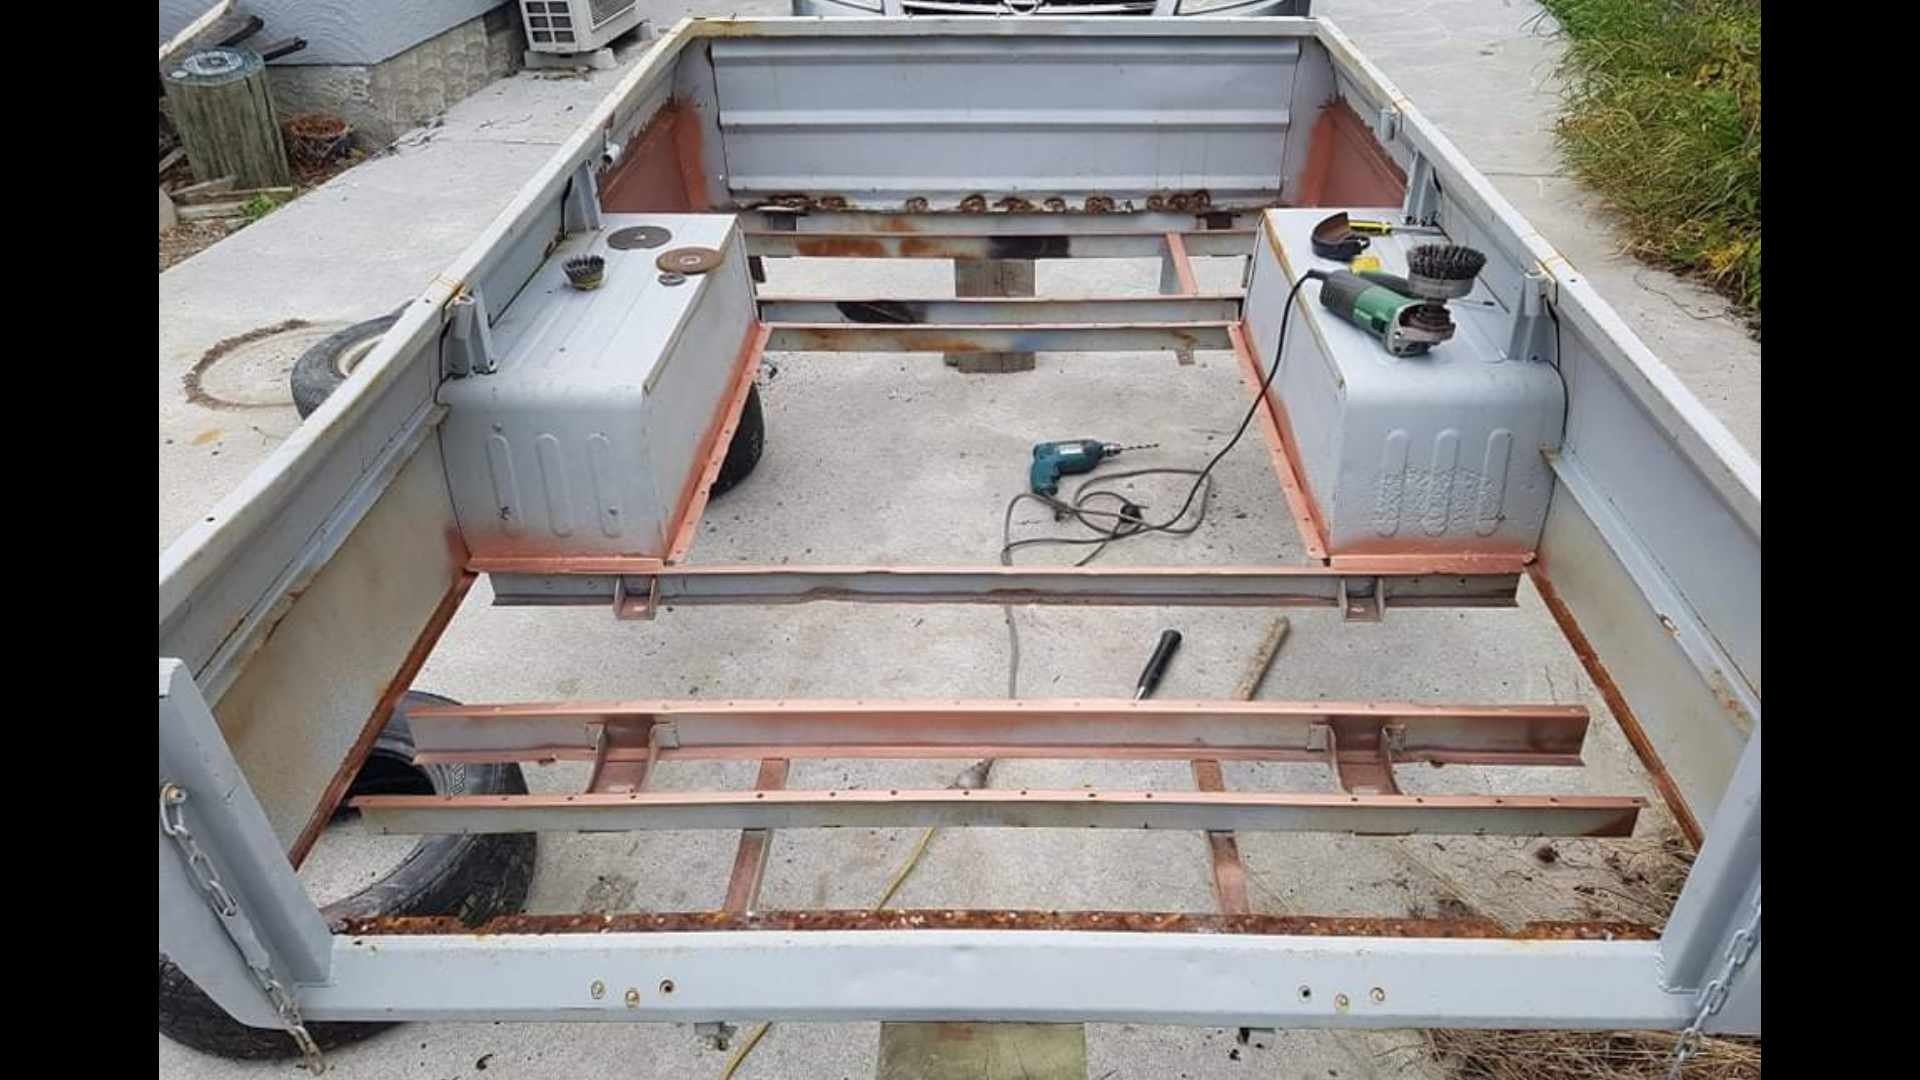
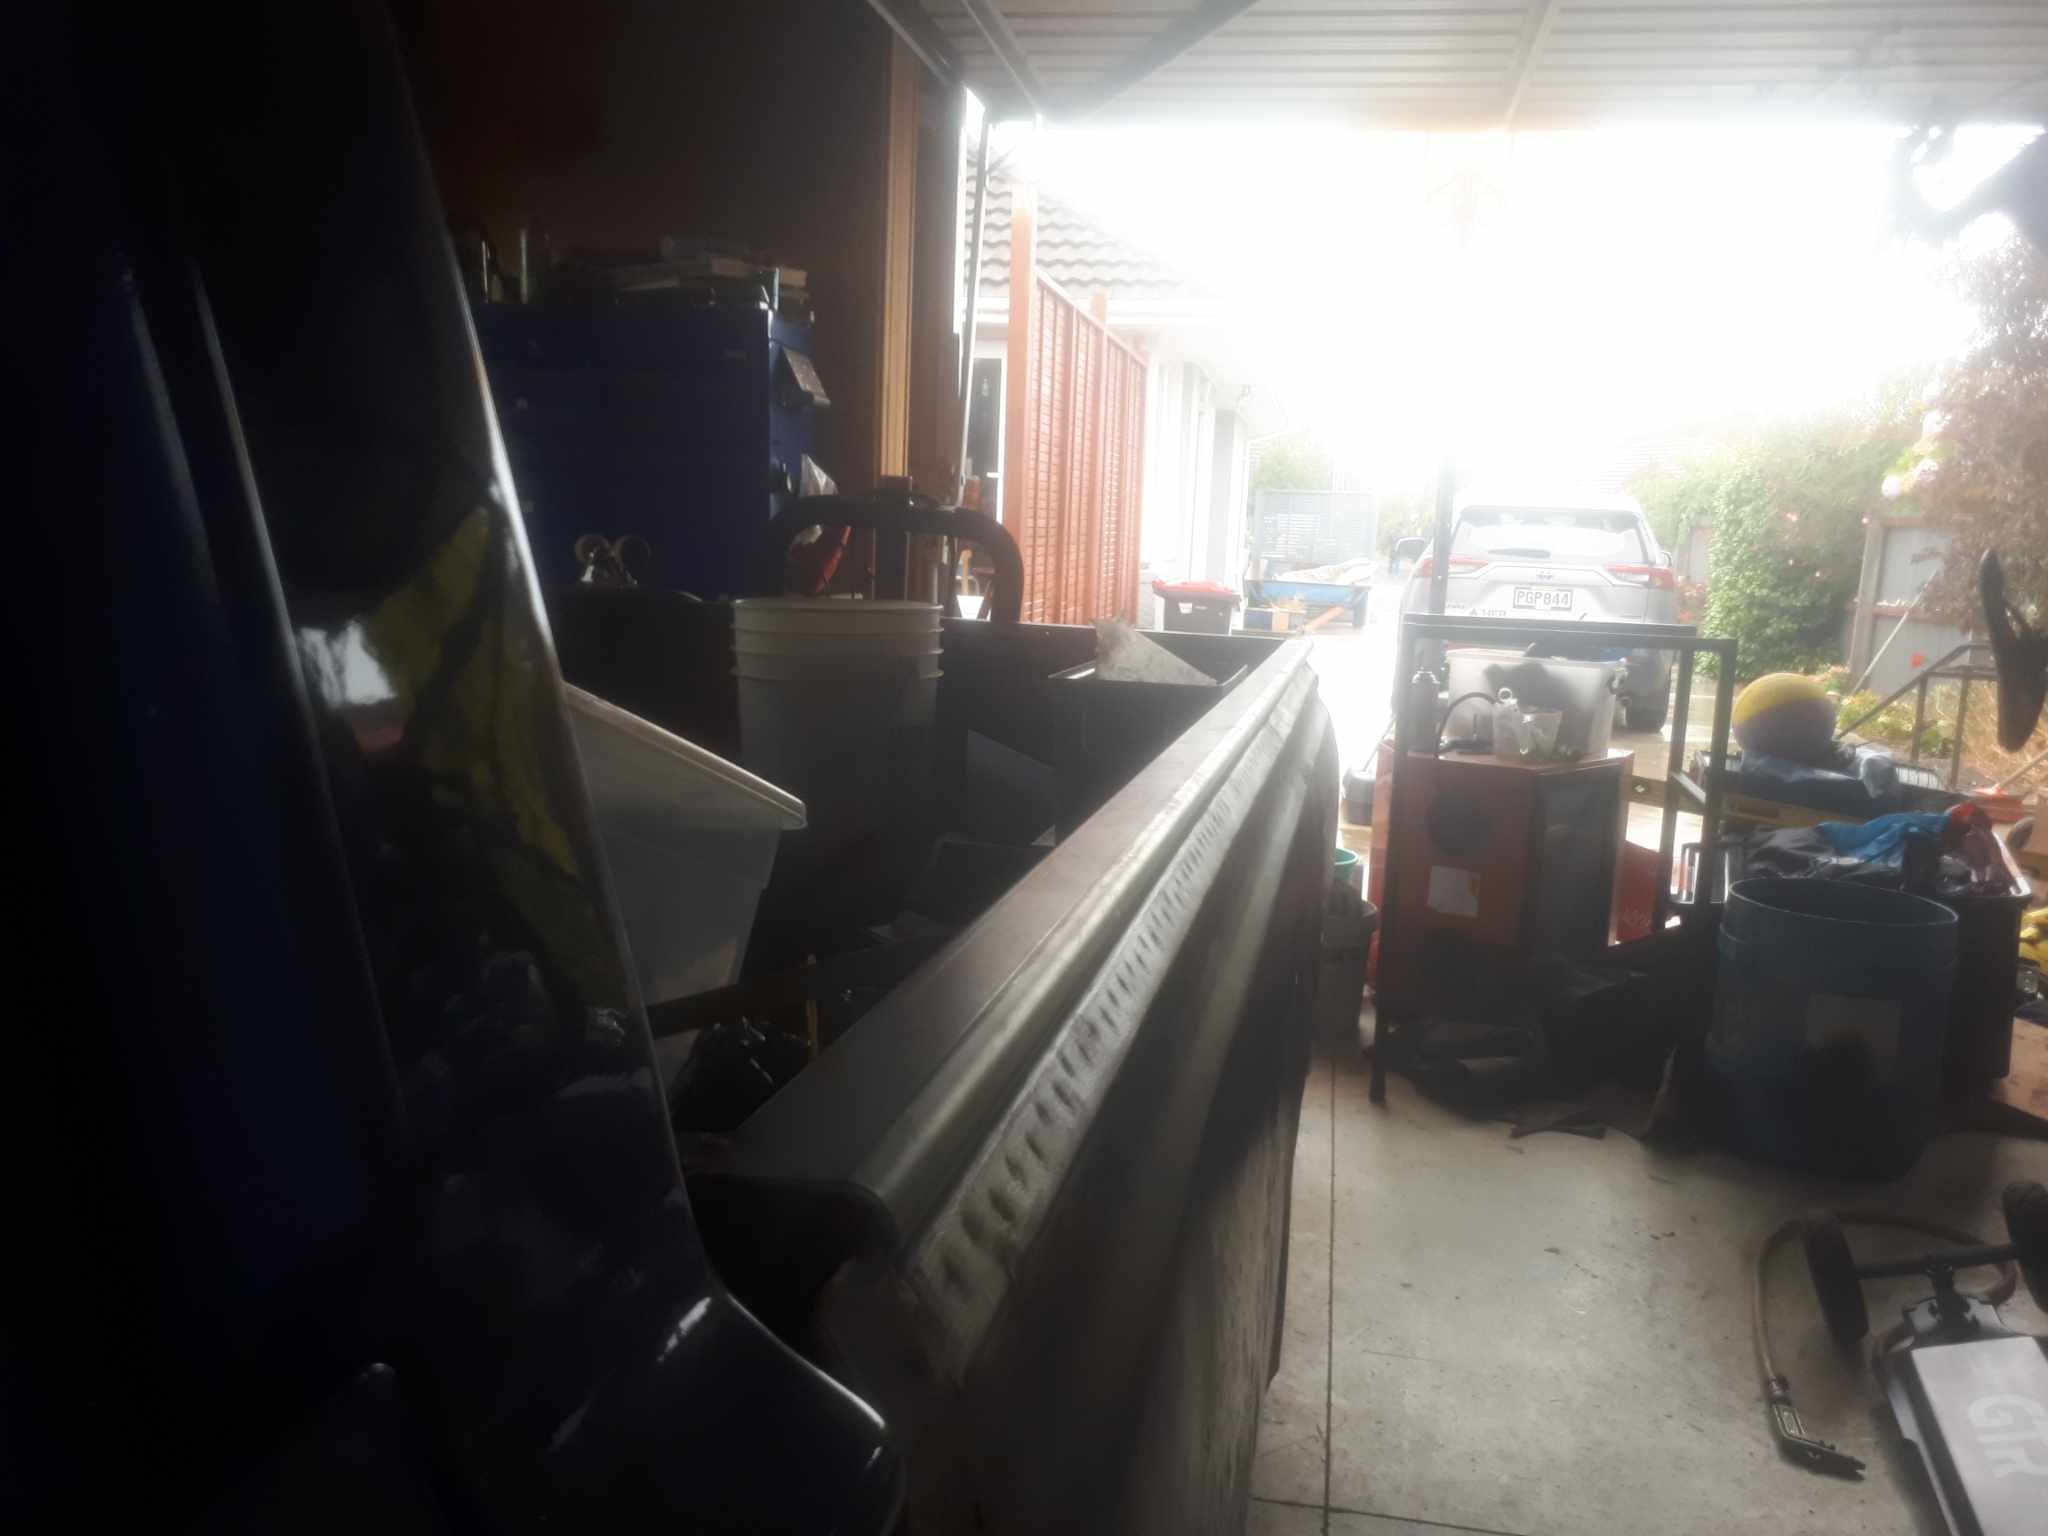
Took the Hunter away for the garlic farm budget Nats .. had brake issues the morning I left, and throughout the weekend, but managed through it cos Slow car.. I knew what it was, the little valley type thing inside the remote booster/slave vh44 deal threw a shit fit and decided to stay put and no longer do brake things. i already had a new unit on the bench, but procrastination took hold and I never did swap it until today. im taking her to Waiau Pa hop next weekend, so keen to have brakes. fairly easy deal to swap it. and it brakes now, and releases.. winning while I had the brake mojo and the flaring tool, I decided to run the brake lines on the trailer. What a Kent, but it’s done and it has brakes and no leaks. ive left the brakes locked on overnight to check for any leakage. Should be good. also clamped the conduit up. so only have the 4 mudguard stays to weld on, then screw the boards on before getting it registered.
1 point
-
1 point
-
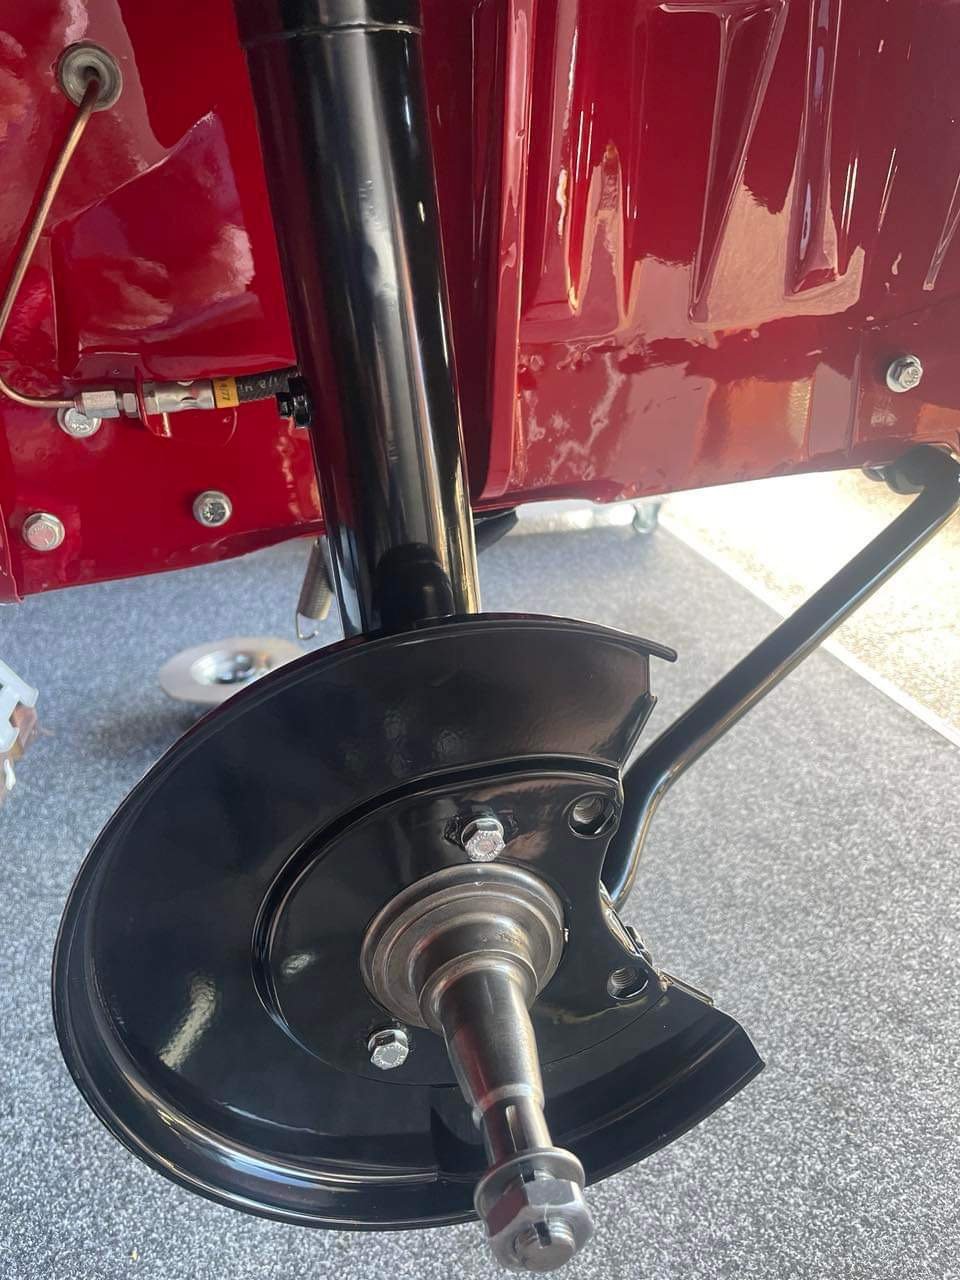
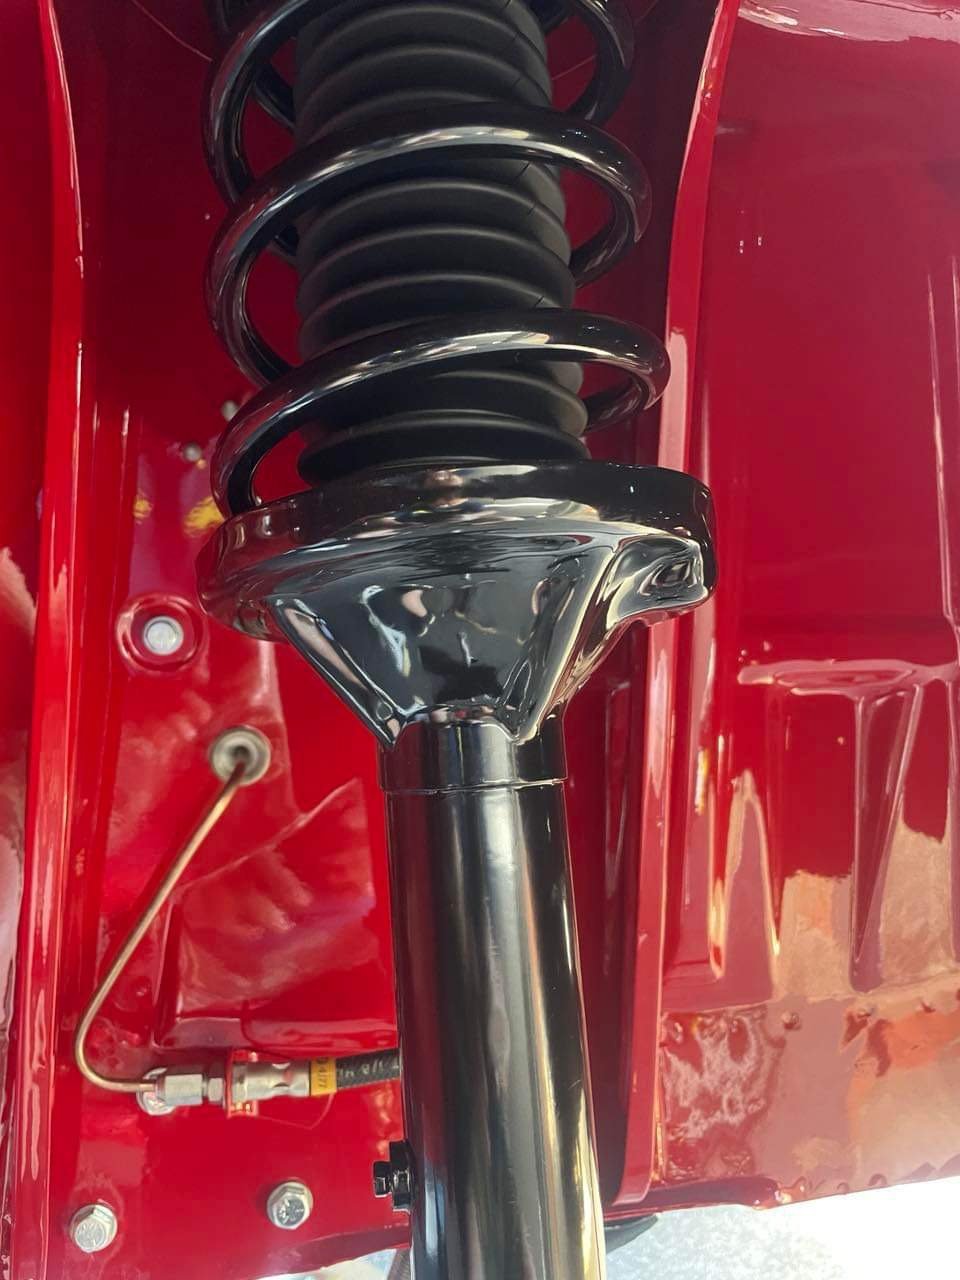
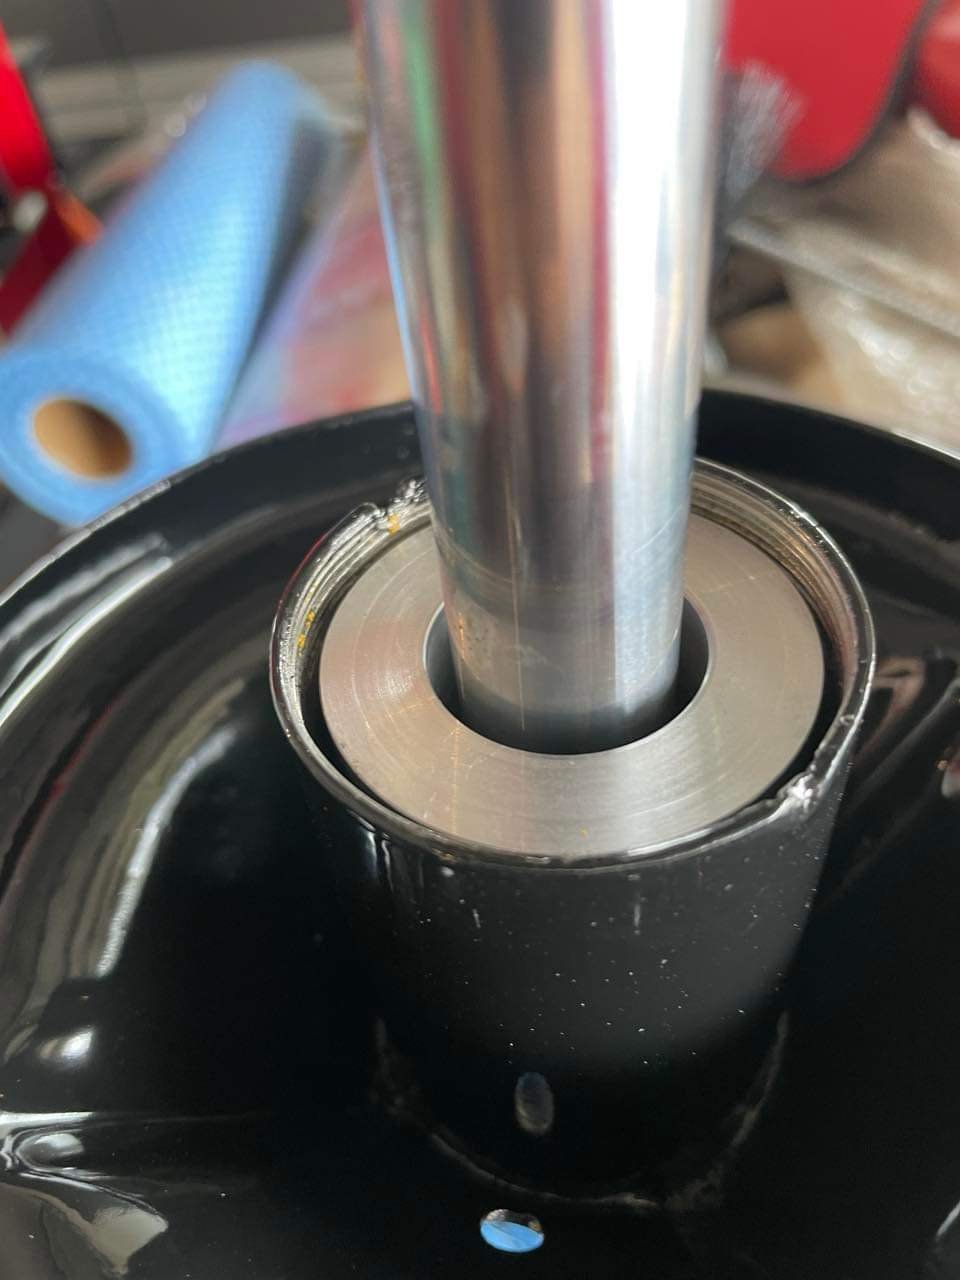
Front end pretty much back together
1 point
-
Been doing more
1 point
-
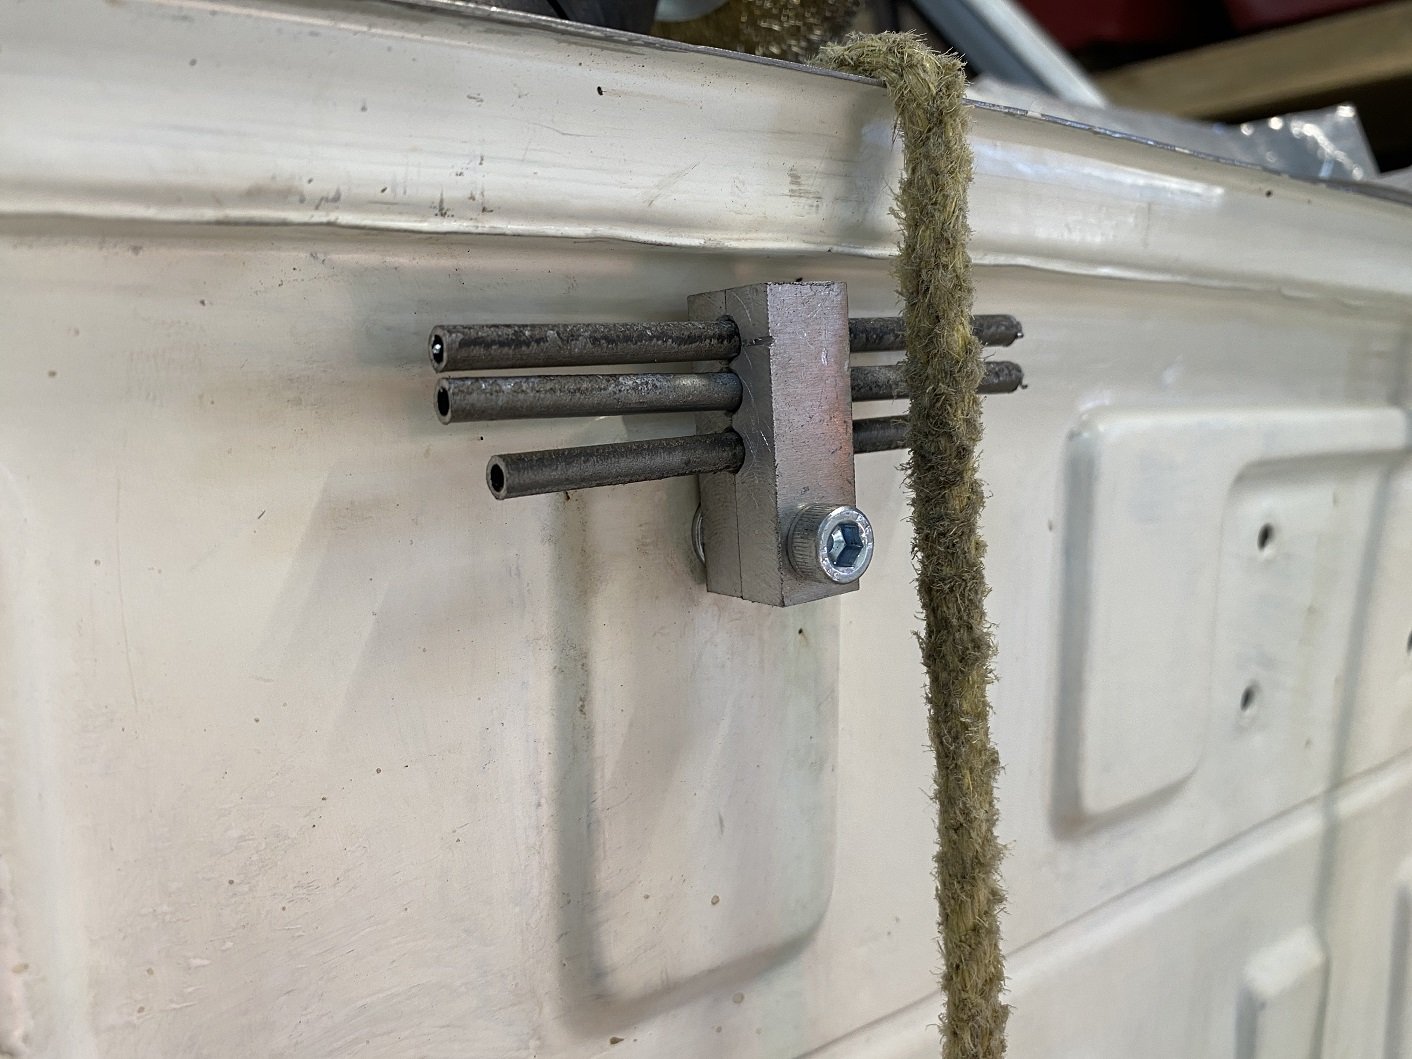
Could not find anything for three lines that was available... Left front caliper, clutch, line to rear. So... yeh? Or nah? They are a loose fit. 5mm drill for 3/16th pipe(4.6mm?)
1 point
-
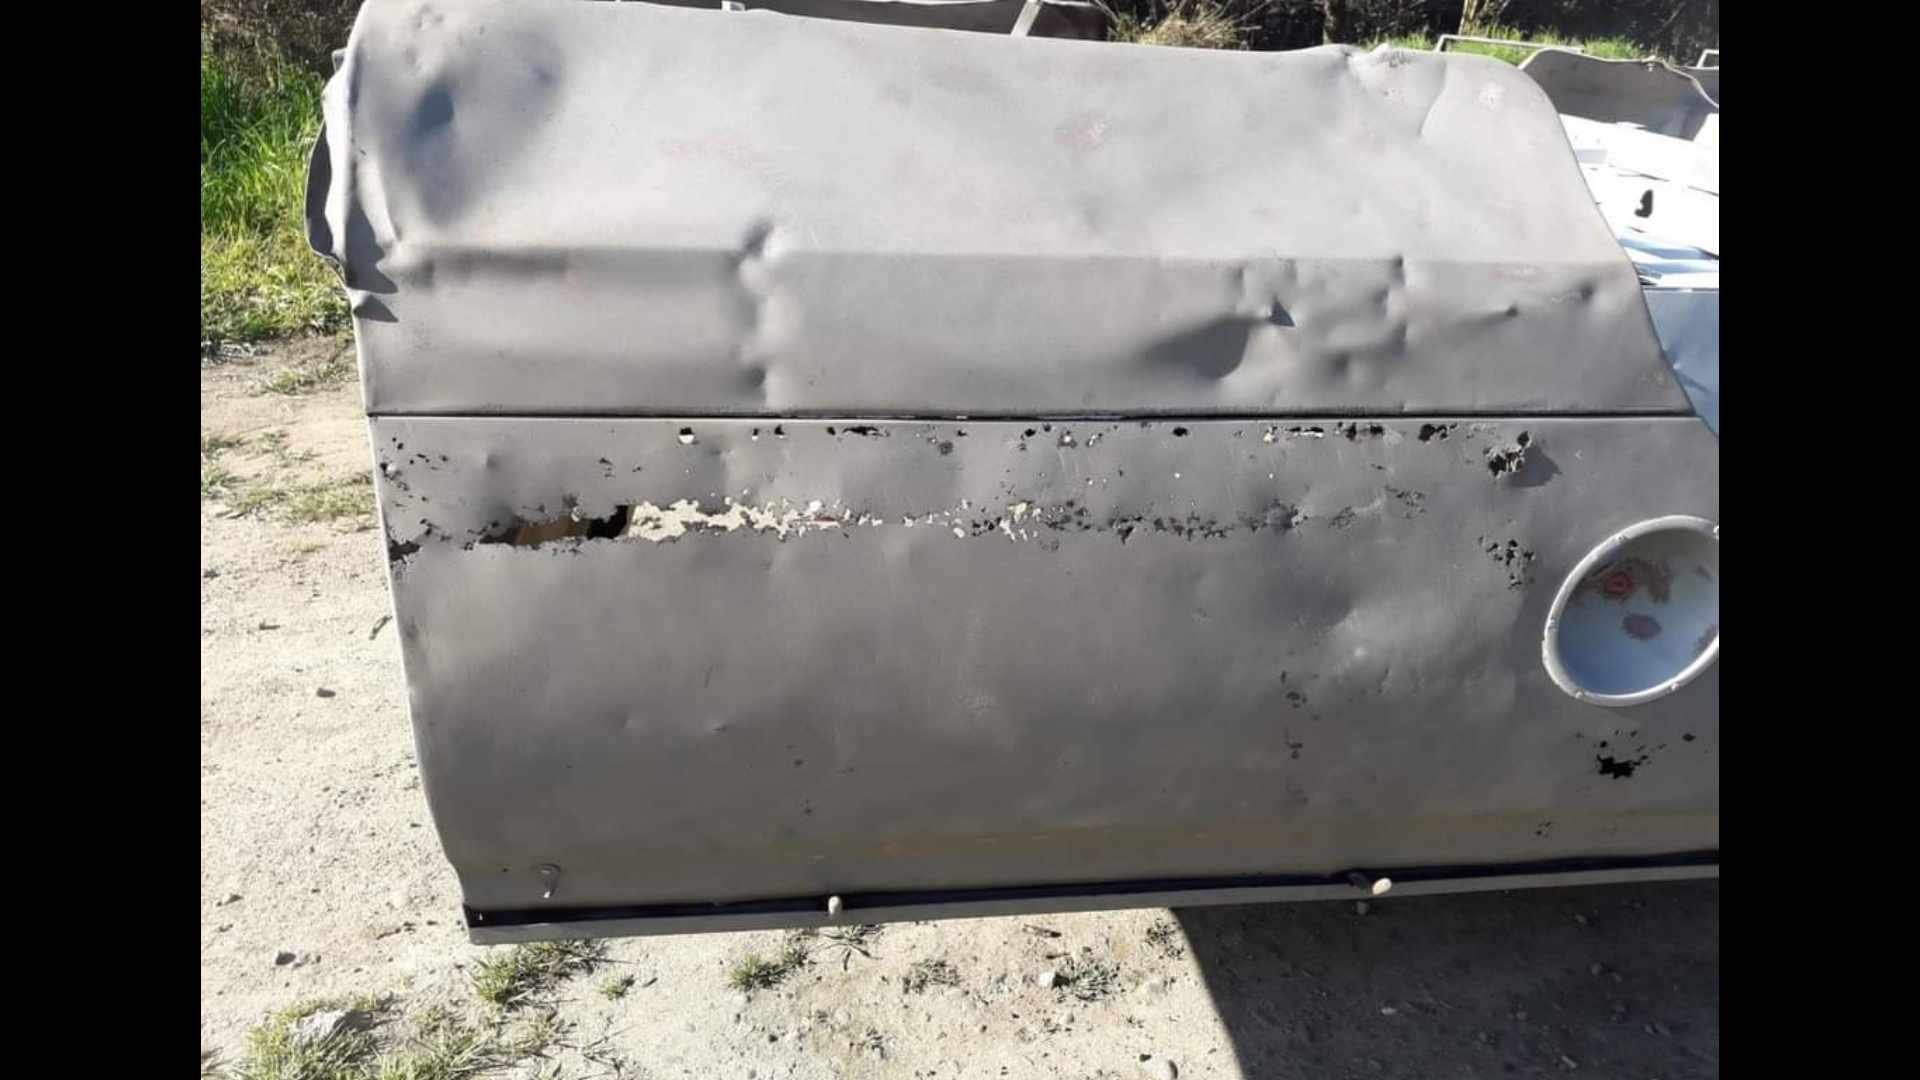
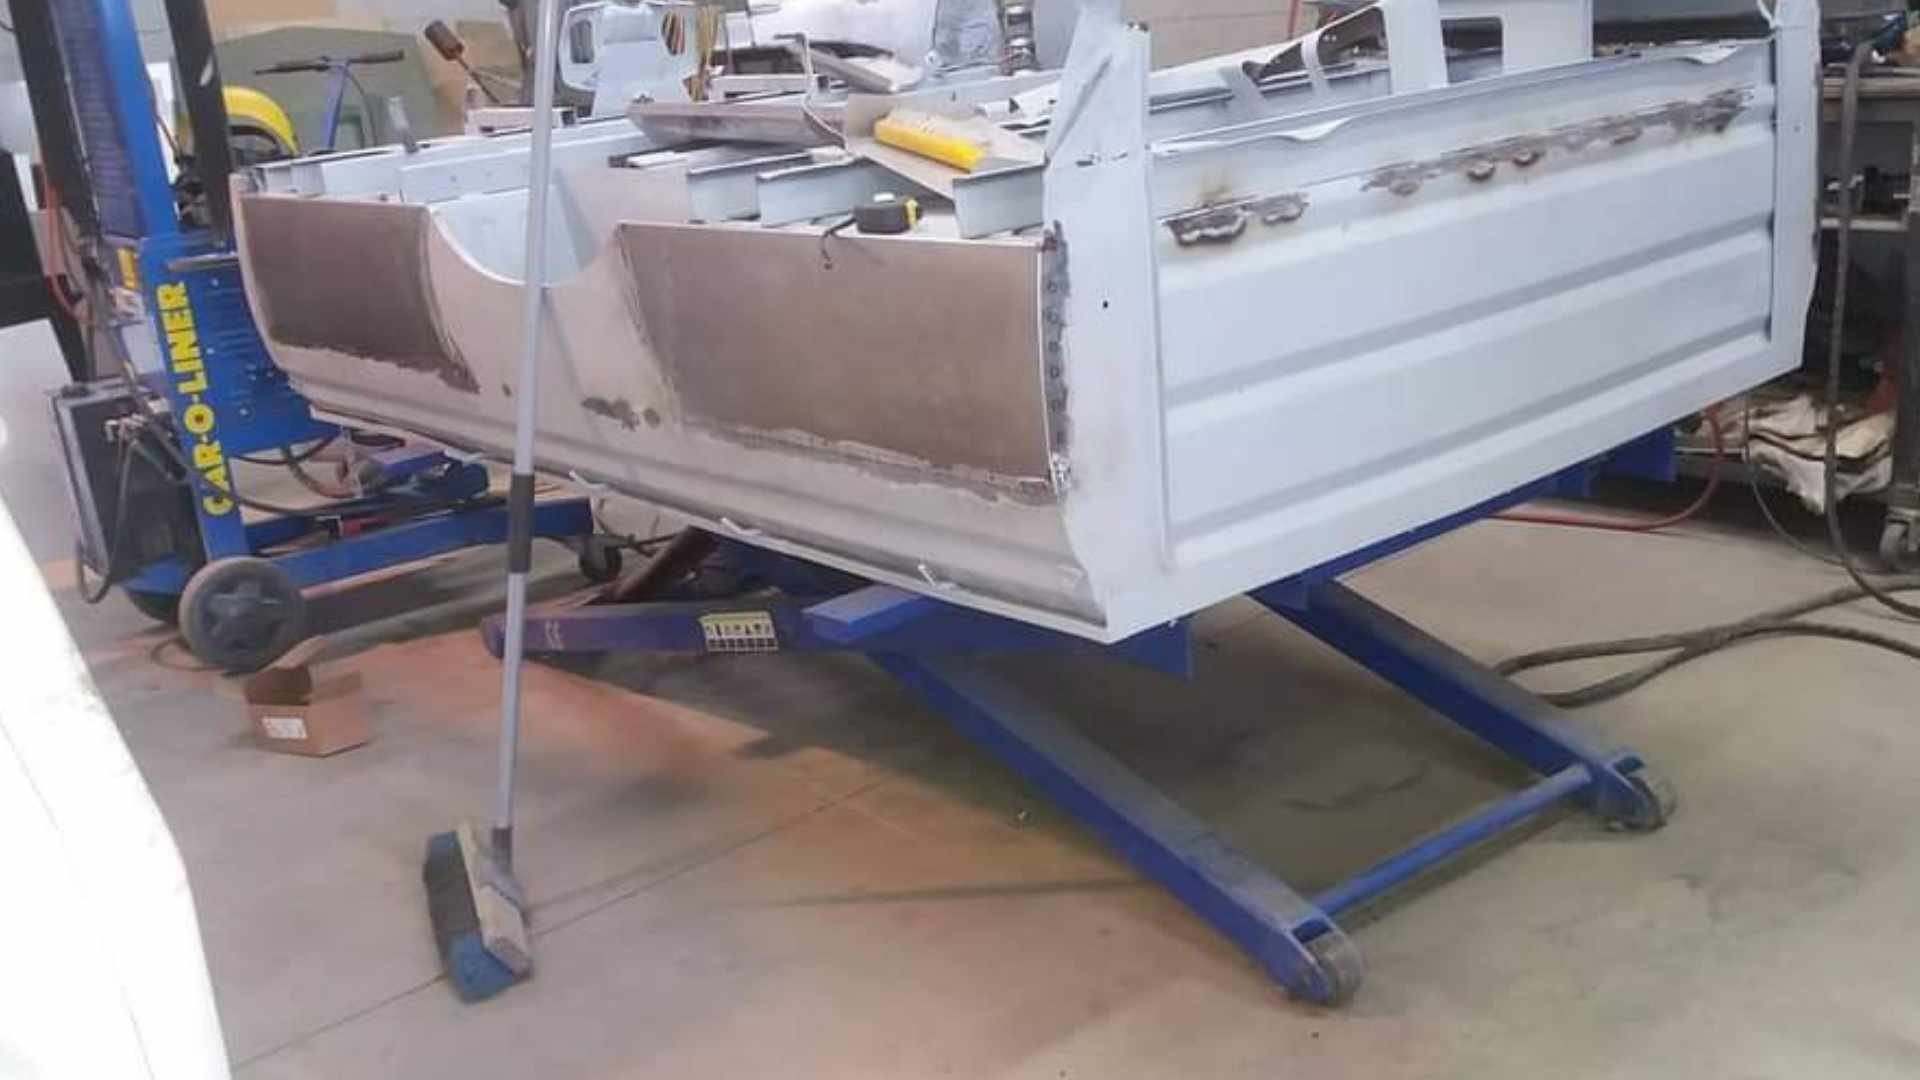
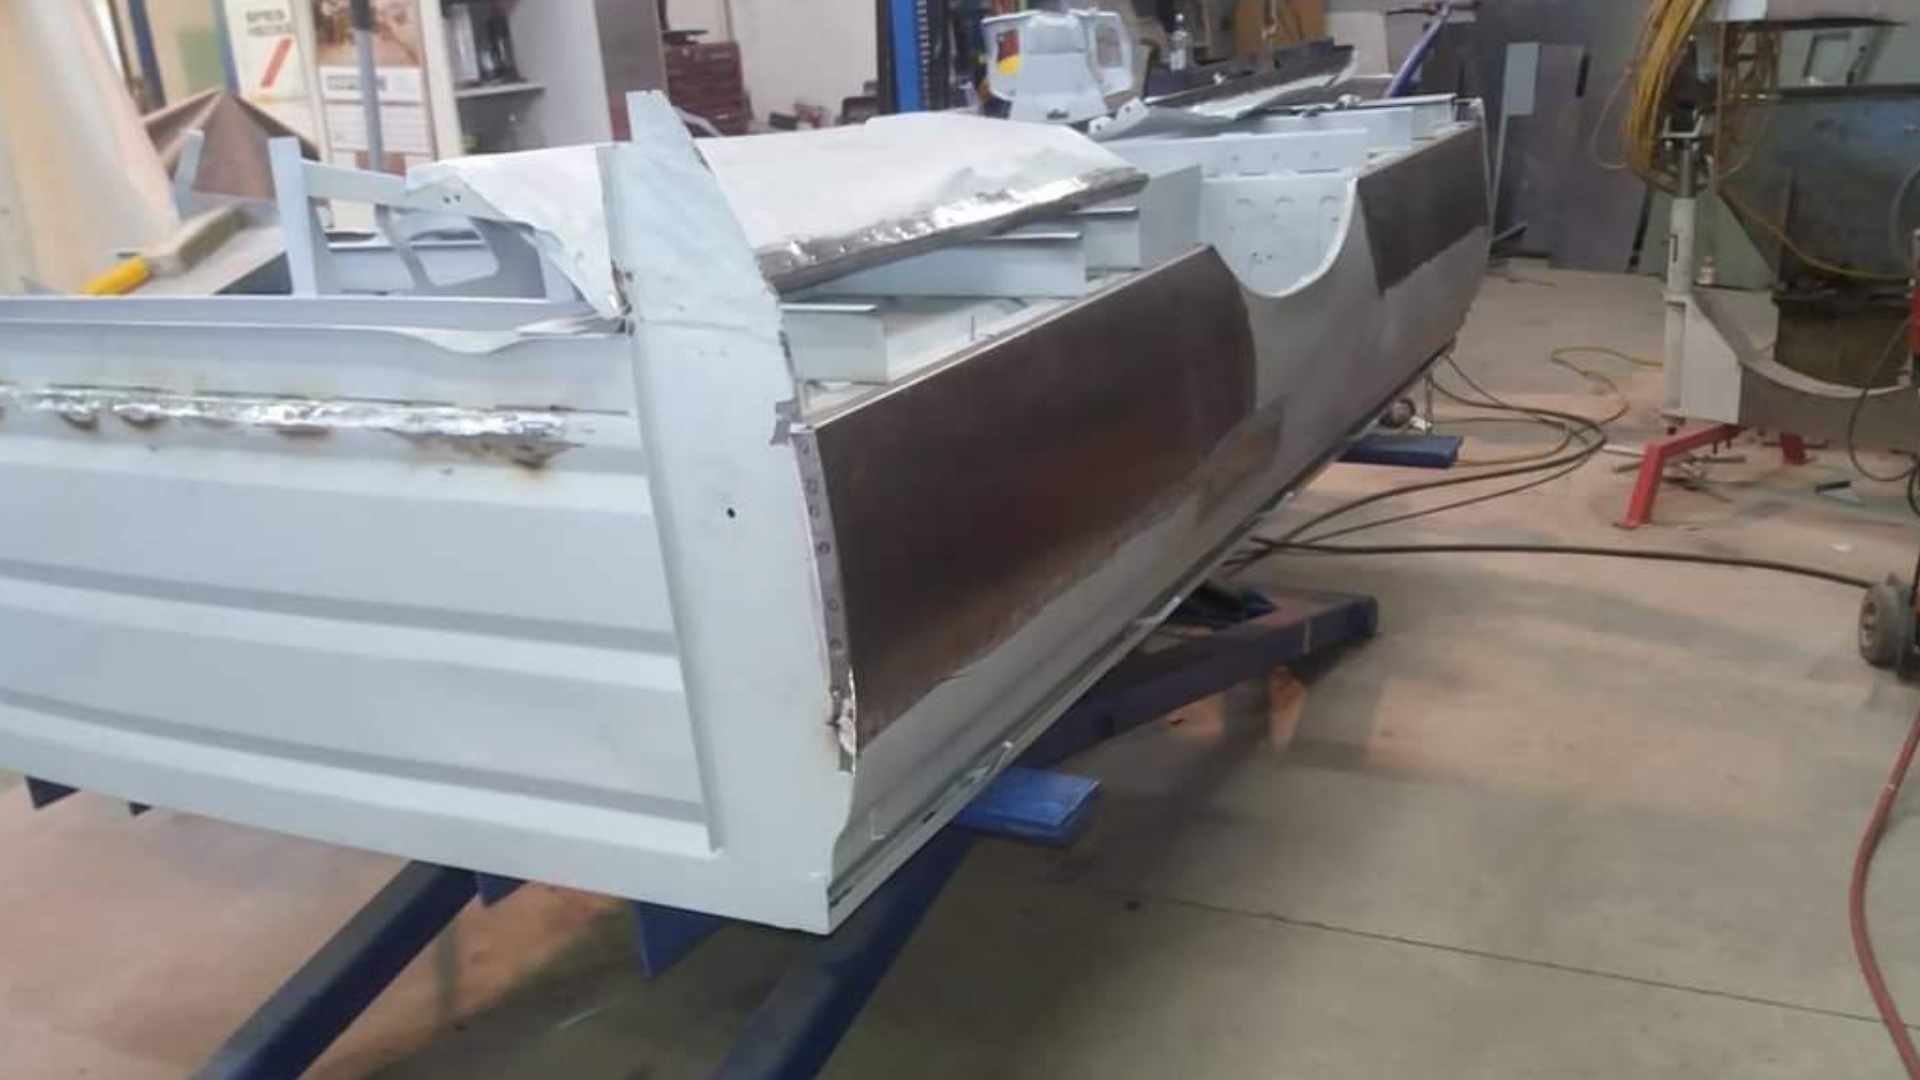
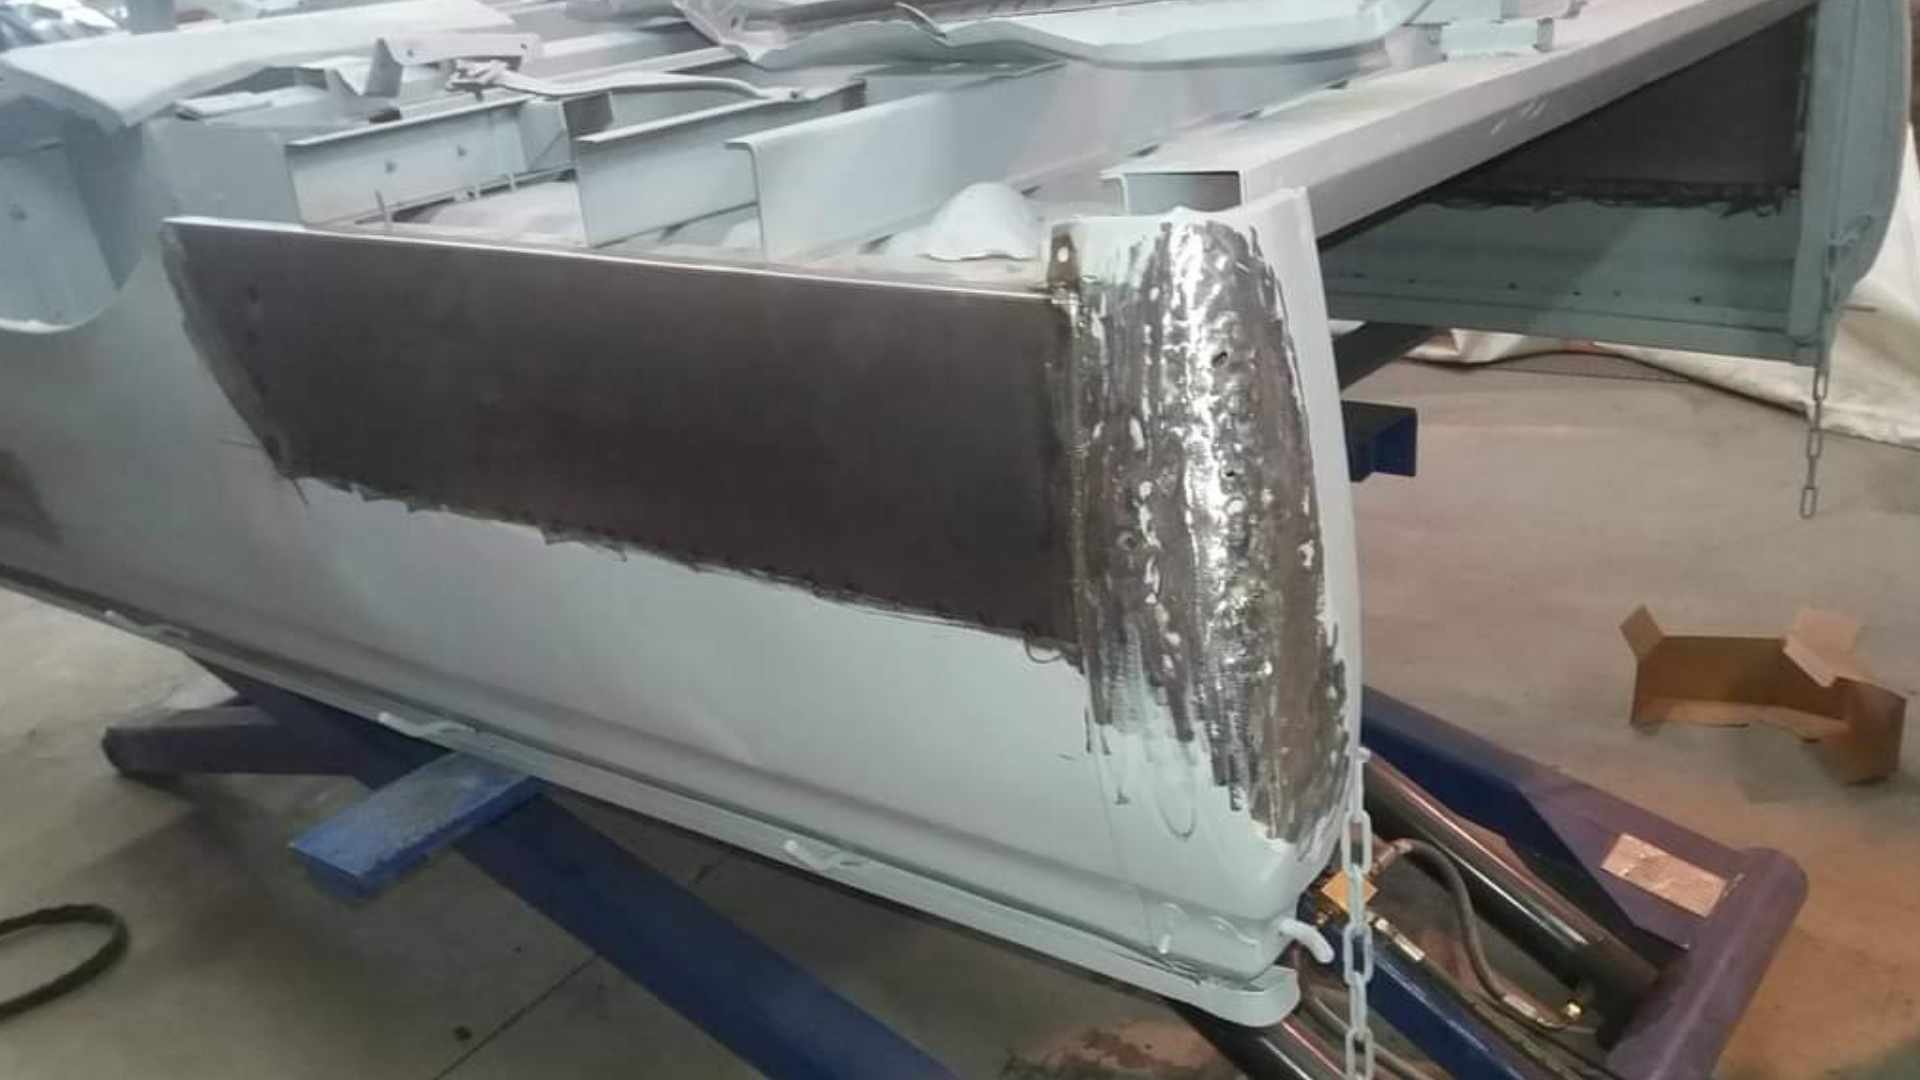
How about that wellside tray i hear you ask? Well, thats an ongoing saga. To start with, i had is sandblasted. Yep, she was a "bit" rusty. it must have been left sitting full of geass or the like i think. Anyway, i was somewhat worse for wear. Dropped it off to a mates shop, and he sid this with it. fast forward to lockdown, and i removed the floor. (It was fuuuuucked) I disovered this was a new Zealand made tray. (Possibly made in Timaru) they had a different profile on the floor, different wheel tubs, no swage around the whel arches to match the front. I replaced the floor with like for like. And a sheet metal mate halped me make new wheel tubs too. ( @JustHarry grafted these in) the same mate helped me reproduce the top edges which were also different. (Harry grafted those on too) Harry also grafted in wheel arches out of some fucked front guards to mimic what a proper datsun tray would have had. The tail gate is actually off a proper datsun tray, and its needed quite a bit of fettling to fit. (The NZ tray is a bit deeper) The tray is still a work in progress. Harry has opted to make new lower sections from scratch, rather than attempting to strighten the mangled mess that was there before.
1 point
-
Been working on the clutch plumbing. And welded in the lower steering column mount. And made the reliefs in the chassis rail for exhaust and steering shaft. I need to find/make some bracket type thing to hold three 3/16th brake pipes that need to run across the top of the firewall. As close together as possible...
1 point
-
Bit of colour went on too.
1 point
-
Classic is after 40yrs of age. It is not that it doesnt require rego, it is that it is non concurrent. Meaning you can just rego for x months at a time and you dont have to back pay in between for the months not licenced. Also you get 2 yrs before deregisters not 12months like normal.1 point
-
Here is a wee update. The fist job was to sort out a couple of issues on the hydraulic clutch setup. I realized that the slave cylinder I had that came with the bellhousing fowls on the headers. After a bit of head scratching and hunting I found another slave cylinder that just fits. I heated the headers then tweaked them out about 15mm to give a bit more clearance, it is still very tight. I still only have about 10mm of clearance. I'll make a heat shield I think. That is the new one, only problem is that the bolt holes don't line up with the holes on the bellhousing. So I milled slots in it. I was going to TIG the bellhousing holes and tap them but I decided not to just incase this new slave cylinder doesn't end up working out. For the master cylinder I welded a backing plate to the fire wall and mounted it in the engine bay between the booster and the header. Tight fit but it works. That picture makes it look much closer to the header than it is. I couldn't have it directly behind the clutch pedal unfortunately, so it's off set from the pedal. I used some steel rod linking them all together and threaded the ends. It's nice and smooth, I'm hopeful it will work well. Engine in for hopefully the final time. I couldn't mount the gearbox as when I went to fit the fly wheel I realized I don't have any flywheel bolts. Doh. ARP ones are on the way. Next I'll start wiring her up and put the dash back together. Cheers guys. P.S. Pro tip... Don't spray a car in jandals. That was taken after 2 showers.1 point
-
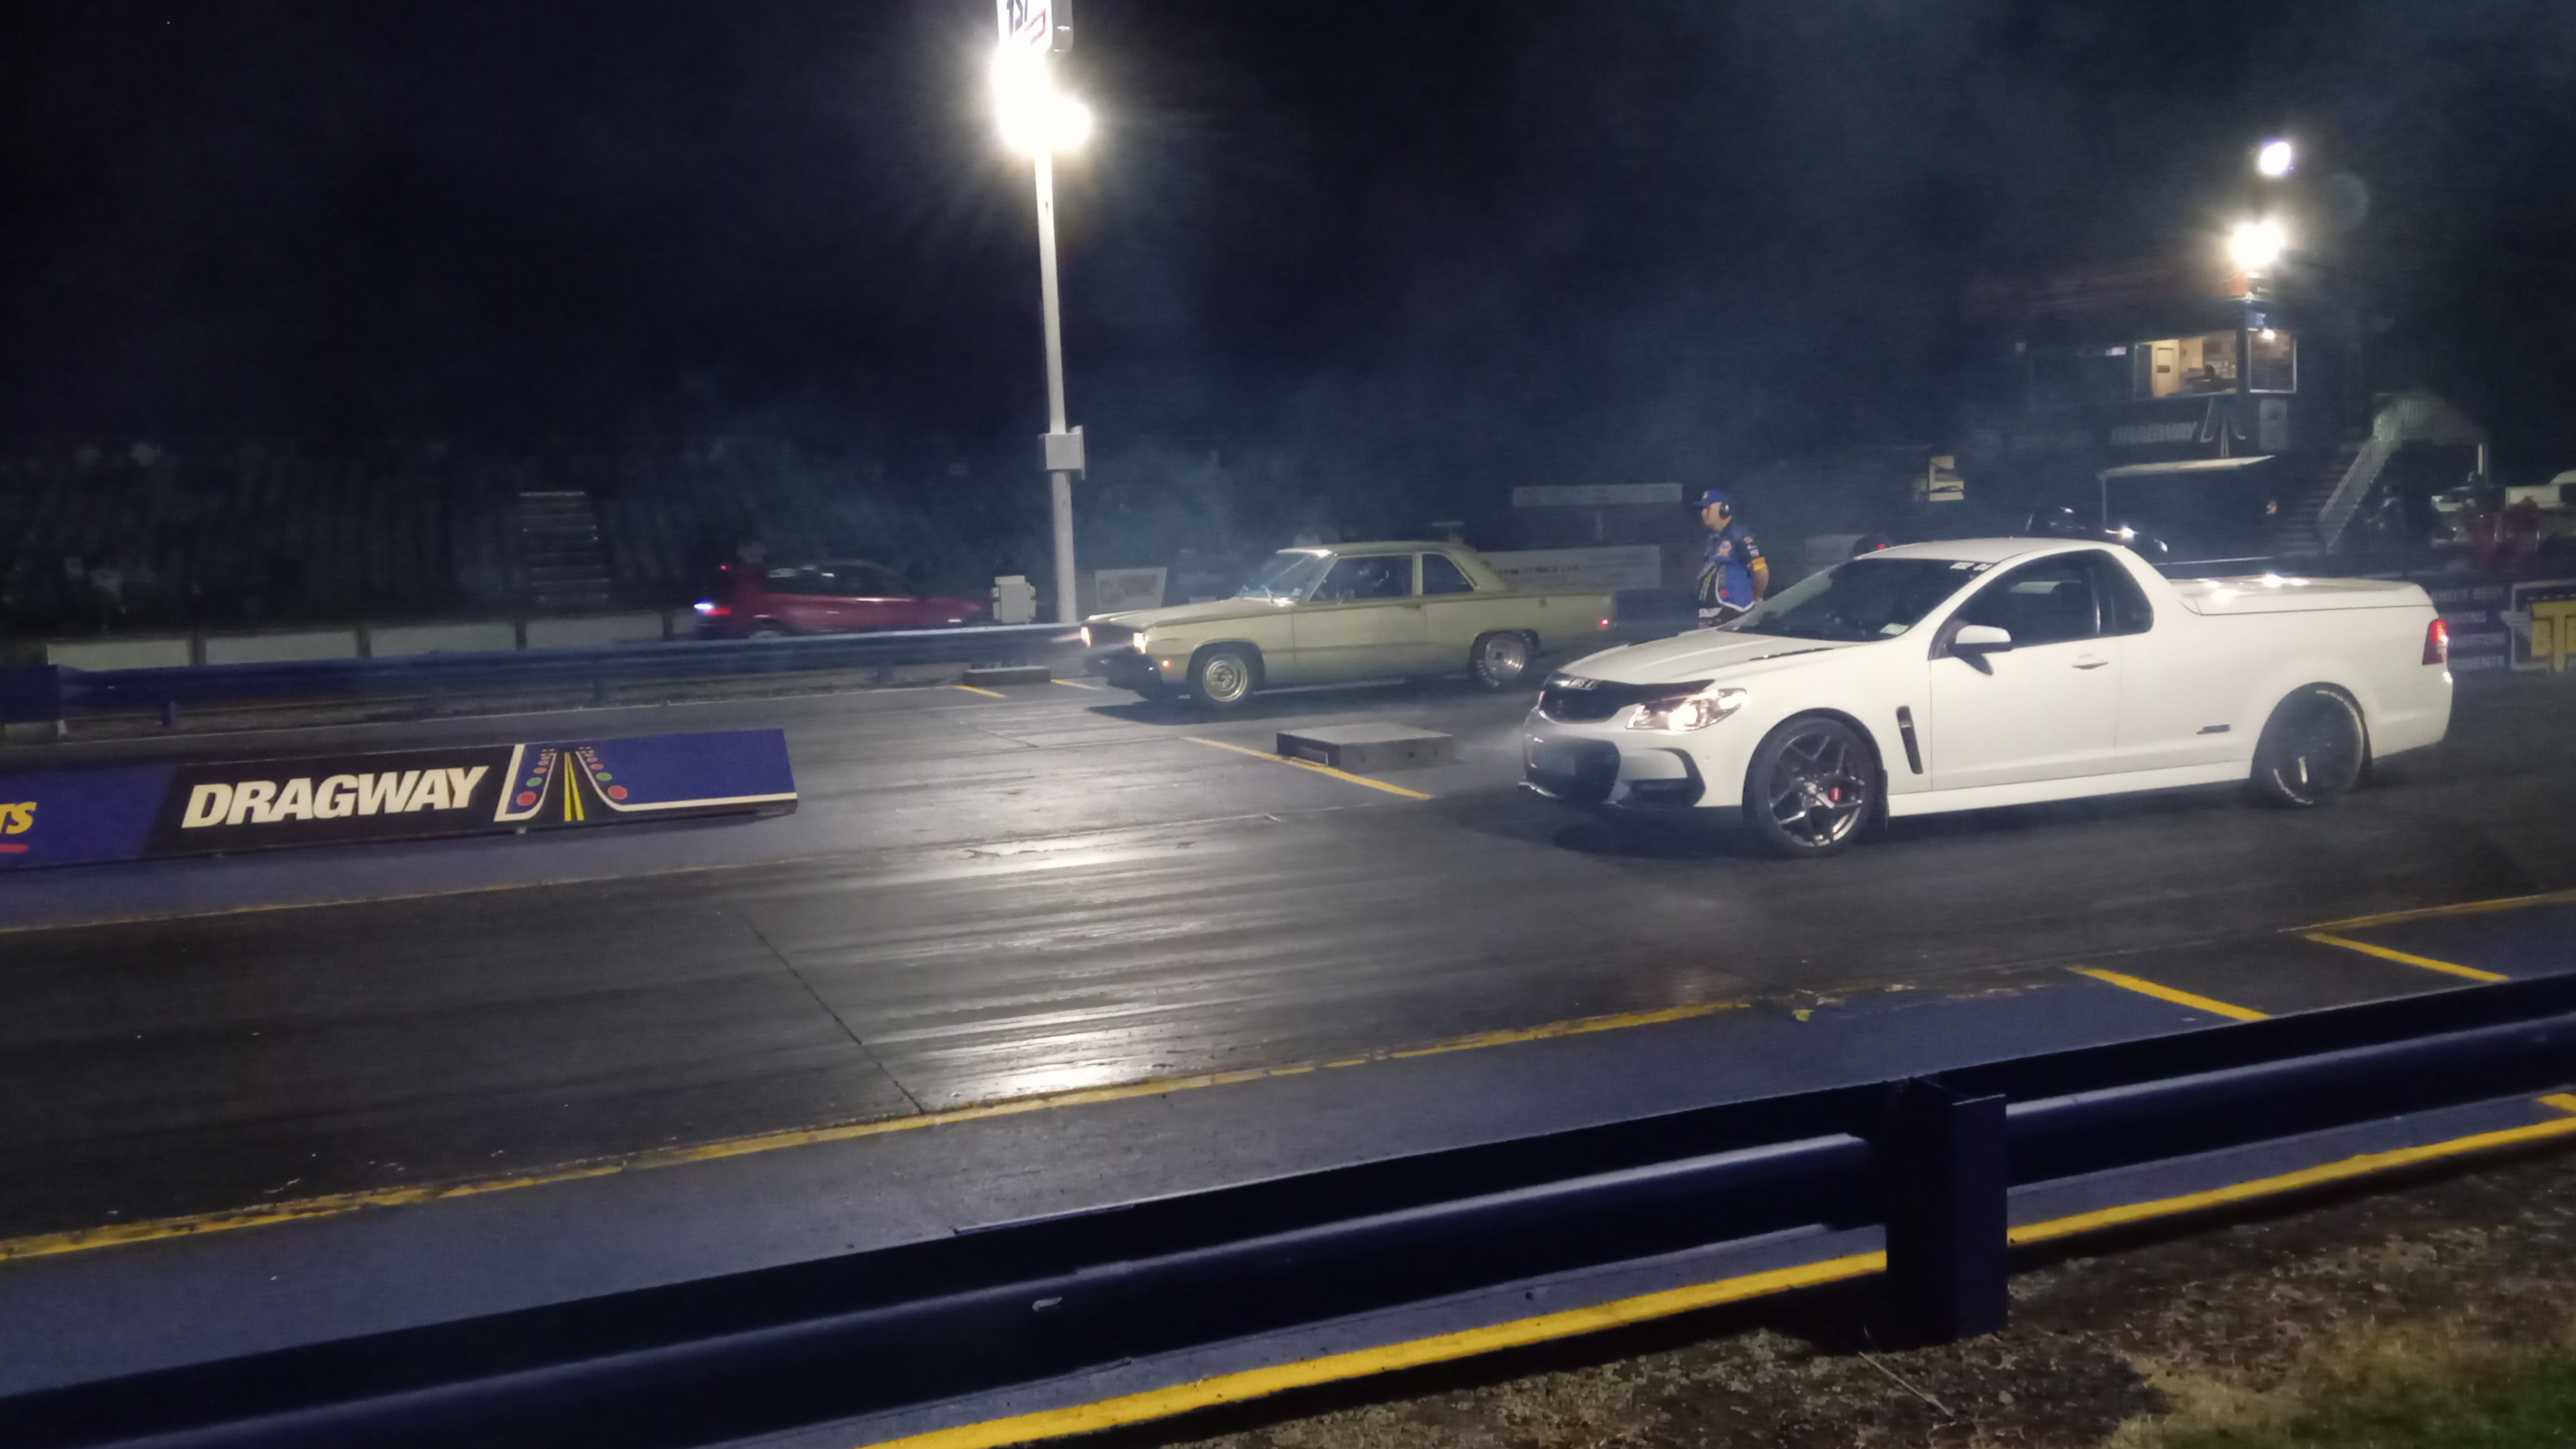
New springs made it more consistent,although slightly slower. Different wheels and muffler off when it did the 11.35 previously 11.5@118 every pass I have turned the 2 step rev limit down slightly as it was having trouble holding on the brake which I can probably fiddle with to improve I'd like to get it down to 11.0 so it's more competitive at the night drags https://m.youtube.com/watch?v=kdfGgT2pKHw&pp=ygUMVW5kZXJjYXJ2aWV3
1 point
-
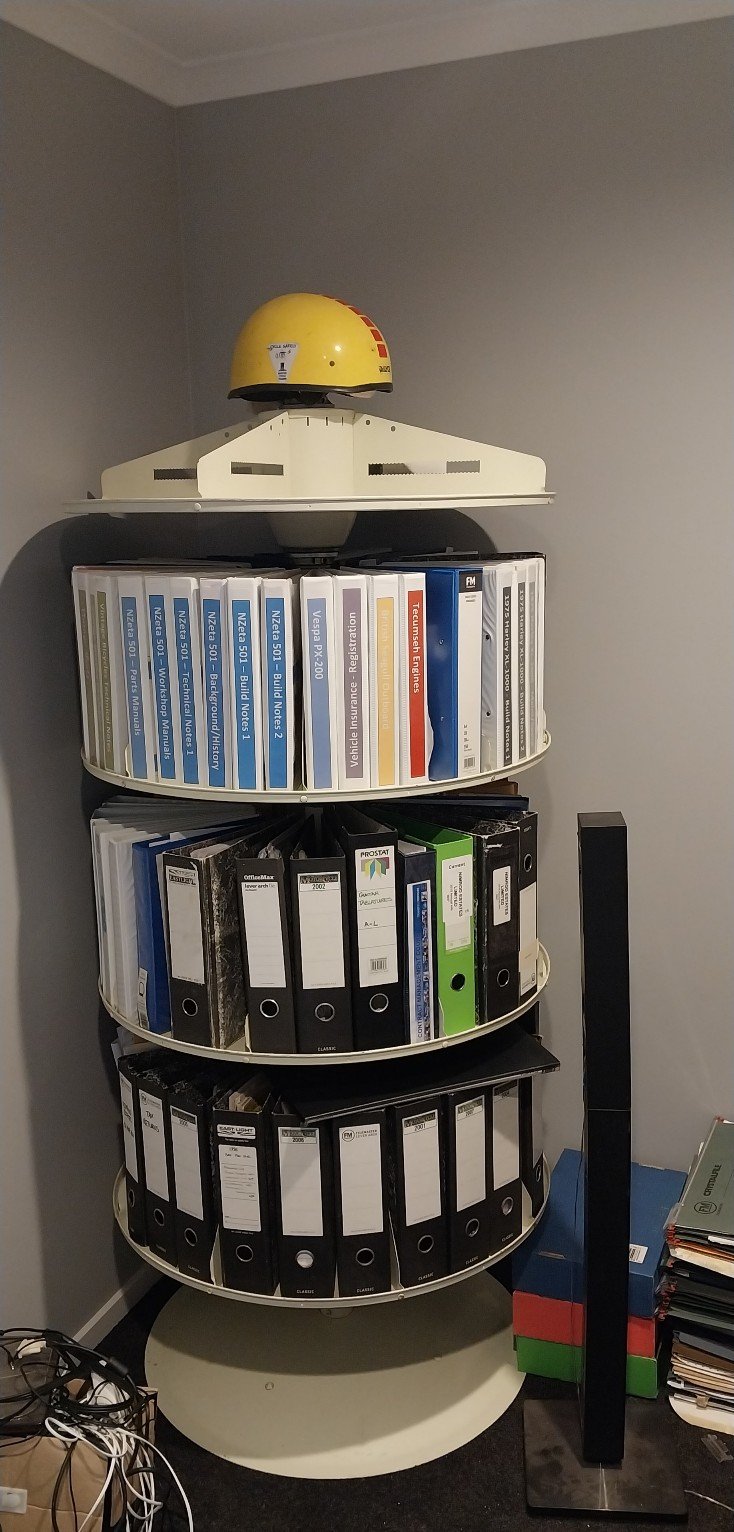
Legit thought that was bacon & egg pie... Sorting the garage/office, found an old rotating file thing at the tip shop for $20, pulled it apart, gave it a clean, greased bearings and assembled it inside. Shit it's heavy...
1 point
-
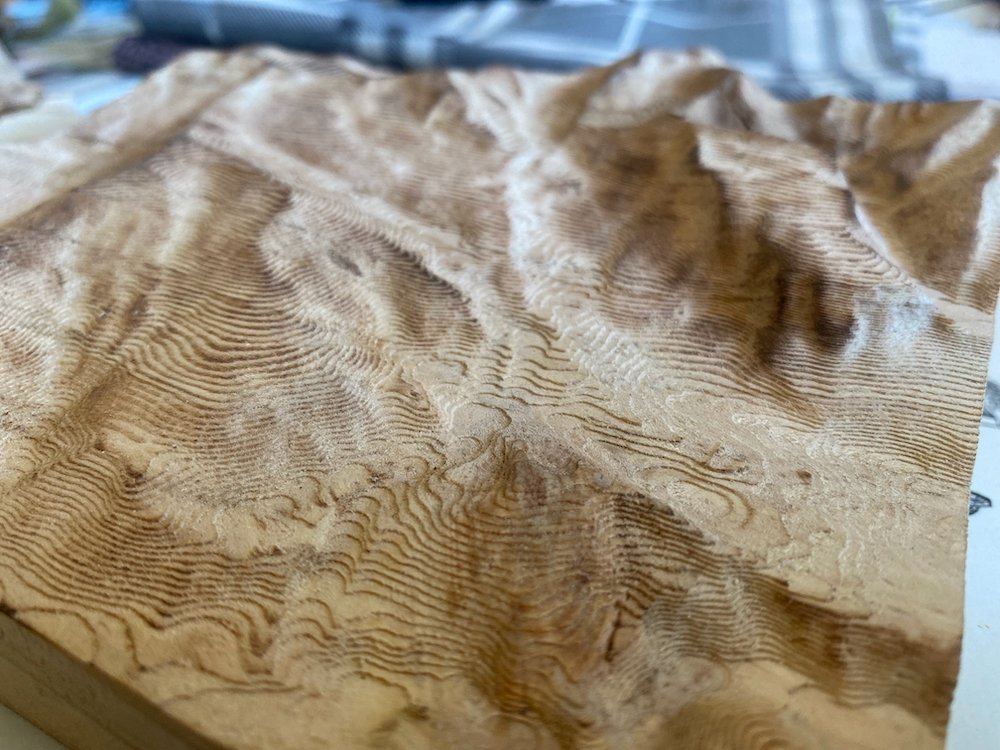
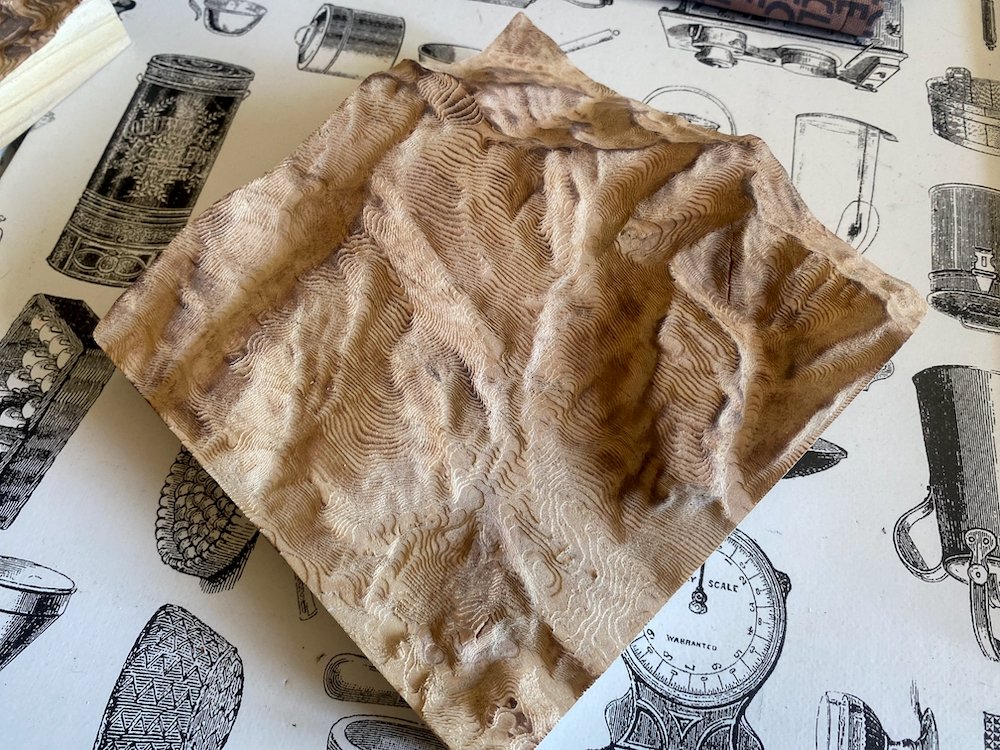
Making some thank you gifts for friends that looked after us on our recent trip overseas, reliefs of the mountains they call home. Carved out with the cnc to replicate contour lines on a map then run over with the gas torch to highlight the ridges.
1 point
-
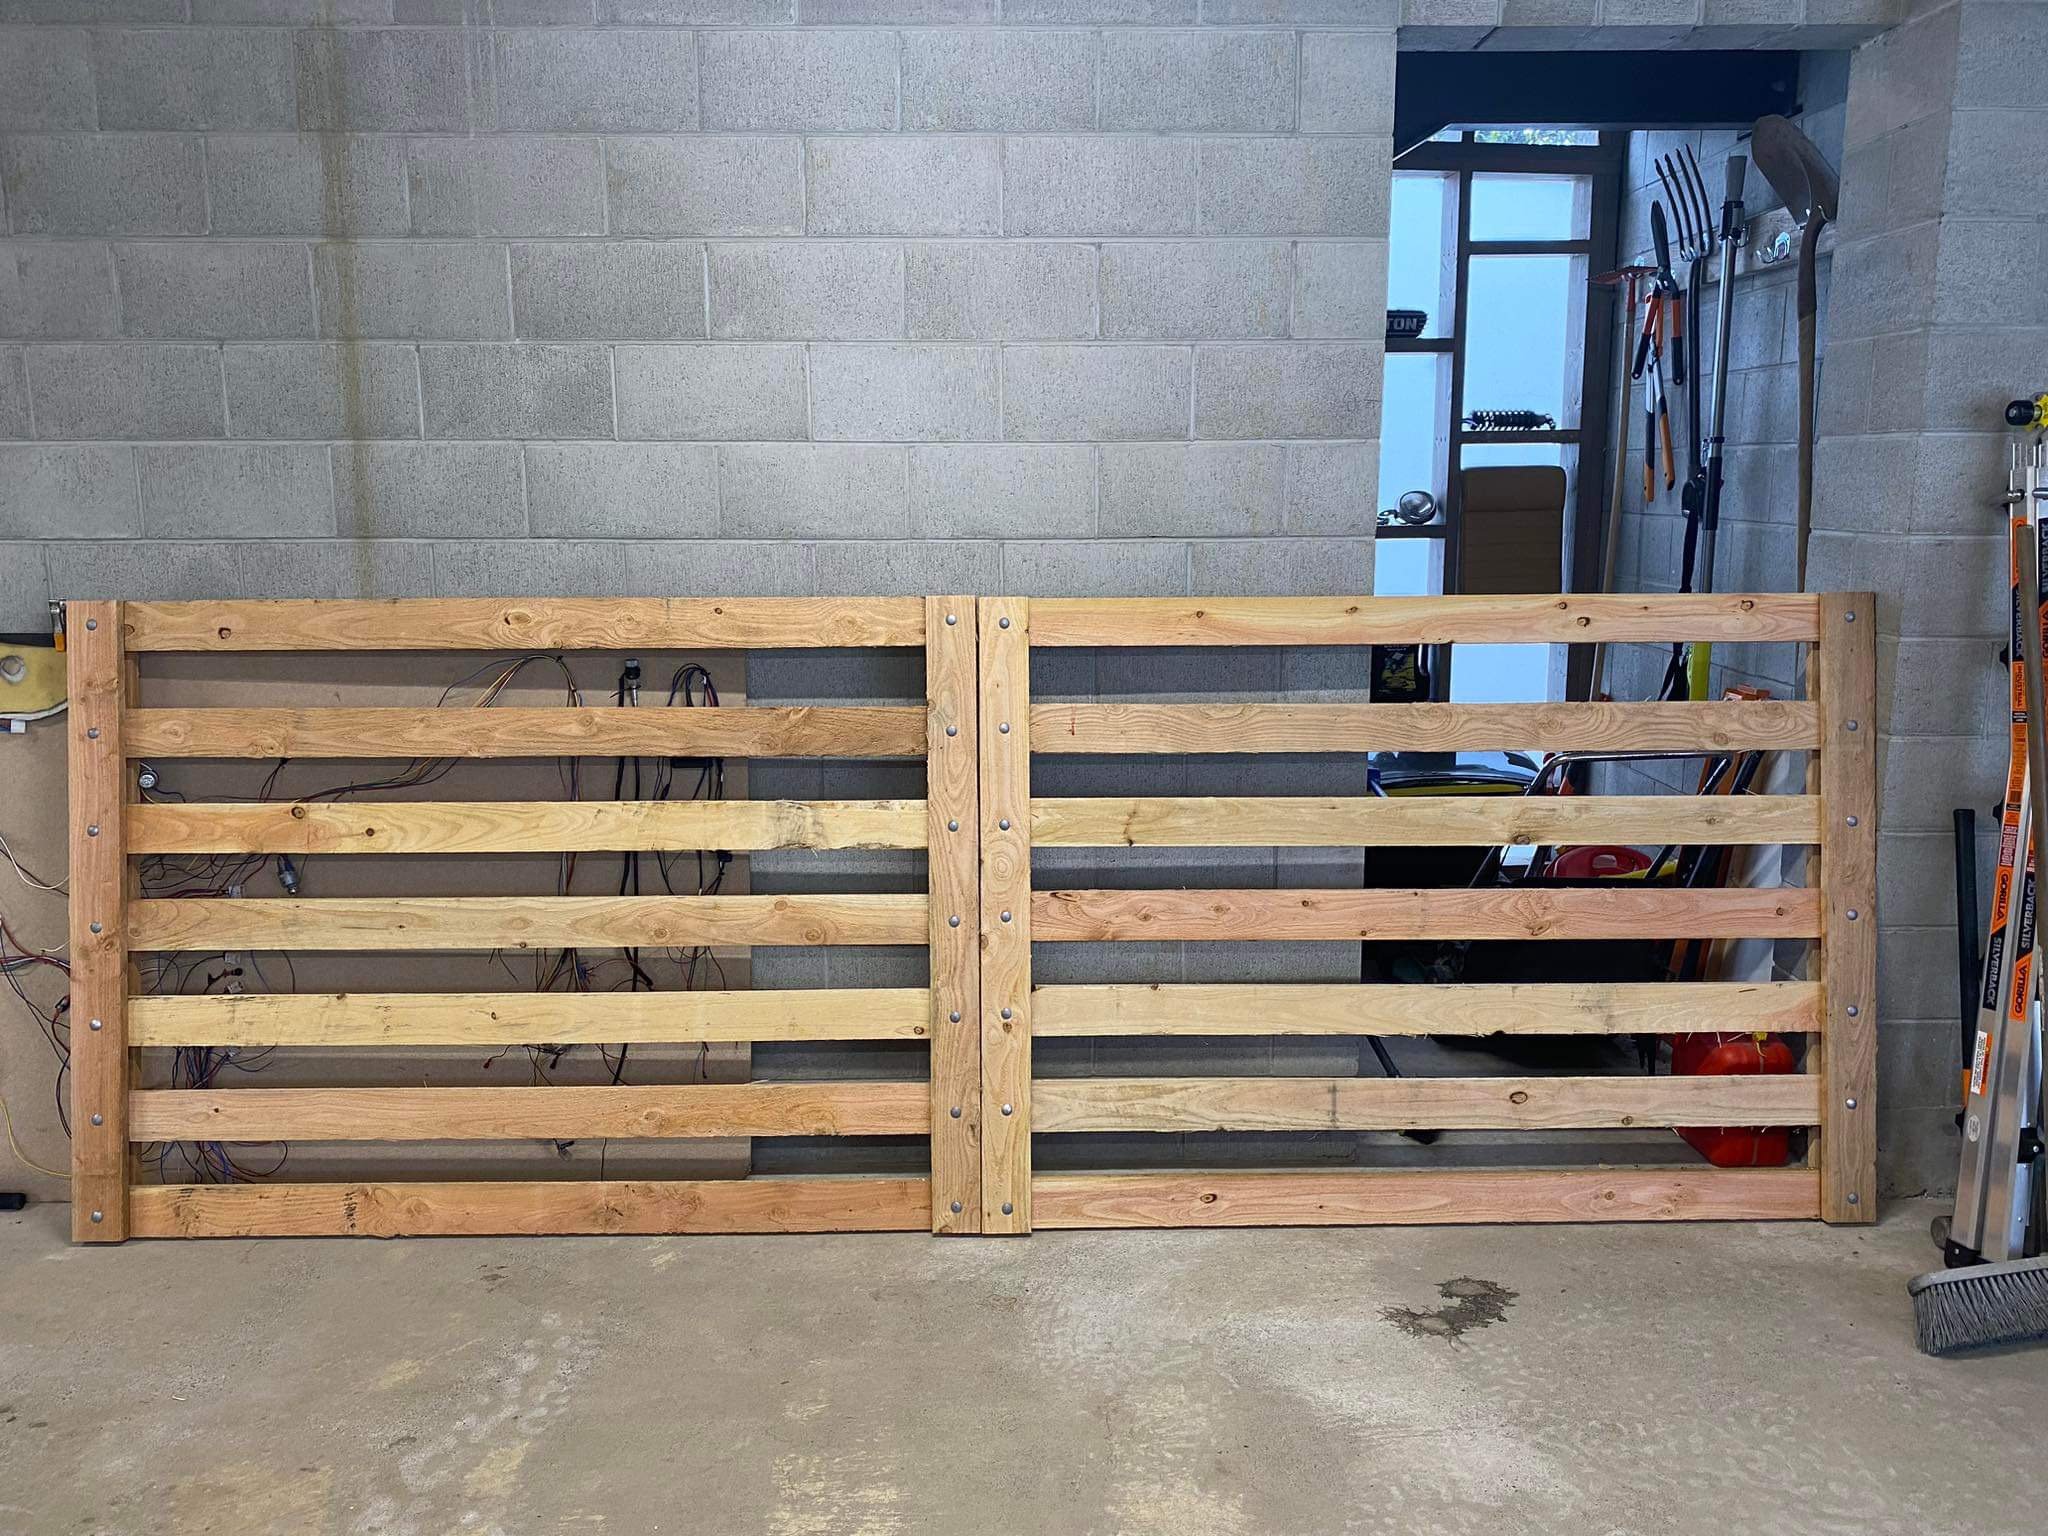
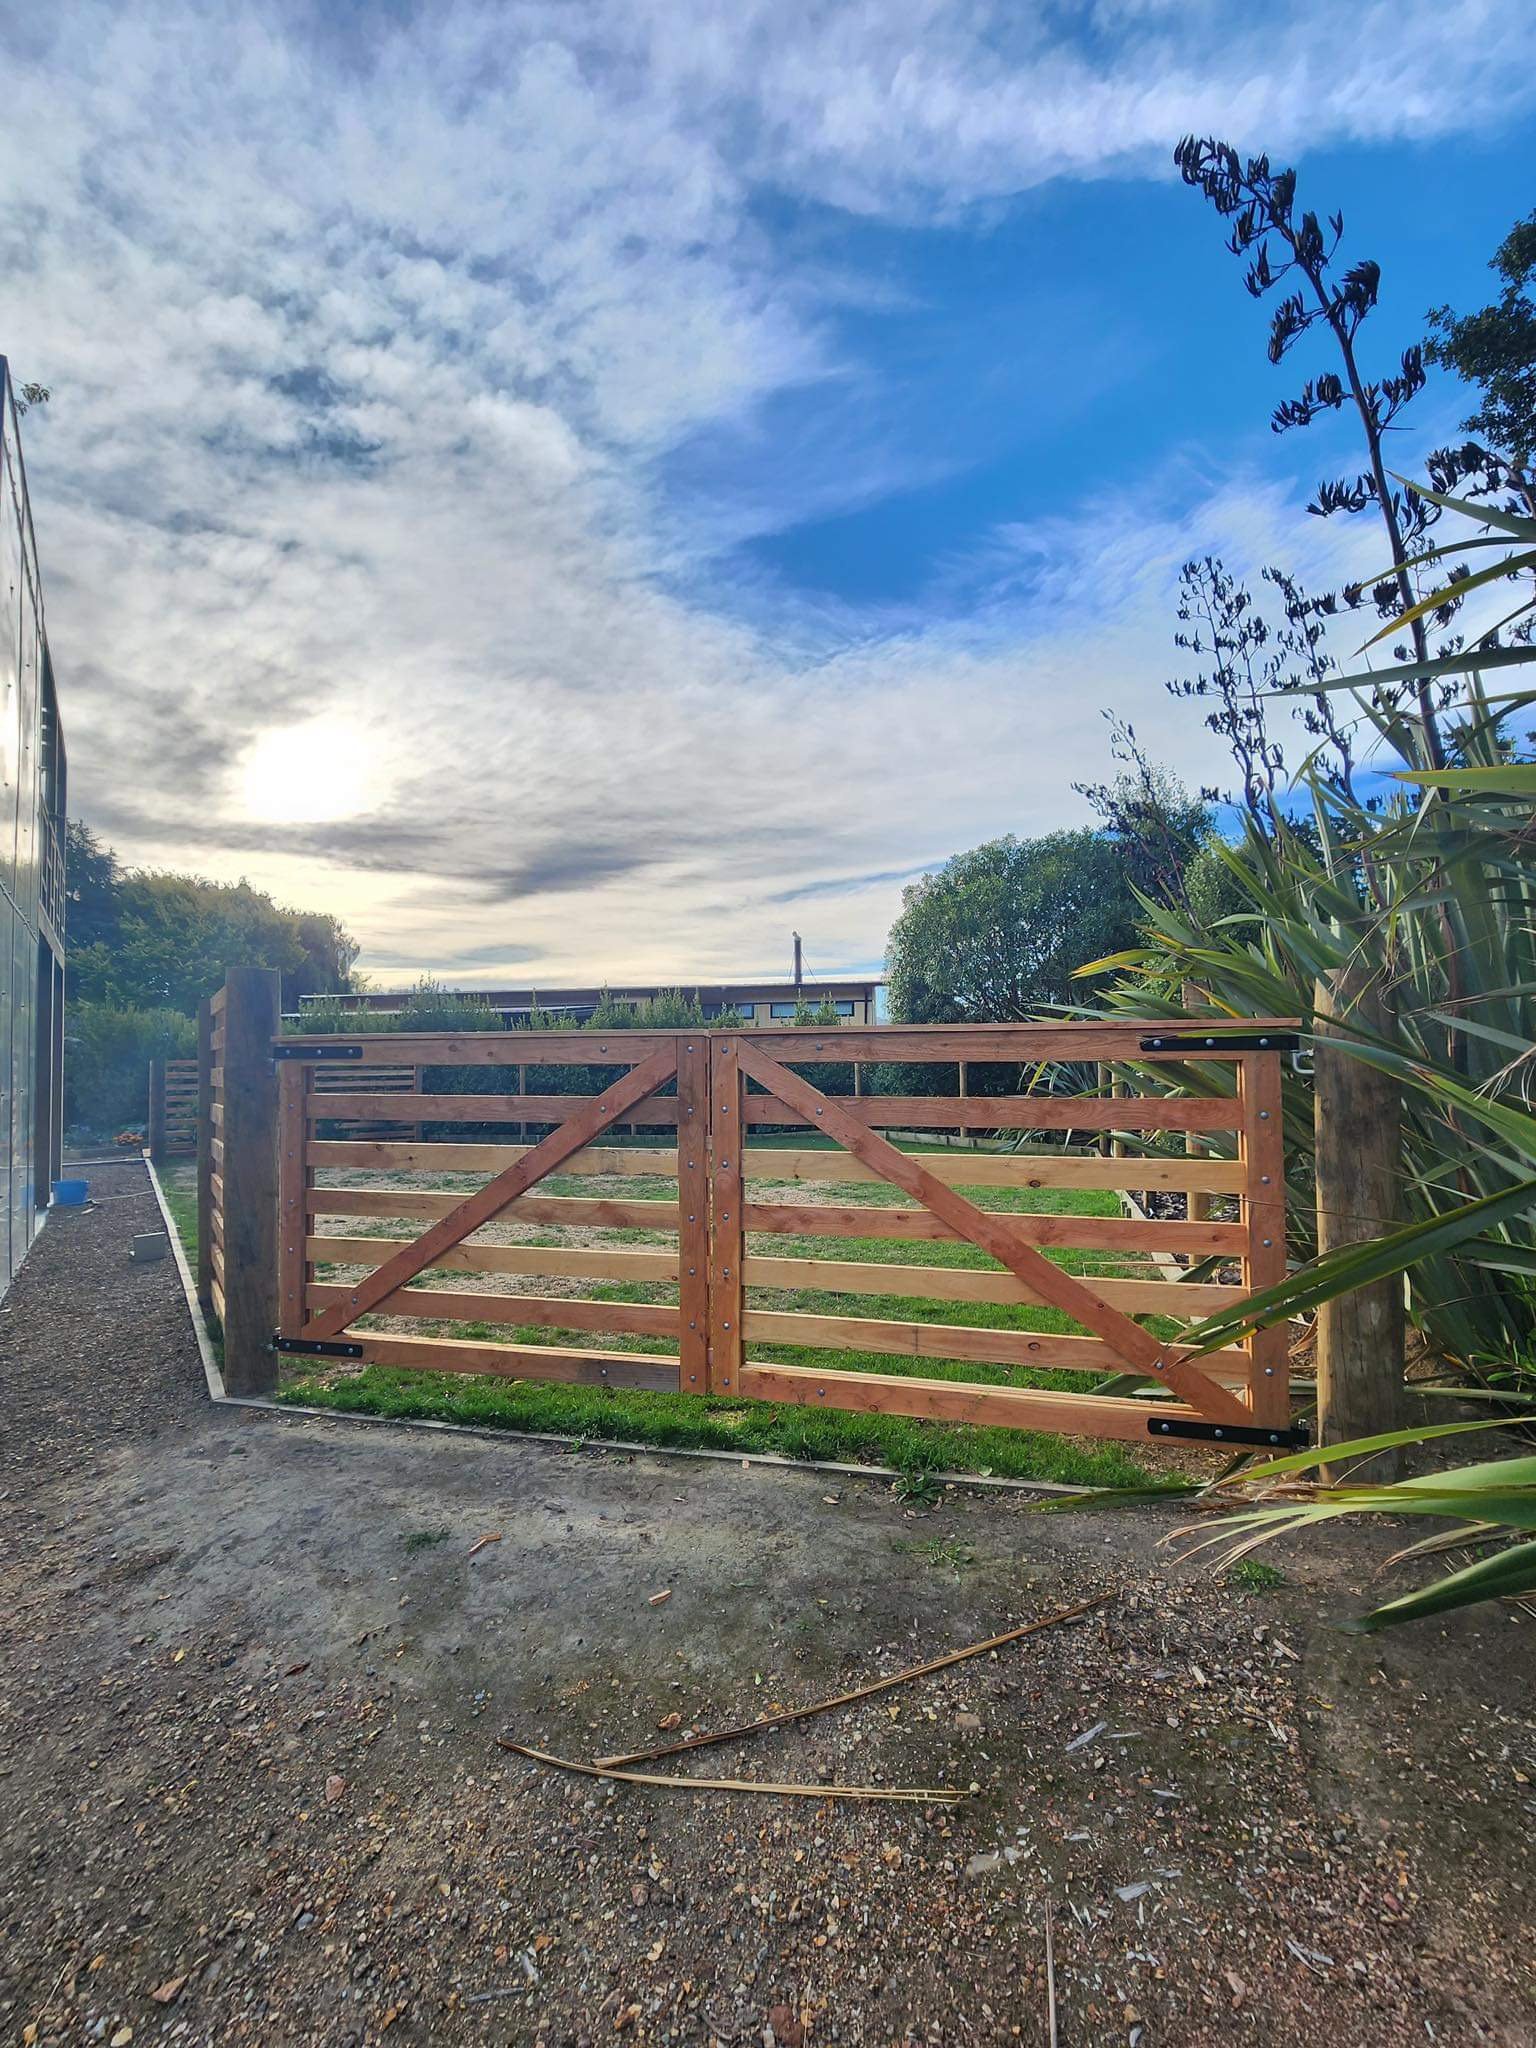
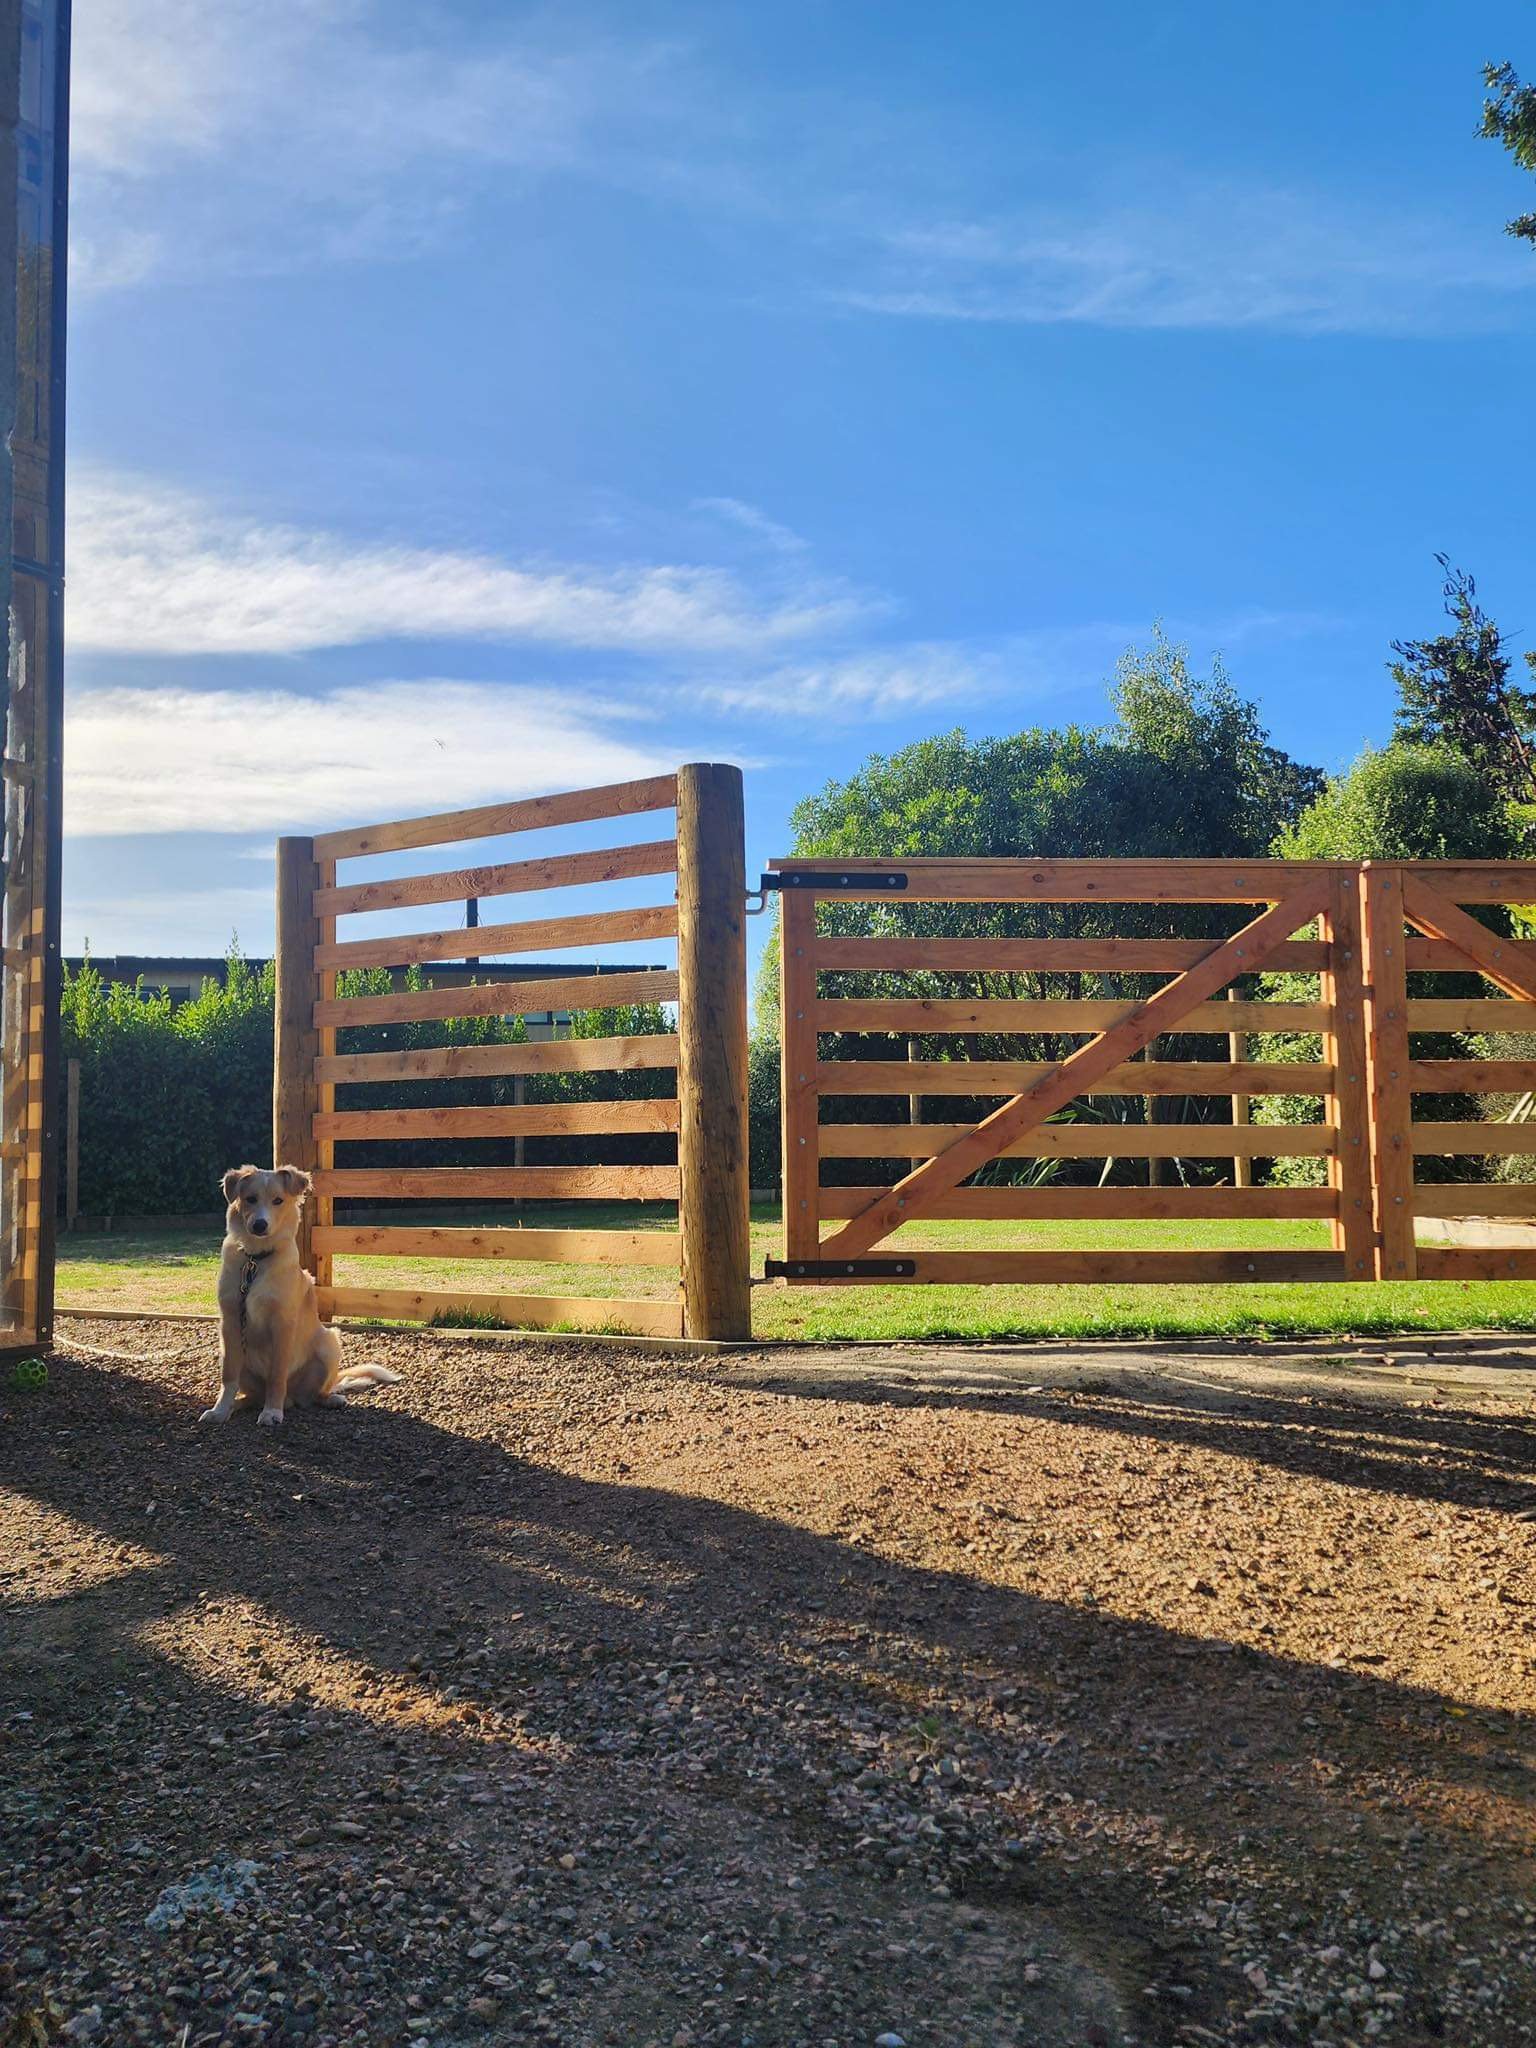
Made some gates so Finn has a nice place to hang out off the lead. Gates are 100x25 Oregon and 200mm round strainers for each gate post buried a meter per side, pretty sturdy: He was keen to show that he could still escape if he wanted to… Alcatraz it is not… yet…
1 point
-
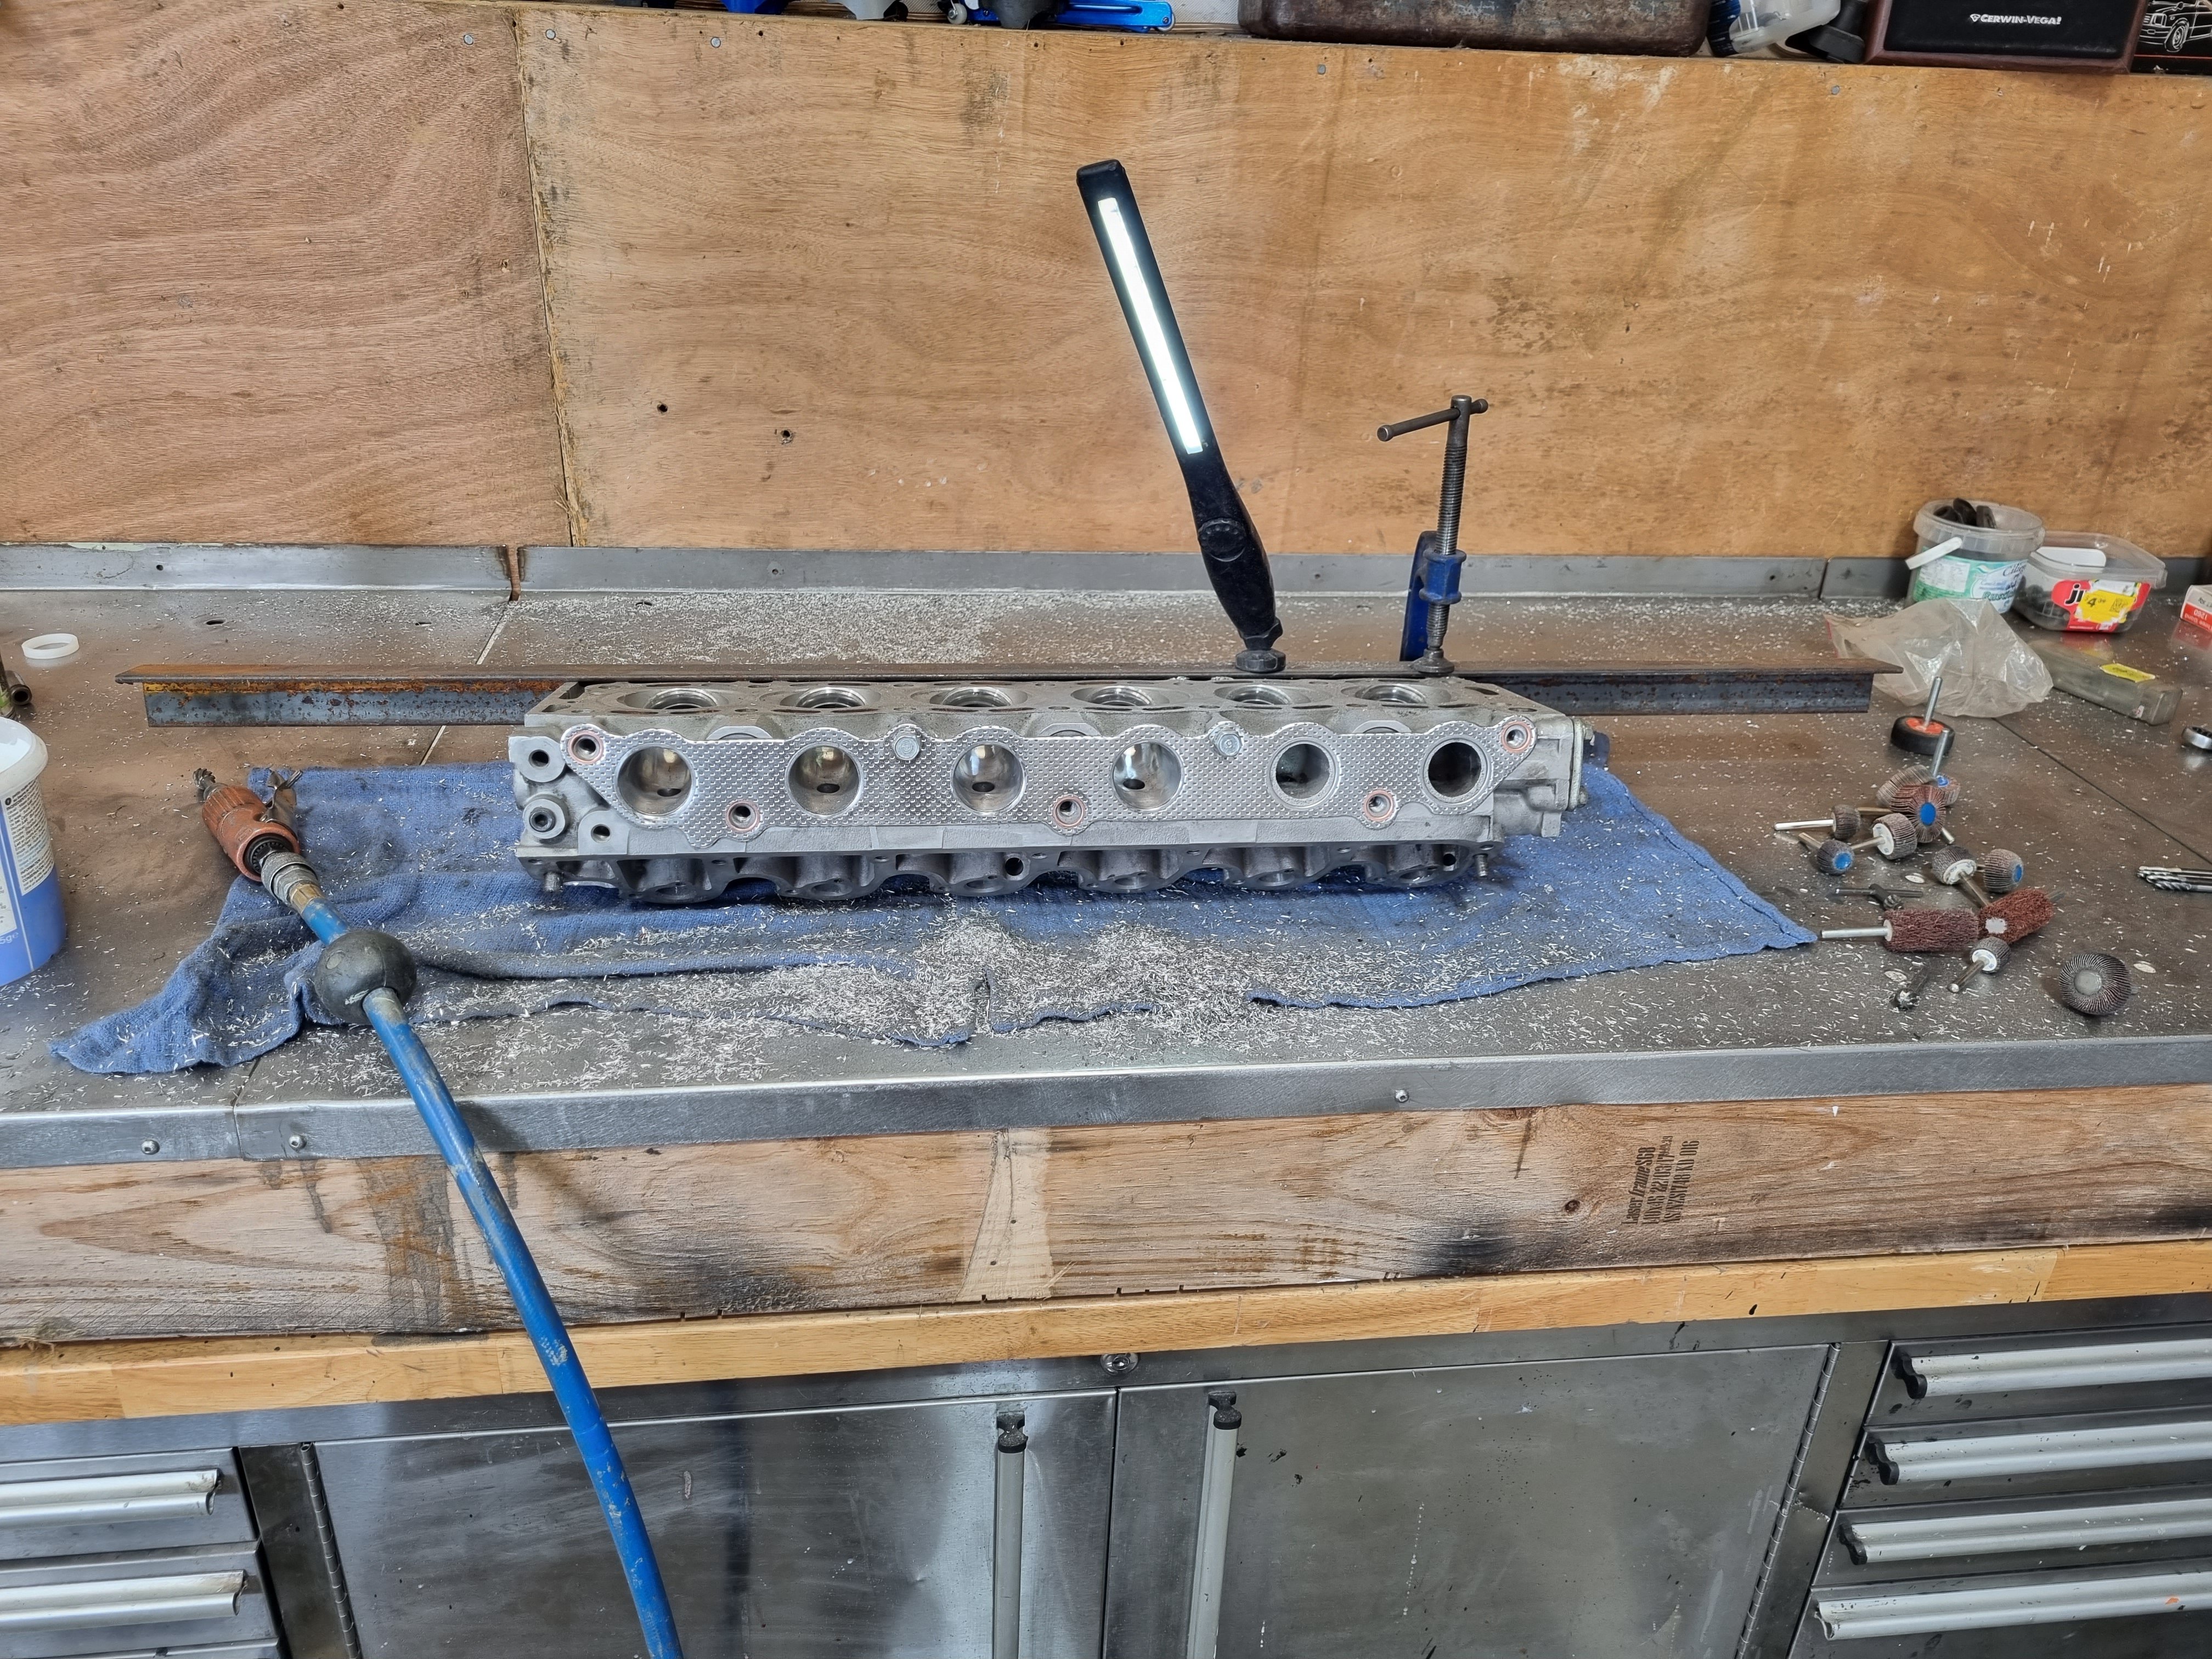
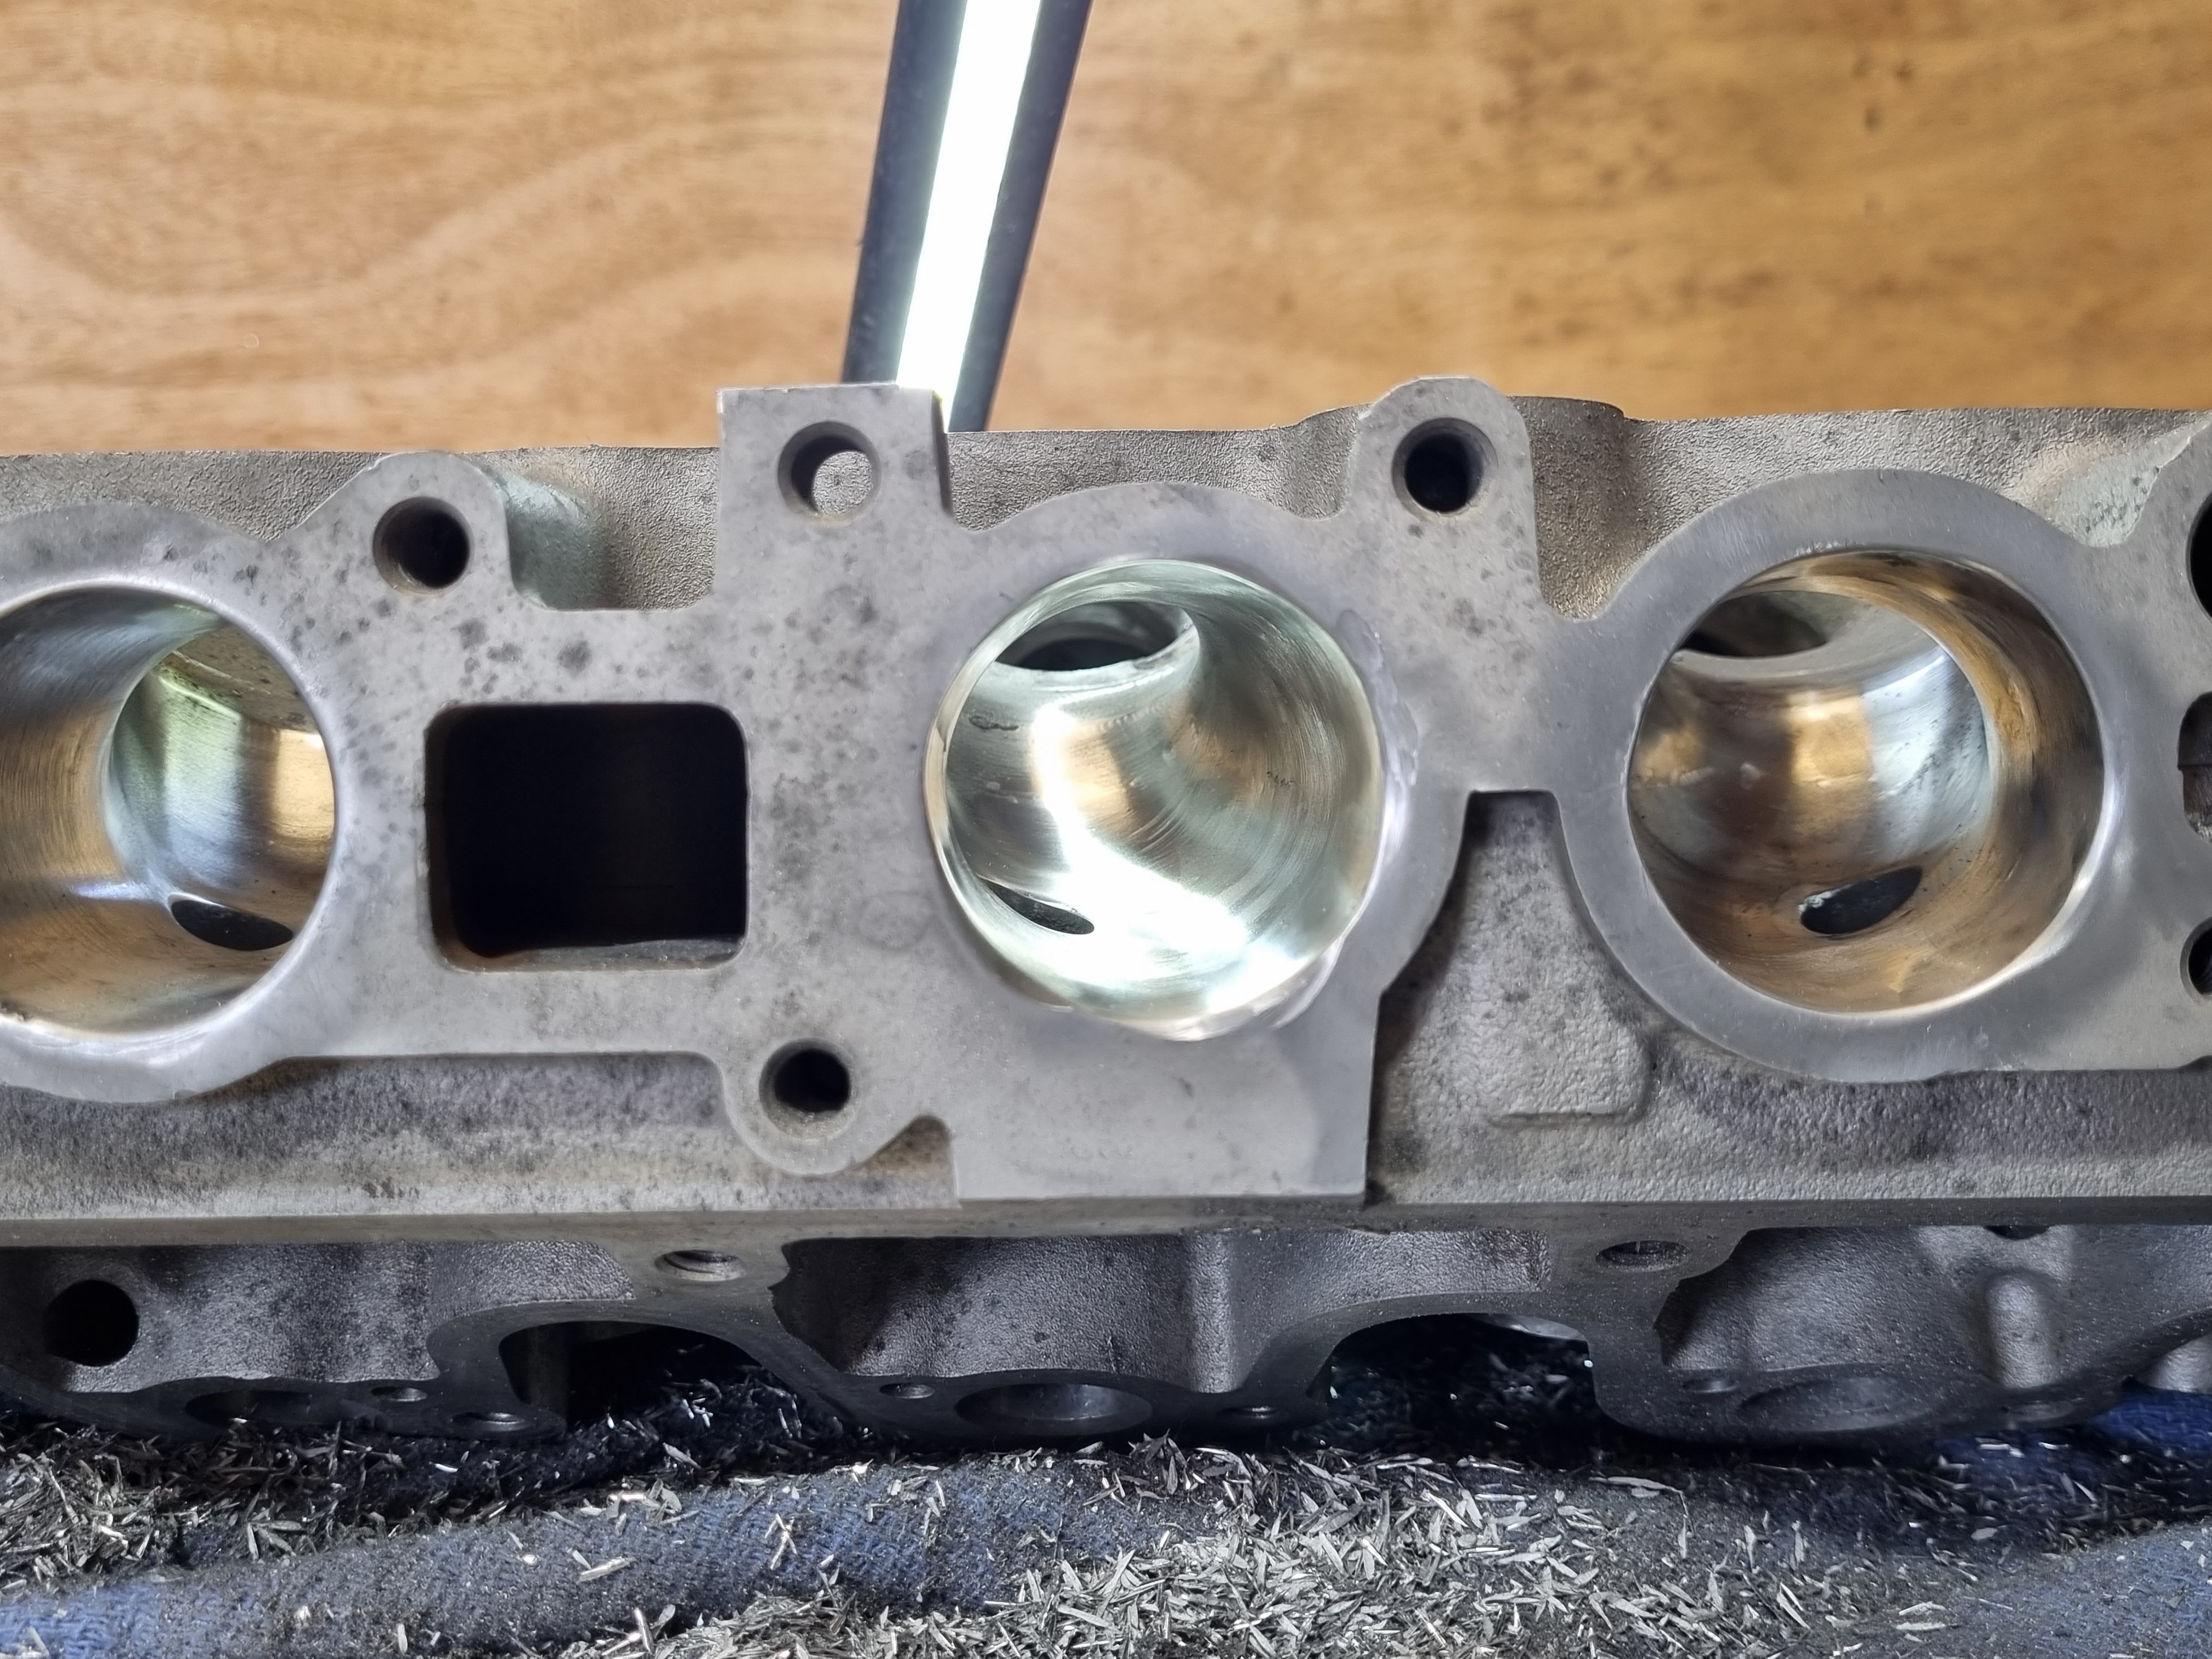
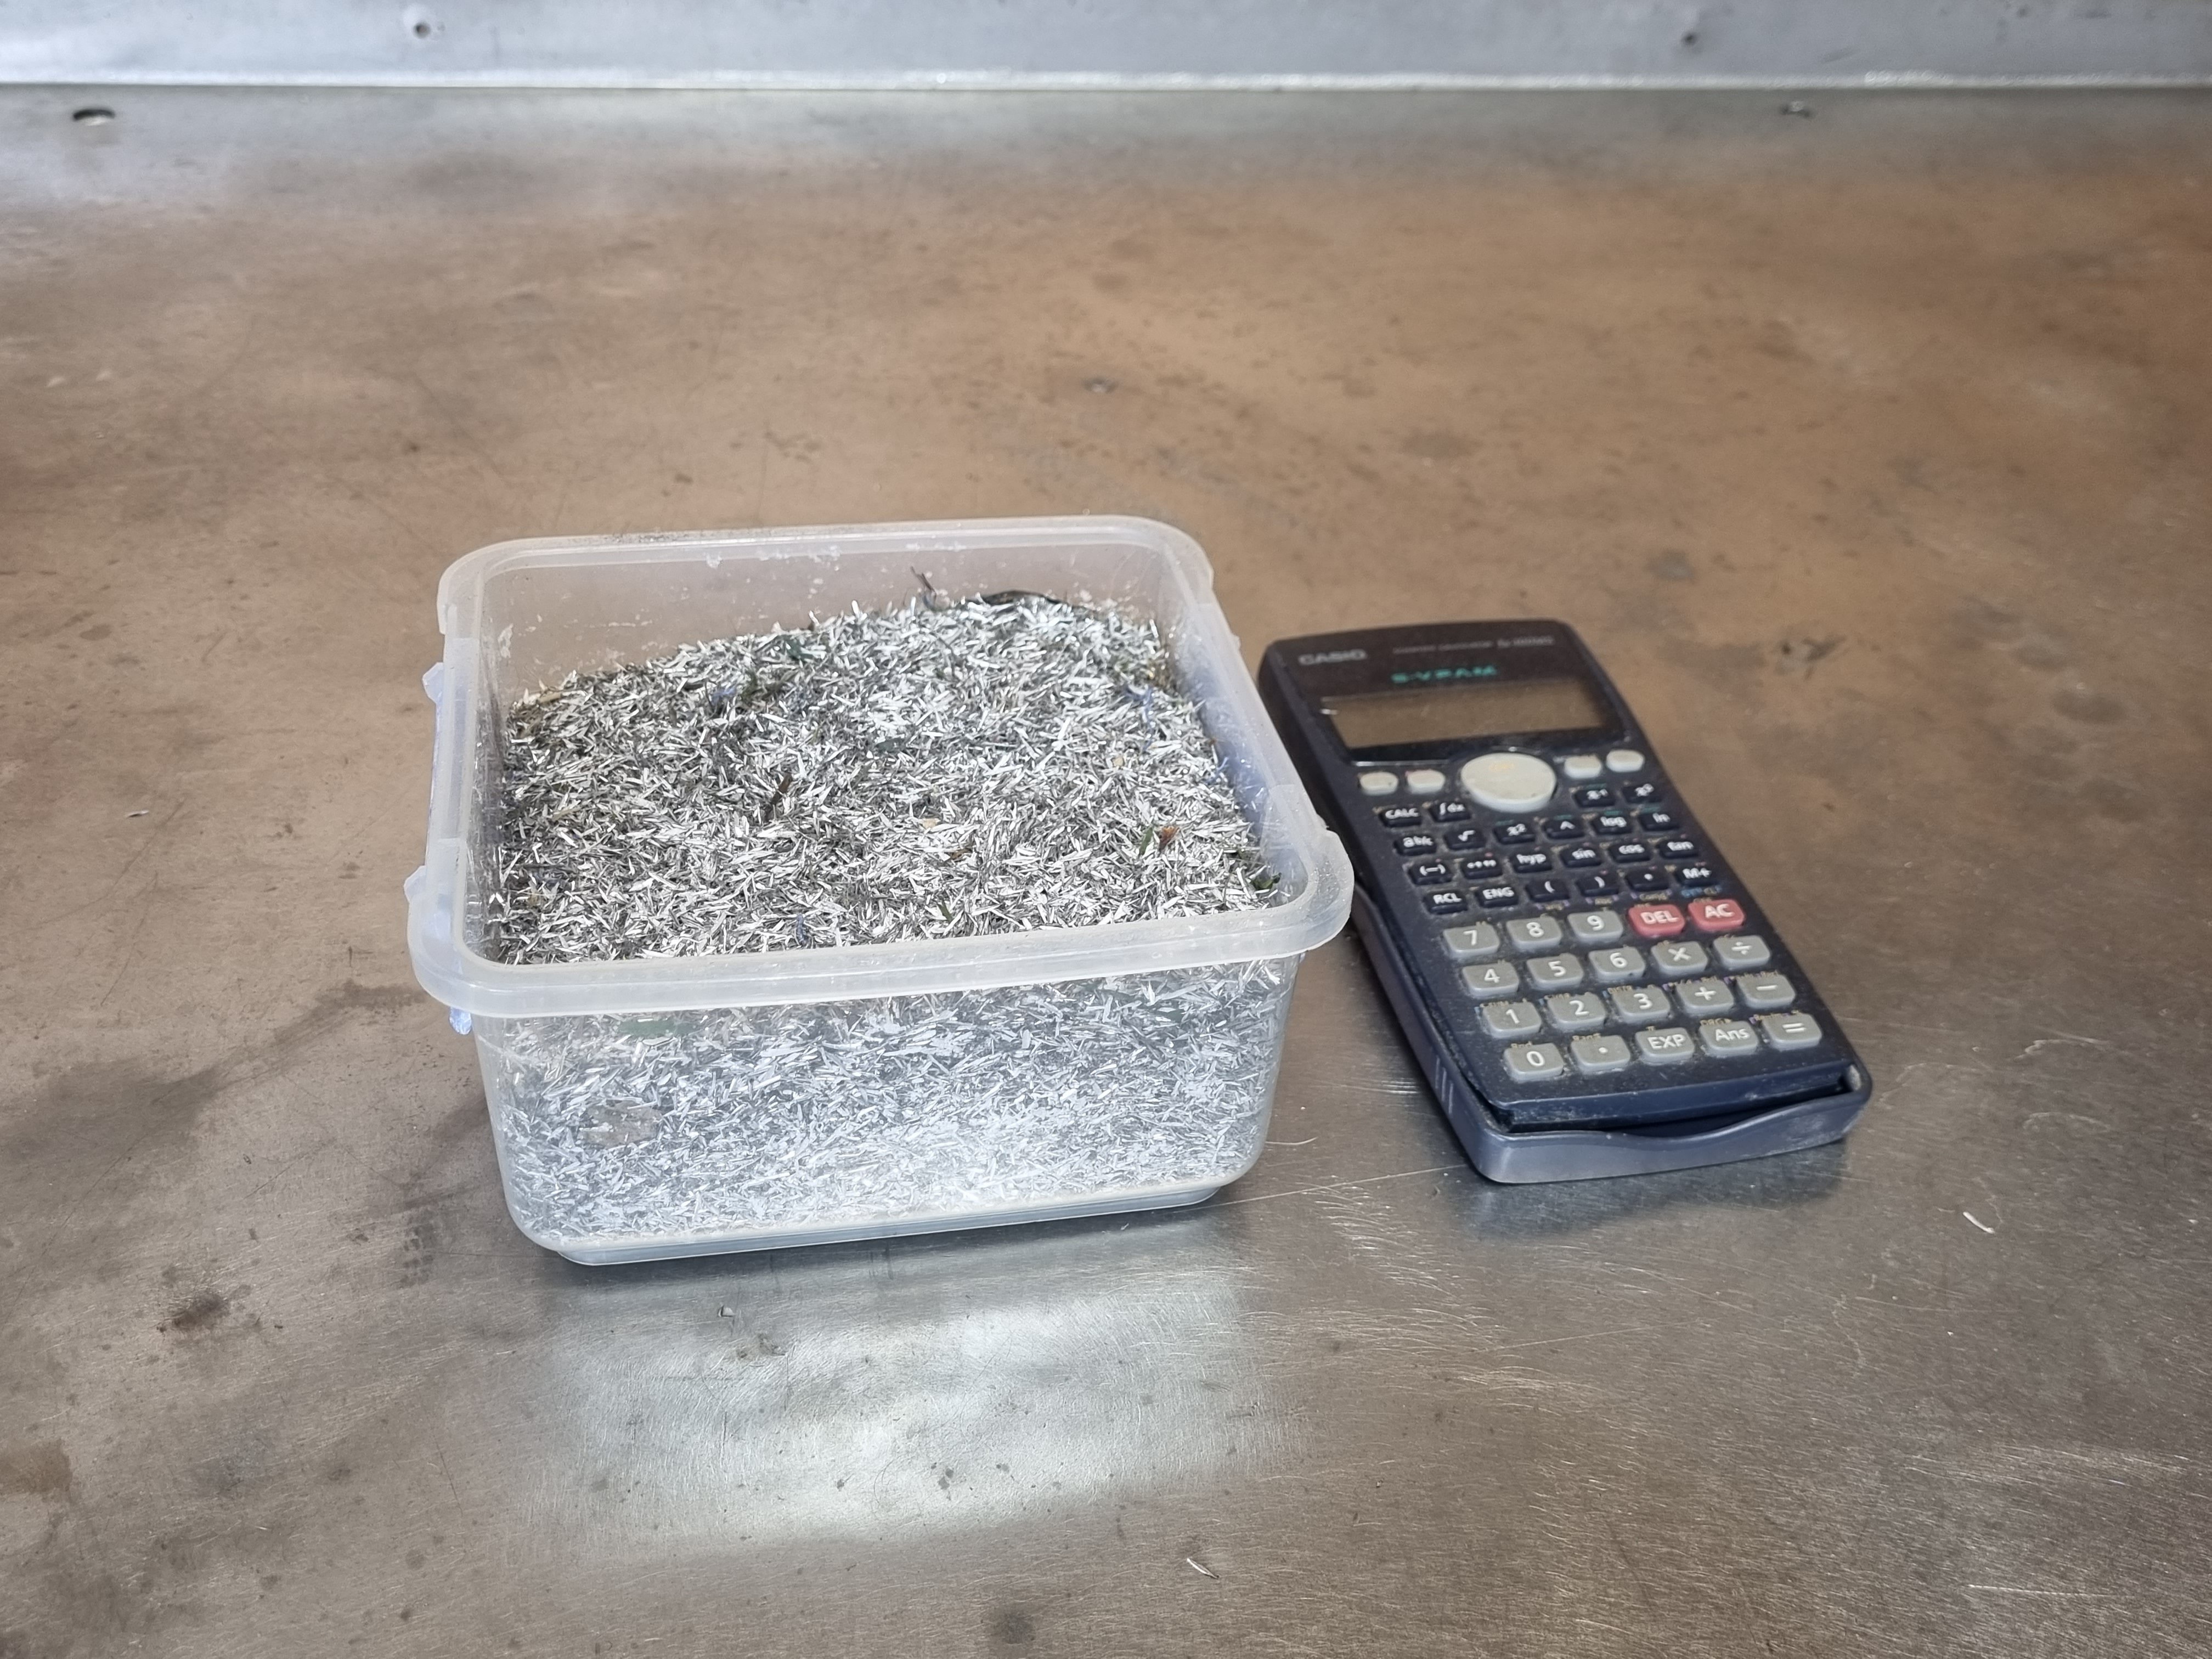
all finished. was a pretty messy job and took two days but its done now. i removed 400g of material from the ports. it will be interesting to see if it flows any better. ill get it back on the flow bench as soon as i can and see how it compares. fun fact, i ported one of these heads about 25 years ago and i cant remember how crazy i went with it (im guessing not very) but it made no difference to the motor at all. tbh that motor was a stock turd with stock intake and exhaust so porting it was a fucking waste of time but that was the style at the time. i think i planed the head to try to raise compression but that's a waste of time too given the stock piston design. ANYWHO, thats done. i took the exhaust from about 31mm to 37mm and removed a fair amount of material from the bowel, the intake went from around 31 to 38mm with the same stock removal from the bowel area.
1 point
-
All back together with some new bearings and seals, also finally got some more road appropriate rubber on there. Off with the moto-x knobblies and on with some goldenboy perfection. SR-244 on the rear. SR-241 on the front. It’s a proper adventure tourer now!
1 point
-
Went to Chrome at Hampton downs , gave it beans all day, used about $200 in fuel, took a few randoms then wife and kid out for some skids and everyone had fun.
1 point


This leaderboard is set to Auckland/GMT+12:00