
Leaderboard


Popular Content
Showing content with the highest reputation on 03/26/24 in all areas
-
Reminder for myself next time I wonder why it is taking off so slowly.
 12 points
 -
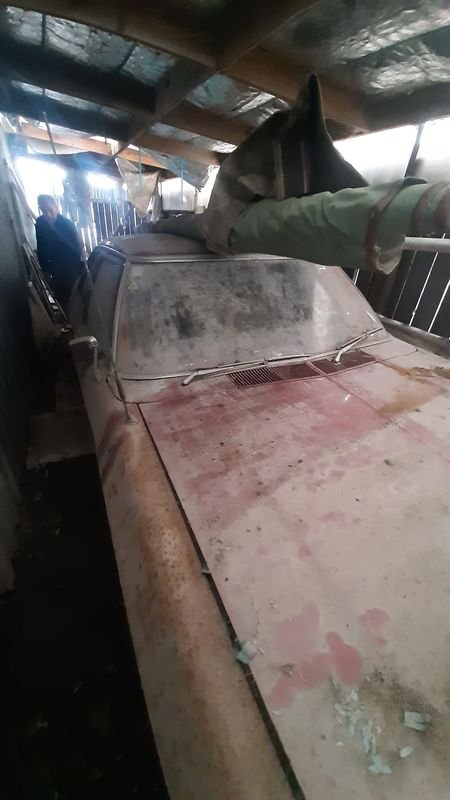
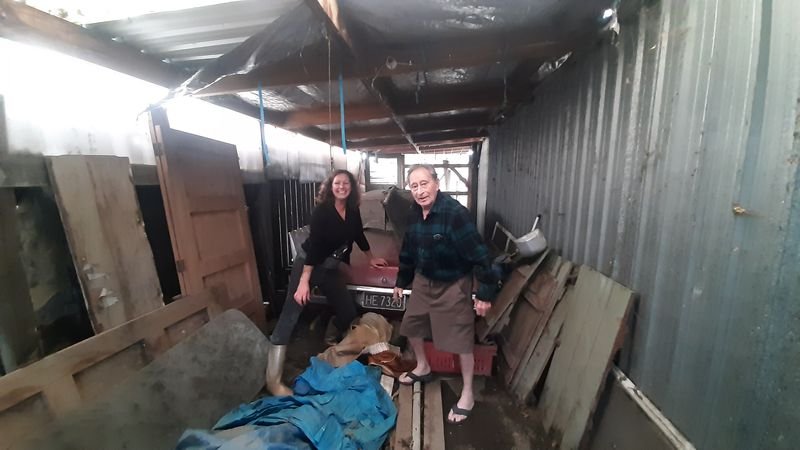
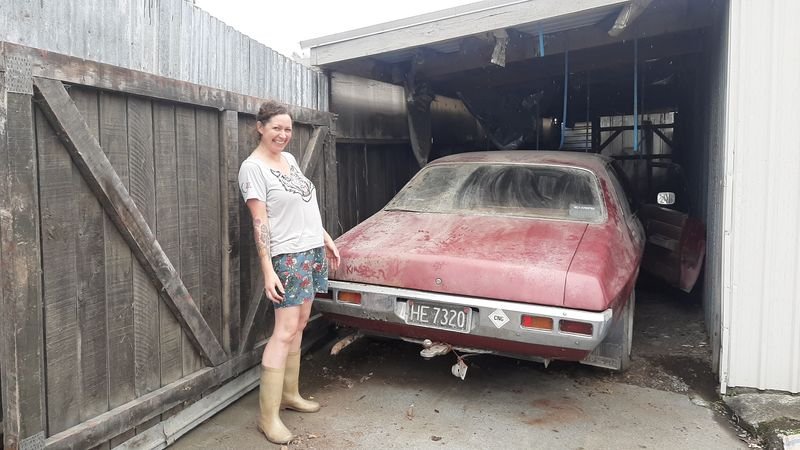
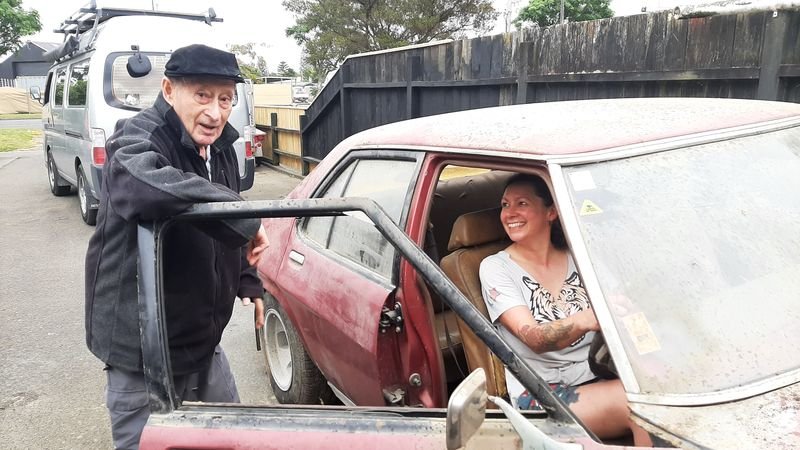
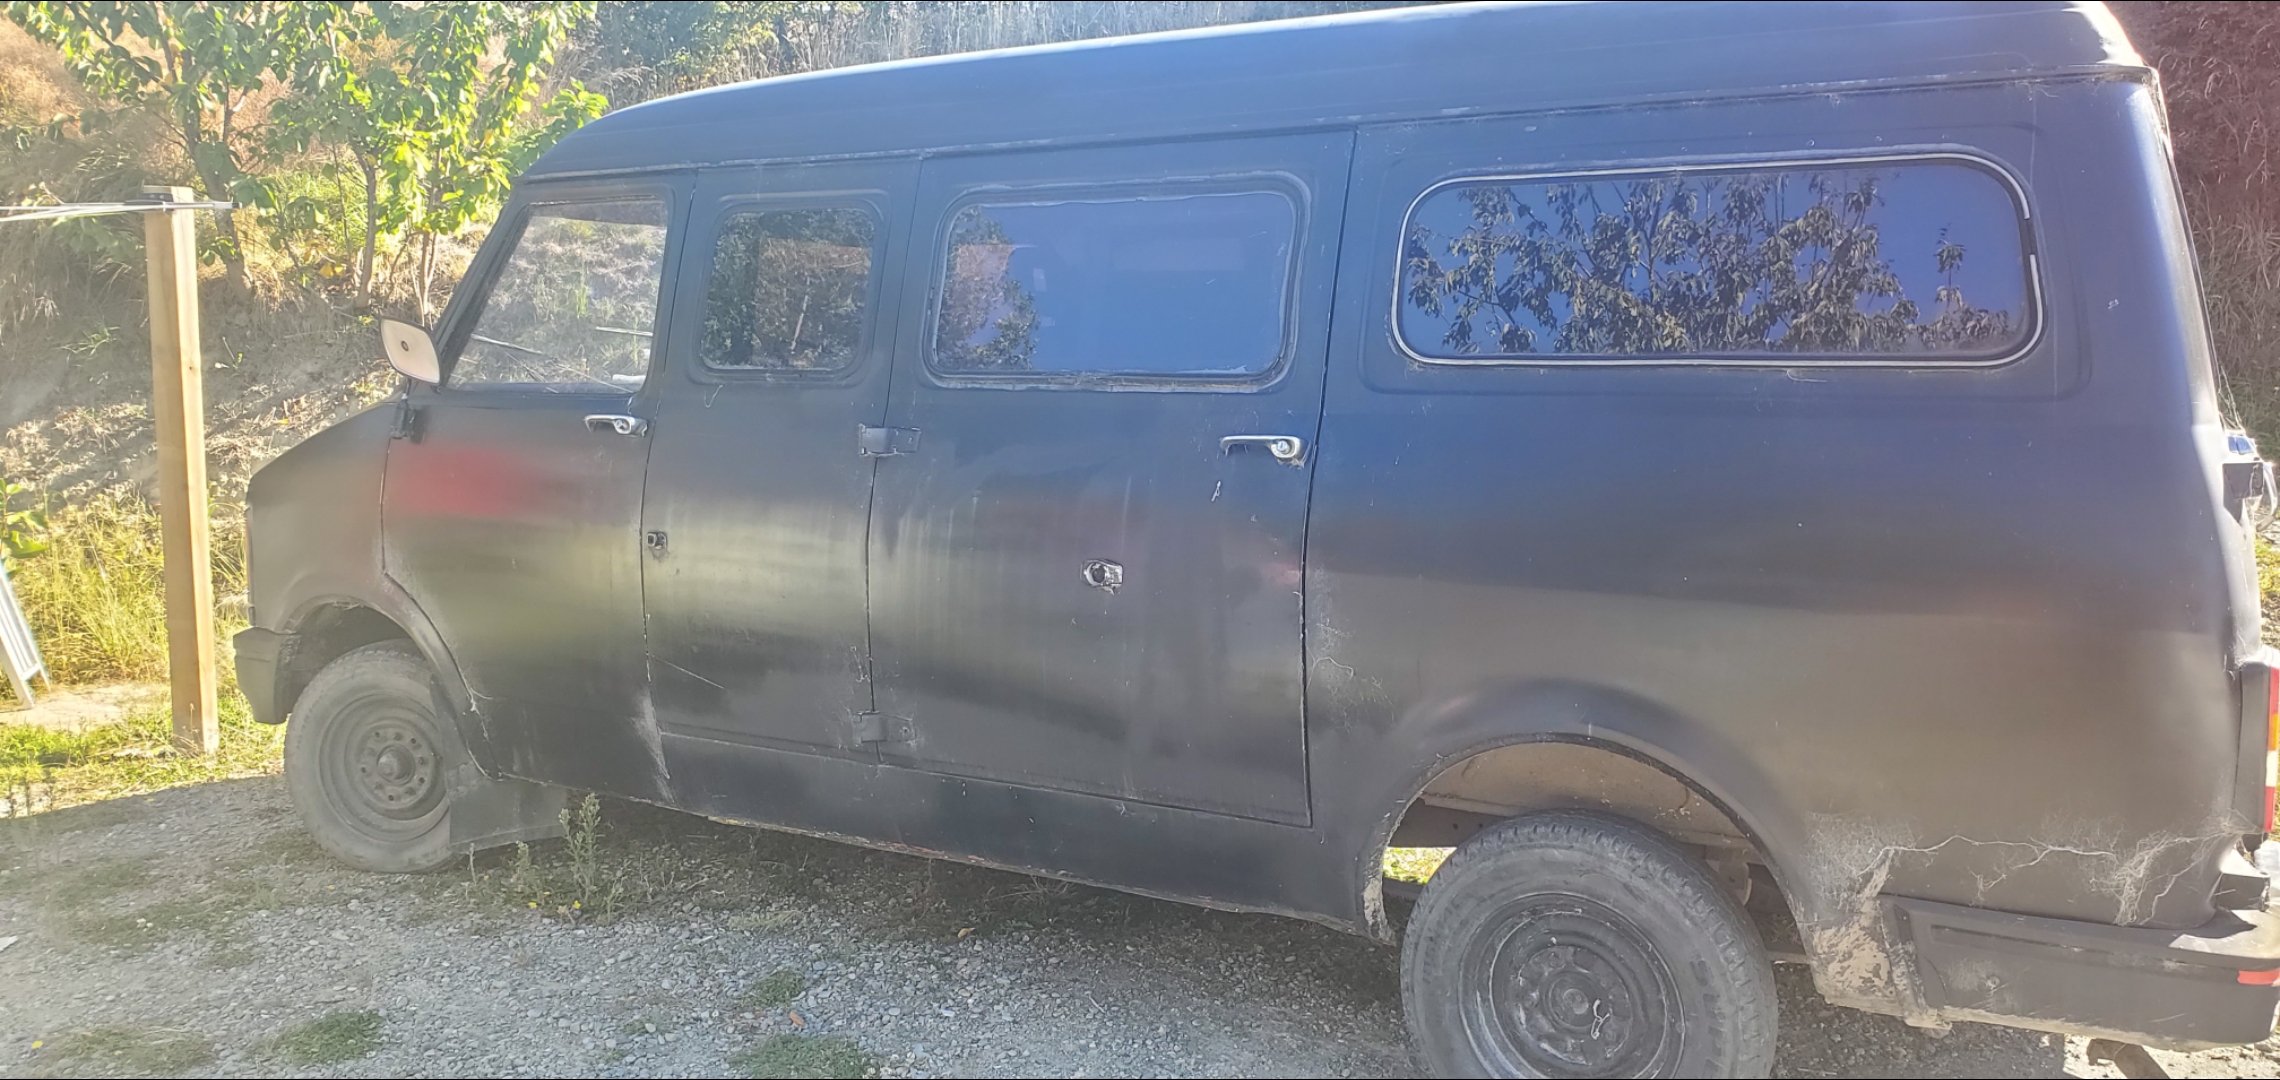
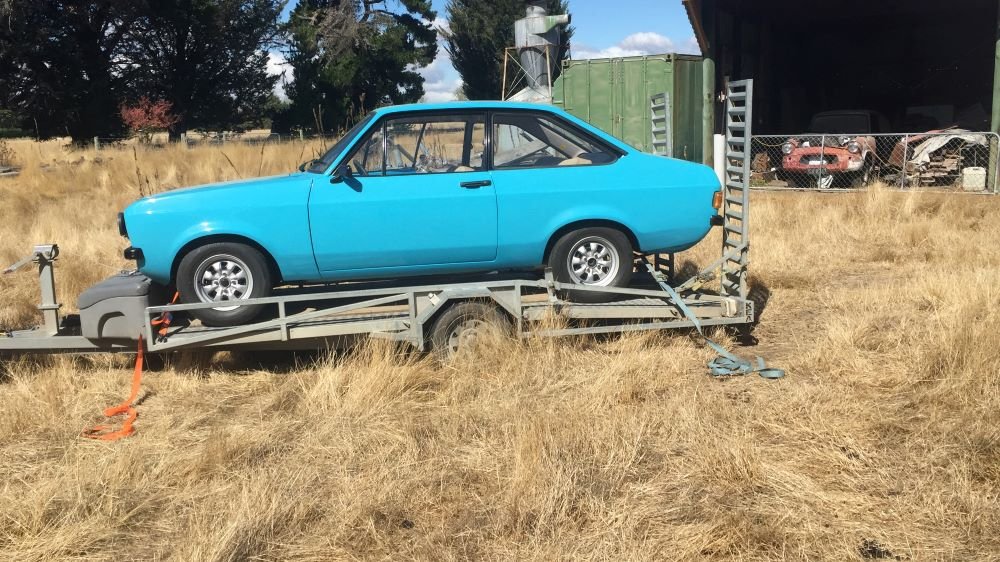
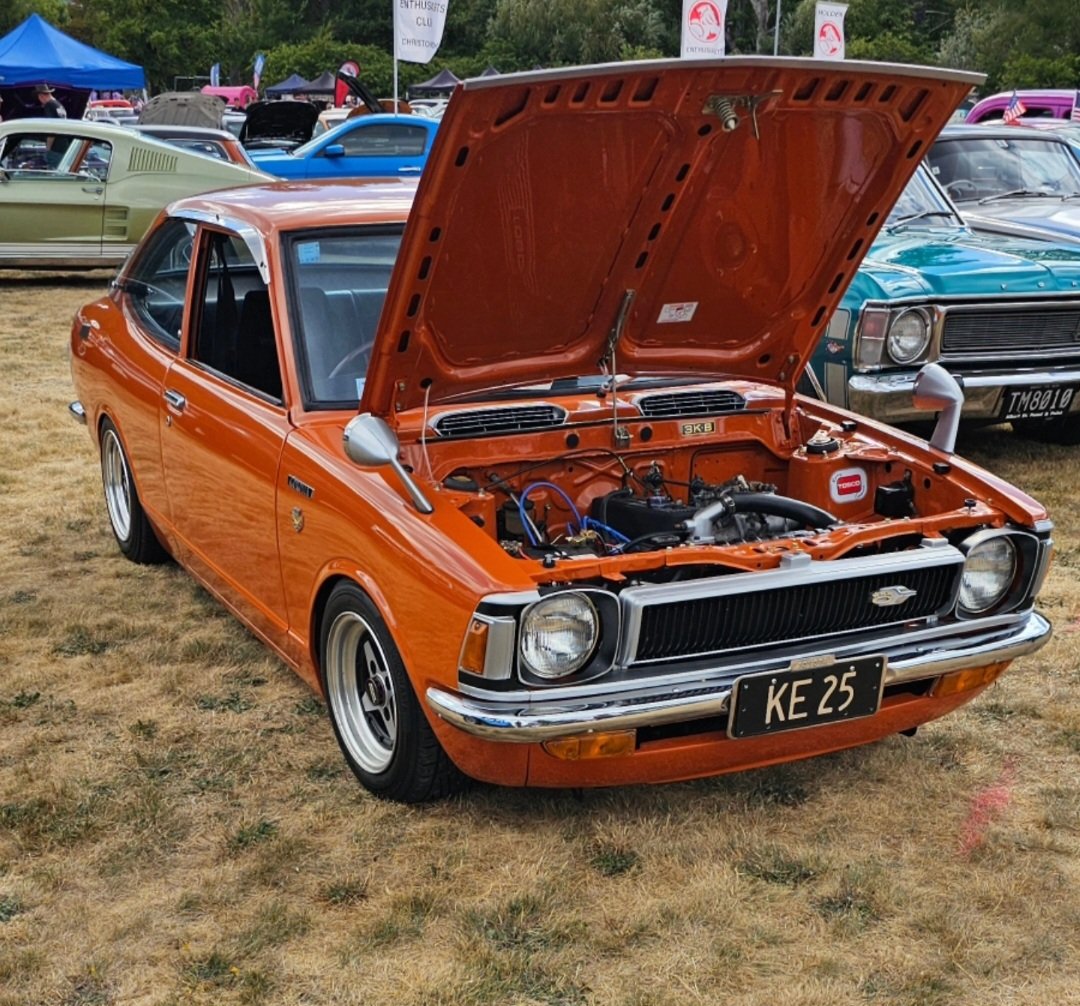
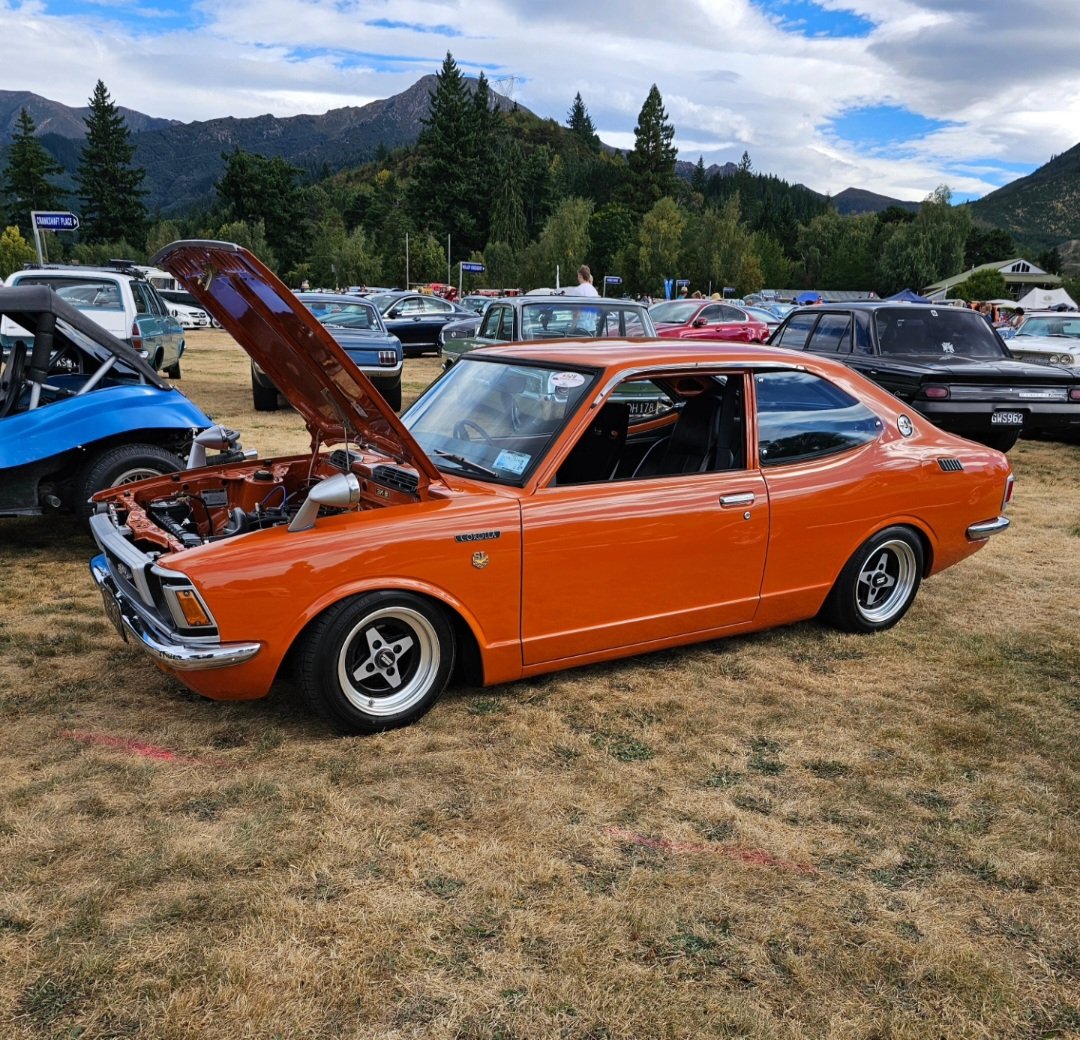
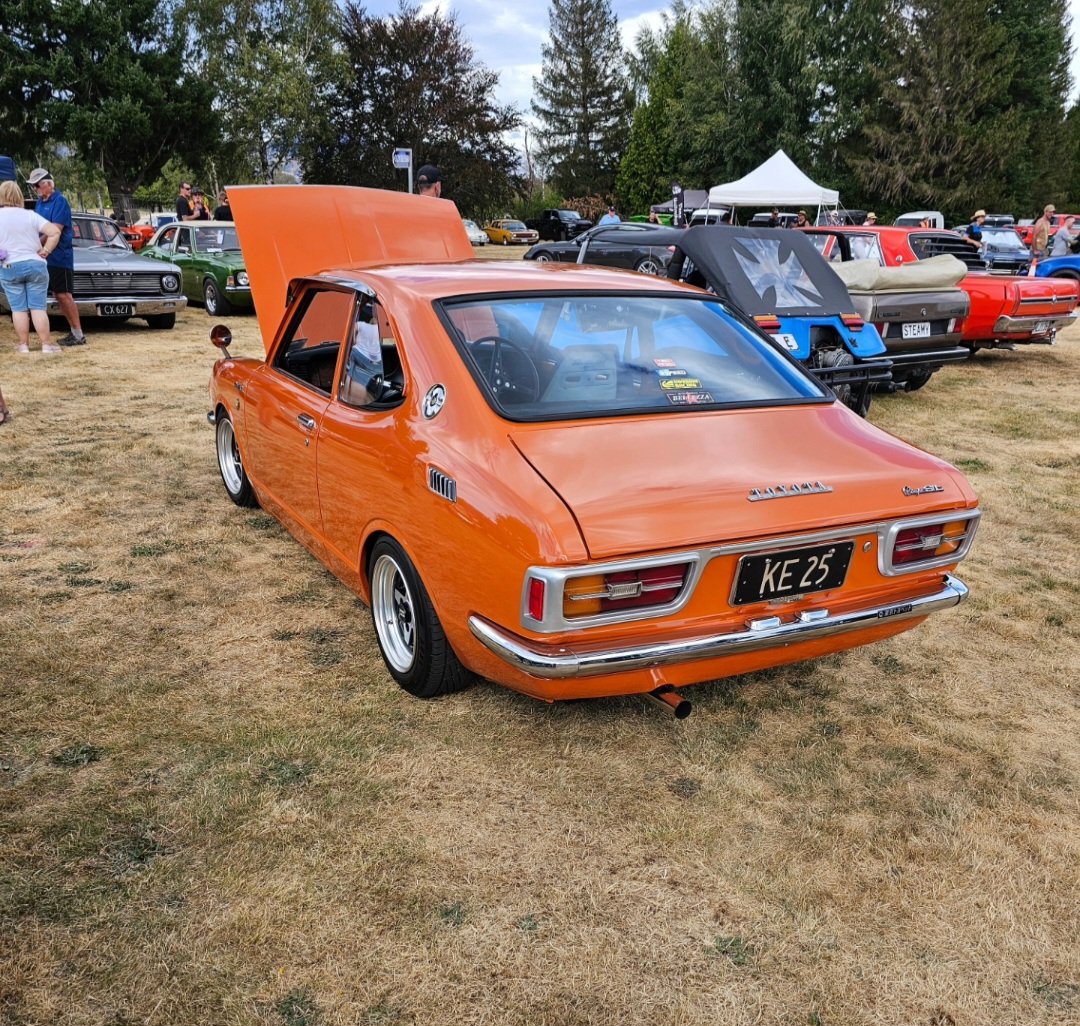
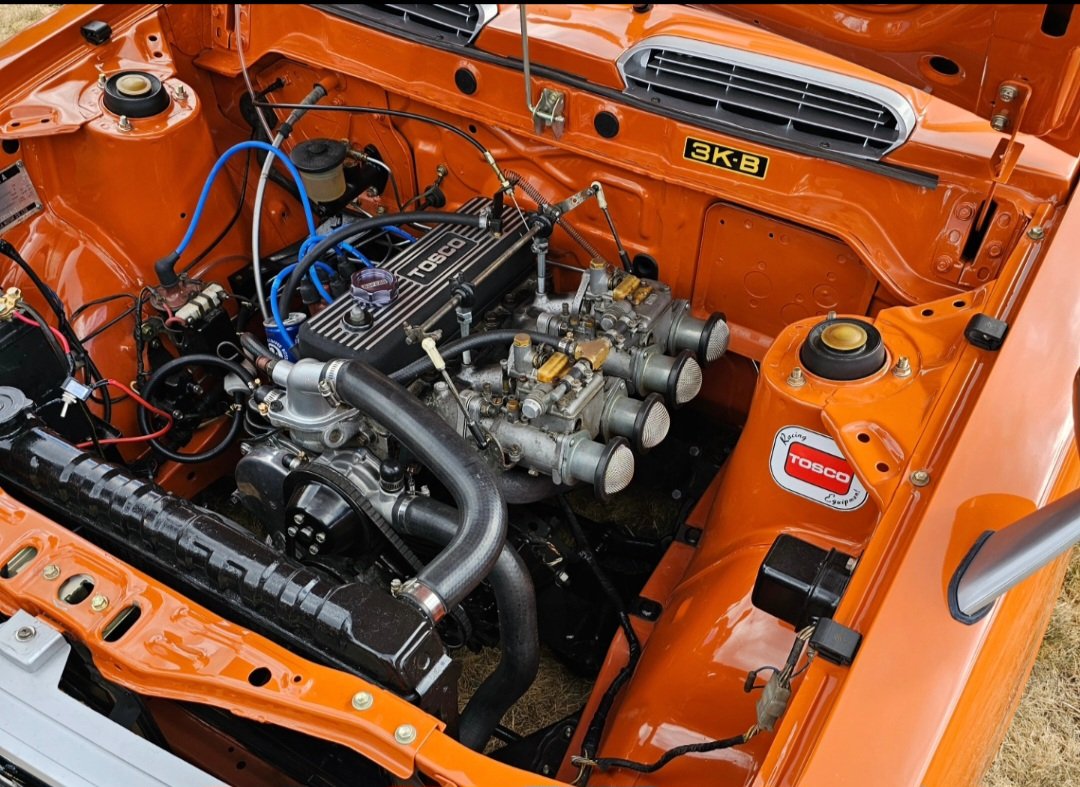
Organized time off and ferrys etc and a cool 10 days hanging in Fielding. Real barn find! Her names on it so this must be it. We pumped up the tyres and had a general look around one day Then cleared all the stuff out over the next few days, did a lot of gardening too, Hooked it up to the van and pulled it into the light
9 points
-
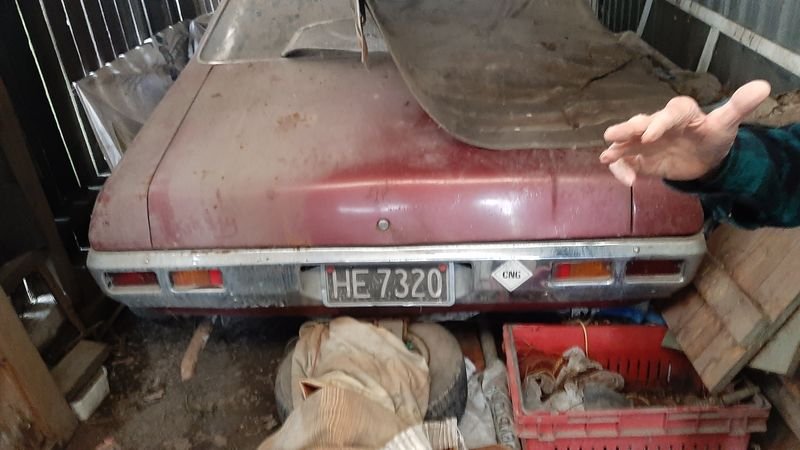
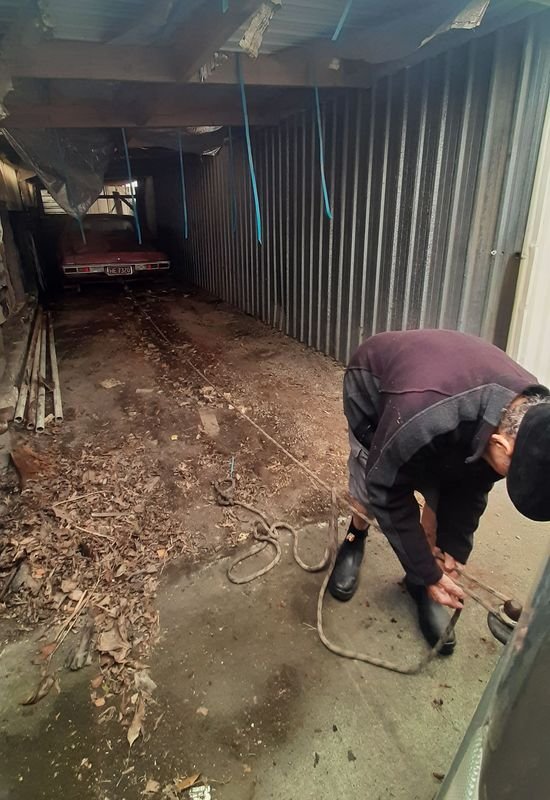
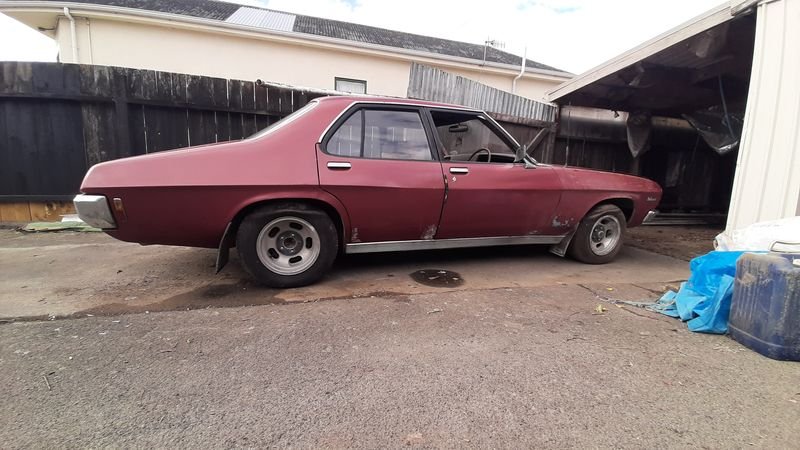
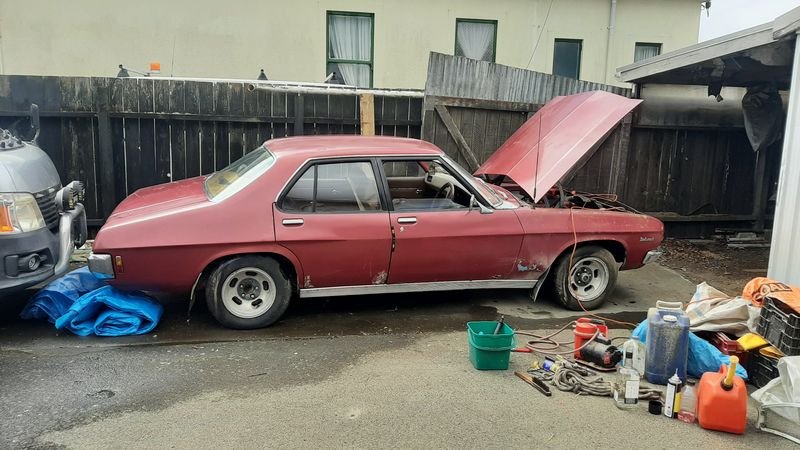
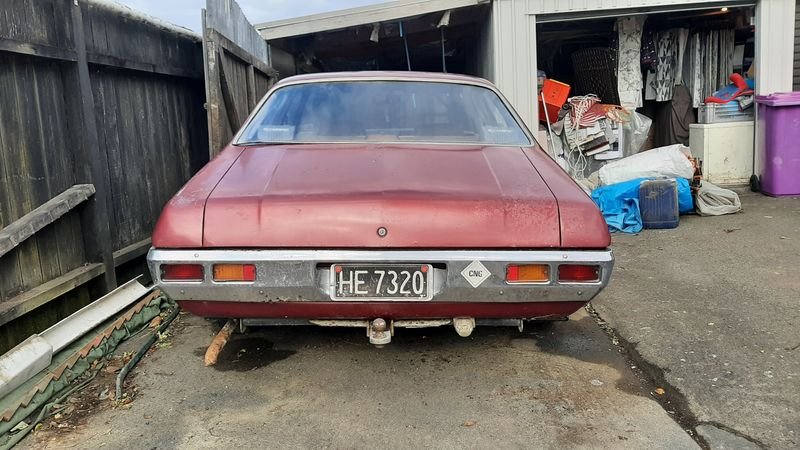
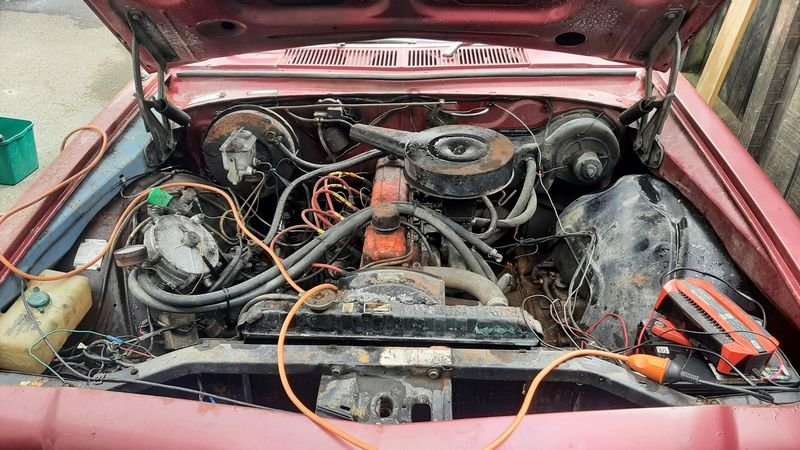
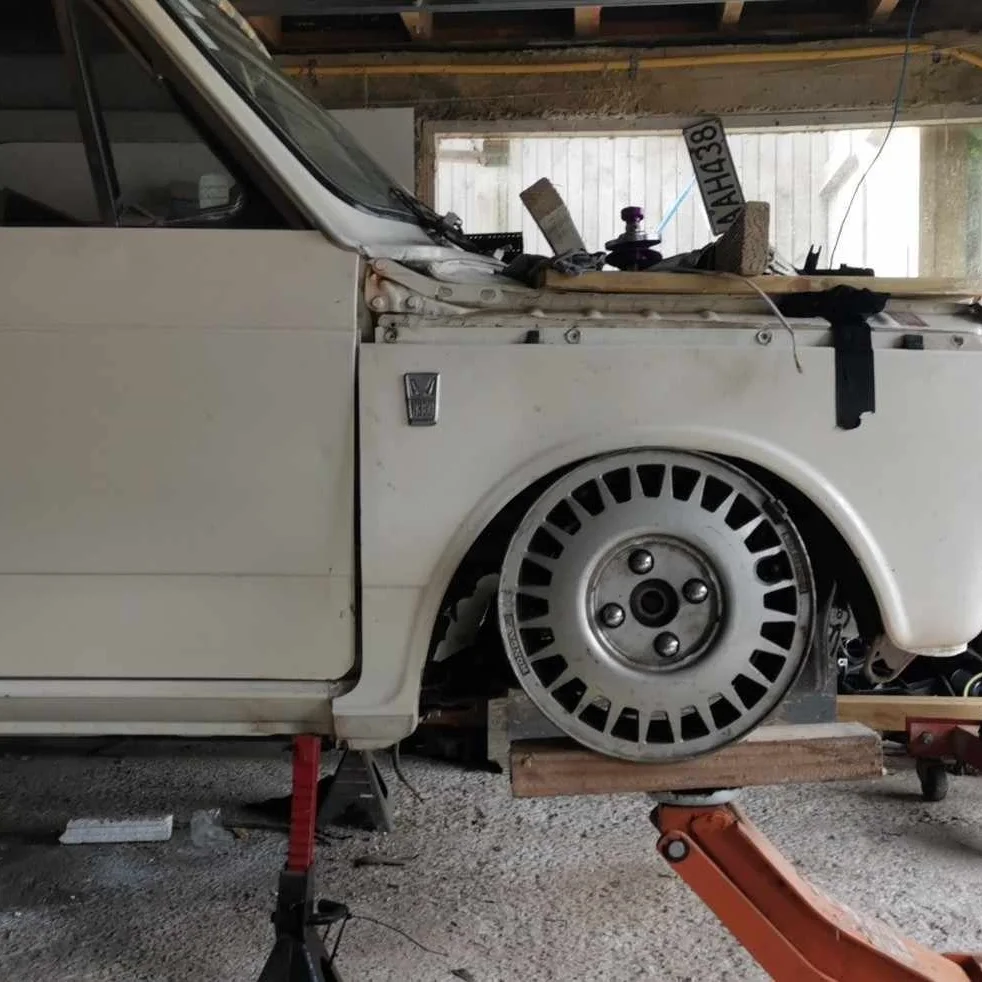
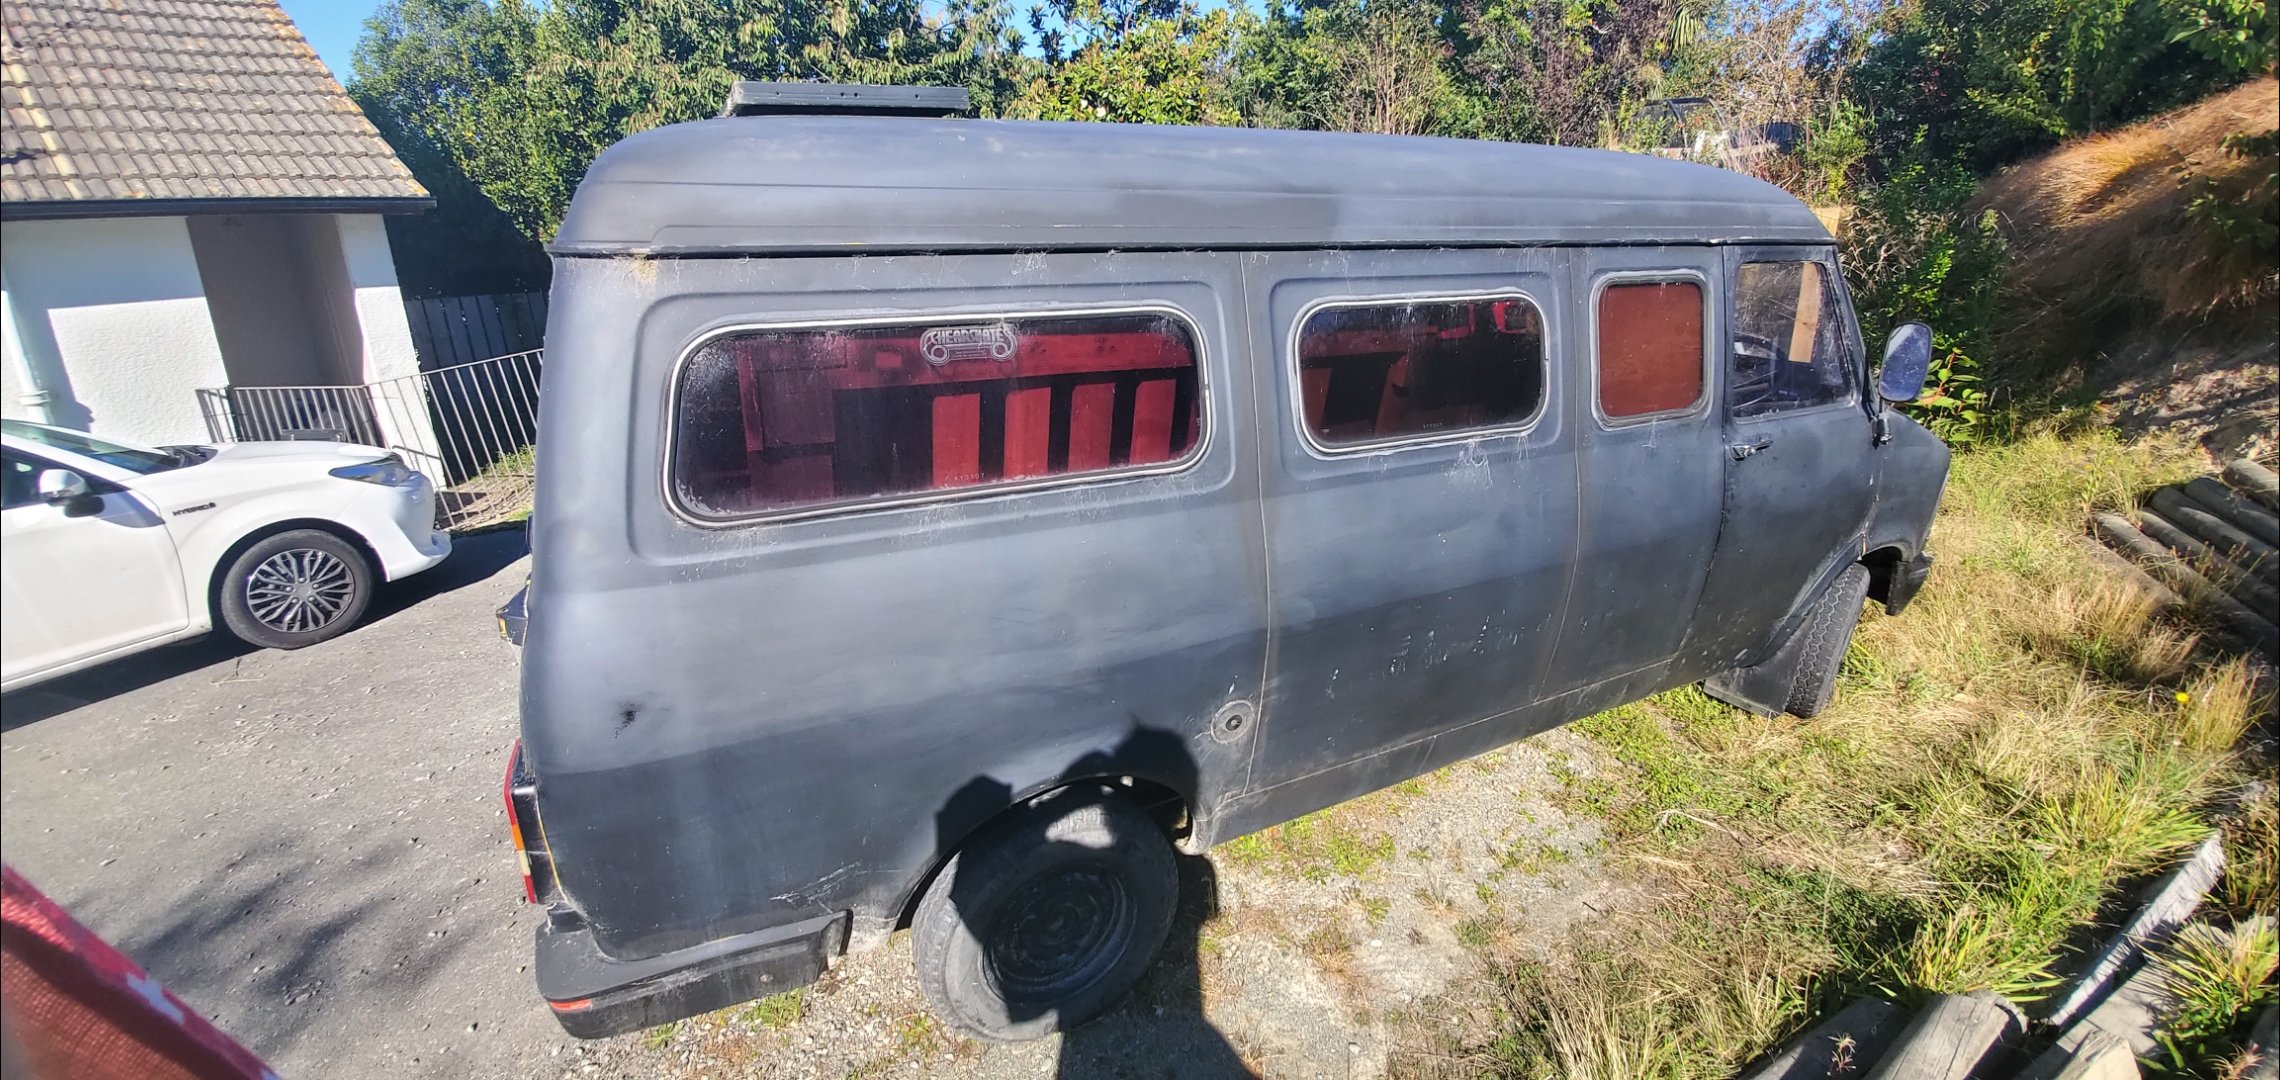
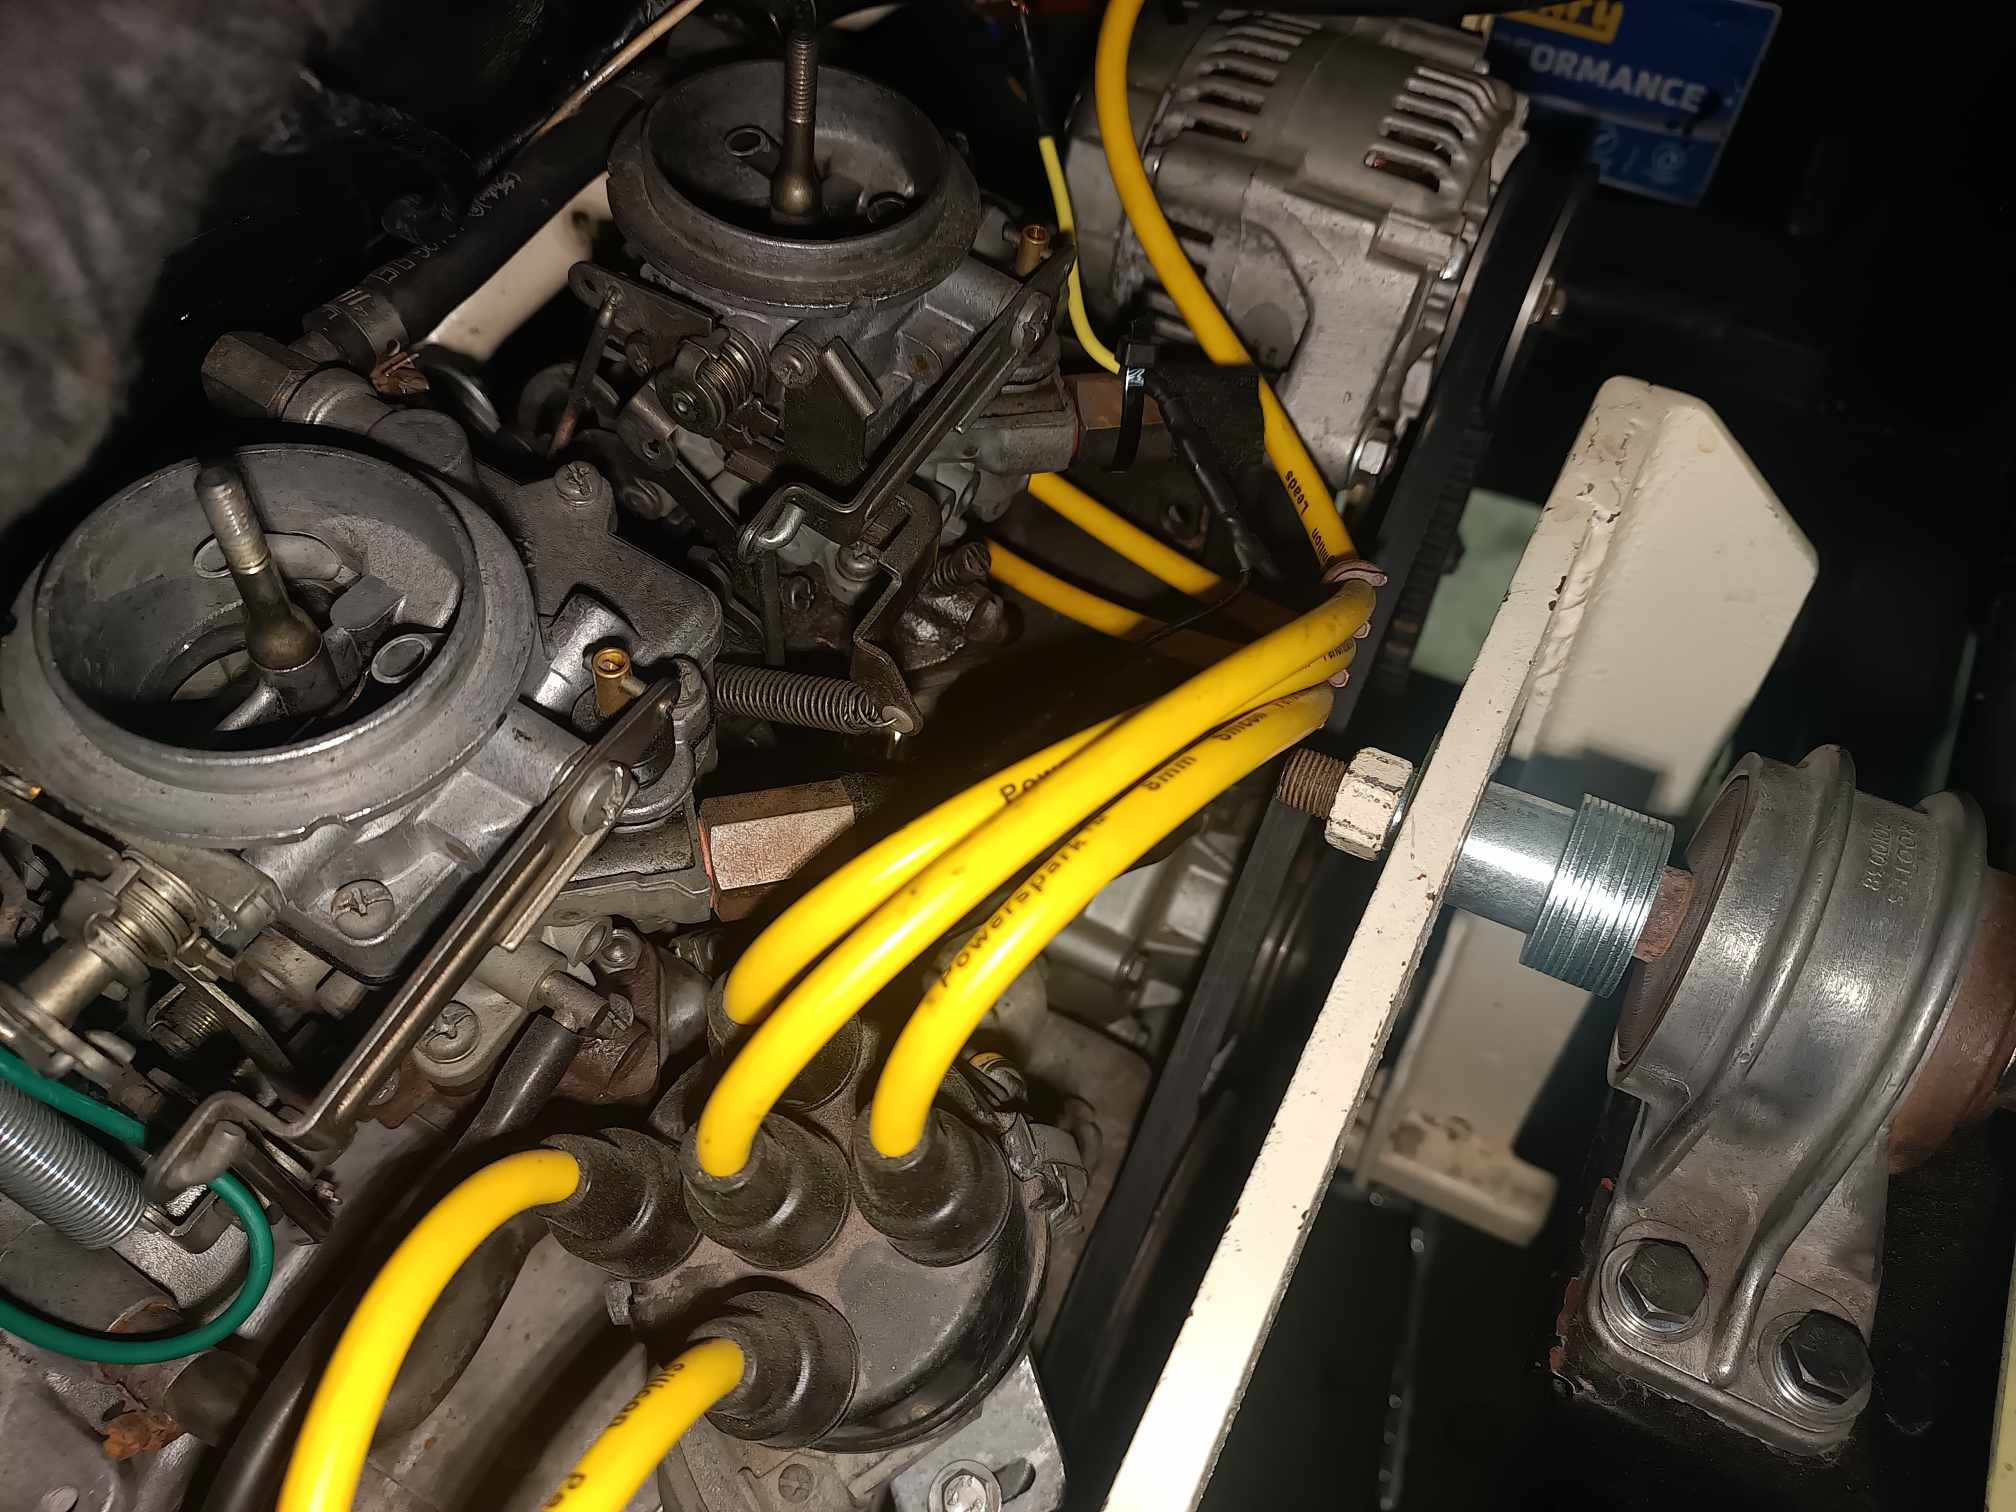
Then of course it was time to have a good look while cleaning it a bit, and taking stock So, its a 1974 Holden HQ Belmont Sedan in Orchid Red. Last wof/reg in 2001, so was on the road into Kpies early 20's around the same time i met her. Seems it also got the Torana front seats, maybe the centre console? Interior looks pretty good under the dust. Overall looks pretty straight and complete. Some rusty bits of course but not too bad at all for one of these 8s out back and 7s up front, massive CNG tank in the book gives it a rake. This car was a NZ new factory 202 manual 3 on the tree car. Bill bought it cheap from a guy who bought it to put the v8 that was in it into something else, or something - bought with no engine in it anyway The engine and box now in it is a 173 (2.8l) with a manual 4 on floor from the aforementioned rolled Torana, which had recently had a fair bit spent on the engine (??) It has a single barrel Stromberg and also has CNG. Only $4.20 to Whanganui! Took the plugs out and oiled the cylinders, cleaned the sparkplugs and filed the points and hooked up a battery. Neighbours come to assist. Many opinions were shared We managed to get it to fire off on squirting gas down the yap, but it just wouldn't keep running. The consensus is that the timing and/or the electrics are weird Brake pedal does nothing till halfway then hard stops, no braking action. Handbrake kinda works. Engine isnt stuck and clutch is free and gearbox goes into all gears. Bill is stoked it fired up, Kirsty is happy, and that it rolls at all is good enough for the transporter man. We push it back in the shed to wait for the transporter
8 points
-
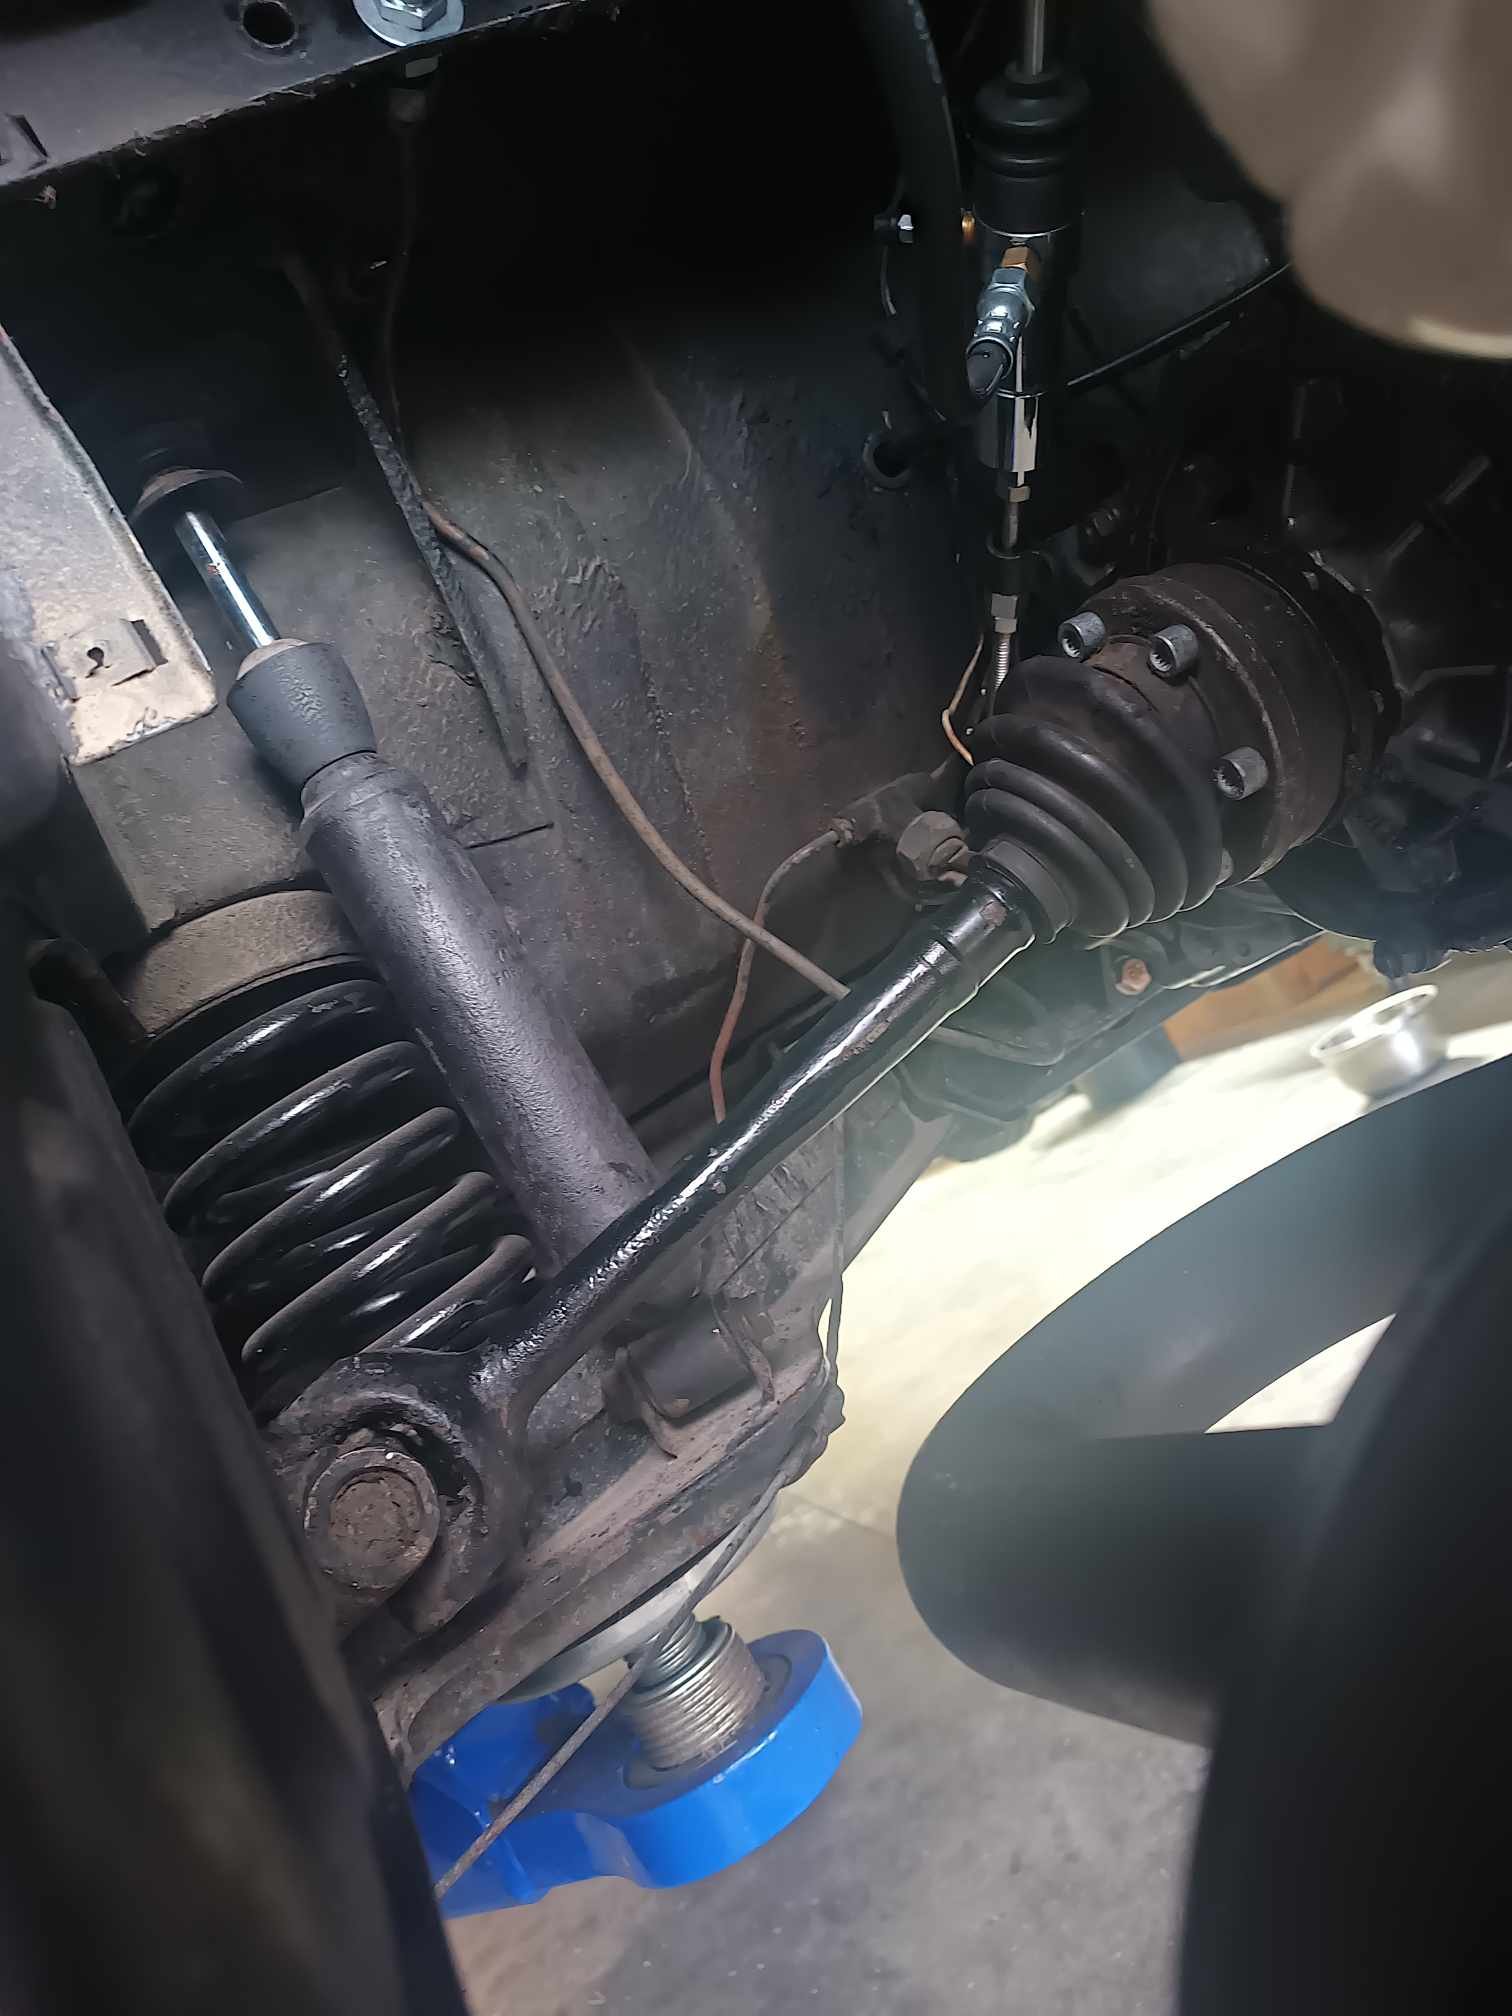
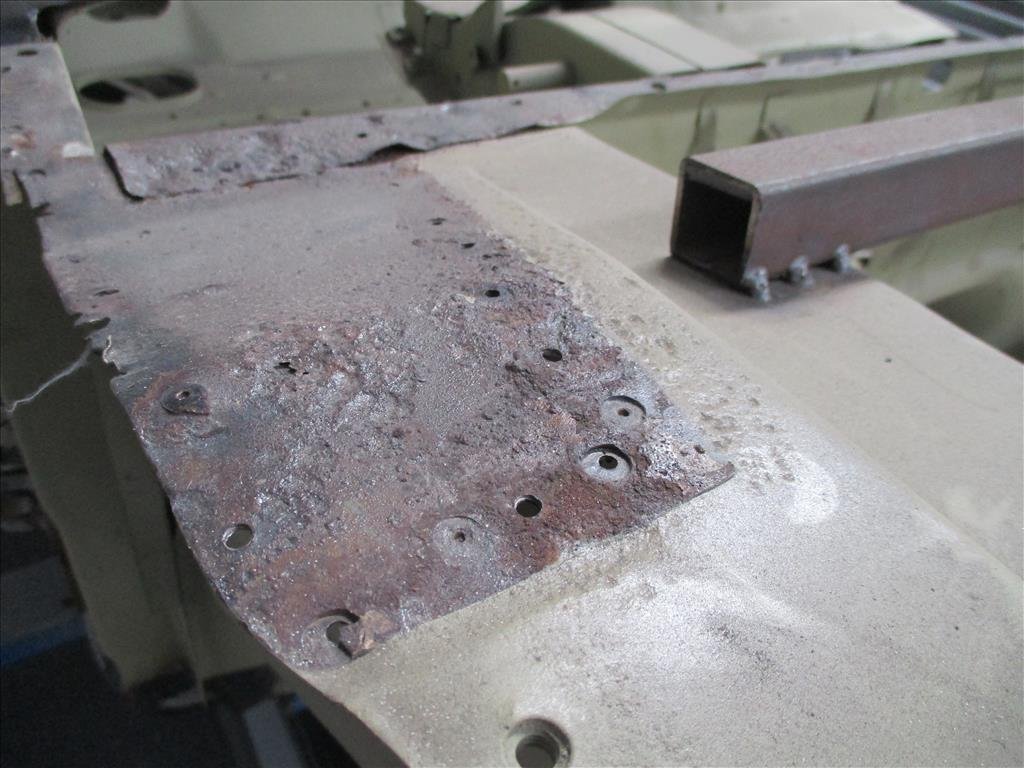
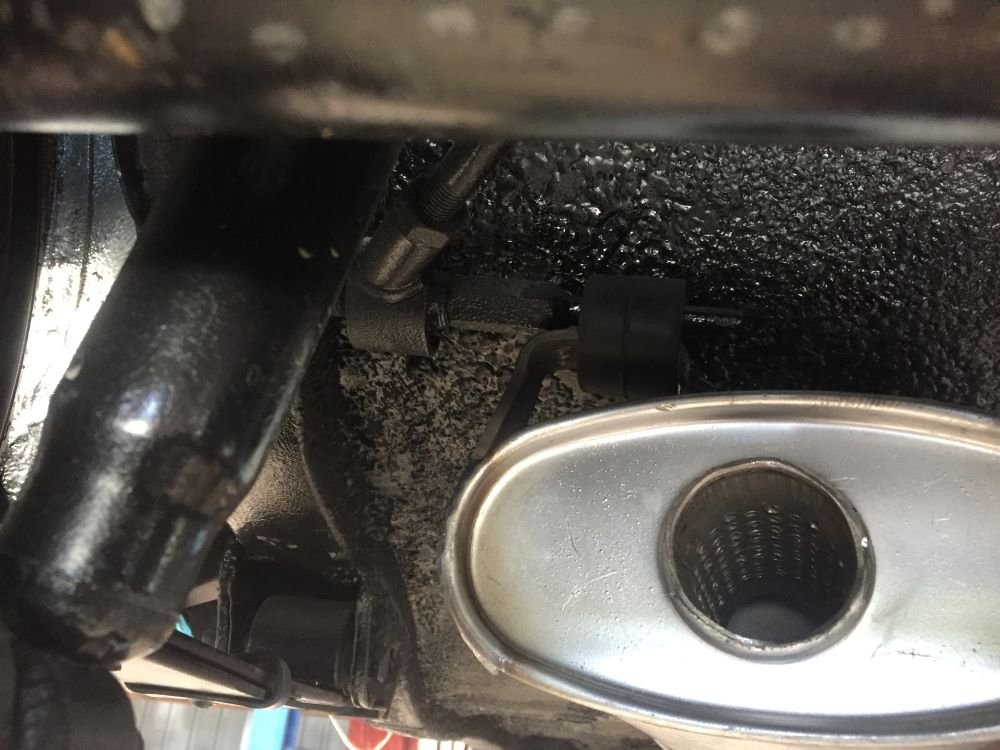
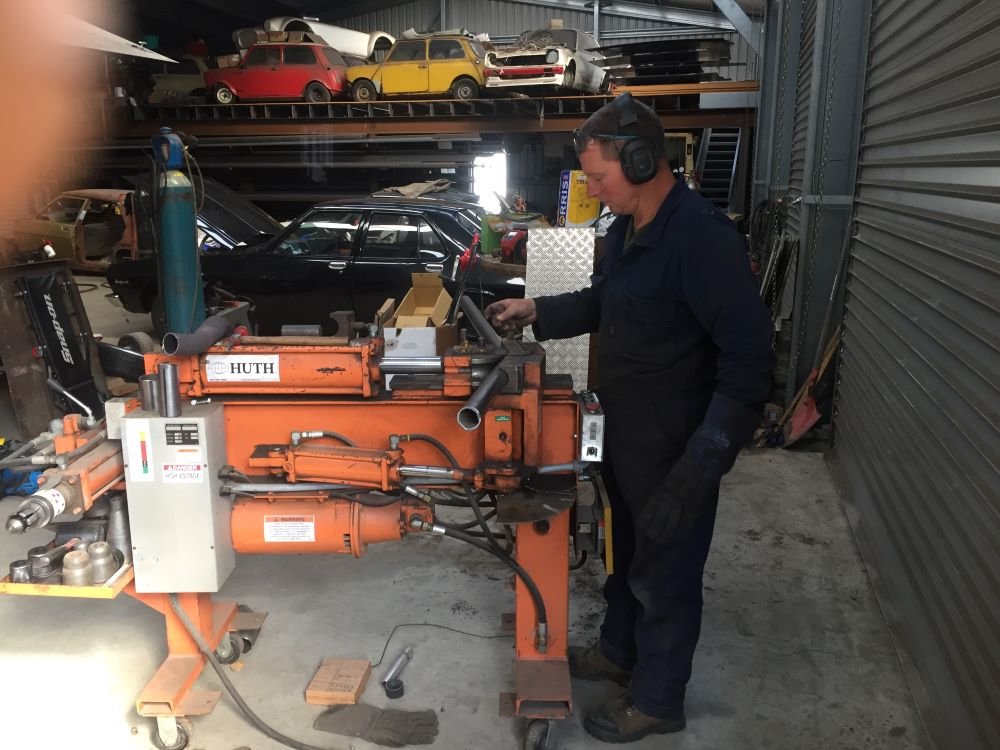
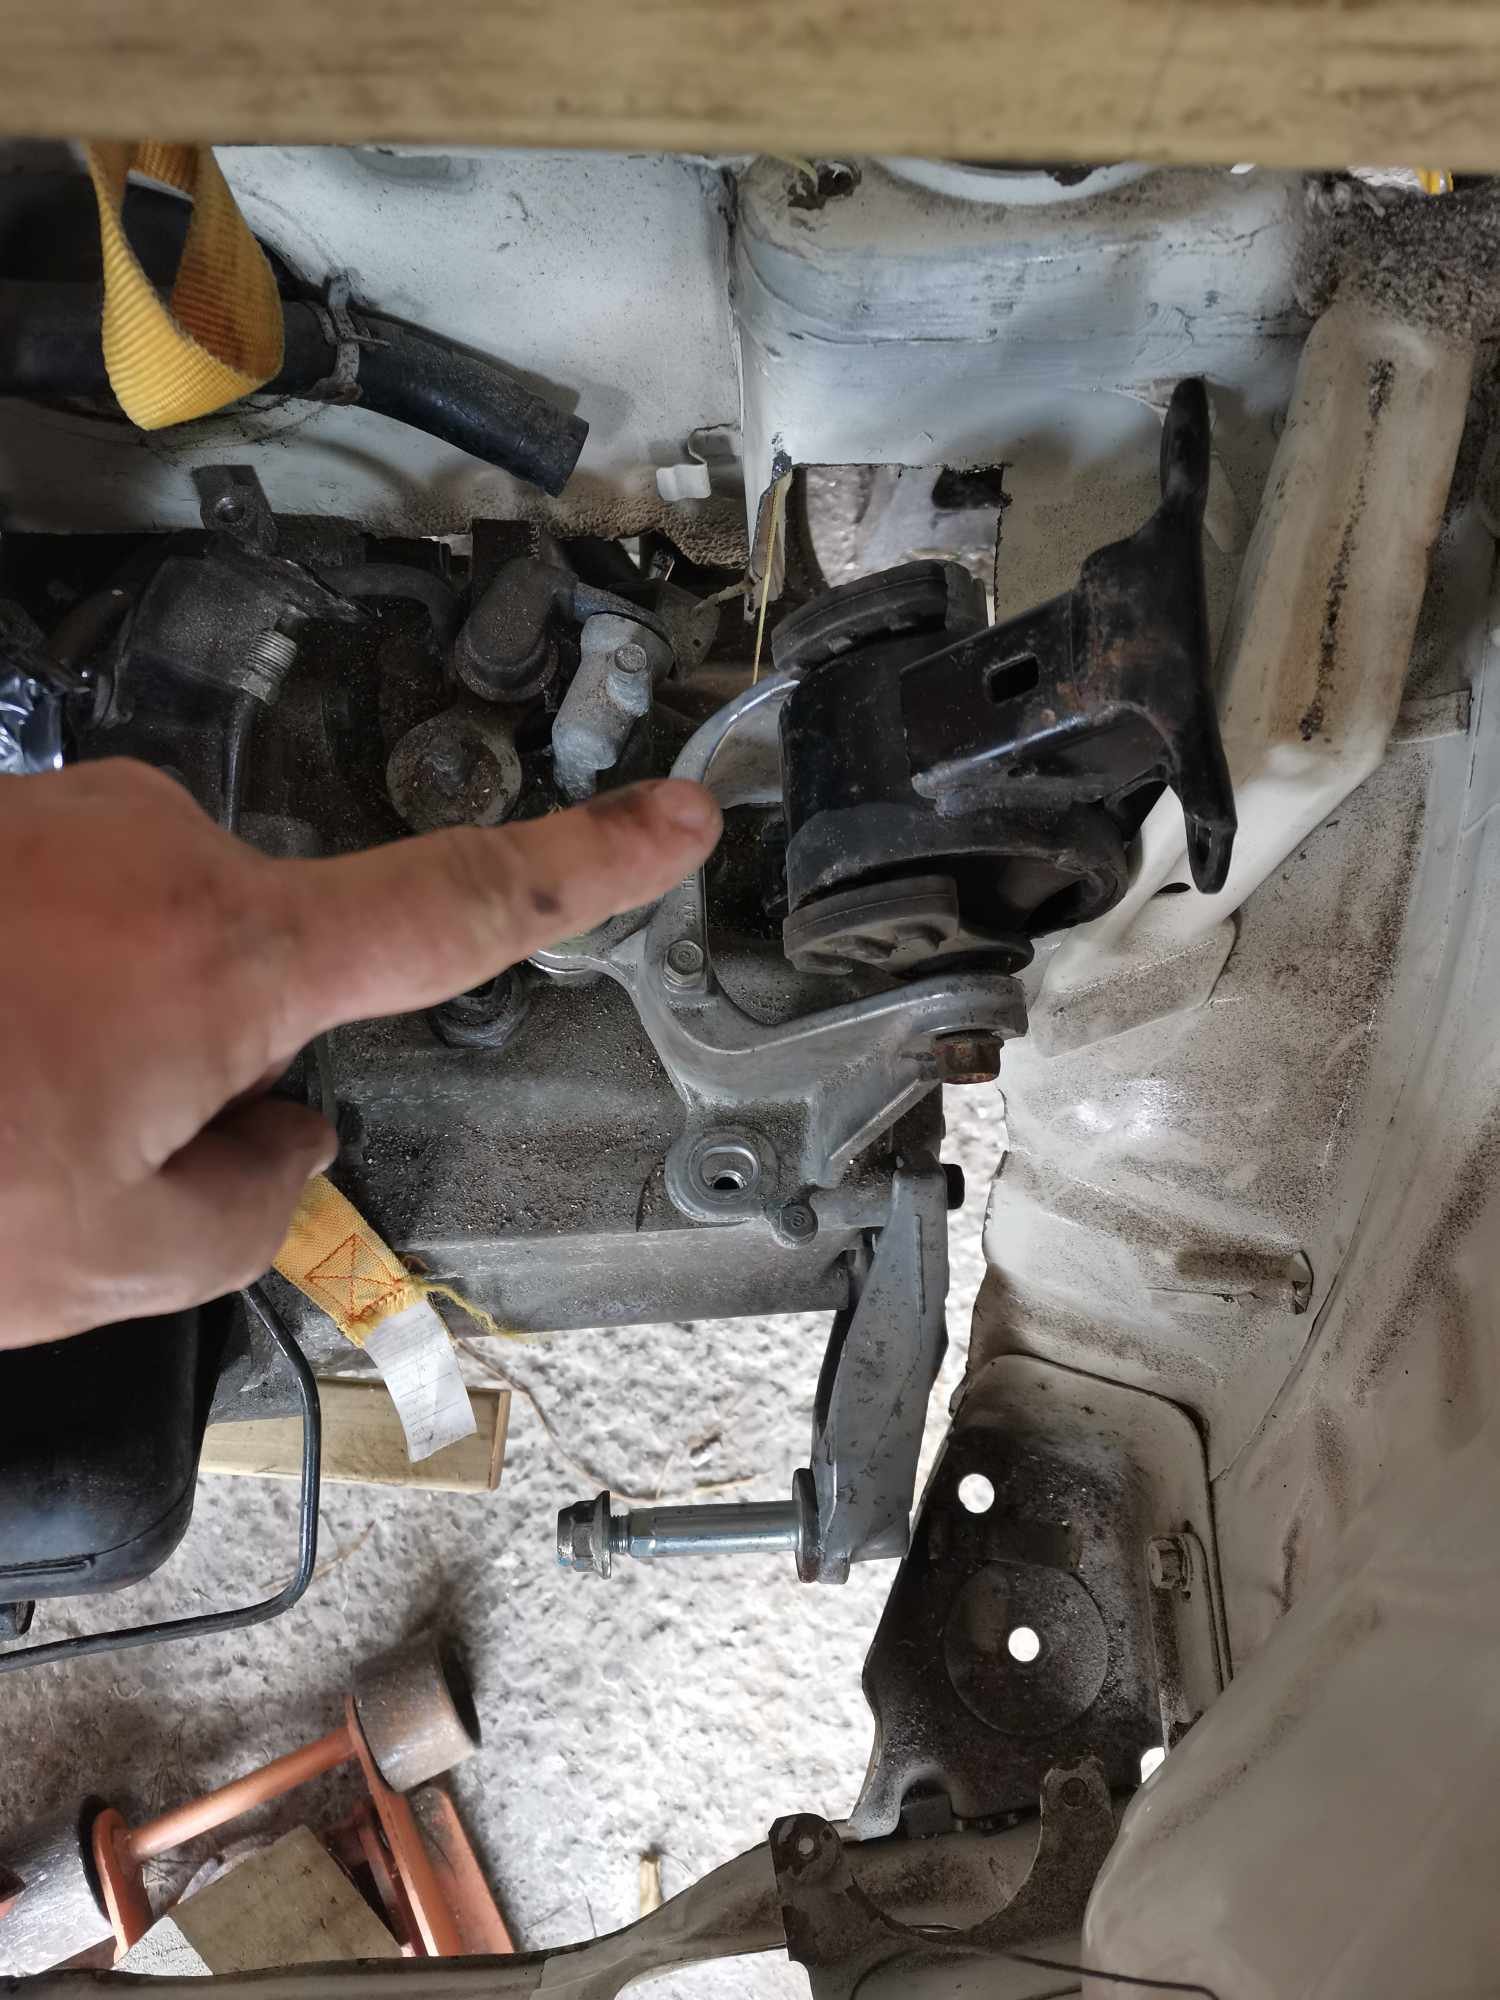
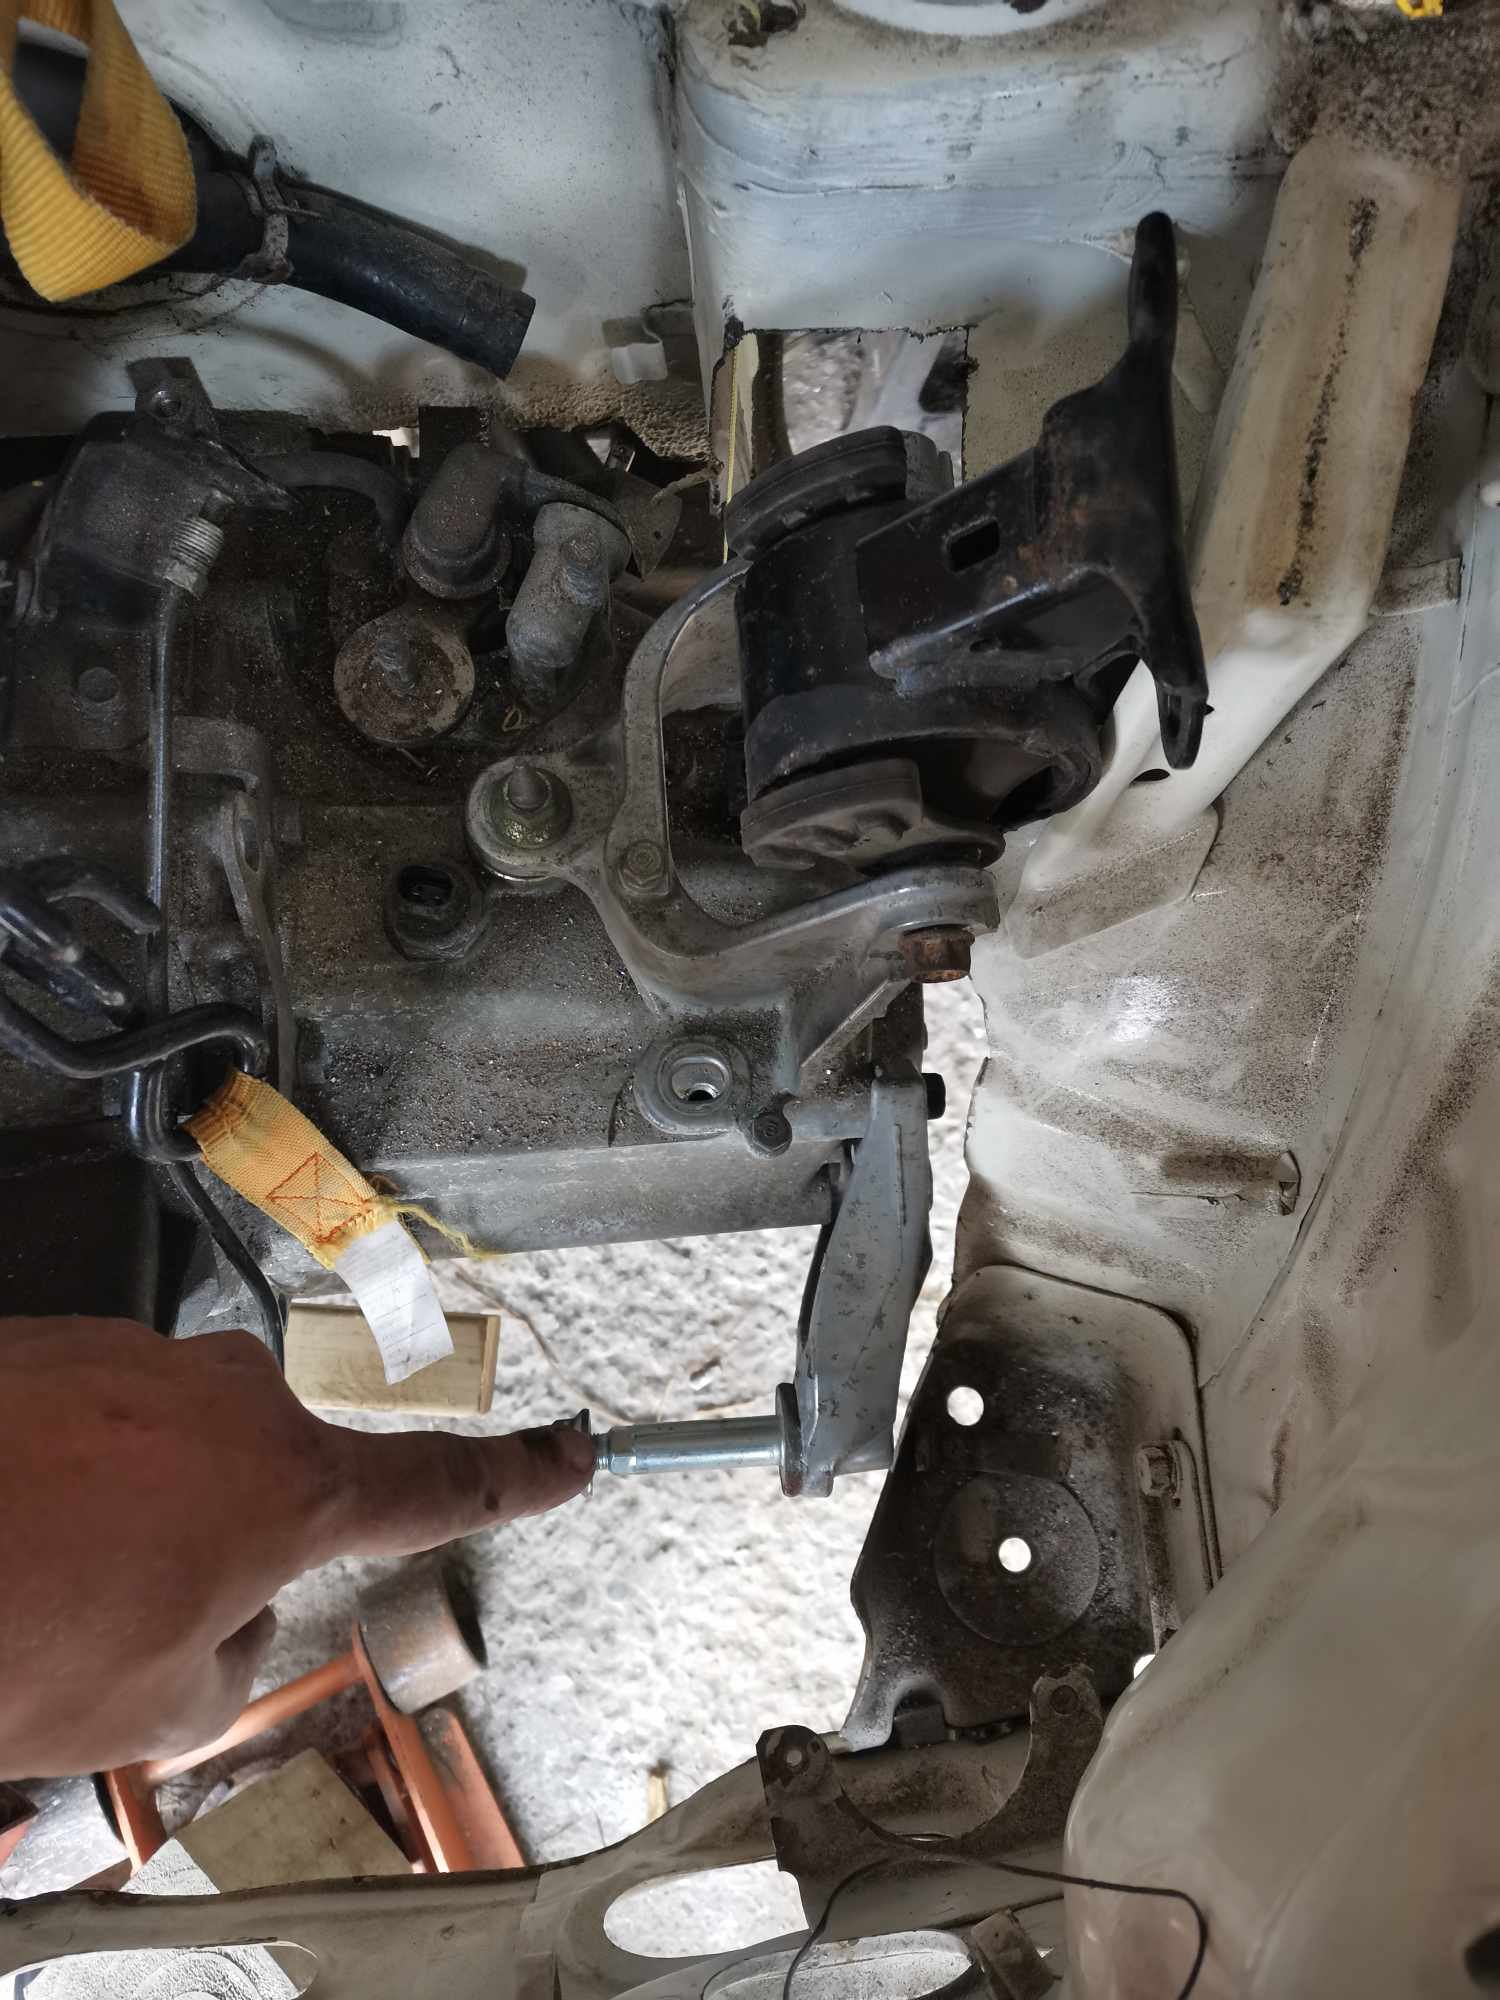
After nearly three months my half shafts are done. Thankfully they fit really well and no binding with the full suspension travel. How he did it was to make a jig out of angle iron. The Imp end was a few mm smaller so he stepped the jig to compensate. Then notched a V into the ends of both and lots of welding to fill it up. He checked the balance and said they were fine. In the meantime I have installed the slave and bled it with the trusted broomstick method. On the hoist the gears shift fine and no crunching and I can even find reverse which is novel in this thing. I presently have the coolant bleeding itself and have remade the radiator mount. The bolts welded into the side for mounting it were flimsy junk so I had to come up with a new solution which seems ok but may hinder my chances of putting on an electric puller fan. I have a short list of works to finish before going to LVV but mostly bodywork and fine tuning. I'll see how it feels after the test drive which all being well should be this evening. Sadly I have to spend time sorting my C20 for the wof fails. I really need to find a new place. 3rd wof in a row I have failed on a ball joint that was fine the previous wof. The chances of three ball joints that are 60 years old failing one at a time every six months is a little disappointing for me. Especially as the replacement always feels worse to me but passes. Oh well. I have this year to get down to 2.5 wofs and I'm on a mission!
8 points
-
Sounds like a great excuse for a large sump with a 2 stroke detroit dewatering pump. You care about your neighbours so it has a muffler but it mostly just rattles around on top.6 points
-
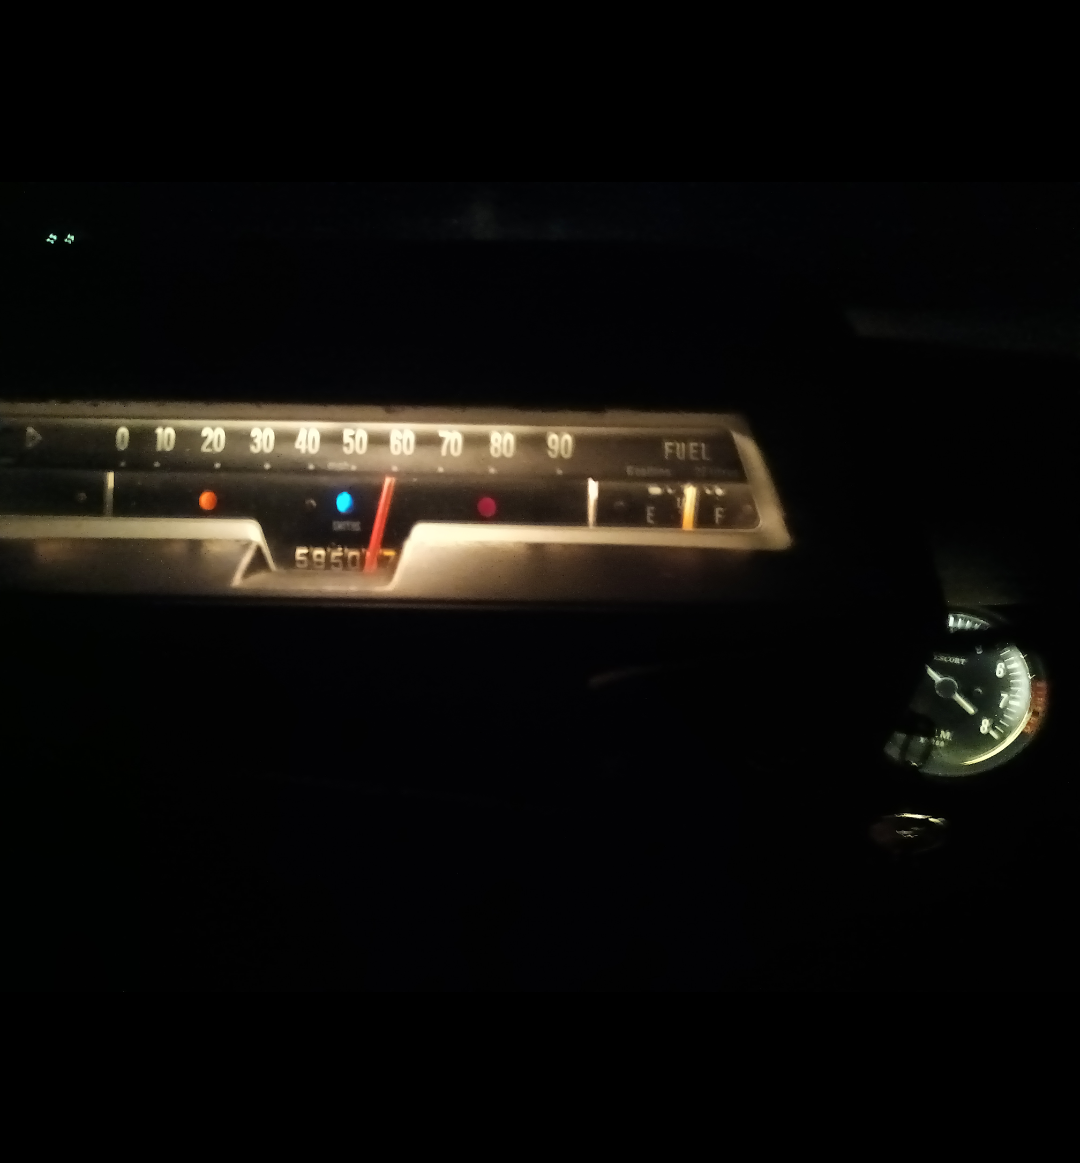
Went for a decent blat into town tonight. A few things to note before I forget. Cruises at 2200rpm at 100kph and has buckets of power upwards from that so the gearing is spot on. Maybe because Im used to a shitty old slow chevy but it feels like a rocket. Makes a weird noise for a second on startup. The sump is too low. Either I have to put in stock springs or modify the sump. @cubastreet got any spare sump pans? The oil filler pipe is now hitting the firewall so I have to modify that again. Second is a bitch to find from 3rd but I'll get used to it. It has enough torque to take off in 4th but I'll leave the clutch alone. I might make the aux water pump booster linked to the ignition as I forgot to turn it on. It's criminal me having this car and living 10kms from a decent corner. It wants to corner.
5 points
-
Phuckin sik uleh
5 points
-
Nah 20 years is a new car that only needs a wof once a year.5 points
-
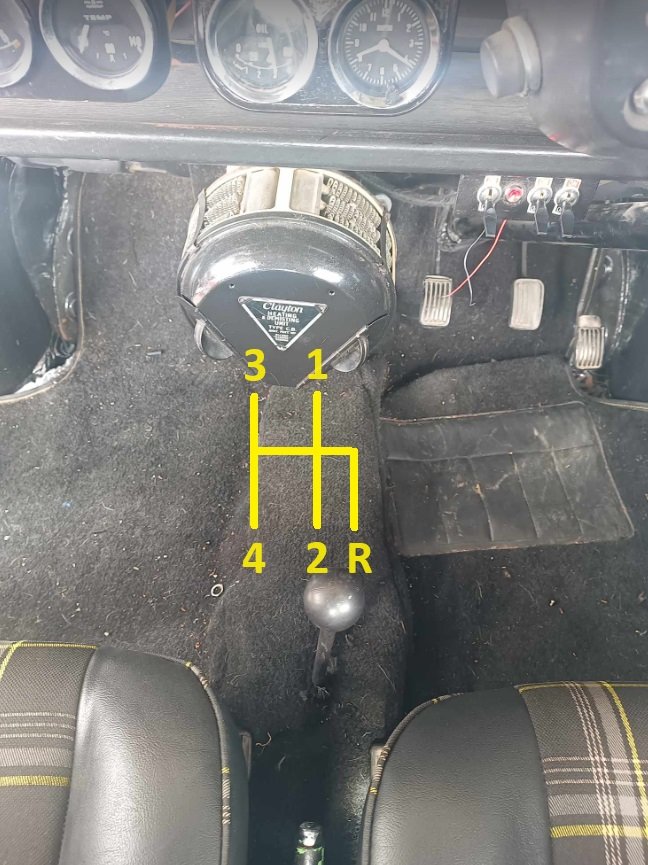
Yeah nah. I'll just have a backwards shift pattern tyvm.5 points
-
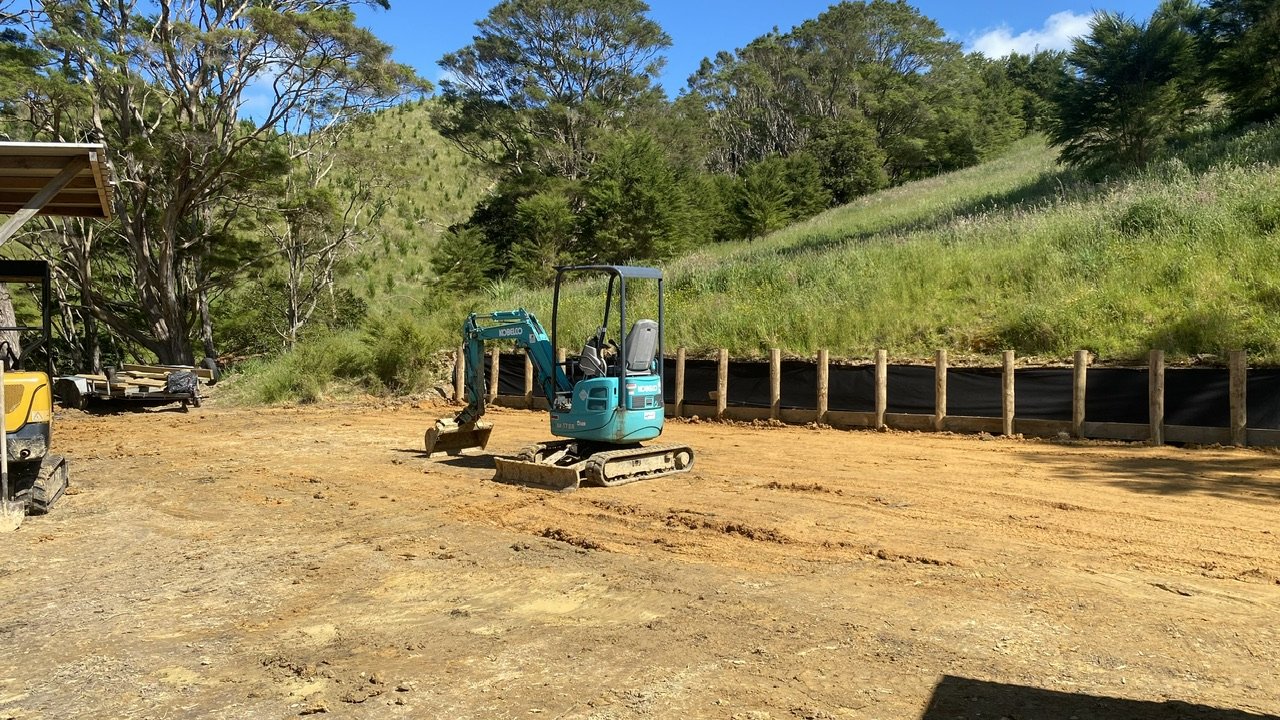
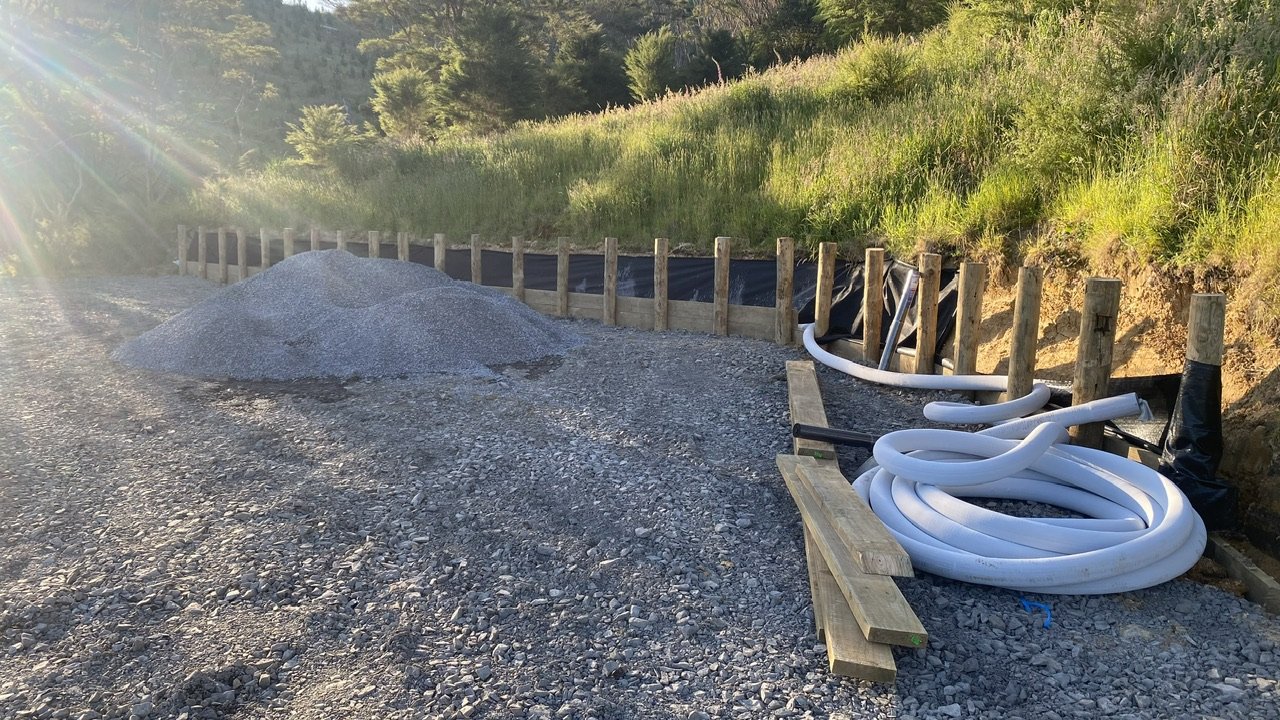
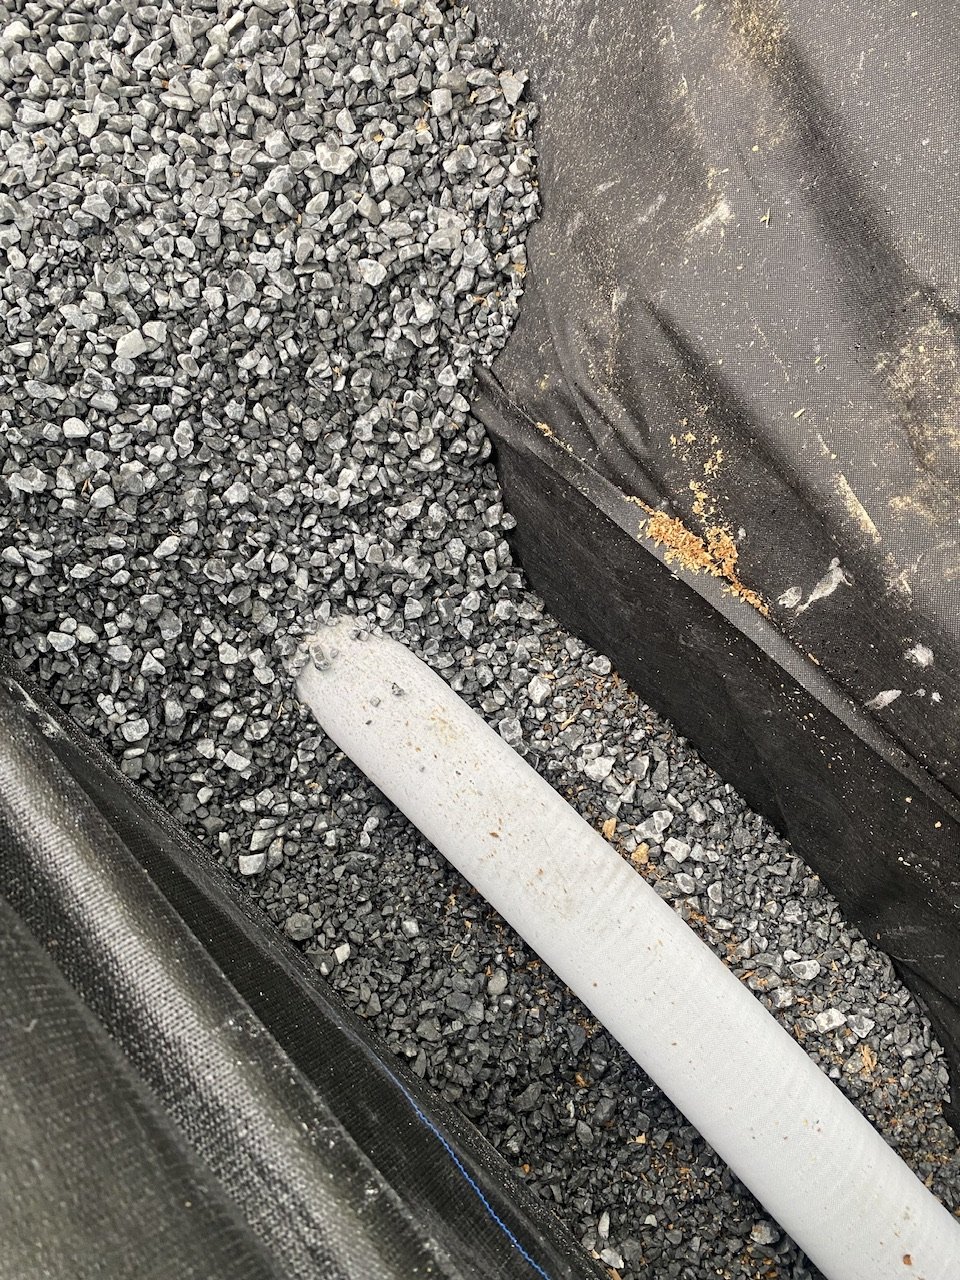
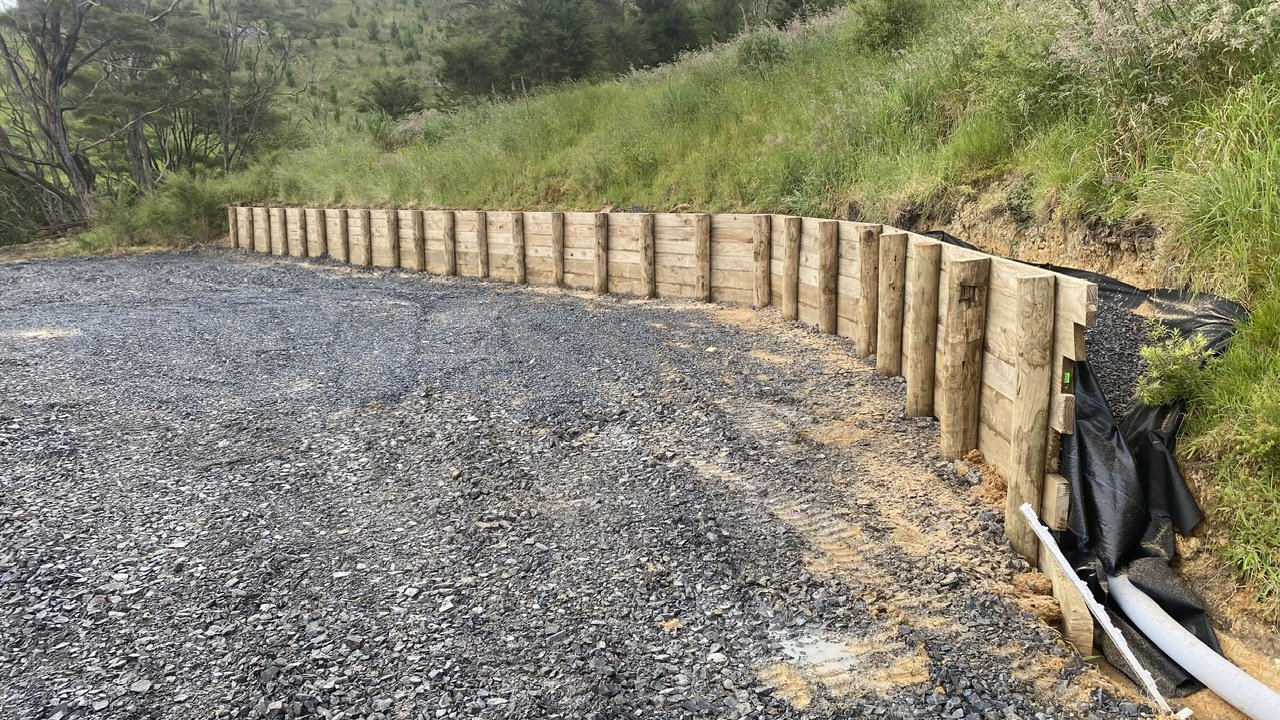
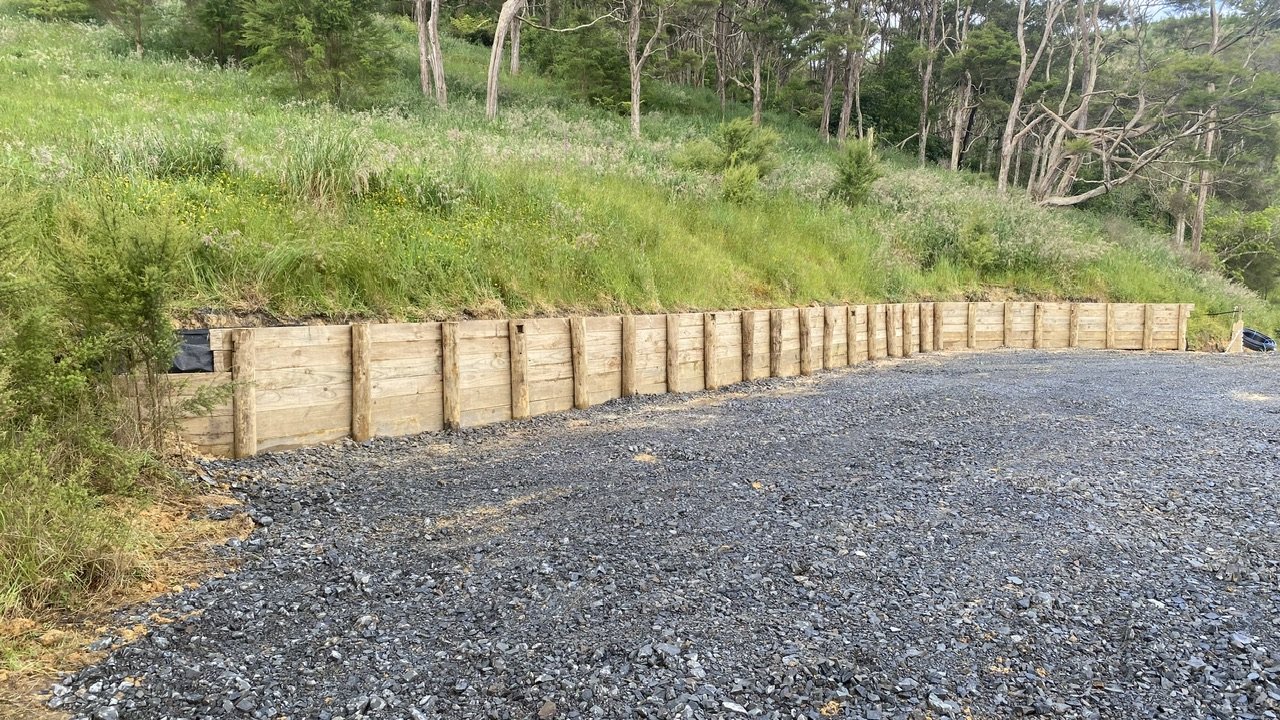
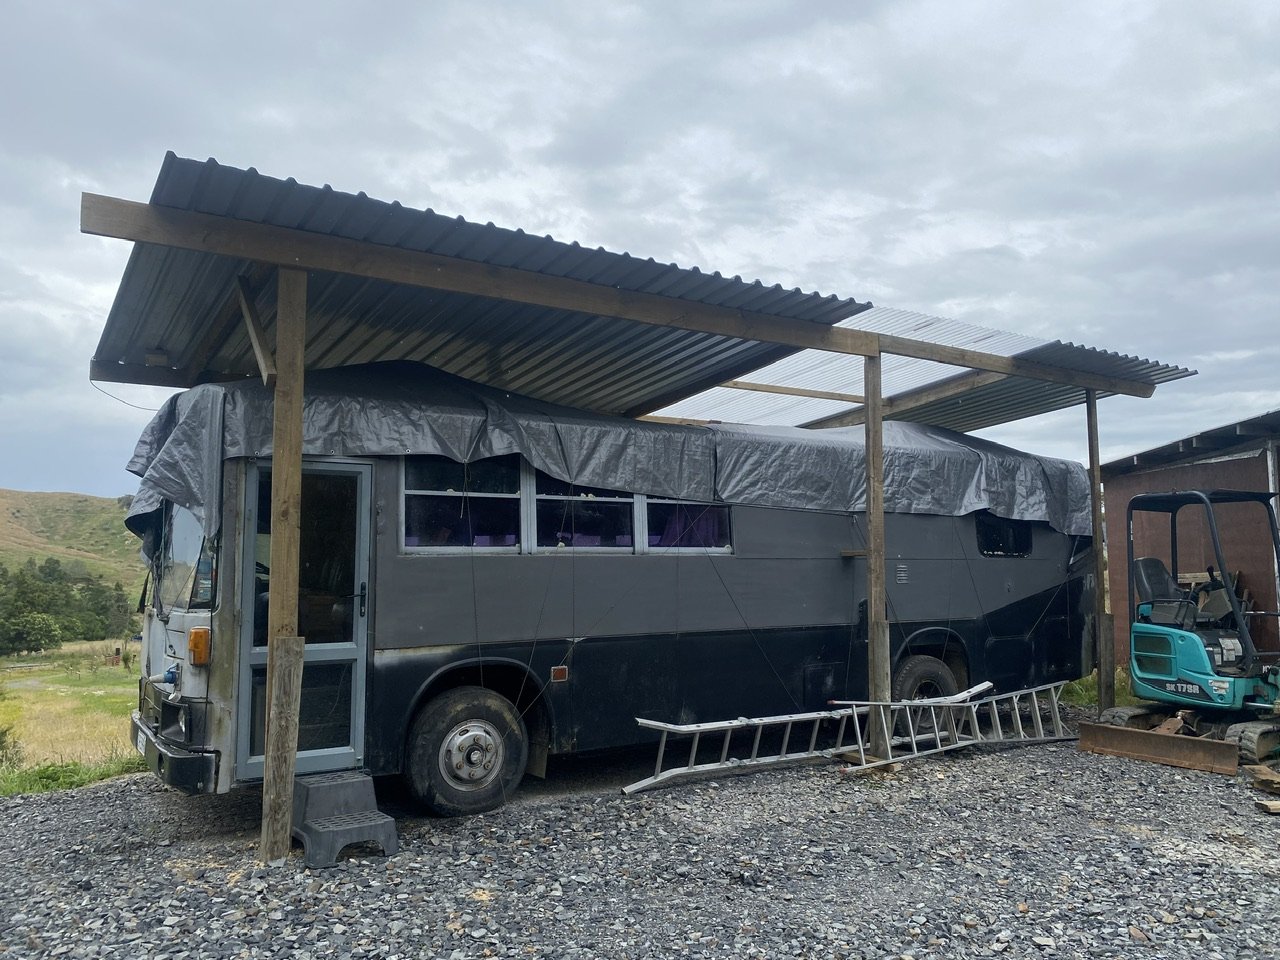
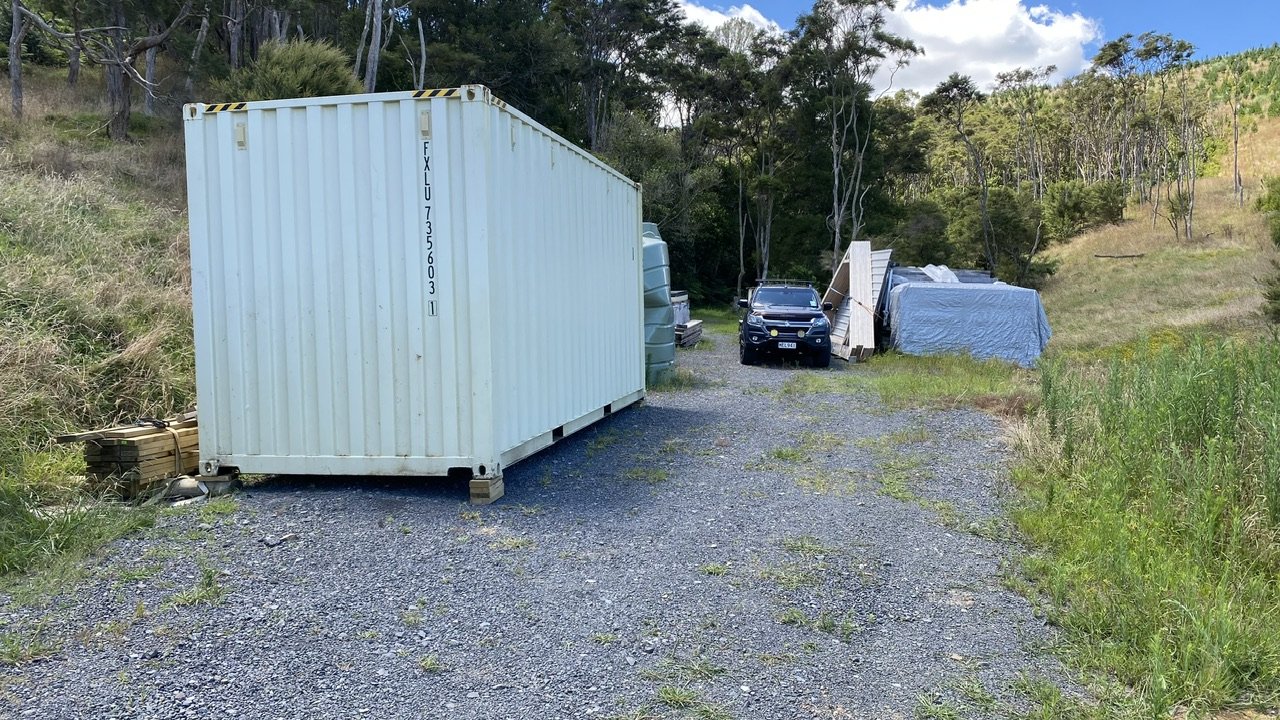
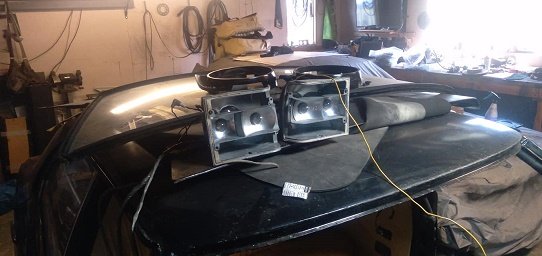
Been a minute or two.. had shoulder surgery late last year which slowed me down a bit. Just prior to that I got dad to come up and help me build a retaining wall. Still got the ends to finish off but it turned out pretty neat for a first timer. Moved the bus up to the building platform and built a sketchy roof over it so it could dry out better. I’ve since removed the tarp. I’ve also got my container down there now and the place is looking more like a builders storage yard.
5 points
-
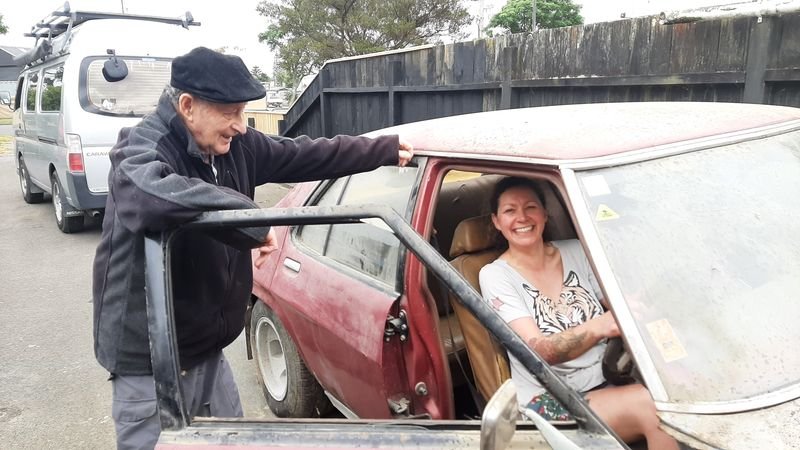
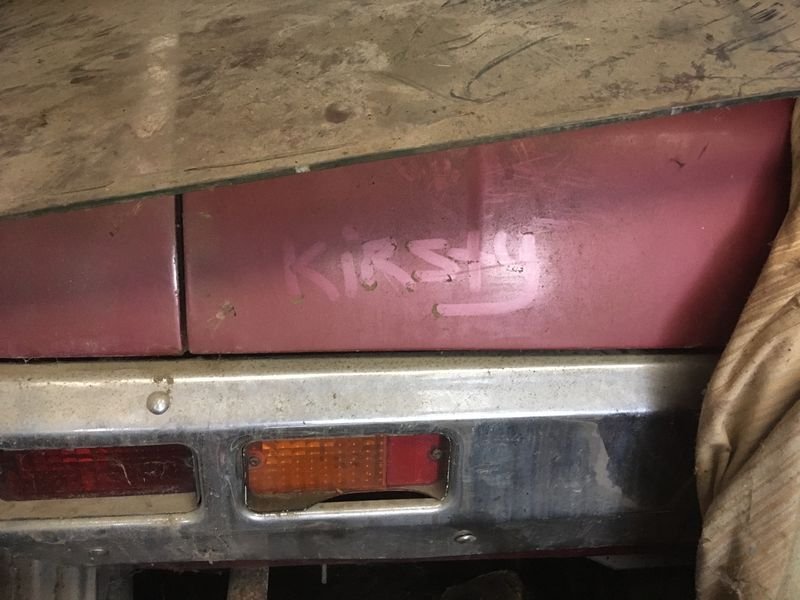
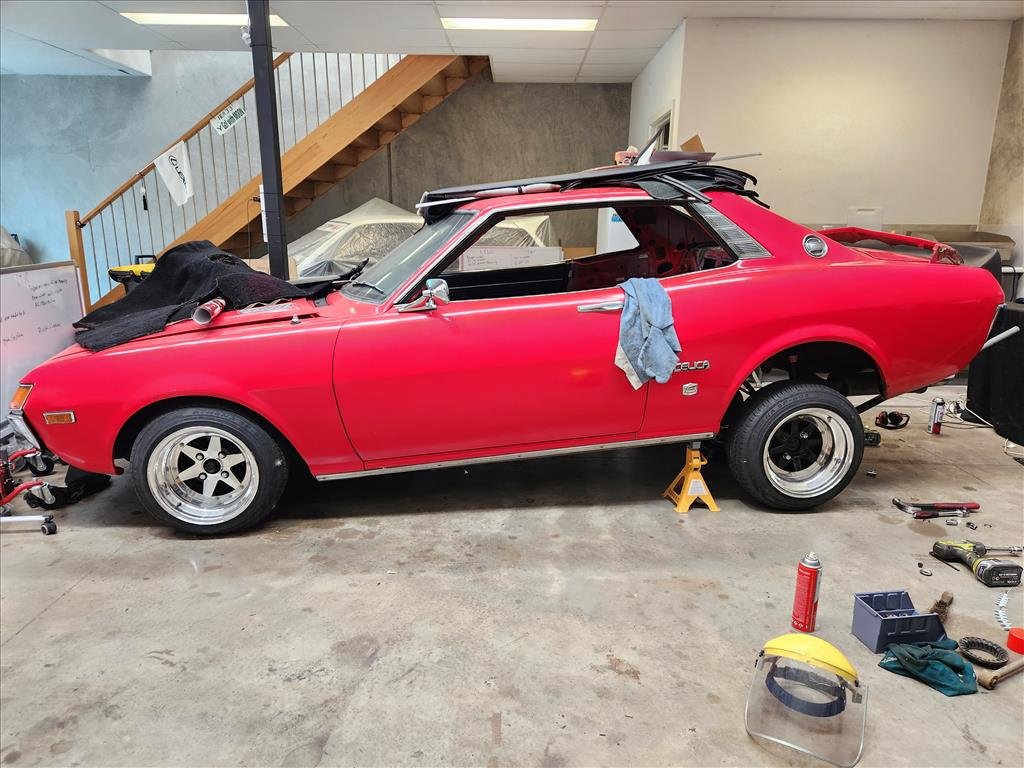
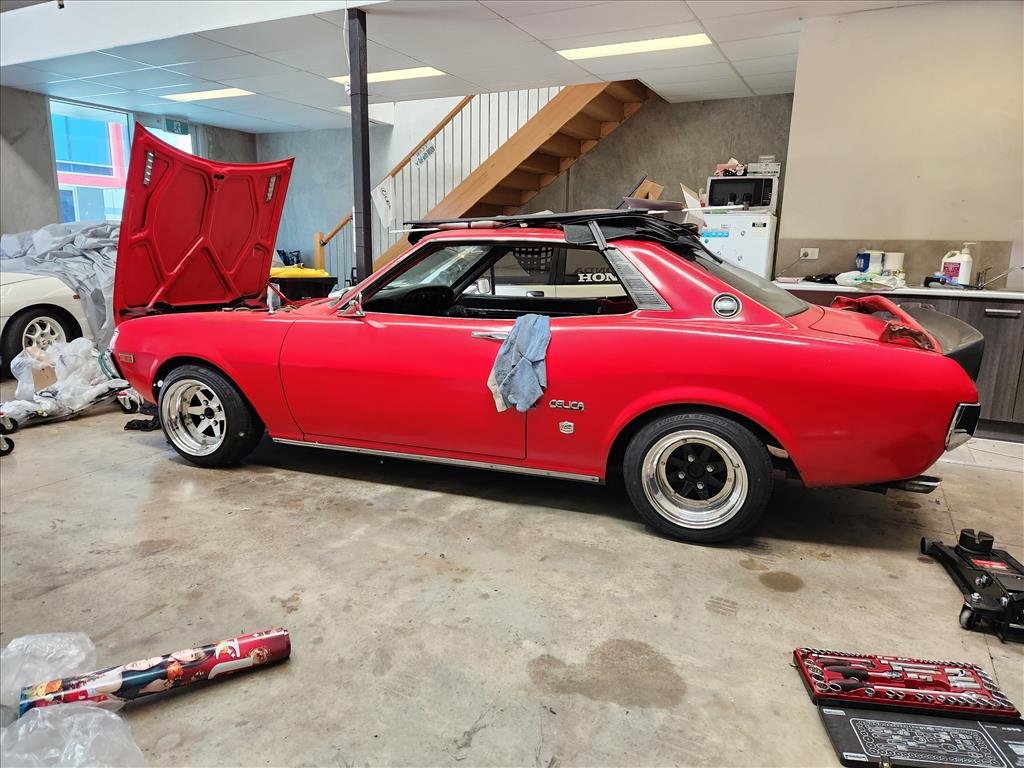
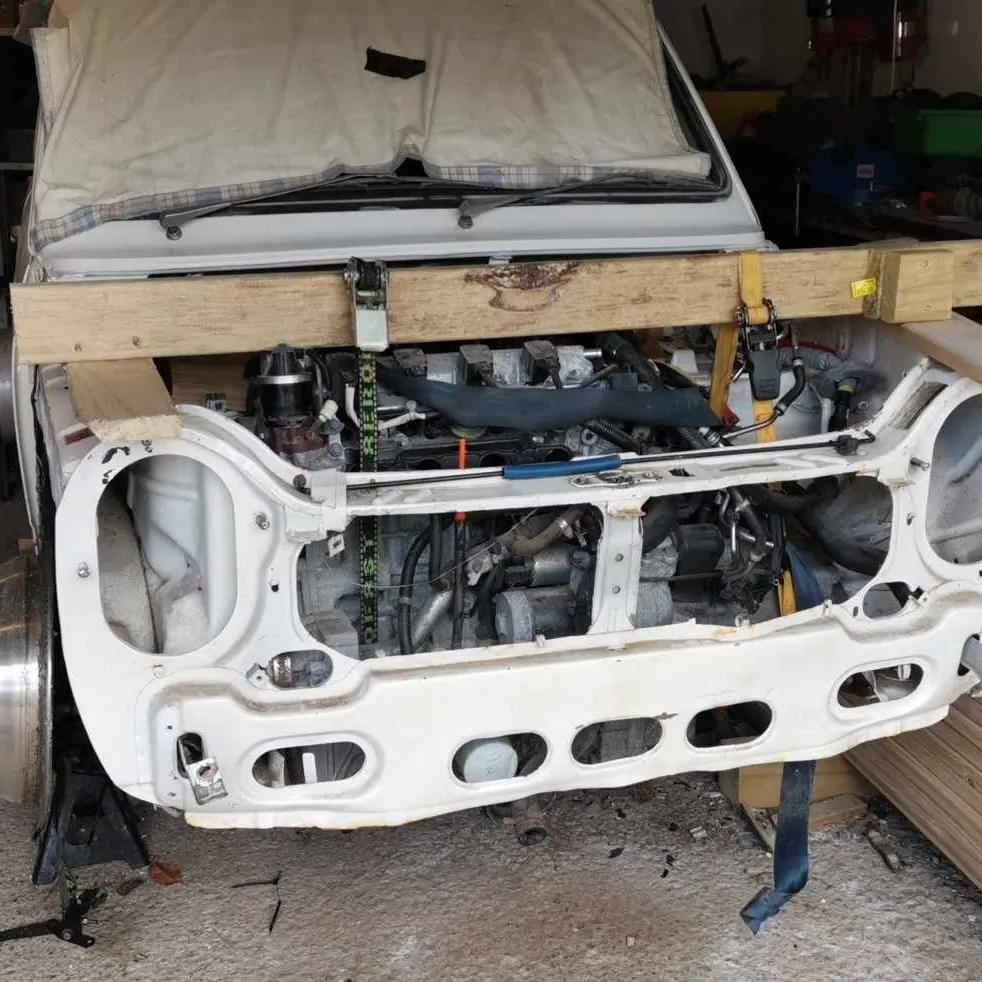
This is not my car. Im just the low rate mechanic. What i knew about this car was: My Father in Law, Bill, has 'The Holden' in a lean to shed. Kirsty learned to drive in it, and shes always wanted it and Bill said she could have it one day. It has the engine and gearbox (exact details unclear) from the Torana her older brother rolled when he was 16 'dodging a rabbit' on a gravel road. Its been in the shed pretty much since they moved into the 'new house'. He used to bring it out sometimes to wash it but hasnt for a long while. She put her name on it a few years ago and sent me a pic. My first and only view of it till now. Then a couple months ago, he said 'come and get the Holden' So, we did.
4 points
-
Made it up to Waihi Beach the Whangamata OK. Parked near the beach, and then in the slamfest on Saturday (bit damp that day). New paint is a big improvement.
4 points
-
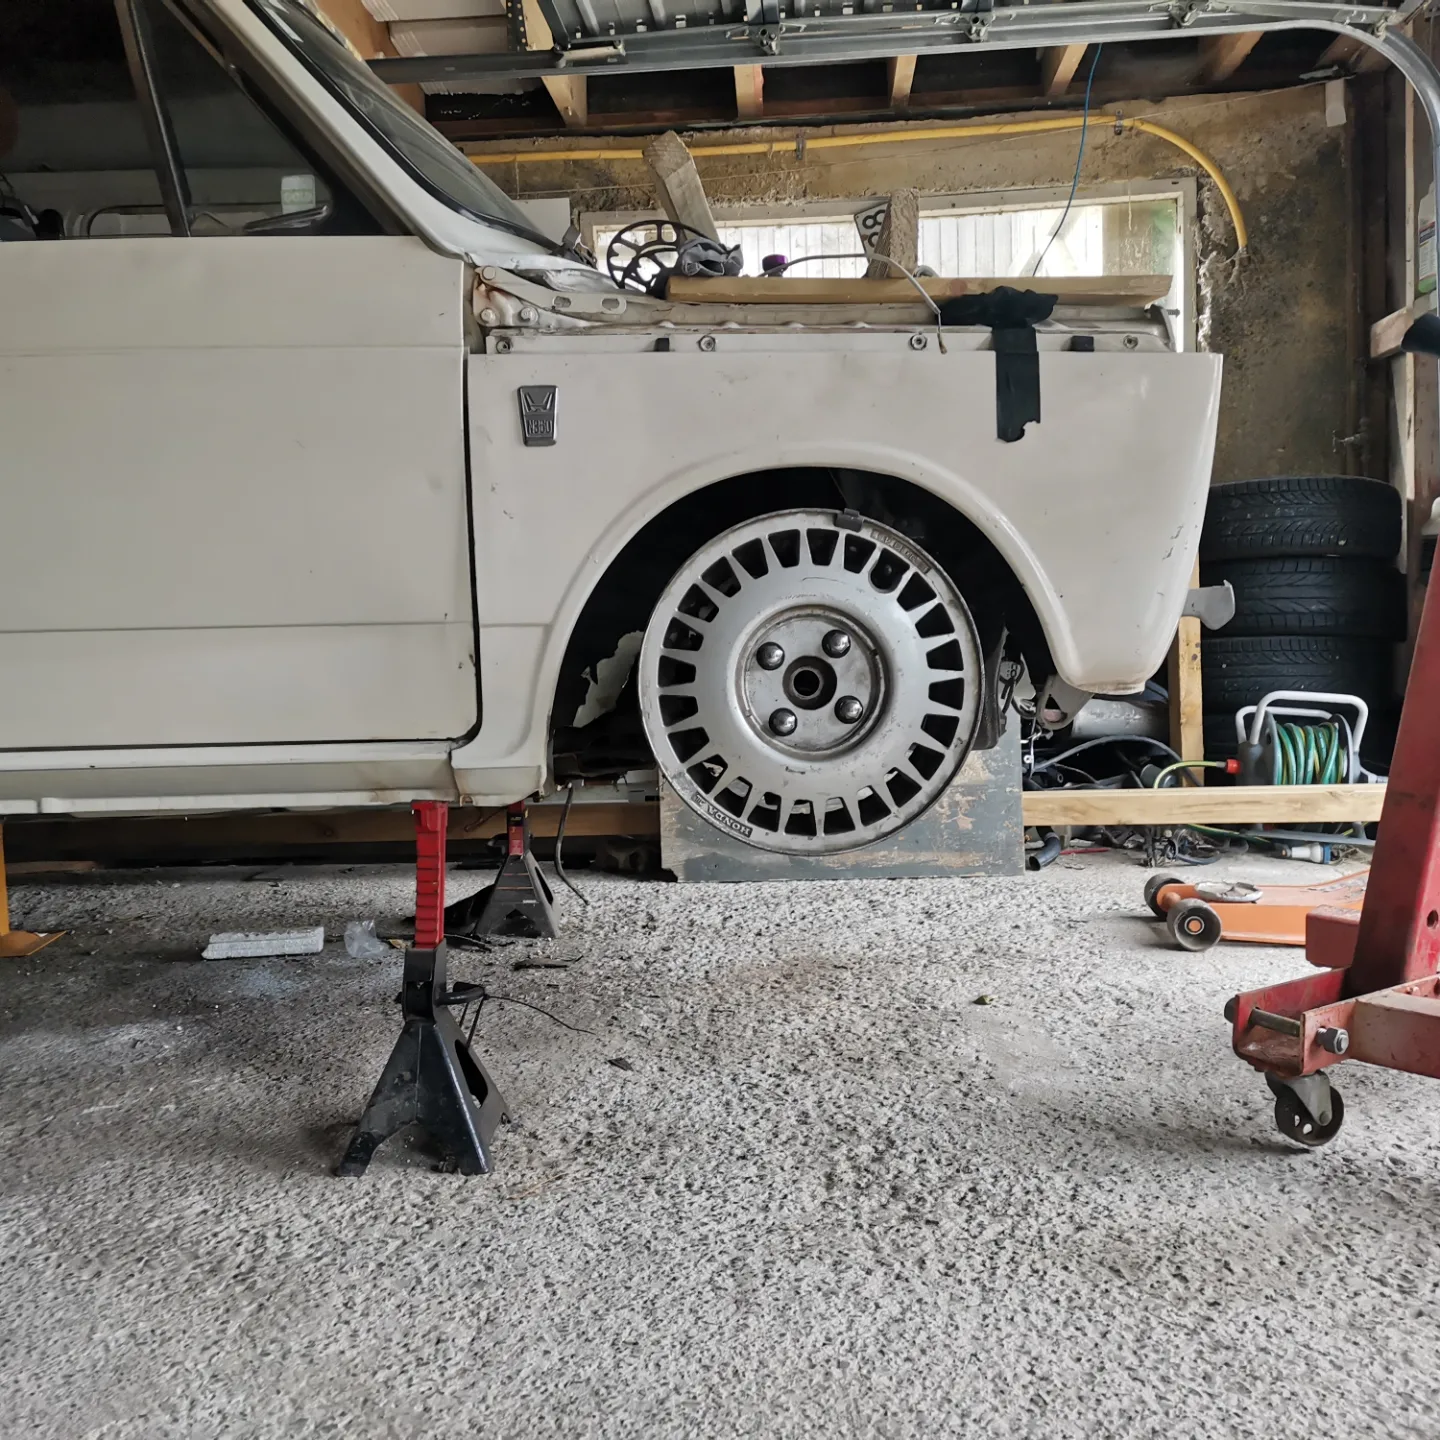
Got my hands on her finally. Went onto the trailer first pop and came off just as easily, then she made easy work of getting up the hill to where she's storing. Fun times ahead Didn't do too much today just pulled some interior crap but definitely got a running to do list already
4 points
-
4 points
-
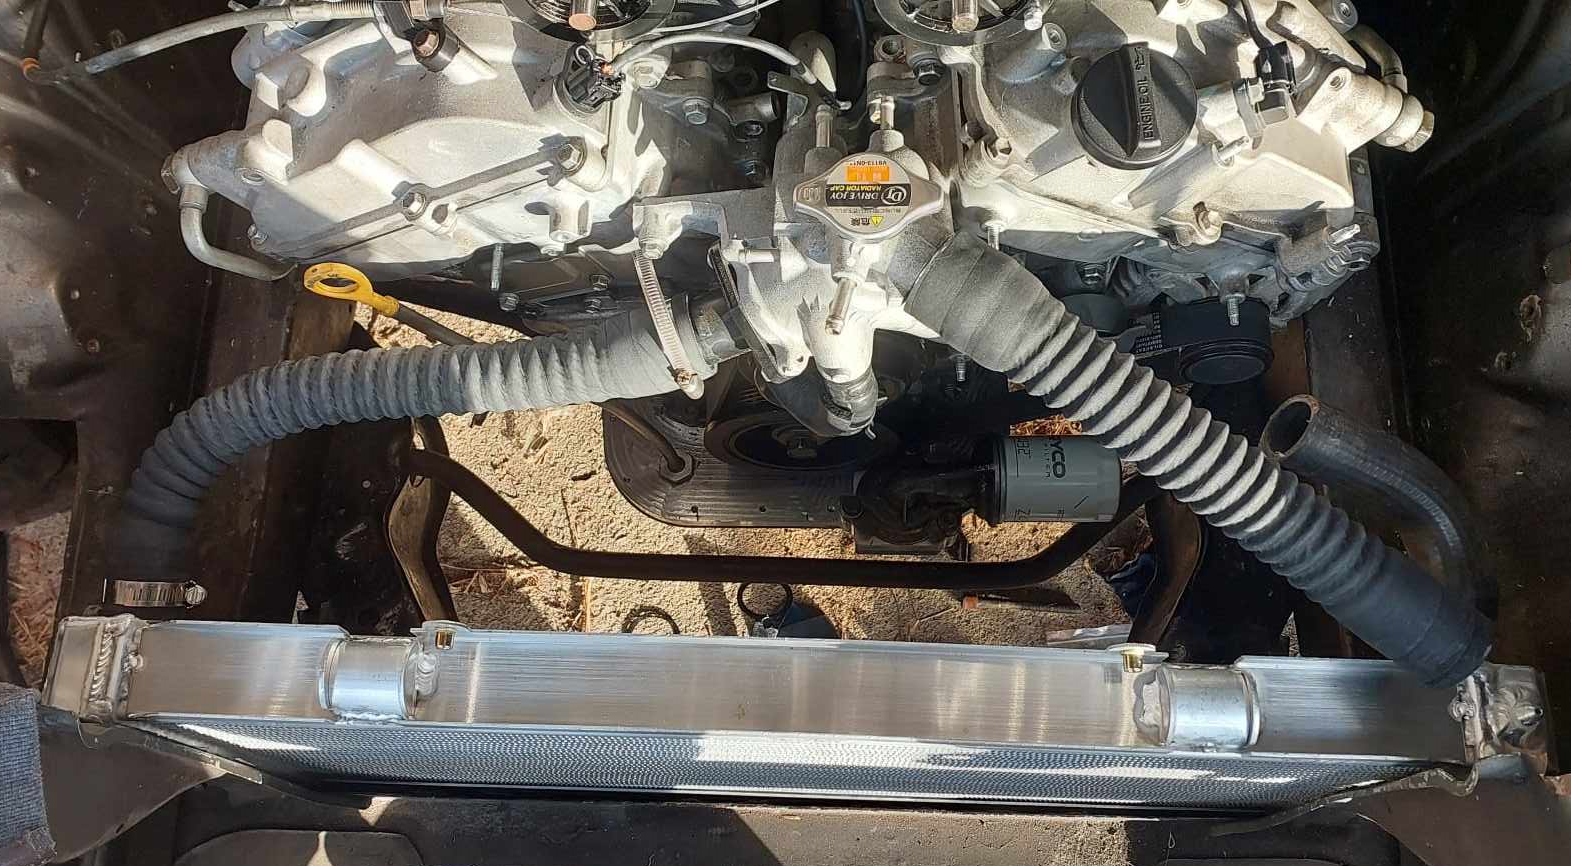
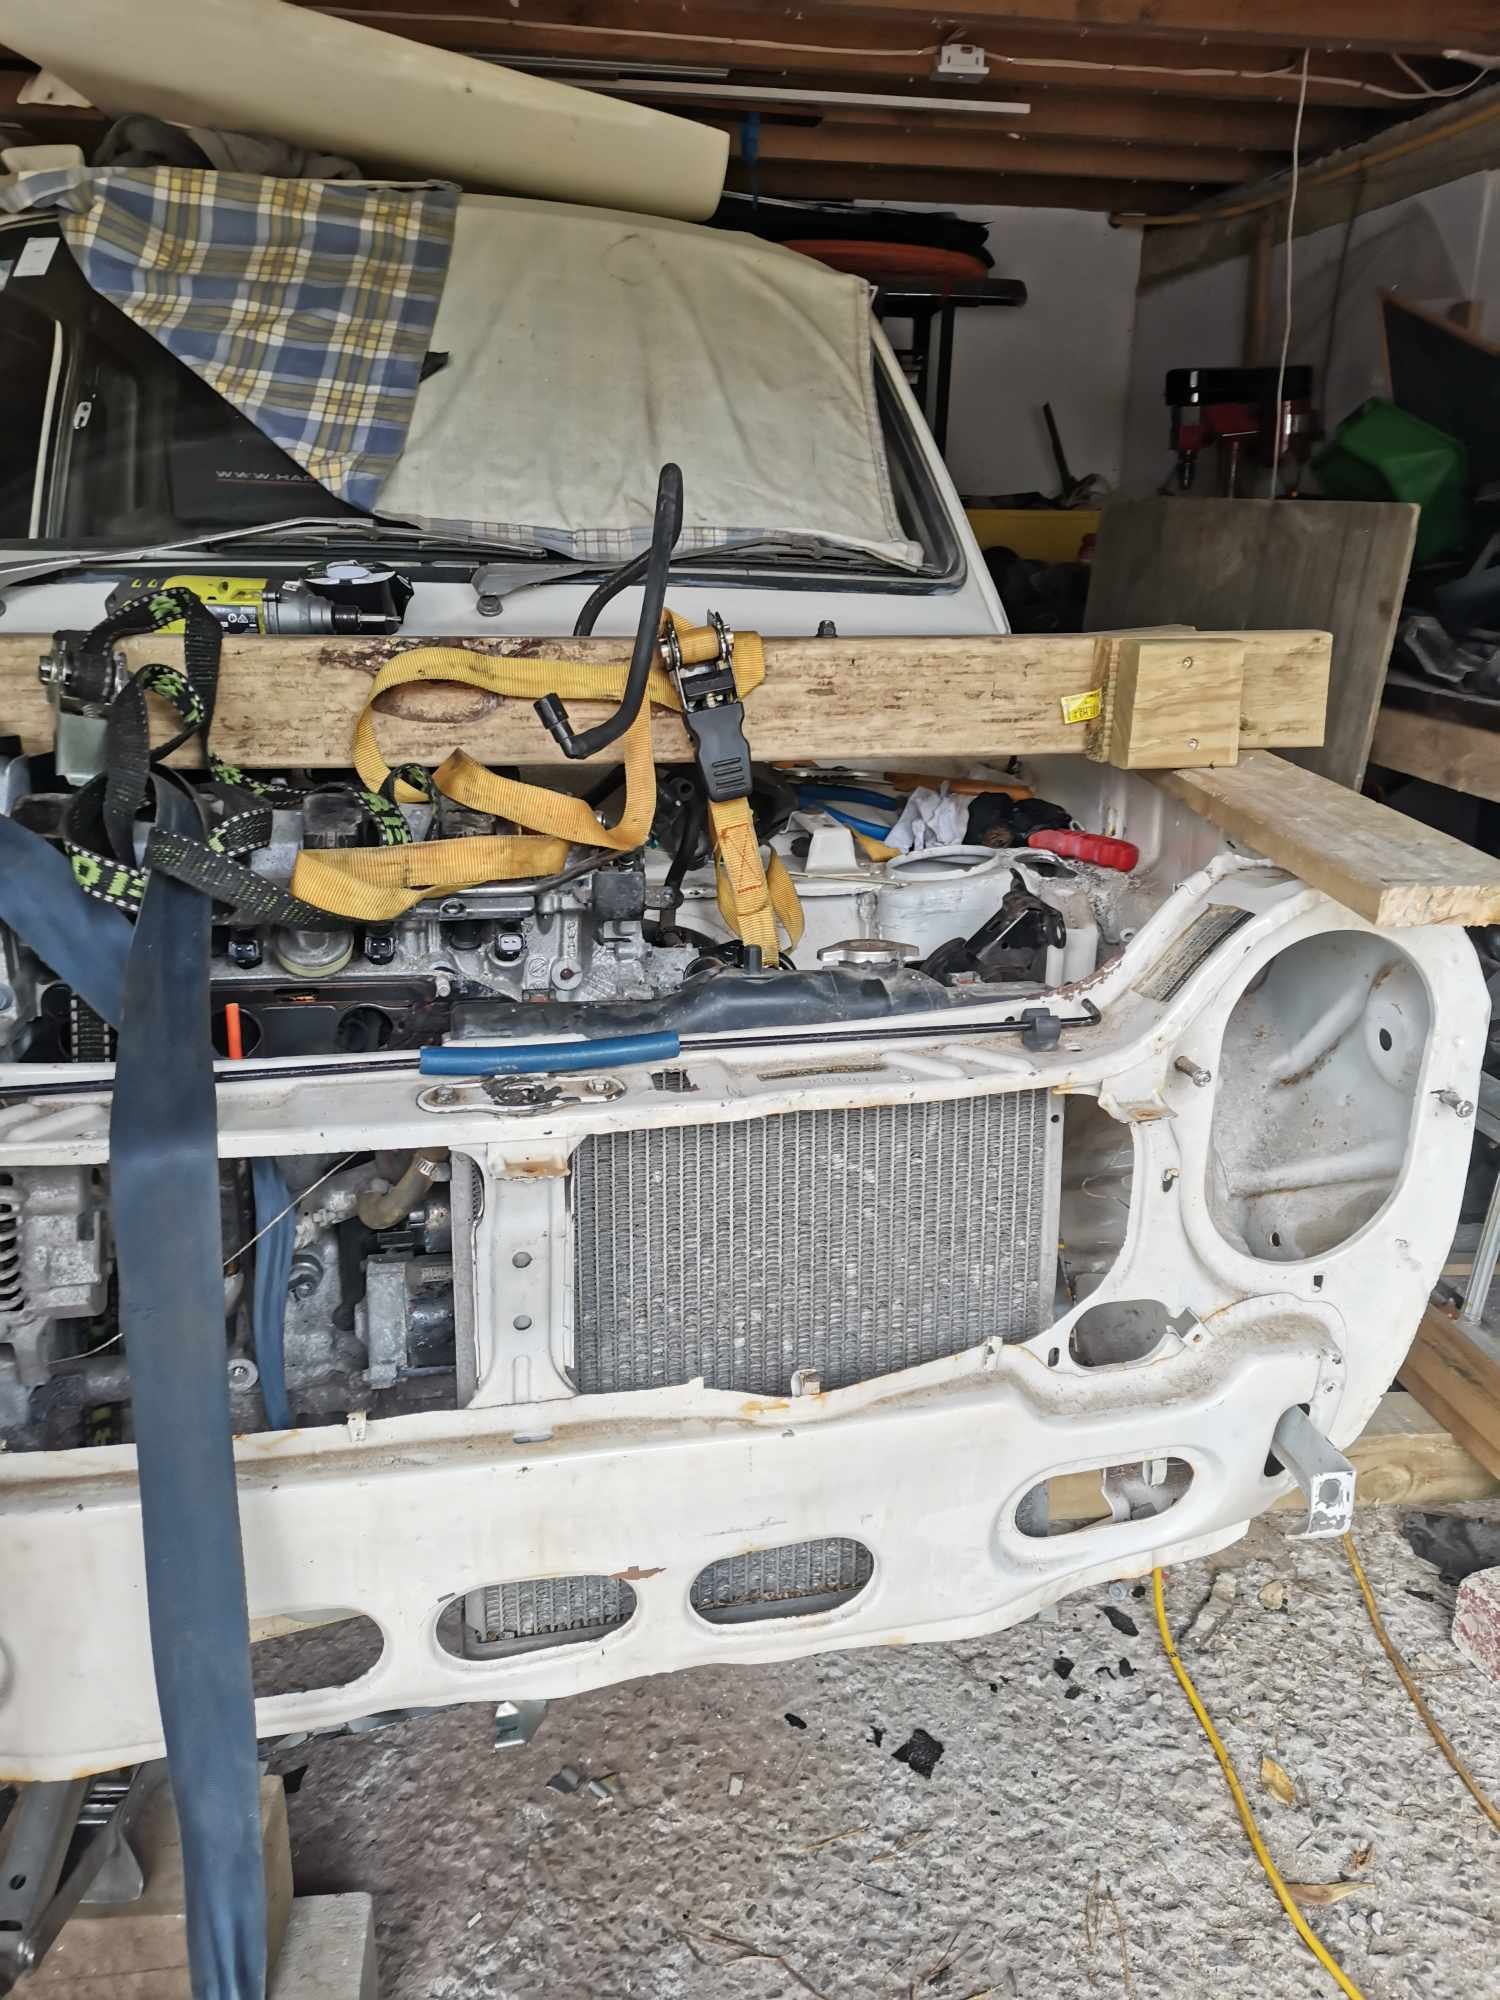
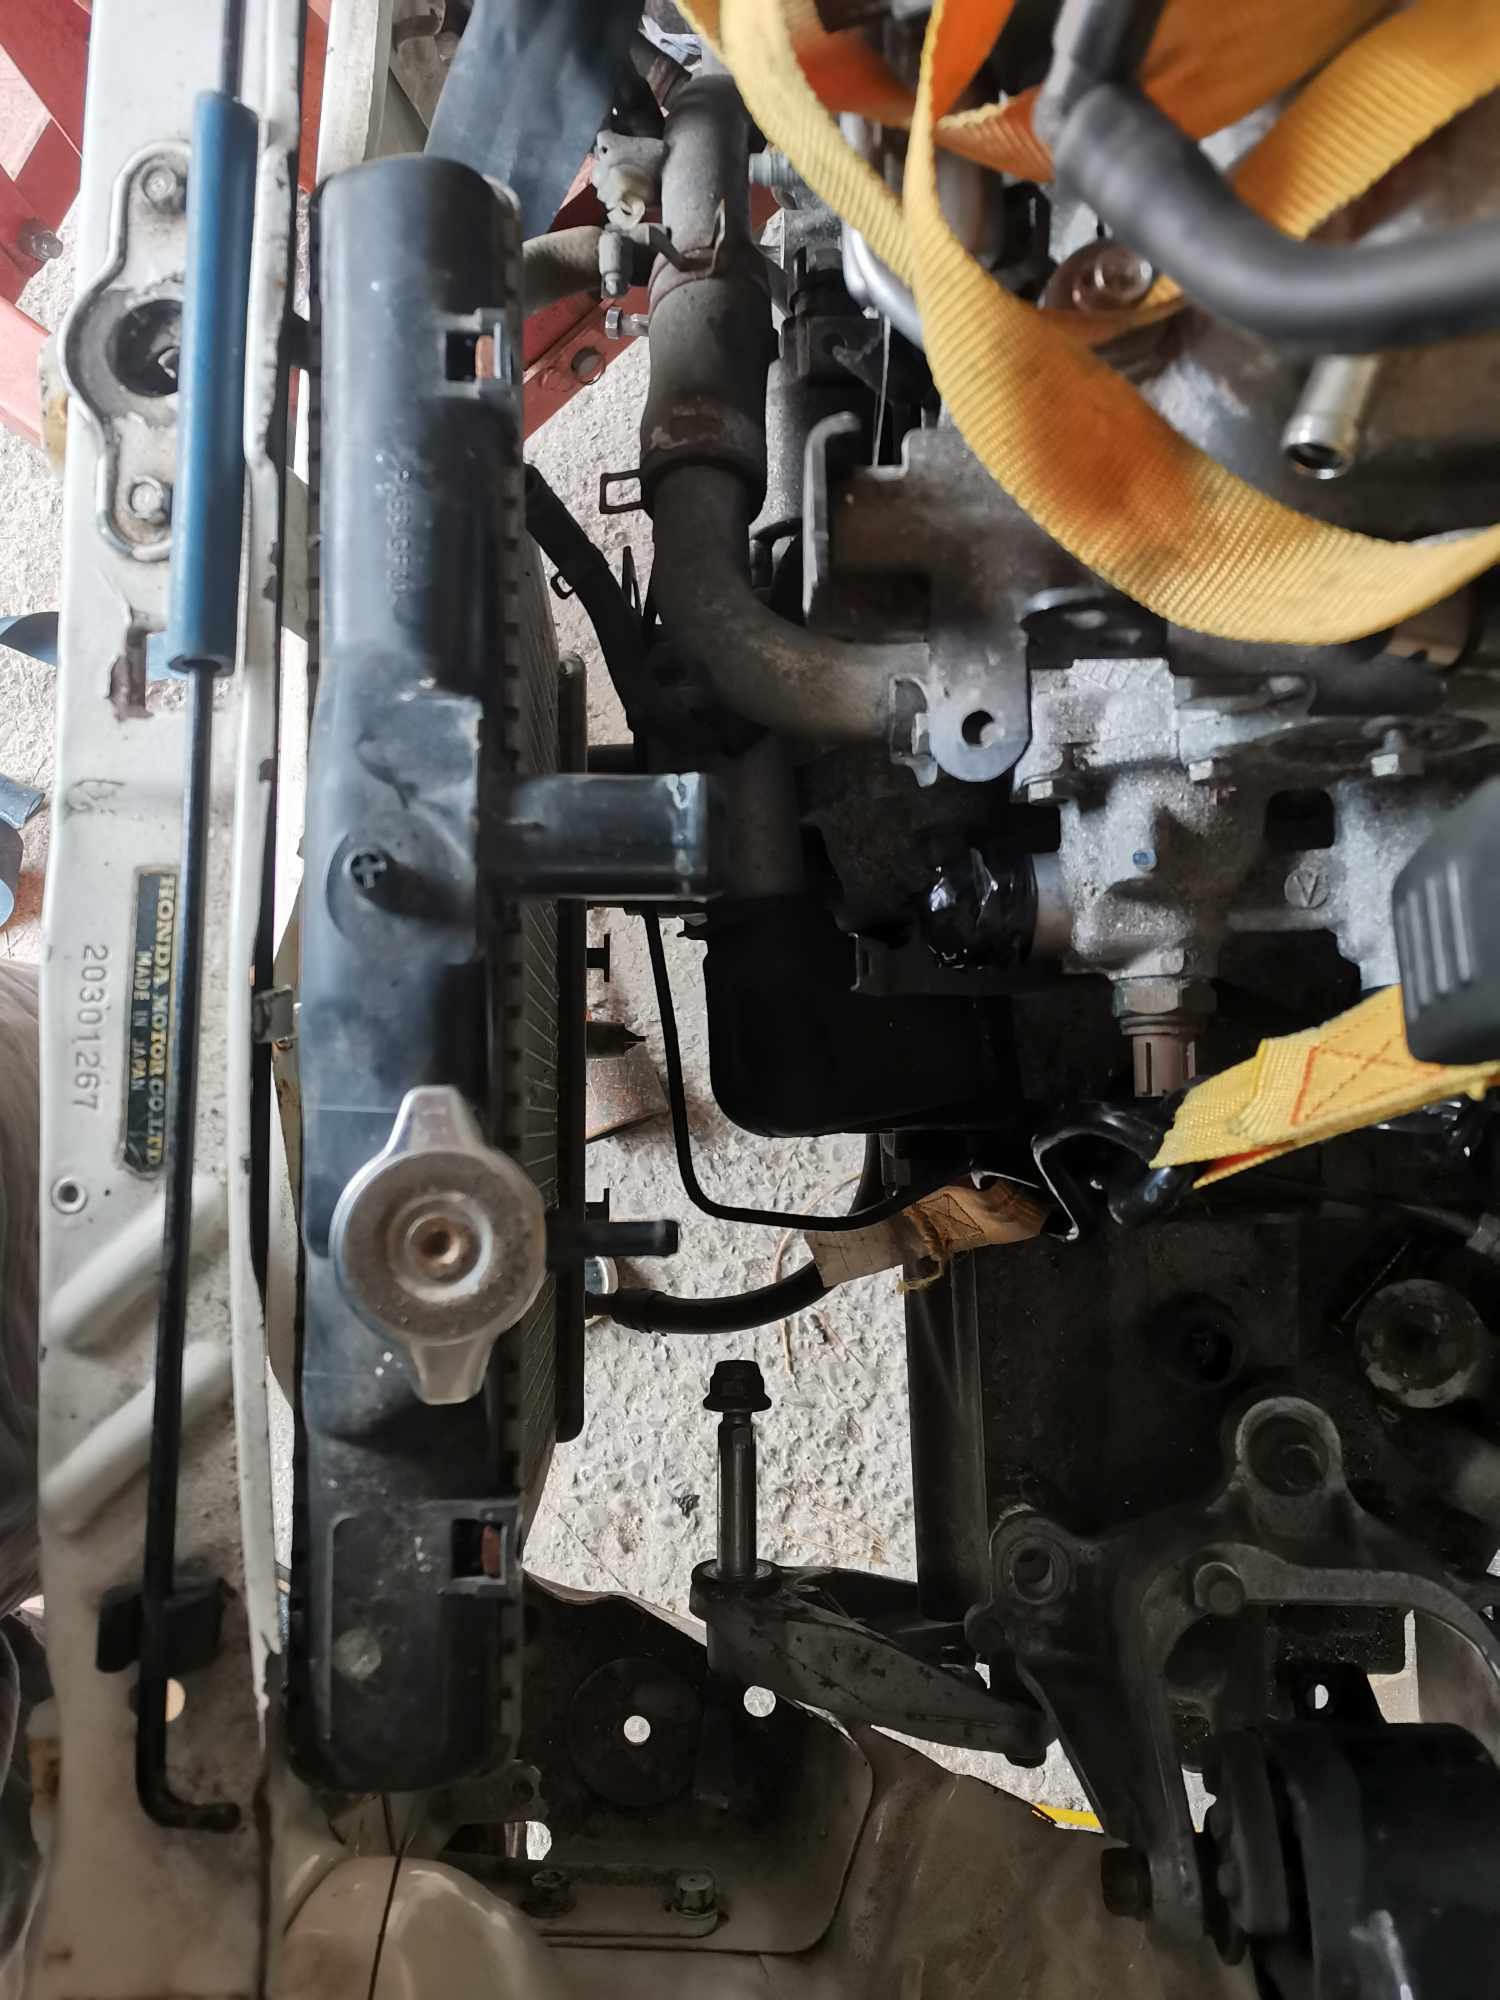
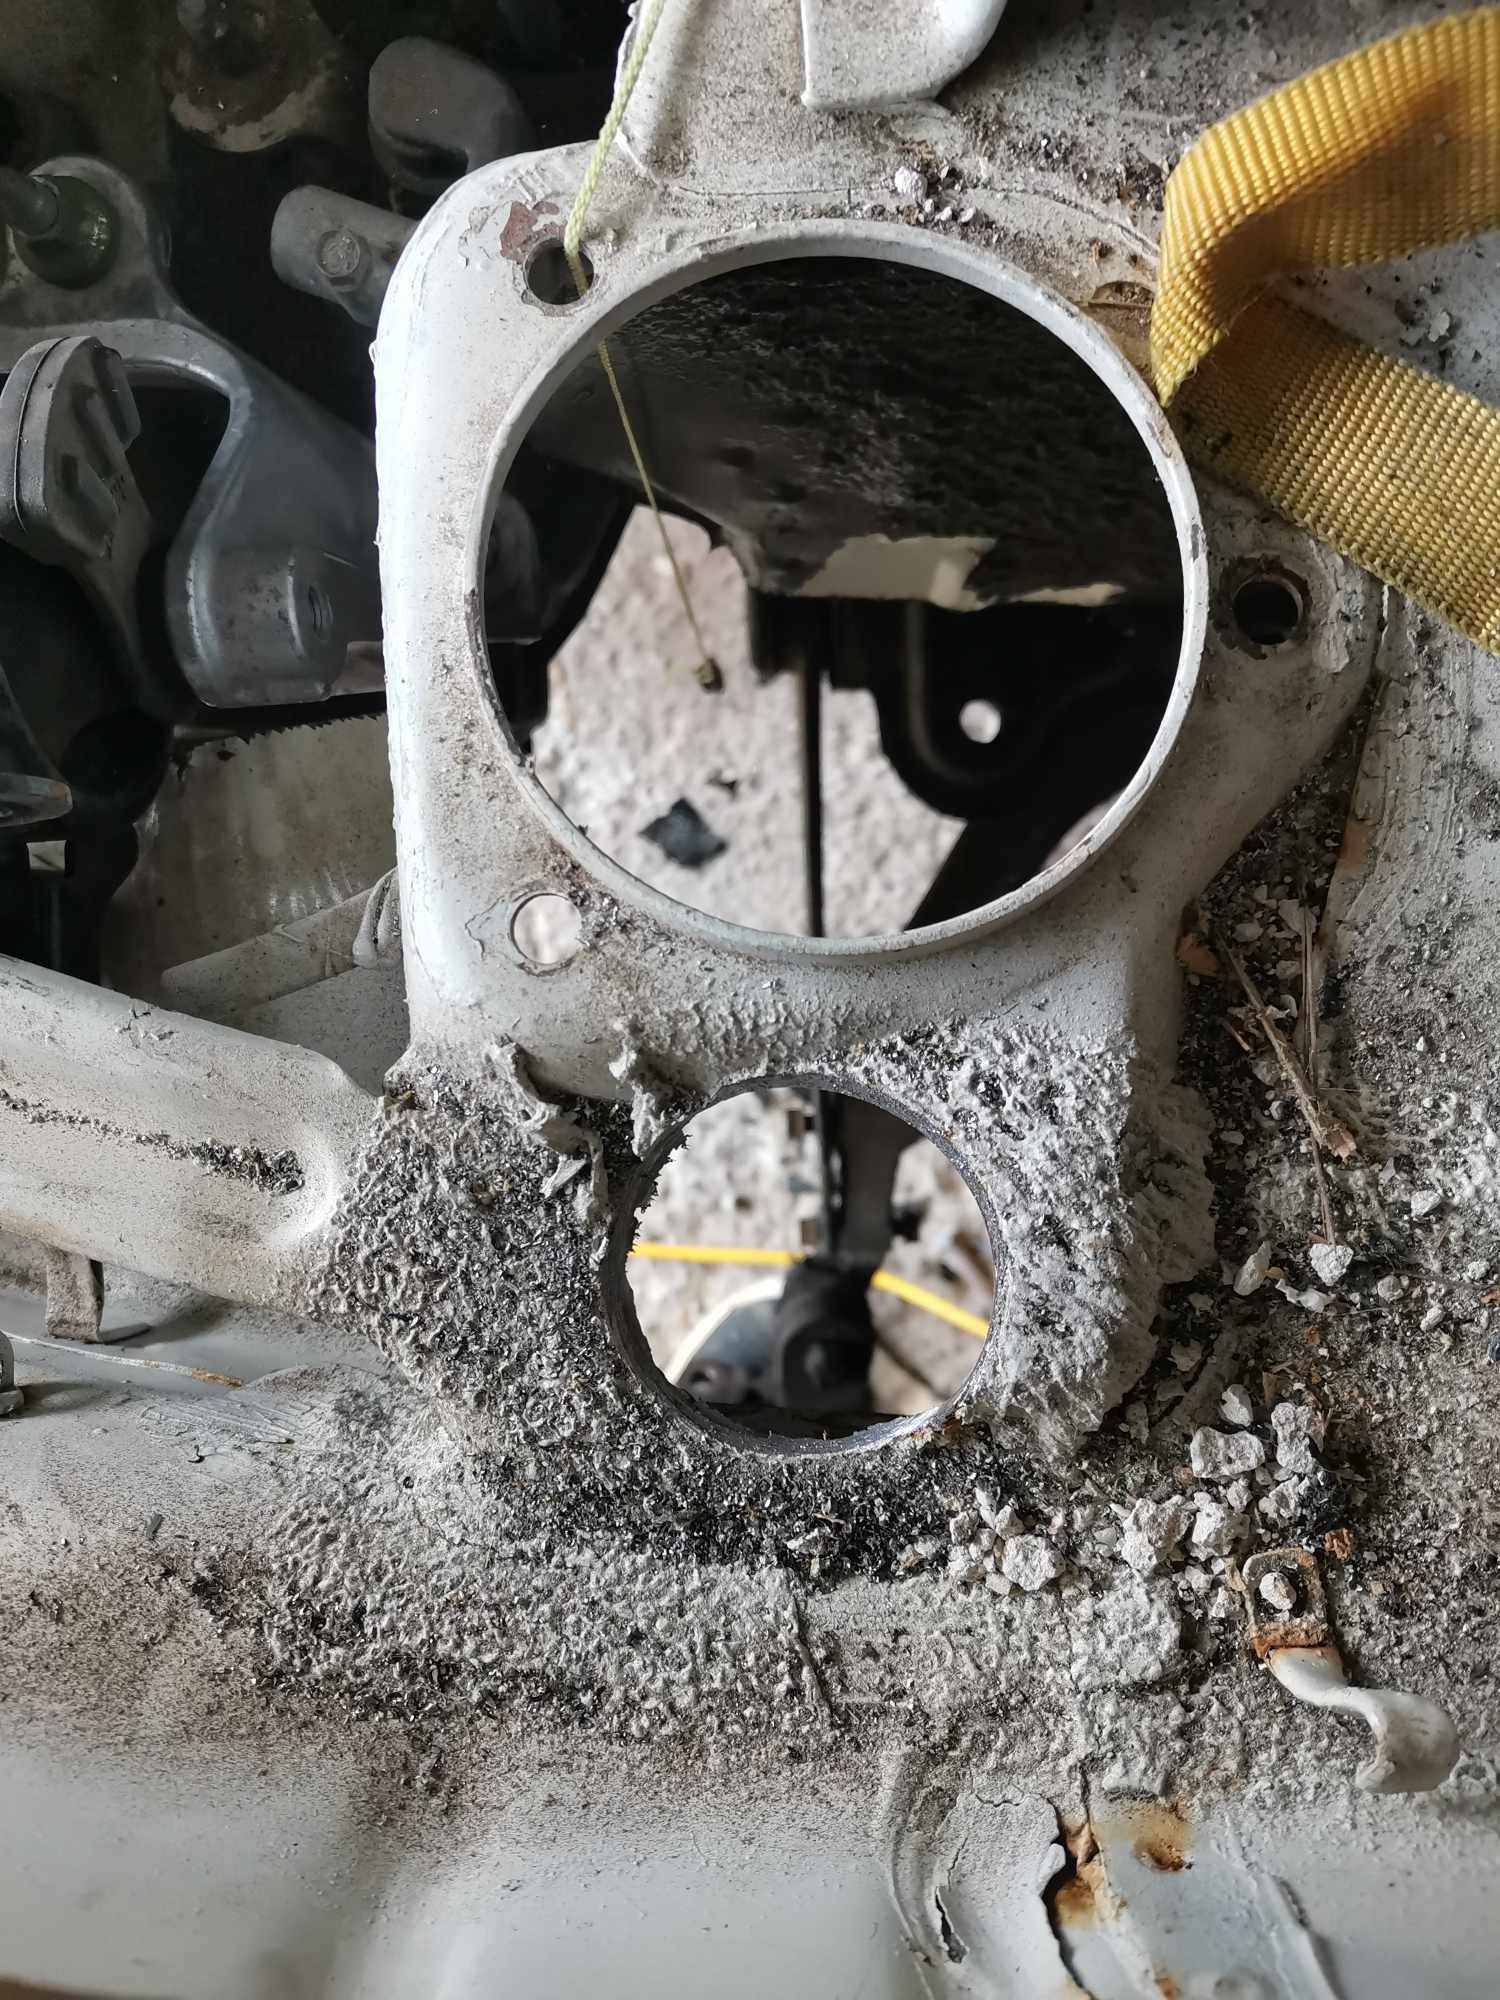
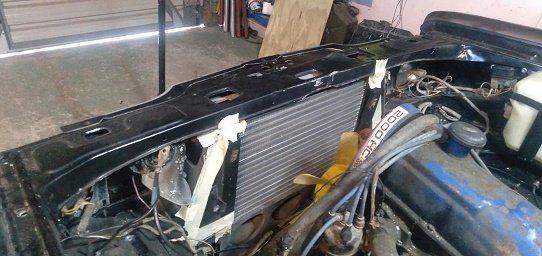
A few hurdles... Only one side worked for the hoses. The next size up is 495mm long and sounds like it would work good. It's over $100 for the hose which is spendy. But for once in my life I want no joins in the radiator hoses damnit. So will just do it. (The non fitting side is currently 305mm) Then I've been making good progress on the wiring, a new roll of DR25 turned up so I finished the injector loom and tested it. Injector 1 - working fine injector 2 - working fine injector 3 - nothing injector 4 - nothing injector 5 - nothing Injector 6 - working fine I figured I must have derped the wiring somehow, so I pulled my loom back off and test it, traced wires back, blah blah. All seemed okay. Well, turns out that the wiring wasnt an issue, but the injectors are. 7 out of 10 of the BMW injectors are seized. BMW life! hahaha. No big drama, as it's probably a good idea to start with some slightly bigger injectors anyway. Internet says these factory injectors are somewhere around 248cc which might have been borderline for high rpm, depending on the deadtime. For interest's sake I will chuck these in Dad's ultrasonic cleaner and see if they unjam at all. Anyone got some suggestions on a good set of long pintle EV14 injectors? Over 250cc and under... say... 500. If there's some common 6 cyl car that is pickapartable I'll go grab a set. Needs the long pintle.
3 points
-
Paint "free candy" Or "Hannah Montana concert shuttle" on the side.3 points
-
in new zealand it always needs to be licenced/rego paid to be on the road at 40 years it becomes "classic". this means a slight change to "continuous licencing" in that it takes a little longer for it to be come deregistered if you forget to put it on hold3 points
-
It's perfect. don't change a thing3 points
-
0.9mm is quite a common compromise wire size. Do alot of solid core mig at work and its my go to for a little bit of everything. Would have gone through over half a ton of it over the last 3 years. I do find its quite lacking at anything big but if I do have 10 and 12mm work to do ill chuck a roll of 1.2mm on for the occasion. 0.9mm can do comfortably about 2mm to 8mm with correct prep all day.3 points
-
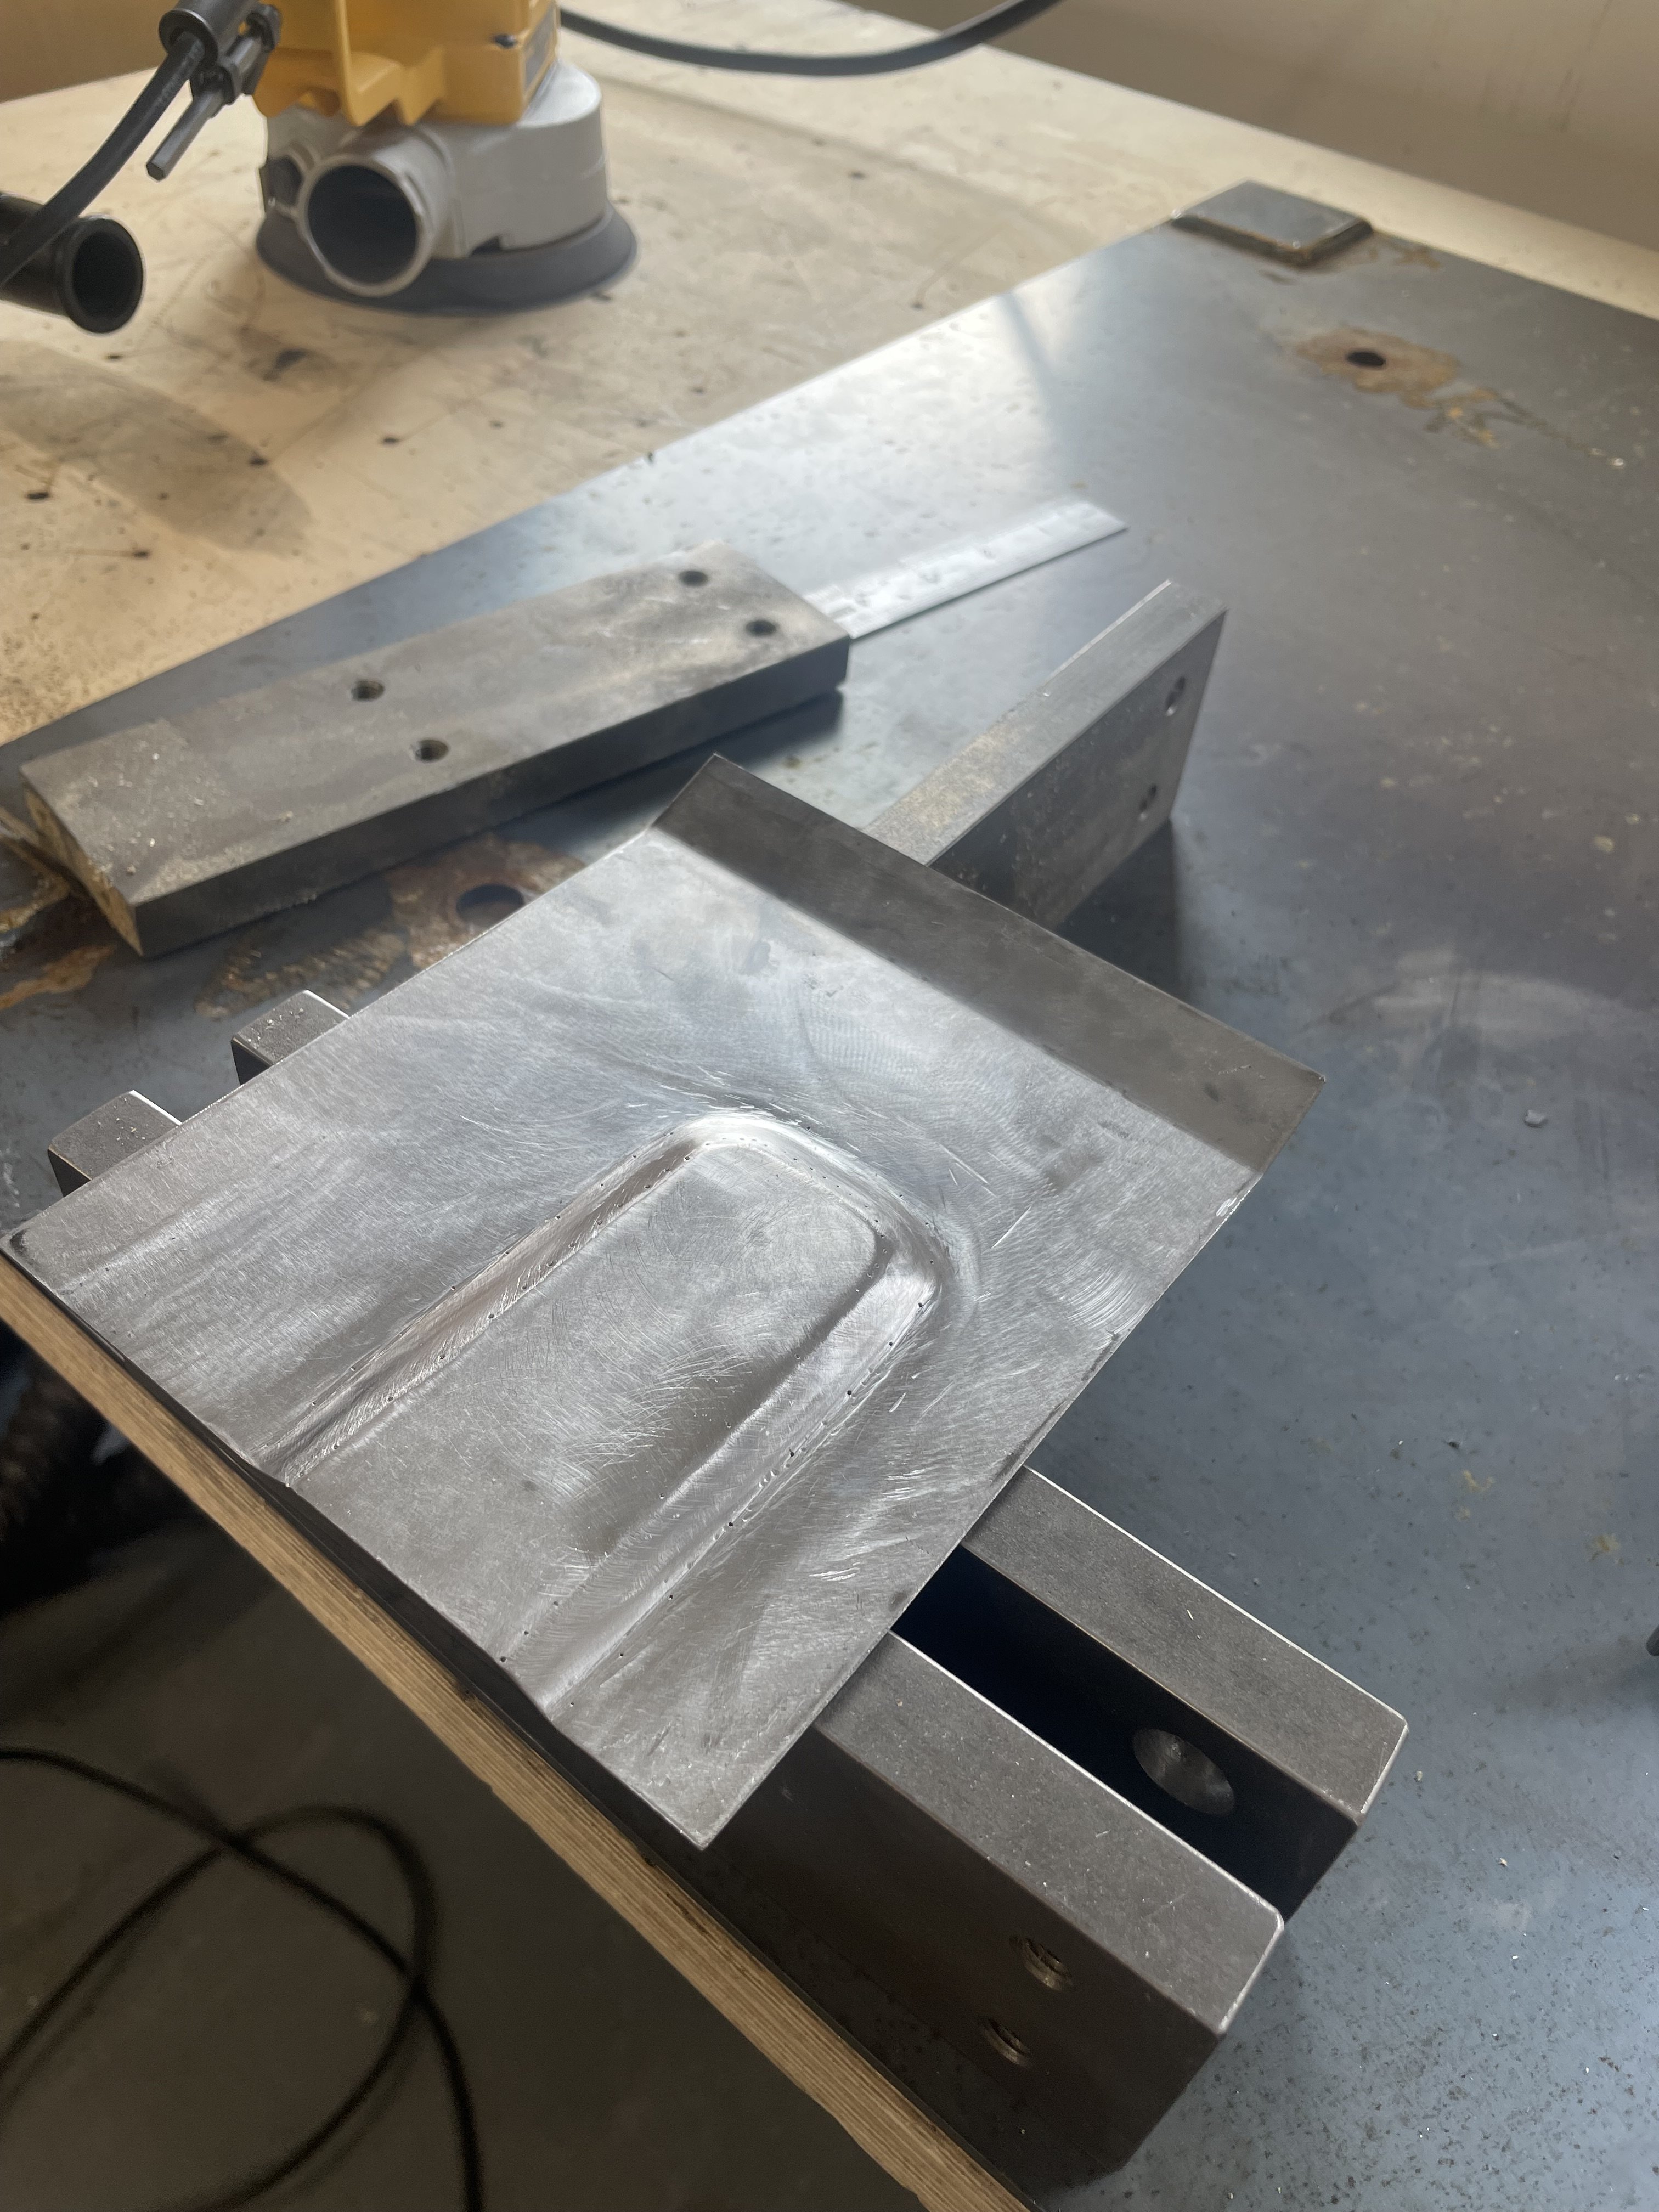
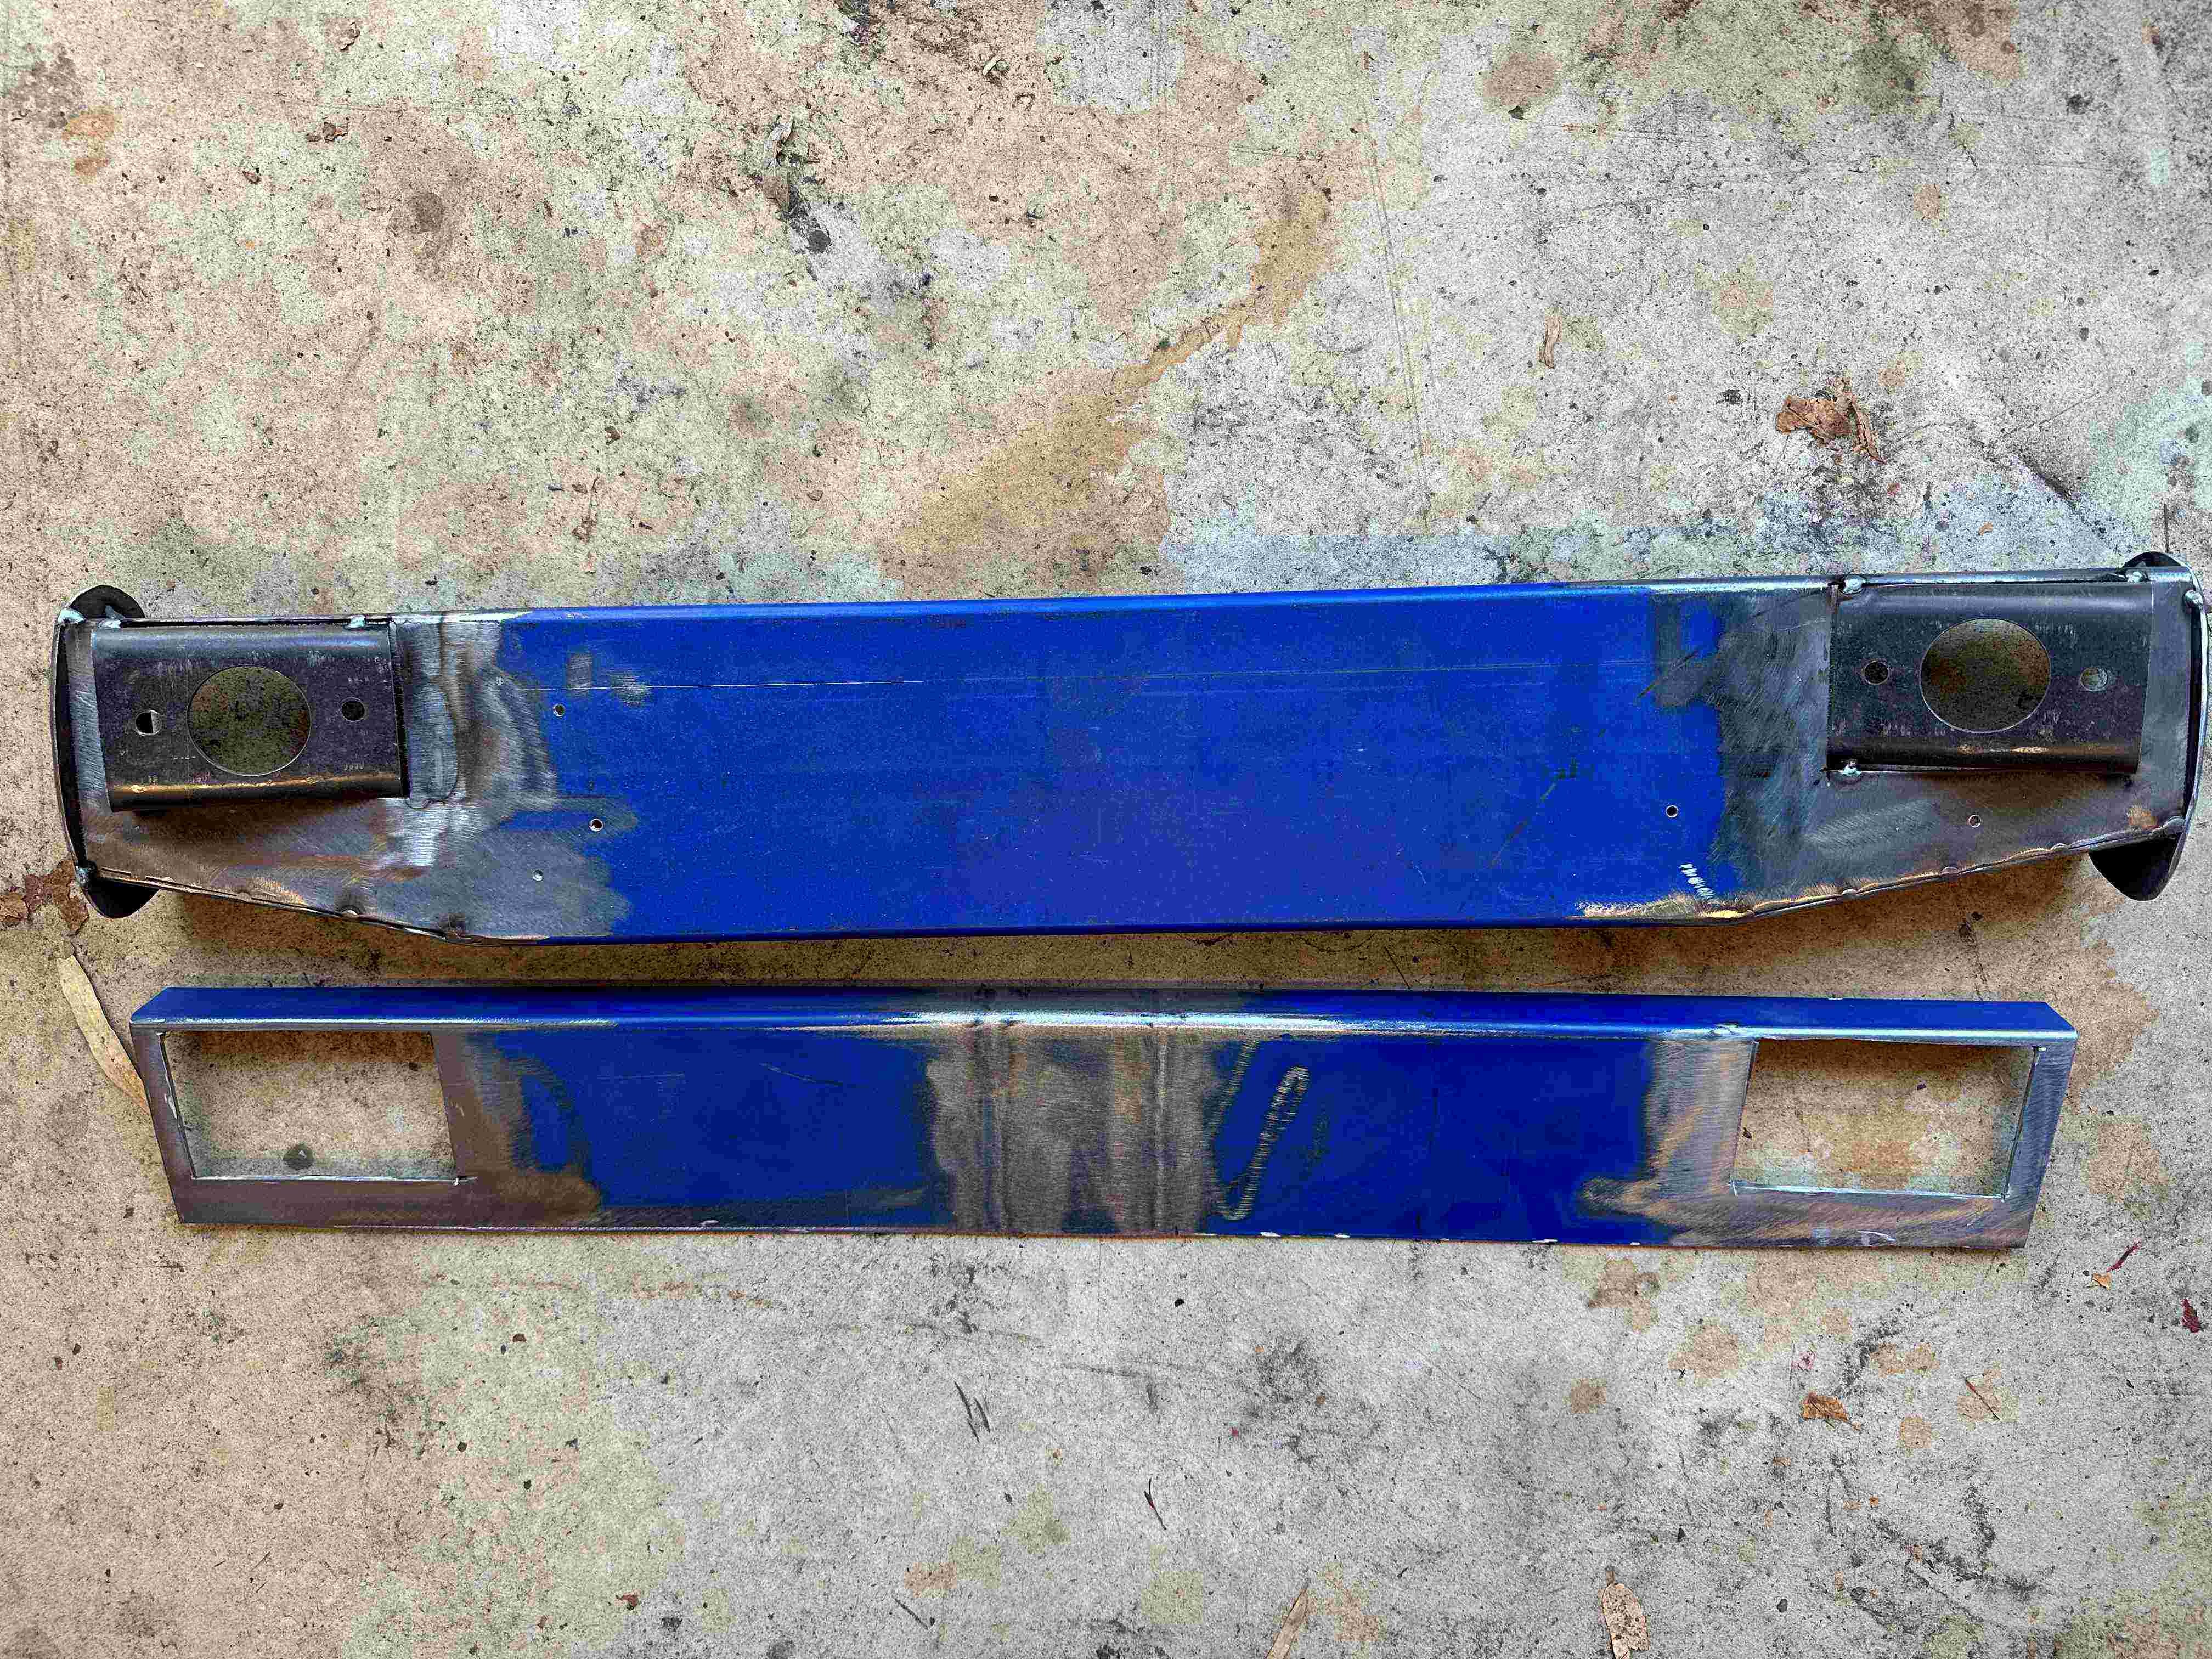
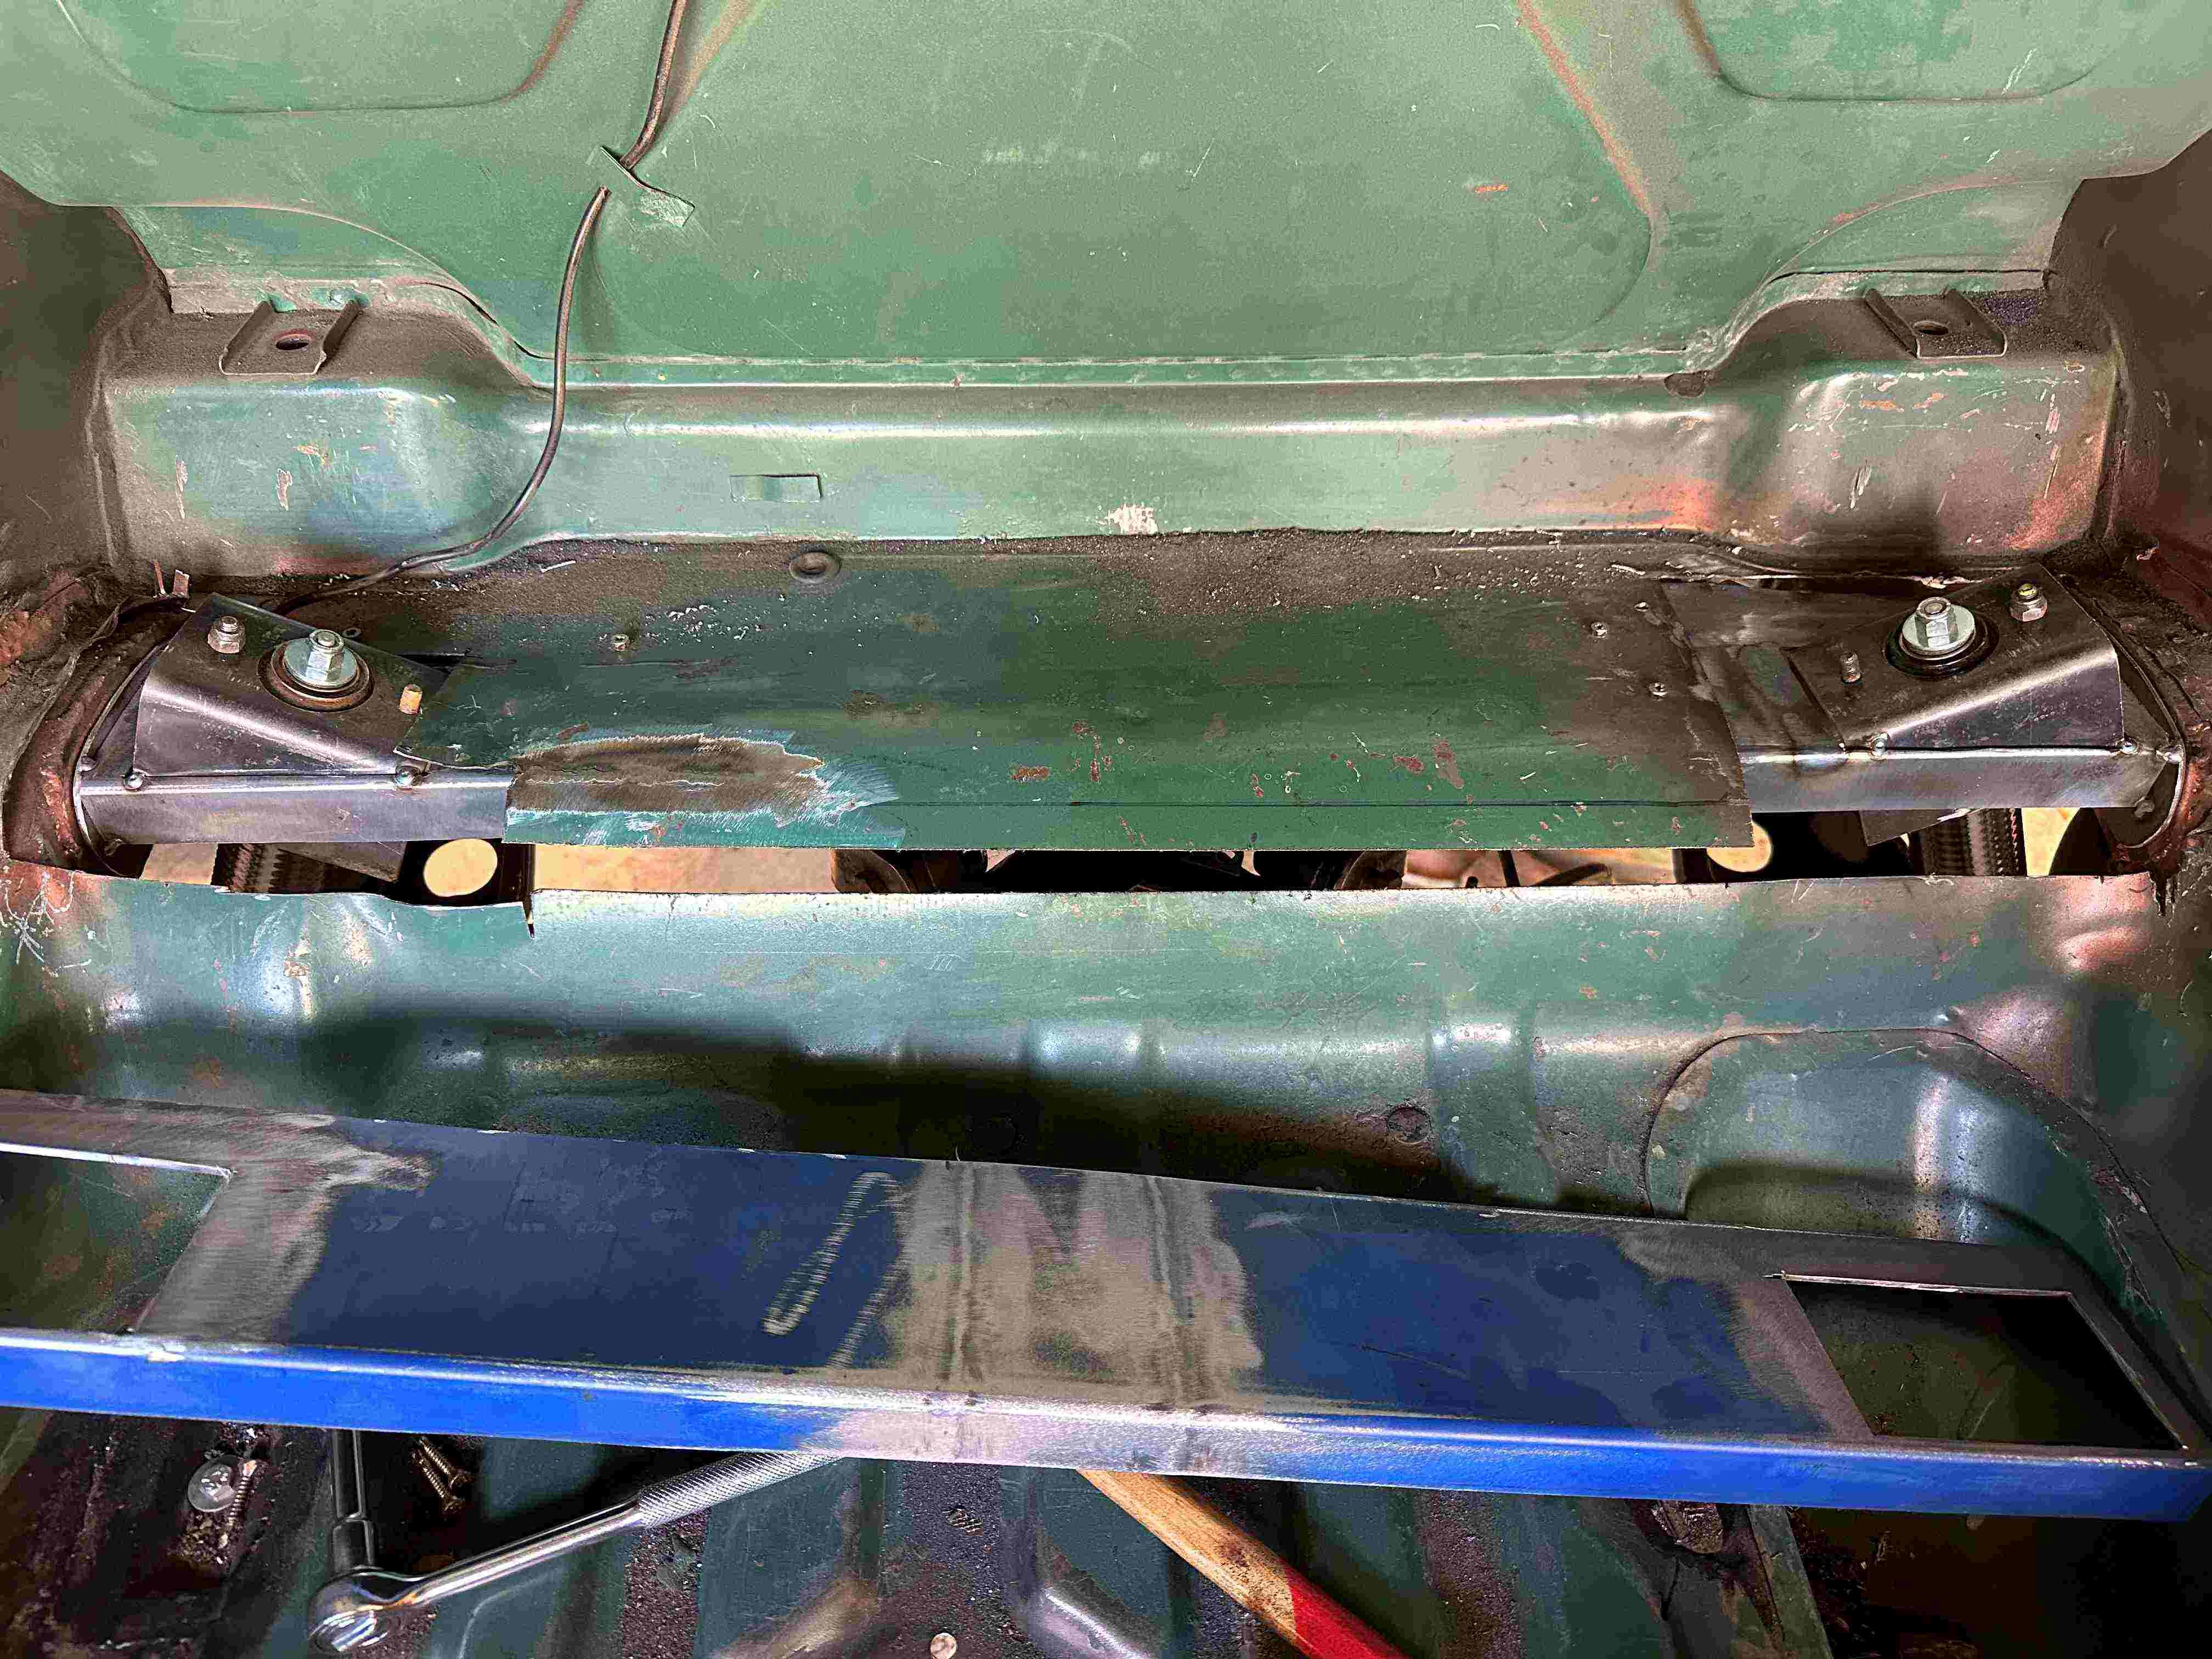
So I decided to make it one piece which I should have done the first time. It makes it much easier to get both sides the same. Pretty much the same design apart from that, with the boots sheet metal sandwiched between the two pieces. All just being tacked together for now until I am sure it is right. Shouldn't need an additional brace between the two sides now.
3 points
-
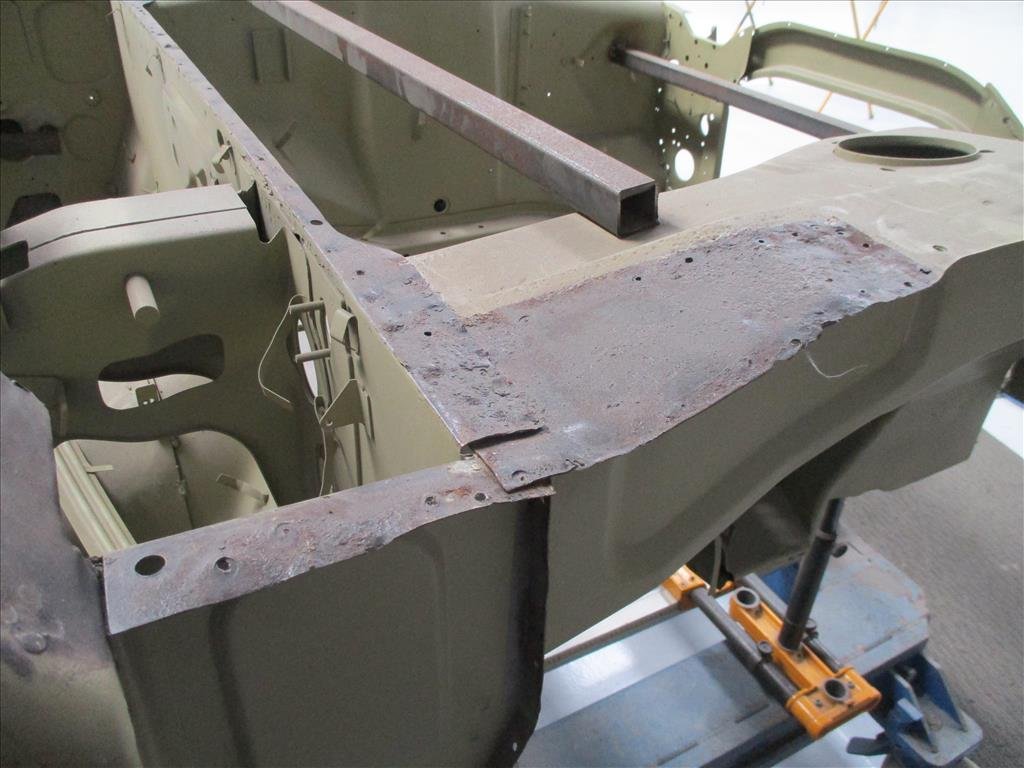
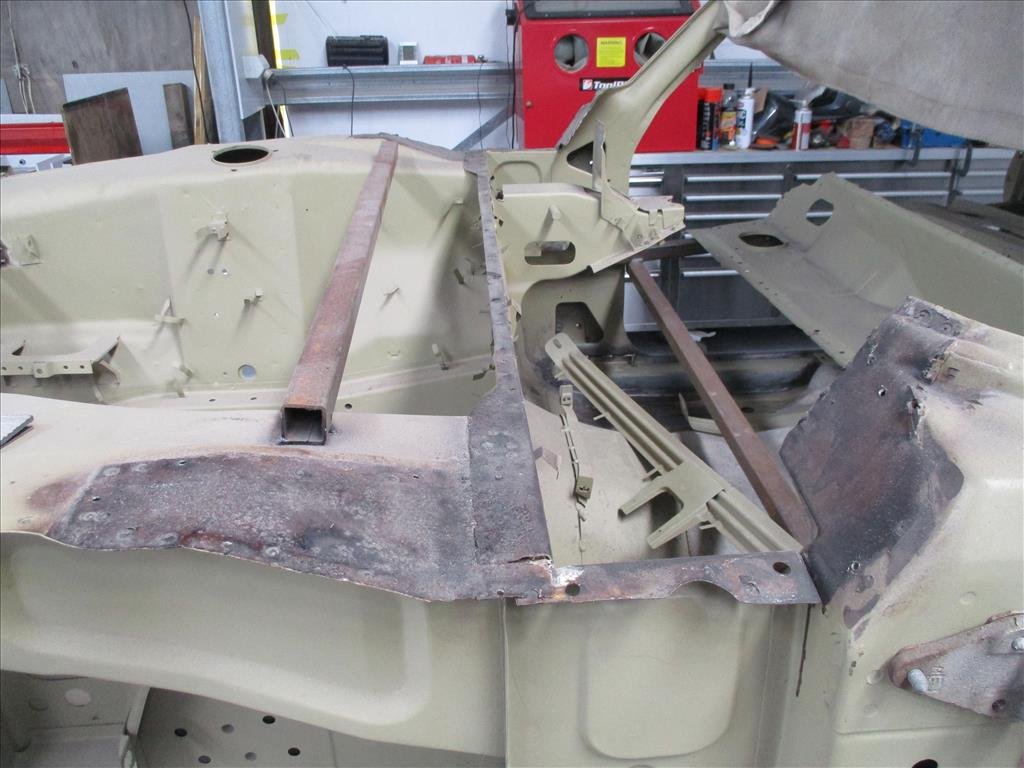
I won't bombard you with 50 more Panel Barry Hakosuka photos but this one is a huge milestone. The majority of the fabrication and rear end structure have been completed and the final weld up is on! The chassis is now razor straight, likely straighter than when it came out of the factory. I can't remember the last time it had a rear end on it? It's been over 5 years for sure. The back panel you see there is the original one which he's using to get the correct holes for welding then will be replaced with a brand new reproduction item that I've provided. Onto the front and to my amateur eyes it doesn't look nearly as bad as the rear but I'll leave it to the professionals on that one. He will have a poke around, clean up what can be cleaned up and replace what needs replacing.
2 points
-
Think the point was to try do it before the clocks move back (forward? Fucked if I can remember) so maybe midweek next week or something.2 points
-
And it is a lot cheaper.2 points
-
When did you fullaz wanna do this? This weekend or nekweek sometime?2 points
-
I too can hook you up with a round thing with a hole in it.2 points
-
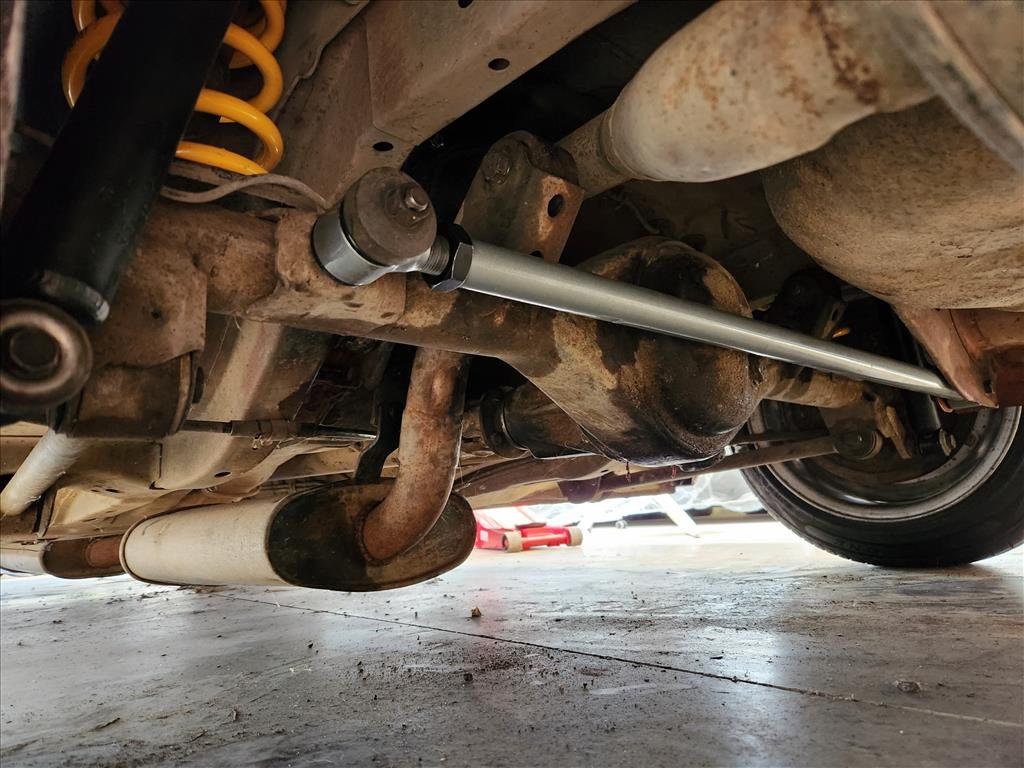
Trust me to turn a one hour job into two days. Ever since I had the SSR MK3s built there was some fender scraping on one side in the rear (which is why I decided to switch it up briefly and have one side swapped around front to back). This is partially because the rear arches are probably uneven and filled with bog and partially because I had the wheels built without measuring anything. Seeing as I was doing a Whiteline stock order I added one of their adjustable panhard rods and try to square up the rear diff. First issue was one of the nuts stripped threads so I had to cut that off and made a hash of it, then I was trying to do this job without unbolting the 4 control arms which meant the diff was super hard to move around so I gave up and went home to sleep off my hangover. Day 2 I straight away unbolted the four control arms and life was considerably easier. I need to get another castle nut to replace the one I cut off but otherwise it's on now. Also a little bonus is the control arm bushes appear to have been replaced so they're still nice. Seems like I was also adjusting it the wrong way so rectified that and I think it's about even on both sides now. Keeping in mind the guards are filled with bog so also not really even. I was thinking about doing a slight one way height adjust on the rear but might leave it for now until car is back to driving and see how the clearance is. Long term plan is not to use those wheels anyway.
2 points
-
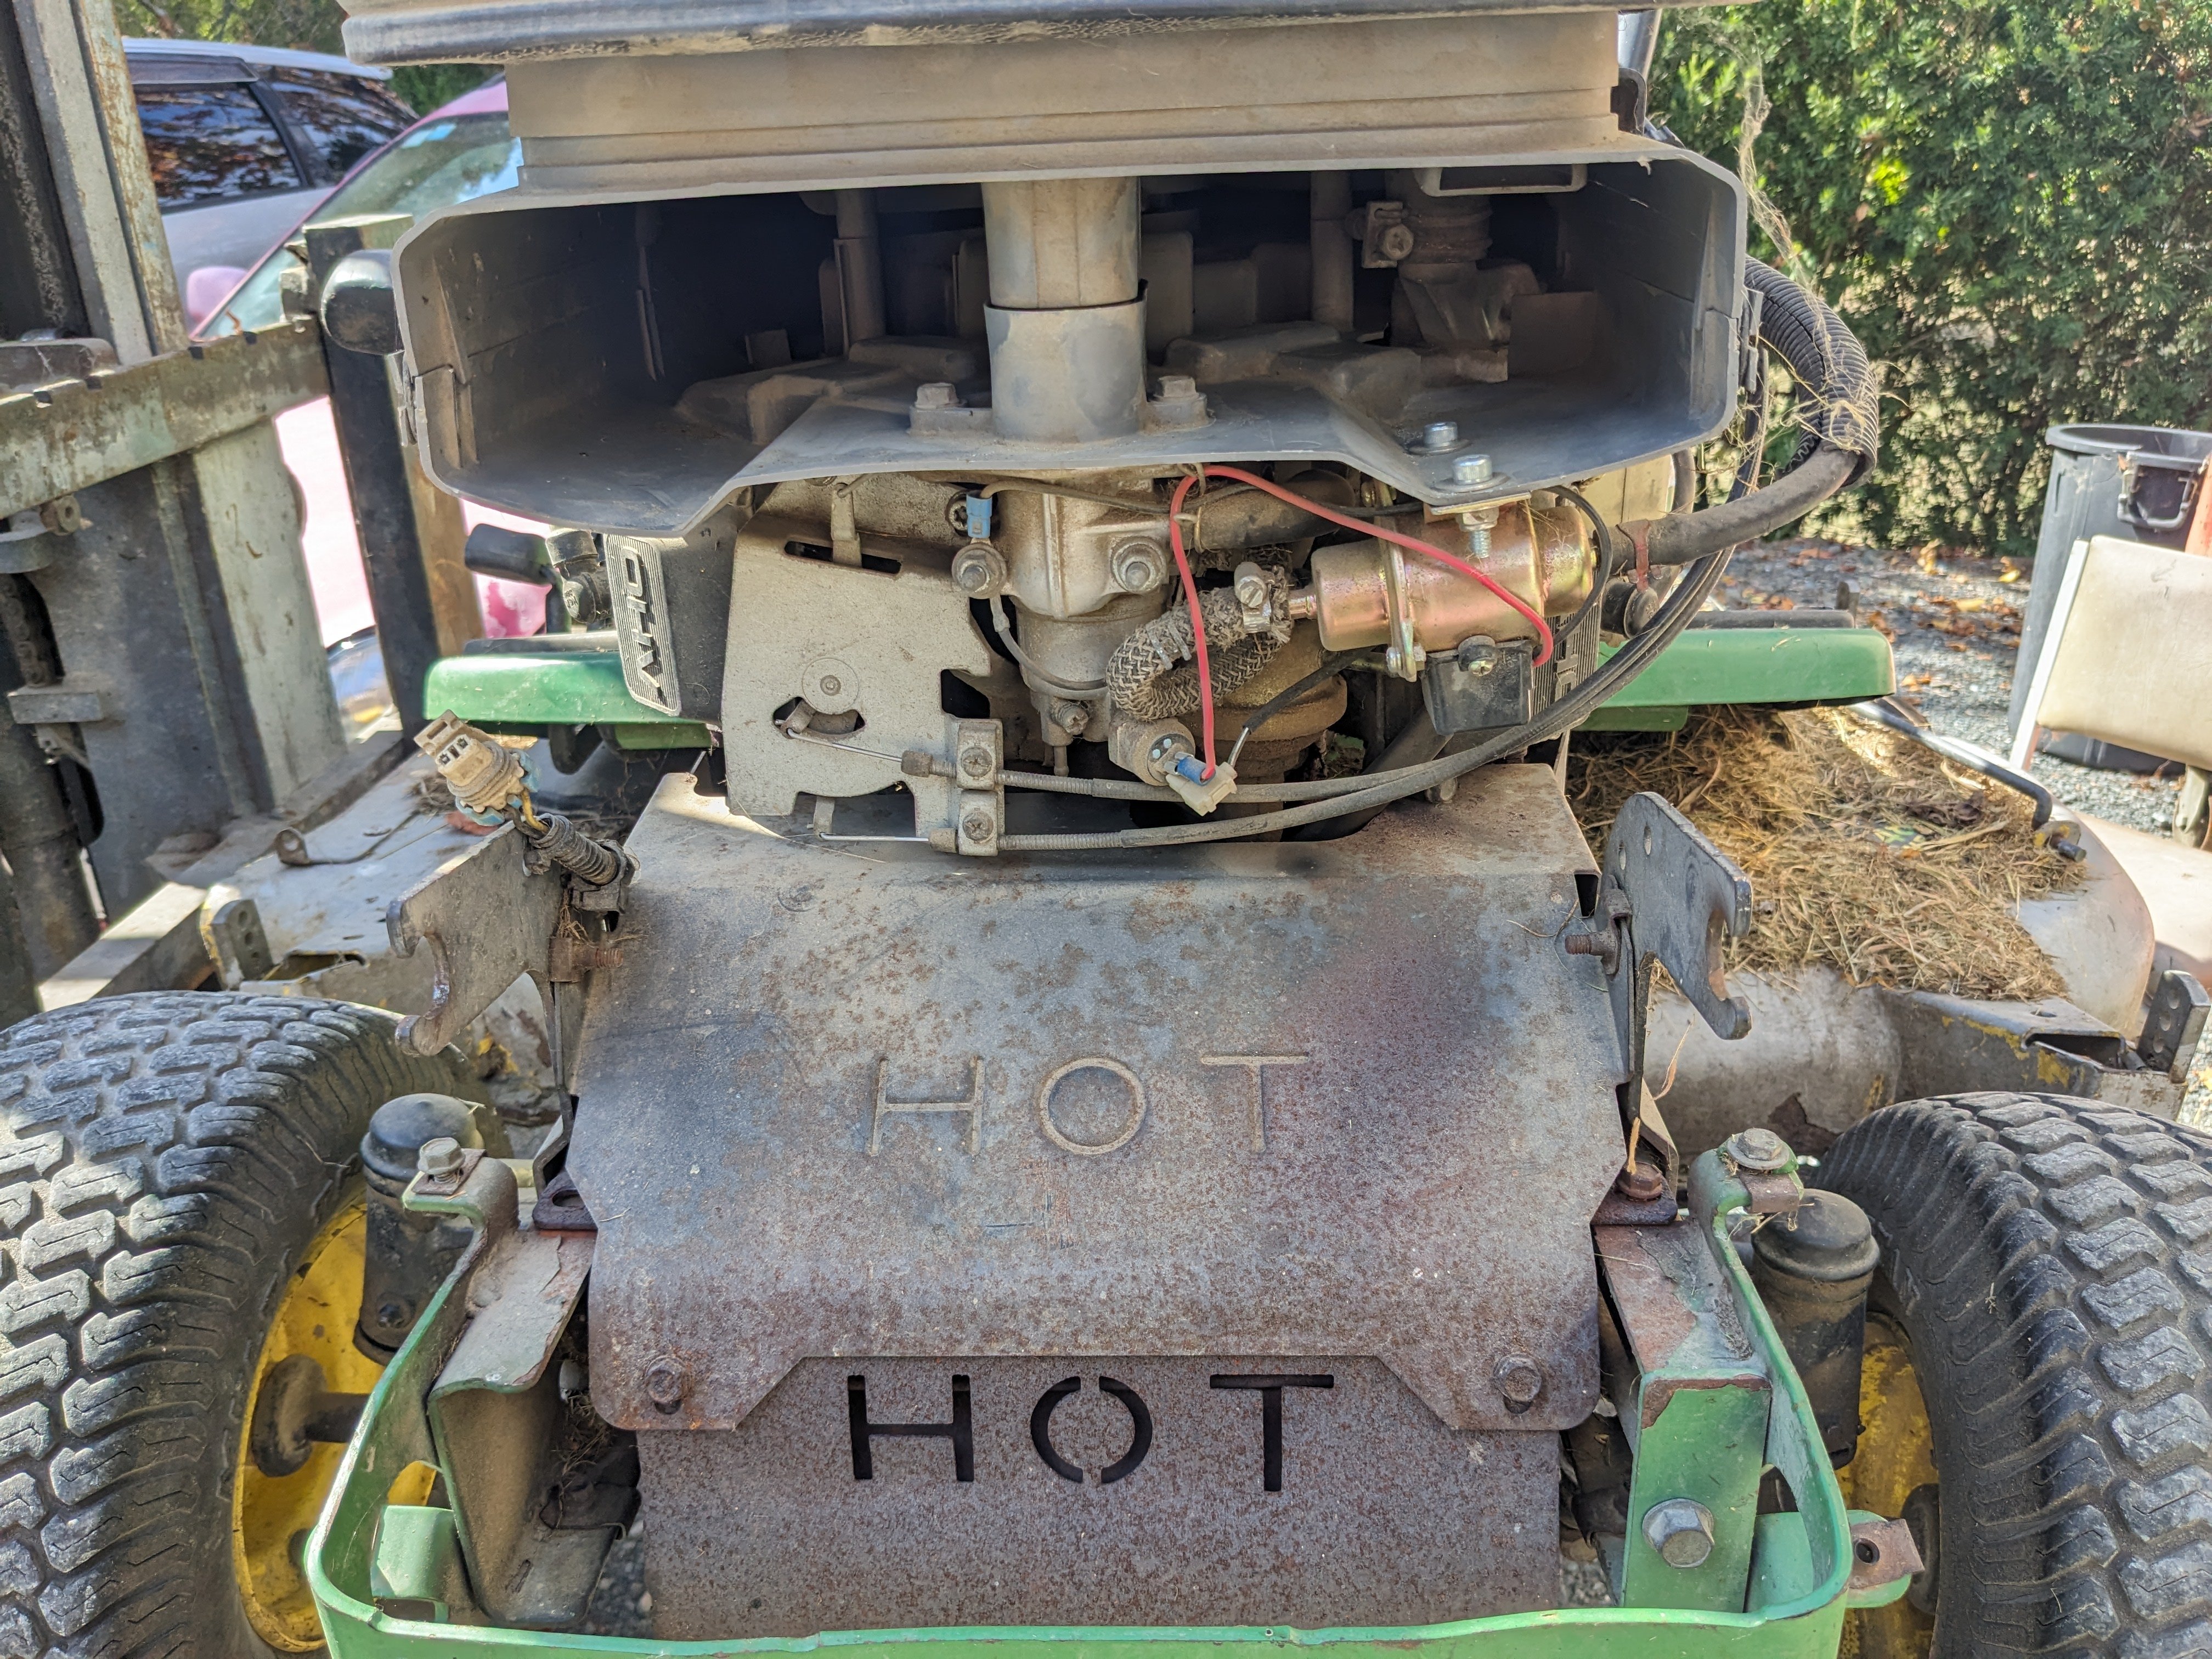
Then I remembered the shitty fuel pump that I hacked into my ride-on a couple of years ago cos it was way too much money to buy OEM; Then naturally this; Dunno what the crackly business is, nevertheless it sounds glorious.
2 points
-
Driveshafts in Oil in Coolant in Popping and banging when I try to start it Realising the plug leads are 180deg out Boom Then realising the fuel pump is leaking like a sieve and it is a $14 AliX special so not unexpected. Then finding the original Facet pump and checking it works, it does Then realising you have no fittings to make it work so no driving2 points
-
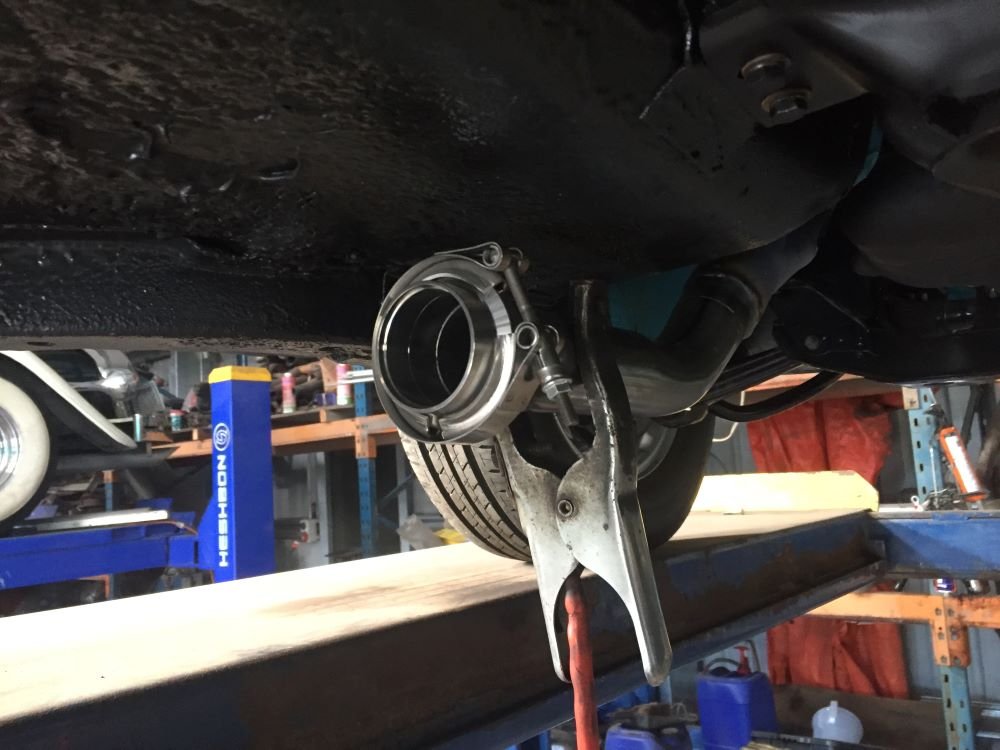
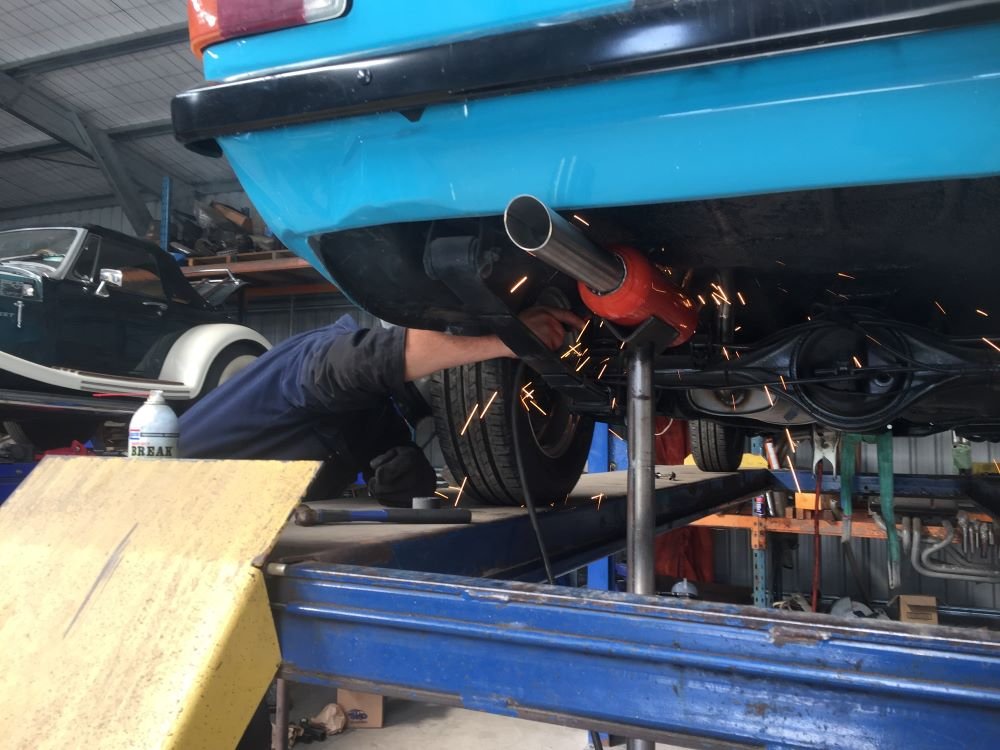
Car back on the trailer and off to Christchurch to have exhaust fitted. Corey from Elite Exhausts has got the job and after discussing what I wanted he sets to work. We are going with a 2" system with standard oval muffler before diff and a Coby after. I really like watching someone working who knows what he is doing. He has it all mapped out in his head. No tape measure, just a piece of wire to help form curves.. He cut off end of headers to start 2"pipe and fitted V-clamp, welding in place. Next placed muffler in place and bent up pipe for first section. Welded in place and fitted mounting bracket. Next put Coby in place and bent up section over axle and welded to first muffler. At this point Corey said we should see how it sounds. While he held Coby in place, I started car. Perfect, has a nice throaty note but not to loud. Welded Coby on place and mounting bracket. Finally put on tip and all done. Just a few more things to do. Wof, Wheel alignment and tune. Shouldn't take to long ??? Project Discussion https://oldschool.co.nz/index.php?/topic/84912-petes-mk2-escort-1600-sports/page/3/#comment-2625686
2 points
-
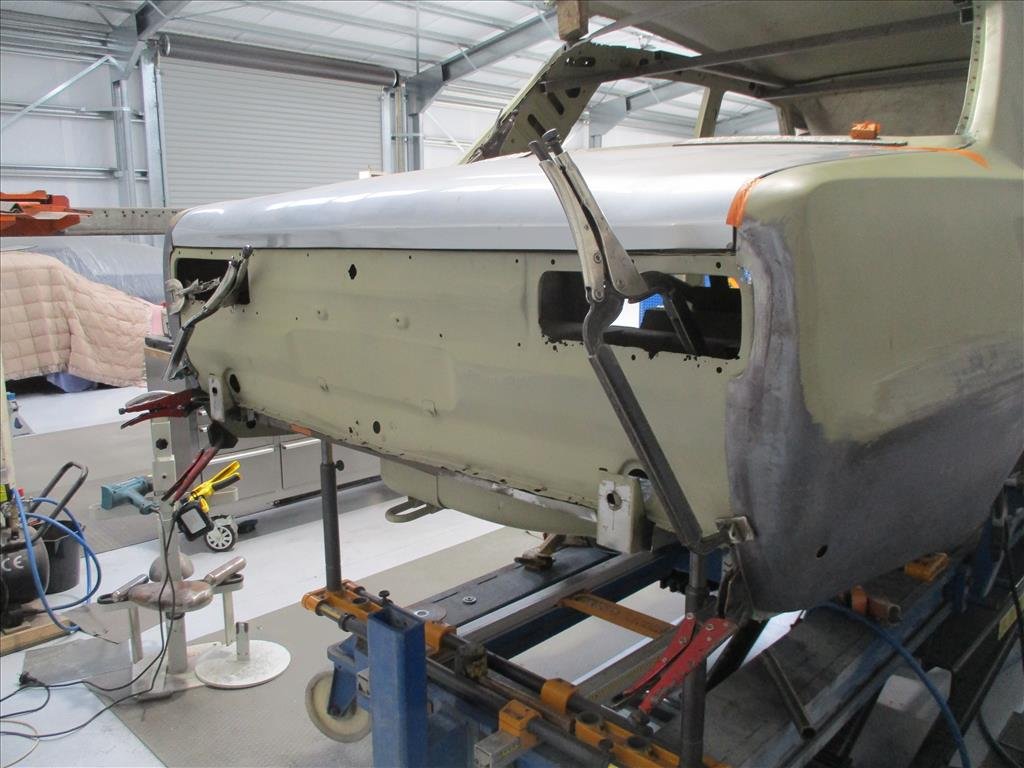
Scooped the engine back out the hole. Then put the gearbox back in so I can do the clutch and brake lines. I'll also be redoing the engine mounts as cert man wanted them thicker. And I can weld in the relocated steering column lower mount. I'll also be clearancing the chassis rails a bit more for the passenger side exhaust cause I put it in the wrong place the first time. And some clearance for the steering intermediate shaft. Epotec goes a bit toasted marshmallow if you use a MAP gas torch to soften underseal for scraping it off...
2 points
-
So when I left off the motor was back to completely disassembled. I got the cap machined and now it's back together with the correct crank end float. The other thing is that I got the head flow tested with the porting and bigger valves. It shows about an 11 percent increase over stock. I was kind of hoping for a bit more but using the "no science just hog it out" method is probably why 11% was the result. Anywho, now it's time to get the head all sorted and I can bolt it on. Need new valve springs, new spring washers and retainers - all of which will need to be custom or at least sourced from some other engine. In preparation for this I shortened the valve guides to suit the machining that the head needs to clear the higher lift. 3mm off the exhaust and 6mm off the inlets
2 points
-
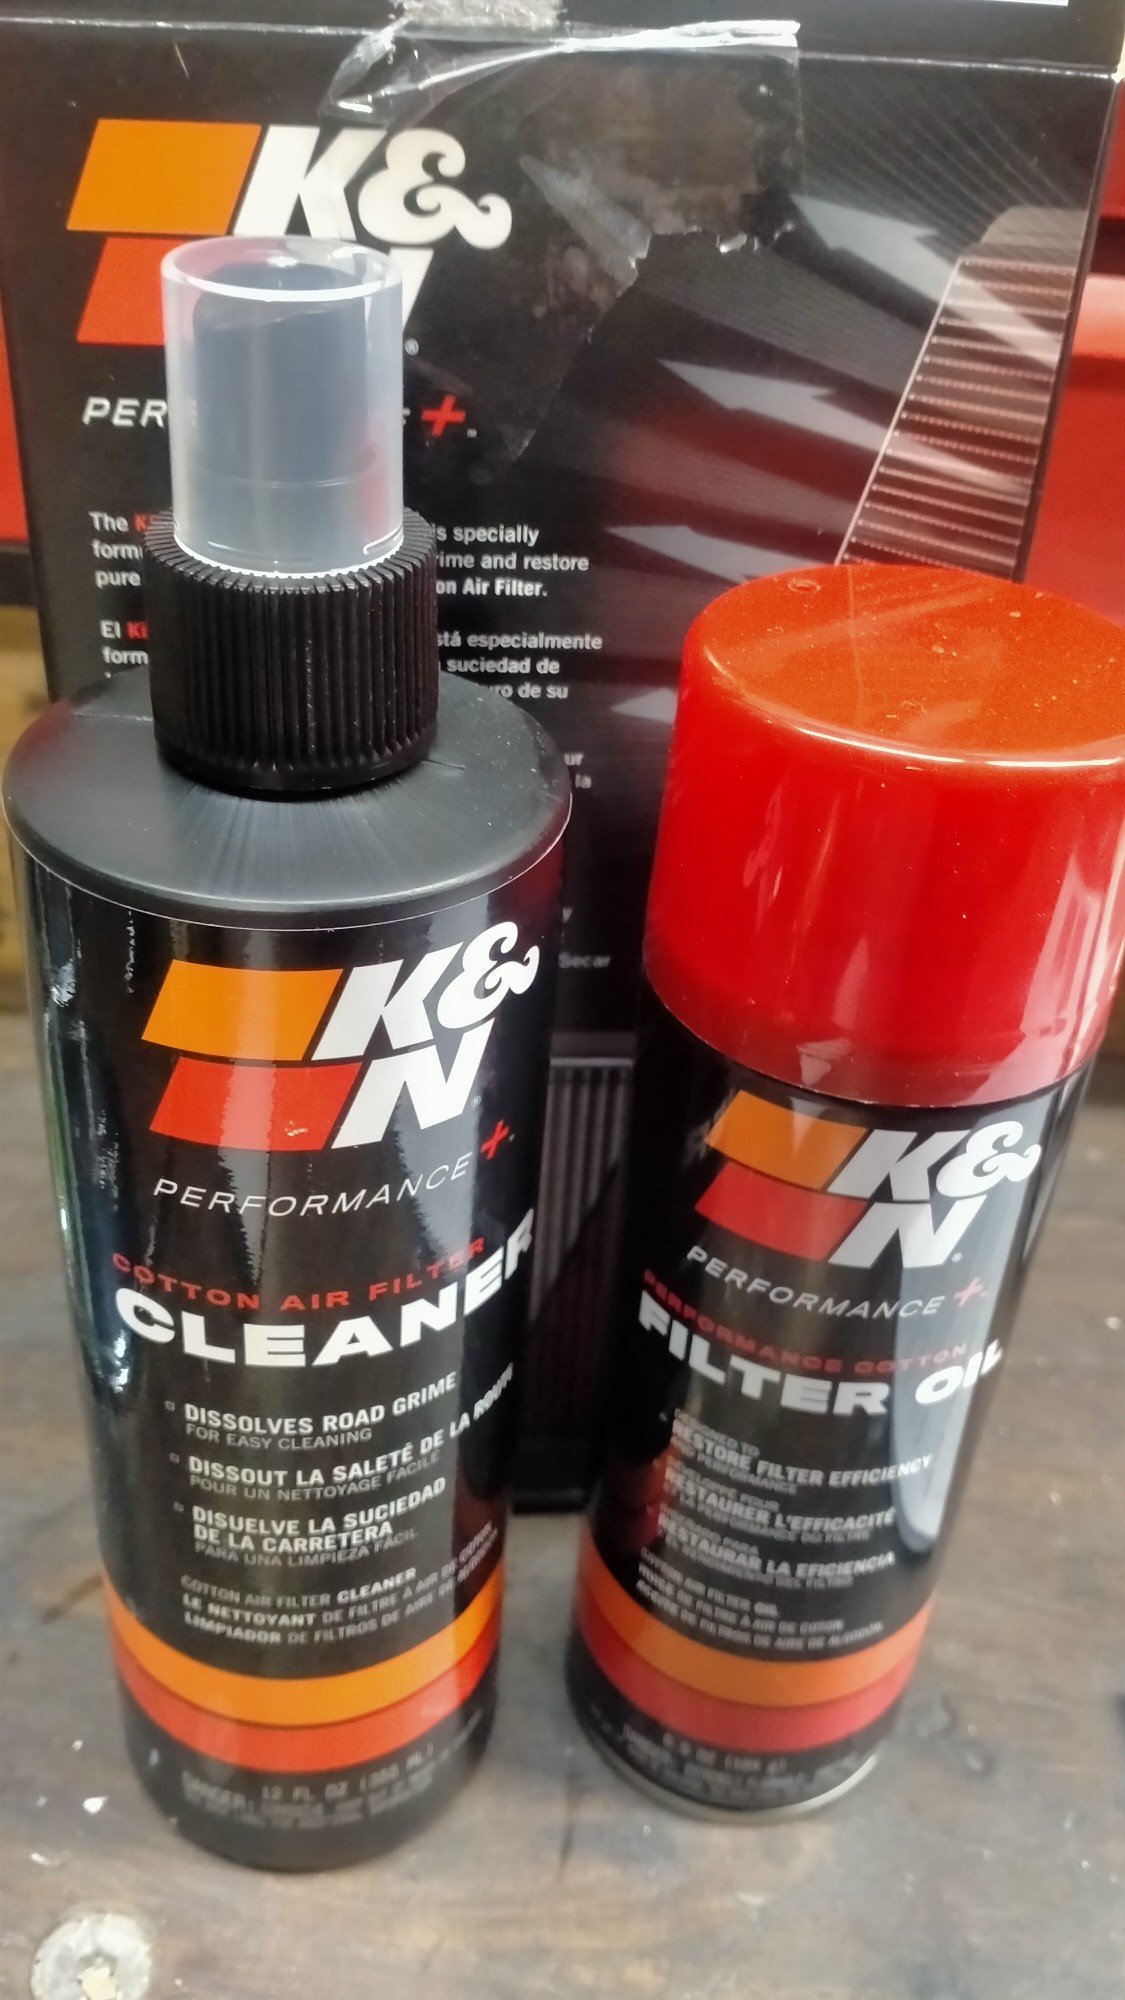
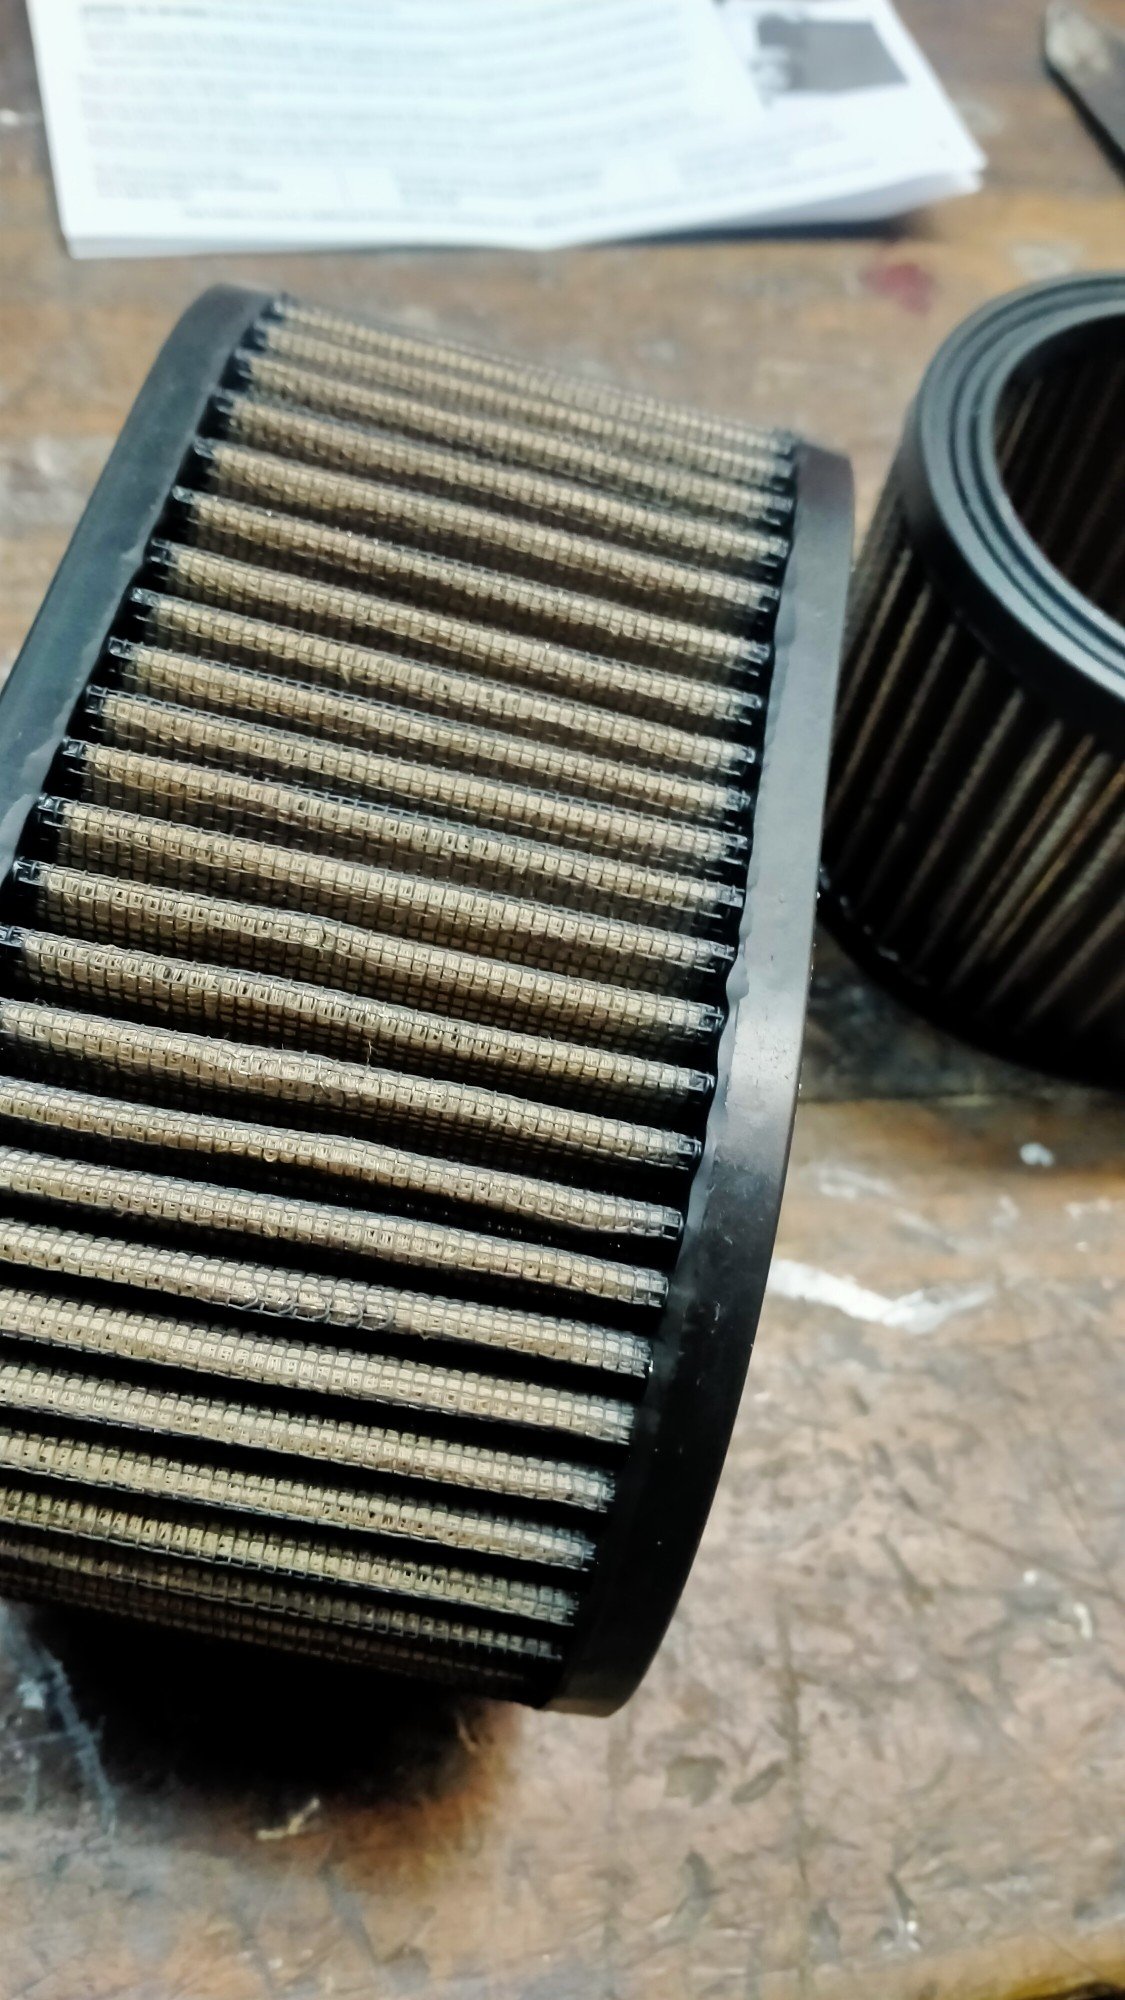
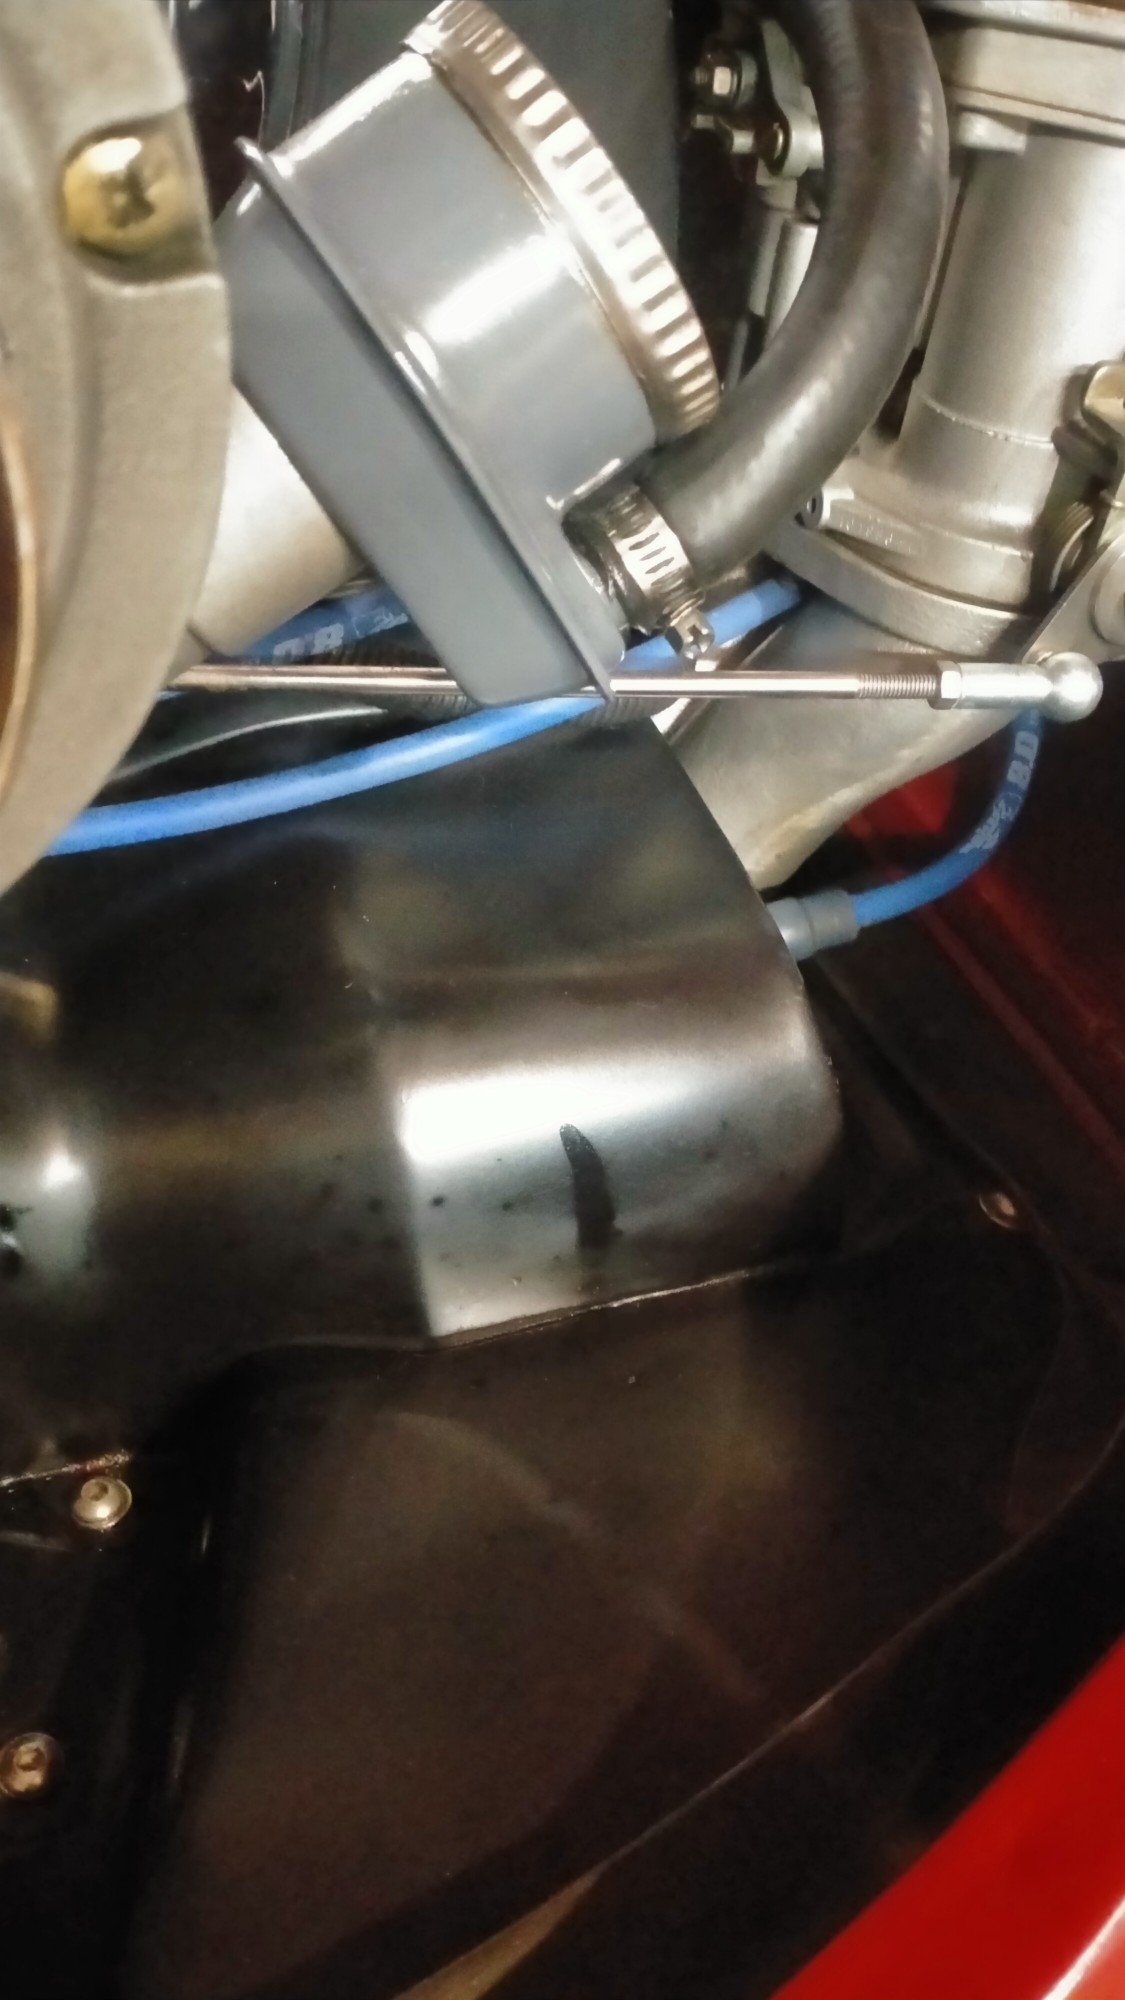
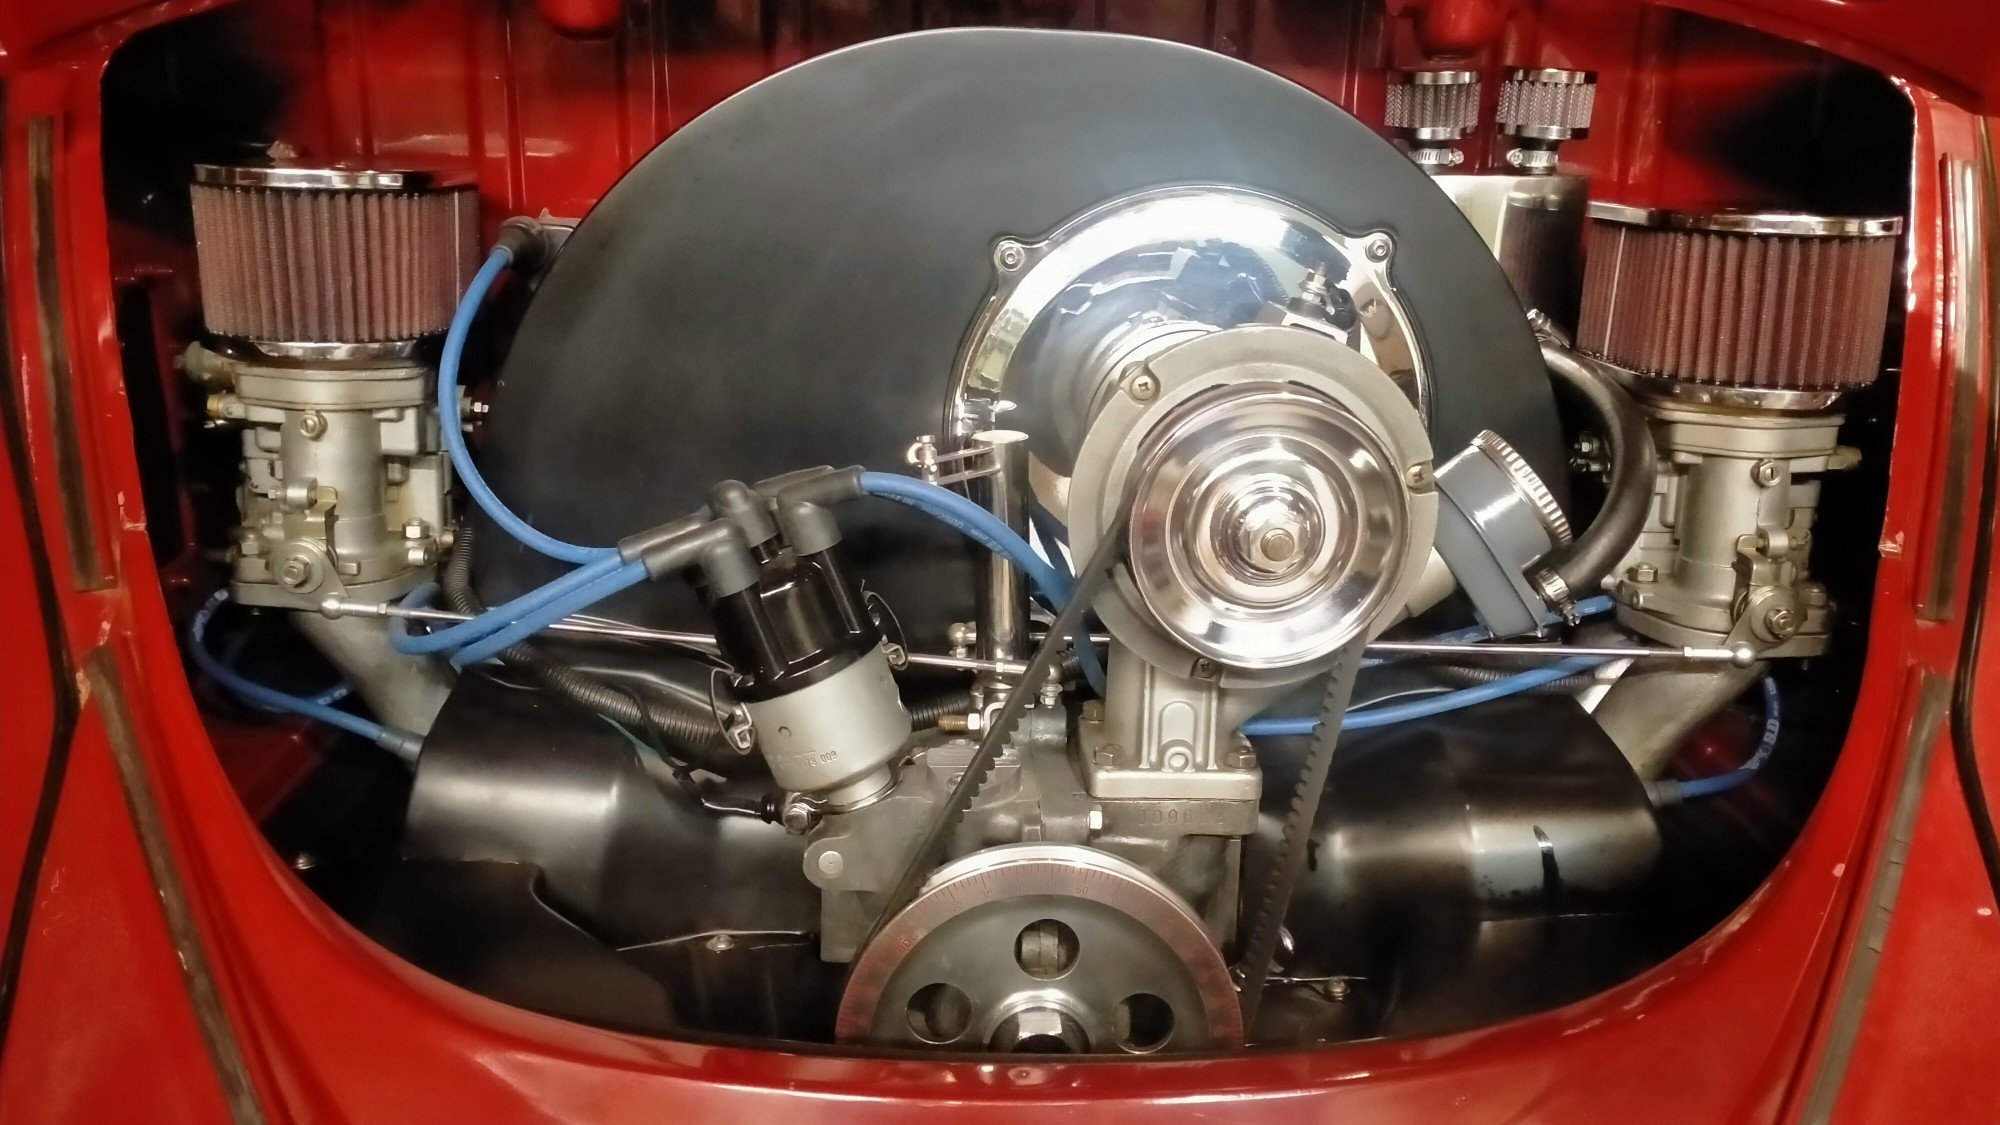
Minor maintenance tasks update. Thought I'd give the air filters a birthday day to protect my newly rebuilt Dells. Cleaning kit is only 40 bucks from ripco/supacrap autos. Stage 1, clean all the nasty. Once dry, stage 2, re-oil and done! Colour match filters. Other thing I've been chasing is this very annoying oil drop from the filler/breather. I wasn't sure exactly were it was getting out from. Pretty sure now it's from the breather hose connection as it's the factory fitting is slightly smaller and doesn't have a barb like the ones I put on the catch can. I had hoped just hooning on the hose clamp would work but no so I'll ad that to the list.
2 points
-
Have done a few nights for the local structural/ heavy transport fella and he gas flux core for everything. Shits amazing for 5mm and up just melts in, heaps of penetration and no splatter. Weld speed is about twice that of solid wire, great for positional too. I brought a 5kg roll for home which I have played around with a bit, ill take a pic of the label tomorrow. Not something a normal person would need at home but for reskinning a truck bed or smashing out some portals for a building, super invaluable.1 point
-
I will bring popcorn......1 point
-
Thanks, Guys, Ouch I thought it was 20 years. lol1 point
-
Hi All, Can anybody recommend a machine shop that can whip up a spacer? With the box swap the engine is a lot further back now and I need a spacer to take up the slack. Washers are doing the job now but I'm sure it'll make the cert man wince.
1 point
-
Isnt it something stupid like gloss coat, decals (better base for them to snuggle down on), then matt varnish, weathering then another dose of matt? All sounds a bit convoluted.....1 point
-
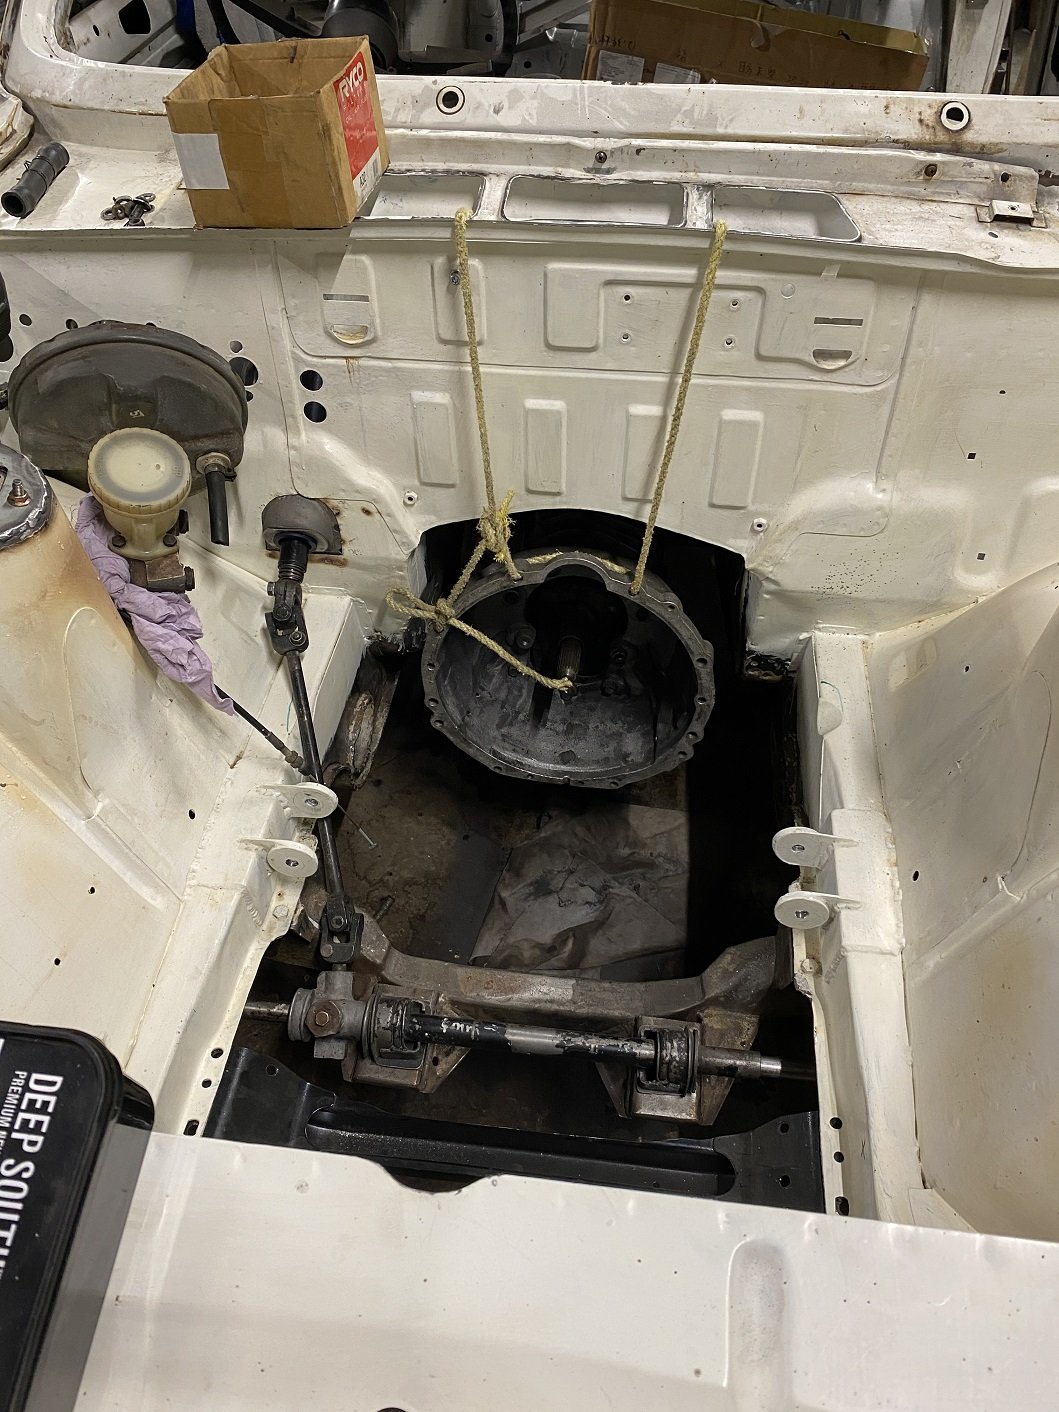
Bright and early this morning, firstly time to pour some liquid money into the box once the engine is kindof level. 3.2 liters of Redline MTL which all the cool kids say is the only shit to use in an X1/9 box. At $200 for 4x bottles it fucking better be. Then on to the main event; Then after half an hour of wiggling and jiggling, angling and dangling etc Then the rest of the day bolting shit back on; Just the driveshafts and some oil and it might be time for a skid. But thats tomorrow's effort.1 point
-
Aaaaaaannnnddd car is still in the weather outside. But i just found and paid for something i have been looking for since 2005ish..... AN INTERMITTENT WIPER SWITCH!! This may not seem like a big deal but only having a 2 speed wiper switch in rainy reporoa is a problem. And yes while i could have wired in an aftermarket timer that wouldn't have felt right. So long as david from gumtree doesn't let me down.....1 point
-
Pulled the tappet cover and sump, all looks well; Printed a new faceplate for the heater mech with the knobs set back a few mm as the cables were pulling it a bit, plus I printed a white insert for the indication to make it tidier, this just got coloured in with permanent marker for the red and blue bits; Clutch arrived; Also my younger self had bodged something for the top engine mount as the original one didnt work with the new engine, this was an unconvincing effort. So I spent some time with the lathe and the welder and made something much nicer with replaceable standard bushings;1 point
-
Hey good news I've fixed all the broken image links in this post.... Soon I'll update it on everything me and the wee car have been up to.1 point
-
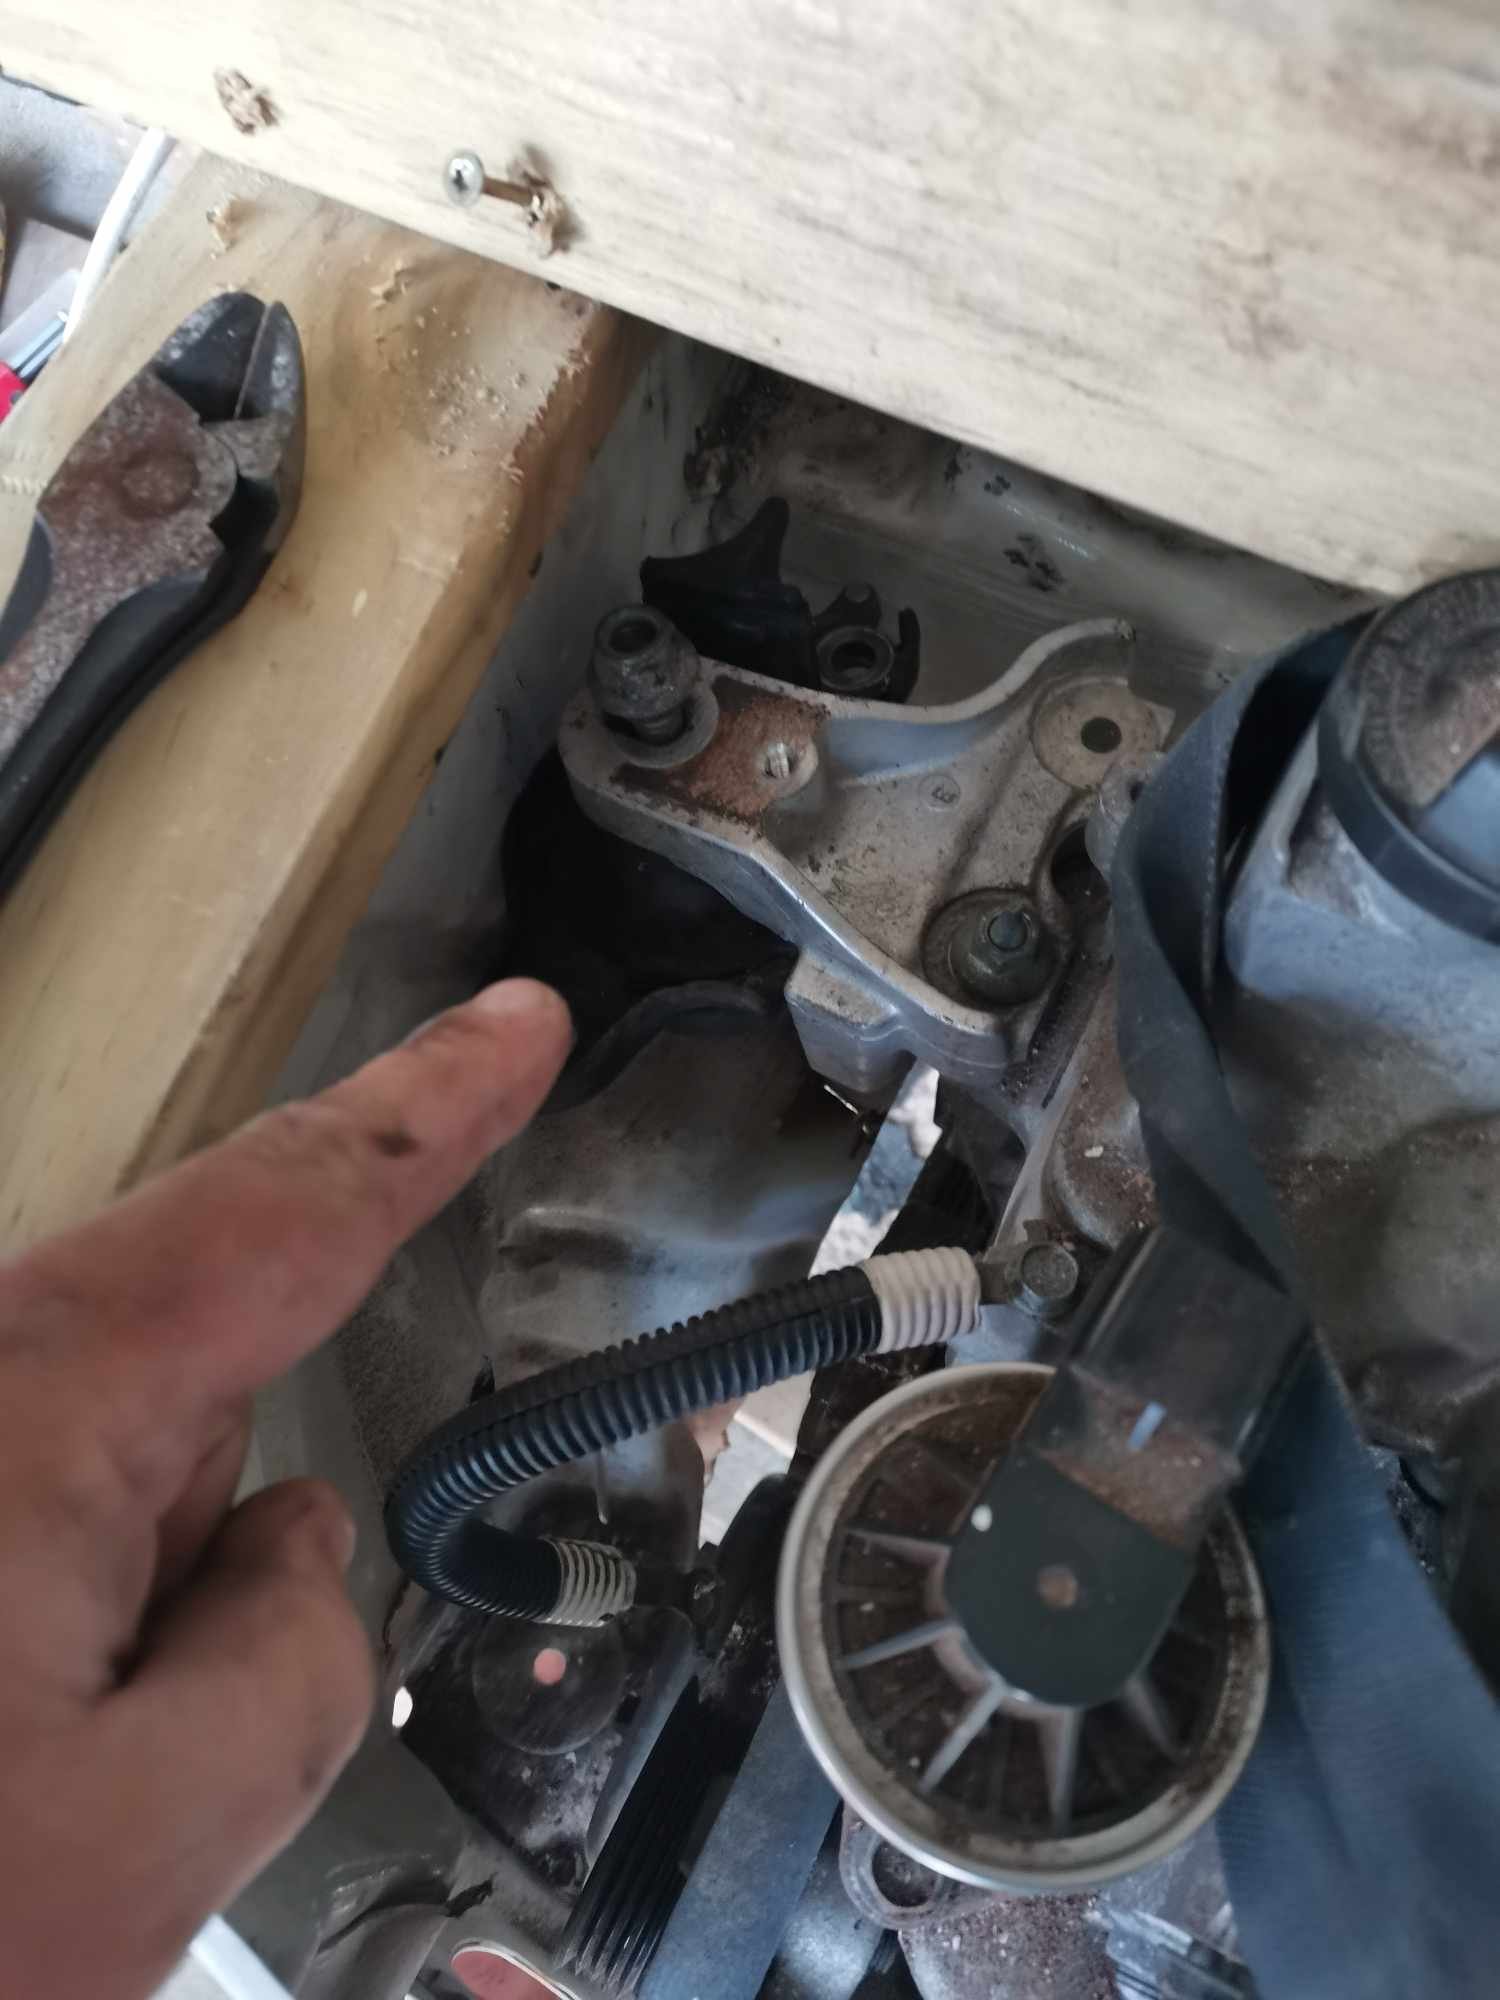
Fitting on factory mounts to see where they kinda land. Gearbox mount mostly fits. The mounting to the box bracket needs to be spaced up 20mm at least. Lots left on threads This bracket is reversed 180, used to point outwards, but this solution looks promising for a front mount Engine side looks half OK, needs a little clearancing with Mr hammer, might look for other options though. EG civic half size seems to fit vertically. Outlets ideally need flipping. Top needs to be to the bottom of the picture and bottom needs to be in the middle. Wondering if I can flip an alloy radiator and swap the fill neck... Hole in strut tower temp drilled so I can line up the evuk 7 shock on passenger side. Next up is steering rack, passenger knuckle and maybe drive shafts? Still keen if someone wants to come have a nosey in Wellington, I'm quite over my head here but continuing on regardless Discust below, https://oldschool.co.nz/index.php?/topic/49007-sirges-1972-honda-n360/
1 point
-
Bolted more shit on. I thought I had better reassemble the doors and check their function before chucking them on, and shortly I noticed that this little tit on the door latch had broken off, which would mean I would have to unlock the passenger side and reach over to unlock the drivers. See that tit on the diecast part? This actuates the lock from the door key; Commence bodging And it worked! I was quietly pleased with that as those latches are pretty much unobtainium these days Then I realised that I was trying to use the passenger latch in the drivers side, so that was all a waste of time. Except that the boot and engine cover latch levers are in the shut off of the passenger door. So actually it will be pretty useful to be able unlock the passenger side to get to those. I seem to recall this not working previously. So fuck all left to do really; Windscreen Box on and engine in Final wiring connections in the engine bay once the engine is in Passenger door Boot and engine cover Carb tune I am assuming the brakes will probably need rebuilding, we will just have to see. And whatever other fuckery arises.1 point
-
1 point
-
Hanmer car show
1 point
-
Engine hanging in there, tighter than a nuns faith
1 point
-
yea that's a good idea, if you bury it about 500 deep and pack the soil tight around it you'll be golden.1 point
-
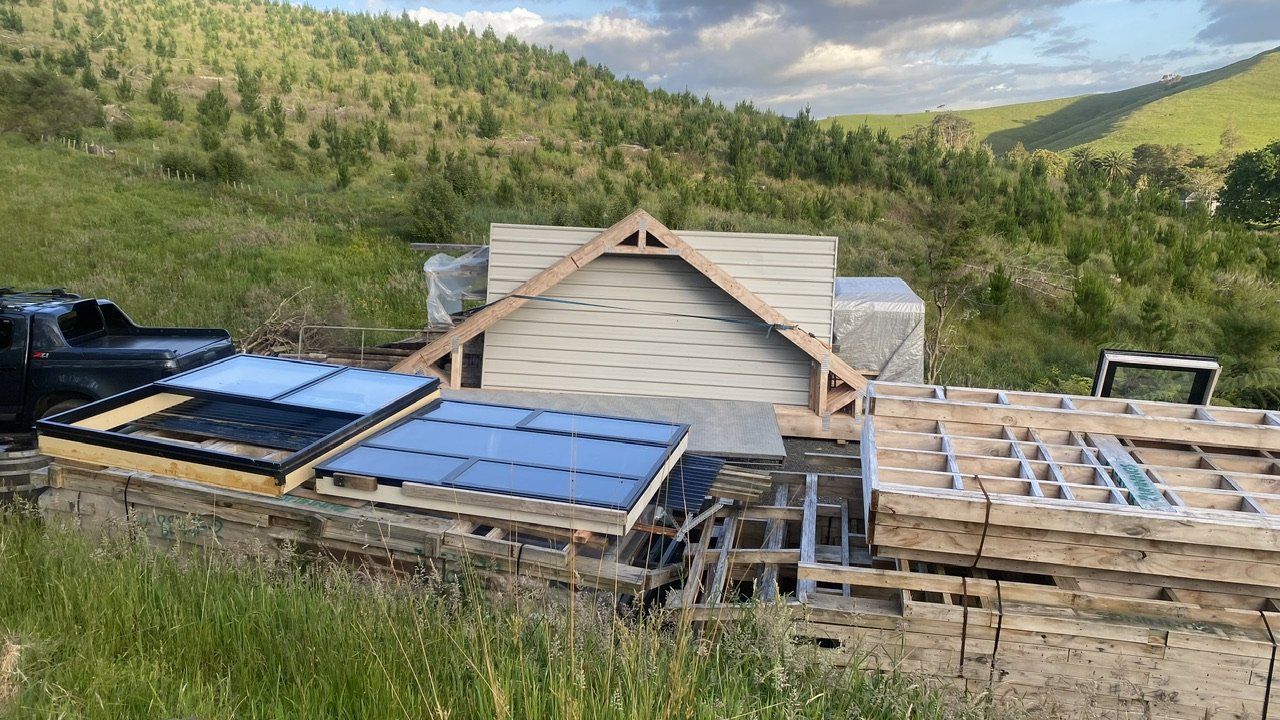
Another month gone and its been quite frustrating that I haven't been able to get much done. My eldest son picked up covid, so that meant working from home for a week, then on the last day of his isolation my younger son picked it up so that meant another week at home, then the next weekend I was in Napier for a mates wedding so I have had very little time to actually work on the thing. First thing was to finalise the solar panel mounting. Yes the panel is overly big but it was free which is the right price. I had the mounting kit I'd bought off trademe but wasn't super happy with how it supported the panel just sitting on the thin roof as there is very little structure in these caravans - hence the liteweight name. So I cut and folded up some 3mm ali as full length brackets down each side that I have VHB taped/glued and rivited to into the edge of the roof which is rock solid. In hind sight I should have powdercoated them before fitting them, but I may sand and repaint the roof at some stage so will make it future Stu's issue. I ran the cabling through a sealed housing down into the full height cupboard and temporarily setup the charge controller, batteries (2x 10⁴Ah deep cycle) and a string of LED modules as temporary lights. I don't know how many watts the panel is rated at but Ive seen over 200w on the controller app so Im guessing its maybe 300w? More on wiring later. Following on from the previous post I got the flooring glued down which turned out to be a bit of a dick to do. Being contact adhesive I needed to glue both the back of the vinyl and the floor, let them tack off then stick them together with no room for error - quite a tricky job inside a caravan and making sure it fitted perfectly into the corners etc. I had some help for this from a mate at work thankfully. The glue was pretty potent stuff to inhale in an enclosed caravan, plus the beers we had it made for a fun few hours. At one point we were both at the back end of the caravan finishing off and the whole thing suddenly tilted from the weight imbalance (tow hook wasn't attached and I didn't have the stands down) which gave us both the shits then a good laugh as we were thinking we must be pretty wasted haha. Got it done but a day or so later a few bubbles appeared which was probably from sticking the flooring down too quickly - should have waited and let the glue outgas for longer. The fix was to use a tiny syringe to pierce the bubbles suck the air out and then weight down with big lumps of ali I had on the shelf at work. After a few days of doing this the flooring was done. Next I pulled the kitchen apart so it could fit through the door in pieces, then assembled it again inside. I machined 5mm out of some ply that the original folded ali drawers can slide on. Fixed it off to the wall and floor temporarily. You can see all the lumps of ali holding the floor down while the glue set off. Took the top back off, fitted off and sealed the sink, fitted the tap and some of the waste outlet. ' With the drop in chopping board in place. The tap outlet swivels out of the way if needed. Fitted the fridge and ran some cabling under the floor over to the cupboard on the passenger side where the batteries and charge gear is - hooked up the cabling and now have cold beers which adds to the motivation while working inside. Also fitted some of the drawer fronts and handles. I need to cut some more ply to replace all the other drawer fronts and the cupboard door so will finish that all off at some stage. Next I started looking at the front seats as the chipboard needs replacing and for some reason the middle sections is completely closed off so there potential for more storage space. The center part of the double bed slides in and out like so: To make the most of the storage potential I cut the guts out and will make drop some drop in inserts. It will be handy being able to use this space and also get the load balance/tongue weight right for travelling. I figure the awning could fit in here at least. There's no photos of it yet but Ive also replaced all the chipboard under the rear seats that turn into bunks. This is with the old chipboard/ply, I will replace it all with ply at the next chance I get. And to close this episode of wounding caravan updates off we now have the squabs back from being recovered. Ash chose the fabric and I'm super happy with how they came out. We have fitted the bunk hinges and frames in the back and I couldn't resist temporarily fitting the fronts and taking a photo. So that's it for now, more progress soon hopefully.1 point
-
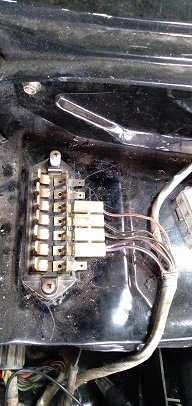
well that was an exercise in patience.. I'm not the best with wiring but I do enjoy the challenge and problem solving side of it... but what I thought would be a couple if hours this morning splicing one loom into the other ended up being 8 hours....but most of that is the fact that no bulbs worked in any of the housings I had....so I had to pull apart and clean every terminal included the fuse holder.. but 3 part looms later....the list of things working is better. heater , wipers (both speeds....I know flash guy) , dash lights , glove box light , park lights (front and back ) headings and high beam , reversing lights and brake lights..oh and number plate light and horn. just need to sort indicators out.....got them to work from hazard switch but not from stalk...( horn and high beam work on the stalk........might just be the stalk ). even got the intercooler in.. (bit tight but once I make some tabs to bolt the rad supports to it will be perfect.
1 point


.thumb.jpg.570970b401ac8d26ce9af7c1bf2bd8cd.jpg)


This leaderboard is set to Auckland/GMT+12:00