
Leaderboard


Popular Content
Showing content with the highest reputation on 03/23/24 in all areas
-
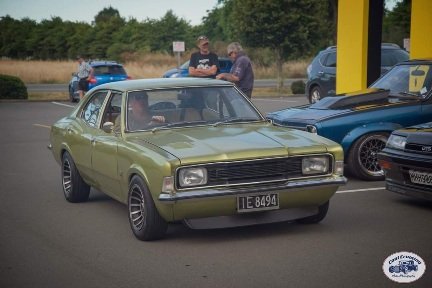
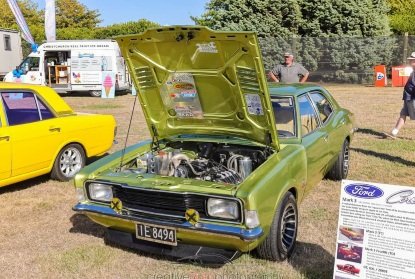
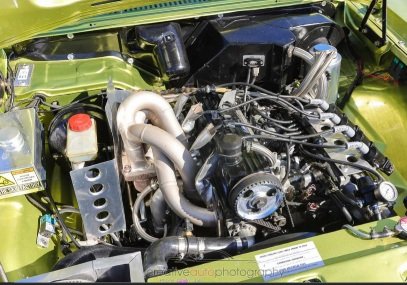
Been a while and I have been pretty shit about up loading on here. . But the car is running and driving it is still on a factory motor (apart from ARP head studs) she is running 10psi at the moment and is happy with it.. We are still road tuning and she not legal at the moment ...but I have taken her to a bunch of meets and to work a few time... (its a fun car Lol).
 20 points
 -
Bright and early this morning, firstly time to pour some liquid money into the box once the engine is kindof level. 3.2 liters of Redline MTL which all the cool kids say is the only shit to use in an X1/9 box. At $200 for 4x bottles it fucking better be. Then on to the main event; Then after half an hour of wiggling and jiggling, angling and dangling etc Then the rest of the day bolting shit back on; Just the driveshafts and some oil and it might be time for a skid. But thats tomorrow's effort.15 points
-
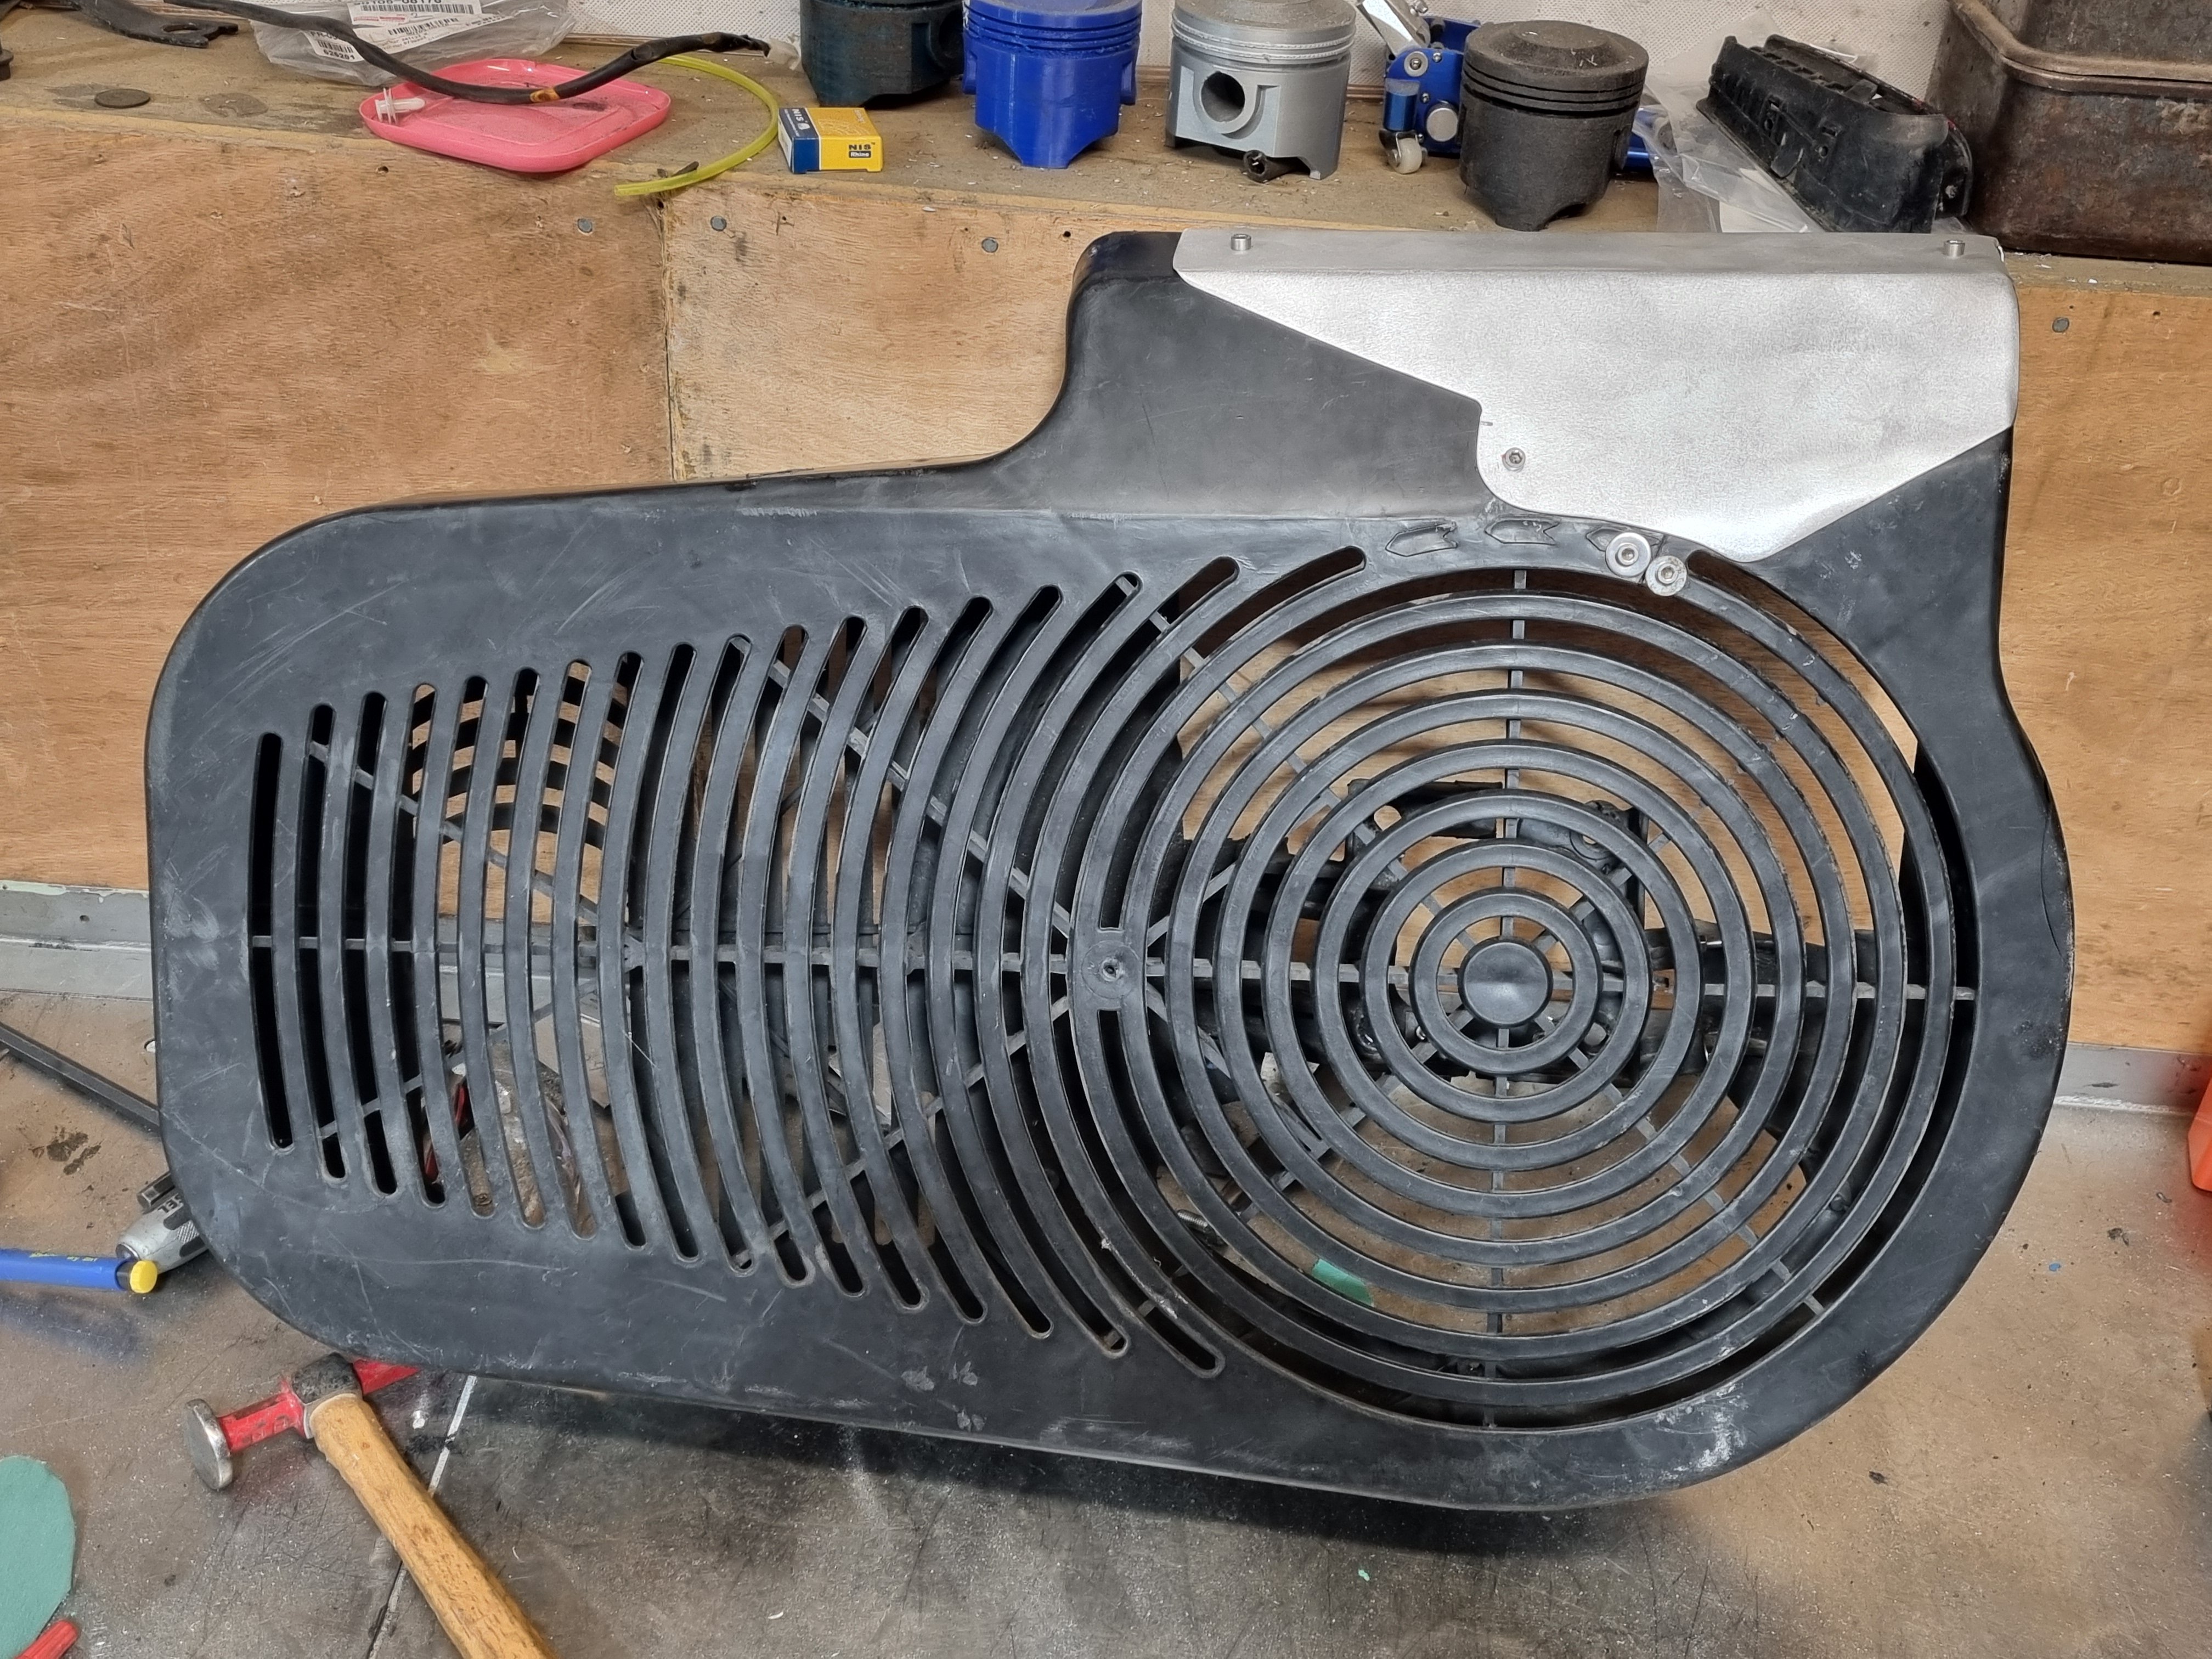
The SW20 radiator turned up, and thankfully it was indeed 755mm wide, not 770. So just needed a small snip up one side to fit. There isnt actually too much in the way of the fins being shrouded by the front panel, because those side parts are mostly the end tanks. So ended up better than expected, it will mount up to the front panel nicely. This is the amount of room to the crossmember level: My next problem was that the radiator outlets are 32mm, but on the motor they are 38mm. Wellllll, turns out that you can buy flexi hoses with 32mm at one end, 38 at the other. At what looks like good lengths (400 for one side, 300 for the other). So ordered some. Too easy! I'm glad to not need a join in the hoses this time. I printed some lower radiator brackets which bolt onto the crossmember similar to the ones I had for the Altezza radiator. I remember we made the altezza ones out of aluminium, and it seems like it took forever and was a really hard job. Now with a printer it's just incredibly easier to test print and test fit a few iterations within hardly any time at all. I've also got all the fuel lines connected, throttles are now mounted on carbon nylon manifolds, throttles are balanced and connected. My to-do list for getting the motor fired up is rapidly shrinking!
13 points
-
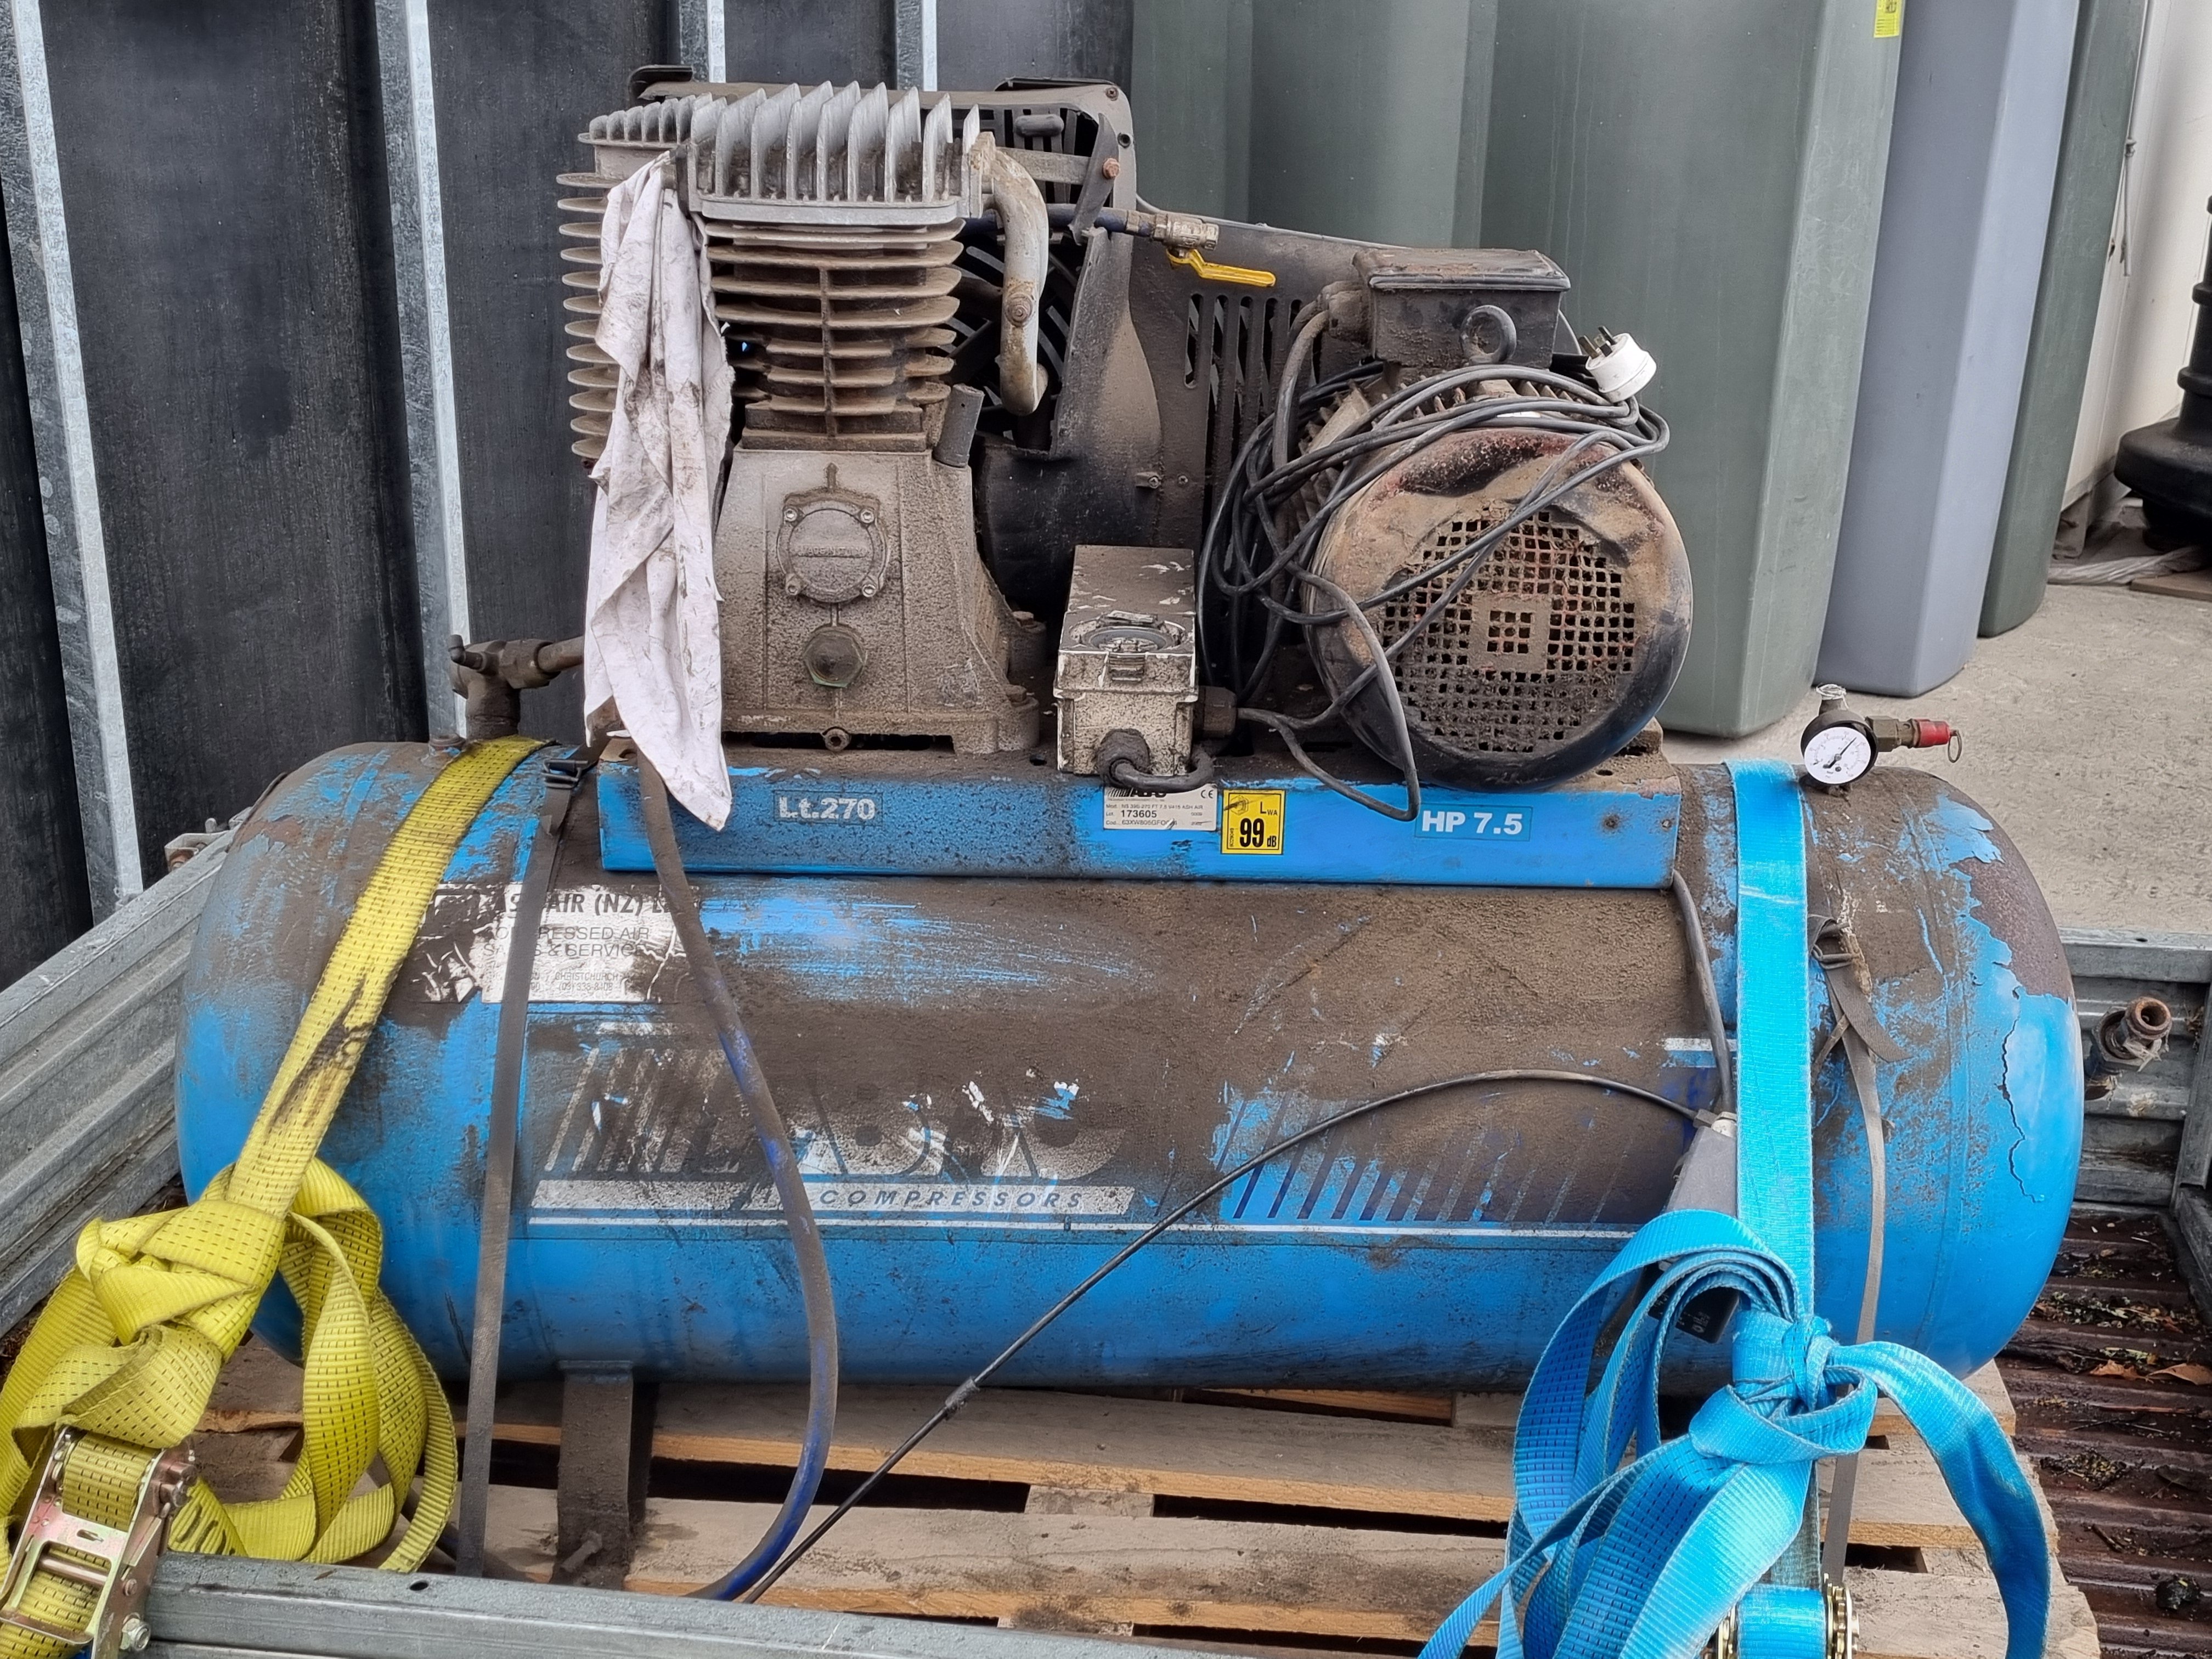
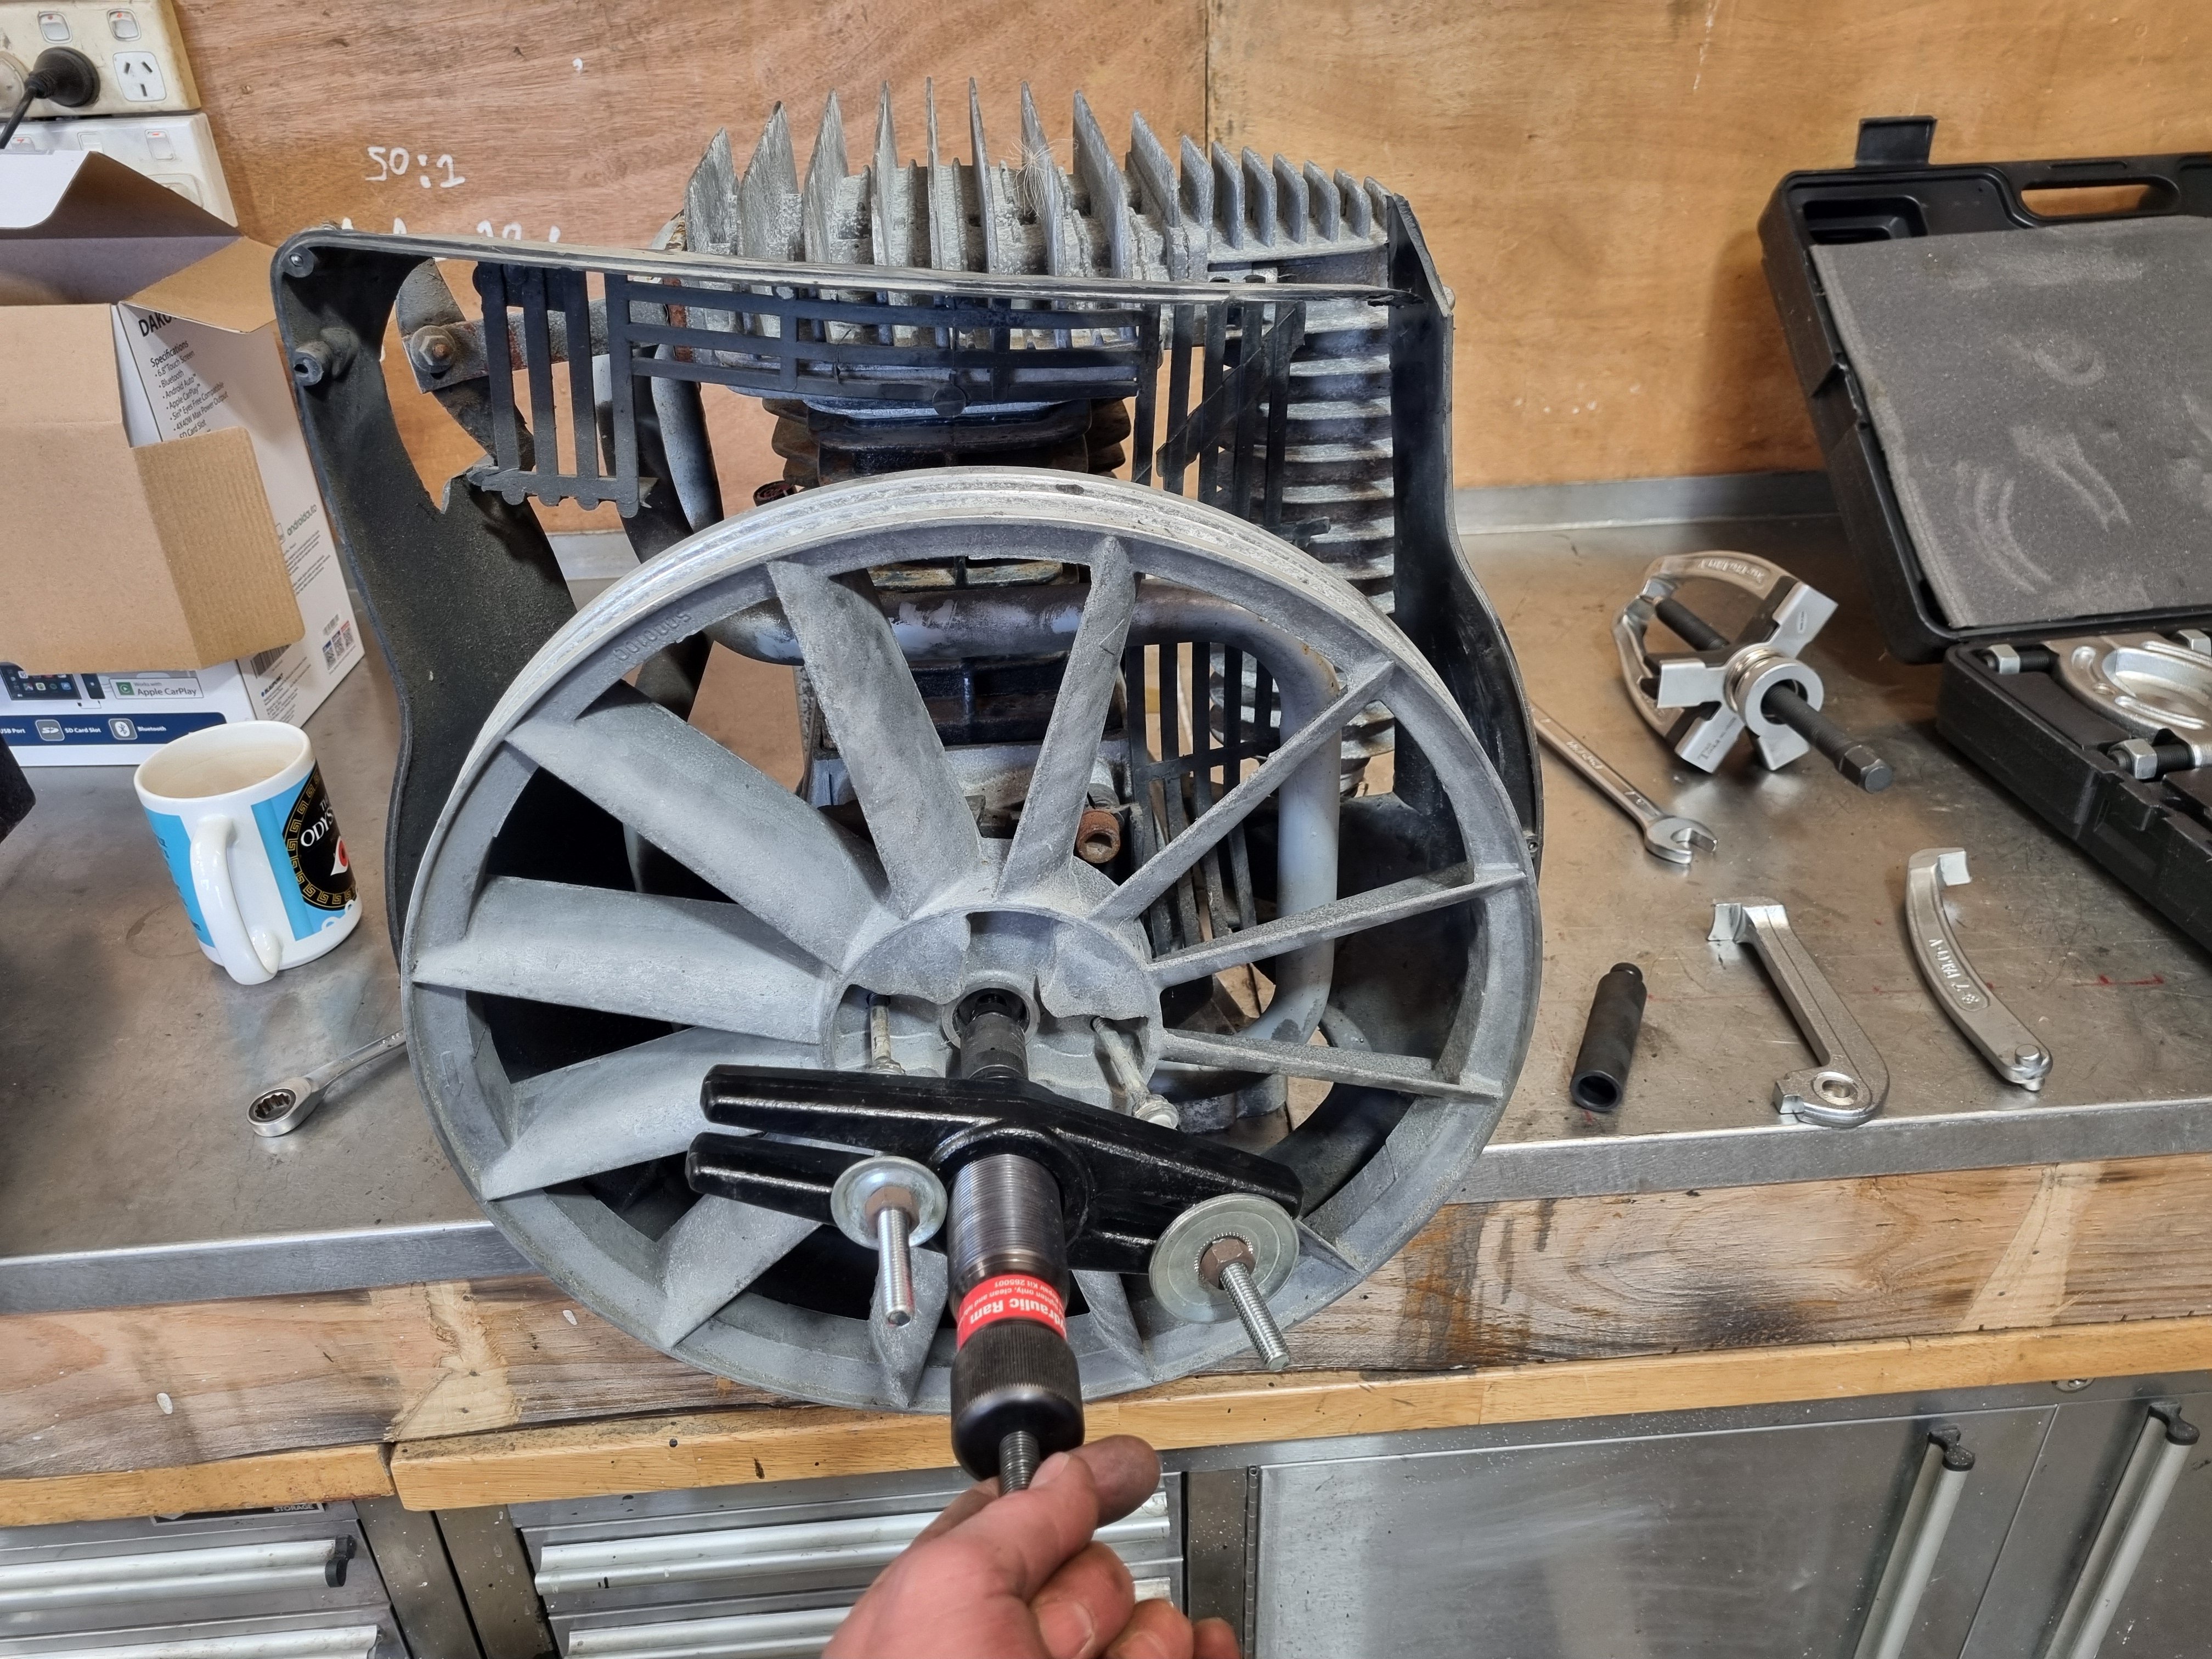
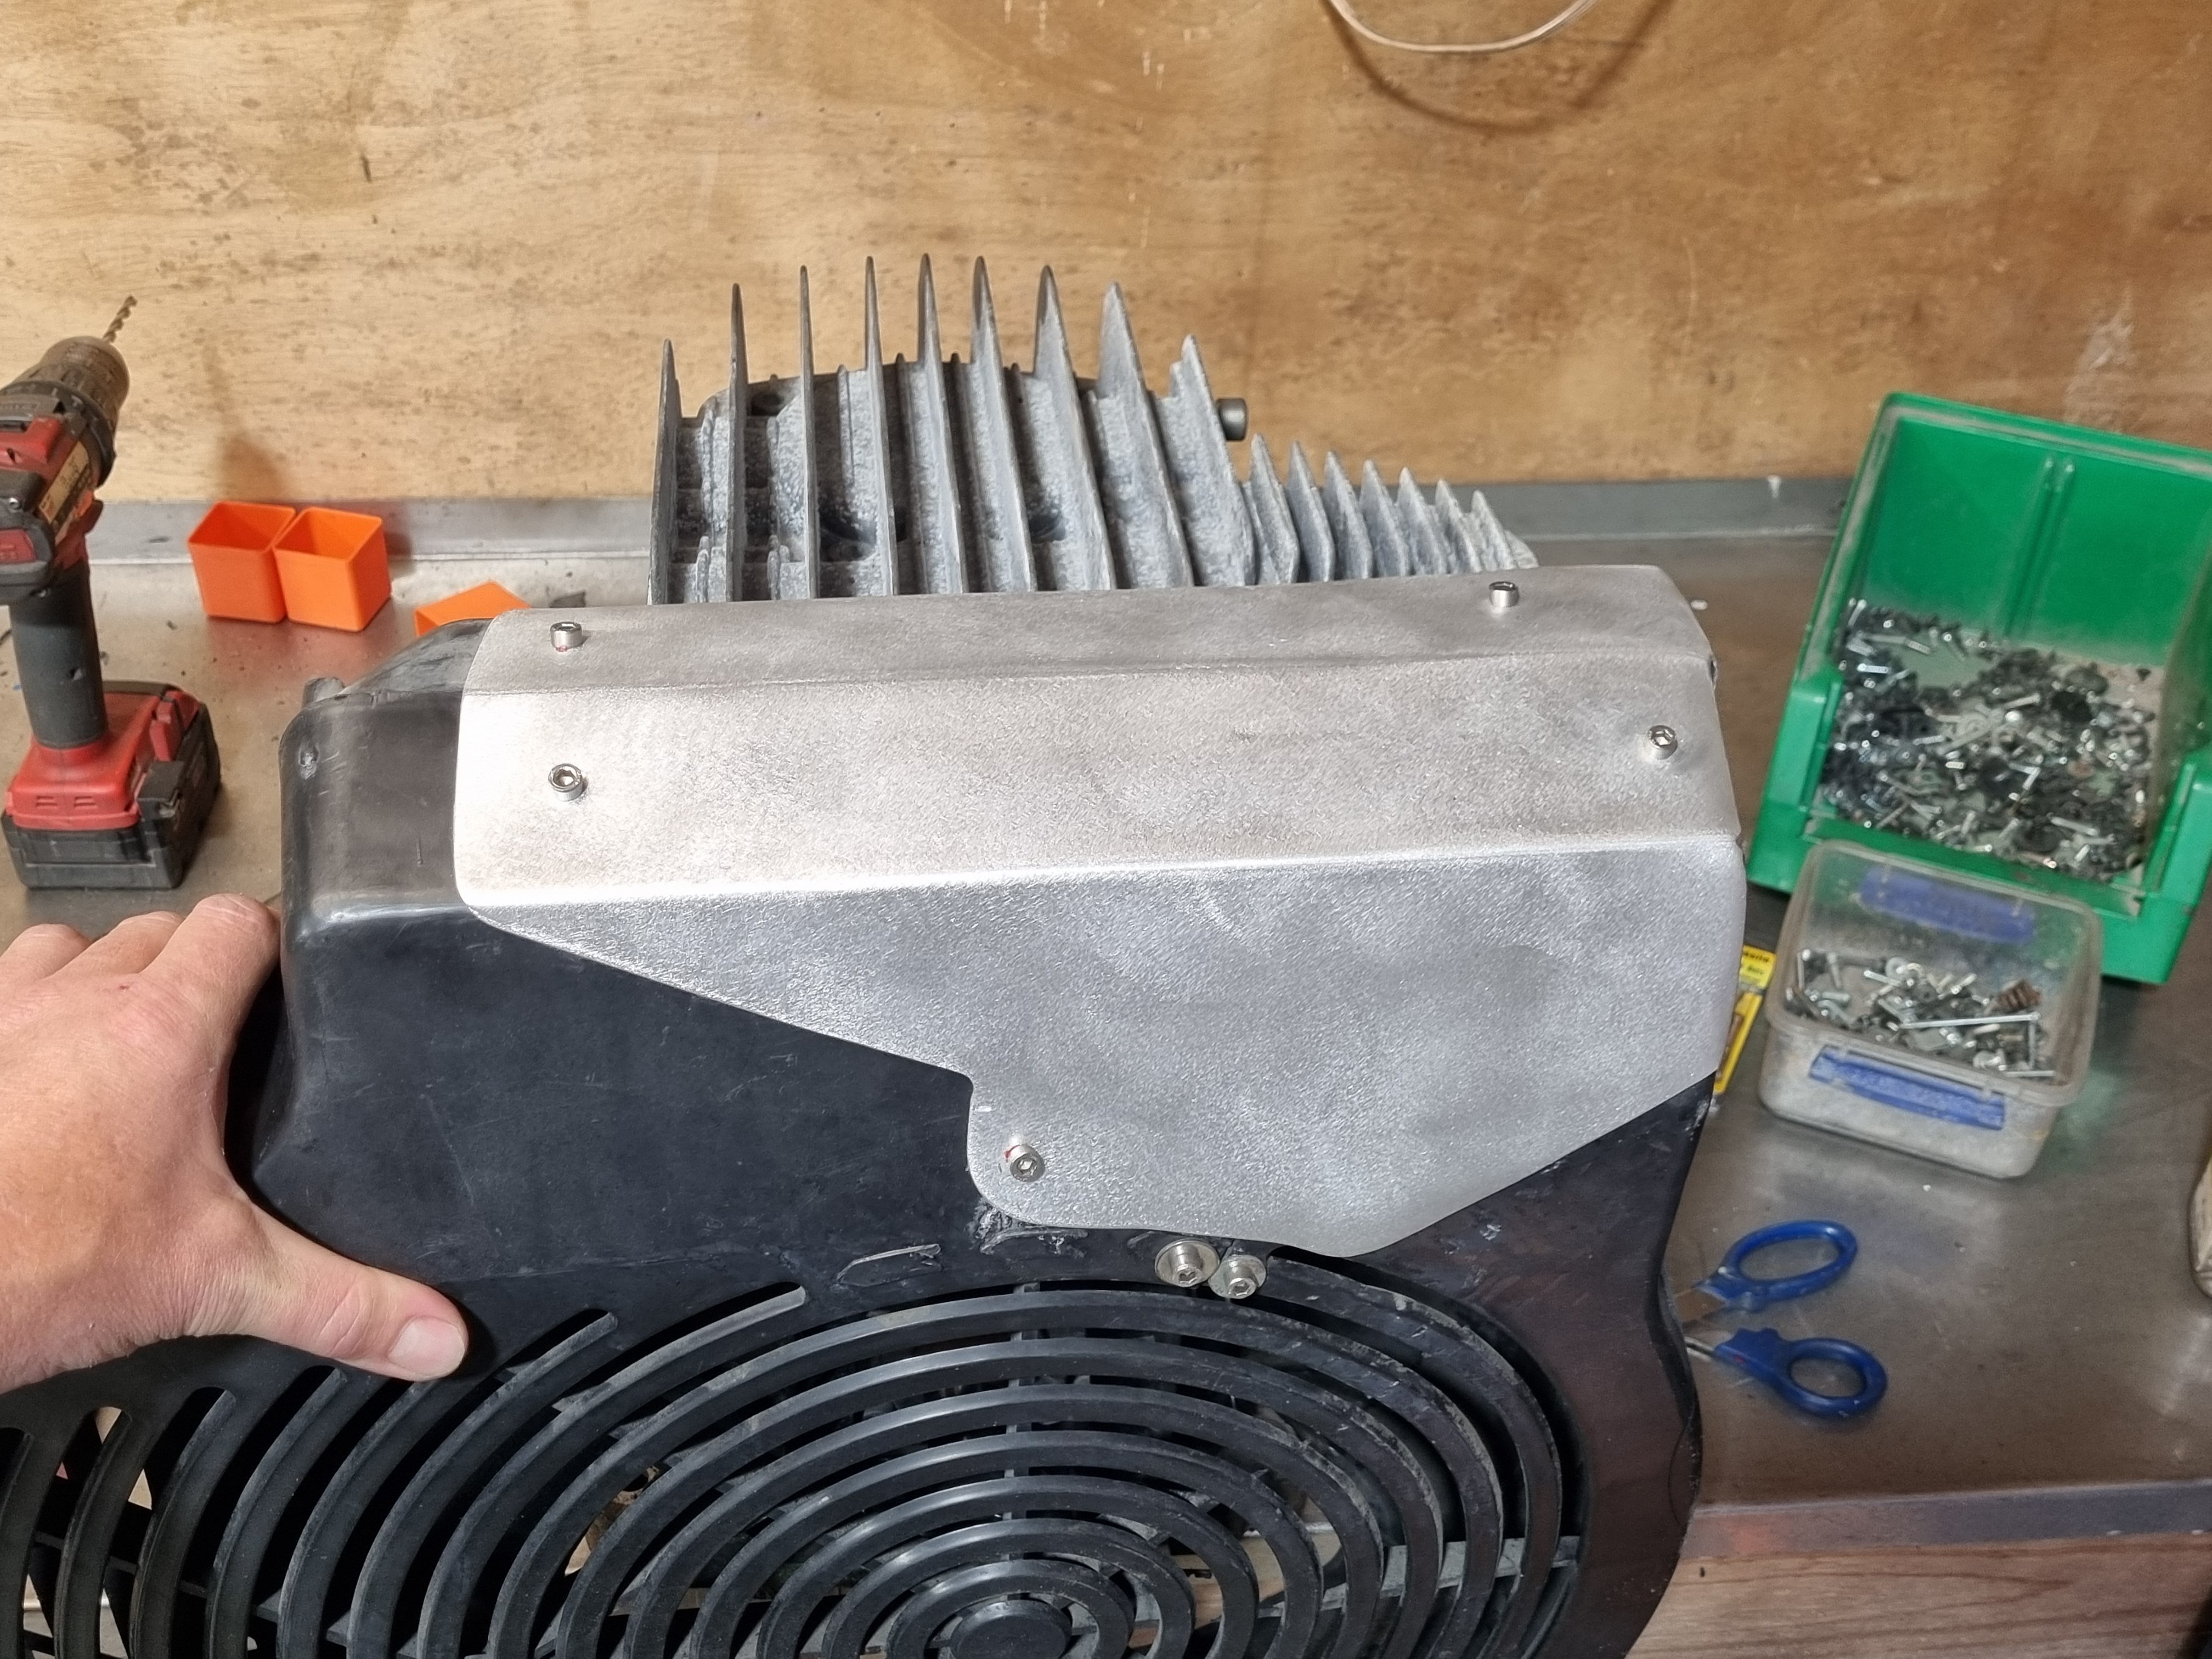
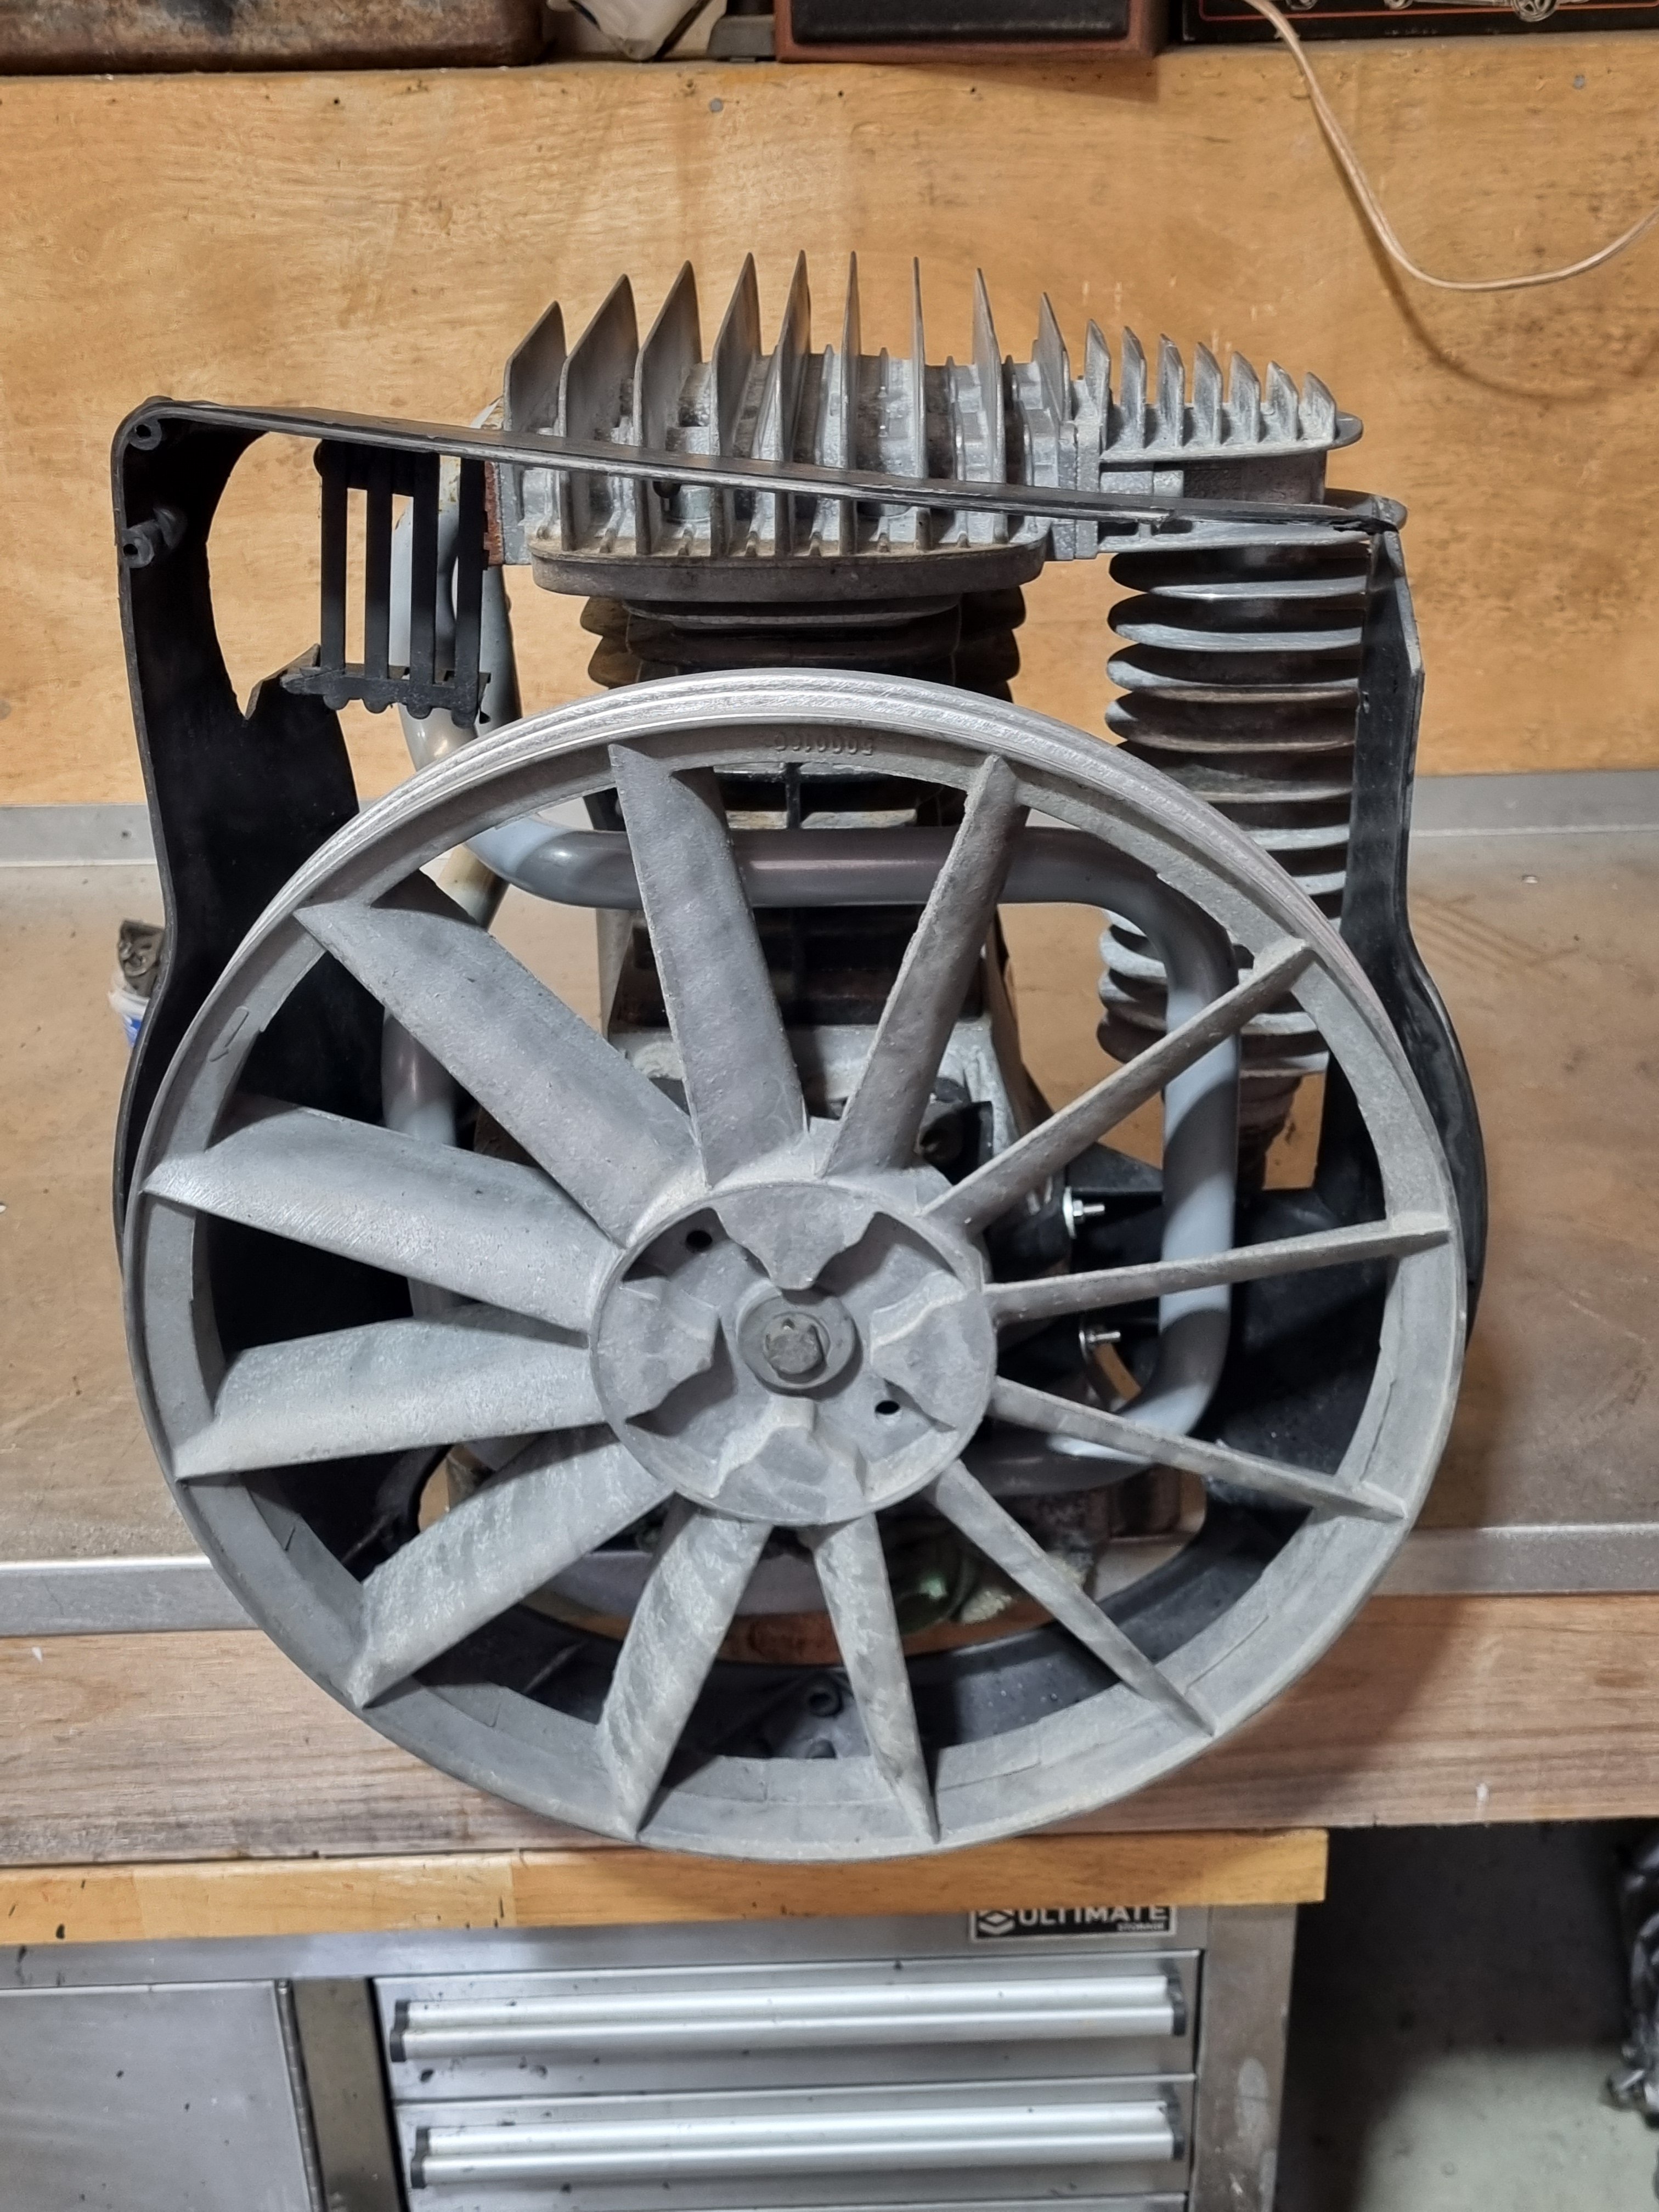
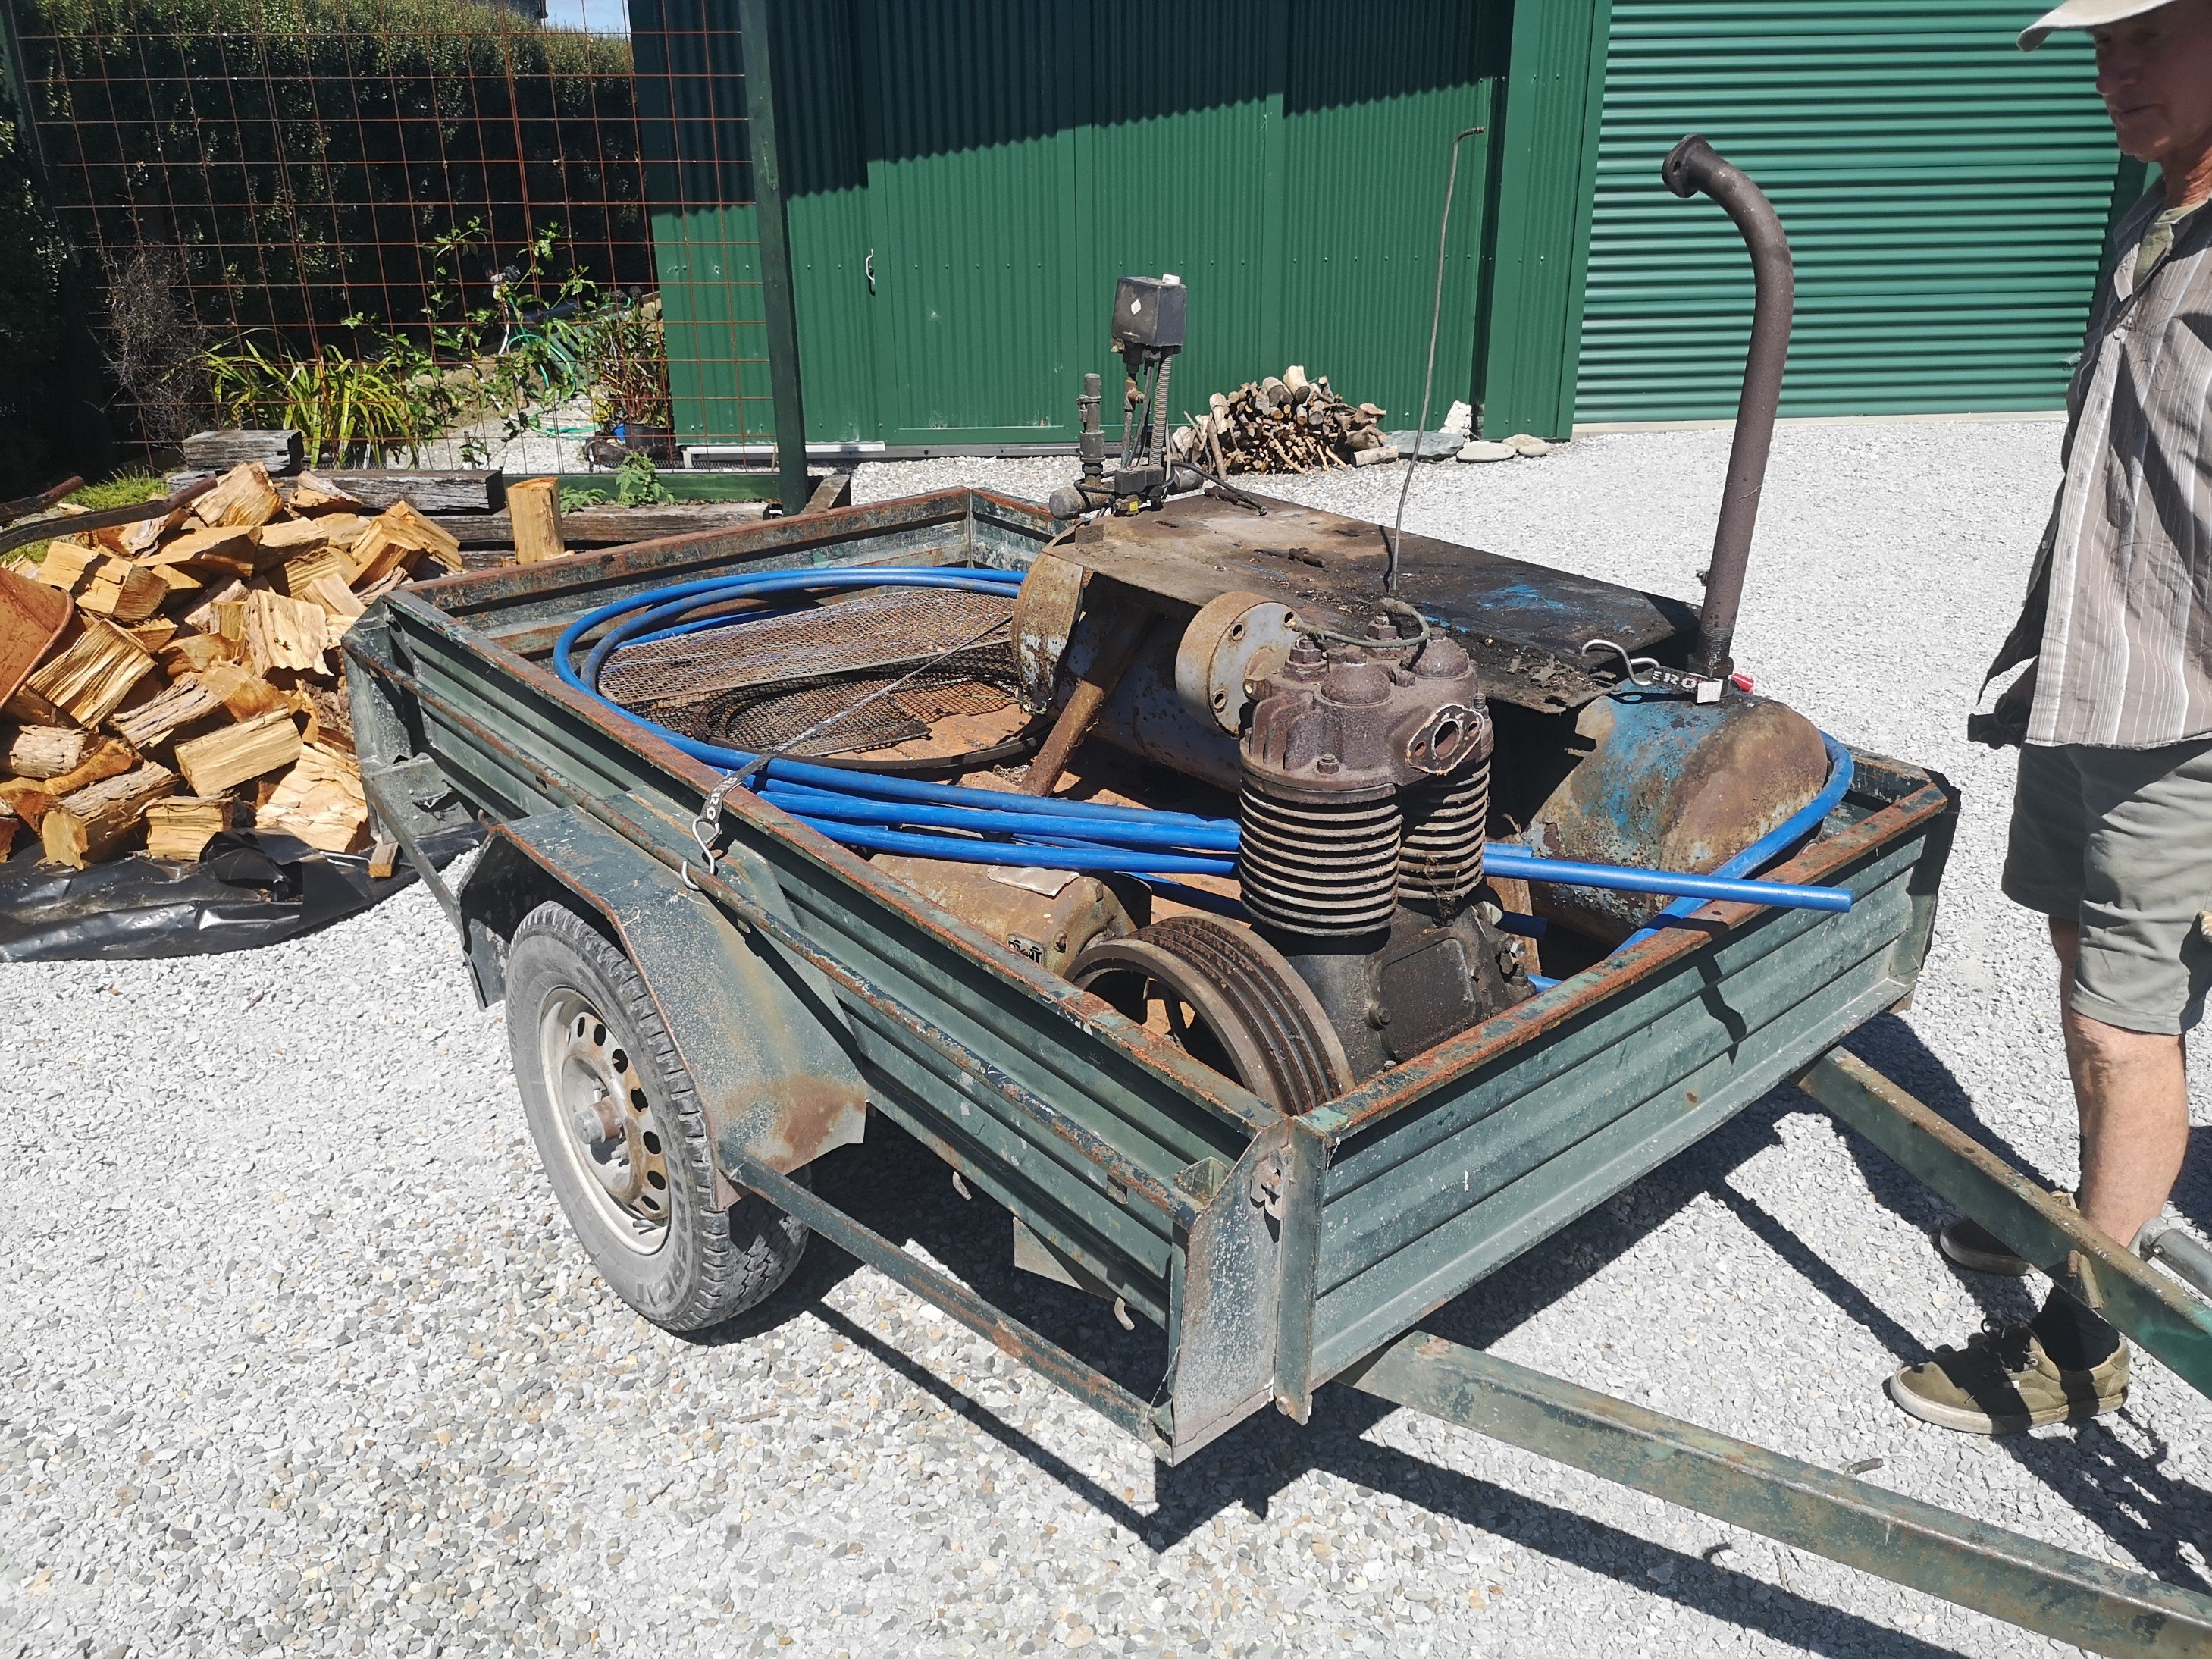
this is the old compressor from work. its been on a pallet kicked around from place to place for the last 10 years or so. its Italian, 44CFM 7HP 3 phase with a 270L tank. and because of that its fucked in many ways. the pressure switch is smashed off, the inlet filter is completely gone, the shroud around the belts is badly broken, the wiring for this thing is all up the shit also the electric motor shroud is all smashed in. it hasn't run in many years and when i picked it up from work it wouldn't even turn. i took it home, waterblasted it and pulled it to bits.
8 points
-
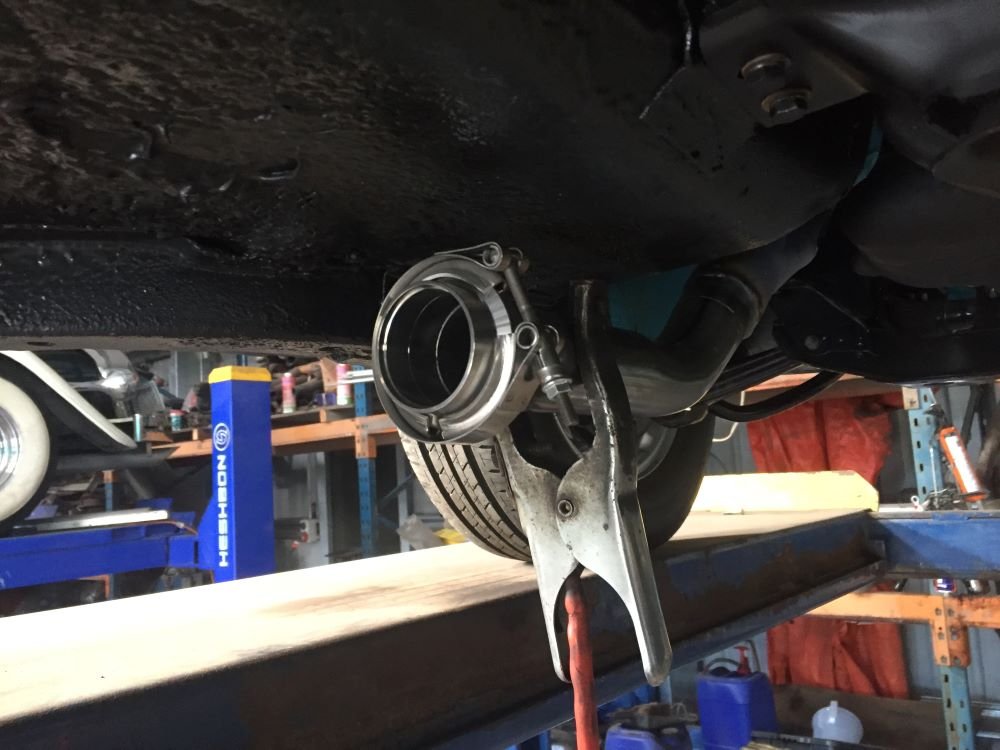
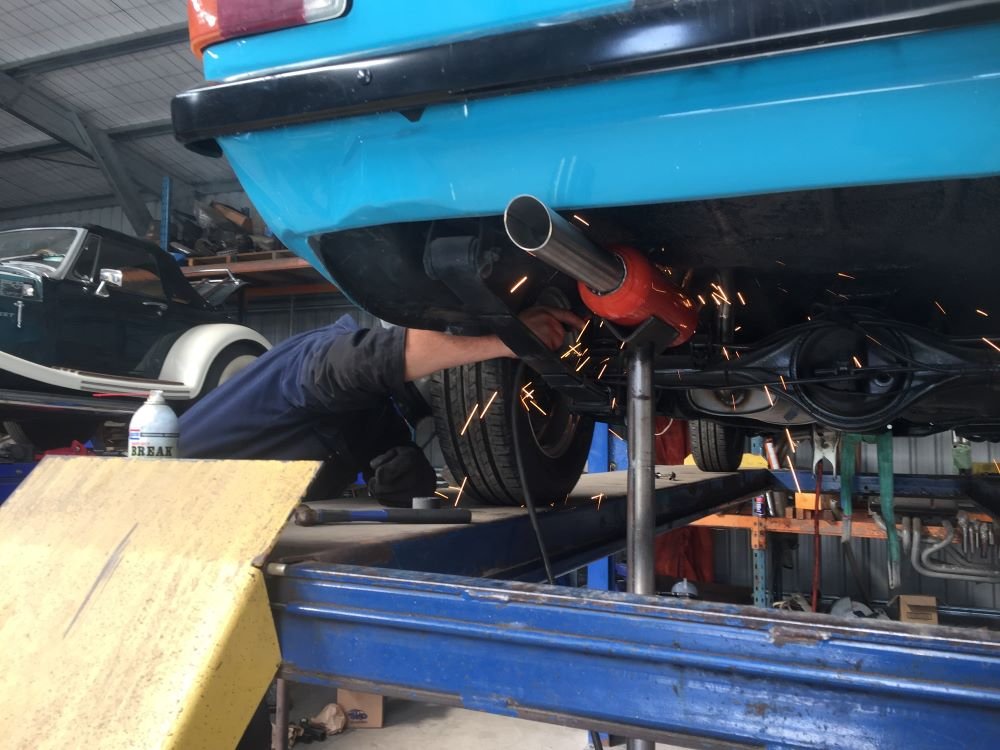
Car back on the trailer and off to Christchurch to have exhaust fitted. Corey from Elite Exhausts has got the job and after discussing what I wanted he sets to work. We are going with a 2" system with standard oval muffler before diff and a Coby after. I really like watching someone working who knows what he is doing. He has it all mapped out in his head. No tape measure, just a piece of wire to help form curves.. He cut off end of headers to start 2"pipe and fitted V-clamp, welding in place. Next placed muffler in place and bent up pipe for first section. Welded in place and fitted mounting bracket. Next put Coby in place and bent up section over axle and welded to first muffler. At this point Corey said we should see how it sounds. While he held Coby in place, I started car. Perfect, has a nice throaty note but not to loud. Welded Coby on place and mounting bracket. Finally put on tip and all done. Just a few more things to do. Wof, Wheel alignment and tune. Shouldn't take to long ??? Project Discussion https://oldschool.co.nz/index.php?/topic/84912-petes-mk2-escort-1600-sports/page/3/#comment-2625686
8 points
-
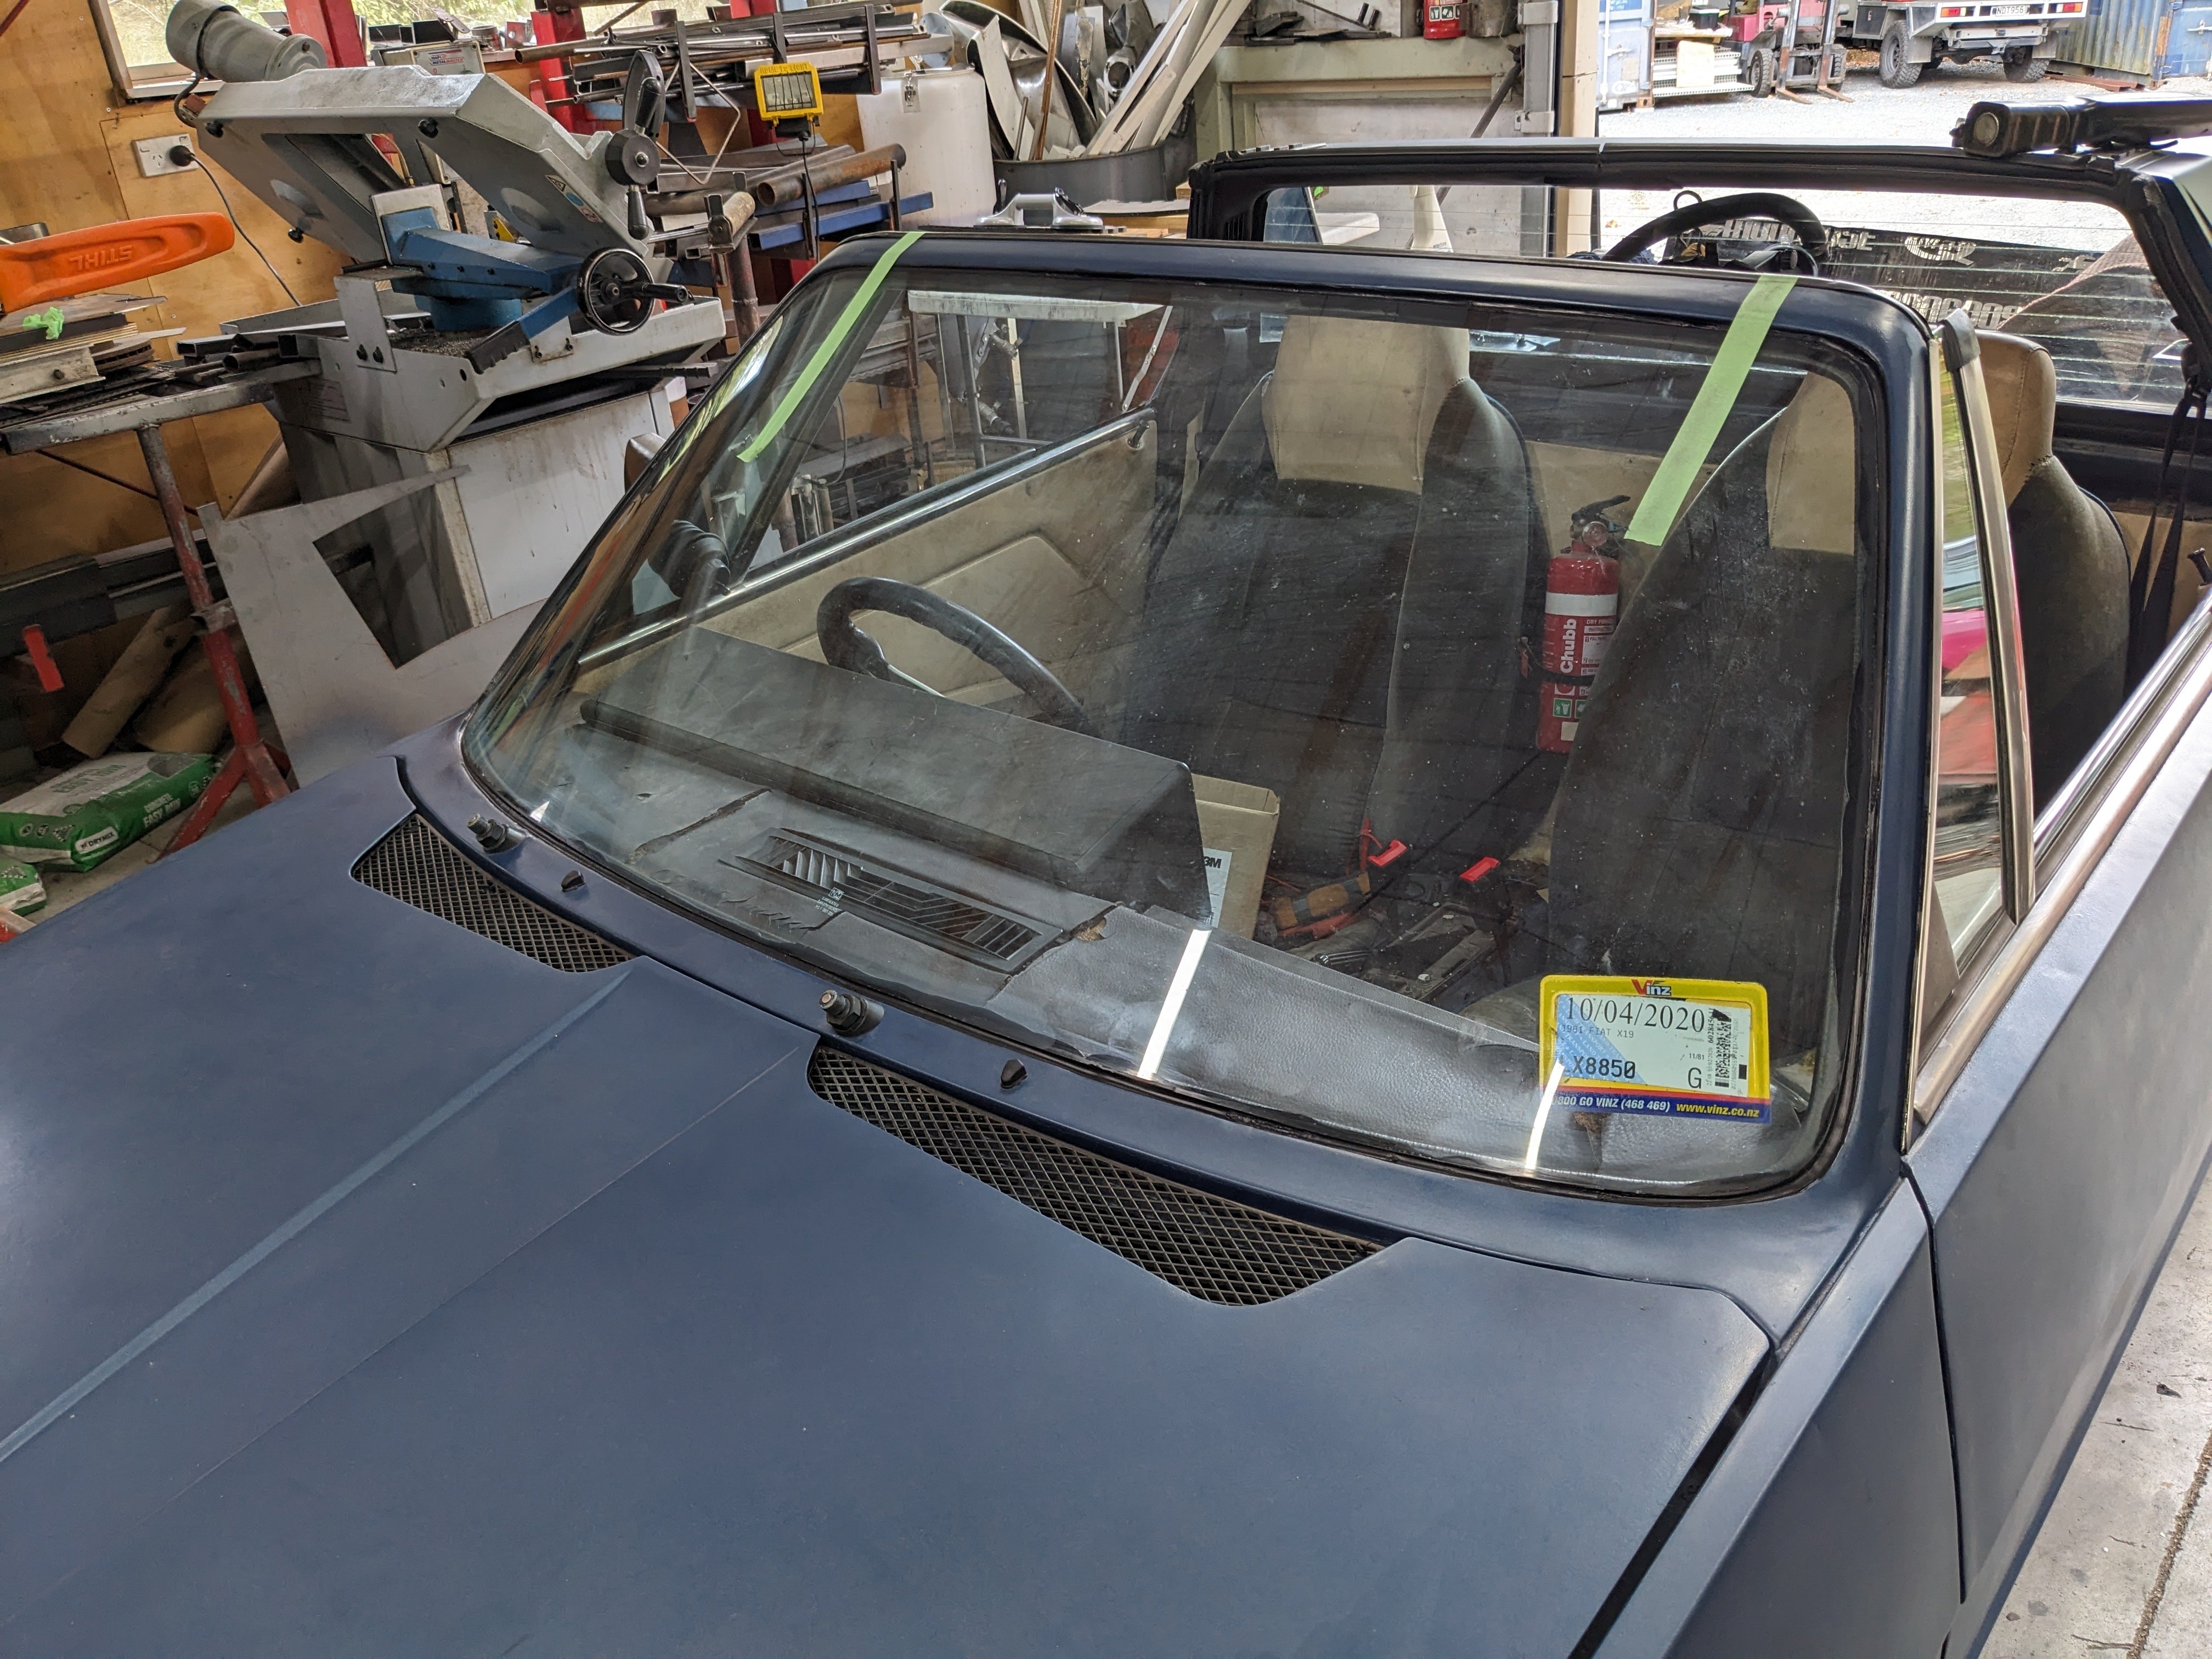
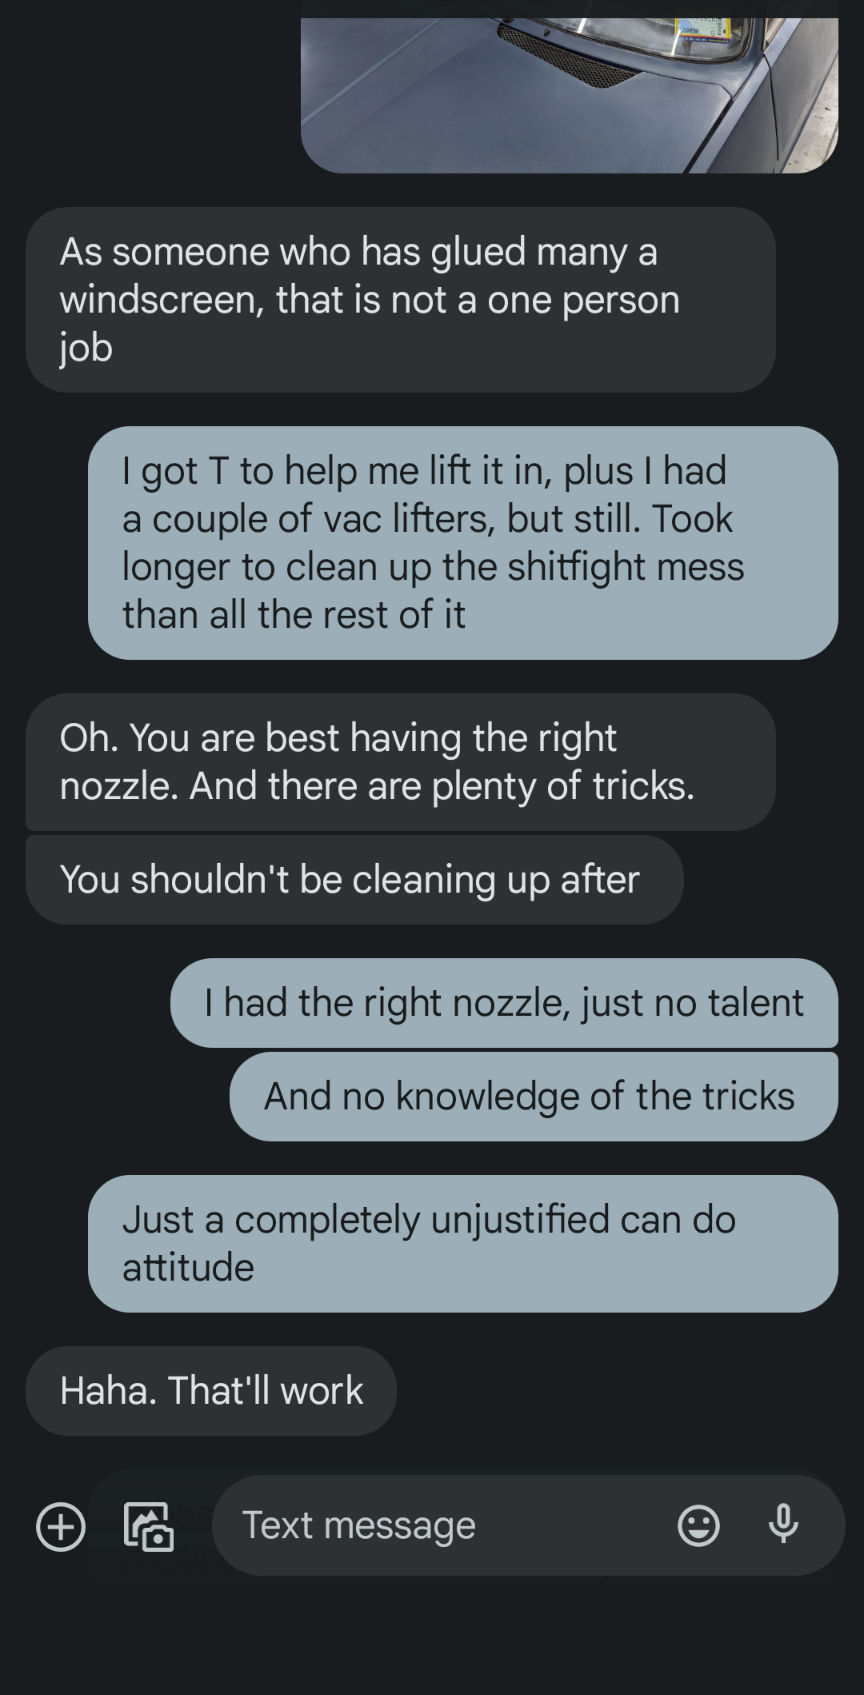
Just glued the windscreen in cos I am too cheap to pay someone to do it. I should have done so. The experience is best described by this convo with @HumberSS
4 points
-
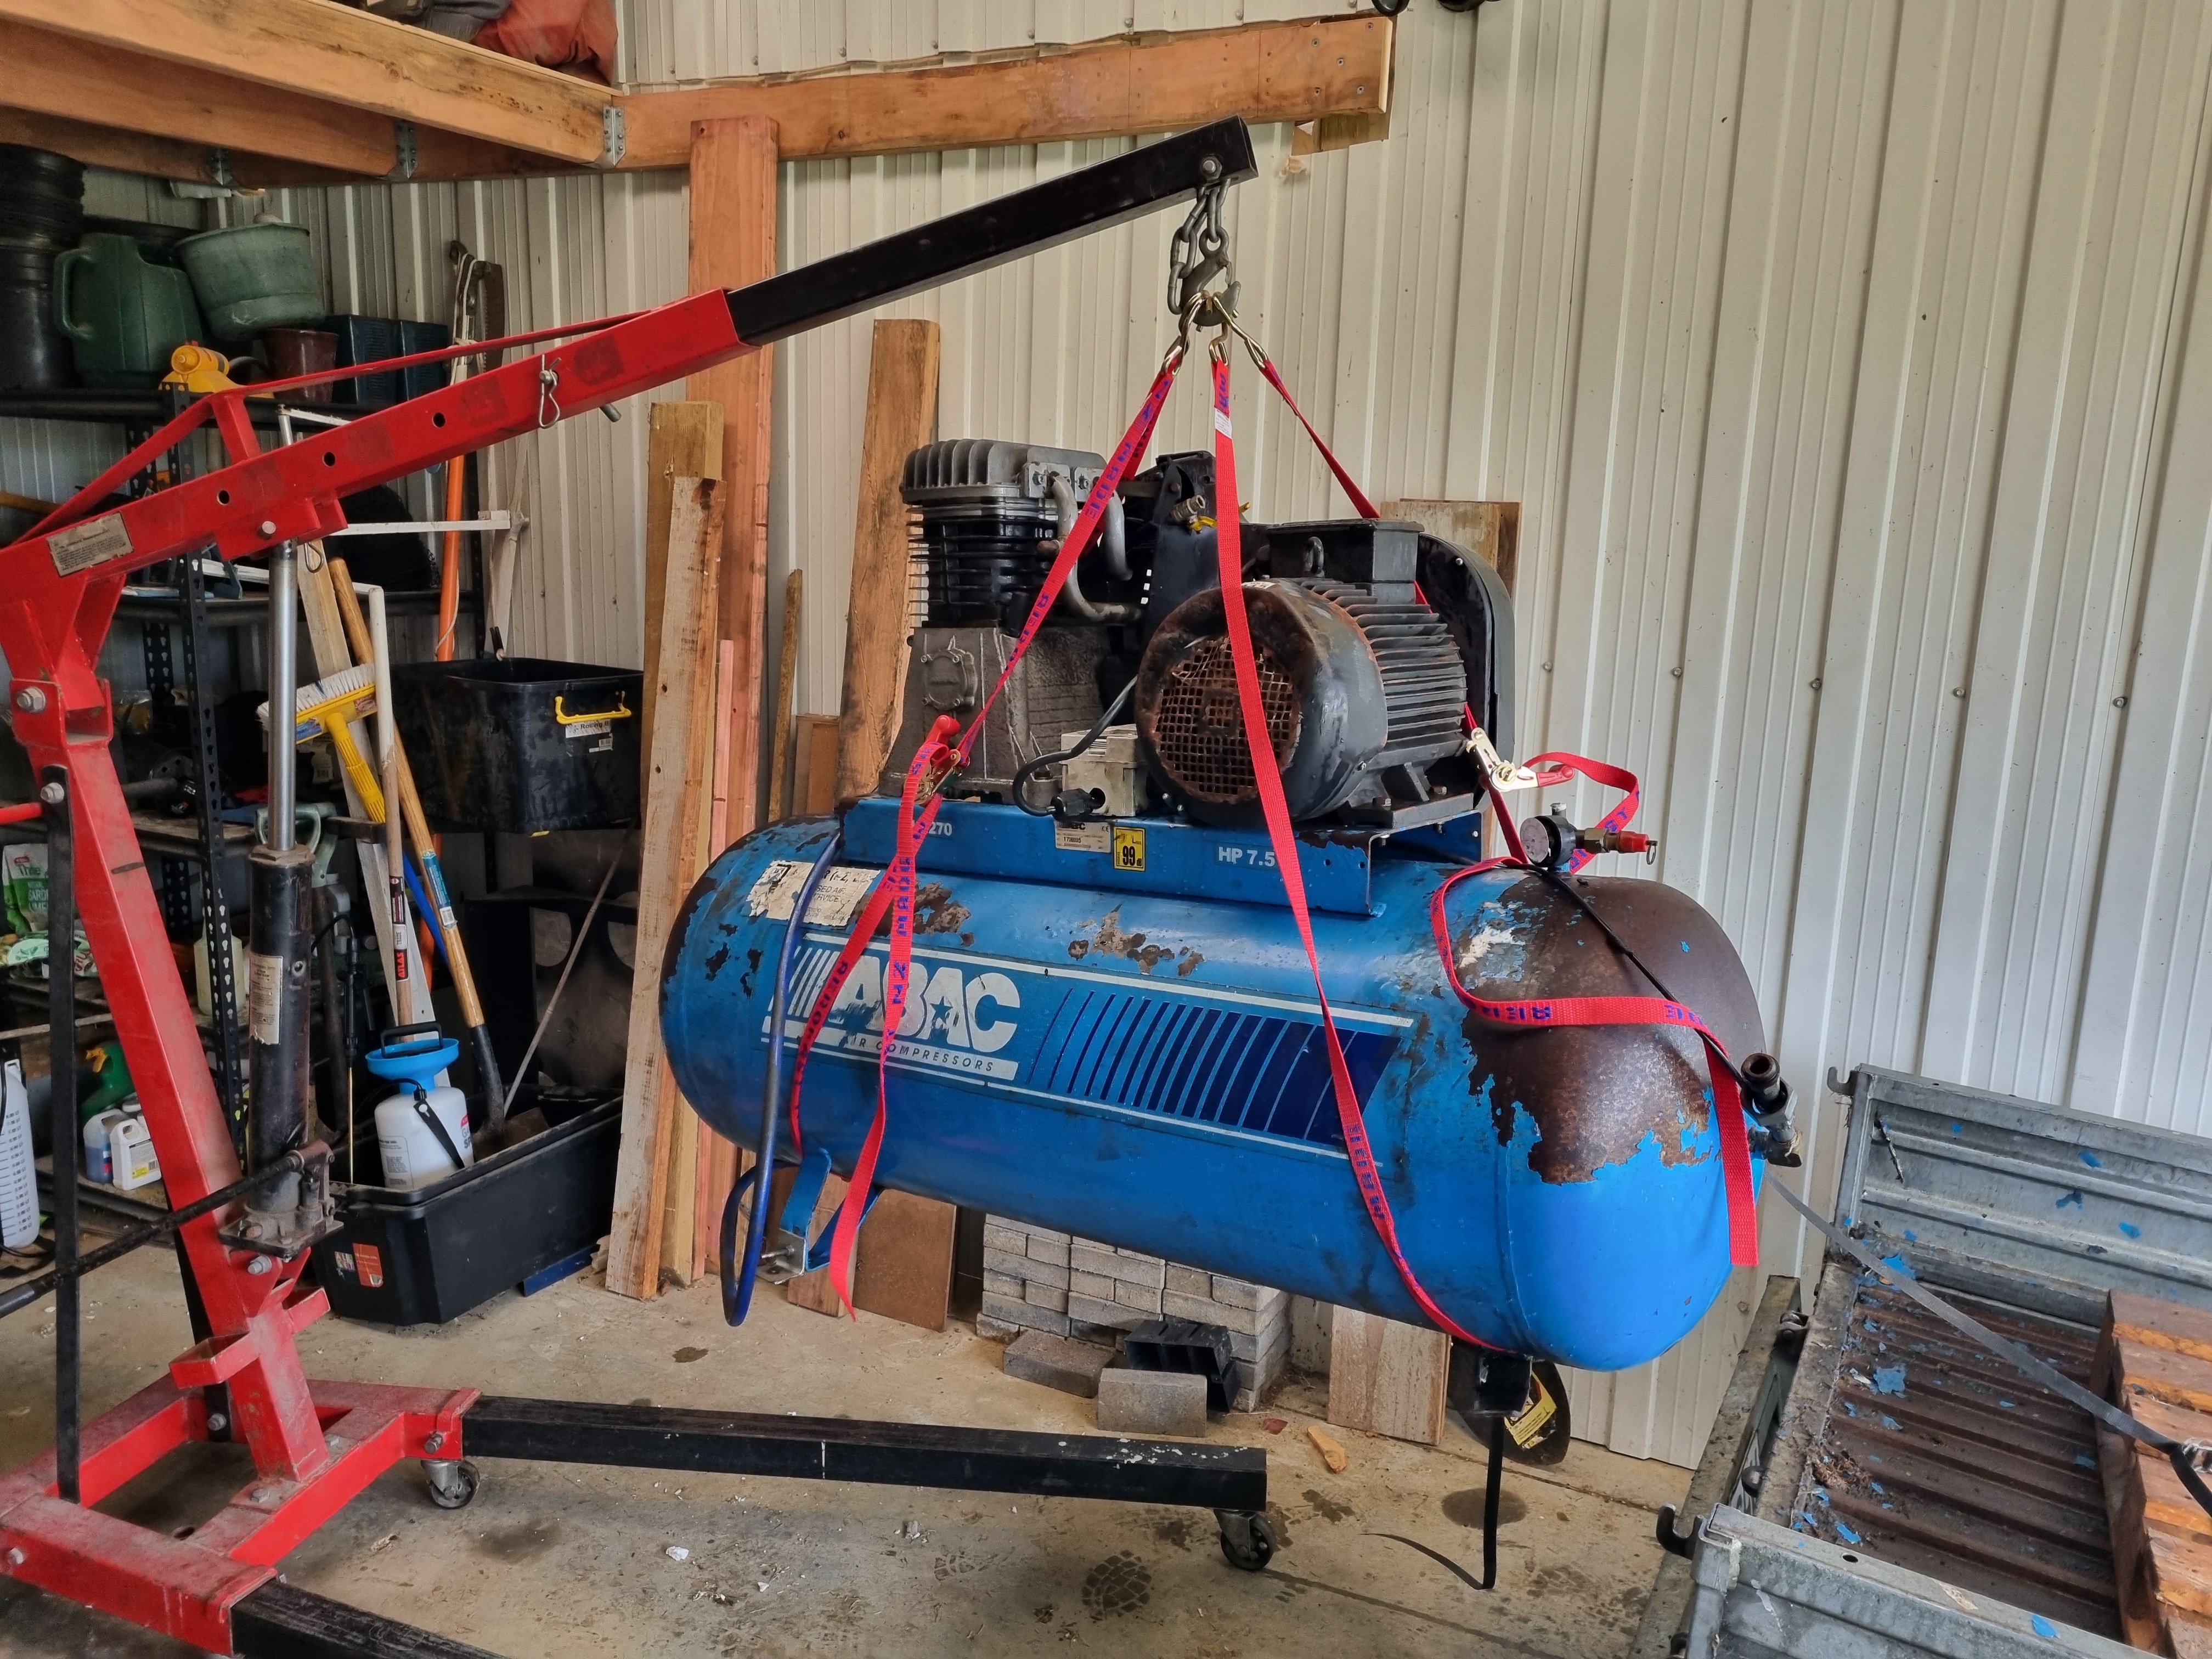
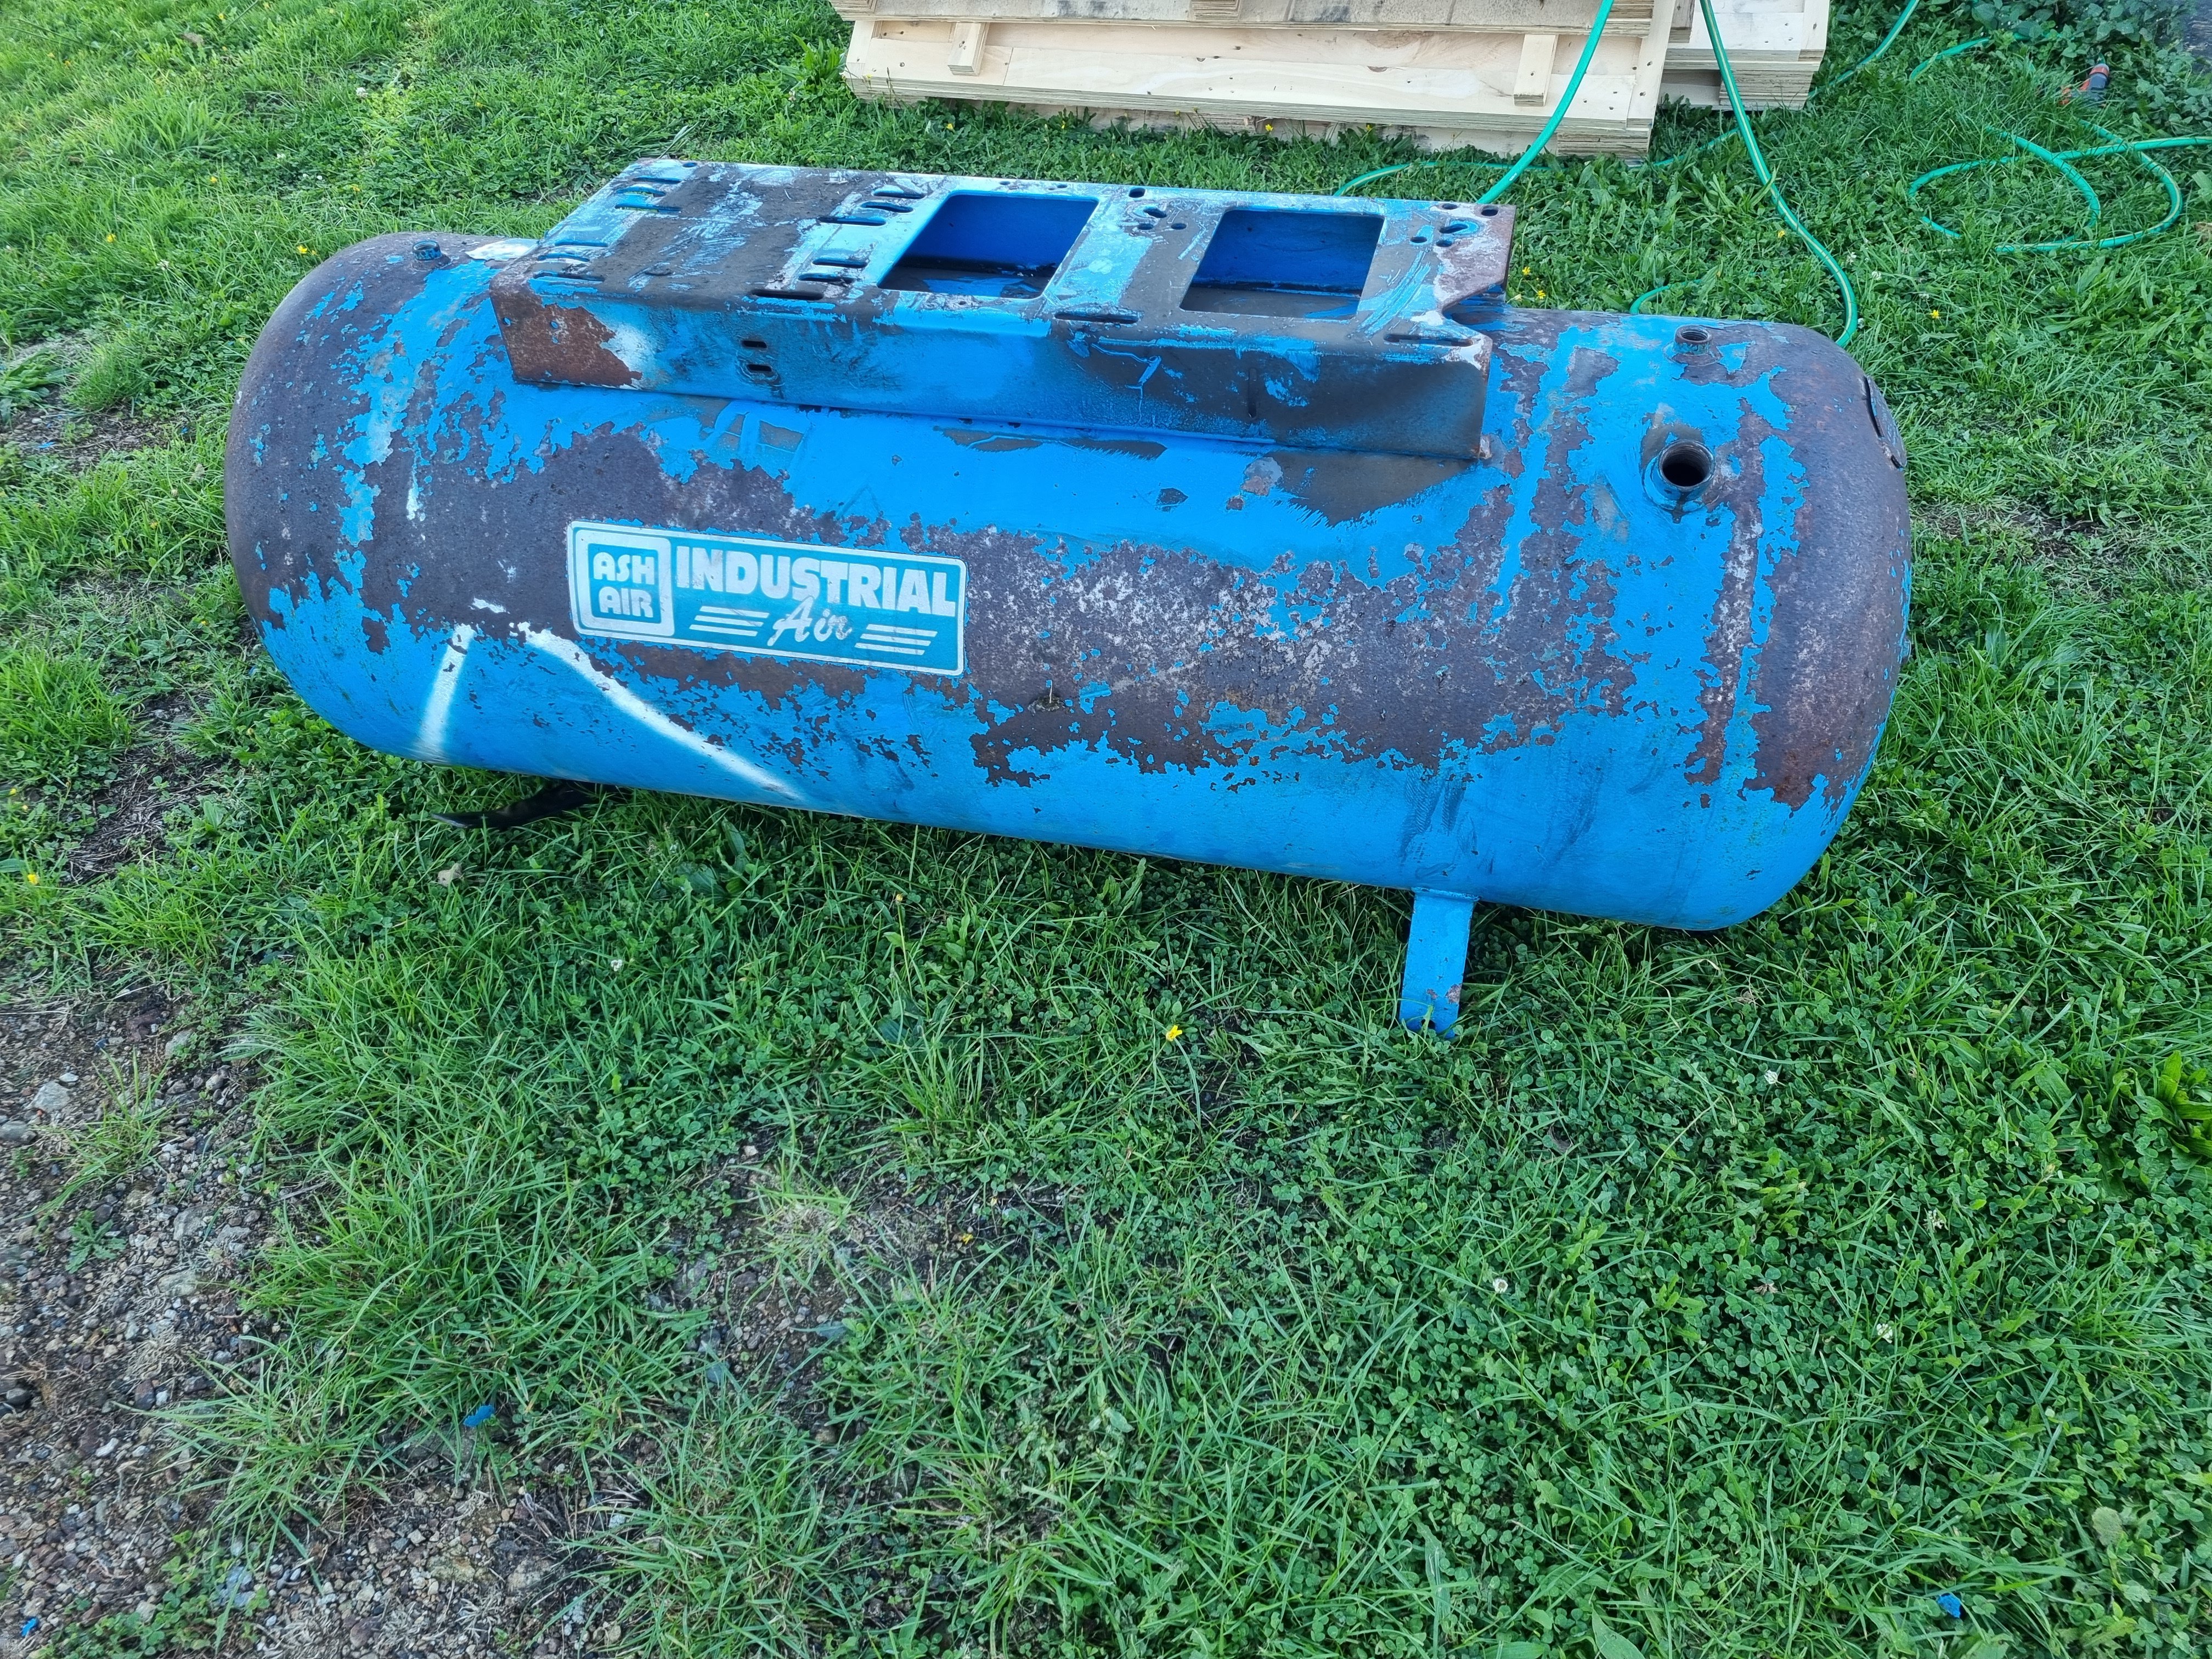
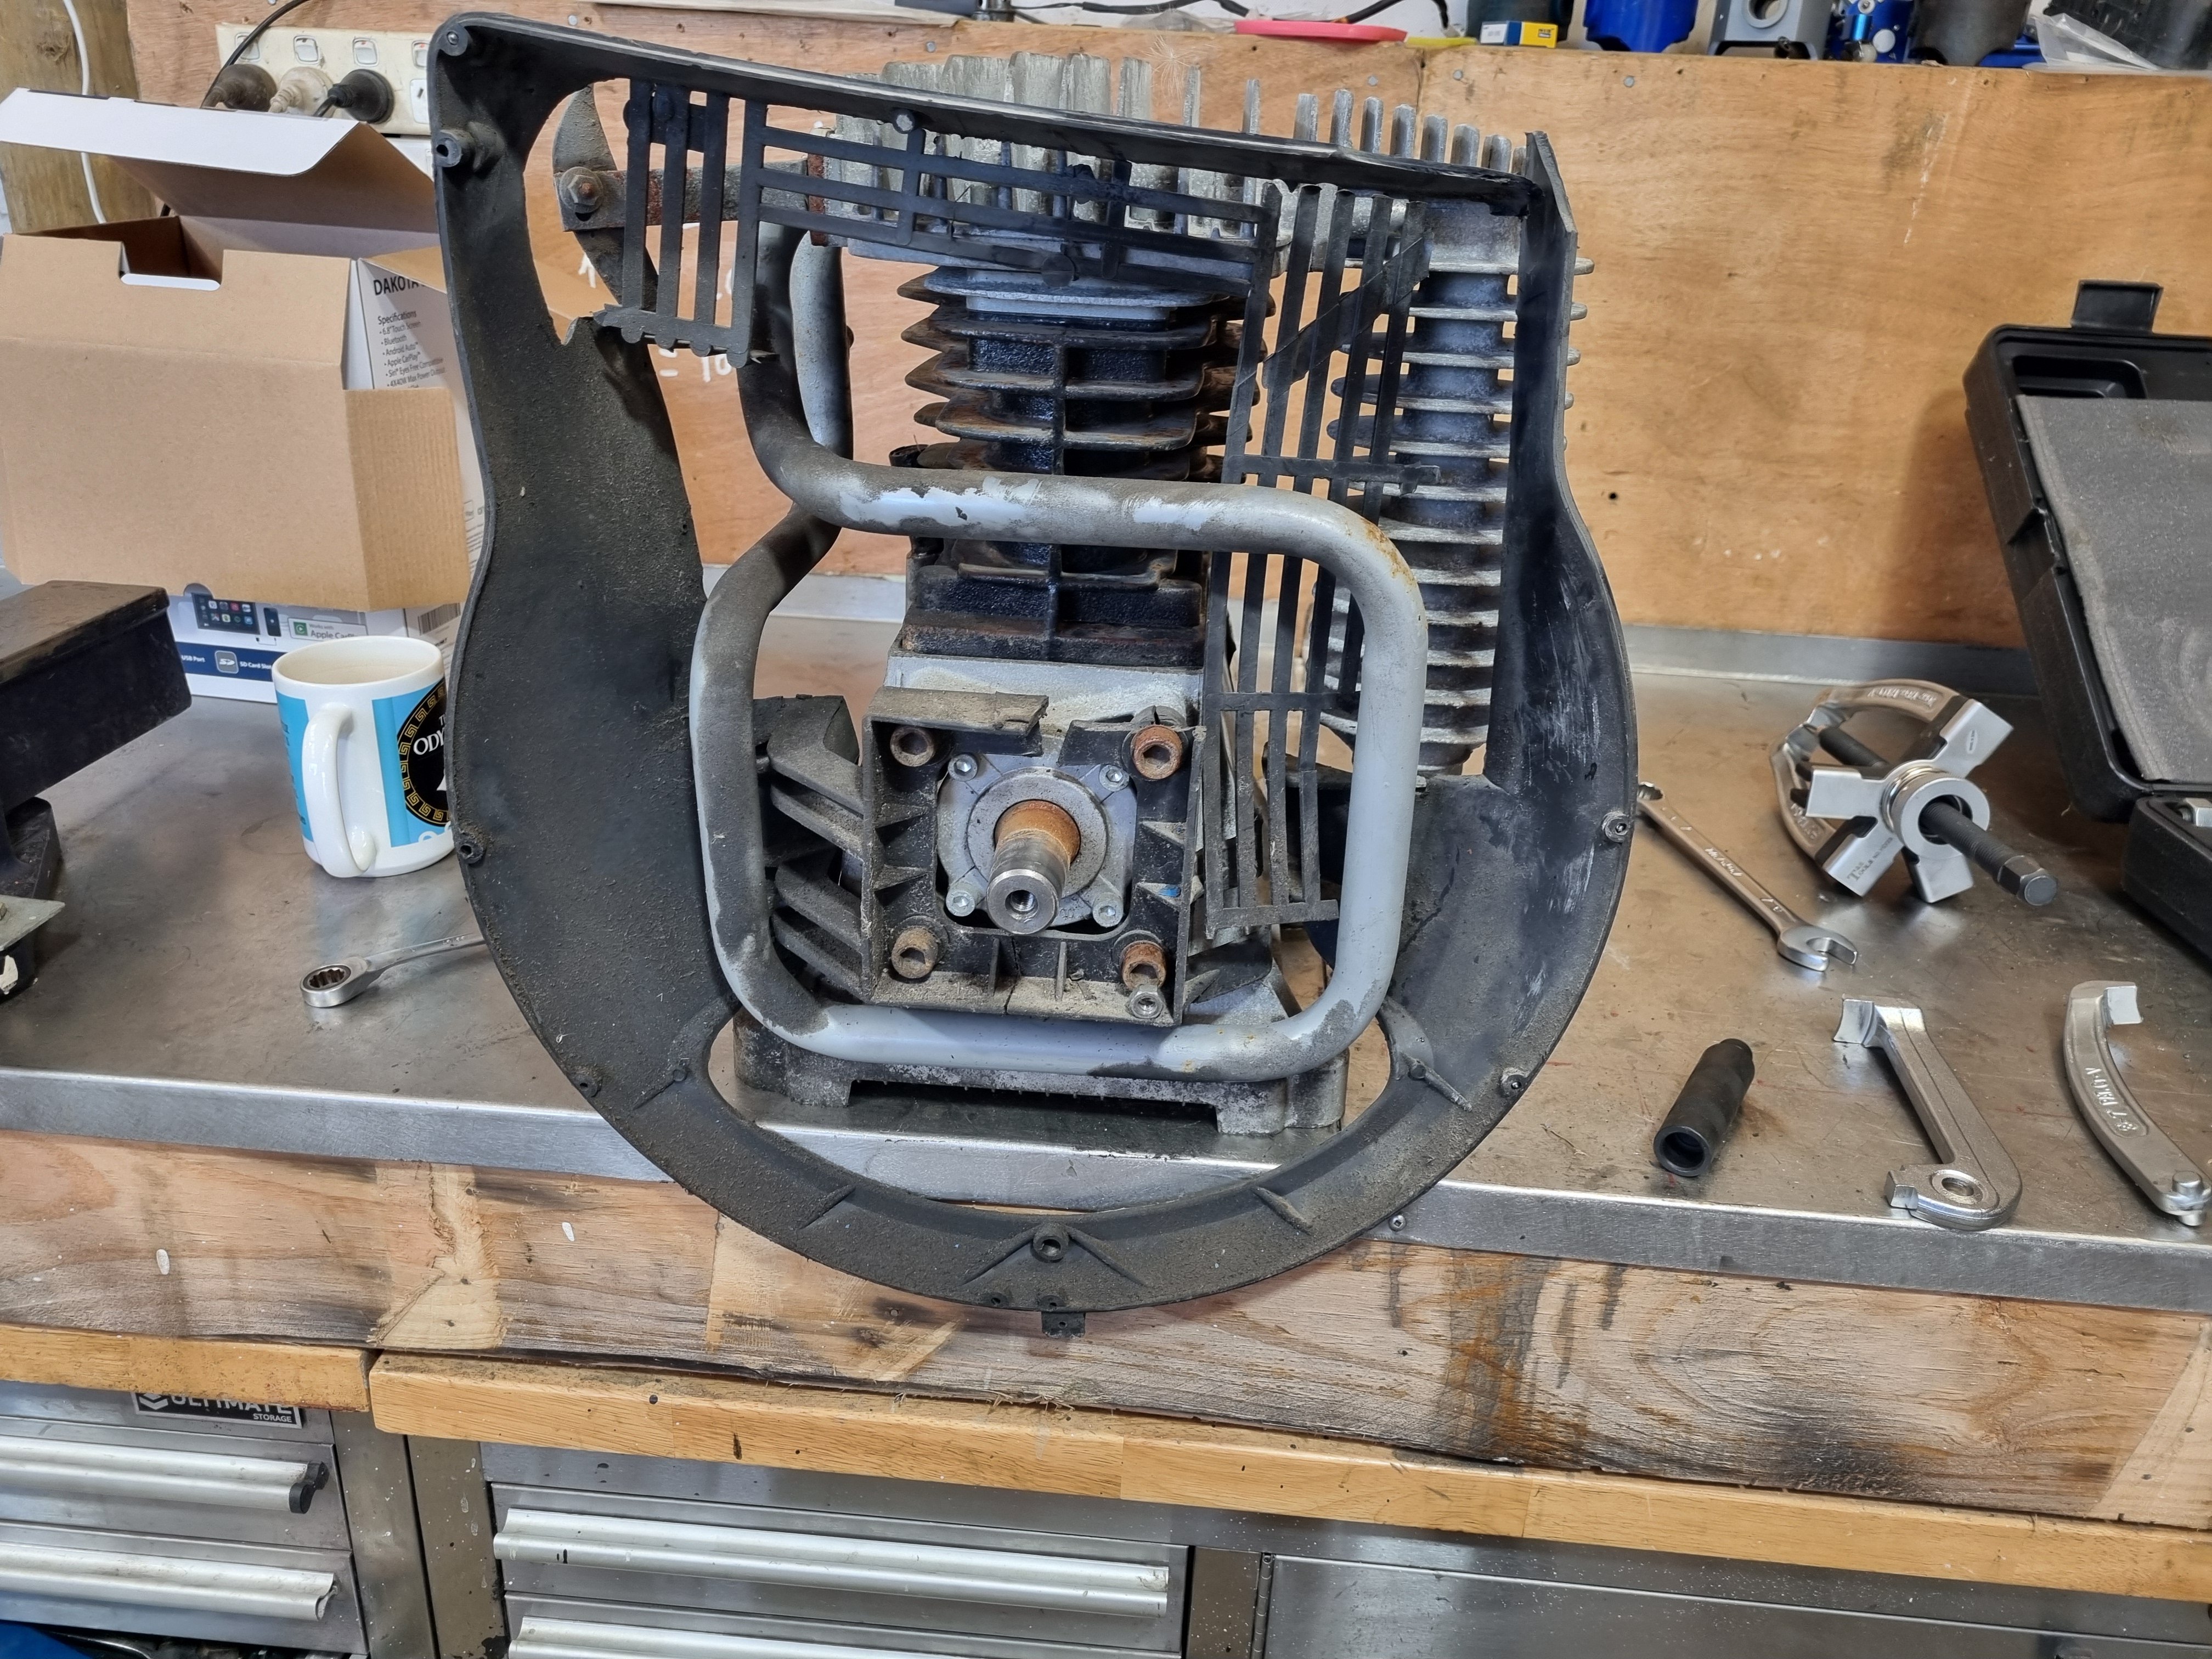
once id gotten the thing apart i had a look inside the tank and it wasn't great, it also wasn't terrible but yea. im sure there are many, many tanks being filled with compressed air every day that look way worse but still i wasn't keen on having it explode in my face. so i took the tank to get pressure tested. the joker said it was too rusty for him to certify but that's cool with me, i don't need any documentation, i just need to know its safe. so its at the testing place now. once its tested i will get the tank blasted and then ill paint it some colour, probably whatever colour i have enough of to do the job. then i had a go at fixing the belt shroud. i had to make a bunch of metal brackets to bridge all the breaks i could and bolt it all back together. I also had to make a big aluminium bit to fill in a huge piece that was missing completely. when its a whole unit its pretty strong, ill make a bracket to support the far end of it (the whole thing hangs off the 4 bolts around the crank spigot and thats it) once i put the thing back together on the tank.
3 points
-
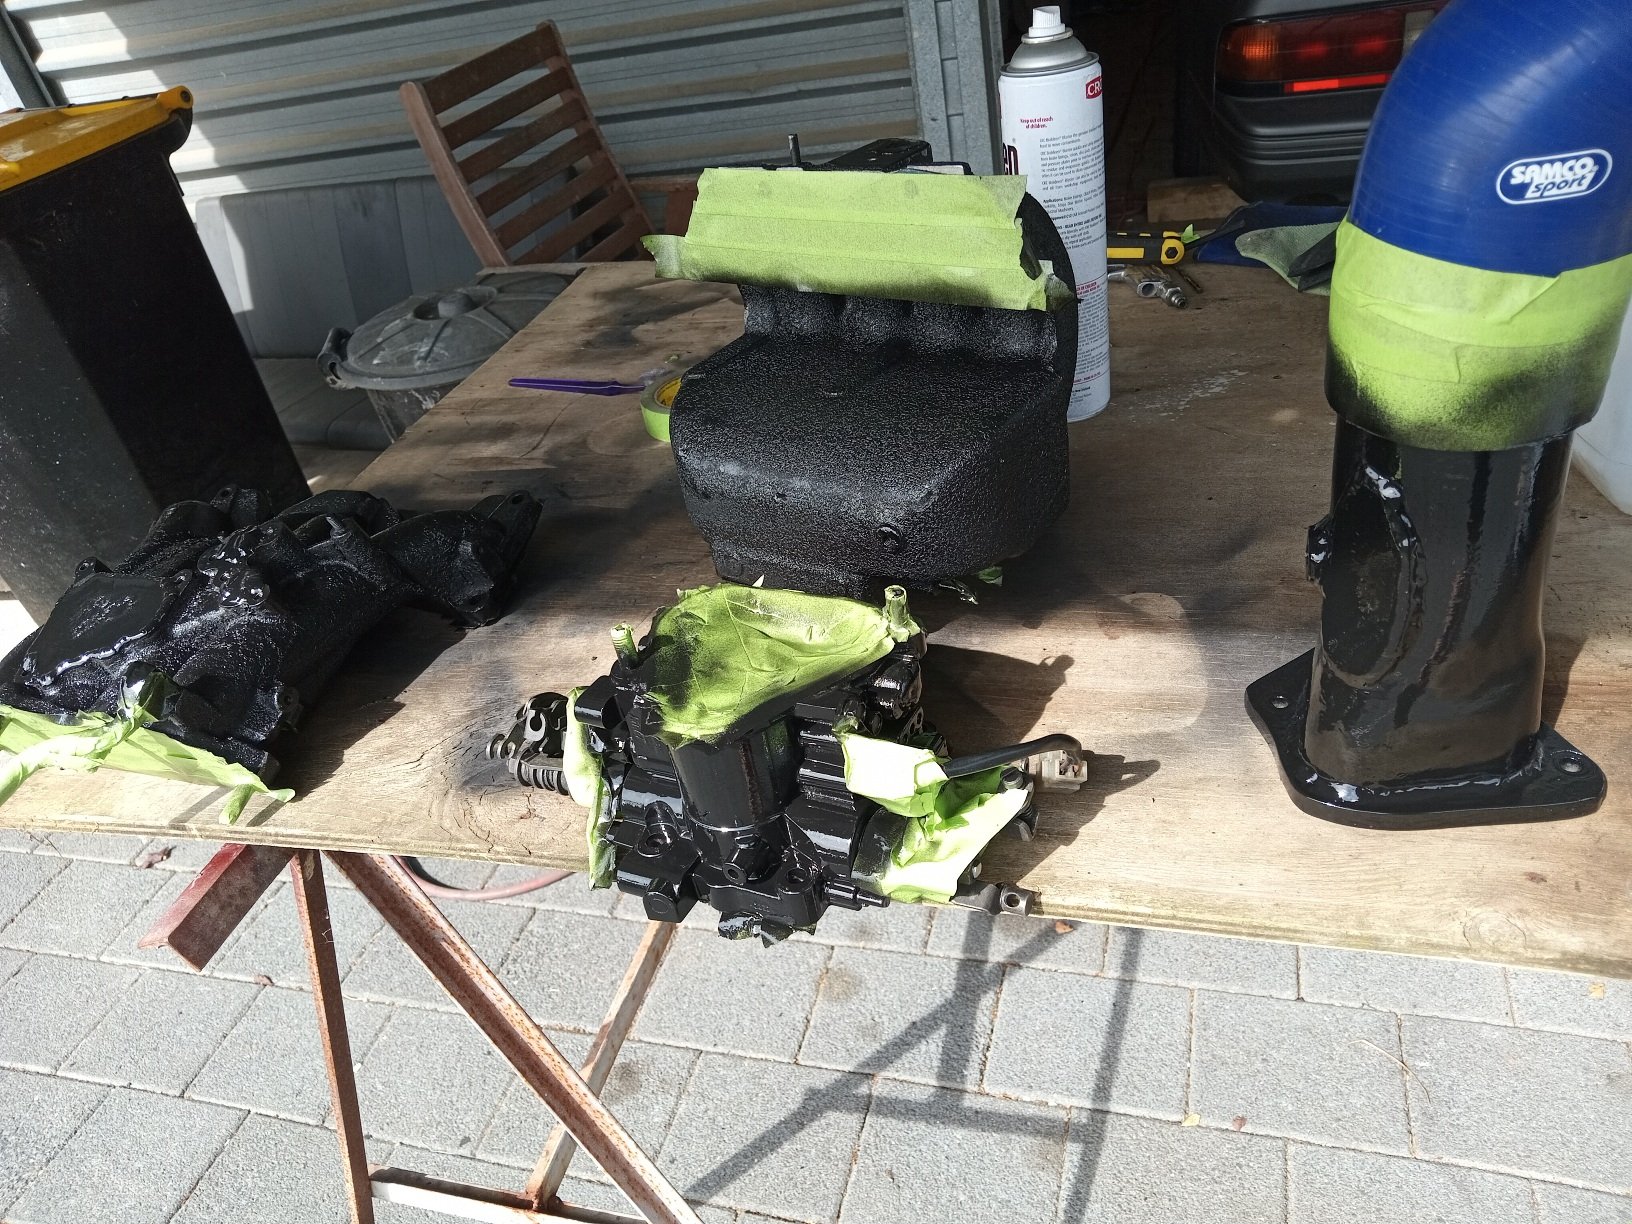
Welded up all the emissions and unused ports, this got rid of about 5 plates and gaskets as well as 3 or 4 hoses with bolts in them, sprayed in high temp black, should tidy things up a bit
3 points
-
Shit also I forgot to say the red thing up there ^^ weights more than the sun2 points
-
Potential interest in a Hanmeets. Would be bringing my work car though as (free gas) it was a long slow drive to chch in the little red Mazda and would be a nedzillion dollars to bring the 7. I would get to visit all of the gas stations though in the 7…2 points
-
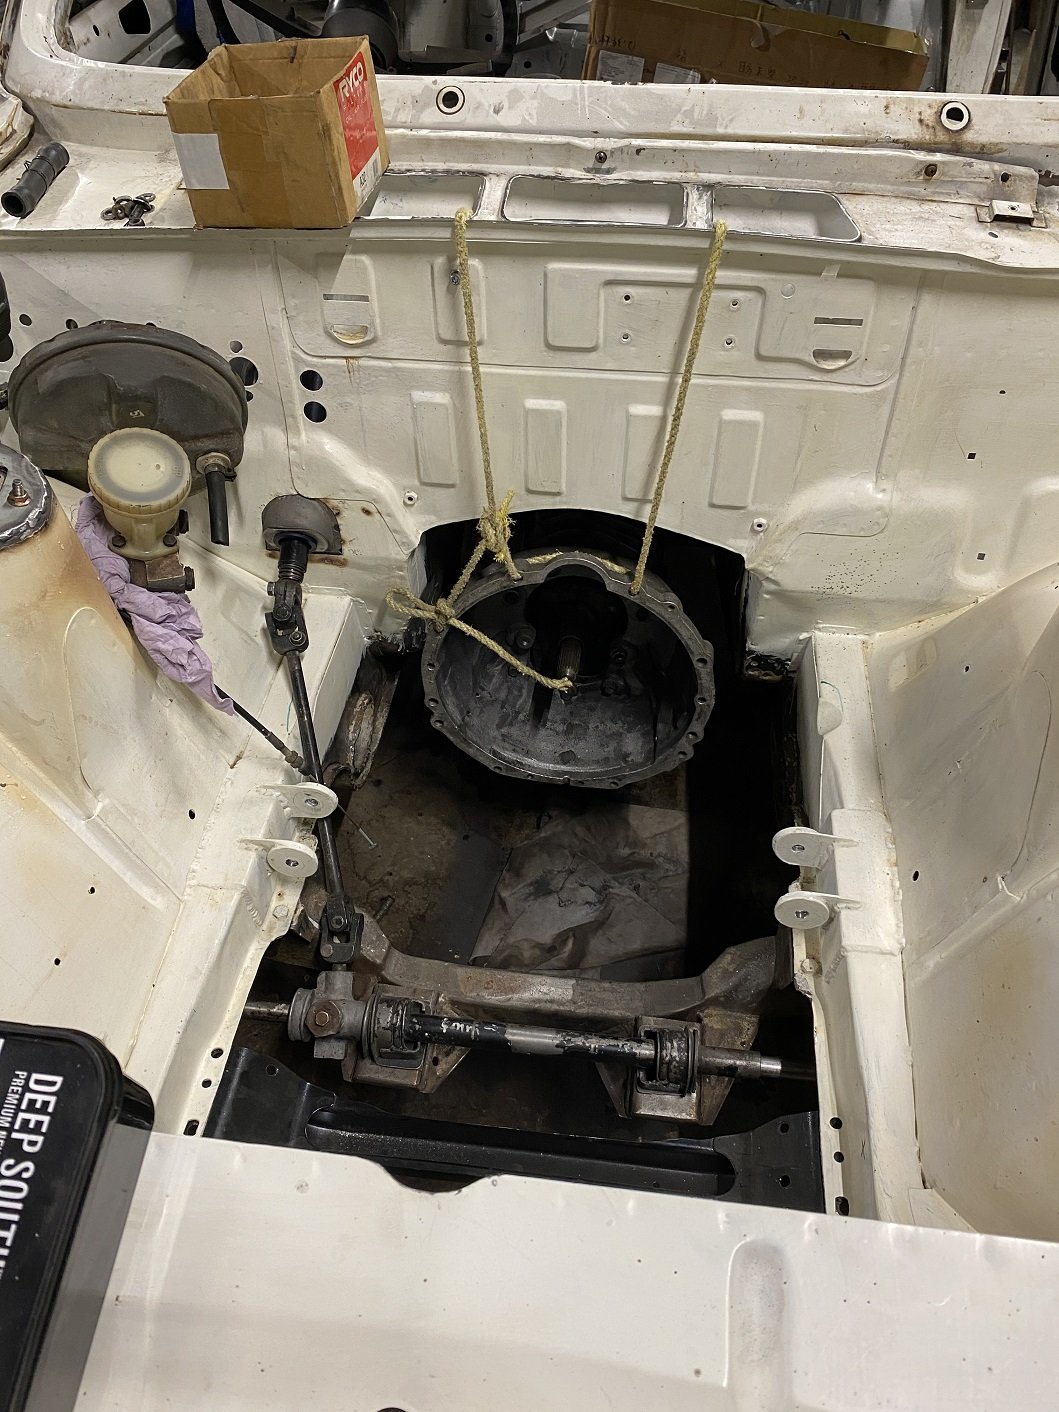
Scooped the engine back out the hole. Then put the gearbox back in so I can do the clutch and brake lines. I'll also be redoing the engine mounts as cert man wanted them thicker. And I can weld in the relocated steering column lower mount. I'll also be clearancing the chassis rails a bit more for the passenger side exhaust cause I put it in the wrong place the first time. And some clearance for the steering intermediate shaft. Epotec goes a bit toasted marshmallow if you use a MAP gas torch to soften underseal for scraping it off...
2 points
-
So what you're saying is, a modern car would be better? That's it! Close the forums, we're done. Let's not forget a 2J is 5 miles long and weighs the same as a bus.2 points
-
I bought mine as a 2l petrol converted to a camper. Ripped out the bunks etc but kept the lining and the PC Cresta diff. After one extremely expensive trip to Teretonga where we had a headwind all the way and had blown our fuel budget by Gore it got the LD28 conversion. An outfit in Waterloo Rd ChCh did it. They were doing one LD conversion a week at that time. When I went to pick it up I was met by a mate from speedway who'd already driven it and raved about how quick it was compared to the others they'd done. Told them what the diff was. It would cruise at 115k with two bikes on board. Never did find out absolute top whack as over 120k it was still accelerating - but very slowly. Went to most NZ race circuits in the following 5 years Puke to Teretonga. Had to keep it on 13in rims as 14's would have geared it too tall. Bit hard on rear tyres - rolled one off the rim running fast and empty once. Rust killed it ultimately. Far as i know it's now a mobile shed on a farm around Waddington. The wife loved it. She dragged off a Porsche once. Nail it hard and the left front got very light. From my experience I'd look hard at a taller diff than standard. But also fit bigger rims. They've got enough torque to pull something taller.2 points
-
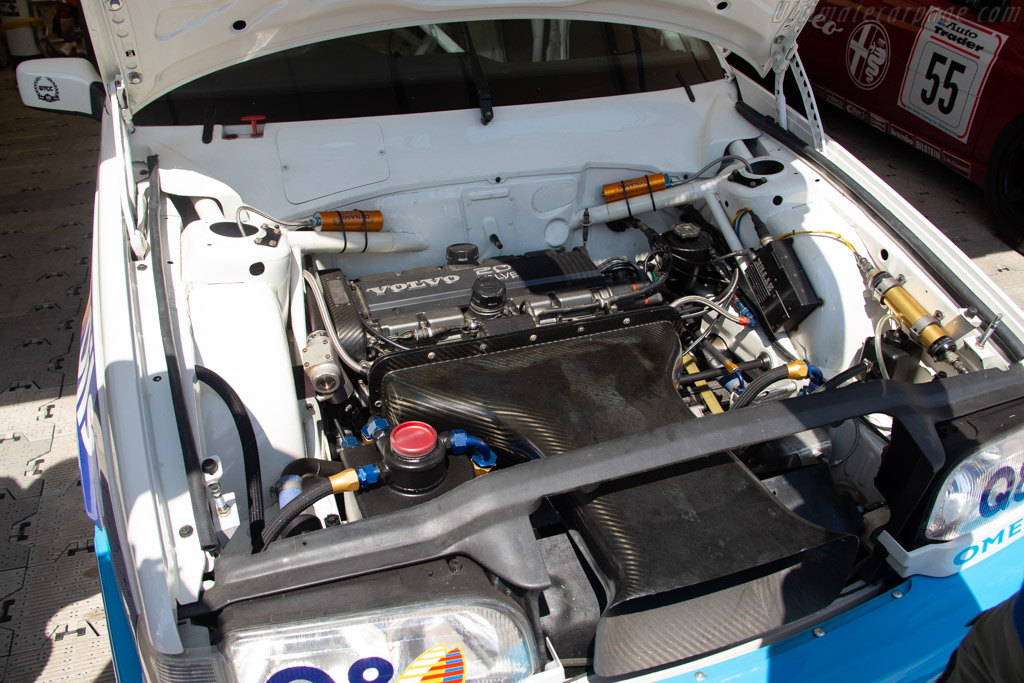
Yeah true. Apart from existing options not fitting, it's also that eventually I want to be able to have an intake something like this. Both because it looks cool, and works to hide a lot of other sins in my engine bay haha.
2 points
-
The start of a probably long process of repair and conversion Get my hands on it in a few days finally. Will upload photos then Link to discussion:1 point
-
Nice... looks like a red dwarf.. At "some point in the future" I have this 10hp Broomwade to reco.. Think it was out of a mine
1 point
-
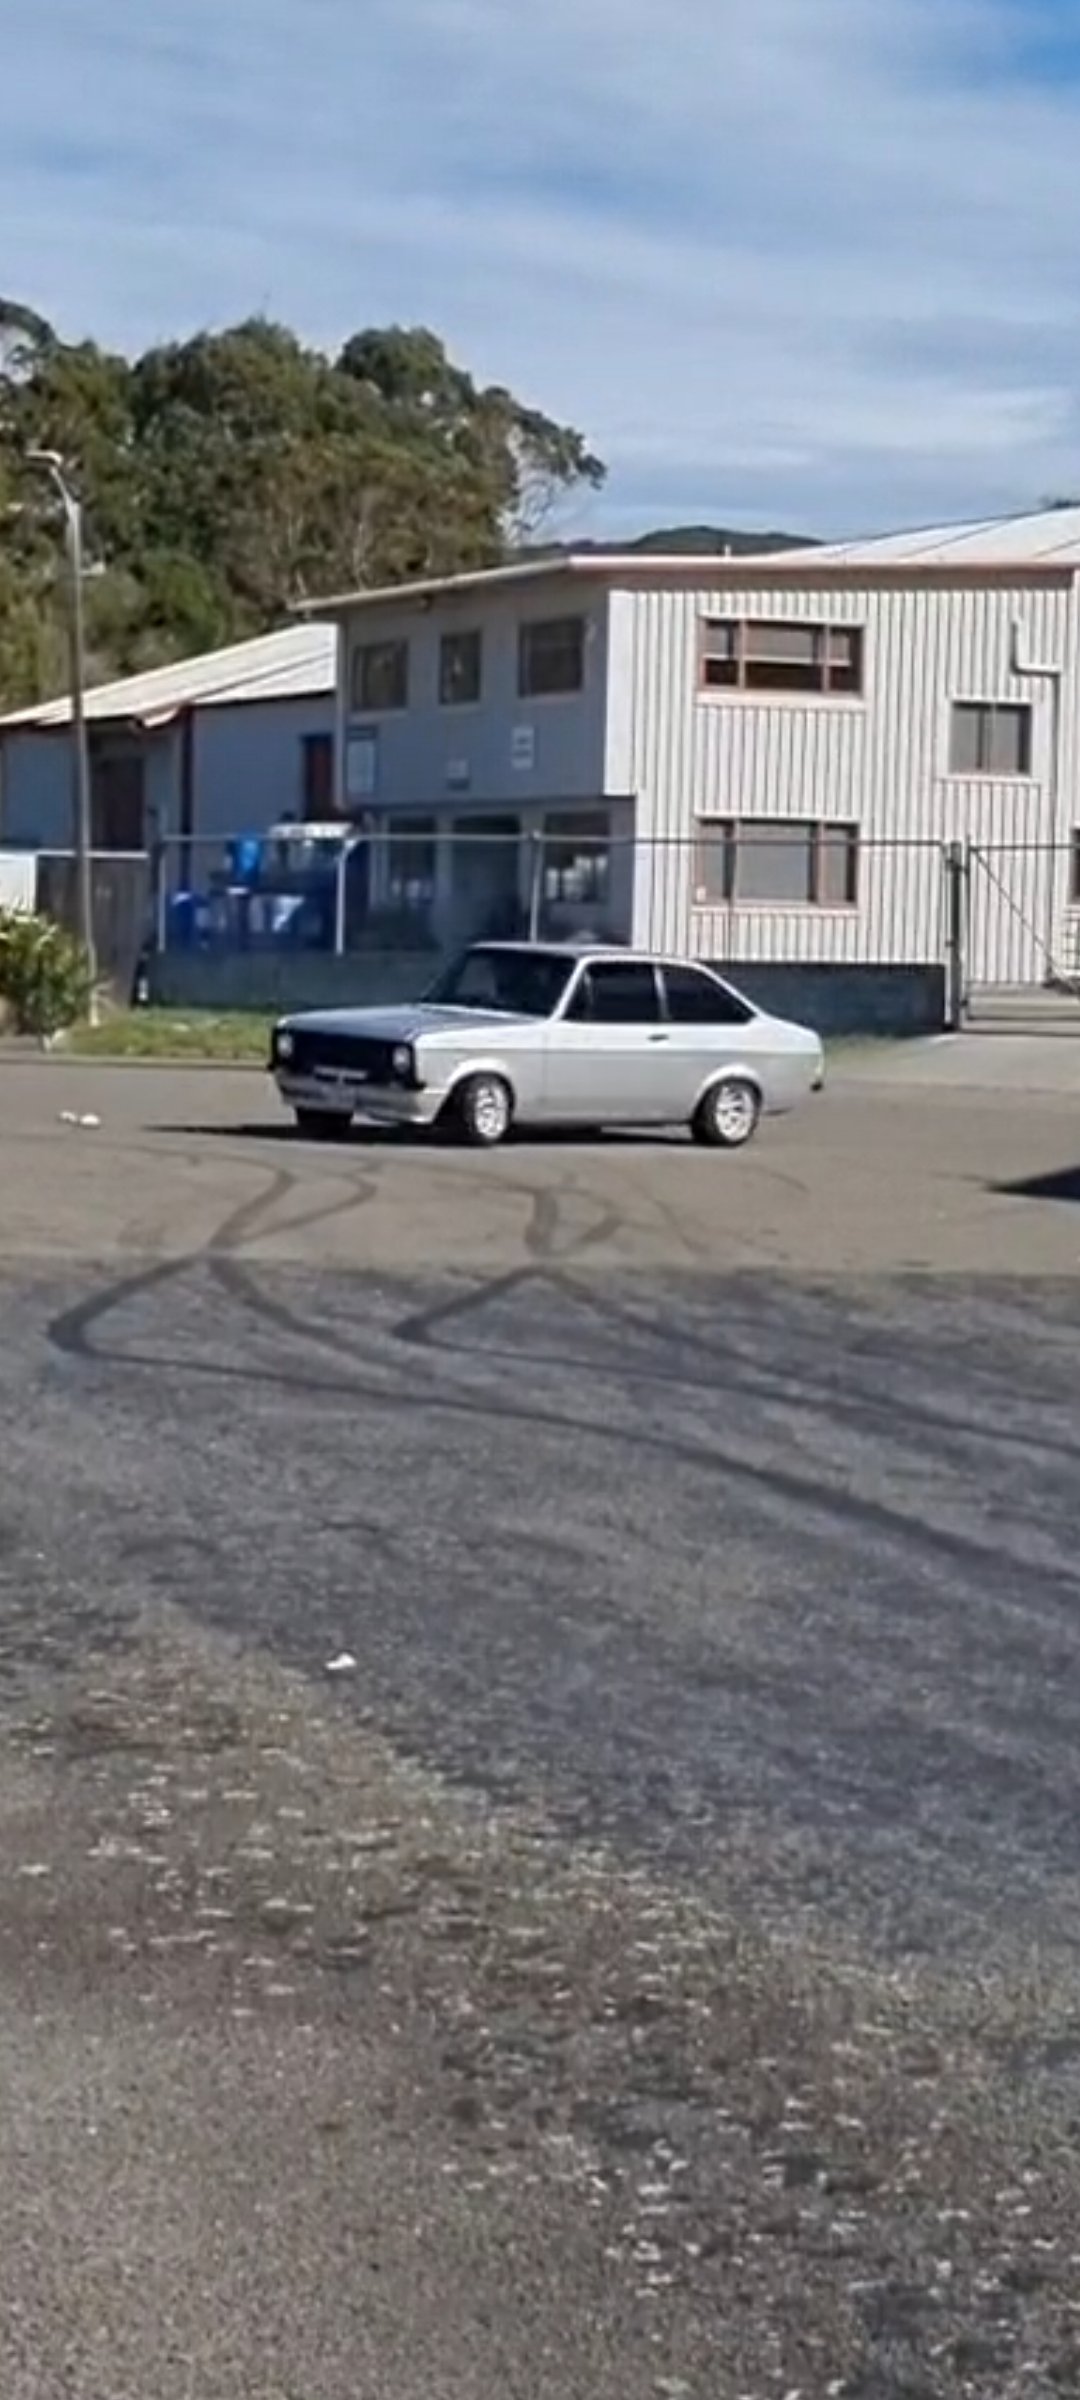
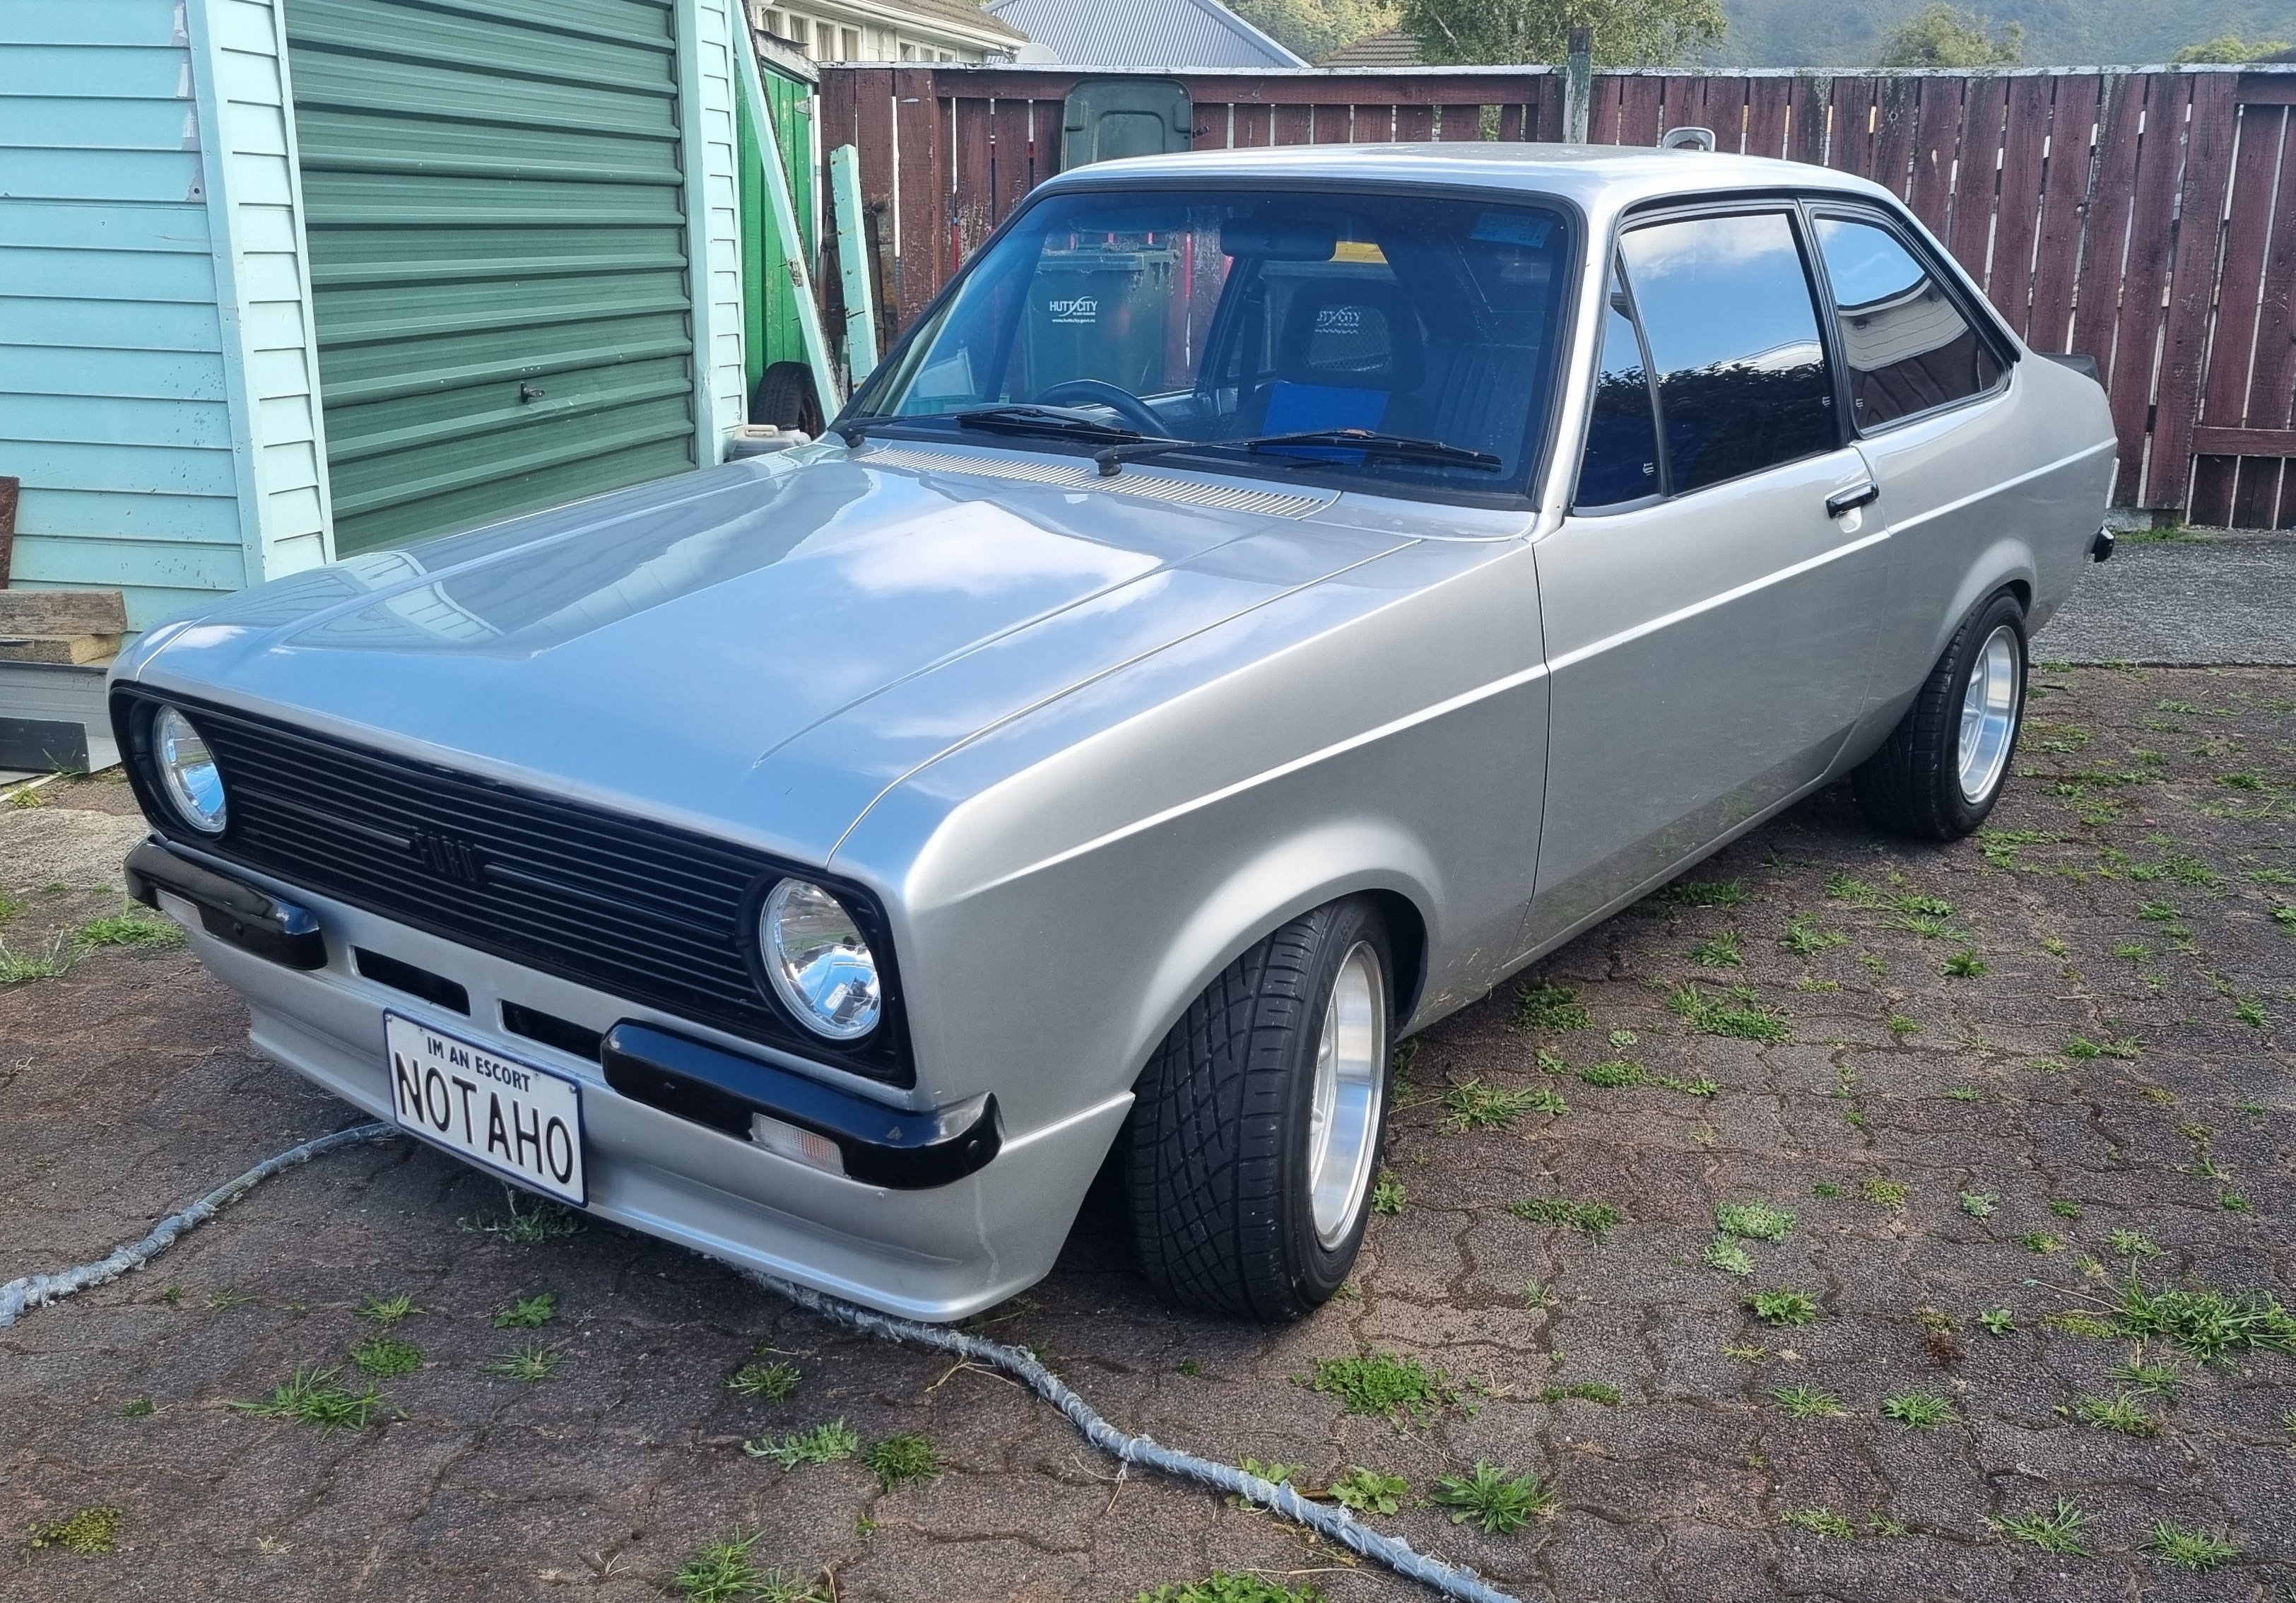
Picked up some factory mk2 escort Recaro seat mounts, Seem to make the seats a bit high compared to the flat bar I had, but is alot more comfy overall, will leave them in for now, make something similar with less height will be ideal Grabbed a console, but due to gearstick placement I'm trying to think what might work better here instead Goes well, starts easy and drives well and even got the tyres squealing today
1 point
-
We had a similar one at work but a precision brand. Fark me that poor thing rattled and banged away for hour after farking hour. It would blow a head gasket quick pit stop and away she would go again. It actually never died we swapped it out for a screw compressor and sold it on. That machine will ace for home use.1 point
-
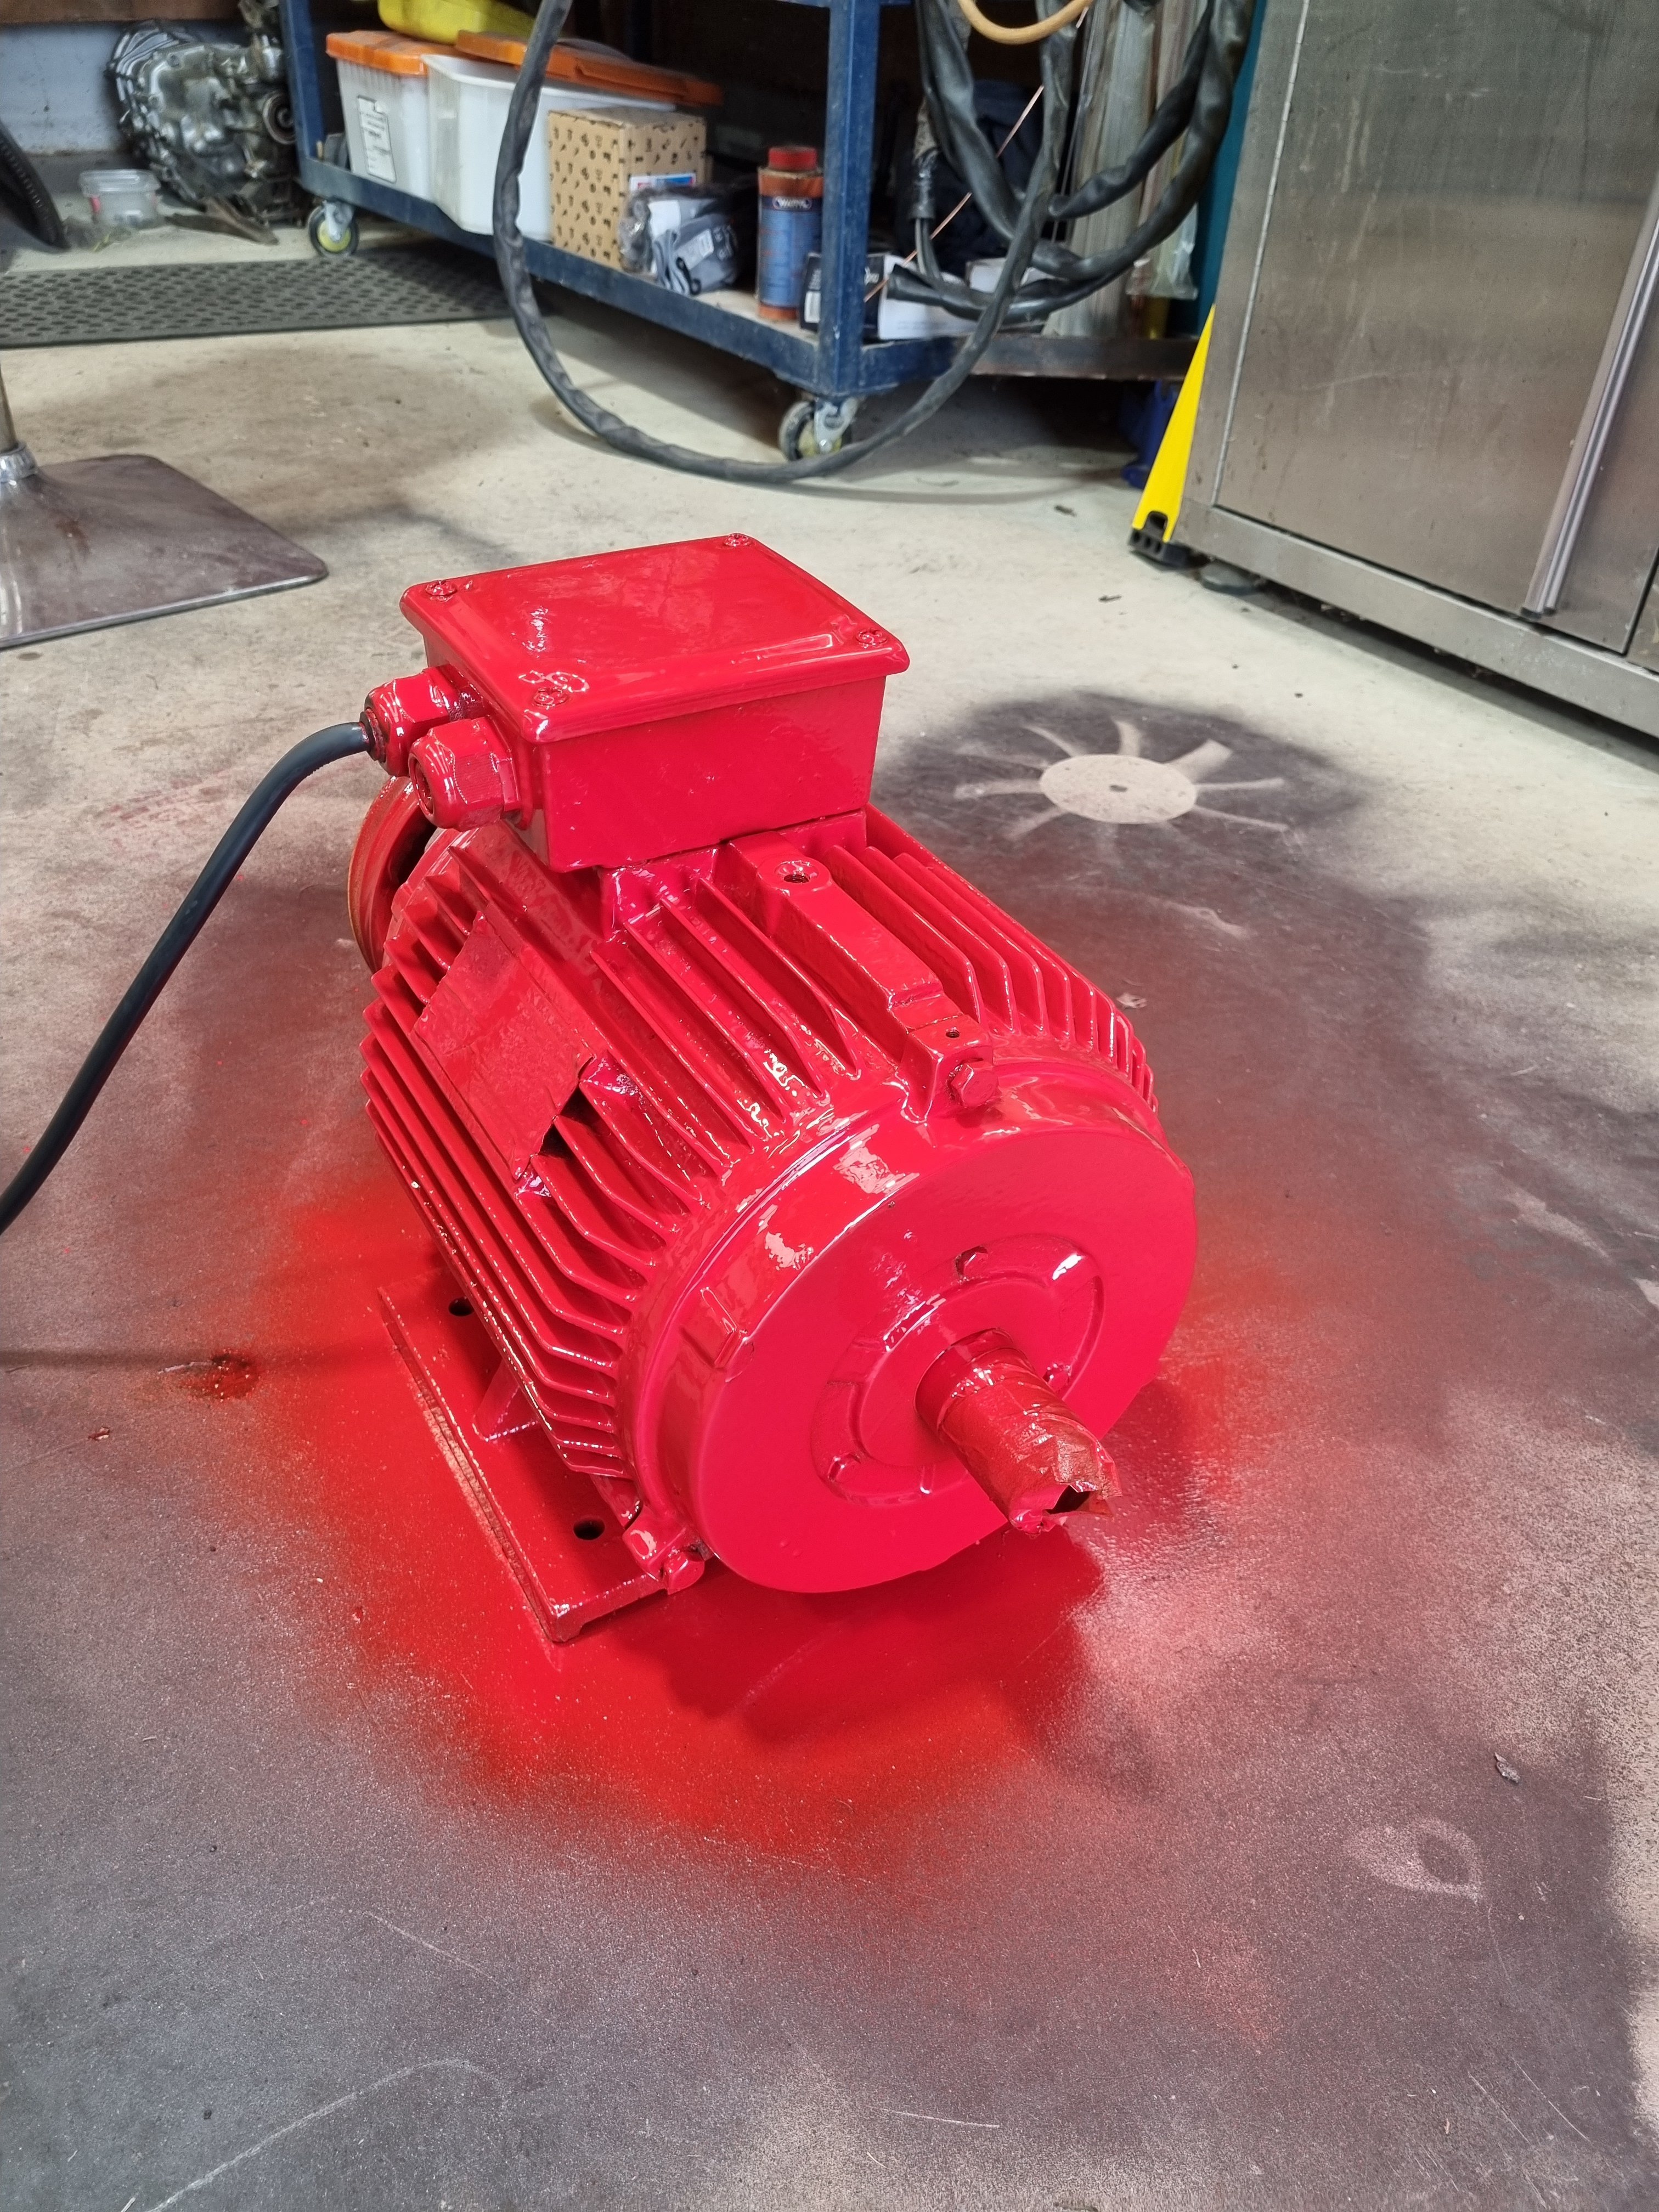
then, to make it go faster, i painted the electric motor red.
1 point
-
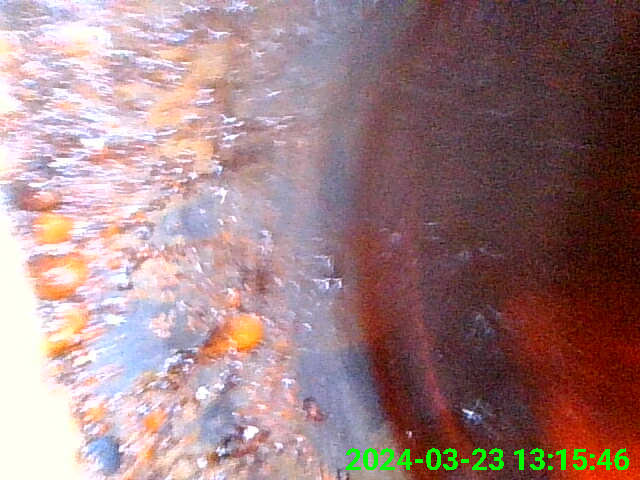
the red is ATF floating uselessly on a layer of water I guess1 point
-
meanwhile in the cylinder bores
1 point
-
You gotta suffer for your craft....1 point
-
If you're looking at getting that wagon, probably want to do a rack and pinion conversion as the steering box stuff takes up heaps of space where you'd want to run the exhaust. Also most likely has leaf spring in rear of that wagon which is a bit gross compared to 4 link. Also, at the best of times with some $$$ spent these cars handle... not amazing compared to modern stuff. But with standard suspension etc they just wallow all over the road haha. Costs a fair bit of $$$ to get them handling and braking a bit better. With lots of weight in front and not much power would be kind of like wielding a marshmallow sledgehammer.1 point
-
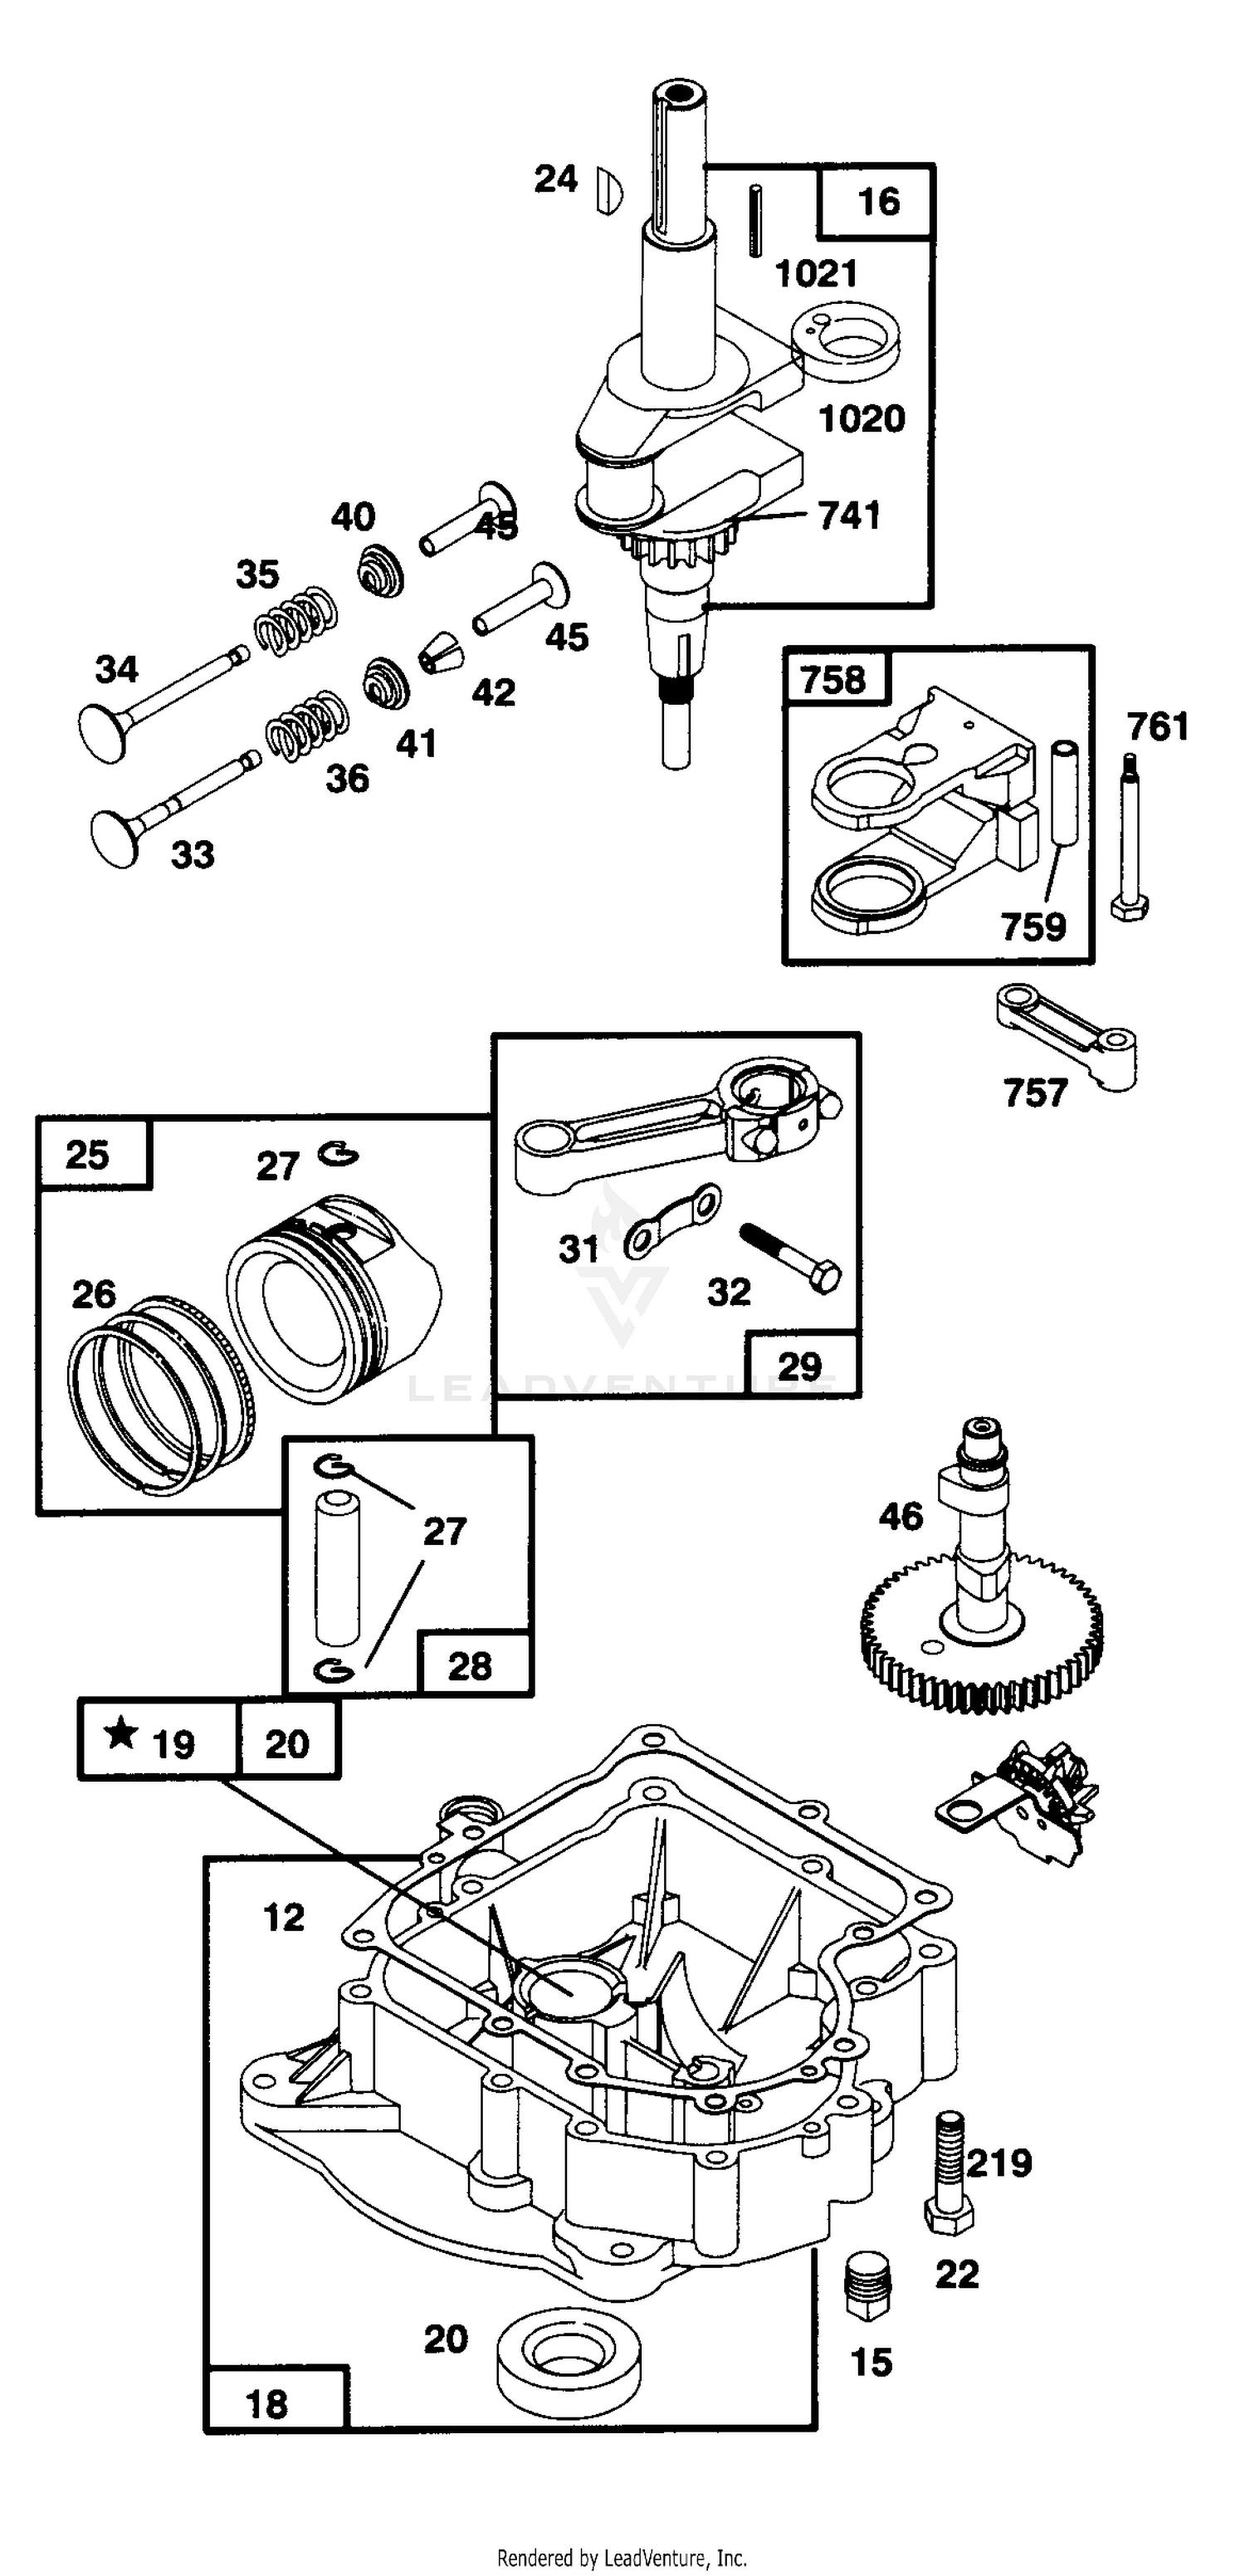
I remember pulling apart the motor that was in the ride on mower I bought off @Nominal a number of years ago and thought the plastic components were surprising and you can’t help but think that can’t be good, but in saying that the reason that motor had given itself an upper cut was due to a metal (cheese) part giving way. I think if any of the plastic gave up it wouldn’t run but unlikely it would have ventilated the case either. Was the little pivot arm 757 in this diagram that let go.
1 point
-
Here is a wee update. The fist job was to sort out a couple of issues on the hydraulic clutch setup. I realized that the slave cylinder I had that came with the bellhousing fowls on the headers. After a bit of head scratching and hunting I found another slave cylinder that just fits. I heated the headers then tweaked them out about 15mm to give a bit more clearance, it is still very tight. I still only have about 10mm of clearance. I'll make a heat shield I think. That is the new one, only problem is that the bolt holes don't line up with the holes on the bellhousing. So I milled slots in it. I was going to TIG the bellhousing holes and tap them but I decided not to just incase this new slave cylinder doesn't end up working out. For the master cylinder I welded a backing plate to the fire wall and mounted it in the engine bay between the booster and the header. Tight fit but it works. That picture makes it look much closer to the header than it is. I couldn't have it directly behind the clutch pedal unfortunately, so it's off set from the pedal. I used some steel rod linking them all together and threaded the ends. It's nice and smooth, I'm hopeful it will work well. Engine in for hopefully the final time. I couldn't mount the gearbox as when I went to fit the fly wheel I realized I don't have any flywheel bolts. Doh. ARP ones are on the way. Next I'll start wiring her up and put the dash back together. Cheers guys. P.S. Pro tip... Don't spray a car in jandals. That was taken after 2 showers.1 point
-
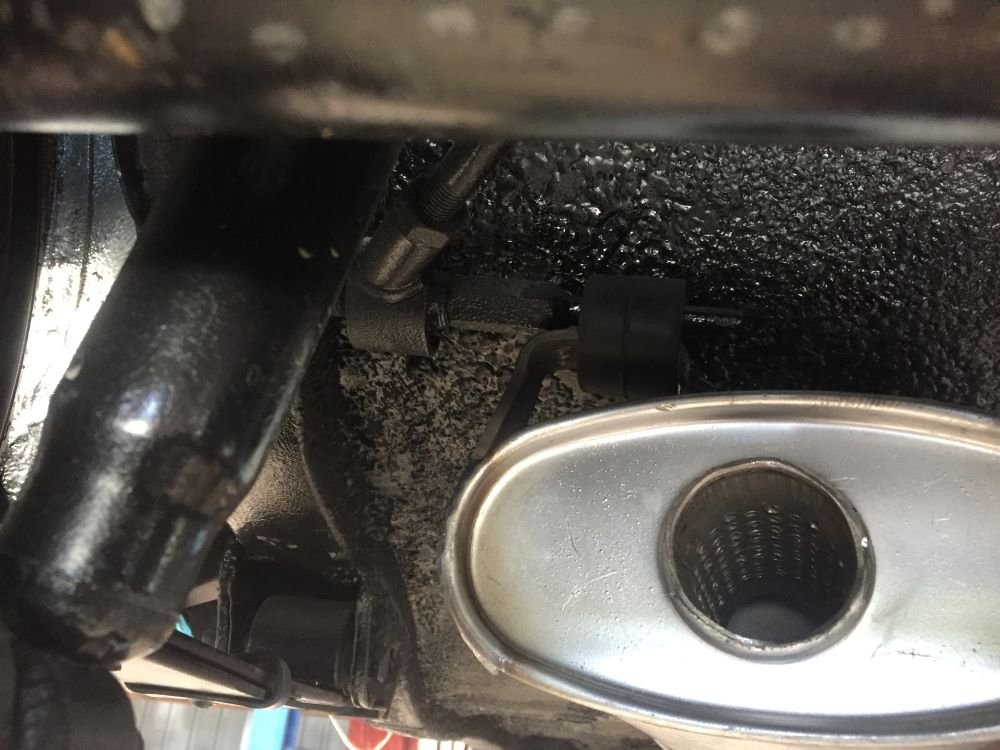
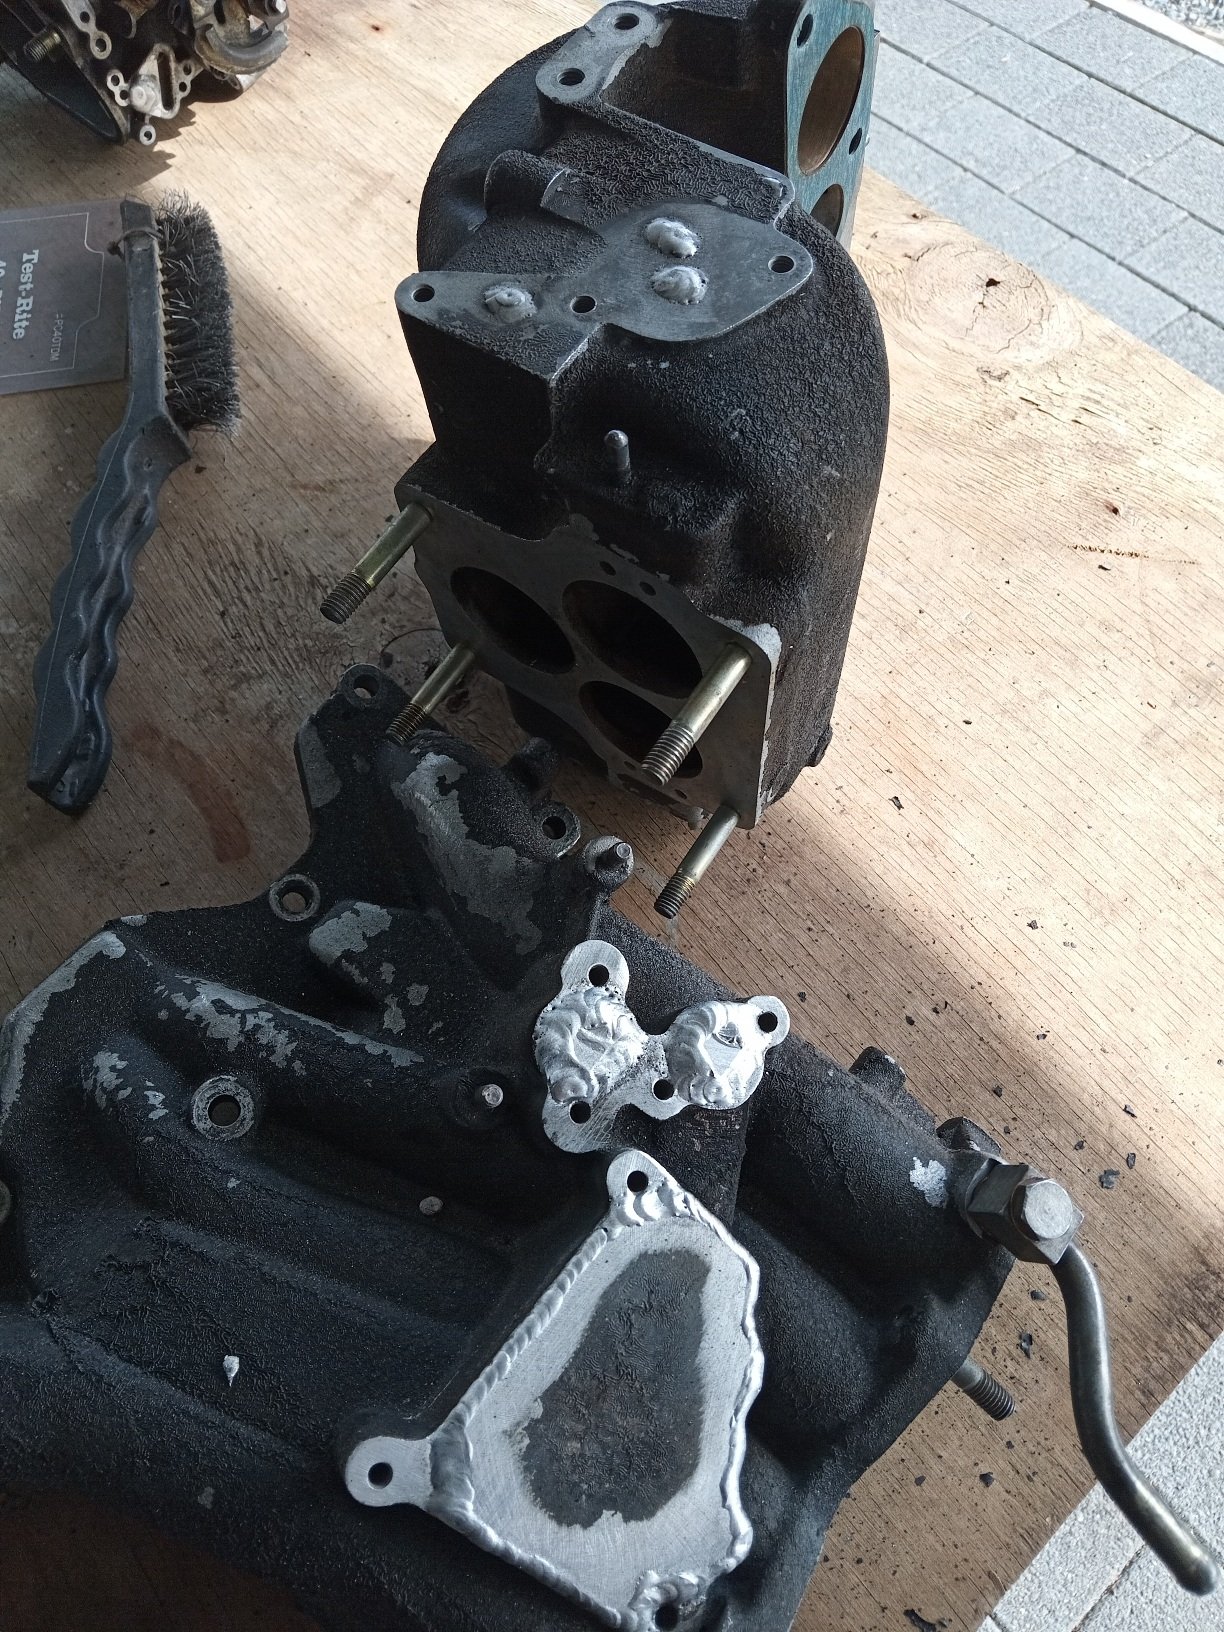
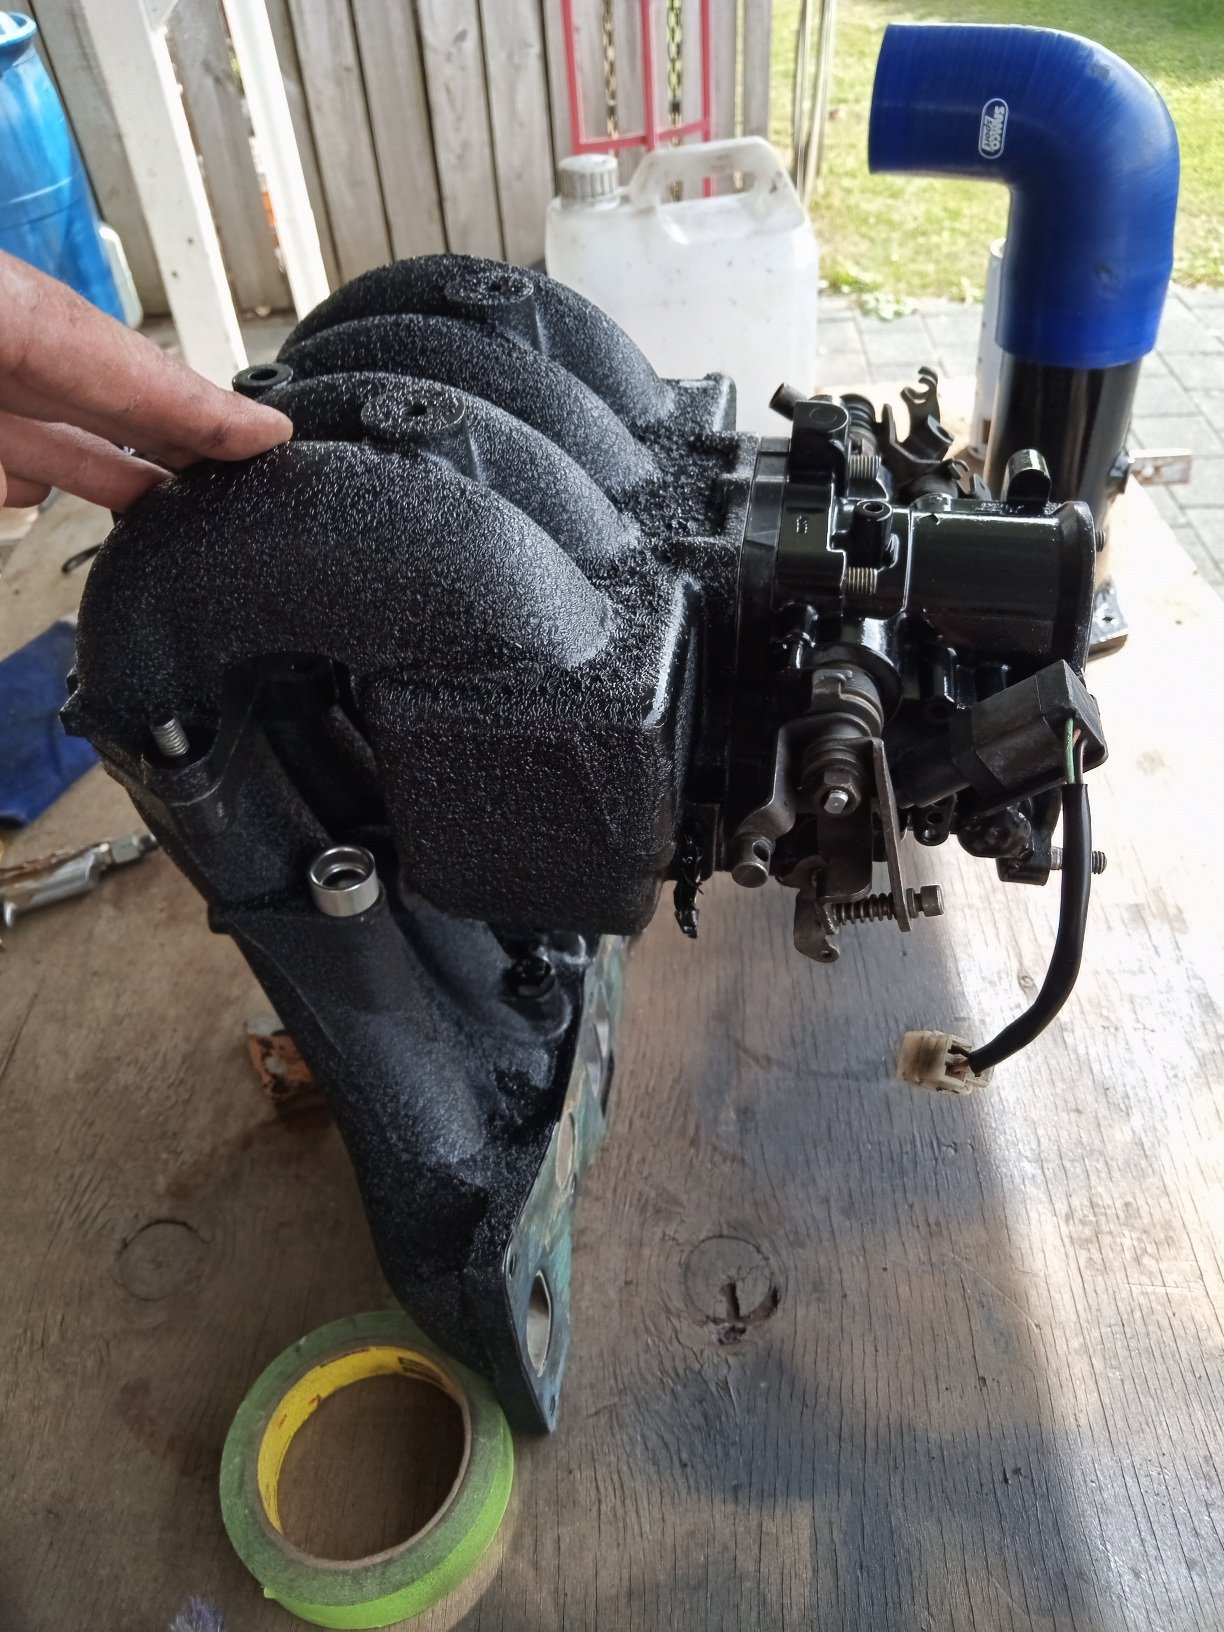
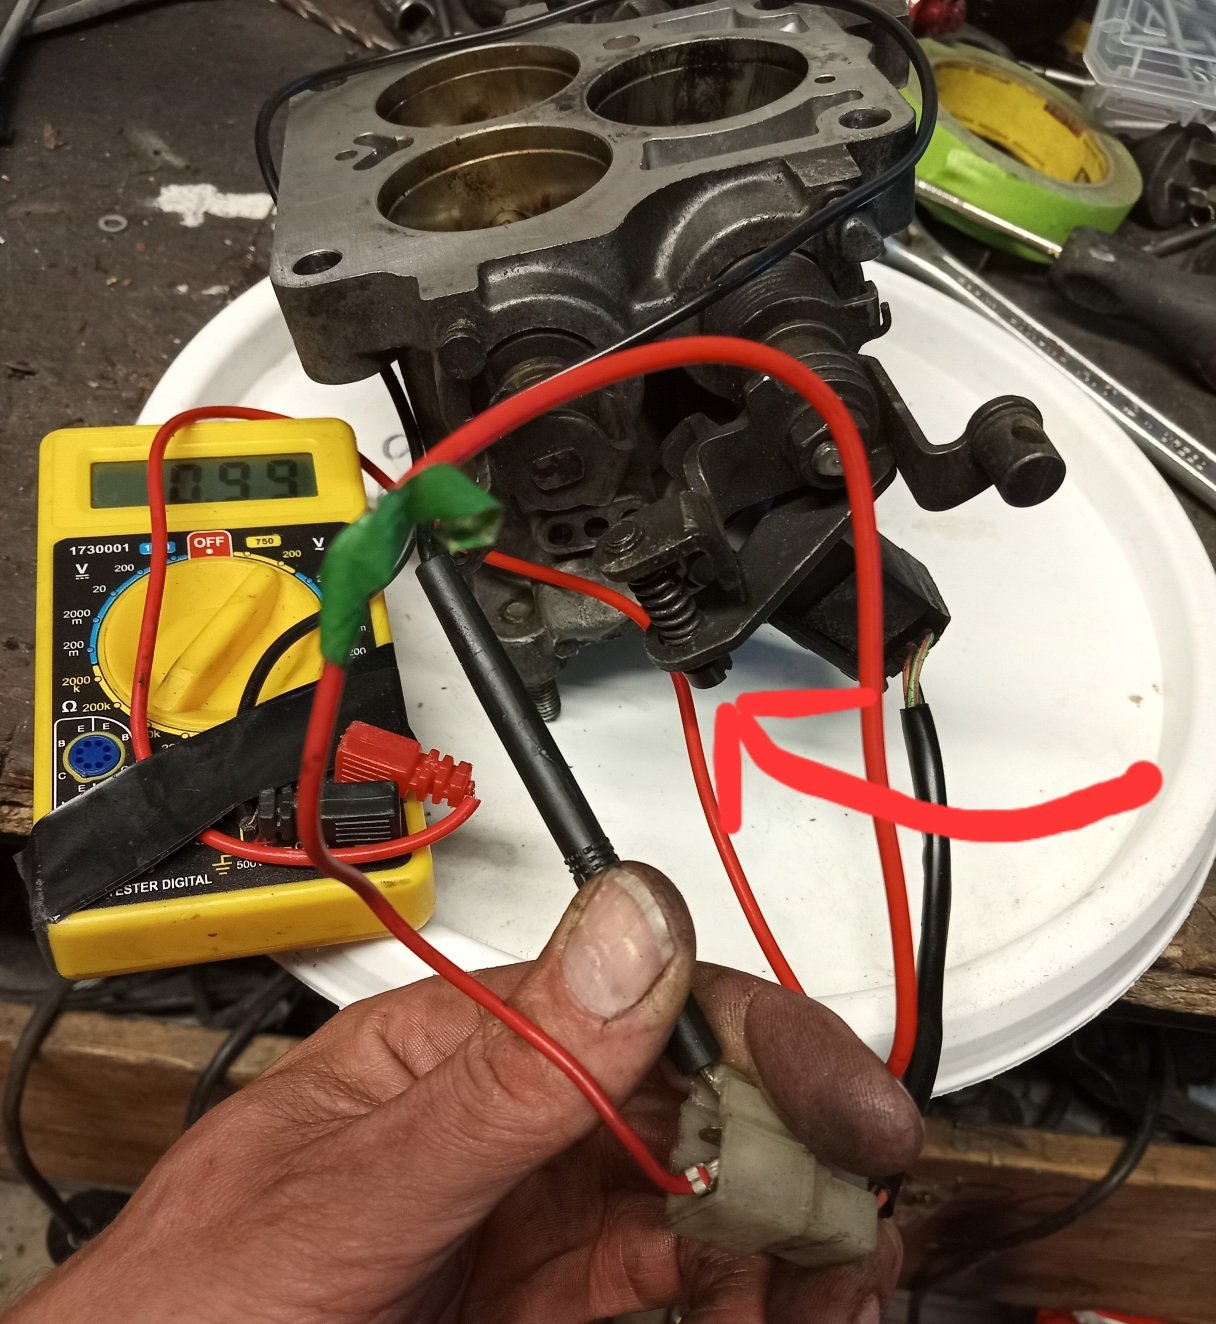
So im having a bit of a tidy up now, removed the turbo/intake area... happy to report none of that was leaking at the flange again so thats promising, decided to give throttle body an inspection, the tps was real sluggish to return and on further investigation not in spec in terms of resistance readings, some wd40 and compressed air cleaned out what ever gunk was holding it up and it now returns quickly... The ohm readings at closed throttle were off, and i needed to adjust the screw and bend the bracket slightly as i had run out of adjustment screw.. 1k ohm at idle, 5kohm ohm WOT. Im assuming some wear happened or someone bent bracketry previously to cause it to be misaligned... a lot has been deleted off this unit, including cold start functions, secondary throttle blades and linkages, but it should all work good now... i aint forking out $300+ for a new tps... Its now in spec and im going to clean/weld up some unused ports on the intake and throttle body to prevent unnecessary leaks, at the moment everything is blocked off with plates, gaskets and hoses with bolts shoved in them... a little agricultural, tig should sort that out when i get argon tomorrow...
1 point
-
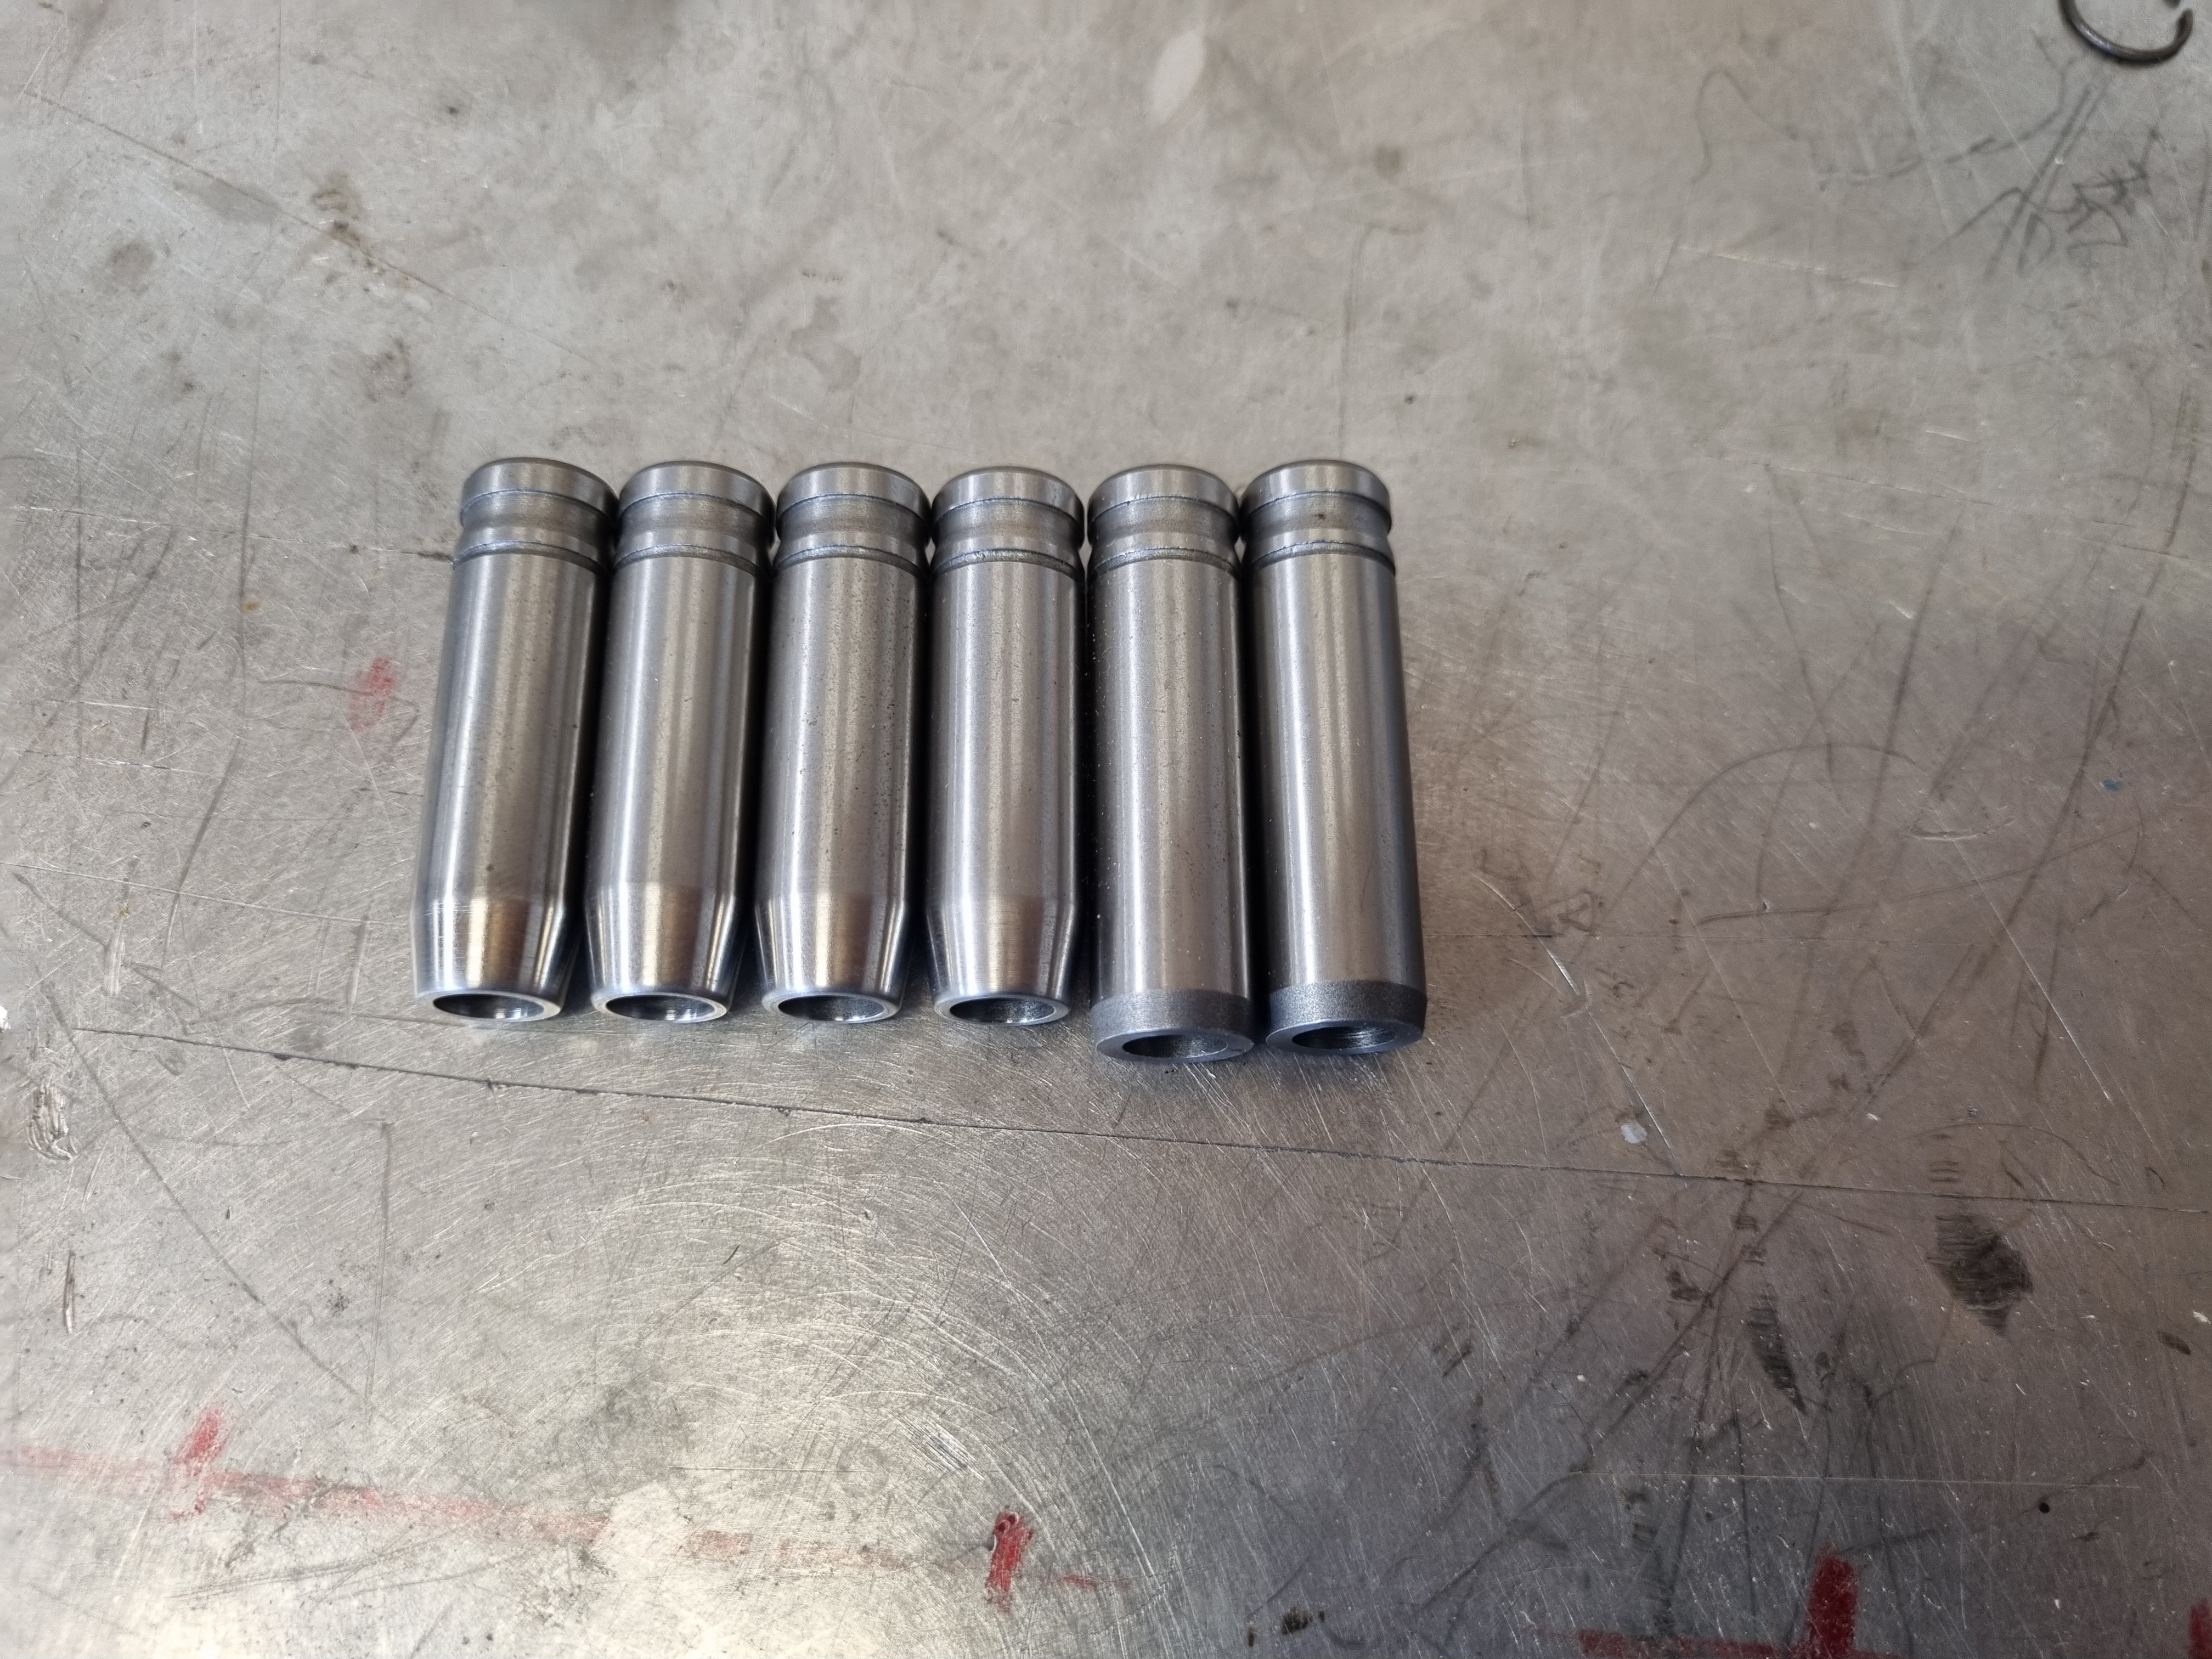
So when I left off the motor was back to completely disassembled. I got the cap machined and now it's back together with the correct crank end float. The other thing is that I got the head flow tested with the porting and bigger valves. It shows about an 11 percent increase over stock. I was kind of hoping for a bit more but using the "no science just hog it out" method is probably why 11% was the result. Anywho, now it's time to get the head all sorted and I can bolt it on. Need new valve springs, new spring washers and retainers - all of which will need to be custom or at least sourced from some other engine. In preparation for this I shortened the valve guides to suit the machining that the head needs to clear the higher lift. 3mm off the exhaust and 6mm off the inlets
1 point
-
Aaaaaaannnnddd car is still in the weather outside. But i just found and paid for something i have been looking for since 2005ish..... AN INTERMITTENT WIPER SWITCH!! This may not seem like a big deal but only having a 2 speed wiper switch in rainy reporoa is a problem. And yes while i could have wired in an aftermarket timer that wouldn't have felt right. So long as david from gumtree doesn't let me down.....1 point
-
Pulled the tappet cover and sump, all looks well; Printed a new faceplate for the heater mech with the knobs set back a few mm as the cables were pulling it a bit, plus I printed a white insert for the indication to make it tidier, this just got coloured in with permanent marker for the red and blue bits; Clutch arrived; Also my younger self had bodged something for the top engine mount as the original one didnt work with the new engine, this was an unconvincing effort. So I spent some time with the lathe and the welder and made something much nicer with replaceable standard bushings;1 point
-
Hey good news I've fixed all the broken image links in this post.... Soon I'll update it on everything me and the wee car have been up to.1 point
-
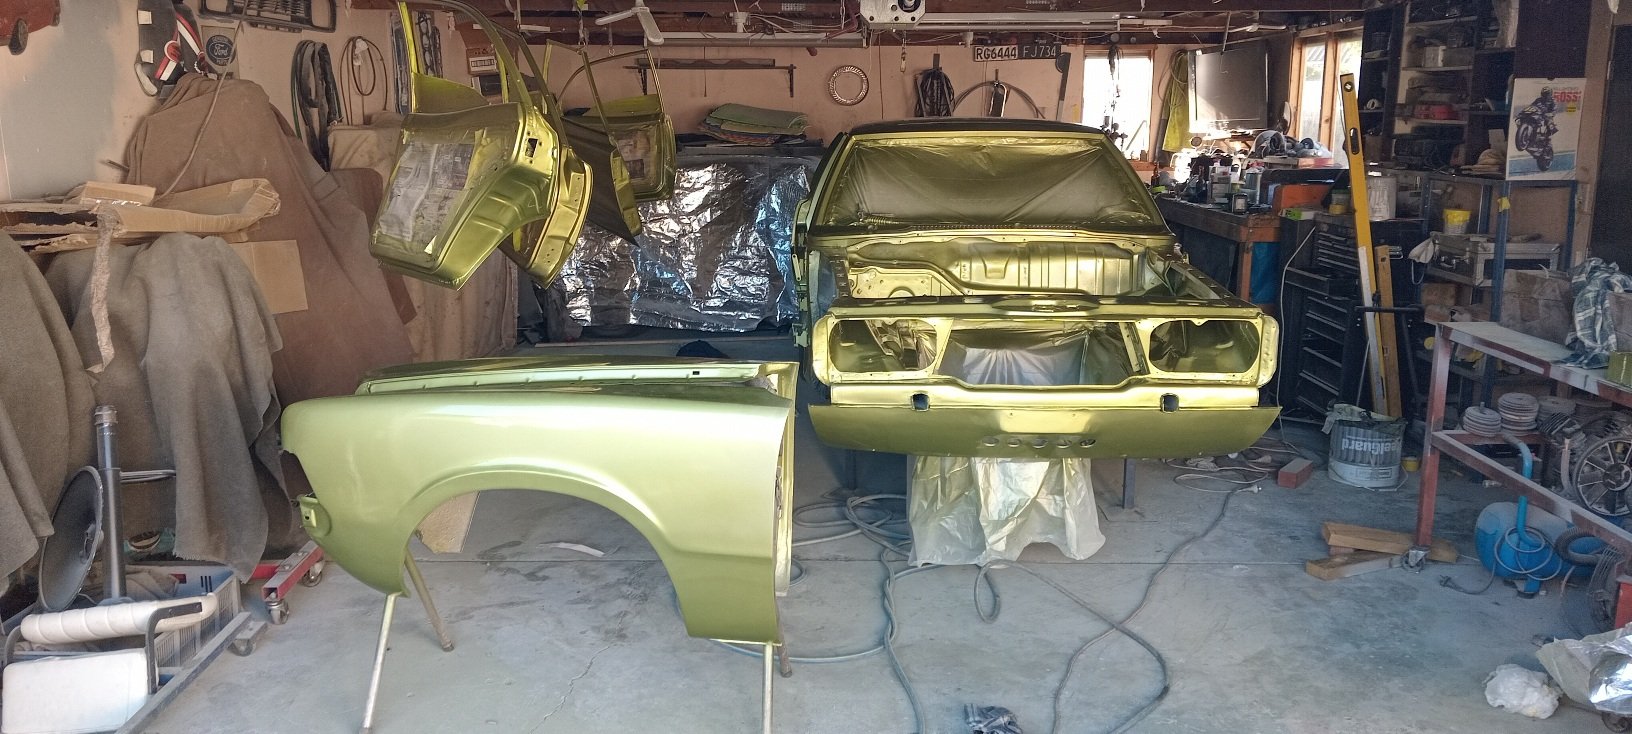
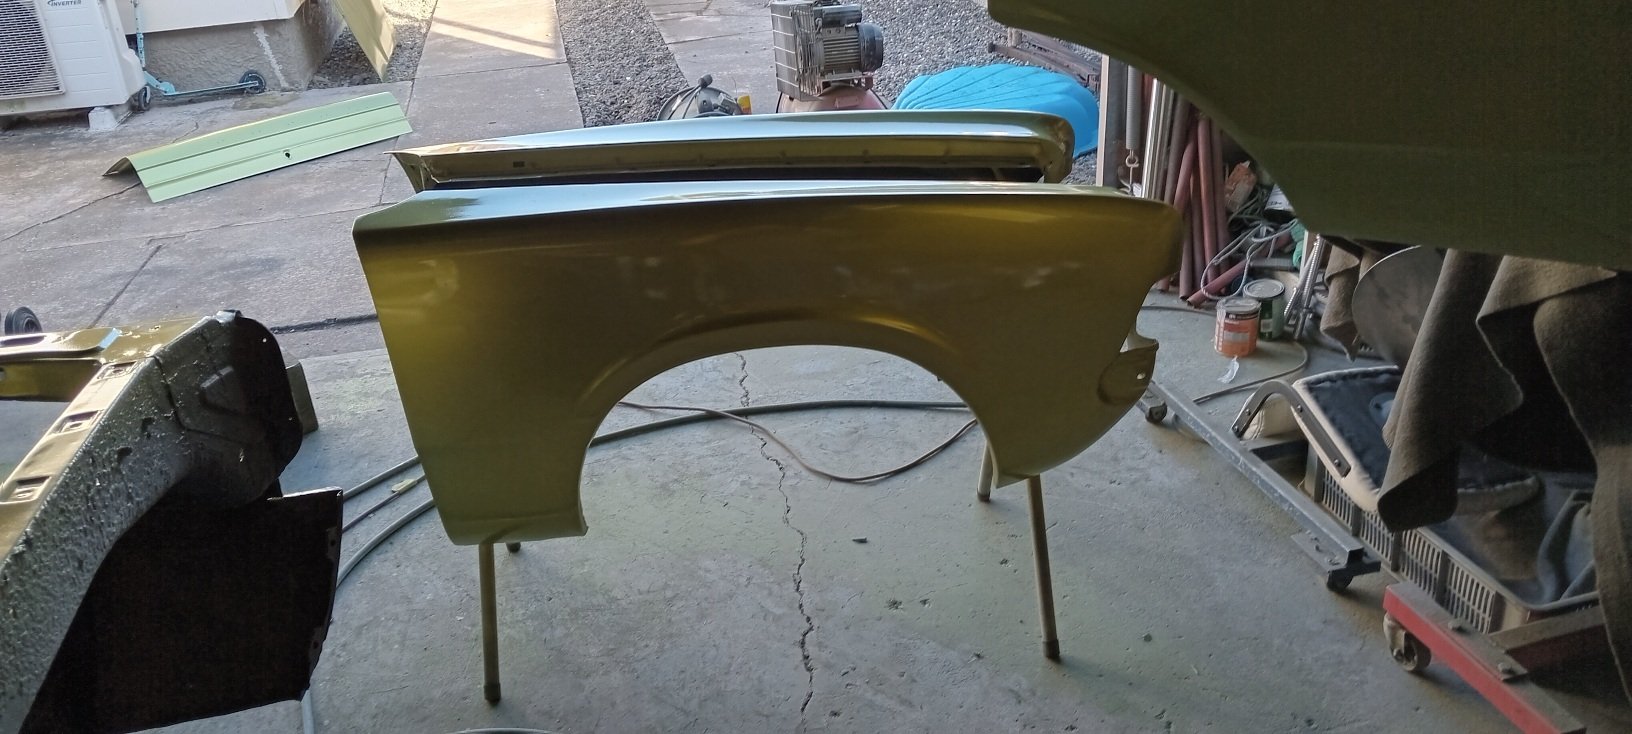
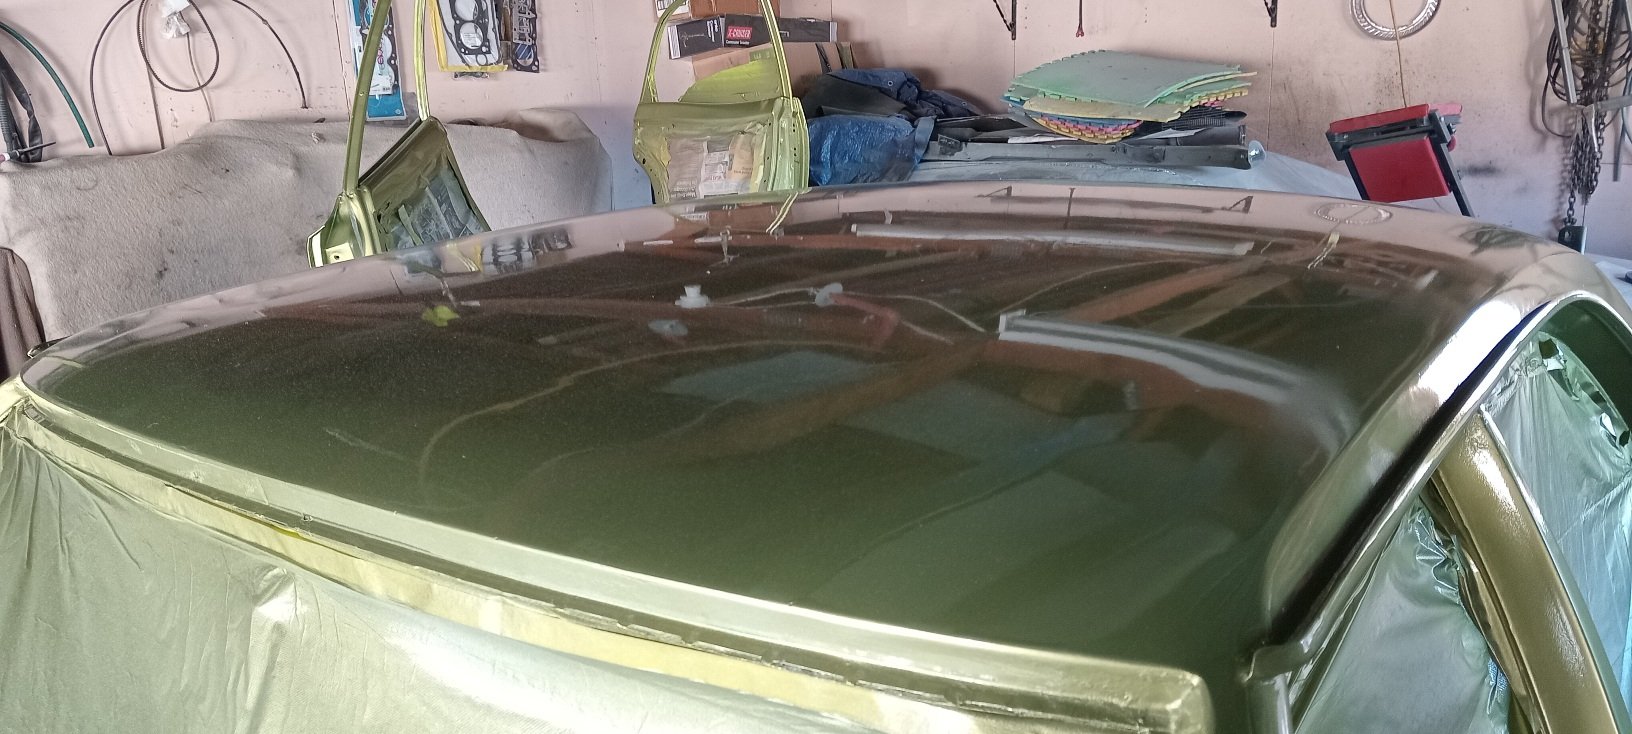
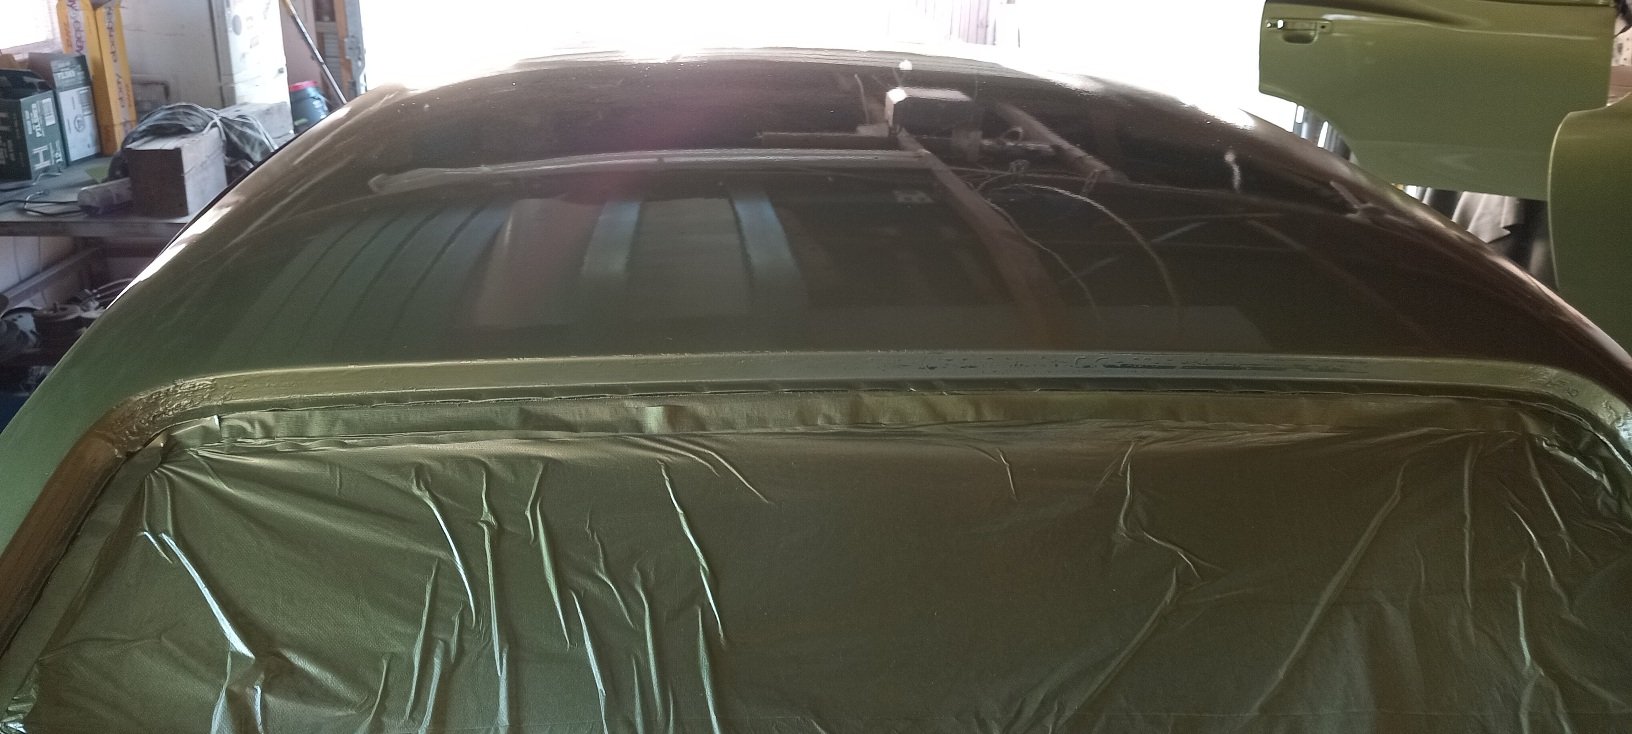
So it turns out when... your daily/operational fun car breaks down and you decide to take on a huge DIY job to fix it that you know eff all about you specifically lay out your mortgage repayment strategy in front of you and truly understand the ramifications of paying off even tiny amounts of principle early in the loan and decide to restructure to get every little spare cent going into it that you can scrounge up you pick up a second job the remaining work on your project car kind of hinges on either a stupid amount of unappealing and tricky skilled labour, or collar-tuggingly large amounts of money to pay for said tricky skilled labour ...things on your project car tend to slow down. But I figured I should post something because otherwise I'll totally forget everything that I've done and I don't want this project to fade away. Before I put all the fuel tank stuff back, I was messing with panels. One of the pre-reqs for the panel work is obviously that it needs to be all stripped back, and I decided (with panelboi's blessing) to do it myself rather than mess around with the local acid dipper or with transport to a more reputable one hours away. The idea is to just pick some reasonable panels, strip them, fit them, and then I've got a clean no-surprises job I can show around and get some better quotes and info on. I test-fit the rear bumper from the original black car and it didn't quite sit right - the panel gap was inconsistent no matter how I fudged the fastenings - no pix unfortunately, so I went with the red's bumper. It fits a whole lot better! Next up is all the front panellage. The two bonnets have their issues so it's really a toss-up, but I opted for the red one as it seemed to be a bit more contained in its damage. Both nose panels are totally fucked so... not sure what I'm doing there just yet. But fitting the nose panel reveals some fun. Uh-oh. Fitting the bonnet and popups makes the problem a bit more obvious. The black ones are just as bad - no pix soz - so it's not just a "different donor car" thing. The frame repairs were done with the fenders and bonnet available, though not the other panels. I need to get in contact with the panelbois to sort out a warranty claim, but the last couple times I tried they didn't pick up or reply. Hopefully this doesn't become a struggle :\ Anyway, forging on. Key and clean. Apply stripper and keep wet with plastic. Create murder scene. Scrape. I probably should have applied more stripper here but newb. The fenders are all pretty crap. The one I've already lightly beaten into shape and stripped and durepox'd is the one that had a minor collision, so you'd think it'd be the worst, but it's actually probably the best one. There's no rust and it's otherwise totally straight. All other fenders... well... So I decided to just keep the fender I've already epoxied, because it's probably easier to bang it into shape than any of the others. The red driver's side fender seemed marginally better than the black one so I went forward with stripping that. I busted out the paint stripping wheel for the grinder to finish it up. I'm not really sure this was a good move - it's nice and shiny, but possibly a bit tricky to spot the imperfections in the panel now? Then the nose panel and popups.. Everything back on. You can see here what I mean about the swirlies making it hard to gauge if things are okay. I'd already taken a sanding block to the driver's side fender in this pic to try and make the flat bits even. As you might be able to tell, there's a fair bit of damage to it... there was quite a bit of bog at the front and the rear of the fender. I think it worked, so I did the rest as well. As you can see, there's a few low spots and dents, but I think they'll hammer flatter without any major headaches, and even if they weren't, they could probably just be straight filler'd without failing. The chunky spot is the part I already knew about - the front corner which had a giant slab of filler applied and has subsequently received a lot of pitting. There's also a spot on the front edge of the bonnet that has numerous rust holes, hidden under a small but deep patch of bog. Honestly, it seems saveable - though I'm also far from an expert here! The pop-ups are fine, no dents. As expected, the nose panel is worse than the surface of the moon. It's probably not worth trying to save and I should just find another one. It's also super easy to dent these to begin with; they're the most natural place to push the car from, and there's almost no structure to them. If I do get a new one I'll try mod some gussets into the back of it. Side quest to put the very first thing I restored on this car back onto it: the fuel pump access panel, which a few years ago was extremely rusty. The CRC black zinc has held up strong . Spot the fasteners and grommets stolen from the red car... Speaking of the red car. It's door time. On both cars, passenger sides have a couple of dings but nothing crazy. Also on both cars, the driver's side is absolute dent and bog city. I have pix but they suck so just hold on till the strippy bit to see what I mean. All the doors also fucking suck at the bottom. So I just went with the black doors since they're both right there, already half-stripped, and the red car is currently sealed from the elements. There's a few holes at the top as well. Annoying, but the rust seems fixable. I completely stripped the doors - which was a massive PITA when it came to the door latch, only removable via black magic / the completely wrong method. The mirror blanking was just gooped in place to fix a broken bracket. Also there was a little protective metal edging strip along the open edge of... just one of the doors? The red doesn't have these. Japanese mod + replaced door? Anyway, it's strippytime. This time I put it on thicker, and did several passes. It made the job a bit easier. The starion makes for a decent workbench... <.< I haven't finished these yet, there's still some bog to remove and then get it all nice and flat. And that's where I'm at. If the panelbois are kind with their warrantying, and the lack of surprises makes the price right, then I might be able to eek something out in this space before we pay off the mortgage :P. If not, I'm buying a welder and the scope of the project shrinks from "like new" to "guy in a garage job but the engine bay looks sweet"...1 point
-
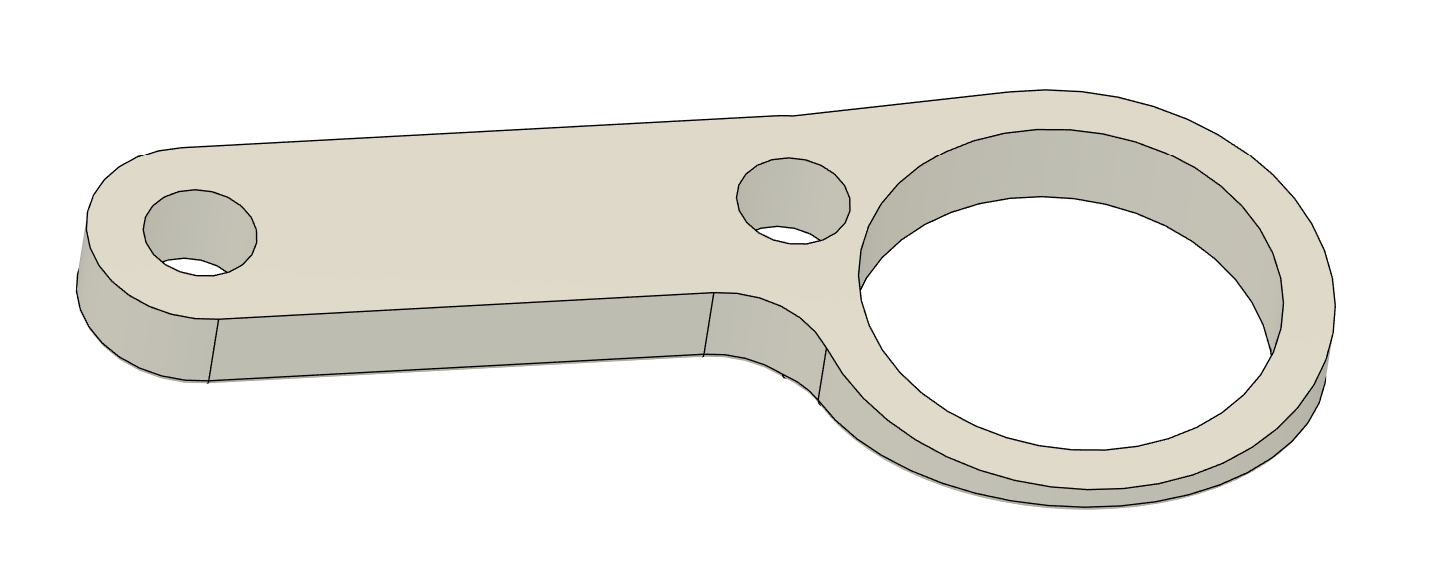
Well after the last novel length wall of text I'll try to keep this update shorter otherwise I'll never finish the thing. Lots of little jobs starting to pop up on my 'to do' list. Driveshafts. Connecting the scooby shafts to the imp axles. A job I wasn't sure which direction I'd take as there's so many different ideas out there on the nerdnet showing 'the best' way to join shafts. First thing I did was to double check the suspension travel allowed by the stock shock absorbers and then use those datum points to work out if there was any growth in the length of shaft required as the wheel moves through it path up and down. There was minimal amount, like maybe 5mm at the very most. I guessed as much because the stock Imp driveshaft doughnuts dont allow for much sideways travel. I then cut one of my 22mm scooby shafts down in length so I could work out the lengths required with the CV joint in place. This move I soon regretted. I was allowing for plenty of plunge into the CV joints to make sure the whole joint could be removed from the box stub axle with the box pushed sideways when removing the transmission. I was happy with the length and then decided to go visit a local hotrod builder friend for some advise. He's well known about for his many many full scratch builds and has done heaps of driveshafts in his time (a fellow machinist by trade too) I showed him the two ways I was considering doing the join. He showed me a better way. Shrink some bored out yokes cut off from some spare axles. Plenty of meat, will never let go and even if they somehow did loosen and spin they cant come out because there's not enough travel in the CV joint to allow them to. No welding needed. He's run axles done in the same way with some serious big block power and they never let go. Just has to be accurate and luckily its the sort of machining/fitting job I like. But i needed to start with almost full length scooby shafts to do it, of which I was now down on.. Roll eyes and back to the wreckers to see this beauty get pulled from the hedge... Hannah helped me remove the shafts. It was her birthday too so wow, what a treat. She got visit the wreckers and get oily. Got home and the shafts didn't fit my CVs. Bigger diameter end. Really weird because I checked online... ha. It lies. Turns out some late 4wd Leones had even bigger axle ends than the imprezzas. Also odd is that one shaft is 22mm and the other side 24mm, although both the same length. Back to the wreckers. This time I got larger 25mm shafts with the smaller ends from front wheel drive Imprezzas. I grabbed two pairs. Same again, 22mm on one side and 25 on the other. Now I had two of each. Got home and spent some time cleaning them up, outside because petrol fumes. Cleaned up the spare pair of axles in the lathe to make sure I had an accurate clamping spot for the later boring. Good quality steel! I turned them down to less than the 23mm bore size and chopped the yokes off. Made lots of swarf Bored out to bang on 23mm with nice radius. Double checked and triple checked I had my lengths required correct. Chopped the two 25mm scooby shafts down to length and turned a step down on one end of each, a radiused step to stop any stress risers. I went for .0015"~.002" interference. Go online and see the debates between all the barries about what a good shrink fit should be There's many variables as well. I consulted my old faithful machinery's handbook. I wanted it tight, but not stressed. Luckily the axle is of good steel. I also made a sample first, using one of the cut off bits of scooby shaft and some 4340 I machined to the same outer dimensions as the yoke. This way I was able to test how hot I needed to get it to expand enough to drop in place. I'll take this to a local engineers who have a press with a pressure gauge and see how much force it takes to wreck this thing Here's about a one hundredth of a millimetre (iirc) getting removed.. Then things got hot.. photos taken after it was done because I had to move bloody quick! Hannah would grab the torch and I would drop the yoke in place. It was a tense bit of time. If the yokes teetered and grab they'd pull the heat so quick and shrink in place before getting to the shoulder. No removing them without damage and I only had the one pair of spare axles. It went well. I was happy and relieved. The light rust flashing off on one is simply due to that one having been left nearer the front of the workshop to cool down and it was a chilly damp start to the morning. They wired brushed up neat as, got painted with black epoxy and when that was set they had new universal joints fitted. I cant try them on the car until I remove the existing axles from the hubs but it should be fine. Next up was to sort the fuel tank out to suit fuel injection. I brought the blue imp in and checked a few ideas out on what I could do. I don't really have room for a surge tank and I never liked the noise on my Viva from the external fuel pump anyway. Nor did I like the way the fuel in the surge tank heats up. Enter the humble Nissan Micra k11 intank fuel pump and surge container... It actually looked like it was just going to fit into the pressed depression at the bottom of the imp fuel tank.. With enough room to run the imp fuel float sender next to it. Cut a hole.. It fits. I'll cut the bracket off the side at bottom of pic and it'll move sideways a bit more.. Made some metal brackets Welded them in and now I have a cradle that takes two cable ties across the top to secure. I needed a flange.... Made this. Its designed to recess the lid about 10mm below the tank top. I want to keep the tank top as flat as possible. It'll have the usual layer of foam over top but I don't want things sticking up proud when the 'frunk' is being used (cant be tearing those bags of concrete now eh....) Many holes drilled and tapped.. Carefully welded in place. Was a tricky job. Thin steel on the tank that had some sort of (probably poisonous) coating. But happy with result. I made another hole... That takes the sender. Drilled and tapped more holes to suit. Now I needed to get fuel from the outside in and from the inside out. I machined up these in stainless.. Thought of a neat way to hold the little bits together for tacking. Blue tack. Or blue tack tack? welded up.. I made an angled recess into the hatch cover so the fuel hose goes even further below the tank line. Visible in that photo are the cable connections. Again - I needed to get power in. I machined some shouldered fittings in plastic.. Luckily the micra pump so handily just uses a simple connector with 6.3 spade terminals. Under the lid... Tank hard work done. I'll paint bits and cut some gaskets. Speaking of gaskets. One of mine between my oil filter pedestal and the block is weeping oil. Plus one of the bolt heads weeps. Typical. Put a Japanese engine in a British car and turn your back for a minute... I've already drained the oil cleaned it up and ran a smear of paintable sikaflex along it and around the bolt head. I didn't take photos because not really exciting. I'll paint it silver and no one will know. Except you the reader. Next up is the exhaust I think.1 point
-
All legal beagle, any cruises etc hmu,will head upto cars in coffee, few things to do still but that's any car really, needs gearbox badly and decide on a new engine, time to give her a beating
1 point
-
Crazy idea here.... Run what you have, and see what happens. Don't waste energy theorising on what might happen, and over-complicating things. This was the Echo's charm, cheap, cheerful and iterative. I also know that your name is David and you're incapable of not over-thinking the whole process1 point
-
I modelled and printed some door card clips which as always gives me the deepest pleasure. These worked pretty well after some tweaks. These are not exact copies and are designed so they are easier to print, but functionally they are sweet. The drivers side window winder mech was deeply wrong, the wire tension adjustment was maxed out, hacked and the maxed out again, but the wire was still as loose as fuck and while it kindof worked it made horrible grindy noises. This came from the barrel where the wire was straddling grooves cos it was so loose. It was all down in a difficult to reach place, and those mechanisms are notoriously cunty to pull out and put back. Amazing that I got a bollock into that shot as well. The passenger side was sweet and the wire connection looks like this; After a bit of thought and dicking around trying to take slack out of the wire a genius idea came to me; I routed the wire like that through both lift points, which took up enough slack that I could tension the mech properly. Another 1/4 hr of contortion with a torch, phone and screwdriver and I had the wire slipped back into its rightful track. It works perfectly again, yay!1 point
-
Old rubber lines swell up inside and act like a 1 way valve. I had this on the rear line on thr morrie, was letting the rears stuck on1 point
-
Once you drive it the first time you can see how noticeable it is and then swap diff etc plus an opportunity for graphs1 point
-
I had a escort with a modified 1600 a long time ago, that had a 2" pipe and a couple of resonator type mufflers, it was quite raspy I then put that motor in a mark 2 cortina and 2.5" exhaust with a single triple pass muffler before the diff, it was a deeper sound but from memory it sounded quite good1 point
-
Yellow bikes are great, I hope you have the matching suit1 point
-
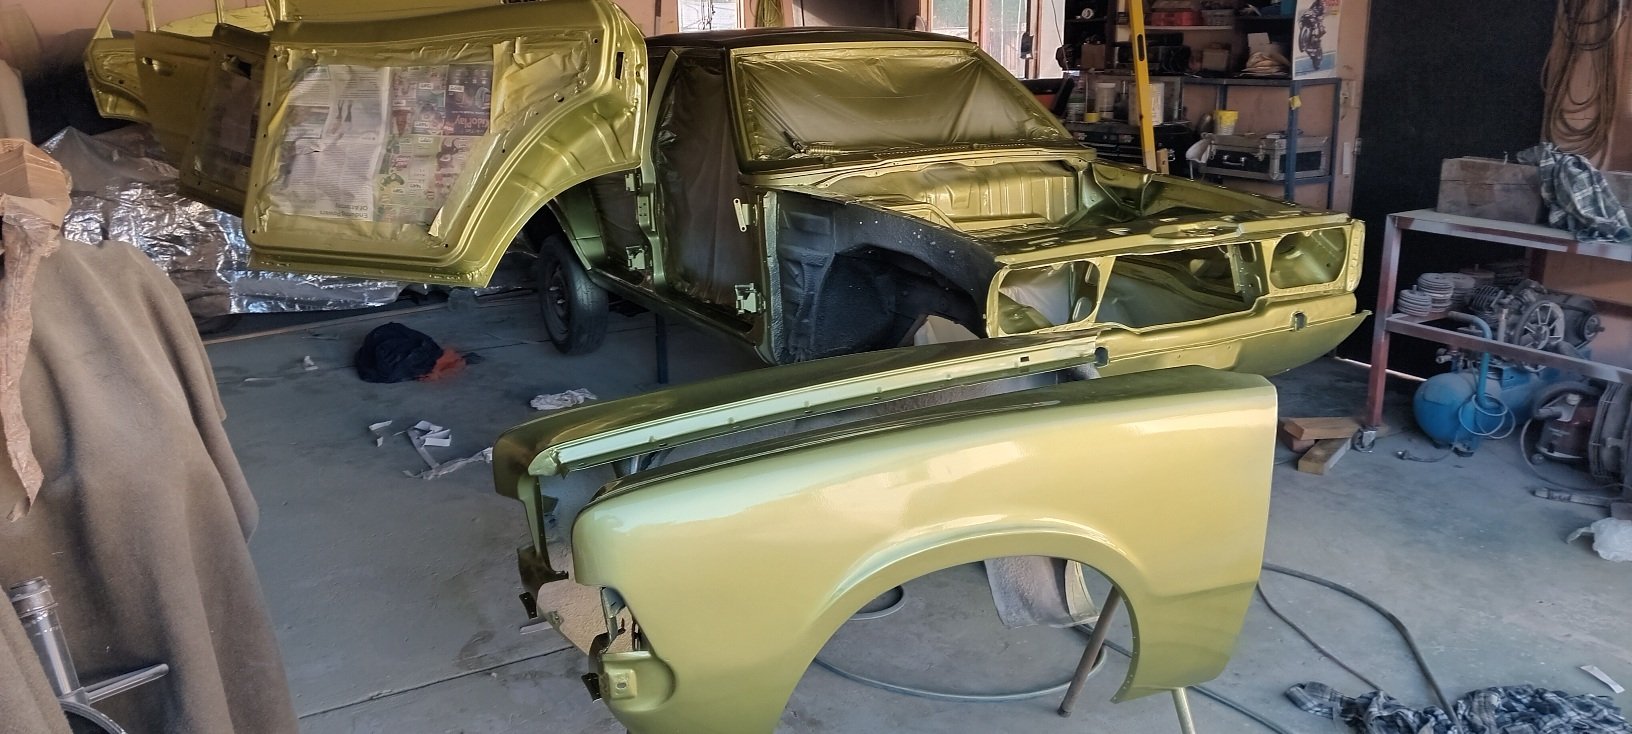
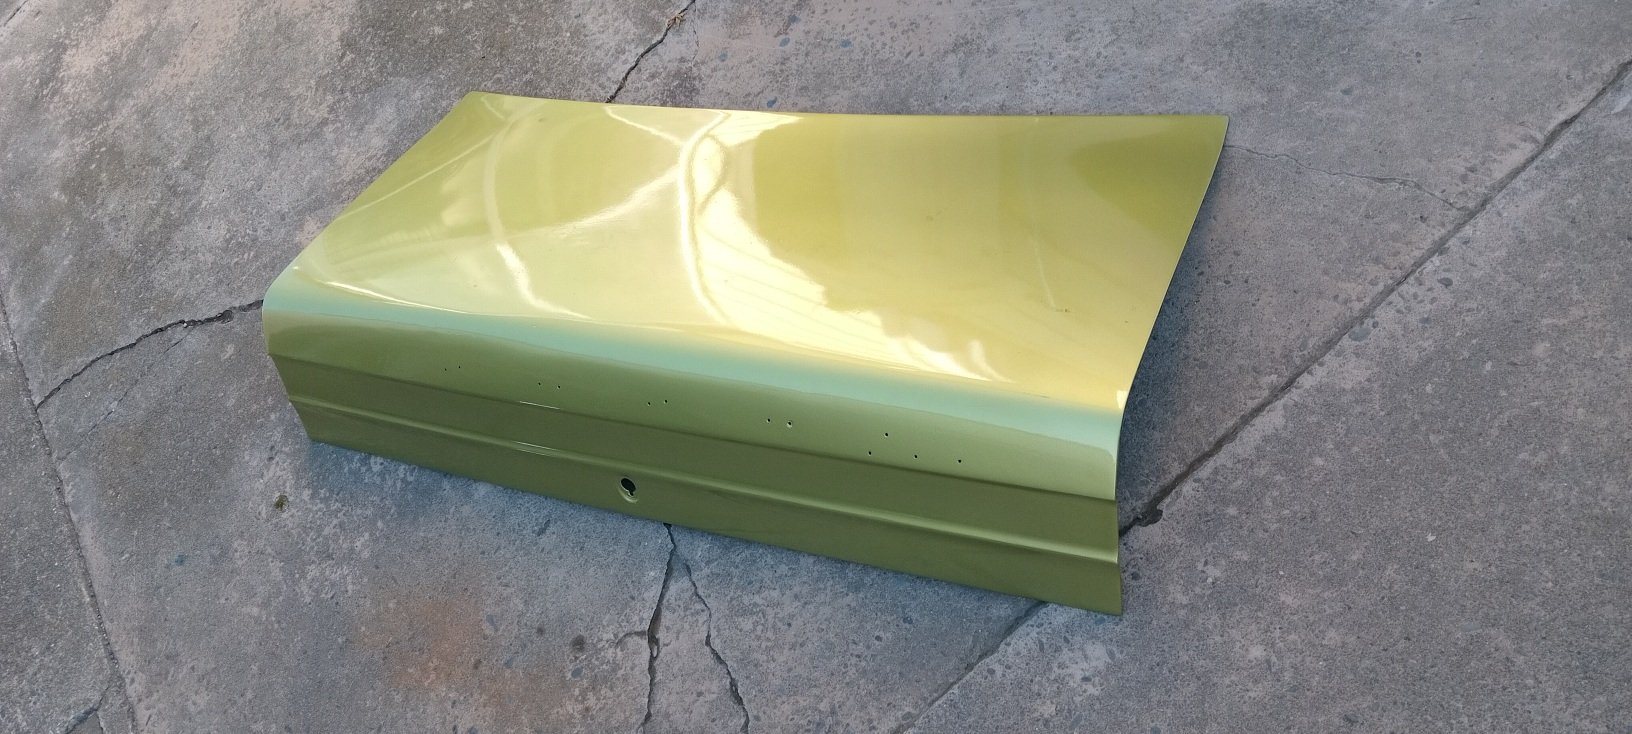
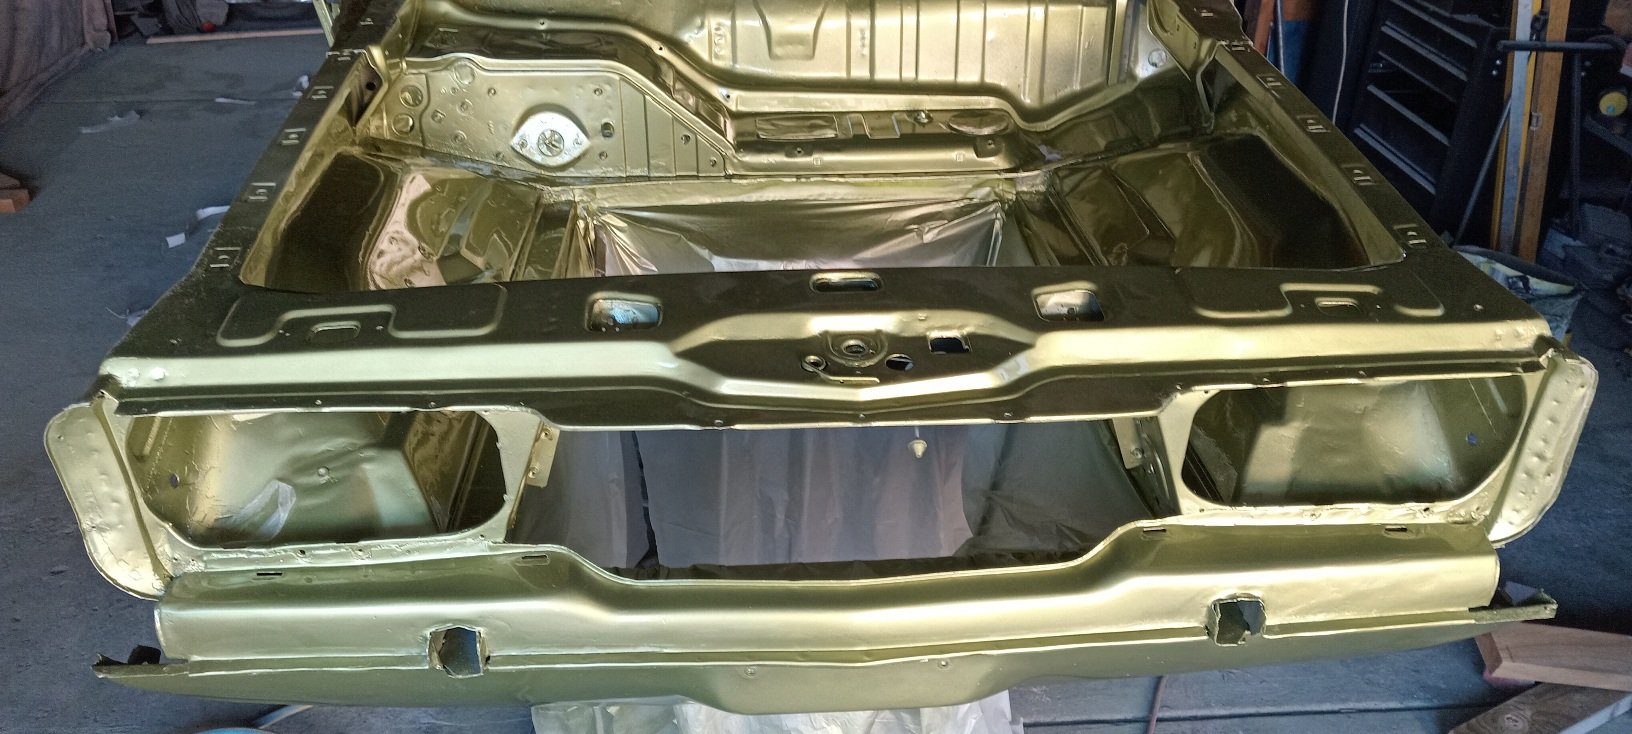
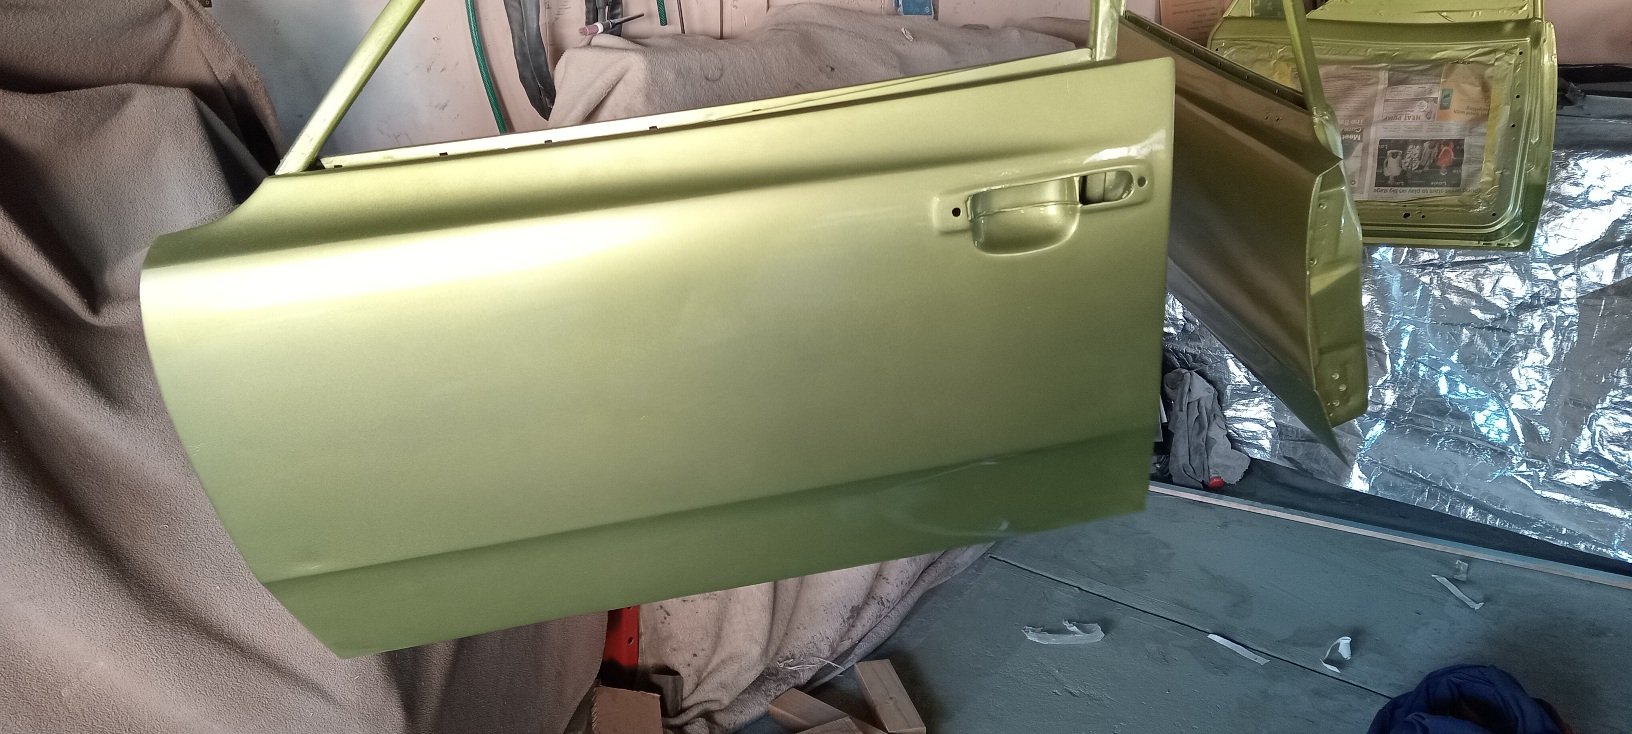
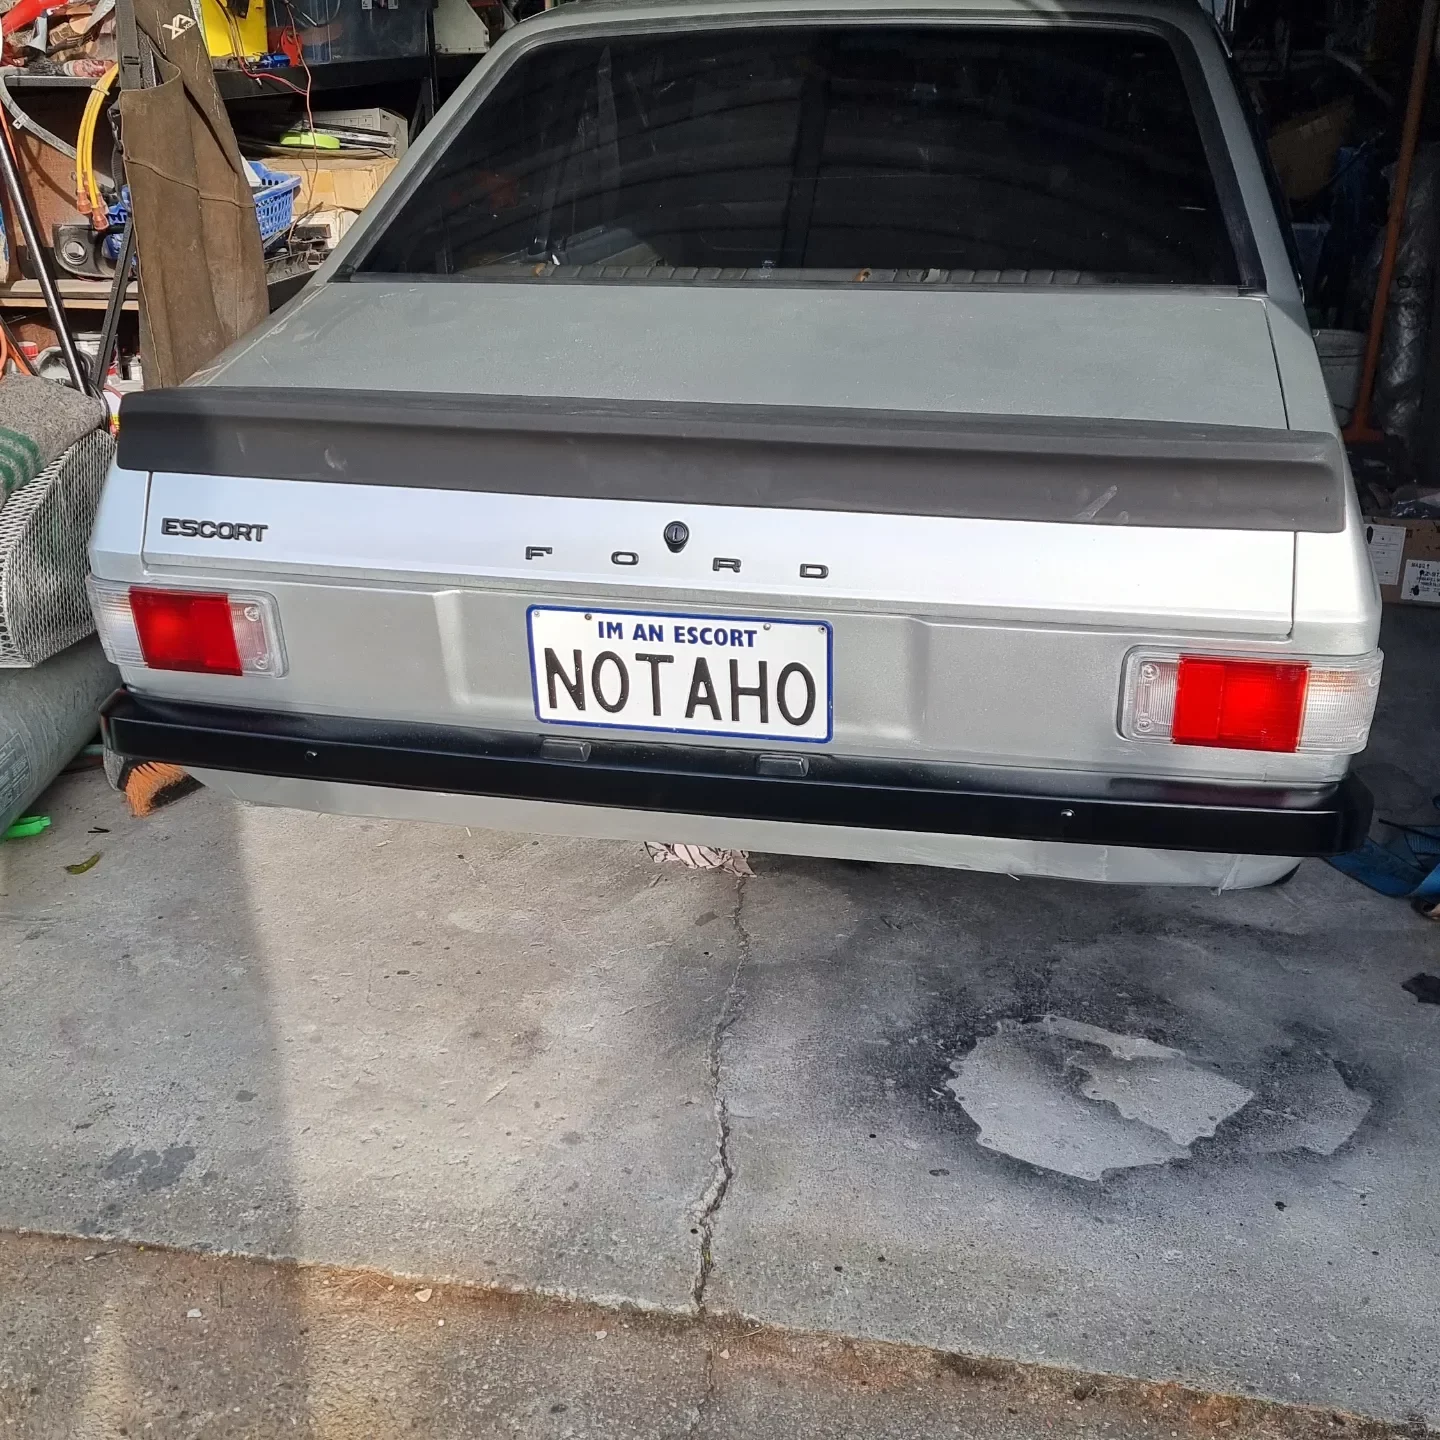
then Wednesday evening I locked my self in the garage and painted the old girl.... no more black... it's not mint it shows up all the dents .. but it's clean..the colour is stunning and I'm stocked .... also cost me less than 600 bucks for all the materials..
1 point
-
Rear screen tinted and installed aswell today, Glad I had the boy here to lend a hand made things easier
1 point
-
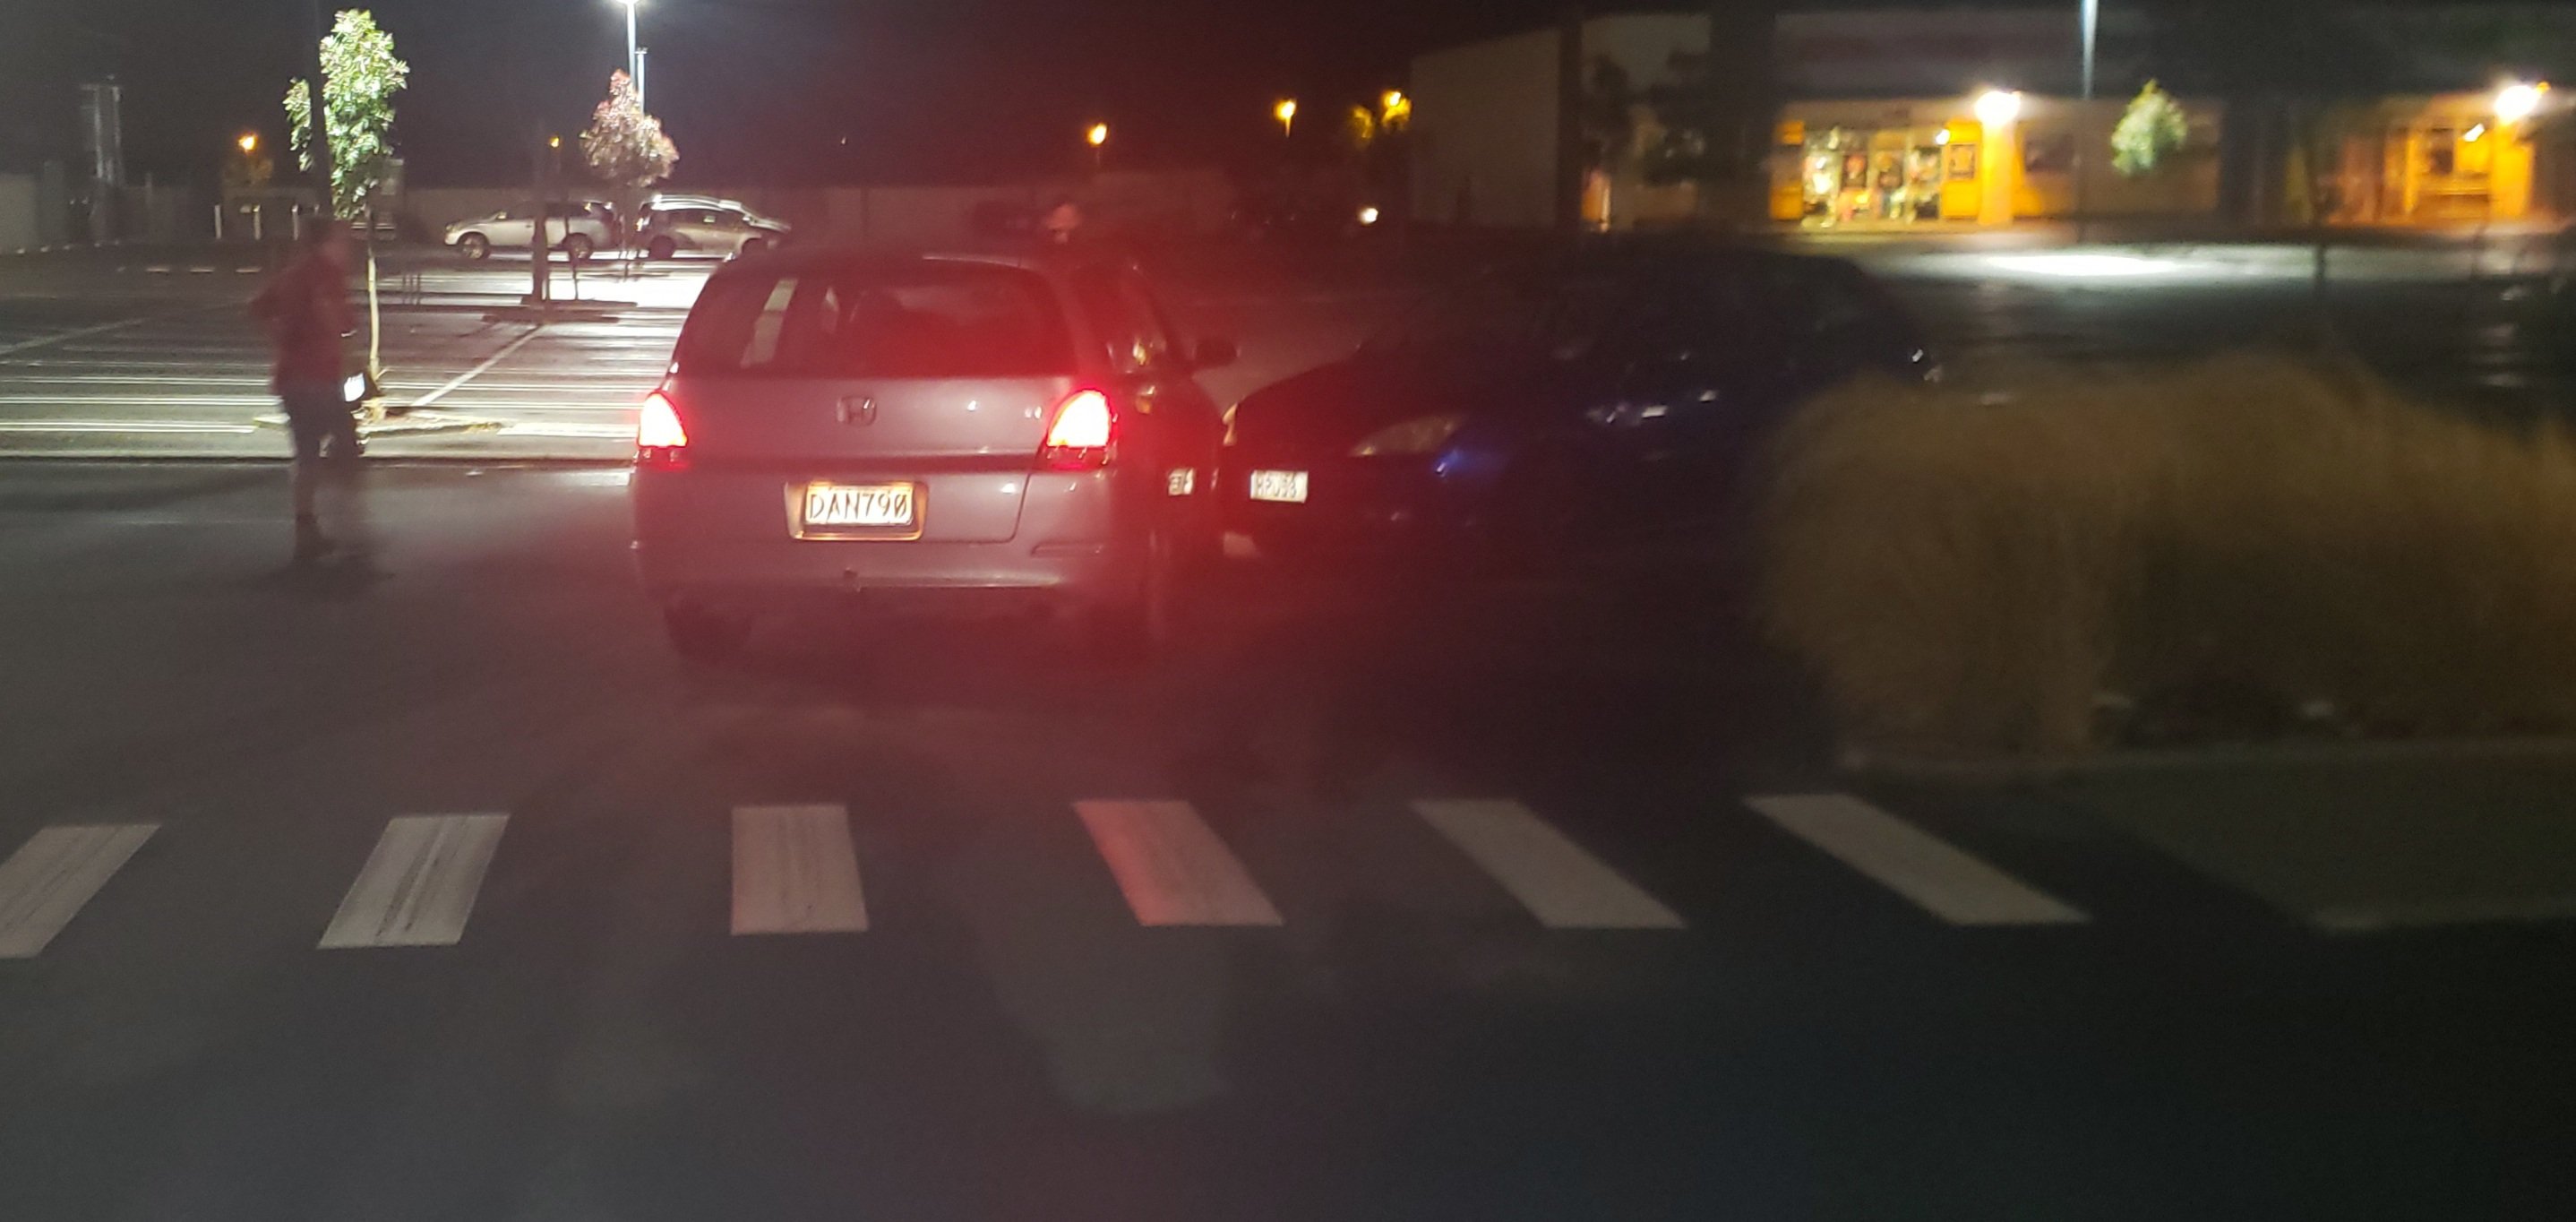
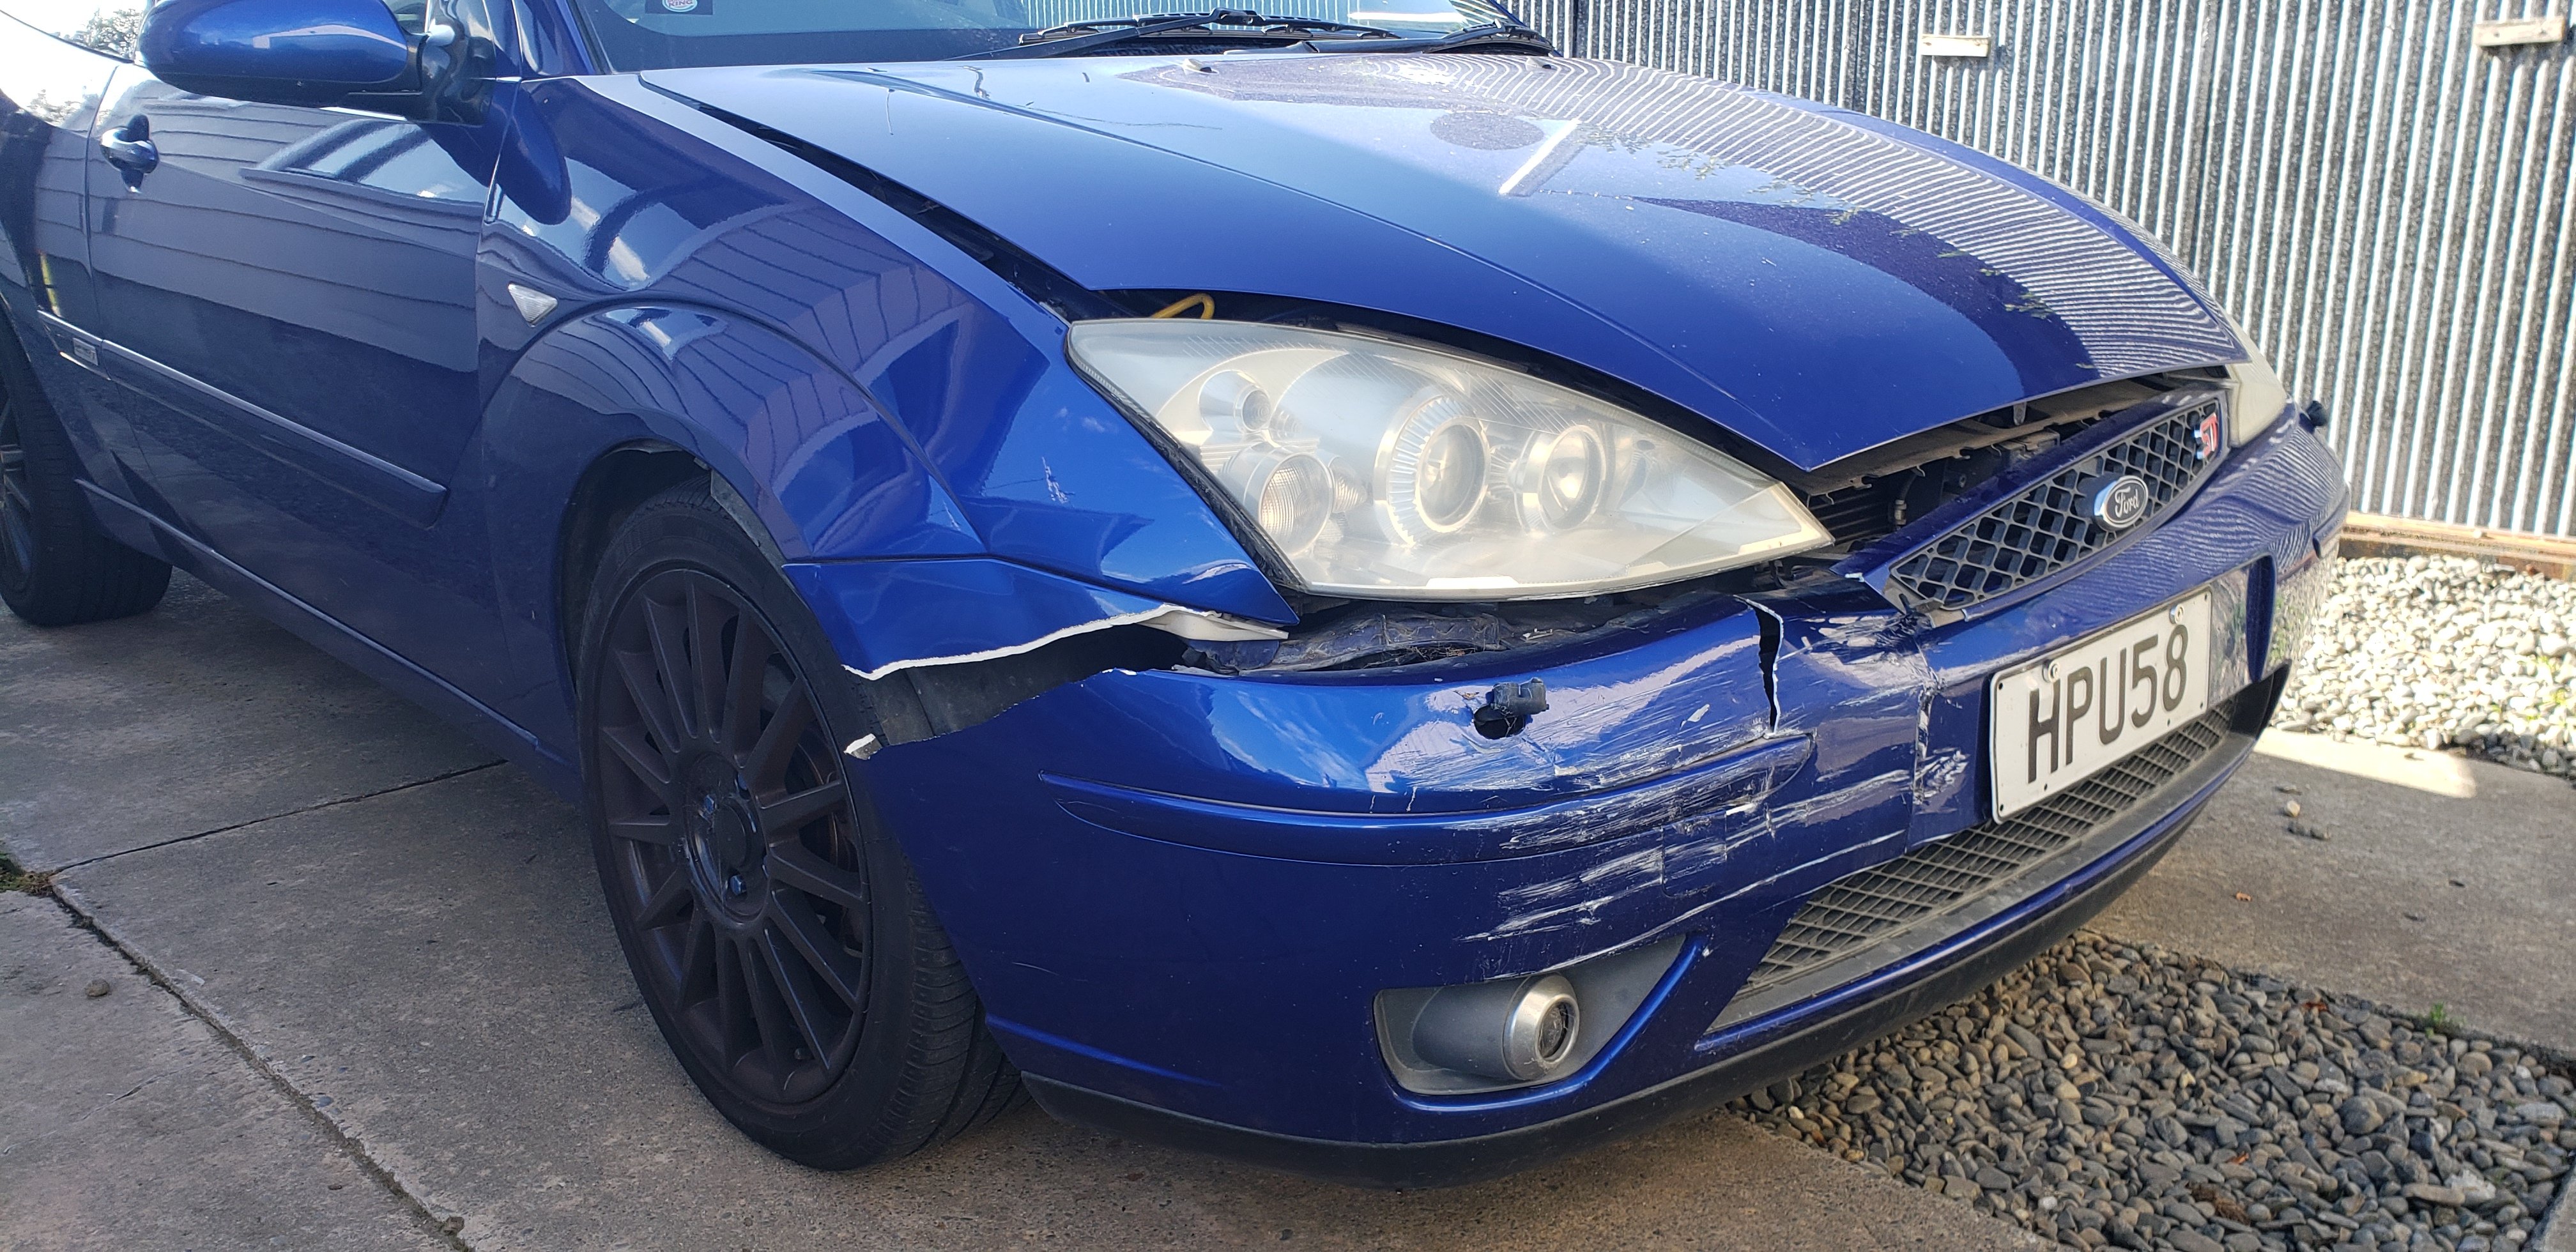
Well its all come to an end..... Thanks to some dickhead not watching where he was going .. Cut across the carpark and drove straight into me... I seen him and stopped he didn't and ....he didn't. Nothing wrong with his car .... but the damage to mine ..is enough for ut to be a write off..(bent chassis rail).......pretty gutted.. I am insured and he has accepted liability....but it wasn't insured for enough to buy another st170.(I will be buying it back if I have the chance). But for now ... I think ill just buy a cheap daily car thats reliable as I now have 2 teenage girls that are about to start kerning how to drive ...and ut can be something they can use aswell .. RiP..... by the way ....none car people DO NOT get it ... sometimes a car is not just a car and they do have a special place within.
0 points


This leaderboard is set to Auckland/GMT+12:00