
Leaderboard


Popular Content
Showing content with the highest reputation on 09/08/23 in all areas
-
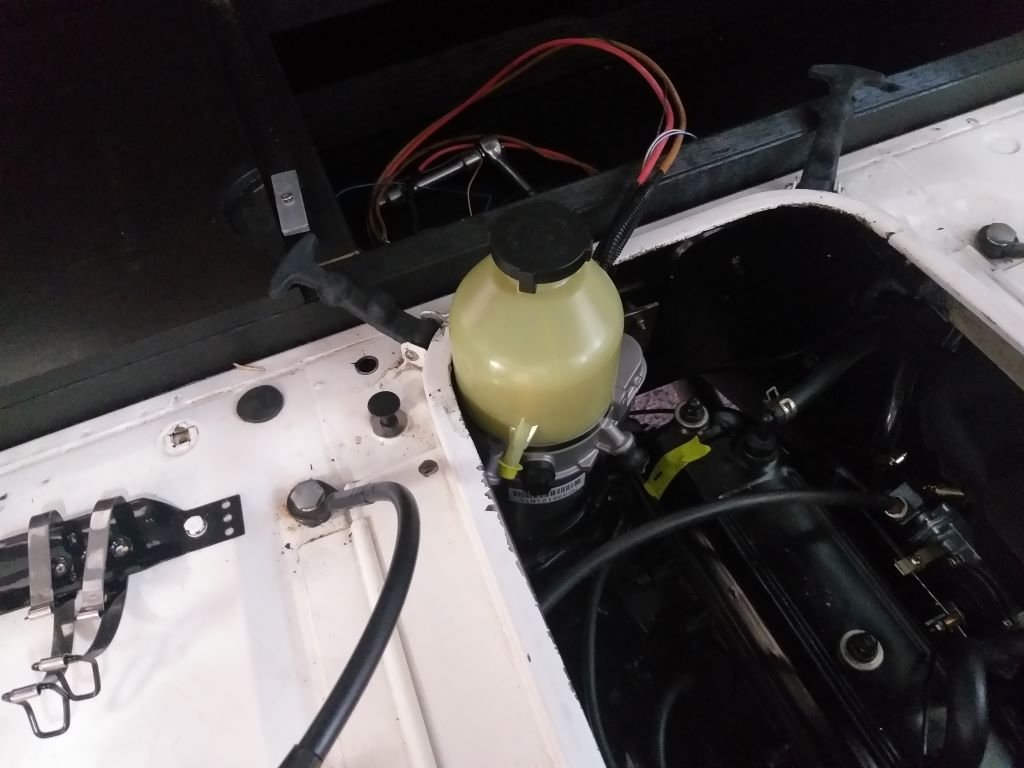
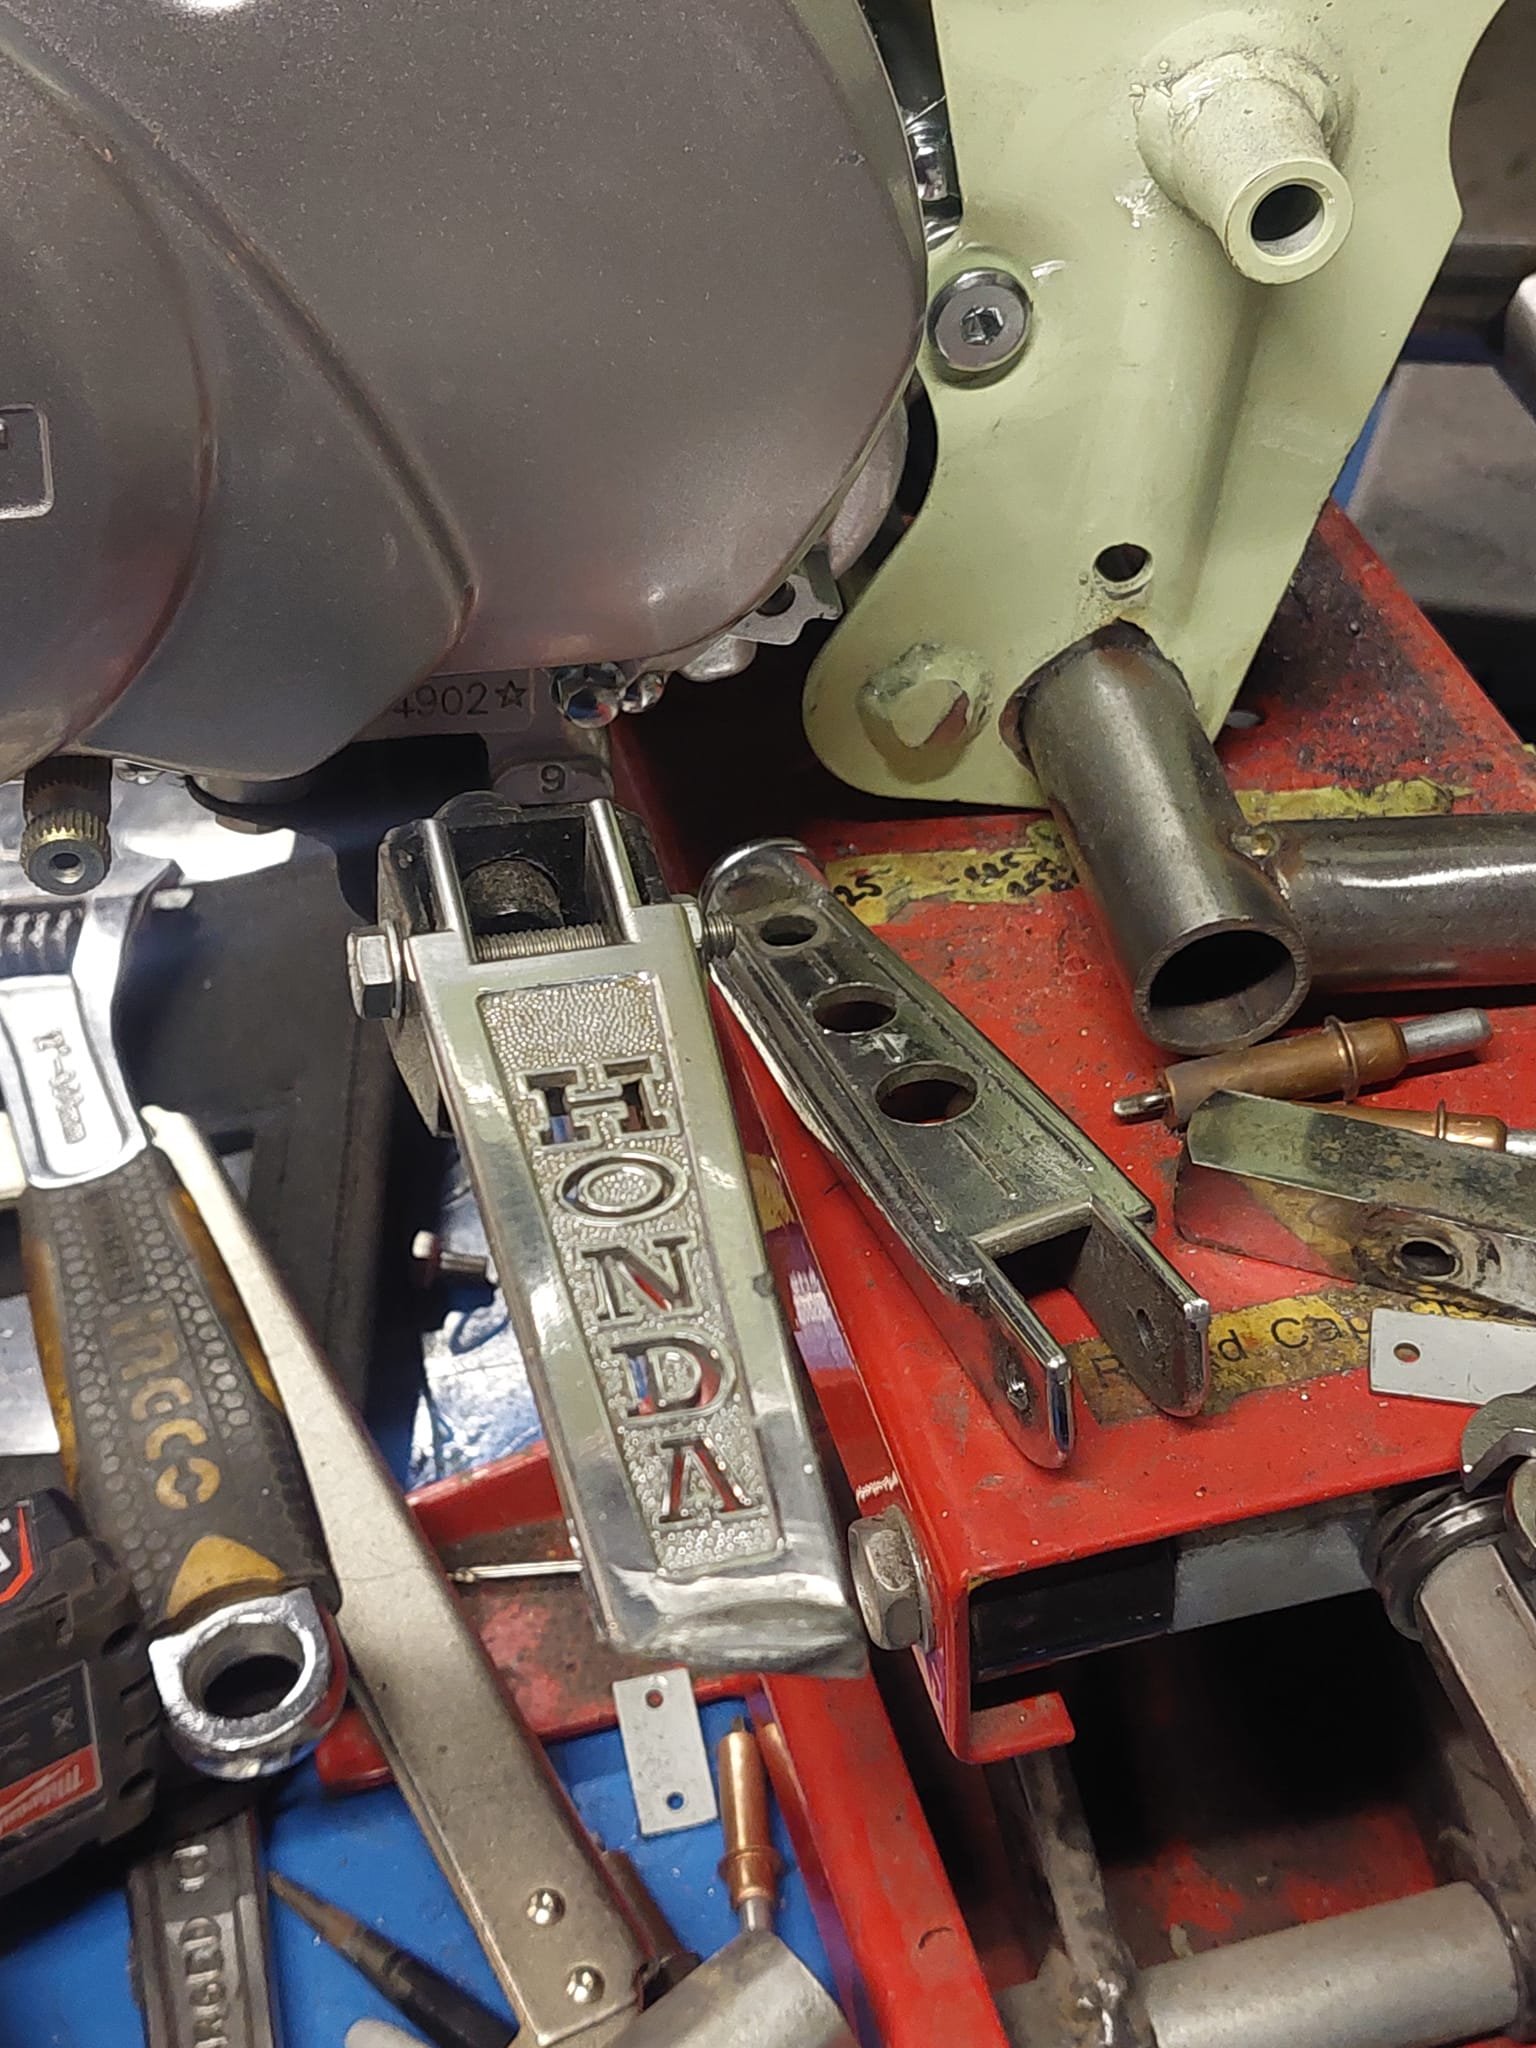
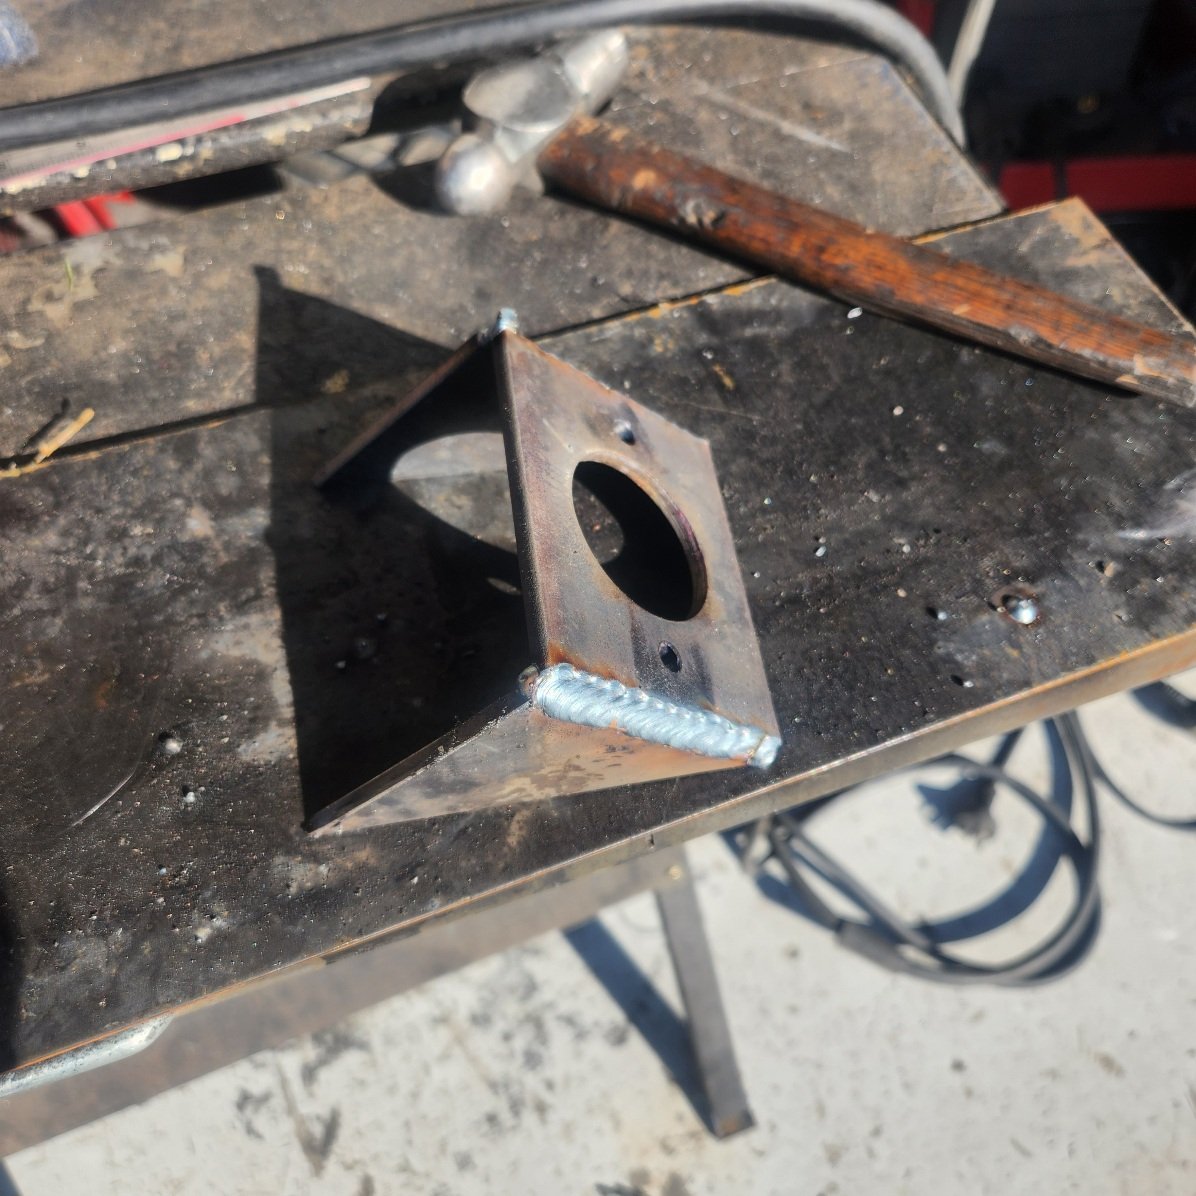
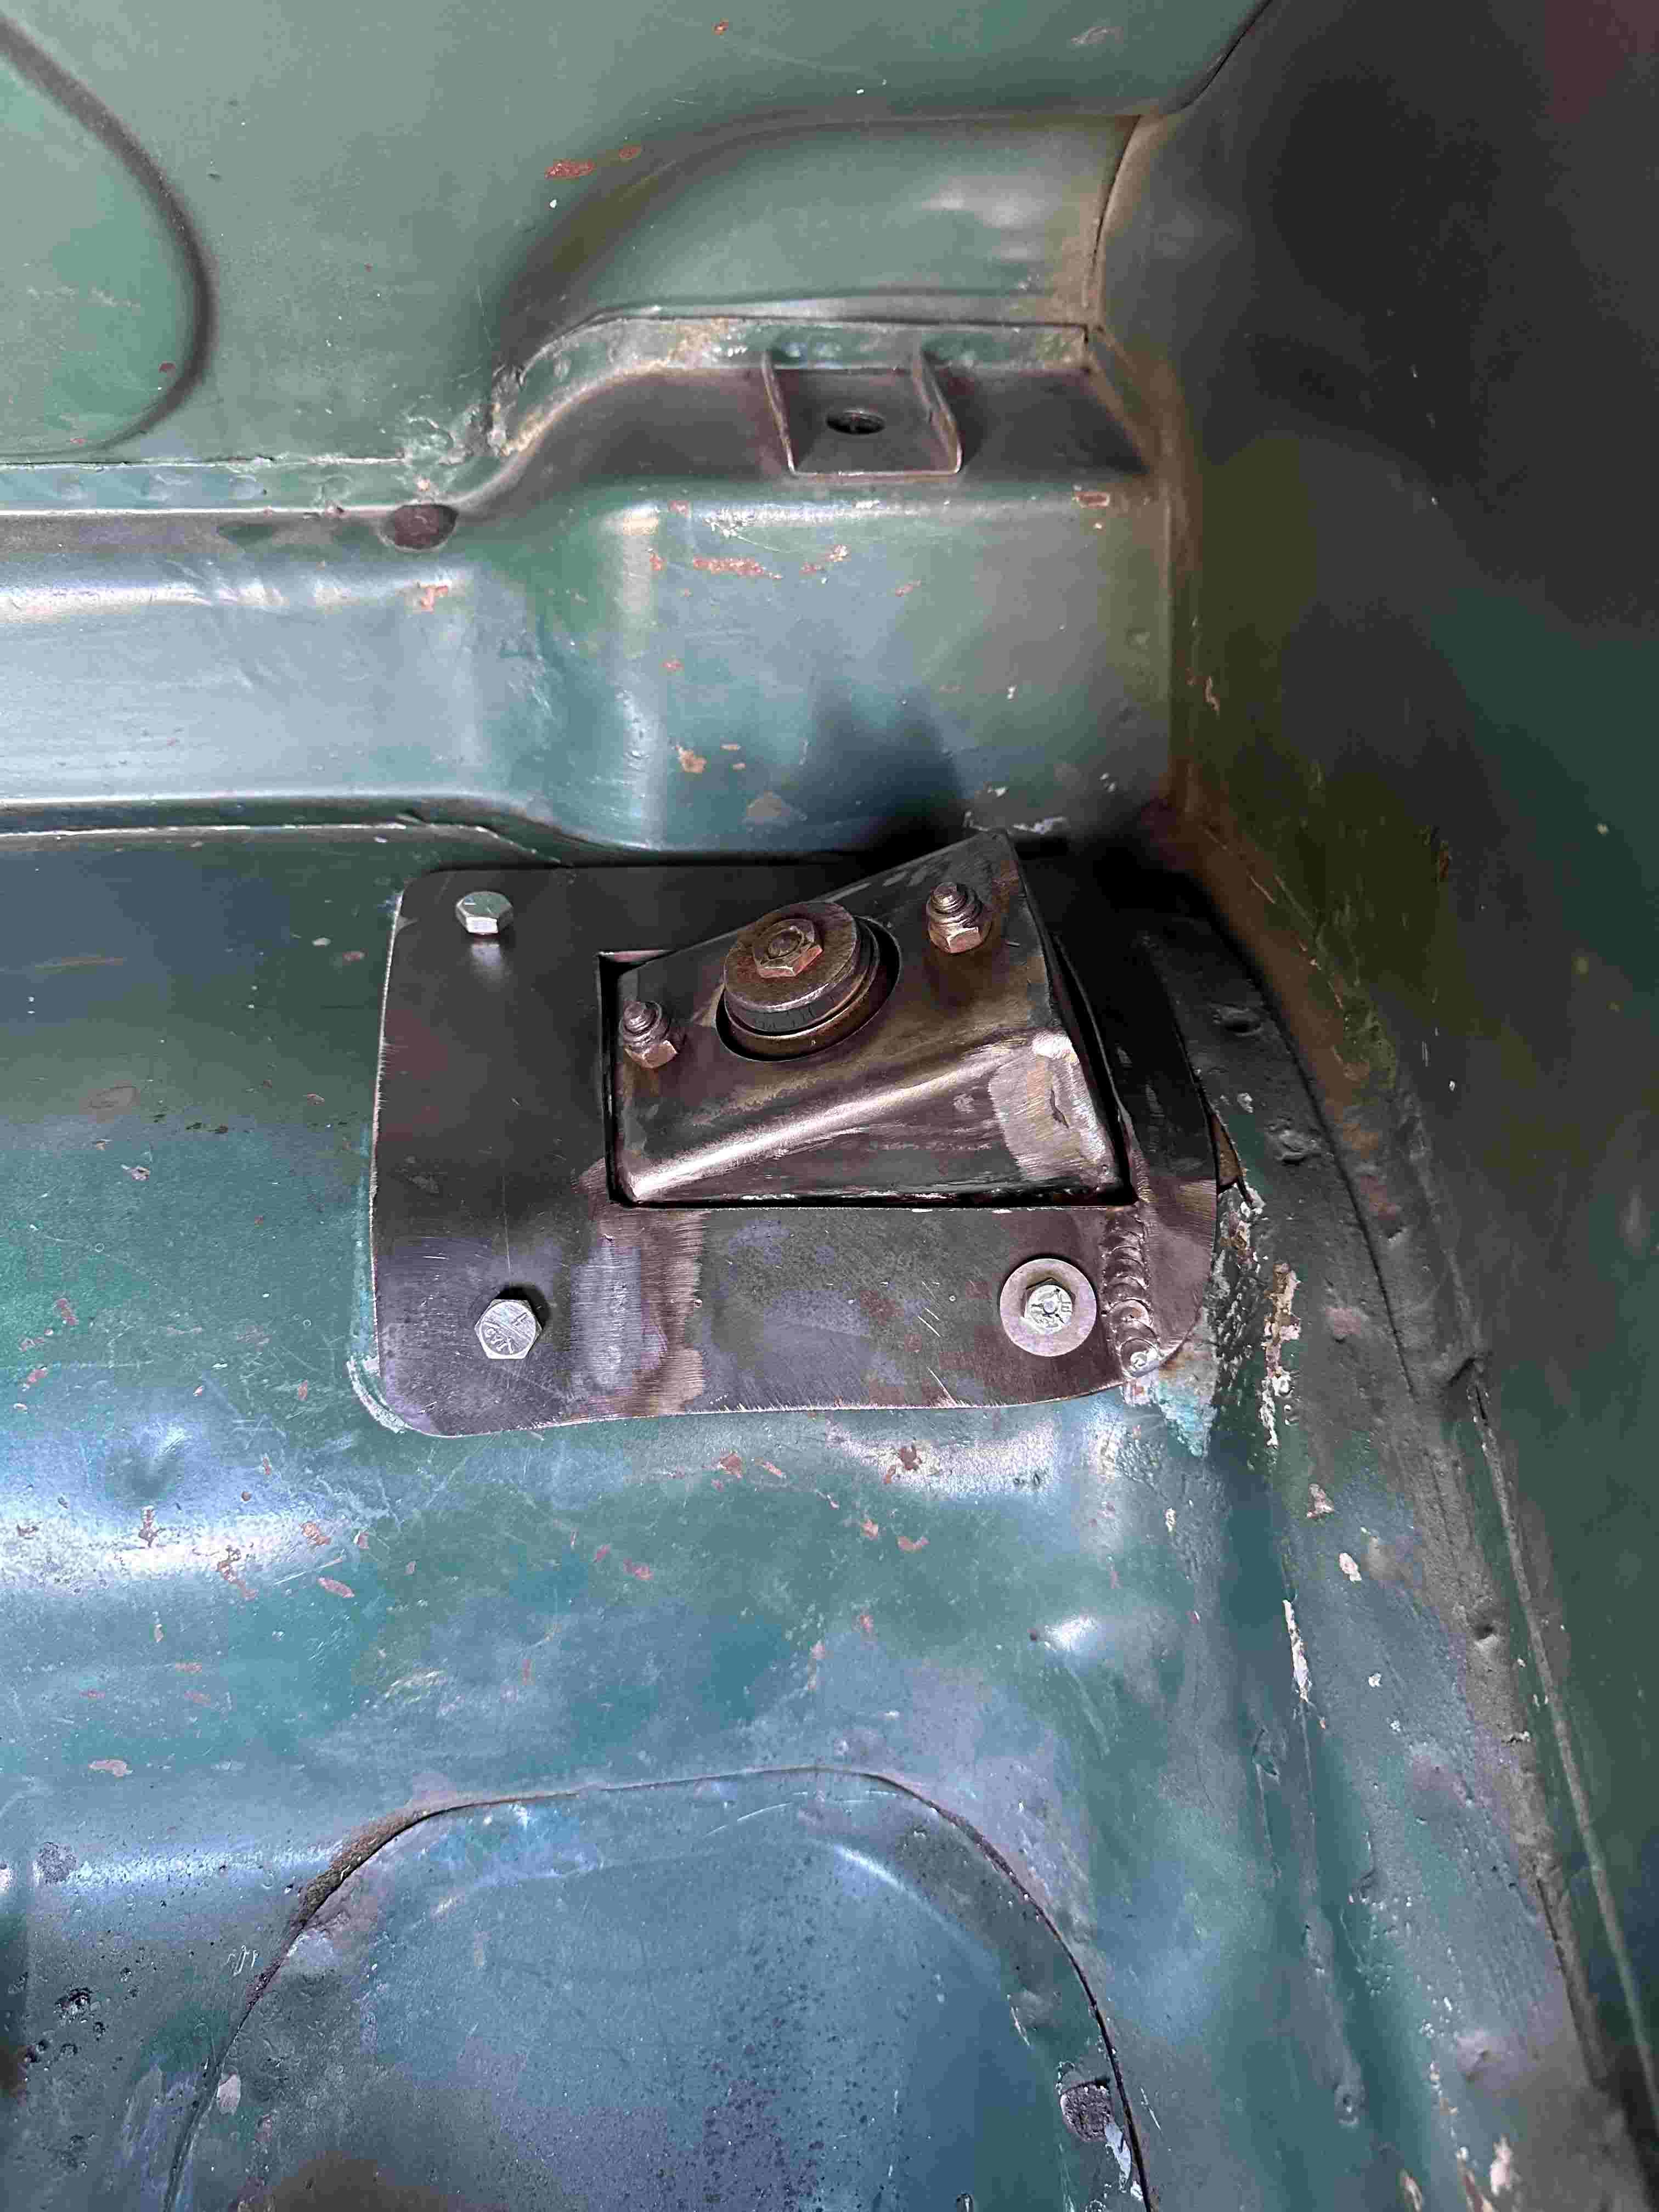
Poked some more holes that allowed me to bolt the original Astra mounting bracket to my newly fabricated bracket. Took a few goes before I managed to get everything in place with just a smidge of clearance all around. Closed the engine lid and the top of the reservoir just clears. Sheesh, she's a tight one as the bishop said to the actress. Tomorrow I'll pull the brackets out for a bit of beautification.
 7 points
 -
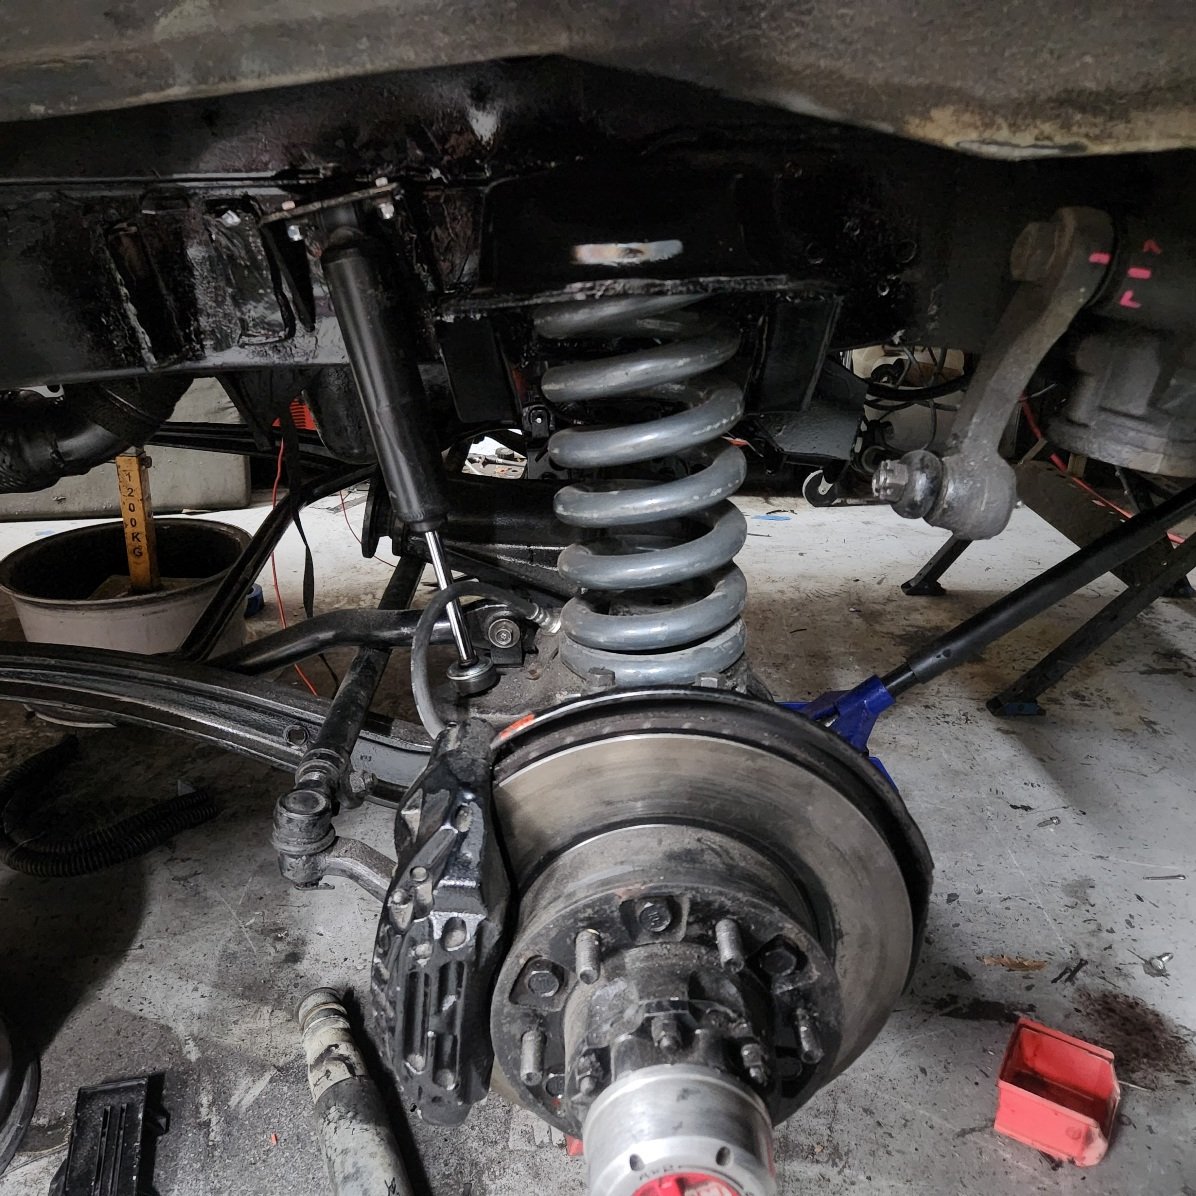
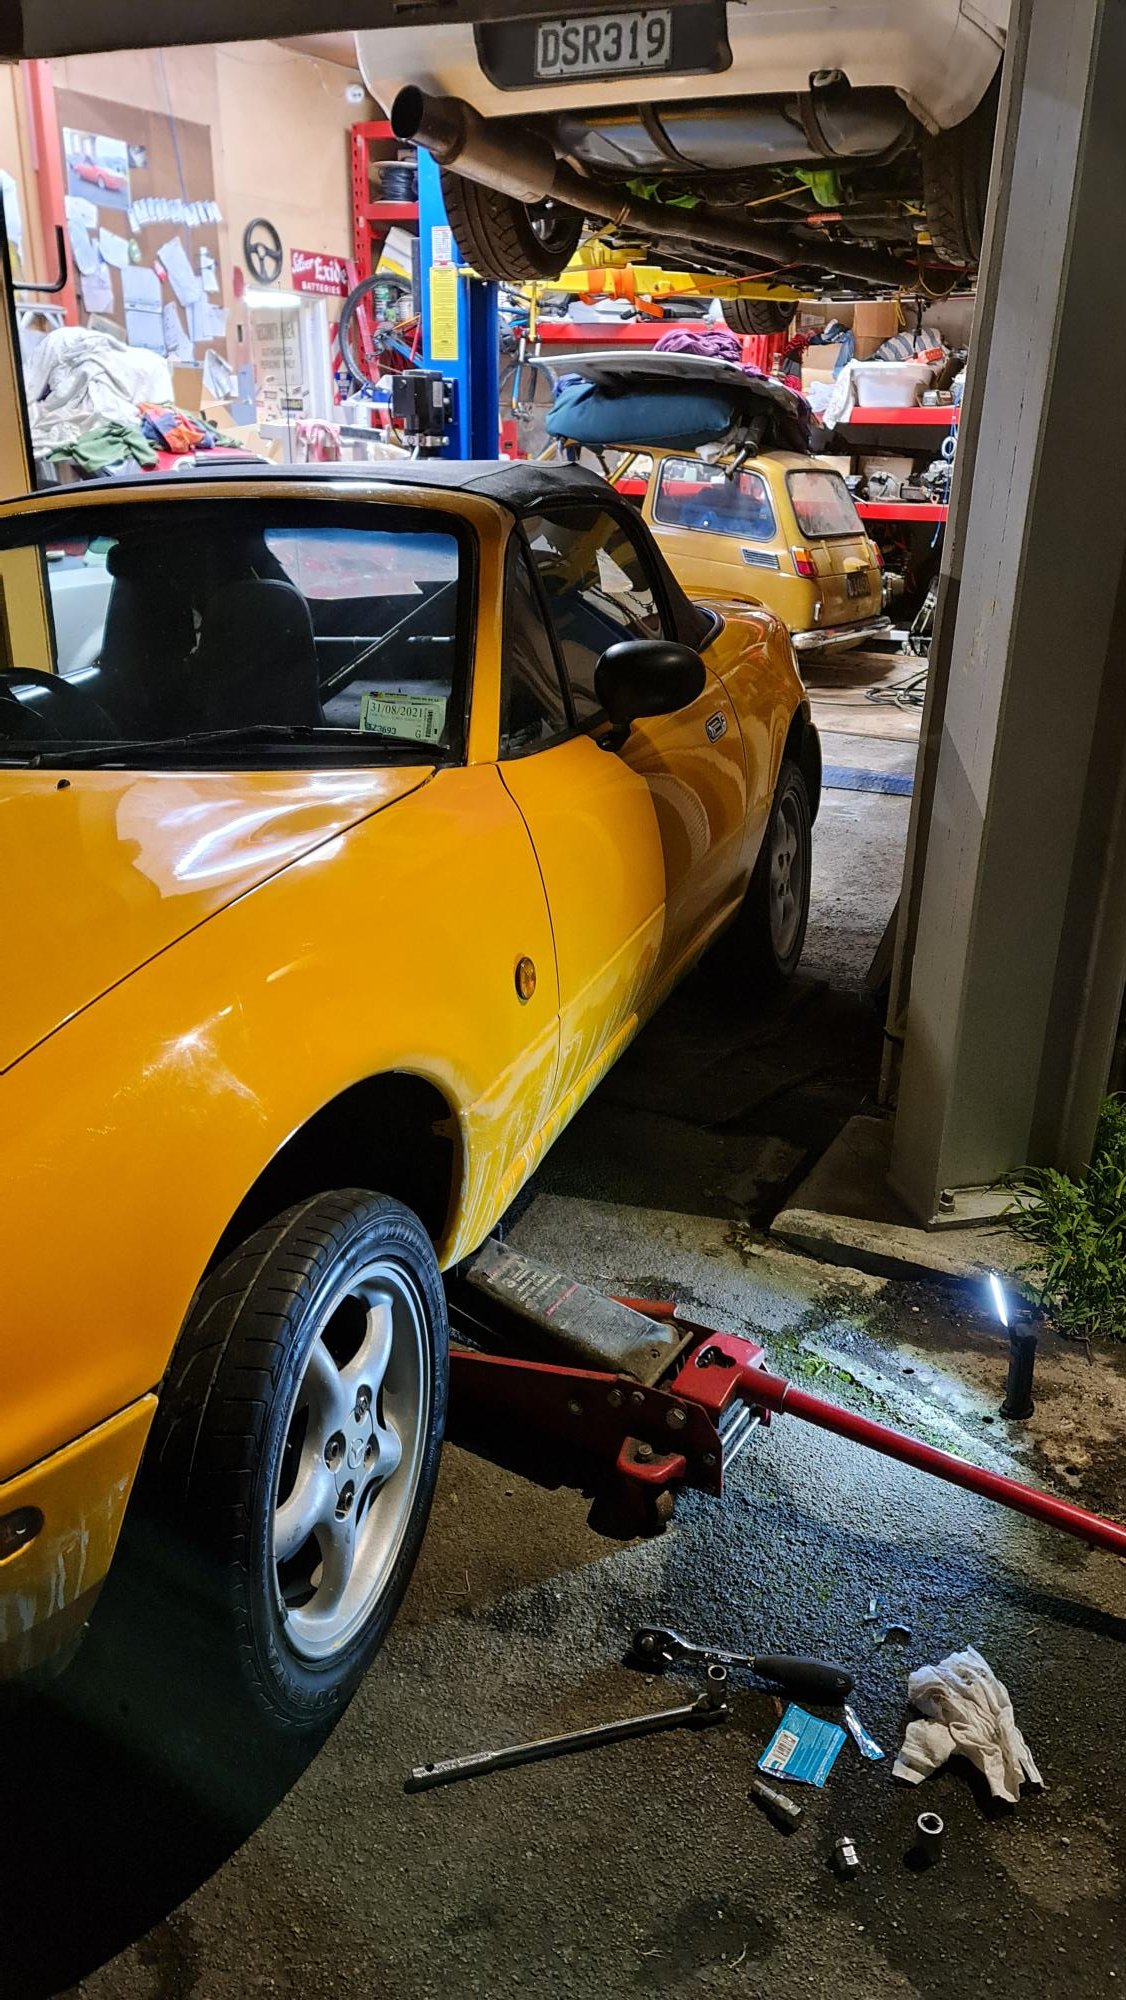
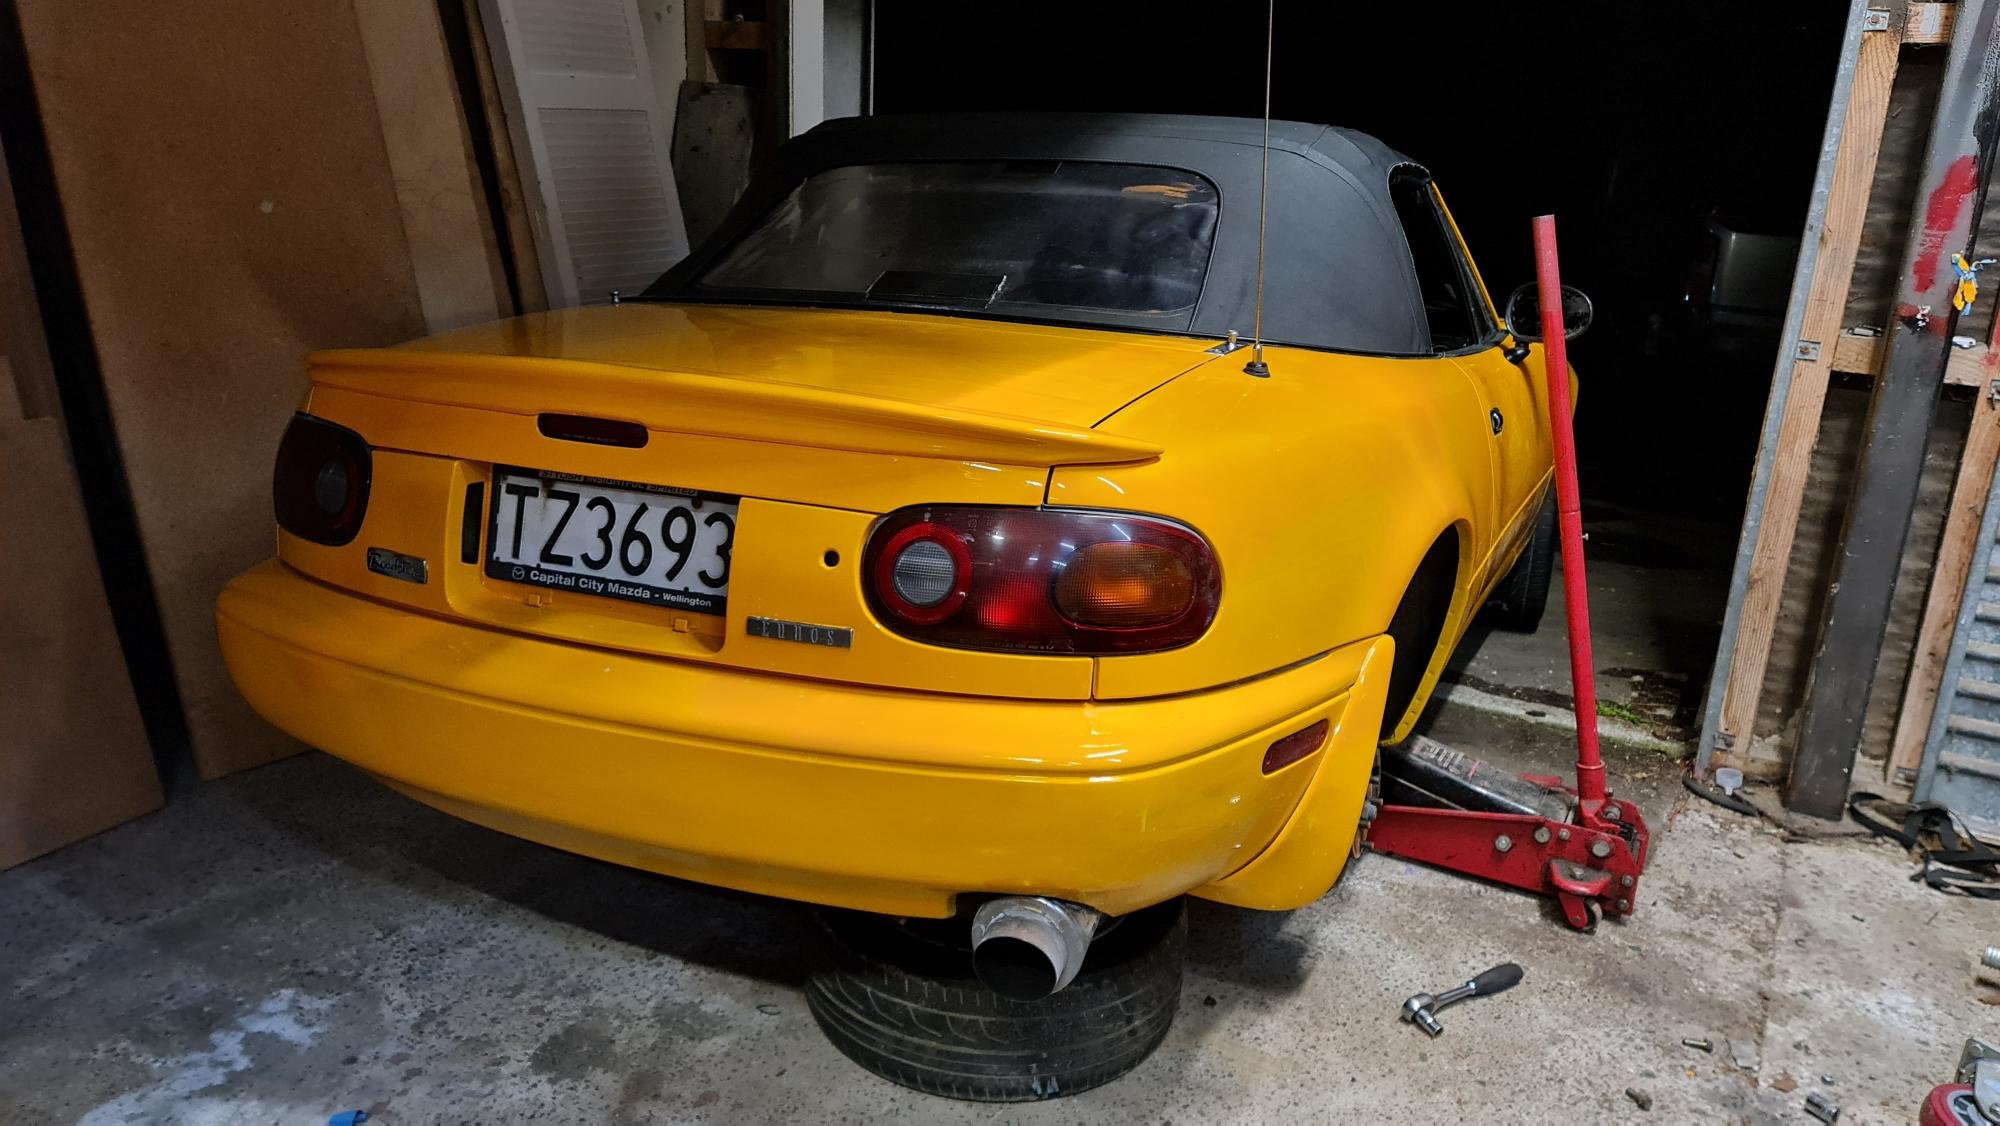
I'm still waiting on the trans, hopefully next week then I can fire it up and get shafts made. Meantime i got the steering stabiliser on, I need to drop the mount angle down a bit to give the inboard ball joint some more movement but position wise it works through the travel without hitting anything. I just got old mate to turn a tapered bushing up and I stuck it together with some plate etc I also got it outside, it looks mean as, but too high in front, static stability ratio is at 1.03 so I'll put stock springs back in which will drop it 40mm and it'll be good. Chevy fleet is on point One thing I do need help with is the glow plug relay, is there a vehicle I can get a combination timer and solenoid out of ? Running a solenoid triggered but a timer is being harder than it should, i just fried a $160 one and I'm not keen to do it again Any advice appreciated https://oldschool.co.nz/index.php?/topic/87859-squares-g20-pest-van/
7 points
-
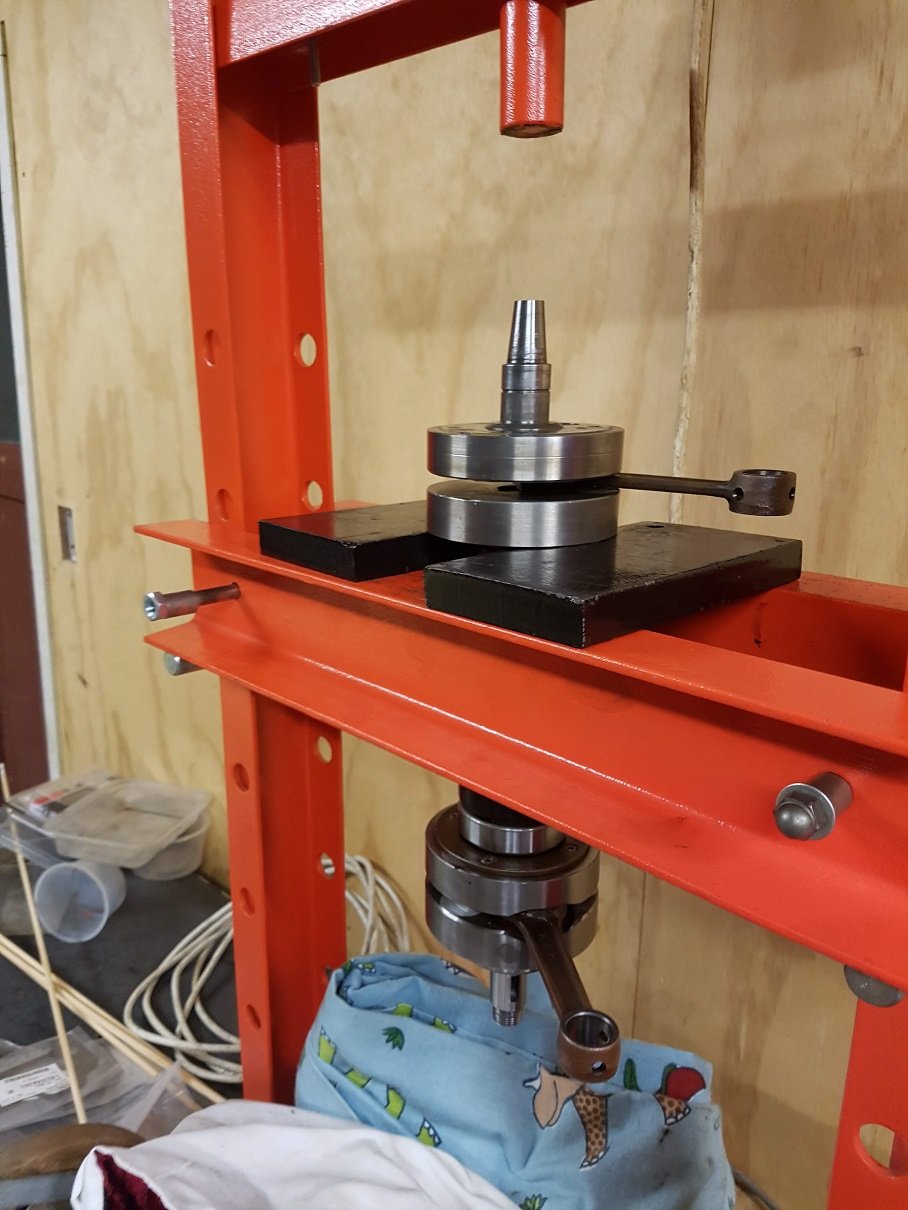
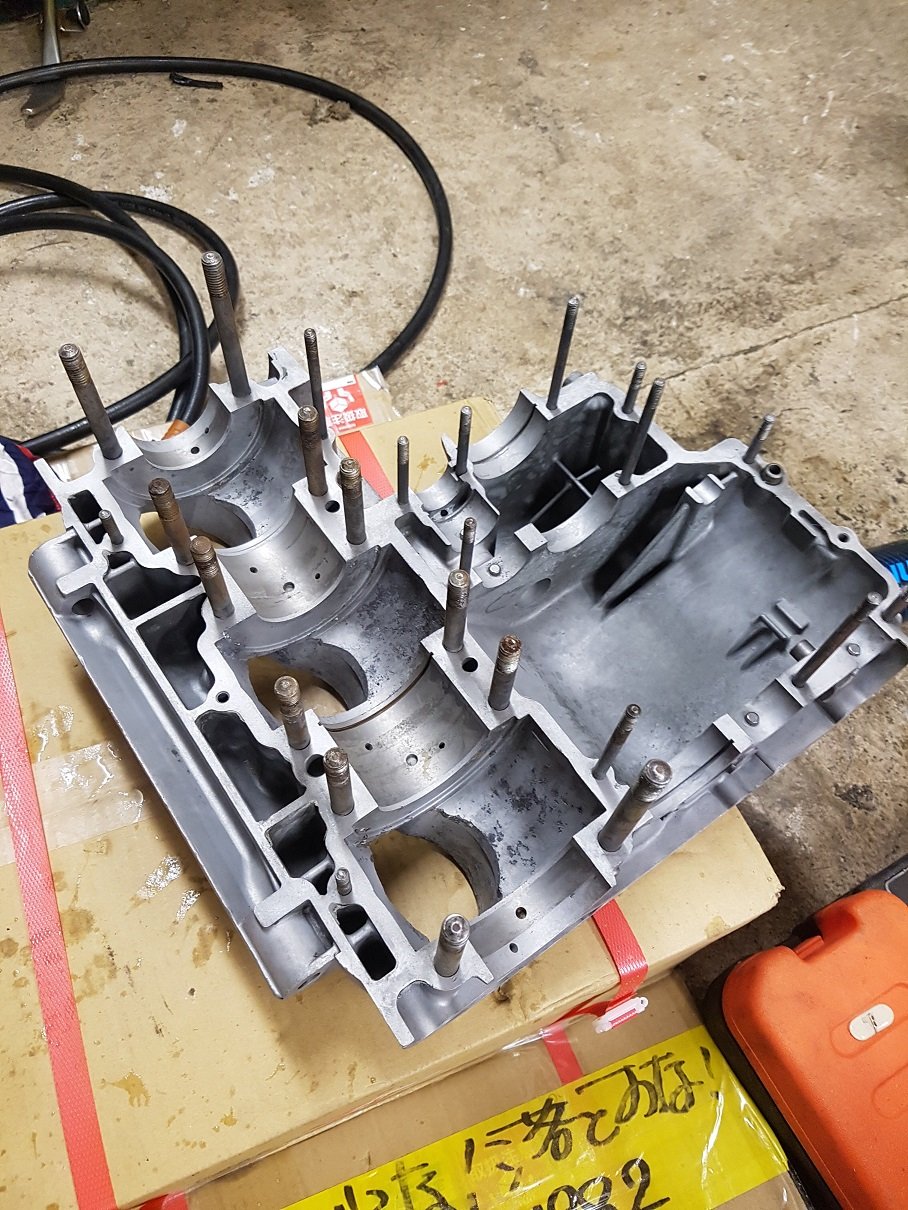
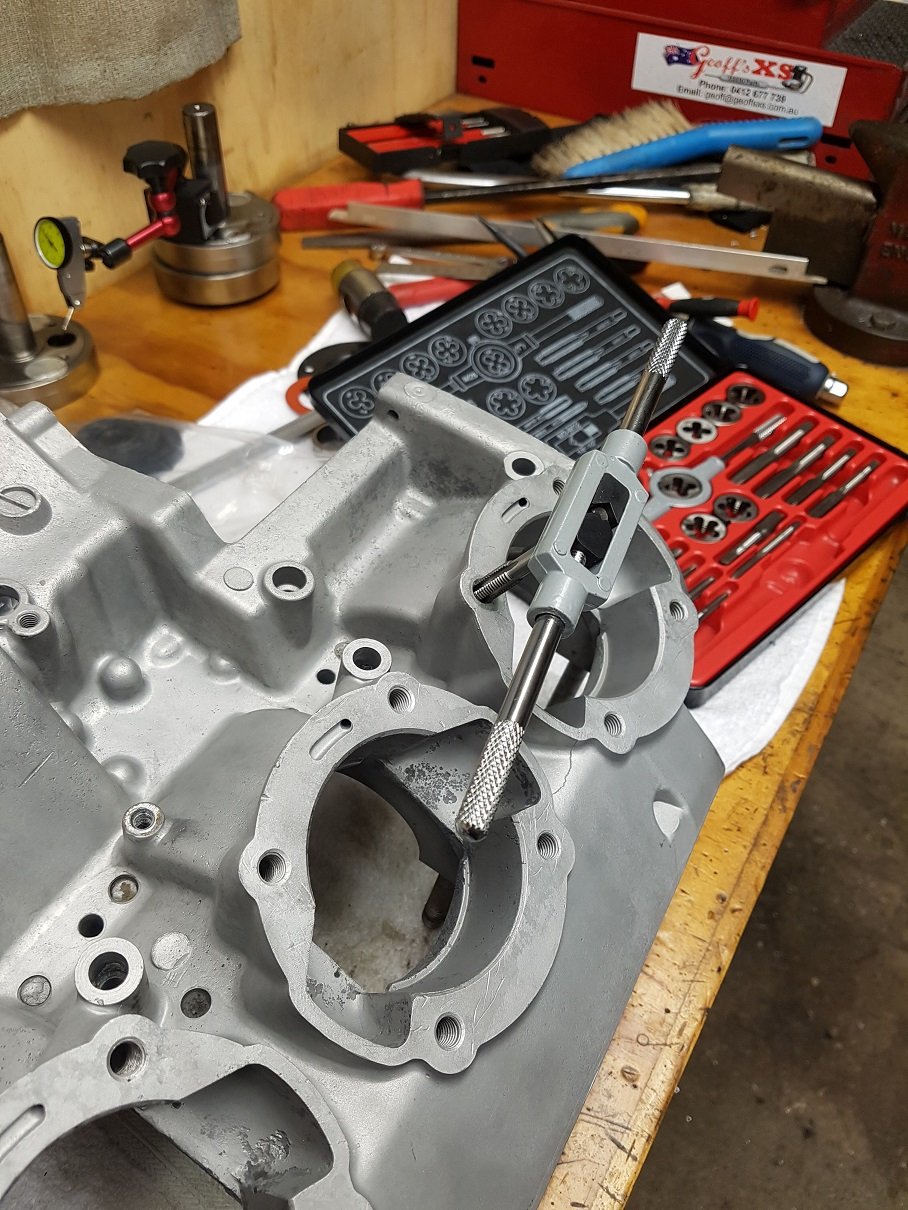
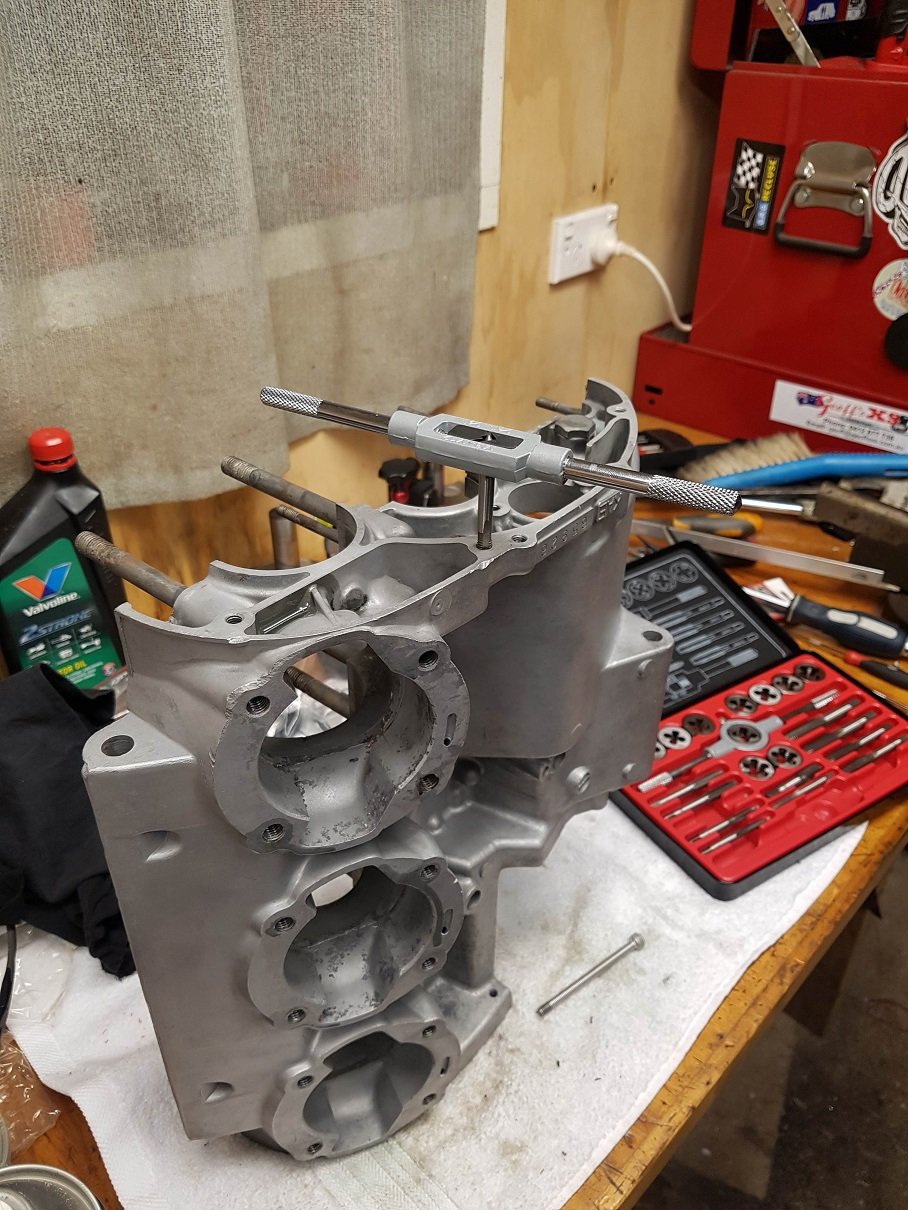
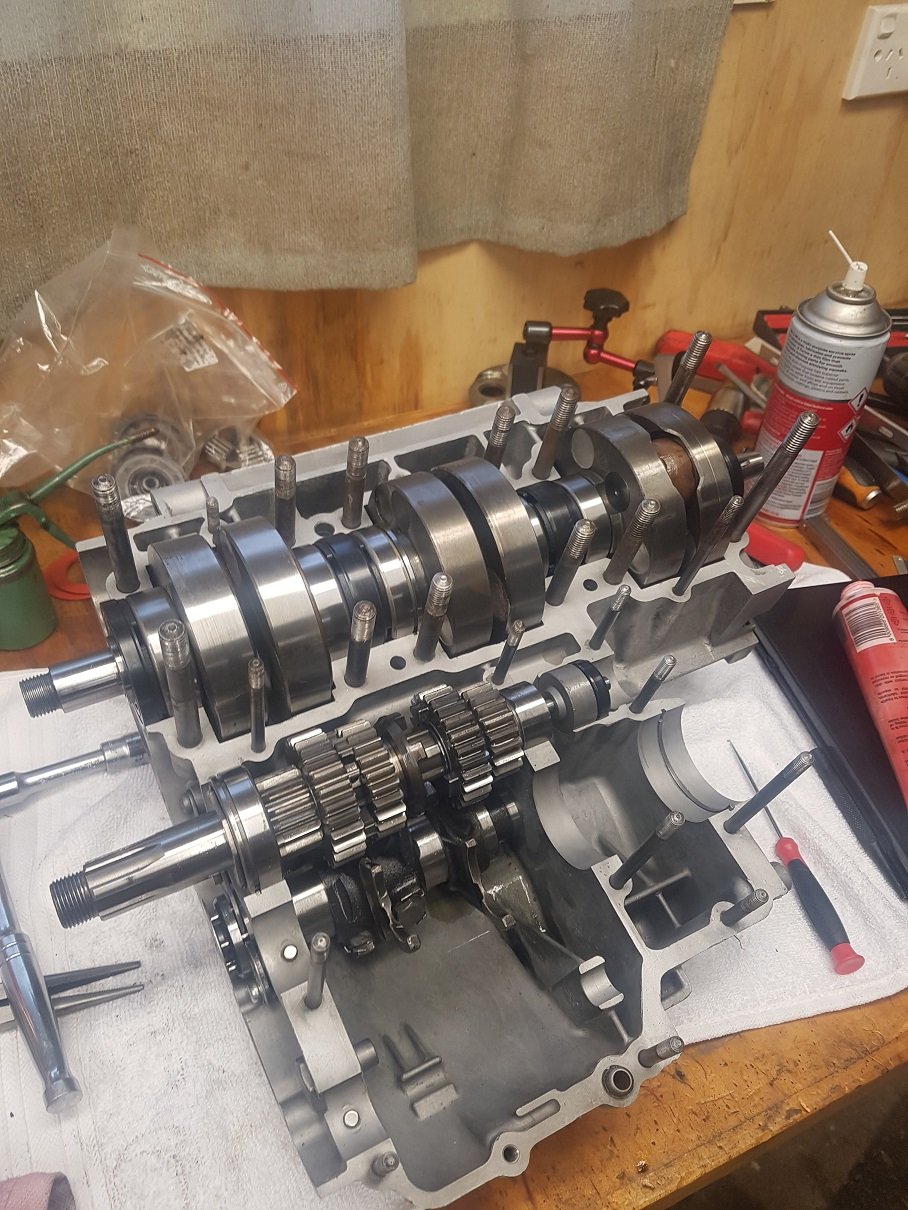
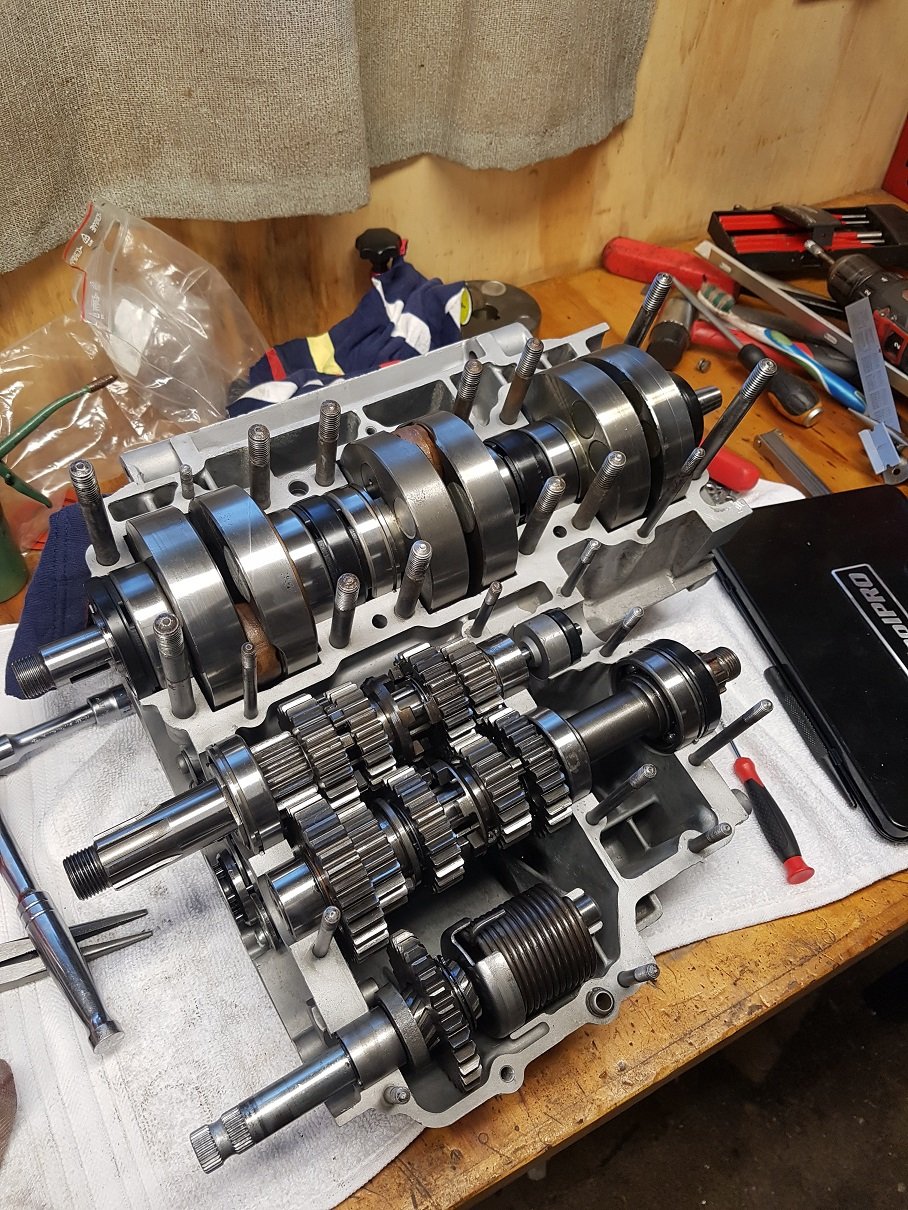
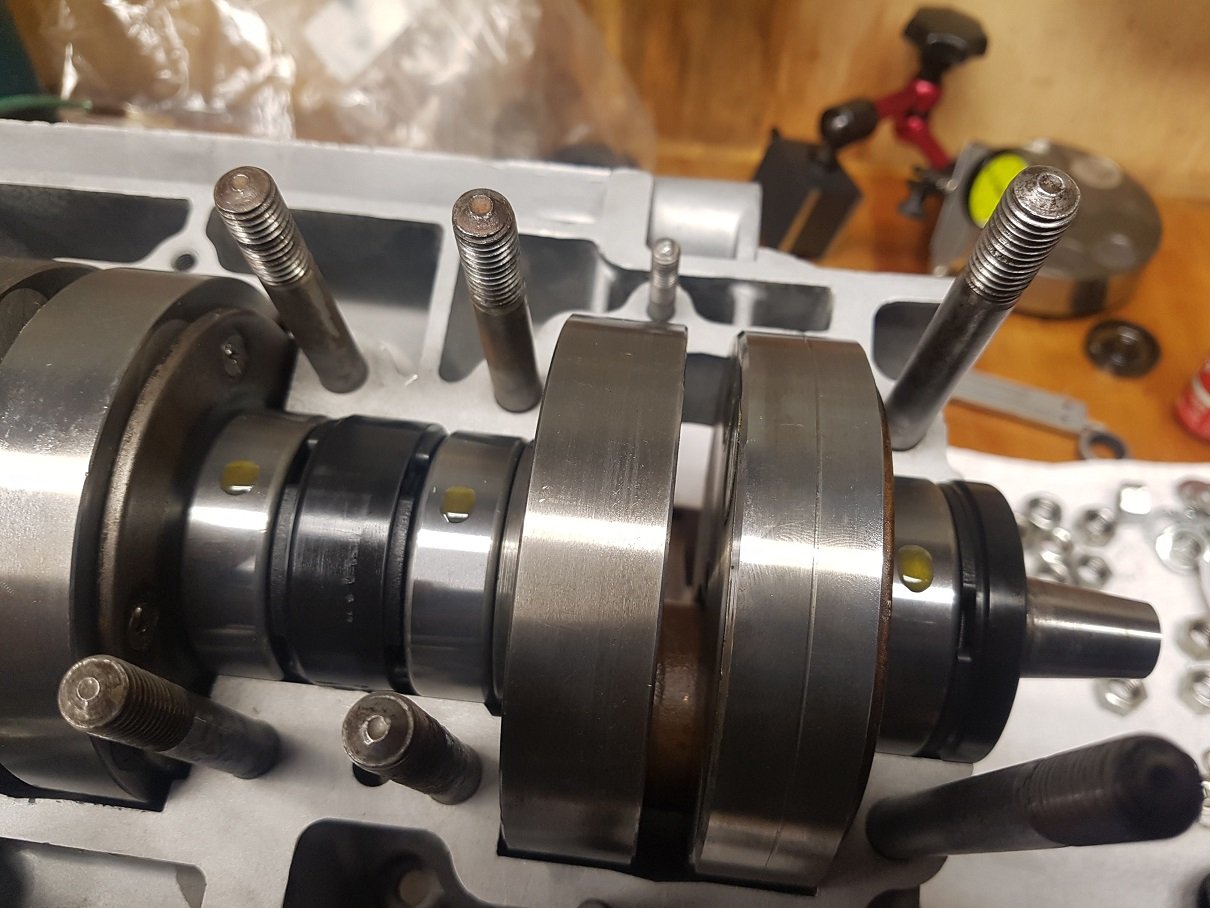
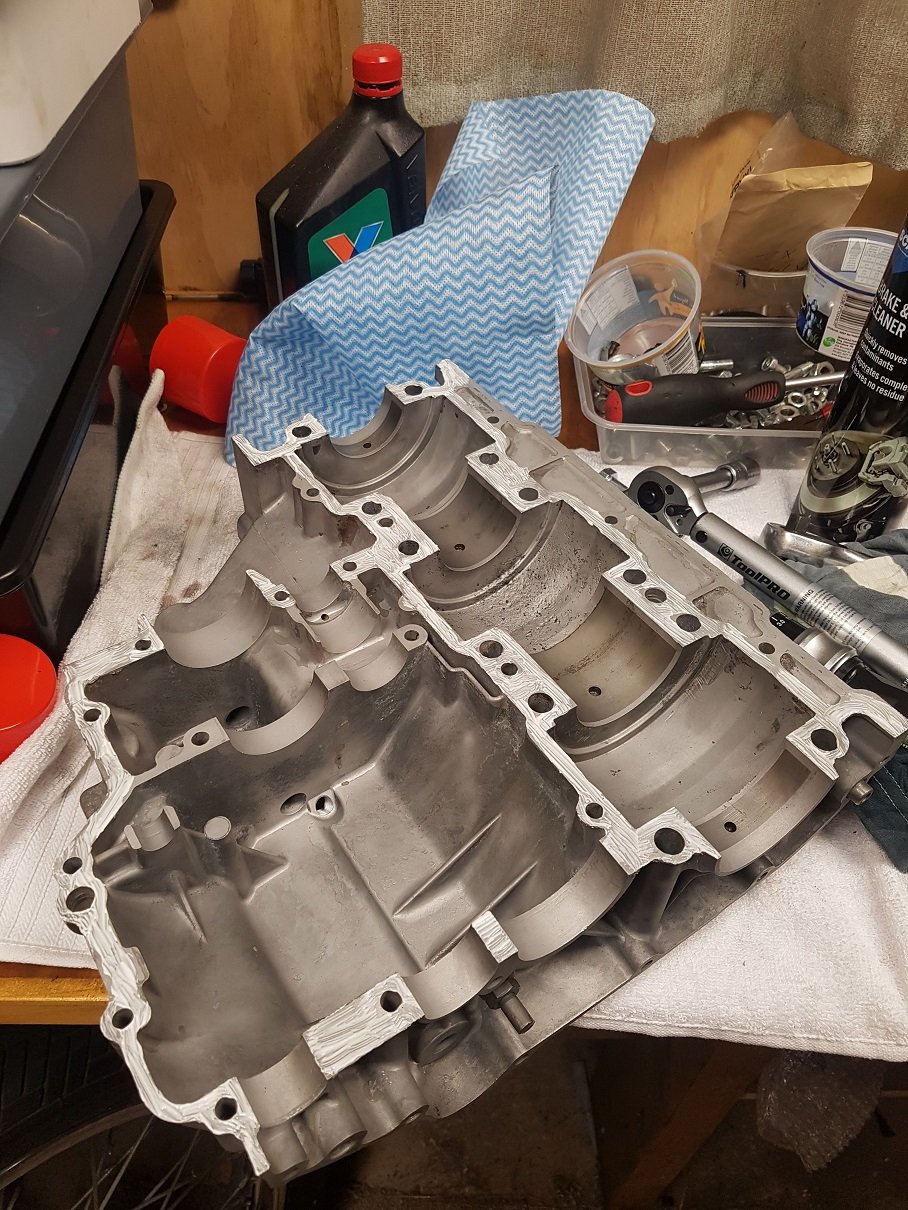
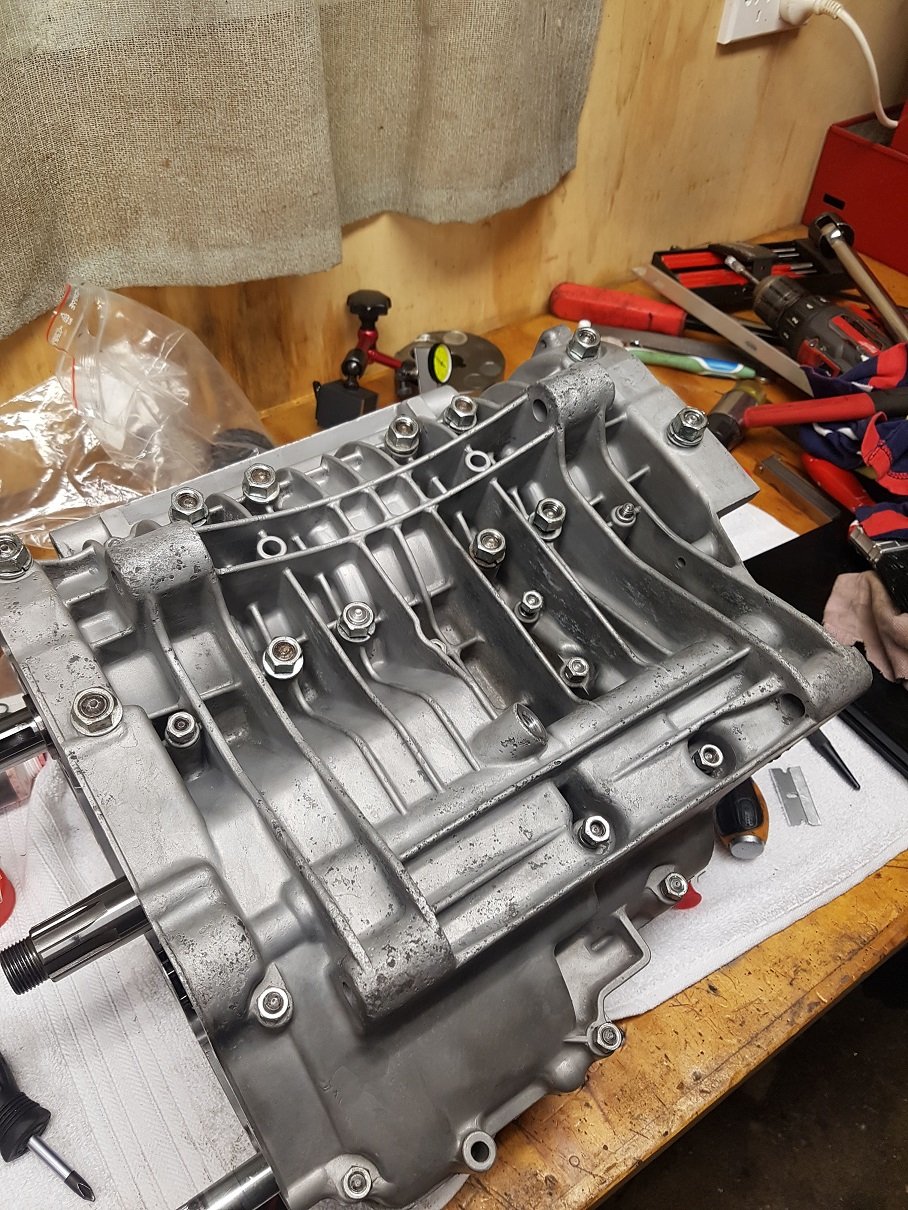
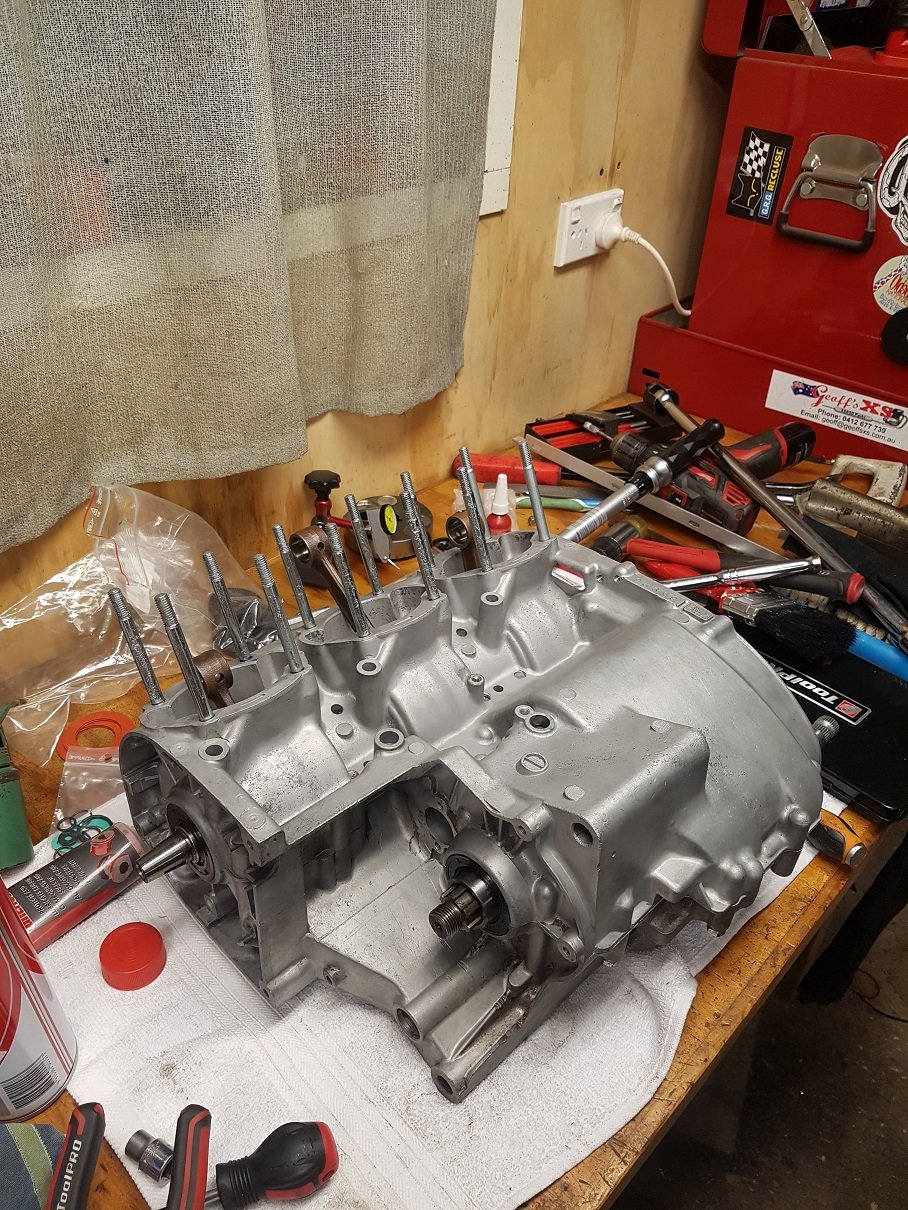
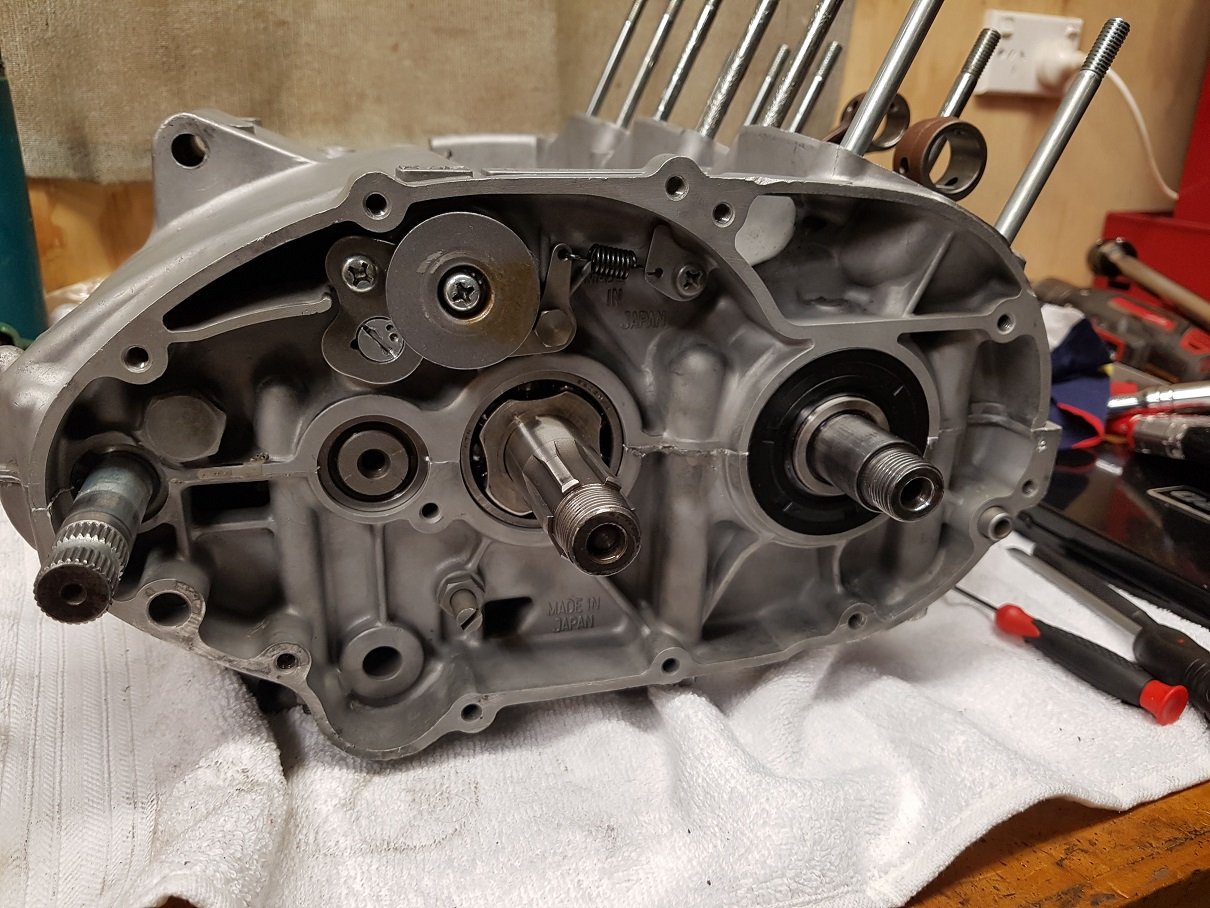
Making progress. I ended up using the original crank web and just used bearing retainer to hold the bearing on. Worst case it will spin and damage the already damaged crank. Consider this practice. I also used retaining compound to hold in the mallory weights. This seemed to lock them in good. Note that although loose, they couldnt actually come out, so even if they come loose again they won't fall out. With the crank all true within 0.02mm. It was all ready to nip up the bottom end! Setting final bottom end clearance on the last web: Prepping cases, Cleaning, cleaning, chasing all threads and more cleaning: Now I could sit the goodies in the case checking for function and binding as i go: Couple of dots of bearing retainer: And a fuck up on my part, who can spot it: All together ready for torquing: All nipped up: Goes through all the gears, crank spins freely, and kickstarter works. Polishing up sidecovers as they go on. And need to assemble the clutch etc. But that should all go well. Next step to pick up freshly powdercoated frame and start reassembling the bike. Might be on track for some summer hoons!
5 points
-
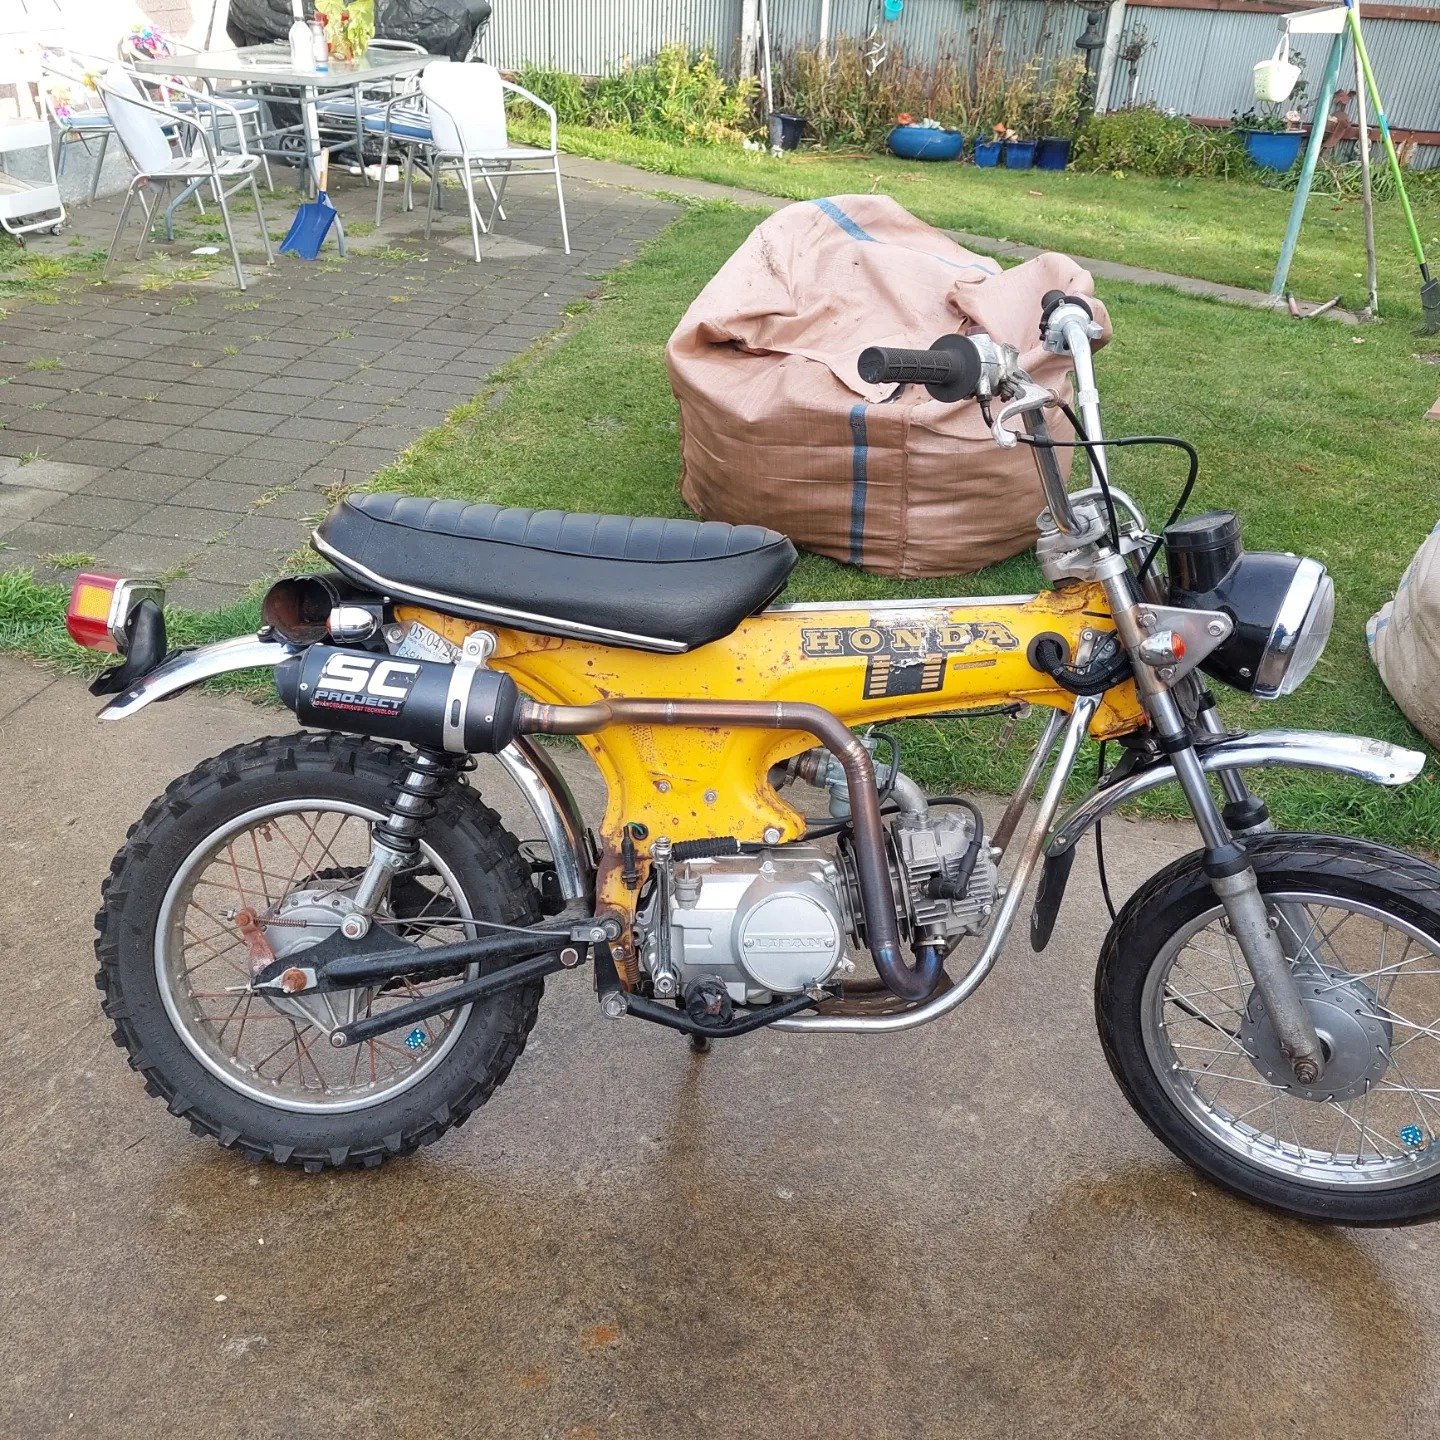
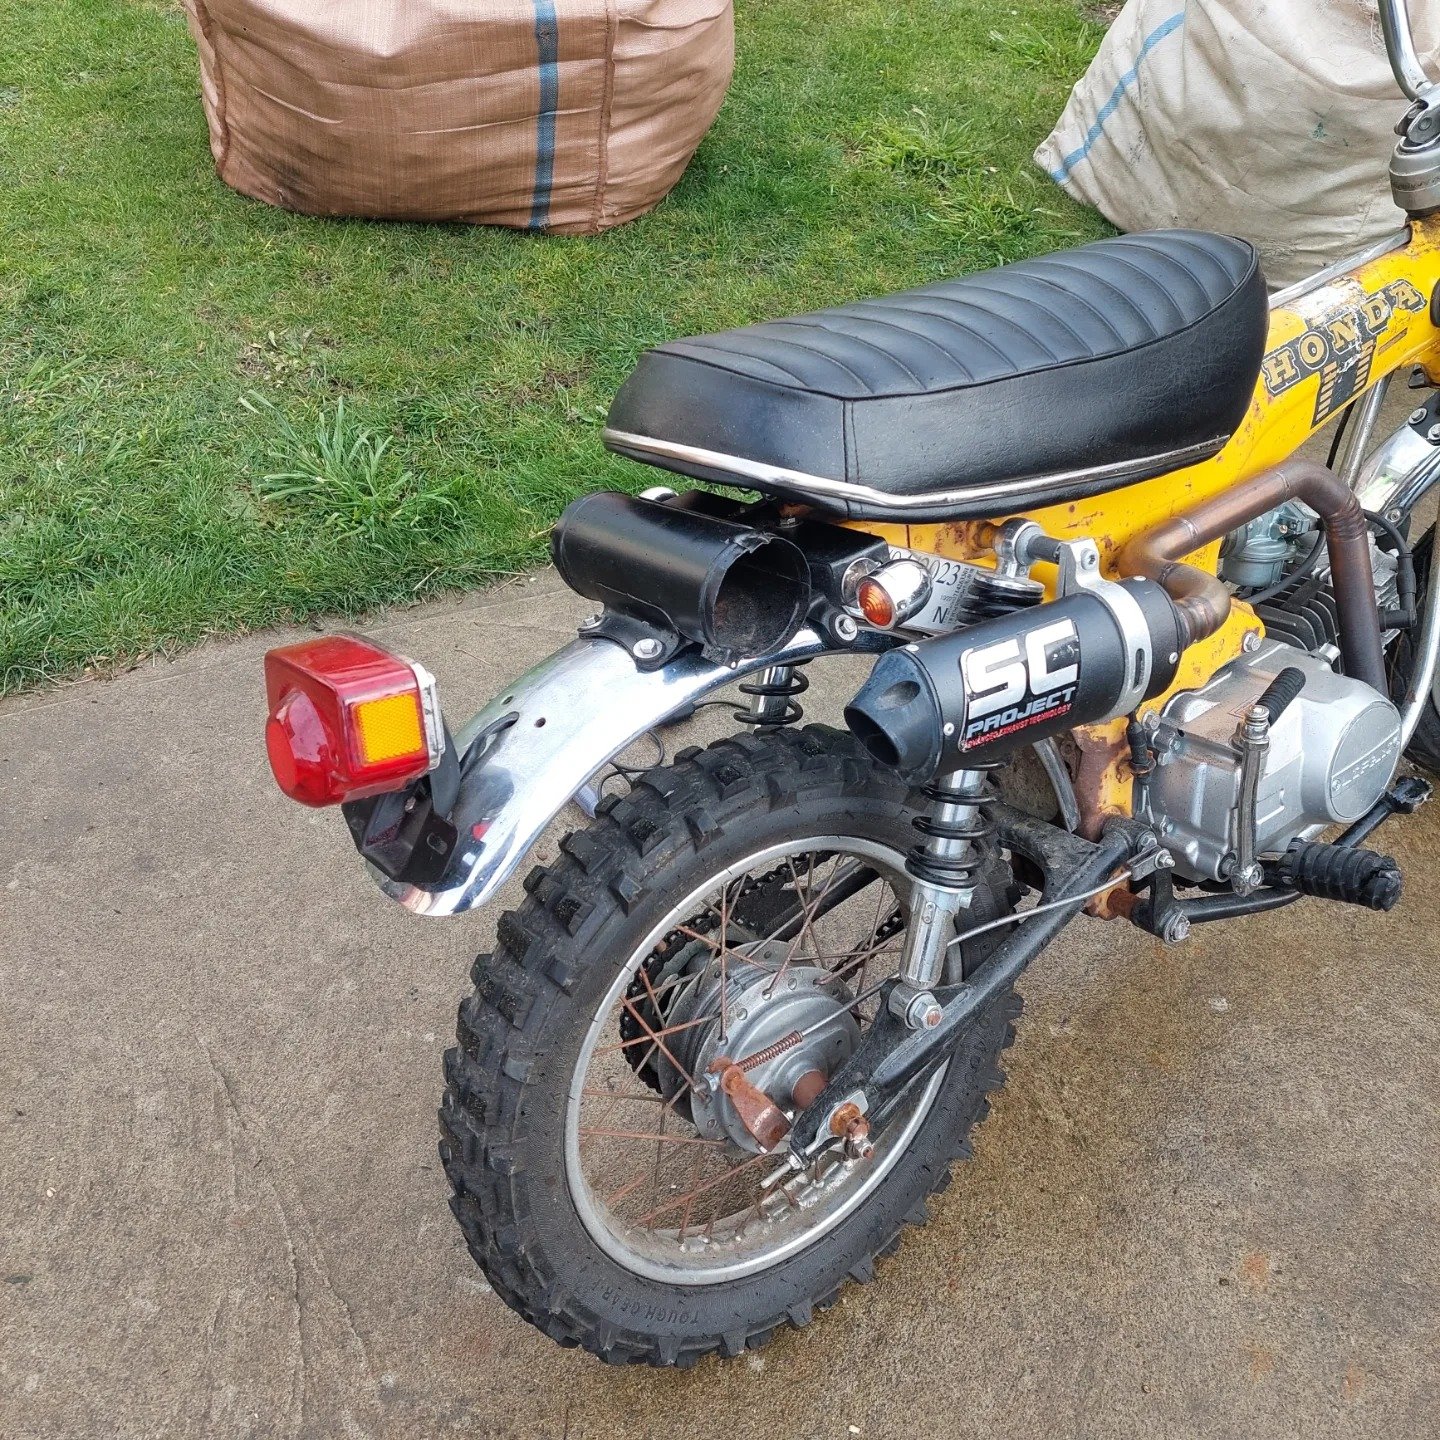
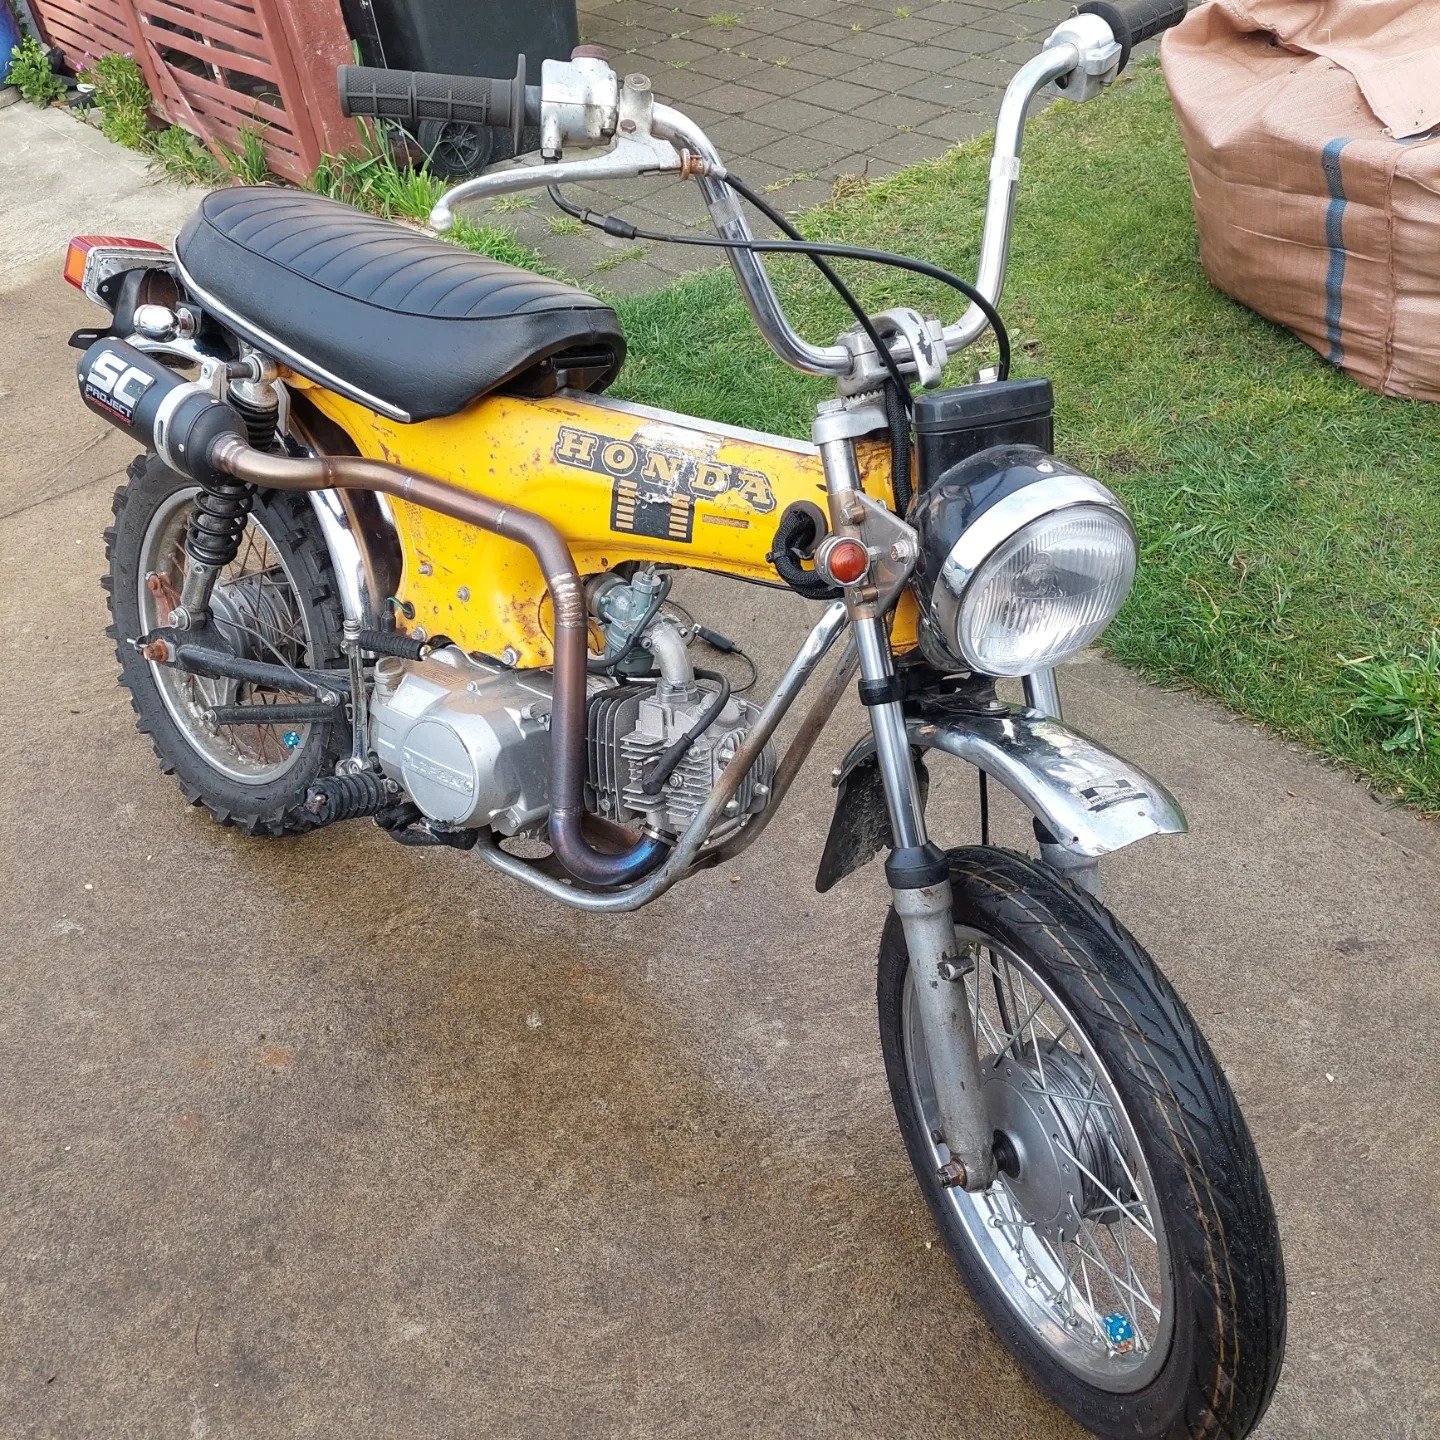
Not many pics to show this time but quite a bit of progression. I took the frame from the jig and put on the forks and wheels etc to make sure I've got the stance how I want it. The hardtail is just tacked up at the moment incase I need it make any alterations. Im pretty happy with how it sits. I bought a new 125 semi from Andy and Wie at mBike. Fitted that and a new rear sprocket to check for any alignment issues. Then I put on some Goldwing footpegs that I've been hoarding for a good few years and mounted them to a modified footrest that I'd originally had mounted to my chaly.
5 points
-
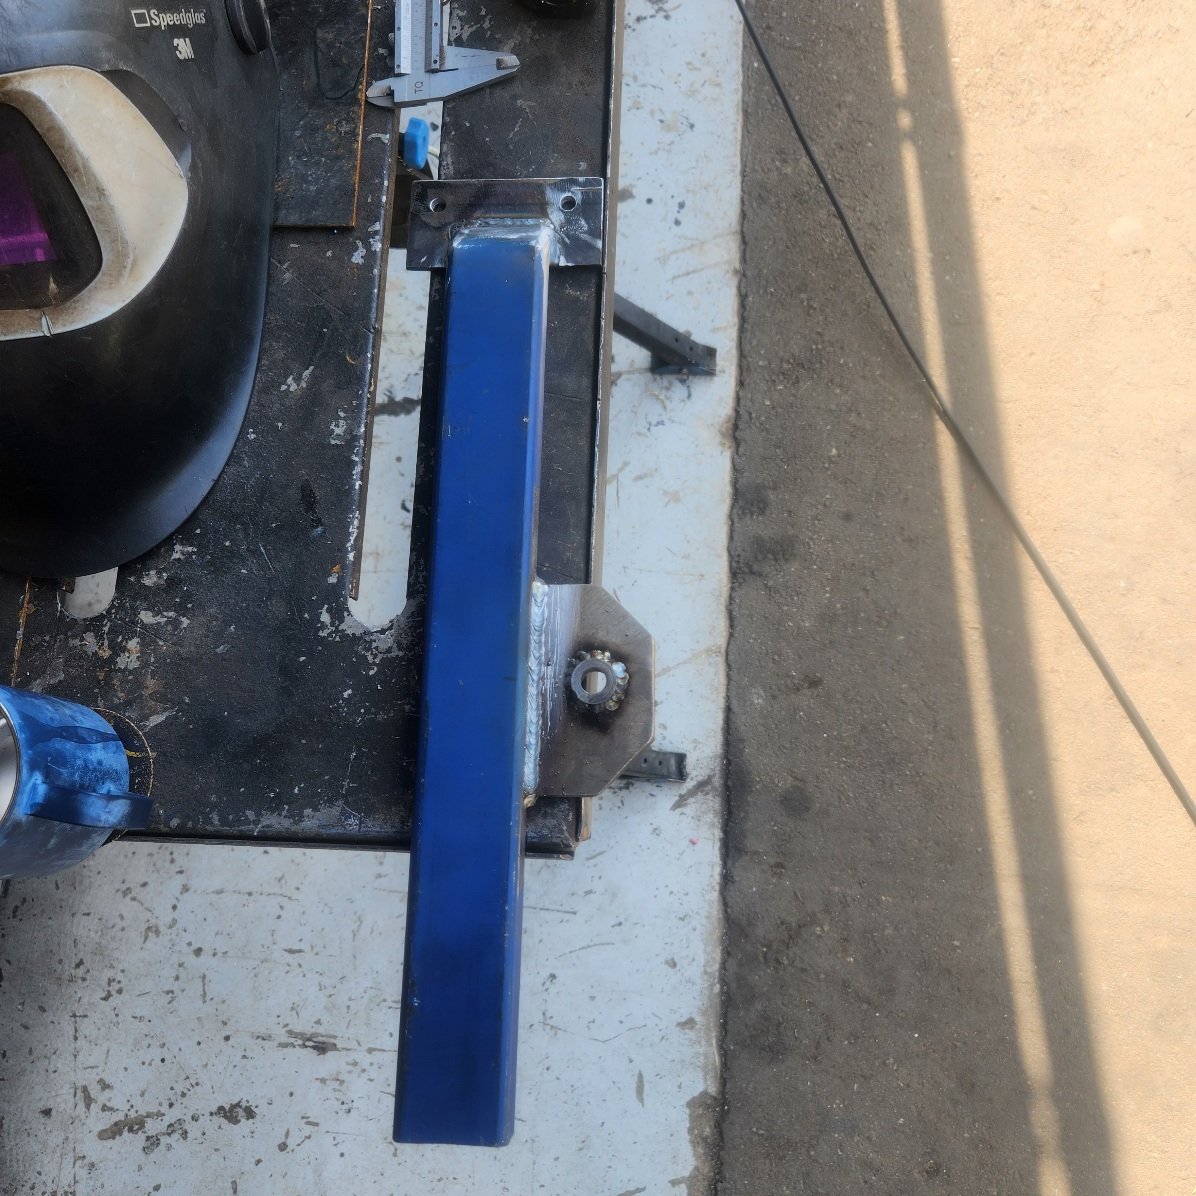
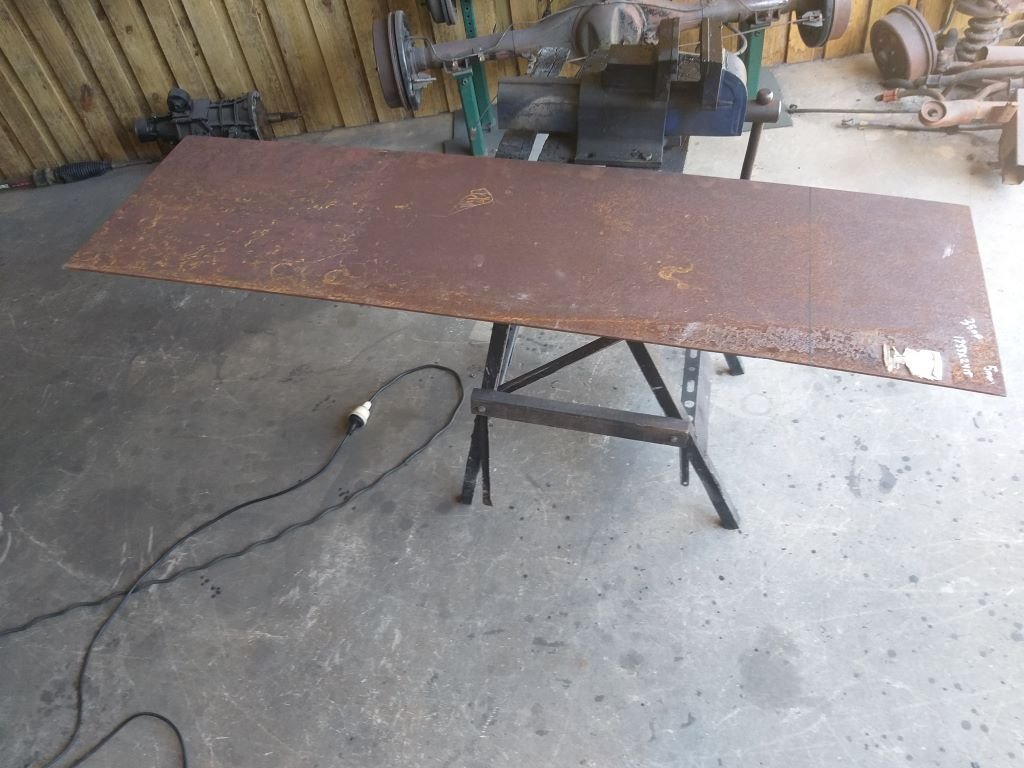
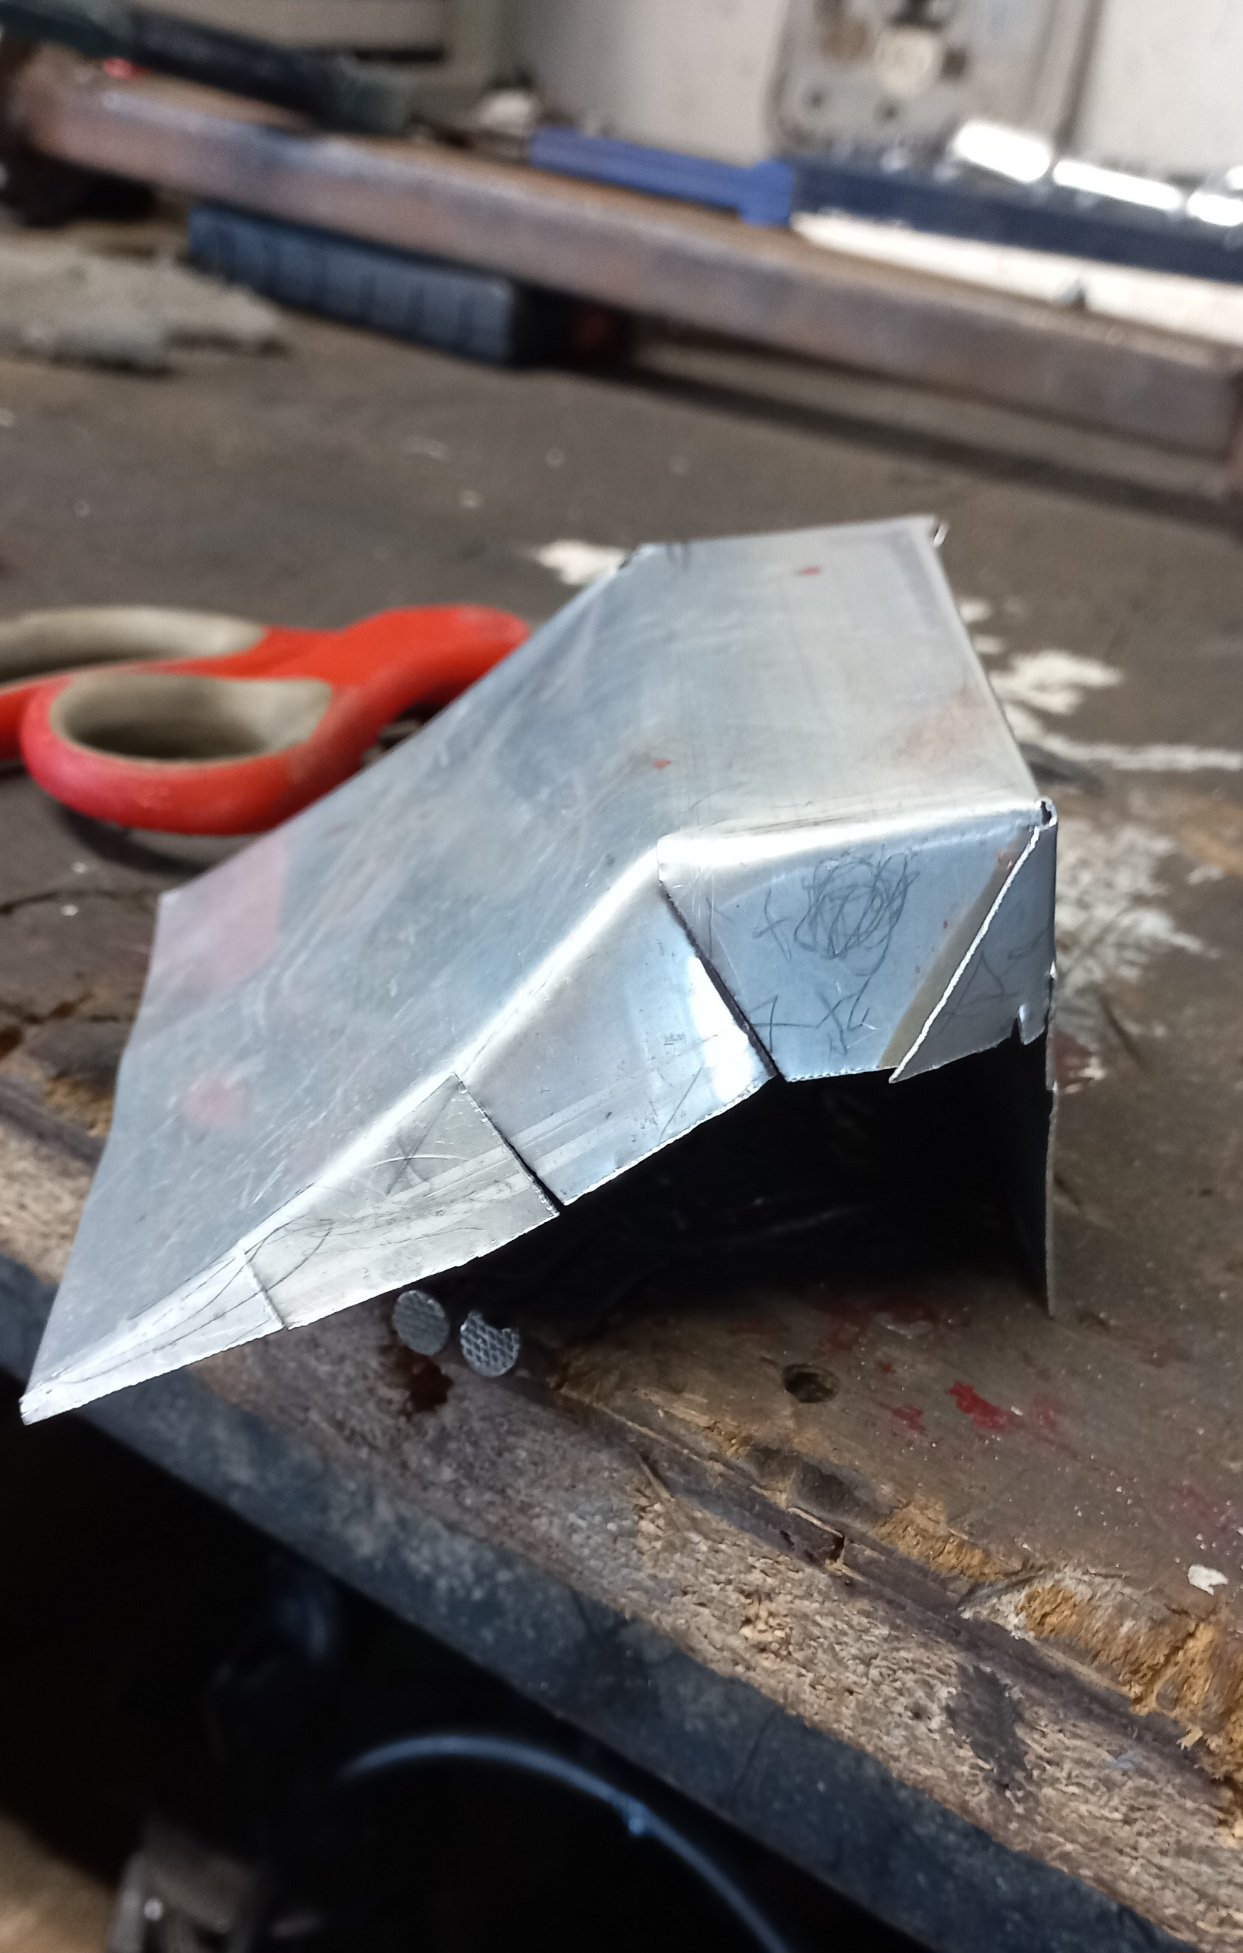
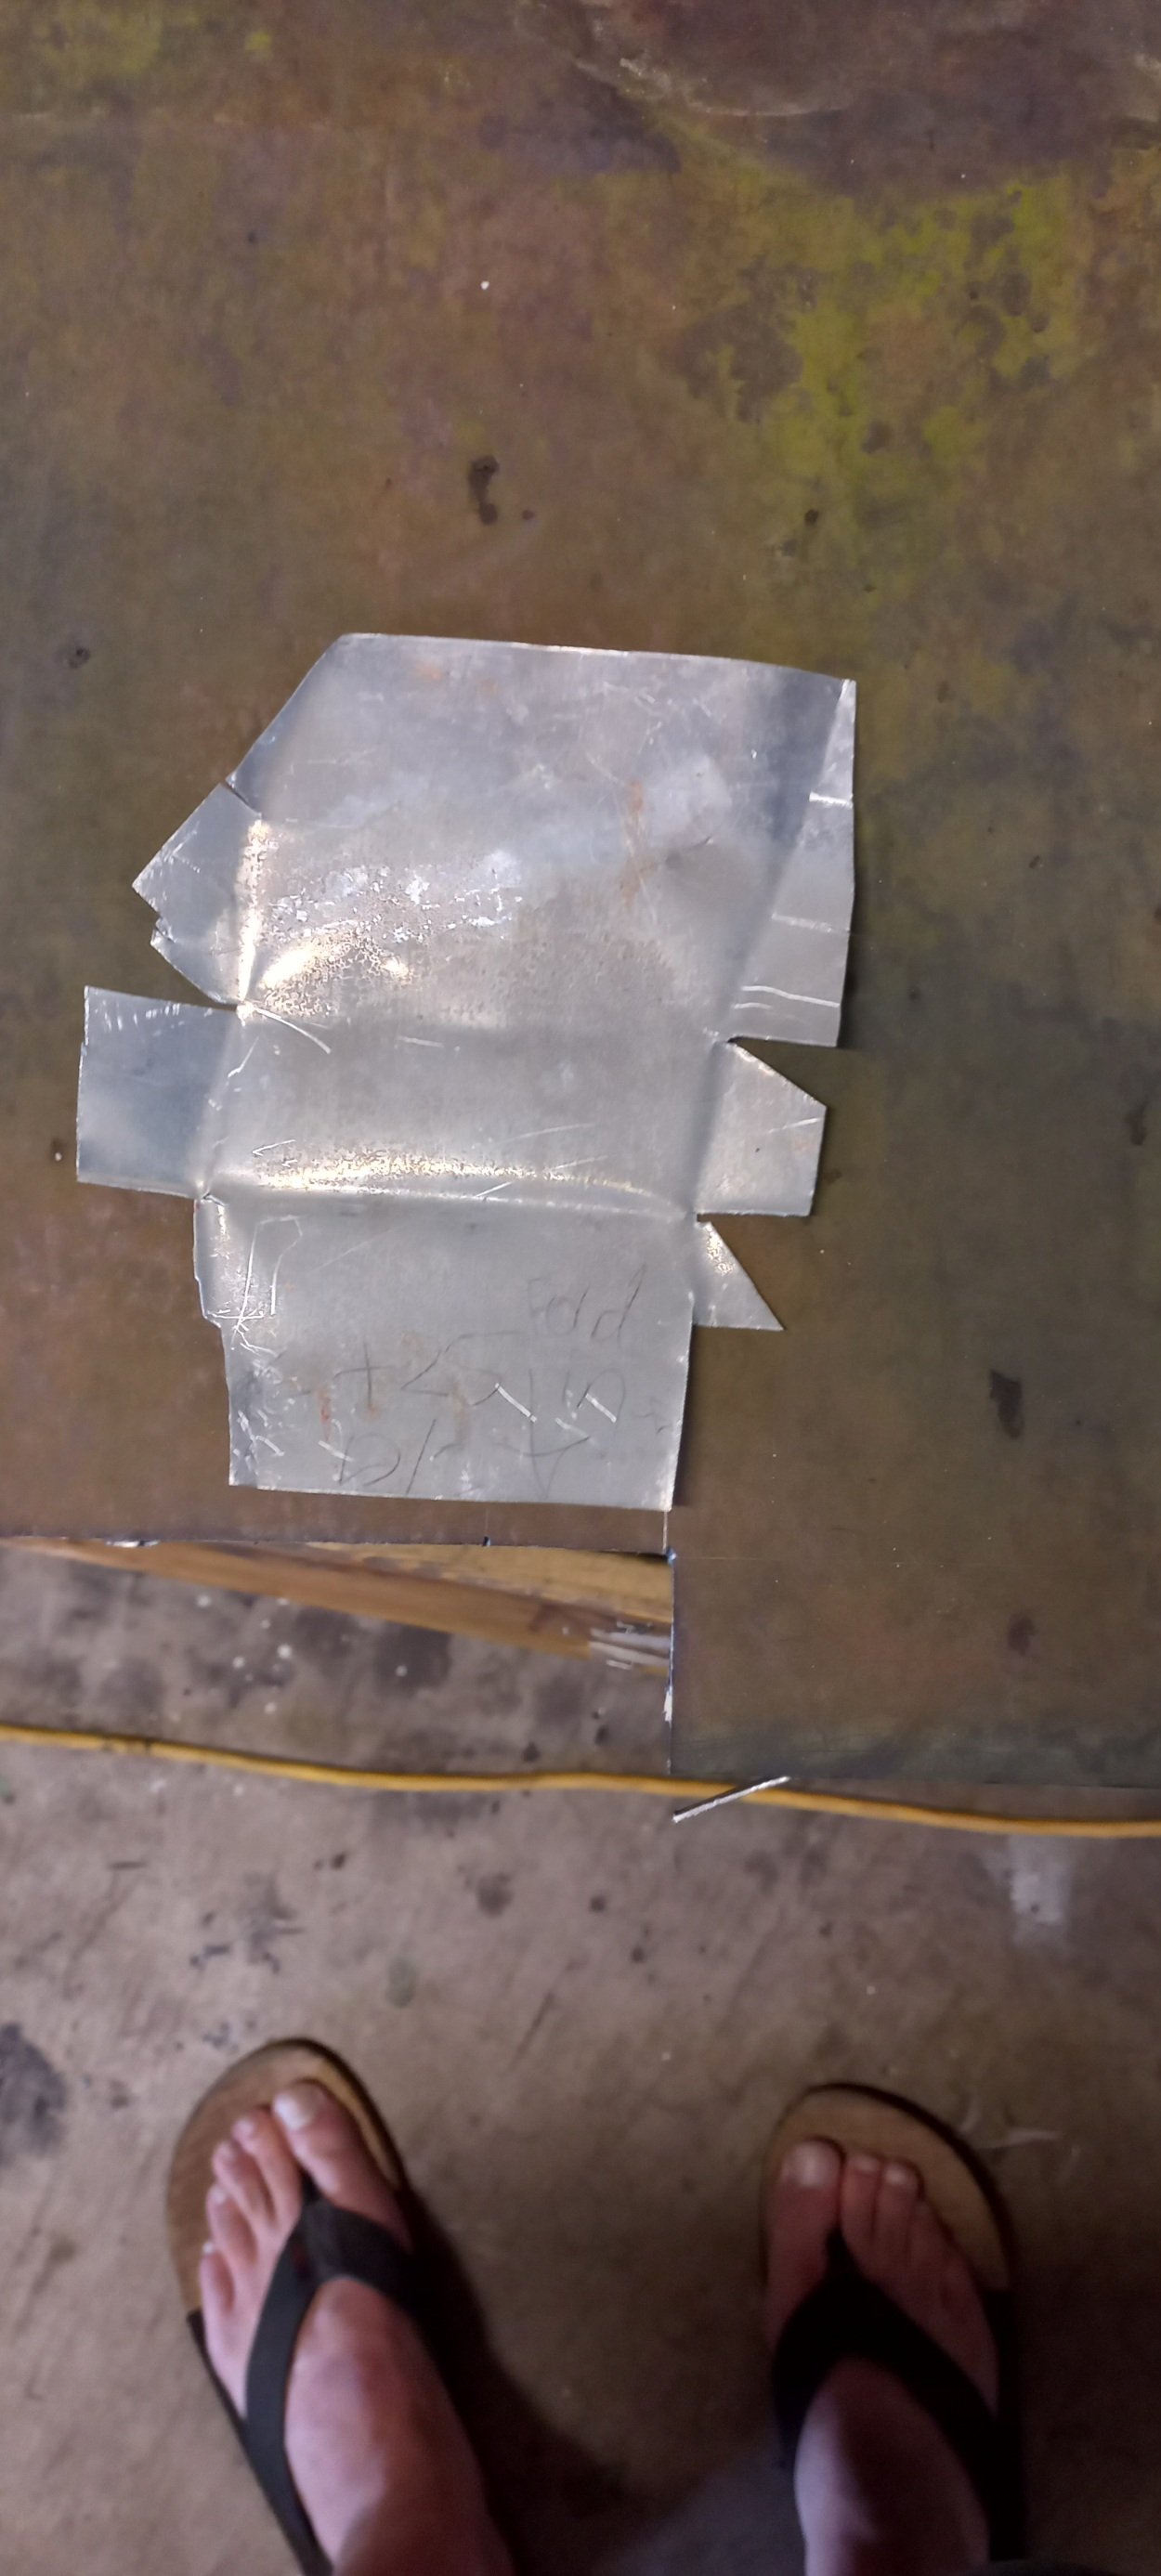
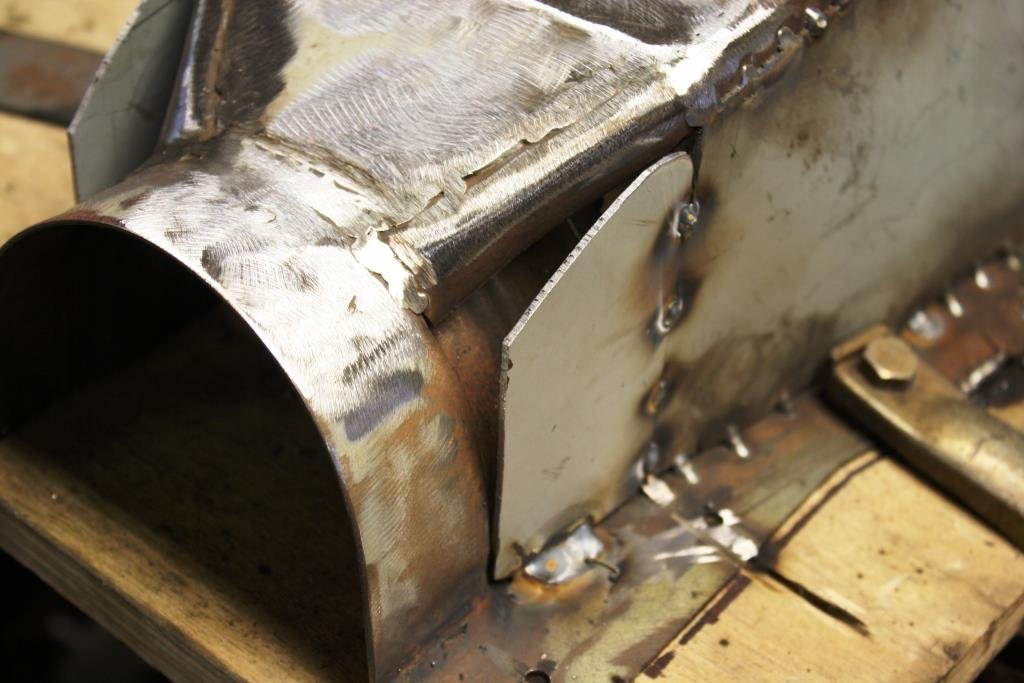
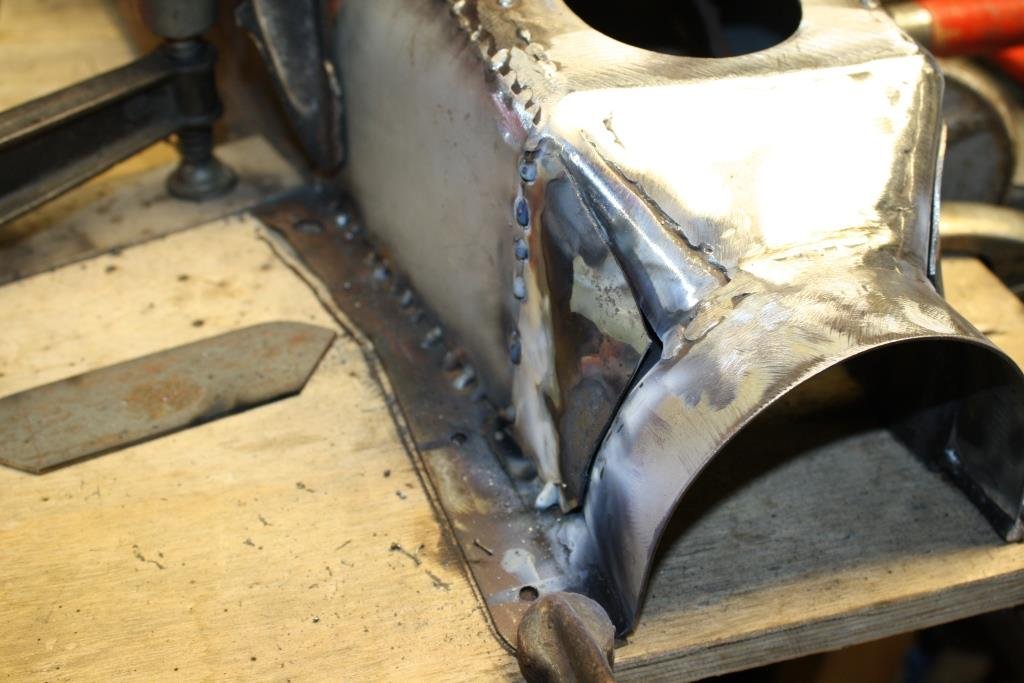
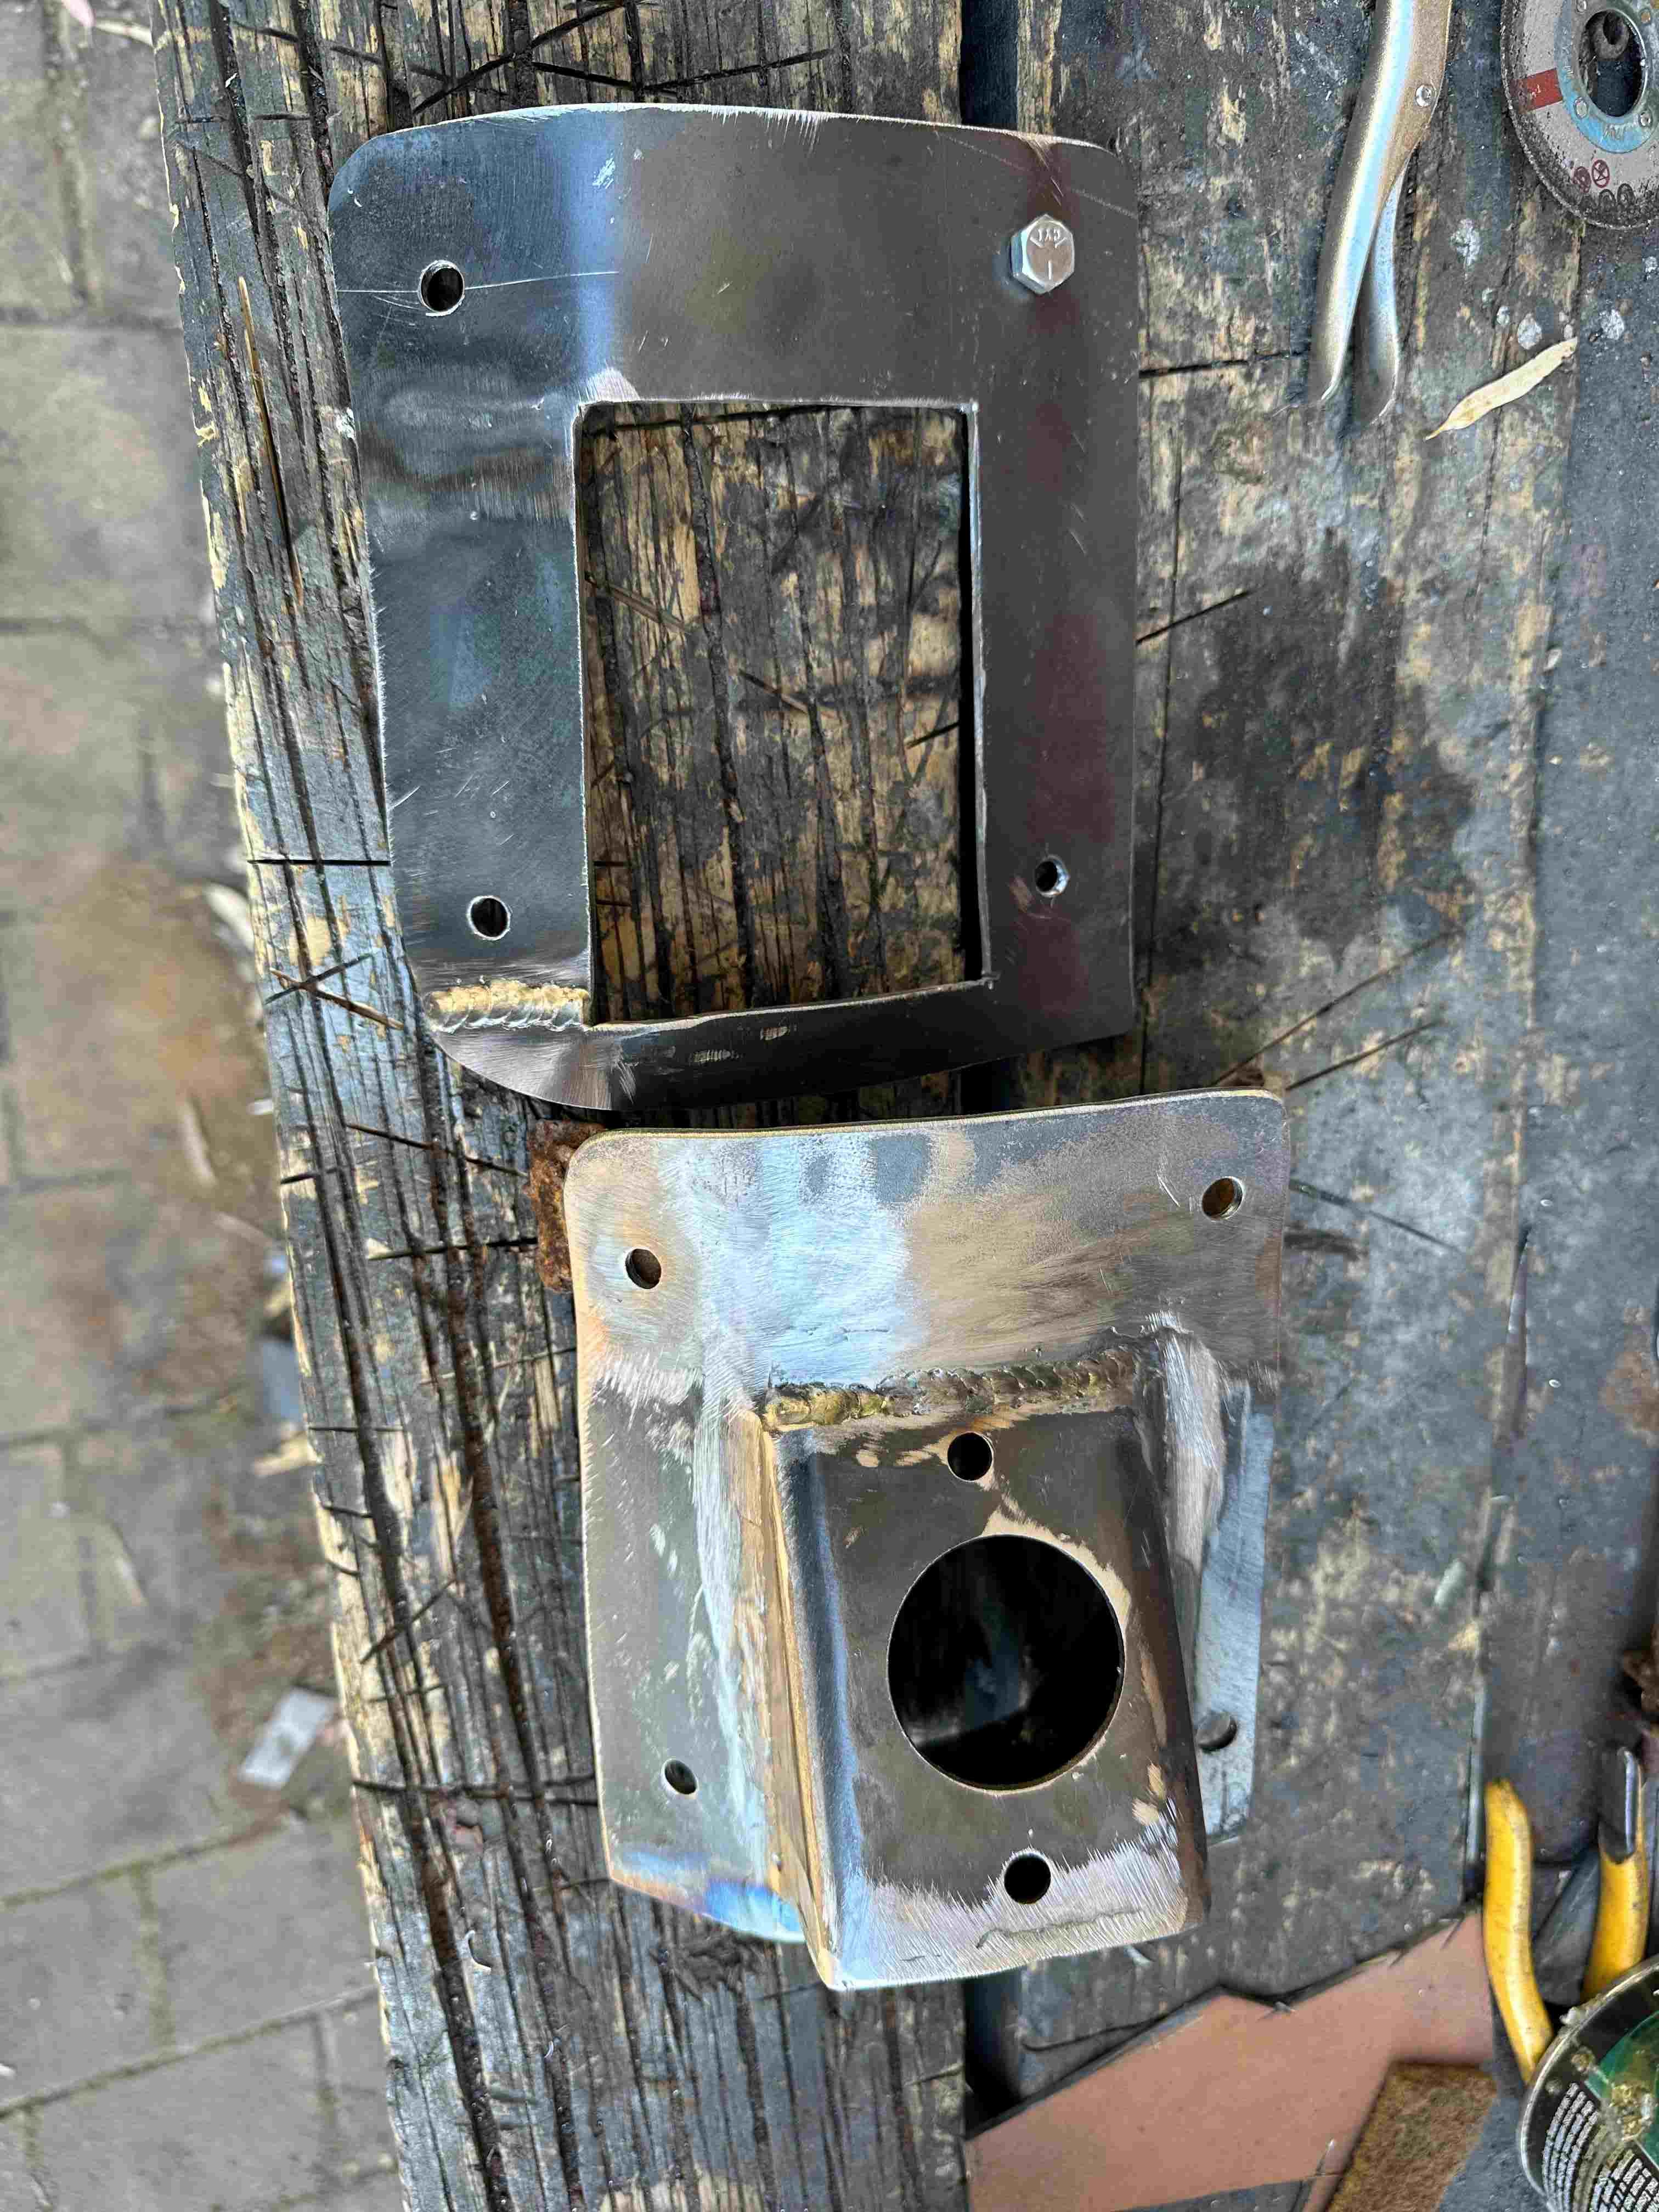
Took a trip into town yesterday to pick up a fresh roll of welding wire and grabbed a bit of 5mm plate from my local scrappy. It's a bit crusty but nothing I can't sort out. Did a bit of cutting, did a bit of welding, poked a few holes and we have the rough makings of a mounting base for the Astra power steering pump. More tomorrow.
5 points
-
i see the problem
3 points
-
Sounds like a bad earth. If it's standard wiring earth is white, not black btw3 points
-
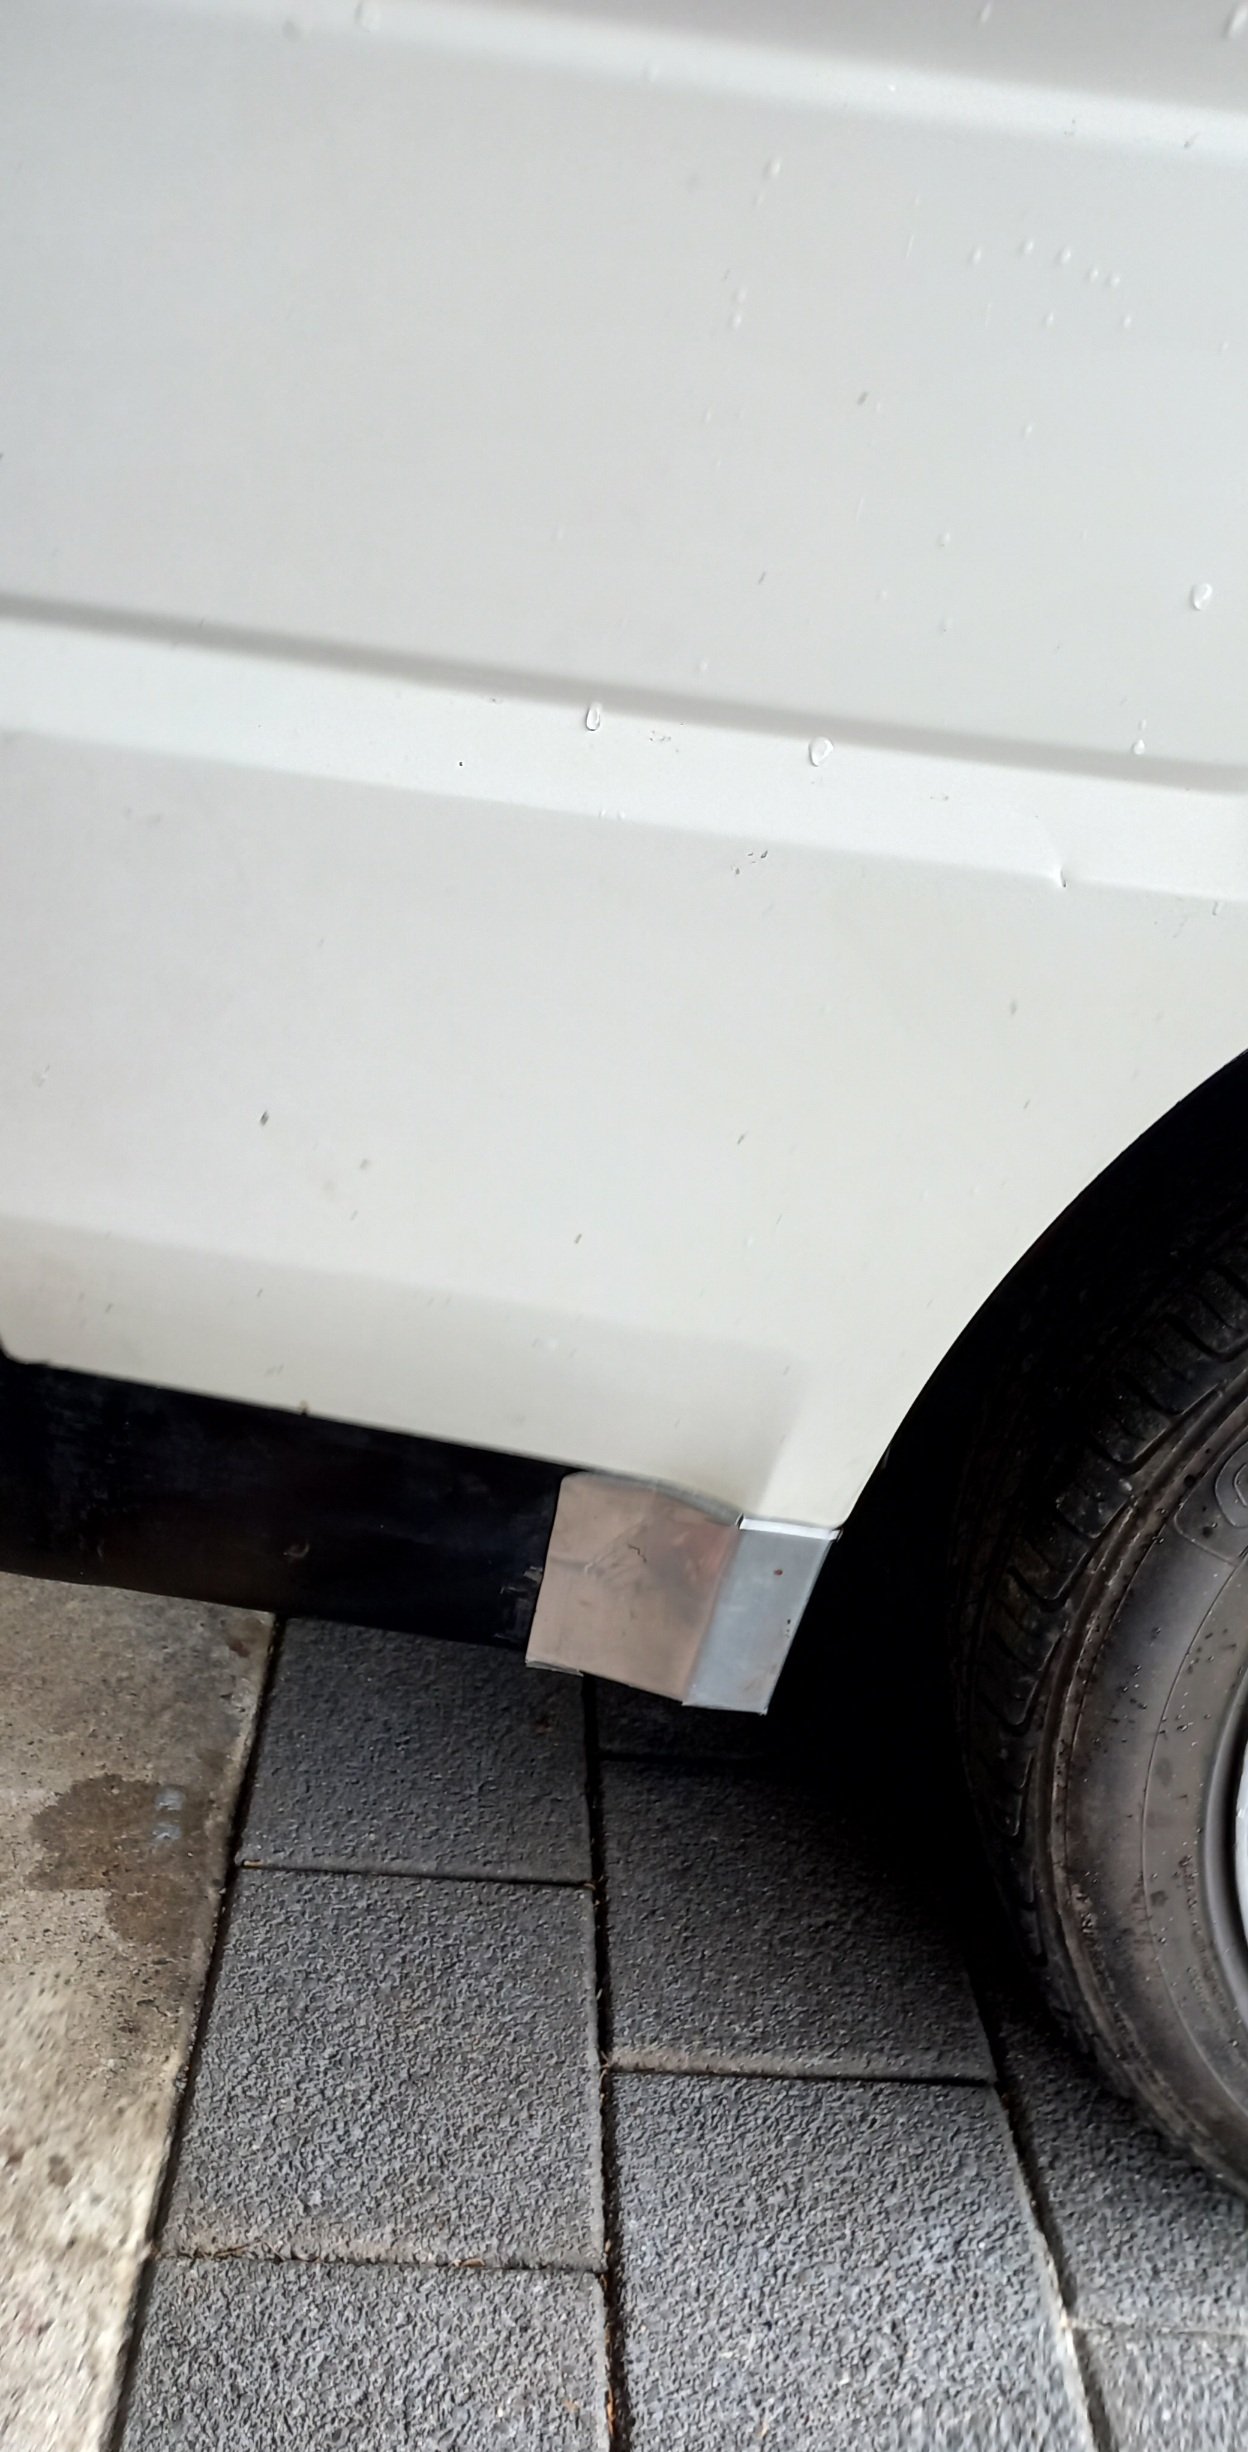
Made some little panels to bring lip closer to door profile, will need to make final versions, and weld them on when i have time... They also hide the welded mounting nuts that attach the bumper and one of the welds that joined the extension i made to the hilux lip to fit the van, less sanding when i go to paint the thing satin
3 points
-
Those things and the similar 500 have a nasty trick. If the kickstart gear seizes on it's shaft, the whole assembly including the kickstart pedal can spin at the speed of the gear in the box. I'm told it can be spectacular - and painful. Moral is to never let the oil level in the box get too low. Good progress. Well done.3 points
-
Looking good with windows! Welded up a temp switch into housing put that in over the weekend
3 points
-
Finally fitted the new carby hat and bolted the removable engine box side back into position. Looks almost like a bought one.
3 points
-
Looks like its a Melexis rotary position sensor. Too complex will adapt a regular tps on.2 points
-
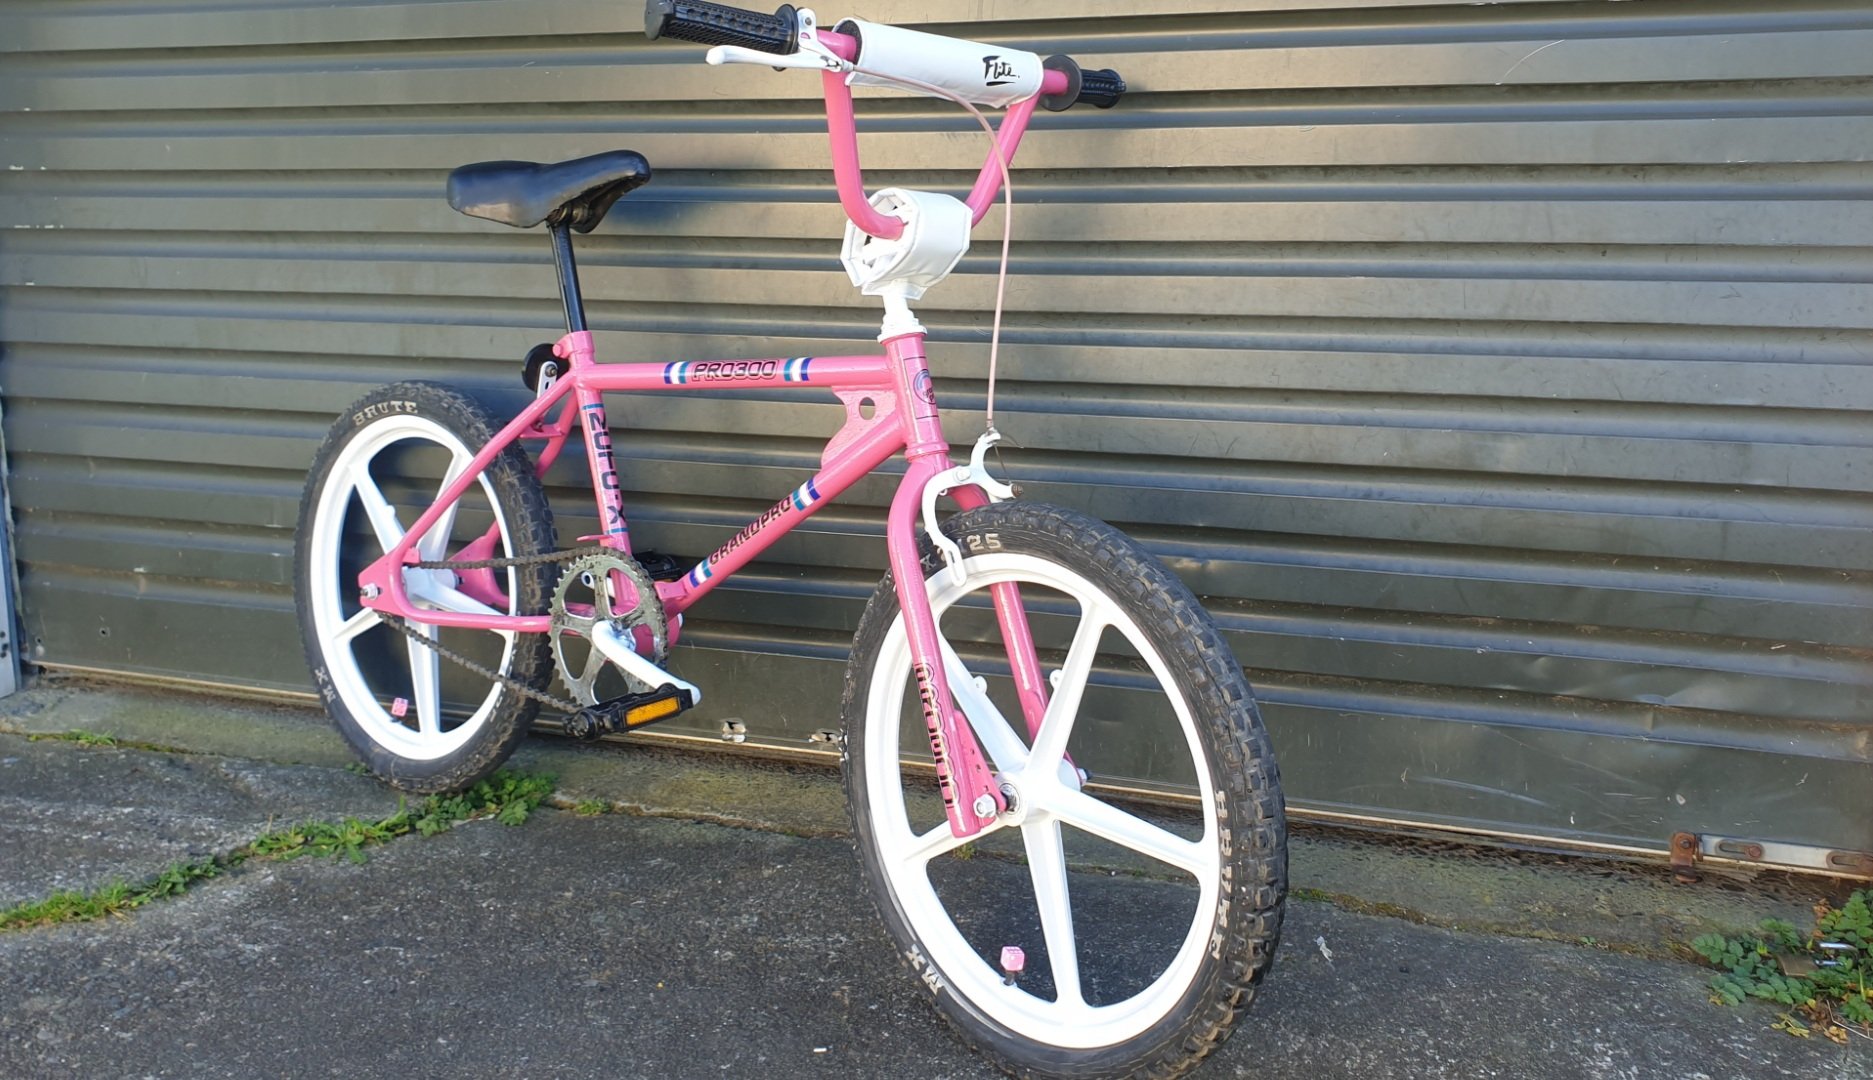
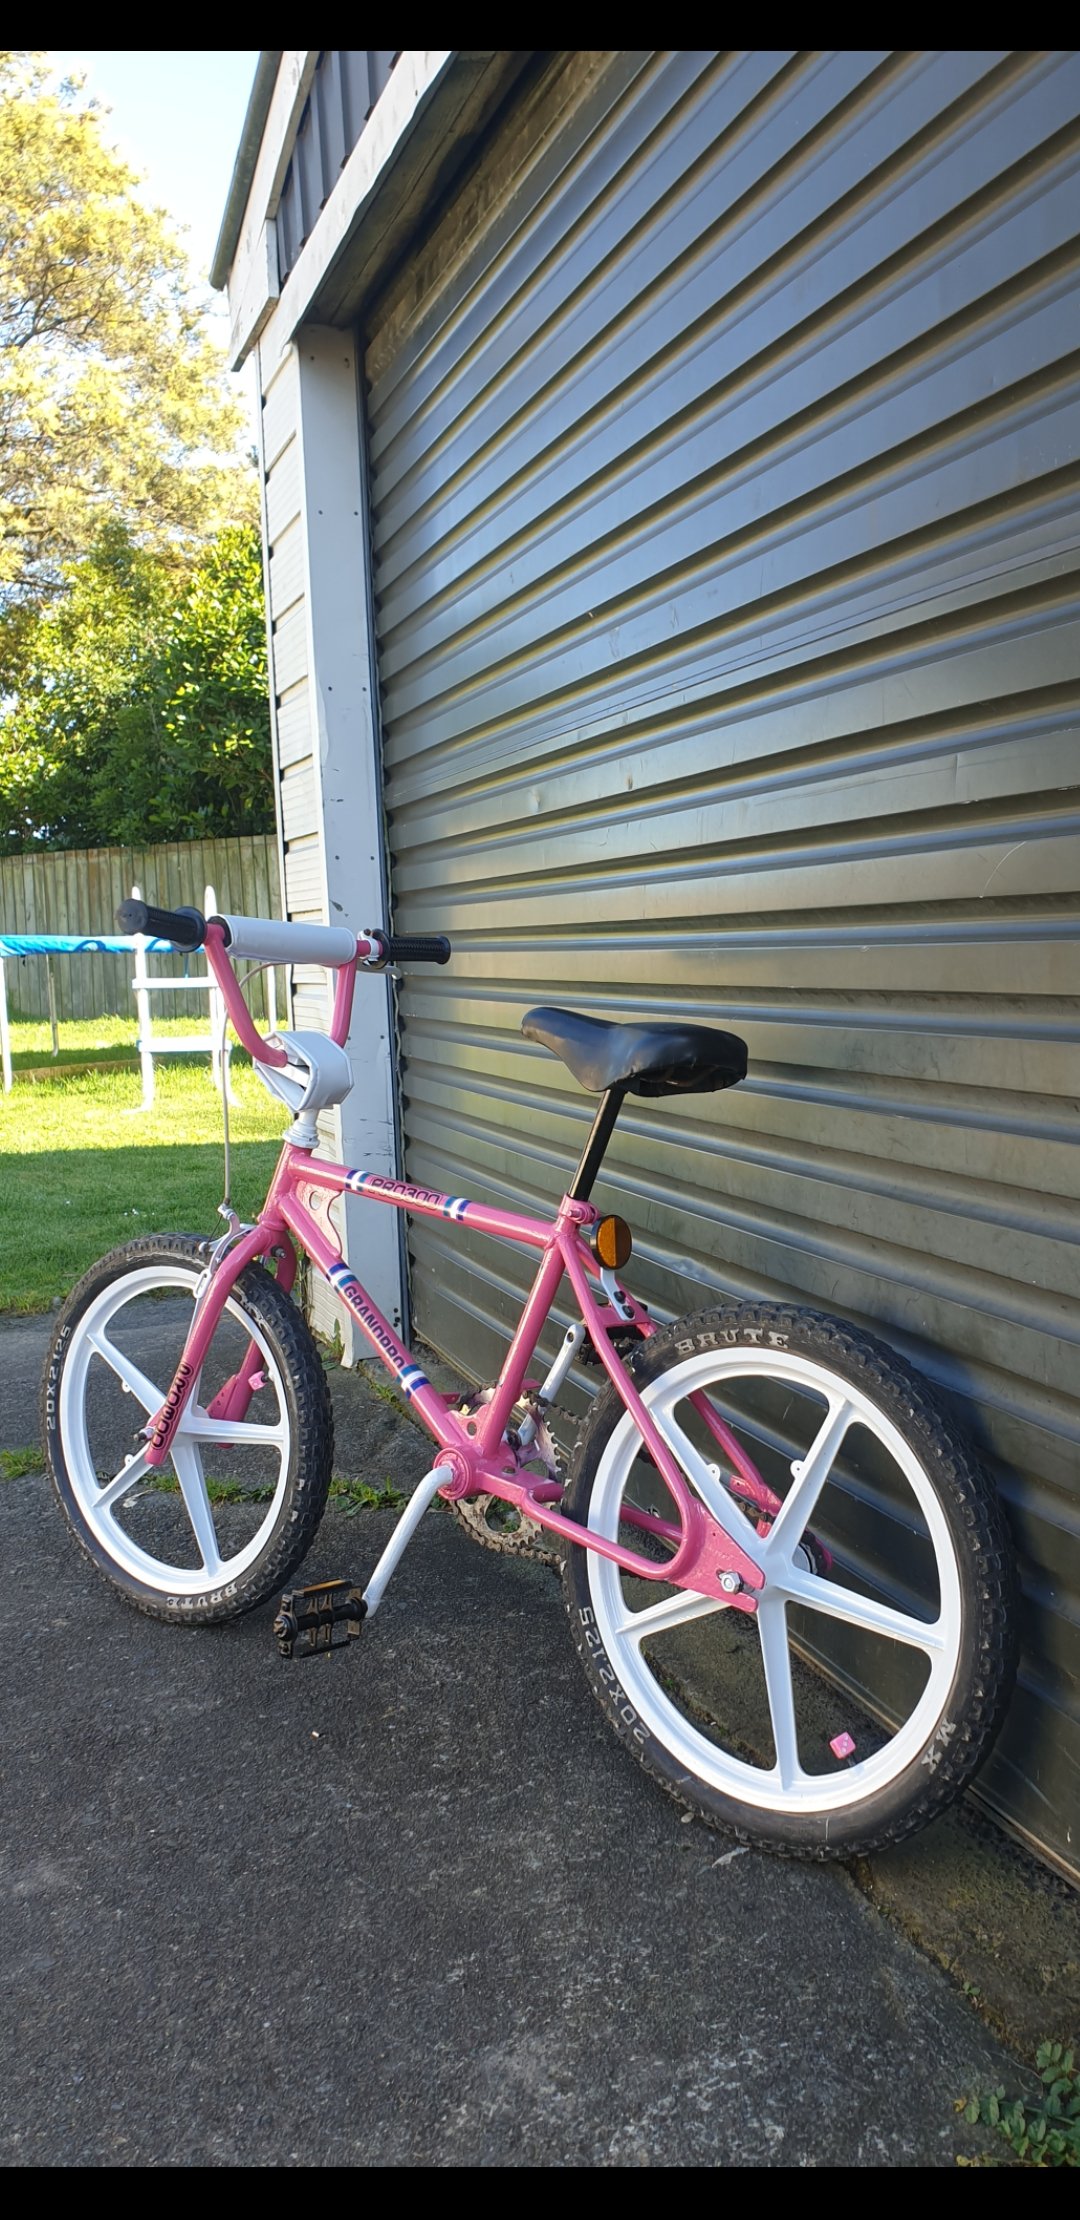
My flite pads finally r hea. Have the big pad for tube aswell but looks better asis. Just took for a good ride she rides really well prety happy. Got some white skyway pads on way for breaks then shes finished
2 points
-
2 points
-
A few updates on the ST90. I got the front and rear wheels relaced with different rims and new spokes, also put more practical tyres on it too. I also got some better forks which werent pitted and leaking oil. They also had the quick release lever too which was snapped on mine. Got some chrome front and rear guards too and a new seat from mBike.
2 points
-
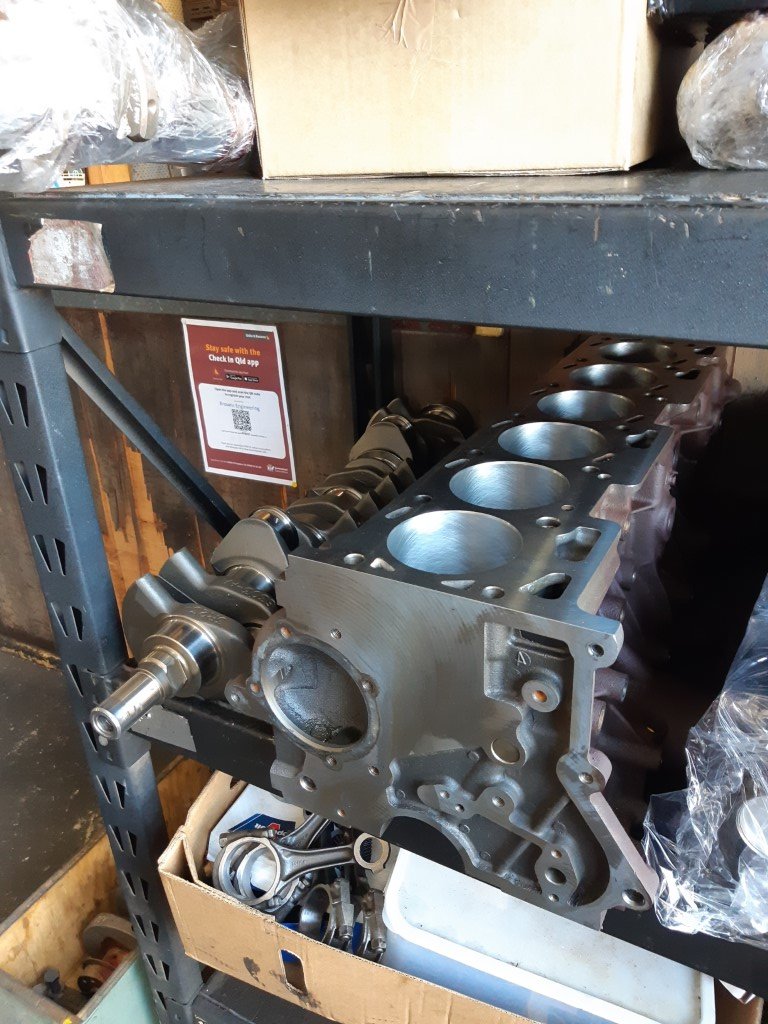
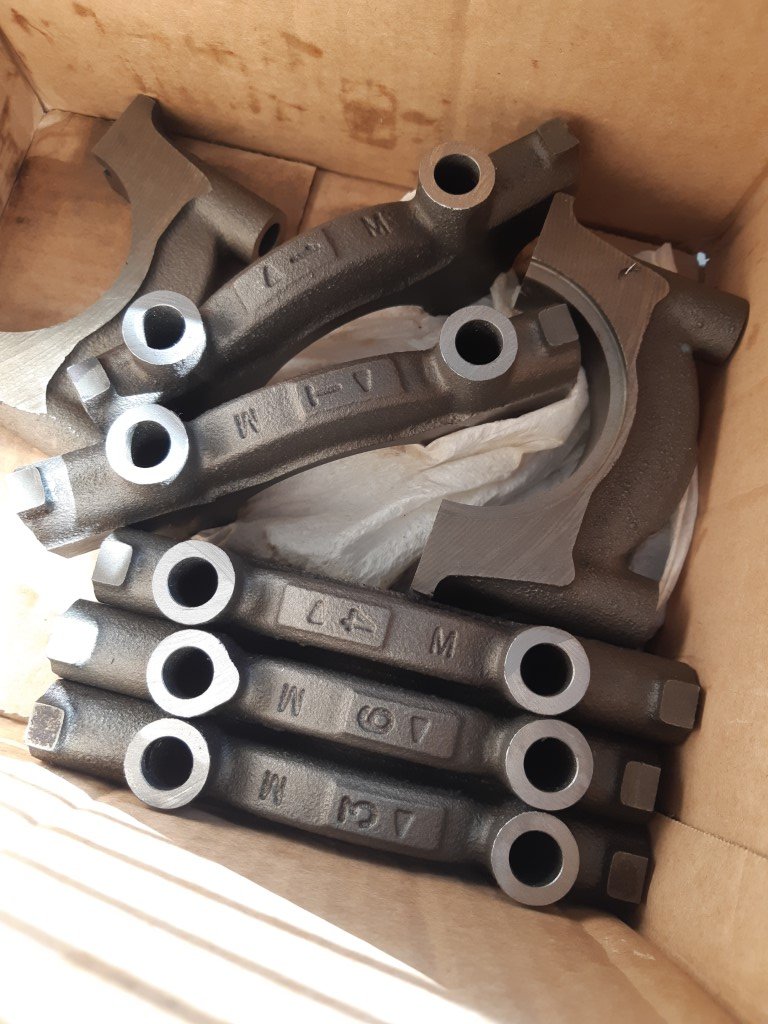
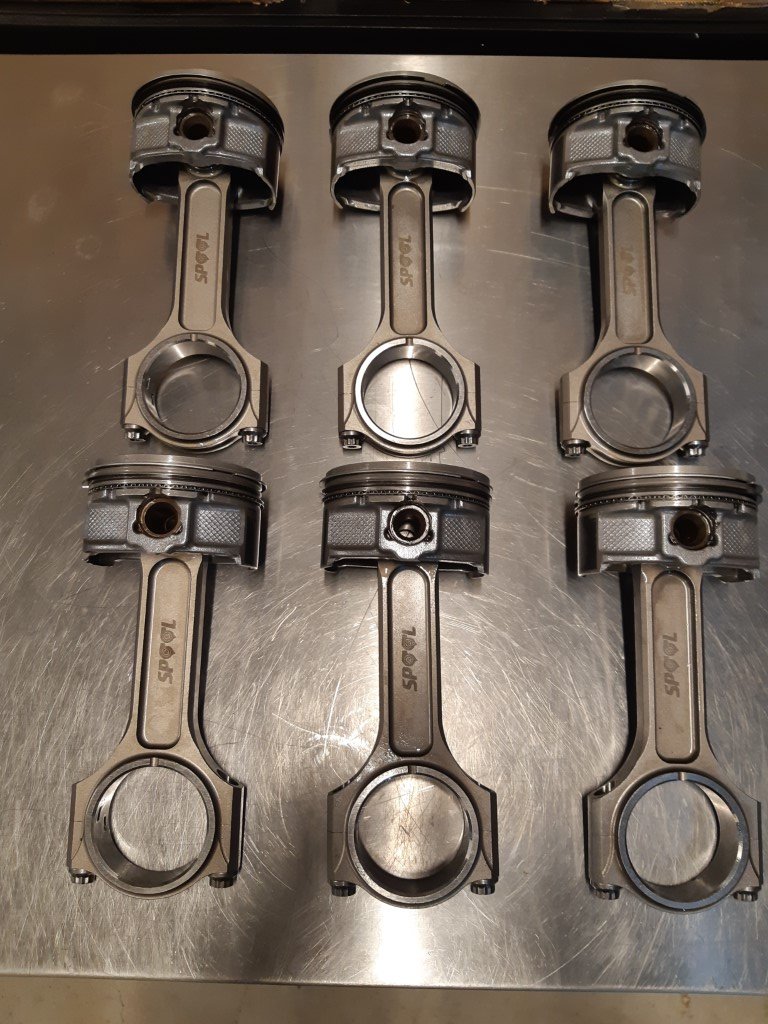
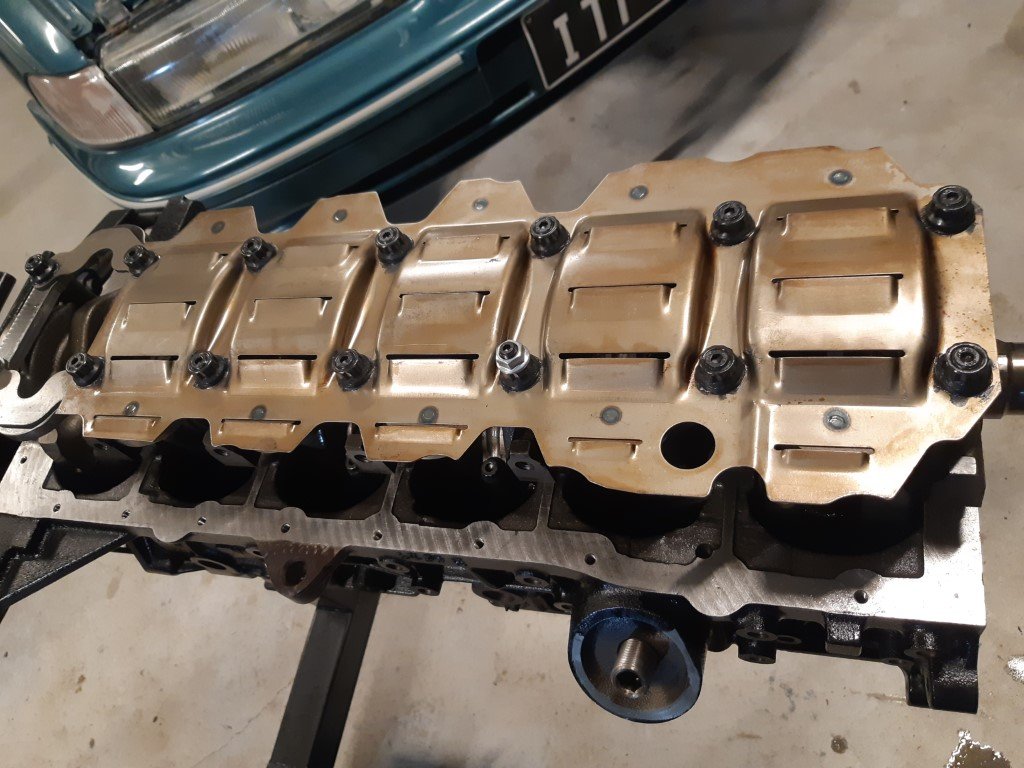
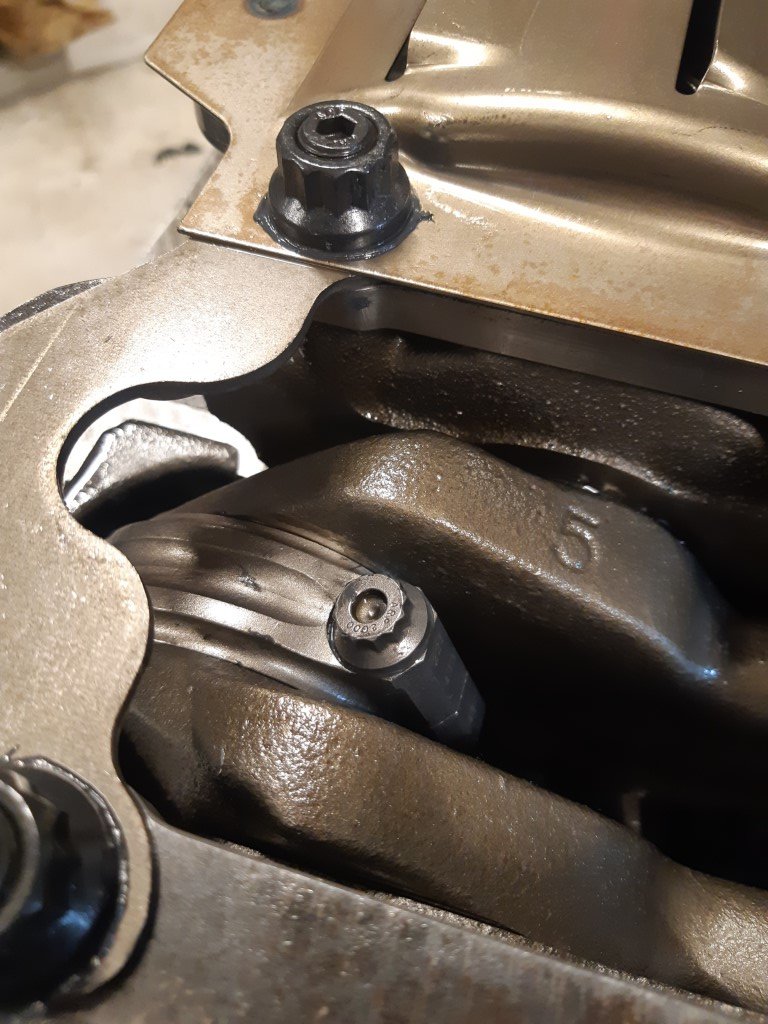
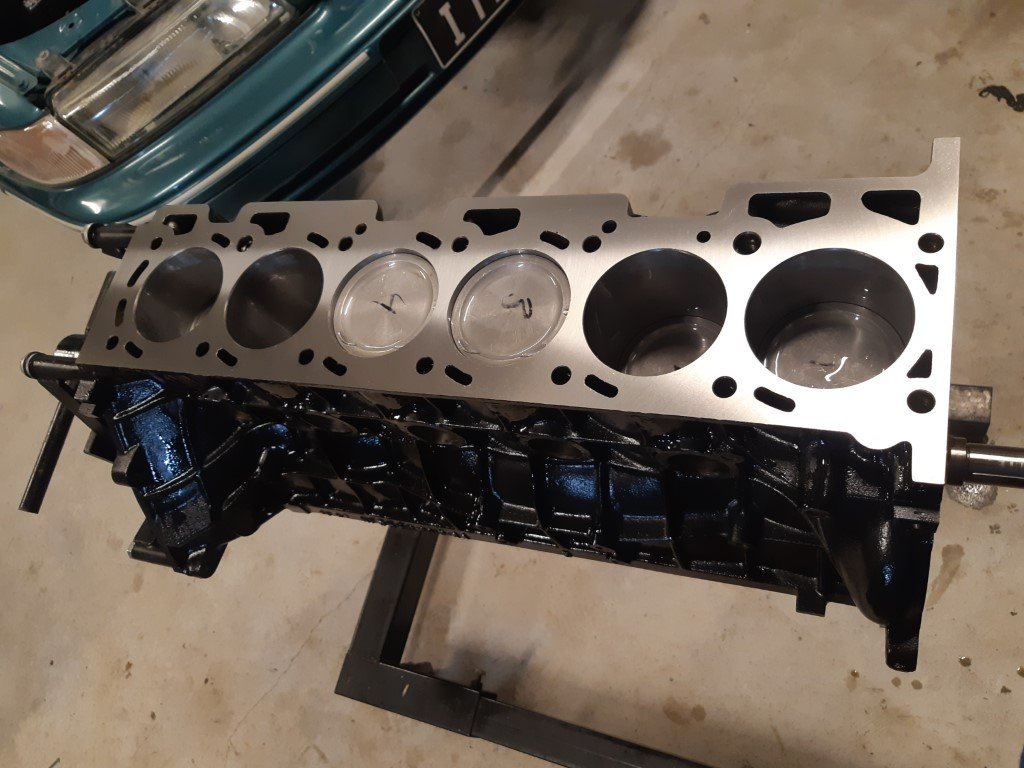
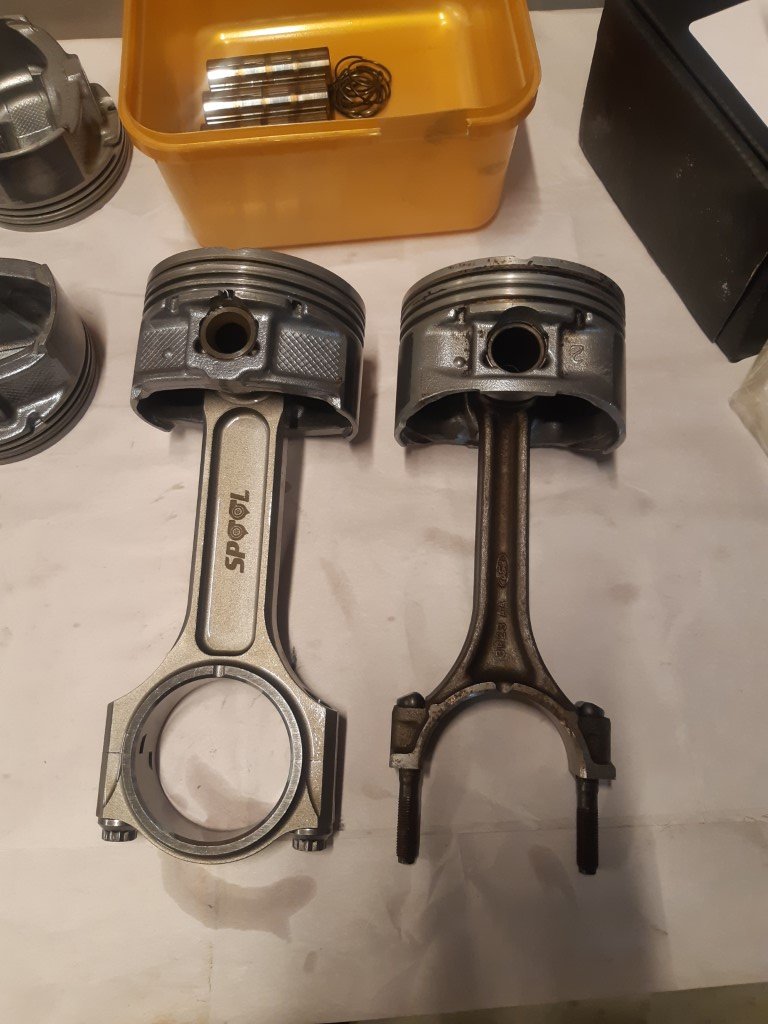
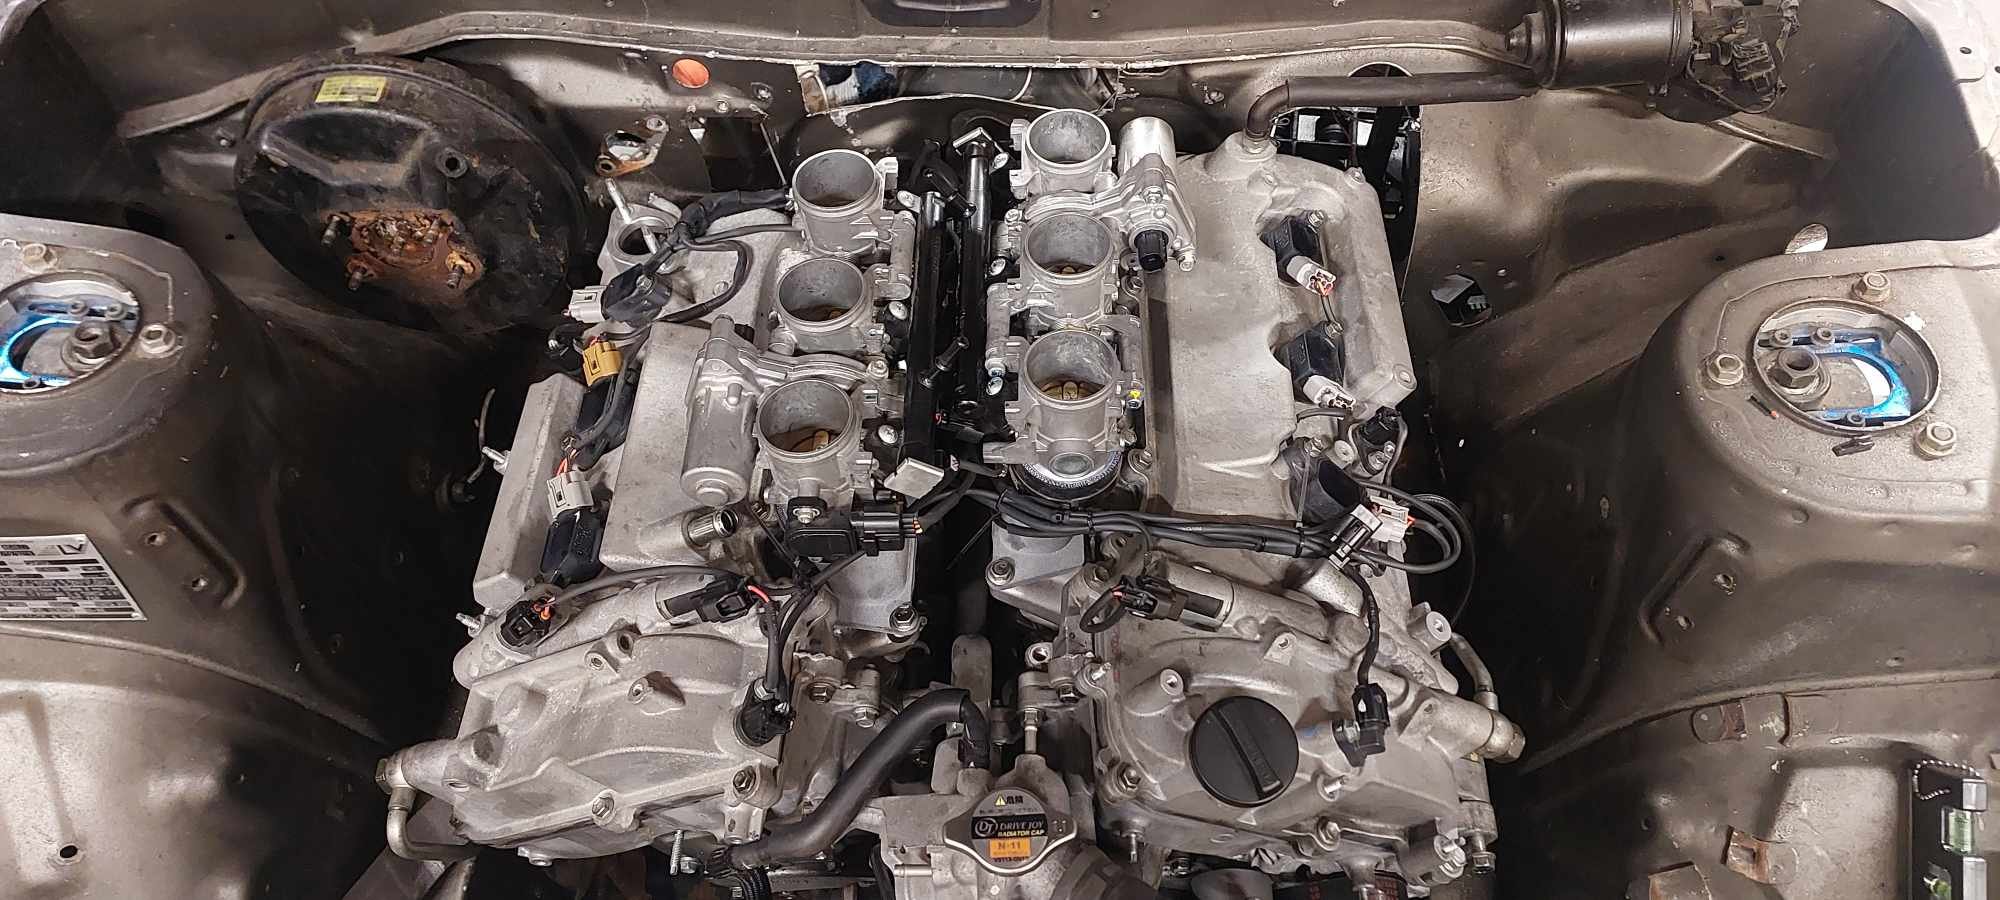
The motor in previous pic was bought from a wrecker and used for test fit. When I disassembled it, unfortunately, cyl 5 had rust in the bore. So I picked up a MK1 FG block with good bores but the water jackets were badly corroded. So finally found a good, well maintained motor from a vehicle that had a front end impact. A local Engineer cleaned the block, power honed & ball honed the cylinders retaining the standard bore size of 92.25mm, surfaced, an crank linished. And 10mm taken off the main caps to fit the Ellis Engines girdle. Youtube is a treasure trove of knowledge for building barras which is why I have opted to do the assembly myself. I now understand why engine builders charge what they do. It takes time! And care! So much process involved and I got caught second guessing myself as to whether or not my second compression ring was facing the right way up hahaha. So out they all came and, yes. I had done it properly. The engine has not been torque plate honed, tunnel bored in the main journals or grout filled. All are highly recommended for engines making big power. The main component I wanted reassurance with was the rods. These are Spool drag pro I Beam. Factory rods have been pushed by some tuners to 800hp but from what I understand, this is only possible due to conservative tuning. I want timing and boost as early as possible to make the power hit very hard. Strong rods will hopefully help me achieve that. Cheers
2 points
-
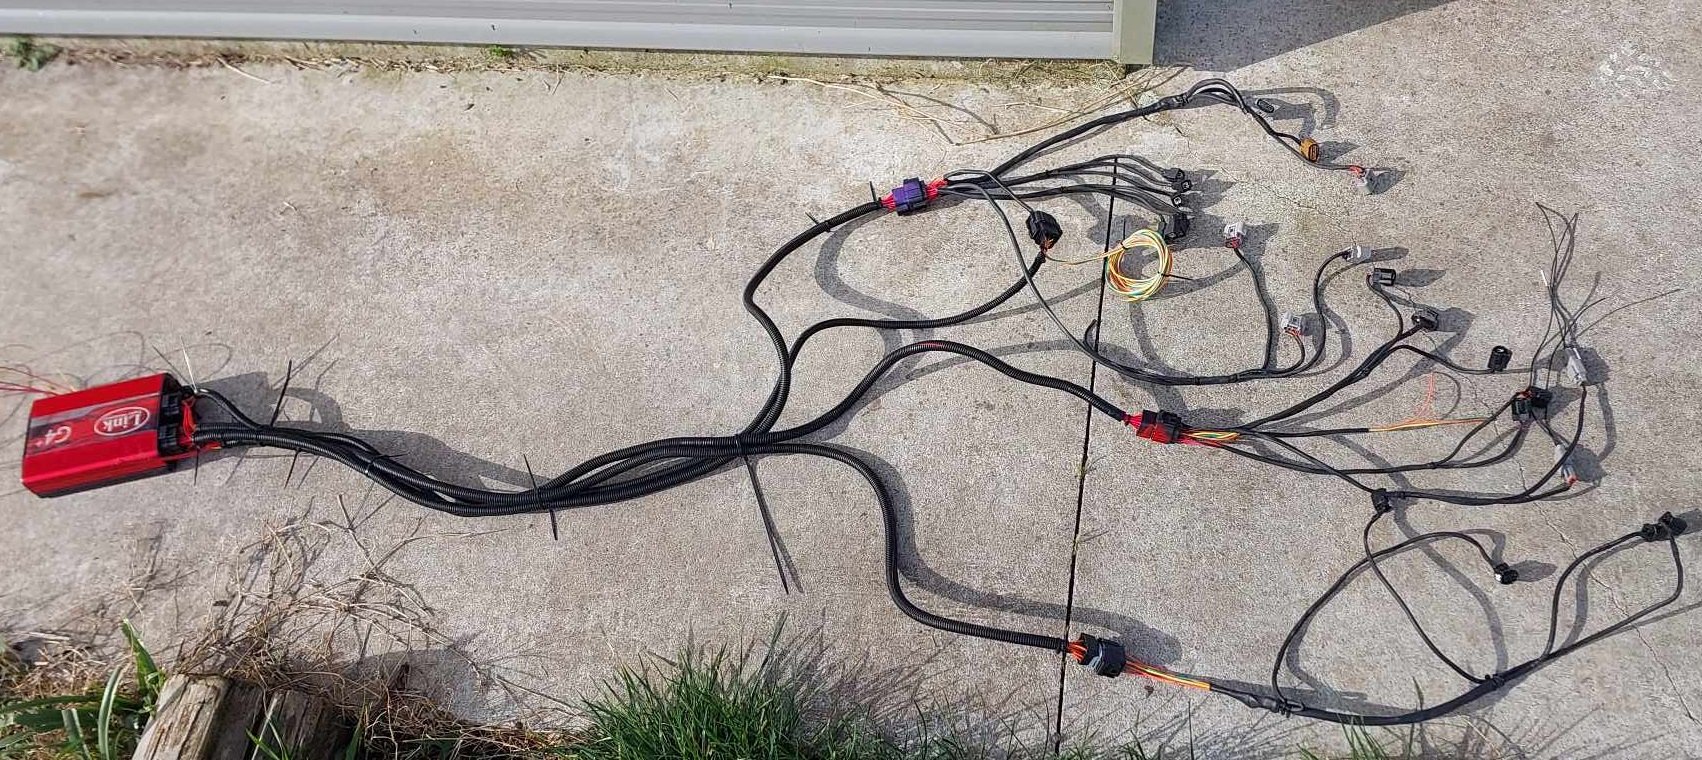
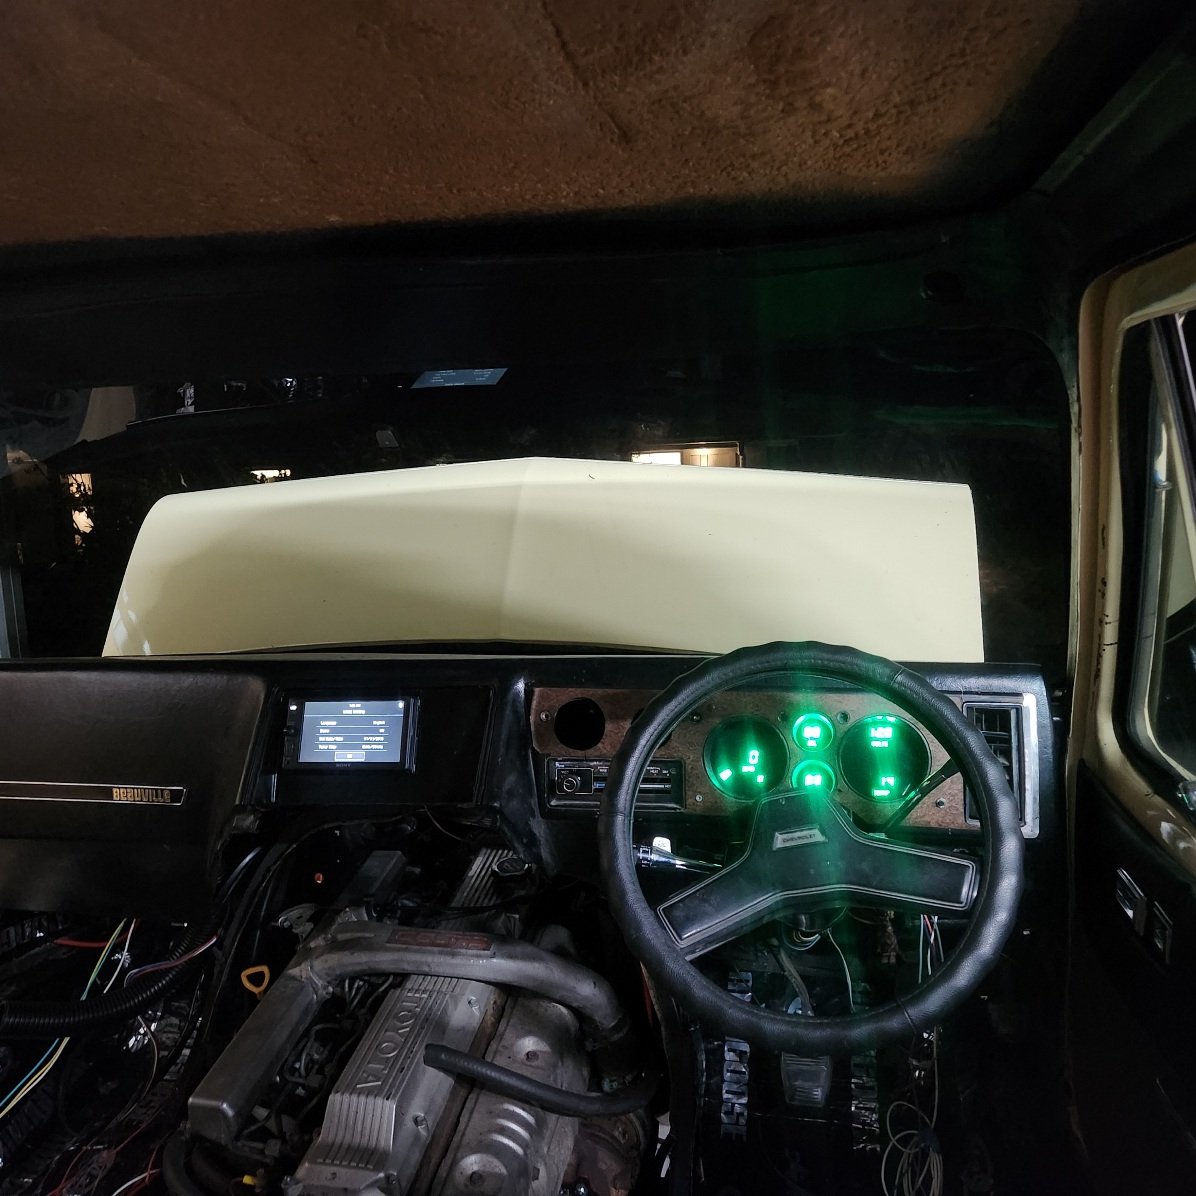
My loom is mostly finished. Will give it a few tweaks to make it look tidier but happy with how its turned out. I still need to plug it all in and verify that everything works / wired to the correct place / etc. Which takes some time. I've got two more plugs to do, that tie into the body loom and my fusebox arrangement. So I need to try remember how all of that works. I've given up on finding e-throttle plugs, so I just slotted some terminals onto the pins inside. Filled up the plugs with liquid plastic from the 3d print pen. Then heat shrink over the top, and silicone in the end. Feels nice and secure, hopefully works good. Will probably do the same with the 2nd TPS that I cant find a plug for.
2 points
-
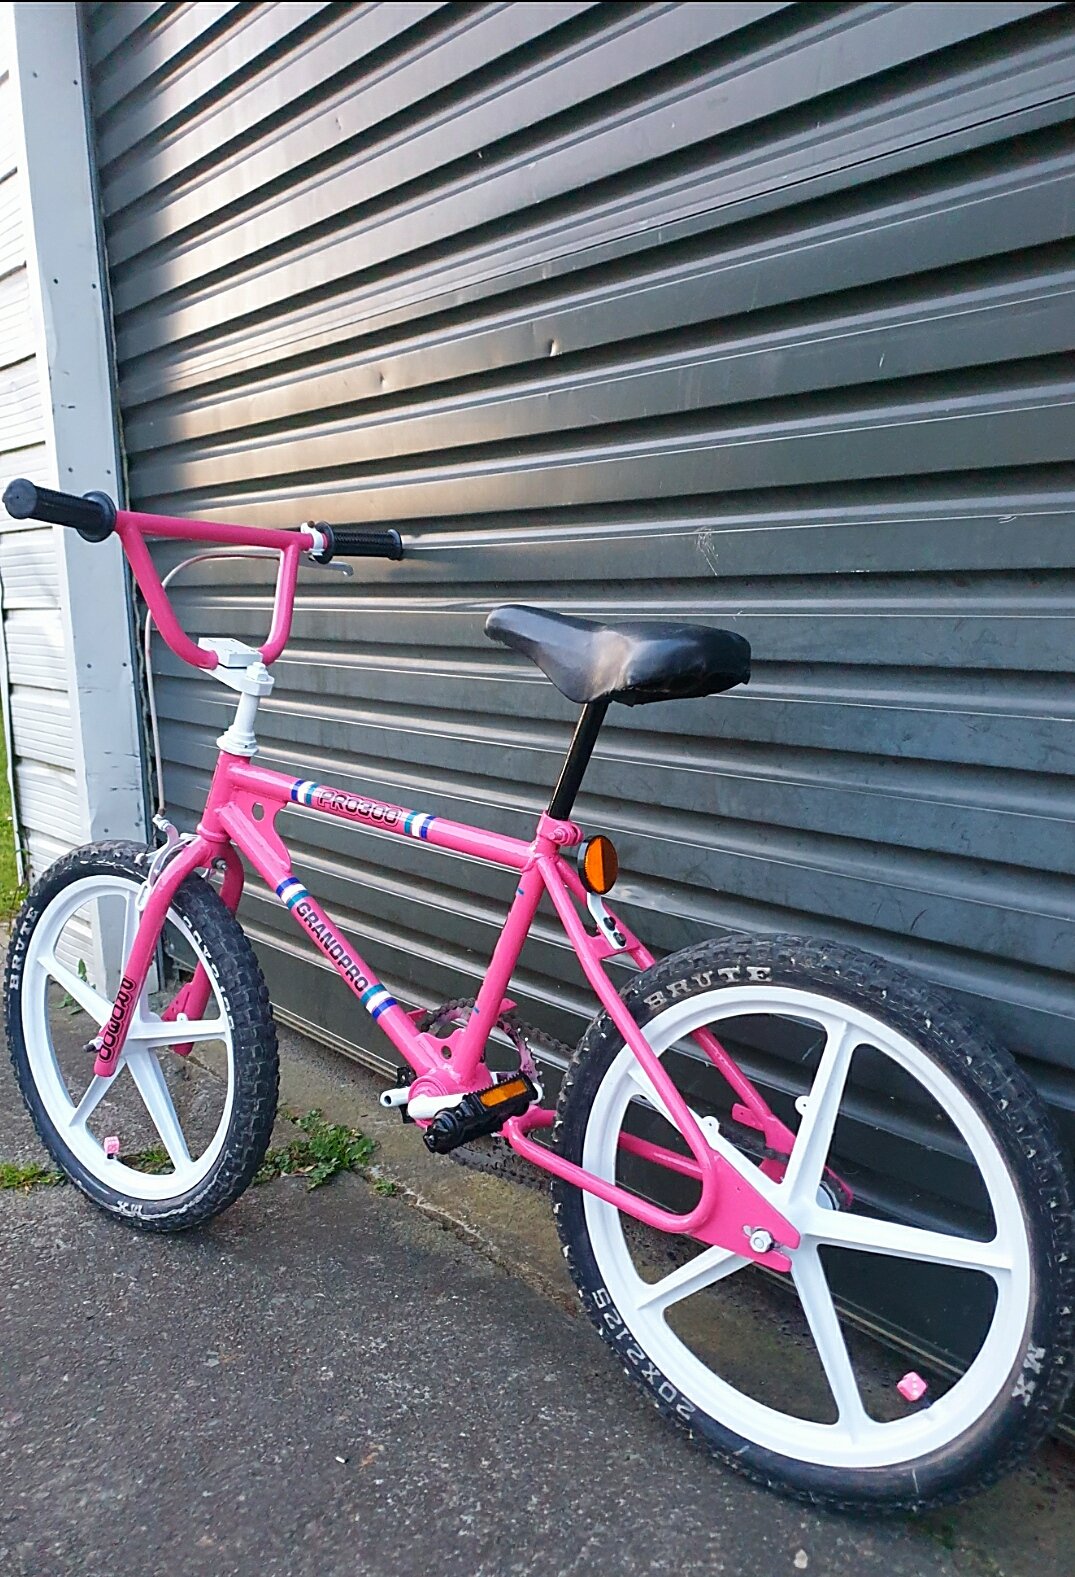
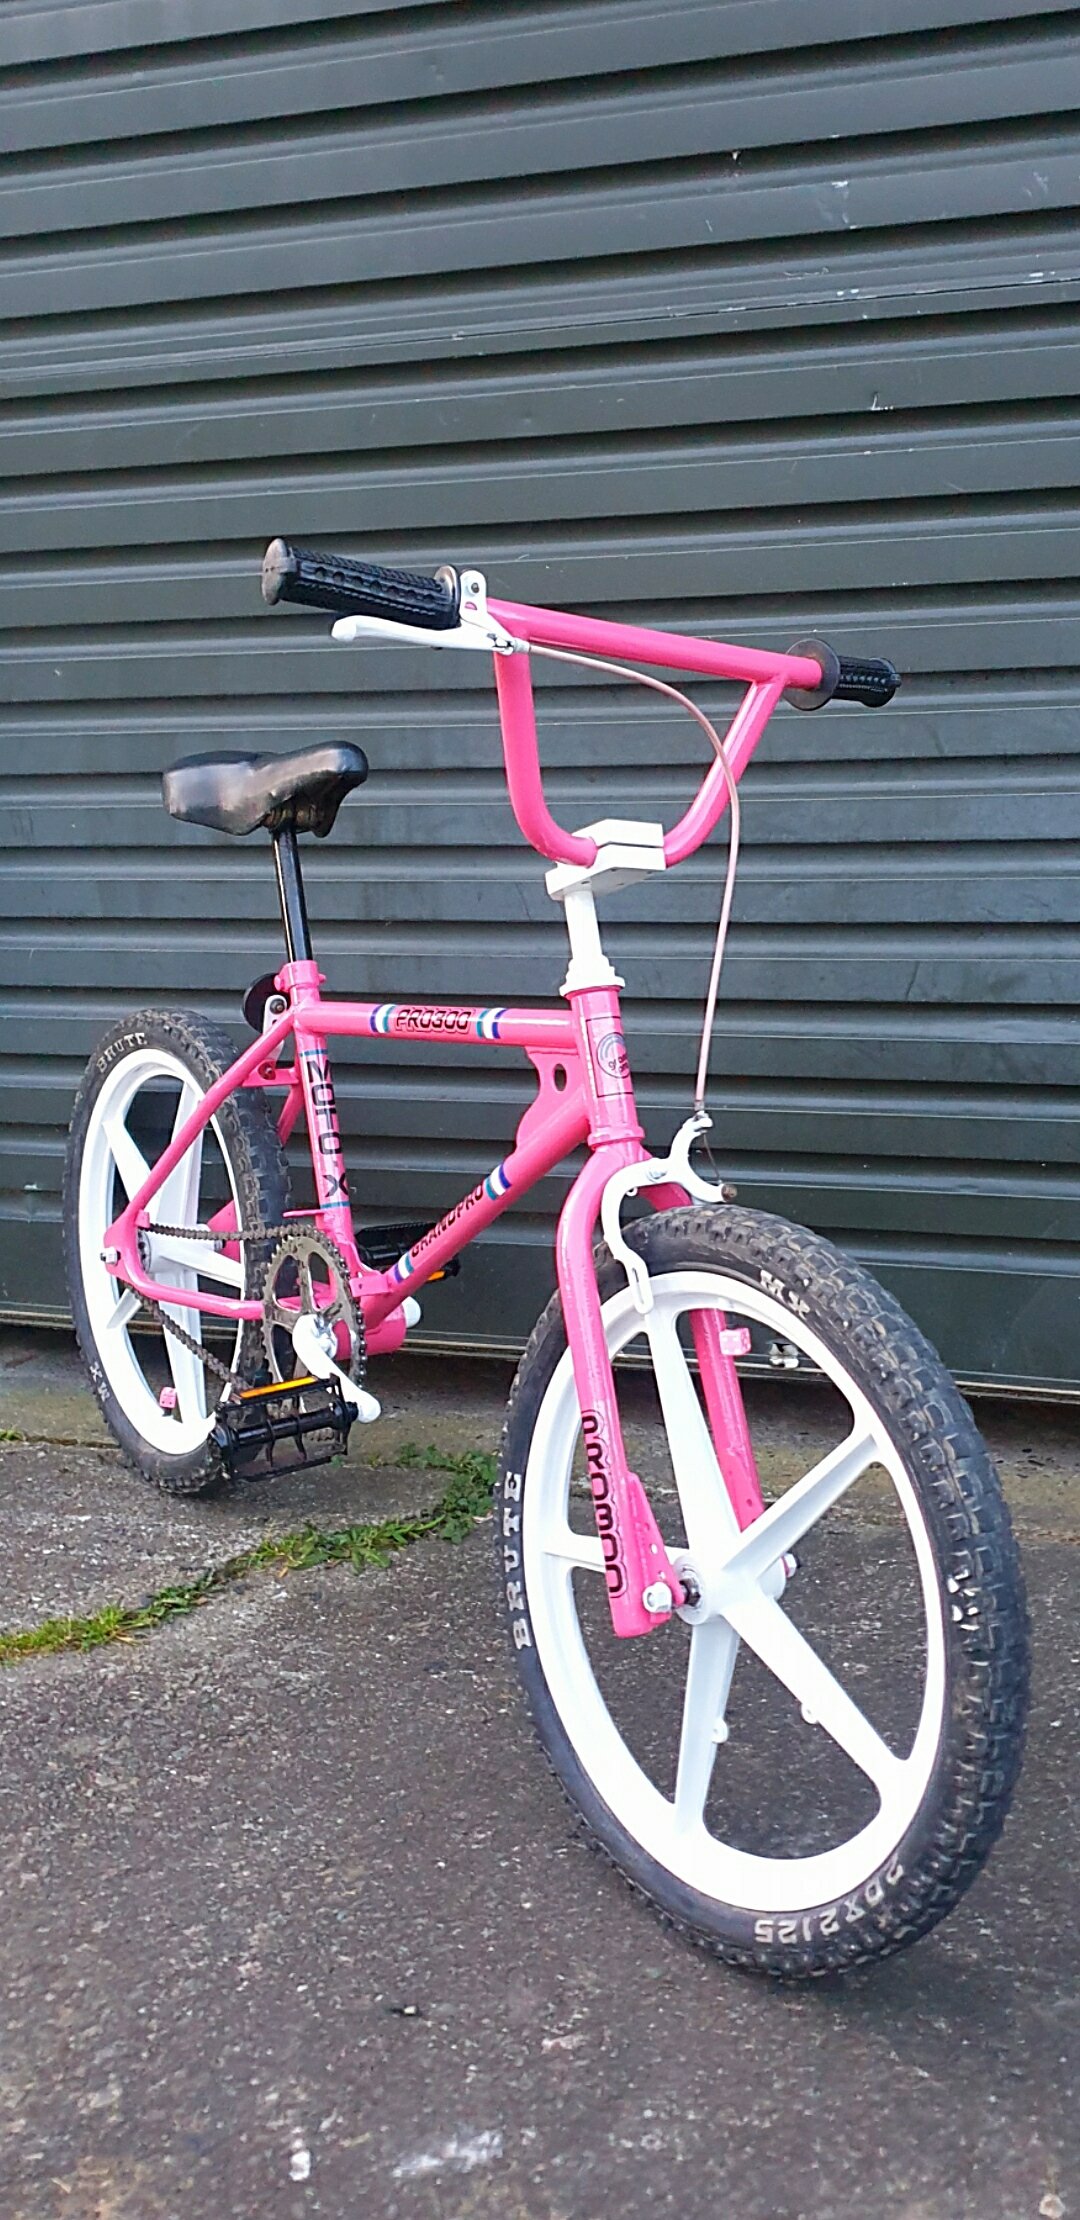
Full original spec stickers got made lookn prety fresh still need to change seat to white plastic race seat pads and maby some pink dice on break cable end
2 points
-
I managed to cut some fancy angles on the band saw without losing any fingers… Tacked the ‘fancy angle’ bits in place…. And plated the top. I often use damp rags to keep the heat under control, harking back to my days of welding sheet metal with gas. Have to say making all these little tack welds and grinding afterwards doesn’t sit well with me (I like big, grunty welds) but it does keep the distortion under control, it’s just not very elegant. Maybe I need a Tig? Tacked more metal on the sides… Gave it a tickle with the gas….. And started stitching it all up. With everything welded up and still nice and straight it’s time to cut the unused steel out. Before… After…… I left the ribs in there for extra strength, looks a bit clunky but only you guys will see it. Lots of grinding on the floor, on my knees. (No comments about Mecca being in the other bloody direction please!). Out with the old standby - CRC rust converter….. A quick test fit before paint… Regrettably, and much to Rigamortice’s disgust I stooped to using poo for the first time in this build. Just a little bit of Newtech to smooth things out (I didn’t want to grind the welds down too far). Some primer and two coats of ‘insipid green’…….. And it still fits….(phew)……!
2 points
-
Bit more progress last few days, I got the dash back together, the instrument panel cover bit is pretty fucked, I might try and make a new one or try find one on eBay. But the new cluster work good and mounted ok I made up the front shock mounts, shocks are some ones I had, Google says Hilux, Torana and a few others so will see how they go for dampening. I think I'll use limiting straps aswell for top out, it'll be a heap of weight on the shock shaft otherwise I also farted around with springs. I got a set of cruiser ones but they are way too big so I chucked in some g30 ones I had, I know they ride good and have lifted it another couple of inches which it needed. Im stoked as fuck on how it looks, big feet and stock body. I live in a town infested with late model Japanese 4wd utes covered in every accessory know to man, this brick will stand out.
2 points
-
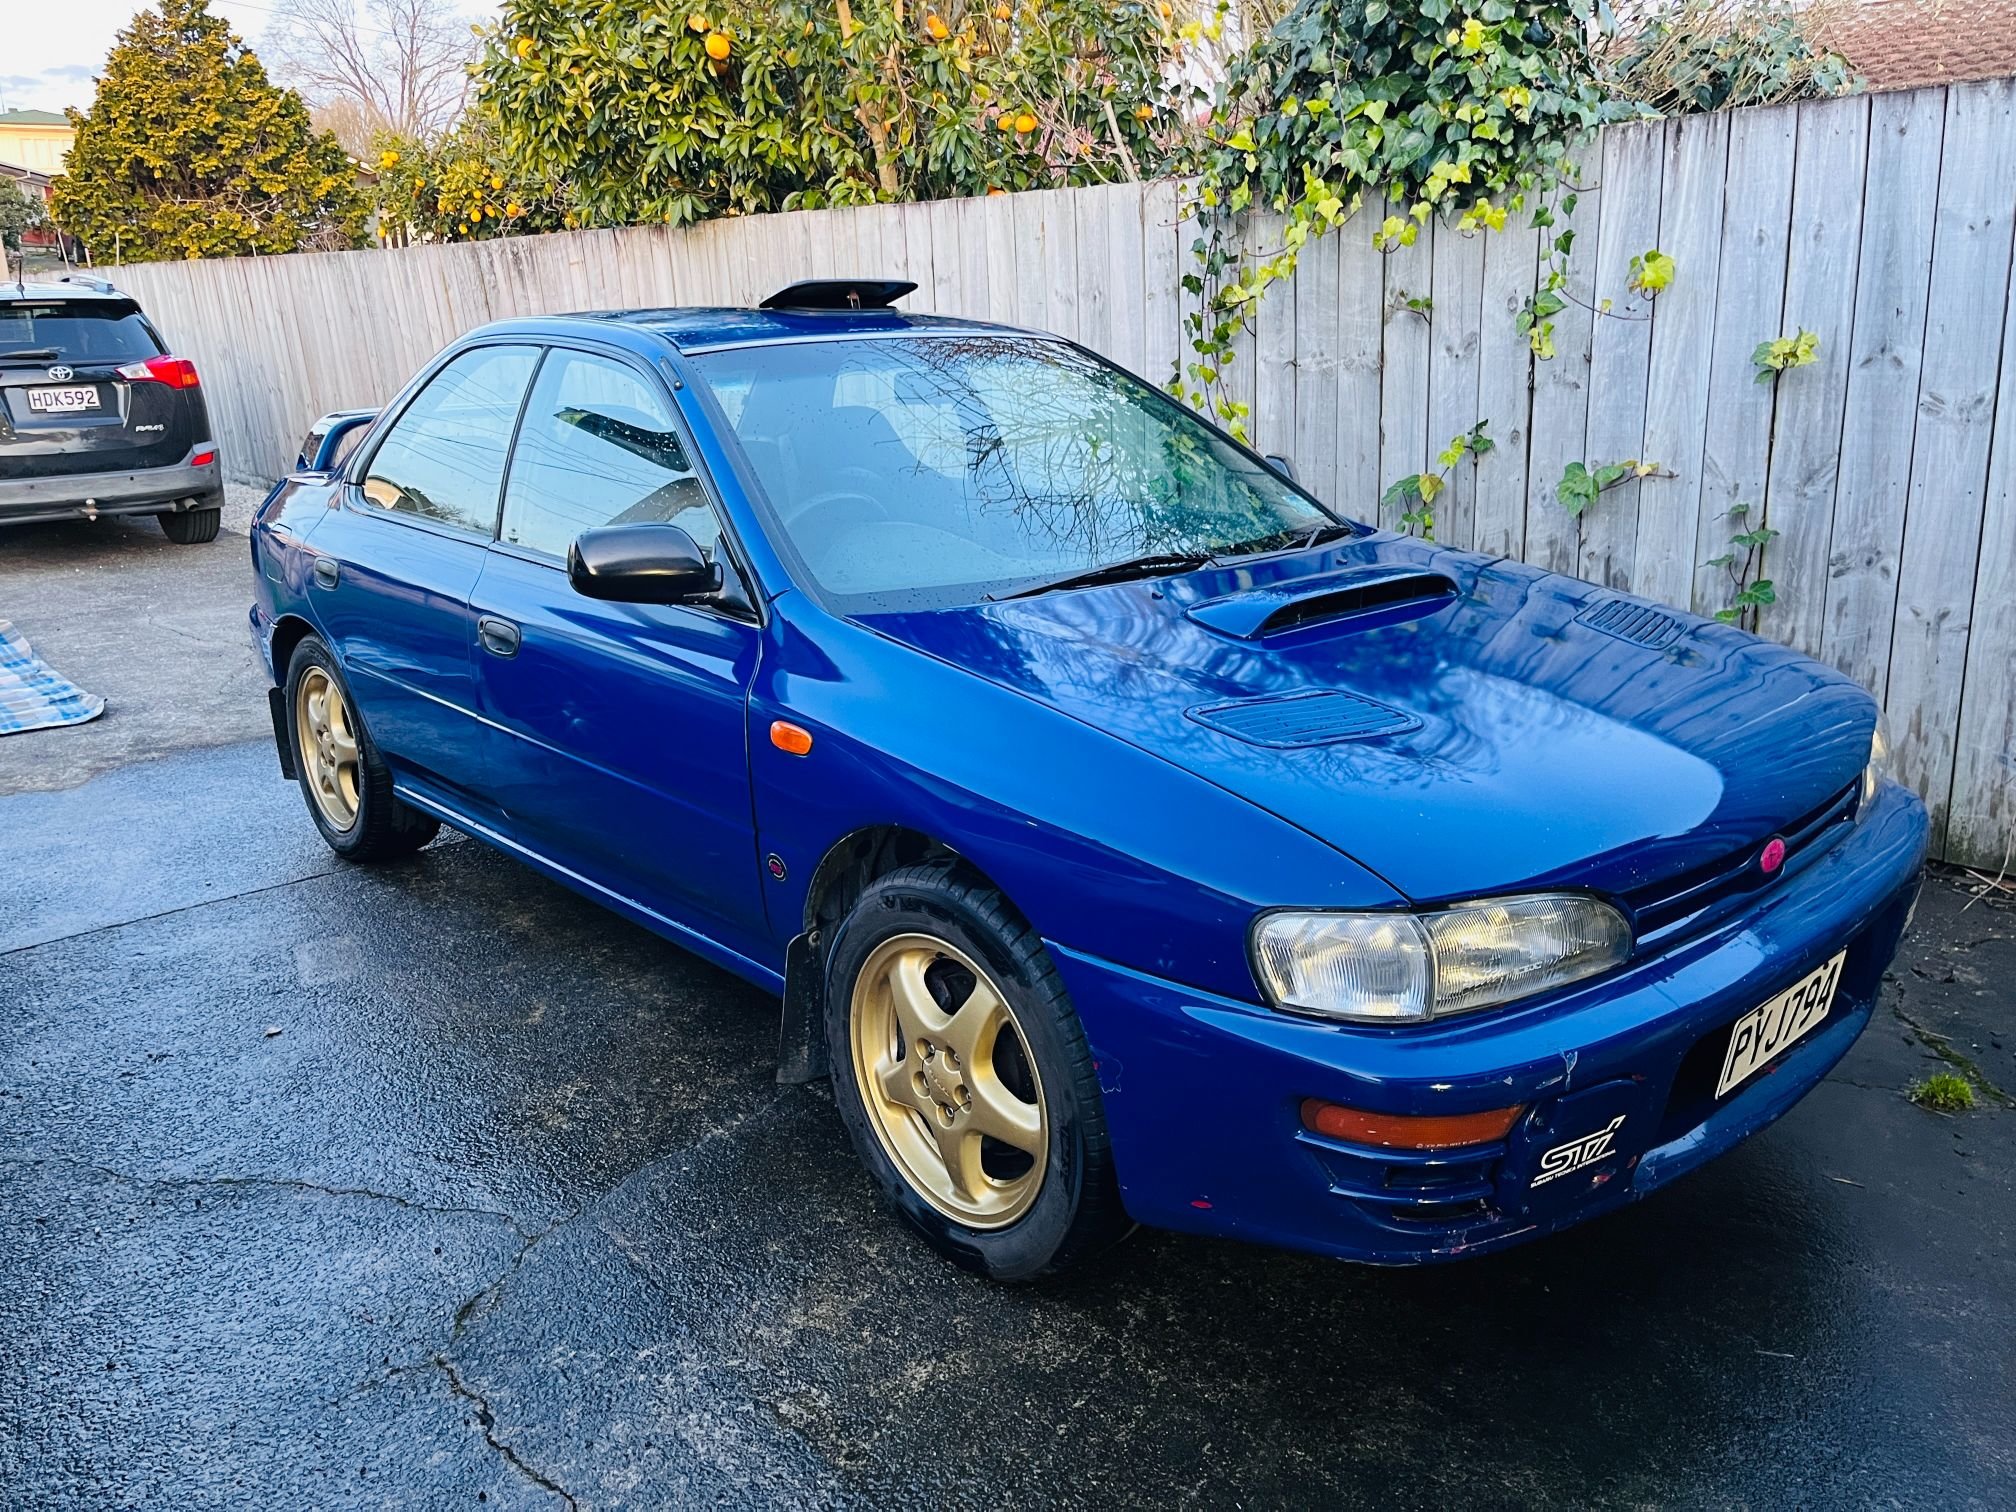
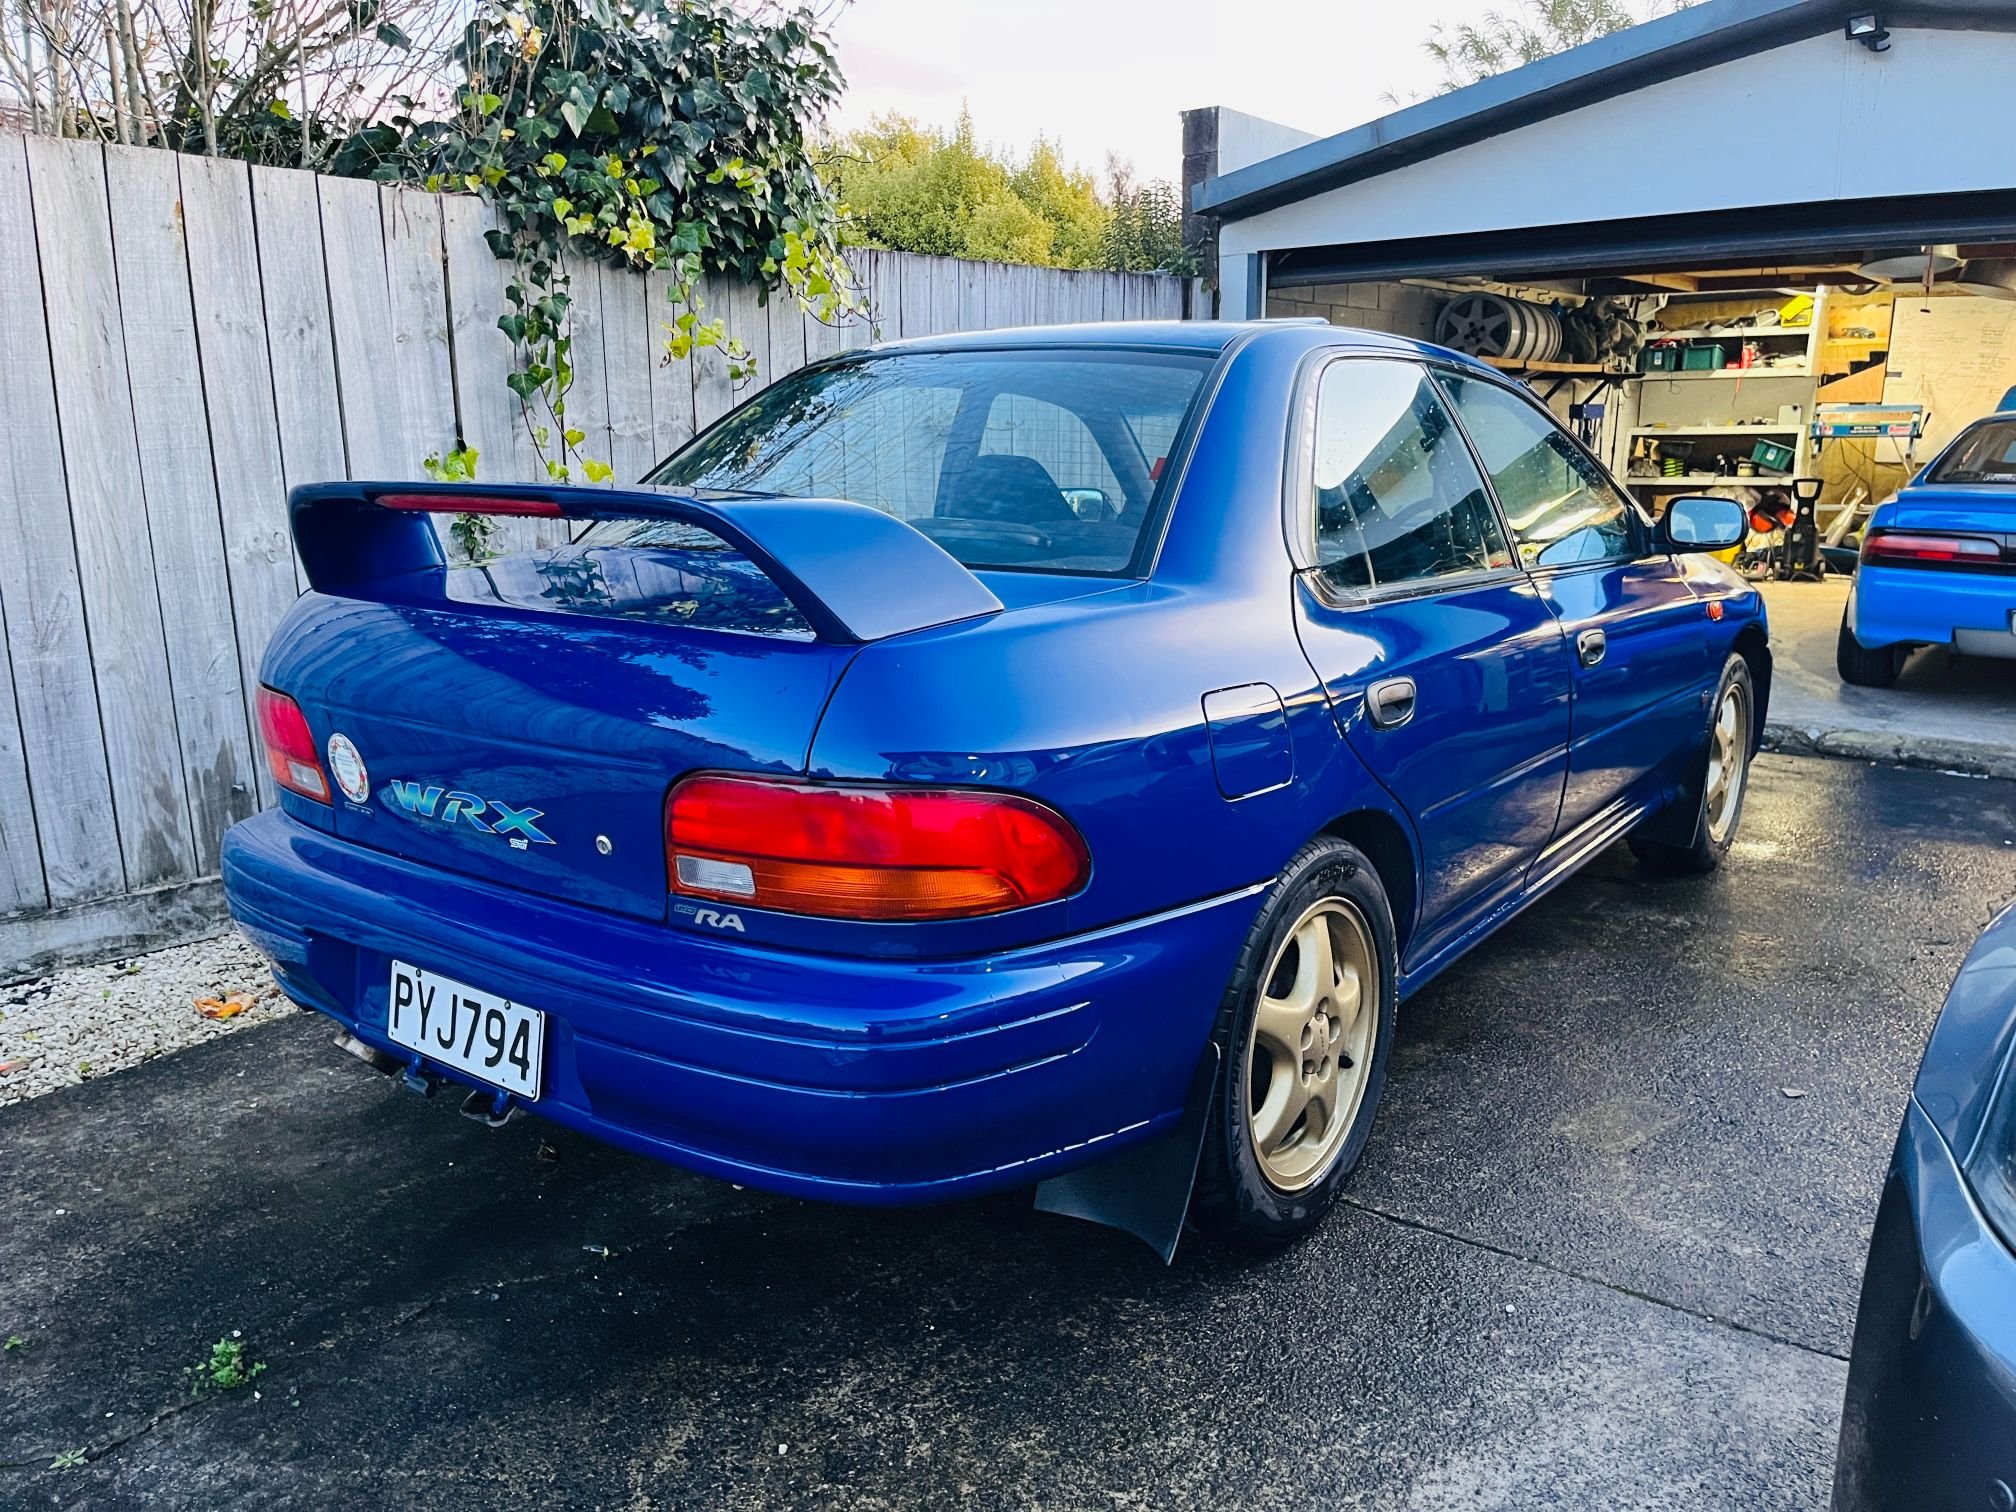
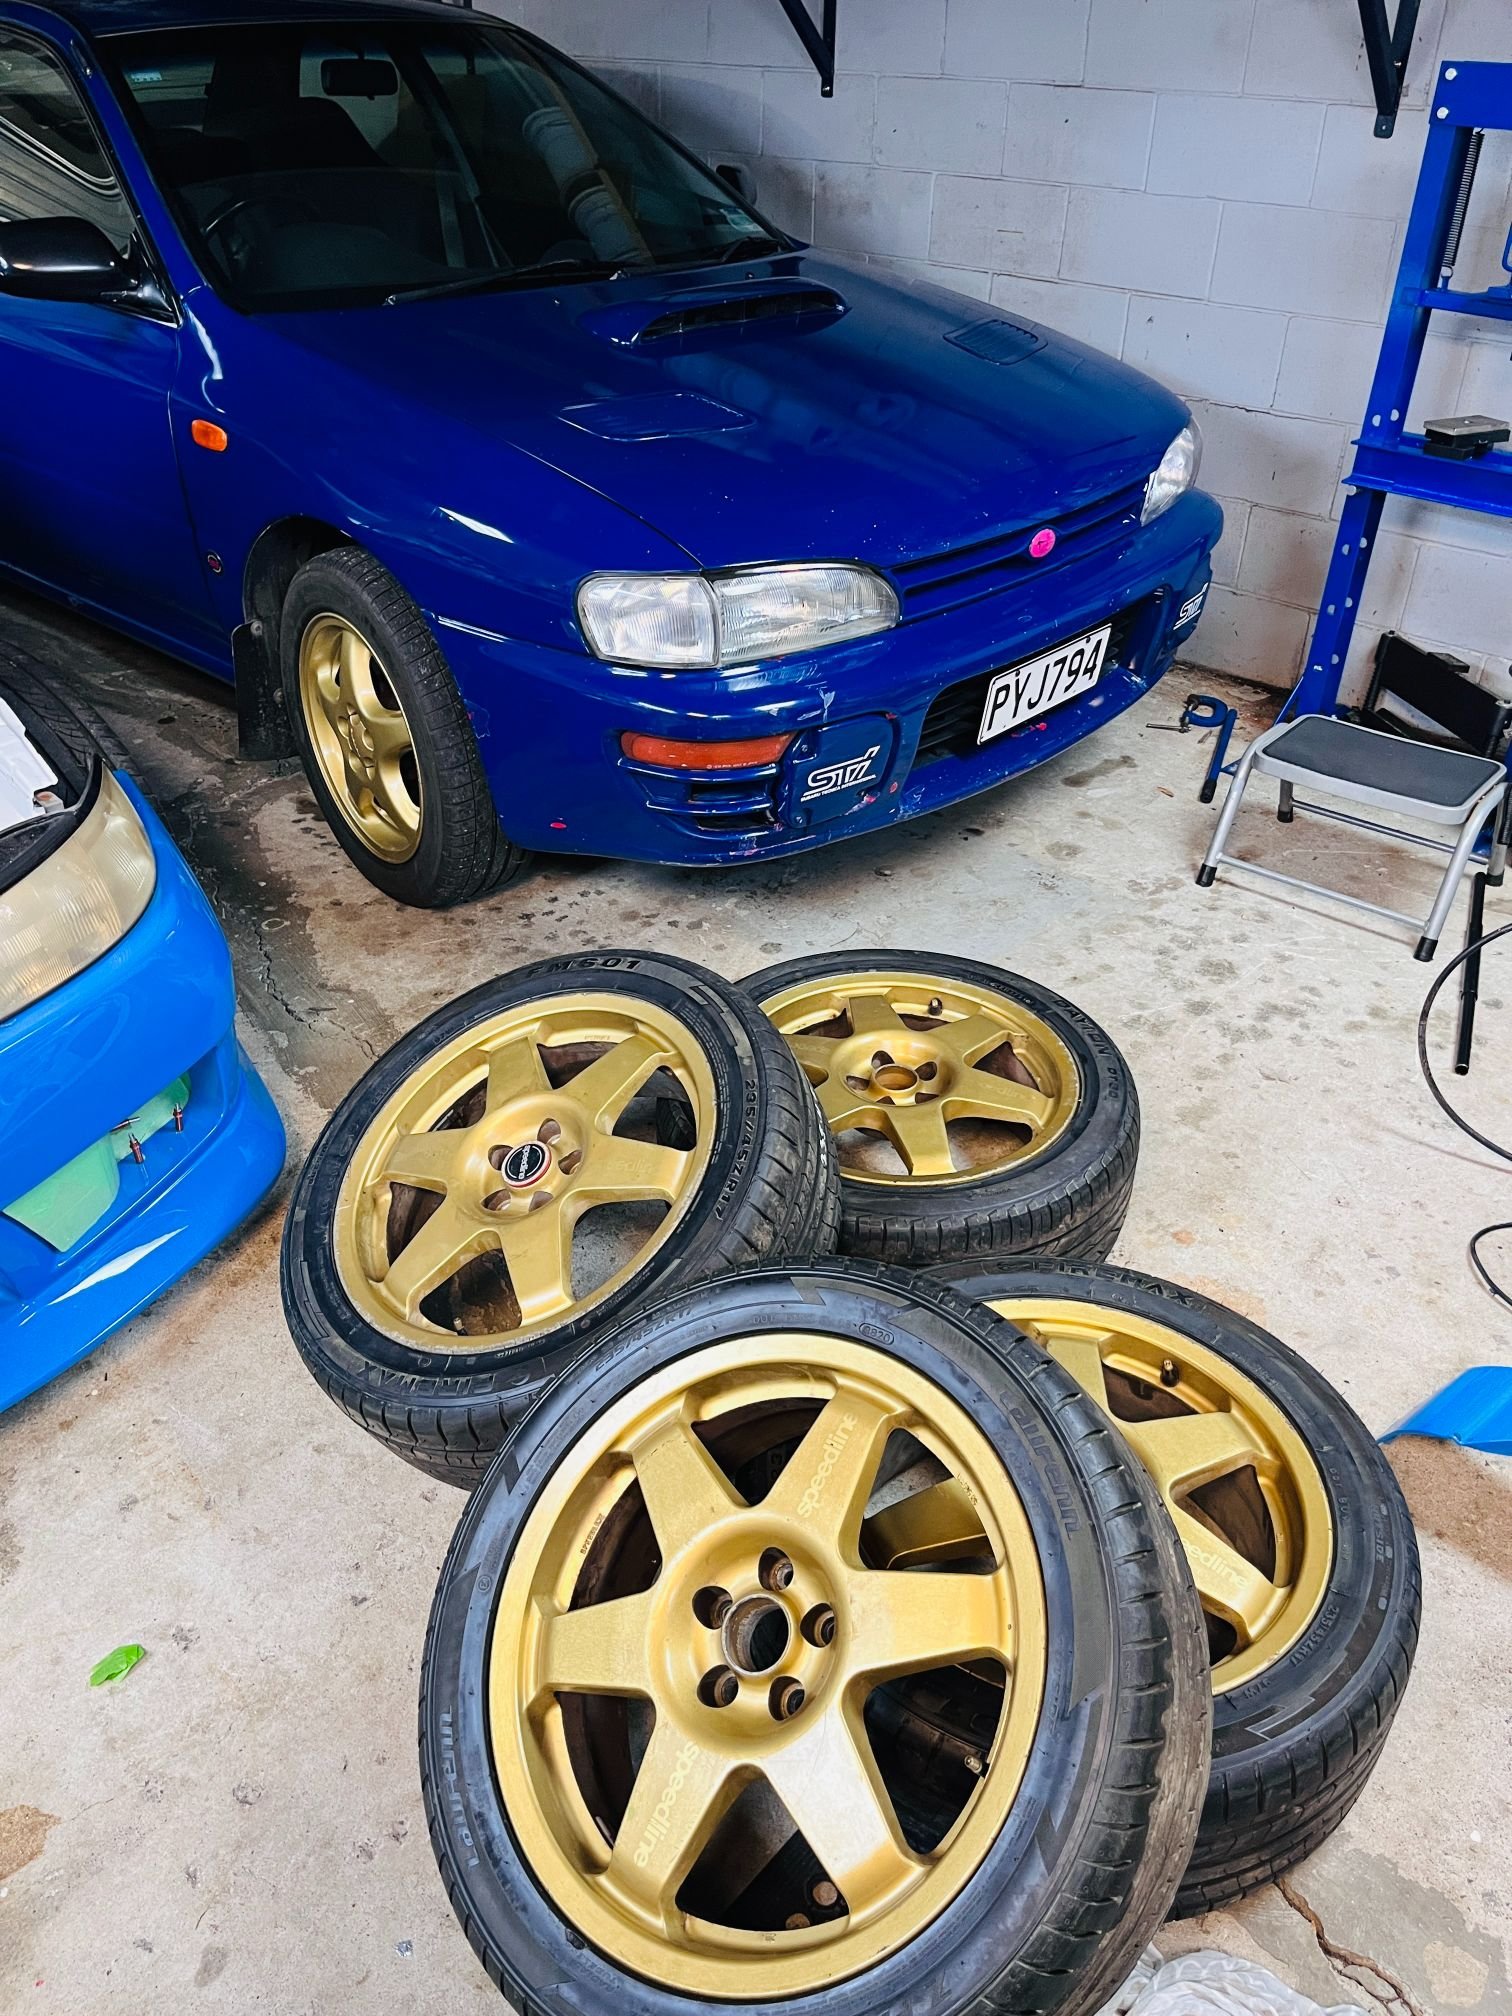
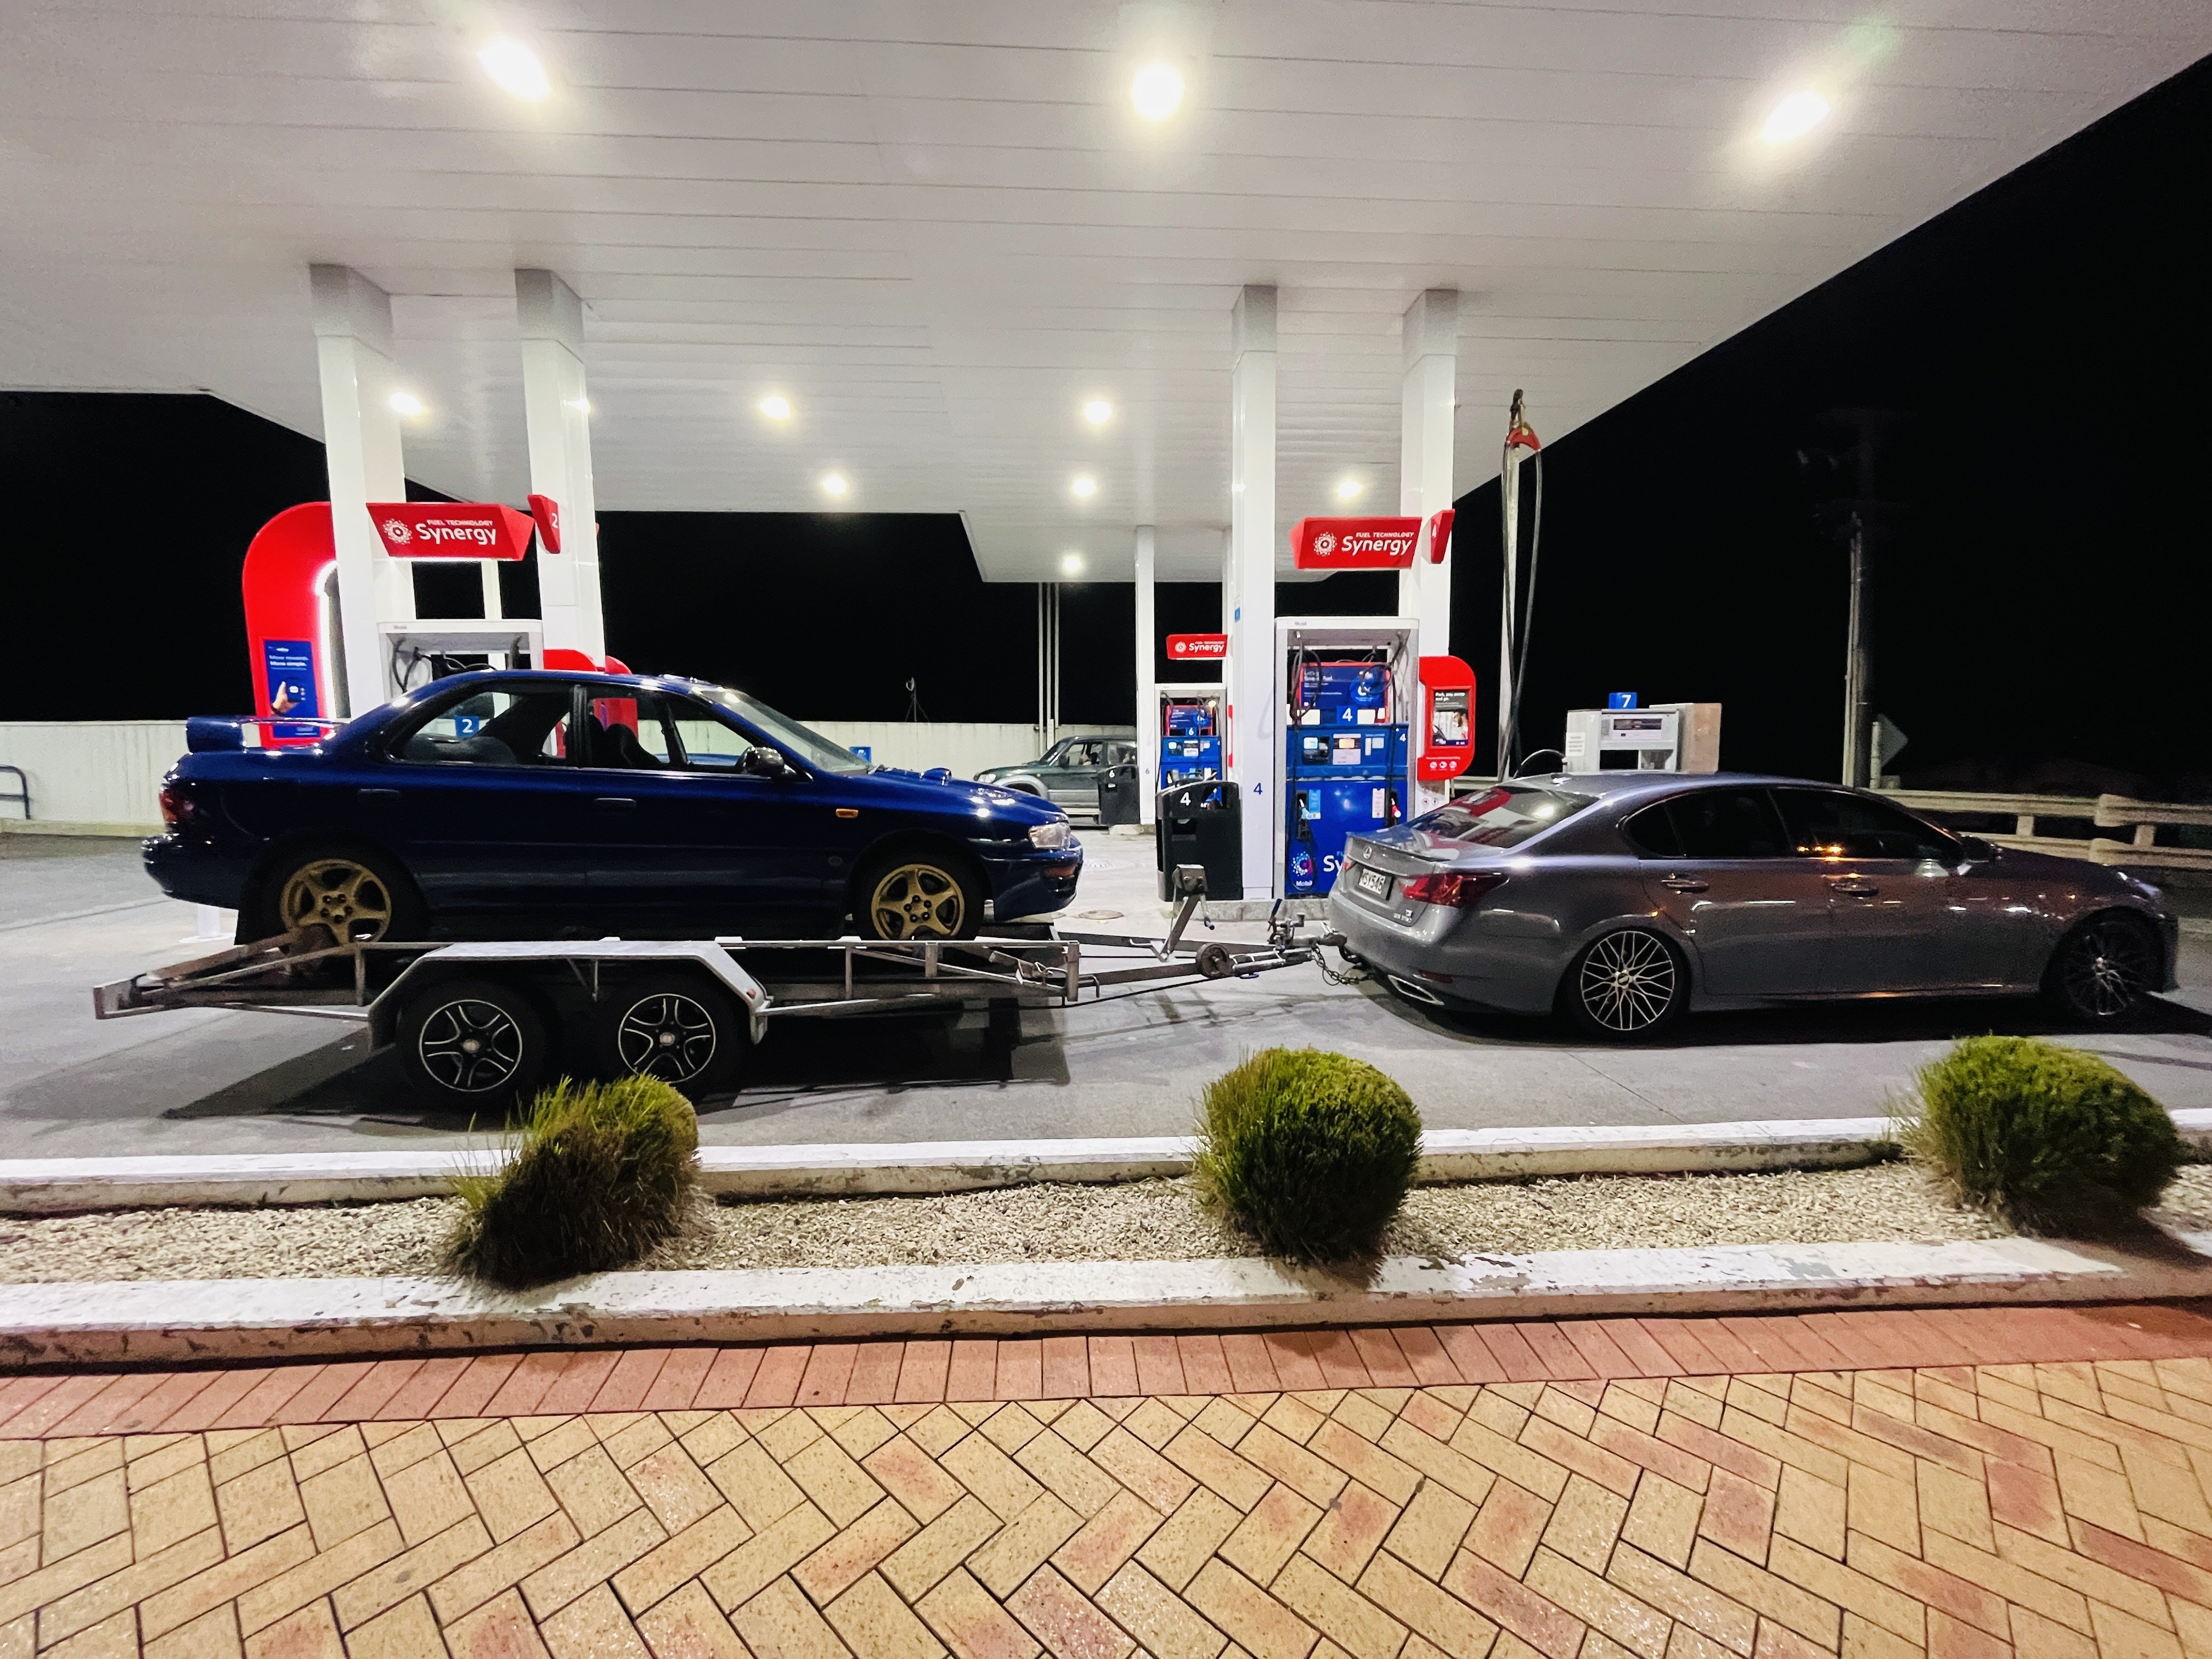
So wife and I have been looking for a sunday cruiser for the family for a while now. Won't be a forever car like the Lexus & Levin, but should be enjoyable to own & do some basic Resto stuff for a few years. I've always loved Subaru's based on their rallying pedigree, having spent my teenage years drawing Subaru rally cars and building Subaru models. My family wasn't into motorsport/cars back then so I didn't ever get much exposure to them. Found this 1996 WRX STI Version II Type RA V-Limited for a reasonable price. This is the first of the V-limited models which was released only in JDM market celebrate Subaru winning WRC manufacturers championship & Colin McRae winning driver title in 1995. It was also the last year Group A regulations were in place - meaning the road car was much closer to the WRC car. From 97 onwards the 2-doors Subaru's were based on World-rally-car regulations and didn't have to adhere to production vehicle specs as closely. This was the top-dog model with a bunch of special homologation features/quirks; Closed deck block, forged pistons, rods, mechanical lifters, fancy valves & TD05 turbo. Reportedly made around 300hp from factory (a shade more than the 206kw JDM gentlemans agreement) 5th injector in intake plenum (unused in road form, this was a homologation-special) Intercooler water sprayer Short ratio gearbox with Centre control diff (DCCD), rear plate type LSD Lightweight glass (green tint), lightweight panels/bonnet Seats with Colin McRae/Derek Ringer signatures Roof hatch, Wind-up windows, no rear wiper, aerial on A-pillar, black door handles, no sideskirts/basic bodykit etc. Weighed in at 1150kg or so. This one may be a little more as it was optioned with AC and a radio. no. 367 of 555 built (Based on Type-RA registry, I estimate theres maybe 100 left in the world?) These were pretty much group N rally cars from the showroom floor. It's 98% original which is super important. Has done high KM's (238,000) but last owner had for 13yrs so hasn't been thrashed too much. Generally rust-free but needs a good mechanical strip-back and freshen up and underbody tidy-up. To do list (in no particular order): Paint tidy up (bumper, bonnet, roof) Replace Shifter linkage Clutch Plugs/filter & general servicing stuff Swap out dumpy exhaust to something group A inspired Not planning to do much to this car just drive it every so often and do some basic restoration work. Focus is still on getting the Levin racecar finished by the end of the year. It was also my first experience towing with the Lexus and god-damn its a great tow car. Good noises, super lush, towed like a dream (even with very poorly loaded car). Used all the fossil fuel. First order of business was to acquire a set of gold Speedline wheels for the full Colin McRae look. These are the 17" version of the wheels used for Tarmac rallies in 1996. Will report back in a few weeks when I get a chance to get these on the car.
1 point
-
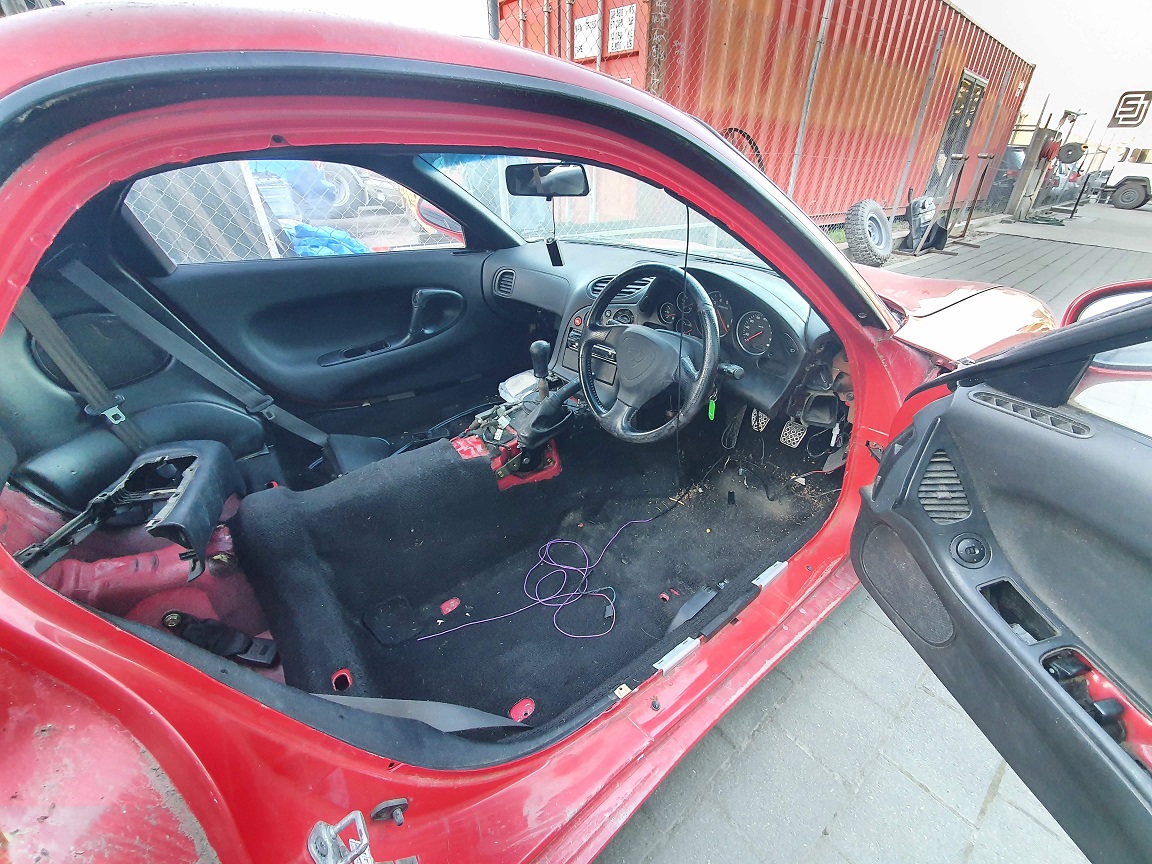
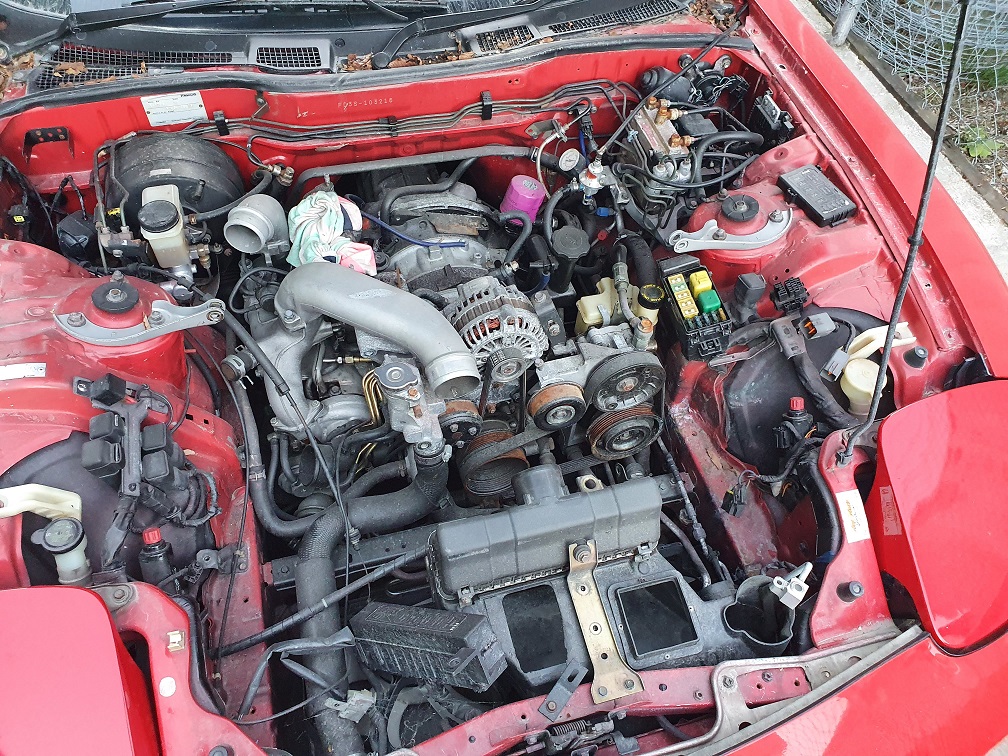
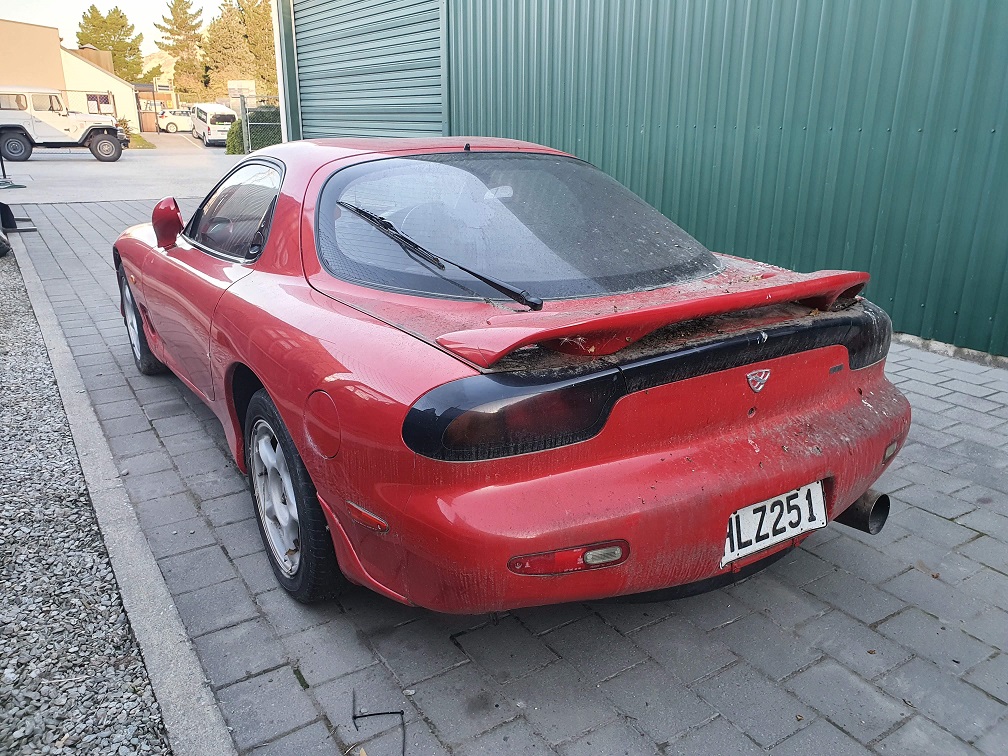
A whiles back I had a nice FD RX7 , and then I sold it, because of reasons. Always thought it was a silly thing to have done, so I have now un-done that decision... Sort of. FD's are in a bit of a bubble at the moment, with asking prices being sky high. It doesn't seem to me that many are actually selling at these inflated prices though... But, you can't argue that the prices on them are going up. I expect the bubble will burst at some stage and prices will fall to something more reasonable, but more than likely still more than I'd be willing to pay. I managed to do a deal with my former employer, High Performance Academy, (whom I still do work for on occasion, they're awesome guys ), to acquire this: They had purchased it to use for their tuning course, as a worked example on a rotary engine, but it just wasn't tidy enough, and would have taken too long to get there for their timeframe. They ended up purchasing the white FD I owned at the time, which was good to go for their needs. Towed it home (Christchurch) from Queenstown last night behind my 3.0TDI A4. Only a little dodgy... But actually towed with no problems. No scrubbing / scraping, and no weird handling, basically didn't know there was anything behind the car, except for the increased fuel usage and lack of usual grunt. Max slam. Spent this afternoon cleaning. So much dirt, bird shit and sap. The cover had blown off the rear corner, and because it was tucked away, no one noticed. Paint is a bit marked (it's had not completely shit re-spray in the original red), but it'll buff out. Plan for this is to tidy it up, replace the interior (most of it is thrashed), and get it going again on some factory(ish) twin turbos. I love the quirkyness of the sequential twins, and I know them inside and out (literally) from my time with my white car, so keeping those is a must. Most of the parts to put it back together are with the car. I'll be doing some hunting and scrounging for sure though. The wiring is roooooooted, but luckily I know a guy. This will probably take priority over the Starion, as it needs much less work, will be good to get it to a nice driver state. HMU if you've got a stash of parts! ;-).
1 point
-
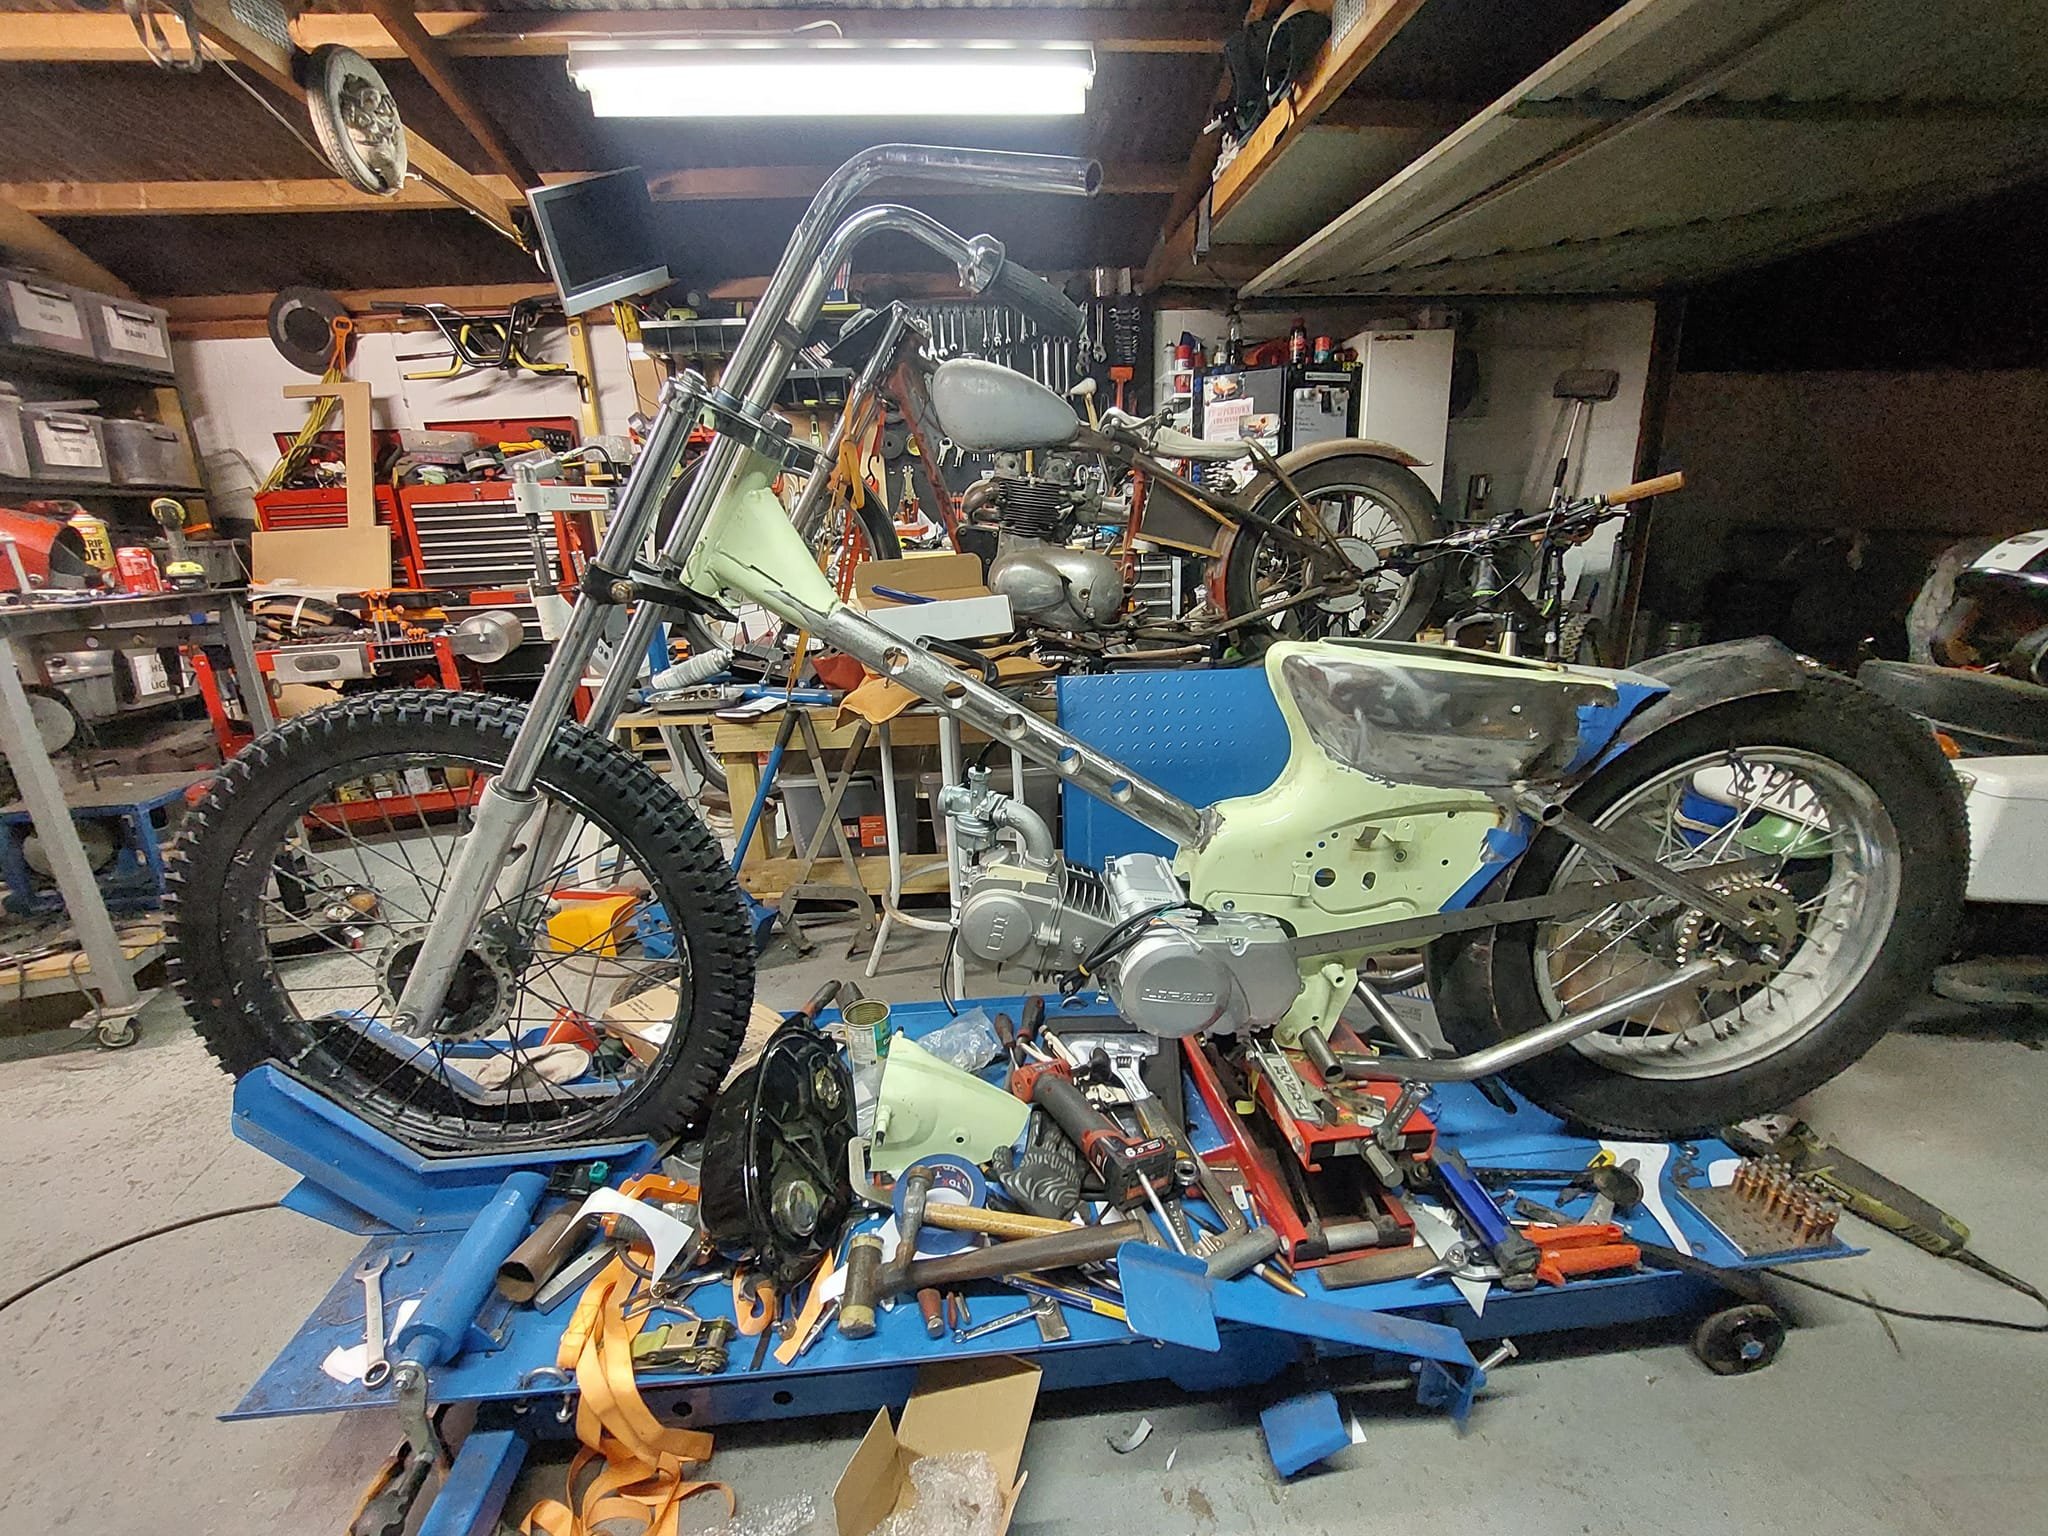
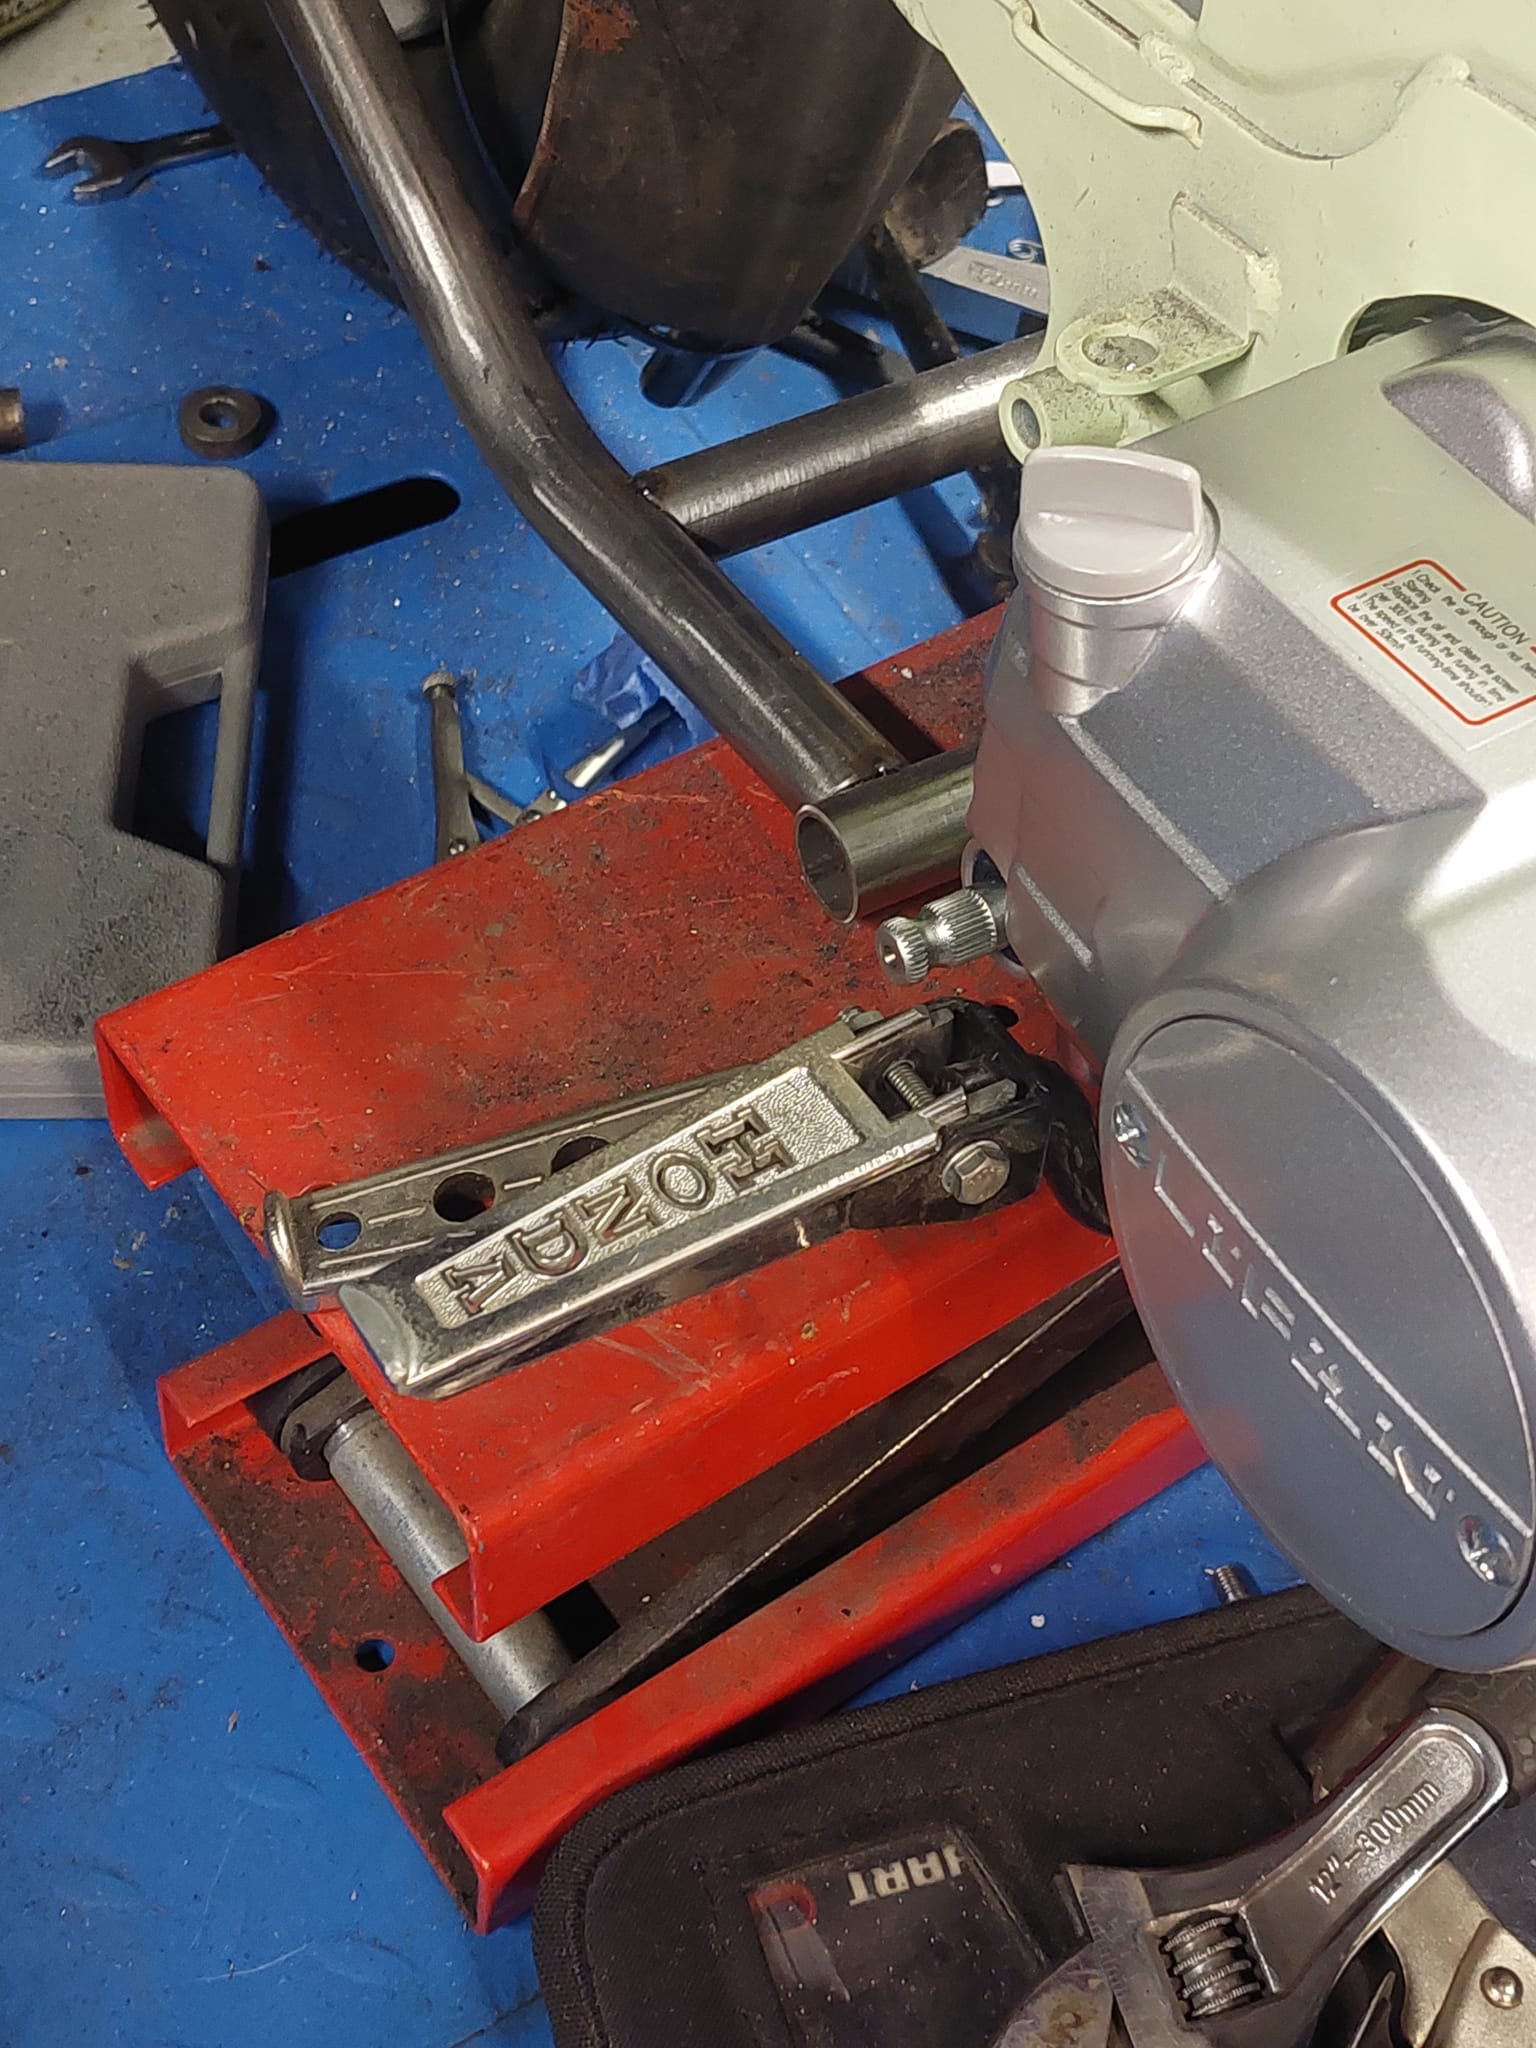
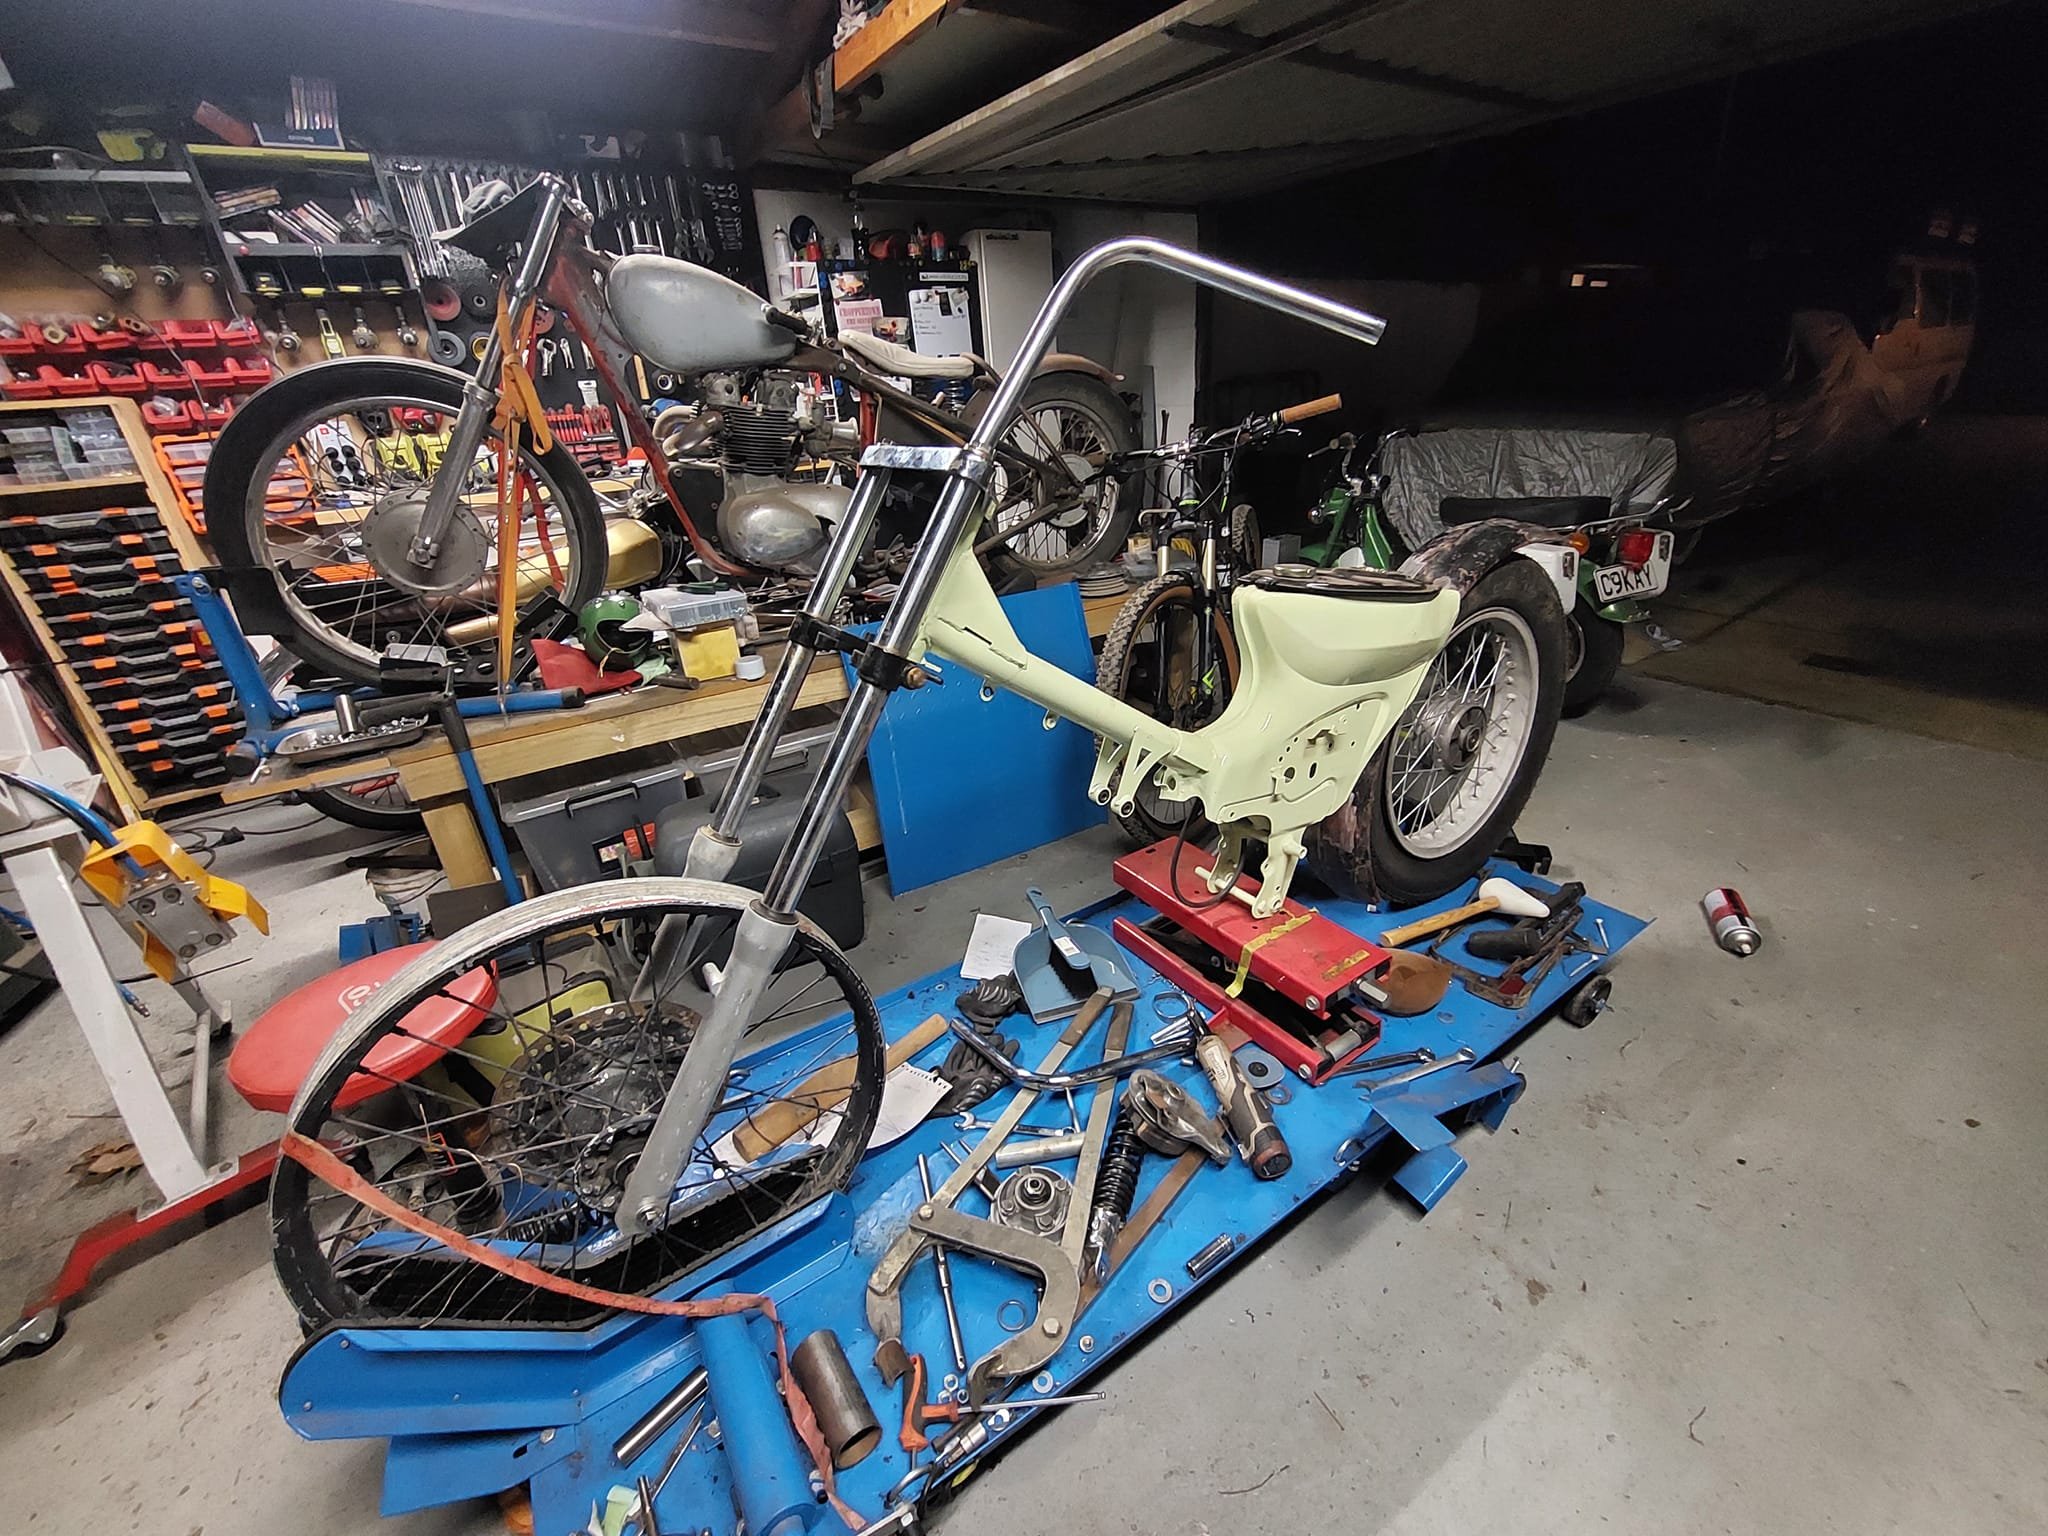
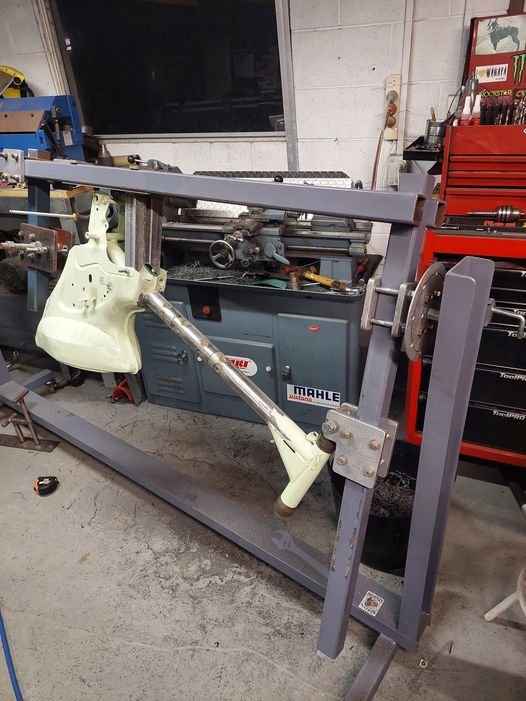
So I picked up another project cos it was a great deal and came with all the right parts for the base of a new build. A mate of mine was selling as a bundle and threw in some more parts for extra $$. Its an mBike chonda deluxe frame thats already been cut by my mate. The style I'm going for is the Indonesian choppy cub I'll be hardtailing the rear and stretching the front by 150mm. Luckily for me the downtube is the same OD as some steam pipe i have, so I'll make some slugs and splice the frame and steam pipe together. But before that I thought I'd mock up some parts to get the overall look of the bike. I knew I wanted rabbit ear bars for the bike so I took a pair of really ugly bars with quite a tall rise and cut them just before the bend at the bottom where they clamp and then sleeved and braced them with some 1 inch stainless tube. the 7/8 part is left loose until I figure out the position I like. I then mounted the frame in my jig and cut the frame and inserted the 150mm extension and slugs. Its held in place with plug welds until I get it fully welded up. Having a frame jig that rotates makes life so much easier!
1 point
-
Nice find: datasheet here: https://media.melexis.com/-/media/files/documents/datasheets/mlx90324-datasheet-melexis.pdf Arduino code for a cousins here: https://www.melexis.com/en/documents/tools/tools-mlx90397---firmware-for-arduino and here https://github.com/melexis/mlx90392#readme PC stuff Prob easier to gut it.1 point
-
Bit of sunshine is good, finished the window fitting Temp switch fitted and works well for the fan, Currently looking into front calipers atm since they're grabbing a wee bit, free em up I'll be happy, Really need to scrap these tyres unfortunately and find some new ones
1 point
-
Ooooh, blue caps!! Shiney! Ain't got nothing for you until you fish out the board and show me the chips, sorry.1 point
-
Yeah there's some good barnfind shit there eh, Id say its flood damaged/floated to thr top of the rubbish pit It would all look rad in candy apple red, but I already have a pile of scrap to work through1 point
-
Thanks! Its all learning. Definitely learned some lessons already. And have a more robust plan for the other H1 rebuild. Biggest win is I'm no longer scared of pressing cranks apart, pulling bearings, and truing. Was pretty good towards the end in knowing where to hit to get desired changes. The actual only pain was these mallory weights, it looks like they were cast in the crank, they weren't press in slugs. Every web i had to give the bash to true, the slugs came undone (very slightly). Loctite seemed to firm them back up, and they couldn't actually fall out. Next crank I rebuild, I'll take the cast weights out, and press in some equal weight tungsten slugs. That should remove this issue completly.1 point
-
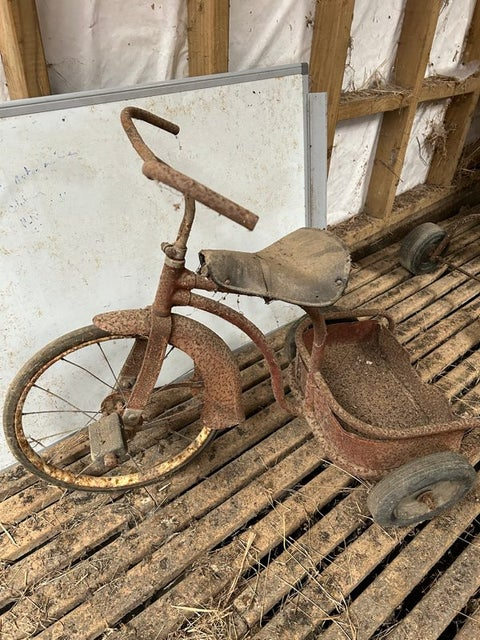
Here's a twin tube version I thought the twin tube ones were bigger, but this looks the same size if not smaller. Possibly it's that the seat is actually an adults one https://www.trademe.co.nz/a/marketplace/antiques-collectables/coins/new-zealand-pre-decimal/collections/listing/4307746259?cc=61&pid=2067400817&hbc=24&ct=image&tm=email&et=61&mt=DEC3FABC-AB8C-4119-8FA0-B206A40E13F0 I wouldn't mind another to make a trailer out of, Warkworth is a bit far tho
1 point
-
A quick update guys. I sent a PM to Zane from Maxx Performance regarding the stock turbo pistons (he supplied them for the aforementioned Greentop Barra build) and he's run them at 680RWKW on E85 for several years but does not recommend this! My goal is 550kW.1 point
-
Thanks so much man. I'm hoping it all works out ok for your amusement and my sanity.1 point
-
if the pin is hollow, I have heard of people threading them internally and using a screw screwed into the pin to reassemble (not on gauges, but something else I can't recall). I agree with Bryan that it looks like a pin that has the end flared out holding it together1 point
-
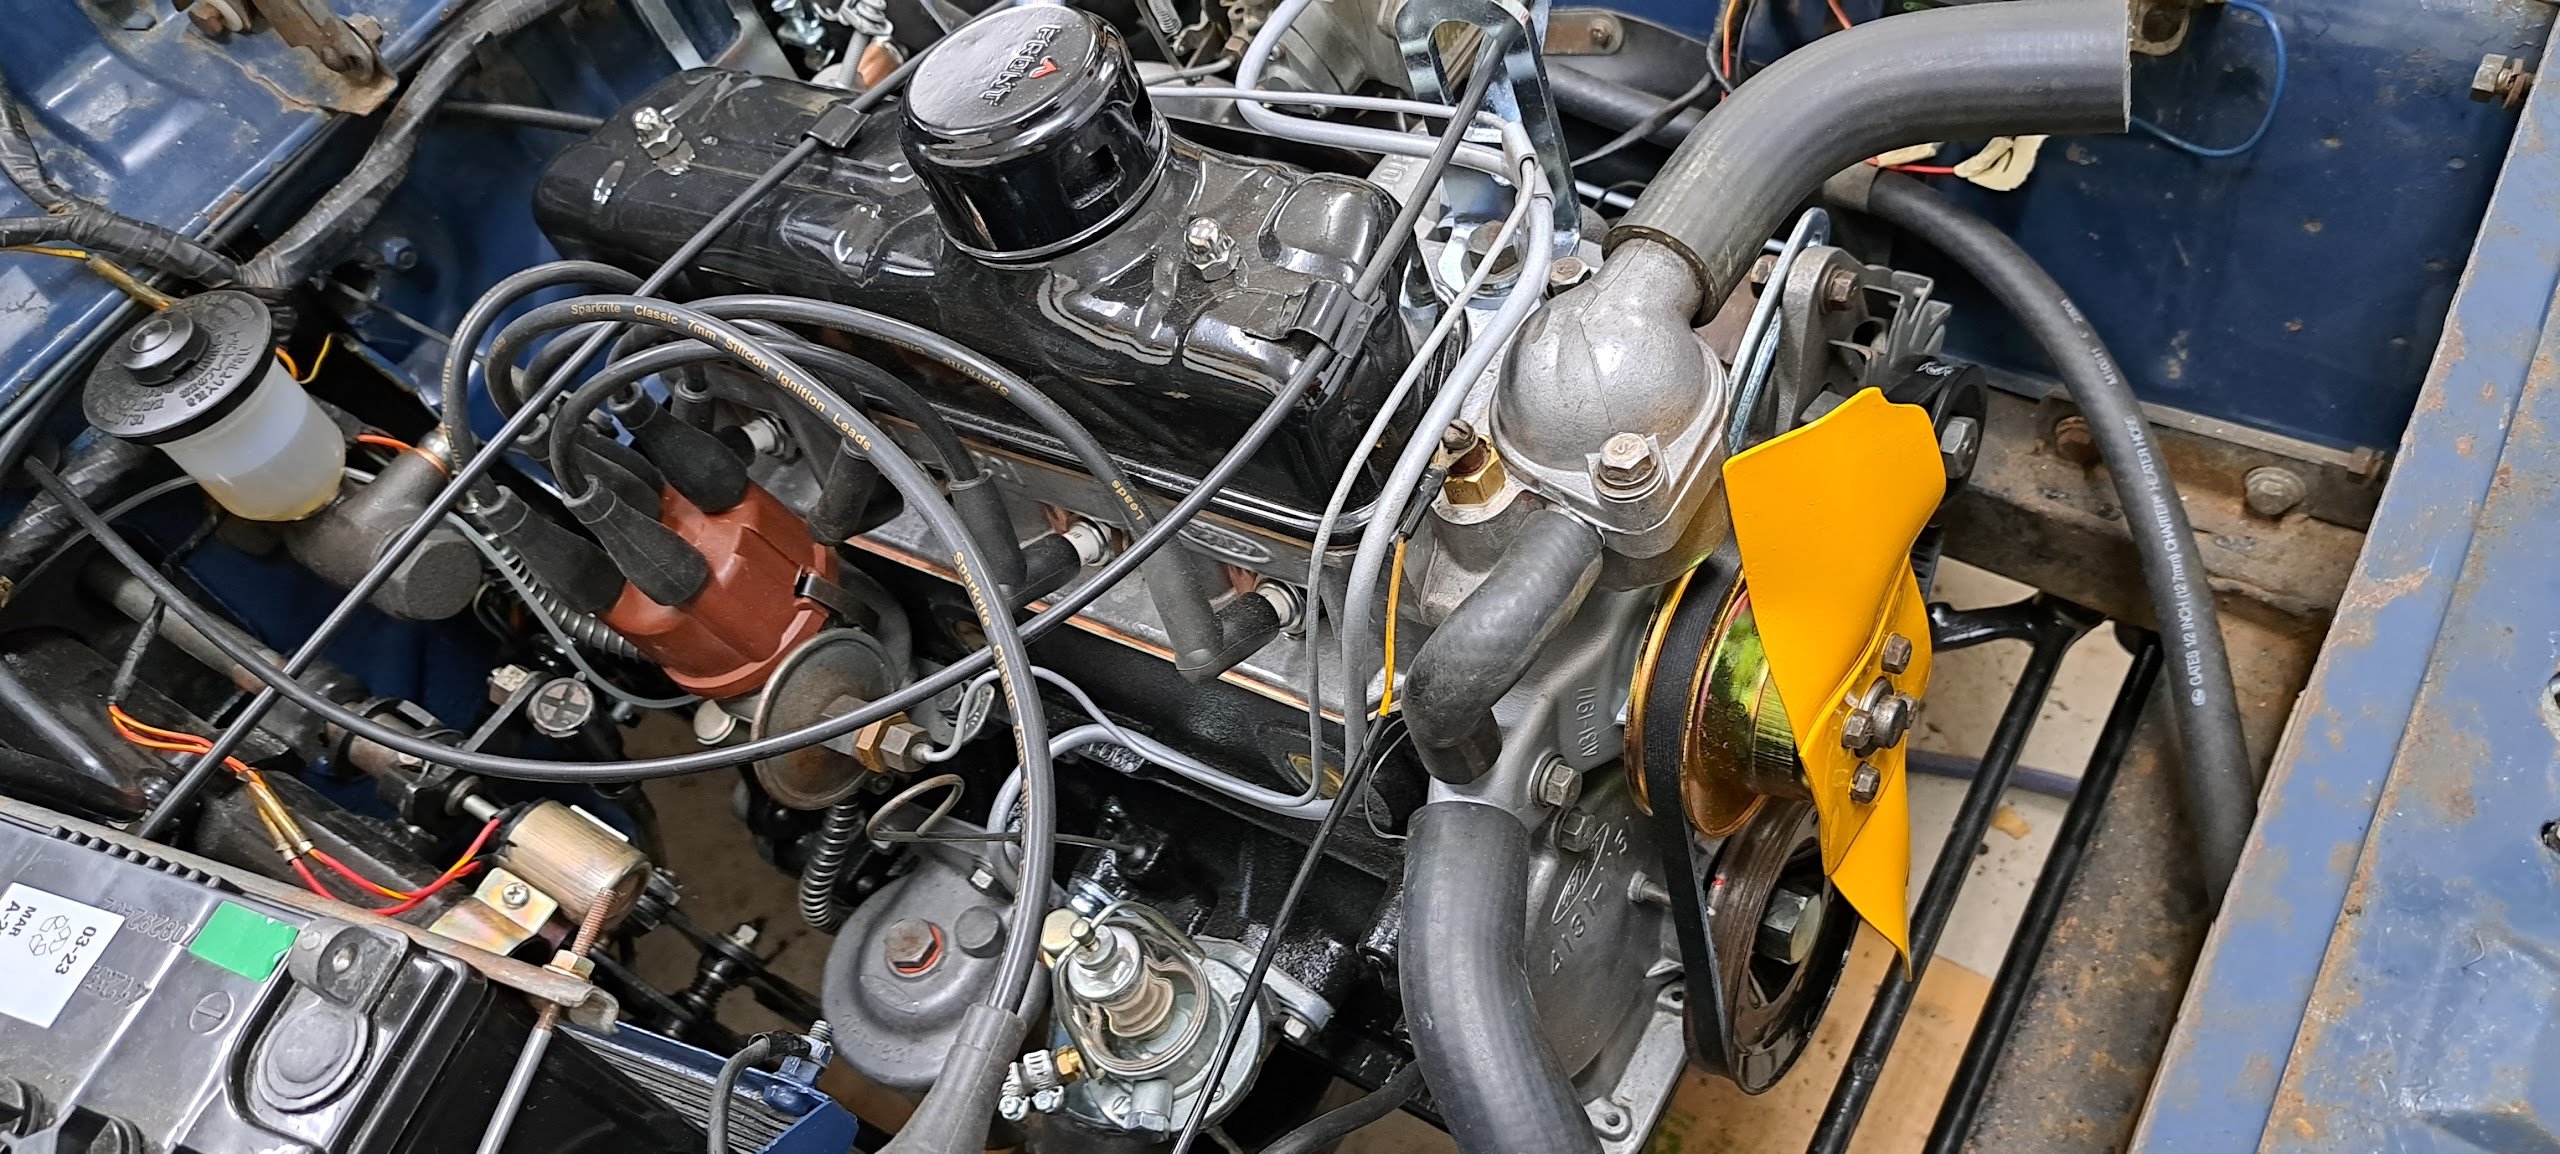
Water pump.. all clean and new I have to say that Gil from Waikato Engine reconditioners was awesome to deal with on this water pump - highly recommended and promptly fitted
1 point
-
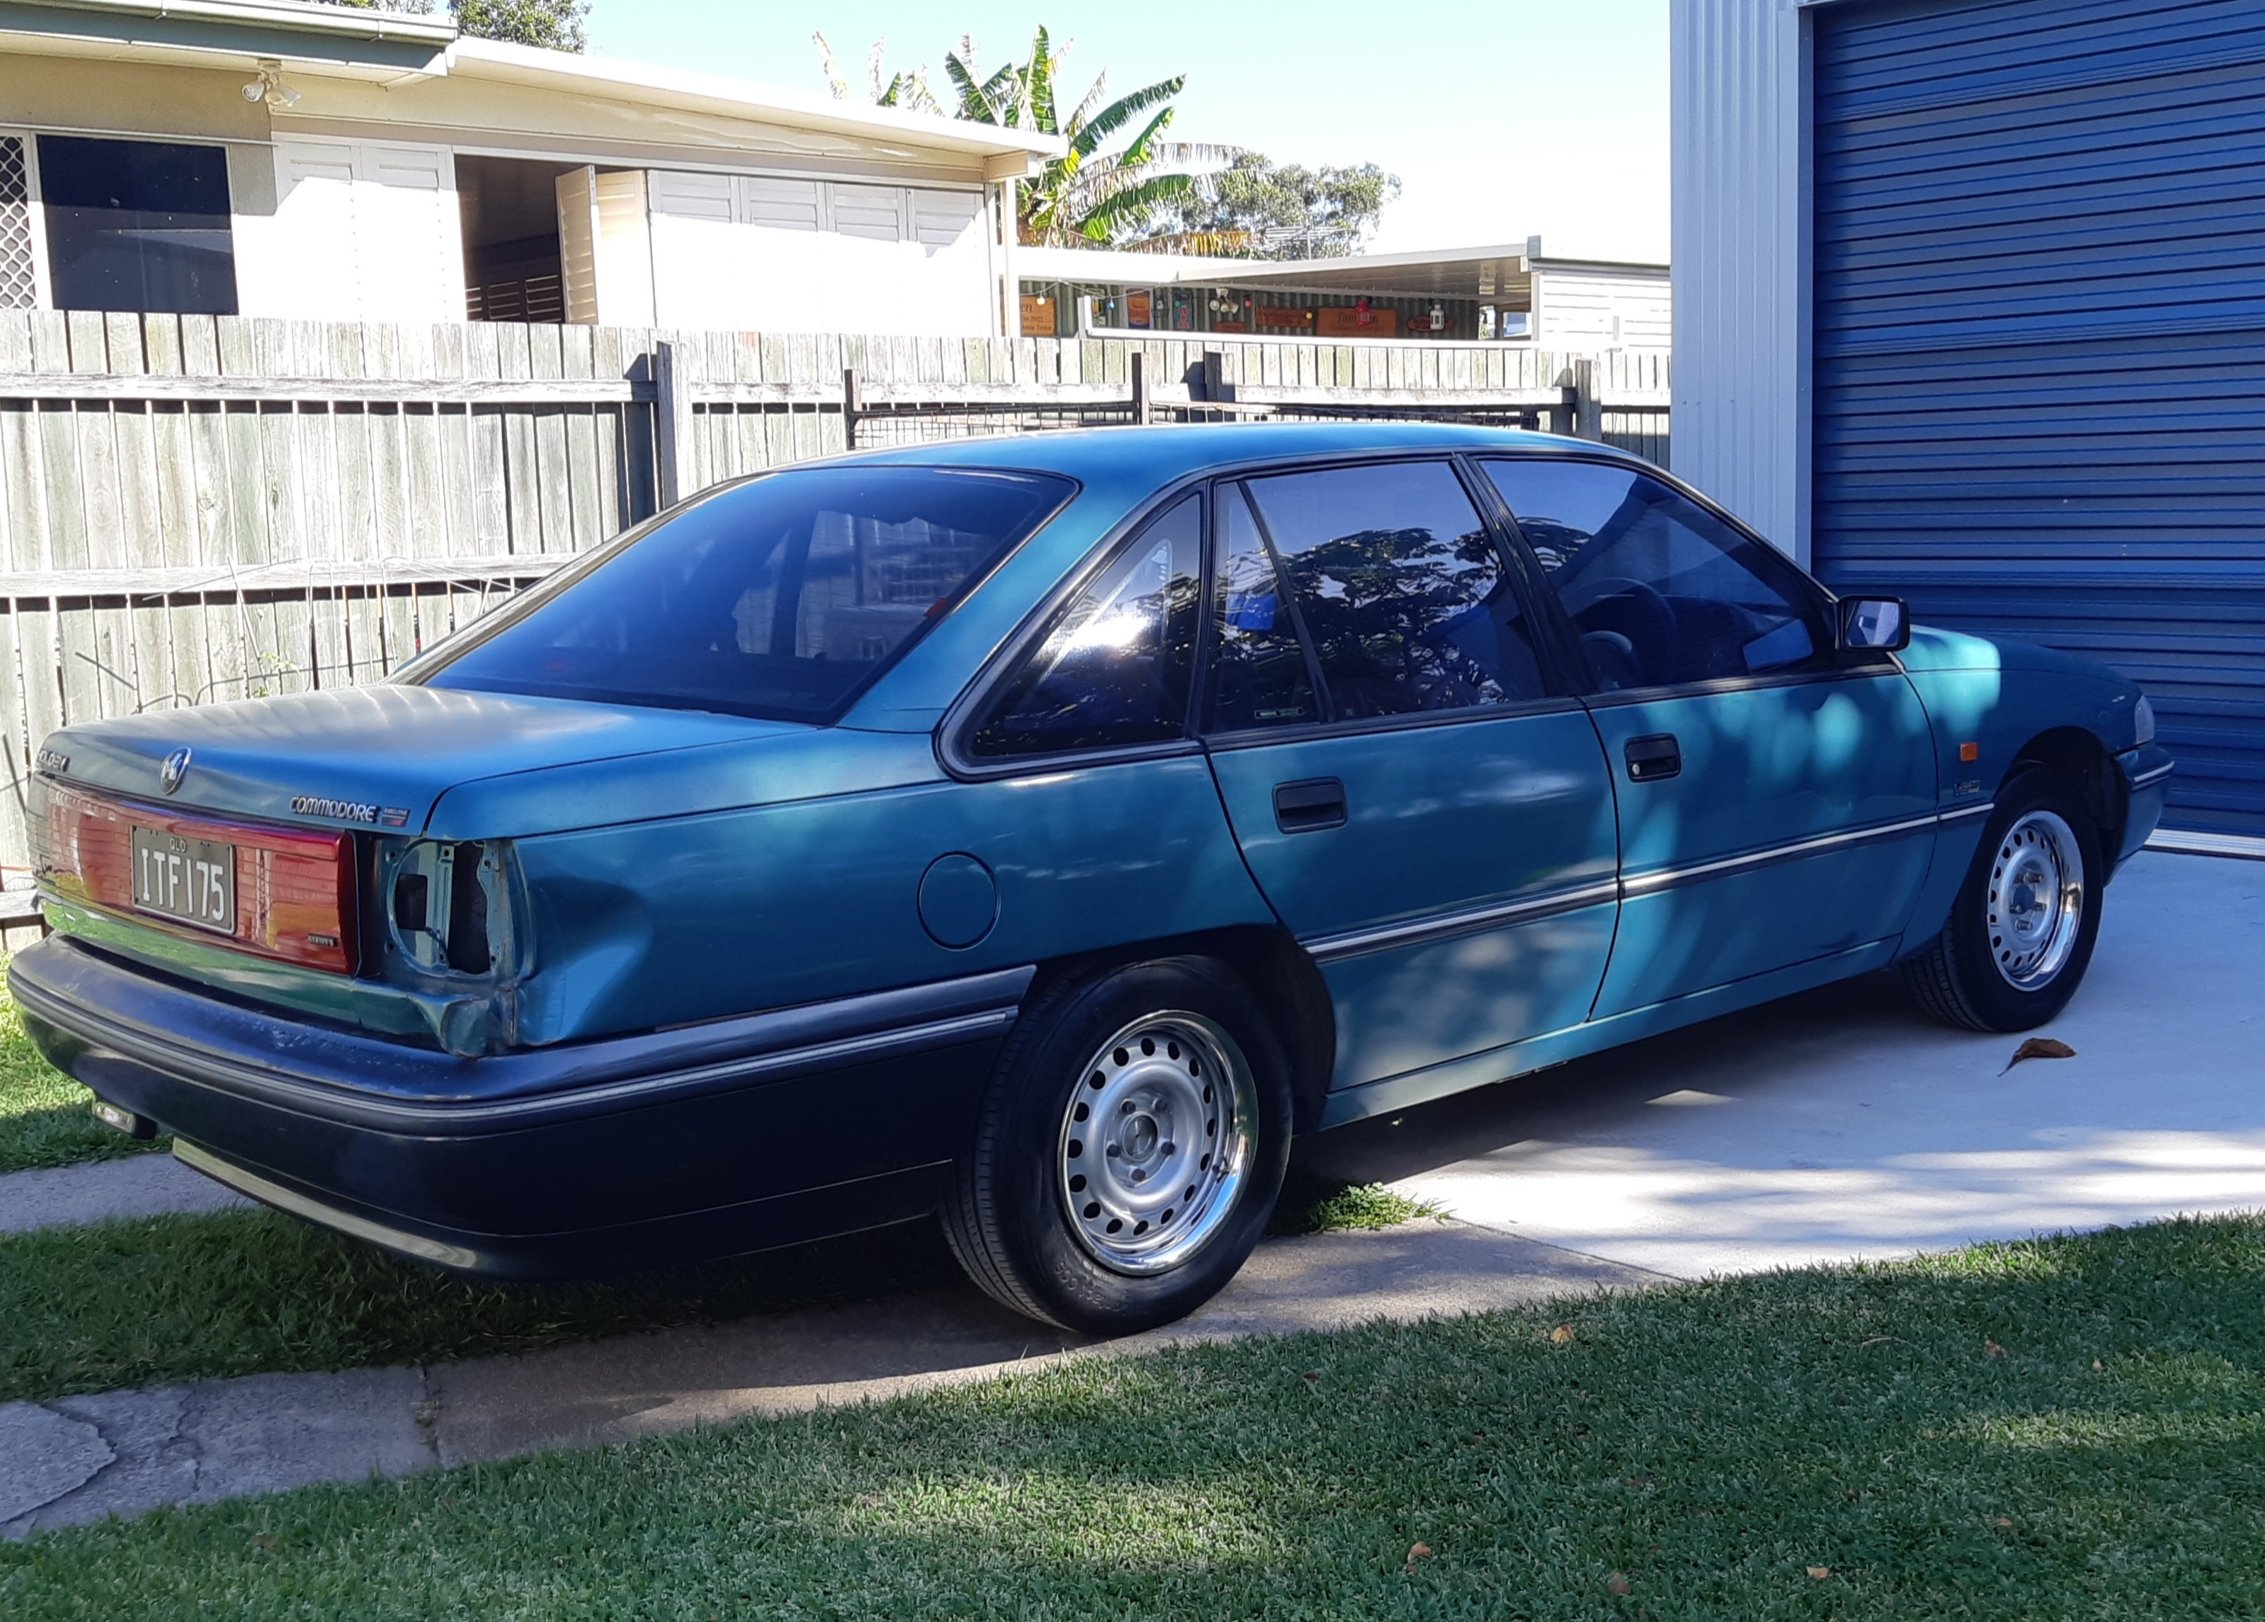
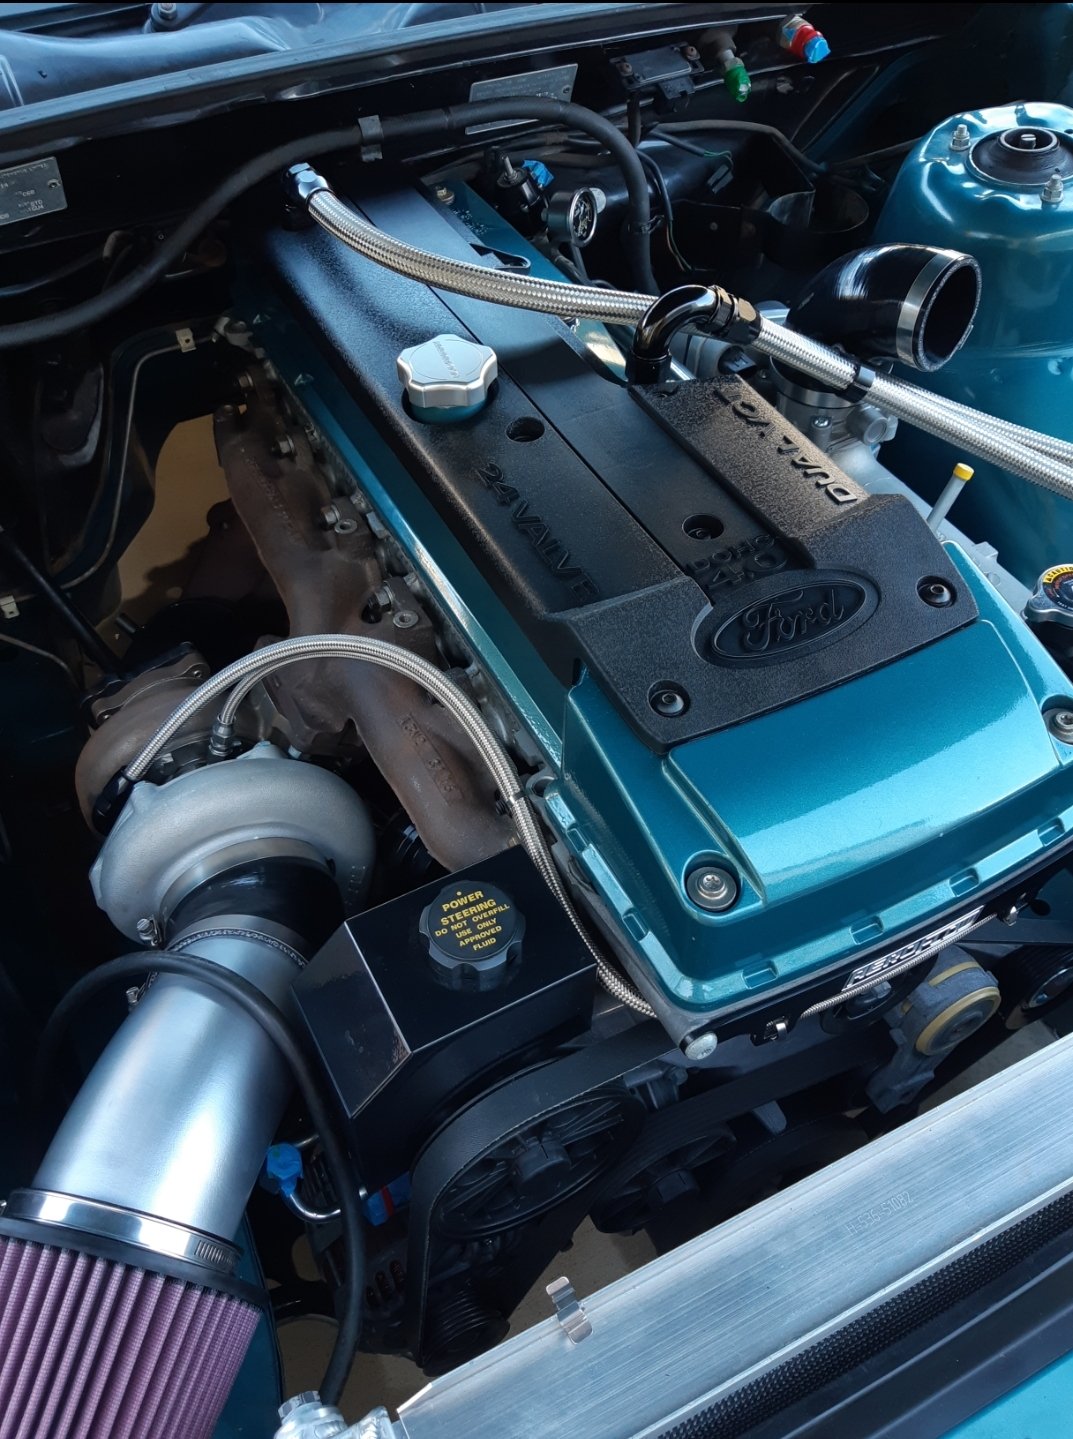
Hi crew. It's been a while since posting. I sold my 355whp turbo pinto Escort after many years of good times. Living 10mins from a popular race track (Lakeside, Kurwongbah) that hosts everything from circuit racing to show and shines/ cruise days it was just a matter of time before I became miserable not having a project to tinker with. I want to go much faster this time and thanks to Castlemaine Rod Shop the process is simple. Engine mounts , T400 transmission crossmember, VT brake upgrade hubs from them and front swaybar (to clear the front sump) from Muscle Garage. It's a 1993 Holden Commodore Executive. 92,000 genuine km country car from Roma, Qld. No rust! The reason for choosing this car well there's a few. My favourite series of Commodore and lovely Marine Aqua paint. Ford's from the same era are heavier and uglier (no hate just my opinion!). The weight, only 1275kg. 1250kg with the barra. No firewall modifications other than massaging the tunnel for bellhousing where starter motor sits. Power goals 650whp 1300nm but it might increase to 800whp depending on the transmission spec. Motor will get forged rods, stock turbo BF pistons, ARP bolts, crow springs, girdle, stock timing chain, stock BF cams, torrington bearing. Fuel system Aeroflow 76L anodized cell with triple pump hanger, 2x Walbro 525 pumps. Diff has been built with 31 spline axles and Chinese Trutrac. T400 is going in for build on 3rd July. Torque Power bellhousing, billet input shaft and possibly a billet intermediate shaft too. 36 element sprag etc. Link to dicussion
1 point
-
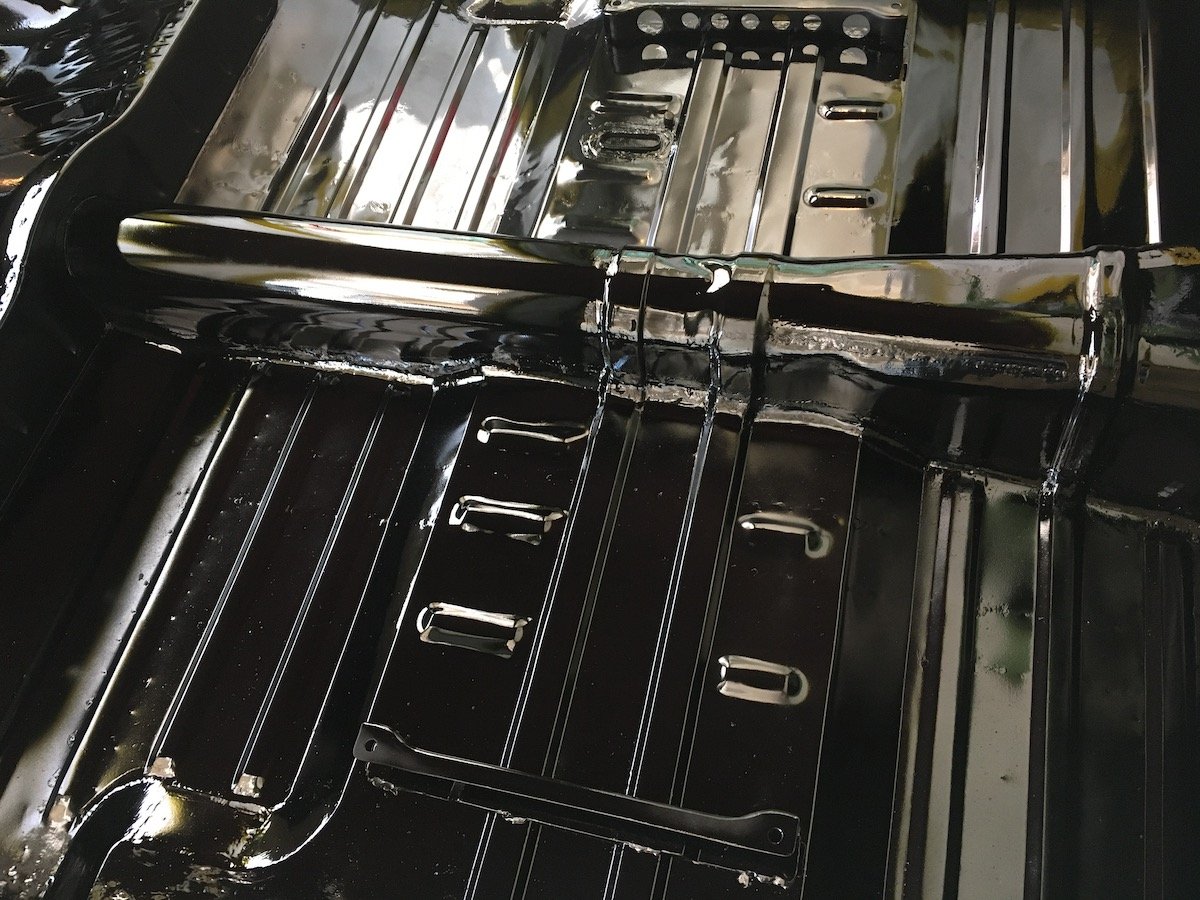
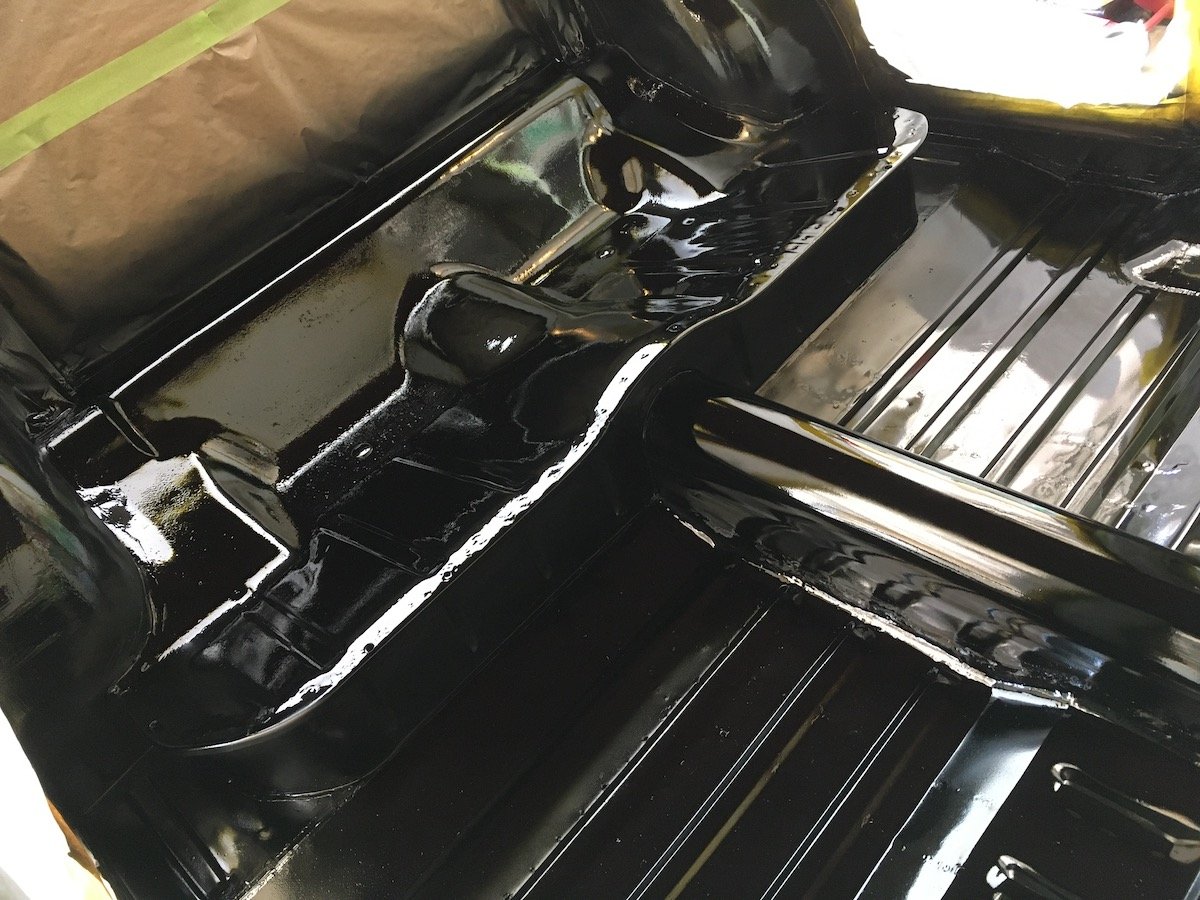
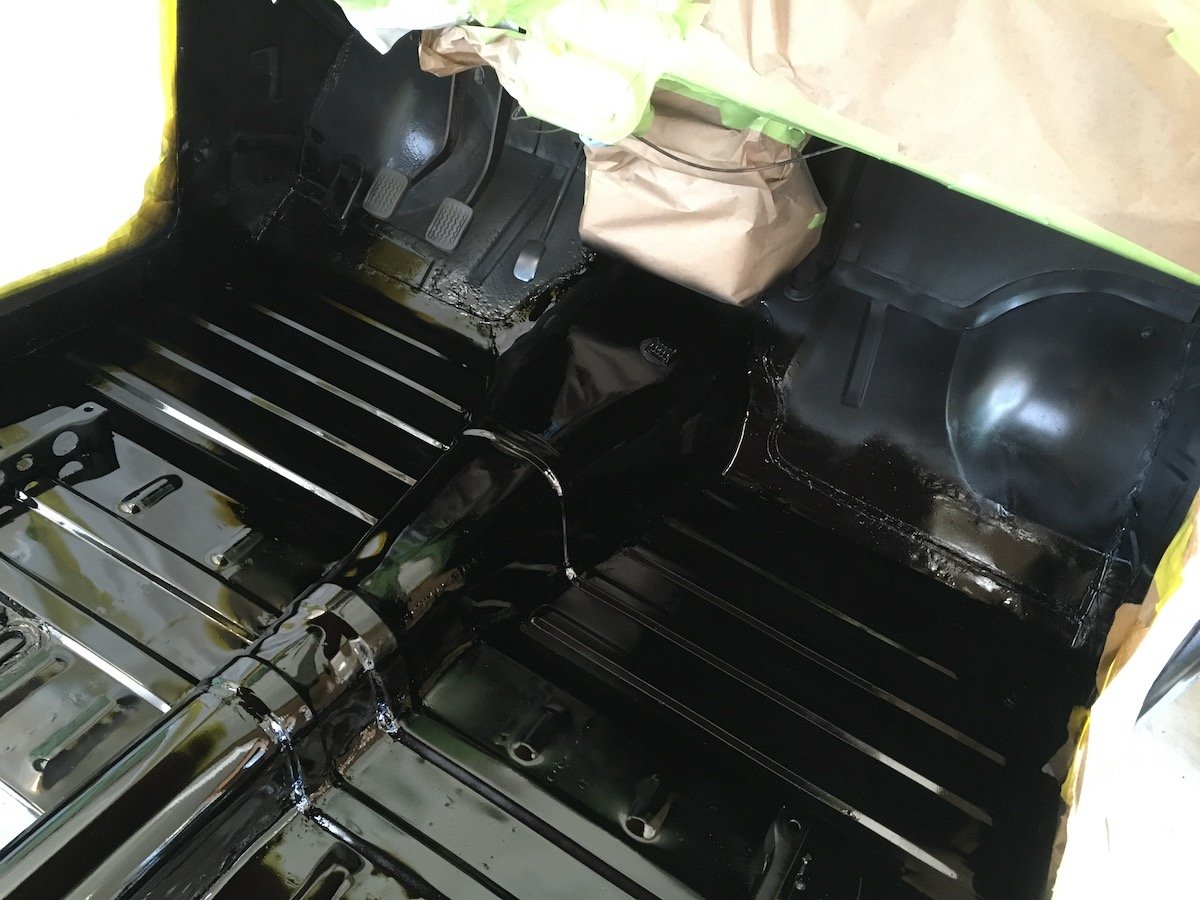
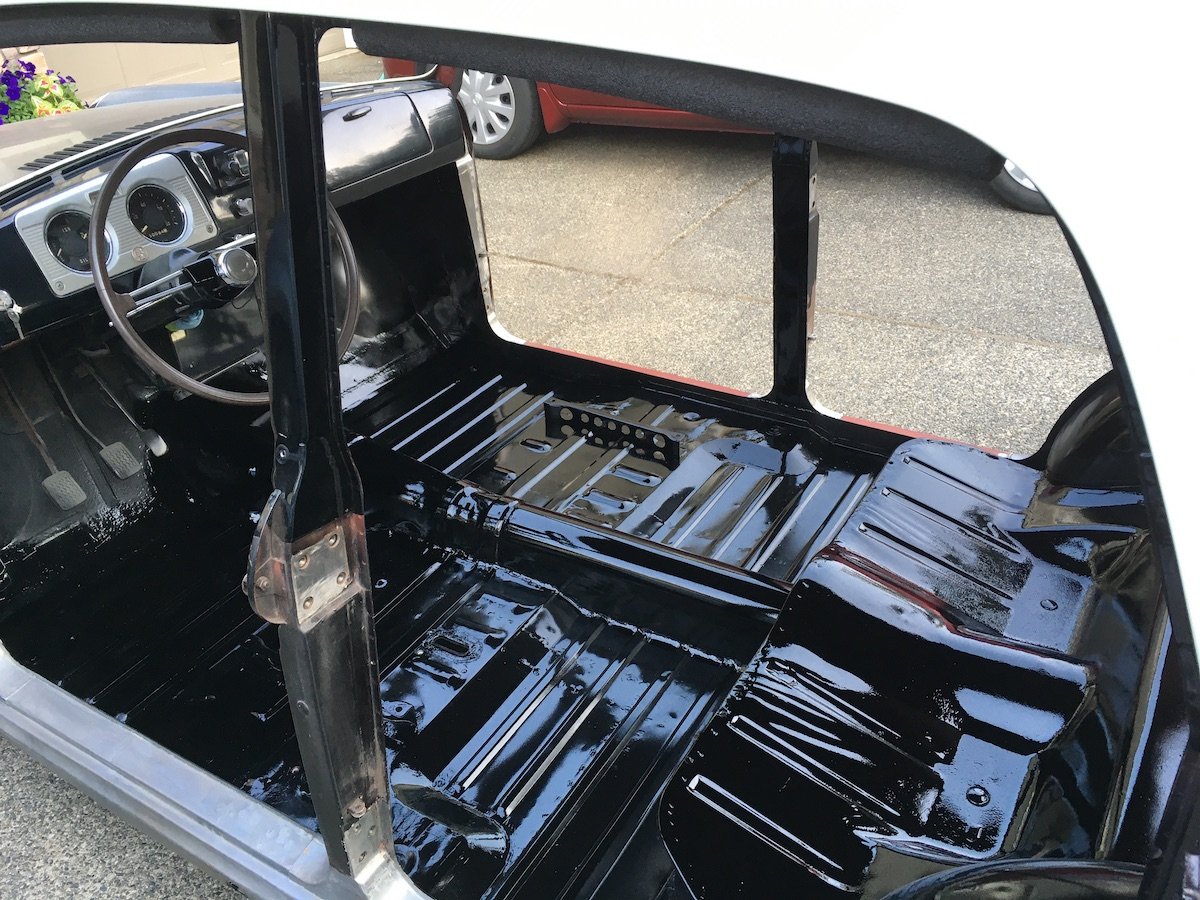
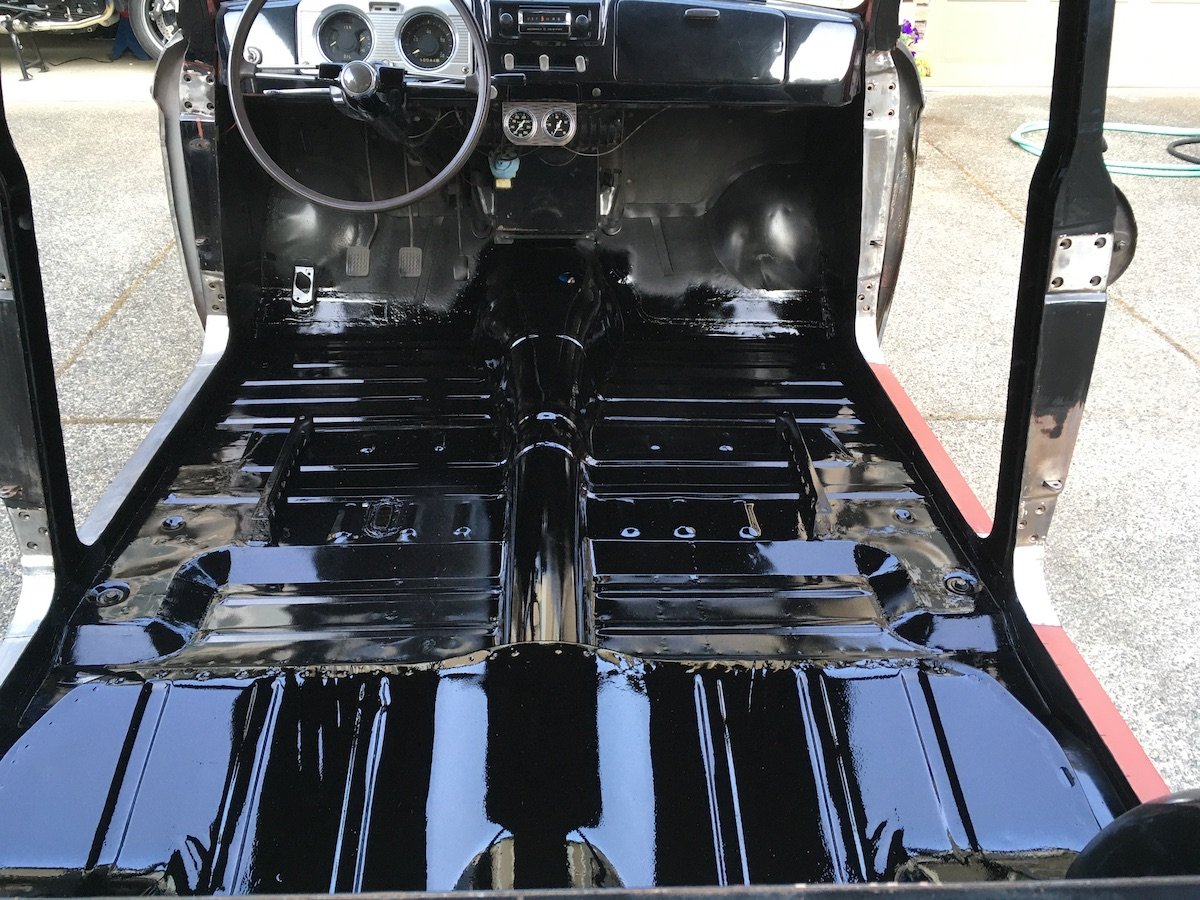
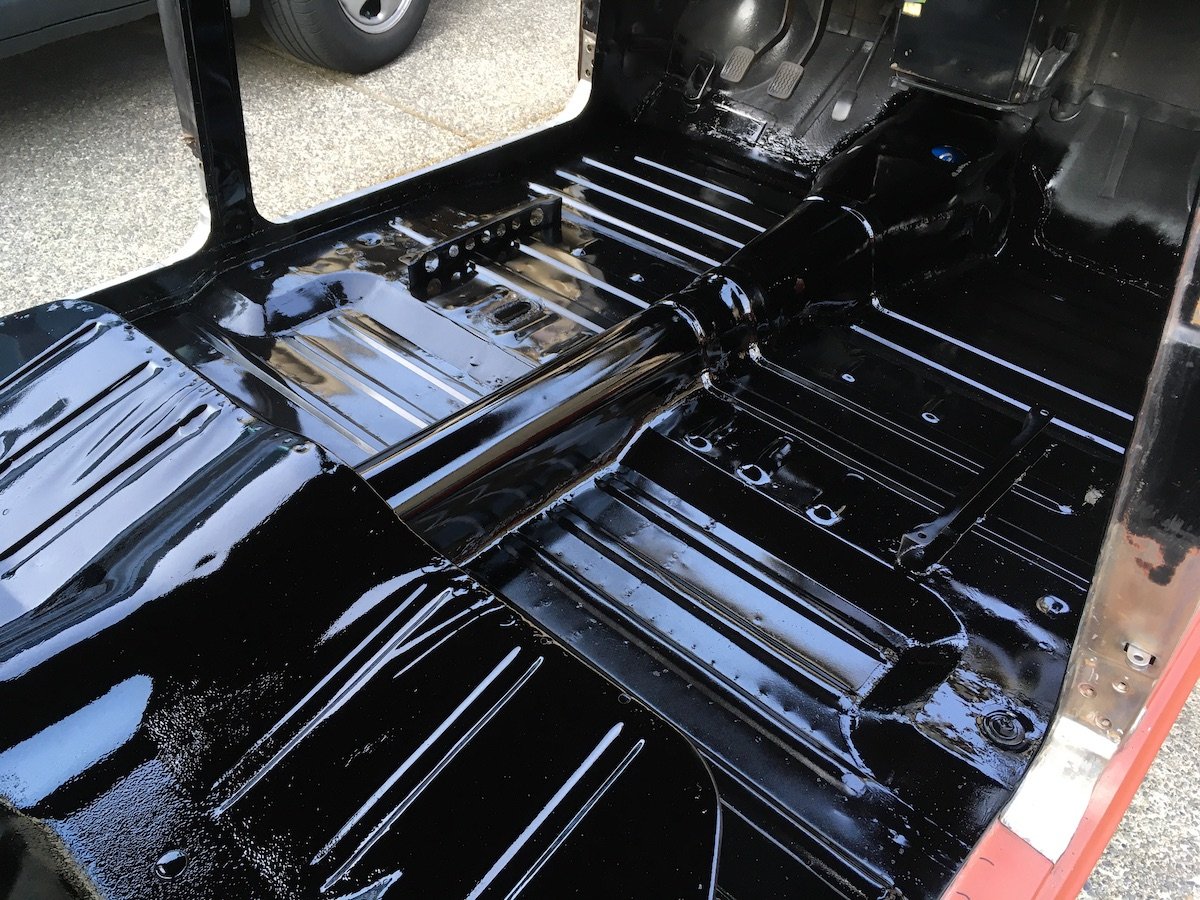
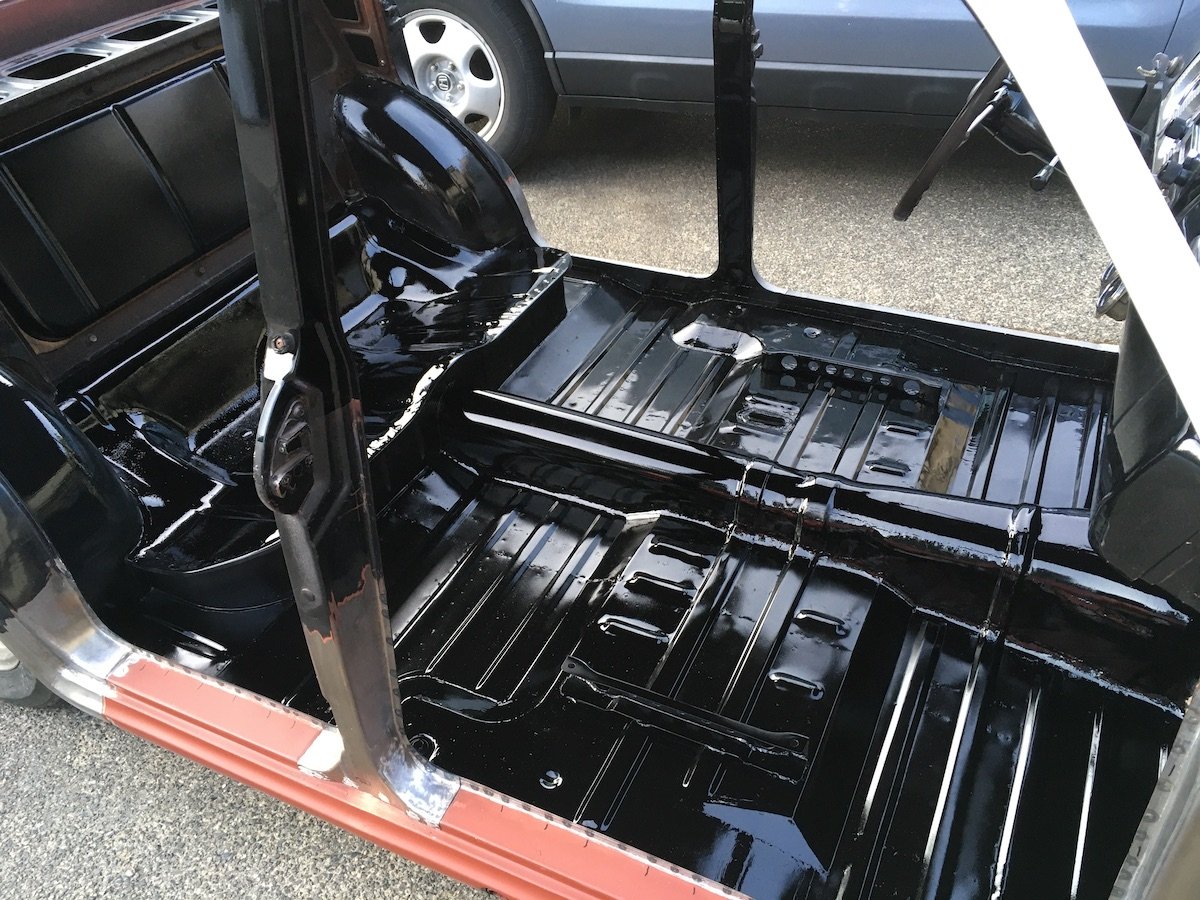
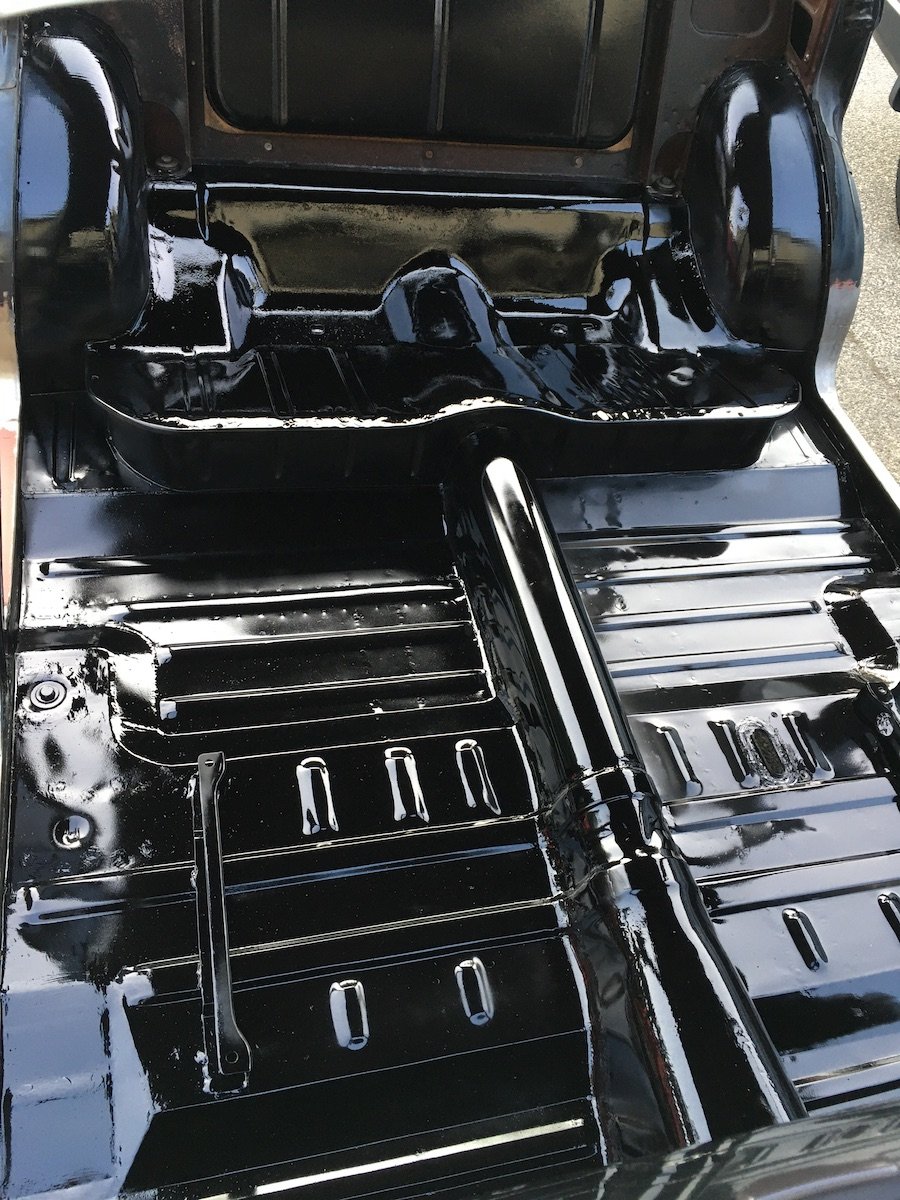
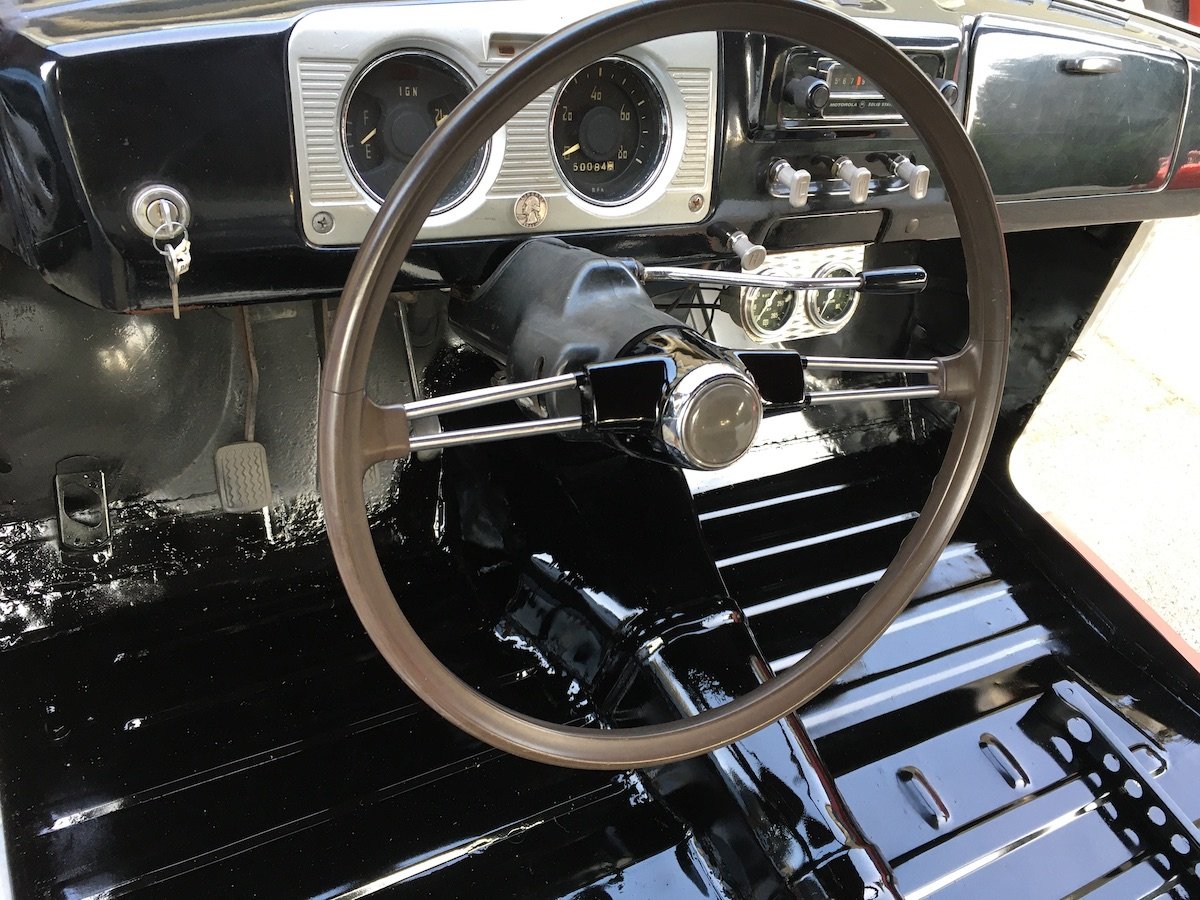
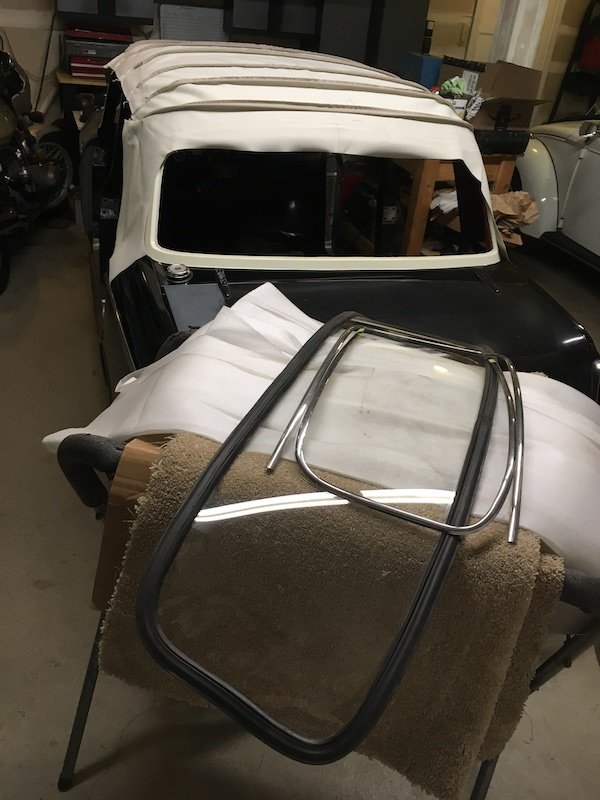
Building the 1961 Datsun 310 Bluebird - Painting Floor Top Coats- Black Basecoat and Clearcoat. Paint application photos. Floor is finished! This brings the latest intense flurry of completed work up to date. I've now got most of the parts and materials required to get started installing the roof insulation, headliner, and glass, but it's going to be another slow learning process each step of the way. I definitely don't want to break the difficult to find glass! Thanks for checking out this latest series of posts on the PL310 1961 Datsun Bluebird!
1 point
-
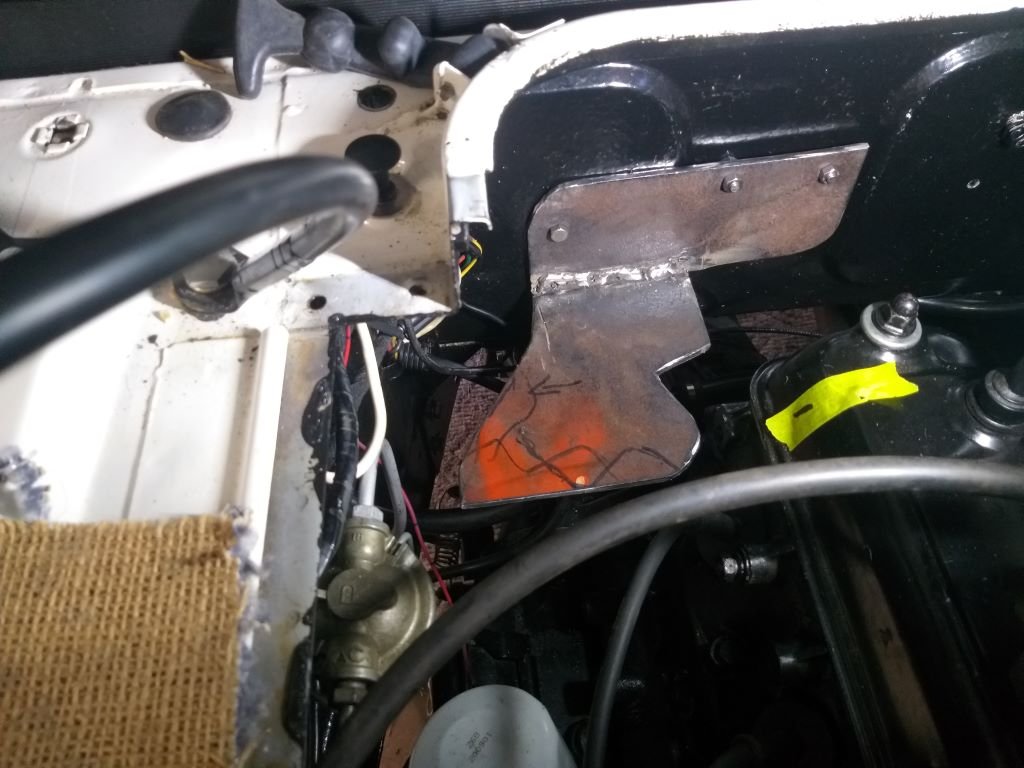
I have spent the last couple of days making up the shock mount for one side. I will send pic's through to the certifier and see what he has to say. So far, it's only time spent and a small hole through the boot floor. I have made it with the boot floor being sandwiched between two 3mm plates. Bolted together for now but will be welded in. I can weld the bracket to the chassis rail on all four sides before the top section goes in. I really need to get the car higher when I weld it in. I have two engine stands so I might make them into a rotisserie of a sort.
1 point
-
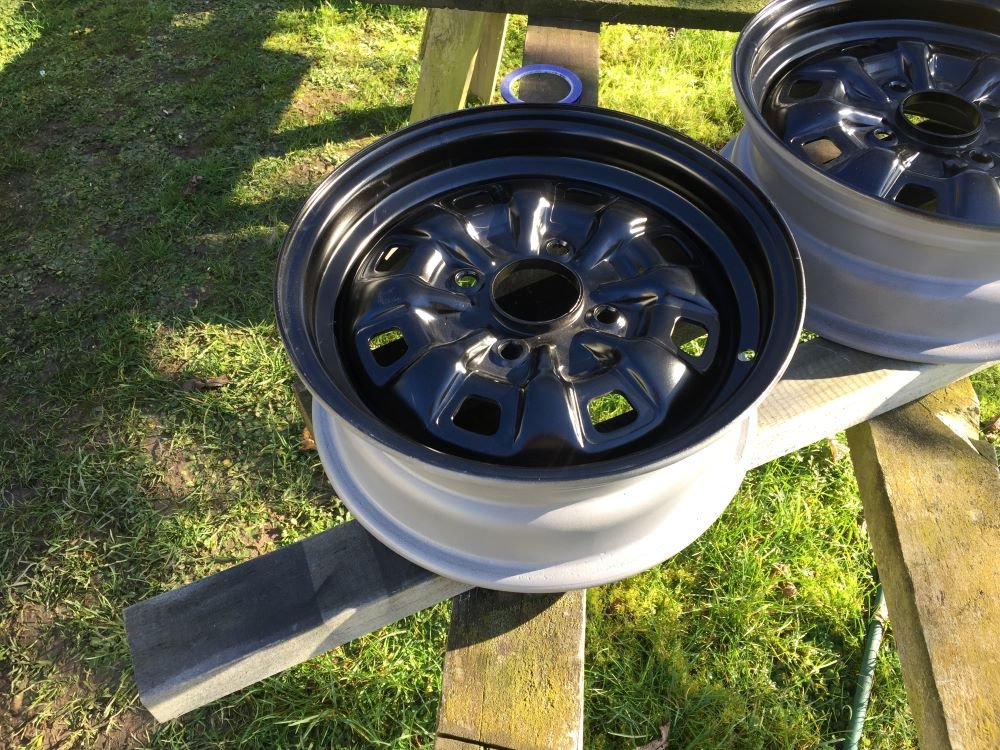
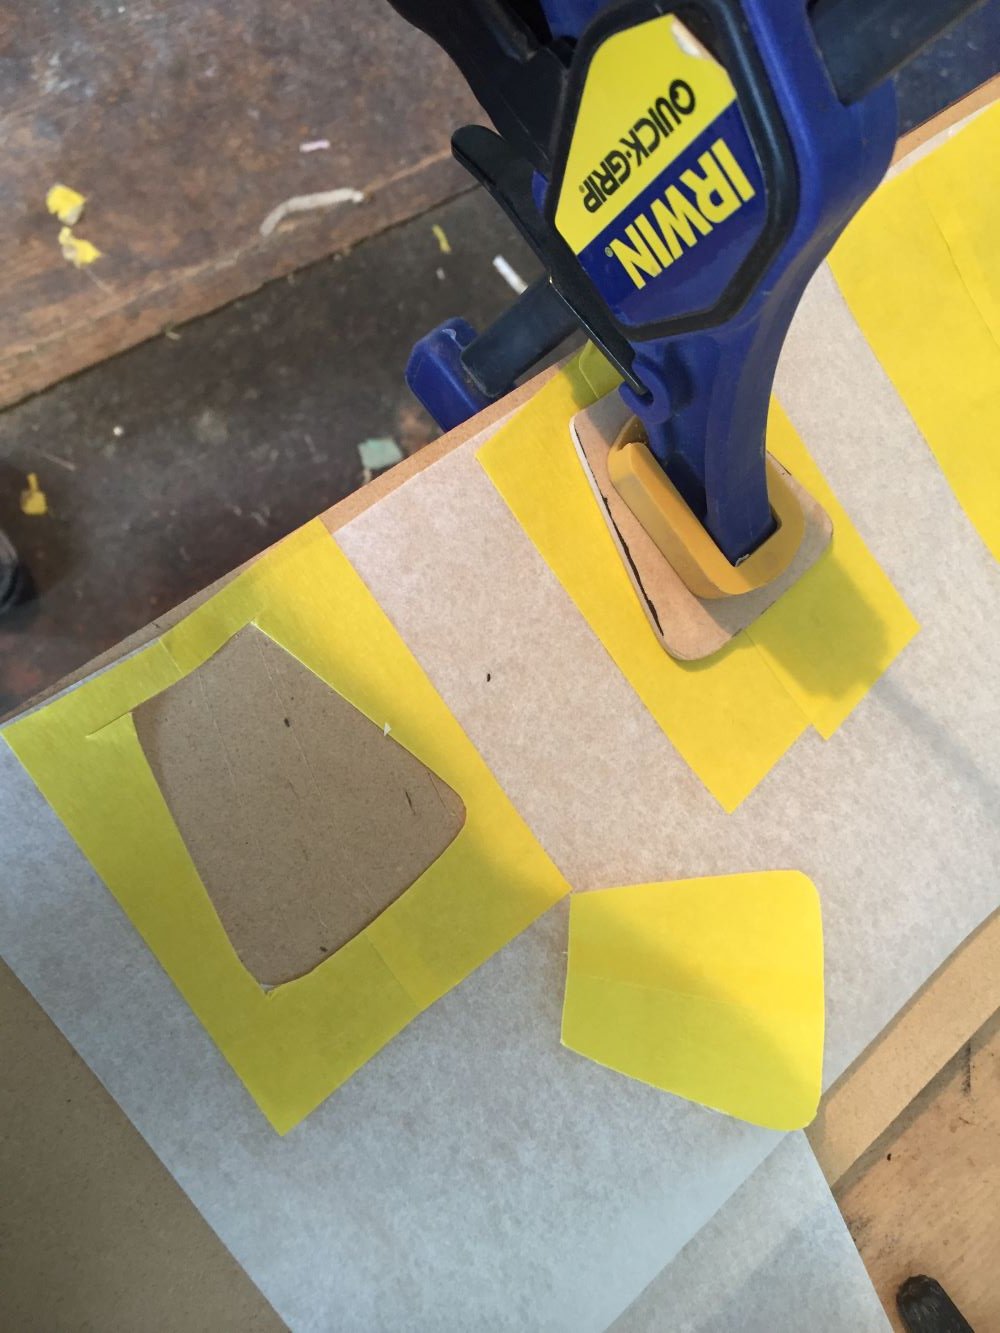
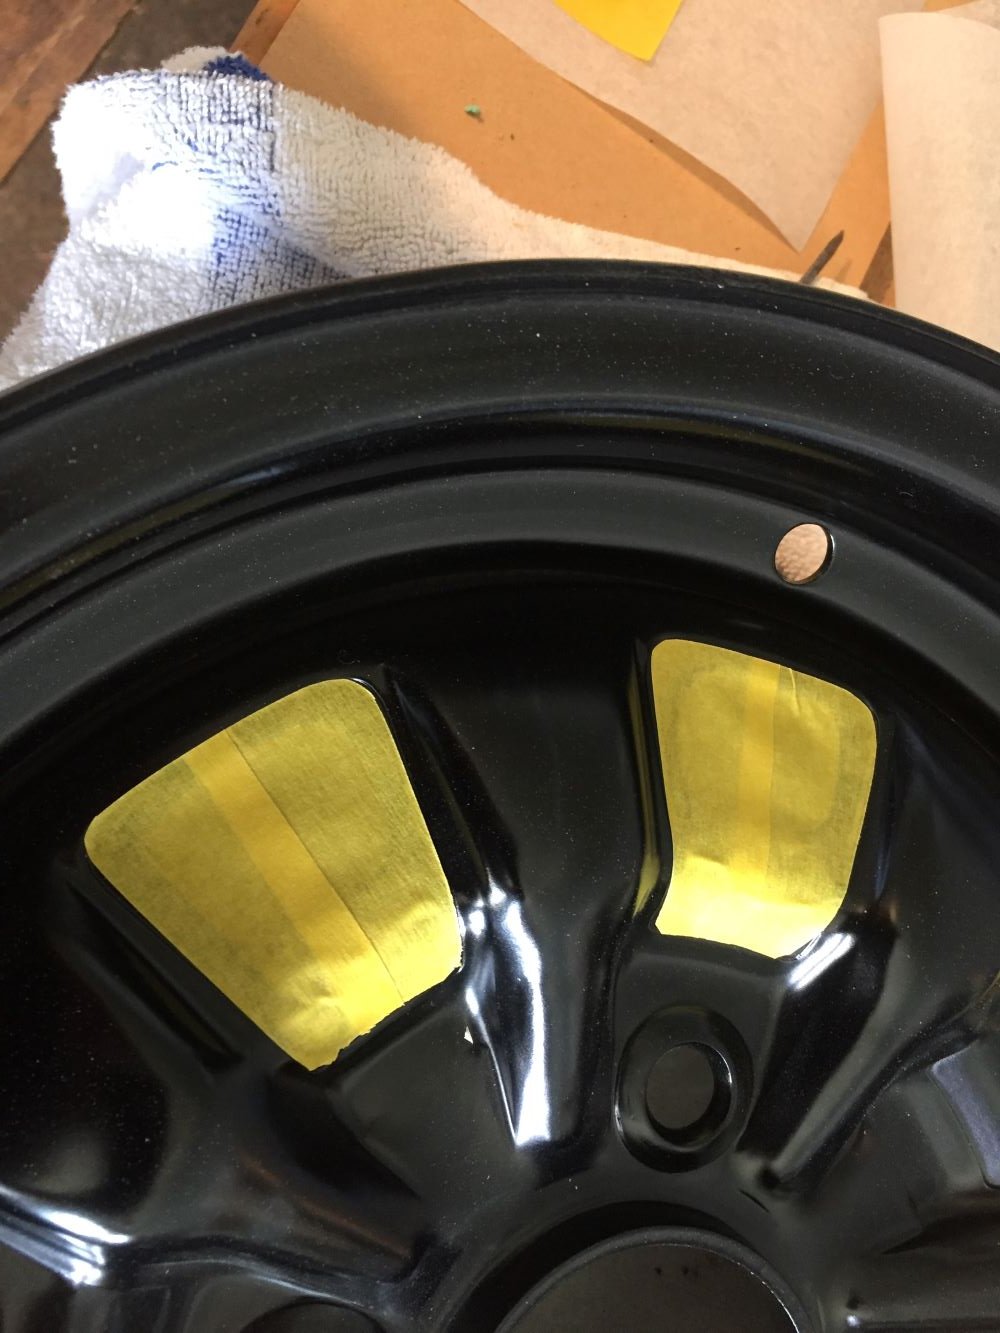
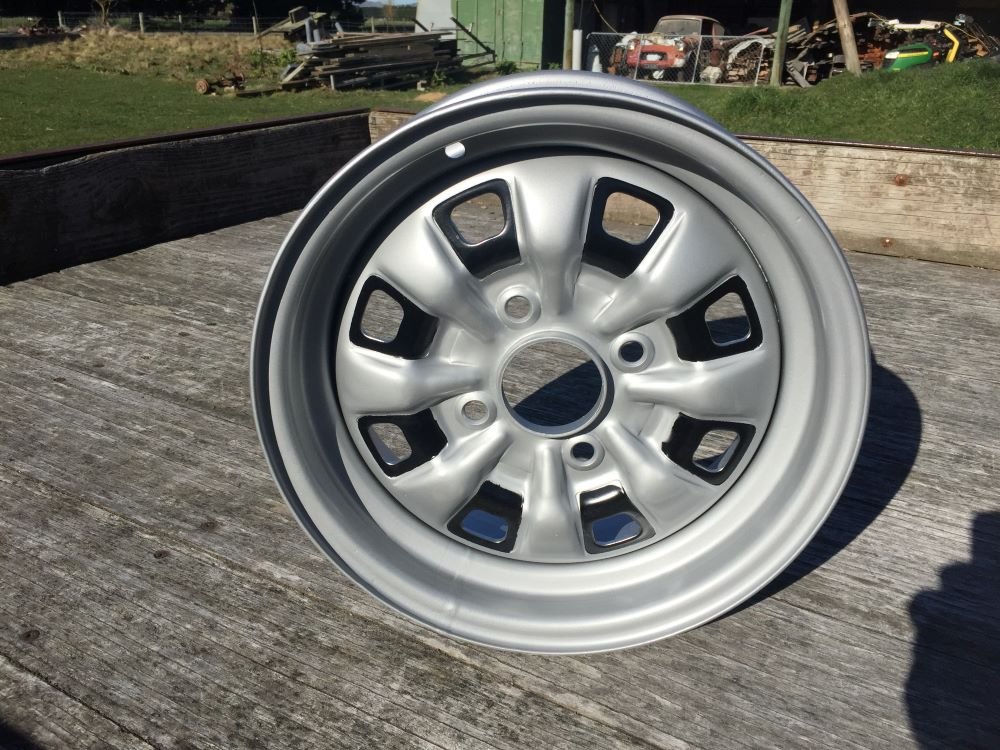
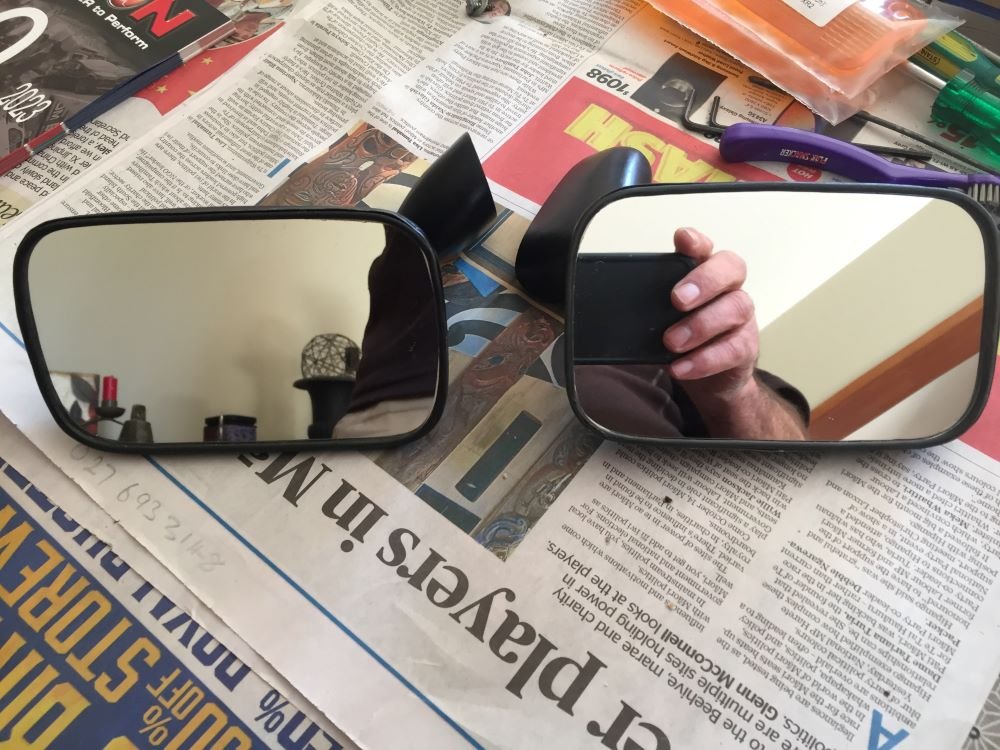
Got a few more jobs finished this week. Had the old rostyle rims sand blasted, then epoxy primed, then painted outside facing surface black. Next had to mask up areas I wanted to remain black. Made a wooden template and then used this to cut out masking tape which I had stuck to some baking paper. Worked really well and just had to peel off backing and place on rims. Now respayed rims a metalic silver and once masking tape removed they look really good. Small amount of bleeding whiich shouldn't be to hard to fix. Also found someone to replace mirror glass in wing mirrors. Did a really good job so am pleased to be able to use original mirrors. Have been putting loom back in and have a few spare wires. If anyone is able to help, have put up picture on Project Discussion page. Cheers Project Discussion https://oldschool.co.nz/index.php?/topic/84912-petes-mk2-escort-1600-sports/page/2/#comment-2579154
1 point
-
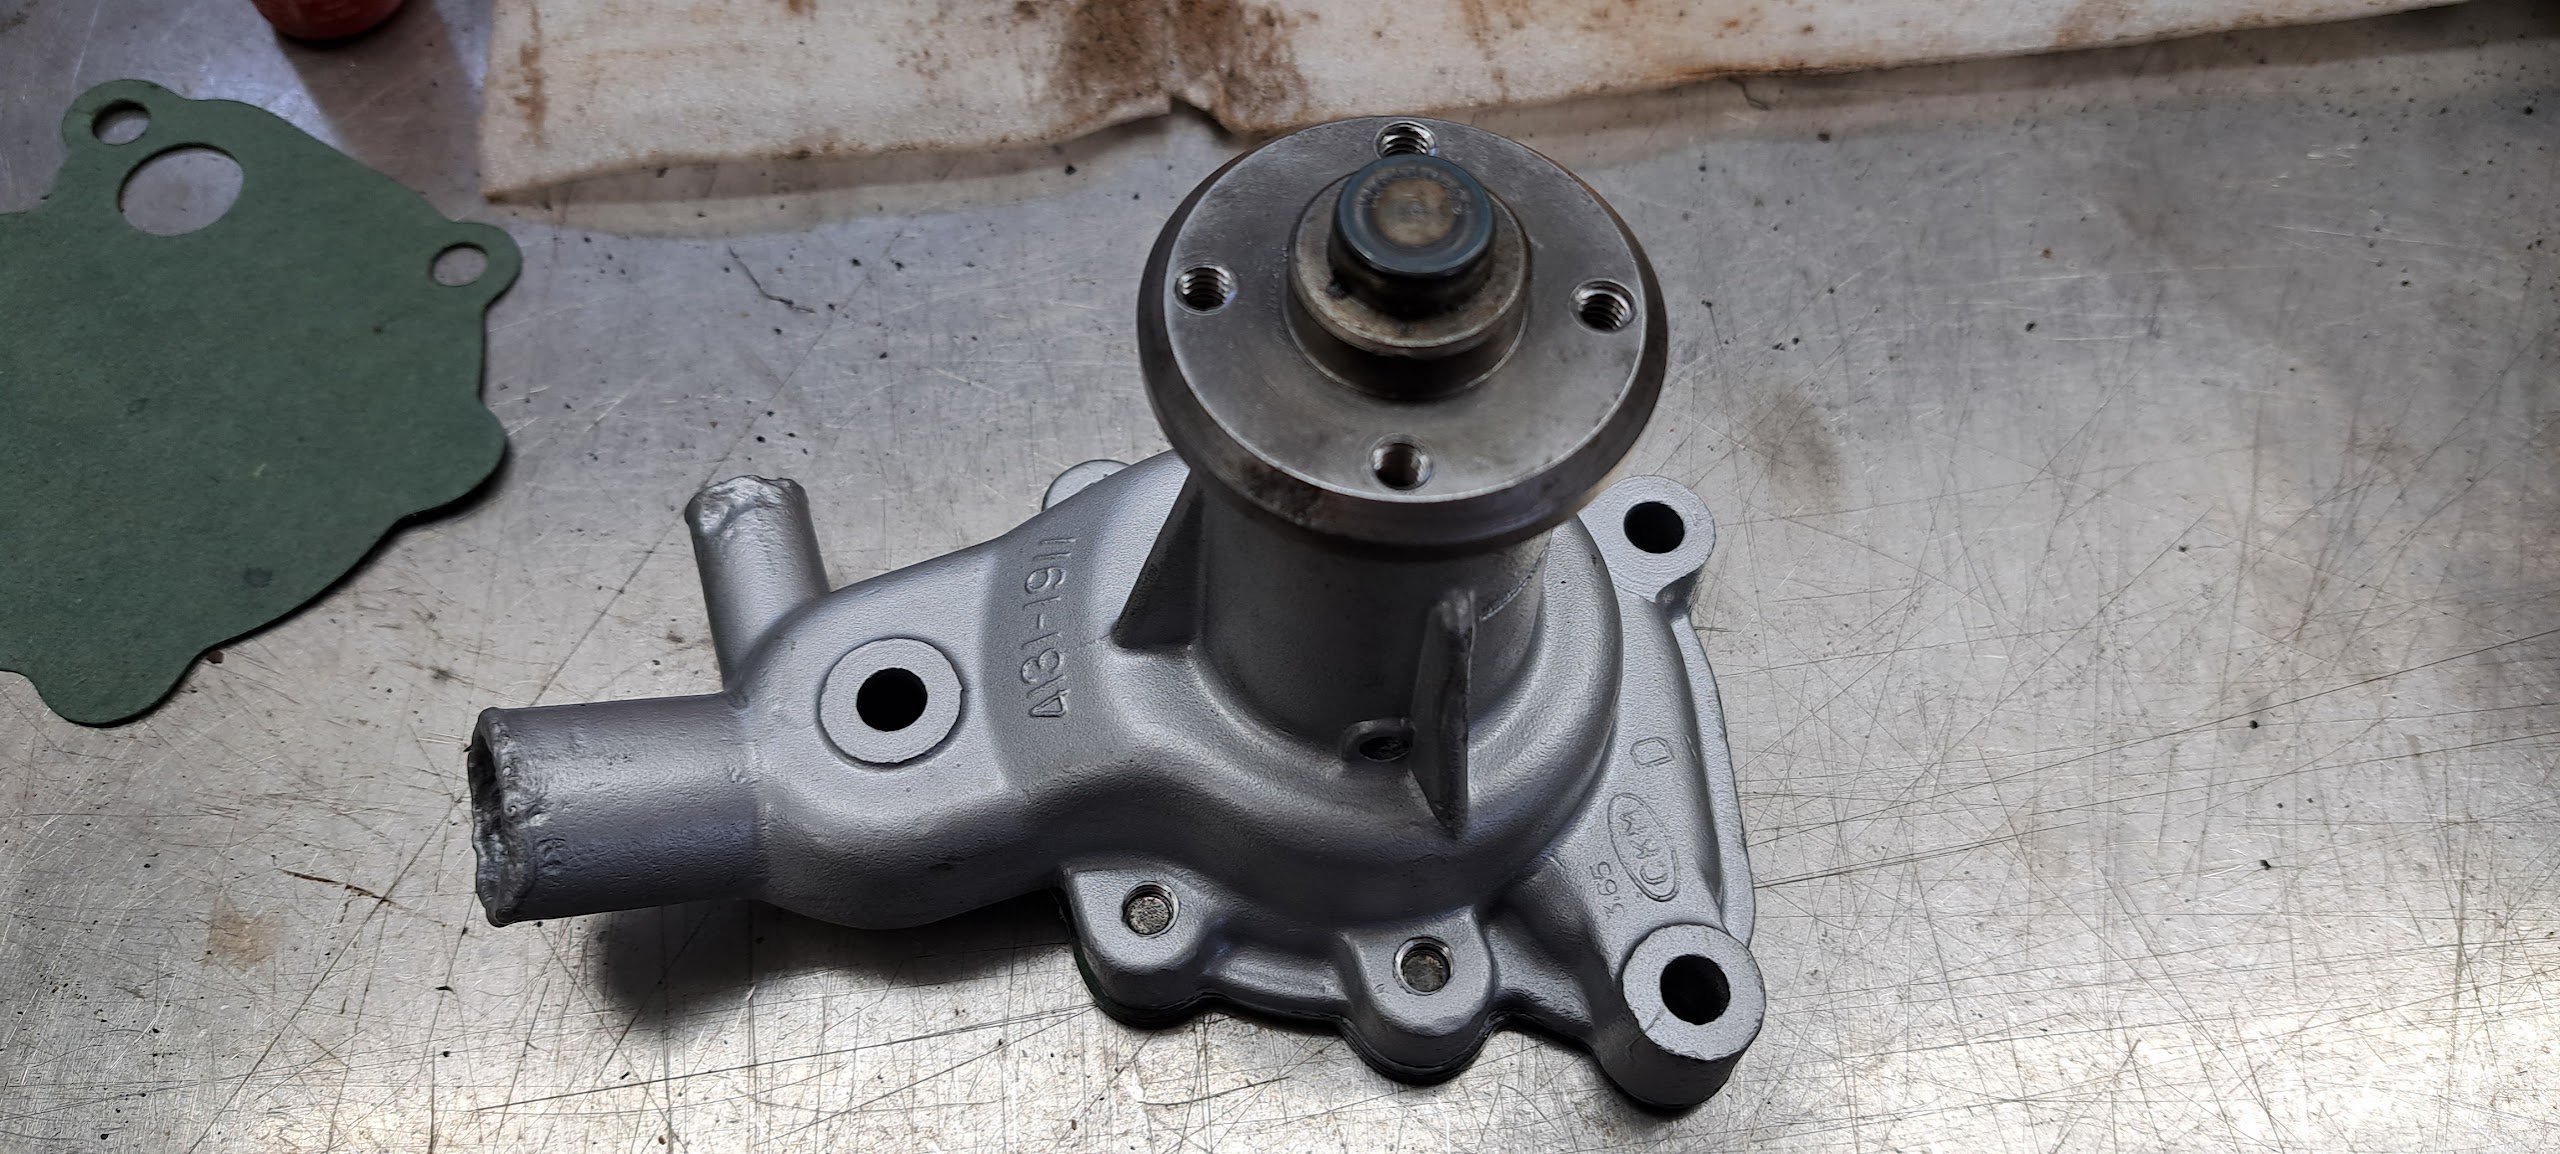
Like just about every other part on this car .. the water pump seal is made of unobtainium. So a small mod to the impeller and its now got a much more common seal. Oh and a picture of some fine hooters Freshly painted
1 point
-
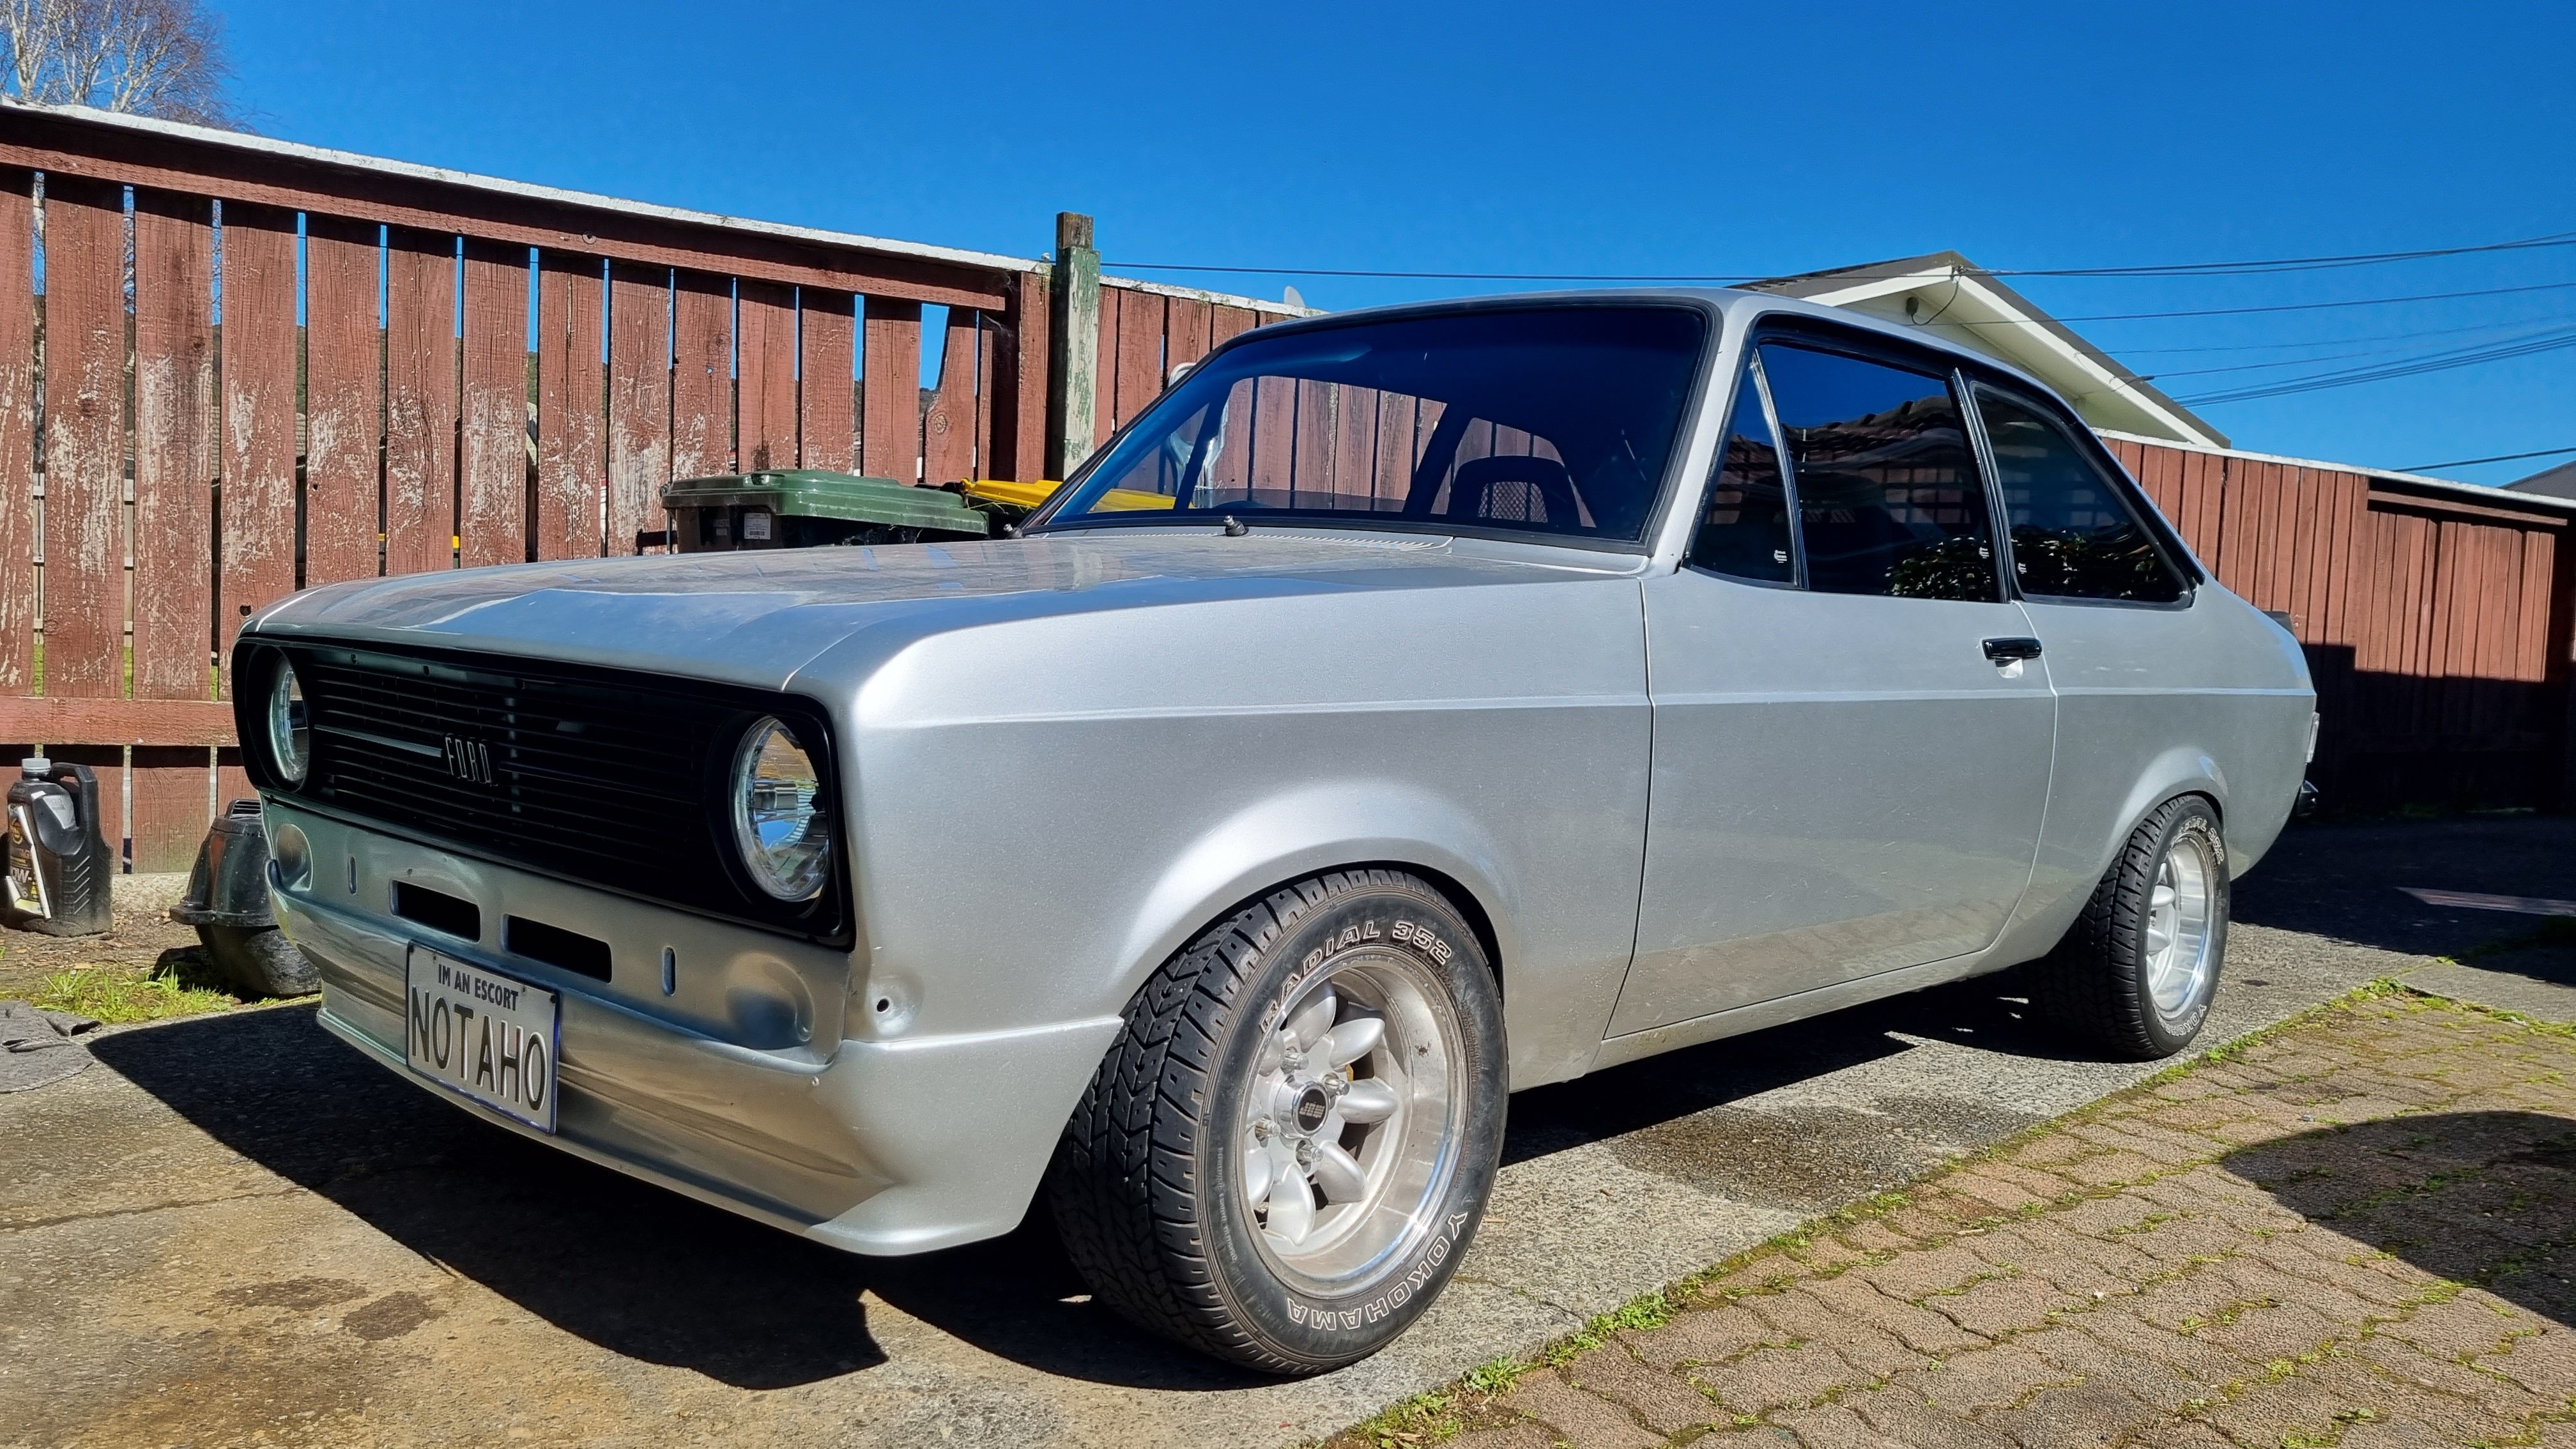
Drove it to work today and man it feels great, these are such fun cars to drive. Just makes you want to heel toe down shifts everywhere like an idiot. Also feels really good with the upgraded sway bars I put on just before starting the 'just fix that dent'. Smaller Momo steering wheel is much nicer than the stock one and a bit more leg room. A bit harder at slow speeds with the manual rack. EDIT: typos.1 point
-
Wof'd again after almost exactly 2 years, had to put a set of new rotors on it. It was 3 degrees C and late but I wanted to drive it again Not totally done with the paint, probably going to have to redo the clear coat on the bonnet. Not sure what happened but it wasn't fully hardened so the 1500 wet sand put scratches in it. Very annoying but it looks good if you don't look too closely lol.
1 point
-
Gator from Gumboot Rally came by one Sunday and hot a wee Youtube video of the Datto Mods since last post: New fuse box, new number plate light assembly. Probably some other stuff but just bits and bobs. Check it out if you wish:1 point
-
Putting this brochure here for reference later on:
1 point
-
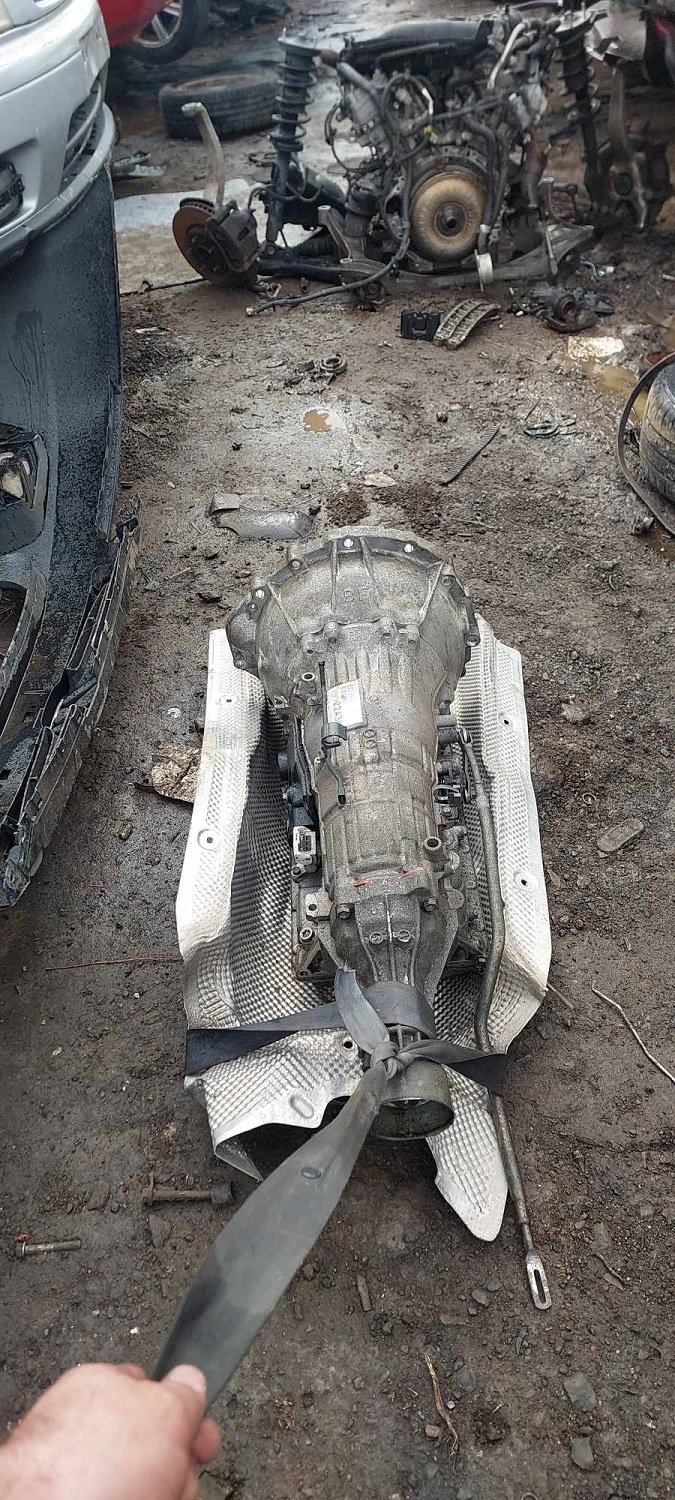
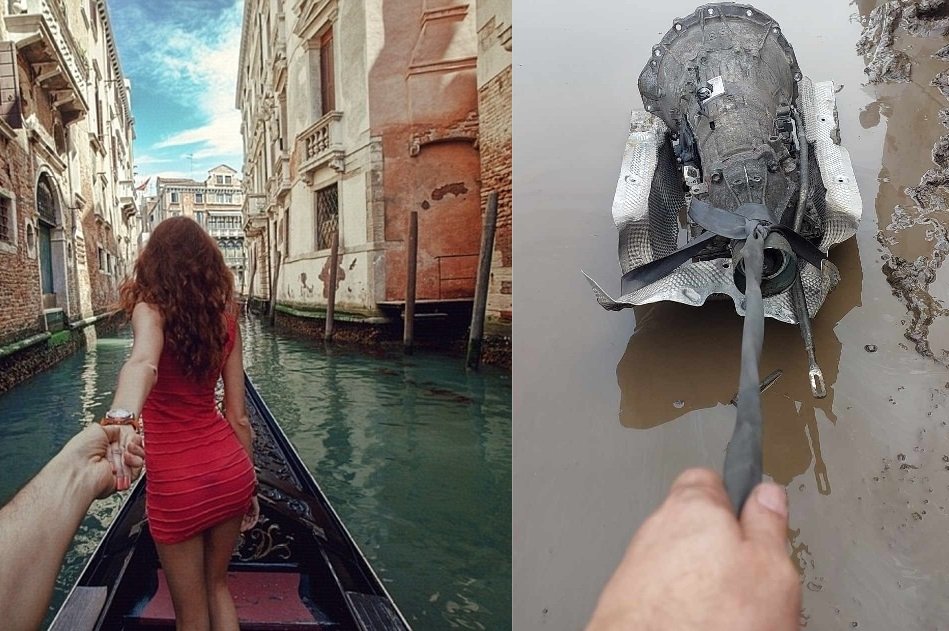
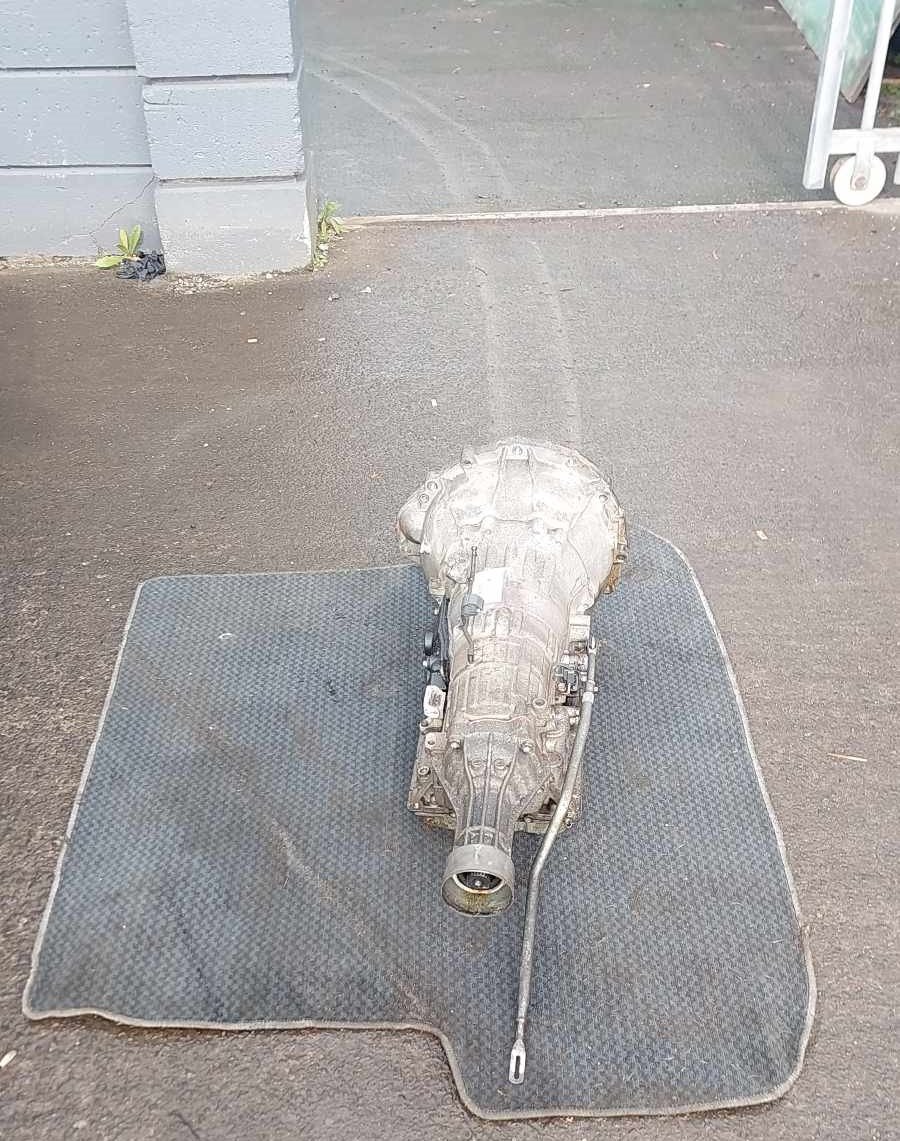
Hey, looks like a great day for Pickapart! Time to get a bellhousing. So I using some fairly crappy tools I brought, after smashing a few knuckles and many swear words I got a gearbox separated from an engine. Luckily I didnt have to undo the torque converter, it just slid off. As that was looking like a whole other nightmare. I couldnt get the bellhousing off the box, and it's same price for a full box. So I decided I'll just grab the whole thing. However, my next problem. I'm down near the back of Mangere Pickapart and there are no wheel barrows or carts or anything. This transmisison is bloody heavy. I can carry J160s okay, but this thing is beefy. So, I made a little sled out of an engine heat shield and a seat belt. Instagram vs real life: Then I dragged it to the car on a piece of carpet. What a mission haha. The auto bellhousing is very short, but hopefully the idea of a cut and shut onto J161 front will work okay. That's enough punishment for one morning though.
1 point
-
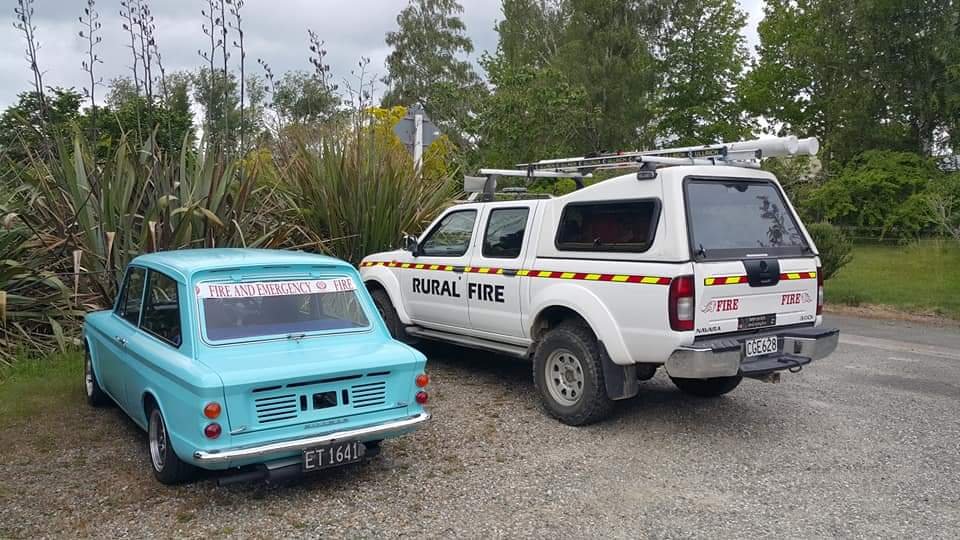
It's gonna be a proper hot summer for sure - perfect timing for the running in the new motor in the marahau fire station imp...
1 point
-
Go start some bush fires on Takaka hill with the Imp, then go put them out as the fire fighter. Full circle community swoon for Alex.1 point


.jpg.beece1a28e1b2829fa6b1b2f55e19e06.jpg)
.jpg.04c290231729054304460053f46c72a0.jpg)


.thumb.jpg.570970b401ac8d26ce9af7c1bf2bd8cd.jpg)

sm.jpg.09a680304a6ca90b0cabdb9c90e61988.jpg)


.jpg.ed28dc38513e105c70ac7c93d56338ea.jpg)

This leaderboard is set to Auckland/GMT+12:00