
Leaderboard


Popular Content
Showing content with the highest reputation on 08/29/22 in all areas
-
Roman Dave, who is a fucking super good cunt by the way, made me revision 3 test fit piston. I stuck it in and measured the clearance and its super ace at 2mm between valve and piston. So I'm calling that good and now is time to actually do something, so I've pulled the motor apart. Now is time to get the block machined, crank polished, bigger valves cut in and start actually assembling this bastard thing.
 21 points
 -
Started looking for suitable brake line saddles, all I could find were the same old clips we were using 40 years ago and some newer B/S plastic variants. Just a reminder that the plan is for this rebuild to last another 75 years – When the time rolls around for the next rebuild Rigamortice should be going strong while we’ll all be dead & buried! Maybe we need something a little more old school with a little steampunk thrown in for good measure? Started by buying length of 10mm ali square from SD Aluminium in Albany (great company). Marked things out with the odd-leg…. Started cutting, milling, drilling, countersinking and tapping…… Cleaned them up on the linisher….. Knocked up a holey bracket or two…… And bolted it all in place.
16 points
-
^Might try that vac pump @Stu! If not for the valve, could be good for just running on the booster so I dont need to tap into one of the runners. I found my graduated cylinder so its time for some more fire hazard-ish testing, to try characterize the injectors a bit better. So the first test is just to find the CC rating of the injector. This is simply turning the injector on full blast, counting the amount of time it's open for, then seeing how much fuel came out. So in the ECU I am turning on the fuel pump ahead of the test, then turning the injector on and off using the ECU too. So I can look at the logs and find out the exact time period it was open for. So in this case: These injectors are rated at 305cc at 300kpa, however I'm not sure what my fuel pressure is with the returnless setup. I thought it was 325kpa. However using an injector pressure calculator, it looks like it's probably 360kpa ( 52psi) The next important part is working out the injector deadtime. If an injector could turn off and on instantly, you'd find that spraying 1 time at 10ms would deliver exactly as much fuel as 2 x 5ms. But each time the injector is commanded to open, there's a physical delay until fuel can first come out. So 5x2 does not equal 1x10! As a visualization lets imagine each ball of fuel represents spray time. First instance is how long you tell it to open for. The second result is how much fuel you end up getting. As you can see, by spraying different quantities and time periods that should theoretically give you the same amount of fuel, the results will vary. My first test ends up spraying at 10,000 times at 8ms per spray. Because it's not really feasible to measure just 1 or two sprays at a time. Then second test is 20,000 times at 4ms, then the third is 40,000 times at 2ms. The results are as follows: With some Excel fuckery, we can figure out how much time is missing from each individual spray event, by trying to balance the results. There's probably a smart maths way to do it, but basically I just adjust the deadtime number up and down until all 3 of the columns are the same height. So for yellow 2ZZGE injectors, deadtime is around 0.515ms at 12.6 volts. Ideally you do this same test at all of the different voltages, but this at least tells me the ballpark of where the motor will run at 13.1-13.6v which are the operating conditions. My existing deadtime values were too high, around 0.7ms at that same voltage before. This existing number was from guesstimating by adding 10% fuel to the running engine, and then seeing if the results changed by more or less than 10%. Then adjusting up or down until it sorta matched. Not a perfect method but gets you somewhat close. Now it should be able to adjust itself with closed loop lambda or temperature corrections a little more accurately. It also means it takes fewer iterations to correct the fuel map, if it's off target when testing new runners or whatever. The end result of all this is that my fuel table will end up changing shape a bit. But once it's done this time it should stay pretty good even as altitude or whatever changes.
15 points
-
9 points
-
It's been an afternoon of working on Lucas today, with the intention of sorting the fuel tank once and for all but ending in a bad discovery. I noticed when the car was still on the transporter for delivery that the fuel tank wasn't looking too hot, and sure enough a quick peek under the car shows there is a fairly significant dent in the rear of the tank, denting it upwards. Worse than that, was that there seemed to be a lot of moisture/melting paint in a couple of spots on the underside. Yay. Tanks for the EFI cars are borderline unobtainable, and no one is reproducing them, so my only real option was to work with what I had, or try a source another good used one, which was fruitless. I've been putting this off for a bit because I haven't had the motivation to roll around under the car on the cold garage floor, but today was the day I couldn't put it off any longer. I got the car in the air, and sure enough, the back of the tank has a nice dent. It's hard to tell in the photo but the whole back of the tank is pushed up a CM or two with some rippling and creasing along the back edge. You can see the dark damp spot on the inner edge, along with the one in the middle of the tank I lowered the rear seat, lifted the carpet and exposed the fuel sender I wanted to see what the inside of the tank looked like (if it's rusty, it's trash) and see if the dent could be pushed out, so using a hammer and flat blade I removed the locking ring and removed the sender. The sender had some surface corrosion on it, but nothing major. The inside of the tank was a massive relief though; the tank is shiny and silver, no obvious rust. The exception is some flakes on the bottom of the tank, and the pickup swirl pot has a covering of rust flakes on the bottom (the strainer was still in place on the outlet). The tank will need to come out for a proper cleanout and fix, but that is a future issue. So the good news is the tank is worth persisting with and I'm not chasing rust holes. With the sender out the dent was right there, below the hole. I tried to use an old Toyota suspension arm to hammer the dent out a bit, but it kept slipping. I would've liked to use something like a broom handle or other length of wood, but didn't have anything on hand. I'm not sure I made any difference. I cleaned the areas in question with brake cleaner and a rag before giving it all a sand with a coarse grit paper You can actually see the two pin holes that are leaking; immediately after cleaning the area, these two spots would have a growing ring of dampness around them. The tank is super low on fuel, it ran out of fuel on the drive when I got the car, and I have put about 8L into the tank since. I've kept it low waiting for this repair, as this allowed me to raise the rear of the car and slosh all the fuel to the front of the tank, away from the damaged area. I started with the weird leak in the middle. This looked like someone had driven a screw into the tank and then soldered around it. I cleaned it up, sanded it and then scuffed it with a file before mixing some steel reinforced epoxy putty up and squishing it into place This stuff is meant to bond to steel and is impervious to fuel, so should seal the leaks, in theory. Next, I did the same to the pin holes and sealed them with the putty too I had to redo the one on the right as it wasn't bonding to the tank too well and had a growing ring of dampness around it. I chipped it off, scuffed the area with the file again, and then using force, smeared some of the putty hard into the area. Once this was slightly cured, I then used more of the putty over top of it. This seems to have worked. The putty is currently curing, and I will lower the car down tomorrow and see if there is any further fuel seeping around the repairs. If not, The area will get some paint and that's the job done. The other issue with the tank was that the breather hose in the rear wheel well had done its dash Strangely I don't have any 12-13mm-1/2" fuel hose on hand, so I'll pick some up on my way home from work tomorrow. It's no wonder the tank was dry, it just either leaked out or evaporated away. Before working on the tank I checked the fuel pressure, just as a matter of course. It's all within spec, 36psi with the engine off, and 30psi at cold idle. No issues there. It was a bit slow to build pressure when cranking, but I wouldn't be surprised if that was due to the low fuel level. The last job I did in the engine bay was to look at the coolant leaks I found last time. I tweaked the hose clamp on the waterpump hose and found the radiator top hose wasn't fully on the radiator fitting, so loosened that and pushed it further on. A pressure test now results in no coolant on the ground, which is a major achievement for one of my cars. The hoses still need to be replaced, but that should keep it happy for now. Now for the bad news. I poked the orange scab on the floor. I knew the driver's side of the floor wasn't in as good shape as the passengers' side, mainly because I could see the "paint tin lid" trying to make a break for it on the underside of the floor. By the way, the reason they are called "paint tin lids"? Because they literally are, people have often used the lids from 1L tins and found them to be the same as what Rover supplies. They are bonded into a recessed hole in the floor and are a massive trap for water. After the success of the passengers side last time, I was hoping for something similar, but with having to replace the tin lid. Sadly that was not to be. I removed the driver's seat, as I needed to lift the carpet further. To do this you remove the two nuts from the front of the rails, these go onto studs And then slide the seat all the way forward and look inside the rails for the four torx T40 bolts (two per side) that have square washers Undo those and the seat will just lift out of place. I tipped it over and into the back seat, but if you wanted to completely remove the seat you would also need to disconnect the seatbelt from the seat. With the seat out of the way I lifted the carpet further and found despite the car being in the garage with the carpet partially lifted for a week, the underlay was still sopping wet in the footwell. I also started poking around at the cracked underseal and orange scabs, and ended up with this under the car Some stabbing with a screwdriver and scrubbing with a wire brush and I revealed this Damn. The hole for the lid has become somewhat overside, with some thin metal towards the inner sill, and another hole formed near the inner sill toward the front of the car. I'm pissed off it's that rusty and the seller swore the car was rust-free, but I'm not too daunted by it (I'd be crying in a corner if I discovered this a couple of years ago). I have a plan of how to fix it already, which will get rid of the paint tin lid completely and restore good metal to the area, but that'll take some time to do since I will need to strip a bunch of the interior out to make it safe to weld. So that's where we are for now. I'm still trying to dry it all out, but I'm tempted to just bin that underlay and use some of the jute underlay I have to make a removable mat for under the carpet, so if it gets wet again I can just pull that out and dry it out. Foam is never a good idea where it might get wet. This whole car has been one step forward and three steps backwards. It'll be a great car once I'm done with it though, I'm sure.9 points
-
This is still going strong. Broke a set of points on it while being a dirtbag in the wet which was lol. Have also been chasing an intermittent misfire/stumble, so it's ended up with pretty much all new ignition bits other (points, cap, rotor, coil, leads). Also pulled the carb off for inspection and clean. Hasn't fixed it, but hasn't made it worse either so I'll just keep on keeping on. Did a service today, next one is the big 300,000km! Oh, and some decent headlight bulbs have made night driving much more pleasurable/bearable. Have some assorted load hauling pics
7 points
-
pics relating to above ..
7 points
-
Last few weeks have been semi productive, if a little convoluted in terms of achieving the desired outcome - but achieve I did. Following on from last thread, I brought the Delta, turned out that was a comedy of errors. I asked the dude what the diameter of diff head and bolt count was - around 320mm he assured me. I had roughly measured mine at 300mm...it was close enough to warrant the half hour trip south the confirm exactly. Got there and scoped it out with a mate of mine who knows more than a thing or two, measured diff head at 300mm - what I had hoped. Good to go. Also started talking of other bits we were going to raid off it, I think at this point the dude had a few regrets as he had another one with some fucked bits on it...so I threw the cash at him and loaded that fucker on and hightailed it. Got it back to work, double measured both diff heads, turns out mine was 320mm. Dumb Cunt. Spent an arvo ripping some other shit off - most of which was done to make me feel good about the wasted effort, and little of which I may actually use. The fuel tank however was a better size and shape, 80L was ample. I got to Monday morning and thought to myself - well what am I going to do with this half fucked POS that I no longer want in my workshop... Rang the local truck wreckers and told him of my conundrum - all I need is a diff of better ratio, are you interested in a swap for a half fucked Delta that supposedly runs. Its on the trailer and I can drop it off now - I was persuasive (/desperate..). He pointed us to the earliest Dyna diff he had lying about in his stack, we ripped an axle out but it was bigger than mine so we proceeded to rummage through an endless pile of dyna diffs ripping axles out and measuring - but to no avail. It was a biting cold miserable day so we ditched the Delta there, not before actually firing it up so as to make good on our end of the deal - it lived! We resolved to come back when the weather came good, and also rip the fuel tank off the Delta, about the only truly useful thing from it... When I got back to pick up the diff and rip the tank off a few days later ole mate Rodge, with all the requisite finesse of a ballerina had managed to stove in the fuel tank - avoiding every other fucked bit of shit around it - shot bro. Anyway I grabbed the diff and he let me rummage through his pile of tanks - turns out that was a far better outcome.. We werent hopeful with the diff situation but it was kindof our only choice. Got it back to work, ripped the cunt apart and low and behold the diff head looked near identical internally (despite the external casting differences) and all the key measurements stacked up. It was a 4.7:1 ratio too, which is ideal. My math tells me that the little 4V will be humming to the tune of about 3150rpm at a hundy in top which is far better than where we were. A few days later we ripped the other diff head out, pulled the diff center out and swapped the new ring gear onto it, then dumped that all into the new diff head. This obviously negated the need to pull the pinion, which as some would know is kindof a cunt of a job, and also my original pinion was leaking like a motherfucker - this one was dry so a no-brainer really. So we then dropped the freshly assembled new diff head back into the diff after a nice cleanup, as well as gave the brakes a tear down and inspection. These have clearly been done in recent times - the cylinders looked pretty new and the pads had barely bedded in so its good to know the whole arse-end is now in tip-top shape. Once that was all back together I then finished ripping off the last few bits of shit left on the chassis before giving it a full steam clean. I then pulled it back in the workshop, sprayed a bit of caustic cleaner on it for the night and then followed up with a second steam clean the following day to neutralise - its pretty raw now so the decision has been made to sandblast it in the next couply weeks. Undecided if I will pay someone to blast and paint or bother doing it myself - the former option will be relatively cheap but consume 2 days of my life. The latter option means I get the desired result and keep 2 days of my life. If Im honest it will probably work out better in many ways to just outsource this whole cunting bit of the job. The former option also requires much more logistics than my forklift and a 5 minute trip around the corner. Speaking of forklifts, I hammered up a BBall hoop out of some square bar to entertain the minions.. So whilst I have been figuring out the paint situation (or rather coming to the likely inevitible conclusion of spunking money I dont have) I thought Id set-to with getting a few other bits sorted on the chassis before it gets a lick. I mounted up my new tank. Fuck I am stoked with this, it was a totally mint tank, much shorter than my original, which means no encroachment into my battery area now and it measured up at a very healthy 87L capacity - fully in the pocket. I also started to mount up my radiator. A few months back I randomly happened upon a 4-core 70 series Landcruiser radiator on FB marketplace locally for $150 which looked like it had potential. It was re-cored, had never been used and just been sitting around in someones shed for years. She gave me a few measurements and it looked like it could be the go - so I lowballed her and got it for $130. Criminal. I offered this up into the original position but it was about 80mm taller than the original, which necessitated some minor adjustment to the chassis xmember. I havent quite finished this as I keep forgetting to order a couple of universal rubber mounts for the bottom, but Ive trimmed some shit and mostly done the necessary fab to get it sitting exactly where the original was - will finish in due course. I then cast my mind to the handbrake situation. I actually started a bit of a sub-thread here as I thought it might be useful info for someone else in a similar conundrum at a later stage (will update that thread too..) So essentially in most trucks, the handbrake is affixed to the back of the trans rather than how cars work. Its clever, but given I am running a car motor and box this presents challenges - namely there is nowhere to confidently mount a handbrake mech to the back of the box without considerable brain-hurt. So I found a bit of info on pinion mounted brakes, which seem common on rock-crawler type stuff and various other things. I had semi settled on the idea of using a disk to ease aforementioned brain-hurt - but then went round in circle a bit on the thread entertaining all possibilities, with @smokin'joe rightfully re-questioning the disk logic...it got me to further thinking. Anyway, I had to go back to the truck wreckers to get a driveshaft as the flange bolt pattern was slightly different to my original. I thought while I was at it, Id give him back the diff I had brought instead of scrapping it for $5 with some fucking scum cunt ripoff scrap metal dealer. I was happy to pay for a driveshaft, and a brake setup, suffice to say Rodge is genuinely a fucking good cunt (Lorryland Tariki FYI) and let me once again rummage. I found a drum brake off an Isuzu which I thought might be workable. Got it back to work and by-fuck the thing just about slipped right over the pinion flange. A little massaging with the die-grinder and it was loosely in the posi it needed to be - so I basically now need to machine up some sort of alignment piece to mount/align it to the pinion so as I can then fab the bracketry to hold it. It will be a mish, but Im glad I have a fairly solid direction now, and of course with it being truck-spec my cert dude should be happy. I managed to track down a king-pin kit in NZ also as one of mine is marginal so may as well sort, but just need to pull one out and measure before ordering. Will sus. So the most recent task has been to jump back onto the motor to get this ready for firing up. There are a few things left to sort here, the first is the alternator bracket, the second is the degraded bakelite-looking bits around the plug tubes which seal to the rocker covers - which I need to machine up, and the last is the headers. I had already got bits cut for my alternator bracket so I proceeded to start sorting that. My CAD was not as ideal as I had originally thought so once I finally offered the actual plate up to the engine I realised two things - I made the holes stupidly oversized.. which kindof doesnt really matter, and the shape was a bit shit and needed some additional massaging. Anyway, it all worked out not too bad - on the second attempt. I think a few less doobies would have helped.. This was really the only posi it could occupy, and of course being both free, and of considerable amperage it fit the bill rather well. Main problem is owing to its girth and position there is not a lot of swing for tightening the belt. My worker is a rotorhead and brought in a tensioner off an RX7 so I hacked that up for belt tensioning duties and just fixed the alternator in posi using a U-bolt. I spun up a little ally idler pully on the lathe and replaced the bearing. Its a bit Heath-Robinson but fuck it, it will work. Basically I am now waiting for the 1st of the month to roll around so I can order a bunch of profile cutting which I wont have to think about paying for for 2 months... this will be engine mounts, header flanges and handbrake bracketry, which should keep me fairly well occupied for the next month or so. Also @ThePog will be an old cunt (50!) this week so Im heading down to remind him so on Friday - and get shitfaced courtesy of Richmond Fresh Choices amazing beer selection. It inconveniences my progress, but man-love knows no bounds. Chur.
6 points
-
5 points
-
The bottom end has come back from the machine shop! There’s a bit of cleaning work for me to do, as the block didn’t get hot-tanked. The rationale for this was it would destroy the auxiliary shaft bearing which they didn’t remove because they couldn’t be bothered. They did remove the gallery plugs and gave it a good manual hose out though, and he reiterated several times how much crap was lodged in there! The deck has had a very light skim. The marks still visible can’t actually be felt by my sensitive fingers. It has been bored 0.4mm oversized. The crank has had the journals polished and also had the gallery plugs removed (full of crap also) This meant the holes had to be drilled and tapped for new modern replacement plugs. This apparently ruined his tap because the steel is so hard! Go Fiat!! The crank has also had some weight ground off to balance it. It didn’t need much apparently. Shiny piston The rods were balanced too. 6 grams between the heaviest and lightest ex factory. All spot on now. Looks like number 2 was the lightest as it has nothing missing. The flywheel and clutch cover were also balanced. The flywheel was pretty good, just 4 small holes drilled. Clutch covers aren’t that well balanced evidently because swiss cheese to get it right! I have only had time to gap the rings on number 1 so far, and they were bang on the low end of the spec range out of the box. If all the others are the same I’ll be happy as.
5 points
-
Today I started dismantling the front a bit more to do some refreshing on the headlight surrounds as the black is fading and also try to refresh the panel under the lights whatever that's called. As you can see those bits are crusty so will refresh that. Not quite sure if I'll keep it the grey or do something else. I also decided I want to paint the area behind the lights etc in black or some dark to hide the poo red. Sat the rear wing on just for looks too, nice. I also want to work out putting a wideband sensor in the headers for tuning the carbs as there is a provision for O2 sensor in there which as you can see has been used simply to block off the hole. Most wideband sensors don't seem to look like this though so hopefully I can find a threaded flange to put in it's place.
5 points
-
So the snorkel i order turned up at the start of the week and straight away there was a problem, instructions didn't quite look right So it turns other that Safari being an aussy company make them all there kits to fit ADM vehicle not jap imports. Ask on a Pajero page how people had got around this in the past and got some interesting ideas as well as some not so great in my mind ideas. One person had modded an L300 air box to fit. this got me thinking what about a L200 air-box. There very similar body shape and come with he same 4D56T and after some googling looking at photos i was sold. Managed to get to Pick A Part and pick on up for only $28. After fitting up the template and double and triple checking i decided to start drill out the 85mm holes. Drilled out all the mounting holes and test fitted the snorkel. very happy with hoe it sits nice and tight to the A pillar and gard. Dosent even block much vision form the drivers seat too. This is why i order the Safari snorkel not one the the ebay/trade me one. Offered up the L200 air-box and after bending and trimming the mounting point as well as welded a couple of captive nut in the on inner wheel well it was fitting very nicely. I ended up over lapping 2 holes in the inner gard to get more room for the pipe to bend in to the intake of the air-box. Trimmed down a random bit of intake piping i had laying around in the shed to Finnish it off in to the turbo intake pipe. Very happy with how it turned out. Looks almost factory, Also i know that none of the existing holes in the A pillar are need any more so ill be welding them up later this week. Also hoping for a dry day so i can get it out of the shed and give the body a good blow off before i start will filler.
5 points
-
Reversing camera. And also side view camera. The new head unit has twin camera inputs. The reverse camera works as per normal I.e when the cars in reverse but the other one is selectable with just a button on the bottom of the head unit so you can turn it on whenever you want. I thought it would be a good idea to put a camera in the left side wing mirror so I can see the kurb when parking. Because I can't drive that would be a good thing to stop me driving my rim into the kurb.. So anyway mounting the cameras was easy. Running the wires was not. Got there in the end and it all works sure super awesomeo.
4 points
-
Forks have new bronze bushes and seals, and fitted to the new frame,
3 points
-
Evening all, small steps this weekend. Mounted the remote oil filter , I scored this while working in the Uk. It's a genuine magnesium remote filter block from a works Ford Escort Cosworth. Needs a new filter as this one has just been sitting in storage and ironically is starting to rust..
3 points
-
As a newbie one of the most confusing aspects of this process is "what the hell do I do with the struts?". I learned fairly quickly the basics of what the bits do... the purposes of the shocks and the springs. You can lower cars with smaller springs but that the springs themselves aren't linear in nature - some of it is stiffer than the rest - and so you can't just lop some of one end off (not sure how true this is for this car but whatever). Then you also need to get inserts appropriate for the new height or they'll be too stiff (unless that's what you want). I think that's right anyway. As a dumbass who took all the suspension off first, I don't actually know what height I want this car to be. I can look at the red starion for reference, but I also have some new wheels I'd like to put on it which are much wider than stock that have no tires on them as of yet - so not sure how that affects things as I'd rather not roll the rear guards if I don't have to. And I'd rather not get new tires for wheels that are not a sure thing right now as they'll need spacers which means cert and all that. Anyway less rambling. I took all the struts apart to see what I was dealing with. Stella's shocks are absolute toast, leaky and they don't really seem to dampen anymore. The fronts are bad, but the rears might as well just have hollow tubes. I read on the interwebs in many places that whilst the front struts can easily accept replacement shock inserts, the rears are a sealed unit and the whole body has to be replaced. I cracked open the fronts easy enough with a pipe wrench. The inserts have been replaced at some point in the past, unless Mitsubishi subcontracted to Monroe. Not pictured: lots of oil that had filled up the housings. However the rears have a different style gland nut that I just couldn't crack. I didn't want to round anything off or explode oil in my face or whatever so I left it. So things are lining up with internet observations and it also explains why the rears are so bad compared to the front; they're not as easily serviceable. Because this may shock you: the rear strut bodies don't exist new anymore. I'm sure some OK ones exist in some enthusiast's stashes but hunting for 40 year old "good enough" gas struts just doesn't sound like an appealing path to me. So: - The rears on this car will fail WOF, but I can't get new ones. - Therefore the rears need modifying (cert needed) or replacing with aftermarket coilovers (cert needed). - Therefore I will need cert no matter what. I'm not married to authenticity with this resto; if I have to replace something stock with more modern technology I'm not going to cry. Insert justifications here - bottom line is that's my attitude towards what I'm doing; YMMV. Coilovers sound like an excellent route; they'll solve the gas issue, make the "what height do I want" question obsolete, and I'd like to be able to dial in my stiffness. There are three well-known budget coilover brands I found that are advertised as working with the Starion: XYZ, D2 and KSport (they still need the fronts modified to get the spindles on them). Reviews of these brands appear to have been very poor in the past but they seem to have improved over time to "fine I guess". There doesn't really seem to be a step up from the budgets for this car, at least not one that my dumb ass can see. My mate has fortune auto coilovers and swears by them so I got in contact with NZ's distributor, MLP. They've got a welding service for old RWD cars' fronts and they were happy to provide that service for me. But the rears? Not so much. He wasn't confident he could get it done up to cert and didn't generally seem interested. I made a post over in the tech talk forum which was very useful. @Bling mocked up what I suggested and pretty much says what I was expecting. The fortune autos have a threaded bottom which are paired with bottoms made for various cars so the idea would have simply been to cut mine off at the bottom and thread them. Didn't seem like an overwhelming task but I'm also not a certified welder or aware of certification rules. My mate even had some spare bottoms that were mis-delivered to him he gave me that I can throw at people for reference. Again, seems totally doable to me, ugh. So anyway, I pointed at a lovely fellow named Malcom Lovett who said that he'd had Autolign modify his rear struts ten years ago with new Bilstein inserts. So I packed it all up and went off to Autolign. Now the first thing I will say is that the guy at Autolign in Petone (I forget his name) is a top notch bloke who genuinely had my interests at heart. He spent a solid half hour with me essentially deflecting any attempts I made to self-upsell and save me from myself. We talked about modifying the housings to behave like the FA housings so I could fit new FA coilovers. He either dismissed that idea so fast that I've forgotten the reasons why, or he misunderstood, "you want coilovers? We can do it but it'll be spenny". He talked me through the process for essentially fabricating coilovers from scratch and put a rough estimate out there that was.. spicy. I thing the conversation may have shuffled on too fast and we lost each other in the confusion, but also he really knew what he was talking about so it's hard to believe he didn't understand what I was suggesting. I might still pop by again in the future to discuss this. He pawed through the Almighty Tome of Shocks and found that the starions' front inserts aren't being made anymore. But with a bit of fiddling he determined that there are some MR2 ones that would essentially fit. He was adamant that the gland nuts on the rears could be removed by an engineering shop and there'd be a replaceable gas strut inside. I raised my eyebrow. He then did a quick bit of research and changed the tune to "oh.. yeah we can modify them to take new struts, would need to add a spacer...". He confirmed that he could ship them up to Auckland and they'd be able to do it all, but he actually advocated taking it to a shop first to disassemble just to cut down on shipping costs for me. To confirm what I already knew, yes this'd be certification territory even if it's essentially just restoring to factory condition. Likewise he also asked if I intend to lower the car - as these are not adjustable, I'd need to go in with a specific ride height in mind. Not much point in me paying to get them shipped up and modified only to have to ship them back up later when I decide what I want right? When asked what he'd do, he said he'd get XYZ coilovers, they'd be perfectly fine and way cheaper than a bespoke thing that likely would be just as performant. Autolign doesn't stock these and he was clear that if he got them in they'd be paying retail price and passing the margin on to me, as I say, really looking out for my wallet. Overall a bit dejecting, I was hoping to get this cloudy aspect of the rebuild checked off, but I guess that'll just have to wait. So the plan now is to initially get the car back on the old shitty struts and figure out the wheels and ride height from there, then get the rears modified (involving cert guy from day 1 as suggested to me) and figure out what the hell is happening to the springs if I intend to lower her. Probably jumping the gun a little here but I cleaned it all up to go to the blasters/powdercoaters (or in the case of the rear strut bodies, just cleaned). Here the batch is just after parts wash, looking deceptively non-rusty. That was a few weeks ago, they'll take another couple weeks to get back to me and I'll just keep on carrying on with the myriad of other things that need doing. If anyone has any alternate ideas or information or advice or suggestions please do hit us up.3 points
-
Finally finished it
3 points
-
Time to run the brake lines, starting with the rear as it’s the longest. Welding wire pattern……. Following the wire pattern (I find it easier to tape them together as you go). Happy with the result… And it even fits! Starboard front was a lot easier. Bit more drama with the Port front… A rather convoluted shape… Lots of bending in all directions… Once again happy with the result. And once again it bloody fits!
3 points
-
On today's episode of rolling shit in glitter I have a go at fitting up the front splitter I've had for a few years. Never really had the space to disassemble the front end before. Considering the car is more bent than your average family bar enthusiast it doesn't fit toooo bad. I have to get some proper fasteners and do some sanding down and more bending and it might be not terrible. Then just need to buy some house paint (looks like that's what the car is painted with LOL) and make it red
3 points
-
Was going to buy one of these but thought, what I need is another project! Salvaged some angle steel. Some other junk. Weldie weldie. Welder was running like a bag of dick's, finished it off with my bros. Seems to work. So this will allow the case to be open, receive the crank, cam etc. Then get sandwiched with the top half.
2 points
-
A couple small jobs finished and a few more started. Went through all my spare glass and have selected the best. Rear doors are pretty good but unfortunately the front are all scratched from winding up and down. Escorts have a poor external door seal design which eventually damages the glass. I'll polish the bests one up and just deal with it. Added the petrol tank breather pipe and cover. Added a thin strip of foam backing to fill in any gaps and avoid any movement. Finally ordered some sound deadening. Was quoted about $400 for dynamat so decided to look into the os approved kilmat. I chose the thicker 80 mil sheets because I wanted to give it the best chance. 34 sheets, 35sq ft total, $250nzd landed and arrived within a week. Added sections to rear doors as an early test and so far so good. Looks like decent adhesive and its easy to work with. The 2x inner door sections took almost 3 sheets total. Gave it the before and after curled knuckle tap tap test and it's noticeably less tinny. Will apply it to the usual cabin places next week.
2 points
-
Time for another update. Slow and steady here, nothing major to report but just little jobs ticking along. I had a bit of a panic moment as I started thinking a bit more about the califont, and the legalities around that. I asked my gasfitter broher-in-law but he said dont touch it. So I stopped talking to him and went to my local gasfitter next door to my workshop, conveniently. He came had a look, basically I cant co-locate the gas bottle where the califont is so have to build a separate gas locker, and just fully line and vent the box where the califont will be going, as well as some separation from electrical. I was happy. He essentially said, its all down to the dude signing it off being happy - to which I asked "will you be that dude?" A bloody good cunt, even happy to guide me on what I can do without him, hes pretty disinterested in doing the actual job, and I am a cheap cunt, so I think we are going to get along just fine. I finished the ply lining in the califont locker, and decided to mount to the rear face of the locker. Made a couple brackets and got it dummied up. Now I can starat planning out some plumbing, and obviously the gas situation. I need money for the next steps in here, so I have elected to keep moving on with tasks which are not of cost at this point. I also went to the south island with my kids for a week and visited @ThePog - here is a picture of his ass sticking out from Uncivil Ian. I was also fortunate enough to convince him to let me drive The Dynafari. I nearly accidentally offroaded it - the look on that cunts face was priceless. It goes bloody good, I feel like my cock grew 3 inches that day from the manliness one is imbued with when driving. It has since retreated back into its tiny pocket under my beer gut. Also, Ian needs some love, so I think Dylan is tending to that. So returning home from a bout of inspiration from my southern friends rather impressive workshop, I set too on the camper again almost immediately. I have decided that I am going the full hog, as its already pretty deep and Id be fucked off it it failed wof on some scabby bit of rust I missed or whatever. So next inexpensive job on the list was to whip the chassis out from underneath the body. Not exactly easy, just a cunty job really. I made these sweet stands one arvo out of bits of shit lying around the workshop. There was a bit of maths involved in figuring how much I needed to lift it, and a bit of pondering over how complex to make them. It would have been great if I could have essentially made them jacks, but my brain hurt thinking about it, and I wanted it done in an arvo so I just made something simple. Unbolting was a bit of a cunt, and I had to kindof lift, then slide forward, then lift some more, teetering on one jack I got up a few notches then decided it was getting dodge, so borrowed some jacks to get it up higher. Ended up lifting it about 600 off the ground, not quite high enough to clear the wheels, but high enough to remain safe, which was starting to be my greater concern. Anyway, finally slid the entire chassis out a few nights ago, then finished pulling the loom out. Next job it to xy12 and steam clean, then start the glorious task of wire-wheeling, rust converting and painting in black enamel (eventually once fab is complete). While it was half-way jacked I slipped the cab back in. It looks rather Over-landy and quite beastly. There was some conversation around the potential to pursue this vein, but I just cant be assed, and the thing will handle like a pig. It handles pretty sweet so Id rather keep the weight low. But it does look cool lifted! So we whipped the wheels off and rolled the chassis out on a pallet jack and trolley jack. Its good, cause I can stow it back away each night and it doesnt take up space. Also I have included another gratuitous engine (and trans) shot, just for good measure. So after all of this, we have now started really thinking out the chassis tasks. There isnt a hell of a lot to do really. Mount engine and box, make a disk handbrake setup mounted to the Diff Pinion, driveshaft and hoop, radiator. Fuel tank. Ok, there are a few things. We finally also measured the diff ratio - a very spritely 6.2:1...By my calculations at 100km/h with the original 5R was spinning at about 4150rpm - obviously 85-90 is a more realistic cruising speed for that, but anyway, thats not really going to work on the V8. I want to cruise at 100k. My original thinking was to find a 4speed overdriven Auto, but I couldnt conclusively find anything Toyota that would bolt to the existing bellhousing, dont want anything electronically controlled, and basically got lazy and/or didnt like the price/hassle on the GM and ford 4speed boxes. So that necessitate trying to find another diff head. Which luck would have it, I think I may have done from an early 80s diesel Diahatsu Delta - just down the road even. Im going to look at this on Sat, and if its the go Ill load the truck on the trailer and bring it home. https://www.trademe.co.nz/a/motors/cars/daihatsu/delta/listing/3615732978 The dude has already given me some critical measurements/pics and spun the wheels to count the driveshaft turns - its looking anecdotally around 5:1 or perhaps a fraction under ratio which is way more acceptable - cruising rpm should be around 3300 at 100kph. Anyway, fingers crossed this is the same diff head. If anyone wants some Delta parts hit me up! Thats all for now
2 points
-
So ThePog convinced me to post up some info about my Camper Build. Its a 1977 Dyna U10 which was probably built as a camper straight from the factory - my guess is a CI Munro camper body, its very Caravan-esque. Its a cool thing in so many ways, Ive had for a bit over a year and probably done around 3-4000km in her - Far North, Raglan, Tahora...never missed a beat. Have fitted proper seats in the back for my kids, extended main bed, fitted good stereo and reverse cam, thats about it. It is on wof, which is nice, and has the mighty (79hp) 5R 2L petrol engine and 4spd L40 gearbox. As one might imagine performance is not 'spirited'... some of the best hills it will struggle to surpass 40km/h, which is not entirely conducive to making friends on the road... I am of course always willing to accept defeat and pull over. The 70s must have been glorious, certainly not in a hurry! Anyway, the wof ran out late last year, I still did some adventures through summer because, you know, the fear of actually being pulled over was of little concern! The rust issues were starting to rear their ugly head, and the engine thing was becoming tiring. FYI, it is actually surprising that, given time it will push the camper to 100km/h (@9000rpm) on a flat road, and up to about 40km/h it all sortof works, then goes downhill rather quickly. The 5R is still in good shape, but out she goes... So one night standing around having a beer ole mate from the workshop across the road comes wandering over for a brew, asks if any of us have use for an old toyota V8 hes had sitting on his floor for about 10 years. At that point, the consideration of what to put in the camper became abundantly clear. Somewhat irrational, but on-brand and period correct. Its a 4V, likely from a mid-70s VG30/35 Century. Its carbureted and came with the 3speed auto (I really want a 4 speed to avoid needing to lower diff ratio). Conveniently, it has also had a rebuild and some tickling. Has had a reasonable amount of port work, and a cam, we pulled it down to inspect and fresh hone marks on the bores, all new gaskets etc. Has the factory 4bbl Aisin Carb, which I will keep. The price ws also right at $1200.. So I have just really started, cab is nearly off and engine is likely to be slotted between the frame rails this coming week. The Cab needs an extensive amount of sheetmetal work, someones been pretty rough, lots of fibreglass, bog, gaffa tape... anyway will send cab and panels off for sandblasting/epoxy prime and then commence that bit in good time.' Plan is really just a sweet cruiser, nothing too extreme. Id like to keep it pretty quiet, so will run full twin pipes and 4 mufflers. Cab is going to be decorated in some sort of 70s/80s Toyota Orange. The Caravan body needs some loves too. A couple of roof leaks, a few rivets to be fixed etc. Have a new Solar panel to replace the tiny one on it. Also will rejig the kitchen a little and add in a better inverter, new fridge and new batteries and charge controller. Thats prob about it for now..
1 point
-
Here we go again. The SD1 sickness just gets into your blood and never leaves. I really regret selling Effie, but at the time I had no other choice as I still had Tess and she wasn't ready to sell, and we had just been kicked out of our rental so they could sell it, so had no parking for one SD1, let alone two. I managed to source a spot for Tess to stay until we settled on our house, but Effie had to be moved on. Tess wasn't quite the same, I never quite bonded with her the same and found that between the aftermarket cam and the manual box it didn't quite drive how I wanted an SD1 to drive. I feel the autobox and lazy low down torquey engine suit the style better. So here we are again. That desire for an SD1 didn't leave me, so once the Tomcat was sold, I started my search. I looked at what was available online, of which nothing was suitable (HAD to be a Series 2, and there were none at a reasonable price), and then began reaching out. I started with Nigel, or NP70 as it used to be called. It's been sitting outside, uncovered, untouched and unused since approx 2018. Allegedly it has a starting issue, which is why it was parked up. I contacted the owner and proposed buying the car and saving it, but unfortunately the owner wasn't having a bar of it and more or less said he'd get around to fixing it at some point and that was that. Of course, I checked with Effie's owner if he might sell, but he is dedicated to getting her back on the road and knows full well that selling her would be a regrettable mistake. Next was to try my luck with a comment I had seen on Facebook on an SD1 group. An NZ SD1 owner posted asking if it was worth exporting his Vanden Plas EFI back to the UK as he had tried to sell it in NZ with no luck, and the UK market for these cars is far hotter. This was back in December. I sent the guy a message and just asked if he was still looking to sell the EFI. Sure enough, he was. A few more messages were passed back and forth, a price was discussed, and some photos and a video were sent to indicate the condition. It looked nice enough in the photos and video, and did sound like it ran well. Being the bore that I am, I keep a database of all the injected SD1s I come across in NZ. This is one of the ones on that list (one of 10 VDP EFIs), and I had known about it for a number of years, since it was originally from around my region. I have a few photos of the car from when it was for sale the past couple of times, and had even seen the car in person about 5 years ago, and recall it looked quite tidy. Once we agreed on the deal, I once again booked in my preferred transporter (Brent at Classic Towing) and by some miracle, he managed to fit my collection in this weekend. The next day, today, after a solid effort by Brent, the car was delivered The engine took a few turns to get fired up from cold, but came to life easily enough and without any unusual noises or clouds of smoke. I warmed it up a bit while Brent undid the rest of the tie-downs, and then backed the car off the truck and into the drive. First impressions are a bit of a mixed bag. The paint looks good, but only because it had a blow over at some point, which is really obvious as there are masking lines and overspray everywhere you look. There are a couple of spots of rust that I have found, including some big bubbles in the sunroof panel, and some small blisters at the top corner of the windscreen. Otherwise, without having been under it, it appears to be quite solid. The interior looks in good condition, with no tears in the seats and it all seems to be complete. The obvious elephant in the room is the steering column being in bits, but that is due to a disclosed issue where the indicator stalk has failed, so the previous owner removed it for replacement (and had failed to source the replacement). Everything is really dirty though, so I will need to get the wetvac out and give it a going over. All the doors are really sticky and the catches need a real good slam to catch. The car has only been off the road for about a year, but obviously sitting hasn't been kind to it. The engine looks like a standard, albeit slightly neglected, EFI engine. It starts and runs well enough, and although the temp was low on the gauge, it didn't overheat sitting idle. There is a slight tapping from the engine, which I'm hoping is just an indication it needs an oil change. The obvious modifications/issues I have noticed are that there is an aftermarket electric fan on the radiator, which appears to be running at full speed whenever the key is turned ON. There is also an aftermarket cooler mounted in front of the radiator, for either the transmission or power steering, I haven't looked to see which yet. Someone has also messed with the ignition coil setup, as it has a Bosch GT40 coil and the electronic module for it is mounted to the AFM bracket on the strut top. Speaking of bodges, the breather system can't be working as intended. There should be an inlet filter on the LH valve cover, but instead, someone has blocked it off with a bit of hose and a bolt. I will need to look into refitting a filter to it. It might explain all the weeping oil around the engine. I haven't driven the car yet (as the steering wheel was barely held on and the adjustment clamp for the column was loose - oh, and no indicators), so I'm not sure what the suspension and brakes are up to, so that's some excitement yet to be had. It's a good basis for a car, with some foibles. I'm glad I bought it when I did, as it really needs the Tastes Like Petrol treatment to recover it back to its glorious self. There will be a ton more work to be done, so stay tuned. Also, why Lucas I hear you ask? Well, the obvious link is the Lucas electrics, but the more obscure reason was the little jumping spider the car came with. They're about the only spider I can happily live with. Discussion1 point
-
Yup PPSC will be camping. Unless it rains of course then well just pass out on someones floor wonder if ol bill will open up the Te Araroa cinema again1 point
-
someone doesn't like the metric system. but looks ballpark, long as there aren't any other compensation or 4d maps adding to it. All the stuff from the states is super expensive atm, prices gone up and bad exchange rate. Looked into any of the jap brands? quite a bit cheaper getting stuff from japan if there's an option worth considering1 point
-
Threw some fresh tyres on my other wheels and have been getting it ready to race next weekend. Few more jobs to do tomorrow and then it's pretty much ready to roll!
1 point
-
Picked up the repaired car today. Garage in Waimate did a good job, temp gauge didn't move all the way back to ChCh. Talking to them it looks like they found another 2az core engine and fitted the Alphard accessories. Lower mileage than the original too. My first look at the car - shell and trim is mint. Still owes her less than same off a yard. Long day but the weather south of ChCh was very nice.1 point
-
Progress update: Got stuck into the painting the chassis which now has two really good coats on it - I might put a third coat on if I feel motivated but for now that will do. I also bought some waterproofing paint used for ponds and threw a couple of coats of that onto the underside of the ply floor which has nicely covered over where the sand blasting took off the old sealer. Last job job was to make up some new brake hard lines so bent up some and clipped them neatly to the chassis rail. Bled up the system and took it for a drive to bed things in. All seems to work reasonably well - I should really look at getting the discs skimmed but it works Then I got brave and put it thru for a wof. The supervisor came out and took a look, then the area manager came out and took a look followed by 20mins of intense caravan chat... But it got a clean sheet! Woop! So that's a decent hurdle overcome and another doomer back on the streets. Rego is in the mail so she's legal now. Pretty stoked! Next steps are removing the old graphics, giving the outside a good cut and polish, new graphics, and get stuck into the new kitchen.1 point
-
So this bring us to the pain in my ass that happened 4 months ago So the sunroof, was always the worst part of the truck. It has been sealed up multiple time over its life to try to stop it from leaking (and had pretty much never not leading to it not having are carpet when i bough it). I believe a logging truck passing were i was part deposited a rock in the the sunroof causing the mess above, not helped Im sure by the rust out frame the glass is glued down to below. And i quickly found out that getting a replacement was going to be hard. Could get a second hand sunroof anywhere in NZ, Mistibushi NZ didn't have a new one. I could only get a new one out of japan witch would of been around $2500 + freight and maybe border tax too. So i though heck lets see if my insurance would do anything about. First off to the glass shop, they didn't want anything to do with it. So then to the panel beater, after 3 weeks of waiting they got back to me saying what i knew "We cant get you a replacement, but we can offer a steel panel repair to your insurance as an option". I was happy with this so said yes. A full 2 weeks later insurance get back to me saying sorry cant get the part and that they don't want to cover a panel repair, but would pay me out for what a replacement would of cost however they would have to get a price from Mitsubishi NZ. So another week went by, i started getting quote to have in paneled over and they finally got back to me saying that the repair would cost $3570 if they could do it and to expect the money in my account in a day or so. A this point all the quote for repairs i got were all stupid money (even with me stripping and refitting all the interior my self) the best being at $2500-3000 just for the steel work no paint. So i though fuck that ill just do it my self. and just pocket the money for later mods.
1 point
-
Something I'd been meaning to do for ages was replace the shitty Supercheap spec wheel on the Celica. I had this Nardi for years and it was on my Accord before so just needed the boss kit, easy done. I also need to find a new dash so I can replace it as this one had the headunit bit cut out, will give me an excuse to pull the whole thing out eventually and check the hvac stuff as I can't really move any of the sliders Put the other mirror on as well, not photo worthy.. still useless but the holes are covered now.
1 point
-
Will get back soon with some photos of the ign map. Have been looking at images of bearings for far too long now...
1 point
-
1 point
-
*ducks and runs away to avoid being hit by a 4age camshaft*
1 point
-
fucking 10 years latter.... we were trying to sell our house and that fucked up many things including any progress on this engine. anywho, here we are. ive been doing many measuring and many modeling of things and i am 99% sure i have a piston shape that clears the bigger valves and the increased lift but yields 11.5 to 1. i figure if the CR is too high i can remove material but if its too low that's a bit harder to fix... so yea now i need to do a final check of piston clearance and then find someone to make a set of them to my drawing. ill start the ball rolling with getting the head work done too. with the head sorted and the pistons under control the rest of the project seems like its achievable. however we shall see. still got a whole ITB system to craft for this as well as many other things.
1 point
-
Been a while since I posted anything, progress has been not too bad. The engine has been hanging out in there for a bit now, Im pretty comfortable with it. I decided to start working on the mounting and some of the other ancillary bits, as well as sorting out the gas locker and battery area. Got a sweet new toy too! So I threw the engine mounts and trans on and really got the engine into the final resting posi, or thereabouts. Started sussing out what to do re engine mounts, which necessitated starting to sus out what to do with alternator.. I have a 140A alternator form an old benz I scrapped so kindof dummied that into place, took original pully off old motor and bored centre out on my lathe for dummying purposes (still unsure if crank to alt pulley ratio is bang on - minor detail at this point). Anyway a bit of faffing about and we settled on a way of mounting and tensioning that ensured the belt doesnt foul the water pump housing (its pretty close). Made a cardboard template for the bracket, then drew it up in CAD, then printed 1:1 and cut out and checked fit. Was good. Did the same for header flanges. Also good. Next mish was then to CAD up the engine mounts, or rather engine cradle... So I spun up dome hollow bosses on the lathe for mounting to the original mounts, then roughly figured the width across these. Did a butload of measuring and crawling around underneath, fucked off a whole bunch of shitty wiring under there while I was at it. Then drew up the engine cradle, which mounts between the original engine mounts and gearbox mounts. Ill make a gbox xmember later. Looks like tail shaft will be about 600 long. I CAD this up with the intention of mounting the engine without the alternator to get engin placement right, and for ease of fab, then Ill clearance the mount later to accomodate the alternator. I need to release all these files for cutting now, but just been sidetracked with other bits.. So I started sorting out the gas locker, random I know but I kindof want to get the fuel tank situation sussed (possibly going to find another slightly bigger one, different shape), anyway that kindof relates to the gas/battery locker as there is some encroachment there.. So I removed a shitload of shit out of there, cut and trimmed everything that needed to go so I have a nice simple rectangular opening I can start to work with that also maximises use of the space. There will be a fair bit going on in here. Starter and house battery, battery splitter rig and solar controller, inverter and gas califont for sink and shower (see below, I got me a Joolca!) For the battery splitter/solar controller I have done a bit of digging around, there appears many different ways you can do this, but I was really hoping there was a product that just did it all and sorted it for you...turns out I think Ive found it - https://www.kickassproducts.com.au/buy/kickass-25a-dc-charger-with-anderson/KADCDC25A-AND be interested to hear peoples thoughts on this, and also opinions on simple ways of doing this. For me this ticks a lot of boxes. Controls Solar, does battery isolation between house and starter battery, accepts alternator input. Only problem I see is I have got me a pretty big panel to throw up top, around 375w from memory. I recall it outputing around 40V peak in summer and this thing is only rated to 23V... anyway, good to hear peoples thoughts on this. Plan is to mount Joolca in the back, gas bottle in front and a floor between gas and battery cavity. So I trimmed out the gas locker nicely, framed it up and instated a new rear wall for the locker from ply, reused some old bits of framing I chopped out. I gave the Joolca a good thrashing tonight. It pissed me off a bit, but I think it was because I was reciring water and it doesnt like the inlet temp of the water too high otherwise it cuts off the flame. I brought the Nomad kit for $650 thinking the shower head and tap looked the goods. They are, but I have since thought maybe I just hard plumb everything and only use the flash Joolca pump...will see. So the plan is to fully line the gas/califont locker with ally sheet and then duct from the door and have an exhaust fan sucking the hot air away through a hole behind the cab., go a nice louvred panel for this today and can reuse a few other bits of steel flashing I pulled from elsewhere. I also got some extrusion angle today for framing up around the gas locker opening. Next mish is to get some 0.9mm ally sheet for the outside cladding and gas locker. I will prob just draw all this up and then order a bunch of laser cutting, as I dont have a guillotine. I am fortunate enough to have a brake press though, so will draw to spec and then fold everything. Id kinda like to get the gas locker somewhat completed before refocusing on the engine. I probably wont do that though and jump all over the show or start a new mission...I cant really fully sort the gas locker until I commit to batteries, inverter and the like. That shit is proper money which I dont have right now. so will need to wait a bit and plan as best I can for what will go in there. Ive also started contemplating a bit of body work. I have decided to mount the shitter in the cab under the middle seat as there is enough room for the cassette in front of the engine, and also, its pretty funny. Anyway, thats my lot for now..
1 point
-
Moving on from the last lot of repairs, I have also been tinkering with a few other small issues, in preparation for a potential WOF check. It may be obvious, but the work on this car is kinda sporadic and not really following much of a plan. That's because there currently isn't really one. I'm feeling a bit lost and well over my head, as I don't want to spend money fixing other issues, only to have to put the car into storage until I can fix the engine if it does go pop. What I have been doing is just ticking some things off the list that don't cost me anything but time. Some of these are also getting fixed with the aim of potentially taking it for a WOF check. Technically a clattering POS engine won't fail a WOF, so it's possible I might be able to get it on the road before doing the engine work. The first work I had to do was kinda forced upon me. The outside temp overnight the other night dropped below zero, and having already checked when I got the car, I knew the anti-freeze mixture in the car was pretty rubbish. I pulled the car into the garage for the night to try and keep it above zero, and the next day worked on draining a few litres out of the system and topping it up with anti-freeze, just so there was some sort of a mixture in there. It's not perfect, but it's better than nothing (and no point flushing the system now). Of course, it wouldn't be one of my Rovers if it didn't leave a green puddle at some point I ran the car up to temp, bleeding the cooling system (it's mostly self bleeding) and then set on the next task. Another easy check is to make sure the throttle pot is set up correctly. Most probably aren't, and will result in the ECU not fuelling correctly. When checked with a multimeter, the throttle pot range should be between 0.32v +/- and 4.7V +/-. Mine wasn't quite there (better than Effie though, which read zero at idle). And this is where I discovered the car cannot reach Wide Open Throttle. It stops opening at about half throttle... I marked the throttle pot and tweaked it slightly. This brought the closed throttle reading into line But I was still stuck at half throttle. If I disconnected the linkage to the throttle I could get the full opening (or near enough, it might need a little more tweaking but it's not an exact science) It turns out the auto trans kickdown cable was so badly adjusted it was stopping the throttle from opening fully. The adjustment was wound completely out (I've actually backed it off slightly in this photo for testing, it was right on the end of the thread initially) I backed it off until I could get full throttle and then locked it off. A test drive shows that the car has significantly more grunt when you give it a boot, no surprise there; nothing like opening the last half of the throttle to wake the engine up, but I had lost kickdown on the transmission. Clearly, I need to wind the adjustment back in a bit further. The kickdown works by the linkages pulling on that cable when at a certain percentage of throttle, which overcomes the spring pressure in the transmission and pulls on a rod that causes the transmission to kick down a gear. If the cable isn't being pulled enough because the throttle hits the stops before the cable overcomes the spring pressure, it won't kick down. I can still manually shift the transmission, but I will tweak it so kickdown works again. Next on my list of things to fix, was the washer system not working, and having a bodge in place. This is a common failure point, and the easy fix is to do what both a previous owner of this car and also Effie did and fit a replacement external pump to suck through a failed pump. The pumps on these have no filter, so if they suck in gunk they are prone to jamming up and no longer working. They are mounted on the bottom of the bottle with grommets. I removed the bottle and found the bottom of it covered in green algae. No guesses for what's jammed the pumps then. The cap is also missing, so that won't help. I cleaned the bottle out with some household cleaner and a good blast from the garden hose. One of the pumps is jammed solid and I cannot free it, but after some gentle persuasion of the percussive kind, the other pump began to spin freely. The good thing is that they are both the same pump, so can be swapped front to rear. I don't need the rear washer to work at this point, so as long as I can get the front working, I'm happy. The replacement pump has been fitted on the front guard, sucking through the failed pump. This pump did make working noises, but with the bottle dry and full of slime I didn't actually try putting any water through it. Thankfully no wiring had been cut or altered, they had made a fly lead that plugged into the standard wiring, so all I had to do was unplug it, cut the zip ties and remove the one screw holding the pump to the car. I then refit the bottle to the car, plugged the pump in, put some water in the bottle and hit the button. Sure enough, a large jet of water fired from the hose. We have a good pump. To replace the external pump and join the two sections of the hose, I fitted a handy one-way valve I happened to have spare. This then allowed the pump to send water to the washer jet, but nothing came out. Darn. The jet is just held in fairly loosely with a couple of clips and pulls free with a bit of wiggling. I found the hose under the jet was kinked completely over, which wouldn't be helping, but the jet was also blocked. I could've cleared this with compressed air, but being too lazy to fire up the compressor I instead used pressurised brake cleaner forced into the outlets of the jet (reverse flushing it). This worked a treat, blasting some black grot out the back of the jet. I did this in both directions until I was getting a nice stream of fluid out of the jet. With the jet fitted directly to the outlet on the pump, I could test that the jet was working. The spray pattern wasn't great; they never are, but there was a good volume of fluid coming out of it. With the jet refitted to the panel, I finally had a front washer jet again. It puts enough fluid on the screen to clear it, so that's a good pass. Probably puts enough fluid onto the car next to me to clear their screen too. Yes, the wipers are mismatched and sit too low. Yet more things to fix. I reluctantly took a look at the rust above the windscreen. There were a couple of small blisters in the paint which had me worried, after having dealt with the Corolla rust. Thankfully it looks like it may have started from a stone chip, as after some careful poking, wire brushing and sanding, it was on the surface, doesn't go too deep and looks worse than it is; a completely different sort of rust to the Corolla. It may go down under the bright trim, but I can't see without removing it. I treated it with some rust converter, and once dry, gave it a coating of epoxy zinc. I'll need to get some colour matched touchup paint at some point, but for now, this should keep it under control. The sunroof panel is still ruined though, but I'm ignoring that and pretending it doesn't exist. Those bubbles on the left will be a hole if I look too hard at them. I did manage to take the car further than around the block, just for a quick shakedown. I took it two blocks away to a local park and grabbed some photos. Despite its flaws, it's a hell of a car to look at and drive. Now, if it would stop clattering, so people were looking at the car for the right reasons, instead of trying to work out if they should move back in case it explodes, that'd be nice.1 point
-
So I bight a set of lowering springs for this thing and went about installing them. Started with the back because why not. The replacement springs were quite a bit shorter but a much heavier wire diameter. I stuck them in and put it back on the ground. The new springs dropped the car appropriately zero mm but they made up for that by being not captive. Cool, so out they came and I returned them. Now I'm on the hunt for some coilovers for it.
1 point
-
Just a small but significant update today. With all the work on the column switches completed, this meant that I could finally take the car for a quick spin around the block to see how it actually drives and if it highlights any further issues. The cold start was really good, only needing a couple of turns to come to life. I wasn't too impressed with the top end rattle though, I will need to get some new oil in there and hope it's not a sign of things to come. The oil in there will be at least a year old, if not two, and I don't know what grade. Before I could back the car out of the drive I had to raise the steering column, as all the wiring work was done with it at its lowest height. Overall the car drove really well. The weird notchy feeling in the steering seemed to clear up, so hopefully that's just from lack of use. It tracked and drove straight, without feeling too rolly polly on the suspensions, so maybe it's not completely poked. The engine pulled well, although I forgot how lazy the autos are; but that's what I like about them. The revs stay low, and it just rides that low end torque and gains speed quickly without fuss. Say what you will about automatic transmissions, especially ones from the 80s, but this old GM 3 speed shifts beautifully. The previous owner claims it was rebuilt, but I have no proof of that. The shifts are smooth and seamless, and kickdown was snappy. I didn't check the trip computer, but everything else seemed to work. The gauges all rose, the speedo and tacho worked, and all the lights worked. The low coolant light worked a little too well though, the bottle and radiator are full, but the light is still on. Will need to do some digging. The Rover SD1 has such a commanding presence on the road. I can't imagine what it's like for the average joe to see one driving around in a sea of boring beige appliances.1 point
-
The first step in getting Lucas back on the road was to address the one issue I knew of when buying the car; the lack of a working indicator stalk. The previous owner told me it was broken but didn't say how or why, so until the car arrived it was a bit of a mystery. I could see in the pre-purchase photos that the column shrouds and stalks were missing, but knew no more than that. Upon arrival, the car came with the stalks missing and the shrouds on the passengers seat. There was an icecream container in the back seat with the remnants of one switch, and what appeared to be quite a new, albeit incorrect side, indicator stalk assembly Assessing the stalks, the disassembled one was very likely the original broken one, so that's where I started. If you have been following my posts for a while you will know that I'm a big fan of fixing what I have, instead of just throwing new parts at a problem. This was no different. I could tell immediately that the high beam detent on the switch was broken, which would cause the high beam to fail to latch and stay on. The plastic piece that causes it to latch should be sticking up in the gap the arrow is pointing to. Now, I can't find it, so I may not have written about it, but I have done this job before. Not for the detent, but to fix a broken horn wire. 99.1% of the job is exactly the same, so I had an idea of what I was doing. The donor was the mint condition mirrored stalk. This is either from a different car that uses a similar switch but has the indicator on the RH side of the column, or is from a LHD. You can see that the stalk is upside when on the correct LH side and bent upwards. There were a couple of other differences too; the connector was the later "church window" style, which the car didn't use, and there was that random blue wire coming off it, which had no place to connect to. The first step is to VERY carefully remove the metal plate from the front of the switch. There are two small machine screws, and then it hooks in under two plastic tabs near the stalk. Once the plate is off you can see the gubbins that makes it all works. Be careful though, at the top and bottom are detent springs and plungers that can and will make a break for freedom. The top one should have a ball bearing under the spring, and the bottom one a plastic wedge. The white collar for cancelling the indicators just lifts out, and then so does the central mechanism that the stalk moves (the big black piece with the white arms on it). Be careful here as there is a copper roller, spring and plastic plunger in this section that will drop out. With all that removed, you are left with the rear housing and the stalk. It's interesting to note that the three long contacts for the indicators are mirrored on the opposite-handed stalk. The top holes are populated on one, and the bottom on the other. The detent needs to be released from the back casing, by carefully pulling back the piece of black plastic on the back that is holding it in place. It can take quite a bit of force to pull it out. Here it is removed and flipped upside down to show the notches it locks into fr high beam. That's the part missing from the broken one. Now its time to get serious and cut the two wires that run through the switch and into the stalk (one had purple and black, the other was purple and purple with a black trace, but it's obvious which two run to the middle of the stalk) and then the stalk can be removed. Now, I couldn't just swap the stalk over, since it was upside down and bent in the wrong direction, so I had to remove the detent piece and swap it to the existing stalk. To do this I needed to remove the little plastic block on the end. Be VERY careful with this as it is super easy to break those little round ears off and render it useless; DO NOT use those ears to support it when you drift out the shaft. I lightly held the stalk in some pliers on top of the vice, and used a punch to drift the stalk out through the block. Oh, and it helps to mark the position of the block beforehand, so you can have the stalk rotated the same (or it may not face quite forward). With the block removed, the detent piece just slides off and over the wires. Do the same to the good stalk, and swap the detent piece to the original stalk. Now line up the block with the marks you made, making sure the horn ground wire is tucked under the block and wraps over the top, and then gently tap it into place again. I gently held the stalk in the pliers, clamped in the vice and used a small hammer to tap it back into place. Congrats, you now have a good stalk, that isn't attached to anything. Give it a good clean, and let's reassemble. Reassembly is quite simply the reverse of disassembly. The only thing I had to change was to move the wiper contact over from the top hole down to the bottom hole in the central mechanism. I did give the contacts a quick clean, and lubricated everything with dielectric grease. The front plate can now be gently reinstalled, making sure it sits flush and the plungers haven't fallen out. Now flip it over, and solder the two wires back onto the harness. With the switch reassembled I could plug it in and test it. I got a bit cocky and reinstalled it first. And we have dash lights! Gosh, I love the green illumination in these cars. I was well chuffed. Until I wasn't. We had dash lights, park lights front and rear, and flash to pass, but no dip or high beams. Damn. I connected a known good bulb. No change. Tried a different headlight switch. No change. Located the dip beam relay and swapped it over with another. No change. So it was time to grab the test light and start probing around. I had traced the wiring diagram back and had an idea of where to start looking; starting with the headlight switch Lots of probing later I was led to this mess under the passengers side of the dash. Ugh. That bracket with all the relays on it should be bolted firmly to the firewall, not ziptied to a bracket. Not a good start. I traced a few wires back and ended up at that weird white relay in the foreground. Turns out it isn't a relay, it's a "diode pack" that all the power for the dip and high beams go through. And nothing was going through it. I could see some traces of corrosion on the casing, so pulled it out and removed the casing. Well shoot, that'll do it. It looks like it's been under the sea. You cant even identify the diodes on the board, it's just a mess of corrosion. I got out the can of contact cleaner, and the trusty old toothbrush and got to work, cleaning away as much of the muck as I could. I then used my multimeter to check I had continuity where needed. A couple of contacts were a bit iffy, so I have them a quick re-solder. I plugged it in, initially without the housing on it, for testing. I turned the ignition on and flicked the light switch. No change. Damn. I flicked it off and on again, and suddenly I was blinded, the test bulb was glowing brightly. I had headlights. A quick check also showed that I had high beams too. Everything was working. Headlights, park lights, tail lights, brake lights, plate lights and fog lights. I refit the housing and bolted the relays to the firewall as they should be. One of the two bolts on that bracket I swear is the worst bolt on an SD1 to get at. Cant fit a socket on it, and it's one flat at a time with an open ended spanner. Some quick jiggling of wires to refit all the column stalks, and refitting the steering wheel came next. It's starting to look more like a car now. Heck, I might finally be able to take it around the block tomorrow after work. Hype! I still need to refit the column shrouds, but that will come in due course. One other thing I noticed when I was messing around in the car, was that this sweet old Clarion radio still works perfectly, auto electric aerial and all. Awesome retro design. Shame the plastic surround was broken and someone has bodged it with bits of interlocking foam floor mat...1 point
-
Got Impatient/bored with work today around 3pm and wandered out into the workshop, decided to poke it in the hole. No amount of tape-measury can prepare you for the shear girth of this thing. You think you have room until you are trying to jam a 4V into something. Fuck me there is some thickness there. Chassis needs to be chopped....... actually at this stage fuck knows, time to talk to the cert man about what options we have. I havent fit the cab back over it to see what wriggle room we have, but suffice to say it needs to either come up (unsure if possible without losing the middle seat...), or the top edge of the chassis rail needs some massaging. Either way its tighter than tight thing. It looks fucking cool in there, I really hope I can make it work. If I cant Im turning it into a caravan and towing it with a T-bucket fashioned from the remains of the cab with the motor in it - its the only logical maneuver The way I saw it in my head was I would remove Cab, engine would drop in, sit perfectly where I wanted it and the factory mounts lined up.. I may not only be a cunt, but an unreasonable one. Watch this space I guess, the next bits become infinitely more difficult and time consuming...
1 point
-
Big day of mahi today. Started by making two frames which mounted on each of the door hinges/door catches, castors on the bottome so I could slide the cab off without lifting the camper body. Worked out pretty well, cab came off relatively easily except for the dreaded last two bolts.. oh and some minor inner guard grinder removal work Engine was revealed, lots of this shit has to go as going from manual to auto box really simplifies things. So, dat what I did... At the very worst at least I still have a caravan.. am actually now thinking Ill put coupling mounted on the front chassis xmember for towing it around.. Am now gagging to slot that V8 between the rails. It measures up pretty good now that you can see what you have to work with. There may need to be a little relief on the camper body itself for the weird bulge on the top of the bellhousing, but no biggy. Apologies for grainy pic my camera is smashed.
1 point
-
I spent today cutting and polishing the paint There were a couple of areas that weren't finished very well by the guy who painted it so i fixed it. Then I waxed it. Now I can't move my arms. Picture shows car that may be shiny, hard to tell how good it looks from a pic really ..
1 point
-
No real progress pictures as such, so here's just a couple I liked. Rusty bits shall be gone soon and I'm excited to get to some meets and just enjoy the car.
1 point
-
Except, no. I got to pondering the battery fail. I have a phone charger with a V meter. So I plug it in, and start watching. After a start it's between 13.8 and 14.5 as it should. Then after 5 min (replacing the charge taken by the starter motor), it started climbing, the gauge started flashing at 15V (nice feature), so at 15.7V, it's pretty clear why the battery was boiling off and putting white crusty around the terminals. Ah, oops. 5 or 8 years ago, it had that problem, and I took it to an auto-sparky, but now I think about it, it's killed a couple of batteries since then. Testing, testing: I put it on a variable power supply, it makes a cute buzzy noise. OK, looking closer, he'd bent the high-V contact away (incorrect, there's a spec gap), but the switching V was also incorrect (too high). So I set the gap in the contacts at the bottom correctly, and adjusted the switching voltage by bending the tab holding the resisting spring (per online guides). It Bench tests OK now. Tossed it back in the car. It's a shade low at start when idling, but now comes up to correct V, and doesn't over-charge. Golden. I wandered down to the battery merchant who'd been a GC, and told him it was a car electrical fault that killed the battery. He wouldn't accept payment for it, just told me to let him know if I was ever selling! Cool. People can be really good, if you treat them right.
1 point
-
Handy work bench to clean the underside
1 point
-
Stripped the wellside down today and started hitting the deck with the wire wheel to see what horrors were hidden. Cancer has set in along the front seam, some holes in the front corners of the deck, and another small hole near the back, but other than that it's just a bit scabby. The outside is solid, and tailgate had a few dents and bog but overall not too bad. Have been chipping off oodles and oodles of paint (must have been a painters ute at some point). Will get the rust sorted and then hit the inside of the deck with bedliner. Will clean and underseal and underside and wheel wells, and then get the outside painted to match the the body.
1 point
-
Then @EpochNZwanders over one day to have a look at VW suspension on the drive. After, we have a quick look at the DAi, and it starts on the jumper cables. Hang on!. The battery is showing 12.8V after settling after charging, (OK), but drooping to 10V and less under load when starting. So I head off to Faast fit who supplied it, he tests it (OK on the hygrometer, but poos output current). It's just been a dead battery, all this time! Faast replaces under warranty (good service), and I throw a wee brass strap on because it's a slightly different shape. Runner! Drive to work. It's oookay, but not running well, maybe a little lean? Found an online airfilter dimension search (finally), and toss one in, then change the carb back to the one on the right (no hole in the barrel from long screw), and back to normal for that motor. Sheesh, what a chore. I need to remember to check the basics first. Anyways, it bloody great to be punting this around town again, and now I can get back to important tricky jobs like changing the carpet.
1 point
-
Well its all turned pear shaped rather quickly. Looks like the engine is toast. Really slow to build any oil pressure when cold, low oil pressure all round, and clatters deep in the valley when under load. The engine also isnt the original one, its a lower compression engine from a carb SD1. Been trying various things over the past few days to see if the engine is saveable, but i think its done. Sigh.0 points
-
So the journey begins. I've started amassing the parts I can buy for this turd because why not. The only problem so far seems to be a complete lack of quality parts available. The only things I've been able to buy for it are pretty average TBH. I got a set of pistons for it made by ITM. They're all the same size except for the ones that aren't. ITM made lifters, surface finish is rubbish And will need polishing thus reducing the OD and allowing a drop in oil pressure in the lifter. Rockers, again, only made by one company. They're rubbish. I have to hand stone polish the cam follower face because the surface finish is so bad. In the picture the top one is as they were delivered, middle is mid polishing and bottom has all the score marks polished out
0 points
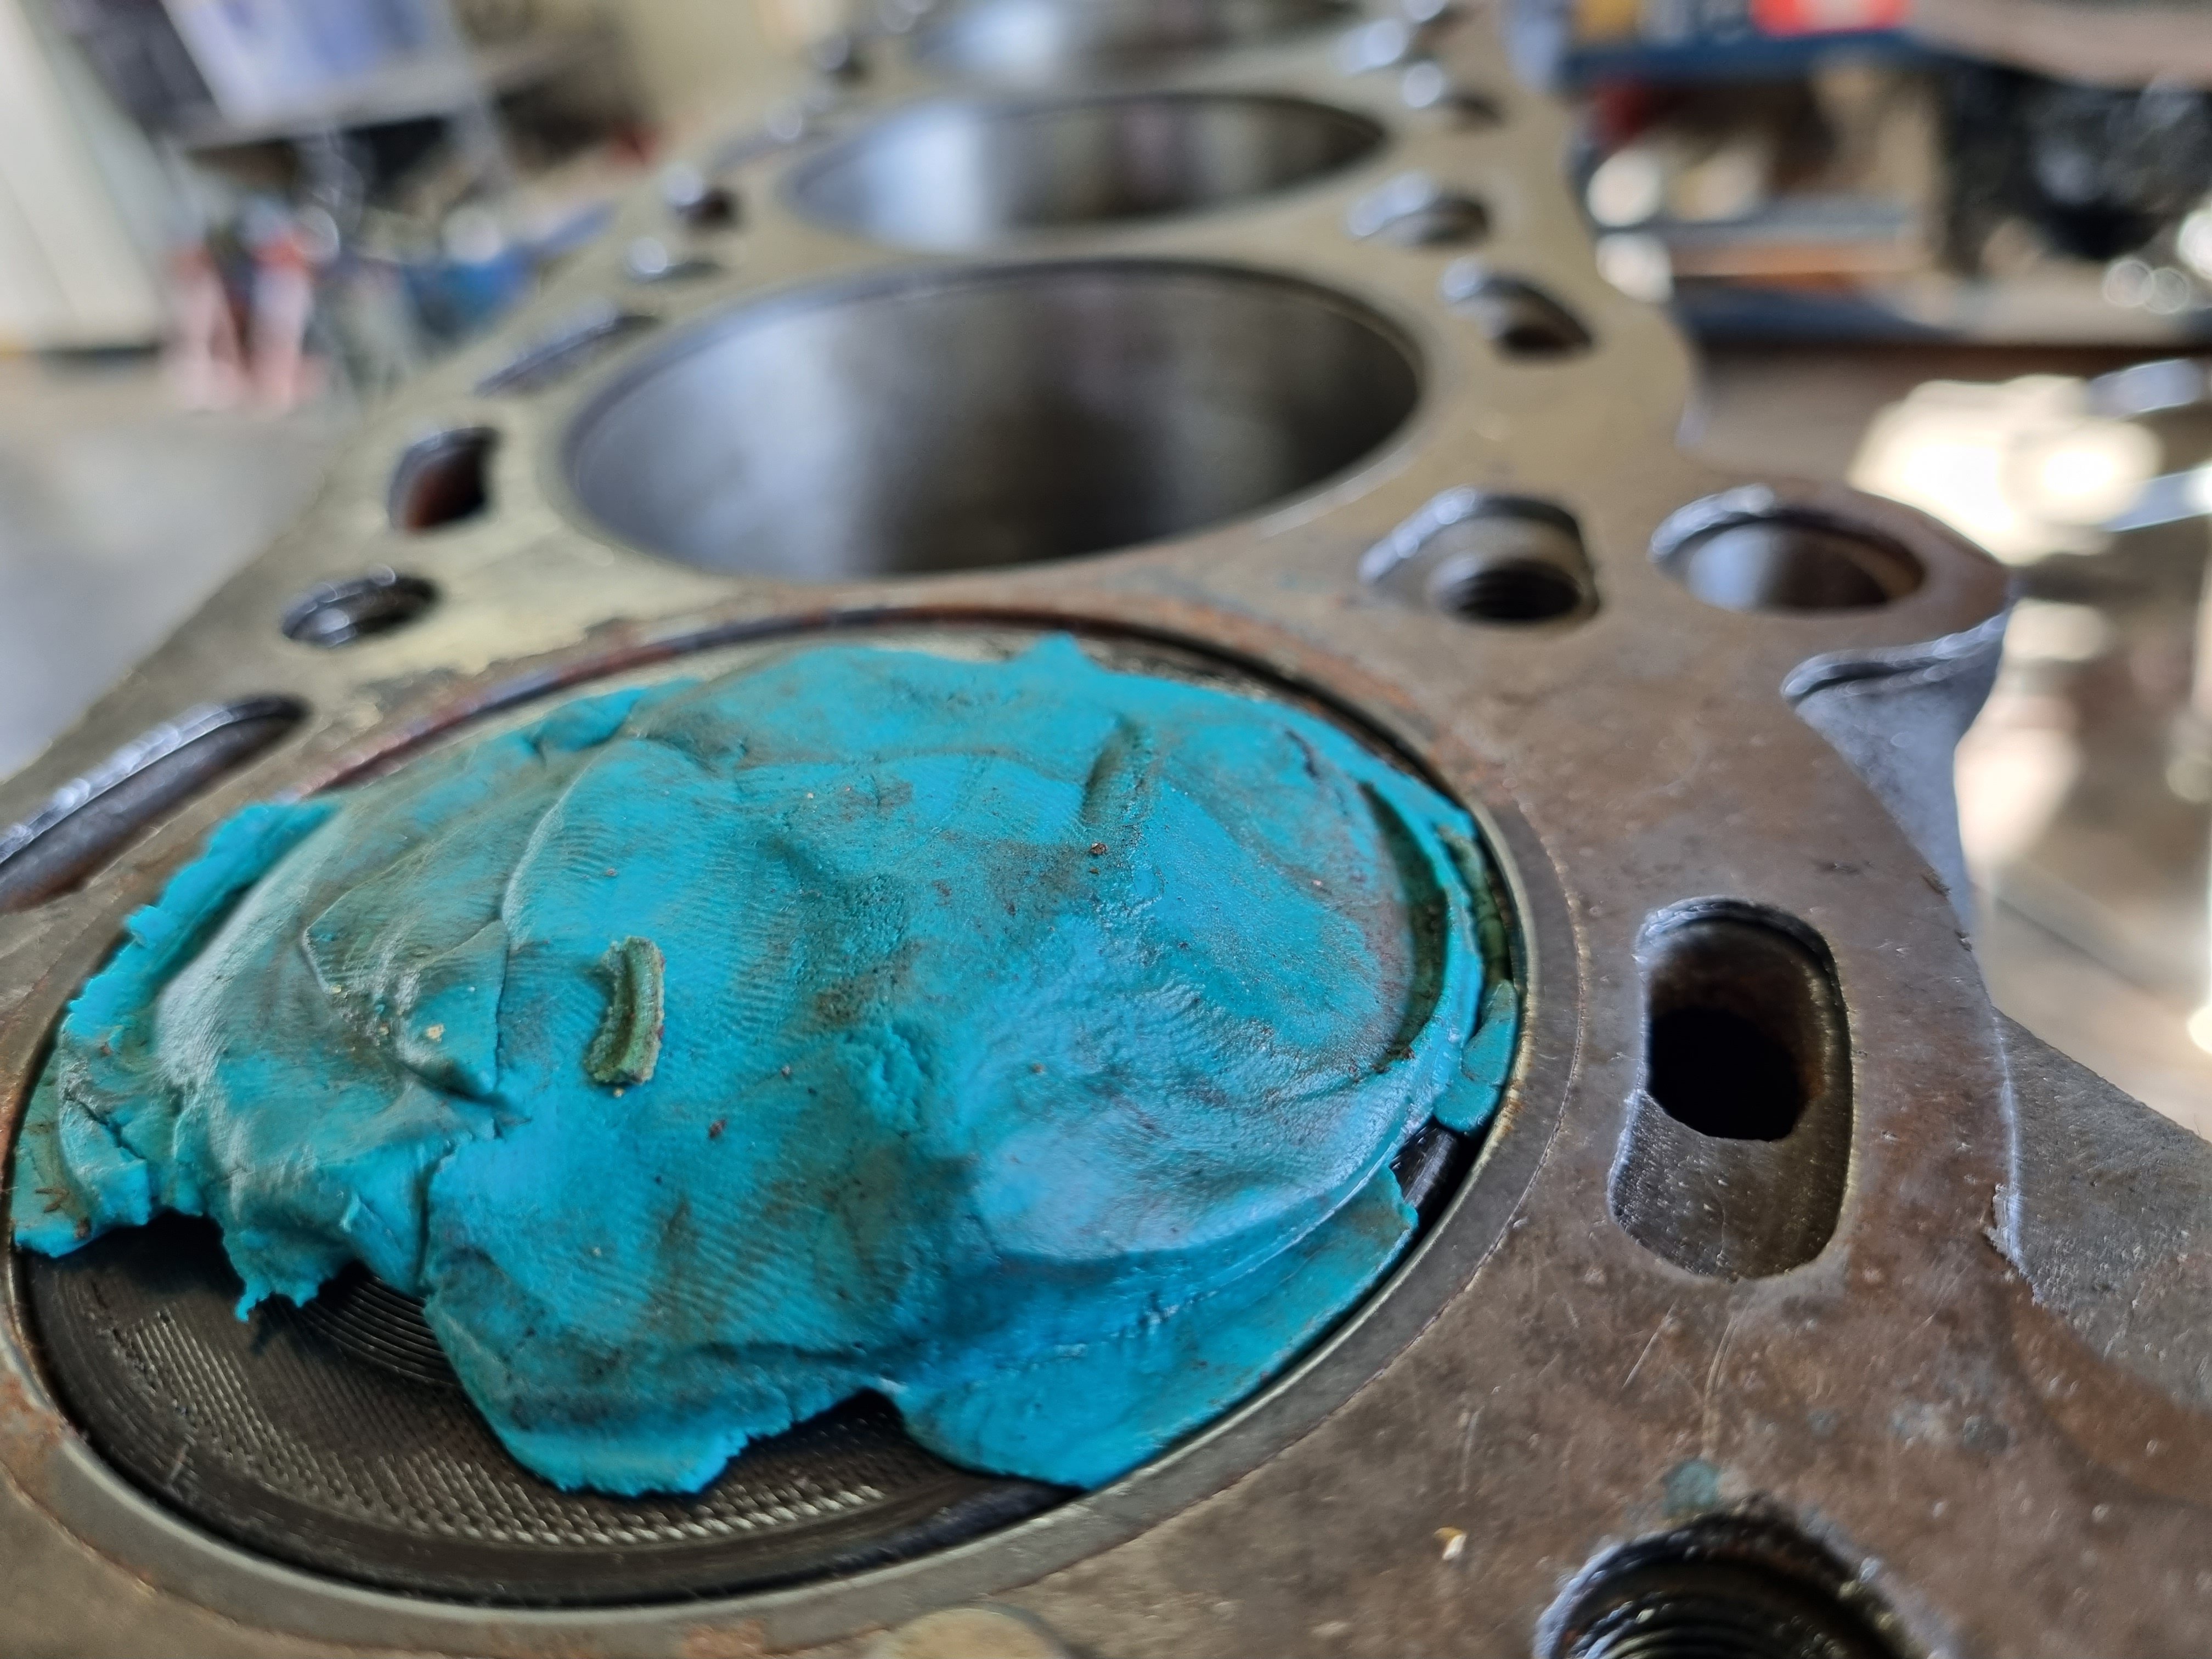
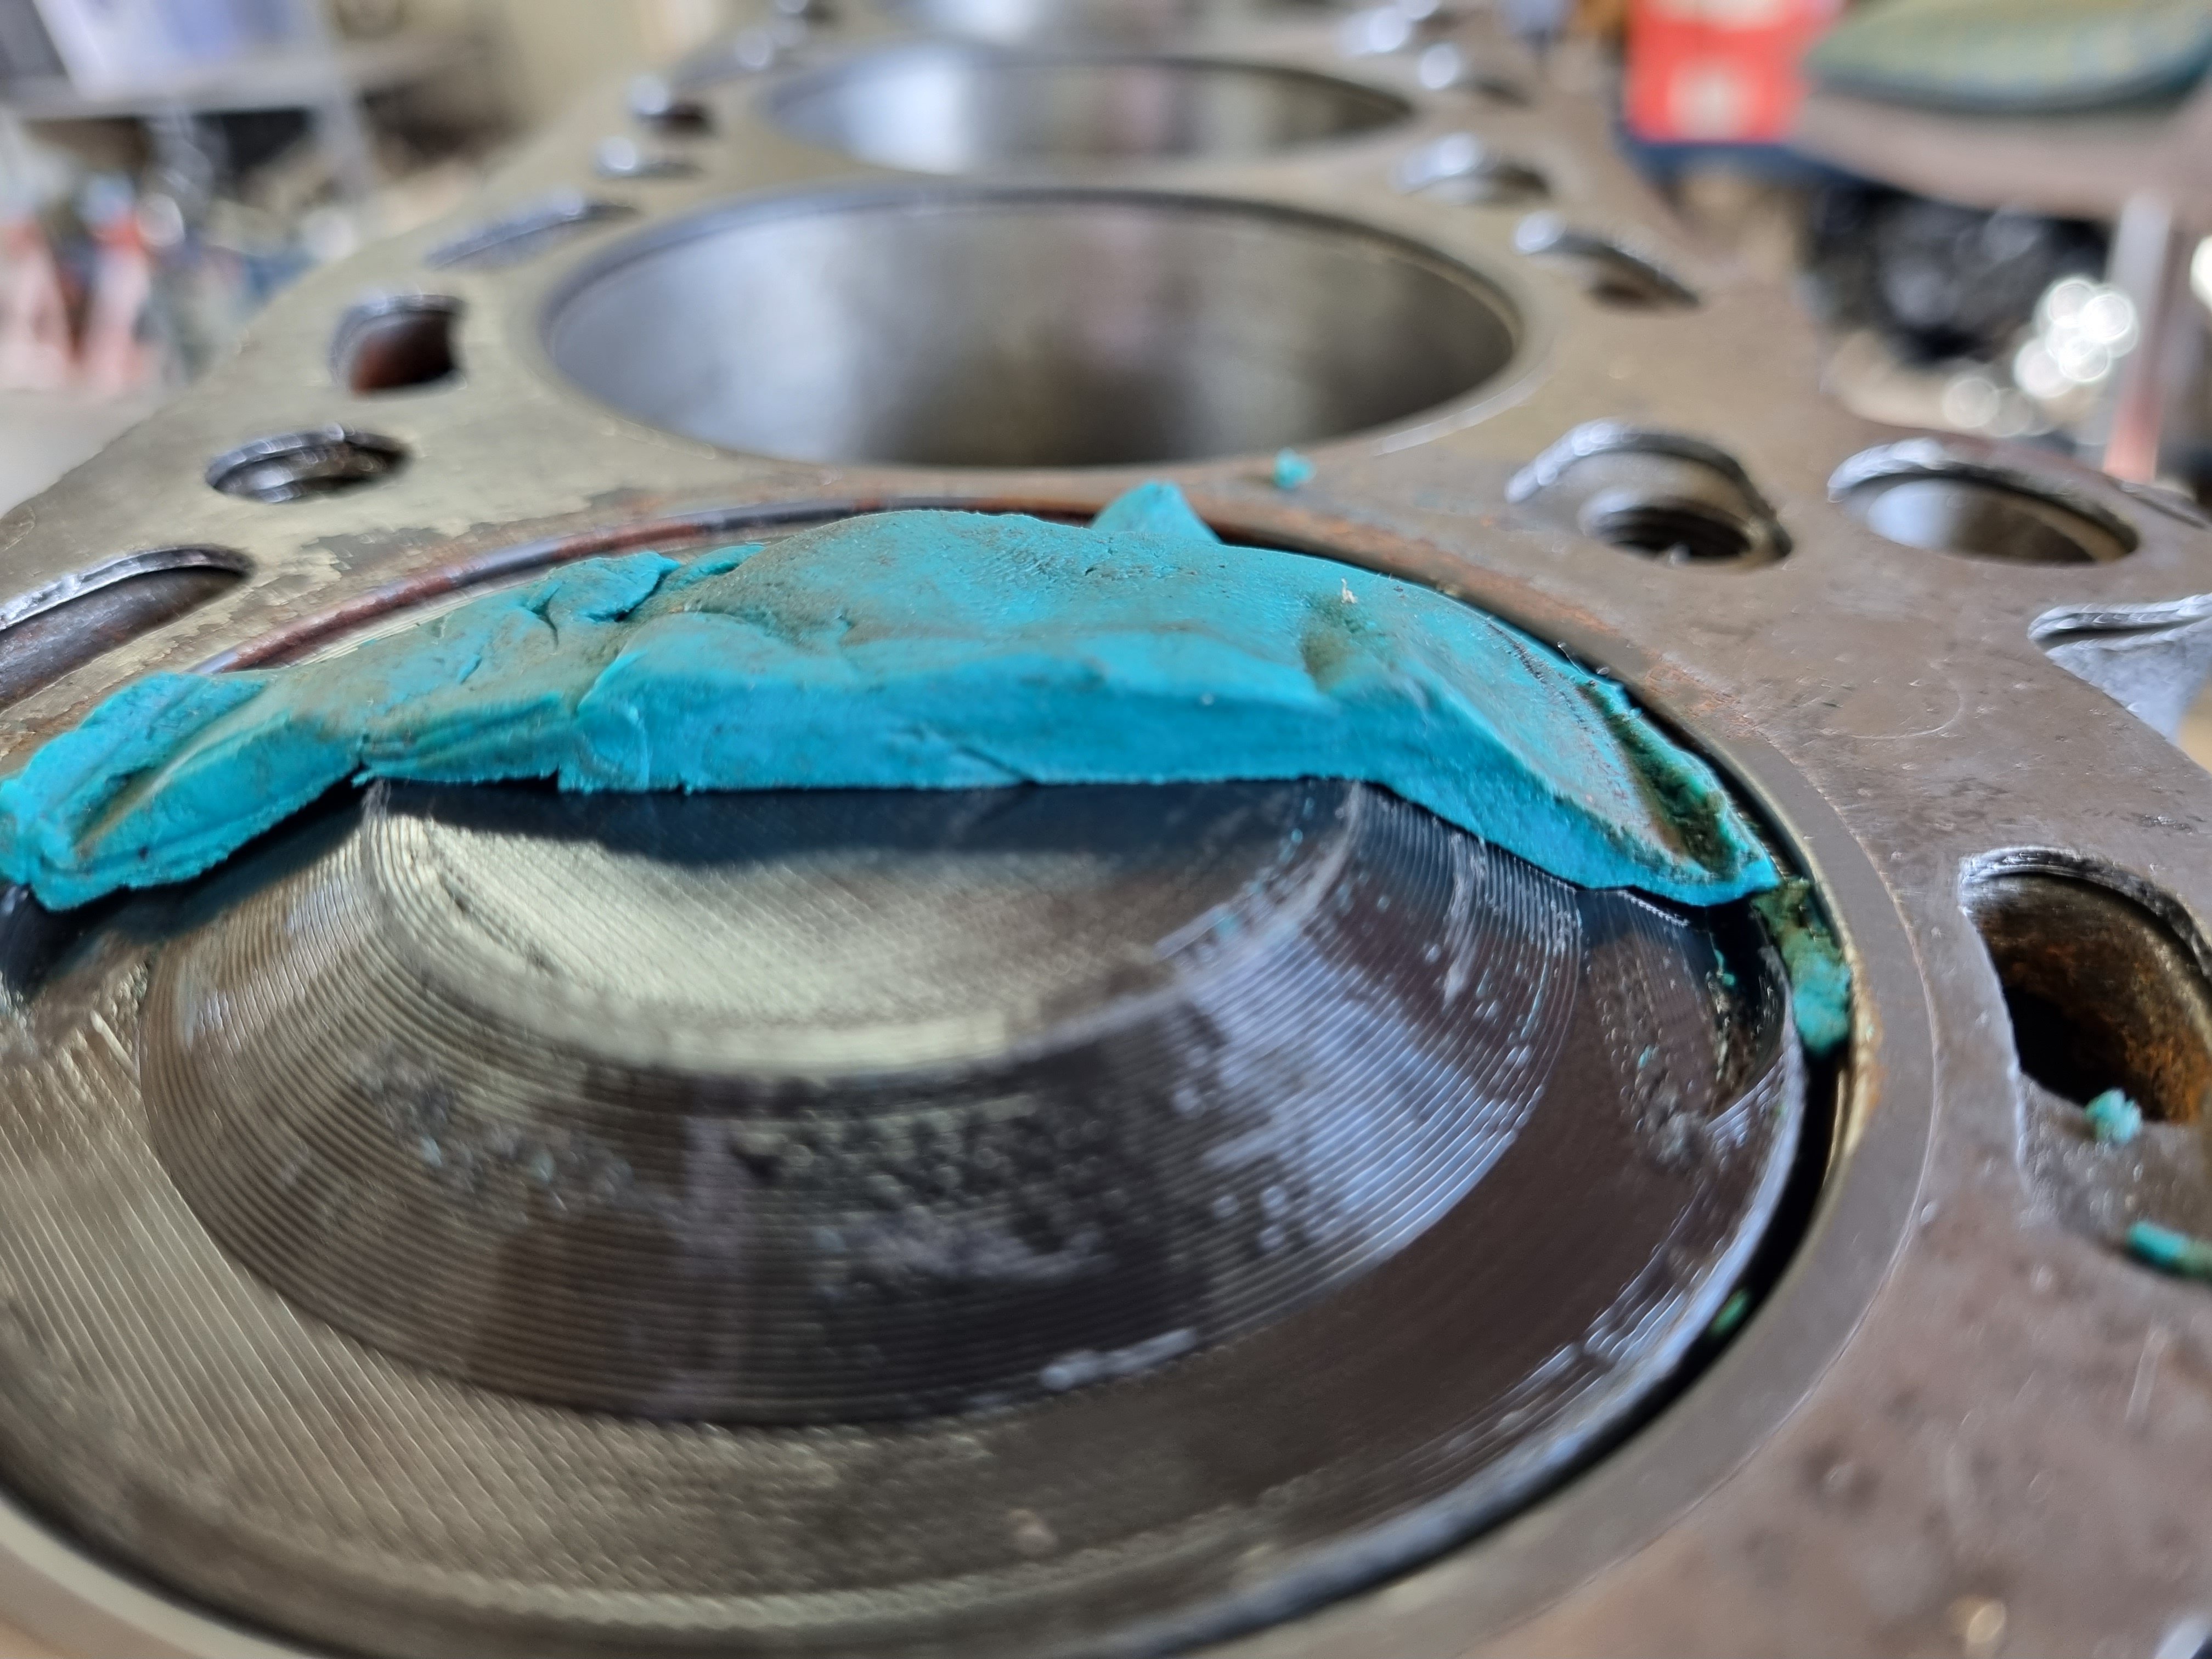

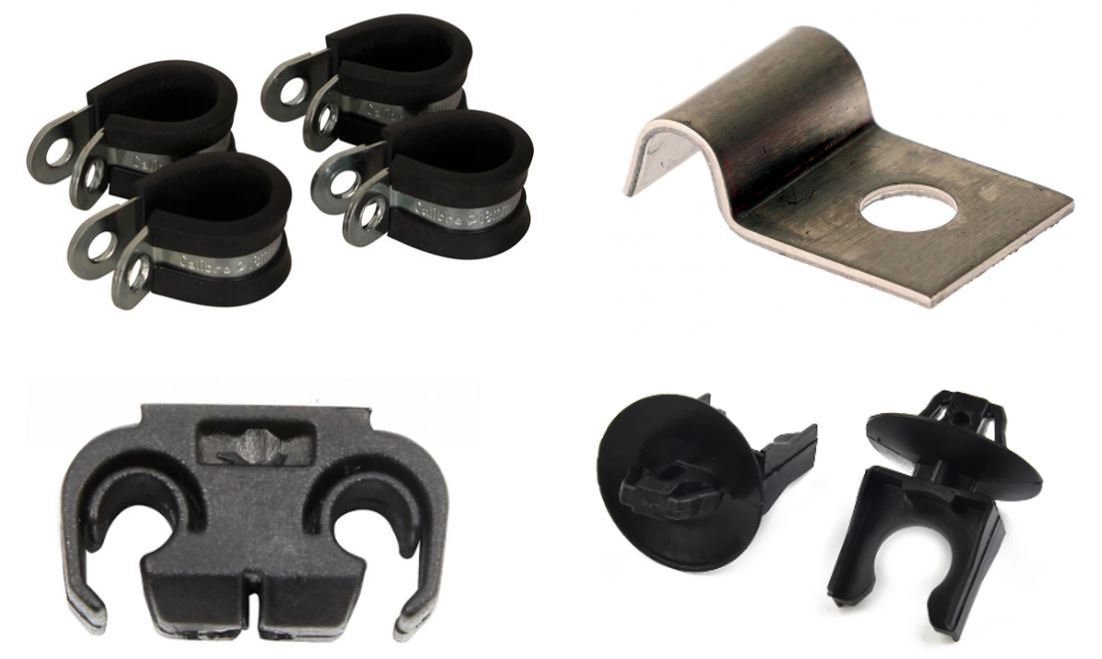
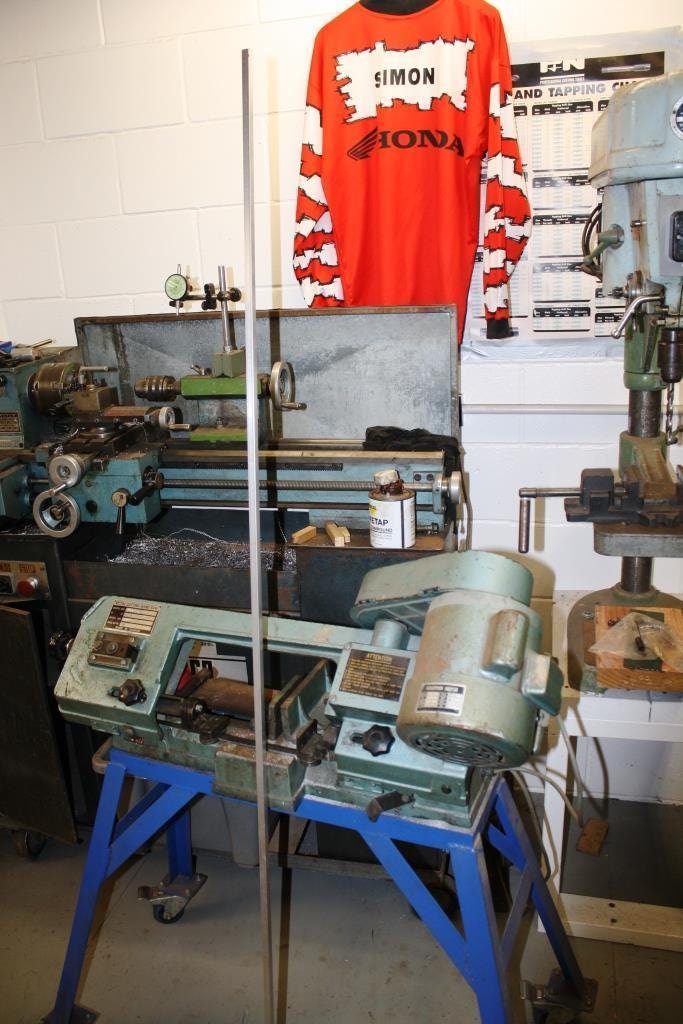
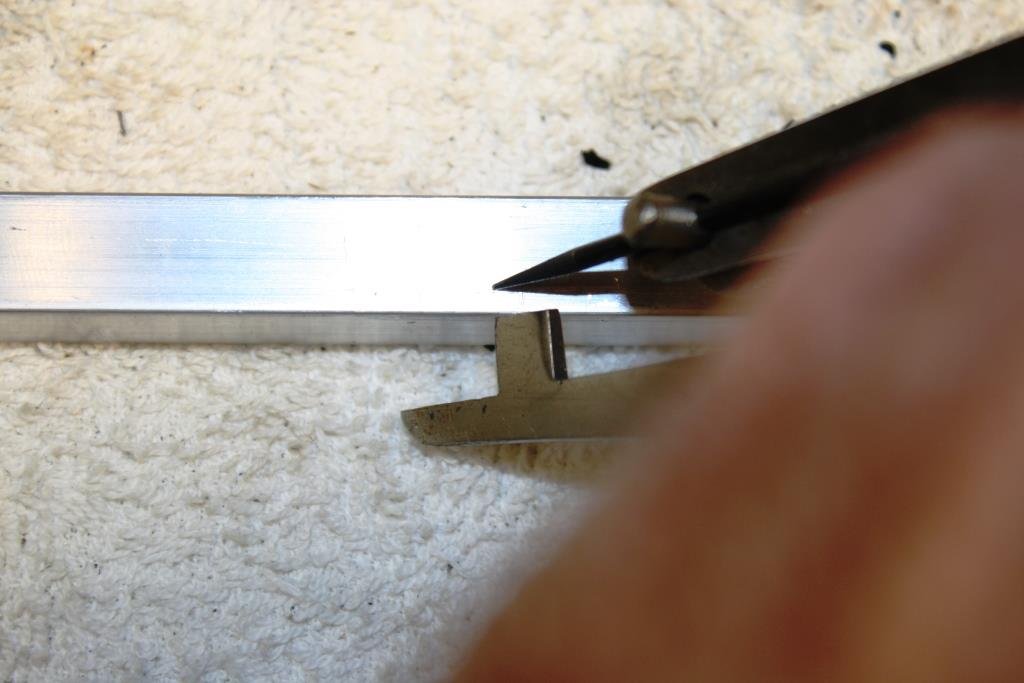
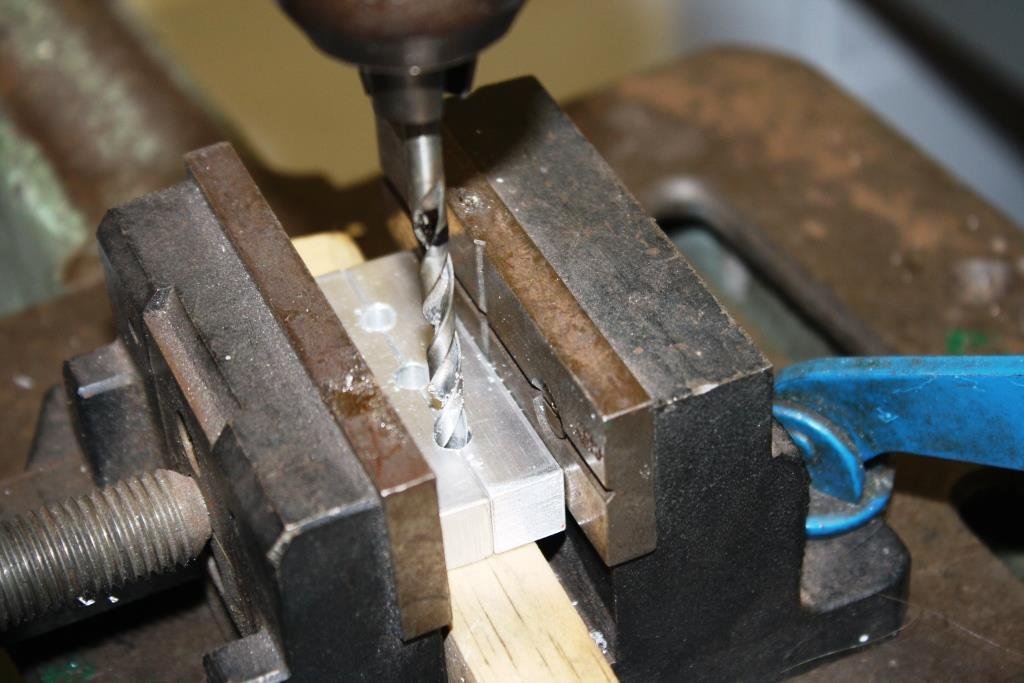
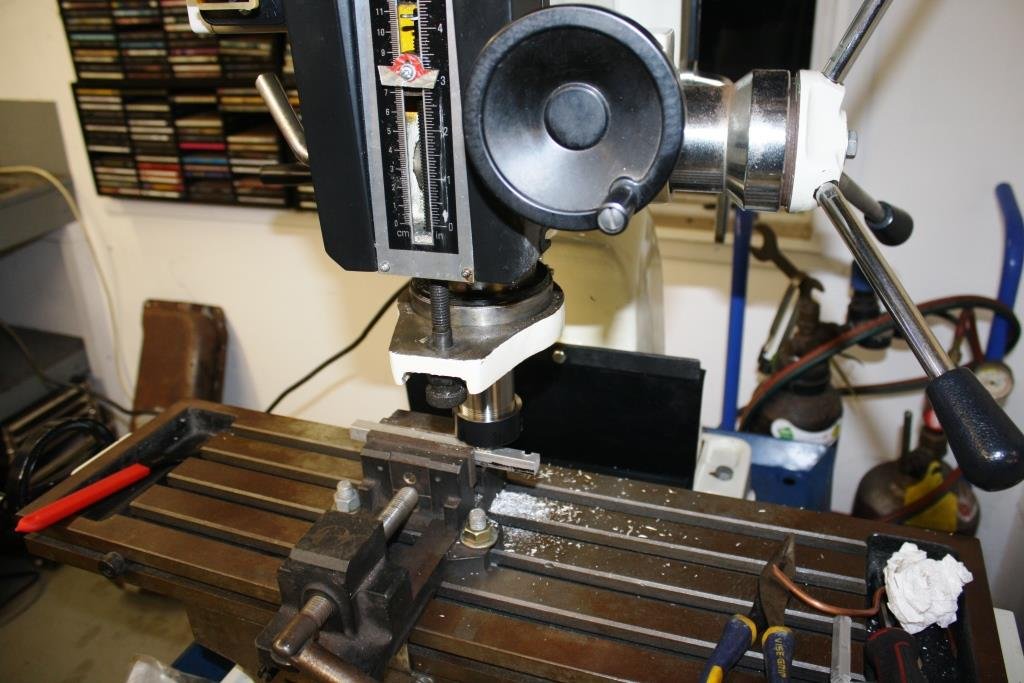
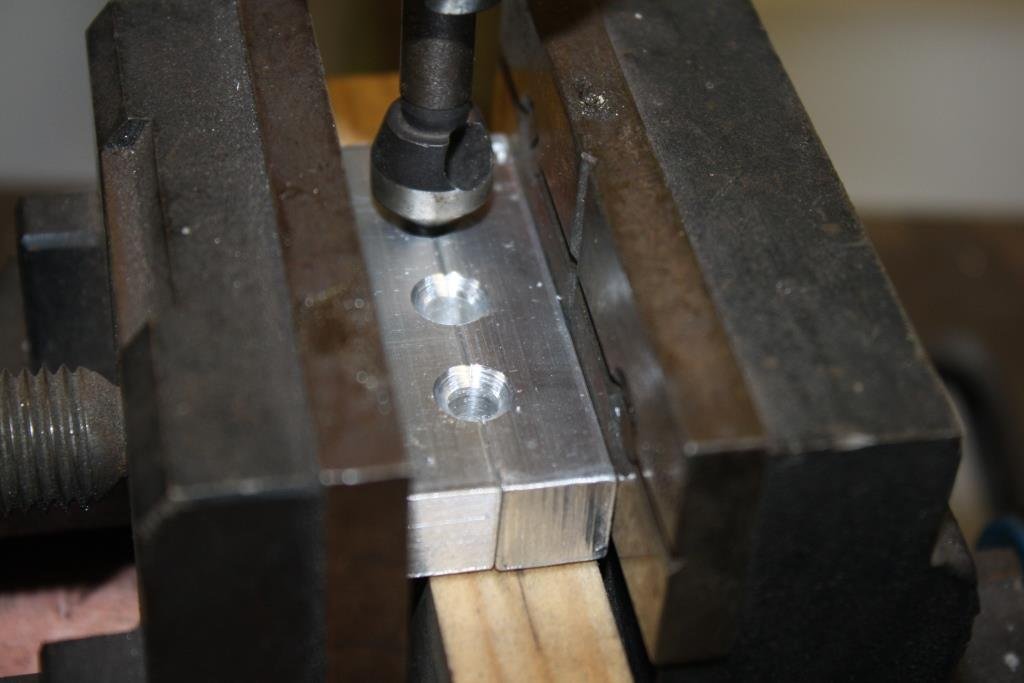

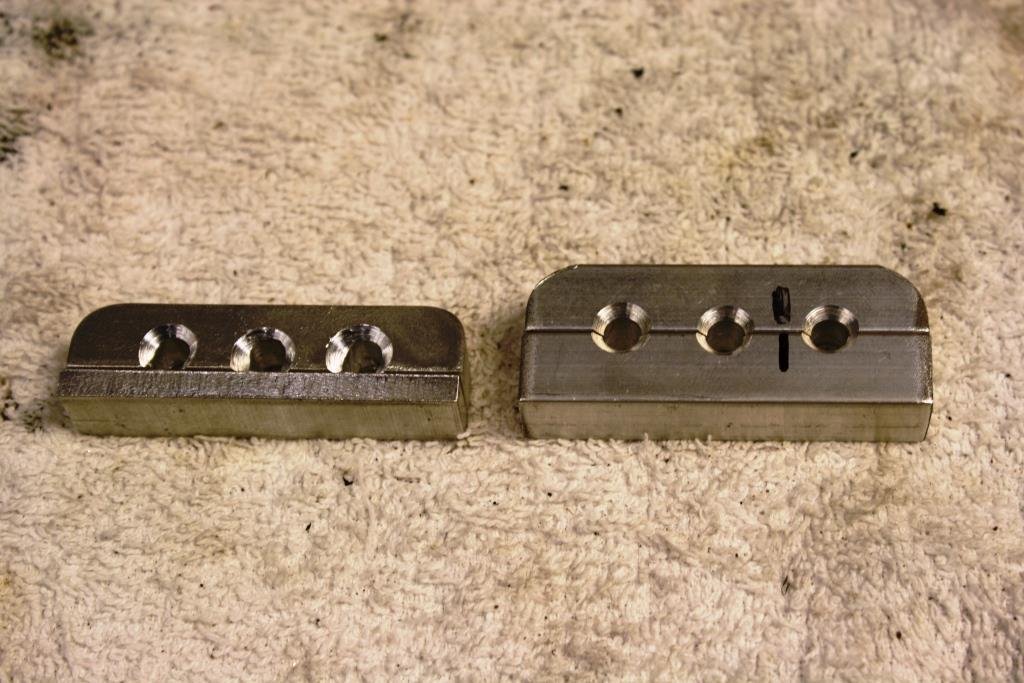
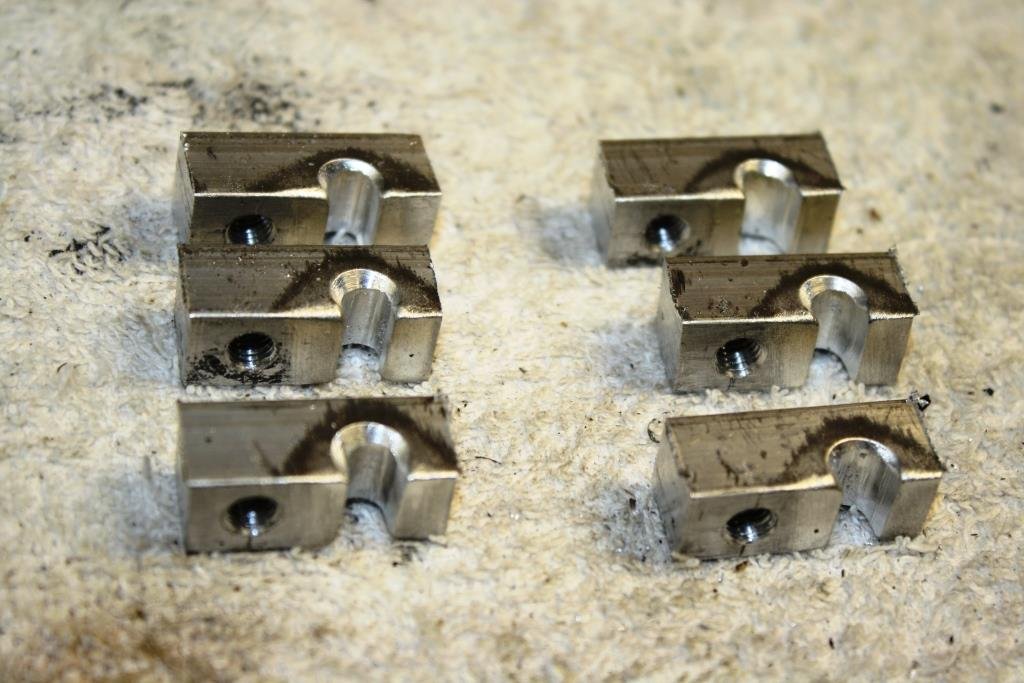
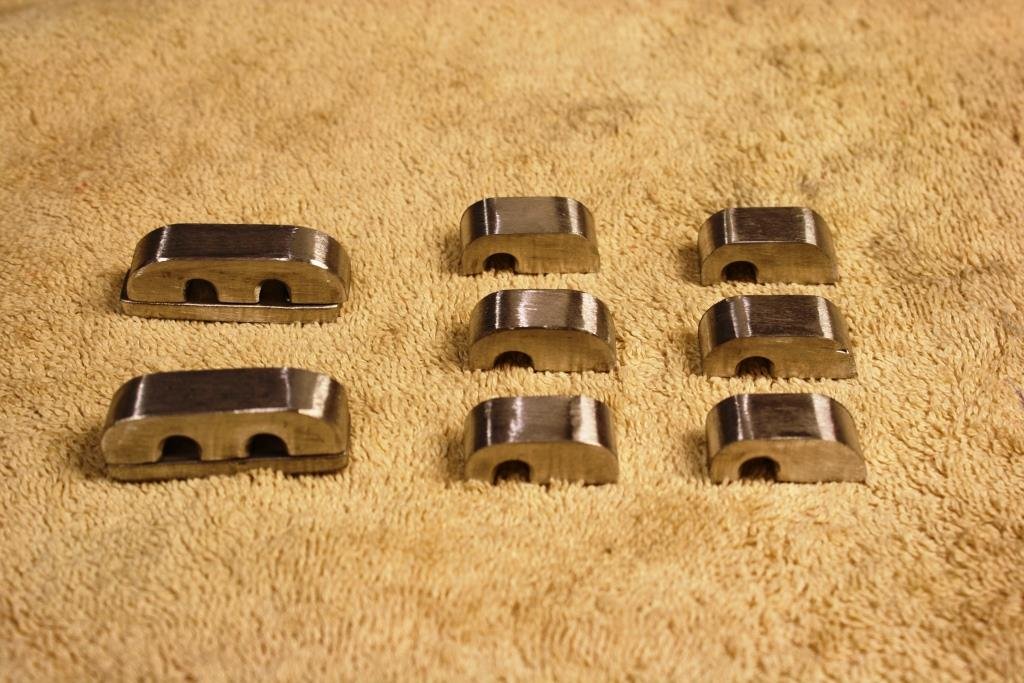
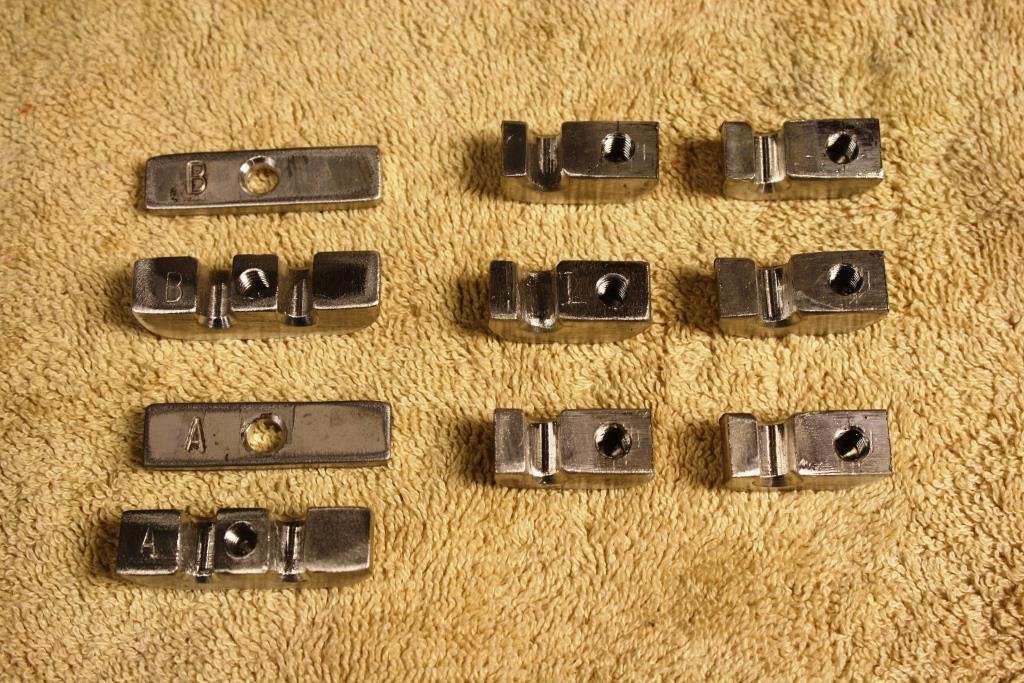
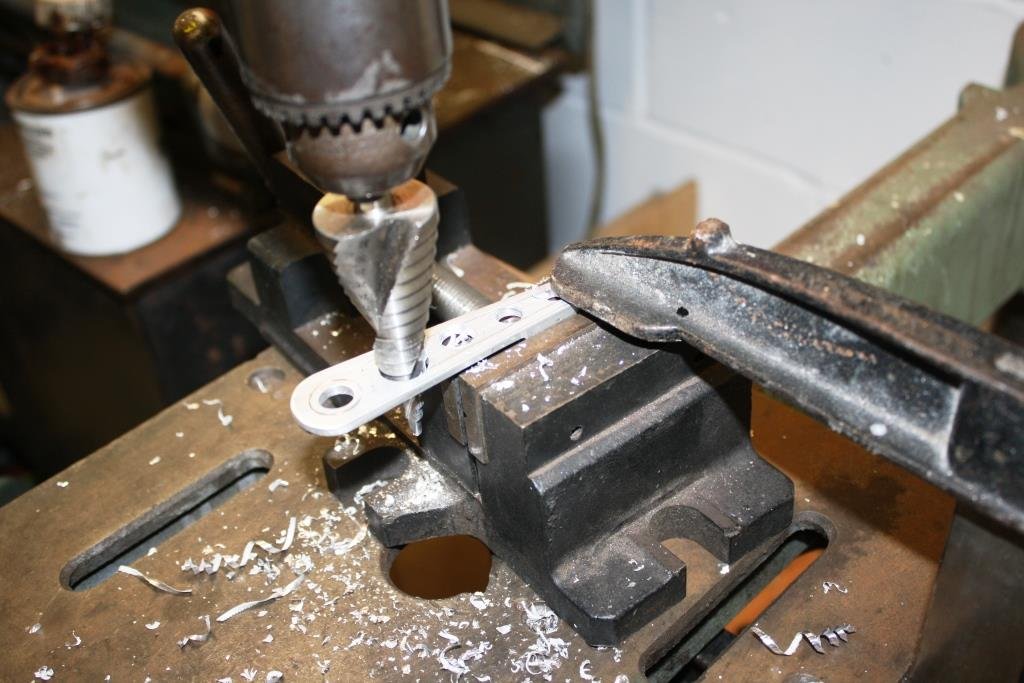
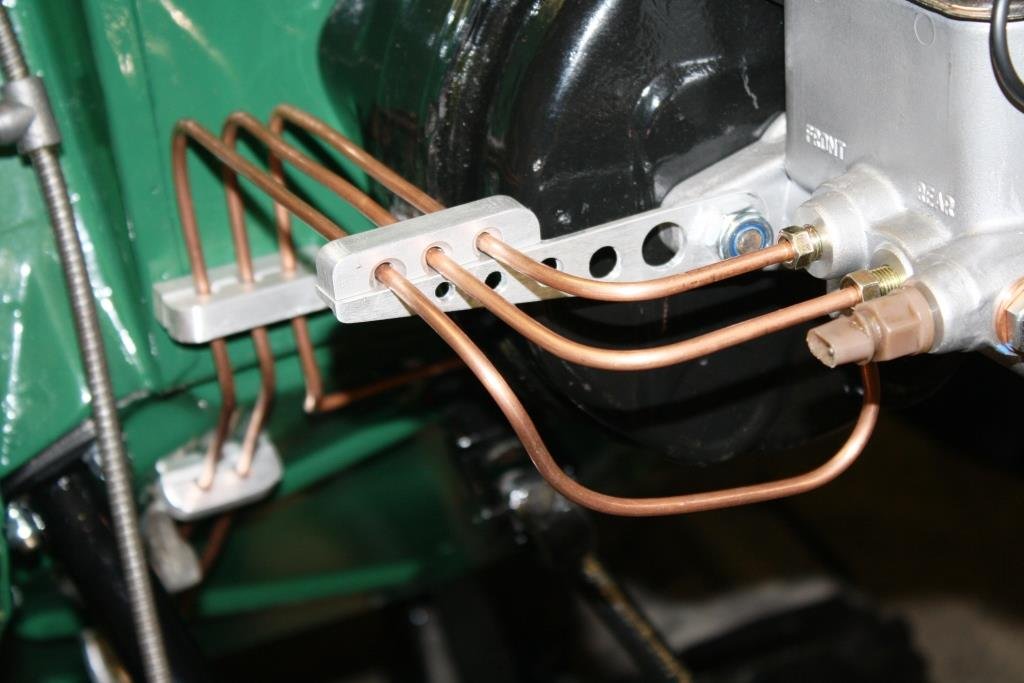
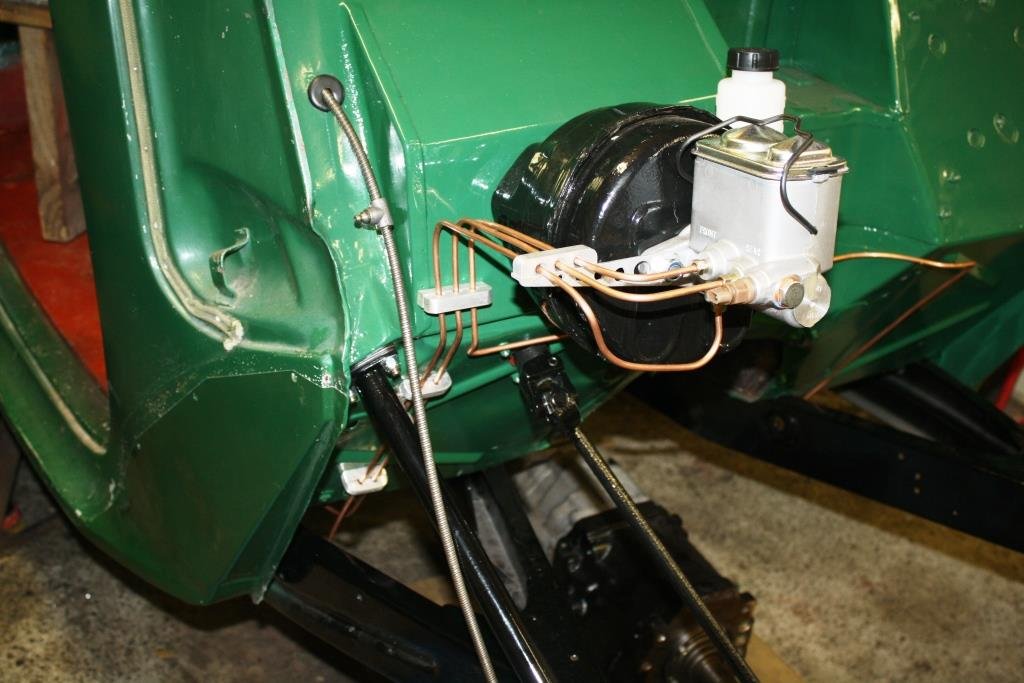
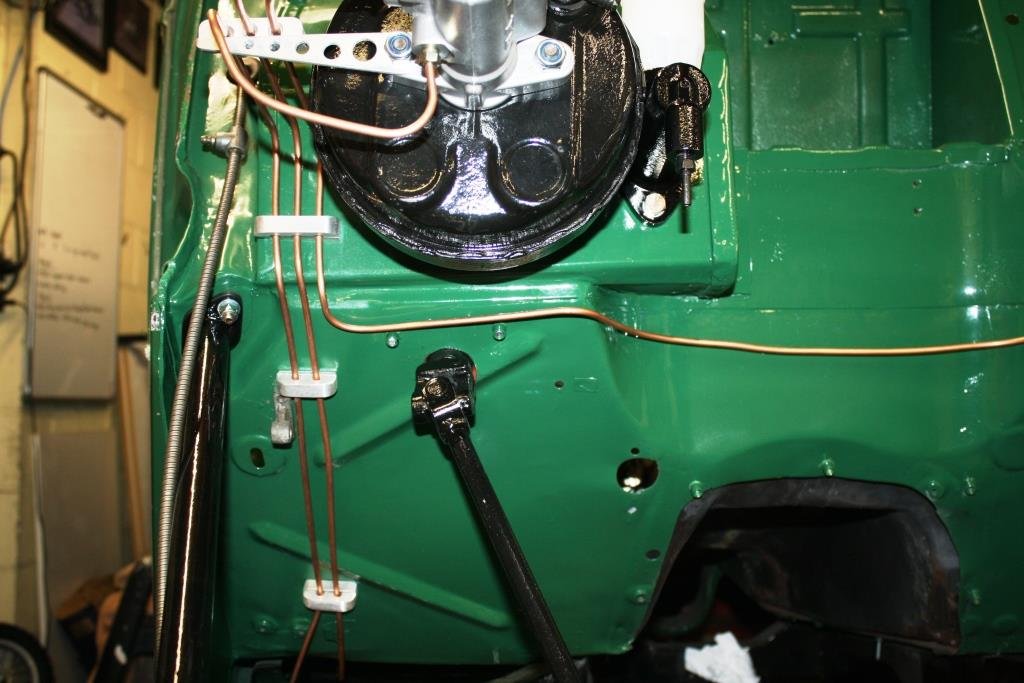
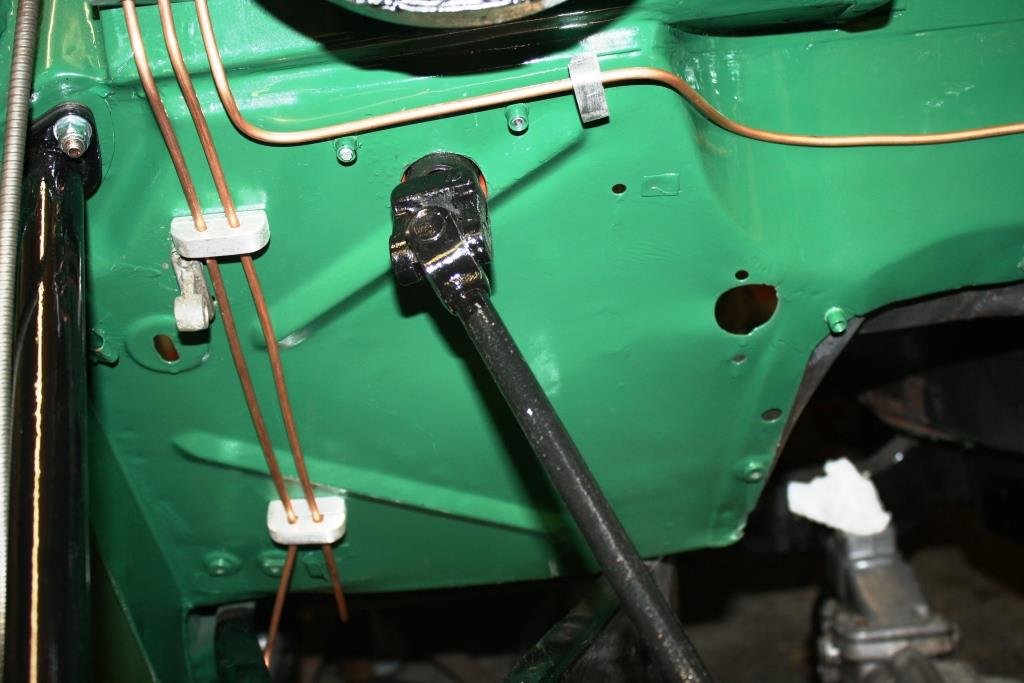
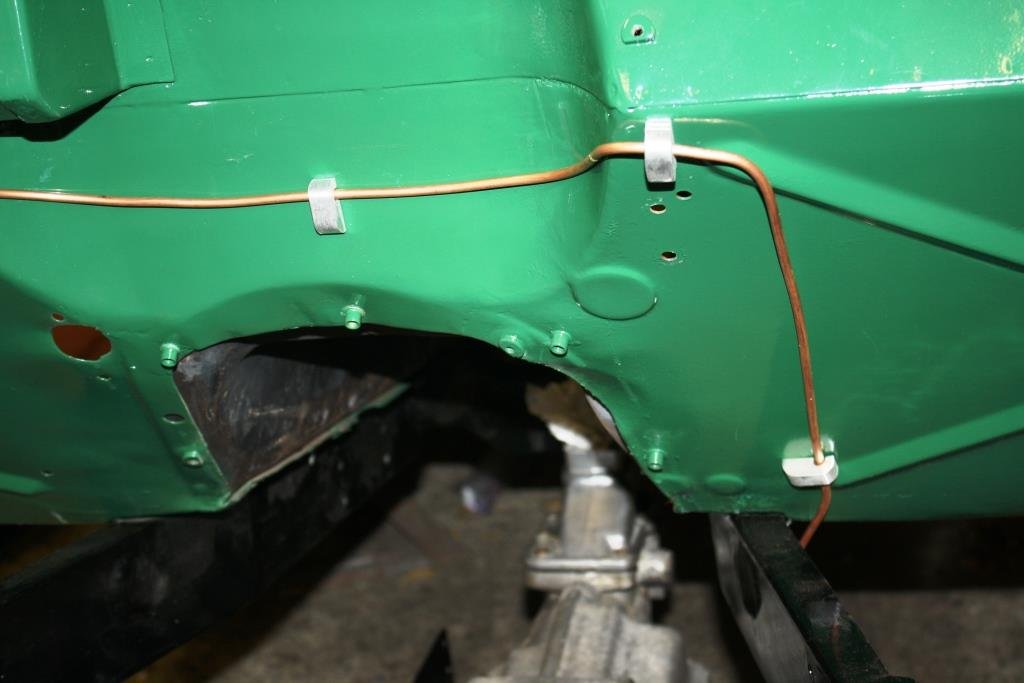


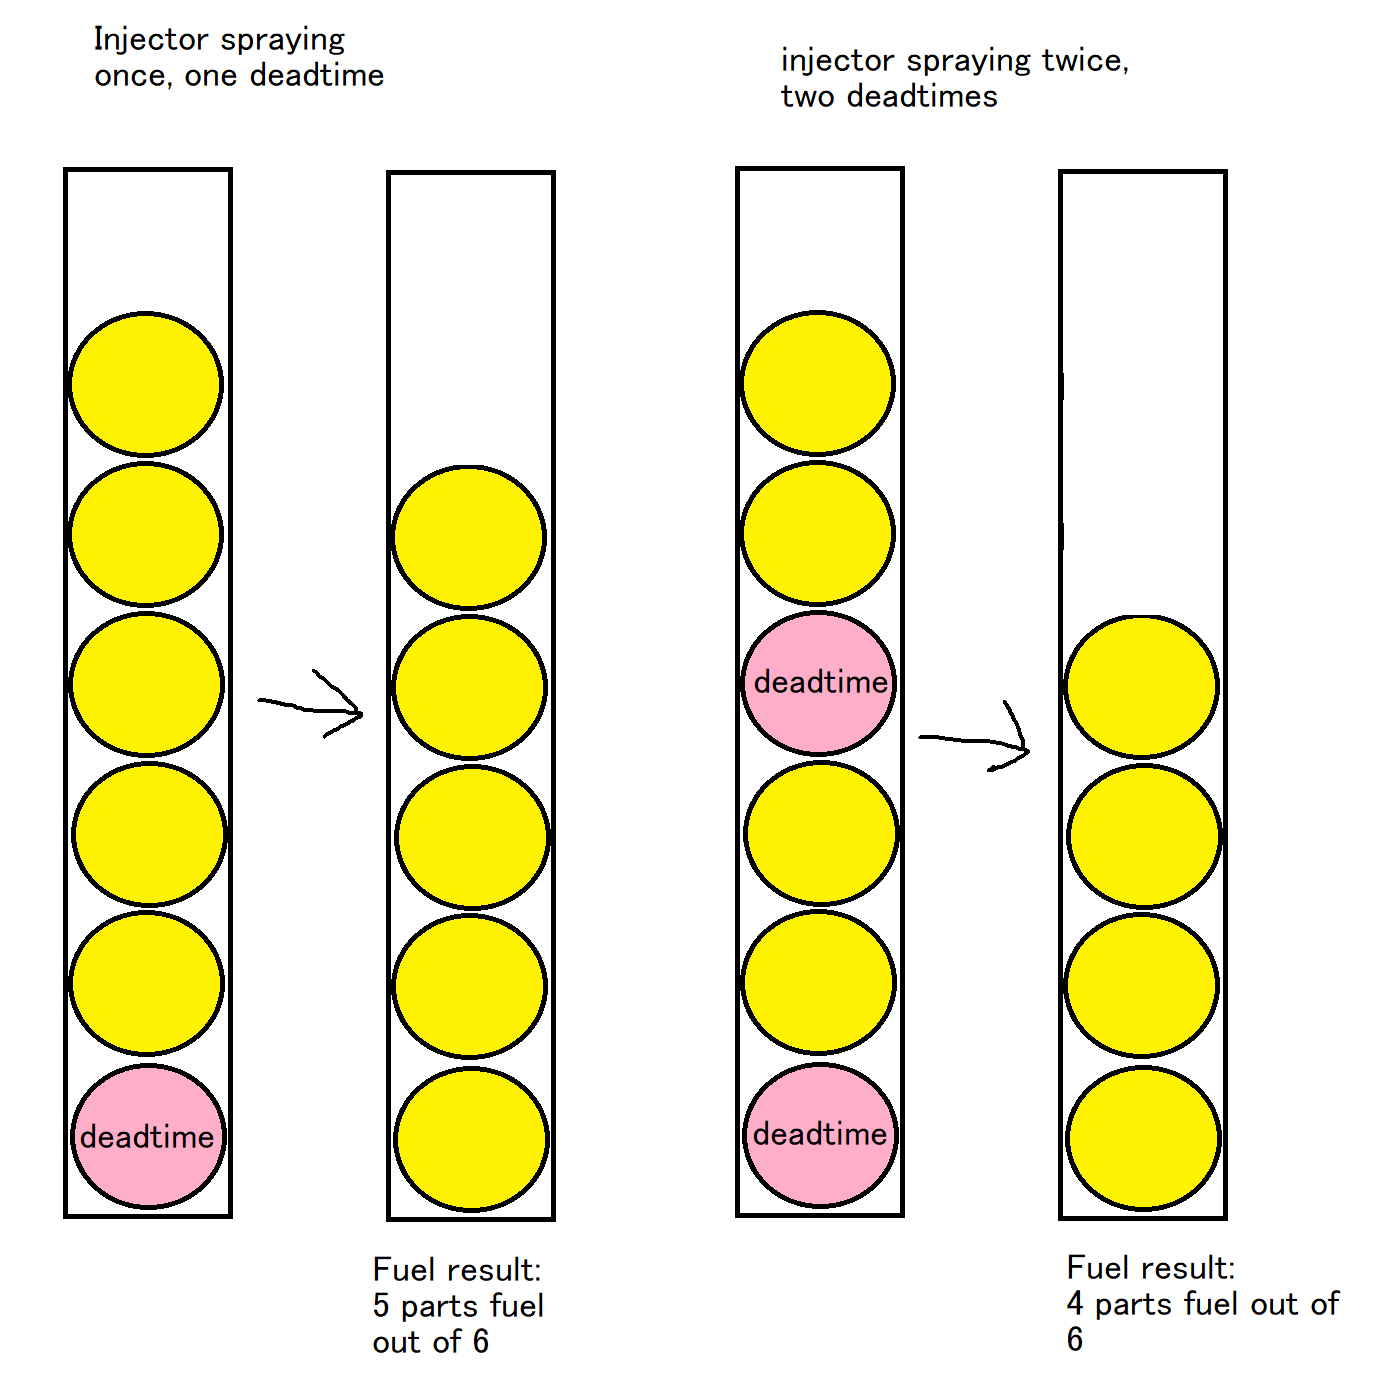

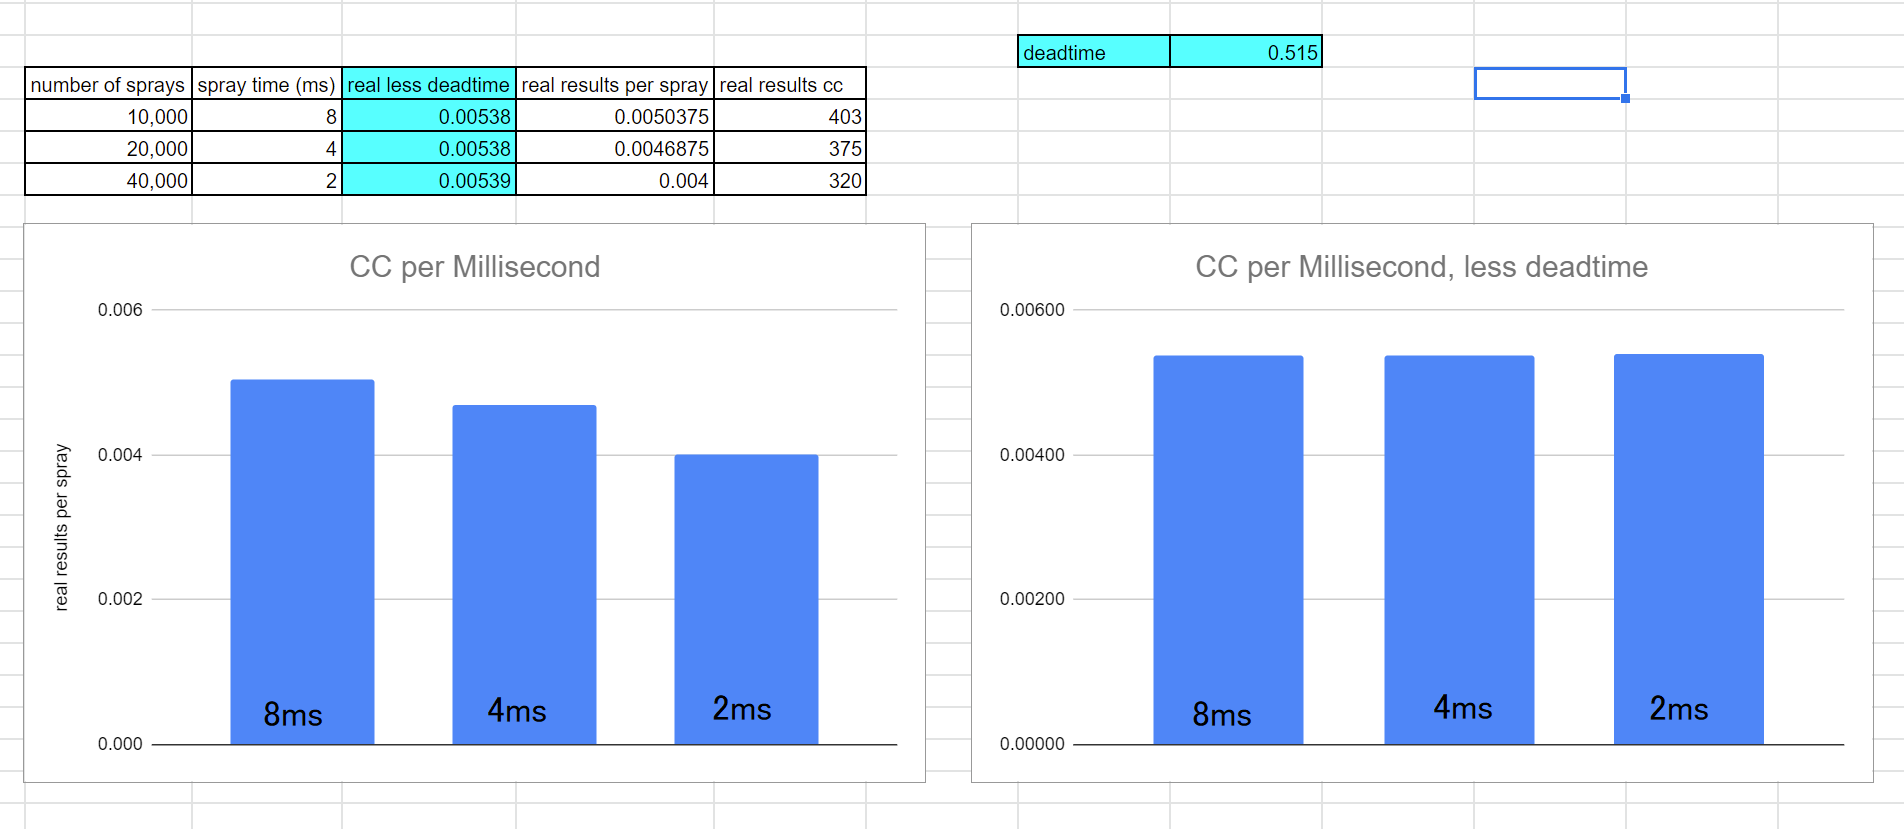
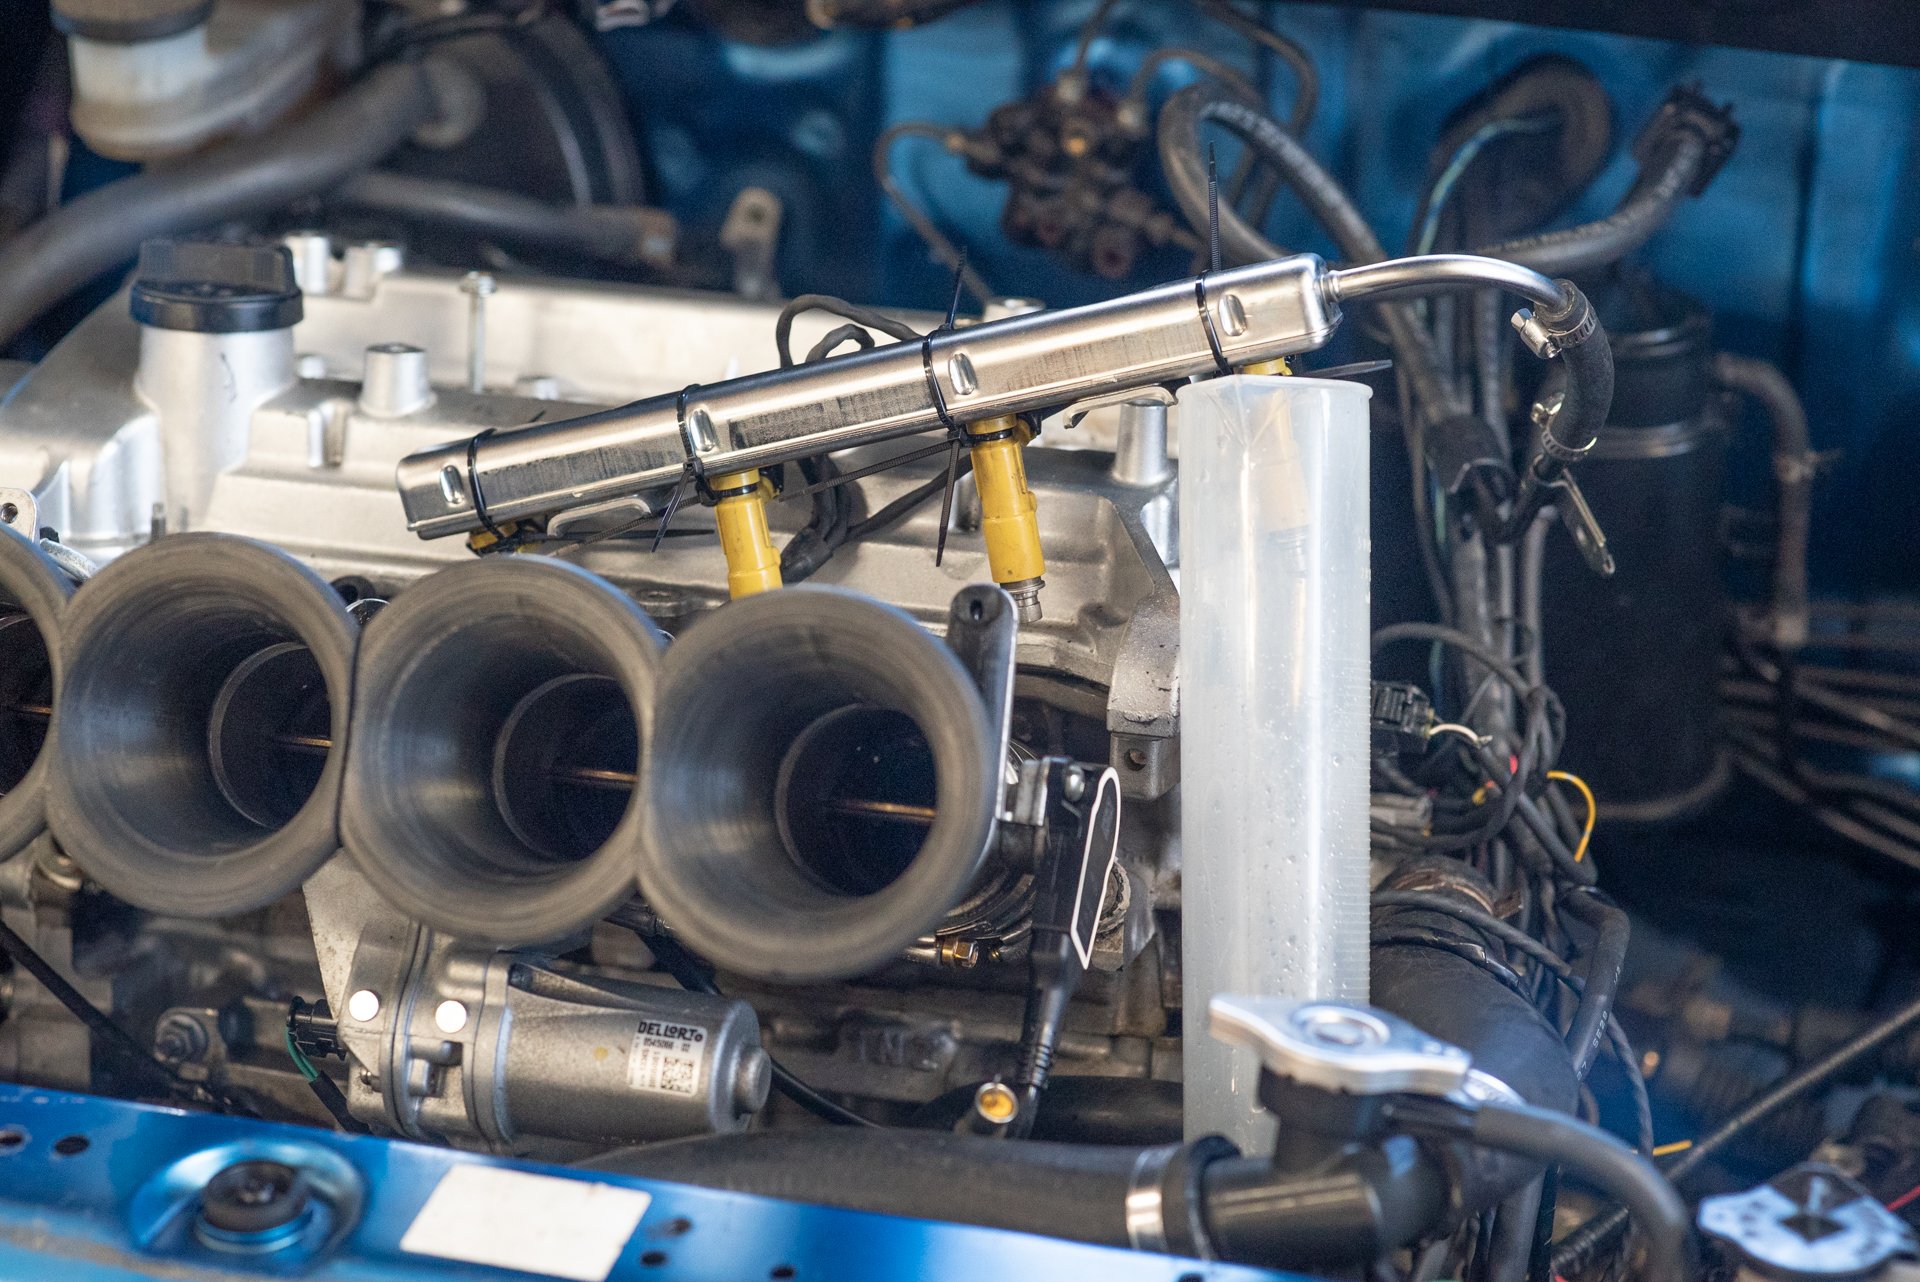
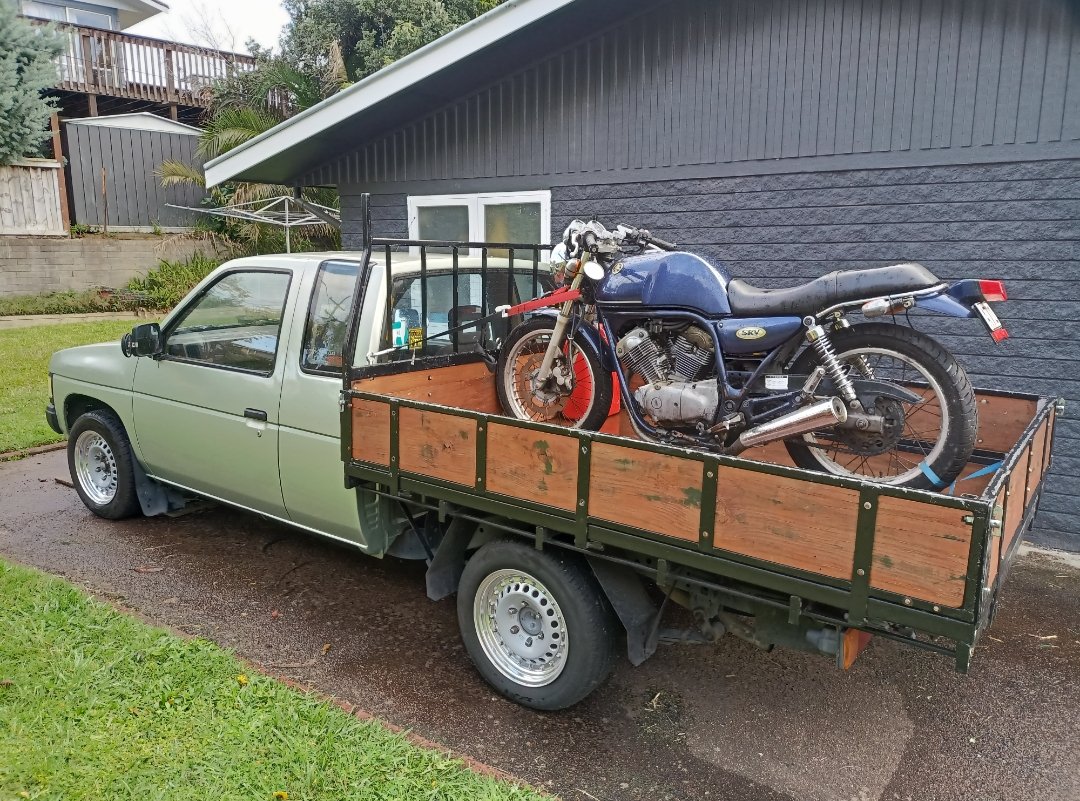


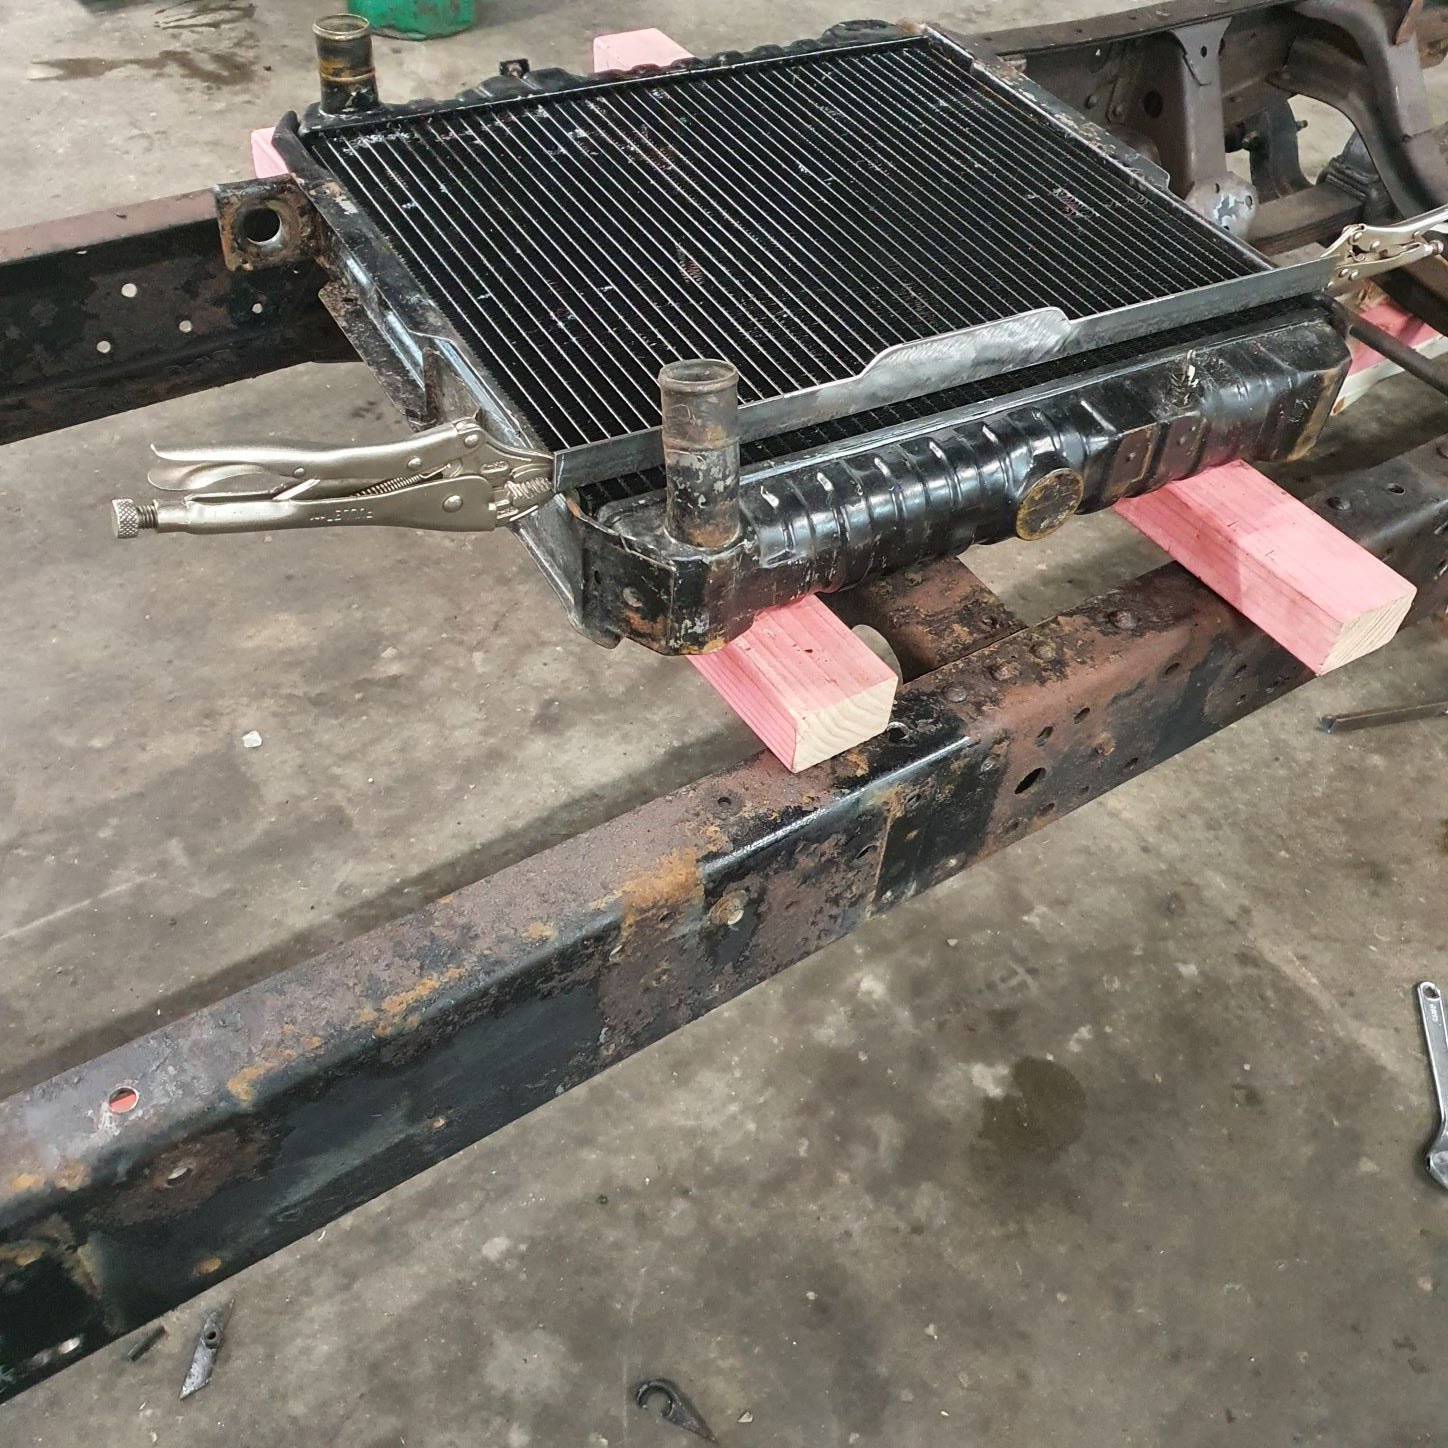
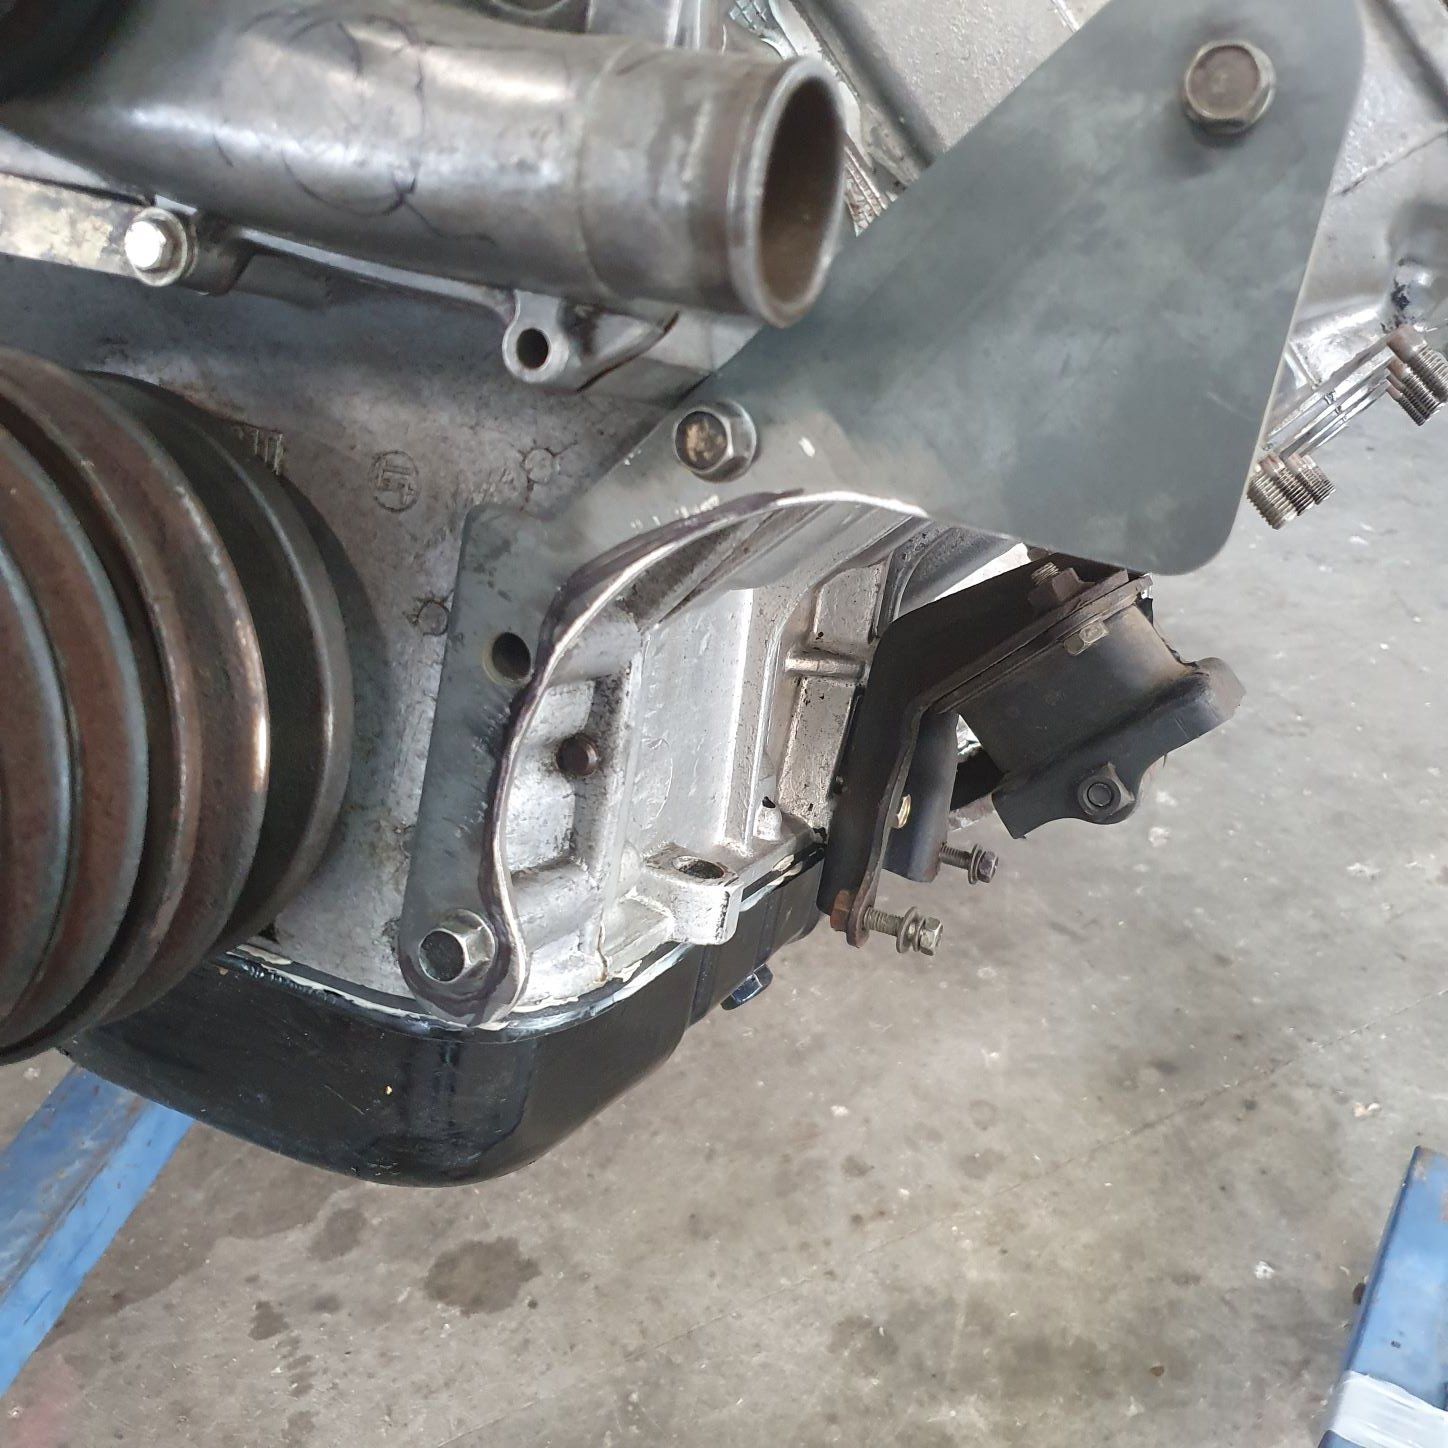
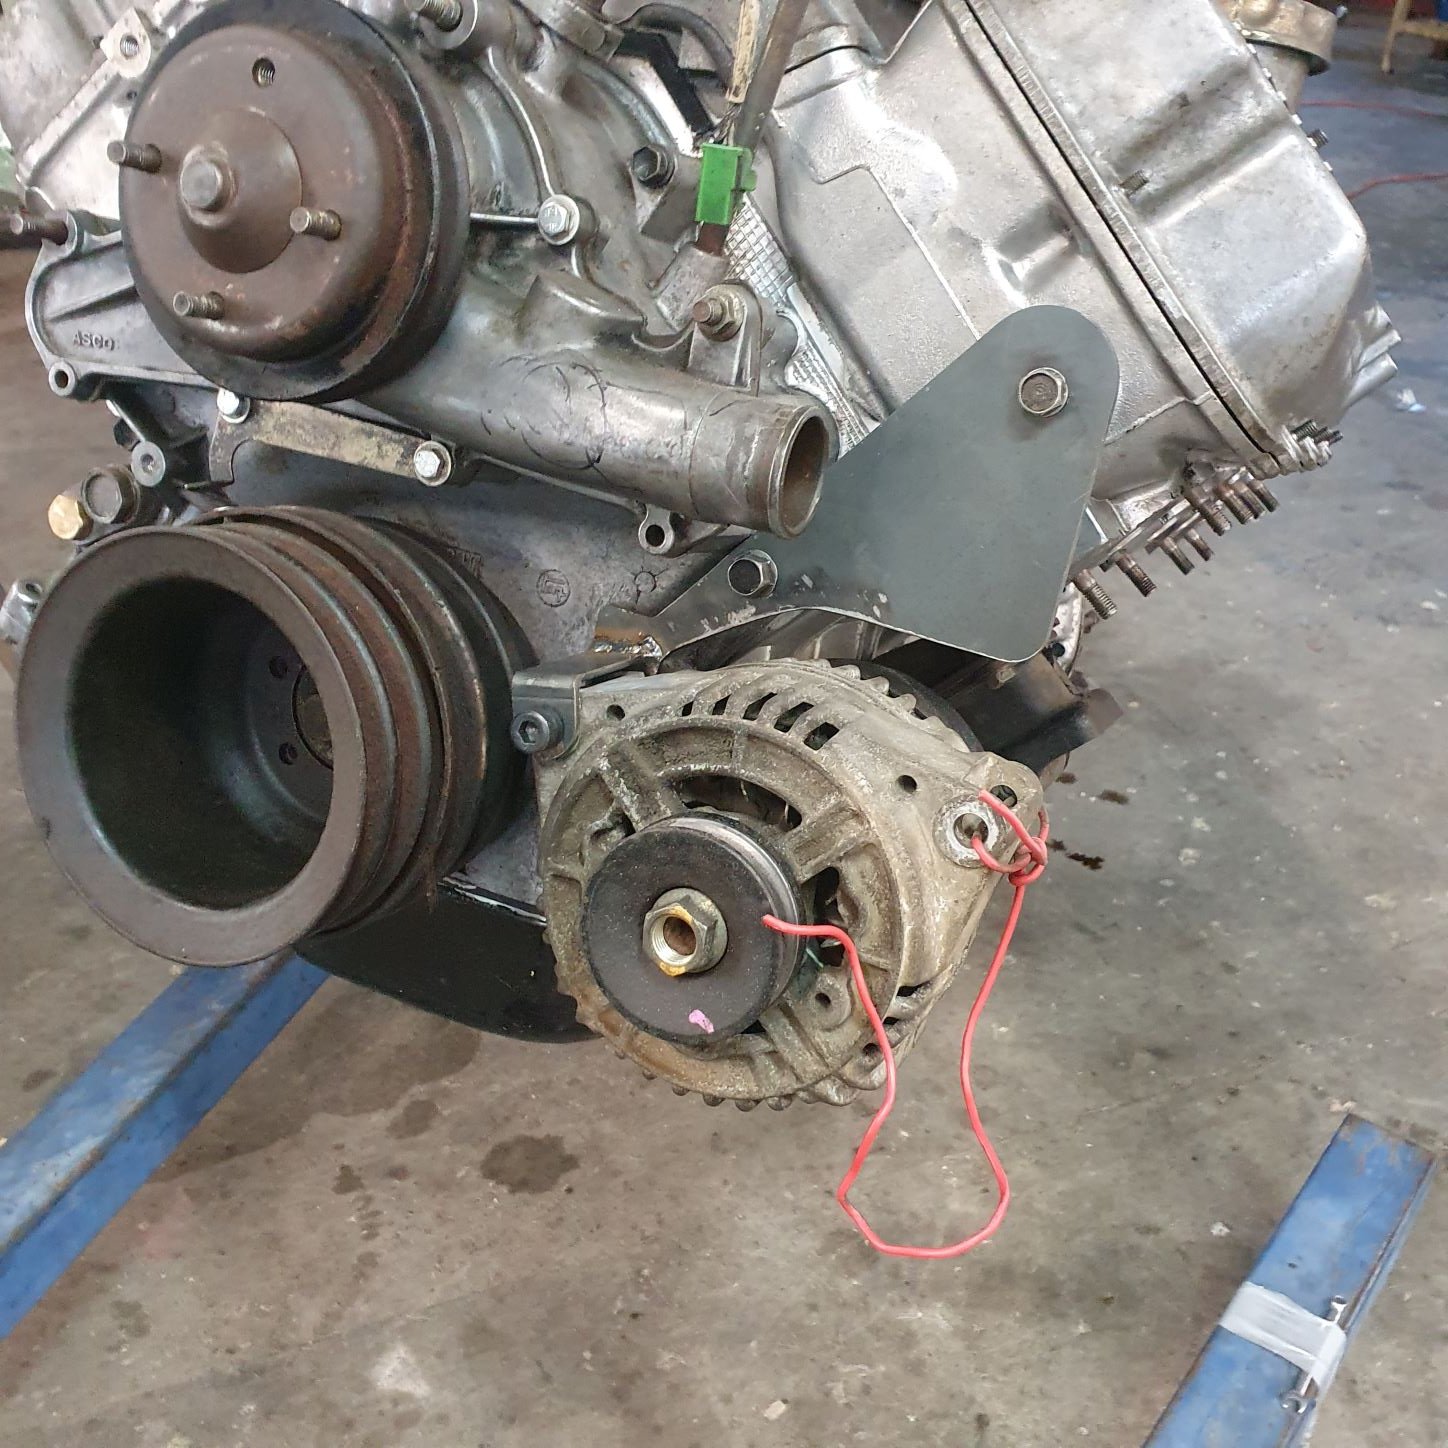
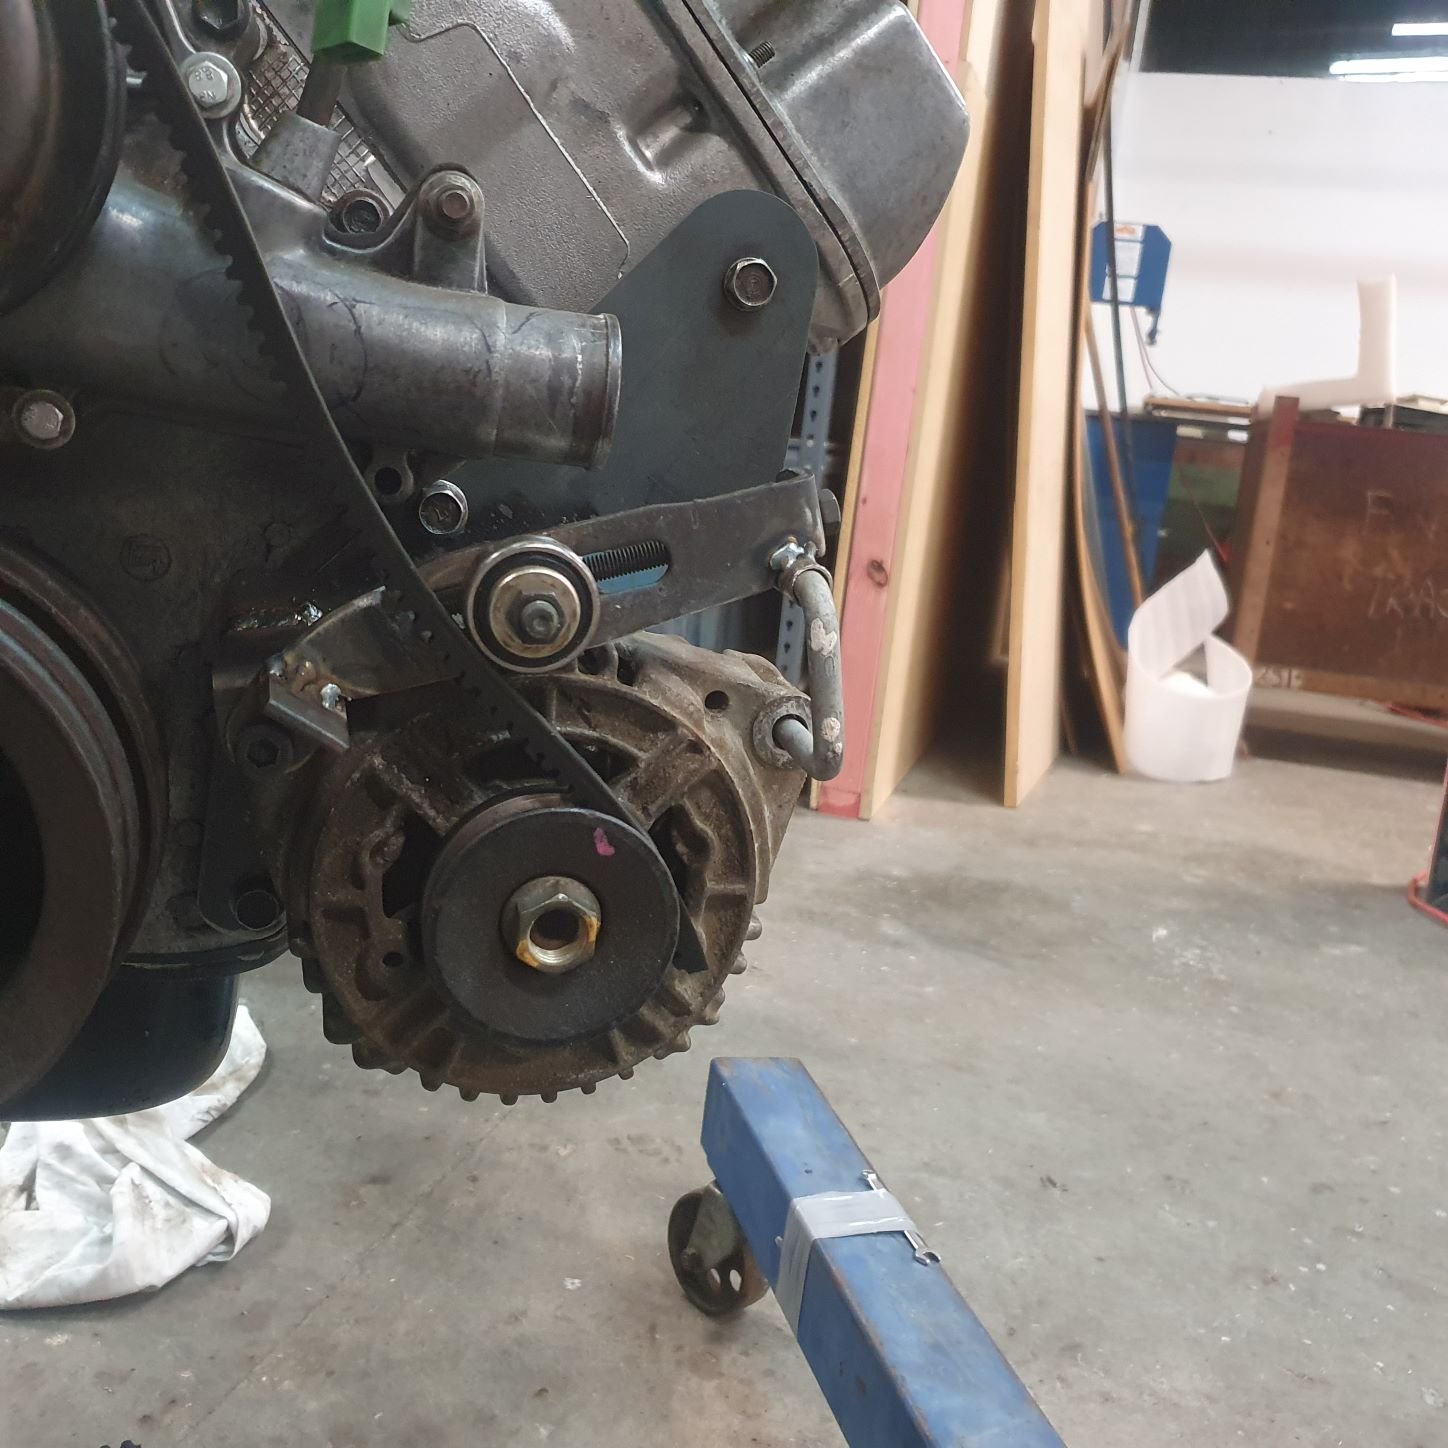
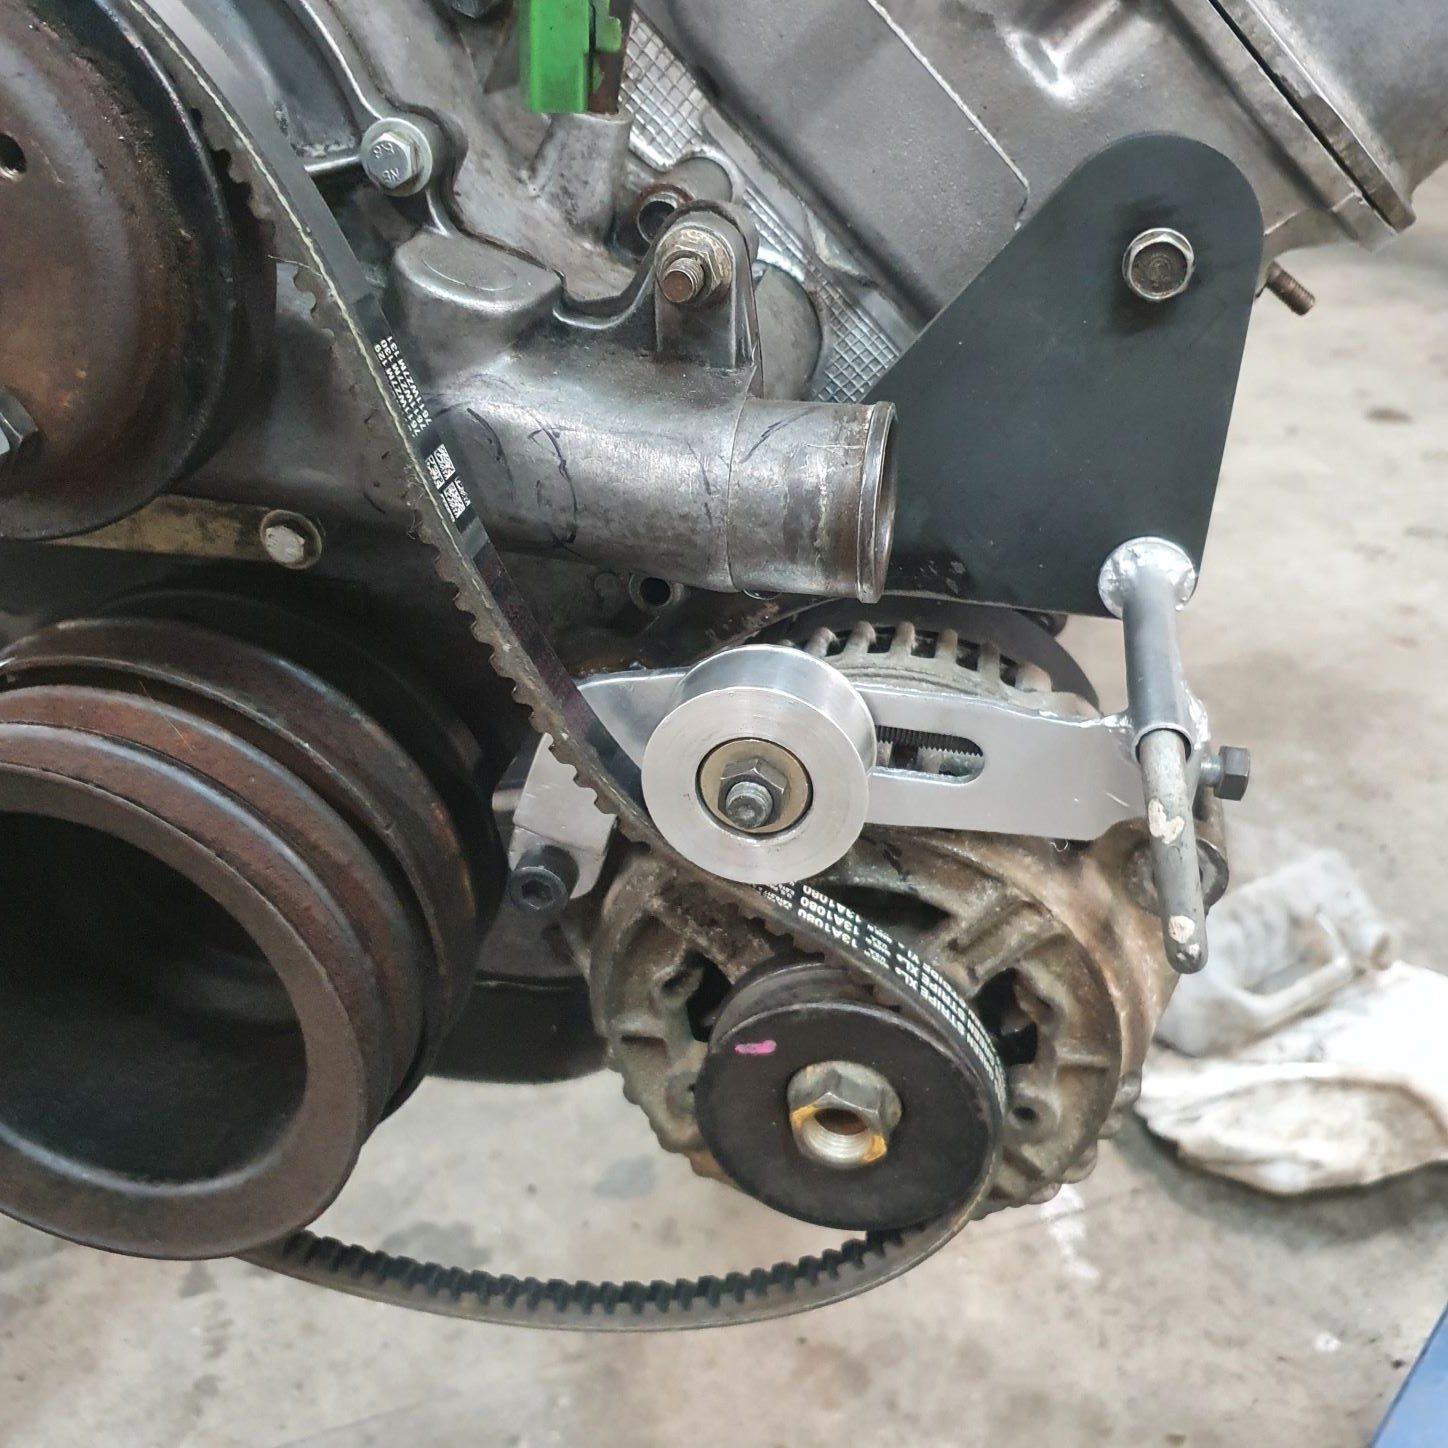
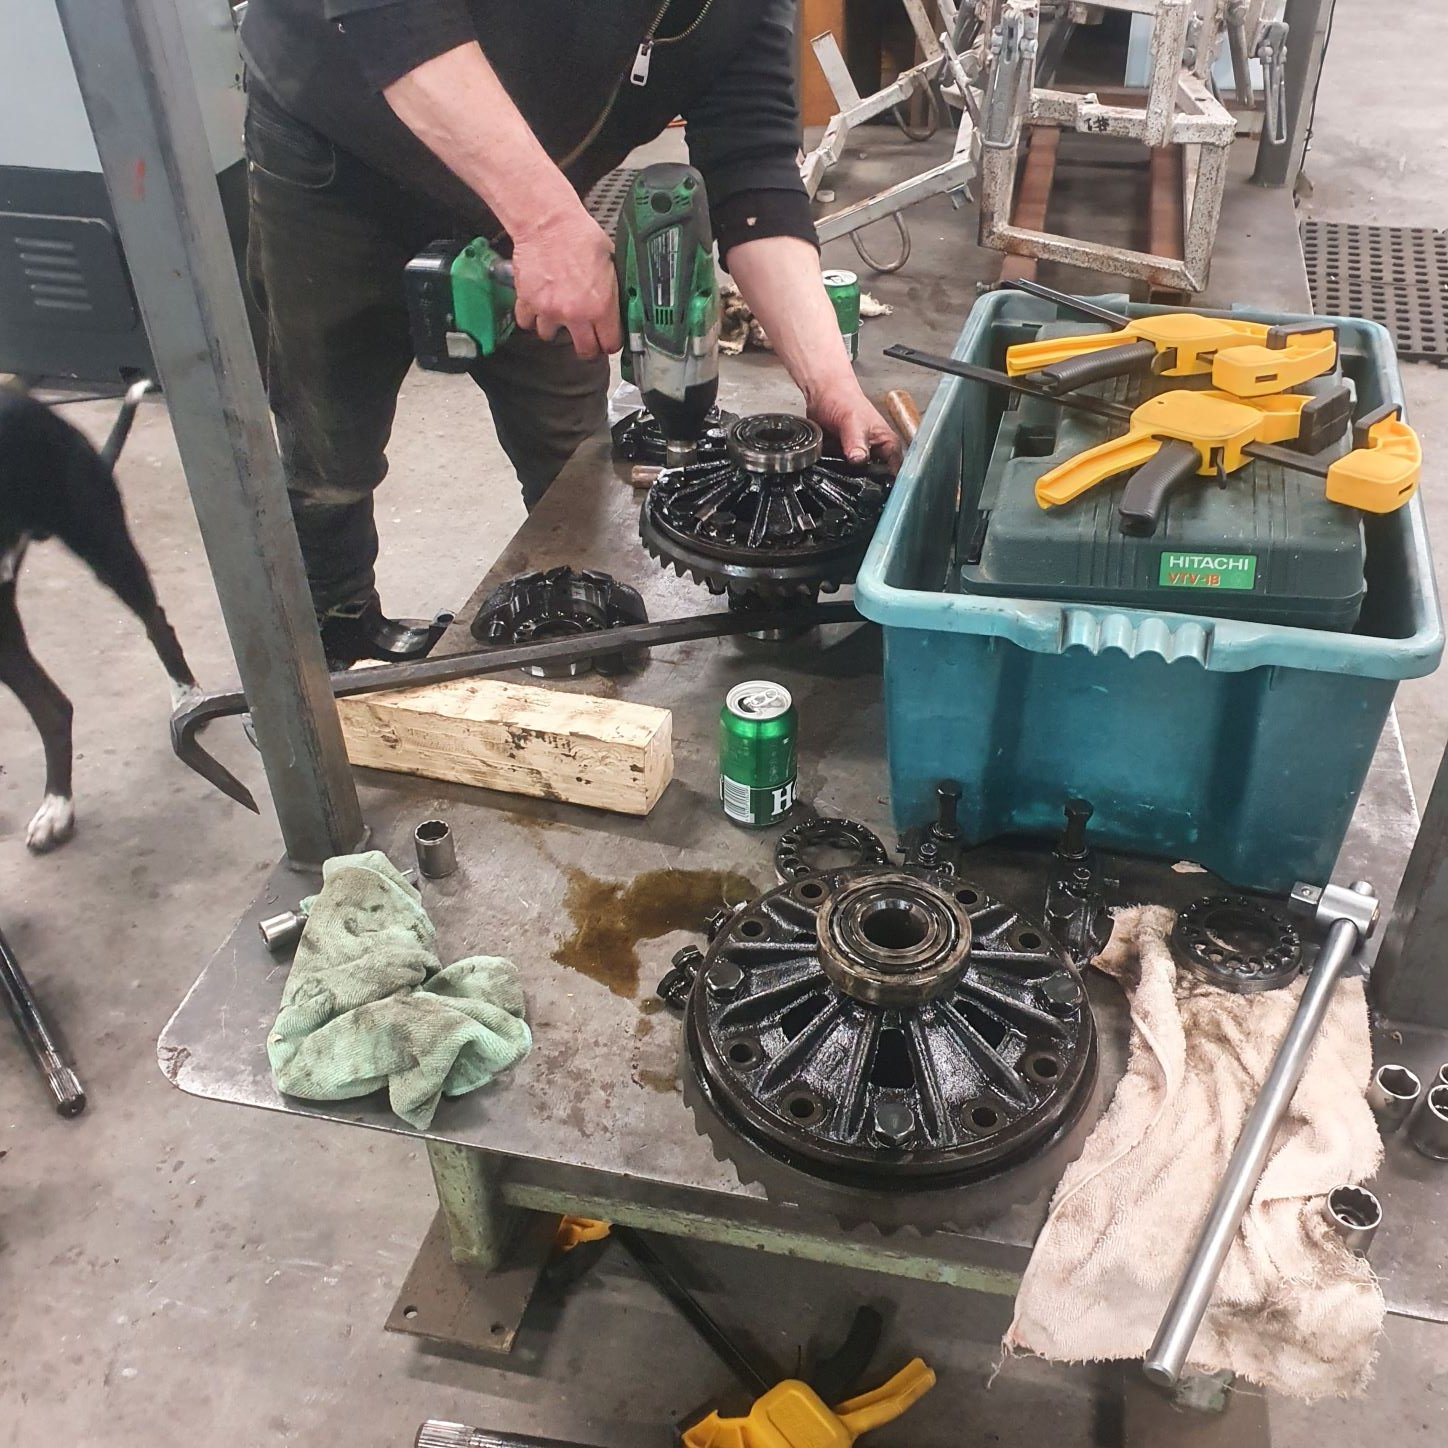
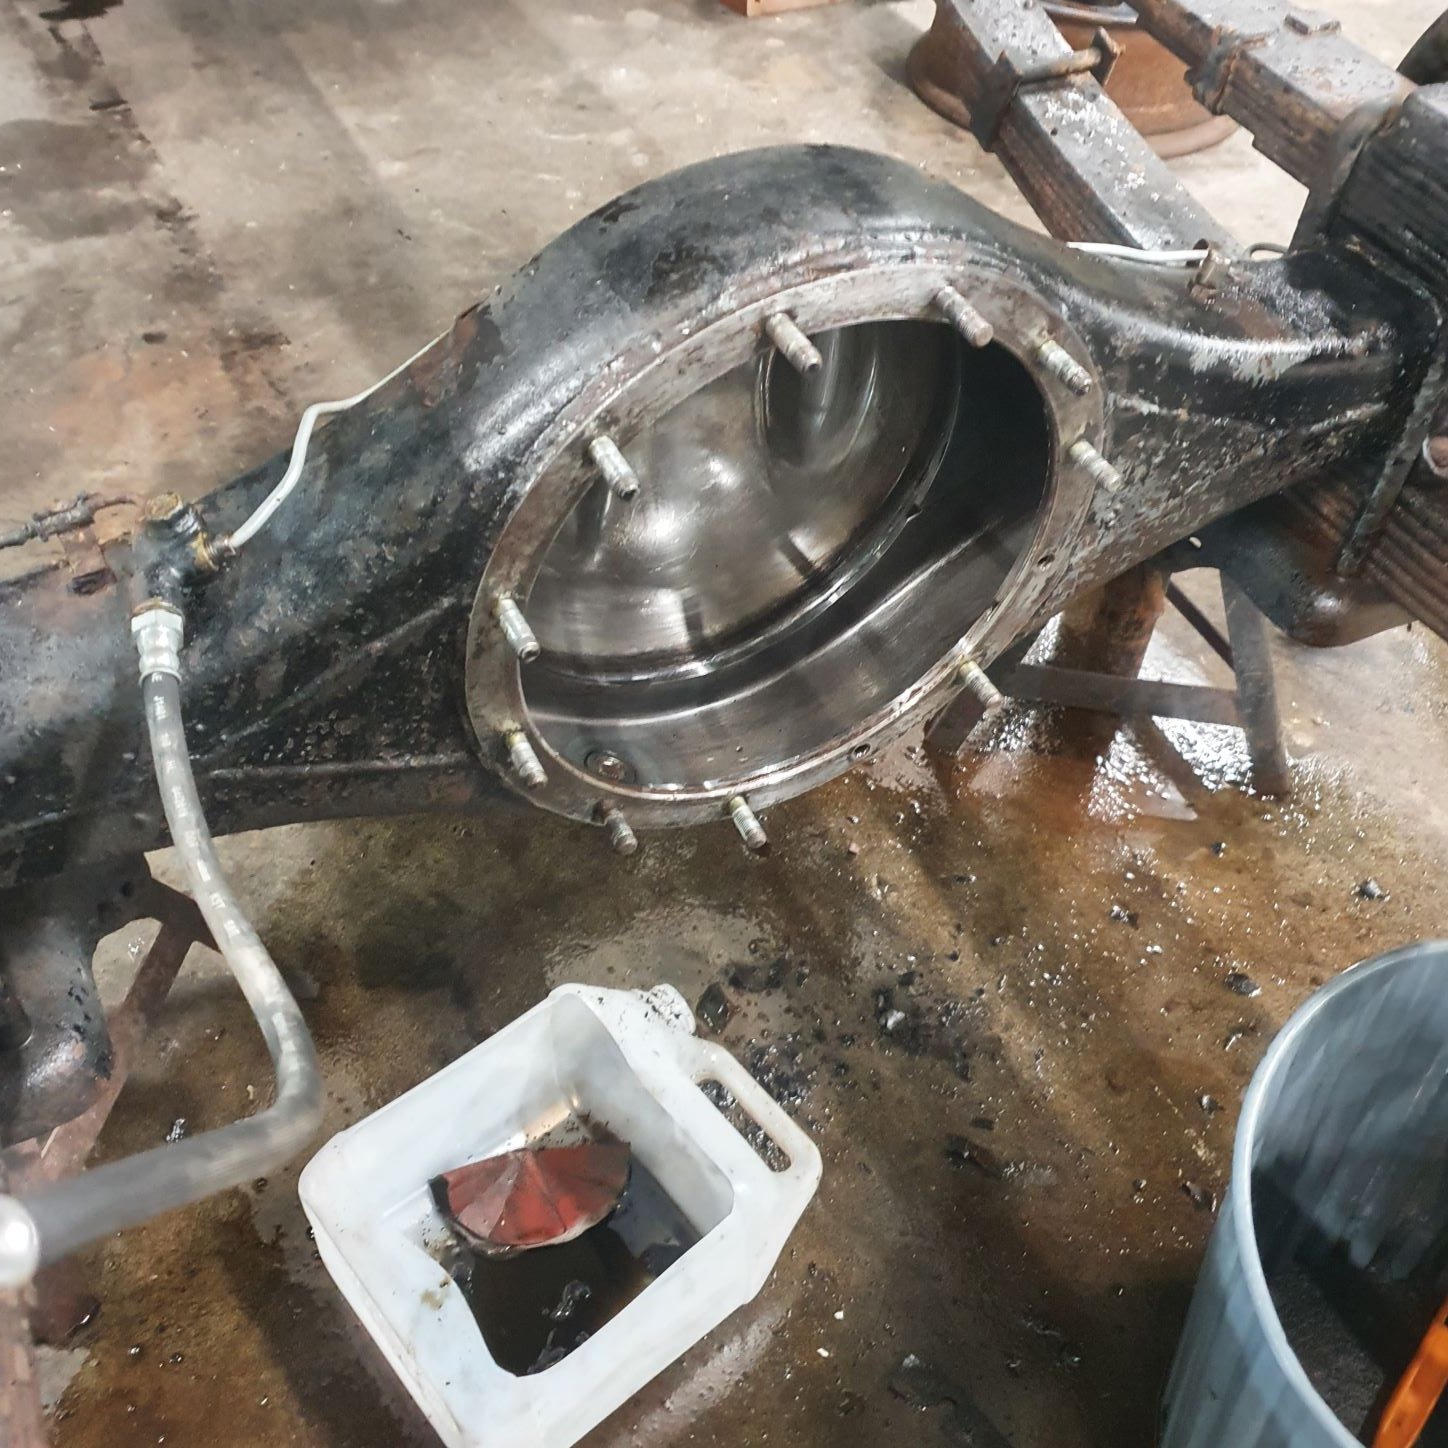
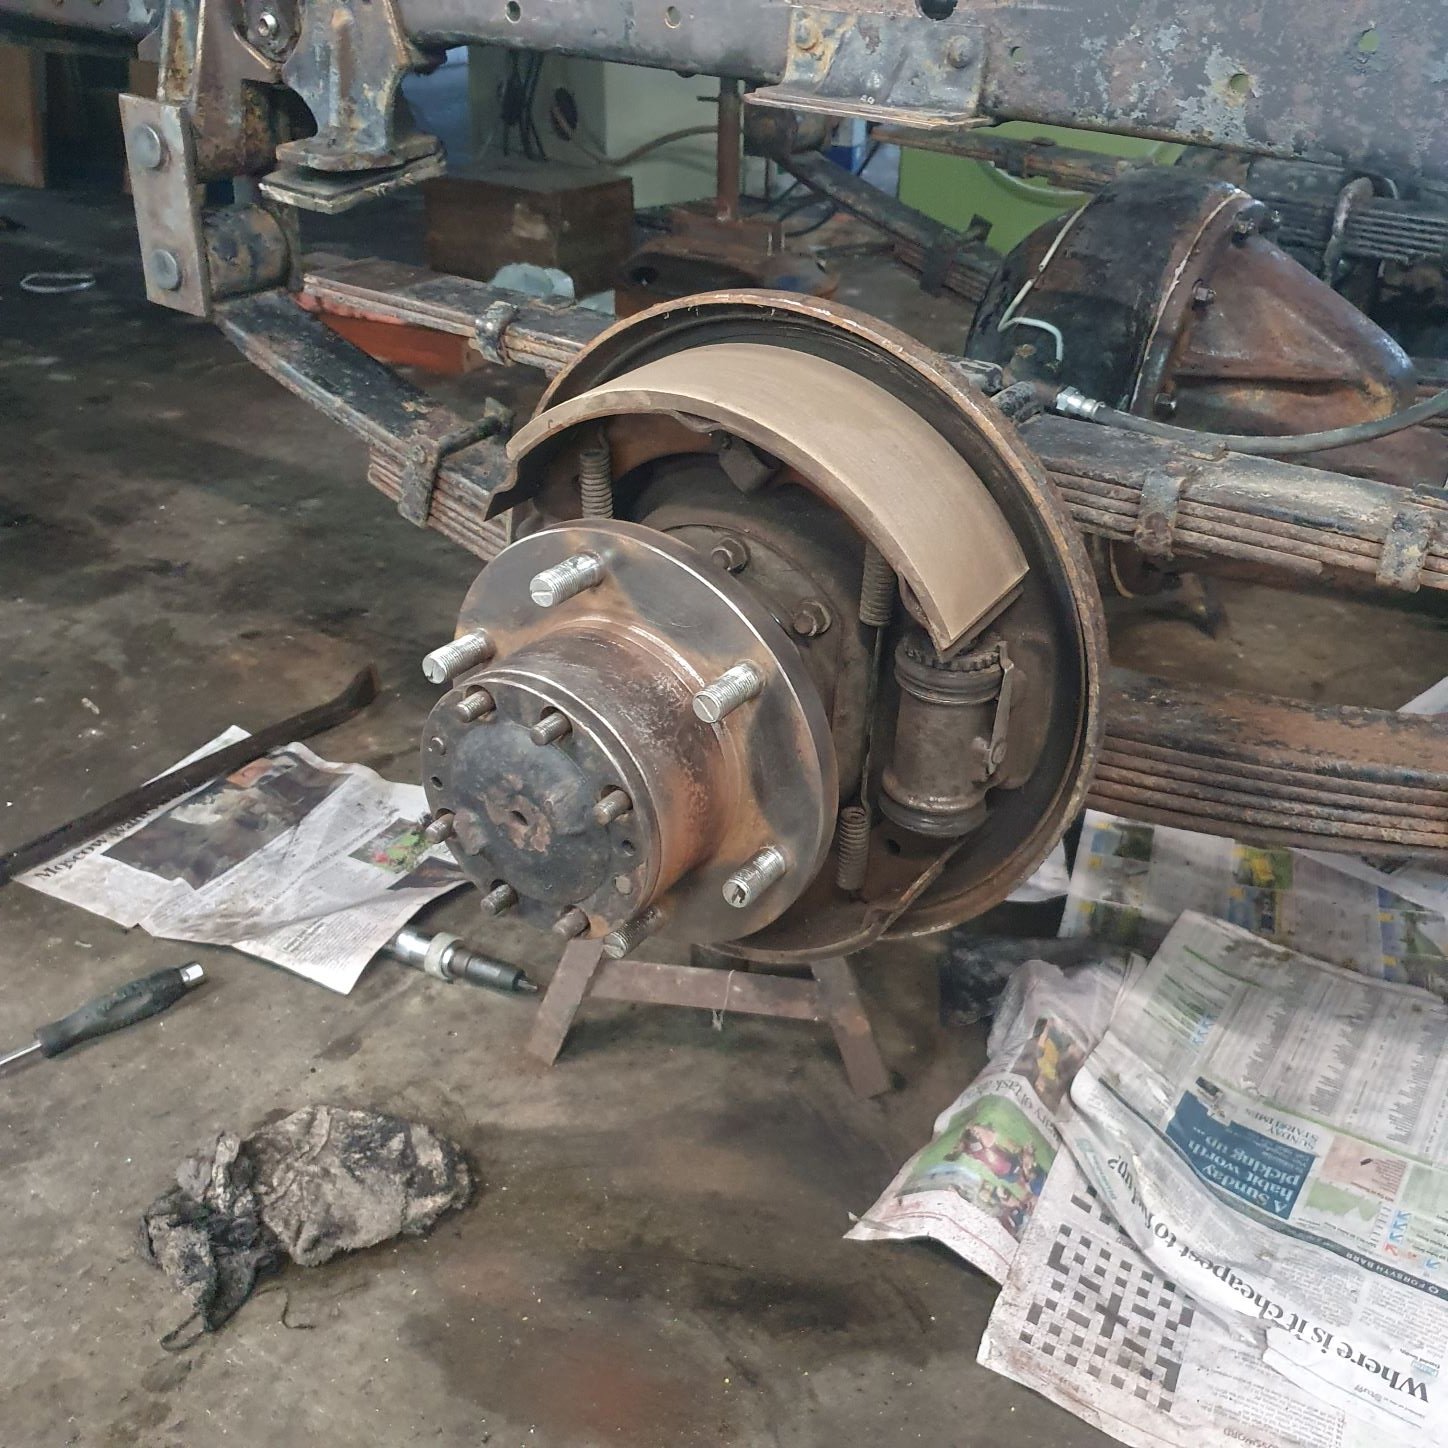
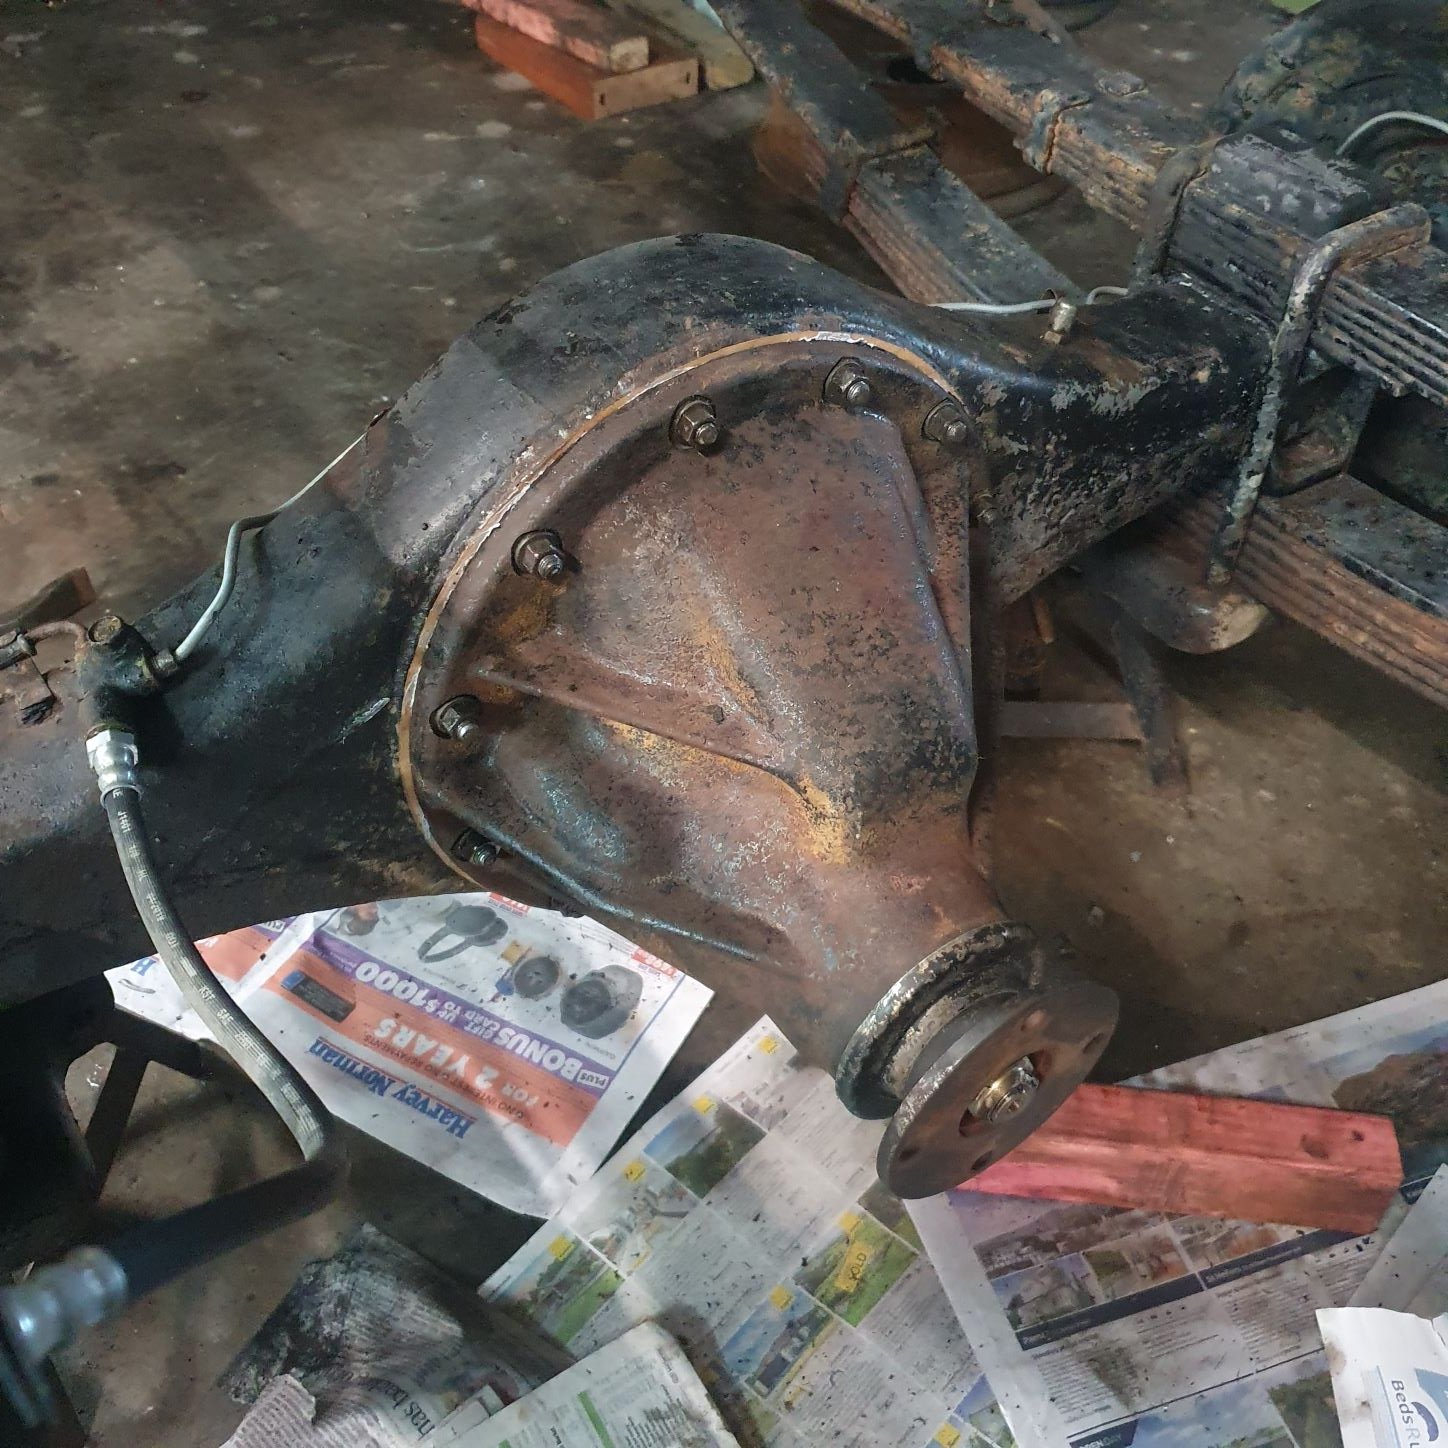
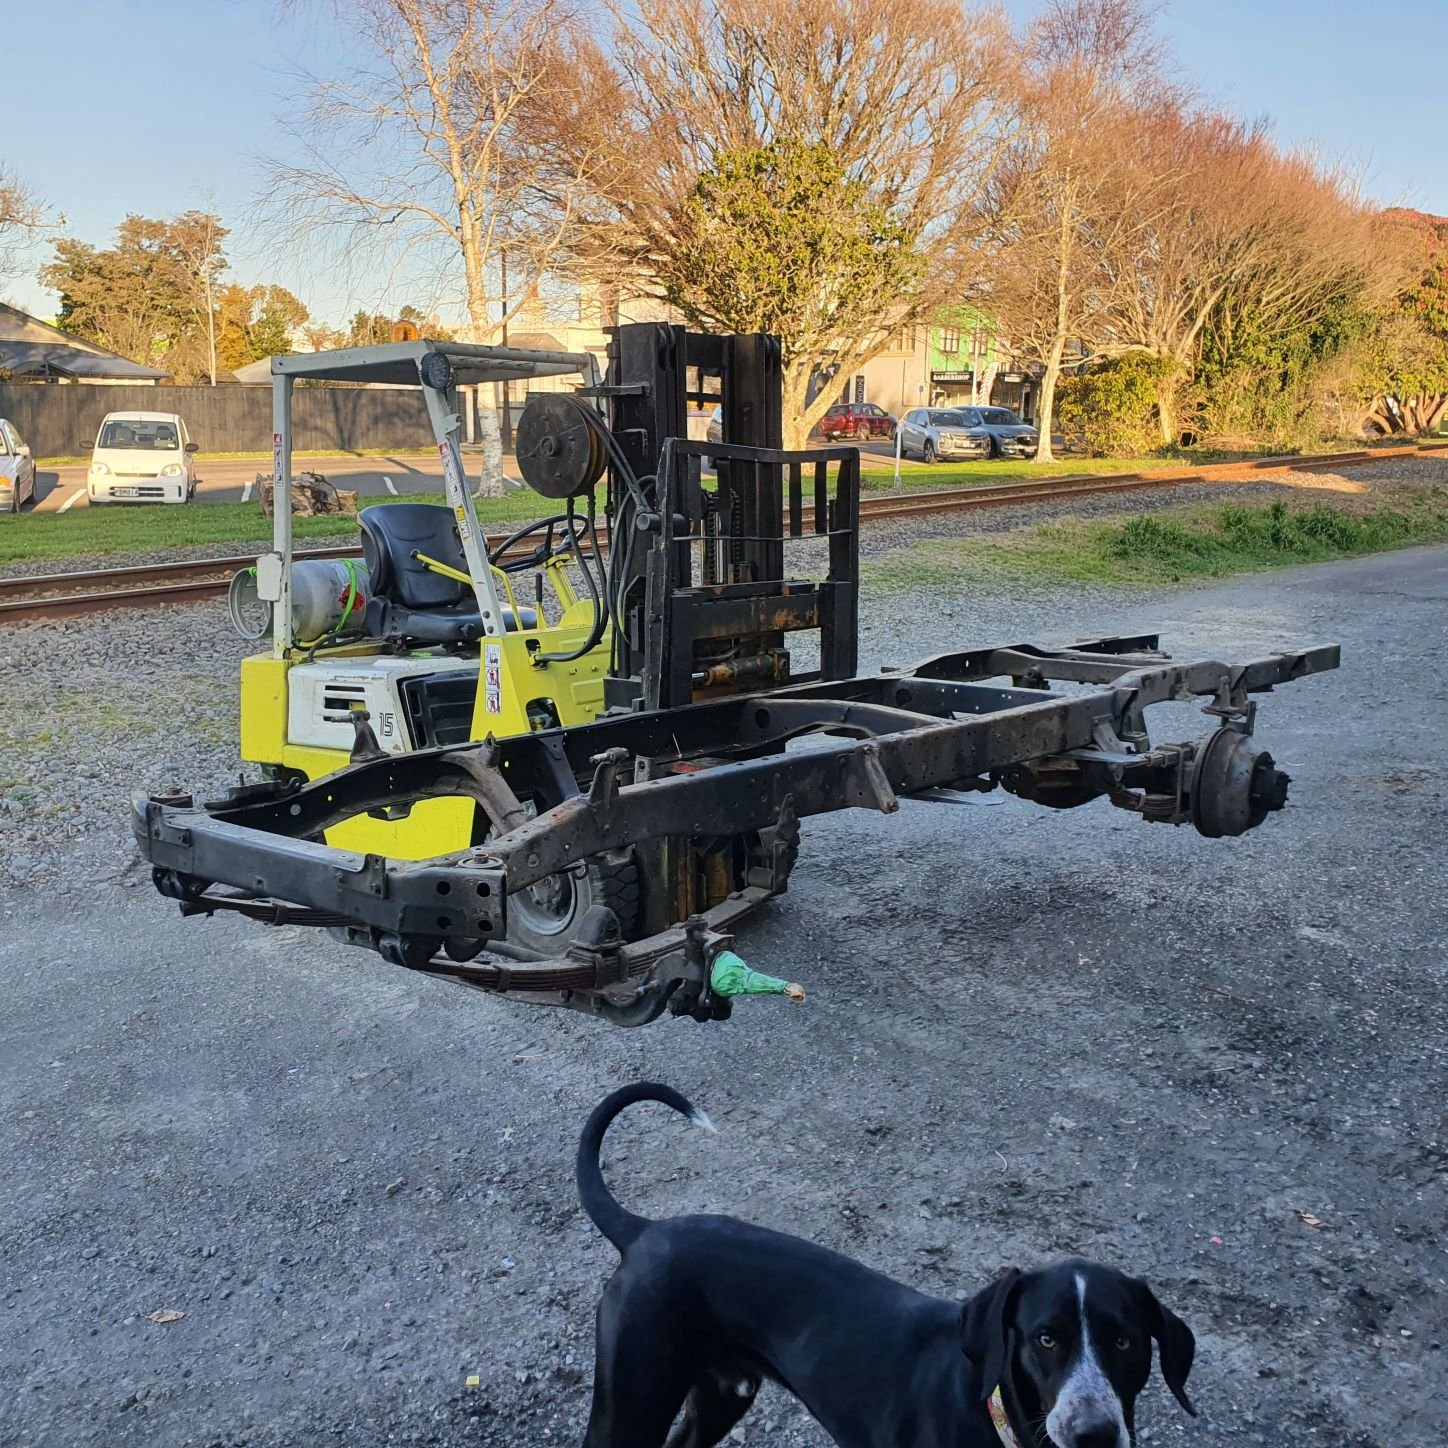
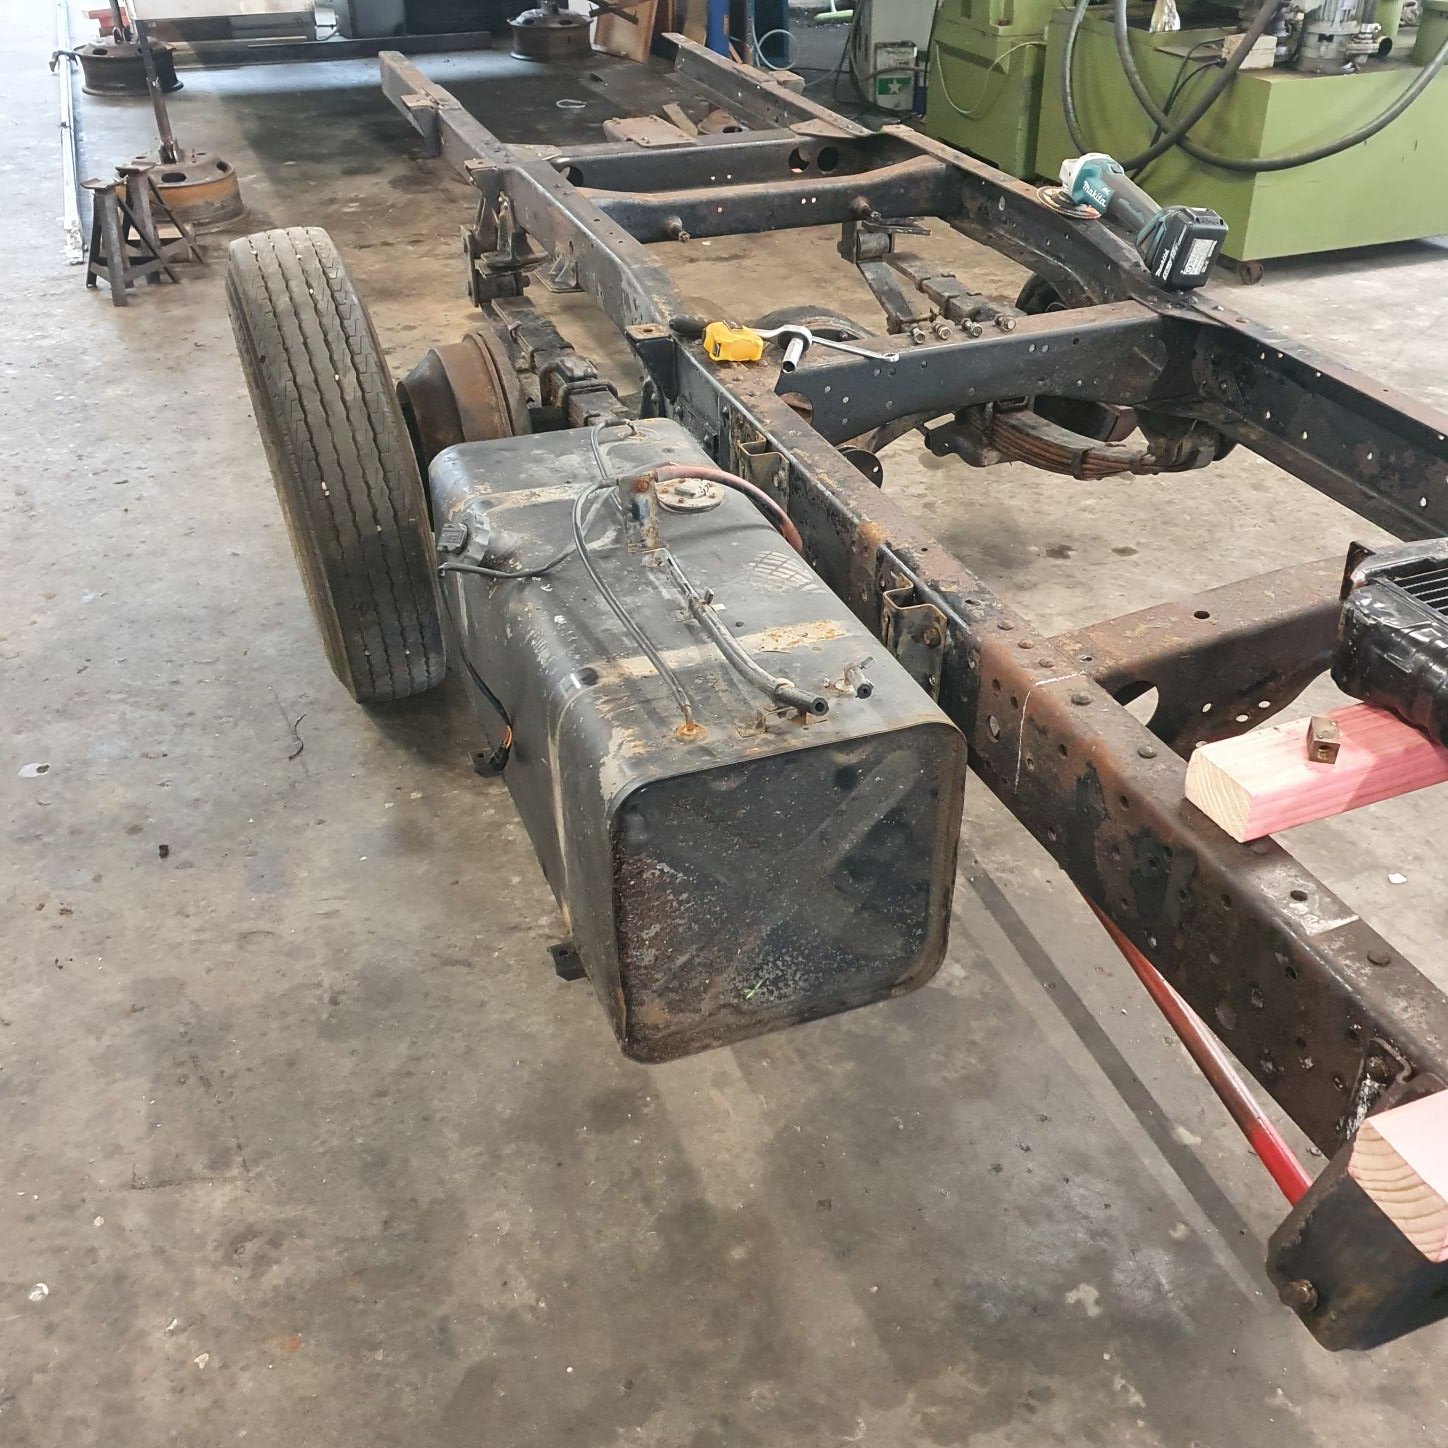
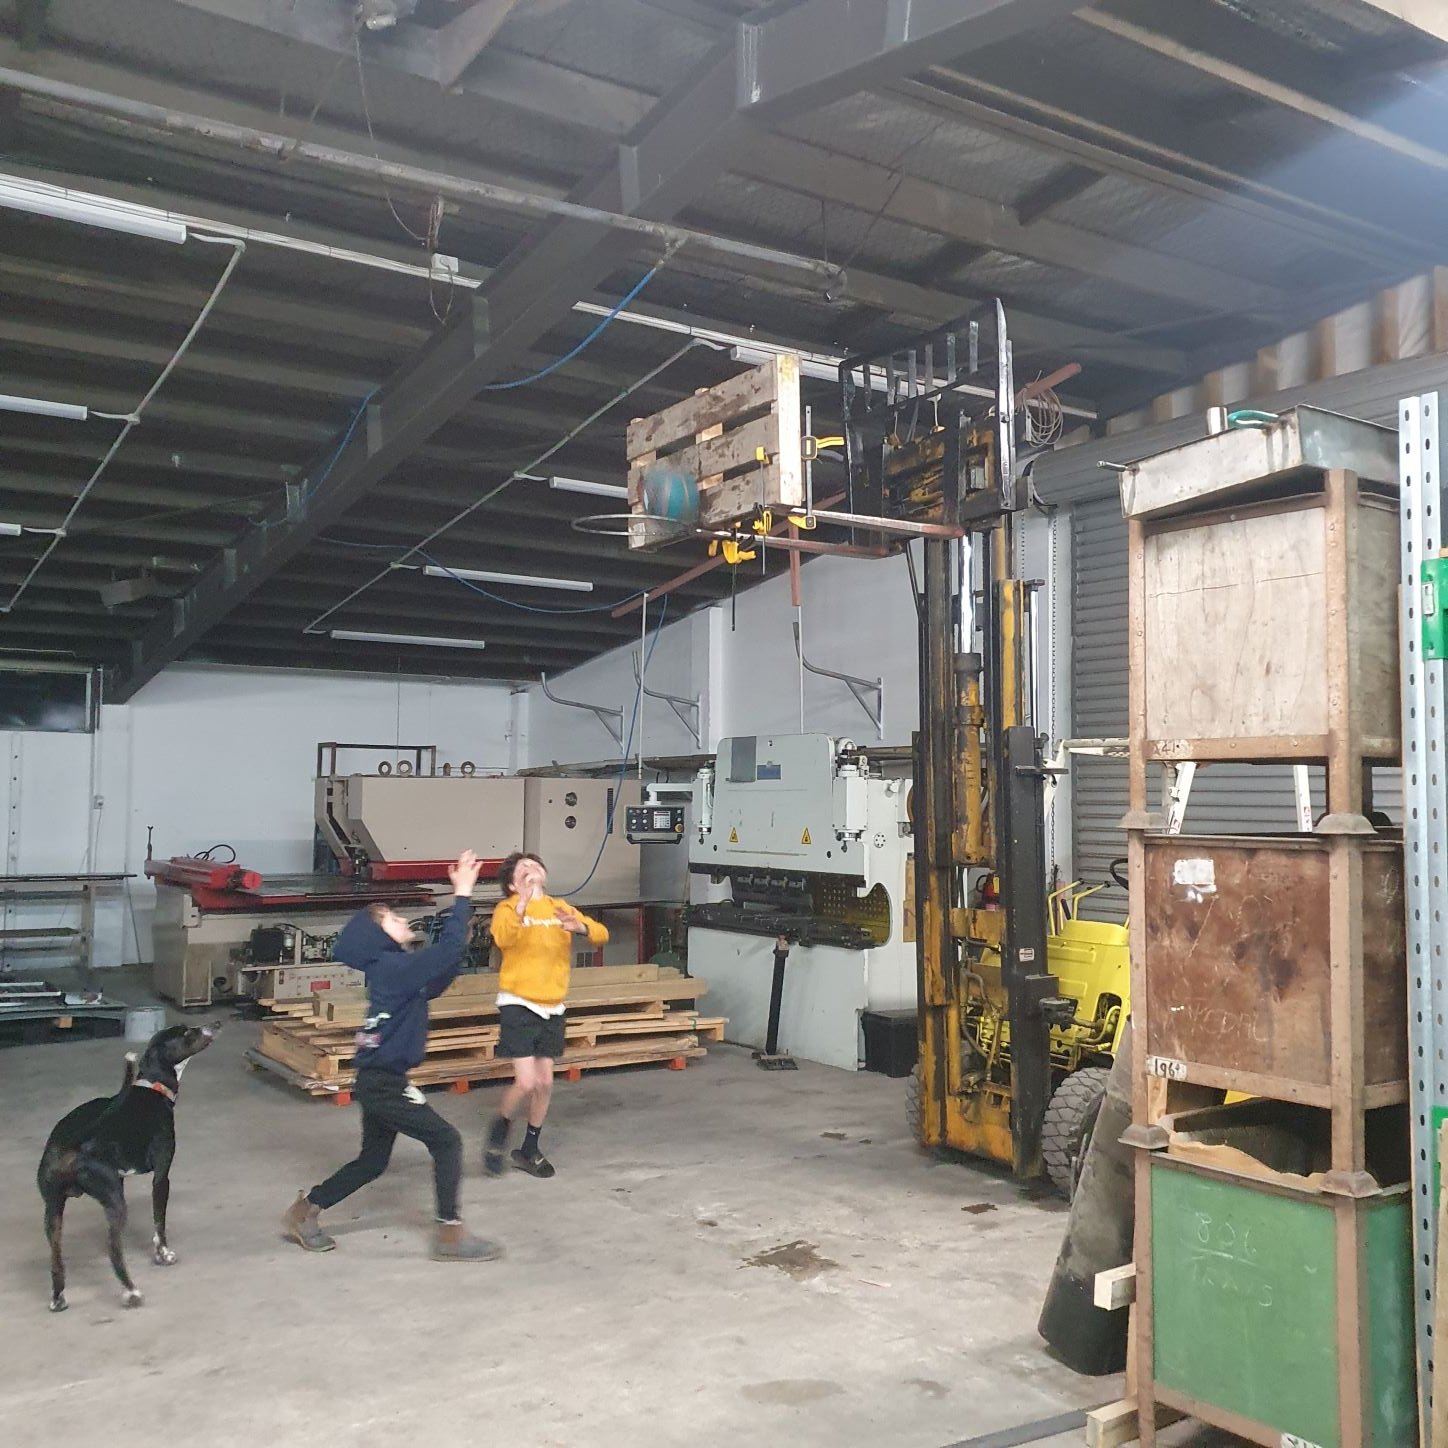
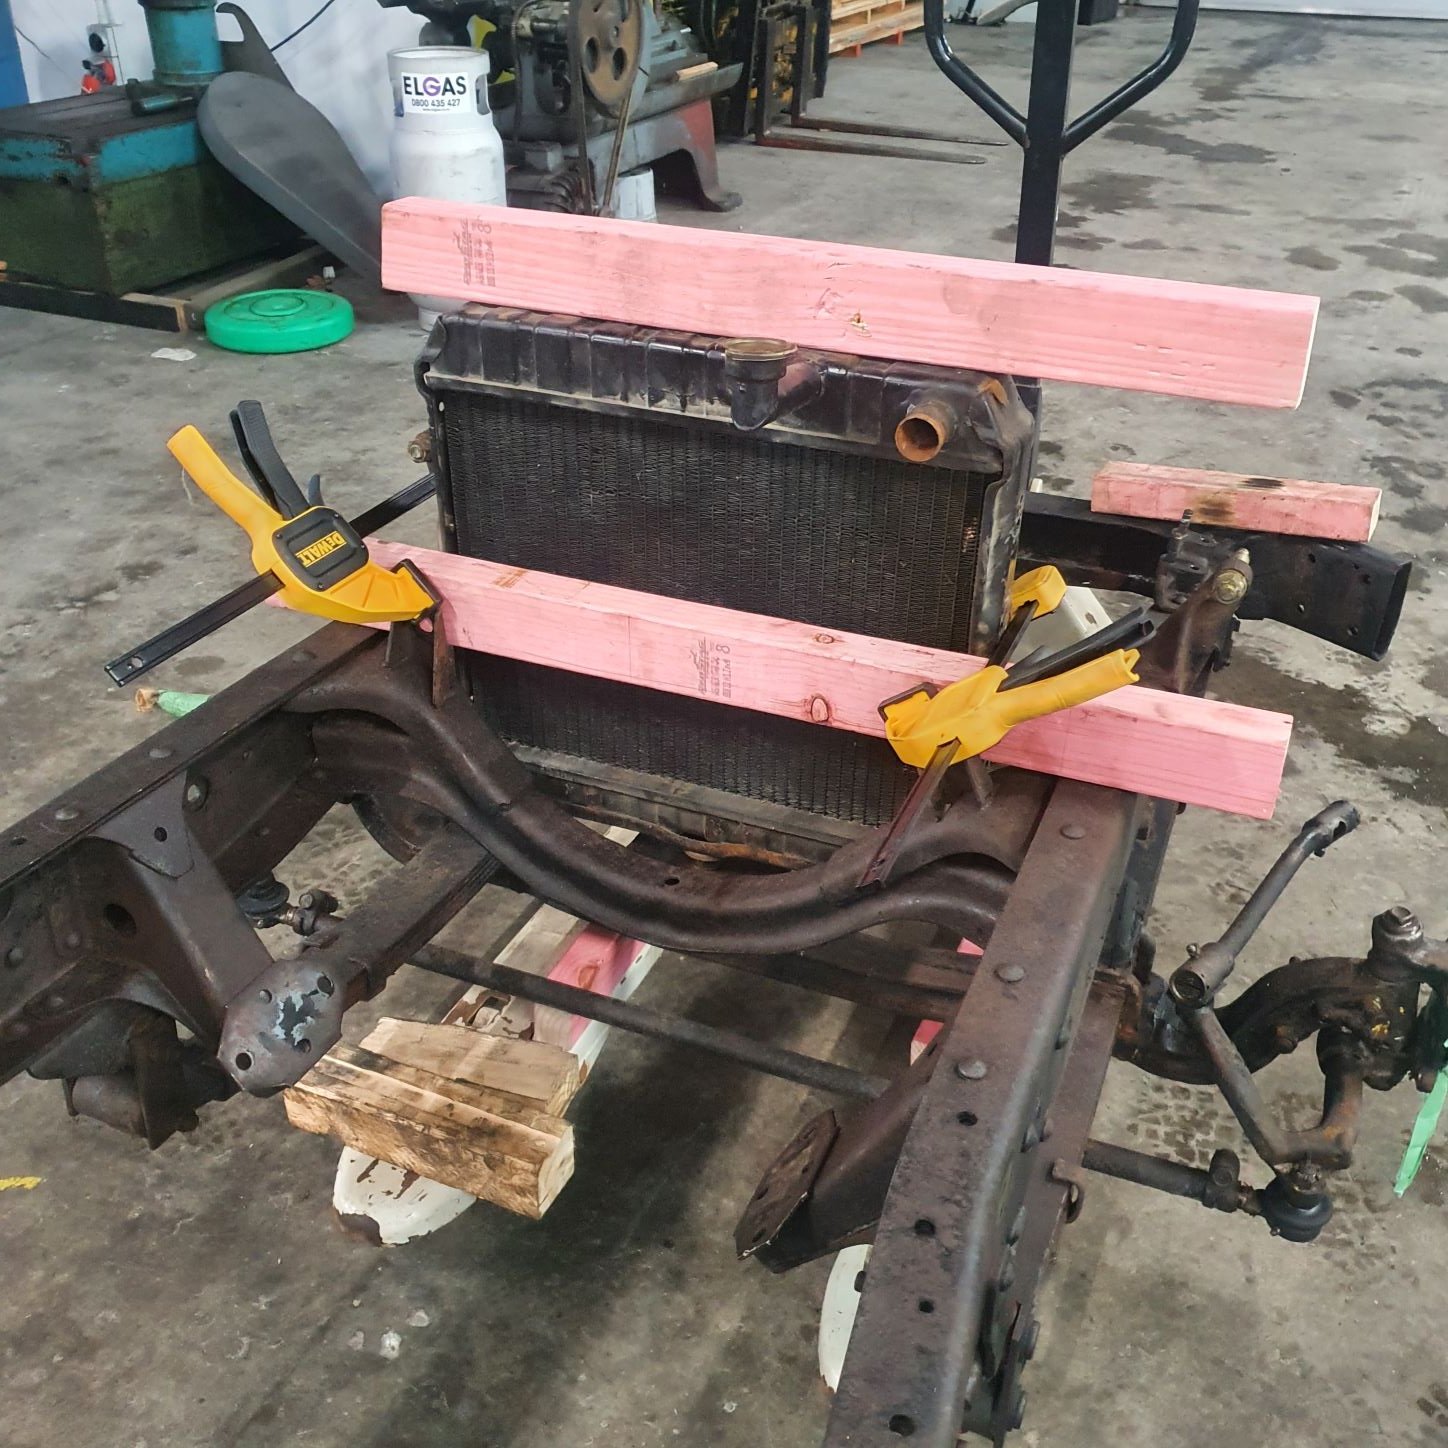
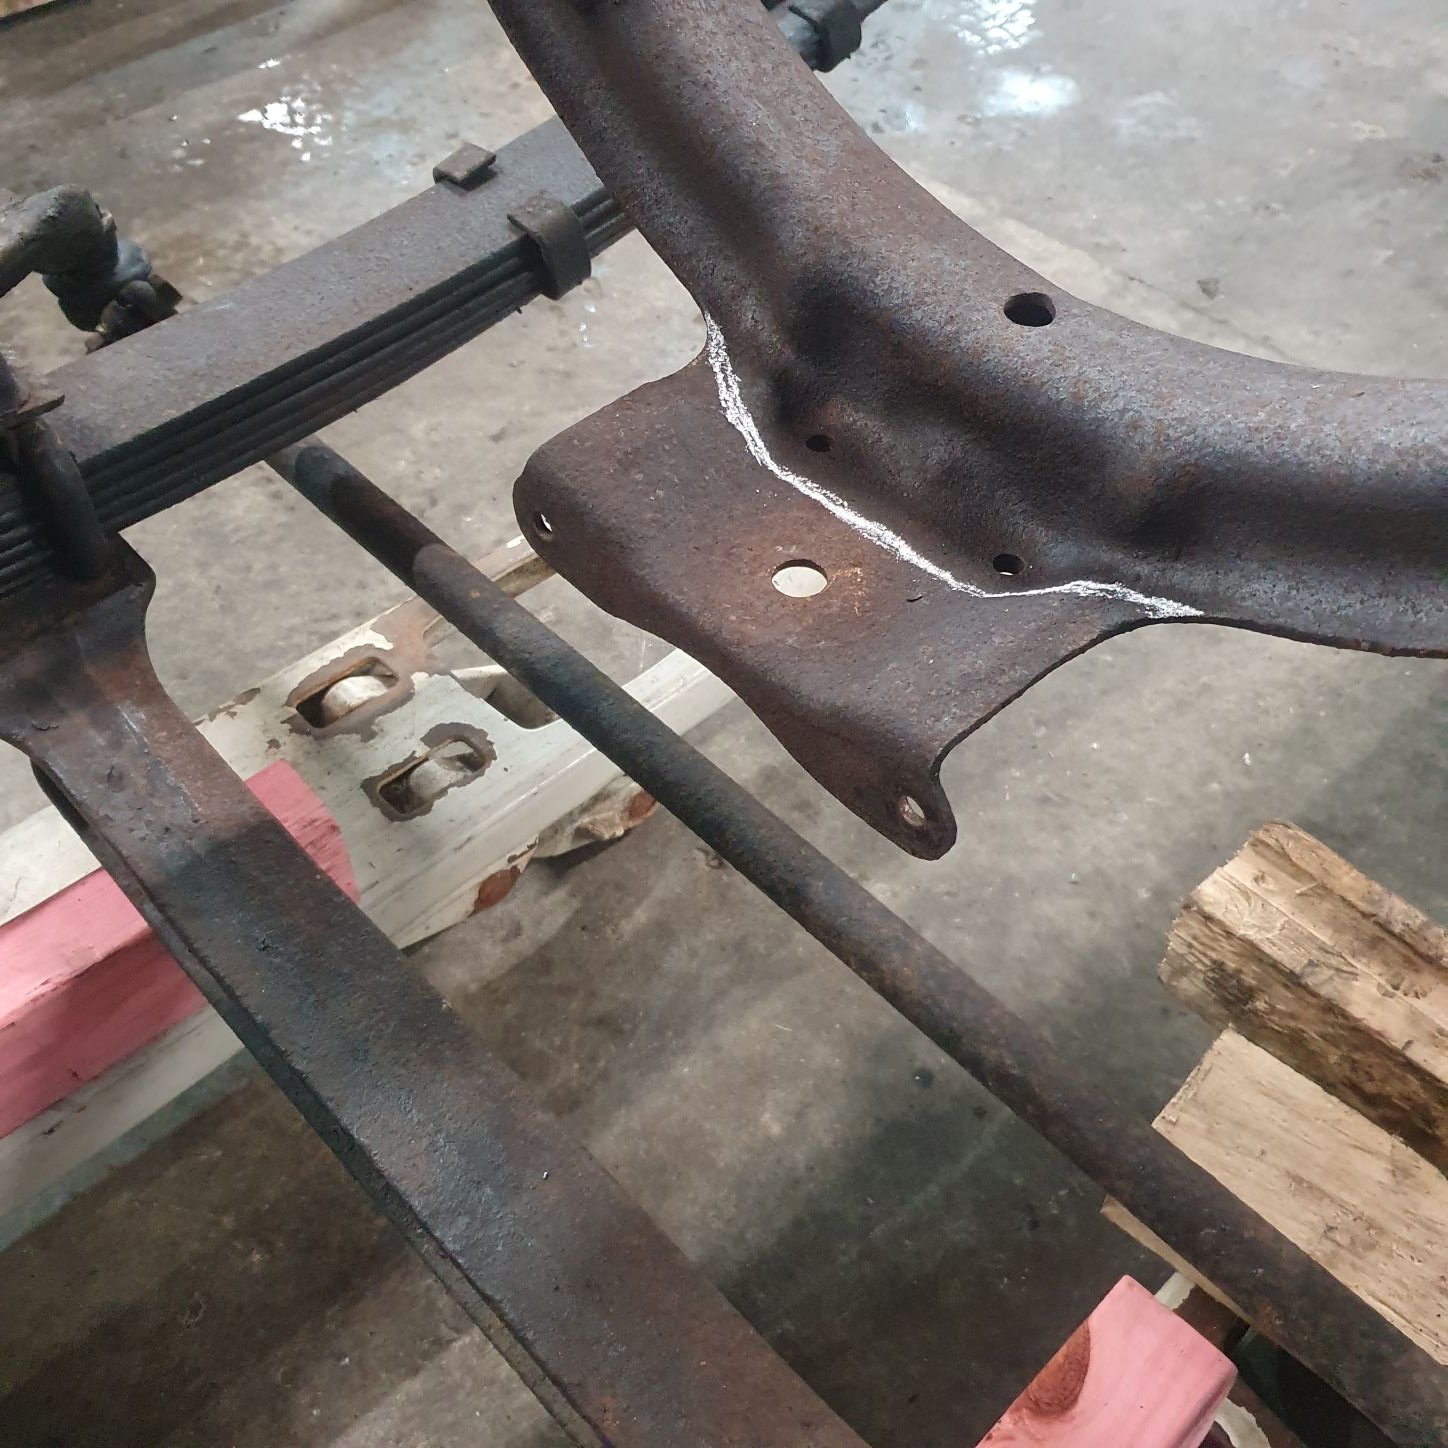
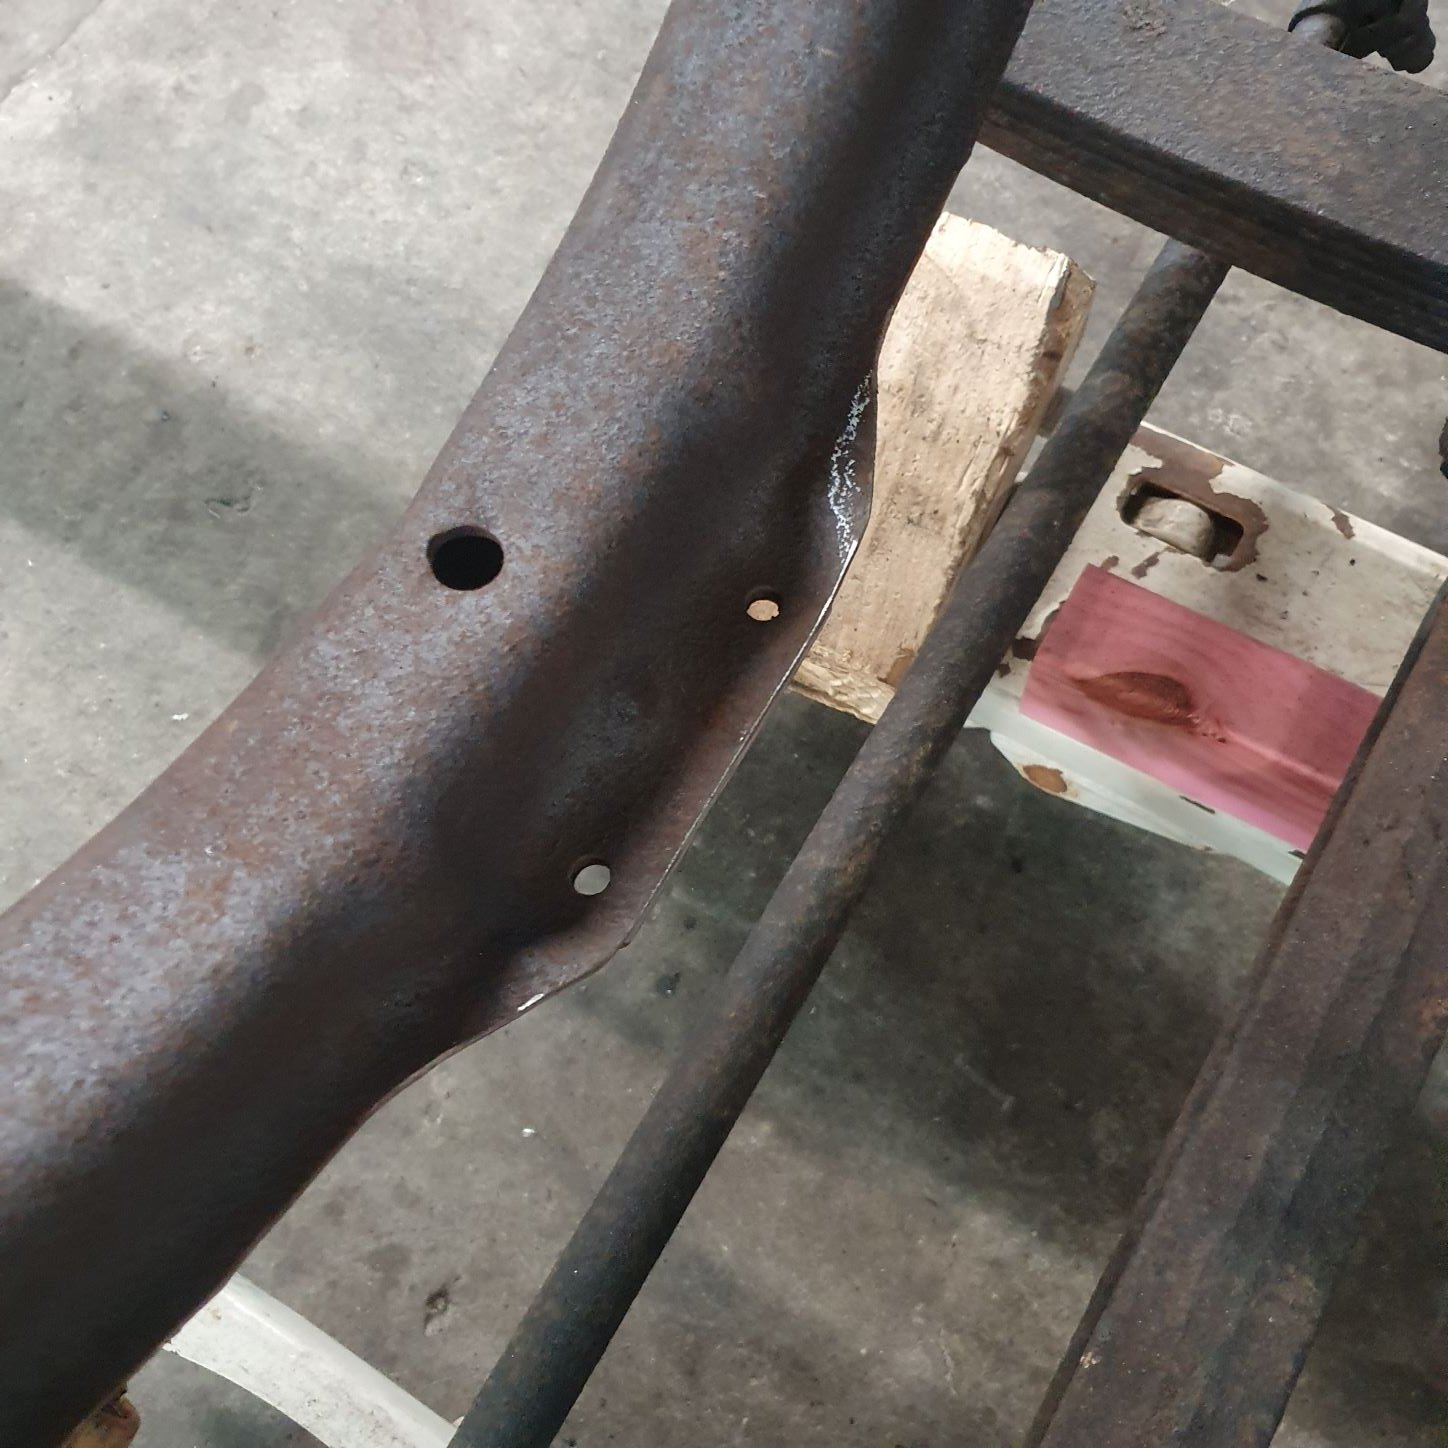
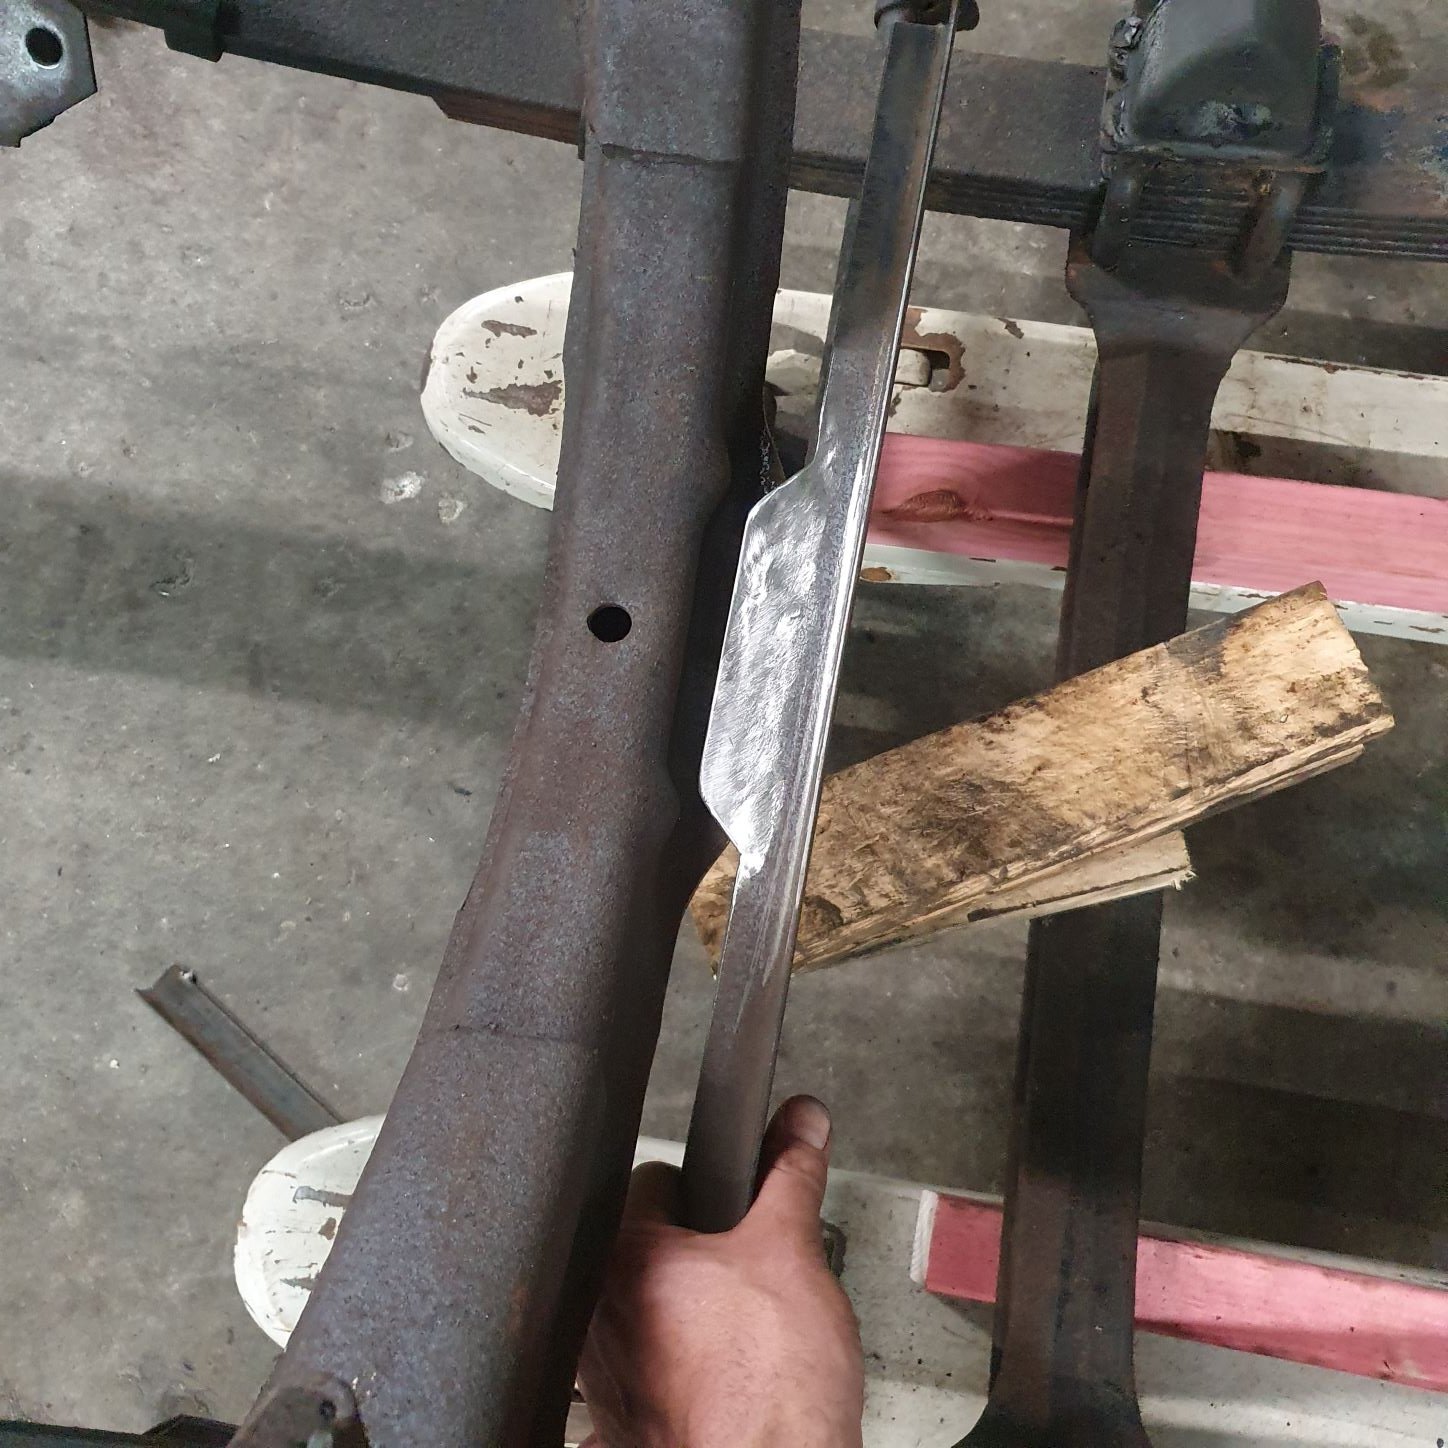
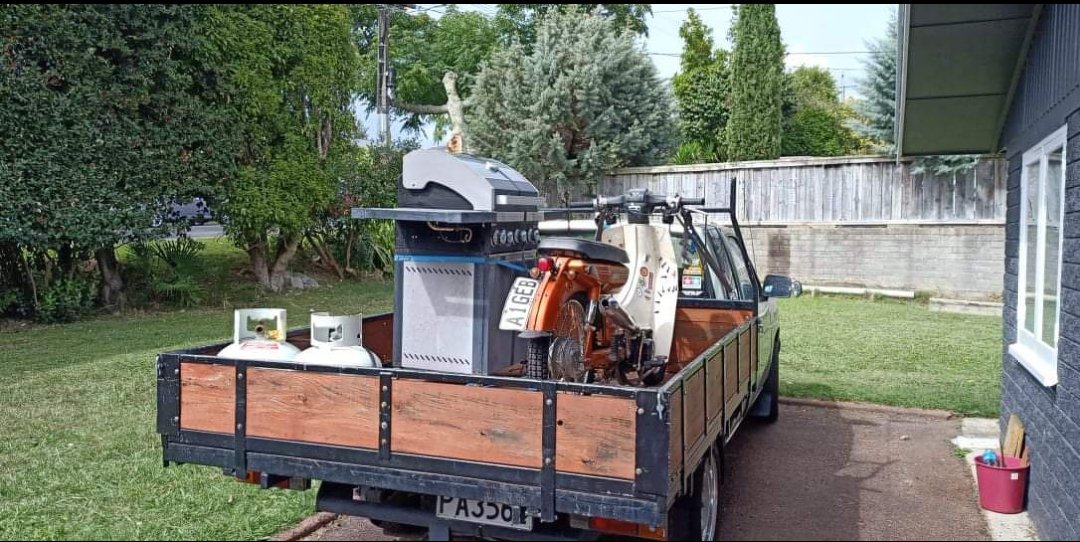

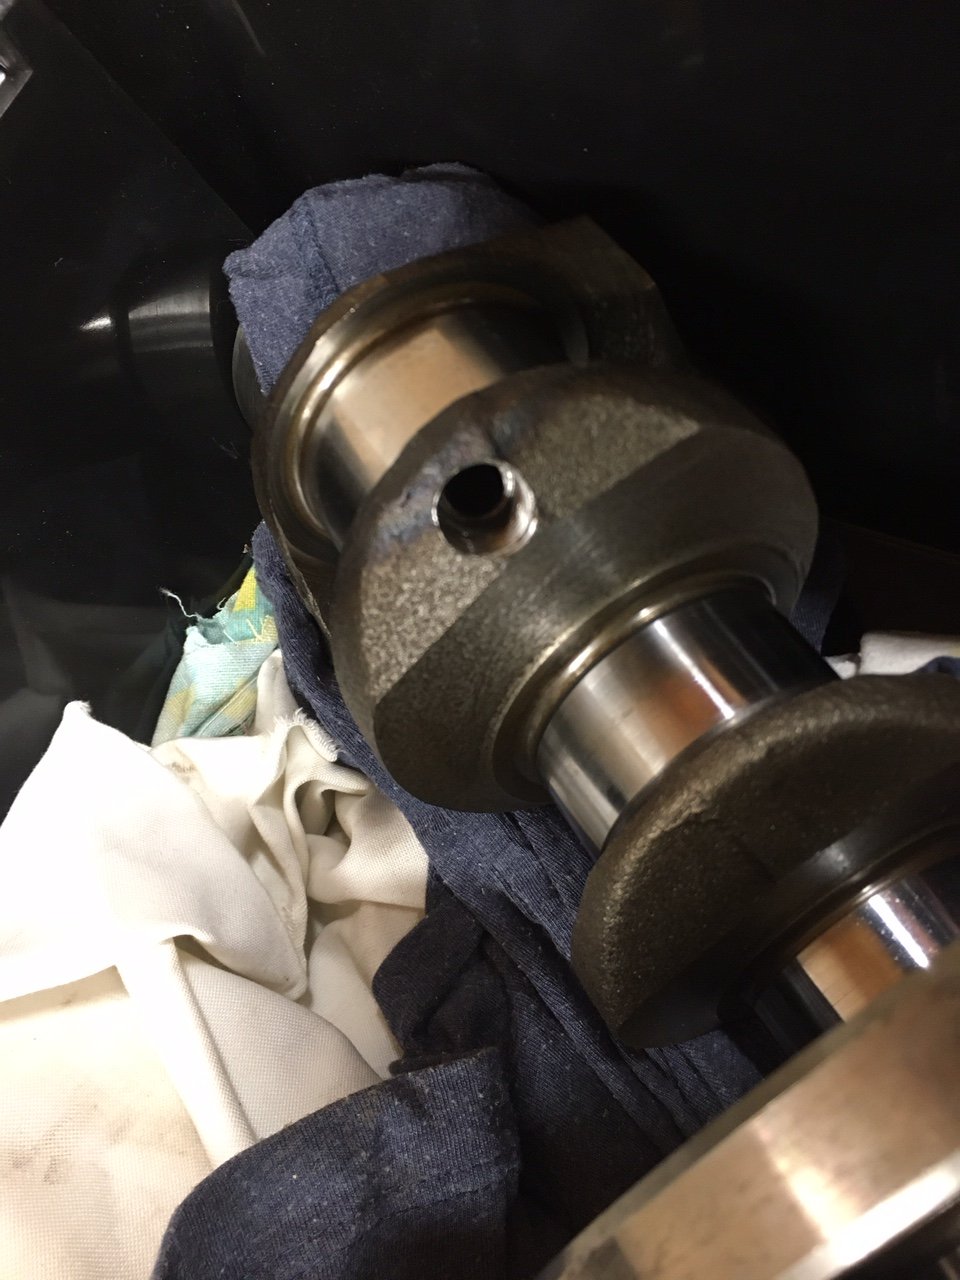
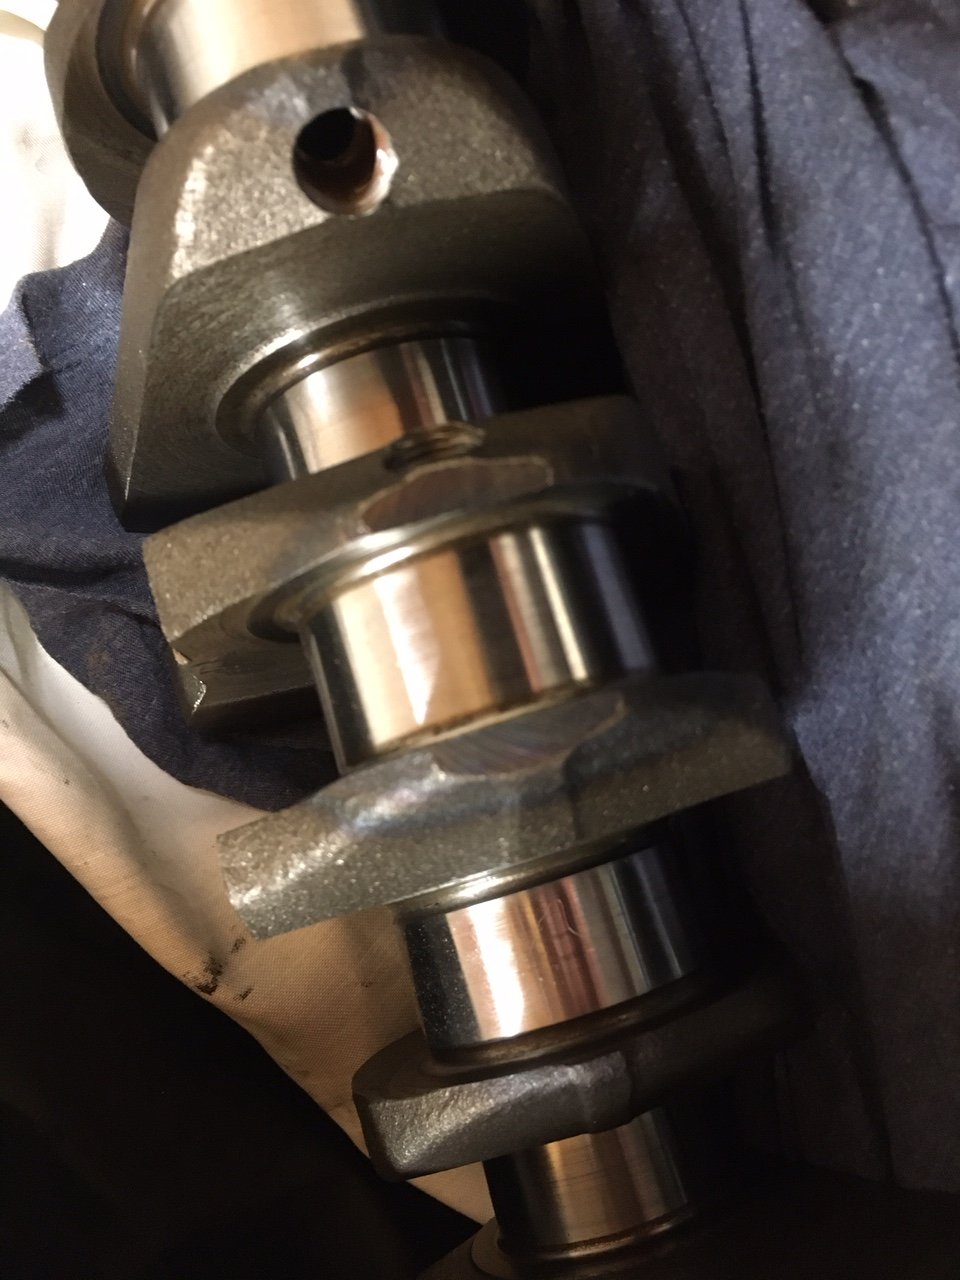
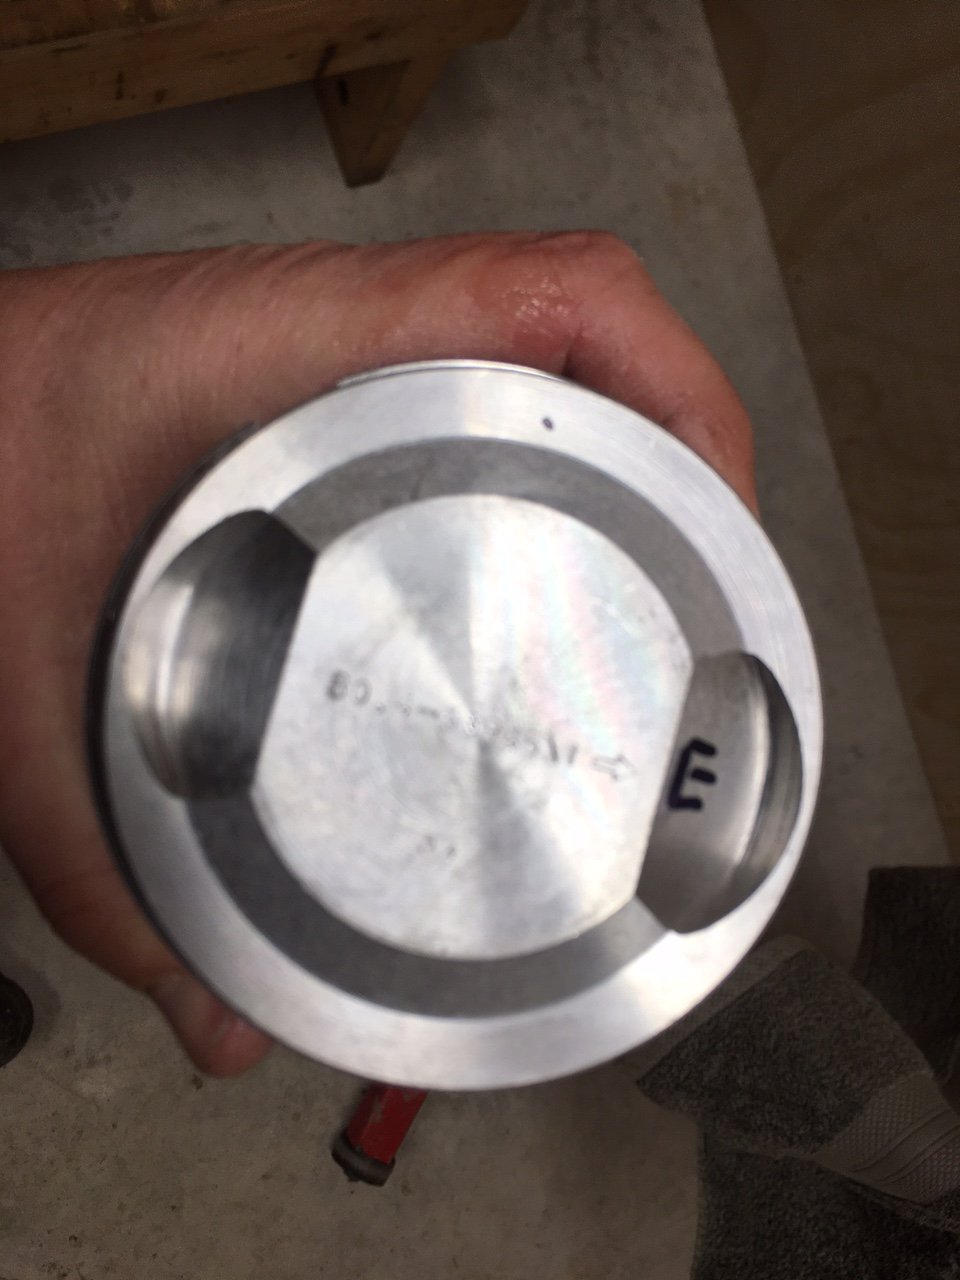

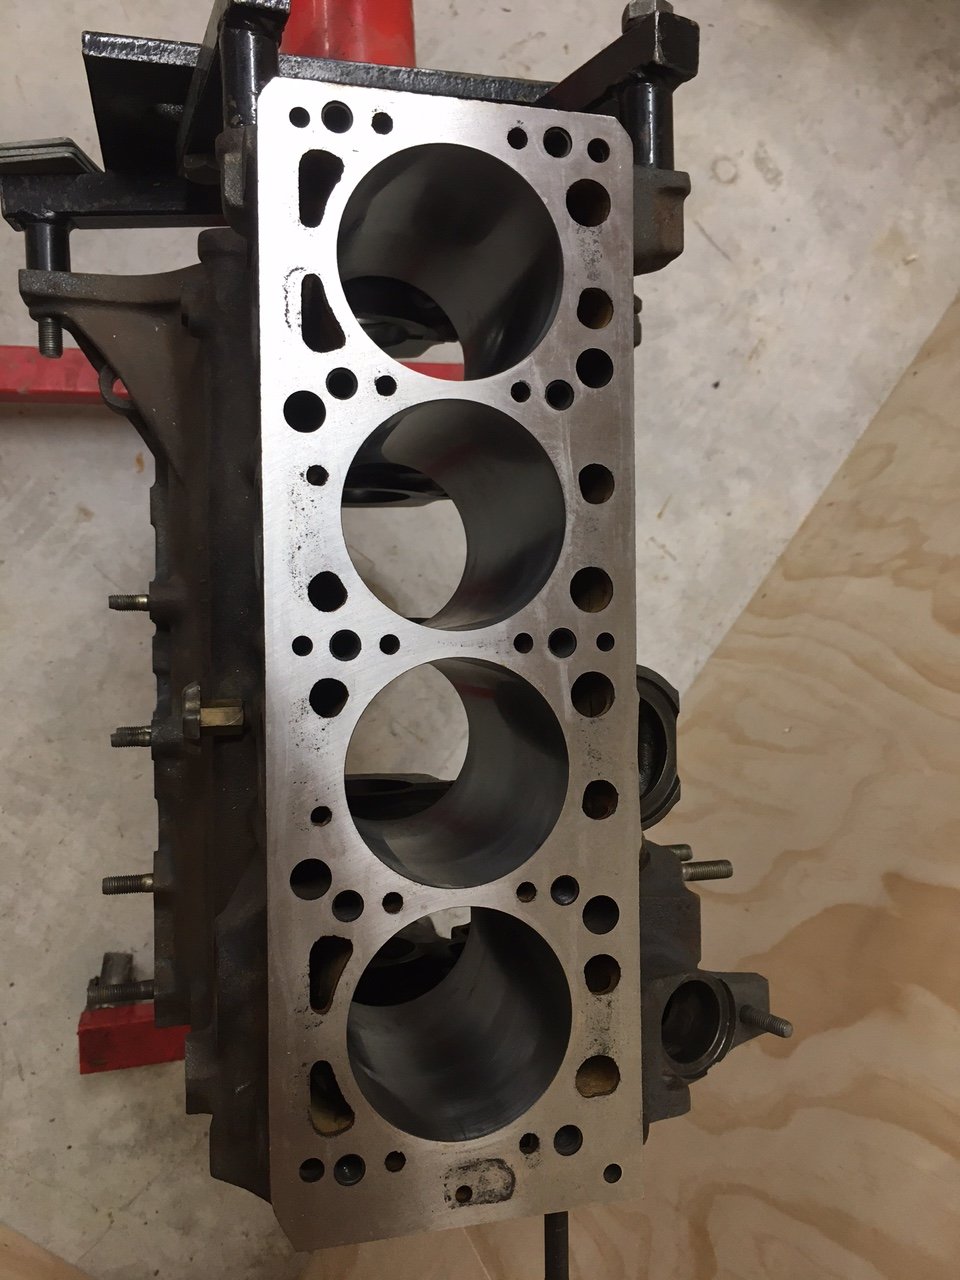
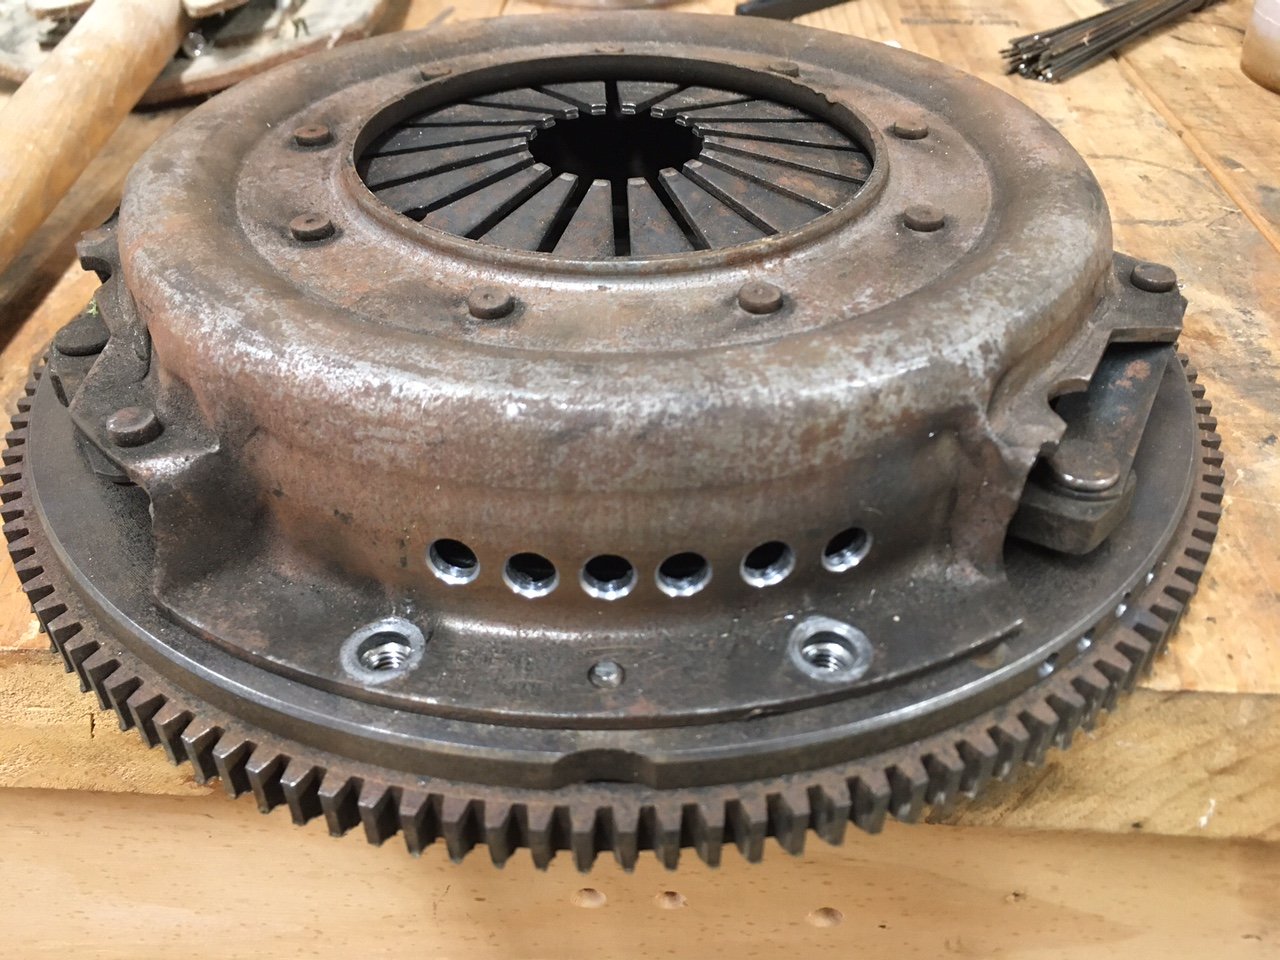

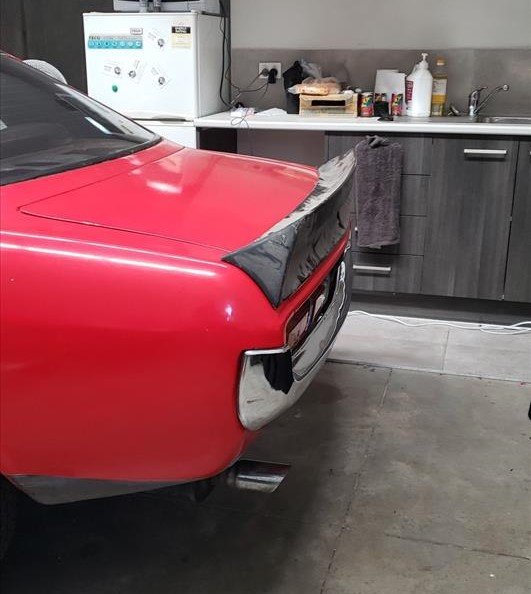
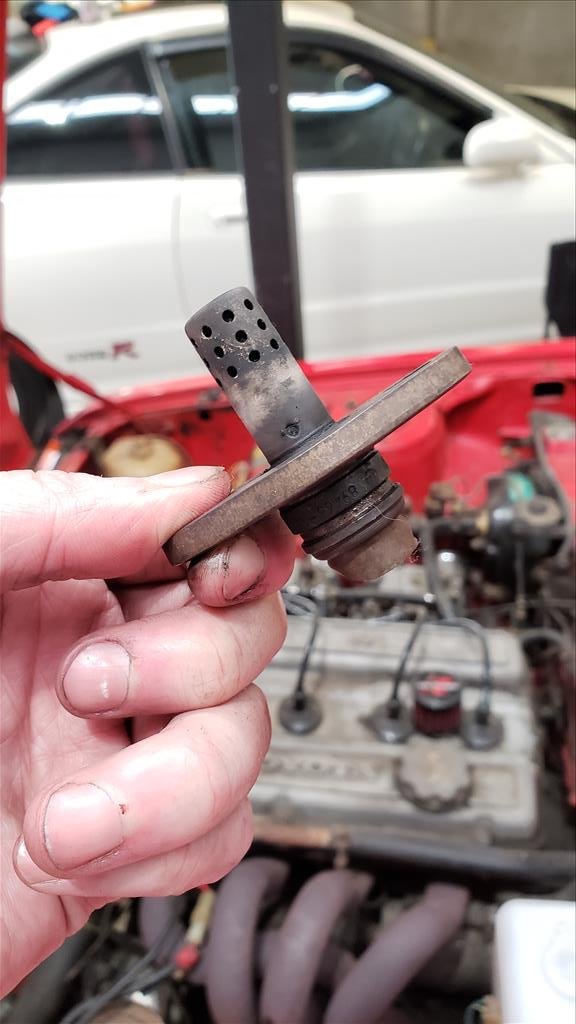
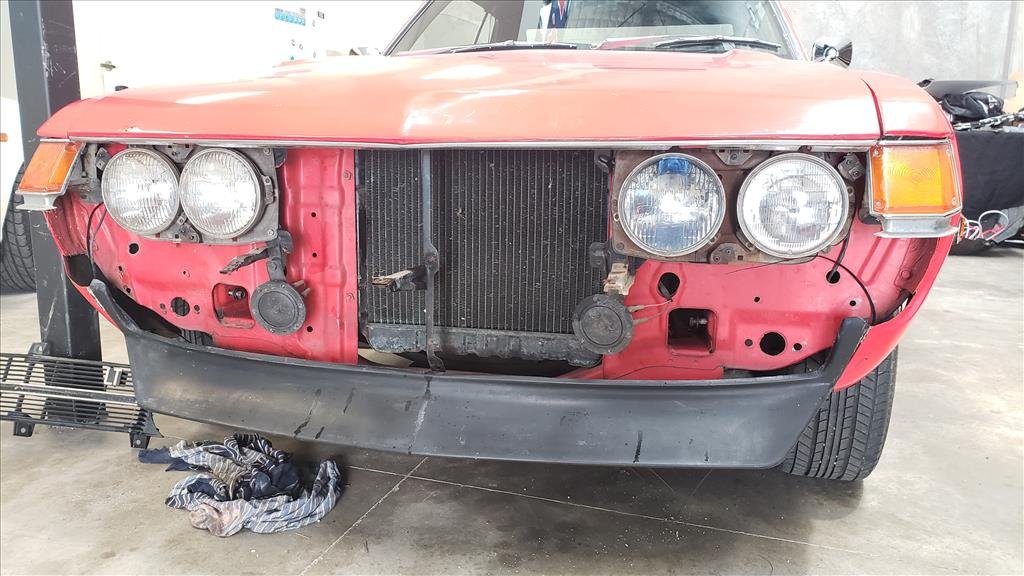
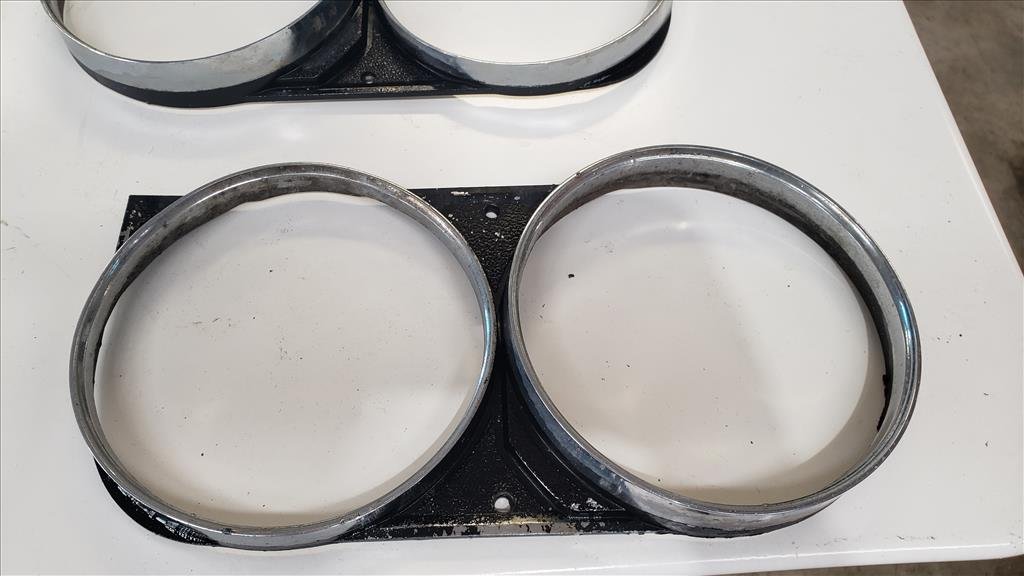

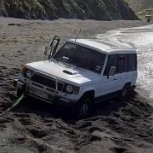
.jpg.6e49f706e2eb6cce1d5b0e61ad441cde.jpg)
.jpg.24ffa34db1ae6b25816155d1c6afe0b8.jpg)
.jpg.e8a99a452246c43be2b4c4fec6563467.jpg)
.jpg.d281f9e8032b6a7b8bd5d76611289218.jpg)
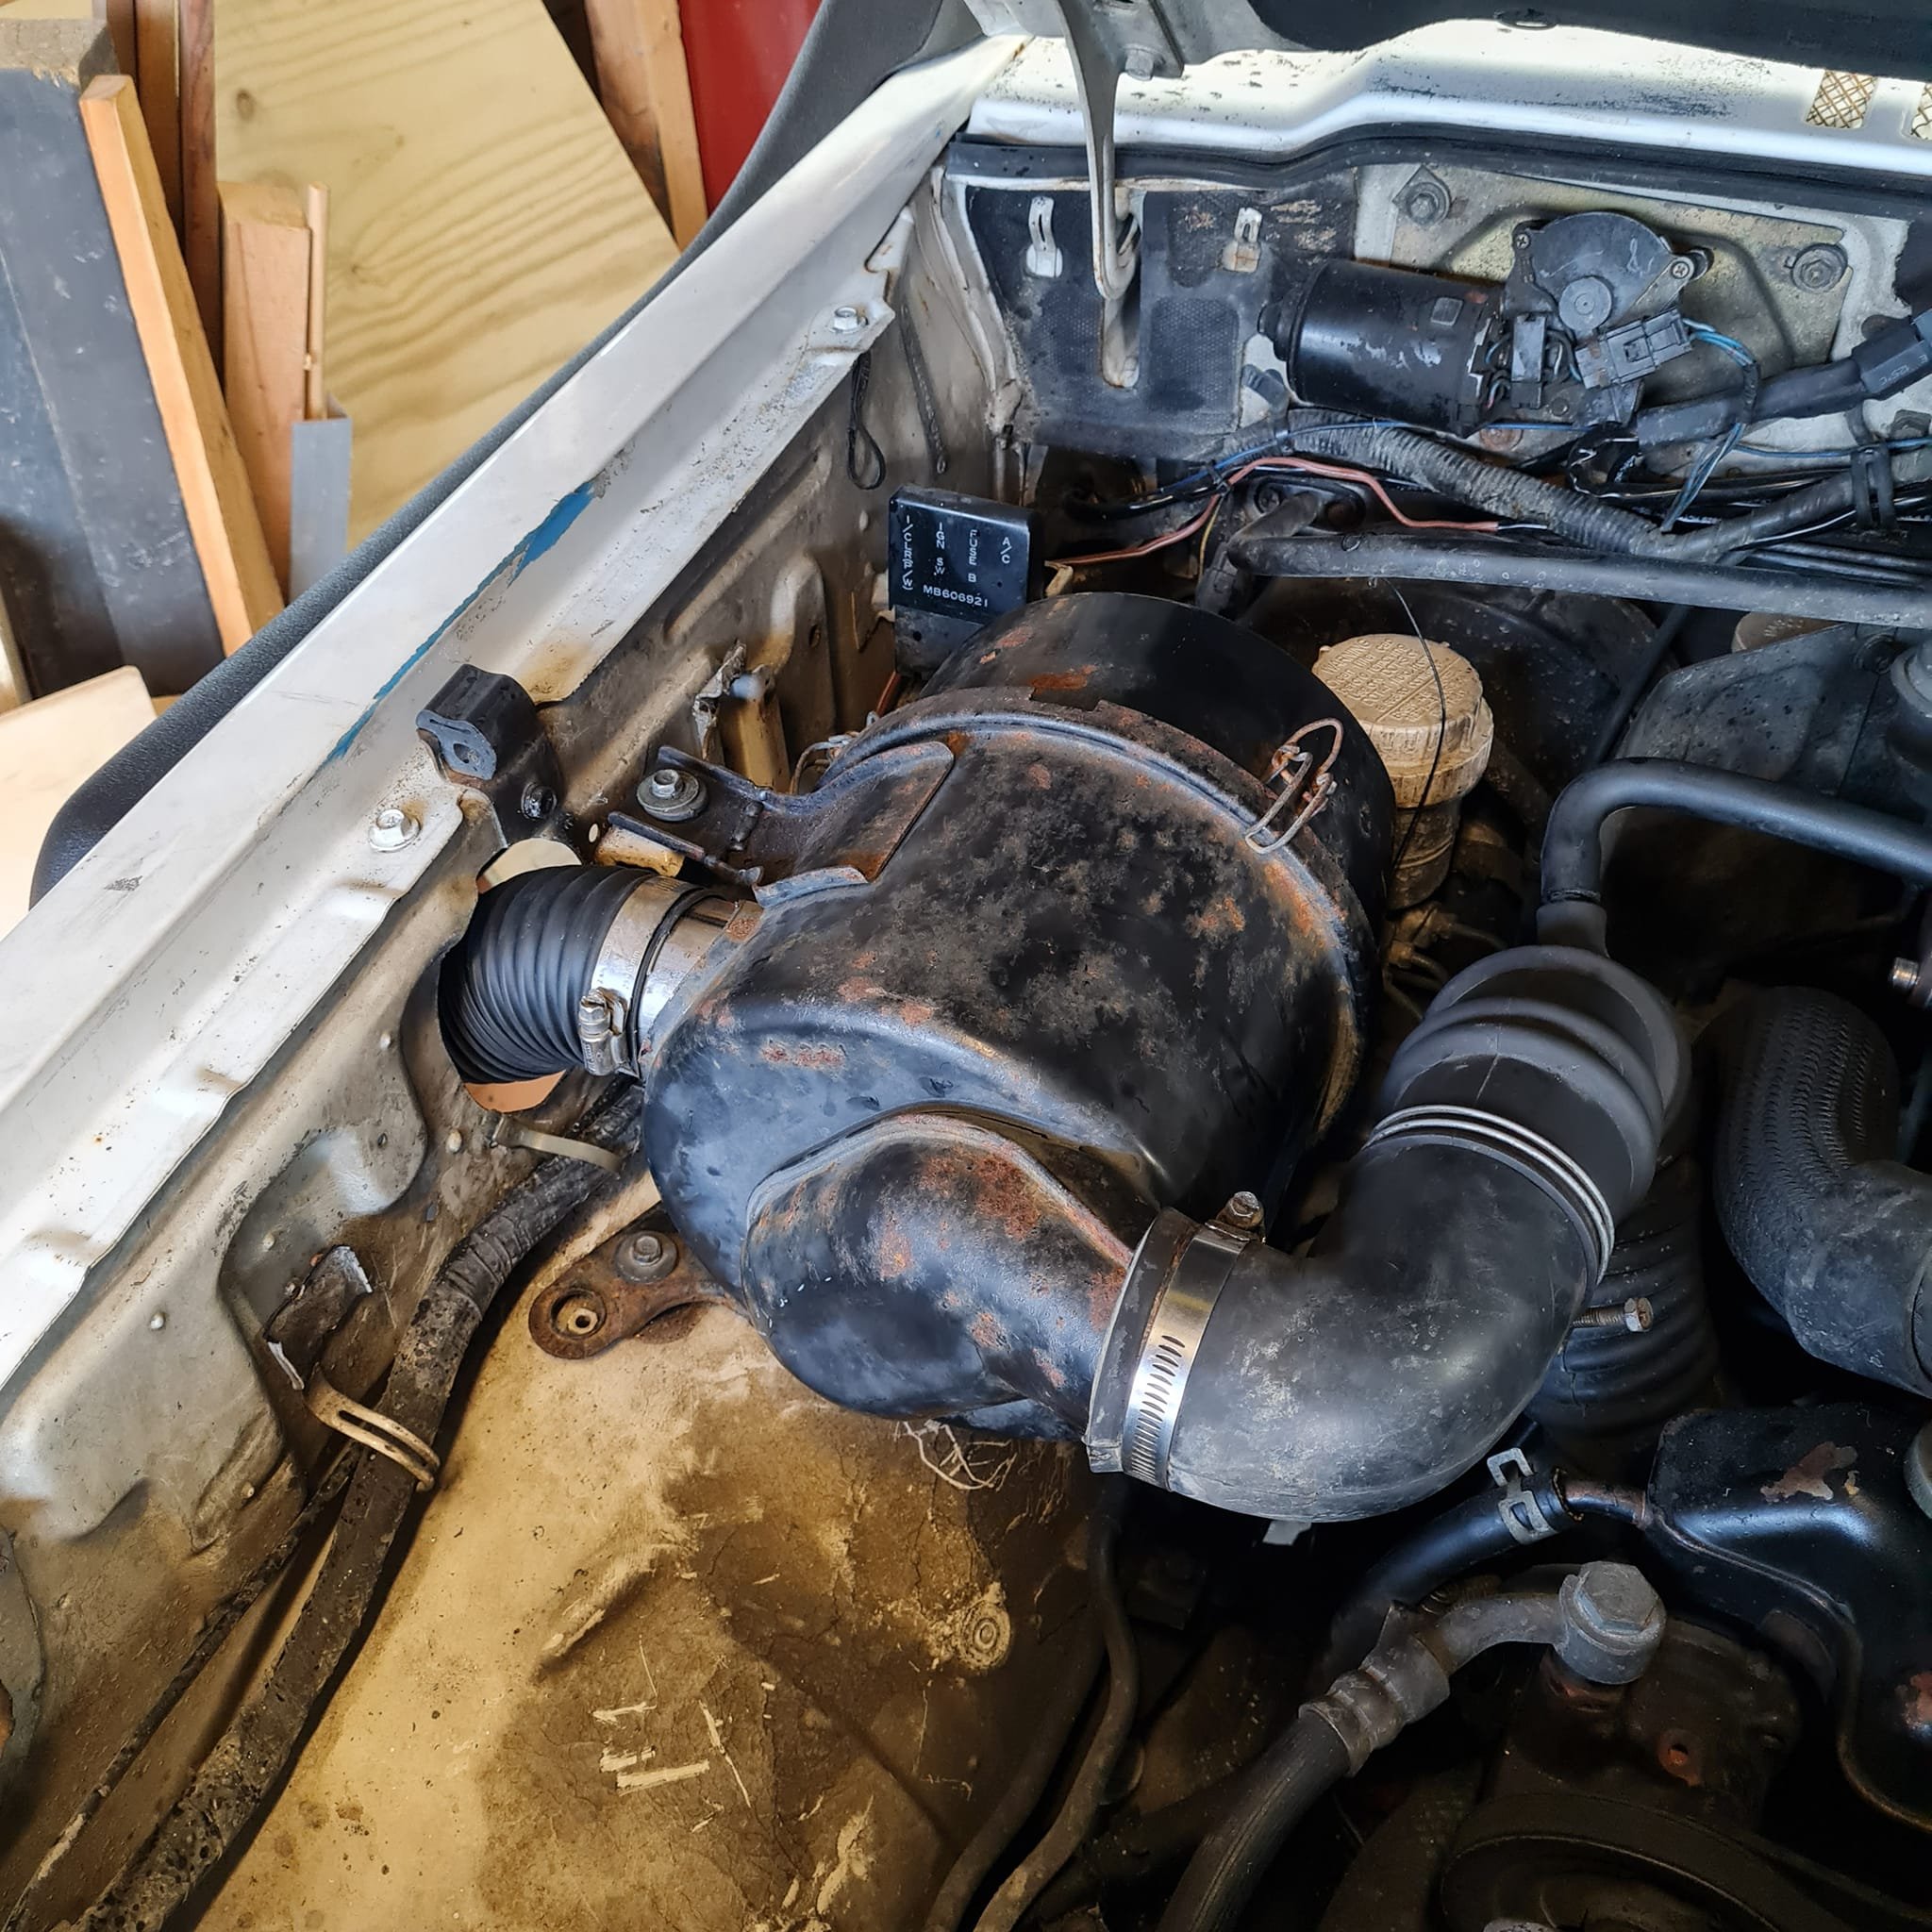
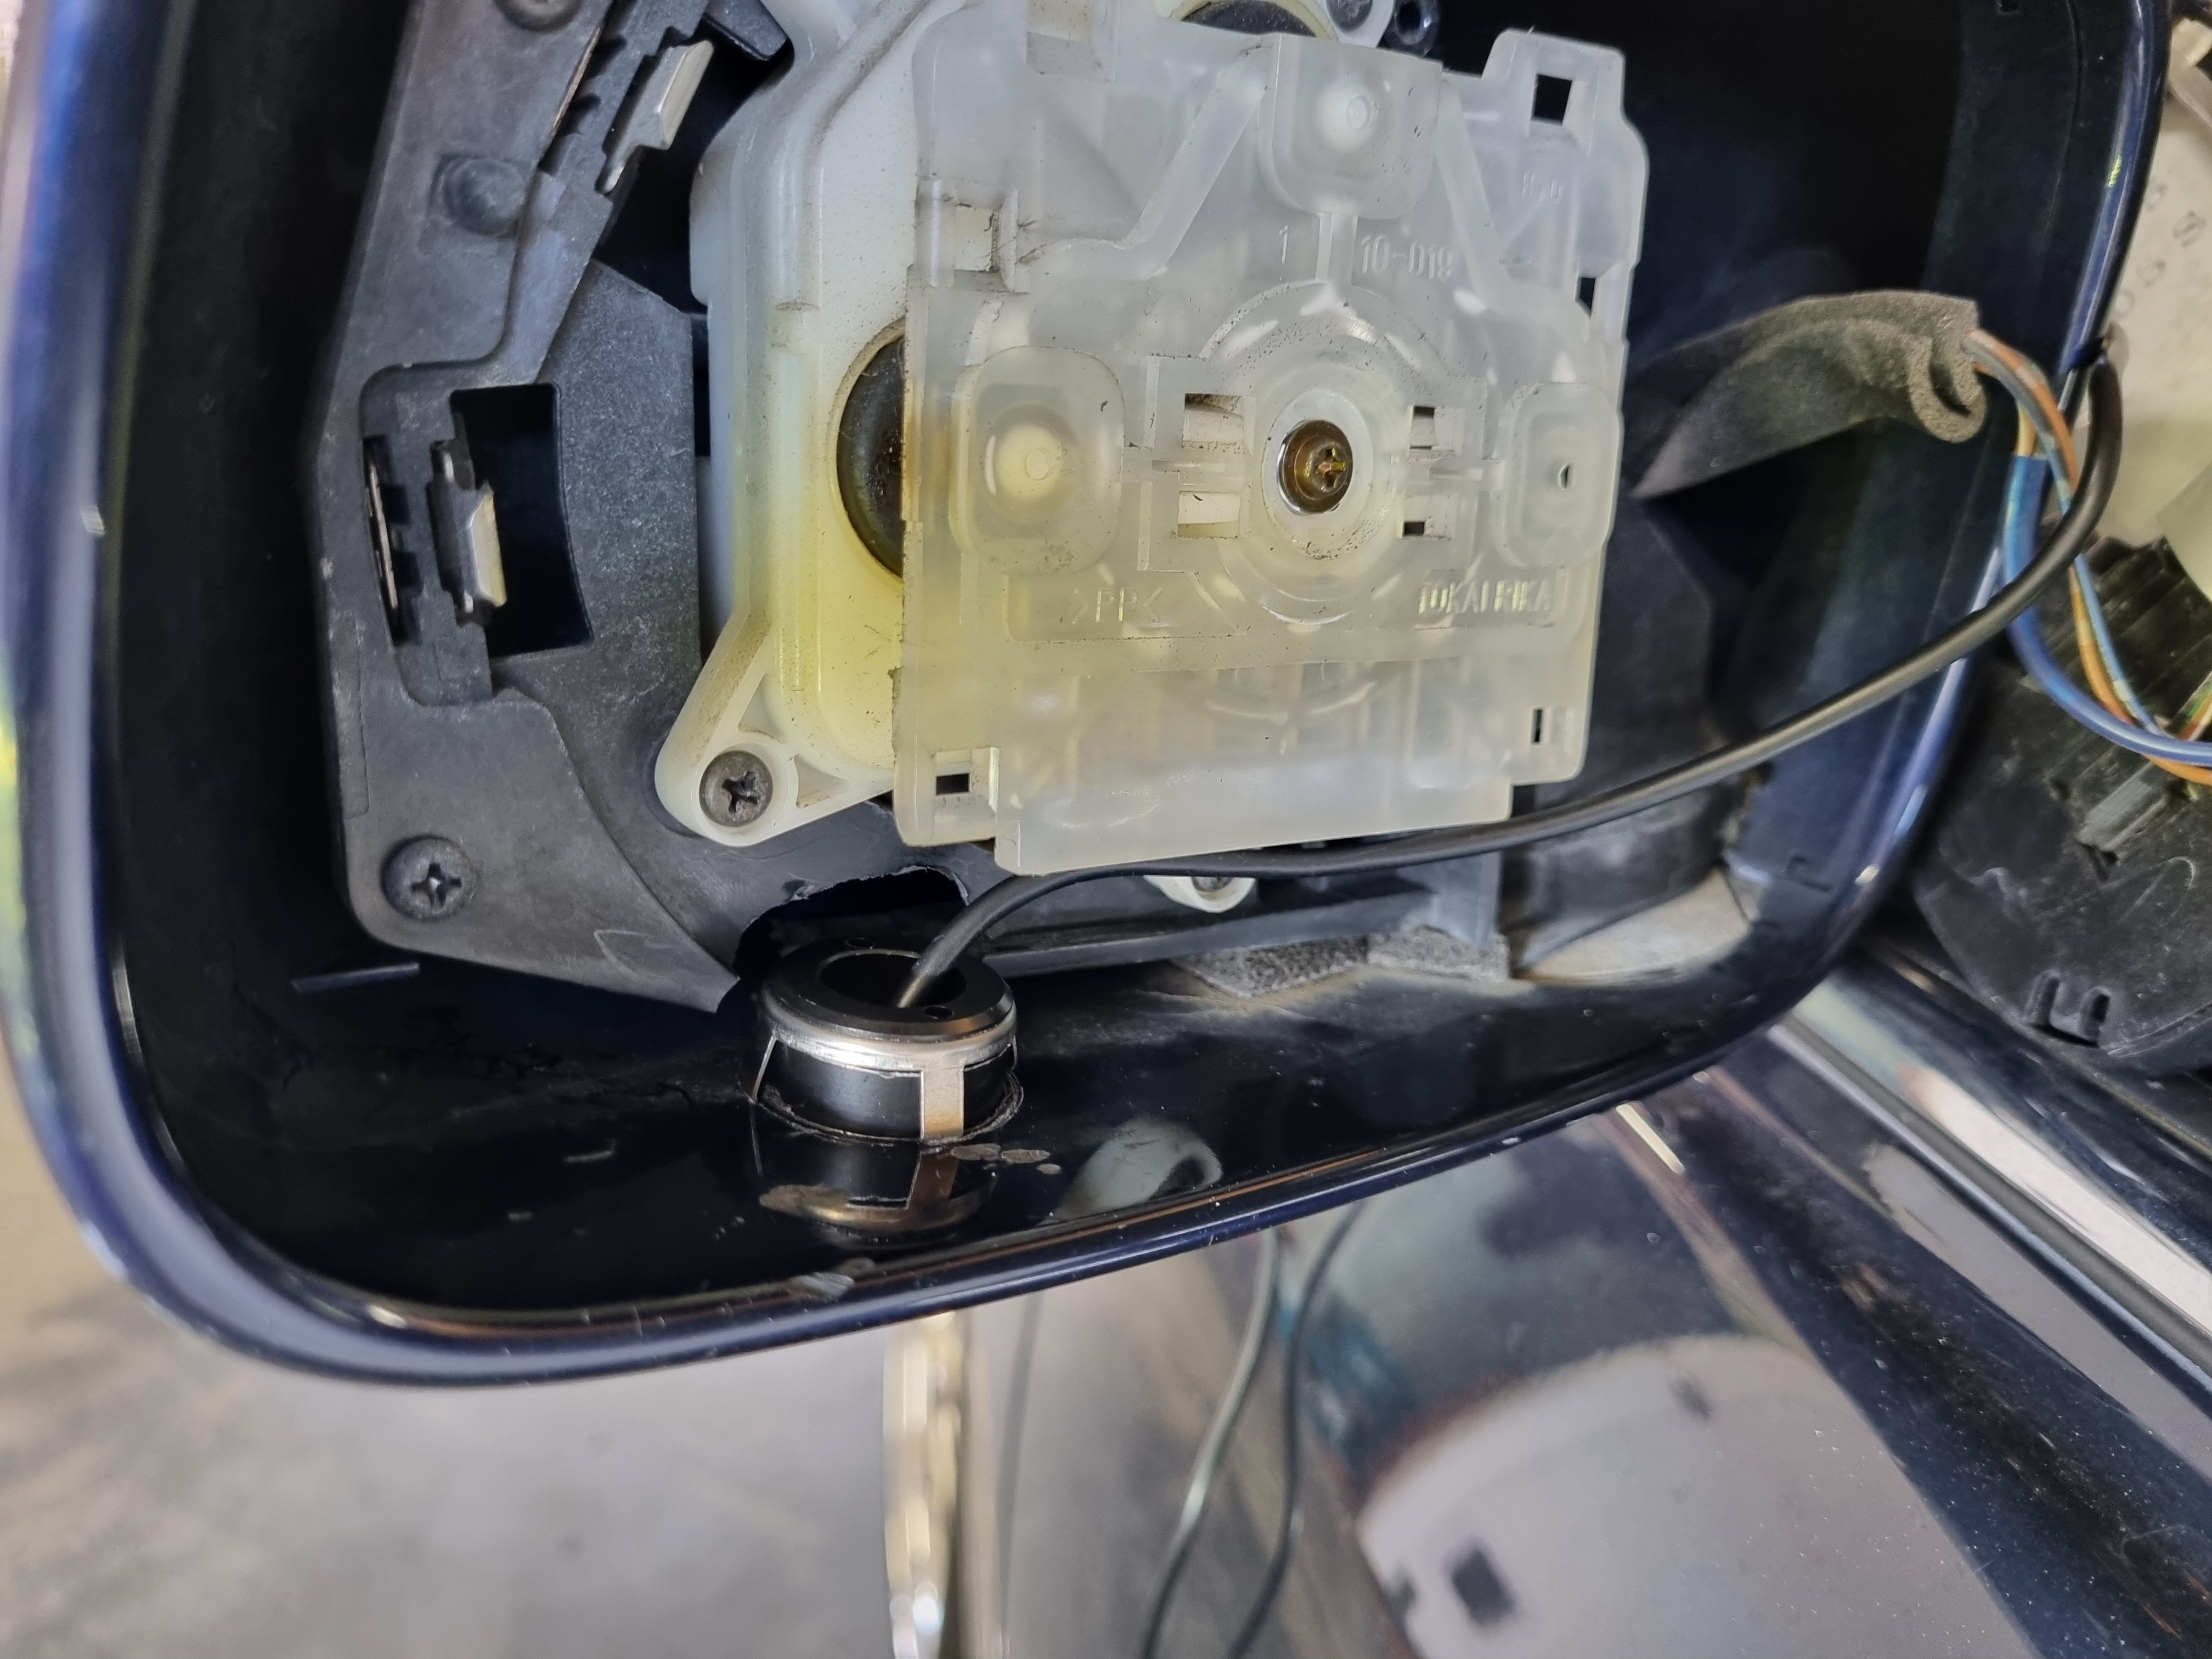
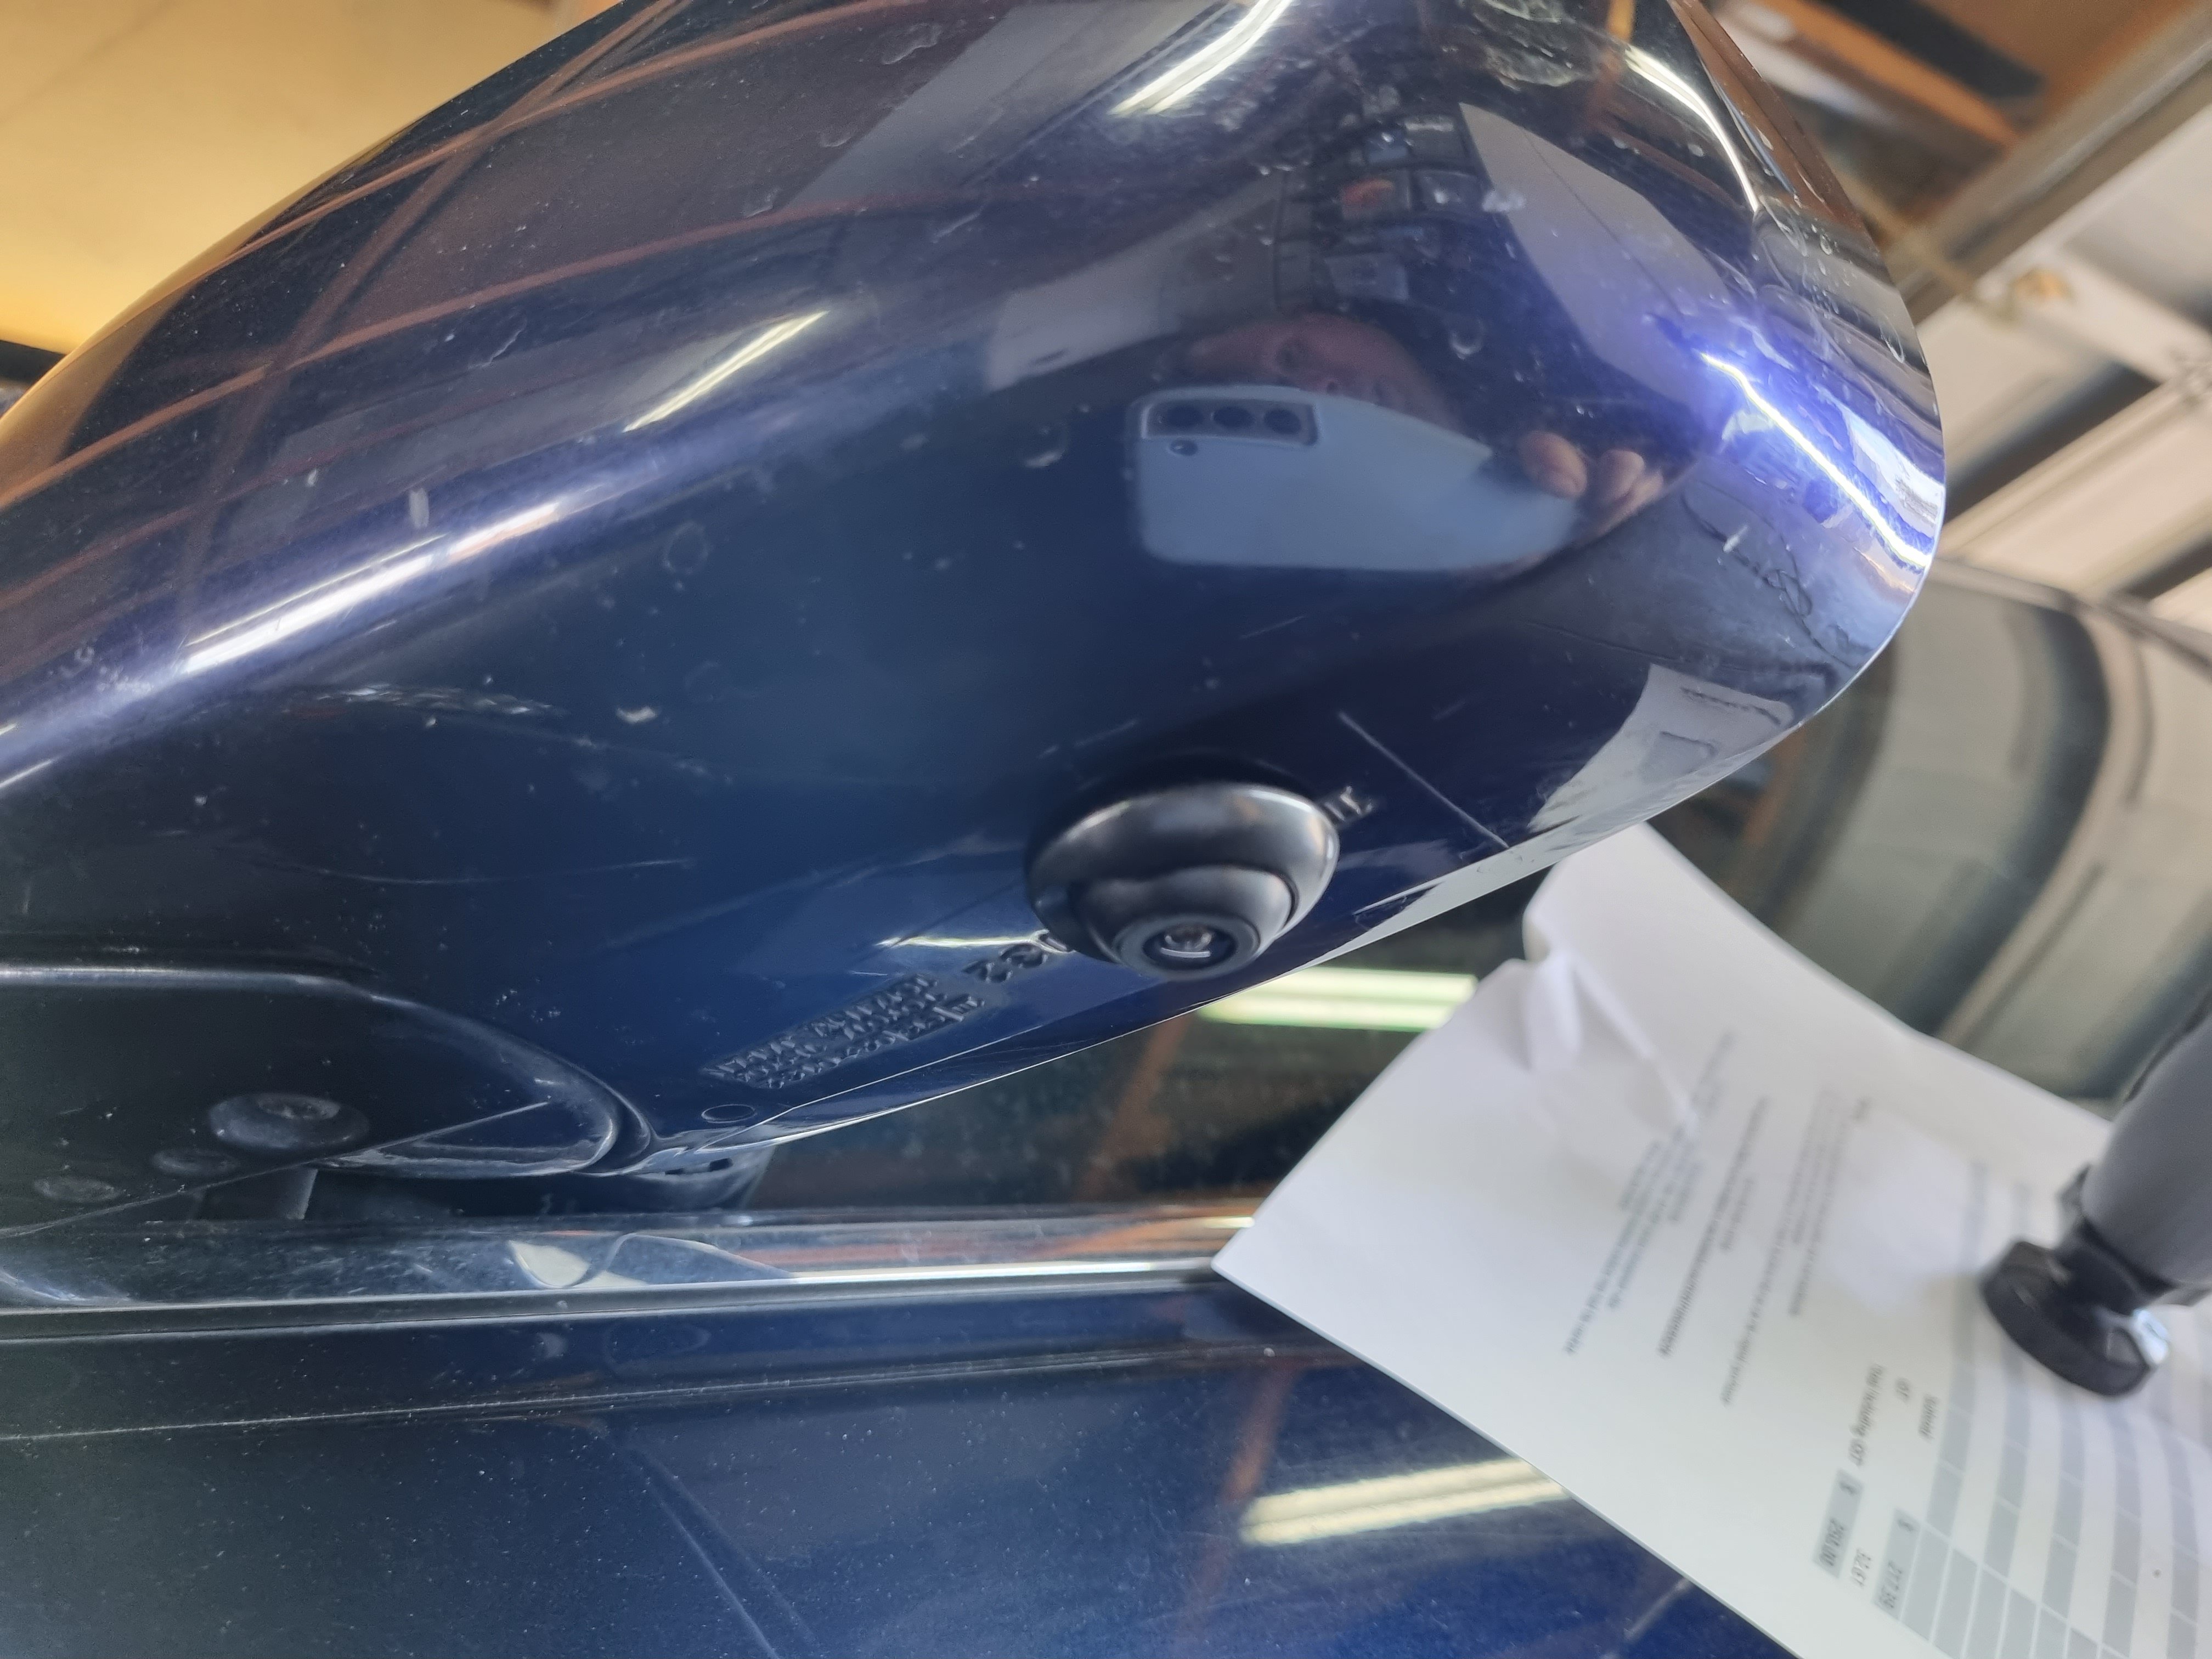


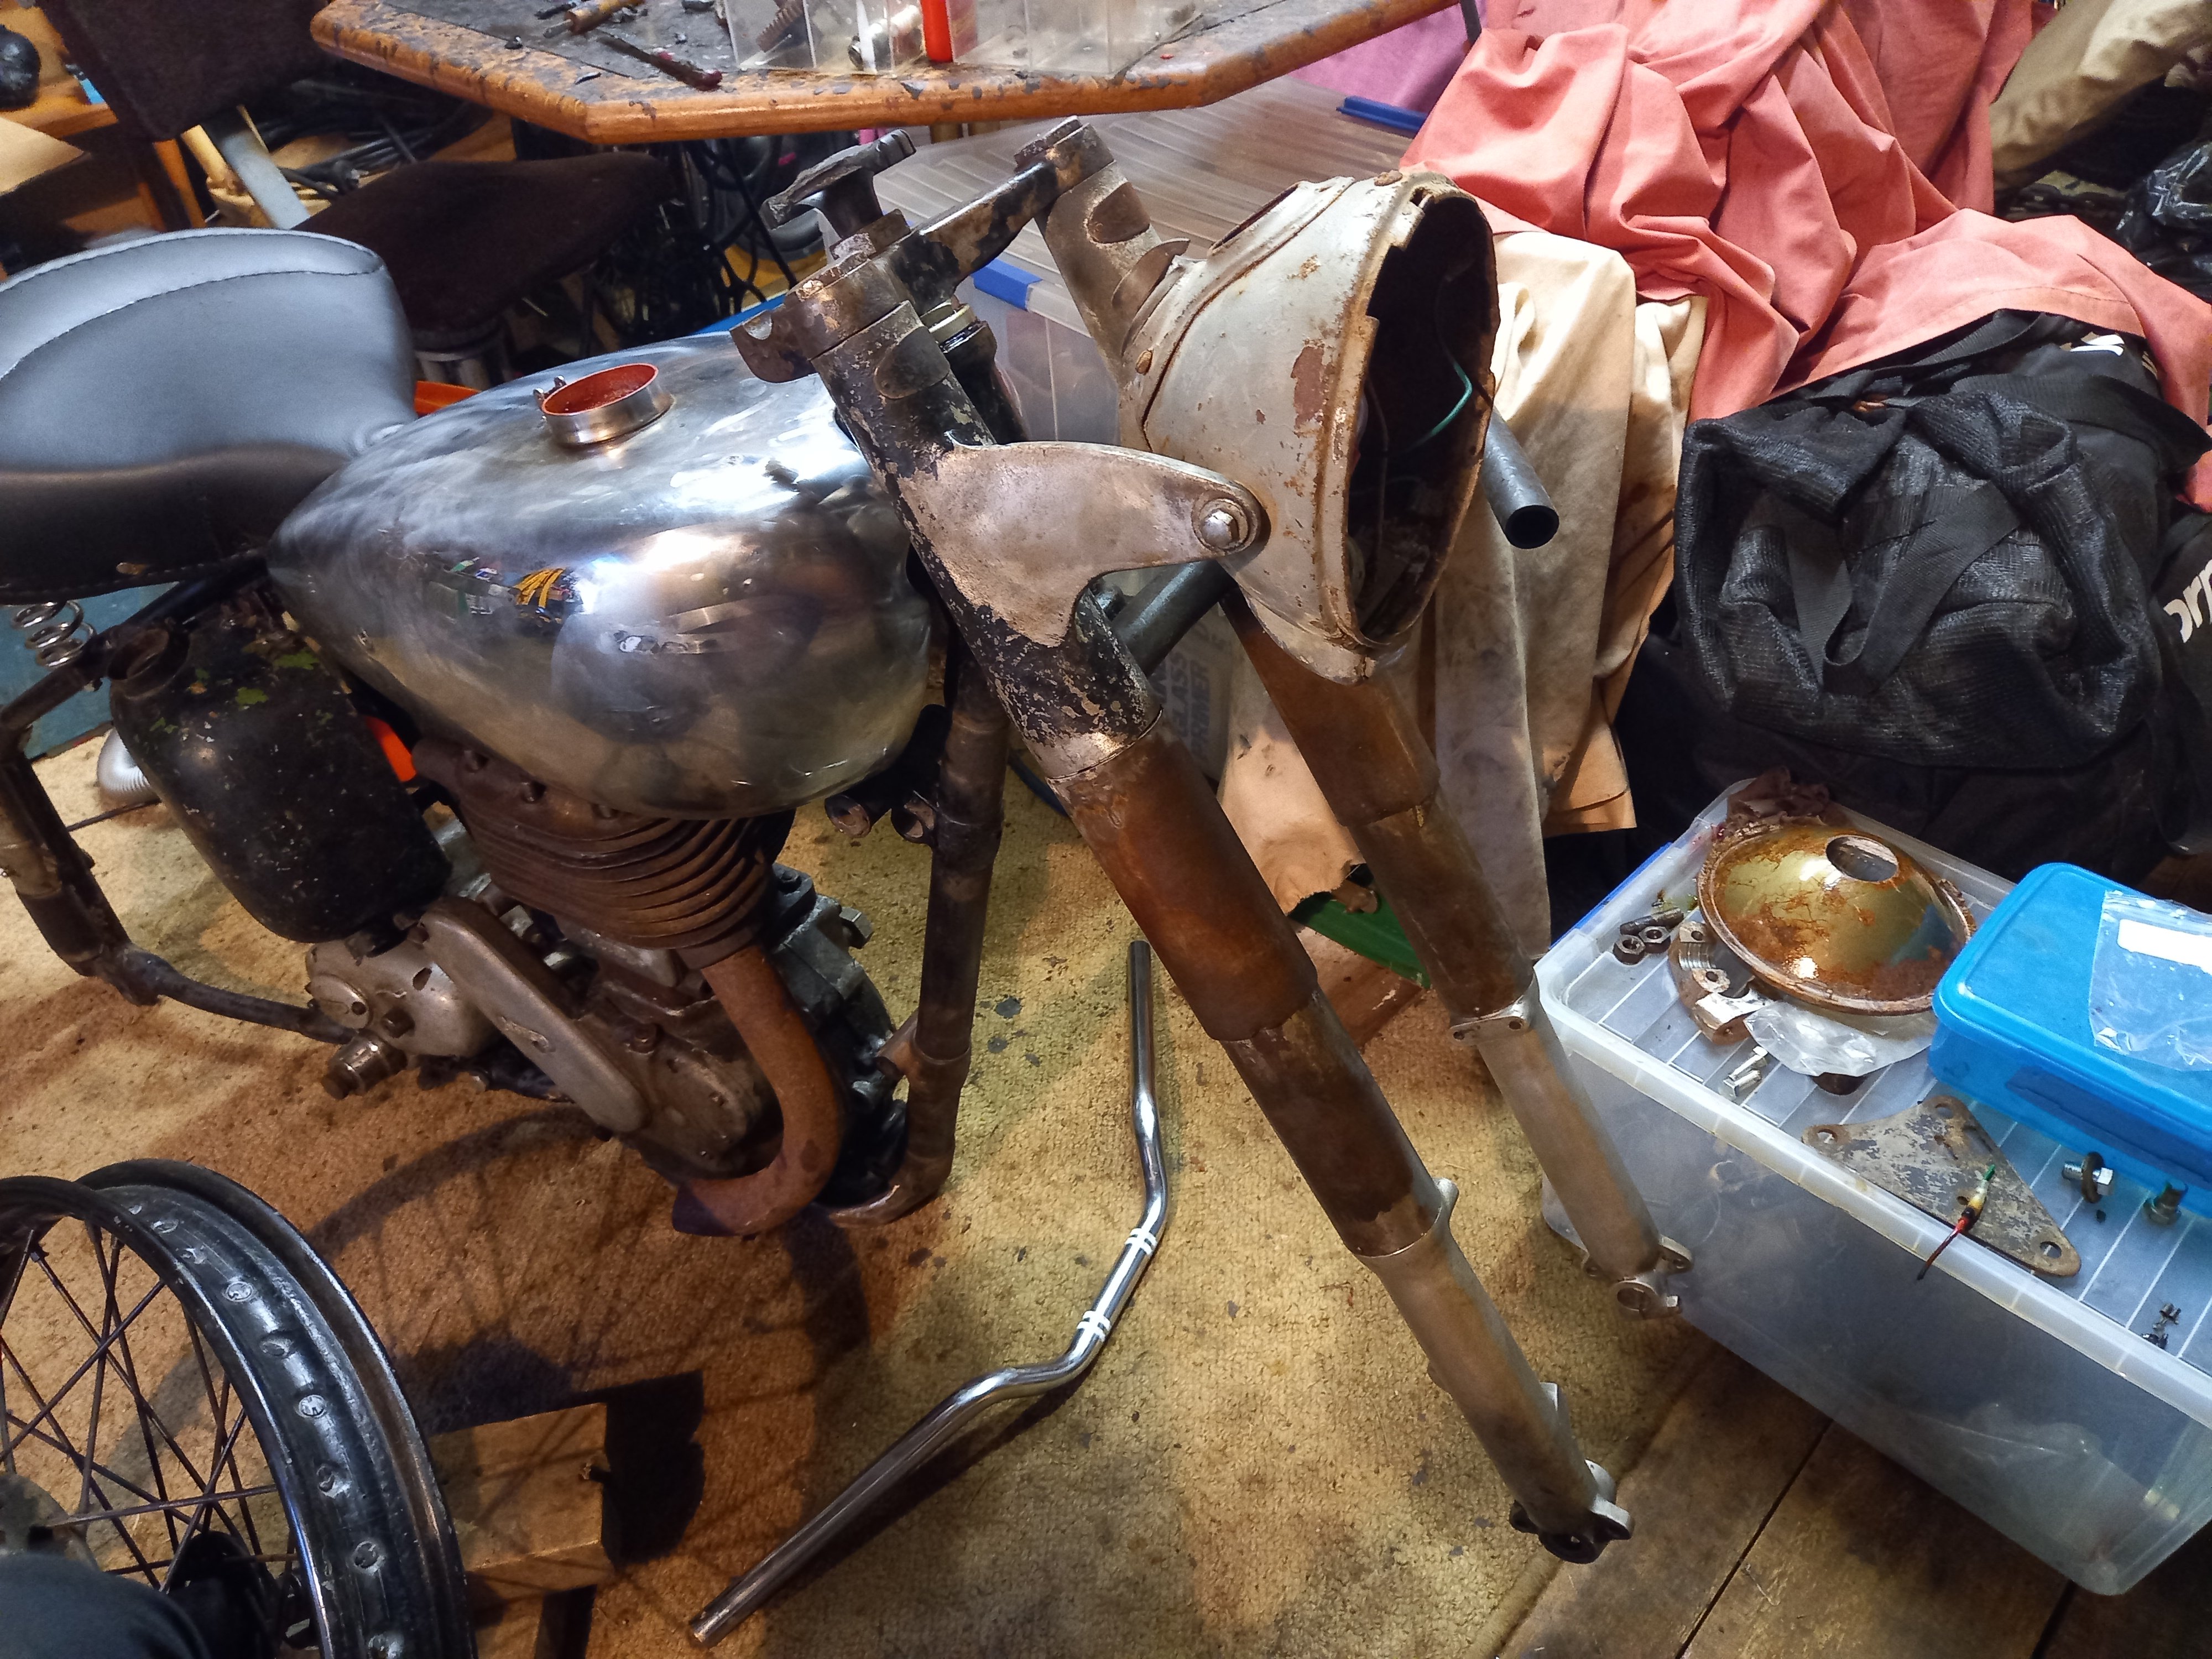
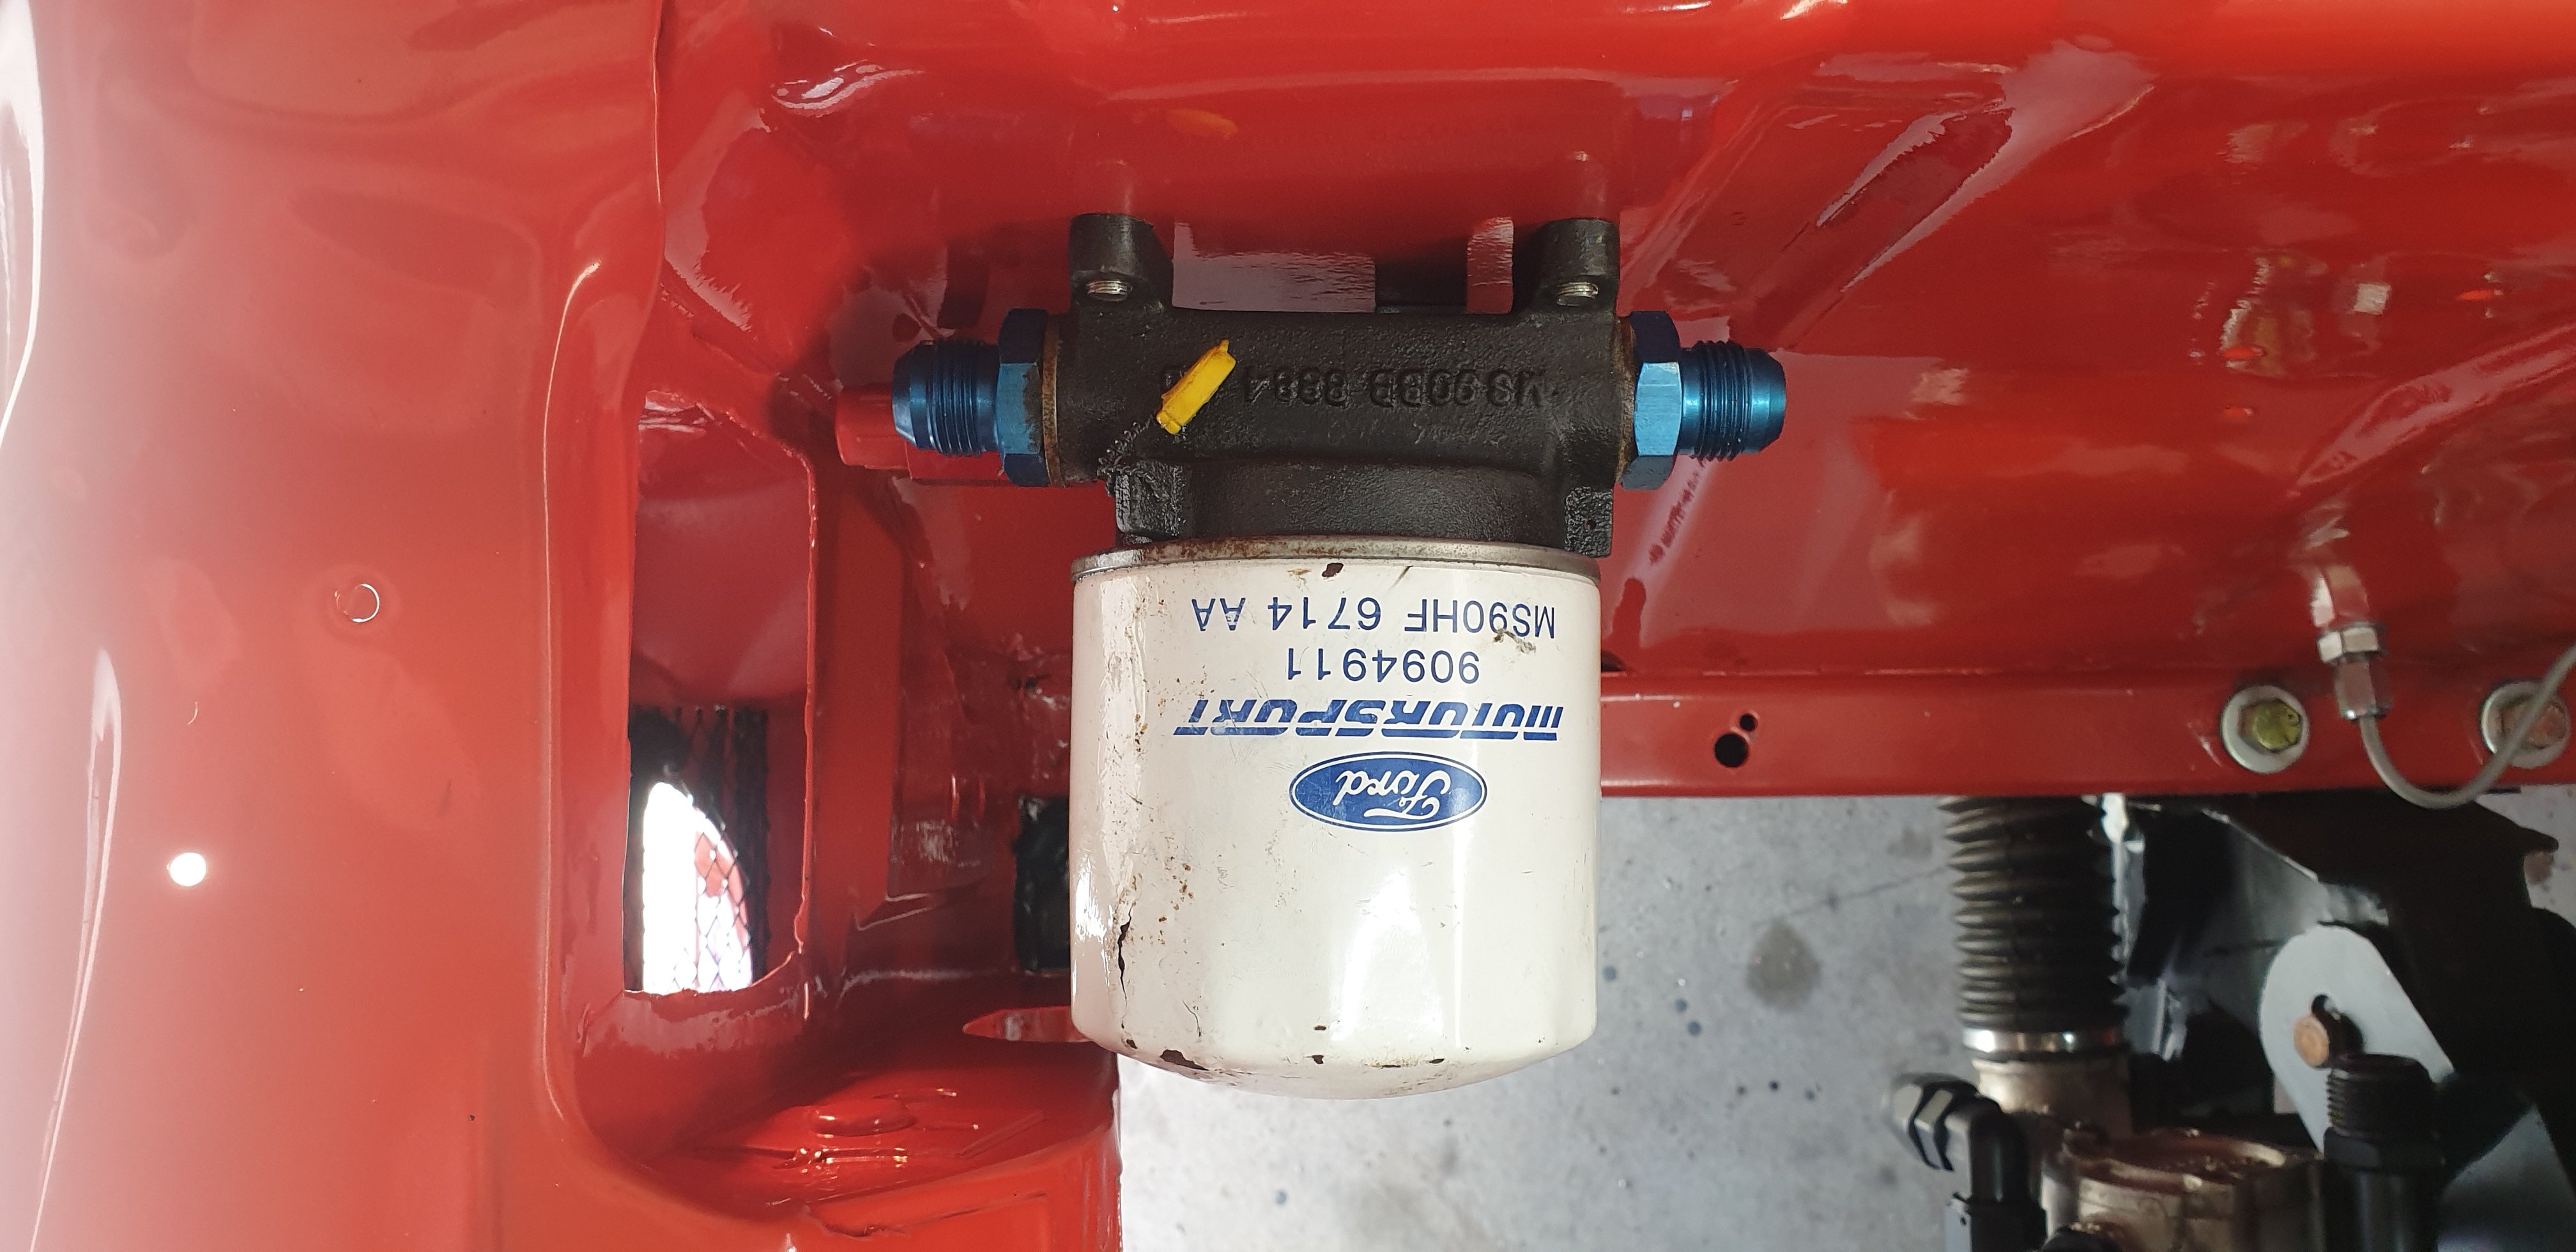


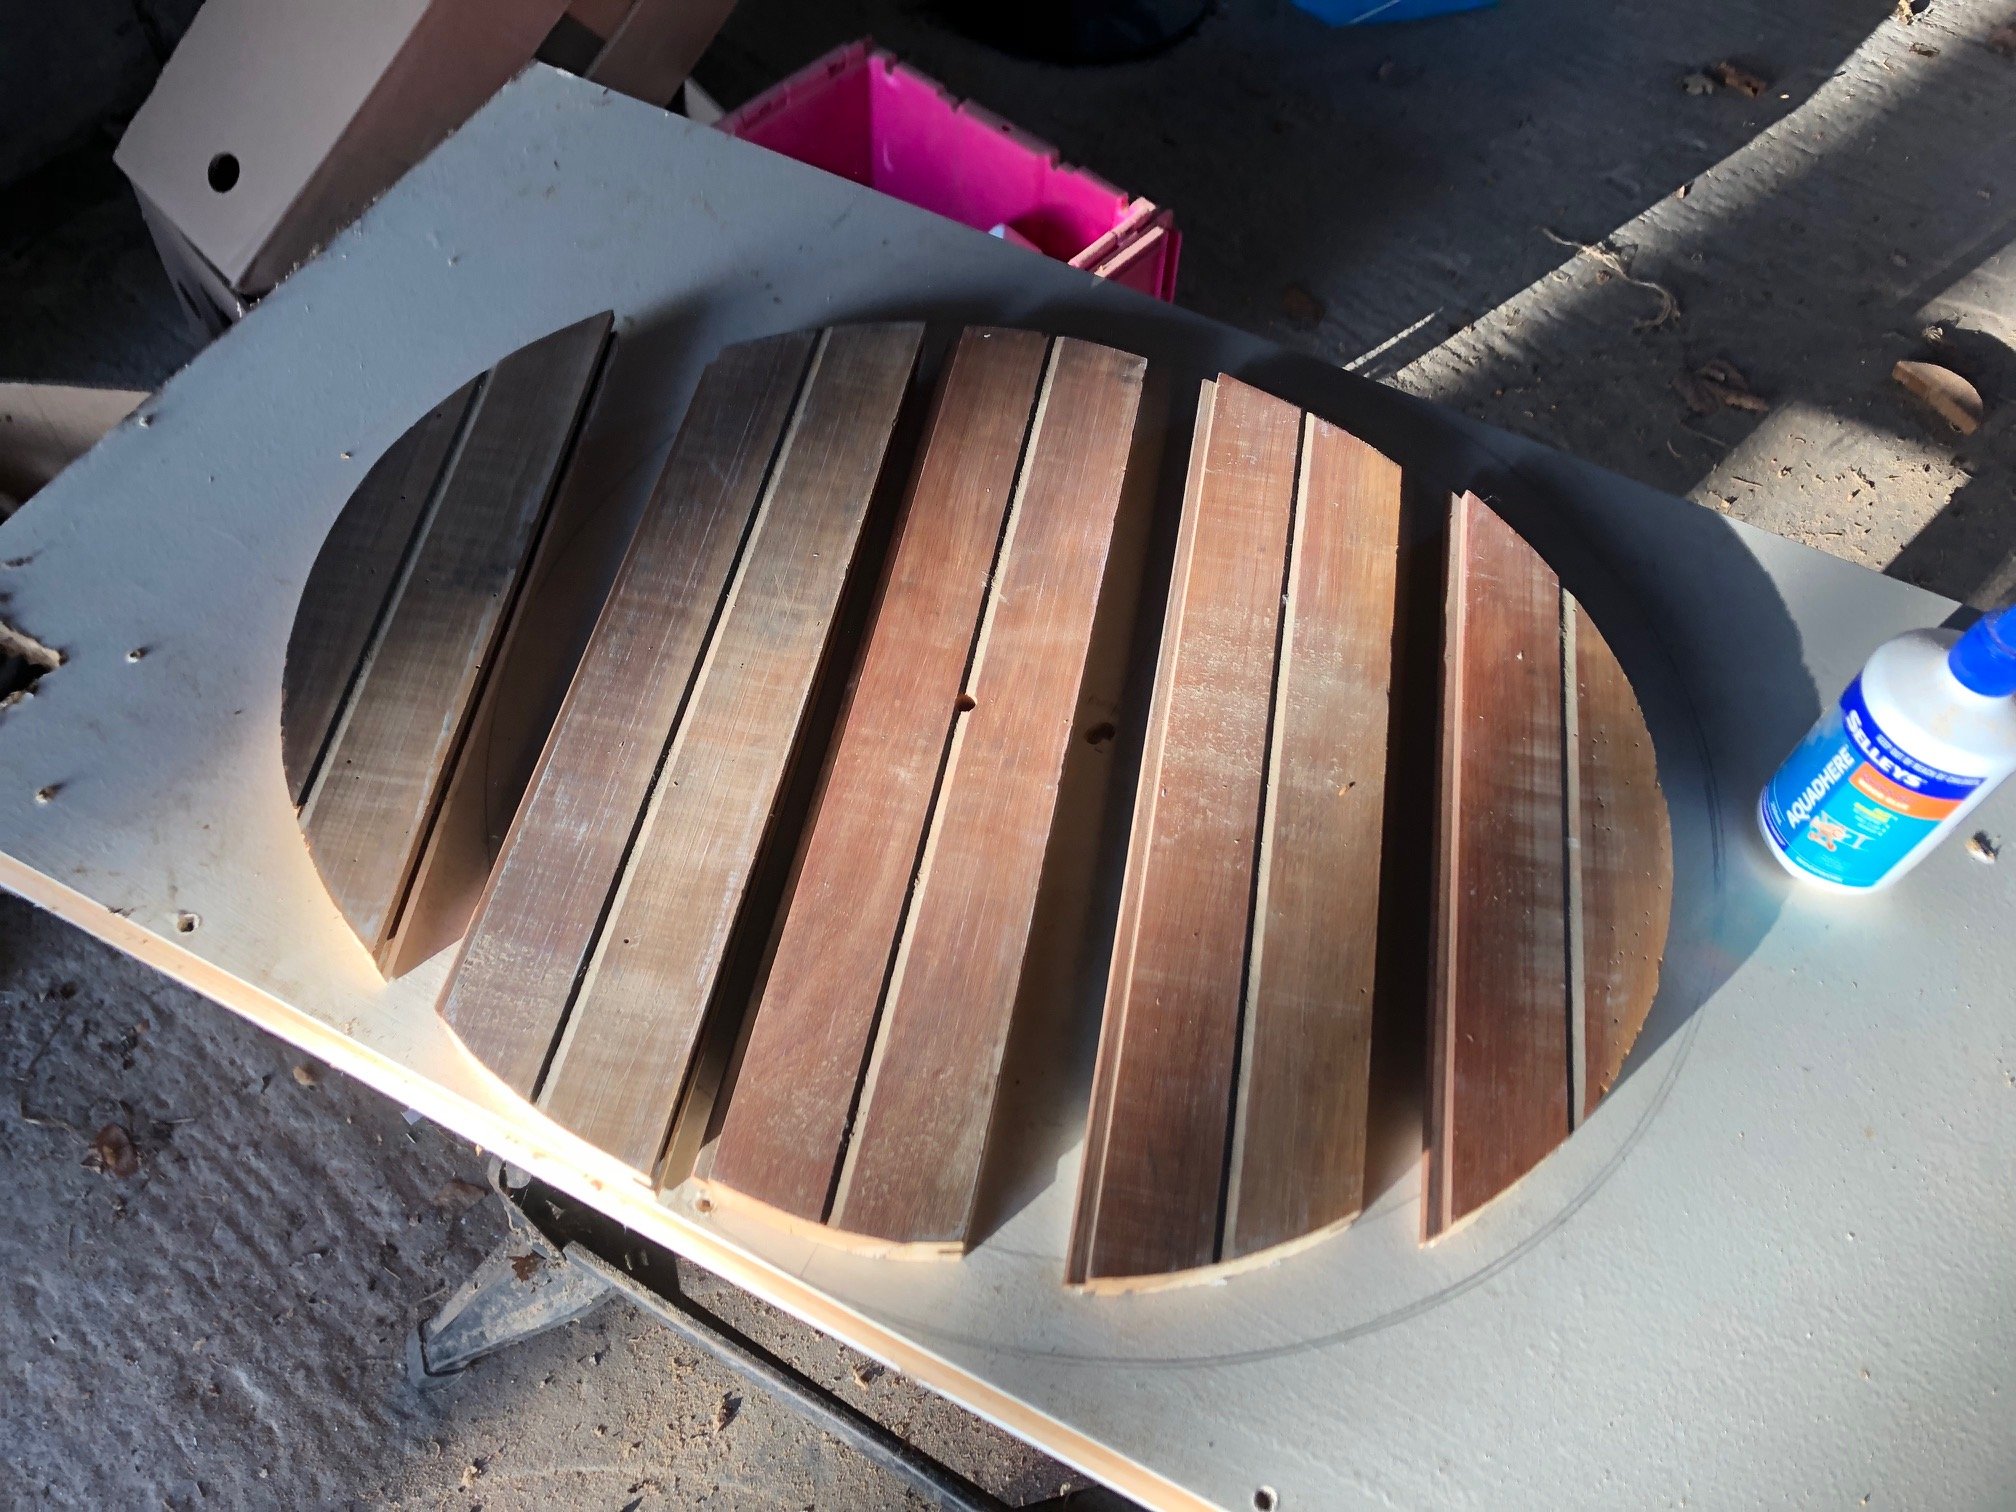
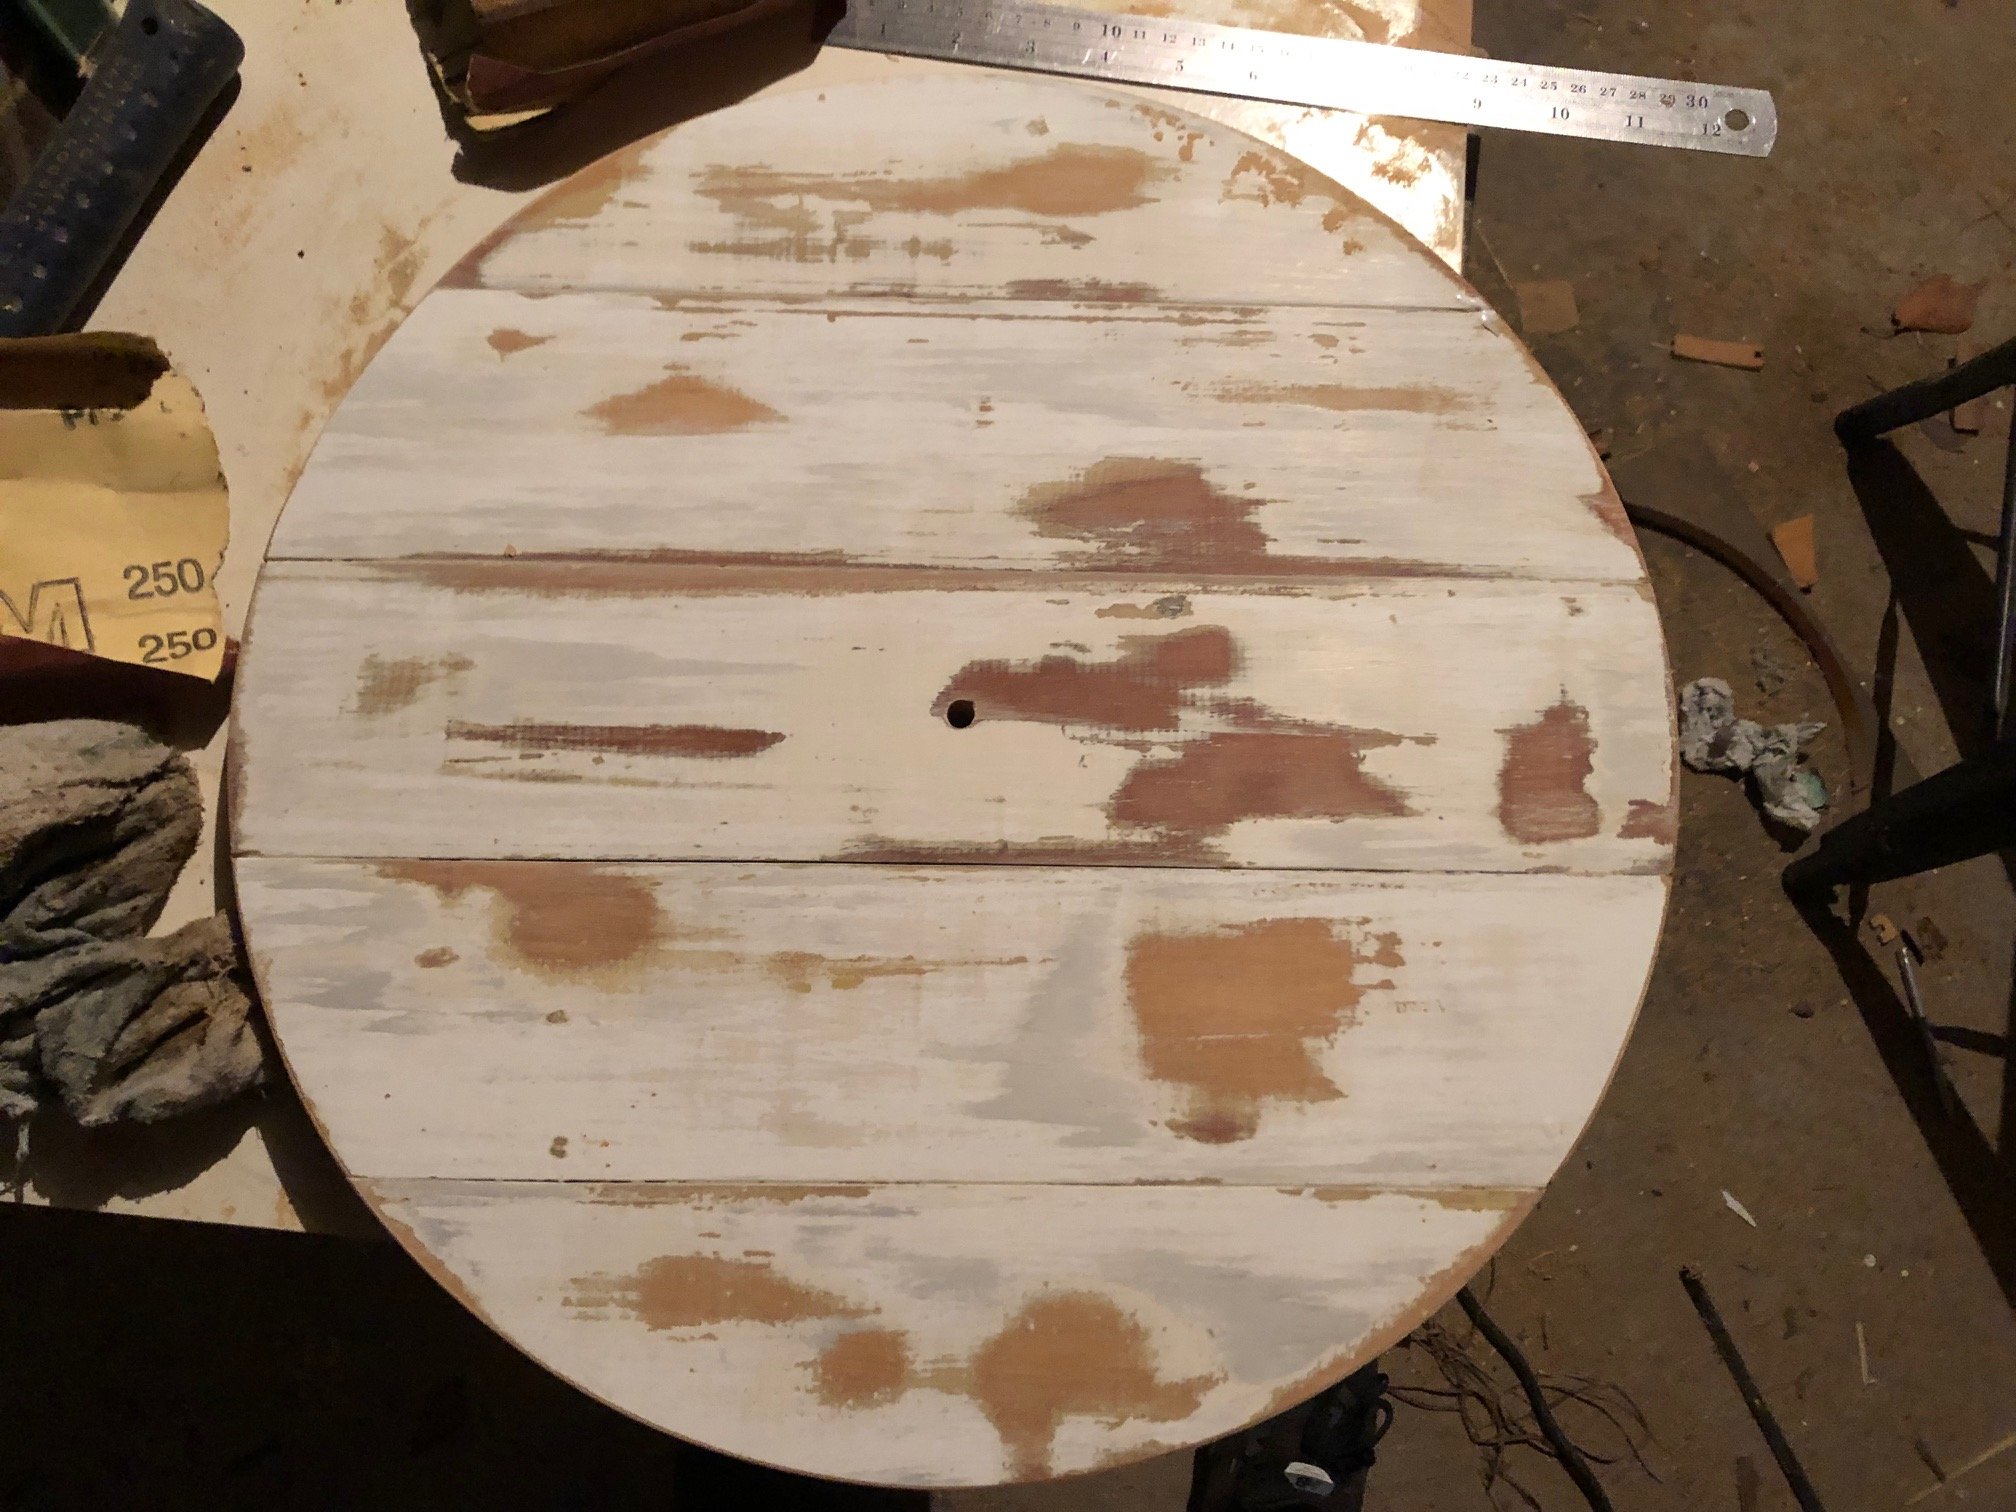
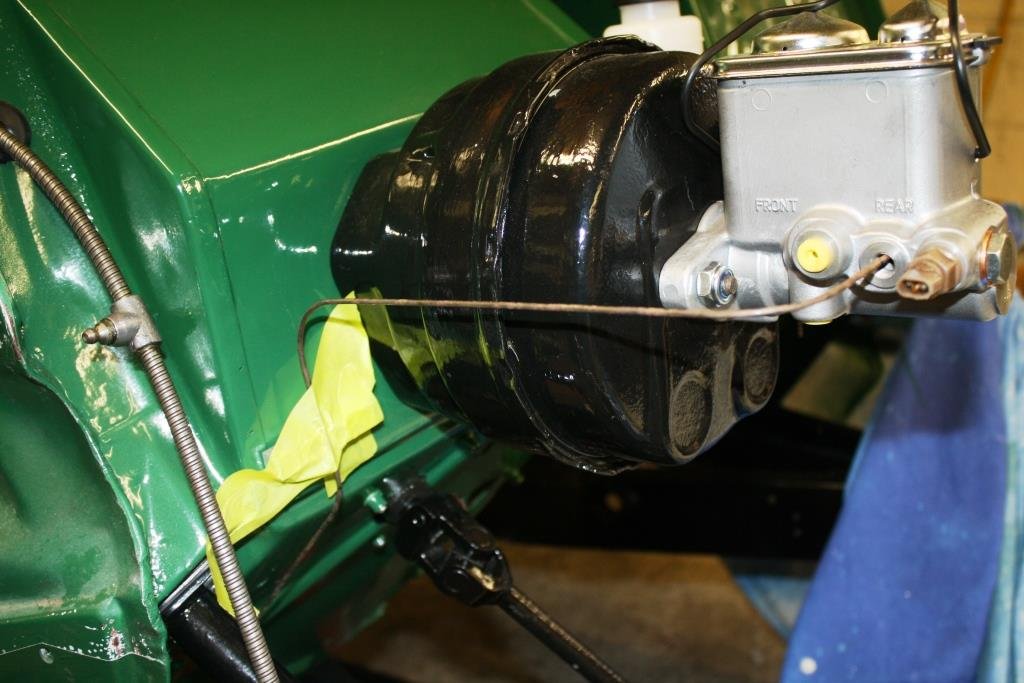
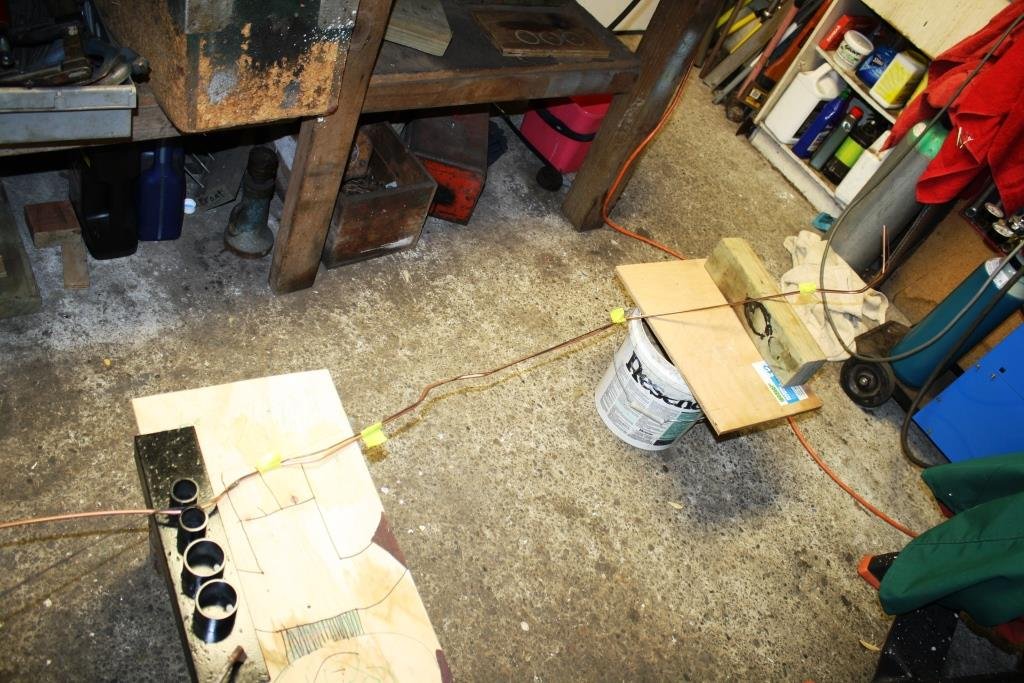
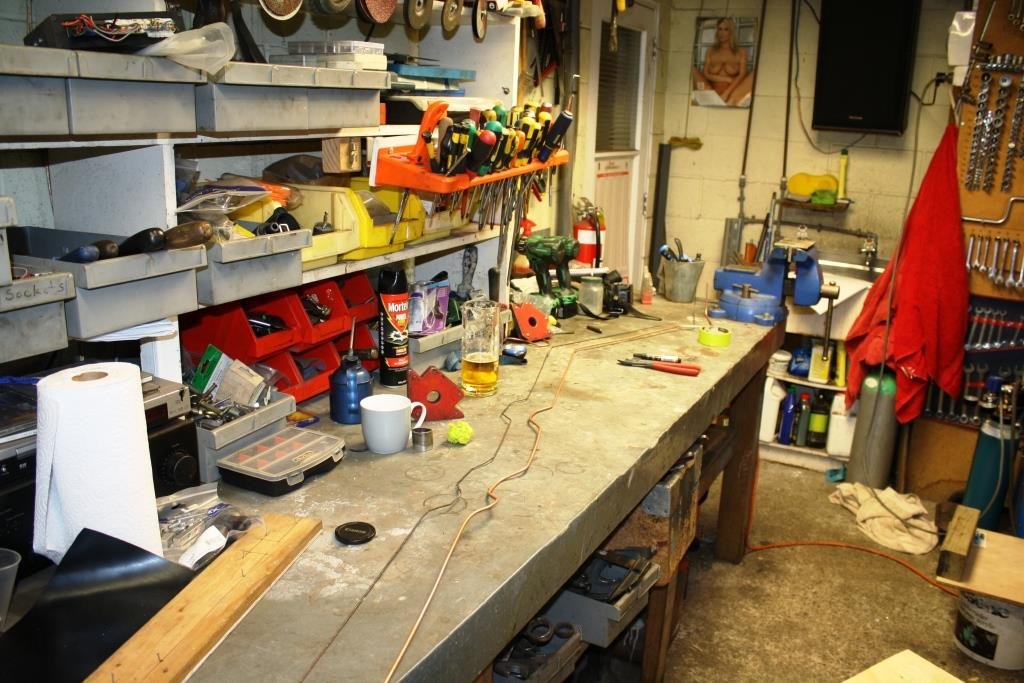
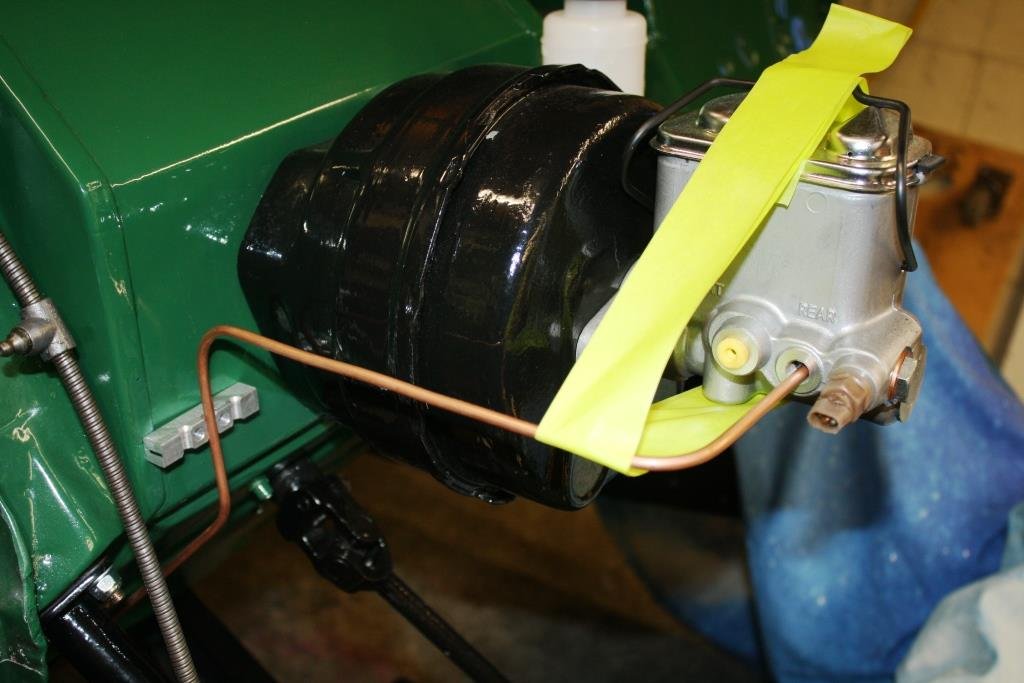
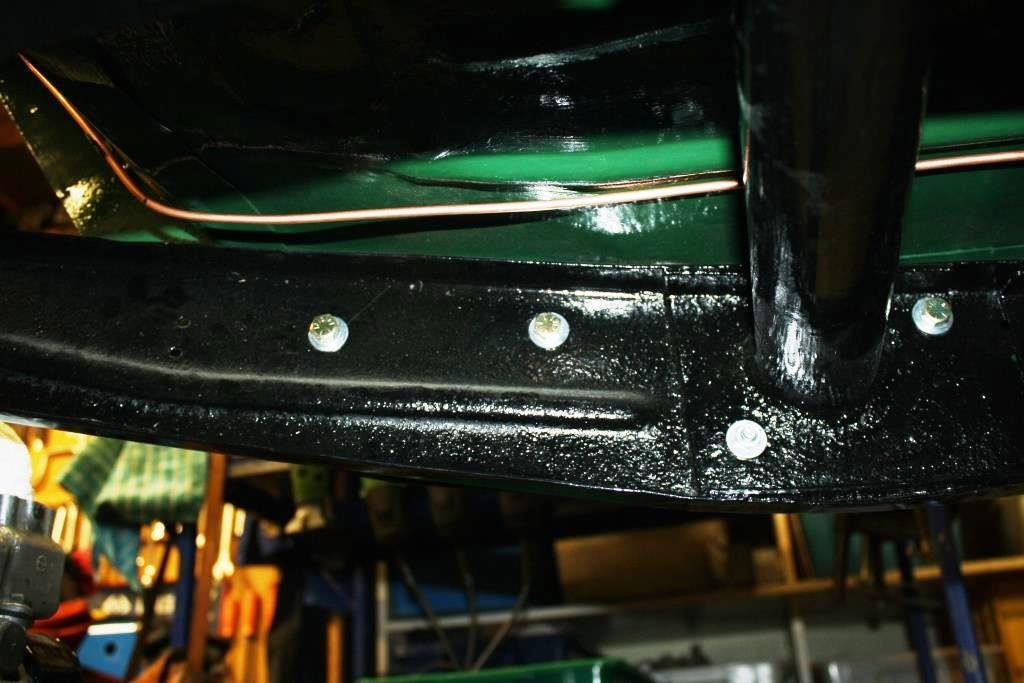
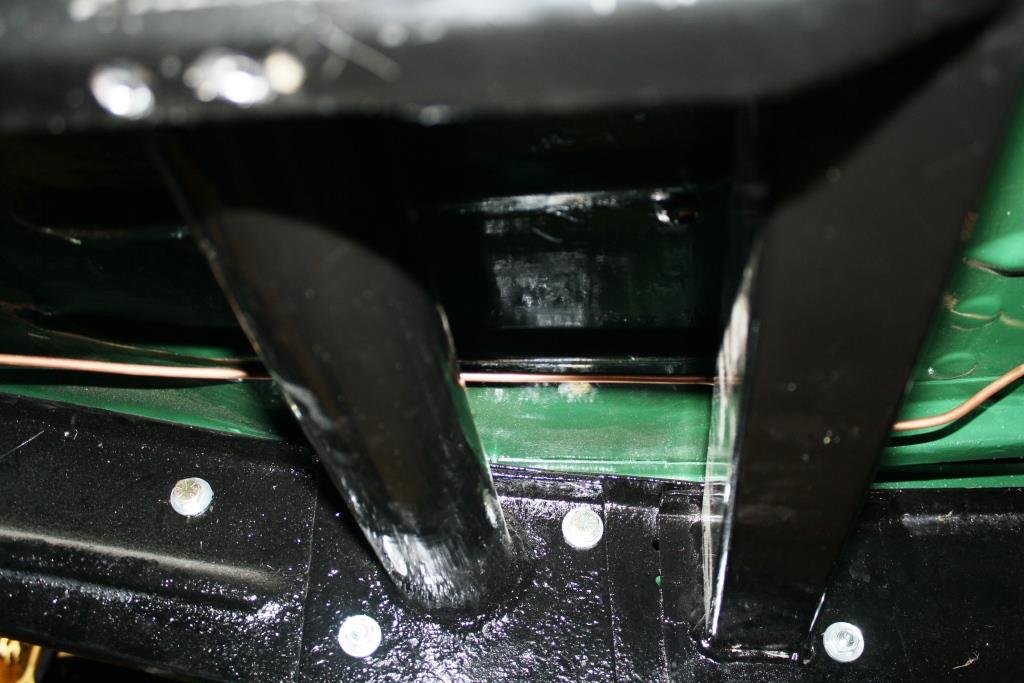
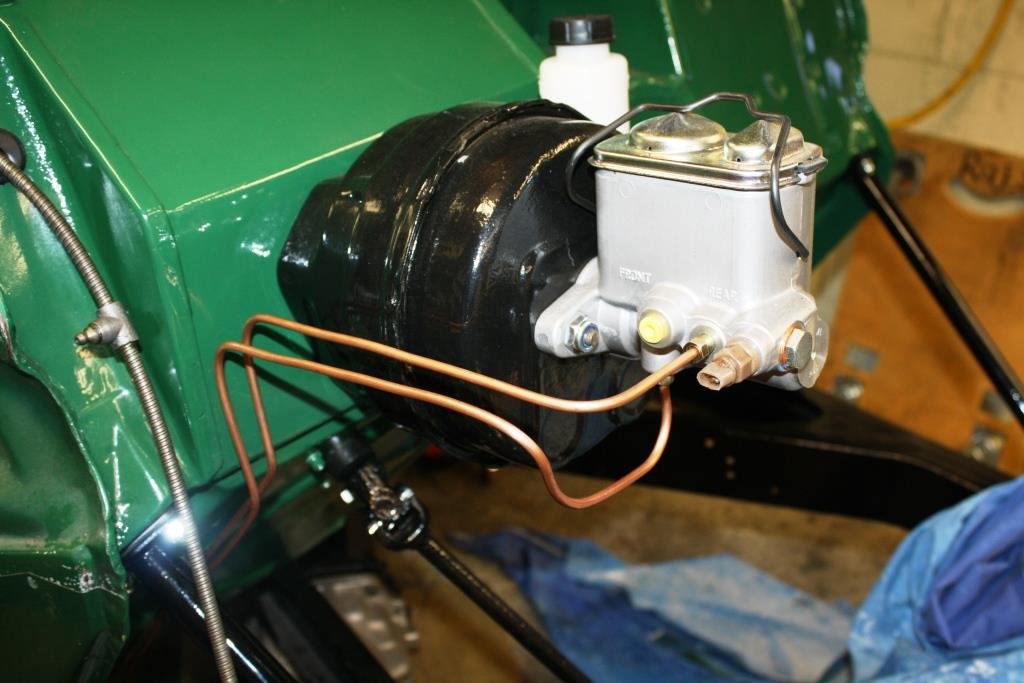
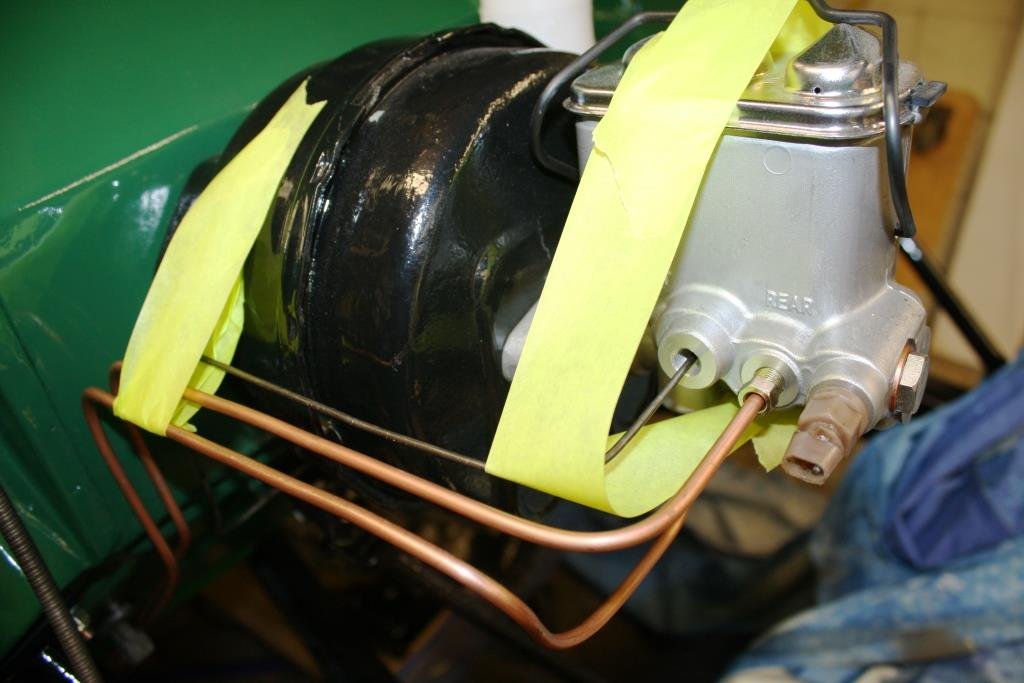
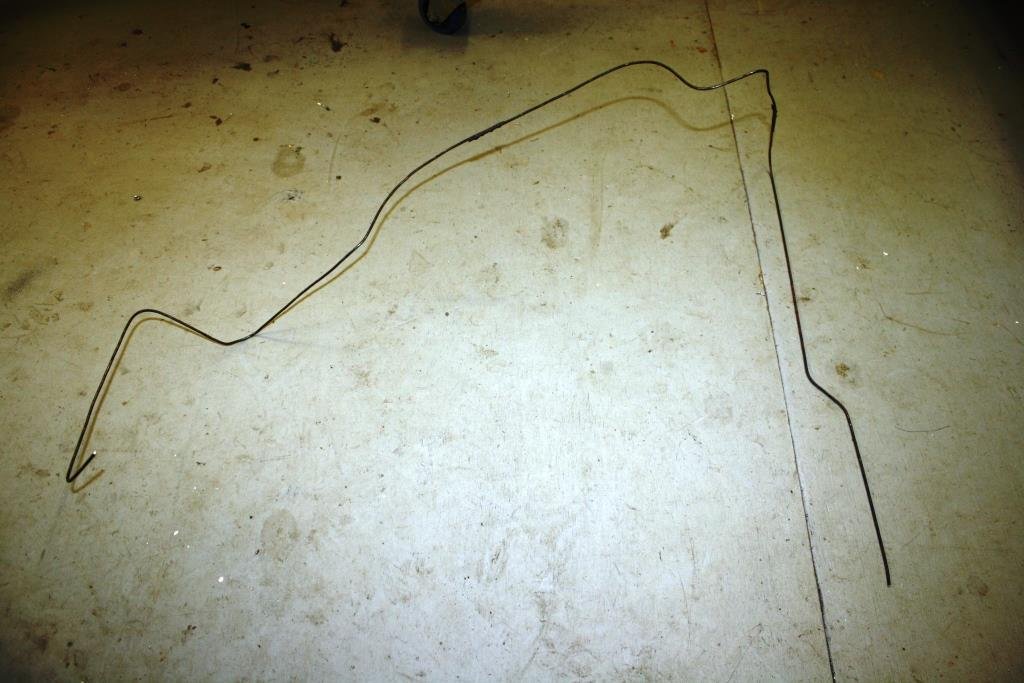
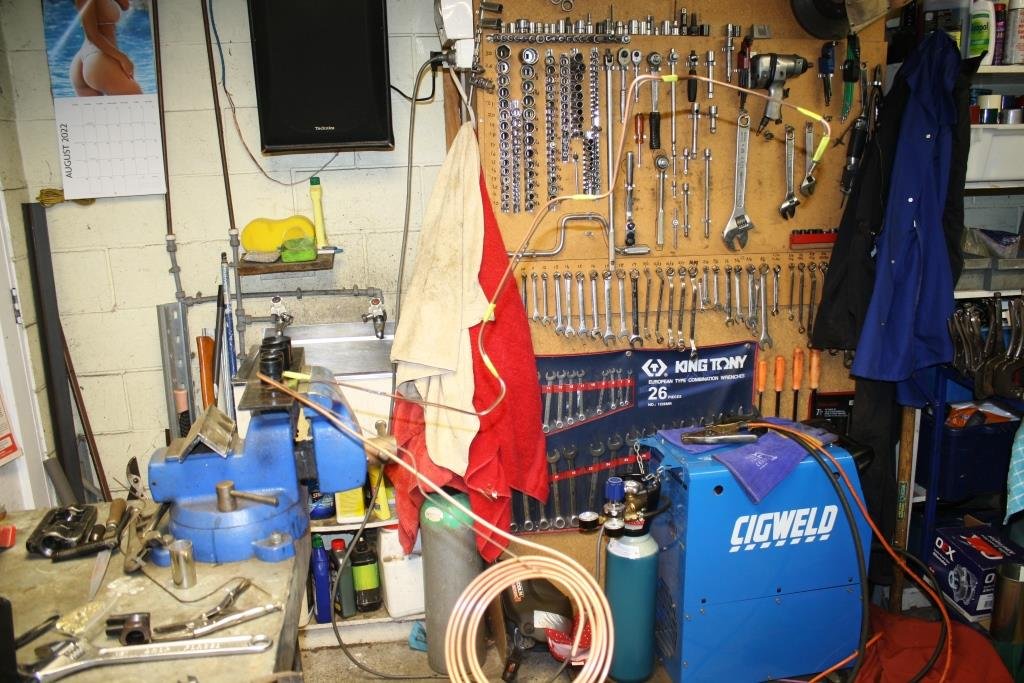
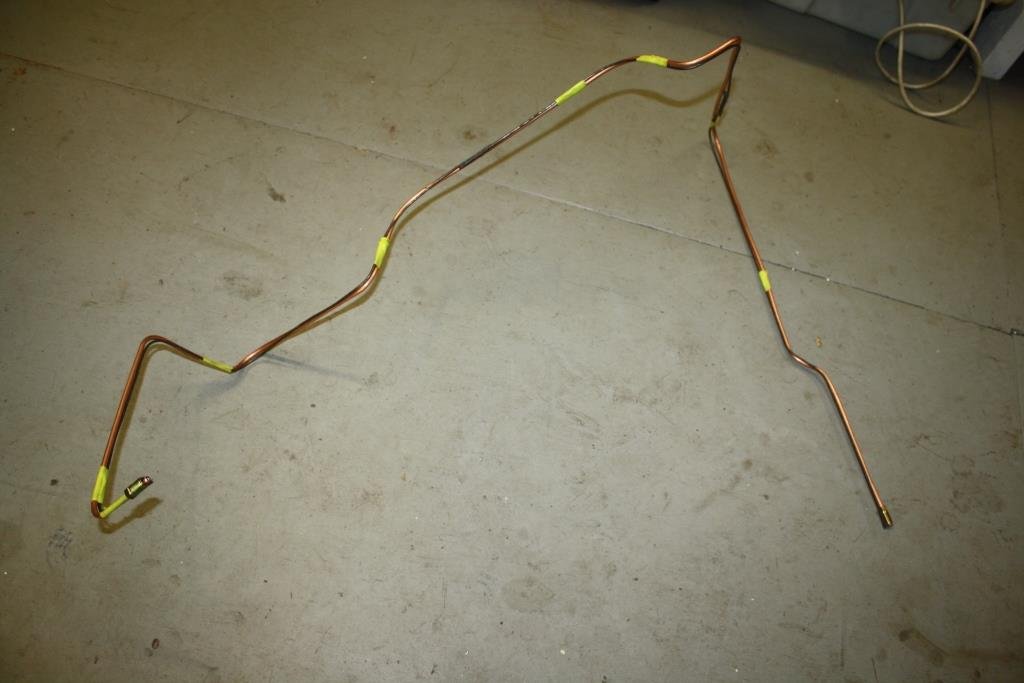
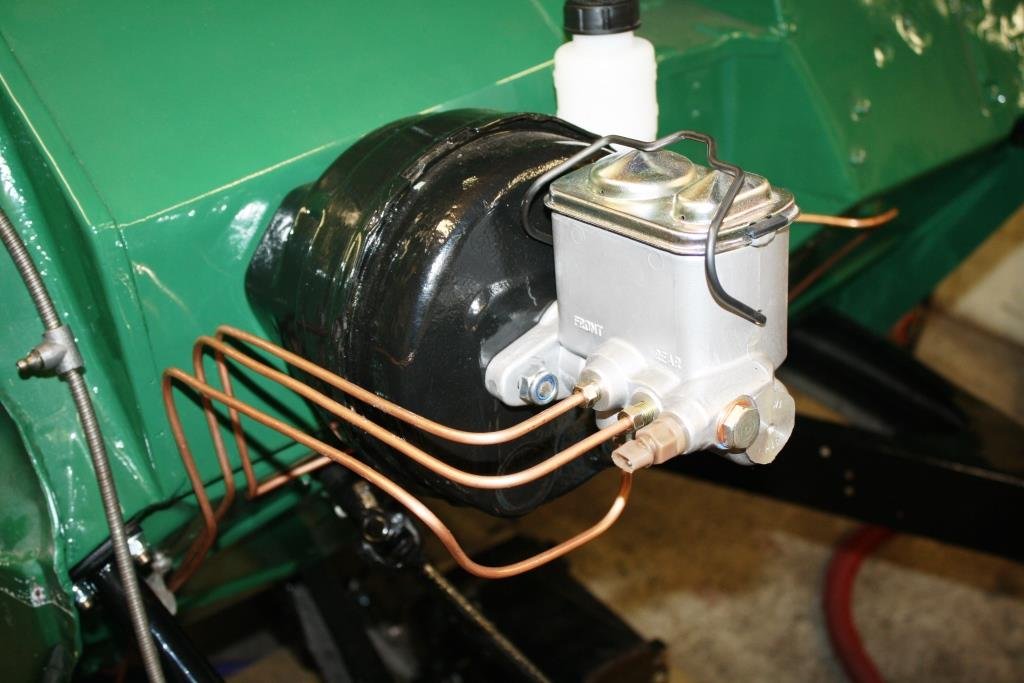
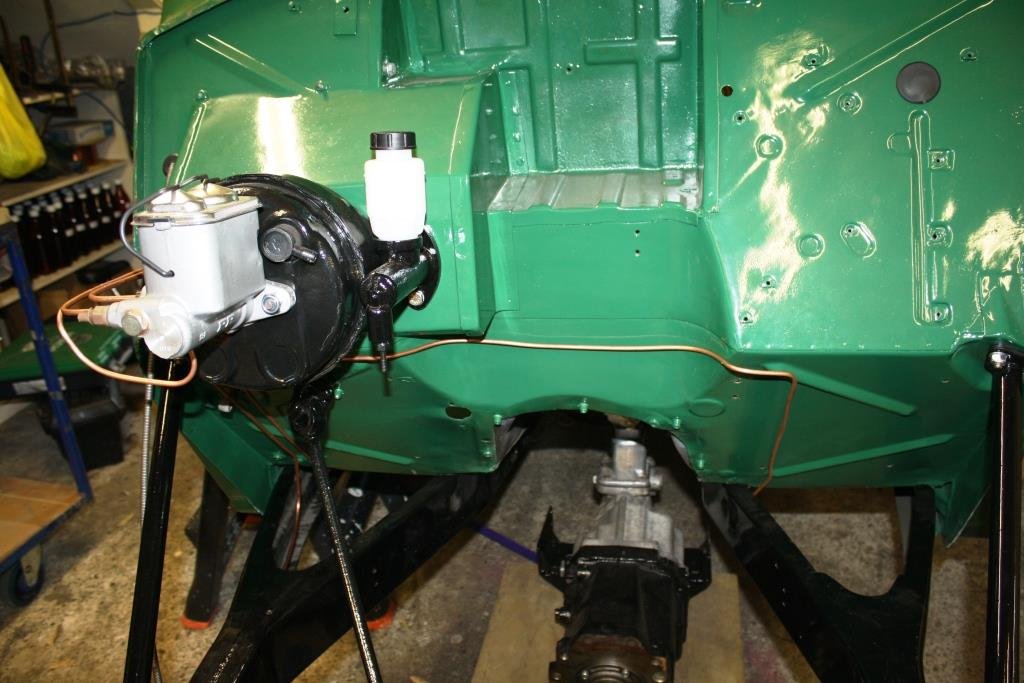
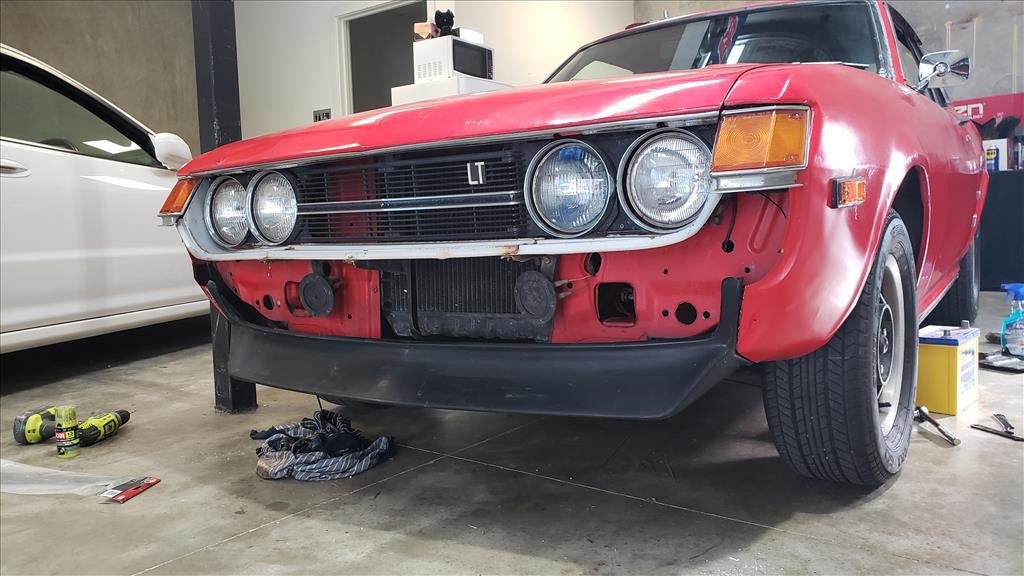

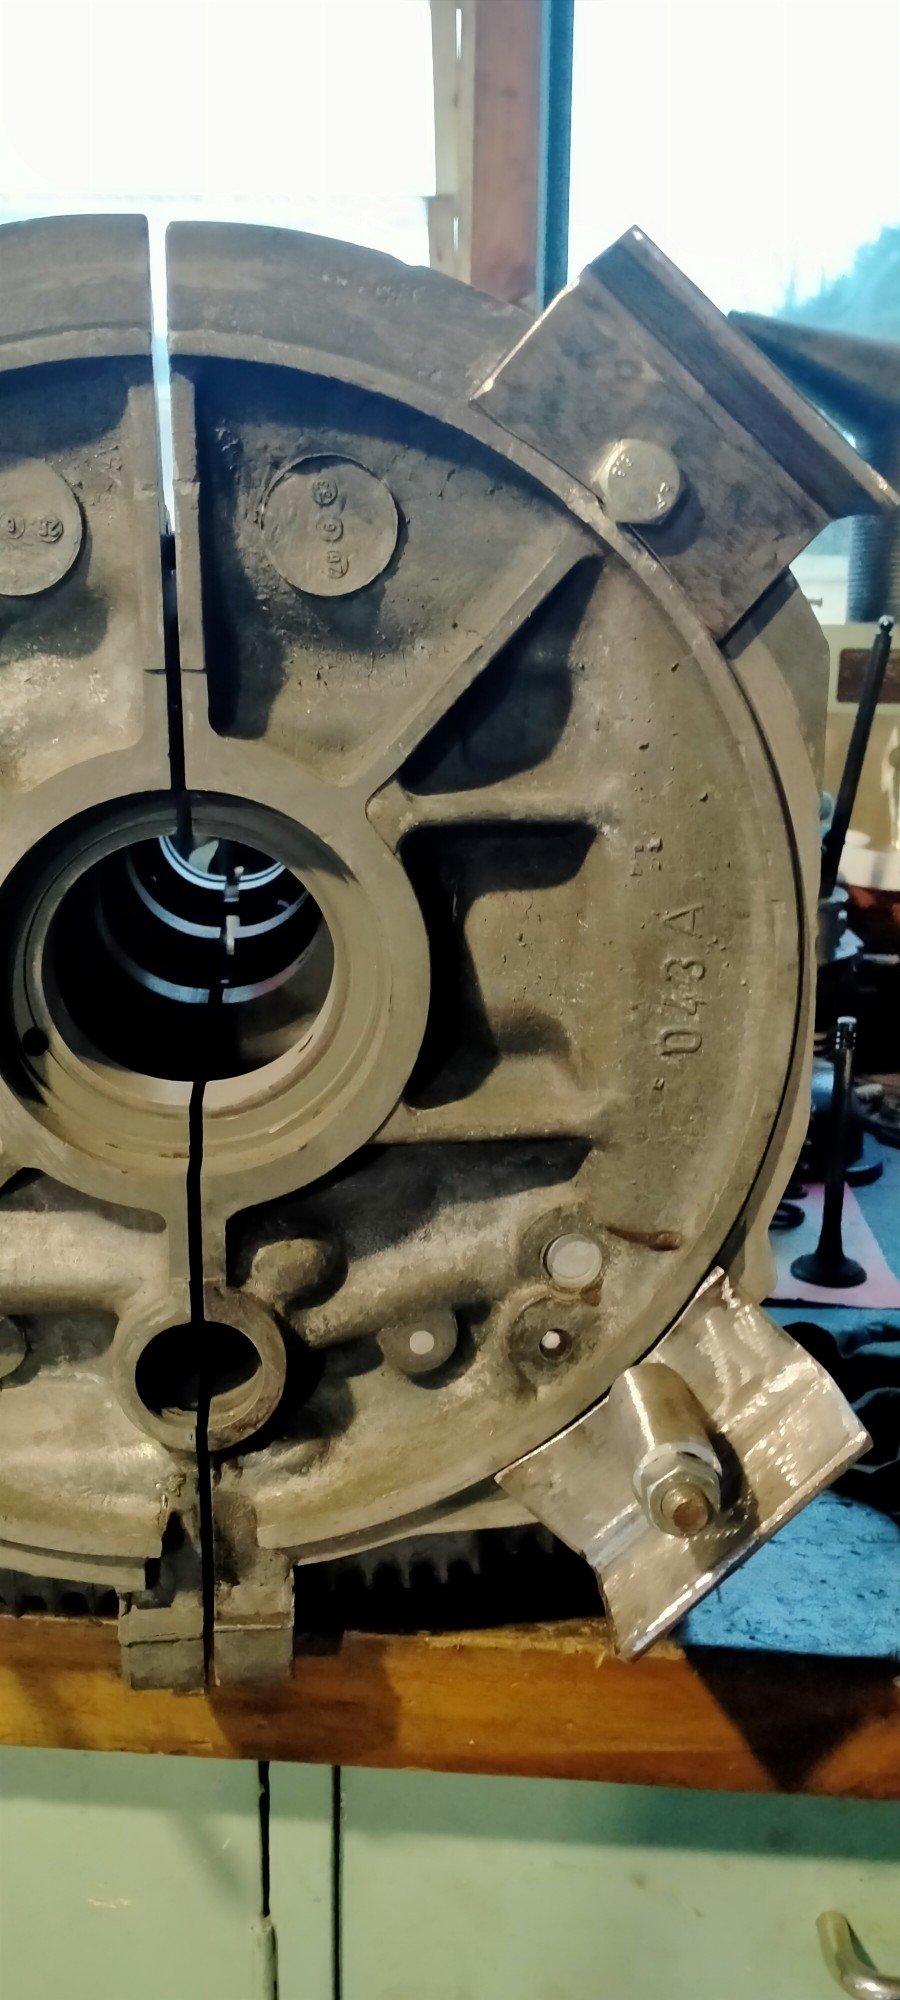
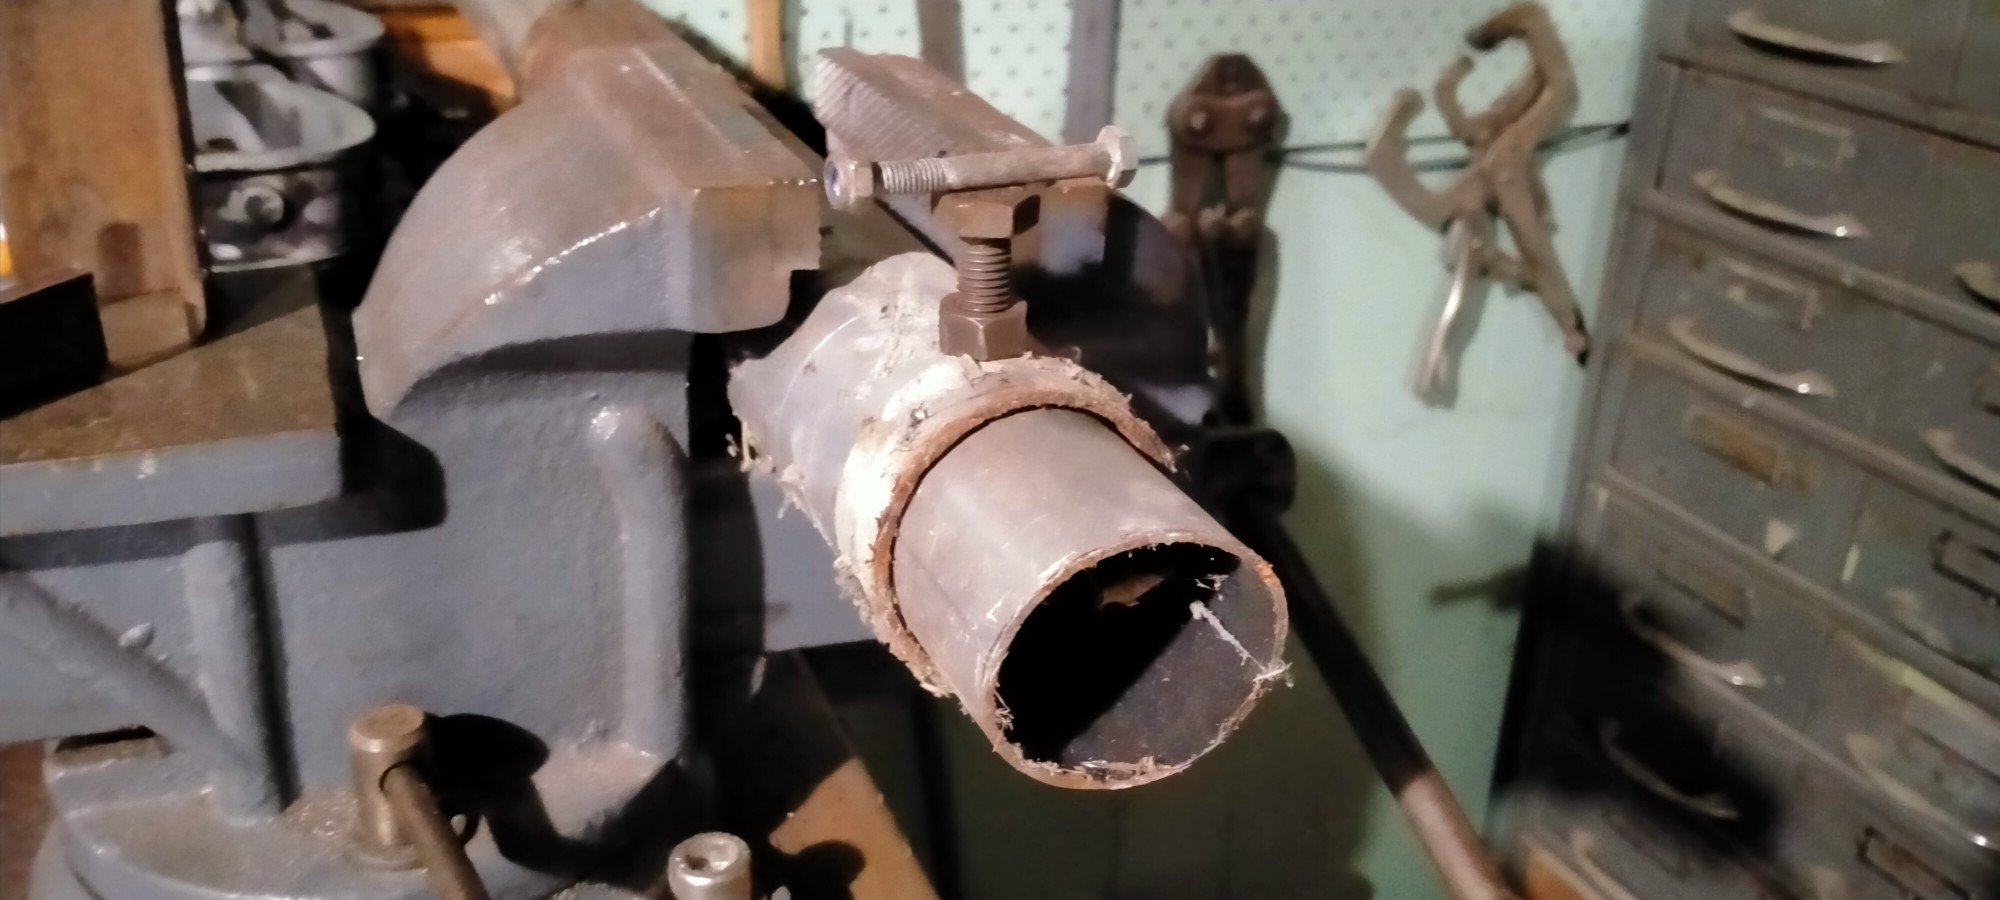
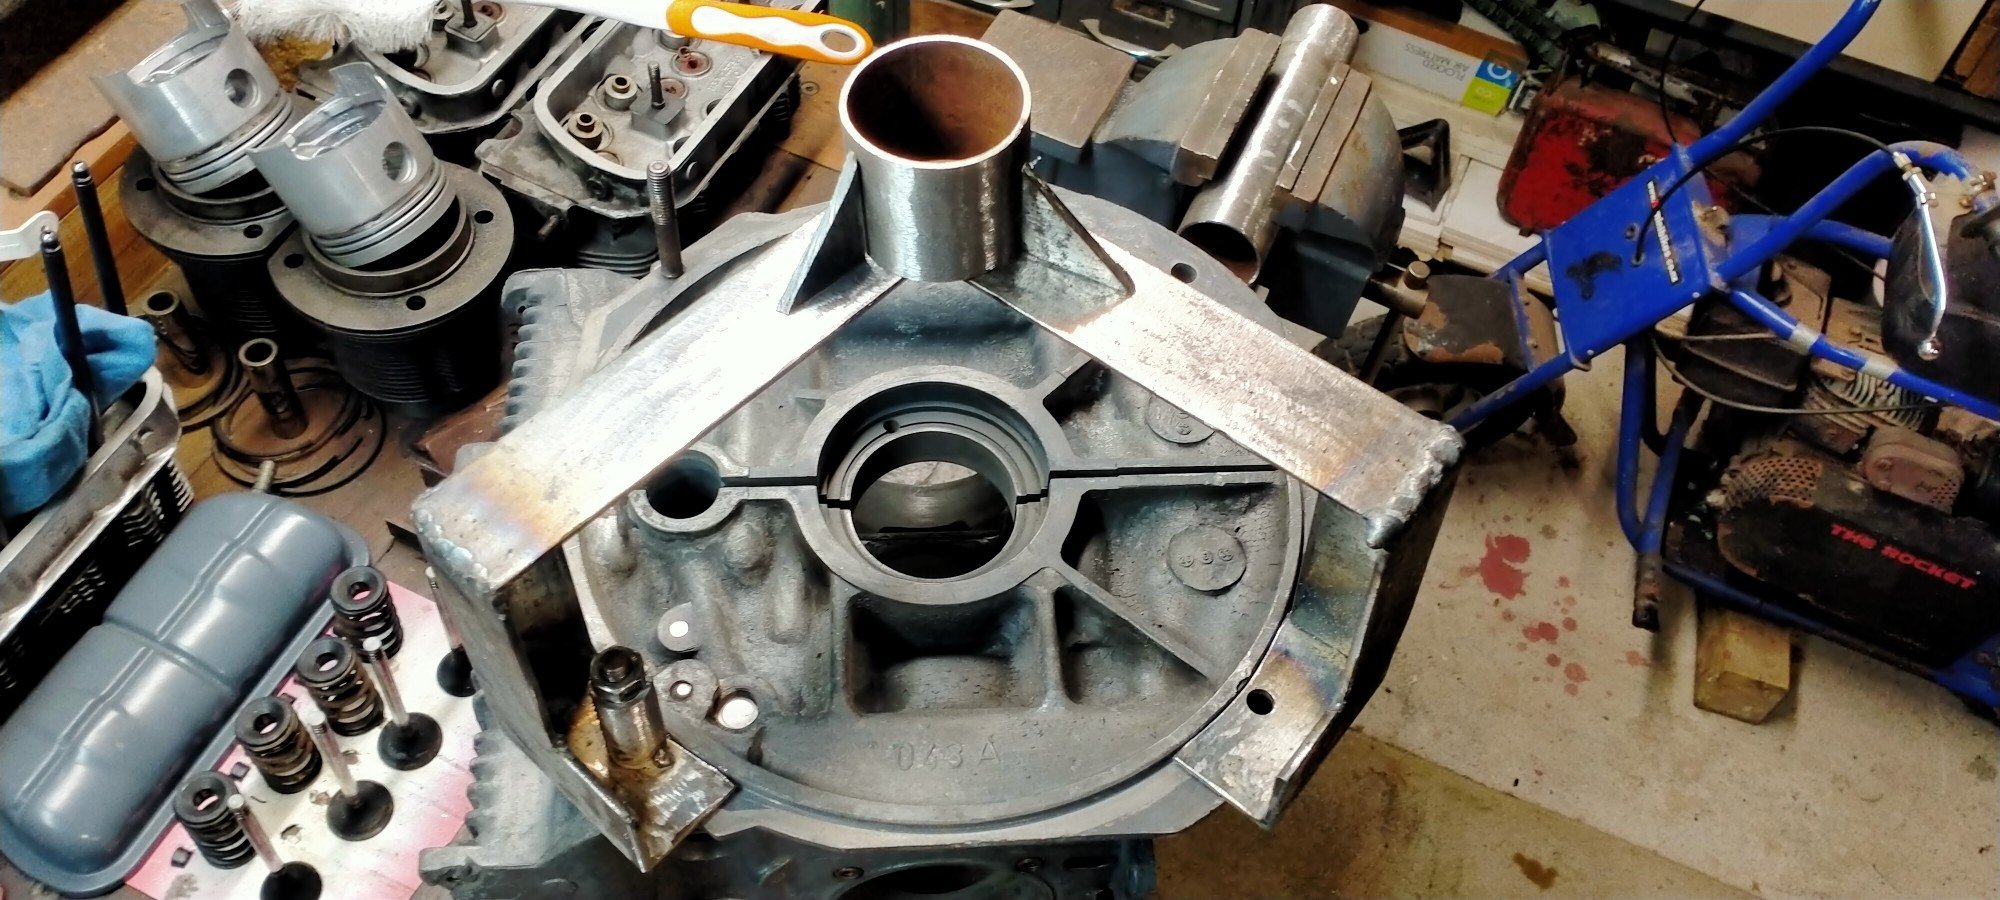
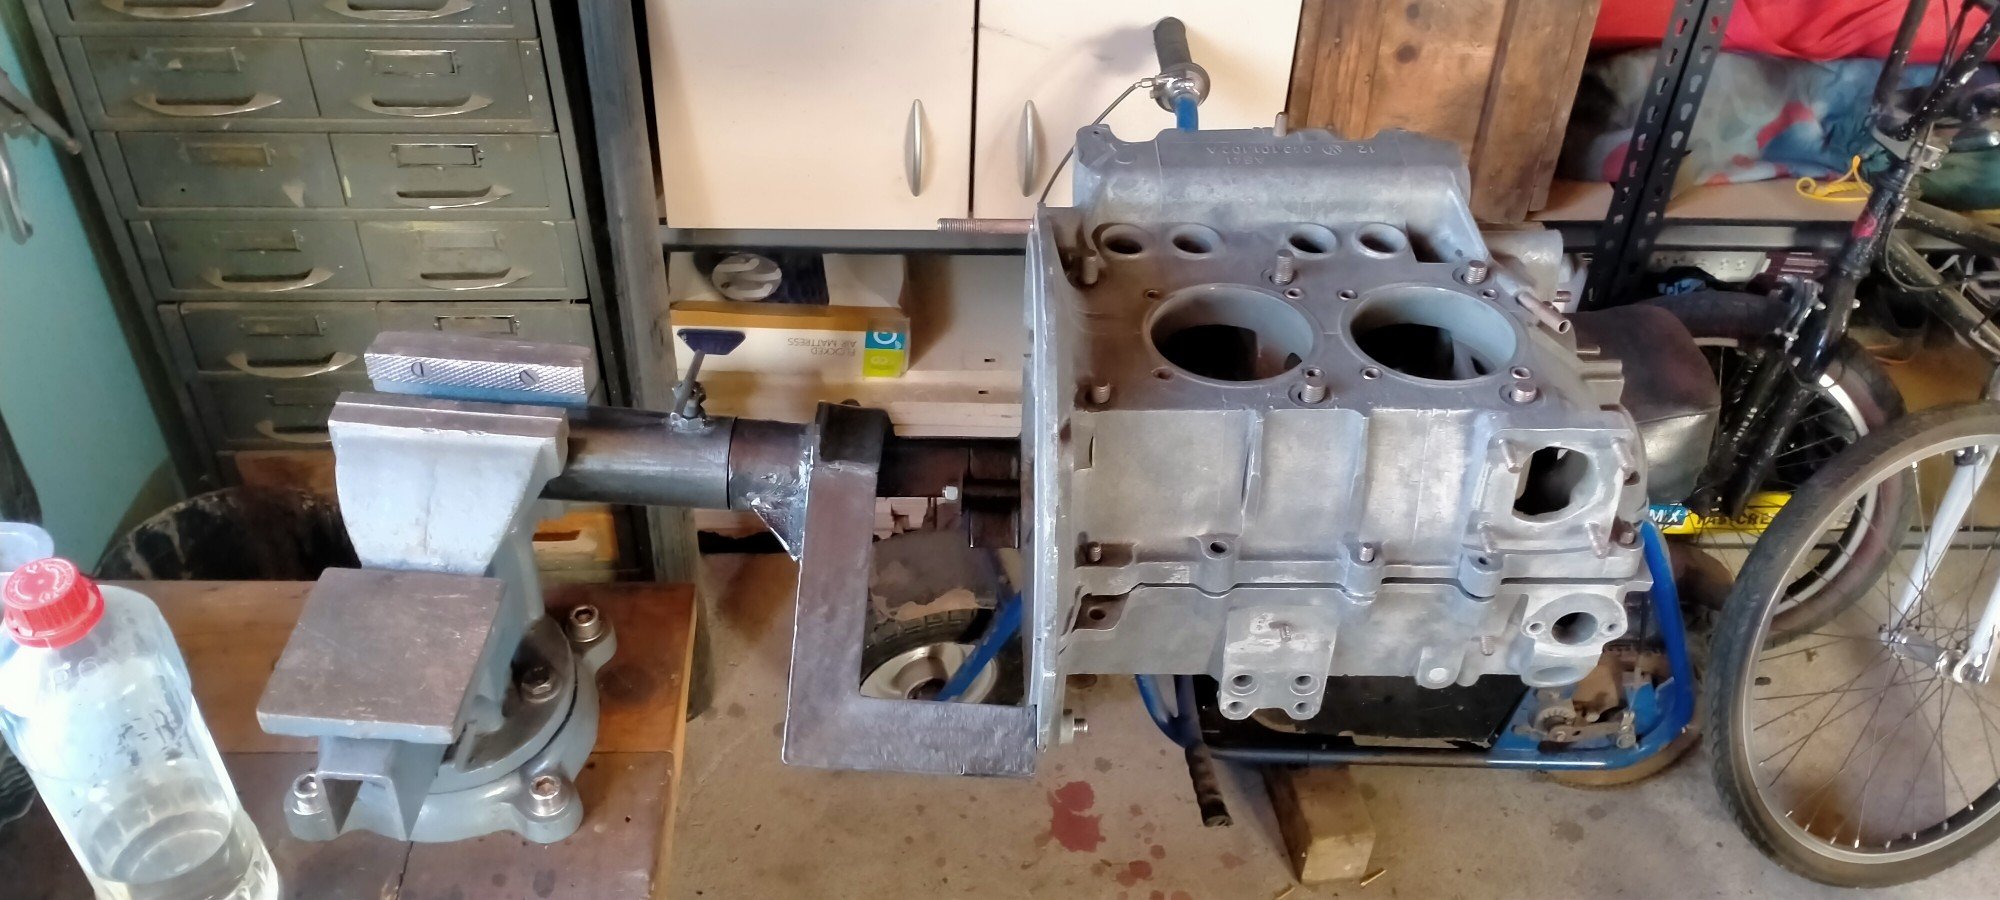
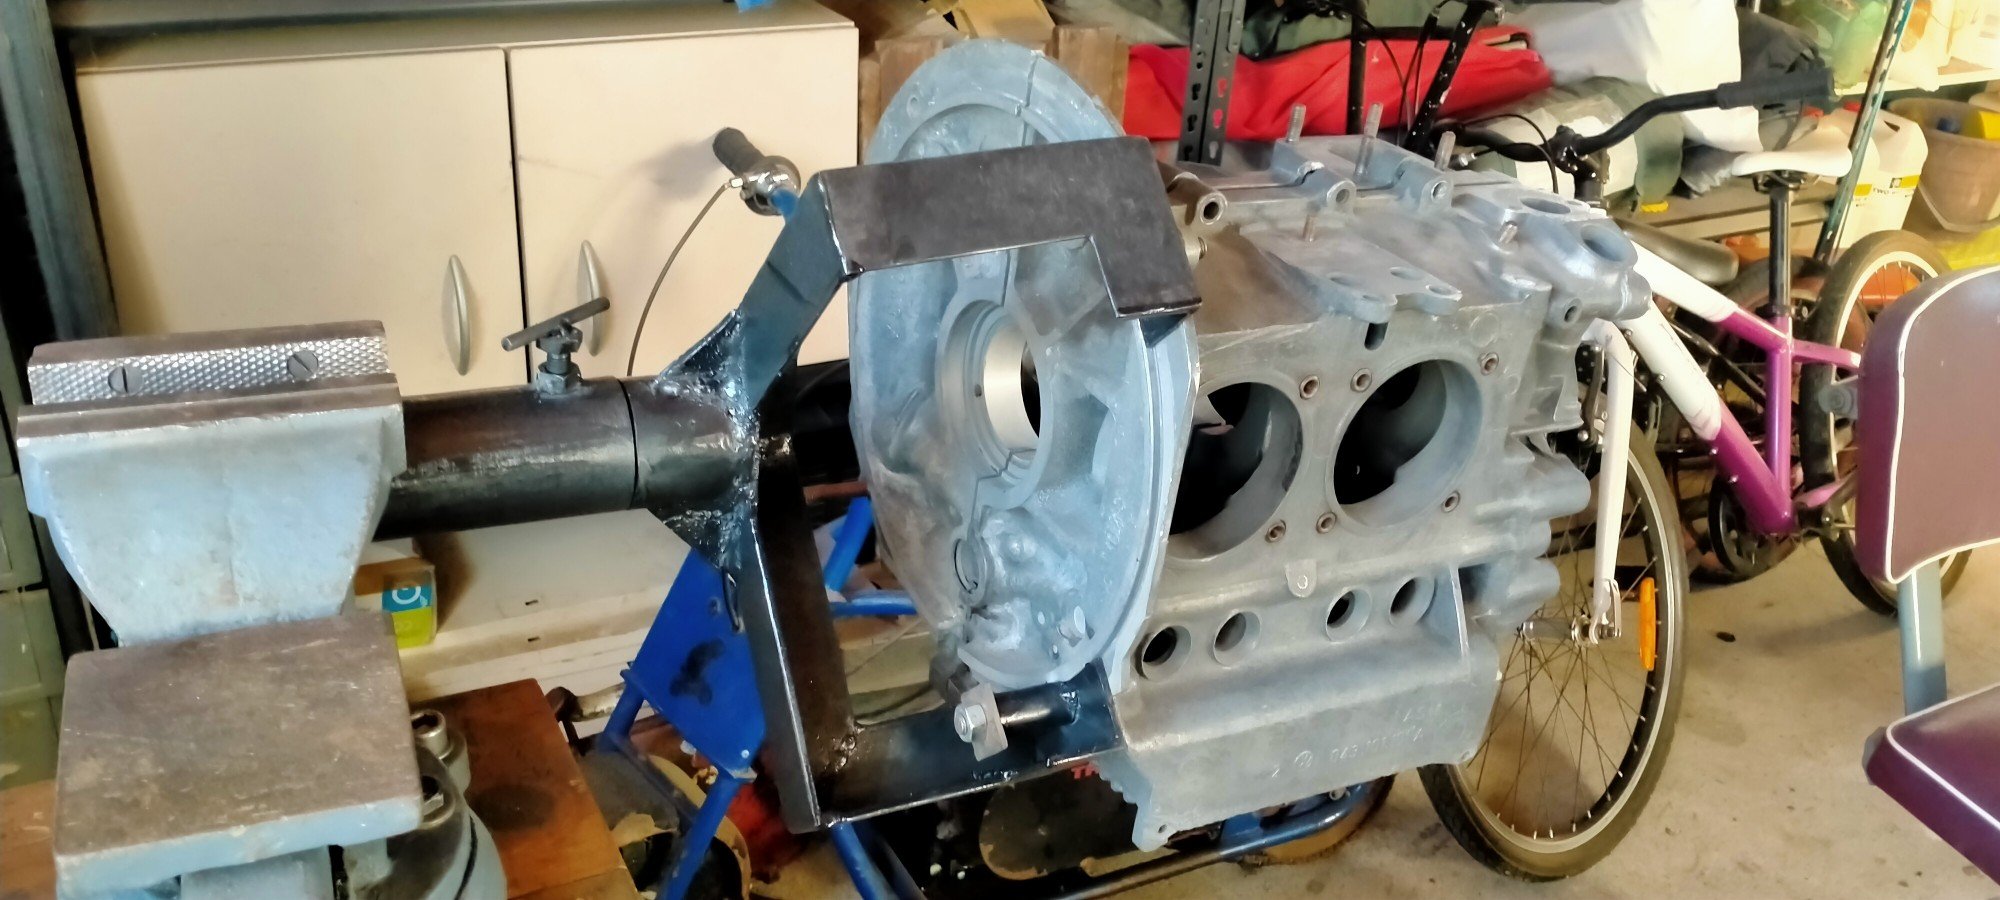

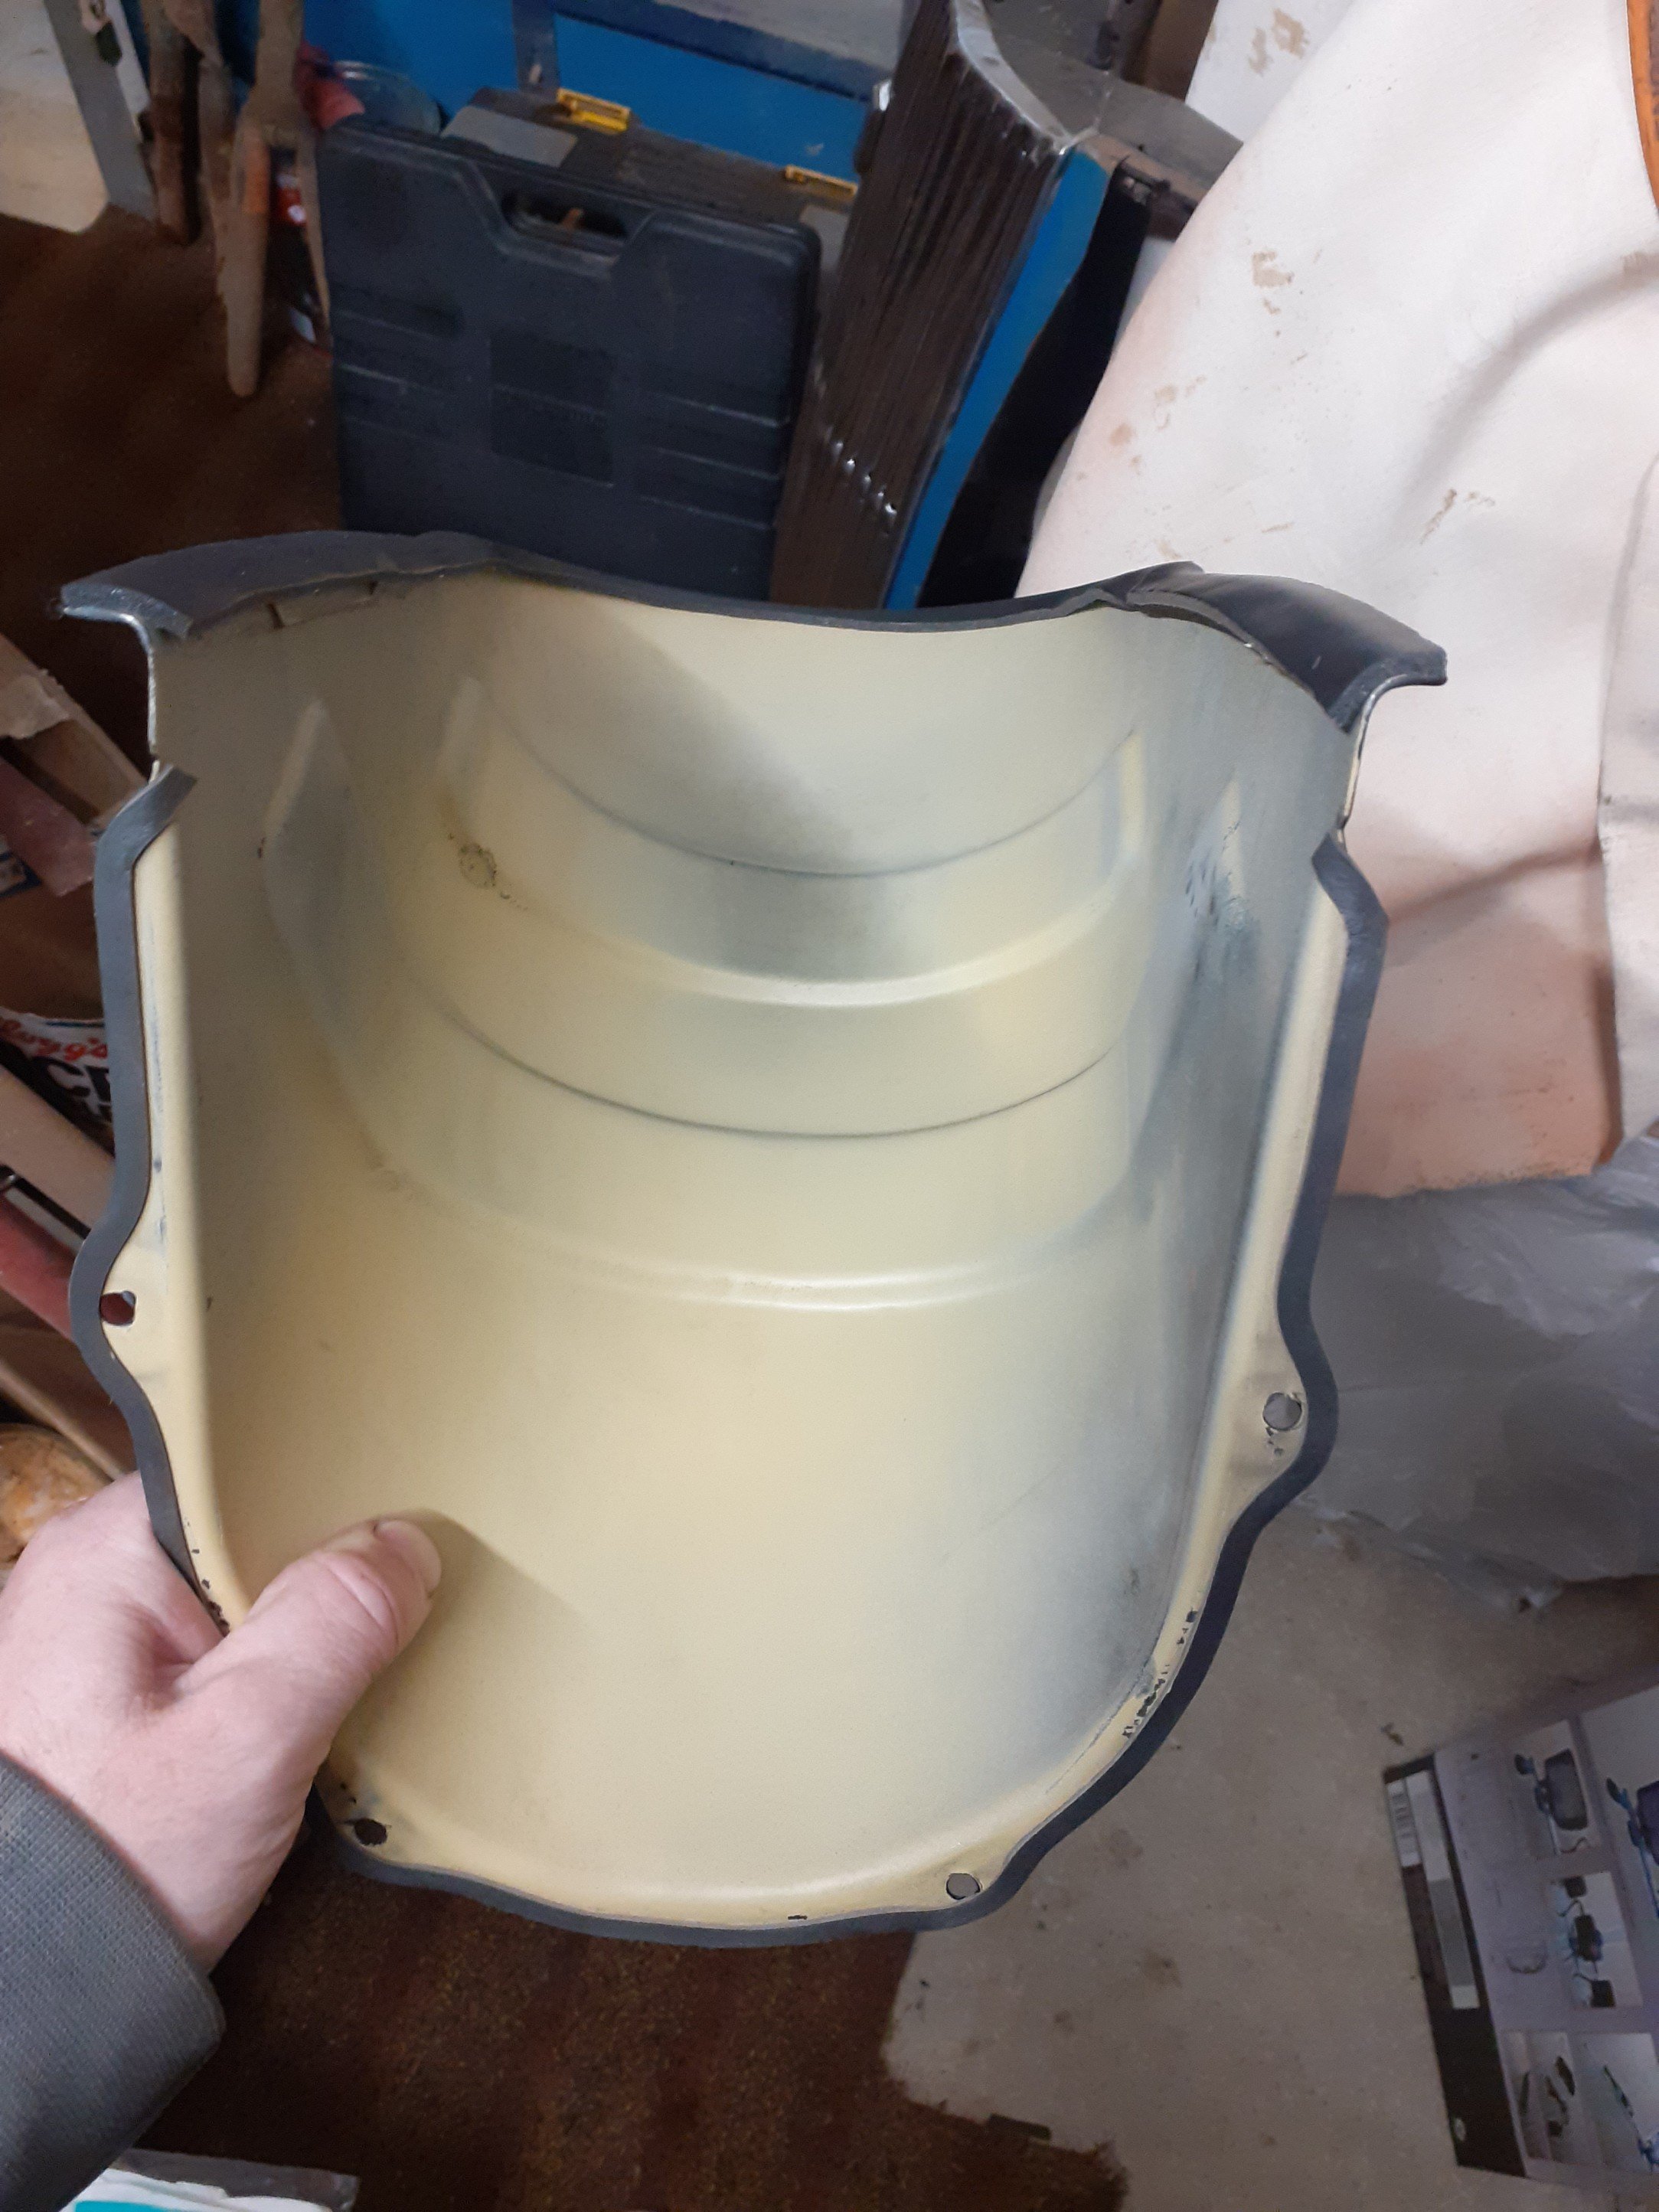
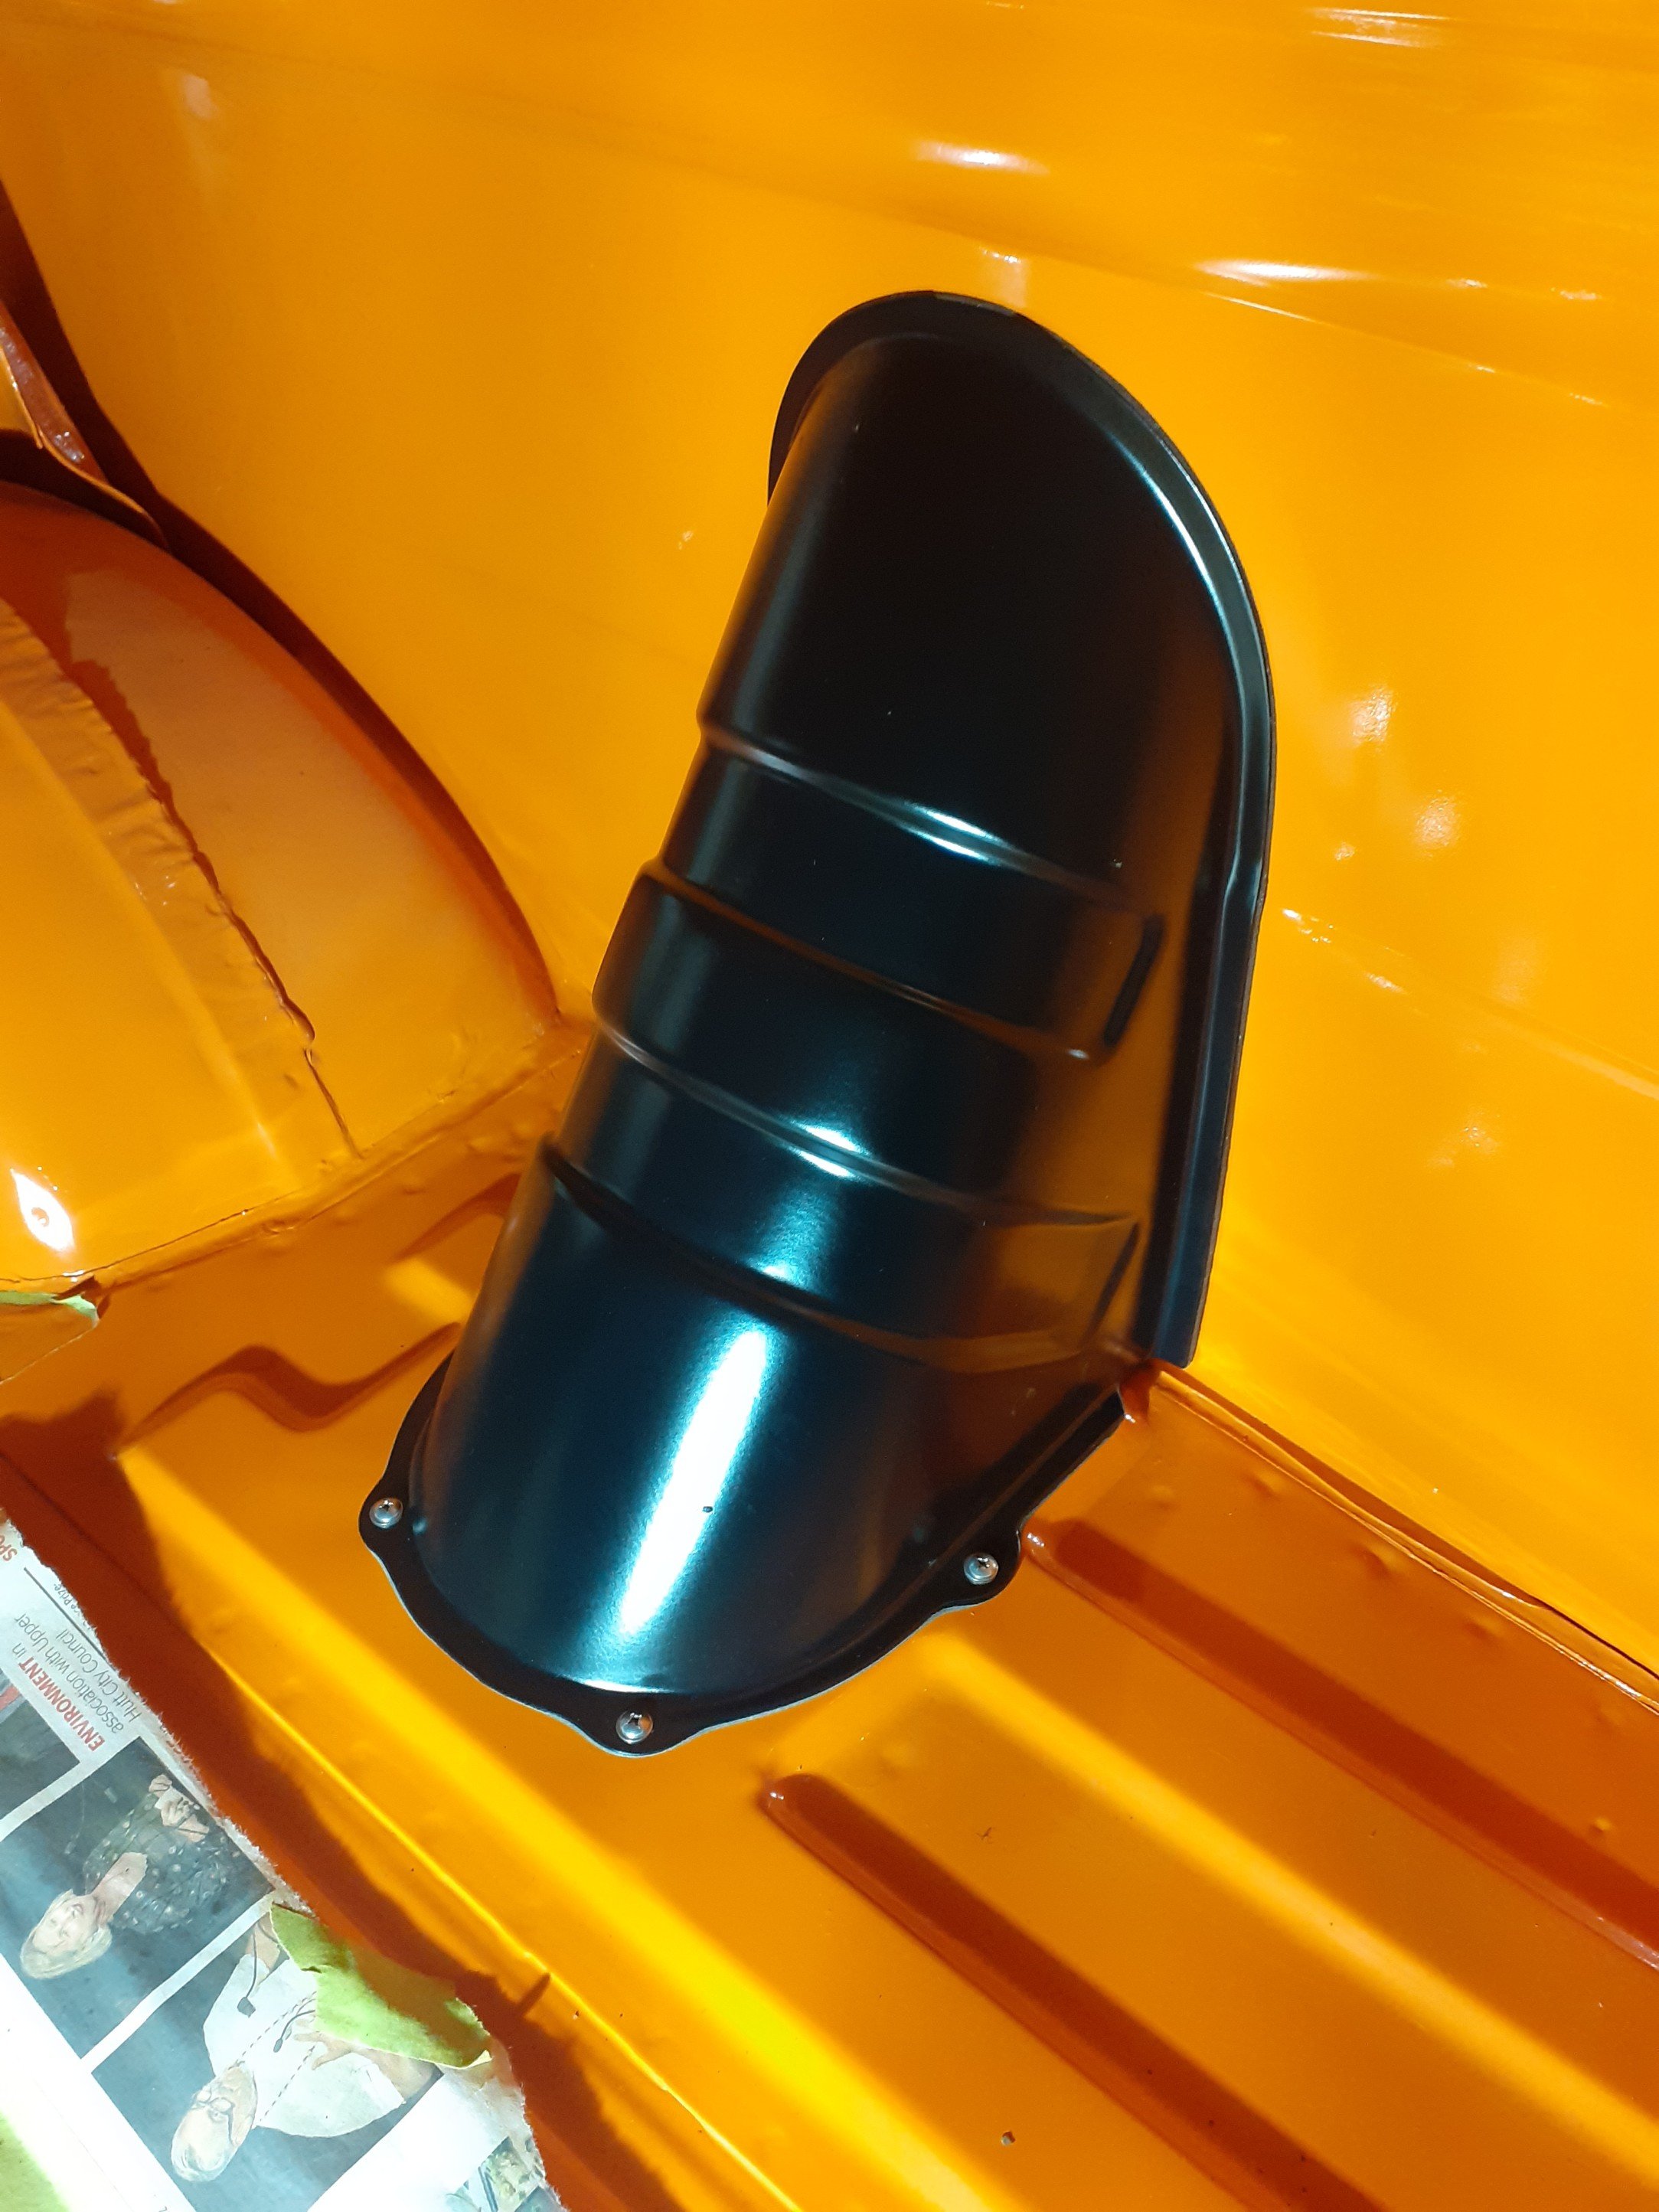
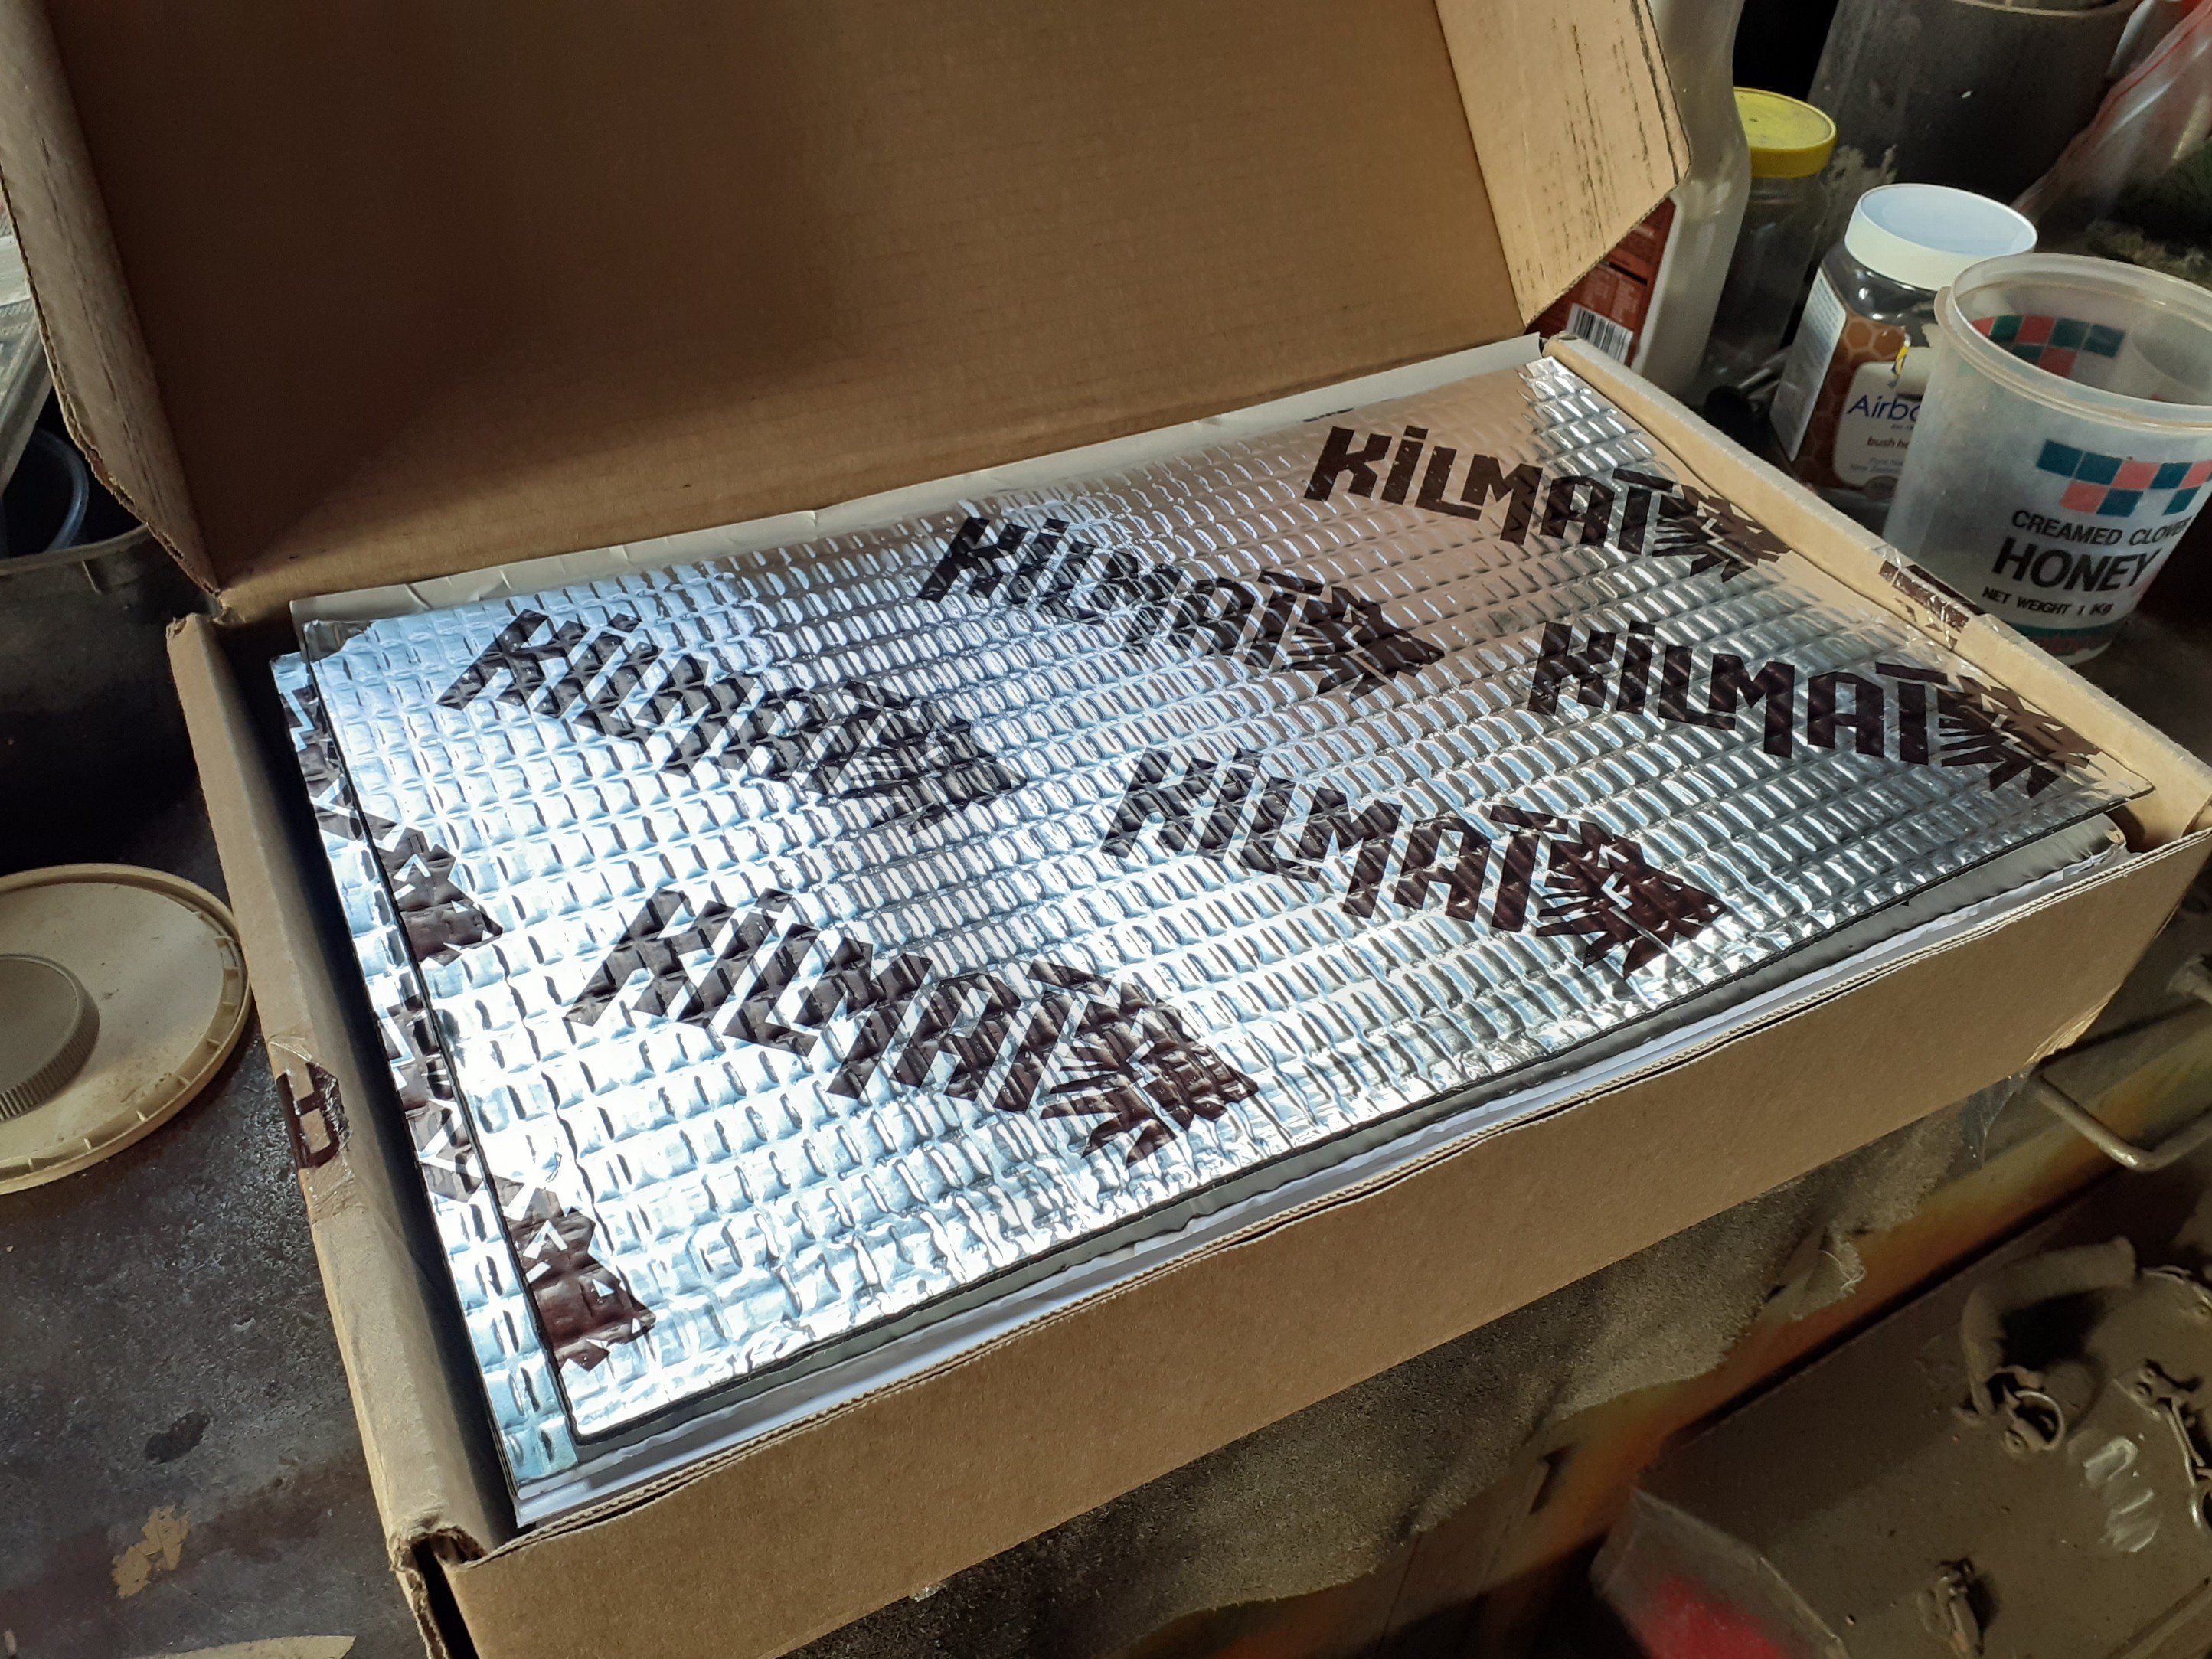
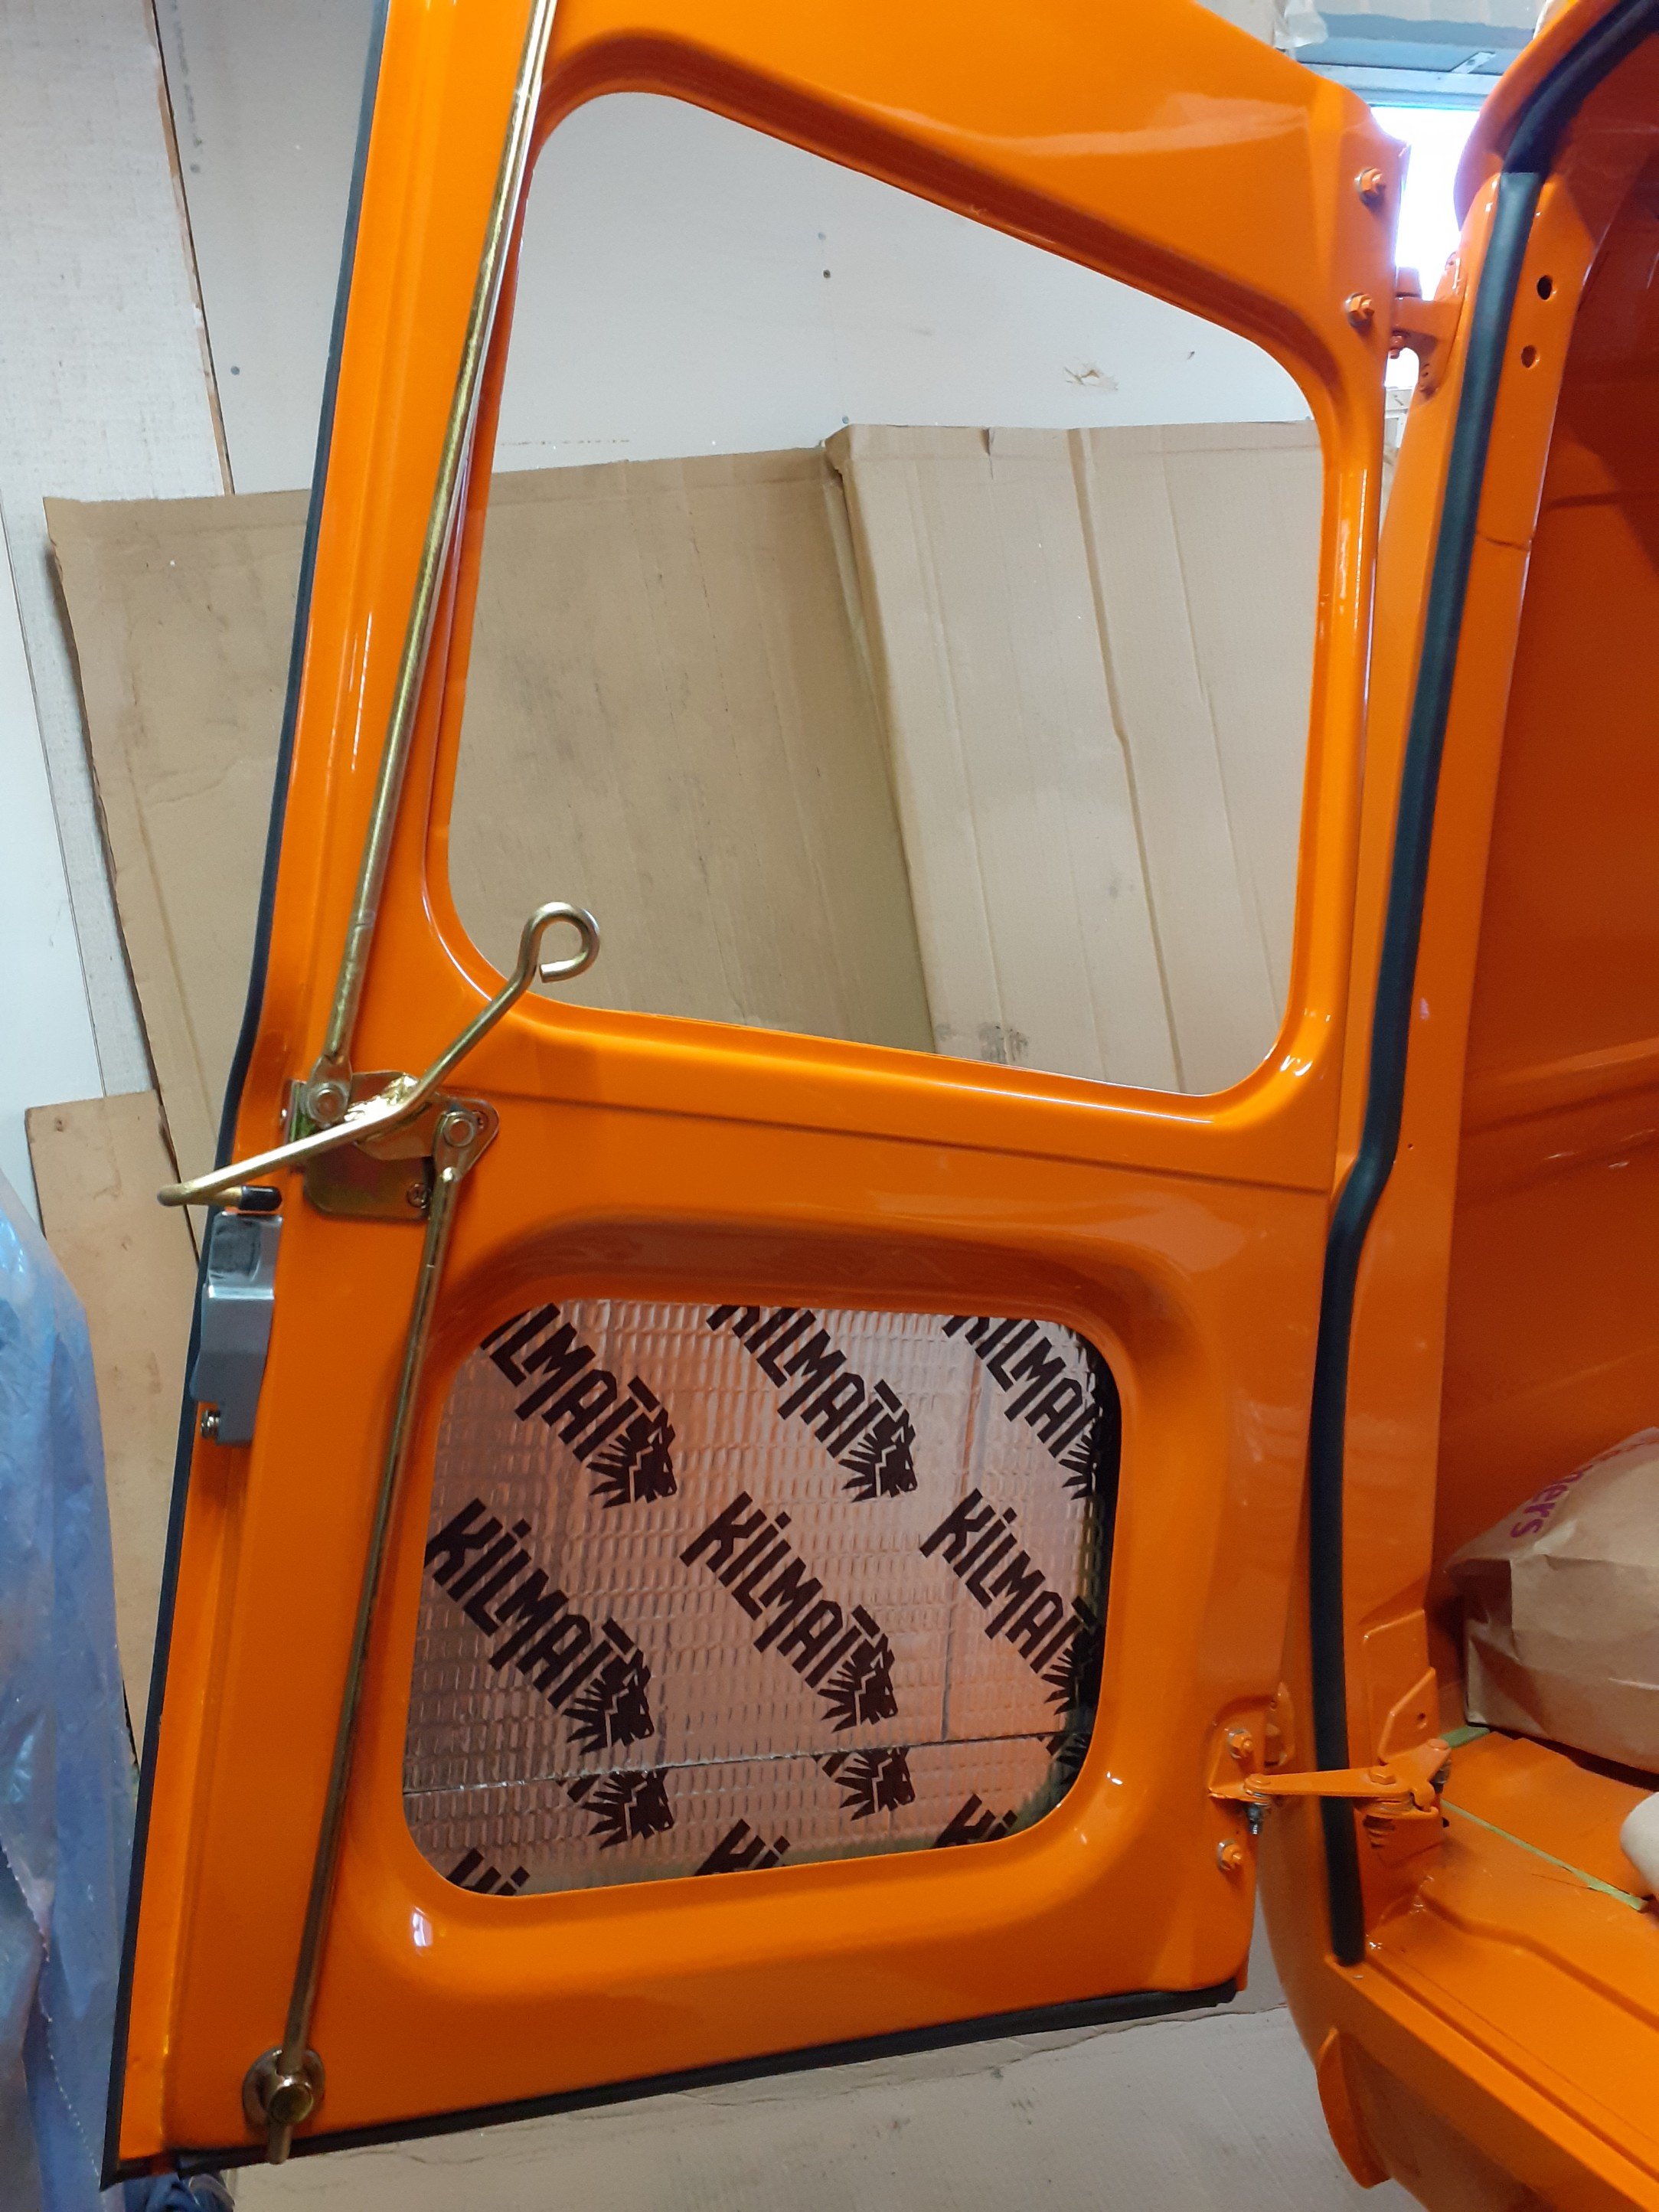
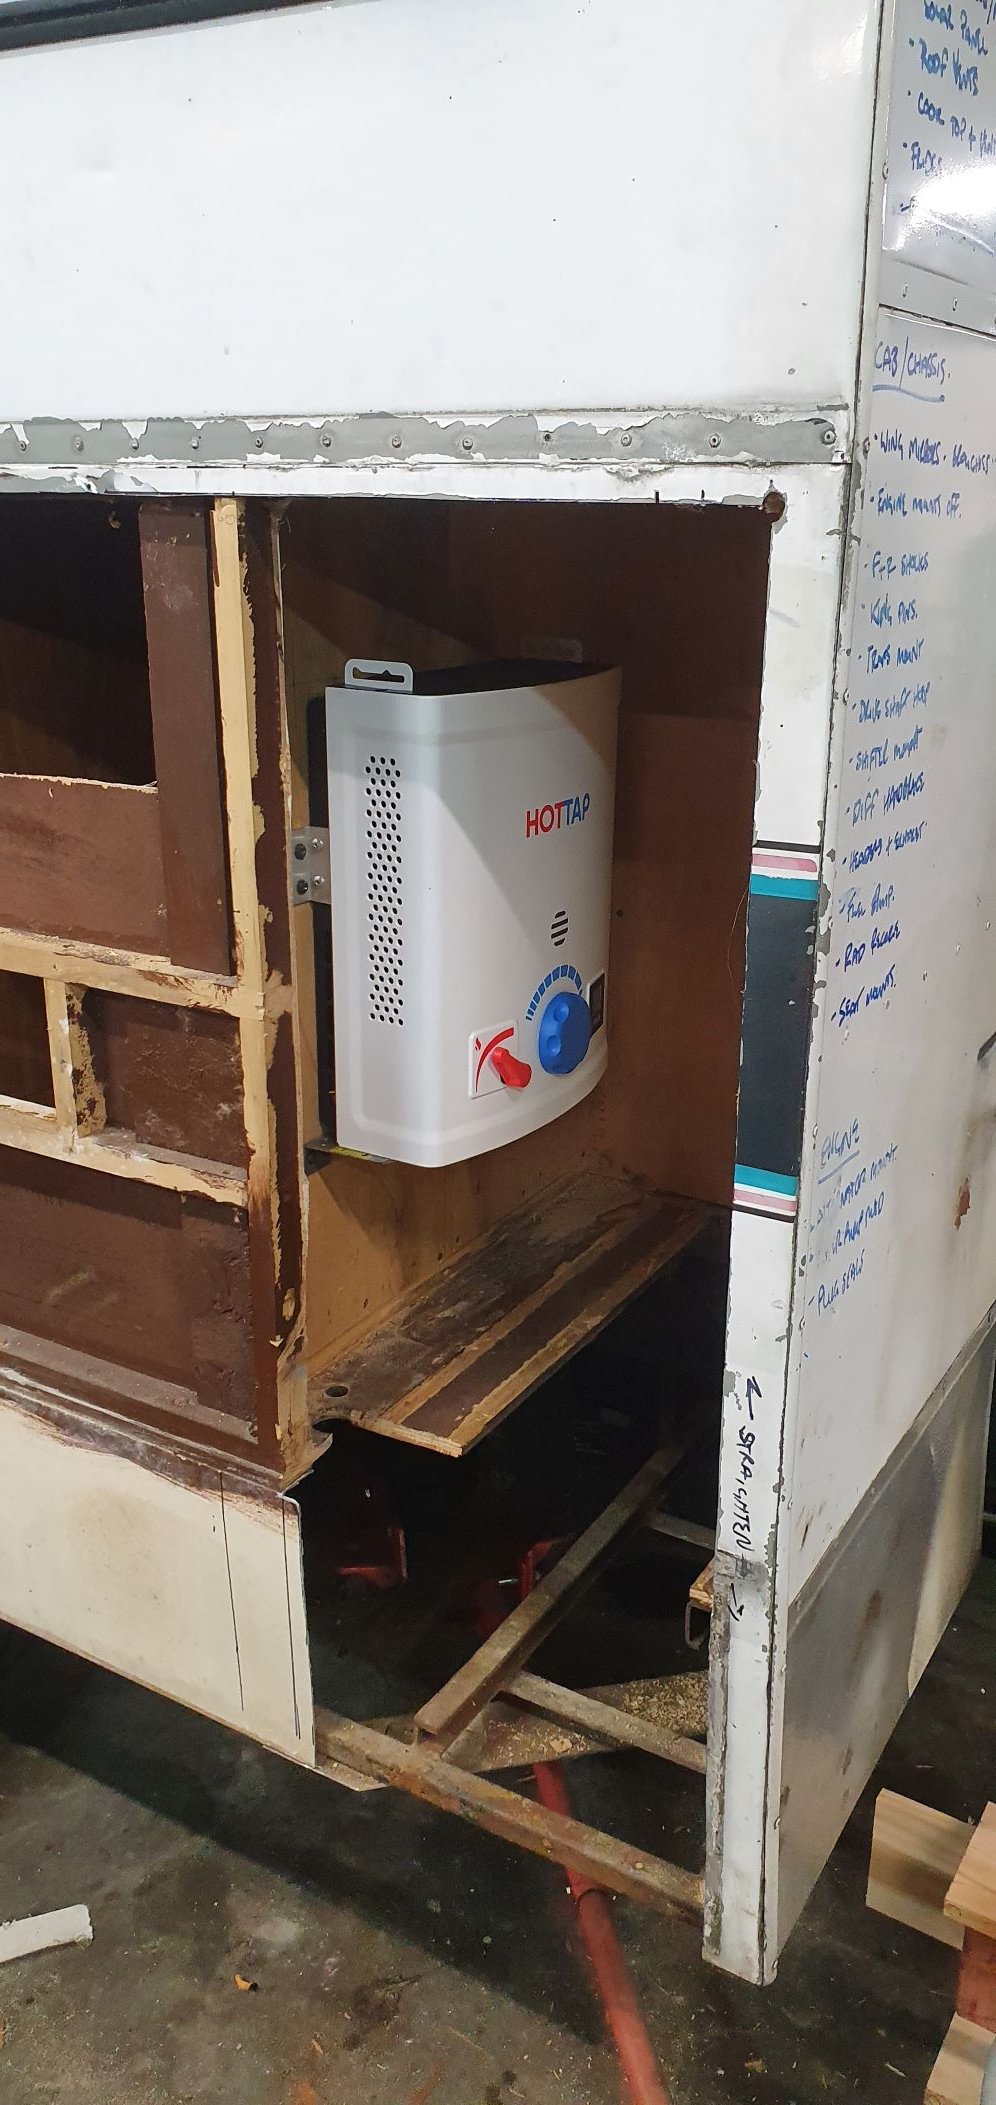
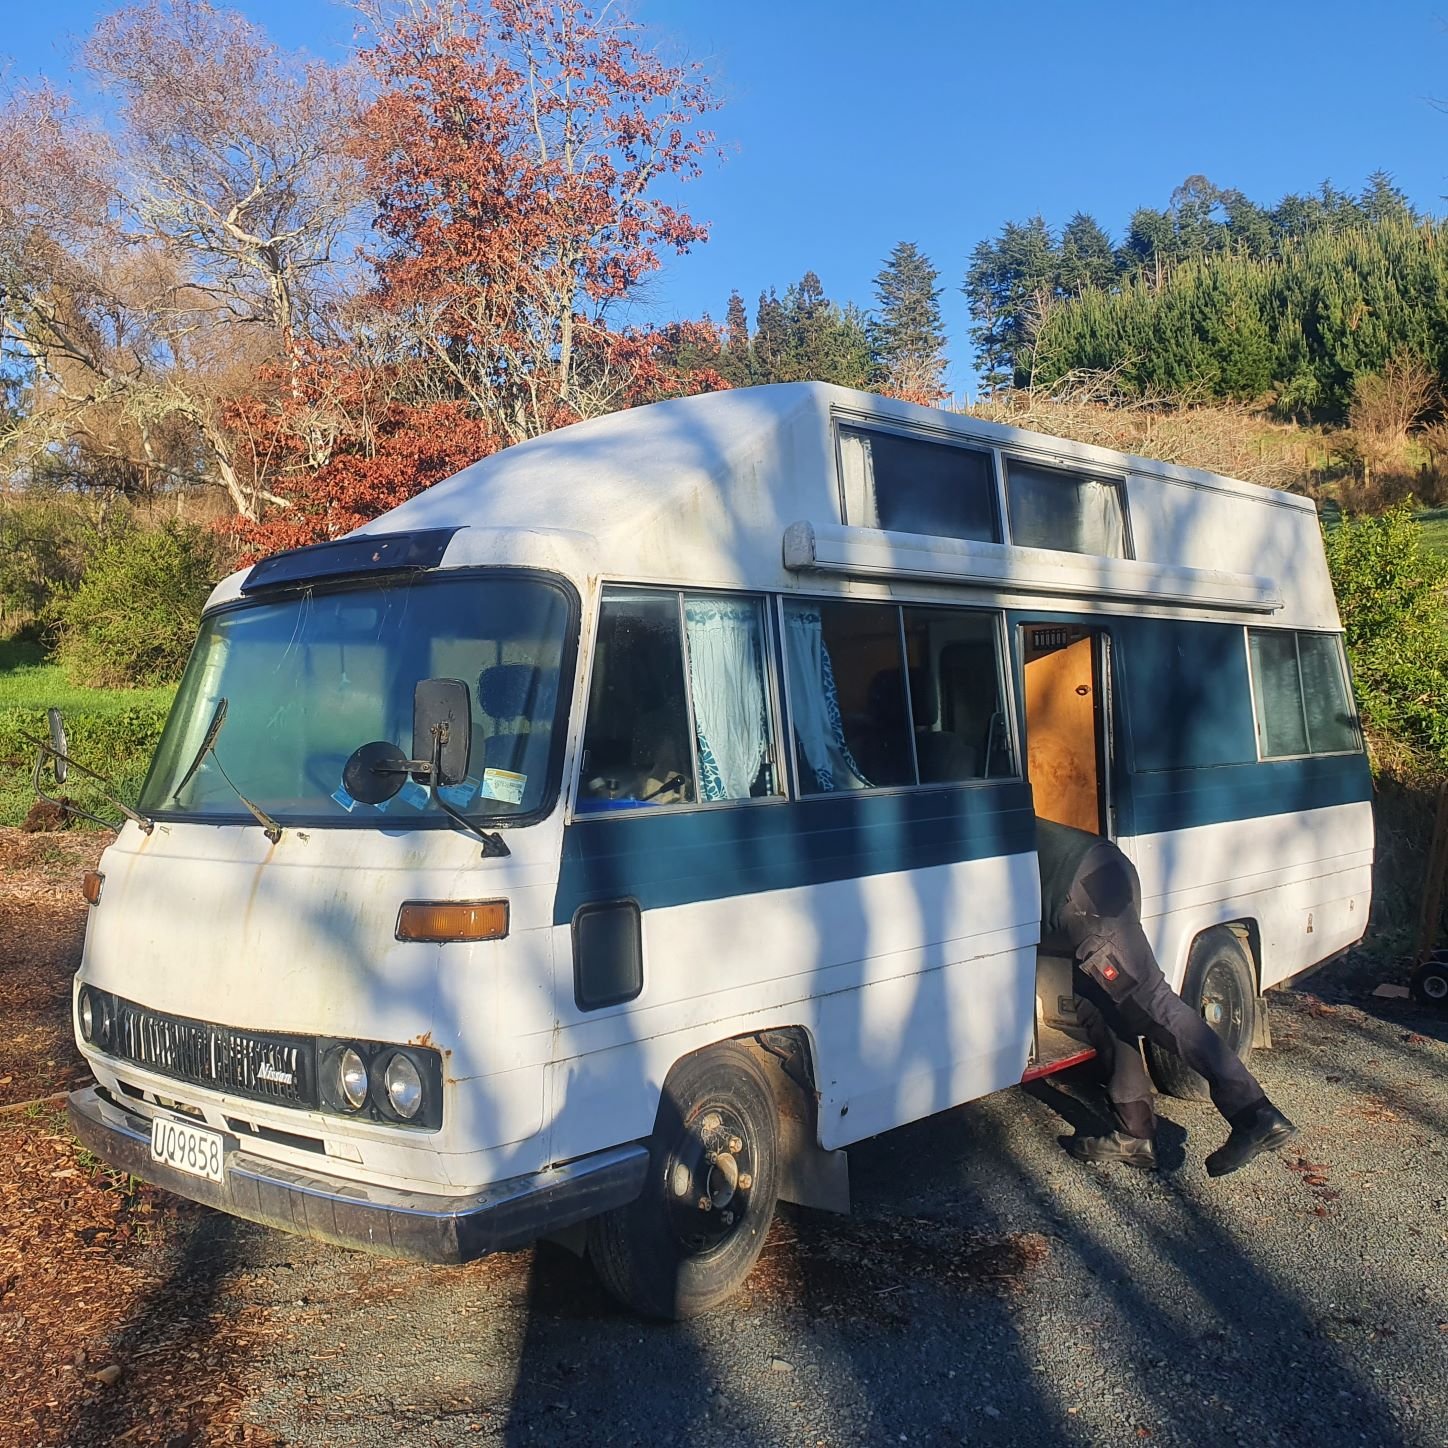
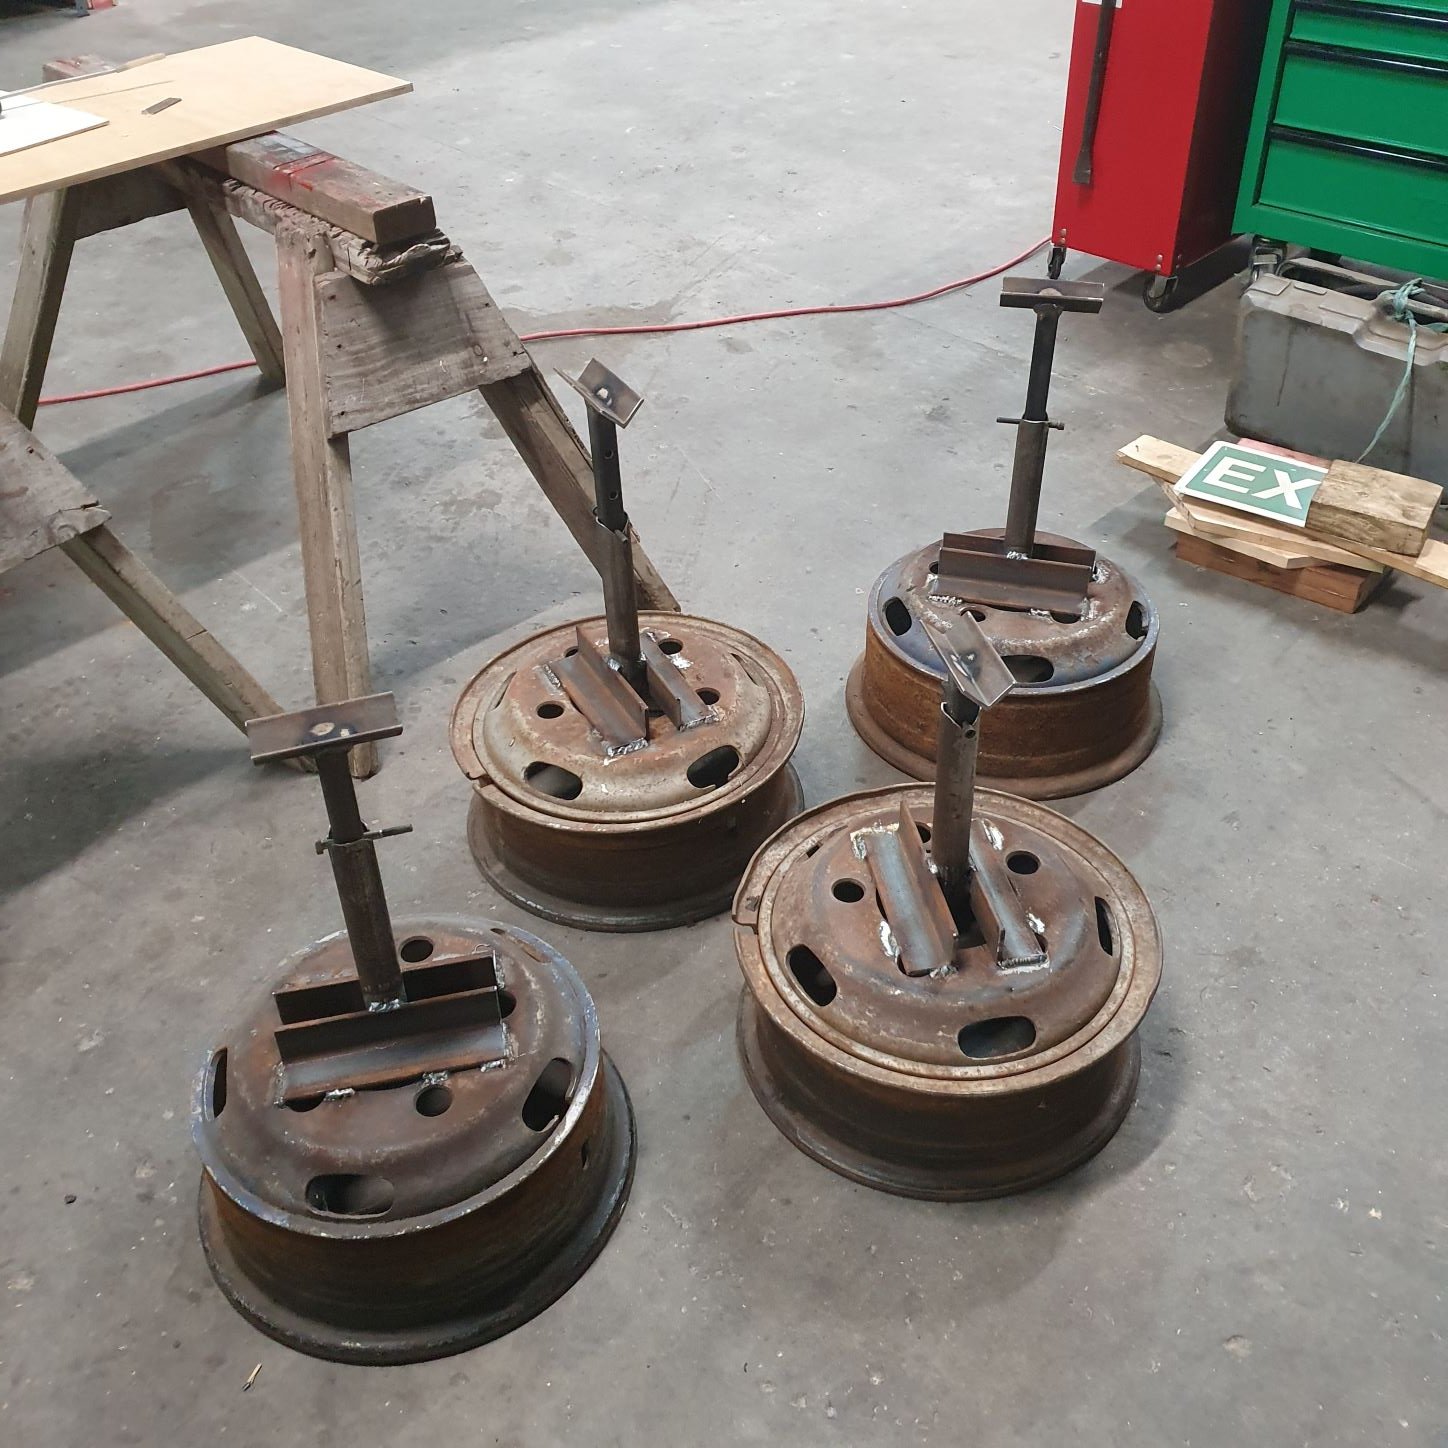
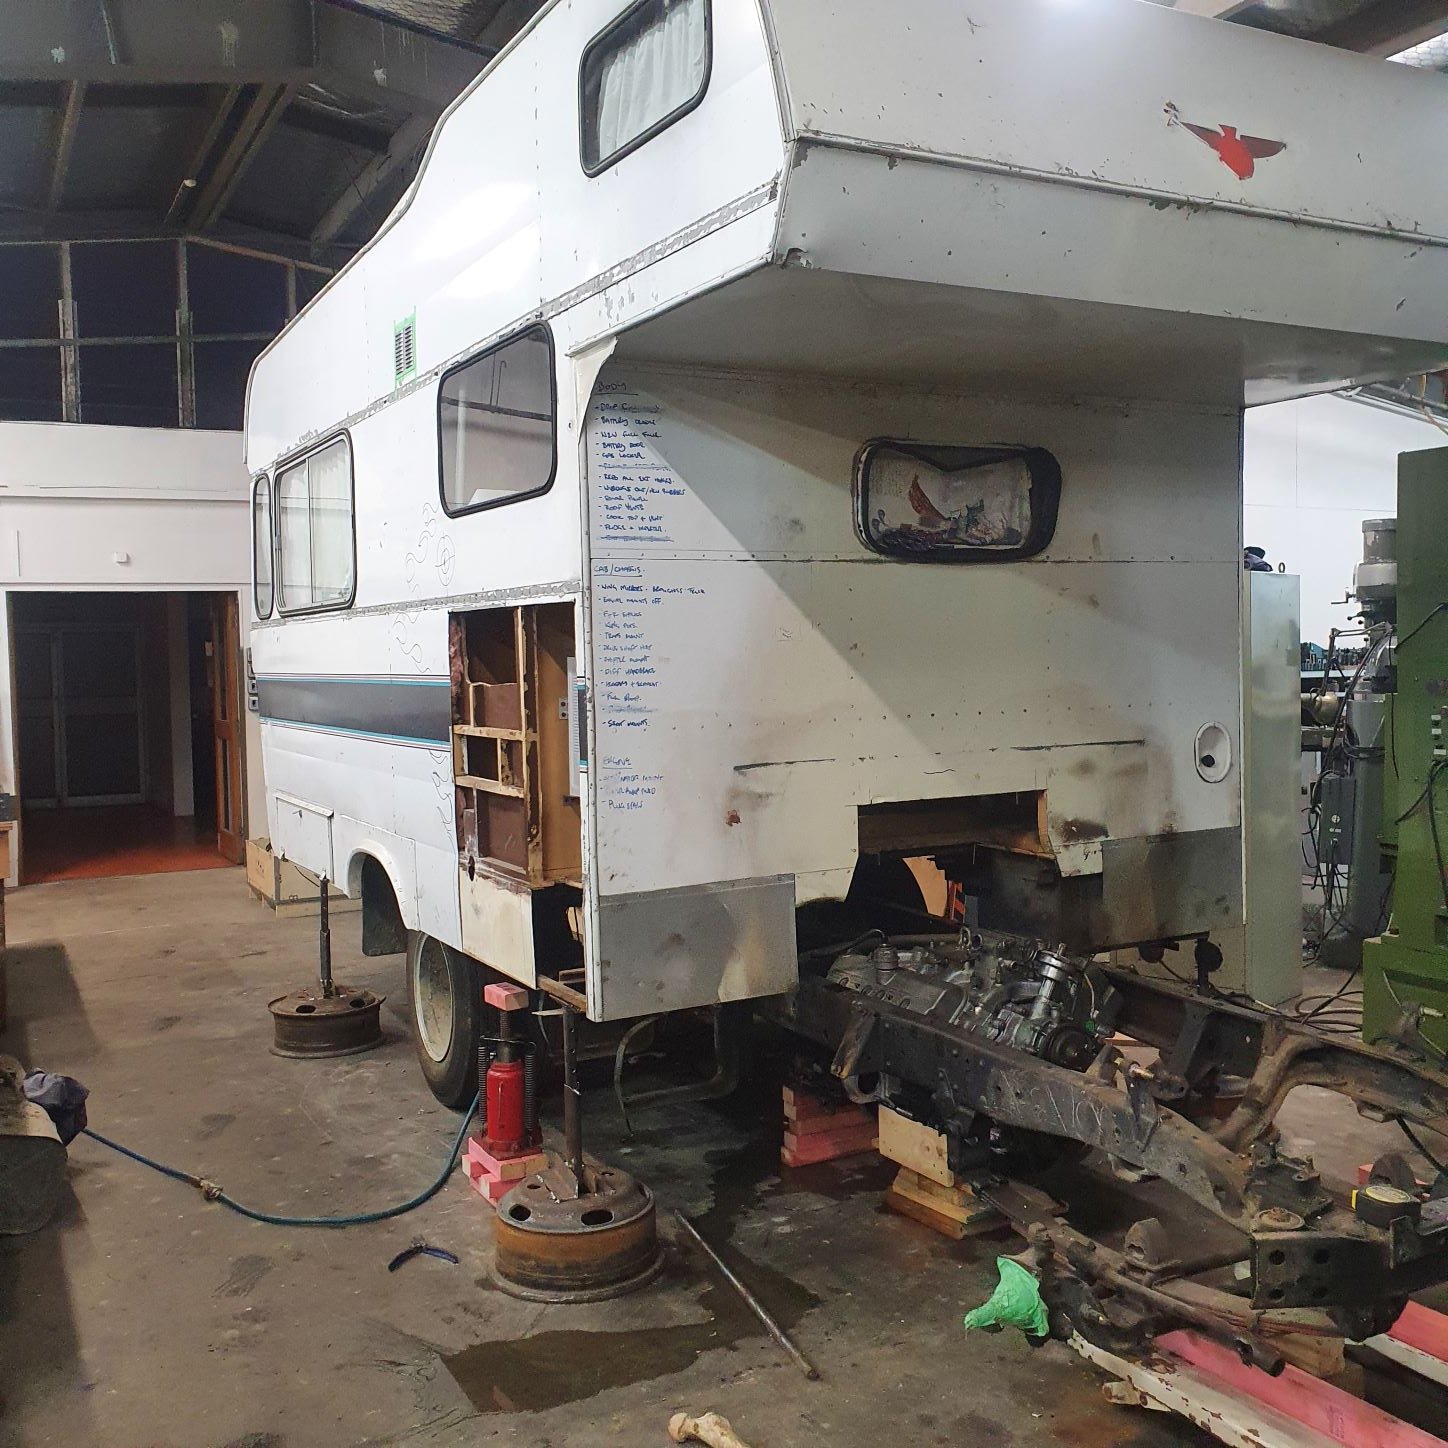
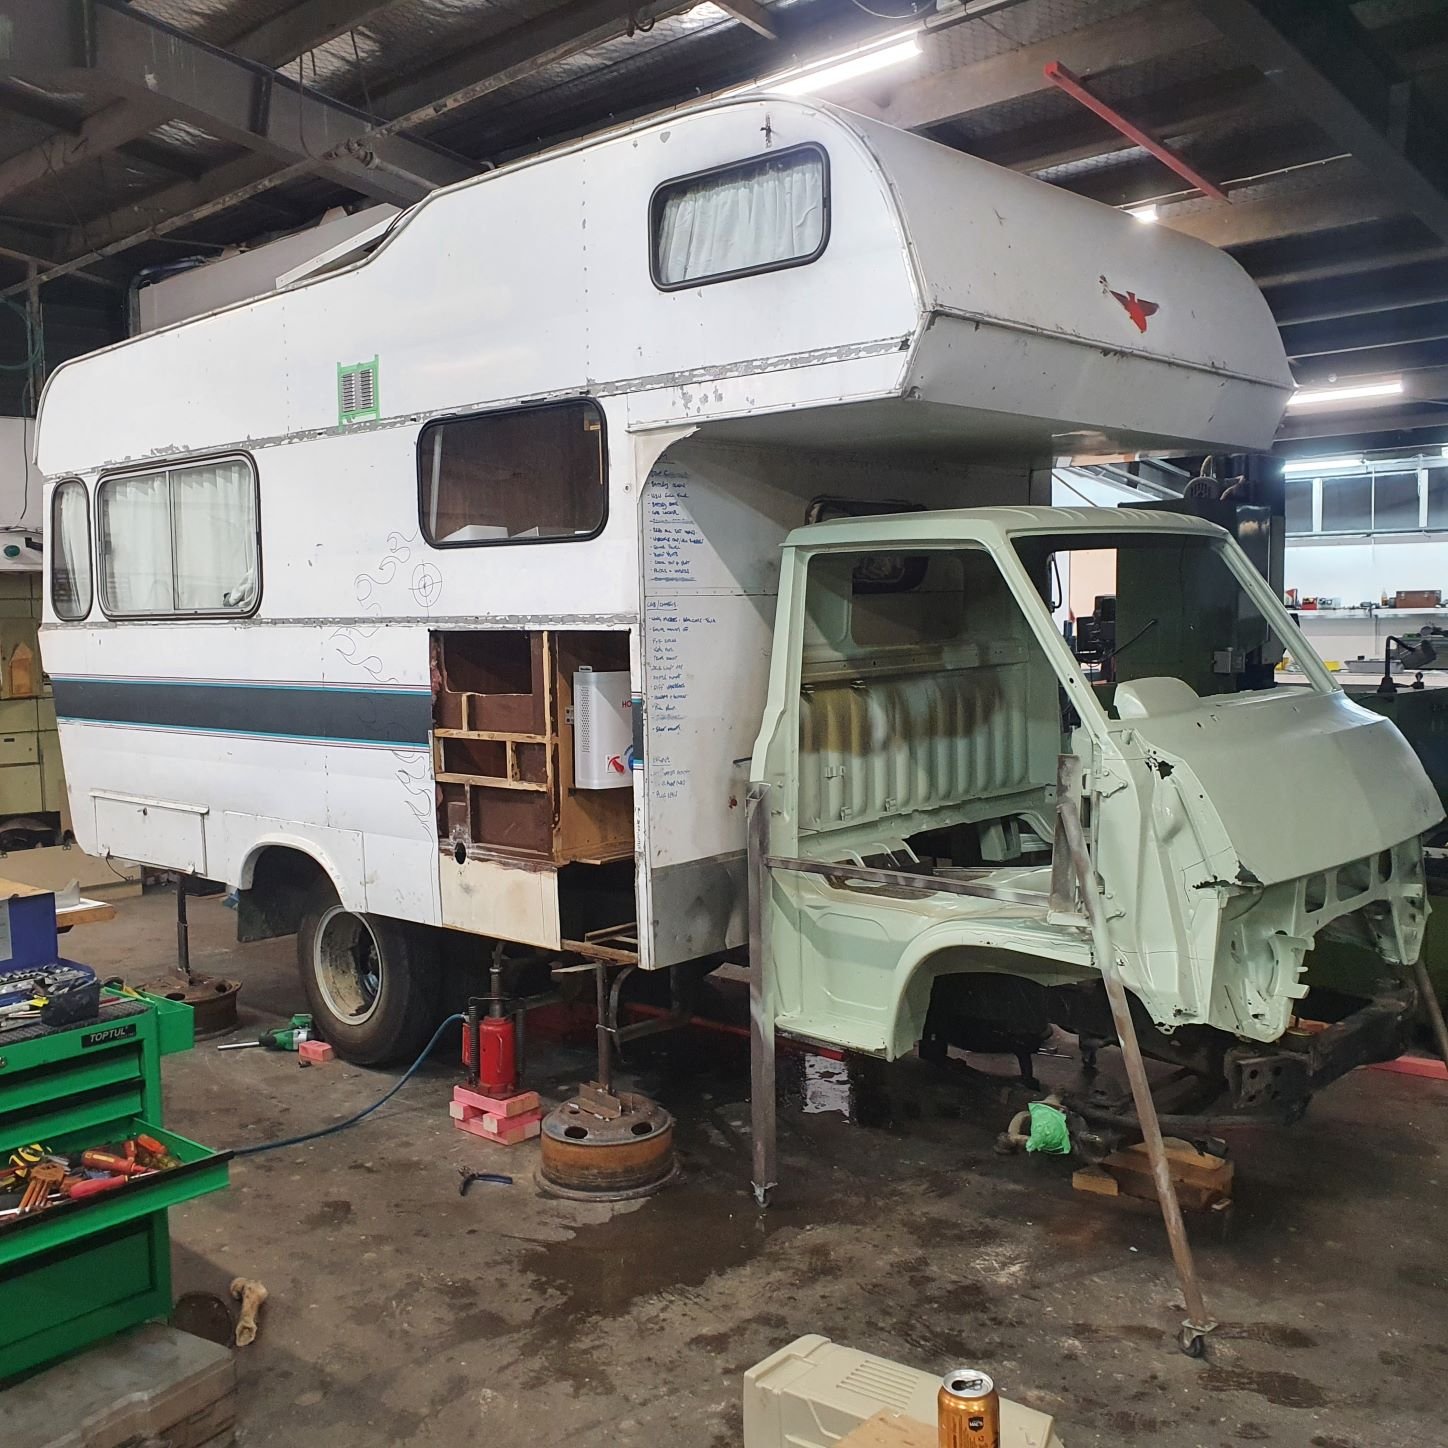
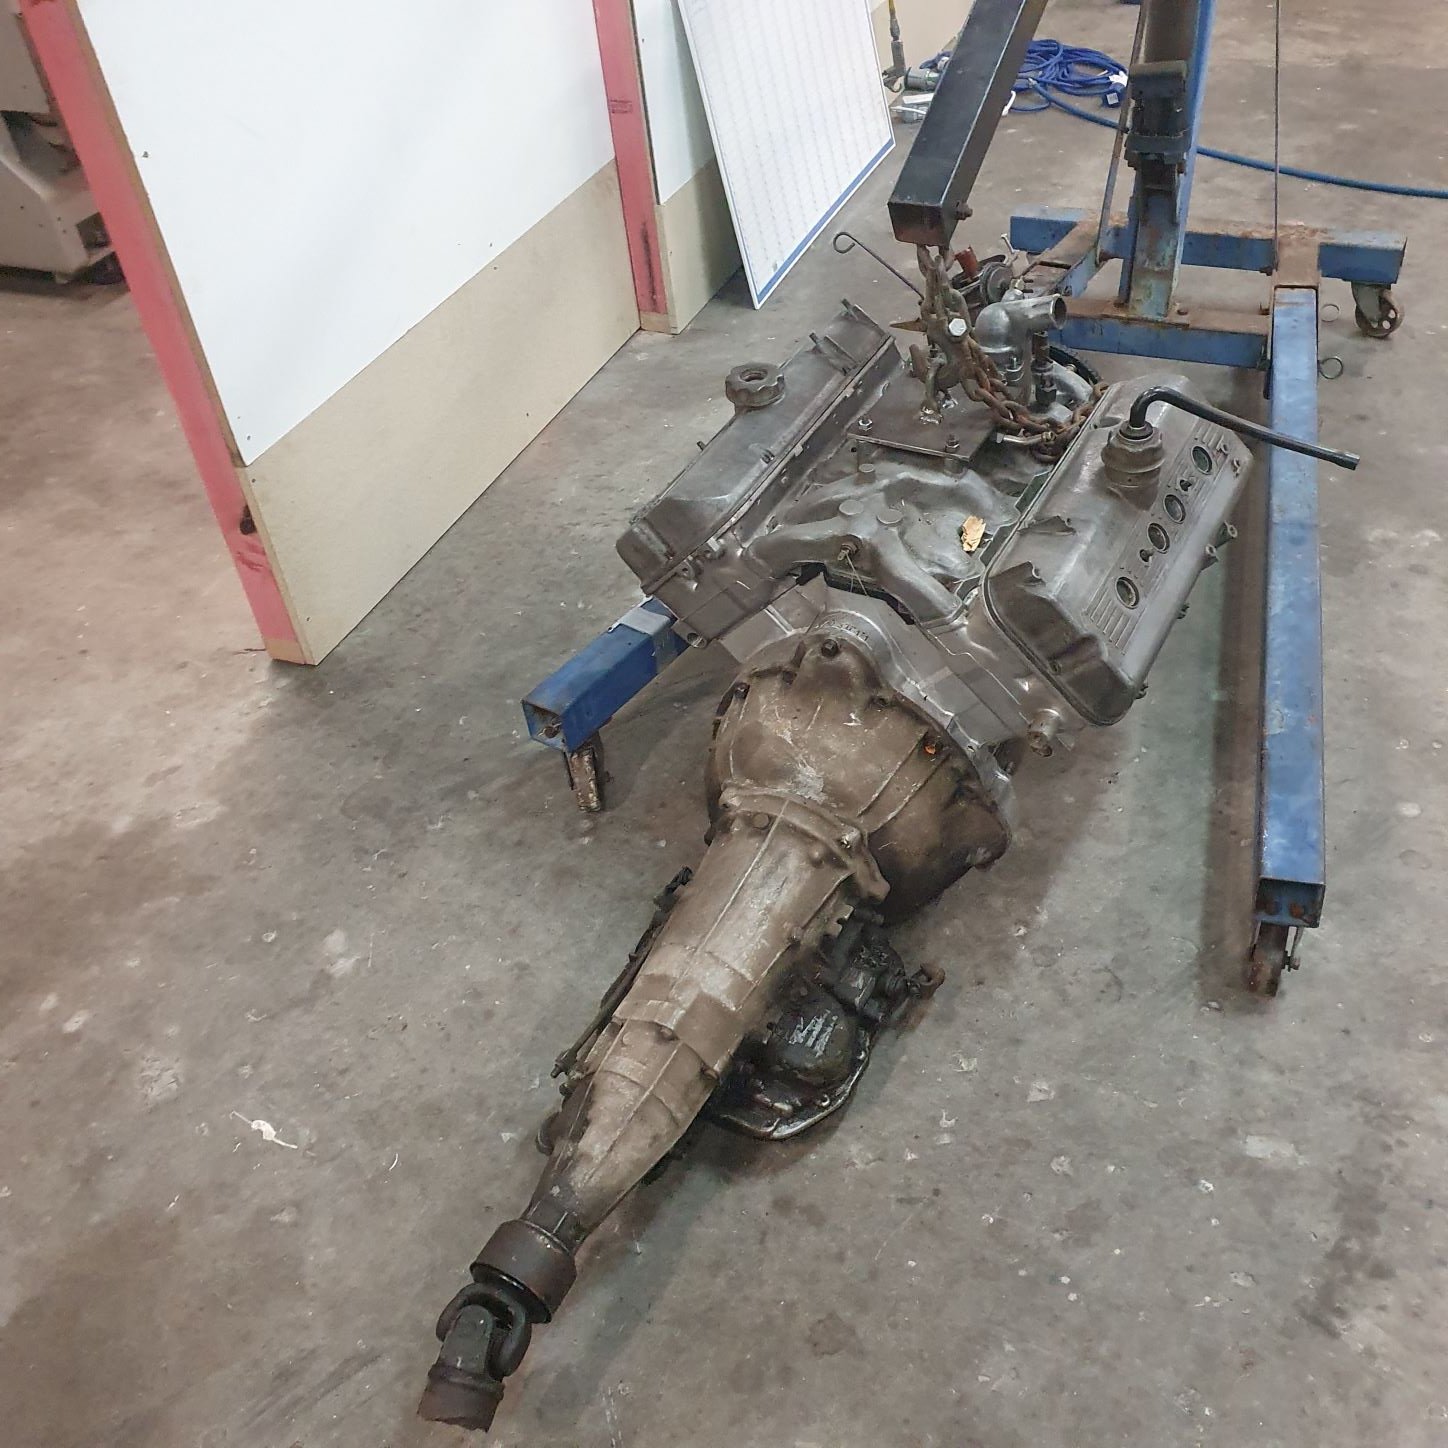
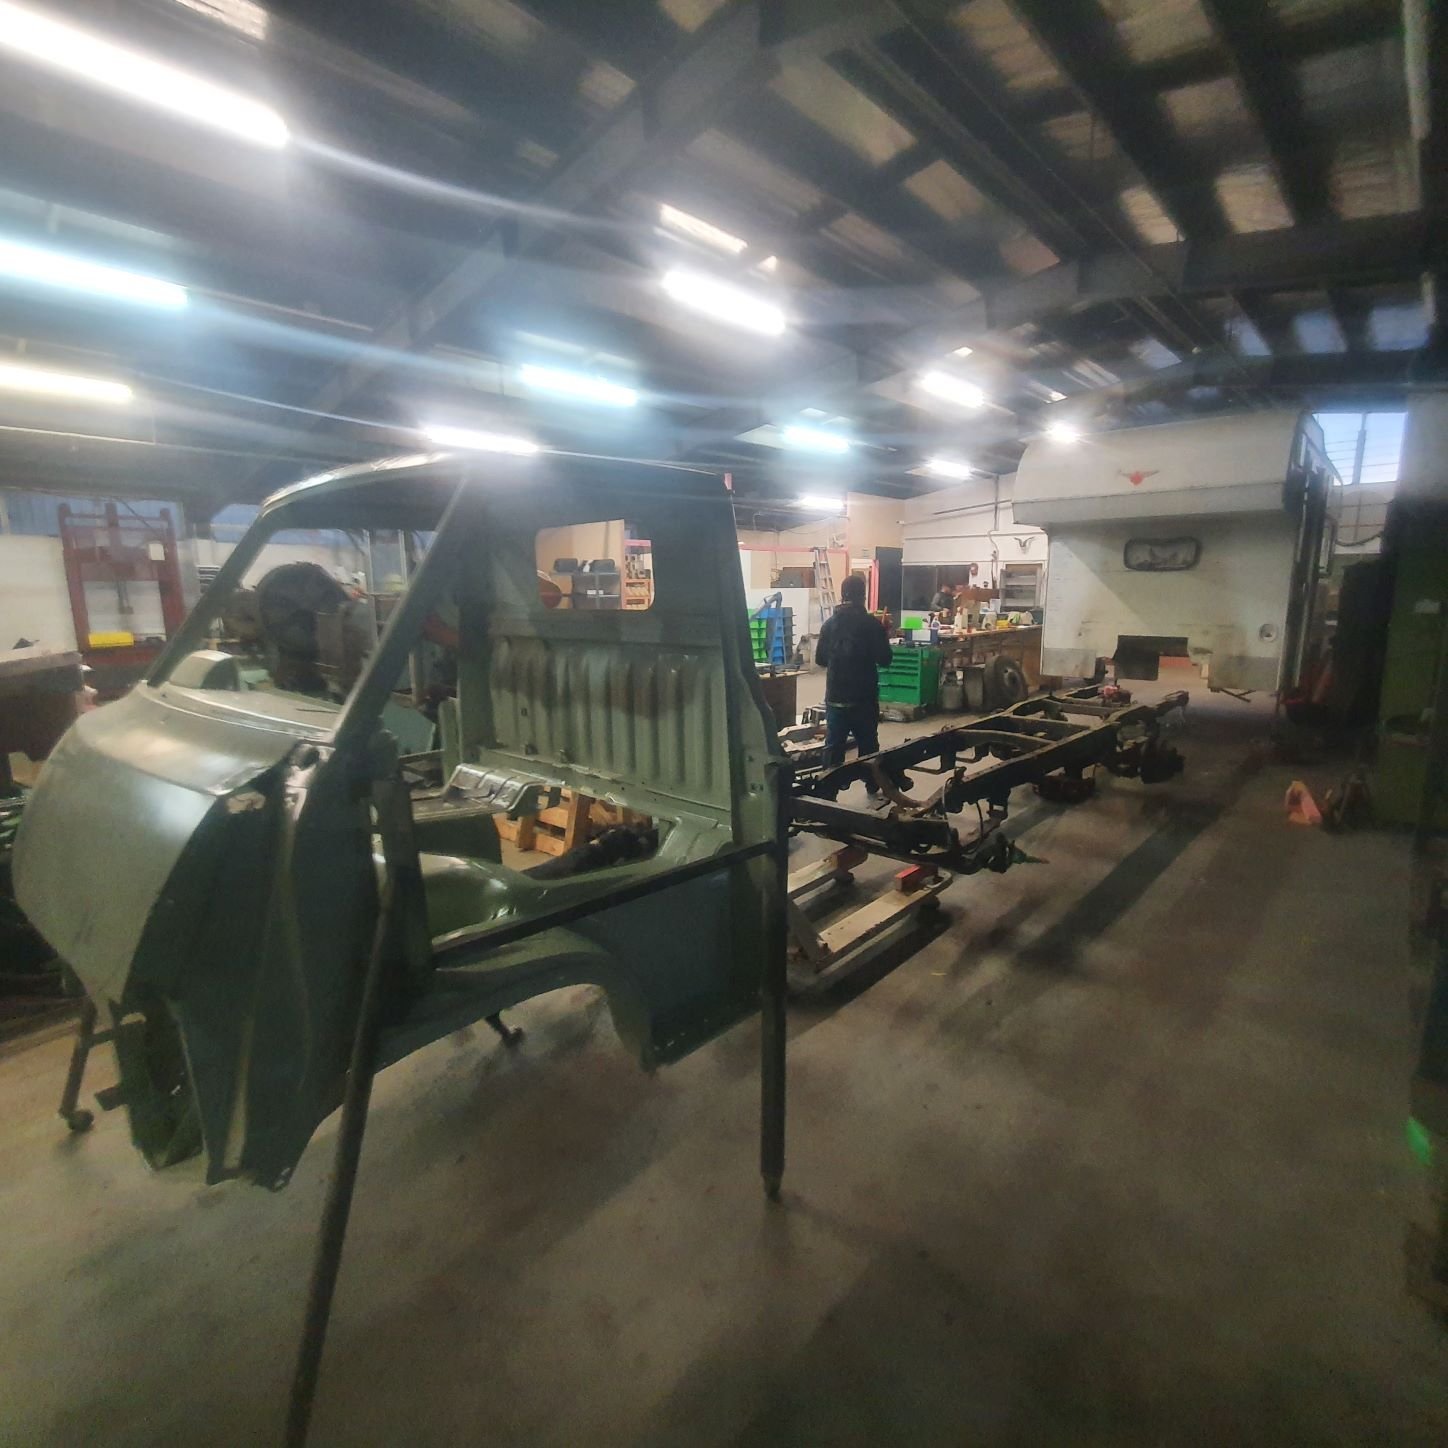
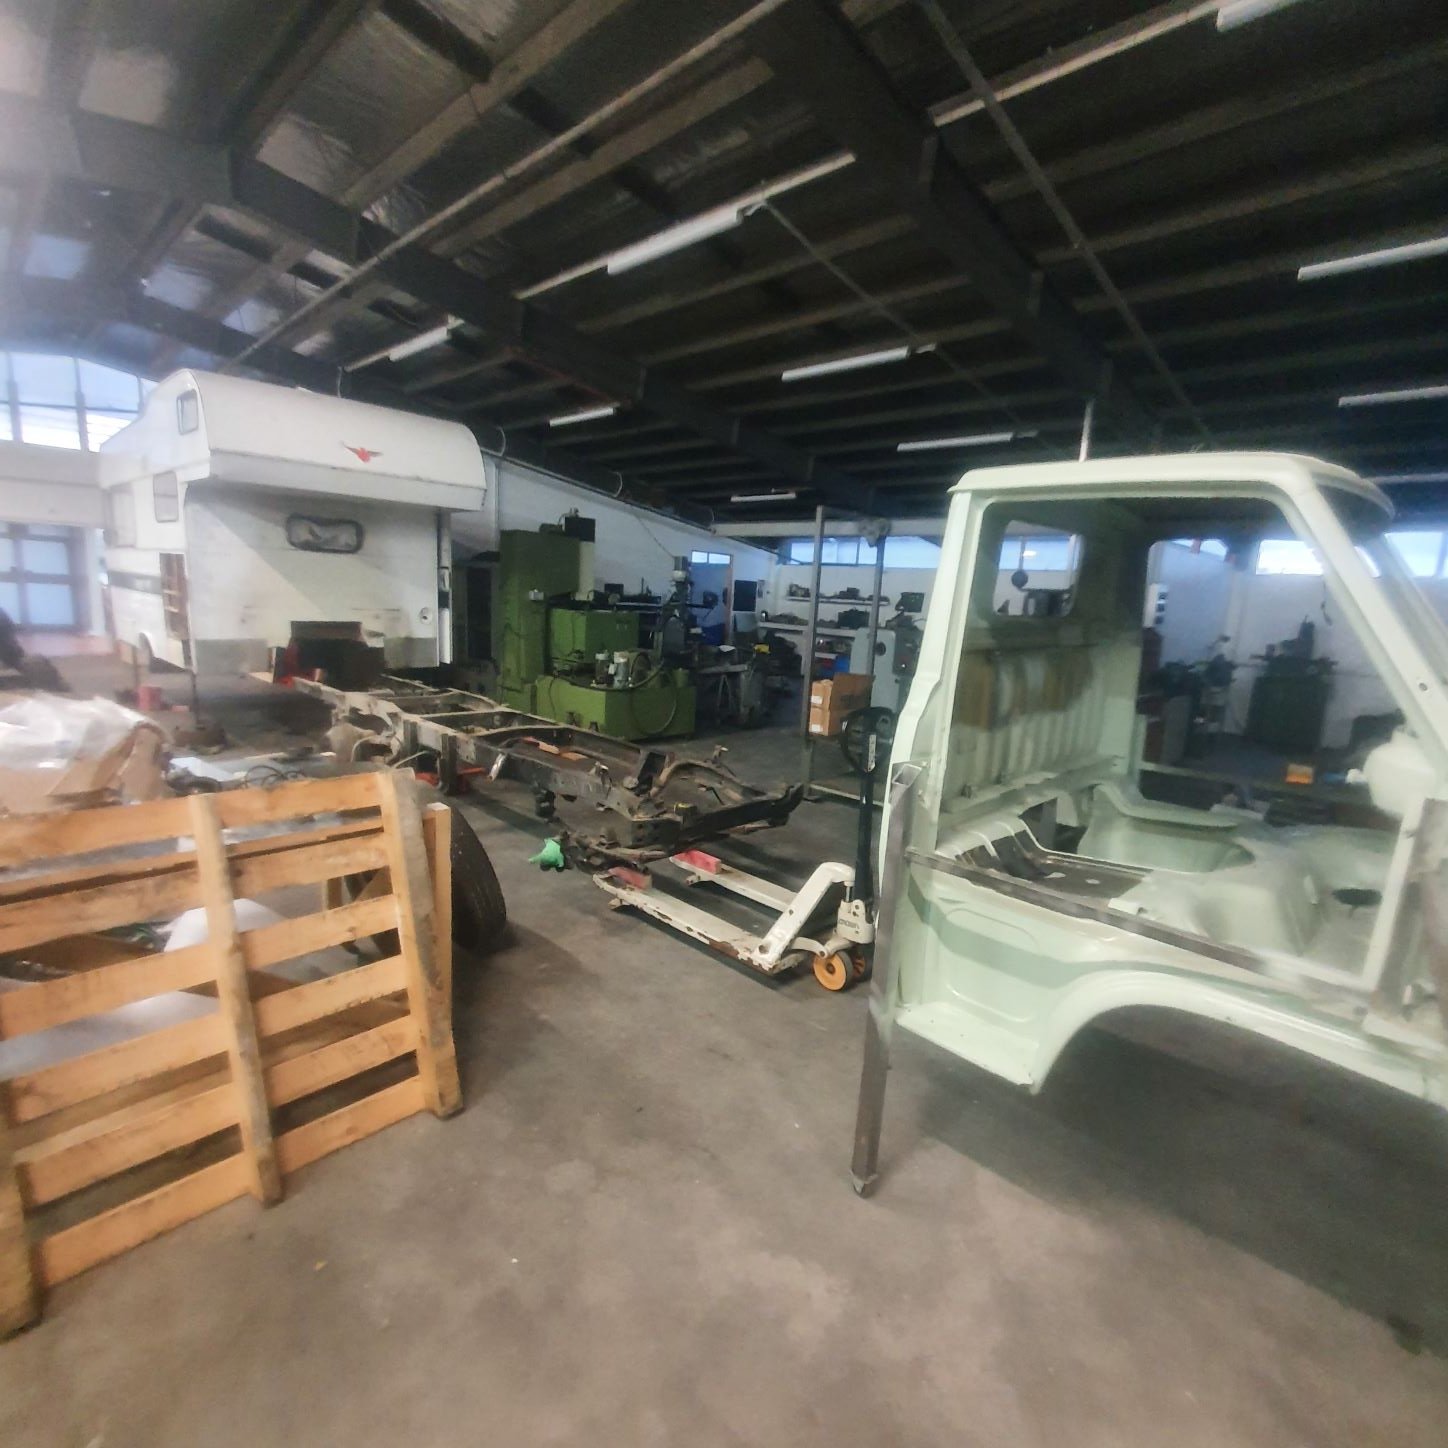
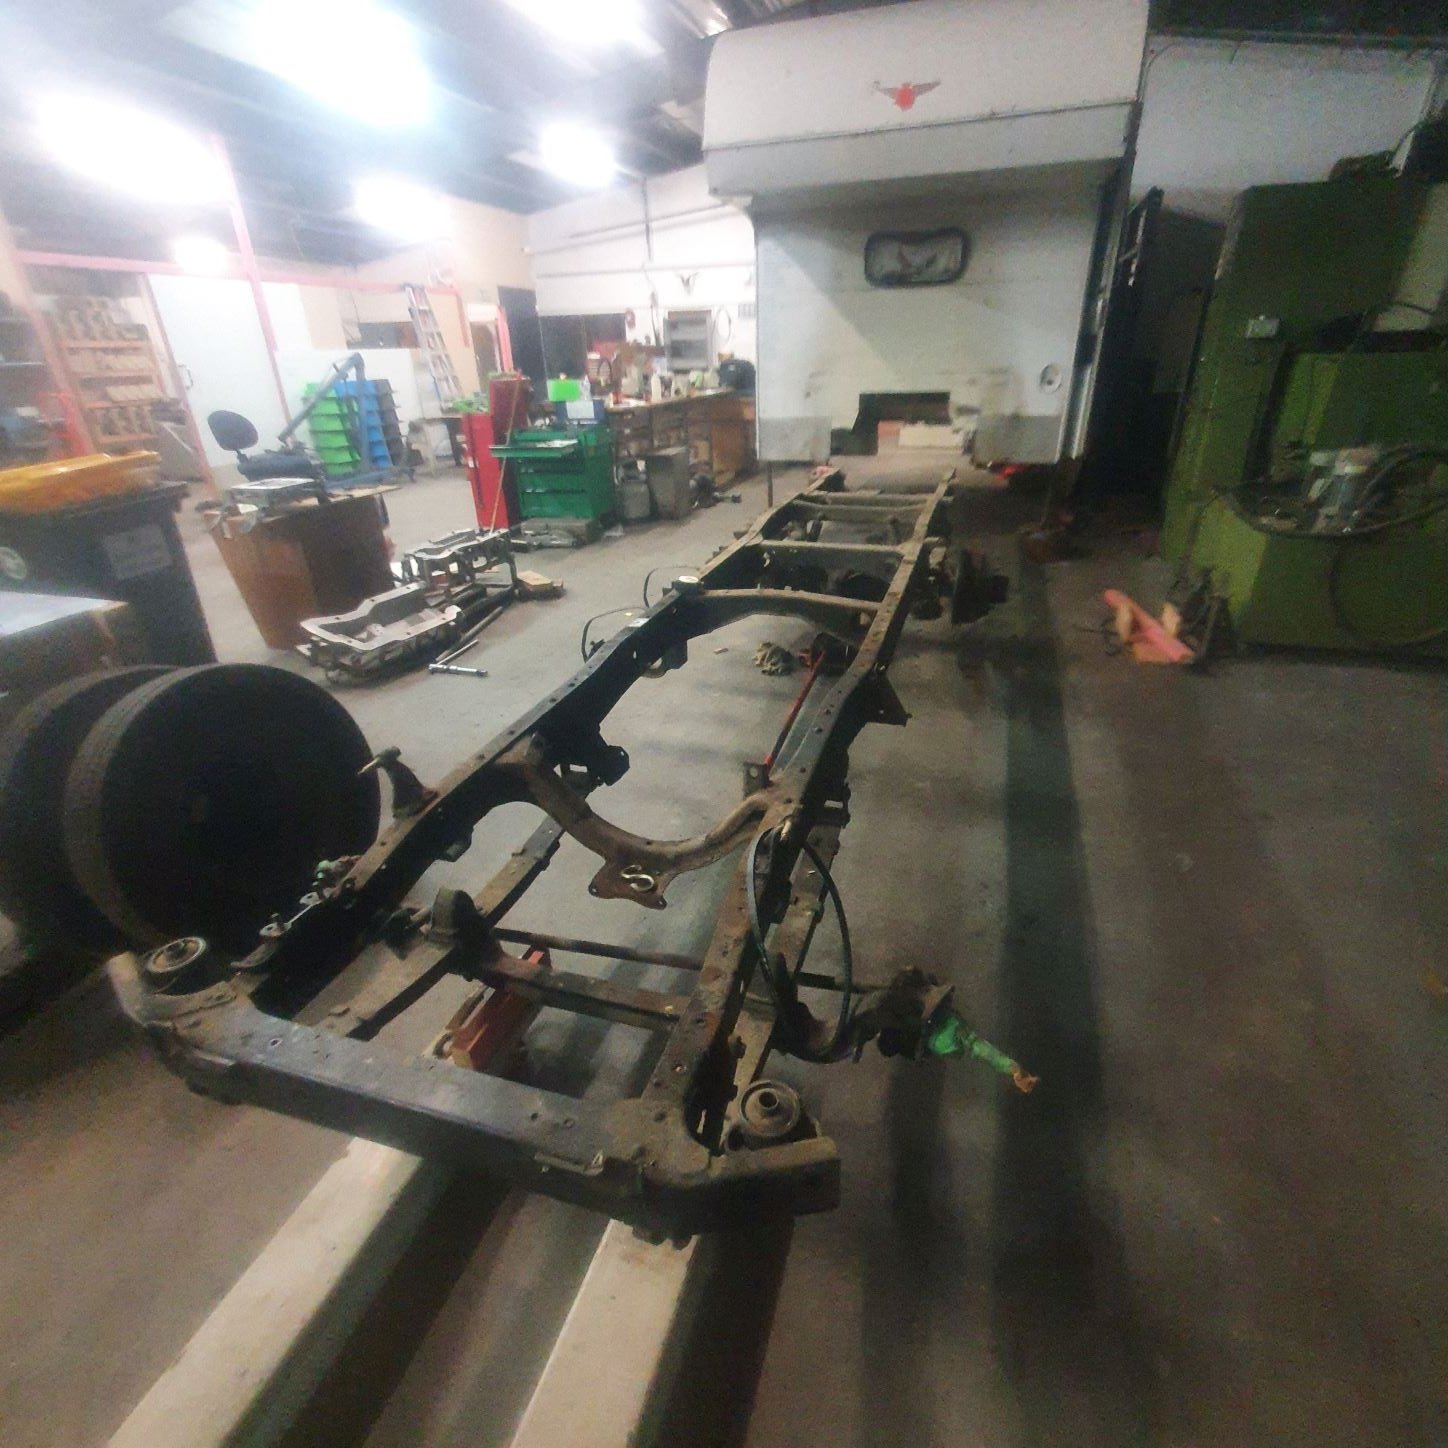


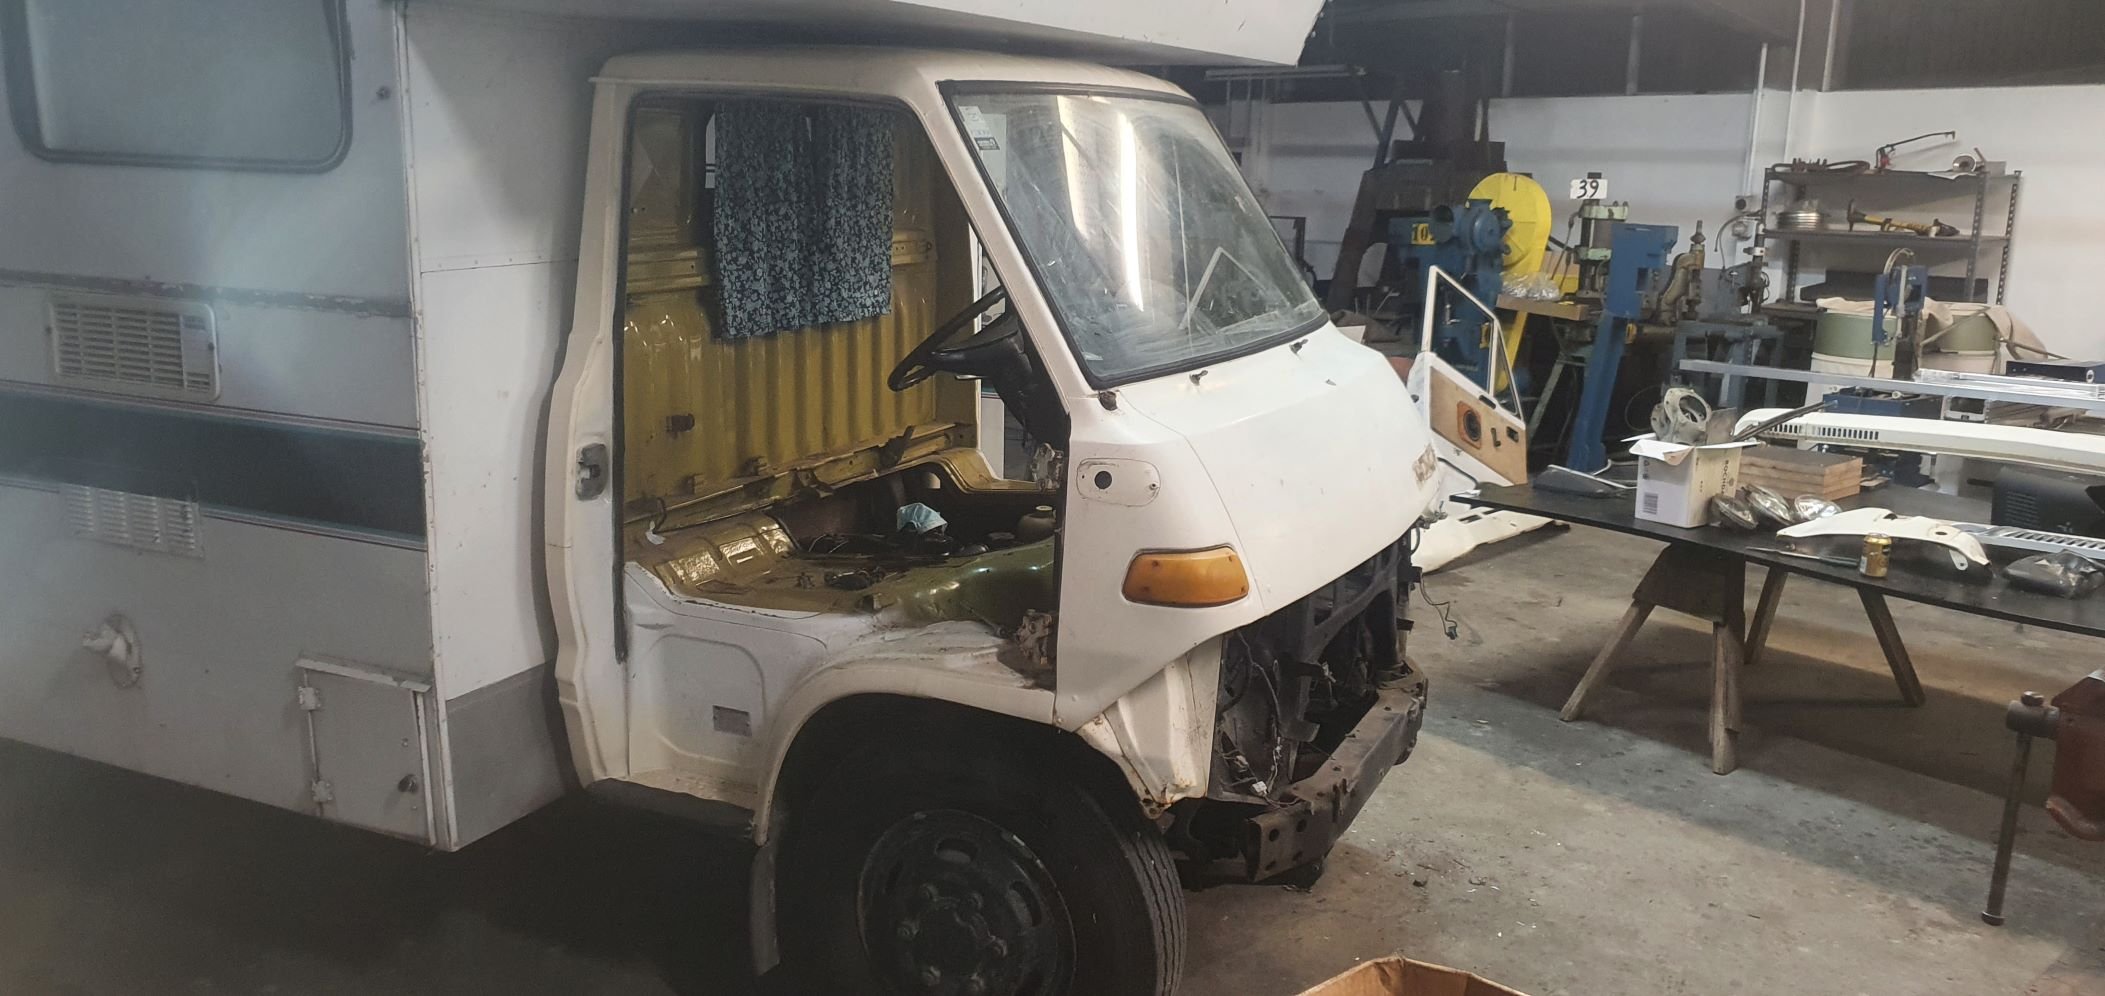
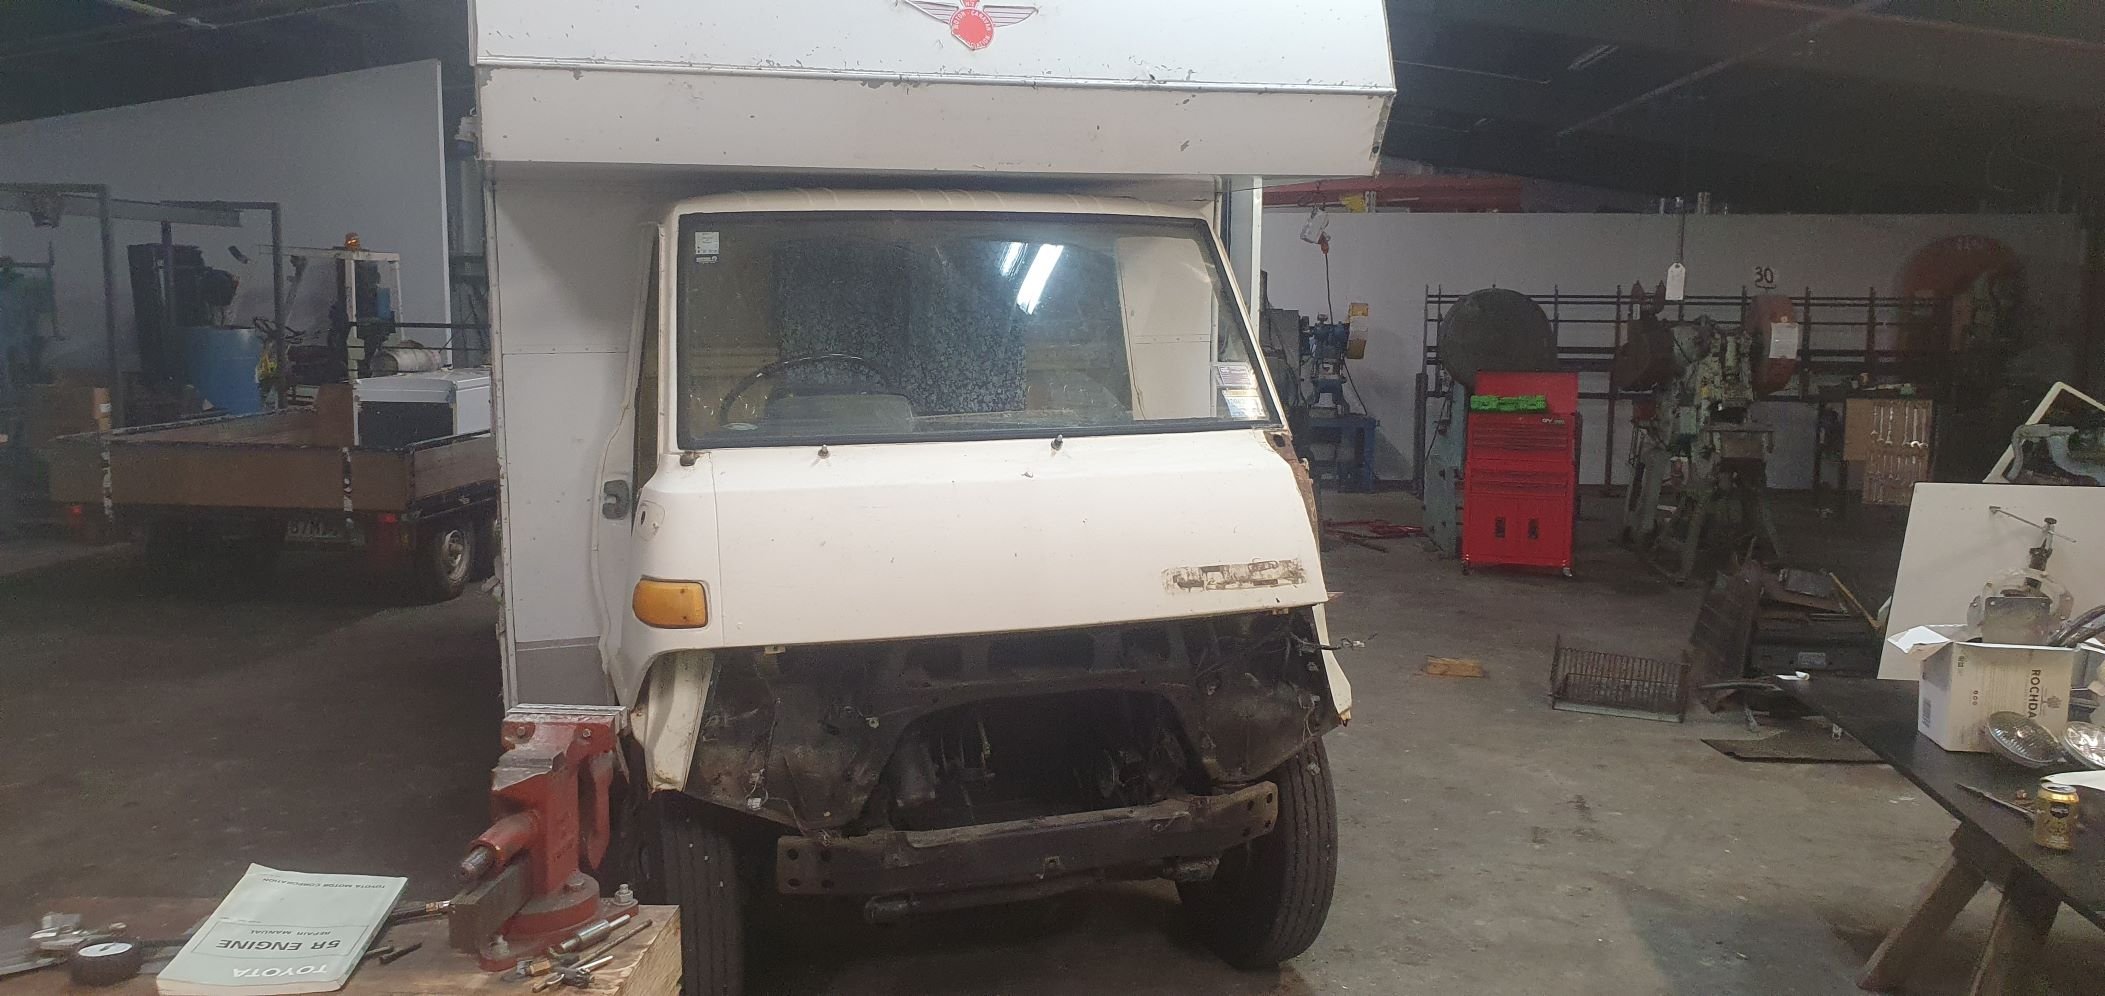
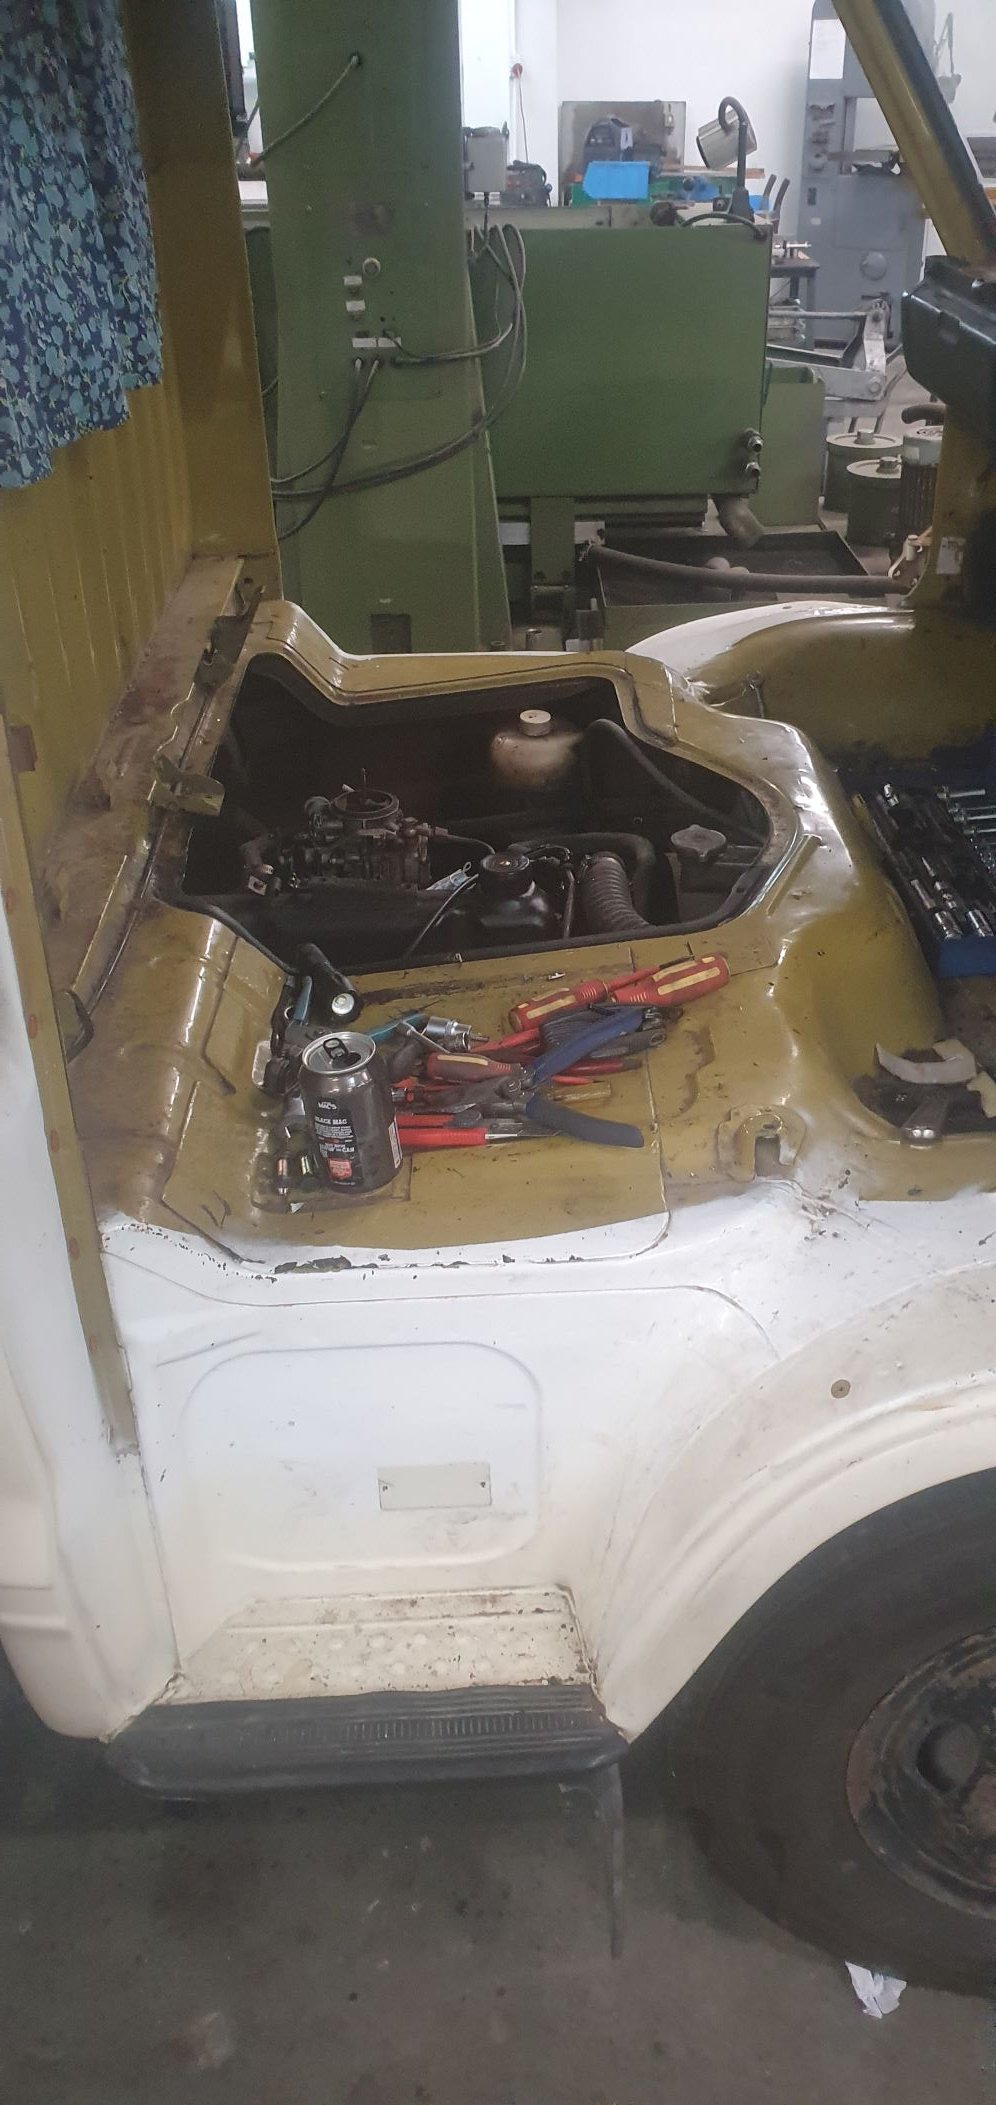
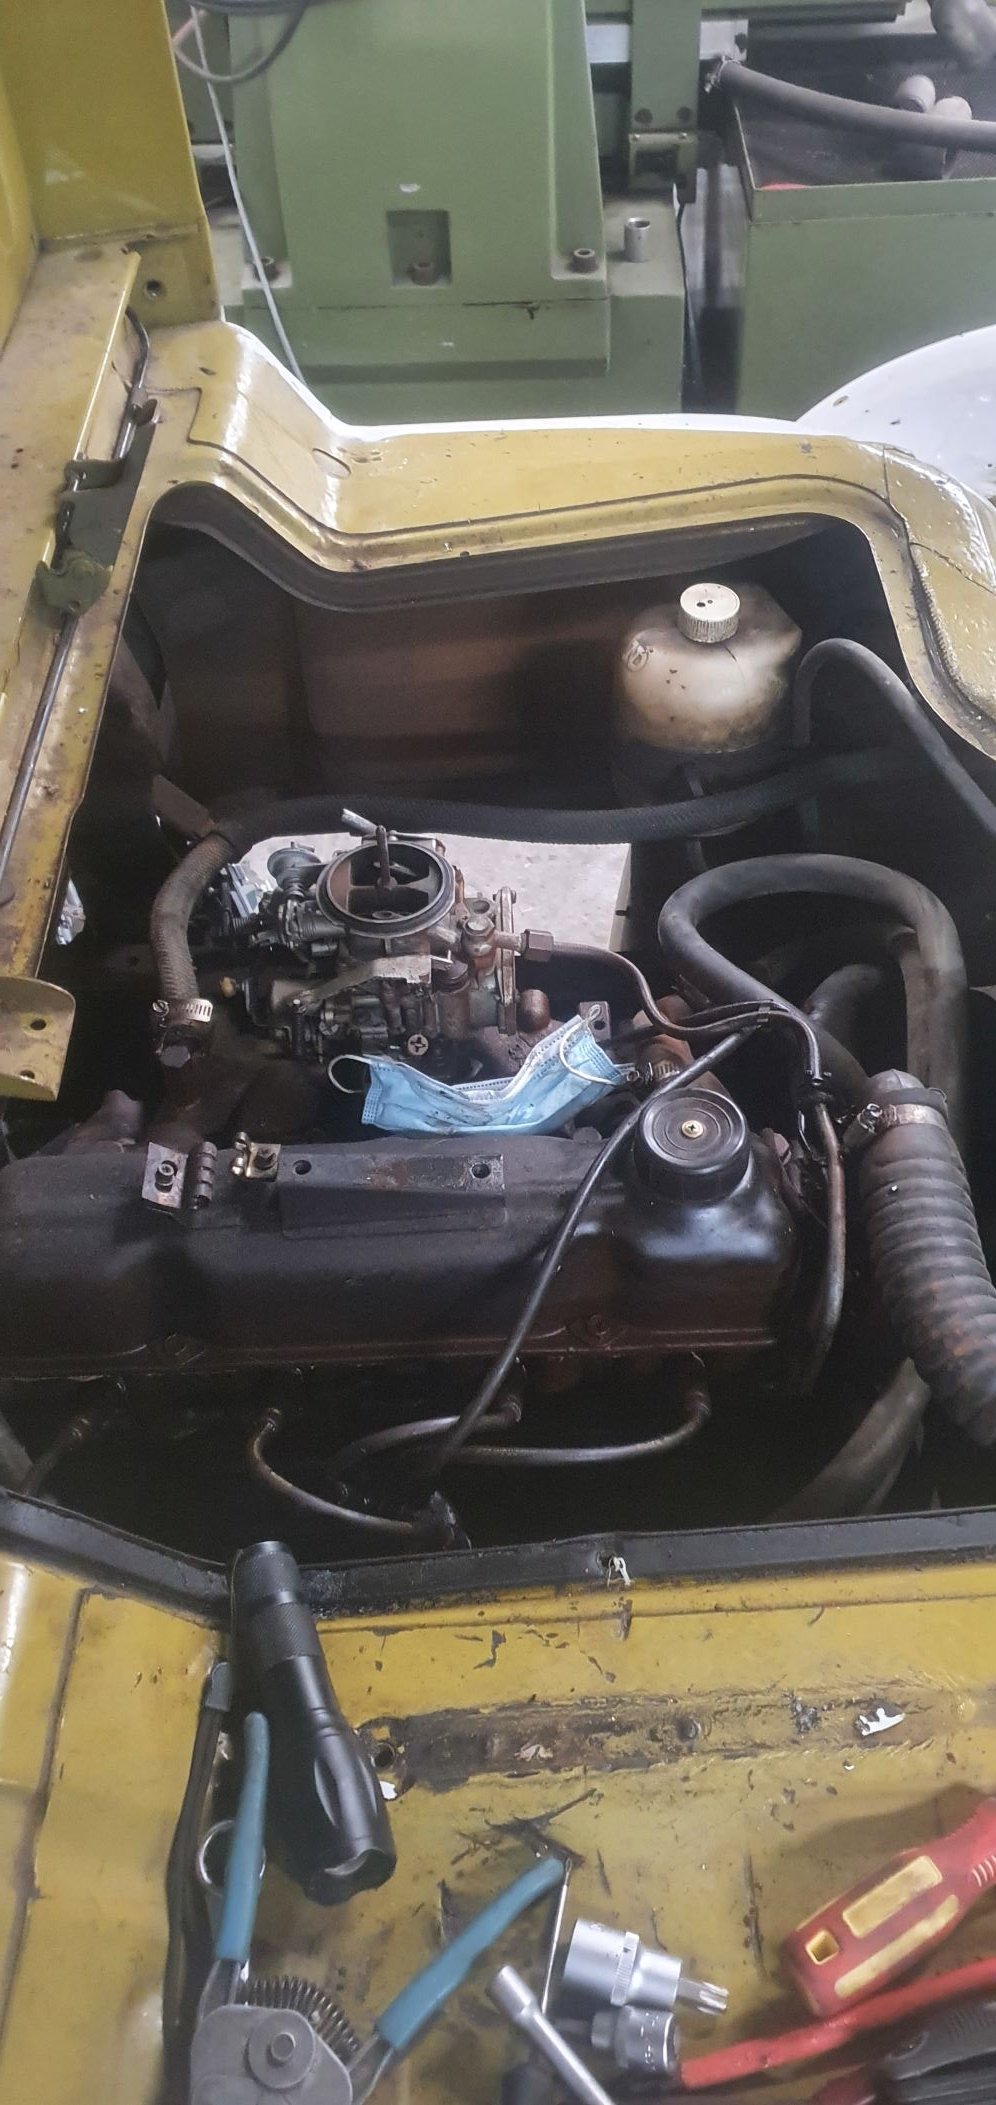
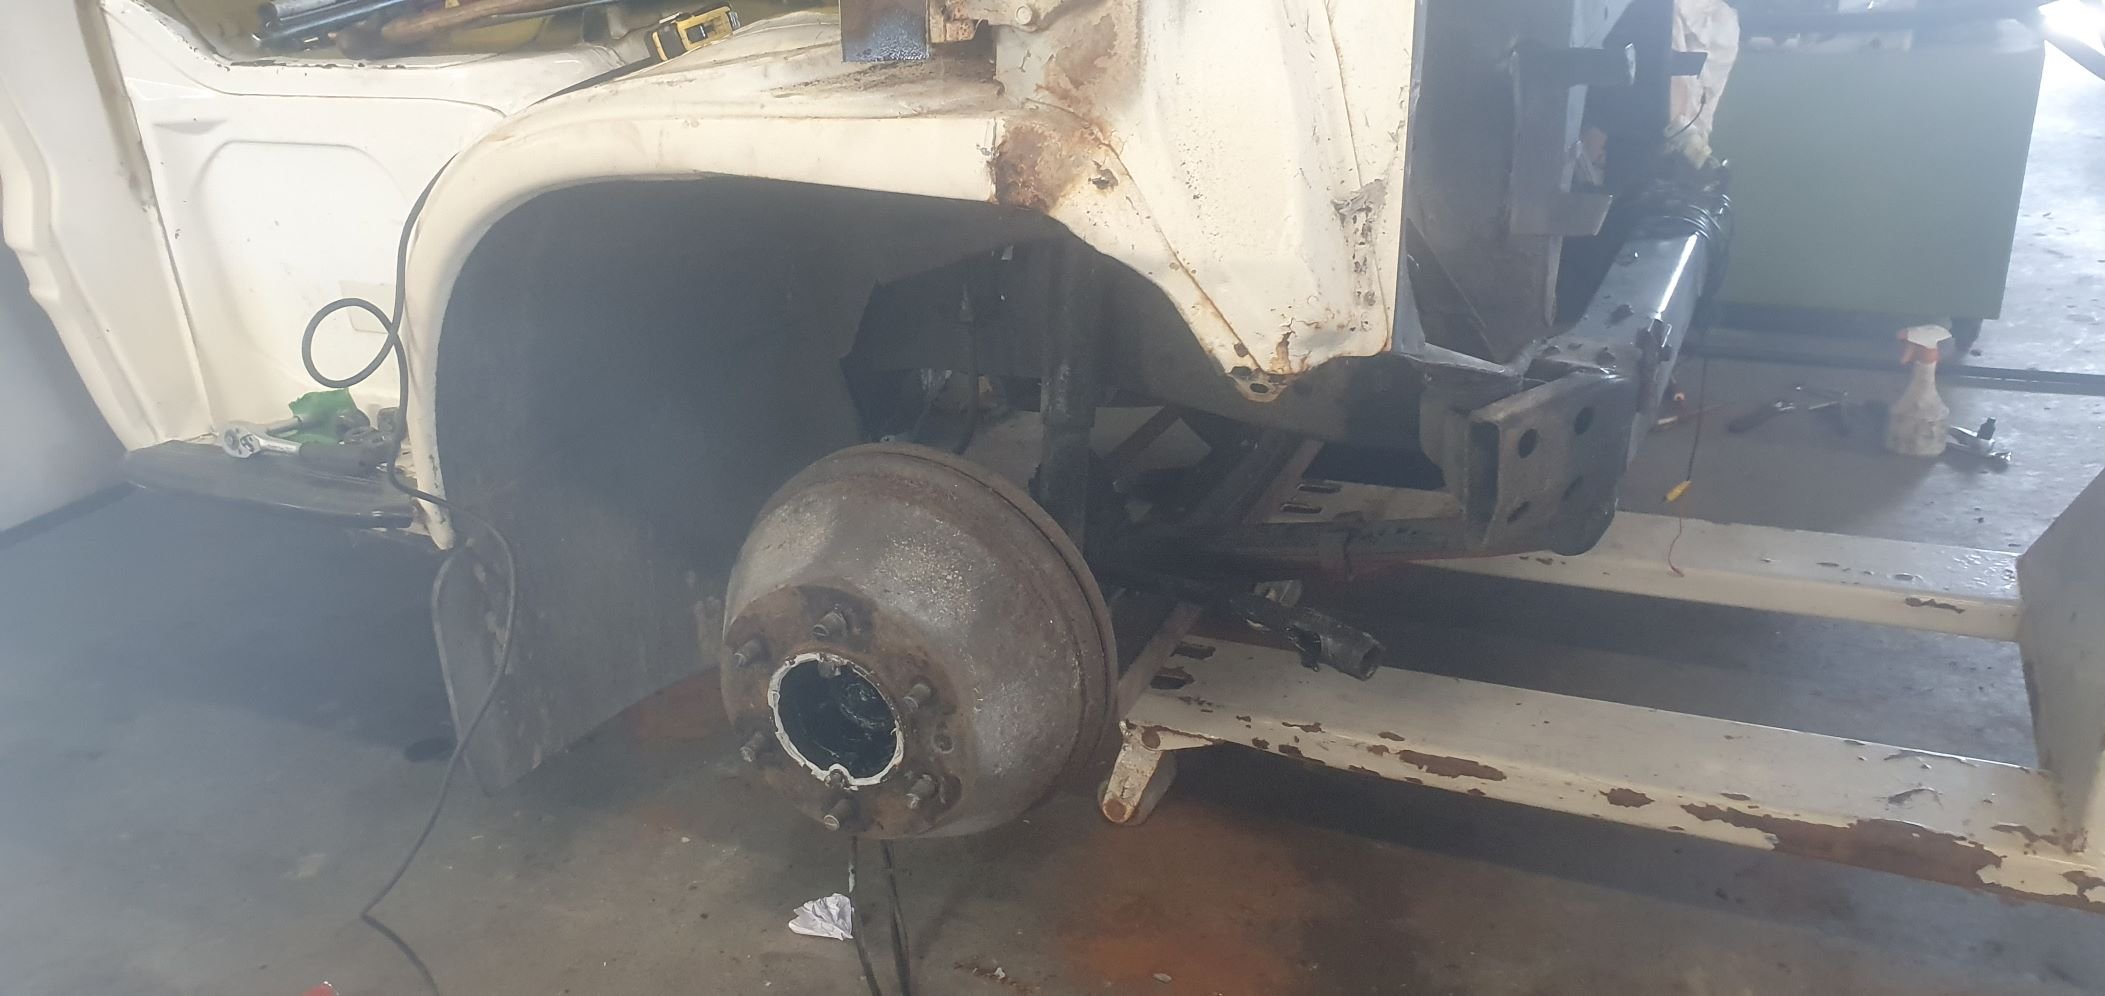
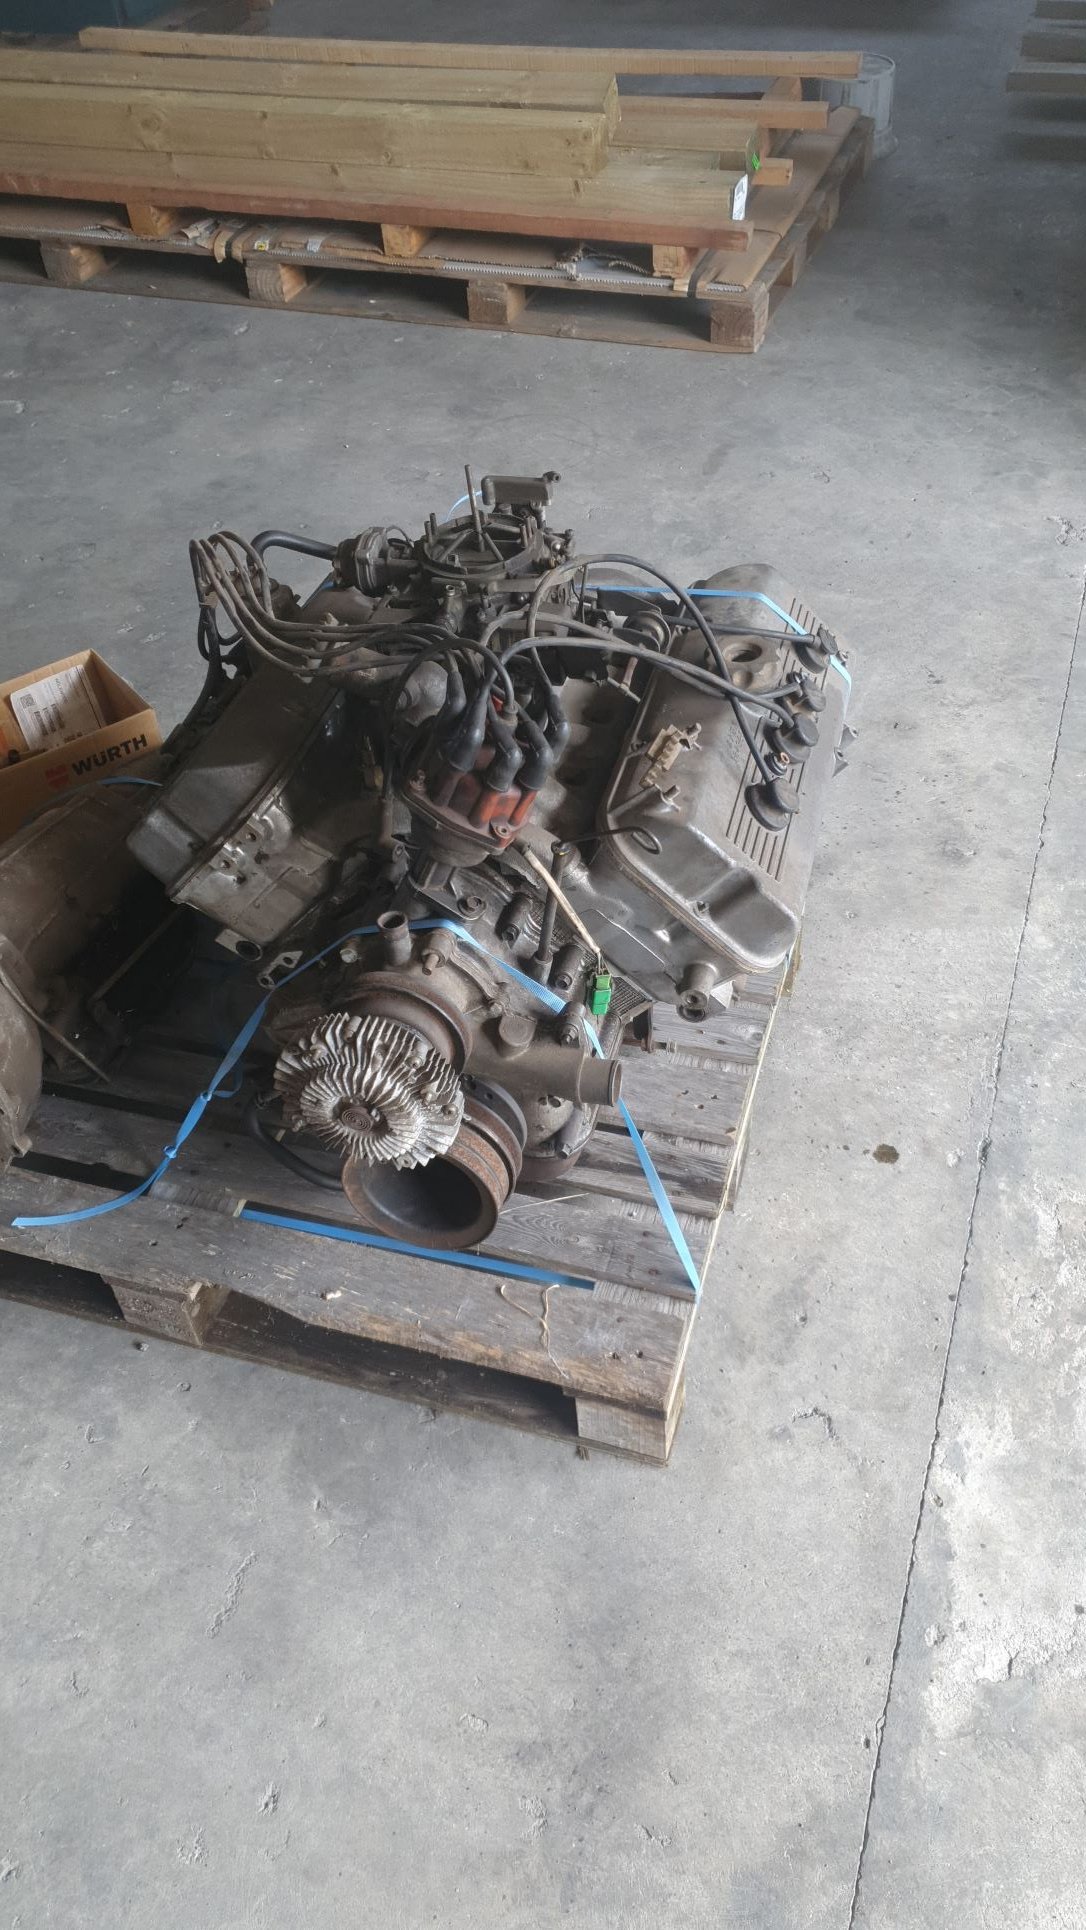


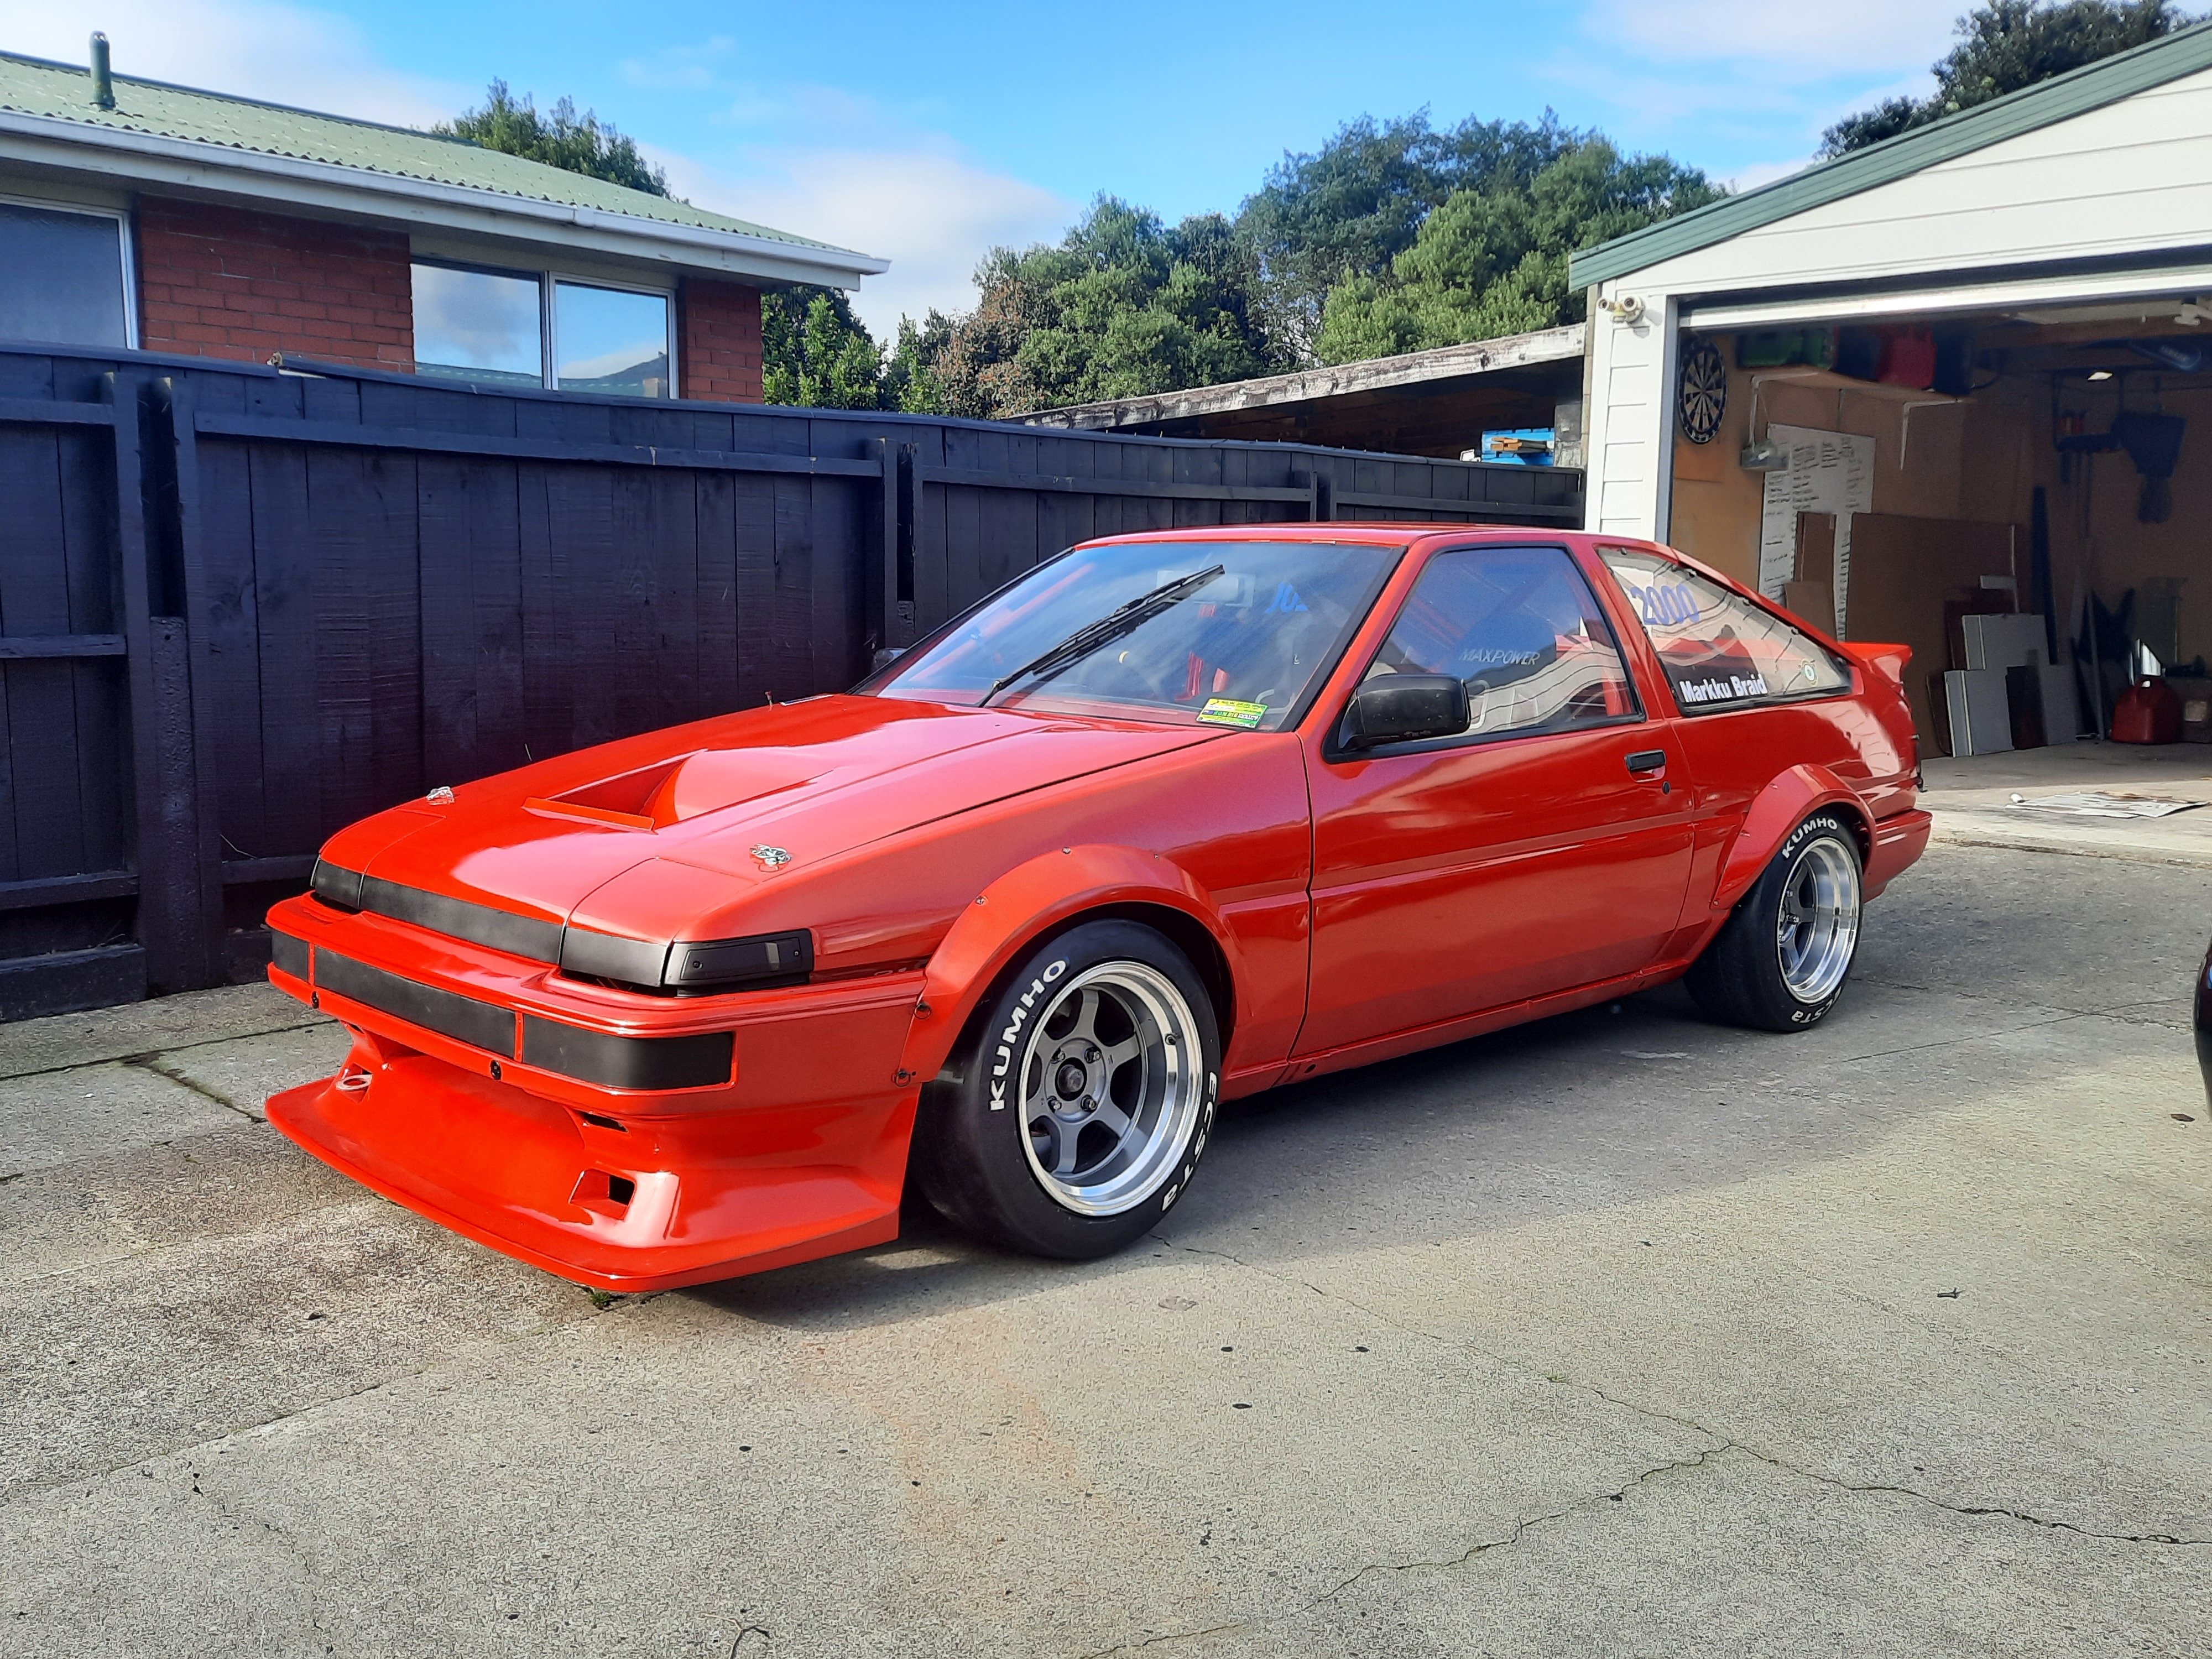
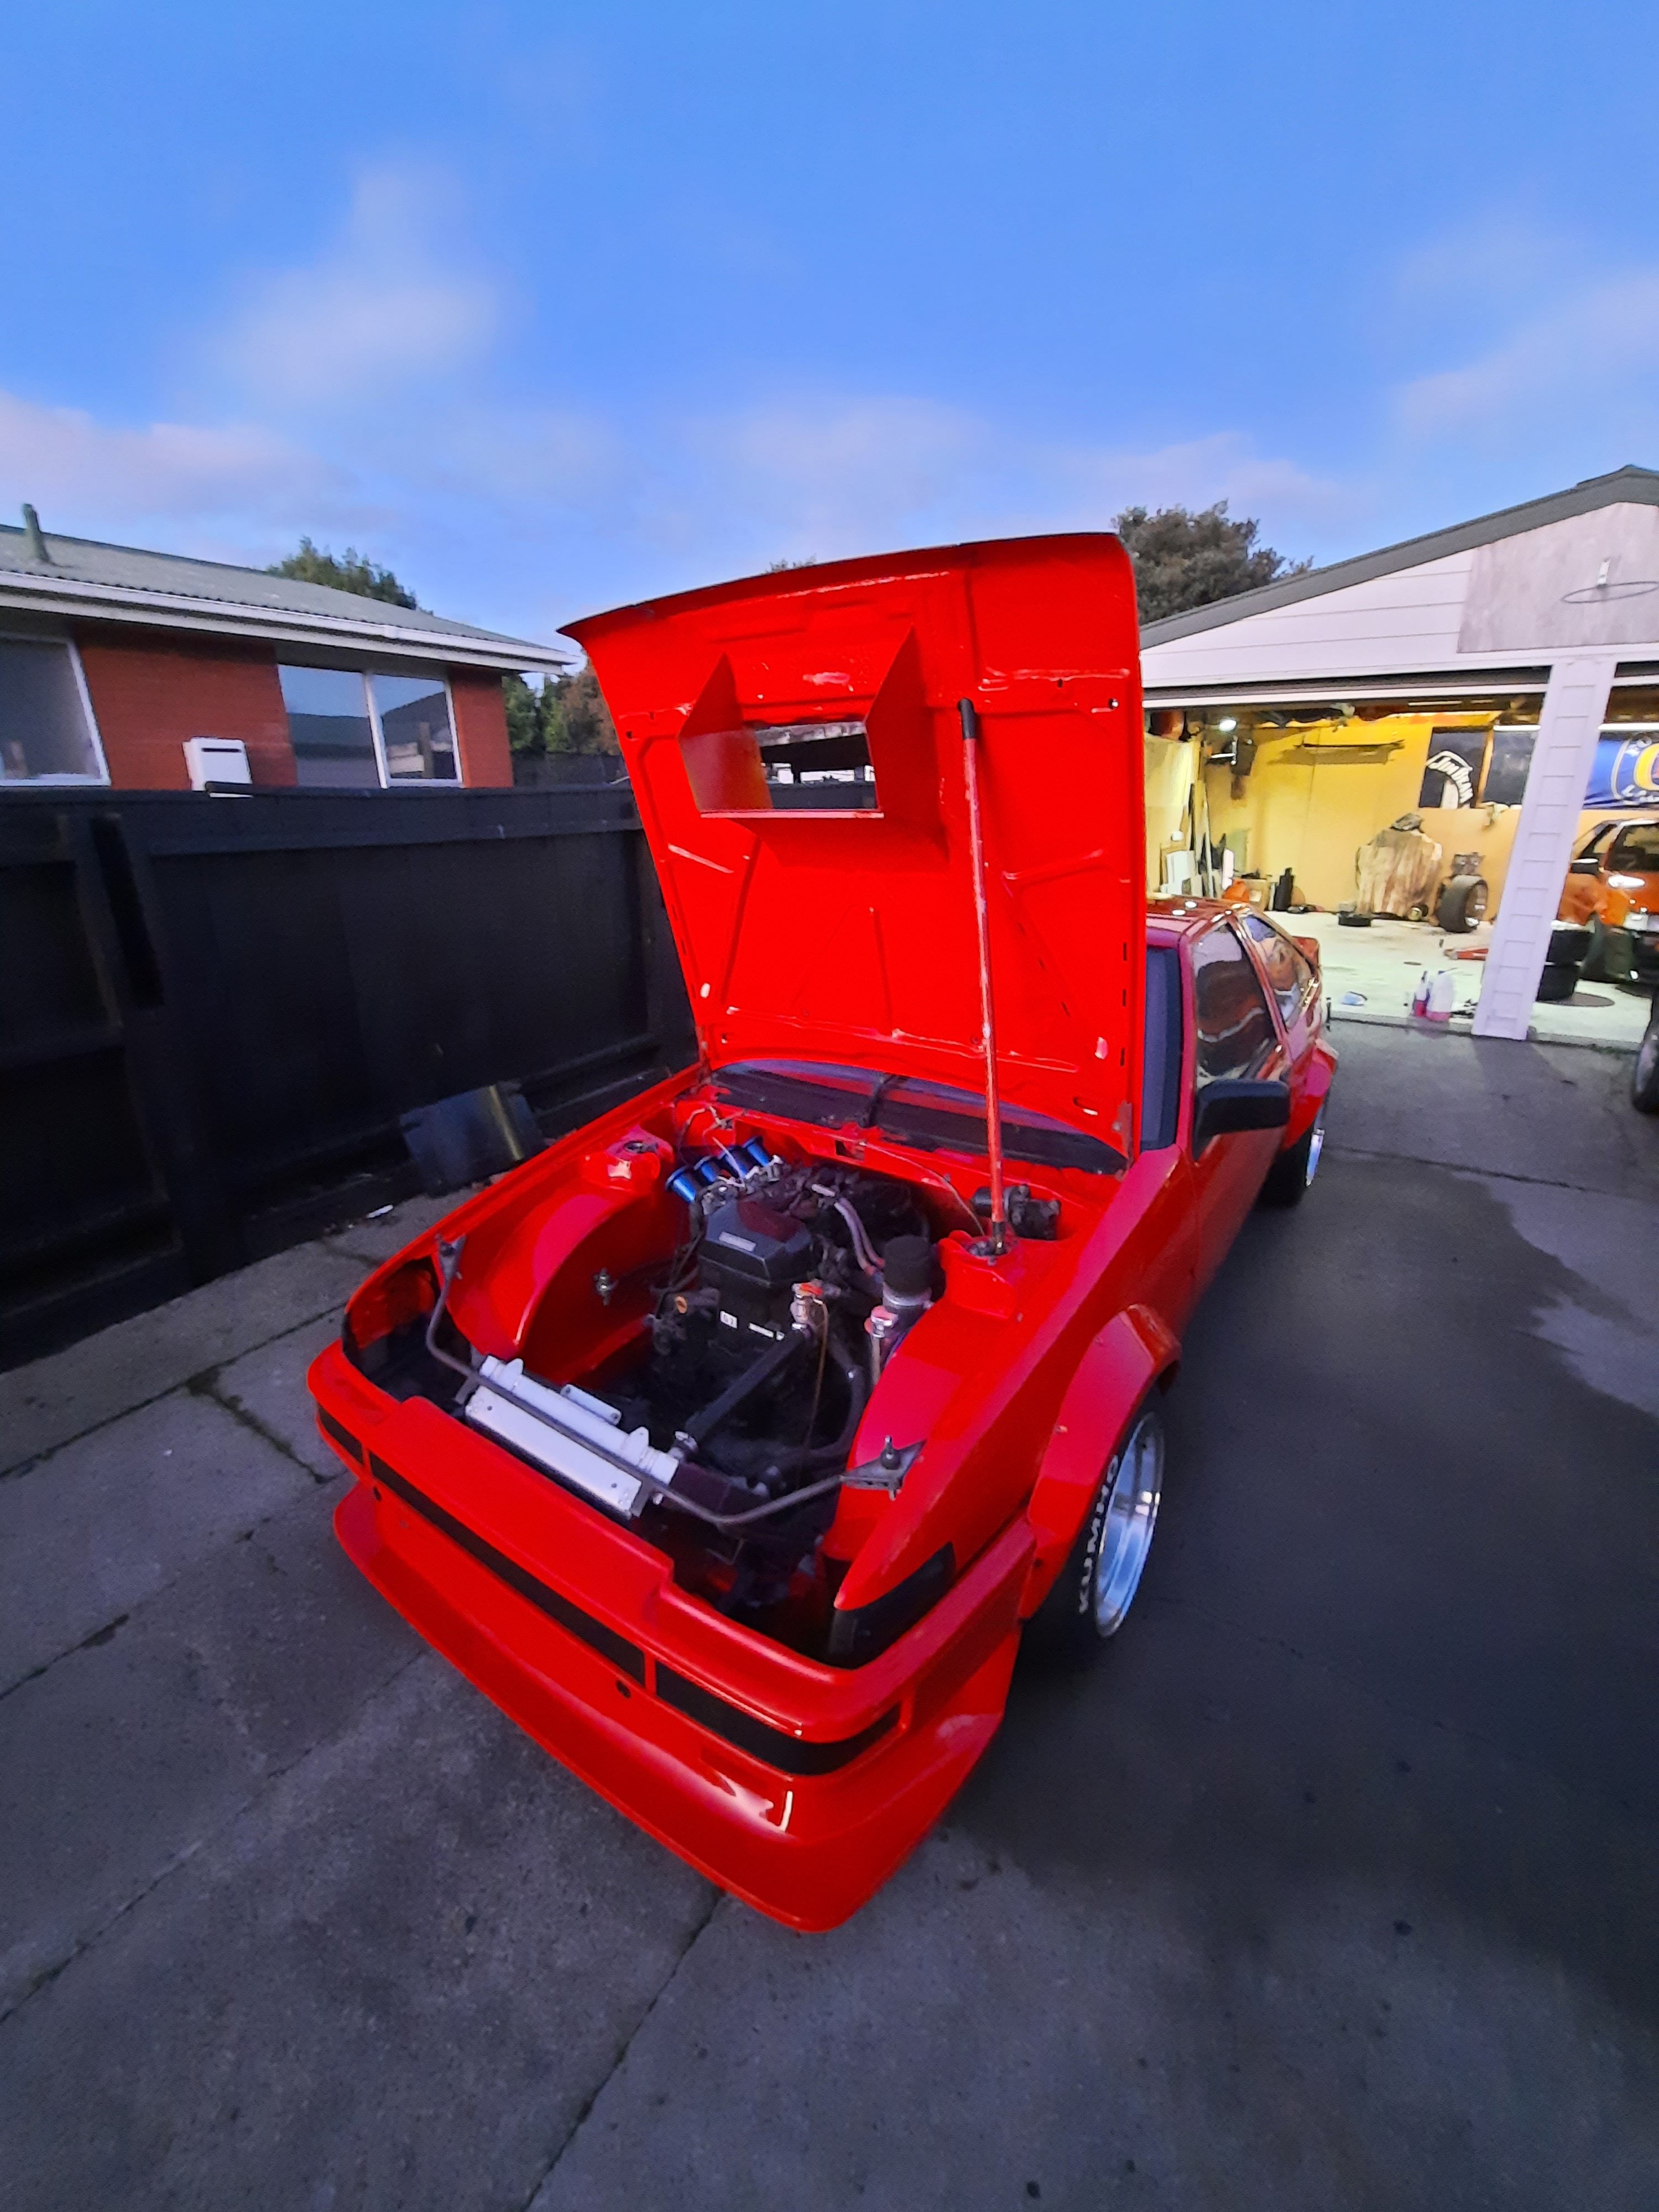

.jpg.ee73b6ec09021ac9daaaca3aebccd669.jpg)
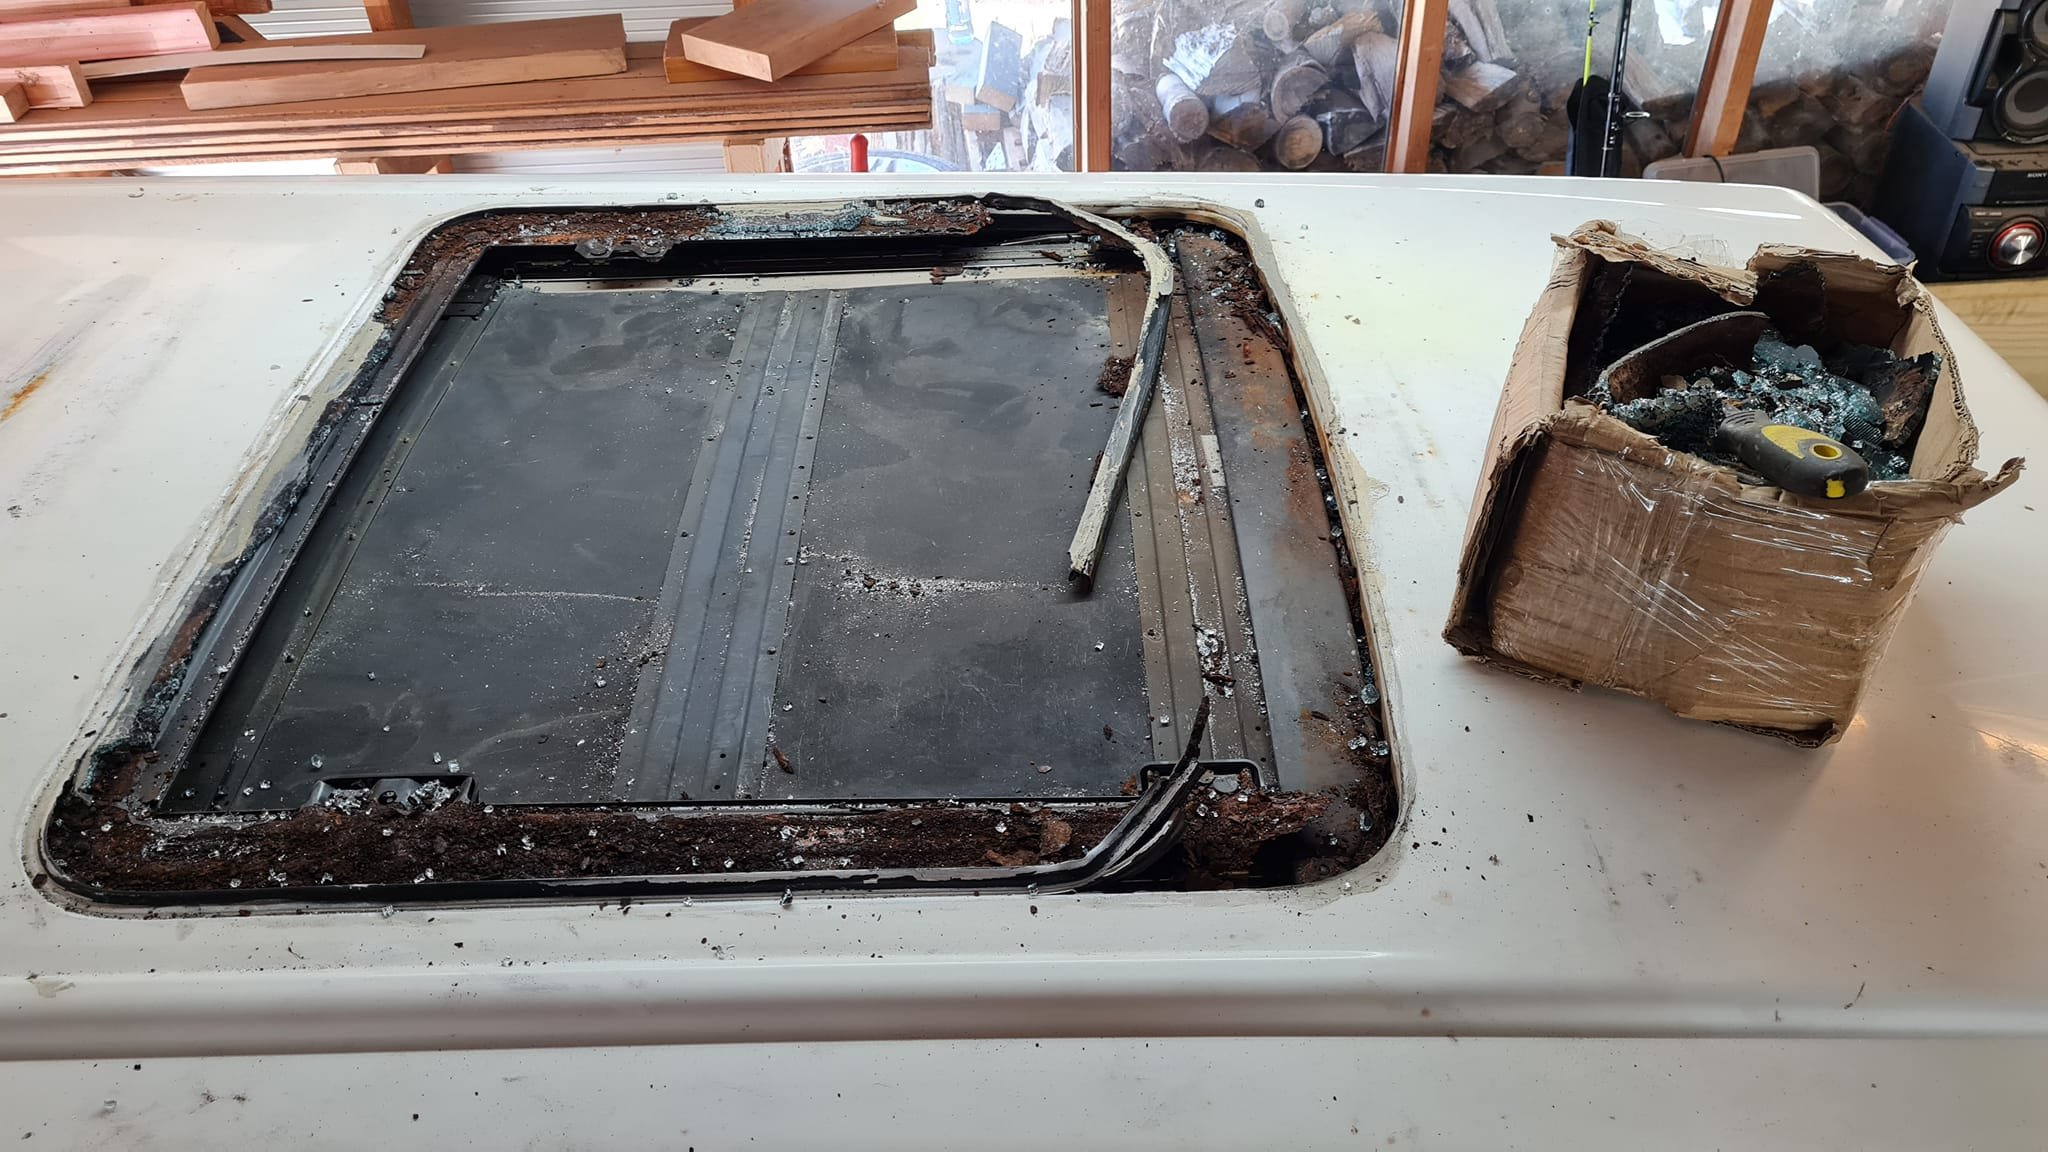
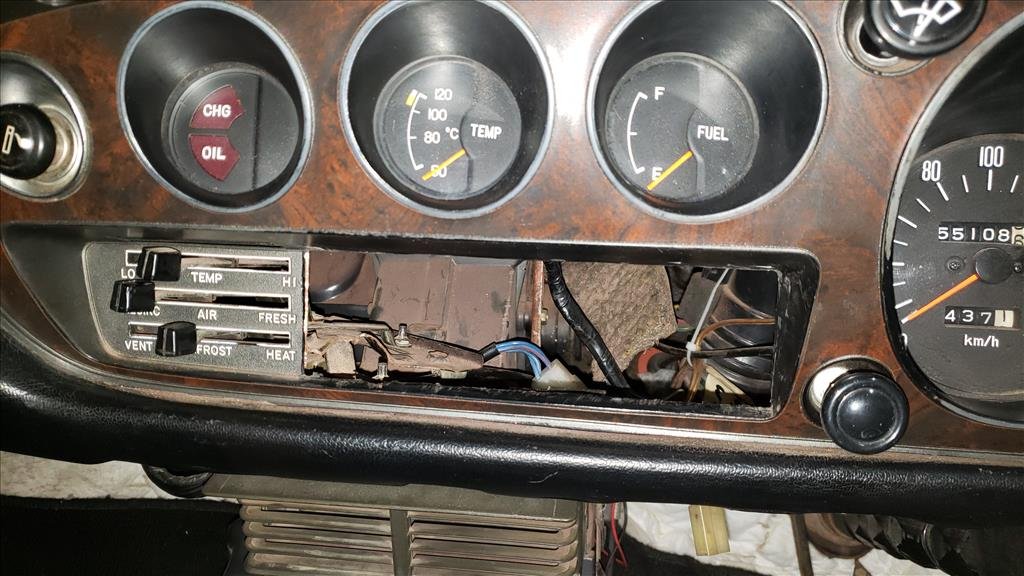

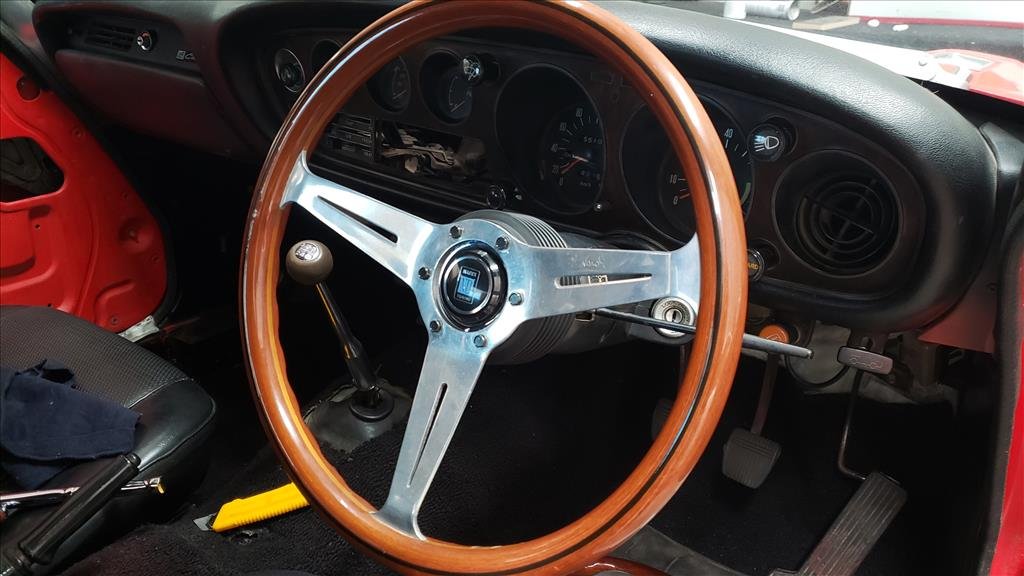

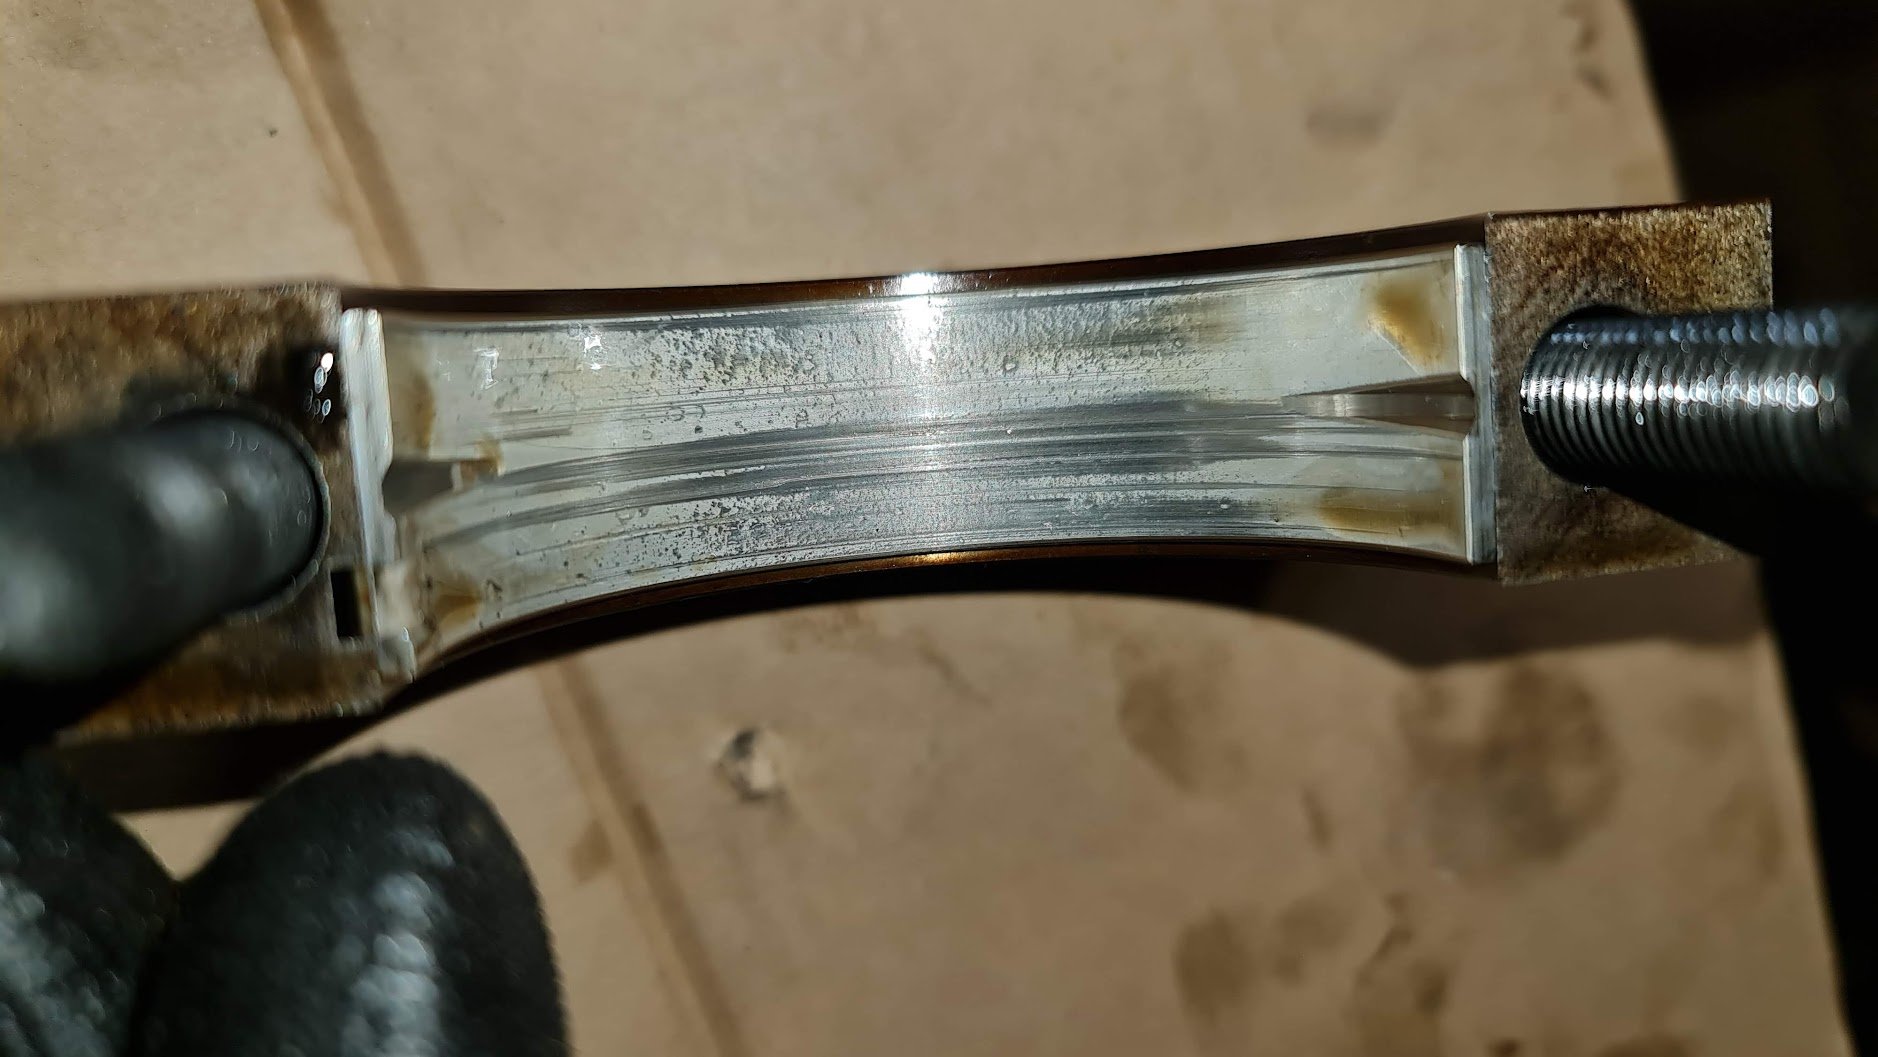

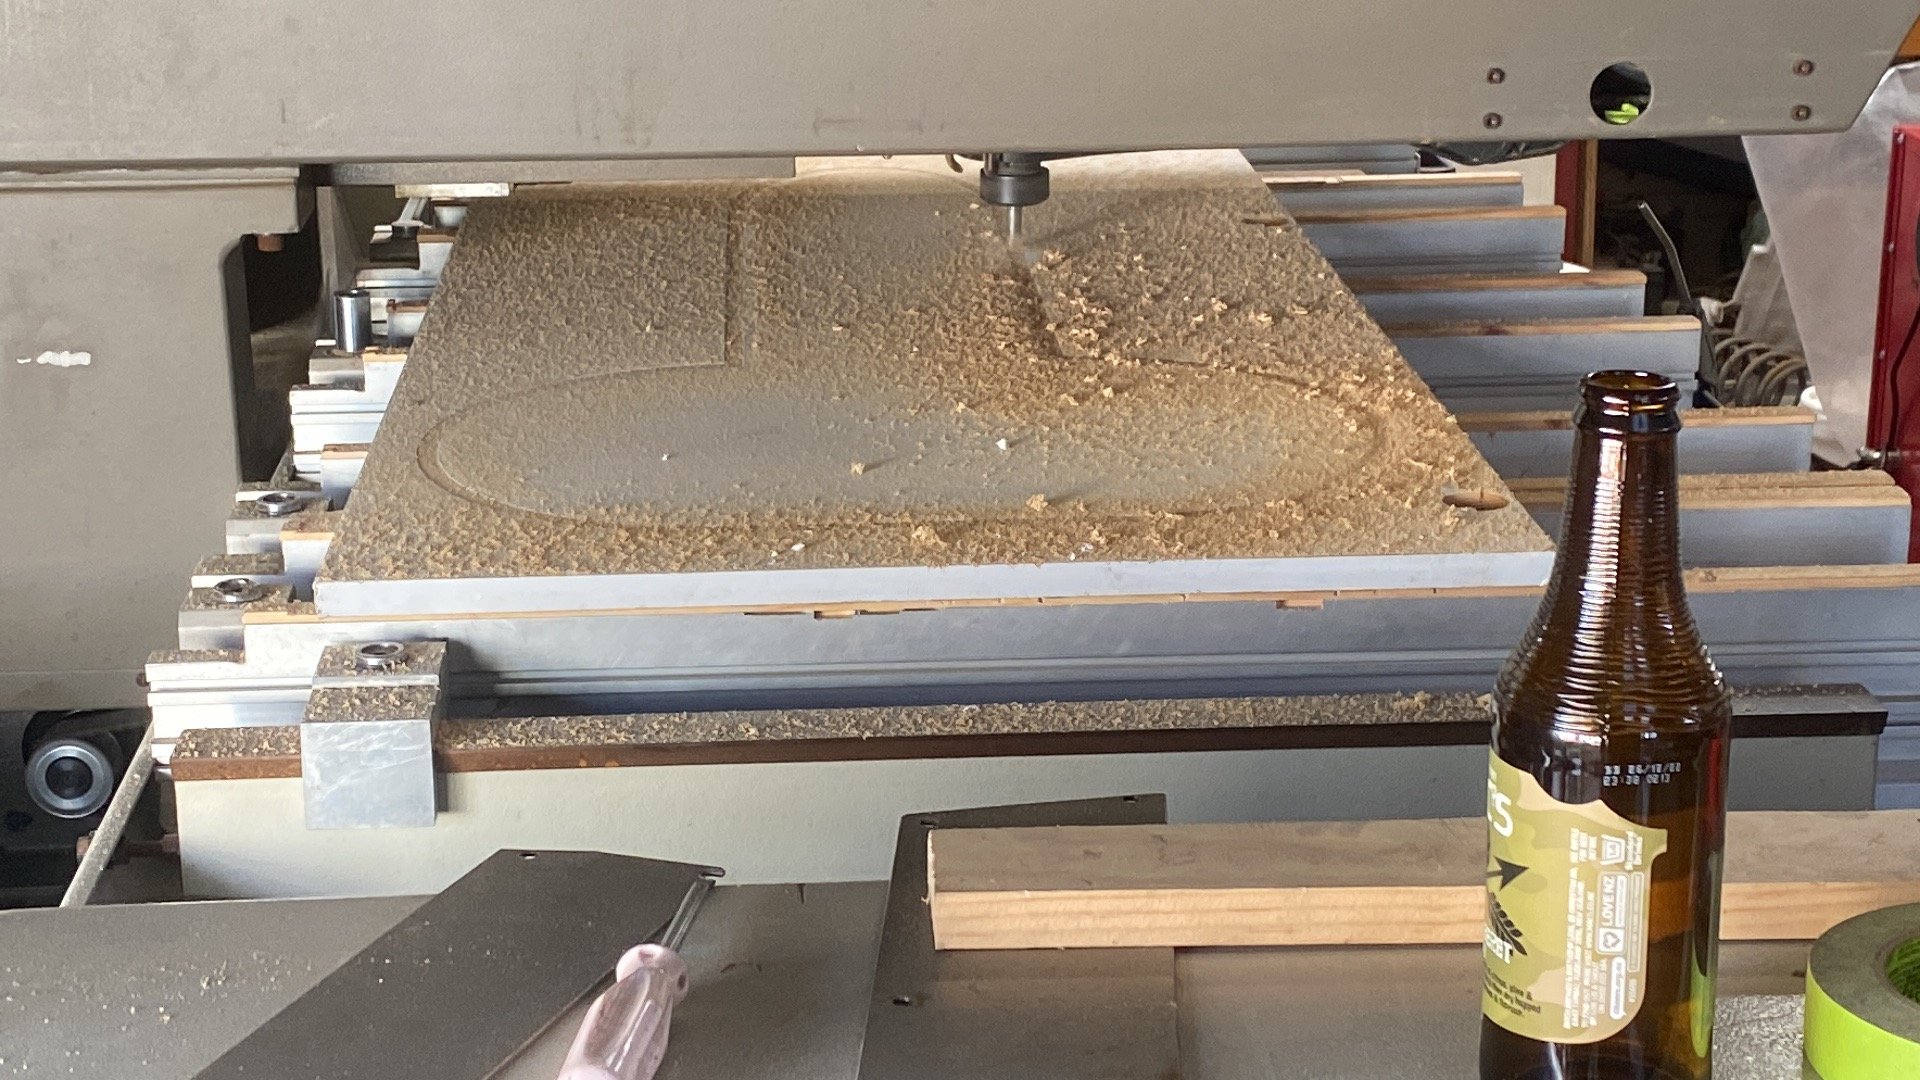

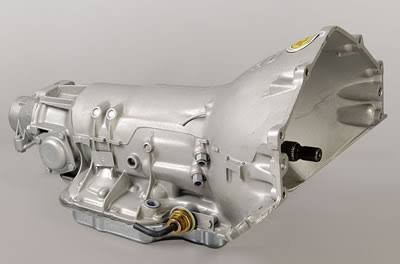

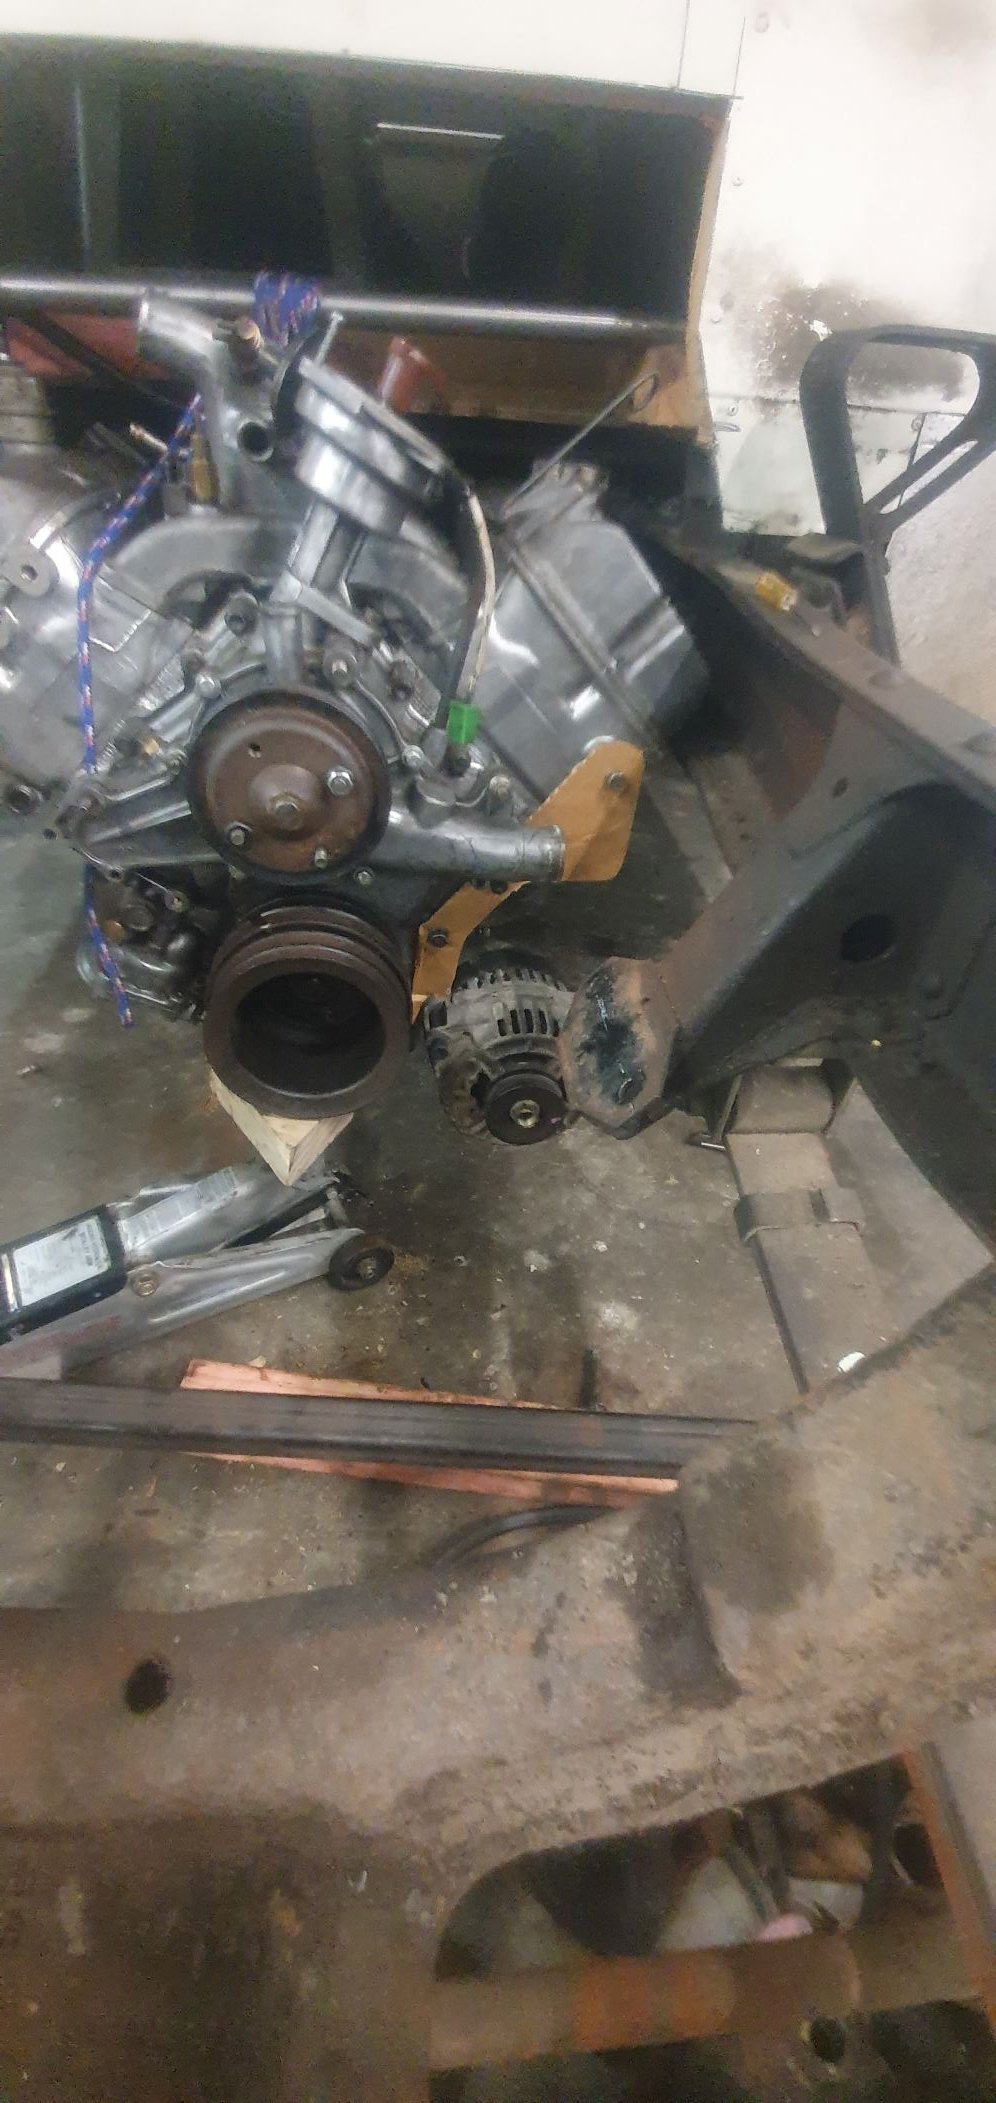

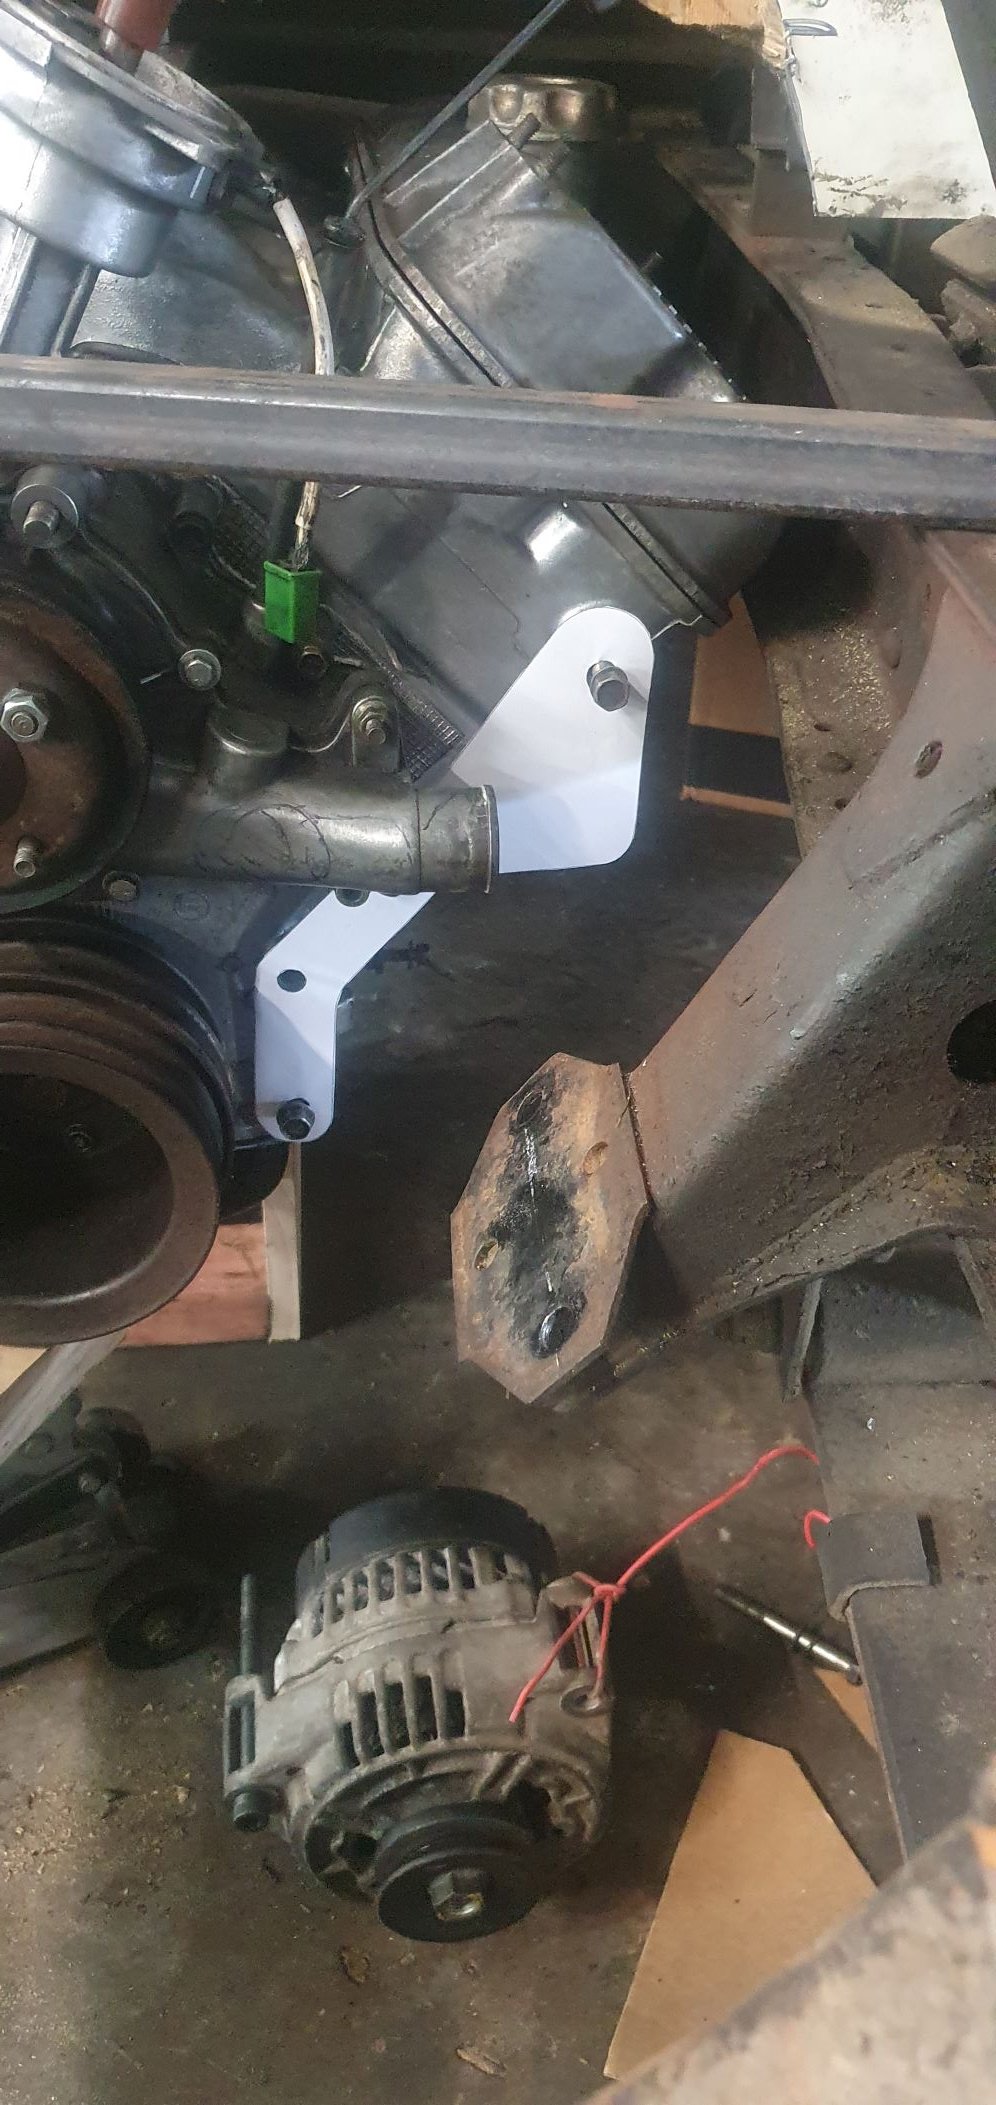
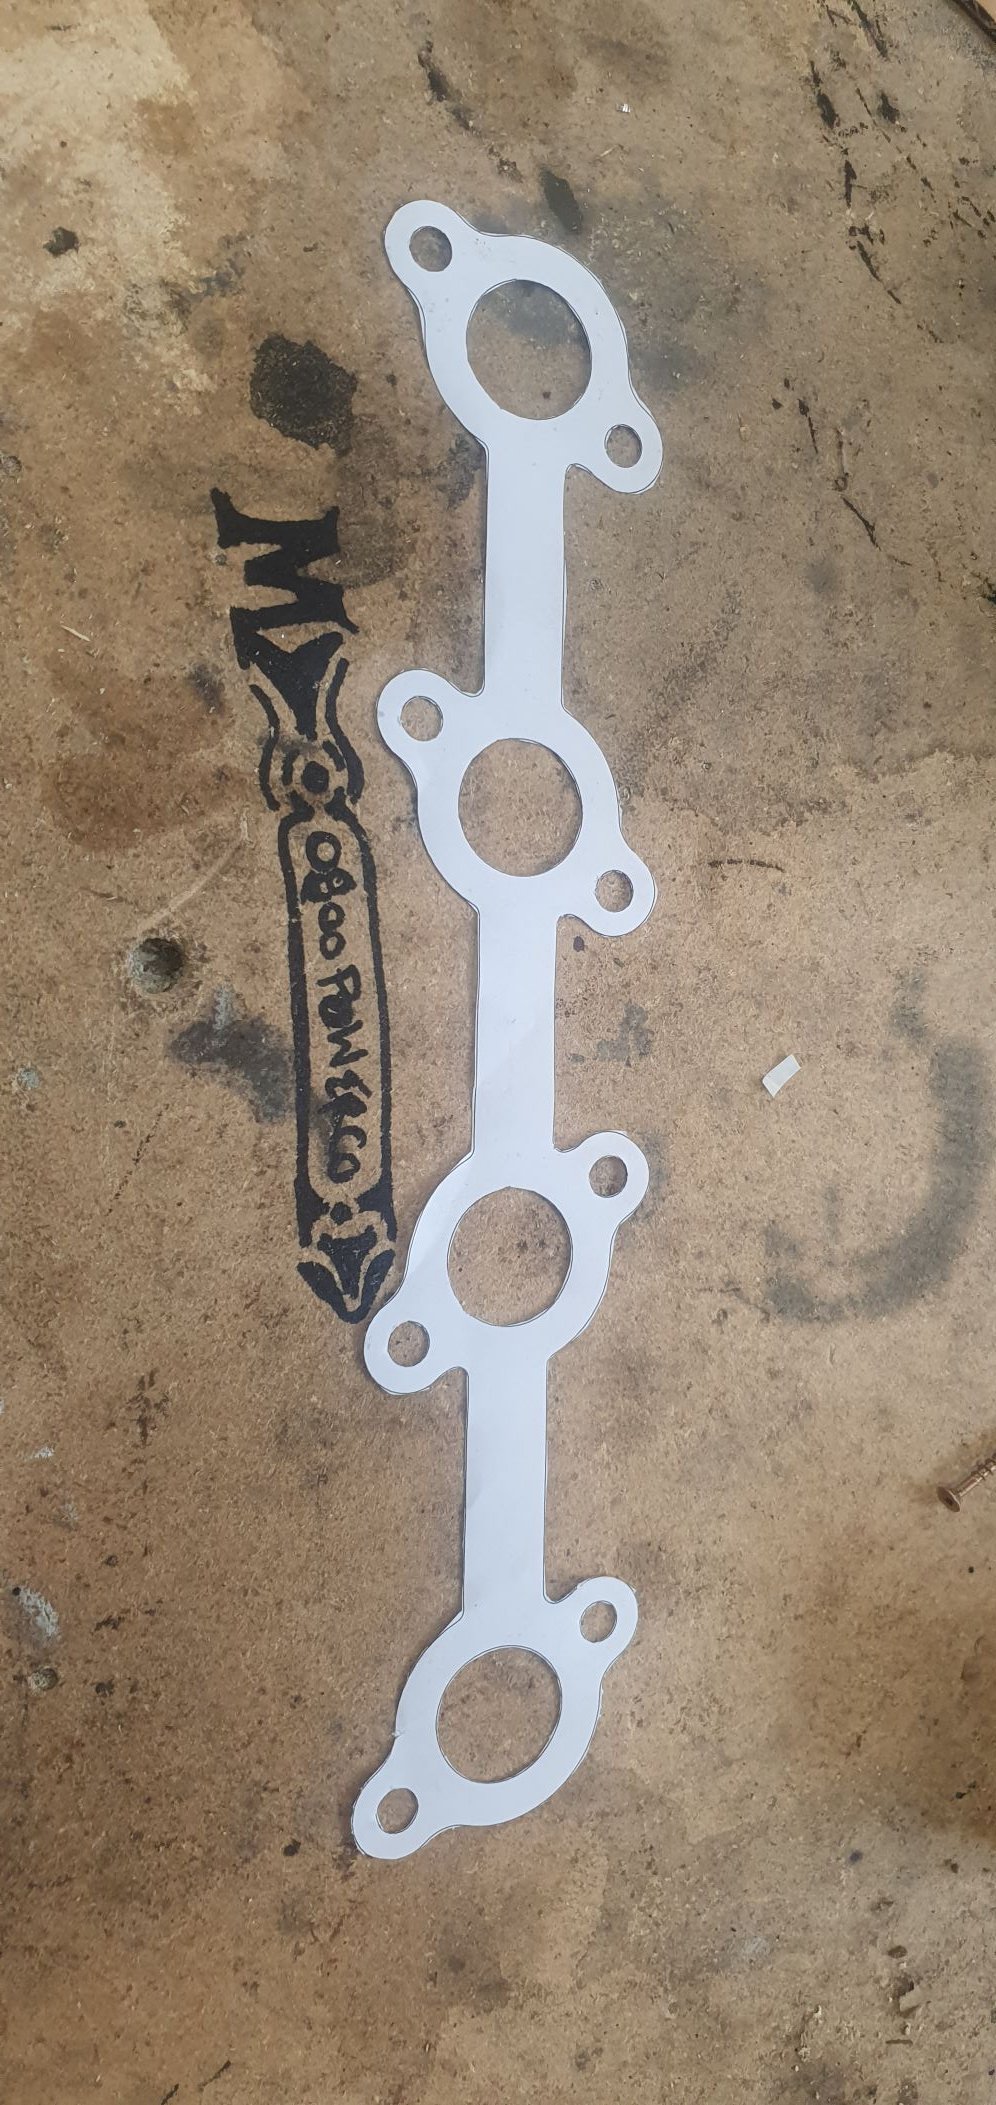

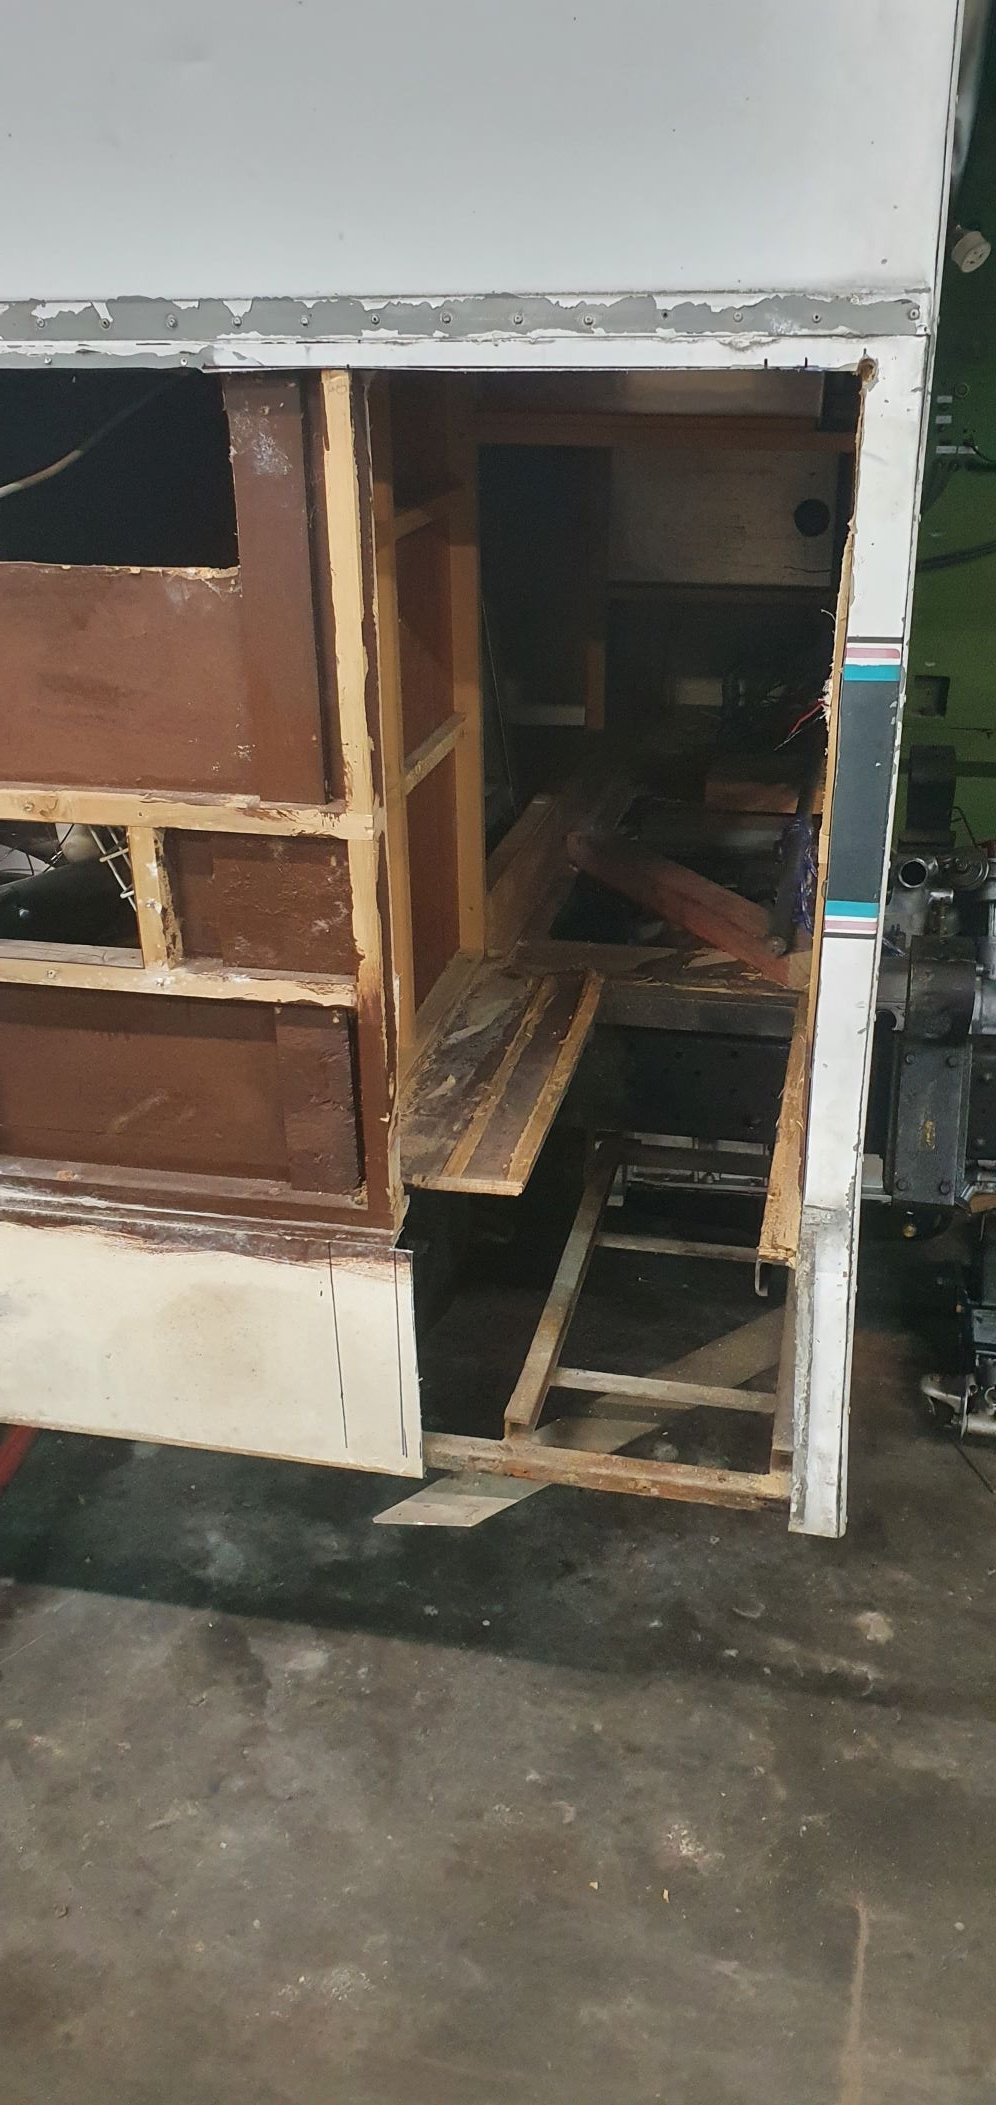
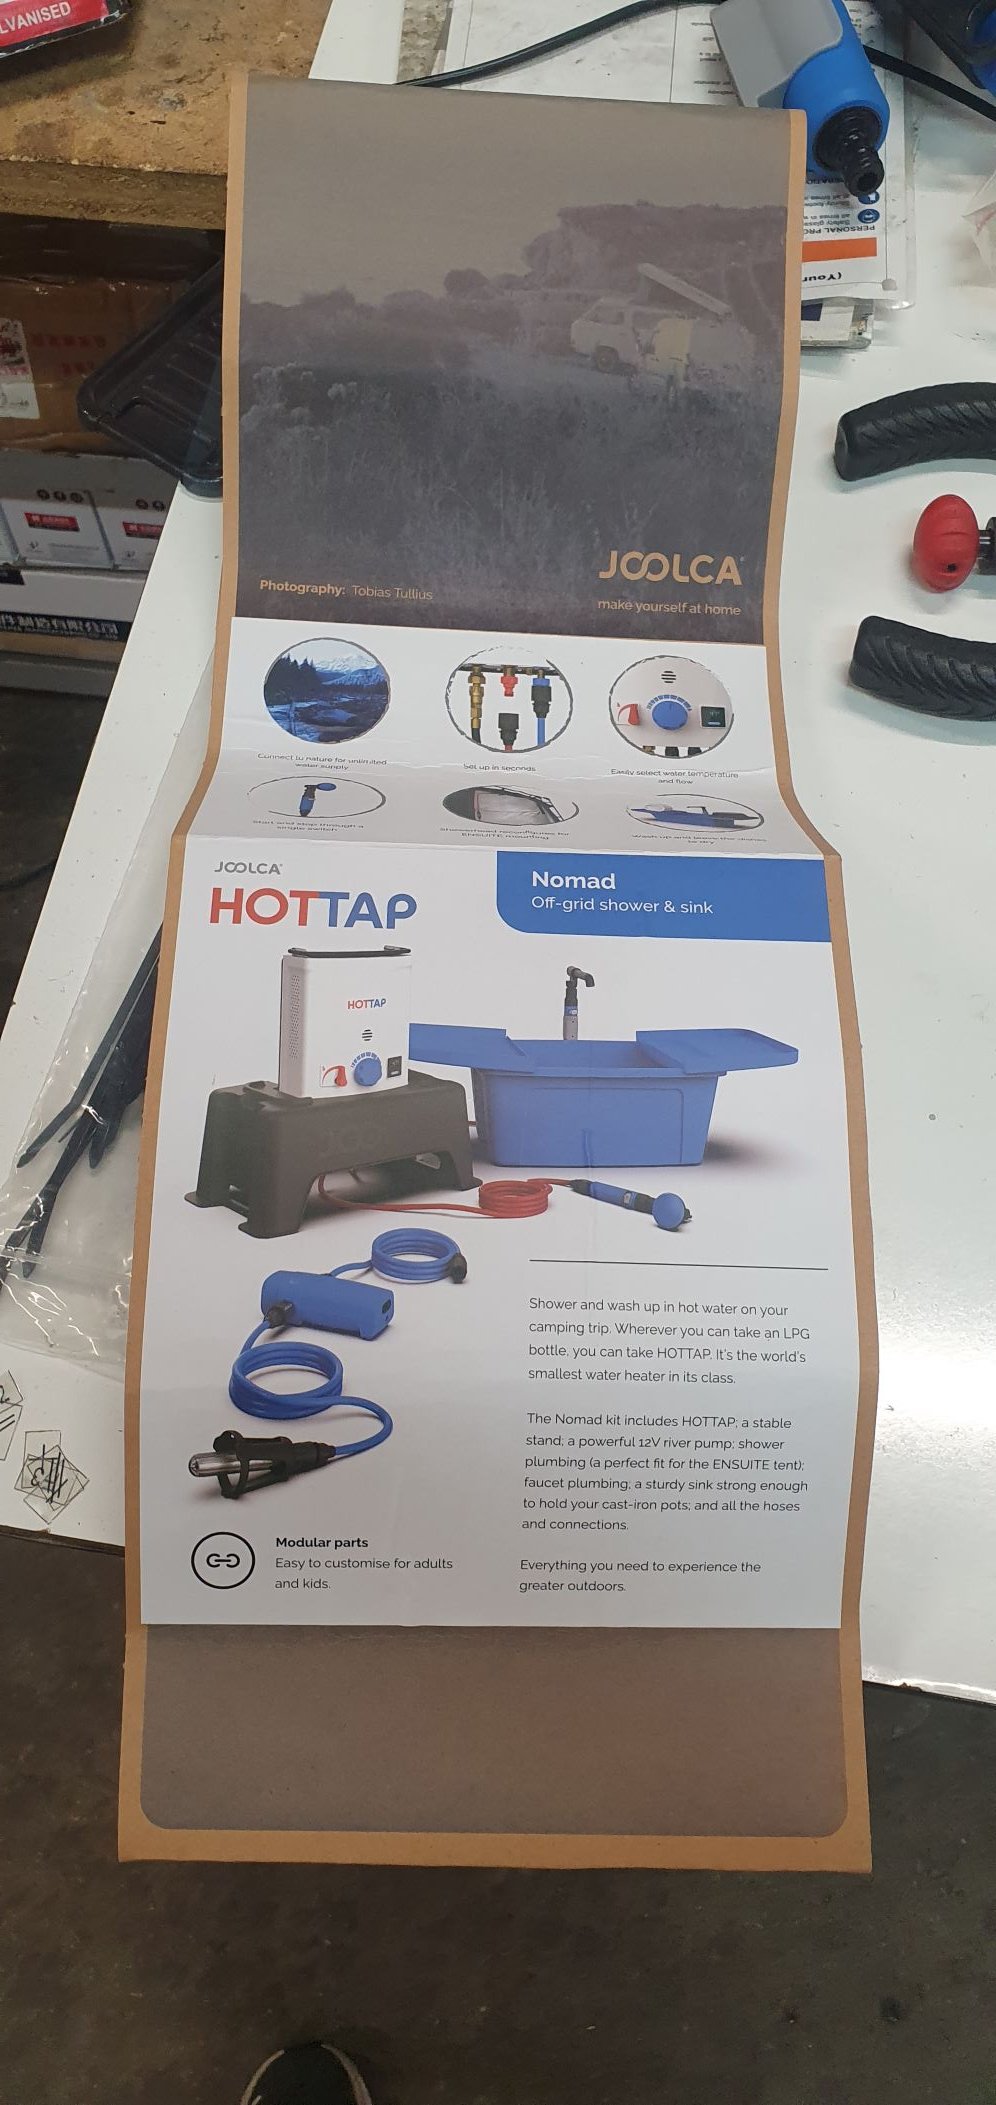
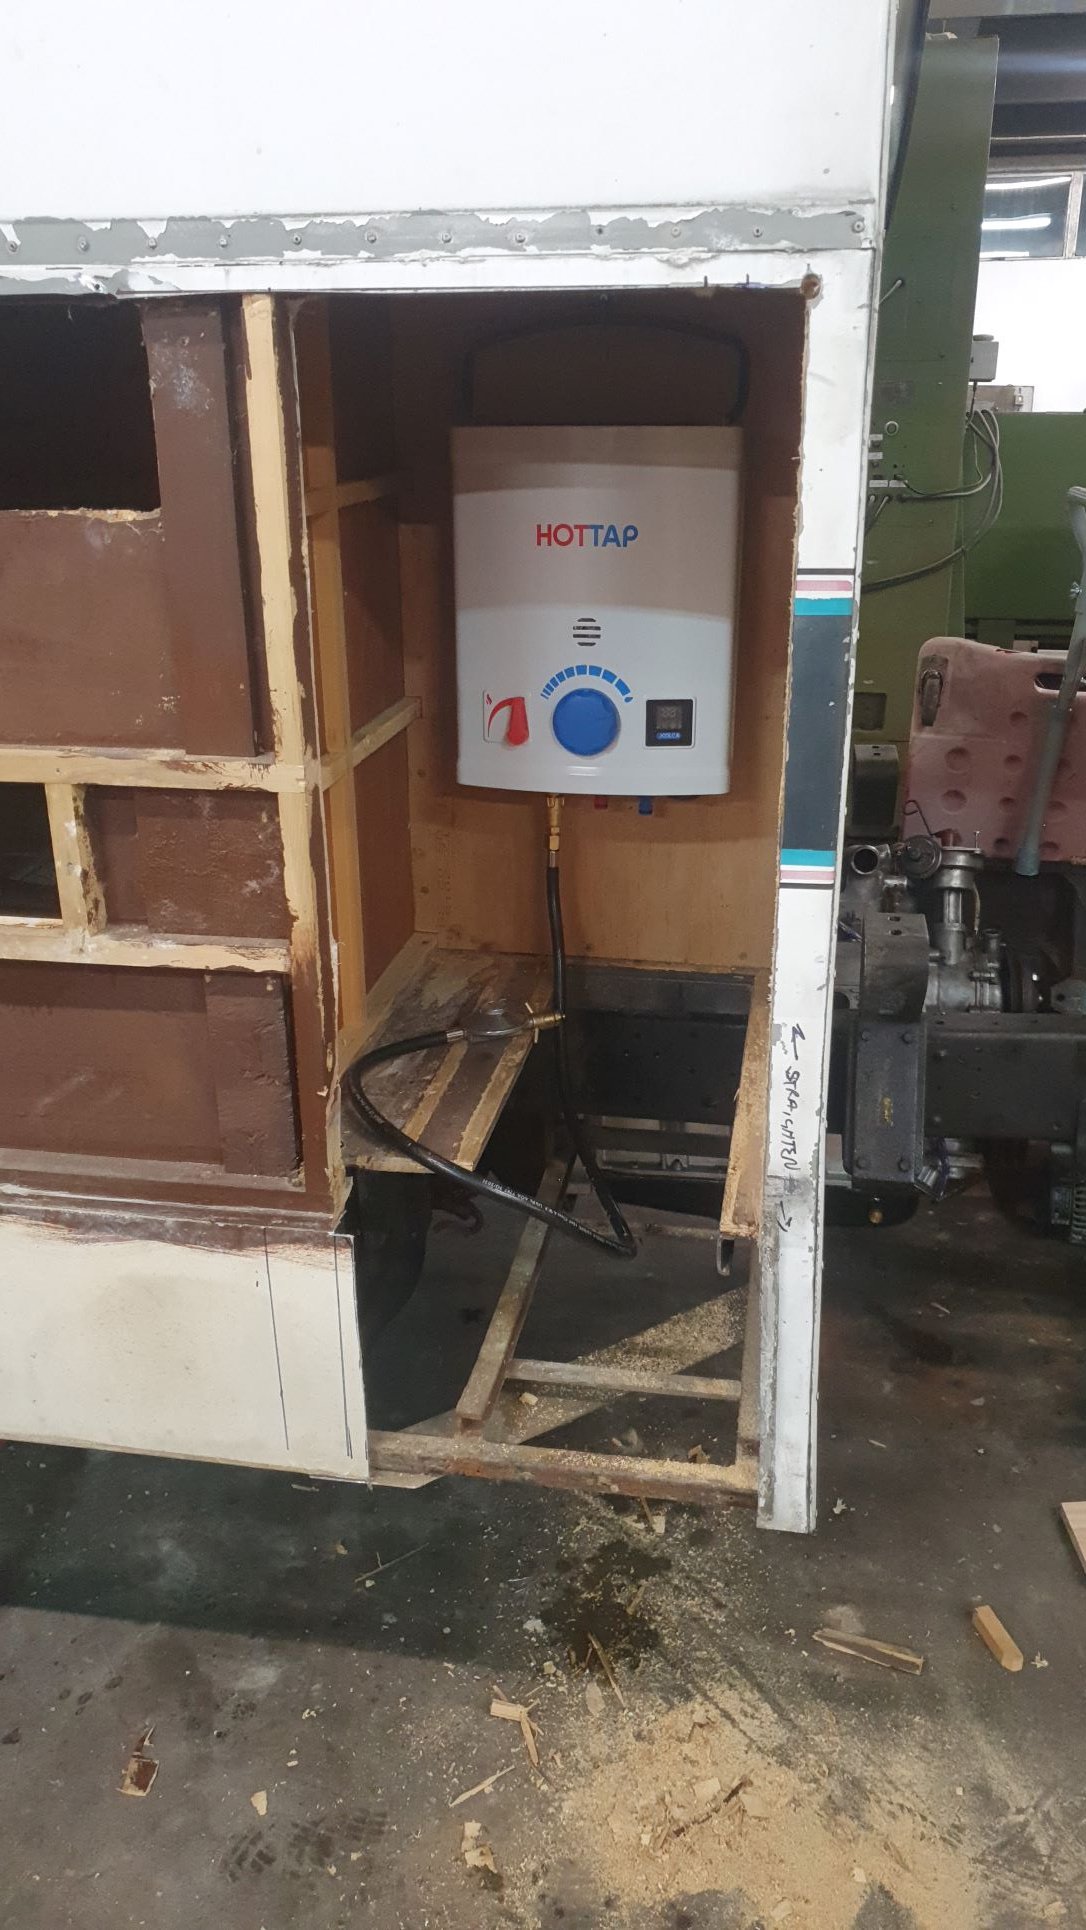
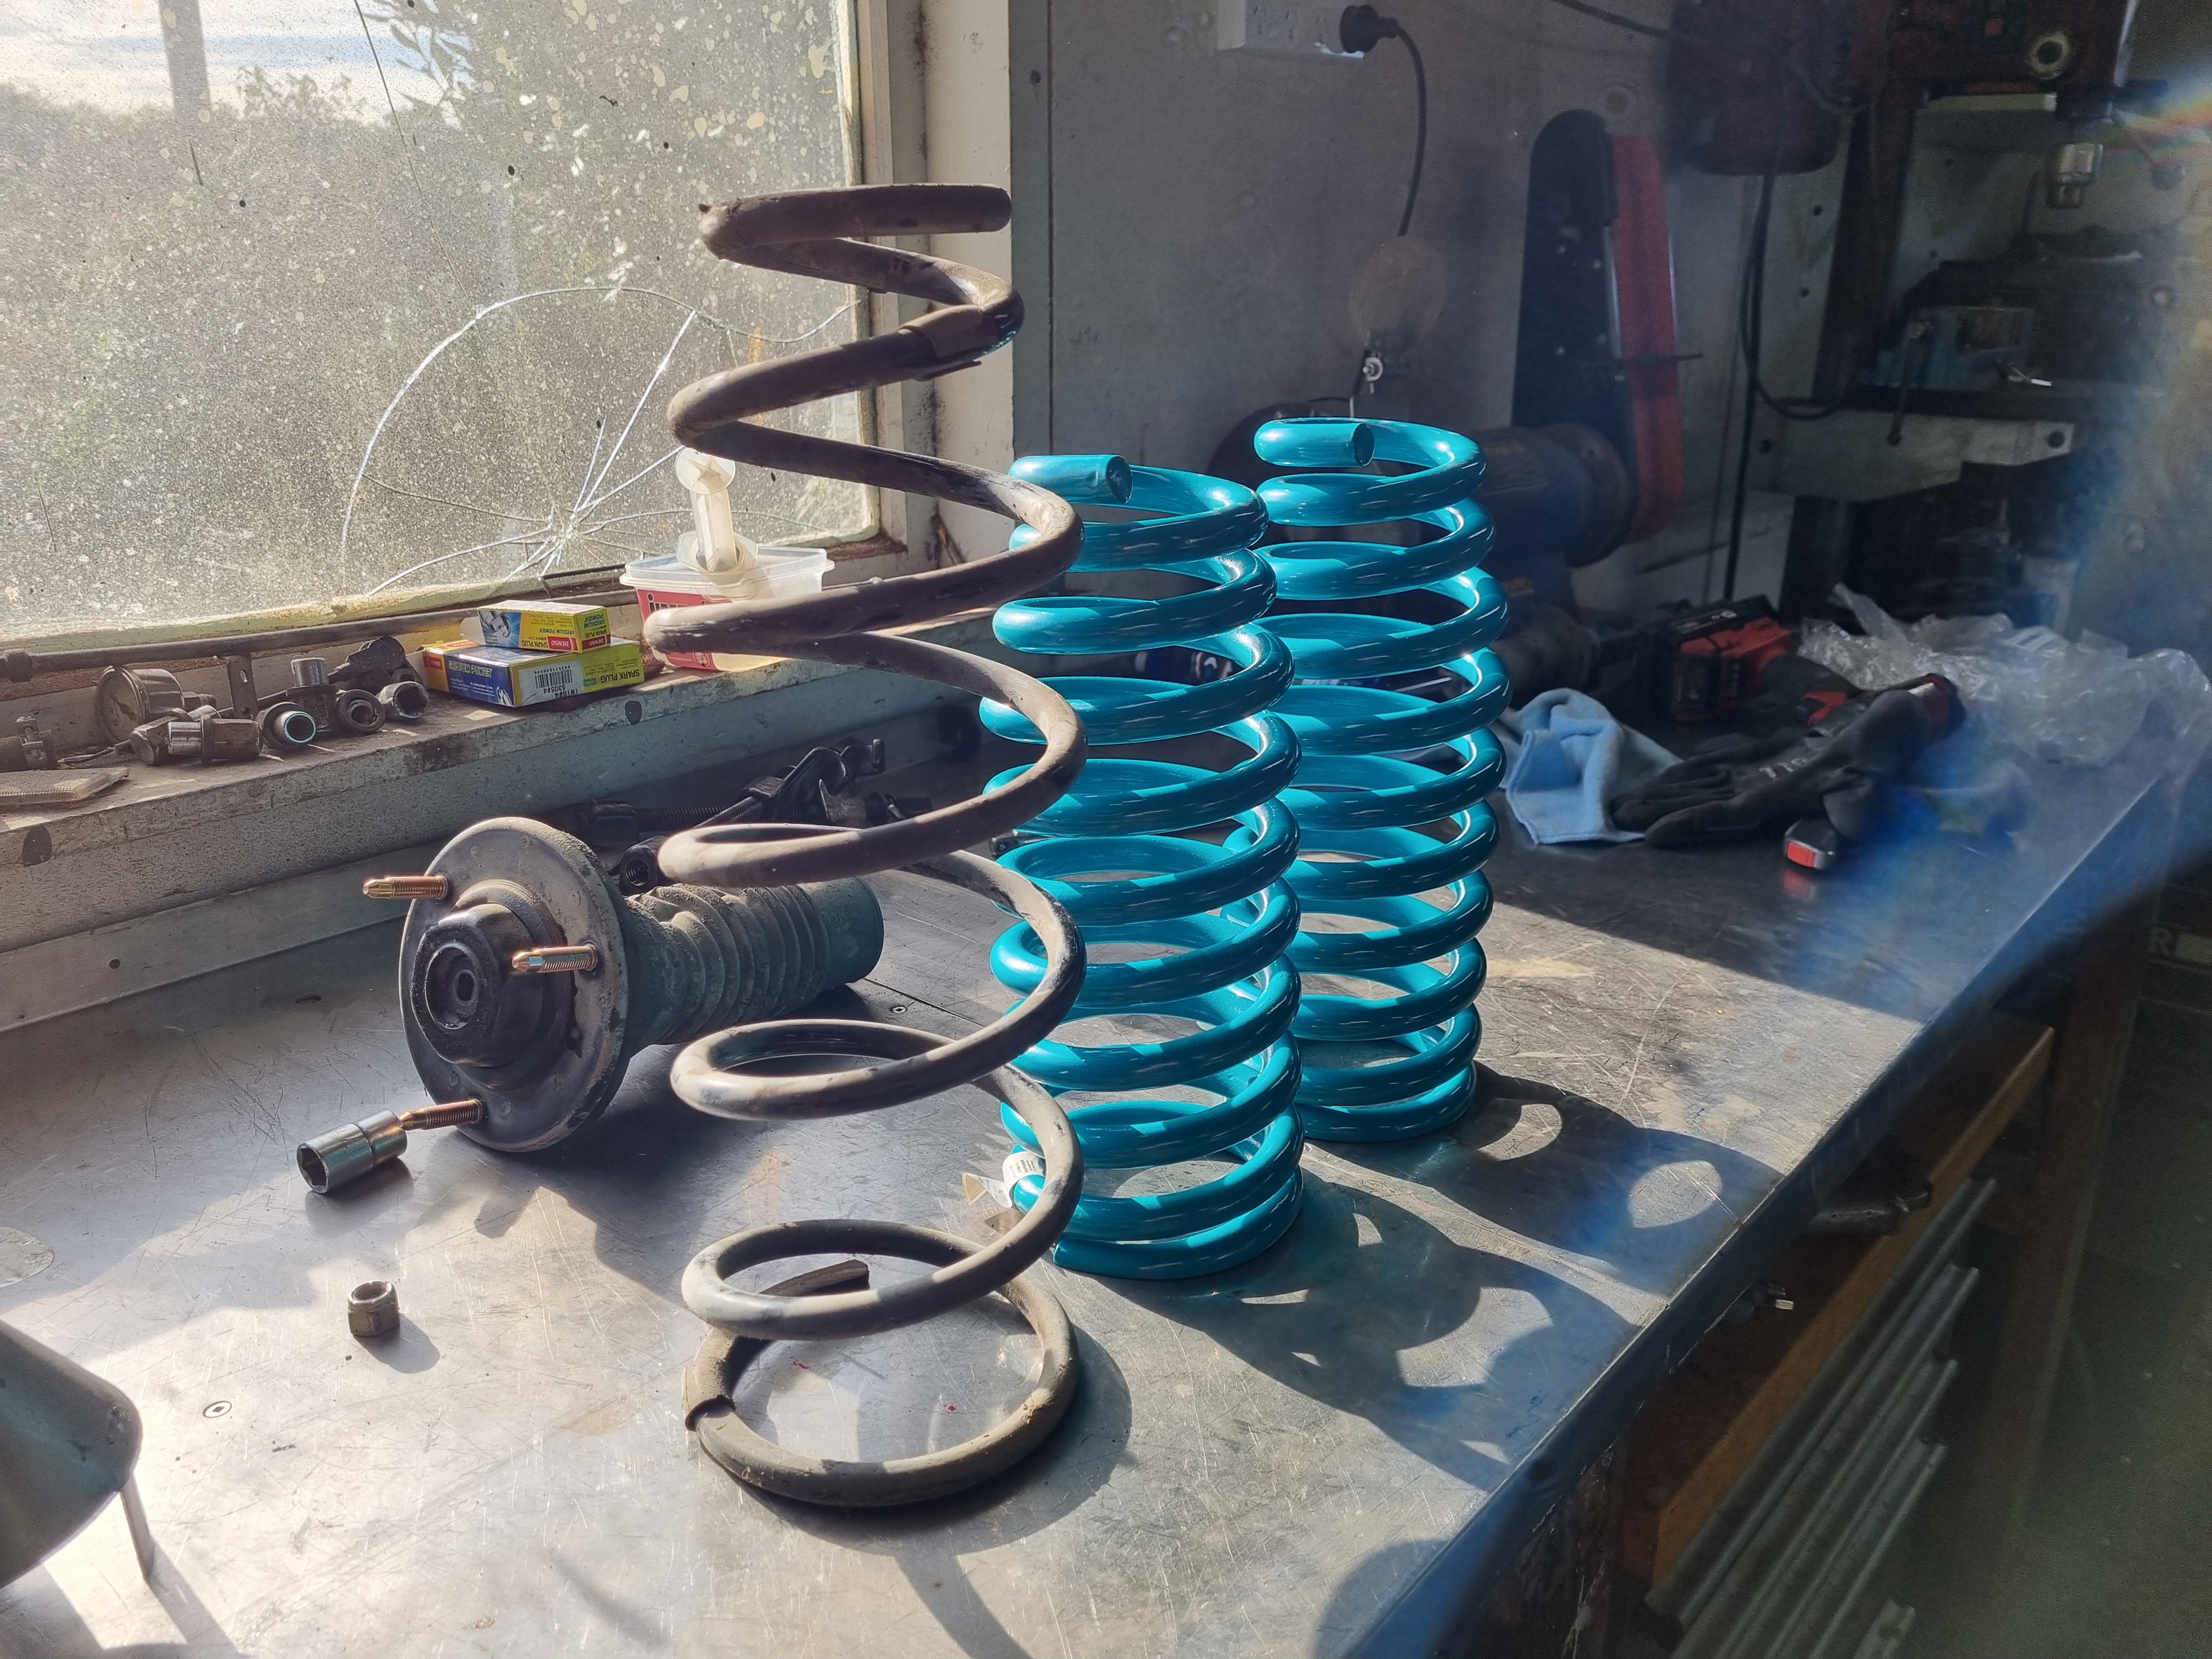
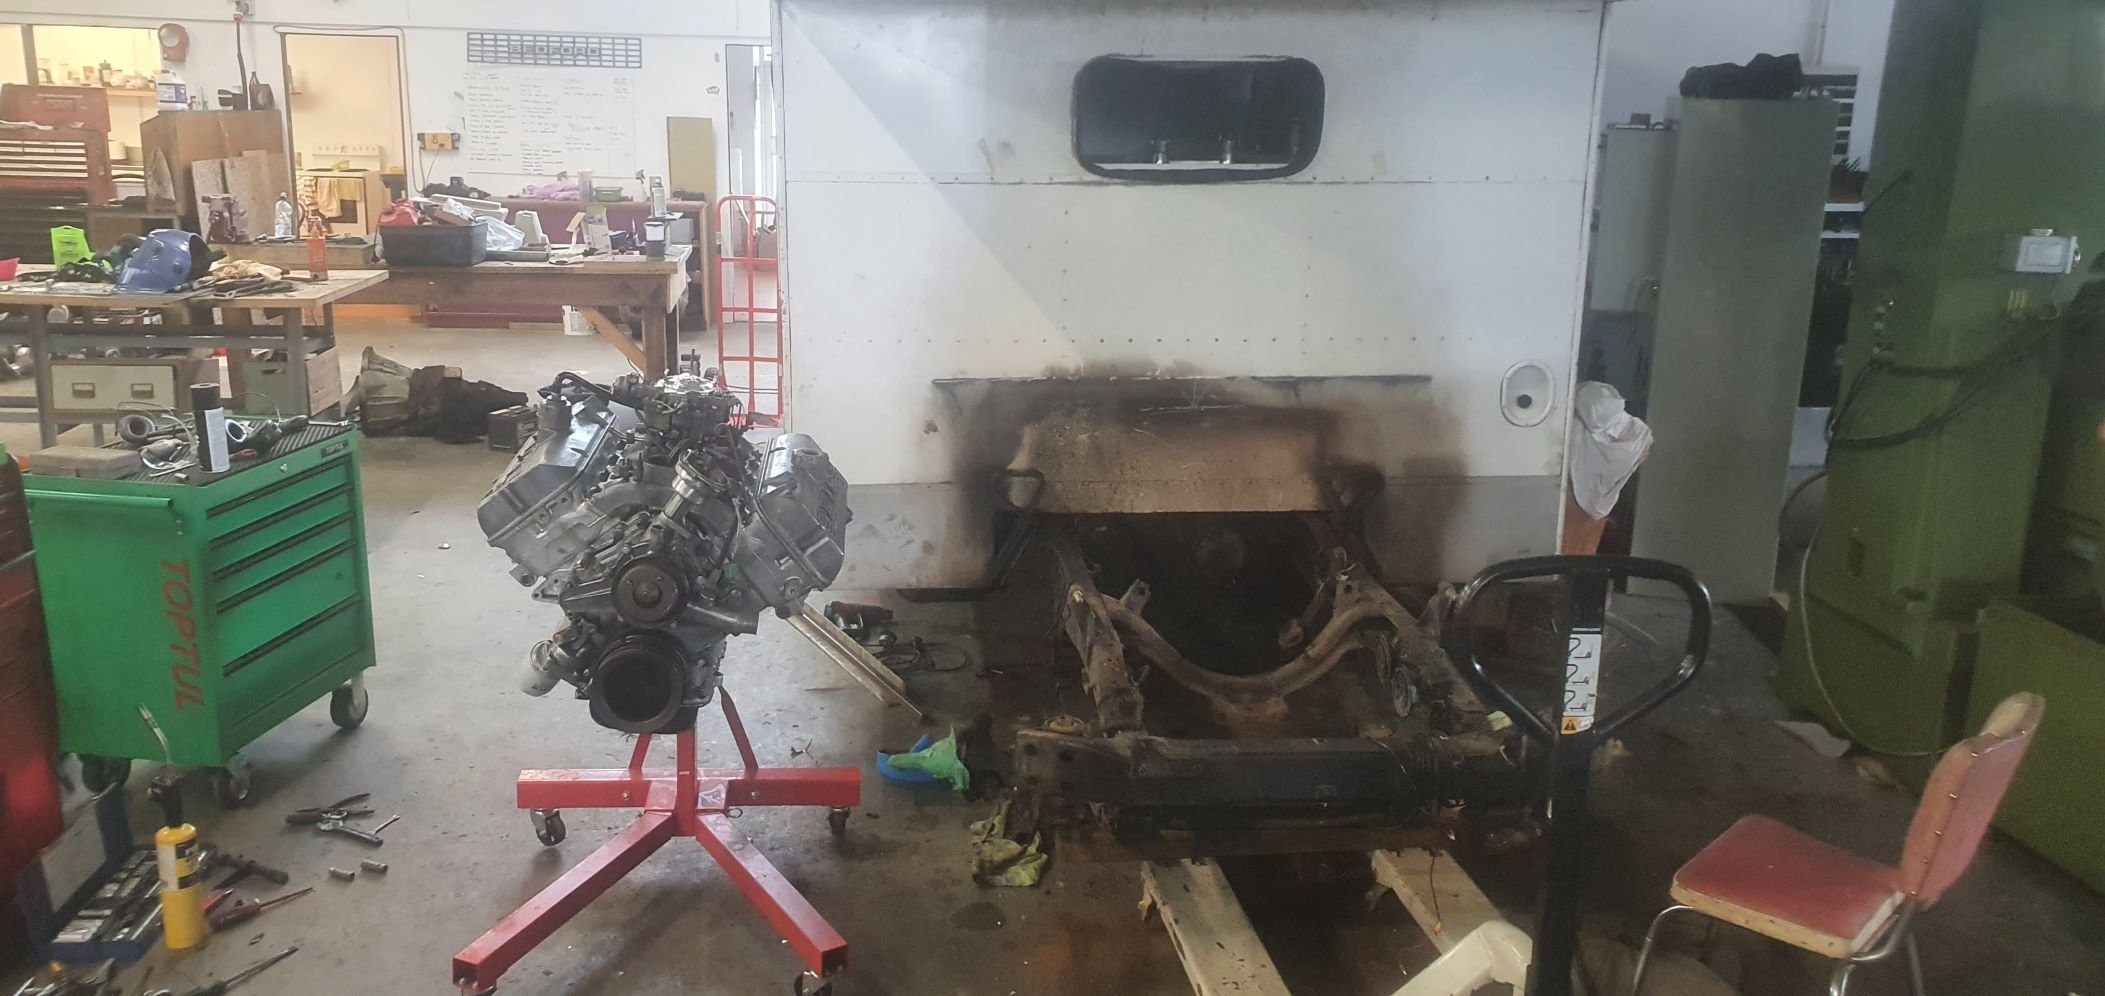
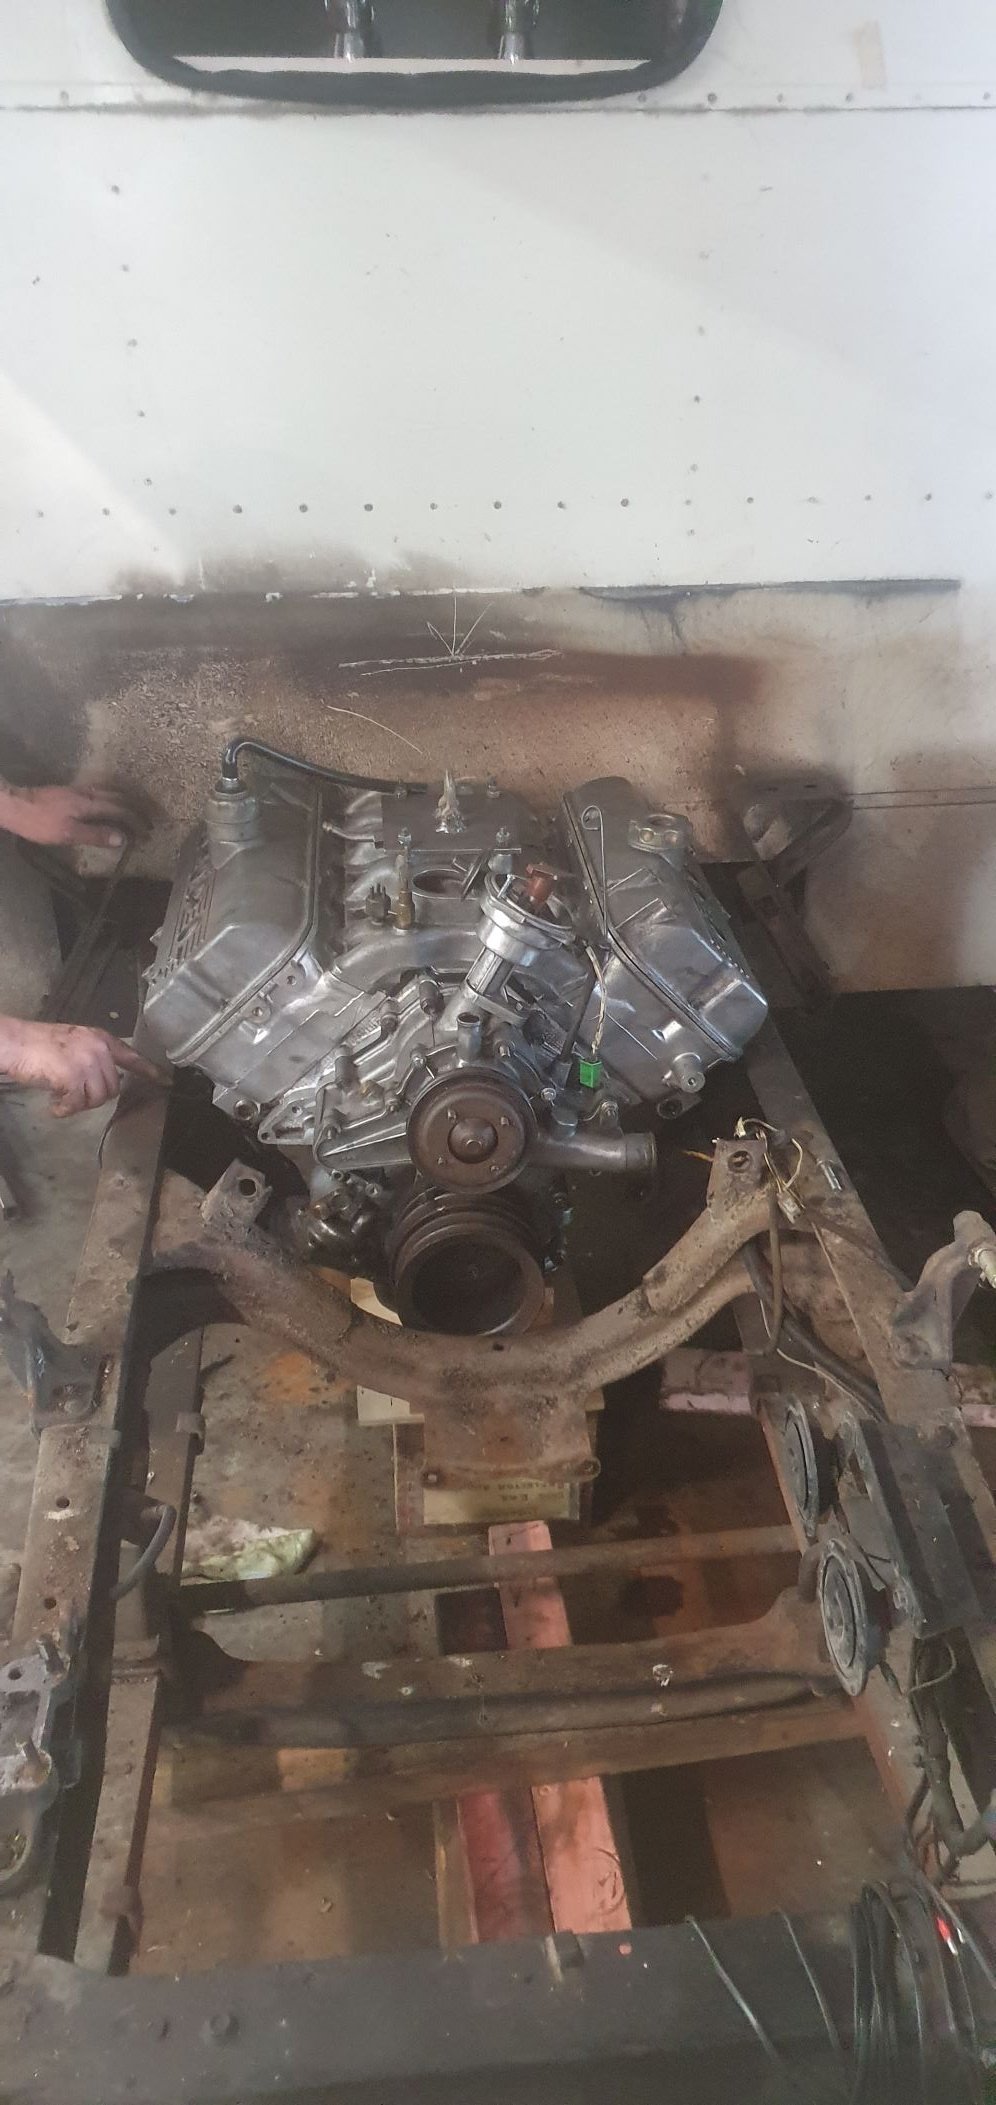
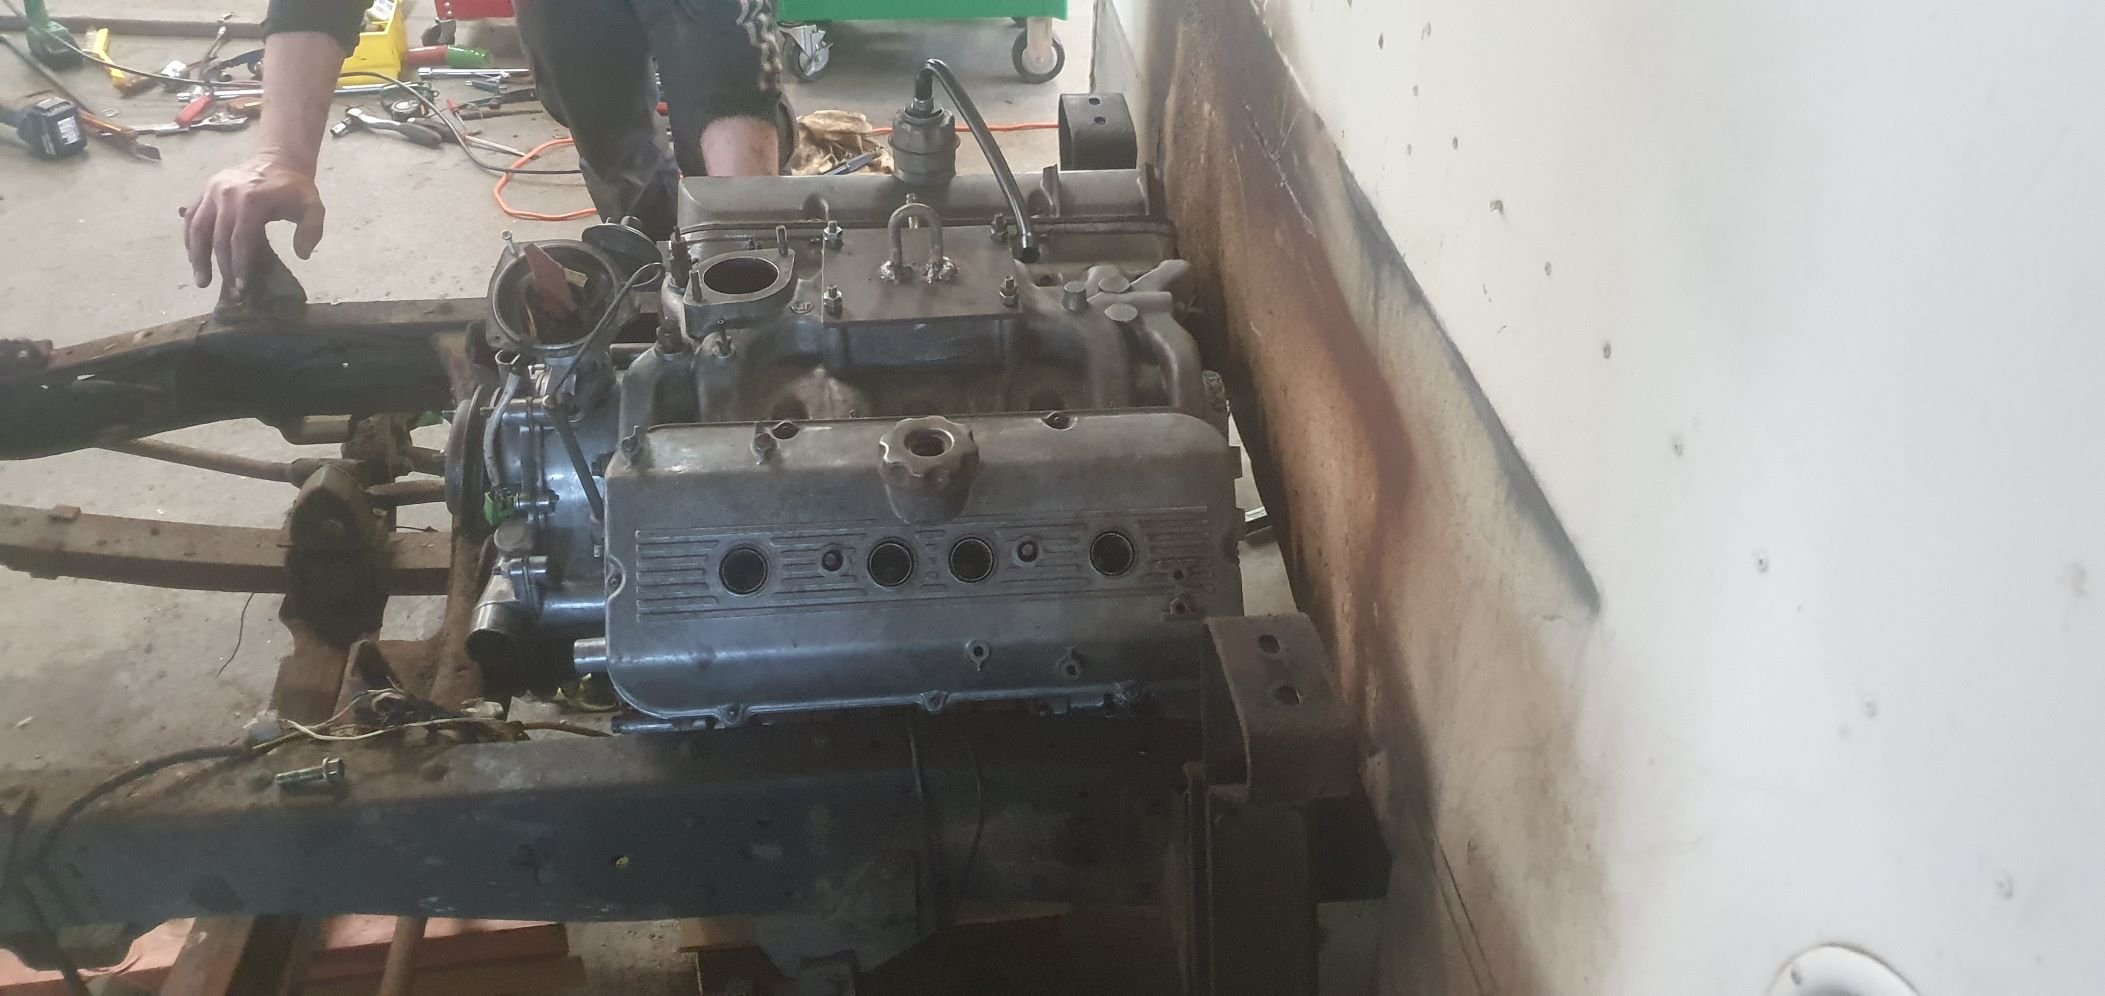
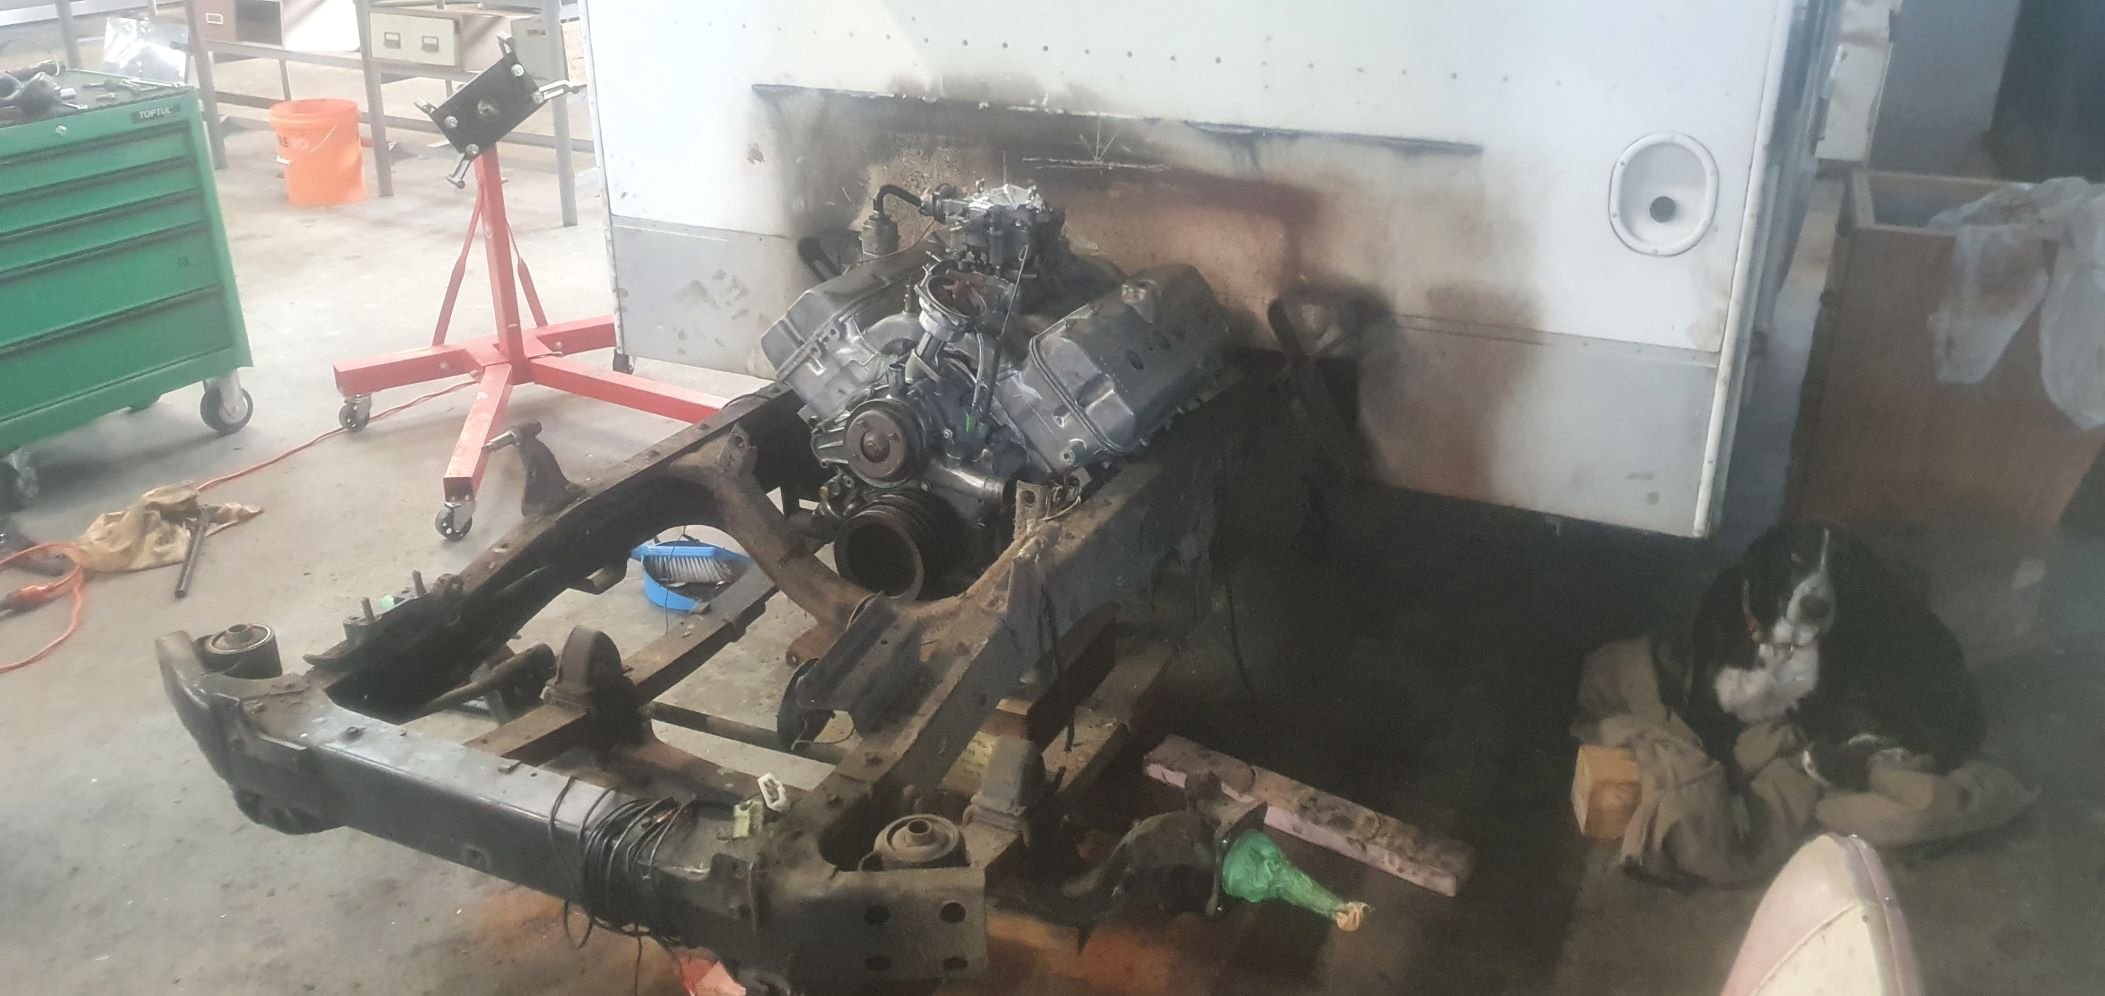
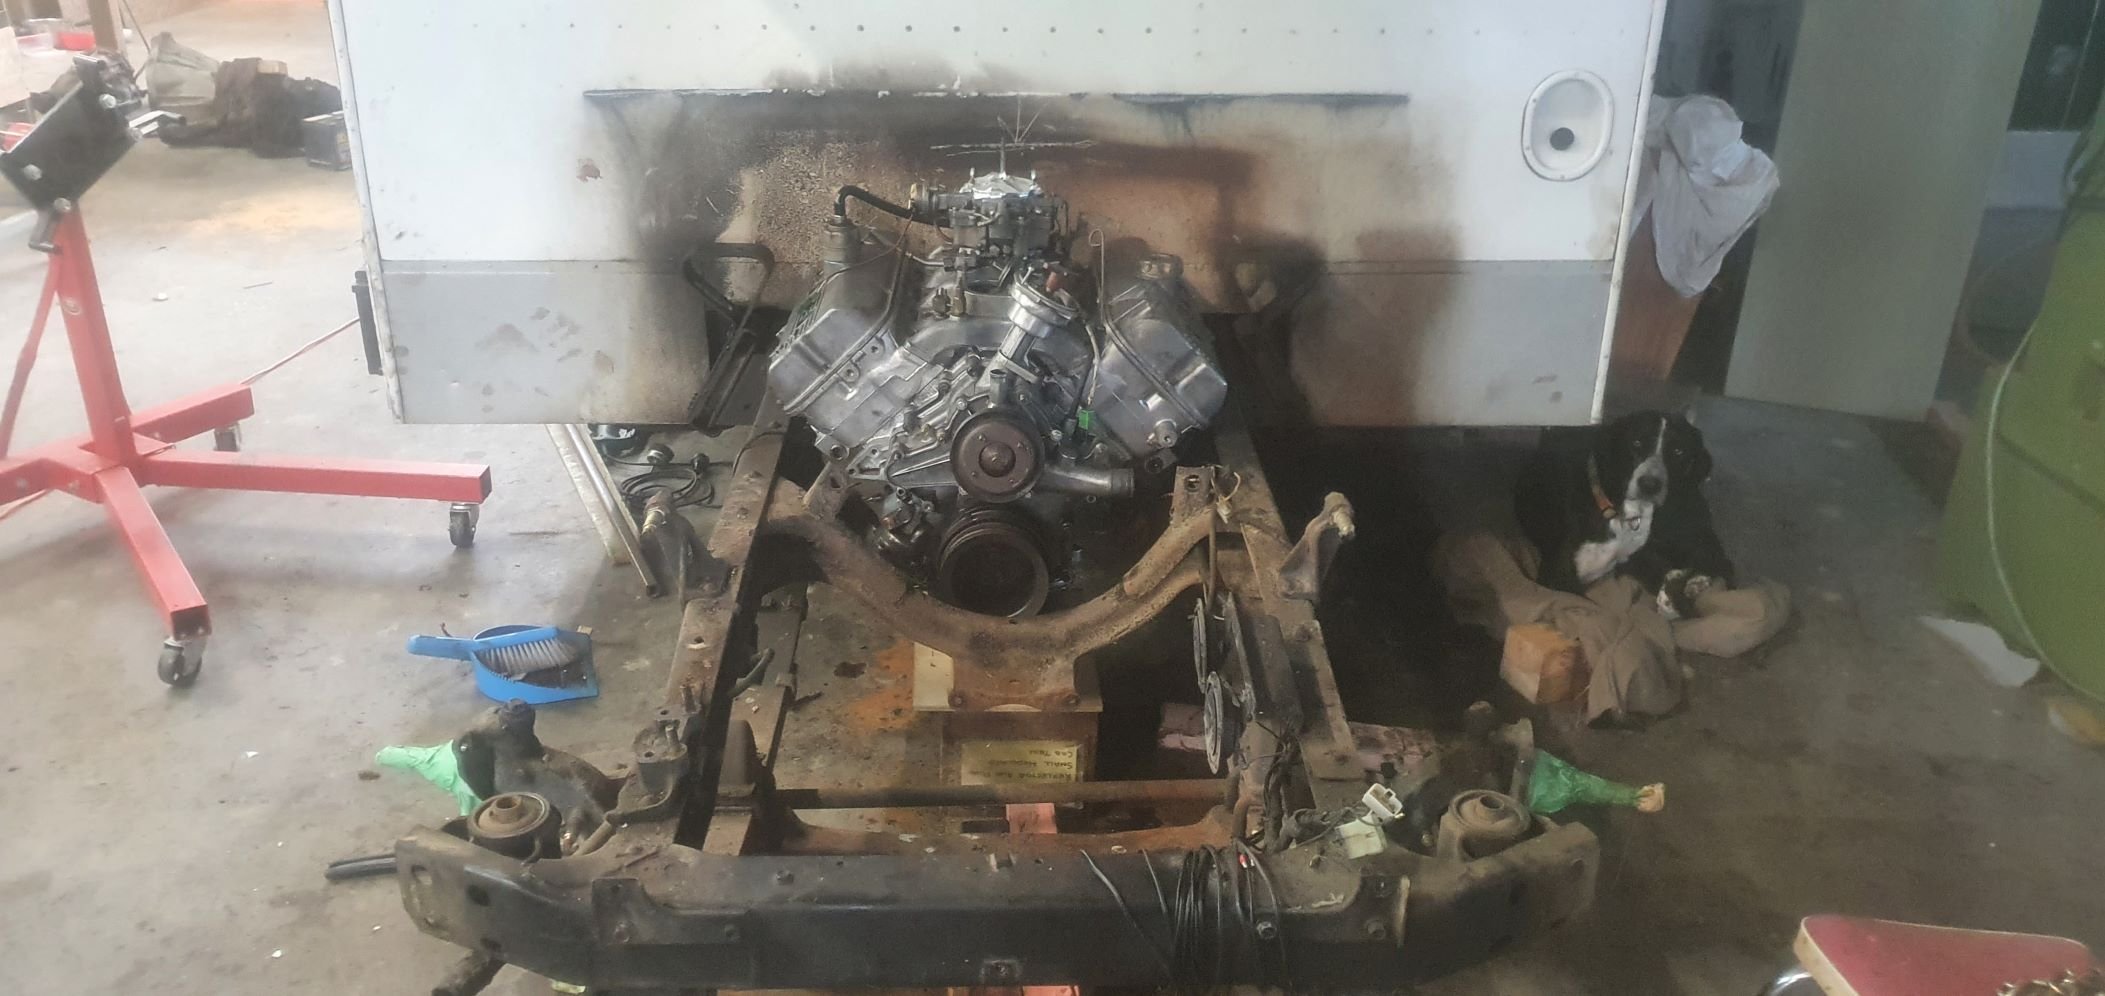
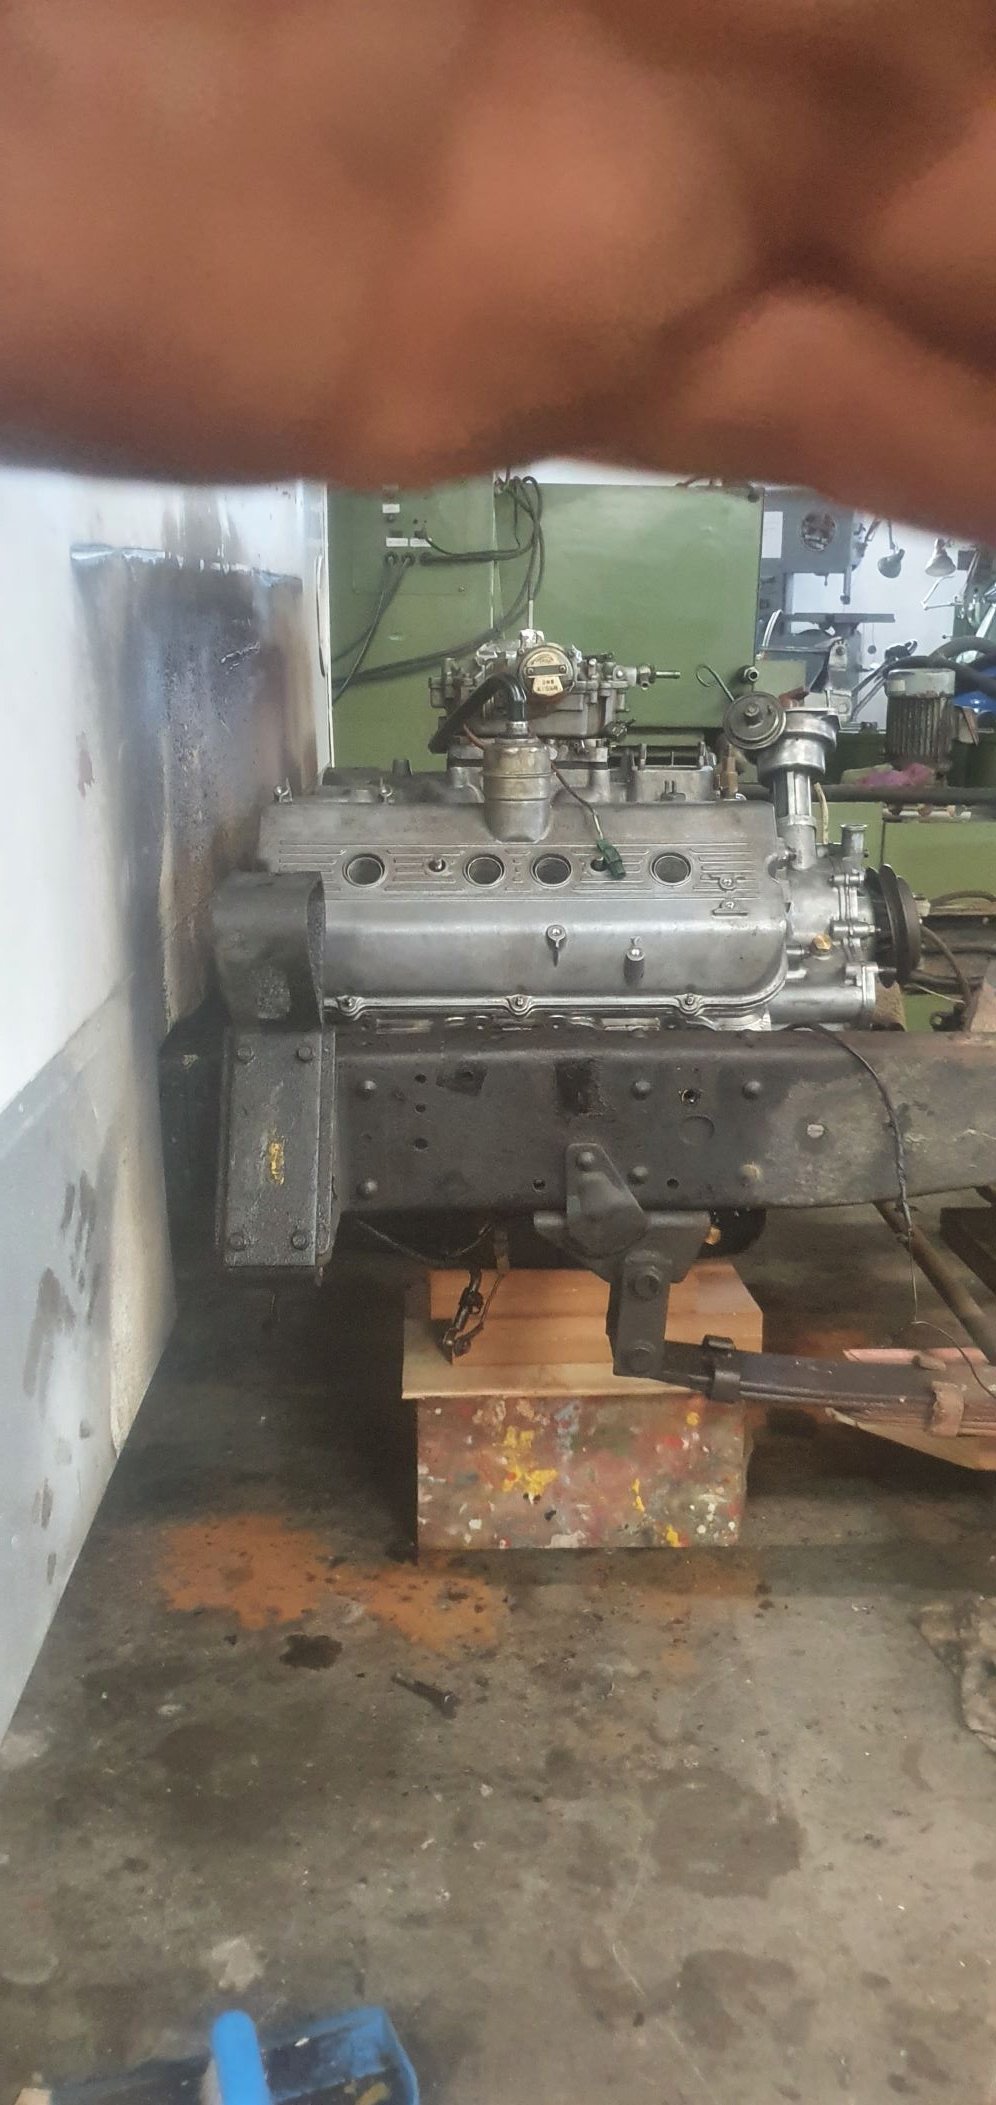
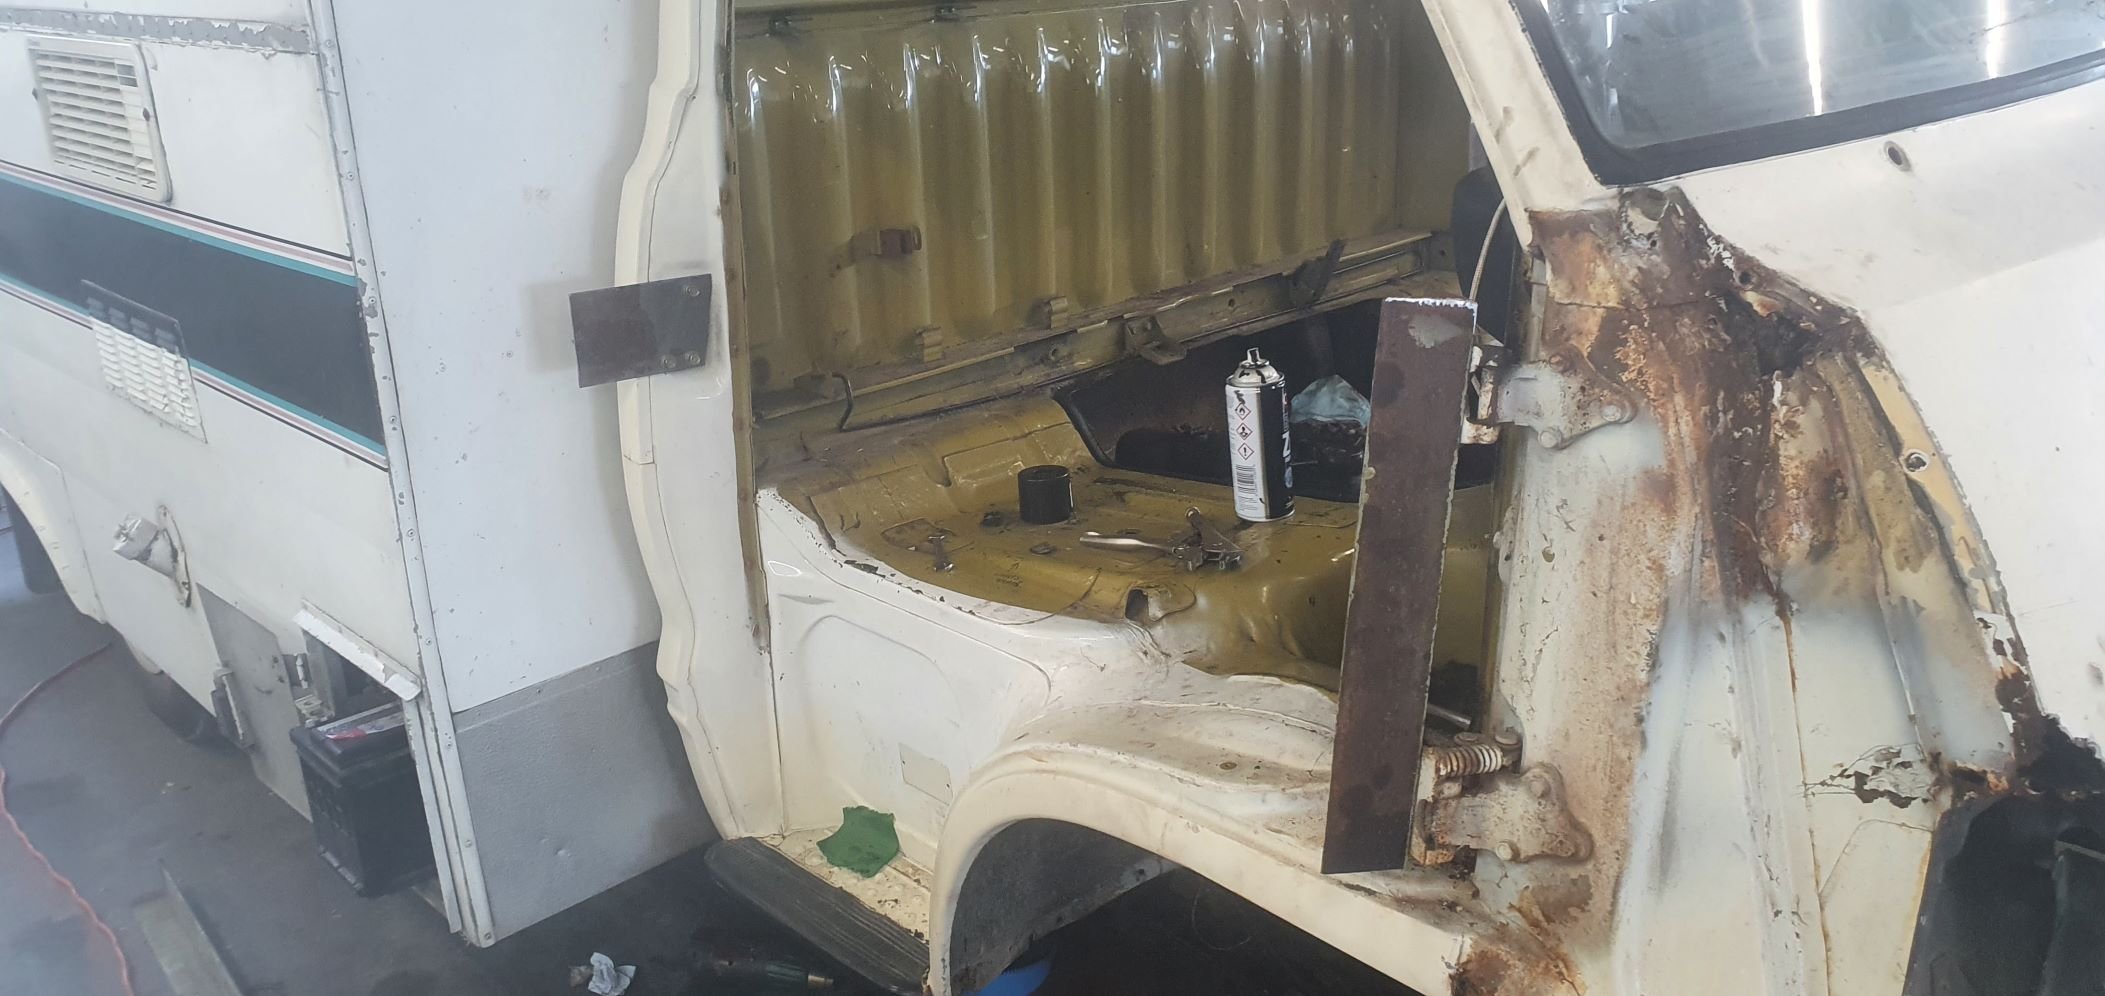
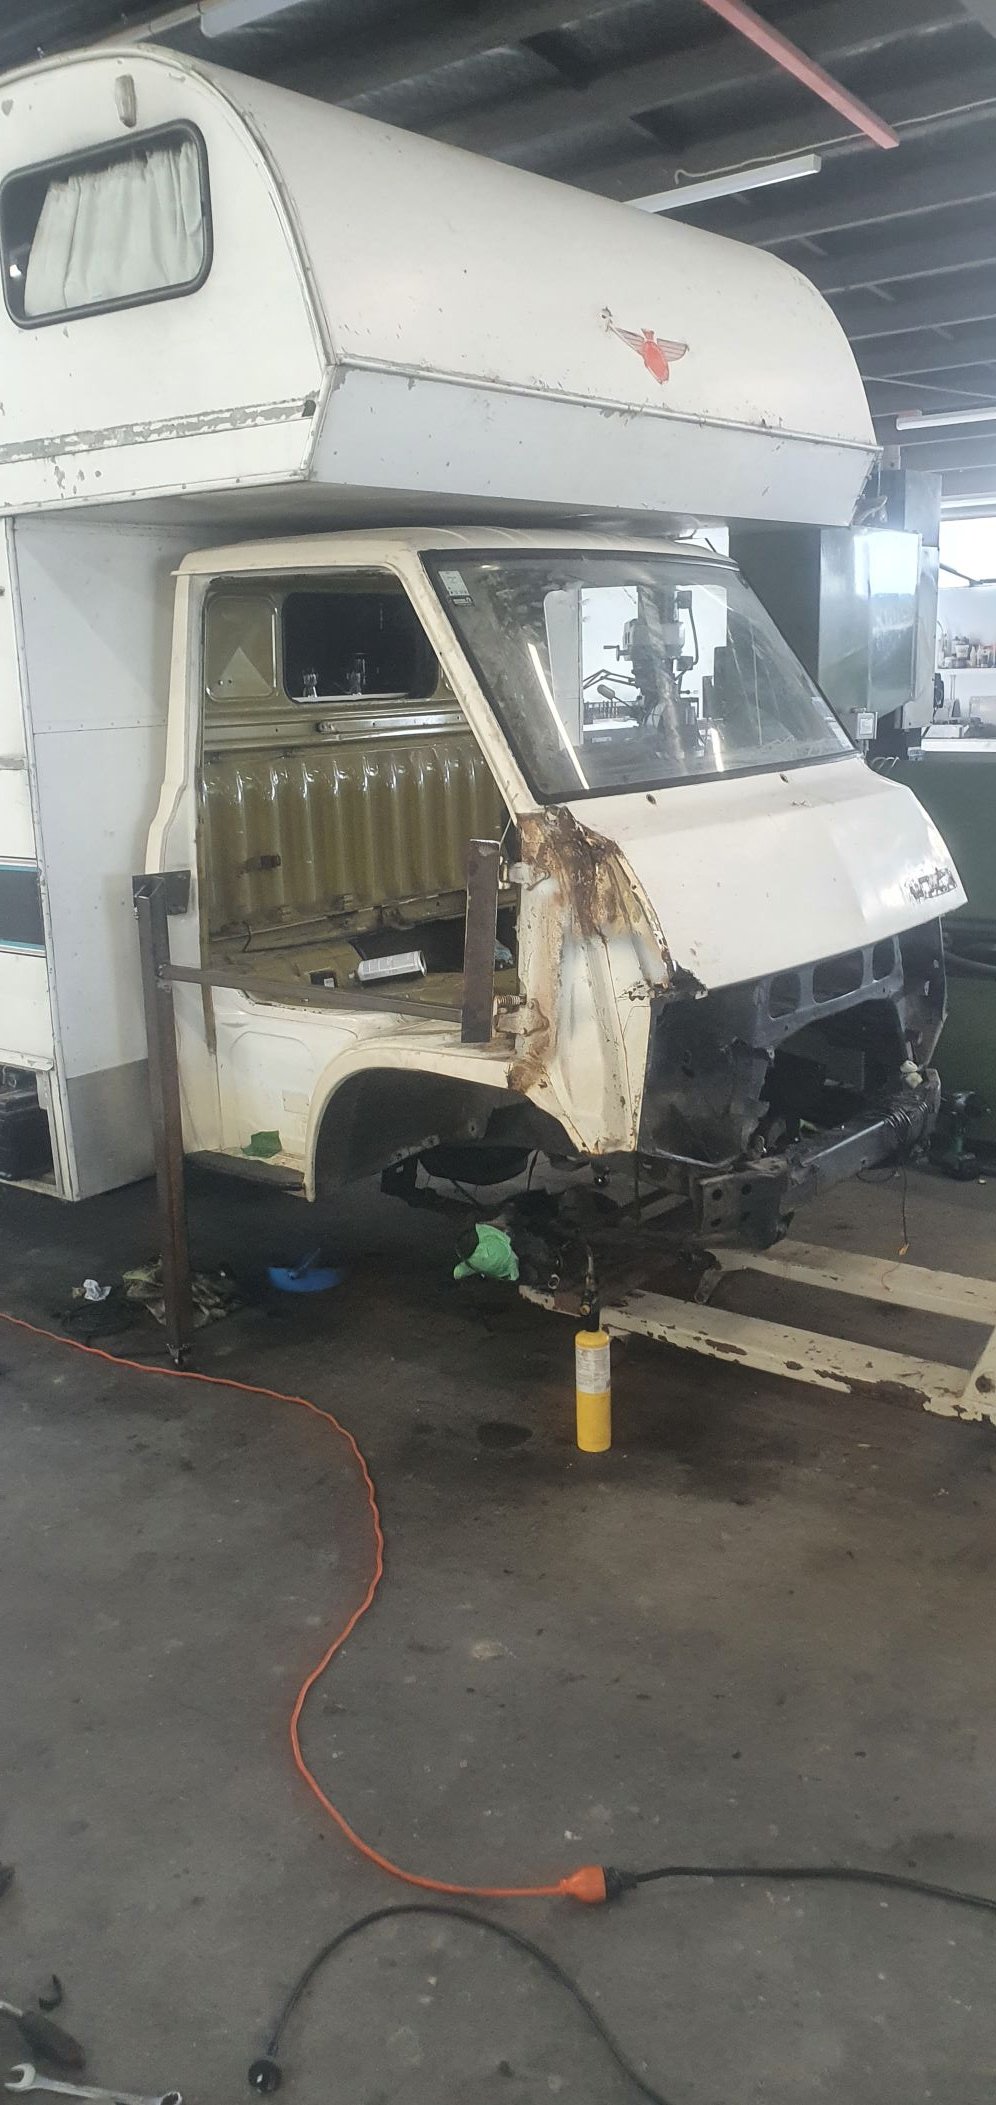
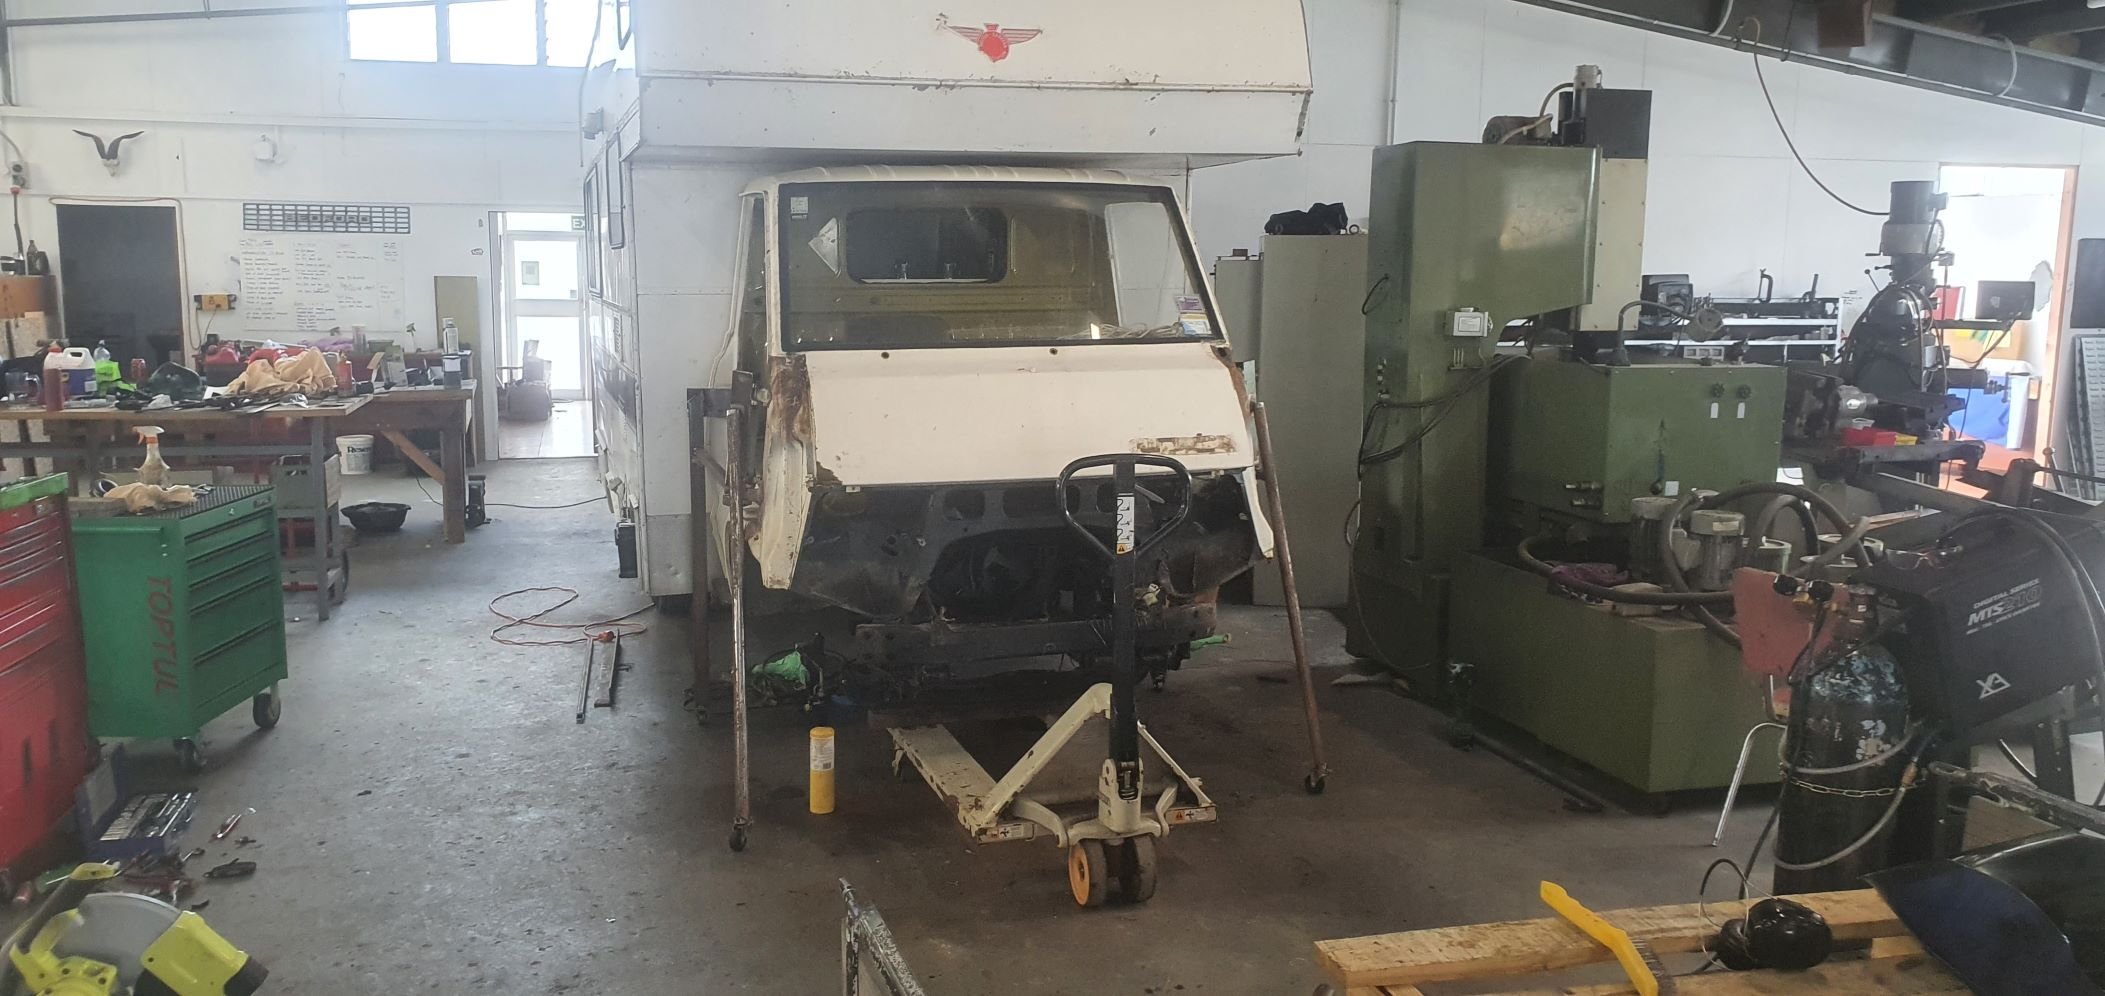
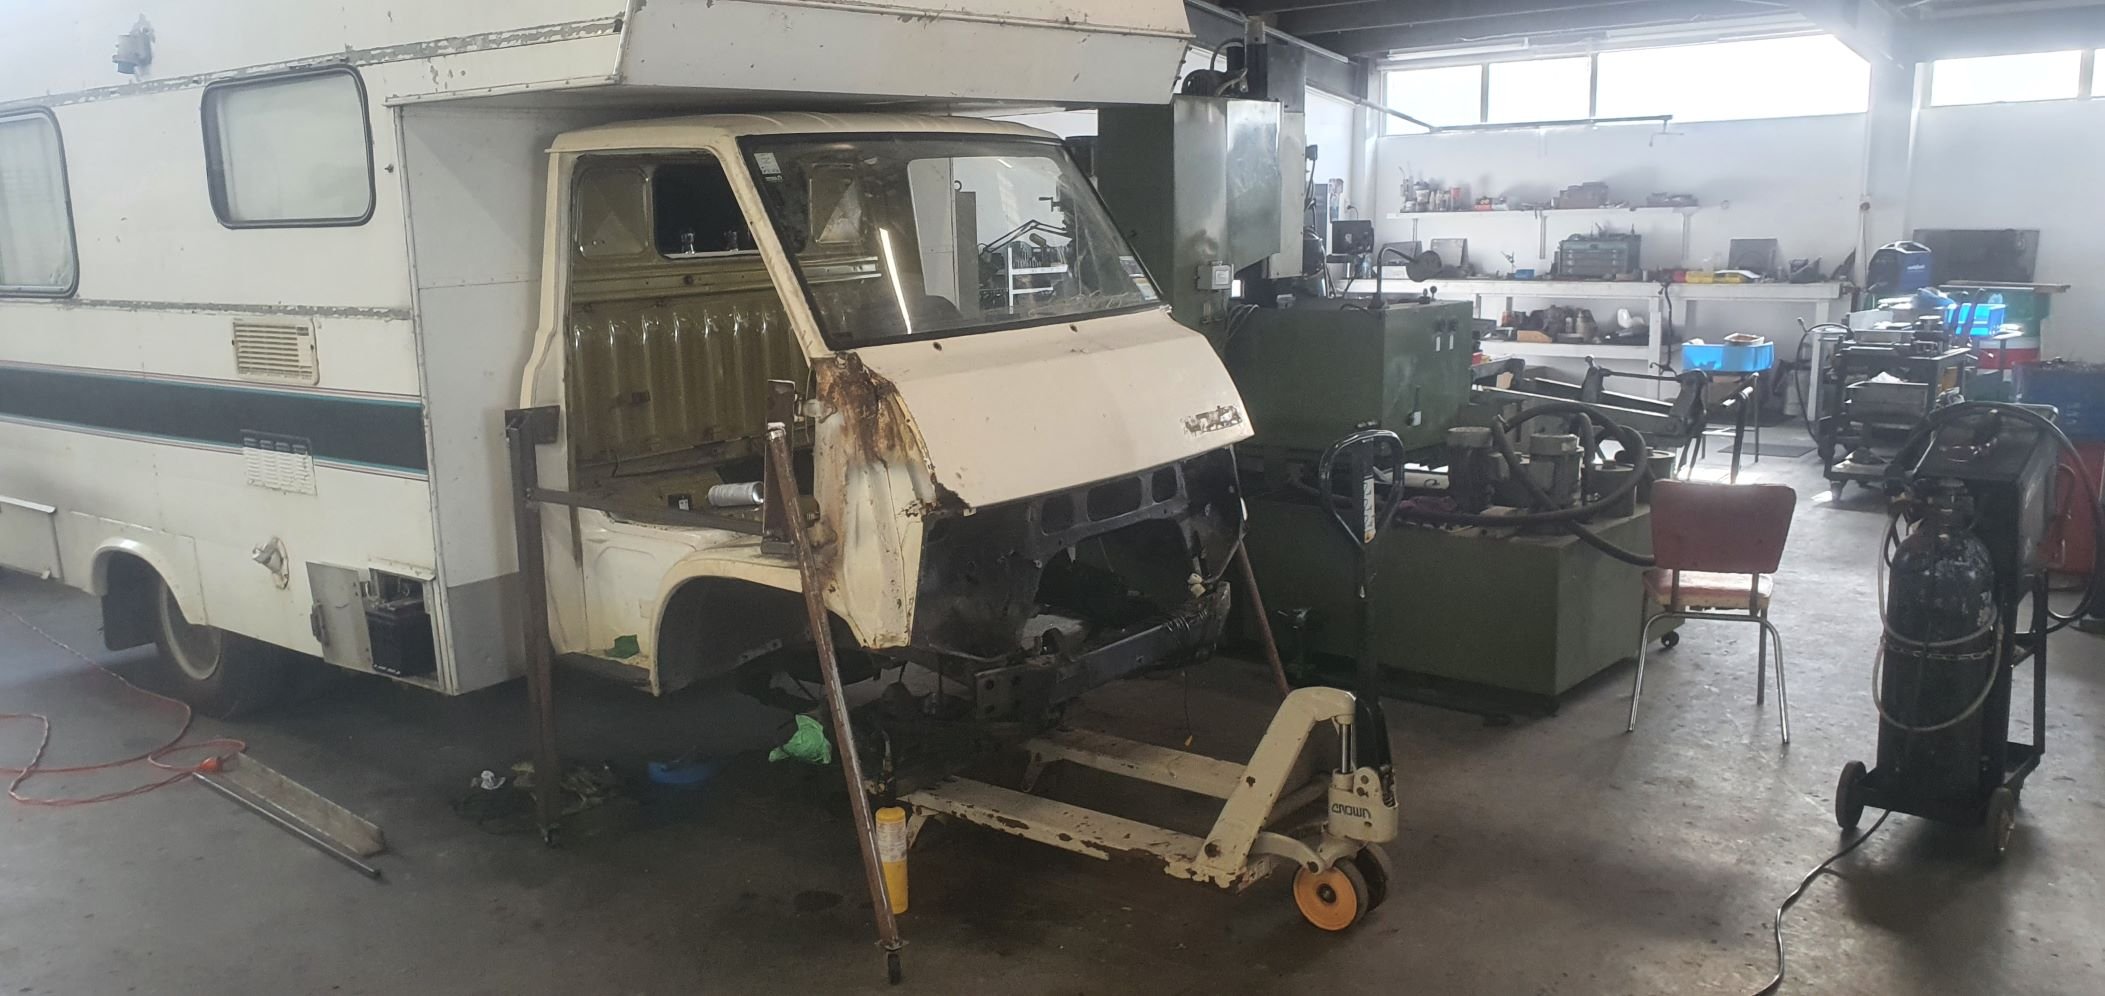
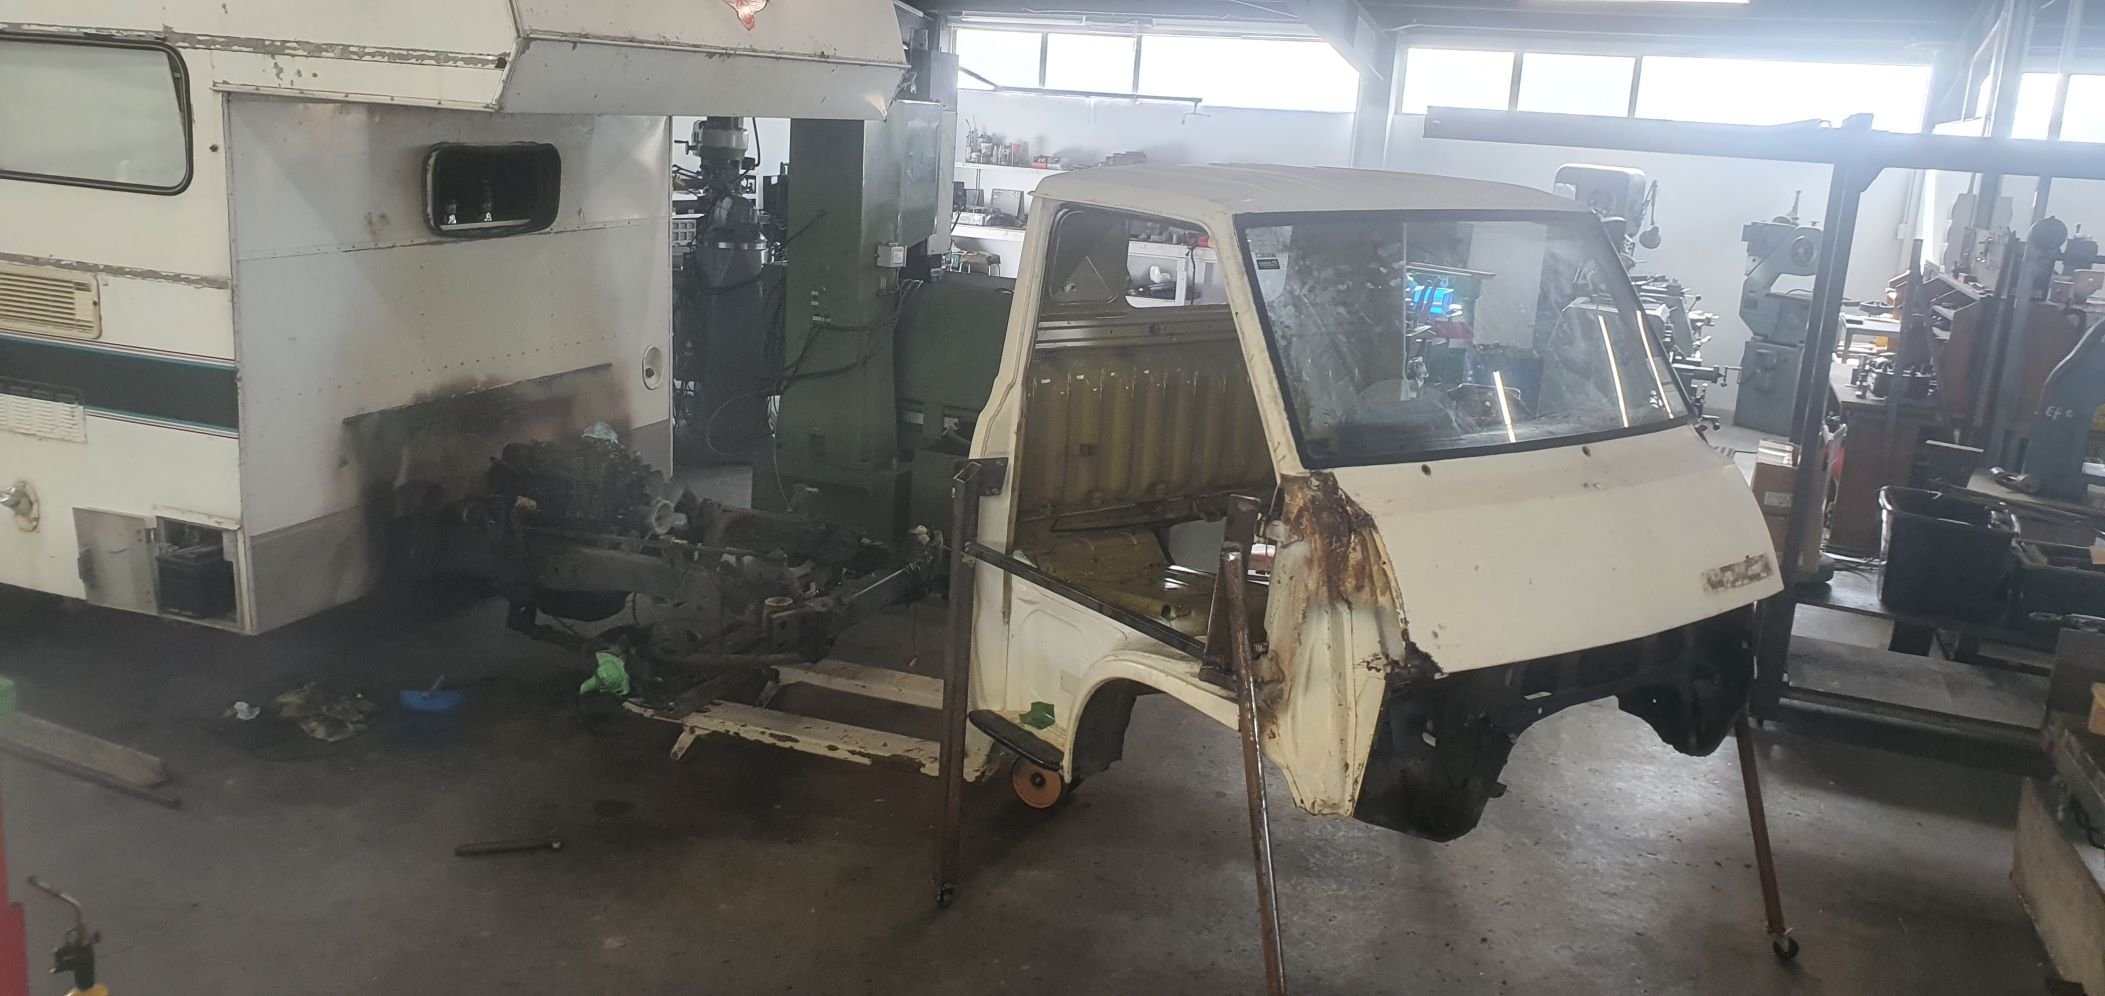
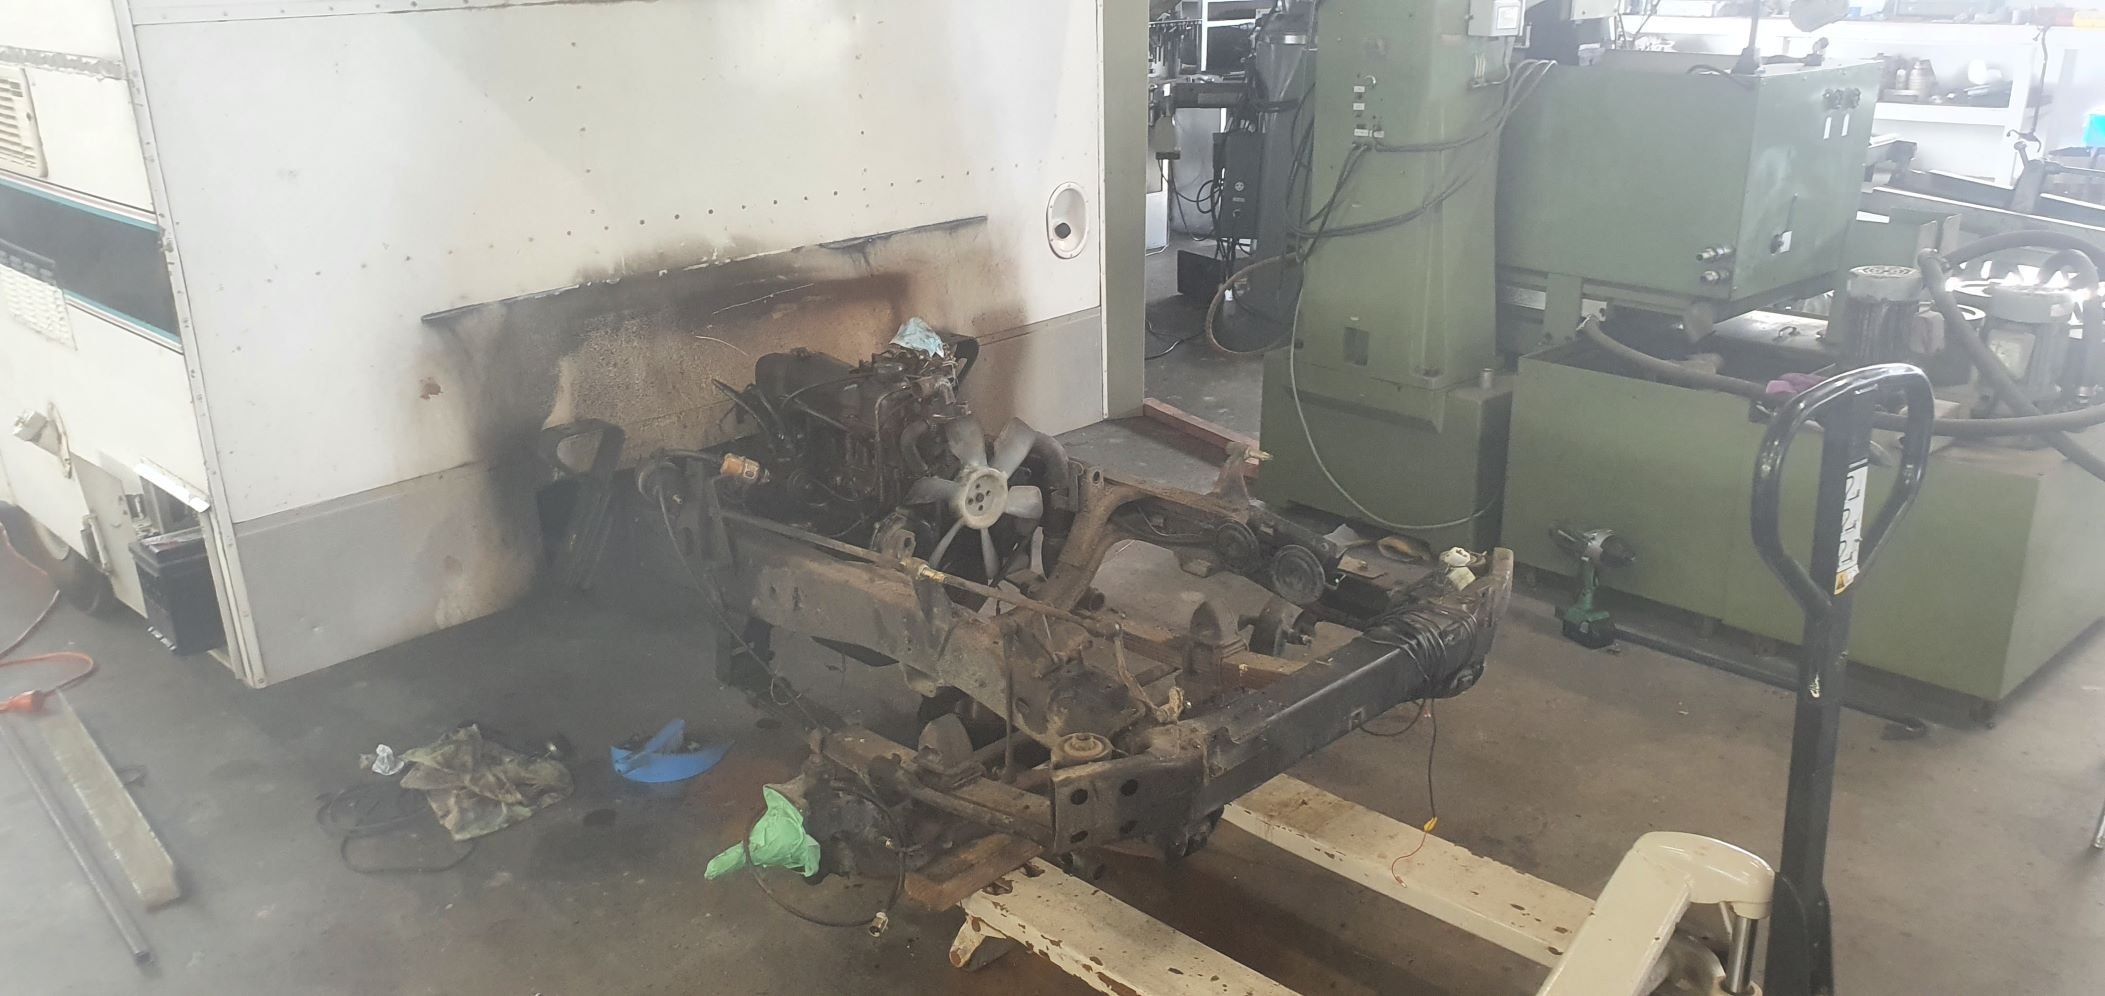
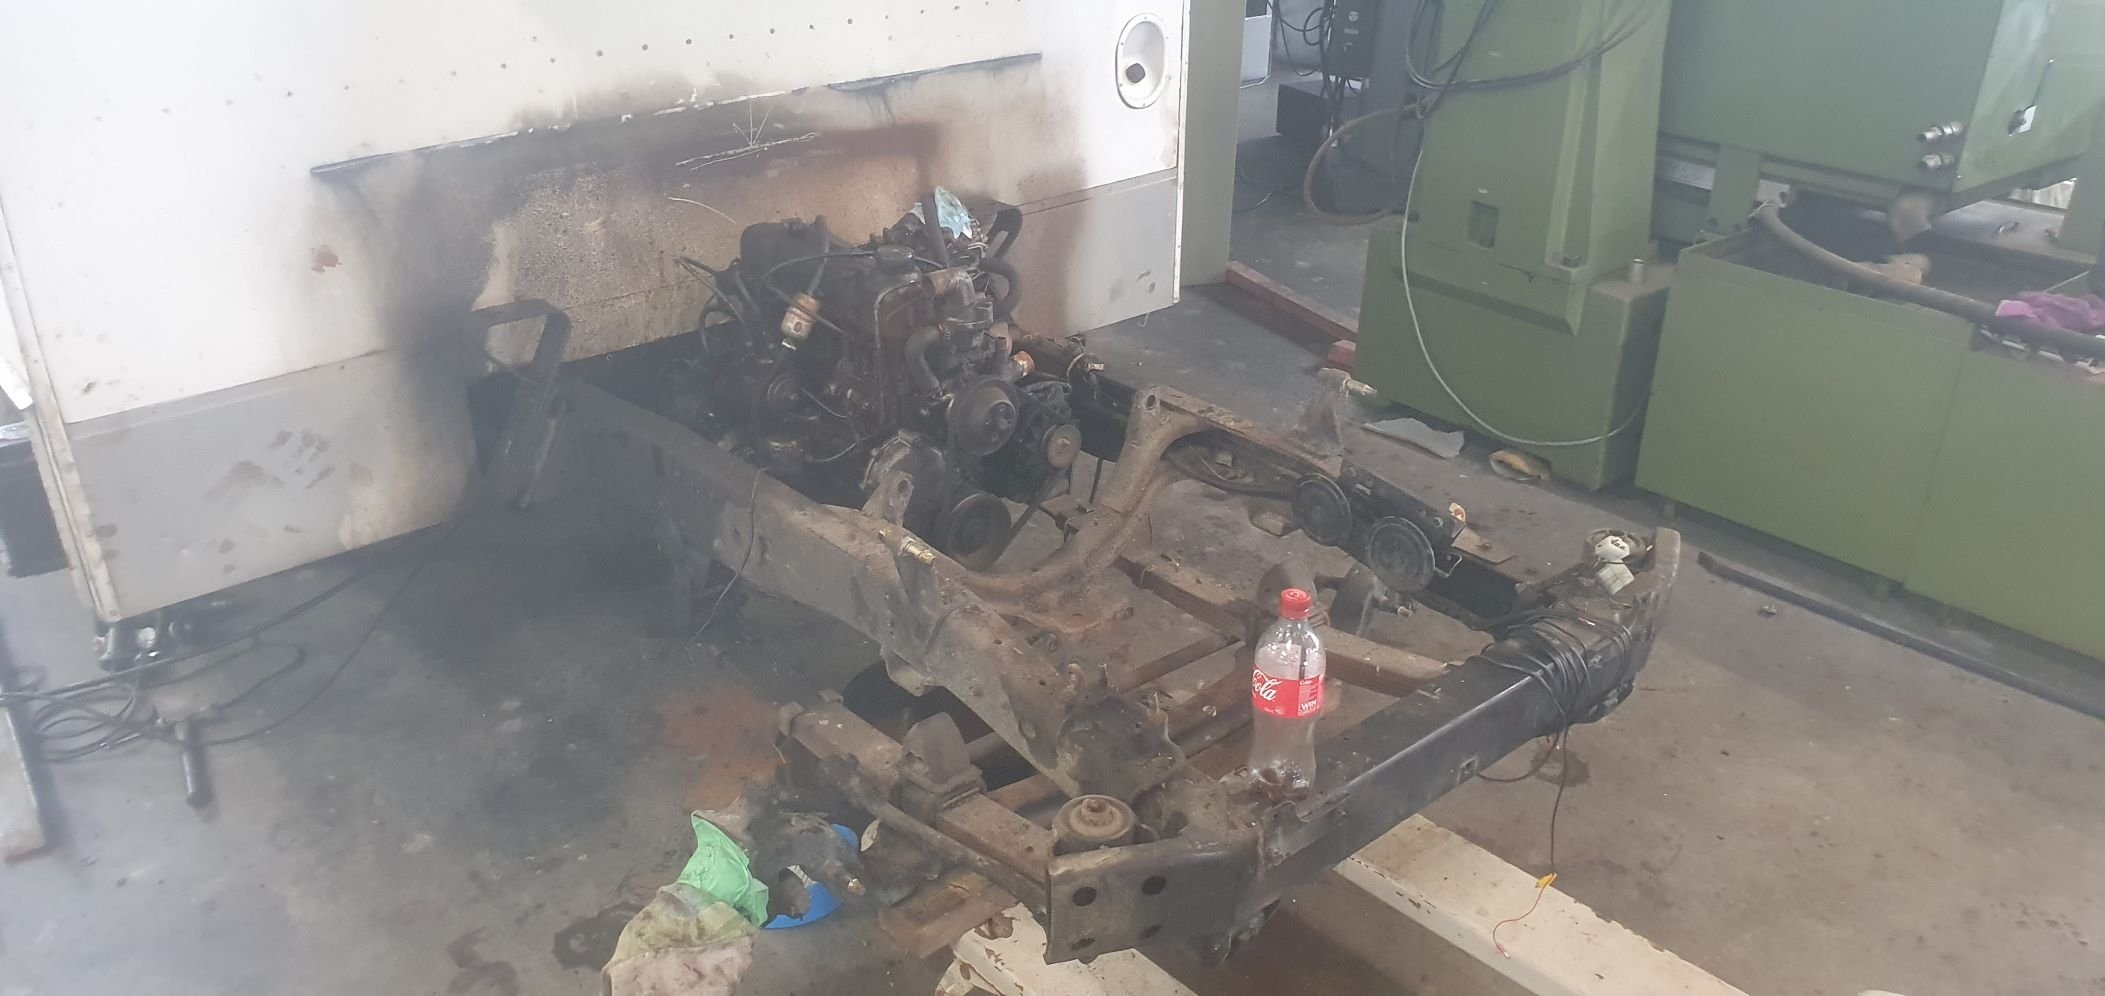
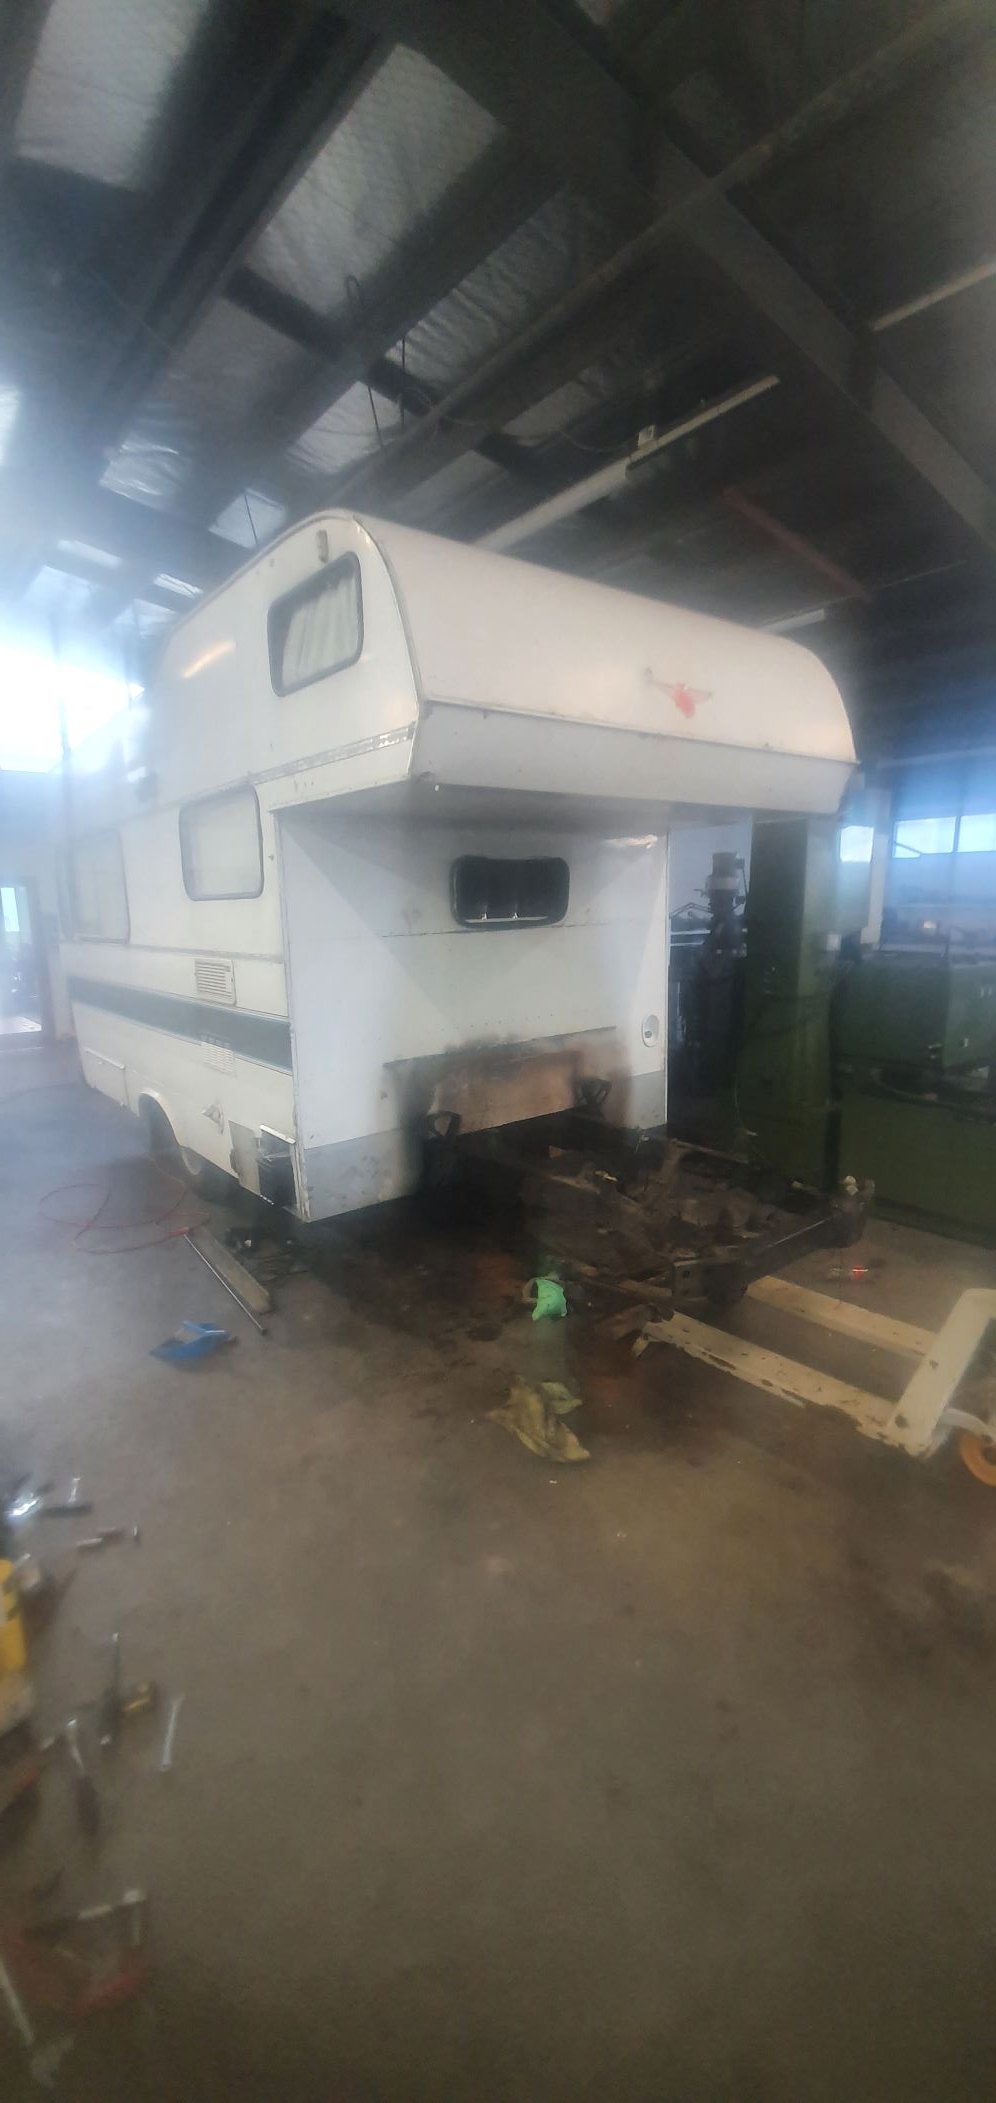
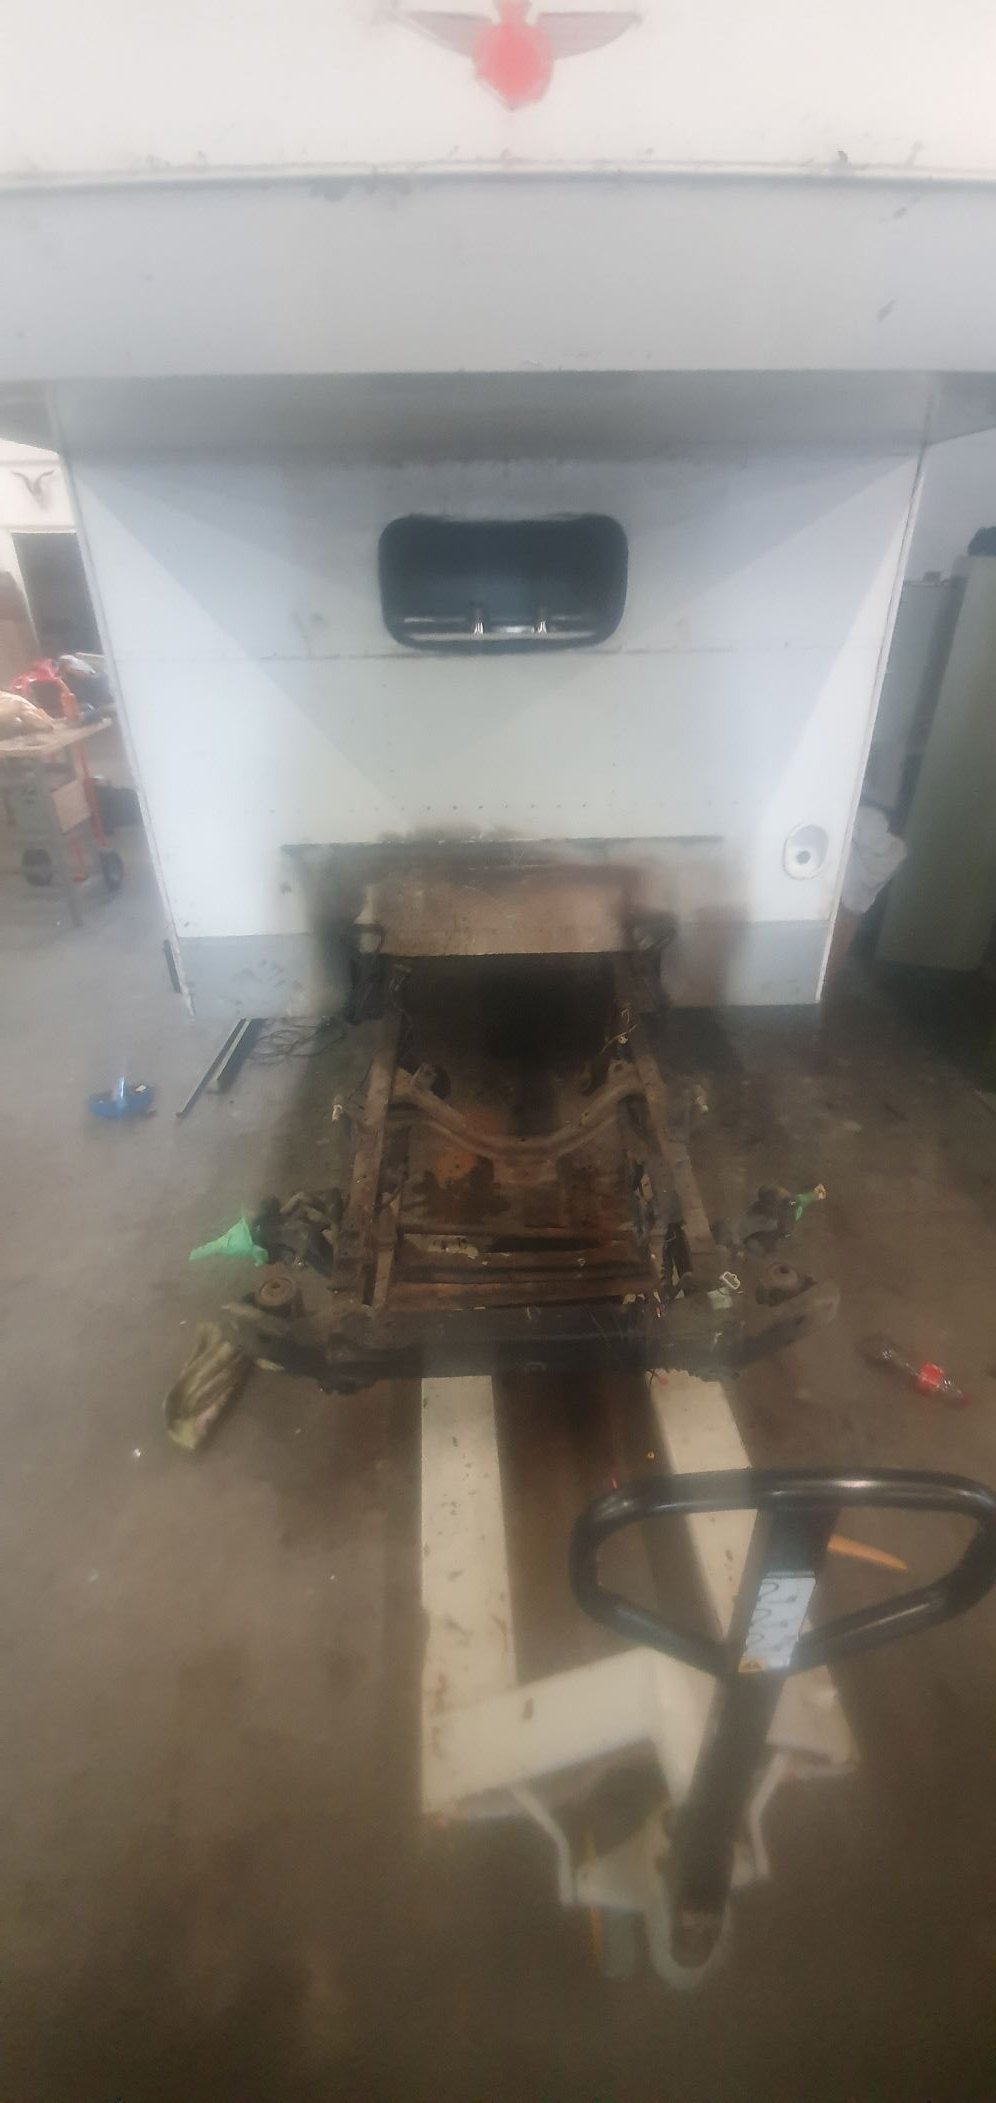
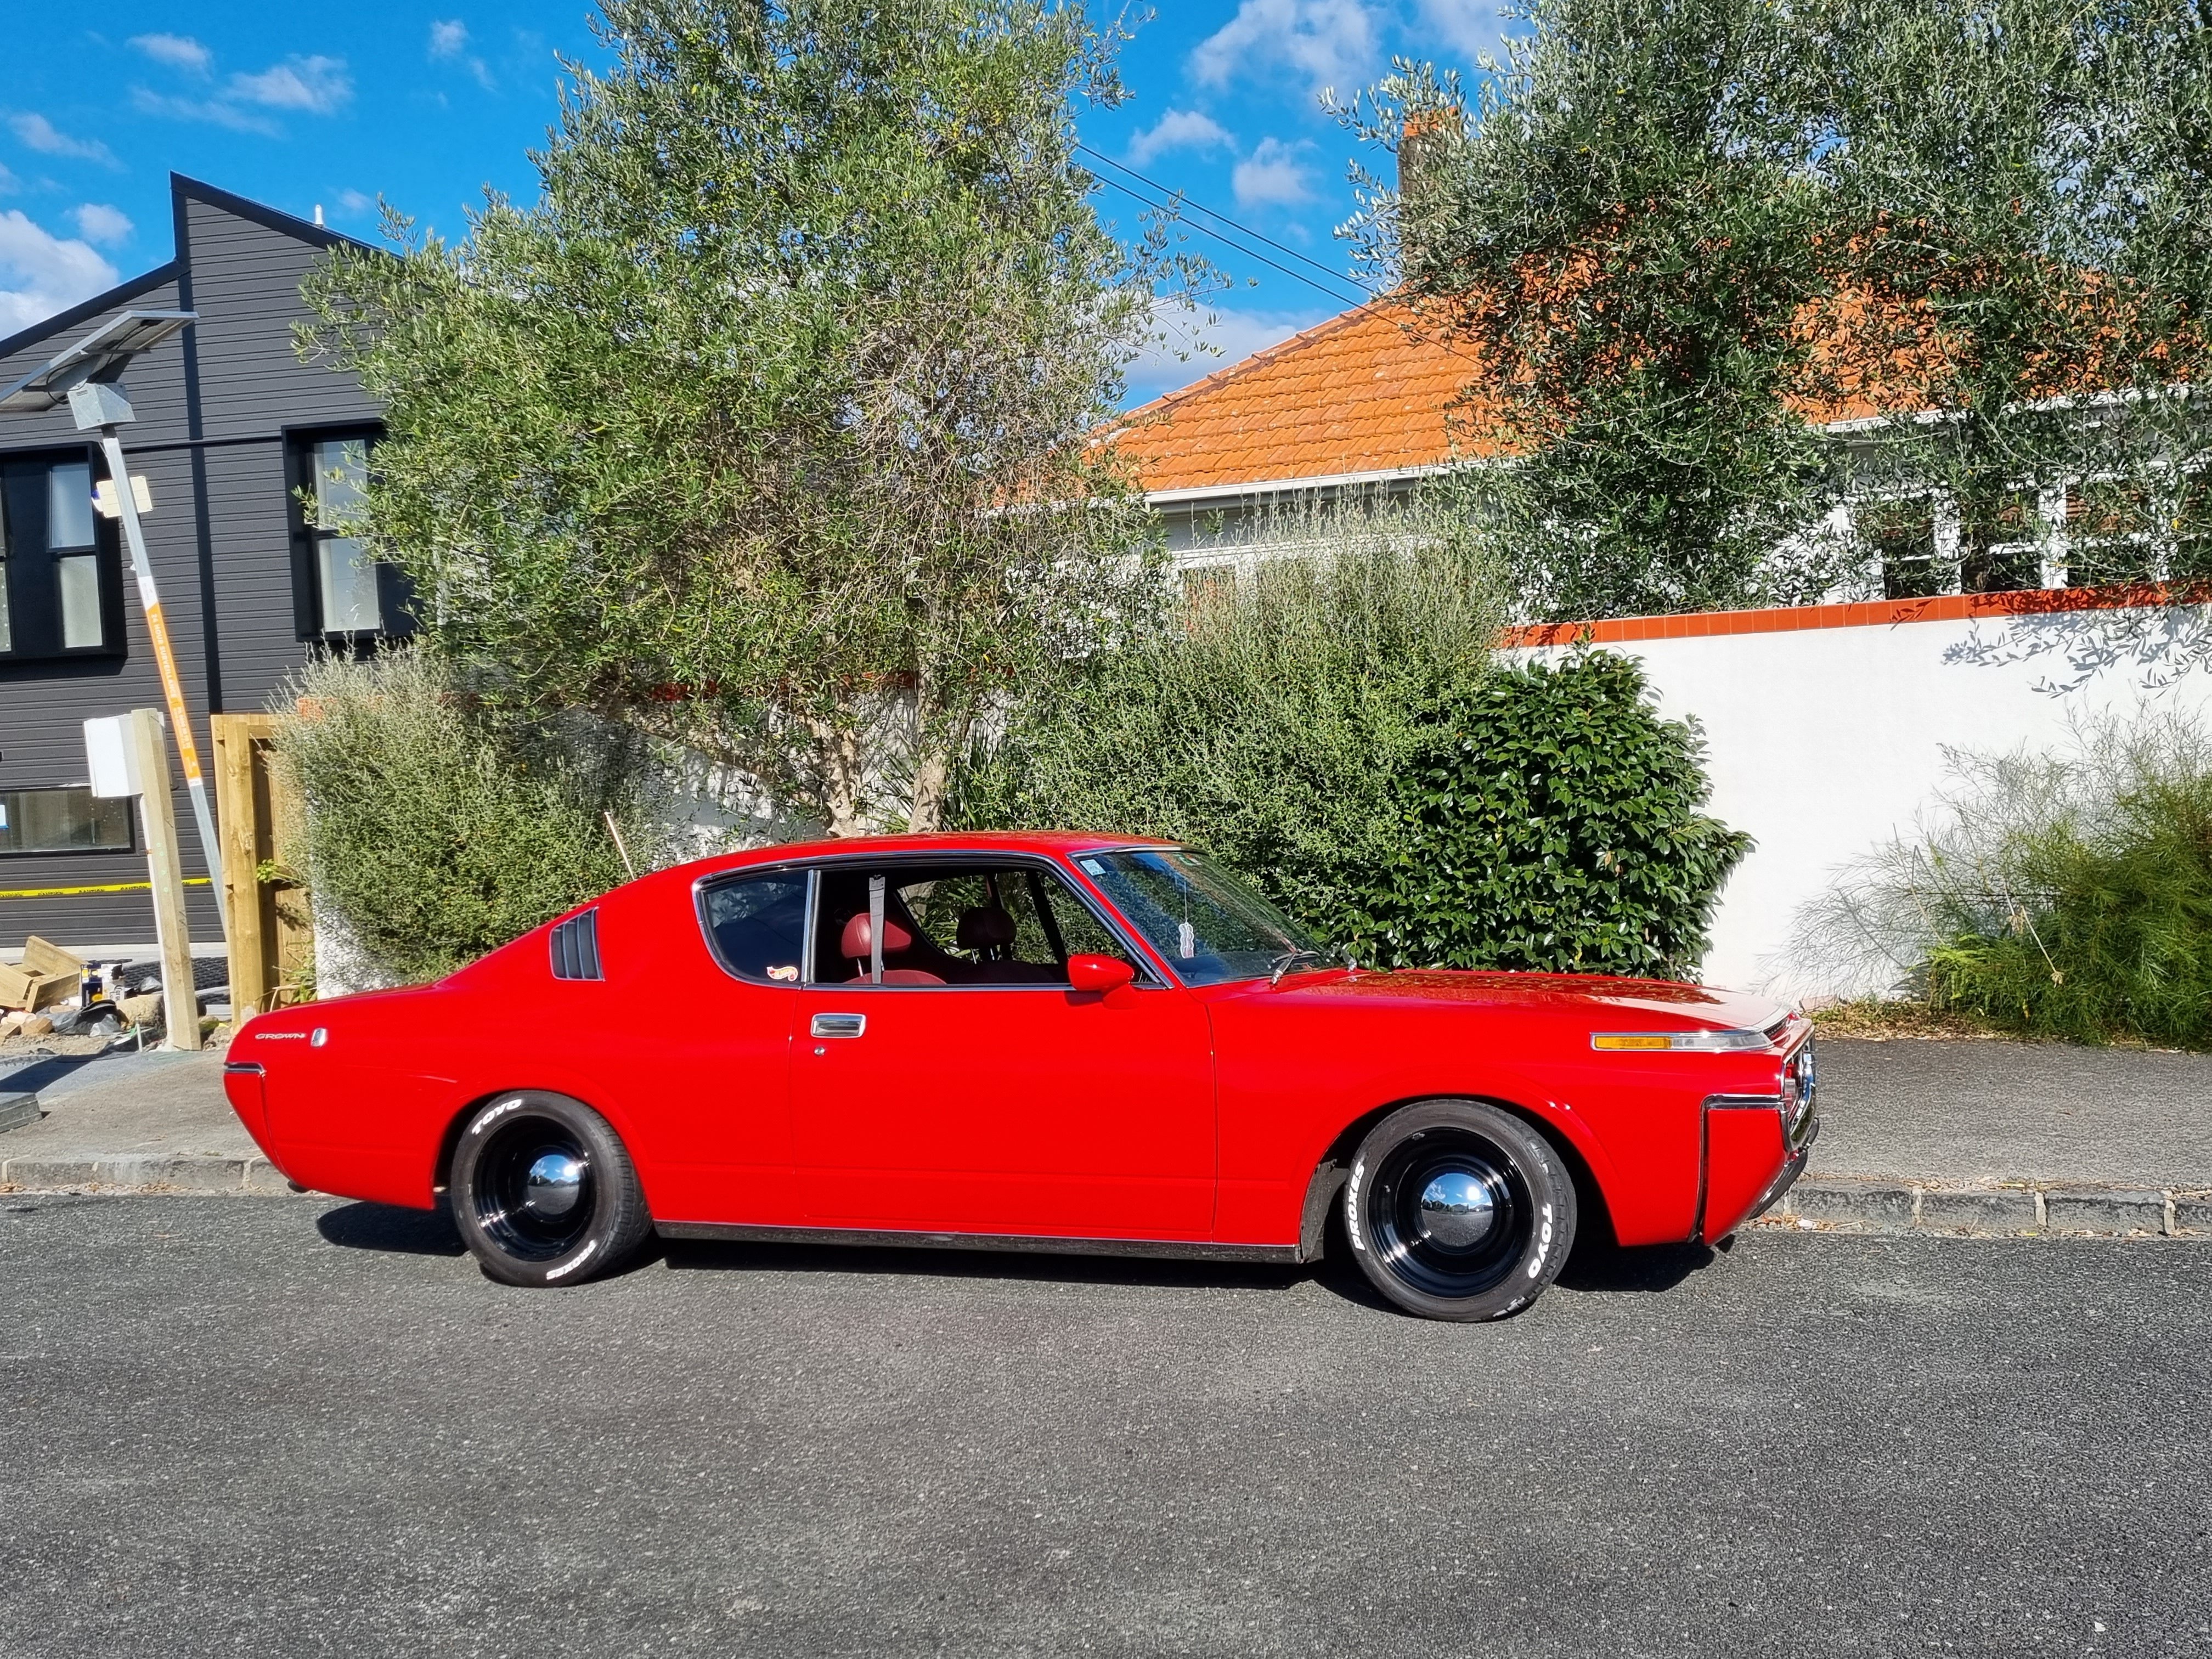

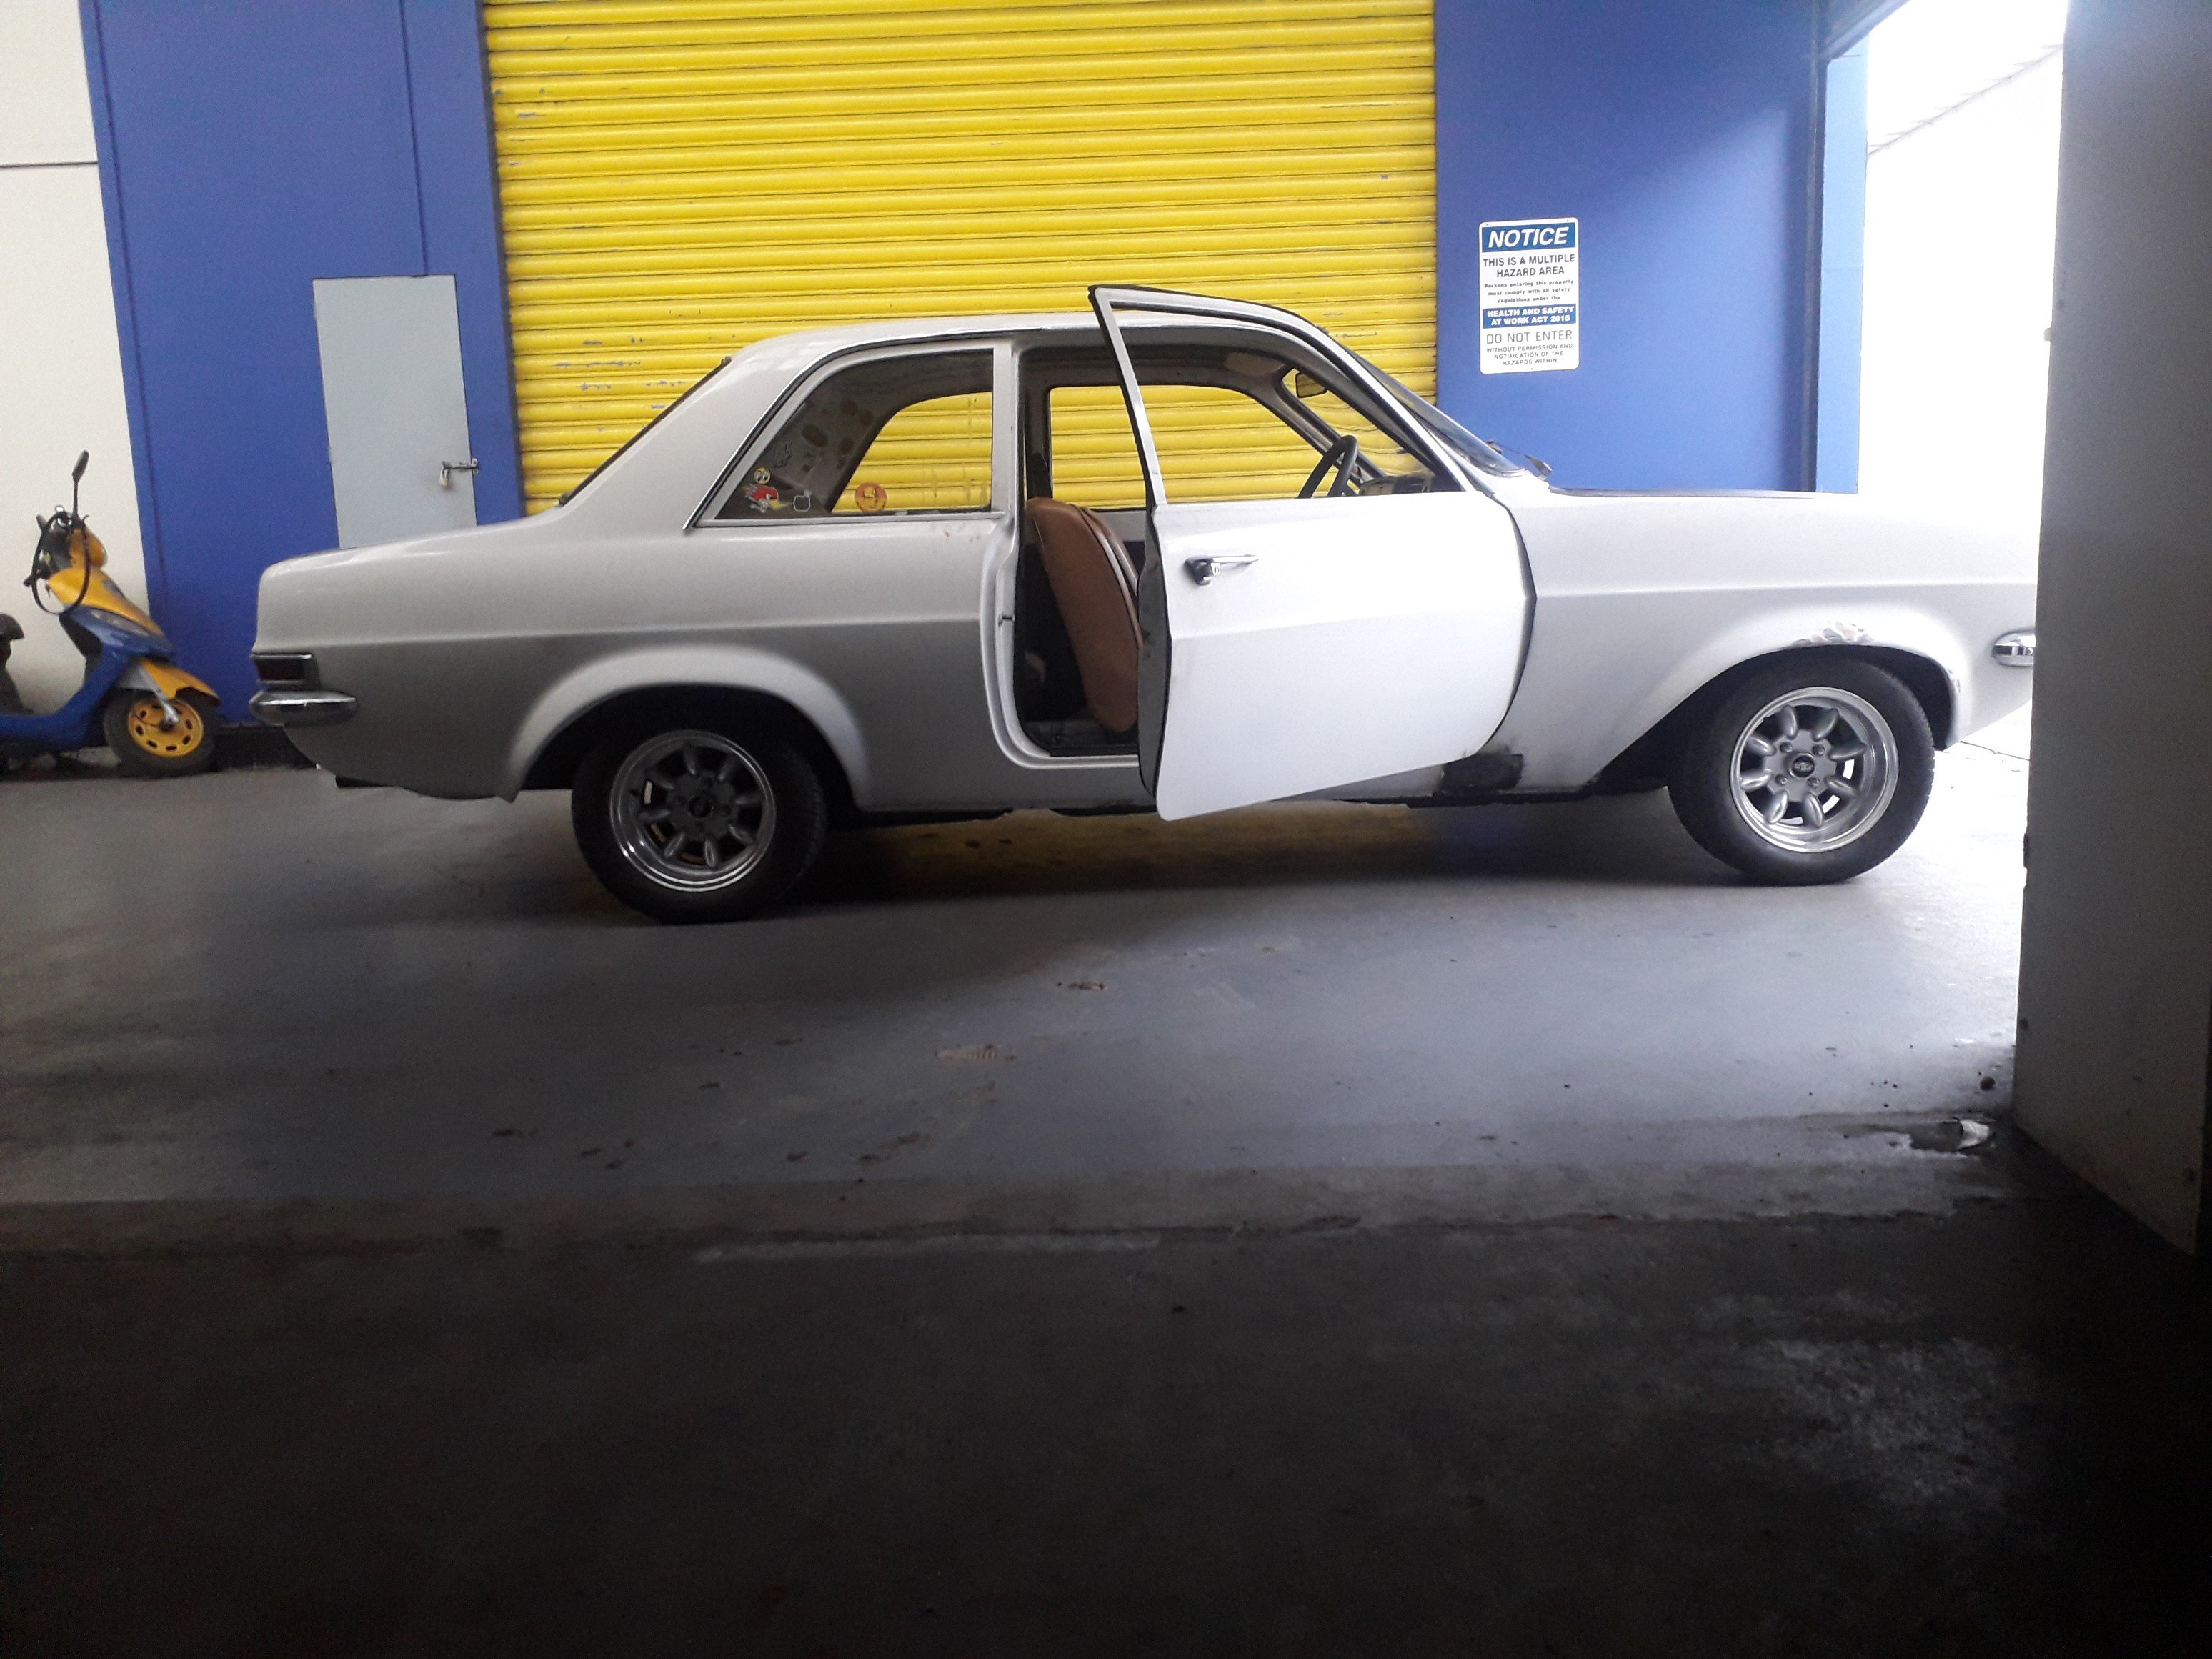

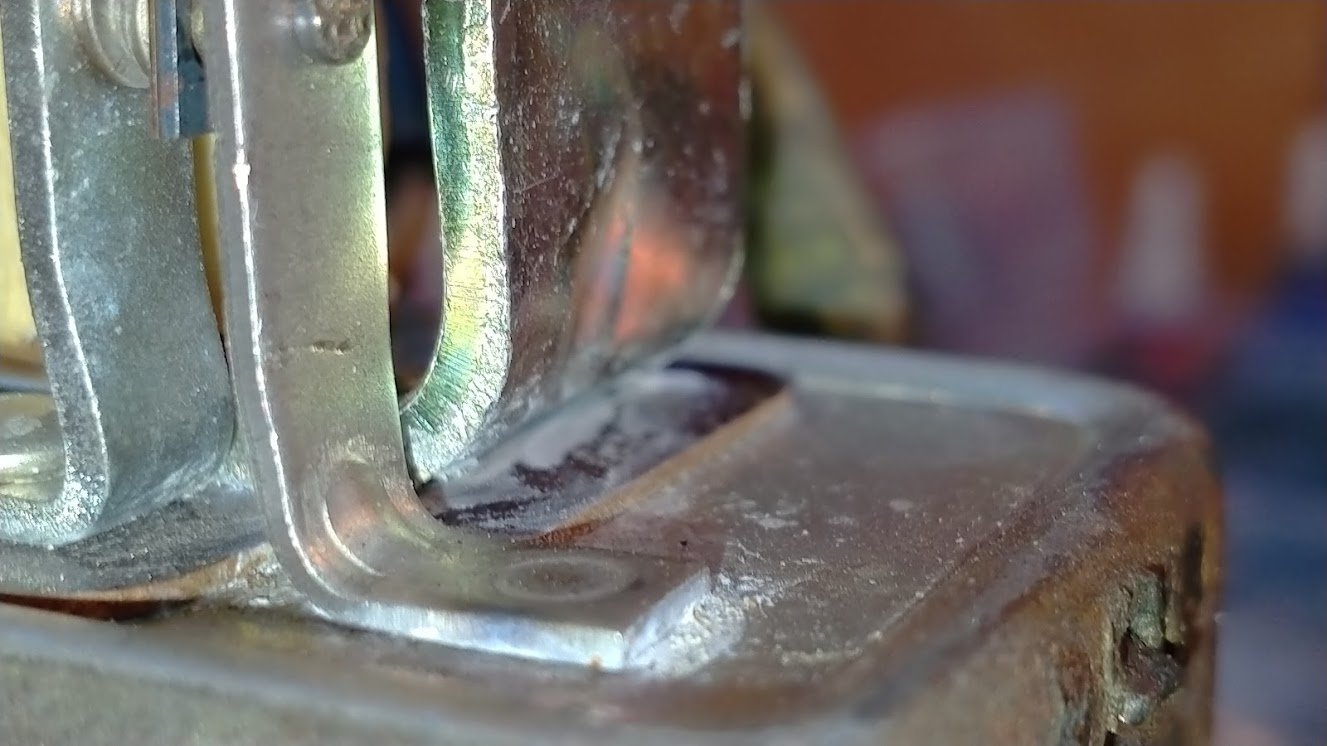
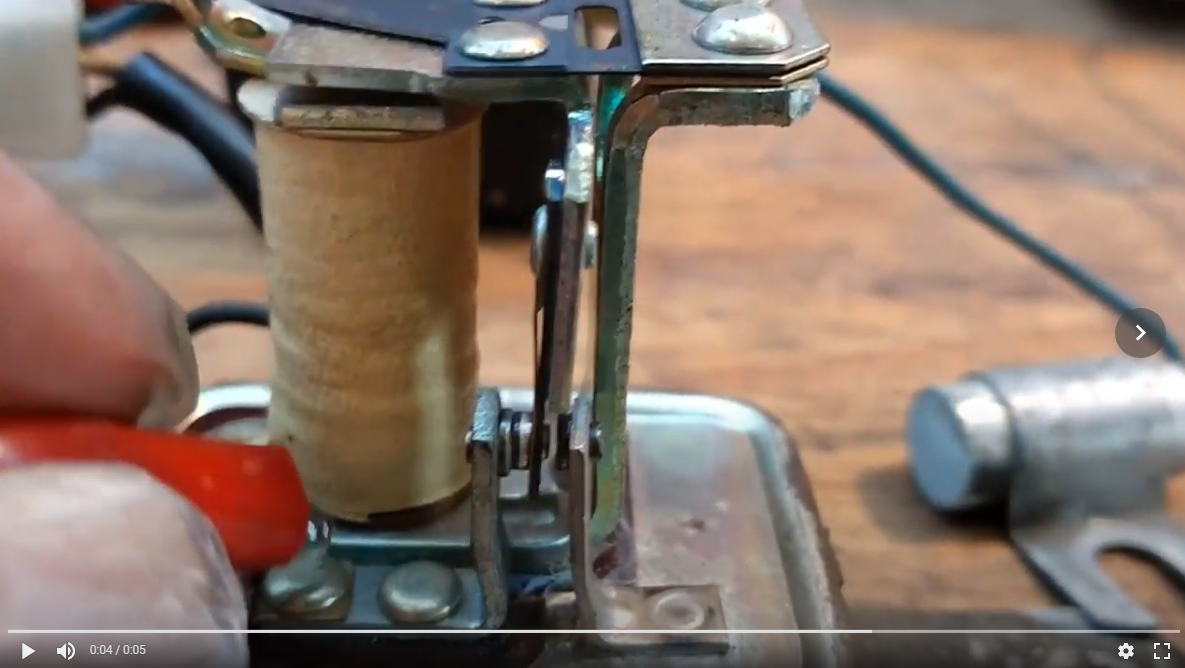
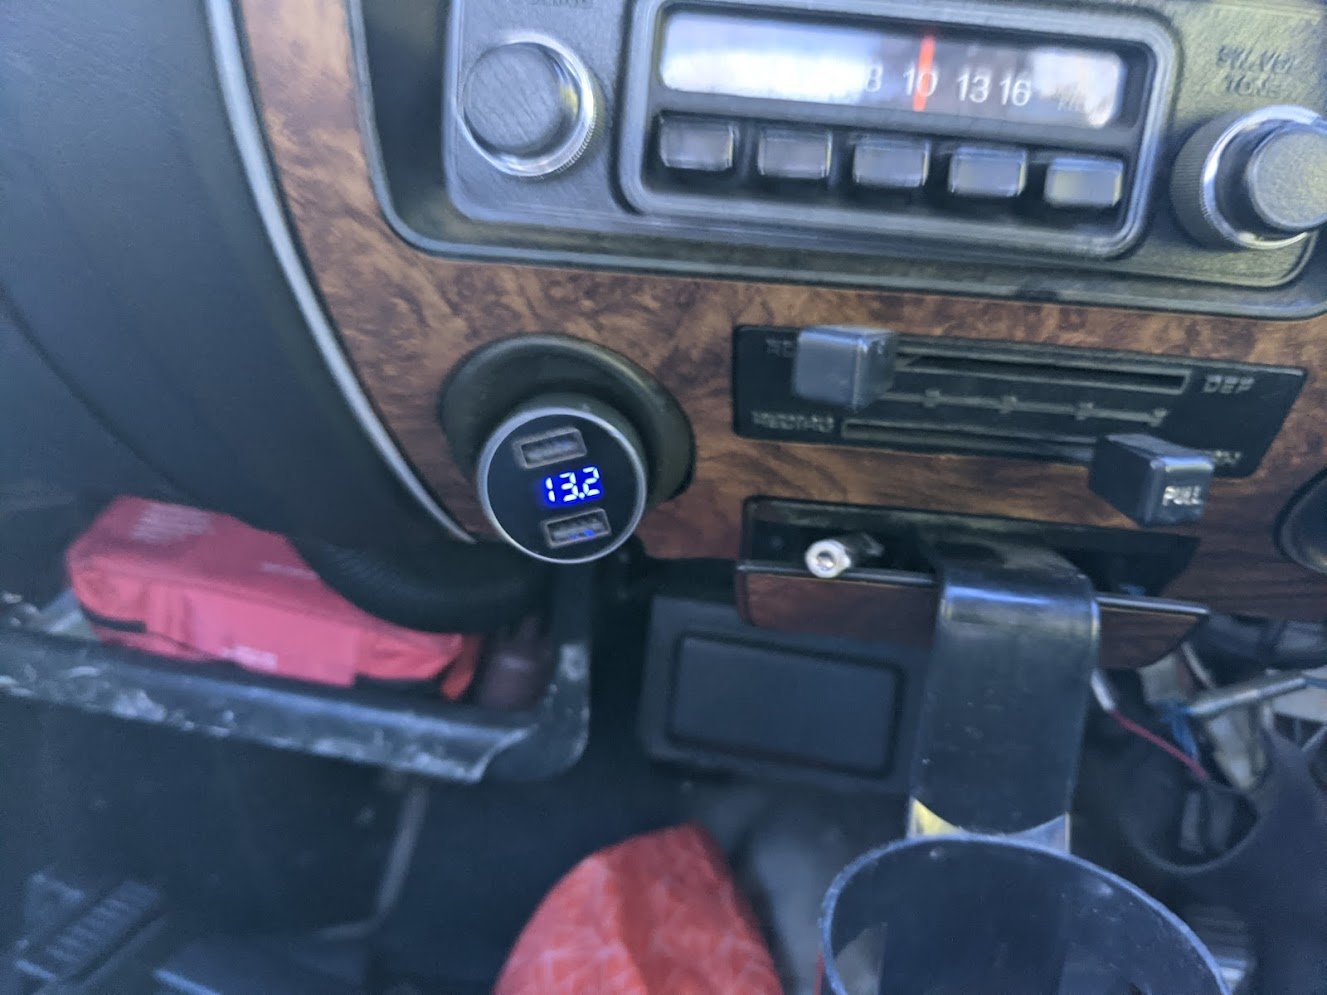
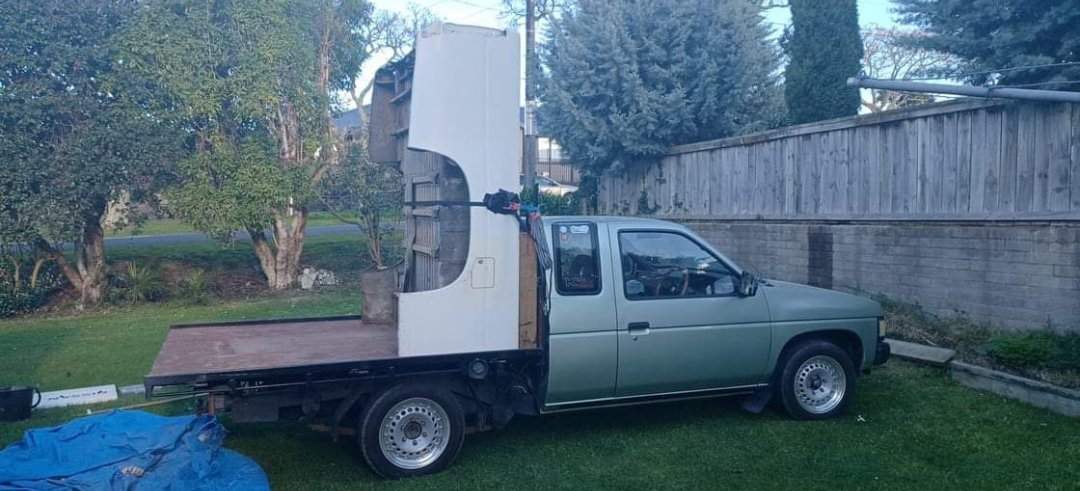
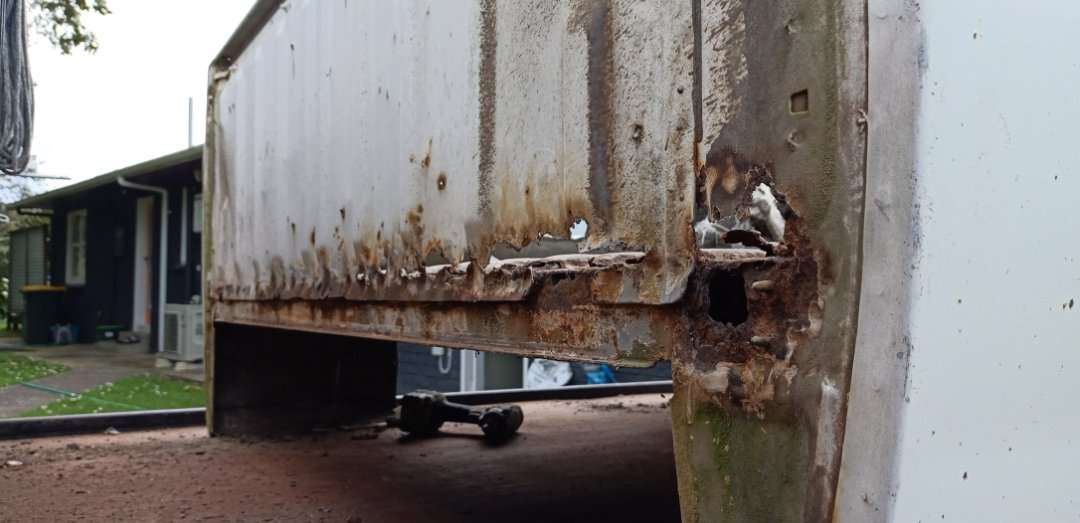
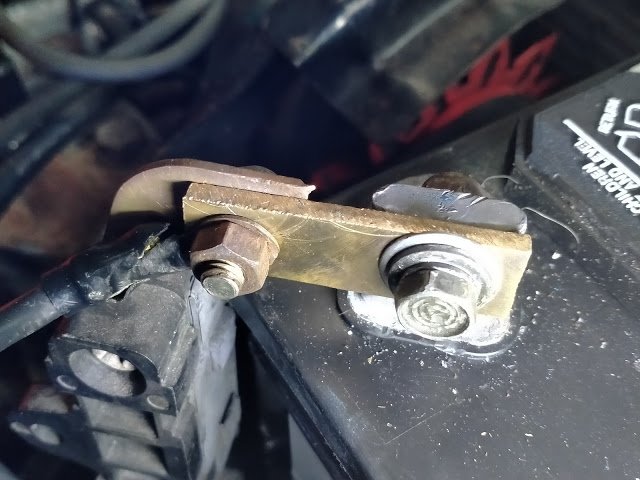
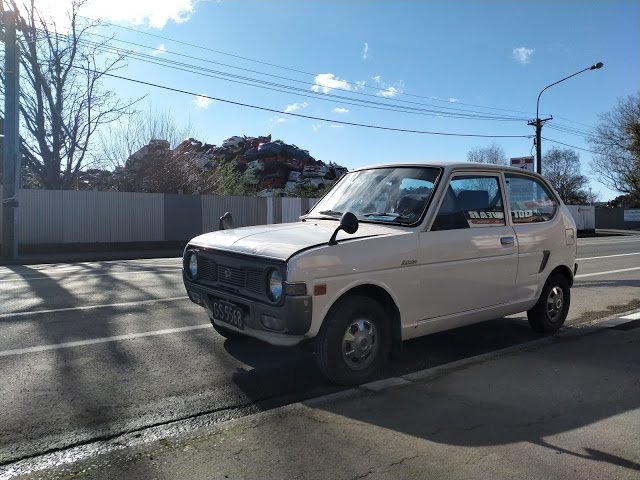
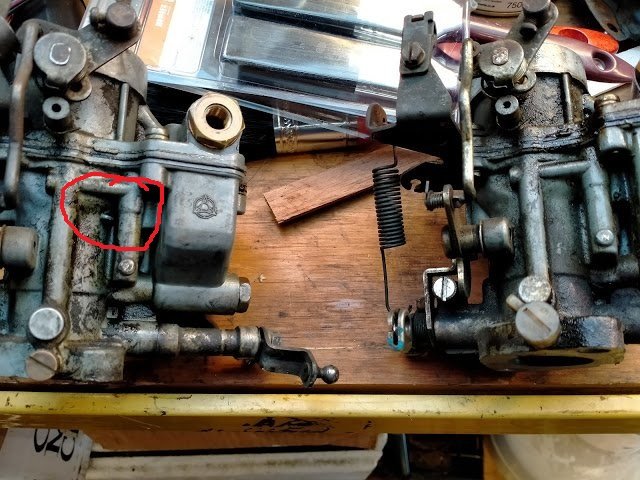
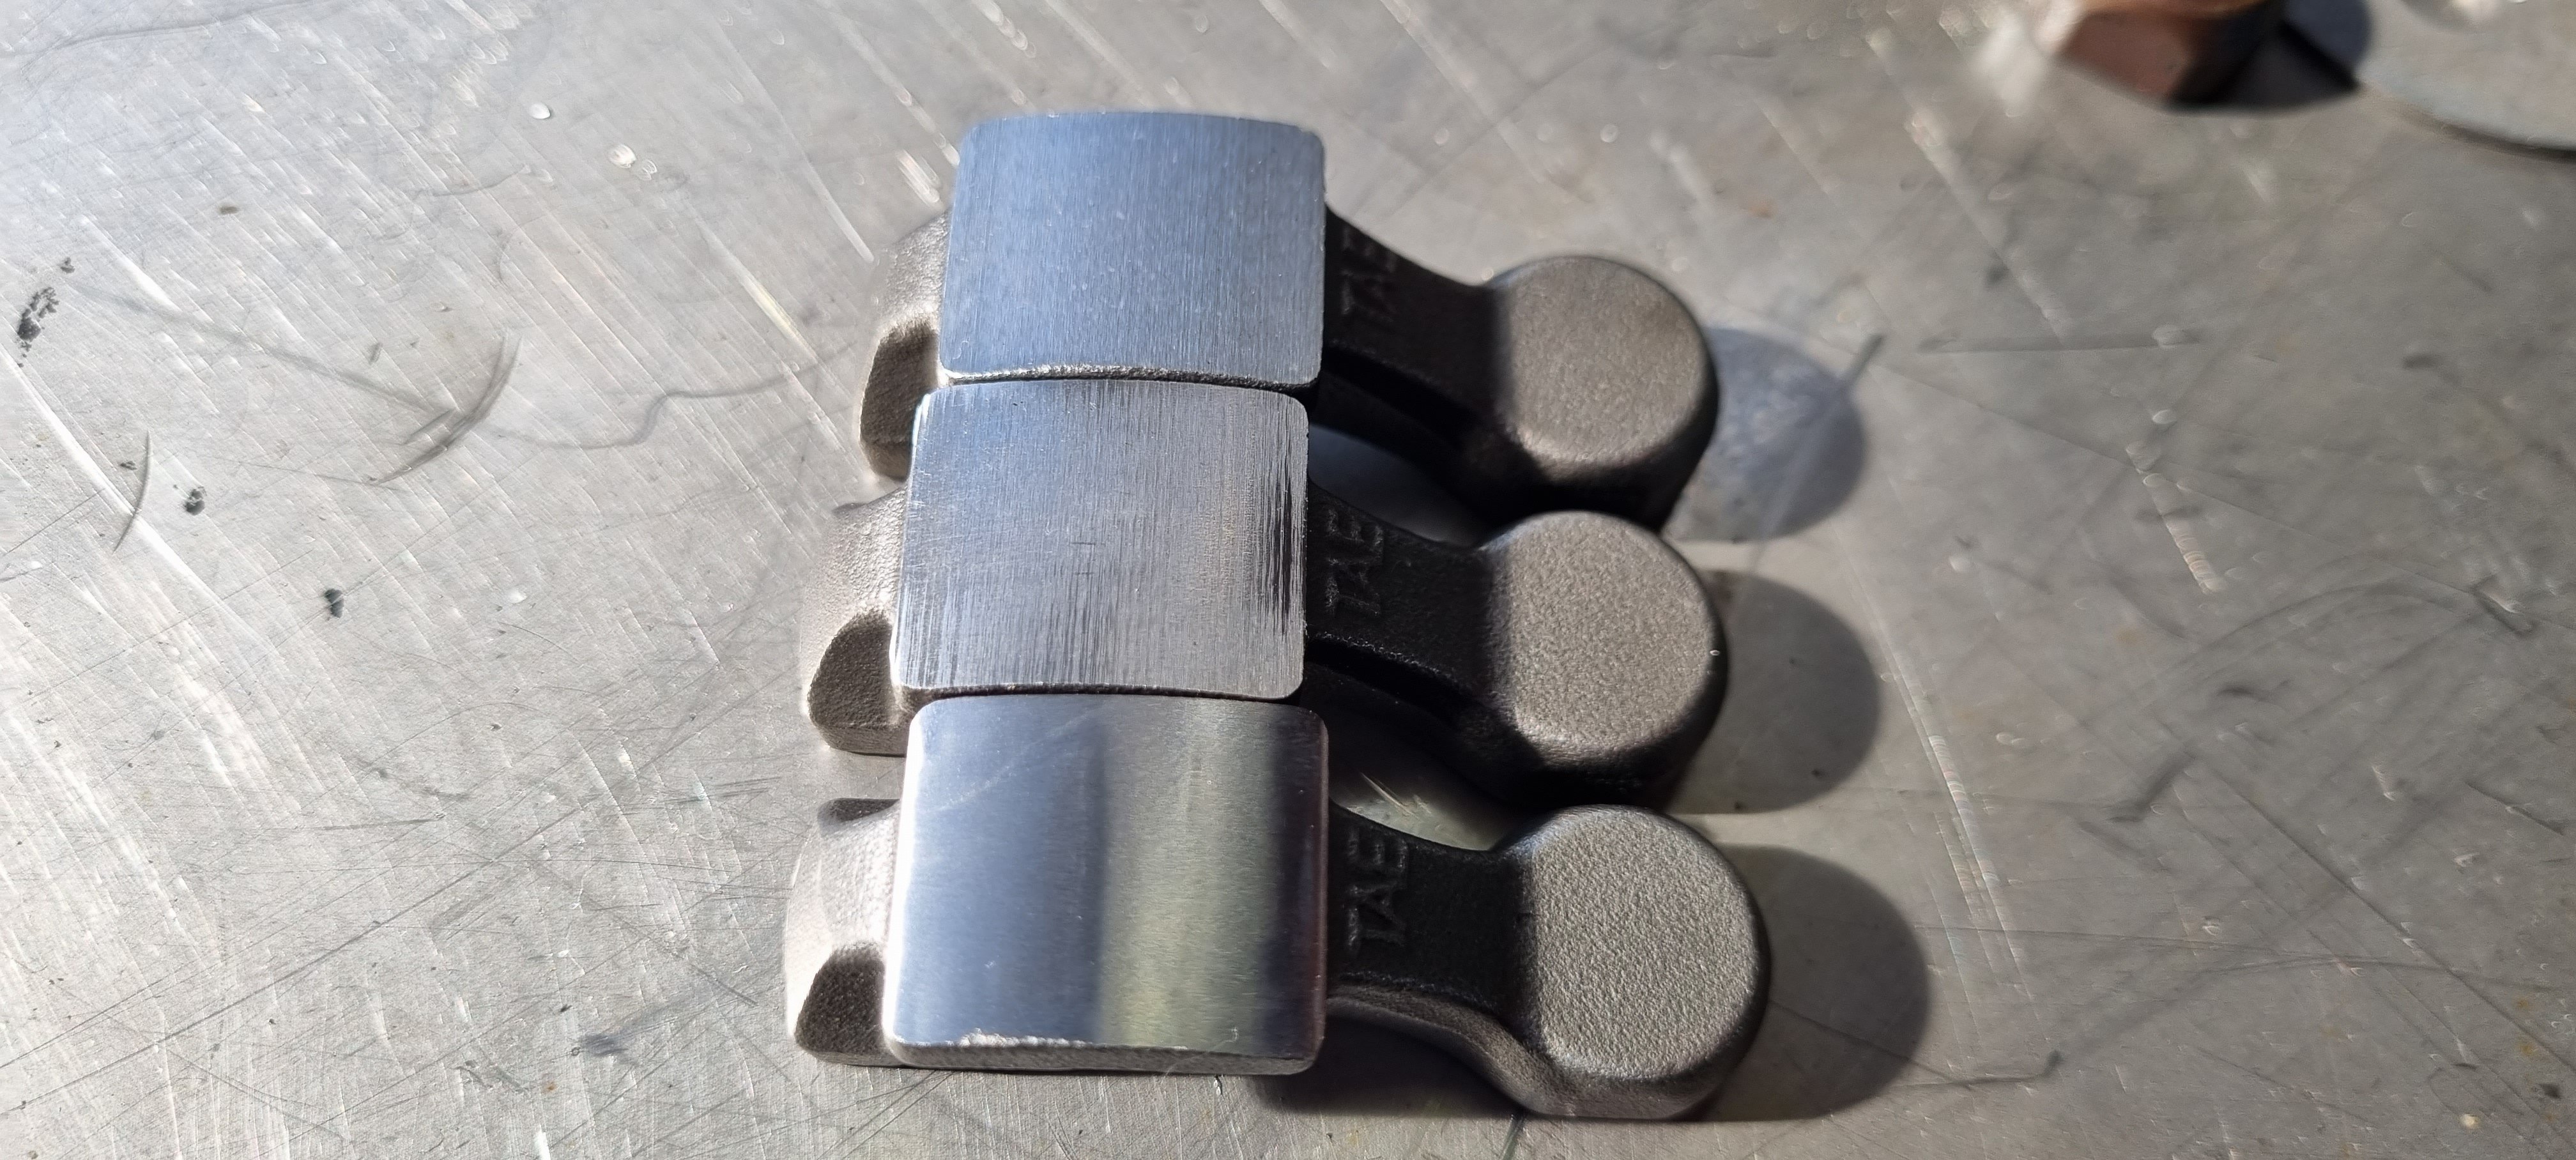
This leaderboard is set to Auckland/GMT+12:00