
Leaderboard


Popular Content
Showing content with the highest reputation on 11/28/20 in all areas
-
forgot to mention, a supercharged 1UZ pulling hard at 7200RPM sounds pretty ace.13 points
-
tidying a few things up with the tune. i had no speed signal so the ECU didn't know if we were moving or not. with an E throttle that makes quite the difference. so i put a wheel speed sensor in the back so now it knows we are moving. the other major thing that needed sorting was the rev limit, it was set too low (6500) and it was pretty harsh. so now th rev limit is a more excellent 7500 with a really nice cut that just works. lots of little things were made better in regards to coasting to a stop, the fan coming on, part throttle curse, just more drivability. the other thing that we did was add a bit of timing up top which coupled with the higher rev limit it made 275 killer wasps at the tyres. keen for drag day TBH.13 points
-
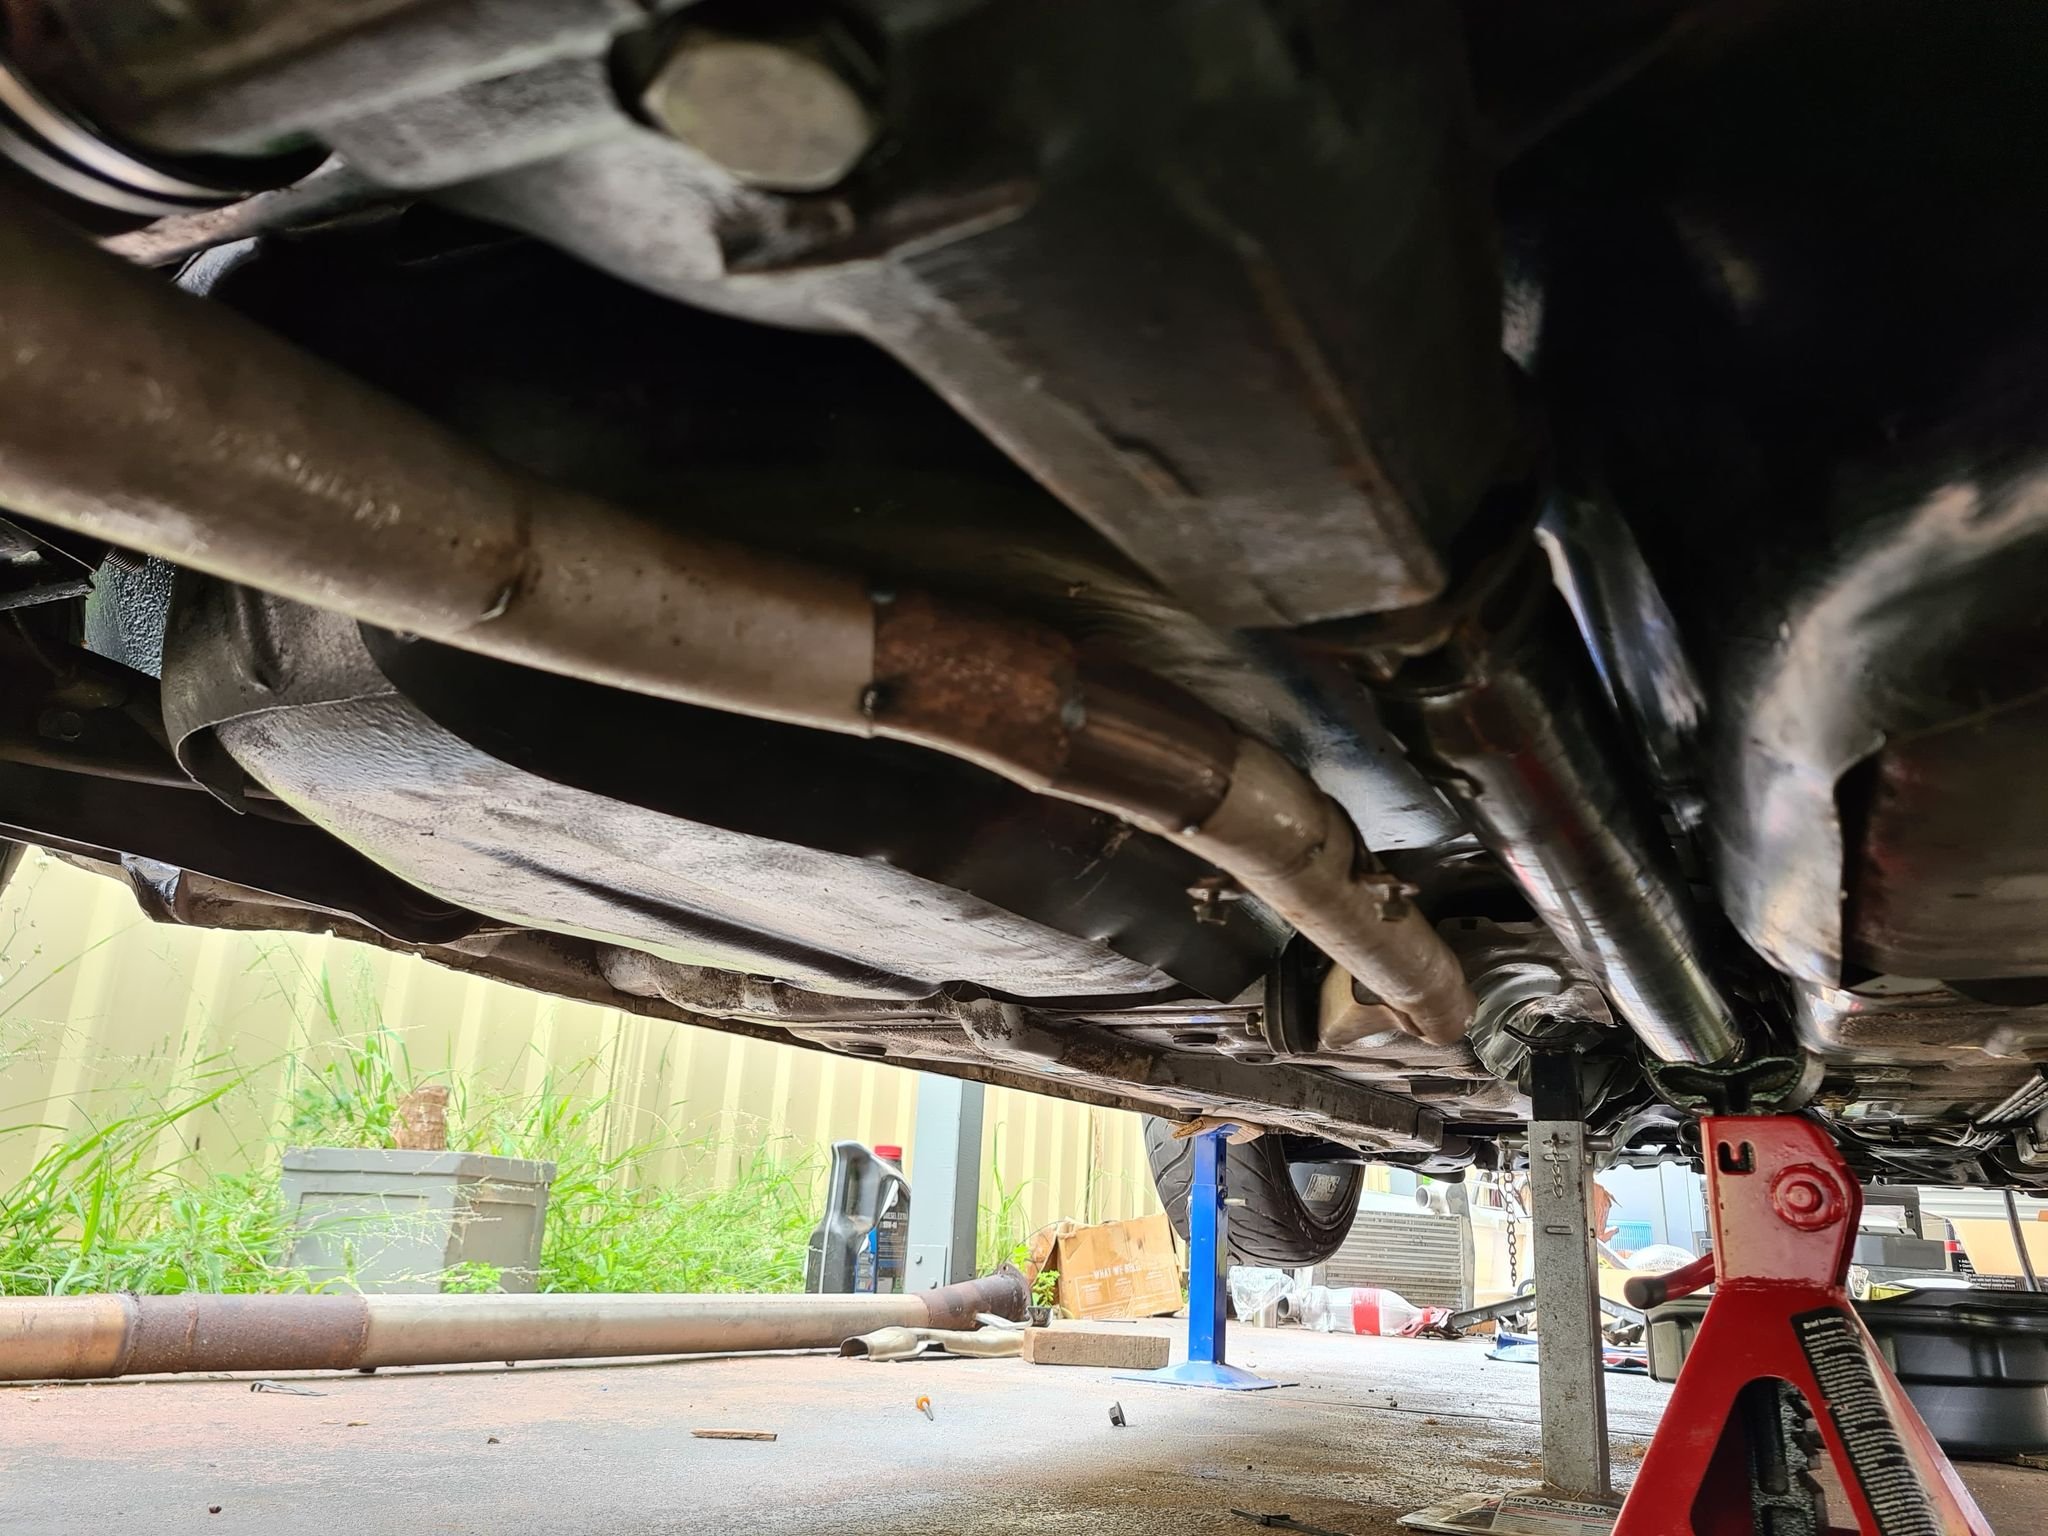
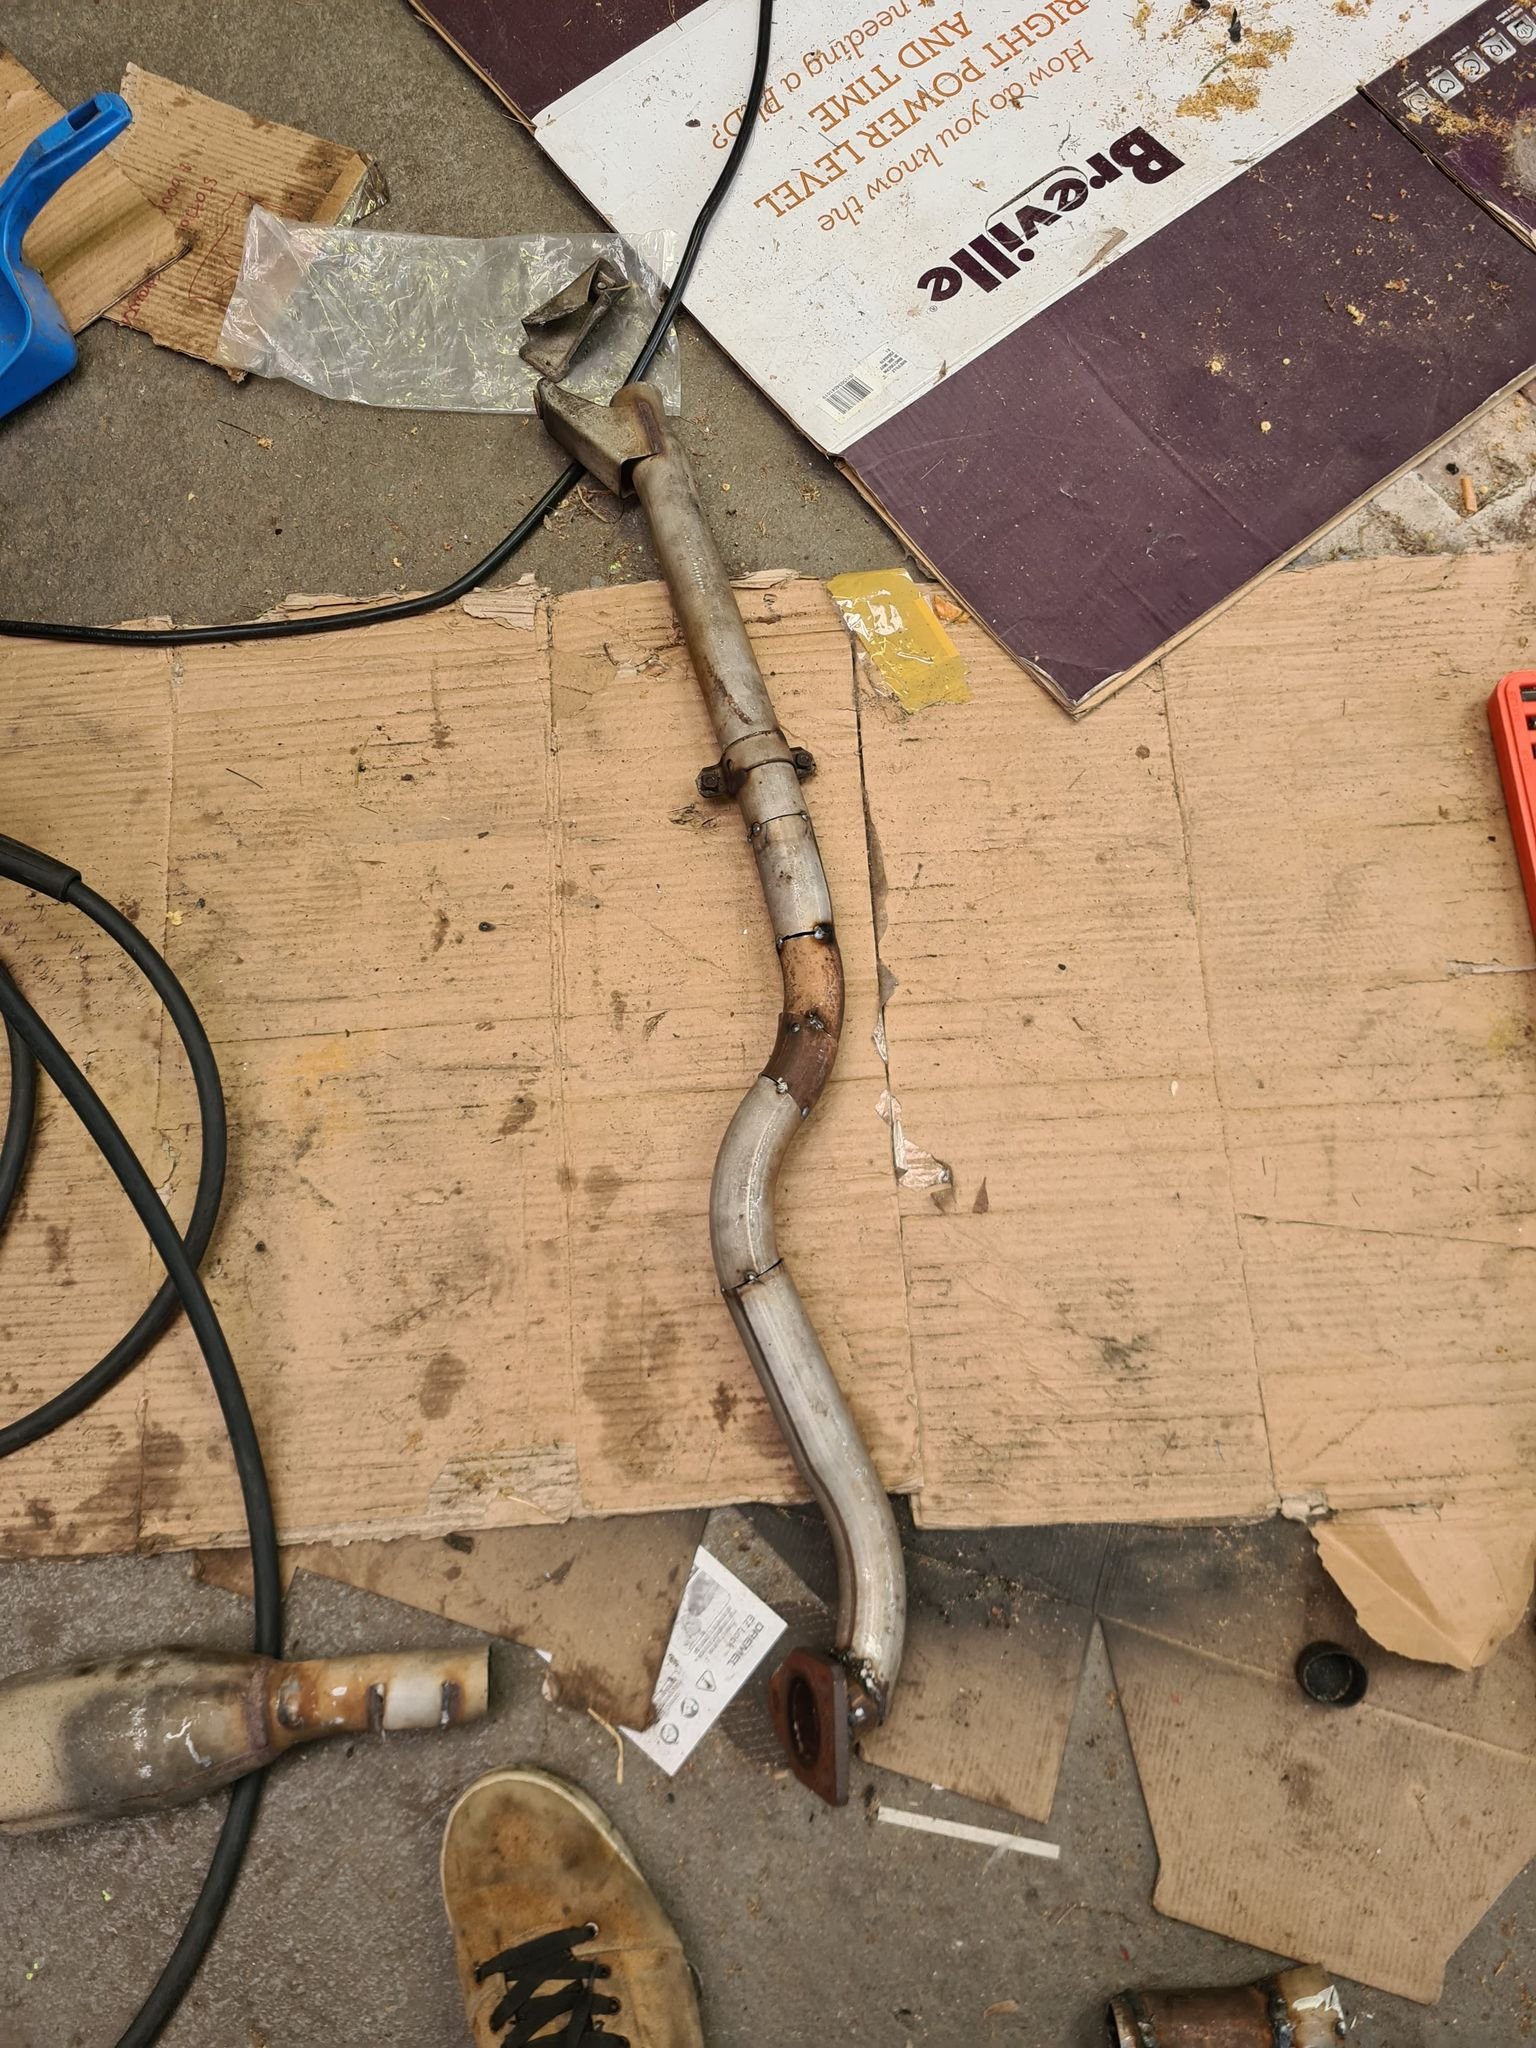
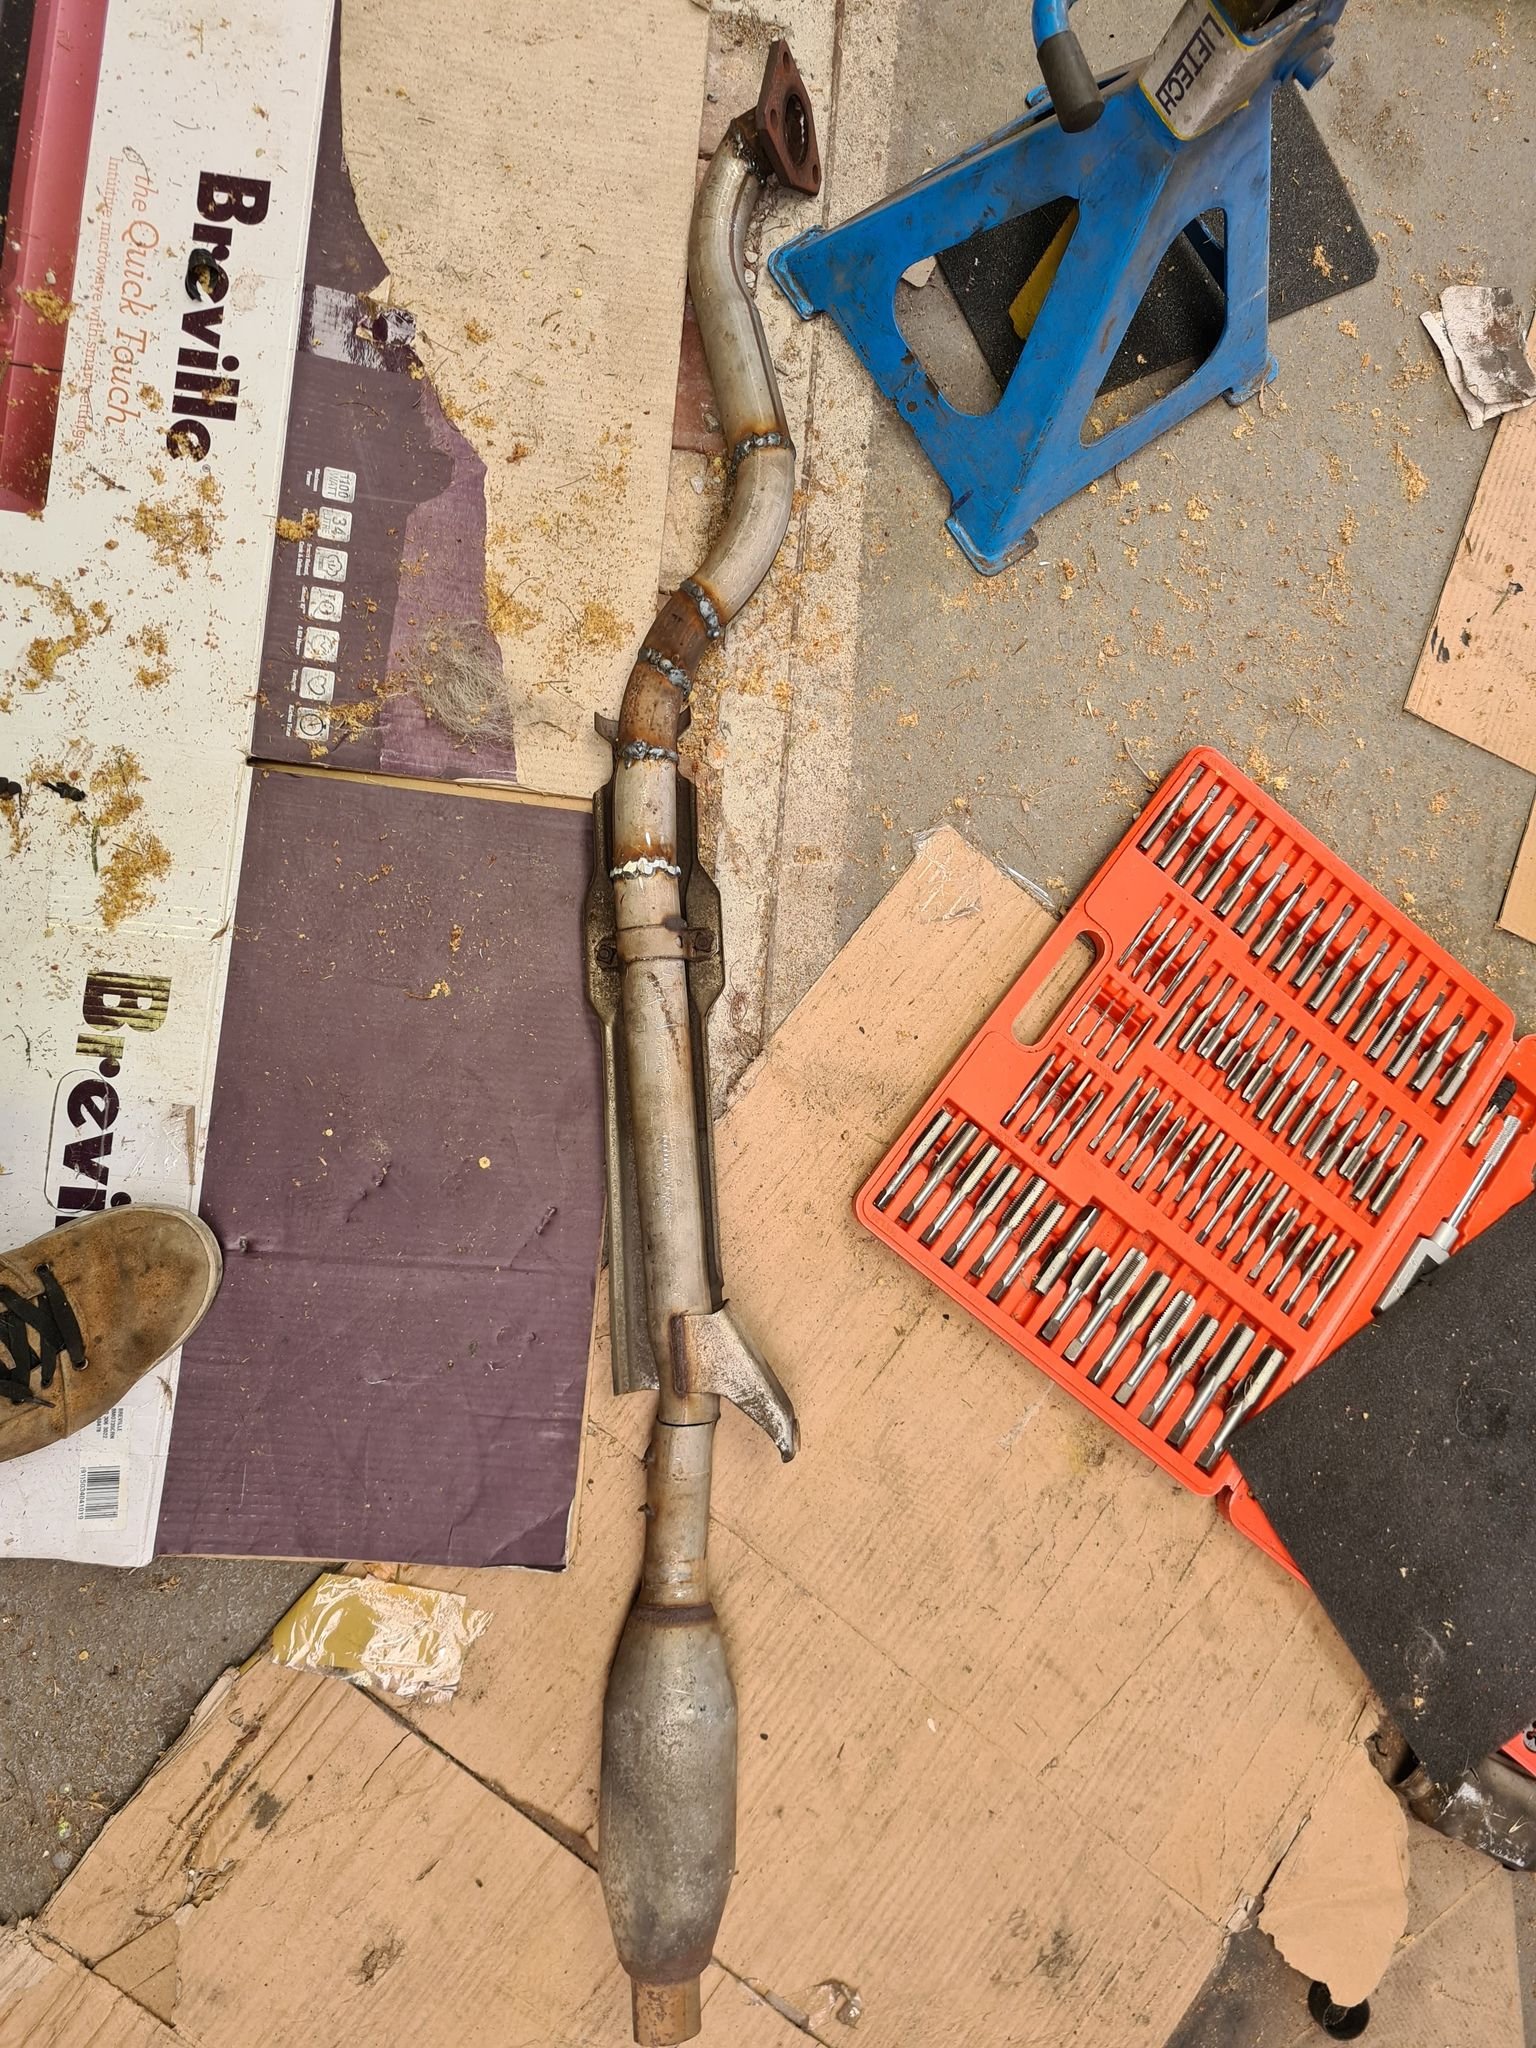
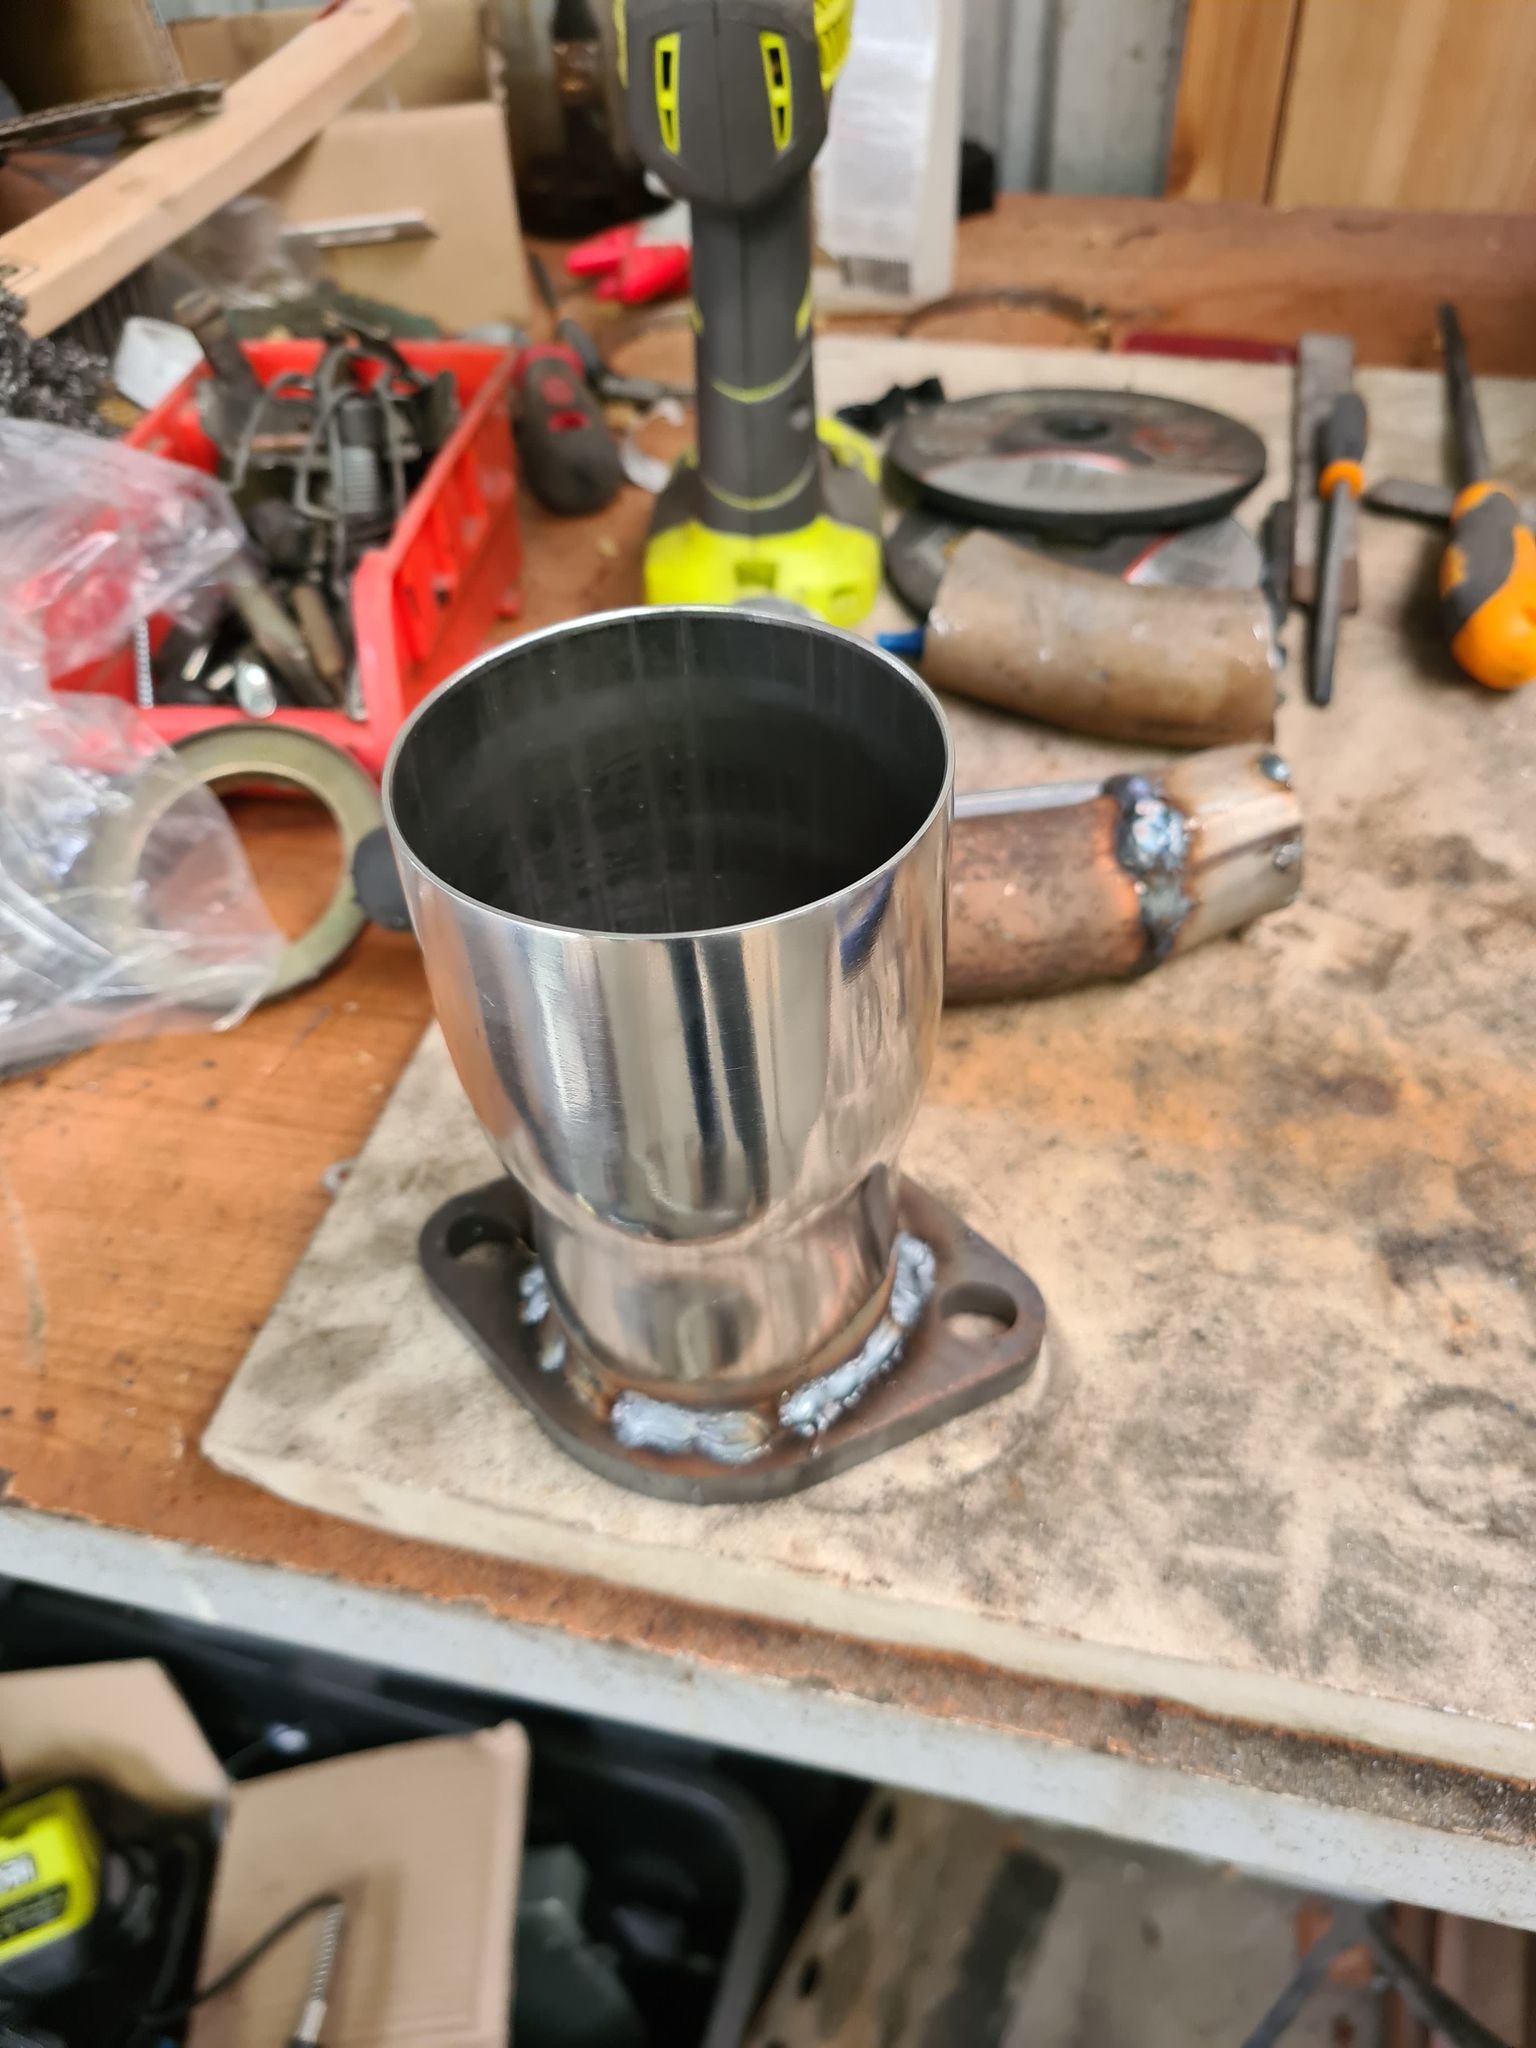
Popped into work to use TIG. I've only used one once and that was for about 30 seconds when I was in high school. It's pretty ugly but should come up good enough with a grind. That was on how welder was set and with zero guidance from anyone. I'm quite proud of it, for basically a first timer
 8 points
 -
Not finished...but you get the idea. I've made it so the top can move around in 90° increments, so you can use it in whatever position you need. Left, right, big wheel or little wheel etc...Paint to come next.
7 points
-
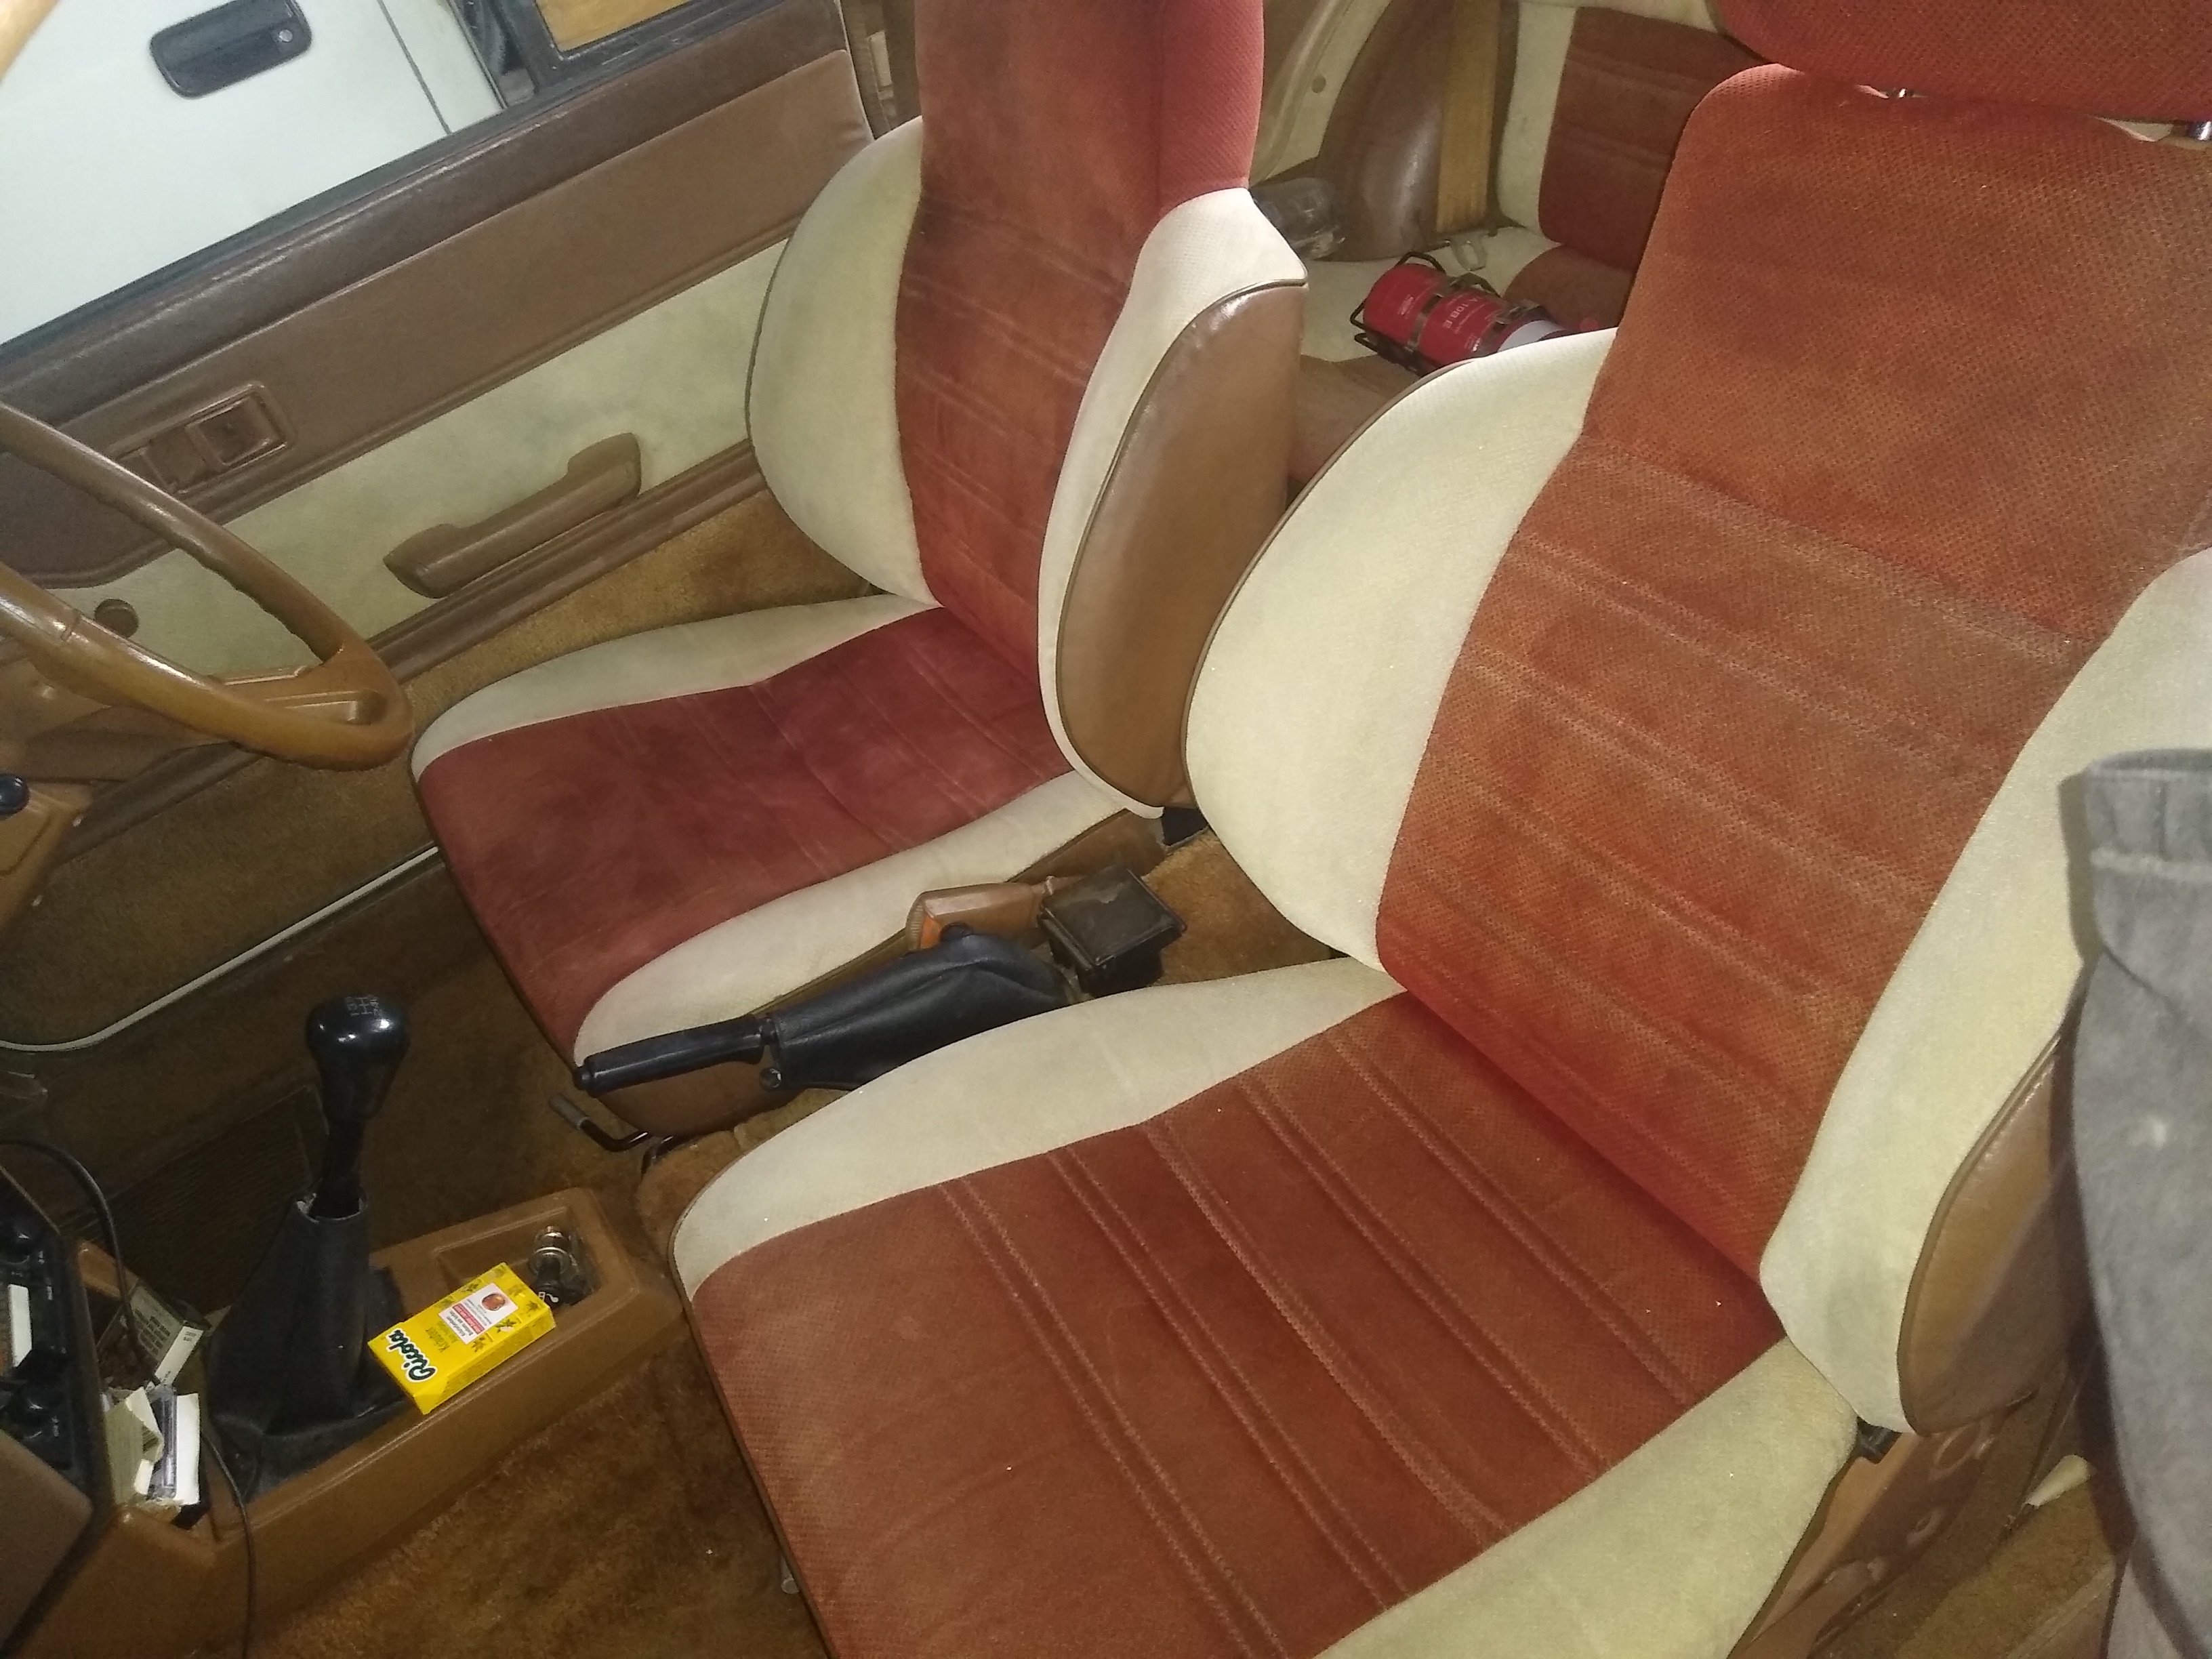
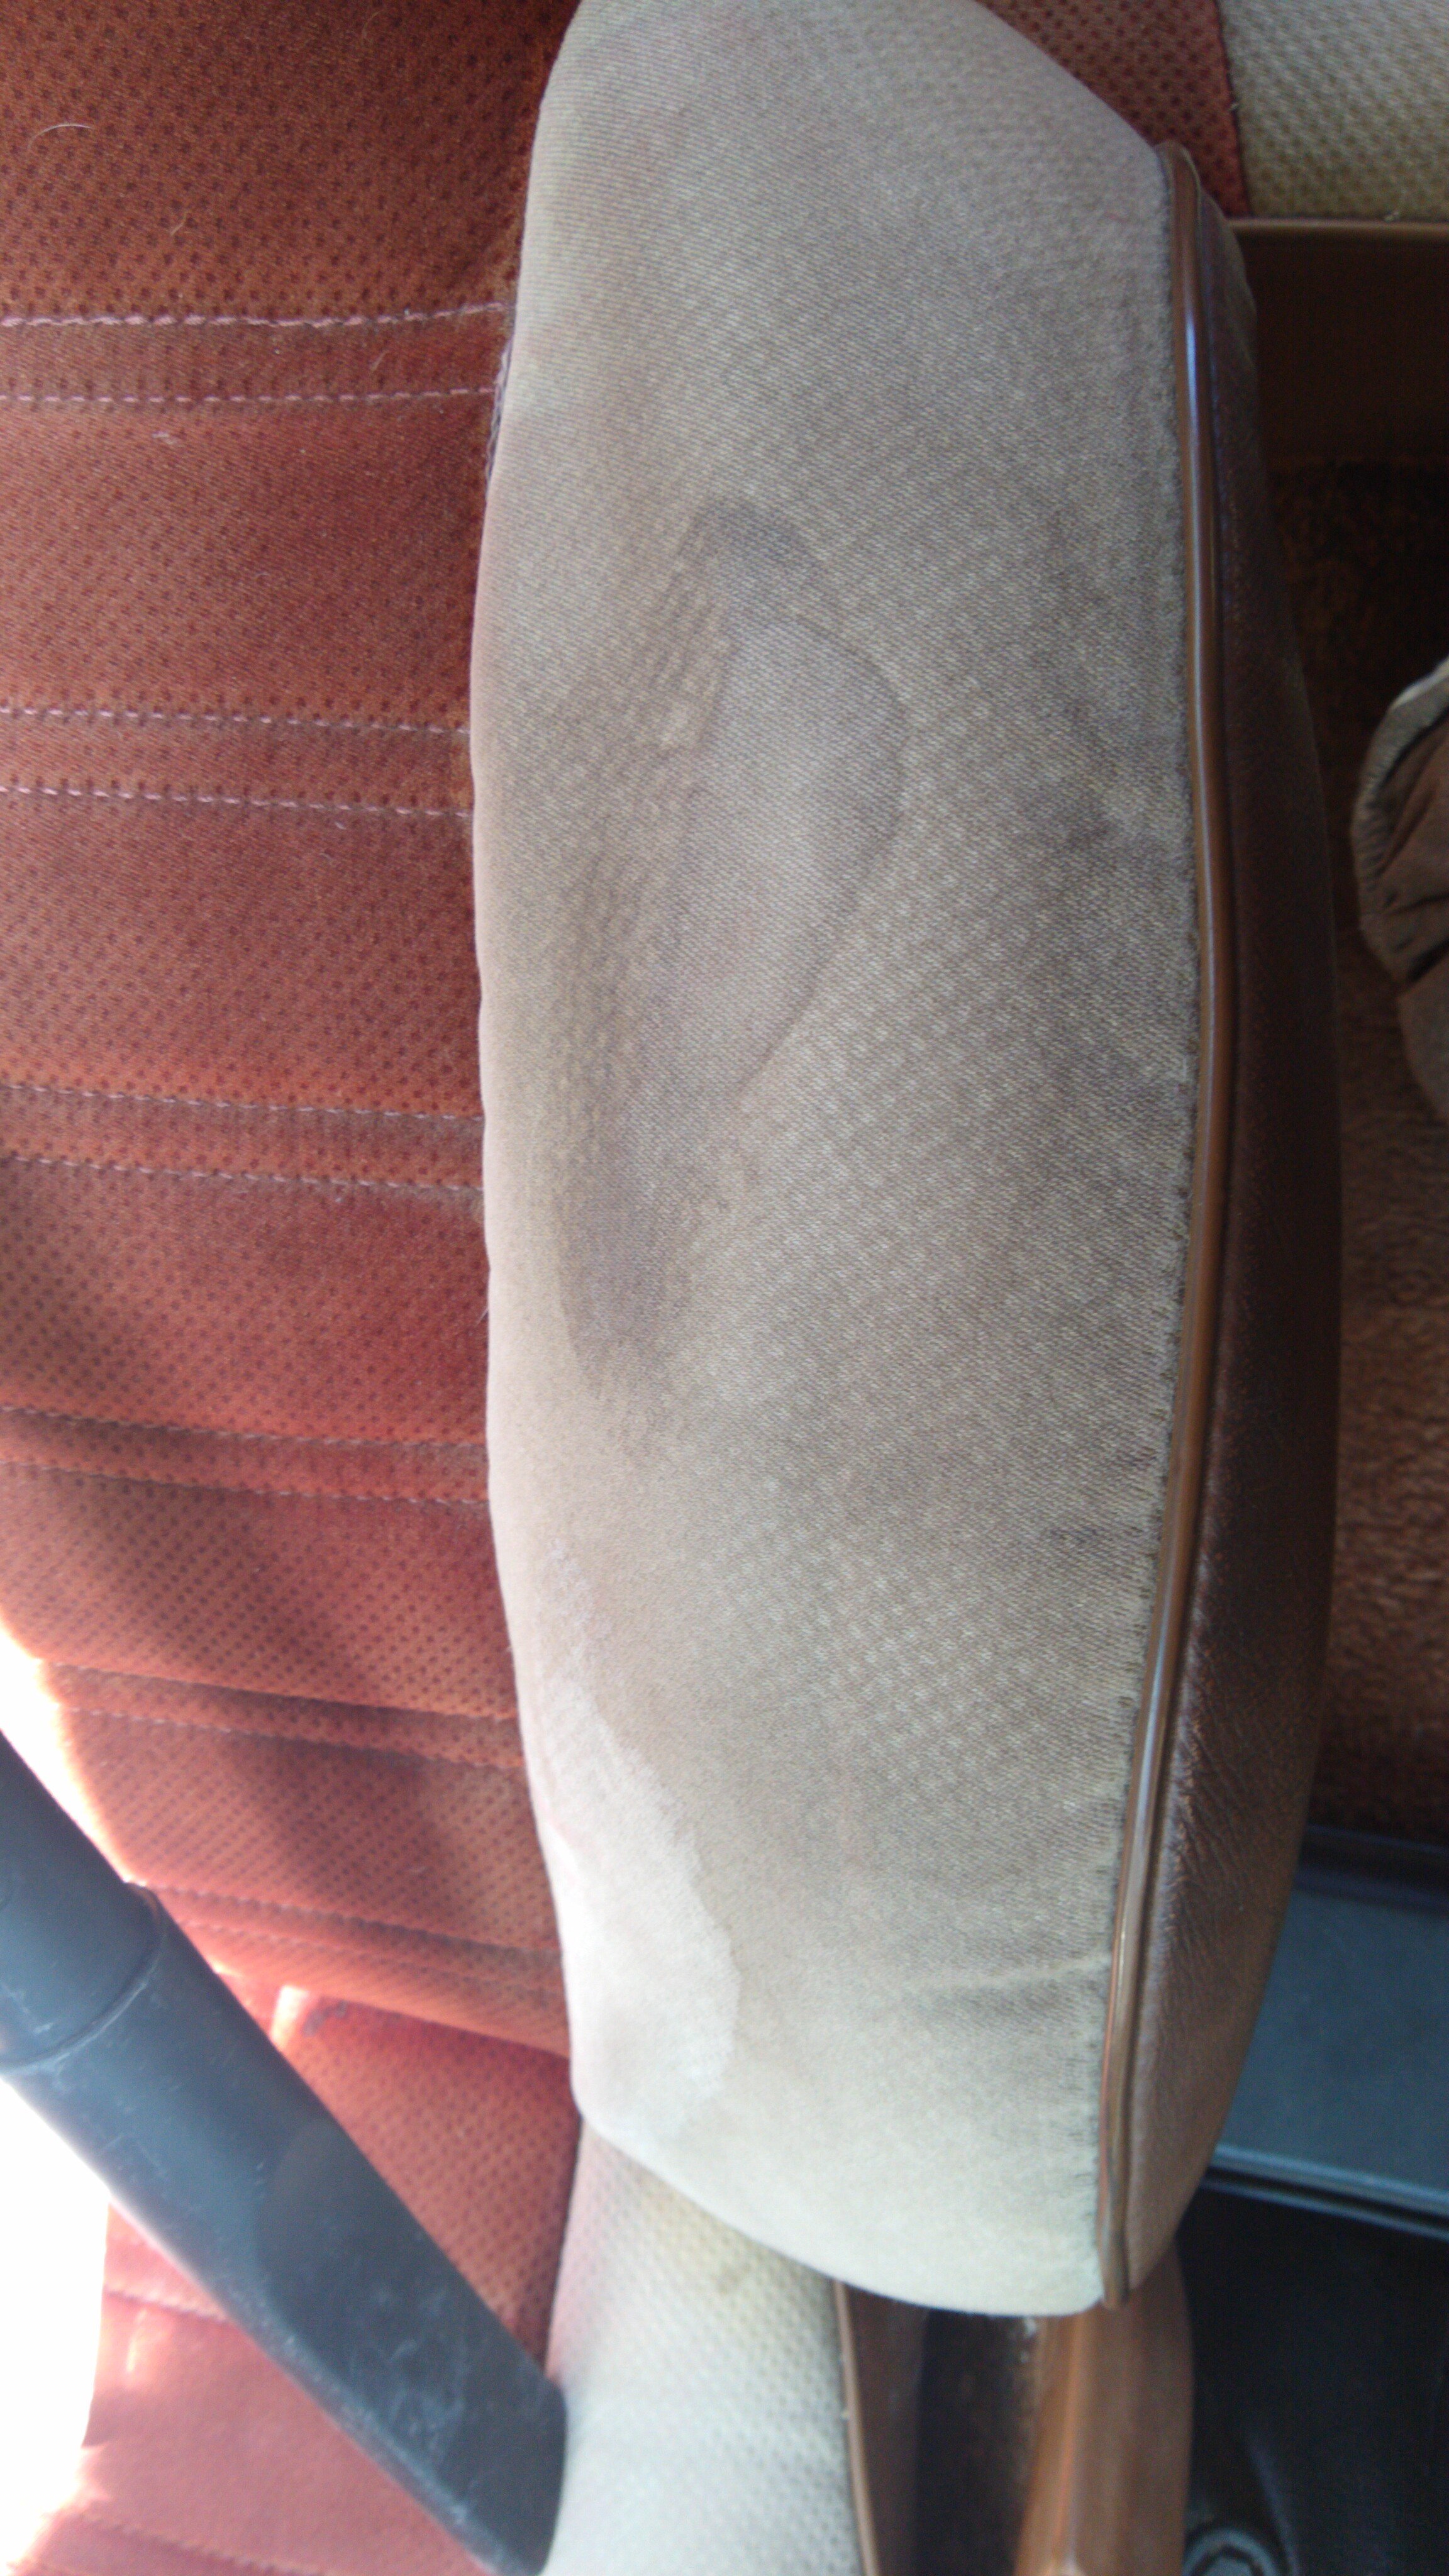
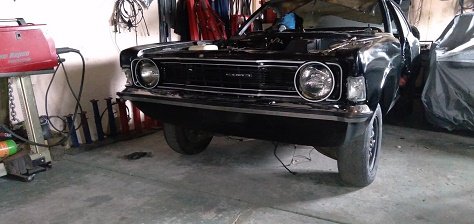
I spent 4 hours cleaning the front seats today. They went from disgusting crusty greasy messes that I was on the verge of reupholstering to looking really good apart from a few worn patches I didn't take any pictures until I had already cleaned the dirtiest parts but this gives a bit of an indication Cleaned using wet and dry vacuum cleaner, a mix of washing machine powder and an old toothbrush
6 points
-
Spent the morning languishing under the Thames with a scraper and wire brush. I ended up lifting it a bit higher so the work angle is less awkward on my poor old back. More scraping tomorrow followed by a second pressure clean. Hard yakka indeed, but its getting there.
5 points
-
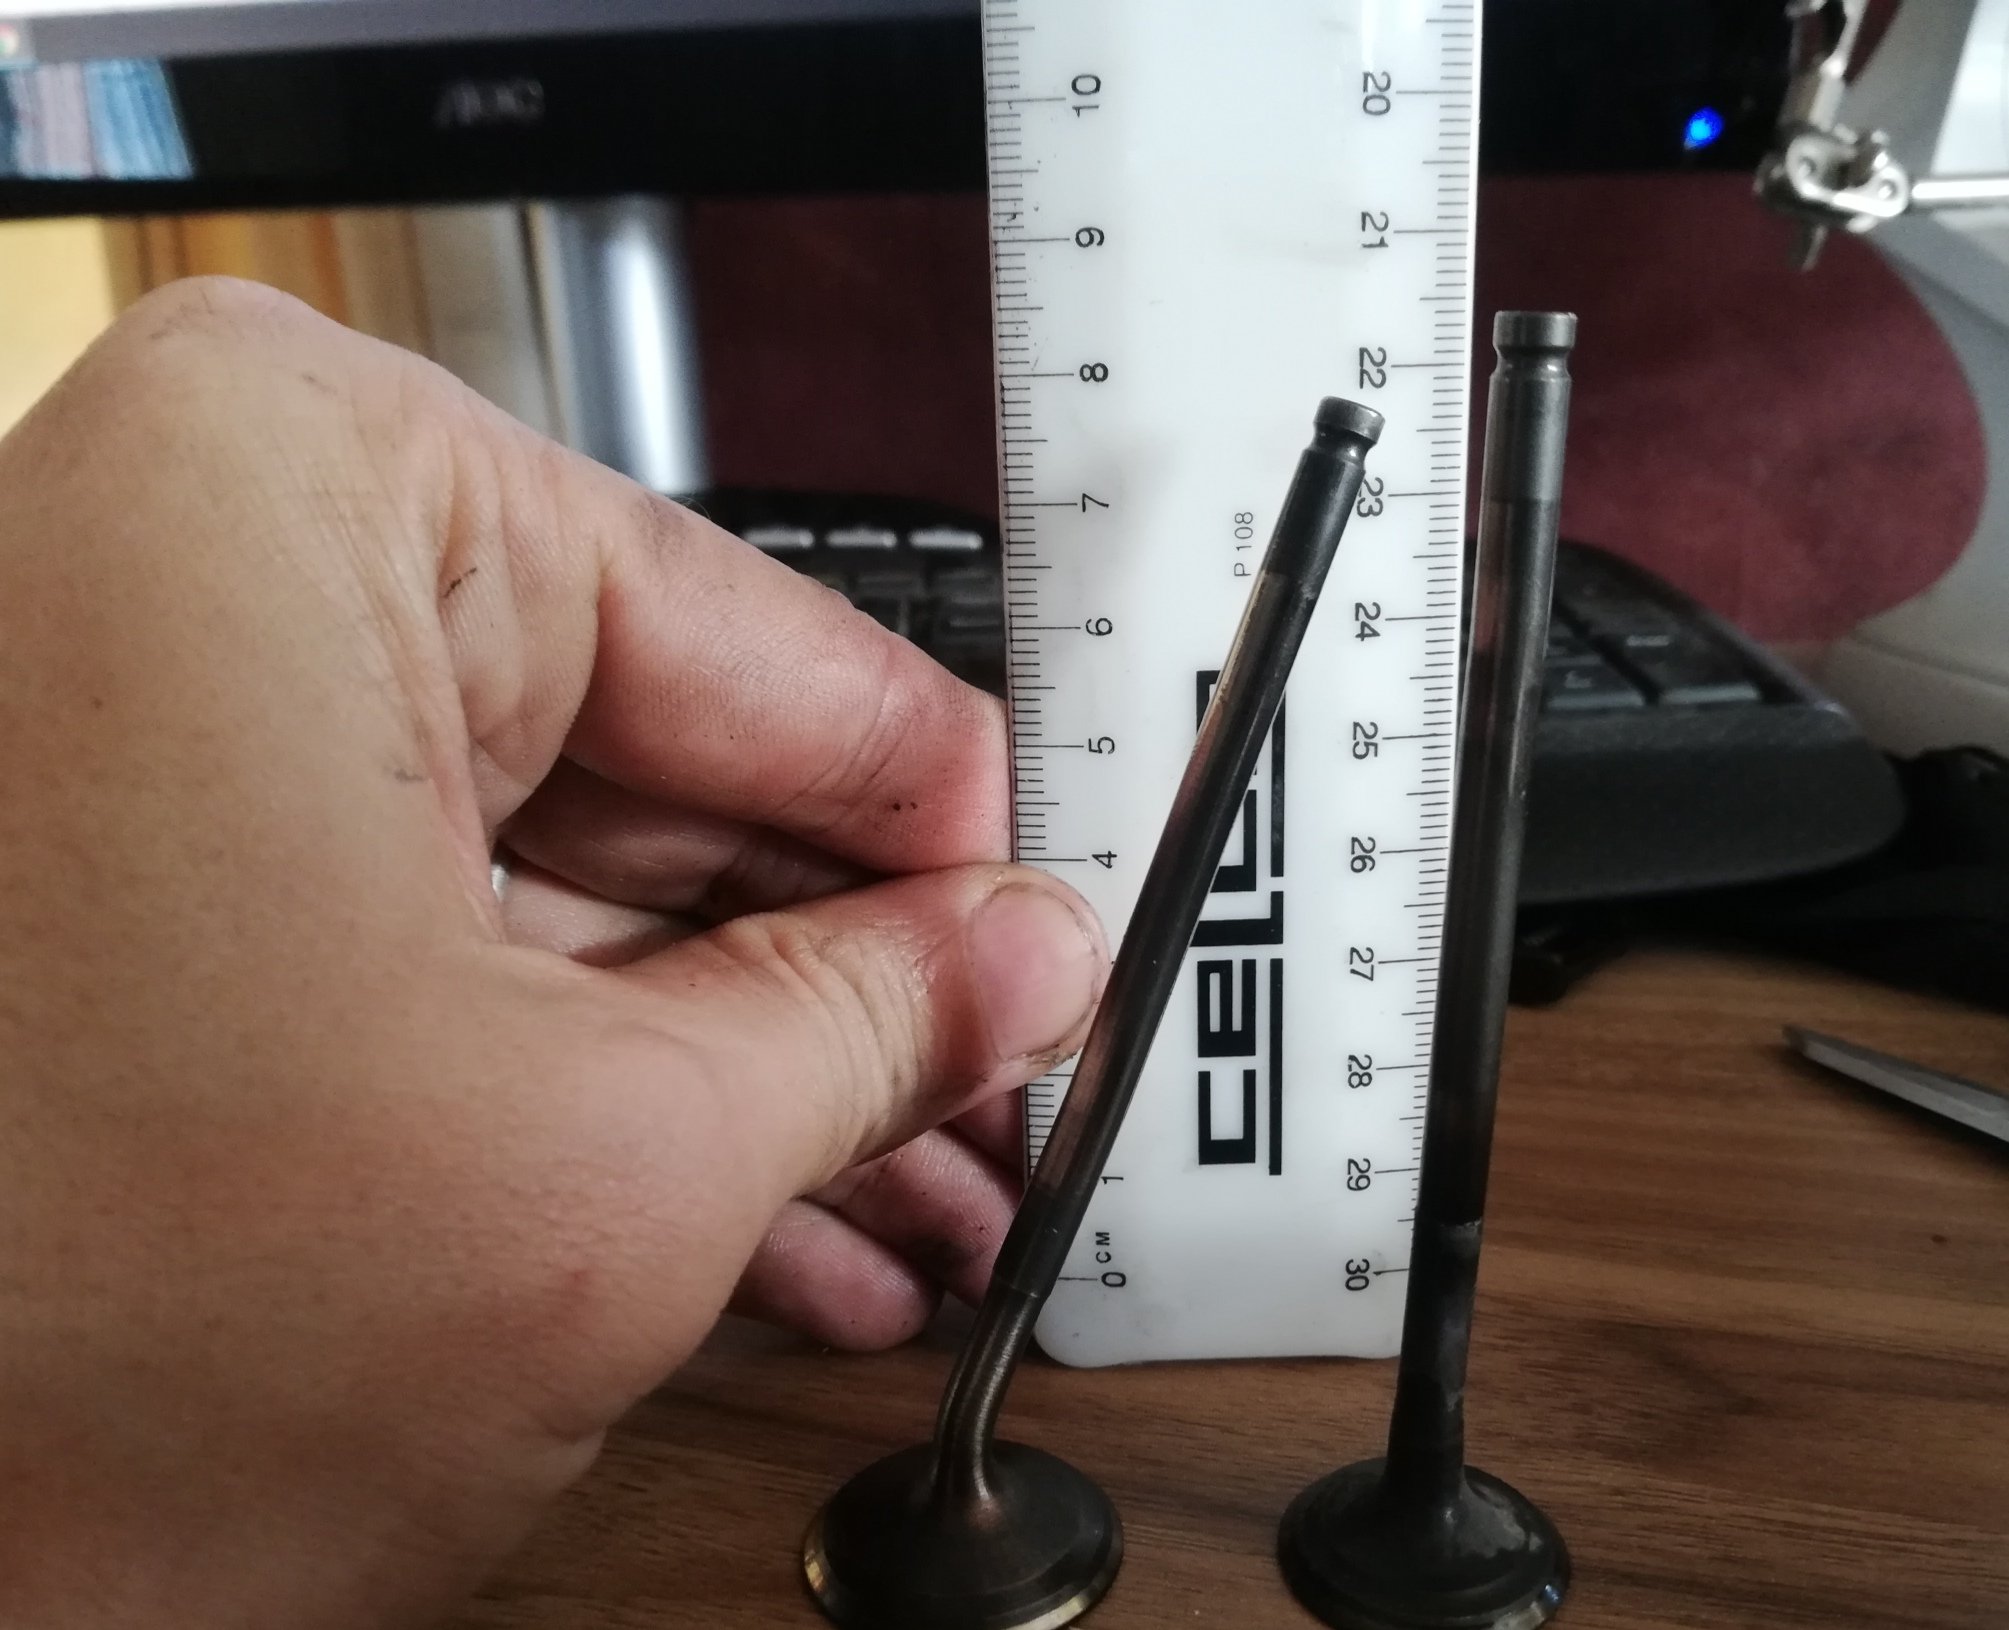
Looks like 2 hours of riding was enough to warm the engine up enough to kiss the valves - very slight witness marks in the carbon of the valve cut outs pretty dumb wanna know what i think the issue was its very dumb i just lined up a couple of the 150cc kit pistons. They are all different fucking heights. The last one i took out had good clearance but the one i put back in was half a mm taller on the edge , Theres one sure fire way to get this engine to work, and thats to bore it out to 165cc because the piston is a much better match tot he head
5 points
-
This is much better, but it kind of reminds me of my grandad's home made belt driven table saw and home made belt driven wood lathe. Both in wooden frames. They both worked fine, but were fucking terrifying.4 points
-
Also it just hasn't got the torque range to pull 5th gear, maxes out 4th at 80-90 at ALL the rpm, change to 5th and it drops off pipe and sits on 65-70. Discovered on a steep downhill it will come on pipe eventually in 5th, but fuck it'll never get there without a big ass hill or a typhoon level tailwind! New piston is almost here, so I'll set it up again and just keep it as a city pester as it's a blast around town. Thinking CG125(?) disc front end and a few other improvements will be a good idea and also have thoughts on building something a bit more serious with my spare rolling frame.4 points
-
Progress - Had to get a few more Racepak cables in, sorted now. Engine running (!!!) with default tune, electronic dash and PDM operational, found baffle in muffler is loose so needs to be replaced, no major issues identified with plumbing. Waiting on fuel and oil pressure sensors and terminating CAN resistor. All default car functions hooked up to PDM. Still to do Air con wiring. Considering swapping out to AIM dash which is more street oriented with built in LEDs for all street functions. Will see, that dash looks a bit more modern than the IQ3.4 points
-
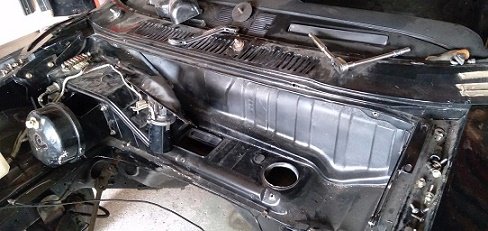
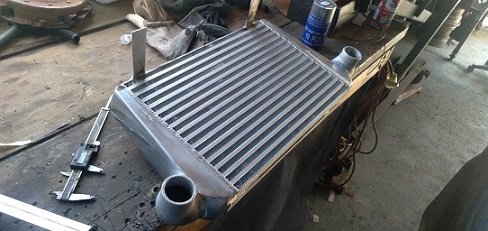
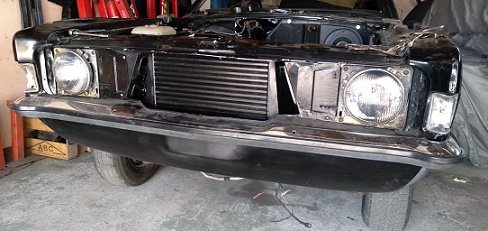
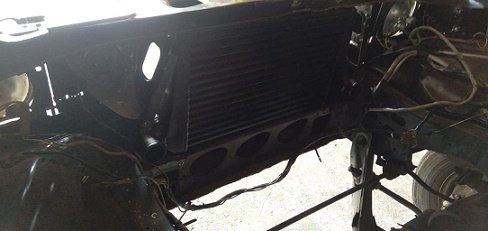
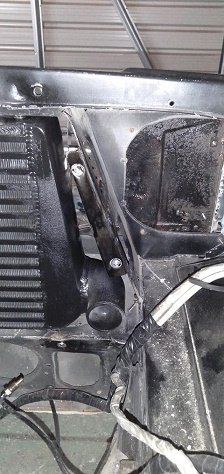
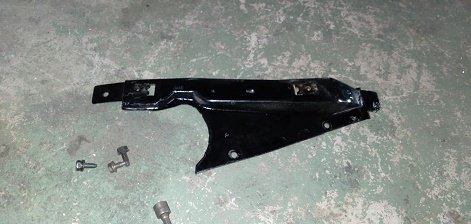
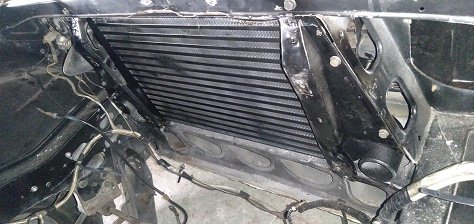
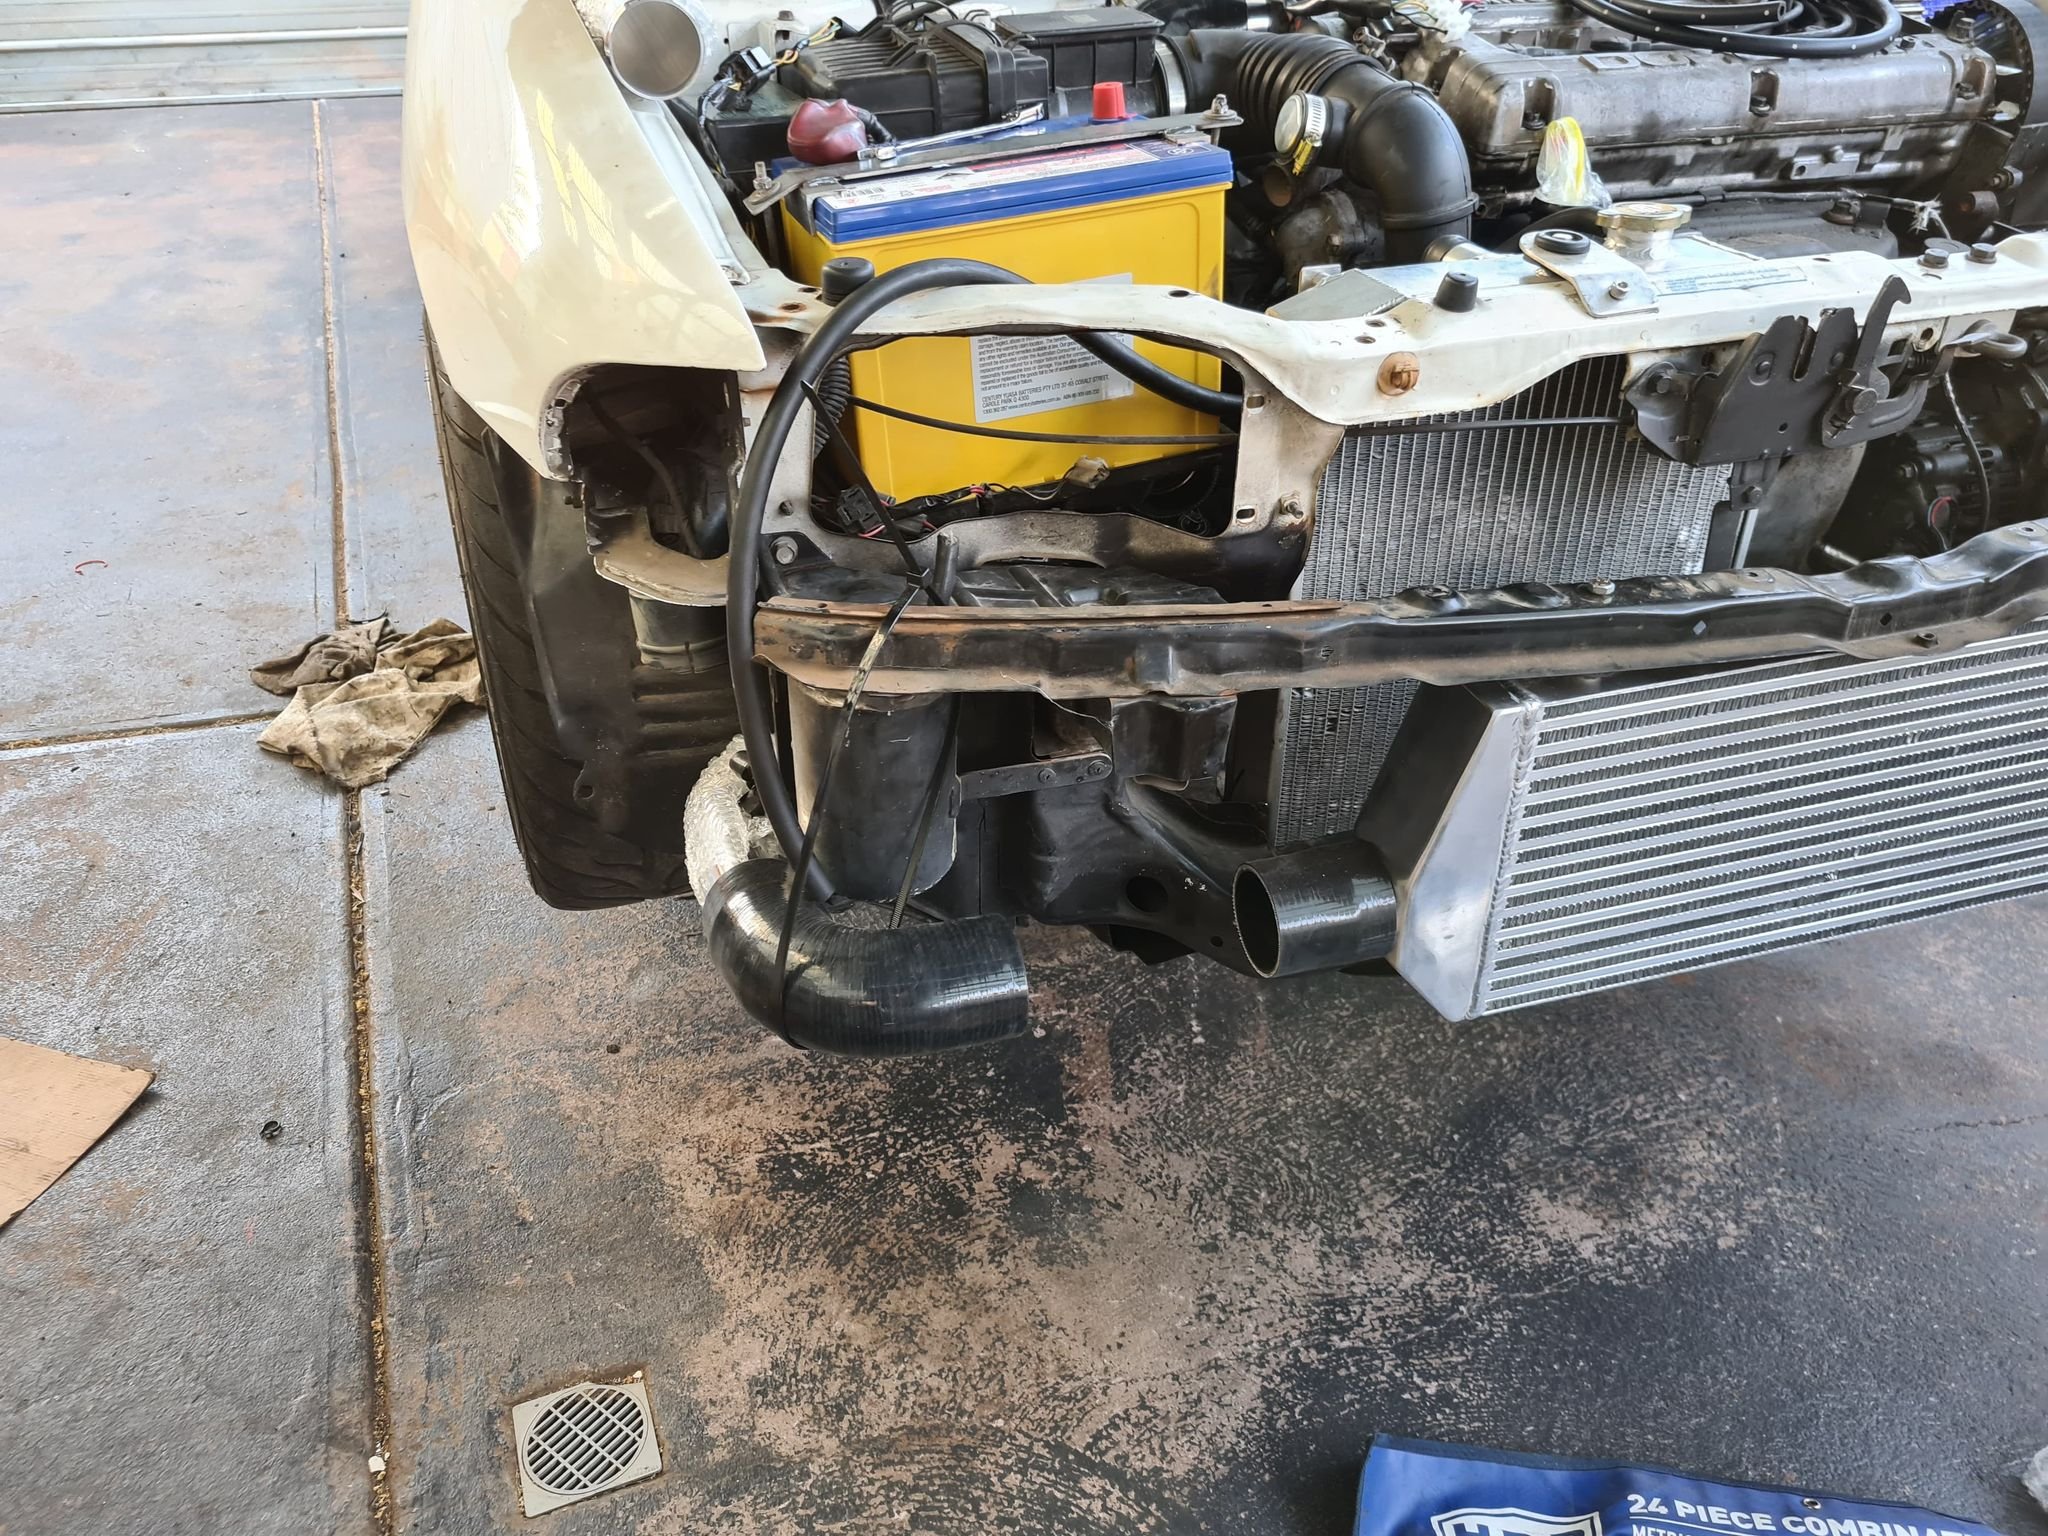
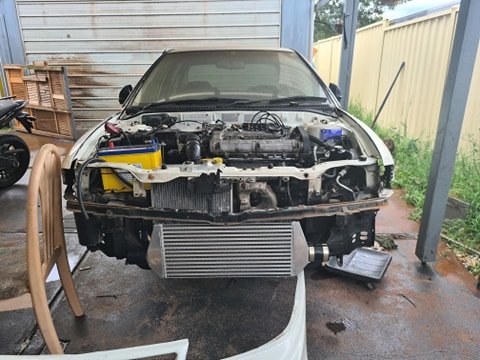
was starting to button things up on the old girl and noticed the wiper mounts lose ..tried to tighten them but they wouldn't ....so out come the heater again the wiper and the panels to get to the wiper mounts them selfs only to find no washers or anything ...so i had a look at the wipers on the white one and ended up steeling the parts from them.. i had the ends of the intercooler cut down and some 90 reducers welded on the end..so not it fits better ; i painted it black and finished the mounts of so it all in and secure i had to cut the ends of the radiator supports off to be able to put the intercooler in ..i made and welded some tabs back on and slapped some riv nuts in modified the rad supports and added some tabs and riv nuts rad supports bolt back on and the rad can bolt back up in the factory spot with a nice air gap as well between intercooler and radiator never know its there....perfect
3 points
-
also if i take the bore out as far as it will go and stroke the crank as far as i have seen done you can turn this 125 into a whopping 230cc beast For way more money and effort than simply putting in a dr200 engine, which can easily be bored out to 230cc and for way less reliability so i will probably do that in the future3 points
-
galv pipe is garbage to weld, i wouldn't bother tbh for the rad pipe you can use silver solder and a mapp gas torch (not electronic solder, you are brazing it) and then use either copper pipe or stainless steel pipe. Both take the silver easily and its melting point is over 800 degrees, and the join is stronger than the surrounding metal. People will look at you funny if you use the copper pipe, tho i did it for the lower section when i converted my morrie from thermosyphon to water pump and needed a funny stepdown to work. You will pick up how to do it in a half hour tbh its dead easy3 points
-
Hey man really appreciate the regular updates on your project. I’m sure if it was a POS micra the geriatrics on here would like it too. Keep it up mate.3 points
-
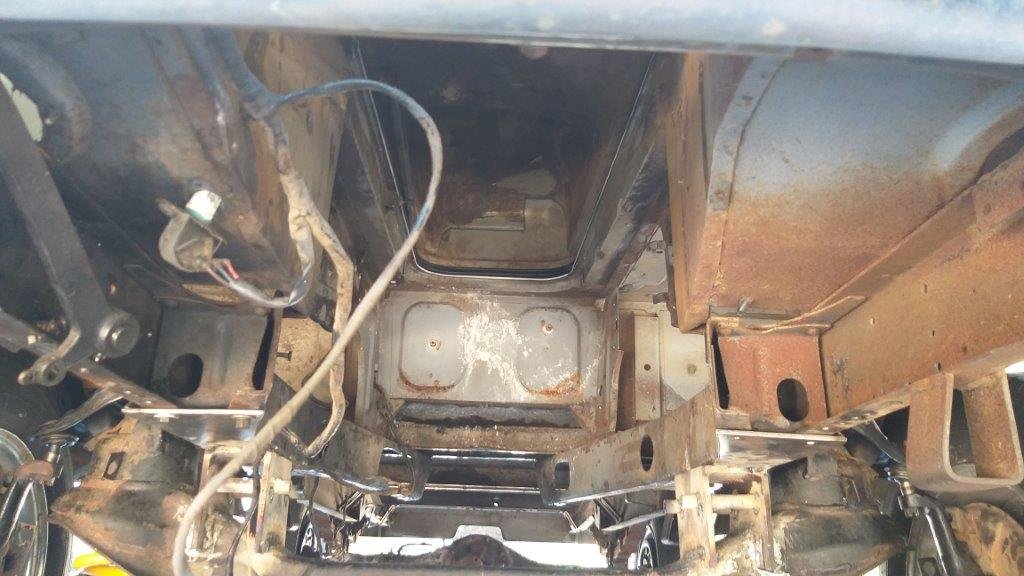
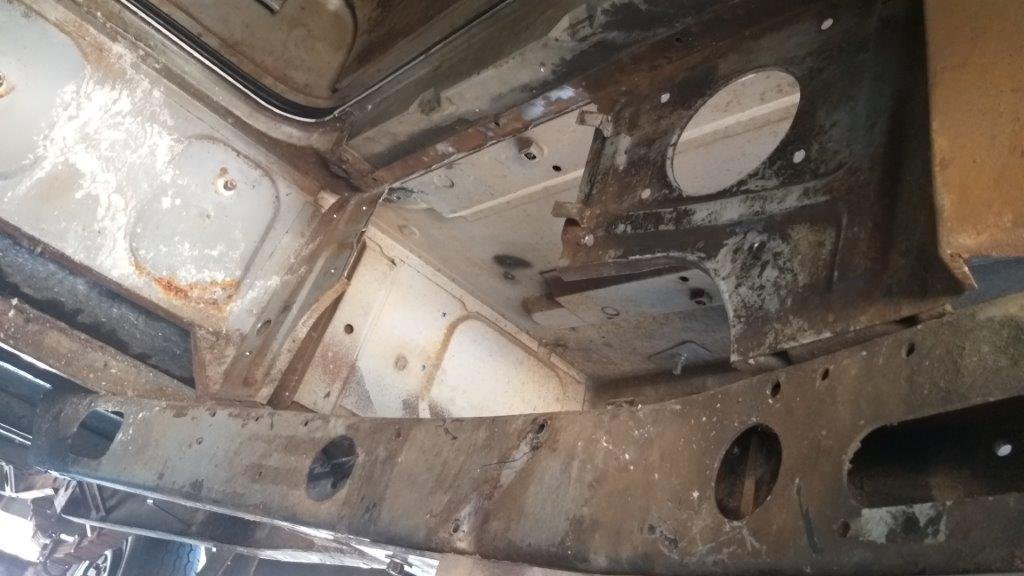
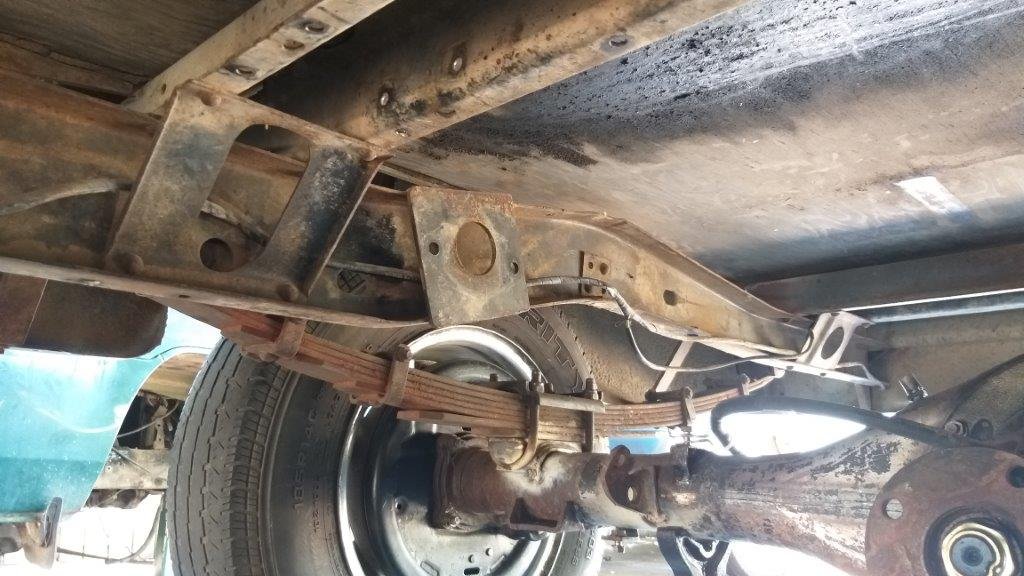
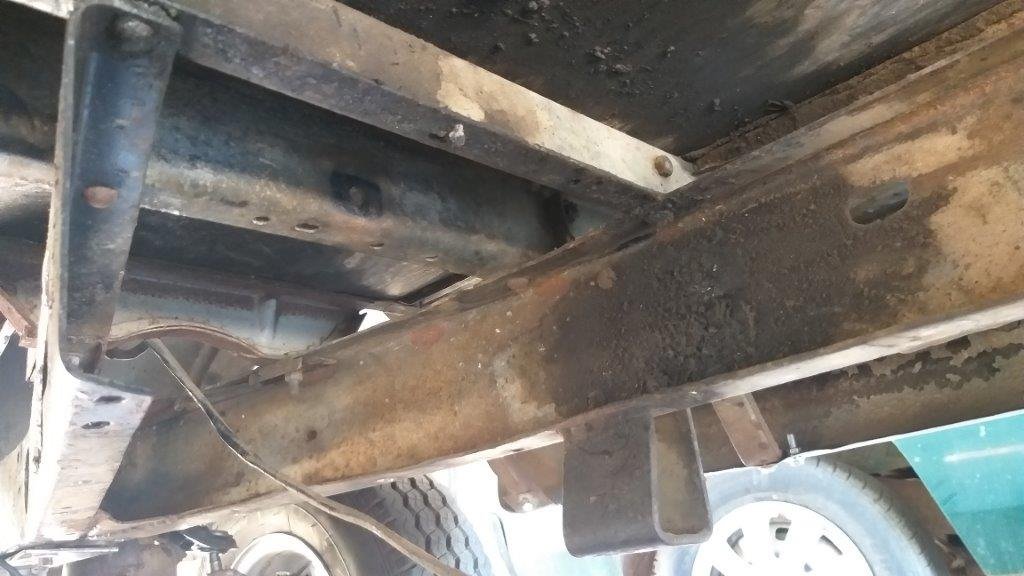
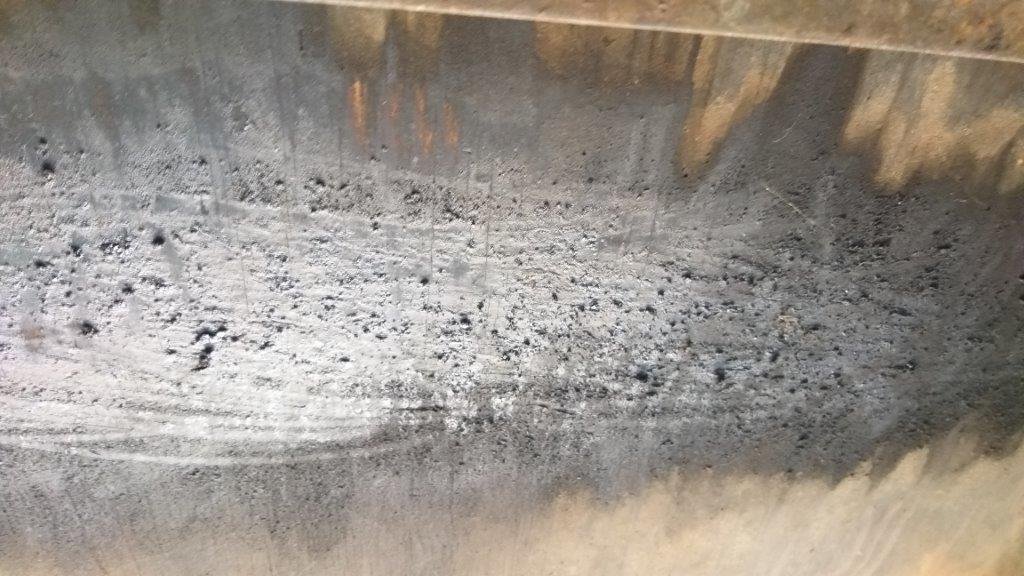
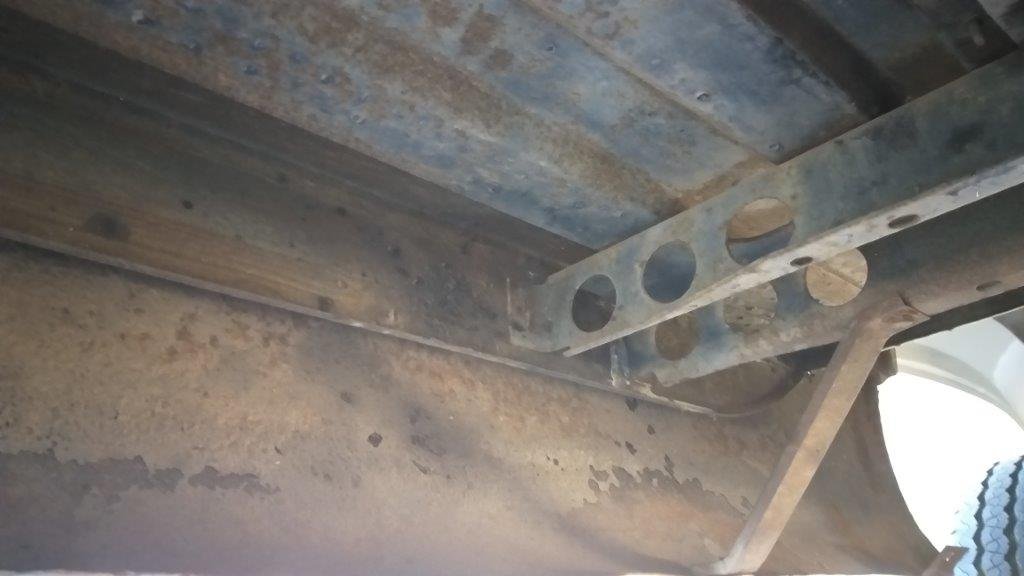
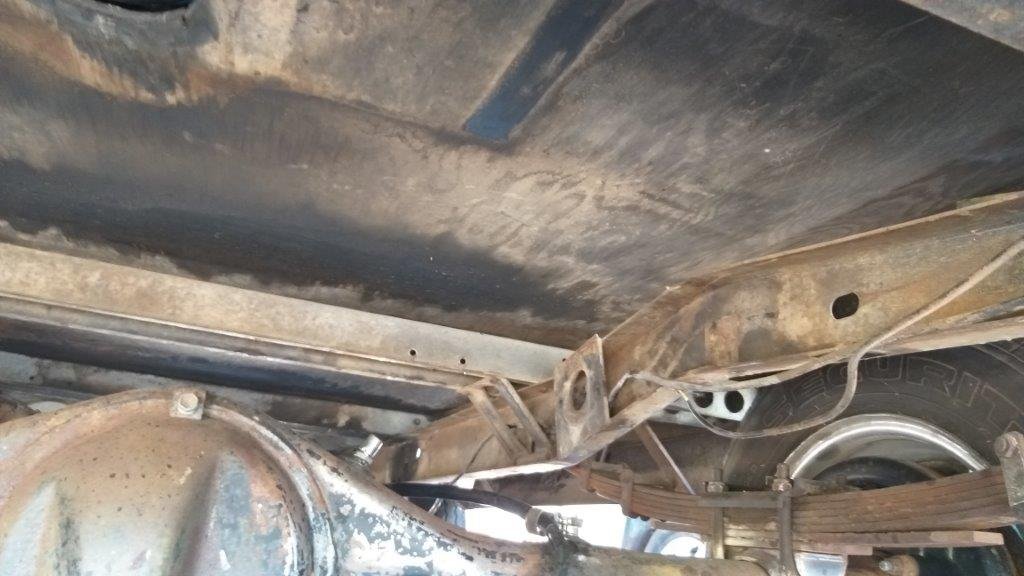
Today I completed round one of cleaning of the underside. Used about a dozen cans of degreaser followed by a good water blast. Below are some pics that I took before I started. Most of the underside was pretty dry with some areas of sheet metal showing a light dusting of surface rust. The underside of the plywood floor in the load area looks to be in pretty good condition with just a thick smear of gunge above the gearbox tail shaft and another above the diff pinion. The side walls of the engine box were also pretty oily as were the areas around the brake and clutch pedal pivots which I guess is as a result of over greasing somewhere along the line. It doesn't look too bad after the first round, but the smears on the plywood floor are still noticeable, so I'll give those areas another go tomorrow. Thanks for looking.
3 points
-
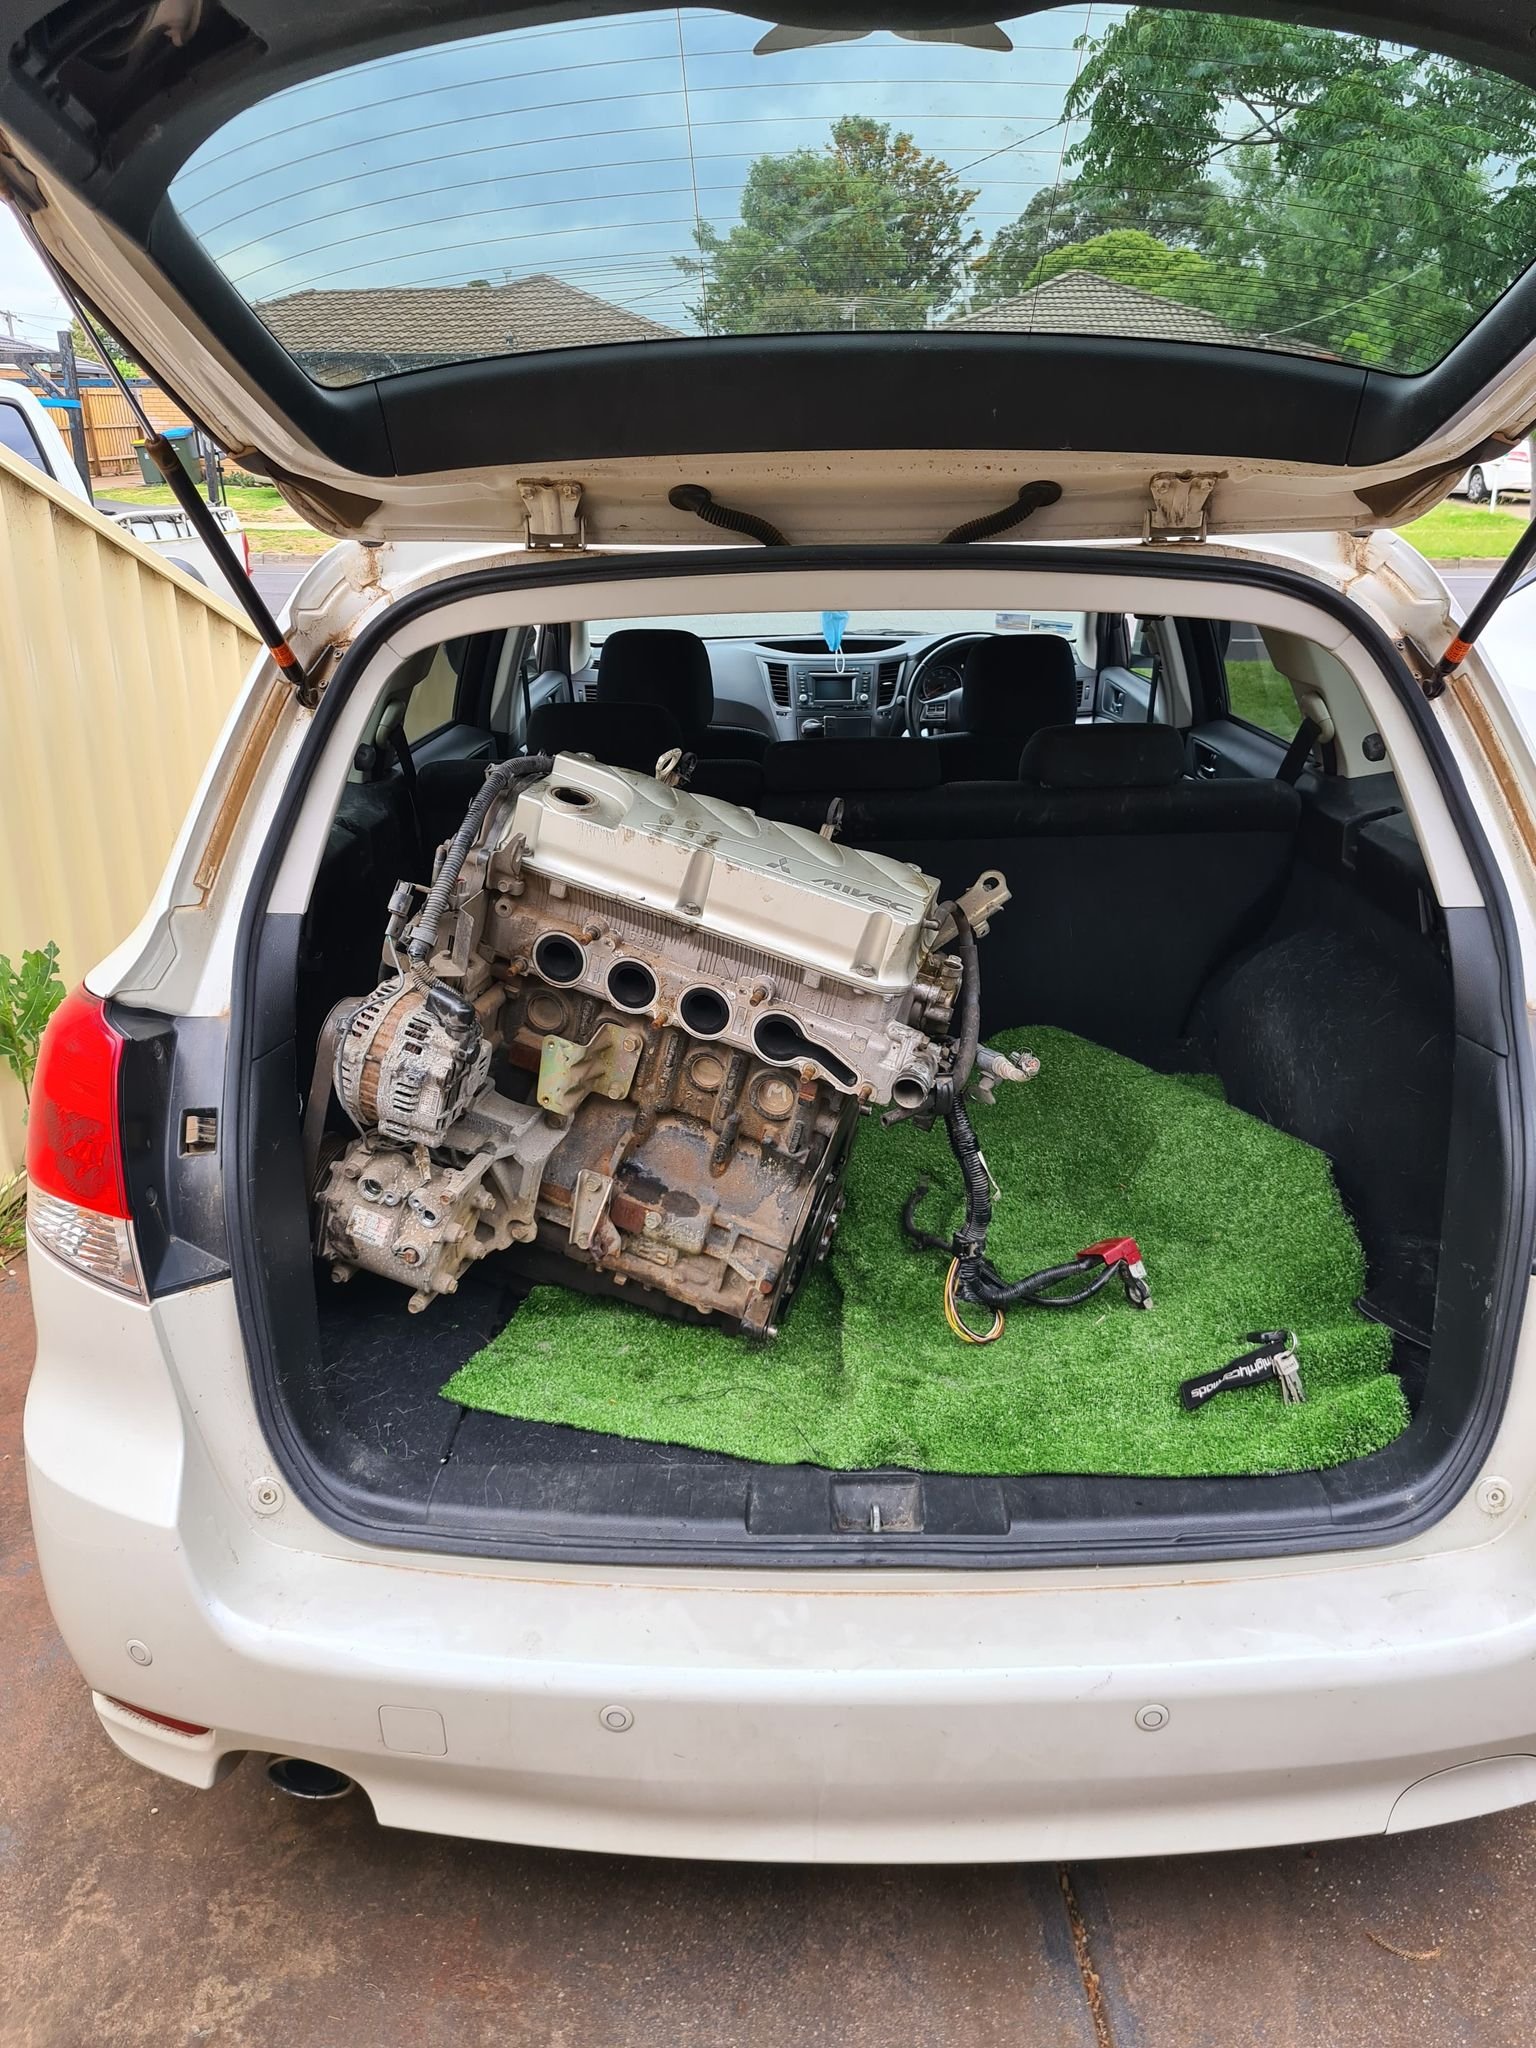
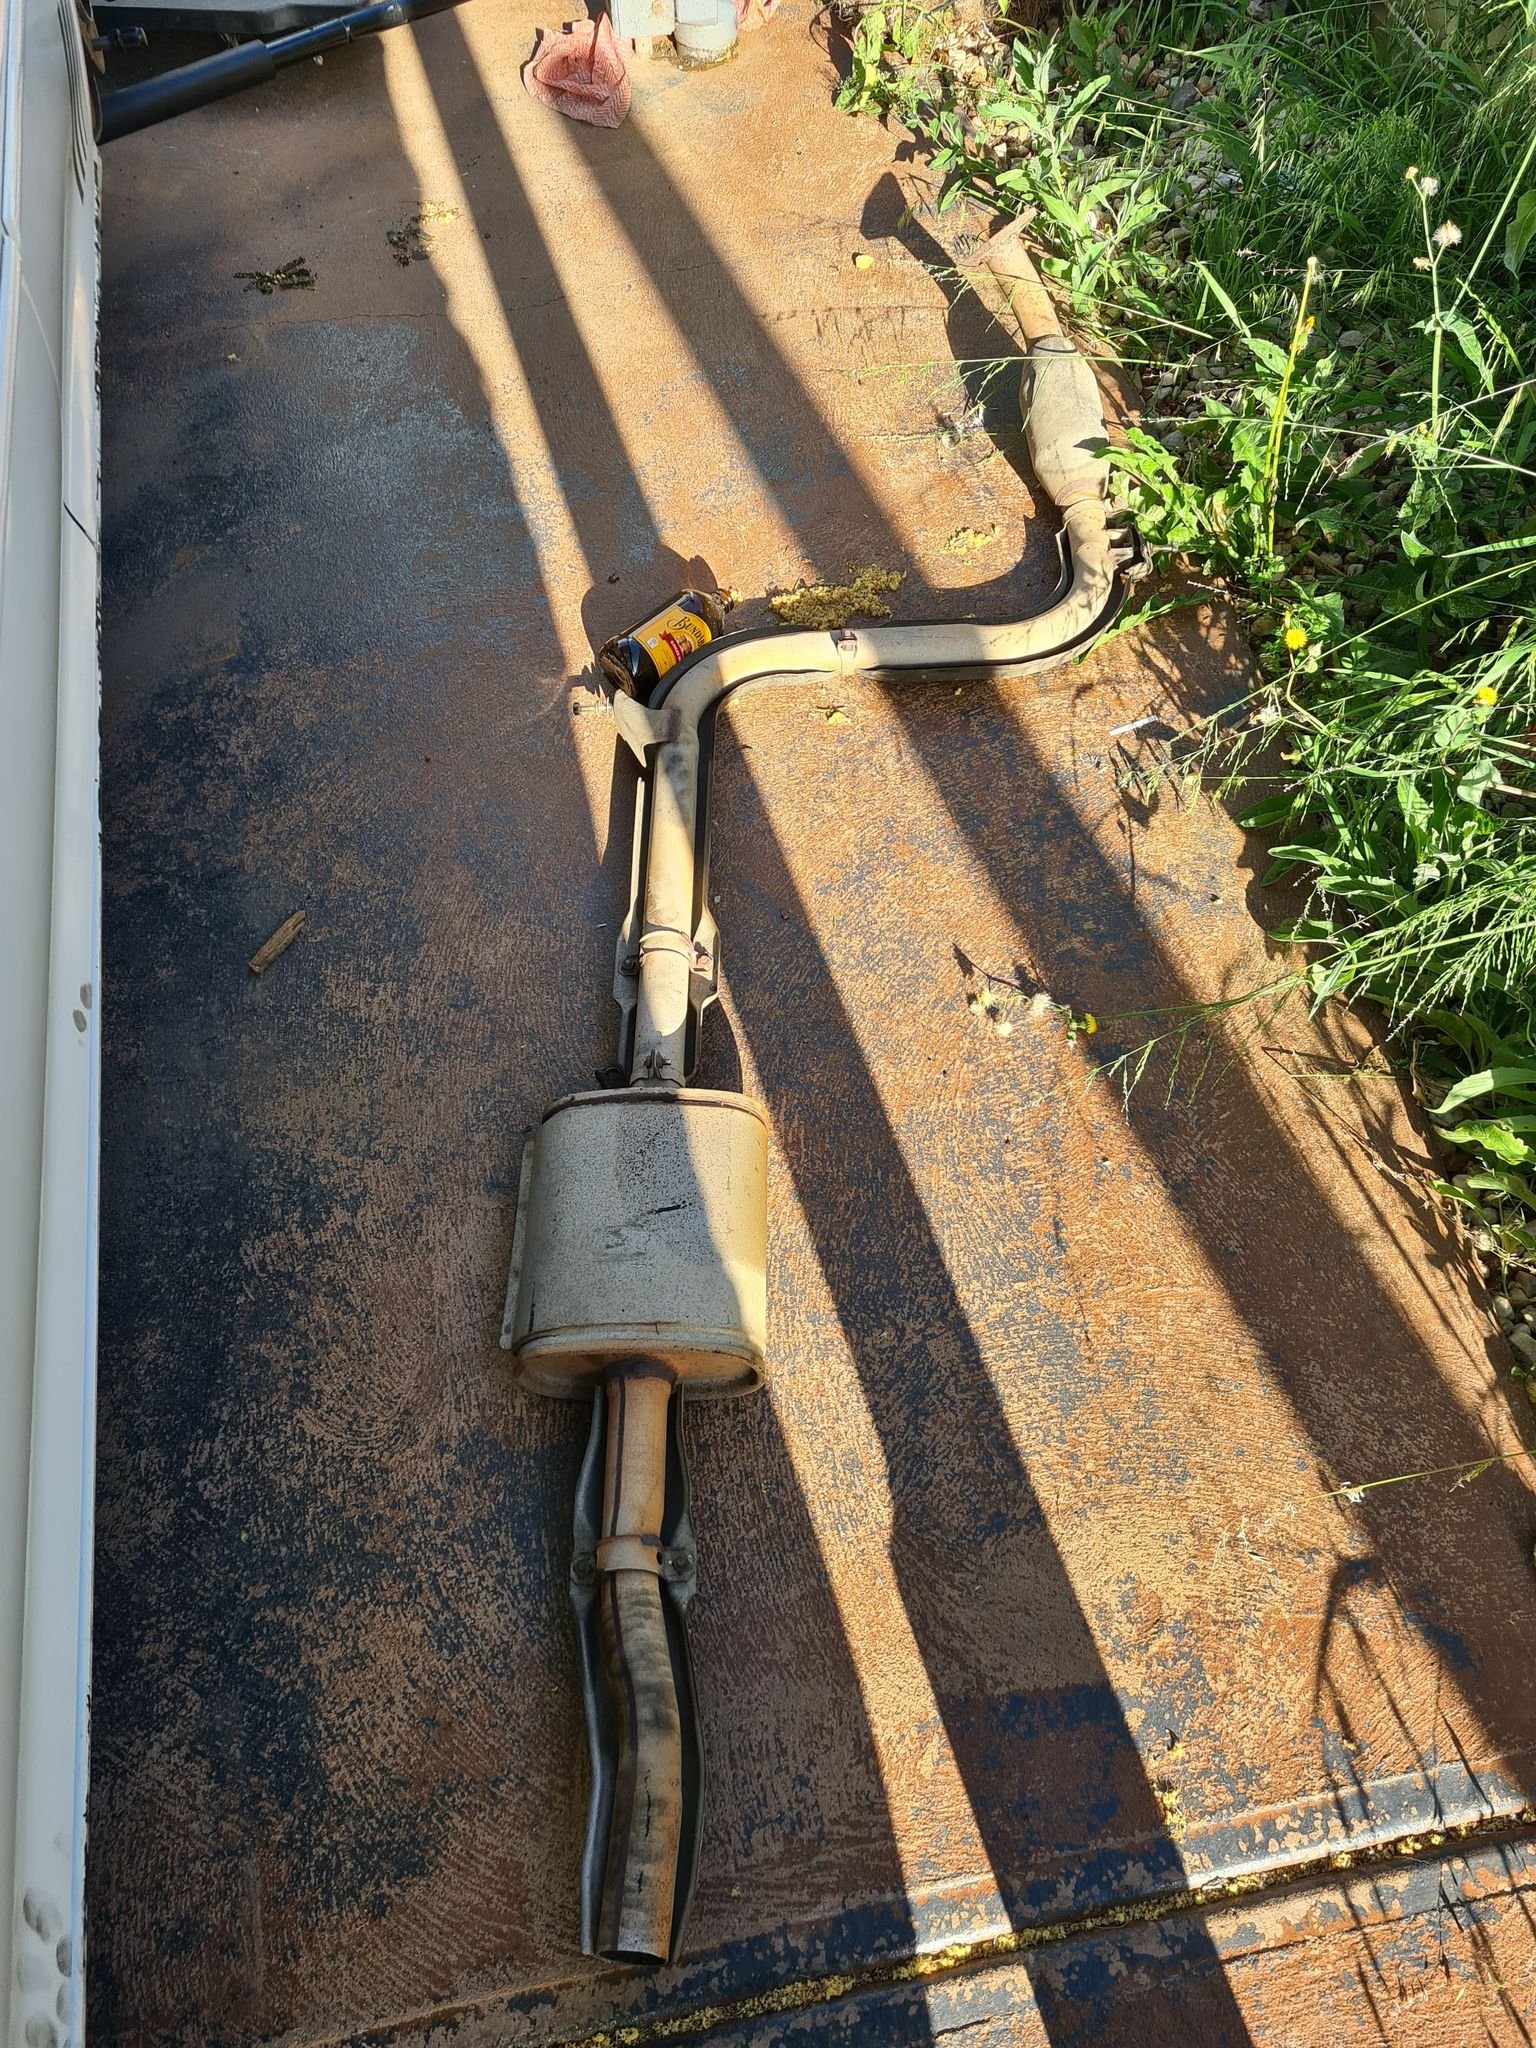
So went to the wreckers to get the Prop-shaft bushes and nuts (ones on an out-lander are the same) considered grabbing the exhaust of the out-lander as it was 2.5" and a lot closer to the GSR/Evo one then the one I got of the lancer wagon but I was already in to deep with the one I had and didn't want to spend the extra $65 for an exhaust ill use once And then this happened, it only needed one engine mount unbolted and a few hoses removed, and for $200 I couldn't refuse. Will put it on the engine stand and get it down to the short block when I have some spare time. Plan is long term for it so not in a rush, will get forged rods and pistons, along with a rebuild to suit the 4g63 head I have, might aim for 9-10:1 comp but see how we go. Not aiming for stupid power long term, but a bit more displacement and some more low end torque are never things to object too Main reason for the 4G69 is I am trying to get away from possible crank walk issues which the 2G RVR 4G63 I have is known for. I may pick up a 4g64 later on as well, a longer rod motor does appeal, and part of me wouldn't object to running a 4G63 crank in one to get a 2.1 long rod setup I grabbed the DBW throttle body and the throttle pedal from the outlander as well with pig tails so that long term I can go e throttle the current speeduino I have doesnt support it but ill sort something long term Bushes and bolts for the prop shaft installed The boot doesn't look super happy but I have a new one to go on when I get around to it, Might be something I use as a reason it fails RWC Spent way to much time under the car today on the exhaust Welds are a little better but still shit, again this will be off the car as soon as RWC is done so not phased as long as it doesn't leak Started making the Front pipe, ran out of CO2 Argon mix when I started it so switched to straight Argon, will go swap the bottle tomorrow/next week. Again not the best welds in the world but they will do till I get a new turbo setup really need to have a clean up tbh Started mocking up the 90 degree 3" bend I have but need to cut it on an interesting angle so need to go buy a cut off saw to do that. May have to mod my 3" exhaust as I think its too far forward to allow space for a cat
2 points
-
Fixed intake, had to cut the end off and weld the inside more thoroughly, added some vacuum outlets and made a better pressure testing rig with rubber and roofing screws haha, no leaks in intake or water outlet area now, hope to install tomorrow
2 points
-
not for this head, i already looked into it and would have to get valve blanks cut to length The gn head has tiny valves 25.5 and 22.5mm. DR200 has good sized valves but the ports and combustion chamber are too big unless you are running a big piston, which i might get away with with the 65.5mm one. Probably be perfect with a stroked crank too. Theres some quad bike heads that are better for what i want to do, im just waiting for the right one to come up for sale and then i will get titanium valves2 points
-
Think my welding is slowly getting better (also seem to have almost chewed through a bottle of gas, might have a leak or left it on or something) remade the top pipe and the new one only have a couple of small pinhole leaks, ordered a 90 degree silicon join so may see if that works If I feel motivated ill pull the pipe out and go over it with the mig again, really need to get a bench grinder so I can sharpen the tig electrodes and give that ago 3" to 2.5" adapter has now arrived so can have a go at making the up pipe, might do the rest of the exhaust for practice first and do it with a new gas bottle if I run out Cranked it over the other night to start bleeding the power-steering fluid and to get some water through it, will put coolant in once I sort the top rad hose (will drain the water out tomorrow) wanted to let it sit with water in it to see if it had any other leaks. Waiting on fitting for the rad overflow, think I may have ordered the wrong size 1/4" is too big so ordered a 1/16" which is probably to small, will take the broken fitting into supercheap/repco/autobarn and see if I can get something similar over the weekend Will do a pic update this weekend, considering going to the wreckers tomorrow as well, partners birthday on sunday so this weekend has a little on2 points
-
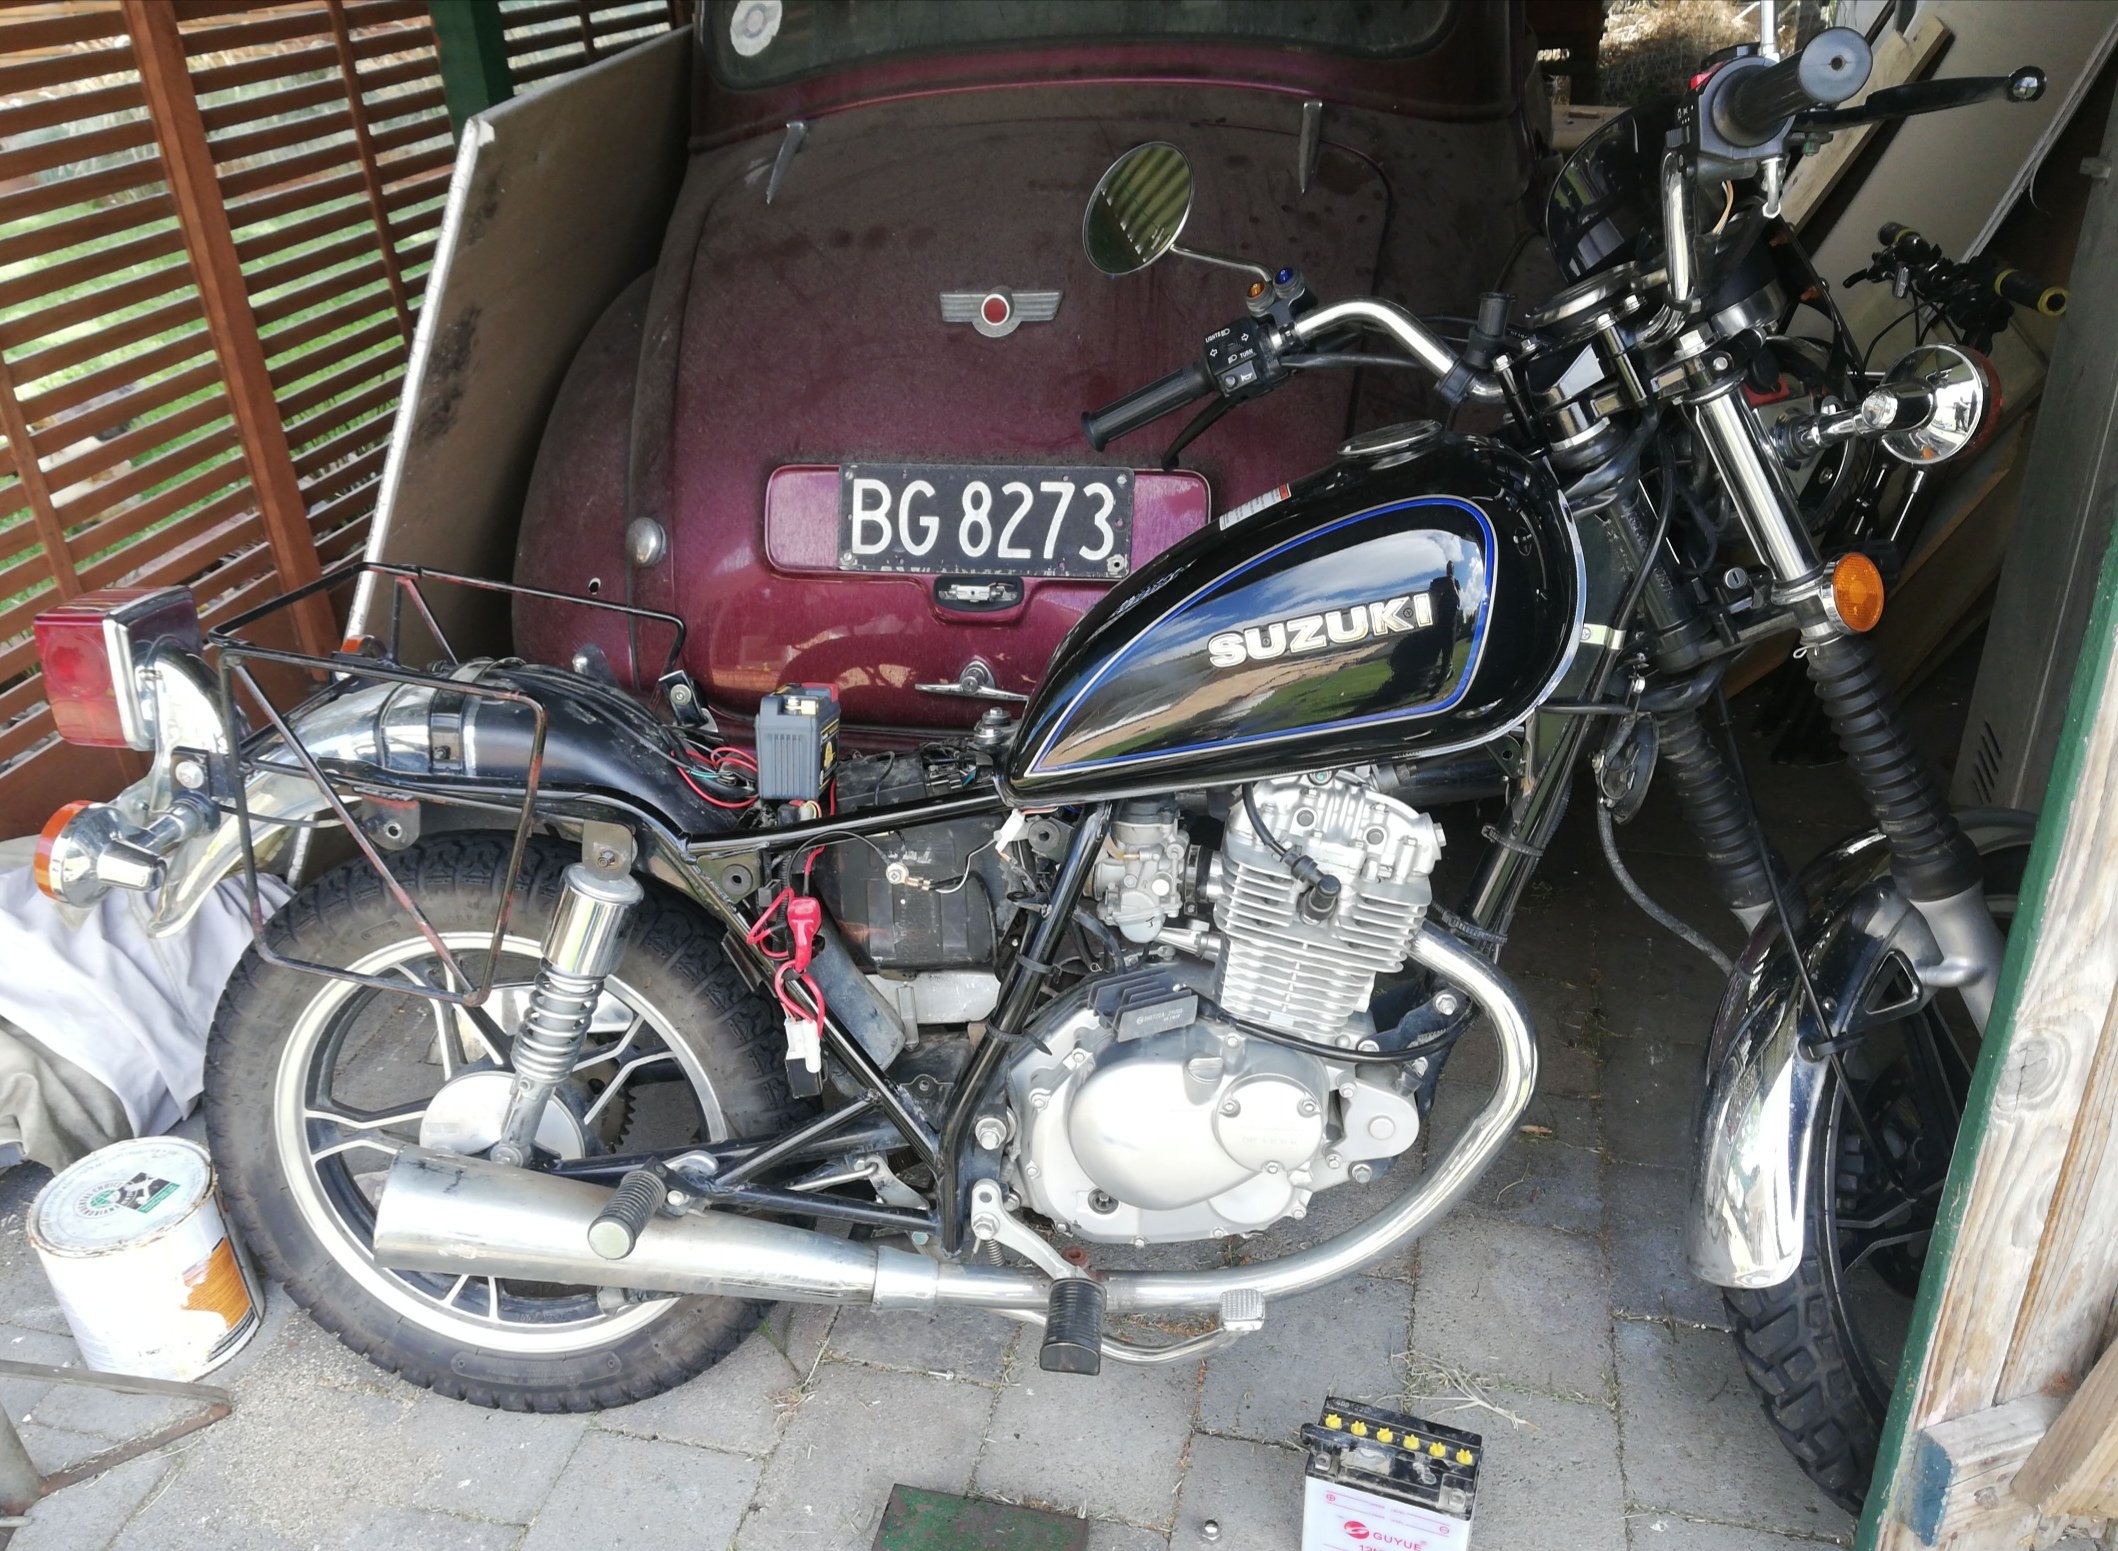
Well I'll be, so a seal can seal intermittently, ha. So, instead of fixing the running issue, I fixed the being able to get it in and out of reverse issue. The last Barry made a lever, but put it in a cunt of a position, and it's quite hard to yank on. The other day I couldn't get it out of reverse and near on backed up a beach. So I recycled his lever, and made it prettier and more accessible. I also made up a new mounting board, I just need a few more screws to finish it off. Before: (can't even see the lever it's so far forward) After: In regards to the running issue, as mentioned earlier, ima try running on a tote tank, and see what happens, but after lots of thinking, I am now nearly 100% sure it's a sticky float that's causing my issues. Regards, VG. XOXOX2 points
-
High build primer is like sanding chalk! Coming out ok but taking a lot of sanding!2 points
-
that looks like a thing that might work. but you're right, burnouts might be compromised and we cant have that.1 point
-
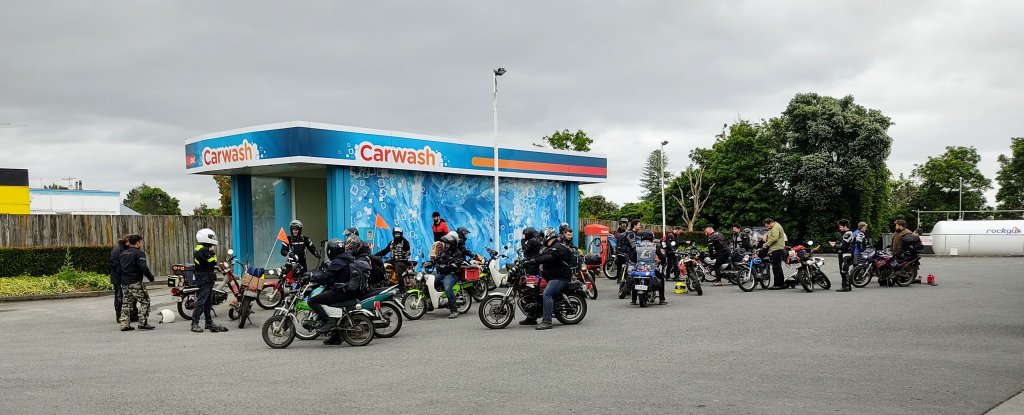
9am at Caltex Makaraka1 point
-
Appreciate the support, im not very good at some stuff but building the skills up. This is mainly getting it running and tidying it up as I go, somethings will get redone later on. Im also slowly rebuying tools, annoyed that I may have lost some gas though but ill sum it up as a learning experience. Also having a crack at pie cuts on galv pipe from Bunnings to do rad piping what was I thinking lol Will start to get more interesting when its running on one of the factory ecus I have for it as ill then swap to the teensy powered speeduino and see now that goes. Ive had to some questionable wiring repairs that ill sort properly once I know they work, im also limited until I get it registered on what I can do. Not after big power but the current turbo will go at some point, thinking a Steve Murch HRC something (35r maybe) but see what he says, need to get an hrc40rs for my nz track car as well. Considering getting a 3d printer as well, so if I can get my cad skills up might be able to make some things for it. Need to work out how to use a virtual dyno as im limited to road tuning untill I find a dyno to use (but thats all when its running haha)1 point
-
1 point
-
i look forward to the inaugural OS boat nats1 point
-
Ahem. Seagull...1 point
-
So after a couple requests on this I thought it throw together a cheeky wee build Fred on this. Missus kept pissing and moaning about not having a car after selling her getz. So I went and looked at a few econobox critters. Had lined up a telstar xri, as having previously owned one we both loved them and how cheap they were to obtain. And figured it's worth the extra fuel bill for having something a bit nicer to drive and quicker than the average shitter. Anyway went to try and buy it and the dude pissed me around all day so bailed on that idea. Then this lantis popped up and I went and checked it out, bartered with the guy as it had a couple issues. And got it nice and cheap. Next thing you know, an hour later, me and Courtney were driving back to Ashburton to pick it up. I love the Mazda K series V6s so was stoked to have talked her into it. And after her piloting it back, so was she. So anyway, the rundown. It's a 1995 Lantis Type R, so has the higher tuned KF-ZE motor, front and rear strut braces, and an LSD box. It's bone stock aside from the fella I bought it off had put a coby type exhaust in place of the rear muffler, which I was perfectly fine with as they're a sweet sounding motor. And only just ticked over 149,000ks this weekend. So, the issues aren't all that major. I noticed after test driving it, it had a coolant leak coming from somewhere near the radiator but didn't quite pinpoint at the time. And the clutch is quite high on the pedal, doesn't slip 98% percent of the time, and is fine under normal driving, but thrashing it and redline shifting it has slipped momentarily a couple of times. So clutch will need to be done in the future. Put a basic Sony Bluetooth headunit and new front speakers in it on the weekend as it only had the crap factory radio and dead front speakers. And changed the oil and filter as it had no history of when it was done last. Tracked down the coolant leak to a split on the right side tank of the radiator too. So gummed it up temporarily with some rtv which has slowed it down while I track down a new radiator this week. Will swap that out this weekend coming. Plans, probably not a hell of a lot tbh, it's a really fun wee car to drive, yet still comfortable, so I wanna keep it that way. Front bumper is a little ugly so wouldn't mind tracking down a tidier one at some point. And would love to find one of those mazdaspeed type massive rear wings you could get for them. But other than that it's gonna stay pretty stock. Be sweet to maybe get some cheapo ebay headers and do a proper exhaust at some stage. Anyway, enough words. Have some pics and a video.1 point
-
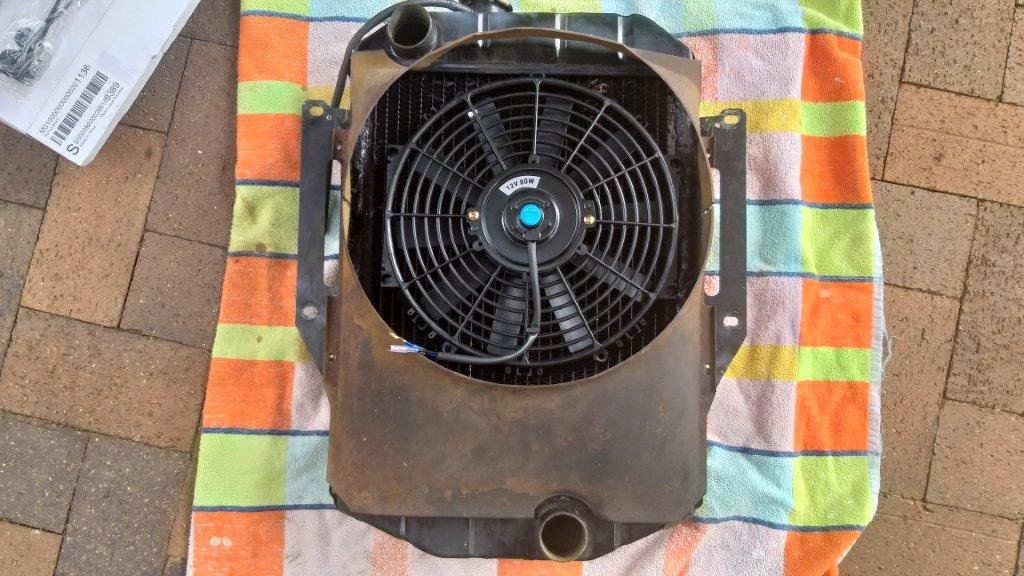
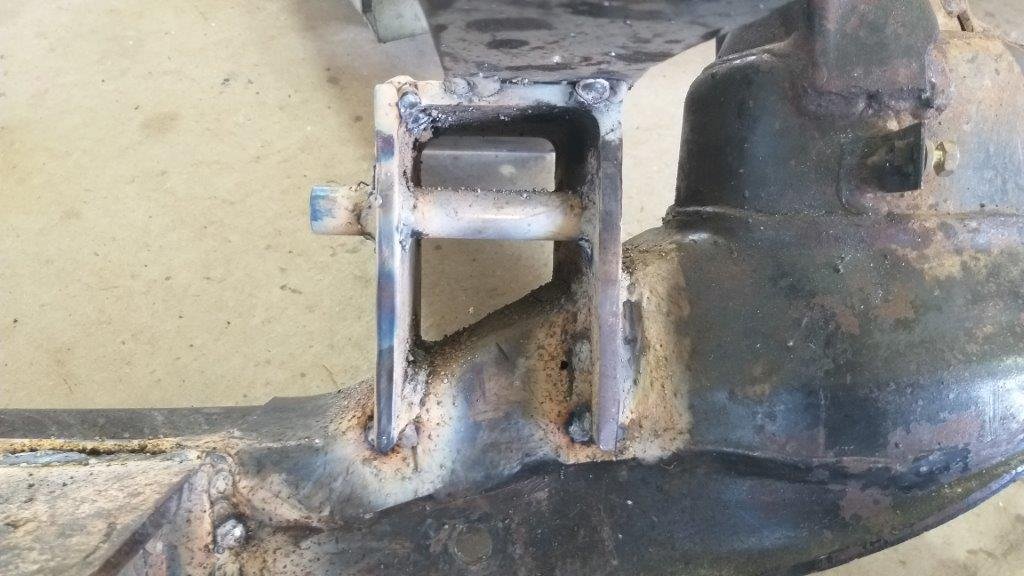
The courier dropped off my 12 volt cooling fan yesterday so I positioned it on the Thames radiator to check clearances. Looks pretty good. The box type uprights on the front beam are all welded up. Just need to give it a final tidy up and trim the crush tubes. The box uprights are still only tacked to the chassis mounting plates as I want to get the van on a wheel alignment machine to make sure everything is true before finalising those welds. Apologies for the pic quality.
1 point
-
First shakedown ride to the bank proved successful but a high speed run revealed that interfering with my front sprocket and tyres has lowered my max speed to something like 80kmh... this will not do... emergency call to the water jet cutter.
1 point
-
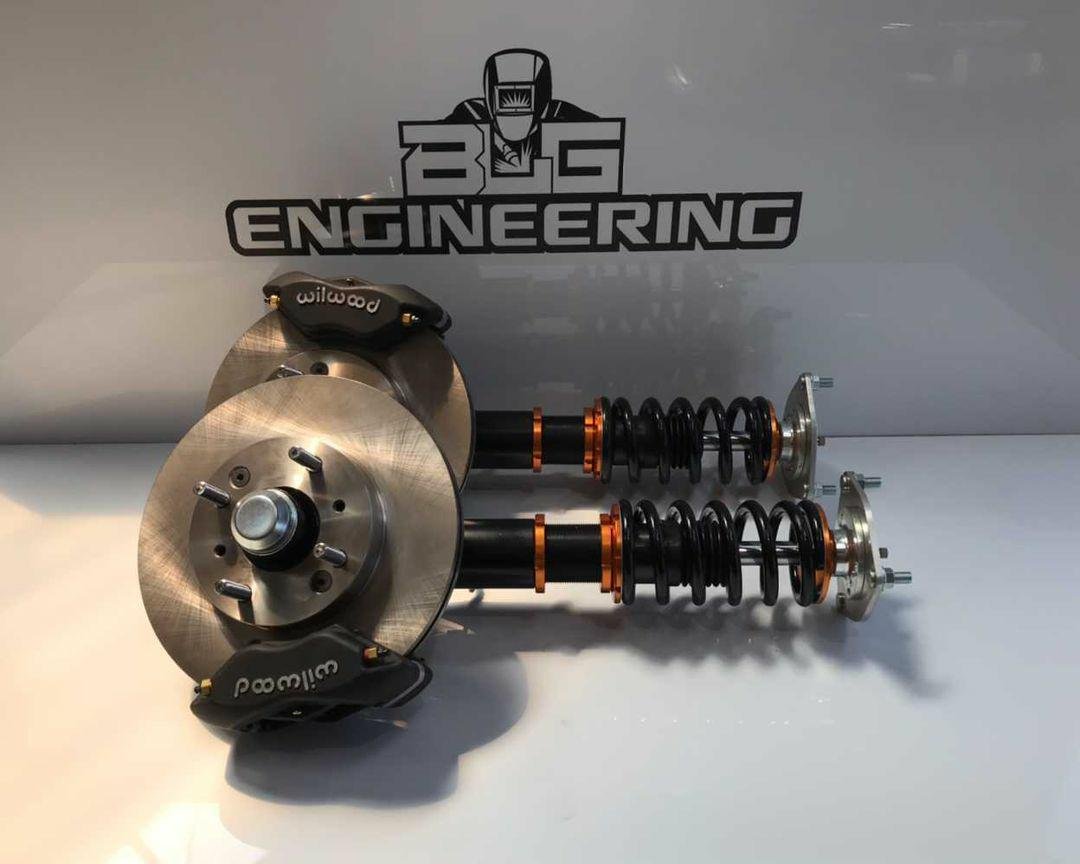
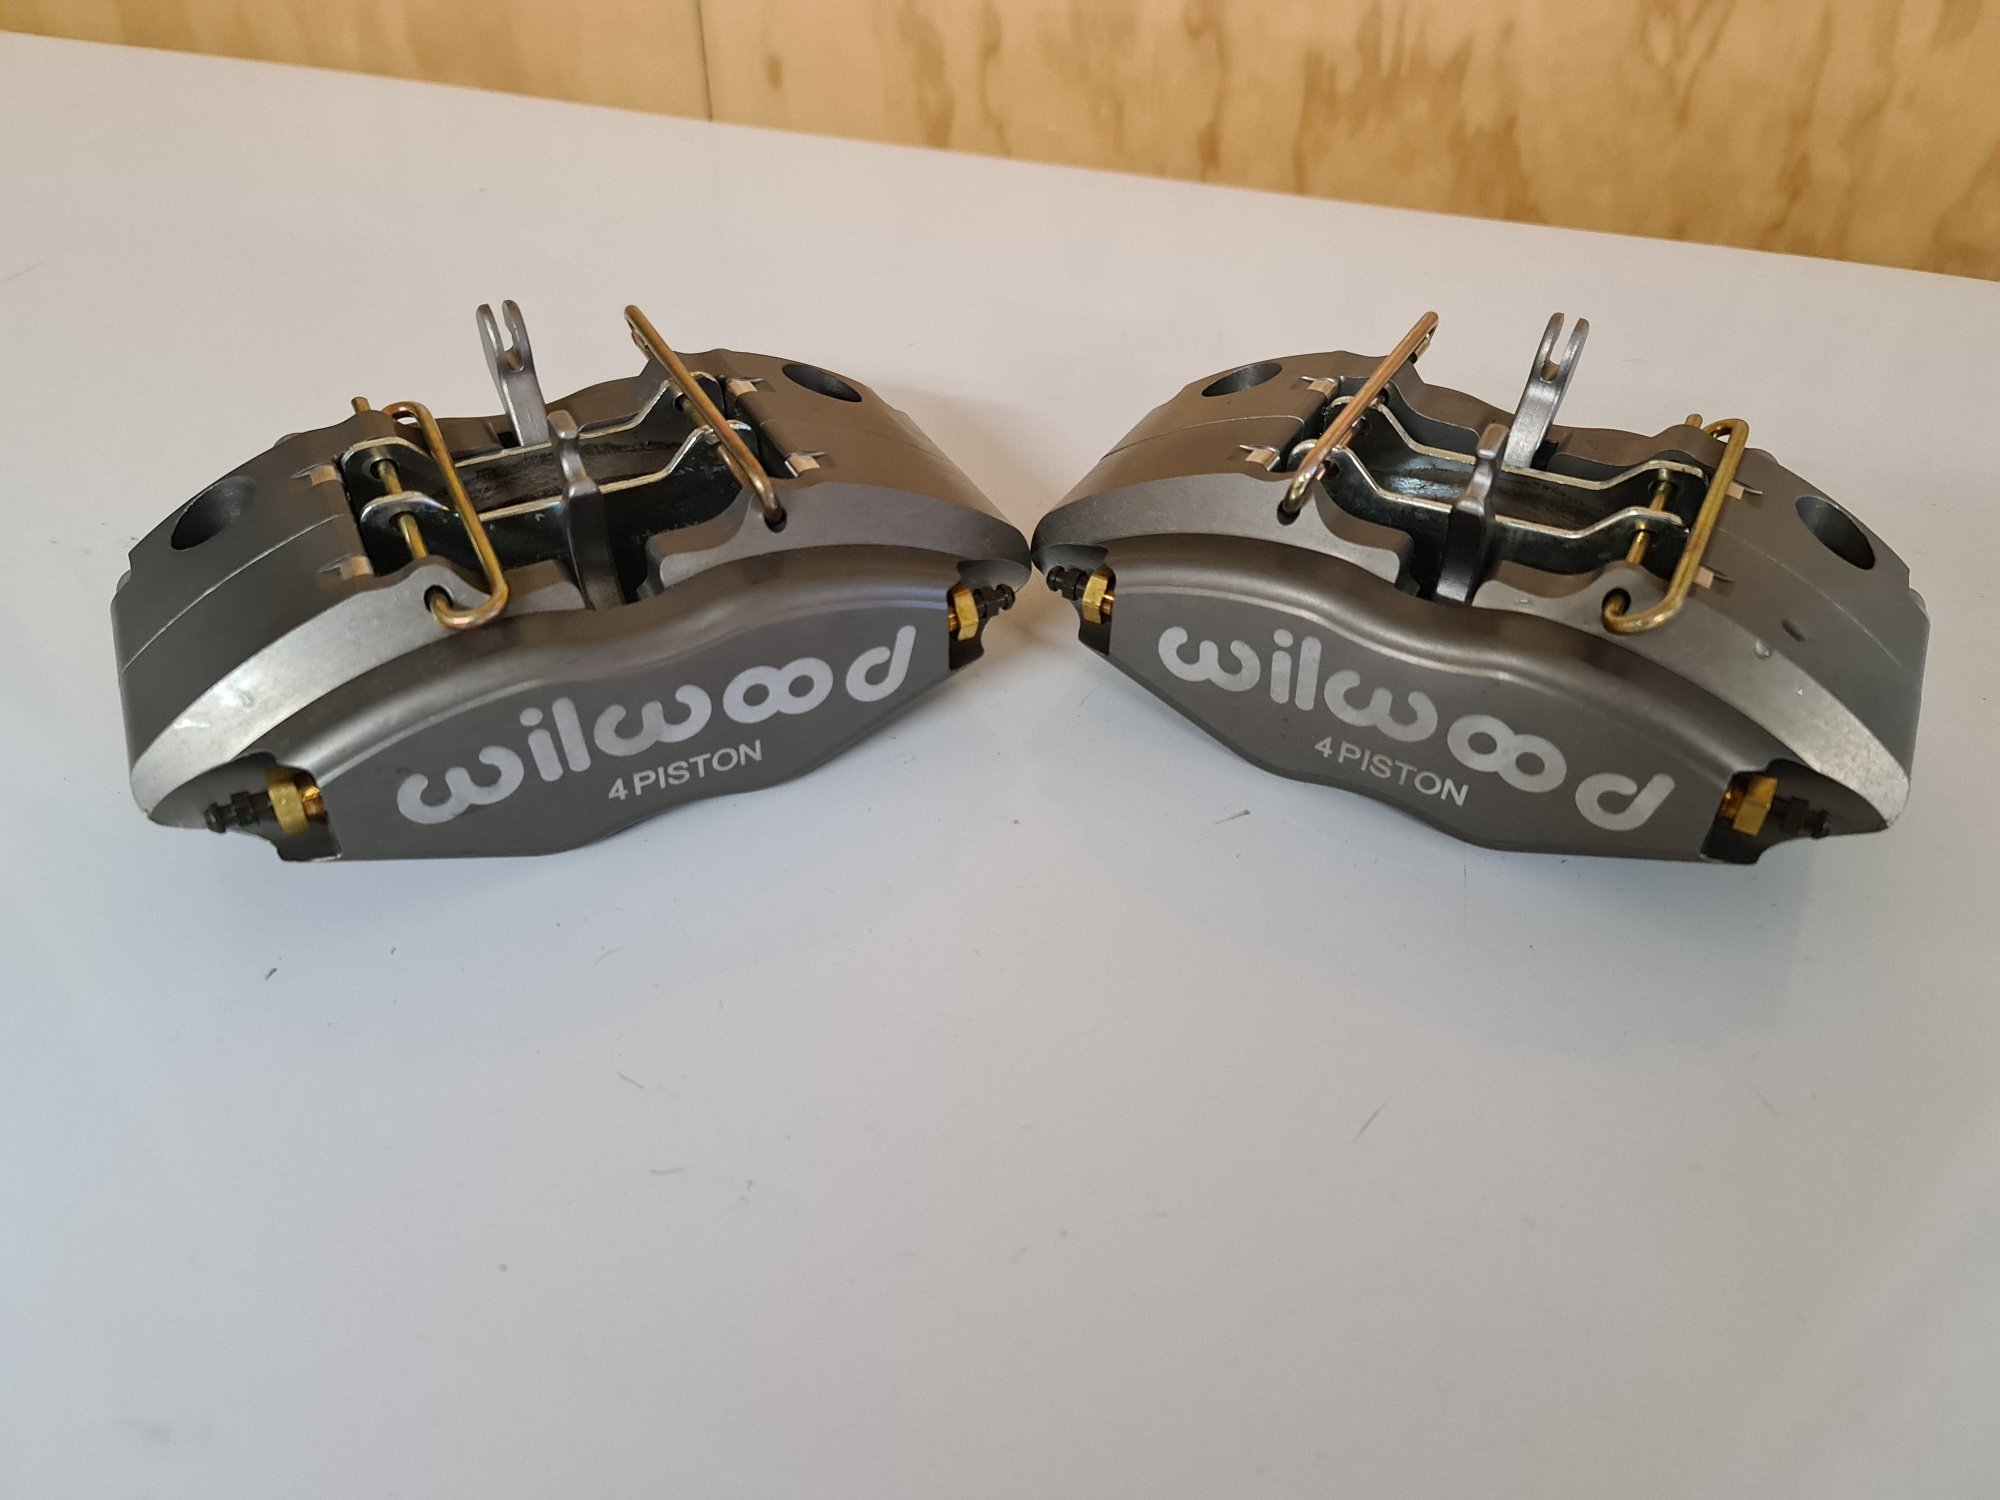
Brady at BLG Engineering whipped me up a set of new coilovers for the front and camber plates Also made new 4x114.3 front hubs and mounted a set of 4 pot wilwoods. He also supplied a new wilwood master cylinder and prop valve as well as rear rotors & 4 pot wilwoods to get mounted to the diff.
1 point
-
bump, next meet up1 point
-
Had the 45 degree silicon bends arrive for the radiator, after some cutting down I now have a lower rad hose. just waiting on some tclamps to arrive (might get some temp ones from bunnings) Still need to do the top rad hose ( probably have to do some pie cuts) and then I can have coolant in the engine Then intercooler piping and exhaust to sort before I put some fuel in to give it a start1 point
-
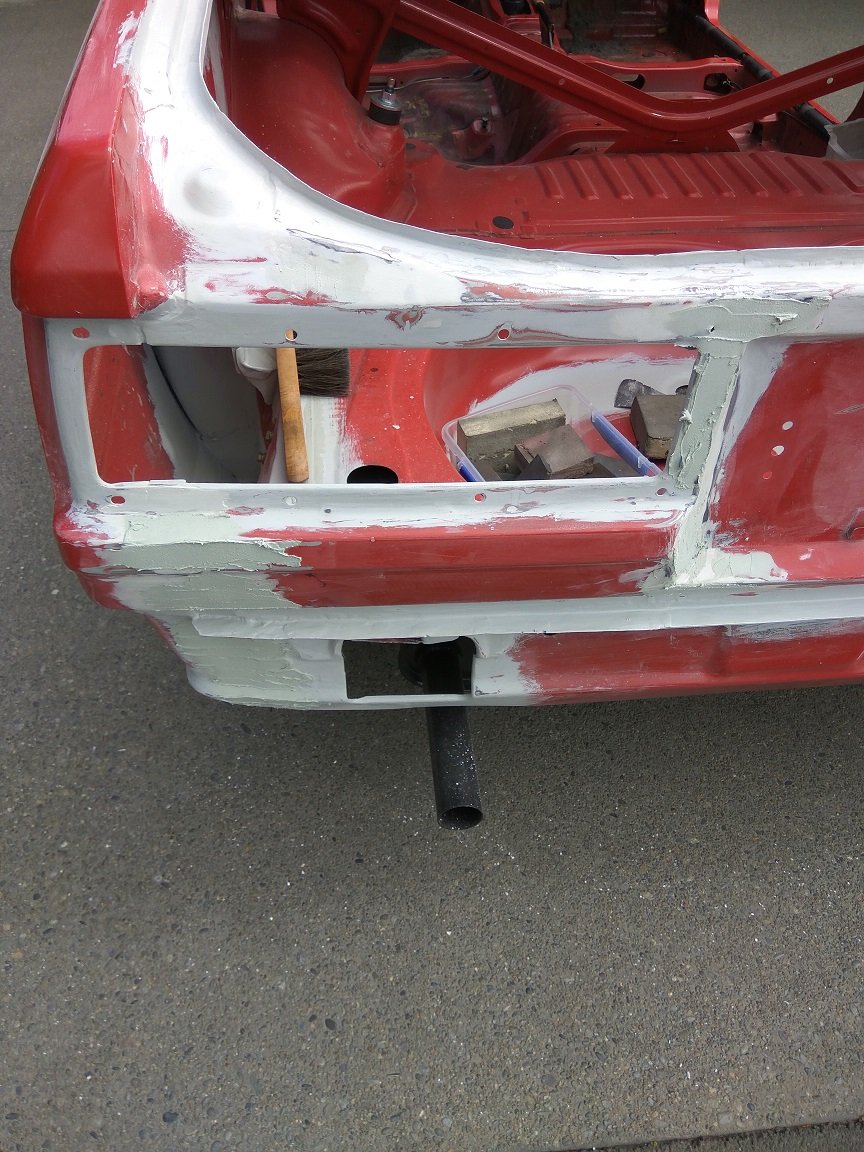
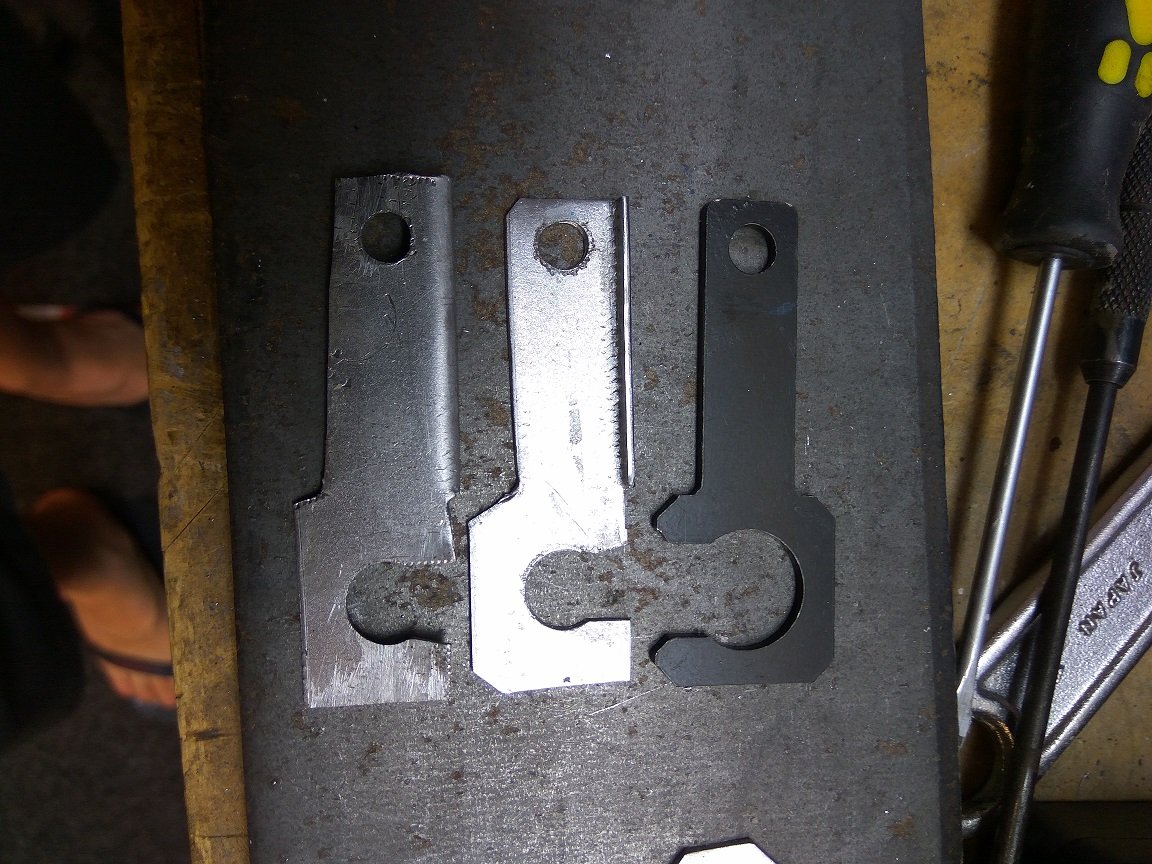
If you don't want to read a book, just look at the photos, I waffle a bit in this post. Not many decent photos this time, have been focusing on getting stuff done and forget to take progress pics. Have given the exterior repaired areas a coat of paint. Ran out of paint pretty quick, so ordered some more cans off the paint code, close enough is good enough. Ran out again, so had some made from the 500ml of paint code paint I had lying around, and a couple of cans made from paint I got matched pre-lockdown. Up until about last week, I was still planning on getting first cert inspection this year. Bit everything on this car is fighting me and so i've come to the realisation that just isn't possible. More rust, wheels don't fit properly, brake lines don't fit properly, certain parts i've struggled to track down, parts from Japan destroying my wallet (will explain below) list goes on. Anyway enough of the negative vibes, here are some potato photos. On the plus side, i'm hopefully getting a deal on a DSLR next week, so quality of photos may or may not improve. Content of the photos, will not improve. First the rust, doors had quite a bit, I removed all I could, and rebuilt quite a lot of it. Then had Warrick @ Canterbury Auto Fabrication work his magic. He fixed the rust on the bonnet previously, and subsequently took most of the distortion out of the doors. Due to lack of time / skill I have just given then a quick epoxy / bog skim and paint. Appearance is at the bottom of the priorities for this car. So long as the rust is sorted, it can be painted properly down the road / never. So yeah just a couple of pics of doors. One of the doors after a skim / paint. Will need a buff up to finish the paint off for now. All repairs got two brushed on coats of epoxy primer, then seal sealer. So they are well sealed and shouldn't cause me any problems for a long time. Rear end bog, lots of epoxy on this too, a quick tickle up, then primer / paint. Rear end got a primer and paint with colour matched paint. Bit light in a few areas after a tickle up, so will give it another couple of coats, then buff up. Will do that after spray bombing the inside of the boot as this is currently all epoxy primer and seam sealer. Brackets that come with coilovers for brake hoses don't fit. Either I am missing something, or they just sell them as two separate things with zero interest in making sure they work together. /rant. I made up some sheetmetal tabs that when the supplied brackets are fitted, lock to the bracket and mean the hose support is locked in place. Gave them a coat of Mathew Black ZincIt, noice. Supplied one of right, which the brake hose passes straight through, the others are mine pre paint, probably obvious because sows ear. They both got tidied up since this photo so they are closer to identical. Car came with one correct belt, which had camo treatment, and one sedan looking belt. Tried to source some poo brown ones locally but to be honest got the run around, so said don't bother in the end. Sourced a pair from Japan. Drivers side looked to be in good enough condition to install as is, passenger side needed repairs. Grabbed them through Buyee as they got listed with pretty short auction lengths. Won both auctions, thought I was doing well. Turns out they wouldn't send them internationally. So I could either bin them or have them sent within Japan. Thankfully I know someone there, so had them sent to them. Much to their annoyance I bet. Had them cut the belts off the parts I needed and bit some perfectly good bits, boo. They sent them to me and I had them in a week. Sweet, by this stage i'm bleeding money, just to get original parts as I want the drop downs from the roof due to them being low profile and sort of a must with the hardtop look. They got the last laugh though, they sent them in a box nearly 10 times the size of the belts and filled the box with heavy packing (not actually protecting the parts, they were at the bottom). Thanks bro... But hey, beggars / choosers eh. Anyway, said parts, which i'll now pay even more money to get remade into usable belts haha, fuck my wallet. From a liftback I think, so the covers for the door panels are different, not a big deal at all. I have one good one and one that needs fixing, so i'll do that then paint them both black. I don't think i'll add up the cost of making these belts, i'll just cry. And last pic the wheels that don't currently work due to lack of clearance from front struts. So i'll scratch my head over the holiday and see about getting some spacers made. Guess I should find out from cert man what clearance he'll be happy with. 1mm currently won't cut it, so i'll try for 5mm, even though spacer maker man said 5mm was too annoying to make, we'll see. Anyway, peace out, probably won't do another update this year.
1 point
-
So few things happened today Intercooler pipe kit arrived, so started to mock it up Ordered 2 more 45 degree silicon joiners, also going to get another 2 90degree joiners, also waiting on 1.75-2.5" connector for the turbo Ill need to cut the straight in half for both from pieces (need to check bumper clearance too ) need to buy a metal cutoff saw as I cant cut straight for shit with a grinder (see the exhaust post under this)
1 point
-
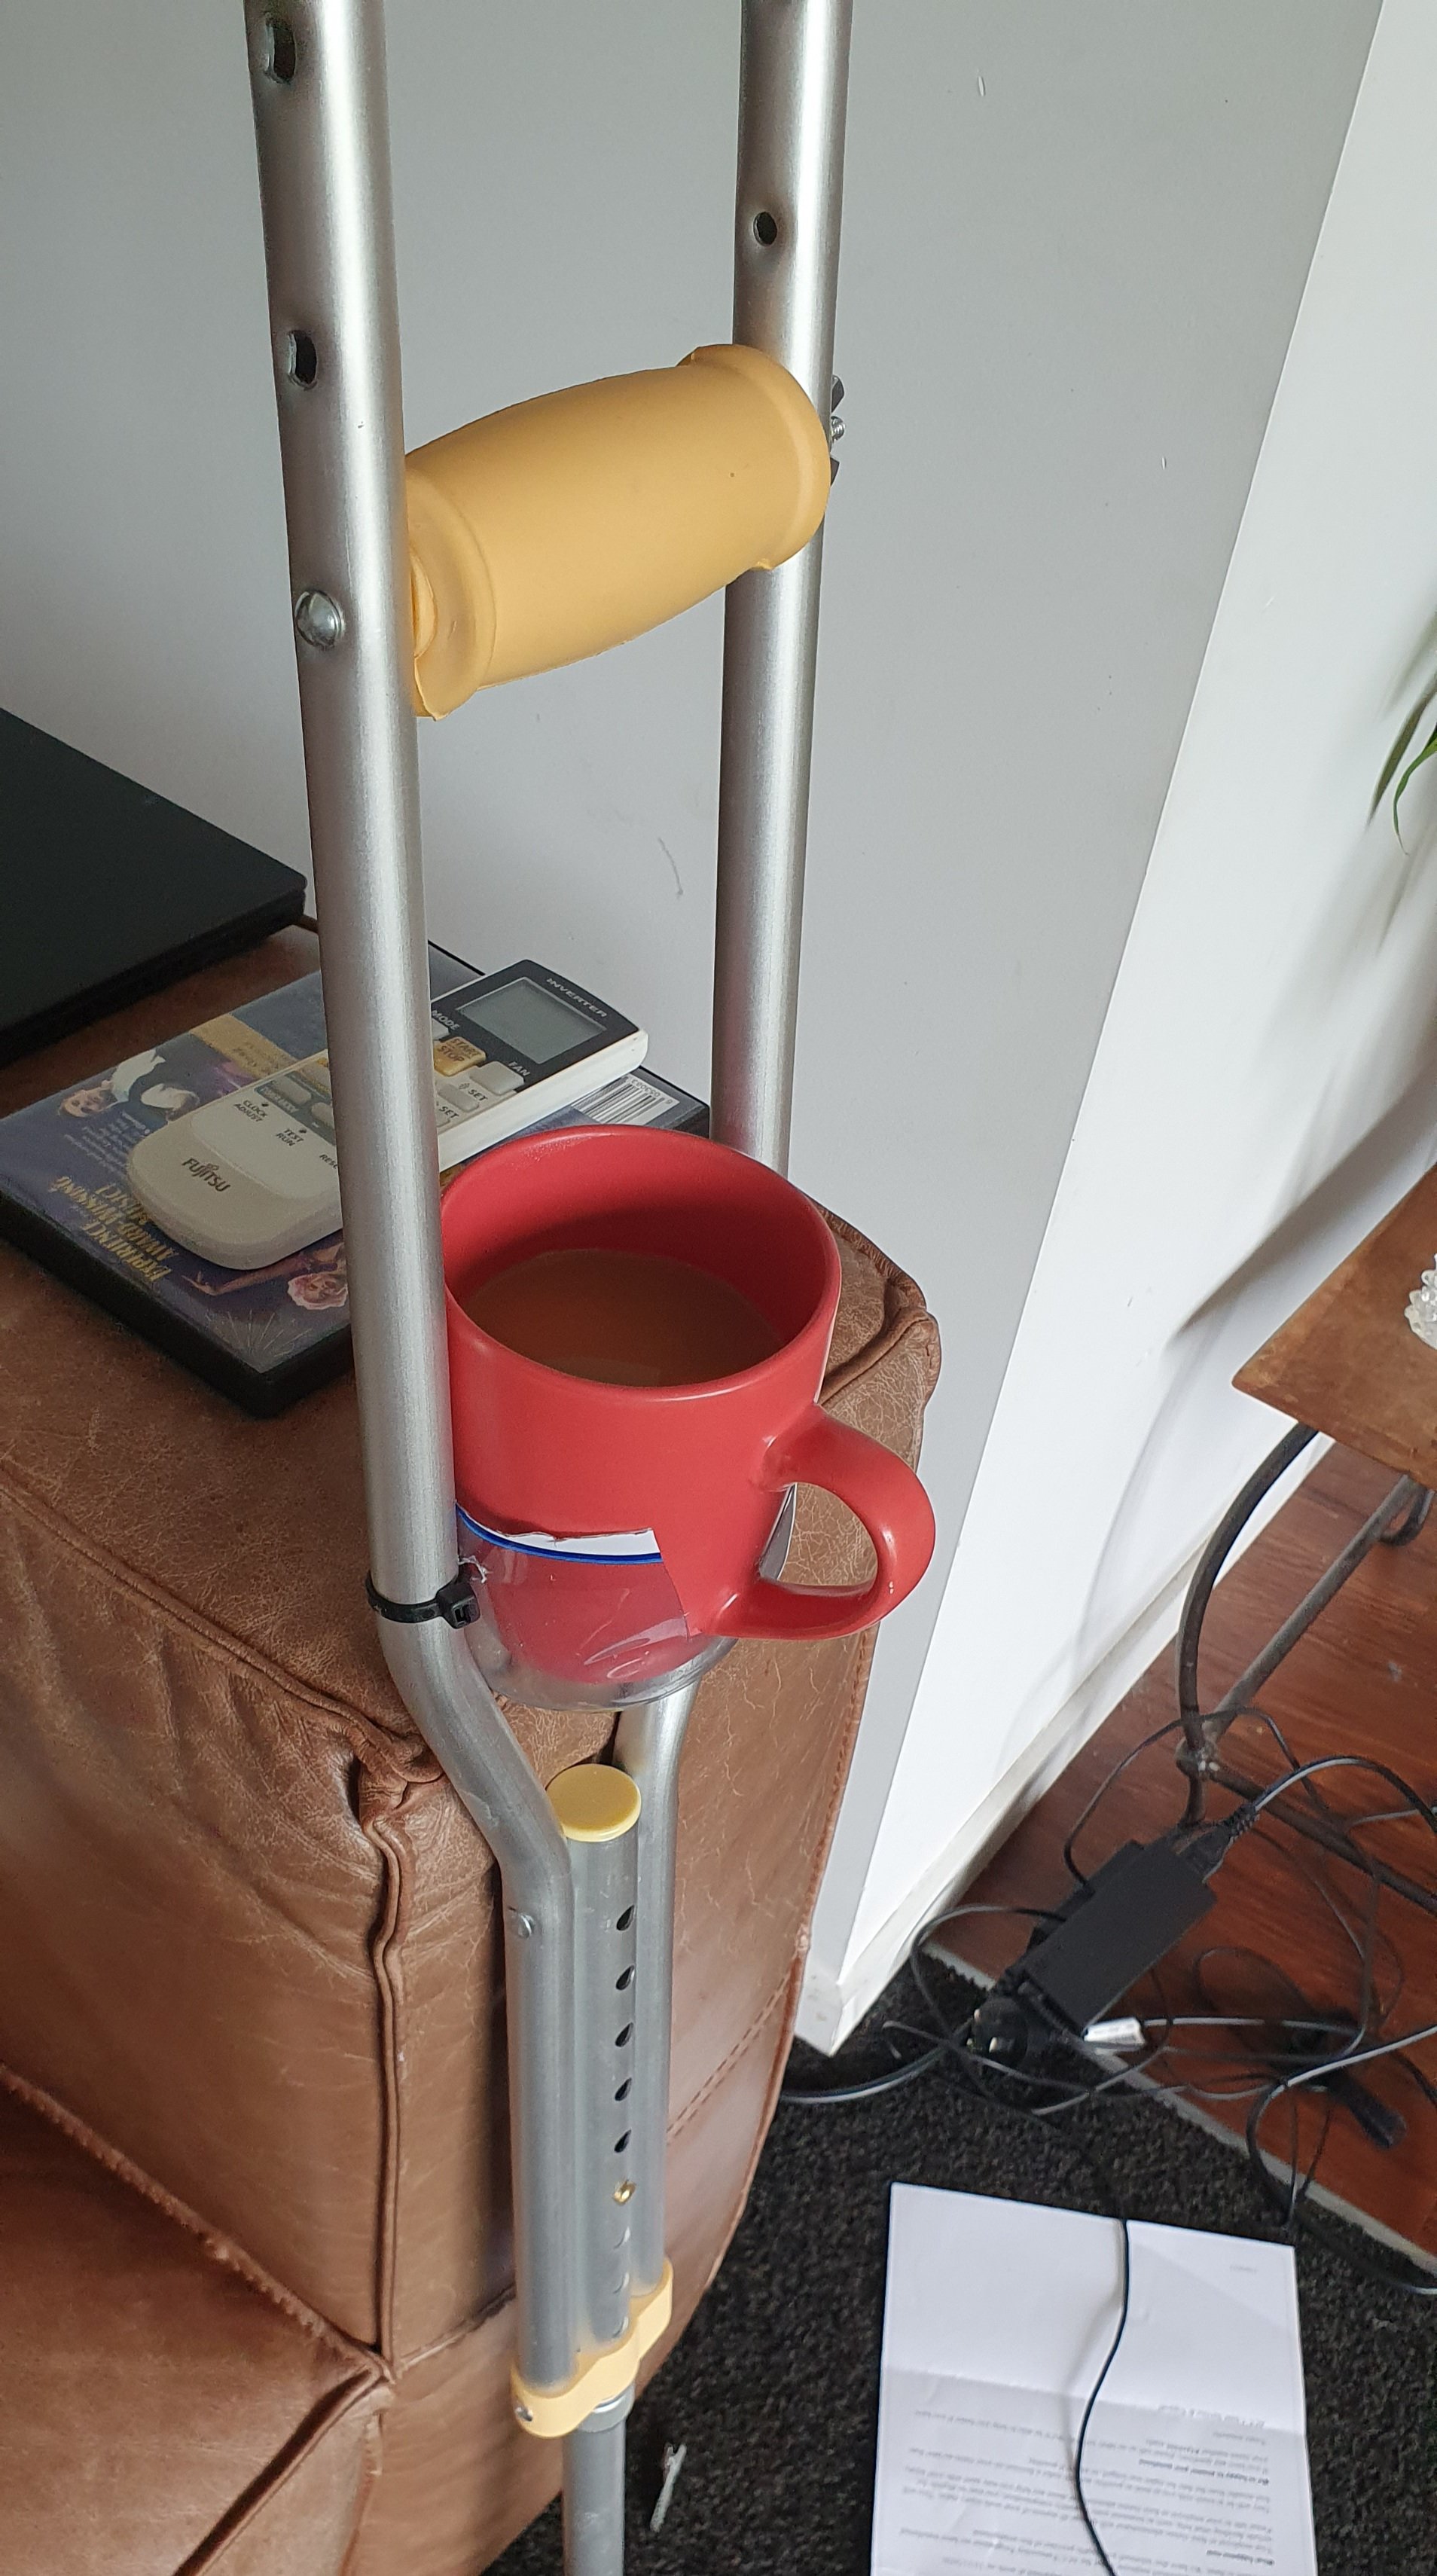
Soooo, I kinda fucked my knee, as in big time fucked it. No, I wasn't riding a dirt bike, a harley, scooter, motorized mobility scooter, tall bike, drift trike, gokart...nope, not even a goped. I simply went to step up onto a deck and some shit broke inside my knee. Totally unspectacular, no cool "war stories" to tell... Now my biggest problem i was about to face is that I drink coffee like water. In fact some days I don't drink water other than what comes in my coffee or beer. So I was getting kind of desperate to solve this first world problem...but never fear, a solution was in hand, introducing the copyright pending "crup holder":
1 point
-
So quick update, spent 3 hours and a 2hour round trip last Saturday to get some parts Grabbed fuel lines out of a CC lancer wagon, they aren't identical but with some gentle bending and some new fuel hose I have all the fuel lines in with the fuel tank, just need to hook the return from the engine to the hard-line and its all done. Managed to keep the diff in (lowered the rear sub-frame) and get the fuel tank in Need to bolt the rear abs sensor cables in but otherwise they are hooked up Bled all the brakes, rear passenger side took ages Clutch clevis and pin are all in with the clutch all bled, might need to adjust the rod to the master cylinder once I get it running but feels good so far Have also put a charcoal canister in from the lancer, will have to play with the vac lines and solenoids I have. Not sure if I am keen on having one between the fuel reg and intake manifold :s Also got one for the Turbo but I may not hook that up at this stage (need to get a t piece anyway. Will take pics later Need to put the steering column back in, the passenger side inner guard liner and front passenger wheel (with center cap), put the rear wheels back on Gearbox, diff and transfer case fluid replacement. Prop-shaft between the diff and transfer case. Exhaust (I grabbed the 2" one of f the lancer wagon that ill modify for now) Front up pipe and cat Inter-cooler piping Radiator piping Front lights, bumper etc Finish the rust repairs in the back and paint Fuel (prime the fuel lines), Coolant Then I think I can start it, bled the cooling system, put a permit on it and take it up the road for a proper wheel alignment as the one it has atm I eyeballed :p it may also need the suspension raising as well Might need smaller rims/new tyres for a rwc as well but will see what the tester says, still need to put all the interior (Carpet) back in as well Getting some progress
1 point
-
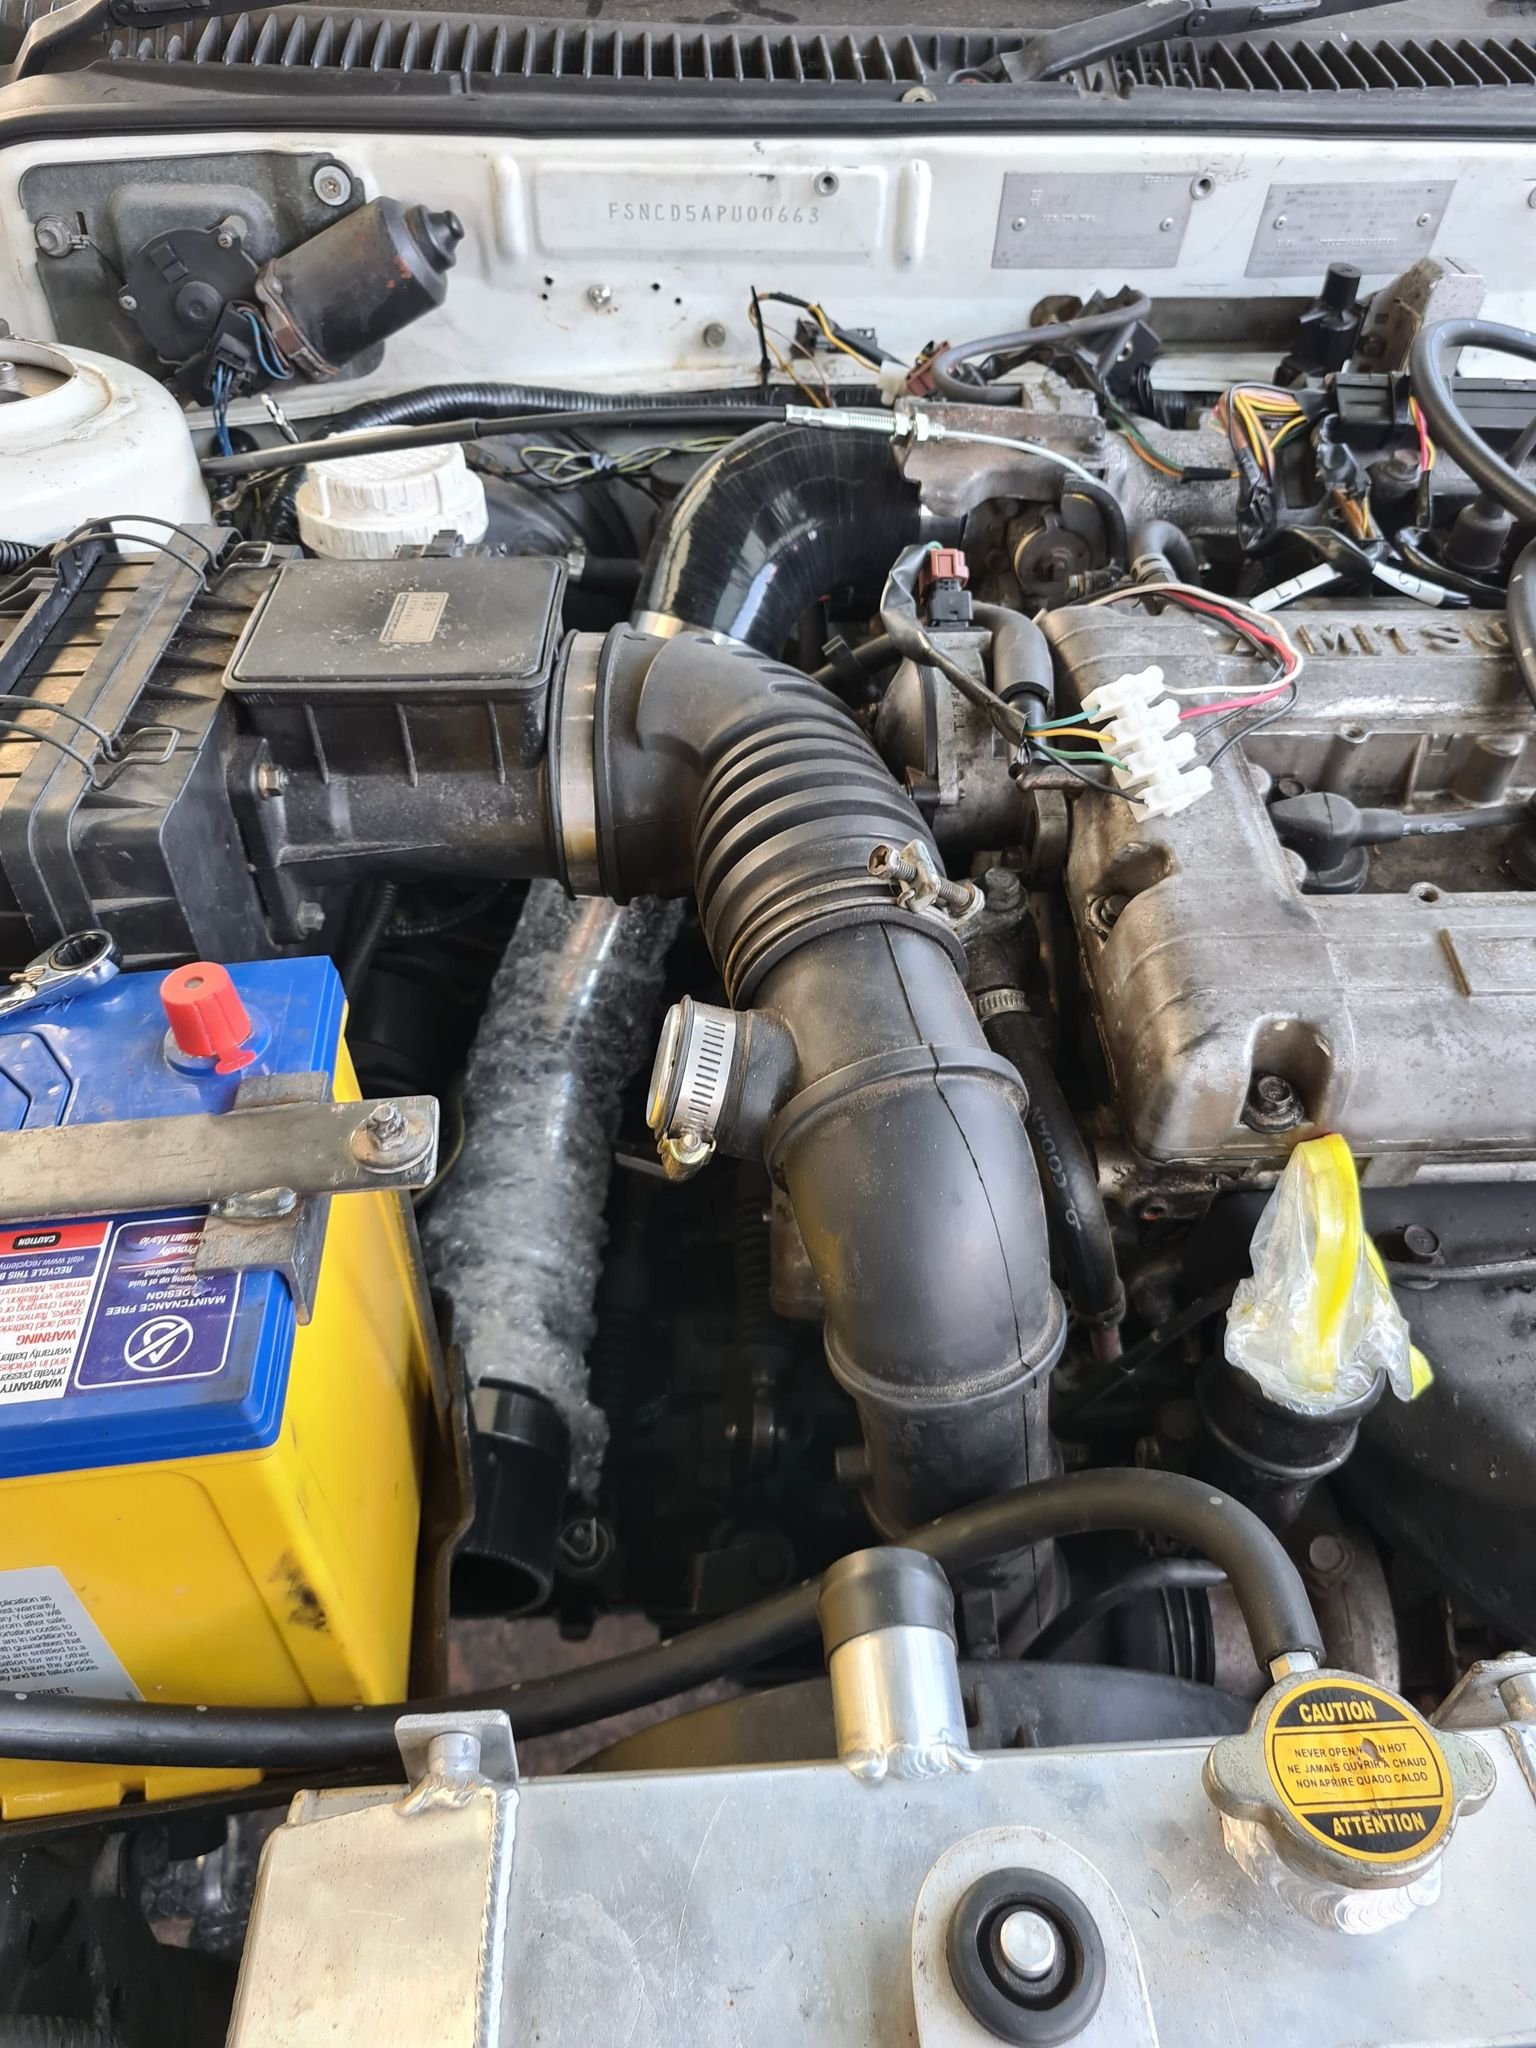
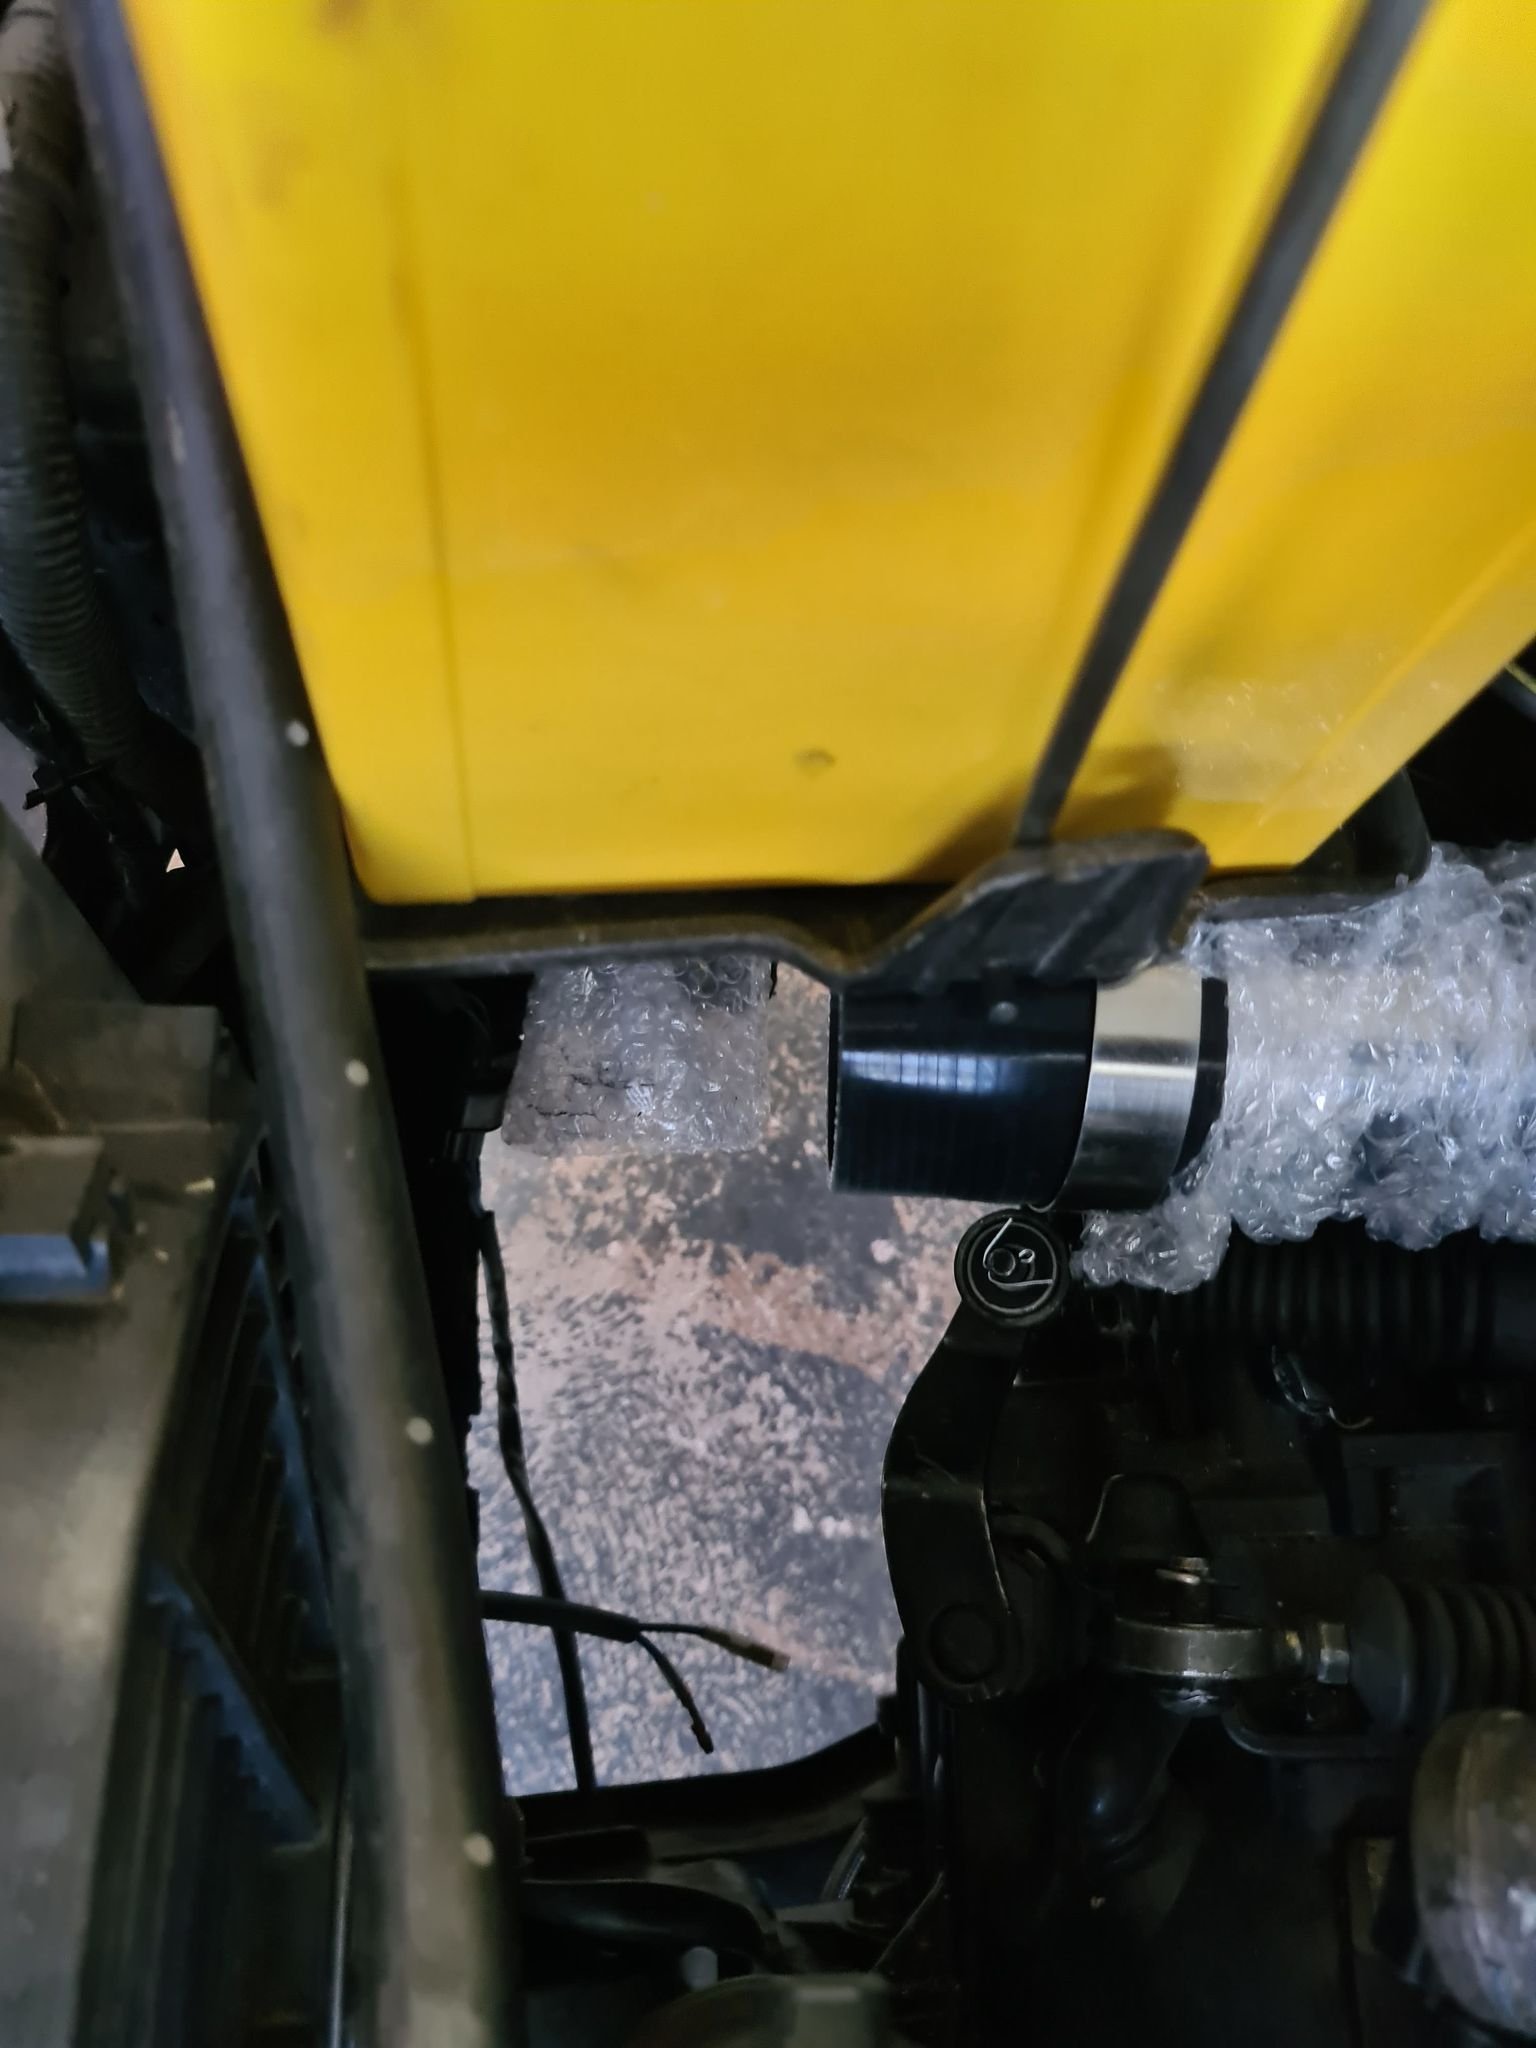
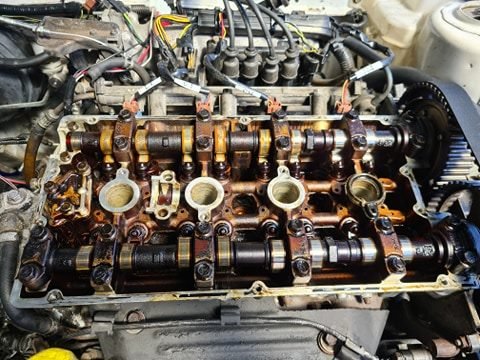
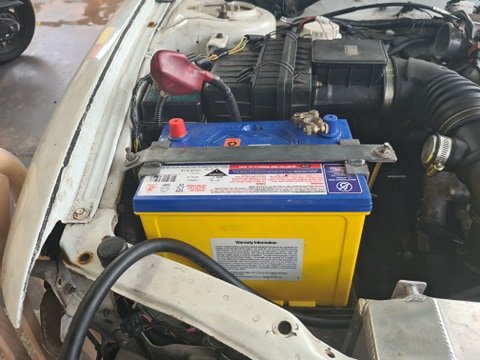
Few updates, will do more after the weekend Installed the Evo Cas I had, head looks a little varnished :s also need to get a new cam cover gasket but that's a job for another day also need to glue the cambelt cover back together (also going to order a new one) New inter-cooler turned up its a 530x233x70mm and fits fine with a Lancer rad support, still not sure if evos don't have a support bar there or not (ive got the cut-down ones to use later if I want) just waiting on a piping kit to turn up for it, should do fine with factory TD04HL power Battery mount all done and installed, need to check bonnet clearance however Front brake rotors on, Tie rods on (need to tighten the inner nuts) all ready for calipers when I get the bolts Exhaust gear is slowly arriving, waiting on flanges to arrive before I start mocking it up 200 Cell 3" cat will probably put a 3" flange on the opposite side to the O2 bung 3" flexi to help prevent cracking of my dodgy welds :p (ignore the feet) Probably do something similar to the below config, will shorten the 90 degree pipe to suit, will have a 2.5" to 3" adapter at the top to suit the factory turbo dump pipe So will weld the flexi to the cat and the exhaust pipe, have a 3" tri flange on the cat and that will bolt upto my 3" exhaust, I also may get a factory 2" lancer exhaust and put a 2-3" adapter on the end so I can get RWC but will see how I go Need to order some silicon joiners and alloy pipe to make the radiator pipes Not sure if I mentioned but I sprayed some start ya bastard down the throttle the other day and it wanted to start when cranking so thats a good sign Pretty sure it just needs fuel to go, coil has power, injectors have power, MPI seems to be working, can get power to fuel pump when cranking Once I get it going with the cas thats in it ill see if I can get it going with the other two sensors, also need to see if I can get it running on the Teensy powered Speeduino I have
1 point
-
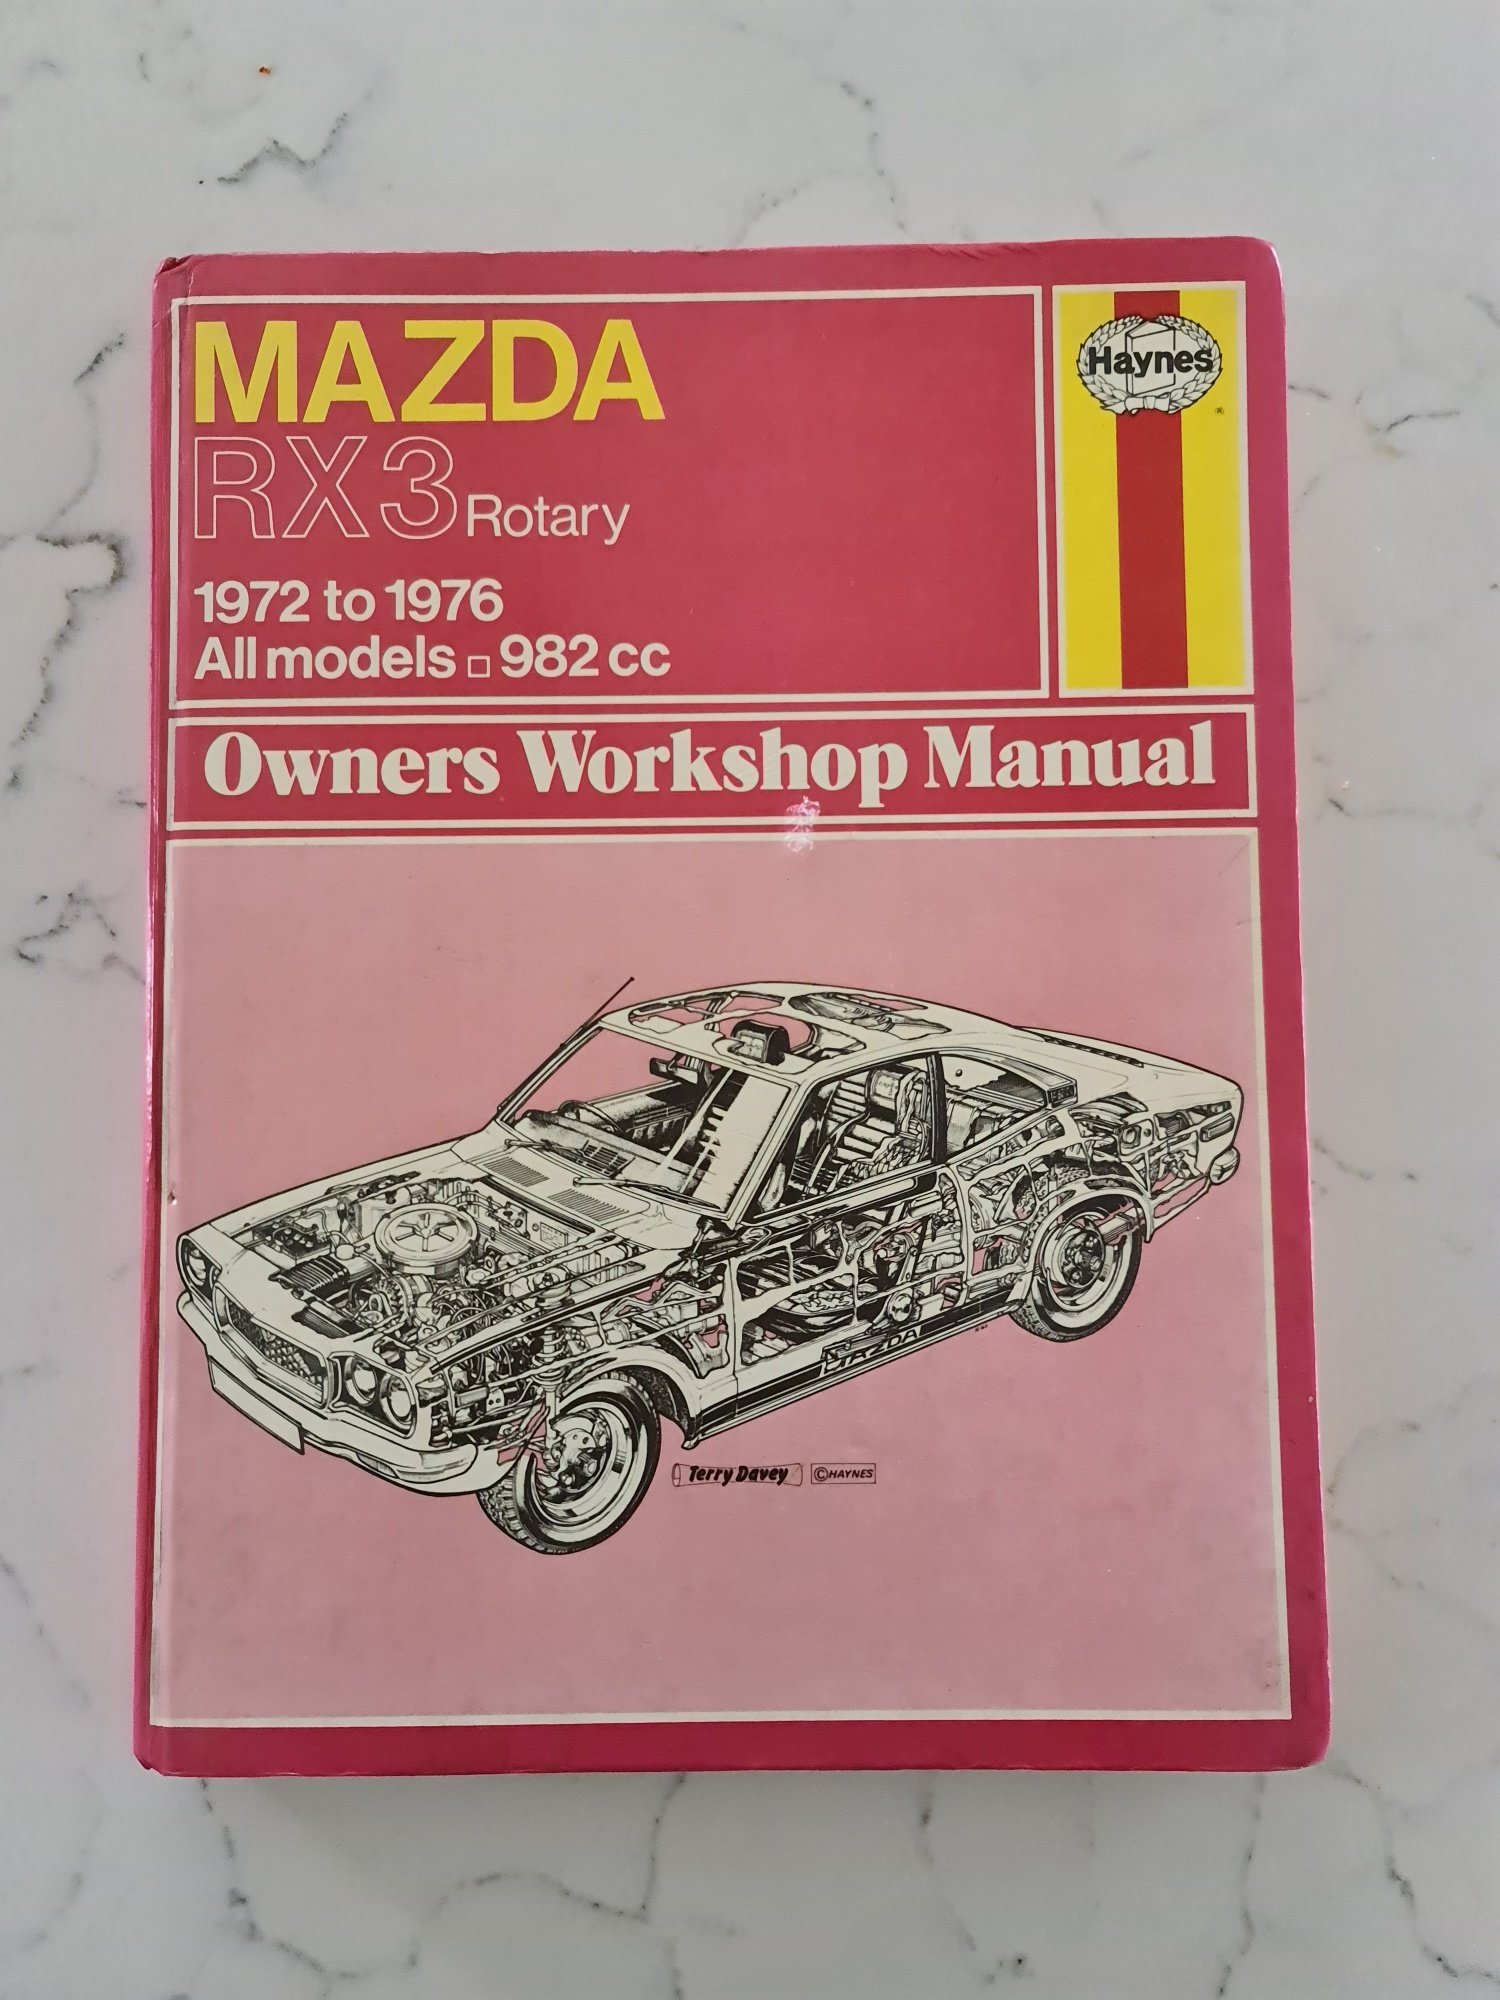
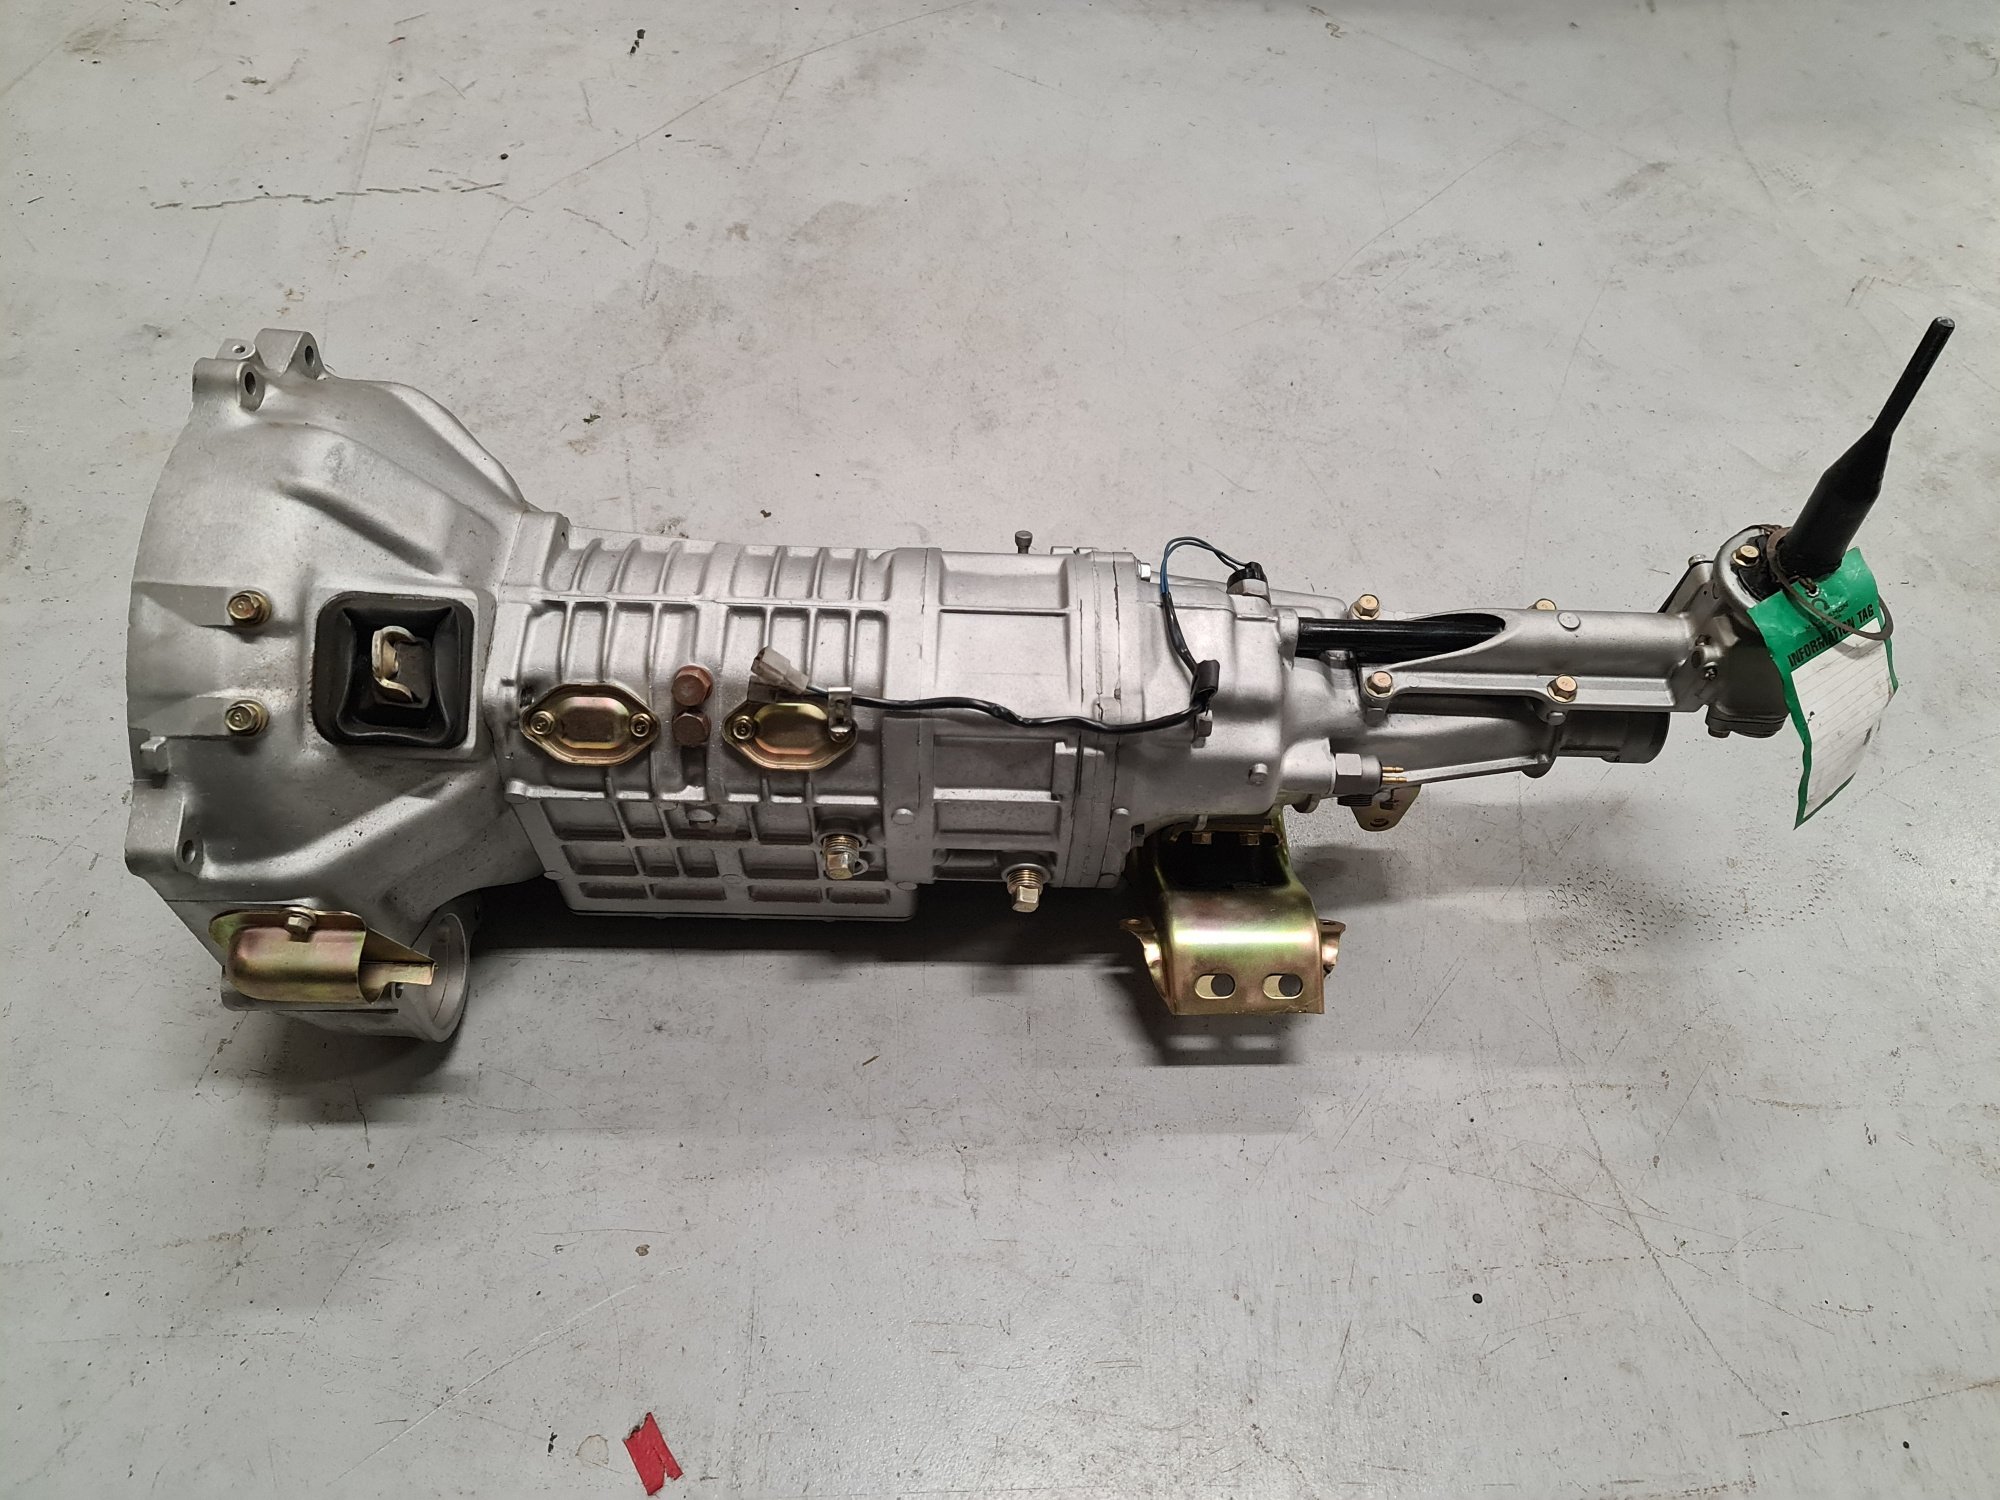
Got a few goodies on the way for this. But this week, Managed to score a old school Haynes manual off Trademe so that was a handy score. Got so much detail in it, right down to how to rebuild the motor and box Also had a clean up of shed and sorting parts out, Pic of the cleaned up S5 RX7 box the car came with. Like new, unsure on internal condition so going to strip it down before it goes in the car to save any future headaches. Thats all for today!
1 point
-
Had another 30mins under the car, if I barely thread in the bolts on the rear gearbox mount and tilt the engine forward with the jack etc I can just get it all to line up Missing a few bolts so will have to wait until I can go to the wreckers to do much more (hopefully on the 15th) and then once I get every thing in place I can start tightening it all up1 point
-
well then, many happenings have been happening. firstly my good Mate Adam strapped it down to his dyno and he had a go at tuning it. the fuel pump died and it was making 15PSI which is way to much for a poor little M122. so i pulled the fuel pump out and replaced it with a walbro GSS341 and i made a bigger pulley for the supercharger. while i was at it i put the colder thermostat in it. put it all back together and this morning i went back to Adam's dyno for another go. everything was working so we set about basic setup, this is where i discovered that id set the timing wrong and it was retarded by 15 degrees. dont know how id fucked that up but i had. explains a lot.............. so anywho with the timing right things progressed well and the thing made power without getting hot so thats solved. pics/video can tell the rest of the story. EDIT - flickr is being a dick and wont upload any pictures. it made 250RWKW and the torque is literaly a straight line at 280 foot pounds. but youtube is working so heres the vid,1 point
-
Messing about with a removable seat and under seat storage tray ideas. At full compression the tyre doesn't even go past the frames seat rails. So plenty of space. While finding space for the seat mechanism I loosened the rear guard Original Angled Looks a bit better in my opinion, my hope is that with it flatter like that it will guard a bit more mud. Wet gravel roads result in covered plate and rear lights, with the slightest bit landing on my back. Might add a truly stylish rubber flap if it doesn't help
1 point
-
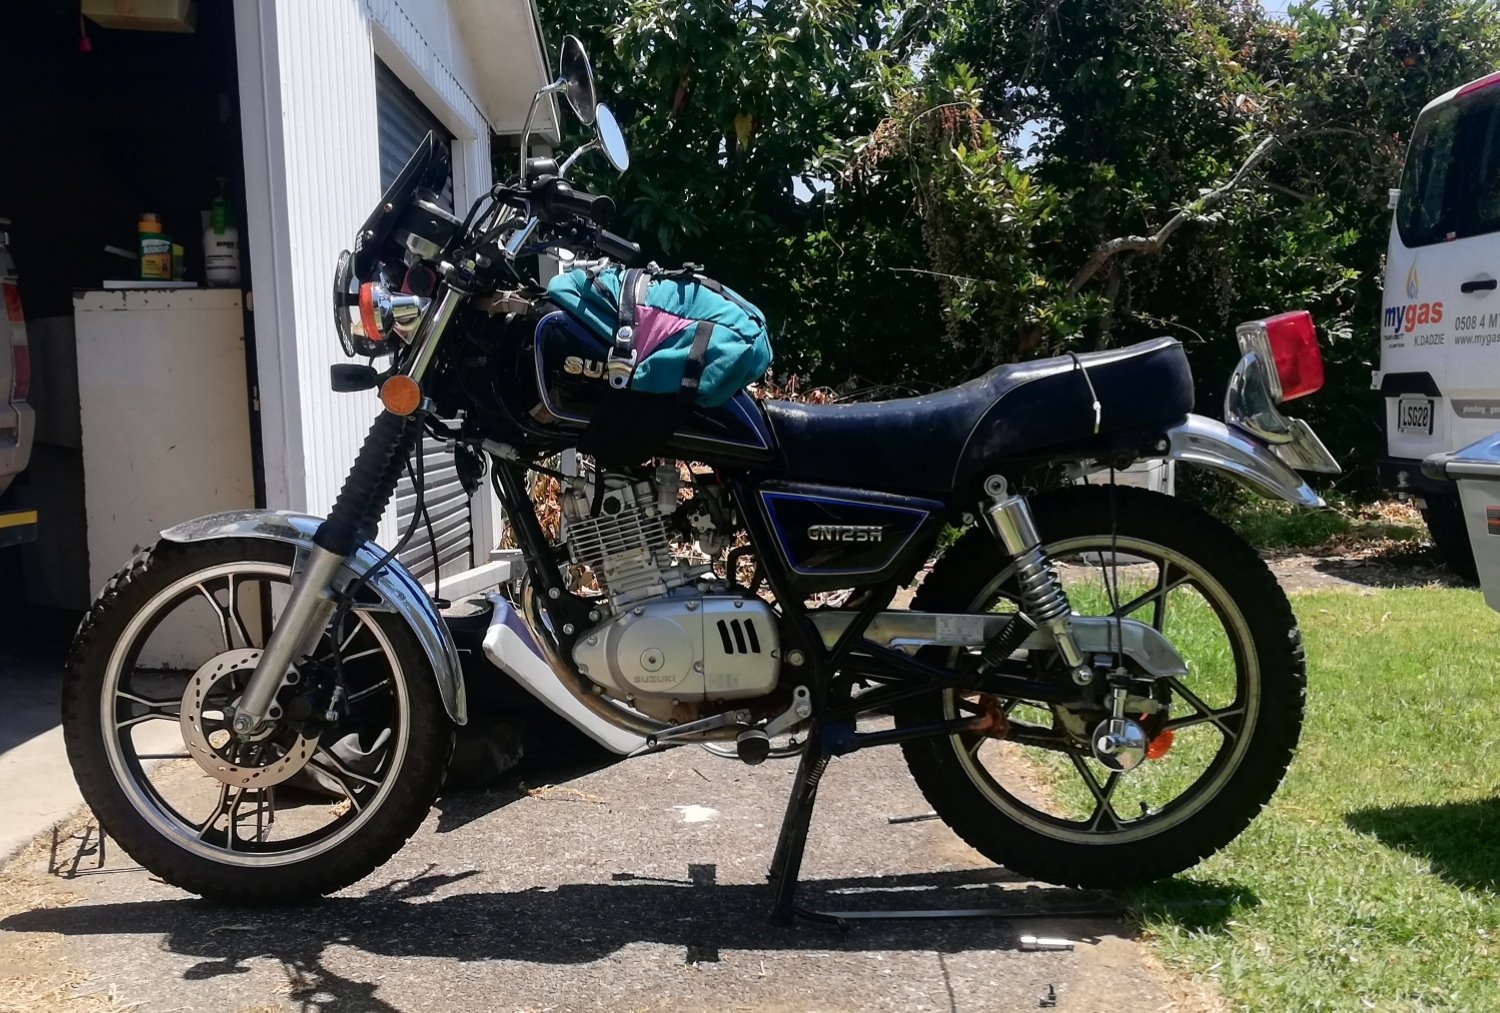
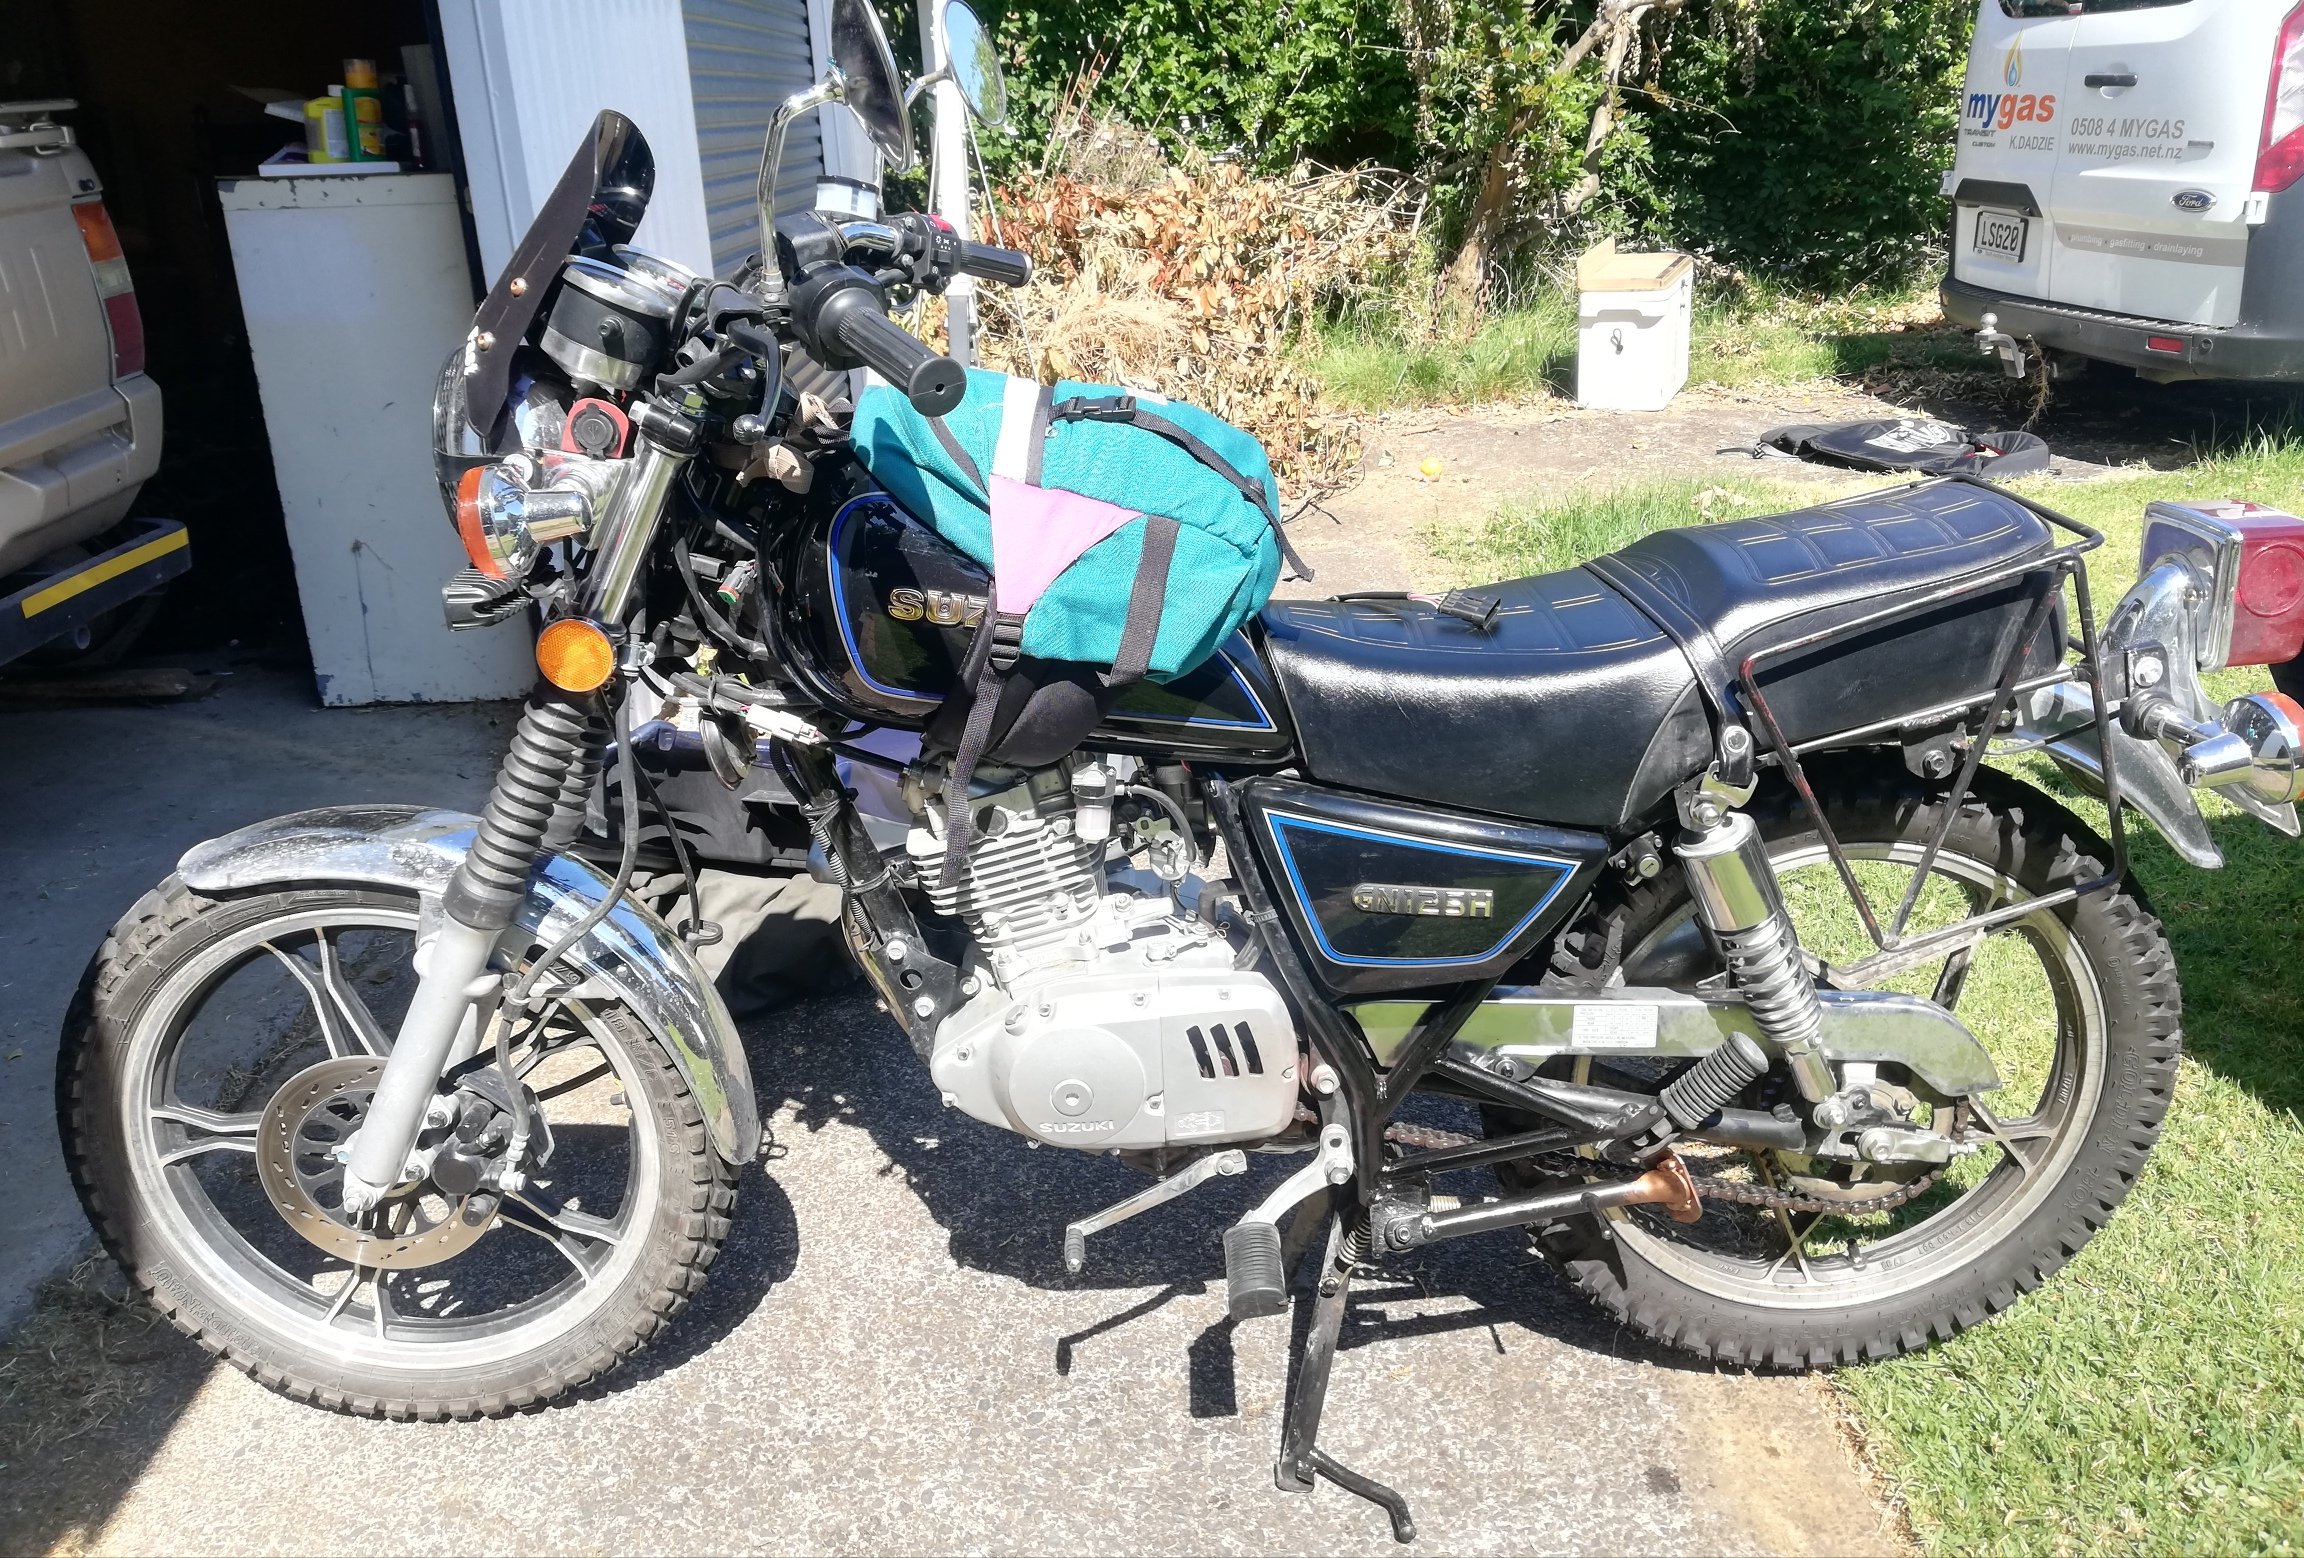
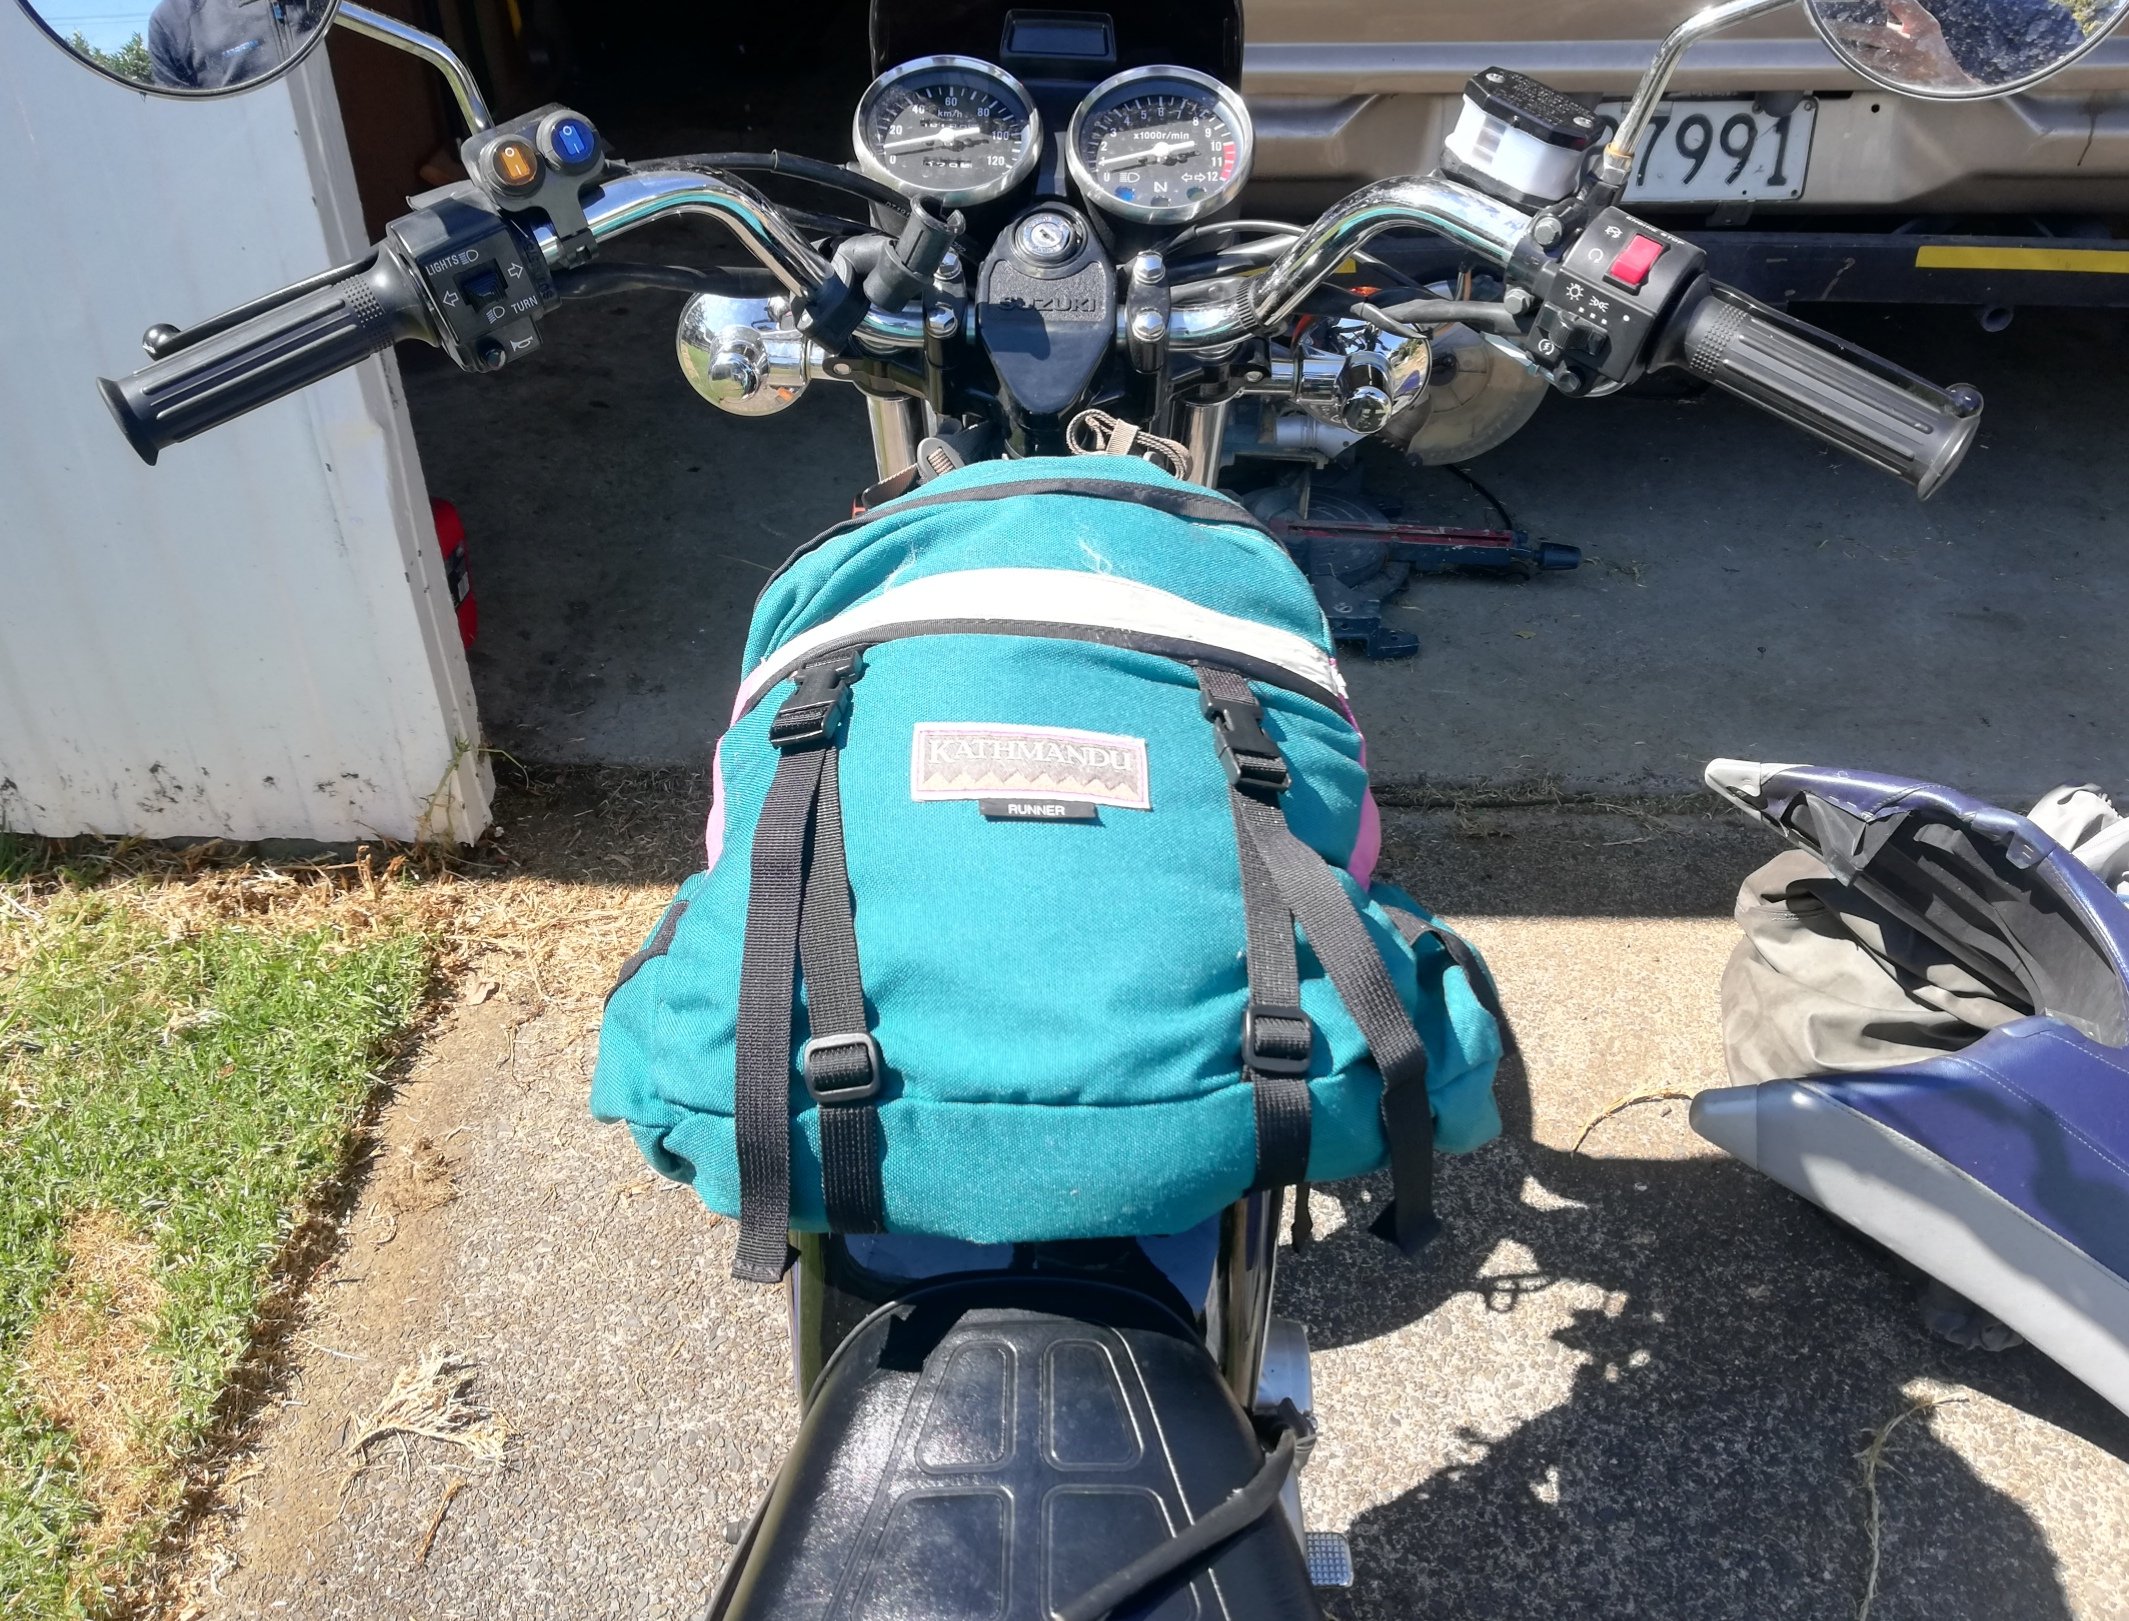
Was Gona get a tank bag, but realised I have more than enough junk laying around to put something together for free. Vintage Kathmandu bumbag pack No arm straps to flap about like a backpack. Waist strap goes nicely around the tank and frame Infront of the engine mount. Cut the hanging loop thing in half and made it two small loop to attach another strap which goes around the headstock Has multiple tightening down straps which work perfectly in use as a tank bag Still usable as a bumbag pack so I can take it off the bike for hiking around. Will also work as a tail bag if wanted. Undo the headstock strap and I can move it down to fill the fuel up. Only thing missing is a clear pouch for maps/pace notes. Will figure out something for that.
1 point
-
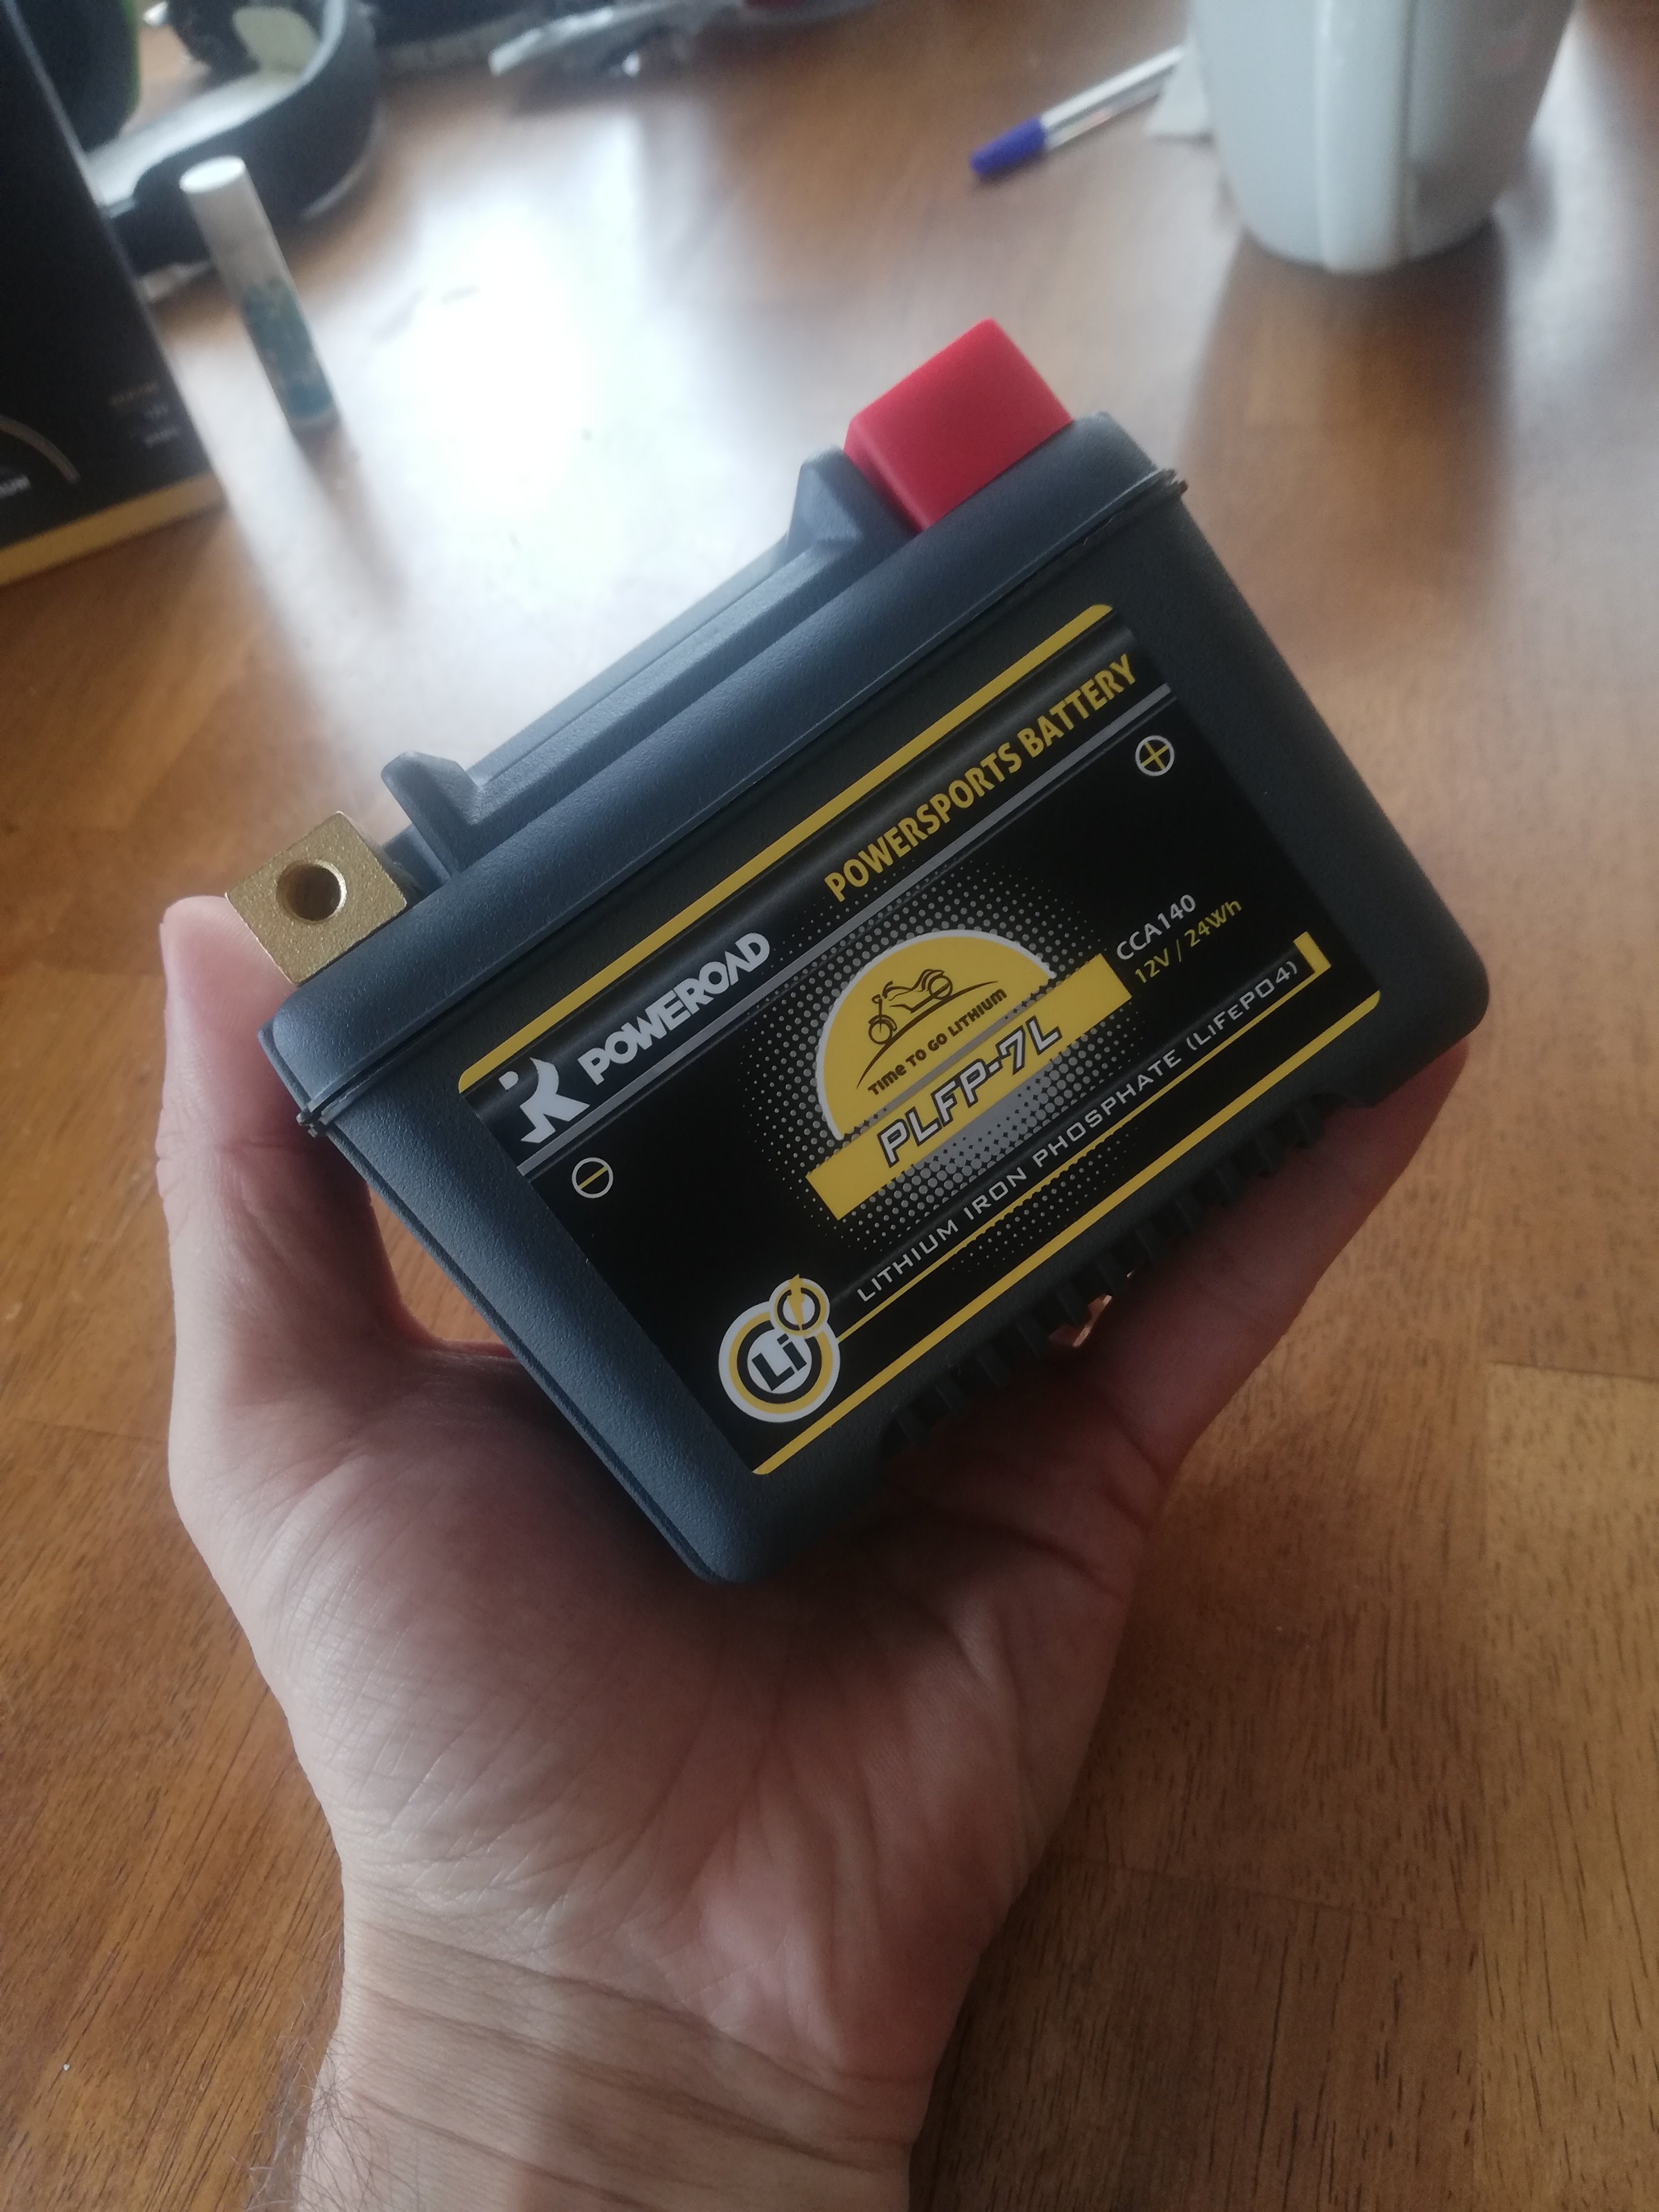
Removed lead acid battery, overflow, battery tray, and tool box Made new tray. Drilled some holes in it for lightness. Used original battery strap, installed with lithium battery. Forgot to take a pic of it while out. Didn't think about it too much as I will probably update it after running new exhaust. I want to make the seat removable and have a storage under it too, so will probably move all the loom and stuff too. Will probably have to chop up the rear guard etc.
1 point
-
What a time to be alive!1 point
-
So cute
1 point
-
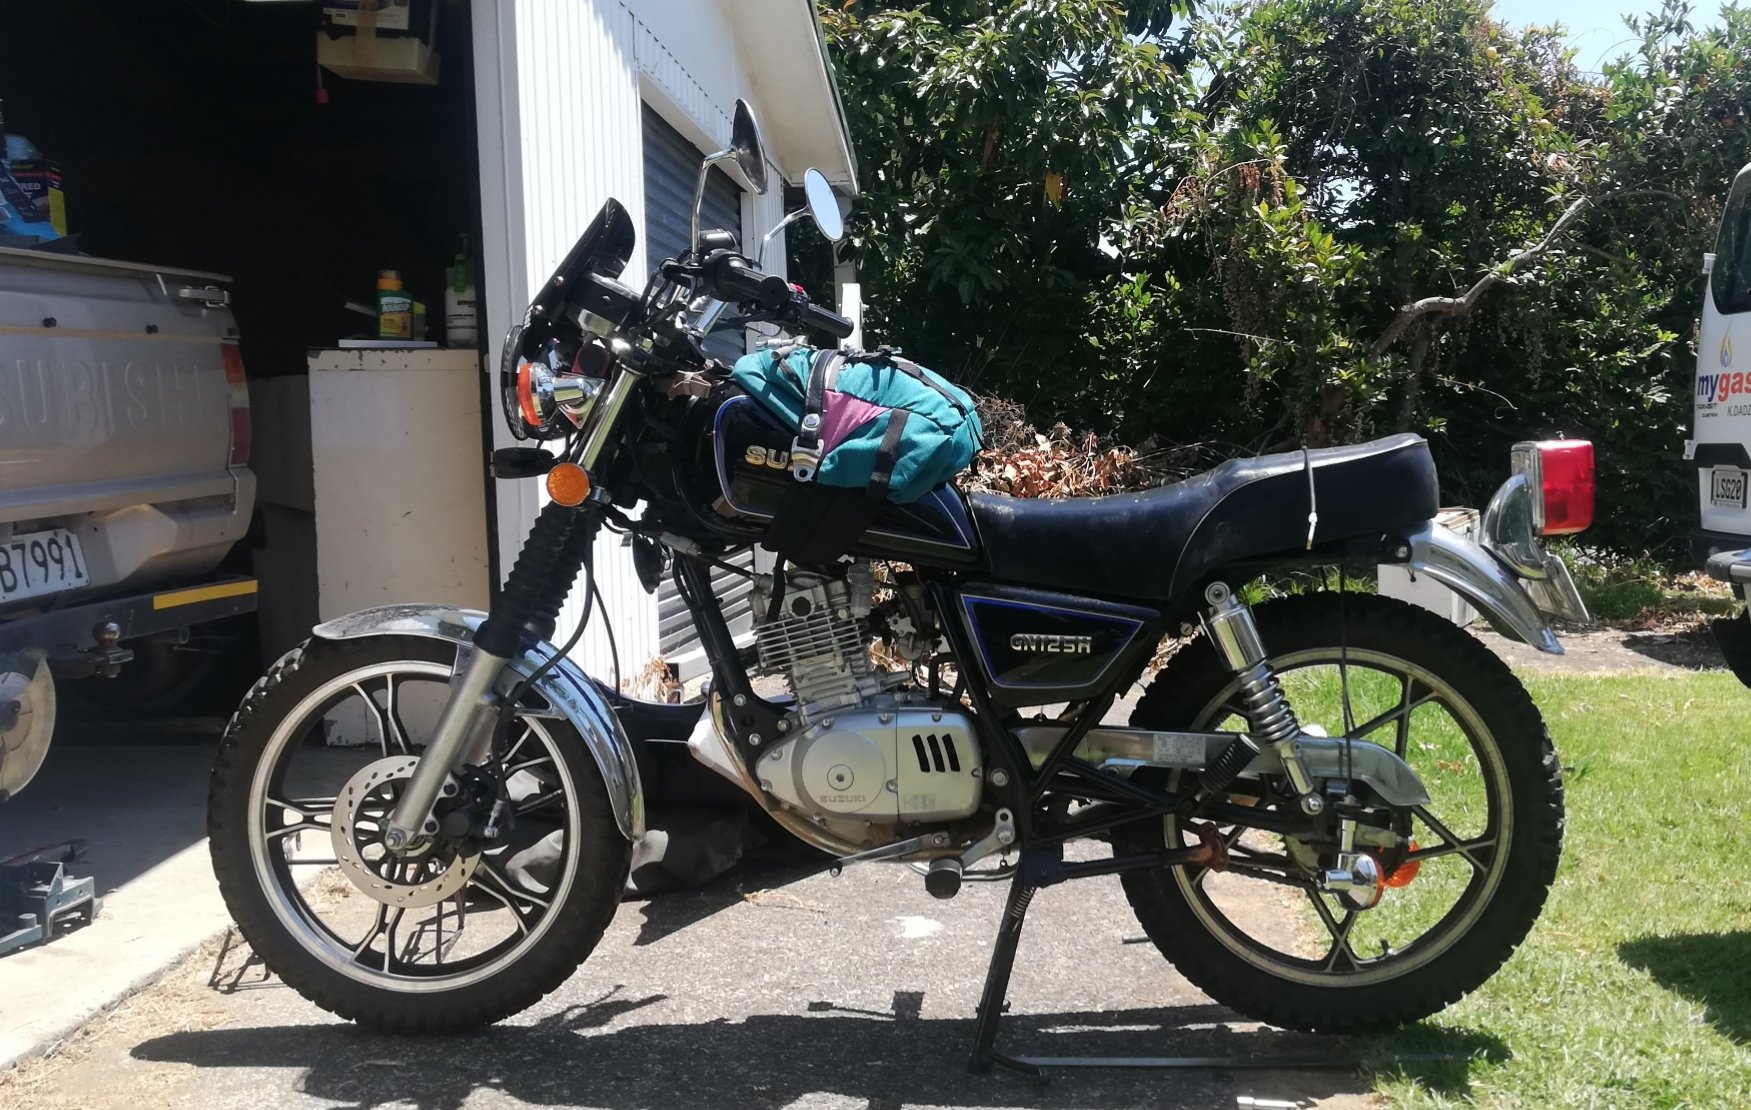
Post eastcape thoughts 150cc kit was pretty nice to have. Just leave it in 3rd gear and use it like a twist and go. Top comfortable speed with loaded panniers is about 90kph. Handling on gravel is noticeably wobblier with panniers on the back. Rear tyre is ok. I would quite like a more aggressive/adv tread for gravel. Not desperate but would be an improvement. Leaving Auckland I lost power for a second on the Bombay's and thought I'd cooked it in the same spot it died last time. Carried on and found it was stumbling at over 8k rpm under a good load. Didn't notice this the week previous but I was going easy on it and had no extra weight. Plug looked like it had some brown spots in it (but was the oil contaminated one from the last rings) as a precaution I bunged in a cooler plug and started using 95 octane fuel. The stumble went away except for a small one very rarely at just under wot under load. I tried 91 again leaving opotiki and the stumble came back. Filled with 95 again and it's gone. So I'm thinking the increased compression from the kit is the cause. Cooler plug looks fine but will try again with a fresh standard. Should add that I never gapped the cooler plug so that may explain the infrequent stumble, wideband shows a bump in richness so I'm thinking the spark is the issue. Riding it today with no weight on it it doesn't happen and bangs out to 110 happily. Current jetting is standard main jet (110) and needle lifted from middle to top. This is the same as it was when the rings went, but wideband says rich and 1000km of loaded riding says it's ok. Guessing garbage rings. Mix is ok at idle and wot. Everything else is rich (high 10s to high 11s). Going to need to fiddle with the emulsion tube I think. Have ordered a new standard one from Ali. Will try that to see how different it is from the original and then start drilling. Exhaust header appears to be two layers so it's smaller than it looks. I'm thinking a new one that's actual size will help the top end. Usb in bike is lush for camp site phone charging. Led bar is lush for when headlight bulb shakes itself off. Stuff for next time? I think I could use some even smaller panniers to carry my "sleep system" which weighs like 1kg all up. If staying at similar places I won't need the stove, just need a zip/kettle at campgrounds. Will take a tarp next time, never got around to getting one this year. Bivy is great no moisture inside but would be miserable getting into in a hail storm, plenty of building at campgrounds to shelter under though Possibly don't need to take a puncture kit. If I don't take that then there's no reason to take levers. Tyres are good cond, just don't be unlucky. Don't need a fuel bottle, always had enough to get to the next pump if I couldn't fill at the nearest one for some reason. Wasn't sure on economy with the 150 kit and loaded, but it's only slight more than before. Potentially shift some weight further forward. I think this would improve gravel handling. I sold my tank bag just before I got the bike - because I won't be needing this for a while.... A pace notes holder would be an ideal addition. Anyway. Got home, changed the oil. It's looking perfect. Oiled the squeaky chain, back into commuting duty1 point
-
What's part throttle?1 point


.thumb.jpeg.384ff72c8d2b0ee0d34a7bdedb55bdcf.jpeg)


.jpg.37ae2047217ab9c8006fe1c4d69cbe46.jpg)


.jpg.4a6d1b86c21fd610a5114d0883256674.jpg)


This leaderboard is set to Auckland/GMT+12:00