
Leaderboard


Popular Content
Showing content with the highest reputation on 09/19/19 in all areas
-
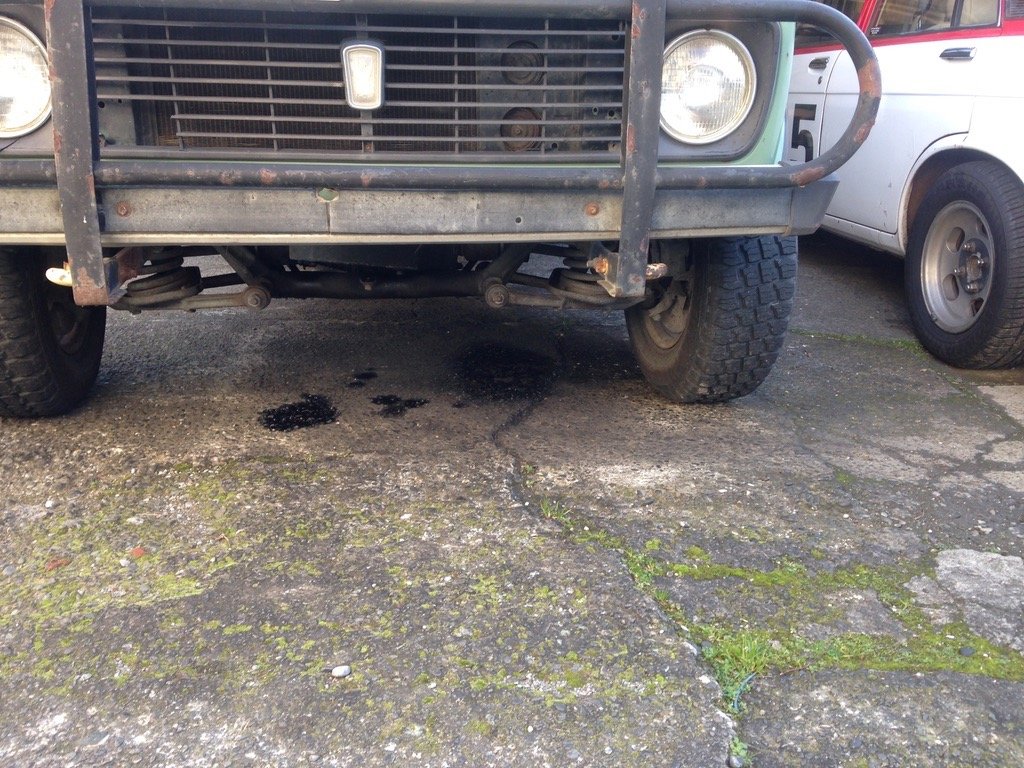
stories from M lyfe. the heater tap started leaking. the heater tap is inside the passengers foot well. like any true M series connoisseur i know it was leaking within seconds of it happening because i smelt it. i knew, instantly, the the M was about to try and fulfill the prophecy of its lineage, and its tradition, and attempt to BHG. but old M masters like myself are made of sterner stuff than that, it'll take a better trick that that old chestnut to bring the prophecy to life. so, i caught it before it had a chance to get hot, no harm done. MS75 heater taps are vacuum operated, incorporate a 90 degree bend in them and just to really make sure there is no way of substituting it with something available its closed with no vacuum. all available vacuum operated taps that i have found are open with no vacuum. there are no taps available that event fit in the space available, let alone have the right vacuum configuration. so ill just have to buy a gates one, cut and weld the vacuum actuator to be on the other side of the lever and put in the engine bay somewhere. if i can stand up for long enough to do that job ill do that tonight. 2019-09-19_07-33-00 by sheepers, on Flickr16 points
-
oh oh oh i forgot the coolest part. Had our resident PPSC pinstriper do some subtle tank art for it. PENNY PINCHERS SCOOTER CLUB BUY FOR CHEAPS SELL FOR HEAPS14 points
-
2 months later i have all the bits to rebuild the bottom end. the heads are already finished and i have them back. parts, 9 to 1 CR Ross forged pistons (the cunts will not change the value of the parts on the shipping invoice so keep that in mind when deciding to use them or not) eagle H beam rods and ARP rod bolts ARP main cap studs and bolts new genuine Toyota oil pump theres heaps of other shit too but you get the picture. block will now be bored and honed to 88mm. rotating assembly will get balanced and ill get the short block back. then its reassembly time. good days. or maybe not good days. going in to hospital to get back surgery in about a month so that will fuck all progress for a while............... 2019-09-19_07-59-37 by sheepers, on Flickr 2019-09-19_07-59-22 by sheepers, on Flickr 2019-09-19_07-58-23 by sheepers, on Flickr9 points
-
sooo we moved into our new pad. i sorta half unpacked my shed and then got the itch to do something motorcycle related. Im taking the GP125 on the Te Uruwera ride, and decided to use it on DGR also, so what better idea is there to completley strip it down 2 weeks before DGR and then have it sandblasted and powdercoated right? bai felicia Got it back from the blasters yesterday and took it straight to powdercoaters after i put sacrificial bolts into all the threads. Hes gunna have it ready next monday maybe so might have to take a day off work next week to smash it together before DGR. Gave the cylinder and head a lick of paint and scraped back the ends of the fins while I was at it. I had all the bits for the '82 Z50R sandblasted at the same time so i can start restoring that for the young fulla now too, excite.8 points
-
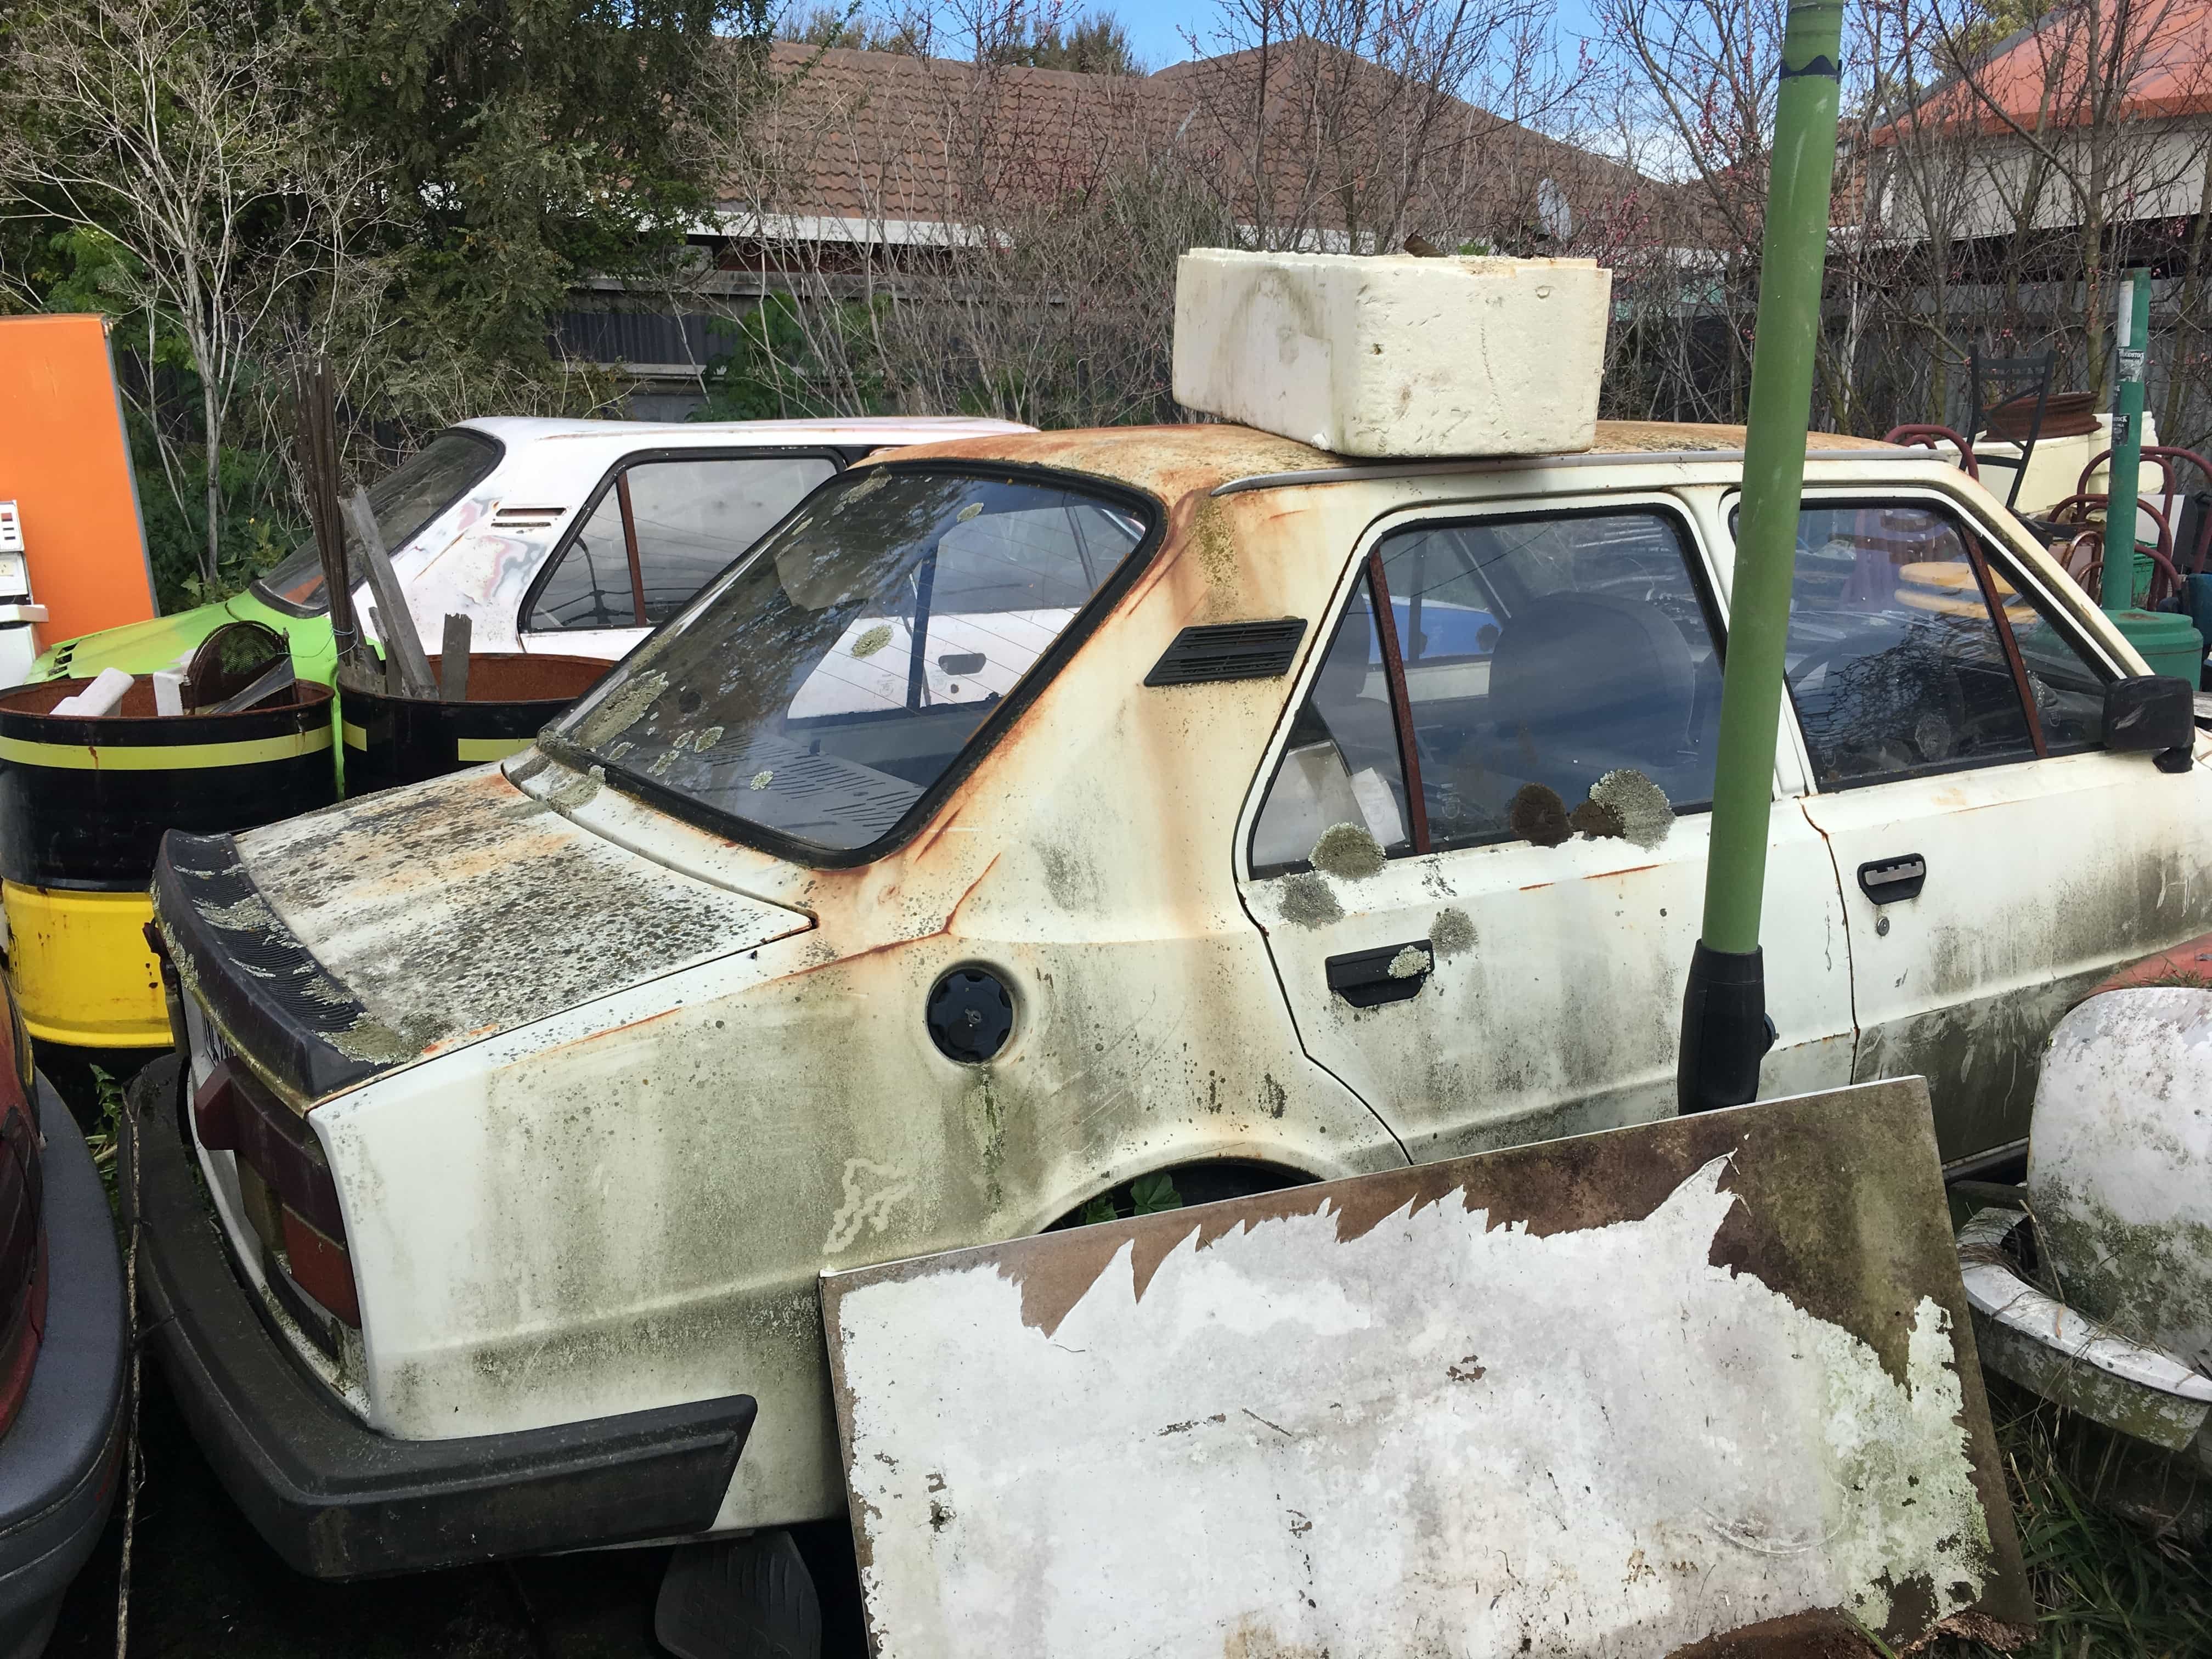
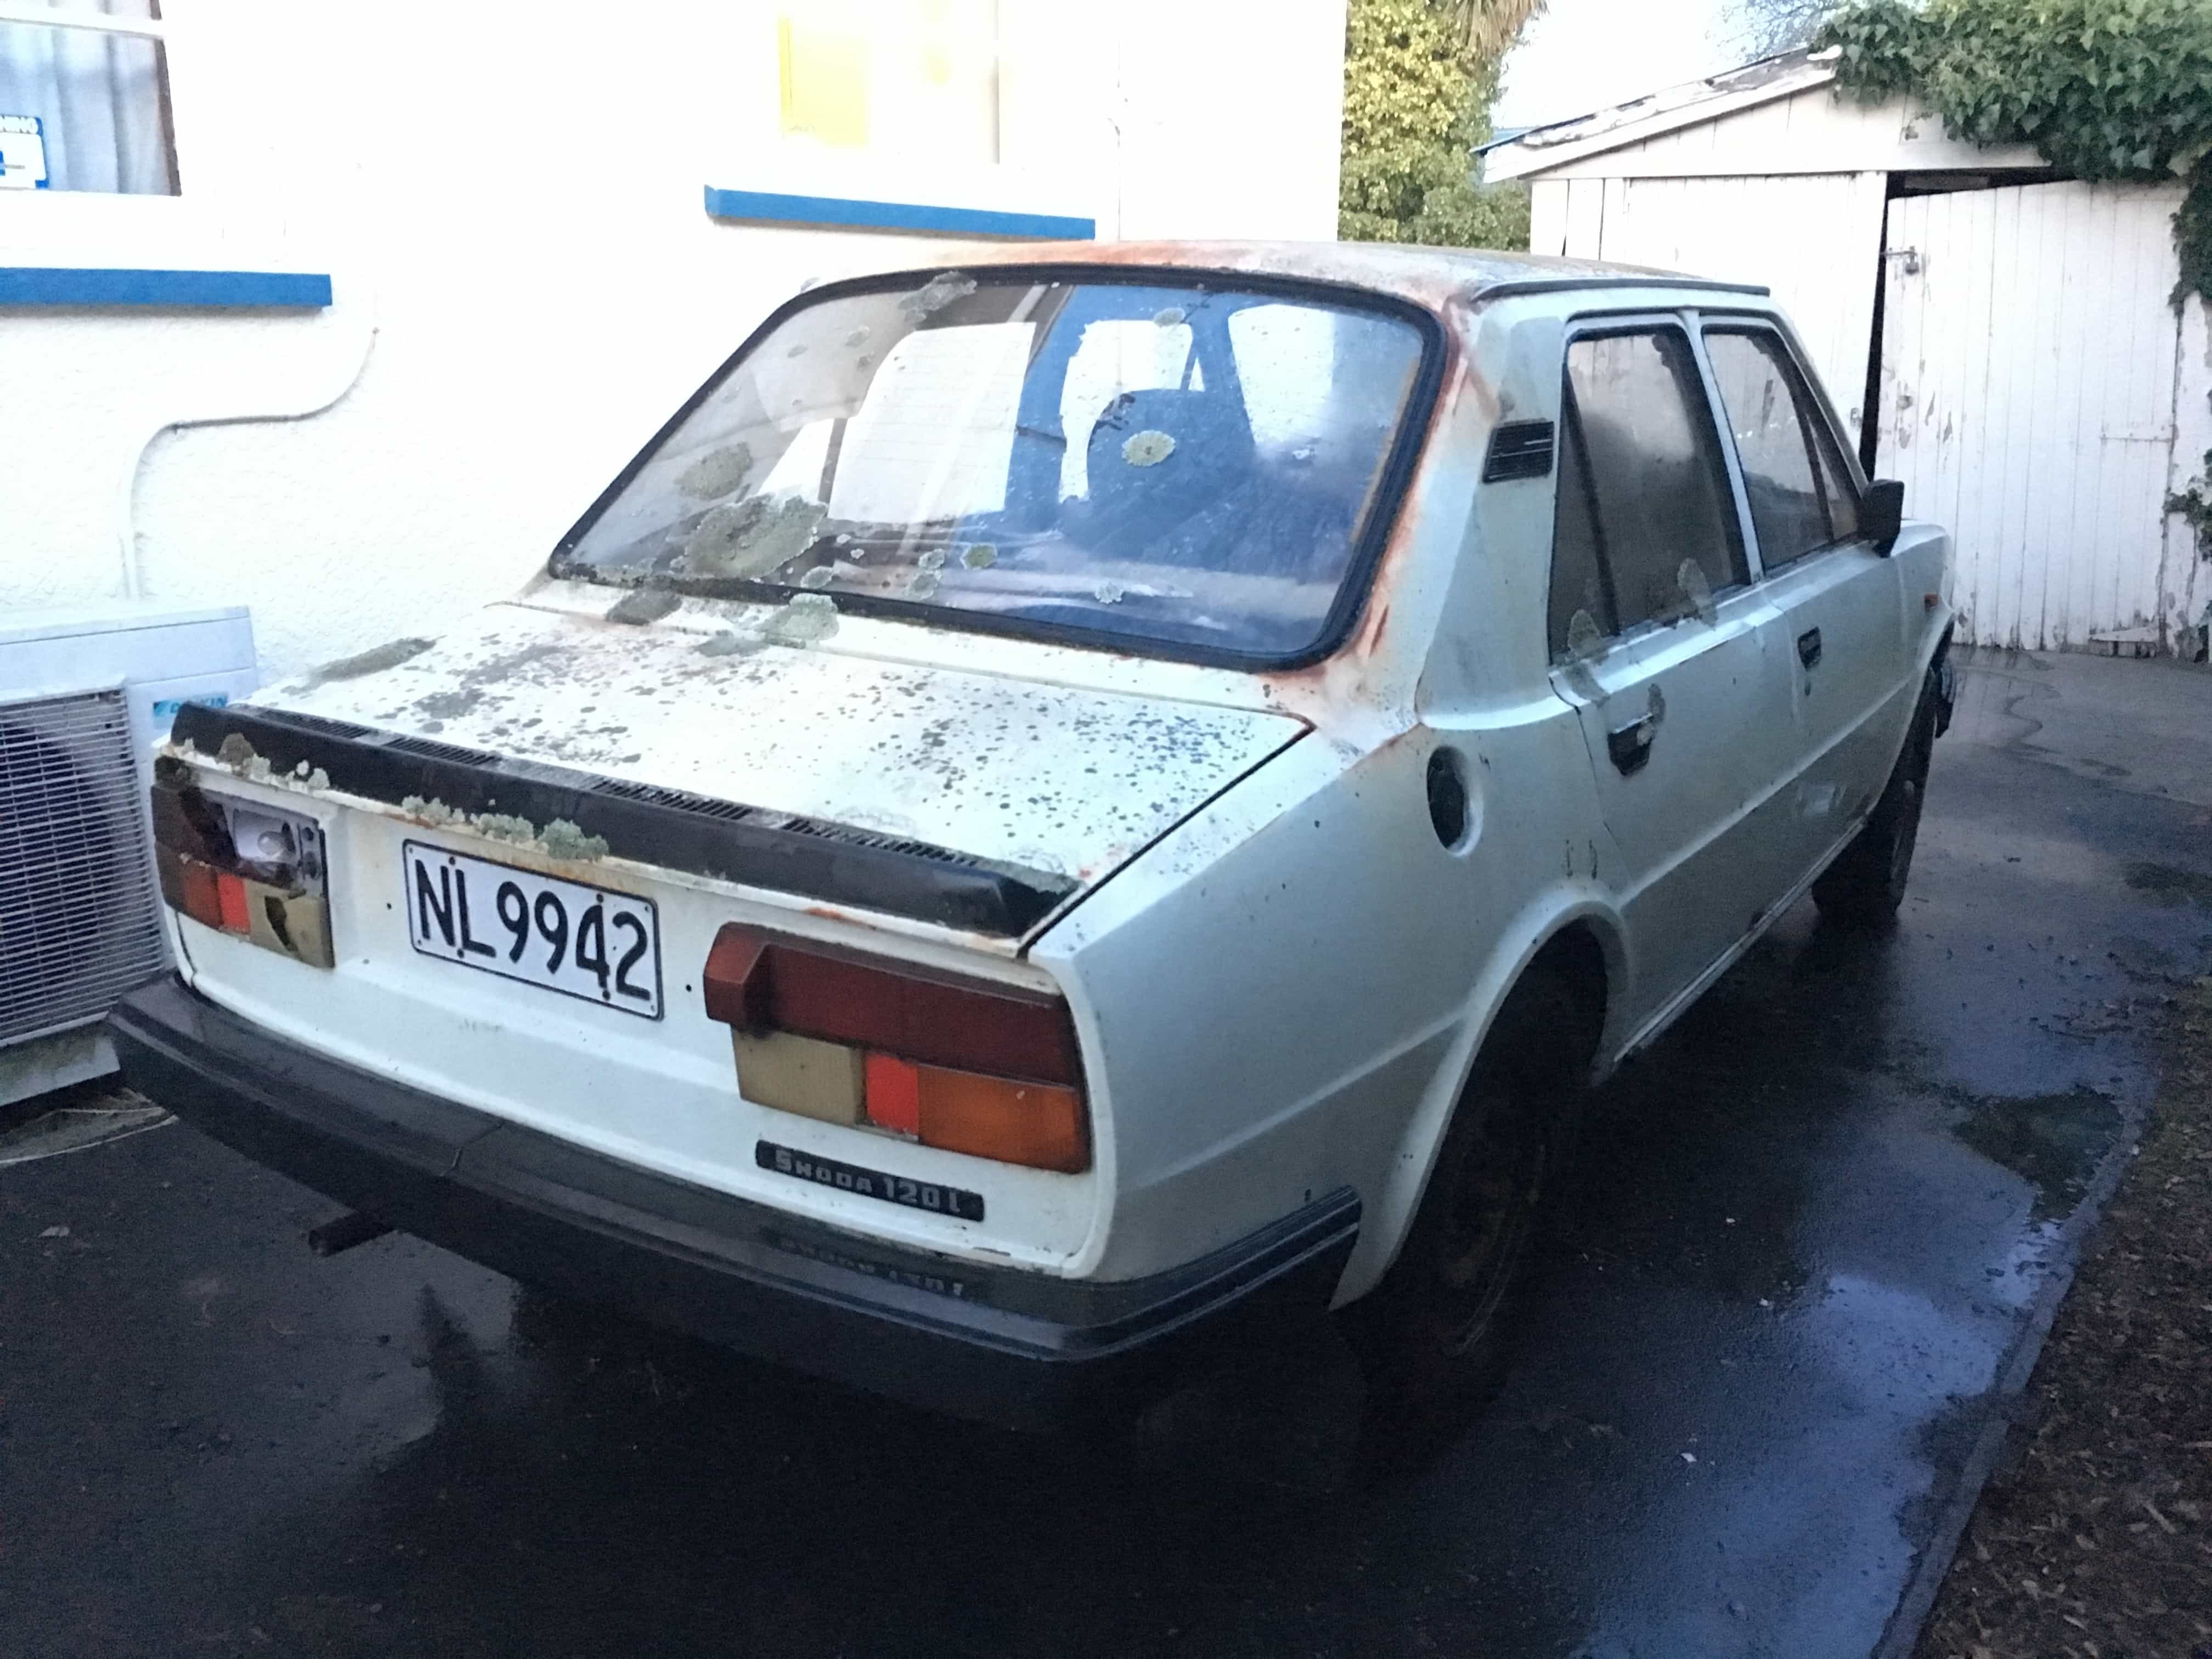
Not immediately build related but after seeing this stuff article @myk00l ( https://www.stuff.co.nz/national/115722682/worker-to-clean-up-christchurch-hoarder-house-begins ) I managed to get in touch with those involved and a sad sight awaited me. Three 110R wrecks All realistically too far gone to save due to rust, the guy told me they had driven into the site three years earlier but I found that verrry hard to believe. There was also two 120L models (one half converted into a rally car) and one solid looking one that apparently only has ~50,000kms on it before the head gasket blew and it was taken off the road. A guy in Dunedin who I've been in touch with has a 120L that he and his son are doing up but were struggling to find parts (was quoted $2,600 for a windscreen from Smith and Smith!). I managed to save the white 120 and will be taking it to Dunedin this weekend when I go down to pick up the Sabre. It's surprising solid considering it's been of the road for ~ 20 years. Almost don't want to let it go! Would come up good with a proper scrub! Also found a loose half axle sitting in one of the cars that I'm reconditioning to put into the Sabre after the fuckery I endured trying to replace oil seals without the right tools / knowledge. Aim is to have it on the road in time for the Mcleans Island swap meet.
 8 points
 -
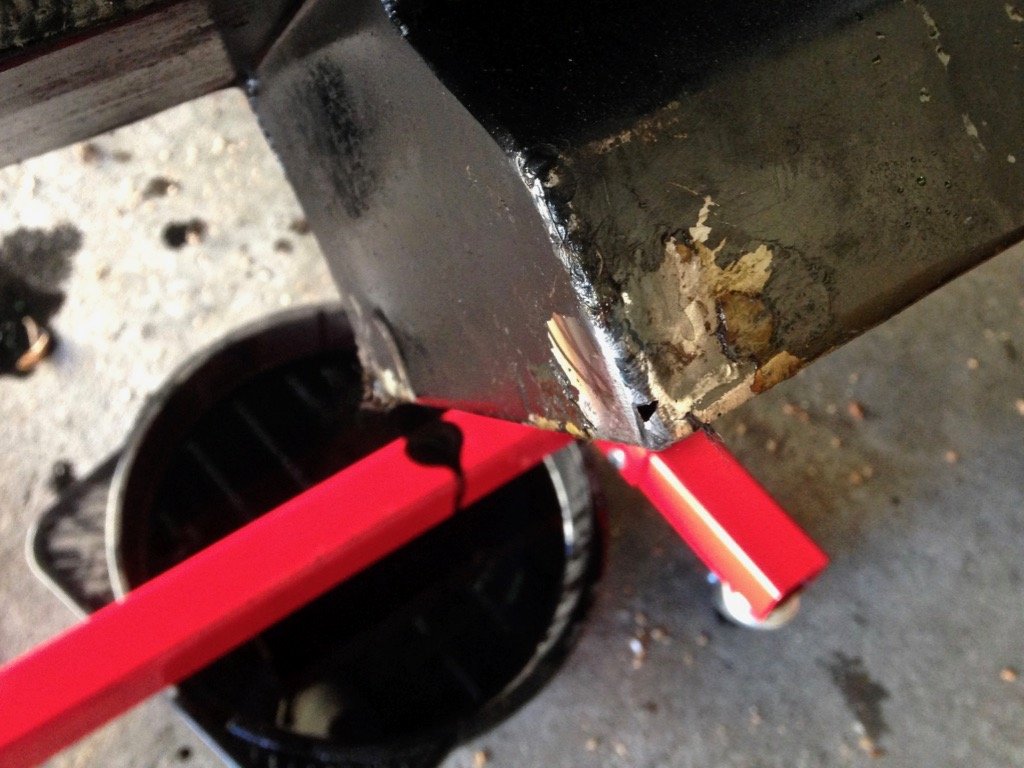
so 1 x generic falcon tap and some cutting and welding and we're back in business. tap is in the engine bay and its fairly ugly but there isn't fuck all i can do about that. 2019-09-19_08-00-10 by sheepers, on Flickr 2019-09-19_08-00-03 by sheepers, on Flickr 2019-09-19_07-59-55 by sheepers, on Flickr 2019-09-19_07-59-47 by sheepers, on Flickr7 points
-
7 points
-
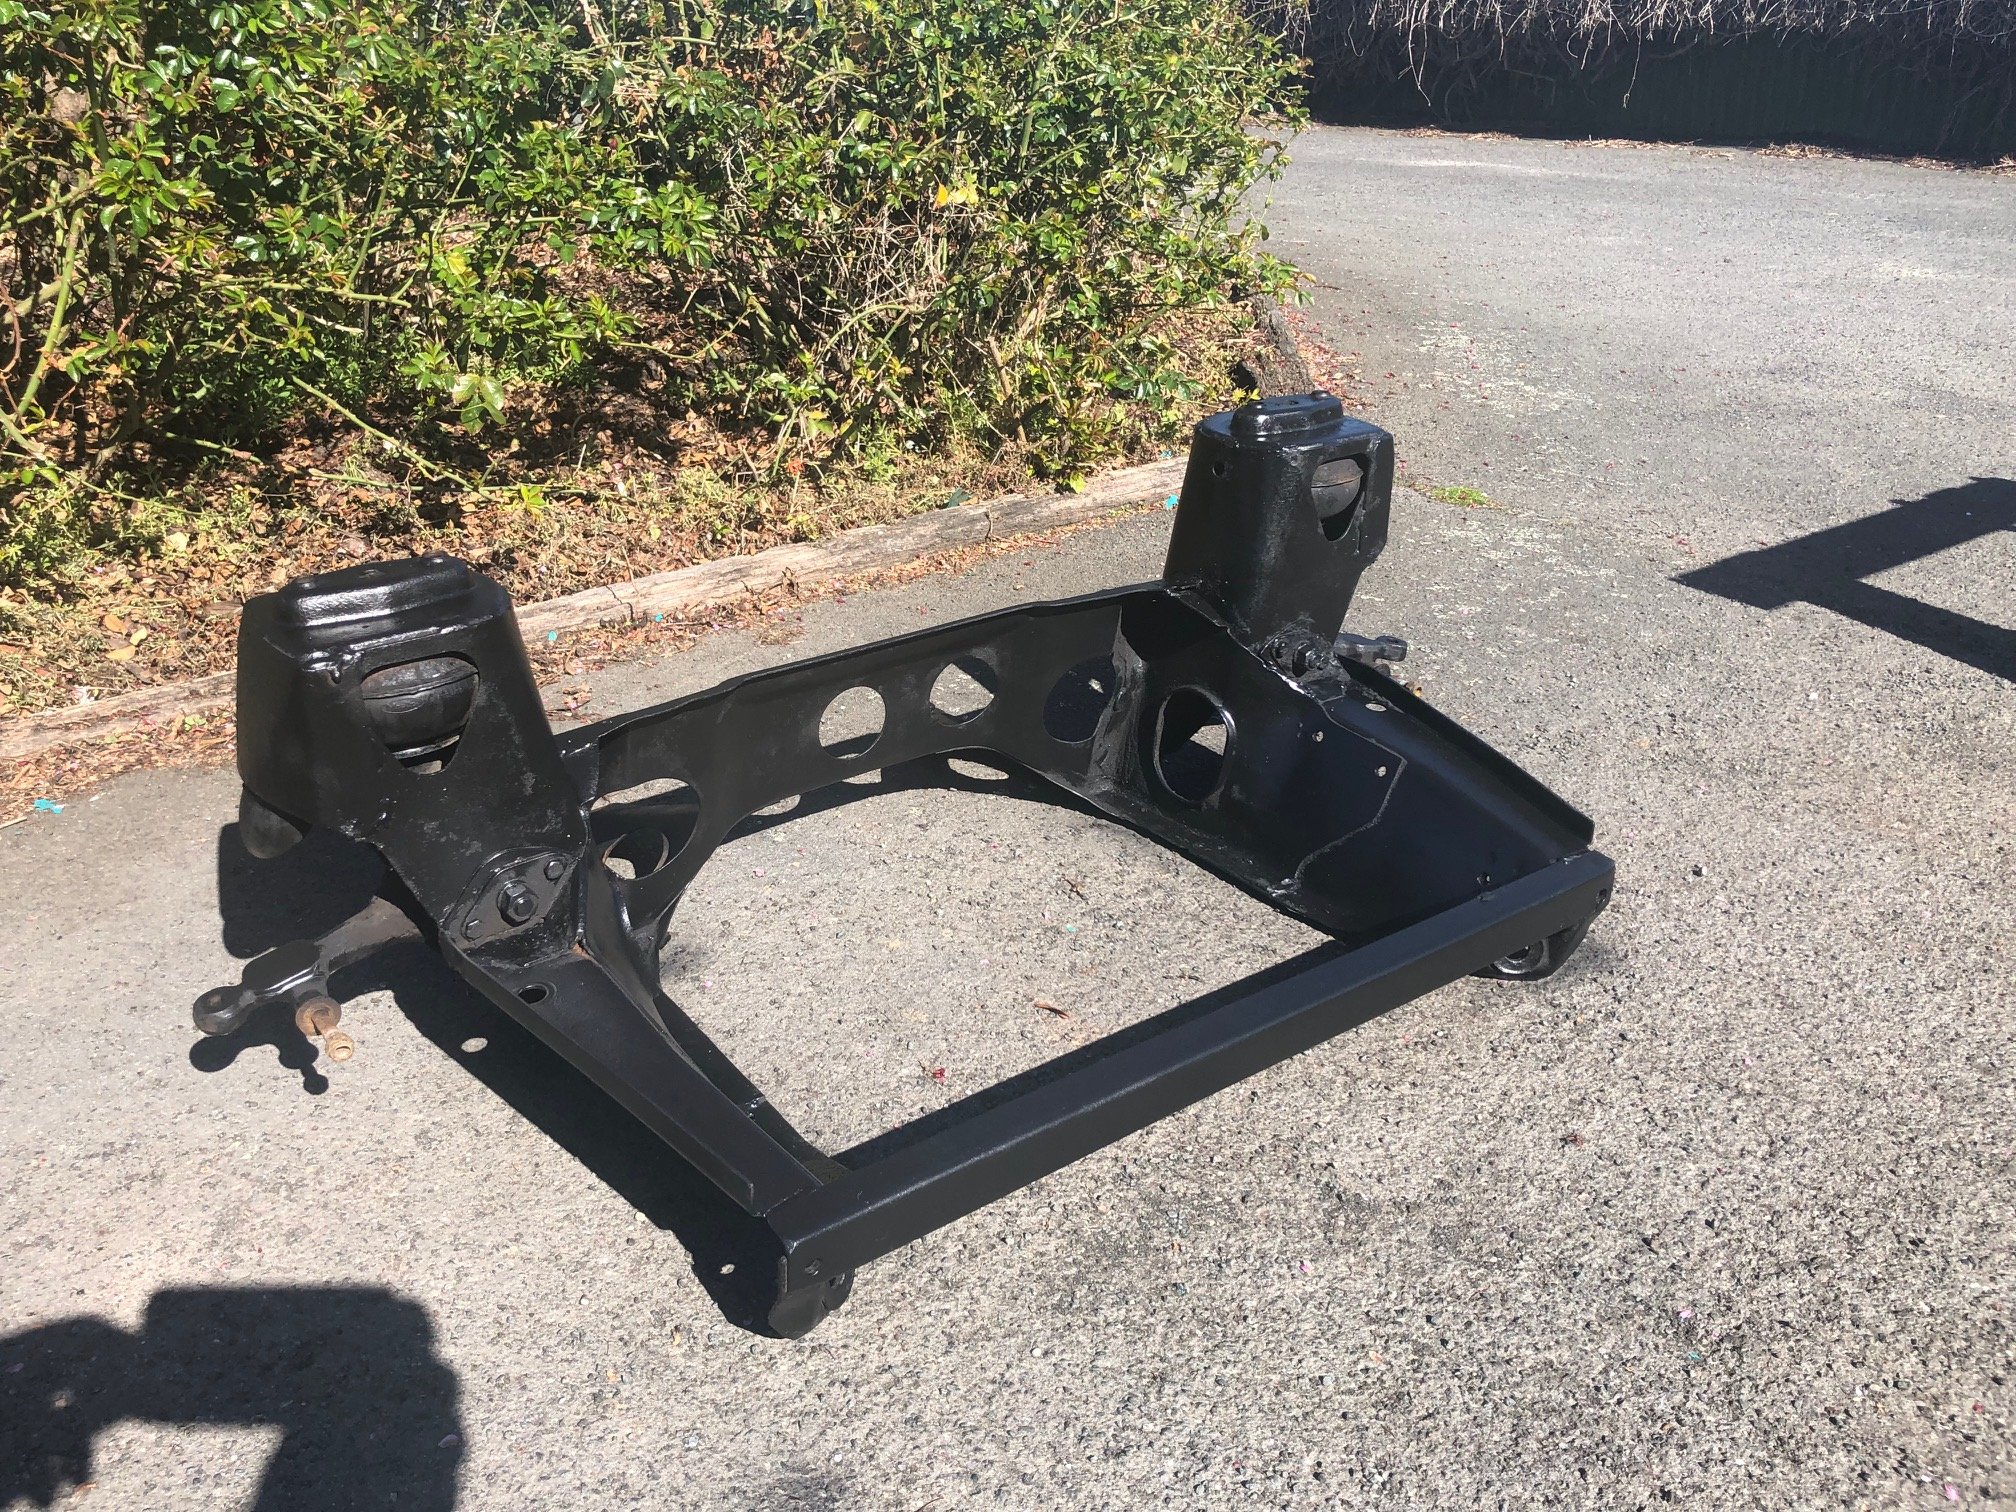
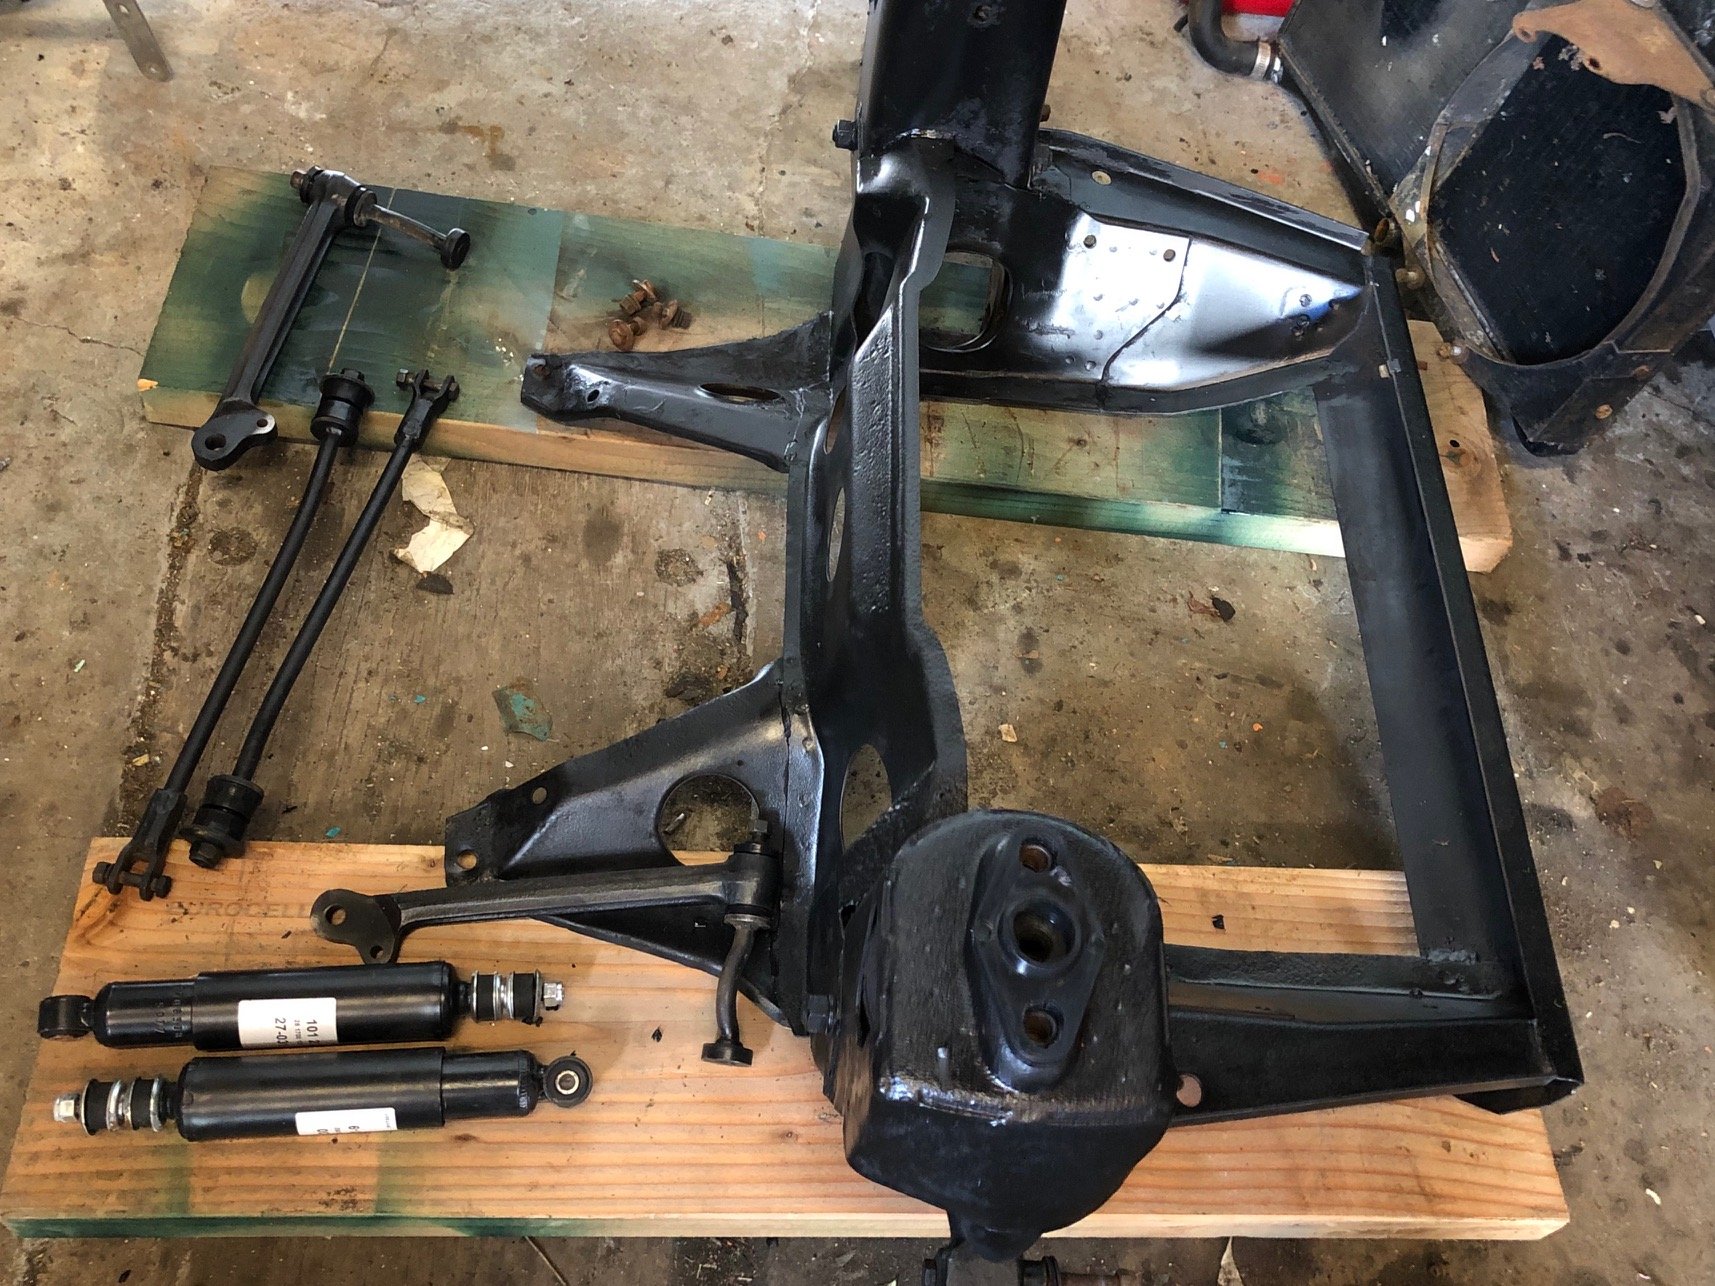
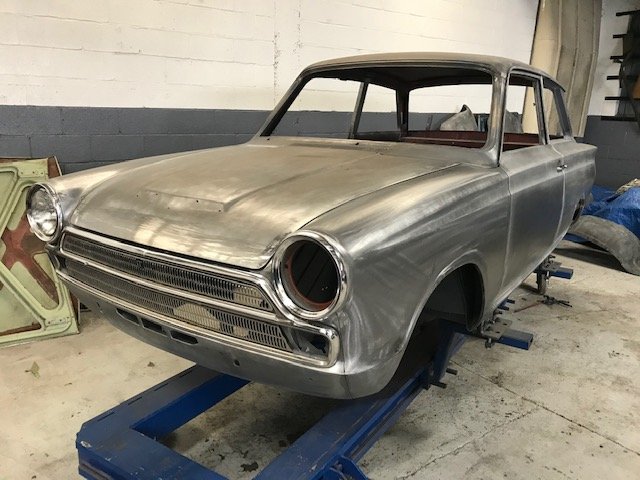
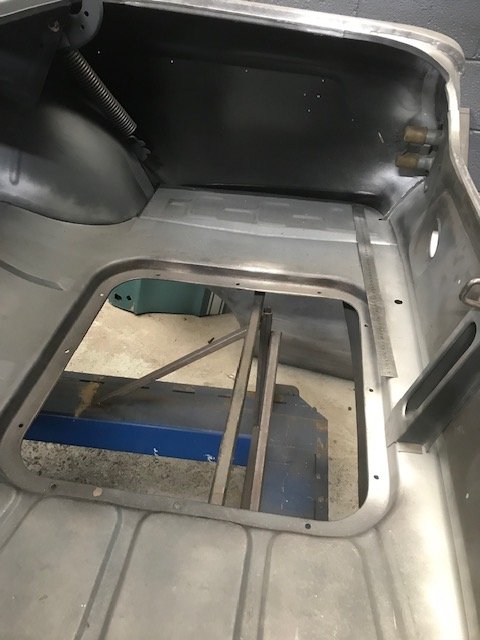
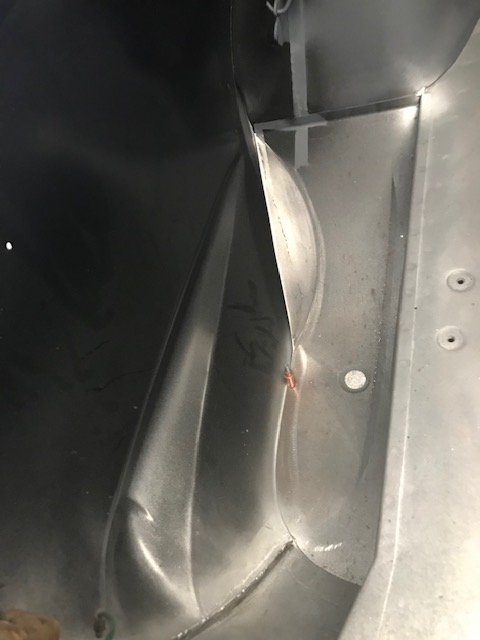
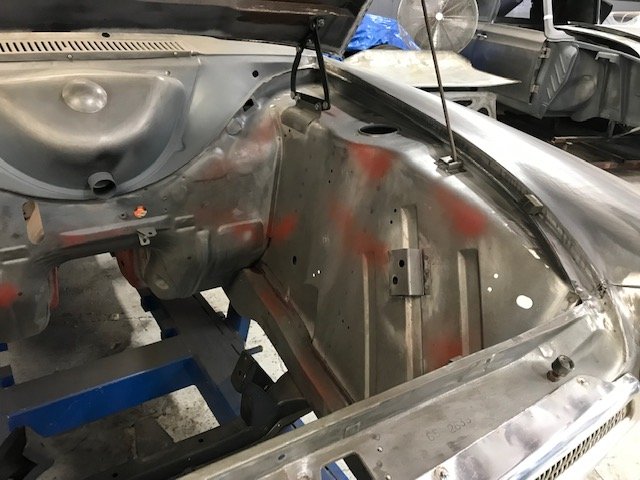
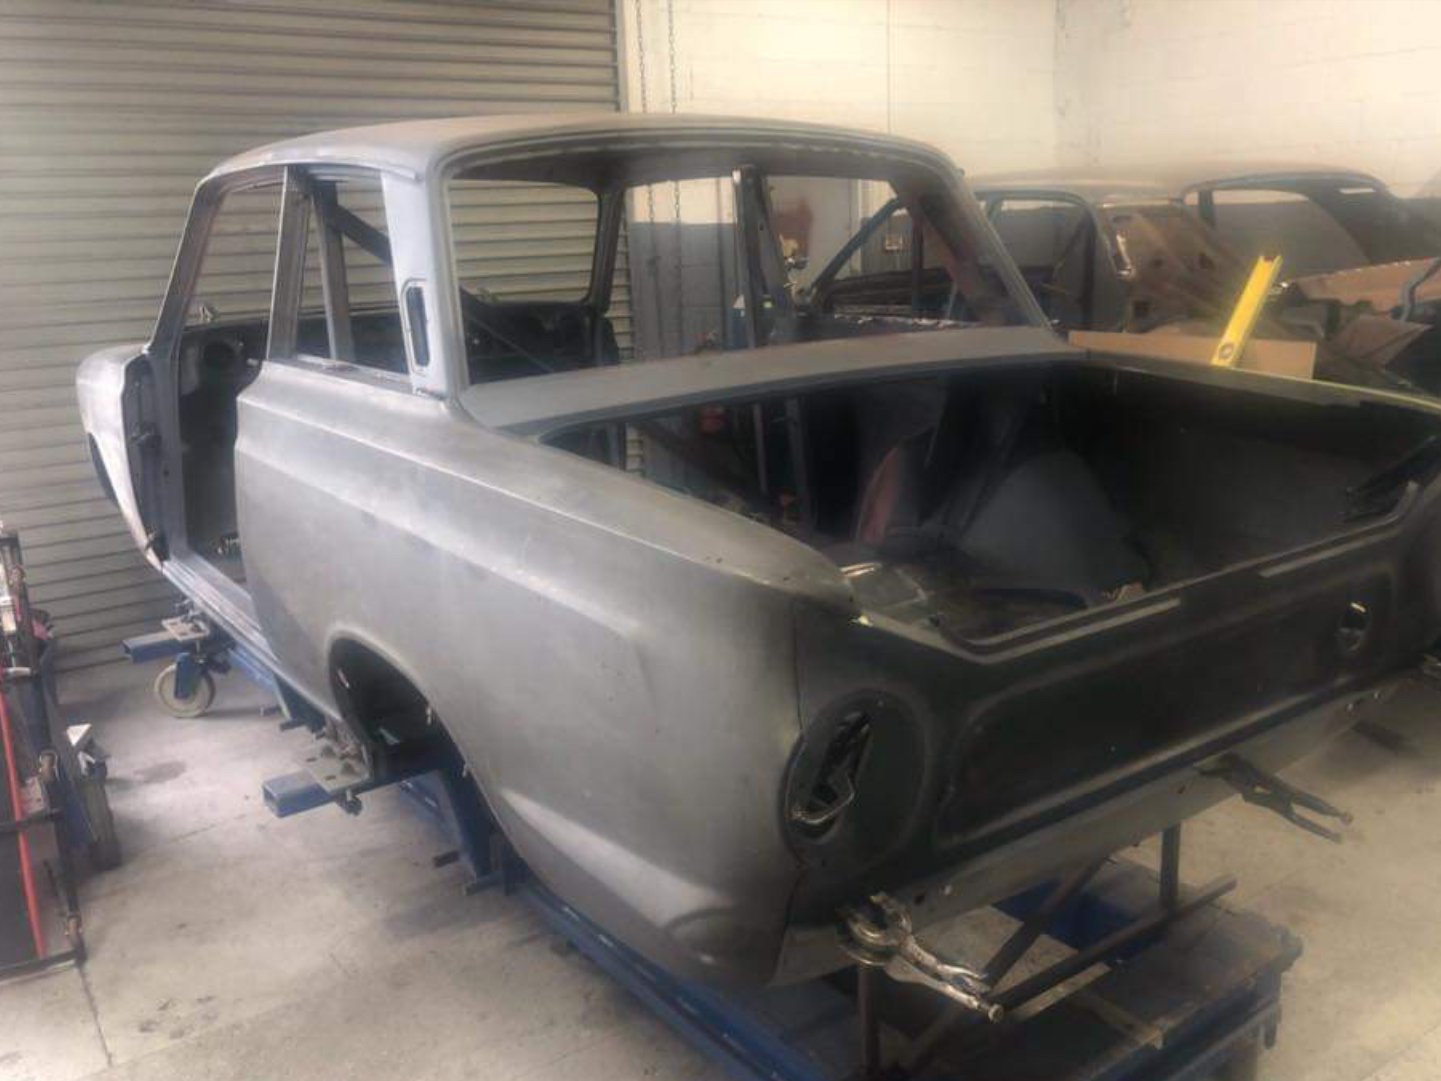
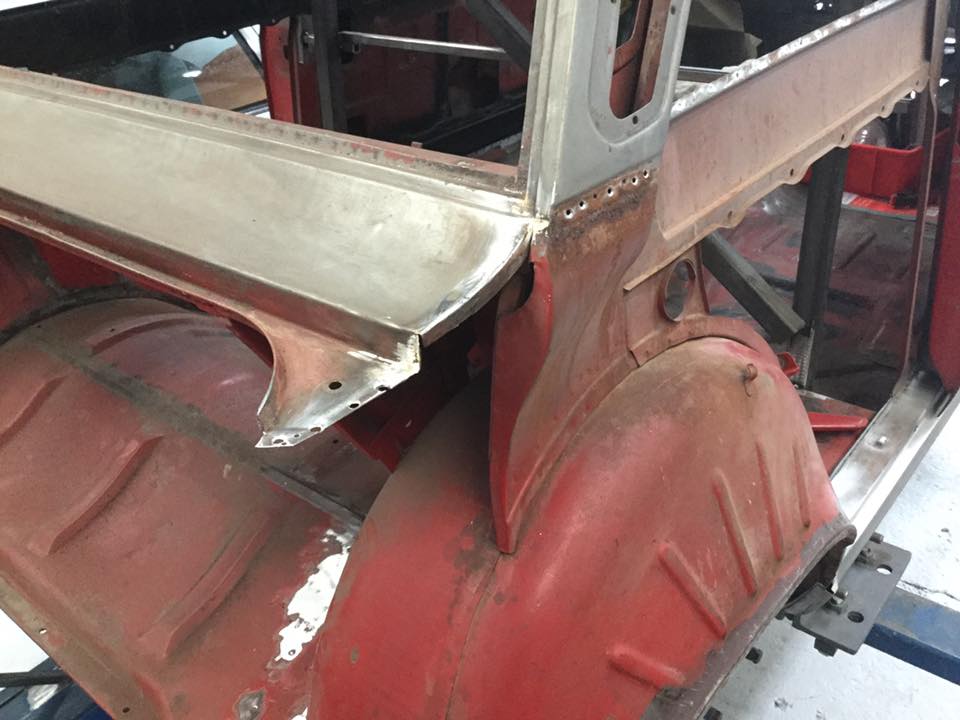
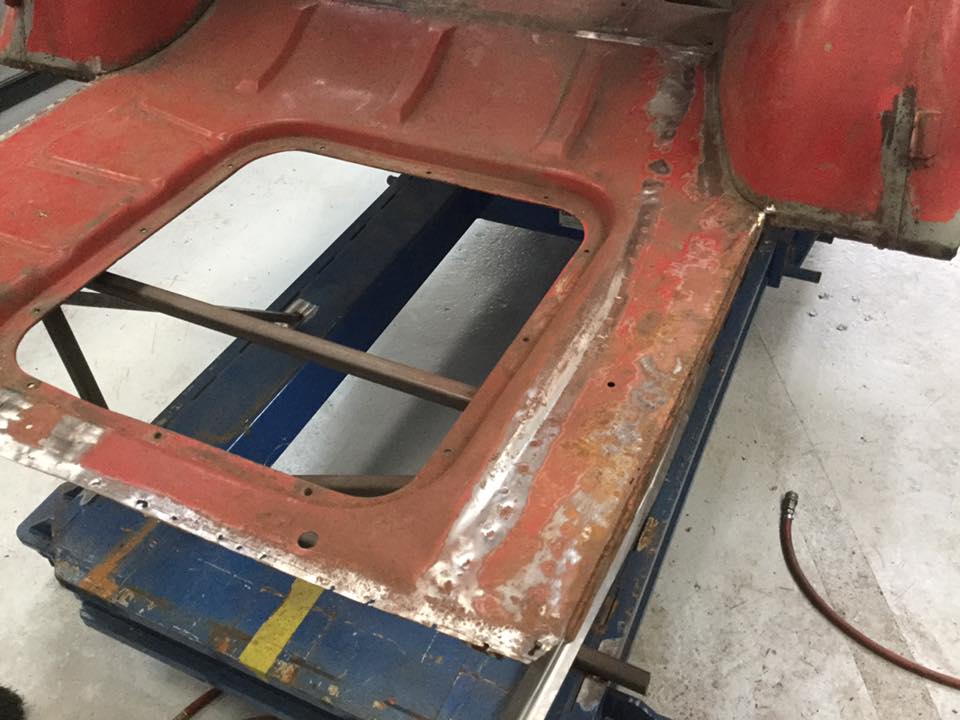
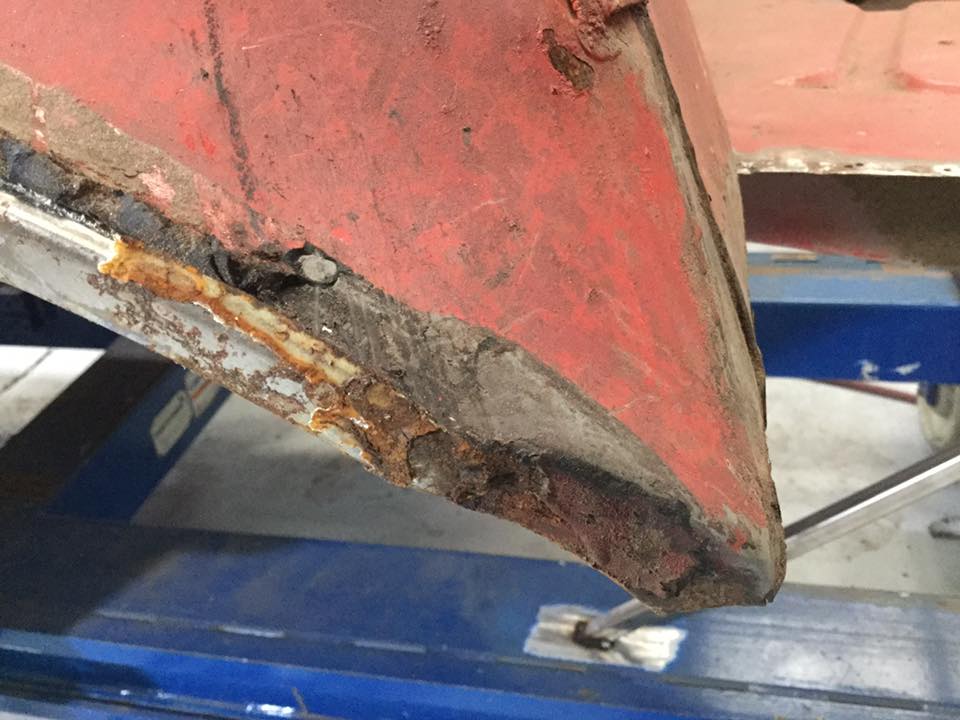
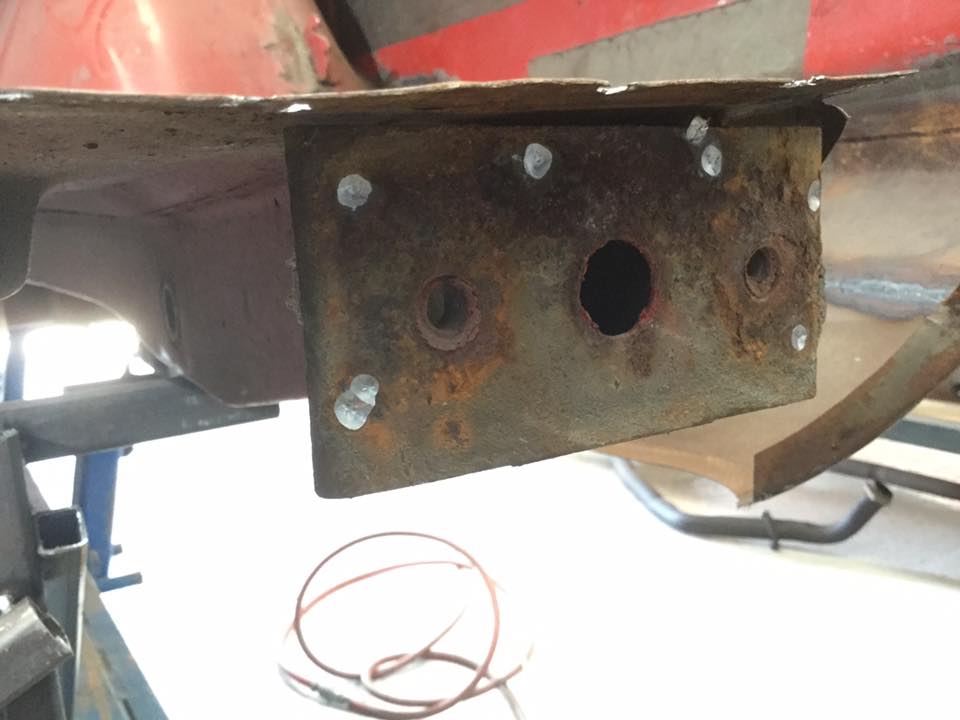
Subframe in and it fits like a glove - way bigger deal than it should be since i mocked my front end graft repair with one of the later subframes which doesnt have the correct floor mounts for the earlier type. Need to strip the rest off the yellow shell I have and fit up the brakes next.
5 points
-
@Tumeke i got the last 241 in 18" off richard, but im only running it on the fron as they chew out pretty quick on the rear. I brought this shinko 244 (far right) for the GP for this ride, its 18x3.00 but then i stumbled upon the NOS 18x3.00 trials tyre (on the left) which im gunna run in the interest of period correctness. Those 244's are available in a heap of sizes and are good tyres, i run them on my XR. can probs sell you that one if ya want as i likely wont use it now but probs easier for you to grab one local.4 points
-
Witchcraft! I just replaced the original fusebox with a new magical one from the future which isn't all hot and melty and gives me more than 9 volts at the headlights! Amaze. Represent. Another year of legality. And since all my thread images are poked, here's one so you and I don't forget what she looks like. <34 points
-
Hi all, Nan from The Bling Company has invited us to check out the build of the 3rd RWB NZ Porsche on November 30 / December 1. Some of us will be on the East Cape ride, but this will be a fun day for those who are local. All the key details can be found here:
2 points
-
Ah excellent my cm125 is 6v and piss poor headlight etc, keen for 12v so I can use a spare led speedo etc too guess I should get it back together and running and figure out all this black magic2 points
-
nah mate, 6v. going 12v with fullwave rectifier and capicator bank was the best upgrade the bikes had by far. the 6v lighting was useless for so many reasons.2 points
-
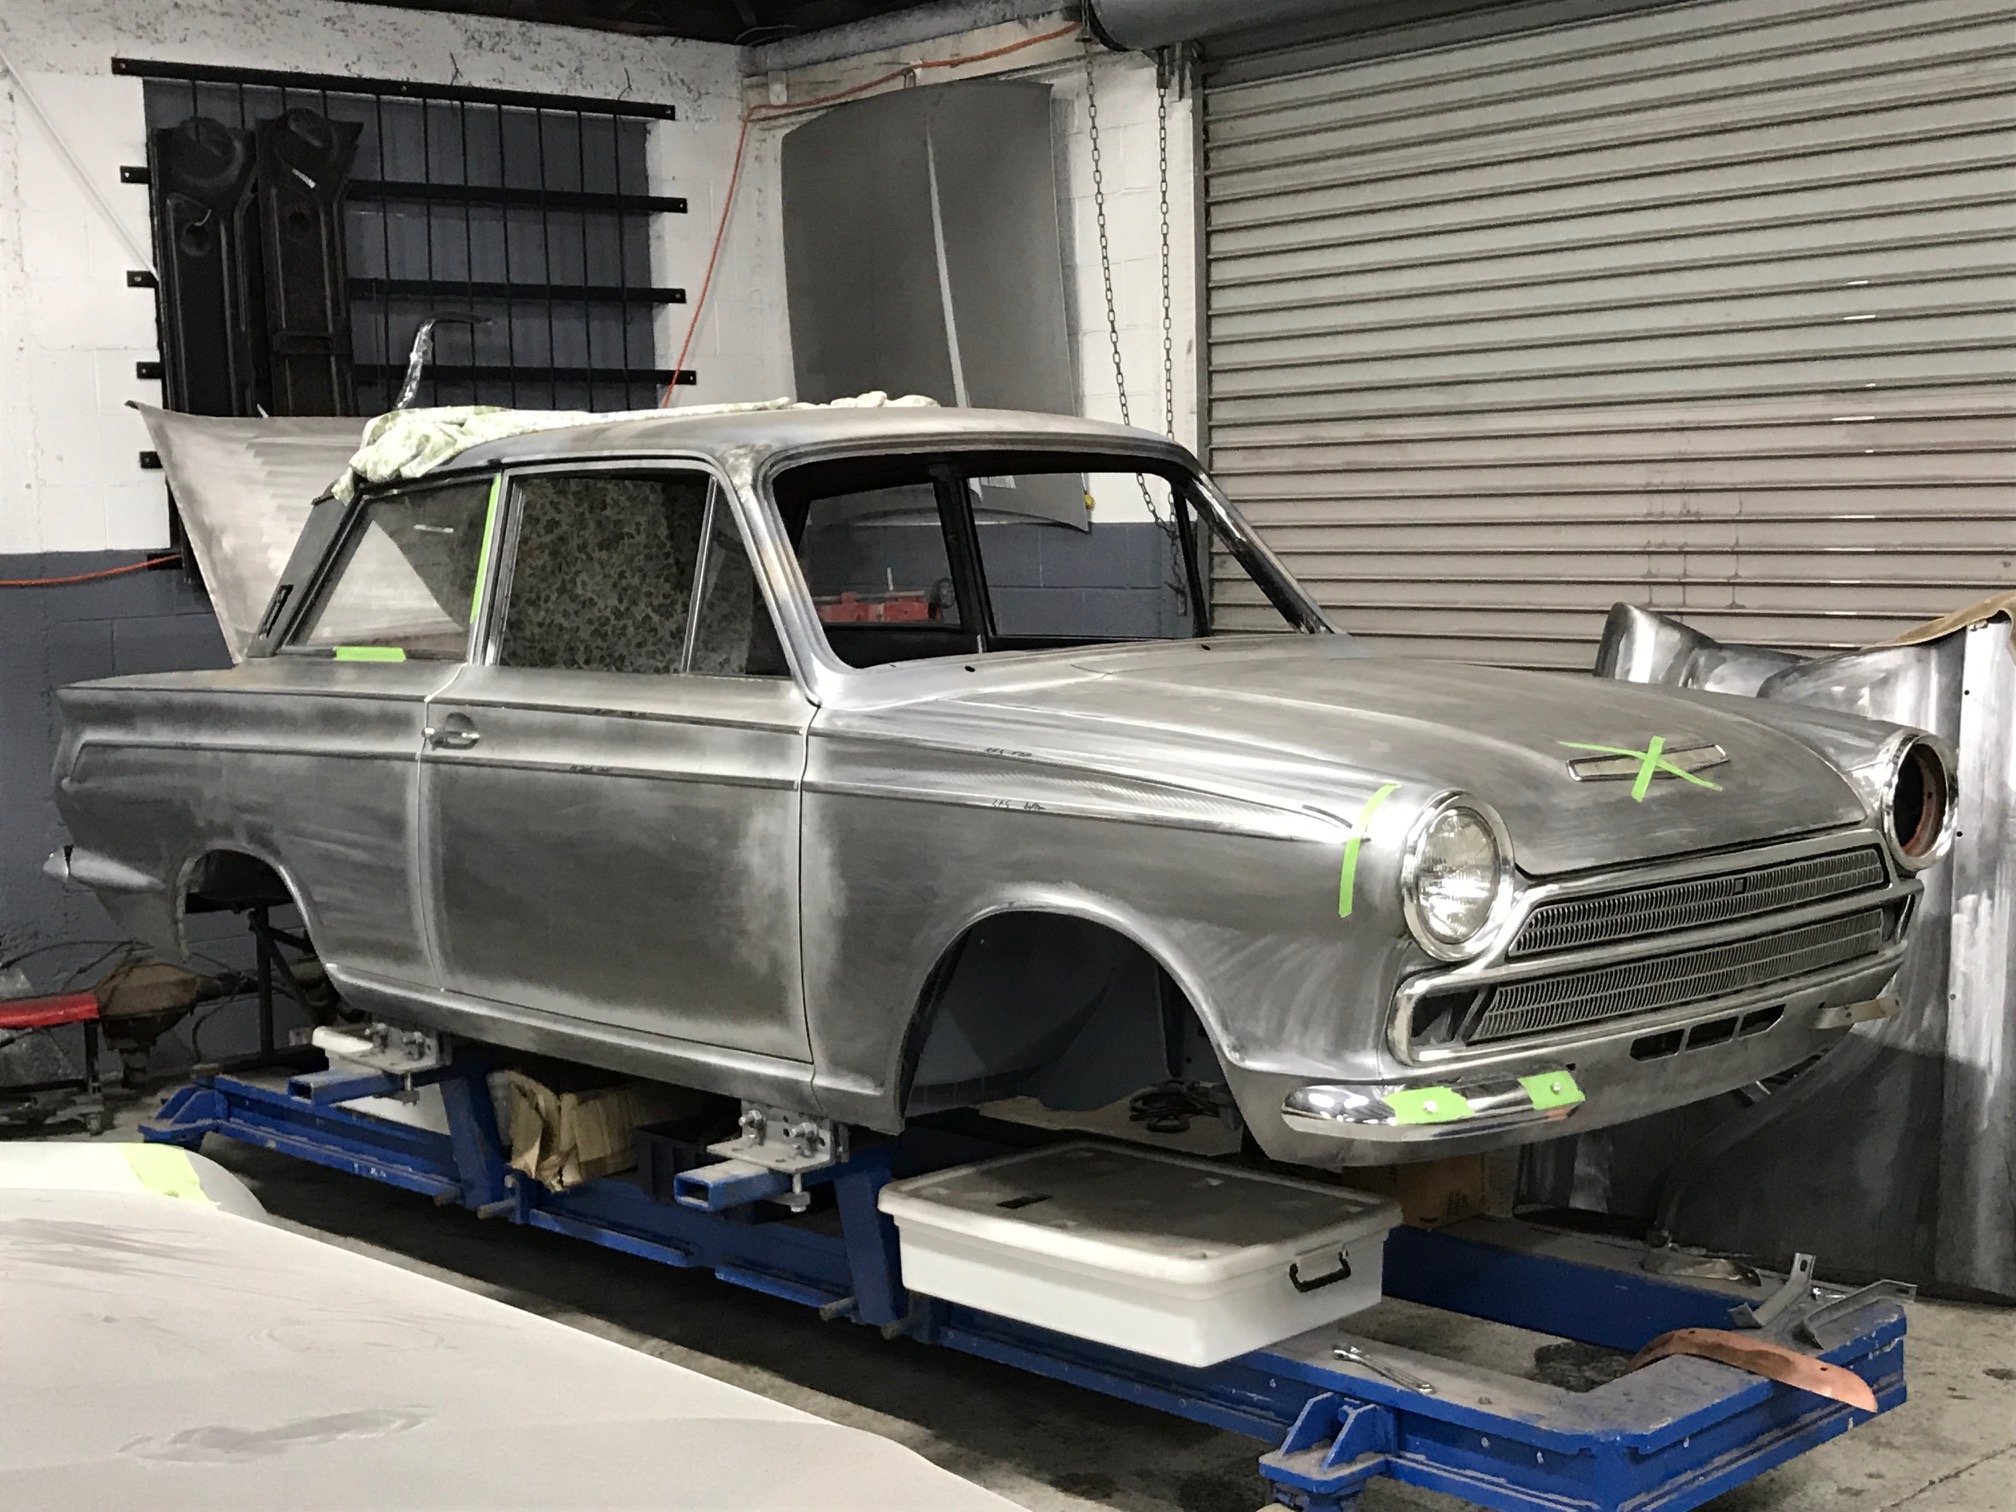
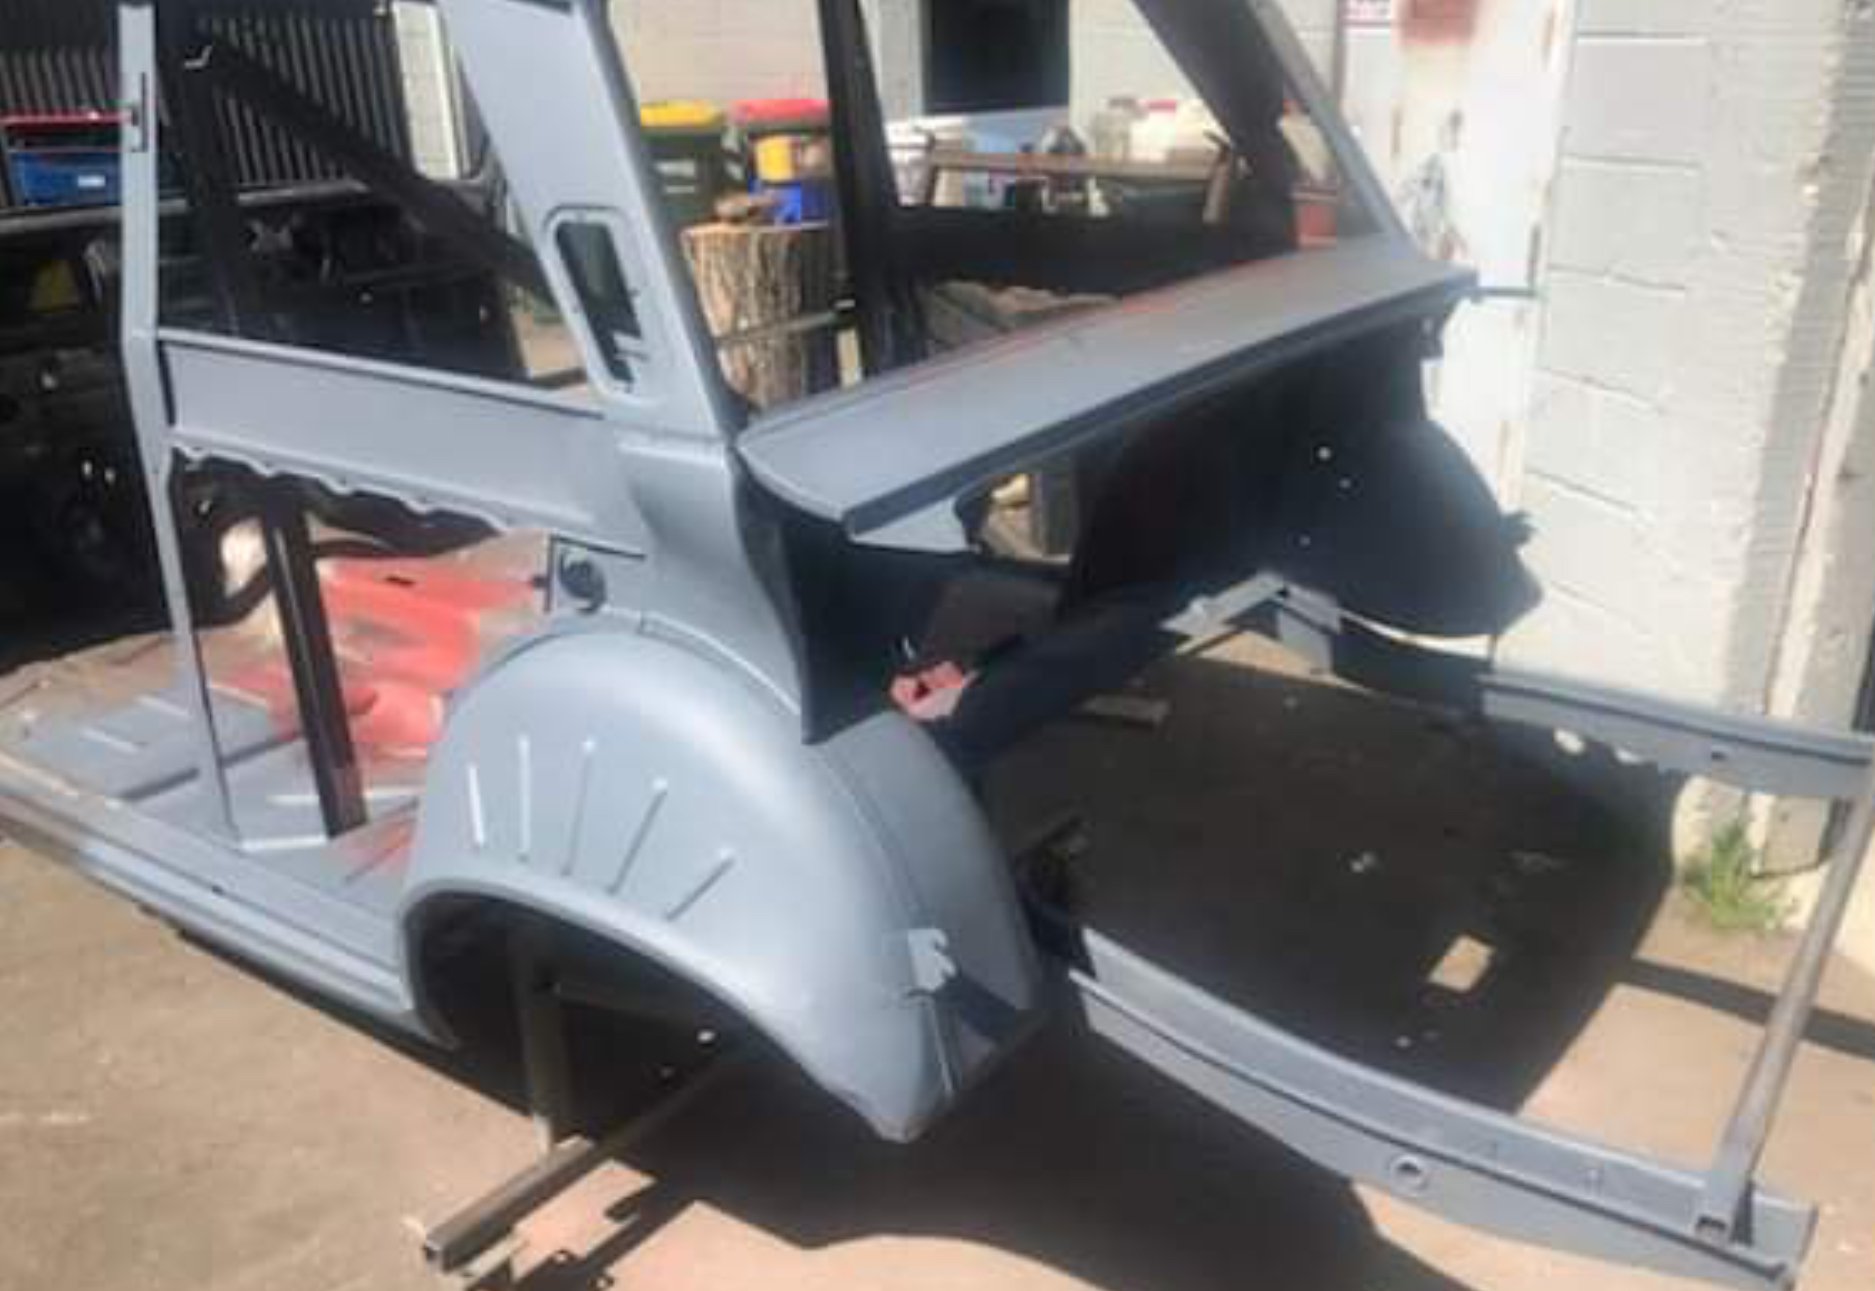
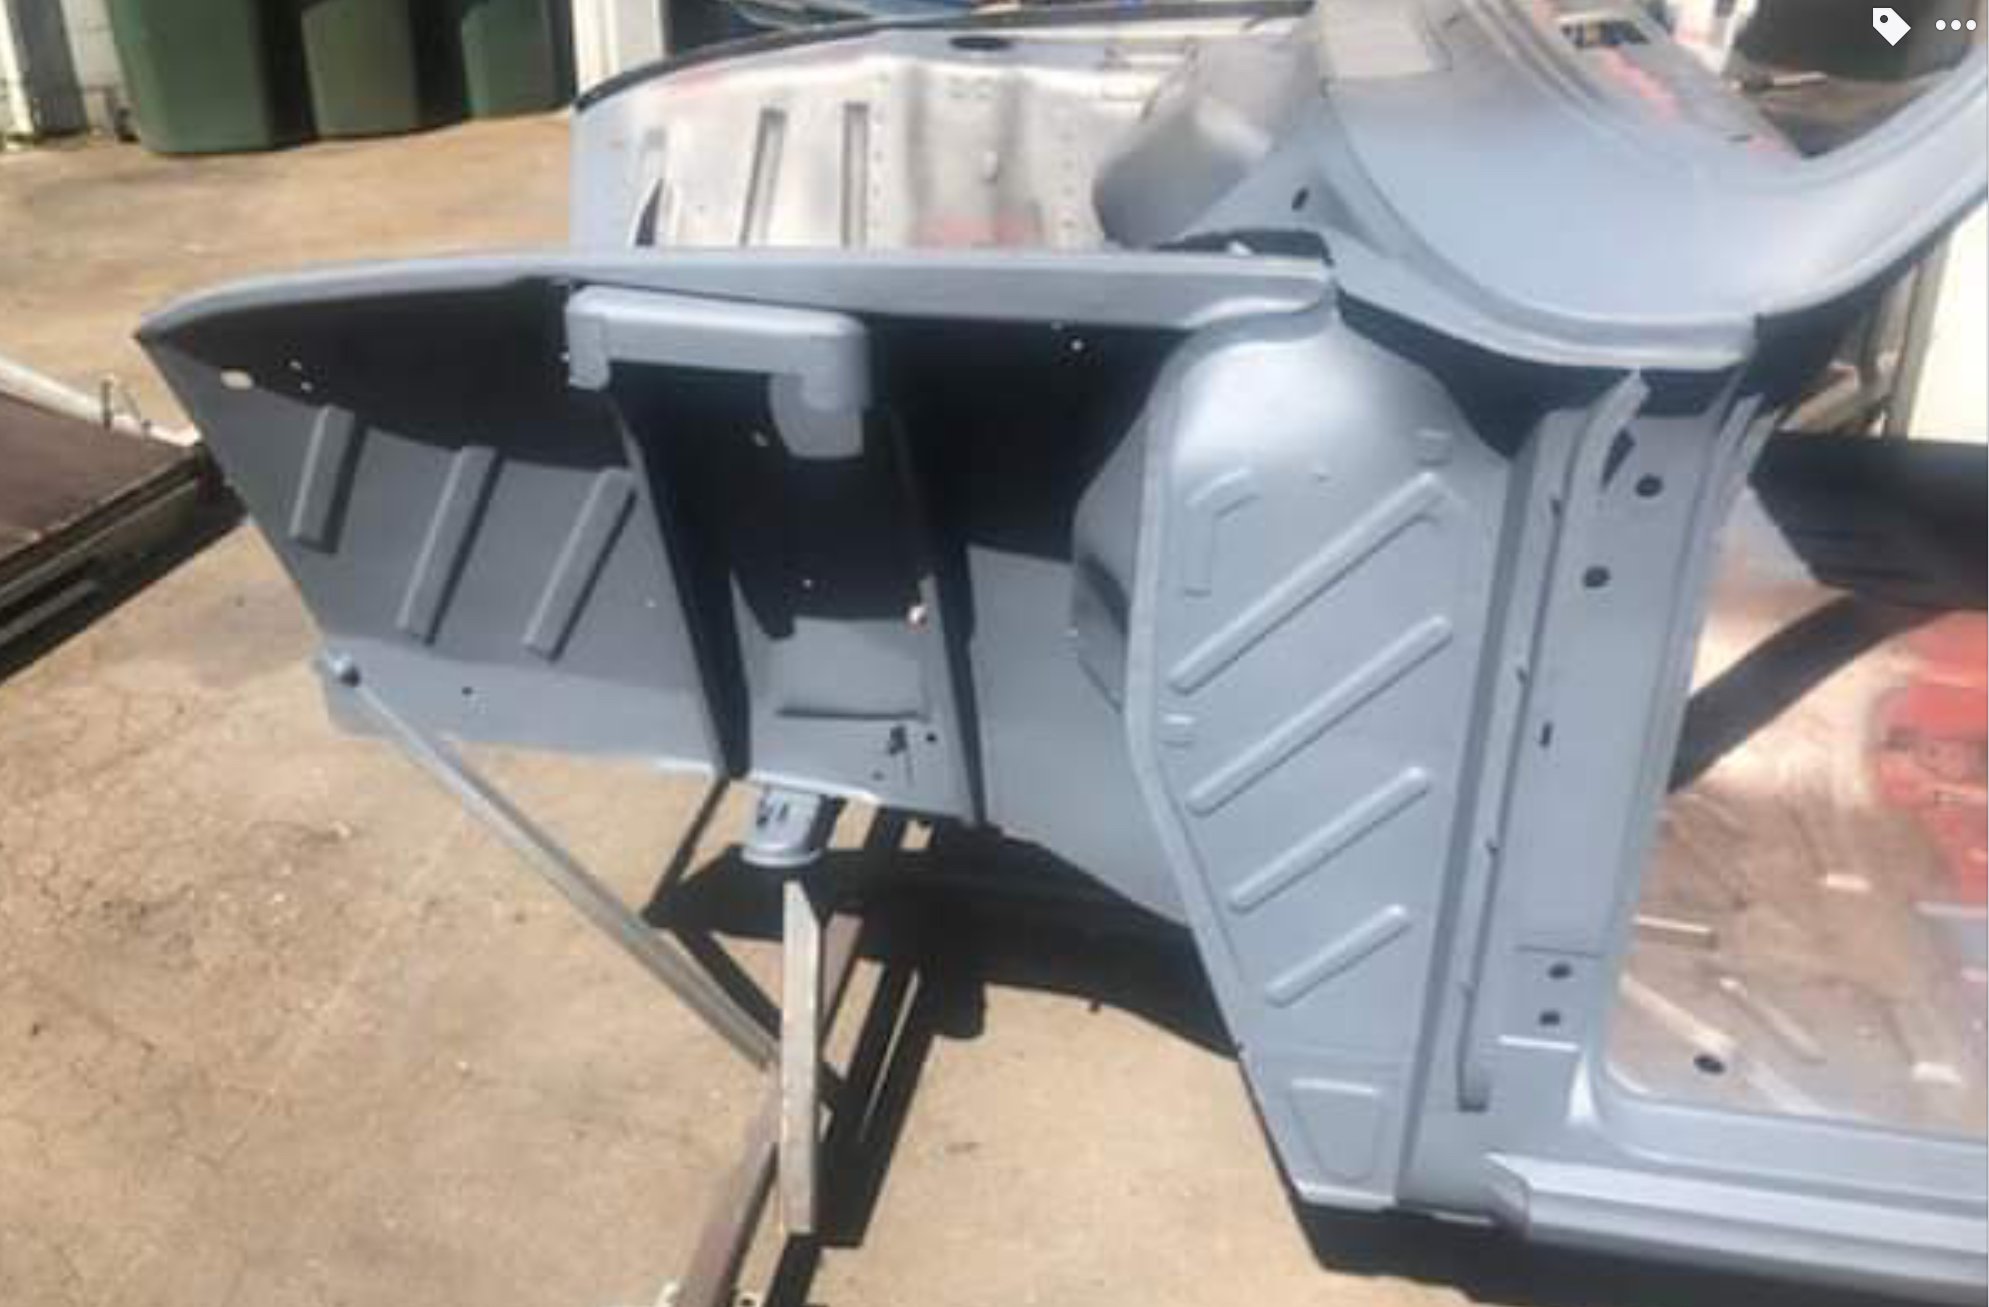
Off for the final blast, then refit the bonnet, doors and boot lid and then off to paint woohoo
2 points
-
So yeah, I still own this. it ended up getting a full Brake rebuild, new fuel tank etc and some other odds and ends. I have been daily driving it along with the EB Civic. It ended up getting a part respray on insurance thanks to a young driver that pulled in front of me causing a crash... luckily I know of a few parts cars so the insurance company happily repaired it its currently waiting on me to clean up the surface rust on the back of the new bumper and fit it.
2 points
-
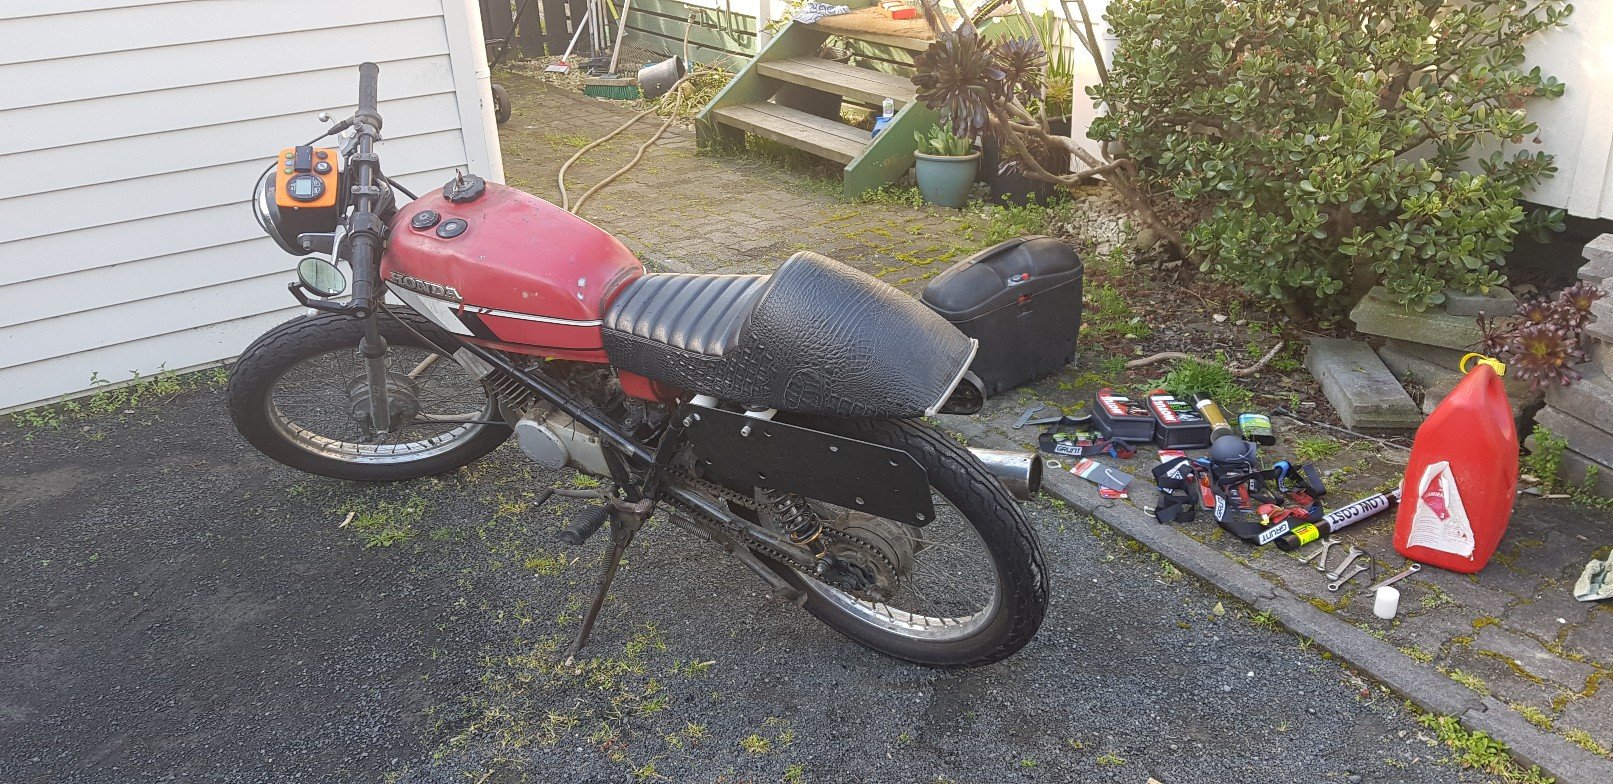
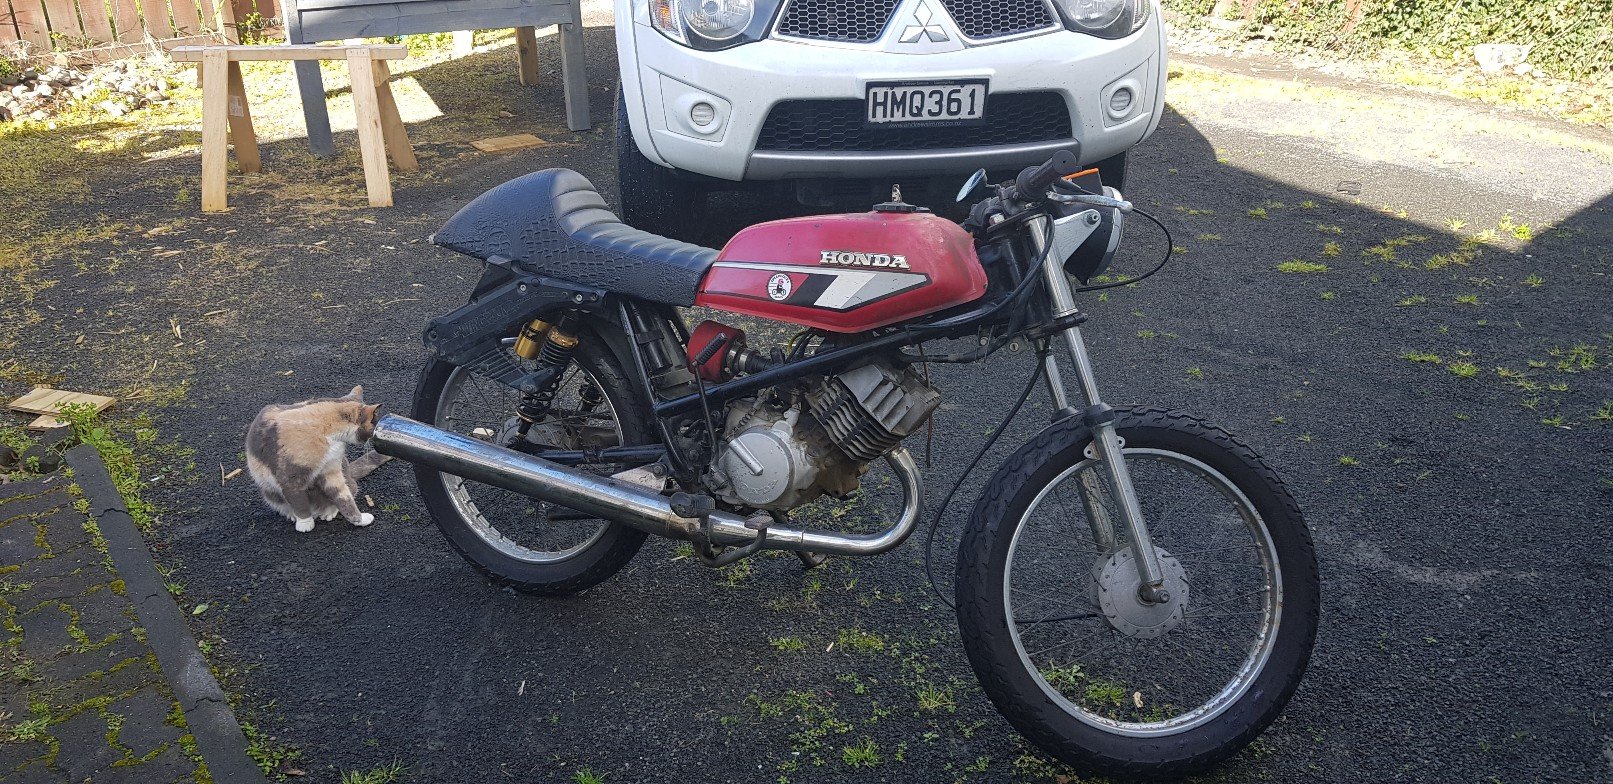
well i was planning on taking the trombone to this years east cape ride (te uruwera) but this wee gem of a GP125 popping up on trademe for a bloody good price, with reg on hold, and after hearing @TimShadboltfan27 harp on like a barry at a sandal convention about how hard the go for that they iz i thought id grab it. first trap for young players was this hilariously added throttle governing screw that has been added and was wound right in. dude never told me about it and i couldn't figure out why it was slow, turns out it was a riding school bike and they had to limit them to stop dweebs hurting themselfs, not a problem that they have with GN125s anymore id think. so this was the slide height at full throttle with the governing screw in also note that dimple on the slide, as it turns out when that circle touches the top of the carb opening as it is in this position, is where you set the CCI oil pump to meter is max amount of oil using the lines on the pump arm and pump body. so once i had that sorted it still didnt run to good, so i whipped the air filter out which fell to bits and had all solidified so that wasnt helping, i order a sheet to make a new one. i also whipped the baffle out of the exhaust which was like 90% blocked, and with the baffle out you can see here that the muffler is almost half full with scum and oil from 30 odd years of putt putting between cones so hopefully this weekend it will be back together and close to its original claimed HP of 15 wild wild smokey horses. should be nice and comfortable for east cape, the tank itself being 10l should be enough for any fuel distance we will require so wont need to carry extra, and will run this tank back and just a small 20l dry bag strapped to the back. looks like i might be taking a bivvy to sleep in too as the cabins at waikaremoana are all booked. then its just sorting tyres, stock tyre size is a bit better than most small bikes with 300-18 on the rear and 275-18 on the from. i grabbed one 300-18 shinko 244 and will see if it clears the guard on the front, if it does ill order another and run 300-18 all round and if it doesn't ill just smack it on the rear and whack a 275-18 shinko 241 (PPSC control tyre) on the front, but would be nice to have matching styles i think. bit bloody excited to have a 2 stroke in the shed, hopefully it doesn't cause me headaches which is the predominant reason i don't usually have 2 stokes in the shed.2 points
-
thats the one im running as mentioned above.. simple as, off the shelf (click and wait for delivery) and works well. no fucking round trying to retro fit another pile of shit into it, sorted1 point
-
https://www.trademe.co.nz/motors/car-parts-accessories/austin-rover/listing-2320939739.htm?rsqid=0b8f1cb23dca4217856b7cfd30359464-0011 point
-
Your 100cc 2 stroke would make more power1 point
-
Flick me a pm when ya ready and I'll show u how1 point
-
Still here, no OS cars currently. But keen for food or whatever. Can maybe convince my mate to bring his Hillman if it will play ball.1 point
-
Sounds like the 25d4 was used in about everything british in the 70s with 4 cylinders. There's talk on an oz mini forum of a couple of Nissan options which sound of interest: http://www.ausmini.com/forums/viewtopic.php?t=1498 As mentioned above I could just put some new points in (may even have a couple of sets laying around), or lose the points in the current distributor, or get a new reproduction that's electronic. Or find the French alternative which is one that came out of left field a bit, will do some googling on that. Am still keen to find out about Japanese off the shelf (or more or less) bits that might do the job. Have had the car since new and the electric bits have always been fair to average at best, a few incremental improvements to ignition, starter and perhaps the alternator would go a long way in making it more usable. When I stopped using it as a daily about 9 years ago it had a bigger battery (550cca vs the original 300) and a water heater in the bottom radiator hose which made winters much more bearable. Really like the old thing but some improvement in practicality would be great.1 point
-
Worth 7hp to go electric (thats like double in an Avenger!1 point
-
classic car parts in hawea can supply a complete set up pretty cheap. I recently got a electronic conversion kit, leads, triple electrode plugs and coil pretty damn cheap... check my build thread for the pic of what I got.. no point trying to retro fit something else if you can get off the shelf components.1 point
-
They're not as smooth or reliable. An electronic ignition setup is fucking massively better. Almost night and day spec.1 point
-
What’s wrong with points? A new set and condenser work fine. Cheap, easy, no hassles.1 point
-
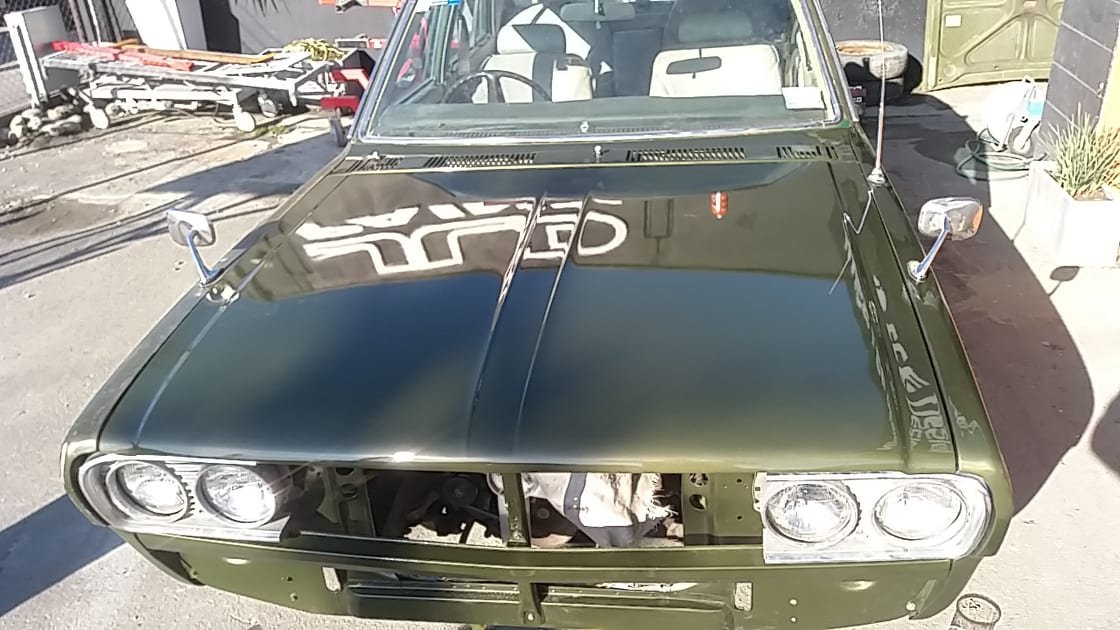
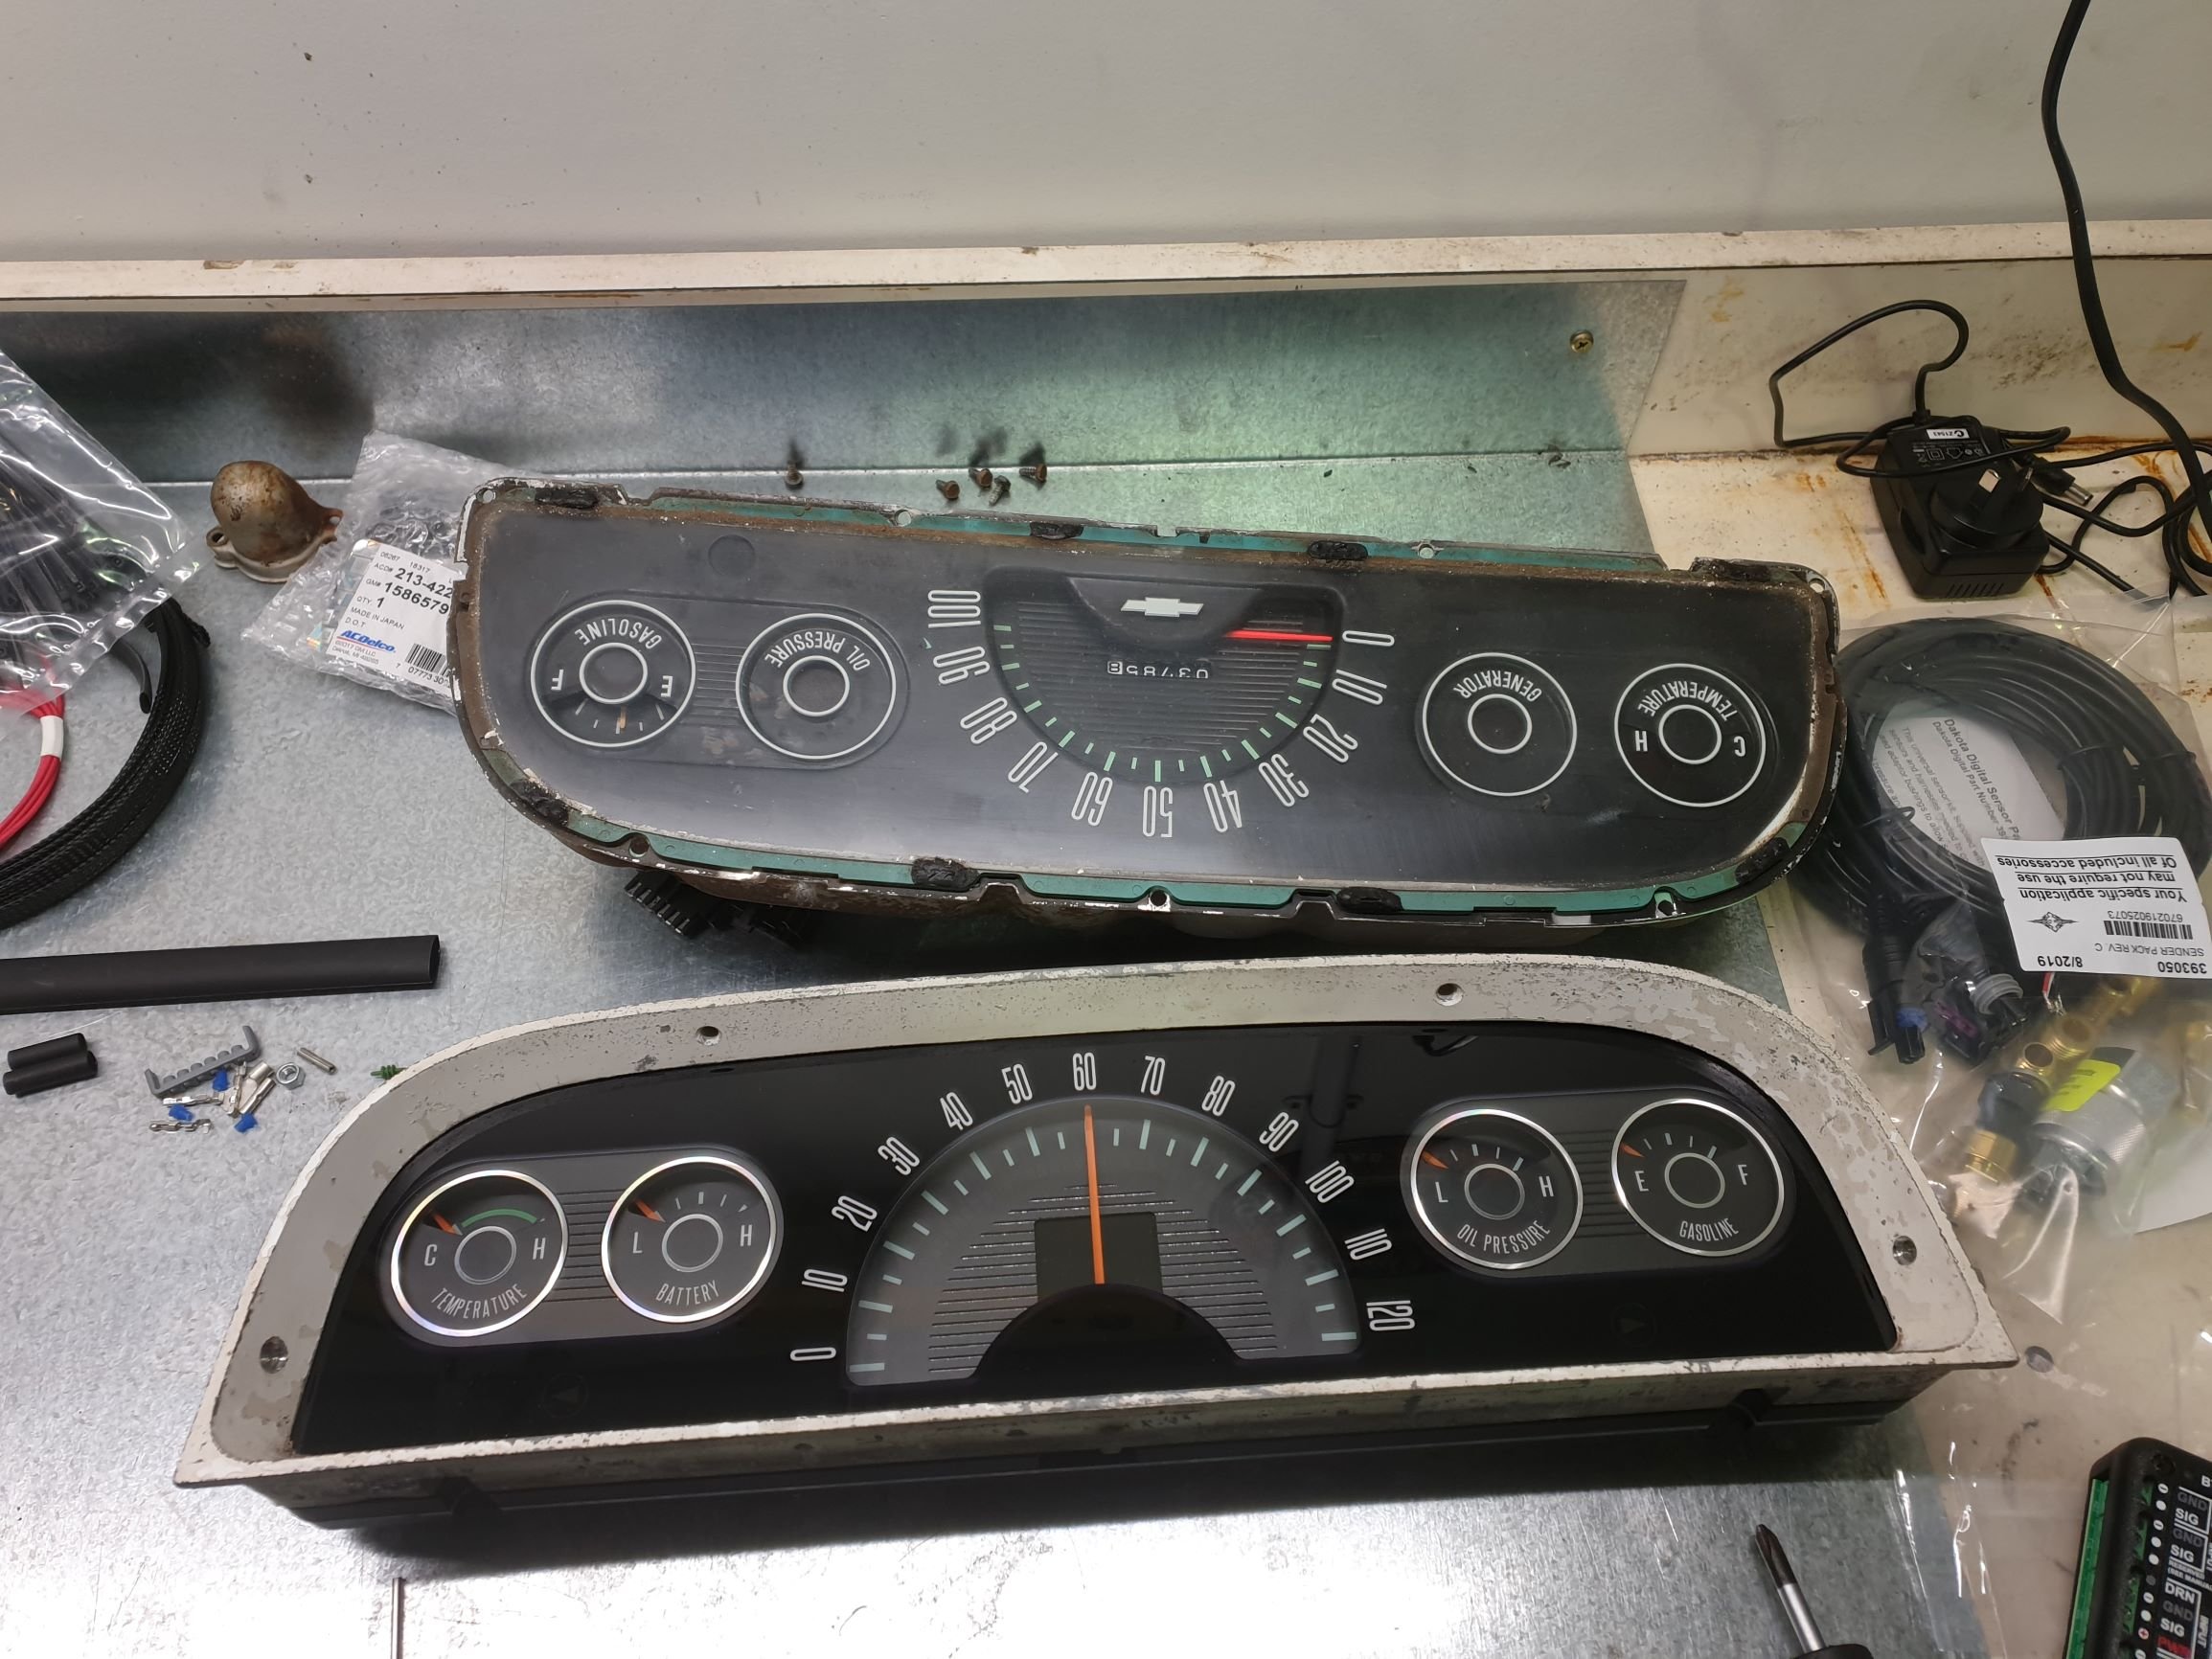
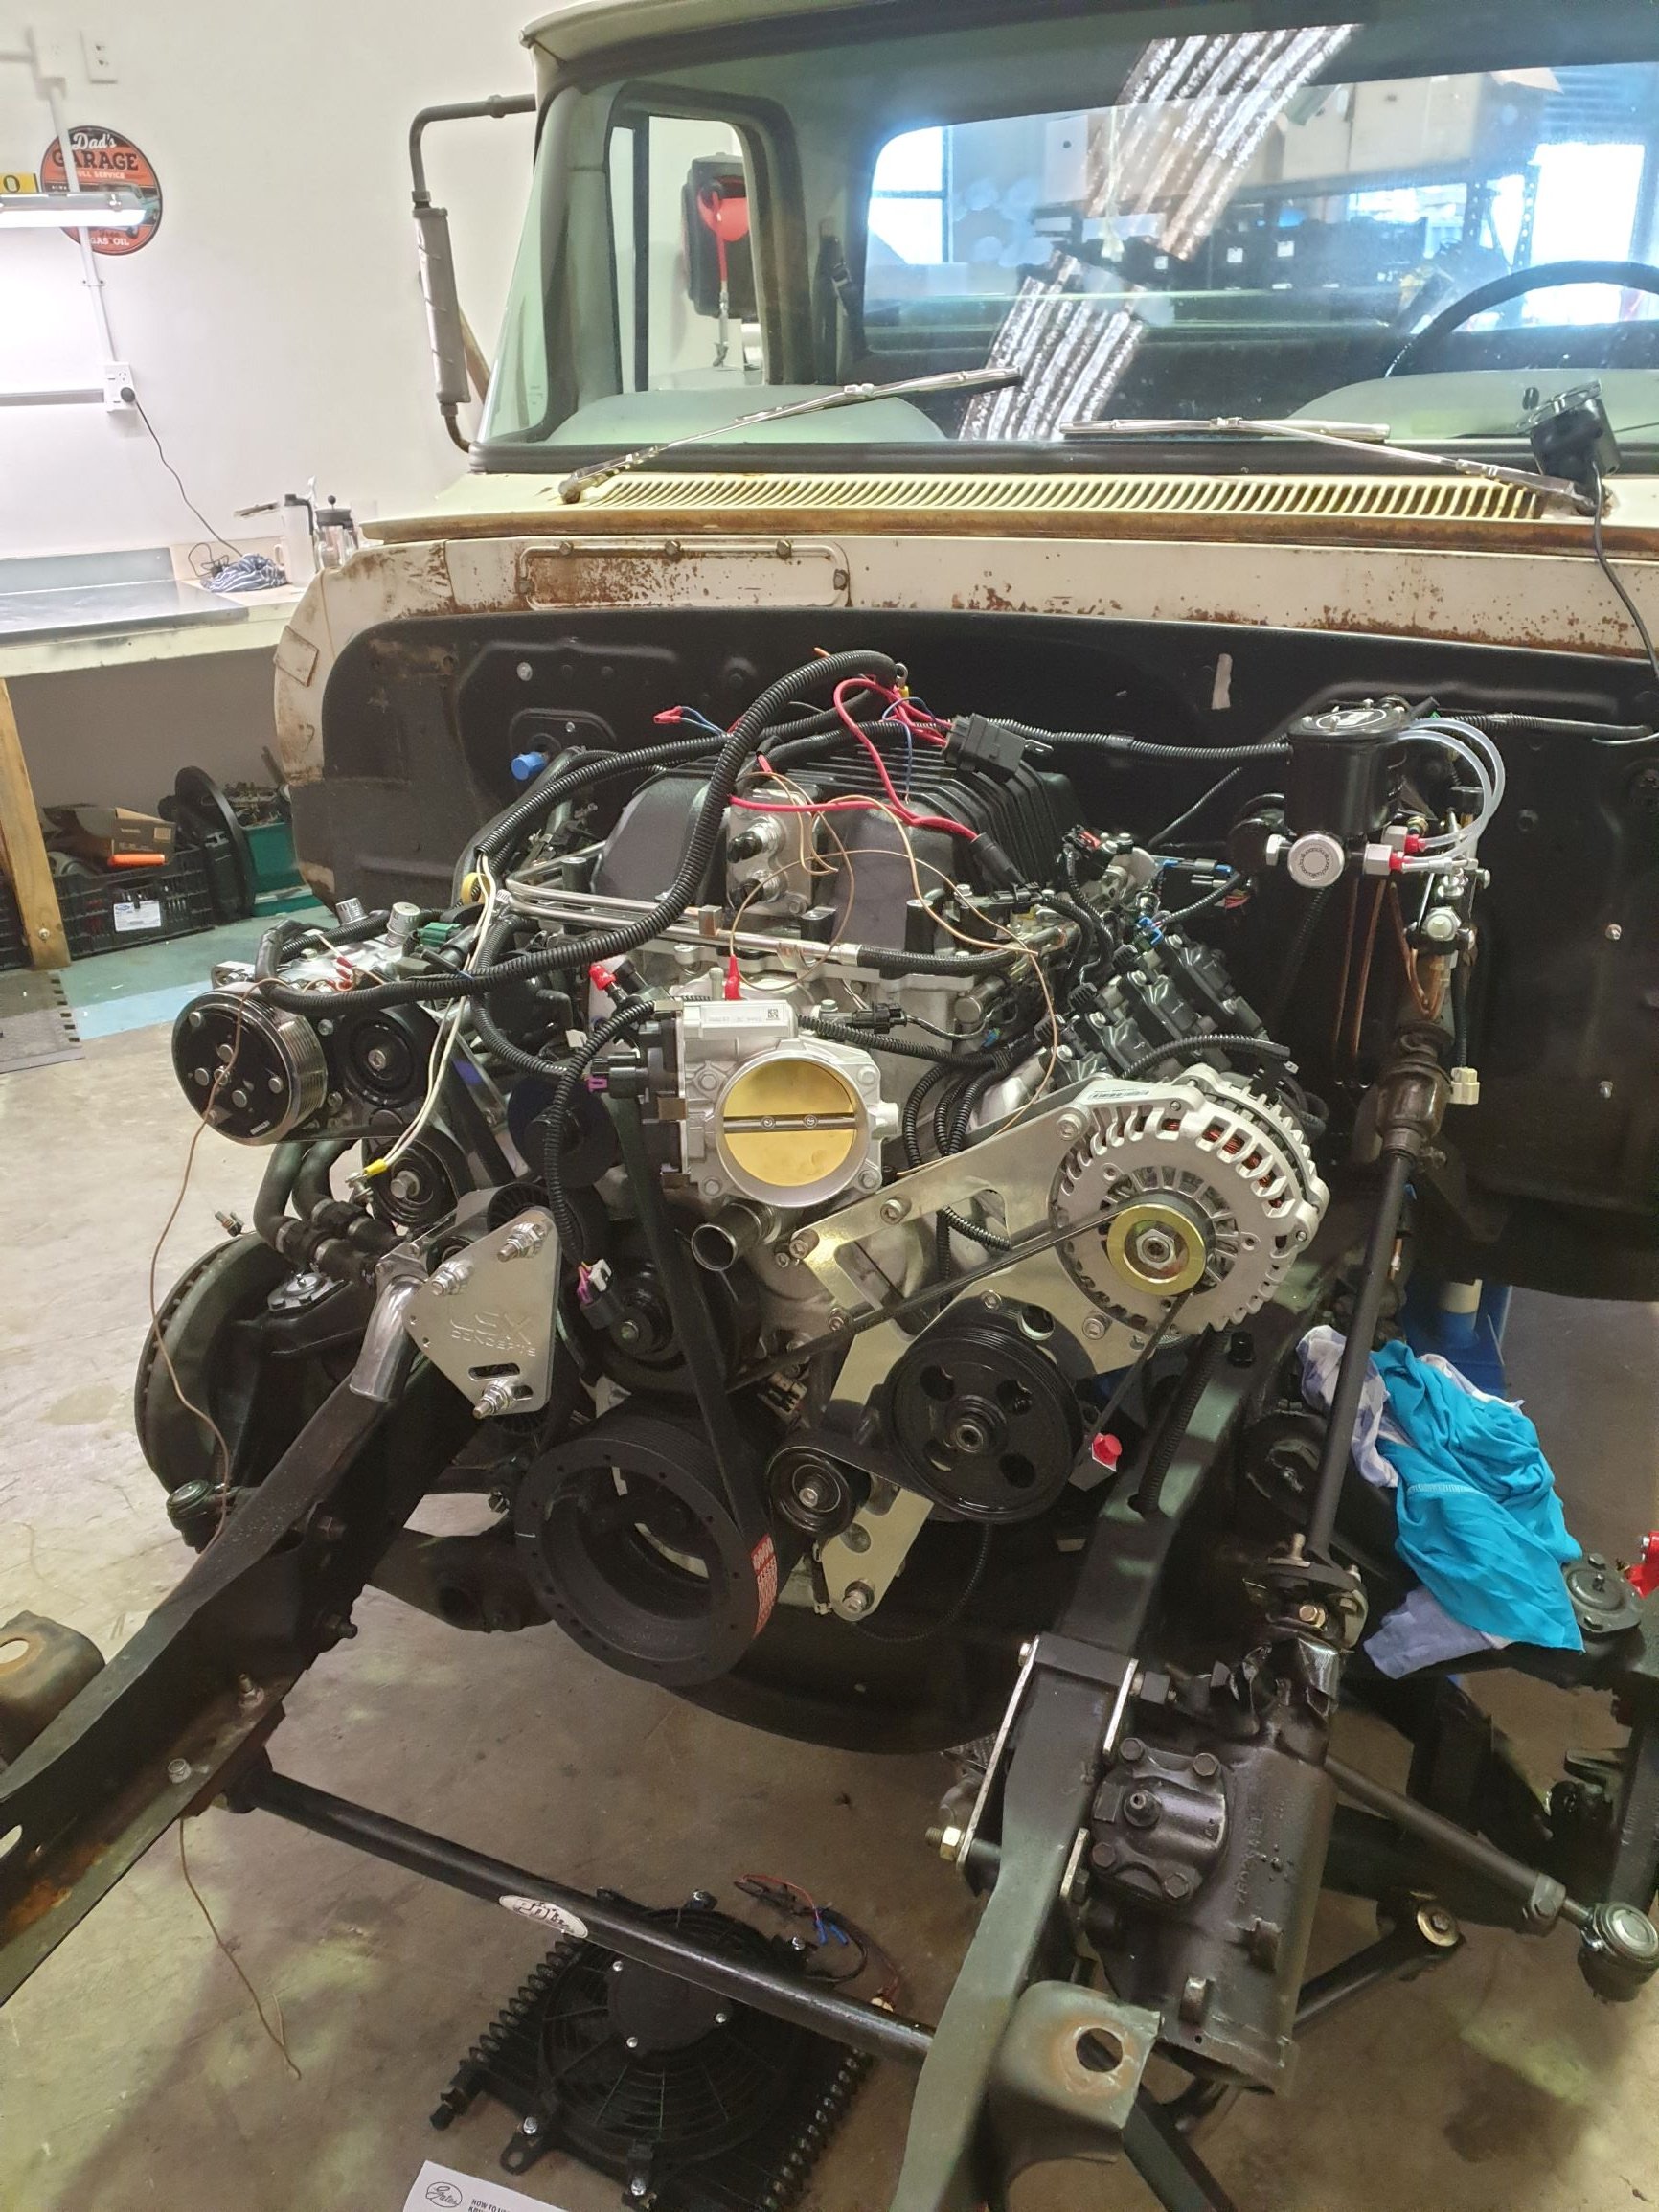
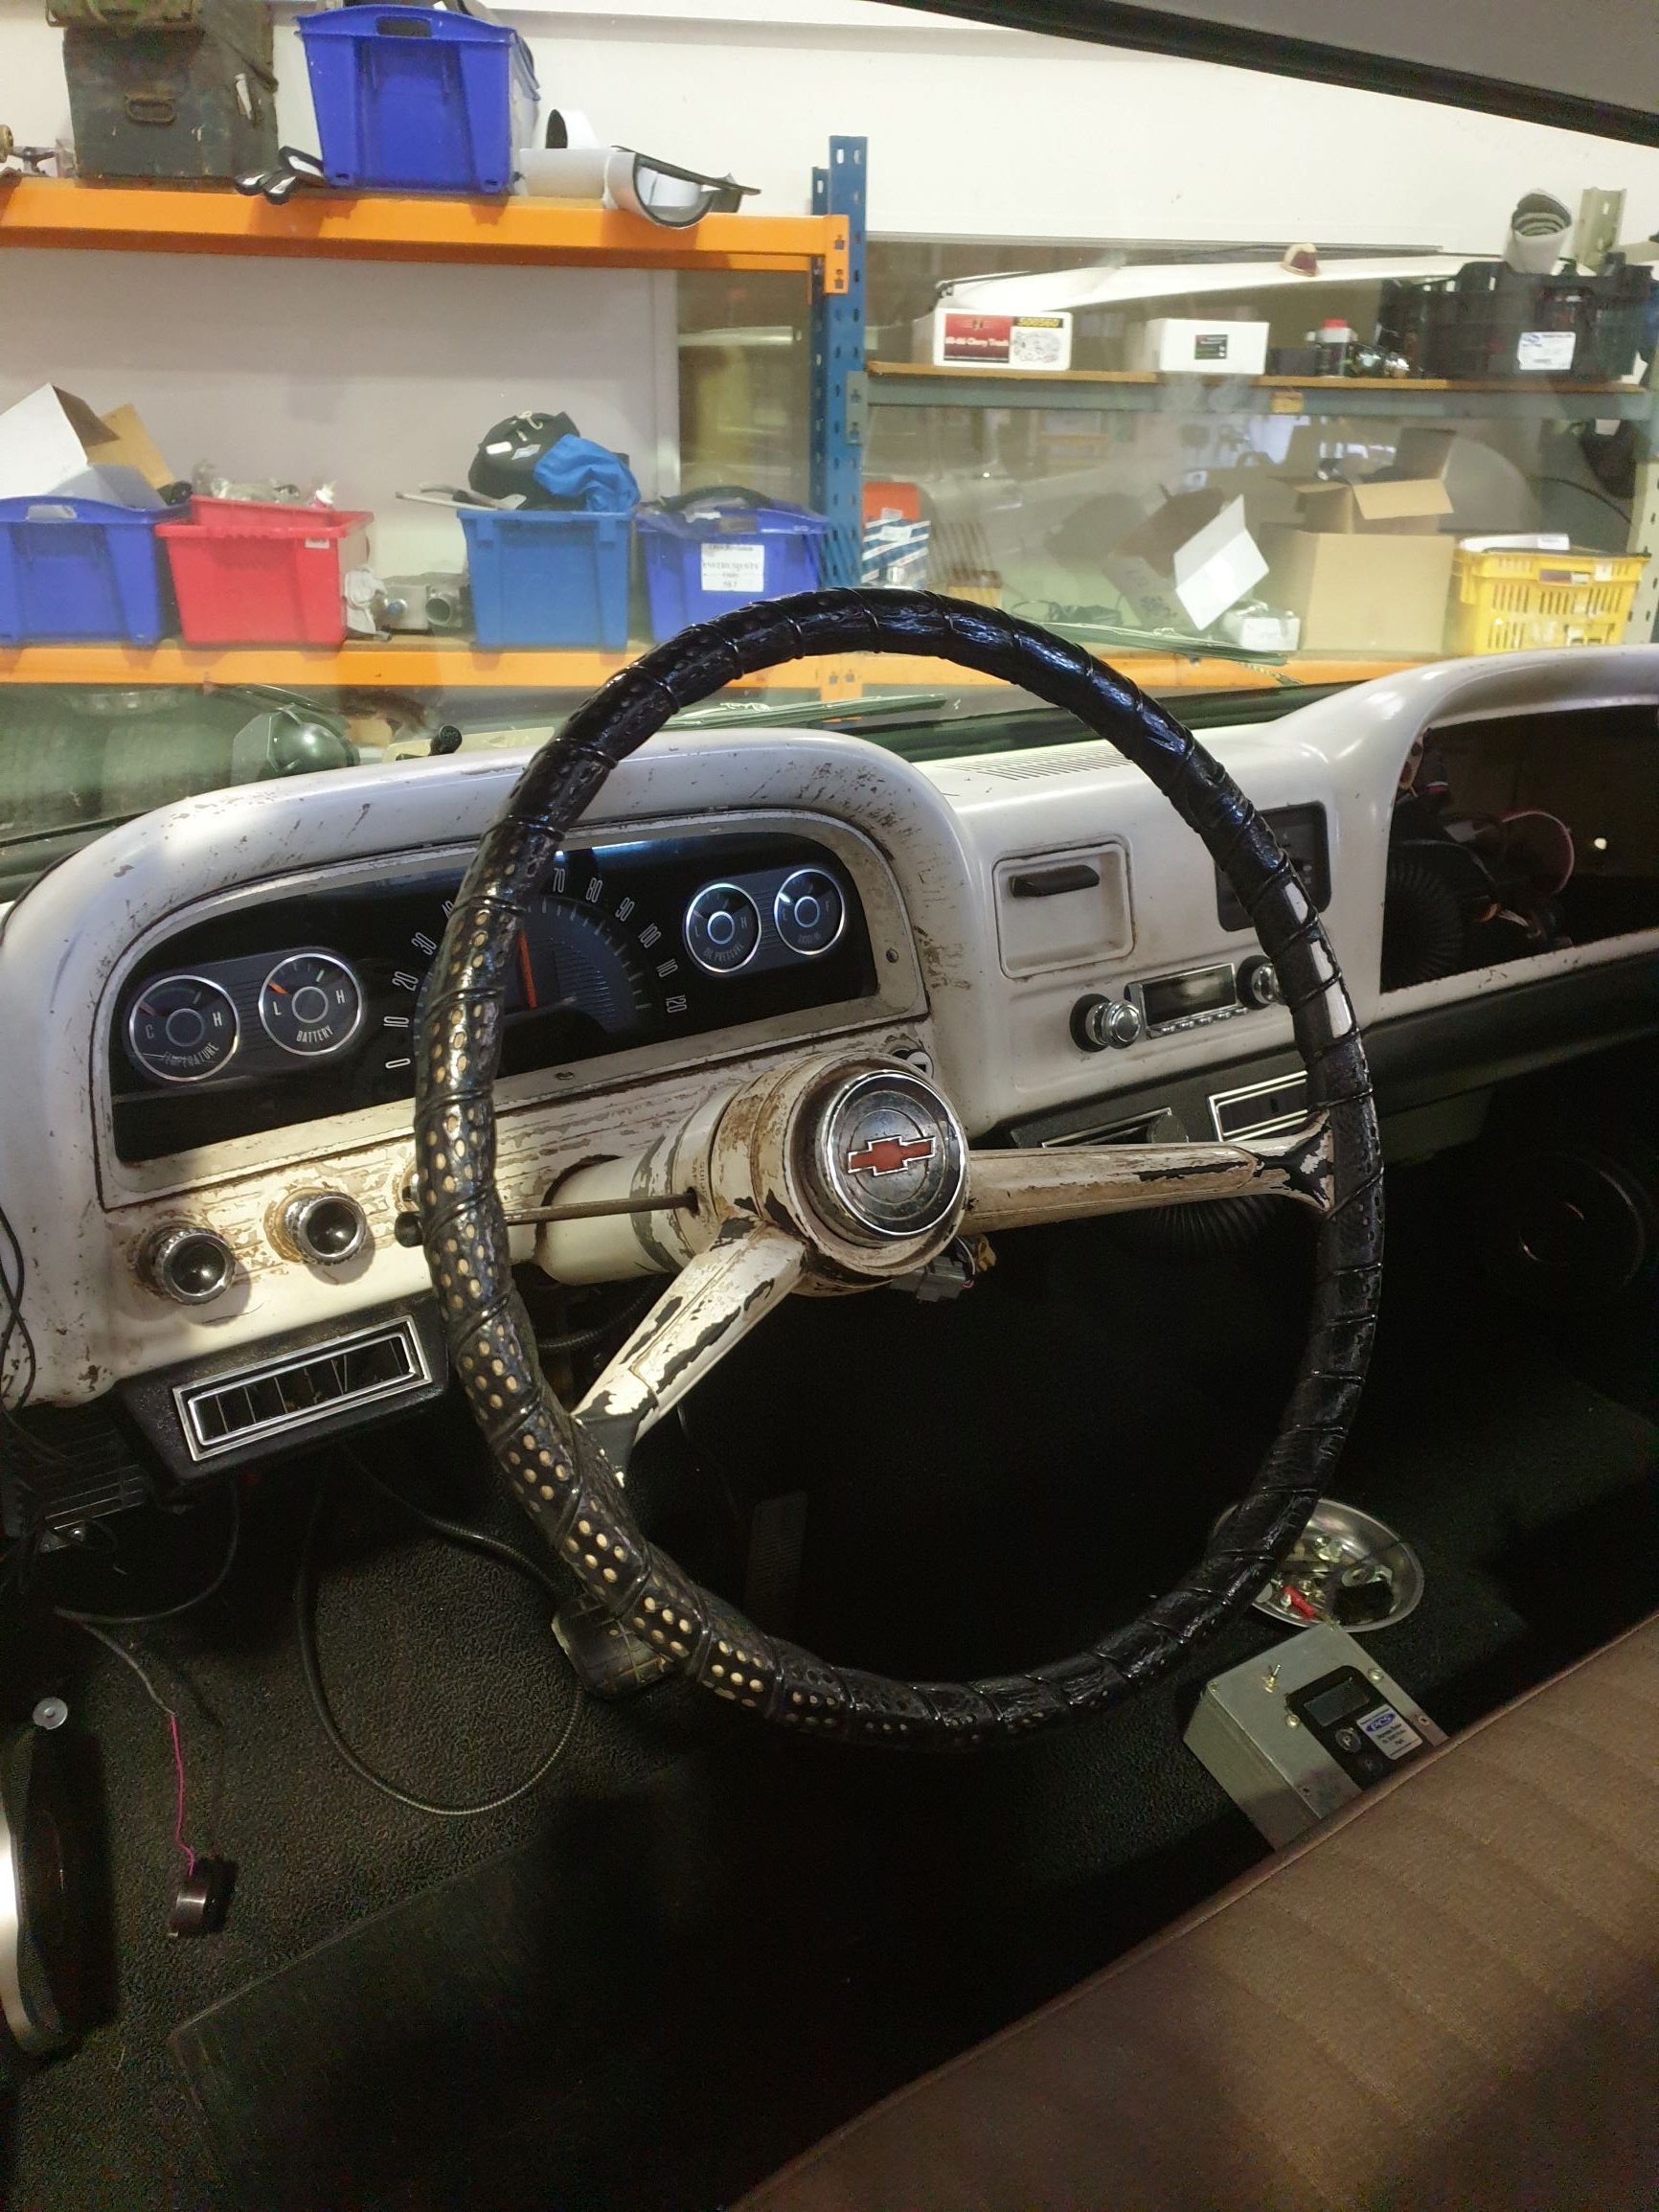
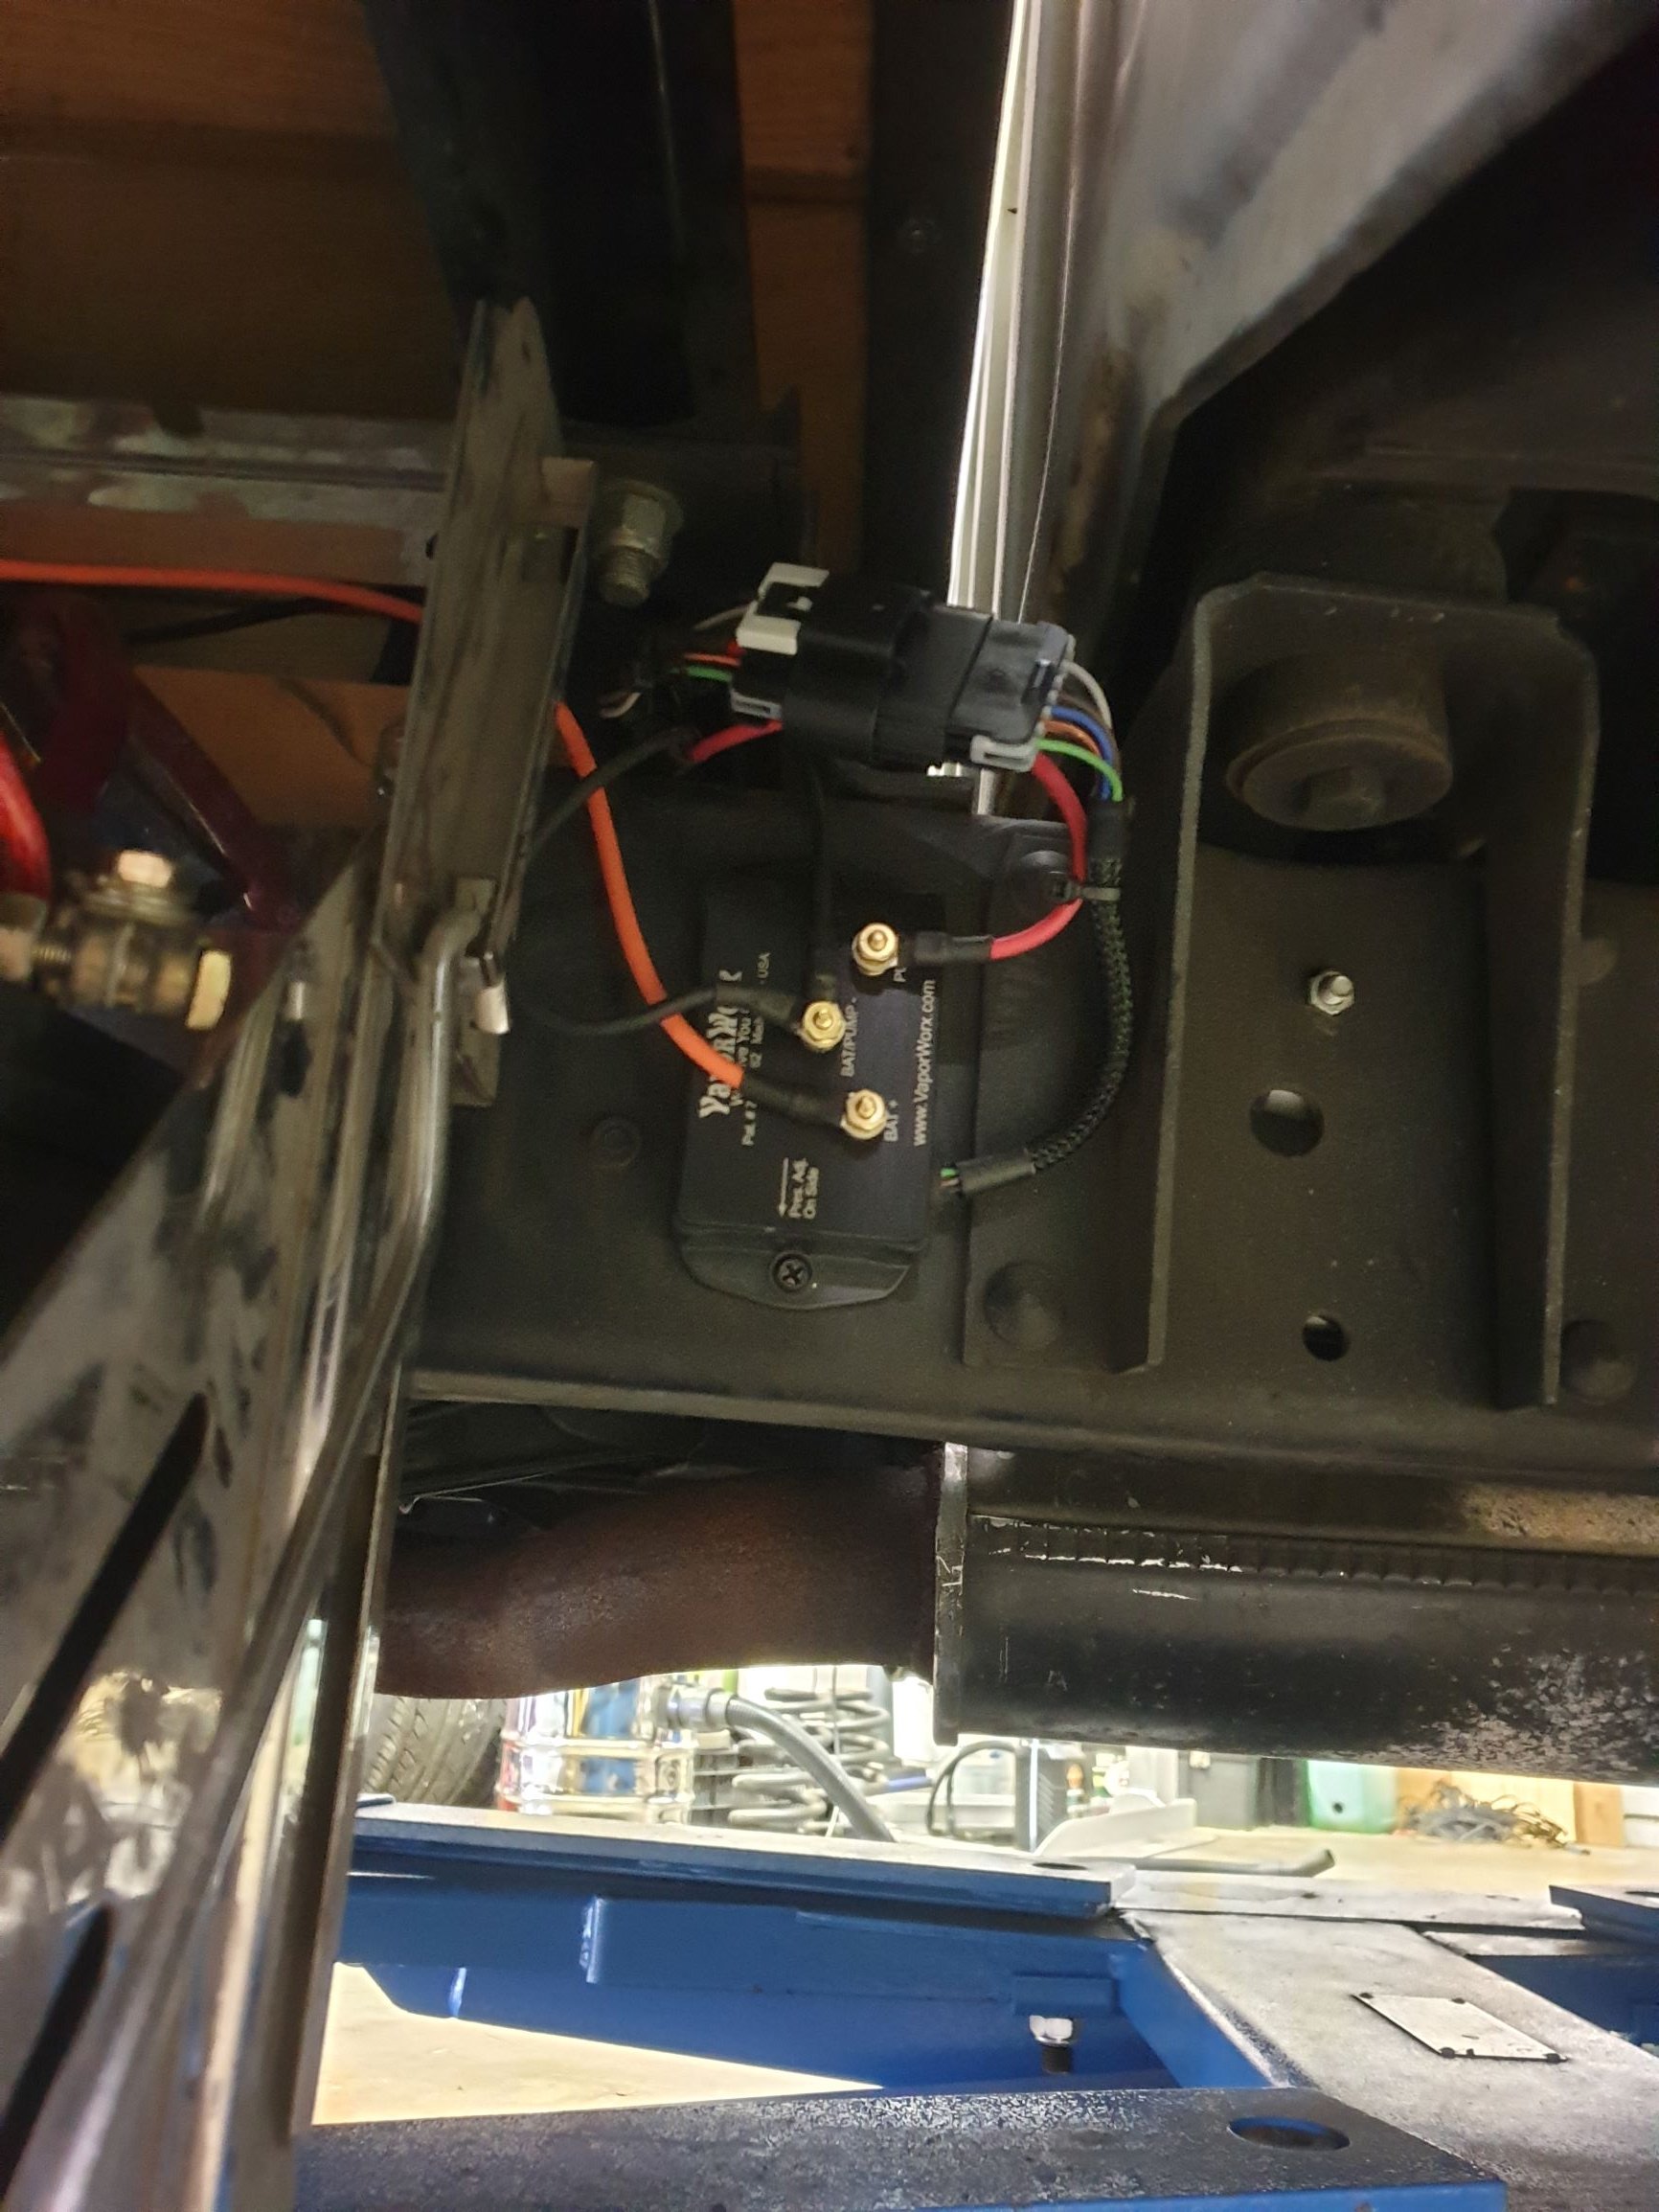
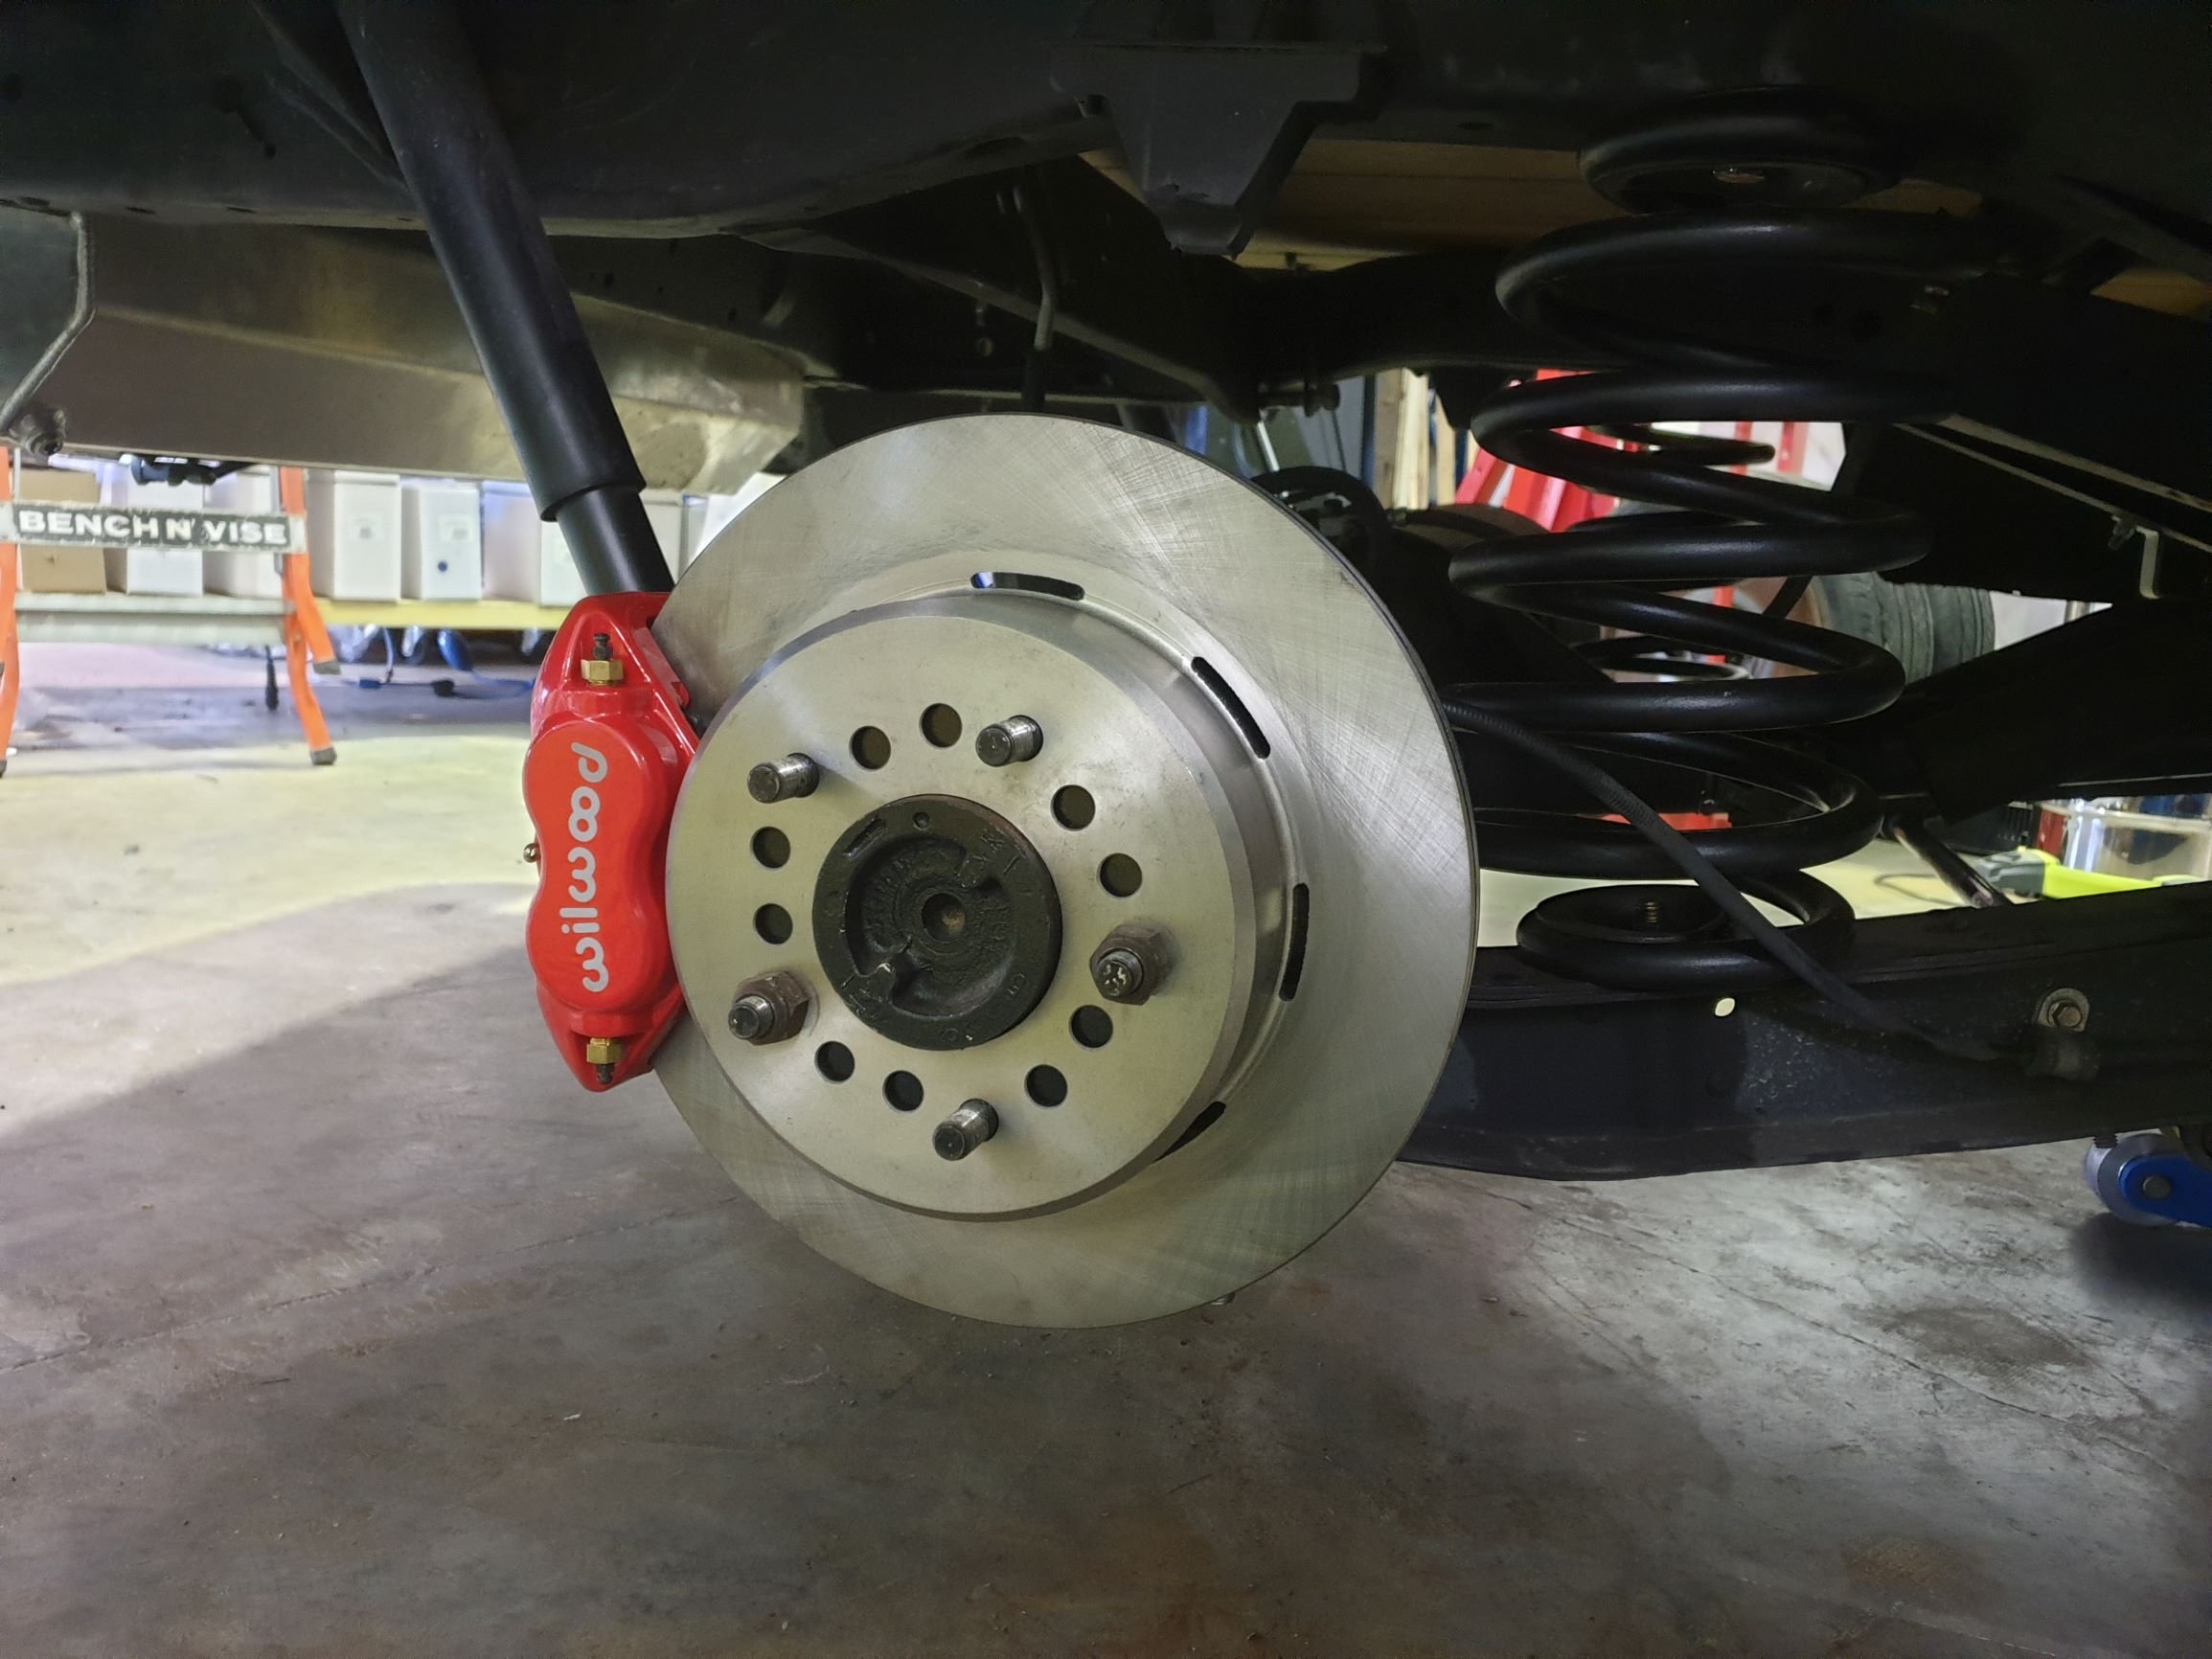
Donkey deep in the swap now. Finished up wiring on weekend, have put a vaporworx pwm set up on the fuel system. It gets fed fuel pressure, MAP, and ecu on off signal and makes the magic happen from there. I reran the fuel line in a 1/2" line, dead headed set up. Trans and engine are in, changed rear stoppers to disc, also changed pinion yoke to 1350 size, it was 1310. Remade all the front brake lines, replaced all ball joints, tie rod ends, basically all the steering/front end stuff is new. Changed the Instrument stuff to a Dakota digital set up that plugs into the Ecu for all the info. Cert check soon !!
1 point
-
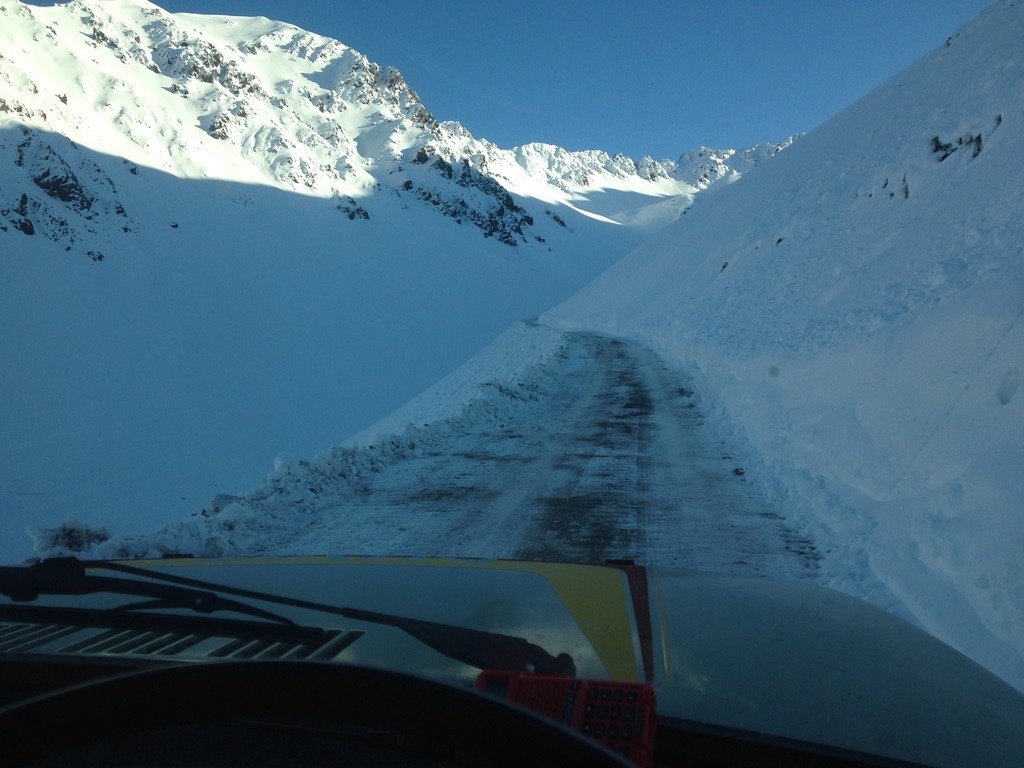
We’d decided we were going to tackle 42 traverse. Which was a great choice for a shakedown ride imo. Adventure50 handled it quite well, 4t motor is just lazy and loves being held wide open to bounce up obstacles. Did a few jumps, bashed through a bunch of puddles, and succeeded at most hill climbs (let down by lack of rider skill mostly) apart from the really wet slippery clay ones (like picture) due to lack of tyre grip, as the SR241 trail tyres just clogged up. Cleared instantly though once back onto the more solid bits of the trail. relocating the airfilter into the frame was good, as it increased the wading depth. However we still had to carry/float the bikes across as a section of this was mid thigh deep. Even made it up to see some snow only issue on the day was I lost the exhaust nuts -my fault for not double nutting/using lock nuts. And could go for some firmer front springs as it bottoms out fairly easily. / less bent fork tubes might help too. however we only did 42 one way as on the way back Andrews bike broke and we had to walk it out. So I need to go back to ride it both ways again. #cape1 point
-
So I had a short list of things to sort after the last test. First was to make a more permanent restrictor, before the tape went through the carbs. I did lots of math to work out the area, and made a stainless restrictor, but just fitted it temporarily in case it was wrong. Turns out it doesn't work as good as the tape, so will try again. I also redid the top of the brake pedal, to try get more swing/feel. Seems to be a bit better/good enough. Did a bit more of the wiring/cleaned a bit of it up, and mounted the magic boxes. I'm waiting on some components to arrive from China so I can finish this and the dash. Speaking of dash, I started making a new one, with new switches and shit. Waiting on new warning lights to show up. This is the same shape as the hood. I also made a new front panel. It's made of thicker steel than before, with more bars and more mounts, so should be nice and strong. I also fixed a few other bits and bobs, and adjust a few other items. In testing today I discovered the sprocket is still coming loose, I think it's because the axle was welded together under the sprocket (it broke years ago because there was no center bearing) and is slightly undersized, and the key ways are a bit flogged out. I was going to re-key the axle and sprocket a size bigger to see if it would stop it coming loose, but while doing beach donuts, it snapped the axle. So I'll just make a new axle from scratch out of 4140 center-less ground. Luckily I purchased a 4wd last week, and I sighted this very occurrence as my reason for needing one. We managed to drag the offroader back to the trailer with a jammed rear wheel. My fucking sweet rig, Broken, Aftermath, Shitty vid of today's efforts: Regards, VG.1 point
-
It was sunny, so I painted... Getting ready for assembly, I need to pull the cones to replace with some better ones I have here. Also, found a set of new shocks that I received from somewhere.... #biwinnning
1 point
-
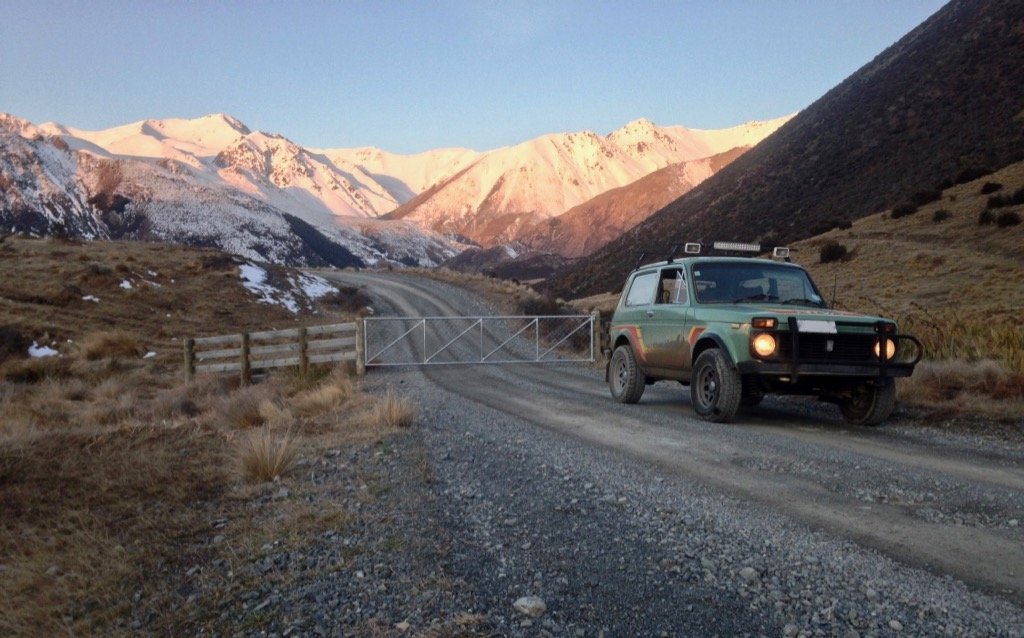
And nearly a year later...... Oil leak finally got to the point of Greenpeace protestors chaining themselves around the car..... Finally got around to setting up the electric winch I brought off @HKM400 ages ago, wish I had one of these since day one, engine removal was a breeze! Turned out the diff mount had been rubbing on the sump leaving quite a hole, once again the lada gods smiled as it also made a reasonable job of blocking the hole. With the engine out I modified the sump to have more clearance and TIGed up the hole in time for a trip to the hills. Always fun taking the Niva up into the snow Also surprising that i've put chains on it twice this year, that doubles the number of times its had chains in my ownership!
1 point
-
Bit of the old grease on the top of the IDA filter then lower the bonnet gently down, capturing the initial lower outline of where the cut needs to be. I need to get a couple extra bits to complete this like the thin black trim for the hole edge. My original red bonnet will remain mint so that I can chop and change the look at will. I noticed it was vibrating towards the front at 100km therefore I had a good look at it when I got home. The factors glue holding the frame to the skin was separating. Now we pumped a load of Wurth glue in the areas of concern and it all should be sweet after the glue tacks off.
1 point
-
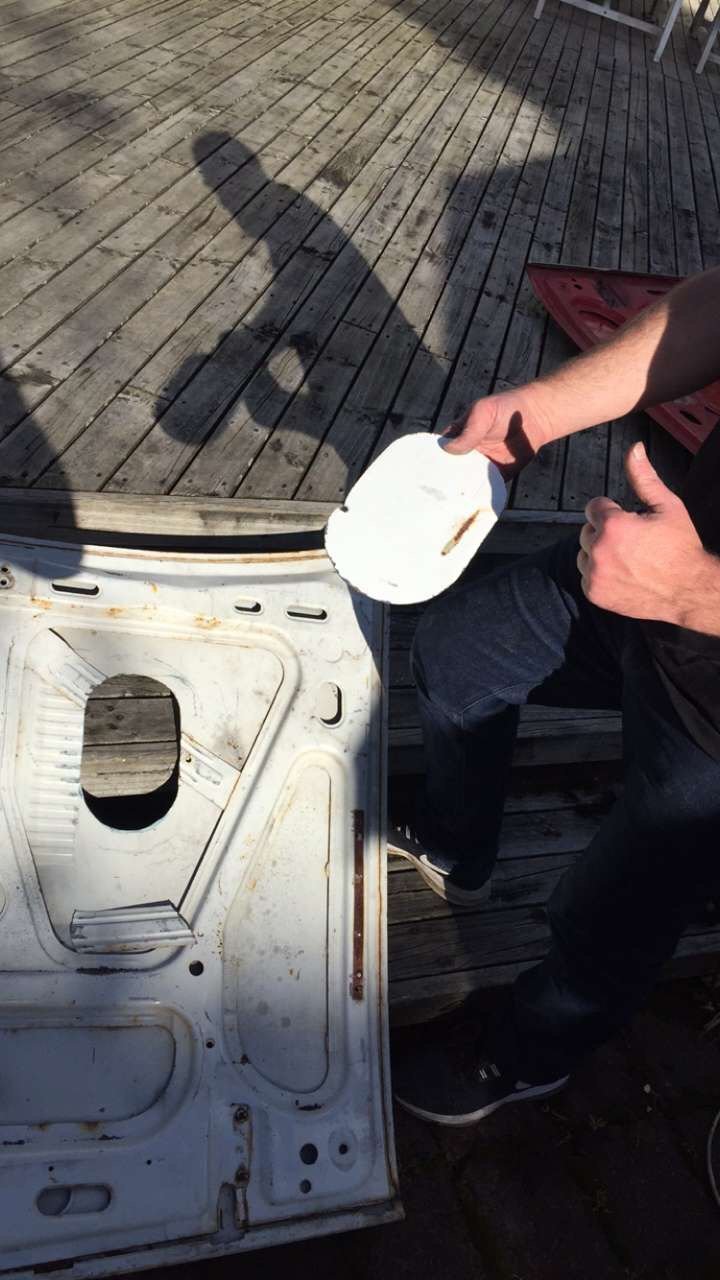
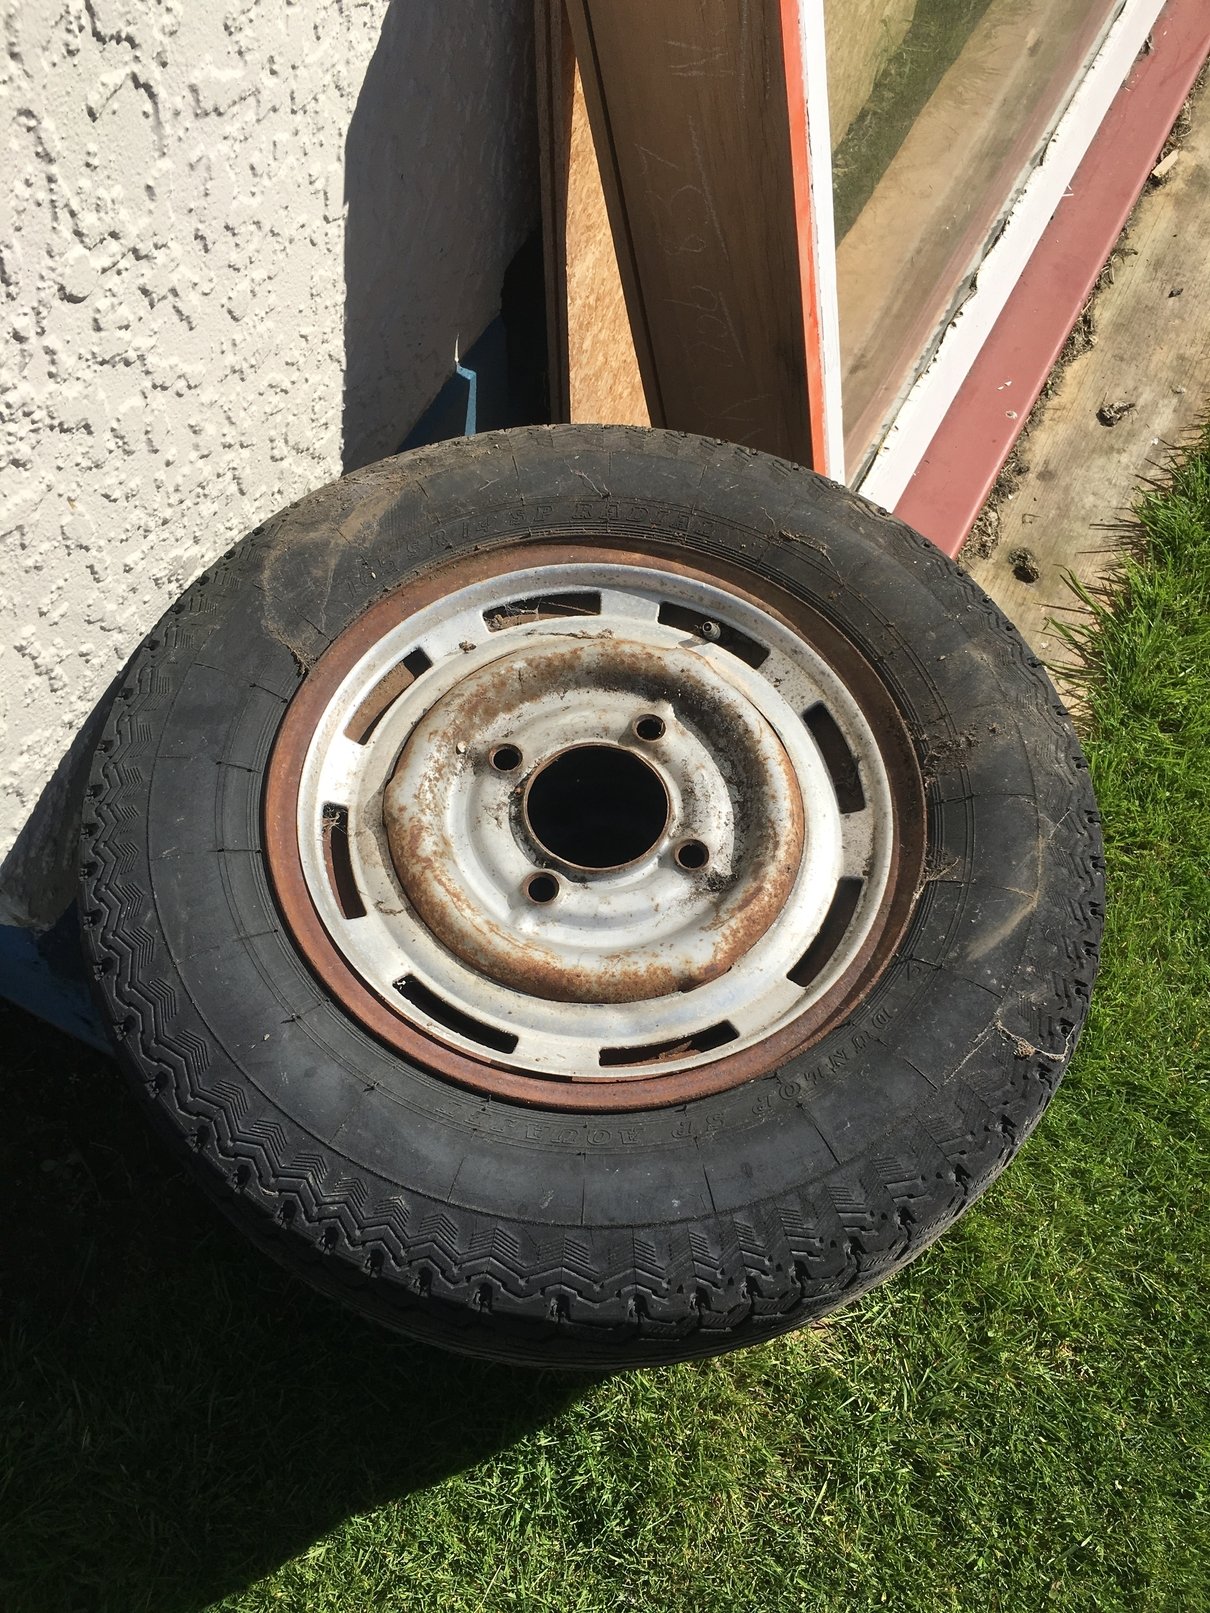
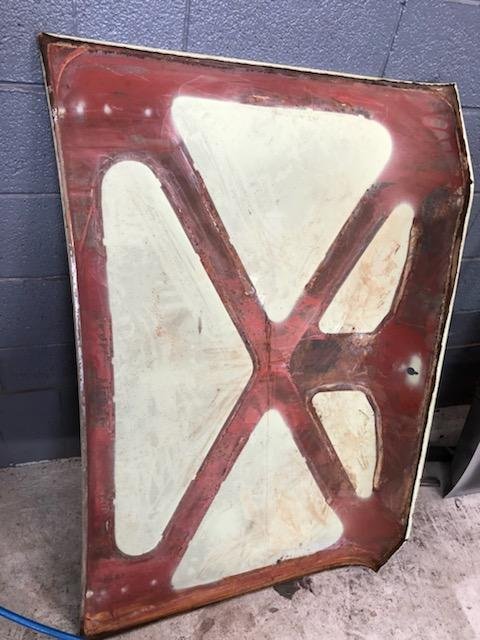
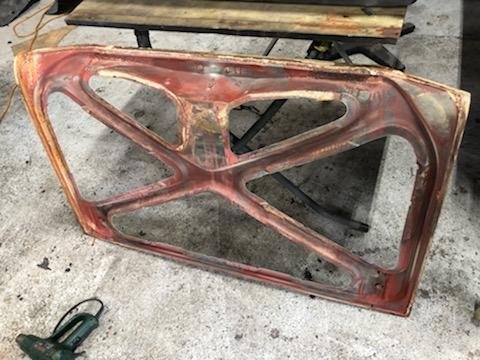
Long time between posts as usual, made another mission back to the Marshland yard before it's all gone. Managed to get four decent 14 inch rims to put the Sabre back to original and so I can fit the NOS hubcaps - will look the part once blasted and painted. Also found a floormat for it amongst the grass, I have the passenger side but had been missing the driver's so I'm a happy lad! Also dragged this monstrosity home because I couldn't bear the thought of it being crushed. I'll clean it up and then decide what to do with it.
1 point
-
Its still held together with G clamps and cable ties, so we weren't going too crazy, but you get the idea.1 point
-
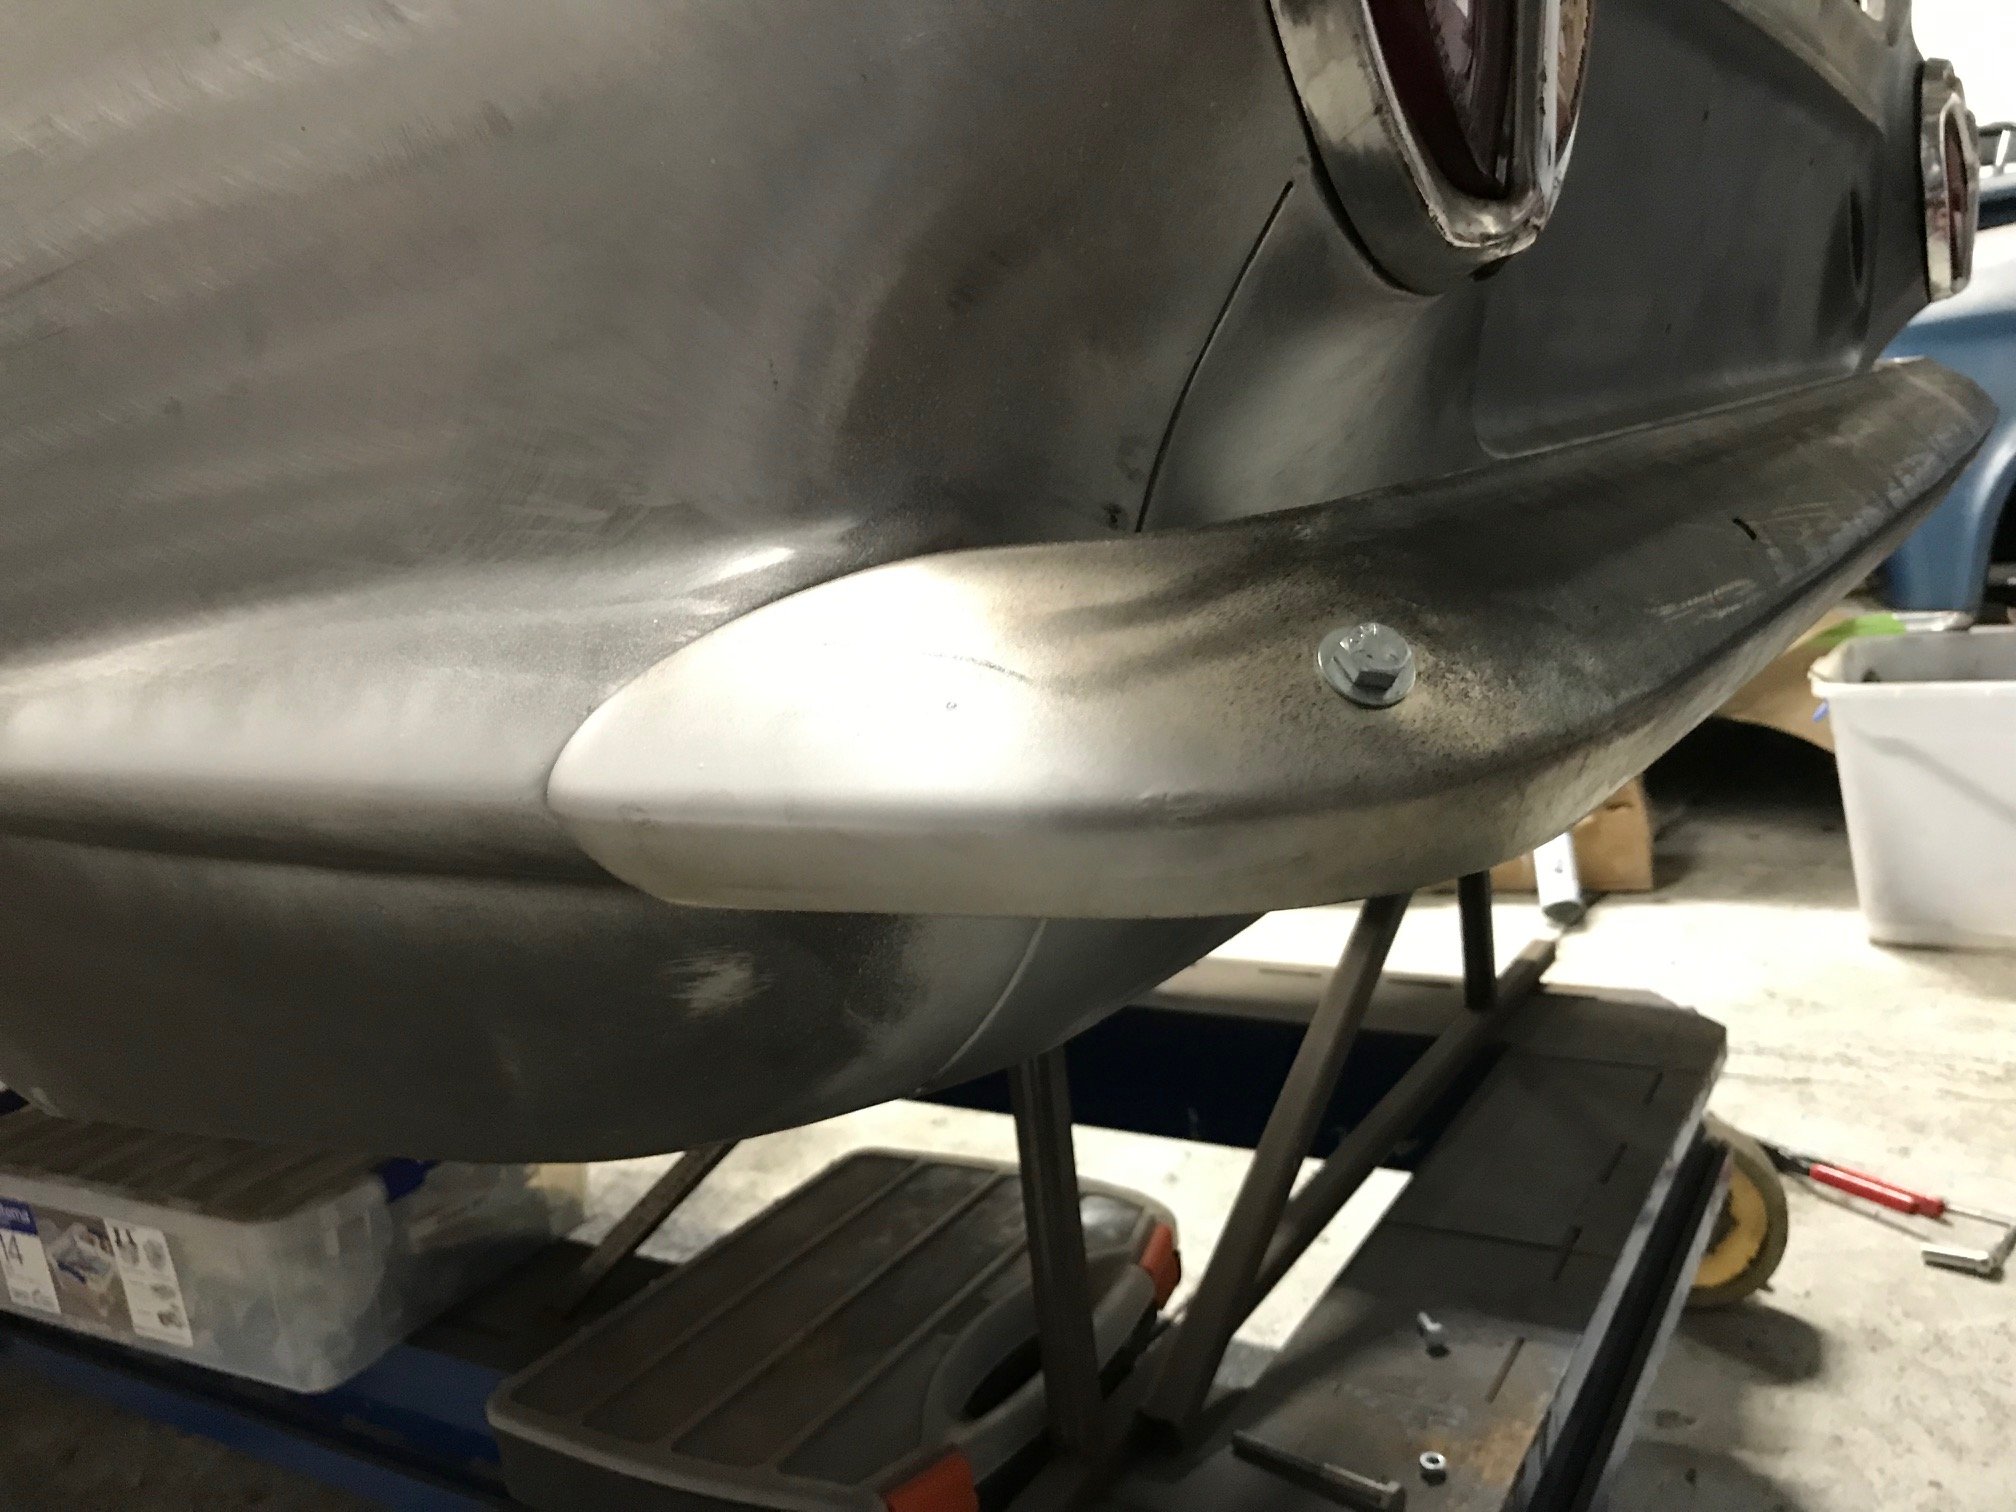
Rear bumper has been straightened up and trial fitted. Looking mint. Just needs a file up and off to the chrome players again. Down to the last few small jobs and off for the final blast.
1 point
-
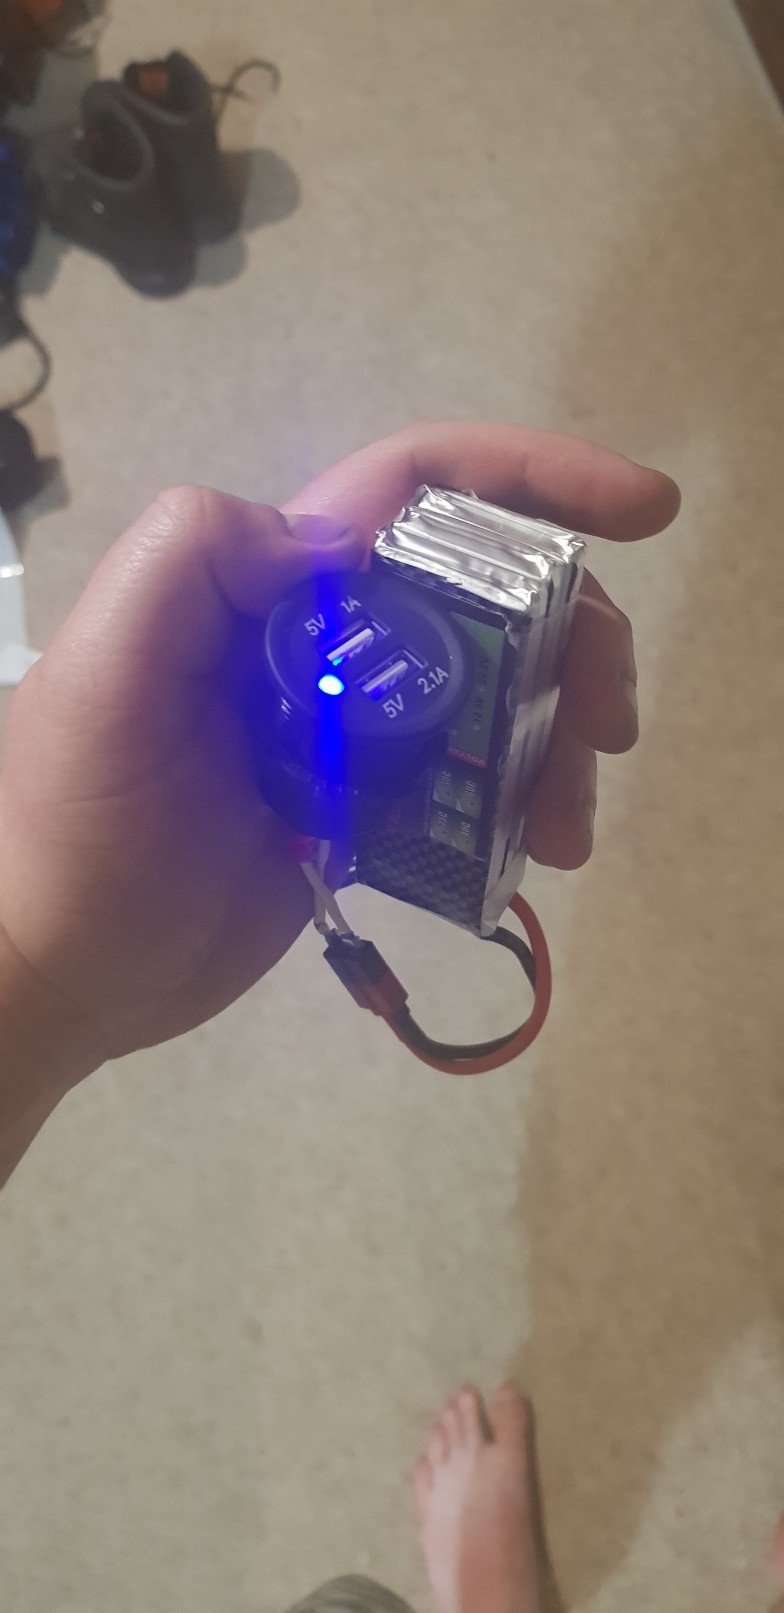
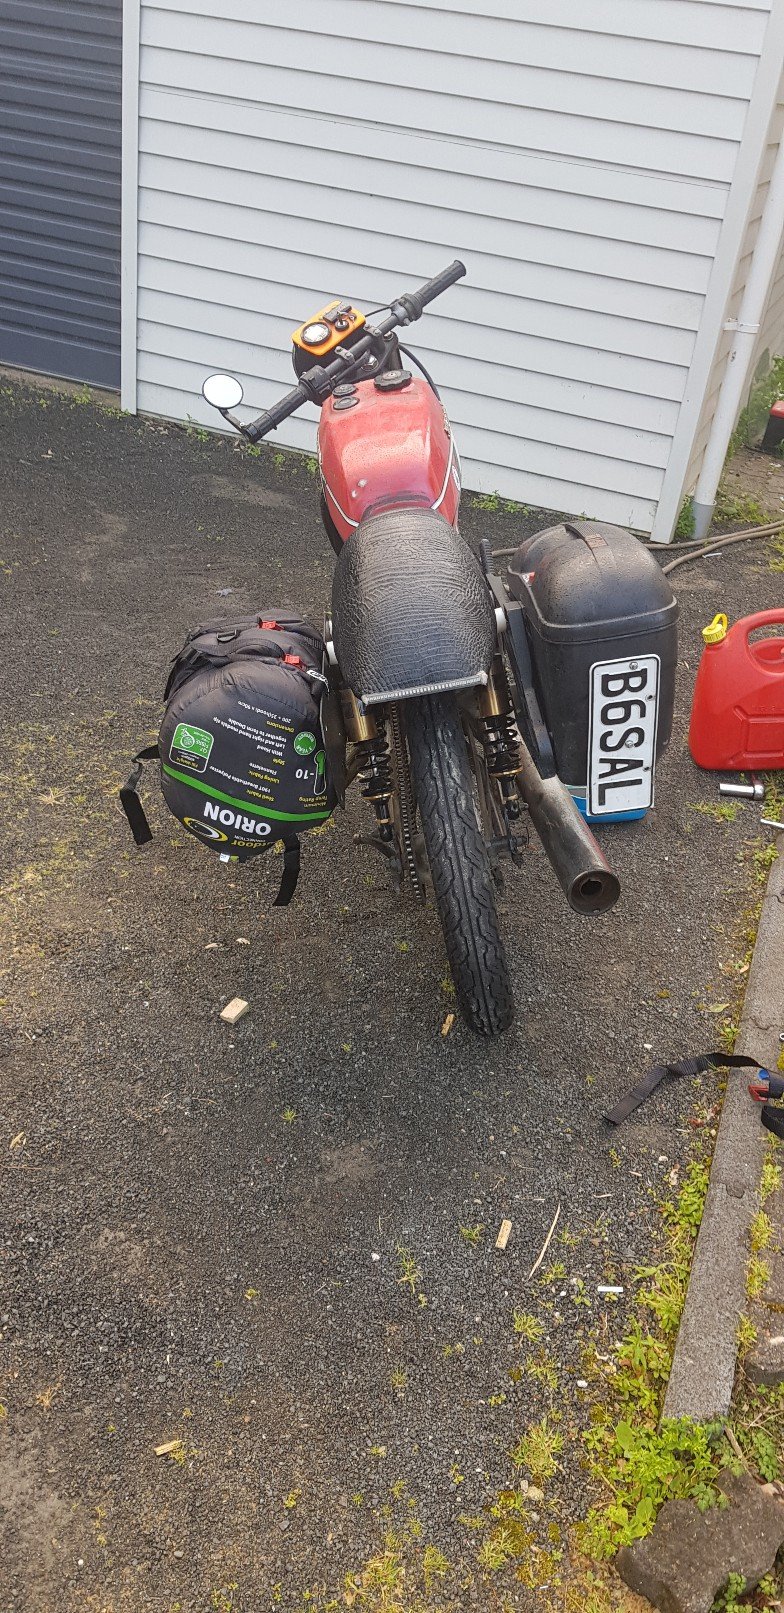
Right so this thing is going to (im going optimistic here) get me from hamilton to waiuru for the cold kiwi. Leaving tomorrow morning. In preparation it got some tlc..most of them things that id never bothered to do (or check) .Some expensive t2 oil (iv had it running on chainsaw oil and outboard boat oil for some time lol), new trans fluid, chain lube, some front indicators, a pannier box thing (got a pair of them for 50$ from a bike wrecker) and the other side got a steel rack to hold my tent, sleeping bag and bed roll. Of course i left this until the last minute so took today off work, slept in, then finished things about an hr ago. Pics fully loaded tomorrow, should be a laugh. Also, got some ear plugs so that i can hear people talking once we arrive. Oh and look at my budget power supply for charging phone. Edit. Yes its ugly as fuck.. but functional. Thats all that matters, right???????!!??!?!
1 point
-
hey also, here's a technical tip for those of you interested in the finer details of auto trans setup, if you want it to not leak fluid out the bottom, do up the drain plug. you got that?1 point
-
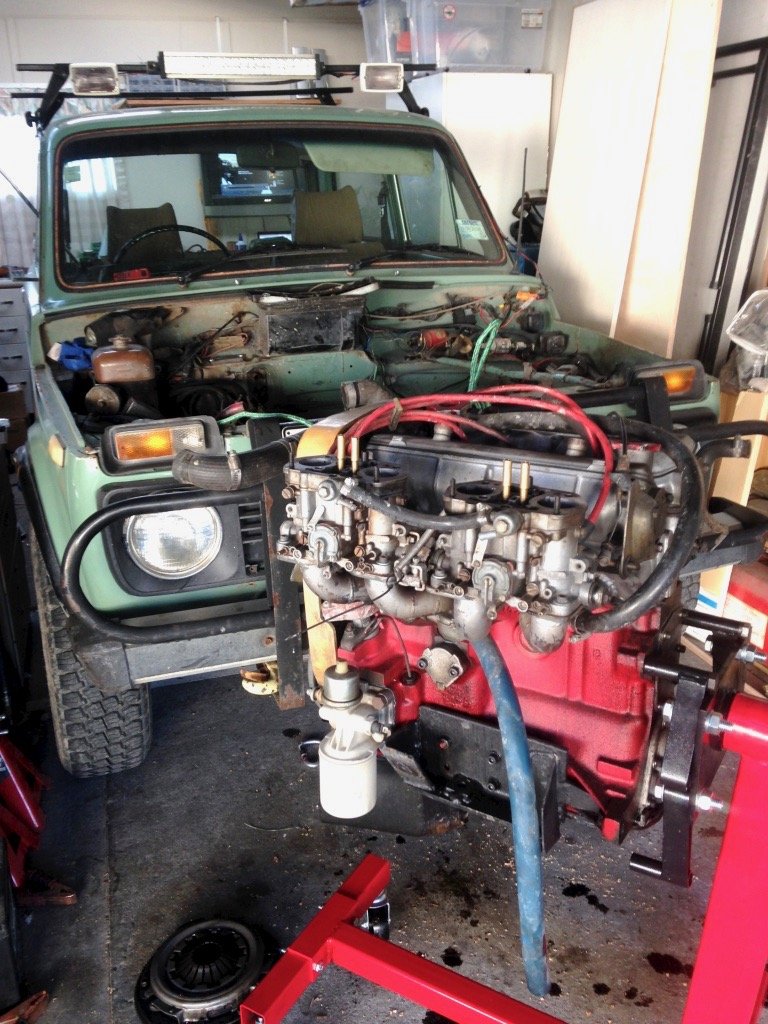
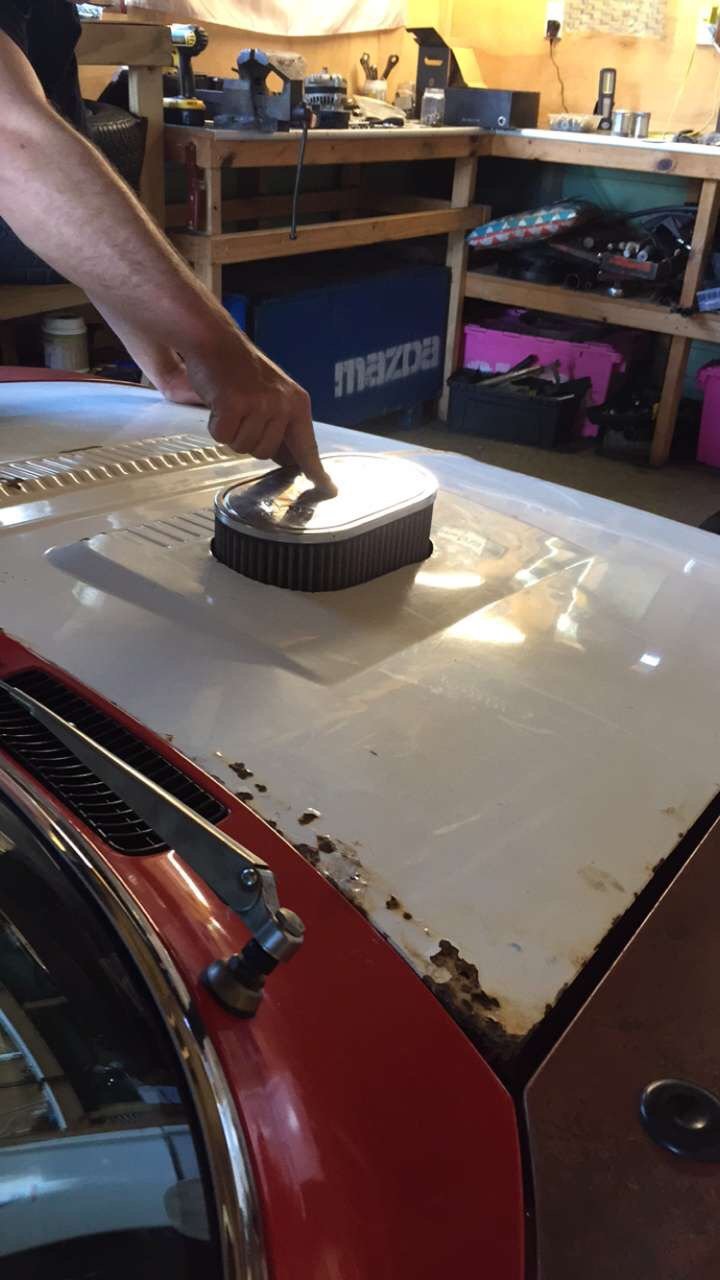
made a thing to mount the little front amp and the crossovers. it goes under the parcel tray which is above the passengers feet. its all installed and working. 2019-07-27_05-45-31 by sheepers, on Flickr this is the stuff ive used for the soundz 2019-07-27_05-45-44 by sheepers, on Flickr in other news i got the power steering sorted. with parts from @JustHarry and @Yowzer i got all the bits i needed to make it work. i had the pump and the box (which i got rebuilt) but i was missing the brackets and pulleys and shit. all installed and working fucking mint. 2019-07-27_05-44-36 by sheepers, on Flickr heres a tip for anyone doing a manual to power steering swap. the shaft that comes out of the end of the column and bolts to the rag joint is longer on the manual cars. to shorten it you can take it out of the end of the column (a cunt of a job to get it out, it has a swaged over lip that you have to fold back and its fucking difficult to do) once its out you can very carefully drill another hole approx 40mm further down the shaft and move the pin down to shorten it. then cut the end off. job done. the picture should explain this better. 2019-07-27_05-45-10 by sheepers, on Flickr also made a sub box today. i dont like the carpet stuff i used so ill re-do that. 2019-07-27_05-44-50 by sheepers, on Flickr1 point
-
Day two. No asplode
1 point
-
Car passed cert today - awaiting Cert plate. You beauty1 point
-
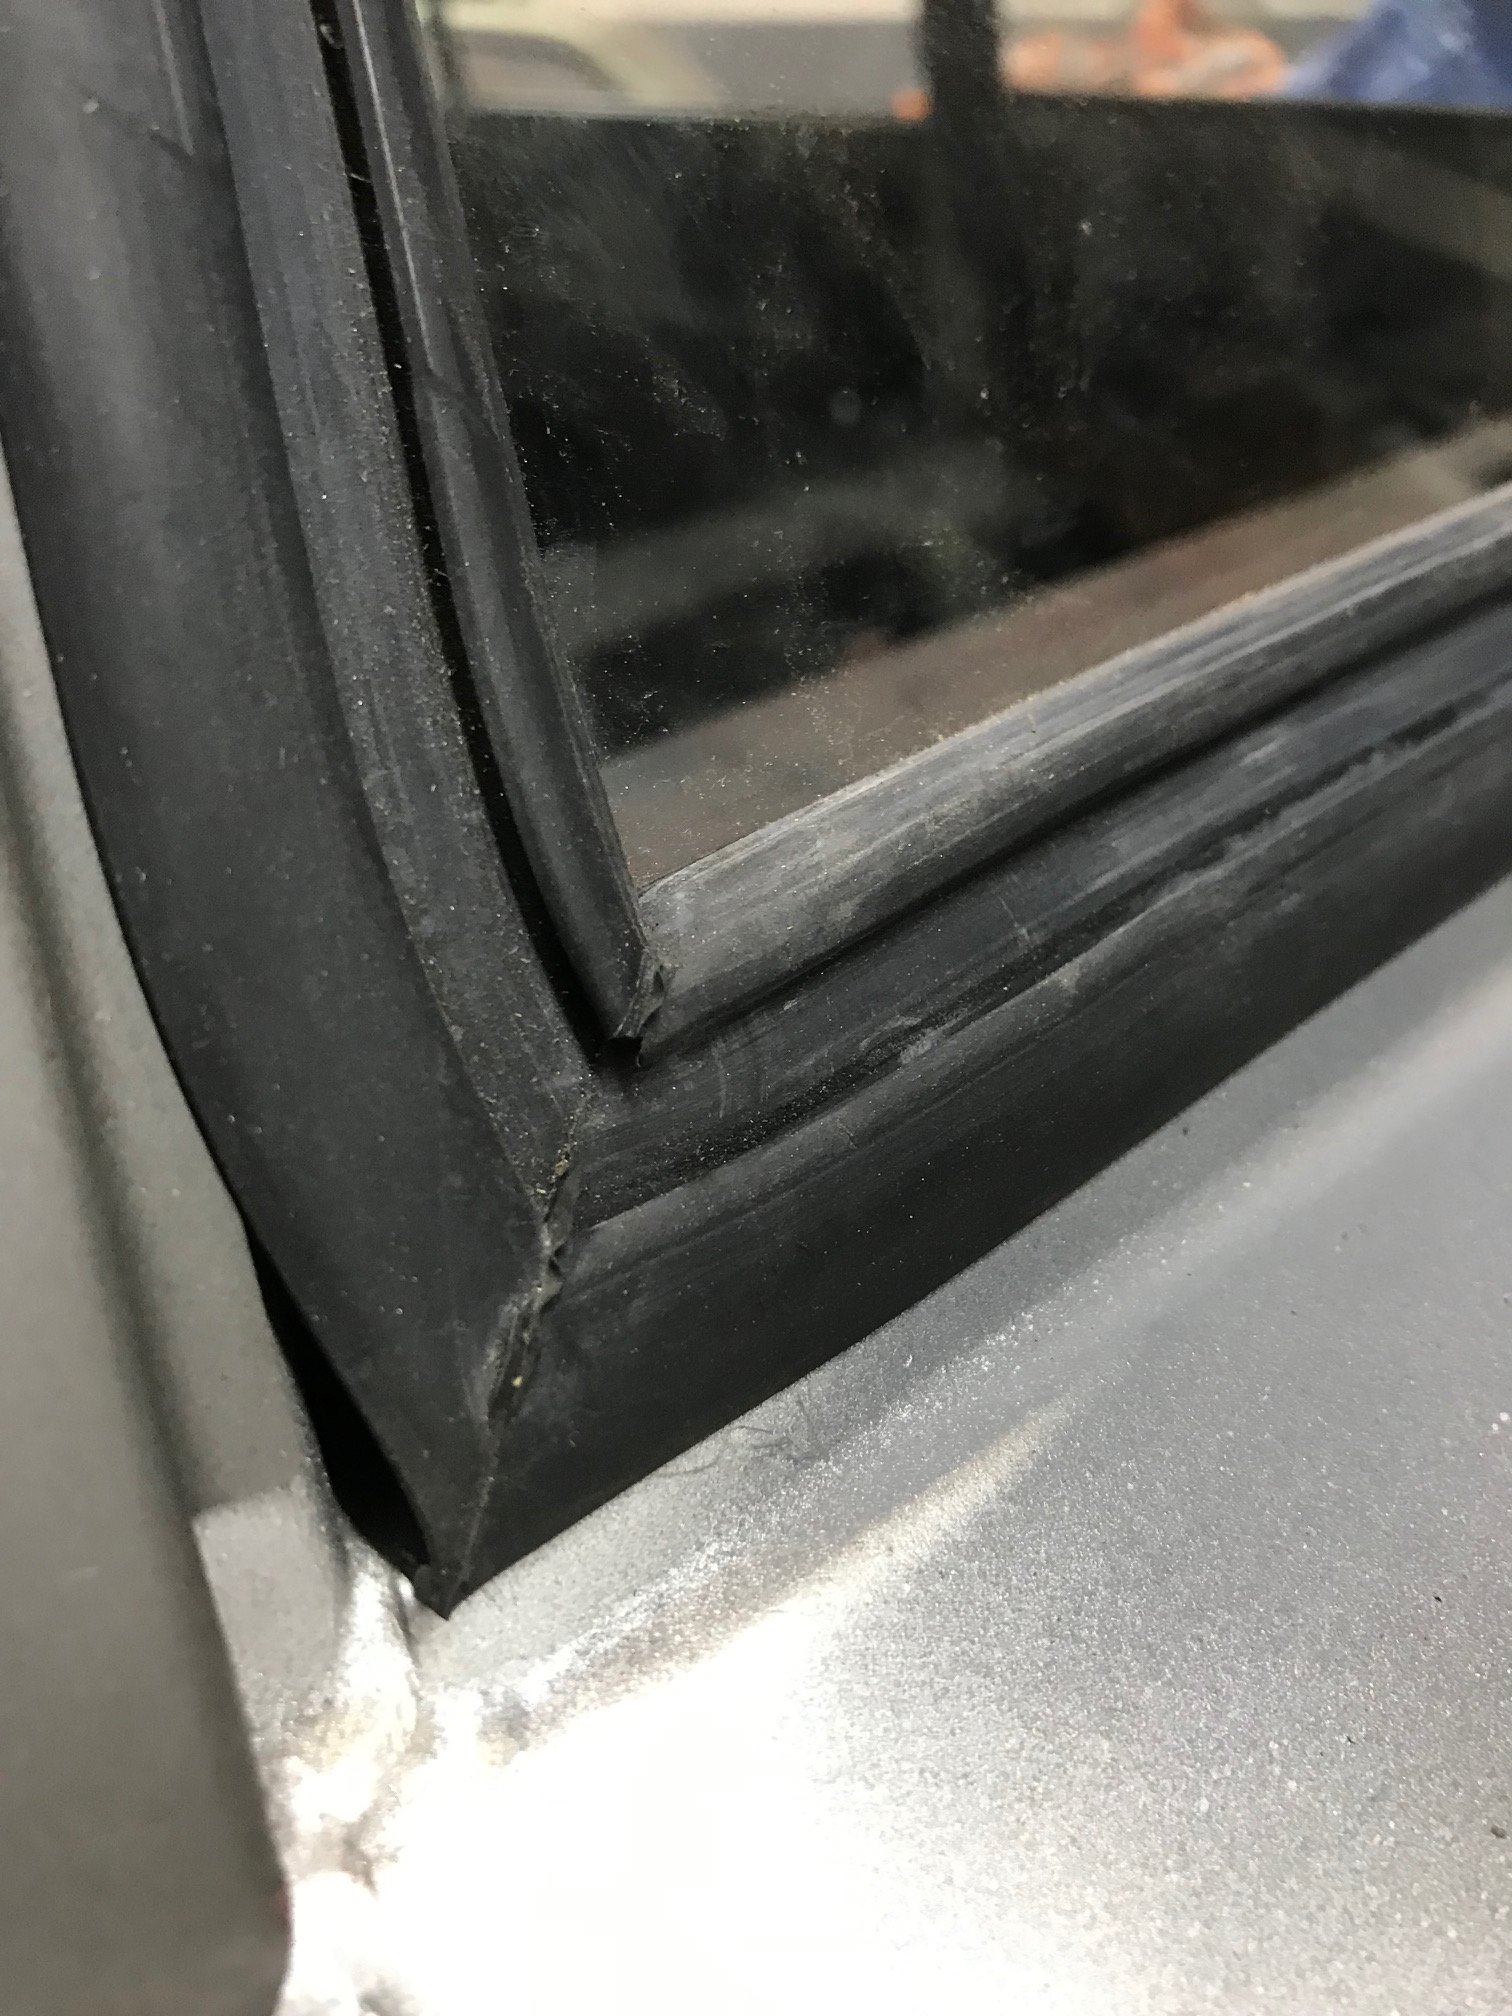
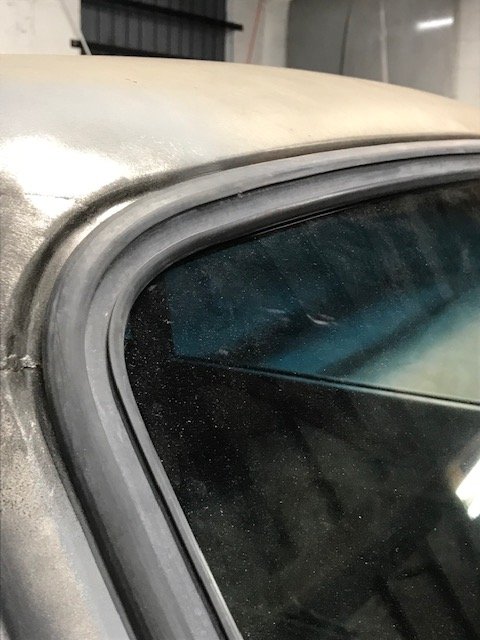
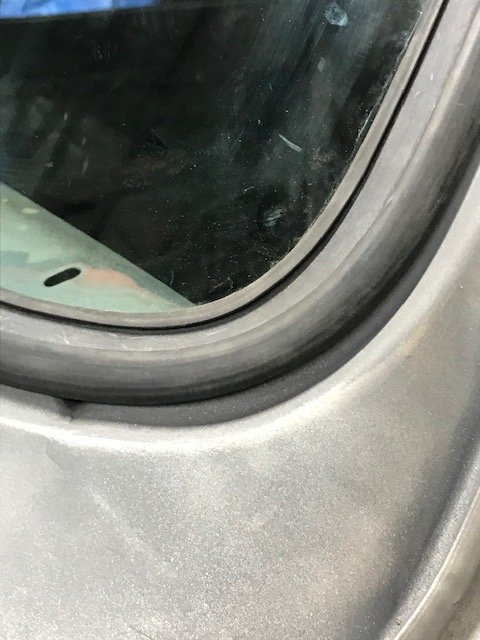
Went and check out the rubber issue today and both front and rear screen rubbers don’t fit good and the rear quarter glass rubbers are average as well compared to the originals. Need to do some research to sort the best rubbers. Rear bumper I had rechromed has a couple of ripples in at as well so it’s off to get stripped and sort the ripples and chrome again argghh. It looked very straight when I dropped it off but the new chrome highlights any defects. The moulding fit off has paid off big time as quite a few of the mounting holes have had to be welded up and redrilled to get it bang on.
1 point
-
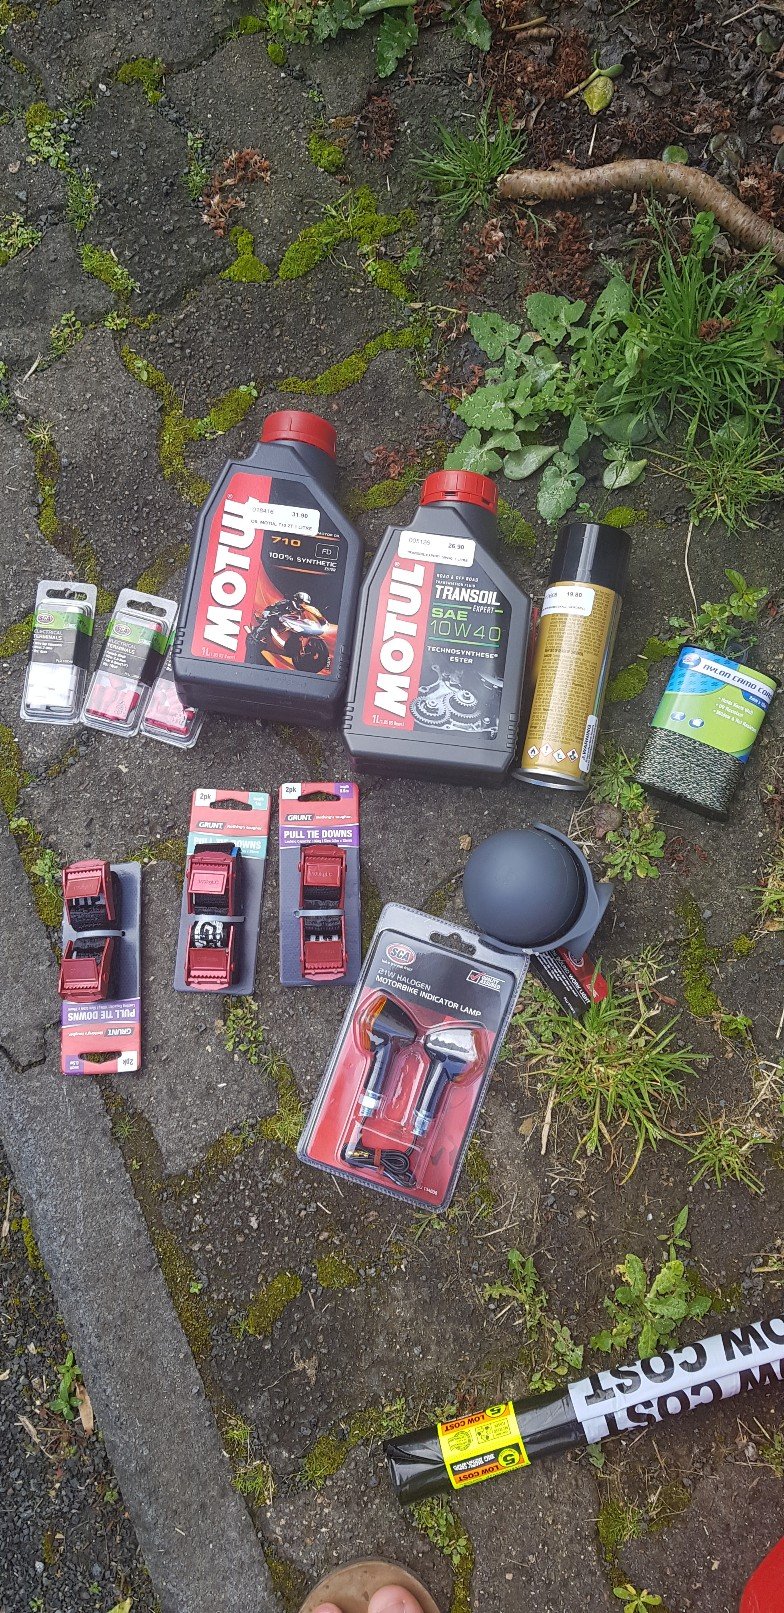
Mrs and kids went down south to her parents place for 10 days over easter, this gave me the much needed opportunity to get into the shed and tick a few jobs off, and also fly to Queenstown to pick up the boomer bike and ride it home. spent a few days chipping away at some jobs on the rally car then got into the trombone. PPSC have a 500km ride coming up next weekend and i needed to get some auxiliary fuel and a little rack to carry a small bag with my wet weathers and beer. i like the idea of the center legsheild racks but im too jew to buy some so i said my goodbyes to the Wifes clothes horse, as i cut it up to get some steel to make this bent up a bit of a profile on one side, then copied it for the other side and it started to take shape. while i was mucking around with it i also make a nice real solid mount for my CT aux fuel can to snug in nice and tight on the back, this should give me some half decent range now with about 6 litres on board in total then i flew down to queenstown on a thursday night, collected the africa twin then heading north on the friday taking a pretty cool route to chch via hawkesburn road to clyde, over the danseys pass to Kurow then over the Hakataramea pass and up to chch where the GC @Chris.QCR housed, fed and beer'd me for the night, and also leant me some waterproof gloves which becuase crucial on the next day where it pissed down the entire time as i went up to Domett, met up with my father in law on his africa twin and then went over kaiwai rd to Culverden and up the rainbow road to st bathans, to his place in havelock for a quick cuppa and then to the ferry terminal. ferry was delayed and i got into welly about 11:30 saturday night and then made the last dash home to feilding. was just over 1600kms in 48 hours in the end, a great ride to get used to the bike, just should have cleaned out the airfilter in queenstown and i might have saved myself like $50 worth of gas, thing sucks it back! cant wait to rip into it and start making it look pretty. Also, i got myself a Blizzshop embroided patch made up for my vest after the GC PPSC aritst callum smacked this logo together for me, i got a bunch of extra ones made up if anyone wants one send me a PM and ill get one out to ya for $10.1 point
-
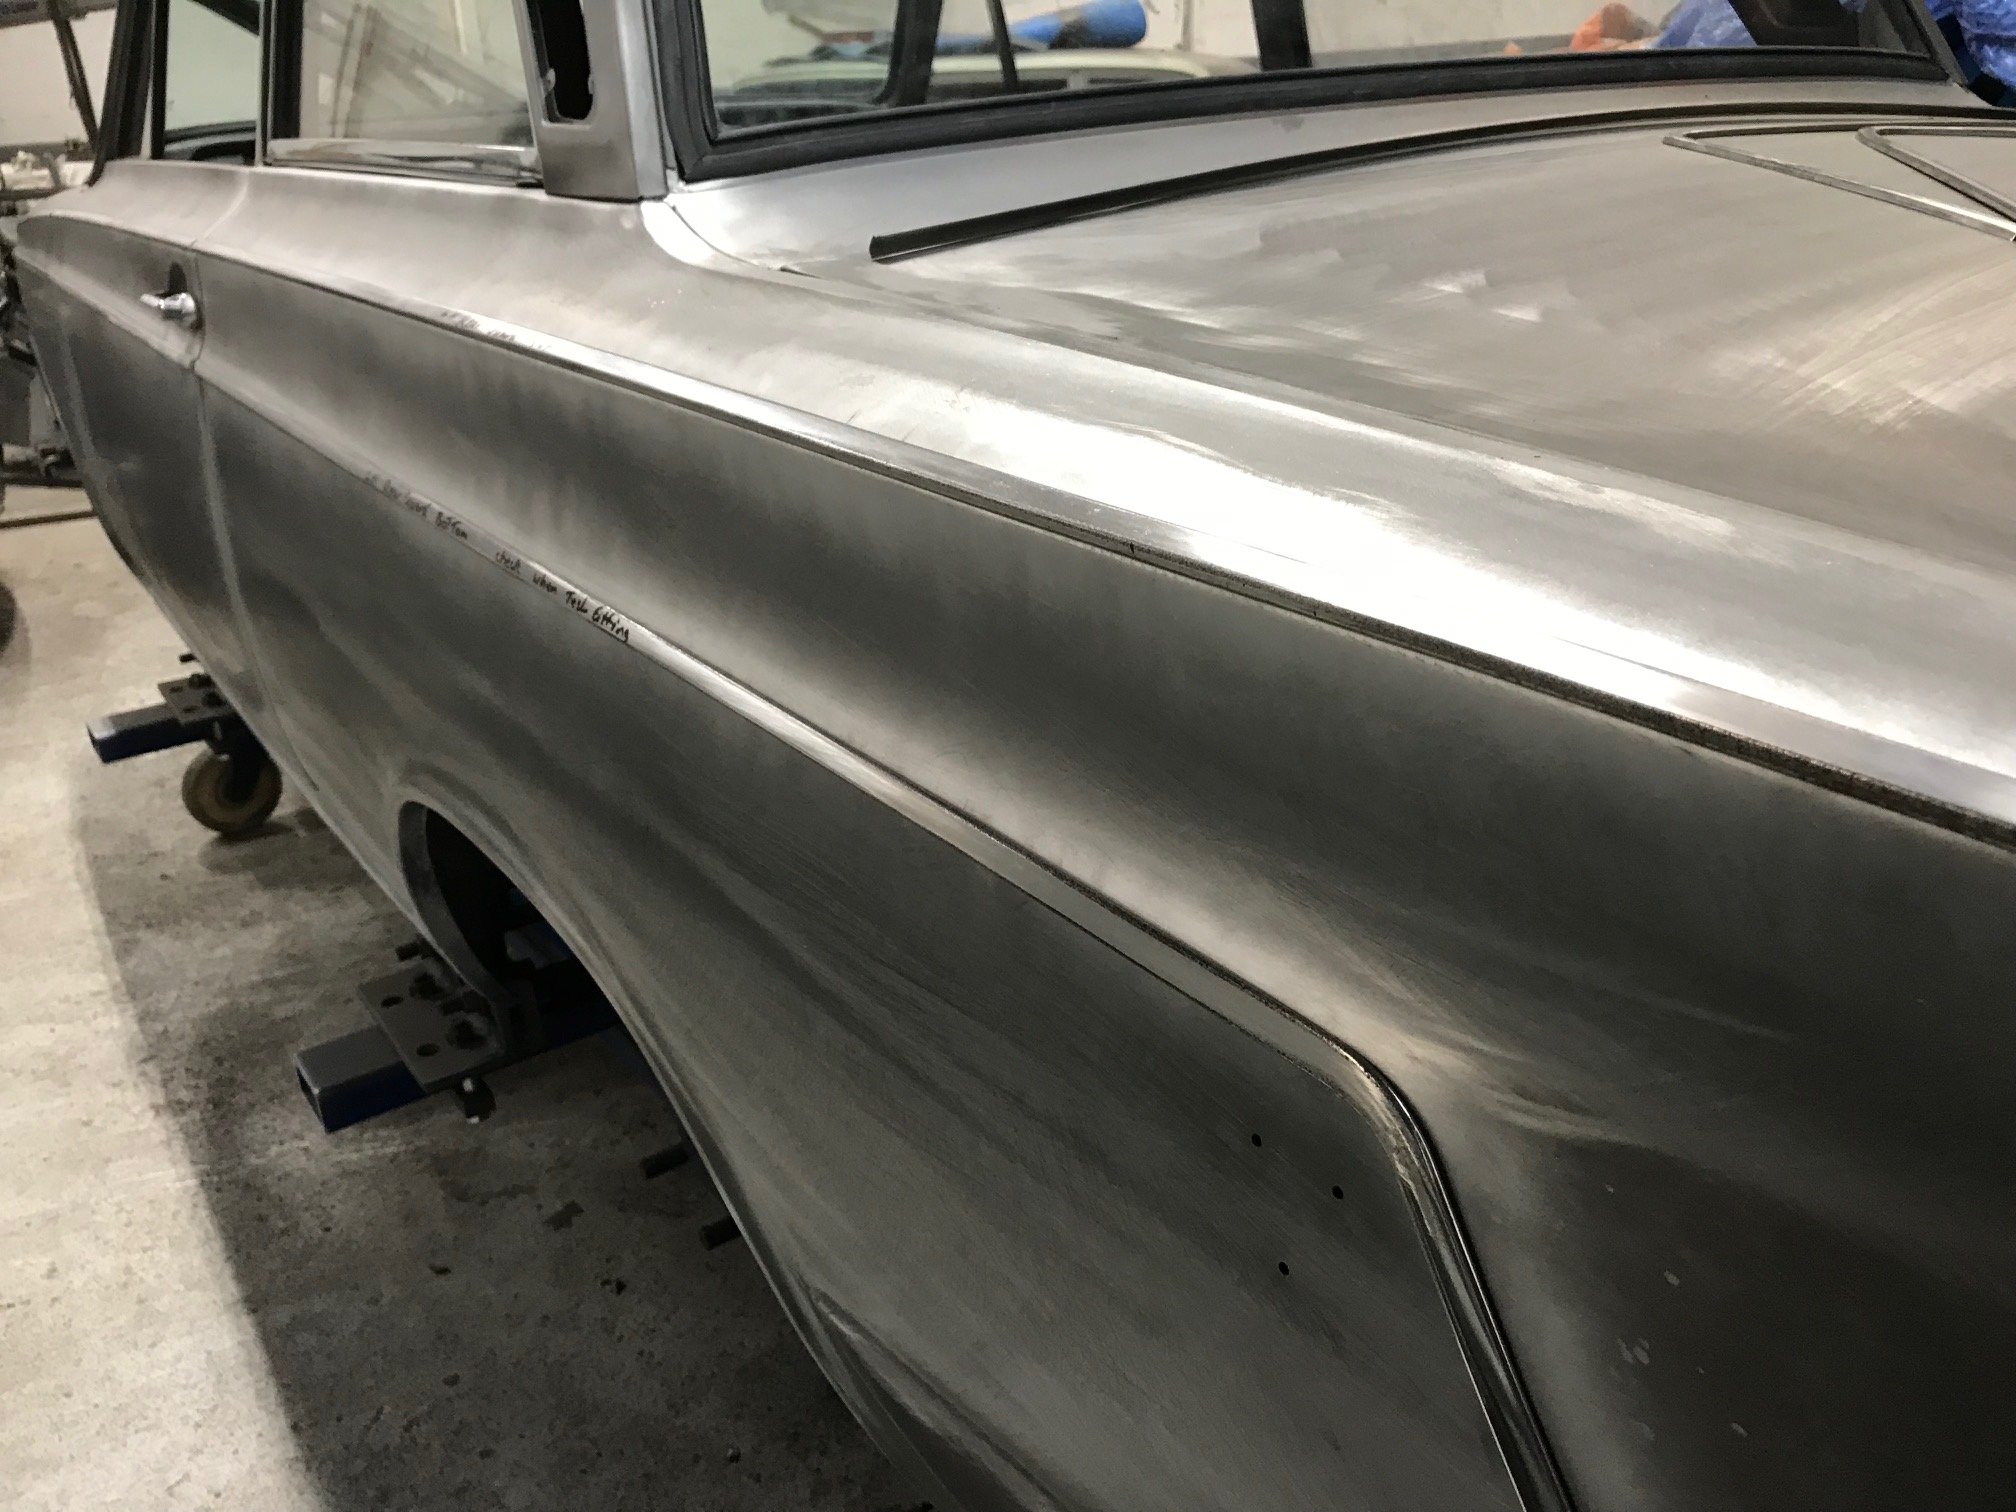
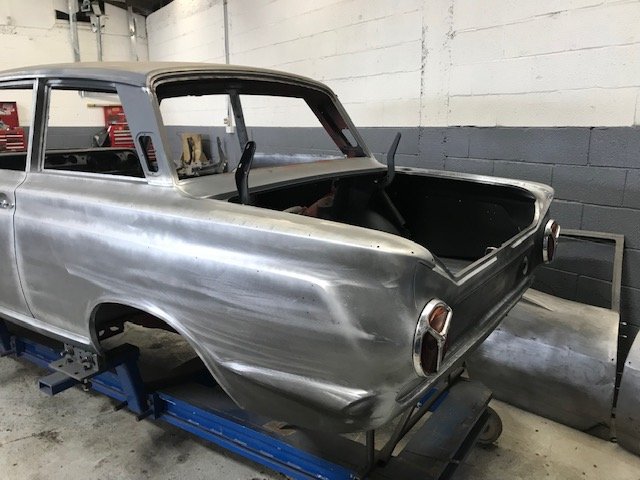
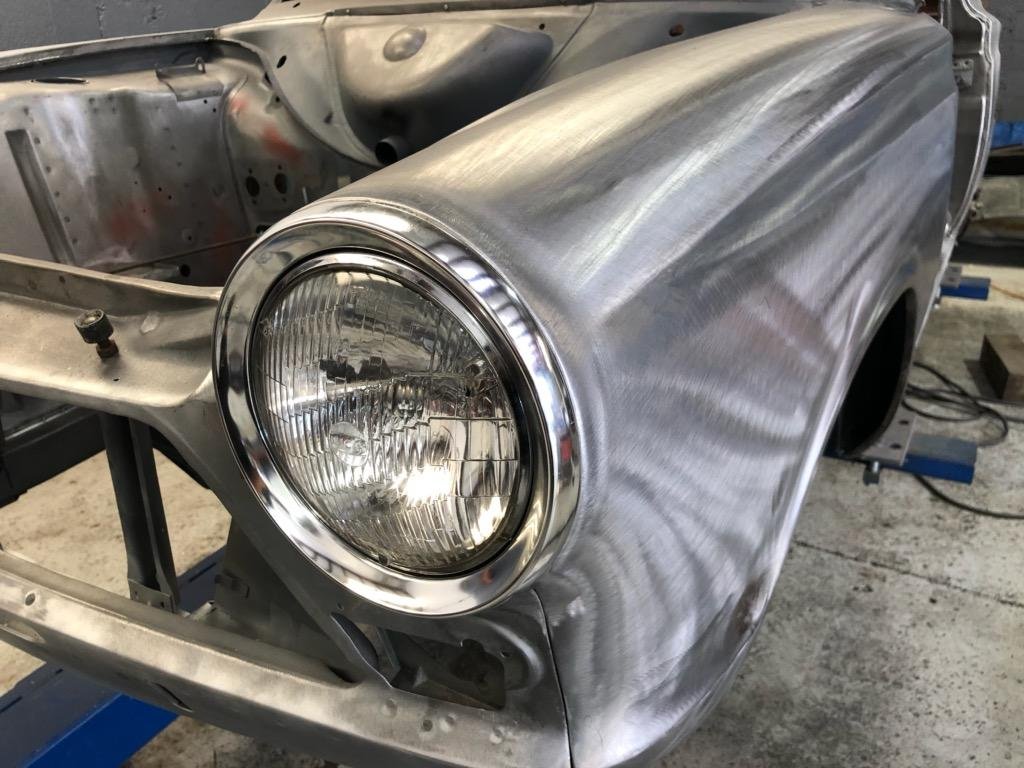
More progress with gapping the doors bonnet and boot. All welded back together again. Trial fitting allthe exterior body parts to check all good and also fitting the front and rear screens and rear quarter windows to check new rubbers all work.
1 point
-
Mate I'm worried your at risk of being patched over. In my head I thought you guys were out at it at the local water hole once a week looking after the turf1 point
-
More progress! Getting exciting now seeing it coming together
1 point
-
Shell is back from the blasters and ready for the final weld off. Rear quarters been dipped and already to go back on. A.l going well it should be in the paint shop by Xmas....
1 point
-
Some more pics
1 point
-
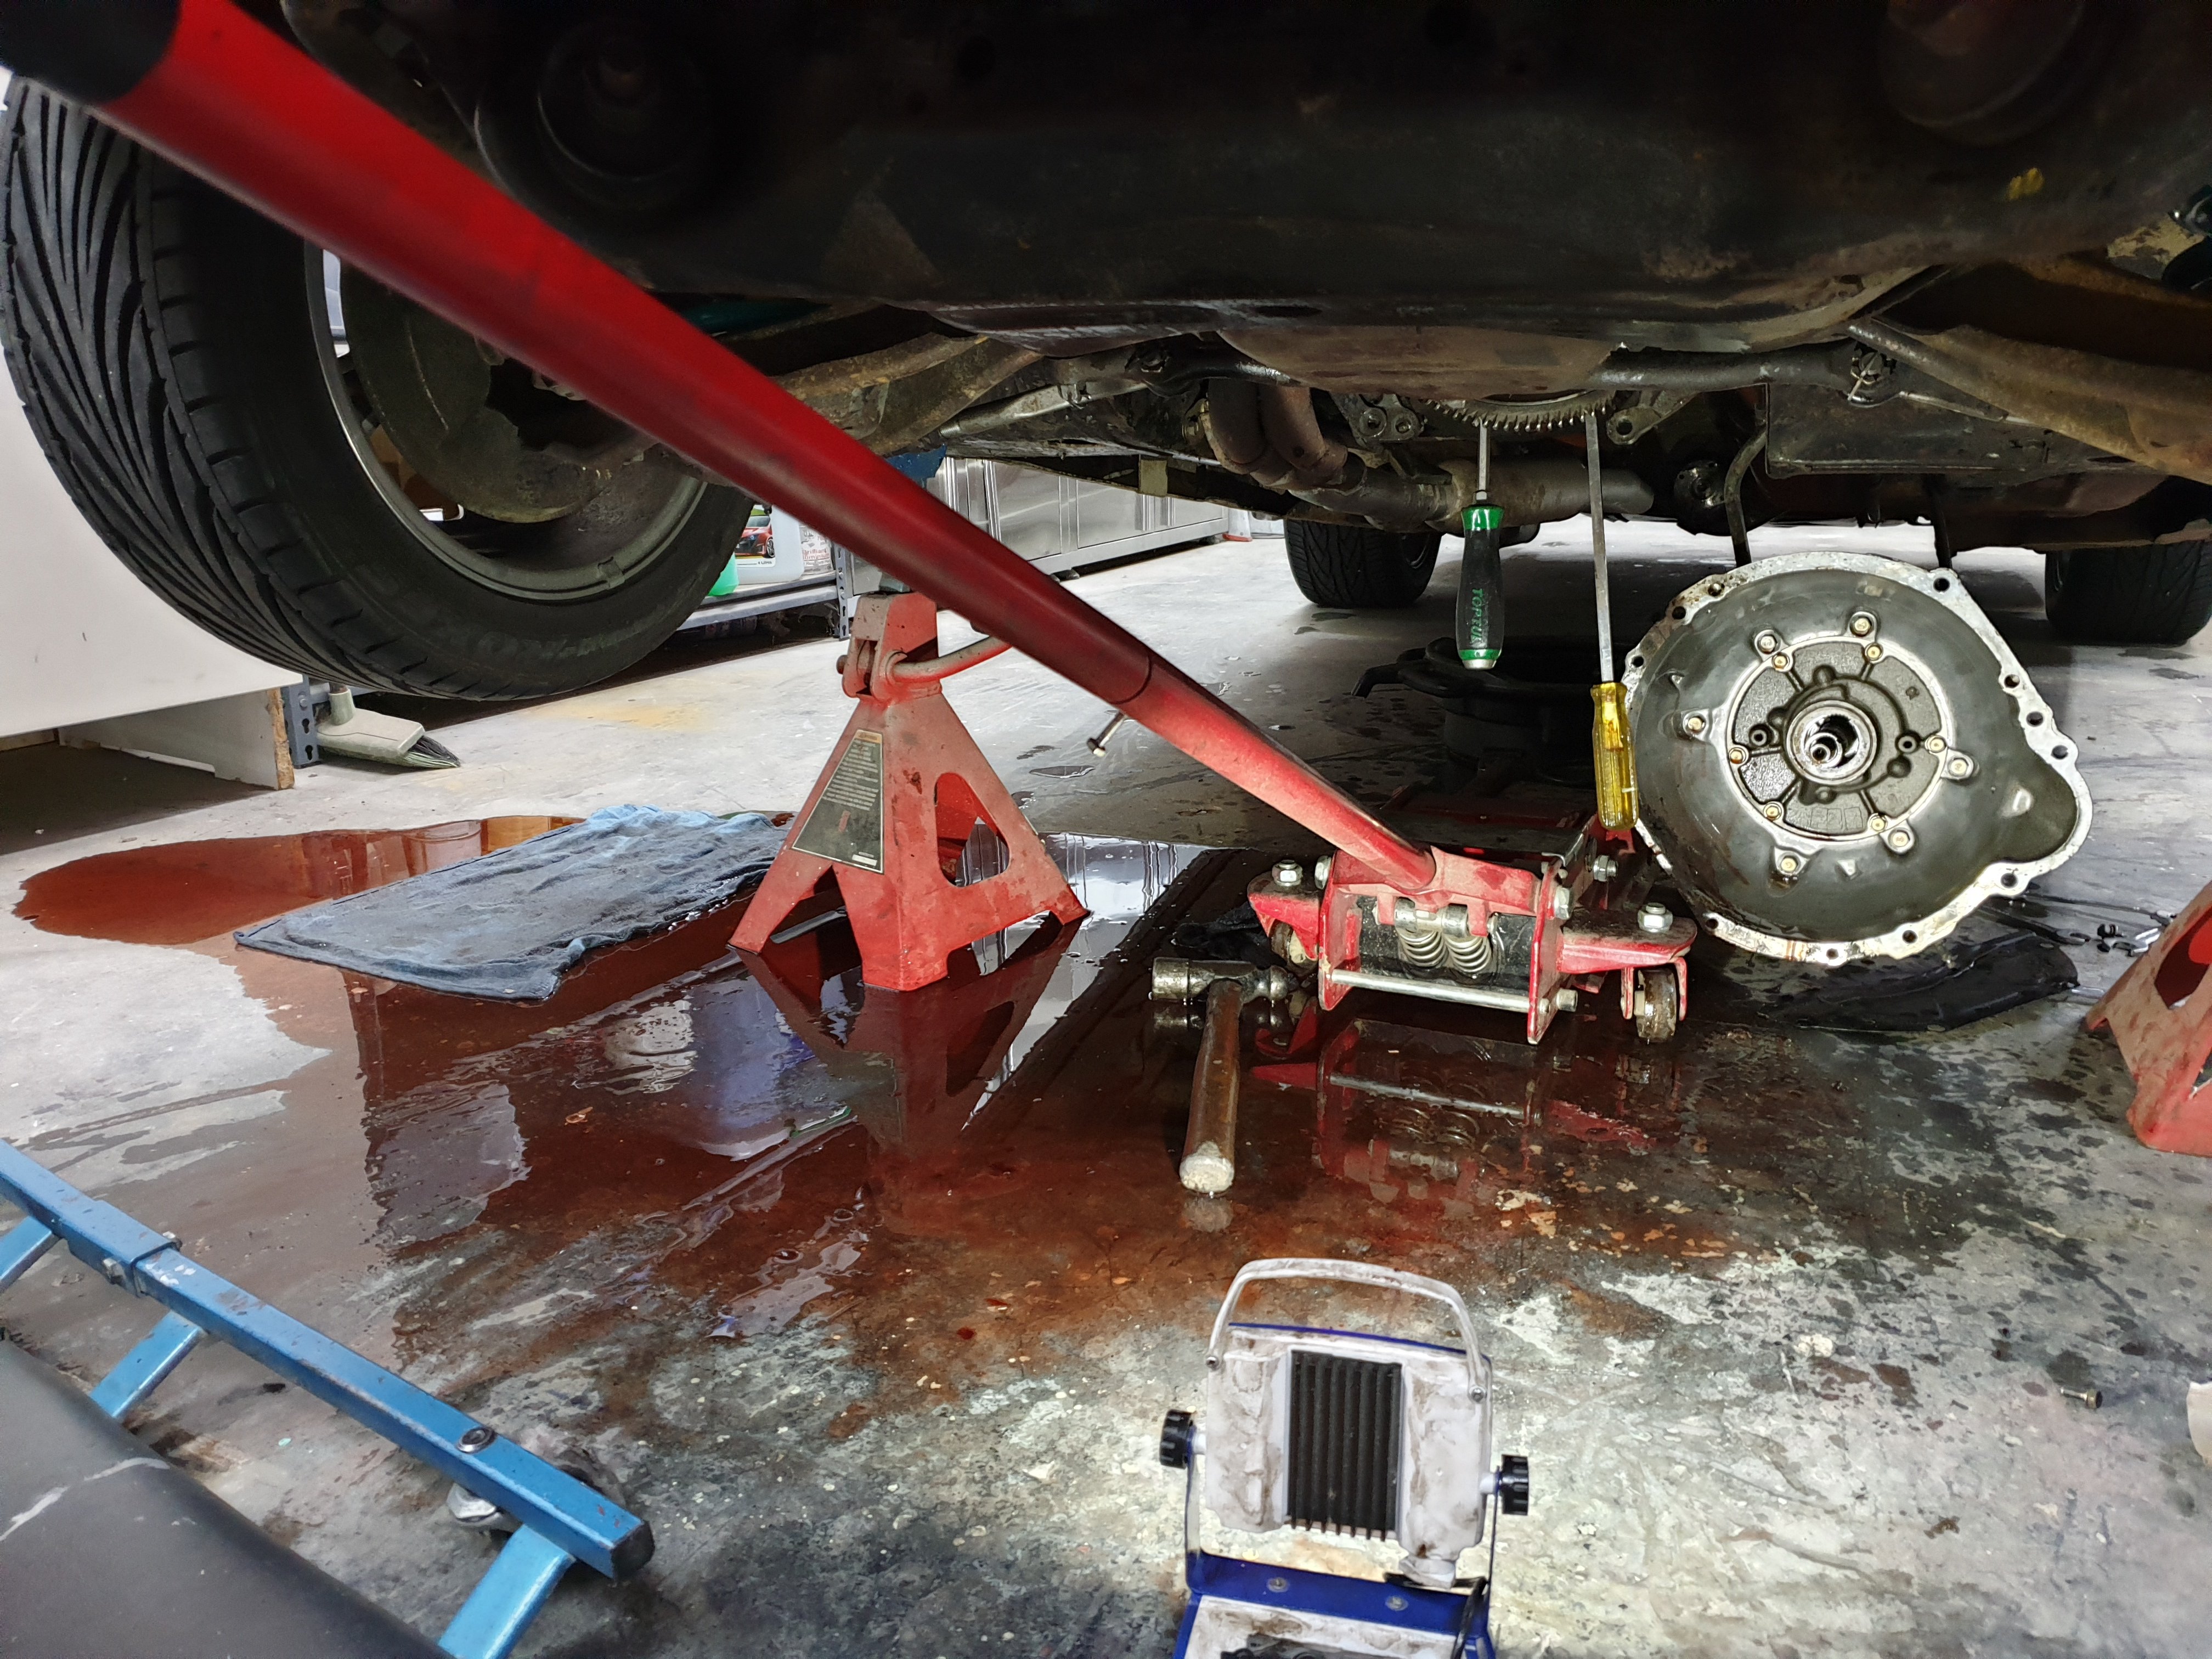
That did not go according to plan. The converter is stuck on the flywheel and I couldn't get it out. Anyone who has removed an auto trans from a 60 series crown will know that getting the box out with the converter still attached is truly the closest thing to impossible on this planet. Somehow after 2 hours I got it out but the converter is still fused to the crank. Note the screwdrivers I've used to strategically bend the flex plate.
0 points
-
engine tear down didnt go especially well. everything was kind of normal looking without any thing sticking out as being fucked. until i got the heads off. there's some pretty major pitting in two of the bores. i can feel it and it seems pretty bad to me. there is one on the other side which is the same, maybe not so bad. that line down by the piston is also degradation of the bore, dont know how far past the piston it goes yet. 2019-06-04_06-05-10 by sheepers, on Flickr 2019-06-04_06-05-00 by sheepers, on Flickr it could potentially be bored but it fells pretty bad. if you've got a serviceable UZ block hit me up.......0 points


.thumb.jpeg.384ff72c8d2b0ee0d34a7bdedb55bdcf.jpeg)


This leaderboard is set to Auckland/GMT+12:00