
Leaderboard


Popular Content
Showing content with the highest reputation on 07/22/19 in Posts
-
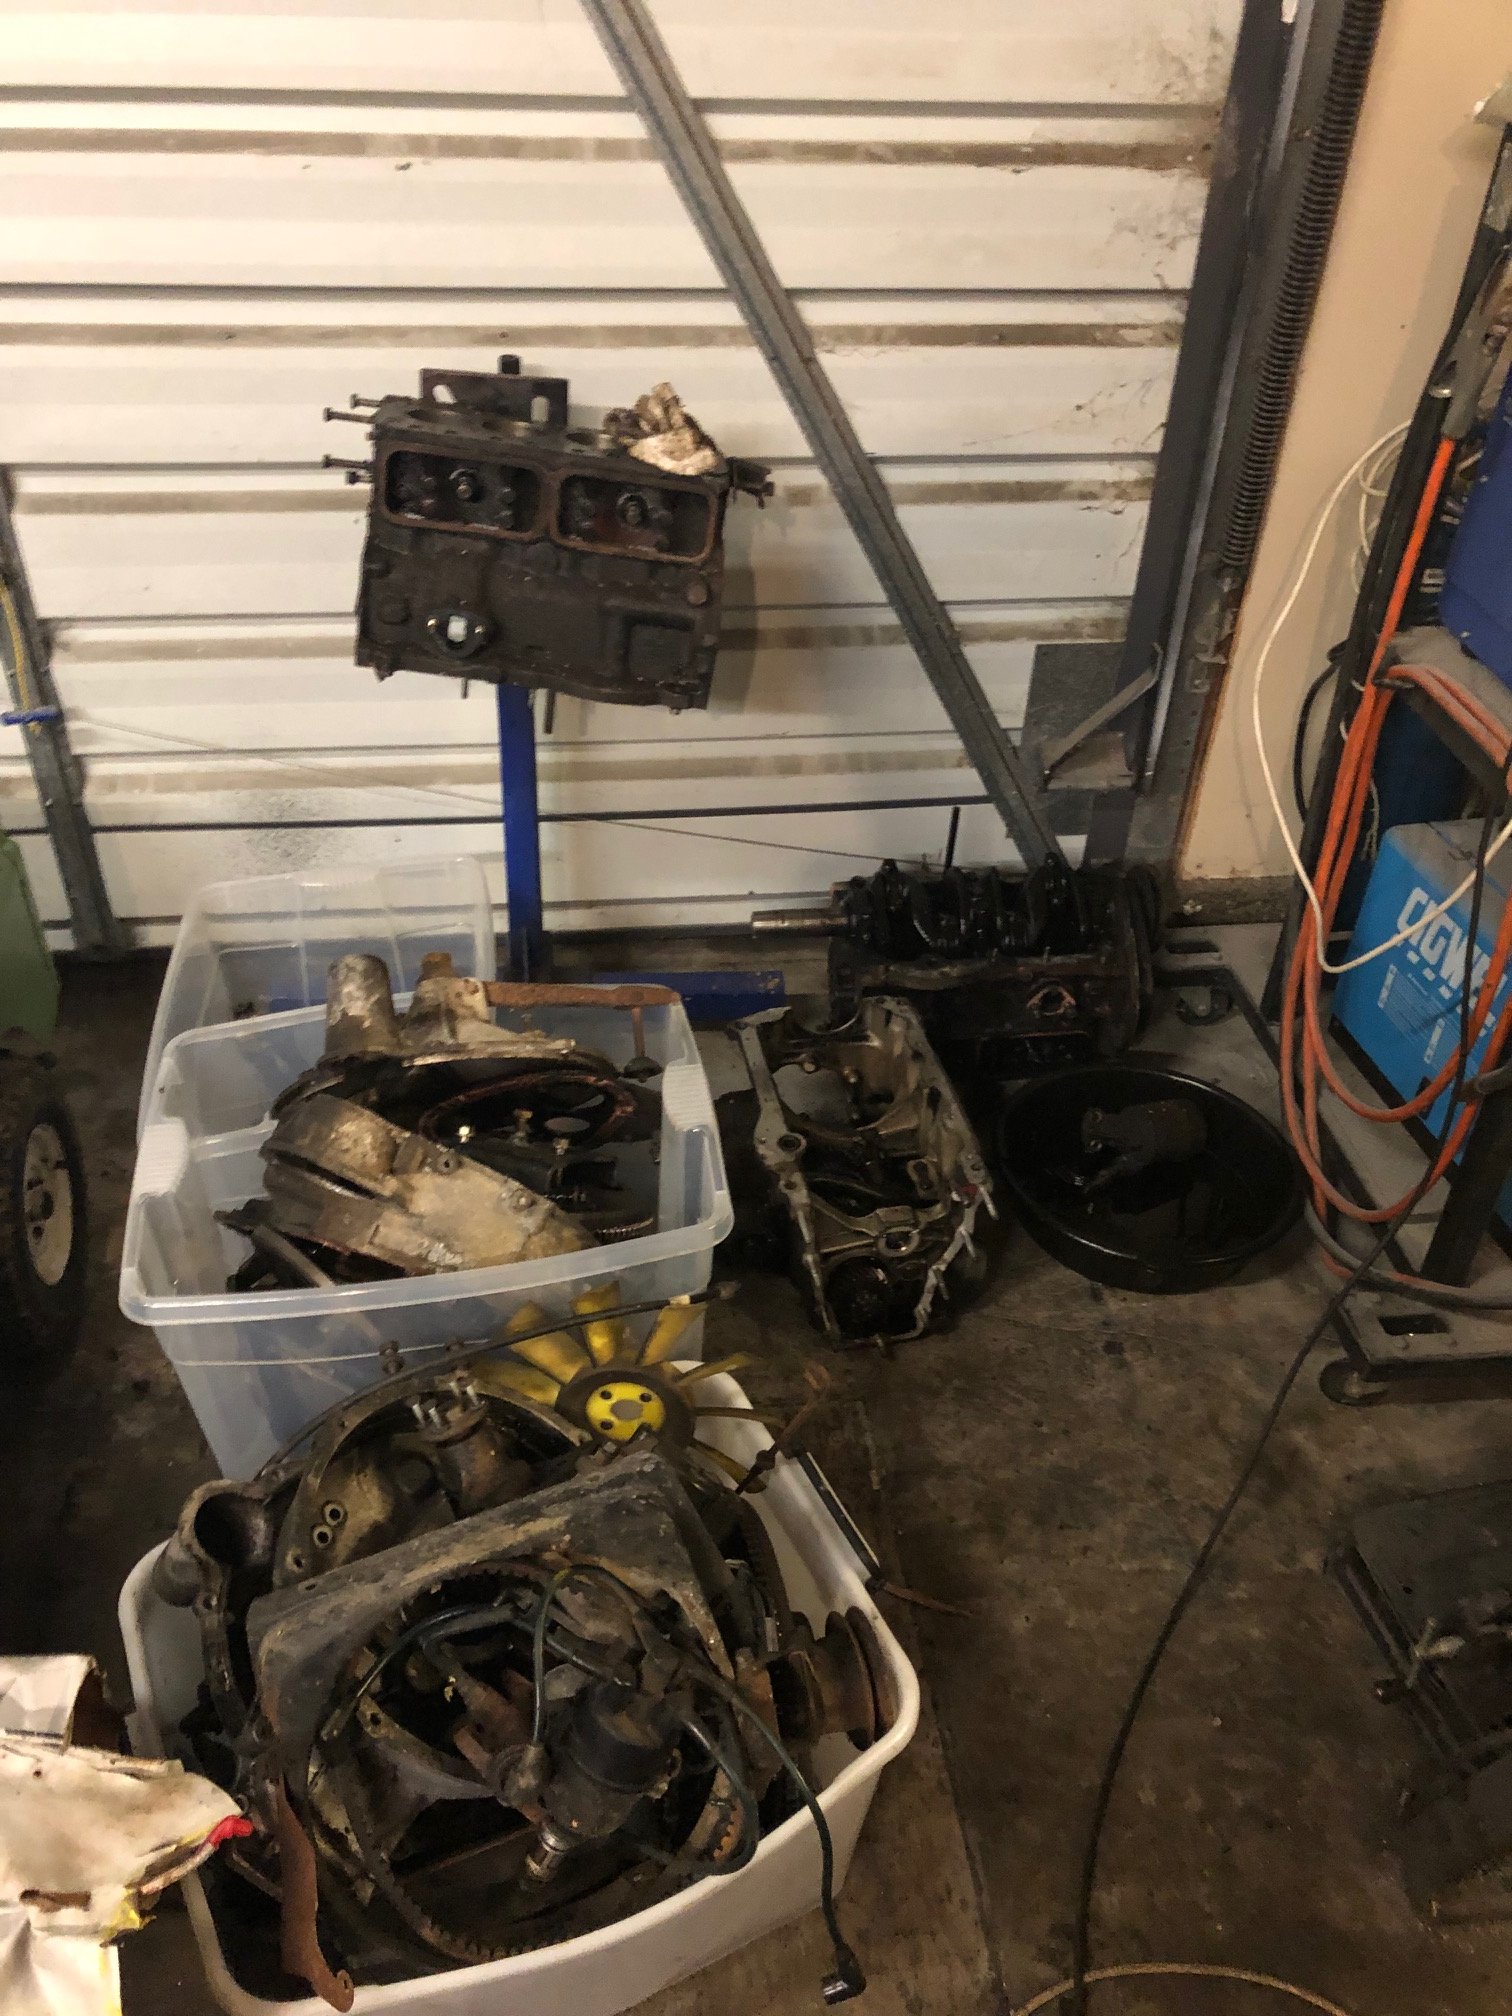
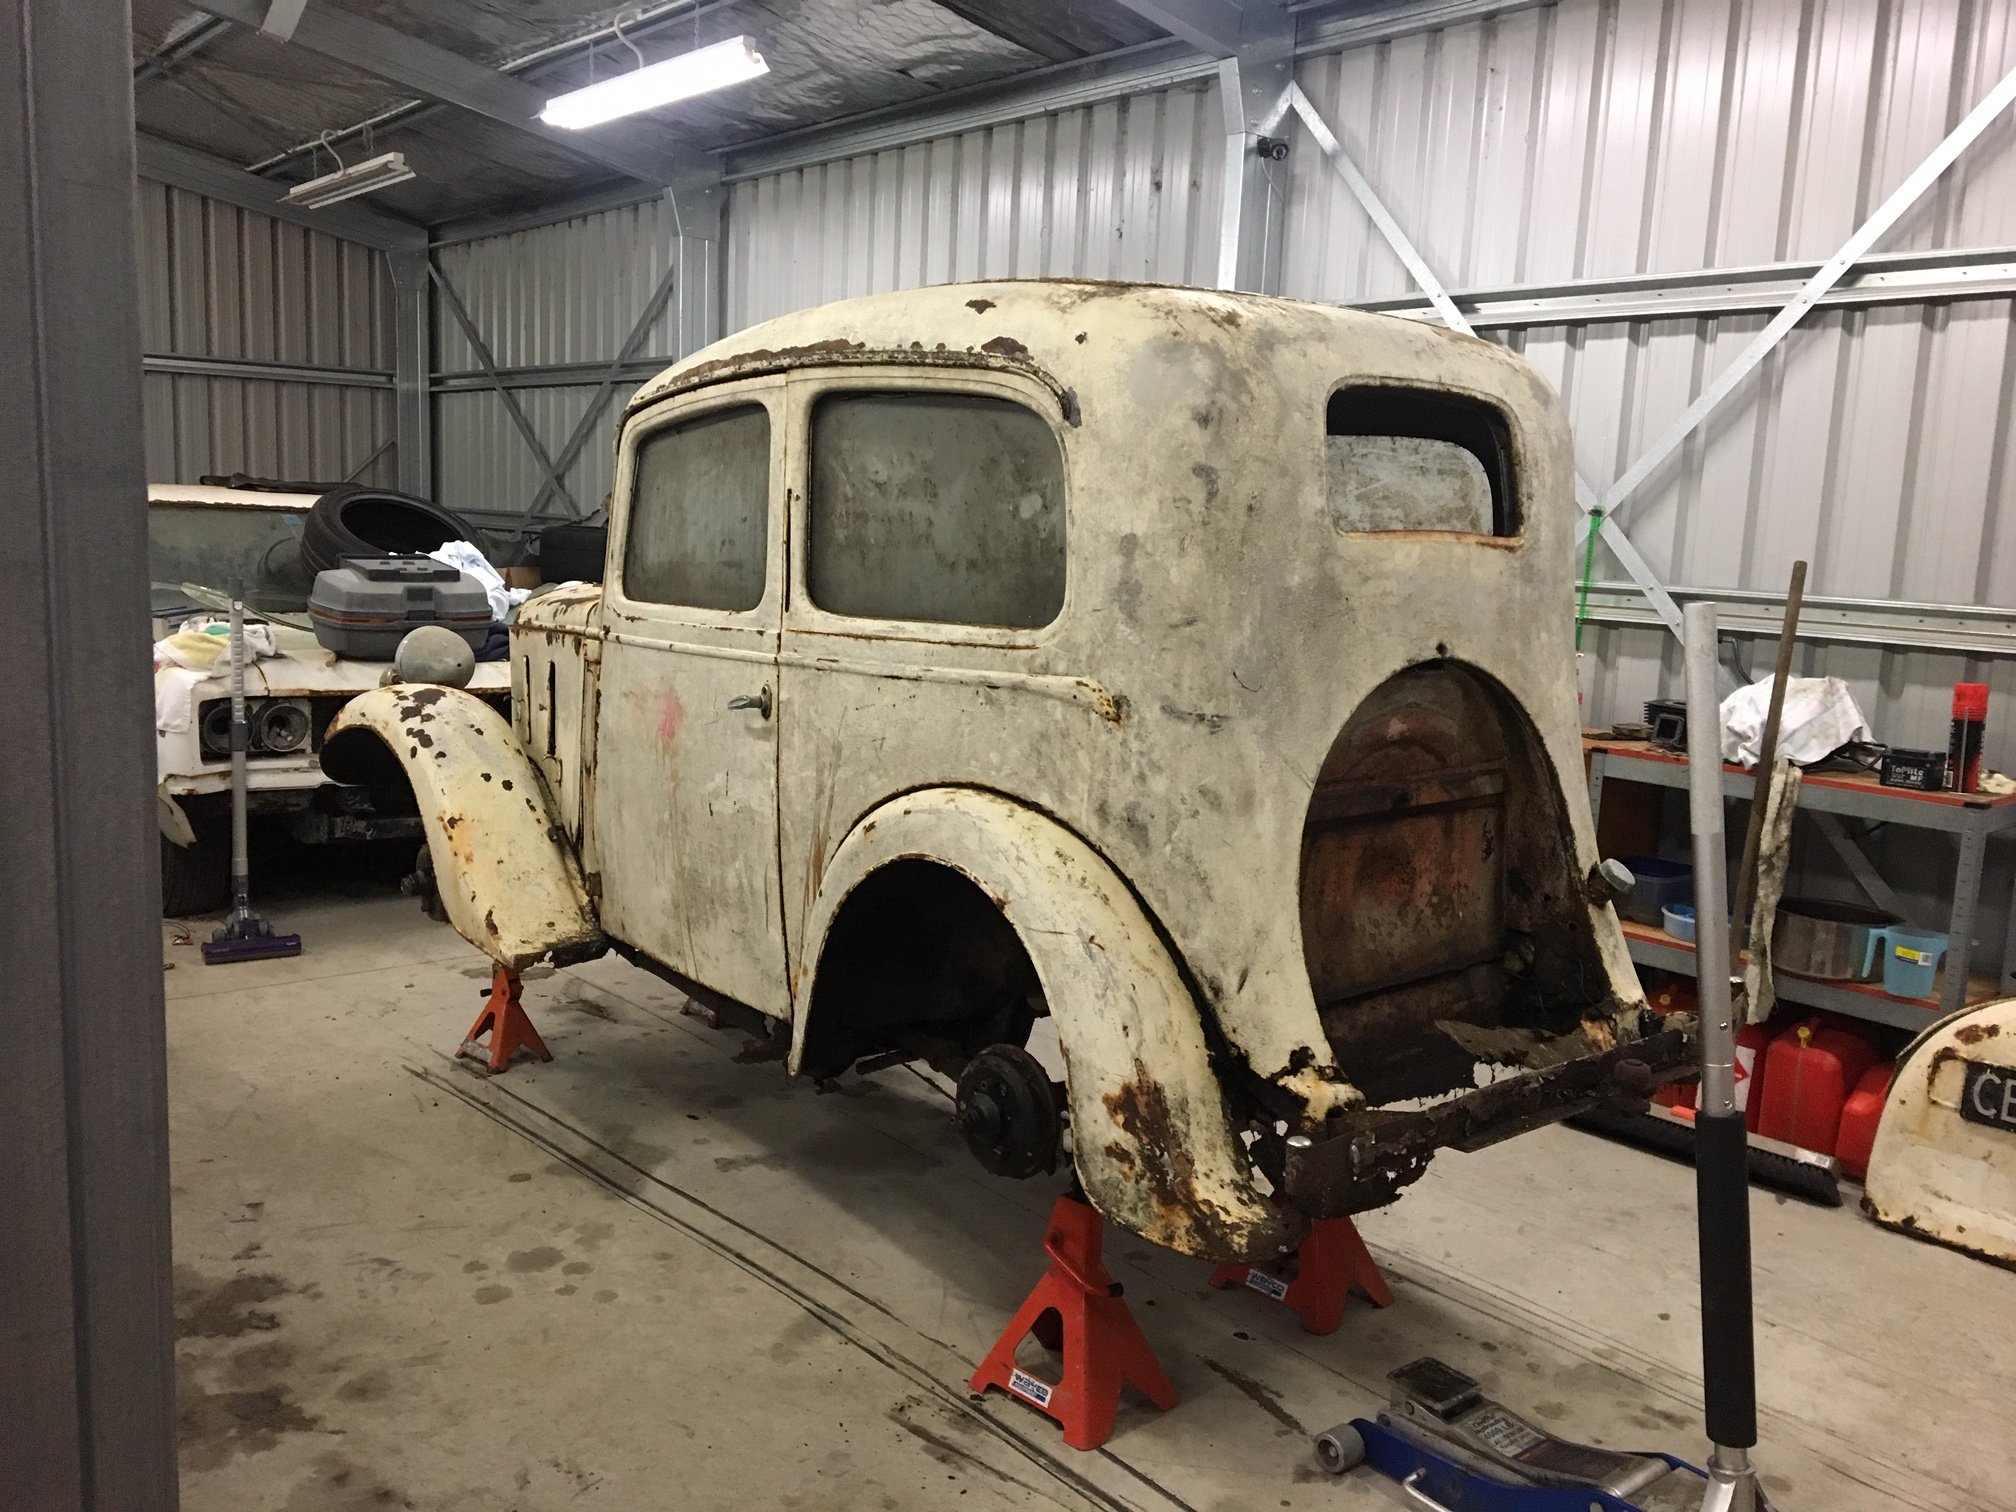
Ok so I'm still chipping away at this. Kinda slow... what have I done...? - Stripped the blue clubman for anything useable and took the shell for scrap (It practically folded in half from rust when they lifted it off the trailer). - Using the front subframe out of the clubman which is the one I need (earlier type), pulled apart that running gear but the bores are rusted out... - Pulled the drivetrain from the yellow mk3 and stripped that one, bores are ok and should come up with a hone. - Took the interior out of the mk3 and started fitting that to the mk2, kinda digging the brown/green combo. - Realised that the hoodlining is different between mk2/3 so am thinking of trying to mod the body to make the mk3 one fit (I 'think' it will)
 11 points
 -
Formed! Shadbolt is my agent and attorney esp in regard to accom but I think I’m pitching a tent and also sleeping under a canvas fabric of some sort this is shall be mean. Will be great to meet people from the internet for the first time ever6 points
-
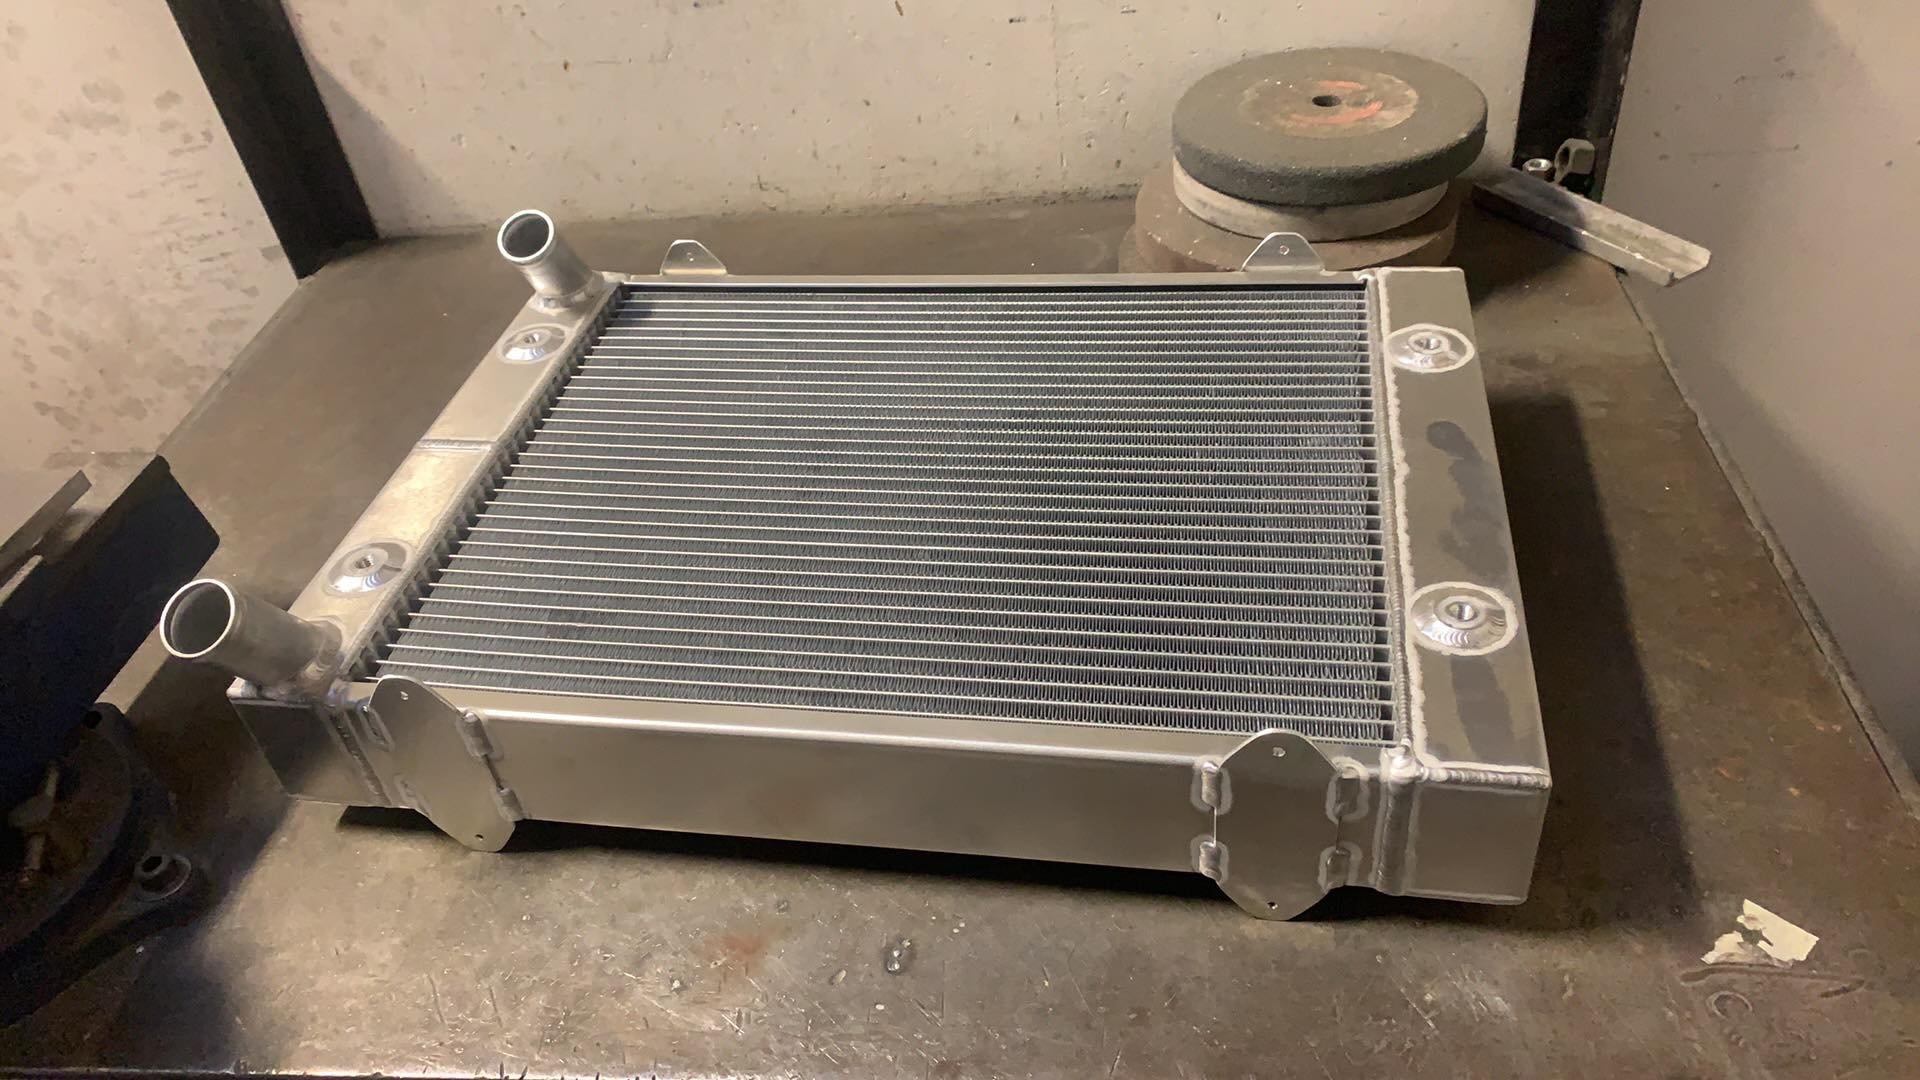
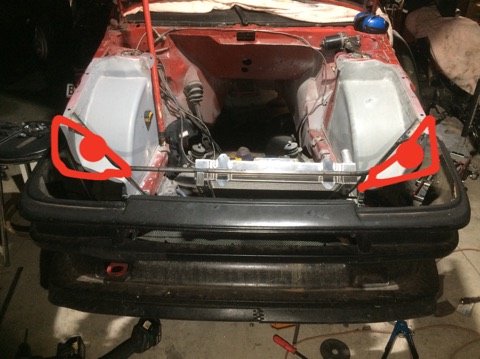
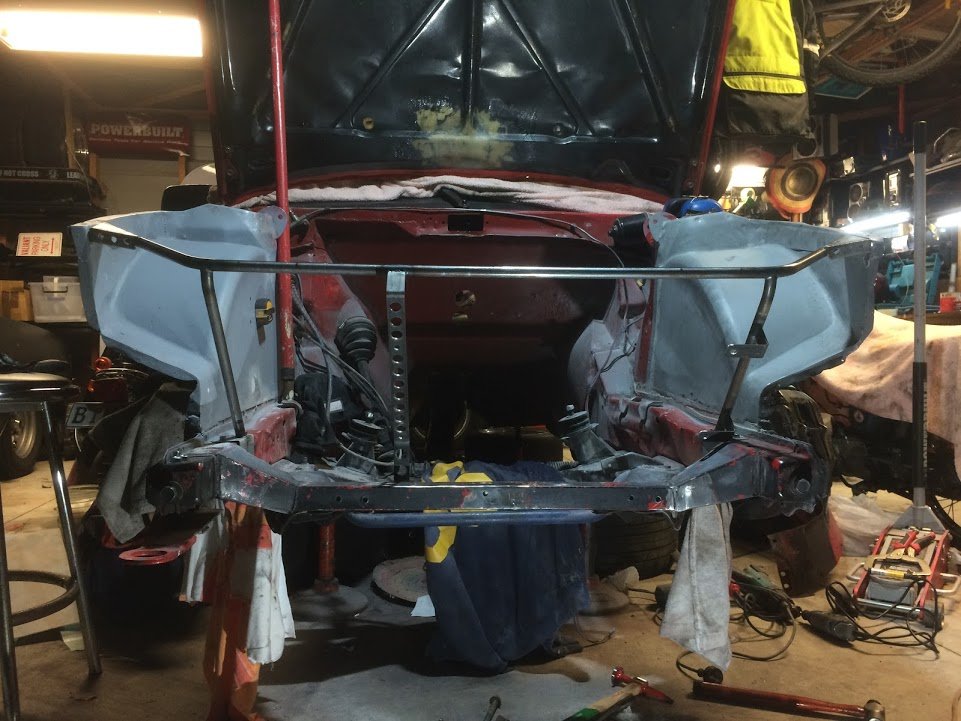
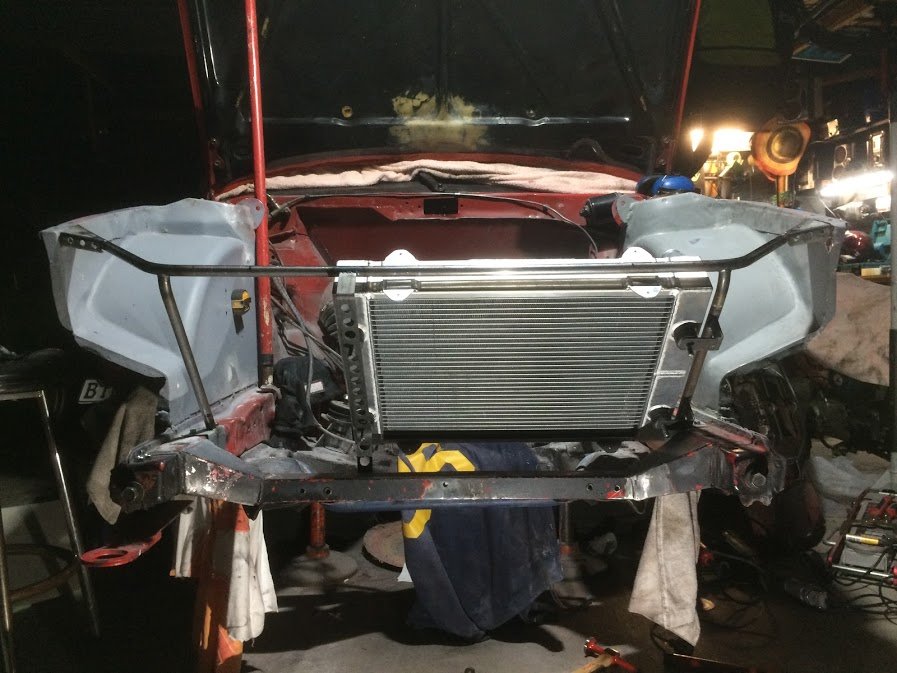
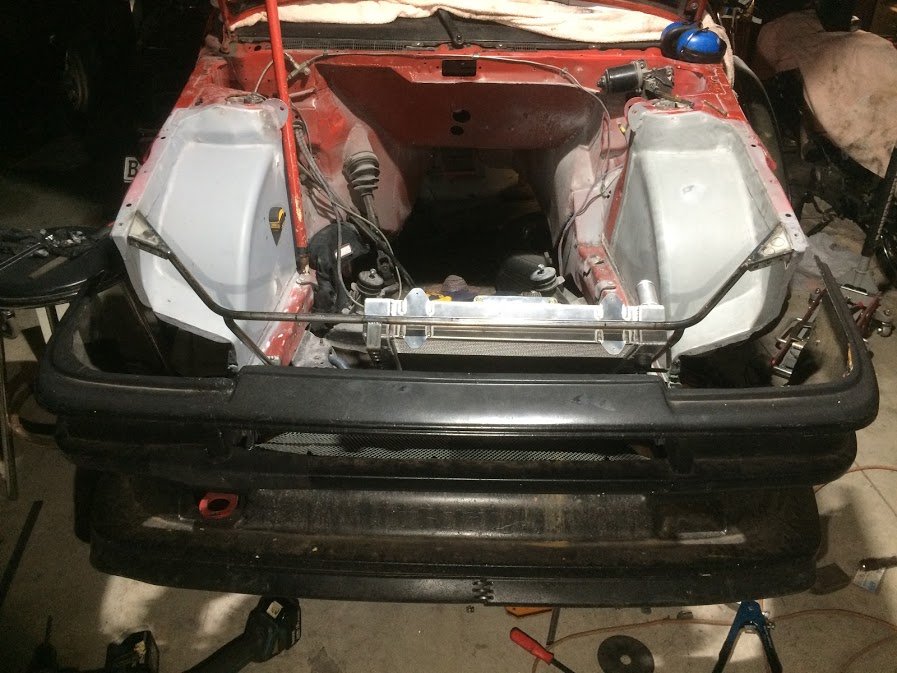
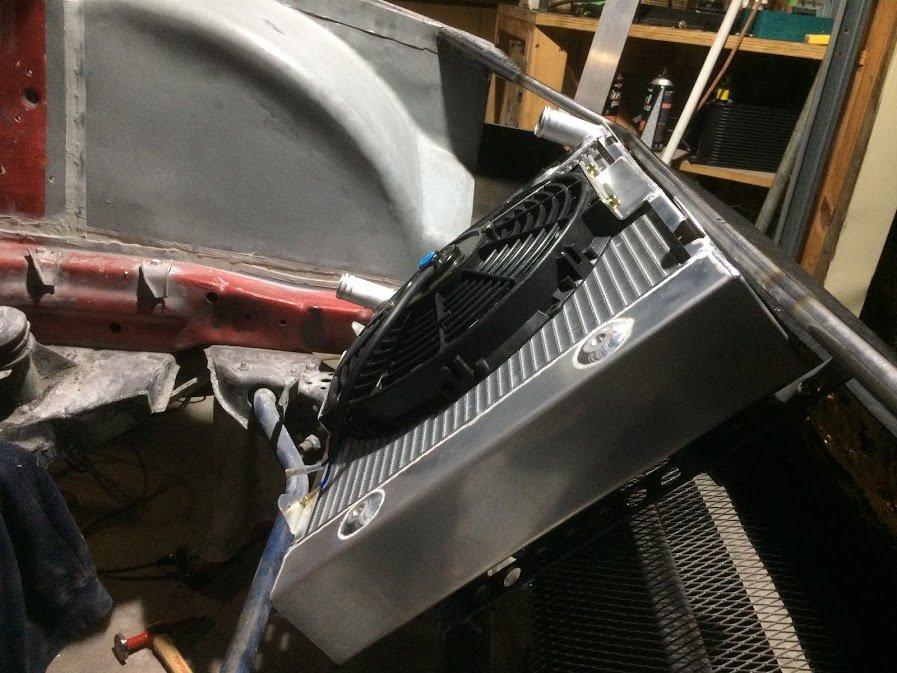
My new radiator turned up on friday from @nick_m at Motorsport Fabrication Services in Christchurch. He made this to custom measurements with custom mount bosses, tags to attach ducting, angled inlet/outlets and a 12" fan mounted in place (not pictured). It's a really nice bit of kit! I highly recommend MFS if you're in need of a radiator or intercooler. We got to work mounting it this weekend. This is what we came up with: And with the radiator in place: The angle of the outlets worked out almost perfect: I think it's starting to look pretty good: .... Hmm, looks like it has angry eyes? Again, huge thanks to @Rhyscar for the fab work and extra brain. I wouldn't have achieved much without him. Next up for fab work is to figure out how to mount the oil cooler and to start thinking about ducting.... But for now it's back to sanding .
5 points
-
Signed up to that forum and will ask the questions after a poke around. came accross a thread detailing how to megasquirt the genIII hemi, so that will be super useful when we hemi the merc SL600 at work!4 points
-
Rockauto delivers again. This time I ordered parts Monday. Received them Friday. just for the size comparison here is the later model dodge starter vs the factory one. Fairly sizeable difference still plodding away on cleaning and painting suspension parts and replacing the bushes. No pictures as I’ve not actually finished any this completely yet. And now I’ve run out of etch primer Got the bill from the machinist for the engine work which ended up being a reasonable amount more that planned (there was extra work done to justify it) which has completely drained the bank account. Also my headers are in the country now so just waiting for them to clear customs etc, all in all still chipping away at it.3 points
-
have begun the process of installing some sounds. got the head unit mounted. next will be figuring out how im going to mount some front speakers. 2019-07-22_08-52-56 by sheepers, on Flickr 2019-07-22_08-52-39 by sheepers, on Flickr3 points
-
That new spike looks like it could be a pain in the arse3 points
-
Mostly finished the engine cover. Not a heap of legroom, but not too bad. I then made a cover for all those electrical gubbins. I then debated about having that whole cover hinge up, but decided that some access holes to get to the important things was a better solution. I have since hinged and latched those. Do I win a prize? Then I fucked around with the surprisingly sweet little stereo that arrived from our Chinese friends. I fucked up but not realising that the Bluetooth on the stereo did not deal with phone calls, so I found a panel mount hands free kit from jaycar for $10 and used the amps aux input. It didn't work at first, then I realised the amp was still connecting to the tablet I use for shed sounds that I hooked up for testing, duh. I mounted it all on some ally, the switch is so I can turn it on without the key if needed. Up is normal acc power, down is always on power, and mid position is fully off. This will be useful for the times the bt does not connect properly and you usually have to turn the key off to restart the lil bitch. It needs some filtering though as a lot of noise from the electronic flasher units comes through, plus the amp has enough capacitance to keep the acc circuit going for 10 seconds after it has switched off. And it has a sweet clunk through the speakers. Cool.3 points
-
3 points
-
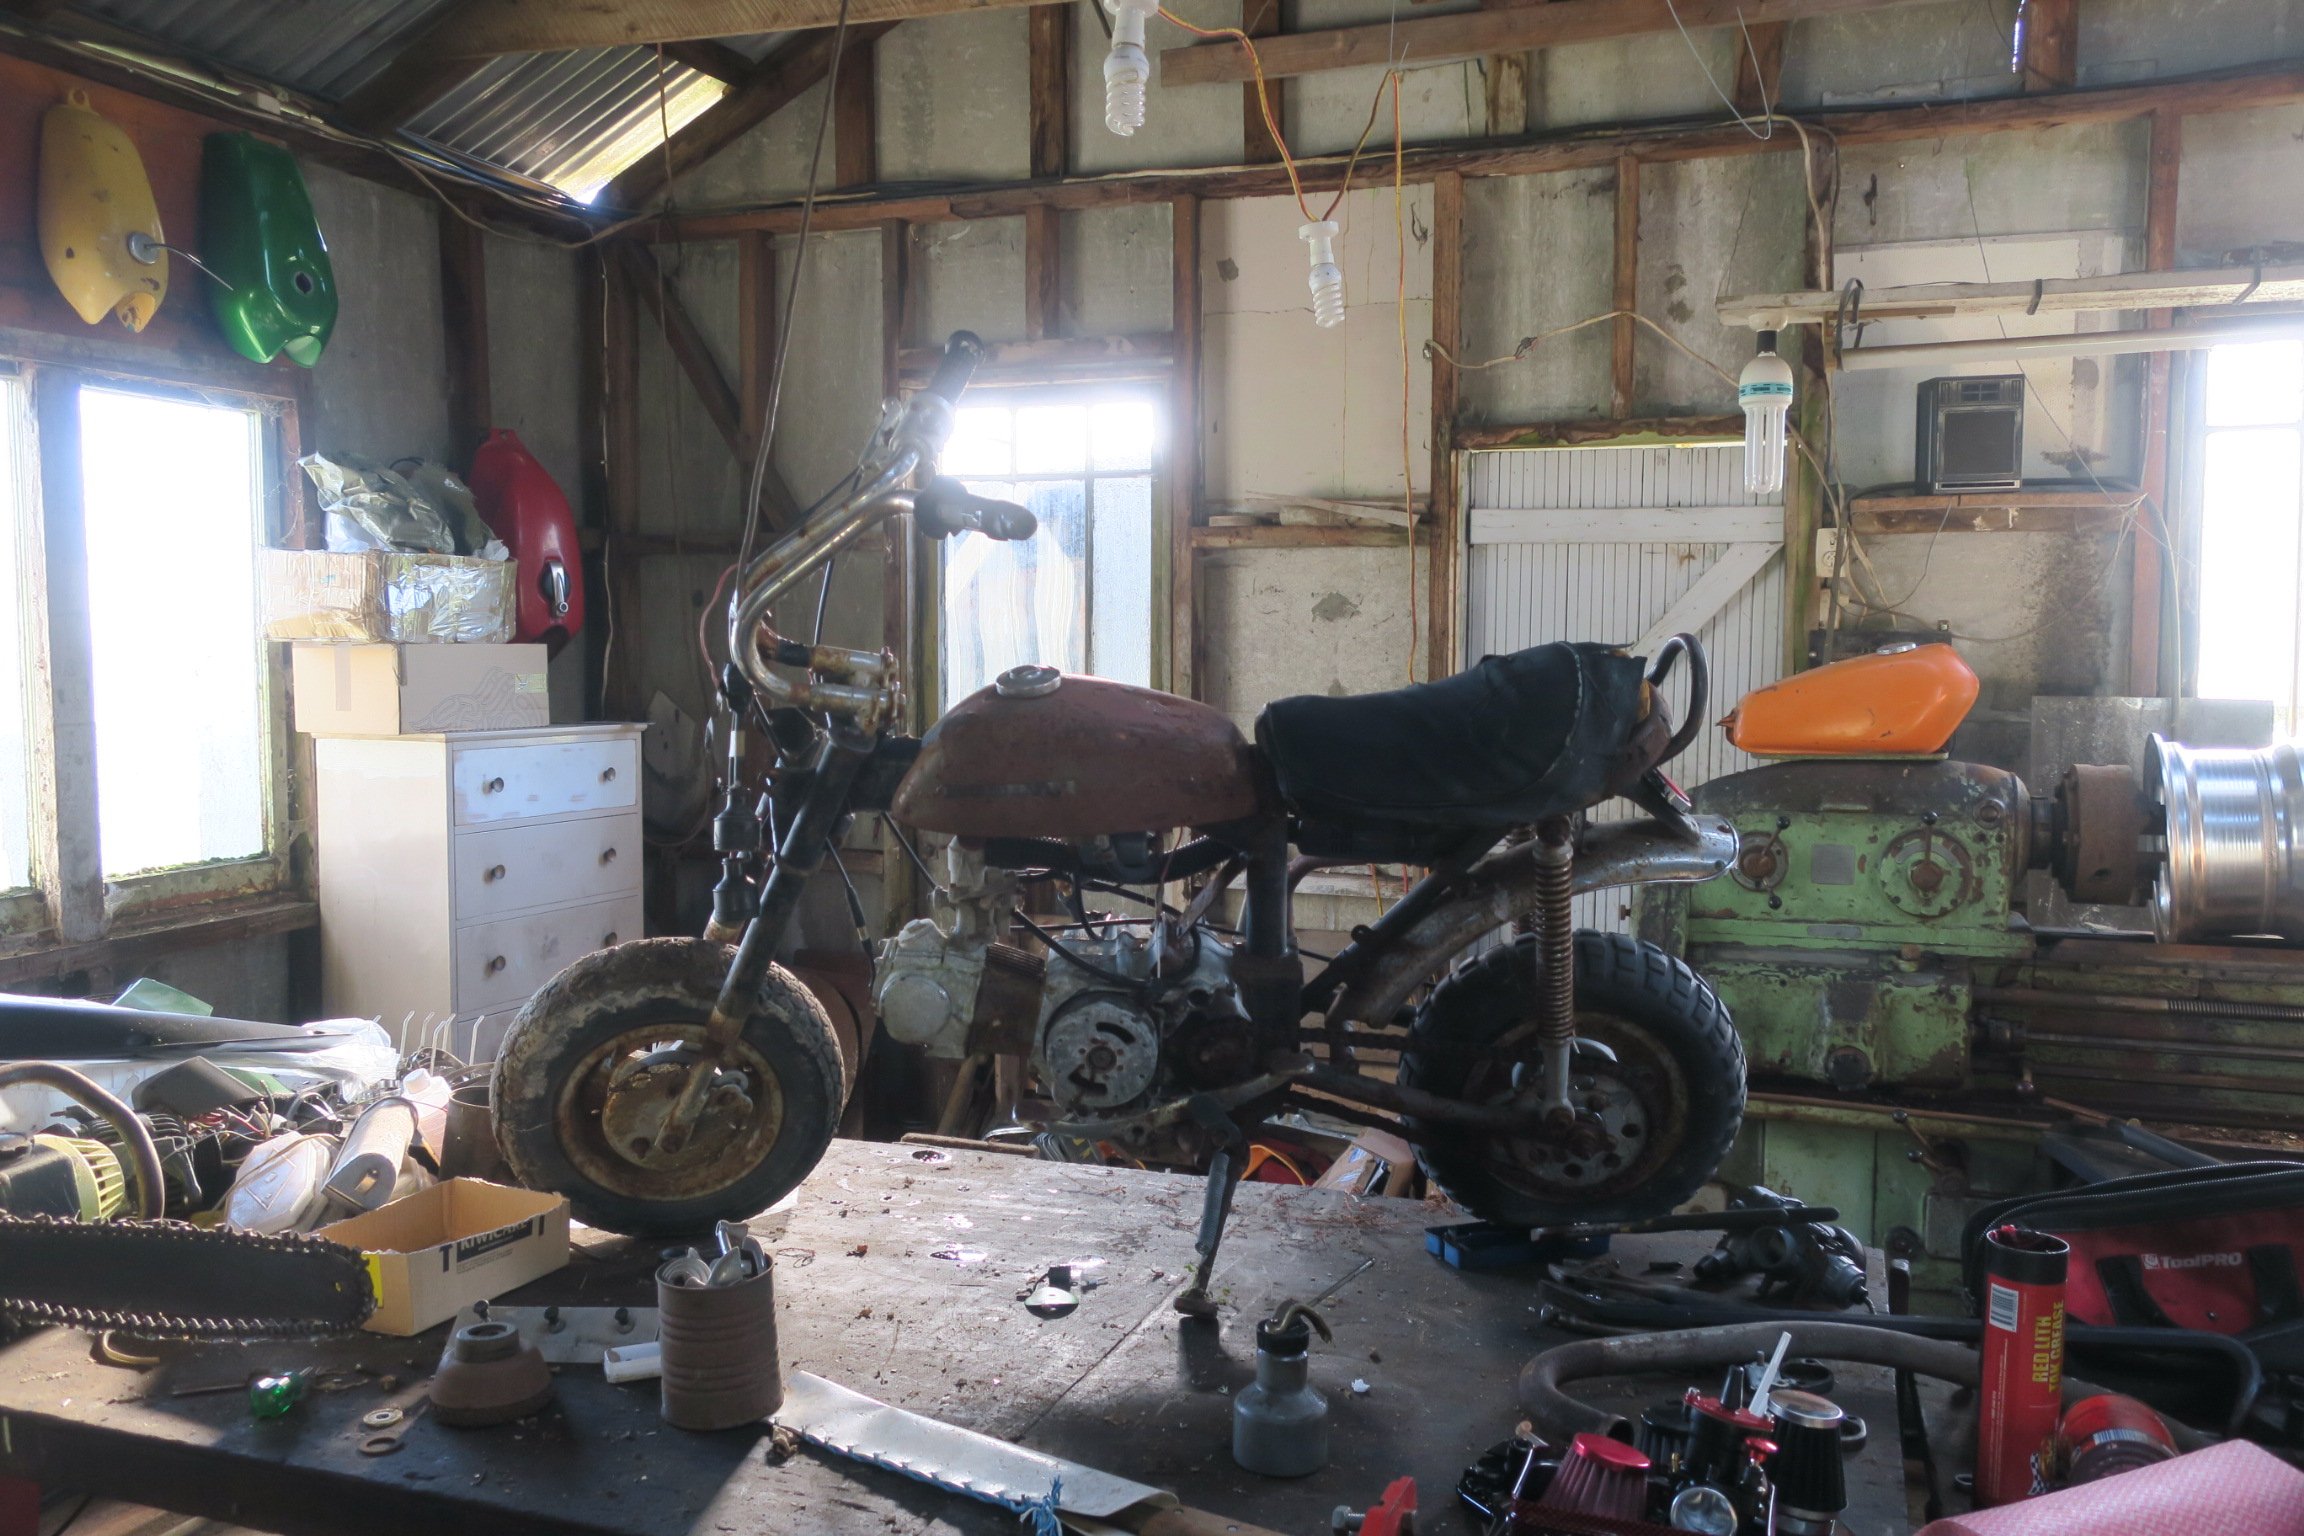
I was very tempted by this when I saw it advertised. A Lifan brand engine will bolt into this. They’re a Chinese copy of the Honda horizontal and go extremely well. Aliexpress and webike have almost every part you need to rebuild and upgrade this too. Longer swingarms, the whole works! Great project.2 points
-
Regarding the first nights accommodation. Even though most of the cabins are full I believe they have non powered camping sites for those who miss out. Give them a call and confirm; but after glancing at the map of the place it seems to be the case. Obviously don't wanna stack the support vehicle with just tents, but yeah. It's an option.2 points
-
Looks like euro gn125's are geared to do max 80kph. I guess that's why so many posts are about them being too slow This one does an indicated 110km at 9000rpm with a full tank of gas, 2 loaded panniers and a duffle bag on the back, and me. That's pretty legit tbh. Now that I have a 12v socket and a 300kg hanging scale I'll swing it off my engine crane to get a weight and do some gtech runs. Also have an O2 sensor I may put on the exhaust to see if I can squeeze a little more from it2 points
-
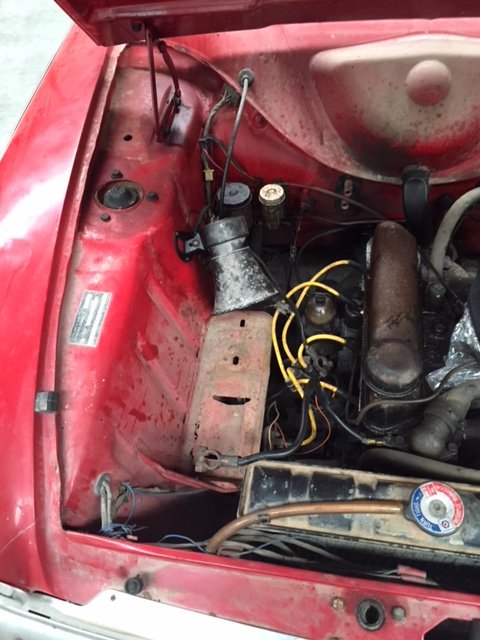
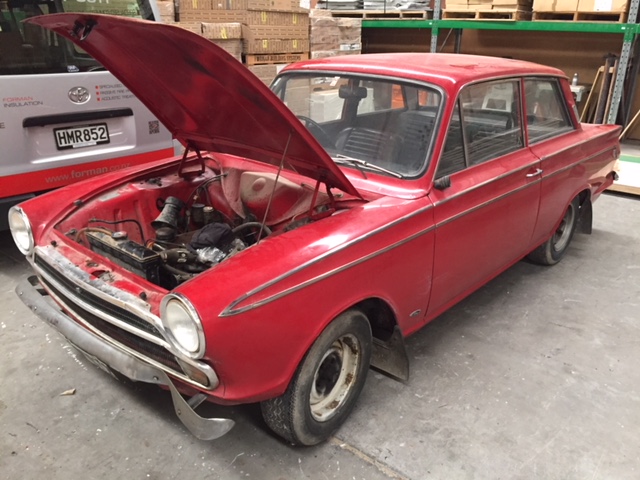
First mod on Gran Turismo 1 weight reduction! Theres is alot of surface rust as the old owner started to sand it back and was left outside Wire brash on a grinder should take care of most of it. the worst of the rust in the floor im hoping its not to bad .Ill get the car in the garage this week sometime and dry the car out. And the mighty 4K-EU.im sure theres room for a turbo.2 points
-
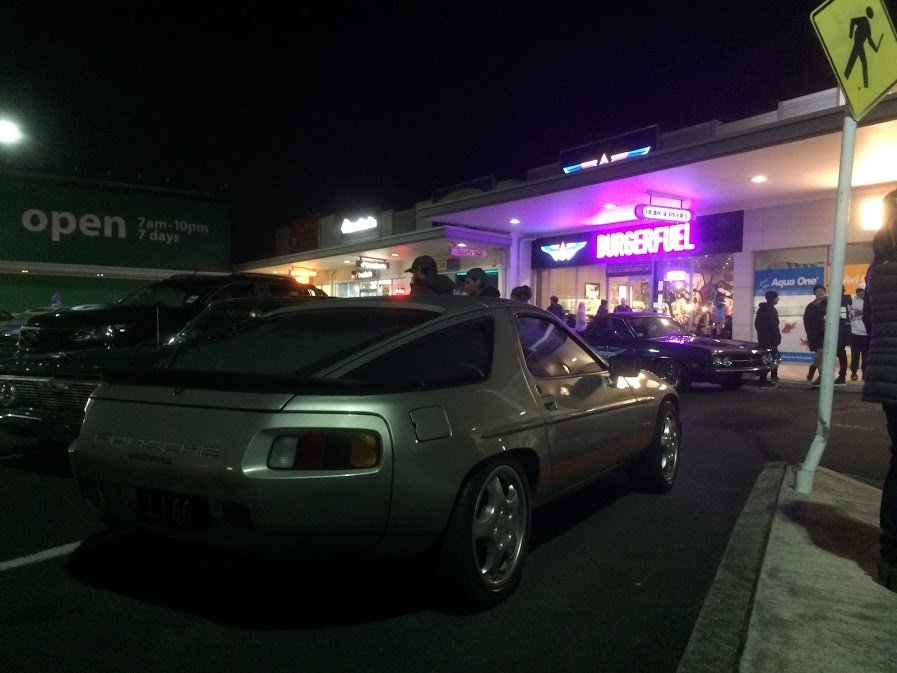
Good meet . Well done to @Archetype for winning 4 FREE BURGERS in the Jalapeno eating competition!! It's amazing what a man will do for free burgers. Well done to @Zeubin for a respectable third place. And cars:
2 points
-
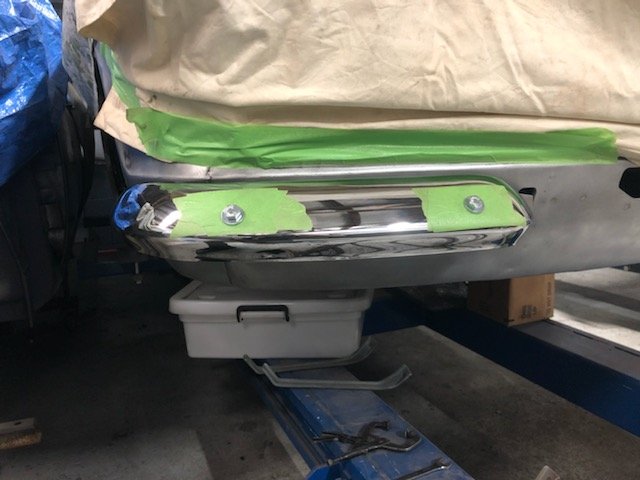
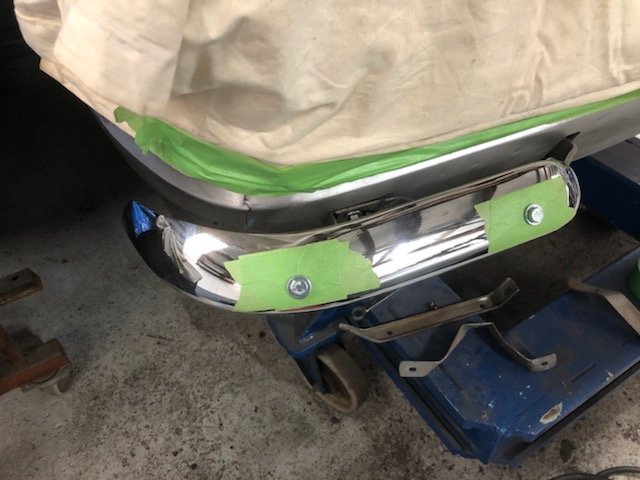
Been away lots lately so no progress on the rubbers. Back in NZ next week so need to get them sorted. Fitted off the front quarter bumpers and had to do a few adjustments to the brackets to get them sitting right. Unfortunately the left front one has had a crappy repair before caroming so it’s off to the strippers for that and the rear bumper and Greg will get them mint before getting chrome plated again.
2 points
-
This thing has been reliable as fuck and still makes lots of noise and goes hard for what it is. Decided to add a vintage sissy bar ive had for awhile. Next up is a suicide shifter
2 points
-
Proof that I am now an auto sparky and fuck anyone who says otherwise; Should have cleaned the smeg off my lens for that last one. Then on to the engine cover, but first I had to build a bit of the intake to make sure I could get it all to clear. There is a sweet spot just behind the cab that will fit a 600x 300 intercooler, I am hoping I can get to that area without modifying my gear linkage too much. Made a rim for the cut sheet metal so the floor was stiffer and the cover had something to bolt to. The intake had to be low otherwise the folding rear seats would hit it. Welded and cleaned up. Looks kinda cool. Then some time honoured 'frame it up in solid round then smash sheet metal onto it' fabrication. It's tight. There was a wee bracket thing that hit the cover when the seat was down so I whipped it off with the grinder only to immediately realise it was the hook to keep the seats up. So now I need to replicate it. Like a cunt. I initially used some real thin galv sheet I had but it was clear I was never going to be able to fully weld it without chasing holes all over the place, plus it already sounded clangy and tinny, so I found some 1.5mm mild steel in the rack and used the thin shit as a template. This meant I could get a nice fold where I needed it using the finger bender. Still yet to do the other side and fill in those gaps, but good progress. Front driveshaft assembly is in getting shortened and balanced at considerable expense. Still yet to hear from engine man. I might have to spend that money on coating the chassis etc and hope I can find some more later on. Or find some more shit to sell. As you were.2 points
-
Just hanging out, being cool.
2 points
-
Been on hols, got back today and had a couple of hours in the shed tonight so I mounted the Safari cluster in the Dyna dash. I had mostly fitted the dash before we went away. Shit will fit ok I reckon, I had to trim the cluster hole quite a bit bigger. Factory looking eh. It's all 1992 So no stylistic clashes happening.2 points
-
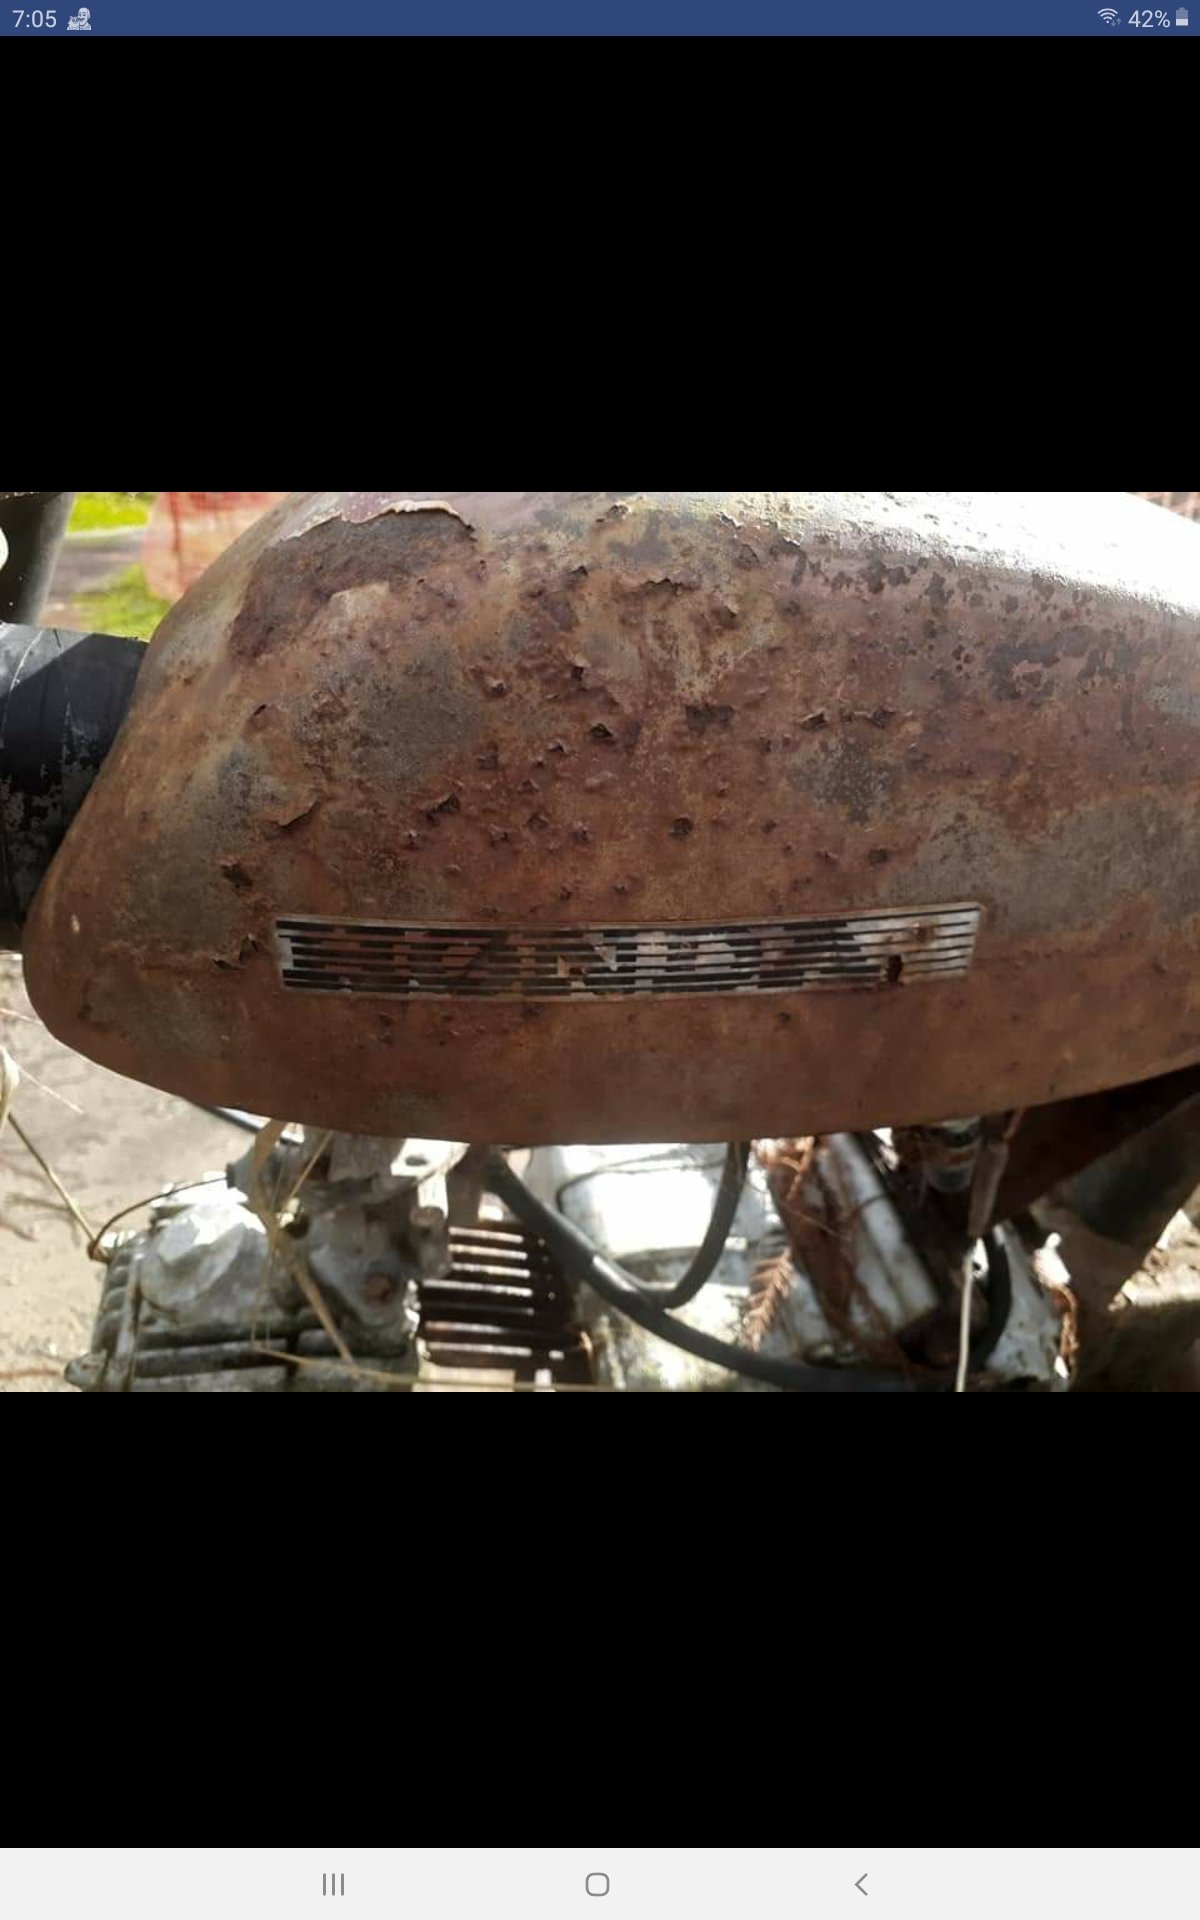
Must be a wall ornament? 70ish vintage, seized as. Rusted though. Any idea of the vintage? Thinking of either bolt it to the building or rebuild the engine and leave it ratty as.
1 point
-
Thanks for this. Given me a new direction to start problem solving. I've just pulled the carb off again. My car has a water choke that isn't functional (the coil has been removed) but I pulled it apart for peace of mind and I've discovered a tear in the diaphragm...ugh. By looking at the carb, this passage leads to an outlet below the throttle butterflies. SO if I'm correct, it looks like this could be a source of the air leak? Definitely running on all four. It actually revs really nice and normal. Just double checked the floats, it was a mm or so out so I've adjusted as necessary. Will give the pump and spray method a go when I have an extra set of hands to help. Thankfully the carb kit hasn't made it any worse - if anything, the accelerator pump seems to be much more 'snappy'. Gaskets are the same as removed. I'm really hoping it's just the choke diaphragm leak that's the issue. I'll get properly into when I get a day off work but thanks so much for the pointers. Sometimes you just need another person's input so you're not going round in circles. Thanks!1 point
-
I havent played on one of these in 25 years so these are only general musings. I don't know your skill level so sorry if I'm telling you to suck eggs. Is it running on 4 when you give it the squirt? Or really lumpy. Like have you mixed a couple of plug leads and its running on 2? Get it to run by pumping it for a few (10-20) seconds from cold then feel the exhaust manifold, are all branches the same lukewarm? If 2 are dead cold, thats a problem. All the same temp, or at least firing, and you didn't play with the distributor or have the leads off, then it is more likely carbie or vacuum. Crank the engine with the fuel line to the carb off. Are you getting enough fuel supplied from the fuel pump? Can you check the fuel float level, is the new needle/ seat assy letting enough fuel in? A quarter full carb will get a car firing on constant prodding the pedal but not have enough "head" to get fuel thru the venturis. Can you get someone to pump it to keep it running while you spray short bursts of Start-ya-bastard around the base gasket and manifold to block surface?( keep yer head away incase the engine backfires) If it irons out the issue a bit you have pinpointed the problem to where you are squirting Cant remember where the brake booster pulls vacuum from but have you cracked the vacuum hose pulling it off or refitting? Not sure if thats the vac line you mentioned but if it is leaking/old/cracked its big enough to kill the engine. The dist vac line off won't give that much grief Can you mix up the jets in the same venturi? Swapping side to side shouldn't be a problem, swapping around within the venturi(if you even can) would be sub optimal at least. Do you know now where you started from with what jet is where? Has kitting the carb made it better or worse than it was after the manifold was removed? If it is the same bag of balls you haven't manifestly fucked things up doing the carbie job, the oil leak/inlet manifold job is where it all fell apart. Have you got the old carbie gaskets etc. There are normally a choice of top gaskets with different holes and portings. Compare what you fitted with what you removed. It sounds like there be 2 issues. #1 was the running a little rough.# 2 is bag of balls since the inlet manifold was removed. Be calm, use logic. Good luck.1 point
-
Haha ma it sits miles away haha so wheel to wheel its actually longer.. than my 1982 xv1000. It when bars folded down in my oddysey. Goes from back door to half way algon drivers arm rest.1 point
-
Thats right, far overdue is an entry form. Please could everyone that is 100% committed fill in one of these, need to get a grasp on numbers. Don't fill one in if you don't have accommodation figure out, cause I don't believe there is much left on night 1. Also, not mad or anything, discussion is cool, just for those trying to find info in here1 point
-
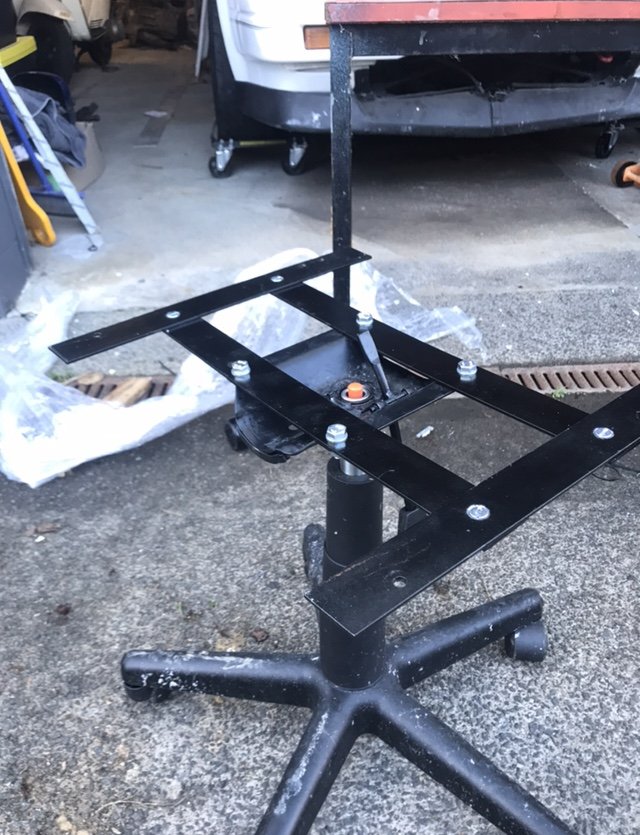
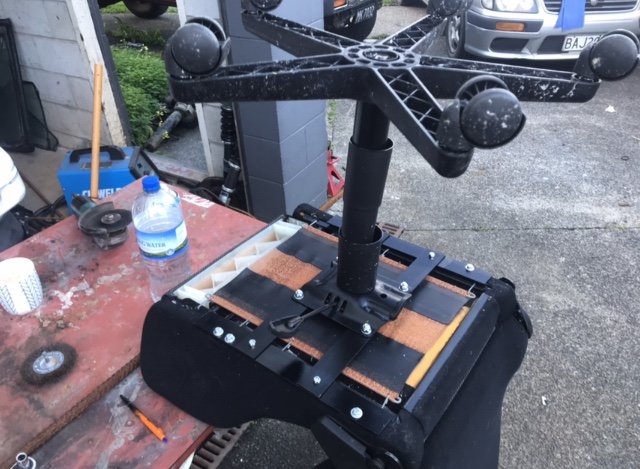
Needed a chair in the garage. old recaro + $30 warehouse office chair + flat bar
1 point
-
Hole is probably too high for it to be used as a bong.. but what I really wanted to comment is, as someone who has experience cutting glass etc, that is IMPRESSIVE that he managed that with a hand drill !1 point
-
Ditto that man ^ please do nothing more then is needed t to make this legal to drive on the road and roll it as is. Don't even clean the windows.. Except for windscreen. Its so cool!1 point
-
Last night I had been in the shed working on one of my bikes, finished and packed up but still had half a bottle of beer left before I could leave. So I wandered over to the little 7, which has been sitting with the pistons soaking in CRC for a couple of weeks now, and as expected, I lifted it off the stands by the crank handle Had a couple more mouthfuls of my beer, lifted the head back off and gave the pistons a fairly gentle tap with a hammer and block of wood. nek minit NO FUCKING WAY! i’m chuffed to bits, it turns over beautifully smooth, and has no real marks in the bores that I’ve seen yet. We pulled the dipstick and it’s full of oil that looks better than the stuff in my daily. The original goal of “get the wheels to turn” has crept now into “let’s see if we can drive it out of the shed”1 point
-
We took the car to my dads workshop as he has a bit more gear than me for getting things free'd up, the initial goal being to get it to a state where it could be pushed around and easily moved about the limited space of my own workshop. We got it into the shed, jacked it up, squirted some CRC at the wheel studs and left it overnight. I came back the next day to start the mammoth task I was expecting to get the wheels off. Armed with a range of metric and imperial sockets, I found the nearest I had to the BSW (*shudder*) wheel nuts and gave an exploratory lean on the breaker bar for the first nut. It turned easily and then came off by hand... NO FUCKING WAY... I repeated this for all 12 nuts, yes it has 3 stud wheels! What I had set aside an afternoon for, took me less than 5 minutes. I later went to take the bonnet off it, it wasn't attached properly and only had one bolt in it. No tools required here, I undid this 82 year old bolt with my bare fingers... As I said earlier, this thing has given me a few surprises about how easy it is coming apart. This is probably a good point for an explanation... When grandad parked up a car for what he thought might be quite a lengthy period of storage, he had a habit of pouring a few gallons of waste oil over them. Makes a hell of a mess and collects every spec of dust and dirt, but it does an impressive job of keeping everything working. The 68 Rambler Rebel in the background was in the shed next to this, and everything on it moves and functions and it has minimal rust due to the oil protection. The floor pans in the austin look as though they have had a tube of grease smeared over them, but zero rust there. The only real rust on the Austin is around the spare wheel, and in the sills, where the oil didn't really get. I've been having a tinker to try and get the engine free'd up. So far I have managed to remove the head, exhaust manifold etc, all without any broken studs. Thanks grandad! In fact the only thing I have found seized up on the entire car so far is the lever for the folding front windscreen (and the engine...)
1 point
-
Since my last update I have re-kitted the P/S pump I’ve also shimmed the relief valve to lower the assistance given as the steering was too light at higher road speeds, I’ve replaced all the inner and out tie rod ends and the drag link, I dropped the block, crank and heads off to my machinist, block had been acid tanked, honed and had the cam bearings replaced. The heads have been checked over, machined, machined to take the valve springs, couple of worn valve guides replaced. The valve springs turned into a bit of a headache, the double springs supplied with my cam kit ended up having 140lbs of swat pressure which is was too high for a hydraulic flat tappet cam, We ended up ditching the inner spring and shimming the outer to end up with 100lbs seat pressure. A bit annoying but at least it didn’t turn into a major. Dont have any photos yet as it’s all plastic wrapped as it will be a couple of weeks before I start assembling slowly coming together, made another couple of orders from rock auto got a cam thrust plate with a tensioner (from a Dodge V6) as the factory 318 doesn’t have one, got some rubber lower arm inner bushes as apparently the complete polyurethane bush kit I got for the car doesn’t come with them (and no one lists a poly bush for it) ordered new rad hoses, bypass hose, rear spring shackles (as mine were too rusty) also ordered a starter motor from a 1992 dodge Dakota as with the headers I can’t use my factory starter due to the size. You can buy A/M mini starters but they are around $400, or as most of the guys in the states do you can get a Dakota starter and it’s basically a factory mini starter and at $71usd plus shipping it’s still way cheaper than an A/M unit. For now I need to let the bank account recover so ill be working on tidying up the rear suspension mounts and springs.1 point
-
"At the Toyota meet in Geneva you told us that it was user negligence that caused the failure." "The Toyota Warranty department pressured me to lie" *crowd gasps* "Although the users were highly irresponsible, ultimately the cause of failure was the graphite material on the tip of the gasket. When the waterpump speed falls below 500rpm, as per their test, any increase in con rod speed with blow the graphite into the exhaust and an unstoppable thermal reaction begins." "So turning the heater on would not help cool the engine, as per protocol?" "It would turn the heater core coolant straight into an explosive gas further destroying the gasket" *crowd gasps* "Order! Order! Please continue. Why was it designed this way?" "Same as everything else on a 5M-E! To save money! Every other company use higher torque on the bolts and a multi layer steel gasket!" *crowd gasps*1 point
-
The wiring is pretty much there now bar the speedo cluster, a bit more tidying in the cab and adding some Deutsch connectors in the rear. And a licence plate light. Now I am a difficult bastard at the best of times, and part of this is that I hate car stereos with all their bullshit inputs, eq settings and animated screens, another part is that I have not willingly listened to the radio or watched television for more than two decades, a small and ineffectual rebellion against capitalism. I only listen to talking books over Bluetooth when driving and fucking hate it when I get into a car after someone has been used it (Shane you dick) and has fucked about with the stereo and turned on the radio. So to prevent this occurrence I have bought a top quality Bluetooth mini amp off Ali express for $54, this has two tone knobs and a volume knob, and no display. Perfect. It is a nobsound brand lol, right up my street https://s.click.aliexpress.com/e/u5tcaeM In other news I have had some front driveshaft adaptors made so I will be sorting that out shortly. I will hopefully have enough cash for a radiator in the next few days as well. In the realm of actual work I have mounted the rear seats. Not masses of legroom but they work well and pack away nice and tidy; It will be tight for the engine cover but do able.1 point
-
It will sort of have the same style tray, but not the roll bars as this will make it way harder to get stuff actually on to the deck. Mostly cos I have a fucking great crane now;1 point
-
Loom arrived, not as scary as the original one, but still not pleasant to contemplate. Ignored it and added deck bits.1 point
-
Made a new bit of the blue box section that mounts the steering box. Then after a bit of positioning fuckery I pulled the whole lot off and welded it on the bench for ease of access. Then slapped it back and started welding the easy bits. I will leave the rest of it for when I strip the chassis for painting etc. and can get the positions easier for a nice bead. Then found a spare plug and hooked up my shitty lathe to the power. I discovered after I got it that the low speed gears are broken, so I had to get inventive with the mill drill as well. It worked out ok, but I am now looking for a cheap VSD to run the lathe. I then made some crush tubes for the box mount out of some spare M24 threaded rod I had lying around. After I did all I could on this (but obviously not take anymore pics), I finished up the cross member that goes where the gearbox mount was, and now acts as a sump guard. This is needed as I have the engine sitting about 40mm lower than factory. This will also be part of the mount for the front driveshaft extension sometime in the near future.1 point
-
Not a lot happening as i am still broken as fuck, but pain is just signals in the brain so I ignore it and carry on as much as I can. Passenger seat is in after significant dicking with the engine cover. Way less welding needed to the actual seat though. The inner bit of cover might need a bit more bracing, but it lifts and clears the seat ok. I will make sure the rad cap is positioned in this gap. I even got the wife to sit in it to make sure it was comfy enough for her, she seemed generally satisfied although the hood lining got the stink eye.1 point
-
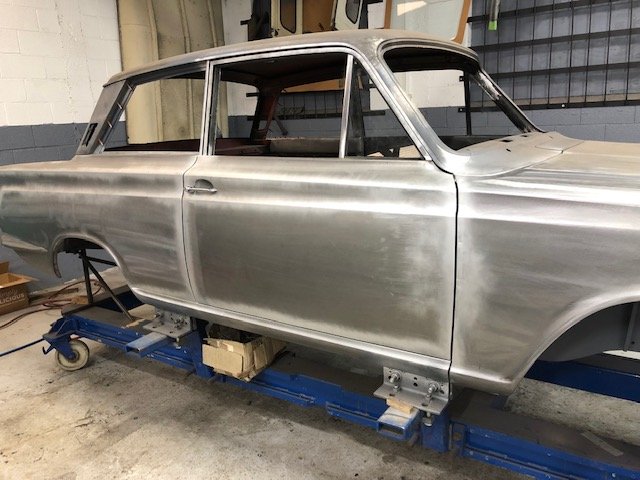
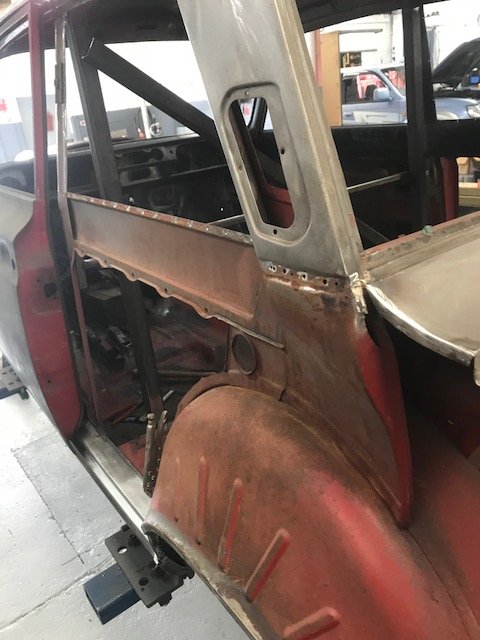
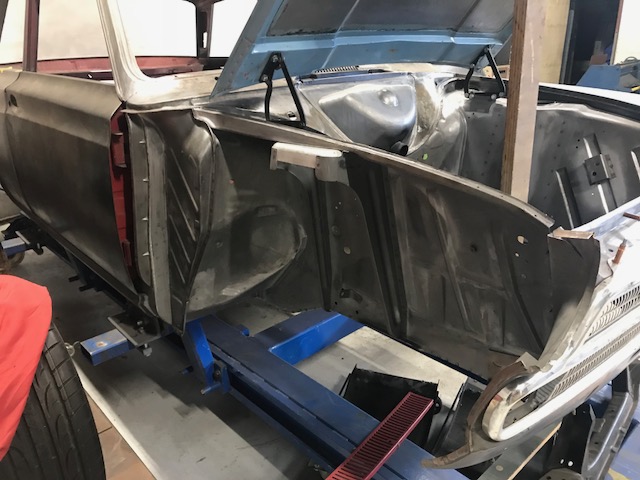
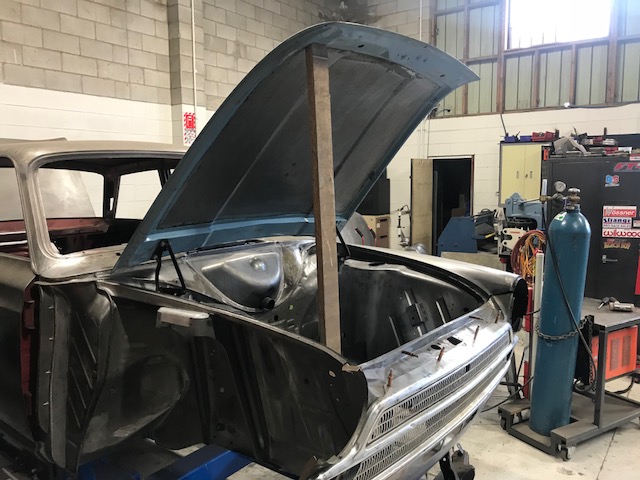
Drivers door complete and only the boot lid to go and body work finished. Still trial fitting parts etc and once done it is off for the final blast and prime then off to paint.
1 point
-
A bit more progress. I bought some Vitara seats from the wreckers, these are the same frame as the ones I put into my bus so I know they can sit pretty low once you start cutting and shutting. They are a bit more supportive than the Dyna seat, and they have the added benefit of being a pair, not a single. Banana for scale; I removed the bar that runs along the back of the seats, this allows the seats to recline into a far more comfortable position. It will go back in when the seats are installed and I know how much clearance it will need. I will need to split that engine cover lengthways and add another hinge and latch. This means I can still get into the rad space without removing the passenger seat. This shouldn't be a drama. I also checked the bump steer situation last weekend, first with the factory setup, then with the new arrangement. The new setup turned out pretty shit as my positioning of the new steering box did not put the tierod exactly in line with the factory setup. This was due to some geometry that I had to guess at a few weeks ago, but when I moved the box up 25mm this made a huge difference, it is now slightly better than the factory setup which is a big relief. The brakes look pretty new with minimal disc wear so that is good. About there is where things have stalled as my back went out pretty badly and I spent a couple of nights in hospital. I'm home now and itching to do stuff but I should probably take it easy for a while. I am going to have to get serious about losing my belly as I am sure that would make a huge difference to the situation. Fat old fuck that I am.1 point
-
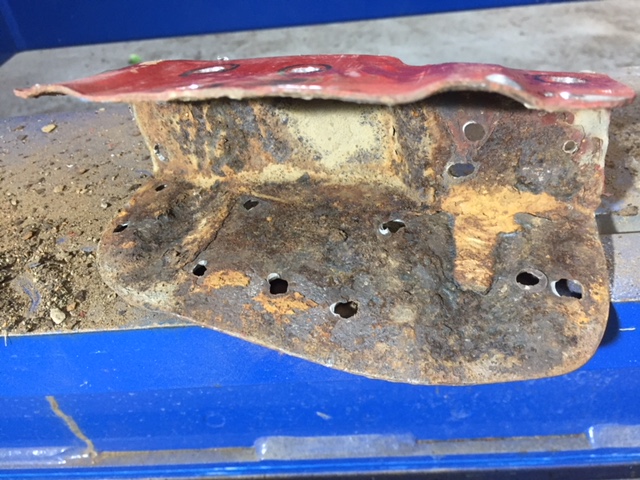
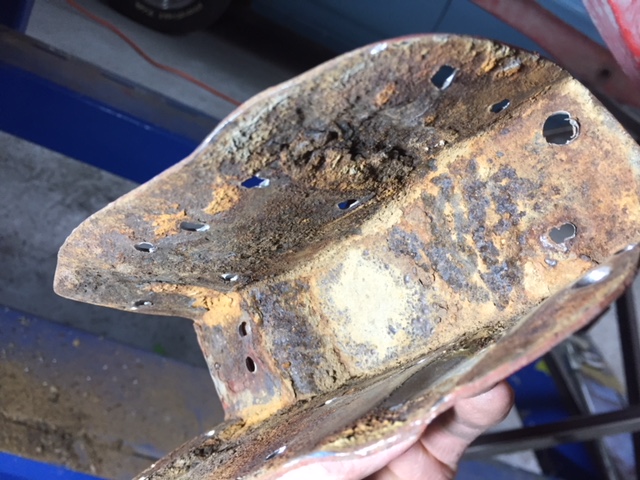
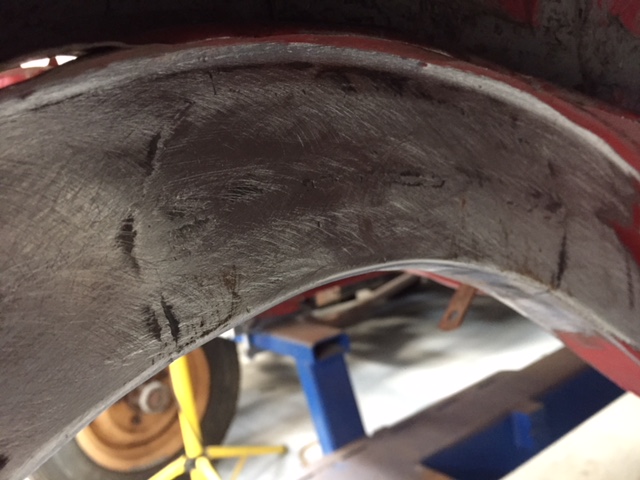
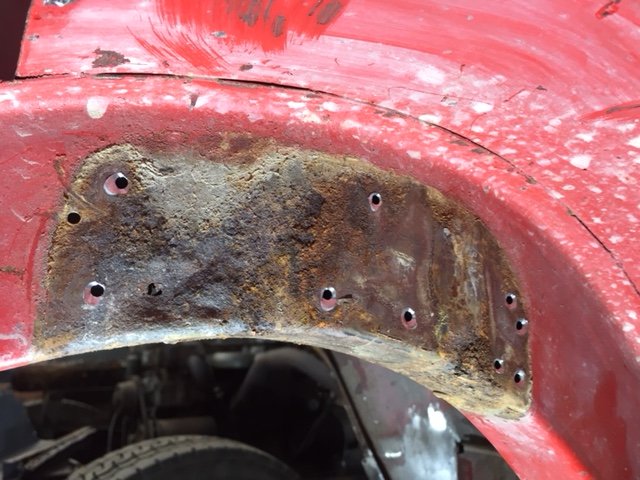
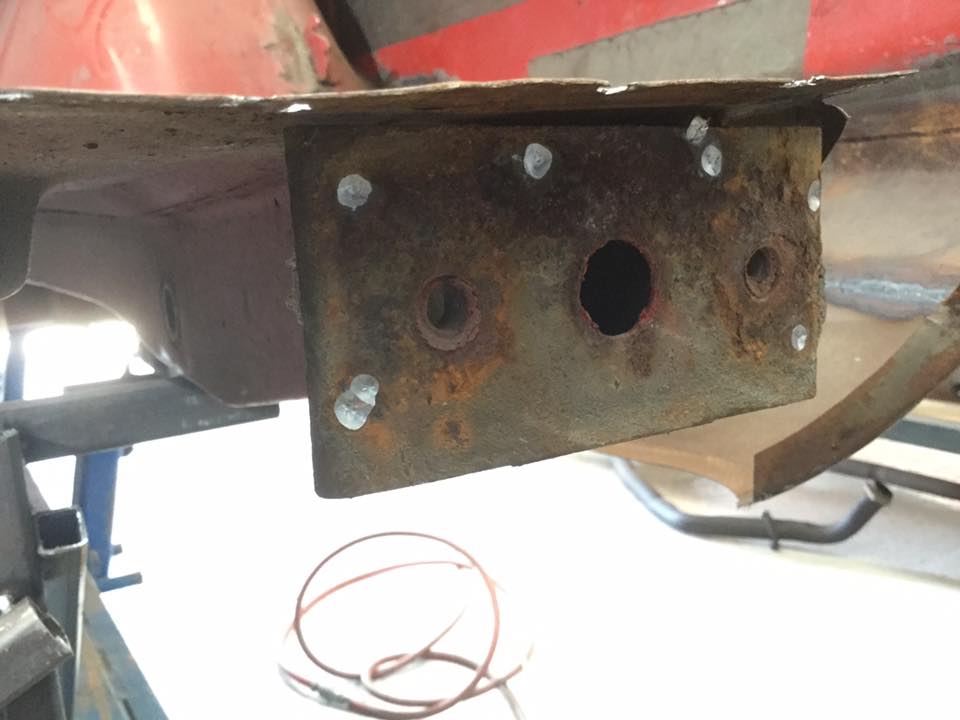
More progress with the boot floor being removed which showed up some rust in the rear chassi rails. One side has been repaired and the other well on its way.
1 point
-
Some more pics
1 point
-
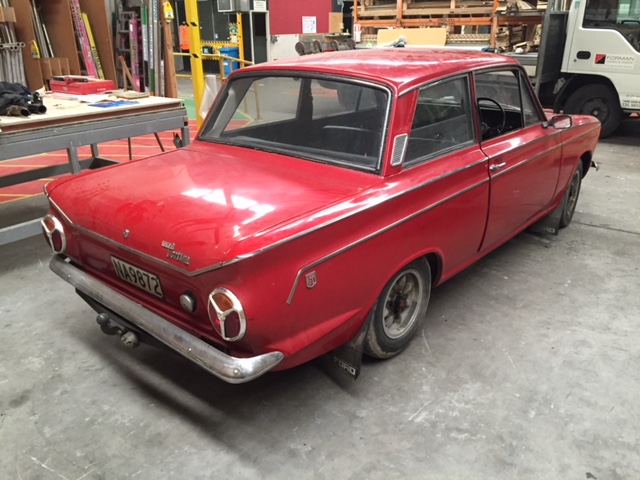
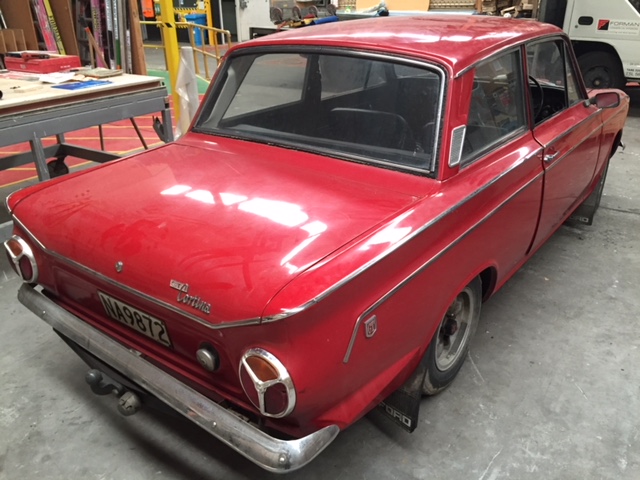
Found these pics of the Cortina just after it arrived from Christchurch after buying it. An old Barry had owned it therefore the rags over the carb. He also had adapted an HQ Holden air cleaner to fit which I should have taken a pic of and was the first thing I threw in the skip followed closely by the mudflaps and door mirrors.
1 point
-
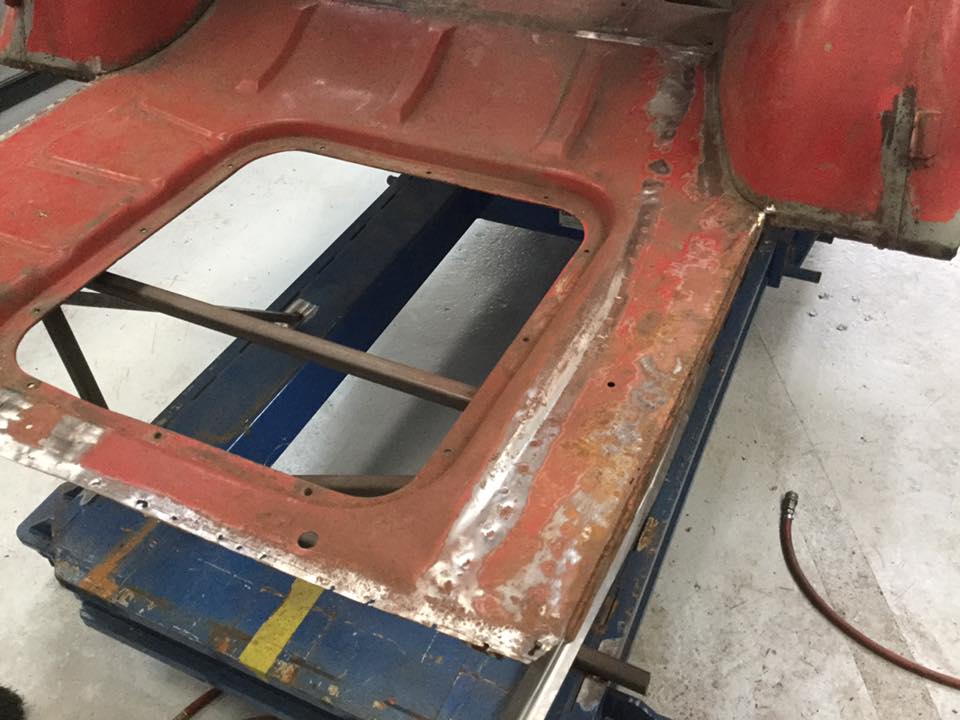
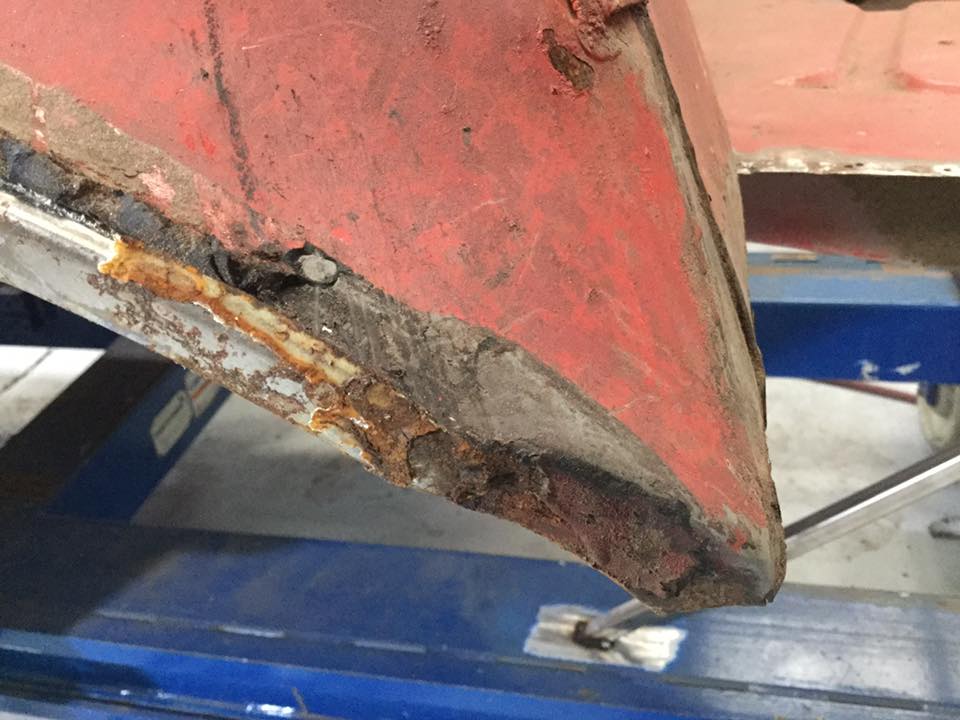
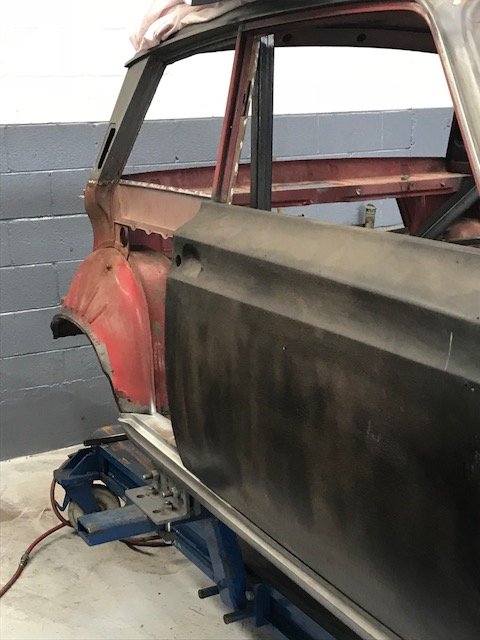
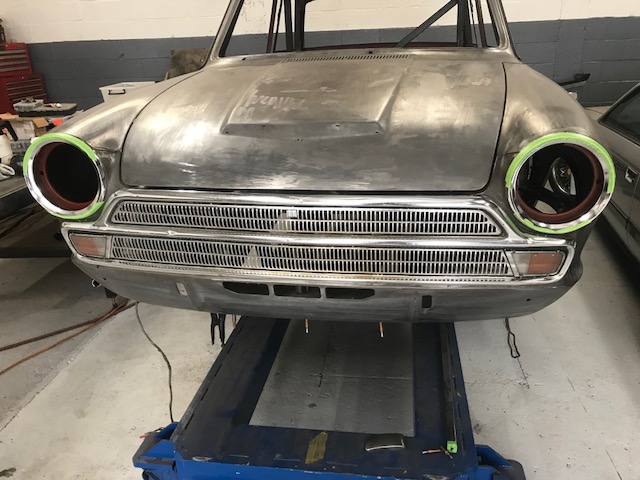
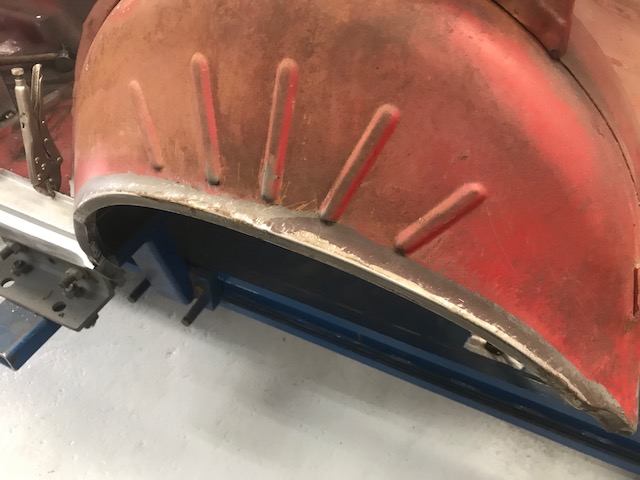
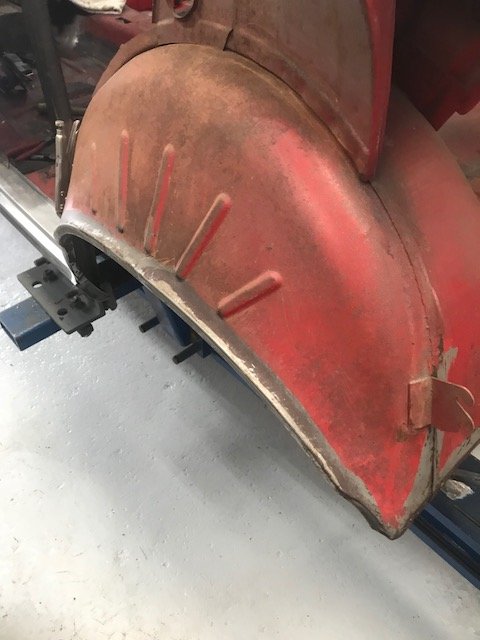
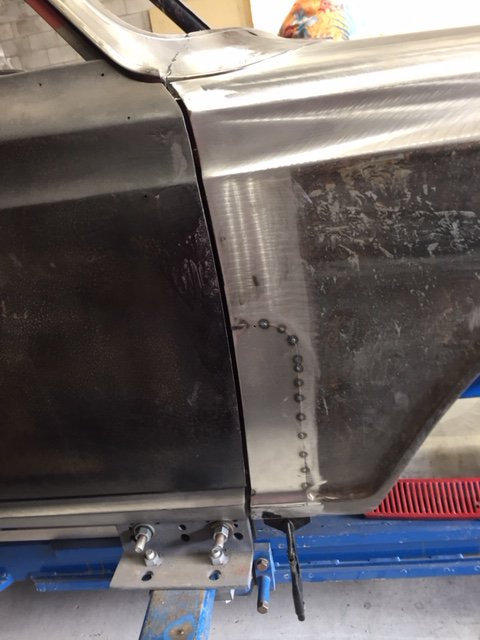
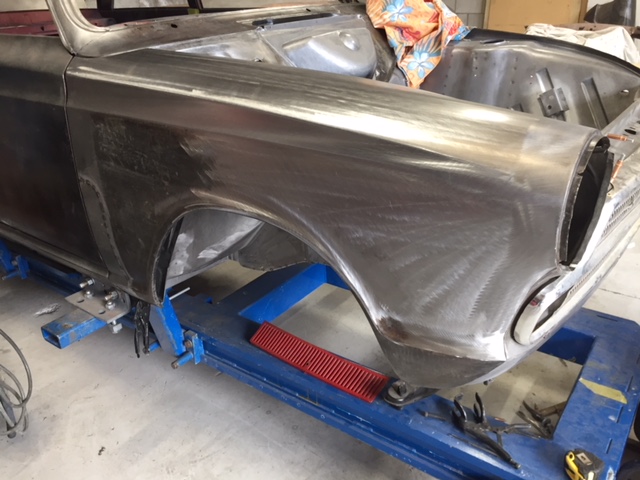
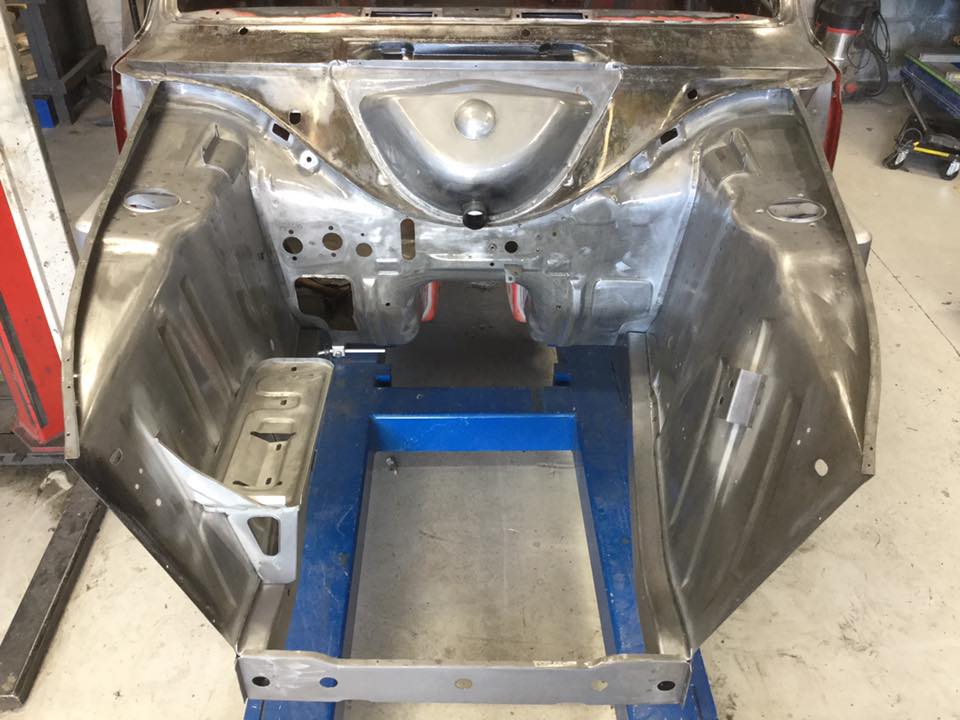
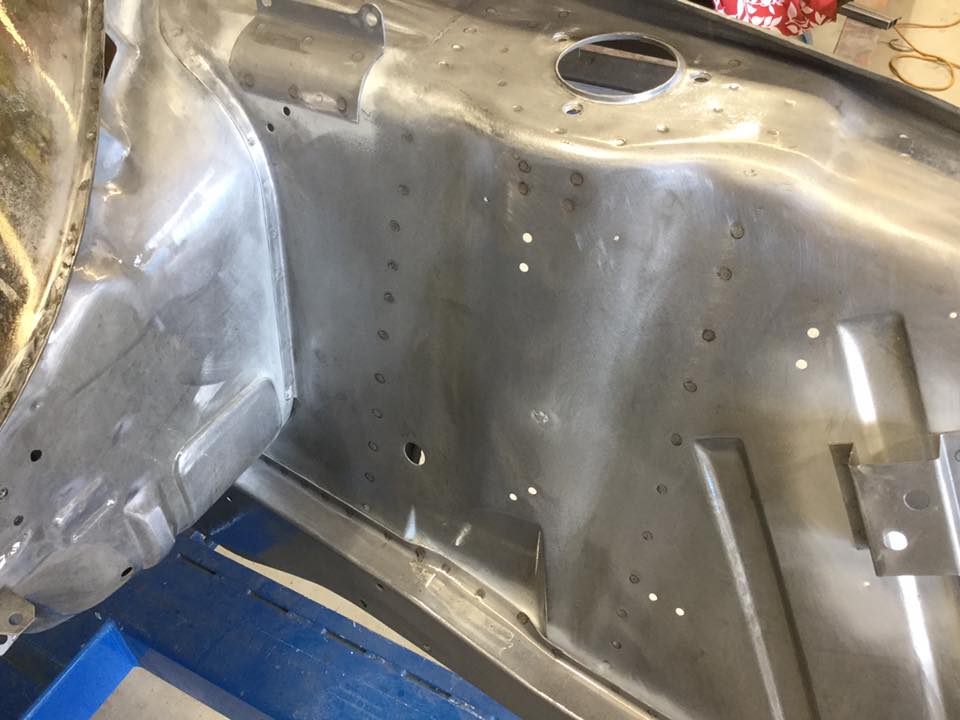
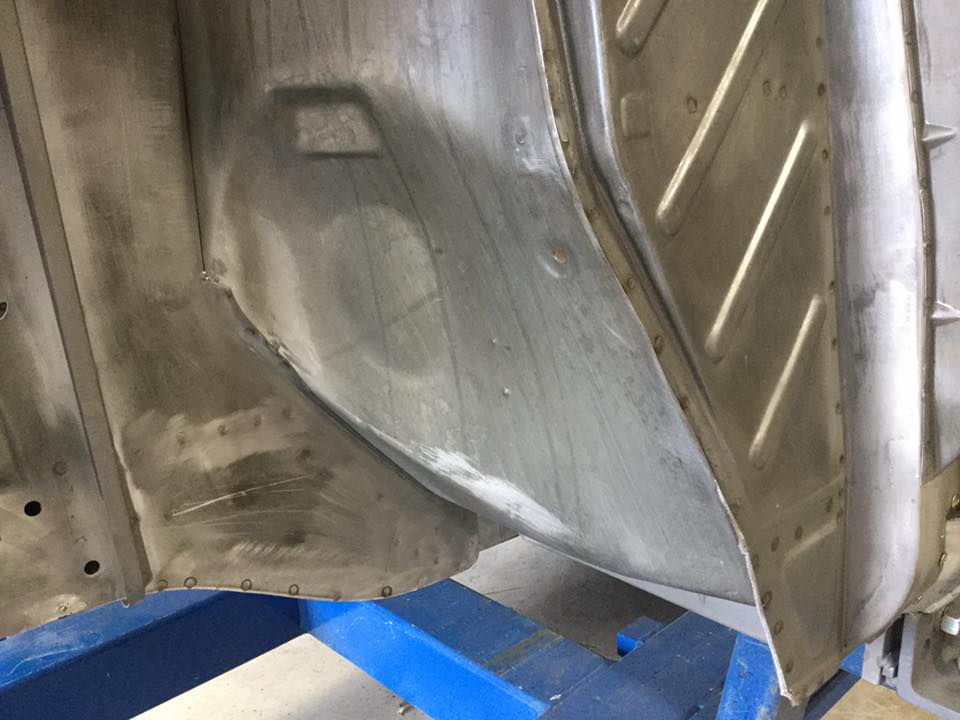
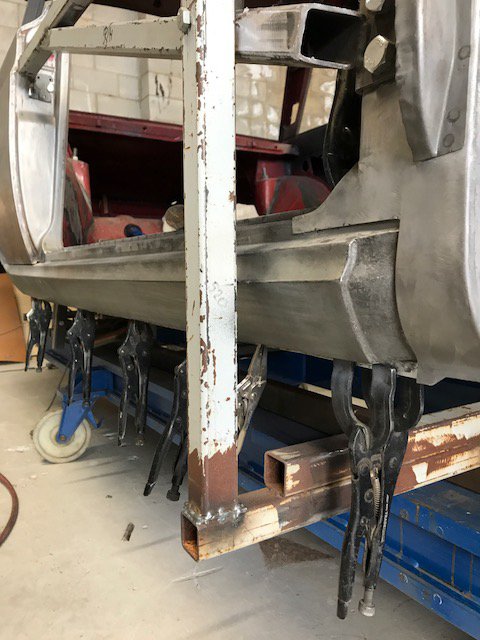
Went to have a look at the Cortina today and more good progress. Front end all fitted off ready for final gapping and welding. Rear quarters removed for dipping and the whole lot very clean underneath so well impressed. RHS boot floor needs a replacement section and then it’s mount the body on the rotisserie for blasting before final rear panel fit off.
1 point
-
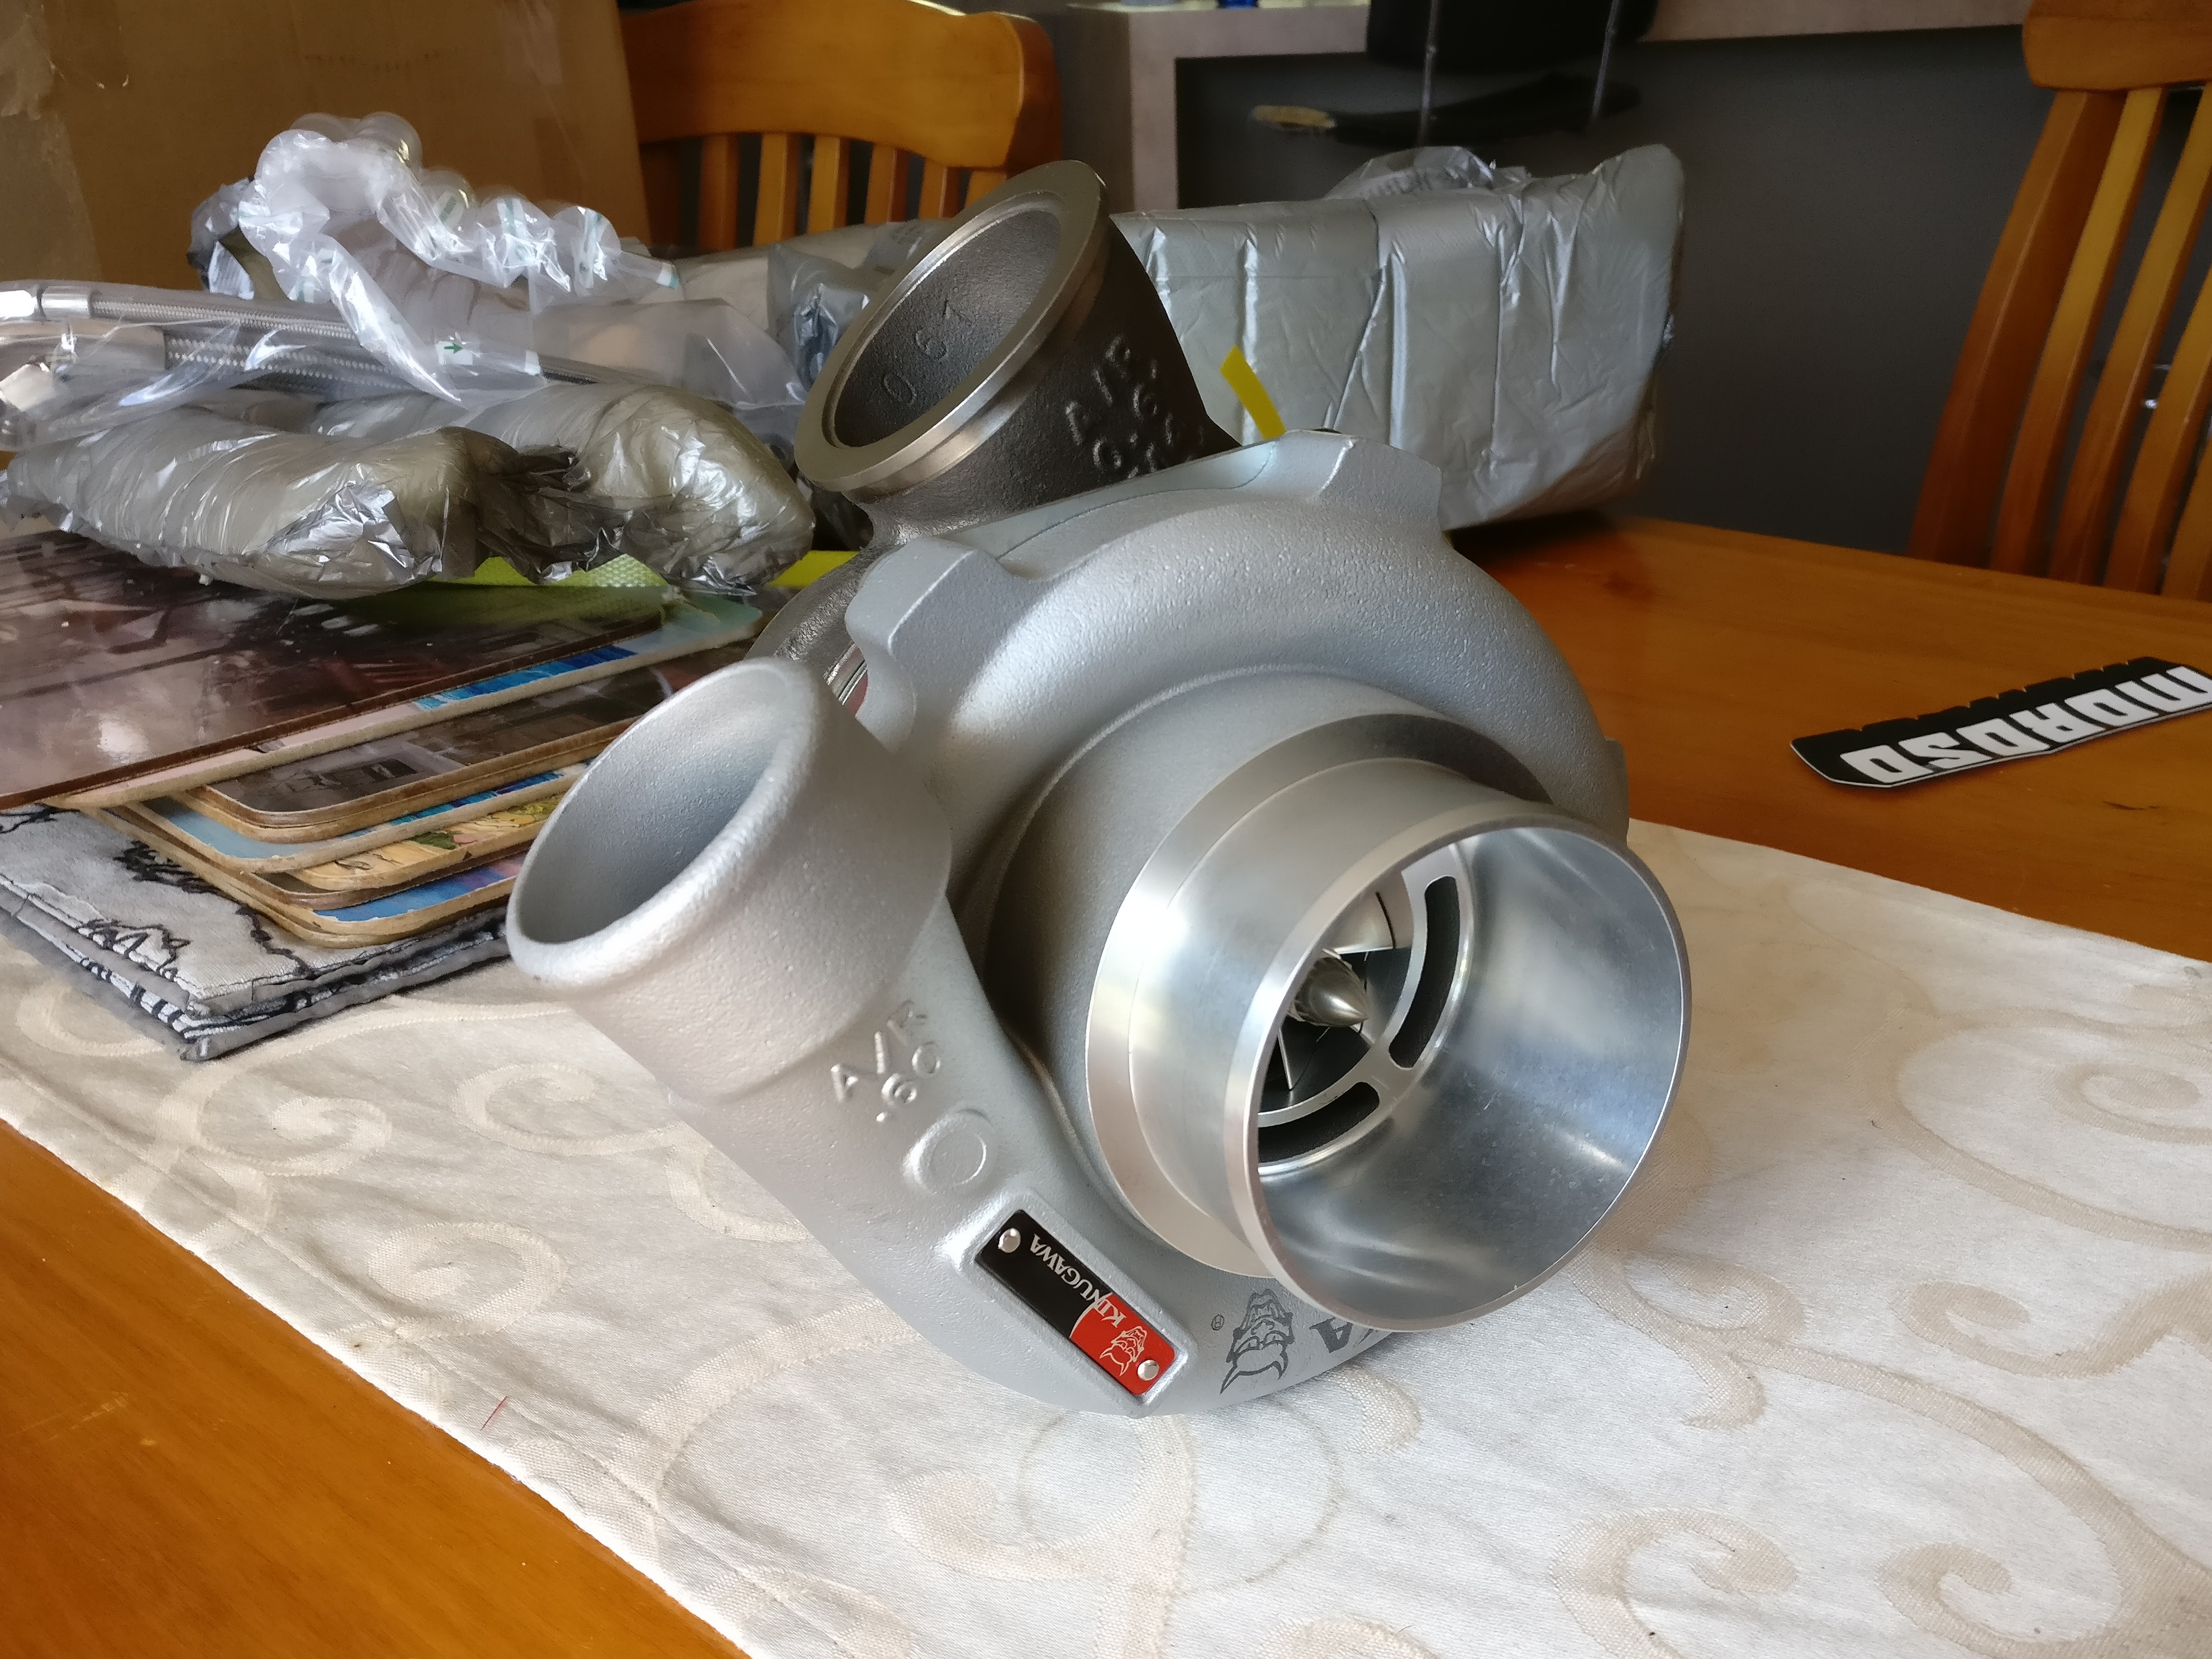
Oh and re turbos, zing! Taiwan-fresh GTX3067R. Will be x2 once I recover from paying for the first
1 point
-
Few more pics
1 point
-
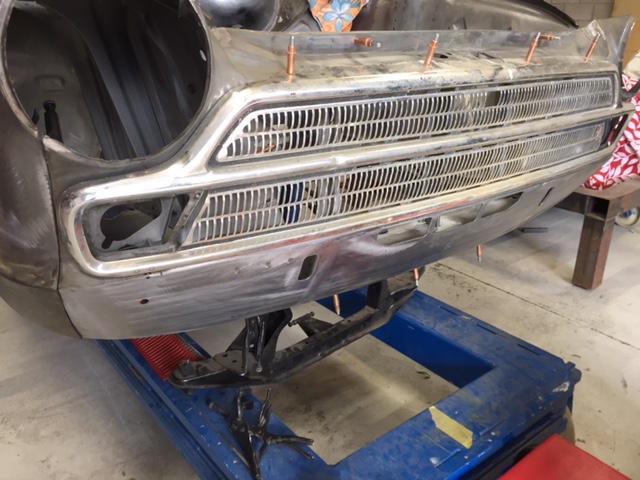
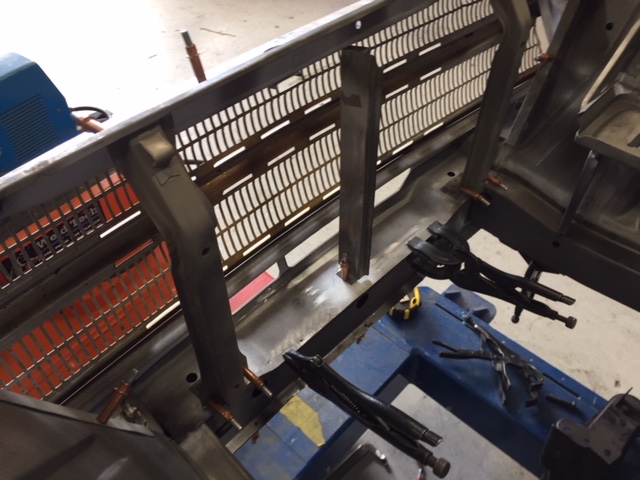
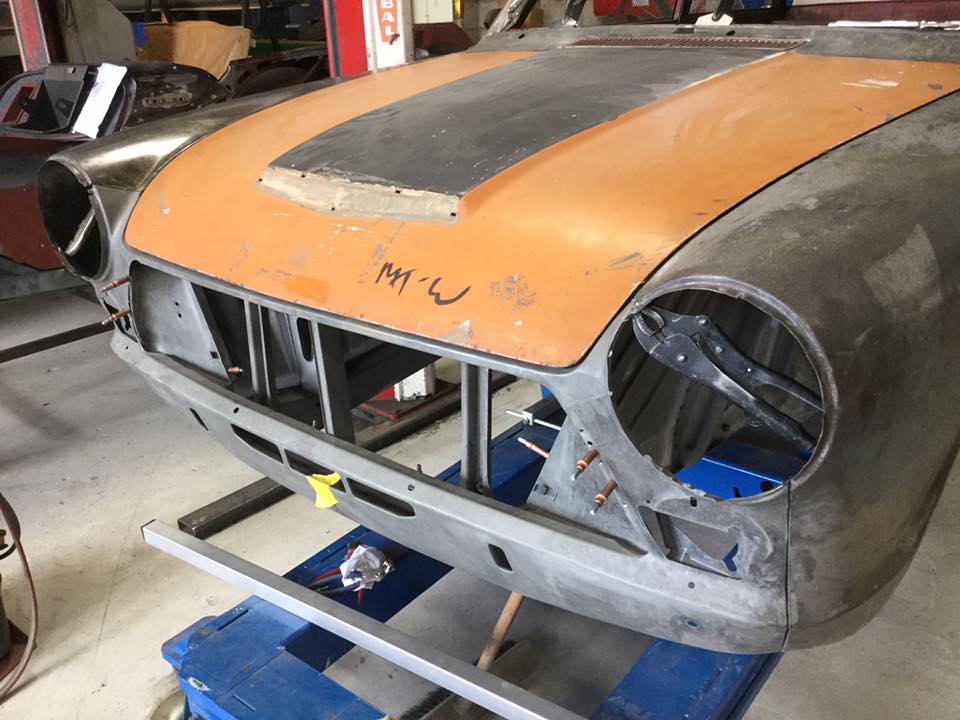
Starting to get the guards and front panel all ready for the final fit off and welding. Good to see a grille on the front again! I have sourced a NOS rear light panel so that should turn up in a couple of weeks and the last bit of the puzzle is the lower rear valence which is proving pretty elusive.
1 point
-
Another update. Front end pretty well done. Next job is to remove both rear quarters to make sure all clean and then sort the rear tail light panel. If anyone has a NOS one or an excellent panel let me know.
1 point
-
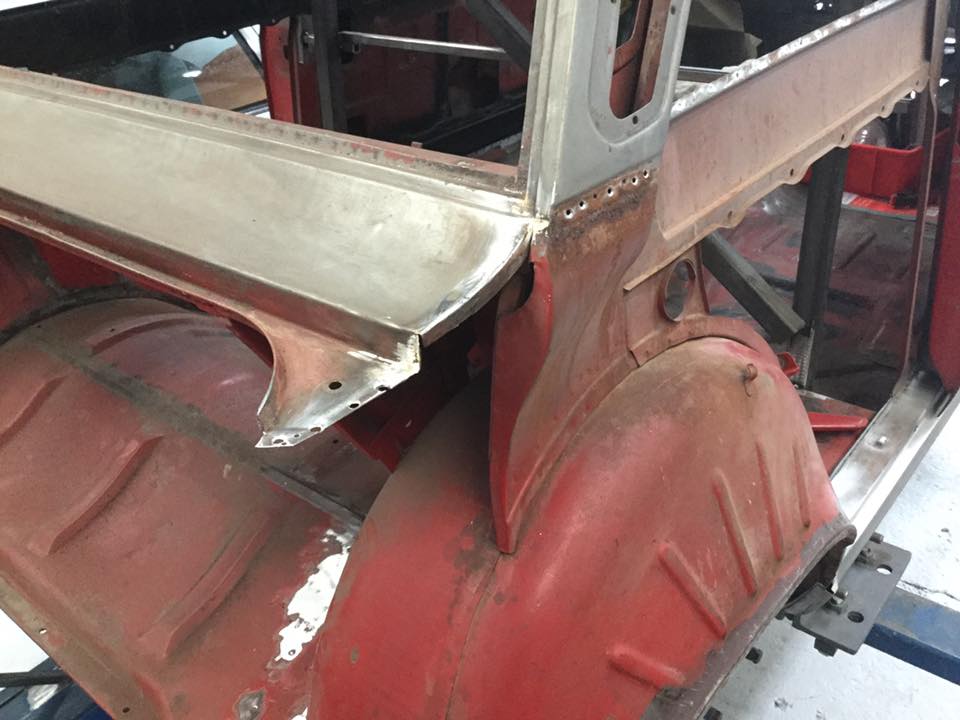
Cortina is looking epic with the front end all together. Both A pillars all repaired and the sills back on ready for final welding. Next job is fitting the front guards and front panel.
1 point
-
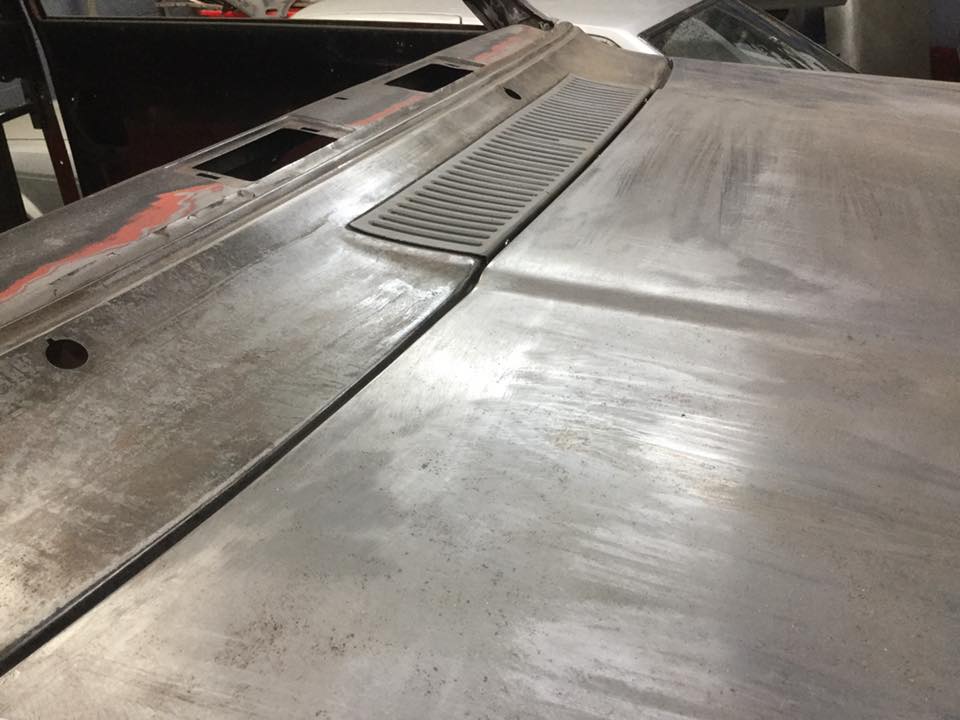
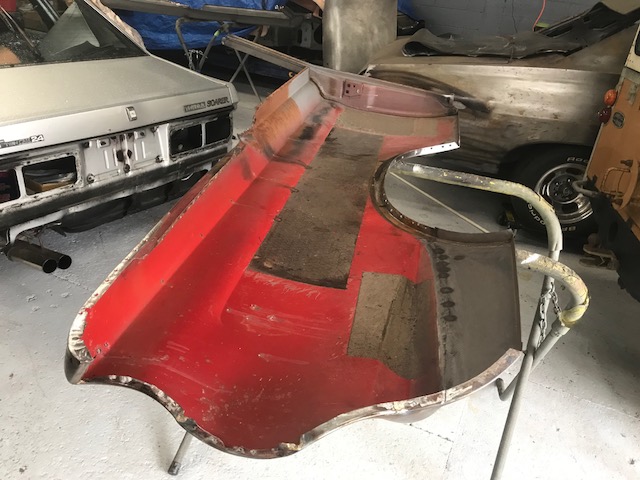
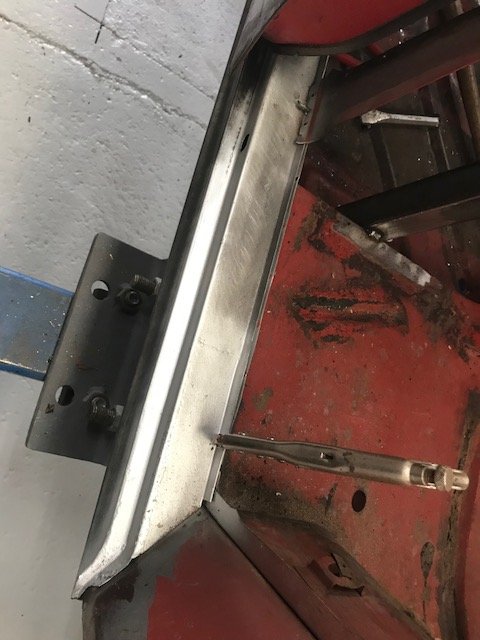
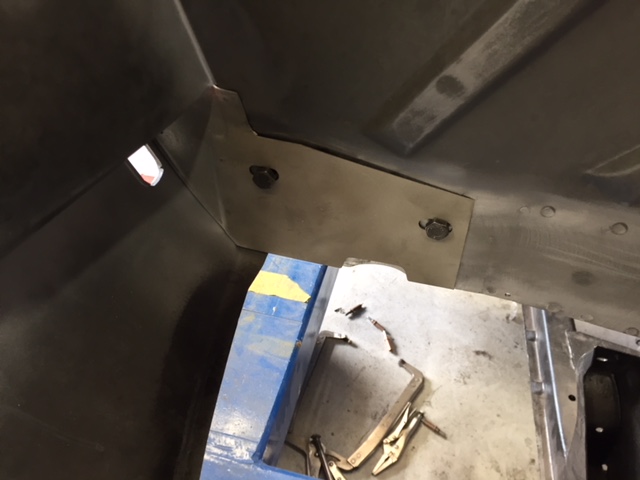
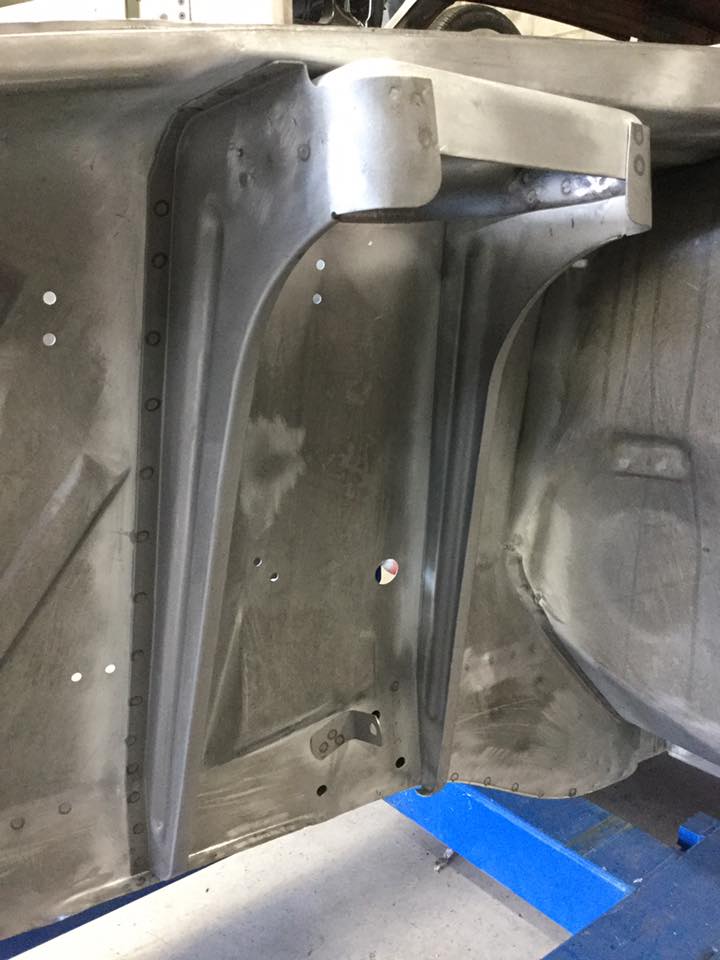
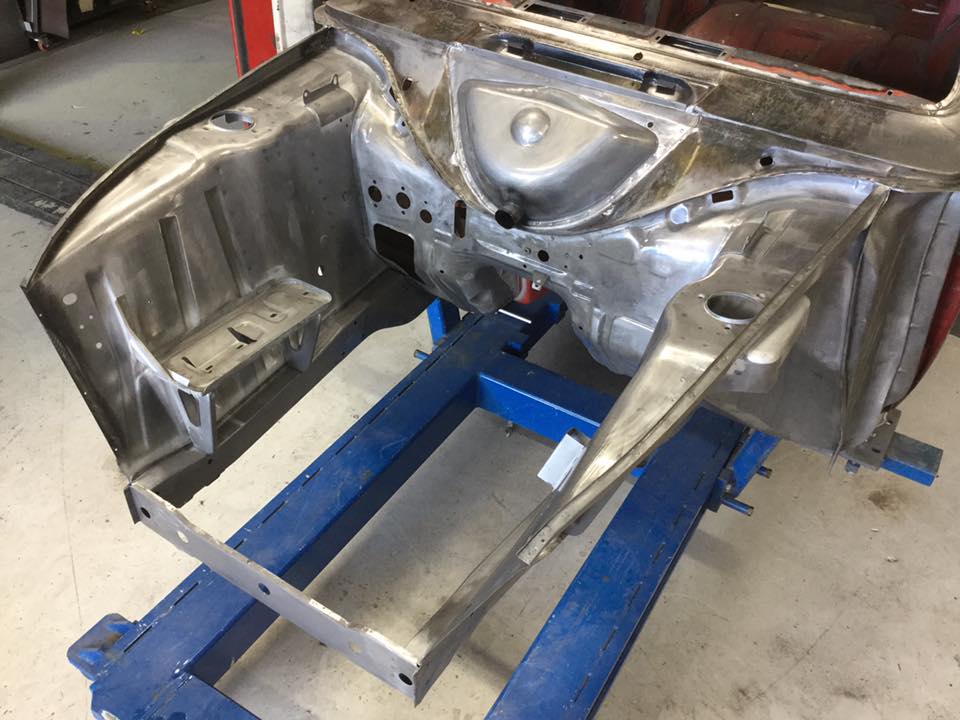
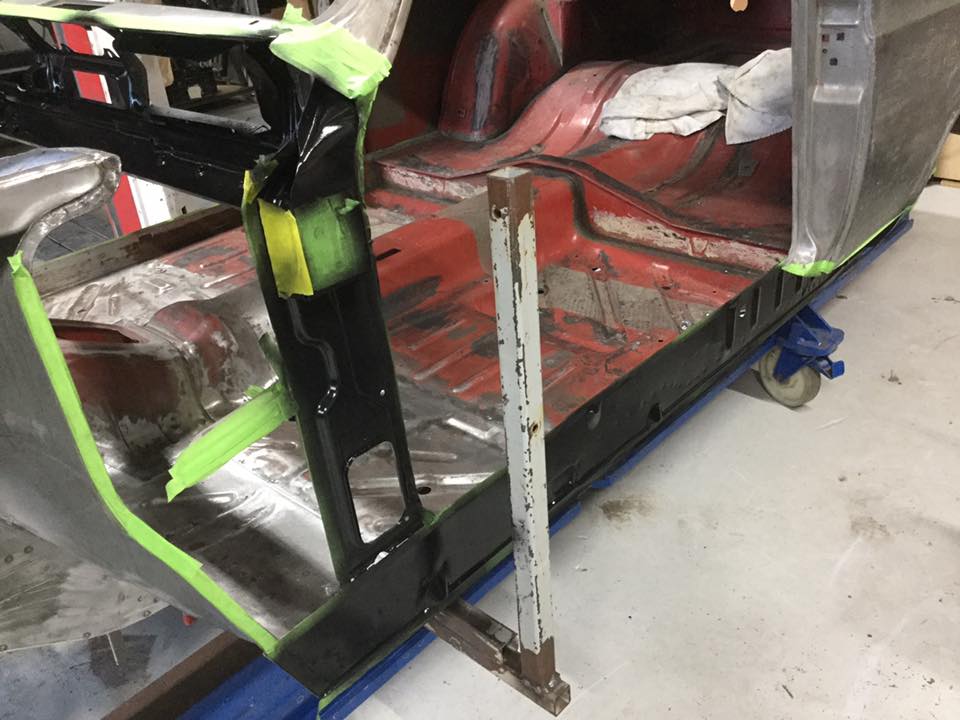
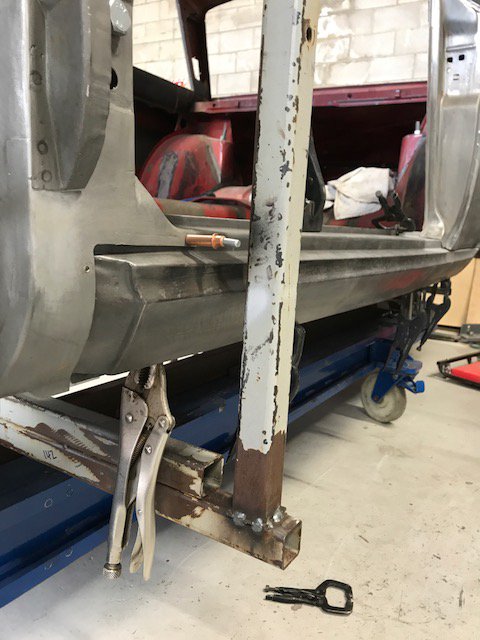
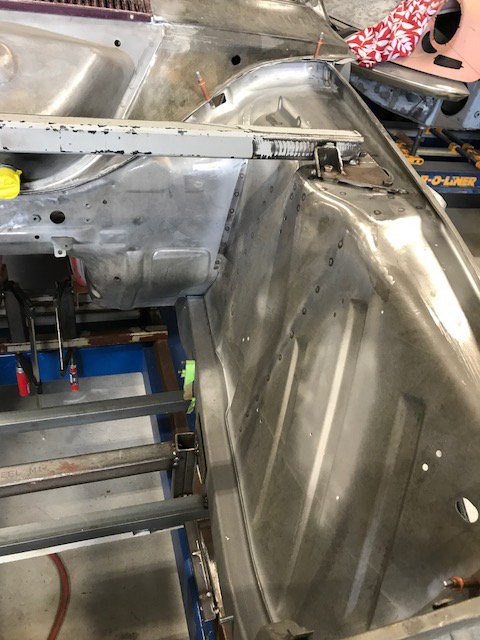
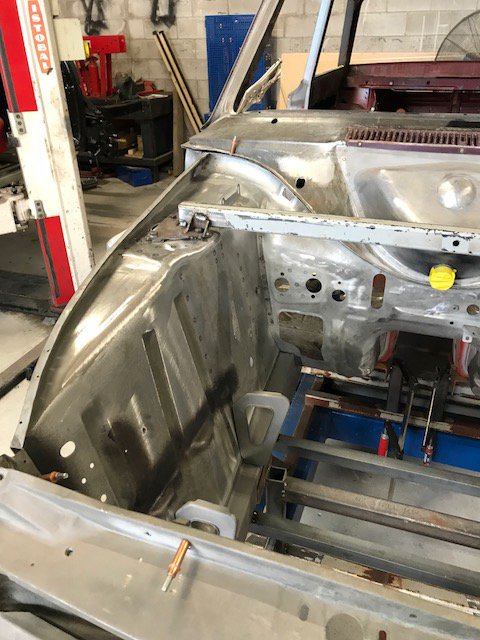
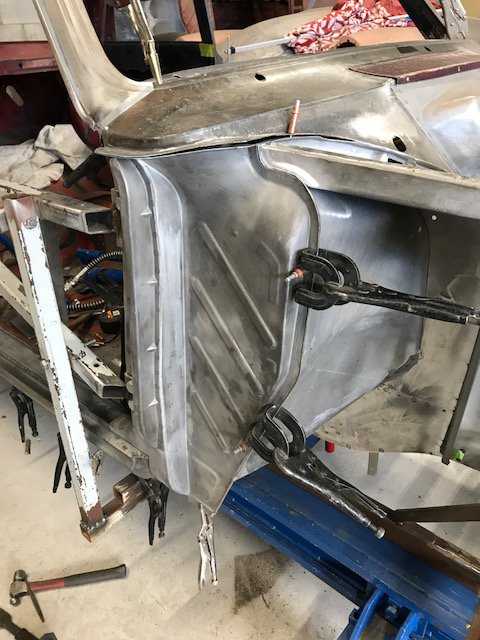
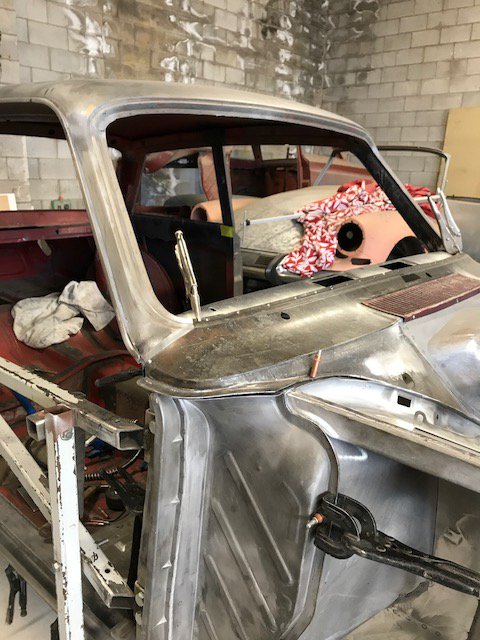
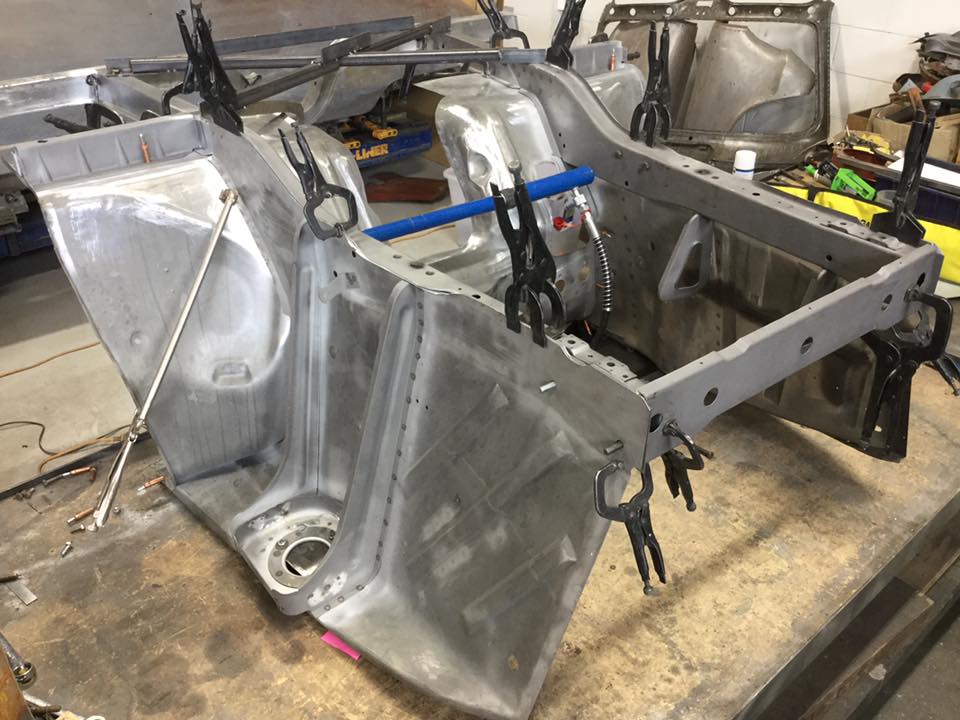
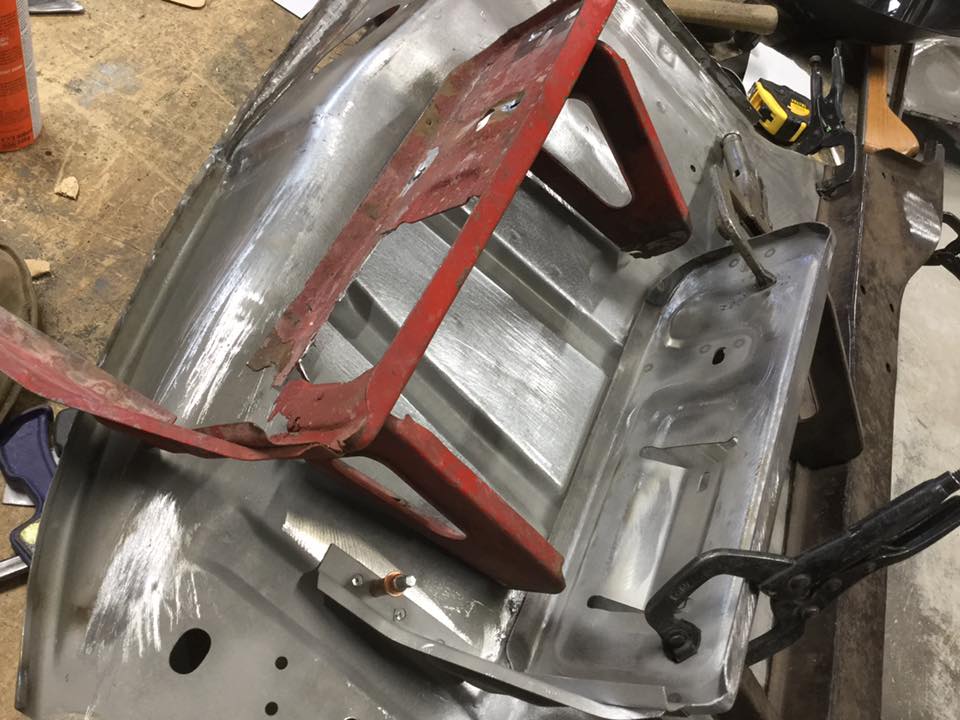
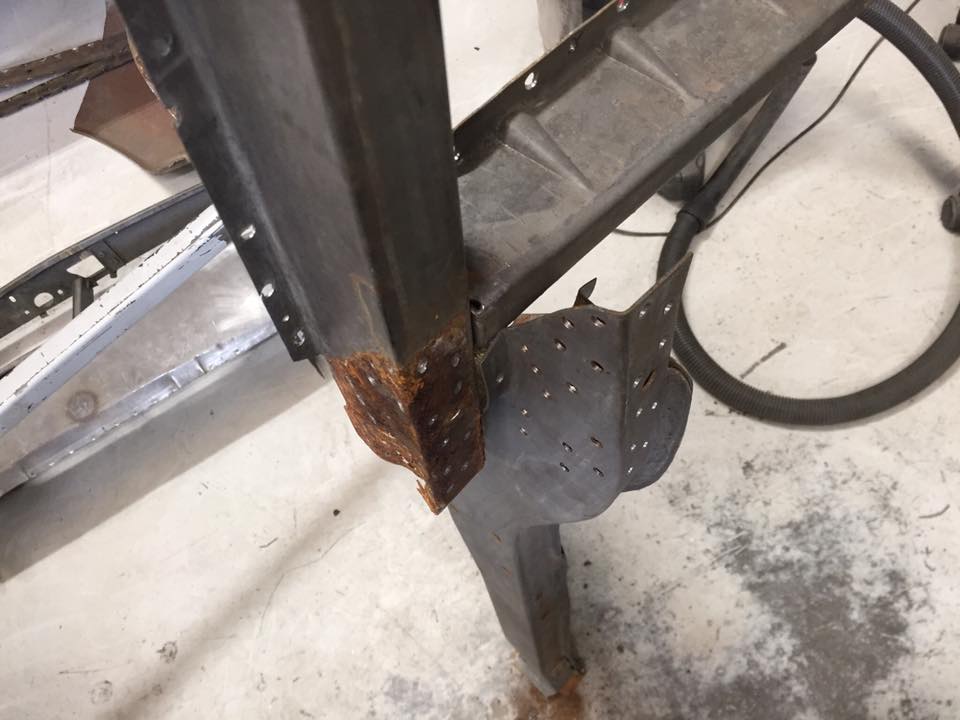
Great progress with front end coming together! The original firewall was creased so the recess,s on the red section needed to be transferred to the new fire wall section. It would appear these were introduced to late Mk 1 for Mk 2 production as my 65 GT doesn't have them. Front end back together after all separated parts repaired or fabricated new.All parts blasted and all inner box sections painted in 2k black and all flanges zinc primed.Will also be using panel bond on some of the areas prone to corrosion for extra protection and strength.Looking at moving on to windscreen panel repairs next and have complete front end mocked up, guards, bonnet etc.
1 point
-
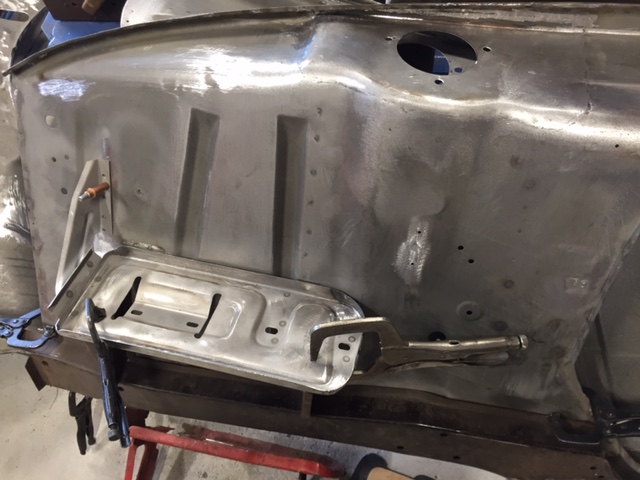
Battery tray getting a trial fitting. I need to start seriously looking at getting a painter lined up! Any reccomendations welcomed.
1 point


This leaderboard is set to Auckland/GMT+12:00