
Leaderboard


Popular Content
Showing content with the highest reputation on 07/13/19 in all areas
-
gotta say. over the fucking moon to drive it again, after so long.7 points
-
and ended up with me getting to do this. https://www.youtube.com/watch?v=ddwY1EinaO87 points
-
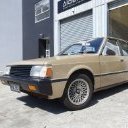
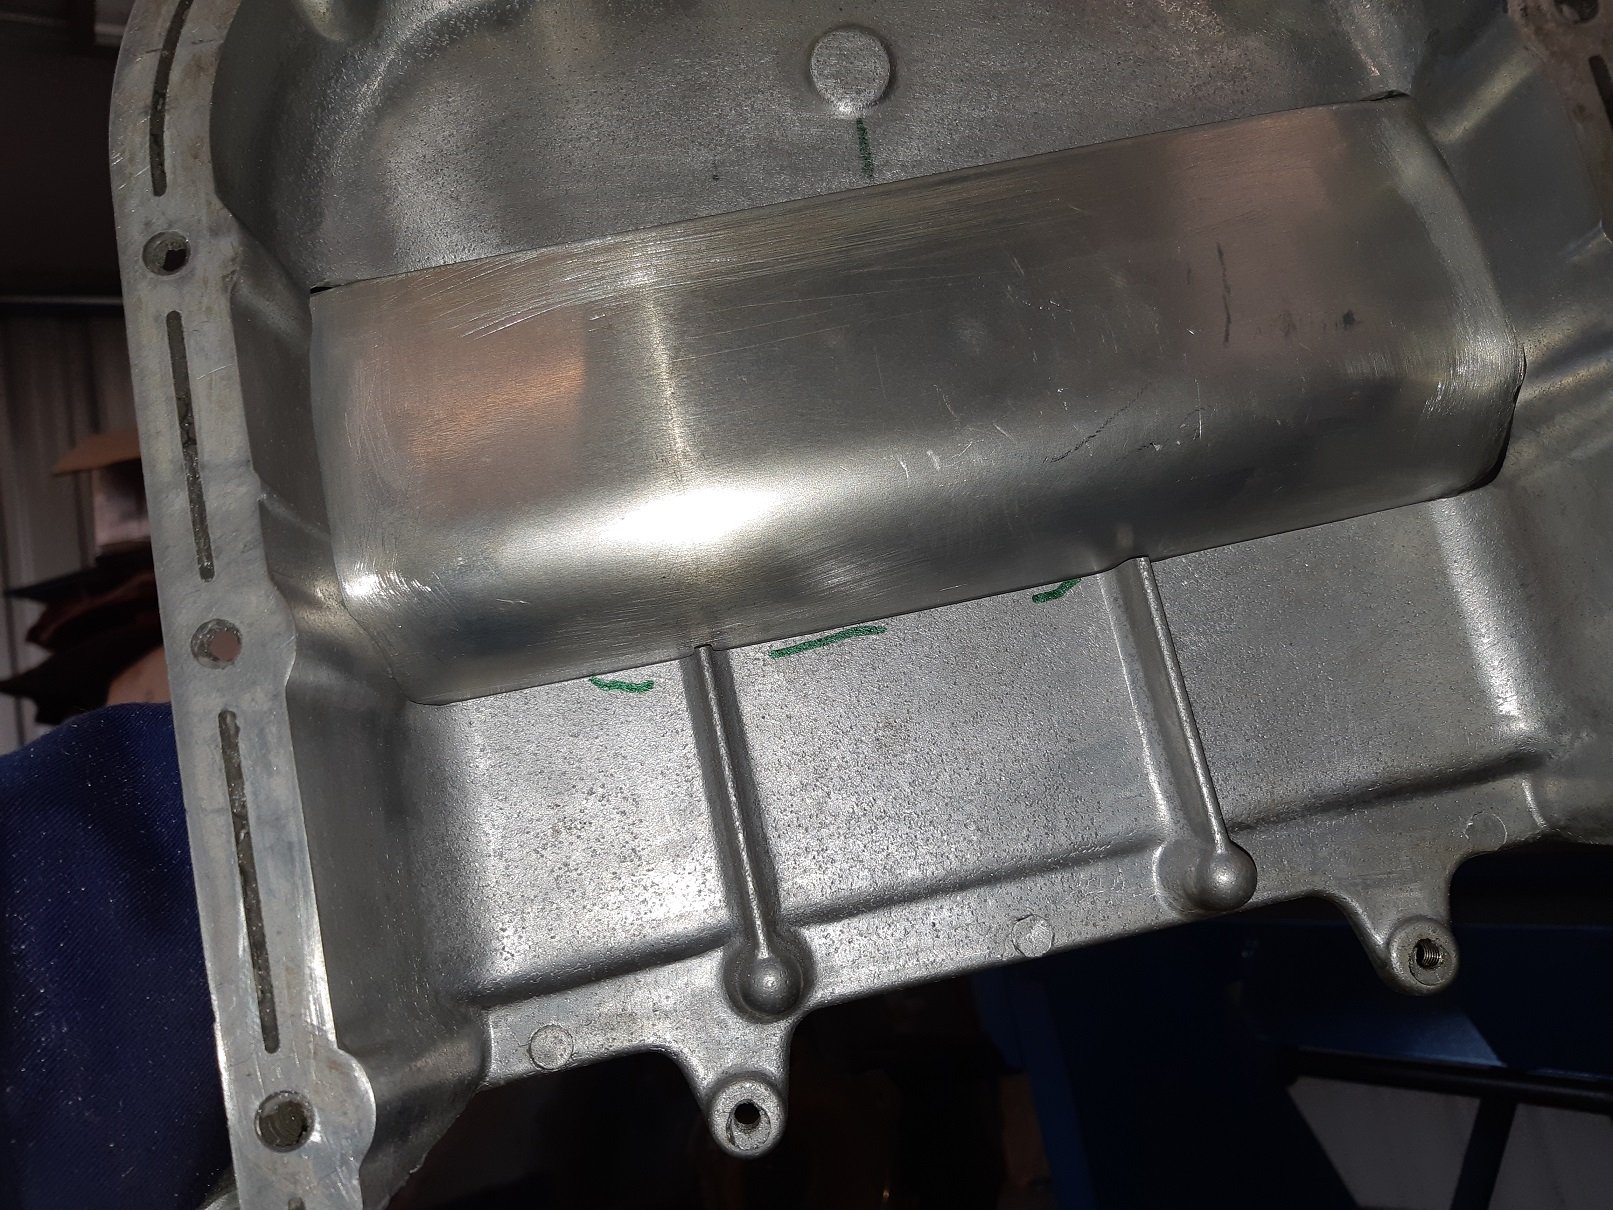
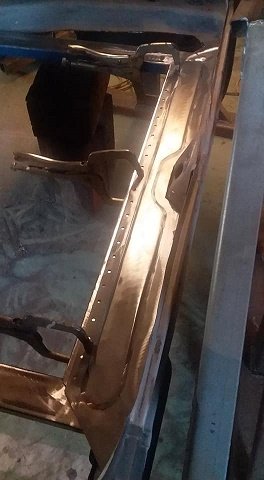
File file file file file file file file file file file file file file file file file file file file file file file file file file file file file file file file file file file file file file file file file file file file file file file file file file file file file file file file file file file file file file file file file file file file file file file file file file file file file file file file file file file file file file file file file file file file file file file file file file file file file file file file file file file file file file file file file file file file file file file file file file file file file file file file file file file file file file file file file file file file file file file file file file file file file file file file file file file file file file file file file file file file file file file file file file file file file file file file file file file file file file file file file file file file file file file file file file file file file file file file file file file file file file file file file file file file file file file file file file file file file file file file file file file file file file file file file file file file file file file file file file file file file file file file file file file file file file file file file file file file file file file file file file file file file file file file file file file file file file file file file file file file file file file file file file file file file file file file file file file file file file file file file file file file file file file file file file file file file file file file file file file file file file file file file file file file file file file file file file file file file file file file file file file file file file file file file file file file file file file file file file file file file file file file file file file file file file file file file file file file file file file file file file file file file file file file file file file file file file file file file file file file file file file file file file file file file file file file file file file file file file file file file file file file file file file file file file file file file file file file file file file file file file file file file file file file file file file file file file file file file file file file file file file file file file file file file file file file file file file file file file file file file file file file file file file file file file file file file file file file file file file file file file file file file file file file file file file file file file file file file file file file file file file file file file file file file file file file file file file file file file file file file file file file file file file file file file file file file file file file file file file file file file file file file file file file file file file file file file file file file file file file file file file file file file file file file file file file file file file file file file file file file file file file file file file file file file file file file file file file file file file file file file file file file file file file file file file file file file file file file file file file file file file file file file file file file file file file file file file file file file file file file file file file file file file file file file file file file file file file file file file file file file file file file file file file file file file file file file file file file file file file file file file file file file file file file file file file file file file file file file file file file file file file file file file file file file file file file file file file file file file file file file file file file file file file file file file file file file file file file file file file file file file file file file file file file file file file file file file file file file file file file file file file file file file file file file file file file file file file file file file file file file file file file file file file file file file file file file etc... Unfortunately I cut the hole too big so there are some large gaps. I didn't want to push the patch in further to close up those gaps because it would create an area where the oil would not drain from. Hopefully the guy I get to weld it can deal with those gaps. I'll be making a jig to bolt the whole thing to so it doesn't turn into a banana.
 7 points
 -
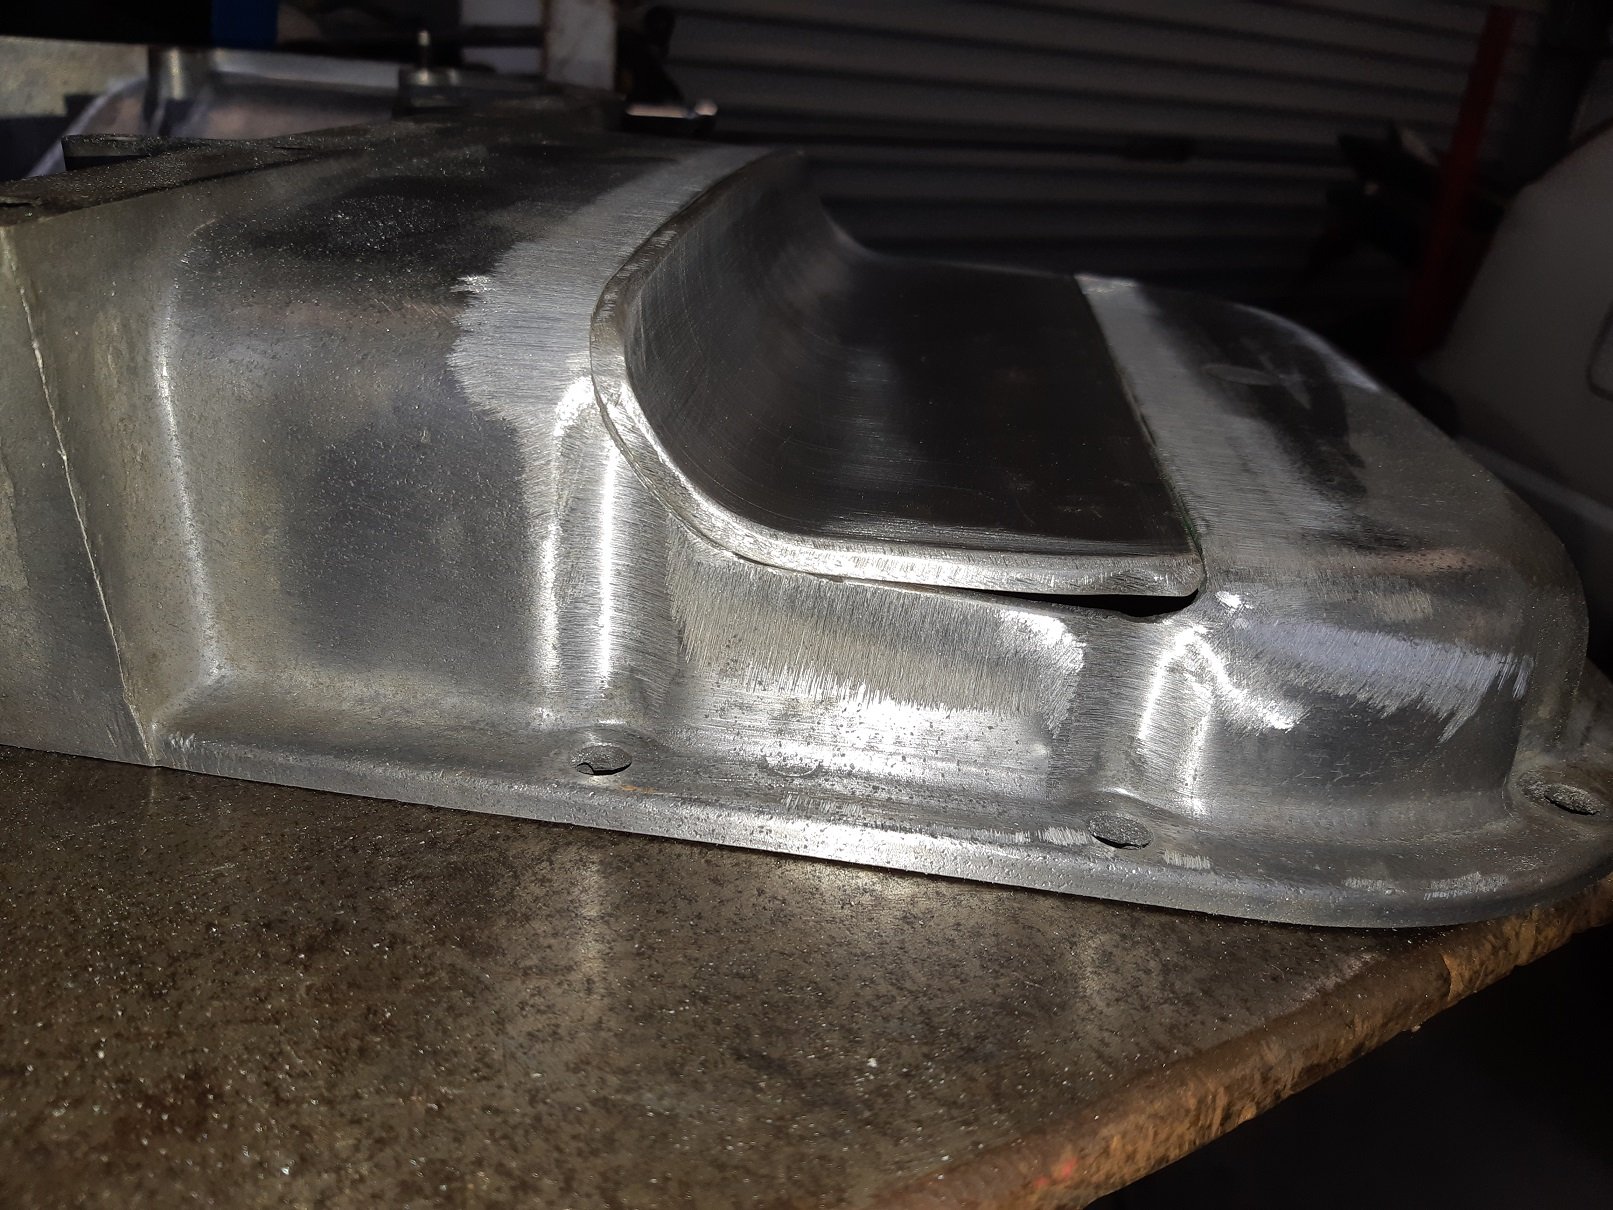
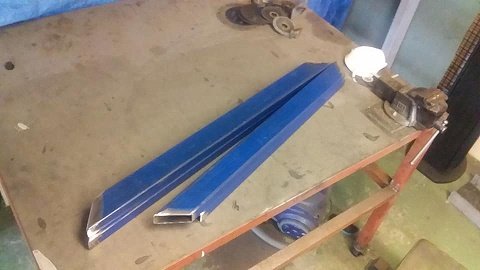
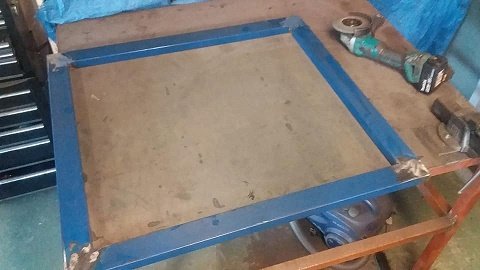
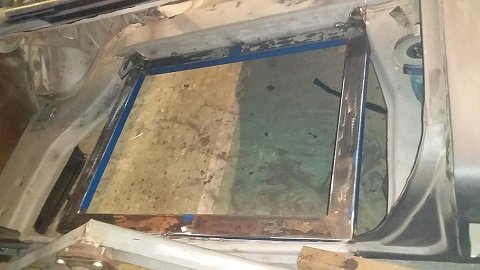
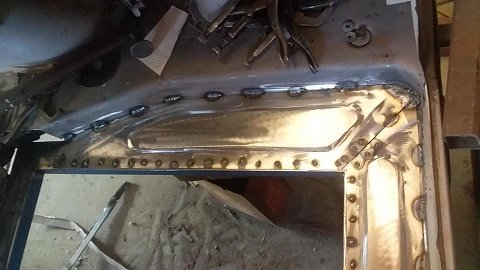
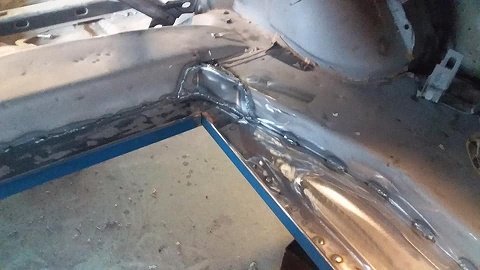
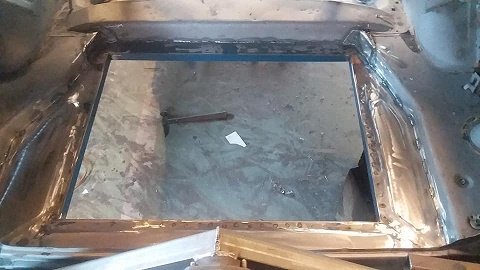
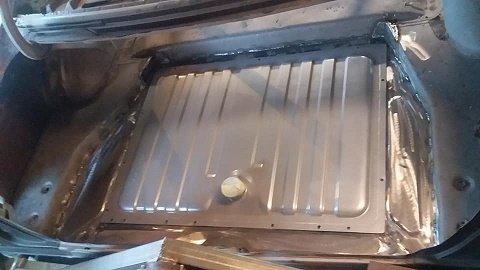
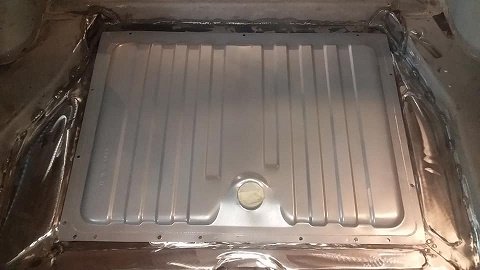
fuel tank boot floor time.... i wanted to change the tank as the cortina one was stuffed so i looked around and decide on a 68 mustang brand new was $210 landed..and that meant losing the boot floor wheel well (didn't like that anyway) it was in good condition and got blasted with the shell so i advertised it and donated it to another build. so i started with a massive hole in the boot and decided to use some box section and the main brace after i welded it up i measured again and found out i stuffed it up hahaha.....measure 6 million times kids and cut once..so after i cut 100mm out of it i welded it back up again so after getting it right i tried it in the hole...apart from having to cut a 45* off the back corners for the chassis rail it fitted. and i welded as much of it in as i could. then it was time to make new floor parts....starting with the rear part. then the passenger side then the drivers side. then made the 2 caps for the back corners from where i had to trim it for the chassis rails. then a quick clean up throw the tank in to see if it fits
7 points
-
7 points
-
Plan 1 use Richards TS185 if it goes Plan 2 copy @MaxPower but in a Safari and rescue/hand out revival beers to those who need them.5 points
-
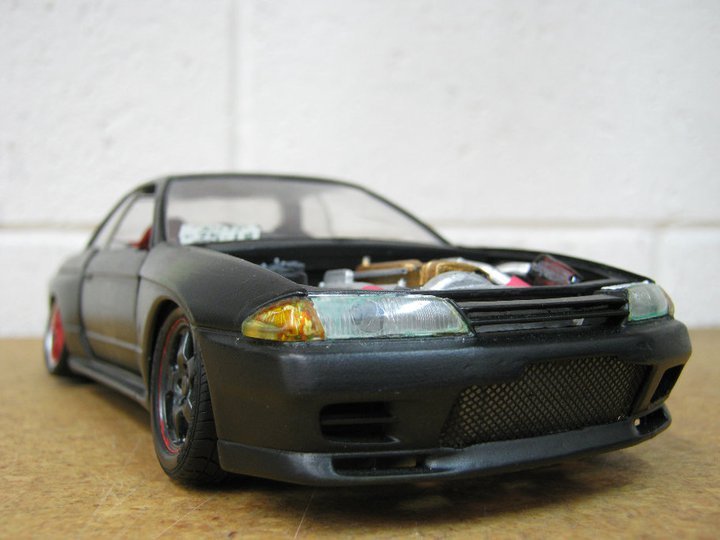
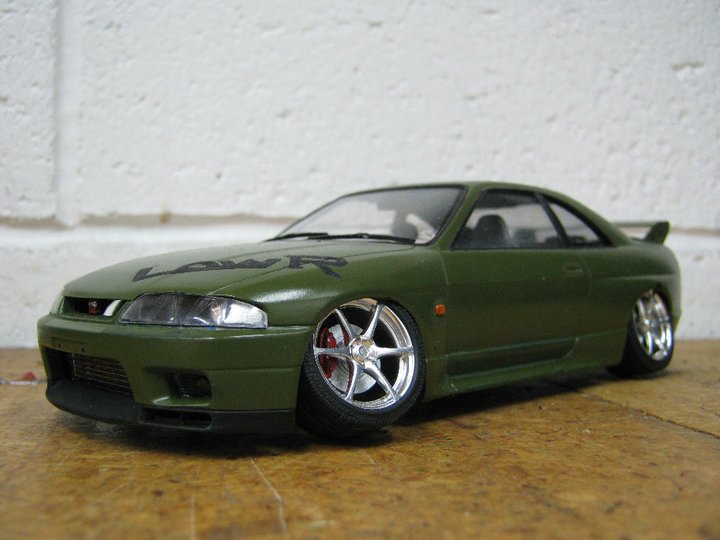
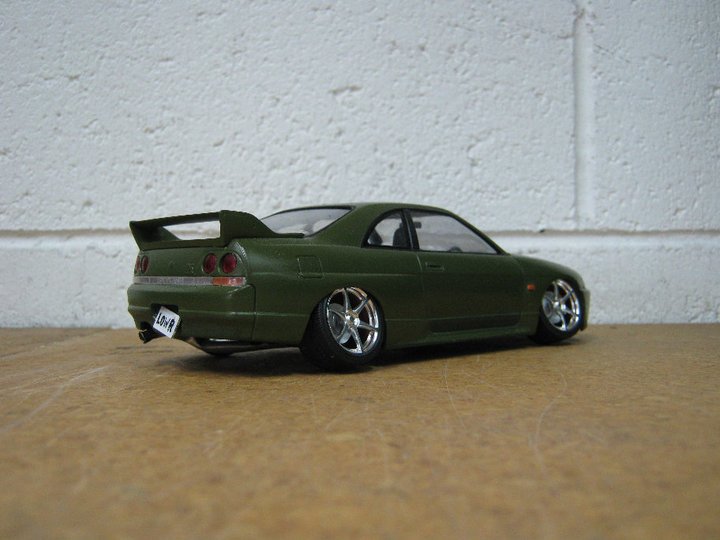
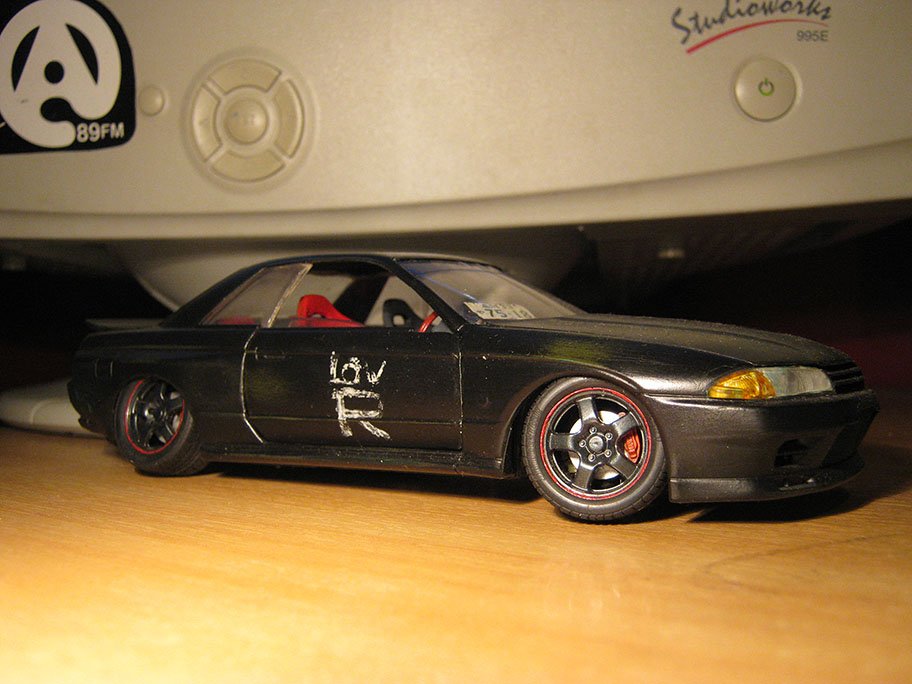
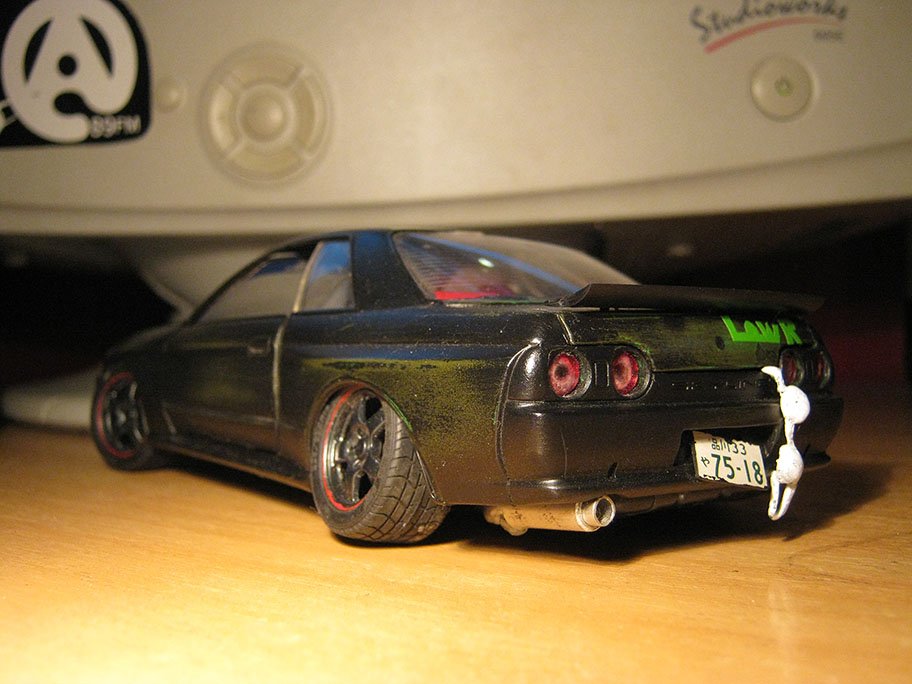
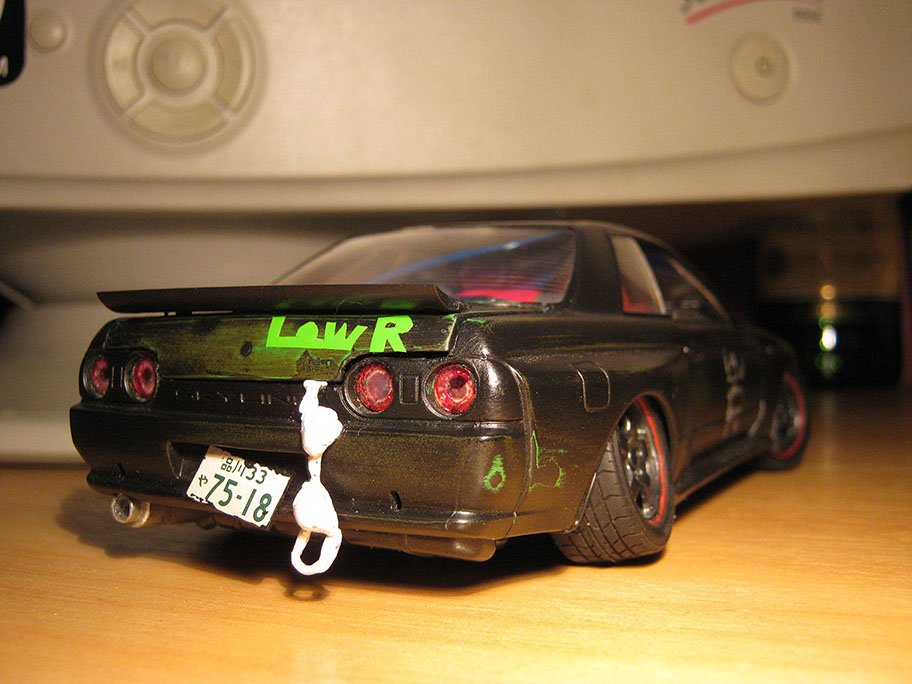
found some more pics on my facebook including the r33 i never really finished.. decided to see how ridiculous i could get it without being unrealistic = stoopid camber
5 points
-
Just hanging out, being cool.
4 points
-
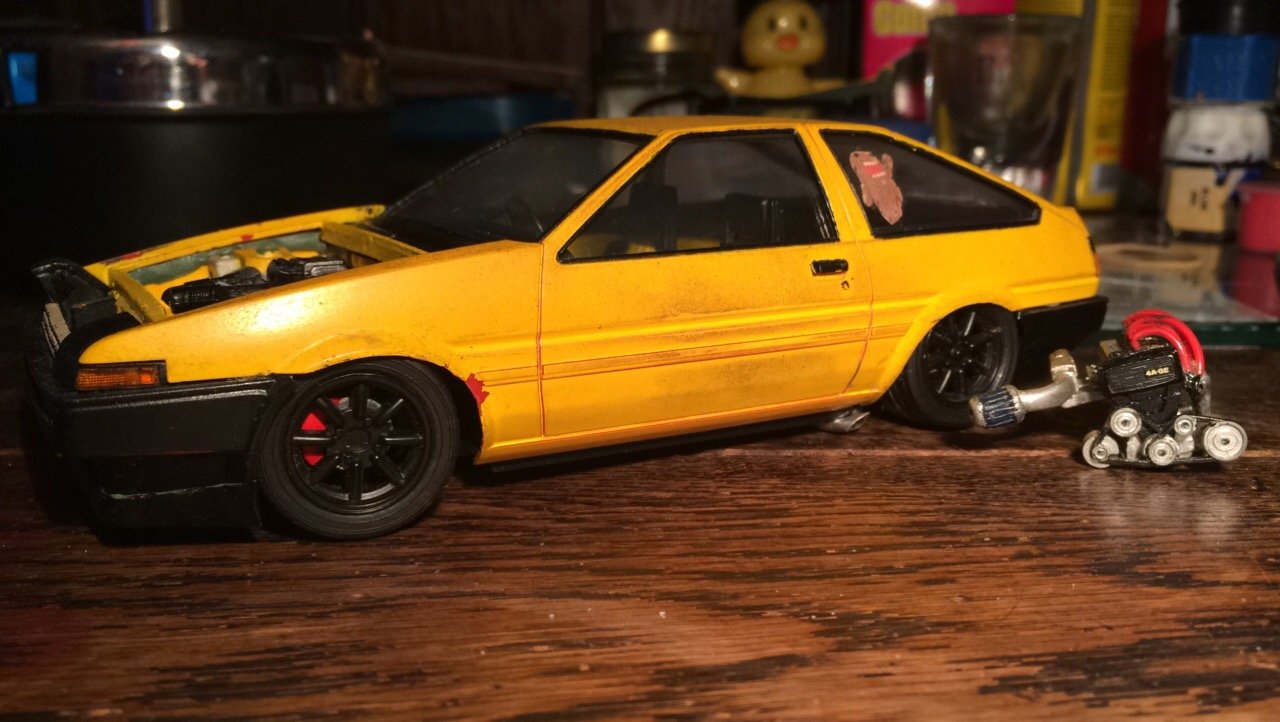
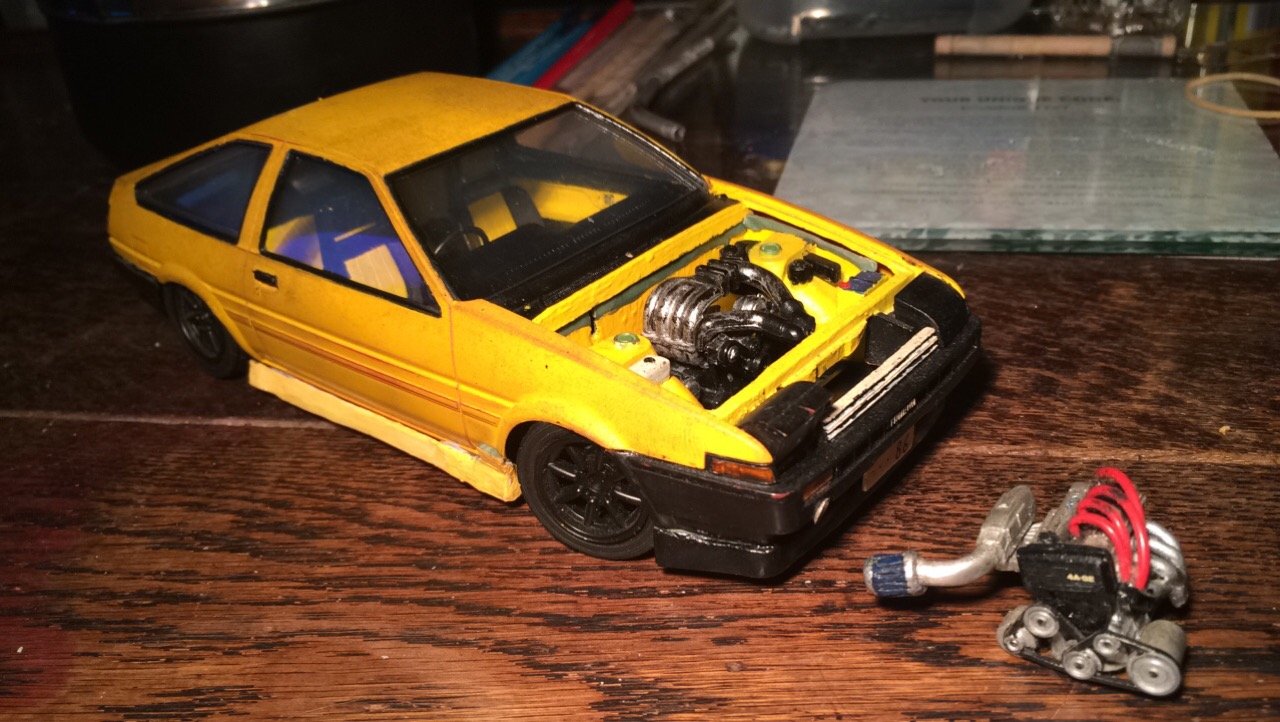
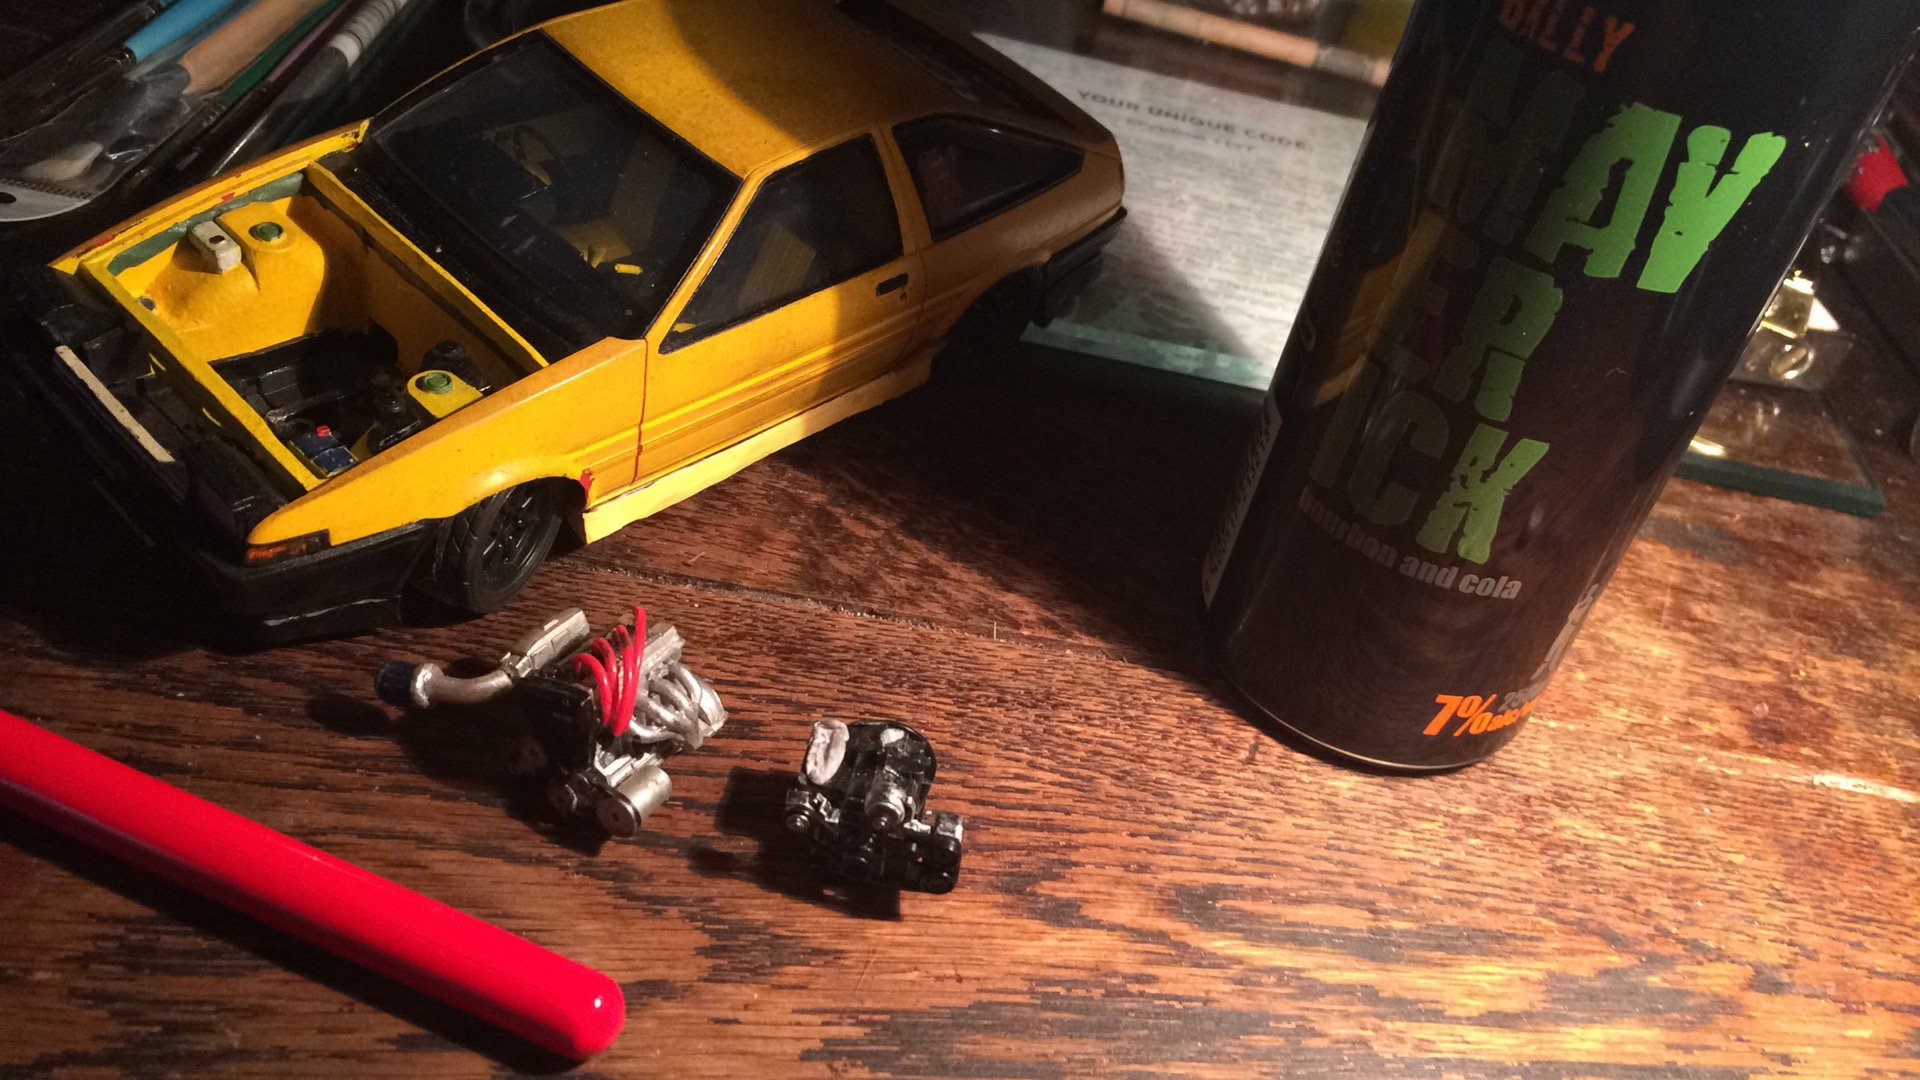
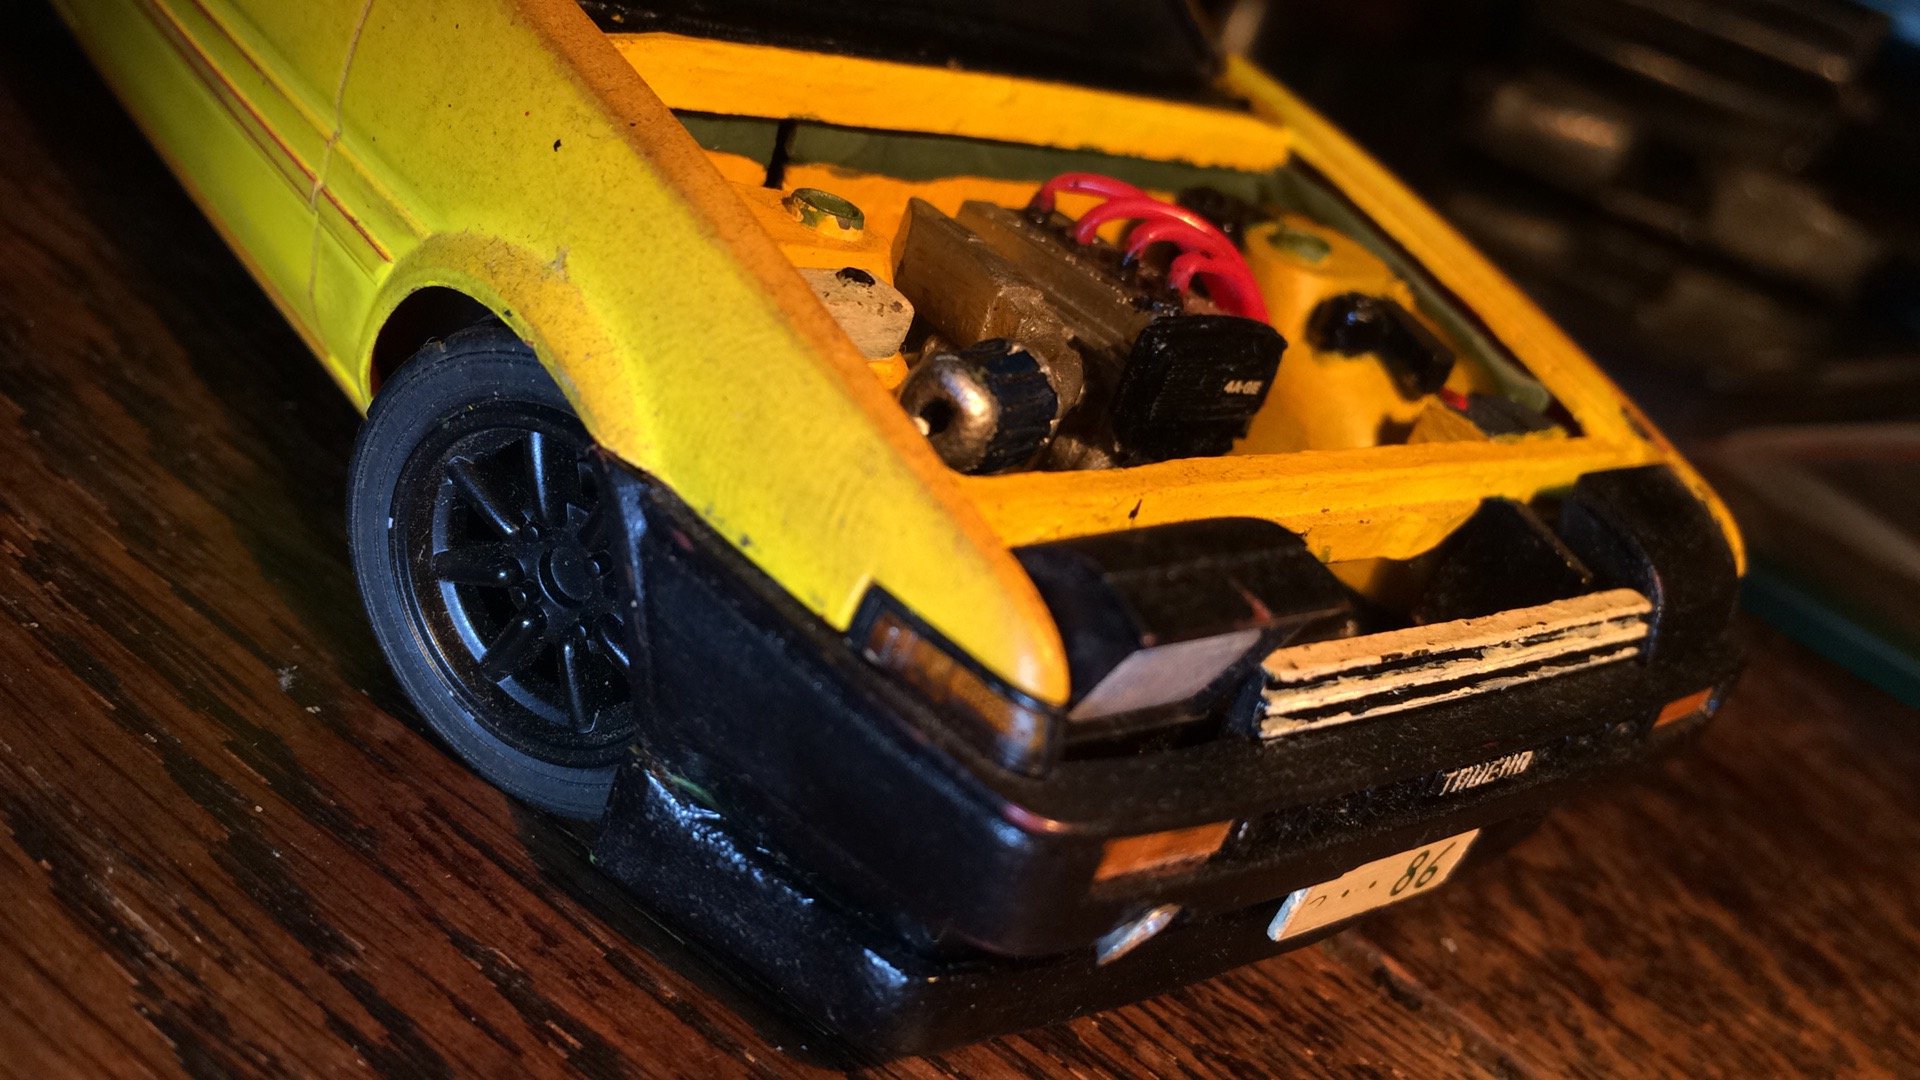
Found a couple more pics on my phone... pretty terrible pics sorry.. but yeah Aoshima 1/24 Trueno it came with engine detail and also had a spring suspension setup (basically just normal plastic struts but with teeny tiny real springs like from inside a pen) took springs out Lowered the body shell itself on to the bottom plate as well as chopped the back out a bit to allow the diff to really slam right down had to cut down the firewall and sides of engine bay to allow body to go down further but massively misjudged and so had to build it back up again with modeling clay custom exhaust with side exit made from alloy tubing had a stab at making front lip and sideskirts from modelling clay cold air induction pipe from front bumper found some tiny rubber tubing somewhere to make into sparkplug leads custom intake pipe and filter made from alloy and clay its been bashed up a bit from moving house and neglect, ill try get some photos of the underside as thats where most of the work was done trying to get it sitting right while still roll freely (thats a thing for me, its gotta still be able to roll even if its not perfectly smooth, not a fan of just gluing wheels in place etc) had an RX7 kit i never really finished that I robbed the 13b out of as well and can exchange that for the 4age if wanted
4 points
-
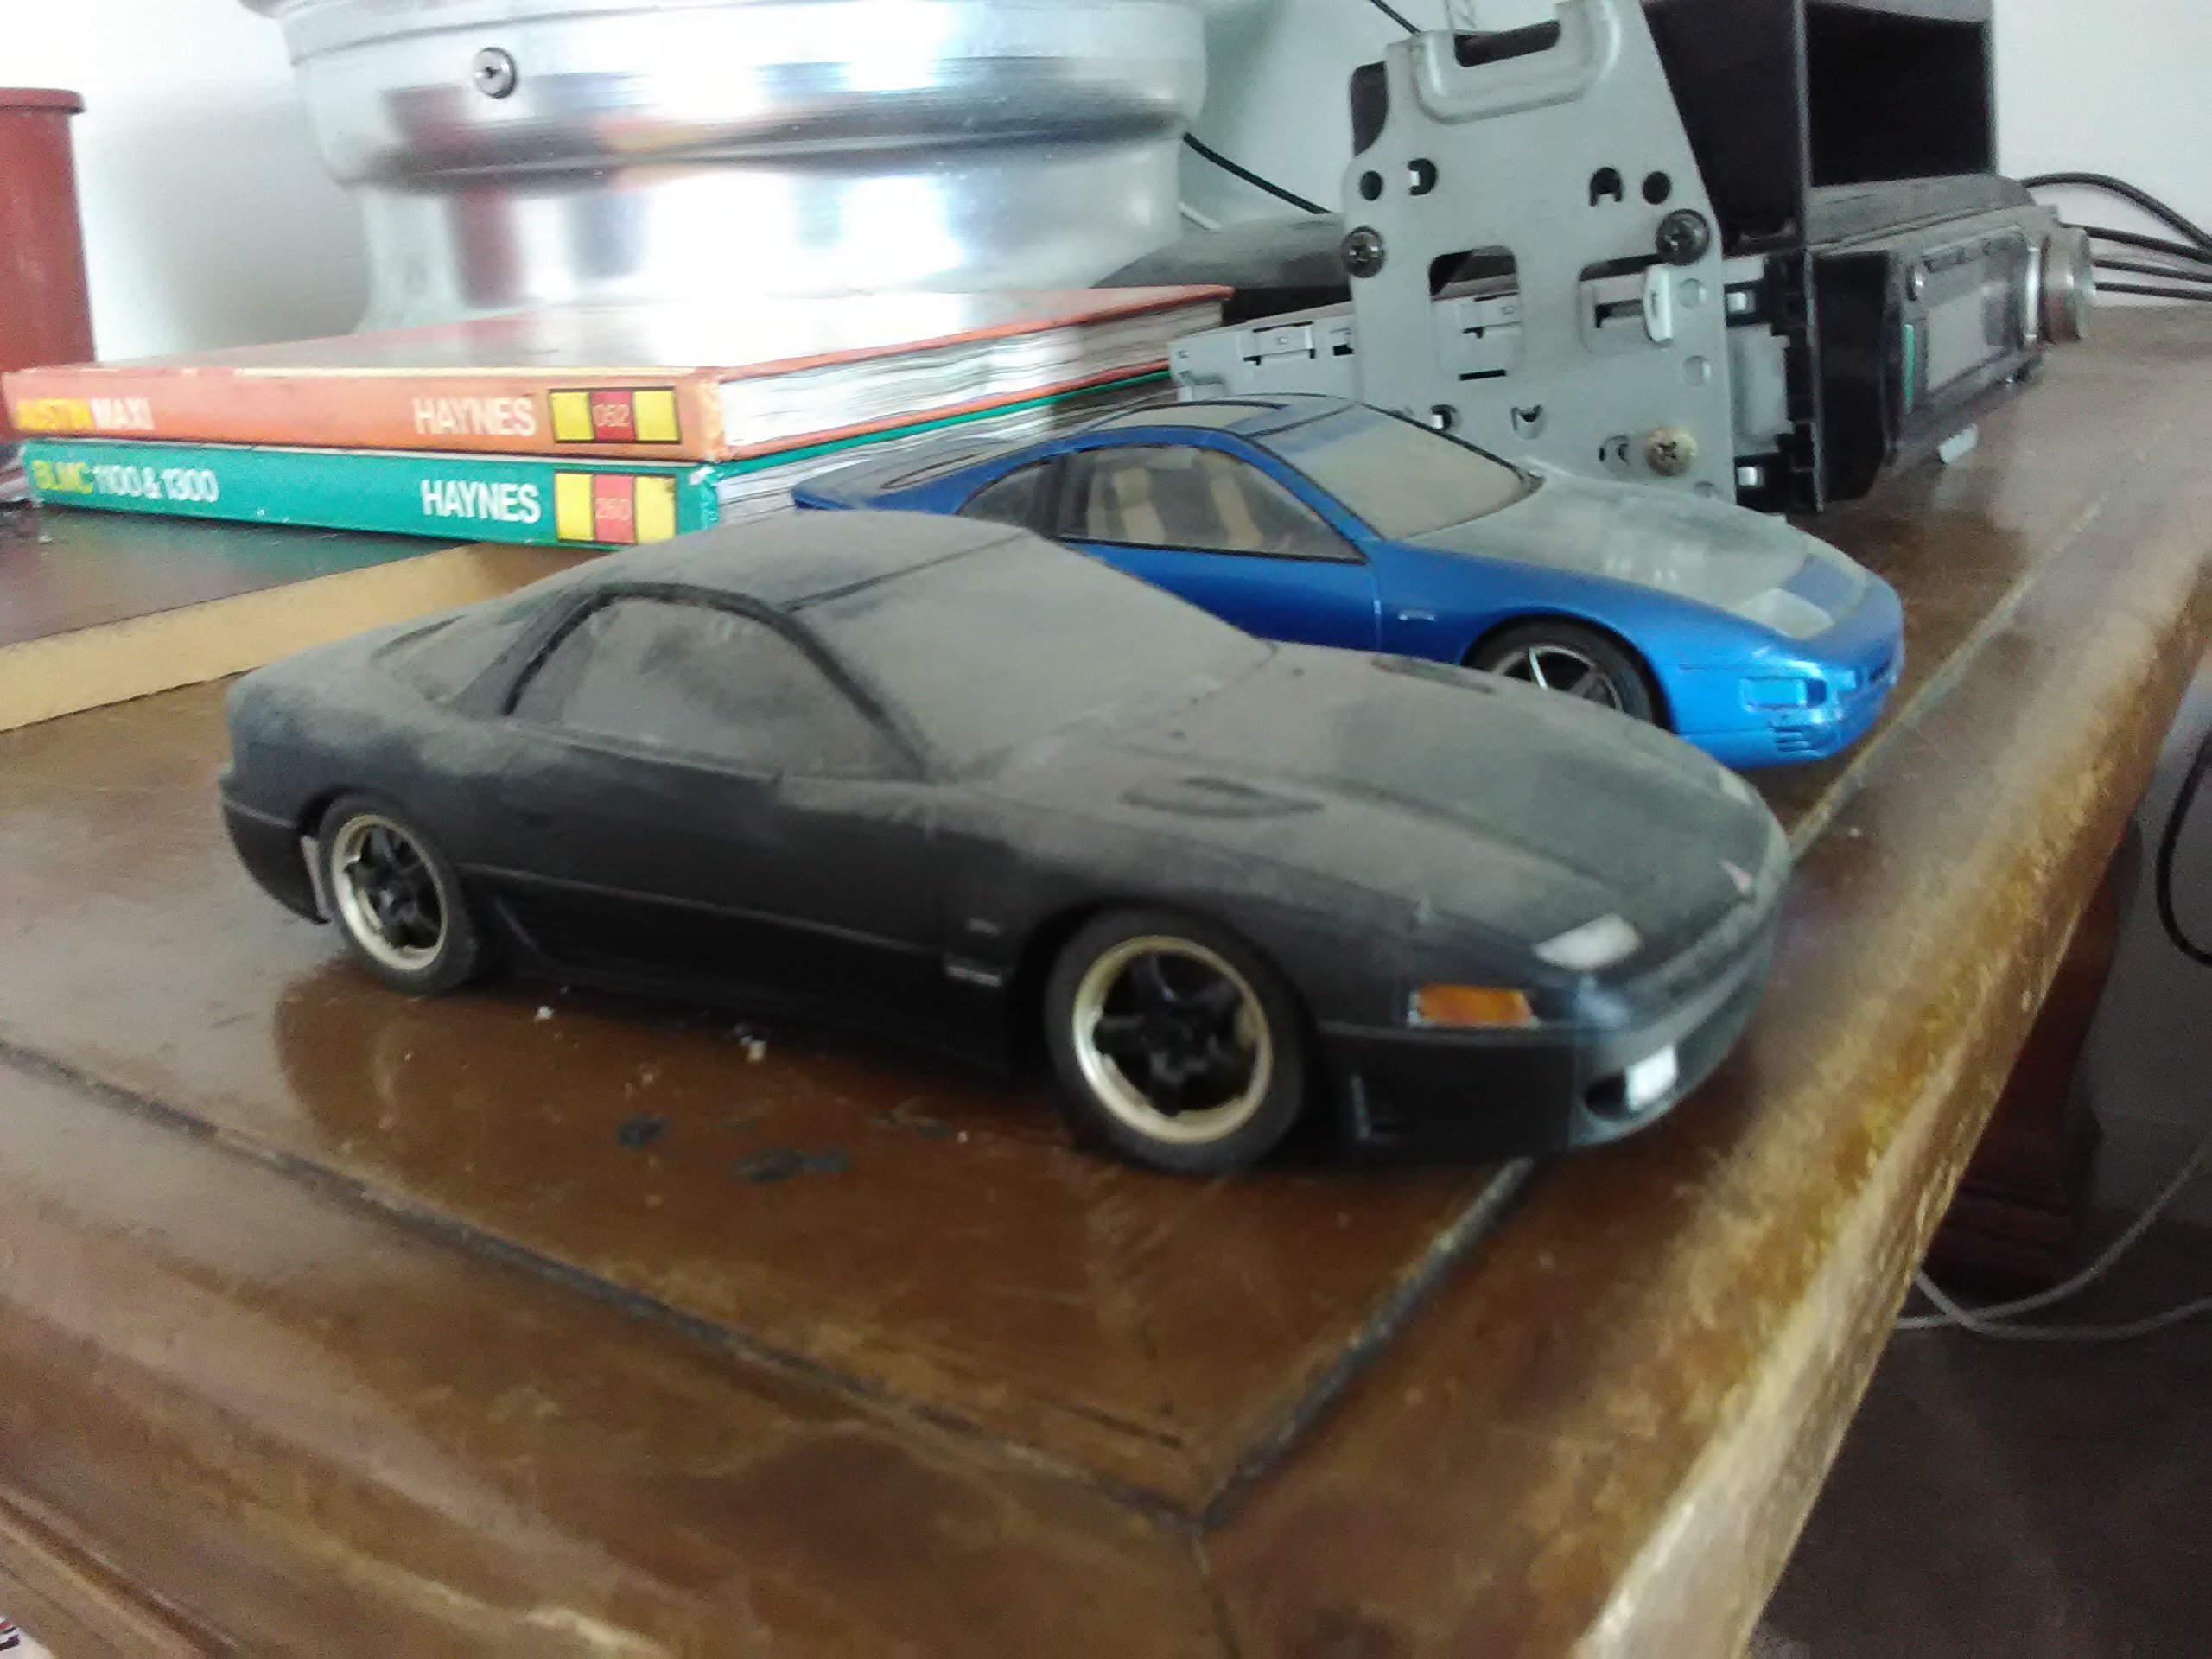
Excuse the dust.. should really clean them LS300zx Sacked out GTO
4 points
-
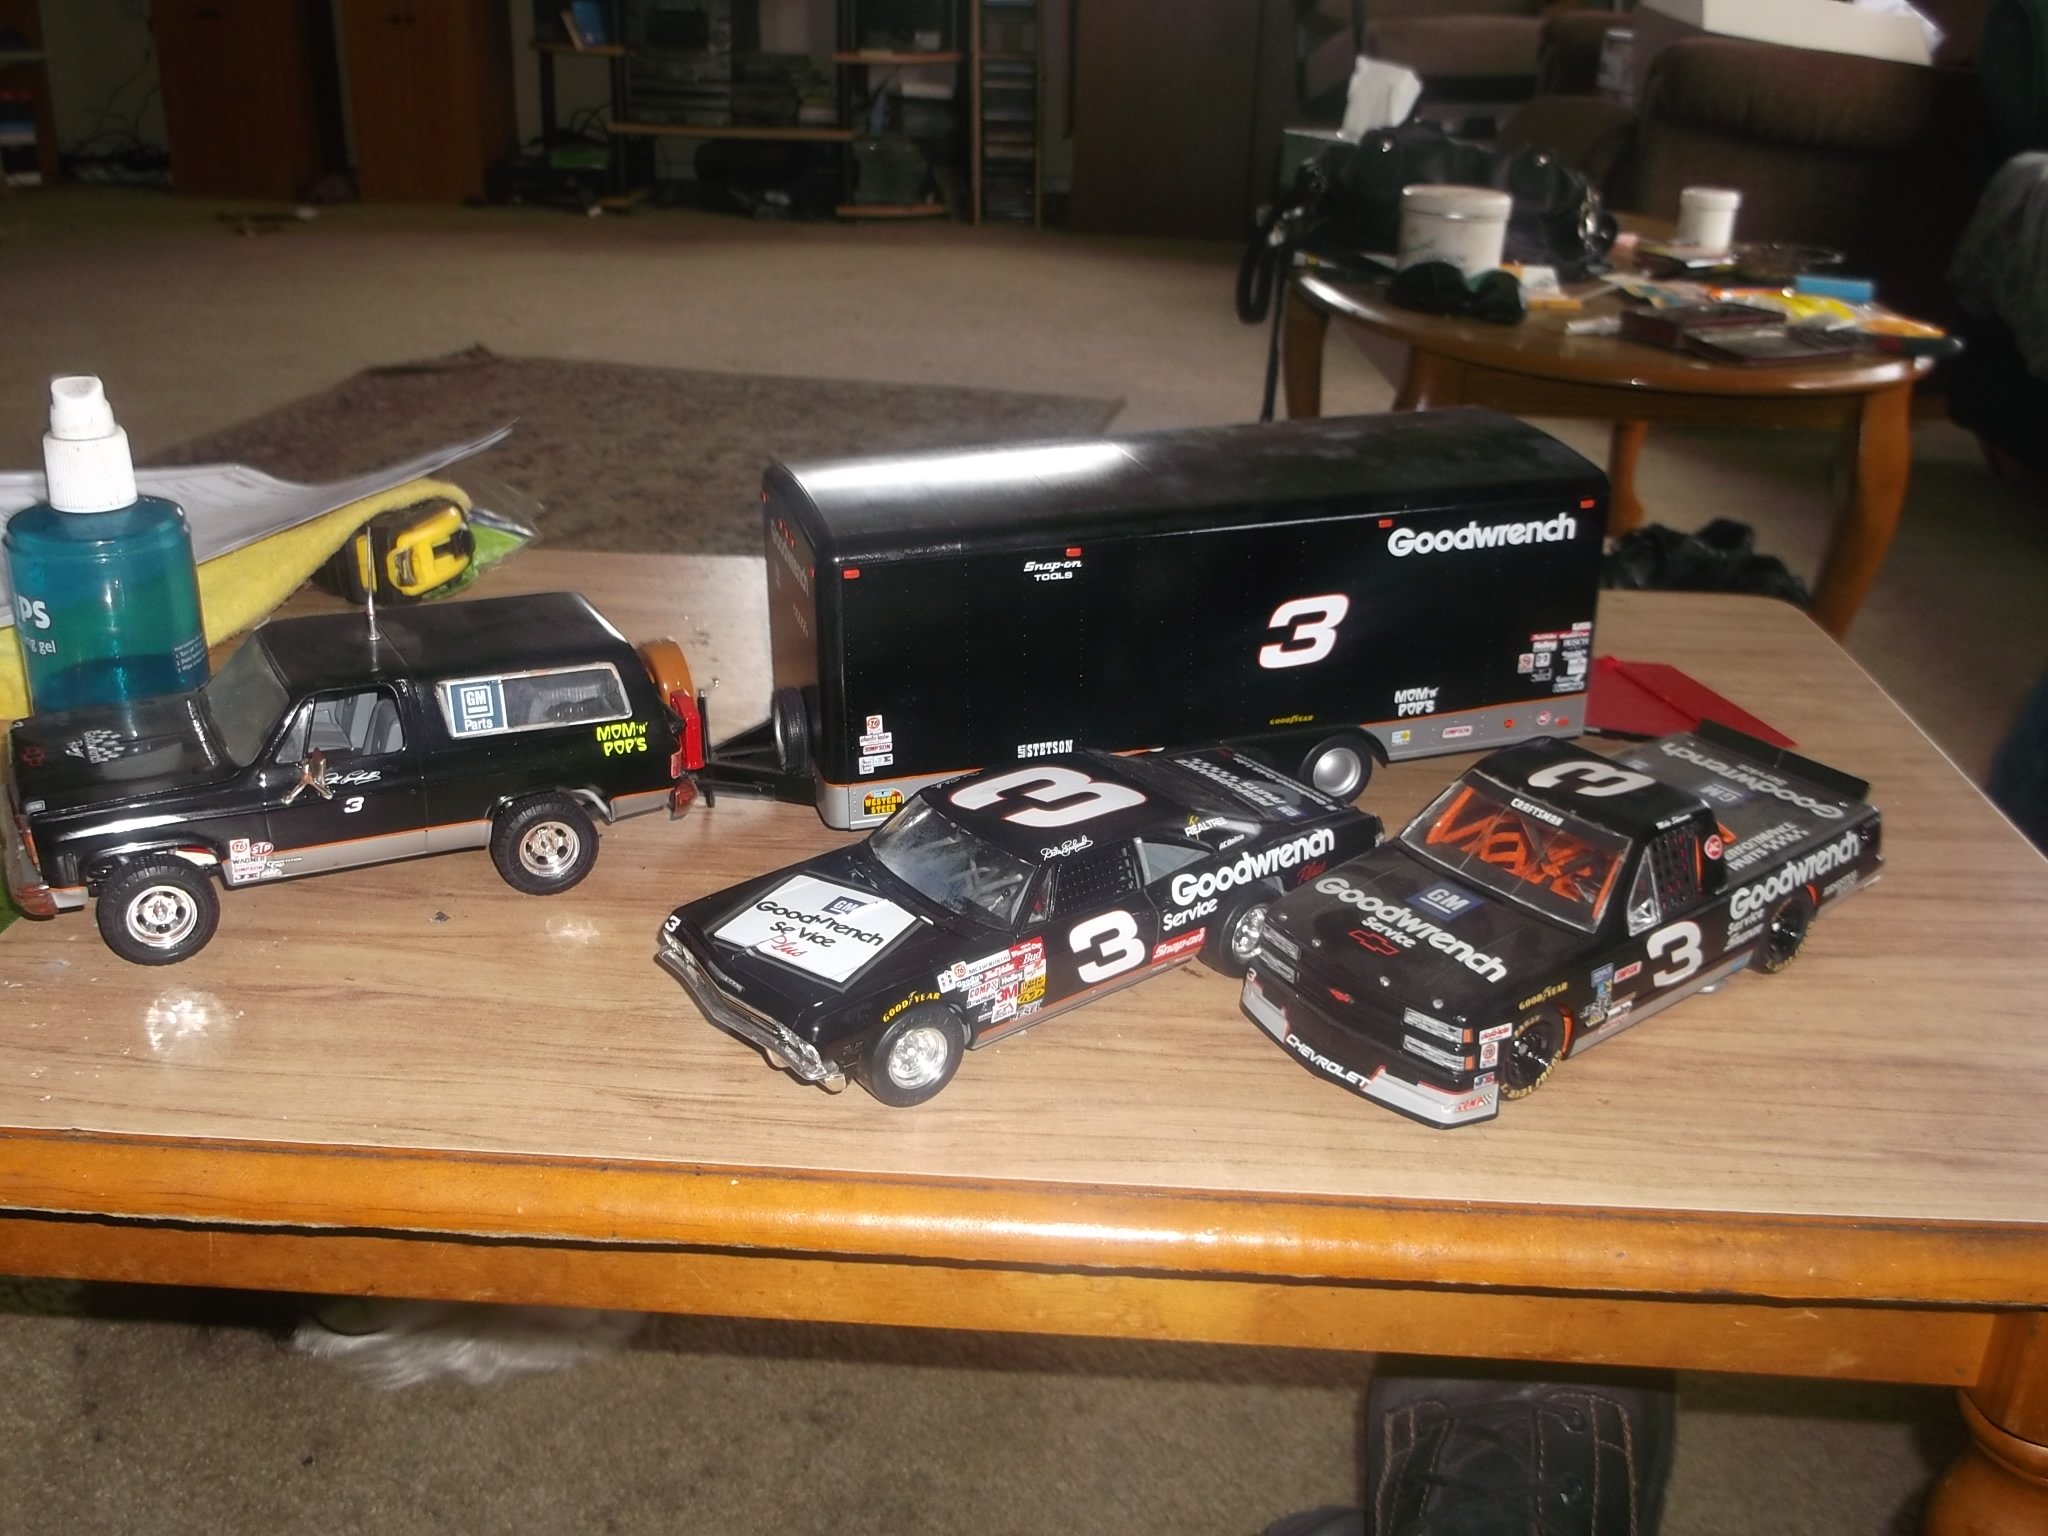
my son and i build a few
4 points
-
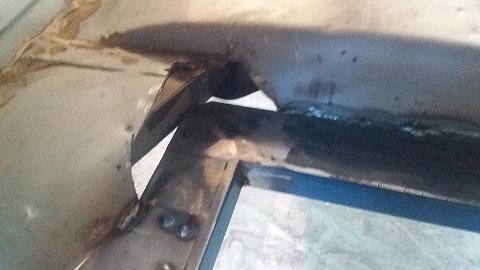
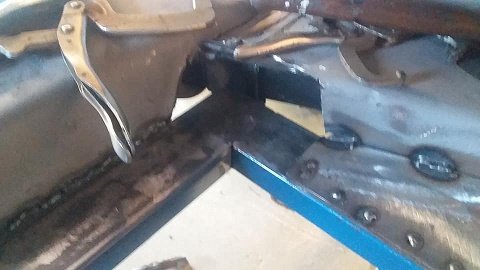
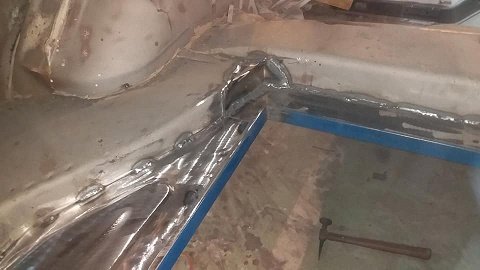
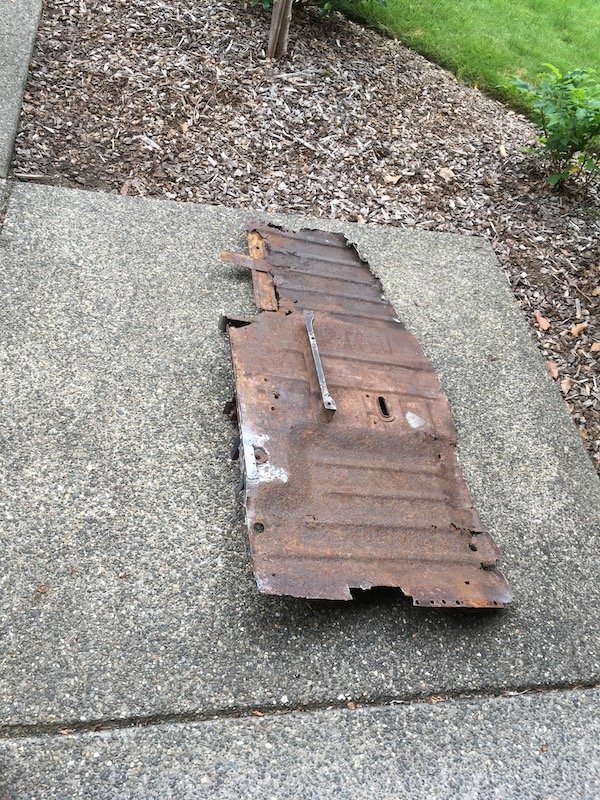
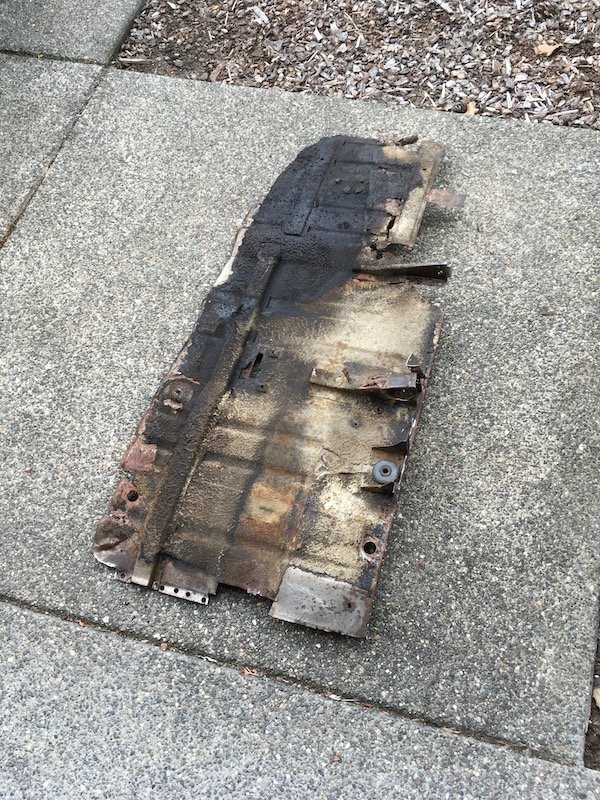
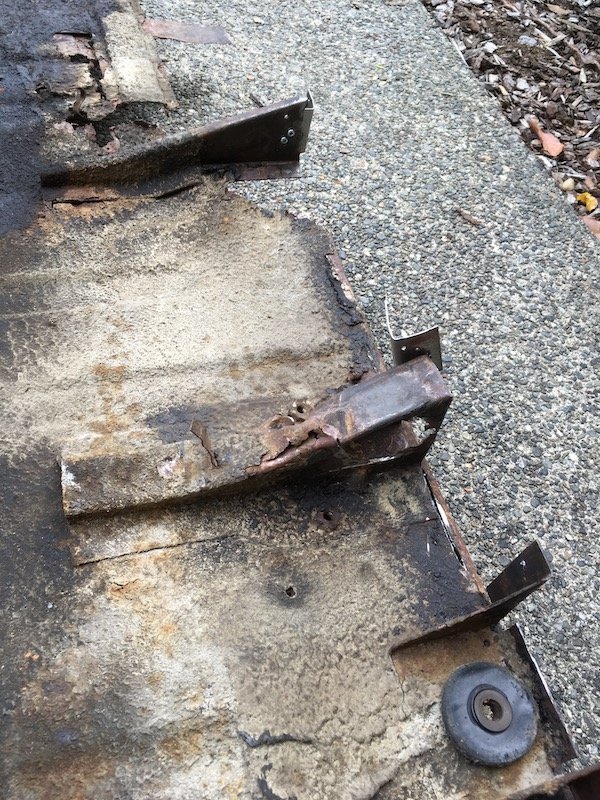
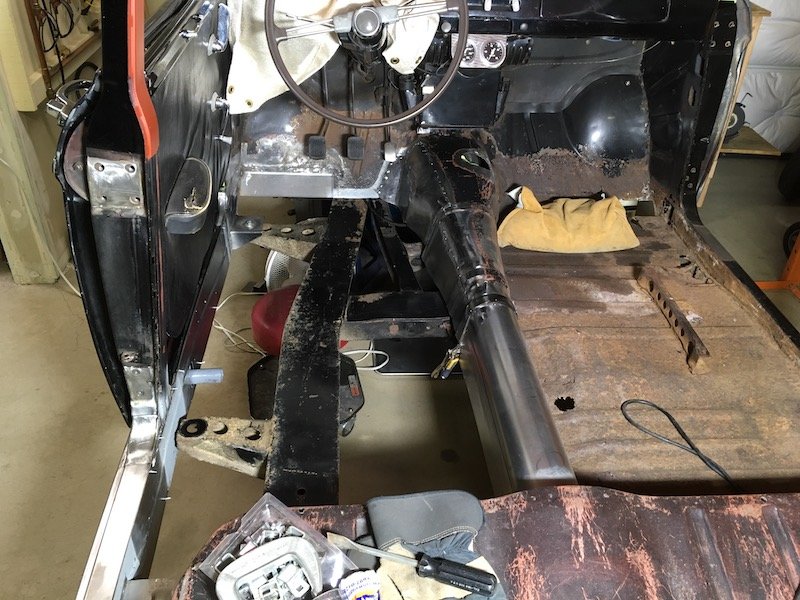
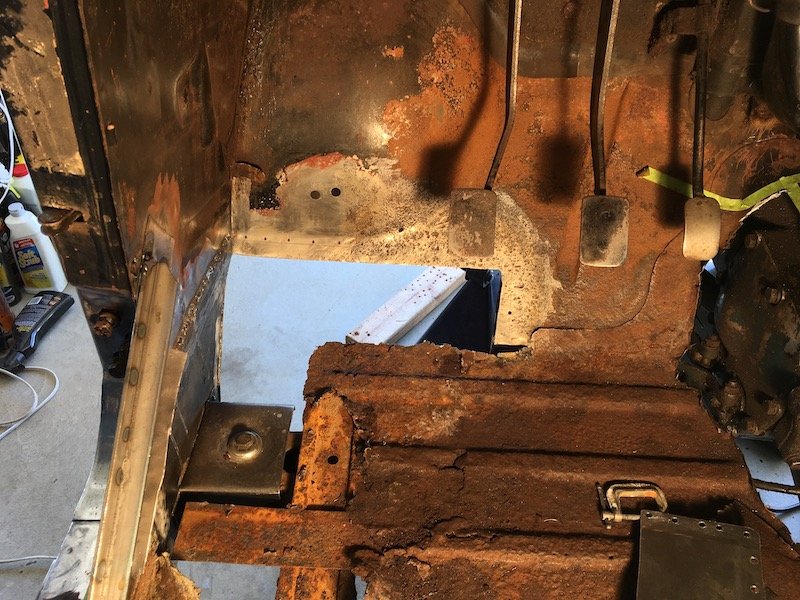
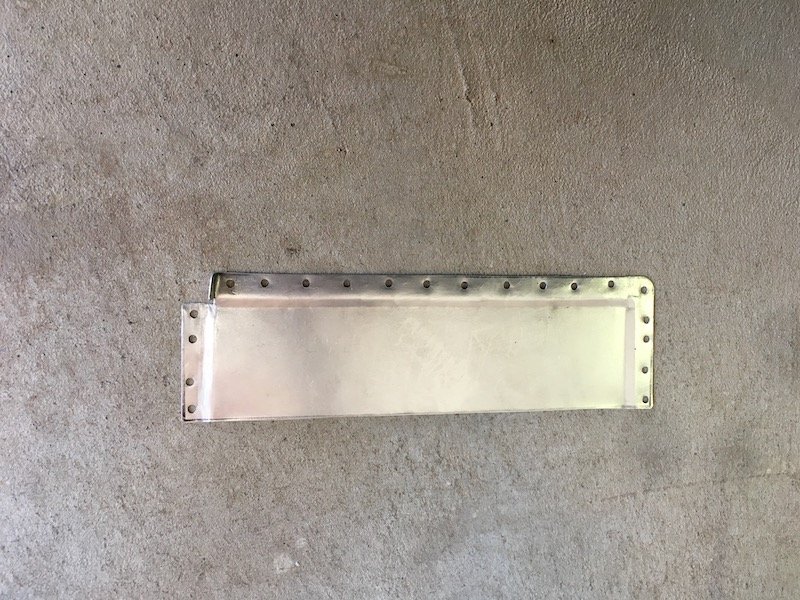
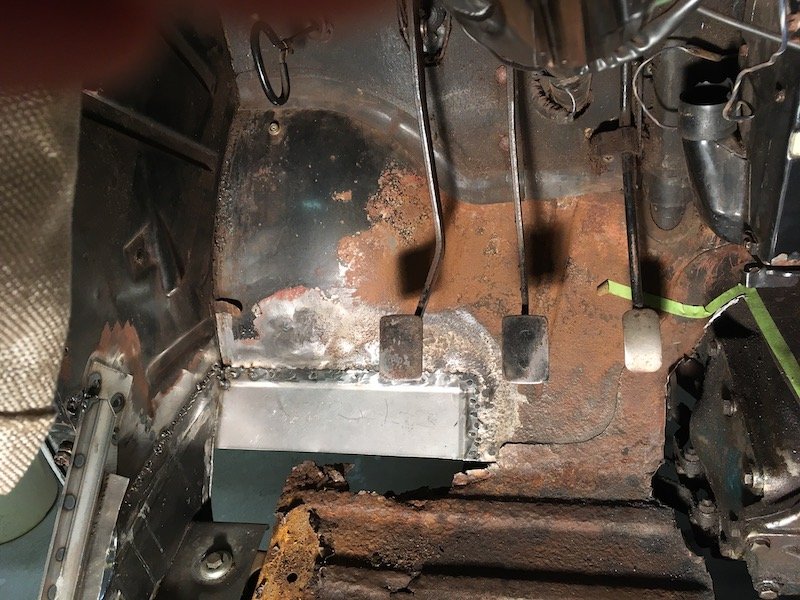
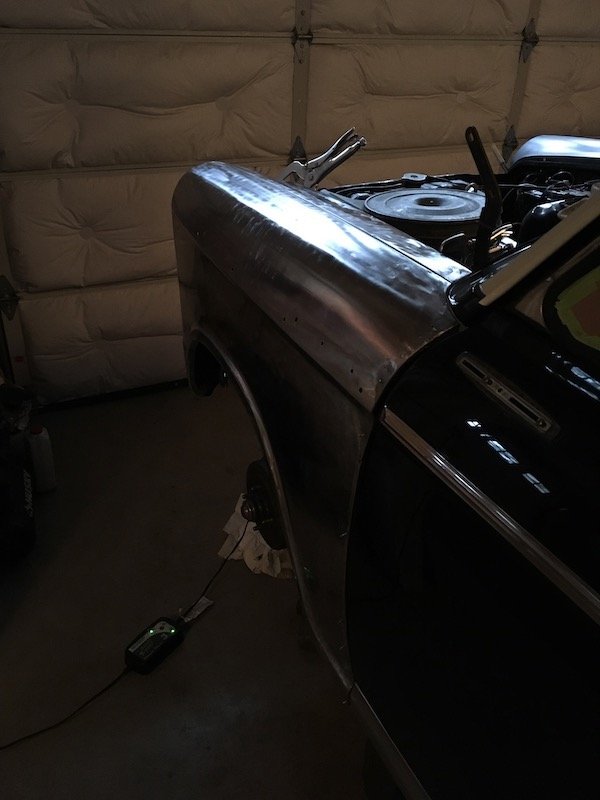
Continuation of the previous post with several more pics. The left middle/side patching of the rusted trans tunnel. As it started out with the fore and aft sections already tacked in. Made a patch to try and duplicate the existing contours and set an upper tape trim line. The black sharpie line was only a guide for torch heating the metal and asphalt undersealant on the other side to get it soft and scraped off. I didn't want my cutting tools getting gummed up. Cut the rotten metal out. Rubbish now. It would have been difficult to get a good weld against it. Cleaned up the surrounding metal. Did some test fitting to determine the trim of excess material on both ends. Final fit and ready for tack welds. Initial tack welds completed. With all the surrounding metalwork taken care of, I proceeded to cut the left hand side floor out. The seat mounting bracket will be salvaged. Same for the reveal or surround for the hand brake penetration. The underside. Planned underside salvage items include the long fore and aft 'Hat" section and body mount bracket. Other brackets are too badly bent, battered or rusted to be salvaged. There are four other simple flat or nearly flat parts that will be duplicated. I'll double up on whatever details are made to be ready for building the right hand side of the car. Never made a scratch built floor before, only patches and brackets. It's going to be challenge with the wide stiffening beads, elevation changes and 3D shape near the mid-body mount and rear footwell. No guarantee of success. Some random extra pics. Sleeping Bluebird with dreams of many road trips past and to come. I've now completely used up a four foot by eight foot piece of 0.9 mil thick sheet metal and need to buy more. Still got a long ways to go just to get the left side of the car finished. I'll post again later with more progress when I get the left side finished. It could be three, maybe four months or more. Discussion: https://oldschool.co.nz/index.php?/topic/60267-marts-pl310-61-datsun-bluebird-sedan/
4 points
-
3 points
-
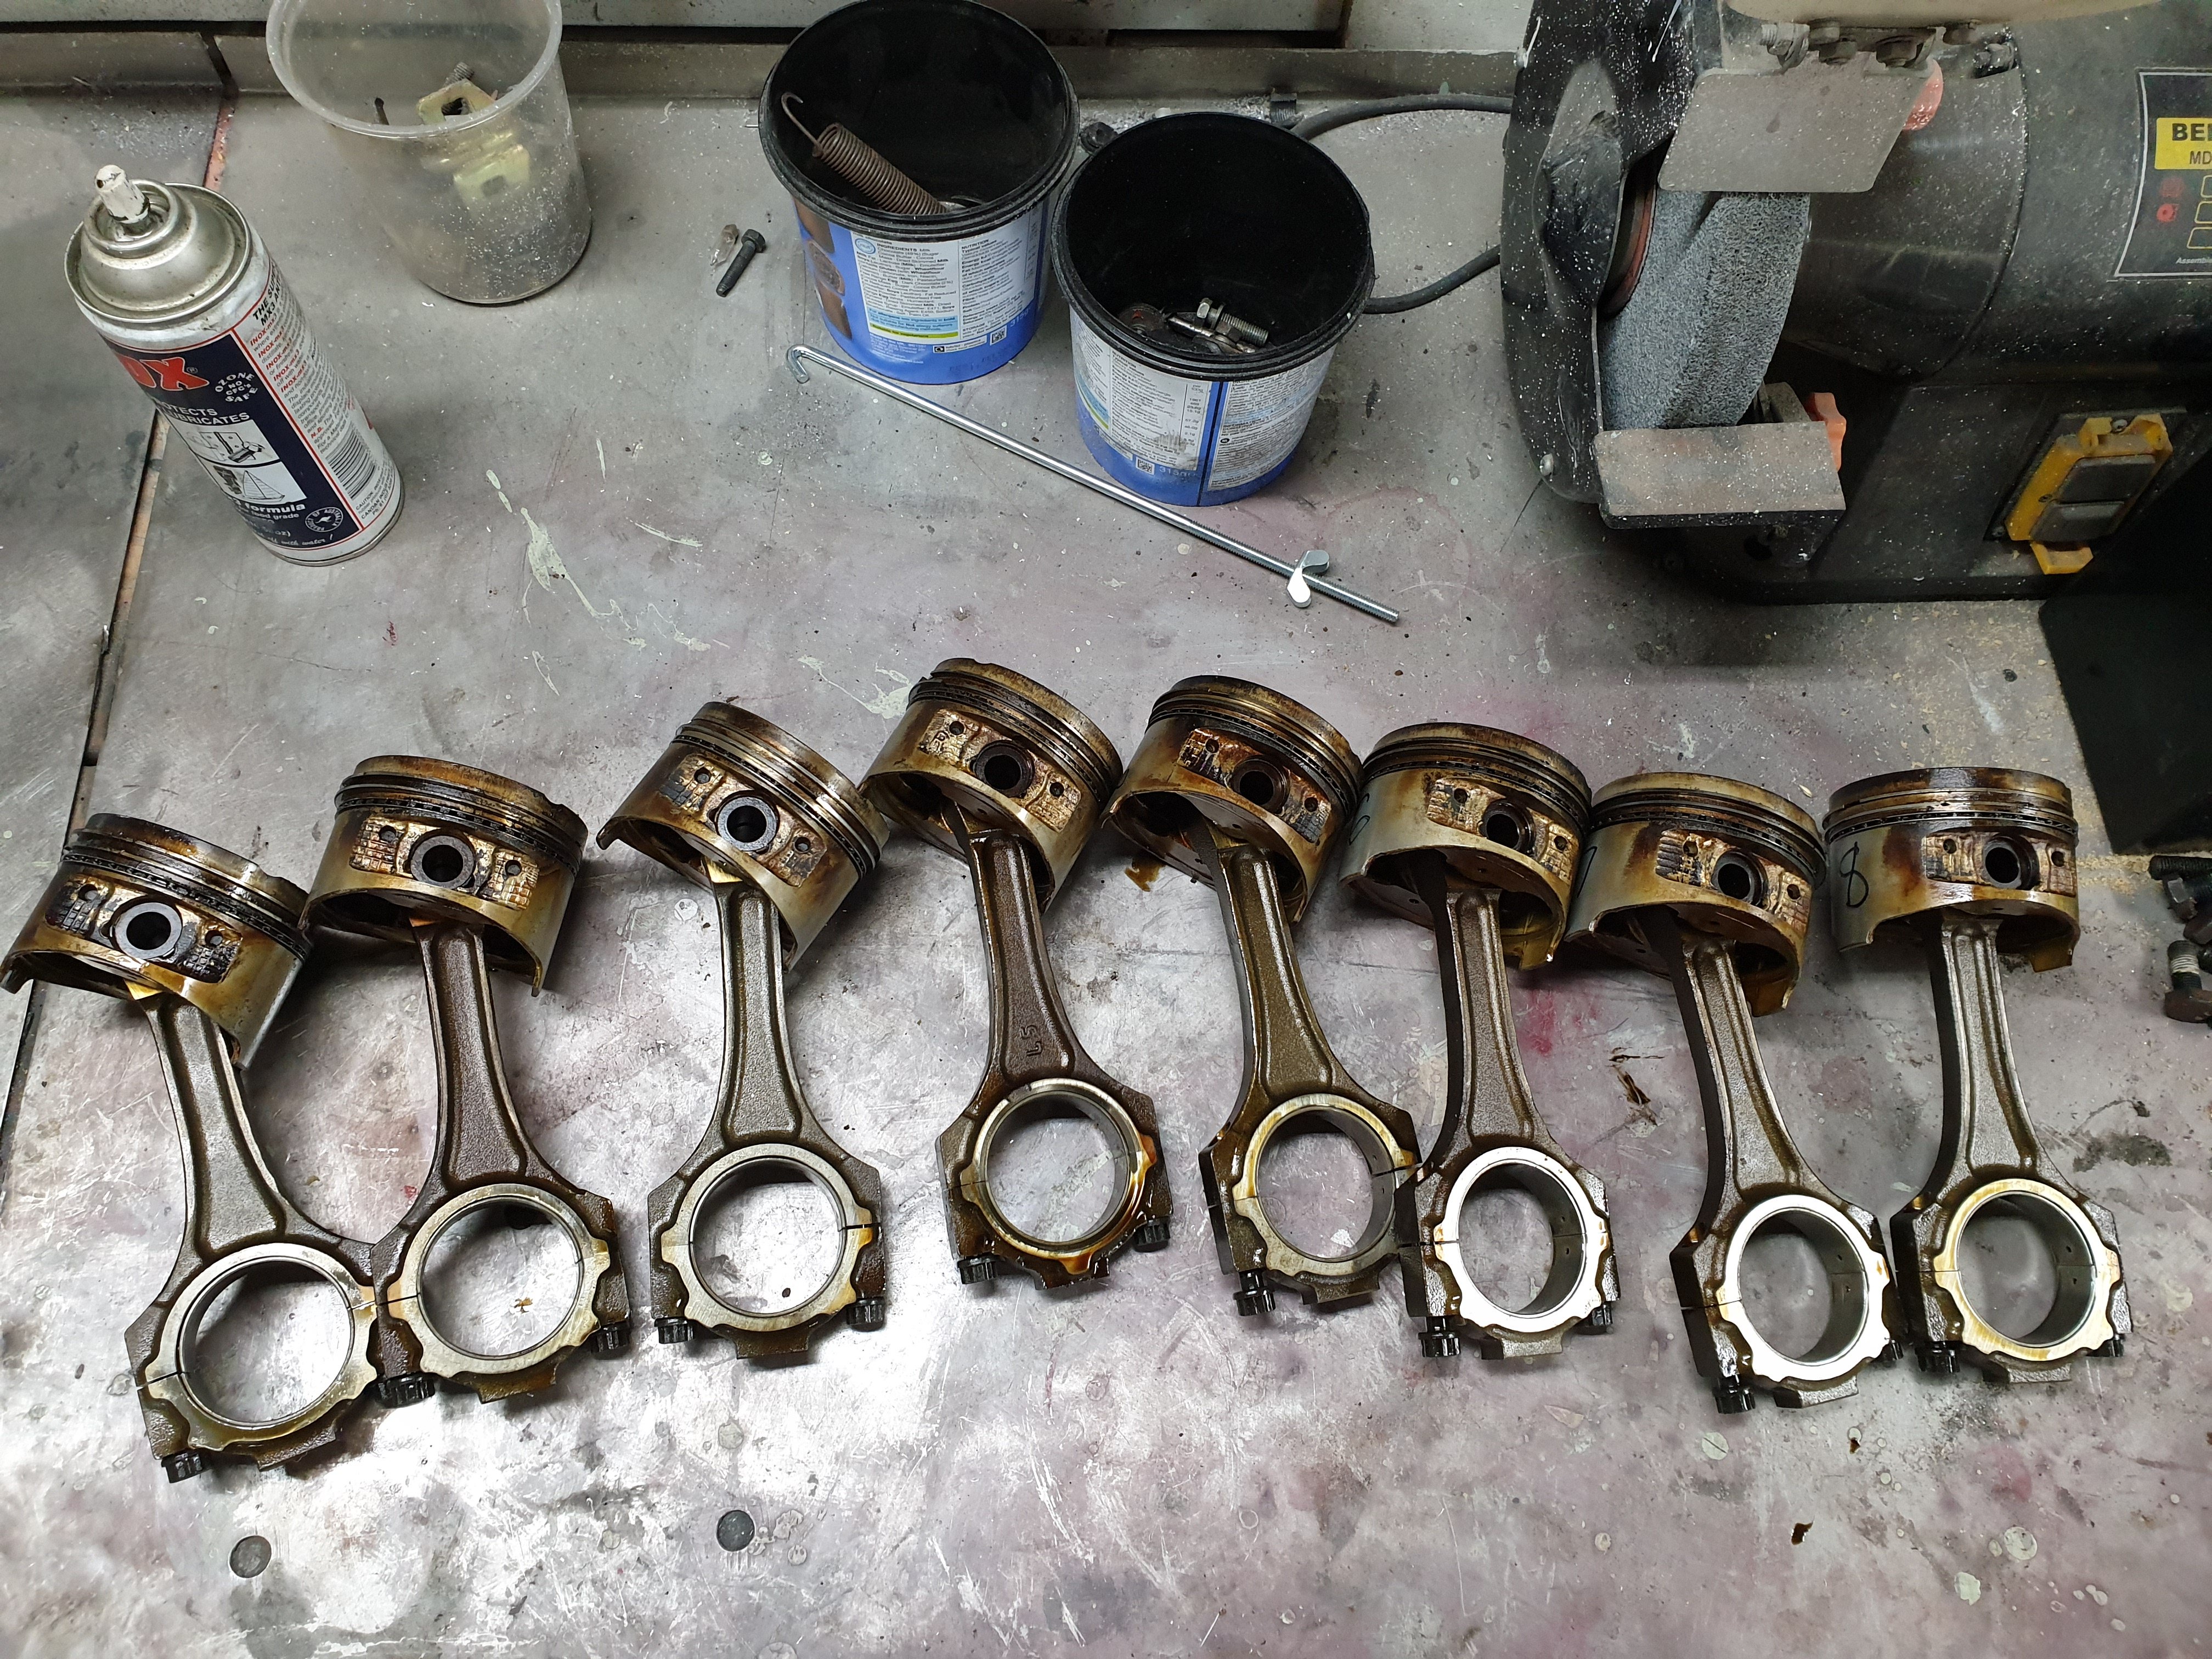
Pistons out of the block. Bores should clean up with a hone but we'll see and the crank looks like it just needs a polish. New eagle rods and Ross pistons to go back in.
3 points
-
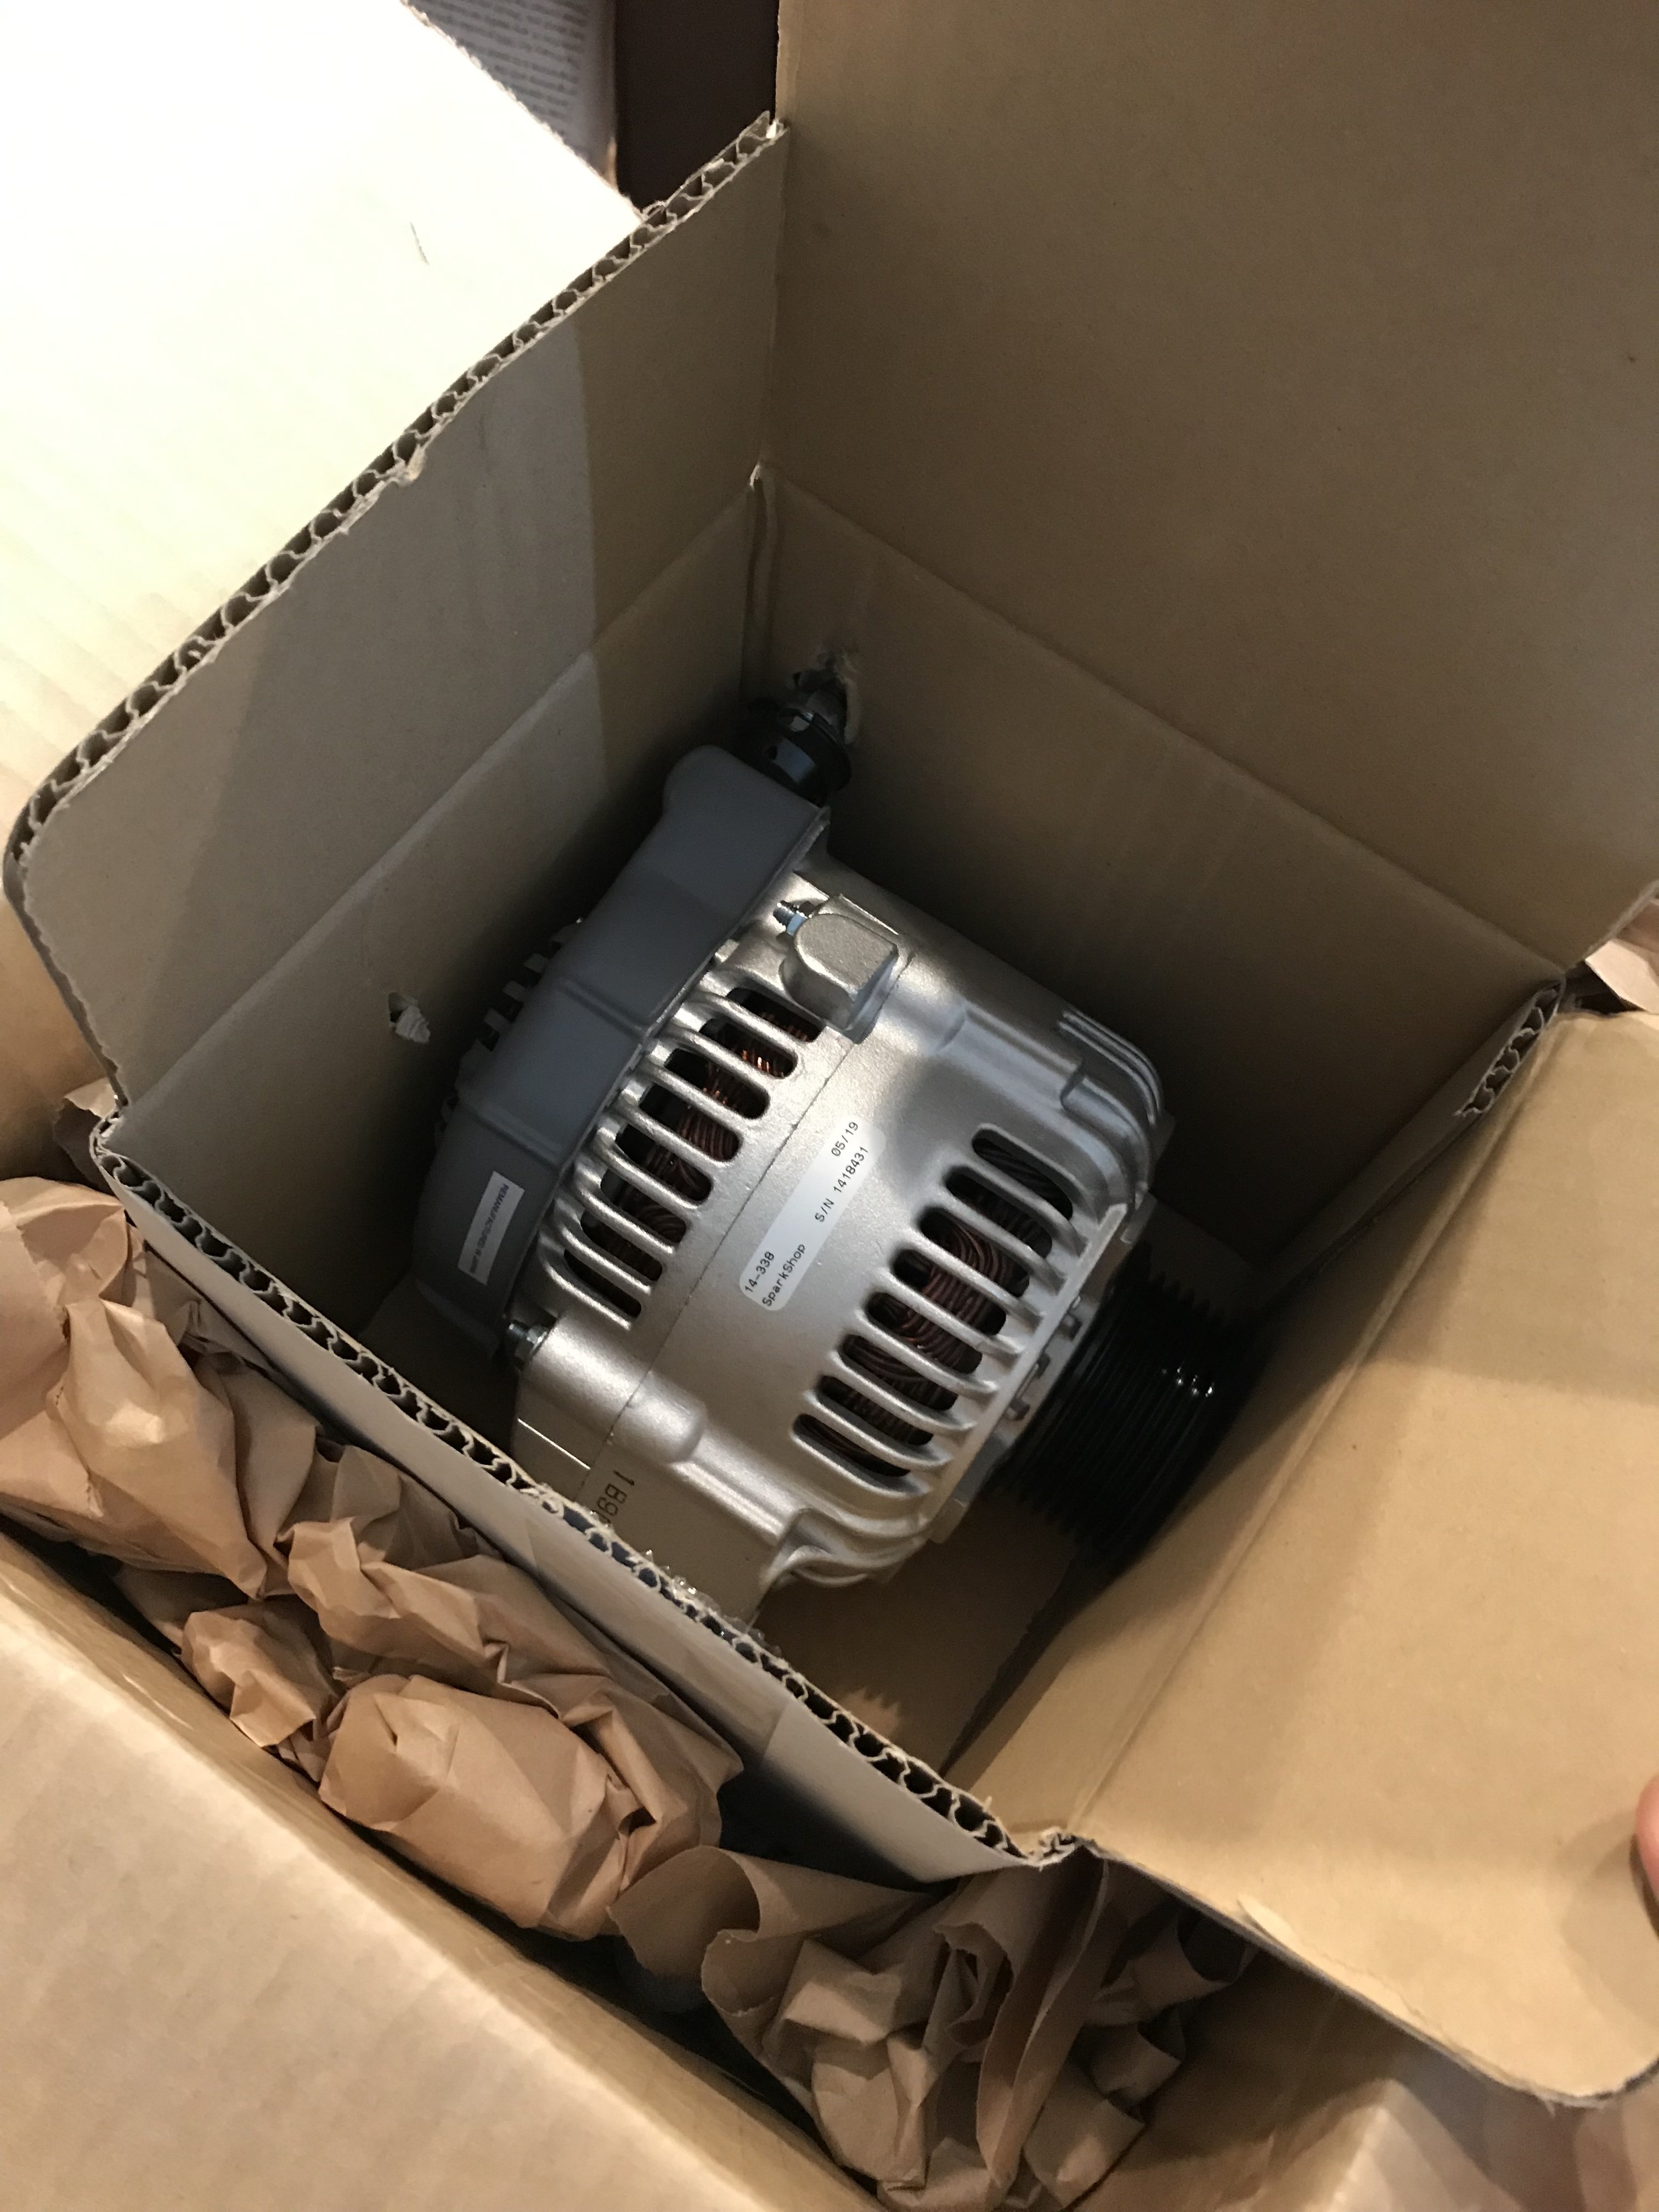
Seems im overdue for another update. Best remedy that I guess and spew forth more pics.To keep all the electricals ticking im using a Powermaster 150amp 1 or 3 wire alternator. As i stated above I wanted all the brackets as low as possible. unfortunitly cooling hoses got in the way in the middle positions and the powerstearing rack when it was really low. So its had to go up higher but is still low as we could get it. Still its not to bad I guess.Also mounted up the radiators overflow seen above.On the other side of the rad we mounted up the PS/hydroboost reservoir. Three port jobbie.Under the car a fly wheel cover was fabbed up. Stock would not work due to the trans adapter. Bit of split pipe was used for the notches to clear the torque converters covers ridges.Car is off the jack stands and front panels are bolted on. not all the bots etc are in but enough to keep it together until I get new bolts for it all and get it done right. Old Nailhead sits in there nicely.Steering wheel thrown on just so we can roll it about easier. GT Performance 9 bolt hub, 15.5" wheel and horn. Really wanted a wheel with a horn ring cus I love those things but ones that suit smaller wheels are bleeping expensive so it can wait.Car is sitting pretty darn low. Like the lowest part is the brace that joins/strengthens the front sub side to side much like the original Hudson setup. I haven't measured it but I guess we have 30-40mm clearance to the road. As you can see with the good old beer bottle next to the car... it low.keep in mind we still have to add side pipes - its that big ol hole you may of spotted in the above pic. You will see also that we will have a heap of room for them under the rockers. They also have a bit of a curve whats a bonus as it will (with luck) keep them out of ankle range whilst keeping them nicely tucked up so we dont rip em off.and moving right along... side shot just cus I like it. yes I know the car is dirty but so is my mind and I like it that way.Now talking about burning ankles on side pipes a subject by gal has mentioned most times I bring up lake pipes. My answer generally goes along the lines of "wear heels" below pic proves it. Ankle out of burn range.. toes on the other hand she has never mentioned.But seriously - like the back tire viewed air out side on.Enough farting around talking about air out this and that. Throw a battery in and test that shiz. Yip yours truly testing it out. We left it air up for a few days and I was pleasantly surprised to find it stayed there with only a few psi drop from what I left it at uniformly across each wheel. I will mark that to atmosphere and not any slow leak due to it being across all four wheels not just one.yeah i know the front could be bolted on a bit better but ahh stuff it it will be off again anyway.And just cus im feeling all gangsta...i know it aint hydraulics but it will do me. When air up we must be around 150mm at that one low point in the middle just behind the wheels. Ass end that has larger bags naturally goes much higher.3 points
-
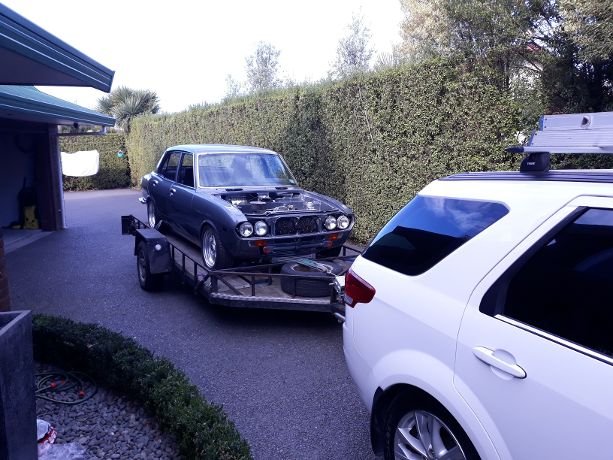
Then it went to this.
2 points
-
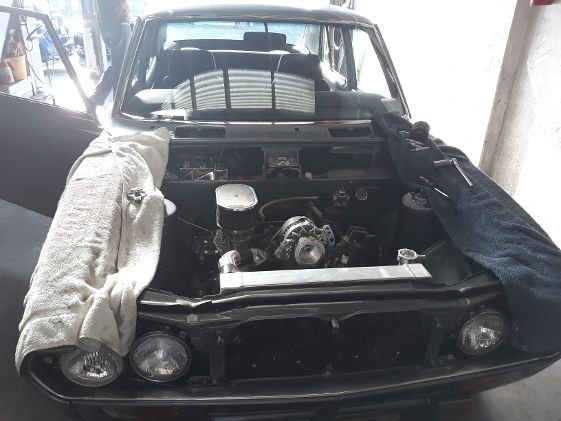
so, today was a very very good day. It started like this.
2 points
-
I've been happy with my Accuair system with slam specialties bags - IIRC the bags were about NZ$250 each.2 points
-
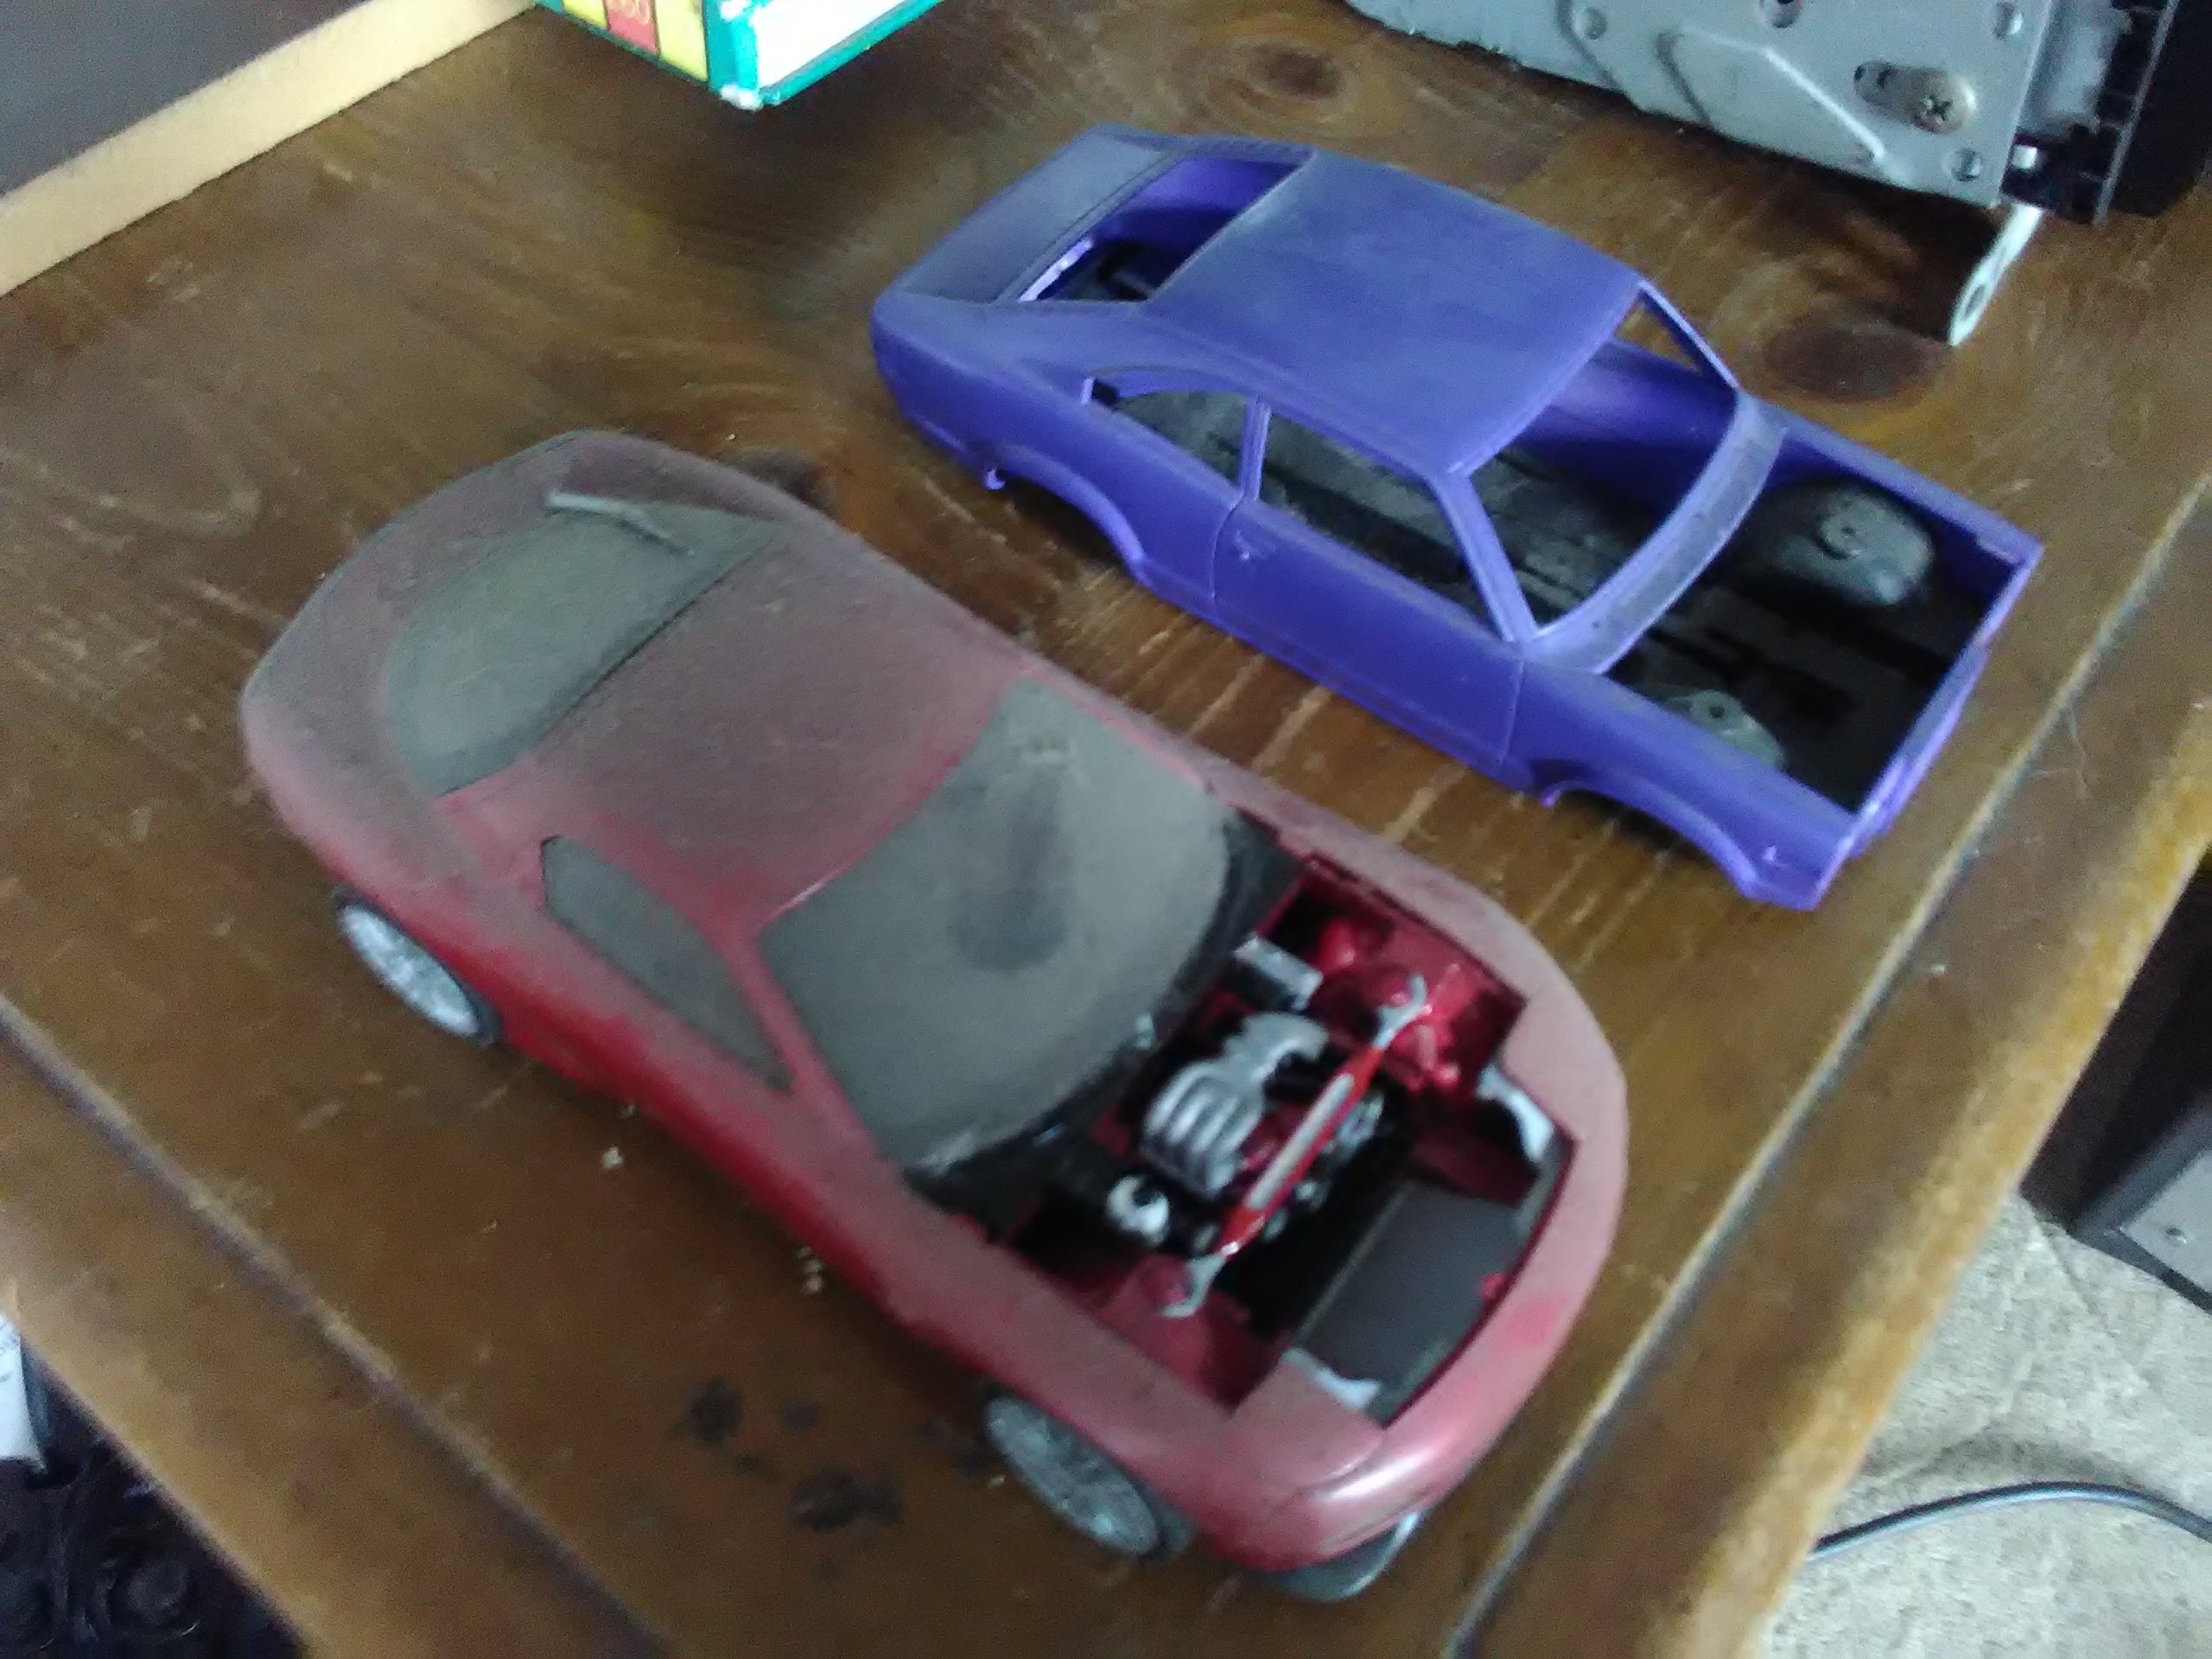
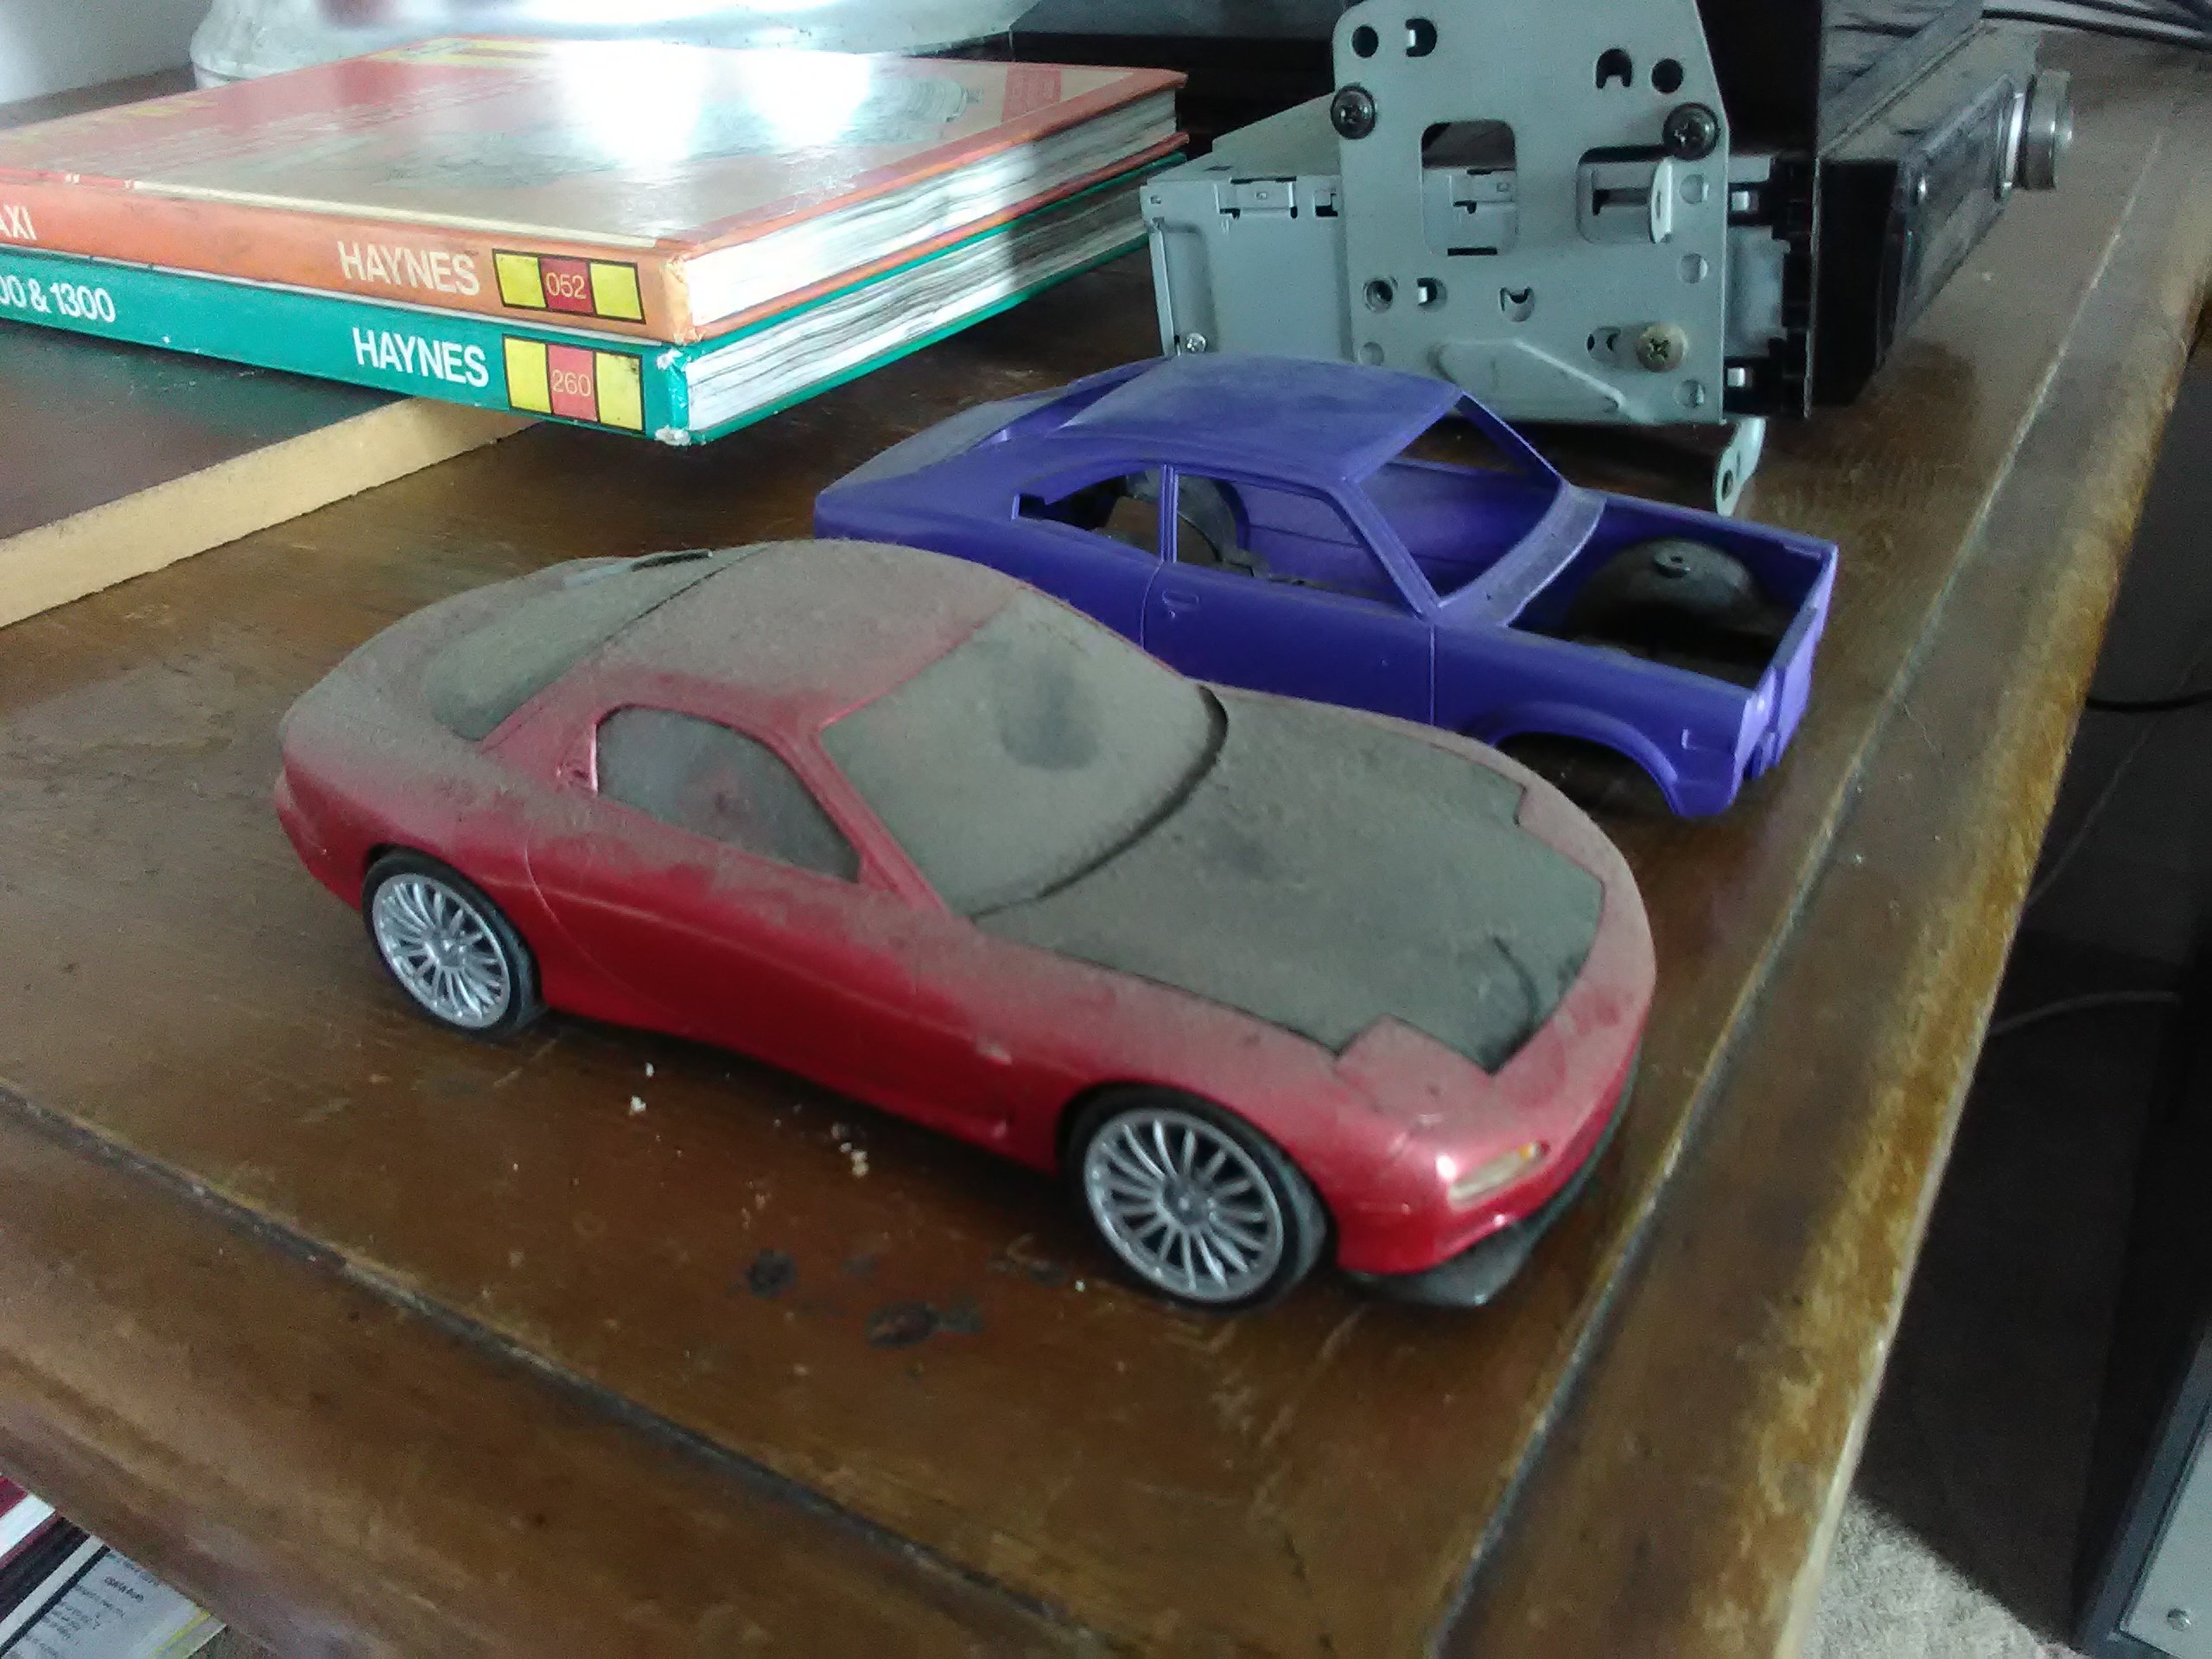
Rota no motor.. If your familiar with the rx3 kit they don't have under hood detailing and no removable bonnet so mine is getting a custom built 20b lol
2 points
-
2 points
-
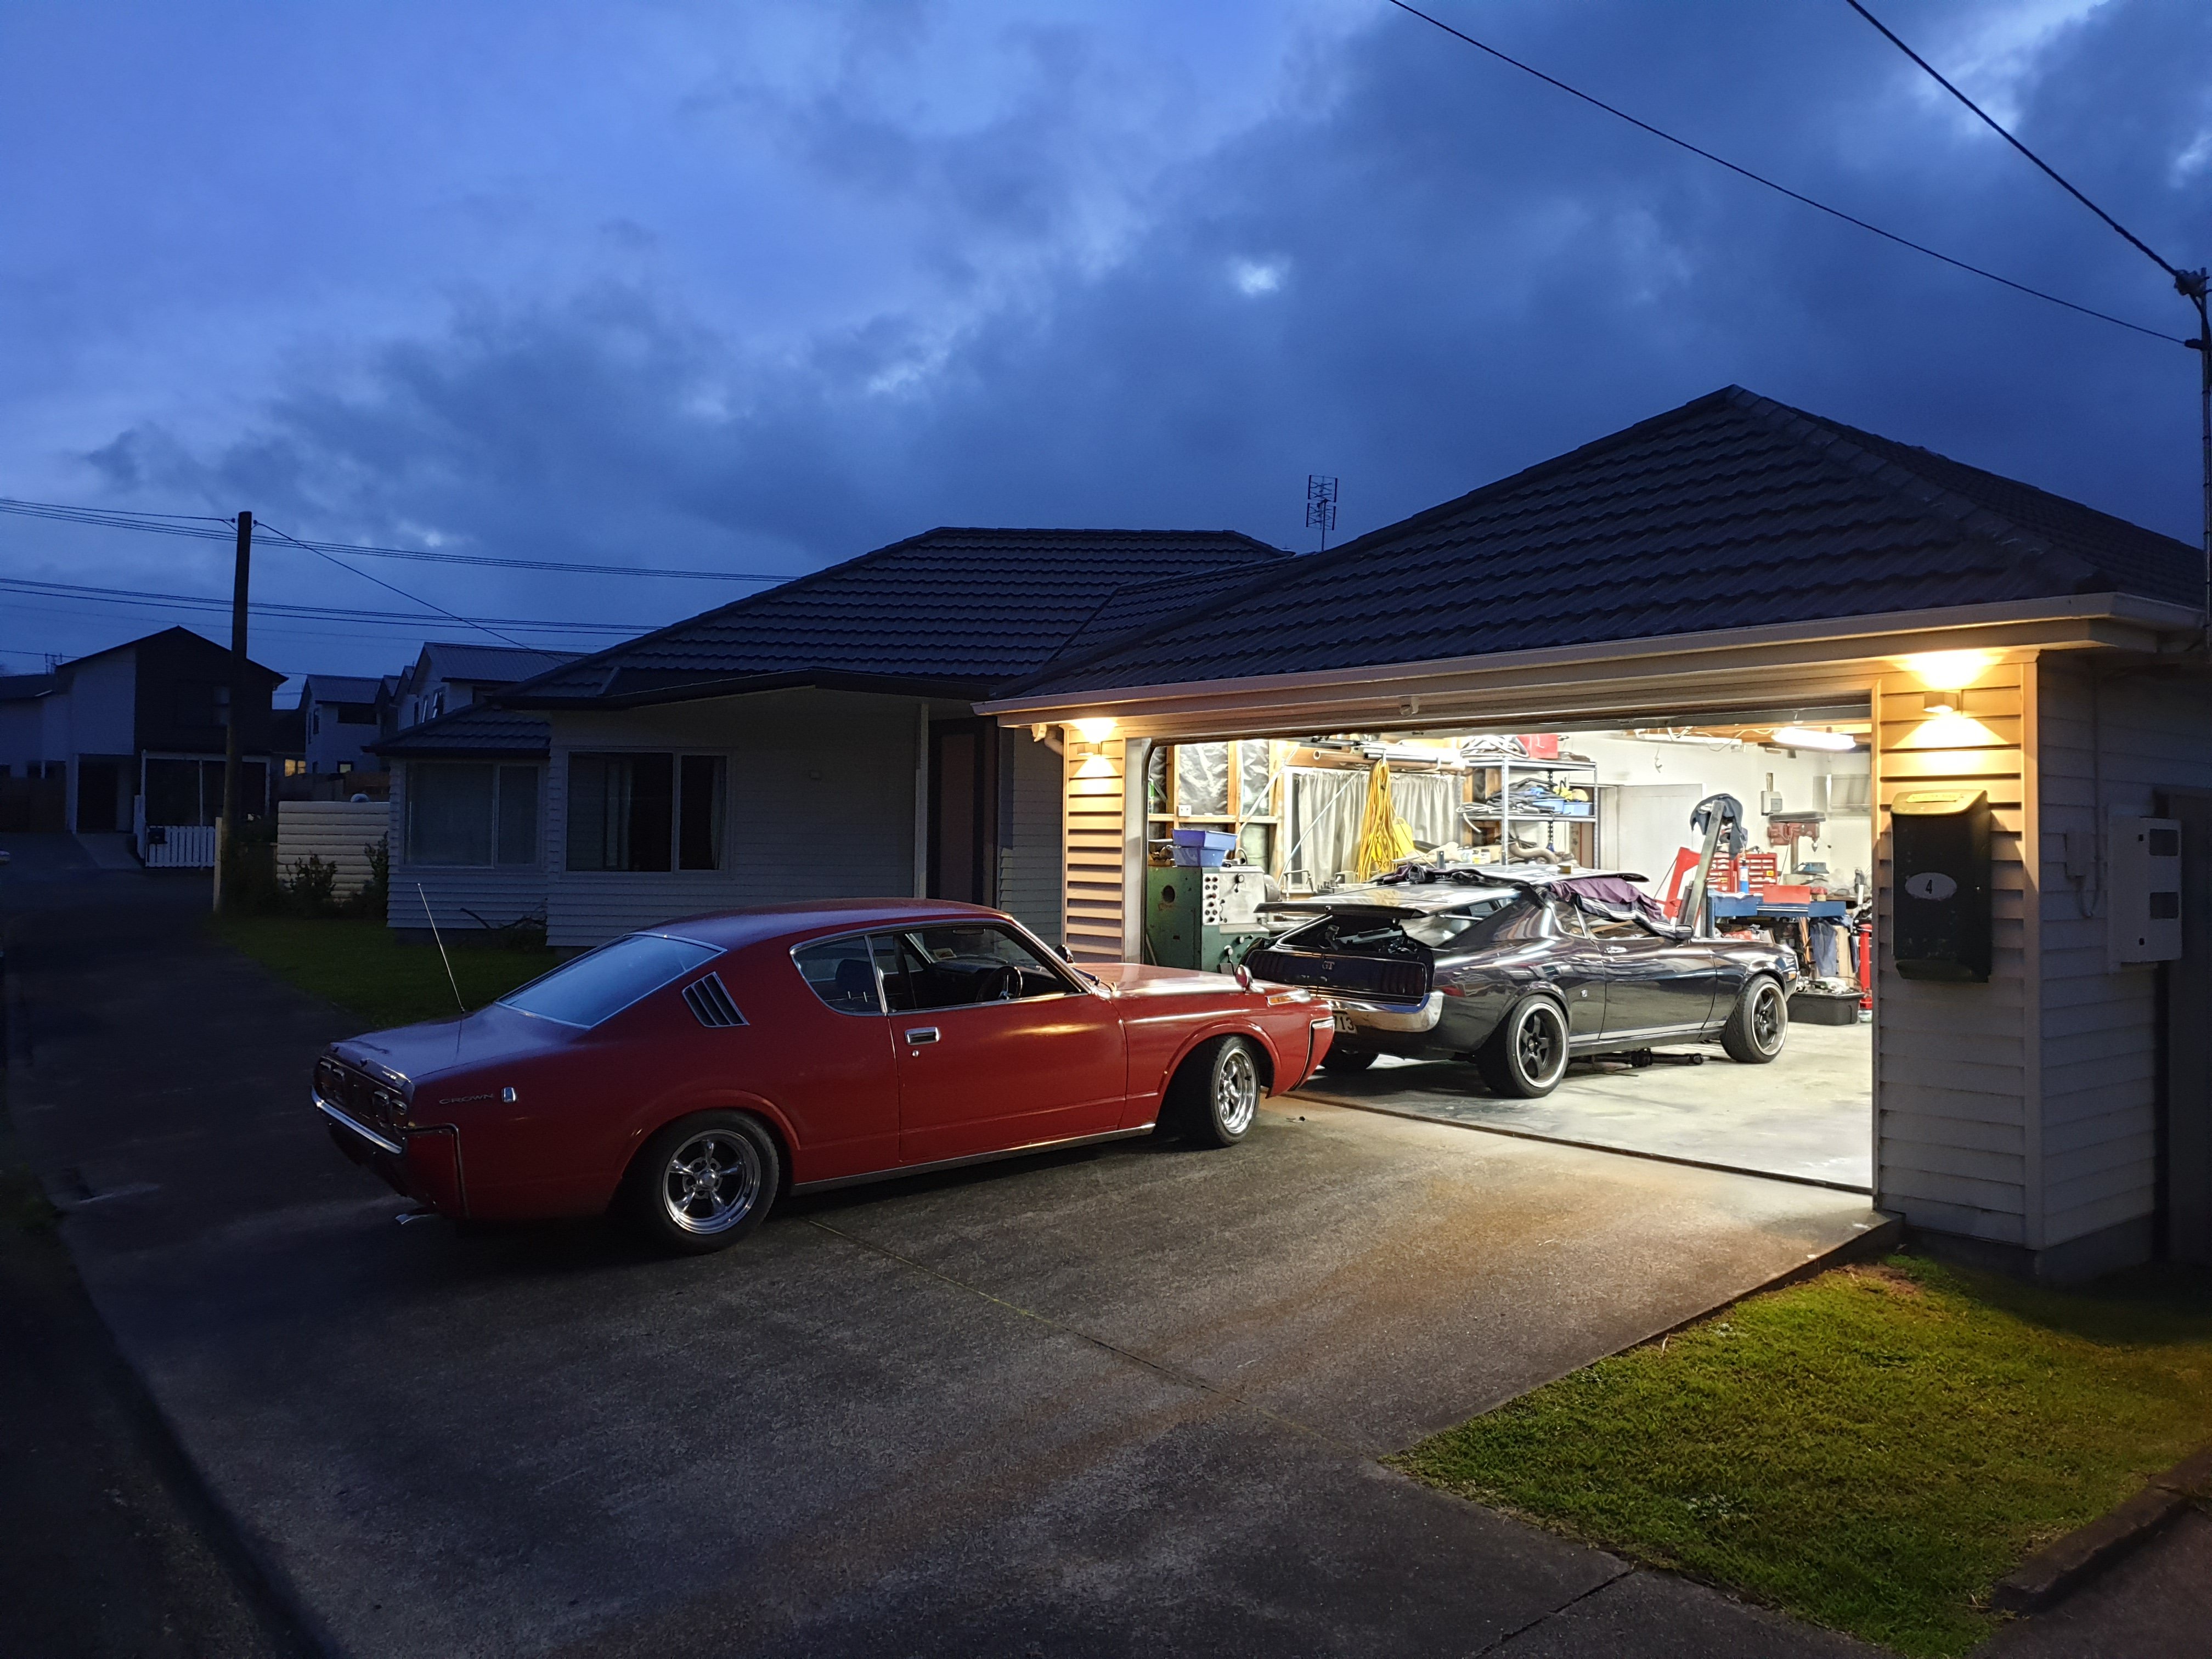
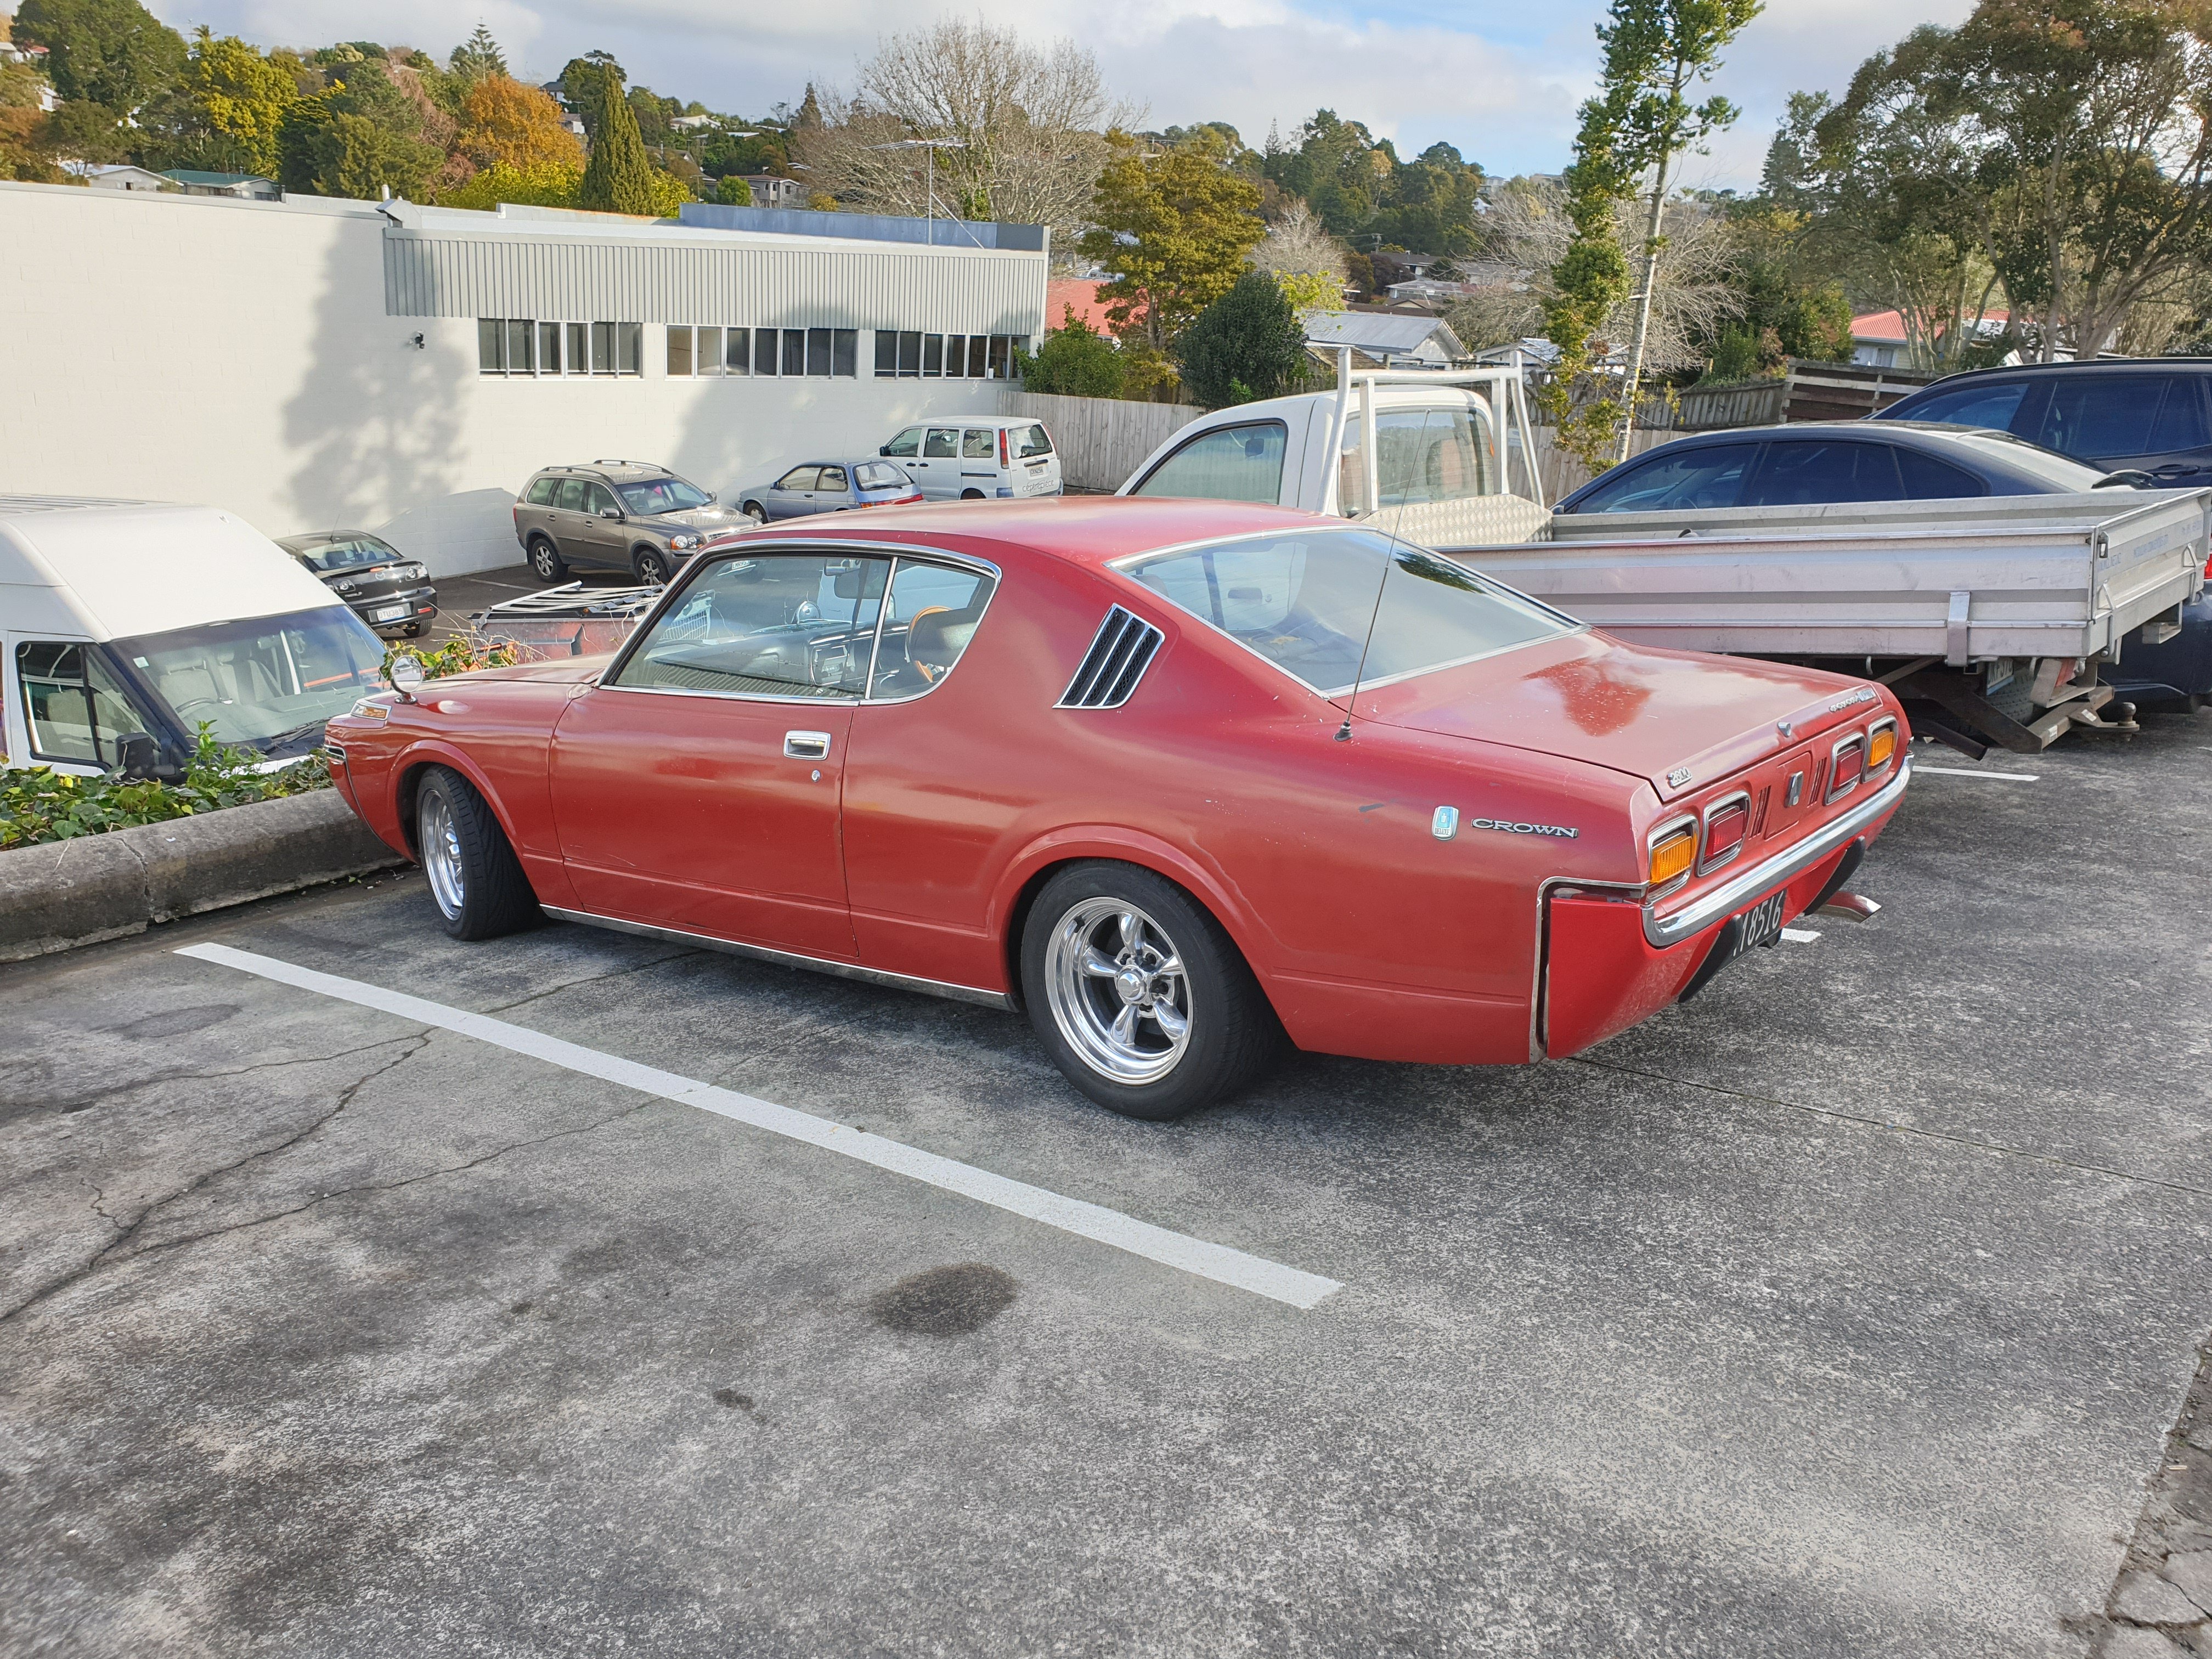
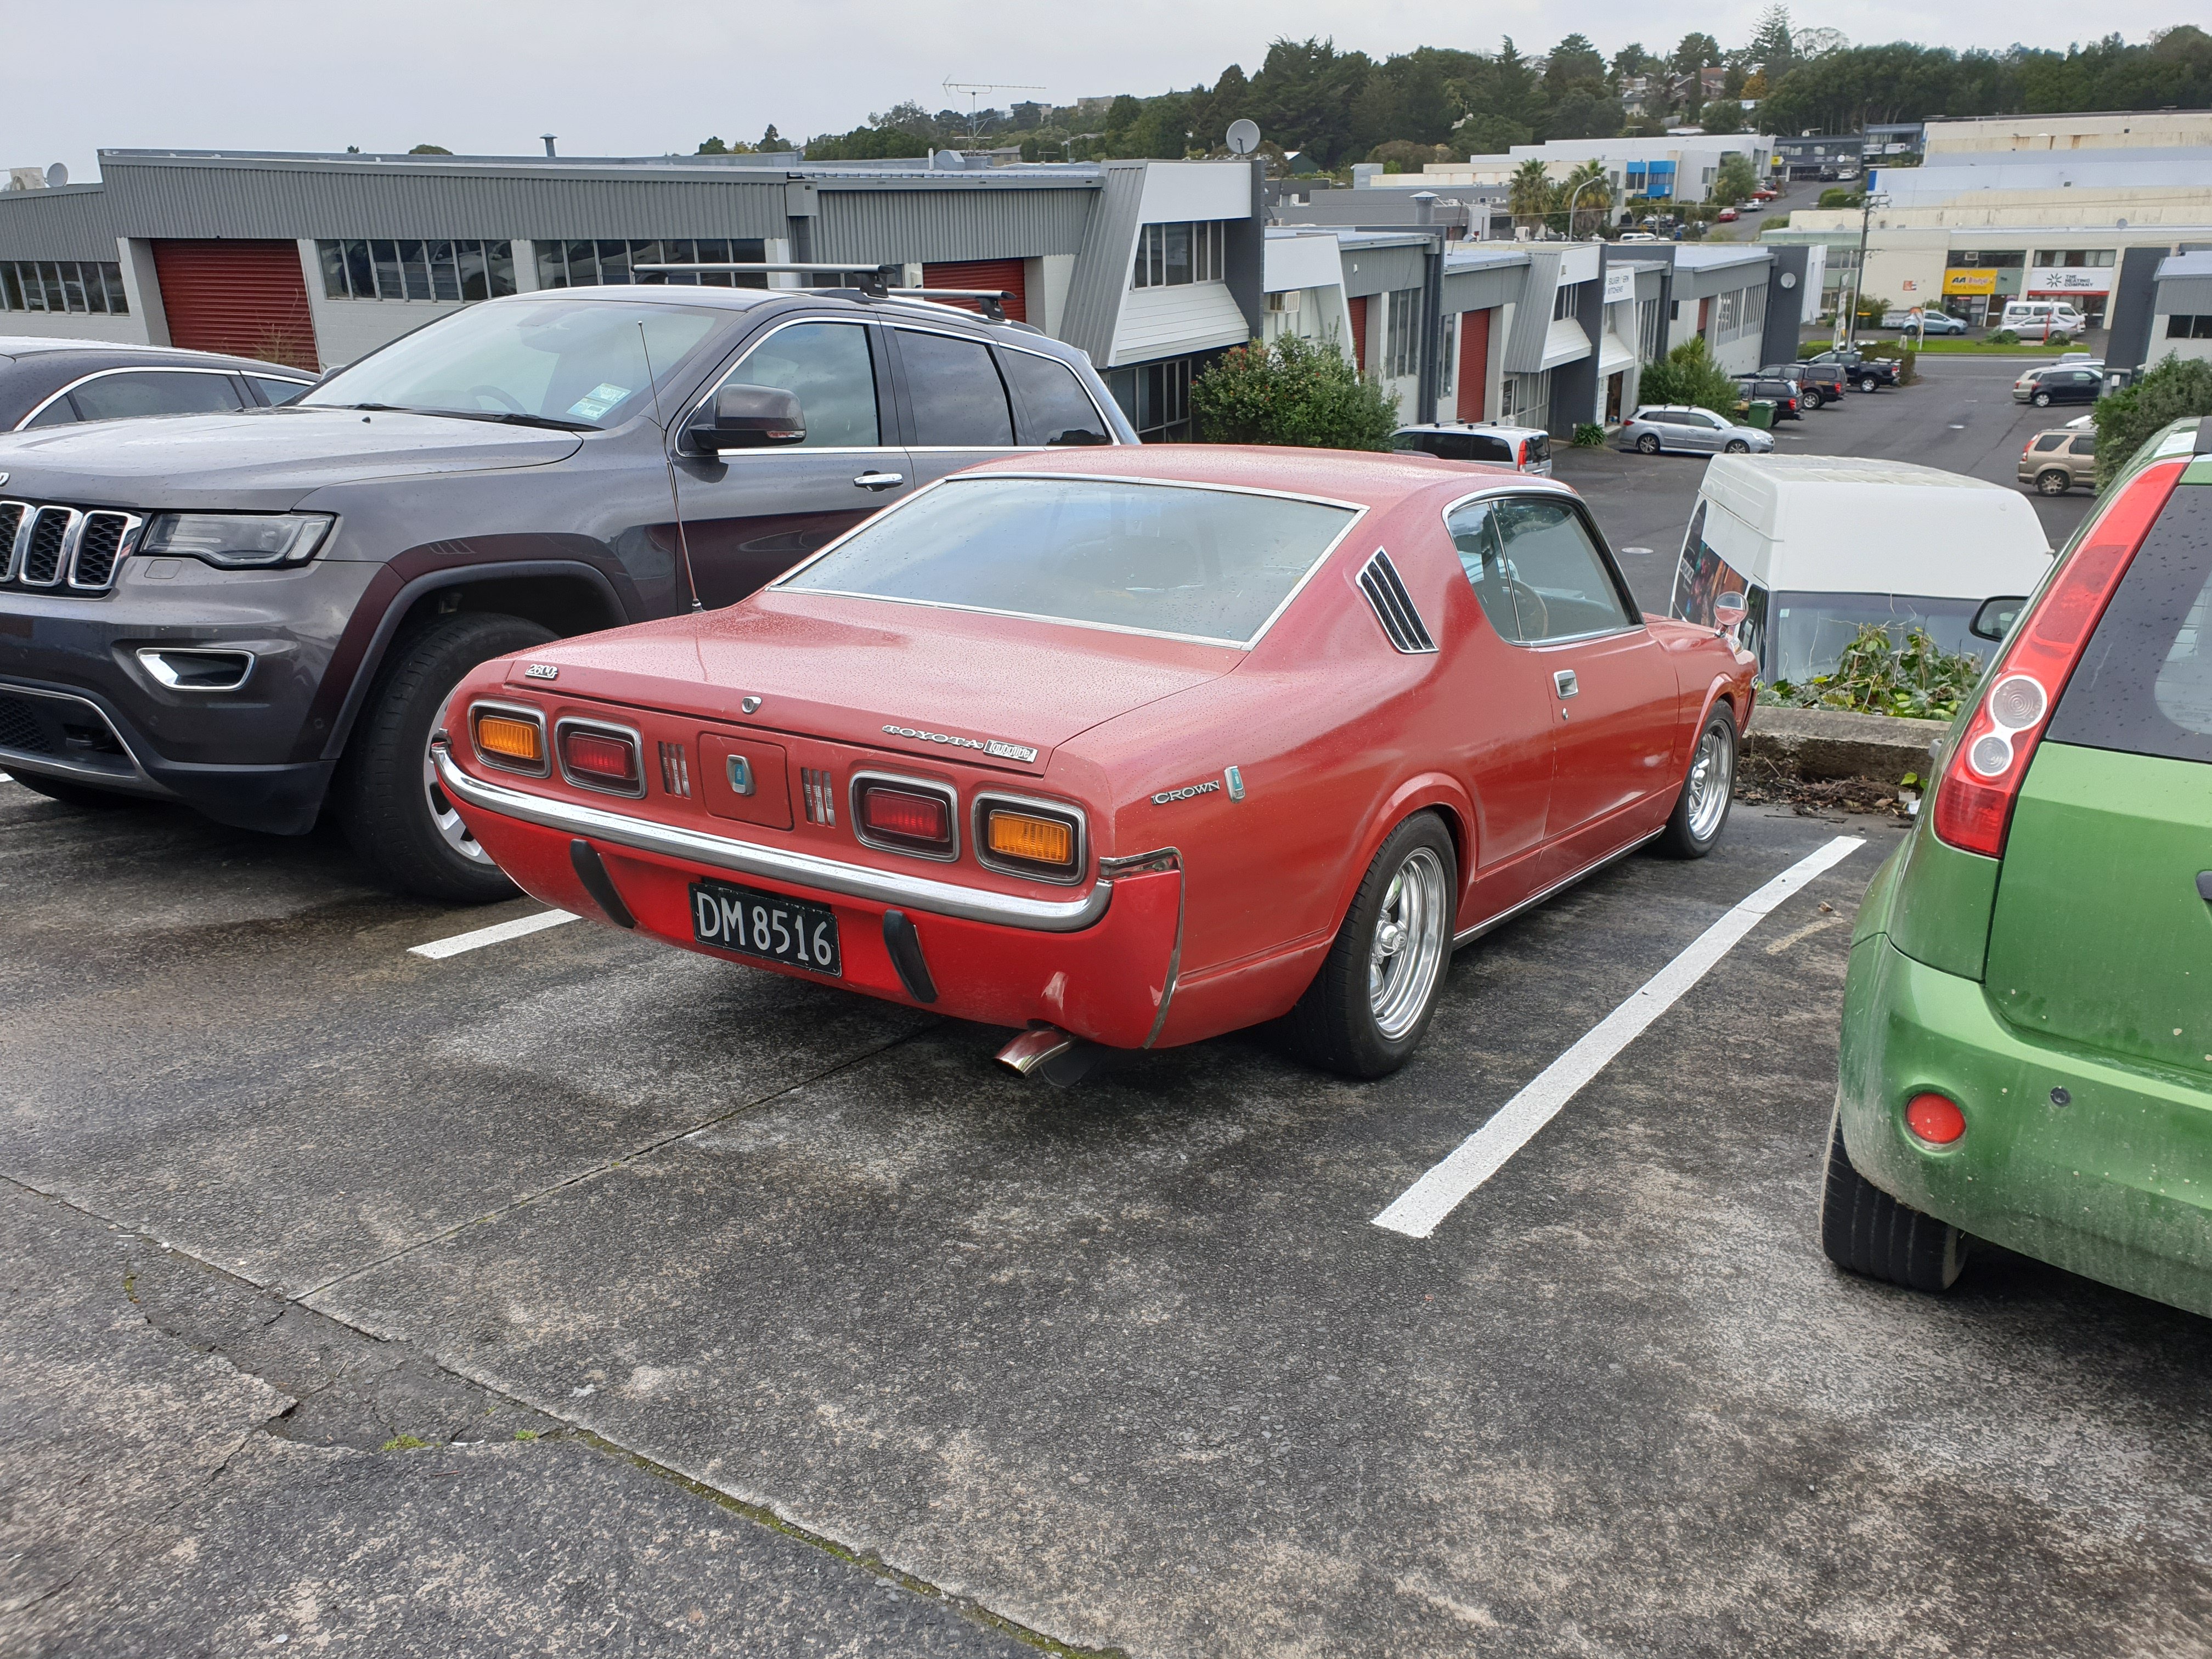
wow. Been a while! this car still goes, and is actually the only car i own these days... Since the last updates, it has run 2 or 3 OS Drag Days, where it would just do run after run after run! like 30 runs in a day, and is just sooo much fun! slow... but fun! It has also been on a number of fun trips that im going to share with you now, and has proven to be a capable trow beast! BUT It also has done a lot of not-driving. 2 diffs and 2 gearboxes in 12 months? so we're pretty good friends with AA (plus) and theres been a fair bit of this But, it's all worth it! because days like this are hard to beat! We have some plans though... Great plans! And the 'final' piece fell into place today.... I have in my garage a shortened Hilux LSD with disk brakes, buying, today, a K-T bell housing, and in slackercams shed is a T50 with my name on it... Plan is to install all of that before drag day, and hopefully i wont smash all my driveline gear again which is great, because then i have no excuse to do other things to this car maybe one day... as i never wanted to do more mods as i was breaking diffs and gearbags already, so didnt wanna put any more power into it... Plus, i kinda like how fast/slow it is... its the right amount of fast you can beat on it on a daily drive around the block, and not get into too much trouble! but at the same time, triple digit HP numbers would be nice... Anyway, thats what we're up to. This car is my ONLY car, so that makes mods more fun... but i live in Taupo now, so cars are optional... plus partner has a car and i have a scooter, so she'll be right.2 points
-
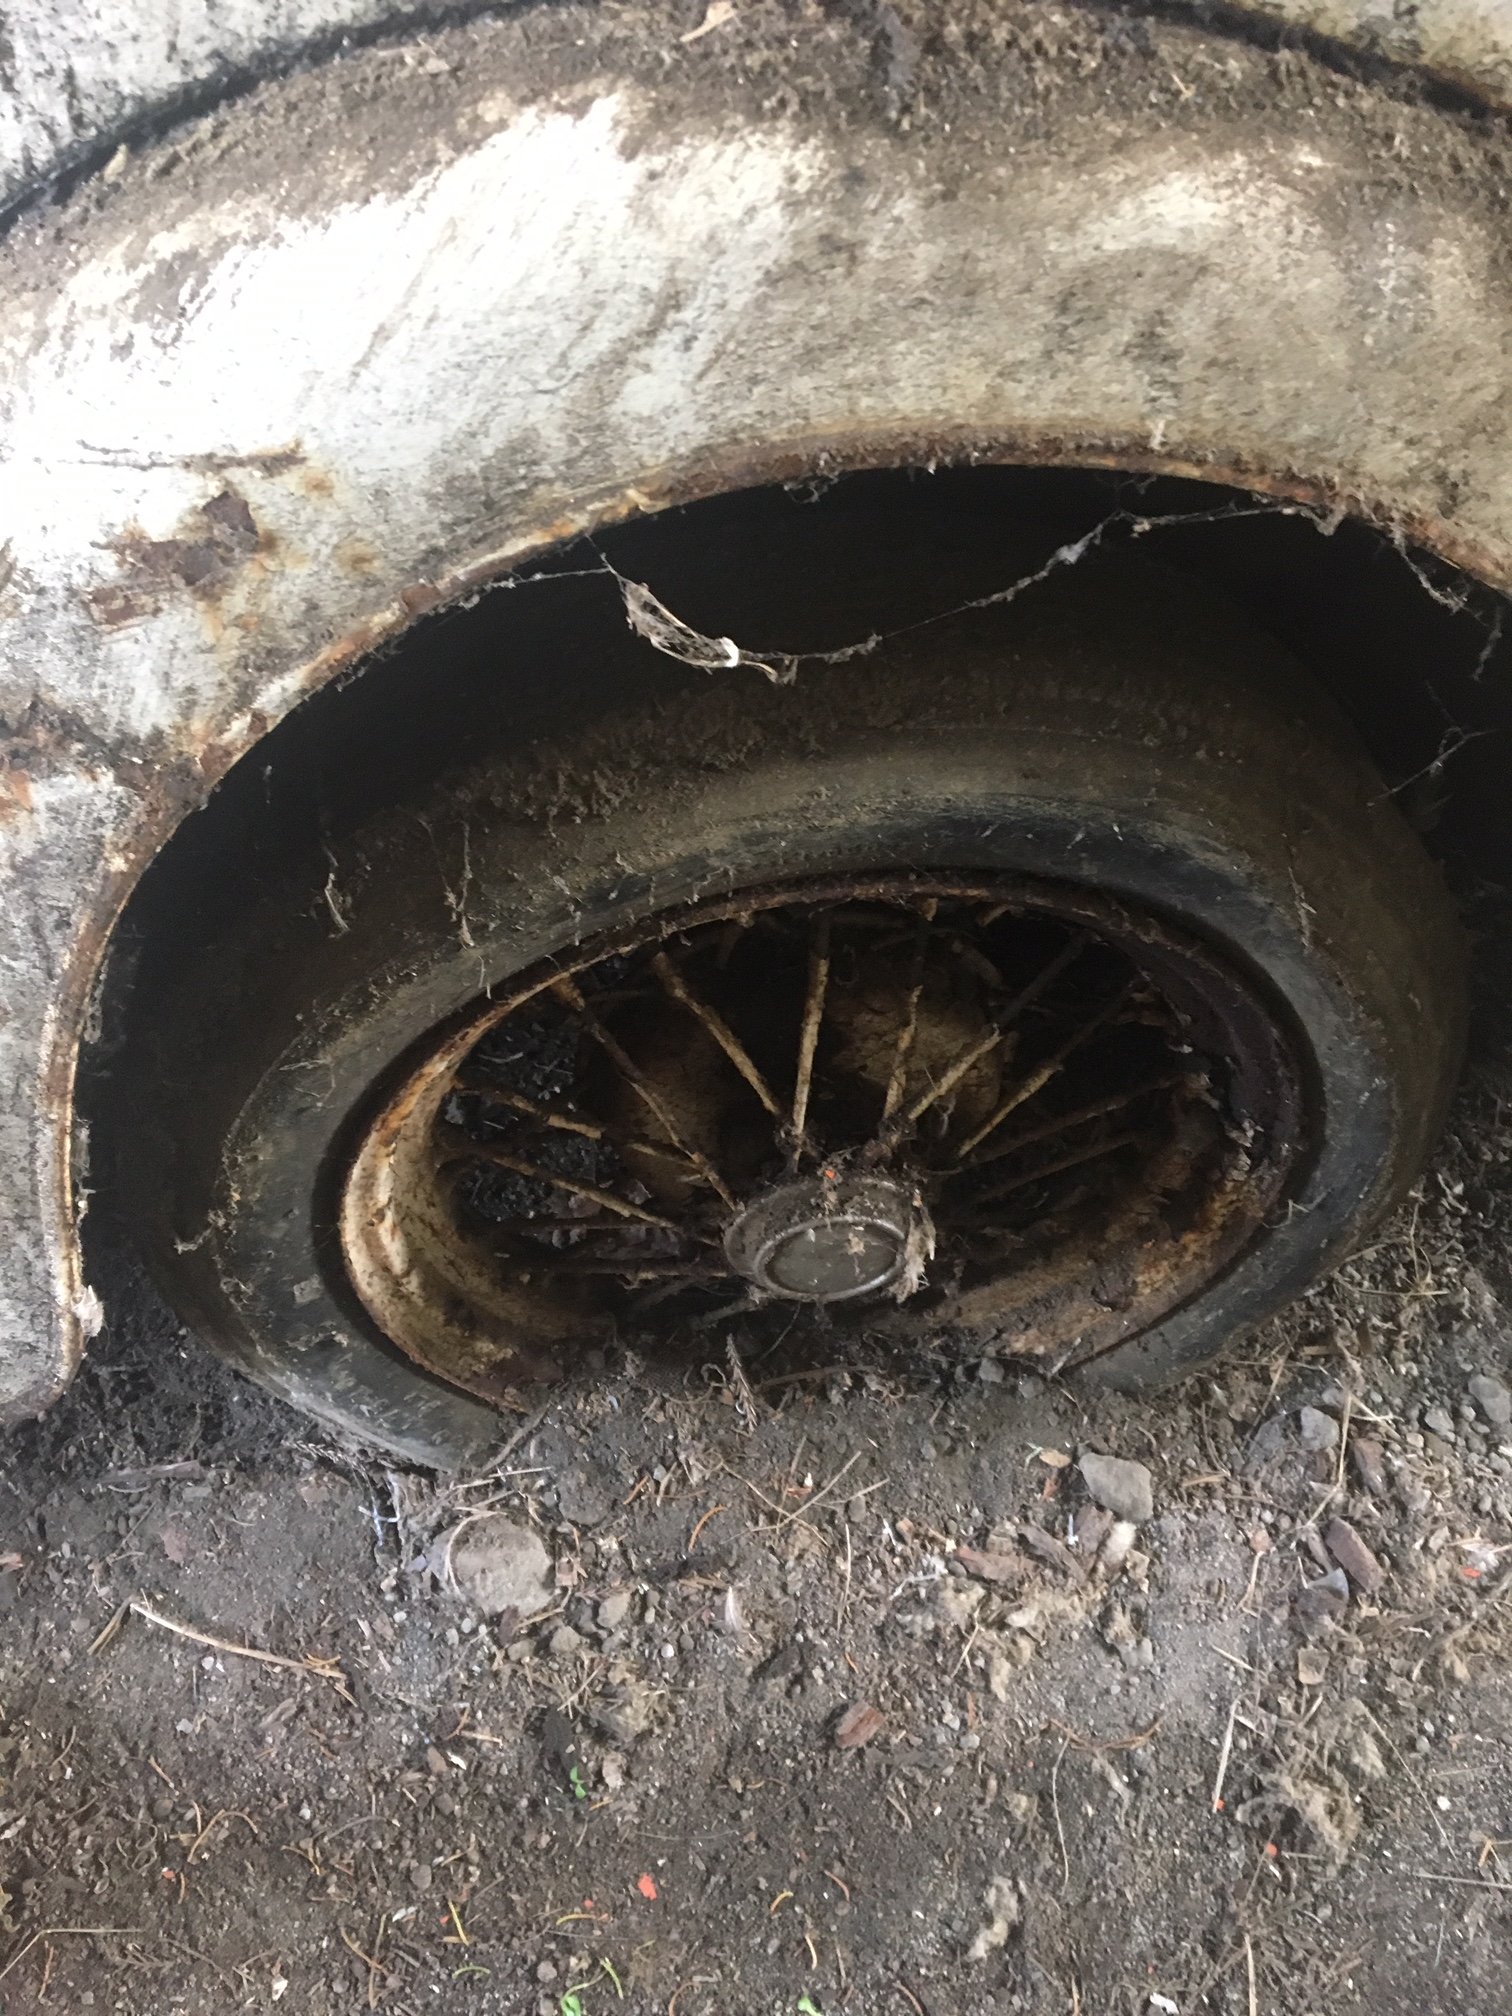
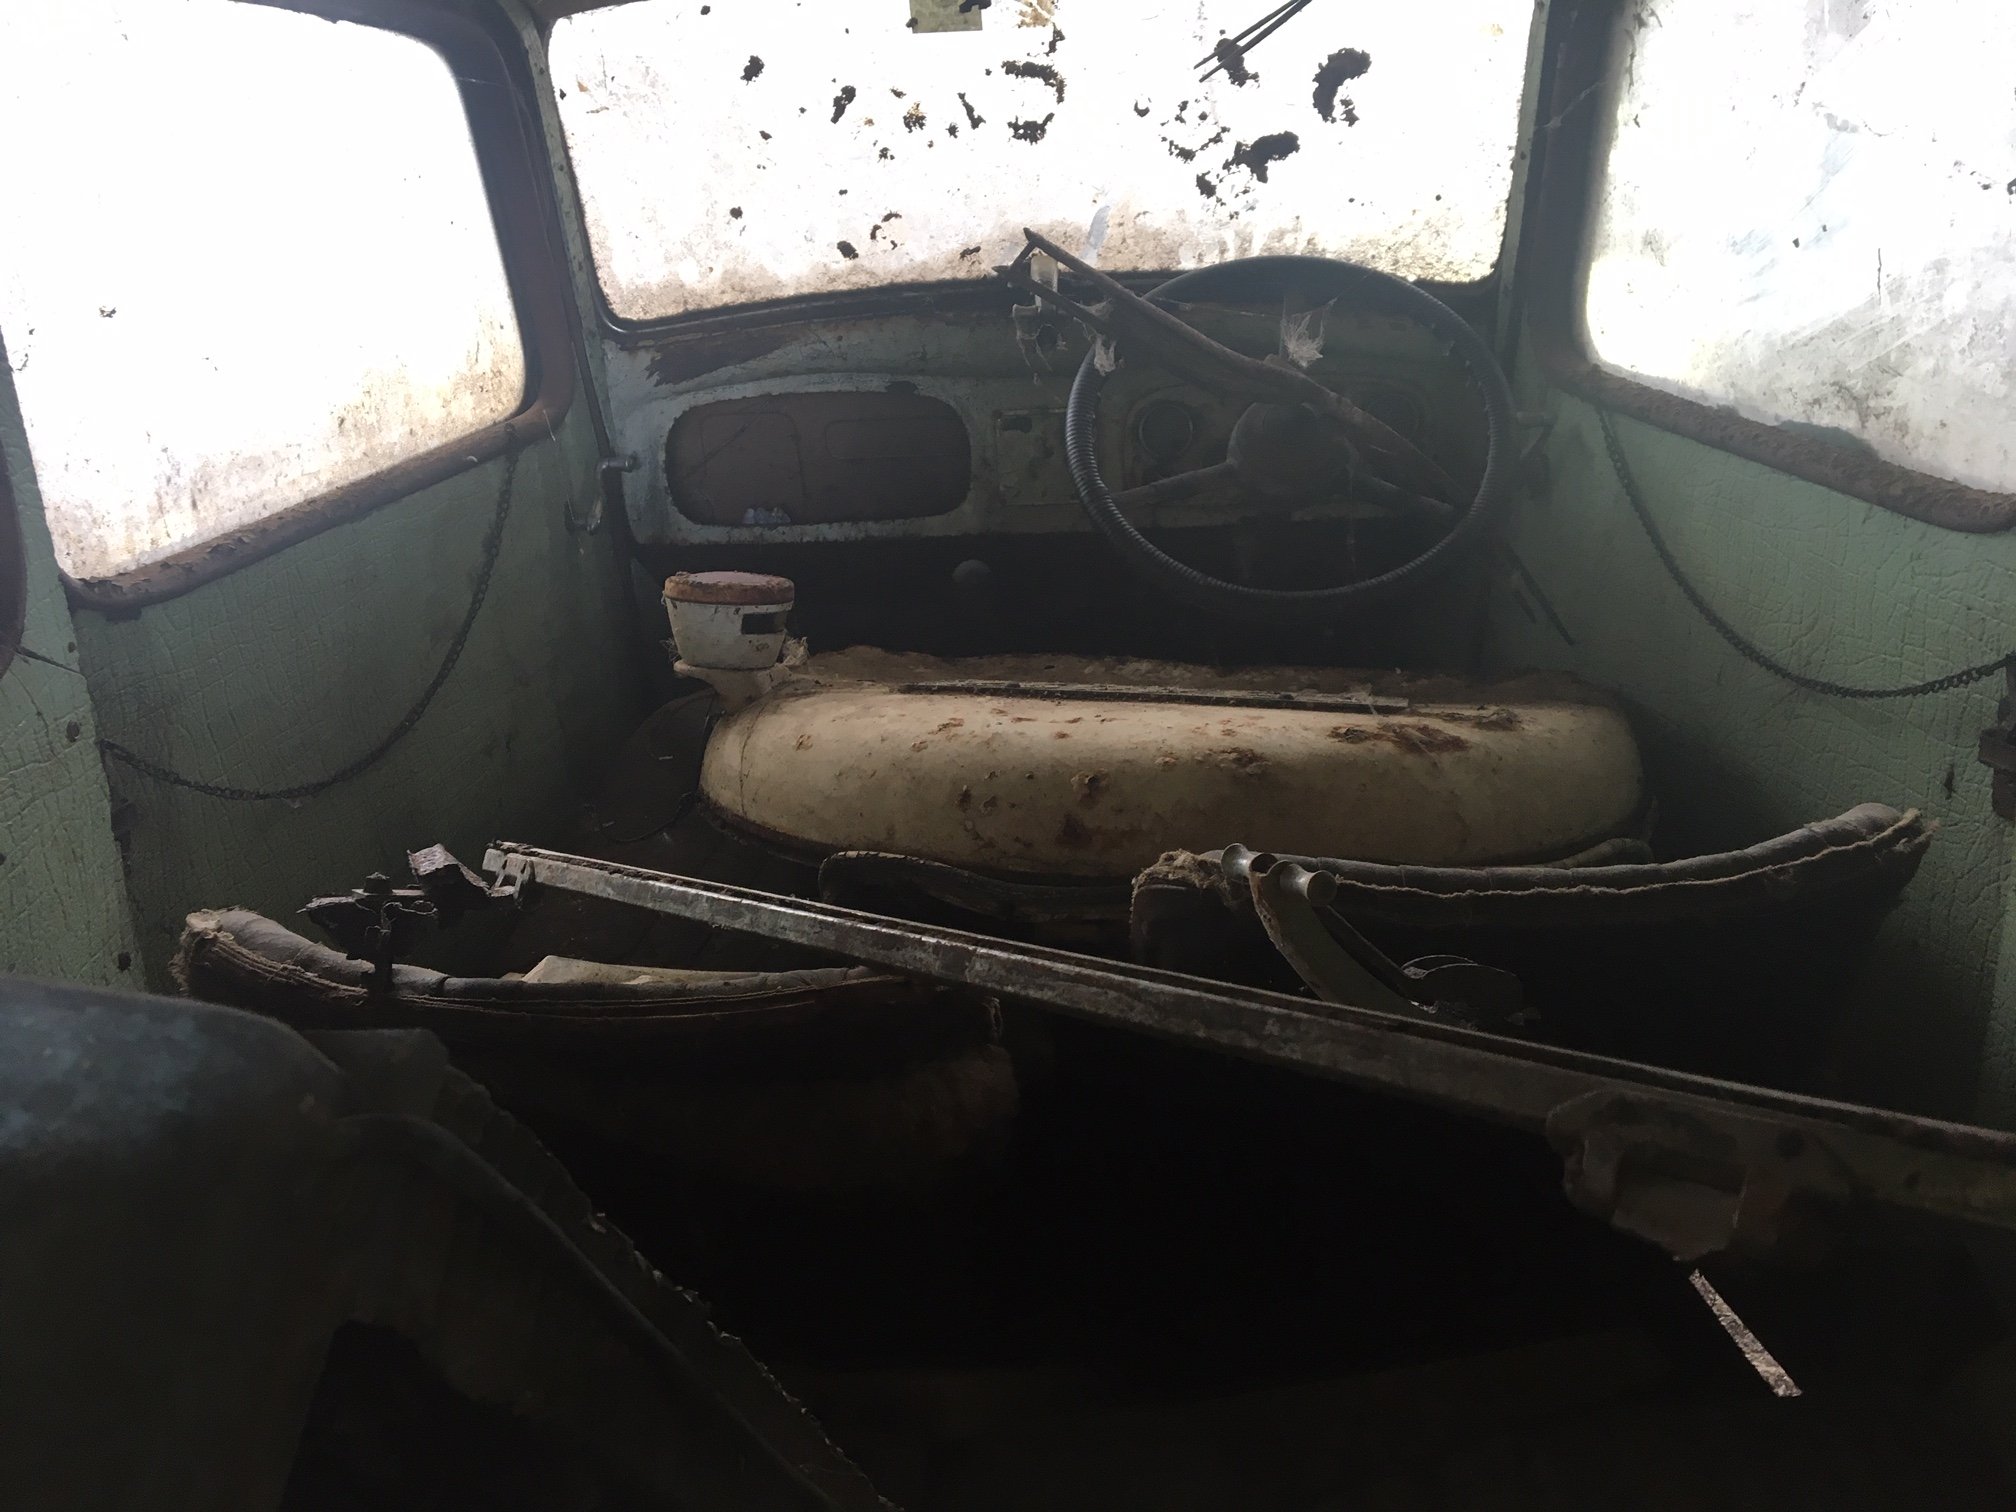
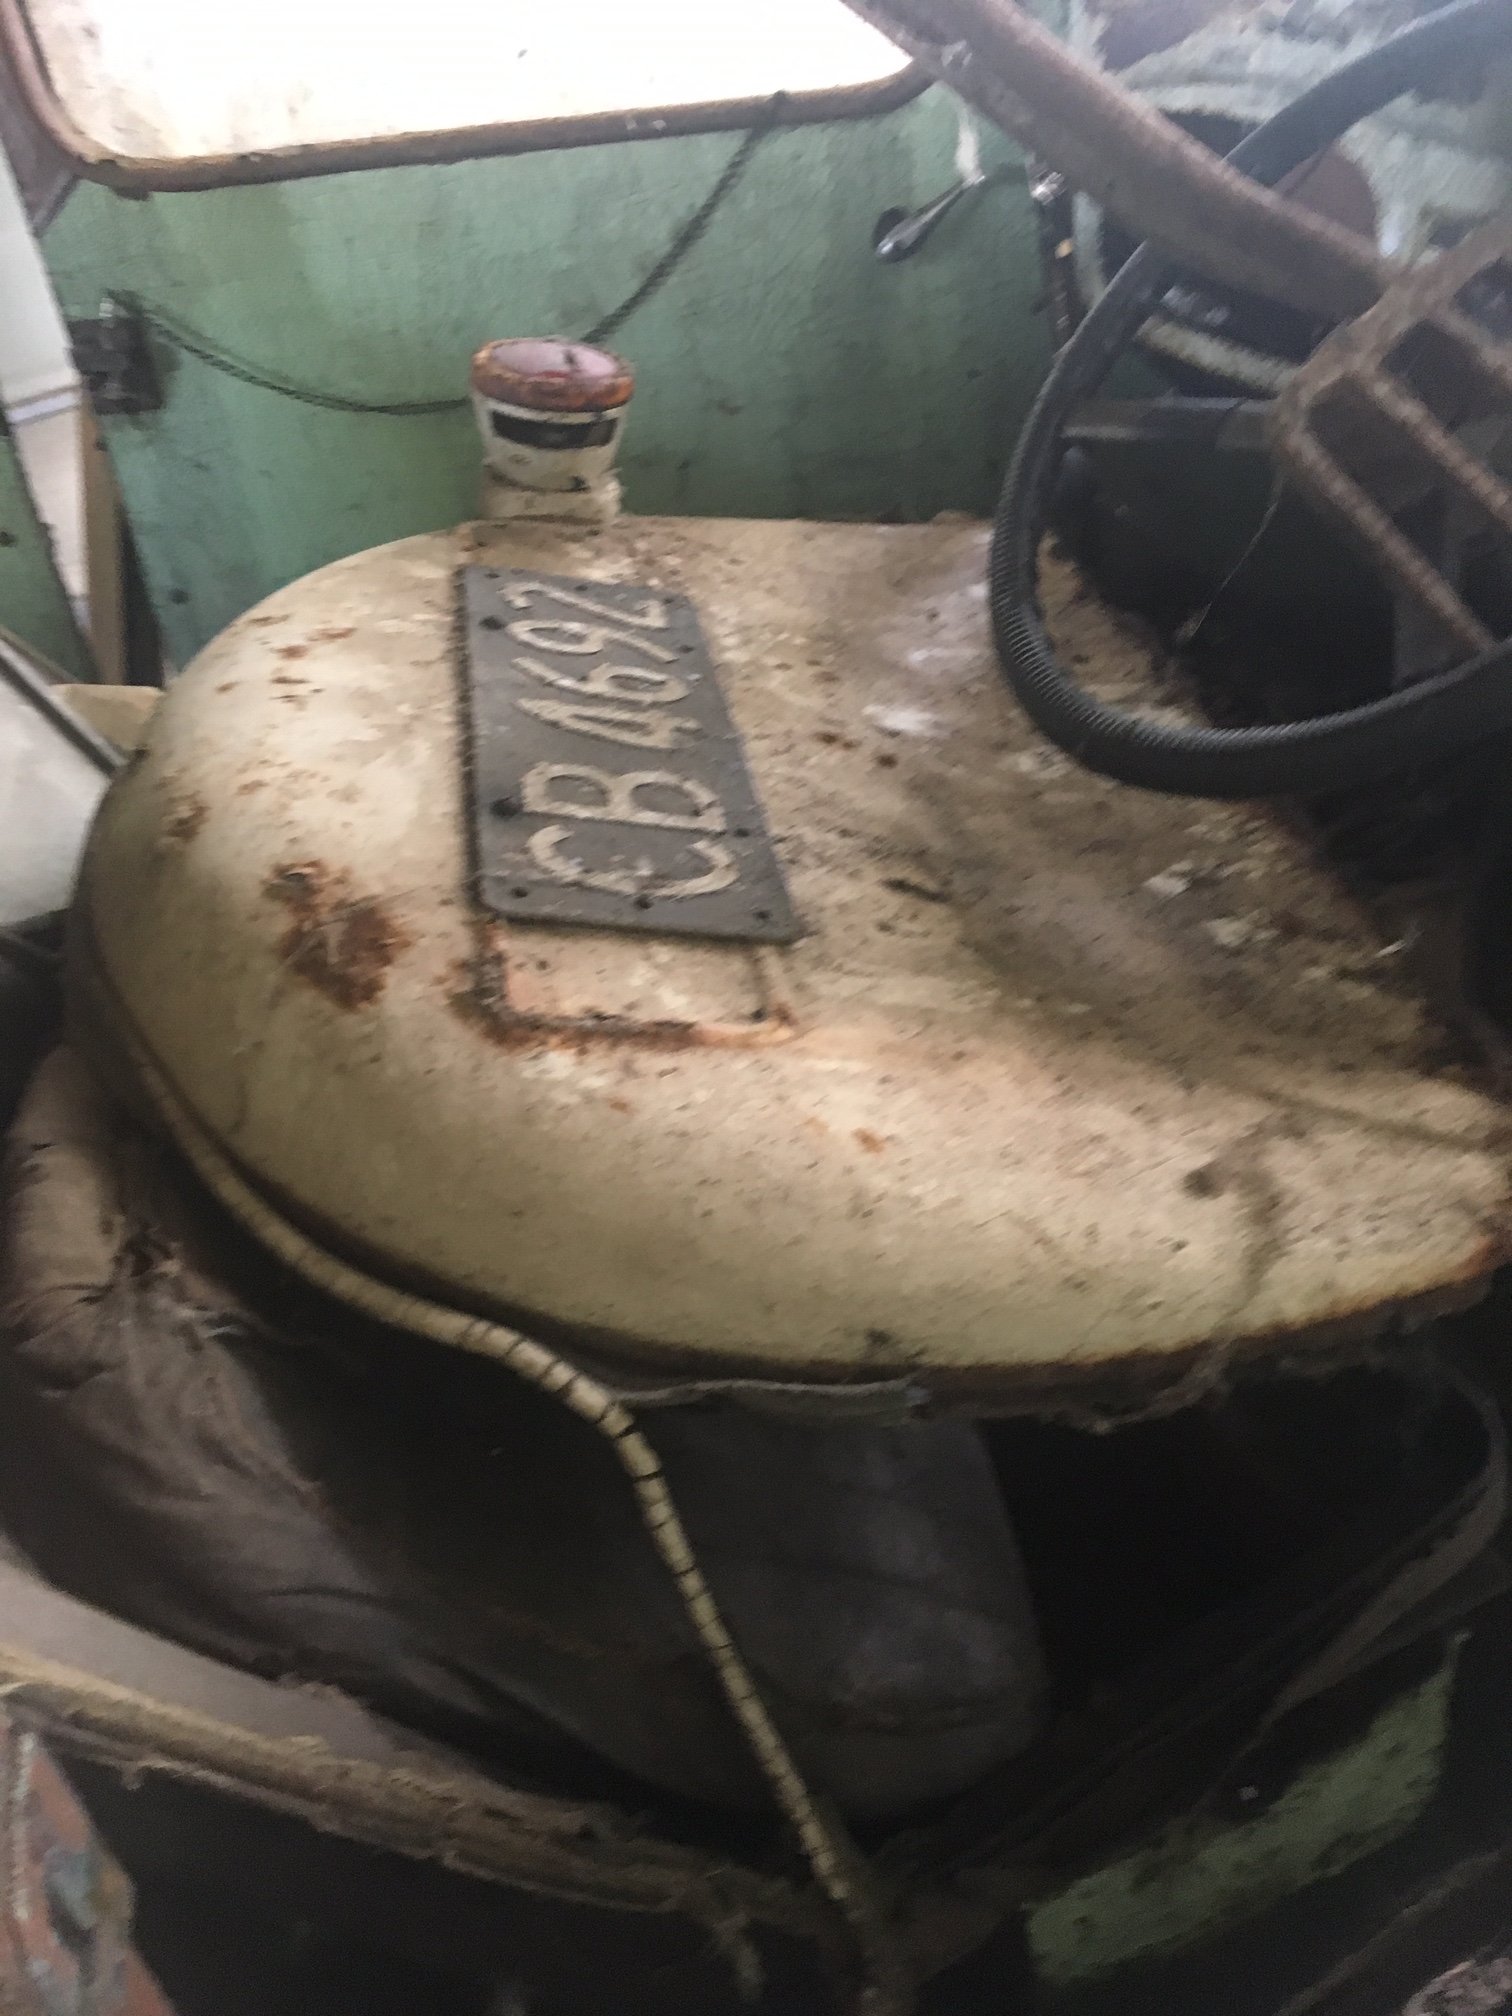
So I started to hatch a bit of a plan. Retrieving it was going to need a decent plan, the poor thing has been parked there for nearly 50 years and had literally started to become one with the earth. I started a tradme saved search for "Austin 7" just to see what kind of stuff came up. I scored a good set of wheels, and then some tires that were just round the corner from home. So armed with knowing that I had decent rolling stock, it was time to start seriously thinking about uplifting it. From the limited access we could get, the underneath of it was looking pretty rusty, so we wanted to be very careful about what we lifted off/pulled on to get it out of the shed. The plan was to put some box section through underneath it from one side to the other, and jack up the box section lifting the car on that. I was going to get it high enough using that method to then wheel the trailer underneath and lower it back down onto the trailer. Lets face it, its been 50 years, those wheels aren't going to turn...
2 points
-
Day two. No asplode
2 points
-
Drove it to work. It did not blow headgasket
2 points
-
2 points
-
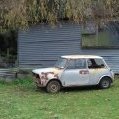
Discussion: Lurking in the back shed at my grandads farm for all of eternity has been an old Austin 7. There was a bunch of old cars there that as kids we used to play in, but the Austin had been there for so long that it was completely buried under hoarded shit and was far too scary to play in, but was always interesting to see if you peered past the old L300, Fergie 19 & piles of old timber. As a 10 year old kid, I was smart enough to know that this one was well beyond rescue... Fast forward 20 years: Grandad has passed on and the sheds have been mostly cleaned out for the next generation of hoarding, revealing this little Austin. Now 30 year old Jeff is not half as smart as his 10 year old self... So now I look at it and think "I reckon I can save that... maybe..."
1 point
-
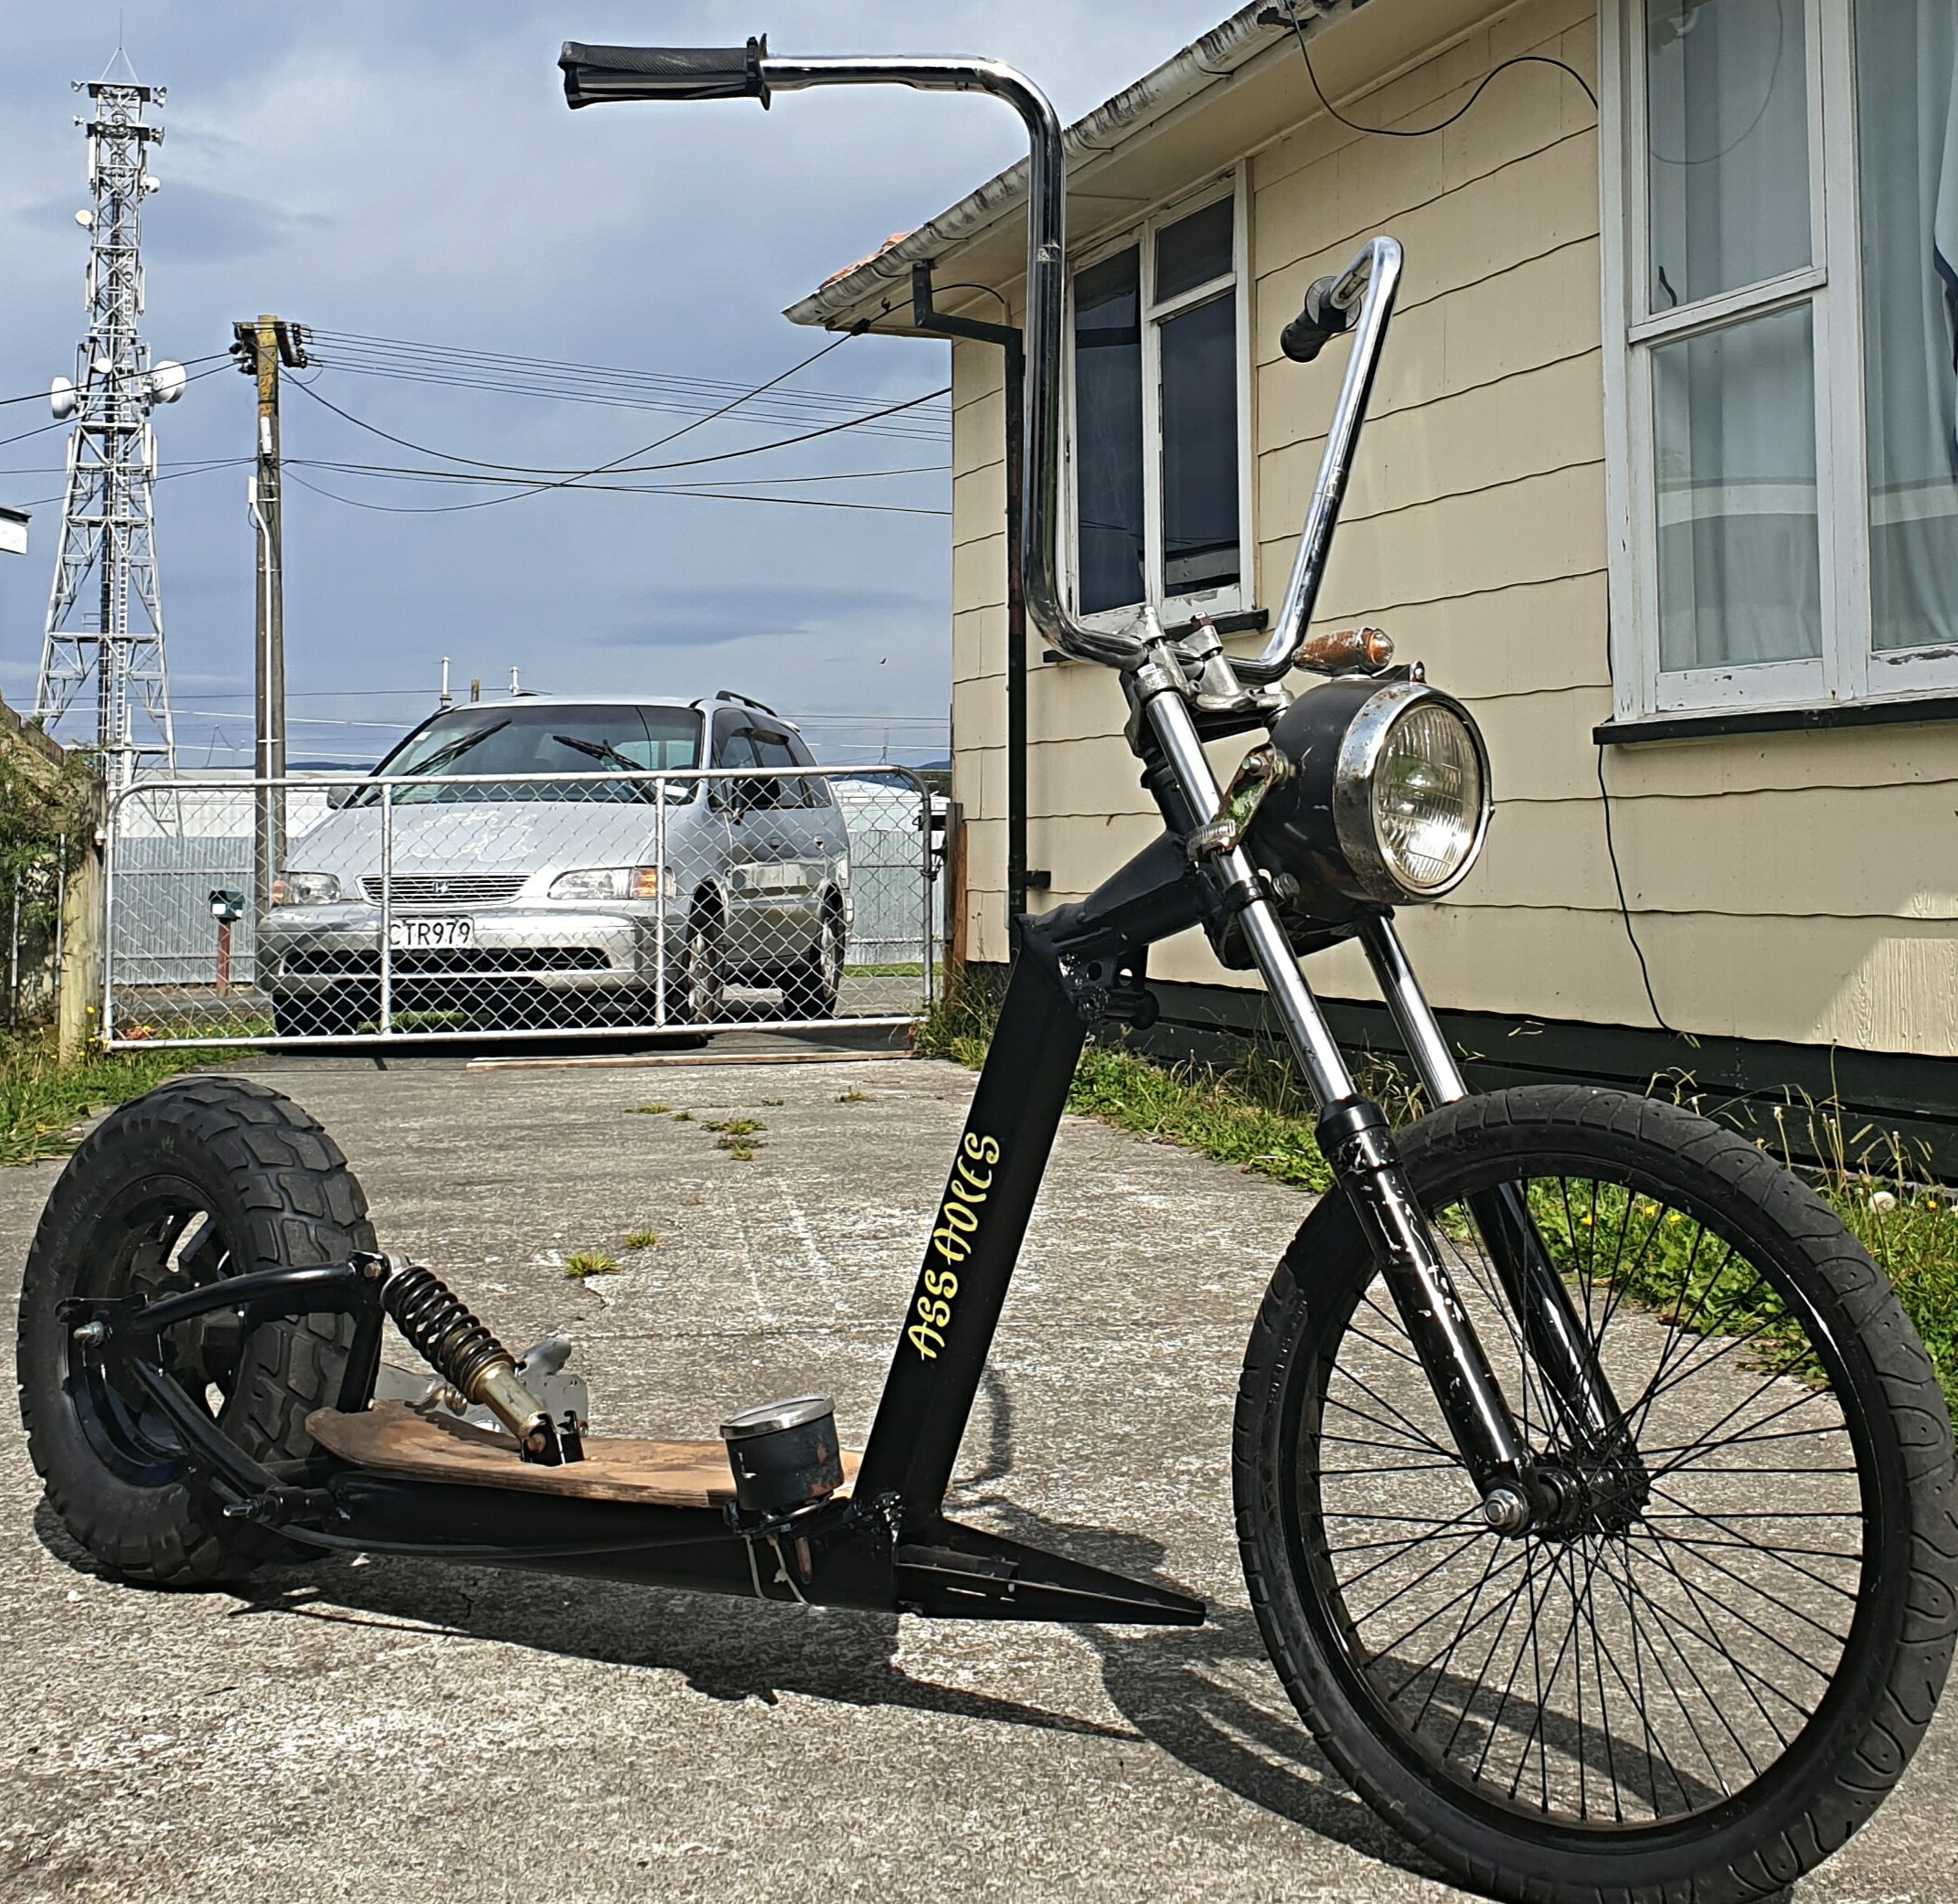
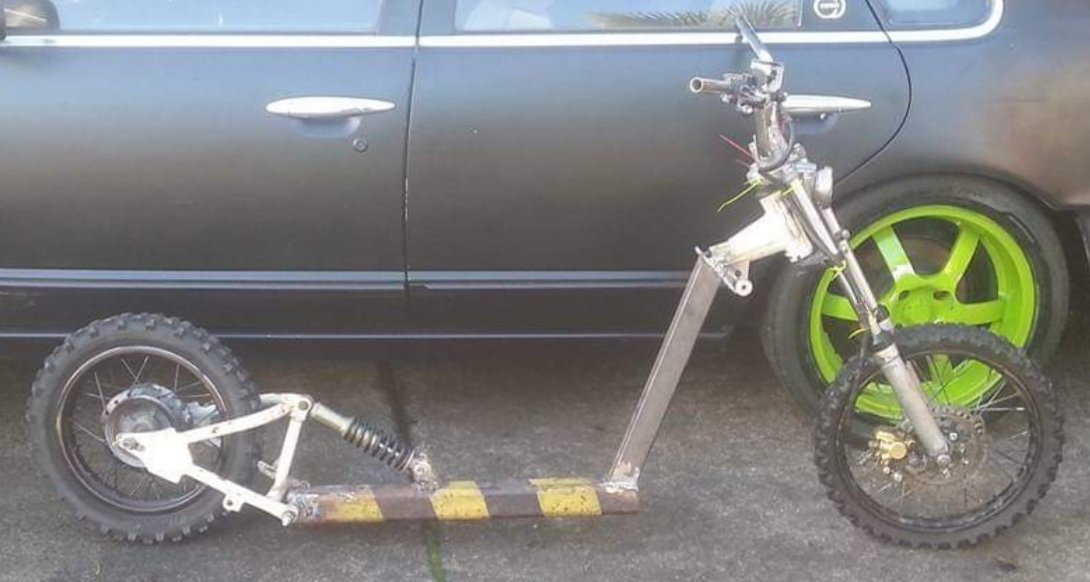
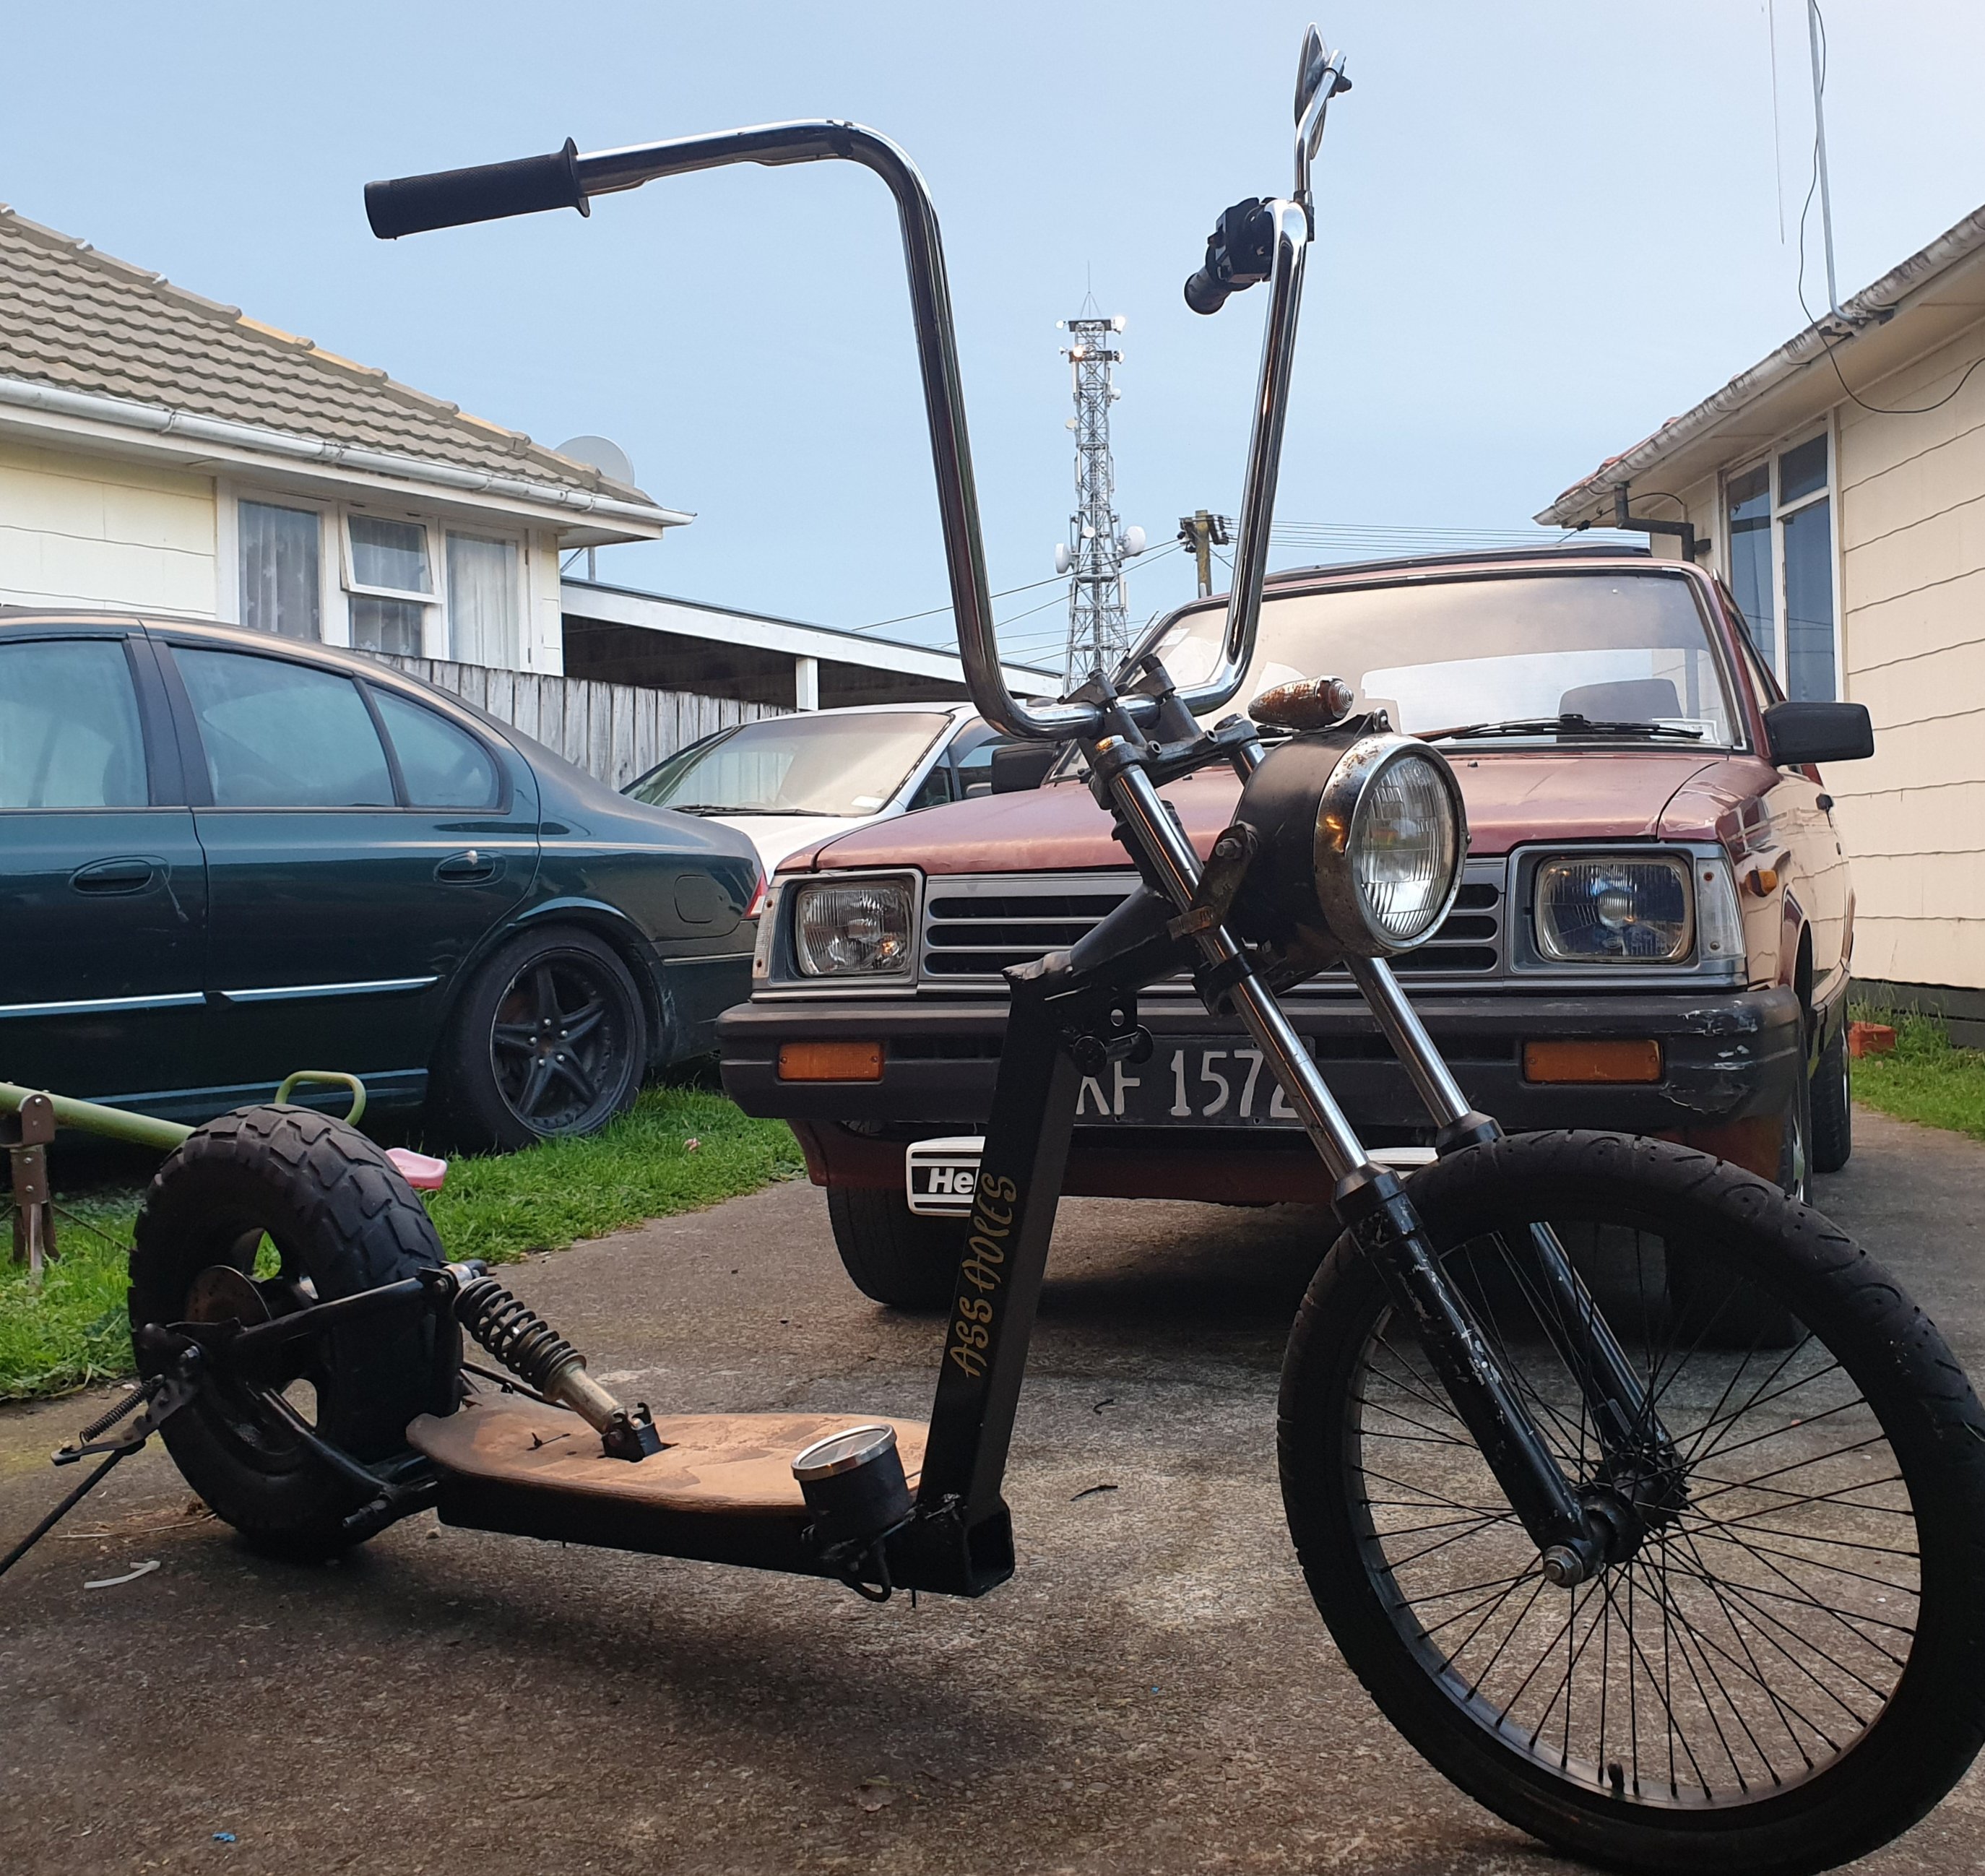
So i built this years ago.... ive had a electric motor on it caught fire hahah. Have had it in diffrent styles over the years always tinkering with it so top photo is it right now... 2nd photo was when 1st put togever made out of old 125cc half size dirt bike. Moped parts whatever really. Have just put on a kick stand so when i take to park with the kids amd gota help them dont gota lay it down
1 point
-
Thanks mate. couldn't have hoped for a better outcome for the day. My 8 year old engine started first pop without a hitch. It sounds soooo good. a wof might not be a simple thing. And I got to fang it up and down the street . Best day ever.1 point
-
I havnt seen any of it in person so I dunno... I had a look at one last week that had china bags and valves and that was really throw it all in the bin and start again Most of the air suspension setups I have certed have had better quality parts, and self leveling systems The way the rules are written, it's very difficult to get a system to comply without a self level system1 point
-
Kids stod on my spike hahah so ill tak it bak on
1 point
-
Looks like chassistech/airbag it.com They have been selling bottom of the barrel air bag stuff for a long time1 point
-
You need to do some of the basic arduino tutorials on this, makes heaps of sense after1 point
-
That's quite a ramble about negative reviews. Tbh I'd give it a crack in a shitbox. Combine with a $1000 eBay turbo kit and you'll be away laughing, for maybe 2,000km.1 point
-
Has anyone tried an Ebay kit like this? https://www.ebay.com/itm/Air-Suspension-Kit-1-2-Valve-7-Switch-Pewter-1958-64-Chevy-Impala-5-Gal-xzx/162083897135?hash=item25bcf3ff2f:g:oxsAAOSwCQNWhEWn Under $1000 delivered to your door...almost to cheap to believe?1 point
-
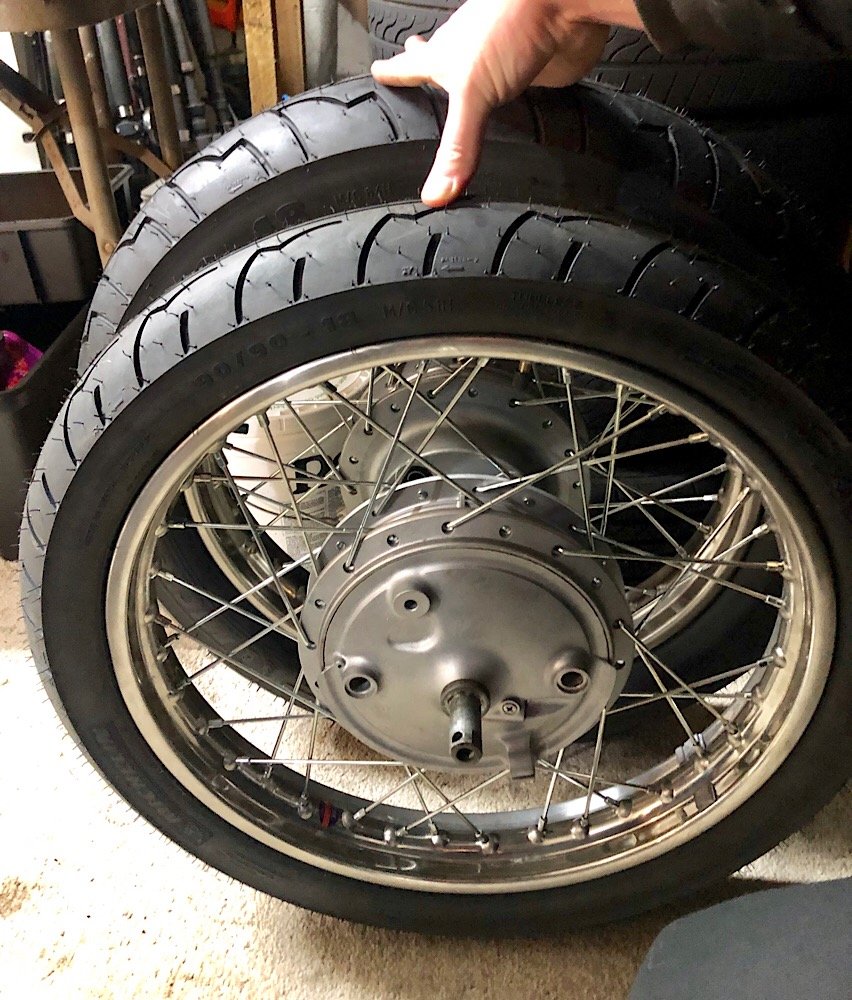
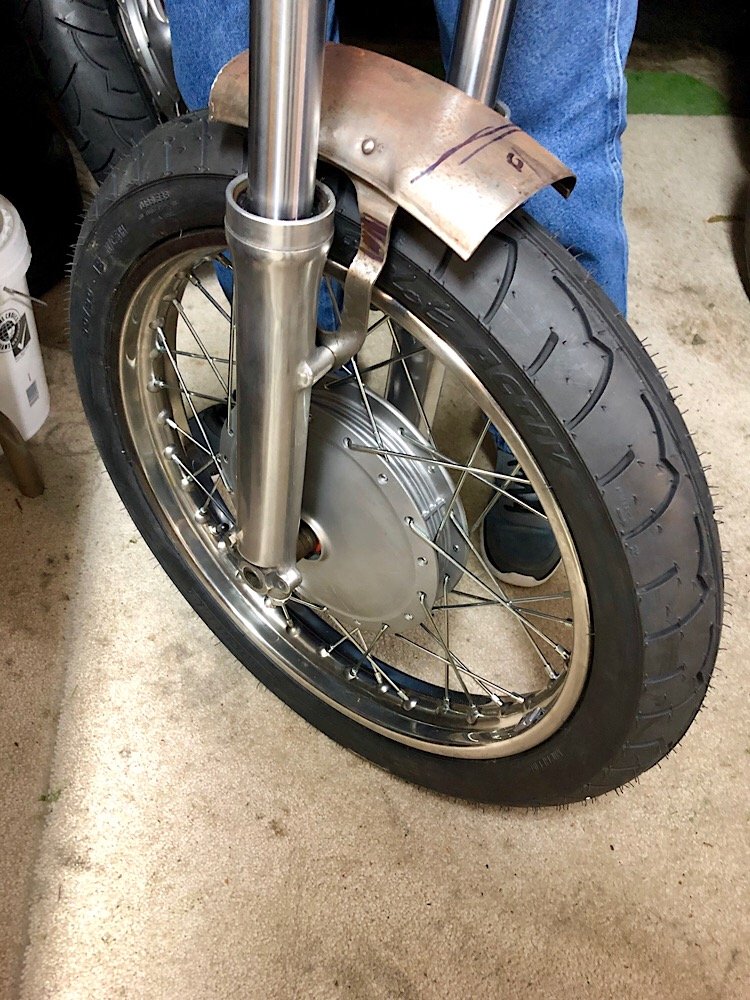
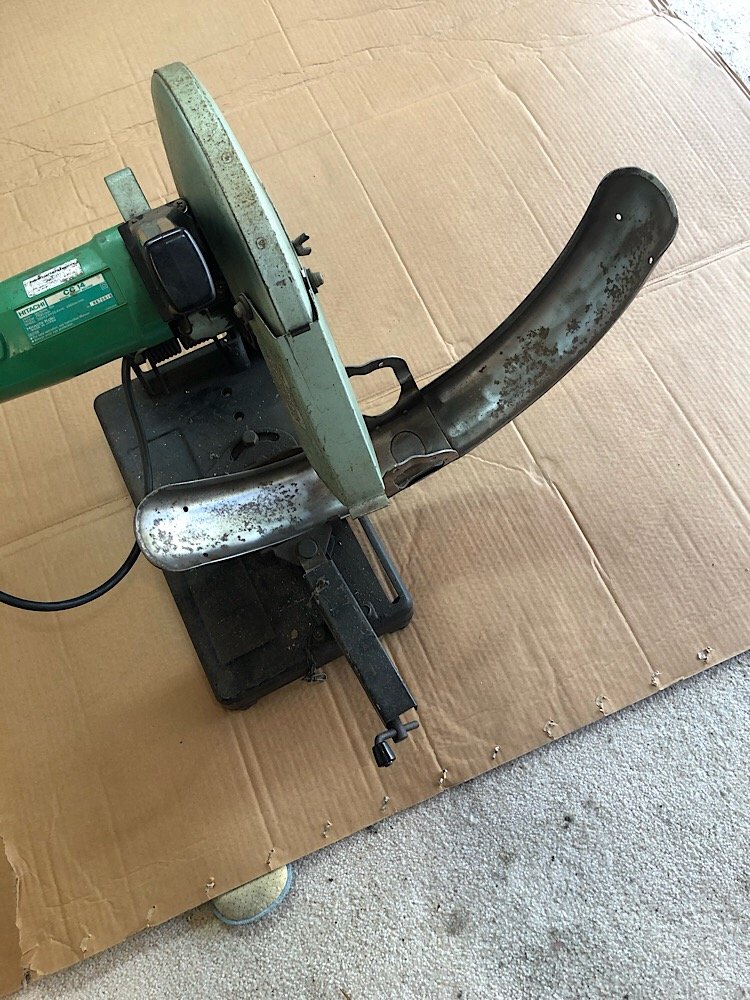
Got the tyres fitted to the rims. Went with Michelin Pilot Activ, 90/90r18 on the front and a big ol 4.00 on the back. Remember the 90/90r18 is pretty much the factory rear size which is now on the front. Looks tiny compared to the 4.00. The 4.00 has a 102mm tyre wall height while the factory 81mm. May swap out the rear for a Michelin Sirac as they have a 110/80r18 rear size which may suit the frame clearances better. Plus they have a sweet semi trail blocky tread pattern. With the 90 on the front it’s a squeeze to fit them under the factory guard but it’ll go. Got chopping with a drop saw, almost felt guilty as it was a mint guard. Will re weld on the ends to keep the nice factory curves. and lower the mounting brackets so it’s more flush with the tyre.
1 point
-
Congrats on reaching this milestone. Looking so good. You look pretty stoked at the end of the vid.1 point
-
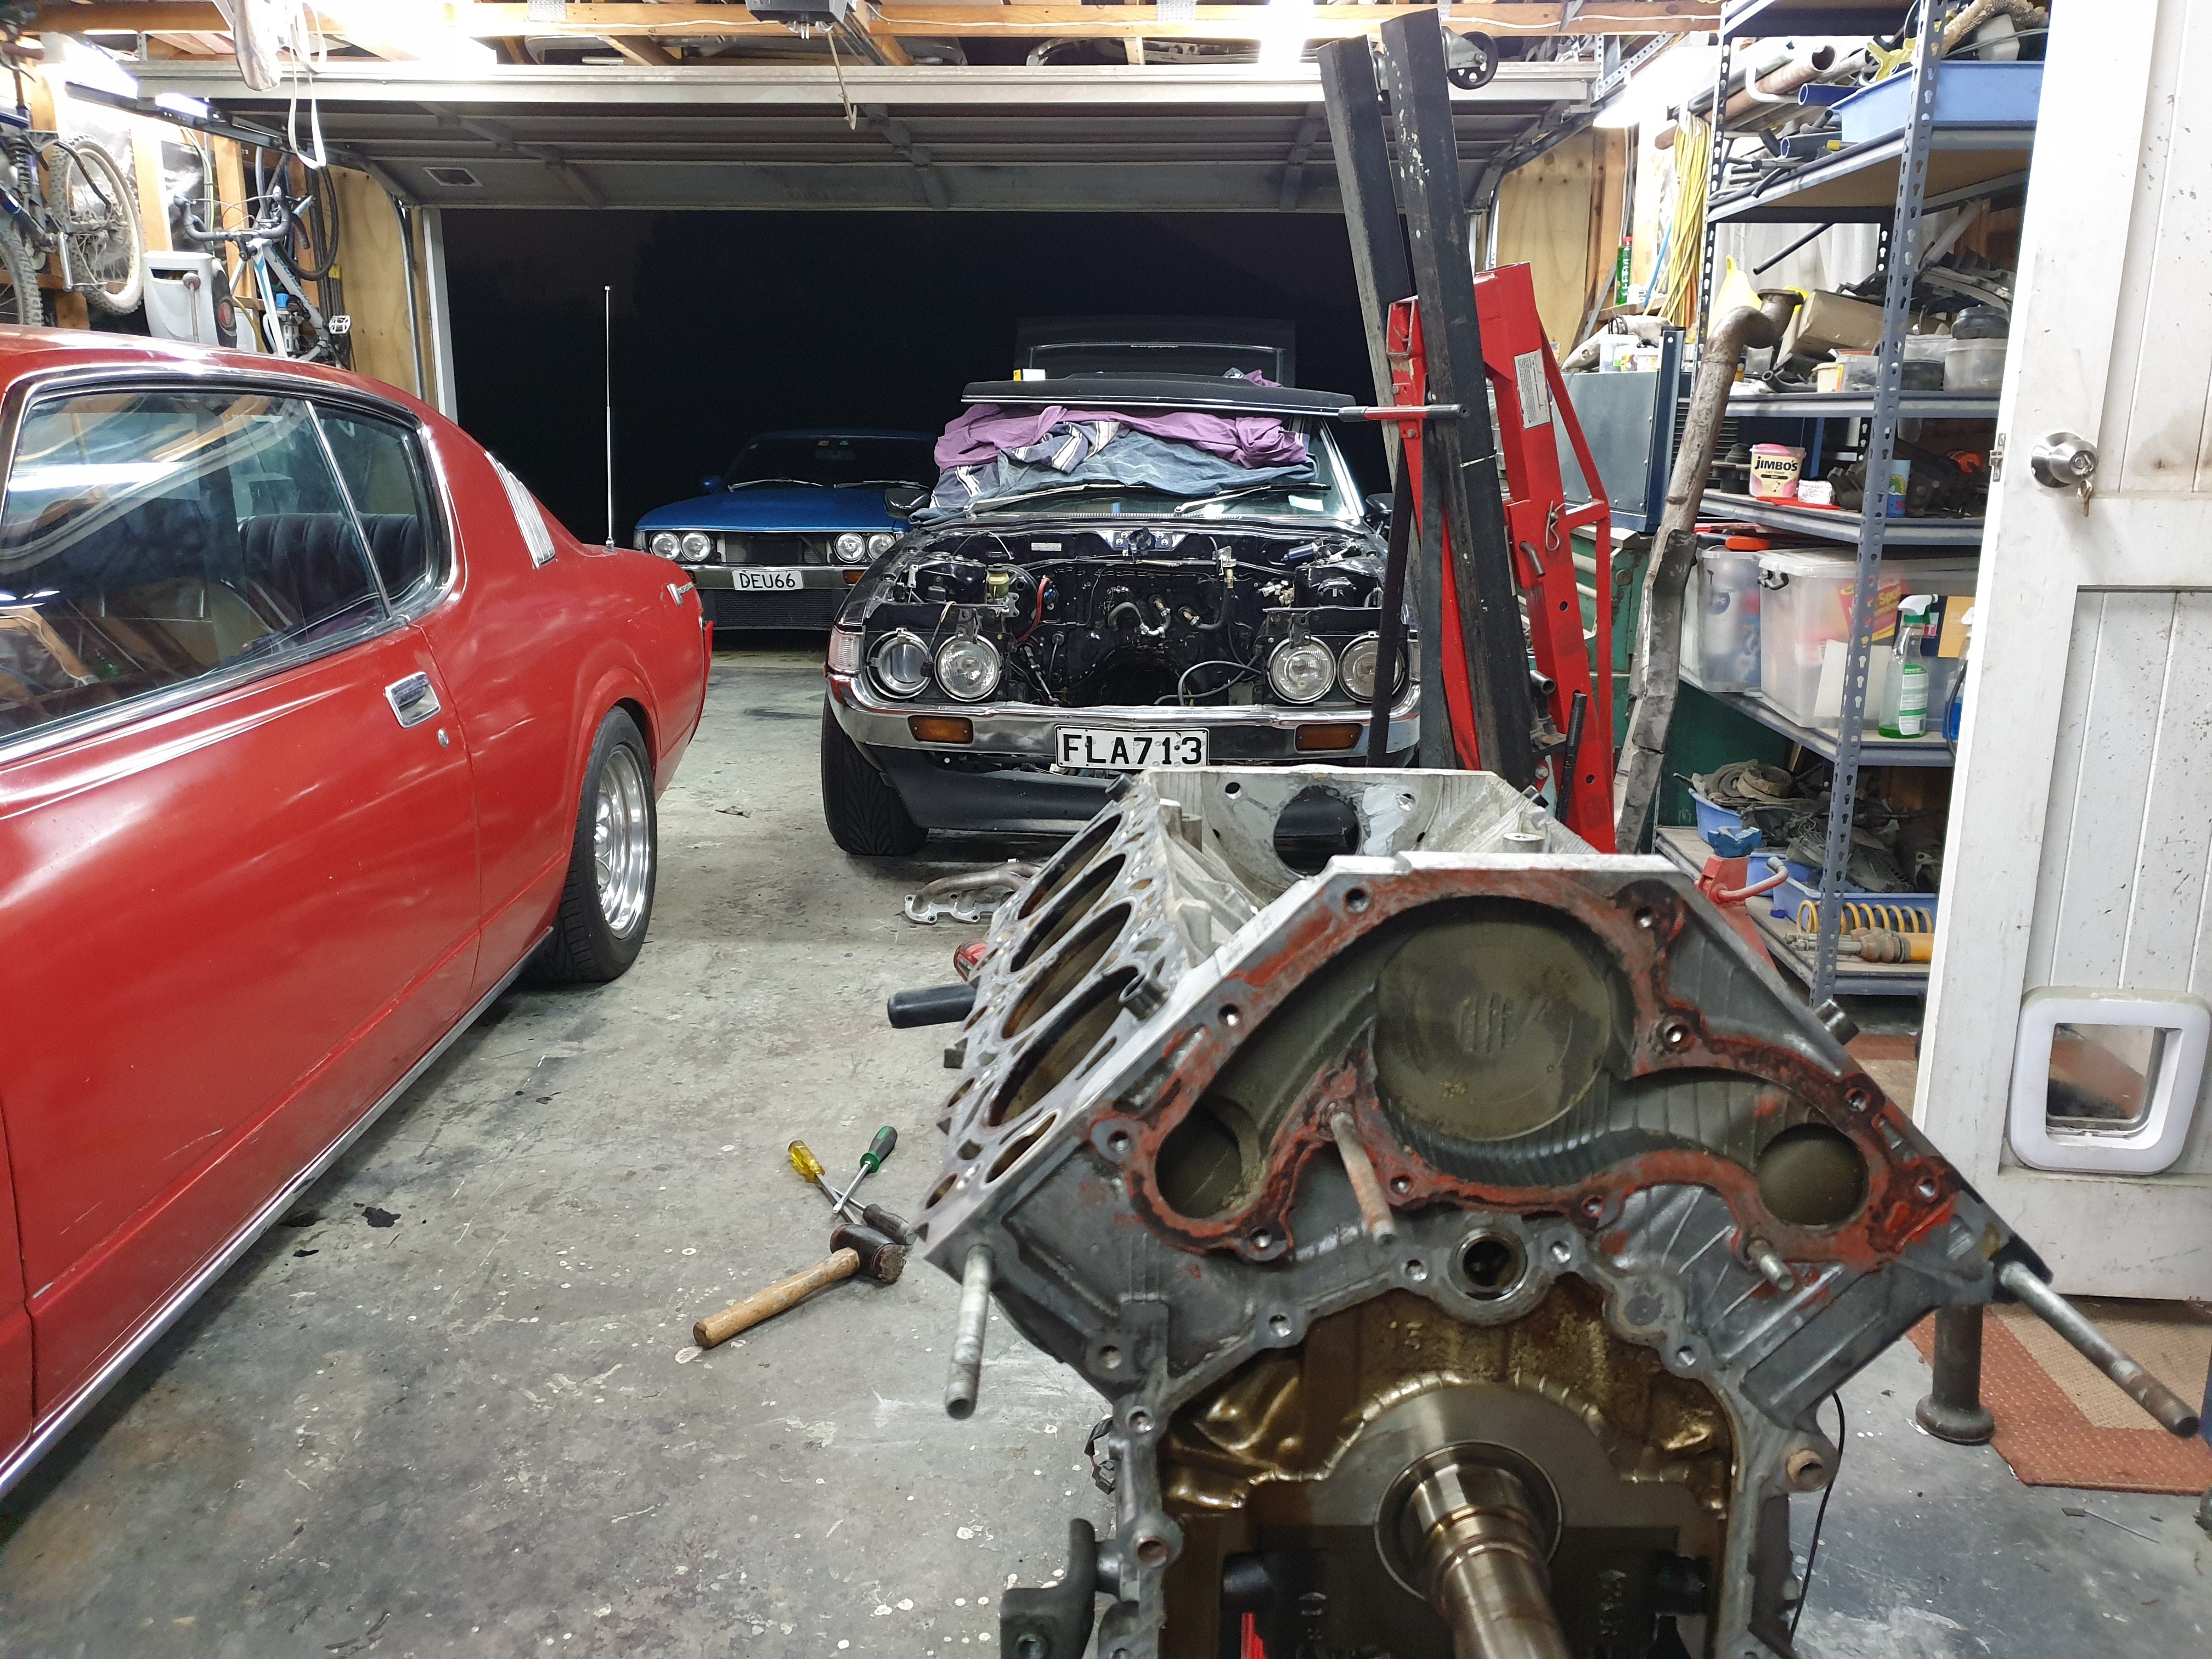
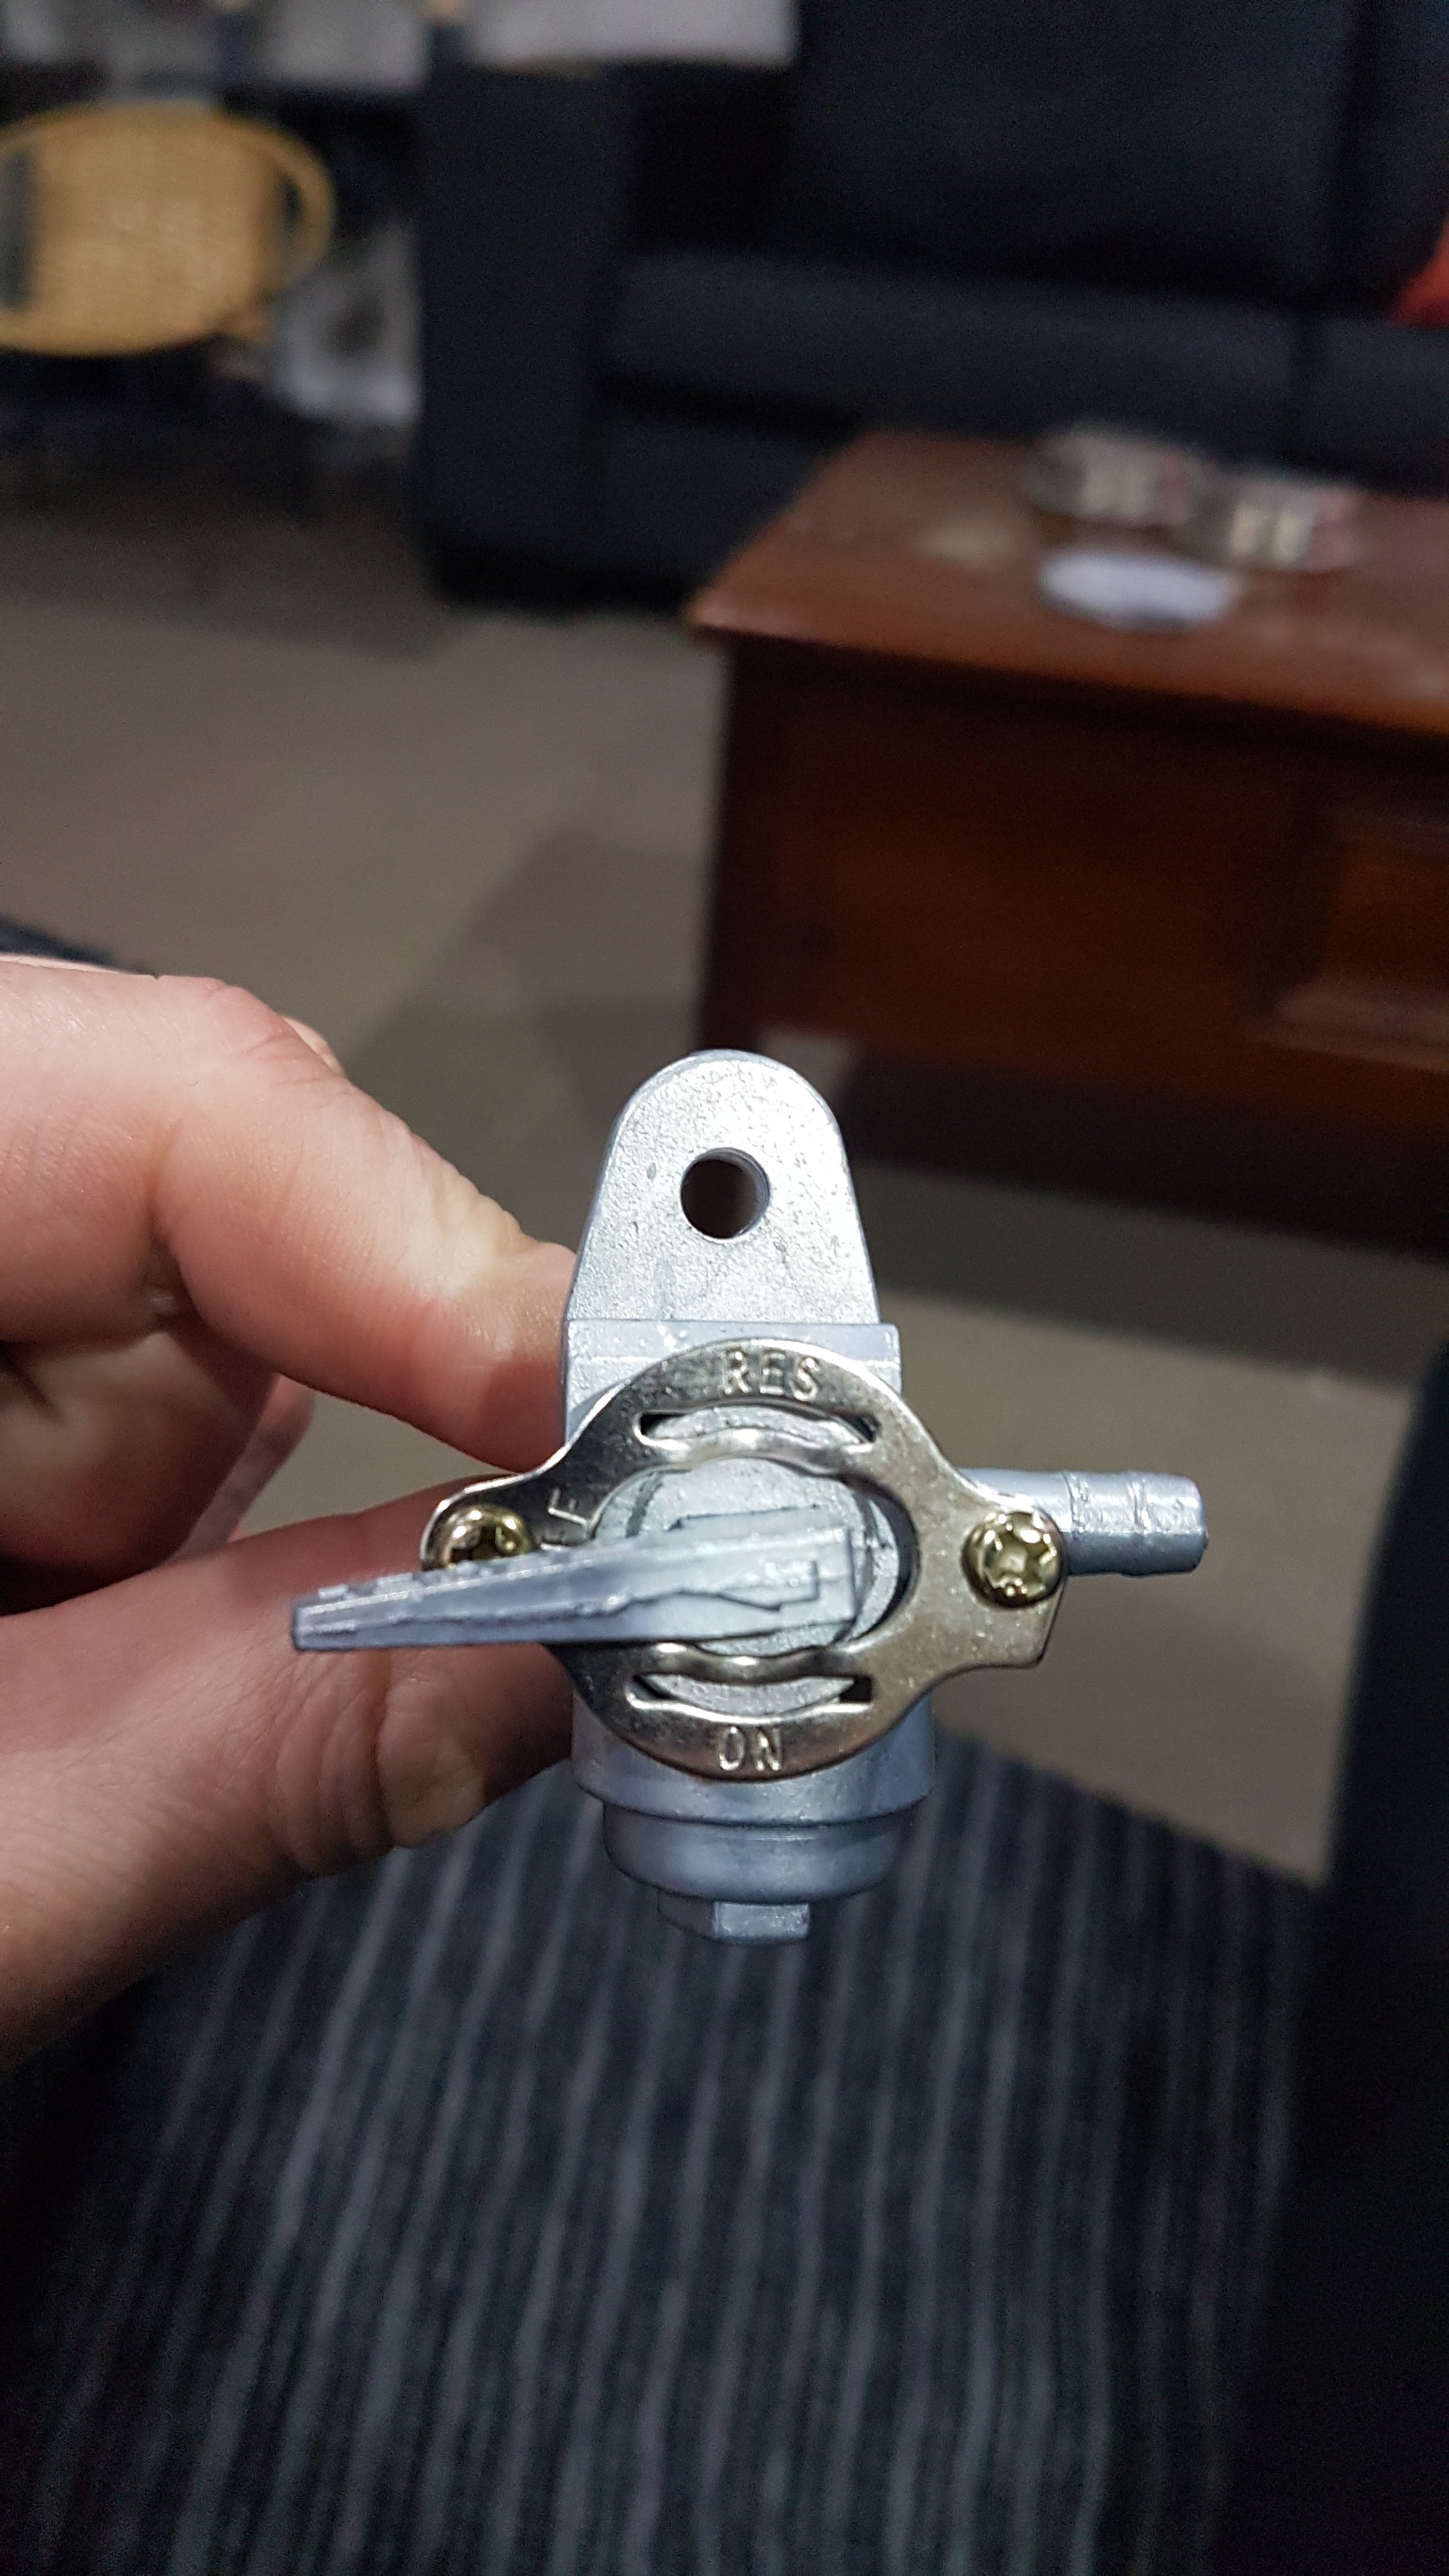
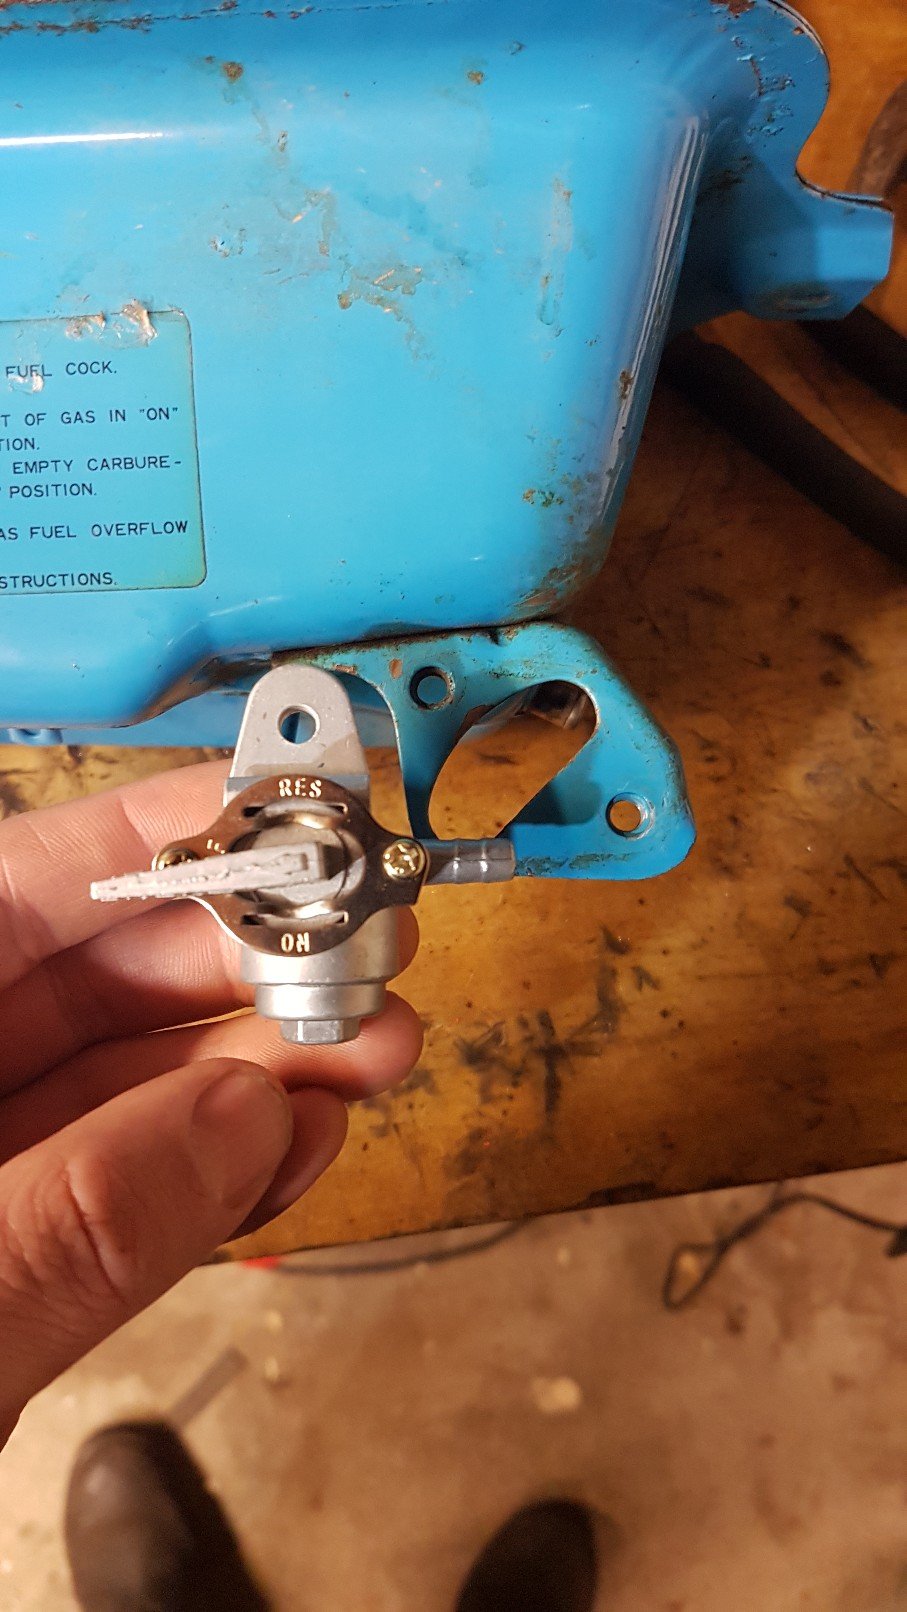
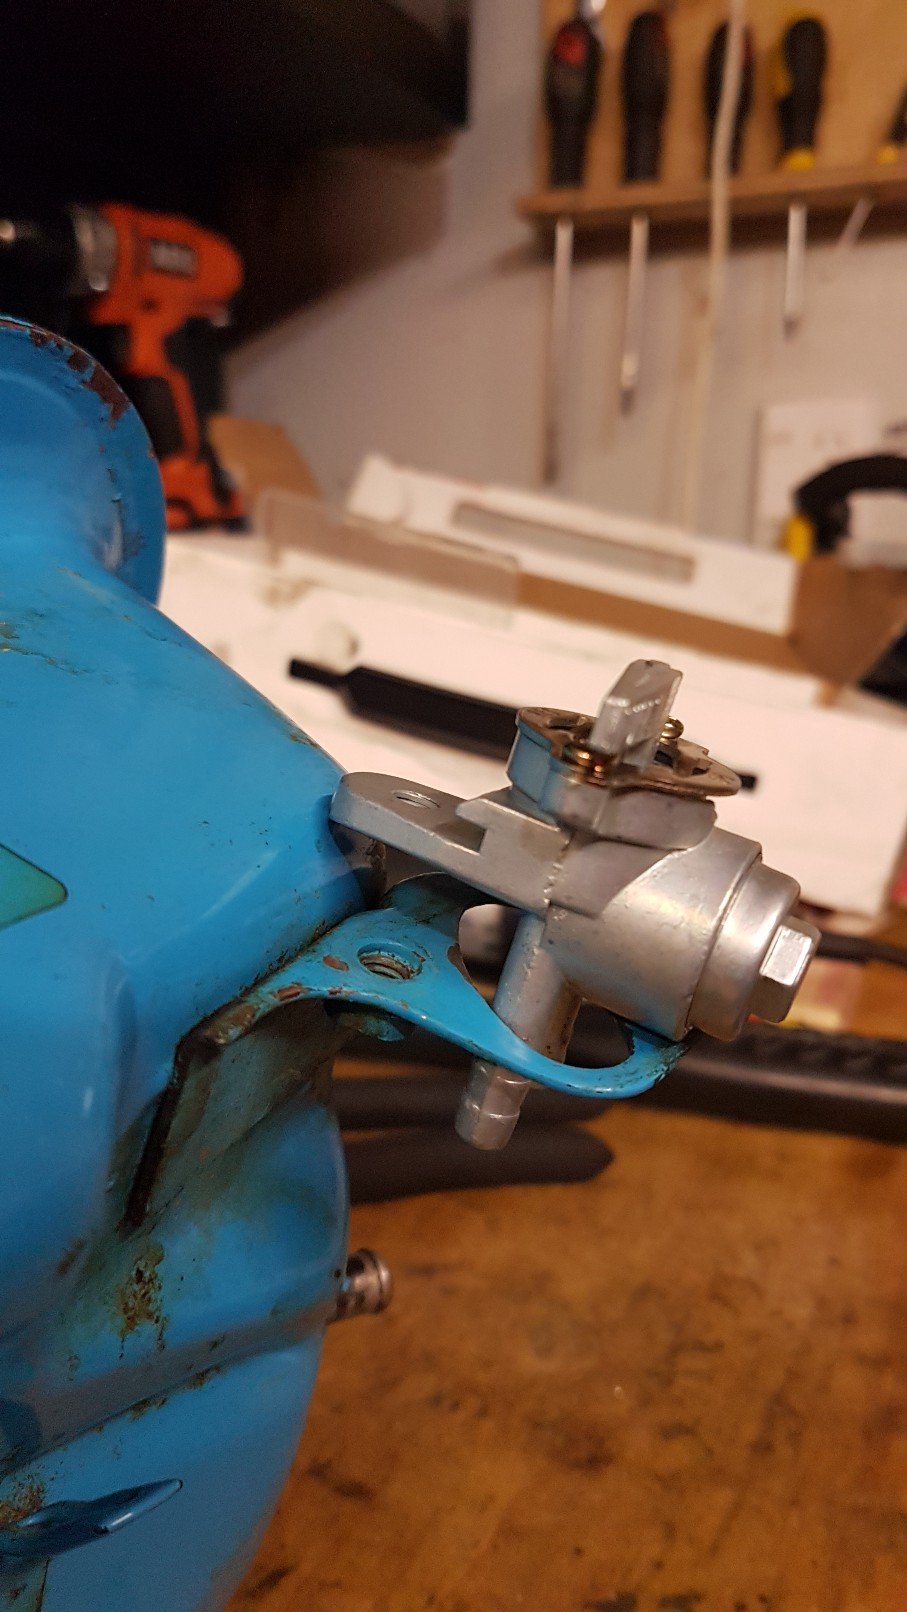
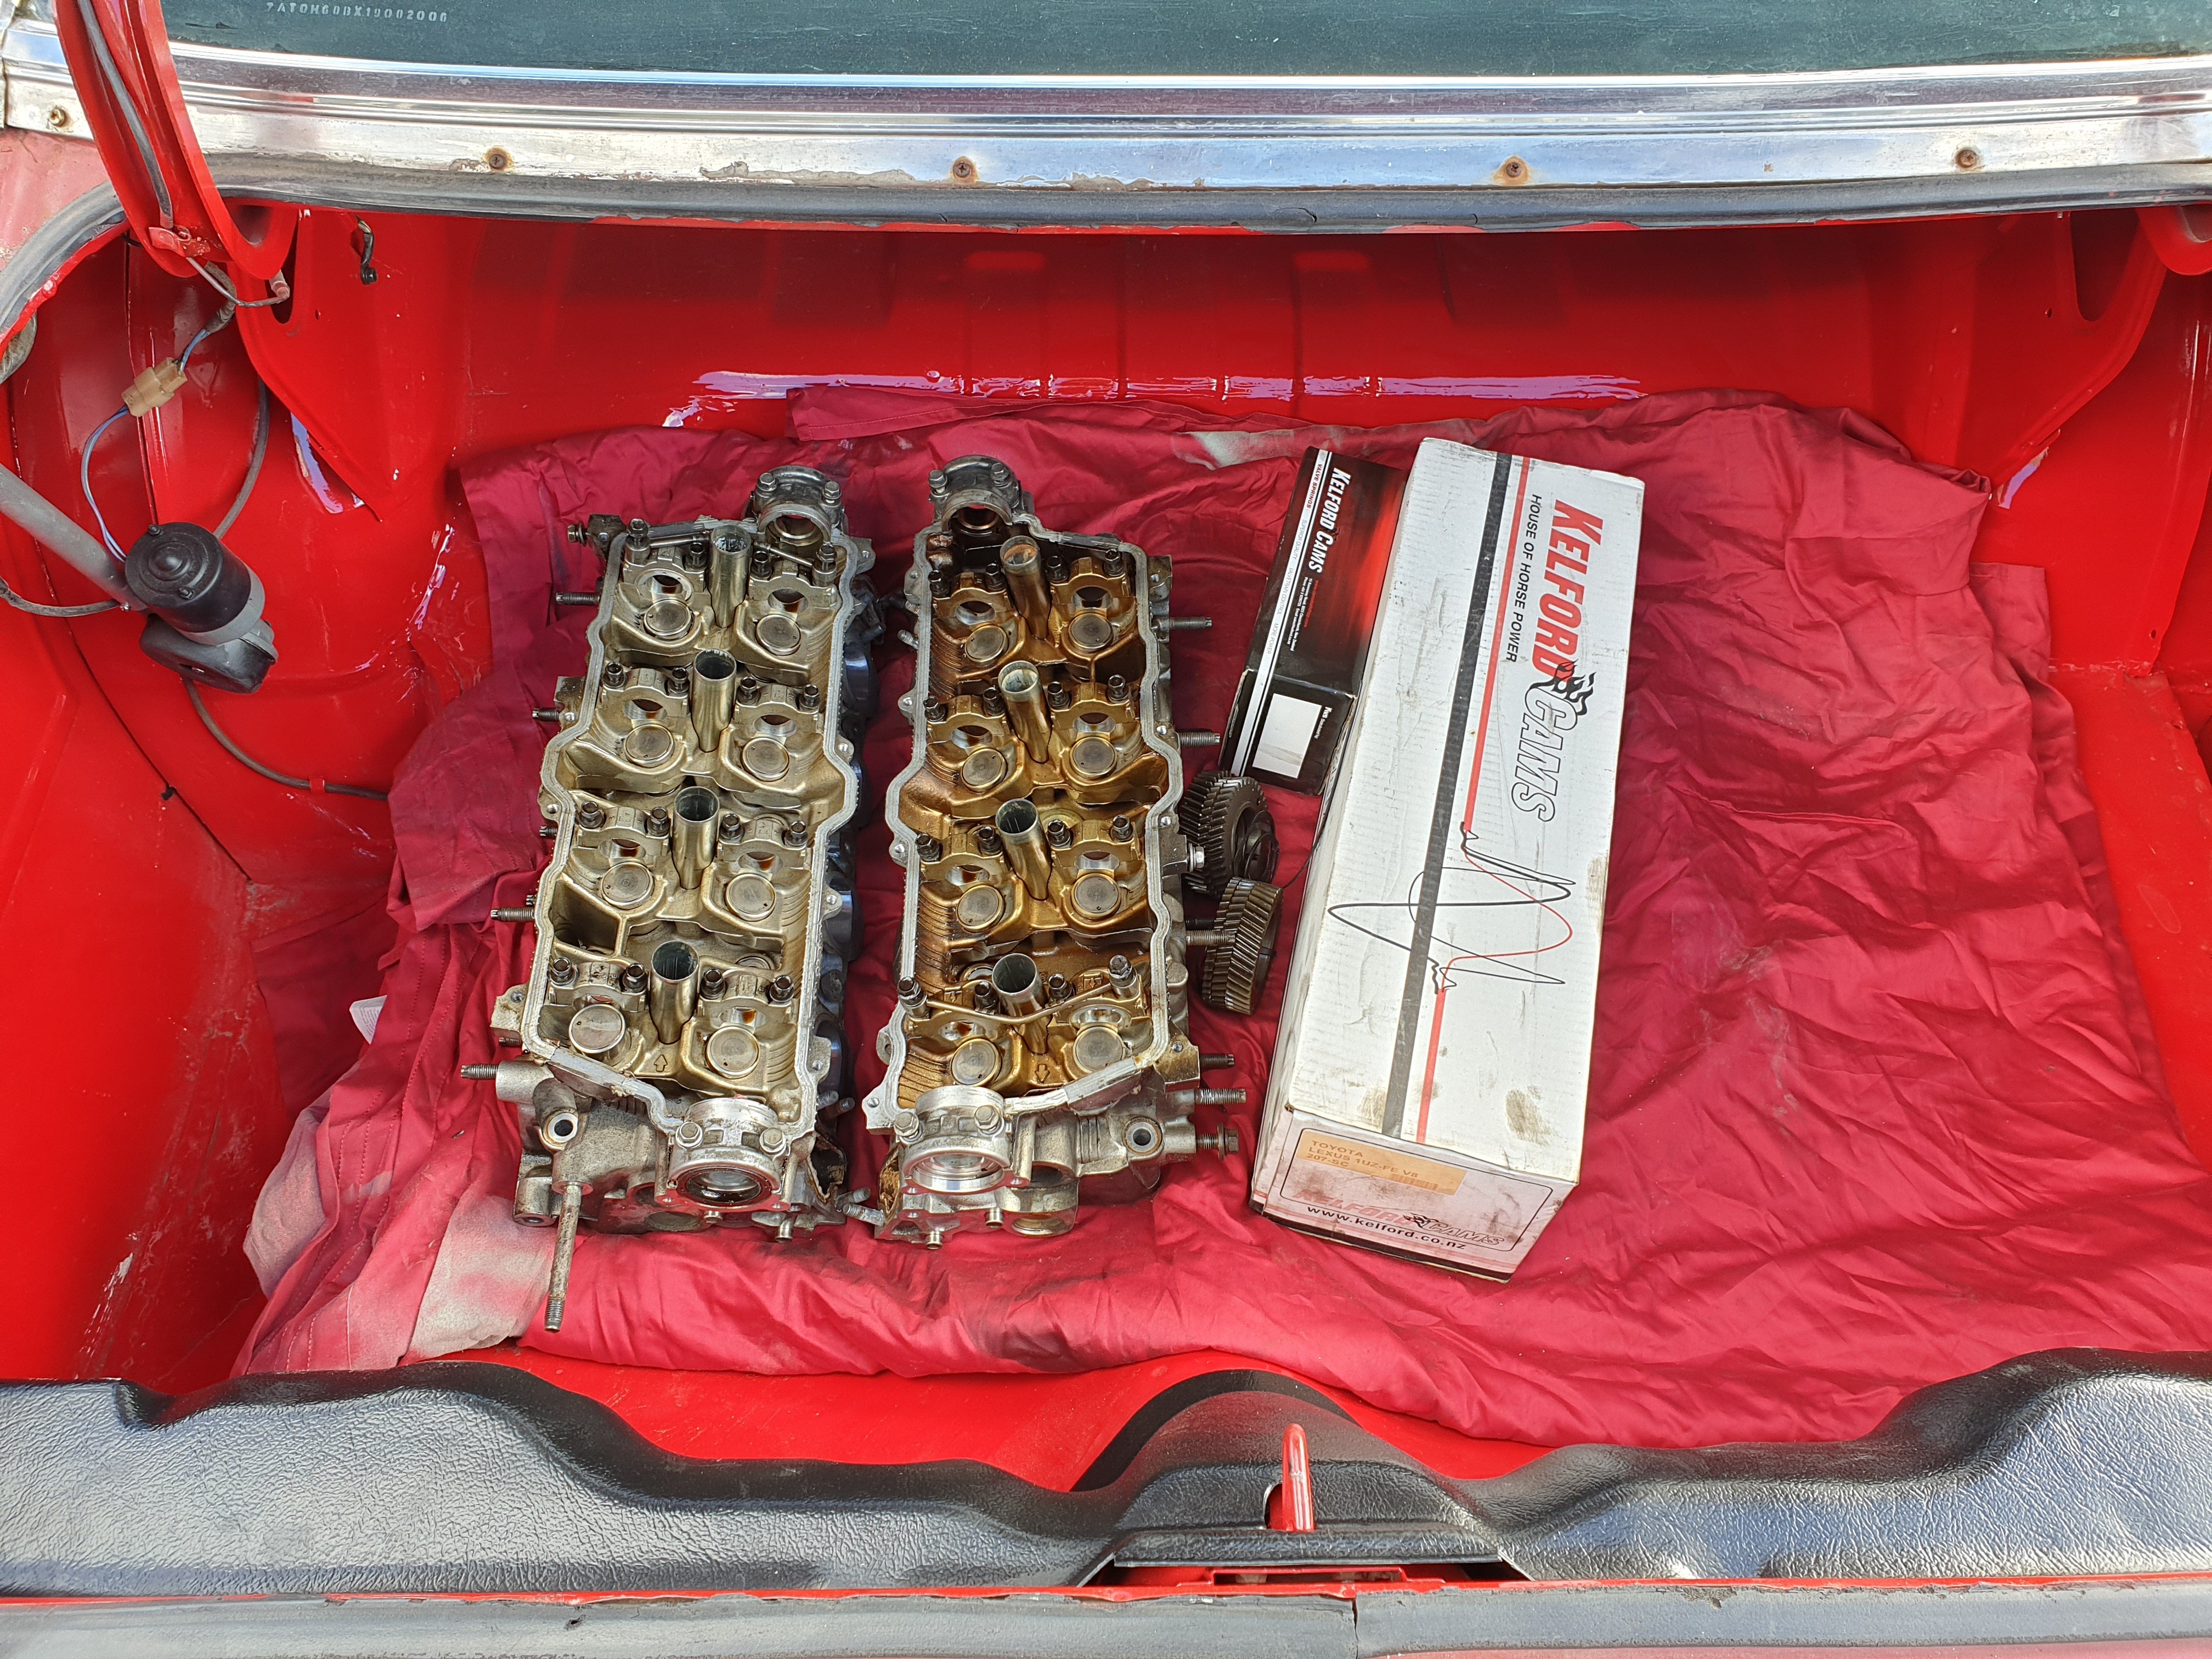
Things have been a bit quiet on this as I've been working on my 180B (like I should be..) but things are starting to come together! A while back I gave my cylinder to @JustHarry to see if he could repair it. Dropped it off to me Tuesday night and I'm bloody chuffed with what he did! Going to hone cylinder and reassemble with the new gaskets I got a while back. Fuel tap and filters from Aliexpress arrived today too. Will be a bit of fluffing around to mount tap to tank but won't be inpossible.
1 point
-
Parts haulin....
1 point
-
Looking good, recommend learning how to use a router and giving laminated ply a go. very on trend lol. about $120 for a sheet, not bad IMO. Flip with a router you can make so many things! I just made this from scratch (Stripped the room bare), learning how to router on the job. Don't recommend Bunnings ply! GIB plastering isn't all that difficult either. (handles still to be fitting to all draws)1 point
-
Make a few bucks on the ride home1 point
-
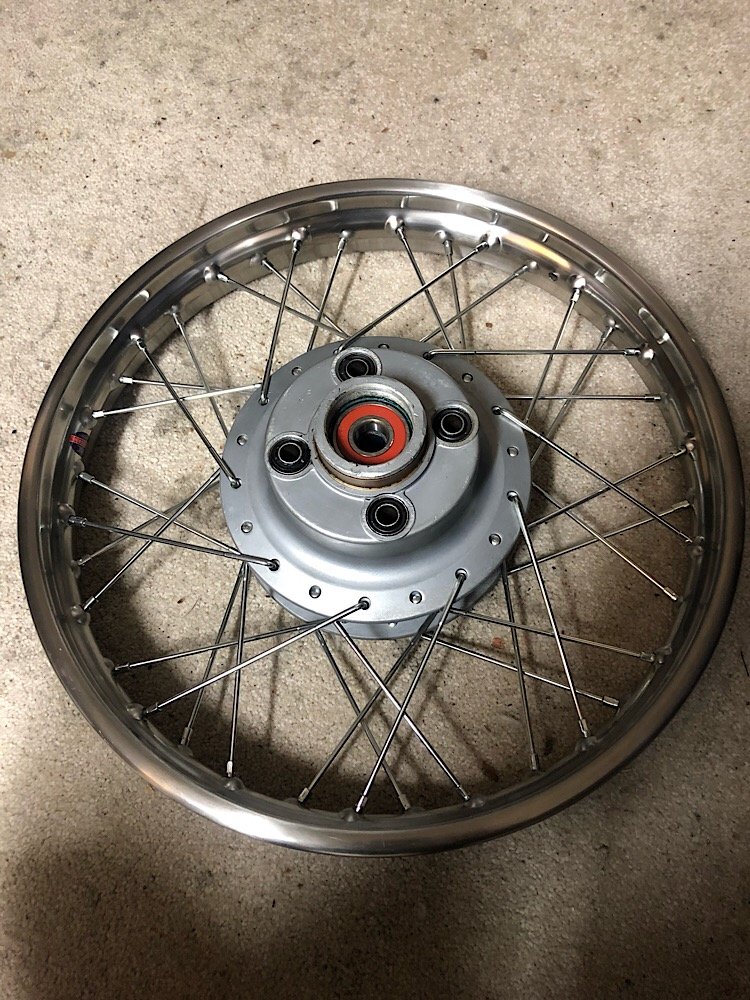
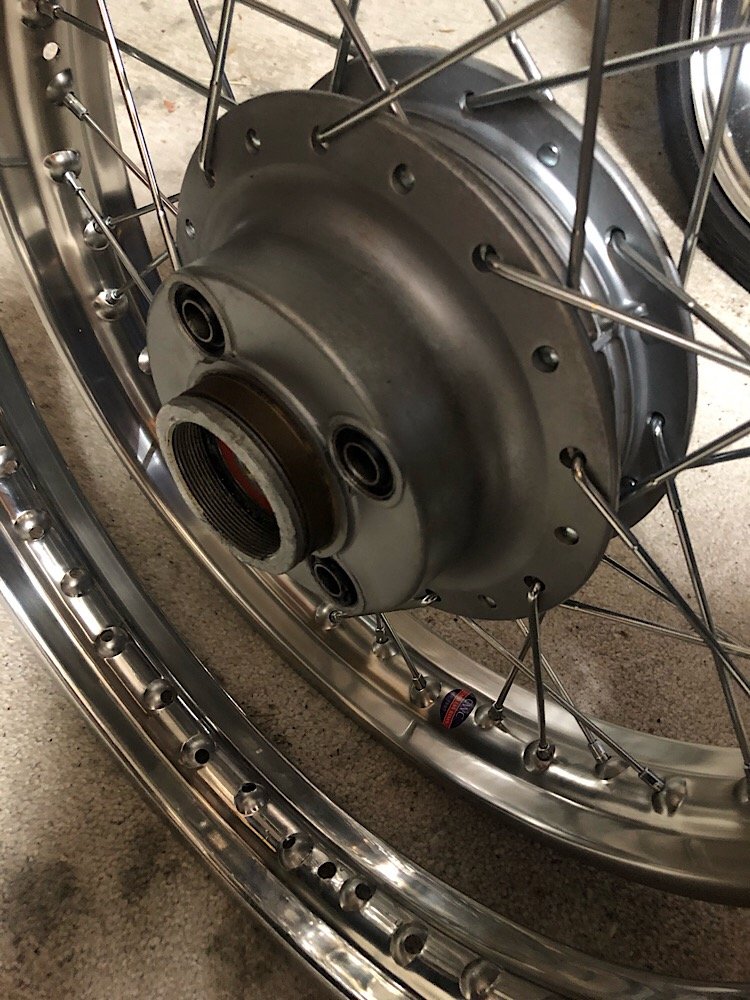
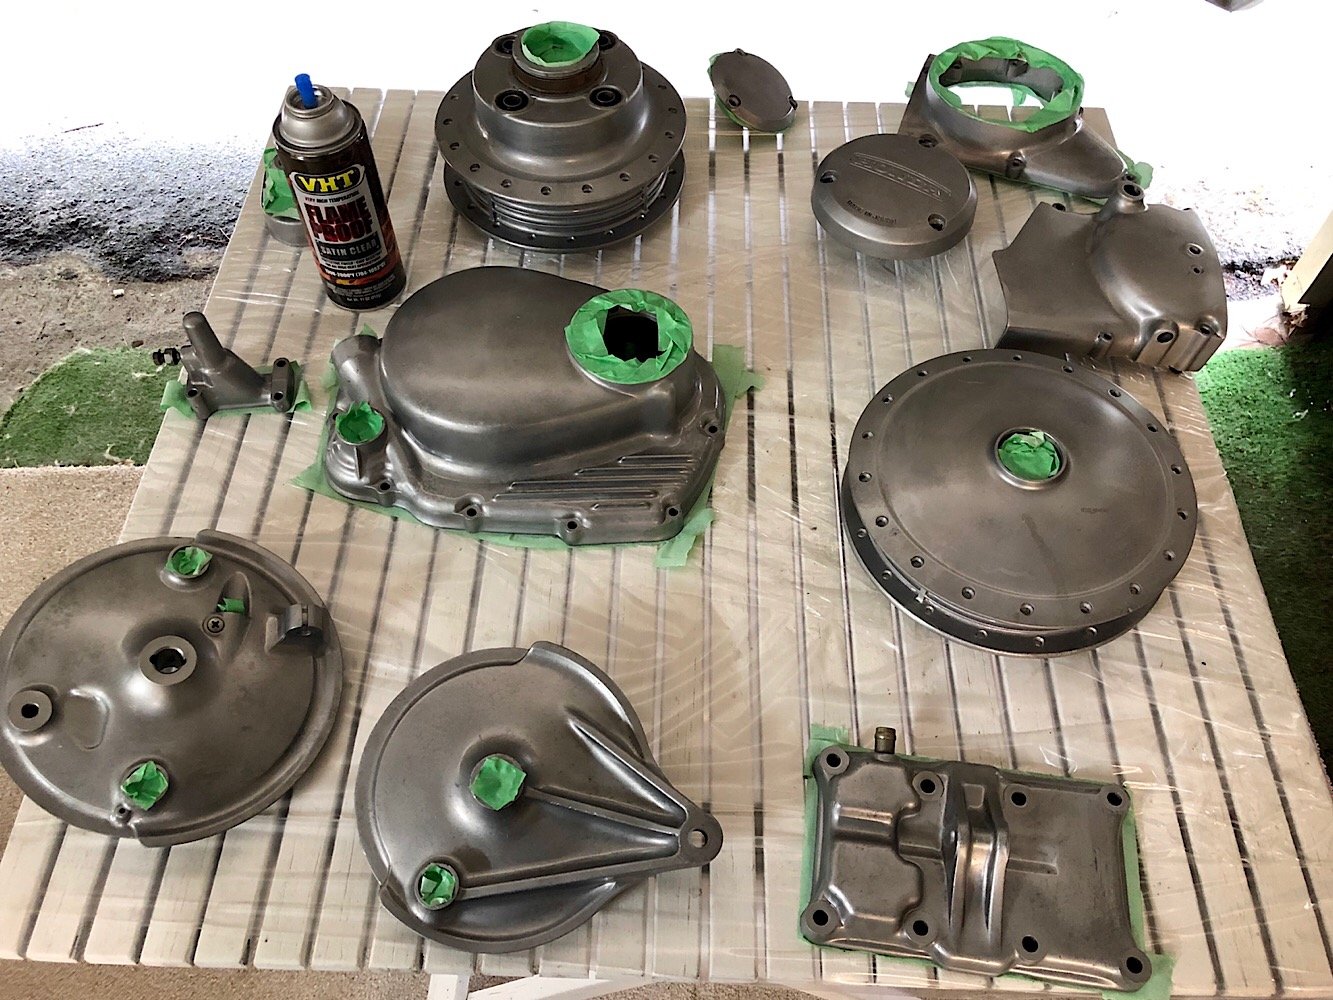
Rim’s arrived from Birmingham, England this week. Stainless steel WM2 and WM3, one size wider than factory. Got stuck into lacing them up to the hubs, stoked with how they turned out. Cycle Treads did the final truing and torquing of the spokes. Going to run a 3 inch wide tyre on the front and a 4 on the back. Gave all the vapour blasted parts a couple coats of VHT satin clear to keep them looking crisp. Also added all new wheel bearing to the hubs, stripped the front forks and cleaned them up. Added genuine Honda fork seals and fresh oil ready to go. Motor is still waiting for the pistons which is on the way and the frame is down at the engineers getting the hoop welded in fully.
1 point
-
I can get a 1:1 scale for that1 point
-
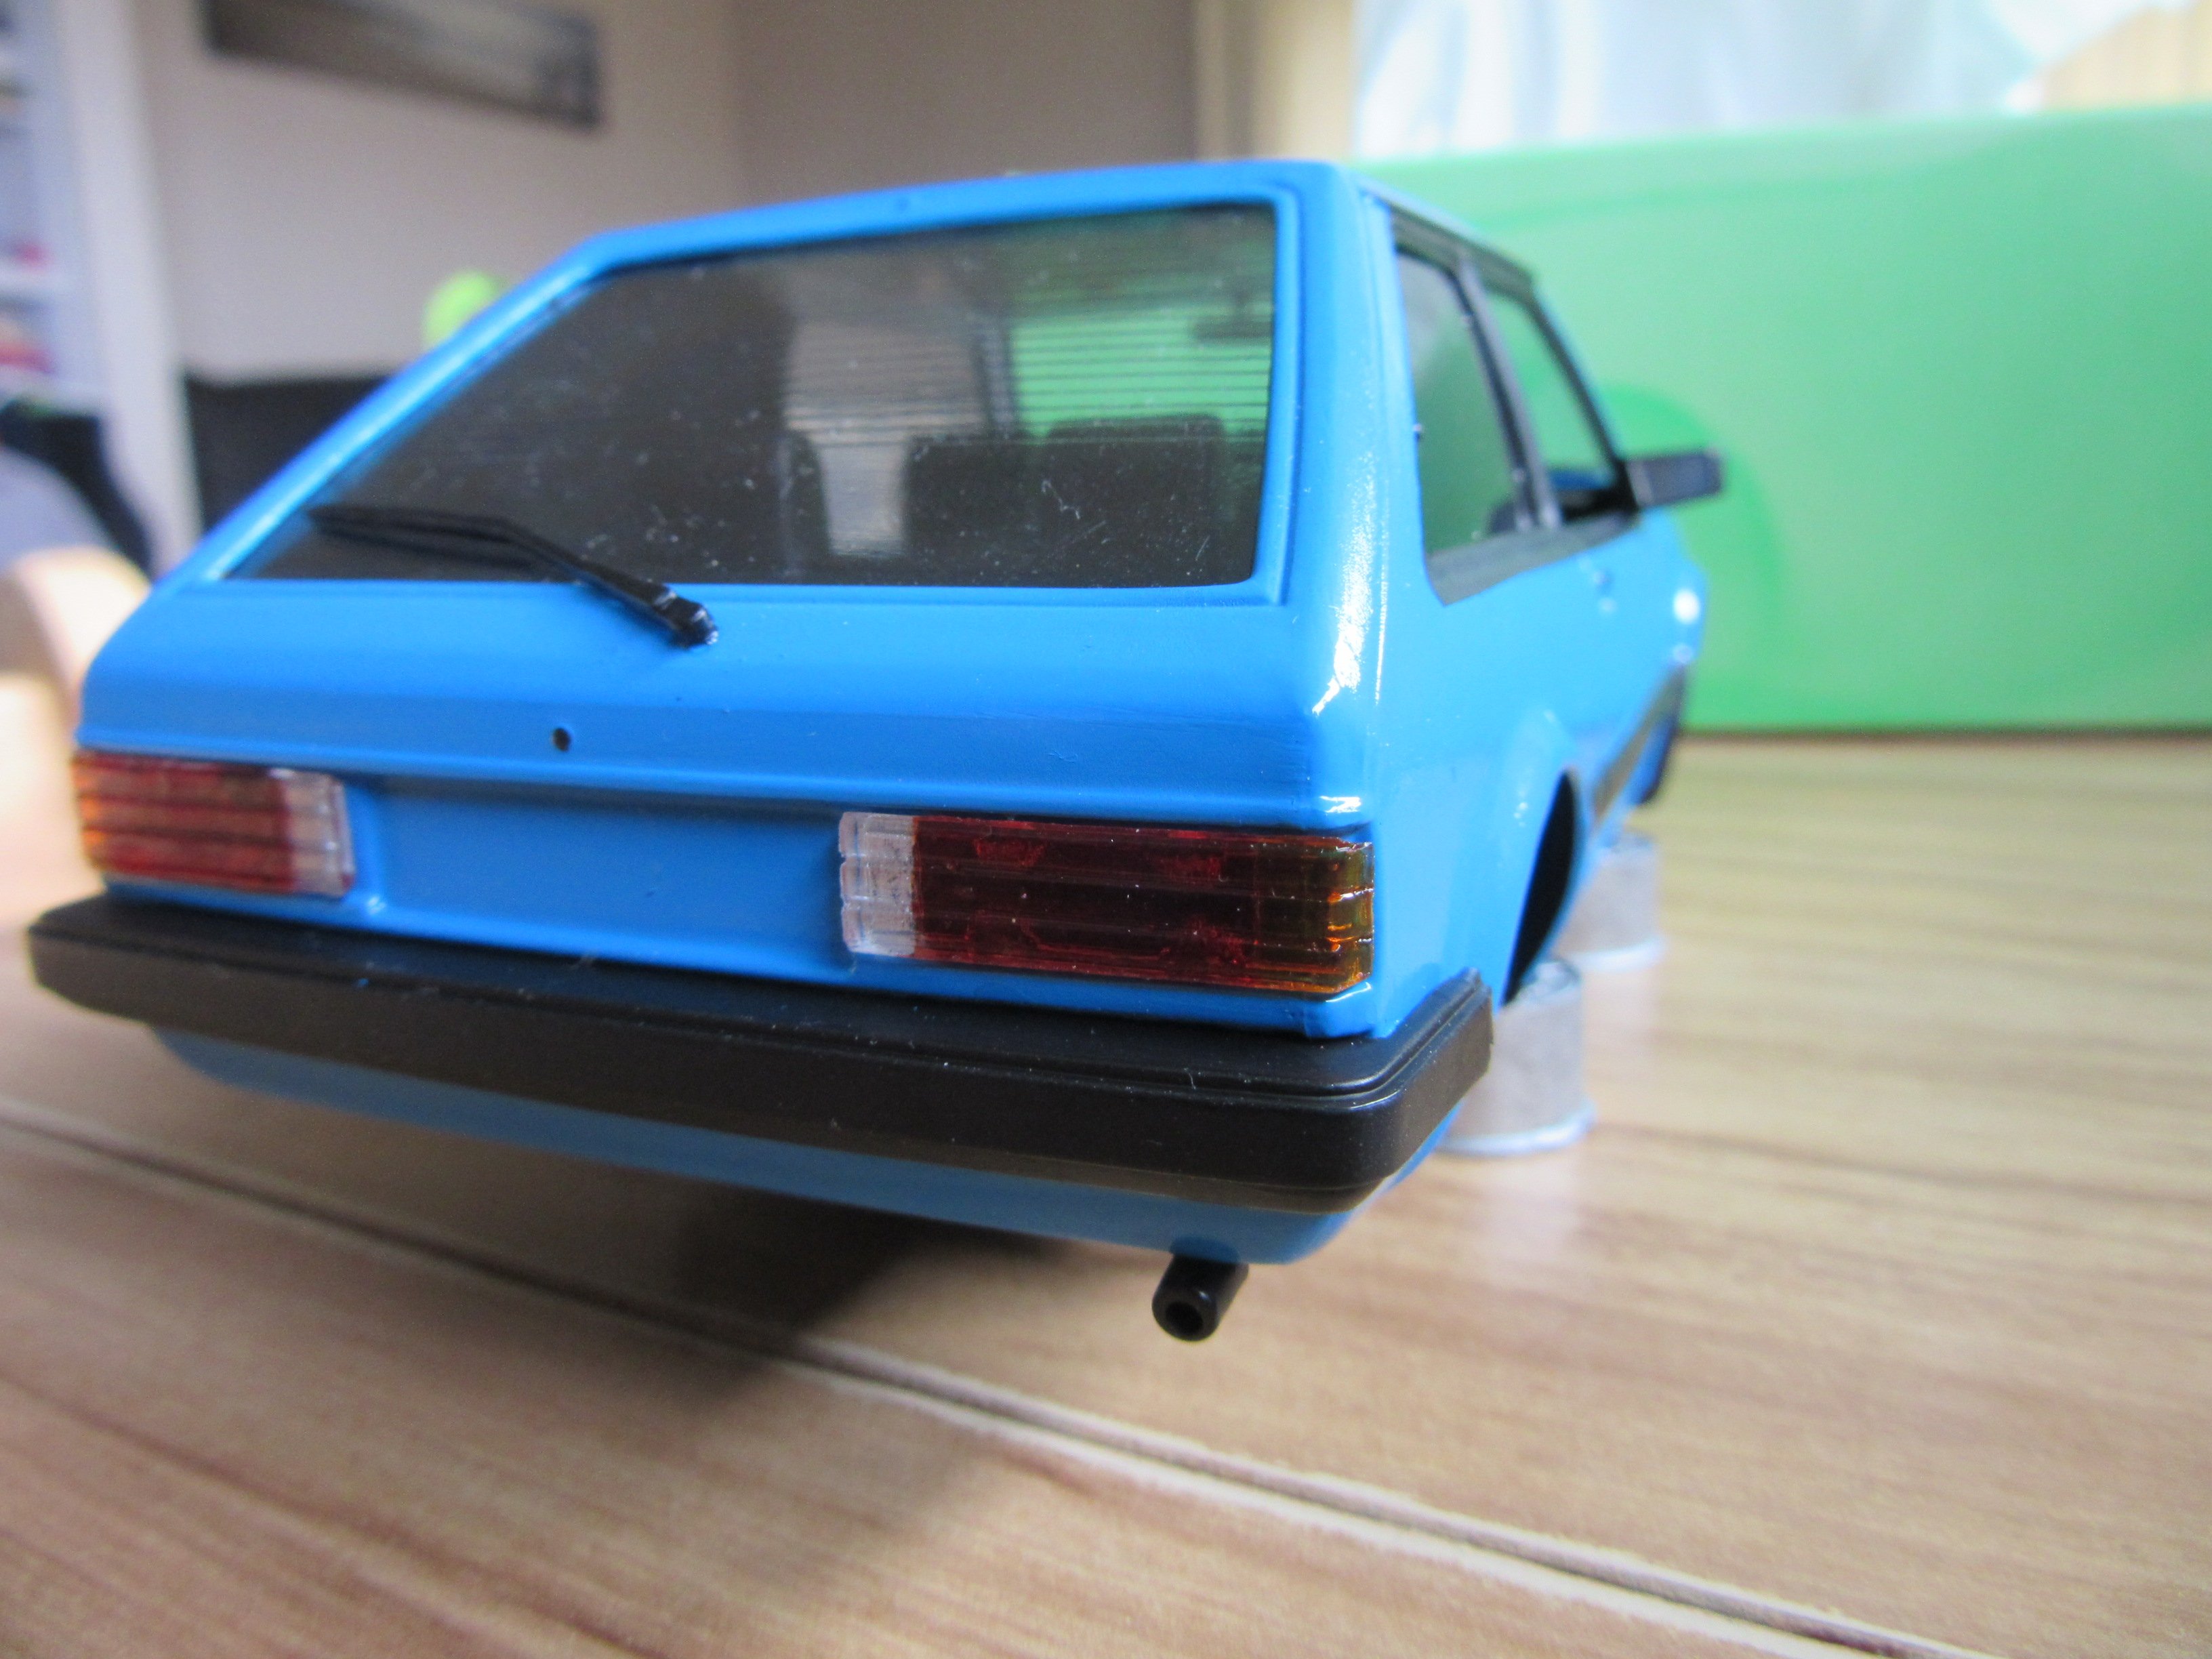
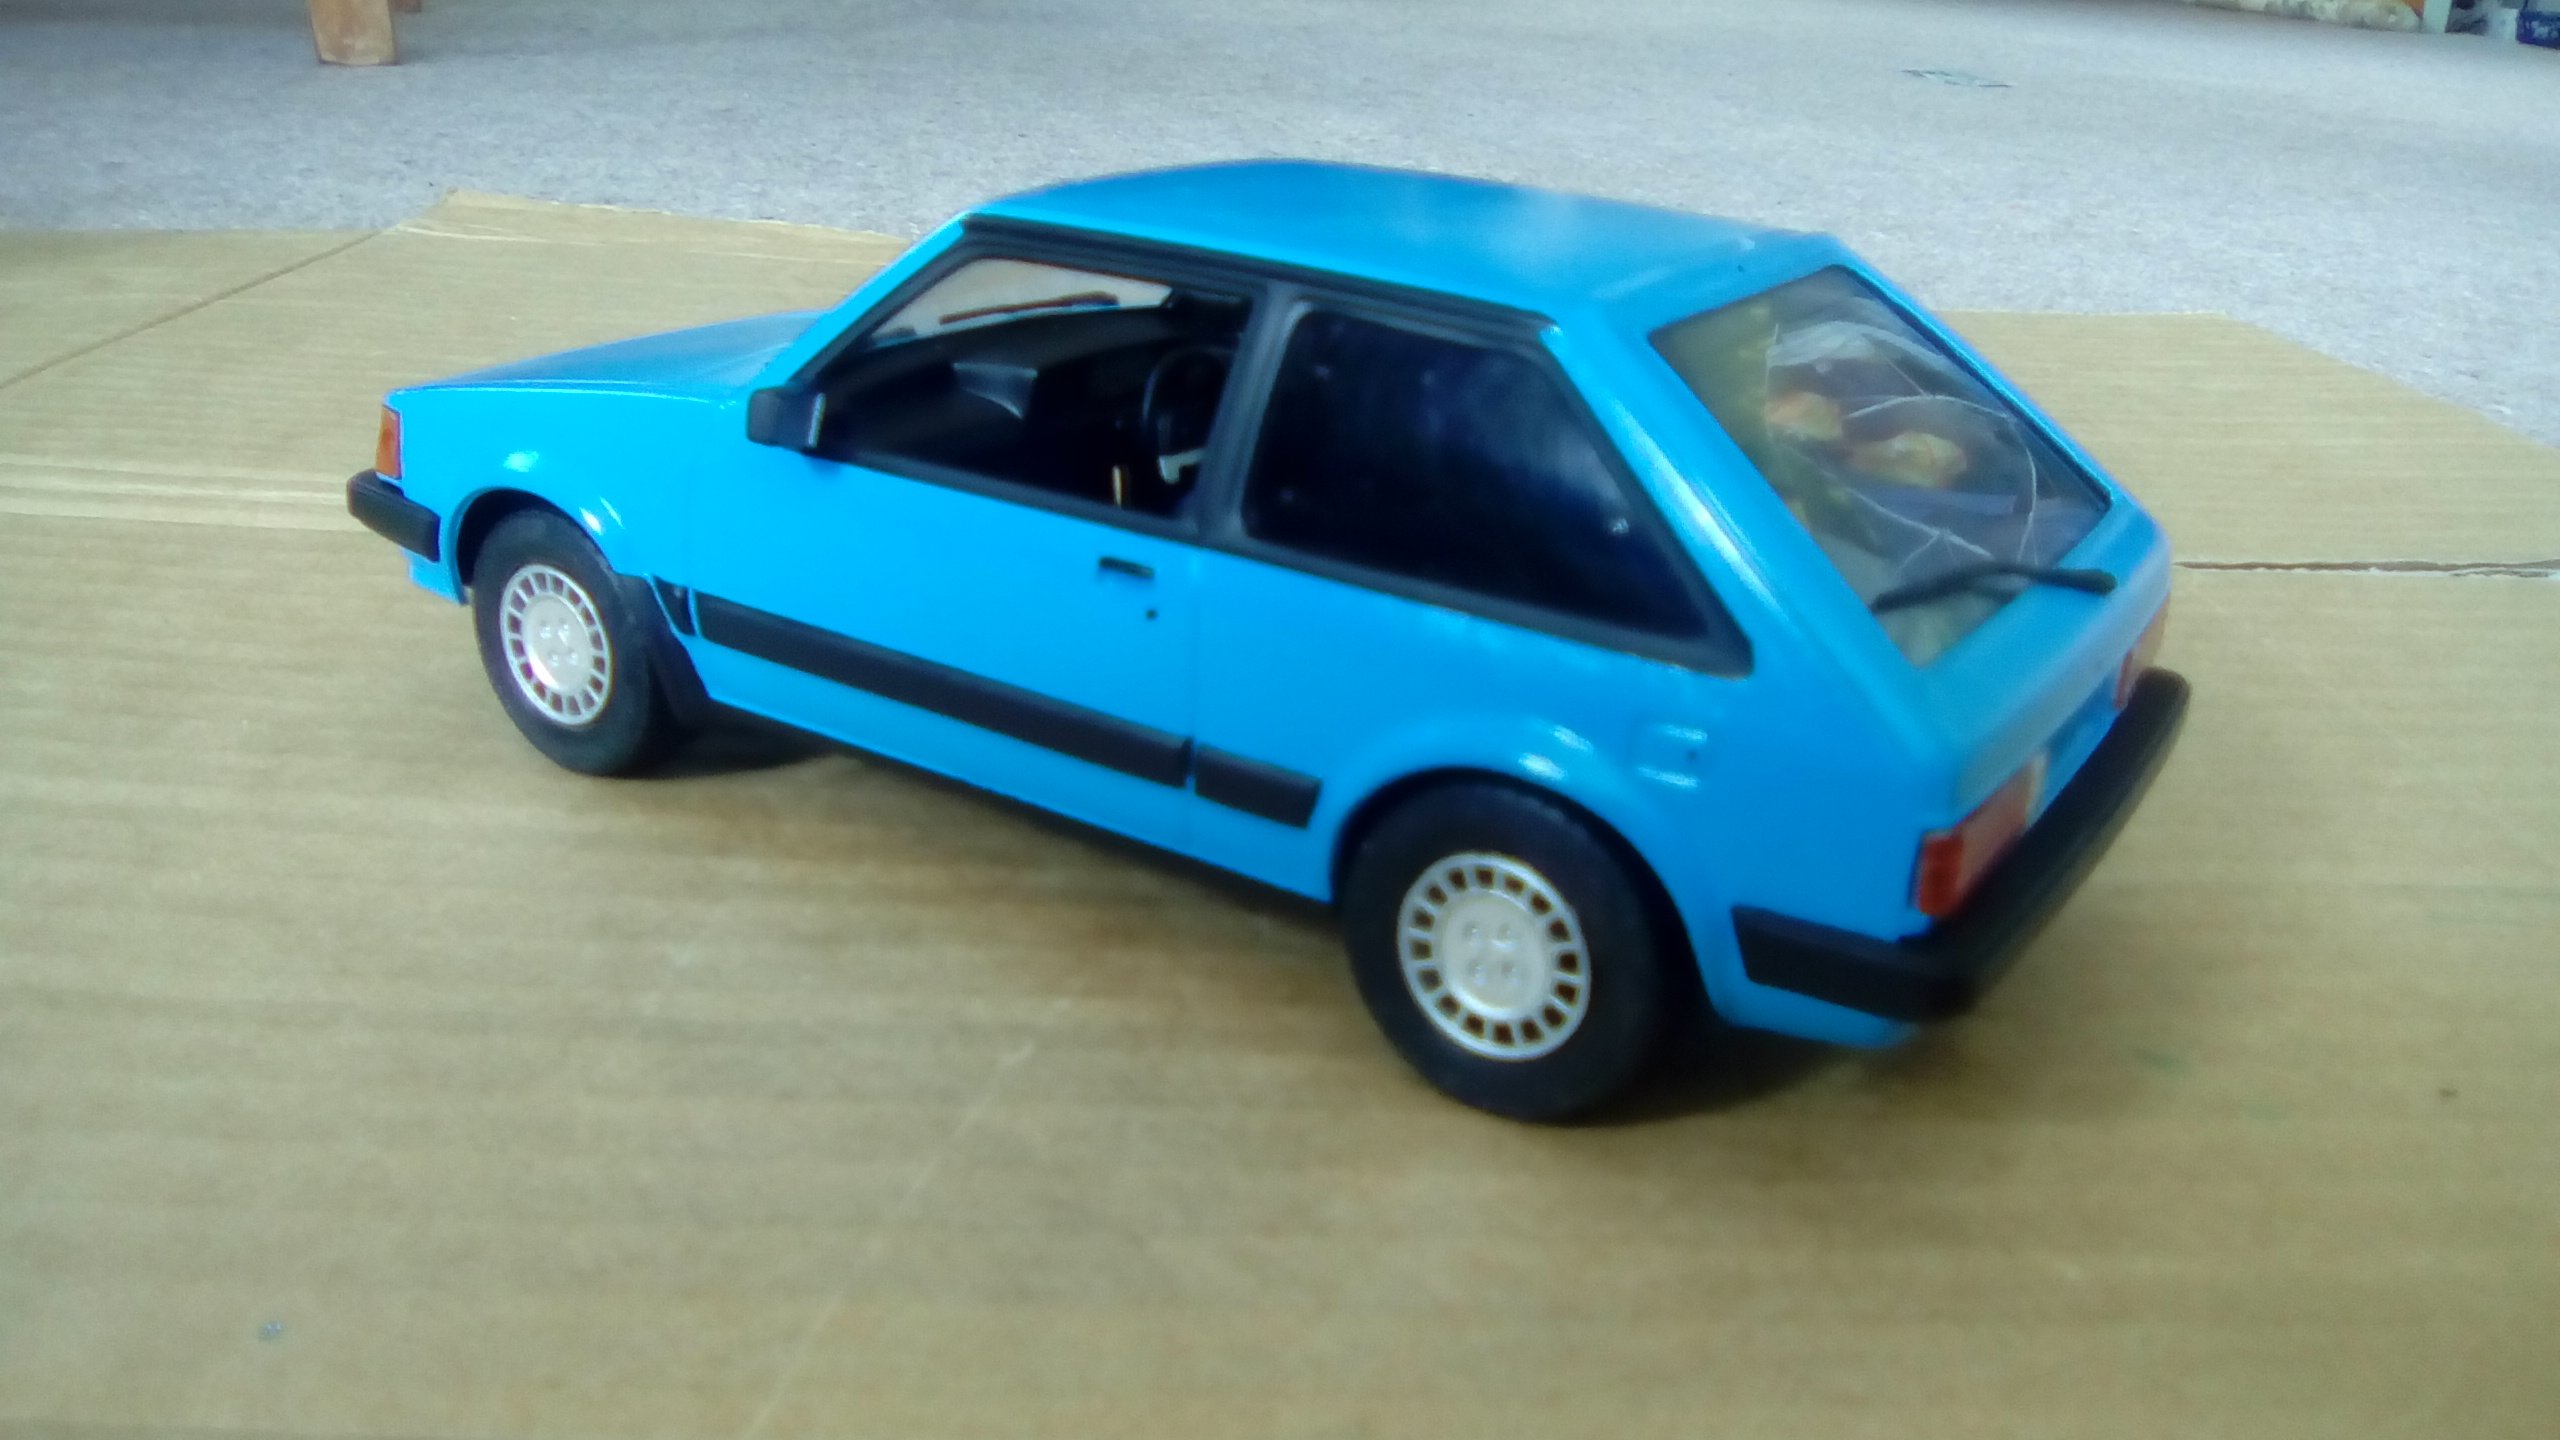
This is my first 1:24 car model I've just done recently. No mods, just a copy of the wife's first car.
1 point
-
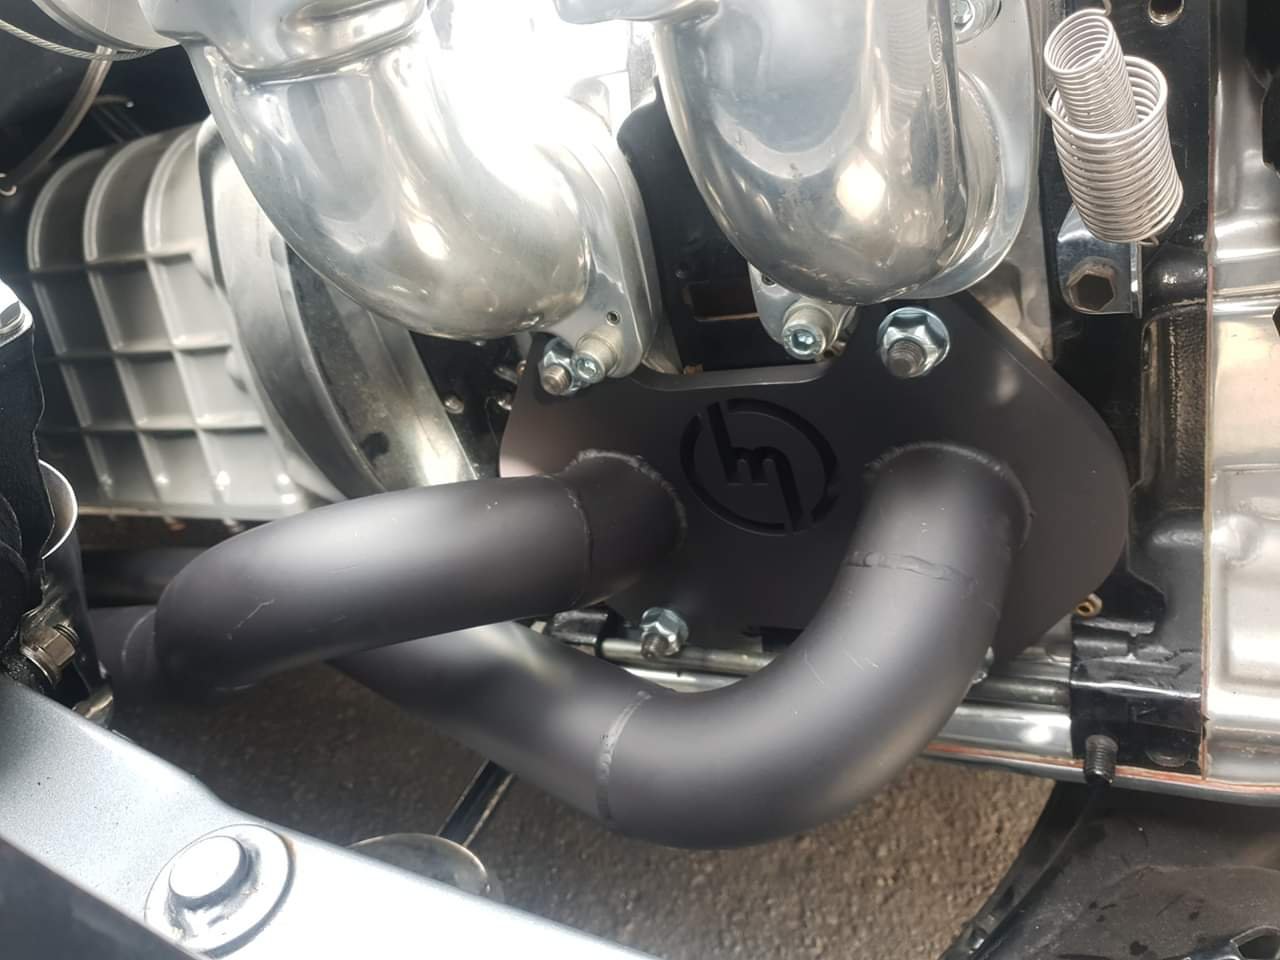
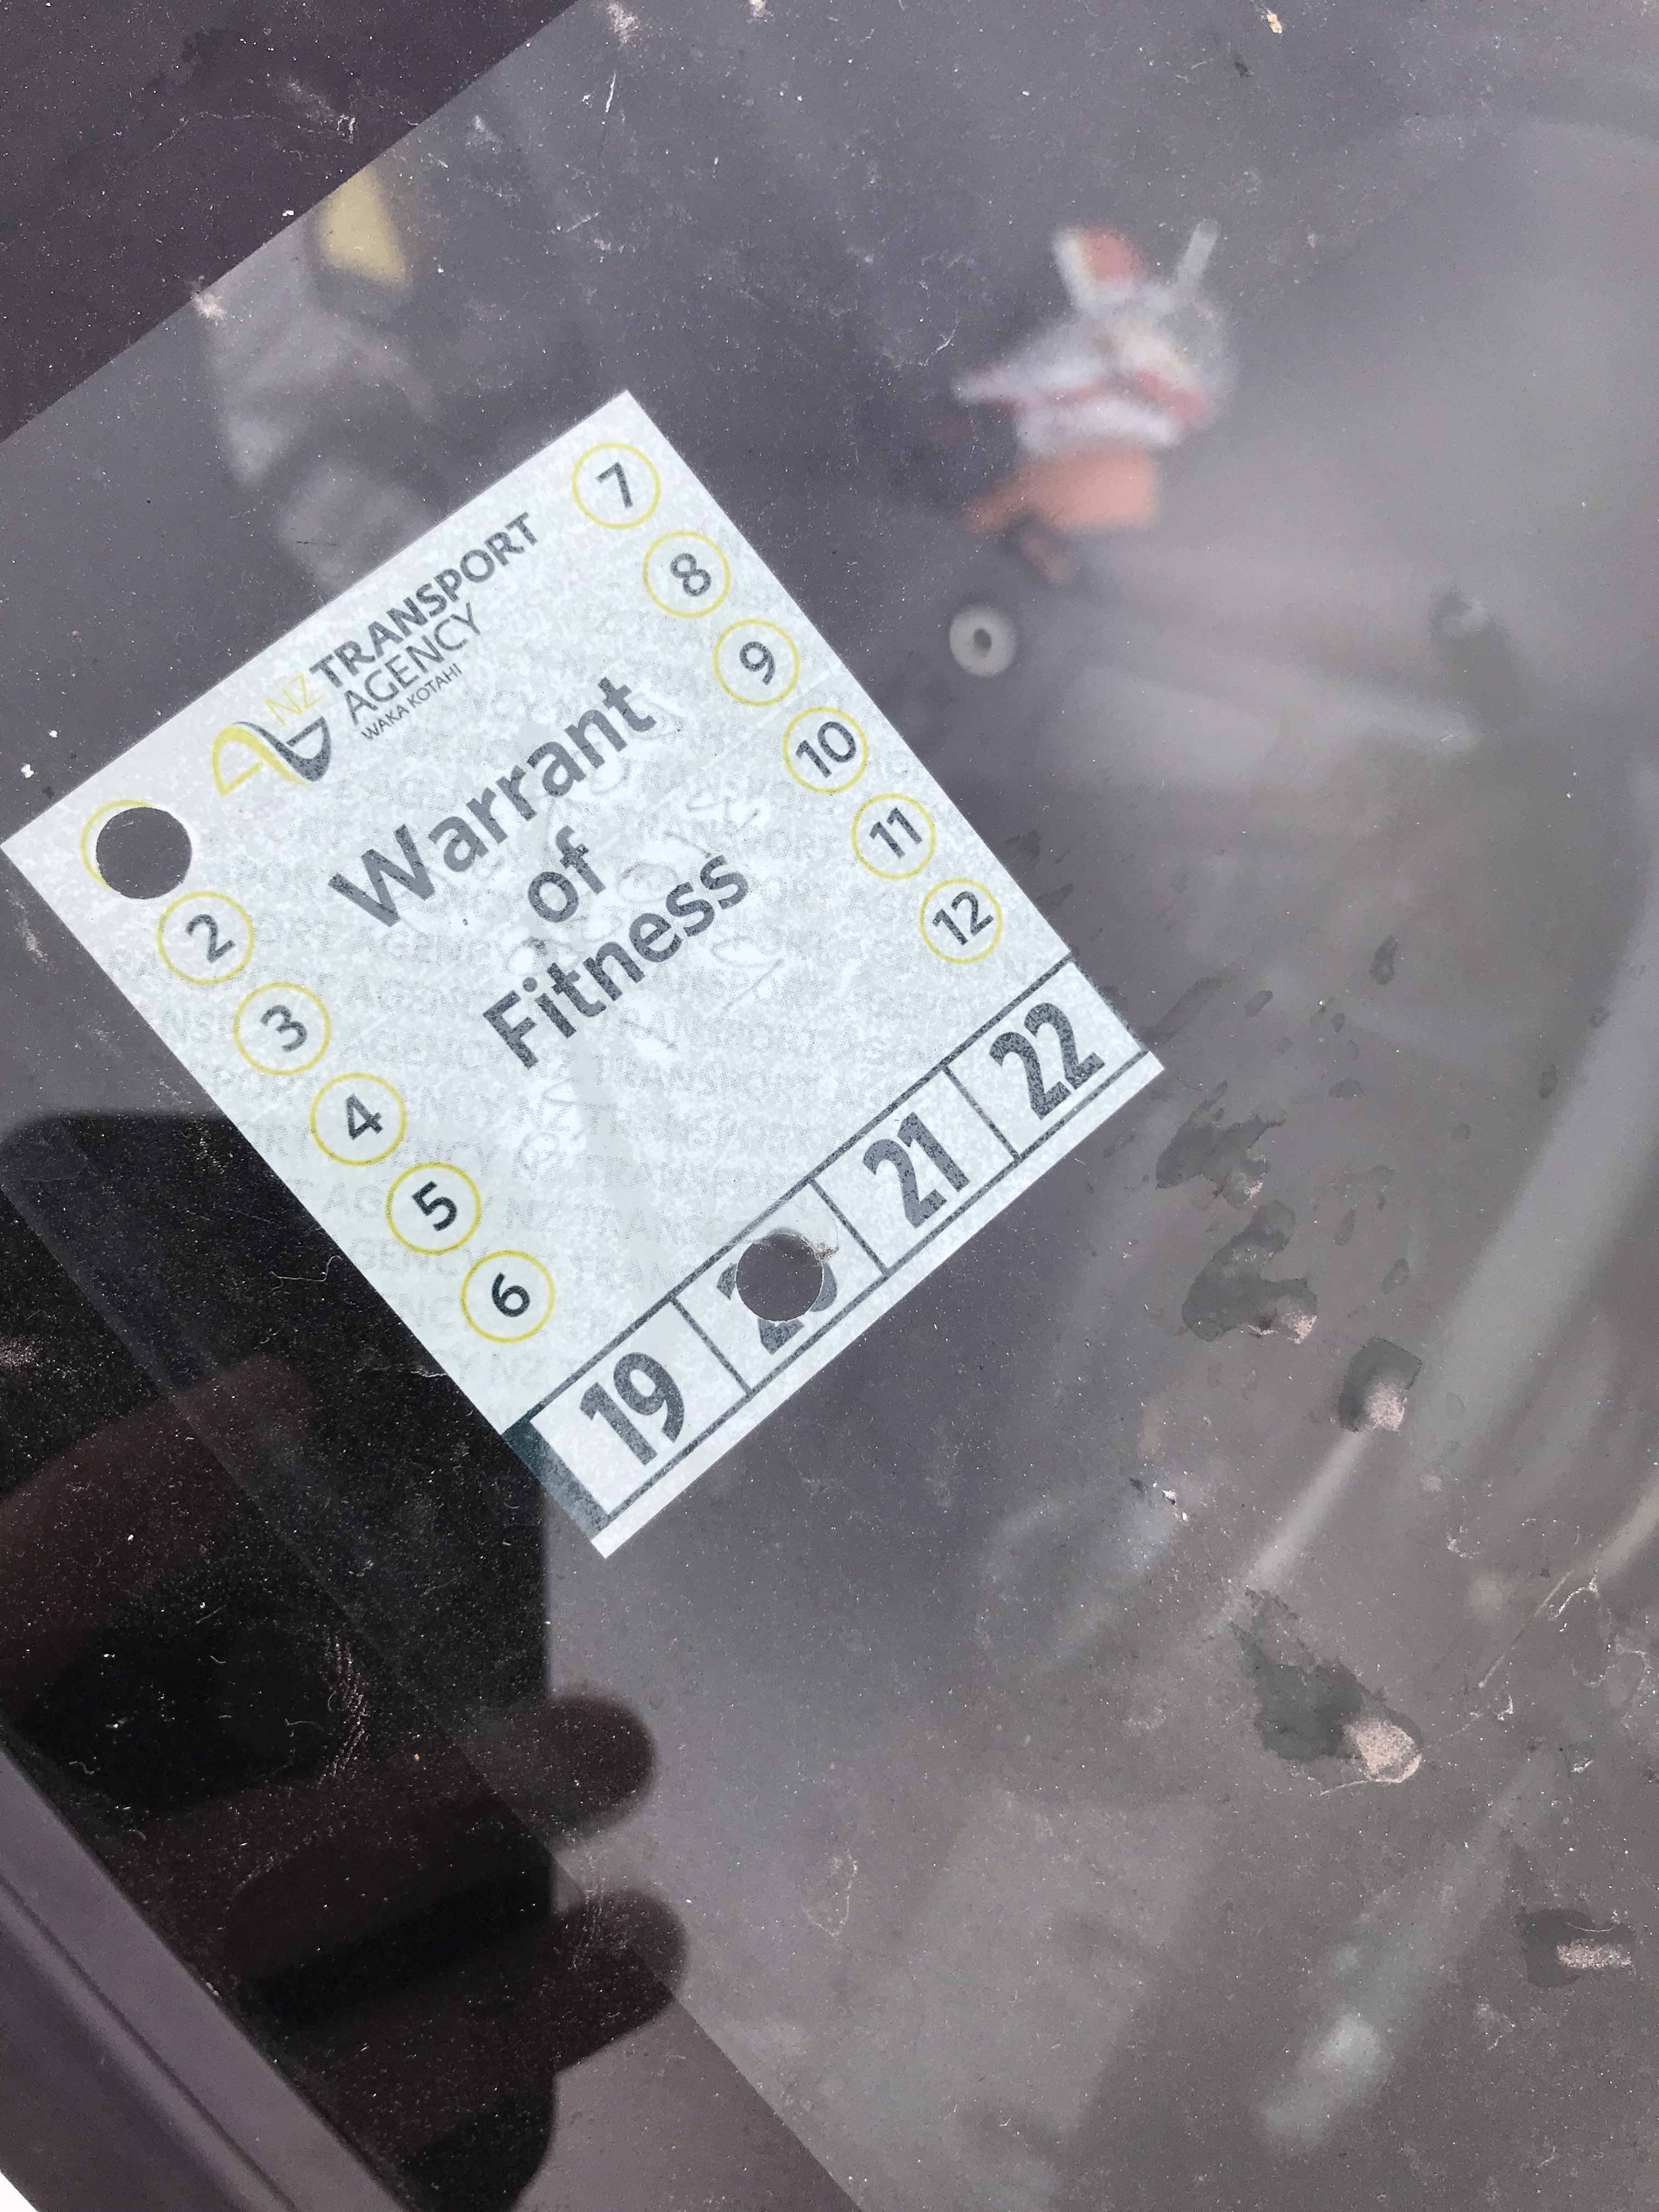
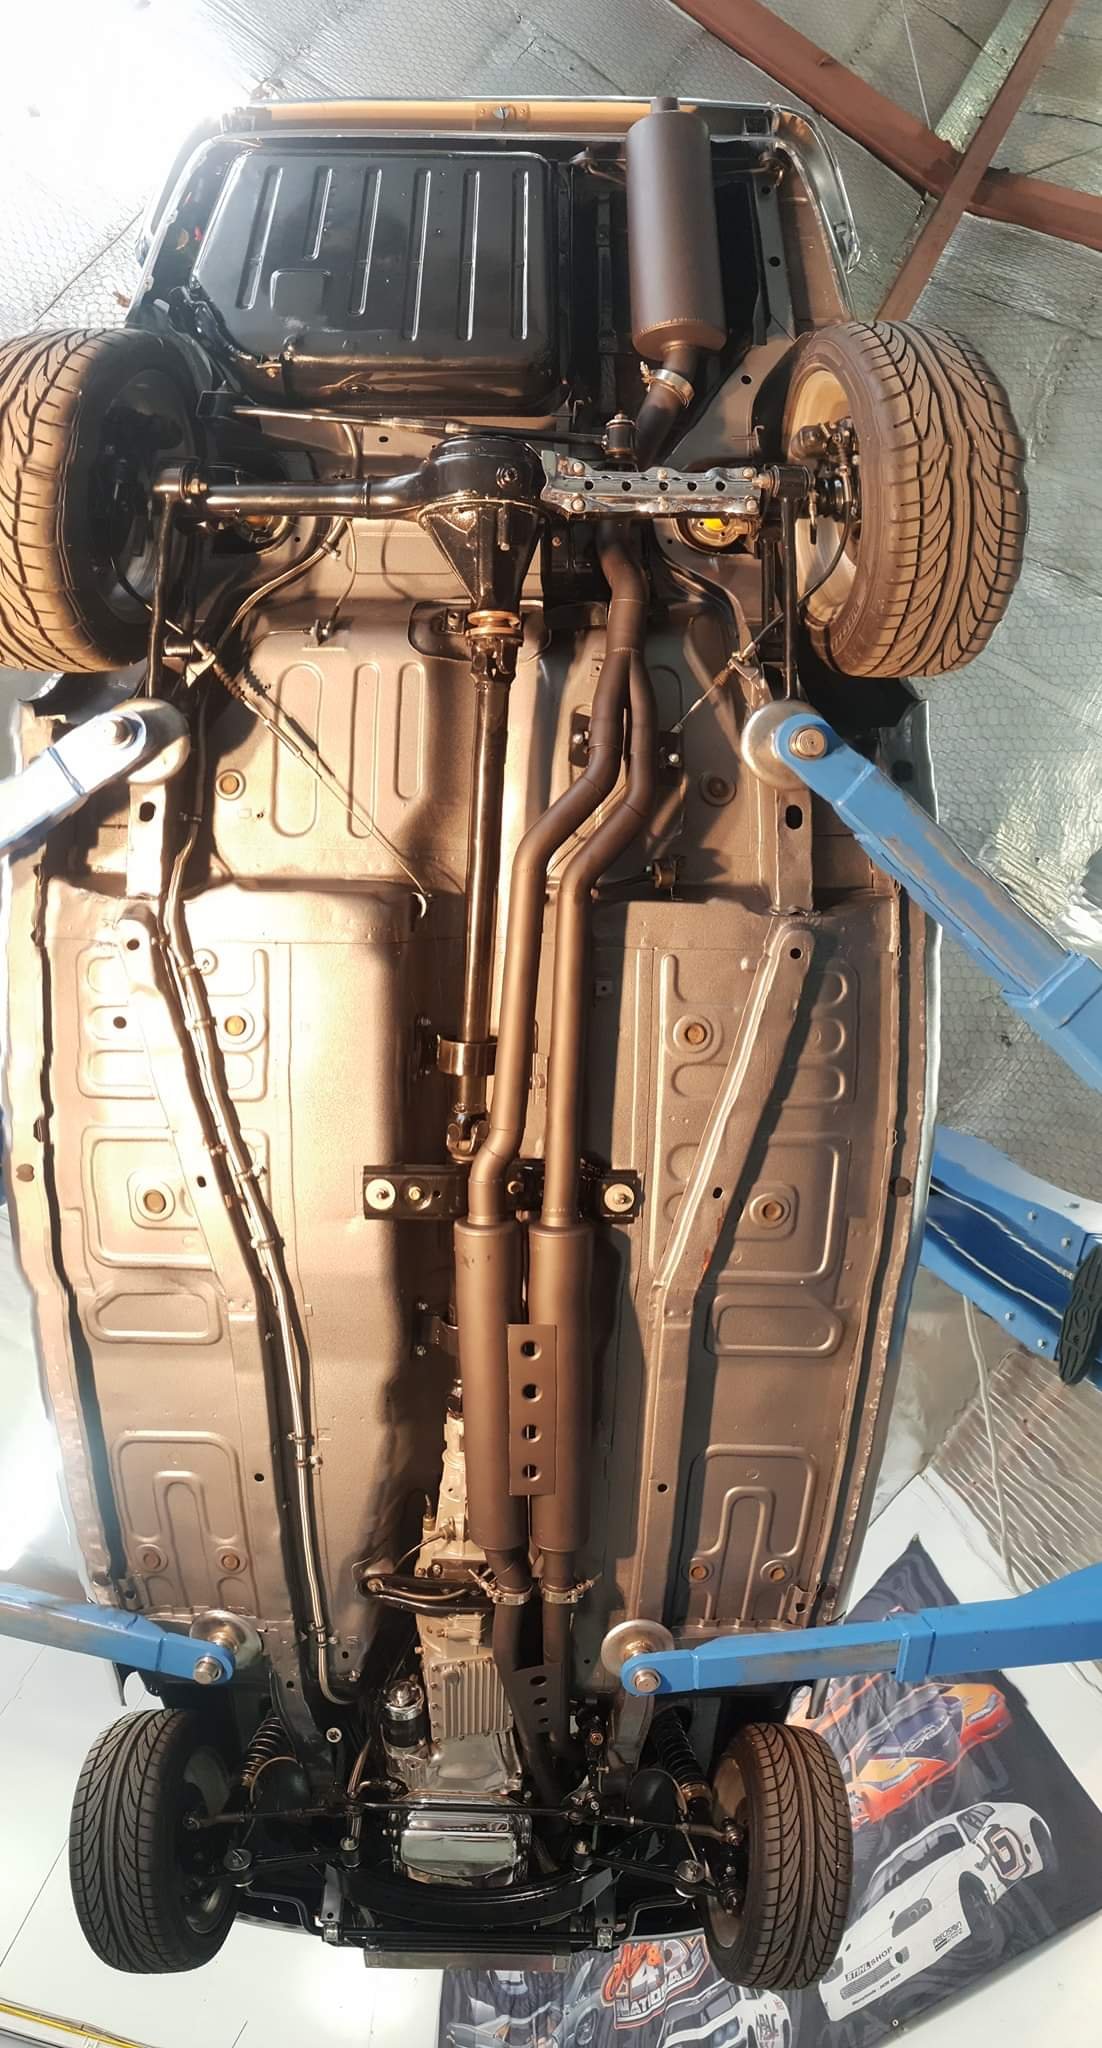
awwww yeaaahhh: Wof man even asked me if I wanted to put the sticker on lol. first wof and reg in 12 years! first proper drive and god dam it feels good! Need to do some AFR testing now that I can drive it properly but it seems pretty good already. pushing it a bit in 3rd under boost and it was around 11.5:1 Also have now realised I really need to do some heat management for the exhaust, the floor/tunnel is pretty hot... tldr fuck yeah
1 point
-
This thread is worth looking through too.1 point
-
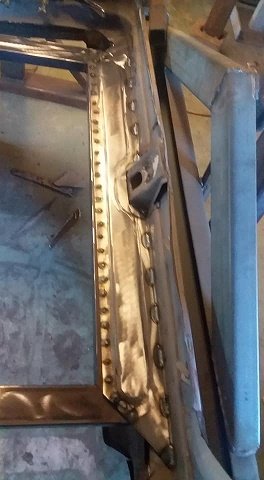
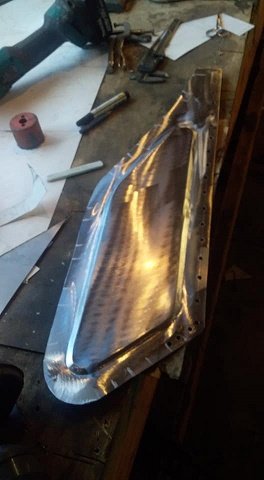
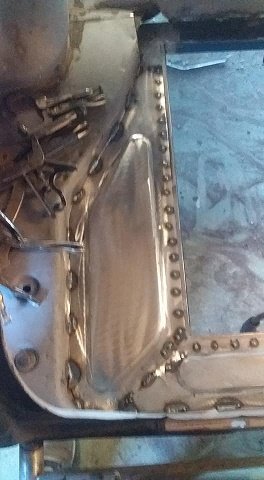
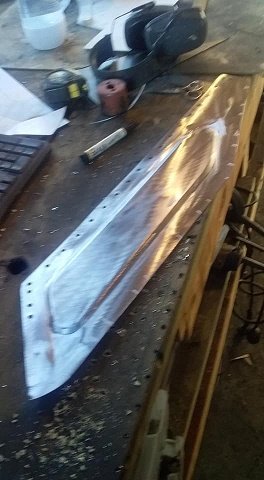
Welcome back viewers to yet another ever so thrilling update on the old Huddyson. Sitting here and looking back over the last few years I must scratch my head and ask where has all that time gone. I really did believe it would of been driveable by now - road legal or not legal. Life has its way of derailing such grand time frames as im sure you all are aware and the fact that even though the parts im using may not be the most expensive out there they sure dont come cheap. To paraphrase Oedipus, Hamlet, Lear, and all those guys, "I wish I had known this some time ago." Everything was such a damned nice idea when it was an idea yet as with everything How you look at it is pretty much how you'll see it I guess. And looking at it I can see the old gal ride low n slow down the street fast n loud on the highways everytime im out working on the old beast. God i got a tad philosophical there for a moment... what are they adding to the water around these parts. /twitch Enough of that nonsense. let start the normal barrage of images and brief explanations. Back floor all patched up over four link brackets. Holes added for access & removal of the top bars bolts. Sparks and smoke flying up front as the Trans cover was all made up like a big jigsaw. To help pull the drivers side floor up the brake boosters cover has been incorporated onto the trans cover to add rigidity. Since the brakes are all tucked away under the floor and me being a bit of a lazy sod im using a remote reservoir. The brake pedal was a bit of a sod that took up a heap of time. Due to the floors sloping angle and other factors we couldn't do a normal pivoting bar as the inside push rod where you stand would be pointing towards the floor. So a duel/tandem lever was made up. its somewhere between 4:1 and 5:1 ratio. Still got to get the adjustable top links. but tested with a bit of bar and have heaps of travel for the booster. Grease nipples all over the place. Machined up brass bushes and ya its solid as. Have to get the actual pedal and the other lever bar it connects to tested still. Moving on to smaller jobs now. Power steering. As i have mentioned I think some time ago im using a PSC setup made for rock-crawlers. So if its powerful enough to drive and survive the crazy setups they have it should be fine for my setup. Now I didnt want to take away from the finned engine dress-up stuff when you open the hood. So a low mount bracket was fabbed up. The little pump has a heap of adjustment, lines up nicely with the other pulleys and is tucked nice and low that will not only keep it out of eye sight but since the pump is gravity feed from the reservoir that will be mounted up by the radiator it will have ample full as well. Mounted up the trans cooler up front of the radiator after I drilled a few holes and added grommets for the hoses. Should be hidden away enough not to be noticed. Got the cad skills out again to design up the gas tank. Its about 19Gallons/72litres. The tail pipes are rather close together so the plan is cut a hole in the trunks floor and have half the tank through this and then the other half taking up much of the trunks floor space. Baffles will also add bracing for those times I may throw heavy loads like tires ontop of it. The bottom should be flush or just tucked up with the bottom of the chassis whilst the top will come nearly up to the trunks lip/bottom of the door. So it shouldn't be a hindrance or noticeable. One end is slightly deeper for the pump and sender. Josh and the guys at Apex in Oamaru cut n folded it up. Top guys with some great kit that I highly recommend. They also made up that Hudson logo for a bit of fun what was nice of them and chucked it in. Until I figure out what to do with it I plan to use it as a stencil to tag a few things around the garage. \,,/(-.-)\m/ On a bit of a separate note the missus has taken up slinging a bit of one shot paint of late. Hell yeah I say. Im more than happy to buy the brushes, paints and what ever if it means I can get some lines laid down on pretty much what ever I want. I think she is busting it out but naturally I may be a tad one eyed, biased and not the best judge in the matter. Take a look any way. Some panels up near the top of below pic in my garage. Cooler to go with her Morrie Door she made up for Flockie on an old 40s Ford pickup door. And of course hand bags... she has a thing for handbags.1 point
-
1 point
-
I’ve spent tonight fitting/adjusting the body to make sure it’s ready to paint. Making sure the clearances are ok. What do you guys think of the windscreen? I keep changing my mind if I like it or not. And what about the latches for the bonnet? If I run with them, the other side will be hinged. I’m just so used to seeing a clean look on it, the latches seem odd to me now even though it’s what I always planned on using....1 point
-
It’s been ages since I touched this thing. I have a heaps of excuses, but, yeah. My bad. Im going to get stuck into it now and finish it, I just finished a big stint of studying and that should be the last time ever for me. I have just just applied the first coat of resin to the tail, I used the West System. Using their clear hardener. I’ll do another one maybe two coats. Now that I have freed up some time and more importantly some $ (scored a pay rise) I can finally get stuck into this again. It hasn’t even been touched since I had kids.... This was my first car, I’ve had it since I was 15.. I pulled her out this week and made a start1 point


This leaderboard is set to Auckland/GMT+12:00