
Leaderboard


Popular Content
Showing content with the highest reputation on 05/07/17 in all areas
-
Now I need to buy a sheet metal folder to make these parts decent. I only have a vice and a chunk of railway iron to form shapes but this being structural, I need it to be proper.9 points
-
PLEASE READ THE FOLLOWING At last months' meet, we had a disgruntled resident turn up and cause a fuss. Accusing us of being unnecessarily loud and a blight on his tranquil neighbourhood. He was unreasonable and arrogant. He then complained to several of the businesses in the area and convinced other residents to also complain. We have since been asked by the majority tenant of the premises to refrain from using the upstairs carpark, though we have been unable to contact the property owner to confirm this. Even though the property owner themselves are the only party that can prevent us from using the carpark, this months' meet will go ahead BUT it will be in the downstairs carpark. DO NOT use the upstairs carpark. While we aim to sort out this issue, let's not try to agitate things any further. Also be aware that the same complaining resident may show up again. I will try to be there earlier this month so just direct him to me and I'll stand there and listen to him rant for as long as I need to. Cheers, Neal.8 points
-
So if you were wondering what those things do, they are 3" travel hydro bumpstops. If there are any hidden objects hidden in the grass, whilst rounding up the cows. these will prevent occupants of said vehicle, from cranium to moldy hood lining contact. or just doing skiz cunt jumps. pretty much overkill for this truck, but while im under there..6 points
-
pads welded on diff for hydro bumps. in the pic below the whole weight of the truck is on them. about 10-15mm travel left and they are super hard at this point. jumping up and down on the front of the truck, they move a little further. the first part of the travel is fairly soft, can push them down a bit by hand if put all my weight on them. Im not sure what kinda pressure they are shipped with, but they are tuneable by adjusting the nitrogen charge between 100 - 250psi. along with the coilovers, guessing im going to have to spend a bit of time getting it all to work together nicely. but should hopefully destroy the leaf spring setup out of the box . still have to fit limit straps and brake lines in there somehow..5 points
-
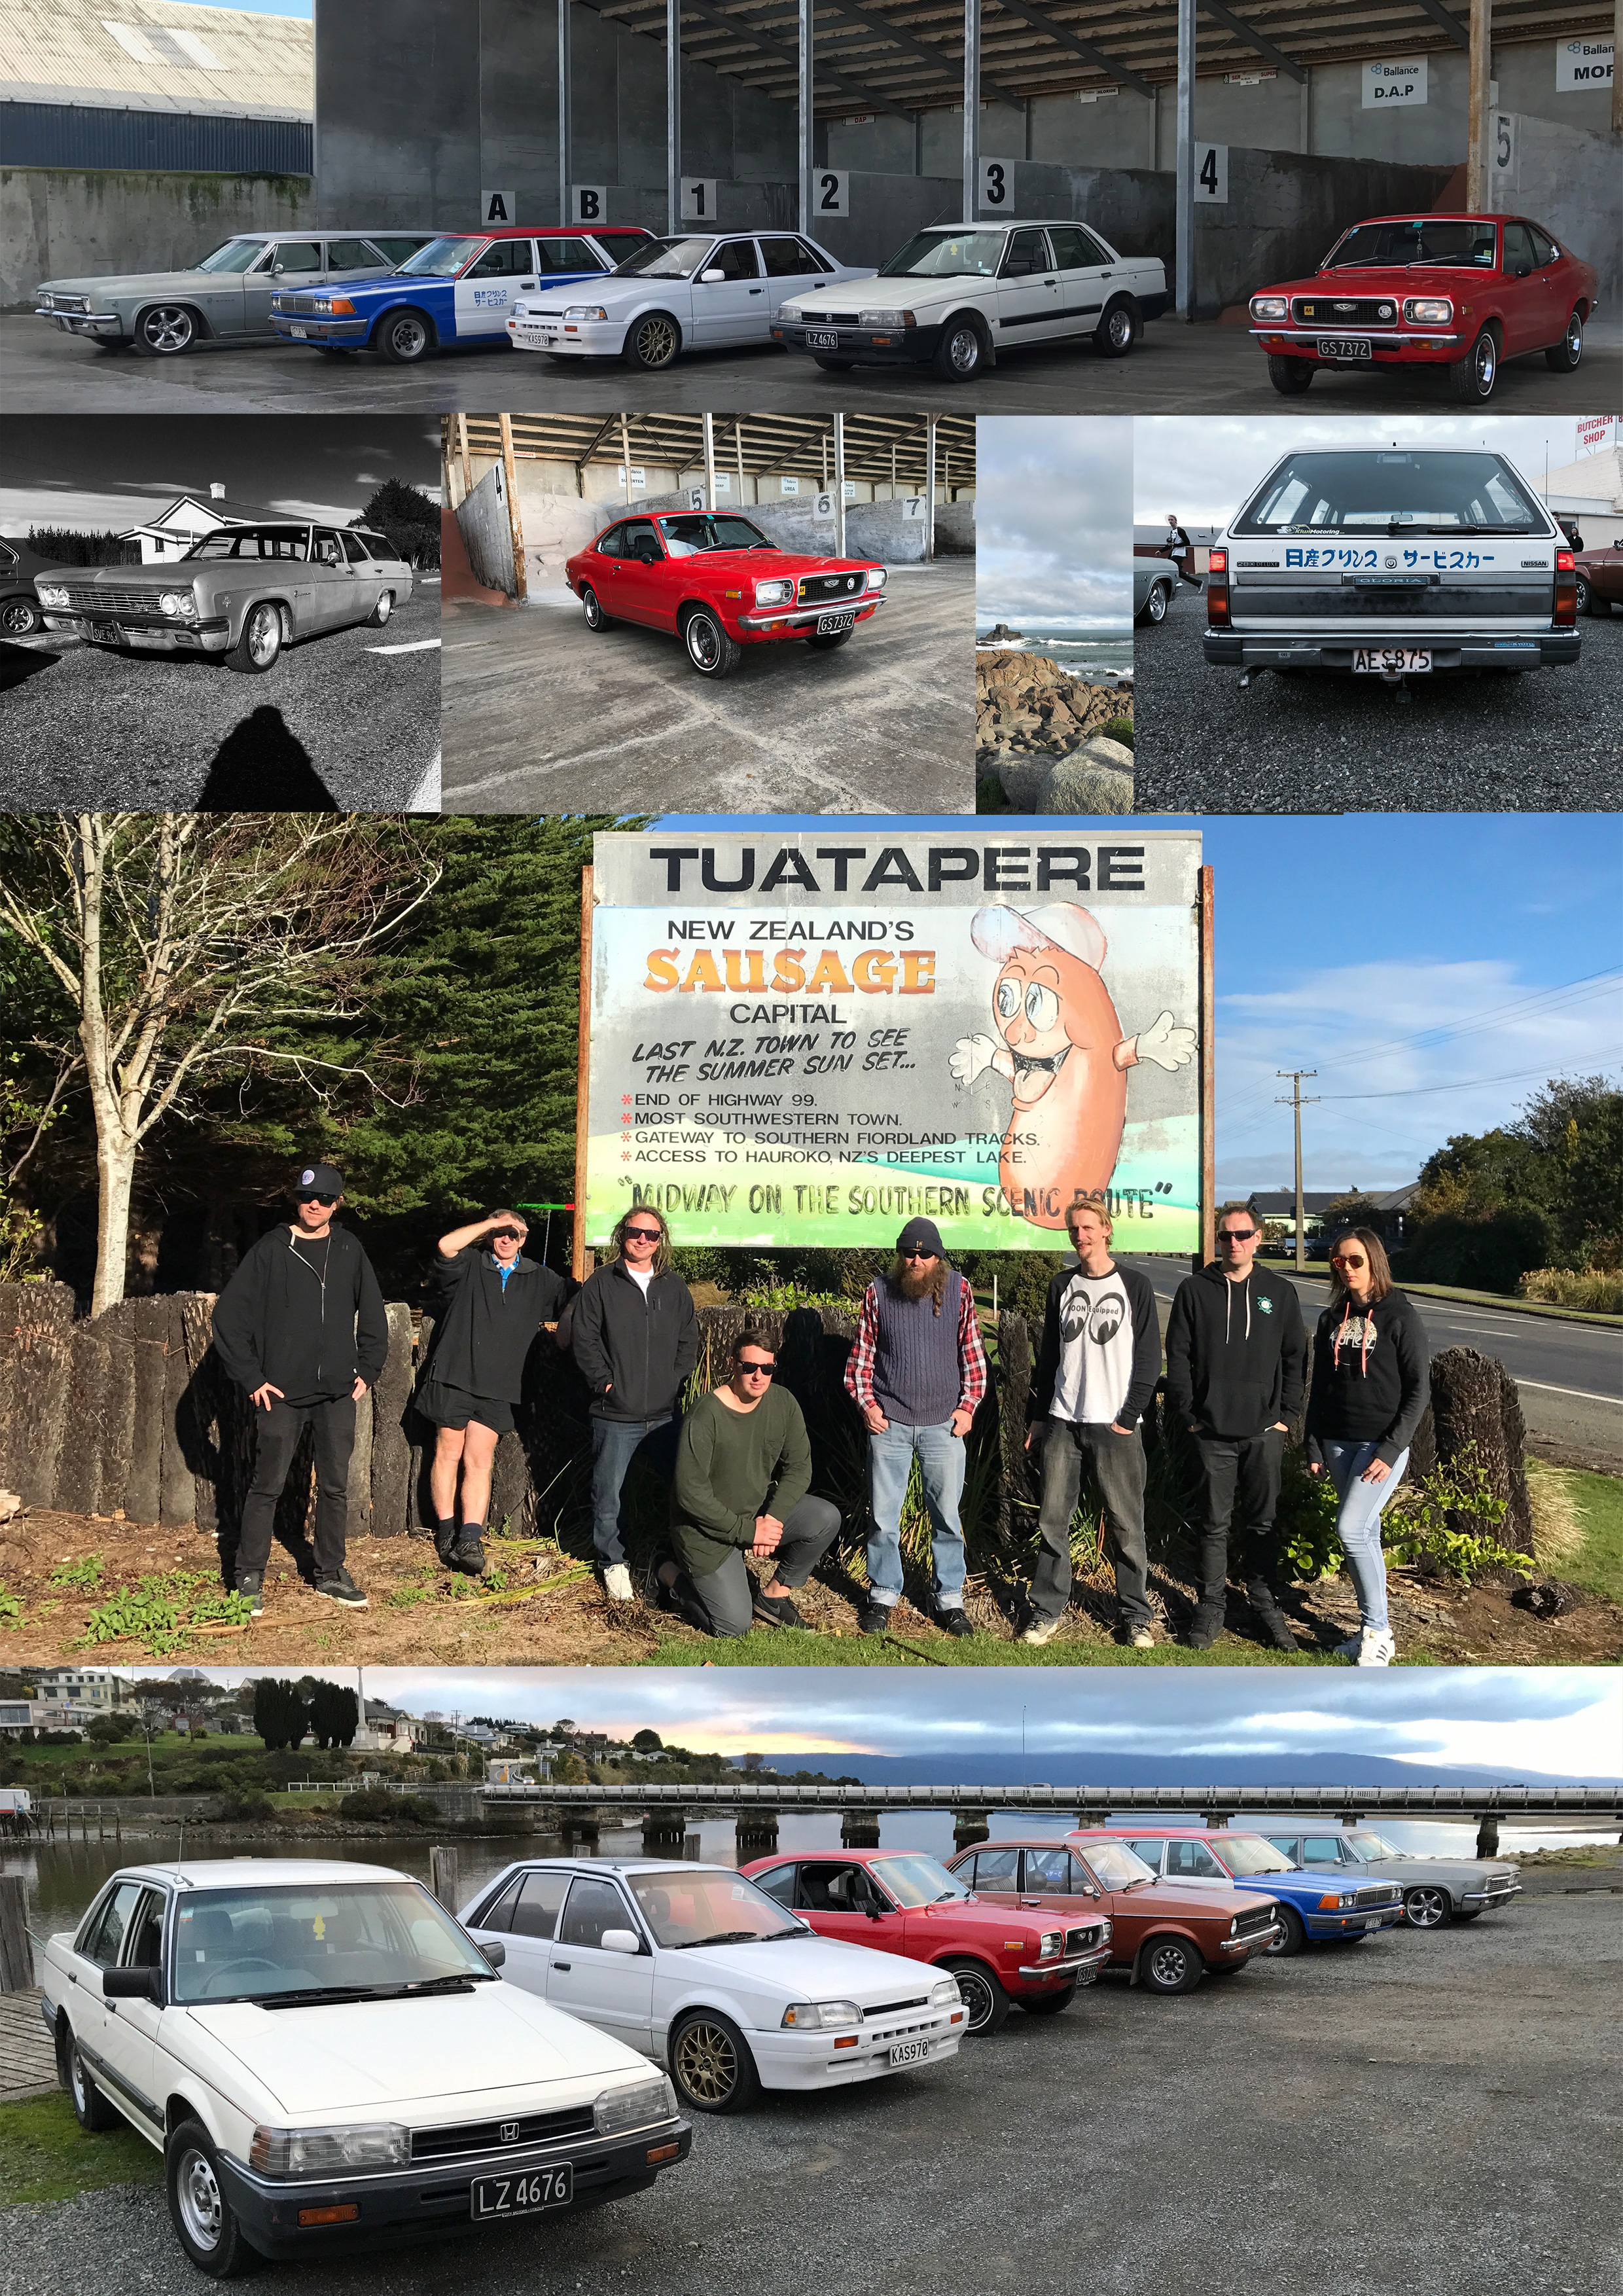
Thanks team for another super fun day out. 12 hour round trip and just over 600km's! The little red Mazda ran beautifully and had no troubles keeping up with the Honda. Plenty of laughs, sharns and Honda jokes. Great to see some new faces and see more of beautiful Southland. (as a FYI as a Auckland, Southland is considered anything south of the Bombay Hills...) I love exploring funny little towns in the middle of no where. And who would have thought the Matron of the Nightcaps Hotel was a rotary piner! Great work, good job etc.4 points
-
and after doing battle with the welder all day I got fed up and left it there. Have a patch tacked into last picture.4 points
-
Moral of the story is don't leave your freshly paneled and painted old car on the lawn for a decade.4 points
-
By some weird-arse miracle I started patching in the last part of the pillar I've been working on, and it was going supr sweet. My patch panel was sitting bang on, and my welds were sweet, and only half the sparks went in my hair and burnt my head. It was the best day ever. Pre bog pics shown here. So I gloated about it on spam here about how good my day was going. I was stoked; such a sweet, smooth process. Then I decided to take off some trim on the A Pillar to prime and respray it as part of the general overhaul. And of course, as soon as i pulled off the trim I found a big rusty fucking hole... Beware the jinx of Gloat3 points
-
new proportioning valve with one new line to the diff flexi (other one is from teh master and thats a hoist job, so nope!) - i slotted the adjustment slot a bit more than factory so it may even have enough rotation to work with the lowered suspension now. You can also see the end of the 'new' (i mean better) hand brake cable from my parts stash featuring intact dust boots and slightly less used new pinion seal in. New Remsa pads and discs, the old discs are ok, but the old pads were very sticky from when i was having caliper leaks ages ago. Id suspect the brake issues were: - sticky pads - master was a bit grogey - maybe old proportioning valve - everything else is nice to do and i may as well since ive got the bits now The blue HEL brake lines i installed a while ago. The calipers dont leak, so Ive theft them well enough alone! Also wanged in some lower rear shackle bushes, these were the only ones that needed replacing, lucky cause i only these ones to use - i got a 10 pack cheap, they fit the 2300 too but it used 4, so 4 still left!. Ended up with quite a pile of old and crusty stuff replaced Nearly ready to go back in, Just need to bleed them now. I have a few other things on the list to do including pondering the following questions: - why does the battery keep going flat? (ignition switch needs rewiring i think) - why do the tyres keep going flat? (time to swap the rims for another set) - why does my Italian car that lives at the beach like to rust? (time to extend the garage)3 points
-
No ladder yet, but it can't go on the back because these Chevy door hinges can't even hold up the doors when they are new. It's not bad climbing up there anyways. A company here makes heavy duty aluminum ladders that go on the side but 1. The van is already wide enough that you have trouble on narrow roads 2. They are ungodly expensive. We're on the road now anyways, so no more mods but the ones I can do with basic hand tools. Went up to New York state a few nights ago, now staying in Boston in a Walmart parking lot because none of the camp grounds around here open for the summer for another three weeks. We cooked dinner on a park bench somewhere in the city. They at least had some BBQ grills so I felt a bit less homeless about cooking there.3 points
-
so got this Austin 1100 for cheap here in nelson, was going to use it for its engine and interior for the white car but turned out wayyyyy to nice and needed less fixing then Emily, so after changing the alternator, all the lamps and a new exhaust pumping the suspension back up to an appropriate height she is now ready for a wof, paint is a bit rough but I'm not fussy =D happy days of owning now 2 austins2 points
-
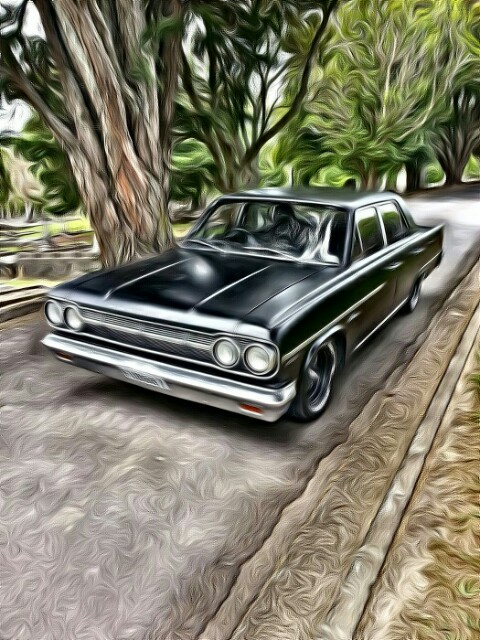
Such a beast car! Awesome! Had to do some back stretching/yoga from bouncing in the sedan for hours yesterday... Haha. Good times2 points
-
Bump stops got a good workout on some of those roads this trip, there was a few bum biting the seat moments haha poor igor in the back with no belt to hold him in his seat2 points
-
after riving this all week the noise from the diff was driving me fucking mental! so swapped the diff out today ...pulled the head from the newish diff and cleaned it all up....used some brand new gear oil and repacked the bearings. also mix matched the best brake parts from both diff and adjusted them so the hand brake only takes 2 clicks......perfect. and oh so QUIET i then bleed the back brakes and the fluid was fucking disgusting ....so i then flushed and bleed all the air and water out of the front and ran some dot4 fluid threw out......much better now. i then had a play with some old cutting compound i had sitting in the garage for about a decade and combined with a buffer and sponge pad ive had since my old man sold his shop..(maybe 15+ years)....the paint is very this and i couldnt go hard out but even getting all the oil hand marks off was a bonus... looks much better now.
 2 points
 -
You know what im really excited for? Being sledged into by jason k on his harley again2 points
-
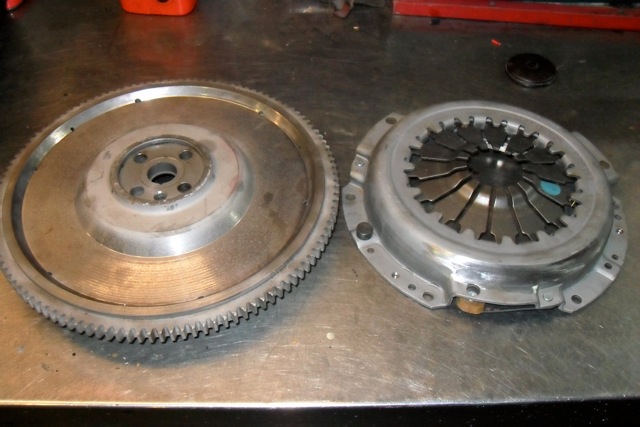
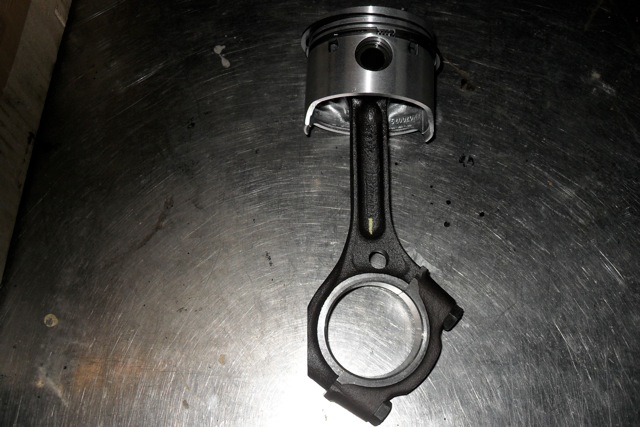
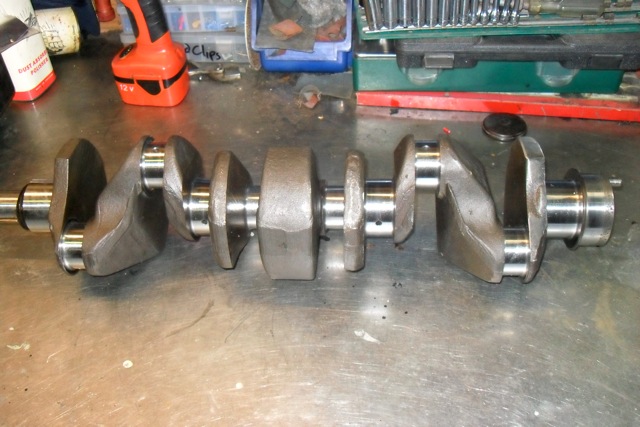
Probably time for a little update on the Trumpy. So the new engine is currently being built up from an old PI motor that was lying around in a garage down south. Basic details are .40 thou over, forged pistons, Newman cam, lightened flywheel, balanced pistons/rods and rotating bits, 10:1 comp, extractors, and the EFI setup based on the old PI bodies. There is also a power steering rack and pump getting the treatment in town which will go in at the same time... Please enjoy some pictures
2 points
-
Nearly done the transmission tunnel. This piece of the firewall has always annoyed me by how it isn't symmetrical, so cut it out and fixed that. Just need to do something with the little hole on either side where the tunnel, floor and firewall meet. Also built the fuel tank. Drew it up in Solidworks and then lasercut it. Added a couple of baffles that located and slotted into the top. Here it's fully welded, will give it a polish or something one day. The big flange is for the pump, the smaller one is for a sender unit and the small holes are for the return line and breather. I think it's just under 60 litres. Now to figure out how to mount it.2 points
-
not an exciting update today, more cutting, welding and grinding. i made my first ever patches that weren't flat pieces today too. had mad fun doing it too, Stan would draw the outline of the piece he wanted on the steel, then i'd make the cardboard template, cut out the piece with a nibbler (crazy fun to use) and attempt to bend and hammer it into a shape that resembled the original before cutting out the rotten piece. Stan would look at it, frown, give it a few taps after me spending 20 minutes on it and it looking like shit, within 20 seconds he had a perfectly shaped panel. thats experience for you. I had awesome fun learning basics of how to shape, shrink and stretch though. inimal pictures too cos the day just flew but i'll take some more soon anyway. she's looking like she might turn out alright after all. this picture really doesnt do justice to the work it took to rebuild the whole inner sill at the front, but most on here are far more skilled than me and know exactly the time and steps it takes anyway. plus with welding sparks and grinding dust all over the place i kept my camera across the workshop so it was a ballache to keep getting it. i wonder why this piece rotted out! also i've scored a sedan rear axle with lsd diff and disk brakes, i'm unsure out of what though. it was fitted to an XF sedan, did these come with rear disks? and i know i cant swap the whole thing over cos coil and leaf springs difference but does anyone know it i can swap the insides like for like? i havent started to look into it yet, but just after some info. chur. //oldschool.co.nz/index.php?/topic/54385-mighty-joes-xf-falcoon-of-filth/2 points
-
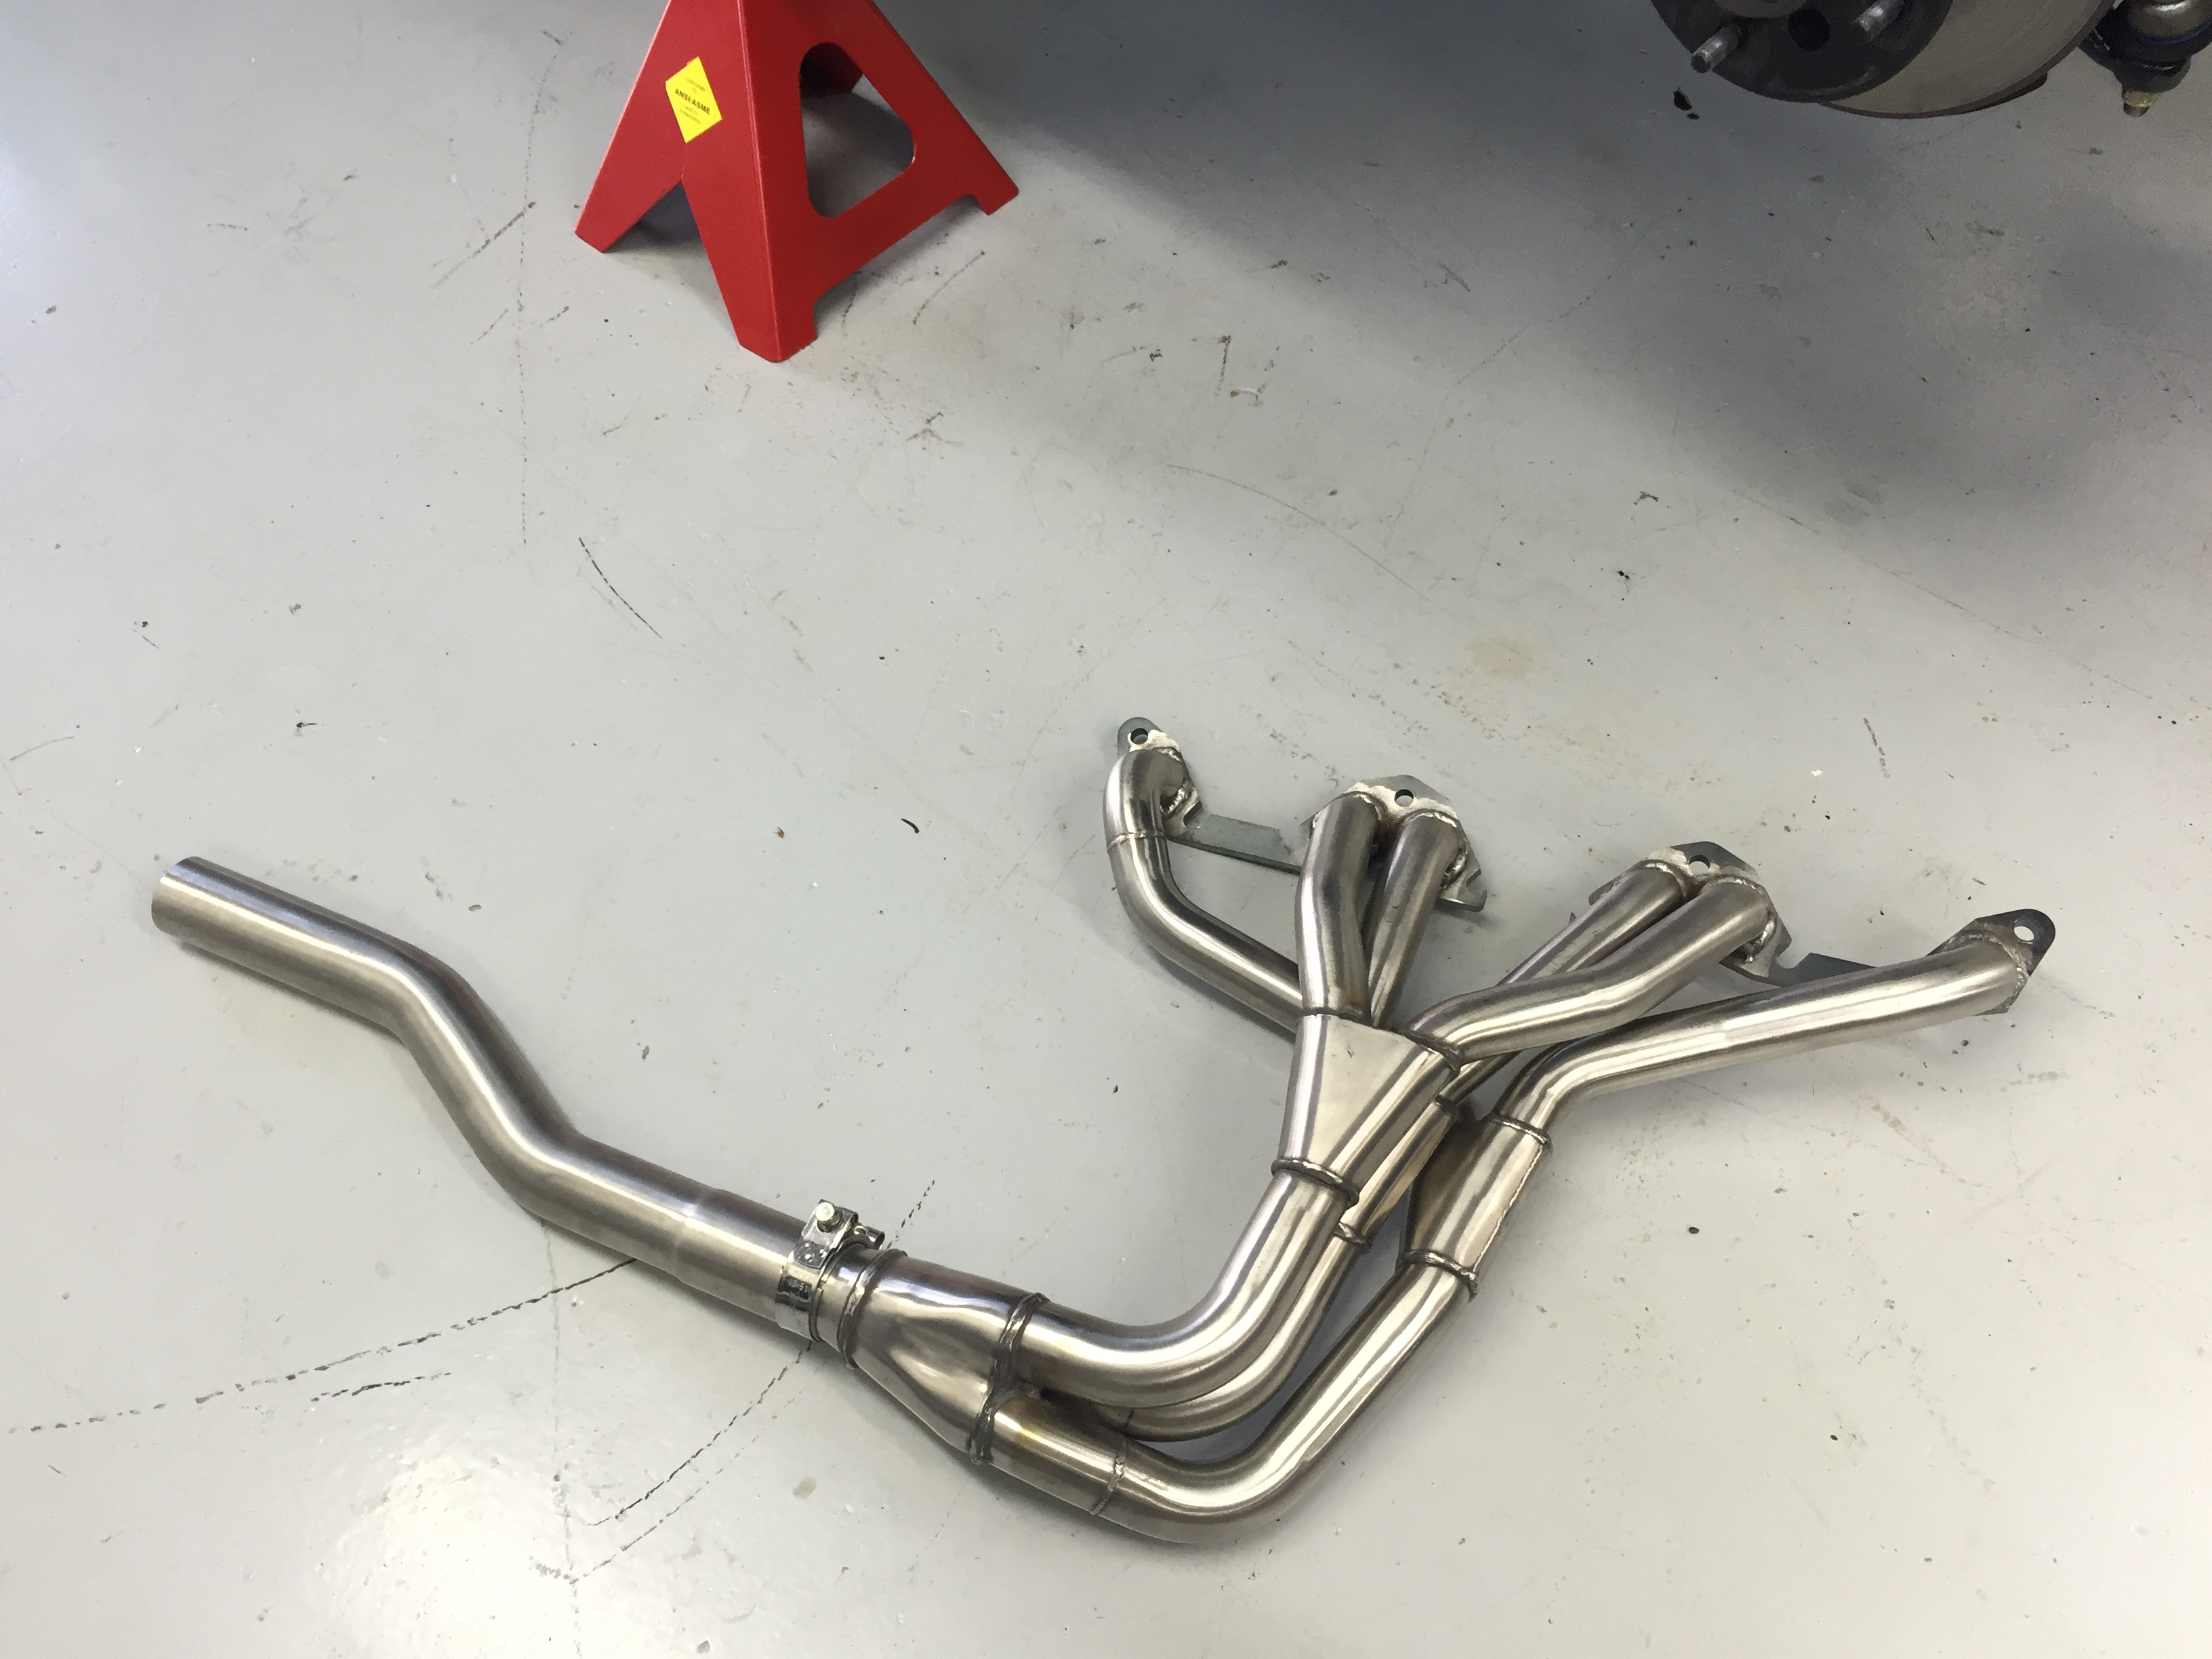
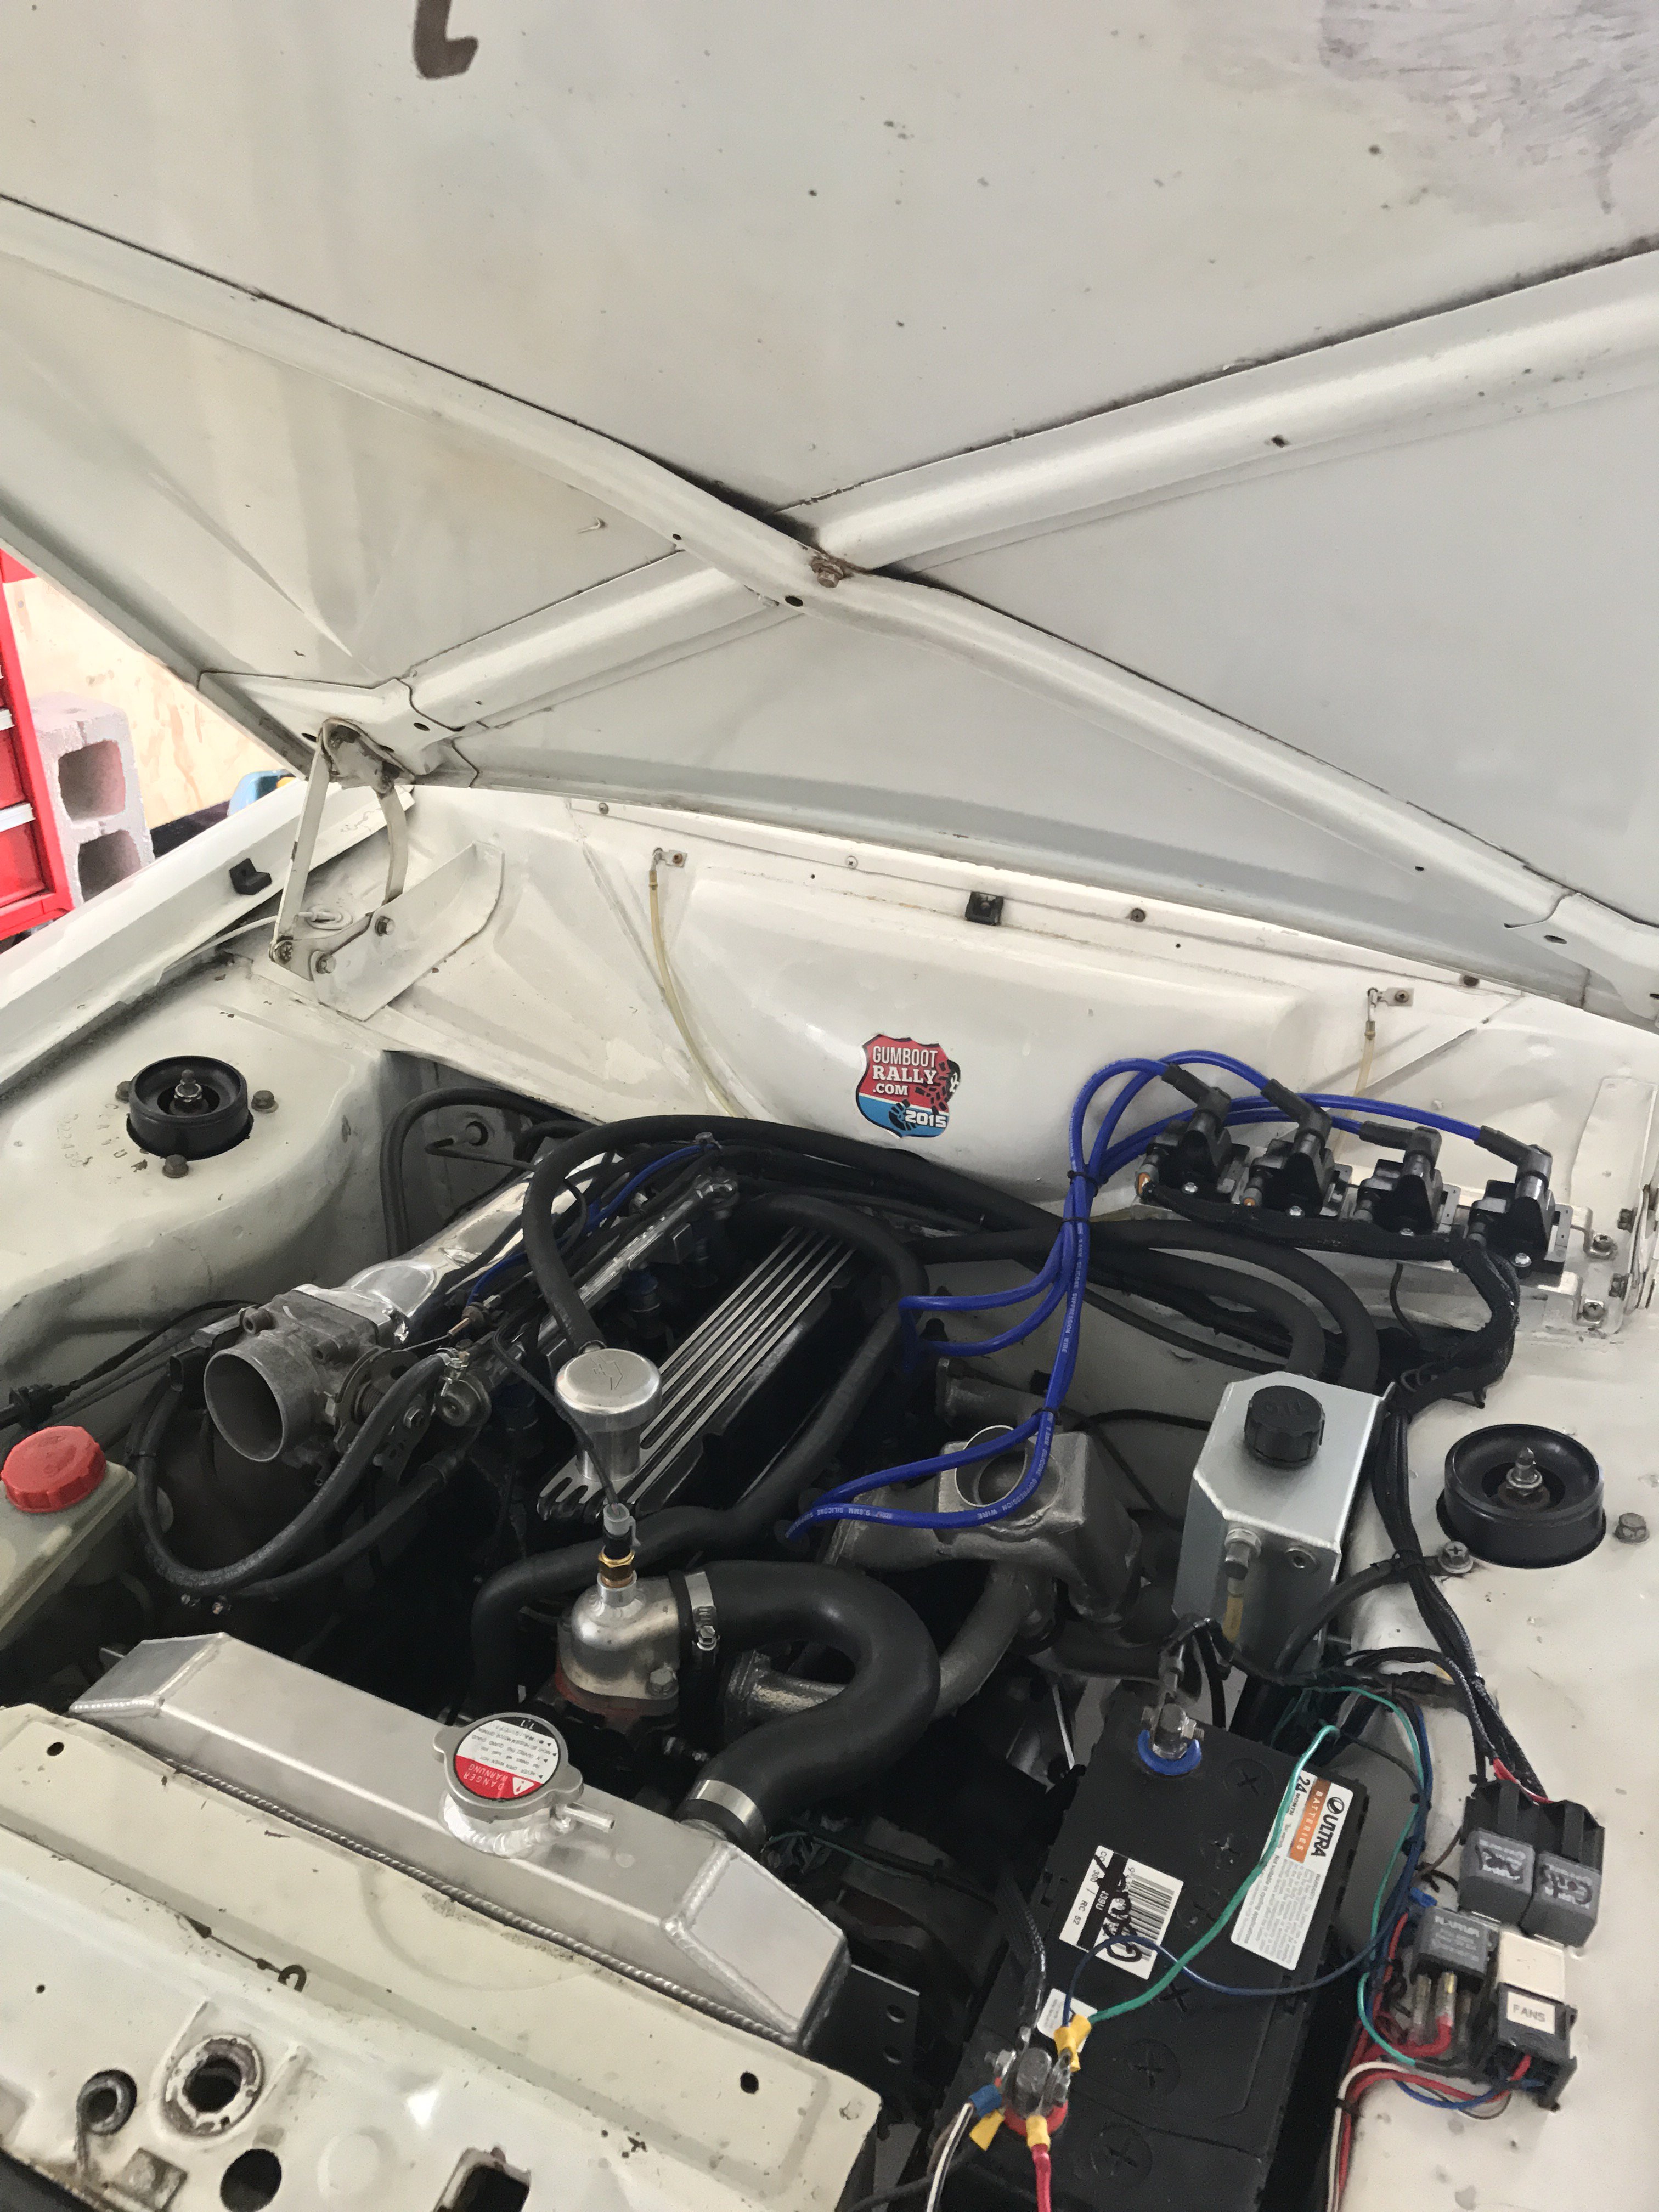
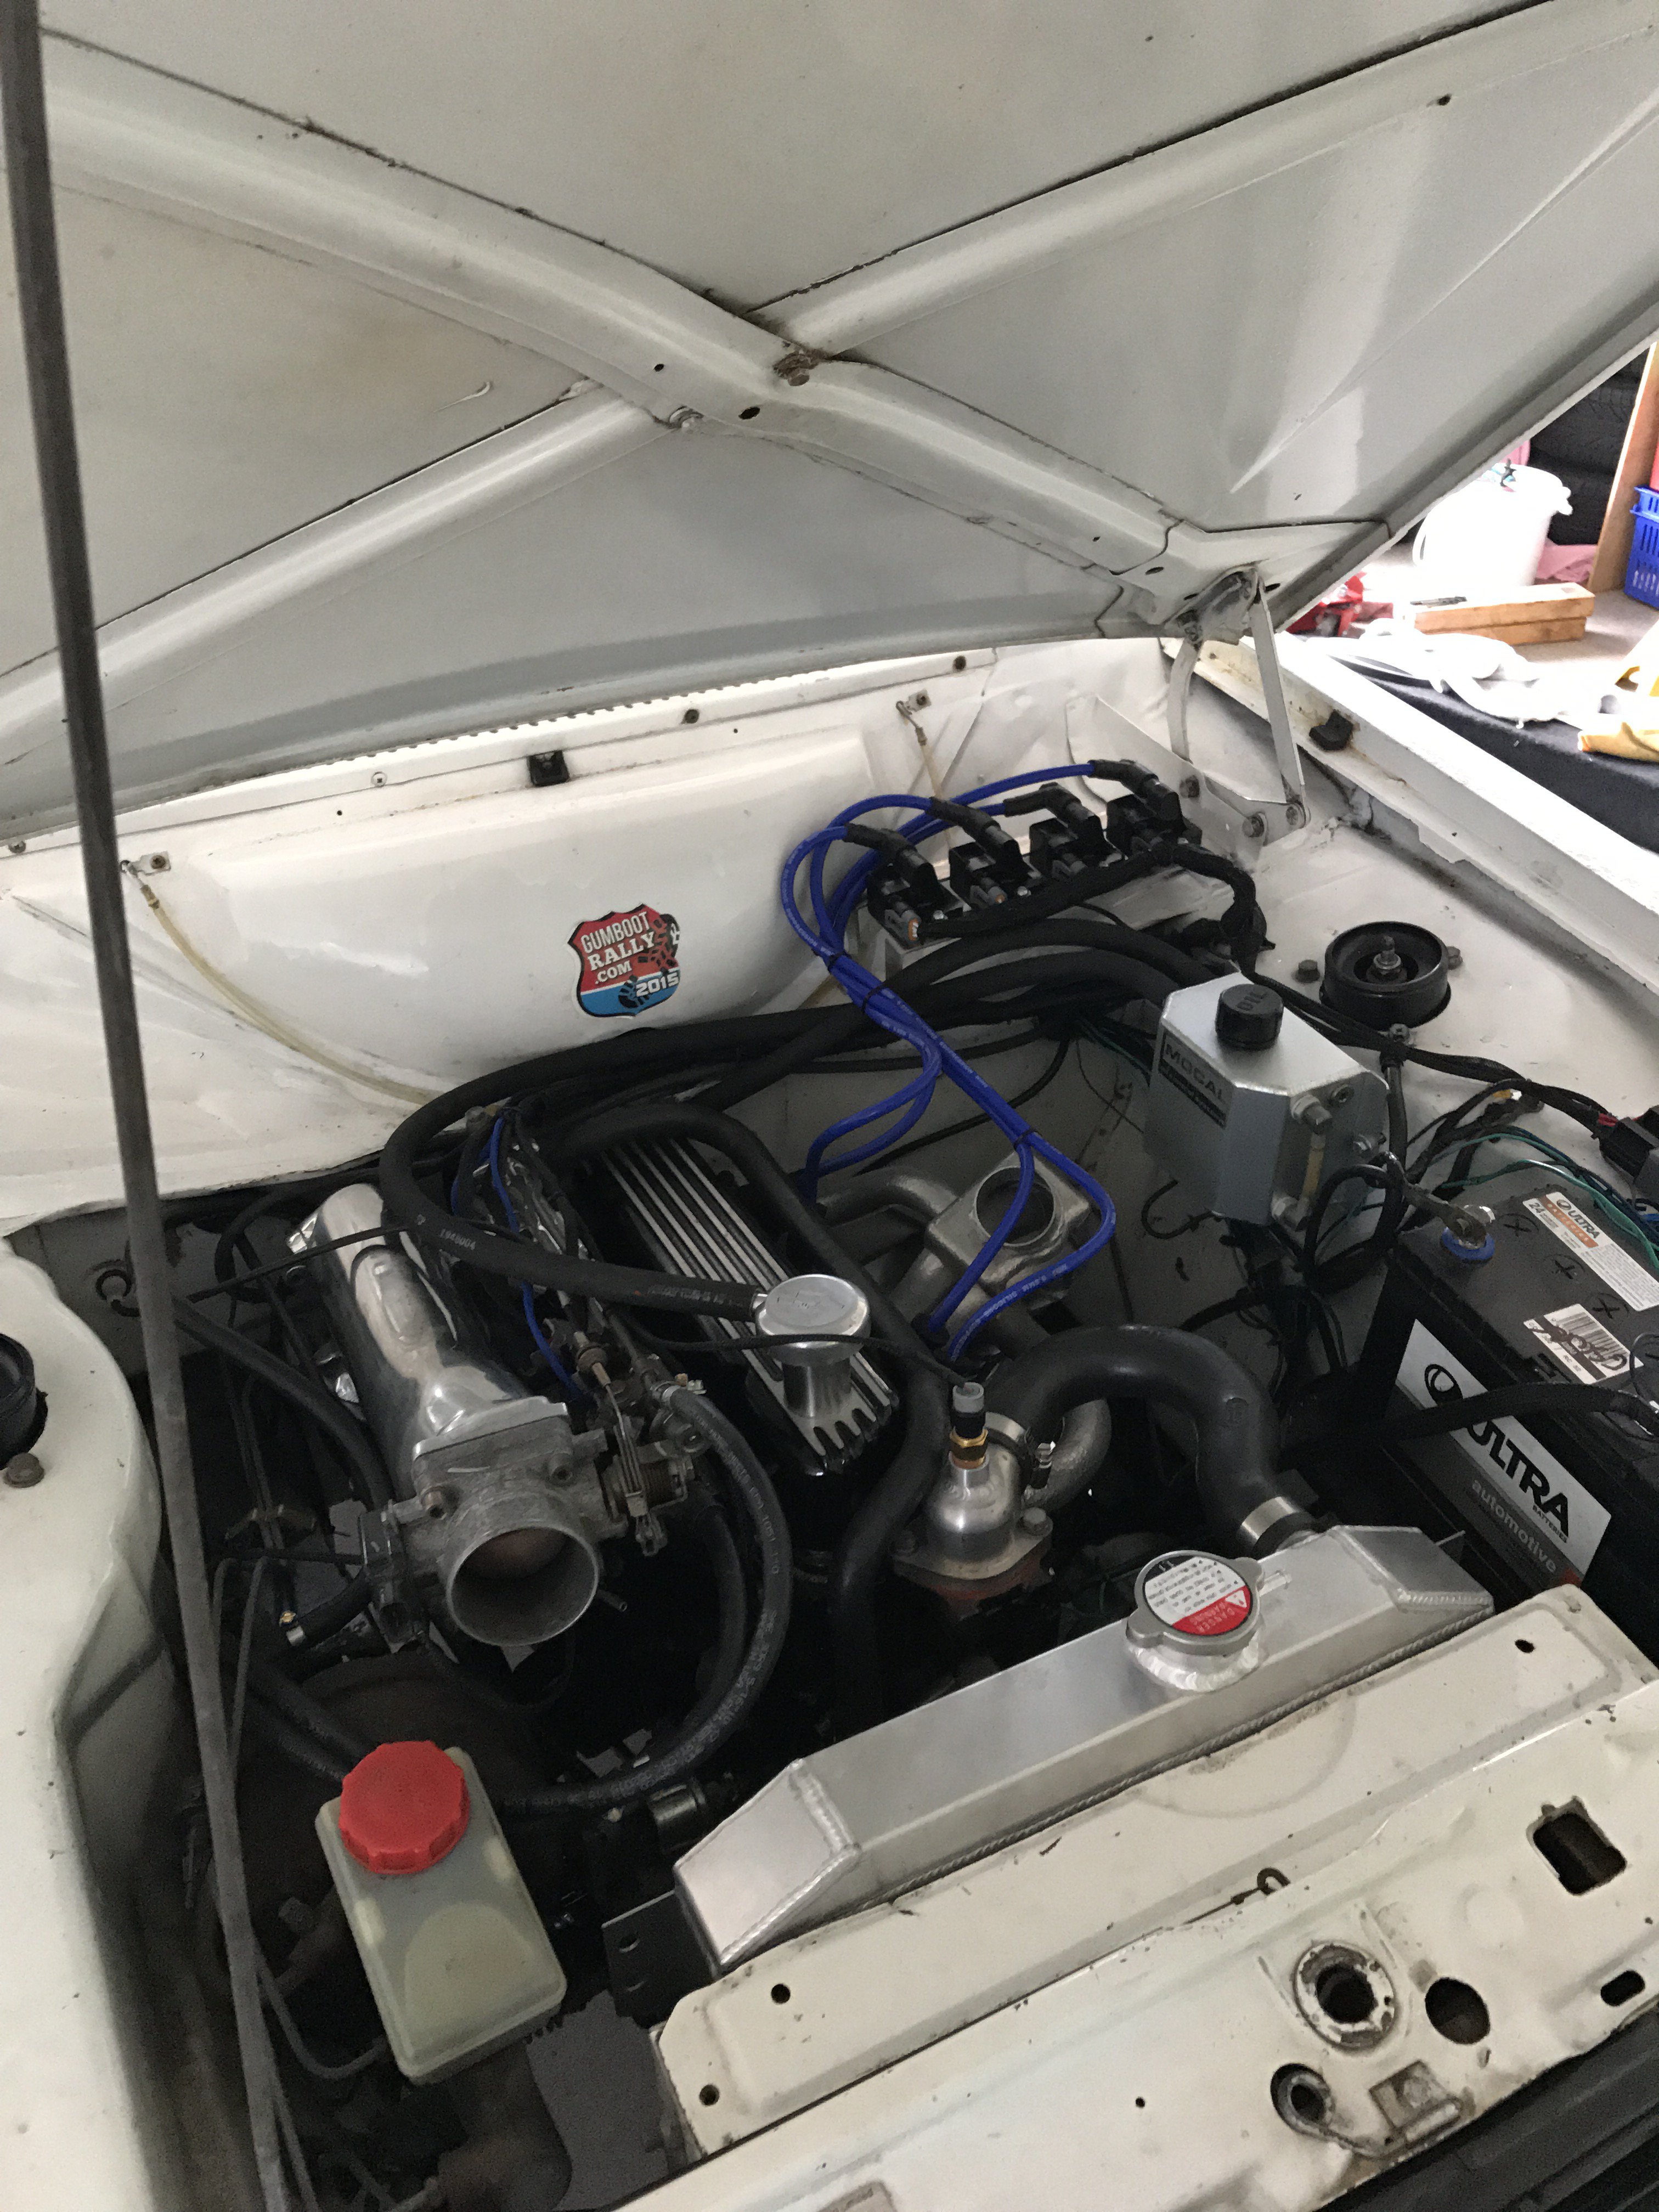
Turbo pipework all welded ready to go.2 points
-
Finally decided to do the coilover setup in the front, after forgetting how much work the rear was. But yeh the front is going to even more work, mostly because there is so much stuff that needs to be moved and shuffled around. Unless i was to do it half assed. Had to get in and chop a few things up before i could even order the coilovers, to make sure everything was going to fit, with the coilover length i want. Turbo was the first thing in the way. cut up manifold to relocate turbo closer to engine. Manifold is done. still need to finish sorting out the airbox and exhaust. After thinking the drivers side was going to be easy, turns out the brake master was going to be in the way. Had a wilwood reverse mount pedal box hanging around, i had brought for the trueno that didn't really fit. Looks like it will solve the problem in the hilux though. should fix the brake bias issue also. Still gotta make another bracket to mount to fire wall but this is where it will sit Ends for the link setup.2 points
-
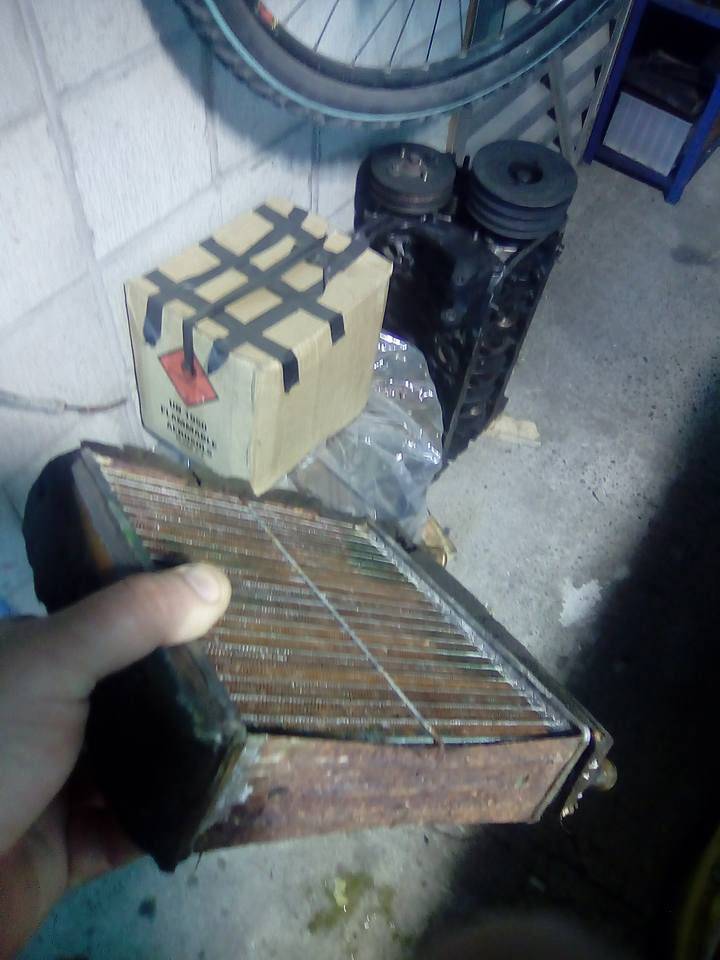
another day and another thing fixed. the heater core in these things just sides into a slot and has 2 screws holding it in....mine was slopping around and air was just blowing around the outside and not just threw the core. so i pulled it out and the foam was stuffed...and bits missing . i remeber Karl saying just put some foam around it to seal it up so i did and now the heaters awesome .
1 point
-
No but there was a sweet yellow Jag cruising around. I also had a sneaky play in the train....1 point
-
looking over the rambler geting it ready for wof time i find a exhaust leak not to worry ill pull it apart and fix well one an easy fix ended up with me welding a cast manafold with my mig so thats fixed now the exhaust leak is fixed lets try the holley carb dam nothing lines up so new linkages need to be made (why cant i find a std carb lol) will post pics when i can get back to the shed1 point
-
500km door to door round trip! @igor @Nick Ritchie @Toddy415 @kyteler @kiwi808 Thanks and look forward to the next one. Check out my awesome clipart skills! You are welcome
1 point
-
Nightcaps Ohai I've never seen someone more excited seeing a sheep than Nick was...1 point
-
Wuz gud m8, you missed out brother. Will expect you next round though.1 point
-
Car passed cert. Ended up getting the factory shocks shortened and putting them in, also lifted it a little bit. Cert plate showed up yesterday, passed wof and got rego. So as of yesterday the car is road legal. Had some little rust spots tidied up on just to smooth it off. Now that I'm driving it I've find a few little bits that I need to tidy up. There is a hole where the factory handbrake lever was thats letting hot air through, one of the springs is knocking in the back under load, not sure why and I want to put factory engine mounts back in. The polyurethane ones in it now cause everything to vibrate so much.1 point
-
so direction changed so this a bit, i have been pining an ADV bike for a while, and after talking to a few barry's about how rare a genuine R80 G/S Paris Dakar is im going to bring this thing back up to its adventure orientated globe trotting glory, with a few modern twists. The Frame will get some HPN spec bracing, the front end will be swapped for a DRZ400 front end, i may go to a repro PD single seat and probably lower the stock footpegs a bit to make it a bit more comfortable to ride standing up, and i plan to take this thing where coffee shop dwelling ADV fag barry's wouldn't usually go. I have already picked up a nice stainless high exhaust for the bike, it goes up and then sits horizontal and goes back a bit further than what i think would look nice, so its gunna get chopped a bit so the muffler section is on about a 20 degree angle similar to the HPN rallye mufflers. This is the DRZ parts bike i picked up, the forks are still conventional so have the "classic" look but are 49mm as opposed to the measley 32mm BMW forks, they also have much better springs and valving. They will be shortened by using a 75mm spacer inside, i will use a DRZ / RM wheel with the suzuki brake and caliper, just with an aftermarket bigger 320mm disc. The only problem with this swap is the triple trees have 15mm offset, compared to the massive 32mm of the BMW triples. I am looking out for some RM250/125 triples which have 24.5mm which is about perfect, because they are USD triples they will just need spacers in the fork hole to pack them out so they clamp down on the 49mm stanchions. Apparently it makes them handle soooooo much better, so looking forward to that. At this stage im still just hoarding parts before i pull it down, need to get escort out of the shed which is going as i have realized its way too fucked an i CBF250 doing anything with it, then ill have some space to rip into this thing. looks like its going to be a fun winter project! cant wait to have it done and then smash out some awesome adventures with Action Waggy!!!!!!1 point
-
So over easter weekend i cracked into the firewall rust Gave her a bit of the ol razzle dazzle and filled everything up with rust converter and coated with PA10. banged seam sealer in all the seams. there wasnt any so they were filling with water everytime it rained. Ol mate had jammed some jb weld in the rust holes to stop water getting in the cab and covered almost all of it in black silicone. pulled all that awful crap out and did it right. the firewall had pretty much separated from the A pillar/guard area so was just kind of flapping about, and there is pretty much no original floor left so some of the previous fixes were a bit rough but i got it sorted well enough. coated what needed it with underseal, everything else left in primer till i can spray some top coat/never because il want to take the engine out. Also adjusted the steering stops so the tyres wont rub on the sway bar and steering box on hard turns1 point
-
This morning I got a text from Joe and it has been picked up! I'm fizzing now. I found my exhaust gasket material so I can hopefully fix the leak, I've ordered a flexible too as it doesn't have one. I'll have a good look over it and make a wish list. But first I'll do the diff & drive shaft bolts and annoy the neighbours with tang noises down the road1 point
-
Almost 2 years little van has been busy done a couple of Gumboot rallies with all of of the greatness of 49hp then the motor gave up 1.3 xflow they go forever sometimes . Motor finally died so put the old sport engine into this to help it get a little more power so fancy rebuild a few extra engine bits and what can it do ???? drive line has a fair bit of work to match loads to update
1 point
-
Note to self: Wheels like this.1 point
-
Got the fwd alternator bracket to work with the rwd water pump. this lifts the alternator up out of the way of top suspension link. and bit further away from mud and crap. just had to modify the top mount to bolt to top water outlet and waterpump. also make a new inlet for water pump fwd bracket already had some racing holes in it from when it was on the starlet? Started making some towers to go around the towers. getting the sheet to do what i wanted wasn't much fun,, but turned out alright after being thrown on the floor a few times not much clearance to turbo is main issue1 point
-
Made a bunch of progress the last two days. I'm using cam buckles and ratchet straps that I've shortened to hold things in. I'm using a cheap grommet kit so I can bolt the straps in. The kit actually works quite well, it's a little punch and a driver/anvil to set the grommet. Here is one holding my table. Got the interior in. This is the last panel to go up behind the driver's seat, these are the wires for the solar and lights. Roof to the factory head liner. Bed platform in. AC and DC plugs on the back of the bed. View under the bed, the box on the left is where the 26 gallons of water sits. Above that is the electronics. Side door View of the water pump up against the wall next to the tank. Held down with some shortened ratchet and cam buckle straps. Wish I had taken more pictures of this area but we were making progress. Switch and plug panel from the front I've got almost all of my wiring done and the inverter and solar charger mounted but I'll wait till I've tidied all the wires up to take pictures of that.1 point
-
Chassis end panhard mount. Yep the drag link goes through the middle of the bracket Ive given up on the whole offroad thing. going stance spec still got about 3" of droop and 2" up to go. need a forklift. likely have to go softer on the front springs, will see what happens once all the junk on the tray goes back in the engine bay1 point
-
mounts all on the diff for good. cant paint over the chrome..1 point
-
failed hard, cant get bolts out of cross bar. yeh the towers look ugly from the top, but wont see them once done v21 point
-
I've always been one to have a project or two on the go. Then there's the ones still in the "planning stage" i.e. they only exist in your imagination. Well there's nothing like a deadline you cannot negotiate an extension on (Christmas), and kids would have to be the toughest of all the negotiators to deal with! So when I foolishly thought out loud 3 days before Christmas about an idea I had - that may or may not work??? ...well the pressure to deliver was all on! So: String line and inclinometer dusted off Holes dug, posts in, concrete mixed and poured. Guy wires, main cable tensioned and clamped (that sentence sounded flippant-ly easy... this was a challenge) I had three bits of wire rope. The longest was 50m, so this became the bit between the two posts. I then machined up a connecting rod for each side, that hooks up to the guy wires. Complicated solution...but it enabled me to get the longest span with the free wire rope I was given. Its designed to slip, so tension remains the same in all components. I used basic trigonometry to calculate the forces involved. But if my theory is true, then it should all be good. So I'd call it a success. Now 4 months old and still working well Kj1 point
-
Top link mounts made and tacked in place. Next on the list is a brace/mount off the link mount, back to the chassis rail. will bolt it through the chassis with a few decent bolts. maybe something similar on the other side also, as the factory x member bolt locations are kinda limited, since the lower links take up the space needed to build something solid off them1 point
-
These arrived in record time. 14" travel, thats about 900mm eye to eye fully extended. or about to the roof on your average oldschool.co.ng ride1 point
-
Coilovers installed. I needed to weigh the truck to give me a starting point on what spring rates to run. Also to give the guys building the shocks, some idea what valving to put into them. just measured spring compression times the spring rate to give a rough idea. 440kg on the front corners 248kg on the rear corners 1376kg total inc mud tyres/wheels (guessing it could go at least 50kg either way) not that bad considering each wheel weighs around 40kg. and compared to the weight of 2wd cars around same size. 64/36 front/rear. yeah its basically a race car,...1 point
-
Wow. So much has changed with this. I'm just going to drop these here for now. Ignore the block of wood the gauges are on. Not sure what I'm going to do there yet.1 point
-
1 point
-
another small update car was used for a school ball saturday night it was so cool to see how happy the kids were when the car pulled up and they seen it1 point
-
Playing with apps on the phone
1 point
-
I'm not sure how the pros do it but here's how i made bumps in steel if you're interested. step 1 - own three cars that all need floor repairs. step 2 - read the internet needed a floor panel for the wagon. measure up, choose swage positions and mark out. testing. using a 1200mm foot guillotine and 1200mm finger folder, both in ok condition. i made two folds in the steel both the same way, then bent the sheet back to 'straight'. it bent between the two folds, giving me the bump. close enough is good enough do em all the same as above in the folder use the folder to clamp the swages at the outer edges flat. sheet warped like a pringle. not sure if you're allowed to do this with a folder. the warp is because the outer border of the panel is larger than the inner area, as i've shrunk the inner area by using up material to make the swages. the outer needs to be shrunk to compensate. shrinking - heat it up, cool it quickly with water/wet rag. hammer flat, trim down to size. soft hammer on anvil - didnt want to thin the steel any, which would do the opposite of shrinking. did both sides. shrink again, hammer flat again. encouraging the swages to be more how i like. hammers, bits of scrap, as you see. anvil, saw horses etc. quick squirt of flat black and a check to see if it's working: trim again, finish up and couple of mild folds down the edges to encourage the edges into straight. in place - still a bit of a warp, but metal hot glue will hold it right. well it's no chip foose but good enough to fill a hole in a 50 yr old floor. thought i'd write it up cos it was surprisingly easy and yall may need to do similar next wof! last time i was cutting and welding the ends of the swages and they were all over the show. turns out patience, fire and hammers were the key. Talk about it here1 point
-
Dragged it outside for a photo. Have stripped all the trim, door, lock, mudguards etc off and started clear coating. Lots of sanding and filling first.1 point


This leaderboard is set to Auckland/GMT+12:00