
Leaderboard


Popular Content
Showing content with the highest reputation on 04/01/17 in all areas
-
Ok I lied. A few more photos. Rear T57 spring mounts. You can see them in this photo11 points
-
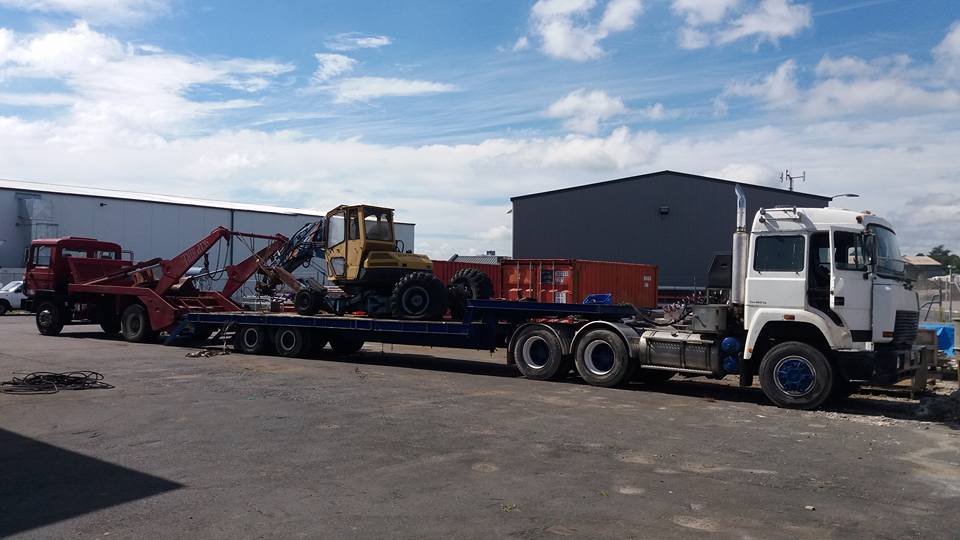
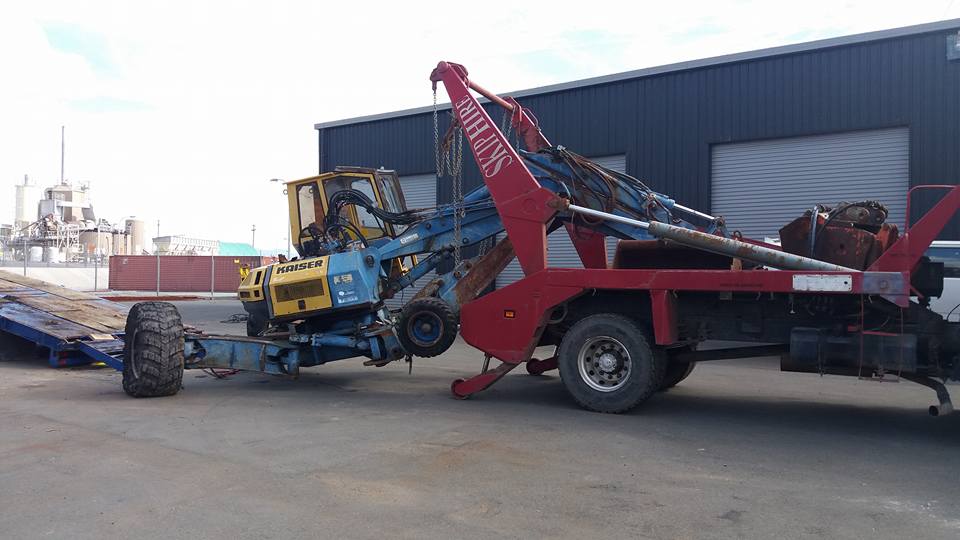
So its been a long time with no progress on this, those of you in the digger thread will have seen some of the other stuff ive been up to but we finally got this off te truck today, Bit of a fuckin mission since both the big diggers are out out site so we went full Barry n used our bin truck gantry! Next i have to shift my bobcat and fire engine to this yard then we'll start cracking into getting the Kaiser moving under its own steam.
 9 points
 -
Not as epic as the kids table up there but I got epic satisfaction from this little project. We have a tiny home and it's important to free up pockets of space and remove clutter when possible (I'm not good at this) Greg popped in the other day and suggested I put TV on wall..It's been on the to-do list for ages. Measured wall and tv angles Had bracket laser cut Bend along dotted lines Draw corner of lounge and TV on table and use to get angles for steel (ends are not 45s) and weld Paint and screw onto wall Now just gotta add a power point and white cable so they exit walls higher. @flyingbrick Please rehost images on OS9 points
-
Is it like the top one? It's possible it's letting a little air in/ not holding system pressure when shut off. Replace it with the bottom one, they're cheaper than the top one and better. @Hemi4 points
-
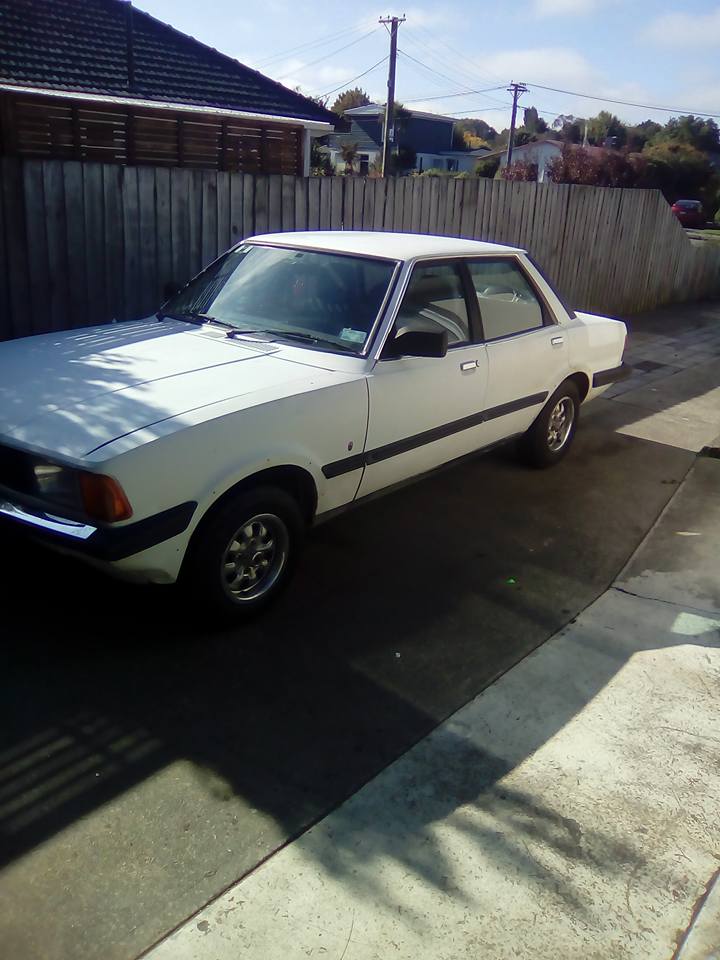
Got my manifold made up, as well as sold all the driveline out of the white car. Am hoping to have all my stuff in this week.4 points
-
Been sharing these around a bit. Looking forward to a drive in the sun and a spin of the back wheels.
4 points
-
No! Don't touch those screws To bring fuel up to the filter (when fitting a new filter or run out of fuel) loosen the 'out' banjo bolt on the filter housing. And pump the primer until fuel flows from the loosened banjo. Tighten banjo. Pump a few more times until the plunger gets stiffer. And If you have run it out of fuel, after you get it to the filter, loosen the injector pipe fittings to the top of the injectors. Crank engine with foot down until fuel starts coming out around the loosened fittings. Tighten fittings. Should start then.3 points
-
This will probably be my last interesting post for a while. Will be moving to California in a month to build space stuff. Visa came through today after months of paperwork!So good! So making parts will slow down, but hopefully CAD work will speed up! Anyway, these are spring hangers and a trunion hanger CNCd from 4140. Having a mill in your shed is key to building shiny stuff!3 points
-
Finished! Bit of machining porn for you!3 points
-
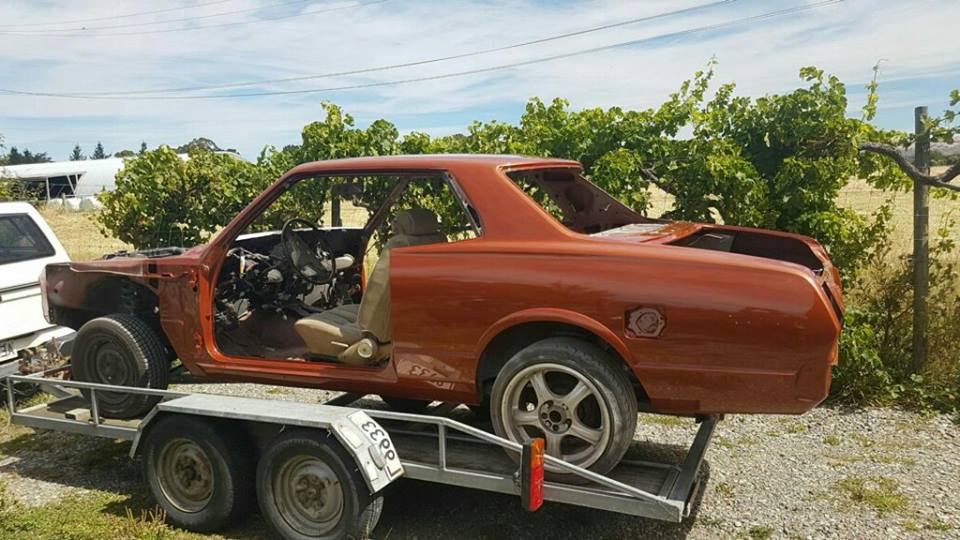
Well so I had almost finished the conversion and ended up losing my licence for demerits literally a hour before spirited test drives, Great! I've had my licence back for a while now and have given it some very thorough testing and there was (and still is) things to be sorted. The exhaust system was a bit of a challenge using E36 328 pressed steel manifolds, the rear manifold flange needed to be cut and welded about 12mm closer to the block to clear the steering knuckle, I then just hacked up the e34 exhaust to get the manifolds to mate with the exhaust system that was already in it. Steering knuckle itself I removed the guibo and made a spacer and bolted the ewe jays together through the spacer. I did keep the e34 steering shaft in case I need to modify it to work but its fine now with plenty of clearance to the exhaust manifold. One of the more annoying issues it sometimes has, is that it will cough and sometimes die whenever it wants and if it dies it wont restart until the key has been turned off, it will fire up straight away after that. Other times it coughs and carries on as per usual, when this problem occurs I can hear one of the relays clicking under the dash but haven't figured out which relay it is and what its job is. This car has seemed to have an electrical gremlin the whole time i've had it with things like the window squirtys just going on their own, which in turn makes the wipers go. The next main problem is the fact that the sump sits about 70mm off the ground and i've already had some ass puckering moments when I was half expecting the oil pressure light to come on, luckily I haven't smashed it to bits So todays job was the removal of the crossmember and oil pan to cut the sump and wing it to retain volume. Cross member came out in no time at all and so did all of the sump bolts... or so I thought. It soon became clear that there was 2 bolts hidden behind the bellhousing, now the e34 gearboxes contain a recess to allow access to these bolts. the 260 gearbox does not so I had to call on the inner bro and holesaw and die grind out holes in the sump so I could get a rachet spanner onto em. I know its rough... but it worked and saved me hours of having to split the gearbox from the engine. So all going well tomorrow I will mark out where I want the sump to be cut and chop it, compute the required wing size and fold up some 3mm alloy to be welded in. Then move on to the oil pick up and shorten it, modify the factory baffles and we should be all go to weld it all up and chuck it back together. I also had a huge power steering leak in the last couple of weeks and found some fuckery that needed fixing. Return line had been hacked at some point and had some very rough repair done. anyway there's my long overdue update pics2 points
-
Manged to squeeze in a panhard rod today. may need a few tweaks, but should work. Will leave it half finished till get the coilovers mounted, to make sure everything works together bit hectic under there, yep.2 points
-
One thing that might pay to consider is center of gravity side to side etc. It sounds like lengthening will probably solve that axis. But I fear putting the weight of a person out one corner and retaining the same width might make it a bit... tippy. Add a rack with weight above your head and well... With the standard quad seat in the middle at least you've free to move about and fight gravity slightly. Don't get me wrong, I love the idea, and I'm sure it'd be manageable as long as you drive it within its limitations, I'd just hate to hear you guys had rolled down one of your beautiful hills.2 points
-
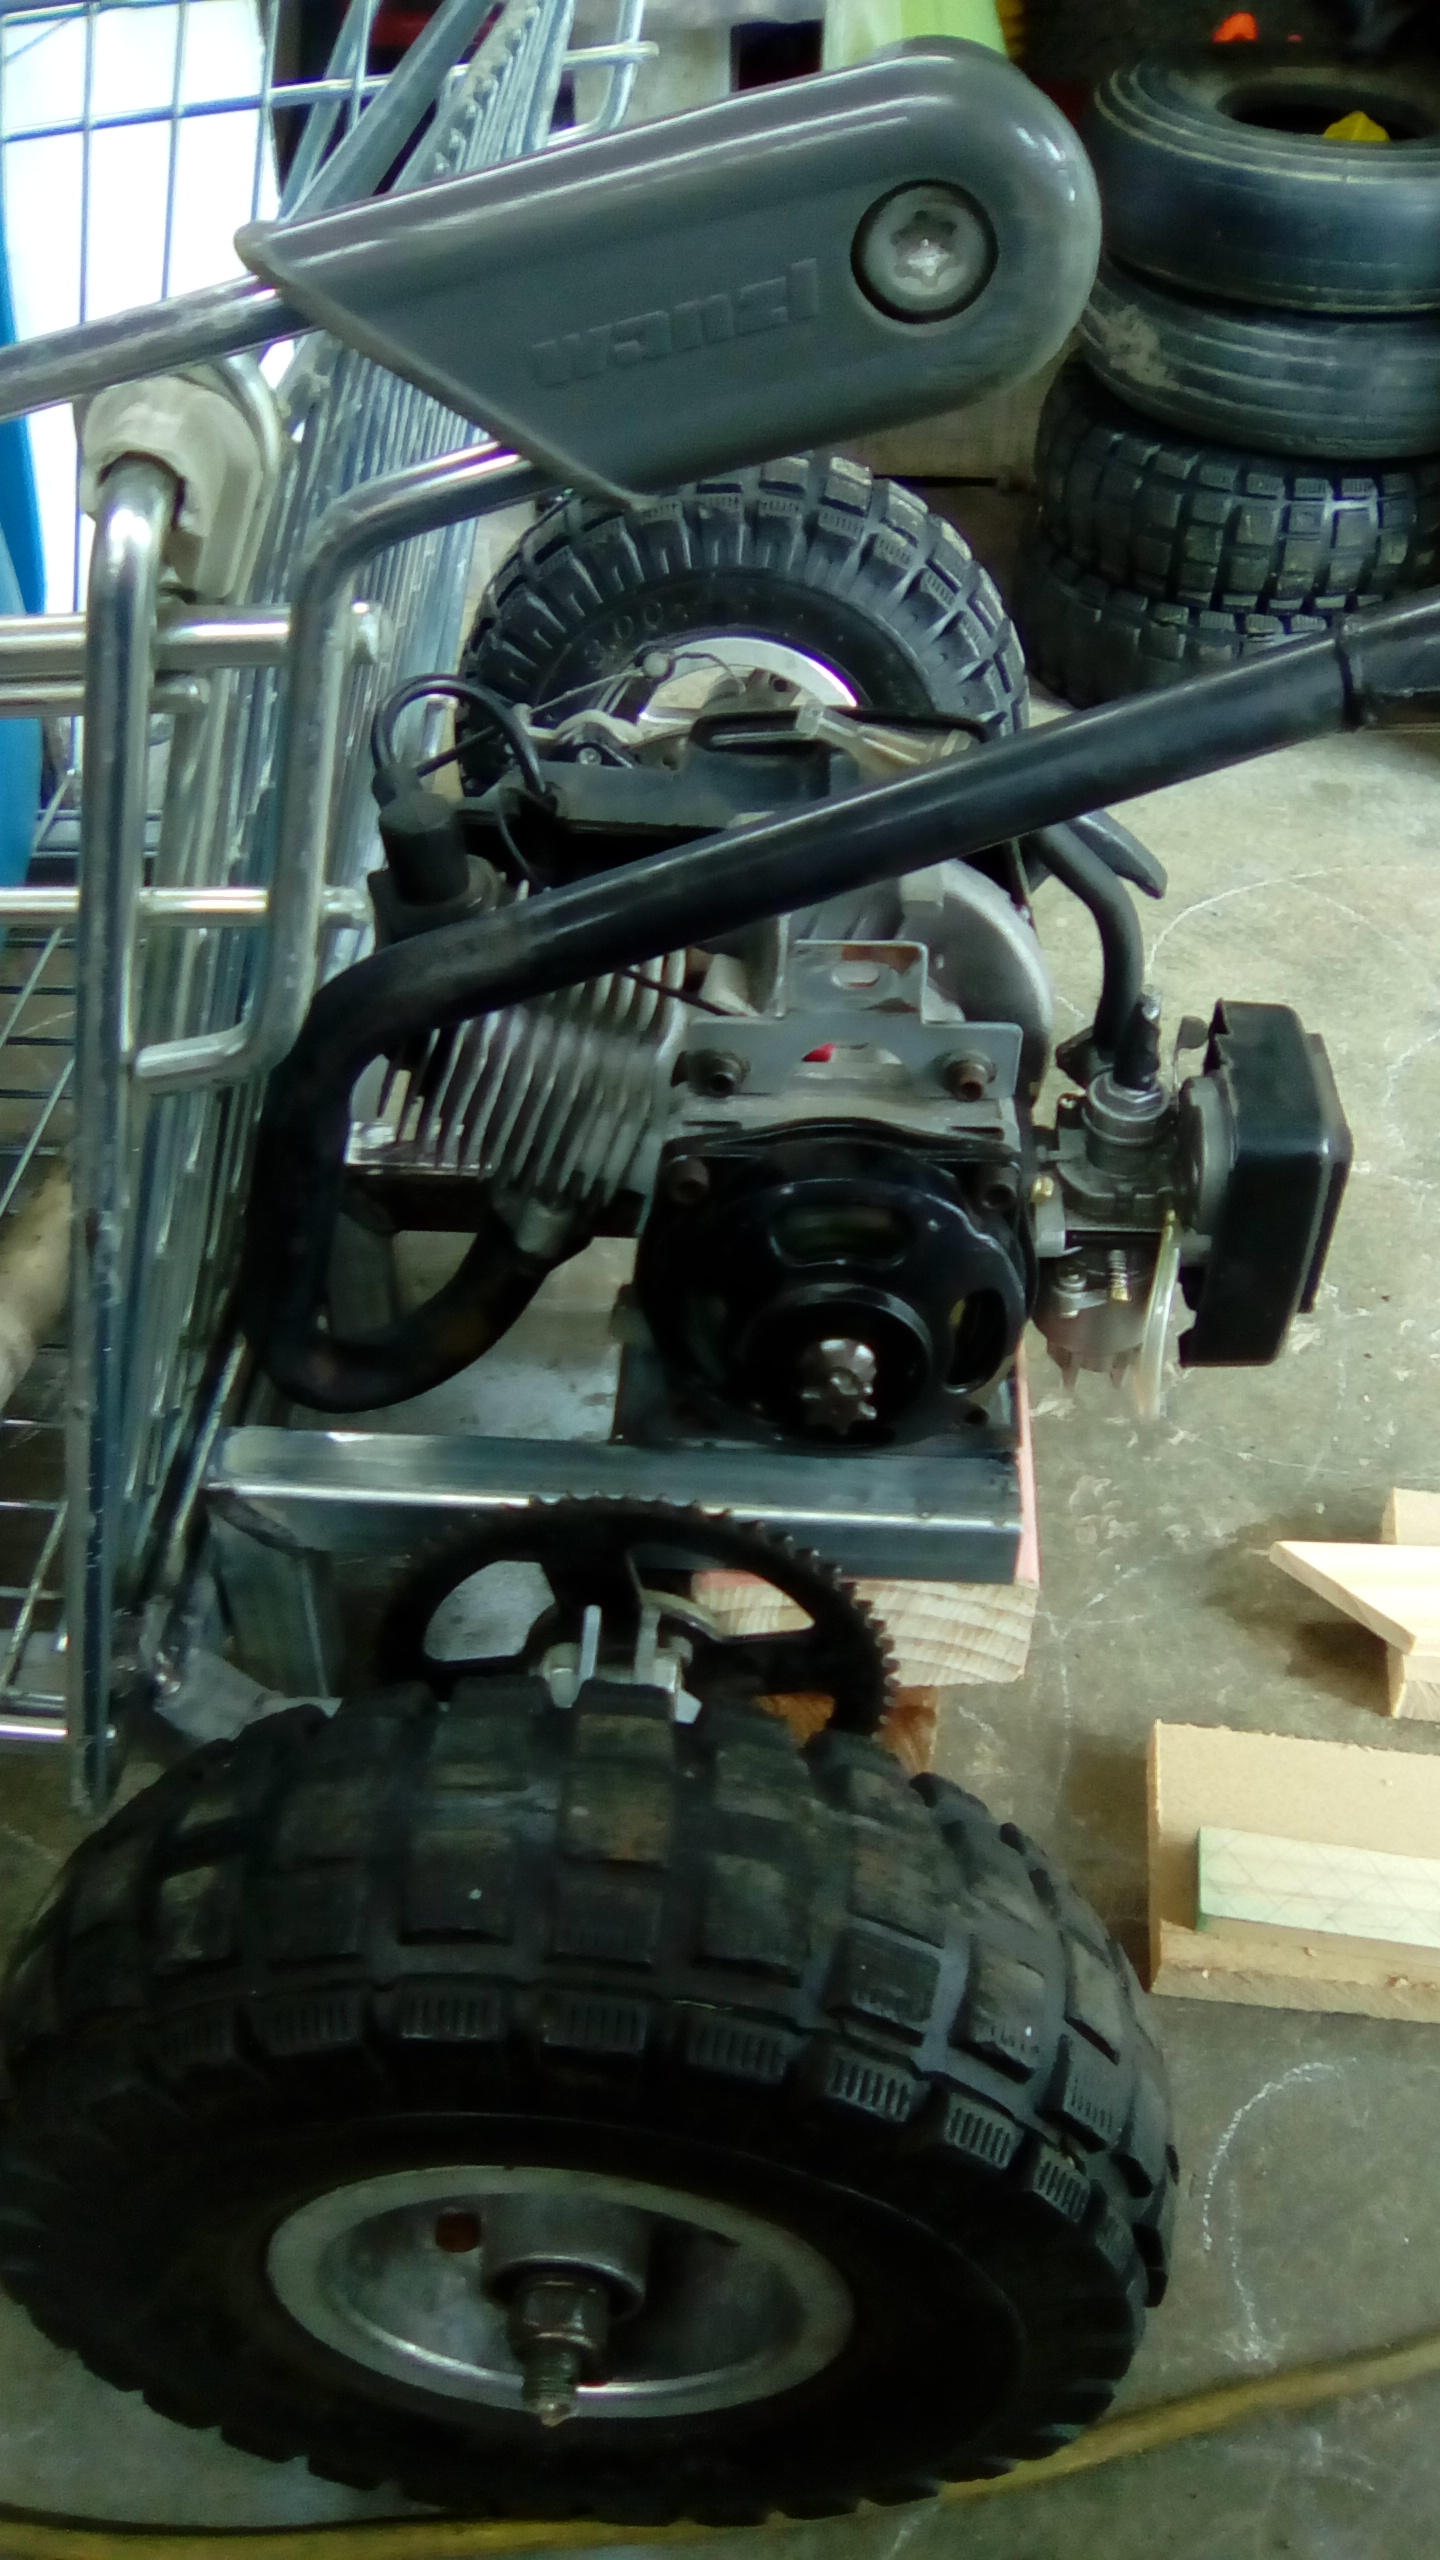
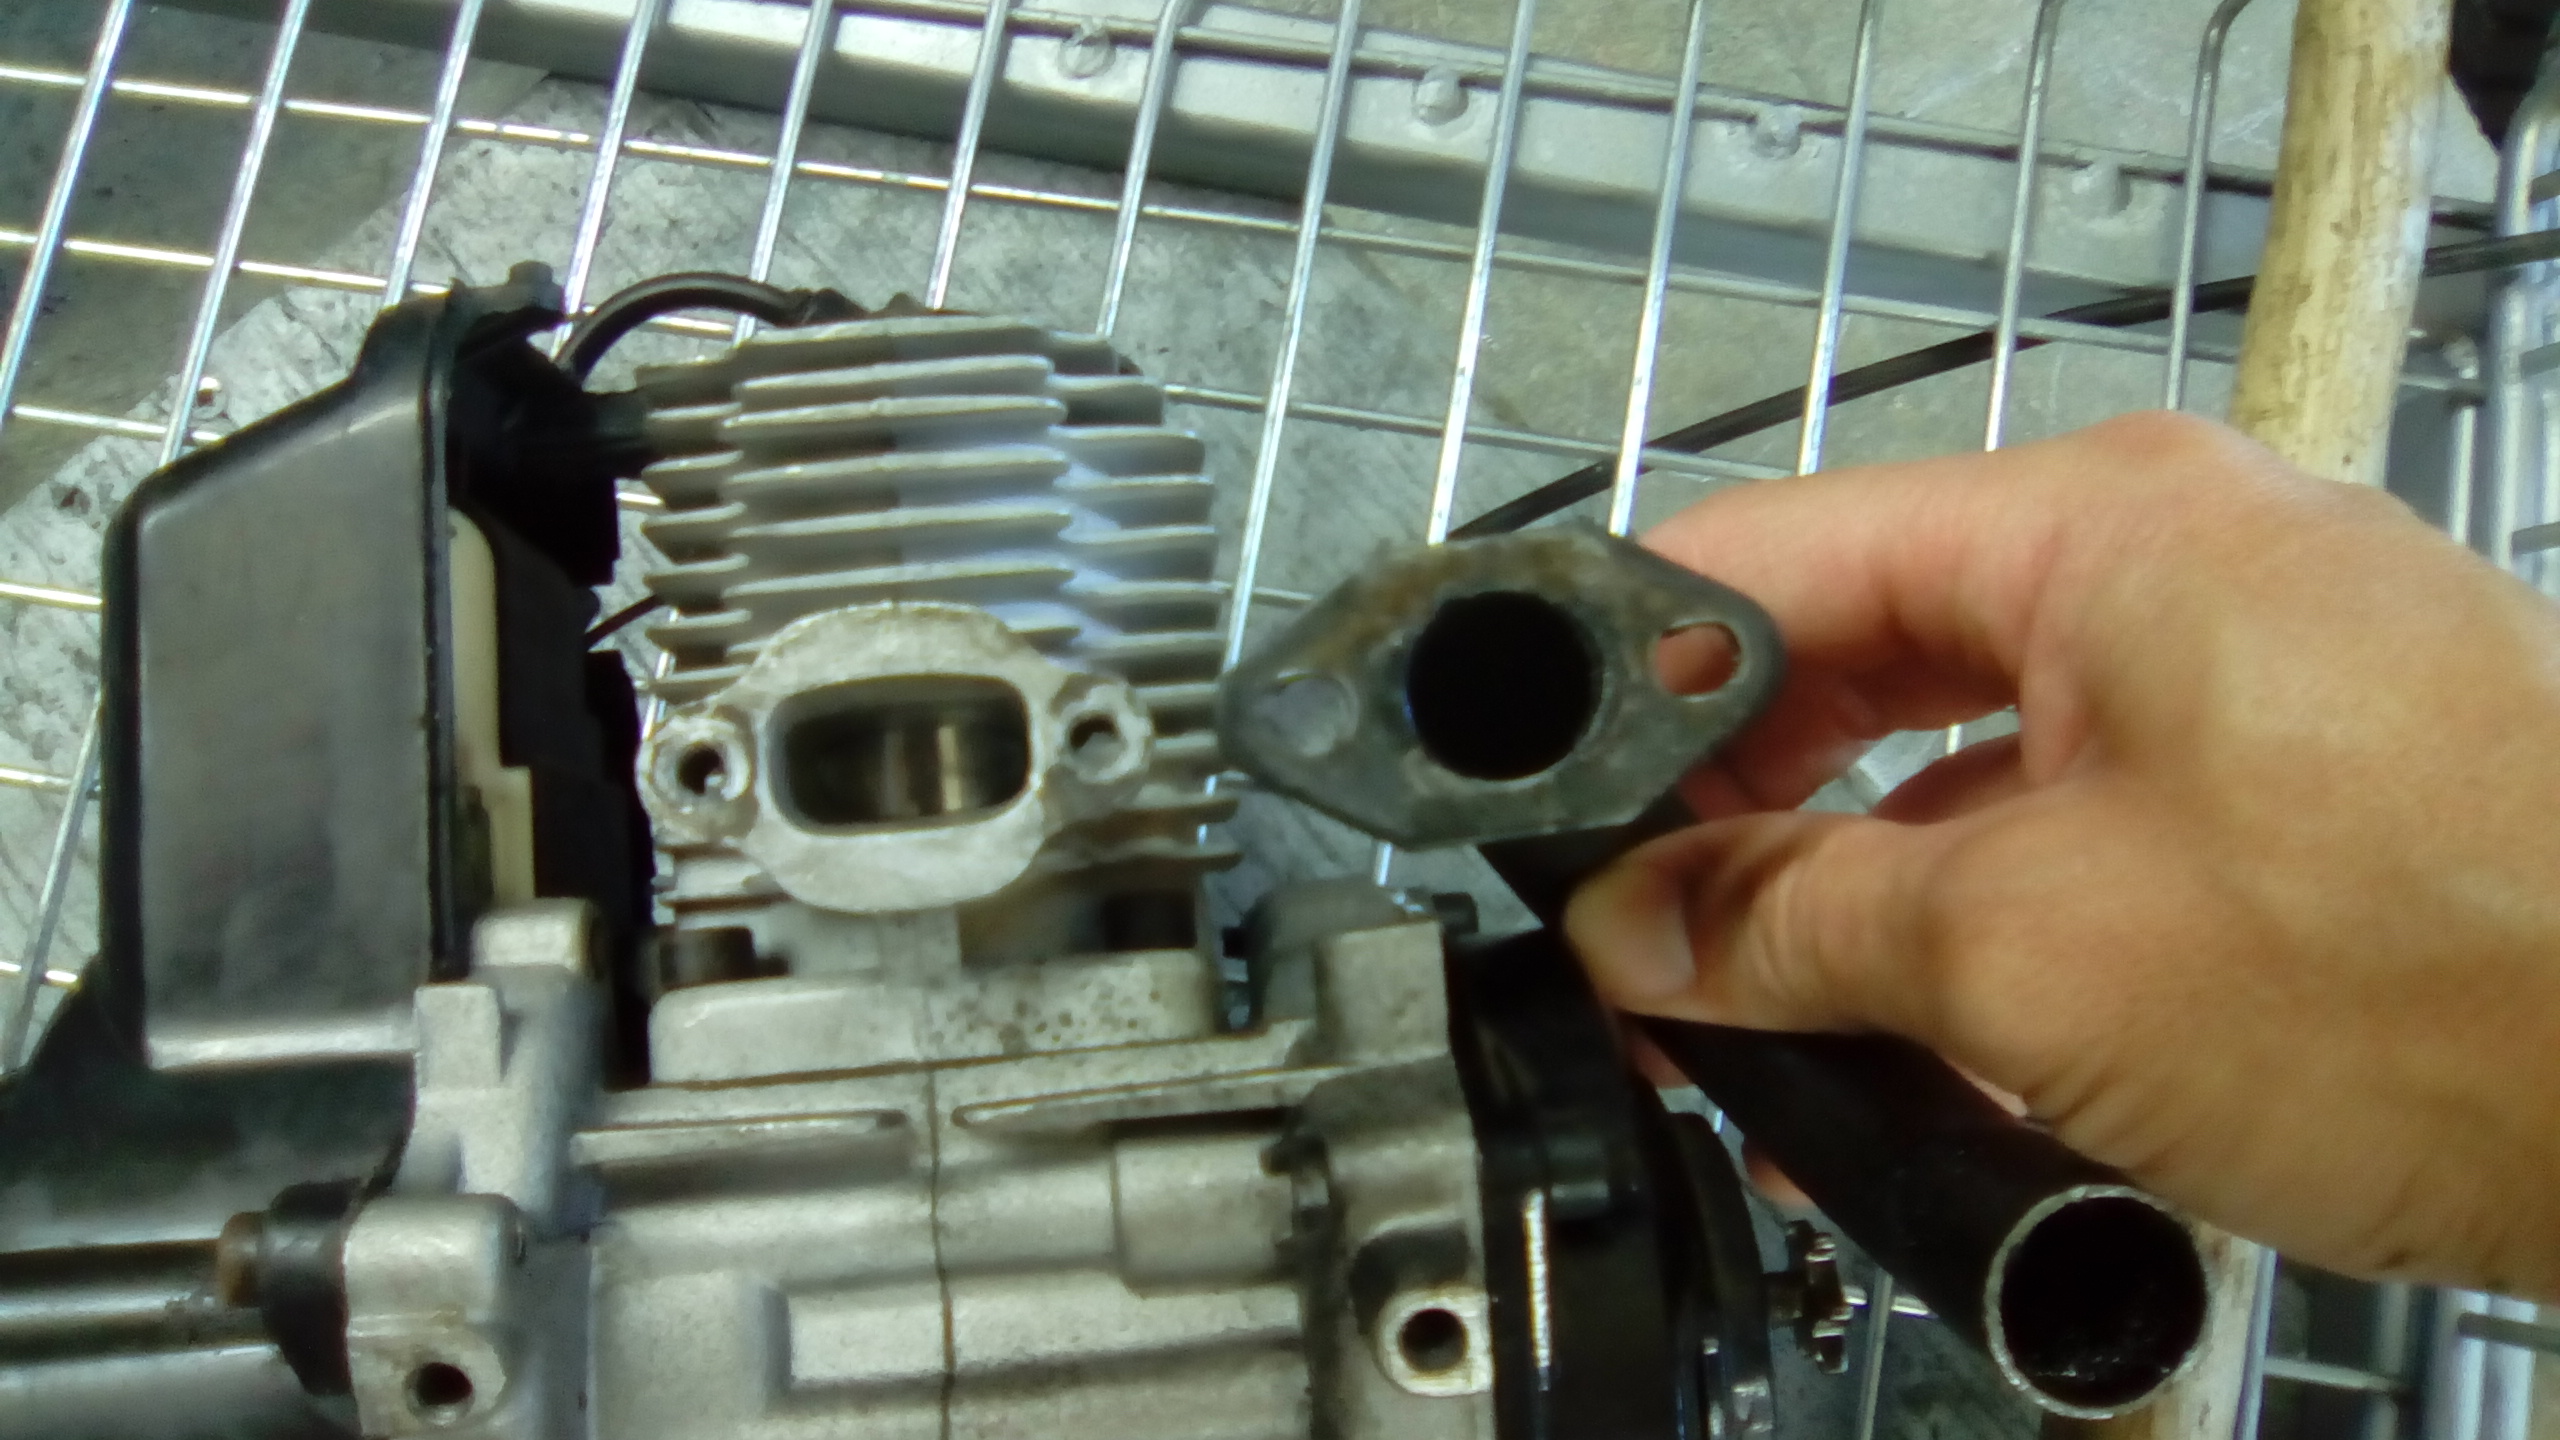
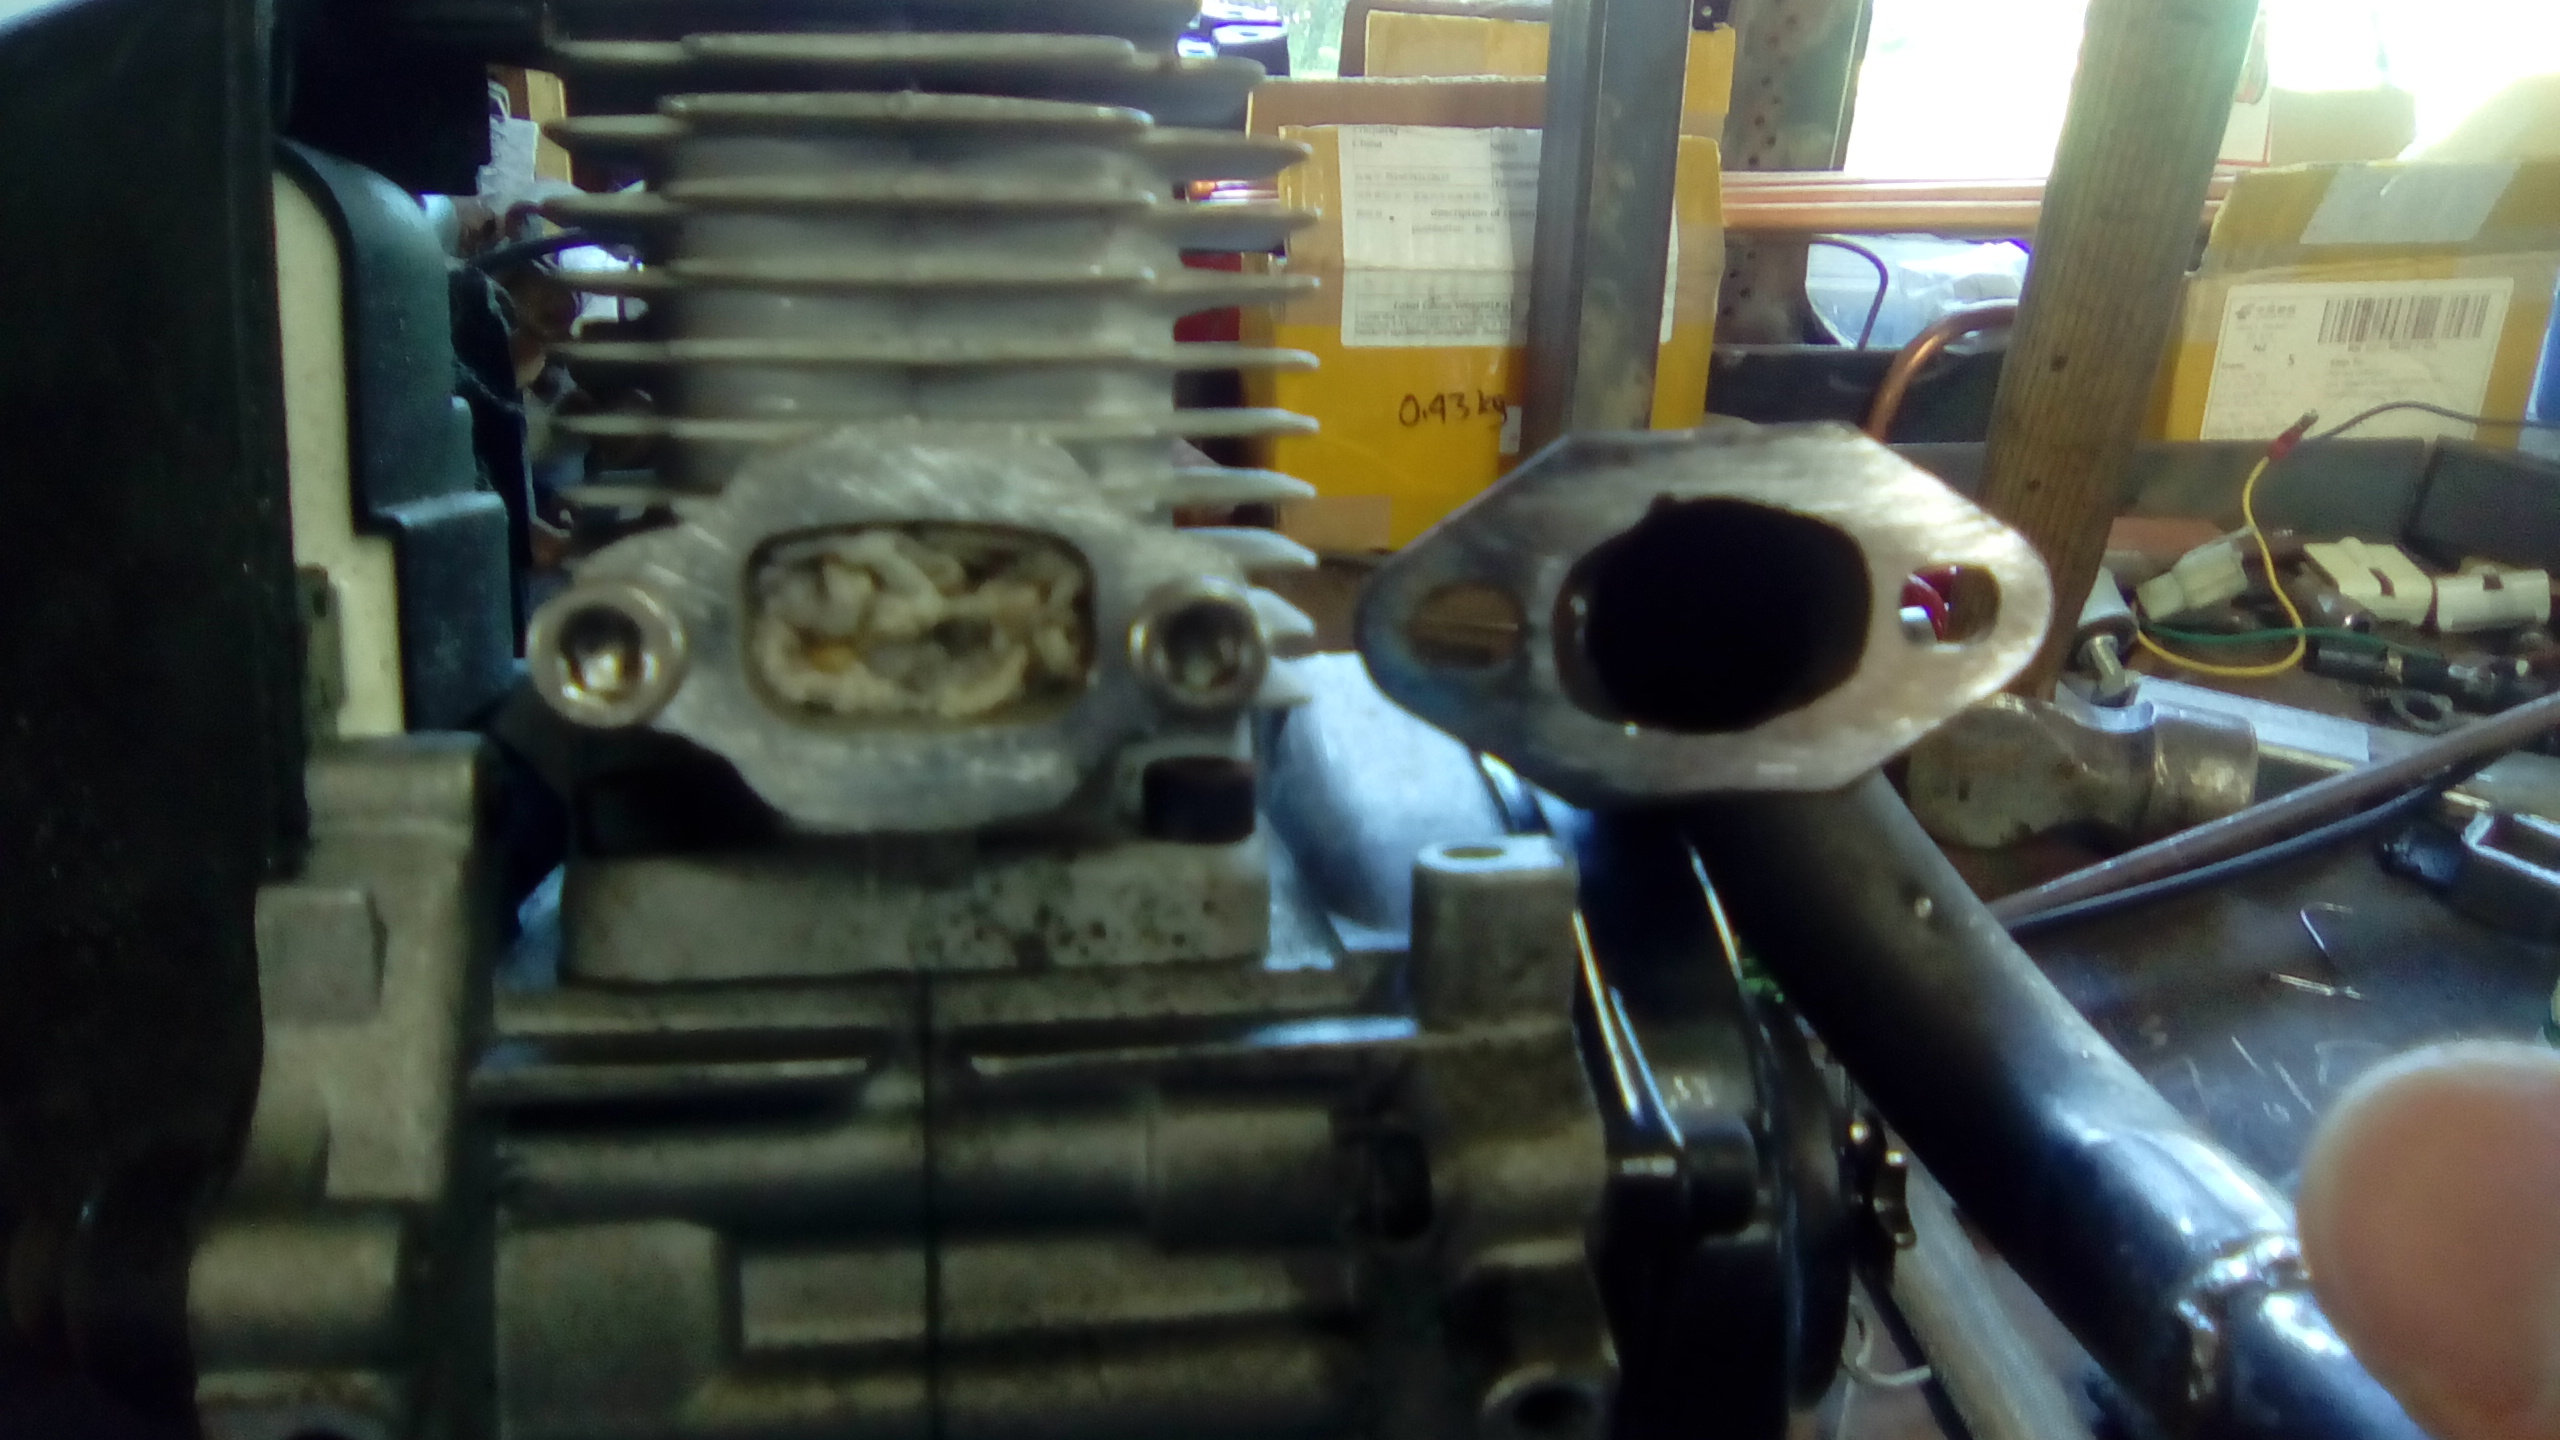
So after a lot of down hill testing while the kids were in bed I thought it was time to focus and chuck the motor on. After thinking how I'd mount the motor out back I was having trouble working out how I'd brace the mount as the axil was right in the way. I finally decided to dig out the motor to see what I was working with. Oh that's right, it's the size and weight of a jandle. More than strong enough. Next up the exhaust had a big bow in the flange where it bolts to the motor, had no gasket material so pulled it off to file it flat and found this. Bit more manual die grinding with a file. While I was at it I cut the tiny little exhaust tip off and replaced it with a piece matching the rest of the pipe. Don't know if 2 smokes like this or not but the boy racer urges were in charge at that point.
2 points
-
Been busy the last few days. Finished up the battery box. Painted it in hammerrite black but didn't take a picture, I'm sure you get the idea. Wired up the charging relay and the disconnect switch for the house batteries. I really like these blue sea products but I was a bit upset these switches don't come with a cover for the terminals so i made one out of lexan. They sit maybe 3-4mm shallow of the mounting surface... Not confidence inspiring when mounting to the body. Ran the battery cables behind the grill over to the left frame rail. Lots of cushion clips and rivnuts. Also swapped the fixed windows for pop out ones and painted the frames (the previous owner had blacked out the windows or something and got black crap everywhere). Would have been an hour job if I didn't have to paint. Used color matched spray paint. Also realized how crappy factory GM paint is, very thin and poorly adhered. More rivnuts Done I also fixed some rust on the driver's side rocker panel and a paint chip on the fender2 points
-
I often spend time building stuff, i find it quite relaxing and gets me out side. I started building shit years ago with the odd subwoofer enclosure to full boot installs, now i own a home so its cabinets, fences and my most recent - an Activity Table for the kids. I went a bit overboard and made this waaaaay more complicated than it could have been. I started in SketchUp where i went through a few design iterations and eventually settled on this; I then tested how it would go together by printing a prototype with a 3D Printer. I was glad i did this as there were a few things that needed changing - mainly i added hidden legs to support the table more. All the sizes & angles came from the SketchUp model and turned out pretty well. I did need to use a little bog because my cutting tolerances were not that precise. you can see the hidden leg supports if you look closely. I let the kids chose the colours for the table, was pretty fun as i just sat them in front of the computer and tried different colours in SketchUp until they were happy. Then off to bunnings for a few test pots. I think it turned out really well, kids love it and use it every day - its bloody heavy though and i dont think i will build something that retarded again.2 points
-
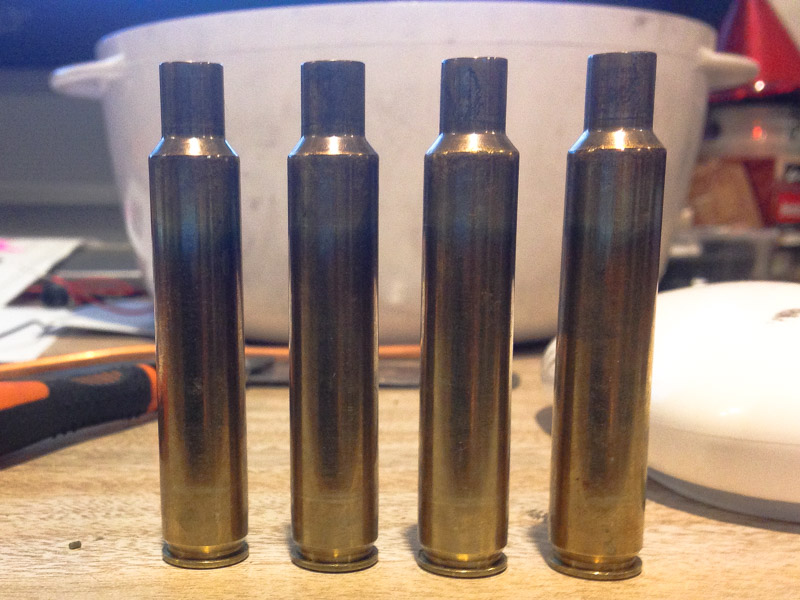
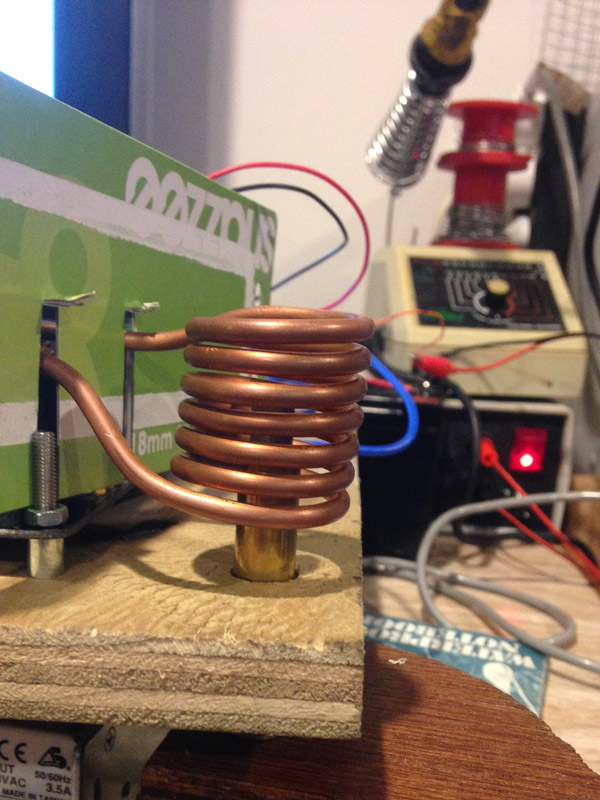
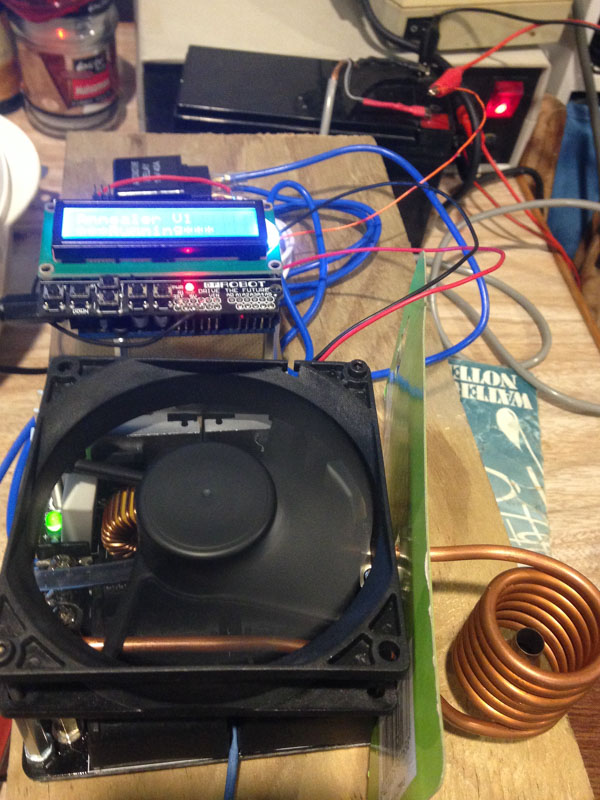
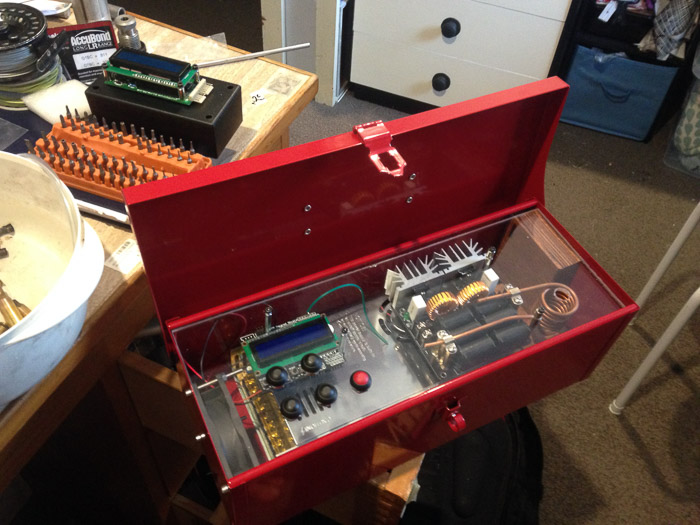
Made some changes to the annealer over the last few months, started with a solid state relay so I could run a 48V powersupply with the added benefit of not needing the FETs for switching, improved the cooling system and made minor tweaks to the coding. Running off a sheet of ply wasn't too nice so I planned to make a timber box to tidy the whole lot up, while looking for supplies, a red toolbox caught my eye for a much fairer price, after drilling a few holes and some offcuts of acrylic, there we go, almost pro looking! There are a few wires missing from this shot, and I still need to organise the dropout chute in the front for finished cases, oh and add speed holes so the cooling fan can actually draw air!
2 points
-
I've loved to piss and moan about how I think these are annoying and a stupid idea. But after having a driveshaft fail at 80ish kph on the weekend, Oh boy am I glad I had these loops fitted! My brake and fuel lines would have taken a hammering if not for these - They are a good idea, even in my case where all factory parts were used within factory power levels.1 point
-
Yeah the thought of rolling it is scary enough.. it's a chunky monkey. 220kgs smashing onto a skull etc. I can see why people get fucked over when they roll one. So yep.. it will certainly be a case of trying it out on the main track we intend to use it on and see what it's like. I've barely any quad riding experience so won't be going in Gung ho like. Try it out, get a feel and evaluate what it might be like with the layout changed. If we decide to just leave it alone then I'll still add a basic roll cage with some rack to carry timber. Only two main corners to go round and both are easy as. So I won't be risking sideways tipping. Main concern will be going downhill. Had a looksie at engine. Only appears to be one stripped thread and it has come supplied with three thread repair inserts. Plus I've got the right tap for them. Sweet ! It'll need a new head gasket. Repco? Motorbike shop? Trademe ? Hmmmmmm time to shop.1 point
-
Oh yeah- it would be easier as far as work involved. But a trailer wont work with the corners, plus I want a tipping tray, a rack up top and a more usable quad. Basically build a simple load lugger that suits our application. Forward control means we have more weight and grip over the front axle for up hill and we get a longer tray for the given wheelbase. It will only be our feet over the front. our backsides will sort of reside over where the current h/bar is. Im not at all worried about losing attack angle on the front because there is no where that we need super amazing bank descending/ascending abilities. A trailer will stlll probably happen as well, but as an extra. I will draw some sketches but today its entertaining uncle time and bbq/beer consumption time. Edit; oh plus.. i want to build my own creation so there is a whole lot of fun and challenges right there.1 point
-
the answer is quadractor1 point
-
I may have the picture in my head wrong, but wouldnt it be easier to simply build a trailer to tow behind the quad to get stuff up the hill?1 point
-
If you have unwound that primer and havent done it back up, it WILL suck air those old ones will be all fucked tbh,those bosch spec ones @Mof posted are not expensive and are way better. Yeah,its not really bleeding if you dont bleed the air but if its starting slow but running fine my opinion is you should get the primer back down, it WILL let air in even a couple CC's can cause ballaches. long starting, shitty idle,"doughy" etc. Oh, yes it will have a bleed somwhere, itll be high usually the filter housing (10,12mm spanner nipple similar to brake nipple) by the sound that wont fix the prob though , get the lid back down or grab that bosch primer ( you should they are way better then those sack twist dumb things)1 point
-
Did some work on ye olde scootee http://www.tasteslikepetrol.net/2017/03/scooty-puff-jr-small-fixes/1 point
-
Haha. I work here www.rocketlabusa.com and will be doing bigger better stuff in the US. Bigger better space stuff.1 point
-
You can't just say "build space stuff" then bugger off. SPACE STUFF!!1 point
-
much better. thanks to i500gt for finding them and cul8r for swapping the tyres over.
1 point
-
OS Nats here we come! The weekend Starts NOW Wof New Tires Wheel alignment & rides like a dream now!1 point
-
I've always been one to have a project or two on the go. Then there's the ones still in the "planning stage" i.e. they only exist in your imagination. Well there's nothing like a deadline you cannot negotiate an extension on (Christmas), and kids would have to be the toughest of all the negotiators to deal with! So when I foolishly thought out loud 3 days before Christmas about an idea I had - that may or may not work??? ...well the pressure to deliver was all on! So: String line and inclinometer dusted off Holes dug, posts in, concrete mixed and poured. Guy wires, main cable tensioned and clamped (that sentence sounded flippant-ly easy... this was a challenge) I had three bits of wire rope. The longest was 50m, so this became the bit between the two posts. I then machined up a connecting rod for each side, that hooks up to the guy wires. Complicated solution...but it enabled me to get the longest span with the free wire rope I was given. Its designed to slip, so tension remains the same in all components. I used basic trigonometry to calculate the forces involved. But if my theory is true, then it should all be good. So I'd call it a success. Now 4 months old and still working well Kj1 point
-
No photos just quick update. Was doing some little maintenance things on the car. One of which involved fixing 4 leaks in the intake system. Once that was done, the car wouldn't run or idle or anything anymore. Went through so many different things trying to fix (injectors, CAS, replacing AFM, fuel pressure/fuel pump) turns out the guy I bought the motor off gave me the wrong AFM. (I bought one with the same part number) $40 later I had the right one and it runs primo. Replaced rear springs with 5kg rears. Looks like I had 8's in it which is why it was so hard riding. and big news; Cert booked for next week. nearly 7 years and it's almost legal.1 point
-
Nats Prep: Oil changed. The Warehouse currently has a special on for 4 litres of 20w50 for $15.00 each. Not fancy oil - just Caltex Havoline. Soon as I brought this I inherited many half used oils from @Mr Burns so effectively a free oil change apart from filter. Warehouse oil will be used next time. Seam sealed the rear leaking window rubber, replaced a 6x9 I blew due to not porting the boot, ported the boot with an ali trumpet, and applied some bling. @Threeonthetree sent me a Facepalm marketplace link for some wheels. 1960's Buick Riviera / Skylark etc in 5x5". They need to be restored at some point, but they had pretty much brand new tyres and some gangsta appeal. Cruised over the the shore and picked them up. Bargain at $300. Filled car up - we ready to go. Car now looks more suitably oldschool: Bigger profile, bigger width. Cruises at 100 much nicer now. Subtle lowering (Makita 'bro) after Nats. Chur.1 point
-
Today is the day when after nearly 3 months on axle stands in the garage, the wheels are back on! Much excite. The painfully slow brake rebuild is finished. The daughters helped me bleed the brakes (they are finally tall enough to push the pedal). Once bleeding was complete I got number 2 daughter to put both feet on the brake pedal and hold it down to check for leaks of which there were 2. I managed to stop the leaks by nipping up some fittings. Actually by doing them up quite a bit more tight than I'm comfortable with... I felt brave enough to drive it to the servo to pump up the tyres. The car looks quite non-derelict so I don't think I'd get pulled over unless I was doing something stupid. The brakes feel really good. Got treated to a wash too!
1 point
-
There was three of them. That would have been a (wet) dream come true.1 point
-
Shes a pretty big job. Been at the machine shop for a week. 1 more week to go! Casting is looking good. Yet to find any lumps of sand or porosity apparently!1 point
-
What an engine! I wish I could say this was my crankcase! Sadly its on loan (like most of the other bits!).1 point
-
Reconditioned the carb today. Sure enough, the pilot jet was the culprit. Completely blocked. http://www.tasteslikepetrol.net/2017/03/scooty-puff-jr-its-alive/1 point
-
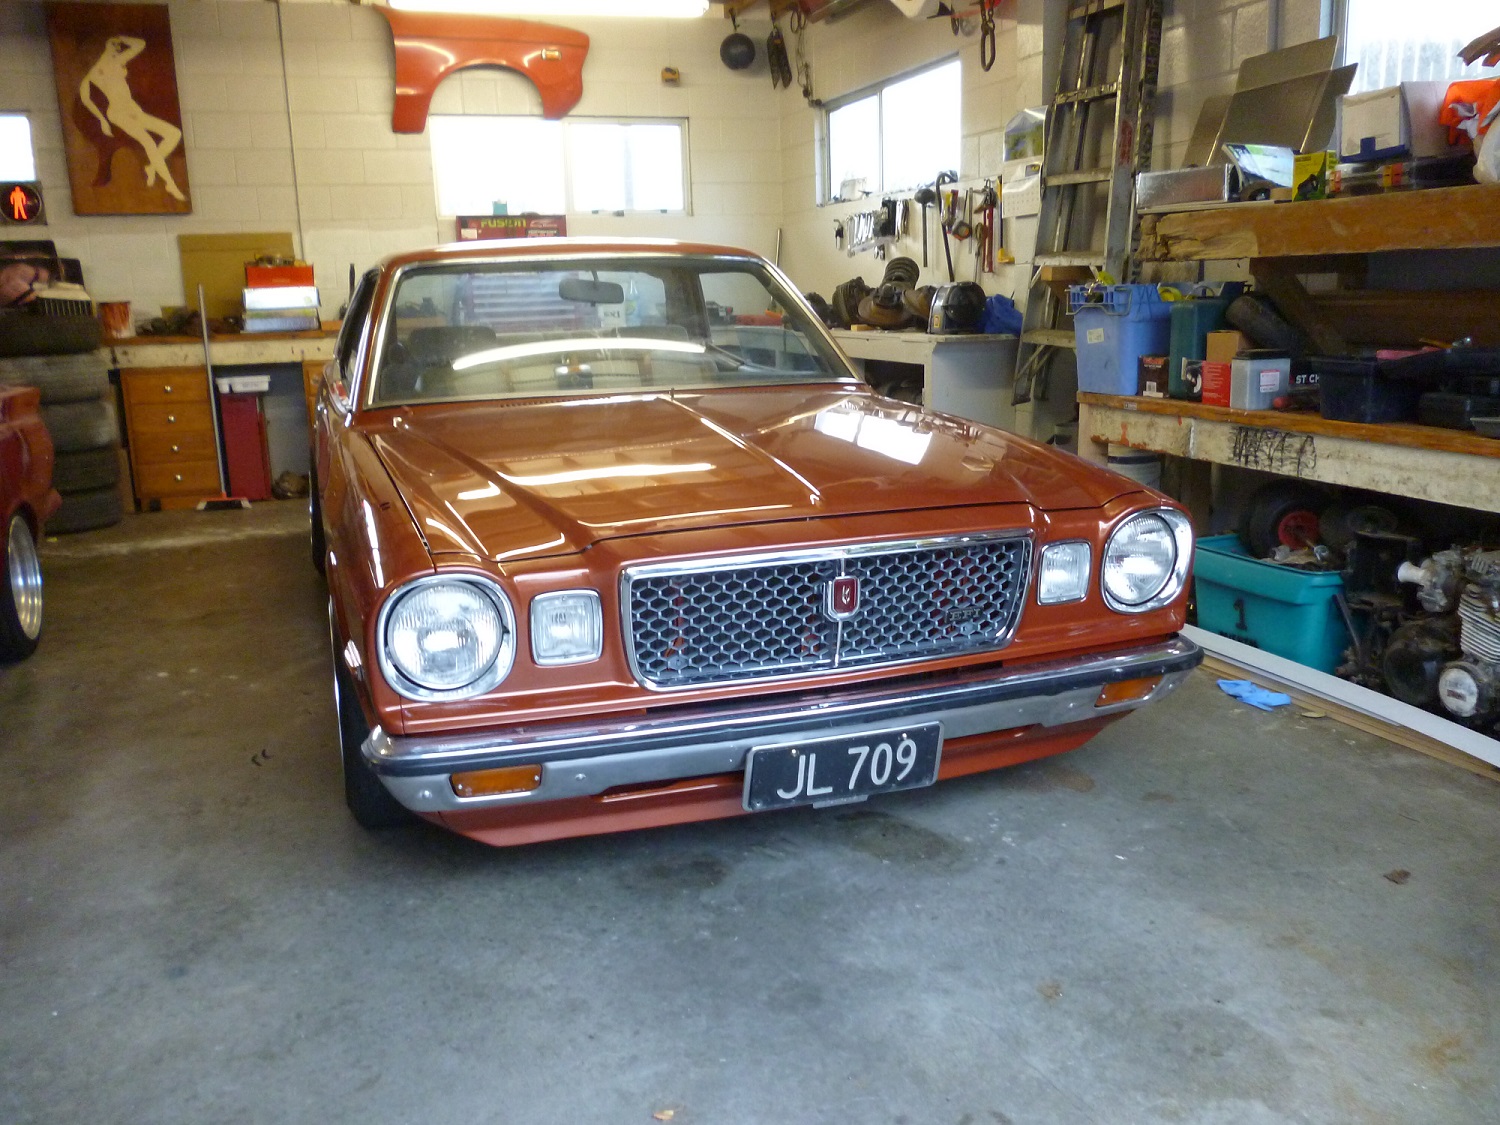
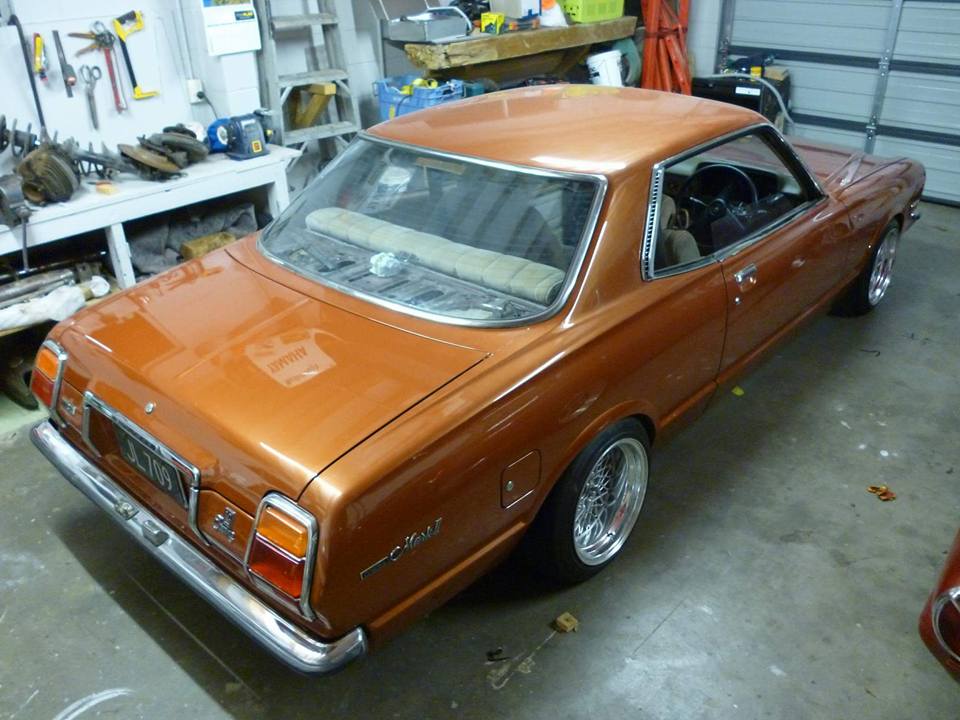
Its been a busy week and Kayne sent me this. Im fizzing hard to have a look and the car comes home next week to be put back together.
1 point
-
All the patterns and moulds finished for the Spring hanger body. Ready to go to the foundry. The sand isnt great (I think the resin is going off) but its worth pouring it anyway to see how it works.1 point
-
All the outer moulds made with runner/sprue etc. Time to work on the inner core patterns and hopefully pour one early new year. Working out runner system Lower half of the mould Upper half with sprue and filter1 point
-
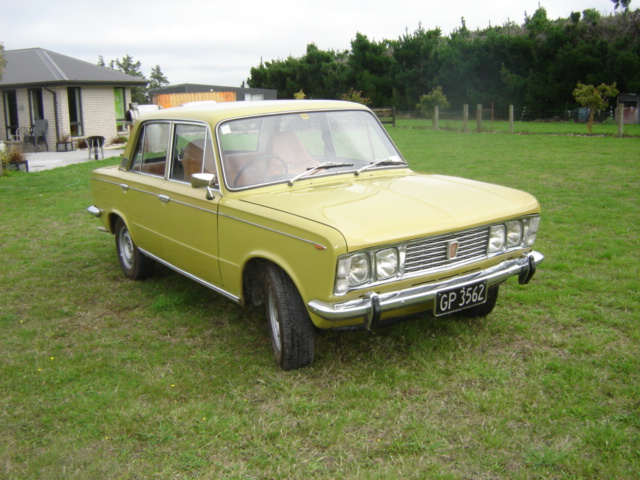
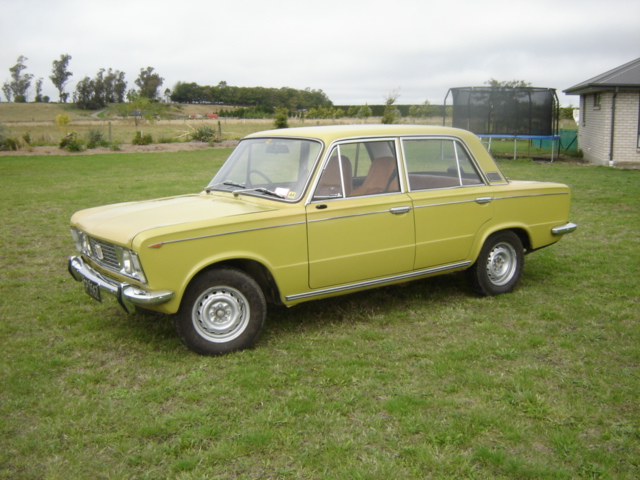
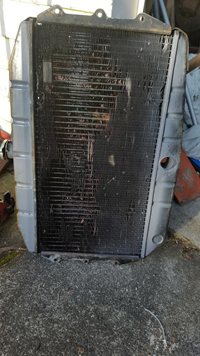
Small update: Hawkes Boes. Big trip from Auckland. So, did the usual check the car before a long trip. Oil change, diff / gearbox check, coolant etc. All good. Went to grab some cable-ties and gaffa tape and the radiator let go. Fluid into the fan, across the engine, up the windscreen etc. Thank goodness for good wiper blades. Anyway, pulled the rad out and it was obvious that it was poked in more than one place. The poked radiator. With only 4 days till departure I had no choice but to get it re-cored, rather than scavenge something else and make it work (which would be normal procedure) 1 Million dollars later I have a new radiator. Anyway, all fixed I followed threeonthetree in convoy to Hawkes Boes AND kept up with his younger car comfortably. Which made me think, The car is 54 years old. It has three gears. It weighs a ton and a half. It has a 3 litre straight six. This isn't going to go well. But then .... It comfortably does a 697 MILE trip - that's 1121kms over three days. (note - without exploding/ breaking / other such stuff) It averaged between 11 & 12 litres per 100km. (23ish MPG) I did worse than that in my turbo Subaru. Wat? I'm impressed. Guess I'll keep her for a bit. Photocred: Roman. Humber at Hawkes Boes camping setup. (It's a BIG tent, not a small car)
1 point
-
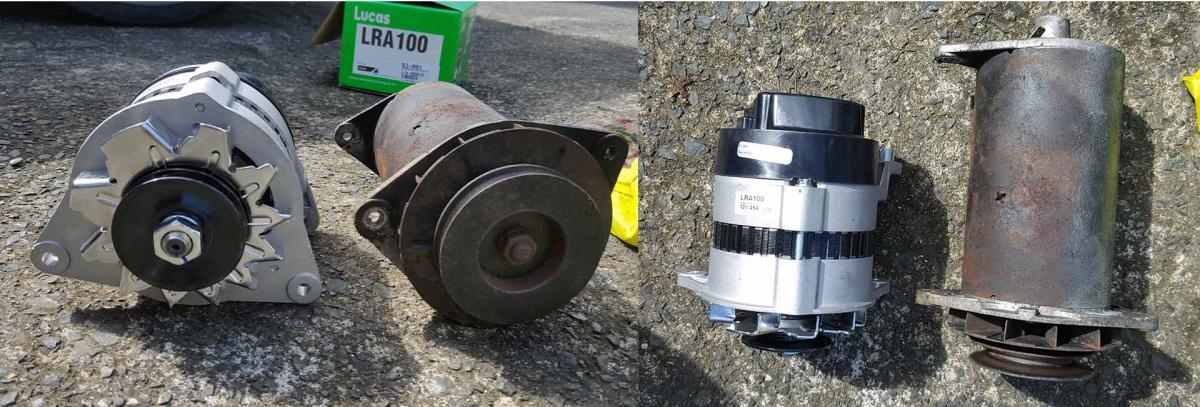
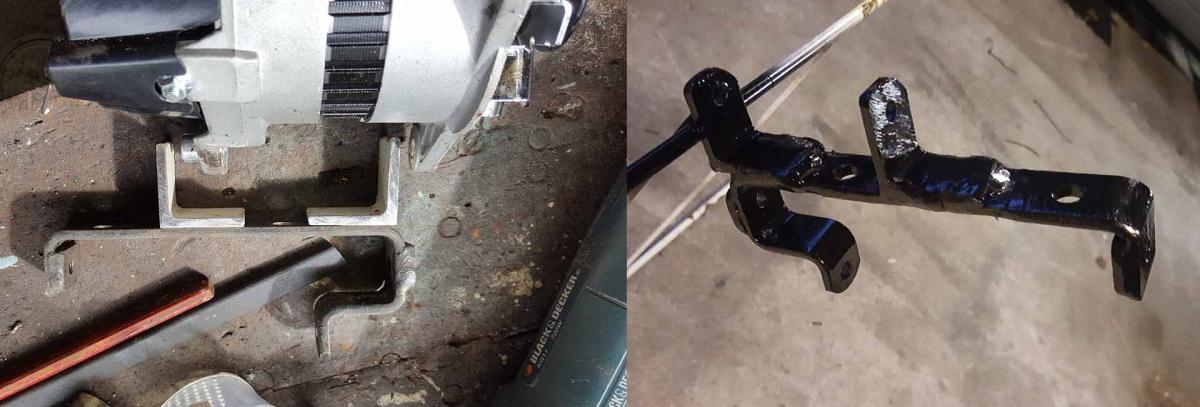
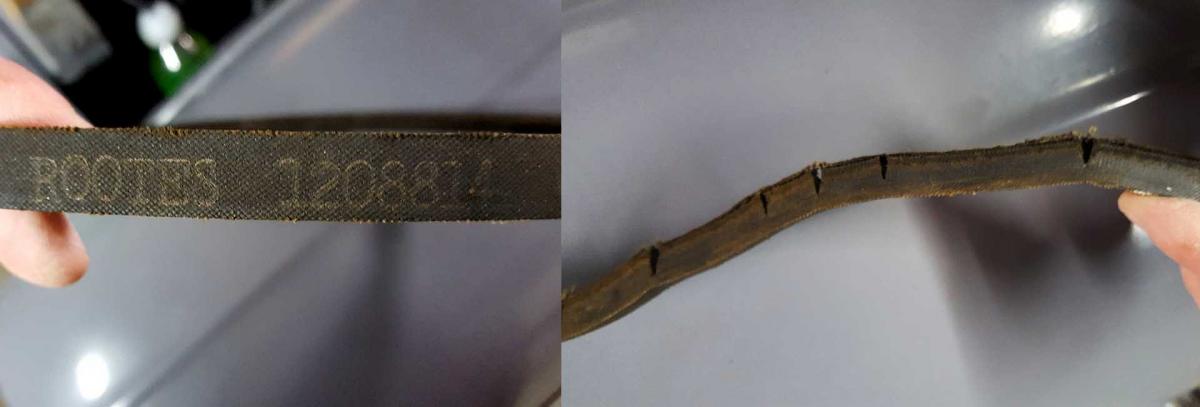
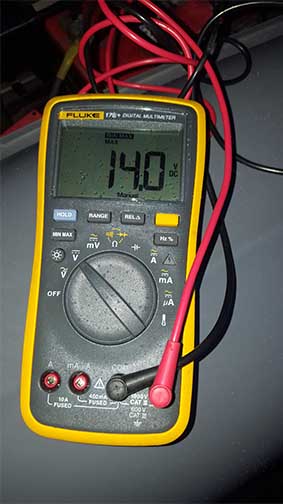
Actual transcript from Rootes group meeting circa 1962: "Good job there Jenkins on the Snipe engine! It's a beauty! That generator for the electric pixies is grand! Easy to get off is it?" "Of course sir. We've used three different bolt sizes and made sure that you can only turn each one 1/8 of a turn at a time." "Excellent. So, who will know which size each one is?" "Um, well, erm, not many. Our head mechanic Barry says not to worry though" I appreciate working on Japanese cars sometimes. Decided to update the electrics with an alternator instead of the 'ol generator. What for making the pixies run faster at idle and stuff. The generator and voltage regulator were both a bit dodgy and fequently decided it needed 30 amps into the battery which was a bit silly. I'd tweaked it and got it normal only to have it change itself or do something else stupid. The size difference is reasonably substantial and the weight difference was even more so. I'd used the ACR type alternators before on my Super Minx so thought I'd go with what I know. They're only about $120 trade which isn't too bad. First hurdle was the bracket was quite different so a little fabrication was required. I'm a video editor, not a welder, but it'll do for me. Painted it black to blend in with the oil leaks. Next I changed over the pulley so that i could use the original 1962 Rootes group belt. Still mint. Fabricated another tension bar for the slightly updated position and found a belt in my collection. At this point I threw away the voltage regulator as it wasn't needed and re-wired things to make them tidy. Big wire is for the big pixies, and goes to the starter solenoid and therefor batter and little wire goes to the warning light and amperage gauge. Voltage regulator goes to the bin. Success. 14 Pixies.
1 point
-
Cheers for the comments. Hours and hours of work there! A lot more to go! Yesterdays work. Two more cam gear covers, off to the foundry tomorrow.1 point
-
Been talking a bit with the guy that owns the Hamilton car museum. He bought the T57 from the Baillon collection in France. His engine is essentially the same as what im building. Hes given me access to any parts I want when hes got it in bits. To copy and 3D scan etc. So Ive got some pretty cool parts sitting around the living room now. The sump is a beast First ali bit cast! Right hand cam gear cover. Using a David 3D light scanner. Sort of useful to help with drawing in CAD More 3D printed moulds. Perfect for part this big with this detail. Would of taken me days to machine it. Still have to do a lot of sanding and paint to get a good finish. Playing with different filter runner designs. Think im getting a better idea of how to do it. 2016 on the left and 1938 on the right! 70hours from start to finish. But only bout 3 hours to make another one. So I plan to make atleast 3 of each part.1 point


This leaderboard is set to Auckland/GMT+12:00