
Leaderboard


Popular Content
Showing content with the highest reputation on 03/27/17 in all areas
-
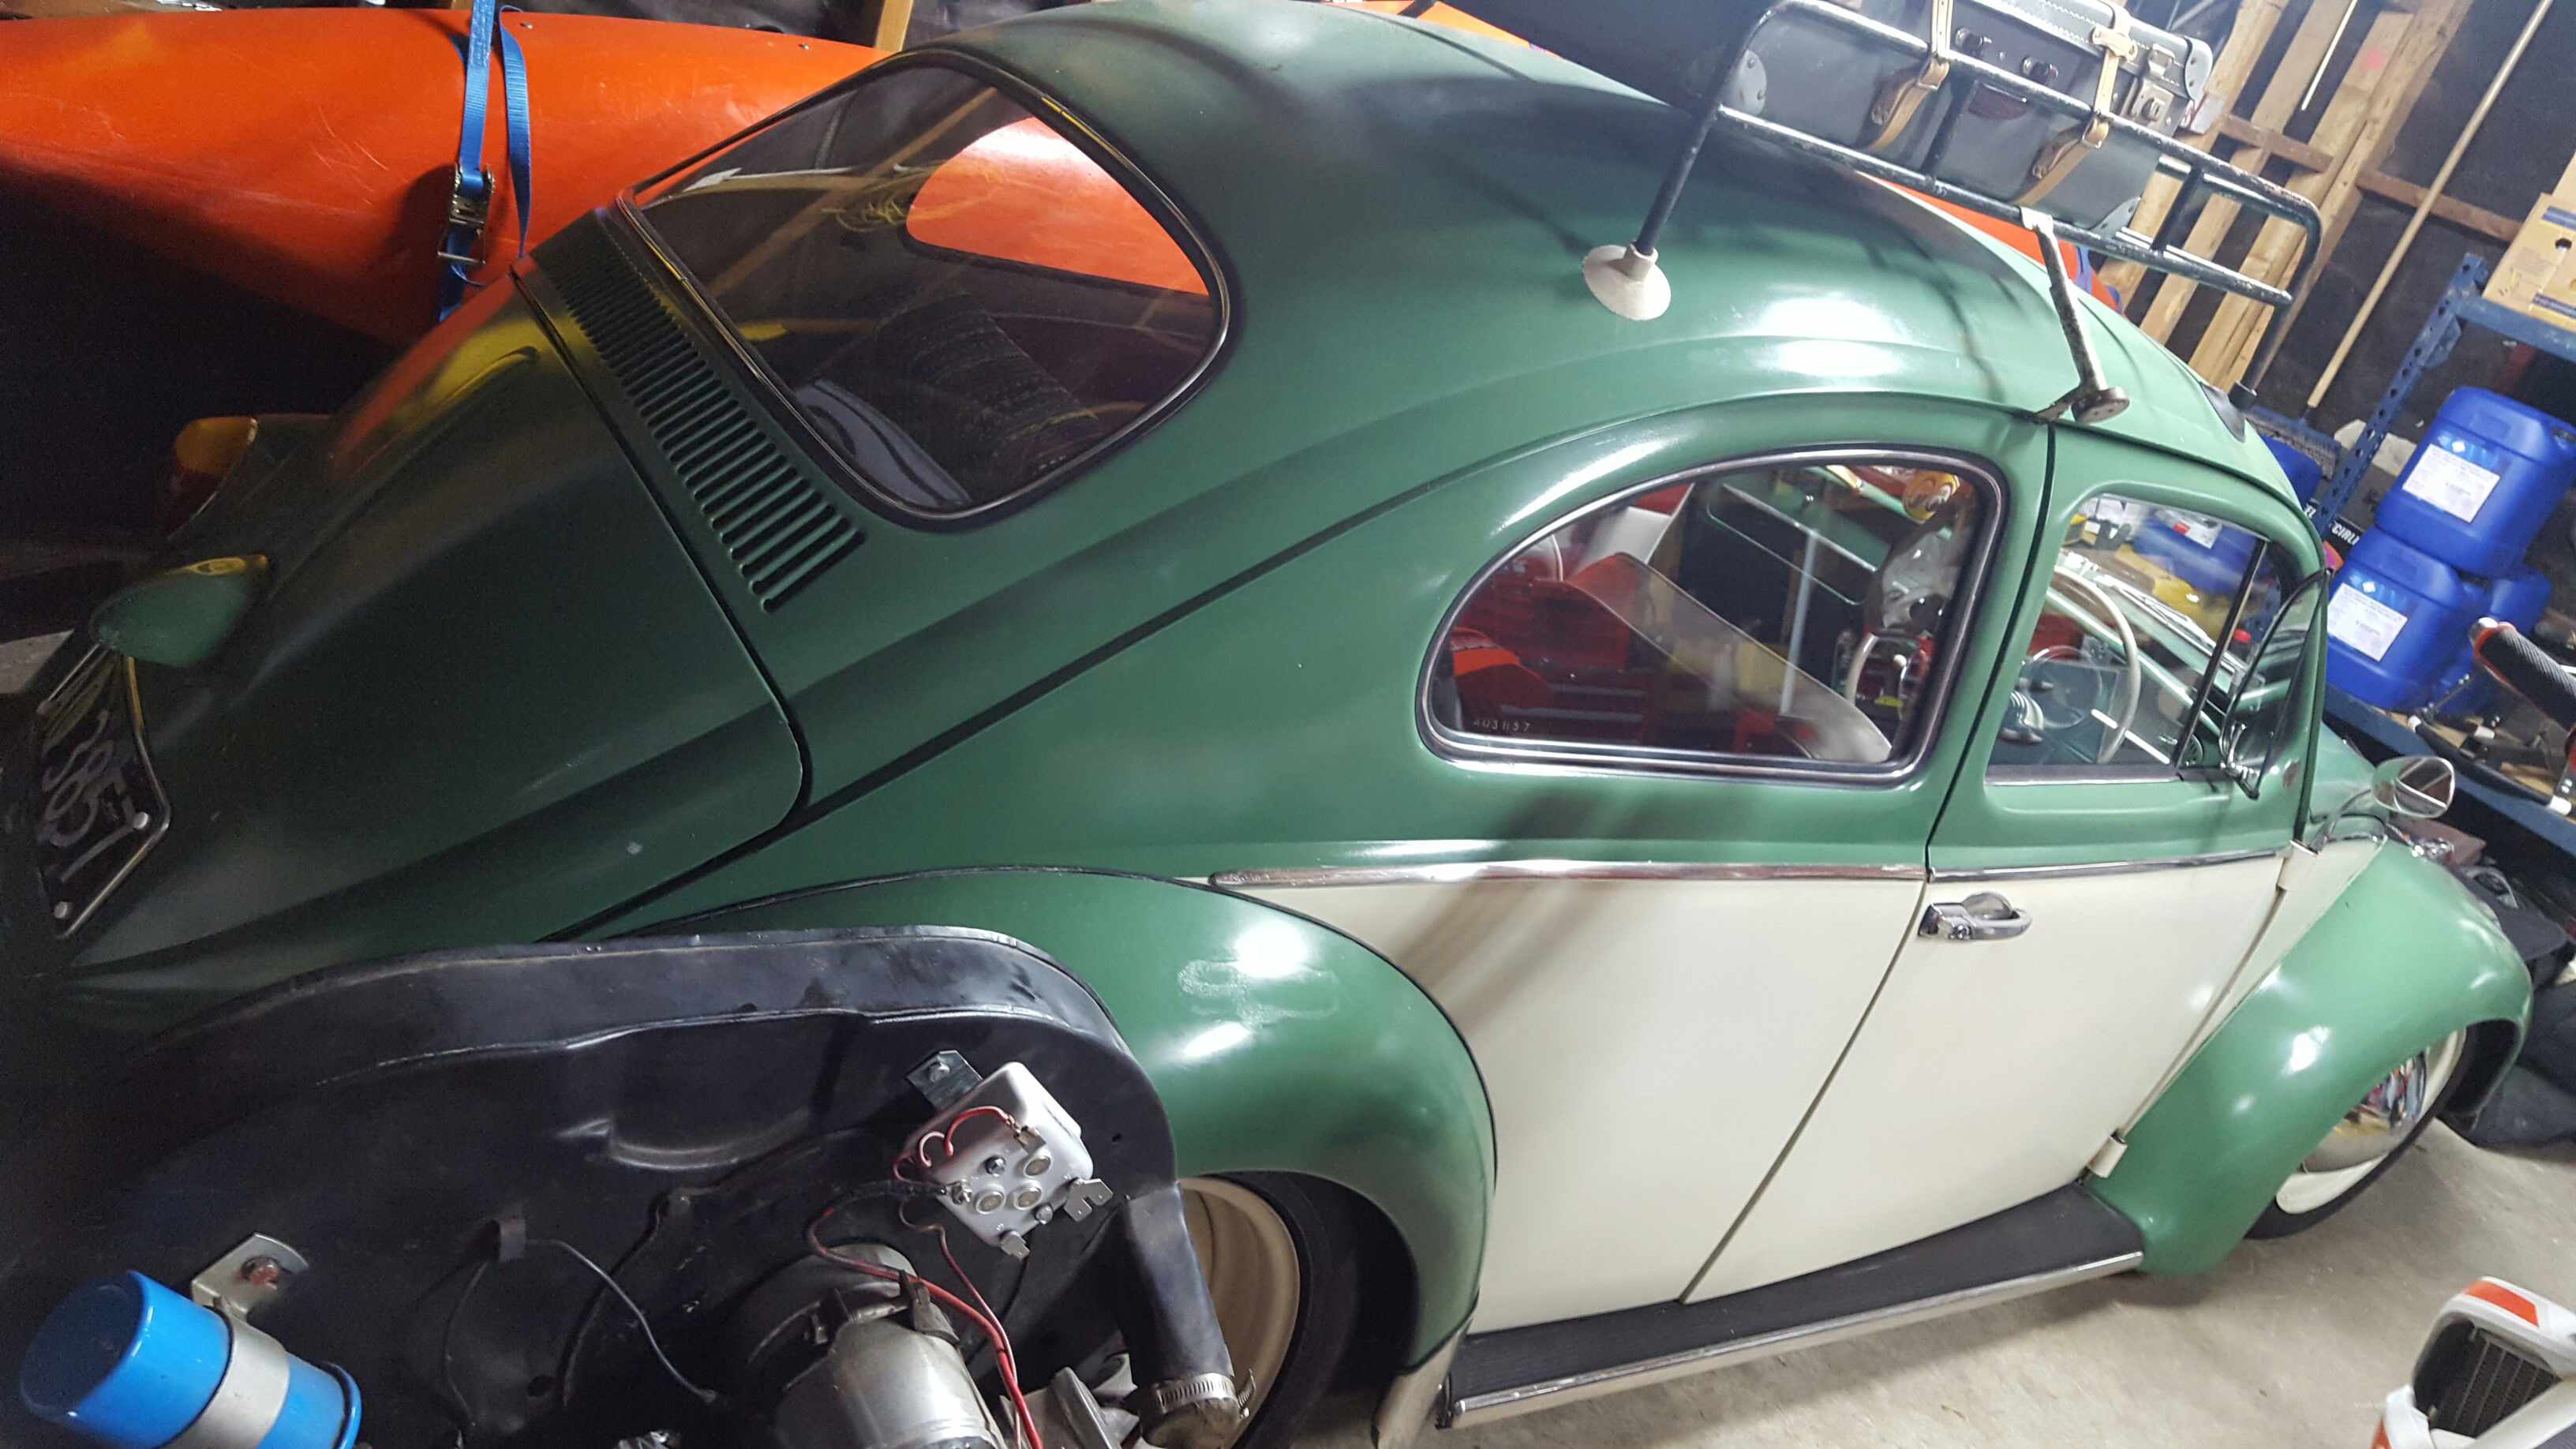
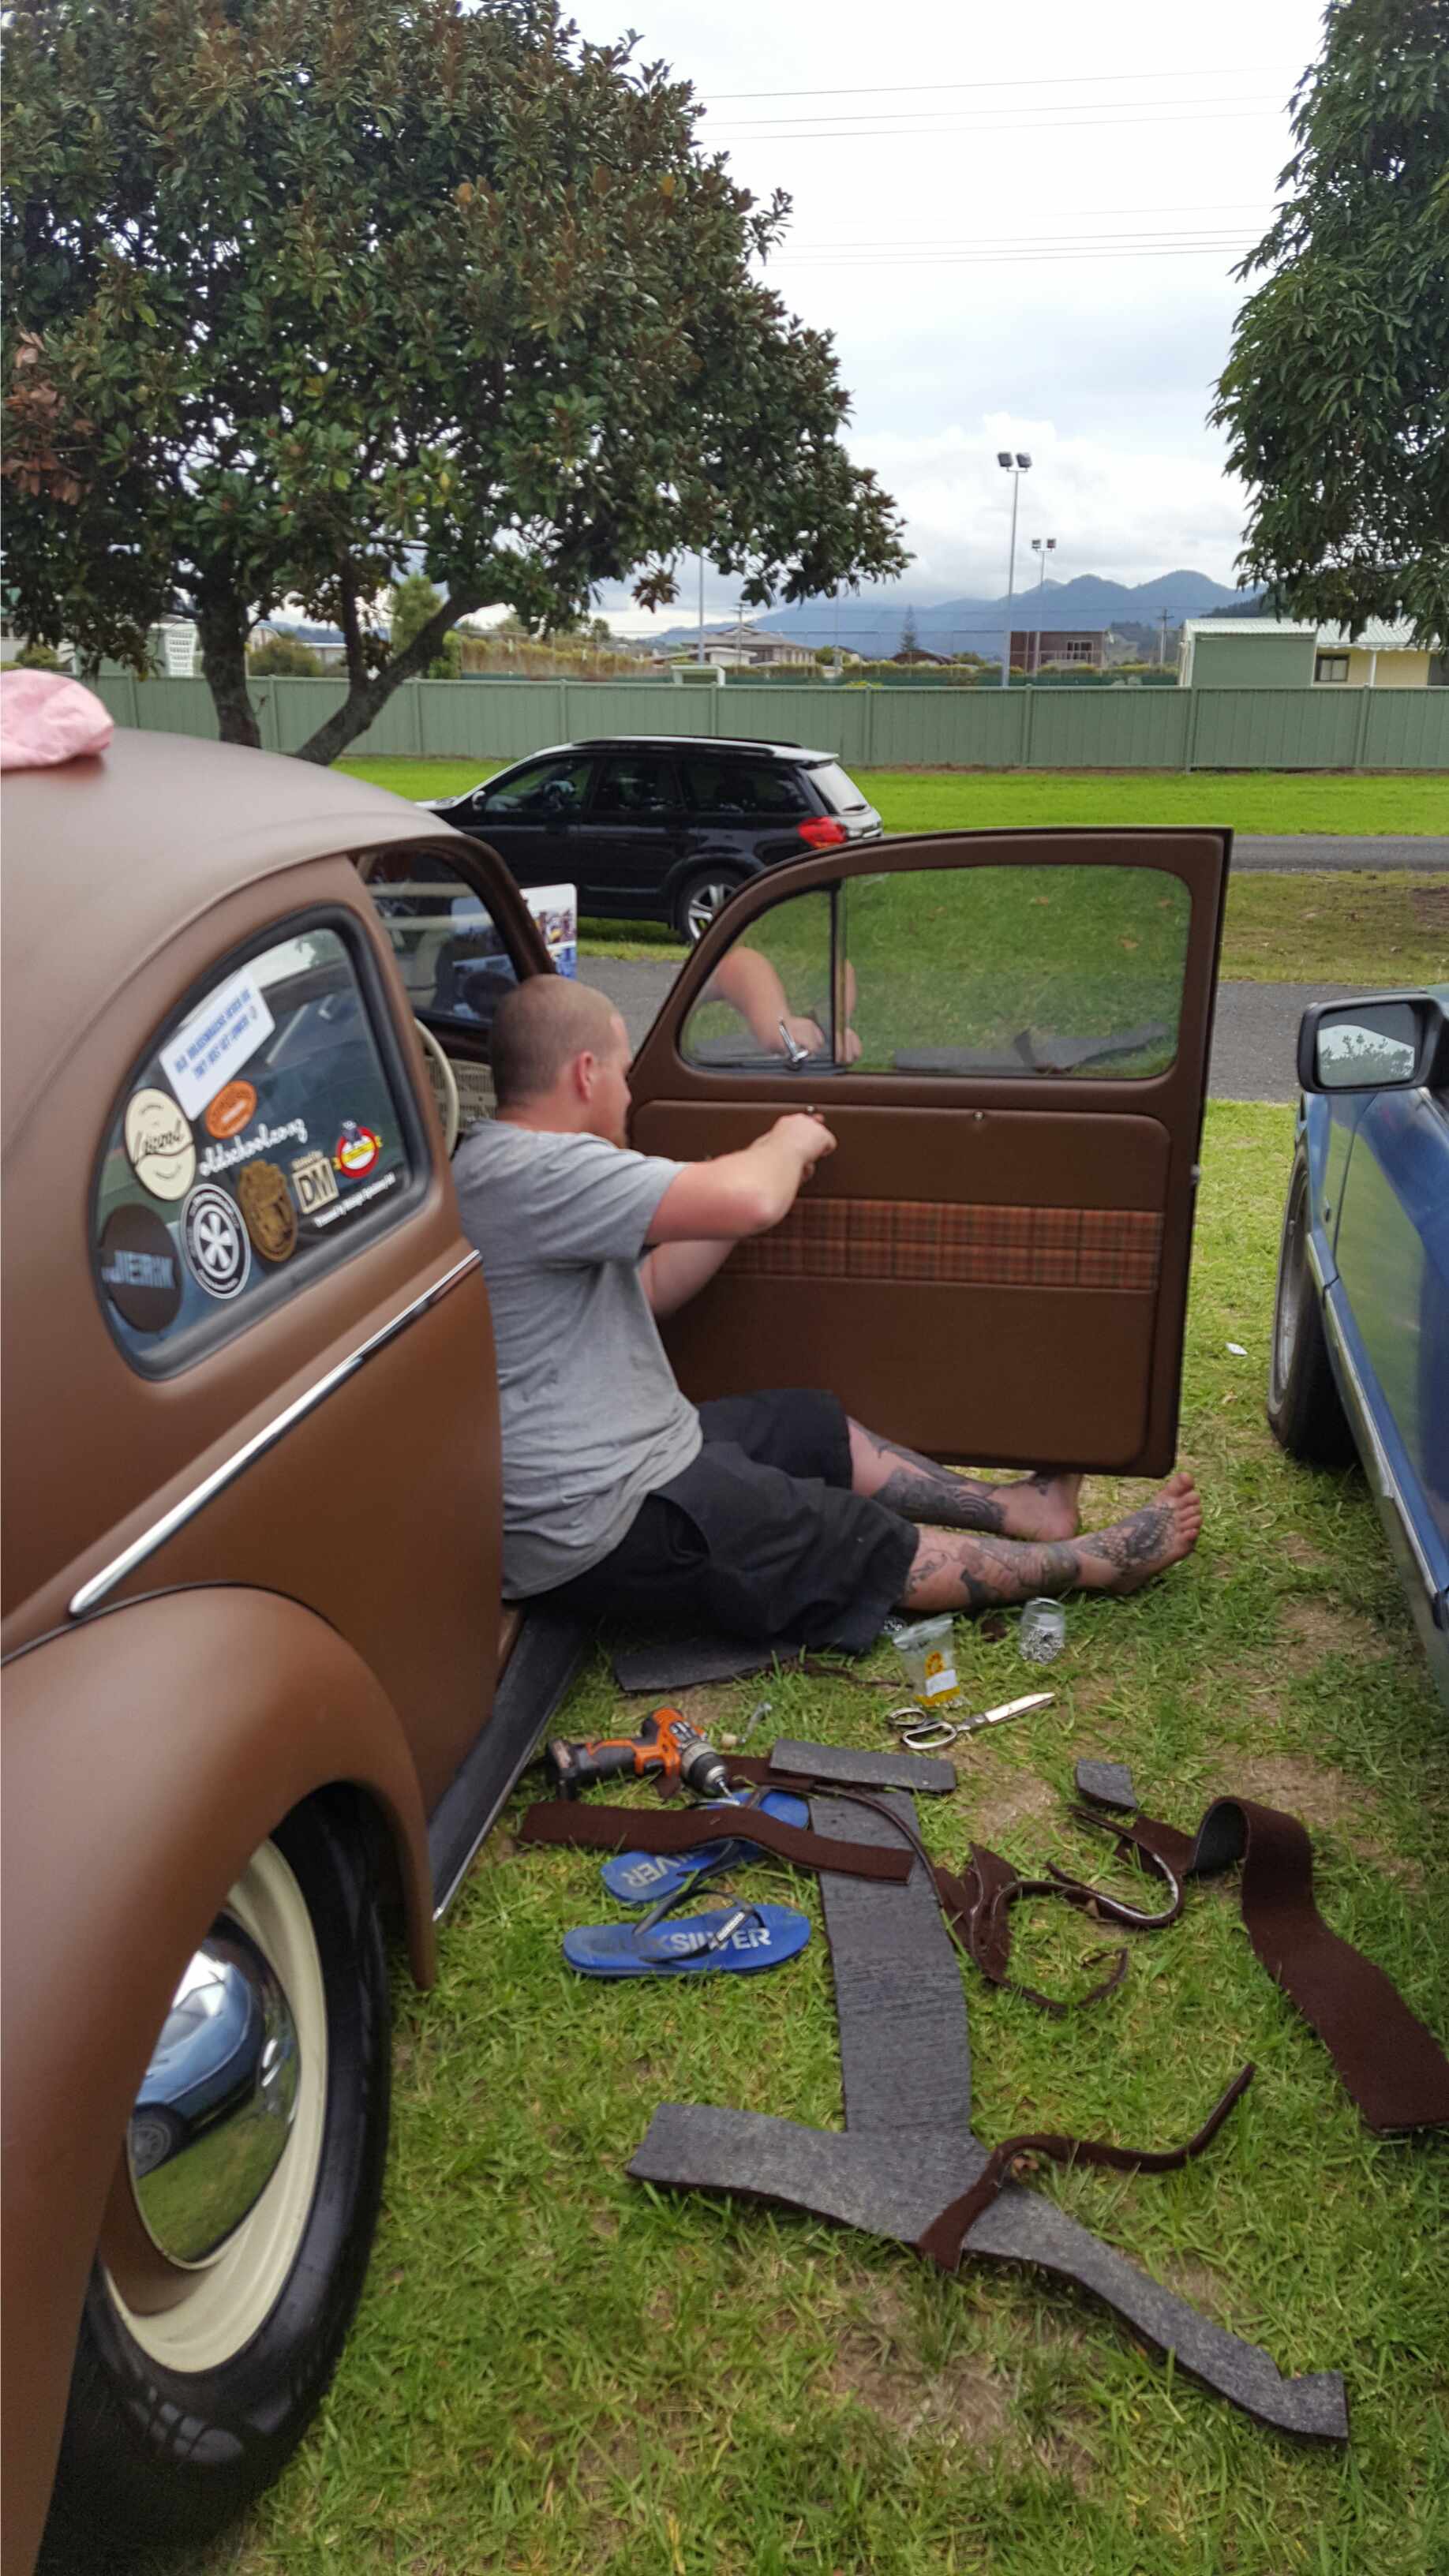
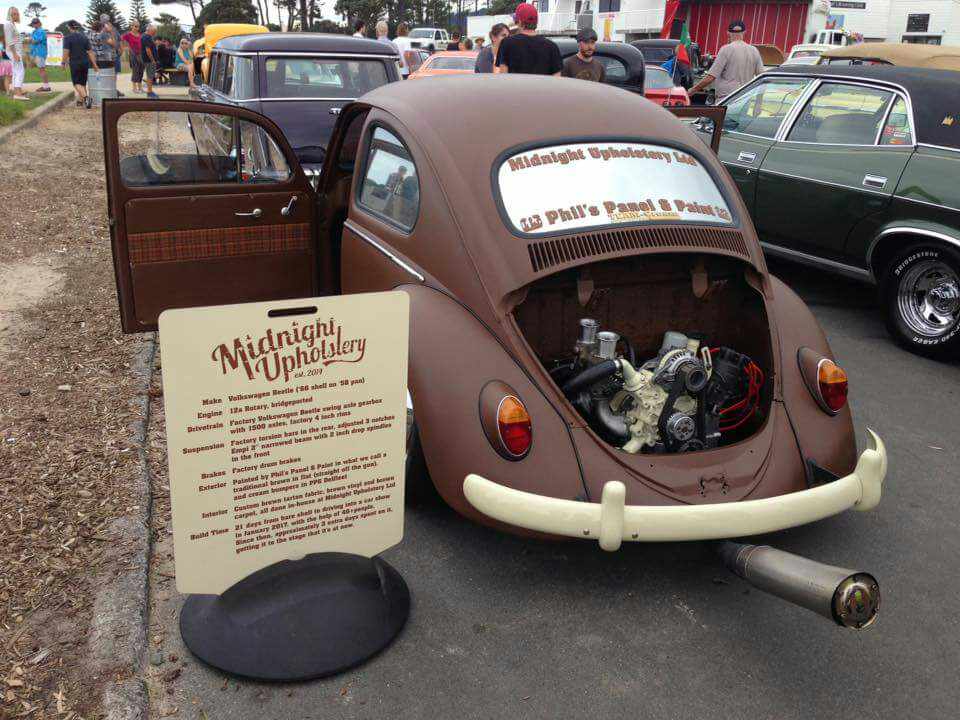
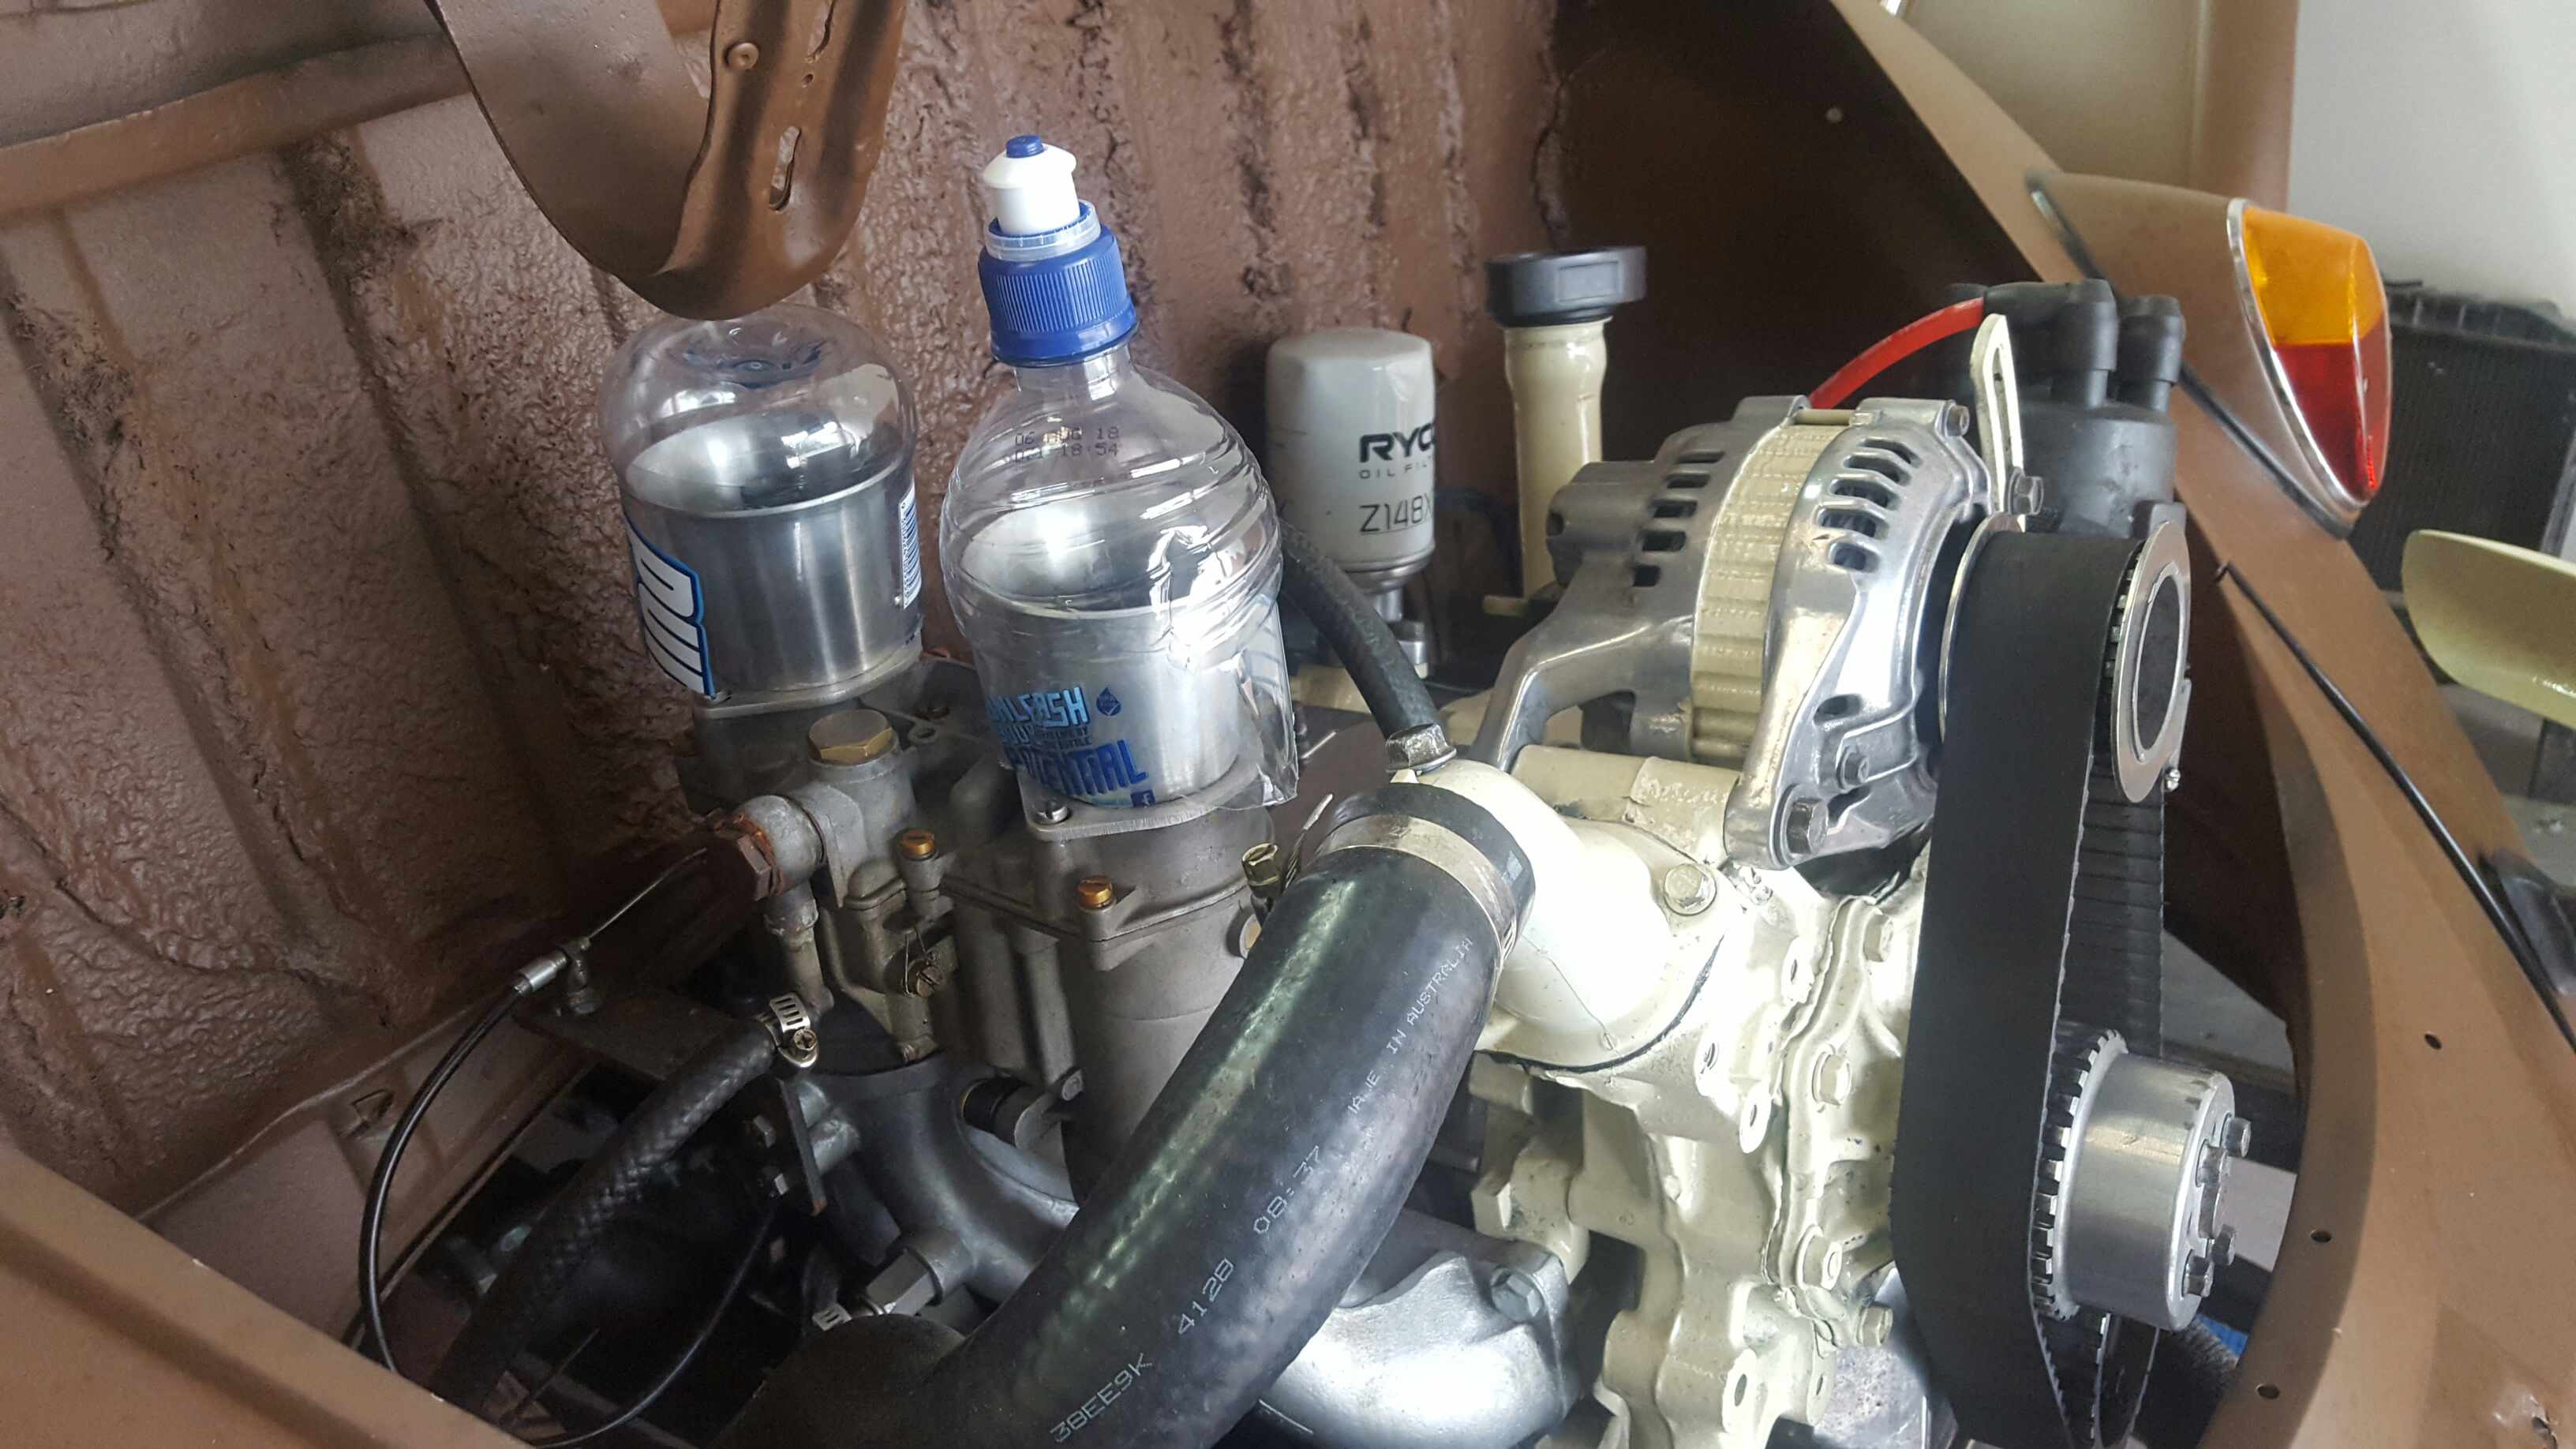
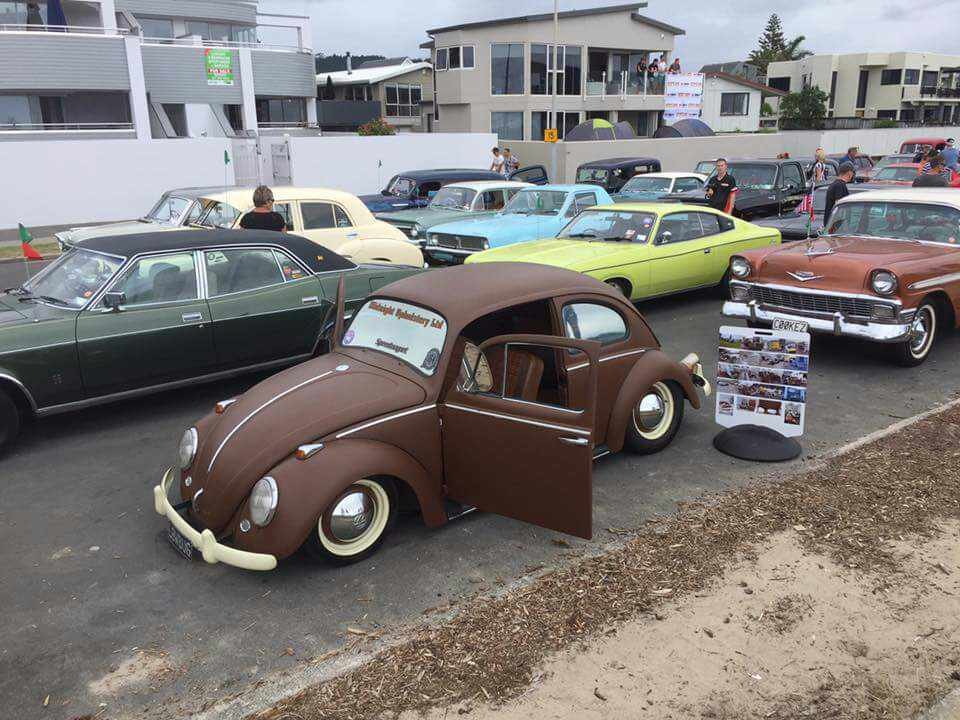
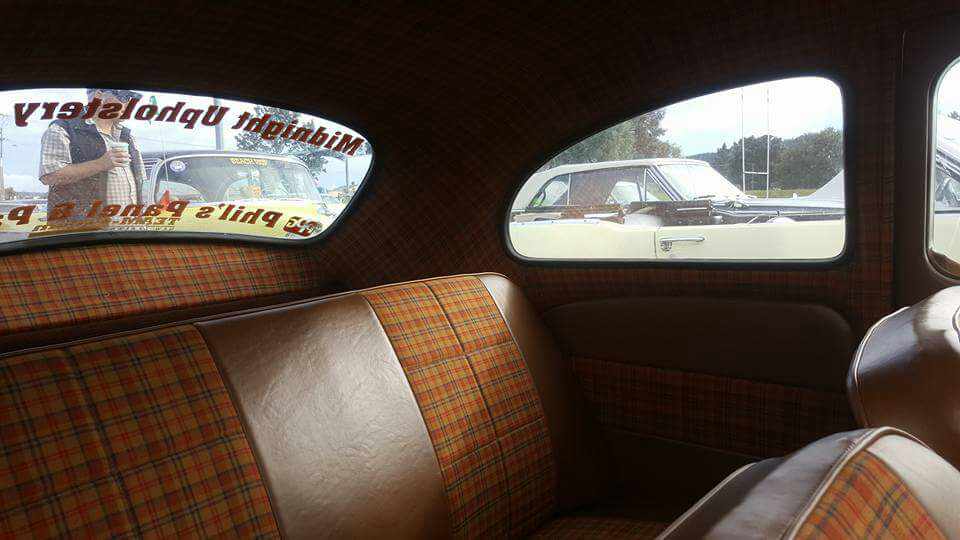
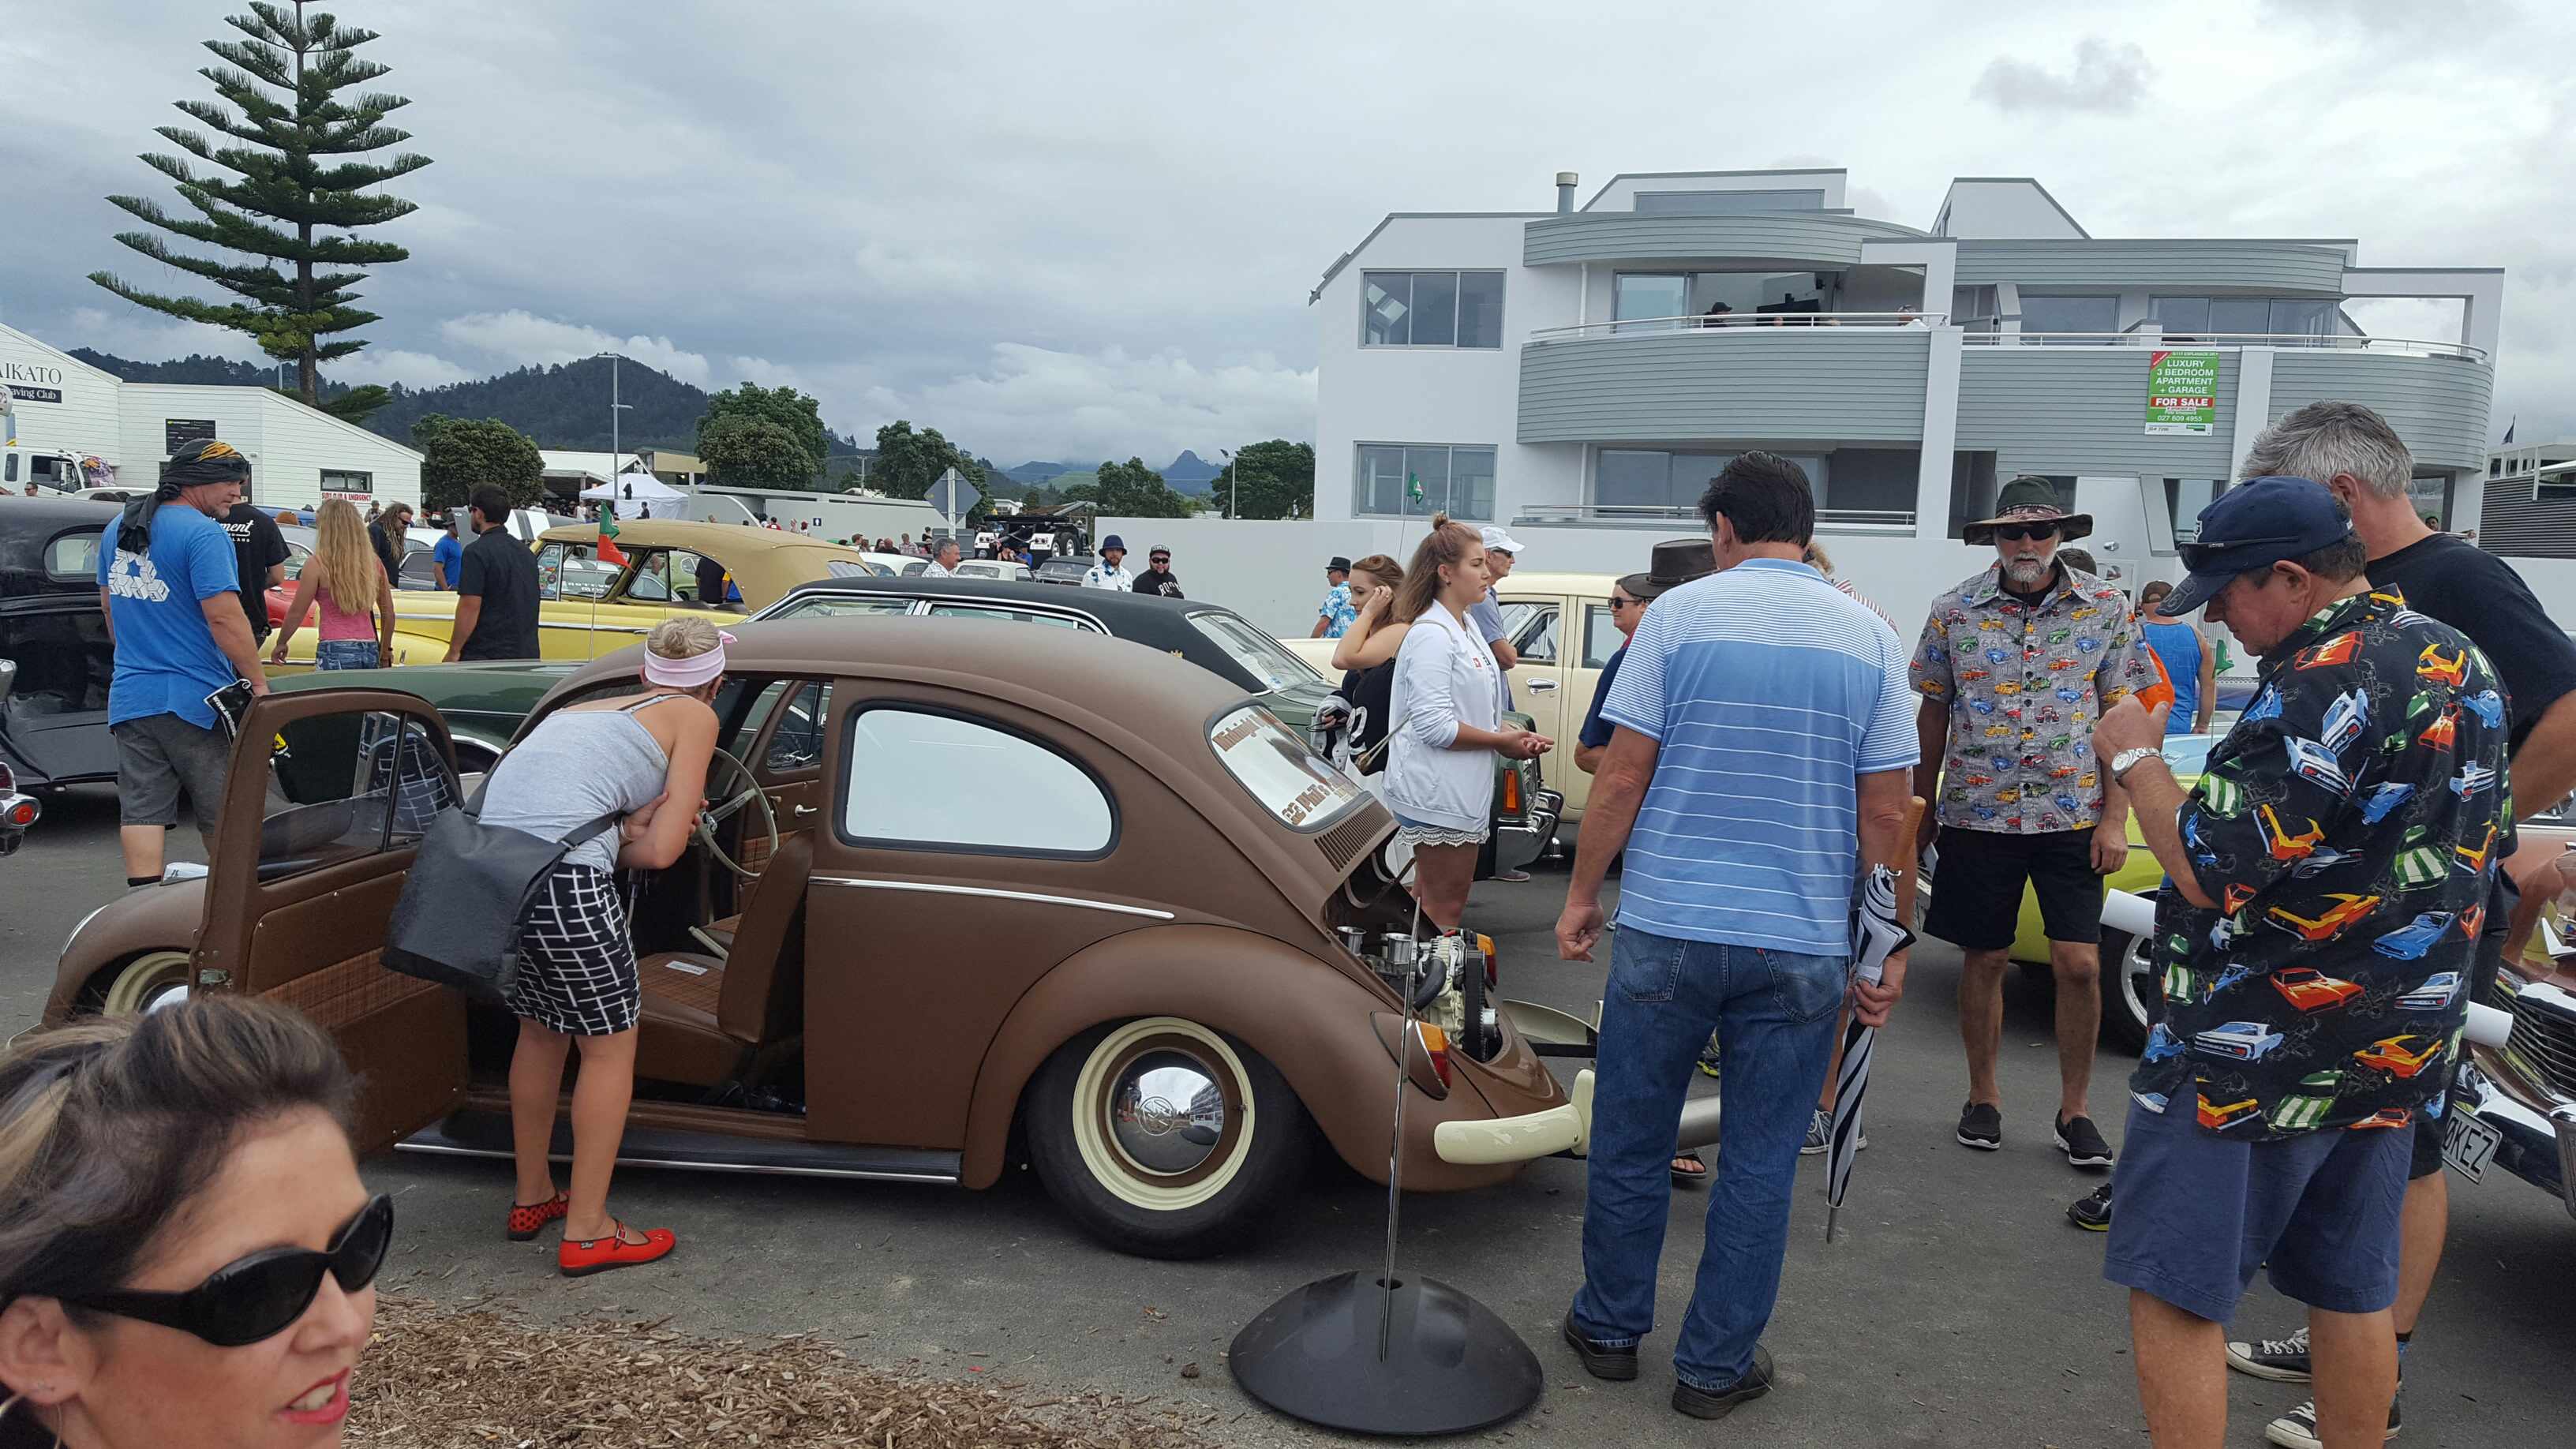
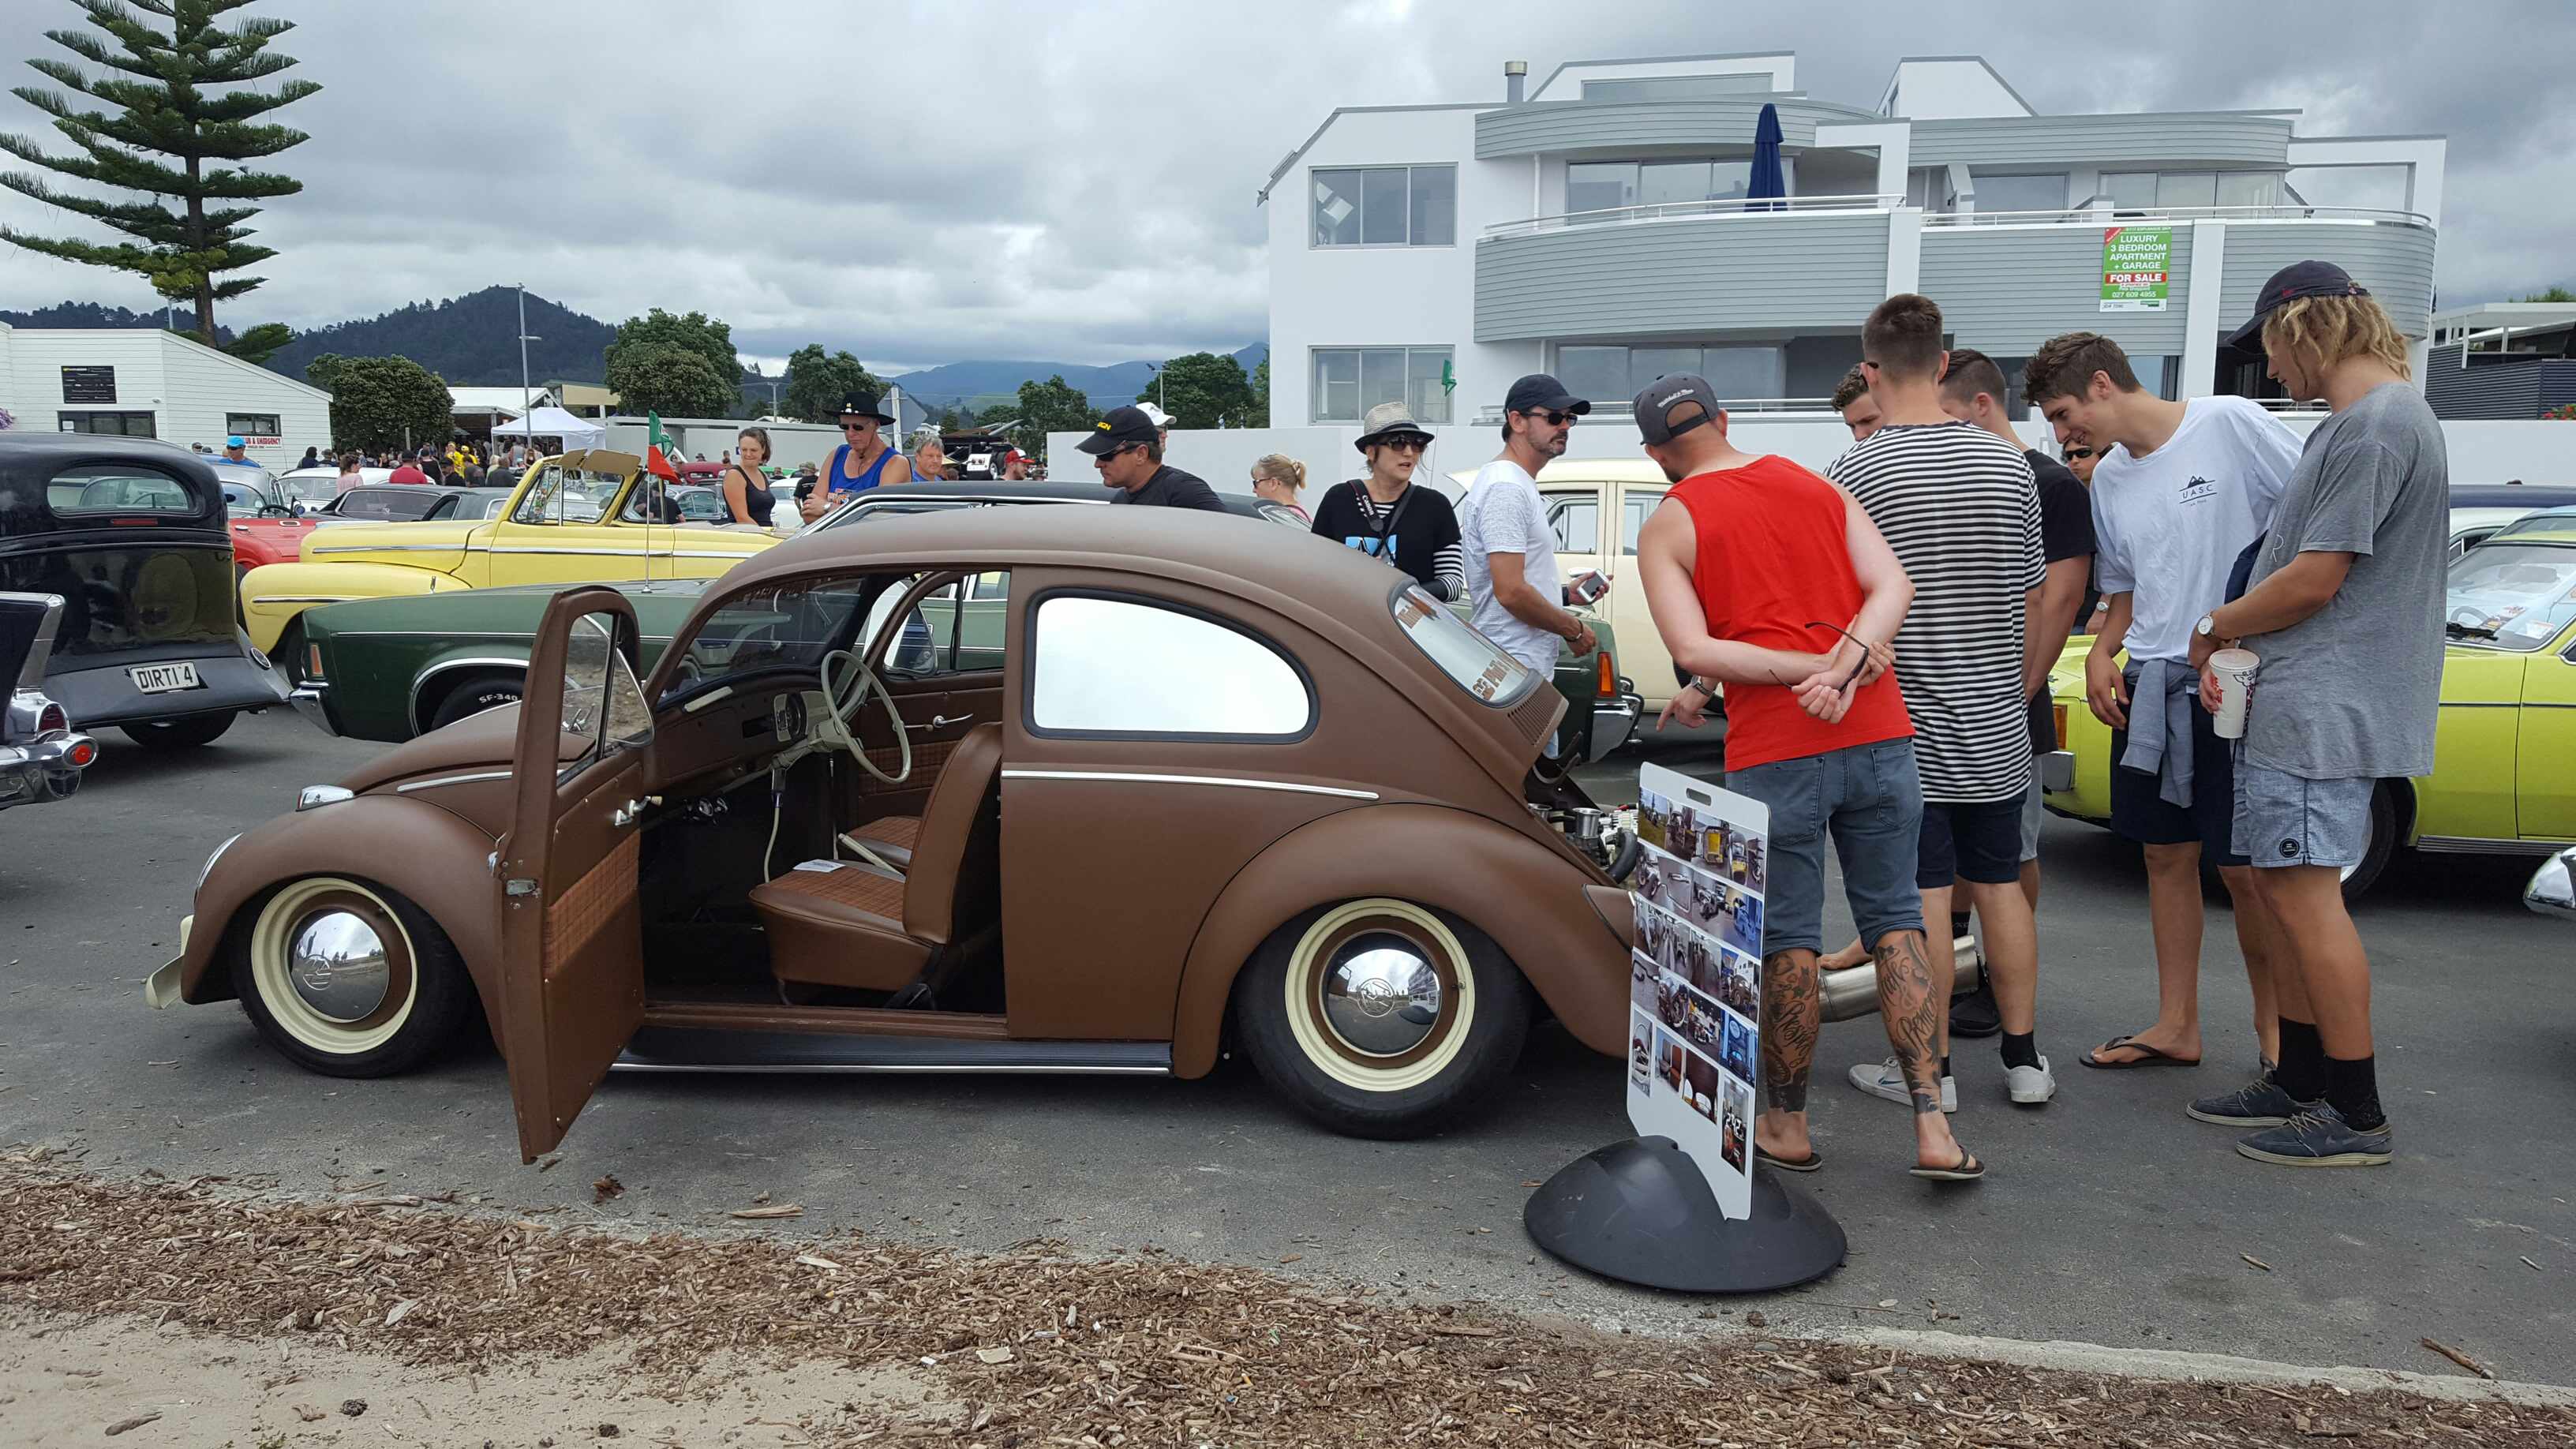
Well we made it to beach hop over the weekend. Started with a trip to tauranga to drop off my 1600 which I sold on Thursday at 930pm..... That's what it's going into. We continued on to whangamata. Made it there at 130am in the end. Fell into bed and was up the next day 1st thing to try get this vw running and make sure we didn't have any issues..... well turned out the radiator was just pressuring and spitting fluid everywhere from word go. So an air lock???? Bled the system a couple of times. Nope still and air lock. At this stage Sean (@oftensideways) was over giving me a hand and we decided we needed to put a bleed nipple in the top housing on the engine. Of we went to see gadget from import x. R100 off old school. We used a drill and Tap from him and got a bolt. Which was handy. Turned out I think the engine had no water in it at all. About 4 letters of water later it was fill to the brim and I was brapping around the block no problems at all. Continued to then finish off my upholstery Yay time to drink. Saturday rolled around and I was up at 8am driving the car threw town to get to the car park. Giving it a good strop and letting the thing Rev it's guts. This was fun. No loud v8s around me. Got into the line quite early which was good. Brent at doozi made me a sign board which I put info on and some photos of how the build went. I had a mate A Aron and his wife come for a ride threw the main parade. Was so cool driving it thew. We had heaps of people ducking down to see threw the front window as I drove passed them. I also packed 2 Bags of ice right next to the radiator trying to prevent it over heating. Did a bloody great job that. Just as we got to our park the over flow just started to spit out. From there I set up camp till about 6. I had a consistent flow of people looking at it and talking to me about it It had a heaps of attention which was cool. Best beach hop so far. All in all it was so good. Also here is a top tip to cover your trumpets if it starts to rain like it did on Saturday while I was by the car. Another shot of it for why not Mate Chris runs the security over there and diverted me to let my car call down but doing that I Gave it a foot full and he really liked the sound, and here he is putting a cone up his bum to impersonate me apparently.
 14 points
 -
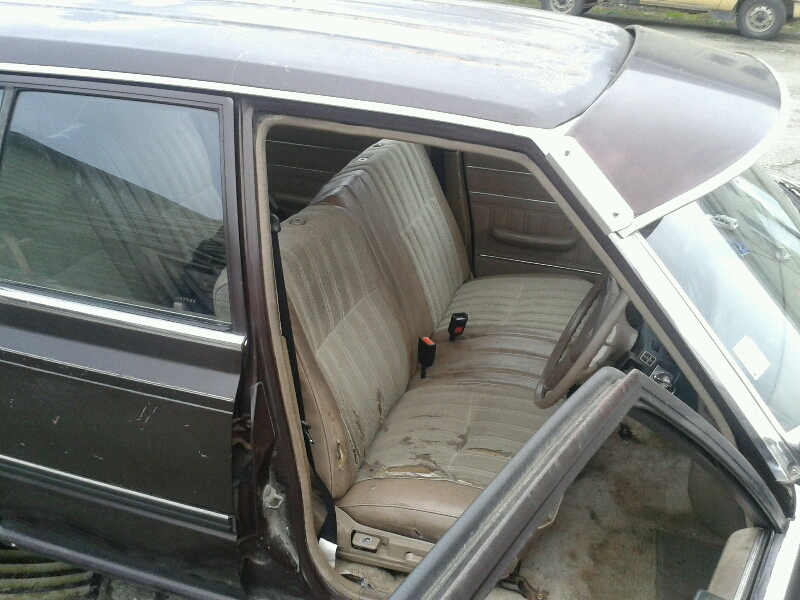
Cooley. Swapped seat over after work. Was a tad gay on my own. But done. Feels heaps better driving around, not so big and gay. Plus niki got me a sweeet brown Mexican blanket for my birthday, so that will make its way in there, once some mods are made for seat belts. So yea. It is now, nats ready. Next on the list, getting the van ready for camping duties, which pretty much just means, clear out crap not needed for the weekend lol. Fantastic.
9 points
-
Nothing too exciting going on with this. just working my way through all the stuff in the way, to get the extra up travel. Driver side engine mount got chopped off and new one made higher up to clear the top link. Alternator had to go as well. will use a fwd bracket to move it up. a new inlet on the water pump should make it work with the rwd pump. Last thing giving me drama is one of the steering links and the the sump. if can get another 30mm clearance between the 2, this will be max up travel on bumpstops. kinda lost count but got around 3 inch more up travel than the leaves other than that just been welding... bottom chassis link mounts are on for good. i forgot to drill the lightweight hole in this one. Crossmember was way too much to weld with tig, and was to lazy to drive an hour to my old boys to use mig. Arc it was. still got a little work to go on it9 points
-
We tidied the engine plumbing and it didn't start. Plugs were dry.... Turns I put the fuel lines on wrong. Fixed that and it ran again. We started to diagnose why it wouldn't turn off. In the process I swapped some plugs and we wasted two hours wondering why nothing worked. Checked the drive shaft and rear cvs 3 out of 4 bolts ain't bad. Drove it out and went to fill the gearbox and it was full I have to remember not to let off the starter too soon7 points
-
China IDA plz.6 points
-
To continue with the theme of not finishing any of the utes sub- projects before moving on to another, today I decided to clean up and repair the leather Audi seats so they are ready for installation (even though the rest of the vehicle isn't, lol) Research was done and I did my best while also being extremely cheap. Firstly the seats were given an extremely through cleaning using an old toothbrush and soapy water to get human filth out of all the stitching, seams and cracks. Just this made a huge difference which is hard to show via pics. Before After Next I got a $6 bottle of liquid shoe polish. It is NOT like shoe nugget- this is a thin black liquid that dries and will not rub off- more of a dye. Multiple layers of this were applied to each cracked area- allowed to soak for a short while and then rubbed off with a rag (so it pretty much only remains in the cracks and damage) Before After So the cracks in the color layer are still there- they just don't stick out like they used to. Next up was this hole in the driver's side bolster. This side is pretty fucked and I always said I'd get it replaced properly....But reality says NO right now. Here's the hole. So I copied some instructional videos for $100 repair kits and made a backing patch out of vinyl. I trimmed the hole up a bit cleaner and stuffed the vinyl in there with the cloth surface facing out so the adhesive had a nice surface to bond. Next I grabbed a tube of trusty simpson panel/chassis adhesive and squeezed some out onto cardboard. I agree this is a strange choice of poo BUT in my defence- I know it sticks to EVERYTHING extremely well, it remains flexible when cured AND it is easily painted. I used a flat blade screwdriver to push glue between the vinyl and leather and pushed the leather down as hard as I could. Then I filled the depression with adhesive and smoothed it out as best I could using a rag soaked in thinners. I tried to stipple the surface so it wasn't glossy smooth. Once that was cured I used my finger to apply some cheap black paint. This was WAY WAY WAY WAY more effective than I expected and after a damn good rubbing have established it's pretty durable too! Not perfect but you wouldn't know it's there unless you look really closely! So after a through coating with leather conditioner cream here's the end result.. I'm EXTREMELY happy with how they came out5 points
-
Almost finished! Bores have cleaned up without any defects. Ports look a fraction off on some of the bores though so hopefully I can cut some valve seats that work! Not going to lie, its quite exciting!5 points
-
Couldnt find any of my old photos, used to have heaps, but this was nearly 13 years ago (Im 26 now)... Been lost through the few PC's over the years I guess. I dug it out of storage though, exhaust and other bits and pieces have some surface rust on it. TS Reed Cases, 2mm stroker crank, ESP ported cylinder head with the combustion chamber re-machined, Tillotson carb, ADA S1 pipe. Frame has a 3mm fender fully welded... as you know they break off after time. Billet wheels, rear needed a beadlock from memory, as the rubber would begin to expand and seperate from the wheel which felt pretty dodgy at high speed.
4 points
-
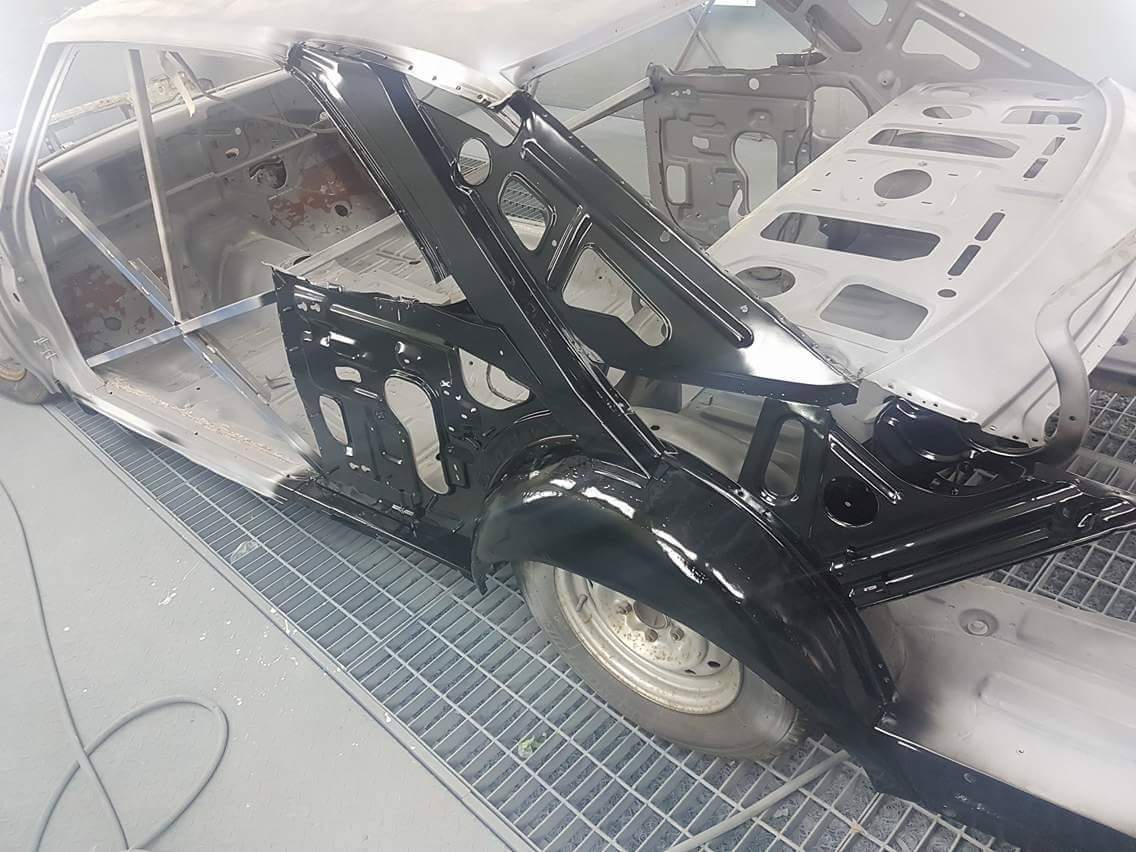
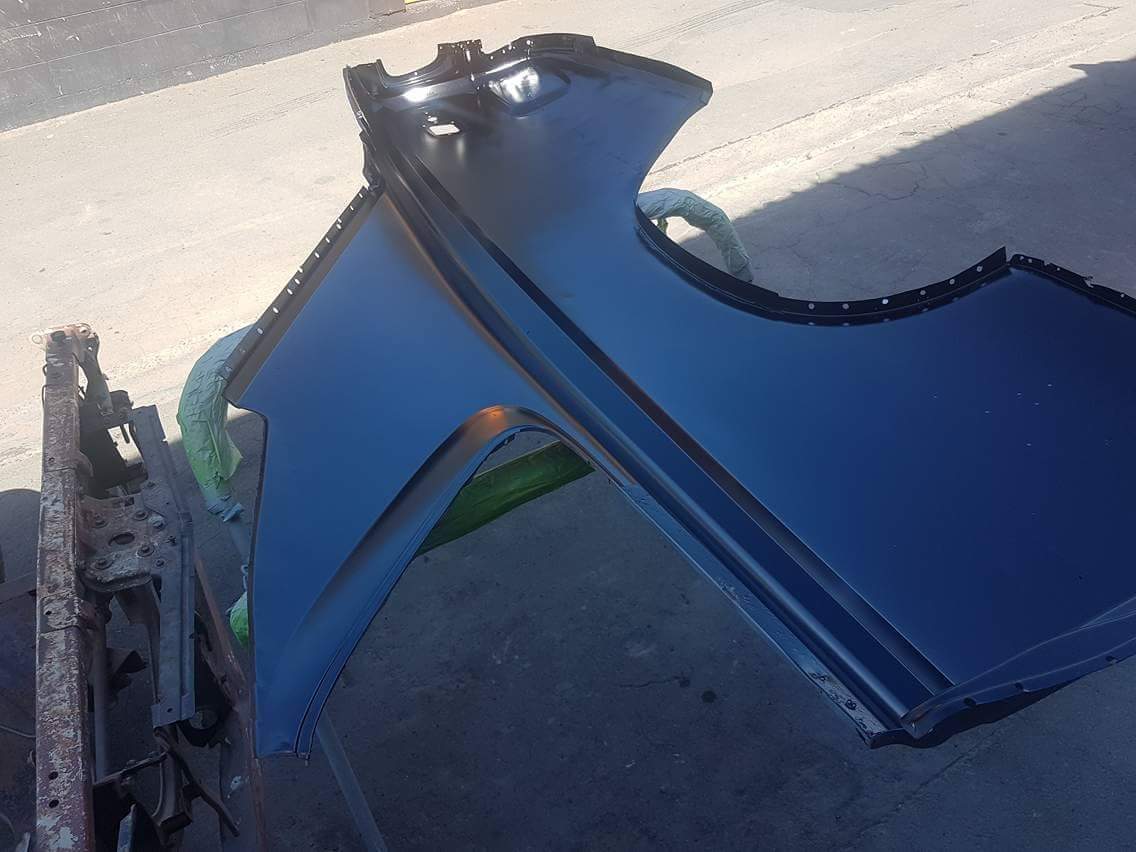
Here are the pics of the full respray, car was mostly flat AFTER 28 years, little here and there some dent etc. colour is original ,Sarajevo Weis W18, but in clear coat it was added a bit of a crystal gold pearl, without sun or light you cant see it, it turned out very very good, and I was very satisfied with that. preparing the car for painting Preimer: Ready for paint Colour:4 points
-
I also am too cheap to spend $8 per pin for the door hinges so machined some high tensile bolts to the right length and diameter and grooved them to take a tiny c-clip. Then heated them up really hot and dipped into waste oil to blacken em. No idea how well this will last or protect from rust but YOLO it was cheap.4 points
-
Some better pics.
4 points
-
Link to Discussion Thread Hello team, Thought I would start up a project thread for my old Range Rover project. It all started with my parents vehicle choices. They had a bunch of rad old cars (most all sold now unfortunately) from Triumph TR2's & 6's, split window Kombi's, old Mercedes and Jags and a bunch of old english motorbikes. The ones that really got me were the Land Rovers. It must have been the family holidays bouncing around the back in the SIIa Dormobile camper or their old Range Rover. Anyhow, long story short, I have a couple now that I am working on that you will see in the following posts but this will mostly be for the 1971 Rover. This truck is Masai Red and was brought over from the UK in 1973 and then sold to the chap I got it off in the same year. They used it regularly to pull their jet boat and horse floats up until around 2000 when they purchased a diesel vehicle and parked the rover in a shed. During their ownership around the mid 80's they added the stripe down the side, re trimmed the interior and wrapped the C pillar in vinyl to make it look like a later model one ( it should be painted to match the body colour like in the first photo). As it sat in the shed, untouched for around 18 years! I purchased it of them around November last year and have been slowly chipping a way at it ever since. Great thing as it was shed stored it is pretty rust free but I will need to do the sills for a WOF. Another bonus is that the registration is still on hold! Bunch of small jobs done (coolant and radiator flush with all new hoses, new distributor, coil and condenser and a few other bits needed to crank an engine that hasn't moved in so long.) Good progress this weekend, Leak in the coolant system sorted and clutch bleed and we now have it moving under its own steam! Still a long way too go... Next weekends job is replacing the old discs and pads and some of the brake lines and look at giving it a bit of a tune.3 points
-
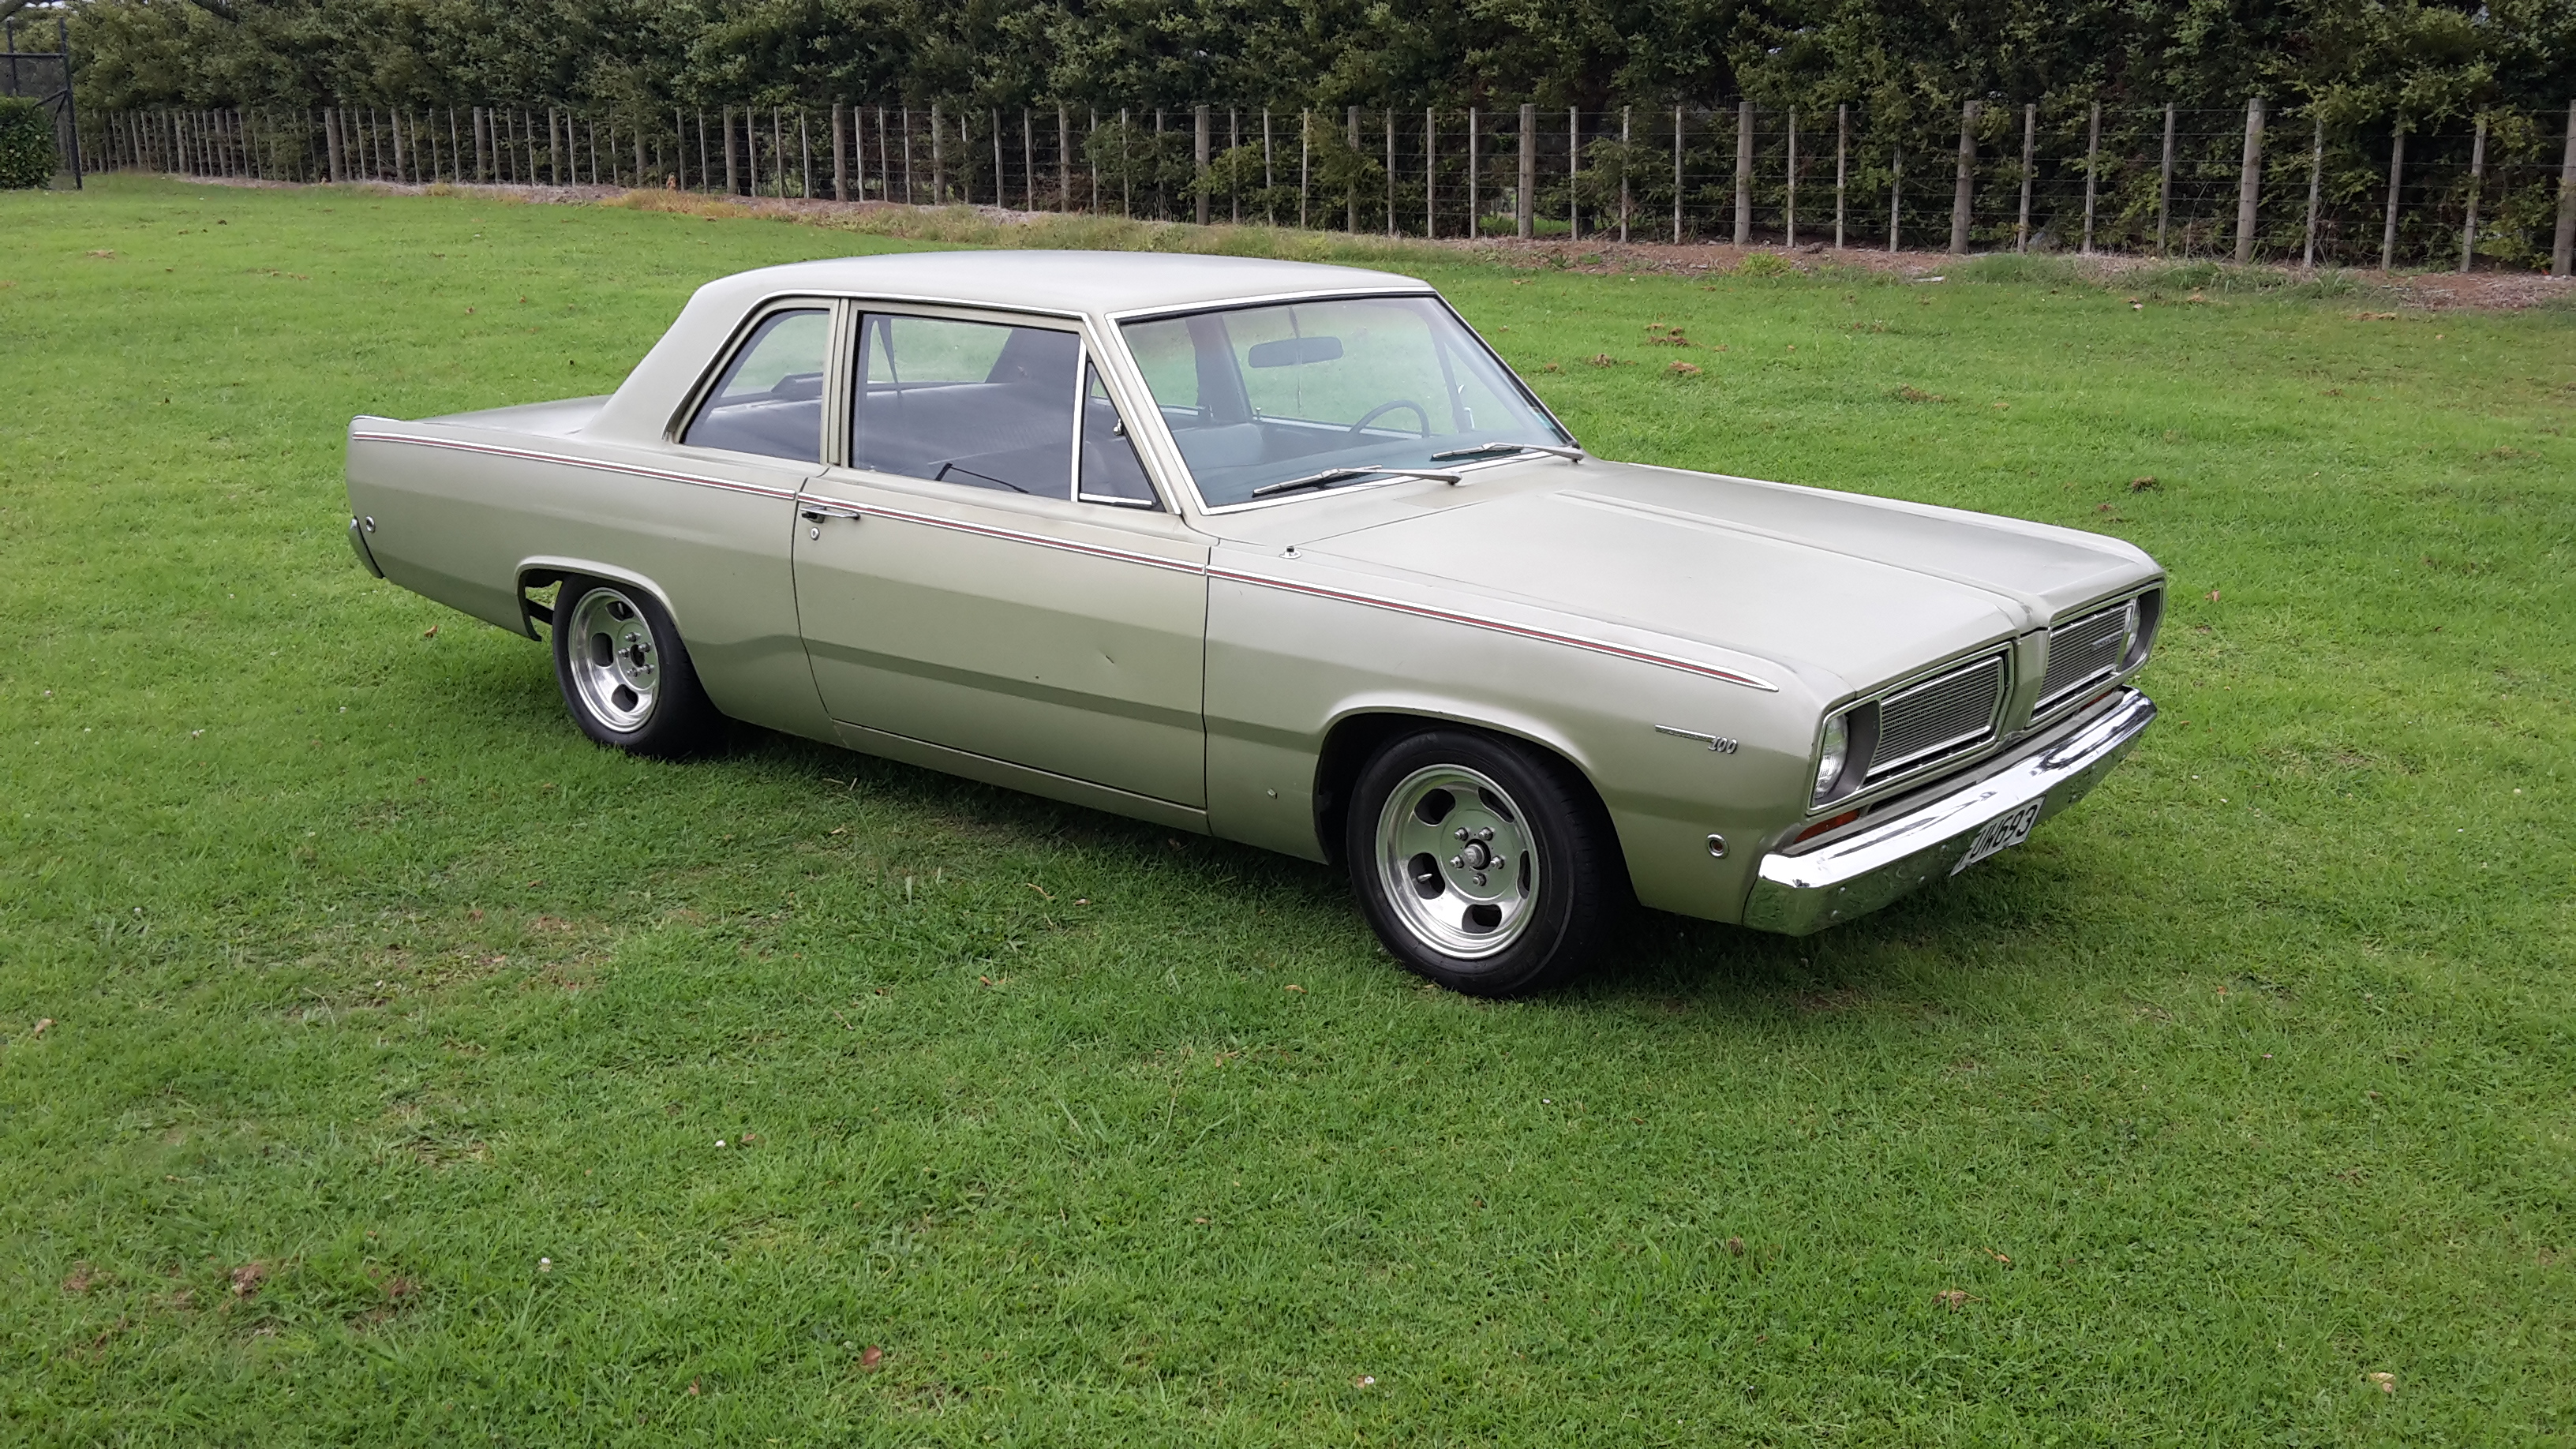
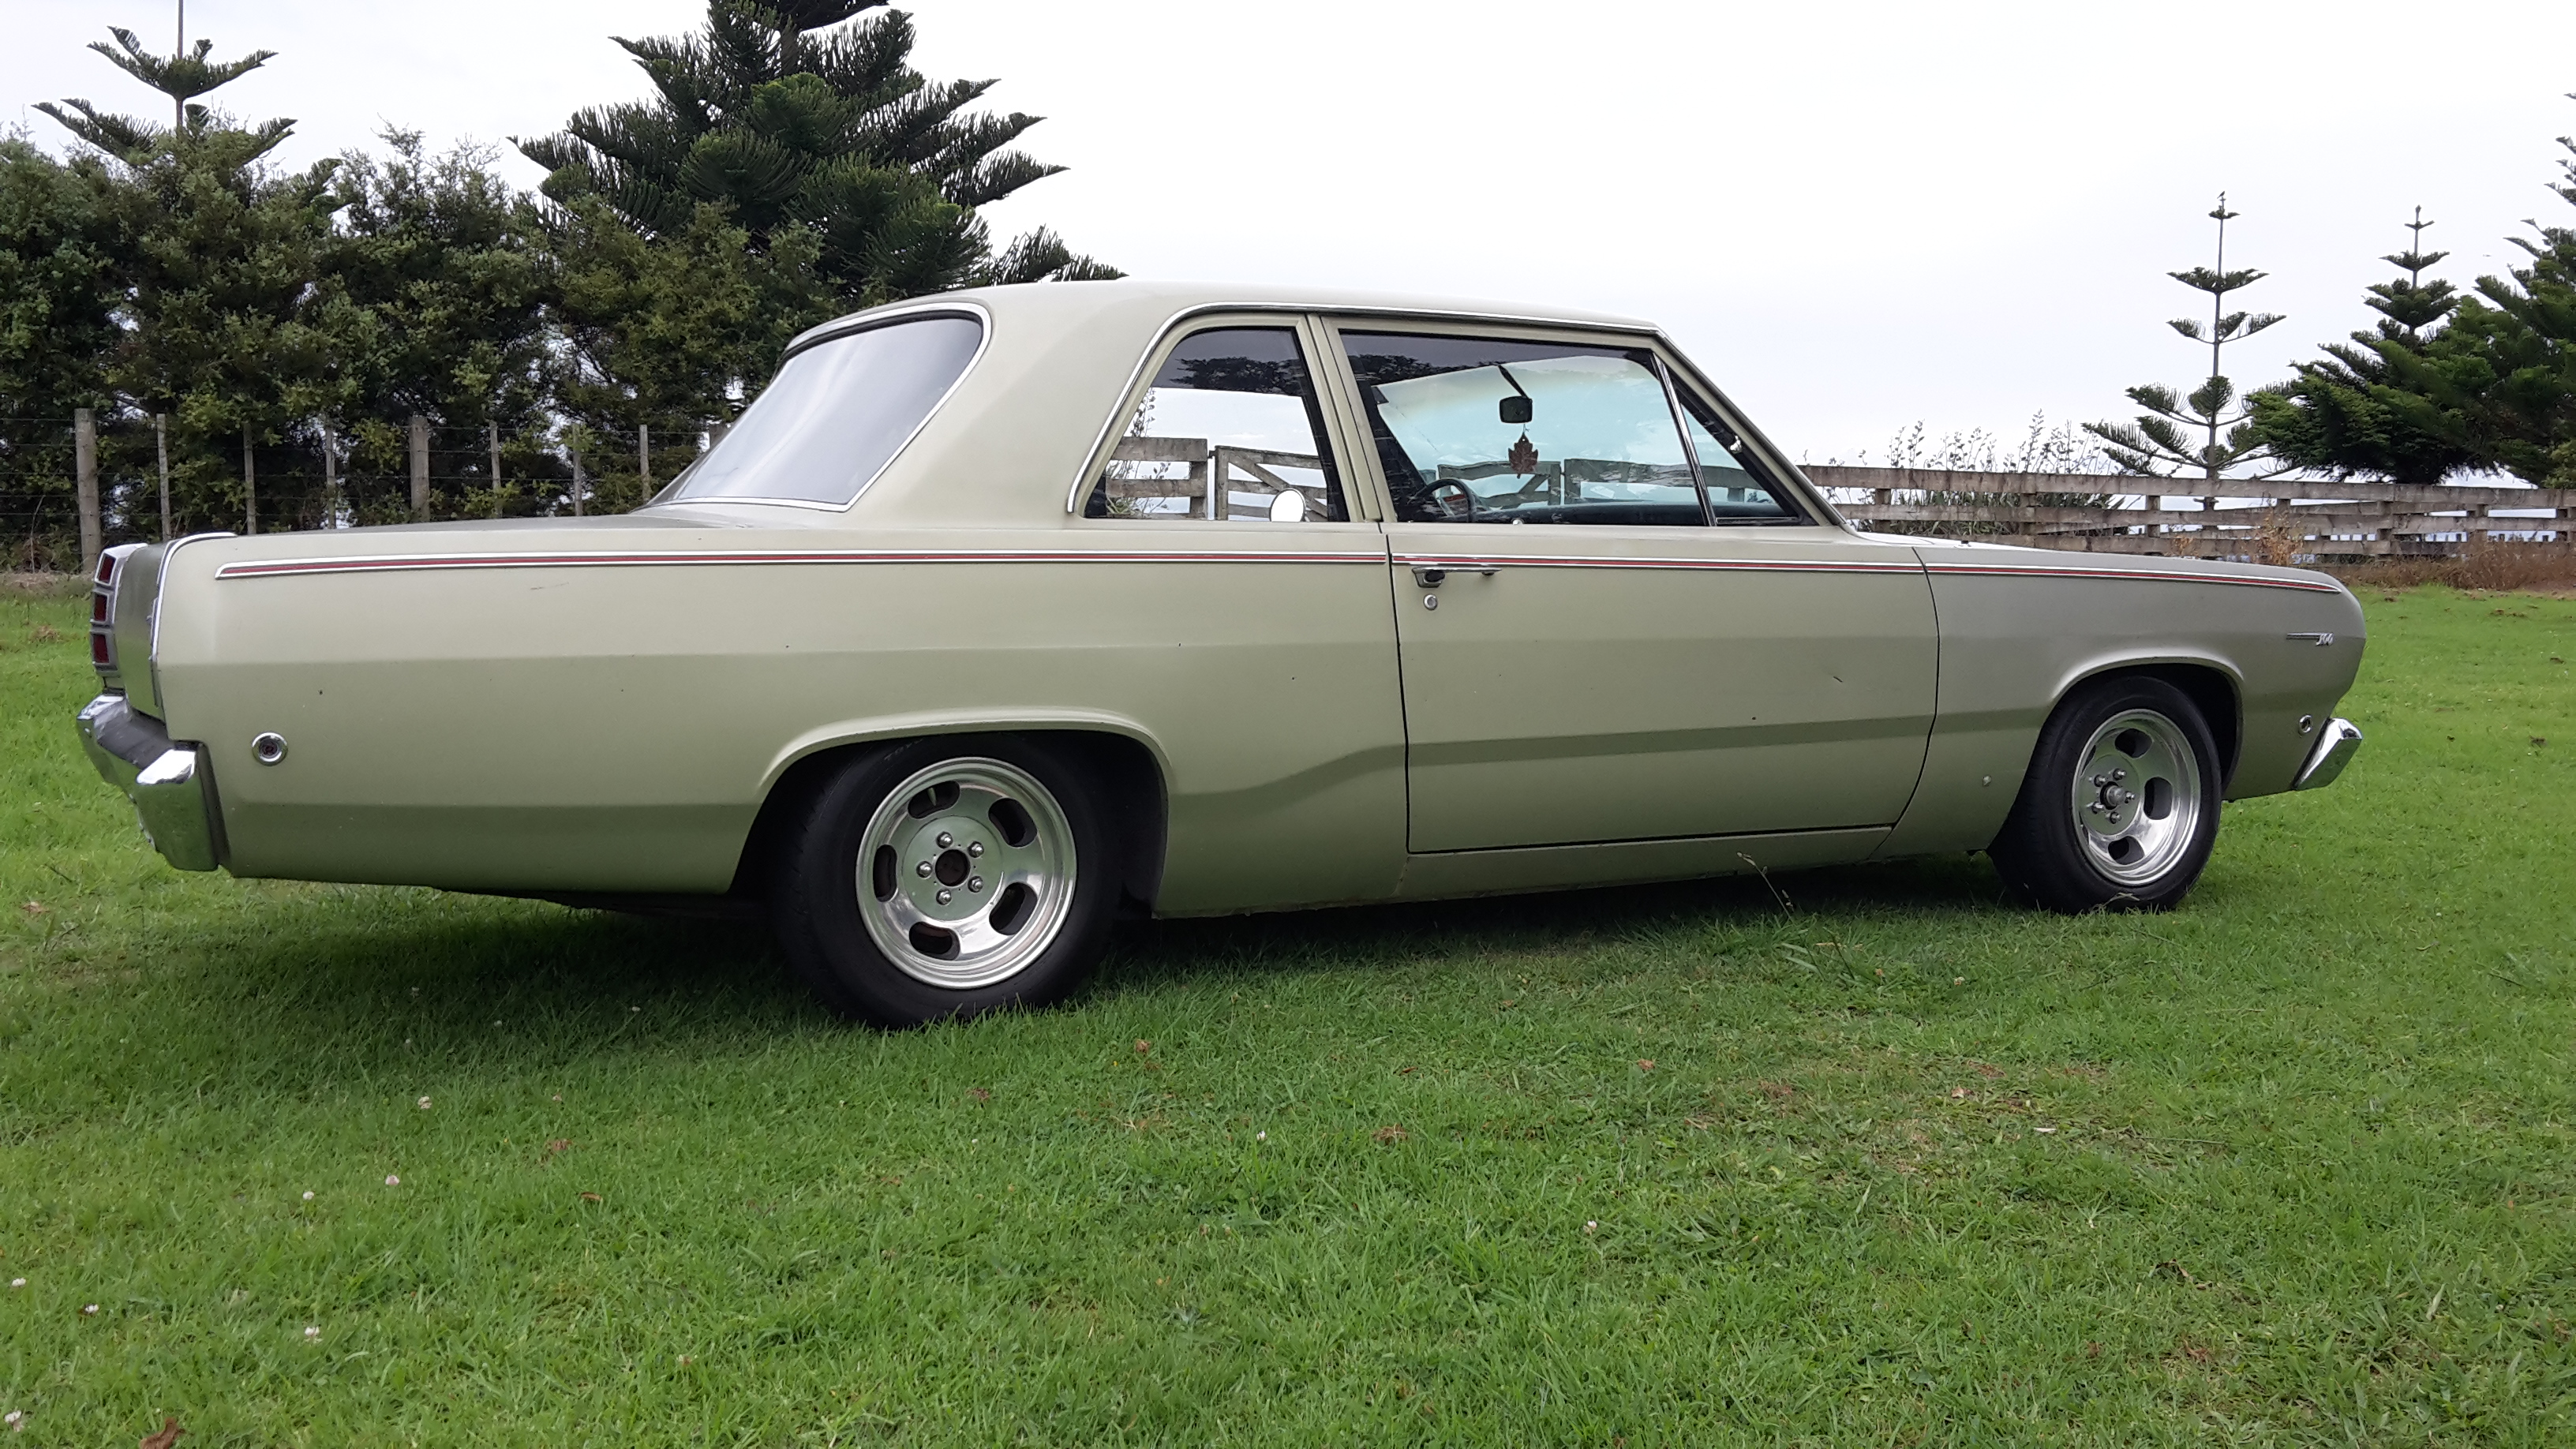
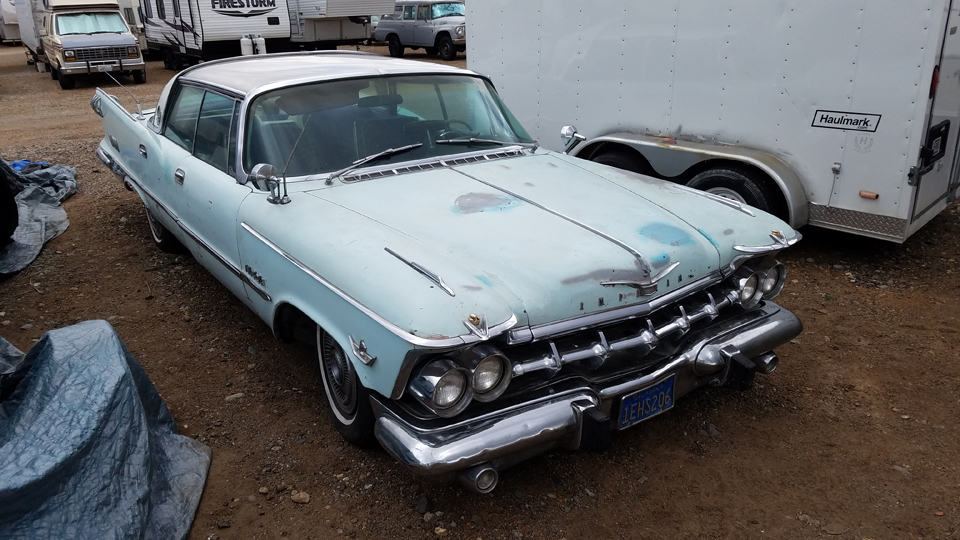
Just got back from this epic event. Unfortunately I am hopeless at taking photos but did manage to take a few of the Valiant at the beginning of a few of the cruises over the weekend. I am sure other members have way better photos of the event so please share them.3 points
-
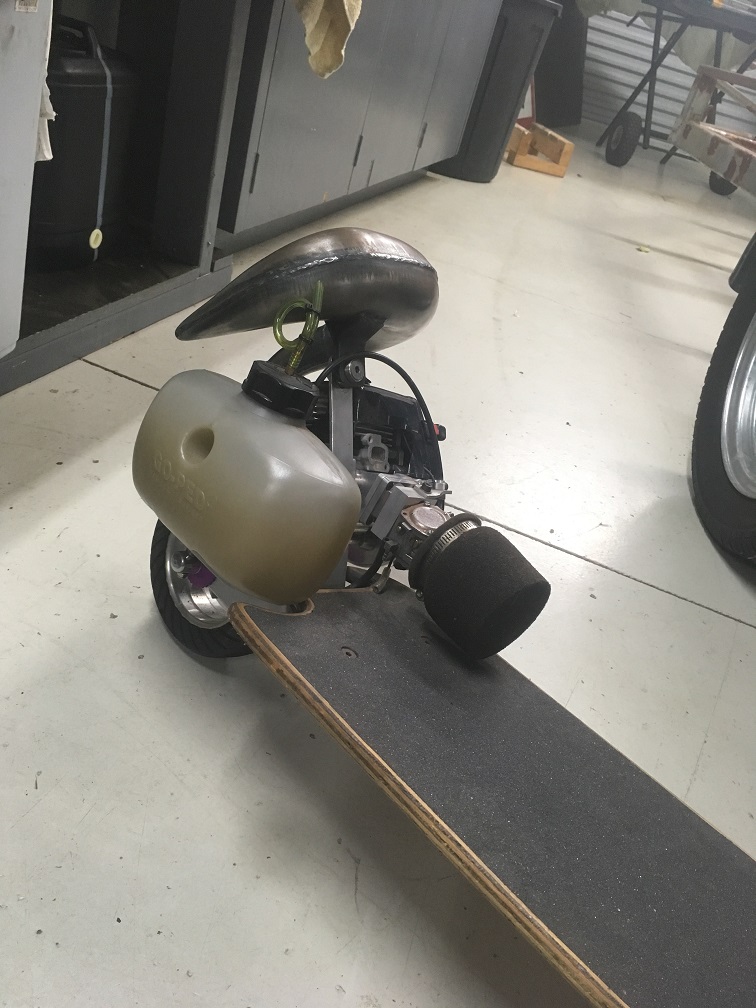
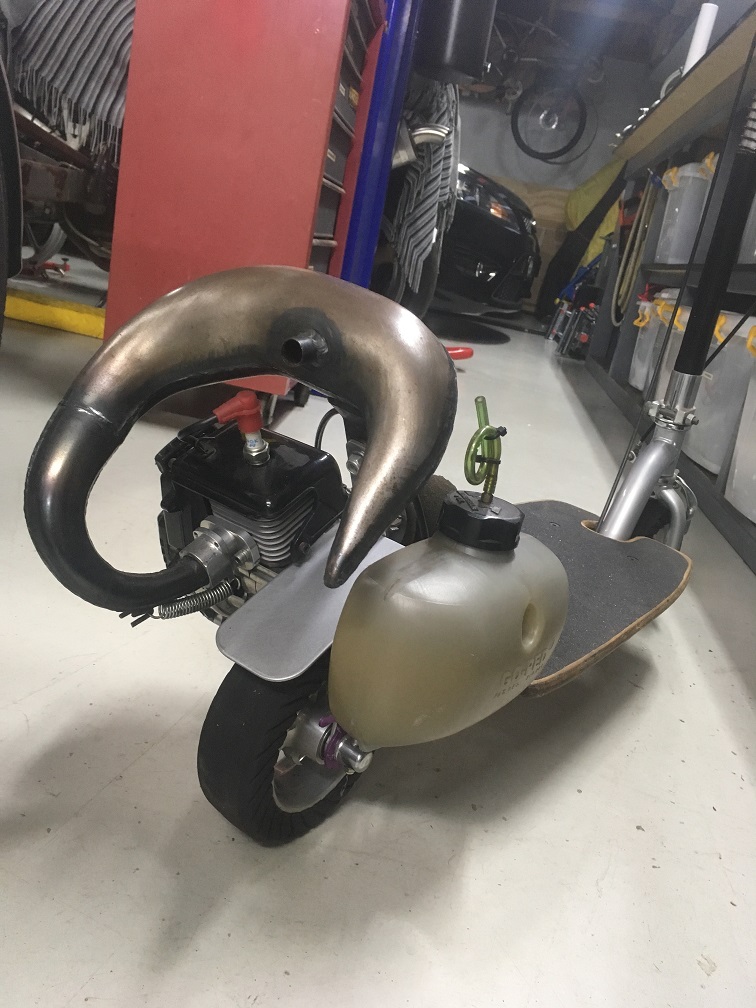
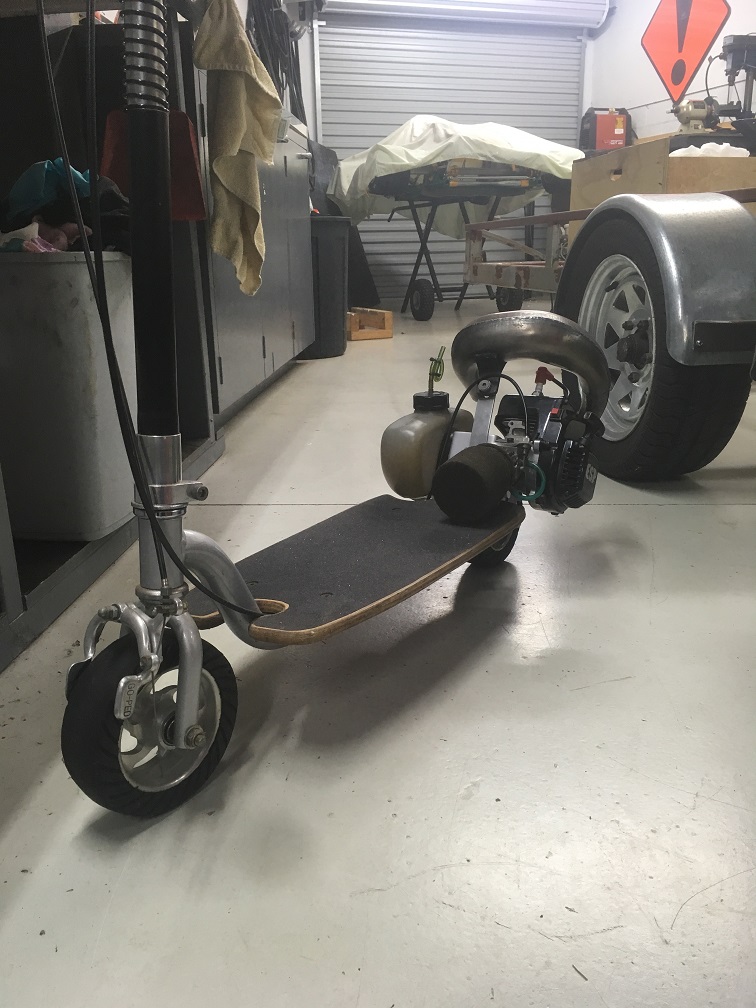
I built a few Go-Peds back when I was 11-13, still have one. Ill see if I can dig up some old pictures of it. Got Trevor Simpson reed cases, ported, 14:1 compression, ran it on methanol for a little while but too much up keep for a toy. It was pretty quick, would rev out to 19-20k rpm, I could be hooning down the foot path on a main road passing cars doing 50-55kph...3 points
-
Did the rear brakes and worked in a battery tray to mount the two group 24 house batteries to the driver side frame rail. Made of .125in plate and 2in angle. Still need to add one more tab to the middle and cut some strap to hold them down and then drill and rivnut the frame.3 points
-
keen to go a much worse and longer way tbh3 points
-
It looks so lush. I was very tempted by this myself but.... no spare coin. Maybe one day.. but by then they will finaaly be hit with Mazda tax and out of reach.. Anyway- I have this that I'd bought in the UK at some random swap meet. Might be of help! I want to keep it but totally happy to post it up to you. You use it/copy it and when finished post it back. PM me your address.
3 points
-
So yeah, picture less update for max who cares. I left the work shop at 8.30pm on Friday, old motor sitting back in the hole, bolted in with no manifolds. Finished up about 2 the next day after just general fluffing around. So then took it for a decent test drive. To my surprise this motor doesn't have ba blown head gasket lol. As said in my discussion thread, this motor had only been driven about 60km last time it was in. So yeah test drive good, what a surprise it also has oil pressure lol. And uses all the gas. And is actually slow up hills. But you get that with a 2litre designed in world War one. And Mourning Cupcake took it for a drive to go see steelies today so she could learn the ins and outs of driving it, as she will be driving it solo to nats as I will be taking the c20. She did good job. So yeah, just wanna swap the bench seat over. Might struggle that tomorrow after work.3 points
-
Bit of paint
3 points
-
Shes a pretty big job. Been at the machine shop for a week. 1 more week to go! Casting is looking good. Yet to find any lumps of sand or porosity apparently!3 points
-
This wagon was super amazing.2 points
-
Hoodlums2 points
-
I'll be joining from Hamilton. Is there a place people would like to meet? Work shop has heaps of parking but can meet else where if wiser. Say the likes of maybe @Archetypes place in whatawhata and do the back roads.2 points
-
A: Hamilton - Tokoroa - Turangi - Taihape - Palmie (well - Feilding/Woodville by-pass unless needed) - Matserton - Featherston is fastest. 7 Hours 41 mins B: Hamilton - Tokoroa - Taupo - Napier - Hastings - Woodville - Masterton - Featherston 8 hours 8 mins more of the scenics. Or combo between. 5 Mins diff going the other side through instead of the 'Tron. SH1 however should be ok on a Thursday and more chance for people to join the gang? My 7 cents.2 points
-
So we probably should start looking into deciding a route..... @Threeonthetree @piazzanoob @Tumeke2 points
-
We found a box with some home made circuit board in it and wondered wtf it was. No idea how I found it but turns out it's a fuel cut defender. I don't quite understand the reasoning of them. They say fuel cut can make you go lean which detonates & damages apex seals etc. So you make a device that tells the ecu it has less boost and it then will be running lean causing the same problem... Can anyone elaborate on that? Here is a link for the write up on making your own for series 4 rx http://web.archive.org/web/20050205221712/http://www.fc3s.org/how_tos/electrical/fcd.html2 points
-
Mayte I should have all those parts and could bring them with me to nats?2 points
-
I've always found those Bunnings specials a bit shit so I spent a bit more and got an oil filled one, cutz way more consistent and breaks neater and easier..2 points
-
Hold the phone in landscape for fucks sake. That better not have been Joe filming that. Other than that though, fuck yeah, good work, congrats, yay, etc!2 points
-
I often spend time building stuff, i find it quite relaxing and gets me out side. I started building shit years ago with the odd subwoofer enclosure to full boot installs, now i own a home so its cabinets, fences and my most recent - an Activity Table for the kids. I went a bit overboard and made this waaaaay more complicated than it could have been. I started in SketchUp where i went through a few design iterations and eventually settled on this; I then tested how it would go together by printing a prototype with a 3D Printer. I was glad i did this as there were a few things that needed changing - mainly i added hidden legs to support the table more. All the sizes & angles came from the SketchUp model and turned out pretty well. I did need to use a little bog because my cutting tolerances were not that precise. you can see the hidden leg supports if you look closely. I let the kids chose the colours for the table, was pretty fun as i just sat them in front of the computer and tried different colours in SketchUp until they were happy. Then off to bunnings for a few test pots. I think it turned out really well, kids love it and use it every day - its bloody heavy though and i dont think i will build something that retarded again.2 points
-
Oh we also made a clutch pin for the slave out of a Datsun clutch master rod. I made a code checker too, got a bit carried away and put it in a enclosure and made it plug in etc. The only code we got today was tps and that was because it wasn't plugged into the correct plug2 points
-
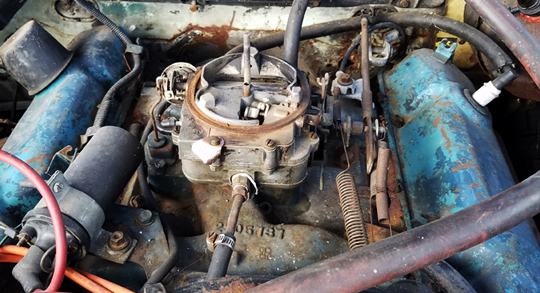
So a few hours in we have found * plugs were worn - replaced then and the leads. * fuel pressure was low. Pump has 5volts to it. Smashed a battery in the back which sorted that. * it's now only flooding on the front rotor. Double checked injector wiring and it's ok. We will pull out and test the injectors. Update. Pulled the primary injectors out and one was wet. Tested them by blowing in and tapping them across the battery. Some were completely blocked and some had old fuel shit in them. Slammed two good ones in, cranked it and it tried to start killed power to the fuel pump and it started!2 points
-
So i started this thread then did nothing about it. so well will all meet at the papakura/drury BP service station off the southern motorway We will be heading on the road at 7AM The current attendees are Shakotom oldrx7 Tumeke tortron Threeonthetree azzurro vivaspeed piazzanoob Also note for people coming into Auckland for this the traffic gets very heavy from drury onwards so leave early to be at BP before we leave at 7am
2 points
-
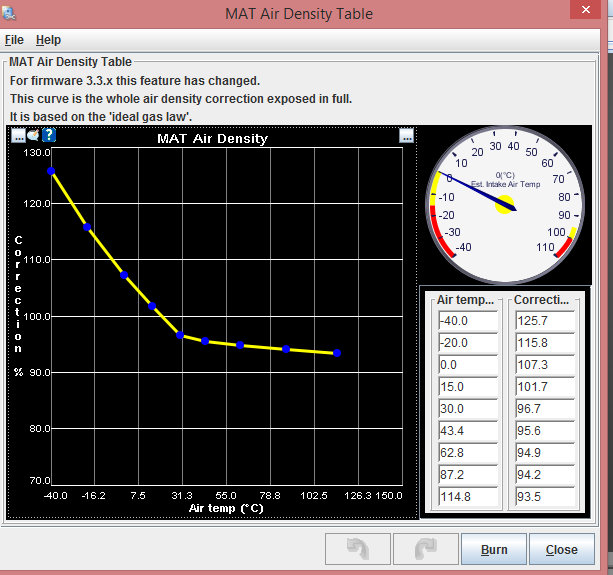
^ This...I think might possibly be happening. I have now got the setup returning from the rails to the tank and the over flow on the surge also returning to the tank. We took the car for a drive to the big smoke that is Motueka. Nothing really wrong with performance and every thing is smooth but with noticable noise from the main pump. I thought it might be low tank volume as I only had 7 litres left. Filled the tank up and noise still there. Got home and climbed under car with engine running. Surge tank is only jus warm to touch so that problem was solved. However the main pump has a noisy cavitation sound. So as much as I thought my Carter lift pump was the boss and was pumping heaps of good volume, the main pump can obviously pump even more. But why the cavitation sounds when the tank is full??? Is the main pump for want of so much fuel that the lift pump cant supply that it then starts to draw air through the overflow pipe which enter the tank nearer the top? Well luckily its going to be a piece of piss to re-route the rail return back to the surge and then block off the extra inlet I had added onto the fuel tank. With this done I am hoping that the surge tank wont get so hot either, having discovered the blocked filter and replacing it which will should give the lift a new lease on life. Plus in other news, related to the above as I thought it was the hot fuel issue causing it, I have fixed the heat soak surging. 1 minute of table changing on that Mat correction thingee before we took off and it seems to be sorted. Having left it outside the steel merchants while I picked up supplies and then outside the supermarket later on and neither time did it lean out after startup. Sweet! I will play with it some more as I think I can get it even better. Interesting to watch the air temps changing with use too. Anything from sitting at 25 degrees when driving along to around 45 degrees after the car has sat for a while turned off. The new table here...
2 points
-
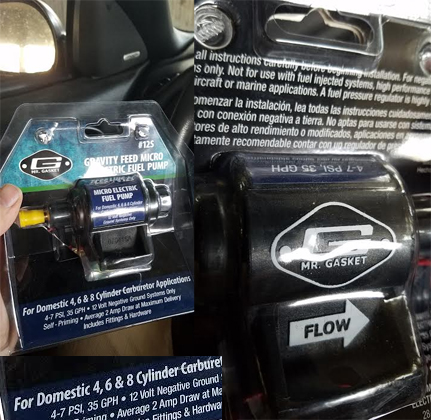
Hi all, New progress since last on here; I just bought a universal fuel pump to replace the mechanical Chrysler one she had as stock. Getting on with this build has been an interesting challenge; mostly due to my inexperience, the distance I have to drive out in the desert to where I store the car and the fact I work nights but I'm really keen to get her moving under her own power before I have to help my father move his stuff up to Oregon- once I get it sucking petrol from the tank like it's meant to I'm focusing on brakes next! Played with the electrics and half do work (Low beam lights, wipers, air con and the driver's side window) while the clock, radio antennae, radio, horn ring and turn signals are all taking a nap. Found that somebody disconnected the black ground wire on the L side horn *Has one hooter on each side of the engine bay behind the grille* so I wired it back up, put a little tape around it and... still no toot. Wish me luck haha >to be continued...
2 points
-
What an engine! I wish I could say this was my crankcase! Sadly its on loan (like most of the other bits!).2 points
-
Awesome brochure shots from the 70s.2 points
-
much more space now after completing the engine bay(all hoses connected etc), iam really satisfied how it looks2 points
-
20th April then?1 point
-
Checker plate. Where. The. Fuck. Is. The. Checker. Plate.1 point
-
He moved the other tang and put oil in the van. I found the remnants of a bag of weed in the glove box too, I found a farm rego label in the glovebox from 20101 point
-
Drove 5min to the second hand shop, bought a bloodhound gang cd. Then proceeded to drive 80km round trip through whitemans valley. Went well besides the fact the jets are a tad big given this motor is 2l verse the 2.8 So it will fucking do. Just need to swap over bench seat and should be gravey1 point
-
I will probably attend the tour de oil leaks1 point
-
You should of been in the back throwing them around Slightly less off topic. Looks good now the height is adjusted1 point
-
Decided I didn't like it all jacked up in the bum, so got some 1.5" blocks to level it out. Much betterer
1 point
-
Took some snapppssss1 point
-
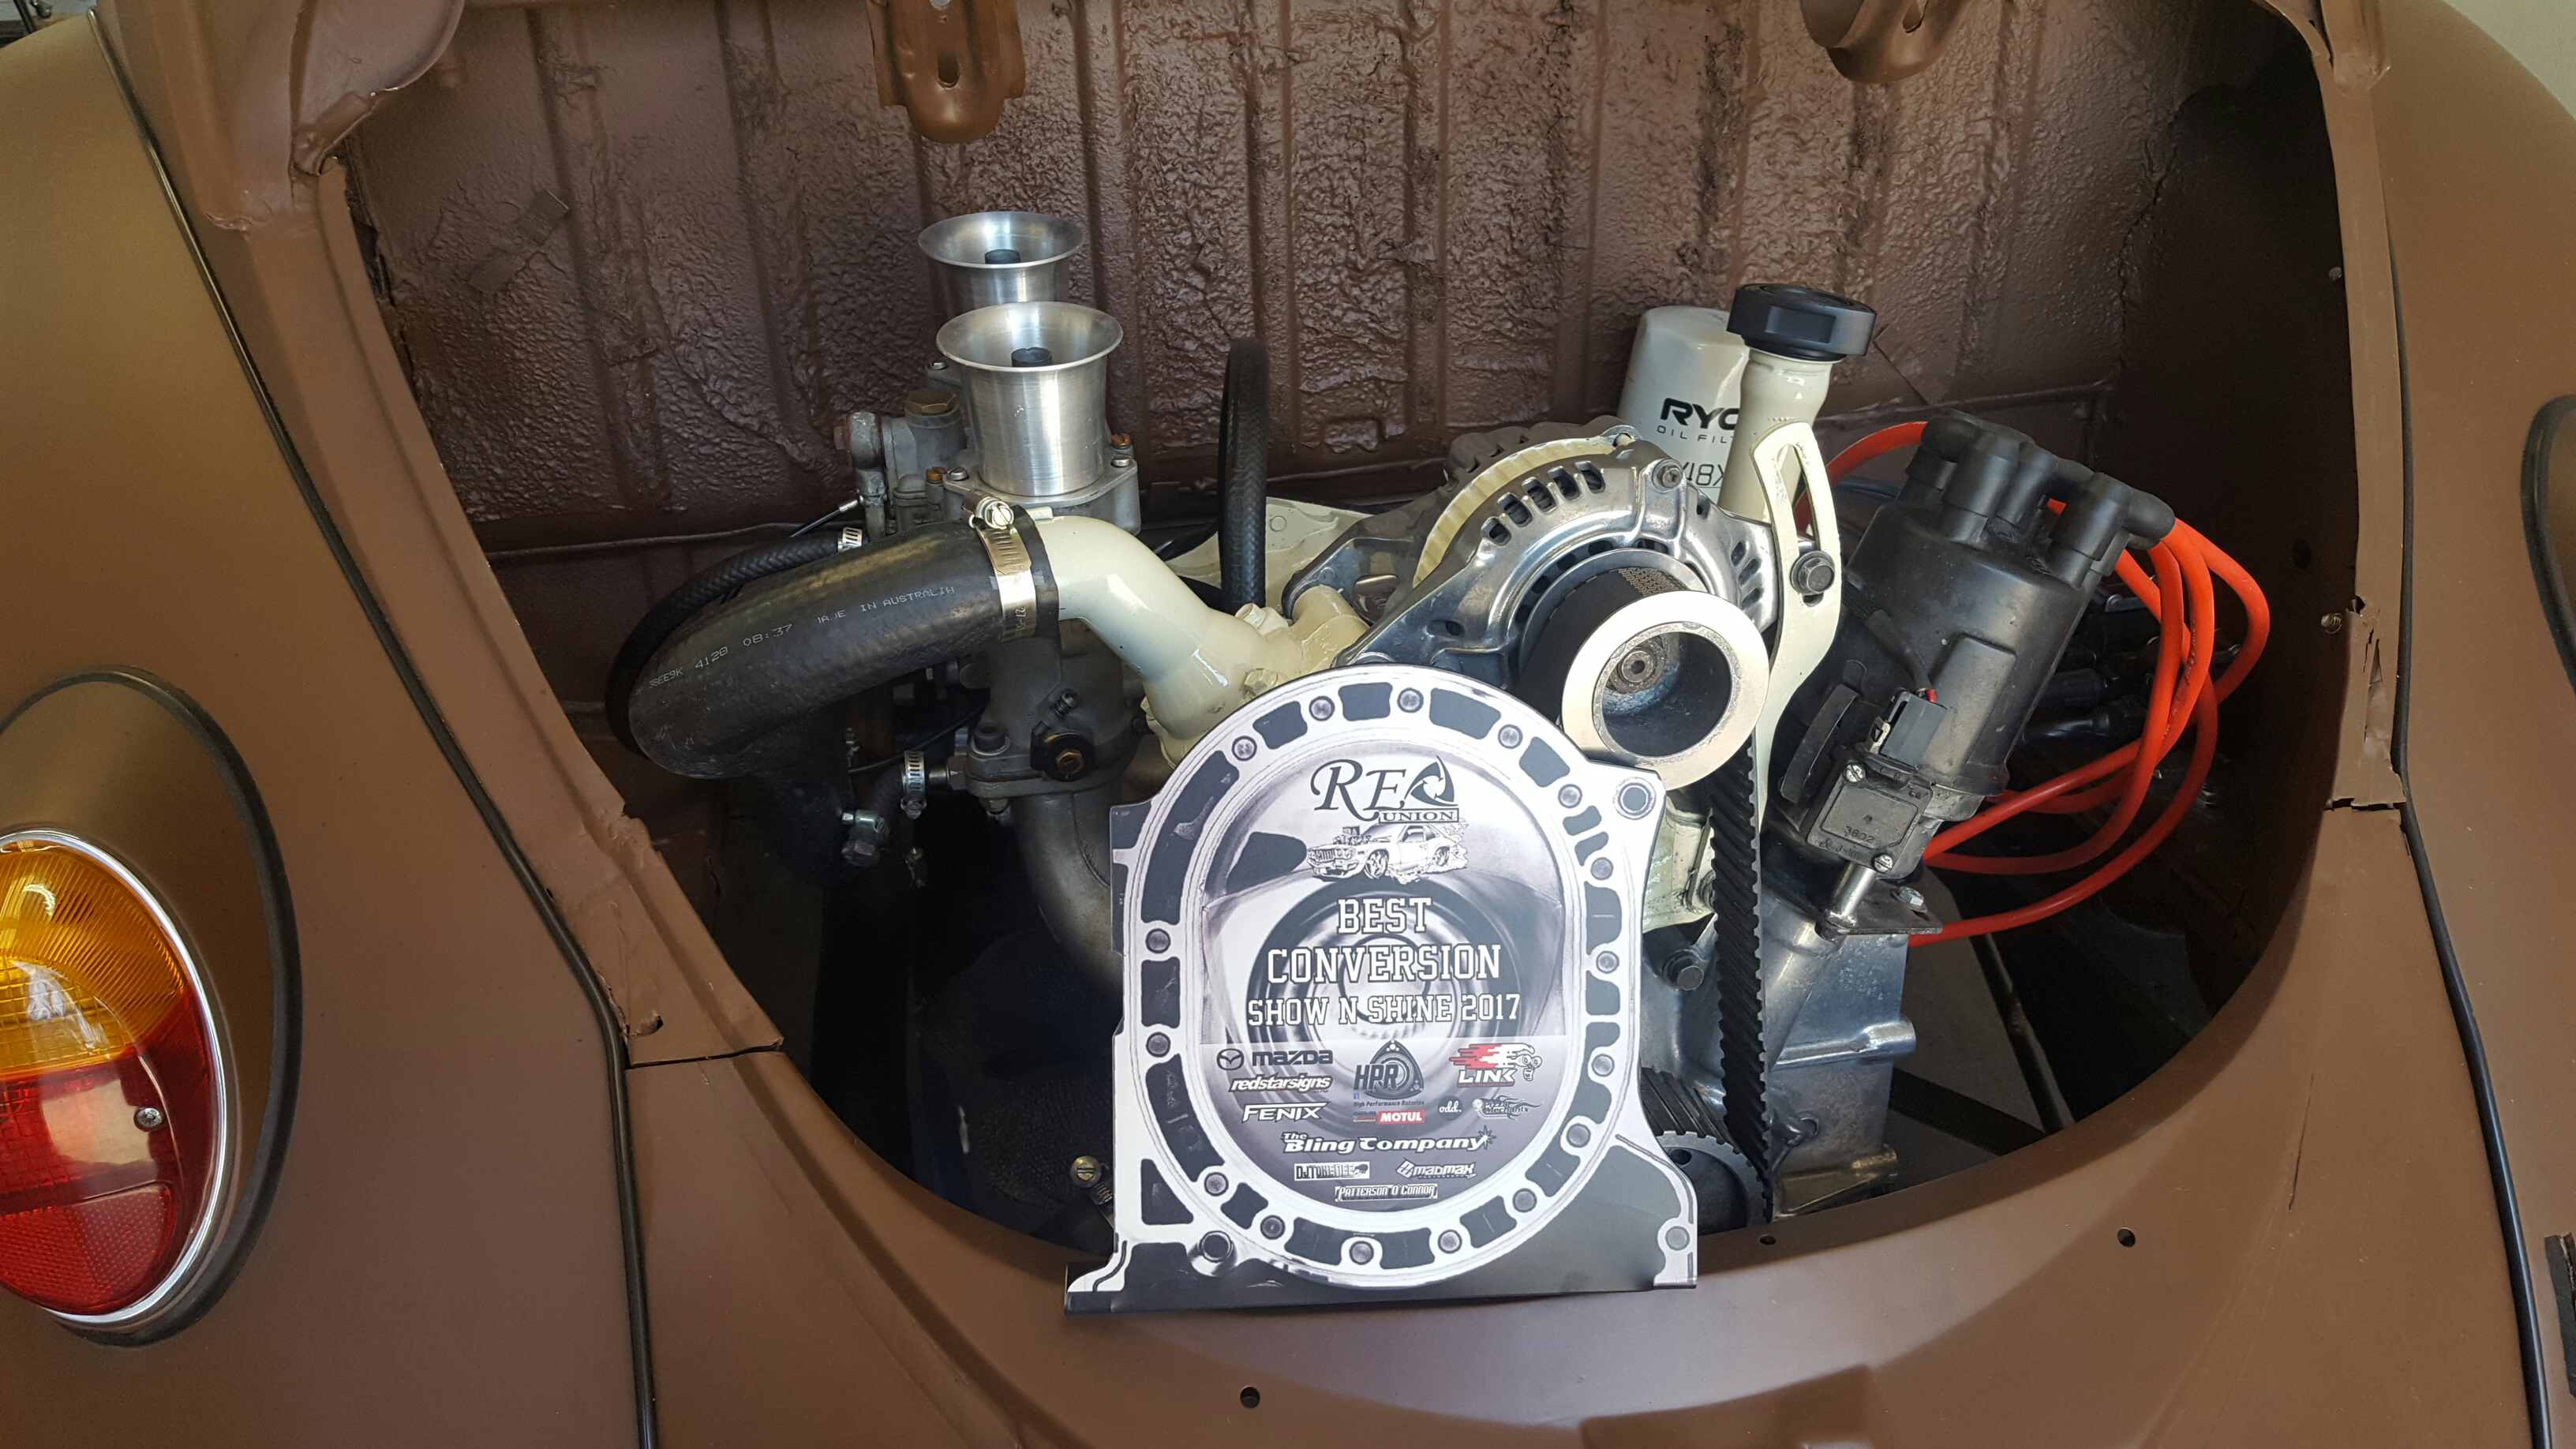
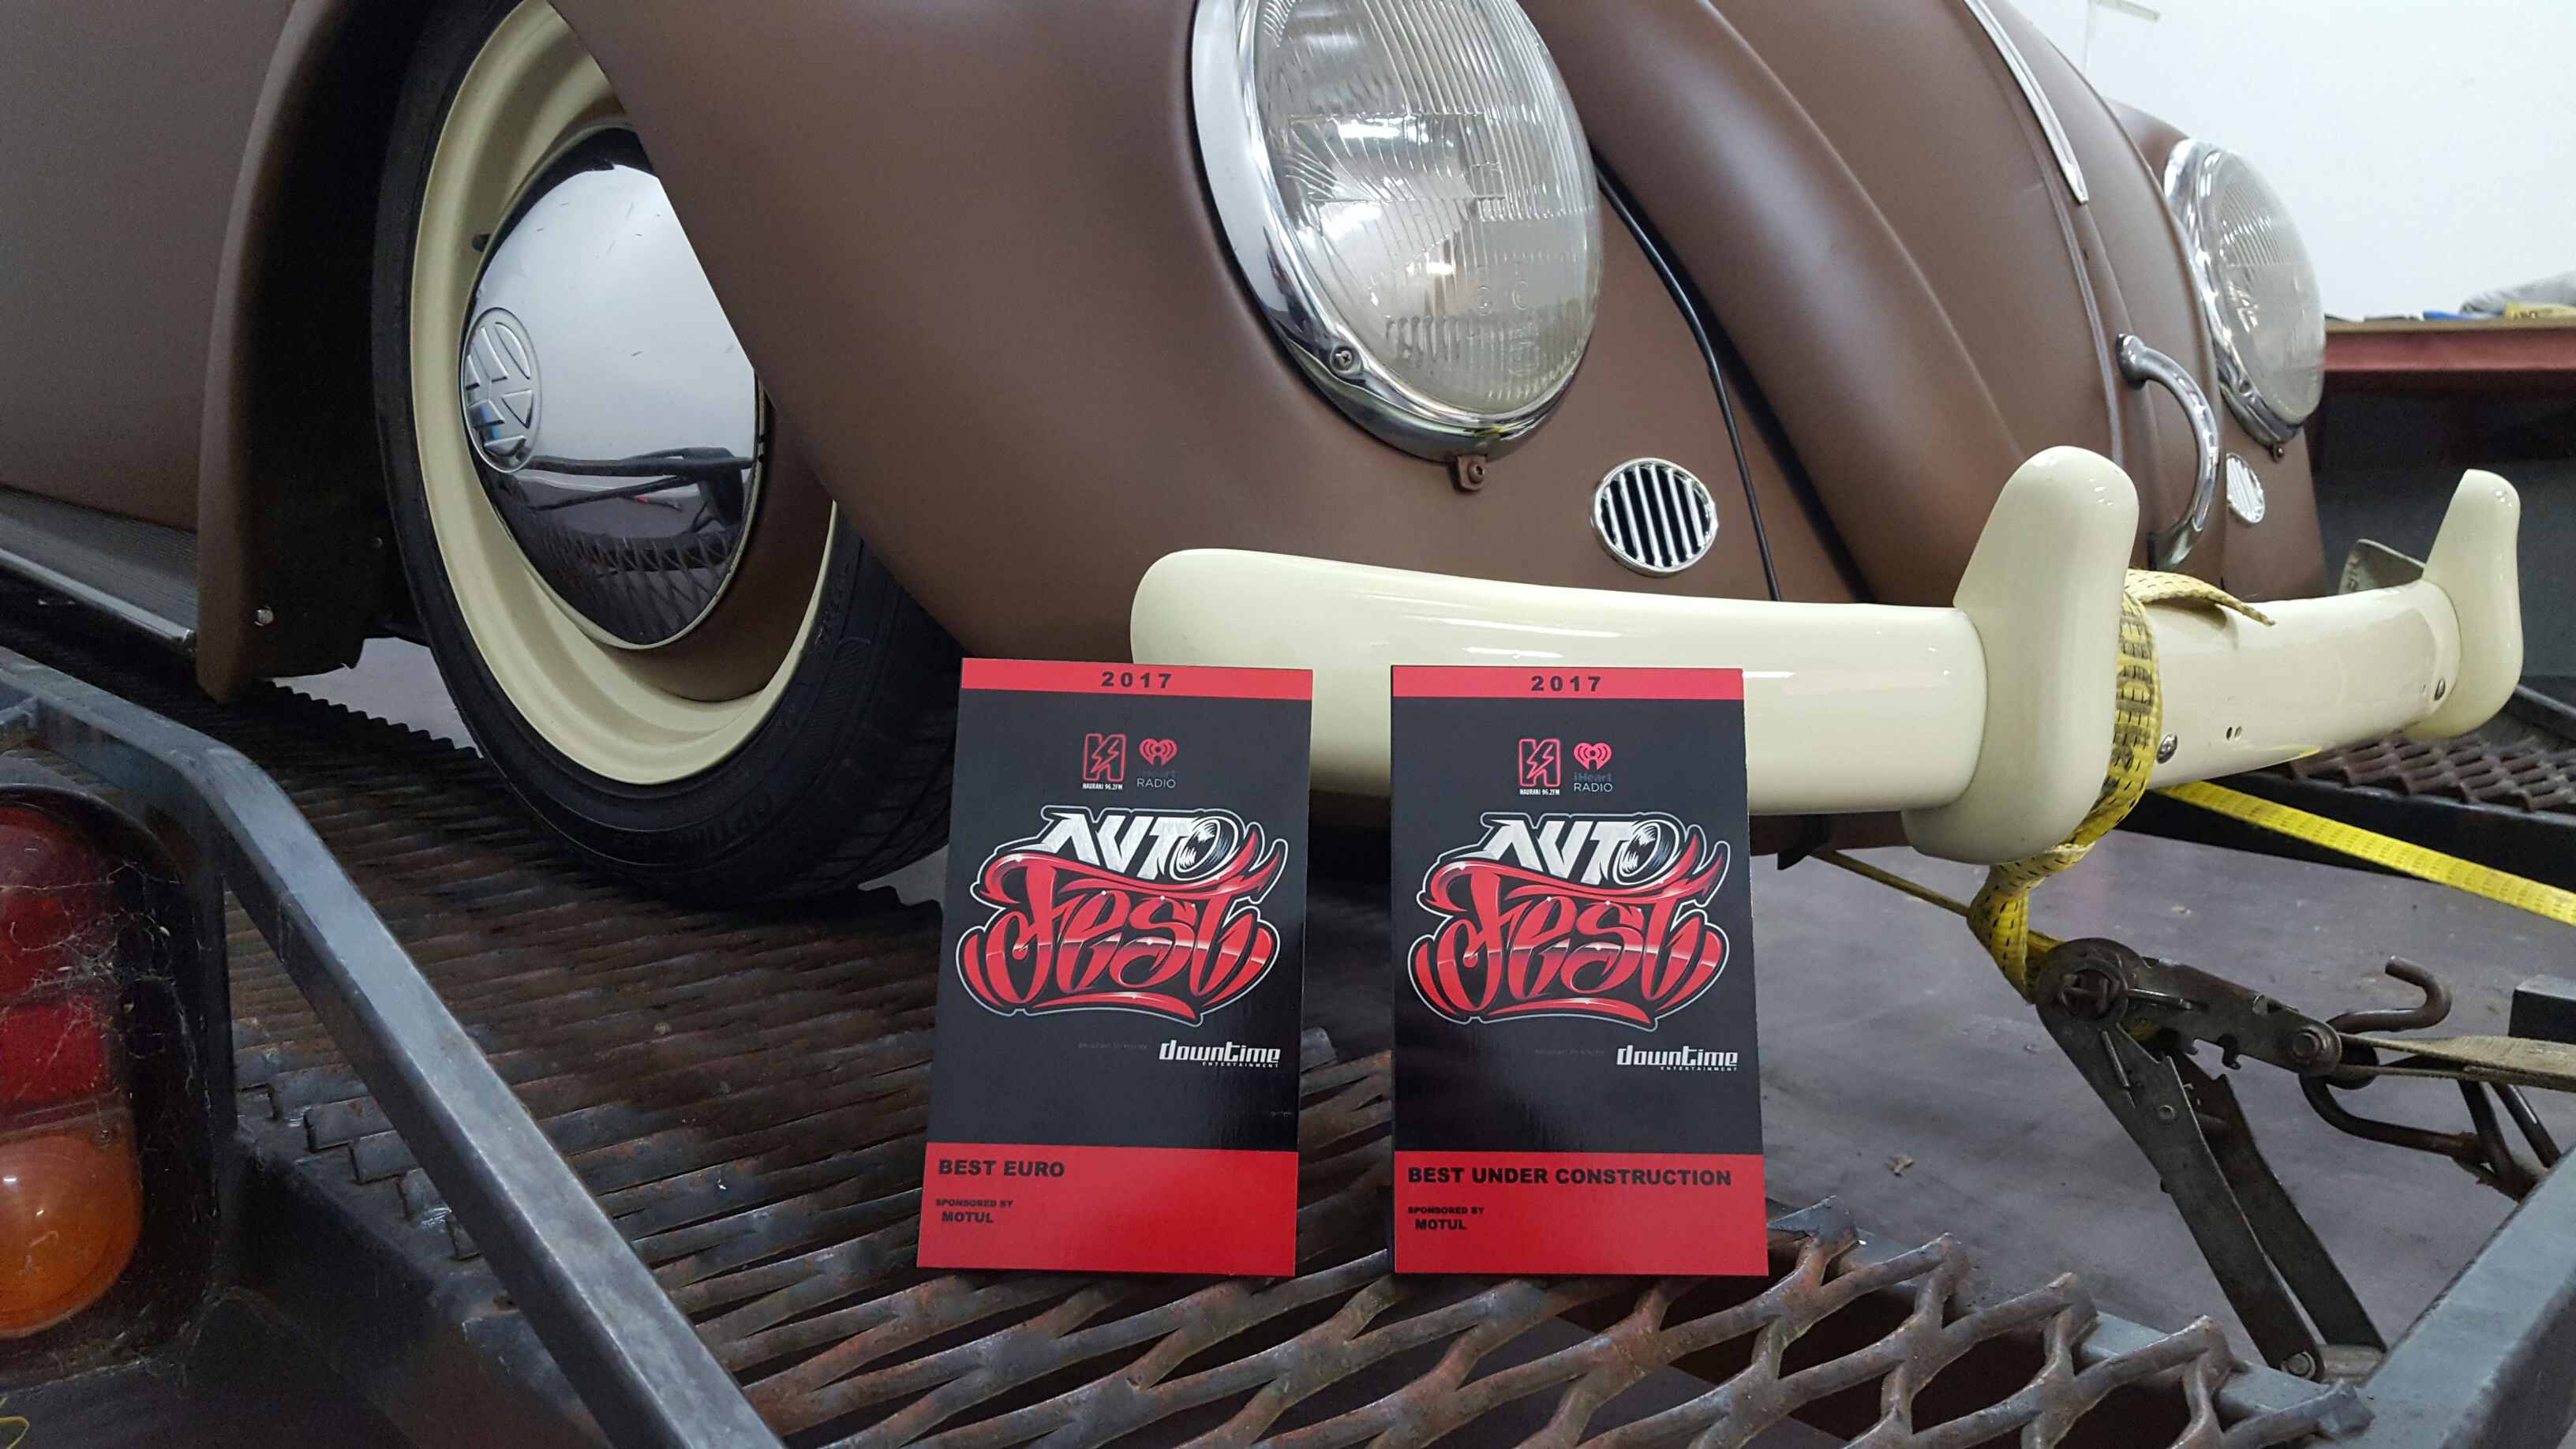
Just a little update. Made it into performance car mag Won best conversion at reunion Got best under construction and best euro at auto fest in the weekend. Time to do the last things ready for beach hop.
1 point
-
Gone all Roman dave science with the link setup. plugged the numbers into a calculator Tricky to get all the numbers in the acceptable range while working around the chassis, engine and wheels that need to turn. main compromise is chassis mounts on the lower links will hang below the chassis rails a bit. but still will be a touch above the transfer case x member, so shouldn't be too much drama. had to do this to get enough up travel without the links hitting the chassis rails, and also to get the roll steer numbers down. The rear is pretty text book since there wasn't really anything to work around after cutting and modifying the chassis. Done it without using a calculator, just following a guide some geezer wrote. putting the numbers in the calc, looks like got lucky and nailed it. can dial the anti squat up to 100% with the adjustment holes. but this is how it's setup currently got some springs for the coil overs 175lb top 300lb bottom. both 14'" long. shocks should be at 50% travel with the weight of the truck on them.1 point
-
I know this is a video of a Disco' but it's related so I'll post here for you rover fiends to enjoy also I like your build and enjoy reading your updates!1 point
-
finnaly i got the last package with parts turbo is restored, had a few broken bolts in it, but now it is like new Difference between Eclipse 1g and EVO2 exhaust manifold Turbo is prepared another round from galvanized New and old water pump1 point


.jpg.a68a3028369a7f3281dcaee1e1f9acc0.jpg)


This leaderboard is set to Auckland/GMT+12:00