
Leaderboard


Popular Content
Showing content with the highest reputation on 02/08/16 in all areas
-
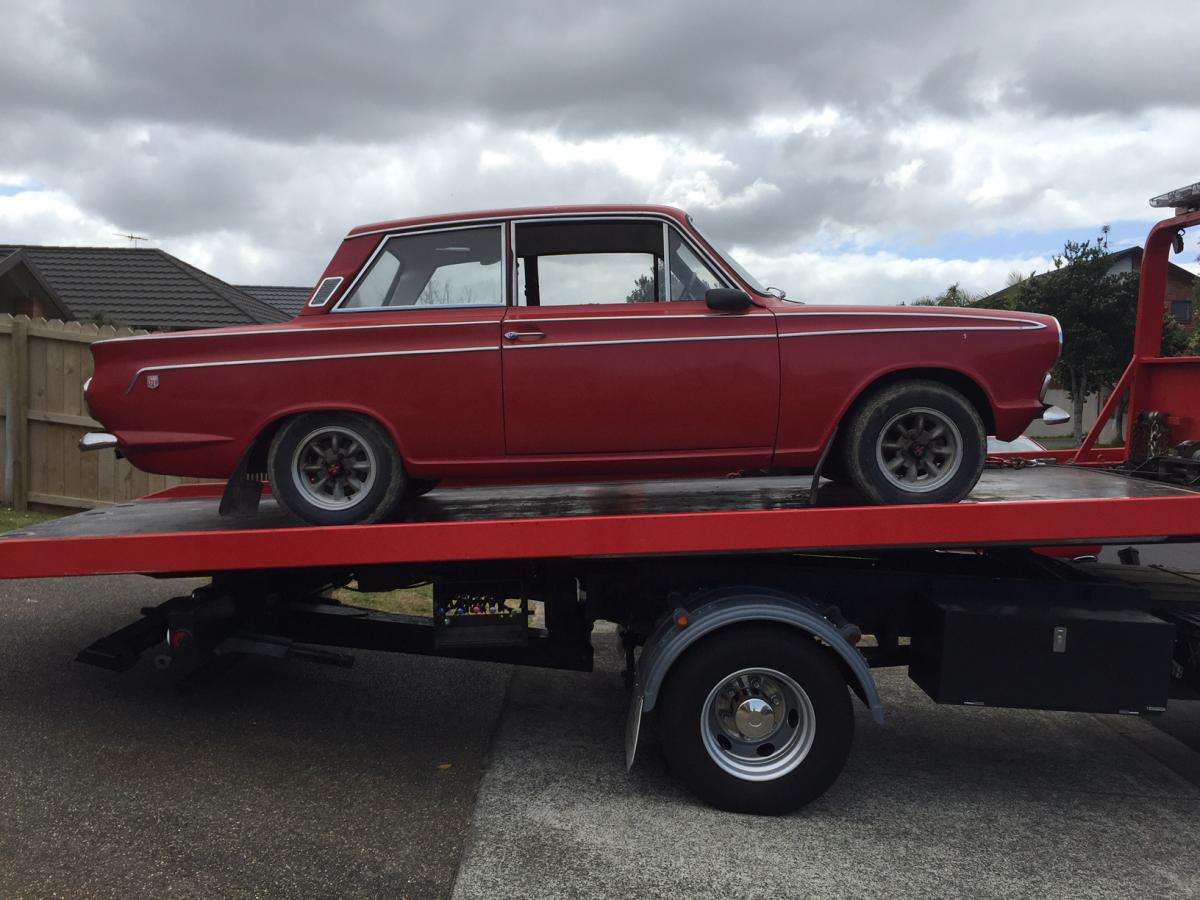
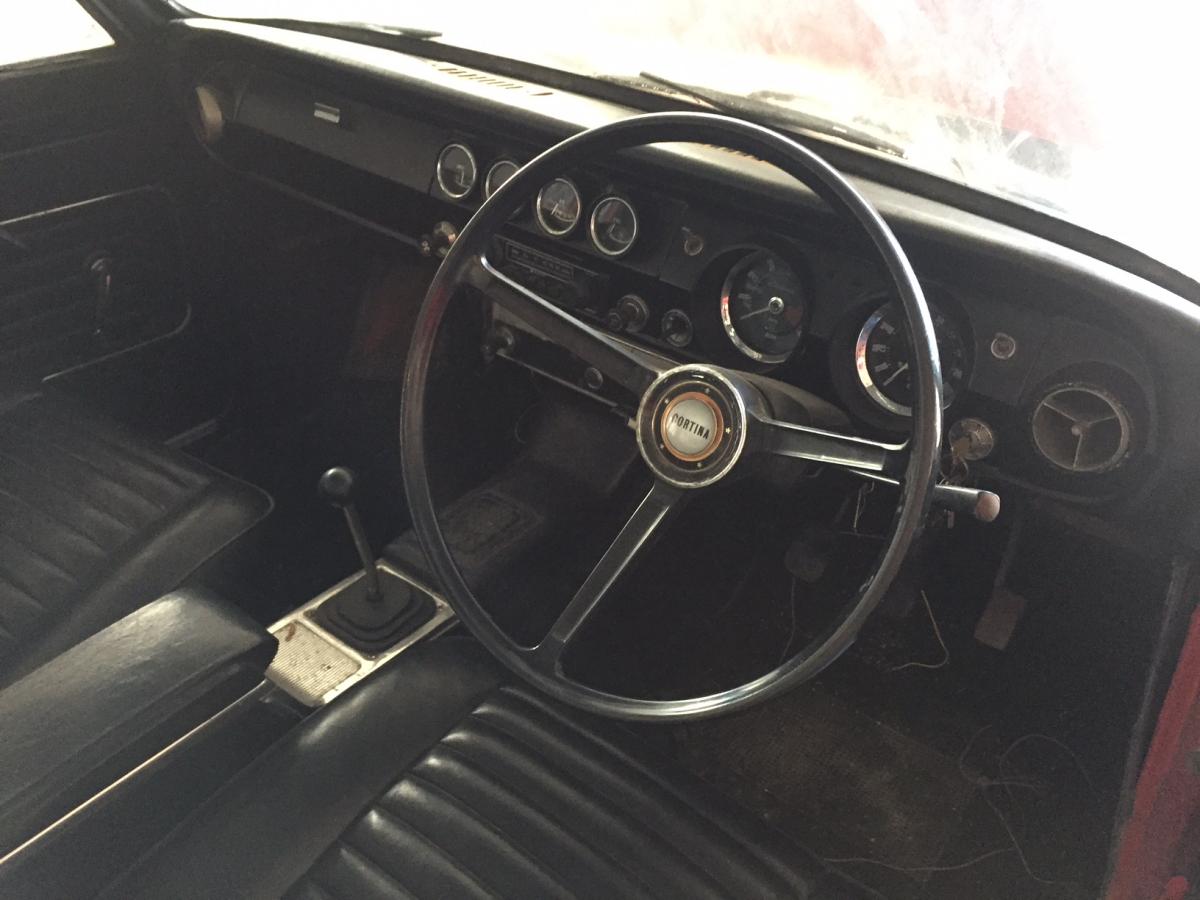
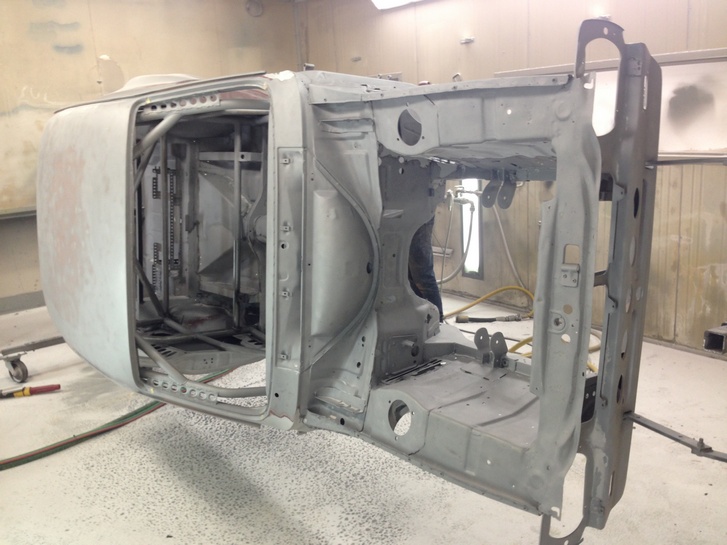
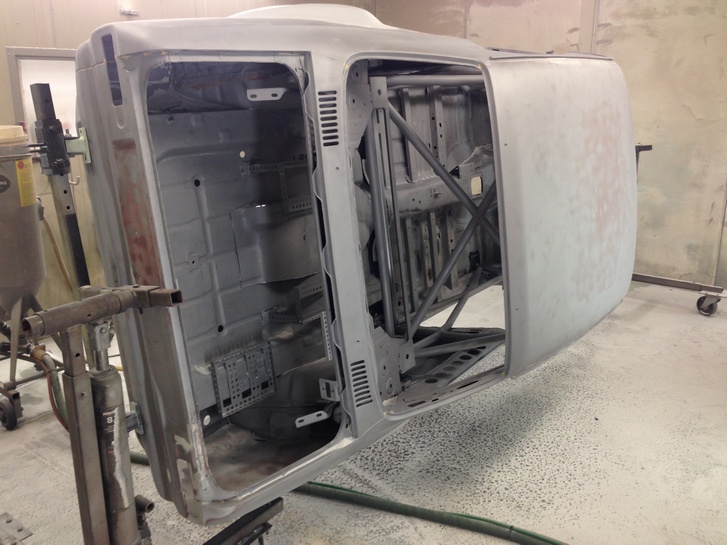
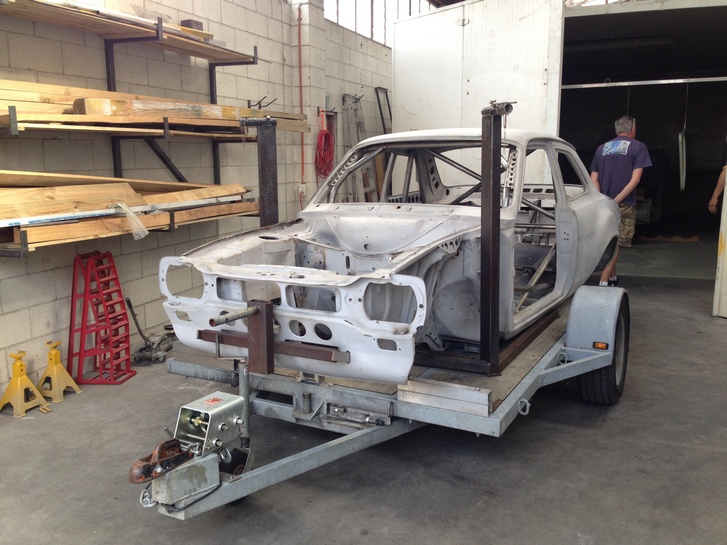
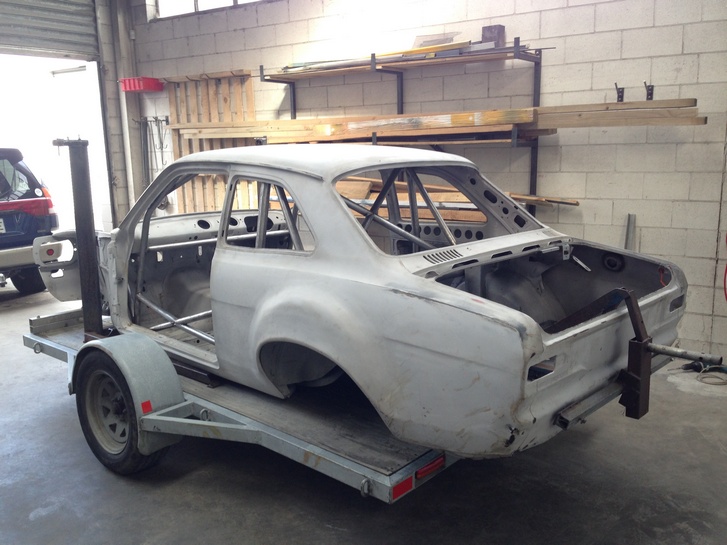
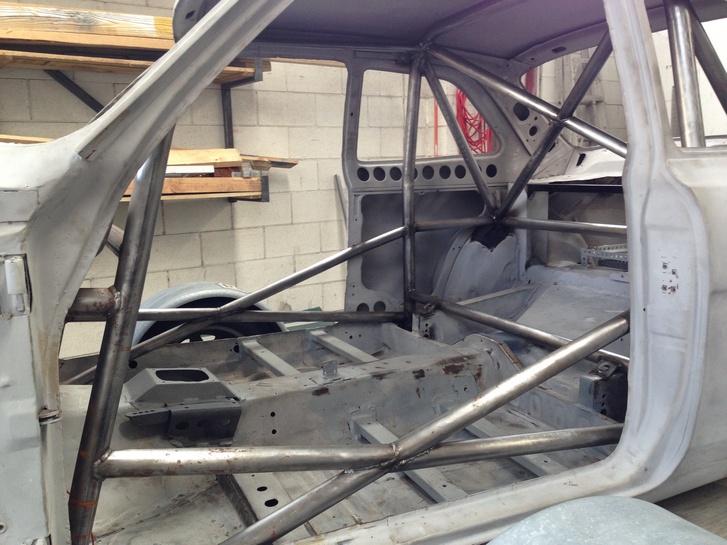
Hi all. I have just started a full restoration of my MK 1 GT 2 Door Cortina. Currently it is fully stripped and with Greg at Custom Metal Shapers. All the exterior paint has been stripped and it is very rust free for one of these. Unfortunately it was restored in the early 80's after I suspect it had a frontal and as a result the front rails and inner guards are a bit ugly. It would really annoy me every time I opened the bonnet knowing what was there so the front rails and inner guards are going to be replaced. The exterior will be finished as per the original Dragoon Red and all completely standard. Ditto the black interior apart from a Les Leston woodrim wheel. Running gear will be all standard precrossflow with period modifications. Engine is a Throbnozzle Racing pre crossflow running the standard 28/36 Webber with jetting to suit. Gearbox is fitted with a 2000E gear set and Ali bell housing, tailshaft and remote housing. Diff is 3.7 in an Ali Nose. Shocks all round are adjustable Spax. Wheels are going to be BRM 4 spokes from the 60/70's. Aiming to have it on the road October 2016
 14 points
 -
Big 3 day weekend. Netting, drip edge flashings, paper and corrugated iron all done. Pretty stoked with that.10 points
-
Found our old BMX in my sister's garage this weekend. I have a wee niece now and have been looking for a new bike project so here goes. These wheels are so pooozed. Some sweet stickers I'd like to get re-done. Definitely going to re-do the two frame pads, maybe have one which has my niece's name on it. Undecided if I want to keep the same style/graphic or think of something else. Gave some of the bits a wee scrub - comes up okayish but will probably just get them re-done. I'll never forget the guys face when I got my first bike sandblasted and I gave him a whole bike's worth of nuts, washers and my chrome bits on a big wire to get dipped. Or the guys at EDL when I took in a bag of mixed nuts to get new ones... I have the majority of it now dismantled, except the pedals - that can be tomorrow's job. Will try have a go at sandblasting it this weekend all things going well.6 points
-
So I refitted the frost/drain plugs and filled the block with a radiator flush treatment to see if that made any difference. Left it in half an hr then drained it thru the sieve again, then popped plugs and hit it with the water blaster... Blasted every passage in as many directions as possible, and got quite a bit of gunk out. The white bits were stuff that accumulated in the old alloy intake manifold after it sat for years... Looked much better after that... I know they're not perfect and it should be properly cleaned, but I'm trying to just do the top end, and I have see far worse than these, so we'll see how it goes. Dried out passages with air and the crappy prelim stuff is done - should be ready to pull the heads off next... Just needed to order the wife and No 1 daughter to push the old girl away for the night... I did help by mowing the bit of shaggy lawn they had to push it over...6 points
-
Big day today, after a lot of prep and sanding, finally got some 2k primer on the car. Made a spray booth up out of a $149 Mitre 10 party tent, and a big fan in window with a duct at back of tent to keep fumes down. Used Durapox 2k. Ordered grey as the car will be white, took can out of box and its Black! Argh. Panic. What the hell, its Waitangi day, but worth the phone call, and put dude was there, told me to come over and swapped for light grey, whew! Brand new gun performed like a champ, but learnt that filtering the paint is a must, got a few splatters in a few places. Big thanks to James for running the gun, was a team effort to keep the paint mixed when required and move things aorund Come a long way!6 points
-
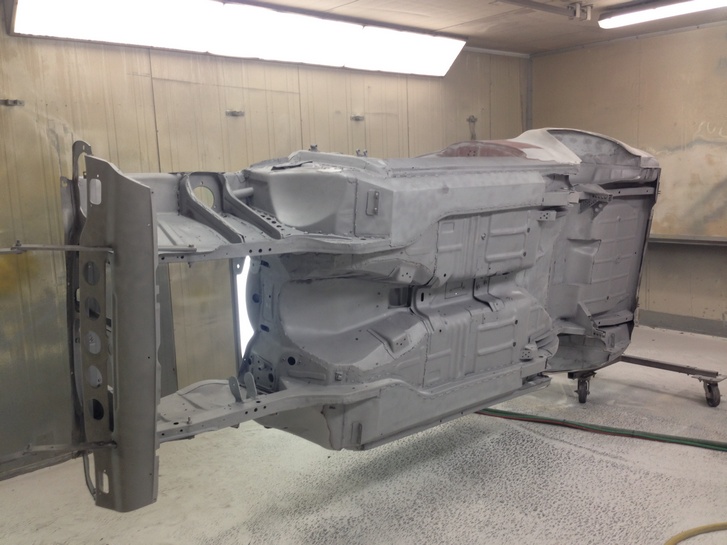
Inside , Outside and underneath blasted Almost ready to be epoxy primed
5 points
-
underneath these bits done, have to make a couple of patches for rust in one side, and weld some bits from inside the car. later will blast underneath, epoxy prime and sealer on the joins in the tubs5 points
-
Yay progress! Still at least 12 bars to cut up and weld in.4 points
-
So .... I'm back in NZ again, went to pick up the 626 and it looks like the alternator has packed it in. All hazard warning lights are on in the dash and it only drives a short distance before it dies. Have a 2nd hand one on the way, so hopefully that arrives soon and then it can be driving again and then I'll sort a WOF this coming week. Did a bit of cleaning and fit the all important plate surround just cos; After that difficult job was done I had a beer and shut the shed door. discussion thread; //oldschool.co.nz/index.php?/topic/50482-oldrx7s-1981-mazda-626-discussion/#entry16031154 points
-
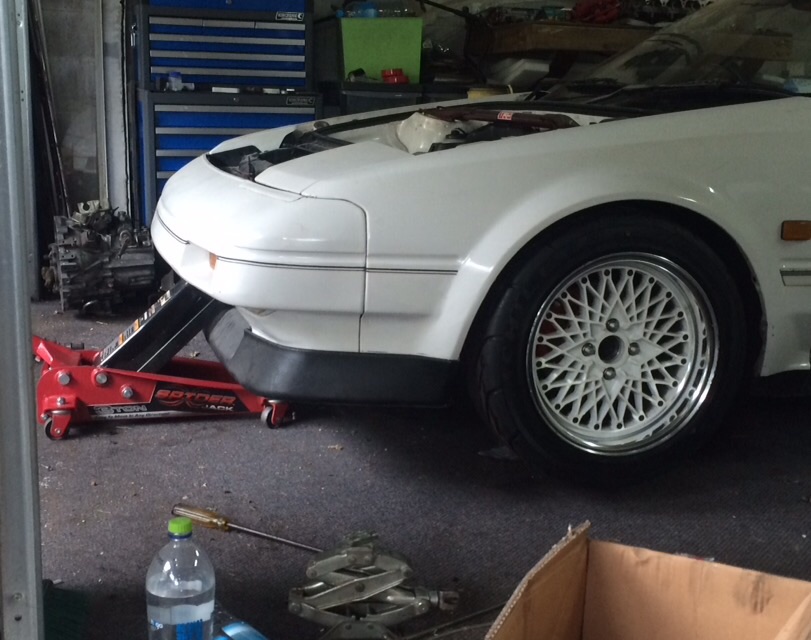
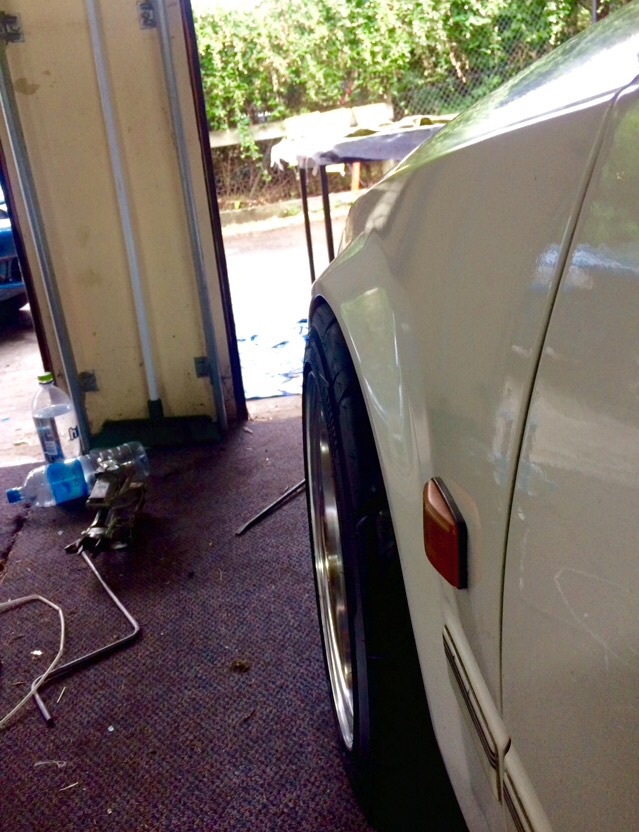
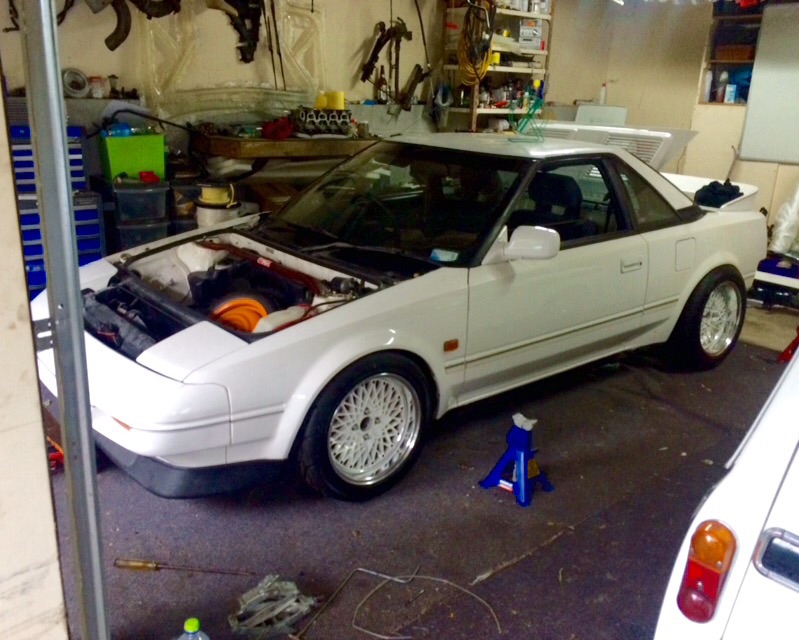
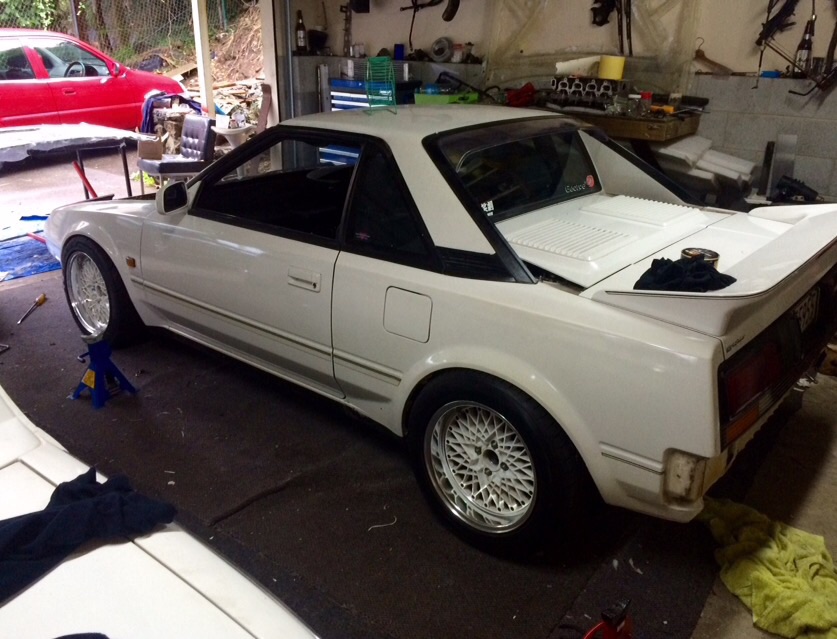
Gonna need a flat jack. And to do something about them pesky rear guards
4 points
-
Been awhile... last year. Oops. Had thought I had knackered the drive line before Christmas while transporting a baby grand piano... went in for WOF when I came back for holiday and it's only universal joints. Winning right there. Still have the V8 and that plan is potentially still on the cards. Issue is these things are actually starting to get rare... I dare say probably worth more in original spec than being hacked up all for a bit more power... and grin factor... very much on the fence at this stage. Currently running in totally awesome surf mode. That's all for now...
4 points
-
I've probably painted my nails more than you have yours, farm girl.3 points
-
My girlfriends dad loves Singers, so I got roped into driving his gazelle wagon along; Had never been to this event before; I guess being a long weekend with so many other events on it was a bit quiet, lots of british and american cars. Girlfriends vogue wagon; A few other pics from a few that caught my eye.3 points
-
Mate of a mate did some pretty swaggy photos for me to. Gonna whack this up on trade me in the next week or so a well.. And a not so great photo of the custom gauge faces haha3 points
-
Dropped off to the blasters Cant wait to see how it turns out
3 points
-
Flushed the engine block cooling passages today. Began by simply hosing through the heater manifold connection and catching any loose crap out each side's drain plug so I had an idea of what I was dealing with... (This pic reminds me of a bloke at work with kidney stones who had to piss thru a sieve for a month to catch the gravel)... Didn't look too bad, a few large bits of loose scale came out... Thought I'd knock the frost plugs out while they were easy to get at - glad I did... Yikes... And after another flush the loose bits were gone, but little bits of crap were still in there...2 points
-
So i took it drifting2 points
-
Slow progress is better than no progress, right? Purlins complete, all brackets and brace straps done. Ready for roof. Dug out about 1-200mm of grass and soil ready for base course later this week. Thanks to Mark and his little digger. I missed cruising in something made in the 1970s so bought this RN40 Hilux lol2 points
-
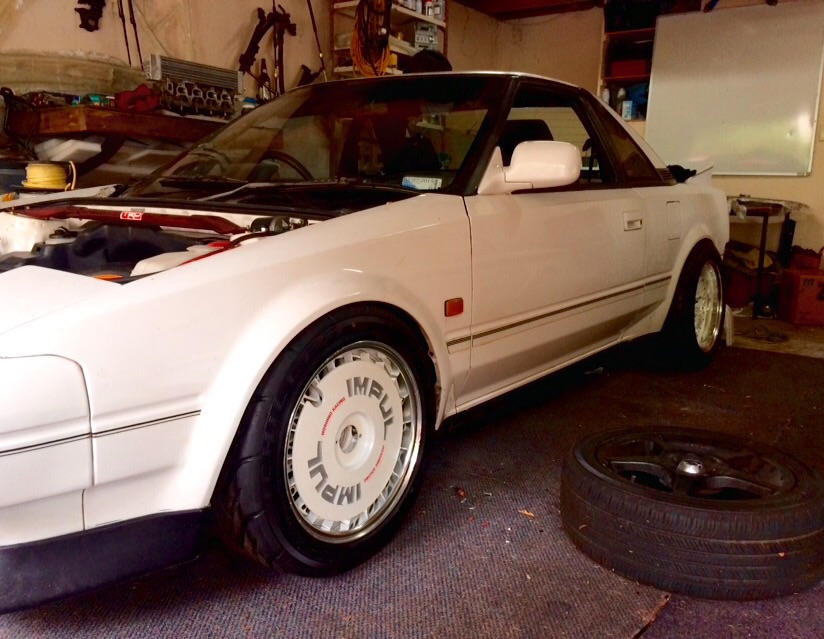
So i saved up and brought 4x new eagers. Sent the rims off to get blasted, then painted them satin black. Got the boys at mag n turbo to fit + balance them and roll the rear guards2 points
-
Day 1! 21st November 2014 Picked up this little beautie for $3200 NZD. The local mini club owner who was selling it gave me a $400 discount purely for my squeeling on arrival, I'd never seen so many mini's in my life! First thing i brought - new gear knob! Cheers Aliexpress! Got central locking for a Christmas gift with the key remotes installed! Accidentally locked the keys and remote in the car.... Took 5 people to break into my tiny car! Central locking sadly didn't get re connected after painting of the car... but hasn't been anymore lock outs since! She turned out to be suuuuuper rusty! Time for some repairs.. and a broken windscreen. "No don't take it out yourself you'll break it!" "No I promise I won't!" ...20 minutes later see my ex boyfriend post on the NZ mini facebook group that he's looking for a replacement windscreen. Damn it. Thank god for insurance! Hello kitty hanging in there during my repairs. 1 floor pan and new windscreen later... it was time to get ready for a new colour! Colour! I literally took in my nail polish and a picture to the paint shop for inspiration and walked away with this! We have some paaaaint! Need to get some better pictures in the light.. or not use my phone camera! She's feeling a little blue Picked her up some new bits in exchange for a box of bourbons hahaha. Goodbye ugly rice steering wheel that someone has friggin welded in place! More new editions? HAHA Interior battles Thought i'd get all fancy and refurbish my door cards with some vinyl and fabric. The door cards that came with my mini were horrible to say the least!! Refurbishing them didn't turn out much better. Manged to make some back ones but have given up on front and dash and thinking of getting some laser cut and then powder coated the same color as little blue! Sitting a bit crooked but will sort it out! I've fallen in love with another mini... I hope this guy doesn't mind me sharing his pics but I found this little beauty on Instagram! https://www.instagram.com/jacktubbsey/ Really want black flares now!! What I really love is the headlights! Found some tint off ebay here super cheap and now just waiting for it to arrive! Totally illegal here in New Zealand but i'm sure i'll be okay with all the cars with blacked out ones I see driving around Some treats for little blue! The sound system in her wasn't that bad when I got her but the speakers were literally put into plastic containers from the warehouse ($6.99 price tag still attached omfg) that you take your lunch in HAHA. Then covered in vinyl!! Kiwi ingenuity. Thinking of doing some colour changing led rings around the speakers like this: Will update once I've finished it! Also wanting to replace the switches inside with illuminated push button type switches. Here's some examples: First pic is a pre made one that is sold by Marcos Controls if anyones after some! Second some switches on Aliexpress I like. Just put in my new brake hose, got my new headunit & sub going. 2016: Finally got a WOF and current rego! But also feeling lazy, need to CAD up my dash and door cards to get laser cut already! Discussion Thread: //oldschool.co.nz/index.php?/topic/51794-samanthamannells-1978-mini/1 point
-
So, time for an update. Canterbury Champs has been and gone, managed a respectable 8th equal from 29 cars. Reliability was the key there, although I wasn't without my own dramas. Have chewed through a clutch, broken a input shaft flange off the gearbox - snapped the dowel holding the throwout bearing, then the braided line and made one hell of a mess. Missed one meeting due to parts availability but managed some extra racing last weekend. Good to get some laps in - however I was battling a miss-fire all night which meant the car speed was down. - To be fair the car still had the same spark plugs, leads and coil pack from when I pulled it from the road car 3 years ago! I've also been struggling with the linkages on the shifter. Finally managed to track down a used Ford Prefect 100e shifter already modified to suit (this involves turning the gearbox on its side - which the Walford bellhousing has the capacity for this anyway. Instantly worked better, but I have had some problems with the throwout bearing from the prior disaster.. (O rings were destroyed, fittings were damaged) Missed one meeting due to parts availability but managed some extra racing last weekend. Good to get some laps in - however I was battling a miss-fire all night which meant the car speed was down. - To be fair the car still had the same spark plugs, leads and coil pack from when I pulled it from the road car 3 years ago! Anyway ; I had bought quite some time ago a MSD lead kit from Craig @ Pro Parts - so set to making them up - took me maybe 1.5 hours to do, however they're certainly a much nicer finish and fit! - As seen, I've modified the position of the lever so it sits forward and well to the left of the steering wheel. V-d out the join where I welded it, then also sleeved it. I've since drilled the base so it picks up more points on the gearbox, and welded some gaps that were causing gear oil leaks.. Thanks to Tim, Blaine, Matt & Troy helping on the car when they can - all hands make it easier getting the car on the track each race and far less stressful!1 point
-
Niiiccceeeeeee. Have you got a temp sensor on the head to aid tuning?1 point
-
Just thought I would start a thread and post up some photos of some of my Bicycles. This was the first of my collection of old bikes I have acquired. Purchased fairly well disassembled and missing a crank. Assembled into this. Clean and simple. Healing Cruiser. Needed a crank, ended up with two donor frames which gave me some cotter pin cranks (still havent got around to swapping onto that bike...) and the sweet stand. One of the donor bikes after I raided some of the bits off them turned into this nicely patina ed example. Need to find some more period correct pedals and more rusty accessories! Healing Cruiser Next, I purchased this for my Kateums (Girlfriend) for her birthday. She came to Hawkes Boes and rode it and partied all weekend. Was a hit! Healing Loline. Then Sister decided she wanted in on the band wagon Healing Harlequin 3 And I just recently found this and had to have it. Such a lush colour and in fairly good nick for its age! Healing Cruiser Stay tuned..... also have got friends hooked on these after going riding round town on the weekend so am on the hunt for a couple more / Really want a folding one for personal use1 point
-
Just ask repco to multisite a bottle up the slack cunts. Or get them to tell you which branch, call and pay via credit card and have them courier it to you. Fucking slack cunts at repco make the good ones look so bad1 point
-
Dammit...Another mini and Im still faffing around with mine. unimpressedface.jpg1 point
-
shit yeah this is awesome.1 point
-
So to give an update over the last 4 months she's been a busy time for me working on my house and JZA70 not to mention xmas, new years and a few trips up north but walah progress has been made1 point
-
Looks great from 5m1 point
-
It's only been 3 months of no progress, whoops. Oh well, back into it now. Decided against trying to make it out of round tubing so just used some 30x30x2mm RHS as it's much easier. More updates over the next couple of days hopefully.1 point
-
Hope you get well soon man. Hopefully it's sinus related- I found out the hard way they can make ya extremely unwell. Xoxo1 point
-
less pressure in exhaust will benefit a big cam engine. small factory cams no so much. big cams with more overlap. means more time around tdc both cams are still open. so get to a point where the exhaust gas goes, hey lets go back the other way because its easier. can see this on a lot of dyno sheets, where people have thrown in big cams with bad extractors or an exhaust too small. usually a dip in power before it "comes on cam" with less pressure in the exhaust, earlier can start filling the cylinder. everything needs to be matched up, adjusted and all working together to see good gains. na sucks. would be interesting to see what the the header bash would do, if they used an engine with big cam overlap. or as tom said a restriction after the extractors1 point
-
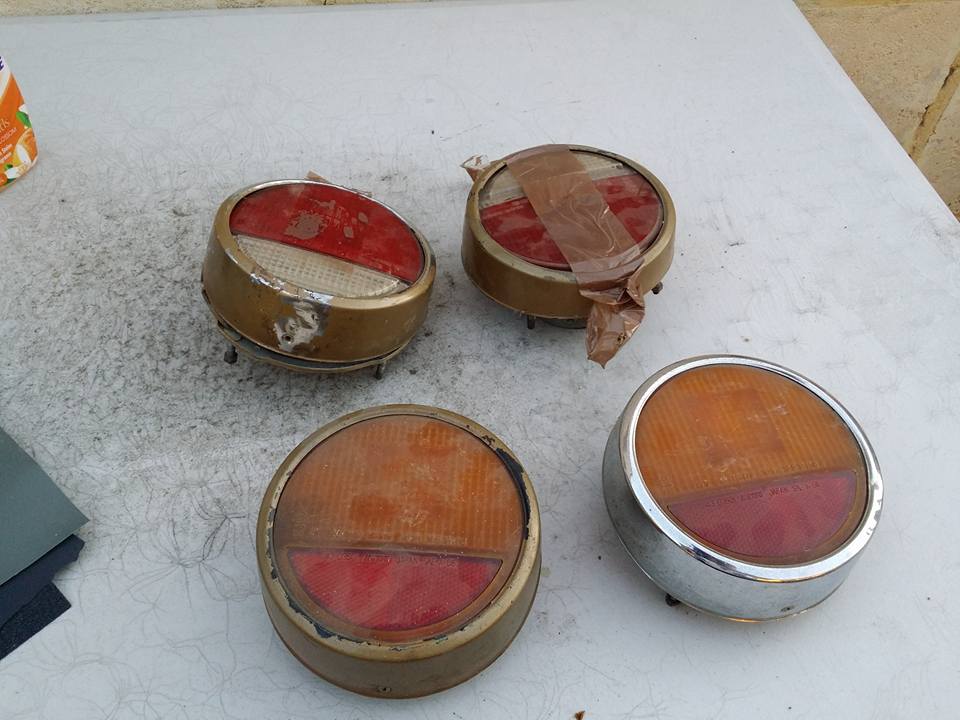
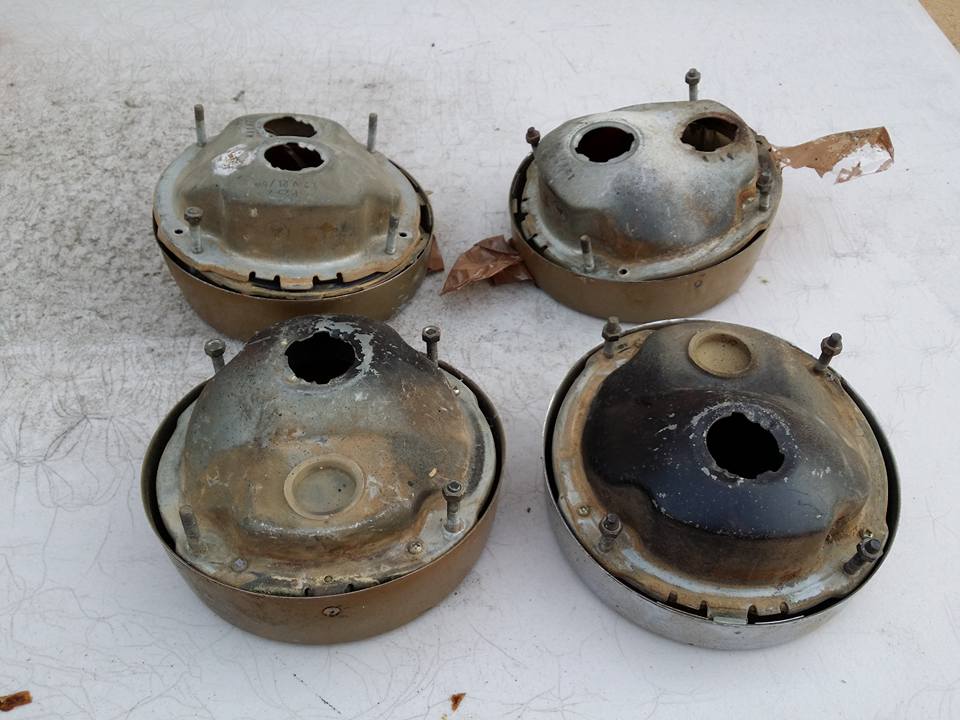
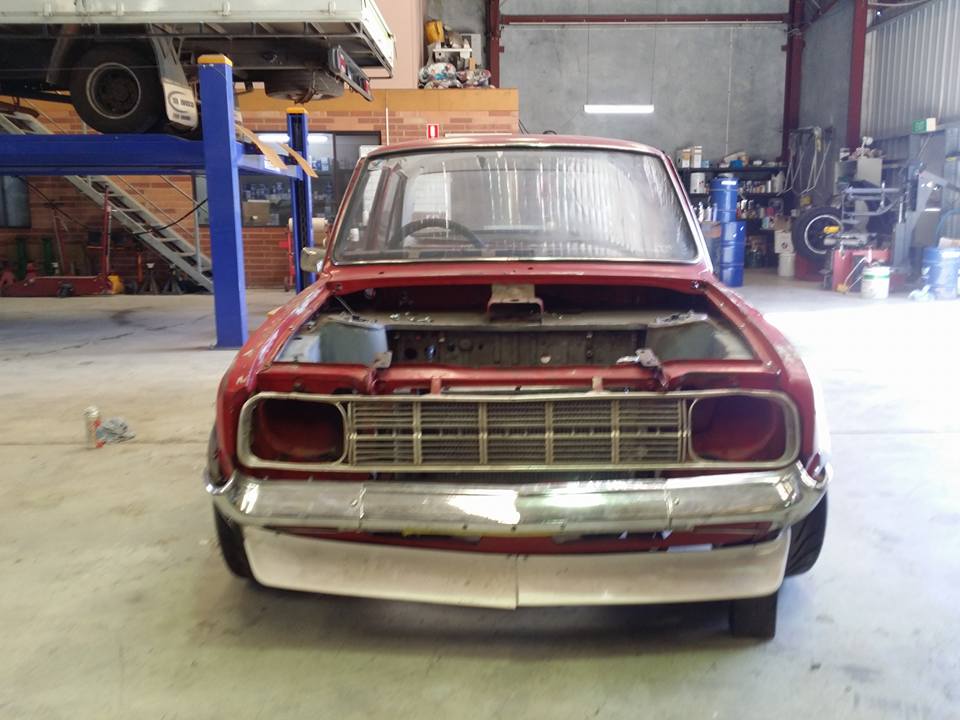
Stephen the GC has also kindly enough given me (yes, free) a set of Aussie spec r100 taillights. They are in need of restoration though and i'm in no rush to get these so wont be doing anything to the for a while yet but going to eventually bead blast then and may even get the rings straightened out and rechromed (will probably just paint/powder coat them black as chroming is so fucking expensive). Will also try hunt down some Jap spec lenses. Oh yeah, here's a pic of the front end mocked up again (with the old grille though). With the new flares fitted they fowl with the front lip, looks like we will be trimming the front of the flares slightly, may even notch them to make fit up all gravy (shit picture sorry). Talk shit get hit here //oldschool.co.nz/index.php?/topic/44085-tai-scamps-mazda-1300/page-2. Tell me what I'm doing wrong. Chur, Tai
1 point
-
Big chunks of carrot and shit..1 point
-
1 point
-
:shock: :shock: I'm sure any of you still reading this thread is sick of my long posts, so I'll try to make this somewhat to the point! Shot down to BNT and grabbed a colder plug (BPR7HS vs the stock BPR6HS), went to my workshop and fitted the CDI and plug Slightly bigger than the stock one, fits nice and snug. Also one of the old owners has trimmed up the battery compartment and managed to fit a much bigger battery than the stock one. I needed to go up a couple jet sizes, but decided I should made sure it at least started first, it fired up better than the stock CDI, mint! Tacho didn't work, not mint! Changed tacho input signal from positive pulse to negative, tacho now works, mint! Changed the main jet and spark plug, tested it, hanging a touch on decel, raised the needle and went to take it for a test run. Opened it up, clutch engaged at about 5500, OMG WHEELIE!!!! Rode around a bit, seemed to be pretty sweet! Needs slightly heavier rollers and a heavier contra spring. Then found a closed road on private property... and attempted to open it up Turns out that at 80k I chicken out and decide trying to ride one handed is not such a great idea!!! Next run hit 93k at about 9600rpm and it was still pulling :shock: But there is a nasty sounding vibration after about 88k so didn't push it any harder as I was worried it was the crank eating itself! Hard to ride at legal speed too, the throttle is only just open at 50k! Of course that's all a big story and I've set the speedo to read really high, it's still limited to 50k max... Lol and it still ended up a long, hopefully somewhat entertaining post1 point
-
Great location for making lots of noise right there!!! Parties, angle grinders, hammering panels, pet lions etc1 point
-
So i've been incredibly slack at updating this, but have been busy with the car. The meet last year told me stuff that i already knew. Suspension was far too hard and I needed seat time. I made the decision to do things properly with the rear shocks first time so I spent my money on a set of QA1 double adjustable coilovers with spherical bearings top and bottom, and also some 12" 110lb springs to go with them. Putting them in wasnt super hard, had to drill out the bottom mount to 1/2" and had to ditch the tophat and weld on some brackets for the bearing as below. I had to add some 5mm spacers as the tires were very close to the spring platform. Next was the front. The brakes had a bit of a wobble when i had it at the strip last year and i decided that they were still far too big for drag racing so I bought another set of front struts and the stock brake setup and started over with the front suspension. I decided to go 110lb in the front as well as in a drag car its really just holding the front up and the more weight transfer to the rear the better, so i ended up with the same as the rear, 12" 110lb springs. I bought a coilover sleeve kit and put together a pretty simple setup with a bit of pipe sleeved over the strut and plug welded in place for the threaded sleeve to sit on. I reconditioned the stock calipers and put it all back together. I forgot how crazy tiny the stock brakes are but I only have to stop once, plus I saved quite a bit of weight. A few driveway launches confirmed that it had made a huge difference to the setup, the front was lifting up as I had hoped and it had heaps more grip on the drive way as it had previously. Off to the first meet of the season I went, first run was a pretty soft run but felt pretty good except it was till pulling to the right a bit as it had at the last meet, brakes worked fine. Gave it a bit more on the next run off the line and it went straight down to a 12.2. Still pulling to the right so went and asked a couple of the on to it guys what they thought and they suggested preloading the right rear spring more to counteract the body twisting up on the launch. I wound the platform up 10mm and went out for another run which was much straighter and ran a 12.04@119mph. i wound another 5mm into the platform and next run was 12.03 and the car felt like it went pretty much dead straight. Played with the damper settings on the shocks for the next run and went 11.88@119. Needless to say I was stoked to be in the 11's so quickly! Discussion - http://oldschool.co....983-5efte-kp60/1 point
-
Hes got this Down hill test driving1 point
-
3/4 way through a 3litre can of bog, roof, doors, bonnet and boot are done, just side and rear to do now. //oldschool.co.nz/index.php?/topic/43814-darryls-3rd-1200-coupe-discuss/1 point
-
After lowering i had to find some rims, couldn't find 8" tridents below one million dollars, so was on the look out for some 12 slots. A mate ended up giving me a full set of them for free and the rear ones had the centers flipped = dish So i ran it round for several weeks like this, standards on front, big dish on rear looking really bogan till i could afford eagers and to get them sand blasted.1 point
-
The chassis is now fully welded. It is so much stronger now, hardly twists at all. This is the design I've come up with so far. I was thinking of using 1.25 inch round tubing and getting it all cut out on the tube laser we have at work. It will be double layer like the last image, so there's room for the exhaust etc to go through. In-between will be hoops for the drive shaft as well. Does it sound like a good idea?1 point
-
She's been wof'd for about a month now, sorry about the lack of updates but i'm crap with that, the missus takes all the pictures anyway. finished it the wed night, wof thurs, straight through, up to kaikoura for the hop on friday. close! since then i've serviced it thoroughly and have been fitting finishing touches took it to marlbrough last weekend for labour weekend and she flew. 100k all the way, only minor issue was she split a rad hose and was weeping coolant because i disturbed it to flush the rad i reckon.but it was close to the end and i just cut it and reattached to get me home with a slight kink. happy days. . Its still not done but its close. can't get the chrome trim on the new windscreen seal so i think i'll have to glue it on. the painter has gone radio silent on the visor and i got a heart stopping quote for some new minilite wheels, so i'm gonna look elsewhere for now. few pics. feedback appreciated on the finish, colour scheme etc, good or bad. its been dividing opinions for 3 weeks now. love it or hate it lol. Joe.1 point
-
Got most of the top welded up and a little bit of the bottom done. It didn't really take as long as I thought it would. Can probably flip it over now to weld the rest of it. Need to also start designing the crossmembers sometime soon.1 point
-
Cut up some plates to fit up to the front crossmember, drilled some holes for the bolts that the front end mounts with. Close-tacked all along the top and down the joins, just need to tack along the bottom. Then I can start the long process of tig welding it all together.1 point
-
Not very much has happened recently, but now hopefully back into it. Most of that time was spent trying to figure out how to clamp the chassis down so it is all straight before welding on the boxing plates. Decided to make some trestle like things that are bolted to the floor, then put some spacers in between them and the chassis to get it all level. Chassis is then welded to the trestles to hold it in place. Managed to get most of it within 0.1 of a degree. So I'm hoping it comes out quite good. (Probably better than it was from factory anyway) Will bring the boxing right up to the front crossmember, just need to do some cutting to get the plates fitting. Thinking we might need to close-tack it all together, then fully weld the top and at least tack the new crossmembers in, so it can then be flipped to weld underneath of the boxing. That should then hold it all together without twisting too much, I hope.1 point
-
Pulled off all the extra mounts and brackets that I no longer needed and welded up the bottom of the c-notch. Took it to A1 sandblasting who sandblasted and primered it. Looks so much better! I think the next step is to box it, make some new crossmembers and sort out the rear arms.1 point
-
Not very much progress has happened in the past months; Gave the Jag front end a good clean, cut off a few bits and decided how to mount it. Goes low enough with out cutting chunks out of the chassis or front end, which is good. Bought an engine this week as well. A lot of people won't be too happy with the choice but it was really cheap and already has been rewired to suit a project like this. It's a Nissan VH41. Gave it a steam clean today and come out much better. Was covered in dust. Test fitted it and it seems to fit quite nicely, except the inner guards might need some work. Keen to get rid of that ugly spider looking thing and get some ITB's on there. Tell me how I should have bought a LS and spent ~10x as much to get it going: //oldschool.co.nz/index.php?/topic/47317-matts-1951-chevy-pickup-discussion/1 point
-
Waterblasted the whole car, removed all the moss, did the door shuts etc. Greased all the latches along with wd40 in the locks. Fuel pump is dead, so pulled that out - replacement on its way. Replaced distributor rotor and cap -but still no spark as of yet. Oil & Filter have also been replaced. Had it cranking, and have cleaned the plugs up. Nastiness.. If you look closely here, you can see someone had done a bodge repair - hadn't cut the rust out, rather just overlapped with tin (not even panel steel) - Which no doubt caused sweating and further rusting.. Made a big hole All done, its sitting in primer now. Fully welded, Seam sealed, Fish Oiled, Etch primered and have undersealed the underside. Didn't have a chance to photograph the primer whilst I was packing up - and the weather packing in! Need to let the paint dry, sand back the inside - Will get a can paint matched with the fuel flap and finish it this week - weather permitting Discuss; //oldschool.co.nz/index.php?/topic/48778-chriss-1987-mkii-golf-eurocup-racer-car-with-added-moss/1 point
-
Pulled off all the junk off the back and put the front back on, so we can start to C-notch the rear end. Took out the diff to see how low it can go and to get some measurements. Can still go a little lower in the rear. Needs about a 7 inch C-notch. 5 inch will be sticking through the deck, which is a bit annoying. Time to make up some cad drawings so it can get laser cut at work.1 point
-
Still not sold someone buy it for $5500!1 point


.thumb.png.b2aee08688778d18bdc7b3e3c1852d9c.png)


.thumb.jpeg.384ff72c8d2b0ee0d34a7bdedb55bdcf.jpeg)


This leaderboard is set to Auckland/GMT+12:00