
Leaderboard


Popular Content
Showing content with the highest reputation on 12/20/15 in all areas
-
Brendan Duncker, of Niteparts/Convert Motorsport notoriety kindly agreed to build a set of his super nice headers for me. These are a 4-1 type, 38.1mm diameter primary (I haven't got the lengths yet but will be getting this info) with his own collector and a V-band flange for connection to the exhaust. They are gorgeous things and I am extremely happy with them. 2015-12-20_06-39-01 by Richard Opie, on Flickr Sorry, only a phone shot for now but will elaborate further when I pop together some more photos of all the garbage I have been accumulating for the car for the next update on SH. Thanks for looking!14 points
-
did some more today. 2015-12-20_01-11-51 by sheepers, on Flickr 2015-12-20_01-11-42 by sheepers, on Flickr10 points
-
The effective width is still 100mm in any case, because the fins in the radiator still run perpendicular rather than sloped. There's still the same surface area of fins cooling the same volume of water. I'd say it's more about fitting a bigger radiator while keeping that nice low bonnet line that RX7s have. I've seen some racecars that have the radiator mounted down flat, with ductnig to push air through. I'd say any angle is fine so long as you're getting air through it, and you can bleed the coolant.7 points
-
just bought another engine for SV2. Very similar to the one already fitted, but has an extra pulley on top
 7 points
 -
Had a bit of time to play on this today. Still smells like rat piss, but now it goes. And like a fucken gem too. clutch was stuck, but nothing a crash start couldn't fix. So stoked with how smooth it runs. In it's new home.5 points
-
3 points
-
Finally got the ITB setup in So got the ITBs and new head in, not much power difference in figures but peak power and torque have moved up in the rev range. Peak power is at nearly 8000 and torque is flat from about 5000-7000 before it slightly drops off. So took it to a drift day on friday and had lots of fun making heaps of Dooort noises everywhere. And heres a few of the clips I got, gearbox isnt the happiest at the moment but it fine for high speed. Just doesnt like low speed changes at high RPM like the 5 speed did. https://youtu.be/EioroBzzrW83 points
-
Today, was a good day. To summarise. No barking from the dog. IMG_2329 by Richard Opie, on Flickr No smog. IMG_2343 by Richard Opie, on Flickr Bex cooked a breakfast featuring zero bacon. IMG_2378 by Richard Opie, on Flickr Went to $hort Dog's house, they was watching Yo MTV Raps. IMG_2392 by Richard Opie, on Flickr Rolled a seven, seven-eleven, seven-eleven and picked up the subsequent cash flow. IMG_2429 by Richard Opie, on Flickr Took another sip of the potion and hit the four-trumpet motion. IMG_2487 by Richard Opie, on Flickr No helicopter looking for murder, purchased fat burger at around 2am. IMG_2482 by Richard Opie, on Flickr Today I didn't even have to use my AK - instead we installed a four-age. IMG_2463 by Richard Opie, on Flickr3 points
-
Knuckle Draggers pic by Richard Opie, on Flickr Thomas (aka The Knuckle Draggers) did this for me. I giggle every time I look at it. It's arriving in it's original, A3 format soon.3 points
-
This is probably true. However if my idea was right it would be awesome. And I had pictures.2 points
-
You sure this isn't your problem. I am suprised that a mig welder would do that kinda damage to those circuits. Welders can damage sensitive circuits such as ECU's especially O2 Sensor circuits which run very low voltage and are connected to the exhaust. Battery can act as a giant voltage / heat sink and can actually help reduce potential damage. Induced voltages are also a potential hazard. Jump starting is a more common method of blowing alternator diodes or voltage regulators from my experience...2 points
-
Shouldn't be an issue.2 points
-
The radiator on the RX-7 is on an angle because it technically increases the width of the radiator without actually making the radiator bigger.2 points
-
2015-12-18_06-53-10 by sheepers, on Flickr 2015-12-19_02-41-37 by sheepers, on Flickr 2015-12-19_02-41-49 by sheepers, on Flickr 2015-12-19_02-42-06 by sheepers, on Flickr 2015-12-19_03-17-20 by sheepers, on Flickr2 points
-
I guess it's easy to tell whether it's the friction/heat etc just from pumping the fuel around that causes a temp increase, turn the pump on while the motor is off. So I did this, with a thermometer sitting in a hole in the fuel rail. With the engine not running, it took a long friggen time for the temperature to go up by even 1 degree. (keeping in mind that the car has a full gas tank currently) However turn the engine on, and fuel rail temp increased by about 1.5 degrees per minute. It's possible that ambient air temp was increasing as well and biasing the results, but, it seems pretty clear that pumping the fuel around just on its own generates a negligable amount of heat increase. In my opinion I think it's radiant heat from the engine, and heat coming directly through the rail bolts causing the temp increases. So heat proofing the rail somehow and insulating the bolts looks as though it might make the best difference.2 points
-
Motor came out after work like a boss. Loom is still in car tho, not looking forward to that shit at all Might just have to cut some relay wires and make sure I label them Anyway. Hole 2JZ No SHIT! And this is the cunty bit of chassis I cut out to try fit the hemi..... Thankfully I was smart enough to leave the cut out piece of steel just hanging out in the chassis rail, so I still have it. Will try steal the welder from work Monday maybe and weld it back in, then clean it up and paint it with iron oxide and some matt black to try hide the fact I'm an idiot Also, went to plastic welder today with my tail light. they kindly informed me they don't do tail lights anymore as the glue takes to long to set and people kept complainging shit took to long. then procecceded to go out the back and bring me the pottle of glue paint stuff they used, which he added a bit of thinners and said to let it soften up for a day then fill the holes, and will probably take a day fit it to set. I was all like, fuck yeah thanks heaps! I have time for this to get sorted so pretty happy there. Also have new front brake hoses on there way, will go over rear brakes etc tomorrow and figure out if I need cylinders as I suspect something might be up there.....2 points
-
http://www.speedhunters.com/2015/10/project-kp61-saga-the-story-so-far/ So I've pretty much committed to completion by submitting this. It's the story of this car, abridged slightly. Will be updates every couple of months.2 points
-
Buying a house and becoming settled in has put a slight halt on progress, but anyway here's a couple of inconsequential additions to the car. With help from a mate, we got a direct line to Hayashi in Japan and ordered a set of center caps - 73mm center bore and 60mm height for any trainspotters out there. Finished off the wheels beautifully! IMG_1481 by Richard Opie, on Flickr IMG_1494 by Richard Opie, on Flickr Then I obtained a nametag for the car. Surprised it was still available, yeah I know they cost obscene amounts that can be used for actual useful/cool things but fuck it. IMG_1460 by Richard Opie, on Flickr IMG_1503 by Richard Opie, on Flickr Lastly, a bit of a keepsake from Hayashi, a 15x10" Street CR in 1:5 scale form, meaning it measures 3x2"... complete in a scale carton, with a scale Hayashi sticker to boot! IMG_1520 by Richard Opie, on Flickr Thanks for being nosy! I promise next update will incorporate some proper progress.2 points
-
Hard on the heels of the 175/50/13 failure, I bought a set of 175/60/13 Yokohama A539. Now order is restored, and (I think) it looks really good. Plan is to add a TRD style hatch spoiler, I think it should have a proper little Japanese street hooner vibe about it! IMG_6862 by Richard Opie, on Flickr IMG_6868 by Richard Opie, on Flickr Much more snug in the guards, closed up the guard gap. Added some camber to the front end and clearance is plenty! IMG_6874 by Richard Opie, on Flickr IMG_6877 by Richard Opie, on Flickr Hoonable. Thanks for looking!2 points
-
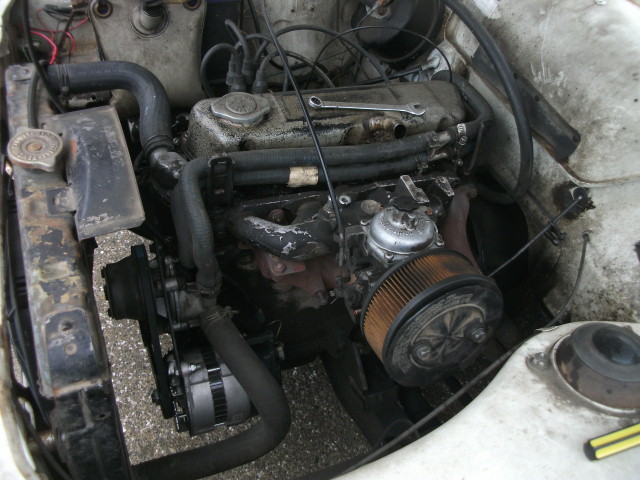
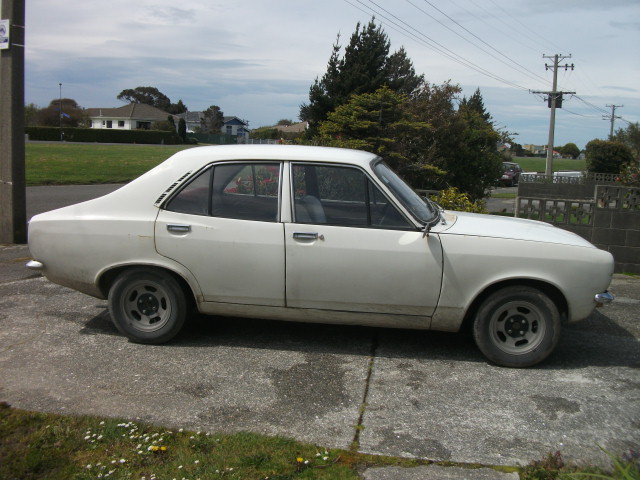
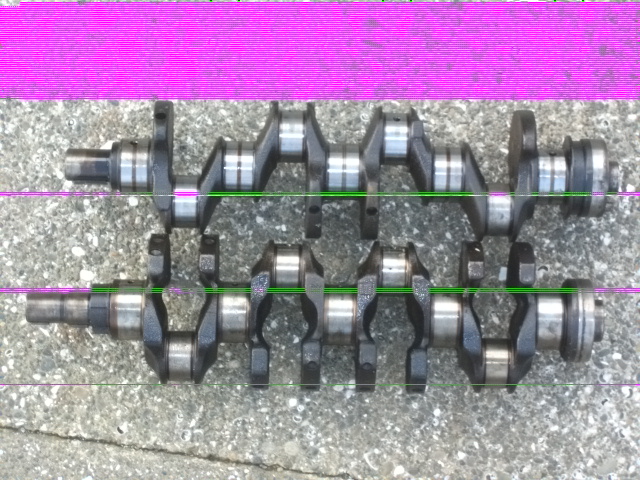
Hi, figured i better get some pics up of the daily hack, (to brokenarse poor to get something 'respectable).Spending most of the time & money driving & fixing it- + buying random shit i may not end up using in it. A pic of the weedy little slug that motivates it, a rousing 45 ponies @ 5000 revs when it was on the rollers a while ago, has a wee bit more coz i've been fiddling @ a pic of what we want to stuff inside it, top crank is avenger bottom is........ toyota. Why? why not i like the idea of it looking relatively standard, AND its a 20mm stroke increase- 1500 out to @ 2L is the plan Discussion Thread
1 point
-
Right. not sure if this should be in here or in other projects. I'm sure the mods will move it if it doesn't belong here. After the sale of the family farm in Kaikoura , I managed to get the farm ute . So last weekend my good lady and I shot up on Sunday and picked it up . It's a 1985 L200 , Grandad was the second owner from about 88, and it has a massive 75,000 kms . Thats the only 2 good points, as rust and rats have moved in, and fuck me does it stink inside. Not sure on the plans for it at the moment. A big part of me is thinking about trying to find a wellside for it and slamming it. not sure how well that would work with it being 4wd. Or fully restore it as a bit of a dedication to my grandad . //oldschool.co.nz/index.php?/topic/51221-wldrx2s-85-l200/1 point
-
I am now in the final adjustment and tweak mode with the car, I tried the 13" rims and they wouldn't fit over the rear disc callipers so made them fit today. The offset puts them just outside the rear guards but my calculations they should hit the stop before they rub. A few other minor things needed.1 point
-
Have you confirmed that you are getting no voltage out of the alternator with a multimeter? Test off the alternator terminals if you can to eliminate the possibility of there being a wiring fault between the alternator and the battery.1 point
-
That new dizzy has got the early 3 bolt mount and it will have the short drive snout, you will need to get the adapter or the end of the cam shaft won't be long enough to drive it if its a 39 style cam,1 point
-
Beautiful man, suspension height looks perfect too.. It's the upgrade i am going to do when I get back in a few years. Good to see what it will look like Personally the 16" Looks a little big, But i love it none the less! What size tyre are you running?1 point
-
Cliff Bond1 point
-
What time is meet? 12 or 1 the fb thing is confusing me1 point
-
I'll be along. I had thought I would be assembling a POOS daily, but will need a head skimmed (recommendations, BTW?) Will be good to catch up with you bogans.1 point
-
Hi Joker, yep thats me, was only going to be a tweak up of a spare motor, but........... we figured that if we're gonna build a motor up then lets give it some grunt- theres a bit of knowledge down here from a few x race/rally guys on what we could do, the word turbo was mentioned at 1 stage but the discovery of the toyota crank being a viable route to stretching the capacity we're running with that option, sourcing a suitable gt head & kelford cam helps too. The sierra box has a skip brown bellhousing & come with pretty much everything needed to fit it but the extension housing hasn't been cut yet, the car it came out of had a hole cut for the gear lever otherwise it'd be in. Scored it from trademe a while ago from waiheke island. Where am i going with it? Aiming for a fast road car that can hold it's own at teretonga at a track day & gymkhana/sprint & hillclimb it occassionaly1 point
-
Mate with a EF9 Civic has shown interest in entering1 point
-
I had some tyres that needed to be removed from the car because they had cracks all through them, surprised they hadn't blown out! Luckily I had some already from other wheels. All different brands/models because I like to live dangerously. Also the sizes slightly different (two 175, two 185) so put the 185's on the rear, naturally. While I was under the car I had a look at the rust and repair places that will need to be fixed up. Some really awesome Japanese typical body panel repair jobs involving urethane, silicone, cardboard (or plastic) and metal tape. Just the usual. The good thing (but maybe expensive) is that inner/outer sills are available as well as a couple other common failure points as repair parts. Not genuine Nissan of course but a couple restore companies are reproducing them which is excellent. They were all like this, and also had cracking inside the tread too. New (old) tyres on.. I think there are some from China and some from Korea, quality. So much room for activities. Bit of a shitty look at the stainless exhaust. It's loud. Hmm those could be a problem. I had a feeling it was on cut springs after driving it. The rear actually is captive so that should be OK, but the front is no bueno, will look at upgrade options because the shocks look pretty average too. Looks like a bolt missing from there... and interesting exhaust hanger situation. Talk: //oldschool.co.nz/index.php?/topic/49704-mlracings-hakosuka/page-6#entry16314961 point
-
Not very good video (from my phone jammed in the headrest), but here's one of the DYO against azzuro's Fiat 125. Only just pipped him at the line...1 point
-
But on topic. Toyo R888s. Fantastic in the Dry and Wet. Even when they are almost worn out. 1200 KG FWD No LSD. I'll run Max 30 psi on a hot winters day, after 6 laps. But I'm still gathering data, rained every time I've been out in the last 12 months.1 point
-
This is only relevant to your own vehicle. Yes each track loads Tyres differently, chassis tuning should be used to compensate for this and avoid excessive tyre wear.1 point
-
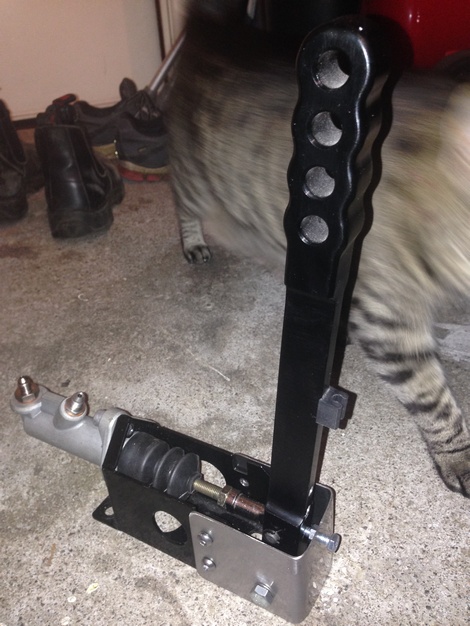
Had some rubbing issues at Puke so have spaced the rear calipers Back together Made up a new support for the handbrake as part of my rectification for the certification / MSNZ regs Getting a new brake pedal water cut so my pedal box can pass cert
1 point
-
Well hopefully this is engine in for the last time but something tells me it won't be. But got powdercoated bits back today. Just sat in place because waiting on auto sparky and spark plug tube gaskets.1 point
-
Got this back on Friday.... Ran out of gas 100m down the road hahah Cheers Highlux for being the saviour Days off work are Sunday and Monday so got some trim on yesterday morning before some commitments in the afternoon Am very stoked on how it came out Has developed a fuel problem so will check everything is all good in the metering unit tomorrow night, spent two hours today with the old guru on pi stuff here in Tauranga today has told me what to look for and sorted me out for parts with a troubleshooting book he put together so hopefully get that done tomorrow and put the rest of the trim on If we get it done tomorrow with minimal costs involved will be ordering coilover parts this week tooooooooo, very excite Plus roofrack is being built this week ready to put on the car on sunday we decided on something along the lines of this made out of stainless that fits in the existing holes from the last roof racks1 point
-
it has a huge japanese computer on the dash that talks for about 5 mins everytime you start it1 point
-
Picked up this Nardi woodgrain wheel for a price I couldn't resist as was looking for something larger than the Momo that was on there in order to see the gauges properly (couldn't see water temp, somewhat important). With a bit of fettling it's on, and looks perfect. Feels really nice to hold, I've never had a woodgrain wheel before. Also took this opportunity to straighten the boss as the previous owner for whatever reason had the wheel on a slight angle which bugged me to no end. Now I need to get some repair parts for the centre console to get it back to it's former glory. When I took that photo from the driver's seat it reminded me of this one I took a little over 3 years ago at Rocky Auto: It was never a matter of IF I would own one.. but a matter of when! Discussion: //oldschool.co.nz/index.php?/topic/49704-mlracings-hakosuka/page-6#entry16278411 point
-
I finally found some time to make some bench seats and get it all home. We had 20 people sitting at it for lunch on Saturday. It was awesome1 point
-
Arts and crafts time! The black paint on these light surrounds was peeling off and looking a bit average so I decided to fix that. While I was there I painted the front grille as well, slightly differently to the OEM just to see how it would turn out. The reason I didn't just take out the honeycombs and the middle emblem is because everything was seized in. Being a Friday afternoon I didn't feel like fighting it so.. in it stayed. Finished! I didn't leave out the 2000GT badge on purpose, just forgot to put it back on haha. Probably leave it off though. I'd like to get in and polish the metal at some stage as it's quite cloudy and average but overall it's pretty average. Probably needs to go to some fancy metal guy to make it nice again. Oh, and need to paint the N in the middle of the badge red again as that's fully faded out. Discuss: //oldschool.co.nz/index.php?/topic/49704-mlracings-hakosuka/page-6#entry16160091 point
-
Installed new cap but still really difficult to start when cold, takes 5 mins at least of cranking, stop, check etc. Usually cranks after I get the battery jump pack so perhaps battery is poor. Or spark is poor from coil? Once warmed up she's all good. I've also learned some of the Z cars use an electric pump to prime the mechanical one, could be a fuel problem perhaps taking too long for fuel to get to the mechanical pump as I'm pretty sure no electric pump in this. This is what the dizzy looks like, guessing still points? Sorry, old old car stuff is still new to me. I've read about the ignition upgrade and some people are saying use later 280ZX distributor and some other bits, still not quite confident on what's required there.. more research required. Also, quick vid of idle when it's warm. Sitting around 900rpm here, not super smooth though >_< https://vid.me/qTDu I'll look at a new coil next because not sure when depot one will arrive/it's not new anyway. Discuss: //oldschool.co.nz/index.php?/topic/49704-mlracings-hakosuka/page-5#entry16138521 point
-
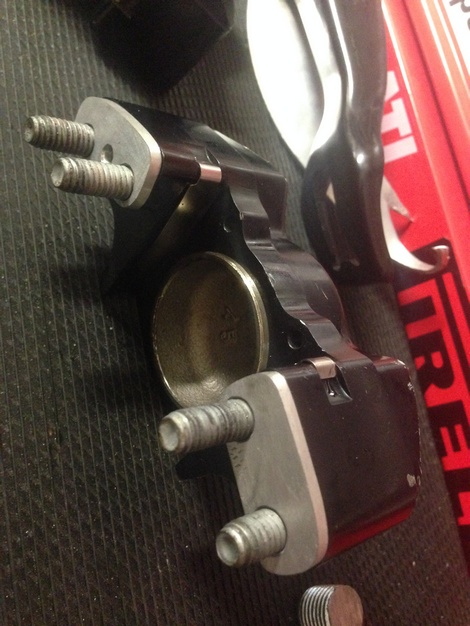
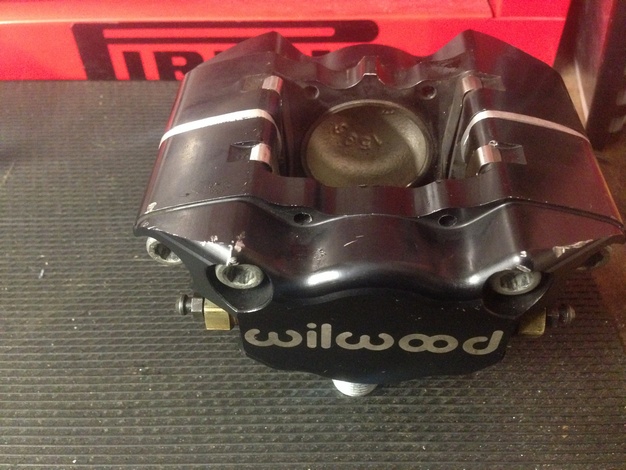
Heaps and heaps of rad parts have been arriving lately, and I'll get around to that and Imma let myself finsh but today these: IMG_8241 by Richard Opie, on Flickr Enkei Dish, 13x7 -2 offset. IMG_8248 by Richard Opie, on Flickr They have a heap of clearance for the Wilwoods - they are in great shape as far as bends or kerb damage is concerned but are heavily oxidised. A blast and a polish will sort it... IMG_8251 by Richard Opie, on Flickr I think they're wonderful. Differentiated from the popular Cheviot or Aunger versions with it's raised area around the PCD versus the flat depression the usual Tridens have. IMG_8233 by Richard Opie, on Flickr Next, I'm going to remove the rear bumper. I've bought a tub of T-Bucket bog, will hopefully crack into that this weekend and next week I'll look out for a roll of camo fabric and drop my doorcards into Greg. Thanks for looking.1 point
-
AAAAAnd after 7 years sitting in a shed the bitch has a wof as of 3 o'clock today....1 point
-
Haven't done much as iv been spending money and time on other things.Decided to pull the heads off and see how bad it was. Small patch of rust in cylinder no1 and a lot of rust around all the studs,actually pull seven of them out with the heads. Gaskets not to bad but seems water was getting in still. I think this confirms the block is a Mecurcy one due to the three different shaped water passages. Plan now is to pull engine and rebuild.With the tapping noise,mixed bunch of valves, and a fair bit of blow buy it seems like the right thing to do. Also I should have a new electric dizzy and 8ba timing cover coming soon.1 point
-
Not sure who put this in but its goood for blowing hot air around your feet in the summer.Its operated via a switch on the passenger side Puts my Personal plates on from my old Rx3 coupe,black and gold kind of suits the car. Plates mean I Buzz You bit lame but got them free so yer.1 point
-
Ok so over the week, the stubs received the tick from the NDT guys (recommend X-Ray Laboratories on Leonard Rd, Penrose for this kind of work if you need it, very fast turnaround and a good price) and then I ambled across to Clint and received a frowny cert-man approval for them after examination and photos. So, then they got painted in gloss black and reunited with their shocks. I didn't take any pictures of that finished article because I was pretty excited and impatient to put them in the car. So here's this. IMG_3138 by Richard Opie, on Flickr IMG_3160 by Richard Opie, on Flickr IMG_3170 by Richard Opie, on Flickr Oh and the Streets are now polished and with Levi for a dab of paint between the spokes and on the inner barrels. Plenty of room in a single piece 13" wheel vs the 3 piece for the brakes too. IMG_3205 by Richard Opie, on Flickr IMG_3218 by Richard Opie, on Flickr Cheers for having a nosy, if you want to discuss anything the link is below!1 point
-
The car was restored in 1980 had a few owners then my dad picked it up in 1998 He did have a twin carb set up before it caught fire after that he went with the holly.1 point
-
Current status: Engineless but awesome, I think. Add to this some pictures of PROGRESS! Awwwww yeeeeaaaaah. That doesn't happen too often now does it? After a hearty clean, of 7 months worth of farm/barn/general filth was removed from the paintwork of my baby. It still looks pretty bloody sharp, however there are several abrasions and scratches that have been caused (I can only surmise) by possums and cats climbing over the thing as it was barn stored. I've removed a few with a light polish, so I don't think it will be much to worry about. The current state of the engine bay... shiny! Pretty chuffed with the job overall, barring the damage to the bonnet caused by blasting - more on that later - but the spots where the brackets have been removed, and holes filled are undetectable. Right hand side inner guard - the battery tray has been removed from just forward of the guard and some holes filled. Passenger side inner guard, voltage regulator removed from the front of the strut tower and once again holes have been welded up. Firewall, relatively untouched bar a few holes filled... In behind the grille, I did consider a satin black finish on this, but as it was red from factory I thought it best to retain as much originality as possible... if I don't like this at least it's simple to go back to a satin black finish. Scuttle panel on both sides of the car, both of these spots had fairly serious rot in them. BAM! The rust is gone! Bugger about the overspray on the wiper mechanism but an easy fix I guess. Psuedo arty shot of brand new fasteners used to reattach the panels. I'm thinking stainless cap screws would be cooler... so these will be replaced. Argh! The bad part... the bonnet is poked, with the distortion clearly evident in these pics. A bit pissy about it, at least I wasn't charged, and Wez (1vaknd, who is the MAN by the way) has kindly assisted with providing a replacement bonnet. Lastly - the motivational pic (as long as it doesn't overshadow the actual progress!!!) as scribed by everyones favourite automotive artist, Nikk (Squid). When I saw it, I think my words were something along the lines of FUCK YES. Ok so the A3A's are a touch wider than what I have, but you get the general idea. Over and out - broadcast your thoughts on my hatchback here ---> //oldschool.co.nz/phpbb/viewtopic.php?f=18&t=42071 point
-
nothing FTW. paint fumes shoudl be enjoyed stz1 point


This leaderboard is set to Auckland/GMT+12:00