
Leaderboard


.thumb.jpeg.384ff72c8d2b0ee0d34a7bdedb55bdcf.jpeg)
Popular Content
Showing content with the highest reputation on 10/25/15 in all areas
-
5 points
-
Got most of the top welded up and a little bit of the bottom done. It didn't really take as long as I thought it would. Can probably flip it over now to weld the rest of it. Need to also start designing the crossmembers sometime soon.4 points
-
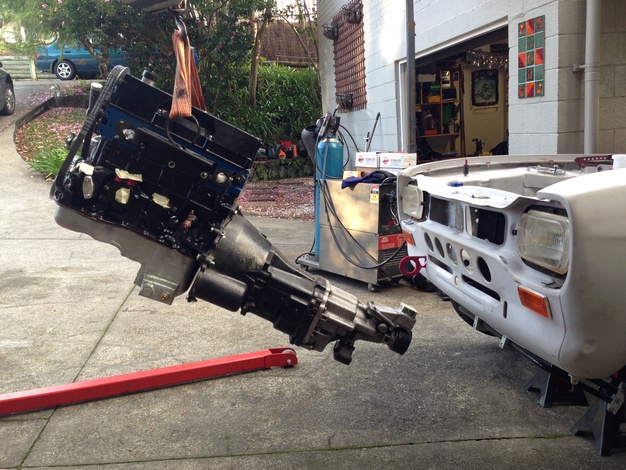
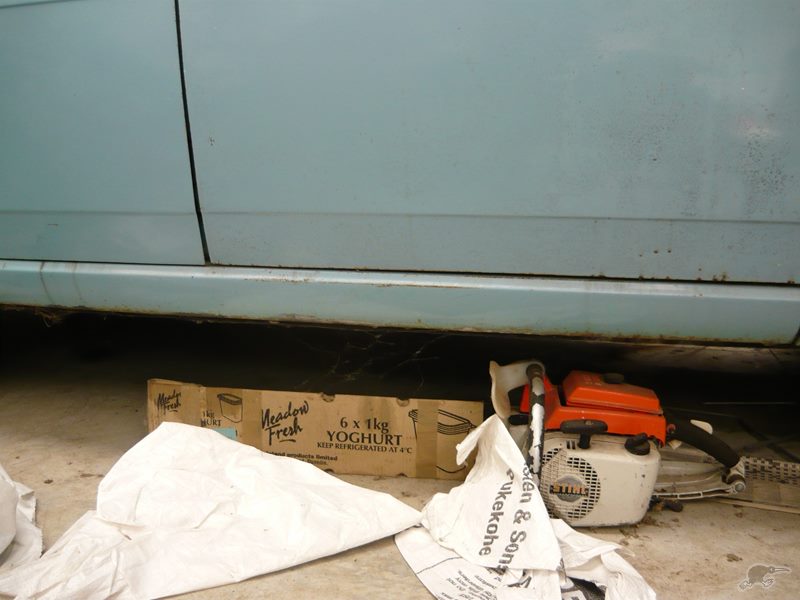
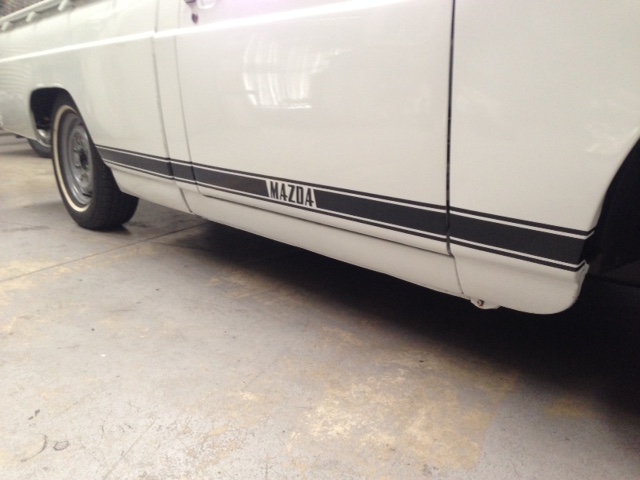
I dug the engine and box out of the hole today. Manual says box out first, so thats what i did 50 years of leaky gearbox sorted with 20 minutes of waterblaster engine bay ready for stripping looks quite bad but its not really, the RH side paint has been affected by leaky batteries, + brake and clutch fluid which has lifted the paint but not rusted very much at all. In contrast the LH side is very good. I thought the gearbox might have been stuffed, as I had not been able to get the box into gear since ive had the car, but once the box was removed it went into gear fine - ive traced the issue to one of the linkages being seized on its shaft, so thats easily sorted and i will be able to keep the column change. I had been investigating, and i think a Lada 5 speed box could work, but thats one less faff around i dont need to do. In other news i have managed to not only find but purchase a parts 2300 wagon and I will collect it some time in the next couple of weeks That means i will have in my possession 20% of all the 2300 wagons that ever existed in new zealand.4 points
-
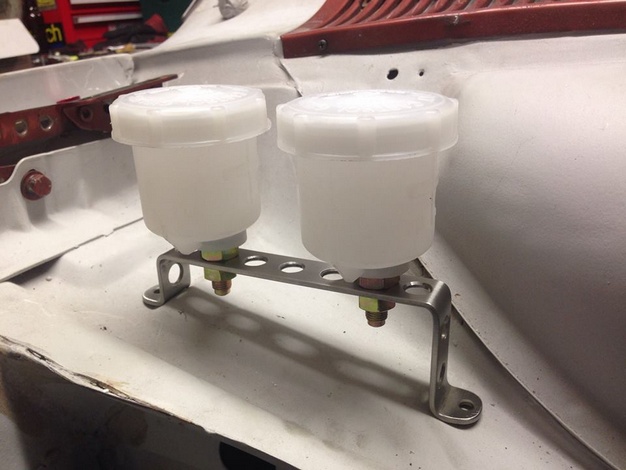
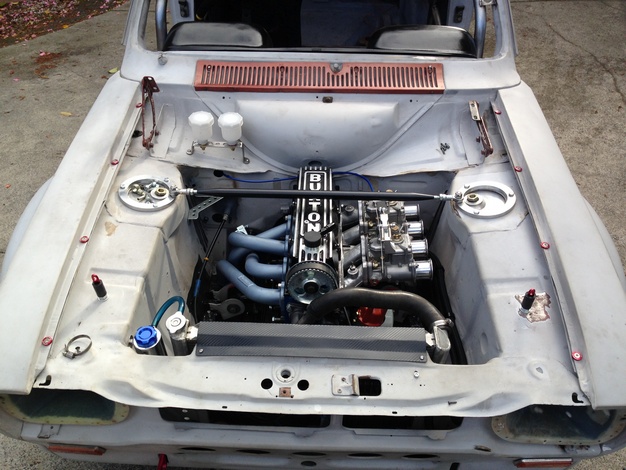
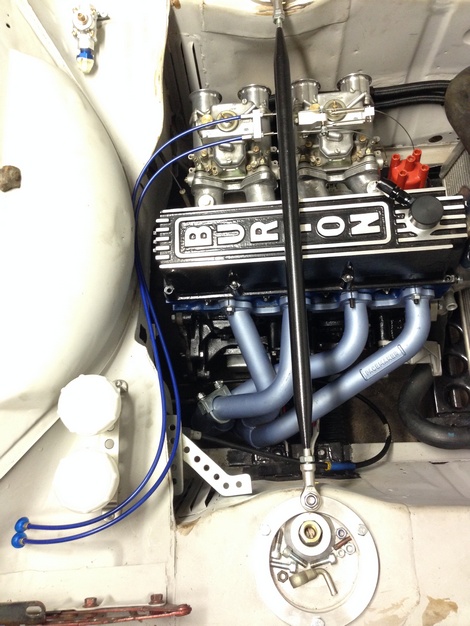
Bracket and Brake Reservoirs Fitted Engine Back in Syntec Historic Linkage arrived and Fitted
 3 points
 -
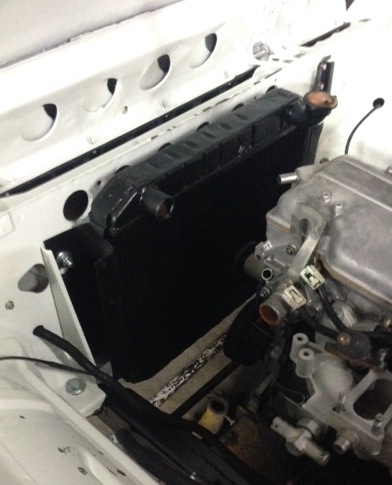
more progress from the last few weeks, I finally got the radiator in, turned into a bigger job than I had expected but it is all mounted all that is missing is the hose clamps for the radiator hoses that I know I have put somewhere in my stupidly small garage, you would think a small garage would make it easier to find things..... The engine bay is looking pretty full now, which will be the next problem, finding some space for the coils. The other thing I did was sort out an accelerator cable, I got one from a Toyota something that matched the pedal I had then cut it down and got a new end put on it, then tidied up the way it comes out into the engine bay using a rubber grommet thing that I got from Basis, can't remember what it is off or anything, just saw a picture and figured that it might work. the bracket on the carb was from Weber Specialties, it is a pretty cool setup, I put a double return spring setup on but I think the outer spring is a bit heavy, makes the pedal a bit heavy and I imagine will make low speeds a bit tricky. I have also been working on the back part of the exhaust and the fuel and brake lines, the ones I made when the crossflow was in don't fit quite right as now the tunnel is so much bigger so I have had to tweak them a bit, I am going to try and get that finished this weekend though, it would be nice to have it back on it's wheels.3 points
-
Put ply on the tray, then got it stuck in a mud hole poser. hellaflush2 points
-
Yup keen as to meet up at the pizza barn2 points
-
Sorry for potato phone pics camera is buried in uni shit that got seconded to trumph So got to have a good look at this today A shit tonne of useful and valuable parts with the car things that will be helpful, can redo the fuel system twice. Still have another van trip to go and get all the subframes extra gearboxes and other engine... Have pulled the fuel system apart checked over it to make sure all is well, it was. We pulled the gas tank out to make sure it was clean. We also Converted the car to electronic distributor. The unit was fried, so we converted back to points... First on the list is a rotor arm and new distributor cap for the engine thats in the car to get it running, which we will do tomorrow. Next is order an engine rebuild kit from rimmer bros for the cars original engine which has the tr6 cam. While I am waiting for this we will go get this thing wofed and rego'd hopefully without a hitch. Biggest problem is crazy cracking which covers the whole roof, around the fuel cap and the bonnet. This will get done when roof rack is removed and filled... Car is insanely tidy a small bit of surface rust has come up in stonechips on the roof this will get fixed with crazy cracking, but can't really find any other cancer at all Hopefully we can have it running tomorrow!! Am after a steel grill and pre facelift bumpers in goodish condition too if you know of anything!! Discuss: //oldschool.co.nz/index.php?/topic/49975-connors-pi-wag/#entry15827742 points
-
Hey everyone heres some pics for your viewing pleasure.... Cheers2 points
-
You may remember my (and beavers) old estate ....... I missed it like crazy Since then I built and sold this.... And after a lot of searching I got contacted about this last week. So today I payed for it, the base car is an original Triumph 2500 pi mk2 estate with 4 speed o/d. Was restored or tidied up in the early to mid 90's. Sadly a terrible aftermarket sunroof was added at this time, along with a modern roof rack which was screwed into the roof.... At least it is pretty much rust free Plans at this stage are to remove the sunroof and fill the holes in the roof along with a tidy up of the crazy cracking that has occurred at the rear of the roof and around the fuel cap. Rebuild the engine and tidy up engine bay.. Summer involves getting some coilovers made up and building some 15" 3 piece wheels to fit Future future involves new carpets, re trimming some retro fixed backs in the original leather from the spare front seats and re trimming the boot floor and back of rear seat in hardwood. Also has a tonne of spare parts including a full leather spare interior, a couple of Pi engines, a couple of o/d gearboxes, a few diffs and a nos tailgate and bottom valance I pick it up in 6 weeks time on the way back from uni will update then Heres a few more pictures... Discuss here //oldschool.co.nz/index.php?/topic/49975-connors-pi-wag/#entry15827741 point
-
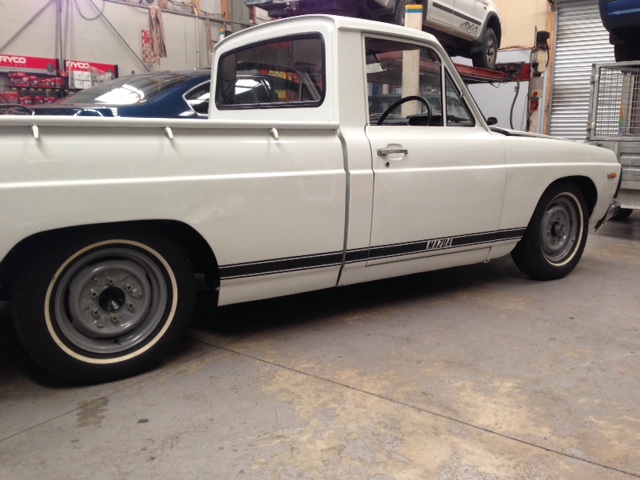
well it's been outside under it's own power...1 point
-
Your dash is not cracked near the speaker grill. Nor is the centre console at choke knob. This can not be. My world is turned upside down.1 point
-
I got a car inspected by incar automotive today and he had this computer thing he connected to the + & - on the battery and another clamped round the + lead, the tool could test the engines compression through the battery, I didn't think that was possible but he used the old style compression tester and it came up with the same readings. it can pick up through the alternators out put the cylinder pressure.1 point
-
Also keen to pop down from Whangarei for pizza barn epicness1 point
-
managed a couple more hours in the garage today so got some more things done First up was the coils, I made this bracket a while back when I was going to mount the coils on the side of the motor but when I put the oil cooler thermostat in they wouldn't fit any more, however the bracket was about perfect for mounting the coils to the inner wing so I went with that. Coil bracket and coils fitted A while back I bought a fan controller as I wanted to have the fans turn on automatically, I bought one of these from Summit Racing thing is it is such an ugly switch and the wire to the temperature probe isn't long enough to fit under the dash so after a bit of head scratching I decided to mount it up the front behind the radiator support panel. And as I was uploading this photo I noticed the rust hole to the right of the control knob, I am a bit gutted about that, can't believe I missed it..... Anyway the last thing for today was to get the wheels back on, I am hoping that tomorrow if I get the brake and fuel lines finished then I can drop it off the stands and roll it out for some decent pictures, but for now this will have to do I still prefer the old wheels1 point
-
1 point
-
Tbh when I first saw this project and your write up about previous experience, I thought oh yea, this things going to rot in his garage and never be heard of again. Good work man!1 point
-
so i have removed most of the un-needed wiring in this, then re-wired to suit the piston motor, also replaced the oil pressure sender and water temp sender and found the wiring to suit. then hooked up all the cooling system with new hose and clamps and filled it up, finished hooking up the fuel line. so then i fired it up after getting the timing sorted, it runs quite nicely... but it smokes like a bitch…. pretty gutted and something is not right in the clutch department, have a strange noise until i press the clutch, don't know whats going on in there everything is new. but i did find it must have a different clutch fork as it doesn't line up with the slave and puts the pin on a weird angle. but its looking like motor and box back out. tossing up wether to give the VC 1800cc motor a freshen up and use that instead and try find out what the heck that noise is in the clutch area. the gearbox has been leaking from the joins in the housings too so i might use another box or pull that one to bits and re seal it. also the gearbox is just fouling the tunnel when it shakes so might be easier to re-shape the hole and hammer a bit more clearance with the box out anyway. bummer more work to do yet
1 point
-
What's the name of that tool you use for pulling holes. I bet it's spendy but man I'd love one1 point
-
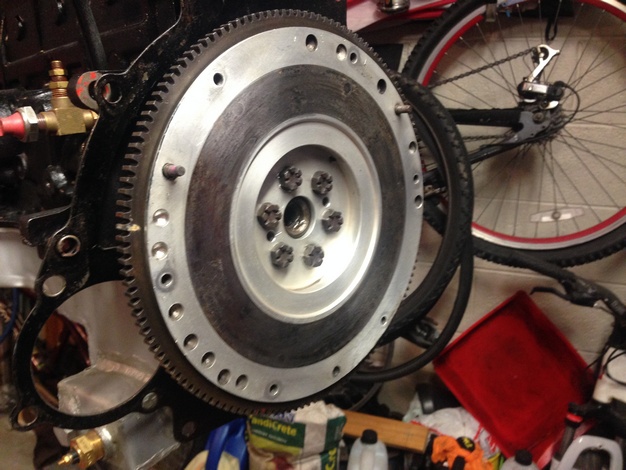
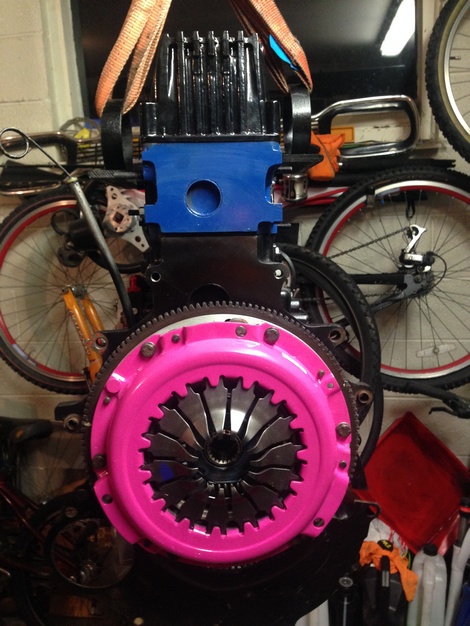
Lightweight alloy flywheel fitted uprated exedy clutch and pressure plate strengthened and fitted clutch release arm and bearing almost ready to put back in
1 point
-
Most likely will attend for the northern half of the trip! All welcome to do a shed raid at my new pad in wellsford on way back from waipu. I'm about half way between tehana and wellsford1 point
-
Look what I picked up today Just got home from a ten hour trip from Wellington to Tauranga via New Plymouth to pick the thing up More pictures in morning1 point
-
more off the tardme pics
1 point
-
Its not a scummy Nissan tractor engine mayte, its a high quality Toyota forklift motor.1 point
-
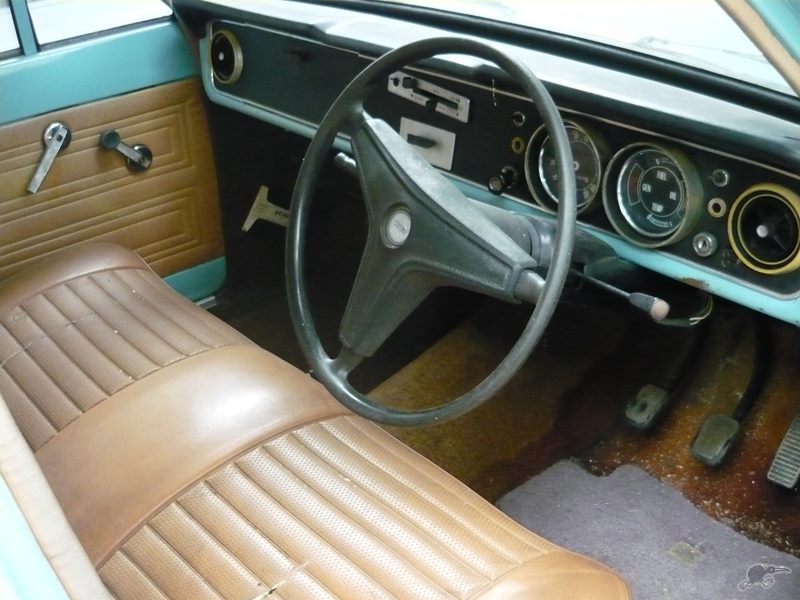
Exciting news! Little Viva wagon runs! It sounds quite sweet too. I had a go at getting it to start ages ago but the points and condensor were shot so I gave up. Today I had to move the car from the hoist to make room for an E21 Bimmer that’s in for rust work. With the wagon down on the ground and parked up near the bench I thought I’d get it going and strip out the engine bay while Im there to make better access for the repairs needed. I had been given another dizzy since the last time so I ripped the points and condenser from that, set it up and got sparks. Set up a fuel can and as soon as the carb had fuel it started. Awesome. It revs nice, idles nice and sounds really good. Time will tell once its running and driving as to how good/knackered/tired/gutless it is. Also today whilst between mucking with the ignition and helping a friend with his Saab I pulled the brake servo off, threw away the single circuit master cylinder, pulled the heater out, bonnet hinges off and some other bits in the search for any more rot. Luckily the usual points behind the hinges were solid as was the heater plenum/channel. I will remove the radiator for a tidy up in front of its mountings. I’ll take off the dynamo and throw that in the bin as planning an alternator upgrade. Pictures from this today.. It was raining to start with so perfect excuse to spend day in shed with Hannah and Rowan and tinker with our respective cars.. This next one.. look at that for some lovely hose locating bracketary.. Engine bay cleared out for a looksie.. Tidy heater/ventilation plenum thingee.. Rust hole.. Another hole.. So over the last few weeks, or since the last update, I have been whittling away at a few bits on it while it was up on the hoist. I finished the chassis rail repairs. As suspected the passenger side rail was solid but for a few little holes and around the jacking point/gearbox mount. Its all strong now. Next time its up I’ll clean up and paint it all. Then some decent cavity wax inside. I’ve swapped the alloys over for some old wheels I had kicking about and had the tyres removed so I can weld up/clean up two of the alloys that the have been curbed. It looks horrible on old skinny steels. I look forward to some new tyres and get them Turbos back where they belong! I am planning on getting 175/70 13 so it retains an element of comfort and that slightly older look rather than the more racy 60 series tyres I have on Viva 1. Next rust repairs will be either the engine bay bits whilst its off the hoist or sort the rotten rear valance out when its back up in the air. Luckily for my wallet I have a few jobs coming in. Unluckily for Viva it waits in the queue as its doesn’t pay me money. Im getting quite excited at the prospect of cruising down to the beach/into town with my ropey looking wagon so I think I see a few evenings spent on it now. Its gonna be perfect for mtb trips too J I will have to get a shopping list together now. Things like brake cylinders, seat belts etc. I will be keen on some Chevette front seats too if anyone can help- I hate driving with out headrests plus Chevette seats are really comfy. Im sure this list will grow. Those with Chevettes... expect some requests soon..... Tim, Chris...1 point
-
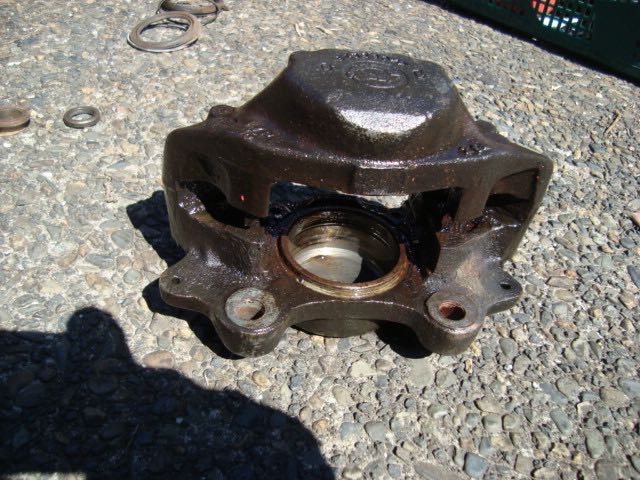
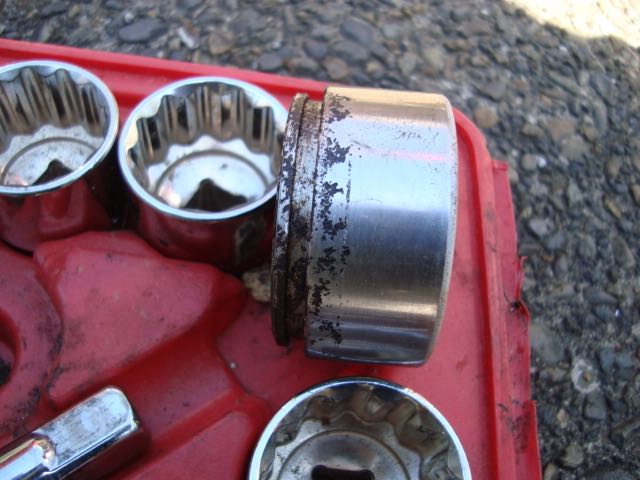
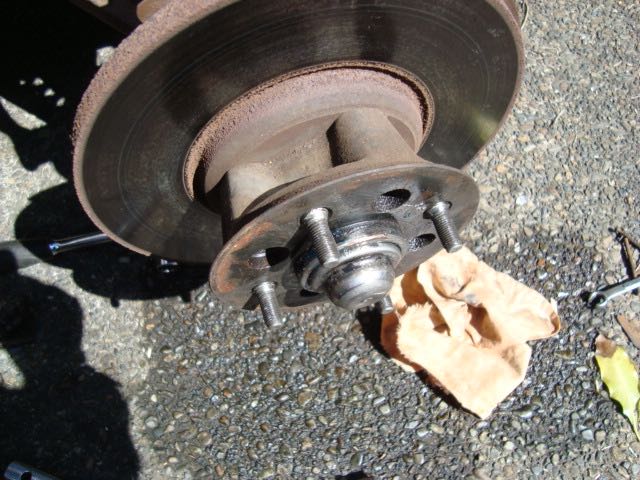
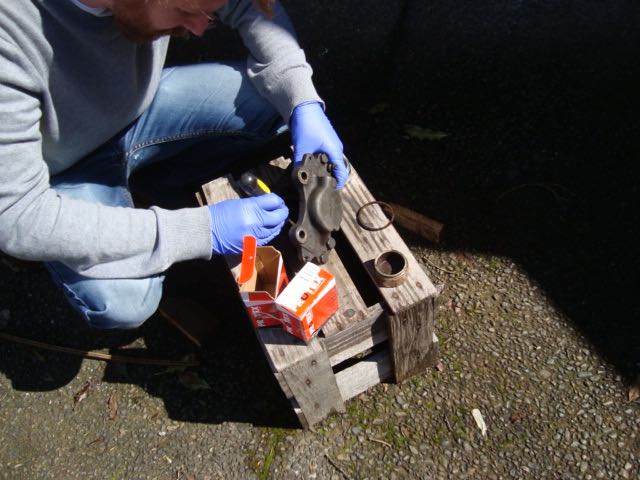
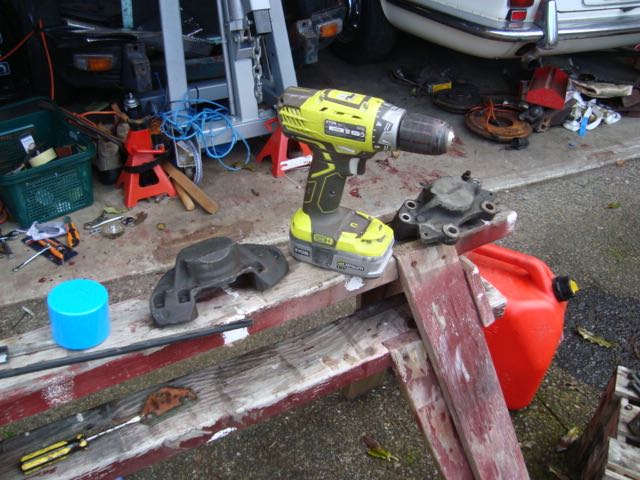
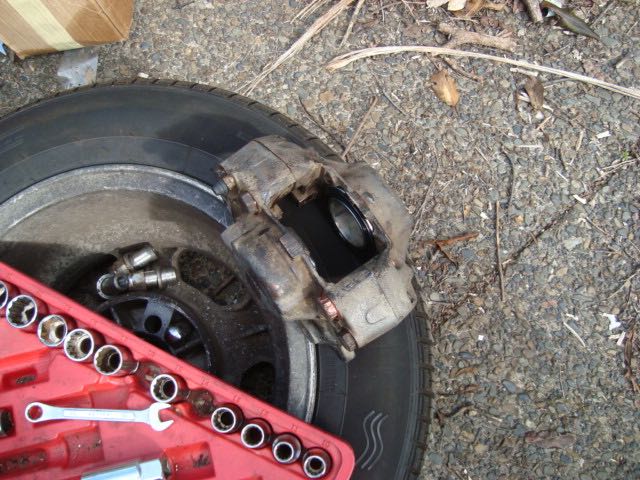
When we jacked up the front and took the wheel off to do the rust I noticed that the wheel didn't turn freely. It was dragging both front brakes. SO we pulled a caliber off and it wasn't in very good condition. IT took a lot of compressed air to get one sides pistons out and it was impossible on the other side. In the end we resorted to connecting them to the brake line again with no pad and used the peddle to get the pistons moving. This is what they looked like. The calliper had to be cleaned but it wasn't too bad. Discs look ok for jammed on brakes. Stripped them down and cleaned them up Got a brake upgrade kit from Sterling Brakes and got started rebuilding them. The look much better with new pistons and seals. Ready to go back on the car. We put them back on and bleed the system and it brakes really well now and goes better without the brakes stuck on
1 point
-
oh that's bloody awesome. shame you ran in to that chris guy but whatever1 point
-
Did any one take a Thomas stevenson inspired touring outfit? Plans for next project? Want to lend me one and ride the length of NZ for charity or something?1 point
-
Dressed to suit. Diggin it.1 point
-
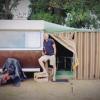
Yeah it was very cool to meet up with some of you OS guys st the swap meet! From what I heard Friday was the day to be there, lots of veteran and vintage motorcycle stuff that was all sold by Saturday. The ride details were: Day 1 was Arundel to Mt Somers, 25km. Day 2 was Erewhon to Mt Somers, 25km, We had an awesome tail wind and we probably had to only pedal 3km of that distance! Day 3 was Mt Somers to Rakaia 50km and the last day was Leeston to little river via a cycle trail around lake Ellesmere 50km. It was such an awesome event i can highly recommend it for anyone who is into old bicycles. Here are a few pics from the ride The 2 trailers with all the bikes loaded up Here are 2 of the 3 really nice Dursley Pedersen replicas that were on the ride Canturbury plains Re tyring a rear wheel on the side of the road after the tension wire through the center broke At the start of the cycle trail at Motukarara Chris having a go at swapmeet A shot with one of the sweet traction engines at swapmeet Rakaia Tavern Stack line up There are a heap more photos on the Oamaru ordinary cycle club FB page if anyone is interested too Time to get onto some of the other projects......1 point
-
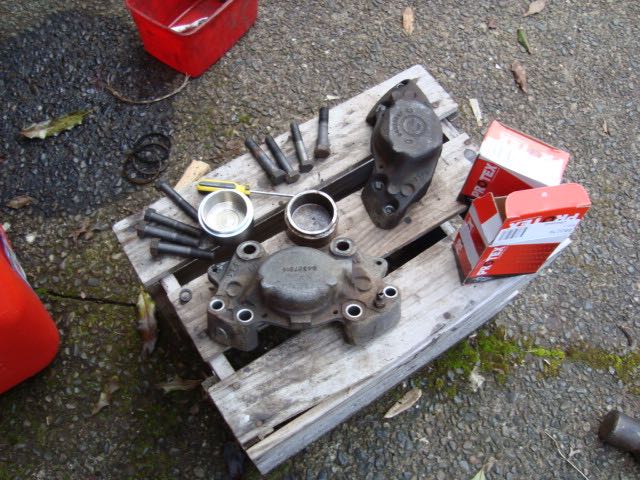
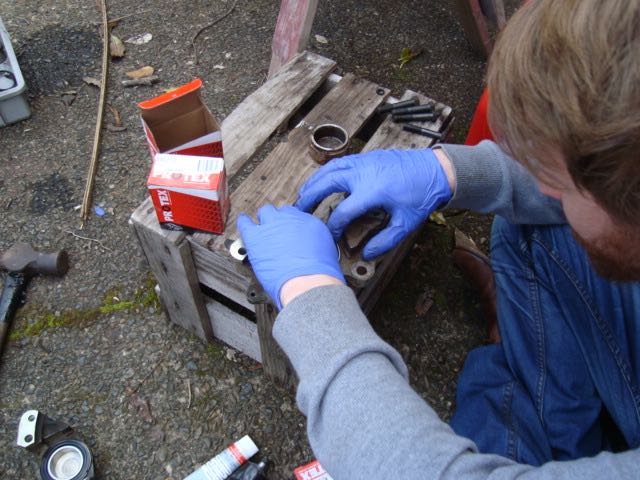
Good news everybody! My pump was field reversible, it was dead easy to do too. It was a matter of swapping the driving gear's location with that of the driven one and putting the front cover back on in the opposite direction. While it was in bits I was able to ditch the flow limiting valve off the back, drill and tap the housing and make it like a conventional pump. I didn't take any photos though. Here's some shit I did take photos of. Some nice shaped hoses for the radiator. A new fuel tank mount. And best of all a MDF Hydraulic pump mount. That I converted into 6mm steel and stuck on the front of my motor. And a tensioner. Looks like it might work, I'm not sure a micro V belt will be able to transfer enough force to make it work. Time will tell. Next to do is to re fit the carb and exhaust.1 point
-
Big thanks to Dave for delivering the Datsun out to us on Saturday night. We shuffled it into a good position for the morning sun and this morning Hannah and I gave it a decent wash. I wanted to keep all the moss in place but really it was just so covered it wouldn’t help my case when applying for a new registration/test. So off it was washed. I took some piccys first though.. Then wash time.. After it was washed down I pulled the seats out and removed the old carpet. As to be expected there is some rust holes where water has sat between the sound deadening and the floor. Luckily most of the floor is pretty solid as are the inner sills. So patchwork repairs will take place there. I'm sure once up on the hoist it will gift me more lovely rusty areas to repair but overall I am really pleasantly surprised at how well the thin steel on this car has survived! Engine bay pretty good but for a few little bits.. I pulled some of the filler out from the dents and apart from surface rust it is mainly just dents the filler was covering. Not really deep dents either. Someone has tried to make this car look pretty at some point which bodes well for it having had a proud owner. I wouldn’t be surprised if the dents were put there by my mum or dad when ferrying us kids around. It was quite a little hack for our family. The roof is really straight. Awesome! Plus the gutters, tailgate, doors etc are all solid as. It has the original Datsun screen still place and no signs at all of even bubbling around the seals. Happy about that! Whilst cleaning out the inside I scored some more treats as well as money. The car now owes me only $247.95. It would be less if the 20c coins I found were not the outdated ones. One of them is 1980. Could have been mine. Maybe I dropped it and missed out on my 20c sweet mixture that day. Oh really?.... I also spotted that it has already been fitted with top quality hifi speakers. Bonus.. So that’s it for now. With the carpet out the car is now nice and dry inside plus I know roughly what I have to do. But I need to finish the Viva wagon first before I start any rust repairs on this. So it will be pushed out back and brought inside when the time is right. Between now and then I can do my best to locate an engine or hopefully get the original 1200cc one back. Plus look for a disc brake front end and brake servo to suit. Oh..and some nice period alloys as well. Hopefully some turbos or even slot mags.1 point
-
cheers to archetype
1 point
-
So it seems kurts attempt at coupe lyfe has failed as this thing has fallen into my hands and I'm going attempt to finish Kurts attempt. He sold it to me with pretty much all the hard stuff done which is verrry nice! It arrived to my house on thursday night looking like this straight off the truck, highly recommend Brent at Classic towing, he is a dream to deal with and at a very good price too! much better than any other company i have had to deal with before. on friday evening i ripped into things, put the last coilovers in the car, and ofcousre slammed it. need shorter springs for the rear coils as it sits wayyy too high and i still have a bit of body adjustmet to play with. also had to put the skirts on to see what it would look like..... it looked good. pulled all the seats out as they were all dirty and grabbed some turtle wax upholstery cleaner. Worked way better than expected got all the greese and rust stains out of the seats, still need to finish cleaning up around the headrests. Before: After: Next on the list -put the side skirts on properly -check all the bolts underneath are tight -install driveshaft -instal/mod gearbox x member -mount enginebay stz -rebuild brakes -acquire and install raditior -wire up engine -exhaust -and a shitload of other small jobs.. should easily be done come summertime hopefully...1 point
-
Dude, throw that bitch up on the FS, surely a Welly local would be all over that.1 point
-
bit more rust, working my may way around the car, front left sill and fender. yum! take that! No wonder it rusted, there are at least 5 or 6 overlapping seams all facing the back of the wheel! I will slop some seam sealer on and plenty of underseal and is should be good for another 50 years. --- pretty happy with how this sill cover turned out i reused the door seam part, just replaced the bit below the door, the jacking point helped to keep stuff lined up on and off to check fitment and tweak at least once... ready to weld on noice and the aim of the game, more rusty bits for the scrap pile have another small section aft of this to whip off ( ayou can see my markings in the last image in the gif (and ill be onto the boot area, the rest of the sill and rear wheel arch is fine.1 point
-
and also sorted out the bonnet.1 point
-
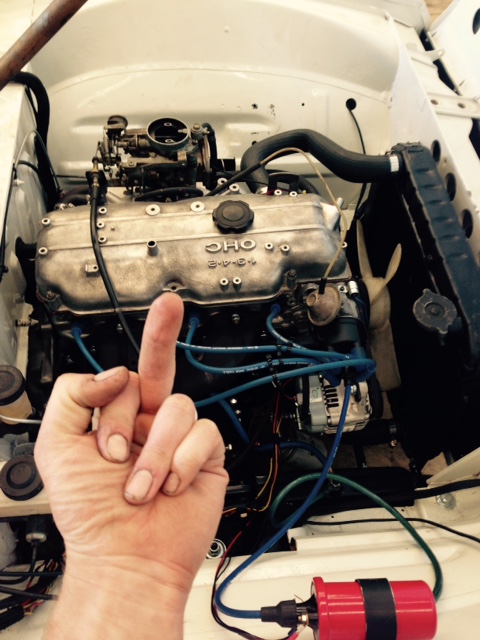
Go tthe mrs to give me ahand to crank this over today, I got her to write down the compression tests (before it started) Not so good on 3 and 4! However ITS ALIVE! https://youtu.be/HCPhc2MetpI https://youtu.be/HCPhc2MetpI Mrs actually got it going first, shes stoked, lol, this my my first start. fresh fuel including filling the carb bowl got it running so guess the fuel pump is borked or has an air lock I forget to test the compression again afterwards but it started & revved well enough so im guessing it was a gummed up valve or something. Stocked as that mean i can get it built up with the existing running gear. Wont be going too far before the engine comes out, for a freshen up but at least it can theoertically move itself around till then! Once it has brakes and a working clutch...1 point
-
And last weekend i took a trip to wellington to check out a 2300 sedan parts car for rust cut purposes. The car is owned by well known wellington 2300 nut Mark, and he has a really nice '65 wagon, the parts car i went to check out, another 'good' parts sedan and a '65 sedan in the body shop. 65 Wagon 'my' Parts sedan I also managed to get a few bits off him to take home including - spare indicator/park lights (for the terminals) - spare dash - column indicator/lights switch (which i broke when i got it home!) - tail light lens - fuse box cover - and some other small bits and bobs unfortunately the parts car is pretty poked in much the same places as mine but may be useful for quite a few random bits. Mark is hanging onto it in case he needs any bits for the sedan in the shop, when it comes out early next year, and i cant use it or collect it at the mo anyway, so it worked out well. Nice to have a good contact anyway. I also picked up some 130 rims from another guy on the way back, so will tidy them up and chuck them on soon. heres a pic of a 2300 sedan with some on (and a 16V Turbo engine)1 point
-
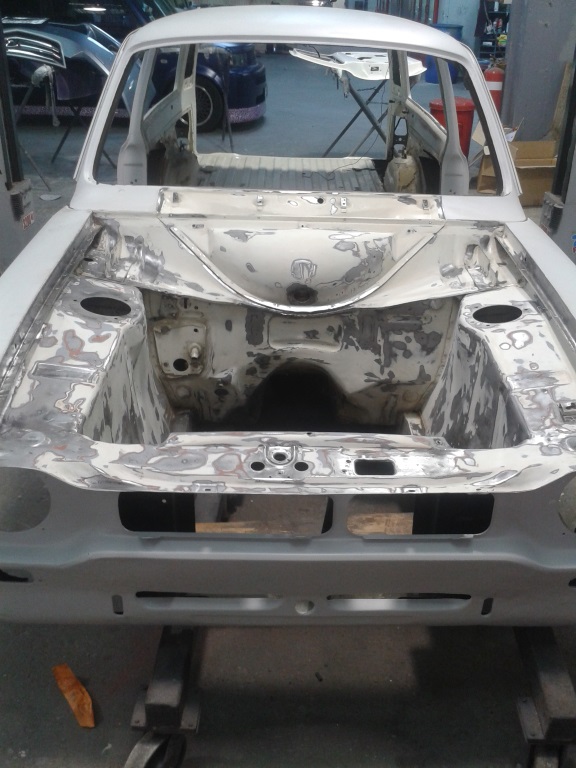
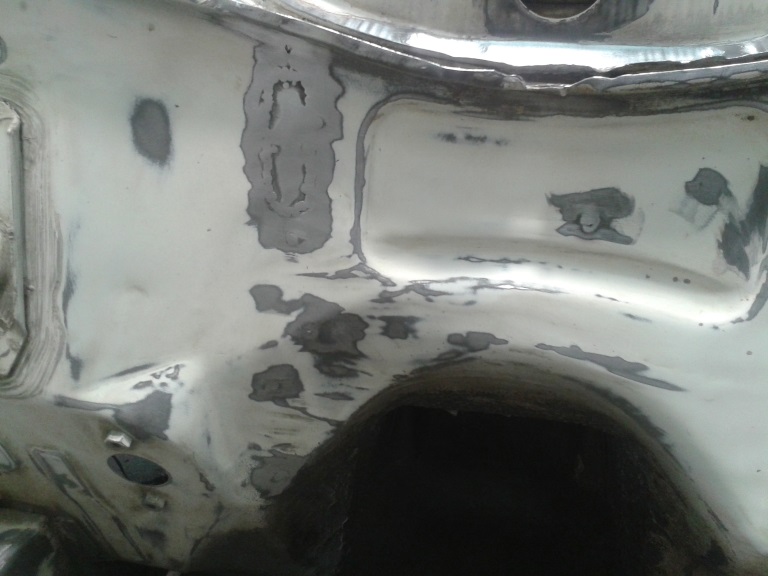
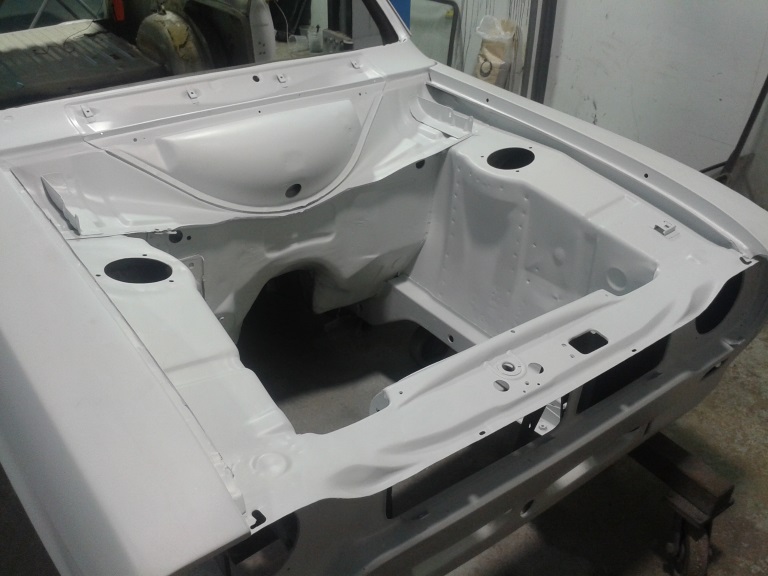
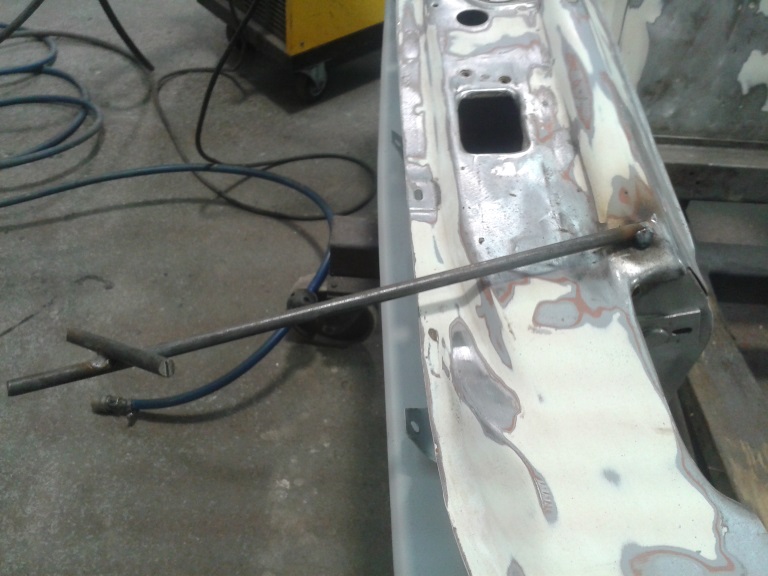
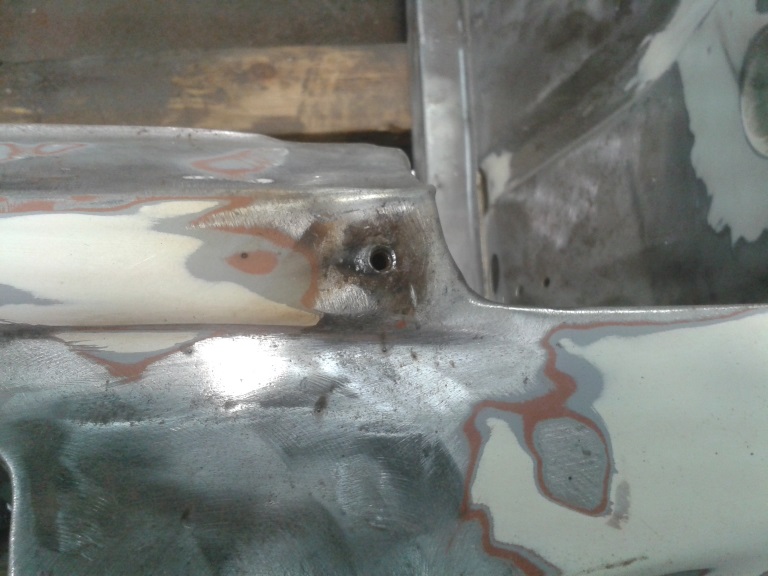
Last of the long overdue updates, some work on the engine bay. There was a broken off bolt at the front of the engine bay, it had been there for as long as I could remember I thought about just cutting it off and welding over it but I thought I'd be mega angry and past Matt if it turned out I wanted to used the hole further down the track so I welded a rod to it so I could wind it out. Success one extracted broken thread from a bolt. I finished feathering some edges and sanding off anymore signs of rust I could find, the engine bay then recieved a metal prep Followed by a couple coats of epoxy primer
1 point
-
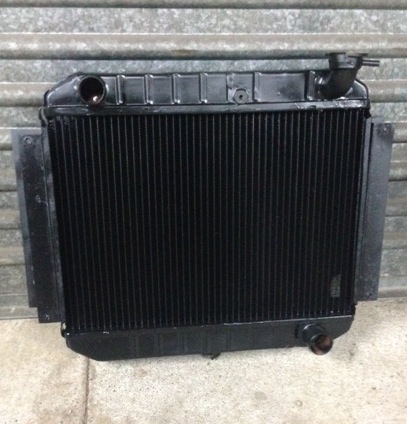
picked up the radiator from being recored today, looks good. not cheap but wanted to keep original copper jobby. sat it in, need to source some new hoses, and hook up the heater hoses also next job is to get the exhaust done
1 point


This leaderboard is set to Auckland/GMT+12:00