
Leaderboard


Popular Content
Showing content with the highest reputation on 10/21/15 in all areas
-
Also for anyone that didnt realise, this car is small.....14 points
-
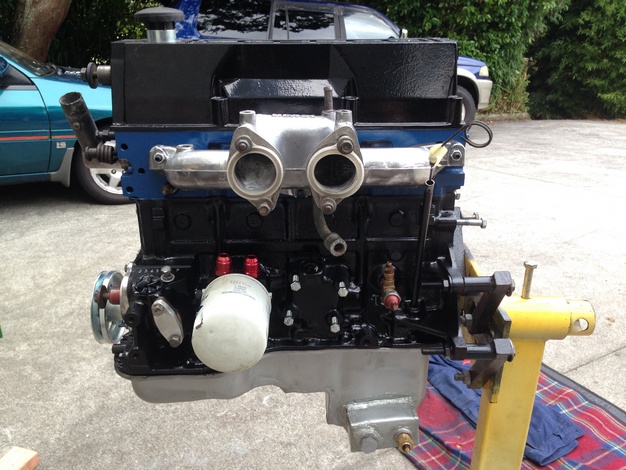
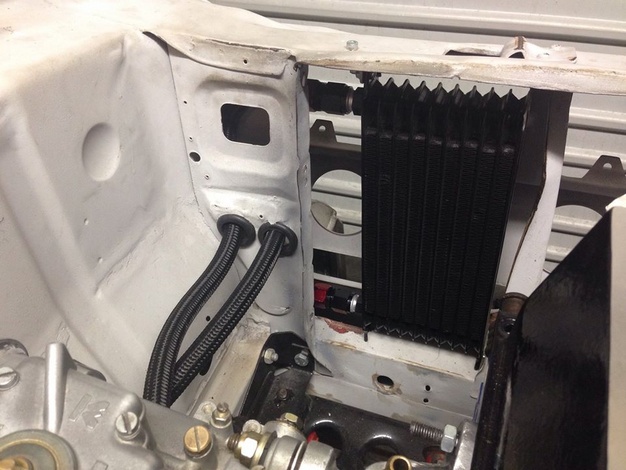
Cleaning up engine and painted it replacing gaskets and seals Fitting Oil Cooler setup
 6 points
 -
Can't make graphs without info6 points
-
made a mdf hoop then said the magic words and hey presto5 points
-
So yea, probly time for an update. A couple of details on the car have been tweaked, this has basically transformed the car into something genuinely lush; - I got an alignment done. - The driveshaft got pulled out cos there was a bit of a drumming noise at speed, turned out it was bent and the mid point hangers were knackered. I replaced those with some of the same jobbies as the gearbox. it got straightened and balanced, it now pulls through the range buttery smooth. It is a flash as anything two piece job, I was a bit surprised. - Yoeddynz was rude about it on the last OS drive we did, highlighting the steering as something less than optimal. I knew this already and had planned to look hard at the power steering stuff as it all felt a little lumpy and stiff. I talked to Ellis st autos and he reckoned look at the steering box first, so I backed the worm and nut backlash adjuster off 1/8th of a turn and lo! lumpyness gone, 2x lighter and much more directional. Win. It drives really nice now. This is the only pic i got of all this dicking around, so a boring update mostly; Except there is also this pic;3 points
-
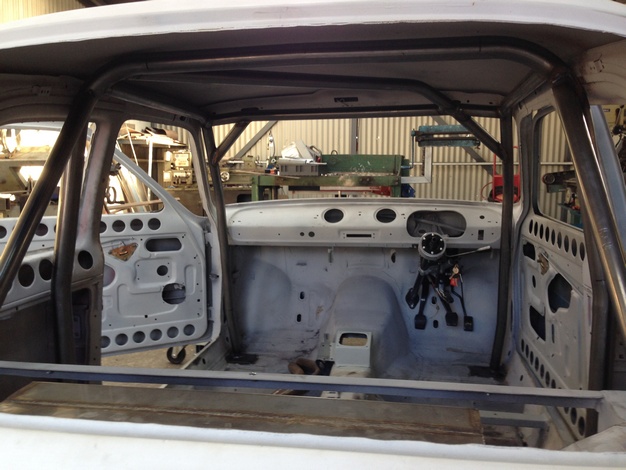
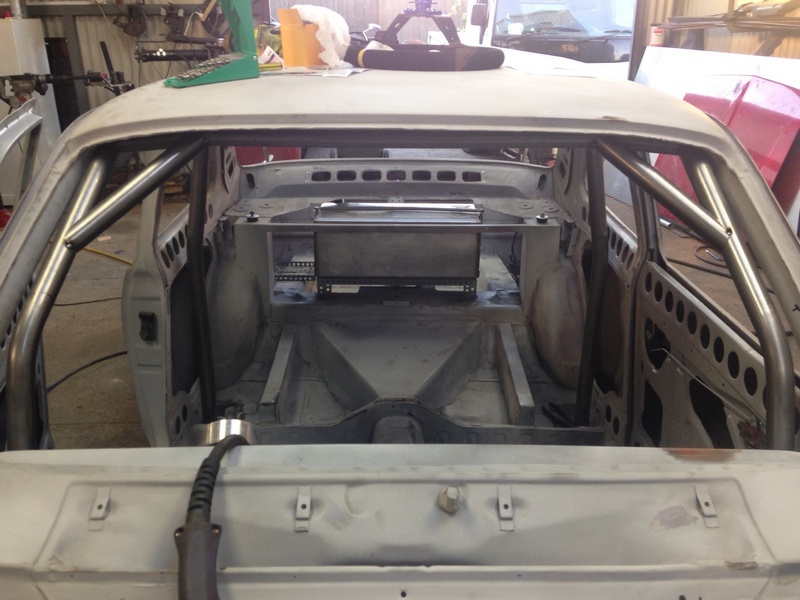
Progress with photos!!! Roof is all welded back together, not as good as I would have liked but itll do, I put a few layers of different colour paint on sanded it back and it sort of suits the rest of the car old running gear all gone. May need to do same reinforcing as the floors and sills arnt connected anymore. Because factory suicide doors The bike has been stripped and the engine is sitting in about the right spot ready to make some mounts.3 points
-
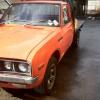
Hopefully pick corona up with its carbs rebuilt n tuned. Supplier has sent wrong diaphragm twice ... Another should of arrived yesterday fingers crossed3 points
-
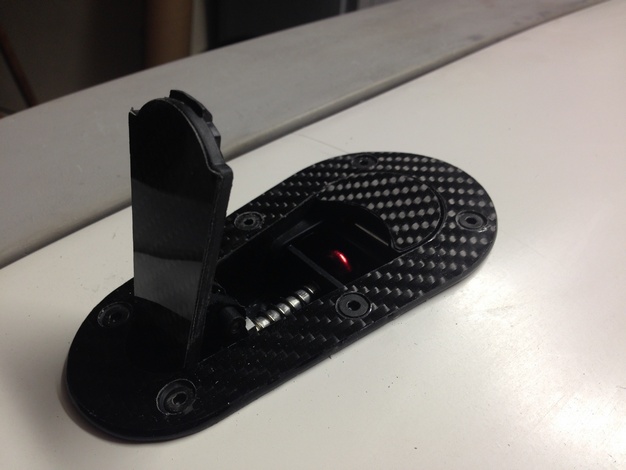
For the last while I have been trying to sort out the clutch and throttle. I want it to be really simple for the wee fella to drive while he is little, just a go pedal and a stop pedal in one gear only. Then when he is older he can have all five gears and a clutch to play with.... In hind sight I should have gone with a smaller simpler engine. So I have been playing around making a throttle pedal that controls the clutch and the throttle.. I am up to the 4th version, the first three used springs and levers but I just couldnt get it to work with out my son needing Arnold Schwarzeneggers legs. Here it is, I bought a chinese hydraulic clutch set up and made this abomination. I need to tidy it up and strengthen it. It probably belongs in the design disasters and fabrication foibles thread, but eh, it seems to work.3 points
-
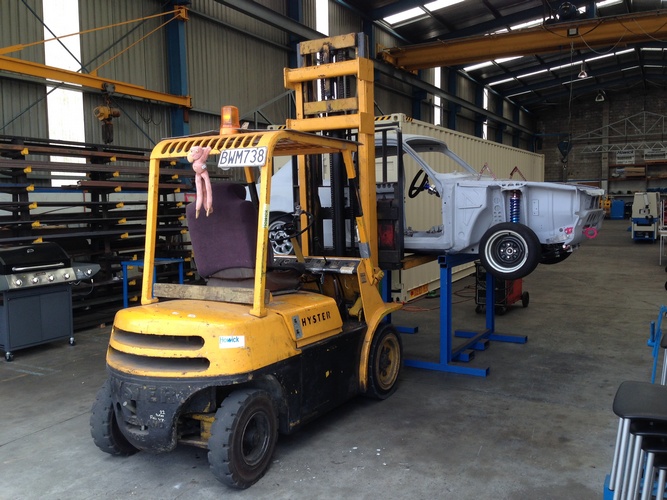
Its not a scummy Nissan tractor engine mayte, its a high quality Toyota forklift motor.3 points
-
Maybe we could funds raise for: Breast cancer, we all like boobs. SPCA, we all like animals. Cure kids, because kids. Or, bring tinned goods etc and make a donation to the Auckland city mission as part of their Christmas food parcel thing. This is often a good option as no one actually has to have money? Woodcocks road is an awesome fang road. The clash with C&C is unfortunate, but not the end of the world. This time of year a clash is unavoidable. December even more so. Pick a date, stick with it and those that can make it will make it?2 points
-
Jeez long time no update but plenty of work has been happening . Fabrication is almost finished . There has been so much of it on this bike . Next up is wiring . Will smash some pics up at end of this weekend !2 points
-
I'm not coming because I hate you all/because I did a shift swap for thursday... dating fail post ahead2 points
-
I remember watching this ages ago, and was facsinated by what they are doing, the possibilities that could be acheived if this sort of tech is the real deal2 points
-
And what's life without graphs.2 points
-
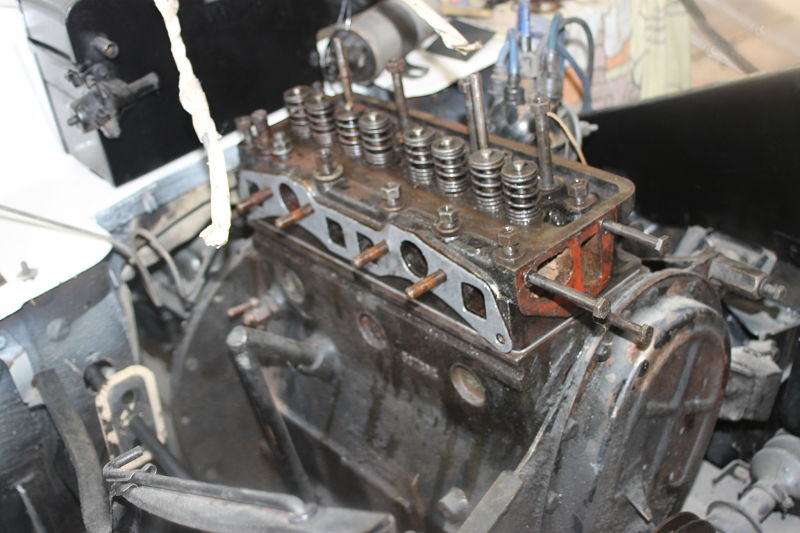
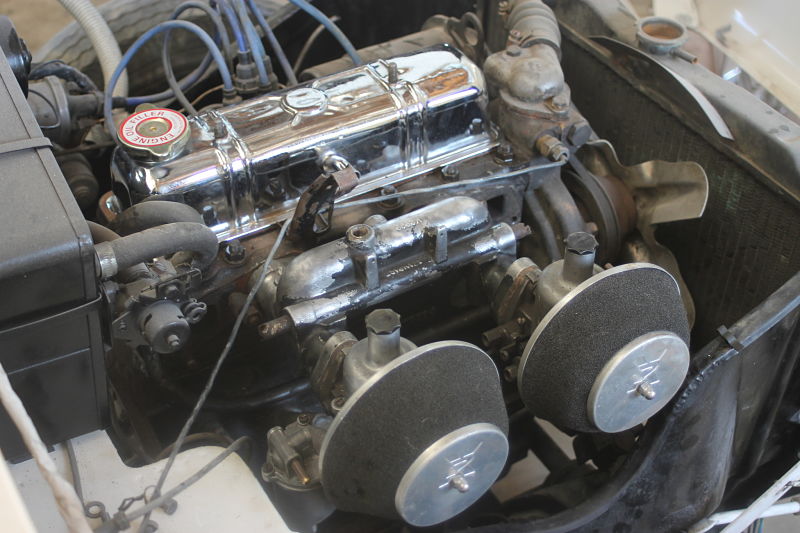
so the engine got a good clean up including new gaskets and piston rings. I also scored some twin hs2 su carbs and a polished rocker, looks pre sweet i reckon.
2 points
-
So instead of doing what I needed to do I started something else. Fan swap. After a quick measure I found that the Volvo fan shroud is a pretty good fit for the Cedric radiator, with a bit of trimming I ended up with this. The rad core is only marginally bigger, about 15mm left to right and 5mm top to bottom. It's tight but it fits. And the dual temp switch and housing2 points
-
Wof'd and reg'd the steed today. May have to bring her out for her first meet for the summer. Just got to convince the missus that she can handle the dinner, bath, and bed process for two kids on her own.... Wish me luck!2 points
-
alright iv been really busy/lazy lately, so havnt made much progress started welding the roof back together thats about it. Anyway heres the bike, A vtwin 250 Honda. I think it should be enough to cruise around in and at nearly 14,000rpm to find limtier it should sound pretty cool. a Also Had a party and thought it should get a load test, It passed.2 points
-
got me one these recently but am pulling me hair out - need new crankshaft and piston sleeve+pistons +rings+bearing rebuild kit -else a no go venture - any help with references on websites would be much appreciated takes Mazda AU 1484cc engine - found in Yale forklifts+HYSTER forklifts and some TCM forklifts1 point
-
As I said it was hard to tell from the pictures but I am glad you double checked and also glad that the majority of them were fine even if you had to re-do them.1 point
-
^ Lol who are you kidding, just change the final drive ratio and pump those tyres up more/soak in bath of diesel1 point
-
I have a nice bmw she can buy... doesn't run of course but you know, you have tow truck "hook-ups" pun intended Actually, I think I have finally found a reasonably priced injector so can get the stupid thing going again... when it arrives from Uzbekistan or whatever :/ I will miss you all... honest1 point
-
I'm bringing the missis, she will try to buy all your cars, she is not allowed There is no space in the lock up1 point
-
Take some dick pics while you are at it please, ok thanks1 point
-
+1 for Jody, especially his padding beads video, basically welding structural stuff right off the bat should be avoided, it won't take too long to get the hang of it.1 point
-
And man, that dreamy IL6 noise...1 point
-
MUST USE ALL INPUTS / OUTPUTS haha1 point
-
Ah ok, basically the same technique, try adjusting your angle, a good weld will lap and fuse both metals being joined with no gaps or high spots. watch this guy he has great welding videos https://www.youtube.com/watch?v=nq2LgmThpP81 point
-
Wind that timing into it Roman.1 point
-
I've been playing around with Virtual Dyno a bit, it's a struggle finding a 100% flat road but it seems pretty consistent between runs anyway suprisingly. Cant wait to use it at the drag strip / compare to actual dyno. Says it should be in the region of 170-180hp atw which sounds about right. and tapering off a little towards 8000rpm but still making power which makes it worth holding each gear longer. Which correlates with how the car feels too.1 point
-
ill come for a gander.. maybe.. hopefully1 point
-
Im coming in the civic first meet since the, Paint and motor and cam and breaks..... yea its been a while1 point
-
You should contact Alan if you've any queries about specifics of your beast, dude. He's a fucking wizard and a super nice chap. I've not actually spoken to him in ages but I'm sure he hasn't changed.1 point
-
So drivers side, Fabbed up the tail end of the OG panel, no it's not made of playdough, it just looks like it in this pic. Welded that sucker in, getting a bit over this rust bidness. Not really all that happy with the finished result, the front wheelwells are better, and no one will ever see them! Very tricky not being able to reach the back of the panel, there is a very gentle curve to these sides, nothing is flat, anyway, I gave it a bit of a beating with hammers and leavers and got it much better, will have another go at it later. I did start getting the bottom plates ready to be spotted into place, stripped the black paint off, welded the nuts (just in case) flattened and welded the two big drain holes up, dunno if this was a good idea or not, might be a reason the factory added these? primed with the weldable stuff, and some very tidy tail light housings I got on the weekend. So the next update should have the body temporarily back on the pan, hopefully everything still lines up and I can spot the bottom plates in place. Gotta get hold of my brother in law first, he's a cop and works crazy shifts so is hard to reach sometimes, even though he lives about 2 minutes away. I need his thread tap set, one of the runningboard bolts is broken off in the sill, it's always been there since I've owned the car, so I'd like to sort that before the sills get closed up. And then, um, I'm not sure then. Body will have to come back off to finish up the spot welds and will need to put some paint on everything. I'd like to paint the whole shell off the pan but will prolly just do the inside, bottom/underneath, sill, wheelwell etc and then paint the outside on the pan/rolling body. Then I guess it's time to strip and paint the pan so the body can go back on for good. HELP!!1 point
-
yeah man. might need to steal back one of them lada boxes too (not this weekend tho!) the bell housing might just fit the engine (starter on drivers side) work and then i will know that i could use a later model 4/5 speed, at the loss of the column change i havnt been able to get it into gear yet moves between gates but wont go into gear - feels like the forks might be worn and i noticed some bodgery on the linkages for more leverage, so yeah. - dented sump - oil leaks everywhere - gearbox not going into gear - no clutch - leaking axles - no brakes - heaps of slop in the suspension bushings but first things first - LOWS1 point
-
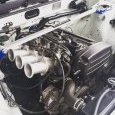
My laser cut parts arrived today! So I pressed the trumpets into the flanges and they look great. Then I bolted them up to the motor. I need some nice new stainless bolts for them now, once motor goes in I will confirm length works and then get them tacked on to flanges. Lastly just need small length of alloy tube to weld to the top water pipe flange and that part is done.1 point
-
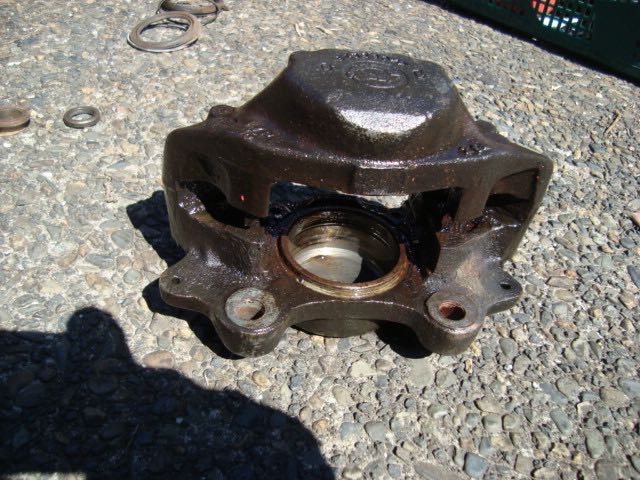
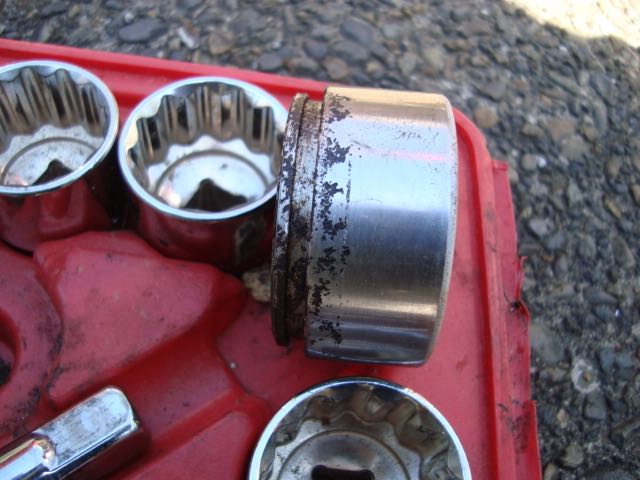
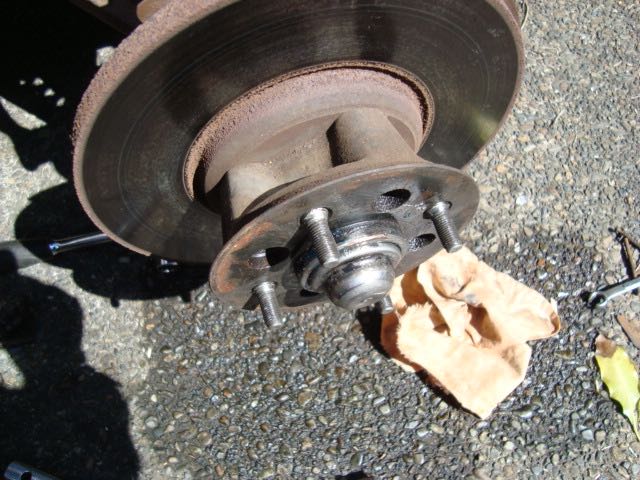
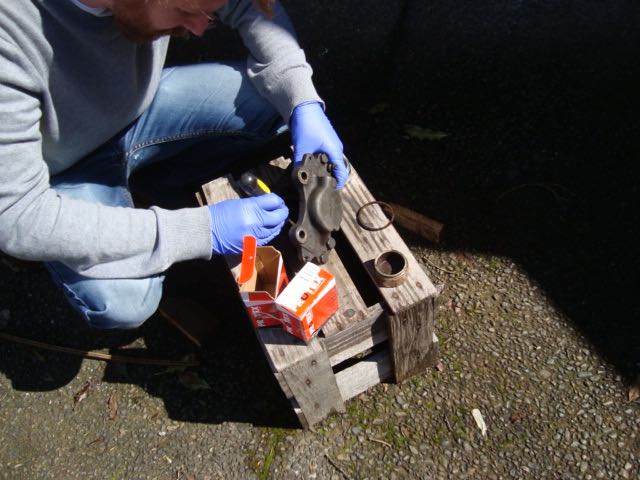
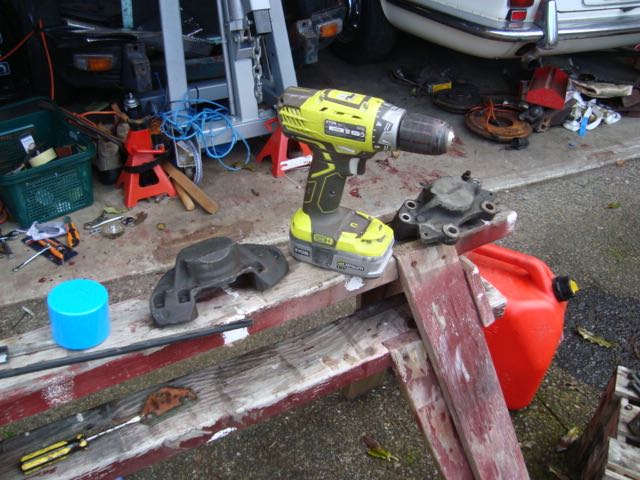
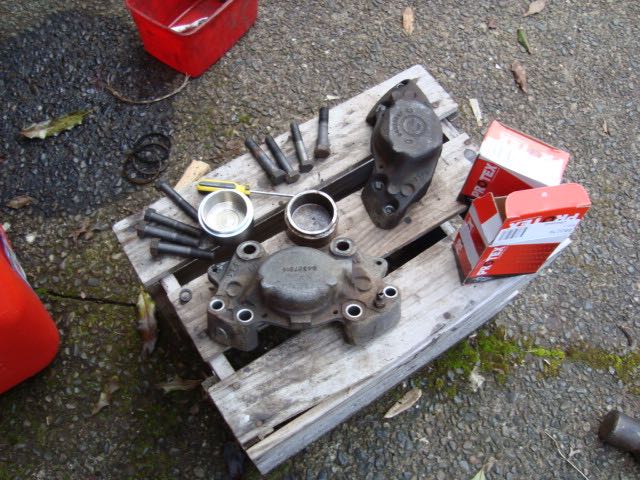
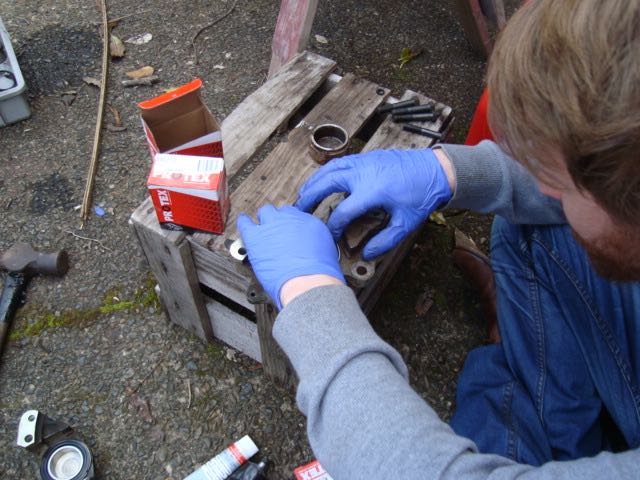
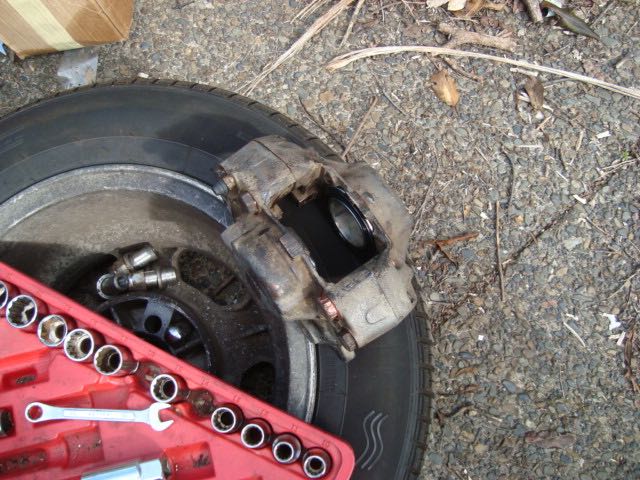
When we jacked up the front and took the wheel off to do the rust I noticed that the wheel didn't turn freely. It was dragging both front brakes. SO we pulled a caliber off and it wasn't in very good condition. IT took a lot of compressed air to get one sides pistons out and it was impossible on the other side. In the end we resorted to connecting them to the brake line again with no pad and used the peddle to get the pistons moving. This is what they looked like. The calliper had to be cleaned but it wasn't too bad. Discs look ok for jammed on brakes. Stripped them down and cleaned them up Got a brake upgrade kit from Sterling Brakes and got started rebuilding them. The look much better with new pistons and seals. Ready to go back on the car. We put them back on and bleed the system and it brakes really well now and goes better without the brakes stuck on
1 point
-
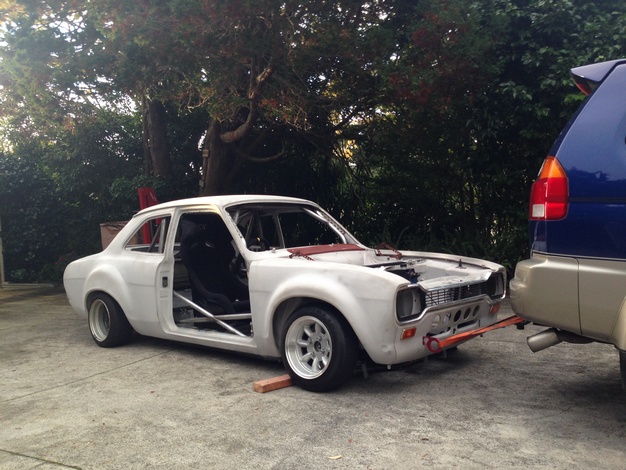
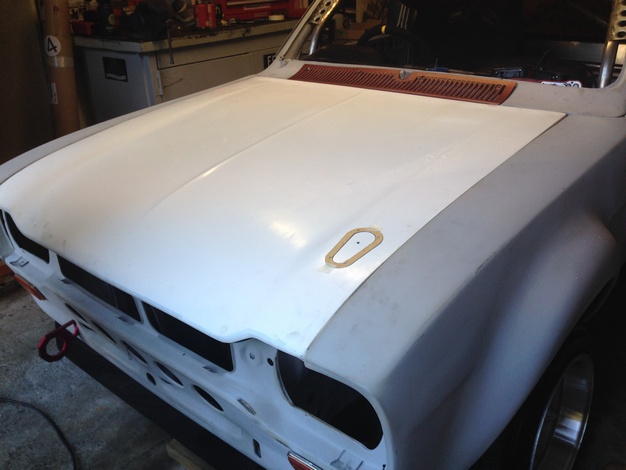
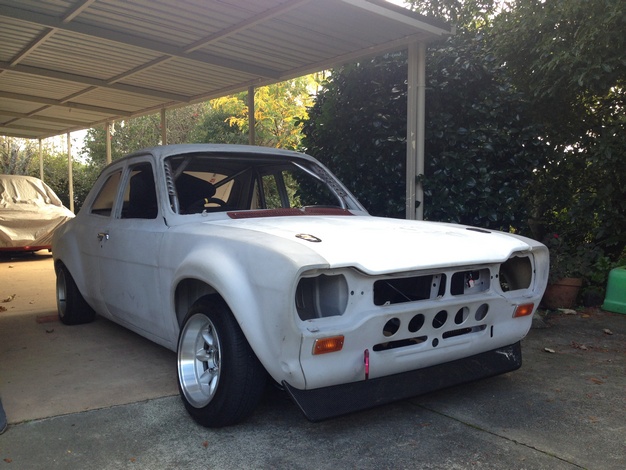
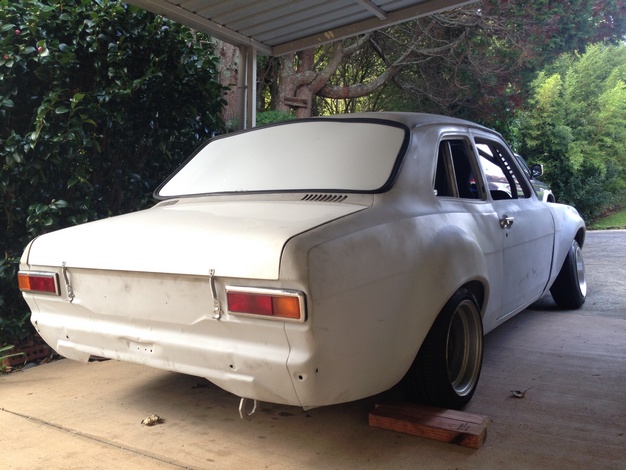
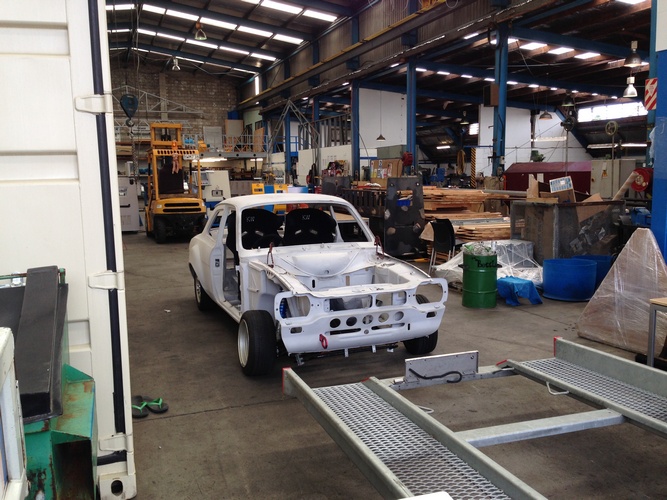
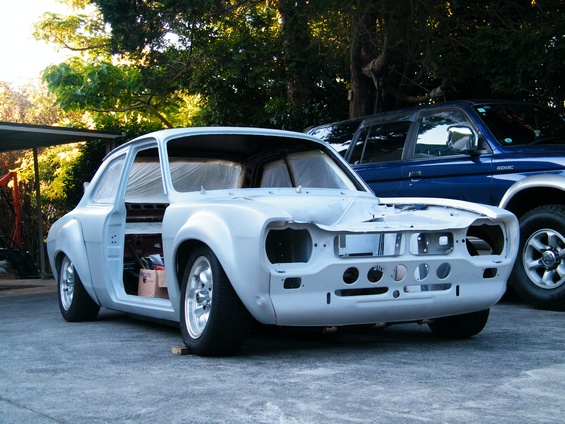
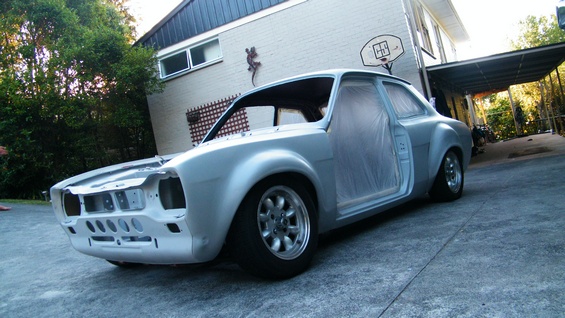
Dragged the Escort out Fitted new Fibreglass Boot and Bonnet Cut holes in bonnet for latches Fit boot springs and trial fitted the rear lexan window
1 point
-
See you there people.1 point
-
Got a bit more done over the weekend, first up I reinforced the chassis rails where the engine crossmember mounts up, I folded up some plates and made up some crush tubes then welded it all into place A bit of paint and it can go back together Then I put the front suspension back together, ne steering arms in New hubs fitted up And all the brake lines etc connected You can see how much I have had to offset the strut tops in that photo to get the camber right, that just gets it back to zero (or thereabouts) so no massive negative camber for me..... I aligned the wheels as well and checked the amount of bump steer I was getting as well to make sure nothing had gone amiss between my prototype steering arms and the finished ones and it is all looking pretty good, hopefully the cert man will agree. And the last job was to put the radiator back in, I made up some mounts a while back to attach the 2 x 10" fans that I hope will keep it cool but I hadn't painted them or anything so I welded some nuts to them to make my life easier if I ever have to take them off and gave them a quick paint. I had hoped to get the radiator back in but sometime between taking the radiator out of the other shell and putting it into this one I have managed to lose all the bolts so I will get some more tomorrow and get it all mounted up. Oh yeah and one last thing, this photo shows a water pipe that sits at the back of the motor, it is the take off for the turbo I think and when the motor was stripped I didn't block it off, problem is now I want to so if anyone has any suggestions for a neater solution than a bit of hose with a bolt in the end I would be keen to hear it. Cheers1 point
-
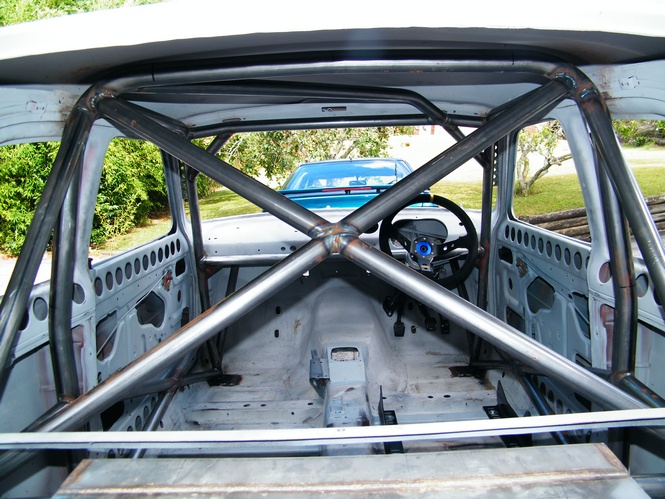
cage complete 2
1 point
-
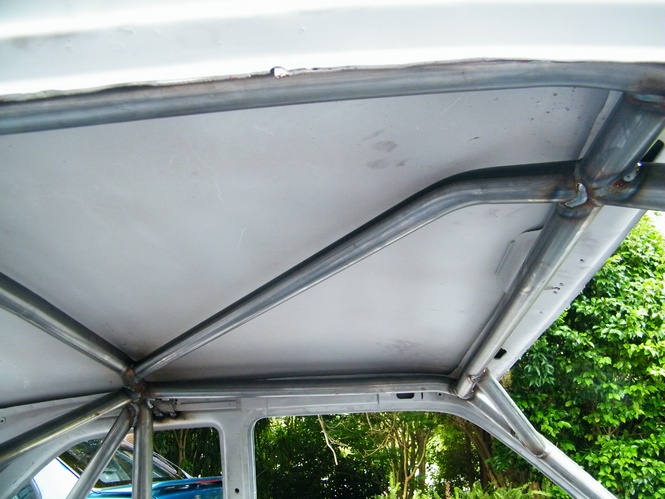
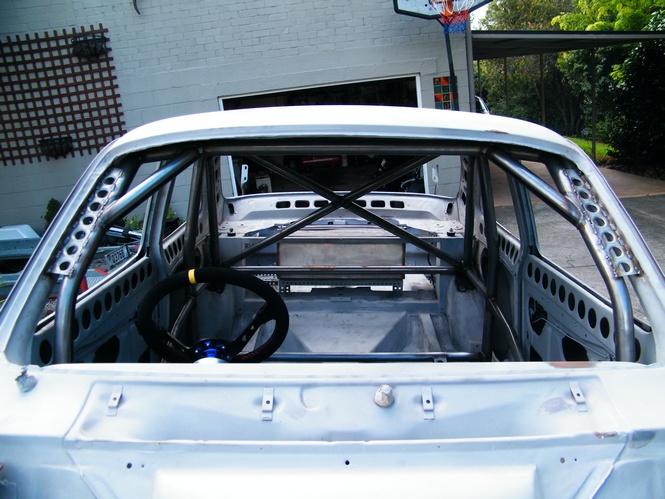
Cage complete
1 point
-
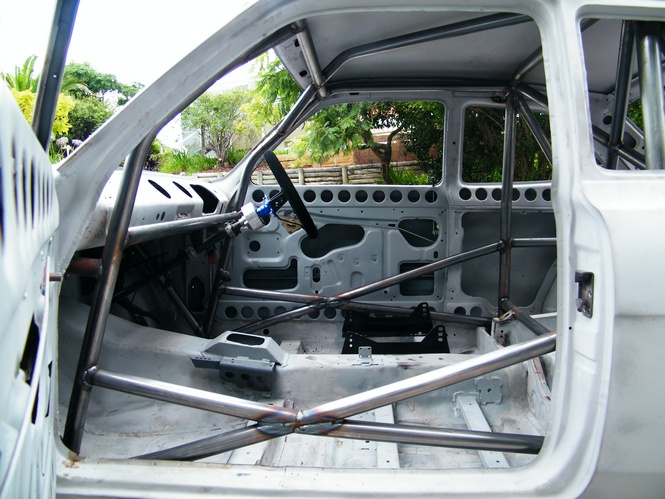
Rear Diagonals , harness bar and Roofbar in
1 point
-
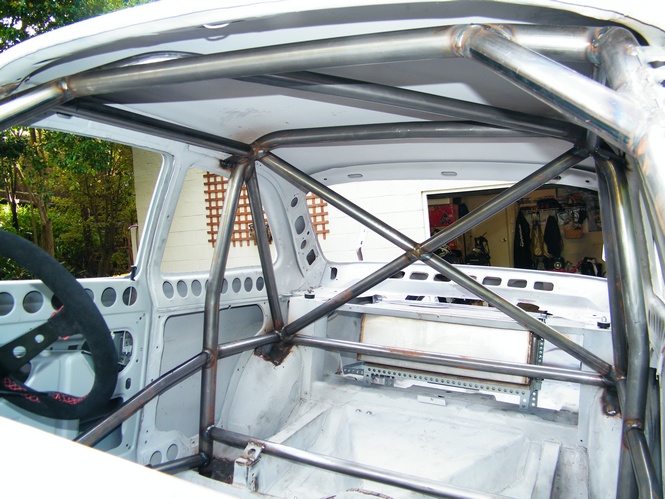
Start of the cage
1 point
-
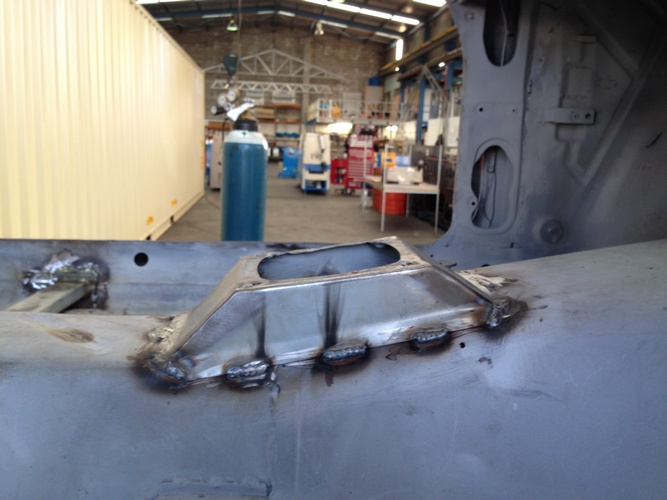
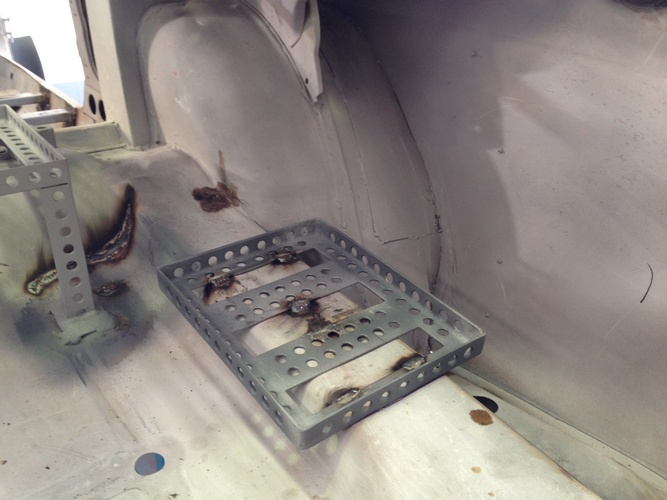
handbrake mount in line lock mount in made a surround for the gearlever battery tray fabricated and welded in seats in , back on the trailer to go home
1 point
-
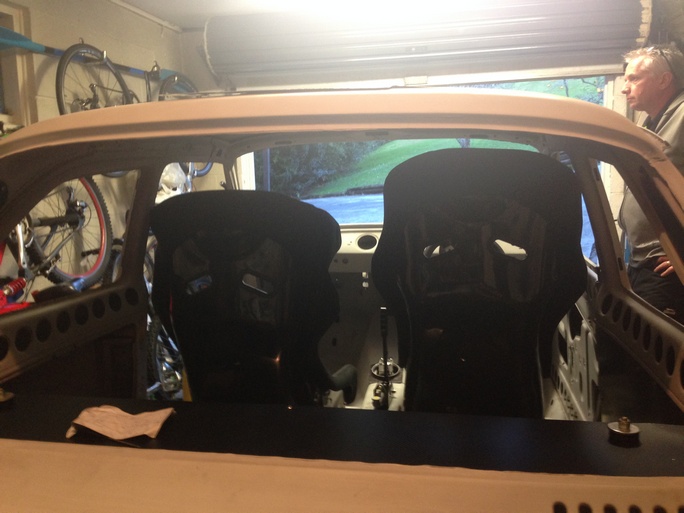
Bought some seats How I intend on mounting them Quick release hub and OMP wheel installed
1 point
-
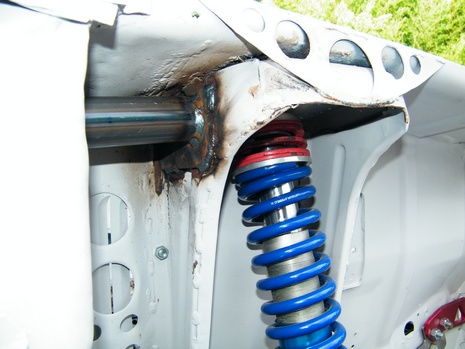
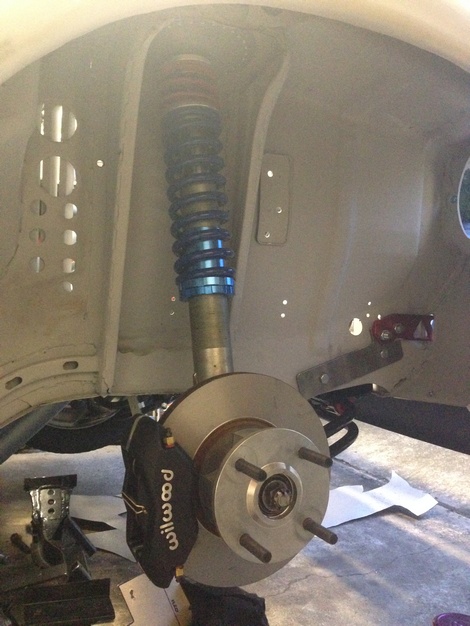
Fitted the wildwood 4pots and capri 2.8i vented discs also added some keeper springs Quickshift installed hydraulic handbrake and linelock arrived
1 point
-
First time on all four
1 point
-
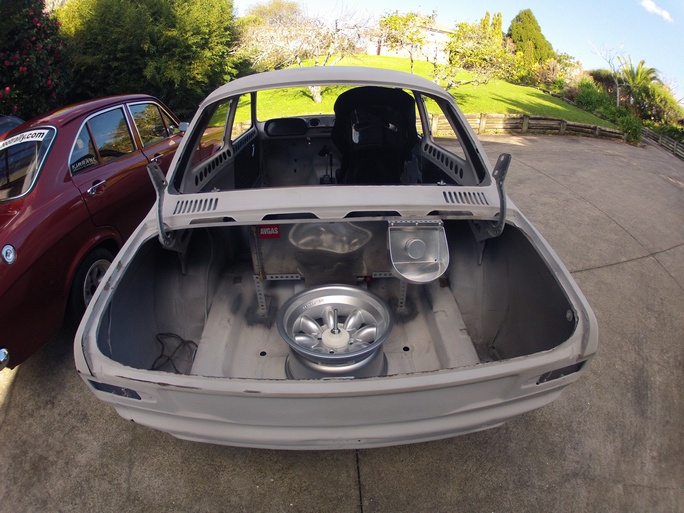
Sooooooooooooooooooooooooooooooooooooooooo some more rims turned up. I was looking for some 15x8 Streets to go with the 9's I already have but the only ones I had seen on Yahoo in the last 6 months were part of a set along with some 7's and were too pricey. Only option then was to go new. Moonlight Racing sussed it all out with Hayashi and after a couple weeks they were on their way. Yummy Other things that have happened; Gearbox is out so can be swapped with a better condition one. Exhaust is in pieces to tweak for clearance and add some flanges. Have also refitted my TS-X11's after painting them black (didn't like the silver and my black TS-X7's are too small), added a small amp and some 6" subwoofers under the parcel tray to add a bit of bass, seems to do the job without being silly.1 point
-
Lately in Sedan lyfe LSD found a home Bum got lowered some more, front next For a rainy day hmmm 15x9 Fun Lots of little jobs done/to do Got some velocity stacks, a heat shield and some gaskets for the carbs Have put 71C gearbox on hold for the mo1 point


This leaderboard is set to Auckland/GMT+12:00