
Leaderboard


.thumb.png.b2aee08688778d18bdc7b3e3c1852d9c.png)
Popular Content
Showing content with the highest reputation on 09/16/15 in all areas
-
Exhaust building time
 8 points
 -
Don't rub him the wrong way...7 points
-
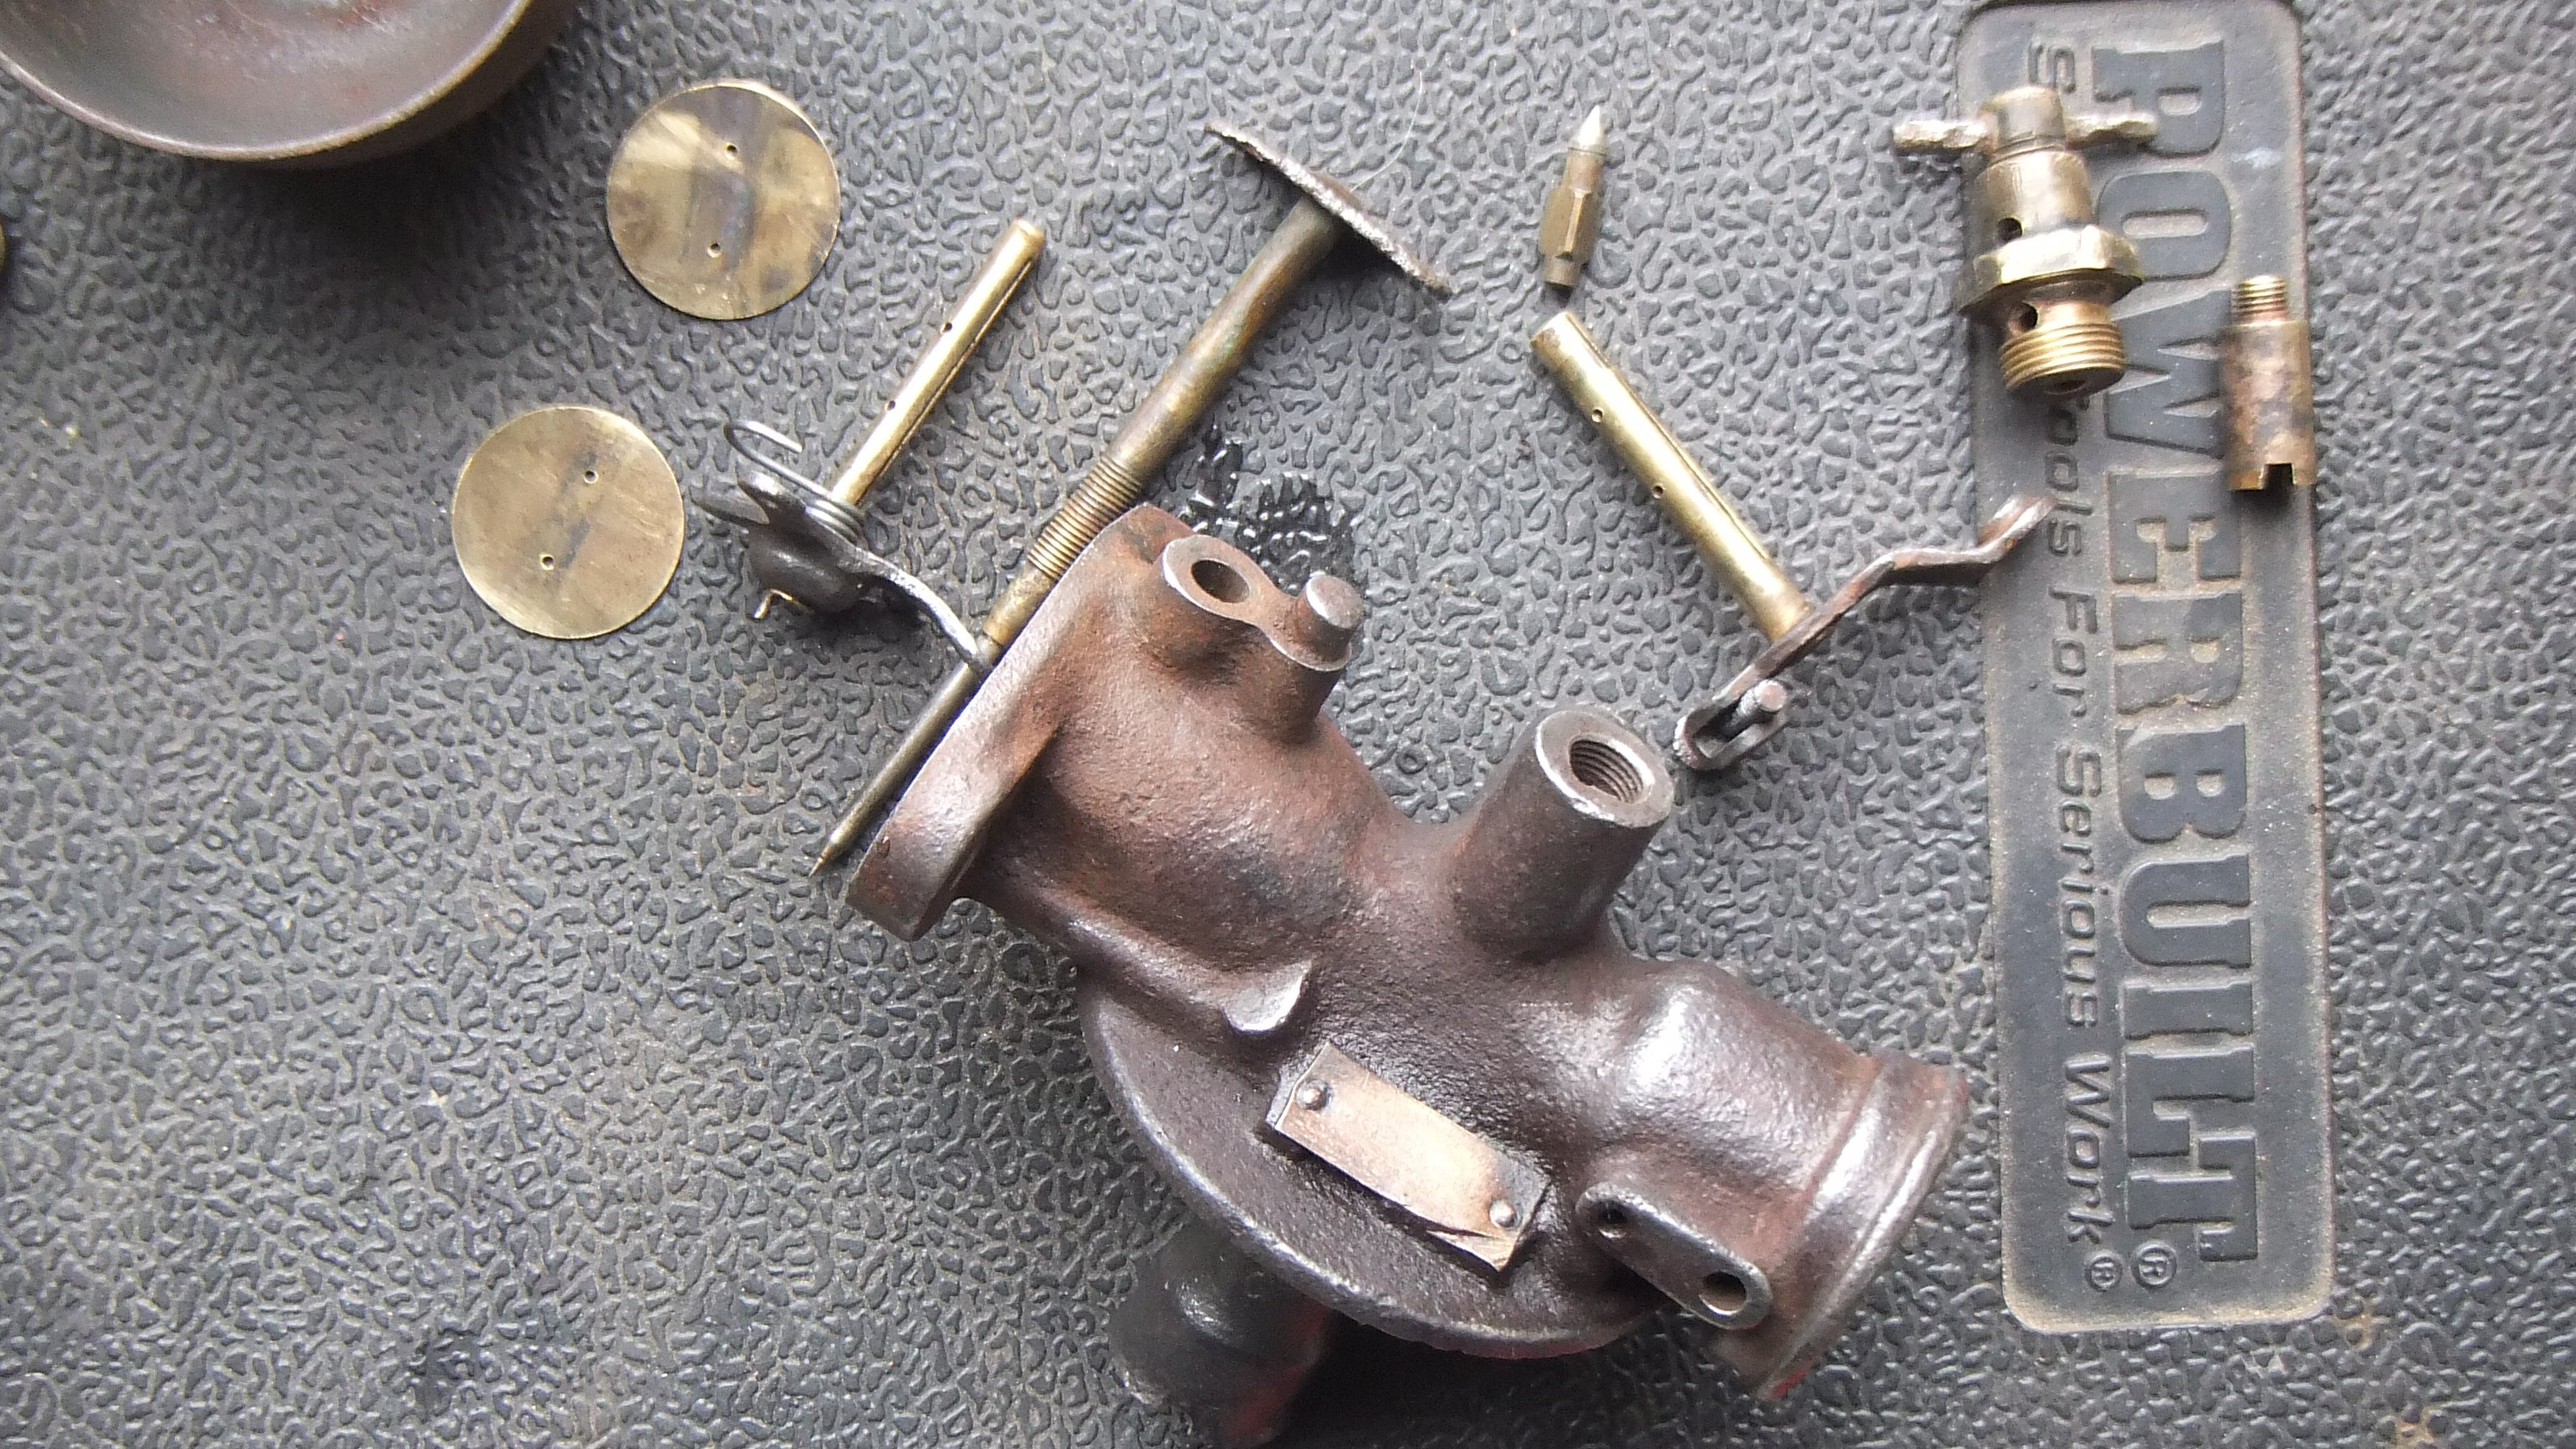
New carby installed - had to modify a couple of small things but it ran right out of the box and ran pretty good too. Genuinely so much more responsive and very consistent at idle compared to the Q-Jet. Things to do - tune it properly with the carb tune kit that came with it and adjust timing as it is a bit pingy now. - fit a right angle fuel inlet to clear the air filter base. - figure some way to mount the air filter as curiously there does not seem to be any thread down inside the regular hole in the middle of the carb. - adjust the throttle response as it is super snappy right now - probably just needs a lighter return spring. I drove it home tonight and off for WOF tomorrow. It sounds so much more rawkus than the video portrays but I know I'll be flayed without pics.6 points
-
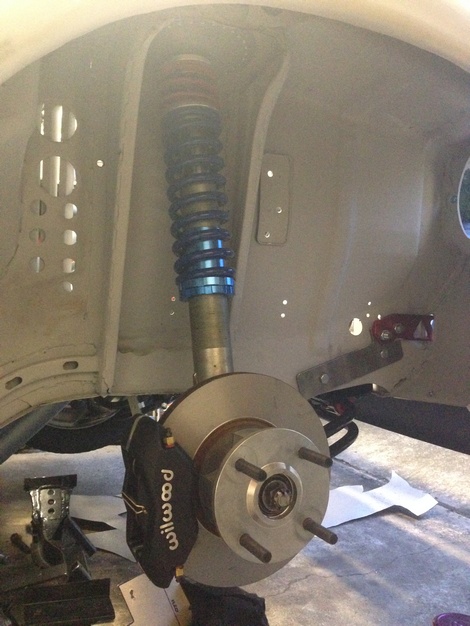
Fitted the wildwood 4pots and capri 2.8i vented discs also added some keeper springs Quickshift installed hydraulic handbrake and linelock arrived
6 points
-
So i brought TMCs C50 Deluxe (still have red one) Past Few weeks i striped it, primered it and painted it. Few minor future additions for it, but its mainly going to be used as the daily commuter.5 points
-
Gotta find me first5 points
-
My rust ain't structural.. The bog covering it is.5 points
-
So Sunday the 27th @ Ouruhia Domain?4 points
-
Most people on this forum have cars with structural rust. /lingpost4 points
-
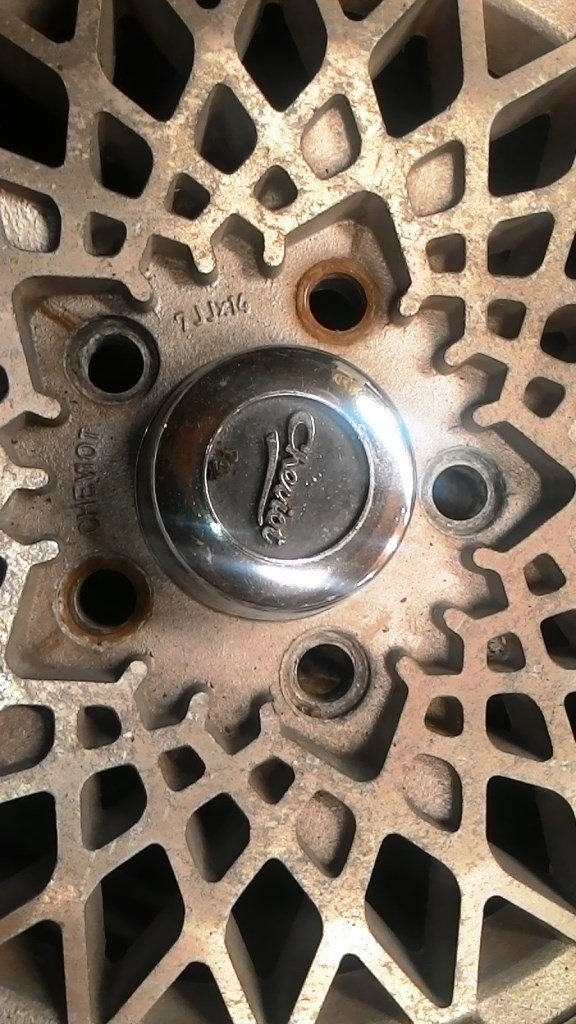
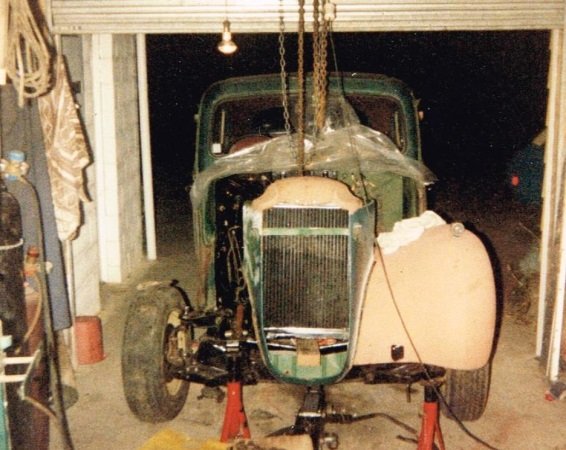
Still stripping rust and painting car parts but have managed to pounce on a few good bargains to feed my compulsive Trademe addiction, (as with the best of my addictions, it’s never satisfied). Found a Steel case W50 5 speed and snapped it up for $150 (Rigamortice will love the extra gear). A quick visit to Zebra parts Manakau found a Triumph 2000 Steering Column for $24, the original one had dry worn out “unobtanium” bearings and was getting a little manky. (For all you “Trumphy” exponents out there Zebra have two cars in stock). Talk about on a roll; picked up a complete HD rear end for $50, (I suspect the old girl has a bent axle and possible bent flange from the accident). (The megaphone gets the occasional “recreational” use with the beautiful Mrs sr2 but its normal application is deadly serious!). (Sometimes playing in a Pink Floyd tribute show has a lot to answer for!). Buy of the month had to be a set of these bad boys. The world’s coolest 14 x 7 old school Cheviot mags that still even have the original centres, all for only $100! Plan is to get Bruger Engineering to give them the once over for alignment, do a little dye penetrant crack testing, (boring safety stuff), do a little media blasting and then apply a lick of matt black Paint. (Very flash stuff and a big step up from rusty old HQ rims for my dear old Rigamortice). The only problem is the cheviot’s are not hubcentric, i.e. they rely solely on the studs for wheel concentricity. Question is; after 20 years of refusing to have non hubcentric wheels near any race car I’ve been responsible for do I swallow my pride, say the rules do not apply to street cars and bolt them on to the old girl? Any opinions will be gratefully accepted and deliberated on by both Rigamortice and myself. (Please feel free to visit and contribute to our project discussion thread- //oldschool.co.nz/index.php?/topic/49843-sr2%E2%80%99s-1947-vauxhall-%E2%80%9Crigamortice%E2%80%9D-discussion-thread/ )
4 points
-
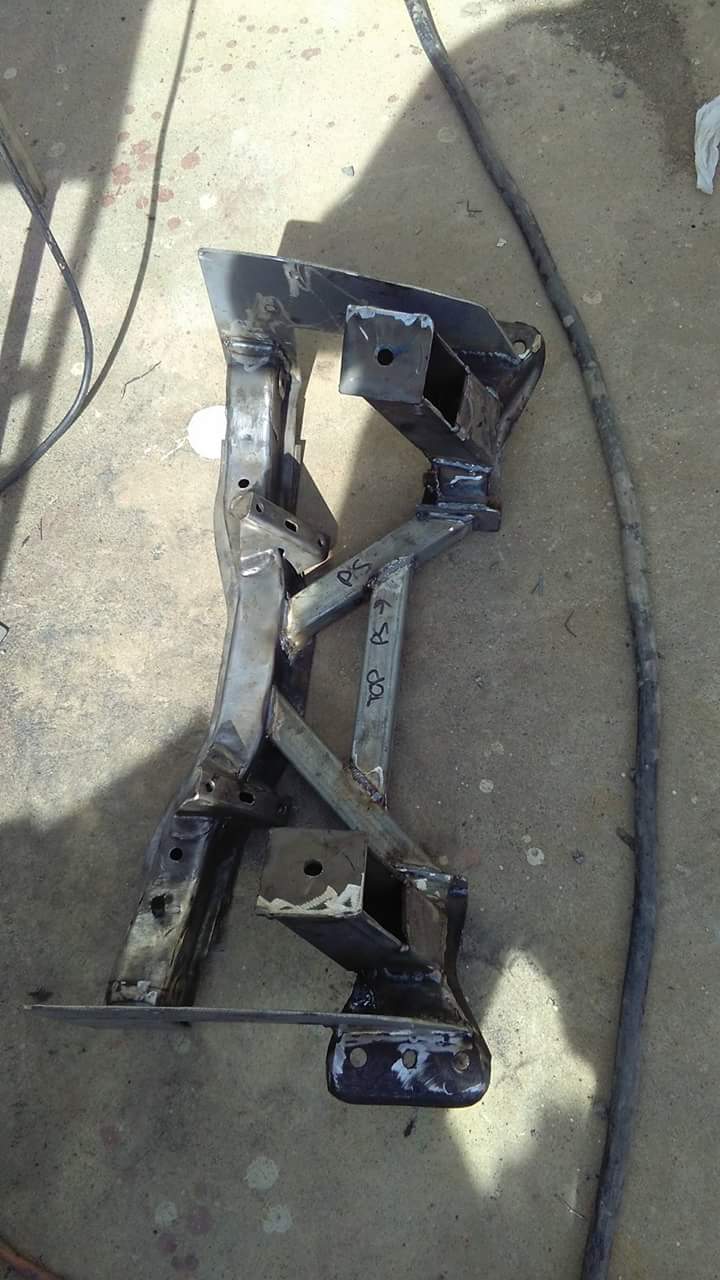
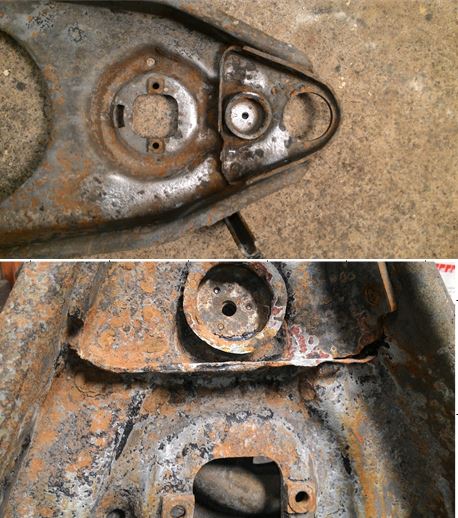
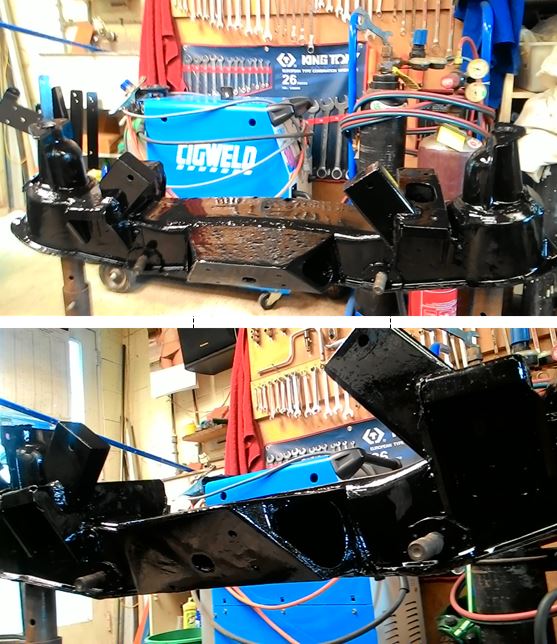
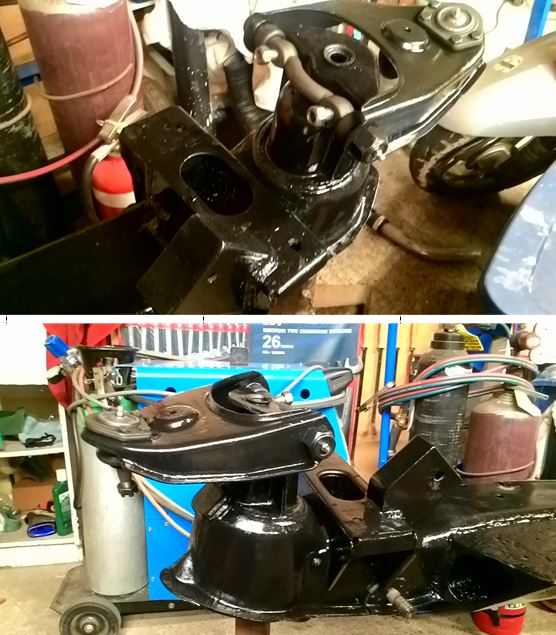
Had a wee bit if time to kill at work today so finished the front cradle.. Just needs some por15.
3 points
-
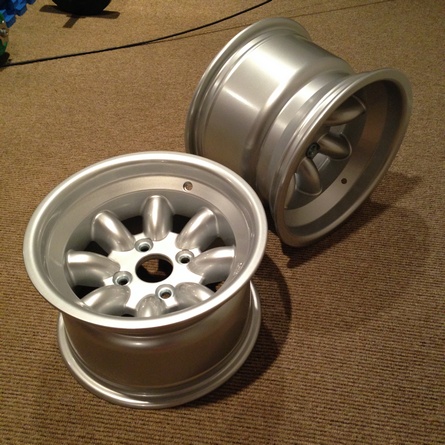
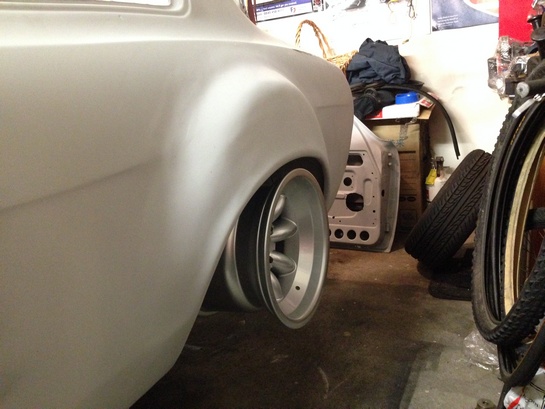
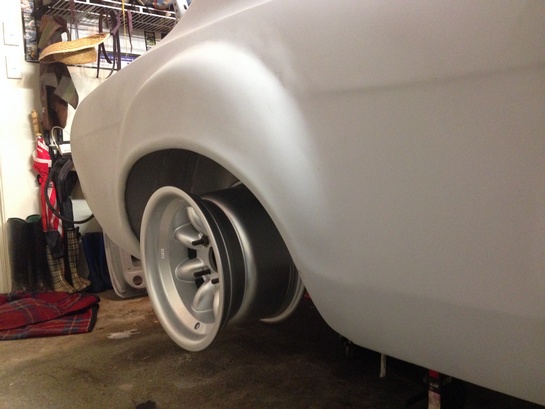
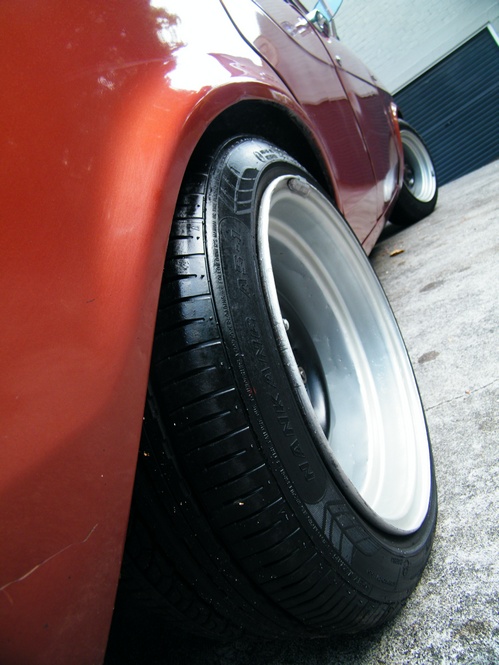
Trial fit of wheels 13 x 9 13 x 8 8's are the go , will order the other 3 when I can afford $$$
3 points
-
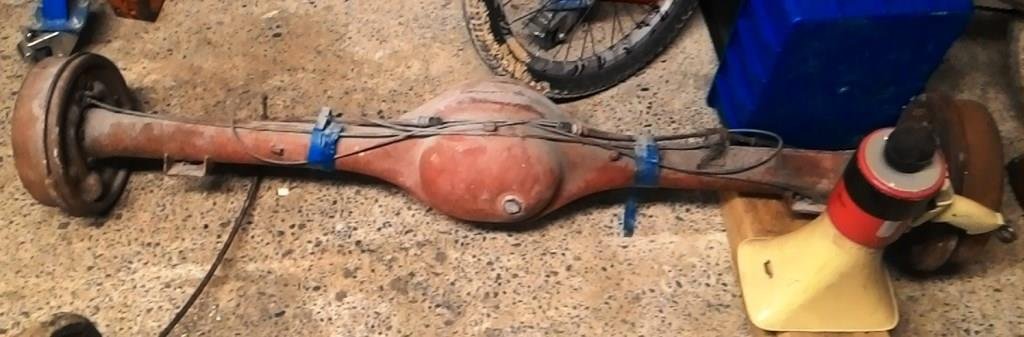
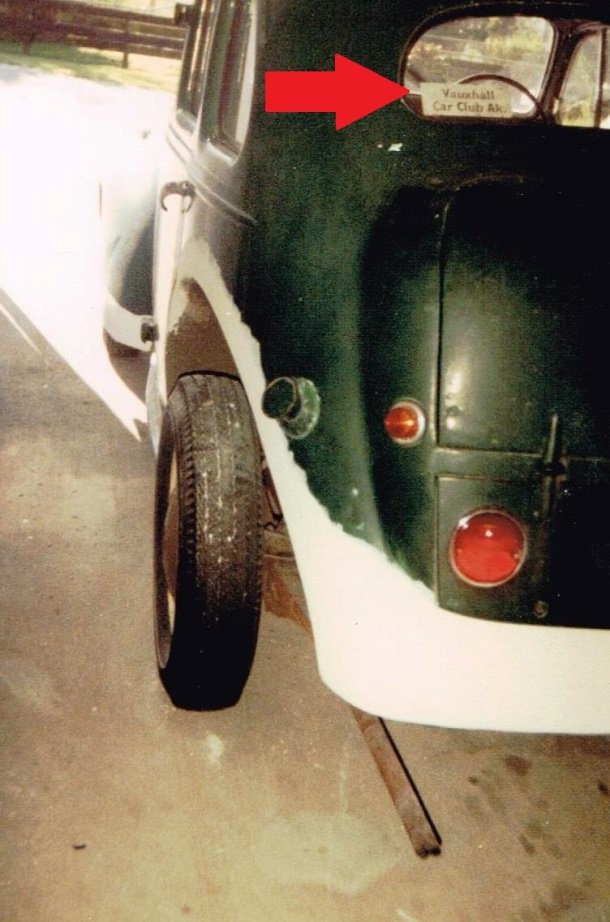
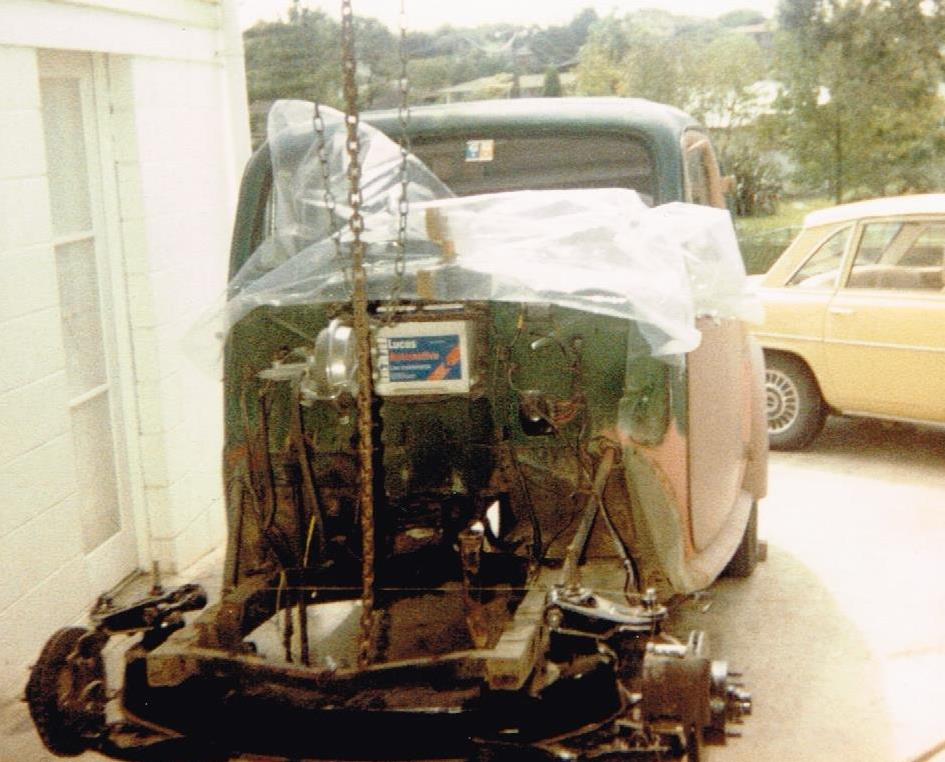
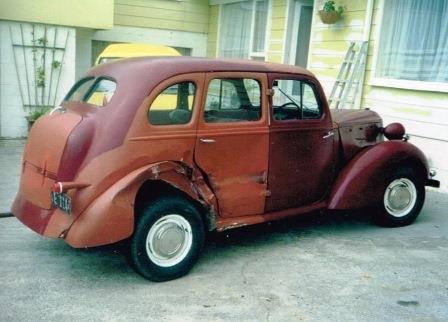
The body was looking a little sad so some panel work was called for and a coat of burgundy paint. Near this time I was ignominiously excommunicated from the Auckland chapter of the Vauxhall Enthusiasts Society for the then unforgivable transgression of “automotive blasphemy”; (i.e. modifying an “already perfect” Vauxhall). Rigamortice loved doing skids with her new motor but the Vanguard diff ratio was far too low and the stud pattern was different to the HQ pattern on the front. When the novelty of doing one wheel burnouts on 15” skinny cross-ply tyres finaly wore off I found a 3.3 HD Holden rear end, fitted it with the larger HQ drum brakes and changed the stud pattern by welding up the old stud holes in the axel flanges and re-drilling them. The old girl was starting lift her skirts and haul arse well (for 30 years ago) and it became obvious the 1930’s style lever action rear shocks were struggling with the additional power and traction so out came the rear end again so I could convert it to telescopic shocks. With a little tweaking of the new suspension I had a car that was happy to be pushed hard and was comfortable with 3 times the original 48 BHP. The only issue was that the standard under floor single circuit 1” master cylinder was having difficulty with the HQ disc/drum combination. I was running a dual Hydrovac booster system with a VH40EL on the front and a VH44D on the rear and despite fitting both boosters with matching “complex” (dual acting) control valves the combination still felt clunky and lacked feel. When late one night I caught myself designing an external control valve system that could operate two boosters simultaneously I knew that drastic action was required and in desperation the following morning, I attacked the driver’s side firewall with an angle grinder…… I mounted an XA Falcon pendant style pedal box and rebuilt the firewall to accommodate an XB Mastervac and dual circuit master cylinder. At the same time I converted to a hydraulic master/slave cylinder clutch combo. Finally the car felt balanced and a joy to drive- problem solved! After a series of small but interesting and exciting fires Rigamortice had to be completely re-wired and I ditched the generator in favour of a ‘modern” alternator. A good mate turned up with a rare (at the time) Yella Terra head he’d procured from his neighbour and it proved to be the ideal combination with the X2 cam, the pacemakers and the DCD Weber (I tried a 350 Holley but it just used more gas and never idled properly). With a little tuning Rigamortice was starting to get a reputation for being a lot quicker than the old tart looked……… love those "one wheeler peelers!"........ One month (and a number of instances of unintended, deliberate, sustained loss of traction) later the Nissan gearbox shat it’s self into shrapnel. I found a W40 Steel case 4 speed Celica box (very sexy in its day) and modified the Holden bell housing to accept it, problem was the main cross member sat where the new gearbox needed to be. I jacked the old girl up, put her on axel stands to keep the chassis straight, pulled the front seats out and cut the whole floor out from the B pillar to the fire wall to expose the chassis. I welded in a piece of 4” RHS to form a new cross member, cut a section out of the original cross member to accommodate the new box and extended the original inside chassis rails. A new floor made from 16 gauge Zintex was welded in and a pair of Triumph 2000 front seats were fitted. Rigamortice had yet another new lease on life.
3 points
-
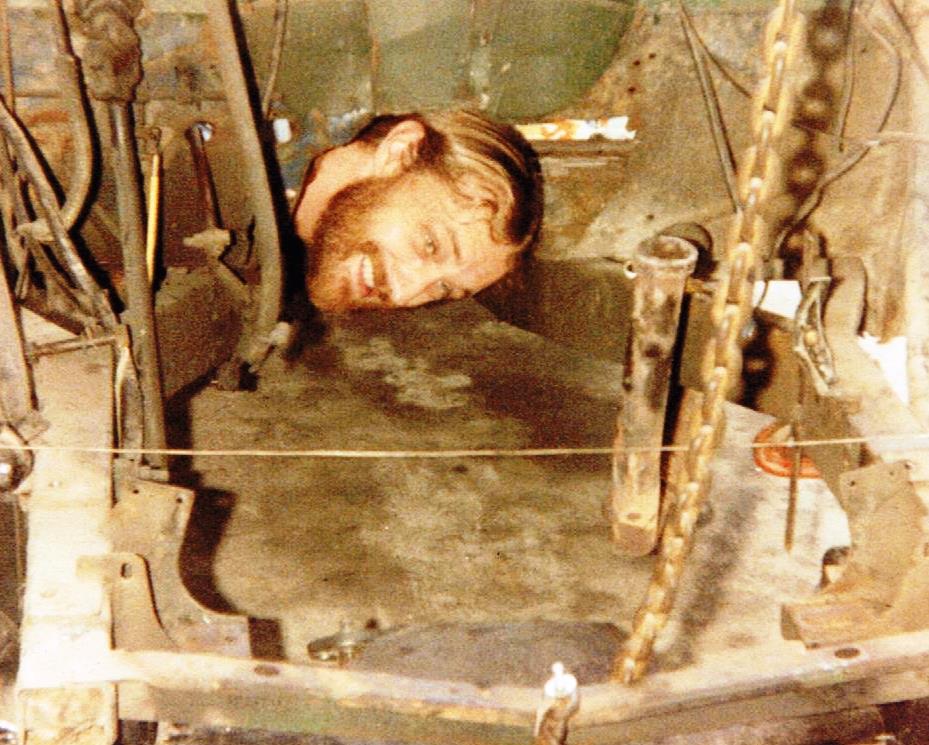
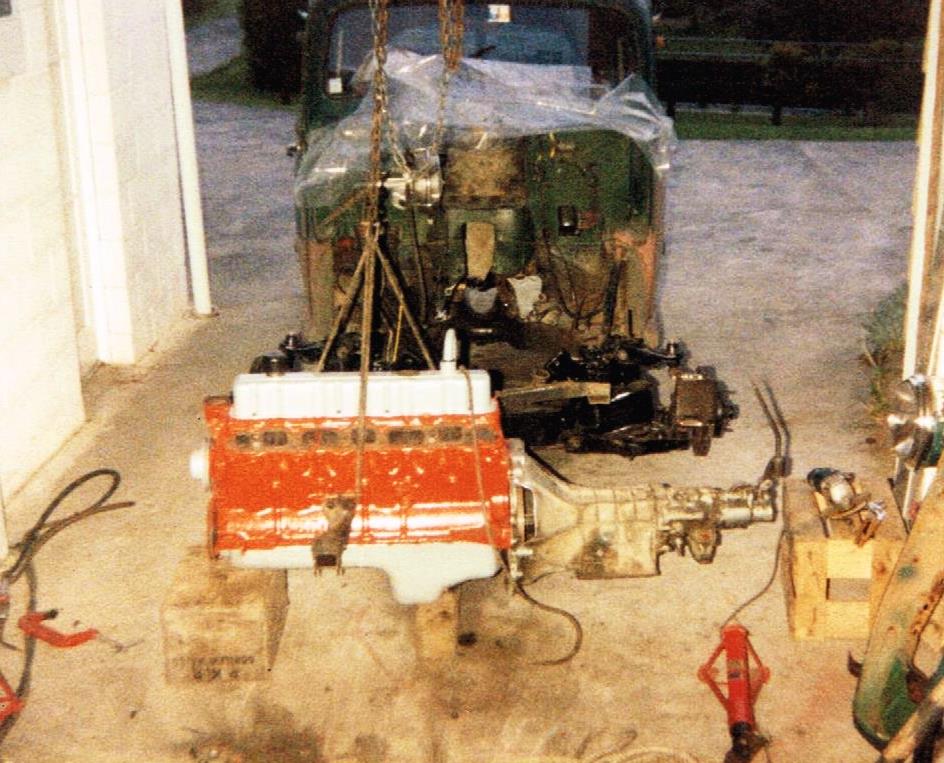
In the summer 1986 I removed all the front bodywork and scrapped the engine, box and front end. I was left with 2 chassis rails and a big hole with a head in it! Soon I was crawling under cars in public carparks with a tape measure and haunting the local car wreckers in search of a suitable front end. I finally settled on a HR Holden wishbone setup that I fitted with reversed HQ stubs and discs. A shortened Austin Kimberly R&P was mounted behind the cross member and connected to a Triumph 2000 steering column. All I needed was a motor and box….. Sometimes you just get lucky, a guy I worked with had a mate with an X2 186 motor hooked up to a Datsun 4 speed and he needed money. $60 later I was poking it into the old girls engine bay. After a few weeks spent fabricating mounts, throttle and clutch linkages, a drive-shaft, etc. Rigamortice’s new donk was starting to look like it was where it belonged. I ditched the X2 twin carb setup in favor of a downdraft DCD Weber and scraped together enough money to buy a set of pacemaker headers.
3 points
-
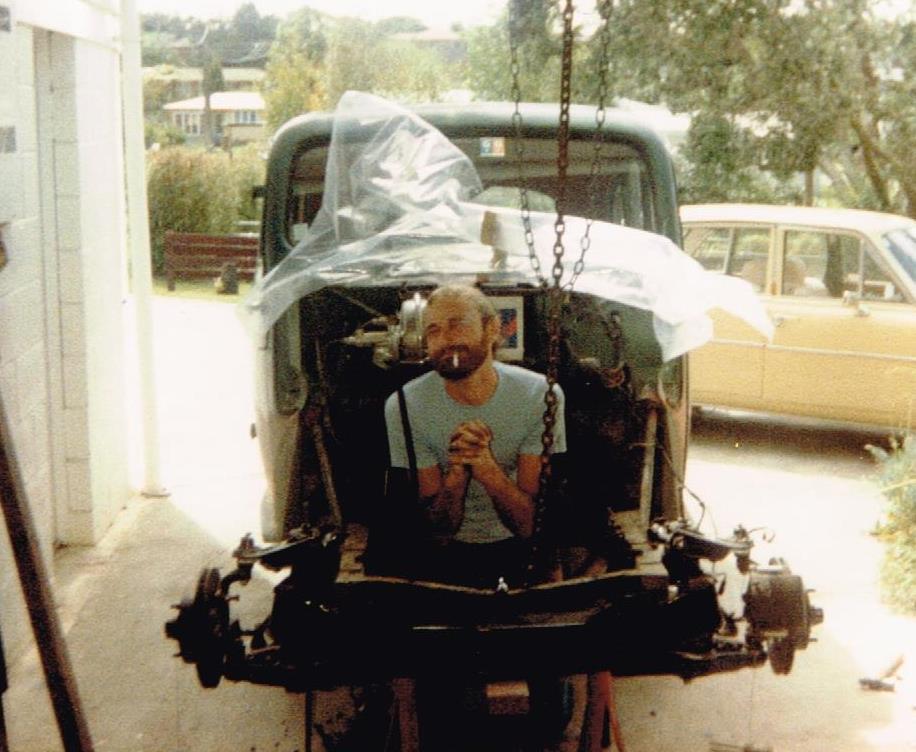
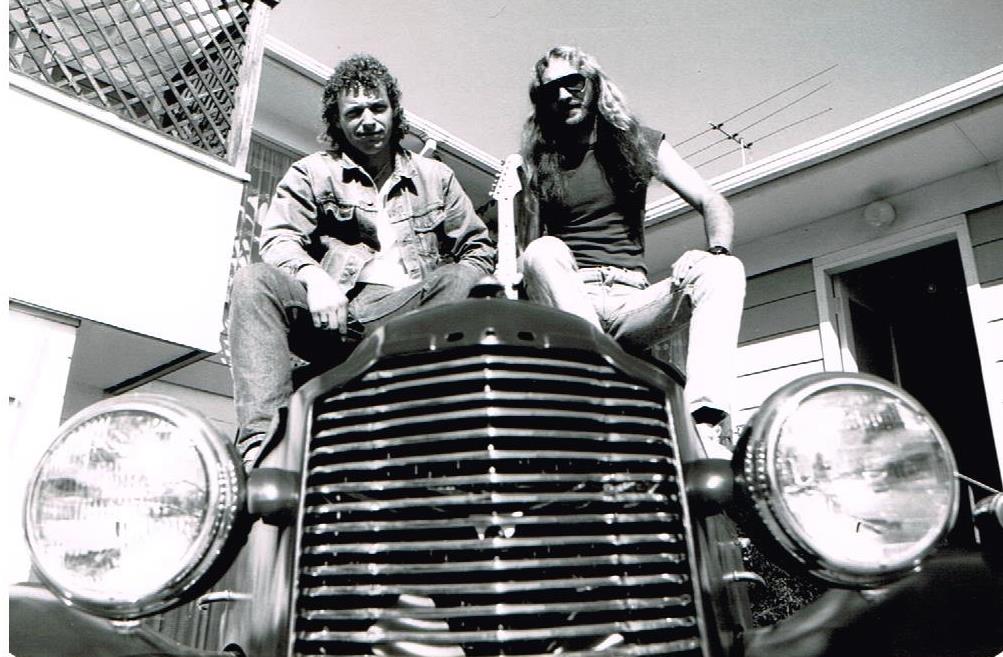
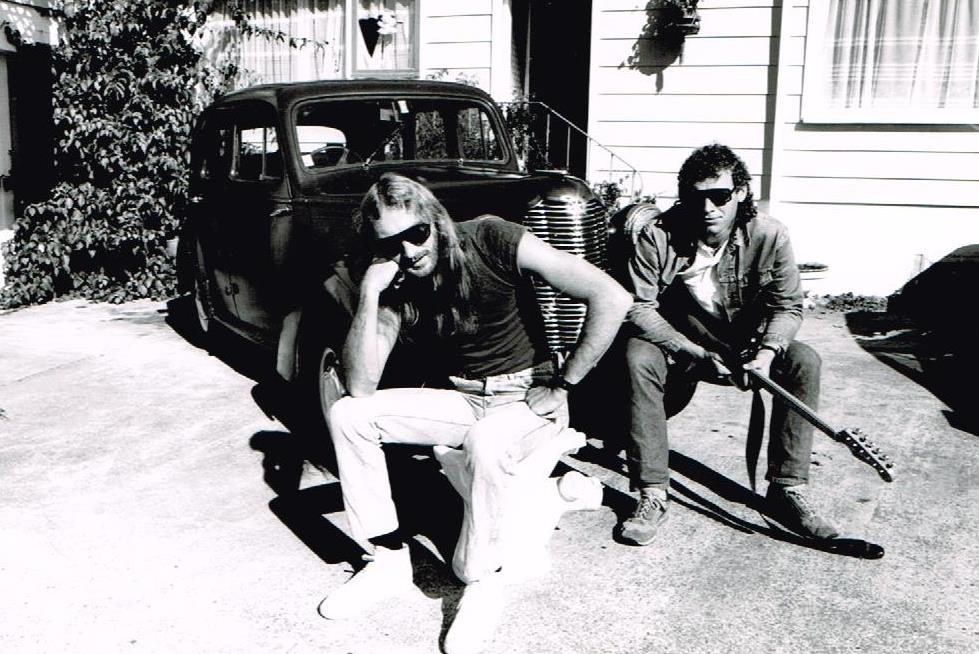
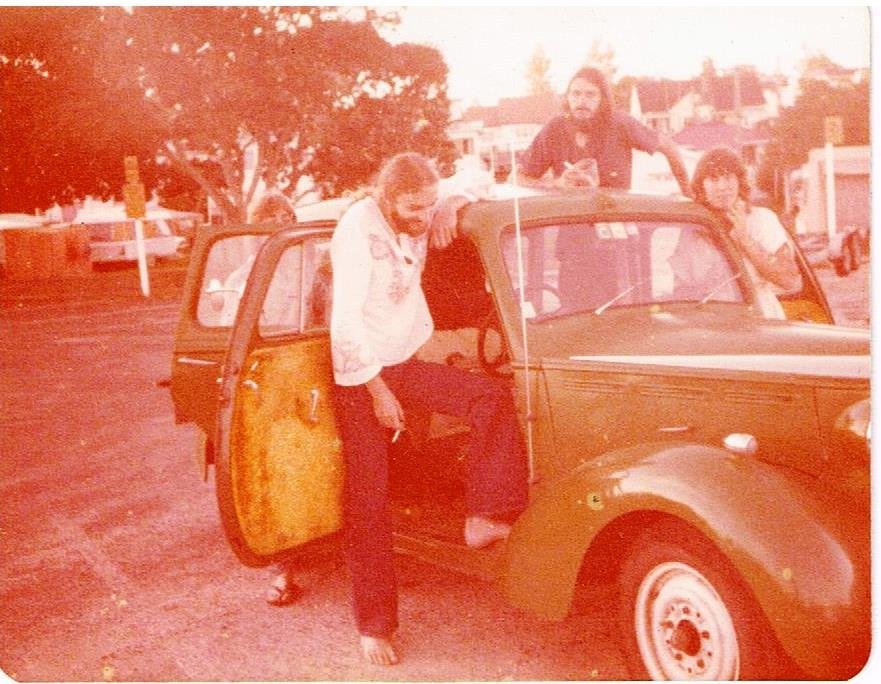
A decade passed and Rigamortice was still going strong as my daily driver. She’d been parked up for a few years while I lived in Australia, she’d been driven by all and sundry, stolen twice and even hauled Band gear around both islands (with the back seat removed) while I was starting my music career. What can I say; my friends and I grew up in that car. Jump forward to the mid 80’s ; the old girl’s still running strong but I’m over being passed on hills and the bump steer is getting hard to ignore; (the future Mrs sr2 spun out in Milford’s main drag while attempting an emergency manoeuvre, guess who’s fault it was!). The time had come for lots more power, good handling and more importantly brakes! (Get a load of the posers in the 1st 2 pic’s, oh the follies of youth).
3 points
-
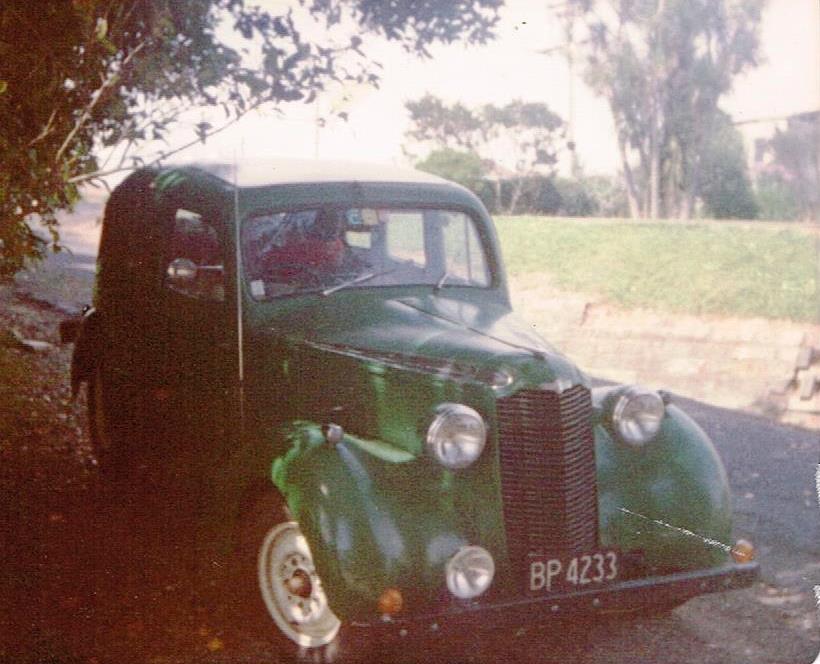
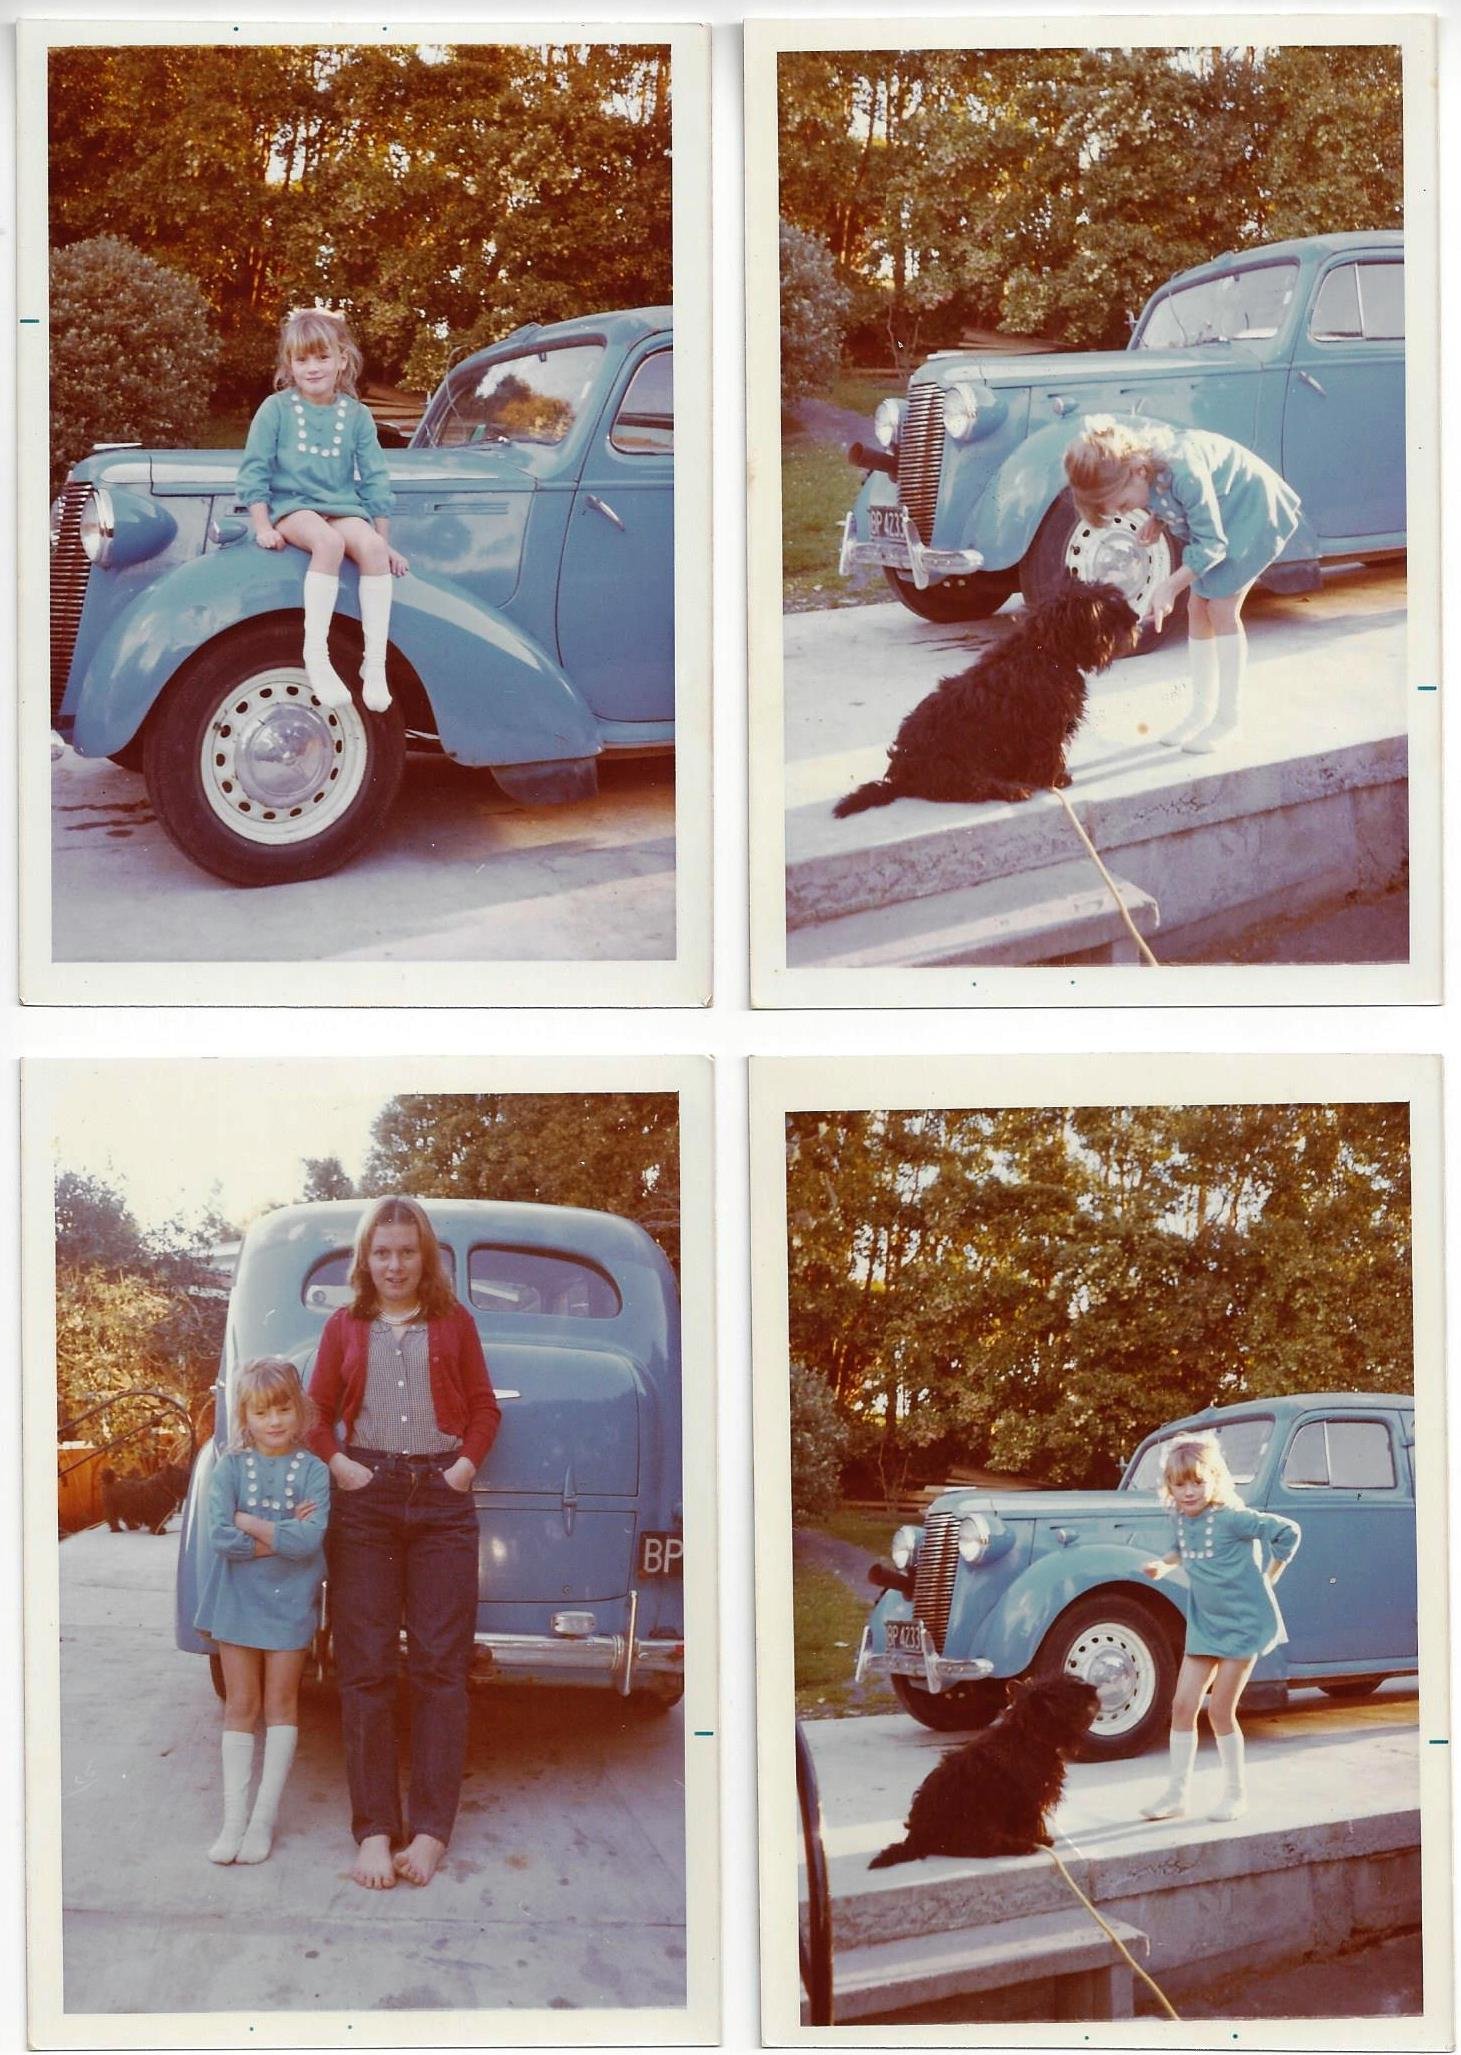
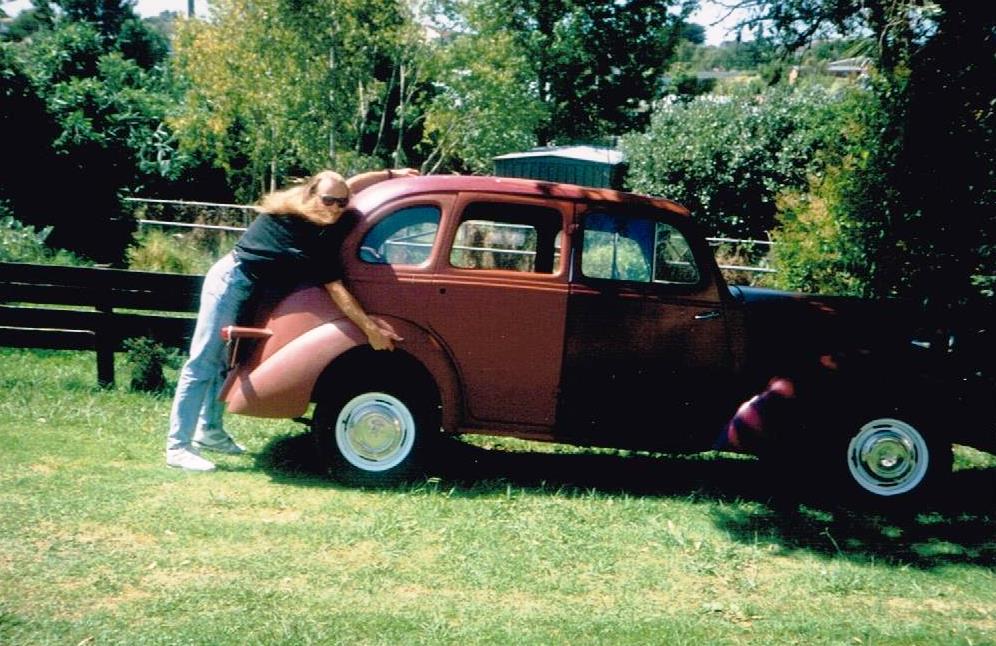
My name's Simon and In hindsight I should have labelled this thread "sometimes you just get lucky". 1973 in little old NZ was a good year. Colour telly had finally arrived (not that any of us could afford one), Pink Floyd released Dark Side of the Moon, petrol was 10 cents a litre, and I was 15 years old and needed my first car real bad! I spotted an old 47 6 cyl Vauxhall parked up in Hastings rd. Mirangi Bay with a faded 4 Sale sign in the window and grass growing through the wheels. After a round of fierce negotiation with the owner the paltry sum of $15 was settled on. With only $10 to my name I borrowed the remaining $5 from my long suffering father, (not sure if I ever repaid him) and the deal was done. After a triumphant arrival at home in my “new car “on the end of a towrope behind Dad’s 6/99 Worsley we discovered the motor was seized rock solid, within days the family was calling the car “Rigamortice” and the name just stuck. The only three early pictures I have was one taken by my mother (thanks mum) while I was bolting the bodywork back in place after Dad helped me with a “rings ‘n bearing” job - all done with the engine block still in place,….. ……and a second of my little sister and my eldest sisters’ daughter (big family) posing proudly beside Simons “new” car. …..and a third from when I found another J14 Vauxhall to park beside (Rigamortice is the green one). Within a few years the old girl had had been fitted with an LIP motor & box complete with Impala shifter, the “knee action” front suspension had been ditched in favor of EIP wishbones, I’d fitted a Vanguard diff and the interior looked like either a cheap massage parlor or Bishop Brian Tamaki’s living room, (the 70’s were a little weird!). Discussion Thread //oldschool.co.nz/index.php?/topic/49843-sr2%E2%80%99s-1947-vauxhall-%E2%80%9Crigamortice%E2%80%9D-discussion-thread/
2 points
-
Shit long time no update. I still mess about with old bikes a quite a bit. here's a couple of photos of a bike that came to me under sad circumstances recently. It's a BSA Fittings, Speedy cycle. These were made in Christchurch by Speedy Cycles and are quite recognisable. I really like this bike, it's still in it's original finish even after 90 years. All Speedy cycles were Nickel plated and as far as I can tell heavily painted in red and green paint with what looks like white and black details. I have a feeling this style was sold like a GT bicycle rather than a racer. It's a bit battered, it has a bent frame, is very dirty, is missing it's correct rear wheel and hub, and the BSA chain adjusting cams are missing. I have everything to replace the missing parts and have started to strip the bike down to fix the frame and give it a good clean. Here's a couple of photos of a friends Track Speedy. BSA "Track" bridge. And the Speedy cycles chaps.2 points
-
We never know how many are going to turn up, so lets just see what happens. It's a pub so I'm sure we can spread out a little. Plus I'm seriously not a fan of last minute changes. It just breeds confusion.2 points
-
Nah ur thinking of the G spot. (Hahahaha)2 points
-
I'm pretty sure you're a myth2 points
-
If I come is anyone keen to be my little spoon?2 points
-
Thanks for all the comments everyone! I suppose everything i do i try to do to the best of my abilities so i can have pride in the finished product. Thats what i couldn't understand at school engineering classes, most of the guys didint give a toss what their work turned out like and even if they finished it at all. There are so many awesome and inspiring projects on OS so its good if someone can get something out of what I'm doing. Steelies, i think lead should be encouraged for sure! BL, you should defiantly head to Oamaru if you are keen, the full ride that I'm doing is 4 days long, i can send you the details if you are keen. Also chuck a pic of that BSA up! FB, about the braking, these things generally dont have them. The main form of braking is by putting back pressure on the peddles. Some pennys have a spoon brake on the front tyre but they are pretty ineffective. Are you doing the full ride Valiant? Thanks rusti, its good that i dont need to go to my dad every time i need something welded now2 points
-
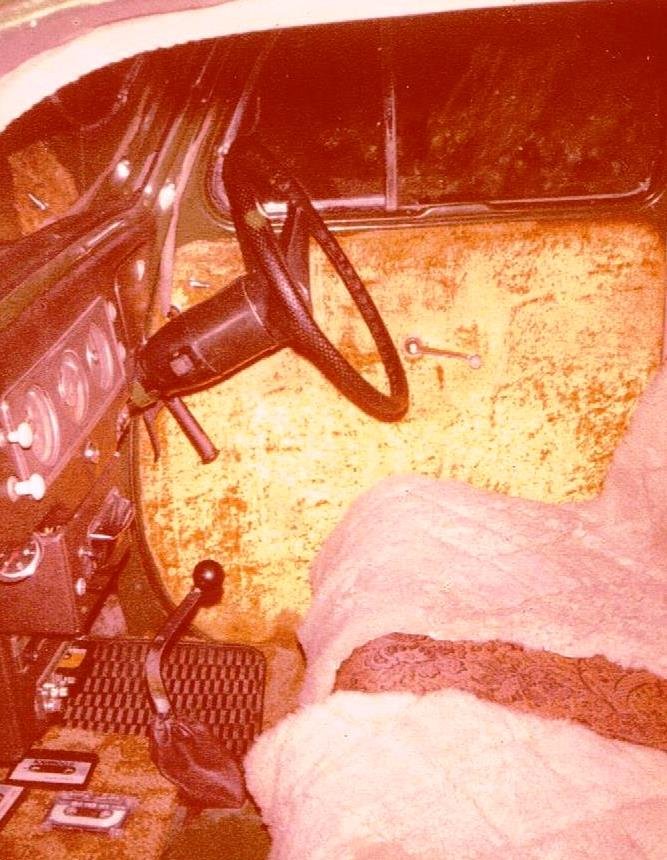
It's like working on a lawnmower carb' but bigger and no plastic anywhere. Not sure if you can read that but the name plate reads "Holley carburetor Detroit Mich" The whole car is like a mechano set.
2 points
-
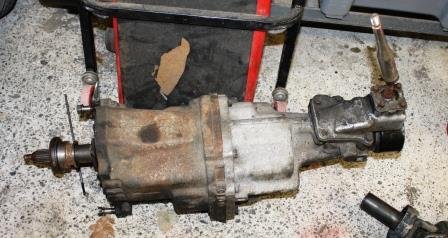
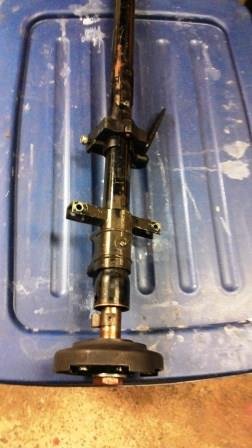
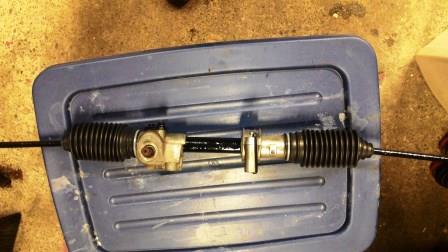
I wasn’t happy with the condition of the lower wishbones…. I didn't realize how scarce on the ground HR Holden parts were getting but a quick call to Bernie at Horopito Wreckers (Smash Palace) and a replacement pair was on the way, you guys rock! The R&P looked so good that I just shouted it some new grease, a set of boots and a lick of paint. A box of new suspension joints had arrived from KC spares in Aussie and I couldn’t resist assembling some of the front end.
2 points
-
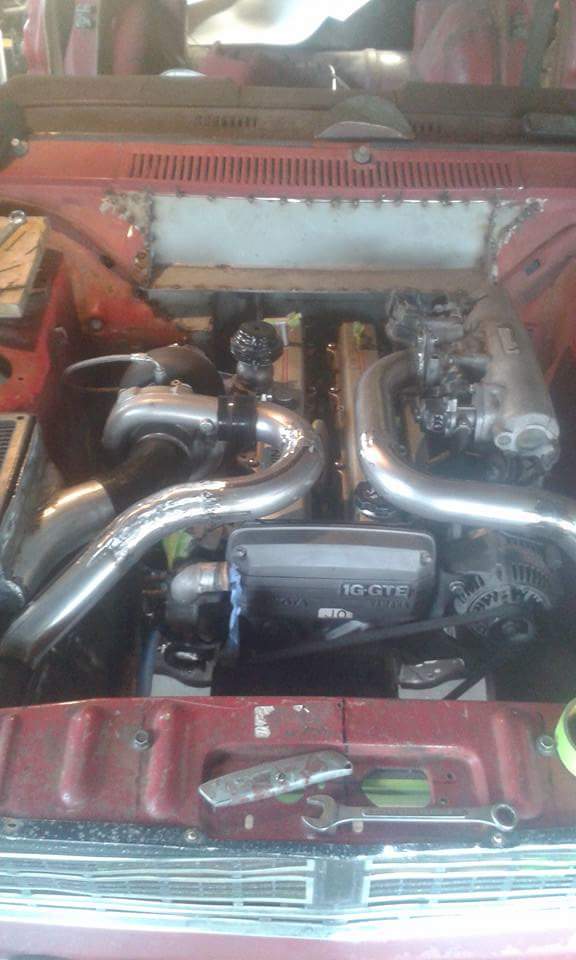
All 4 silicon joiners in place and that's the air system all sorted from air box to intake manifold.
2 points
-
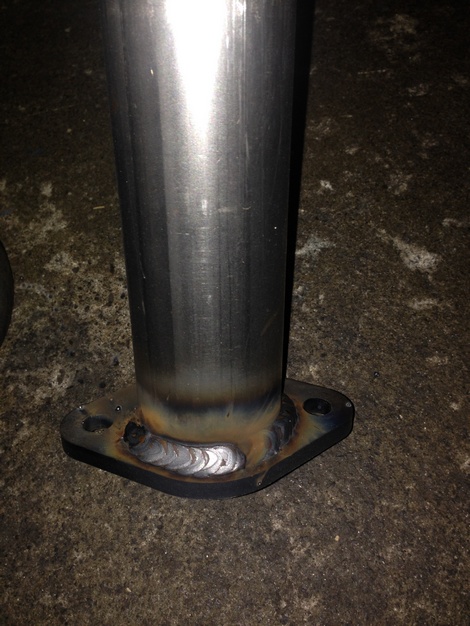
Wow, this sounds like all sorts of complicated. I want a TIG!2 points
-
OK so love it or hate it here it is. The whole thing went a bit more OCD than I first intended... What it is. 1964 Valiant AP5. I draged it out of a garage about 2002 it was push button auto, brush painted and had a seized 225. Now. 383 b series big block. comp xe268 cam 906 heads Performer rpm intake 780 holley etc 727 Torqueflight 9inch ford diff with 3.0/1 open diff. Some other stuff too. I need to do a few things before its fully finished Mainly a better rear ratio with a spool/LSD It gets a bit warm in traffic Bit of panel work needs sorting. I'm sick of spending money on it at the moment so it will have to wait. Discuss here //oldschool.co.nz/index.php?/topic/28698-valiants-big-block-ap5/1 point
-
Build Thread - //oldschool.co.nz/index.php?/topic/28699-valiants-big-block-ap51 point
-
Fair enough Rog. Well Seedy if the girdle fits - or as the case may be - doesn't fit...1 point
-
I was thinking of certifiers1 point
-
After you have tested the setup for leaks. Simply just open the bottle with everything hooked up. Note the bottle pressure. Then shut bottle valve and watch the pressure gauge, it should hold pressure for at least a few hours. If not you have a leak somewhere1 point
-
1 point
-
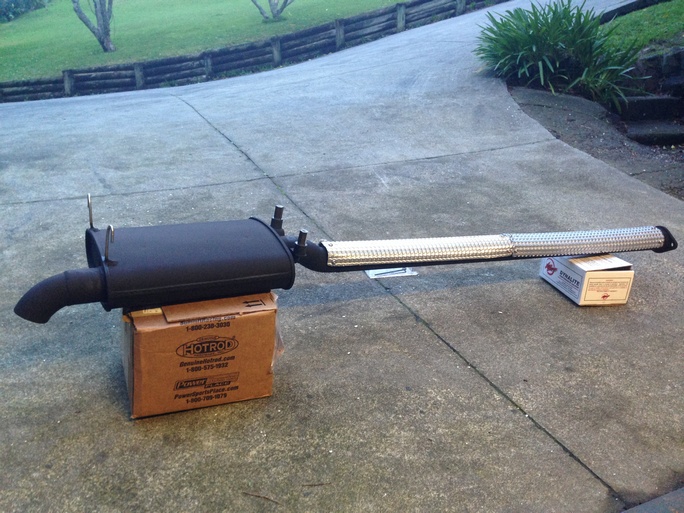
Couldnt figure out how to load pic from phone, so computer it is. Lowered the forks. GN400 Build 09/16 14 by Hayden Rowe, on Flickr spacers on the seat removed and a 120/140mm space went in at the bottom end of the fork GN400 Build 09/16 13 by Hayden Rowe, on Flickr End result, super super soft, but didnt cut/firm up the springs, Im gonna add an air value to the tops of the forks to stiffen them up, will add photos of that happening later on GN400 Build 09/16 12 by Hayden Rowe, on Flickr Nice to have the bars back on though. been awhile! GN400 Build 09/16 11 by Hayden Rowe, on Flickr much less dorky ride height GN400 Build 09/16 10 by Hayden Rowe, on Flickr New muffler showed up GN400 Build 09/16 08 by Hayden Rowe, on Flickr stainless steel Lossa Engineering GN400 Build 09/16 07 by Hayden Rowe, on Flickr GN400 Build 09/16 06 by Hayden Rowe, on Flickr super nice build quality, saw these in a custom hog shop while i was over in ozzie for family xmas GN400 Build 09/16 05 by Hayden Rowe, on Flickr angle up?...... GN400 Build 09/16 04 by Hayden Rowe, on Flickr or flat? GN400 Build 09/16 03 by Hayden Rowe, on Flickr went with up and heat wrap. Welded on a mounting tap aswel, happy with how that worked out, really clean and easy to get on and off, in saying that its only a single. GN400 Build 09/16 01 by Hayden Rowe, on Flickr Really happy with the end result GN400 Build 09/16 02 by Hayden Rowe, on Flickr now onto bog life GN400 Build 09/16 09 by Hayden Rowe, on Flickr lce cake with hummus sand sand sand prime ice cake with hummus sand sand sand prime ice cake with hummus sand sand sand prime repeat. that is all1 point
-
Sure - flick me the keys. 1 x Australian tune-up inbound.1 point
-
Thanks KK. Can you sort the car out for me while you're at it?1 point
-
This build is spoogeworthyu! Top quality workmanship and by golly you don't f**k about! If this was me, I'd be three years in and would have just about finished stripping the donor shell.1 point
-
This is absolutely outstanding work mate! Looking forward to seeing the end product !1 point
-
Arr to the Fucken Bee. Pull the rb20 if it's dead and drop a patrol TB48 into it for some big block 6 action.1 point
-
So, I'm back from the US of A. The Englishman has been chipping away at panel work and so far has found nothing overly sinister under the paint, just the usual you'd expect from a jappa of its era. Fair bit still to go yet but it has been mostly taken back to bare steel. Doors, guards and bonnet have been repaired and are in primer. I dropped a pair of mk3 at pine engineering to get a spruce up and 64valiant has set about making a hoodlining for it. That's all for now. Pretty boring so here's a couple of pictures of the GMC I travelled around murika and canadia in Currently looking for a b1600 diff to throw at it also.1 point
-
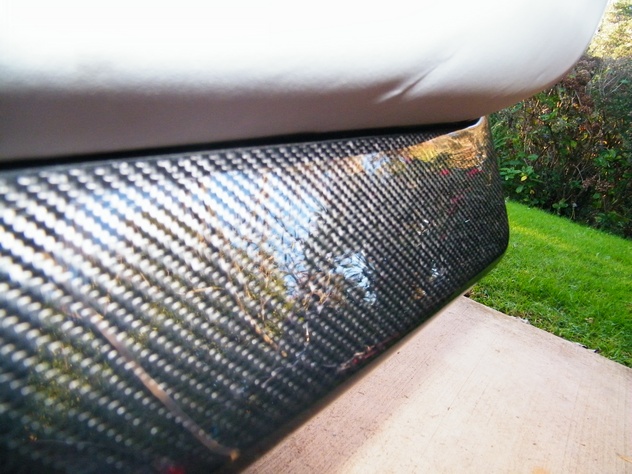
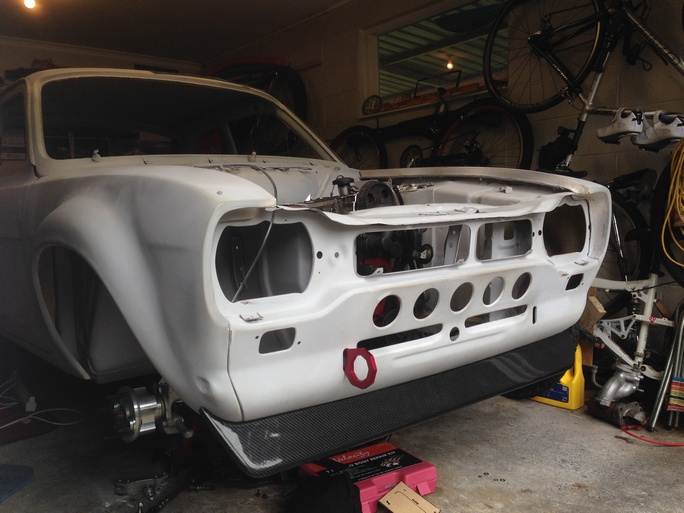
My mate at Motorsport composites made me two front splitters one carbon and a spare fibreglass one
1 point
-
Not much to report; spent the evening cleaning, wire brushing and painting car parts. I couldn't help but notice how guitar amps enhance a man-cave..... (Thanks, Marty).
1 point
-
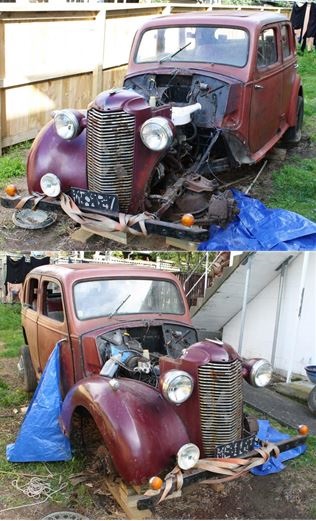
When I finally got the jack out and had a good look at the lower rear section of Rigamortice’s shell the panic started to set in. There was no denying how bent she was as a result of the L300’s untimely demise but my early teenage attempts at rust repairs, (galv sheet brazed with an overlap) had created a corrosive time bomb; after too long in the back yard the lower part old girl’s rear end had simply dissolved. My initial brainstorm was why not reincarnate Rigamortice as the world’s first 1947 J14 Vauxhall ute? Problem was I didn’t need a ute and if I did it would have to be certified which would involve Rigamortice and I feeling obliged to attempt to be nice again to the “angry certification men”. Despite having experience with certifying a number of tarmac rally cars, (in Targa we drive on public roads in the touring stages) having to compromise a restoration project would have been as pointless as the rules and regulations the “angry certification men” would have been trying to make us adhere to. Sitting in Rigamortice in the back yard at 2:30 am in the morning after a ¼ bottle of Wild turkey (I’m a cheap drunk) the solution was as drastic as it was obvious, I needed to find a donor shell. The next year was spent visiting smash palace, following up false leads, finding cars in dilapidated conditions, falling in love with complete cars that were crying out for original restoration and after almost giving up I was finally given a lead to a car that was for sale up North. Que the dramatic background music... "In an ordinary garage, on an ordinary suburban street, in an ordinary town, I found...... this….." Sometimes you just get lucky……….. My initial impression was that I’d found yet another original car in need of restoration until I looked closer. Although appearing to be in good condition the body panels didn’t line up properly and it was confirmed when I was told that the car had been rebuilt (obviously by an enthusiastic amateur) from a rust heap some 15-20 years ago. Sometimes you just get lucky, I’d just found Rigamortice’s donor shell and unbelievably it was even the original color. (To be honest it was more than too good to be true, it was downright bloody scary!).
1 point
-
Suddenly our son is 19 years old; the latest race car (135I BMW) doesn’t need me working on it every night and Sharon’s dropping none too subtle hints about cleaning up the back yard. Could it be time for a Rigamortice resurrection! With some trepidation I pulled off the obligatory blue Warehouse tarpaulin and surveyed the remains of a car that I’d bought 43 years ago…. It was obvious that the ravages of time and damage from the last accident had reduced my old ride Rigamortice to the stage where she needed one big resto job…….
1 point
-
Another six years passed quickly. My beautiful long suffering Sharon, (these days Mrs sr2) and I bought the flat we were renting in Milford, (many thanks to Peter Thomas, RIP mate). My music career was going strong, we were all getting into dirt bikes and Rigamortice was still hauling arse as my daily driver. What can I say, life was good. To be honest she was starting to look a little scruffy, (my early teenage attempts at panel repair were biting me in the arse badly), the little X2 rattled a bit on startup but she still as always did her best for me and pulled strong. Even old cars need a little hug now and then….. In 1992 a collection of overly enthusiastic volunteers from various assorted hot-rod and car clubs formed a committee and came to the conclusion that despite having travelled safely for over half a million miles in various states of mechanical modification Rigamortice posed a real and present danger to the voting public and needed to be subjected to things called “regulations and certification”. I didn’t have a clue what they were talking about but “rules and certifications” sounded very important so Rigamortice and I humoured them by trying to look interested. To their credit they were obviously very clever & determined people who had far too much time on their hands and knew heaps about politics, using impressively long words, inventing regulations and certifications and forming committees to invent even more regulations and certifications! Both Rigamortice and I were overawed by their self-sacrificing tenacity and their astonishingly concise use of mind numbingly self-contradictory terminology - in desperation and under increasing duress we consented to filling out a “Vehicle Modification Declaration” form. At this stage we couldn’t help but be reminded of Officer Opie from Allices Restaurant; (listen from 6:30 to 7:40 or just sit back and relive the full 18 minutes of beautifully, innocent, delicious anarchy). We soon discovered that the “sad little man that the very clever hot-rod and car club committee members had given the task of confirming the above modifications” was in denial that Rigamortice was in fact fitted with a “Starship Enterprise Warp Factor V Hyper Drive” and was not happy with the “structural modifications prior to 1991” being described as “oxidization”. After a vigorous negotiation process where I hid behind Rigamortice while the “sad little man that the very clever hot-rod and car club committee members had given the task of confirming the above modifications” hurled a multitude of thinly vieled insults at me about my car and the marital status of my parent at the time of my birth, we eventually (with a small amount of violence on my part) reached a compromise and I was given paperwork! Eight months or so later a rather confused lady in a L300 courier van T boned Rigamortice very, very hard. Luckily although written off the van hit with the left front and when extracted from the wreckage the hysterical and bruised lady van driver was essentially unhurt. Sometimes you just get lucky.... Modern cars have an effective crumple zone; designed in 1935 Rigamortice just took it on the chin like an old boxer. I drove home in a daze with a very sore neck and a bleeding thick lip while Rigamortice sported a wobbly rear wheel and a rear chassis/sub-frame that had been seriously pushed sideways. A short time later Sharon and I had a baby on the way, we'd bought the house next door and Rigamortice ended up parked in the back yard……
1 point
-
Freshened the front suspension new shocks and lowered springs and new wheel bearings Freshened the rear end New wheel bearings , drums and shoes added some 2" blocks and swapped the diff ratio from 4:1 to 3:5 for better cruising speeds Purchased these from billy fronts 13 x 6 widened steels rears are 13 x 7 with 175/50/13's fitted
1 point
-
Bought a lowish mileage one of these today. Going to buy a carby manifold and stick with good old analogue fuel and spark, The motor in particular that I have bought is a VT Commodore 304 that's the last of the aussie built V8's. I got it now cos it's a hard to find motor as only the first series 1 VT's had the 304, after that they went to the 350 LS1. The VT is different from every other 304/308 because it is factory roller cam, 4 bolt mains and is already clearanced for 355 stroker crank. It's closest relative is the 304 Walkinshaw motor from the VL - but they are as rare as hens teeth and apparently 10K for a complete one. I've been told that the heads apparently flow 400hp from the factory. So if I really want to get carried away I could snap up a 355 stroker kit and chuck that in. But the line needs to be drawn somewhere. Who knows though I may end up putting this motor to the back of the shed while I save up for a stroker kit and monster Rawb cam - jam that in and then proceed to blow multiple gearboxes. Hahah.
1 point
-
Right so it's not oldschool, but I thought I'd pop this topic up here since it's a similar sort of refresh/tidy-up many of us have done many times with our oldschoolers. Background on the car is that I imported it from Edinburgh, Scotland September '07 after it had spent its first 6 years on this earth with its first owner in London and Edinburgh. It arrived in NZ along with another for another NZ owner to beat the emissions laws that would ban their importing as of Jan 1 2008. There were no others in the country and to this day remain the only two. Now the Exige S1 is pretty much similar to an Elise S1 under the skin, basically just being a racing version thereof. Given that the Exige was derived from a competition car though, many of the peripheral items were low-volume bits (they only ever made 601 Exige S1s) and as such many of the bits and pieces had little or no rustproofing on them. As a result, after a few winters on salty UK roads they do start to look tired under the skin. My car was in superb condition throughout compared to many but it was always my intention to spend its first NZ winter stripping it back, giving it a good look-over and pretty much bringing it back to new condition underneath. This meant replacing all the bushes, balljoints, rod ends and cleaning up all the steelwork beneath as well as the chassis and all its hardpoints (which, because they're in aluminum, stay in pretty good nick). Given that the clutch was starting to show signs of wear and started slipping badly after NZ Autocar magazine had it to do their 0-60 tests for the magazine, this would be replaced at the same time. Also, given that the front pulleys made a bid for freedom off the end of the crankshaft in November, it was decided the front end of the engine would get all new pulleys and cam-drive to be on the safe side. This would be easiest done with the engine out, and we'd also use this time to diagnose a clatter that had started in the engine over the Easter break... we suspected something amiss in the valvetrain of the mightily fragile Rover K16-VHPD lump. Anyway... on with the show!1 point
-
yea, it sounds to me like its getting too hot. when its too hot it starts to burn, it goes all grey and powdery on the top and you cant weld shit, cramming more rod in wont help much either. it takes way more energy to get the job hot enough to weld than it does to weld it. depending on the job i usually pre heat it (with the tig, just waving the torch up and down the weld path) then give it a quick wire brush, turn down the heat and weld. you'll always find the end of the weld behaves differently to the beginning as the job gets hotter. start at the small pointy bits that will melt easiest. if you leave them to last they will just run away.1 point
-
Ditto. They have a smell all their own. (although mine smelt like burnt rubber, and a bottle of marque vue that got spilled in the back seat)1 point
-
pete.. you have so many lush lush seats1 point


This leaderboard is set to Auckland/GMT+12:00