
Leaderboard


Popular Content
Showing content with the highest reputation on 07/05/15 in all areas
-
Hard on the heels of the 175/50/13 failure, I bought a set of 175/60/13 Yokohama A539. Now order is restored, and (I think) it looks really good. Plan is to add a TRD style hatch spoiler, I think it should have a proper little Japanese street hooner vibe about it! IMG_6862 by Richard Opie, on Flickr IMG_6868 by Richard Opie, on Flickr Much more snug in the guards, closed up the guard gap. Added some camber to the front end and clearance is plenty! IMG_6874 by Richard Opie, on Flickr IMG_6877 by Richard Opie, on Flickr Hoonable. Thanks for looking!16 points
-
Finally have the old girl back home.Starting to get all the bits together to pull the engine and box out.Ive been working on it mainly at smoko at work,making little bits and welding up the intake manifold.Also have redone the rocker covers in a flat black powder coat finish as i wasnt happy with the out come of the VHT wrinkle paint.12 points
-
vid from today, taken by the bro. nothing broke other than crashing into a tree haha. it doesn't really turn so well. but seems to go places in a straight line, if you hold on for the ride.10 points
-
This is finished! I took it to the firewood pile this afternoon and gave it a good work out. It works great! Fast and powerful, it chomps through the knotted pieces of wood with ease. The tables are a good size and height Dave and I had no problems stacking blocks on it we split probably fiveish? cubic meters of old pine and gum, on about two thirds of a tank of petrol, in about two hours. The engine doesn't even need to be on full RPM. It doesn't have WOF and Reg yet but that's not a problem we'll sort that out next season. Project finished. WIN!10 points
-
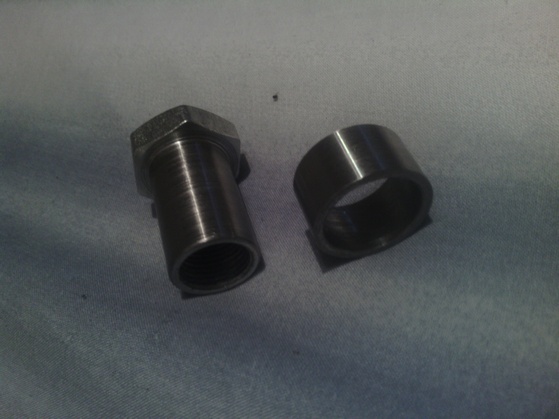
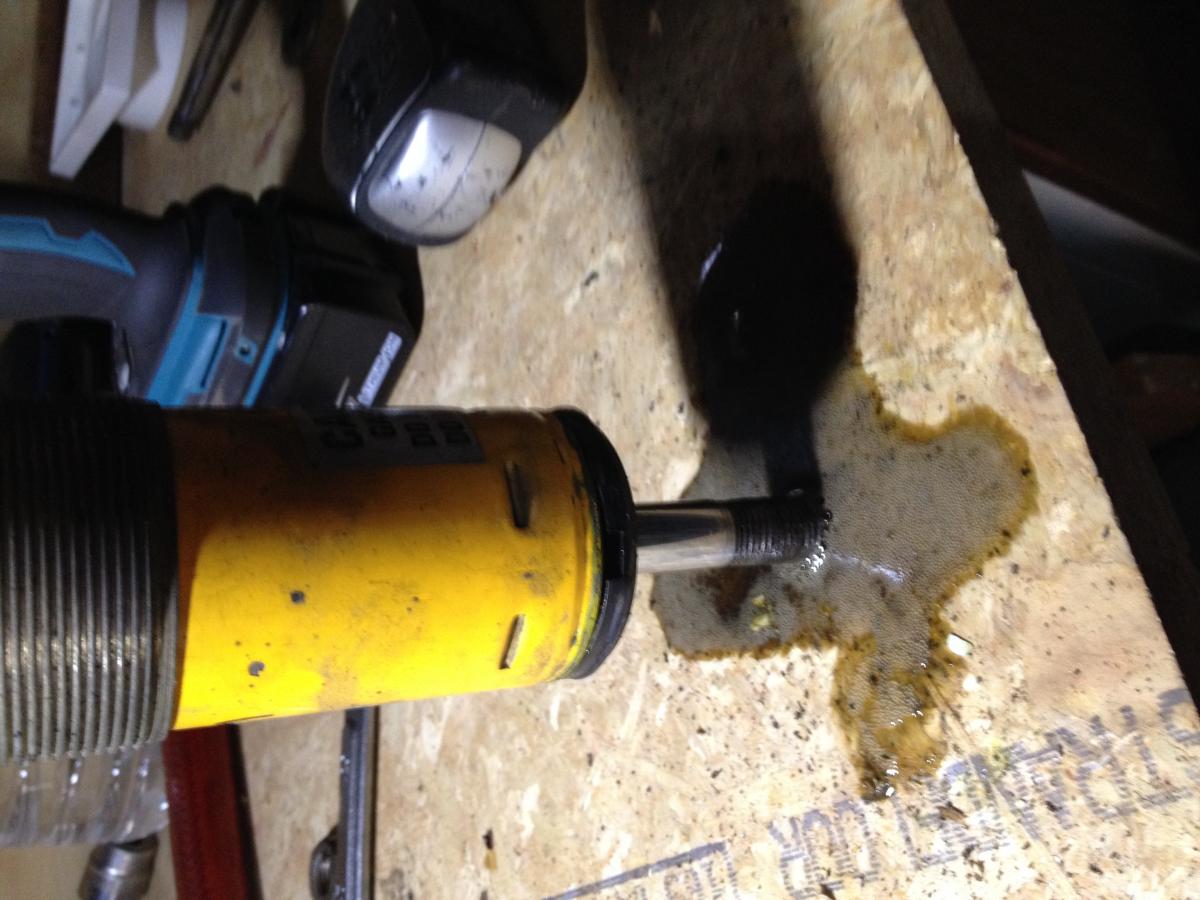
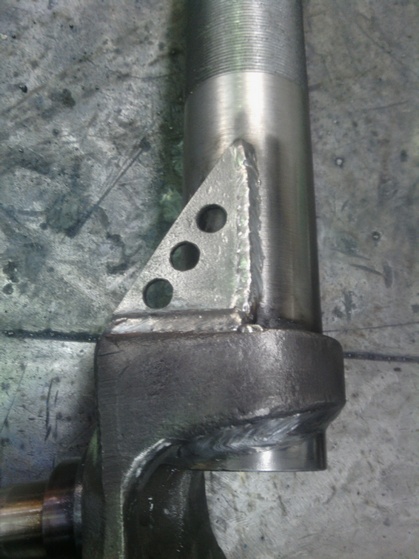
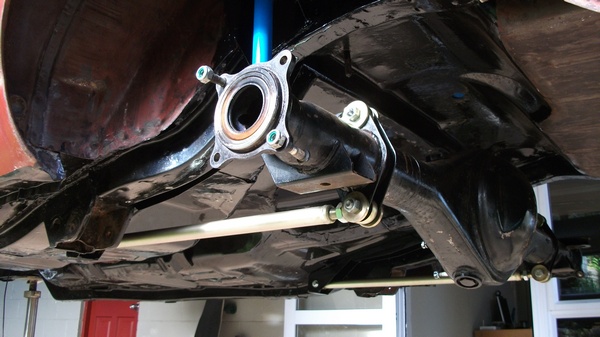
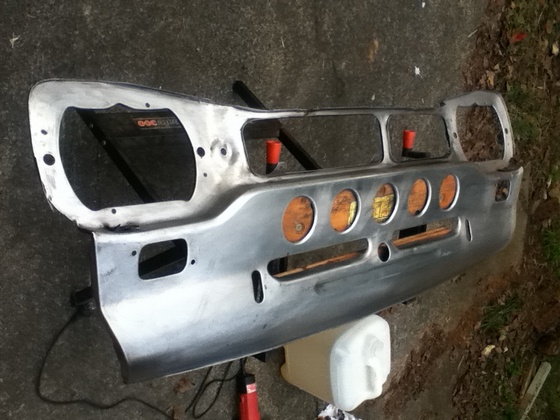
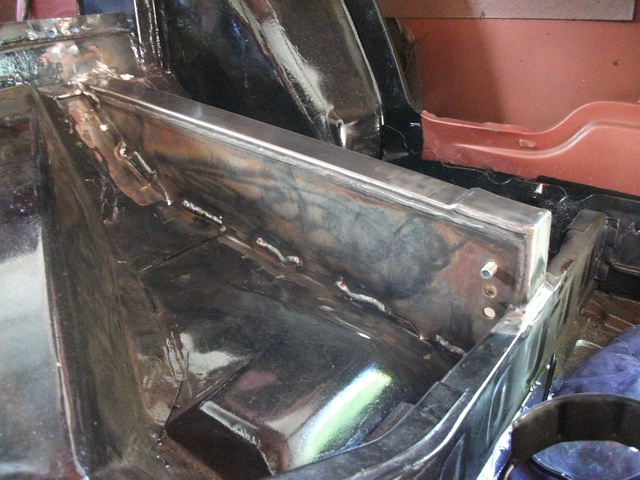
Spent some time hunting for oil leaks this afternoon. Both sides have an issue, but the RR is far worse than the LR. My theory was that there must be a crack or a porous weld on the RH side that was making the problem worse, but on closer inspection the seal appears to be pretty bung! Got floating hubs off: This is the right hand side: And the left: The seal on the right tapers out (which is shouldn't) and the outside edge looks quite worn. By comparison, the other seal has more of a U shaped curve - which creates a seal on both sides. There was also a lot of abrasive crud stuck to the oil on the bad side, which would have been wearing away at the rubber and making the problem even worse. Time for a couple of new seals and it can go back together. I would like to rule out the potential for a porous weld though, as this part has always seemed weepy: Does anyone know of an epoxy or similar that can be stuck to the metal to seal off any potential holes? I've tried CRC need-it before and it didn't stick that well... Obviously it'll need a vigorous clean beforehand, but I'd like to goo it up with something. Oh, and here's the new Toyo underseal I'm trying. It's expensive, but only takes a couple of minutes to apply and sticks quite well!
 7 points
 -
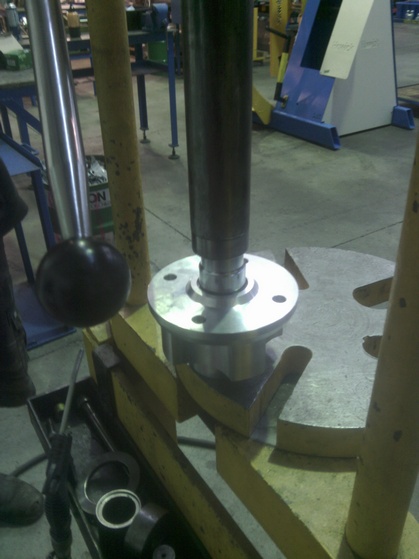
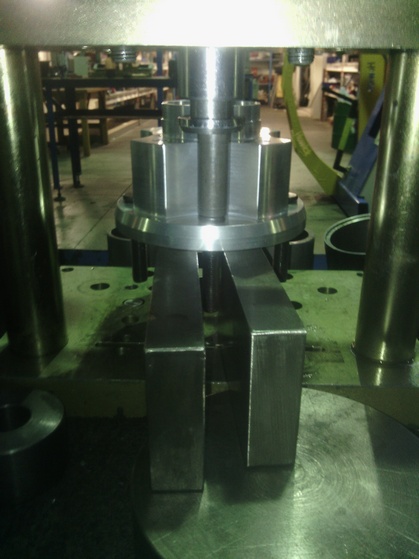
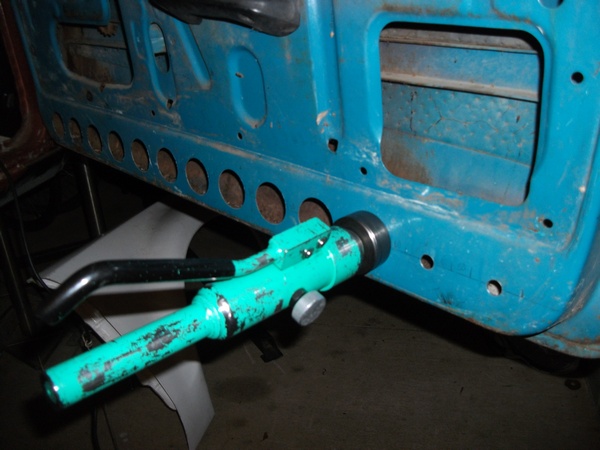
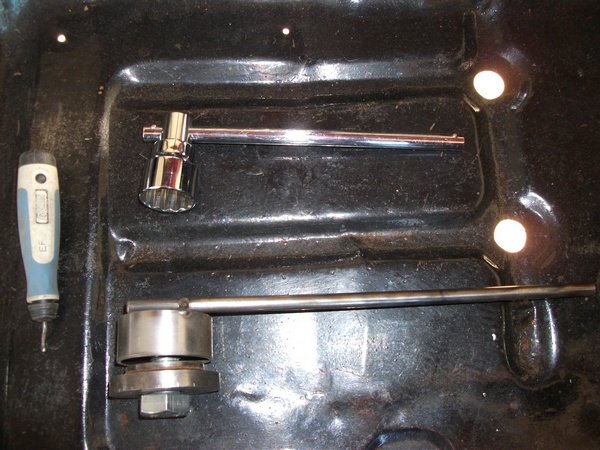
Machining some top nuts and a spacer for the struts Ordered a pair of alloy hubs from peter Lloyd rallying Pressing bearings in Pressing studs in almost time to fully assemble the struts
5 points
-
LOL , I think we make much more sweet pics with this girl and my GTR , but it will be later This is original GTR gangray grey color . Hey NZ , today I make a little trip on touge :5 points
-
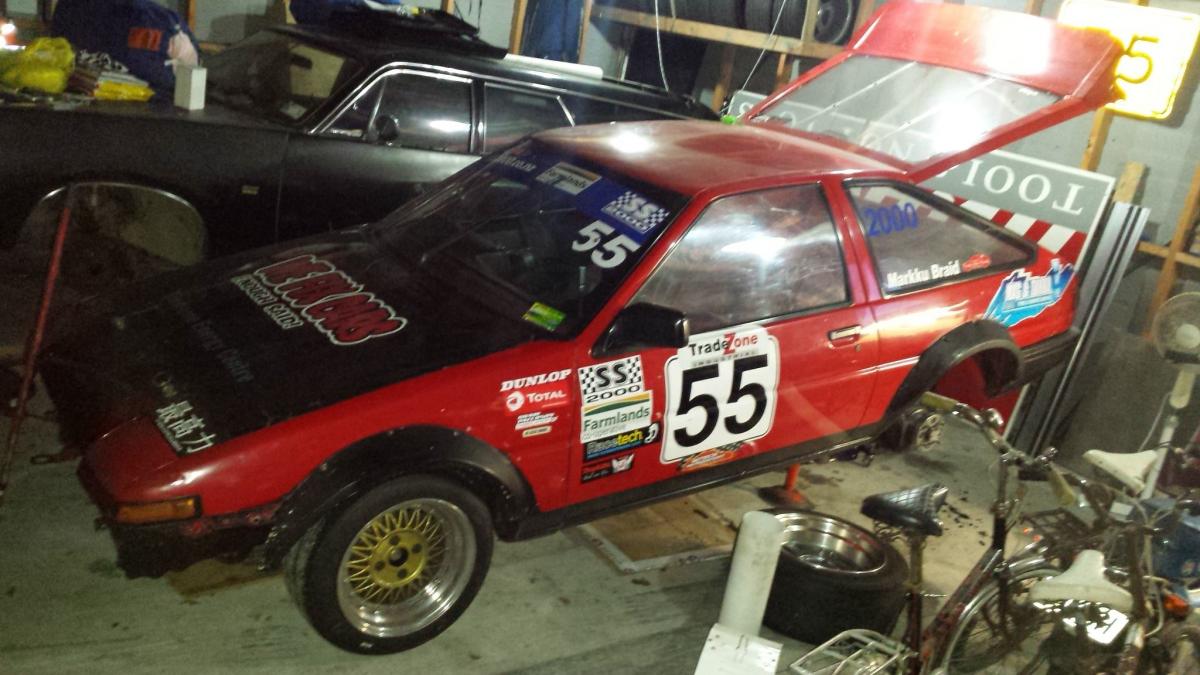
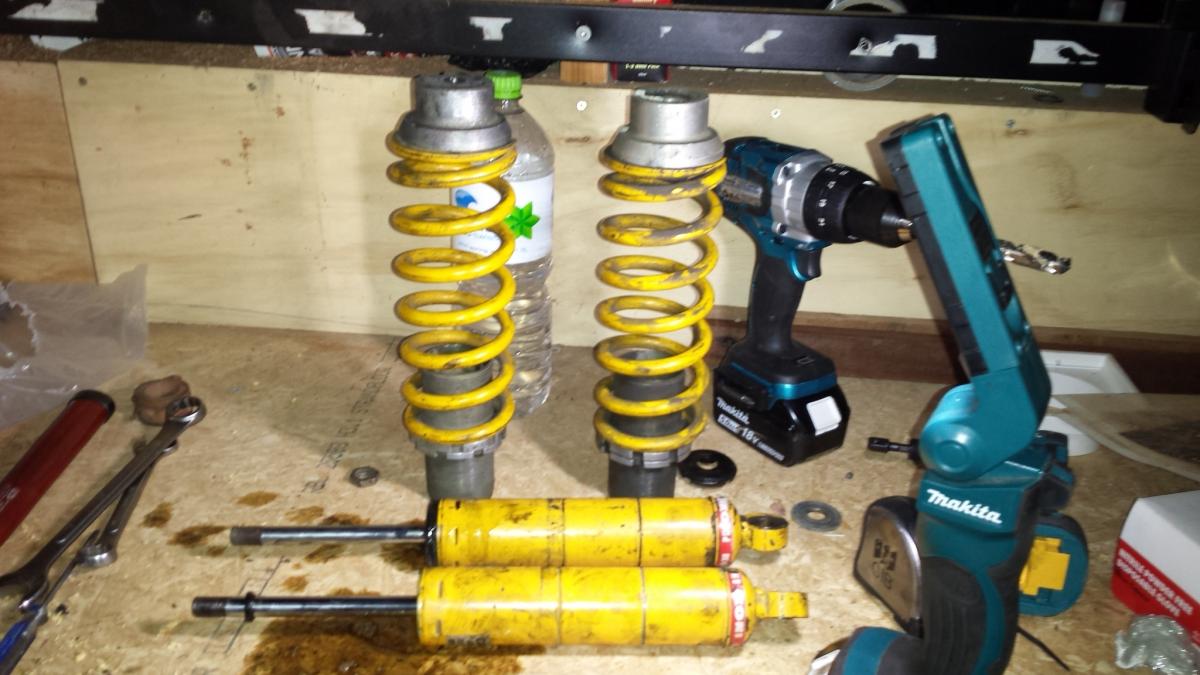
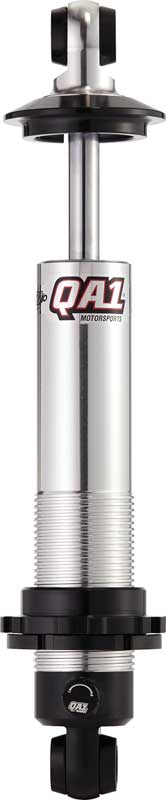
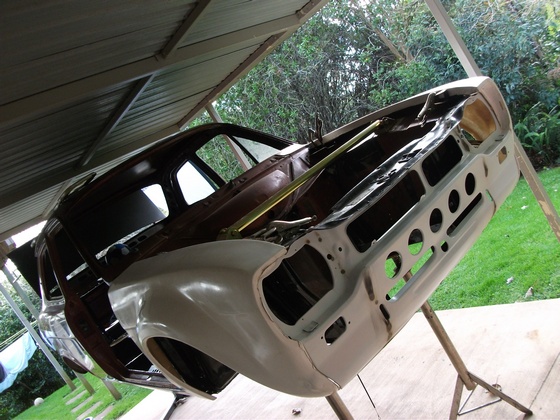
Time to start working on this again after leaving it alone since the final round at Easter. So here's the situation: There's a bit to do in the rear end. I'd suspected that the left rear shock was on its way out after the Pukekohe round of SS2000... And it turns out I was right: So it's time to replace all these bits: While I'm in there it's time to clean up the diff and replace all the axle seals as the RR is dropping a lot of oil and the LR is starting to weep as well. I should have a set of these in the mix soon (double adjustable) which will make a massive difference!
4 points
-
Did something's4 points
-
now you need a bulldozer to shift big piles of firewood with!3 points
-
Same here, I raided the neighbors inorganic and scored some carpet. Every shed should have cream carpet...wtf. It was a moment of weakness, but at least I can console myself for not taking the underlay as well. Makes an enormous difference at night though, doesn't feel like I'm inside a fridge quite so much.3 points
-
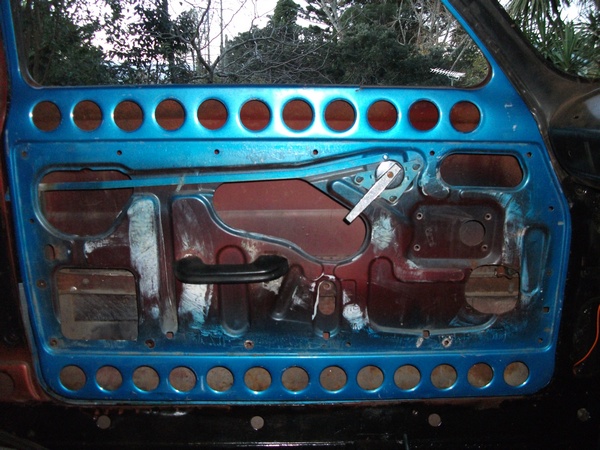
Fairly boring update, just fixed a variety of issues. Replaced the oil pressure sensor (cheers matteybean) so now the oil light isn't continuously on. Went to check the vacuum advance was working and found out the vacuum advance hose wasn't even hooked up to the carb, lol. It was super brittle and had just snapped so got a new length of hose from Butlers. Then noticed the PCV hose from the intake manifold was leaking at the head so back down to Butlers grabbed a couple of hose clamps and sorted that. Also the airbox had a couple of cracks in it so my flatmate took it work and welded them up. Starts and runs bloody good now. Rear window only ever went about halfway down and always rattled, pulled the interior apart to take a look at it and found the wheels which sit within the runners were in about 5 pieces. Luckily oldschool is full of knowledgeable people and matt spitfire told me he'd used some sliding door wheels from Bunnings as a replacement for the ones in his Celica. Anyway they are basically a perfect fit and super easy to install, cheers matt spitfire! Here's the ones you want, $14ish: SKU is 518657, just give that number to Bunnings if your local doesn't have them and they should be able to order them in. I also grabbed a couple of washers as the nuts are pretty small. Pretty easy to install: - Remove and disassemble the window regulator - Cut off the old stud - Punch the back of it out - Cut a groove in the top of the new sliding door stud to fit a flat head in - Fit and tighten it with a flat head on one end and a ratchet on the other Also bought a new clutch and am on the hunt for a new slave cylinder, BNT couldn't seem to find anything. Anyone bought a new slave for a W40? I assume it's the same as a W50 slave? Got bored and chucked the equips on the rear for a test fit. Sit pretty much flush with the guard so happy with that. The fronts stick out quite a bit though, probably too much for a guard massage. Don't really want to go to flares. Some 6.5s on the front would be ideal...Don't rate my chances of finding some in the same style though. Gonna pop into Autolign next week and get some 2 inch lowering blocks and then I'll have to sort out the fronts. Will try to avoid cutting them but I don't think I'll be able to get anything off the shelf so will probably have to take them out and give them a measure up. Fun stuff.3 points
-
The LTD has been letting me know over the past year that it's time for some love and after breaking a valve spring at Nats I knew for sure that this was true. Iv parked her up and removed the shocks and springs to see how a airbag setup would look in full slam Rear ride height before... Rear ride height after ...[/url[url=http://s1372.photobucket.com/user/sidewaysickness/media/Mobile%20Uploads/20150703_161203_zps9s4vi5nq.jpg.html] I get the feeling it's time for a bare metal rebuild so watch this space3 points
-
Haven't had much time lately to do up things because I work 6 days a week, just been enjoying listening to my set up. But this is what I have managed to do. First is a pair of JVC SK-50's I got dirt cheap off TM. Like all good old speakers the rubber had deteriorated but this is easy to fix. Before After I have also got two mono valve amp chassis that I am going to rebuild for HiFi use, I was thinking twin KT-88 on the output2 points
-
I made some head way in part of the garage today Sorta stoked2 points
-
threw the motor back the frame to get it off the floor cos i was sick of tripping over it. thought id throw some apes on just for fun. i'll stick with the original ones i had on.2 points
-
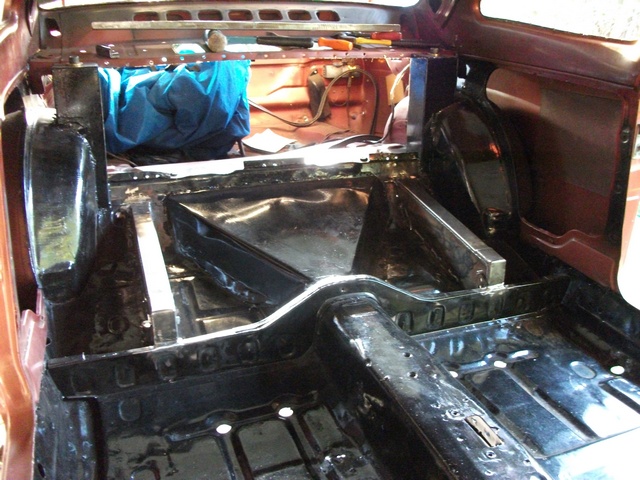
Things and stuff happened today. Motor and box are now in. Need to get some bolts for the gearbox then can chuck driveshaft in. Couple of jobs to do before wire up, like sort out powersteering lines, which im hoping to do this week. Also found aother pair of centre caps to finish off my wheels.2 points
-
Degreased and water blasted the motor then fresh rattle can rebuild. Will take the rest of parts to work and throw in the parts baths to wash properly. New flex plate new starter2 points
-
Choice, looking forward to this. Same pub that KK and I used to party like it was 1999 at. That's because it was 1999. Word.2 points
-
boring pictureless update, Big thanks to neal for helping me grab a new motor for this today. Its a mostly complete 253, will do rings bearings seals etc and bung it in2 points
-
You are both more than welcome to come over and stay at my place. I will pt the kettle on now and the fire is going so you wont need many clothes. If you cant make it because you are fixing your skyline then feel free to send your girlfriend over and we will look after her. Tell her I have a fluffy cat.2 points
-
Guardwork, Team sticker, more low and almost at the perfect rear height, front still needs 165 65 14 chucked on and more low. Pretty happy. //oldschool.co.nz/index.php?/topic/47514-ants-tc24-gx71/2 points
-
Removed red pinstripe and hornet and fitted wheels this morning. Front needs to come down in height which should happen with the engine, gearbox and coilovers being fitted, rear is at perfect height, Previous owner has done some guard work to fit the 15x8 0p wheels so not a lot is needed2 points
-
No , this engine from R32 with painted rocker covers PM me I will send you this pisc Okay man . Take the shot ( this not my sister ) :2 points
-
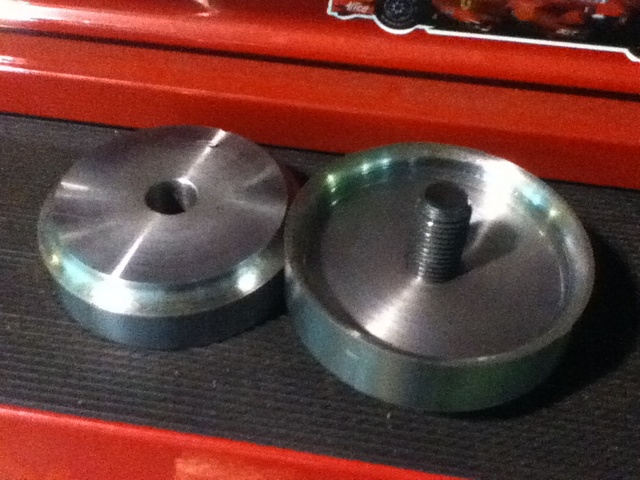
Test nut fits Ready to drop into the stub axle Groove cut for wiper seal A subject of much debate
2 points
-
Maybe one of the last updates before it all gets chucked into storage for year while im away in Canada.i painted the rocker covers with black VHT wrinkle paint and i got the effect i wanted on the top and partially on the sides,the rest just gave a flat finish,i followed the instructions doing 3 heavy coats in a cross pattern,so now im not to sure on how to fix this,maybe put the covers on there edge? nearly there getting the retro 70's look that im after,should look sick in the bay of the crown2 points
-
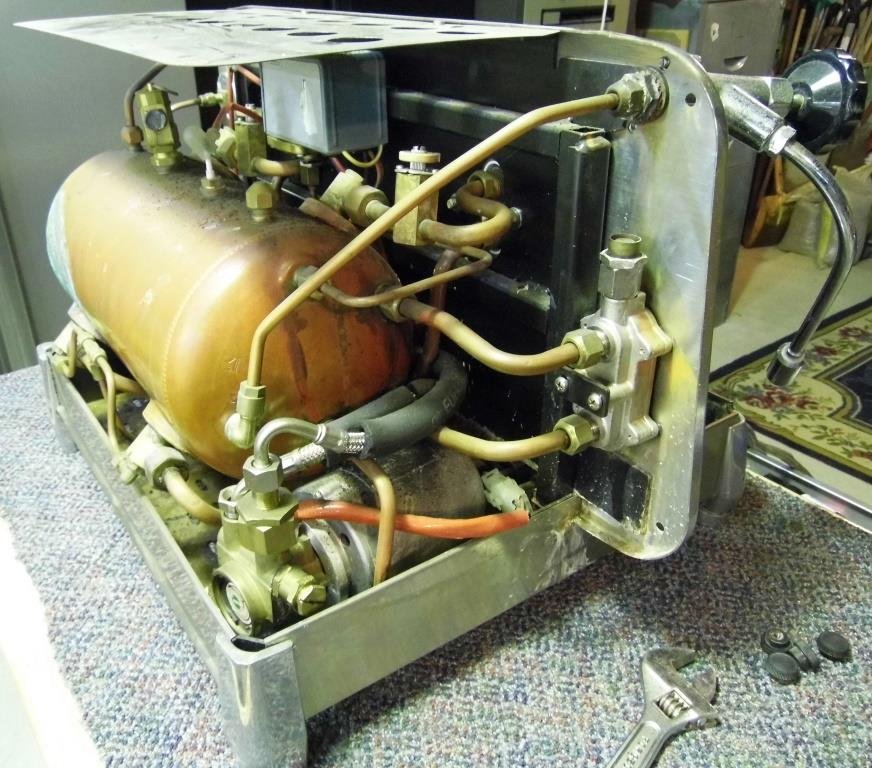
Shed's all tidy and I'm still waiting for stuff to turn up for other projects so I can make some progress, so I might as well do something. This is a rebuild on one of 2 Faema E61 Legend's that are sitting in the shed slowly decomposing. I'm going to post lots of pics for a couple of reasons such as a bit of info for someone else wanting to fix their own machine or that whenever people take their coffee machine to the repairers, they feel like they've been ripped off, in some cases that may be true, generally these machines need a ton of work when they haven't had regular maintenance. I've chosen a machine that's typical of a couple of years of no servicing and bad practices when being used.(will explain later) edit: ok this one is fairly grotty now I've opened it up So here we have it, a reasonably common and well loved machine by Barista's all over the world, it's circa 2001 (not the original 1960's one that cost moonbeams to buy now), but still a well respected machine.
1 point
-
Shit yeah. That should be called on/off roading by the way it's just hammer down or nothing at all! What a noise!1 point
-
pullup lead made, battery charger repaired, drink in hand looking forward to tomorrows developments! /problems1 point
-
Thats an awesome machine. Pining those truck mud flaps1 point
-
Awesome work, hydraulic splitters are so legit. If you find yourself getting bored at some point may I suggest adding a hydraulic lift to the side, that way you don't beat yourself up too bad lifting a thousand rings off the ground.1 point
-
today went well. i blocked back the drivers door and its really close to the right shape. i was able to get the shape pretty much ready for a final coat of primer with just a bit of green spot putty. ill put another layer of primer on it probably tomorrow night. no bog, excellent. Untitled by sheepers, on Flickr1 point
-
must be on at least a first name basis to attend. whats your real name rustisize? "i dont have one" isnt quite gunna cut it1 point
-
ALL THE PERIPHERAL PORTS ALL OF THE TIME plus some pictures https://www.facebook.com/media/set/?set=a.10204084504823712.1073741873.1557560236&type=1&l=c2d4f262701 point
-
Mind if us bunch of Ponces tag along? I'd like to see how the other half live Plus it might actually charge up the battery in one of my wrecks.1 point
-
So I sold this old lady on and now its up to jakemoseleyTo carry it on (not like I did anything1 point
-
Pictureless update: When I bought it the speedo didn't work so I ordered a new cable. It also came with a new carpet set so I figured I'd pull the interior to bits and do both at once. Found a bit of surface rust in the floorpan under the drivers seat but nothing difficult to fix, theres primer under the passengers seat so its obviously been the same at some point. Previous owner was proud that he'd replaced the transmission tunnel with a new fiberglass one. Unfortunately the bolts he put through the firewall were a nightmare. Brass dome head screws with nuts on the firewall side (surely it'd be easier if Triumph had made them captive). With flatmates help since my arms arn't long enough to be in the footwell and engine bay at the same time I couldn't get any of them undone. Only way I could shift them at all was putting a ratchet spanner on the nut and vicegrips on the wrong end of the screw/bolt. Had to do a combination of cutting the bolts in half or driling them out - none of which were easy to get to. Took me 5 hours to get 6 bolts out and none in one piece. Then took the old speedo cable out and turns out there's nothing wrong with it so put the new one in anyway and still no speedo. Guessing drive off the gearbox or maybe speedo itself causing the problem. Also replaced the rubbers between the tail lights and body. I do like that pretty much everything is available for these.1 point
-
Again was a work day so didn't get much done, I finished of the skin patch on the second door and got the inside of the door metal preped and epoxied. I also heard back from burton power, looks like I can get the bracket i need to mount my calipers and if I change over to RS hubs I can use the rotors I want sooo hopefully that all works out and I'll get those items orderd asap it's all confirmed. Sorry still no pic of this just some more boring rust repair photos I also have next week off so I will be trying to fit the five speed gear box before painting the engine bay and much more. I also have now booked the last week of July off aswell but currently fitting a new bathroom which needs to be finished before the end of July as we have friends coming to stay from the 31st of July so this may soak up some of my time
1 point
-
Your new pics arent loading for me Eddie1 point
-
Please.1 point
-
bit of an update got my flywheel cleaned up and skimmed thanks to mate matt at waikato clutch and brakes (fully recommend the dudes there) put that on dont worry we done it super tight with a socket and a long bar. installed my new arm and put the new thrust bearing on. cleaned out old spring from last thrust bearing shitting itself (in the starter motor) made a clutch aligning tool and put all that together (tape and some 10mm stainless rod i had at the shop) put some new spark plugs in and then put it in and thats that for now. hope to have it running tonight and then il pull the front beam out.1 point
-
Passed a Wof not too long ago which required new King Pins . So replaced them and also fitted new rotors and pads while i was in there. Currently changing thermostat and flushing the coolant Next up is some rear tailgate door window seals then i can start the cabinet making for the inside wrap around seating and liquor cabinet. Once winter is gone ill be attacking the small amount of rust at the top of the A pillars then get the englisman to Silver metalflake the roof and then get onto some lake pipes and this is the van loaded up with 3 of my bikes heading out to QCR Dirtmasters1 point
-
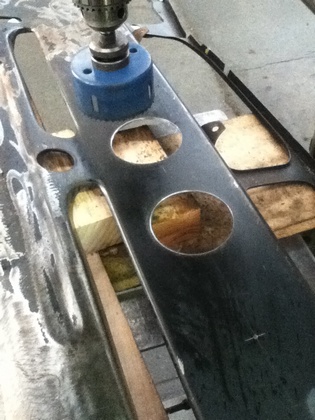
Going to swiss cheese the inside panels Chassis Punch Made another 2" hand swage tool rear quarters swaged Doors Done
1 point
-
four link from underneath hole sawing front panel to add 3" swaged holes Made a press tool at work In the press Panel done and ready to weld on
1 point
-
plans have changed and now adding a four link kit. purchased from Burton (uk) marking the four link boxes welding time done
1 point
-
come on now, we've been through this. assless chaps are chaps assless pants are chaps assful chaps are pants pants are pants an assless can am is a segway1 point
-
so i rung a mate who owns a beetle as well who used to have a 1800 in his and told him to come give me a hand to pull my engine out and he mentioned he had some parts that may be of use to me since his new engine will be bigger and better and using all new fast parts and what not. he flicked me a text at some godly hour this morning going i left some stuff at your back door. half expecting a bloody upholstery job. turns out it was all of this clutch, fly wheel, thrust bearing, crank pully, air filter, oil cooler and rocker covers with breathers welded into them. amazing!1 point
-
Been stuggling to find time for this thing! Anyway.. Chucked a new battery in it and that seems to have solved the electrical problems. Took it for WoF and it failed on a wrong size tyre (had the spare on) and leaking brake master cylinder. Got a second hand tire fitted (anyone know where I can get it white walled to match the rest?), went down to safe-r-brakes and they couldn't find a new master so had to resleeve it which was fairly spendy Anywho it's back on the road now! Also sorted out a manual conversion from an old geezer down in Timaru. W40 box (supposedly in good nick), pedal box from an RT104 (which comparing part numbers should be the same as a factory RT94 one), flywheel, clutch (buggered) and master/slave/lines (all buggered but gives me an idea of what I need). Keen to bring it out to a meet before I rip into the manual conversion since it will inevitably be off the road for quite a while1 point
-
Here's my shed audio hidey hole, bunch of stuff to change around yet.1 point
-
Progress over the last two nights.Dizzy cleaned up and fitted.Rocker covers now fit just waiting on new oem seals this weekend along with waterpump,hopefully paint them this weekend depending on weather.Front TEQ logo all made just needs paint and polish.i was thinking about back lighting it with some white LEDs..thoughts? also cut up the 1jzgte oil cap to adapt to the more suited 4m cap which will get a fresh zinc plating.1 point


This leaderboard is set to Auckland/GMT+12:00