
Leaderboard


Popular Content
Showing content with the highest reputation on 06/07/15 in all areas
-
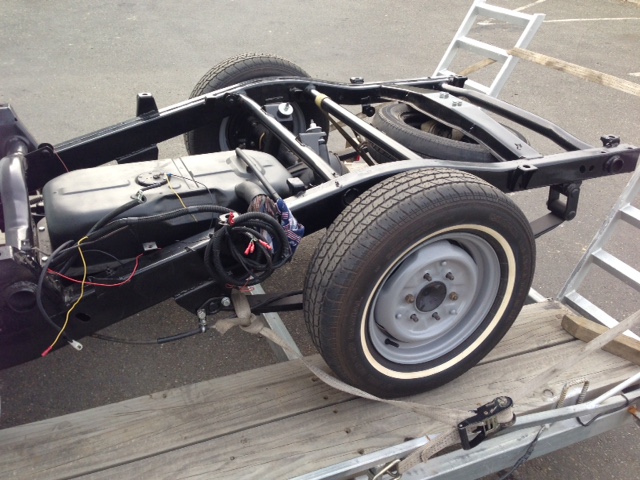
Next little task is to fix up a set of Hayashi Street ST 13x7 +8 and -6 I have had kicking around for a while, ever since I got the car I've wanted to run it on Streets (and even tried and failed once with a set of 14's that Beaver now owns I think...) and these are the ideal size for stock guards. So I got some time with a sandblasting cabinet courtesy of a good friend and fellow OS member and stripped the centers and inner barrels with a fine garnet in prep for a polish/paint in the next few weeks. IMG_2904 by Richard Opie, on Flickr IMG_2913 by Richard Opie, on Flickr IMG_2918 by Richard Opie, on Flickr Will update with progress ASAP! Old mate Sheeper popped around this morning to provide an extra pair of hands to lift the diff into place, without scratching it. Results below. IMG_2947 by Richard Opie, on Flickr IMG_2950 by Richard Opie, on Flickr IMG_2968 by Richard Opie, on Flickr IMG_2972 by Richard Opie, on Flickr Rolled it out into the 'sun' to check height, everything is good. Usable, plenty of travel... I'm rapt. IMG_2925 by Richard Opie, on Flickr Just before I packed it away, I snapped a quick shot of the office - yearning to get back in here! IMG_2998 by Richard Opie, on Flickr As always, thankyou for looking32 points
-
Diff case almost done. just need to sort out a bump stop setup and make some caliper brackets. Then i cut a hole in it Welded up hole.. Have gained just over 20mm ground clearance. Doesn't sound alot. but its pretty much the same difference as going from 33" tyres to 35's. should have done the same to front when i had it apart.but didnt want to cut that sweet chrome. . Also, Someone in another thread awhile back, was saying how triangulated 4 links bind up with rose joints. Yeh nar nar nar.. only thing its binding up on is the ground.16 points
-
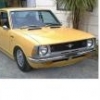
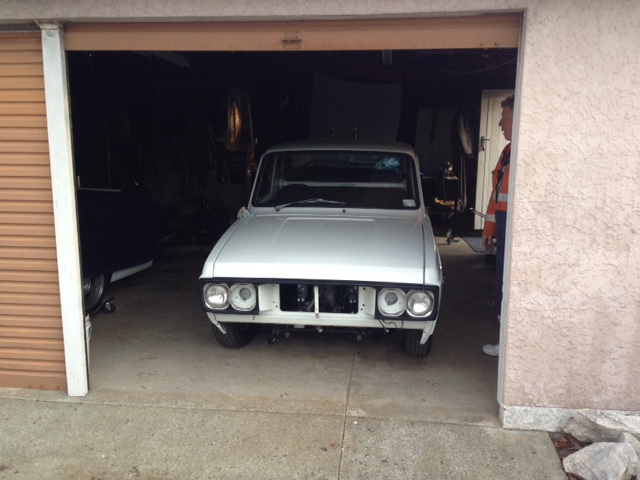
So after 6 years of not owning an oldschool car I thought it was time I did something about that. I decided at the end of last year I'd try to buy a GT6. However, I wanted a Mk2 as I preferred the more 60s styling, the problem being these are stupidly rare. But luckily I managed to be the first to offer money for the one that briefly appeared on Trademe last weekend. I picked it up from Whakatane/Rotorua/Tauranga (its a long story) yesterday. Drive back went well other than the speedo doesn't work and the headlights are dangerously bad for the last two hours in the dark, Its a 1970 and has had quite a lot of money spent on mechanicals recently. It needs the interior redone and theres a small amount of rust in both rear guards and the drivers door. Given I bought it site unseen I was pleasantly surprised. Its reasonably standard though has a few upgrades like brand new Mikuni flatsides, electronic ignition, hotter cam, GAZ adjustable shocks etc. Goes well though it is rather loud at 100ks despite having overdrive. [/url] ] If you look closely in this photo you'll see a piece of wood holding the tailgate up. Its supposed to be held up by a torsion bar by the hinges but like most this isnt working anymore and they're no longer available. So it has gas struts except these are just as broken. It has the factory option rear seat. These are like hens teeth apparently and having now experienced it I can see why noone chose them. Single worst rear seat ever, theres no leg room, no shoulder room let alone head room and you have to climb over the back of the front seats as they dont go forward enough to go around them. Here is the rust in the rear guards. As you can see drivers side is the worst of the two though the passengers is worse than this photo makes it look. Plans are to do not much to it in the short term as my mortgage is looking a bit sick but medium term plans are to continue tidying it up.14 points
-
Brain: Hey get another project Me: Nah got 3 other cars to waste time and money on. Brain: go on, its a wagon. Me: naaaah... Brain: ahhhhh go oooonnn. Me: ok Here it is, a somewhat neglected GX60 wagon with a very sad, oil leaking 1G-EU power house The poor 1G is hemorrhaging oils from every oriface at an alarming rate. Thankfully the car came with a spare engine. So this lucky 1G will be receiving new oil seals, gaskets and water pump etc. + = Why the fuck am i even trying to make this lump look good?? Anyway that is it for now. I will leave you with this artists impression of the wagons near future. Discuss: //oldschool.co.nz/index.php?/topic/48689-be4vers-gx60-wagon-discussion/12 points
-
Greets Amigos, Since last update, The gearbox is back in with new clutch assembly, frost plug and crank seal. After that, we looked into the brakes which were bled for maybe 45 mins before all the air was out (hopefully). The rusty old pressure plate Shiny new clutch plate Also installed this weekend are four new heater hoses and a pertronix electronic ignition system which was suspiciously easy to install... one of the hoses ripped to bits as I took it off so probably worth the time it took to replace them. Heater hoses are my new pet hate! Awkward little suckers to get to but worth replacing since they are the 40yr old originals. Also installed were a new inner and outer shifter boot I got from the states. Now she's going to Speedwells in Hamilton to sort out the carbs and get her running properly. Currently only one carb is working so 3 cylinders are firing. Really need the compression to build up so we can see if the brake booster brings the spongy brake pedal up to a good spot. After that's done, it's just shocks and a windscreen rubber to put in and we can go for a vin check. Cheers, Reubin8 points
-
Discuss here - //oldschool.co.nz/index.php?/topic/48697-blizzos-83-kp-starlet-rally-car/ Right boes, a dream of mine over the last few years of lurking in the corner of my father in laws rally career has finally come true. Yesterday I took ownership of am 83 Kp rally car. I have been wanting to get on the gravel for a while, and have had a go co driving for my father in law in his escort. Now its time to get into the hot seat myself. He gave me a bit of cash towards this starlet under the priviso that he sits in the co pilot seat and teaches me with the occasional drive, pretty good deal IMO. So dont get excited, this thing isnt that flash, hasn't been used in about 6 years and needs a fair bit of TLC, but thats all good fun anyway. good bits - - "worked" 4k, still unsure how worked, has 45mm sidedraught and quite a high duration cam, still waiting to hear from the bloke who built it for more info. - rego on hold - MSNZ hologated cage, i just need to finish getting my R2 license and get authority card in my name. - different struts with good stiff rate springs bad bits - -a fair bit of bog hidden rust - a bit gutless ATM, gunna investigate a few things (buggered mech fuel pump) and poss pull head off - a ghey colour scheme and average paint - VERY FUCKED DOORS (bottoms are very rusty) photos! bad bits - what it used to look like - what it could look like-7 points
-
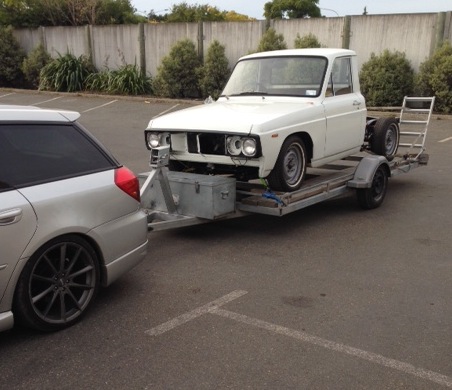
not much progress on the ute week gone been busy getting rid of all the bits i didn't need, have made some progress in getting bits i need. -have some brake hoses on the way -also cleaned up a spare set of axles and got rid of left hand thread and changed to sealed bearings ready for lsd courier/bounty nugget with a lower ratio to go in (that combined with 5 speed should be nice cruising at 100) -also this is ready to go in after sorting out sound deadening and carpet (thinking of going autodec? anyone else used them?) -then need some door cards done to match
 4 points
 -
those arms are choice ^ I built this jig to prove no bind with rose joints. now to put the leafs back in my hilux3 points
-
Somebody's jelous^^3 points
-
A few photos from race day. Lap 13 Took over an hour to find the wheel. My mate was recording some of the race and happened to get part of Lap 13. His reaction still cracks me up and at the end he forgets to turn the camera off, so lots of shoes and ground,but the half hour of comments is hilarious. (Is he allowed to race with 3 wheels? etc). Video3 points
-
Another weekend of fine weather so got some painting done and the trial fit the spoiler, arrived this morning3 points
-
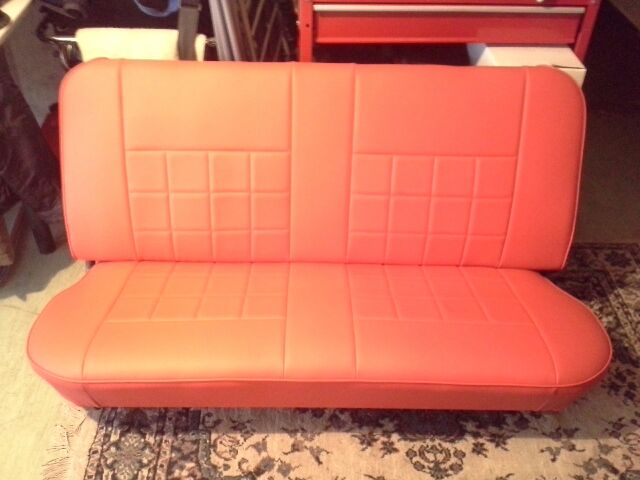
IMG_9911 by Richard Opie, on Flickr IMG_9960 by Richard Opie, on Flickr Then I painted it. And plated the bolts and shit, all the bolts for the calipers/backing plates/brakelines/etc are all plated too.3 points
-
Oh, I forgot to show y'all something else: I wanted to replace the super hard original water squirty tubes that run from the washer bottle to the jets to clean the windscreen, so looked around and found an old IV line my dad brought home from work. It actually fit perfectly haha I also had a nosey in the back and found the original jack and toolkit (may not be original tools but look old enough) in their super secret drug smuggling hatches behind the seats:2 points
-
Went to the dump, recorded Daily weight, lol. Also put the new turbo on this afternoon. SUCCESS! I'm getting 6lb boost under acceleration and 2 cruising. I discovered the feed pipe wasn't sealed in properly too so will get a proper reading tomorrow if any different. Turbo is nice and spooly, oil restrictor is working well and very little excess smoke. I think the turbo I was borrowing was just flooded with oil and may have also had a dicky actuator. It never registered any boost. I tested the flow of the unrestricted feed and filled a spray can lid in 10seconds. The dump pipe and tailpipe are laden with nasty oily deposits.2 points
-
Hahah I just fit 3 years of time, effort and a lot of swear words in one page. Ill get some photos of the car in its current state when the sun comes out2 points
-
Hey man! Saw your car today at Mission Bay and I had to snap a shot, loving it!2 points
-
Todays meet was awesome. Thanks to those that made it along. Thanks to those that attempted to make it along but their Russian cars lived up to the hype and left them..dry..... It was quite a misty mountain crossing both ways and the road was mega slippery. This made for some very fun antics. I spent my driving the Viva chasing Sam in his E30 as we both pushed the limits of our open diffs. We all stopped not far from the top at a view point which gave us all fantastic views of clouds. Stopped again at another view point on the other side and more clouds. Then continued down and cruised along from the bottom to Takaka where we met the local group. Big nom nom nom in the wholemeal cafe which never lets me down for both coffee and grub. Lots of car banter mainly revolved around handling, racetracks, racecars, traction and lack of in old cars and it was all good. Then we joined the local group and cruised in convoy out to a local private museum. This was an awesome place and had so much more interesting stuff then I ever imagined. Hell- it started off with the first display being bloody machine guns from the first and second world wars! Man- all I could think of was how cool this place would be for a big OS group visit. It just got better and better. old army trucks, a Bren gun carrier, army memorabilia, rows of sweet old army rifles, heaps of old radios and records and then old motorbikes. like heaps of them. Anything old, random interesting squeezed in all the gaps between. One of those places you know you have to come back to and properly soak in all the details. The owner is a cool fella and just obviously loves seeing peoples delight in such treasures. We said our goodbyes to the Takaka group and they promised to make it to the next meet in a months time over to Pelorus bridge. Then we cruised back and hit that hill. Even more misty and man it was fun. Very sketchy but very fun. Yep- both Hannah have had a good day out- very much looking forward to next cruise! Lots of photos were taken by others so please throw them up here- especially museum ones because so many cool things to see. These are my phone efforts.. This one...note Shane thinking..'Yeah..yeah one day Im gonna get me a Holden. So cool!" This next one.. a Bren gun carrier powered by a flat head ford V8. Lush.2 points
-
Untitled by sheepers, on Flickr2 points
-
It is assembled, new brake hardlines made up. All that's left are brake pads and the clips to hold the flexible lines in place. IMG_1855 by Richard Opie, on Flickr IMG_1878 by Richard Opie, on Flickr IMG_1863 by Richard Opie, on Flickr That, my friends is the exercise in doing things the hard way. But pretty stoked it's sussed. IMG_1900 by Richard Opie, on Flickr IMG_1910 by Richard Opie, on Flickr Had some of the fasteners and suchlike for the ITB's plated in the last batch I had done, so I thought it would be rude not to pop all the bits on the motor for a little bit of motivation. It's not going to take too much effort to get this thing clean enough to eat off, that's a couple of jobs down the list at this stage though! Thanks for looking2 points
-
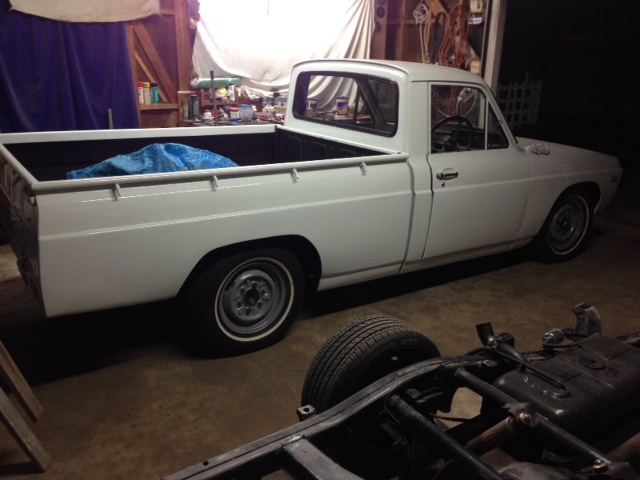
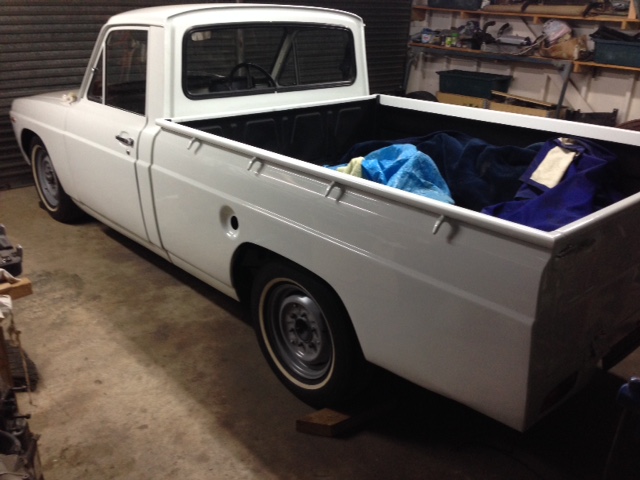
got the well side on, stoked to get it all swapped over with no damage
2 points
-
Moving on After motor was in took care of the radiator and plumbing, jammed an electric fan in there etc, got it to a point where i could run it. Next was the wiring - bribed my mate with beer and promises of work done to his own carina, he came and worked his magic on the, pretty haggard loom that came with the motor. Had it running by that evening, after a couple of small hiccups along the way. After that, I went through and cleaned up some of the looms dodgy bits, an example; Got some wheels, ssr casablancas, 14x7 -1. Wouldn't mind them being wider, but for the moment they're pretty good Rolled around the garage floor for a weekend and made an exhaust, went with 2.5" and a couple of straight throughs. Left the end like that until enough people made fun of me and I cut it shorter Tied up a few more loose ends, then gave it a few easy drives. The tune on the link seemed pretty reasonable, and the cooling arrangement appeared to be working, so moved on to the extremely factory suspension. Scabbed some sleeved front struts, and changed over to mx73 calipers and rotors cause mine were a both bit stuffed. Picked a set late model suzuki swift adjustables off trademe for not much, mainly for the rear shocks - they were nice and short kyb adjustables, bolted straight in. As a bonus the fronts had the same diameter strut body, so harvested the threaded sleeves and perches, etc off those. Just running some dirty ol' trimmed falcon springs in the rear at the moment, they aren't too bad but were only ever a stopgap Was pretty happy about the way it was running so took it away to coromandel over christmas. Was most excellent, but made a several things pretty clear, the stock seats are total poo and cheap tires bought in a hurry suck, so bought some direzzas (would recommend) and chucked in the sparco out of my soarer (probably the best thing i've done to the car) Not a lot has changed since then, tidied up a the rest of the body loom in the engine bay and put a bit more thread on the castor arms and wound them up - a lot better but needs a wheel alignment/shorter steering arms. Looks a bit like this at the moment2 points
-
Hi everyone, been lurking around for good while now, thought I might put up a thread for my carina. It's a 1982 ta63, suited me because it had a t50 and was efi, I had enough stuff lying around to put a 4age in it easily enough. Bought it about a year ago off a certain Older Southern gent (cheers kyteler). Brought it up from invercargill over a couple of days, drove super nice didn't skip a beat Rolled around in bone stock glory for a few months, then grabbed a (very grubby) silvertop/link g1 setup a friend was selling. Cleaned it up a bit, made a few things - low mount alternator bracket, re-did the cooling system (now basically a 16v arrangement), did some engine mounts etc etc Soon after parked it up in the garage for a bit. Pulled out the 3t, gave the bay a bit of a rub-a-dub Around about that point I discovered exactly why 3a(?) bellhousings are less than ideal, so turned it into a 4a bellhousing because i'm a cheapskate/was in a bit of a hurry to get the whole thing done before the christmas holidays. Worked out well, just jigged the positions of everything off the 't' bellhousing which had the fork on the right hand side Got the gearbox fitted up and put it all in there, plenty of room, should have got two 4ages I'll leave it there for now! Discuss Here1 point
-
Discussion: //oldschool.co.nz/index.php?/topic/48043-pedrac3rs-1985-ae85-levin-discussion/ Hey guys, have been casually browsing these forums for a few years now, thought I would finally sign up and share my AE85 build with you. Ive had the car for about 4 years now, has come long way from when I first picked it up. It wasnt factory spec when I bought it, someone had already swapped a 4AG in there, with a W58 box, hilux diff and some minor suspension and brake upgrades, 14x6.5 and 7.5 SSR MKII wheels, bolt in half cage which had been welded in, a pretty rangi surge tank, some of the rust had been "repaired". Although it was pretty rough around the edges I thought I had myself a fairly well set up car, until I had been driving it for a few weeks and all the problems started piling up... Engine bay after a bit of a clean up. Forgot to mention it had been painted a champagne gold colour. First thing was sorting out the clutch. Was using a 85 pedal box adapted to suit hydraulic clutch, didnt really work, was hard to shift gears and the car would roll forward slowly with it in gear and clutch disengaged. Swapped it out with 86 pedal box from Japan, problem solved. Next problem was the intermitted external fuel pump hooked up to the surge tank. Decided to remove it all run as per factory. While pulling some of the interior out I noticed some of the wiring was pretty rough! Spent a few weeks going over all the wiring and removing a lot of unnecessary wiring and dodgy solder joints, which there were plenty! Ended up with a box full wires! With that mostly sorted, I began on tidying up the rear end a little. Pulled the rear axle out to paint it up, along with a bunch of other stuff, clean up the tubs etc. I had the 4.3 LSD shimmed and went to put everything back together. Getting the bolts through the control arms/diff mounts was a cunt, I figured whoever welded the mounts on the Hilux rear end welded them on the piss so I got the measuring tape out and sure enough, left bottom mount was 20mm out... Would have been causing some serious toe in/out and binding issues. As quick fix I drilled a new hole in the bolt-on traction bracket to correct it. Made the decision to get a proper cage now that the bolt in cage had been removed and it was rolling again. Herbert Fab did the roll cage. I took the chance while the car was away getting the roll cage done to have my rear wheels widened. Wheels are SSR MKII 14x9 at -11 offset. Only did the pair for the rear, and put the 7.5's on the front. Then we had the task of painting the cage. Was a pretty big job prepping and masking everything, but came out pretty good in the end. Looked pretty red there, but once everything was back in it looked okay Ill leave it here for today, will have another update soon!1 point
-
na u just silly. buying all these diddle cars when ur tc24 sits, i cry at night1 point
-
Yet another awesome meet! I feel that it should be essential for every Takaka run. Thanks everyone for making it happen and a special thanks to Mark for calling the guy with the collection. Hopefully we will see him and his kermit the frog on here soon. Here's my pics that aren't repeats of everyone elses That was well and truly the LTDs last run for a while, She started running like a bag of balls by the end of that I suppose I need to get try get the volvo legal.1 point
-
only just saw your thread, this thing is awesome love the interior! theres something about red interior. cool to see it went to a good home1 point
-
yea thats pretty much the plan dave. Sorting brakes for a gravel sprint on the 28th june then theres a bit of a dry spell of events. So will do the body work etc then.1 point
-
I'll be crossing everything I can in hope that my jalopy is still functional by then, as of this afternoon it's running again so we'll see...1 point
-
Just keep it above idle speed, battery will go flat if it is idling with lights on. Should make a mini oldschool cruise of following felixx around.1 point
-
so yea if anyone has a parts hoard of stuff lying around let me know, i could be interested in some stuff. Major things would be doors, but could also be interested in a shell for some panel cuts etc. oh oh and if anyone has an external tacho that doesnt read 5k when your doing 2k that would also be choice. please and thankyous1 point
-
I didn't even know this was for sale lol very cool!1 point
-
Good to see someone who will do it justice has bought it, i was very tempted but wrong island1 point
-
I have been researching a bit more on the brake front, at the moment audi rs3/ttrs 370mm rotors look like an option to fill the 19 inch wheels properly, but no solid progress on the fitment of the monster 6 pots yet.. also found some dash inserts on ebay Australia for a sharp price in the colour i was after. Pretty sure they are from a G6E.. my mate brought them back with him to save on postage dramas.. before: 10 minutes later.. sadly thats the best my phone camera was going to do in those light conditions..1 point
-
Awesome dude ! And yeah I know your gonna make it awesome !1 point
-
Your awesome. Love these wagons, you done good, glad it went to someone who will do something with it1 point
-
Bought one of those $19 dollar warrants at some place called CS auto on K drive in Hamilton. Nice guys, not very good english but recommend if you need a warrant guy that wont pull you up on empty window washer bottles or no spare tire. So while I wait for my parts to arrive from Qualitat. Alaster that works there is the freaking man. Goes out of his way to help out. Took my seat out and decided to get it repaired. So off to Midnight Upholstery I went. On a friday afternoon LOL. The GC that Greg is helped me struggle my way through it. My god was it a different experience to running a CNC or spinning stuff up on a lathe. Hahah. But got it sorted tonight. Came out pretty damn good and learnt heaps from it.1 point
-
Trial fit went well. Who needs bonnet clearance when you have a grinder. Made some type of filter holders. Unsure if they really help, still yet to tune em properly. But it runs, and my golly gosh does it move. Pretty thirsty on fuel though. Running richer than Ill ever be. So fine tuning was in order until i was booked into a wof. It seemed to have crap airflow since at the time of fitting the carbs I had the stock 16v radiator which takes up the whole front end. So pulled some of my stashed goodies, a mk1 golf radiator and fan which is top mount.Which means no more coolant bubble. Yay! Also it meant i now have a massive gap in which air can now flow up into the carb intakes....kind of. So dummied up some "air deflectors" which Im not too sure will work but hey cold air is better than hot...I think?? Since I knew it ran i decided to tidy it up inside the engine bay a bit. DIdnt want to cut any wires off though because Id like to be able to return it to factory fuel system if i cant get it right. The finished engine bay looks so much tidier. Before: After:1 point
-
farrrrrrrk, i always miss out on the fun stuff, maybe one day ill get the jalopy together and itll run for at least half of the time im out in it, looks like you all had fun, definately have to make the next meet1 point
-
Looks like a really good day. Whats this about next meet at pelorus bridge? If thats a meeting point that would be awesome. Im just up maungatapu road by the bridge. Would love to meet up with you guys if you come through1 point
-
ice age spec engines1 point
-
i feel like we should make shit like this, relabled jiff rebuild in a bottle, have all sorts of credible shills like sheepys and clint endorse it, and use the funds to buy a forum racetrack in waiouru.1 point
-
More progress. Finished cleaning up all the seams and seam welding the chassis. Once I got into the swing of it it wasn't too bad and Simons welder was ace for it. Sneak shot of engine bay: Decided to cut the spare tyre well out and make a diffuser from some Sheetmetal. Quite happy with how it turned out. Will add fins and underbody panels once all the bumper (what will be left of it) etc goes back on Currently working on trying to figure out how to get the exhaust to exit above the diffuser.. best option so far is to weld up the rear section of the staonless exhaust then weld it into a 3" mild steel pipe and weld it into the car.. just means the rear section will never come out. Undecided at this stage - open to ideas! Also making a box for the 60l fuel cell to sit in the rear seat. I decided on 60l because the long term goal with this car is to do targa. The standard 45l tank would of never been enough and also gives me the option of endurance racing. The old man's ae82 uses approx 1l per km and this will be making about the same power so when being thrashed it's sure guna drink the gas.. Just trying to source a jaaz fuel cell with all the fuel senders etc for a decent price. I know this doesn't look like much but for me this has been a huge step forward welding in this cut outs in the tunnel and finishing off the floor repairs. There were so many holes I'd drilled in the past for seat/battery mounting! I filled at least 15 on just one side of the car. Next step is to mount the seat rails and mock up the dash.. then it will be off to the sandblasters again for the shell and the dash will be sent off to be flocked. Speaking of the dash quite happy with myself here.. Had planned on spending big money molding a carbon dash for coolness factor/lightweight. Turns out abs plastic has a density much less than carbon fibre! So I stripped the vinyl and foam off a ae111 dash (about 5 kg lighter than the Ae101 dash). Total weight is between 2-3kg I'm stoked! Still trying to decide on colour.. options are either white or something along these lines http://lh6.googleusercontent.com/proxy/A2INBHCZhvLKzpoWlW1meodeWGwBvkiG50ZLxglHQmgLcL6uXCcHypQRpEZ0U2u_JzJeLOarO1BIYrmKNGWm0crX3VwCu_hhWOsU0Msc6BzBIffDrg=w443-h332-nc1 point
-
What kind of car? Get some of this from BNT. Not cheap, but is awesome for old syncros1 point
-
Done a little bit more. Tube across diff is thin wall(light weight yo), is basically there to tie all the suspension mounting points together and add a bit of strength to the diff. Same deal tying the towers together. 500mm of spring so far, have some 125mm keepers on the way. so will be tipple rate with 625mm of spring all up. 225lb, 80lb and 20lb (keeper). When it gets close to full travel the soft 80lb spring will get locked out, leaving only the harder 225lb spring in action. keeper will be there so can run lowish ride height, with heaps of droop.1 point
-
ah, top notch. glad the city council doesnt run wofs, we'd be poked then1 point
-
well got the cab all swapped over today and put new rubber mounts and bolts in, need to run the wiring to tail lights, buy a fuel pump (and wire it in) and hook up the rear brakes before swap the wellside over, after having a good look over it pretty happy with it. lots of jobs to do now -sort wiring out -swap in lsd diff nugget with better ratio -dynamat and carpet -get door cards re-covered to match bench seat -paint exhaust manifold -clean up intake manifold and carb/airbox lots to keep me busy
1 point
-
Gearbox time!! Everyone's favourite time! With significant help from my good friend Nick (Cressy) the gearbox has been removed as well as the driveshaft and half shafts. The universals in the drive and half shafts are super notchy and have been sent away for refurb. I figure I don't want to be going in there again for as long as possible. Now the clutch assembly... not so pretty as you can see from photos! The main frost plug has been weeping coolant into the clutch assembly so the flywheel, clutch plate and pressure plate have been sitting in about 25mm of water for the last god knows how long. Needless to say the clutch and pressure plates were fused together hence the lack of gear-change-ness. I had anticipated this so already have a replacement clutch kit ready to go. I also got the flywheel skimmed by the good fellas at Waikato Clutch and Brake who previously serviced all the brakes. Now to take the scrubbing brush and degreaser to the rear of the block to make it nicer and put everything back together after I have the shafts back. I also got a new rear crank seal for safety. Things are coming together slowly, just ticking things off the list. Super excited to illegaly drive her for the first time soon haha! Churp Moment of victory! EEEEEEEEEEEEEEWWWWWWWWWWWWWWW gooey rusty muck1 point
-
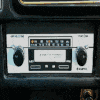
Extra bits of Charm: Original dealer's sticker in the rear window! Original petrol cap spill flap Came with the original papers and manual from dealer1 point
-
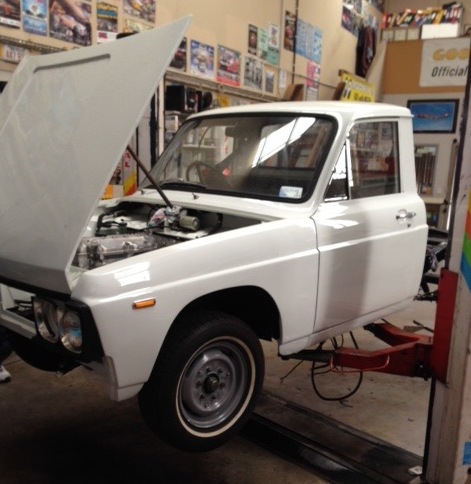
Putting the ute to work with ute type duties...1 point
-
Today's mission was to put the surf turbo setup on the 2L, Seems Toyota changed the stud pattern on the turbo models, so only half the studs line up. Thought about making a manifold or a J pipe and many other dodgy options. 5 mins later come to the conclusion; Get out of my life 2L1 point


This leaderboard is set to Auckland/GMT+12:00