
Leaderboard


.thumb.jpeg.384ff72c8d2b0ee0d34a7bdedb55bdcf.jpeg)
Popular Content
Showing content with the highest reputation on 09/10/14 in all areas
-
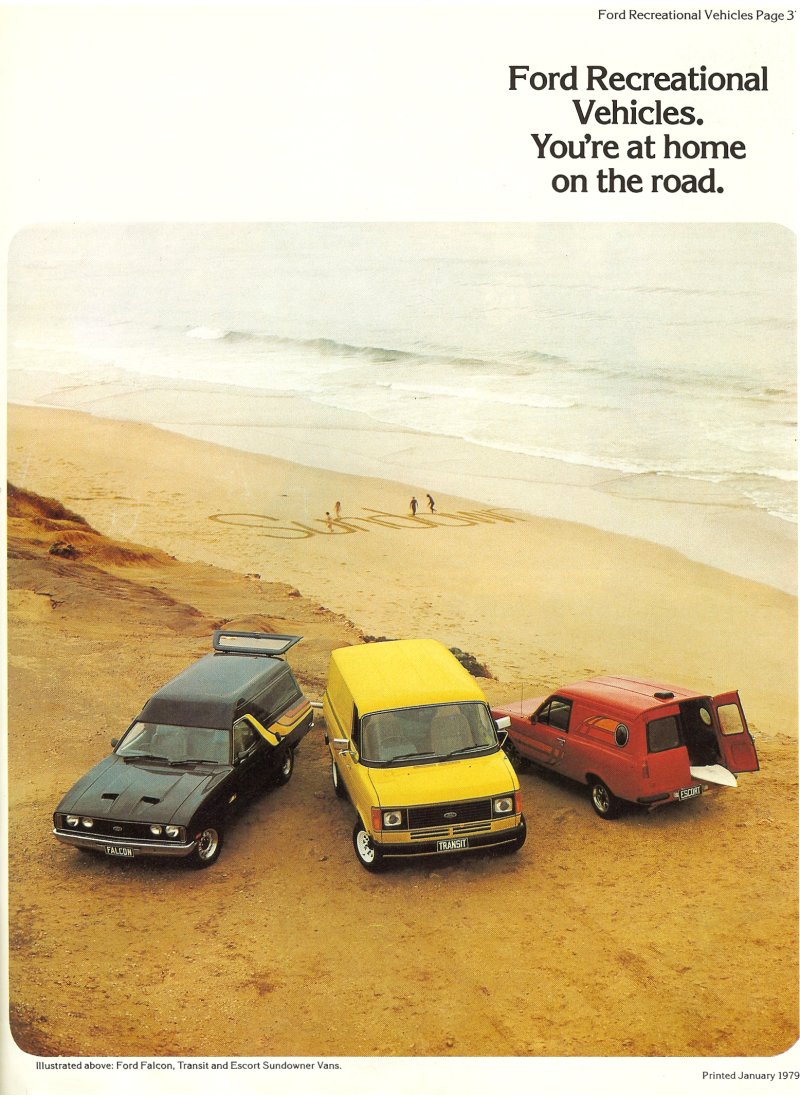
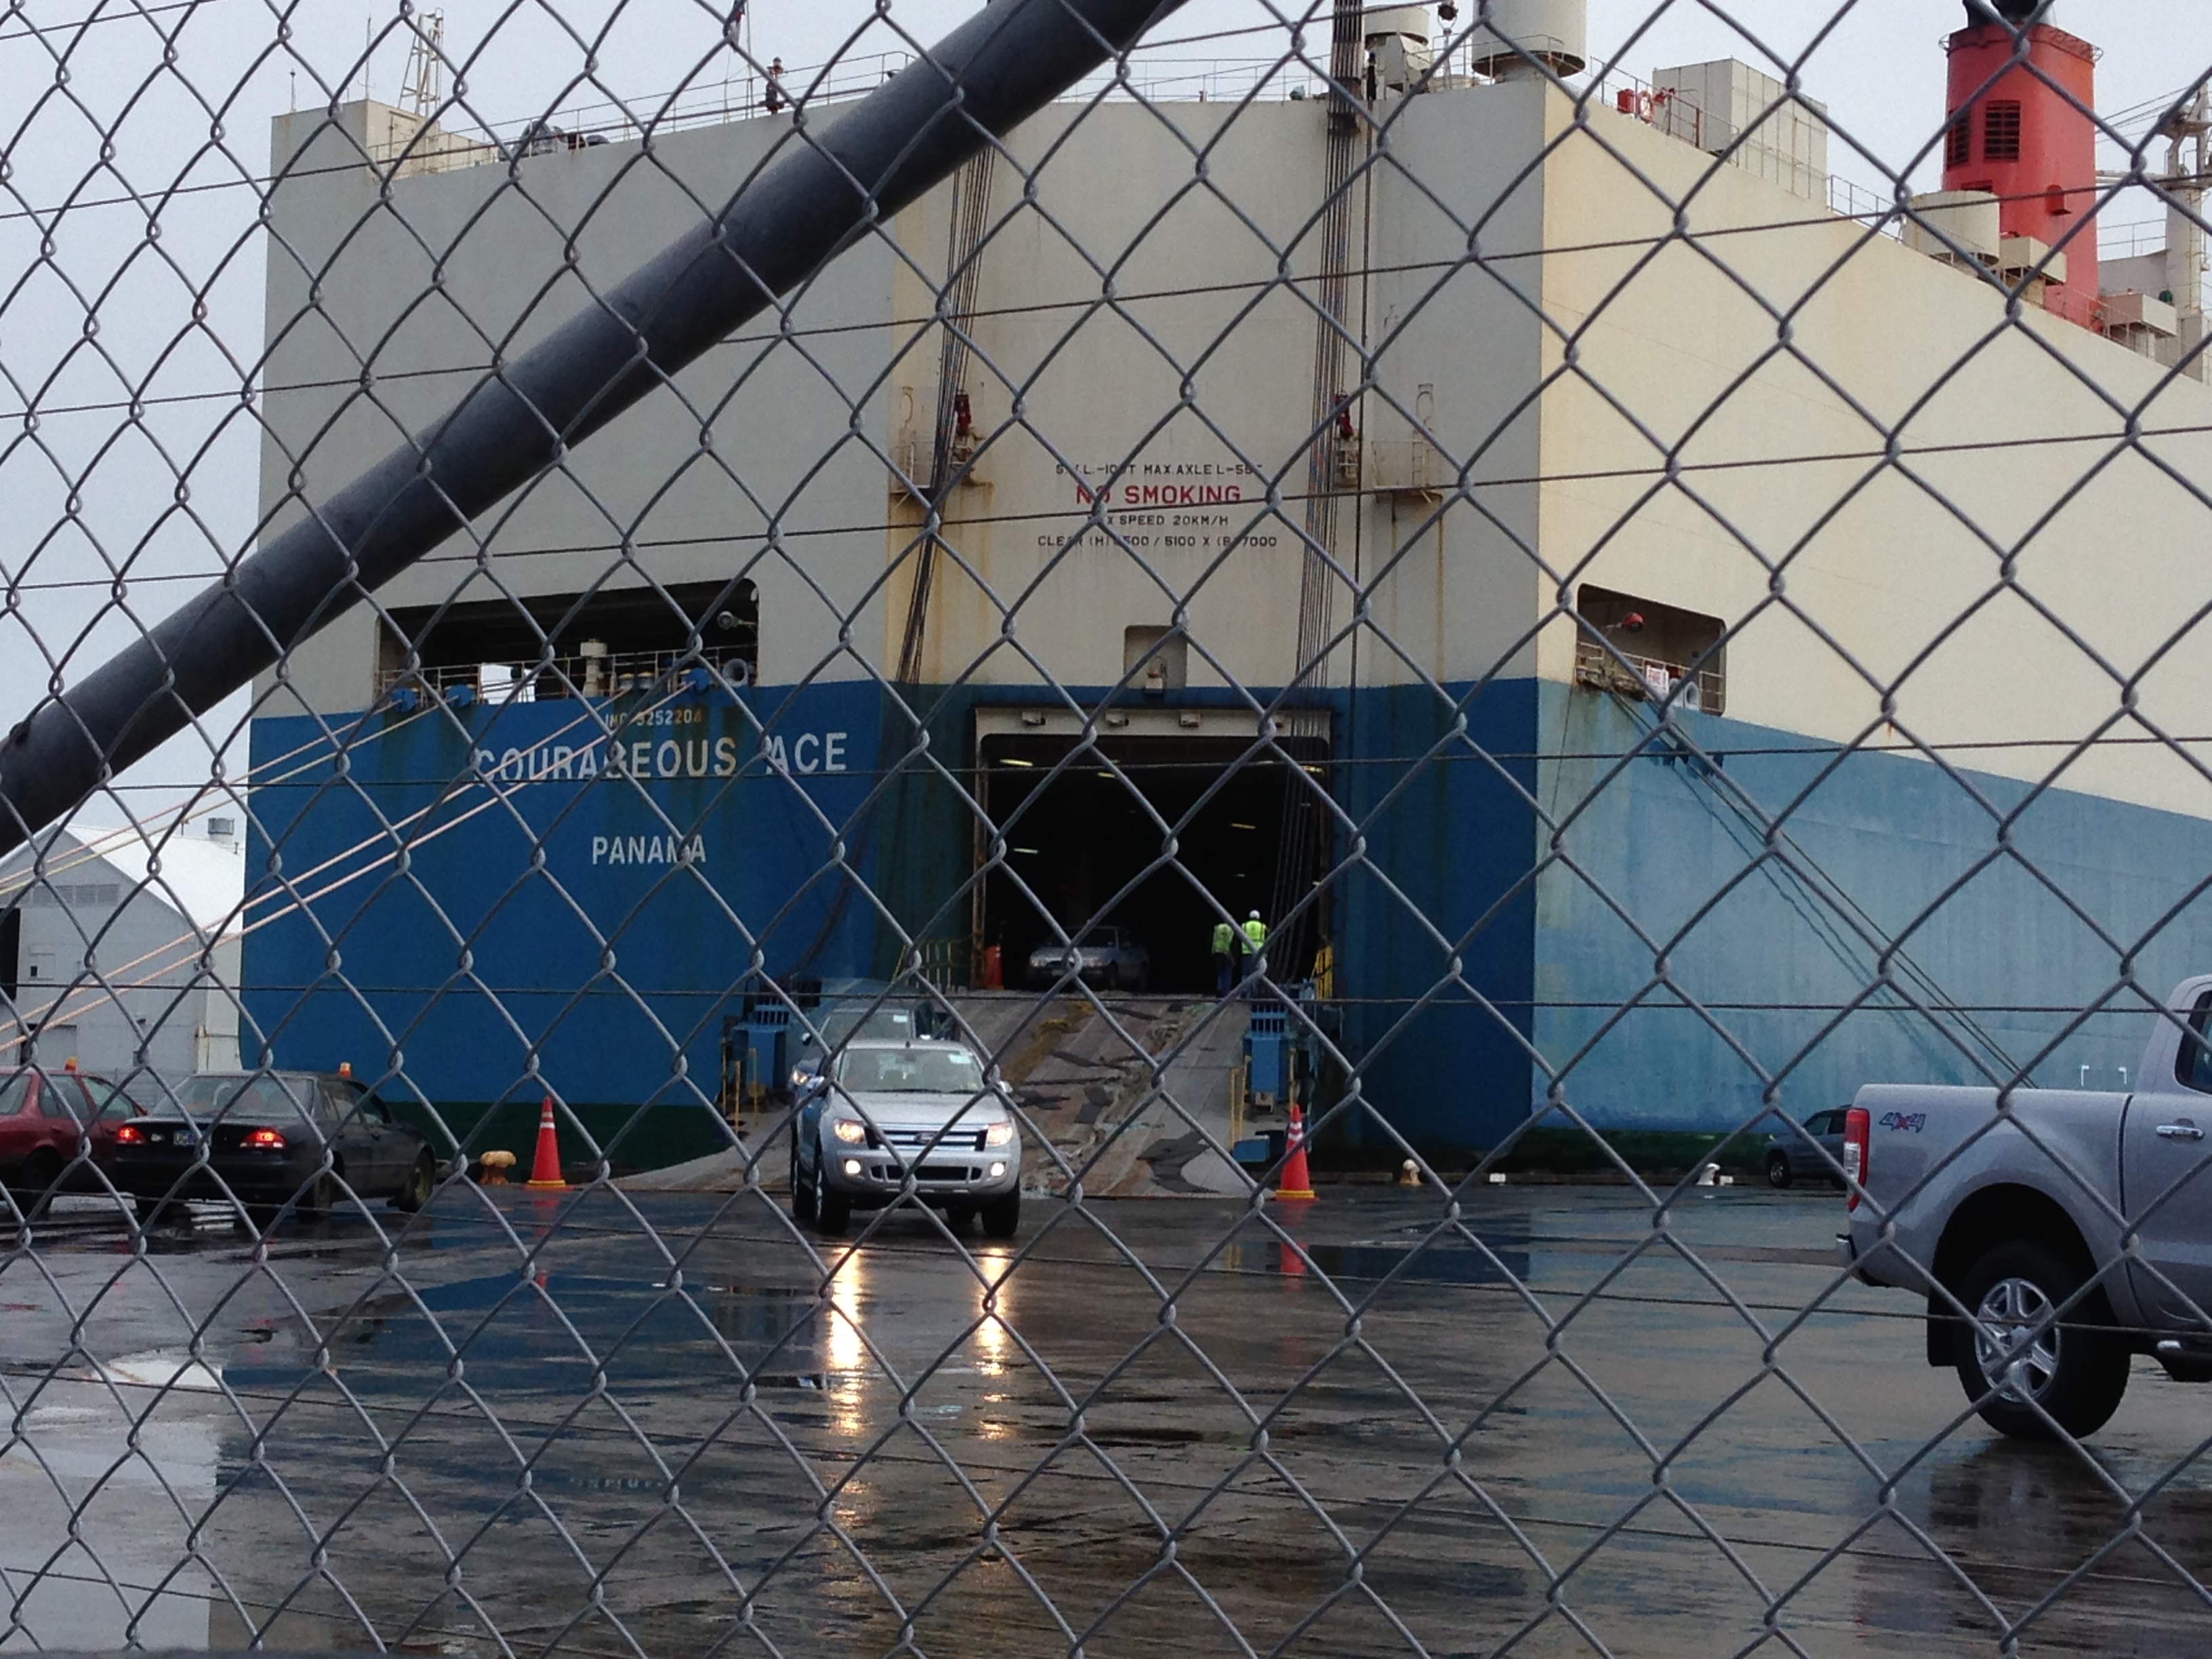
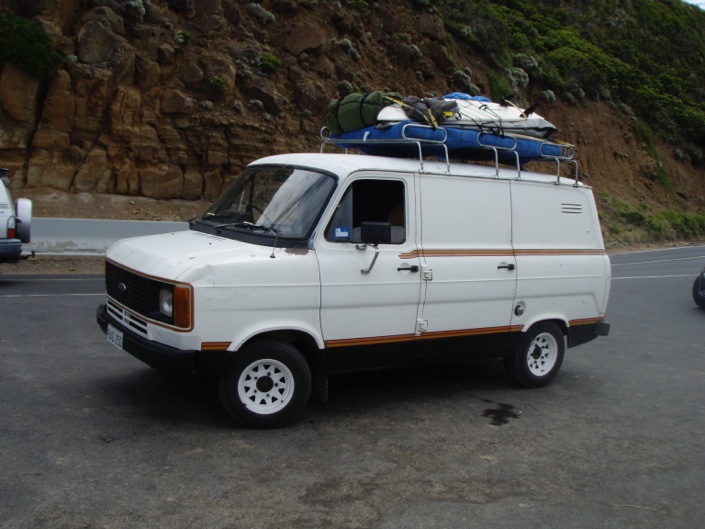
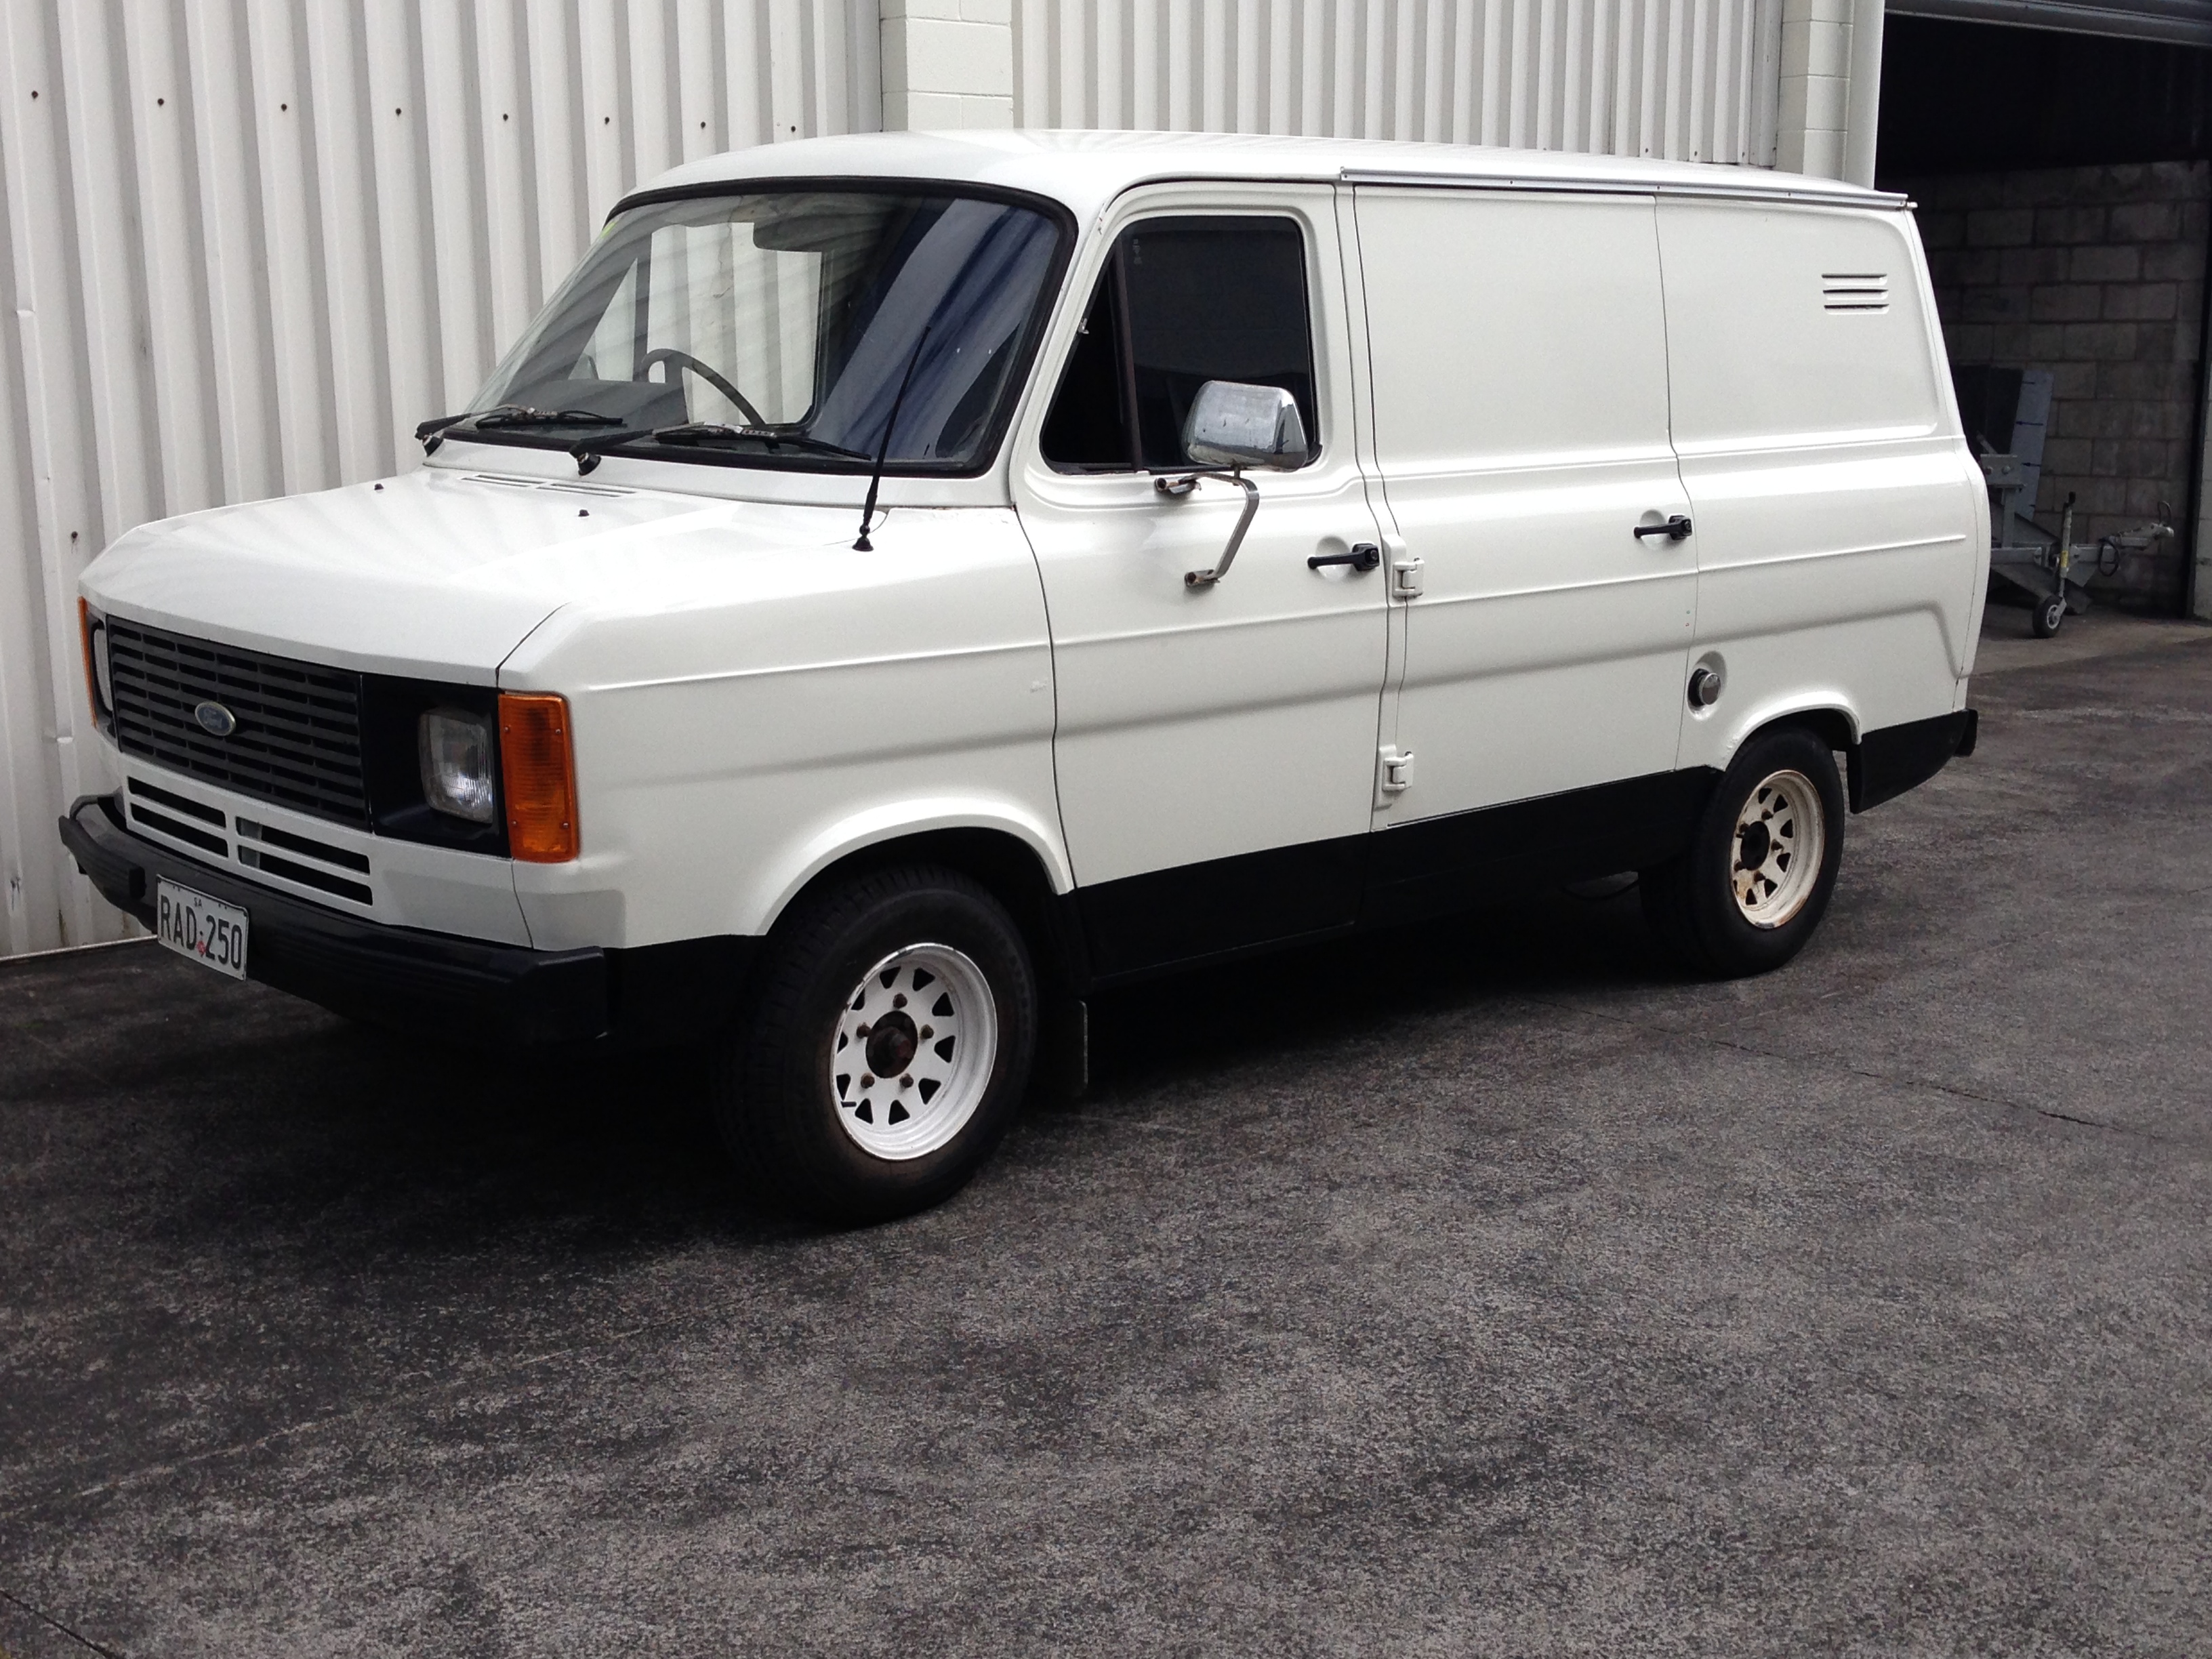
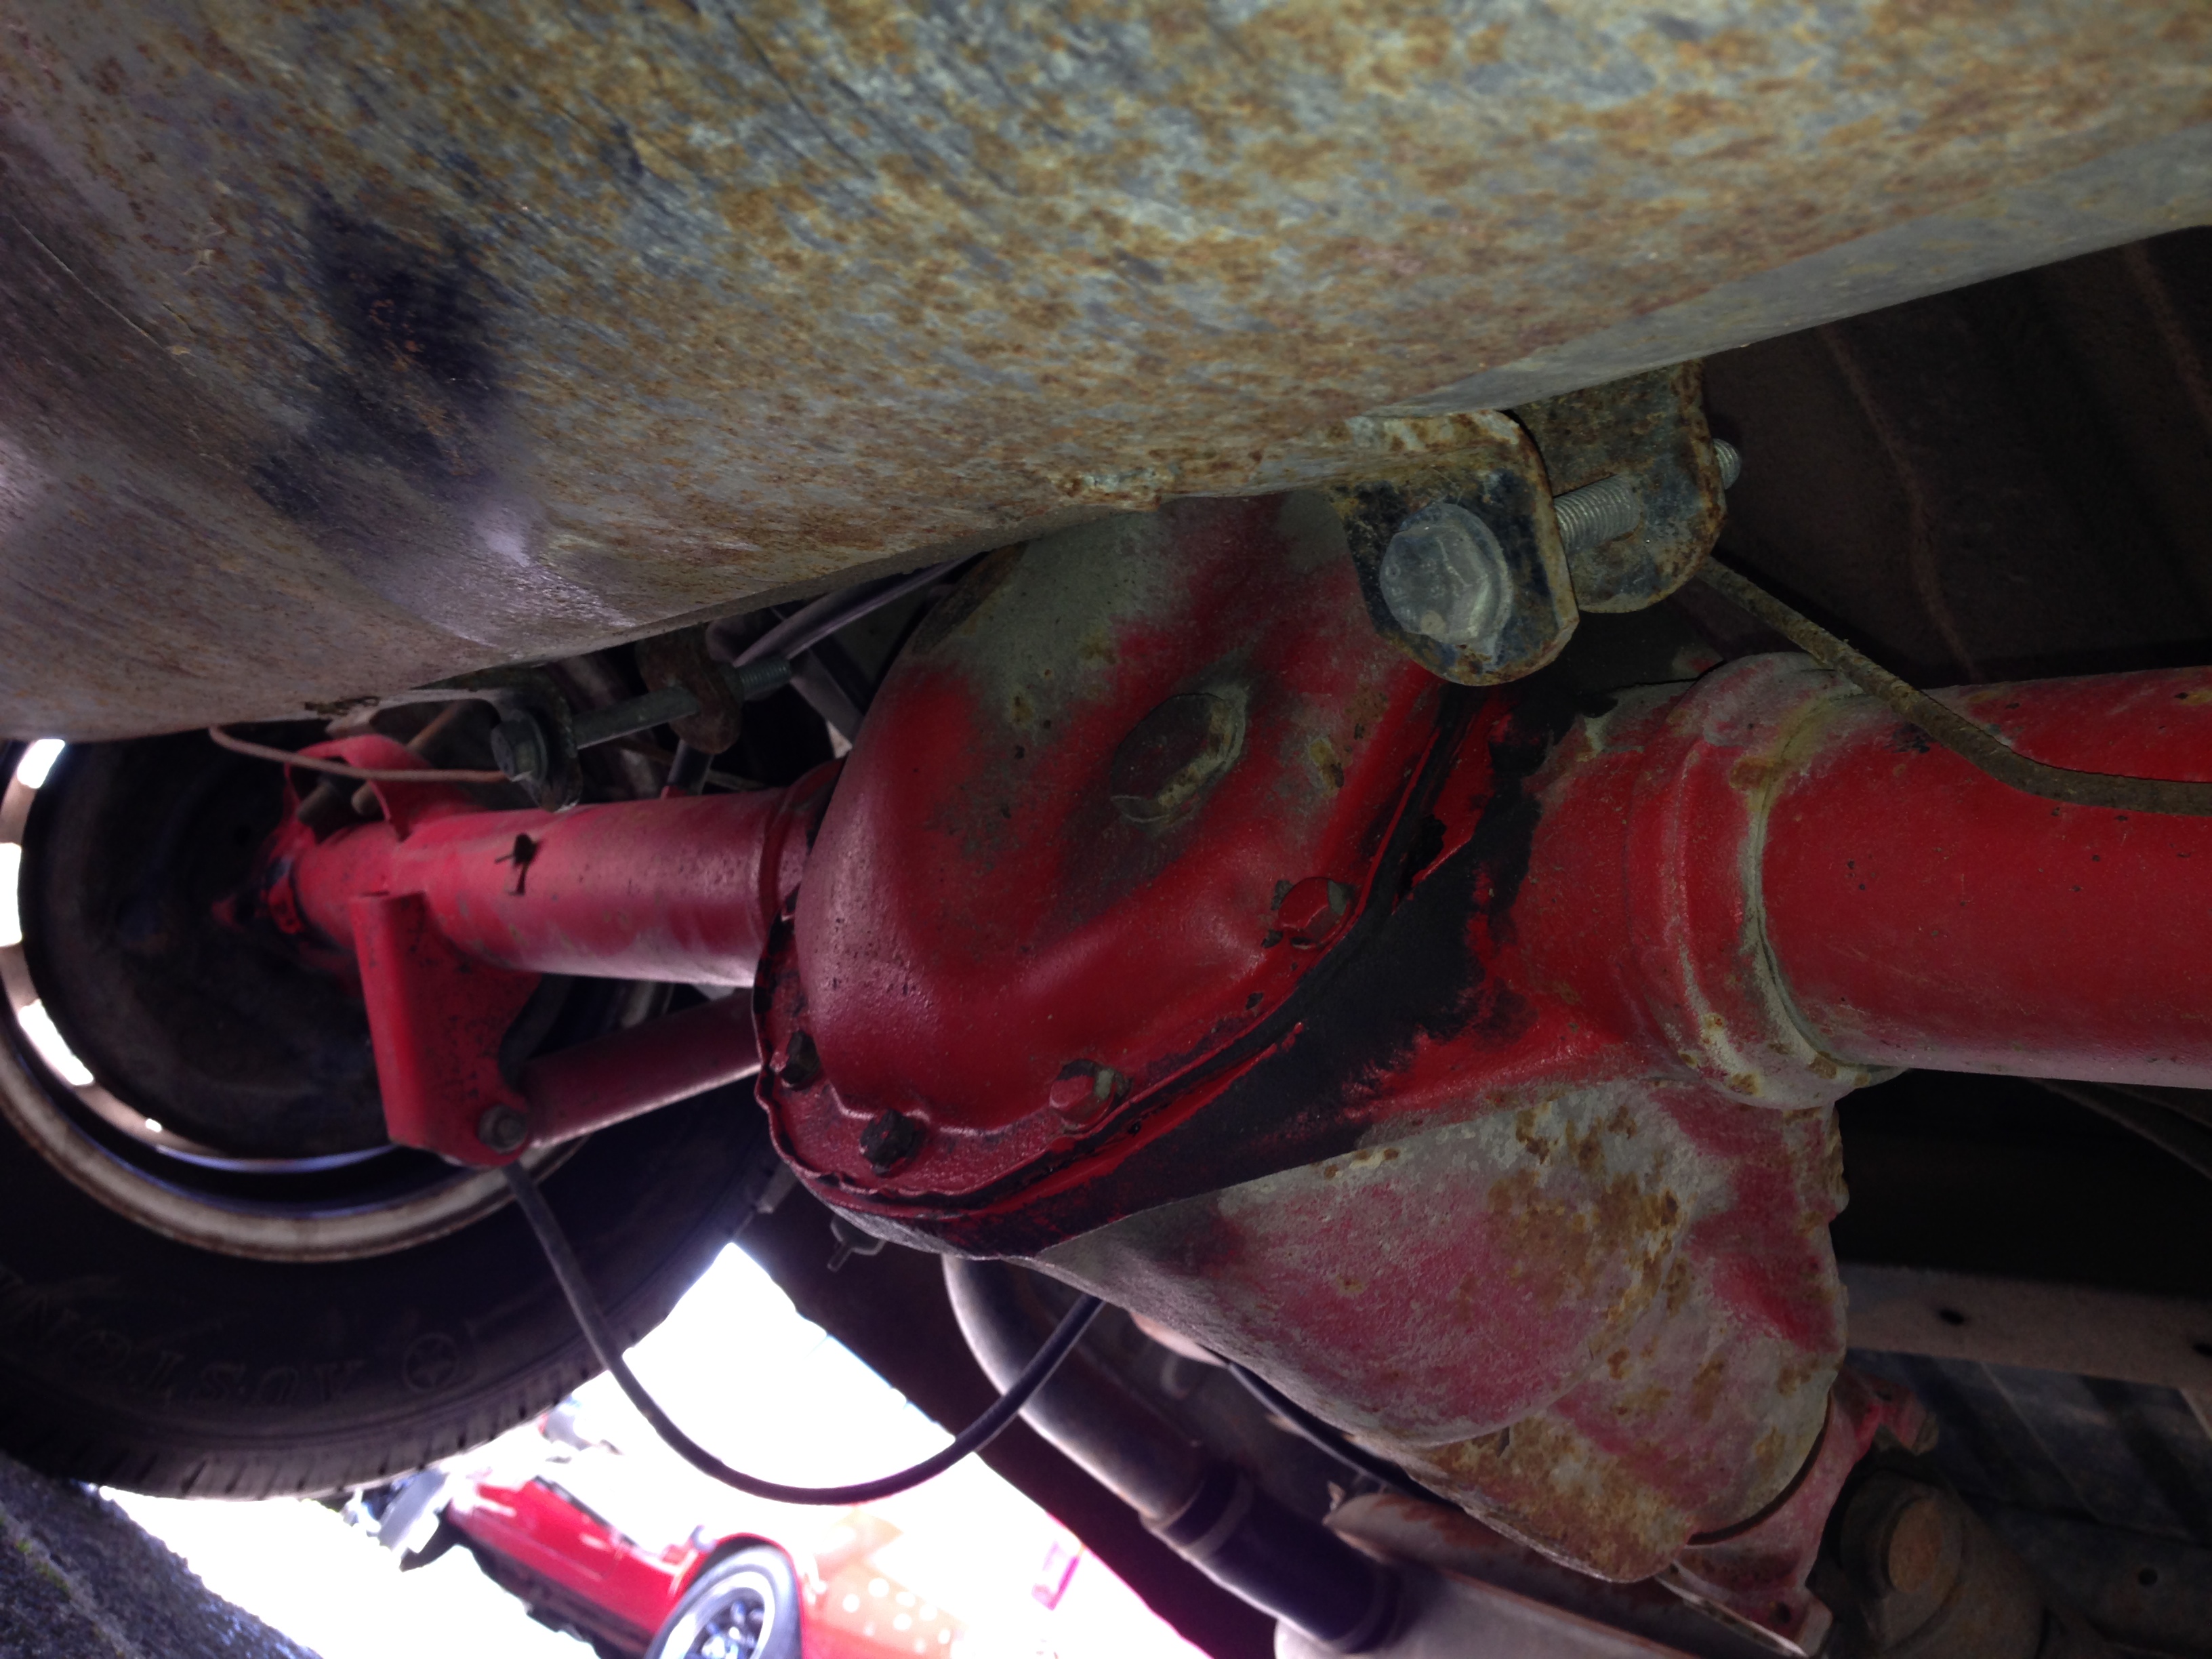
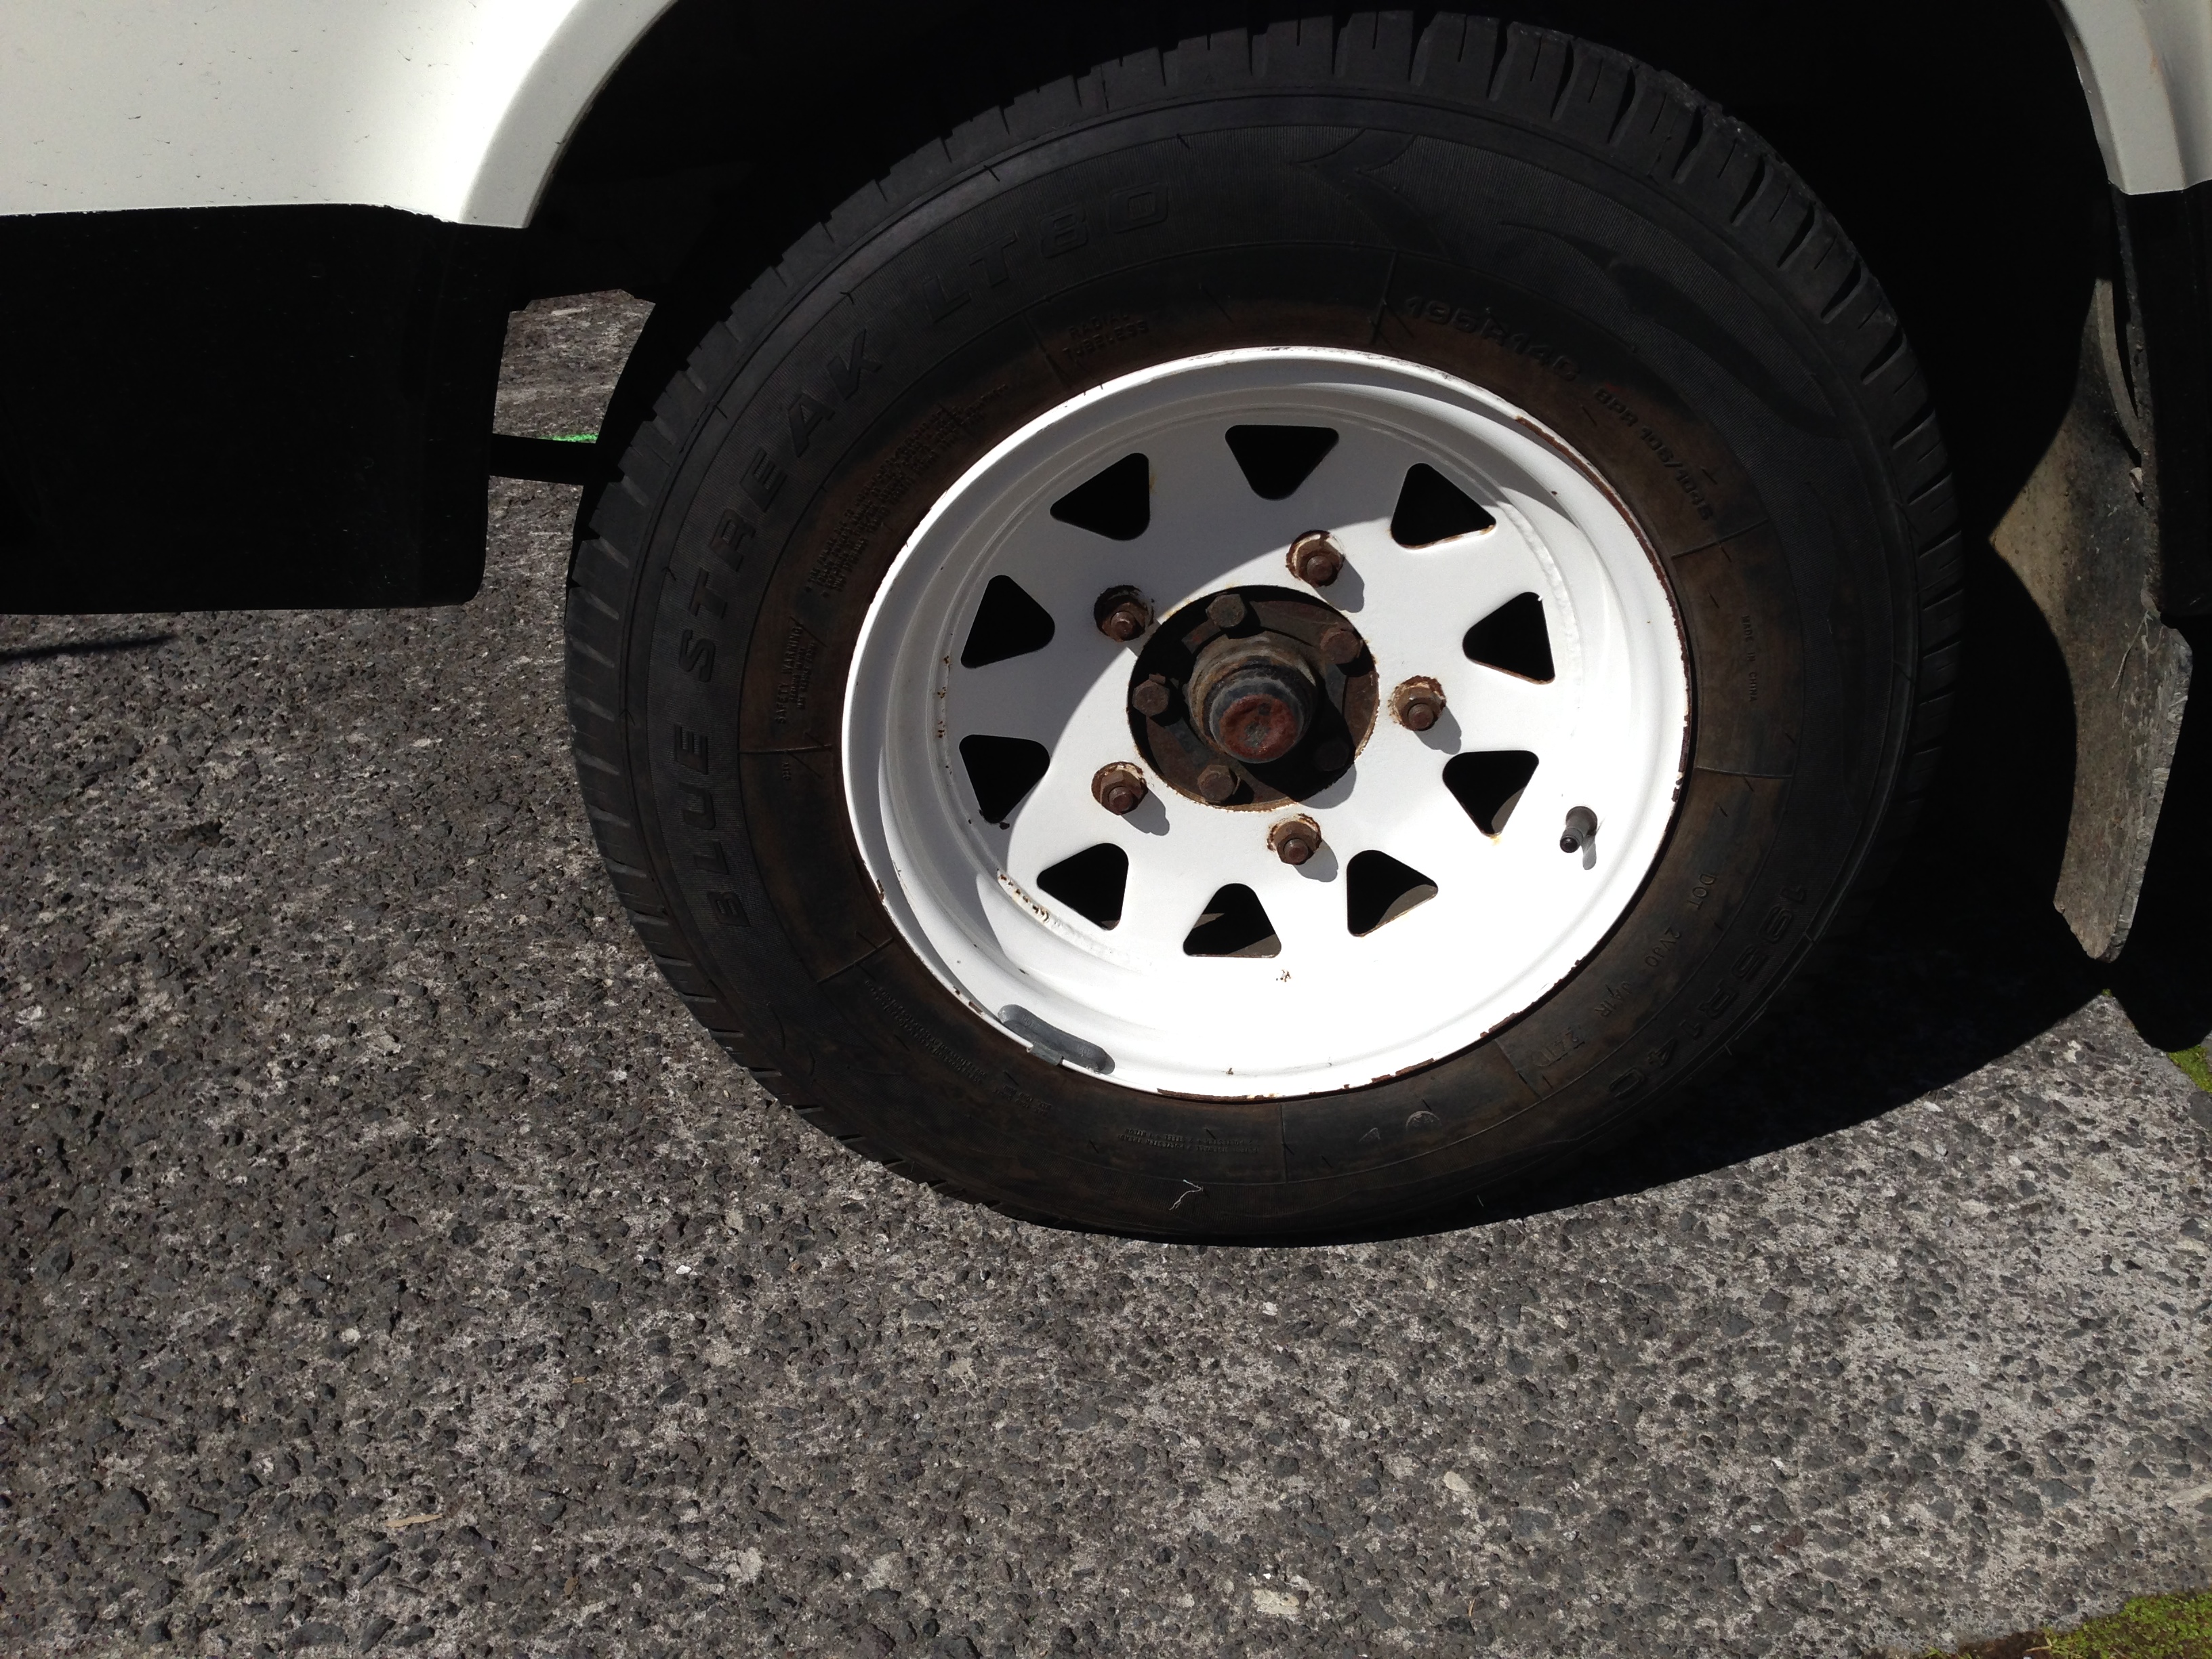
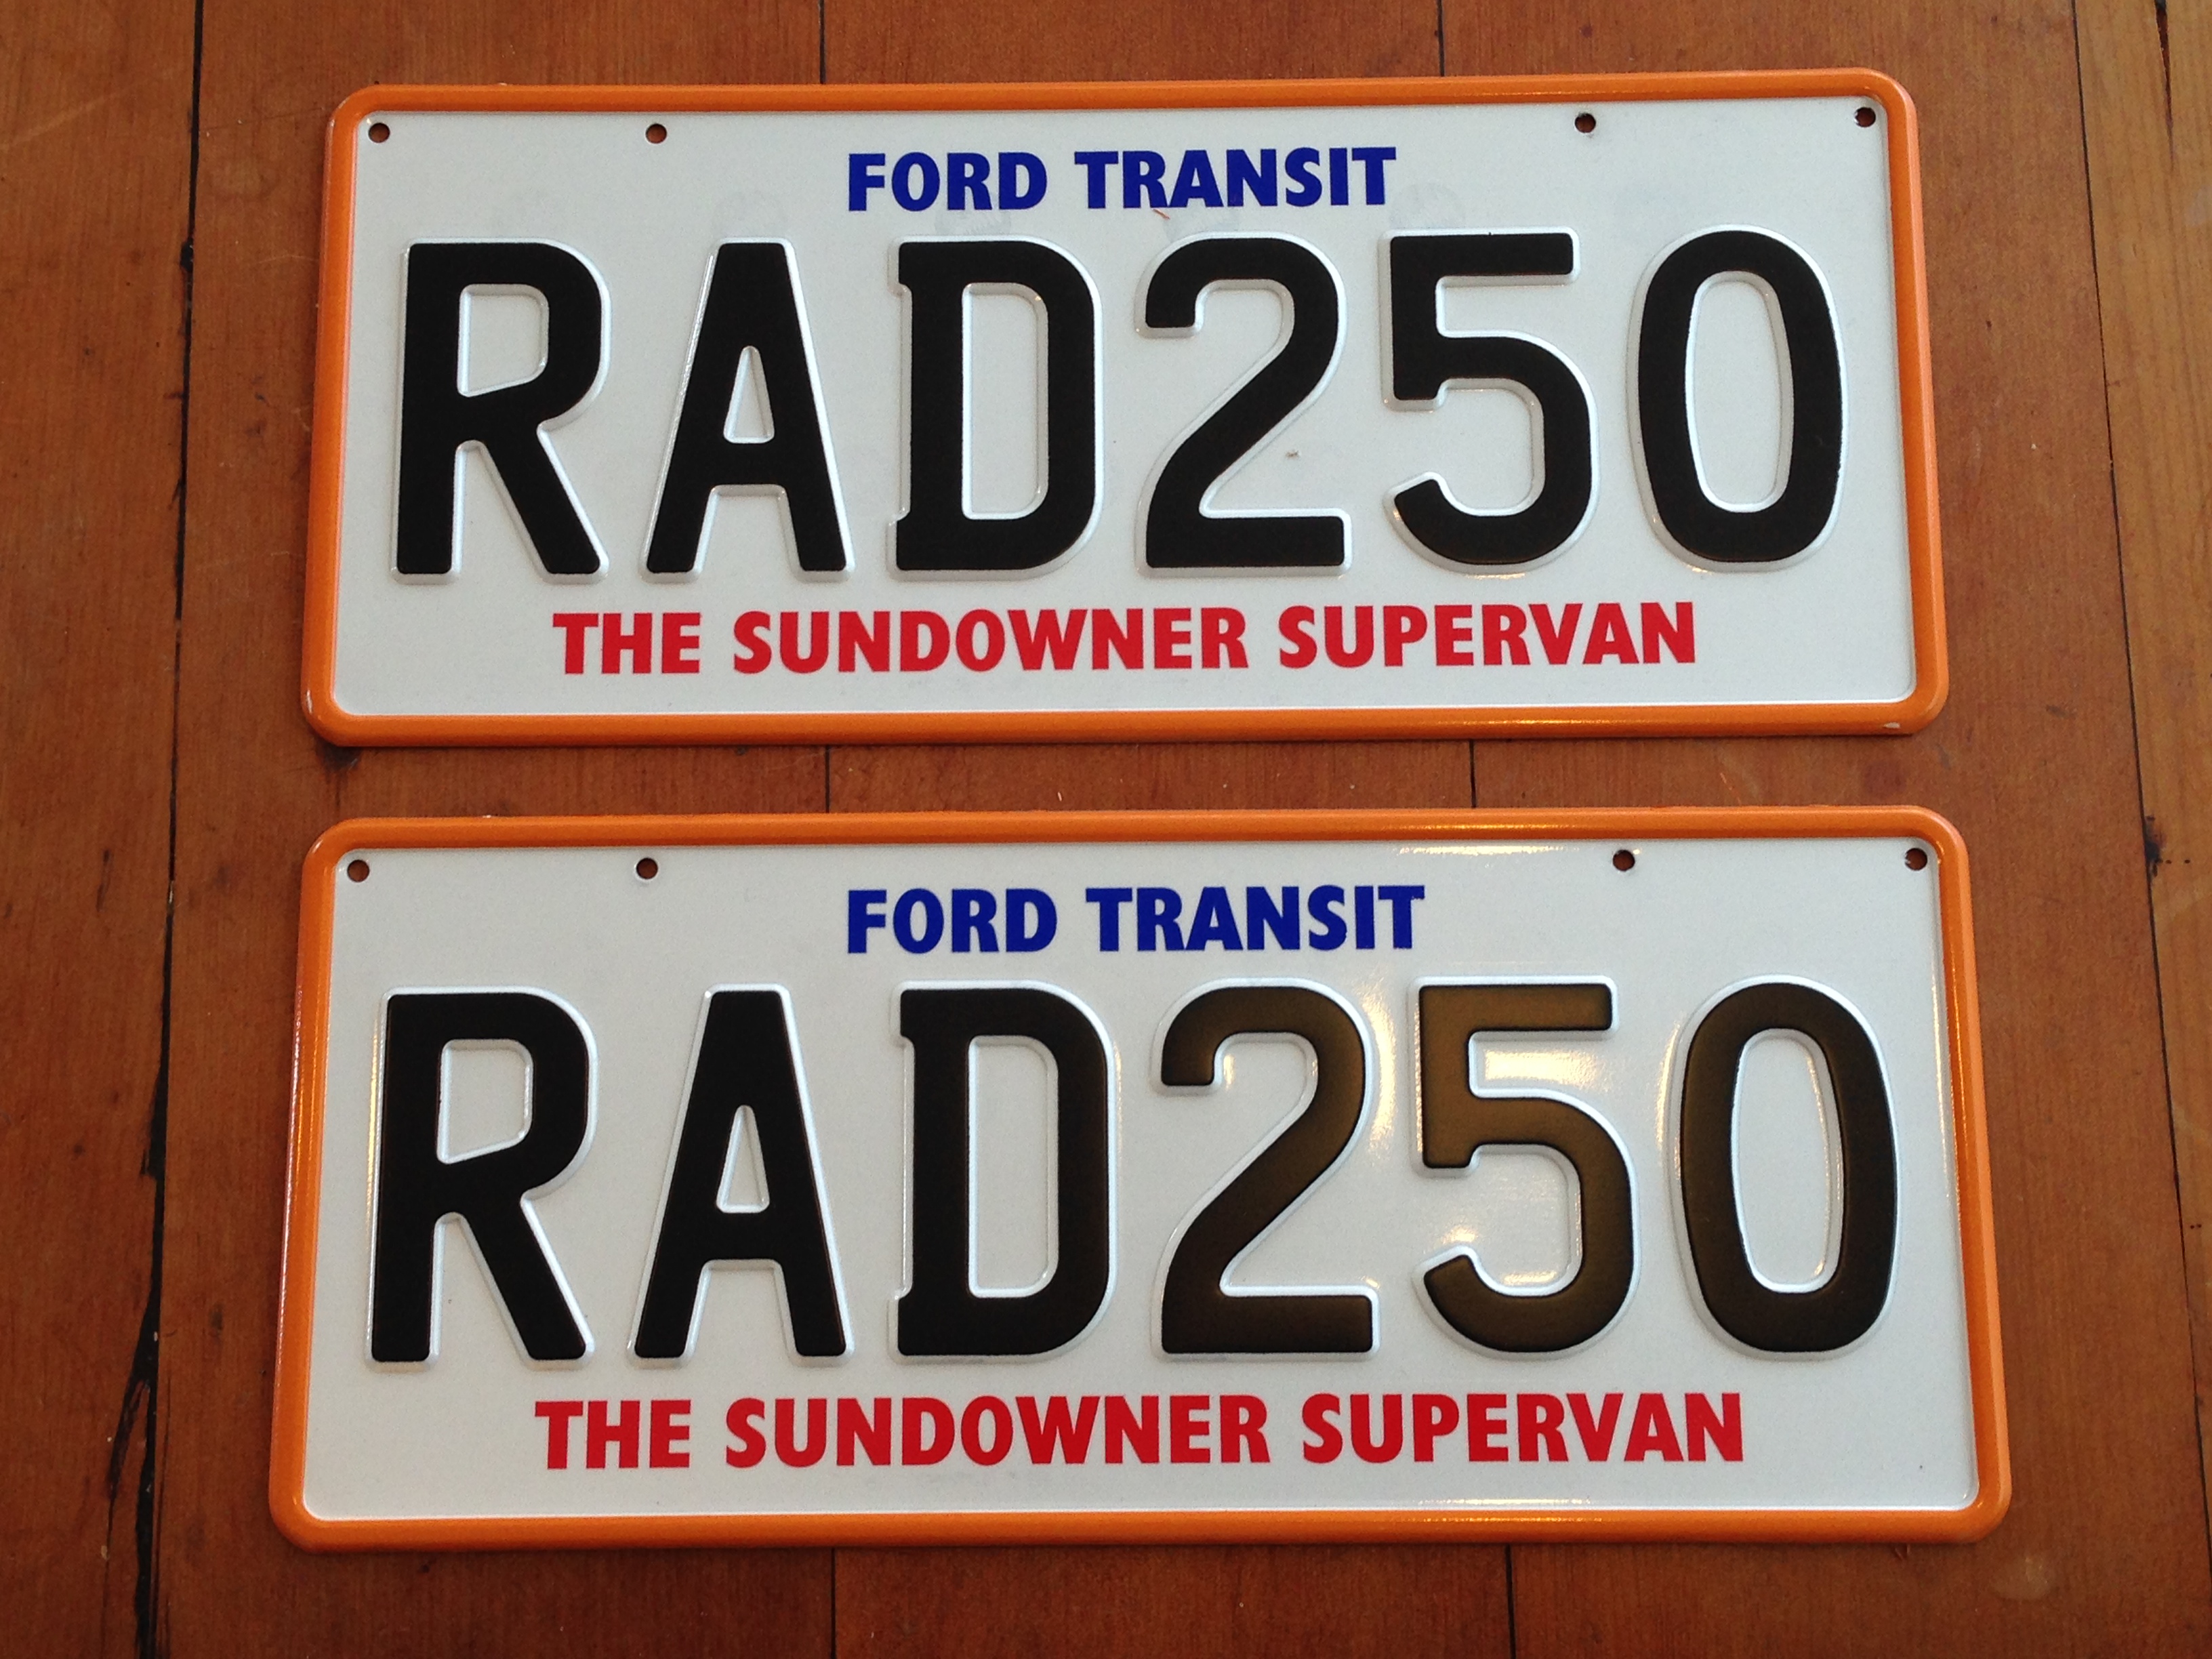
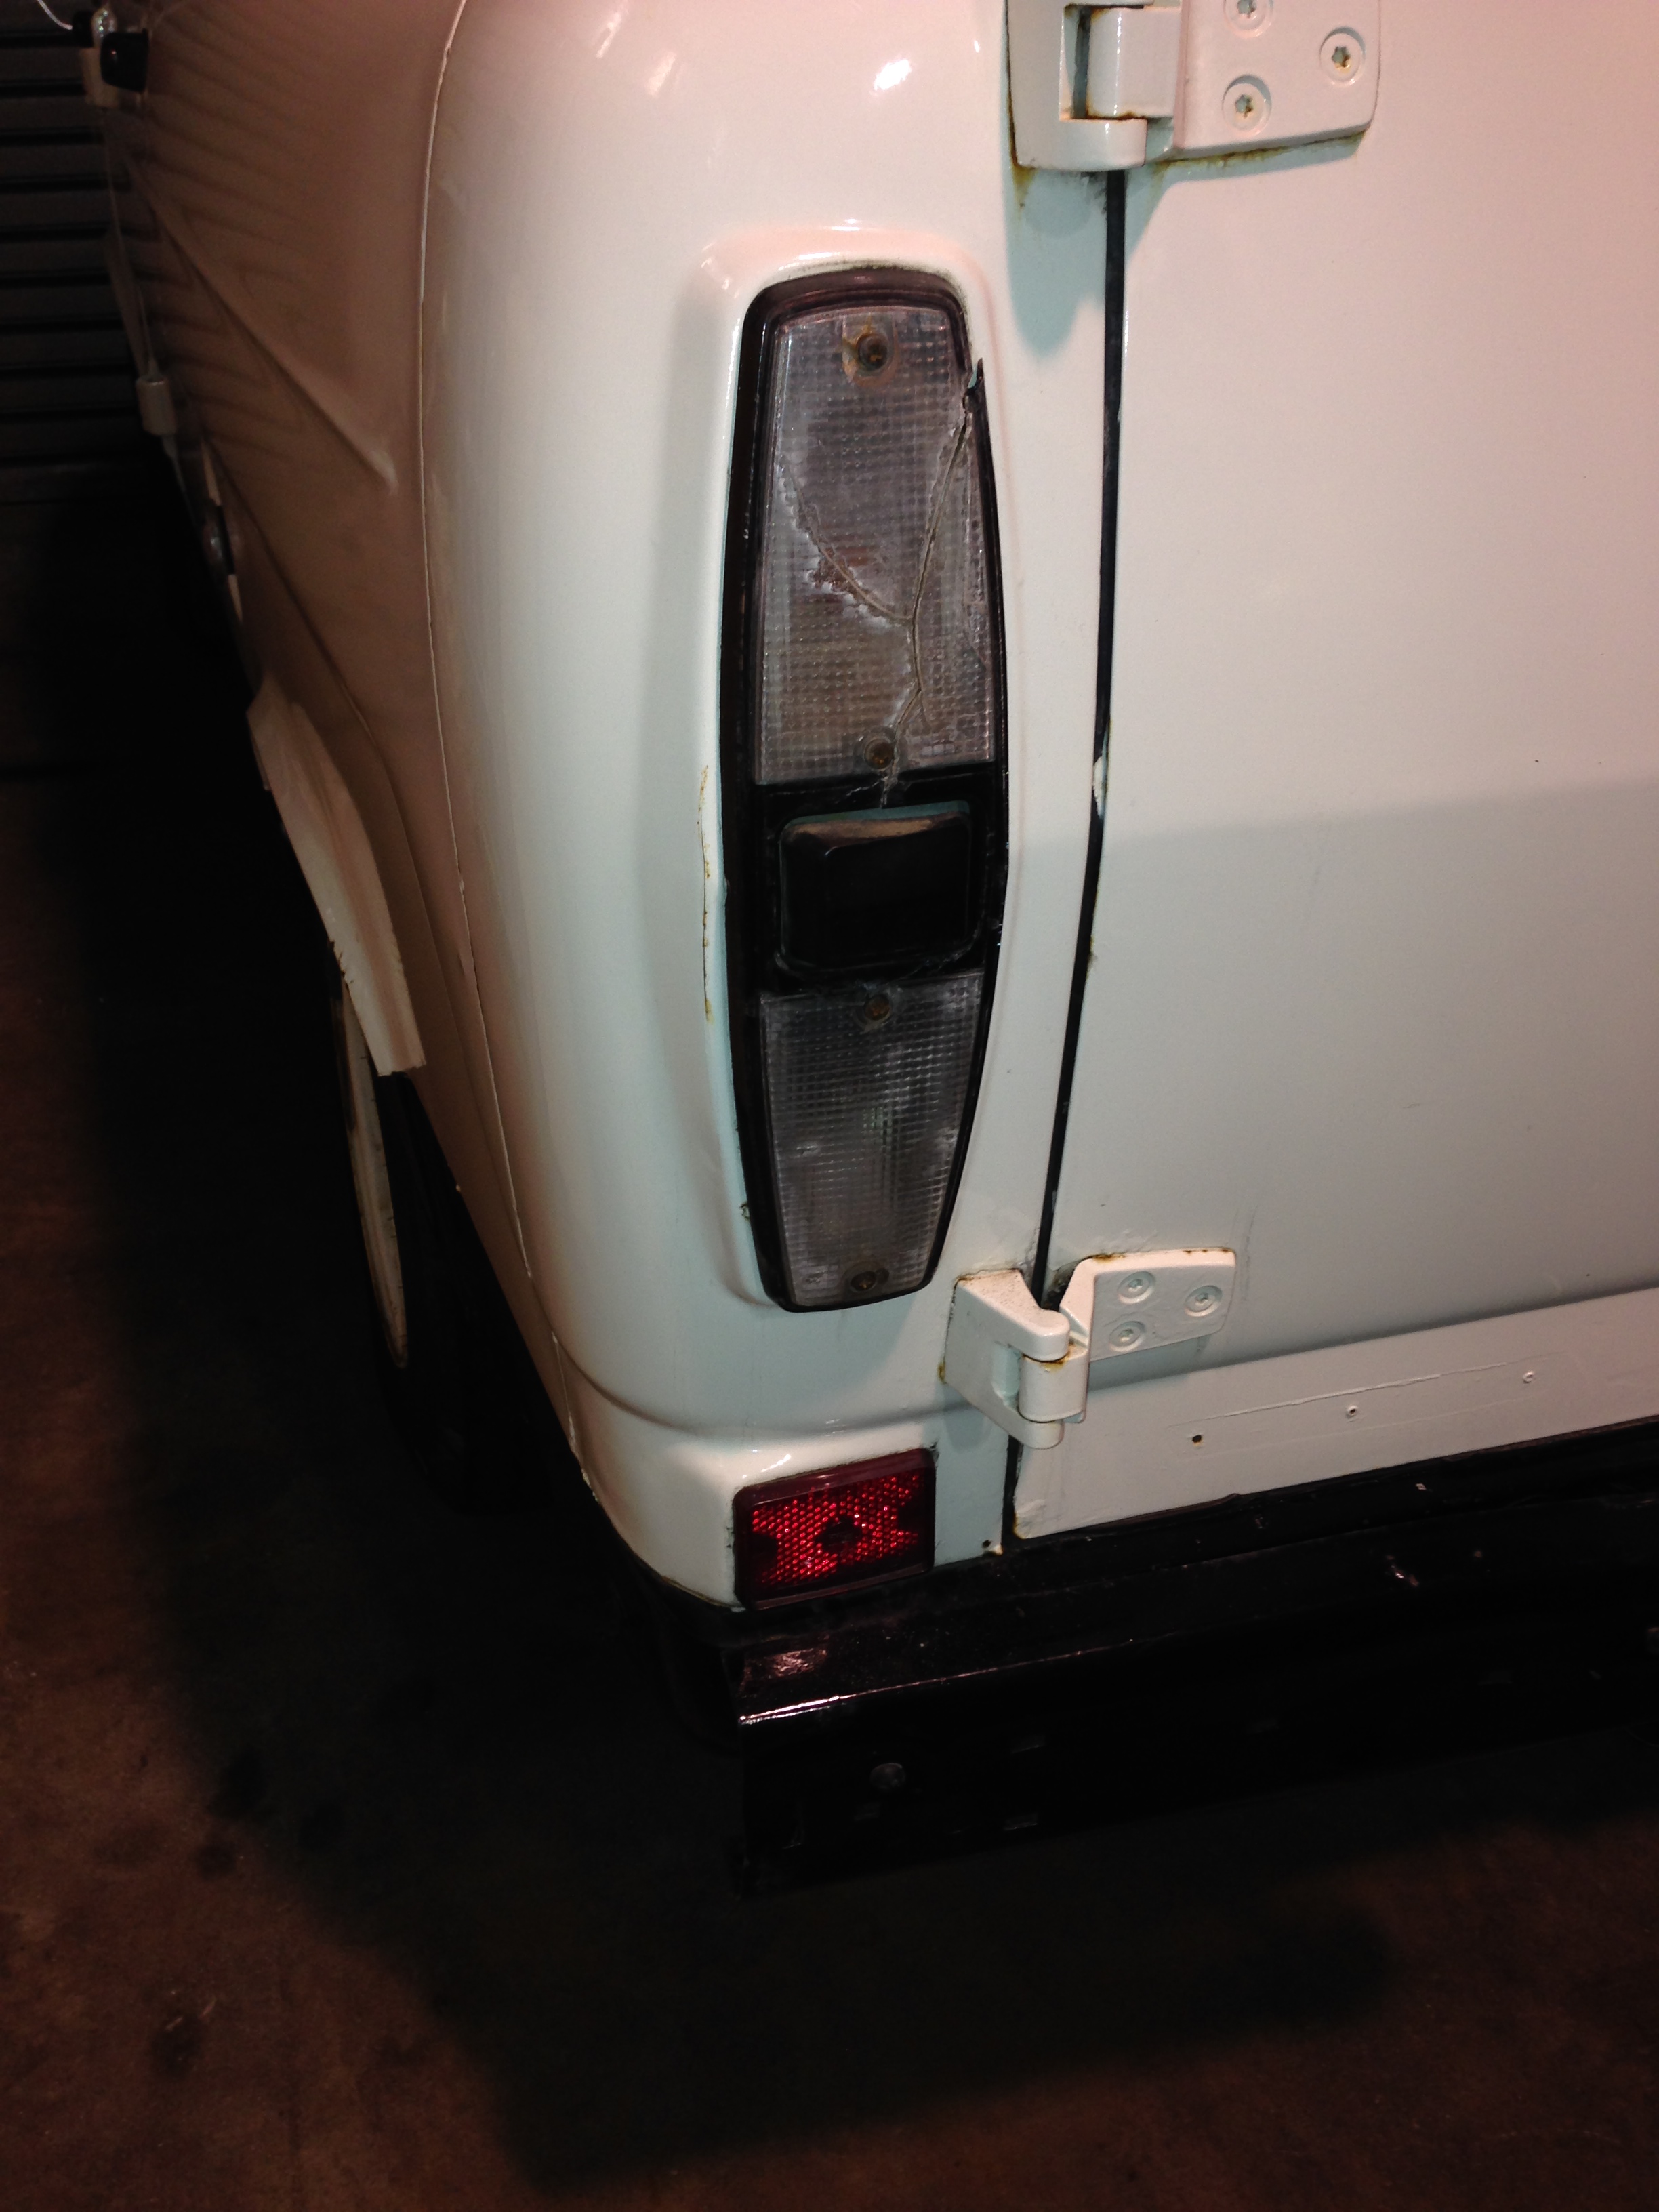
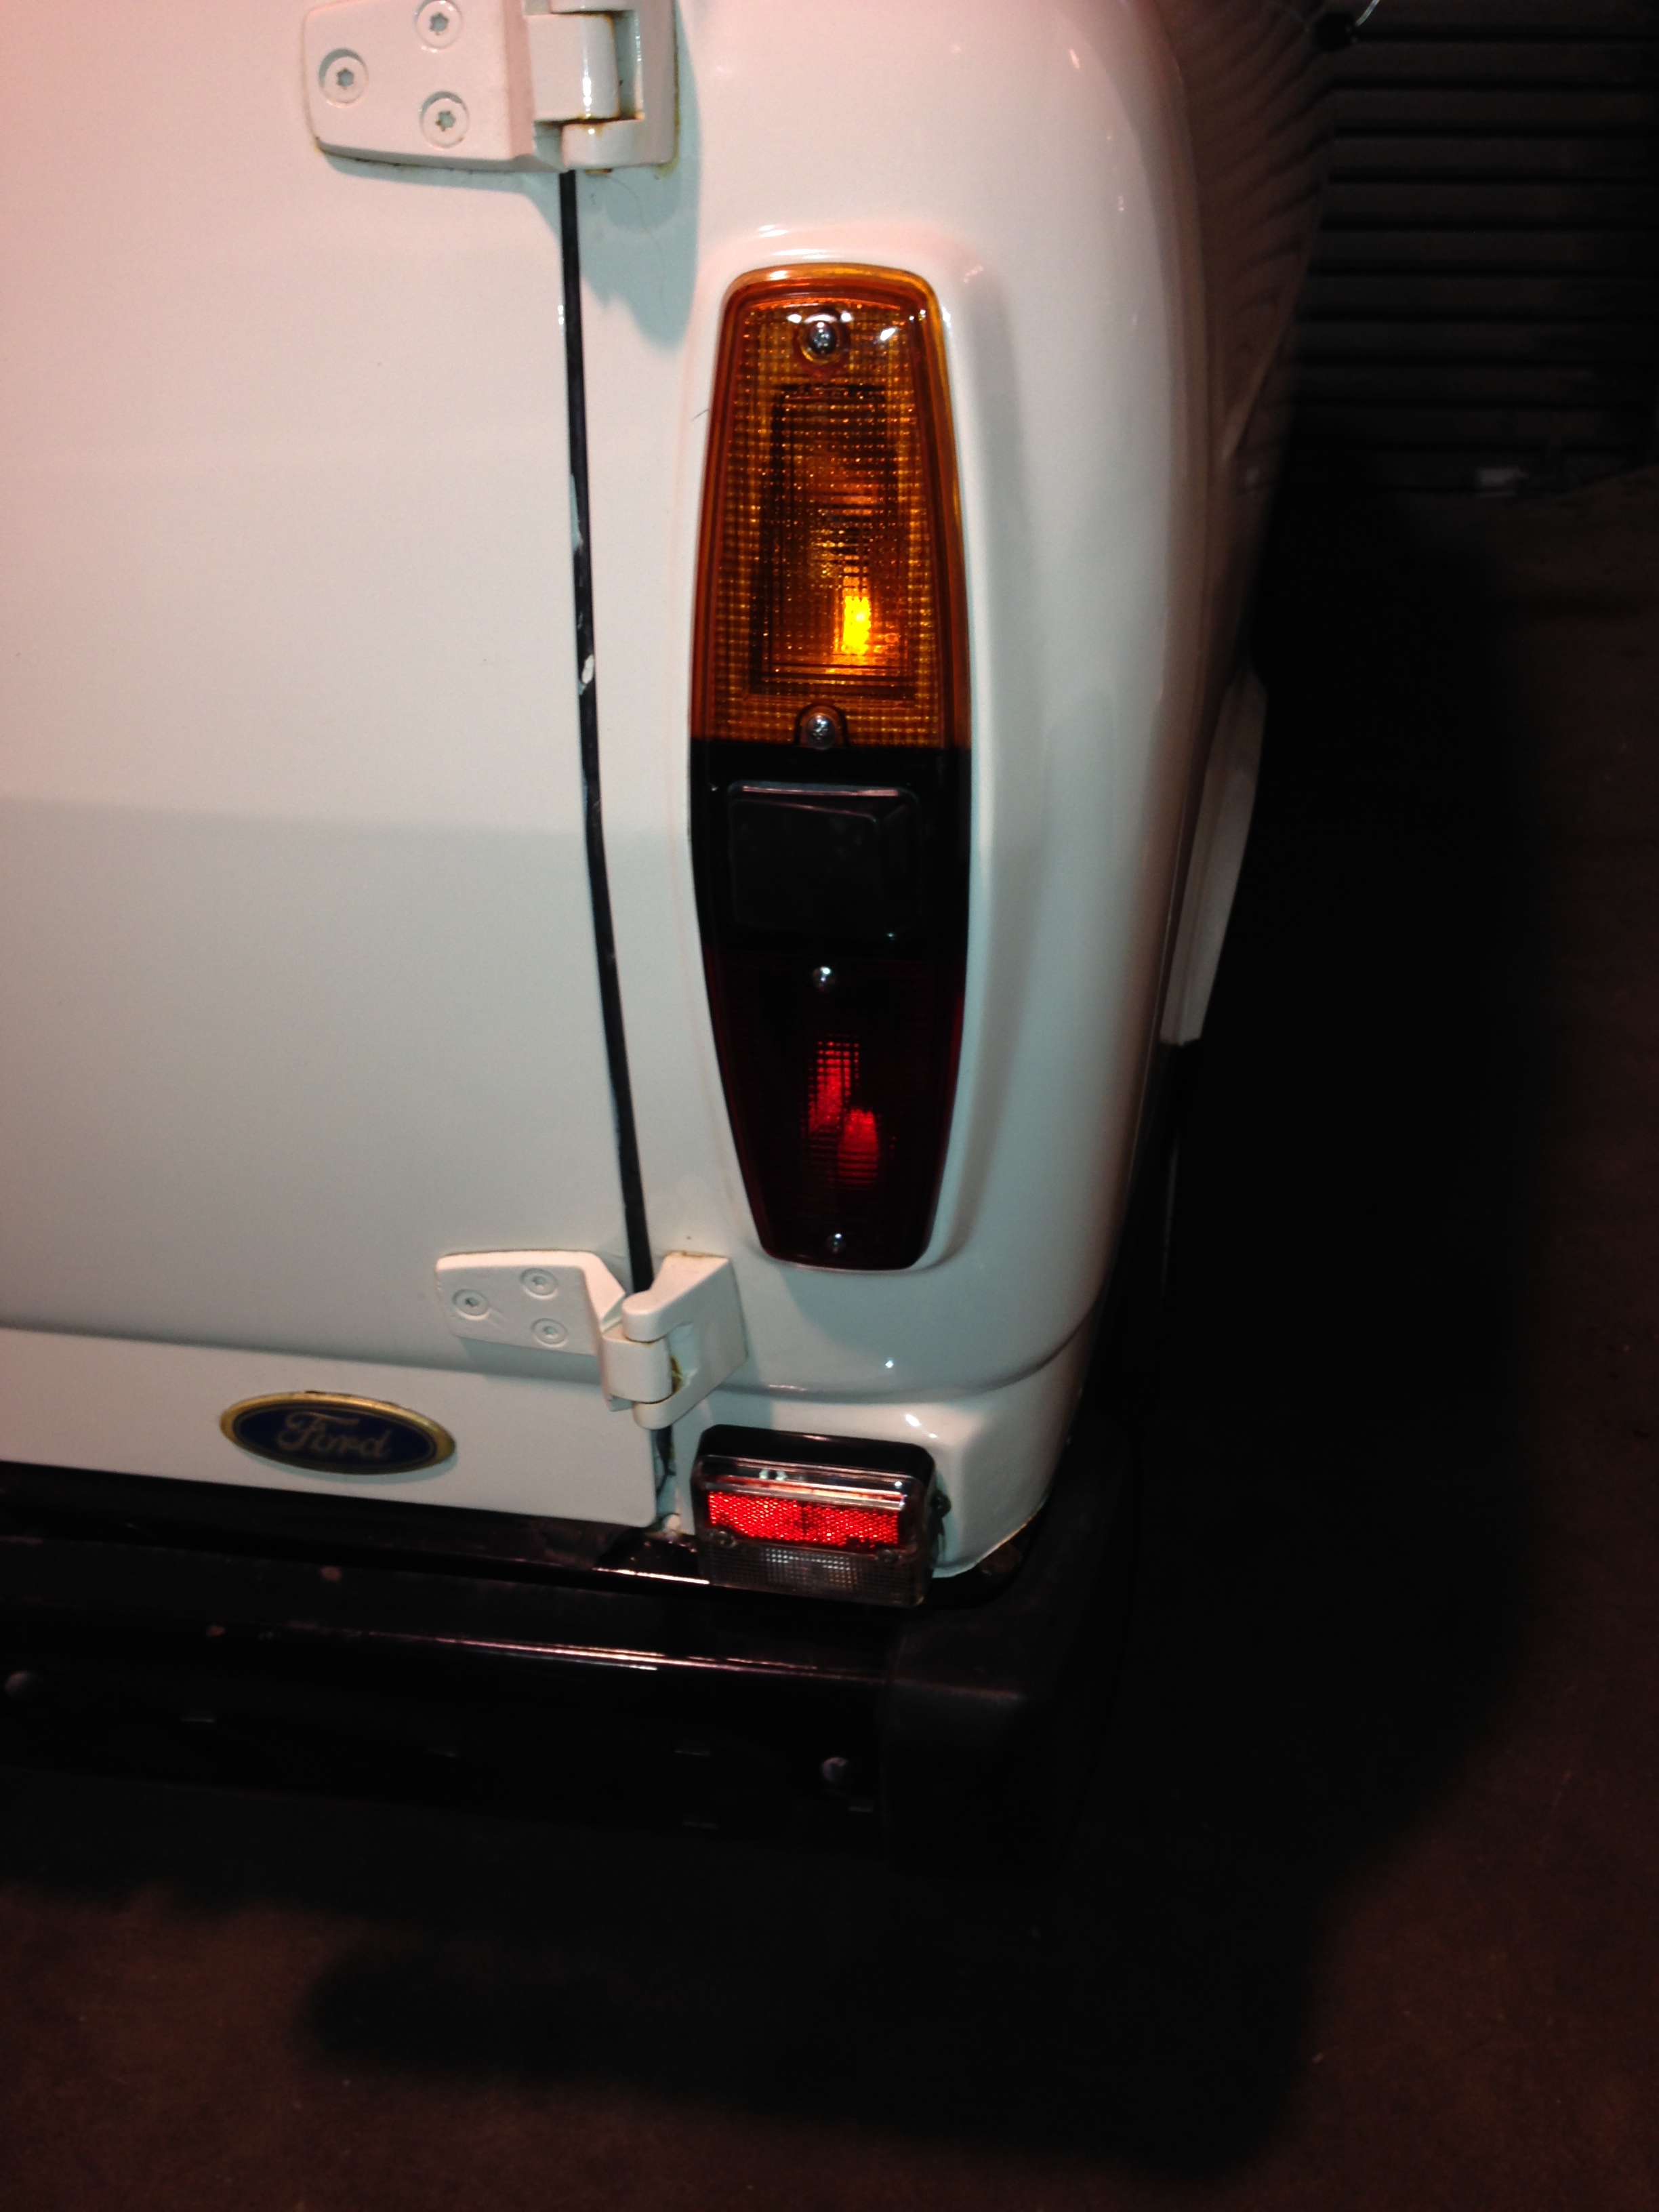
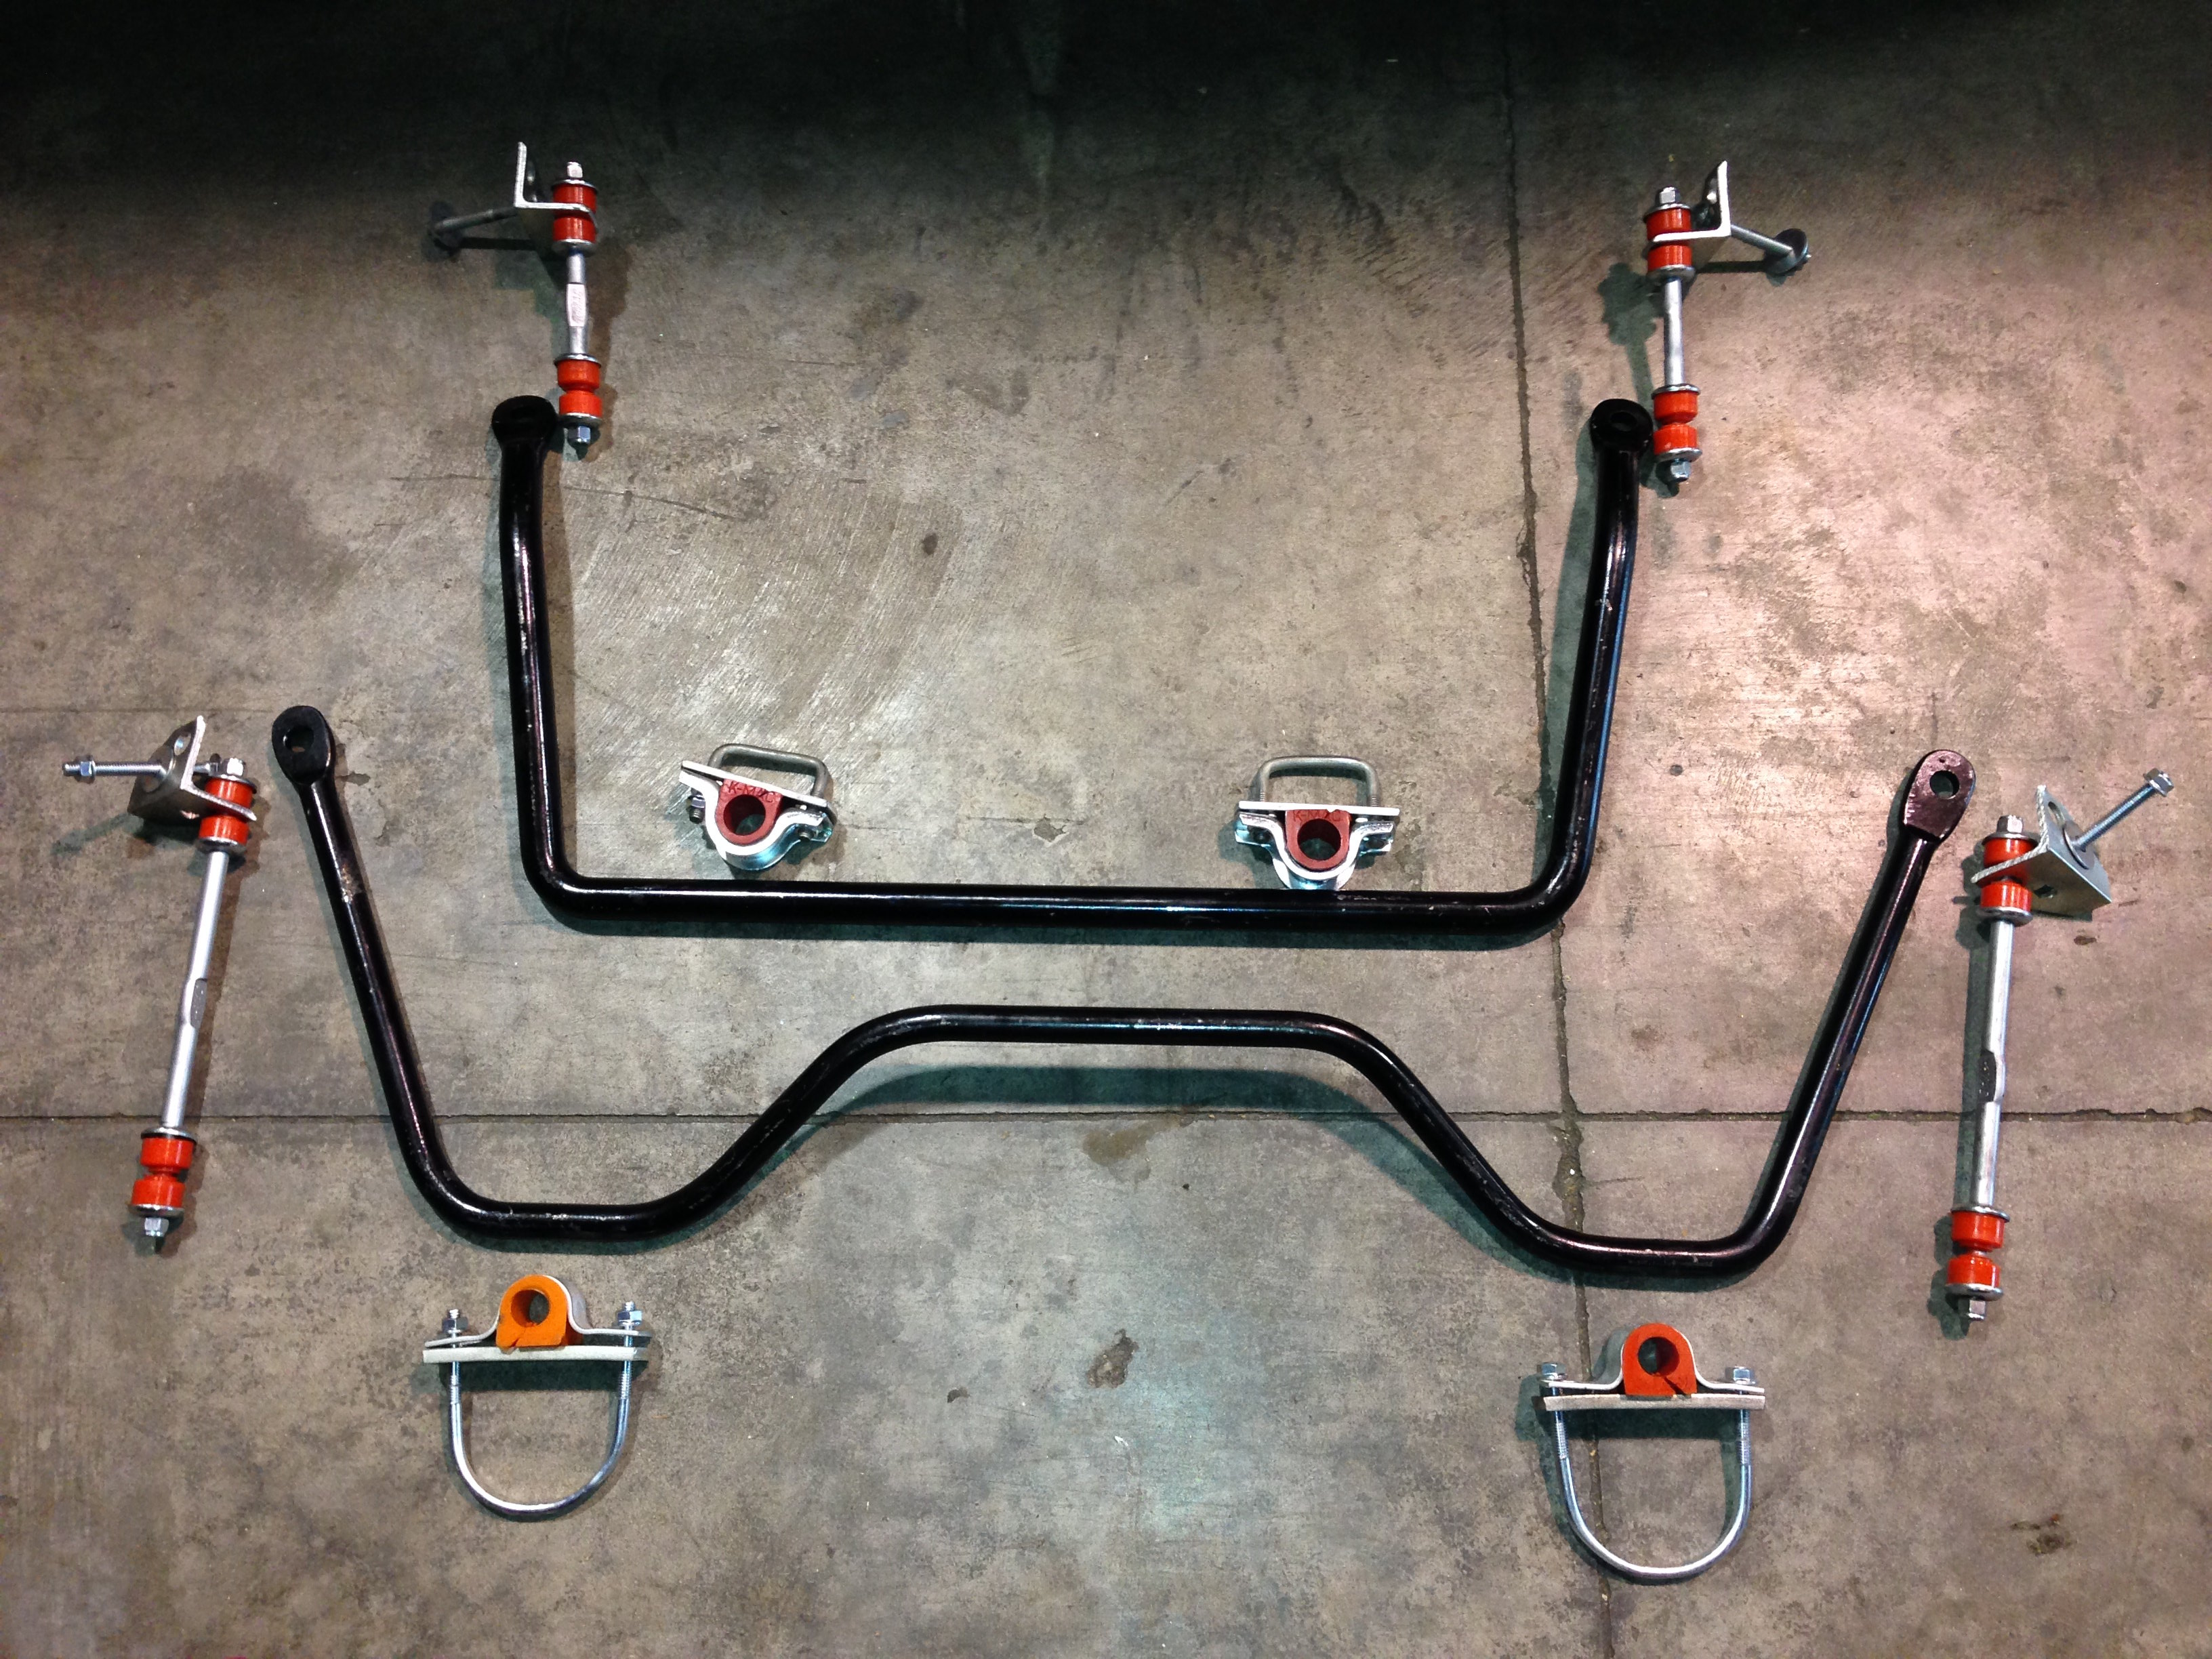
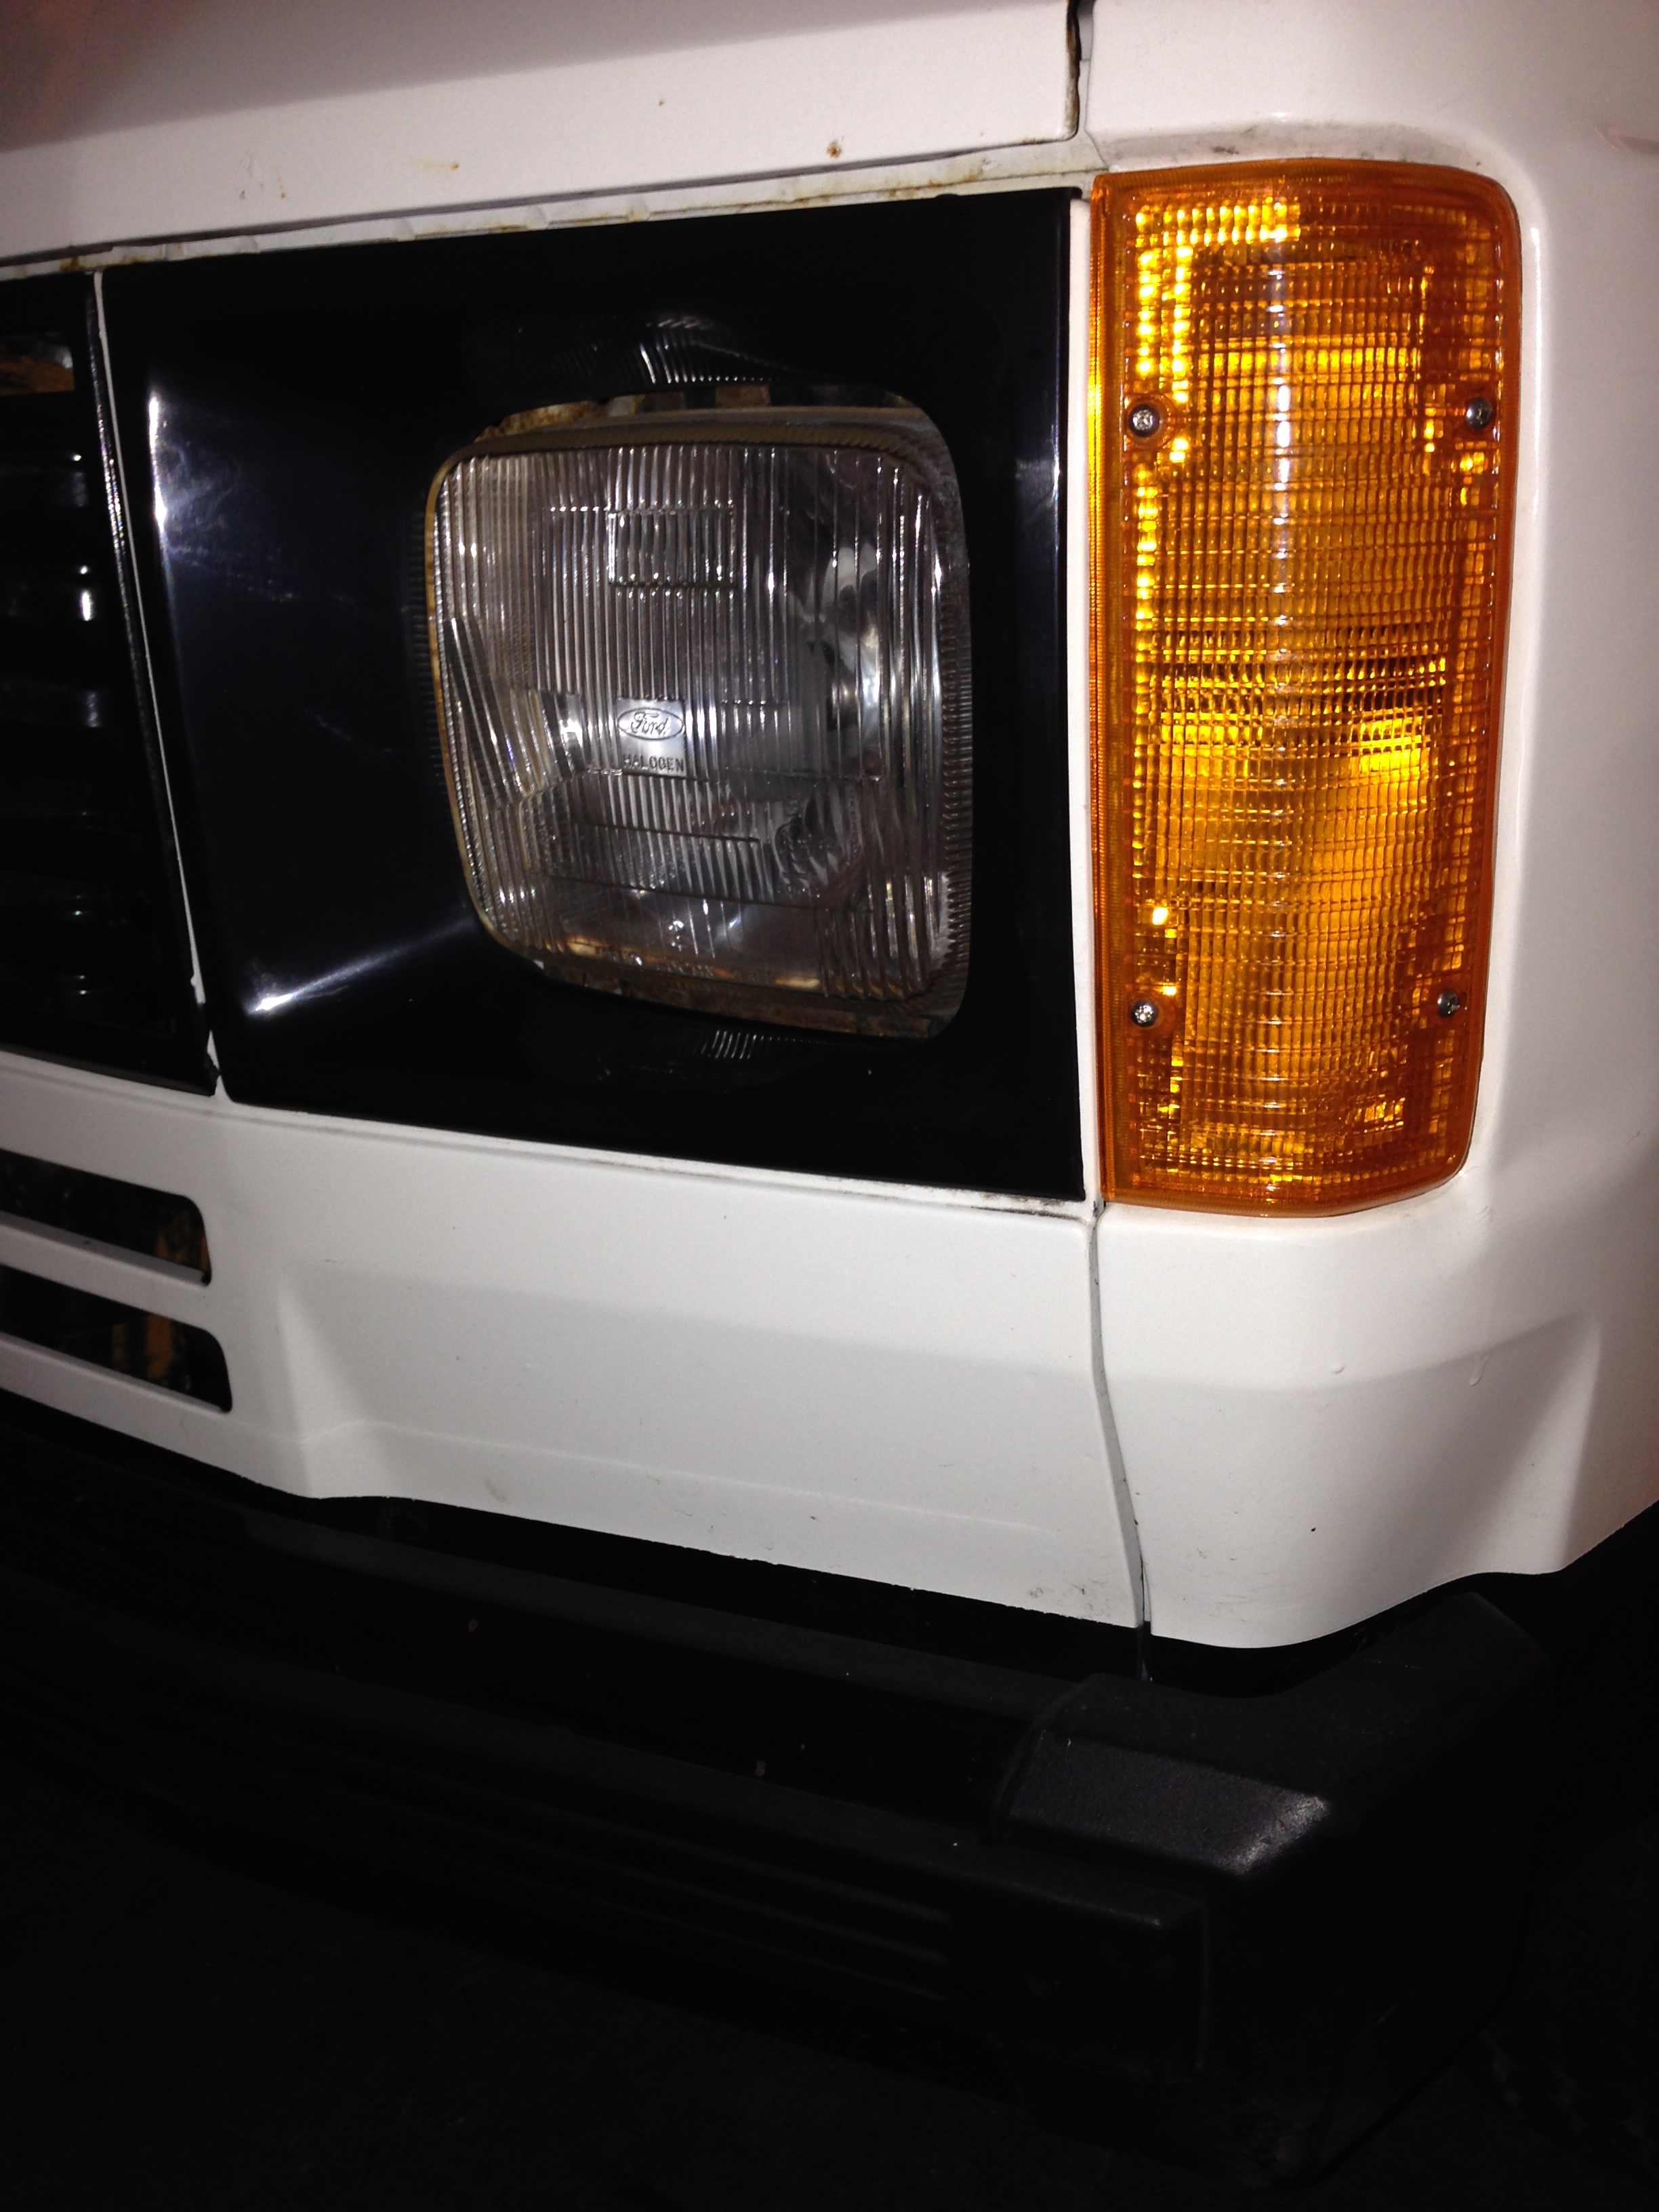
As some of you have probably gathered, I have a bit of a thing for old Ford Transit vans. Not sure why to be honest, they never featured in my life when I was growing up, apart from the ones I saw driving around . I have owned loads of old Fords, (40+) from 100E's to Cosworths, and pretty much everything in between, so I guess that might offer some clue to why I like them Anyway, I have always thought the Sundowner would be the ultimate Transit van, Ford Australia built only 140 of these in 1978, and very few have survived. They featured the "new" 4.1 crossflow iron head engine, 3 speed manual (with option of an auto) high back "captains chairs" with swivelling bases, Sunraysia eight spoke wheels, full length carpet and headlining, pushbutton radio (wow!) truck style mirrors and of course the stripe kit and Sundowner decals. I did not really ever expect to find one, and I literally stumbled across this one being advertised on a UK Transit forum, and after contacting the owner in Adelaide a deal was done, and I had to wait 8 long weeks for it to arrive, back in August! After arrival I booked it in to the compliance centre, and it came back with a long list of things to sort Rust, brakes, non standard gearbox (previous owner had fitted a T5 5 speed) lights,tyres, lpg cert etc. etc. etc. The plan at this stage is to get all of the issues sorted, and tidied up so I can use it this summer. I will strip it back to a bare shell probably next winter, and give it a full resto. Anyway, enough chit chat, here are some pics: Original ad: and another: It arrived mid August, on board the "Courageous Ace" - an absolute monster of a ship, as big as a city block, and can carry up to 6400 cars: Prior to repaint by previous owner: As it appears now: These vans had the Borg Warner (Falcon) diff fitted: Sunraysia wheels: the mighty big block 4.1: I got these NZ P plates, to match the original Aussie plates: faded original tail lights: replaced with NOS tail lights I had "in stock" ditto for front indicators and headlight surrounds: I also bought a set of K Mac anti roll bars ( or "sway bars" if you are Australian!) Which about brings me up to date. Progress will be fairly rapid on it, as I want to get it roadworthy for summer, so I will keep this updated. Discussion thread here: //oldschool.co.nz/index.php?/topic/45067-browndogs-1978-ford-transit-sundowner/
 8 points
 -
8 points
-
been driving this thing to much and not cleaning it enough7 points
-
Took the car to a panel beater friend to get some work done. Very pleased with the results, Got the rear guards redone as I ruined the last ones trying to get the wheels to fit. More clearance under the rear doors and a slight flare. Gets pretty low now with only slight rub on one side. Got the front valance put in again, this was always missing to allow room for the fans, the fans are now on the engine side of the radiator. And a wee diff bump to stop my big dick diff hitting the floor.7 points
-
Installed some driveable low and stripes. Lowered the back 1inch since the picture. Drove it to hamner for Hamnats was a good weekend!6 points
-
Porthole on the starboard. Think I might have it nearly ready for the next Burger fuel meet.5 points
-
So, had to have the steering UJ rebuilt, couldn't get a used one, or find a new match from a catalog at all. Wasn't too costly at $120+, and they had it back the next day, so all chur ay. I then whipped the rack out, cleaned the shit out of it, greased the shit out of it, and then installed the shit out of the new bush, and wham, good as new. I tidied up shit loads of little bits and bobs, slapped the back windows back in with a bit of rope, and finished off the rust repairs, and then went to this circus (the guys are fairly fucked in the head tbh/caught him checking under a sticker on the back window? wat?) to obtain a WOF. It failed on a few minor things, which I fixed that morning and returned to GAIN WOF STANDARD!! Pretty stoked to have it legal, and it is now my daily driver. Still many things to sort out, which include, but are not limited to, Fix knock in front left corner Fix diff leak Fix heater core Fit bull bar and spot lights Get wheel alignment More rust work Rebuild carb Make snorkle Mean beans. Regards, VG.5 points
-
Diff in and rolled her outside for a dust off, think i got the ride height pretty spot on 90mm all round. Also gave me a chance to clean up the shed haha. IMG_1469 by postlematt, on Flickr IMG_1487 by postlematt, on Flickr Also plasti-dipped two of the wheels to get idea of what they look like black.. and a few too many photos of her sitting under her own weight, enjoy haha IMG_1474 by postlematt, on Flickr IMG_1481 by postlematt, on Flickr IMG_1477 by postlematt, on Flickr IMG_1485 by postlematt, on Flickr IMG_1495 by postlematt, on Flickr IMG_1498 by postlematt, on Flickr IMG_1497 by postlematt, on Flickr //oldschool.co.nz/index.php?/topic/38745-matt-spitfires-ta22-daily-driver-buildresto/page-45 points
-
In November 2012, oldschool.co.nz members were able to attend a private cruise and tour of Leadfoot Ranch. Two years later we're bringing it back for the 1st of November, 2014. While this private tour is not comparable to the famed Leadfoot Festival, it will allow you to see a bit of what the event is about, and what to expect for our display at Leadfoot Festival 2015. We will start the morning off with a cruise out to the property, a brief tour by BDA780 and rotorhoe, and opportunities for a photoshoot. Feel free to discuss post tour shenanigans and potential cruise routes. Cheers BDA780 Please fill in the form below before 31st of October so rotorhoe and I can sort out attendance numbers http://www.emailmeform.com/builder/form/ge5e2P7cj9 Leadfoot link for reference: http://www.leadfootfestival.com/ When: Saturday, November 1st, 2014 Plan of Action: Meet up location: BP / Autobahn Cafe, take first exit after Papukura turn off (1.4km). Map for reference: https://goo.gl/maps/jvHHC Remember, roll in an oldschool car ONLY!!! Meet up time: 8:00am, come in, fuel up, grab your V's and your munchies or whatever you need and be ready to leave at 8:30am sharp. We will not be waiting around for stragglers to arrive after the 8:30am departure time - if you don't make it and do not cruise with the main bunch it's unlikely you'll be able to gain entry the Leadfoot Ranch. So please be there on time! Agenda: following our departure, we'll be taking a predetermined route (details to follow on the morning) to Hahei, with a couple of scenic stops along the way for photo opportunities and also a fuel stop for those possessing vehicles of a thirsty nature. We expect to arrive in Hahei no later than 12:30pm, where we'll congregate for a good look around and a few photo opportunities for the crew. Disclaimer: As this is a private event on private property reserved for Old School members please refrain from any dangerous driving e.g. burnouts. Please take your rubbish home with you, also no pets please. Entries as of 31/10/2014 BDA780 rotorhoe + rot808 punkoutnz + 1 Mattwho? + 1 Roman + 1 michaelme + 1 retep130 Snoozin + 1 73crownwagon + 2 M_C Orion Guppy + Glen shaneo + drtdvl Connor + 2 10speed Ned EURON8 + Chickity gnarlydude + 1 sleeektoy datsun280z srf Bigfoot + 1 Styles + 1 Threeonthetree Furai fletchh + Jai1b8 TOYGTE + 1 The Bronze + 3 Beachlander azzuro boostedmk1 + 1 Poo Cletus + 1 sheepers + 1 TTT Tim + 1 elliot74 tittystittys + sentra slrtorana + 1 TrueNotch + Mark10-5 OLDMAZ mk2marty Italia + 1 Nu Buzzy Mikey shandawg Anae4 points
-
3 points
-
3 points
-
This clip was it's last run prior to panel and paint.2 points
-
fuck man, keen! already have hydraulic pump in stock2 points
-
So tonight my bud the chap whom painted the car and I made a start. I cleaned the bumpers up and fitted them while he masked up the rear tail lights and gave them a squirt of paint then as drying we fitted all the side lights and headlights, fitted the moulding around door edge, nose cone assembly and some chrome above it. He did some more detailing in the engine bay, then we fitted the boot. Happy with progress so far.2 points
-
Took it for a WOF this weekend just been (6/9/14). This is it leaving the shed on it's maiden voyage. Borrowed a set of wheels as I don't have tyres yet. Took it to a good chap who knows his VW's. Ended up failing on 3 things; front wheel bearing, door hinge is dodgy as it's rusted out where it goes into the door (I missed that) and the brakes are a bit too spongy and pull to one side. I left it with him as after I hire a welder again it'd get quite pricey anyway and I can't get the hub not off. With things like brakes I'd rather leave it with someone who knows what they're doing. Not that I don't, but it's one of the only things I don't mind paying someone with experience to do. The car outside the workshop: Hopefully get it back in the next couple of days with a WOF on it. Today I got some 165/45/15's fitted to the front wheels, they're fuckin' tiny, I think I might have gone too small. Will know when I get the car back, if they're too tiny I'll flick them and get some 145/65's.2 points
-
You should weld your container doors together, and then hinge them from the top so they pop open like a van boot with big gas struts. Would get them out of the way of your deck.2 points
-
Hi, I just arranged to buy this, picking it up this weekend. Its an 88 model, 3A powered with 6 speed manual, has an "EL" (extra low) gear you can use when in 4WD, and is full of farm spec scum. Plans are to make it more like this: Been wanting to get one of these for many years, so pretty excited! Regards, VG.1 point
-
Bought this in April, girlfriend lent me the money to buy it as long as i stopped spending money on cars, as i said all the work was done on this.....yeah right. So its an original mk2 sport with a 2.0L pinto conversion, the pinto is pretty worked, which i only just found out. Bad points are they rust, it has been resprayed at some point, but not sealed properly so now it has orange peel ripples on every panel, so a full respray will have to be done in the next few years. Pictures Speak for themselves. Was Driving alright for a few months, had my fun in it. Then it wouldnt start one morning, Found the points had closed up, so go it going, made an unbearable squealing noise, thought it was one of the bottom end bearings or something major. took the motor out and down to the motor reconditioners, turns out the sound was the cam cover But luckily i didnt take it out as the cam guides were fucked, said it was the worst he had ever seen, and there was around 10mm of play either side, also the block had been honed to much and the pistons weren't a tight fit as they should be. Found out alot of head work had been done, porting etc, The rest of the Engine is in really good nick. So he quoted me a few options and this is what im going to get done to the engine Full Overhaul: To strip, clean and check out engine. Bore and hone. Surface grind block. Mount and measure bearings. Change pistons / conrods. Polish crankshaft. Change auxiliary shaft bearing. Final wash and assemble short block. $ Decarbonise and crack detect cylinder head. Change 8 valve guides. Face seats and valves. Surface grind cylinder head. Change conrod bearings. Clean and assemble. Fit cam and set tappets. $ Assemble long engine. $ will end up costing me the better part of 3k but worth it but not so good when i have another engine build in progress and not expecting this. hoping to get it back and going in the next month.1 point
-
Discussion Thread //oldschool.co.nz/index.php?/topic/45038-rx3-pps-rx3-coupe/1 point
-
viewtopic.php?f=18&t=19104 Bought it like this a year or so ago. Got it going the engine wasnt running got a wof and put some 13 inch hubbies and flappers on Drove round for 6 months with rooted suspension standard brakes and diff. When my wof ran out decided to get it certed for the engine. Upgraded the brakes to bluebird ones, new shocks, disks machined, commodore shocks in the back, vanette shortened diff 4.1 ratio 2 inch blocks, custom driveshaft etc went for cert had a few issues but eventually got it. Got some new wheels Got them reconditioned and new tyres started making a chin spoiler got in on but with the new wheels looked jacked at the front dropped the front more got a 2.5 inch exhaust Got some fender mirrors and a jaf badge JDM is king! Thats where is at at the mo. Comments suggestions welcomed in the disscussion forum.1 point
-
I must start by saying I can't release details on the vehicle or the shop in question as I don't want to be involved in slanderous claims.. As most of you know, I do a semi roaring trade working on the weird and wonderful vehicles from all parts of Europe. Mostly old and obsolete and quite finniky to work with. Customer has a lovely old real oddball thing that I'm currently stripping the spare motor down for rebuild, the equally low mileage gearbox was sent to a local manual gearbox specialist for a check over and rebuild. During the conversations after the stripdown, He kept annoying me saying it was in good condition for one of these gearboxes (there is no way he could have ever seen one before, I know this for fact) and I start to question him about the information he is using for the stripdown and assembly (ie torque settings, differential preload etc) and he reckons he's going to set it up just like every other gearbox, no worries... Sorry this is so long winded, but I thought I'd give a back story, basically I went in today to check progress and they have fitted up the gearbox with NAC high load bearings over the original SKF bearings, which aren't expensive when brought in from my supplier in New York in a kit. I already have a load of stuff ready to be shipped so I wish they waited as instructed. Problem is the bearings are sealed, they reckon the gear oil gets past the seals and that's how they fit up all the gearboxes these days.. This is where I get annoyed, these are main shaft, layshaft and diff bearings, they should run in oil and not swim in their own junk.. Opinions please, I'd like some advice before I pull the plug on this and kick up a shit storm. Also the original bearings were like new once cleaned, no lateral play, quiet and smooth.1 point
-
(industrial gearboxes, only had a small dabble in automotive) if your operating inside reasonable spec for double sealed/greased for life, and your working on a splash oil gearbox that you have to disturb the gear mesh on allready workhardered teeth its a pretty normal um - arr what the worse of five evils is. will try remember some real examples tomorrow, workhardered bronze oil contam from remesh was a bad one in splash bath due to relying on magnet for filtration would stay in circulation, the stuff harmless to a gear, however would wipe out new bearings quickly.0.005$ will go away now just wanted to keep your minds open.1 point
-
That grease, and those seals are intended for applications where the bearing doesn't see lube. I Always remove the seals when I do a gearbox. (sometimes the bearing supplier supplies a bearing which comes with the shields fitted) Also, stay the fuck away from FAG bearings. My old man did a bearing preload course thru his old employer. Some Aussie from FAG was running it. The old man took great delight in telling his that FAG stood for Fuck All Grease. Cos erry time you pull the sheilds out, the bearing has next to no grease in it.1 point
-
Now fit GTR wheels. GO!.1 point
-
Hey, Cam and Bizzo! Keen for this in Friendly Feilding? https://www.facebook.com/pages/TR-Group-Truck-ExpoShow-and-Shine/510690628945443 I think I could be keen for this, some racing and a hotdog.1 point
-
Yeah not sure the escort will be getting certified anytime soon now... The mustang is all legal and (semi) roadworthy but not sure how the last owner got a wof. Suspension bushes and steering arm bushes are all toast. Haven't taken too many photos yet but my wife was playing with her camera the other night.1 point
-
1 point
-
Heard lots of opinions on the powdercoat vs paint debate but after having a half a powerstation come loose in bad weather trapped in the hole of the ship. Heres my 10c on my dealings Powdercoat is awesome untill it is damaged/chipped. Repairs are hard to achieve and most of the time need a full repaint to match anyway. Not really an issue on smaller items and will work well for what your doing 2 pot Paint is far easier to repair howwever doesnt handle the enviroment as well.1 point
-
Rear shock diff mounts cnc'd and rear to weld on.. IMG_1455 by postlematt, on Flickr IMG_1459 by postlematt, on Flickr Welded on.. IMG_1461 by postlematt, on Flickr IMG_1501 by postlematt, on Flickr Also welded on the extra bracing for the towers.. IMG_1507 by postlematt, on Flickr IMG_1505 by postlematt, on Flickr1 point
-
Powder coating looks nice, i have heard mixed opinions on PC vs paint, been weighing it up myself, either way having a super clean setup always looks the goods1 point
-
Small update it's half way though the panel work and looking good cant wait to get it back The plan is to lower it quick tidy up and keep the rattie aged look with some nice signage where the windows where1 point
-
Wouldn't be OS without car trouble haha..1 point
-
Yes hes a good guy, hes always up for a good yarn about old cars and good at his work. He is responsible for finding the windscreen which I could not find for 5 years until I met him.1 point
-
So despite the KE having problems and getting towed down to CHCH, there still wasn't anything 'bad' about what happened. Of all the people I encountered in CHCH (sparky, Glenn, guy who I bought the alternator off, guy who bought my 4K a couple of months ago) they were all really helpful and made it all an awesome experience in the end. Honestly big thanks to Glenn for bringing me down to CHCH in the Anglia and lending me his legendary glenn-mobile scooter for the few days (sorry about the kickstart, not sure why the tensioner fell off) also to the welly lads for giving it a crack to get going. Also in the end, I DIDN'T CHECK THE CONTINUITY OF THE FUEL PUMP! Alternator packed a foul, overcharged and blew up all the relays, RPM gauge, fuse in the radio, flasher relay. Fixed sort of, pump now runs continuously when ignition is on instead of off the crank sensor as sparky couldn't find why it wasn't working. Currently in process of getting the sparkys who wired up to begin with to see what happened. Awesome drive down, awesome drive up (apart from the 3 hours delay of the ferry) 10/10 will come next year. Will probably be with my KE20 too, hopefully anyway. 3SGE goodness Also, Kicker I have your yellow pliers. They will be kept safe till we next meet!1 point
-
Another tiny update guys, don't mean to sound like a wanker, but I'm pretty flippin pleased with this wee thing! remember this? even though I had it sandblasted so all the rust was gone, this left the metal pretty thin in places. And as this is a strengthening panel I thought it best to put it right. So I cut it back to were it was solid and had a go at metal origami. test fitting the rear fender so I get the stud in the right spot, also checking the quarter panel would fit back on top of it, so many layers of metal in this bloody spot. like so and welding it together, there is also a wee patch at the top, were it was damaged when I removed(ripped) it. tidied up very happy with the fit, took alot of bending and hammering to get this back were it should, I made a bit of a mess of the shape when I pulled it off. yeah the stud I used is just a old bolt I welded to the back of the panel and then ground the head down as it was to big. hope you like?1 point
-
1 point
-
Have updated the topic title nice and early to avoid any confusion1 point
-
1 point
-
Yeah I hauled all 27kg out to workshop cod no space here. I'll get in touch and suss a time to come round and test them/the tapes I'll even bring a Bic biro to wind the inevitable birdsnest1 point
-
1 point
-
awsome weekend .cheers carl and the os crew1 point
-
Fitted up the kit today, still some things to tidy up but Im happy.1 point
-
Rather than the latest update - how about some historic pikkies Freshly restored in 1993 - before the rollcage went in a couple of months later. Looking flash with brand new 13 x 7 hotwires and RE71s 1994 at Mazda Manfeild A little later in 1994 - at Baypark - the flares went on so that the 9 inch "cheater" Hoosier slicks would fit under the guards1 point
-
Cam was apparently racing at NASCAR.1 point
-
Went to D.C. Chased a Squirrel1 point
-
after many many years in storage while i built my crown and stuffed about with the V8 ive finally done some work on this thing. whats been done? new flywheel, 10" clutch and hydraulic throw out bearing. convert from steering box to power rack and pinion. Link G4+ ECU install. engine bay de-loom. so as usual i dont have many pictures because i just dont think of it at the time but i do have a few. so the power steering. its AE86 and i use AE86 power rack, crossmember LCA's and radius arms. to mount the crossmember you need to cut the ends off it and re-drill the mounting holes. you can also make spacers and drop it down by 40mm. some people dont do this and mount the AE86 crossmember straight to the bottom of the celica chassis rail. you can do this but it raises the steering and engine up quite a bit. the steering is no issue but raising the motor by around 40mm is more than im comfortable with. to re-drill the AE crossmember is quite a tricky process. what i did is to clamp the celica crossmember upside down on top of the AE crossmember. then i clamped straight edges to the mounting points for the LCA's on both crossmembers and aligned them. once you have them aligned you have effectively made sure the LCA mounting points are exactly the same on both crossmembers. then transfer the holes through from the celica crossmember to the AE. side note, when you space the AE crossmember down you need to put crush tubes for the bolts to go through into the spacer. its very hard to get the holes aligned exactly so what i do is drill the hole at 8mm. then i clamp the AE crossmember into the car using 6mm all thread. measure it and adjust it so its aligned with the car, then one by one i remove the 6mm rod and match drill down through the celica chassis rail into the crush tube with a 13 (i think its 13mm) drill bit. this makes sure the holes line up perfectly. some other points to note, AE86 crossmember and rack is 20mm a side wider than celica but the LCA has a kick in the end and the ball joint is angled which pulls the wheel back in. if you use all the AE86 parts the total increase in track is 7mm per side which equates to just under 1 degree of neg camber BUT, the bottom of the LCA will be closer to the disk by approx 6-8mm so check you have room. there are plenty of ways around this, like using stock celica LCS's and dealing with the track increase in other ways, or using offset RCA's (once again increasing your track) so its not the biggest issue in the world. the steering column needs to be modified so it has a bearing in the bottom end to support the shaft. there are lots of ways of doing this but i welded the tube from a AT141 corona (i think) to the bottom of the celica steering column outer tube. the steering shafts in the early toyota (and lots of other things, PG hydraulics sell the steering shaft bar stock) all have the same plastic rivet with flats style sliding joint so its pretty easy to use the parts to get the right length with the universal joint on the end. here are the few pictures ive taken, this is the crossmember all finished ready to bolt in. you can see the spacers ive used to move it down. it also has the engine mounts on it and ive seam weleded the whole thing. Untitled by sheepers-ra28, on Flickr Untitled by sheepers-ra28, on Flickr this is the steering shaft with the new end showing the unis. Untitled by sheepers-ra28, on Flickr and this gives you an idea of clearance Untitled by sheepers-ra28, on Flickr so the rest. the flywheel and clutch all came from Brendan at night parts and you can get all those parts on trademe. the throw out bearing it a Tilton 6000 series one coupled with a Willwood 7/8 universal brake master cylinder. the Willwood part is really short and fits nicely to the firewall with a little opening out of the hole. as for the link thats ongoing but its not a difficult thing to get working if you follow the instruction. so yea, soon it will be supremely more drivable and i intend to daily it again for a while and park up the V8 whilst it gets some love and forced induction.1 point
-
Oh hey. Hey.1 point
-
Just thought id post this up, the Sushi celica. stumbled across this a while back now but theyve taken a similar route to what im going down.. Blacked out trim, bumpers, vents, grill etc. ill be going mazda sunlight silver with a satin clear, black wheels, no flares, side skirts or cannon muffler.. IMG_7623 by 2Dkomplex, on Flickr IMG_4001 by 2Dkomplex, on Flickr IMG_4041 by 2Dkomplex, on Flickr IMG_2230 by 2Dkomplex, on Flickr IMG_2226 by 2Dkomplex, on Flickr IMG_1195 by 2Dkomplex, on Flickr IMG_1274 by 2Dkomplex, on Flickr IMG_2283 by 2Dkomplex, on Flickr1 point
-
Man this is a great project. I love the idea cuddling up in one of these. Its like a grownups couch pillow fort1 point
-
+t3 rcas1 point


This leaderboard is set to Auckland/GMT+12:00