
Leaderboard


Popular Content
Showing content with the highest reputation on 07/10/13 in all areas
-
So I brought this today http://i15.photobucket.com/albums/a360/P_Star/IMG_20130917_135849.jpg Traded some lada parts and cash for it then decided it was too dangerous to tow had to hire a trailer to tow it from henderson. And then cut some of it up so it could fit the trailer. So this is what it looked like when I got it home. so to justify my purchase i decided to make something out of what I was not going to use like the heavy guard so a bit of cutting and welding here and there and I created a small BBQ/fire pit thing8 points
-
Was dying to get out if the city so took van for official test run down to coro peninsula. Van ran fantastic! Apart from having no speedo, temp guage. No choke and no vacuum advance haha and the only thing that broke was the rubber exhauste hanger on the way home but a botch job of some wire on the out skirts of Thames it was all sorted!7 points
-
Only a month till Im back in NZ. Top priority, other than sorting where Im living, is getting this thing on the track. Exterior paint may be a wee while off as Jet who is sorting it at James Lee Design, is about to have a baby. So Im going to get the car running, tuned, and ready for the track. Once I can use it, then Il start finishing off the little things, dash, door cards etc. Anyway, couple of photos just before tucking Kermit away for 6.5 months...6 points
-
took it to the drags today for a lol. bad point= 16.49 was best time, nearly fell asleep a couple of times it was that uneventful good point= 16.59 was the slowest. so its consistently slow at least. which is handy in DYO, i won. at a GM club event. HA!6 points
-
A parcel finally arrived from the States - but only after giving the NZ Customs Service a donation.... Anyway nice shiny bits Racing Beat 12A race header - for a pre RX7 12A, as well as some extra flange plates just in case we decide to rebuild the centre section of the exhaust at some stage4 points
-
4 points
-
re: Spoiler, Oh hell no.4 points
-
Wheelie bar sounds awfully safe, so no.3 points
-
good, it would reduce the bench area you can put your beers3 points
-
OH WOULD YOU JUST STOP IT!! Stokedness is on MAXIMUM.3 points
-
Just thought id start a thread on dads new ride - Still has his KE25 and is now looking for a Tidy KE35 as well. Wants the complete set he reckons lol Some of you Hawkes Boes might have seen it at the Meanee Swap meet in the car park. Ill try get him to go to one of your meet ups in HB next time one comes up. Heres some Pics, i think shes pretty tidy - hes having some of the interior redone at the moment. The mags are for his KE25 (running sarlet front hubs etc) and he wants some minilights for this - 14x7 and a little bit of low (like at least 50mm lol) Uploaded with ImageShack.us2 points
-
A wheelie bar with a titanium skid plate instead Of wheels2 points
-
I just told him to wear Heelys shoes when riding it and be a human wheelie bar.2 points
-
Loi that was not that start to trailer building i expected. Good start, fire2 points
-
I need to add a couple more bits to my frame that will hold the strut tower tops in place and then have a few beers before cutting the front end away leaving just the tower tops and the cross member floating in the right spots..2 points
-
The picture of the paint colour is bad but the colour did change after a good stir. Now it's a nice 'flourescent mint green' a bit brighter and lighter than the last picture haha Got all the sills and stuff painted, need to do a little bit of body work tomorrow, then i'll put it together again to paint the rest I like the colour it's turning out, something different from the rest. The paint was cobwebbing bad to start with, but after some adjustment I got a good spray going, I'm having to keep the fan small to avoid the silly string look haha I've never painted a top coat before so this will be a learning experience, so we'll see how it goes!2 points
-
Fuck it, it can have it's own thread for surviving hawkes boes. 1970something Tru Test, repowered very badly with a Honda GX200 copy, 6.5hp of death. Stephen kindly picked it up for me, did casual coupe cartel skids etc, said it accelerated fairly sweet until the fun governor made itself known. CDL and Lee grabbed it from bucklame one night xoxoxoxo, so I took it to work to see what can be done with it. Rode it up and down the road at a fucking boring pace, made heaps better by jamming my foot in the governor to bypass that faggotry, it was then I had a brainwave! Asshole the governor! It was done in a rush last thursday night so it aint pretty. I also replaced the seized wheel bearings, and the inner tubes for the funky 90 degree valve stz so I could blow it up like the world trade. High speed runs around onekawa industrial proved successful, only mild problem is the total loss oil system which I cbf looking at yet. Everyone who rode it at Hawkes Boes knows how lol spec this thing is, capable of long sketchy burnouts or somehow getting traction and forcing you into an impromptu superman provided several hearty lols. Ned took it for a hoon and GPS said he busted out 58Km/h, ridiculous. So, the immediate plan is as follows; 1) more power 2) skids 3) bbq everyday Smoke some with your dog.1 point
-
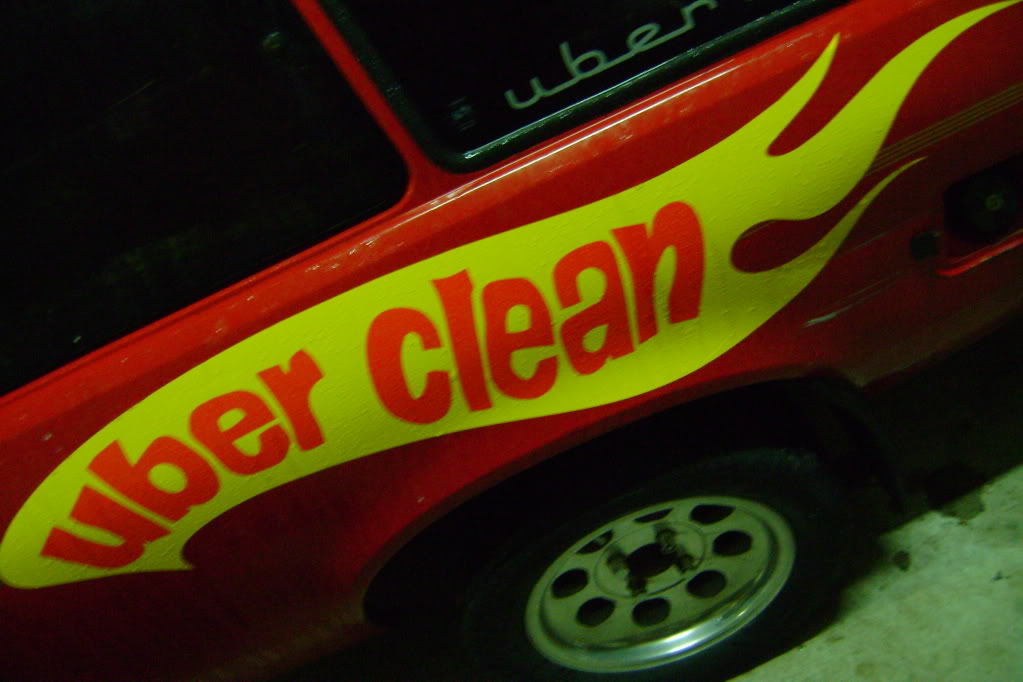
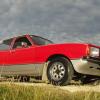
So I've been on the lookout for one for a while and this came up. Picked her up last night. She's a 1976 MK2 GL Escort 4 door. Probably the uber base model but who cares! Currently sporting a classy shade of Henderson Racing Grey, that will change to the original (or close to) Escort orange when my truck sells. Also sporting a set of Cheviot wheels which I quite like but some people don't seem to. Anyway, pictures say a thousand words... First things I want to sort is the miss that it has under light load, sort of goes away a bit when you put your foot down further but it's definitely still there. It's sluggish and doesn't seem to want to rev out. Idles smooth as though. Probably a blockage in the main jet or something a bit dishy on the timing but I've gotta get my head back around oldschool carby engines again (couldn't find a place to plug in my laptop on this one...). Discussion thread HERE1 point
-
I'm keen Markku. I'll also come karting.1 point
-
I've made a tentative booking for Saturday morning at 11:30 Who's in?1 point
-
concur with these two old guys1 point
-
YEH, WHAT SHE SAID ^1 point
-
This thing isn't dead! Daylight saving means I now have more time after work to work on it. I've bought a welder, slowly patching up holes. I've secured a replacement screen for the back too! As she sits right now: I bought a gt4 torsen diff to replace the locked diff, pics from the tard. I measured the stub axle PCD which shouuuuld be the same (fingers x'd). Will ditch the housing, use stub axles (bigger dia) and swap the ring gear. Hopefully everything lines up. They're both T series........ Also bought some electric fender mirrors, the connectors are there in the loom and I stole an in dash control from a supra, so hopefully everything just clips in? I will be painting them black to match the trim etc. Pic from trademe. Keen on some opinions on using an AW11 spoiler Yeah nah?? //oldschool.co.nz/index.php?/topic/38684-banters-ta61-celica-of-yesterdays-future/1 point
-
Oh yea if a mod could move this to two wheels, that would be neat. OH YEA, DISREGARD STOCK TIMING RECOMMENDATION, STILL GOT 8 DEGREES OVER STOCK WOOOOOOOOOO. I still wonder when the flywheel is going to come apart.1 point
-
About time for an update Couldn't wait to have the wheels cleaned up so on they go. Picked up a set of shank nuts and lock nuts from Auto trail I'm digging the simplistic oldschool look, although I will lower it a bit and space the wheels. PROGRESS!1 point
-
rake rules. Leave as is.1 point
-
Its been a pretty sombre affair of the last month or so. After rebuilding the motor again - at the last outing, we didnt even get practice out of the way before something let go. Suspect its something on the side of the front rotor this time - as the engine went very smoky, was fouling plugs, and blowing oil out of the catch bottle - however the apex seals are intact this time. Enough is enough, so the 10A is going to be gone from the engine bay shortly. With having our overseas holiday earlier in the year, and breaking a few engines, its time to ease up a little and let the finances recover. We have a few things to sort out prior to the 12A going into the hole. I need to sort out an exhaust - mainly headers, get some new clutch discs for the Tilton twin plate - the 12A has a brand new flywheel, with a Titon twin plate setup, but the plates are setup for the larger splined FD gearbox, and some of the minor ancillaries - like water pump. One otehr thing to sort out was the needle valve in the carbie. Apparently the 12A will empty the IDA fuel bowl on the dyno at high RPMs - and the standard "big" 3mm needle valve was the issue, and the needle valve had been drilled to at least 4mm to resolve the issue. The exercise in drilling the needle valve sounded a little iffy to me - and I knew that Gene Berg did modified valves - so this is also on the to buy list. So we have ordered - a new set of Headers in from Racing Beat in the states - some 4 mm "racing" needle valves for the IDA from Gene Berg in the states - next on the list is the new clutch discs In the meantime - I decided it was time to sort out the engine bay wiring loom - that had been seriously monkeyed with over time, along with the main battery feeder. The previous setup had no inline fusing - the old fusible link was still installed, but was included almost as almost a secondary power circuit - so effectively was useless So we have a nice new maxi blade fuse setup on the battery feeder The old battery kill solenoid has also been removed - as this would drain the battery if left on - as well as the battery terminals were exposed - not good! Hopefully some more photos later.....1 point
-
And finally for tonight this is the latest project. A tru test styled mini bike with a Kirby lawn mower engine. Goes pretty good once it gets up to idle which is about 30ks.Top speed about 50ks. Direct drive and nice and dangerous. Got some sweet plans to restore it for the smash palace motorcycle show. Watch this space.1 point
-
Bubblegoose cam over for another session tonight. Slowly getting a bit more done. Front drip rails have been welded on. Bits around the boot tidied up And around the left tail light. I have started sanding it down and have filed out 6 of the door hinge holes to get the gaps better. Also have got my reset leaves back and its sitting at a better height. Need to sort out a panhard rod next. Should be quite low once the windows, petrol tank, spare wheel, and 5 people are in it! Sorry about the shocking old cell phone photos but we can take some nice ones when its back together.1 point
-
You're bringing steelies?1 point
-
Venice? Pfft, yuck. Way too much sunshine and happiness.1 point
-
another trip to mackaz. he jammed the finished rim in the ballancing machine, was near spot on surprisingly. seems i picked the best band first. number 2 is 2mm wider on one side of the rim. so had to try get 1mm run out, both on inside and outside. to get the band to run true! liped the guard so wheel turns made some changes on the front. so it turns. cut up the lower arms again. previously i added 40mm into them (for stock wheels and padock bashing) cut them back to 30mm extended and added a decent amount of caster. has rediculous caster now. why am i working on this car? i don't know1 point
-
Video http://m.youtube.com/watch?v=c5OlCNTgXug1 point
-
HAHA IM LHD1 point
-
As it currently stands. Pulled these goodies off. Old shocks in orange. New in yellow. Yum Yum. However, whorey brake conversion as left front struts unusable. If you look closely at front struts you can see some drilled and tapped holes in hub. And the old caliper mounting lugs have been cut off. Grrr. They will not pass cert with the way its been done. As there is only 5mm meat around one of the holes. Not really enough for 4pots. Hmm. Trying to locate some early 240z struts at the moment. Worst case scenario i will have to get a sleeve kit for the later 260z style front struts (which i have a pair of). As these are slightly bigger diameter and my current kit will not fit on these . Just a P.I.T.A. Ah well, story of my life. Whenever i touch or do anything to do with cars, nothing ever goes to plan/right. Except the triumph. Thats always been good to me. Hah1 point
-
So finally after about 3 weekends of not getting the time required to work on my own car, we finally got the car lowered and the wheels on in the Crown. Went up to Pick a Part with one of the rear springs as a measuring guide to see what would work for the rear. Scouring the truck and van lines meant that the springs either were too short, or not wide enough. Finally scored a piece of gold in the form of rear springs from an AU coon. Perfect fit. Jammed it in, didn't even need "modification" and it was bang on 100mm and captive! Rolled the car out, and a bunch of big boned mates jumped in the back for a test drive. Rode smooth as silk, but it needs a bit of rebalancing as there is a bit of a shake at 100k. And cos the car is underwheeled and undertired, speedo is out by about 10k. But it looks perfect and is exactly the look I was hoping for. We then waxed and cleaned the whole car, and I got to be OCD and cleaned up all the chrome bits and started polishing the wheels. This picture was when the back was full of wheels and tools, so the rear is lower, but when all the crud was removed, it sits bang on even! So stoked Then popped home, did some more cleaning and whacked on some tire shine just to complete the car and yay, it doesn't look like a sack anymore!1 point
-
Is this Hippos old one?1 point
-
good to see hippo's old GTrally being fixed up! such a rare spec too. and that black interior is badass AA63 4age celica GT i think has the irs T series also. If you get stuck finding rear end bits, maybe hit up callum WDE_BDY in gisborne, think he may be parting his ta61 celica out? Or upgrade to the F series subframe assembly which means altezza lsd's can be fitted. can source those from the 18rgeu and 3tgte powered A6 celica and tt142 corona GT-T also.1 point
-
Too legit to quit. Car is now on axel stands with suspension out ready to get the chassis rails grinding pavement.1 point
-
1 point
-
none of those pictures are of it slammed. Why? Also aftermarket springs and some nice new shocks won't make it yuck ride quality I wouldn't think man.1 point
-
Goddamnit I want one of those Celicas! So gutted I didn't buy this one. Rust is nothing compared to my ta23, so woulda just welded, wof'd and driven! That said, and not to hijack the thread, but if any of you swell gents have or know of a notchback celica for sale, PM me please! Anyway, good luck with it yo! Keep it super 80s!1 point
-
Meet at; The lower undercover park at the plaza at 7:00pm We run this similar to the Auckland meet, which does really well. We'll check out some cars, and walk straight over the road for some takeaways about 7:30ish Burgerfuel Palmerston North has kindly offered us free fries with every burger purchase for this months meet. - Just a note, feel free to invite other cars/people along, but you will be responsible for them! Please leave no rubbish and no skids/rowdy driving in the carpark - We've been given permission from the Plaza to use this, and we don't want to loose it. We have a rain free car park, and the barrier arms go up shortly after we arrive, meaning no parking fees. Remember to don some warm clothes, grab a camera, and we'll seeya there! Sparkle1 point
-
As of now Seat Rails - Signed off by cert guy as being factory and not needing cert. Yay Exhaust Leak Rust on top of A pillar - Booked in to have this patched and signed off on thursday. Just have fix exhaust leak when i get it back from panel shop and then its off for recheck. Going for this rideheight/fitment once wof is aquired: Stay tuned1 point
-
So i took it for a WOF. And it failed: The rust the found was not the repairs i had done. It has had new floors at some stage and they had been put in pretty rough. There was also rust in the side of the chassis rail up the front aswell as under the battery tray. I took it to local Masterton Panel beater to get him to fix the rust as i was completly over rust repairs at this stage. The more they repaired the more they found. There was rust in the bottom of the tool compartments, the hangers for the diff assembly were almost rusted through. The panel beaters were choice, they let me come in and take the diff out to save me some coin etc. Top notch guy, top notch service. They gave me a call whenever they found more rust to ask me if i wanted to continue etc. The fixed a massive bend in the drivers side chassis rail that had dented the floor up (a good 60mm). I cant reccoment them enough. Masterton Auto Body Repairs. If any of you welly guys need rust don. Hit them up! They are way cheaper than wellington rates! Diff going back in: All of that ordeal for this: Also, while all this was happening, some goodies turned up from the states. Koni Race shocks Ground Control coil over kit Same deal as Mikeys Zed. Gonna do the good old strut section and get this beast draggin' chassis rails I also have a set of them Rota Shakotan 15x9 +0et wheels and some 205/50s to go with the lowering. This is an interum soloution until i can get my hands on some 15x9 SSR MkIIIs. Though this may be a way off. Prioritys are to get it low and legal. Lurking, waiting, it goes for wof on Tuesday. Exciting times. Wof then Coilovers then Cert then Dorts1 point
-
i got the shits with those wide steels and having to pump the tyres up every day, i had enough spare tyres and a set of charger rims so had these powdercoated and bunged them on for now until i sort out the other ones this thing has been handy, it has actually been used for its intended purpose as a load carrying contraption a few times, and has never missed a beat. uses not a lot of gas either. have got a spare 2.77 diff for it so am going to fit that for max economy. Uploaded with ImageShack.com Uploaded with ImageShack.com1 point
-
slam it like a gang wife, now please DAvid1 point
-
Got some super sweet shots from Richy on the weekend. rest here... http://www.flickr.com/photos/snoozinrichy/sets/72157633413882414/with/8705655705/ dizcus; //oldschool.co.nz/index.php?/topic/29495-sparkles-bmw-of-supermega-happy-hell-yes/1 point
-
Here it is, daily driven and enjoyed LD28 with cert Raised about 2 inches with cert White rims i think 8inch wide with cert OME shocks brand new fuel tank brand new front driveshaft what i need to do radiator has slight leak hub seal has leak probably should attend to small bits of rust in various locations needs stereo Pic dump1 point


This leaderboard is set to Auckland/GMT+12:00