
Leaderboard


Popular Content
Showing content with the highest reputation on 08/12/24 in all areas
-
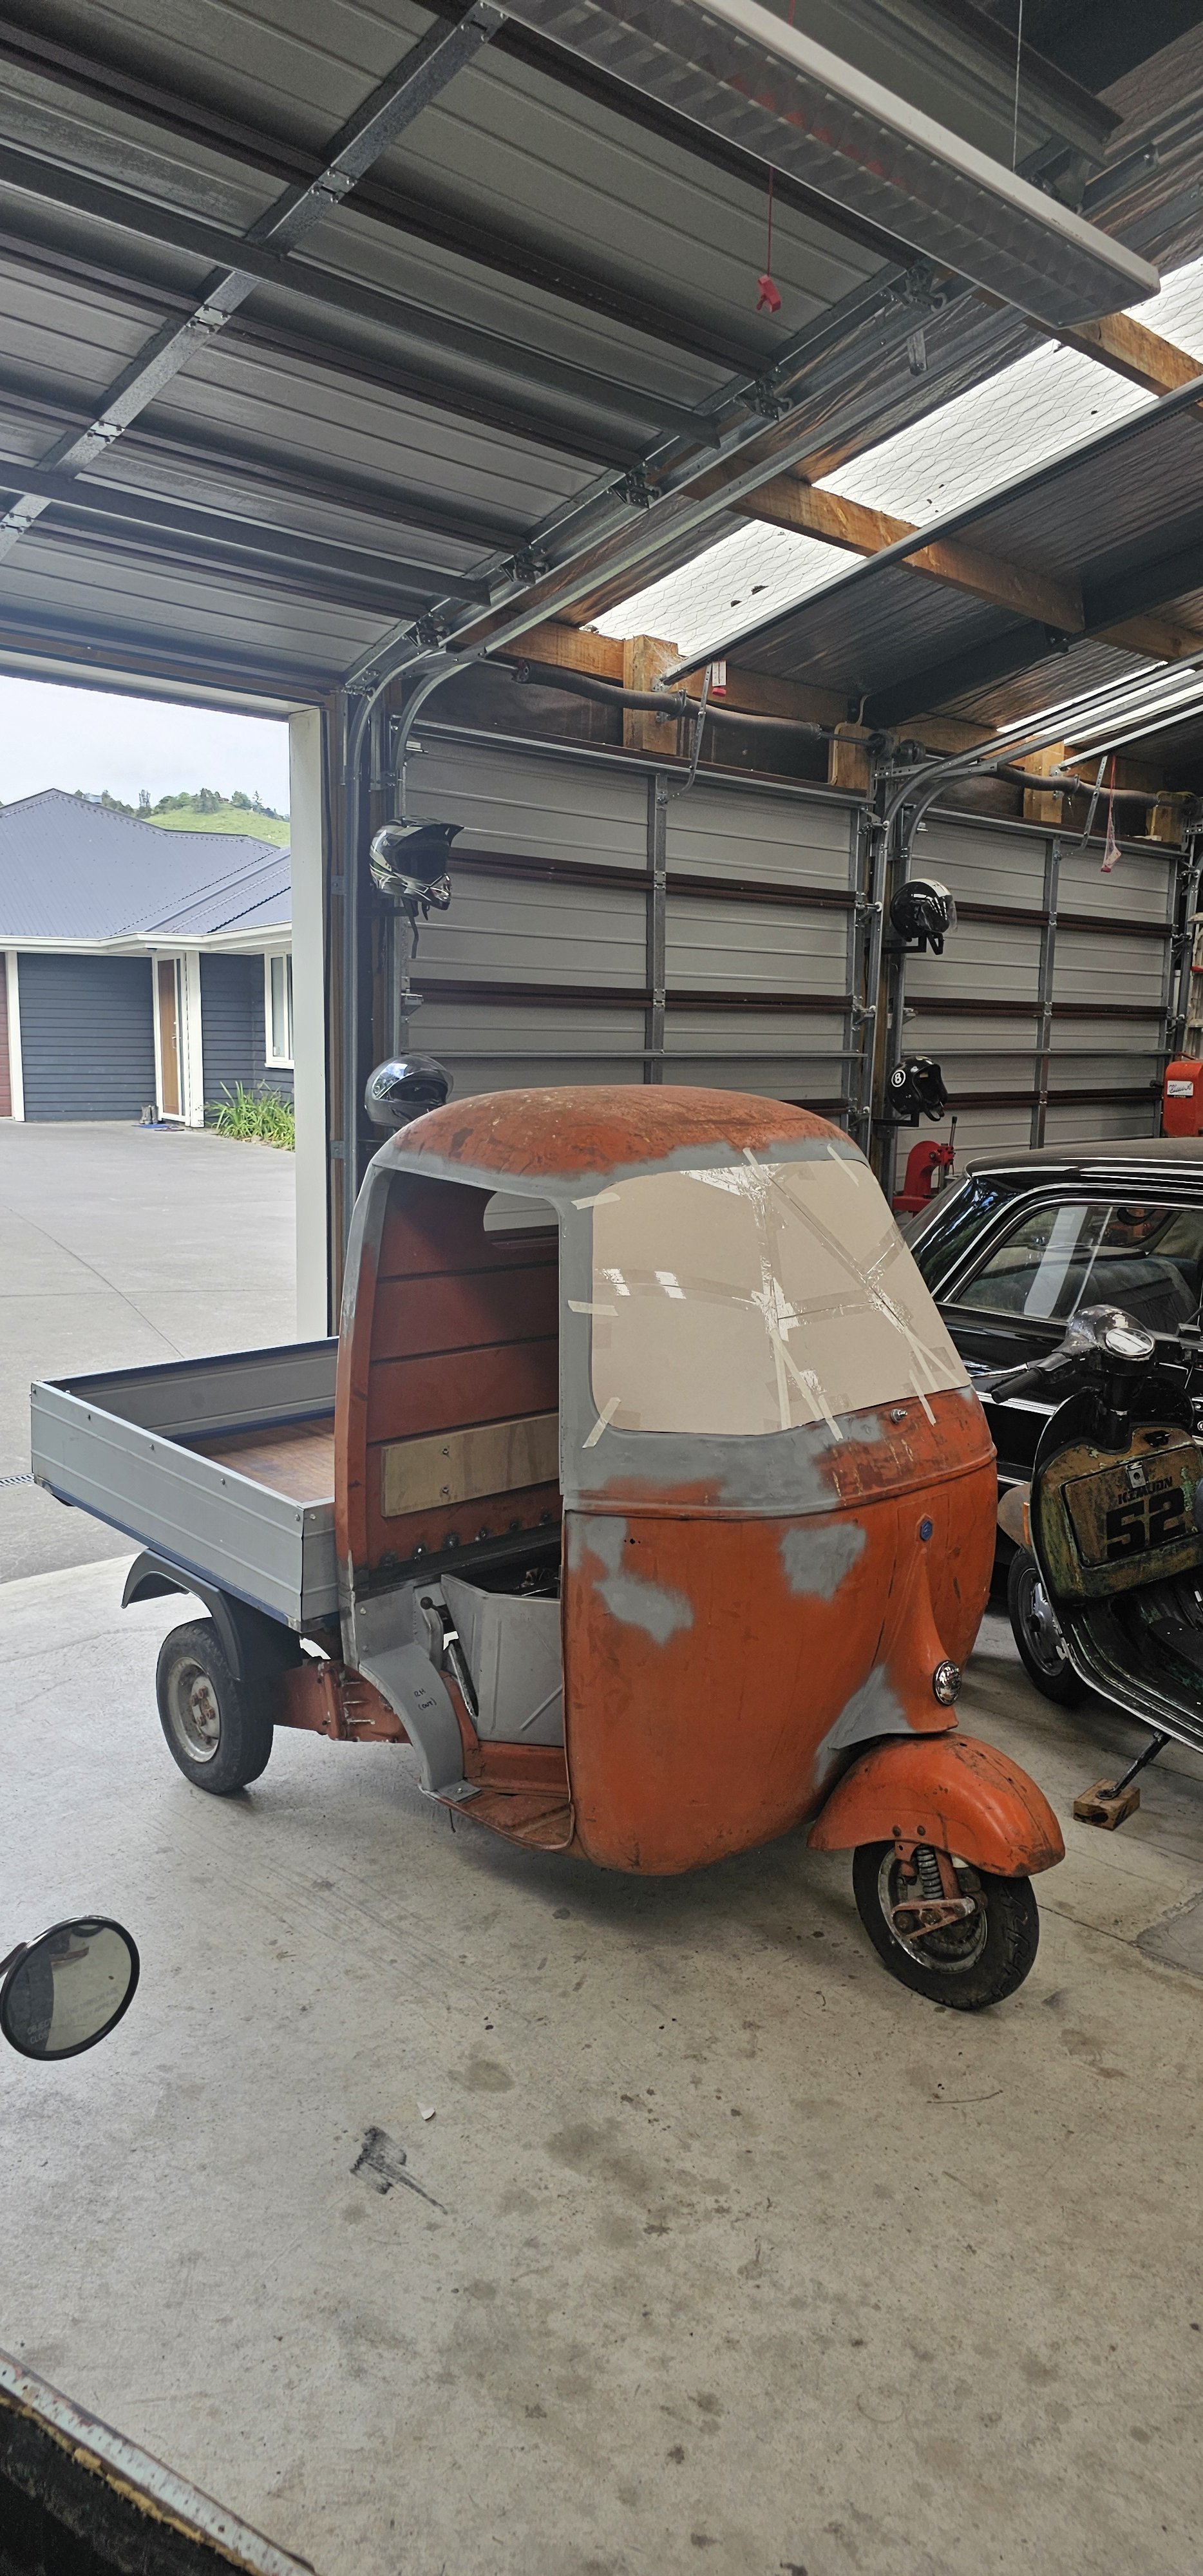
Hopefully everyone was thinking I was engine swapping the logo. If you have seen anything that I've worked on in the past you will know my skill set is make something pretty before actually working. Then worry about the driving/functioning later. The logo has fallen somewhere in the middle. (Currently) at this stage we are on track for the drags next weekend. Here are some photos from the past few weeks Thanks for looking
 13 points
 -
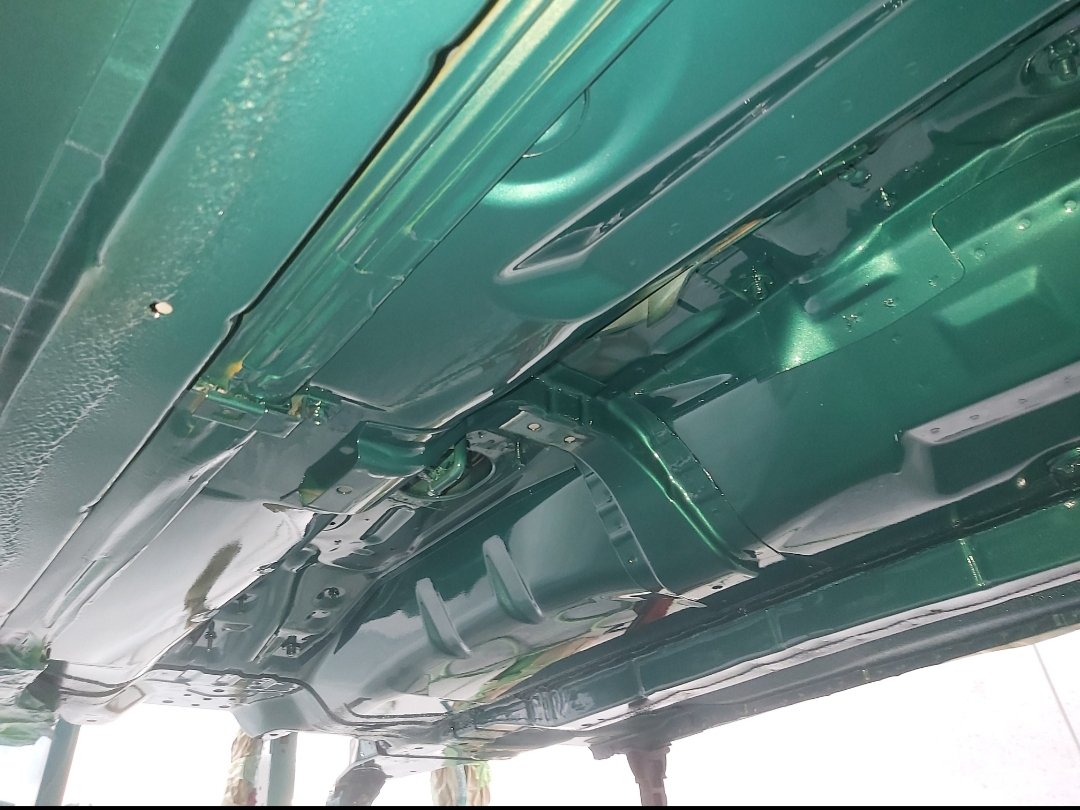
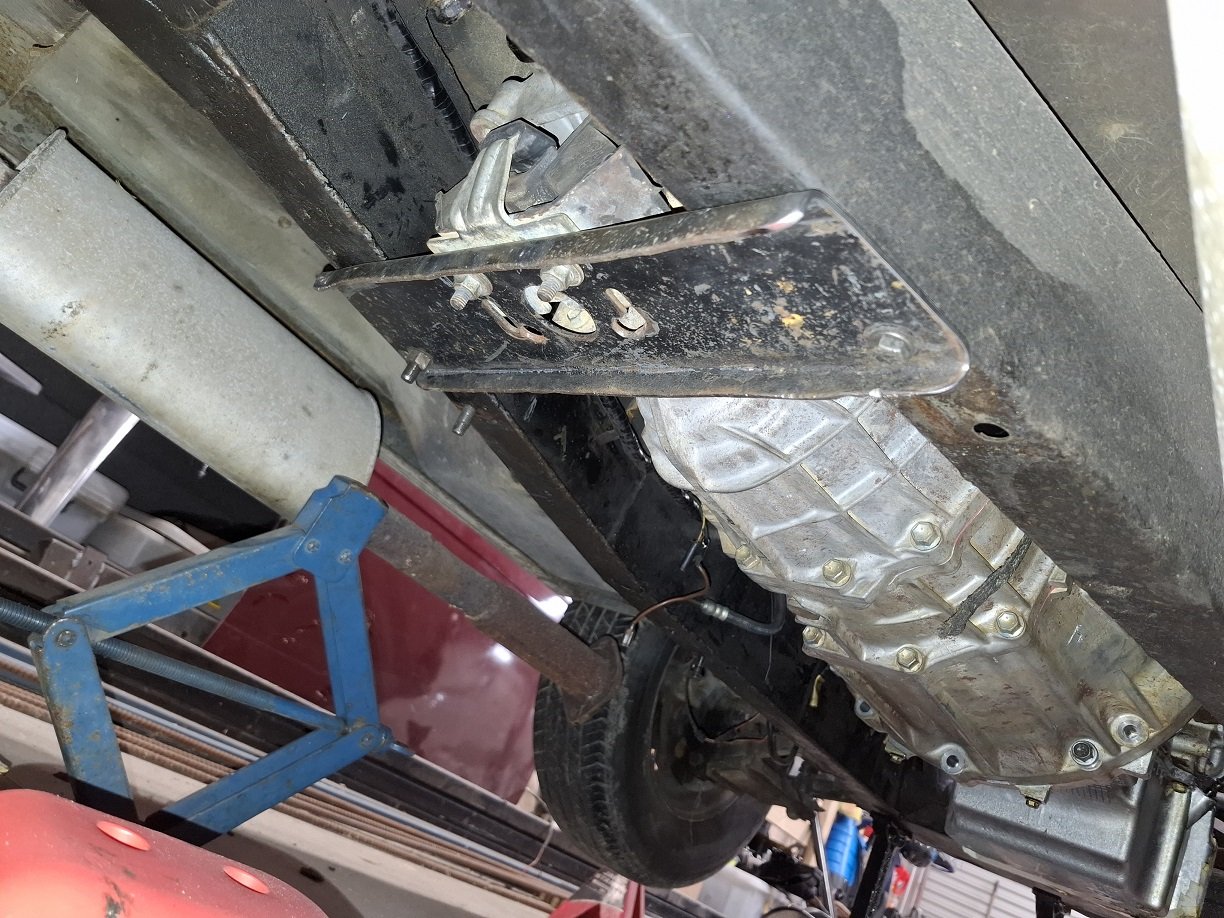
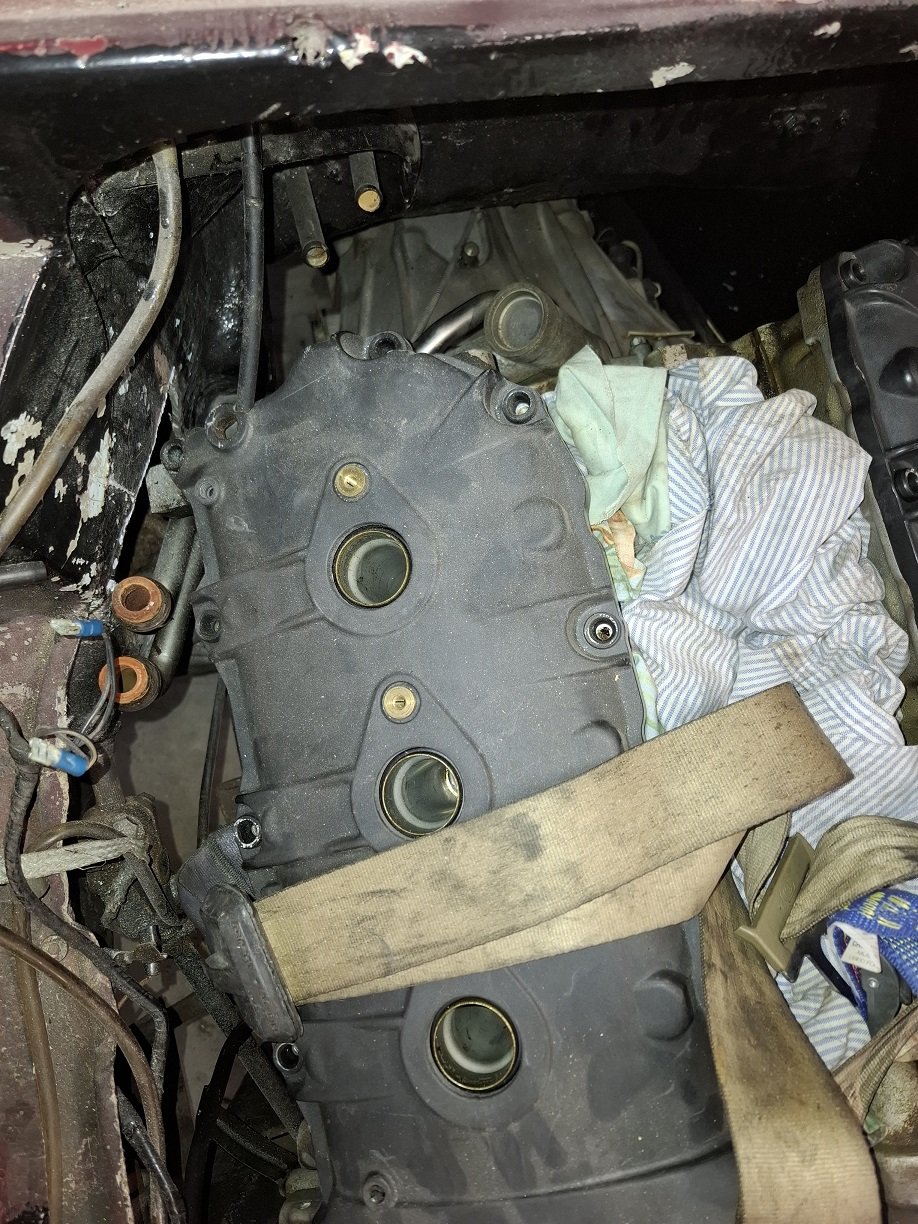
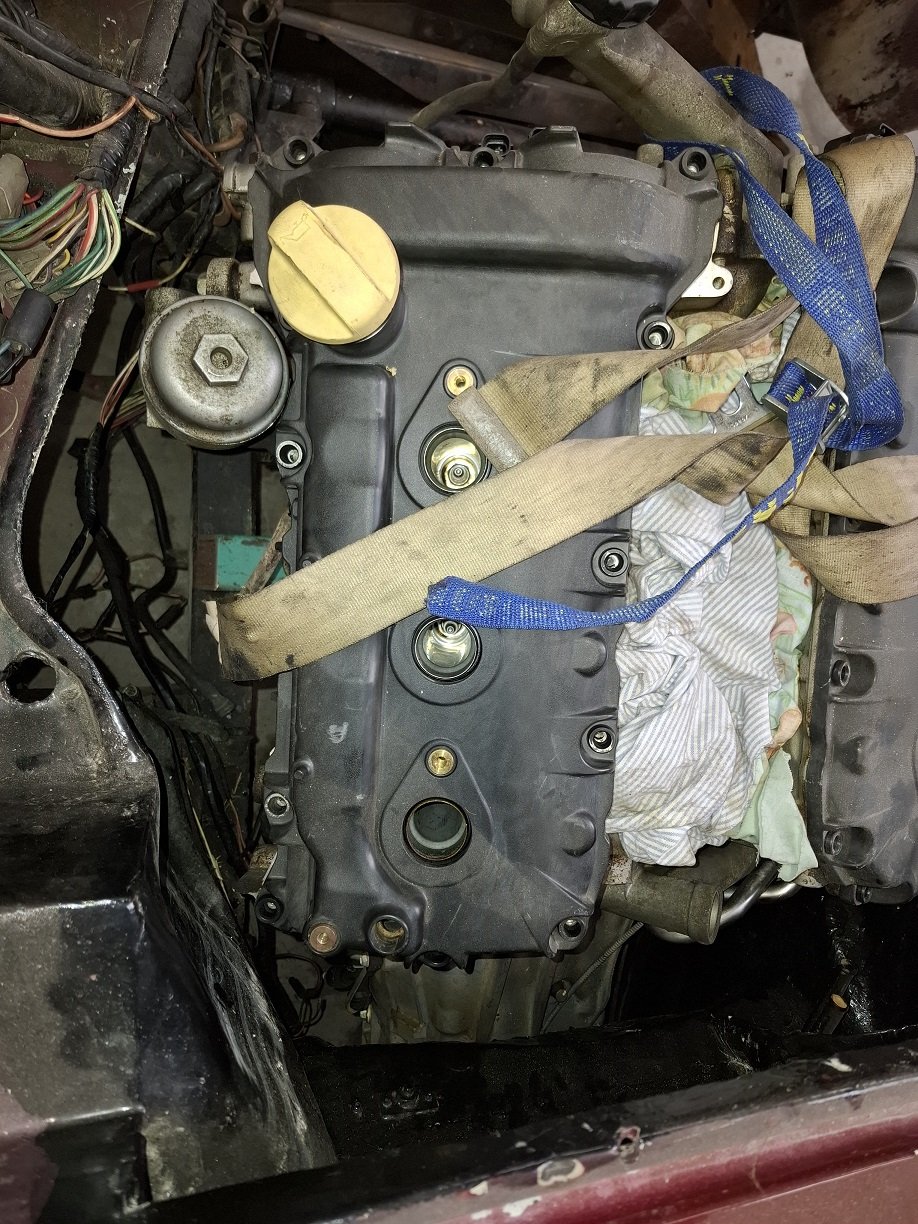
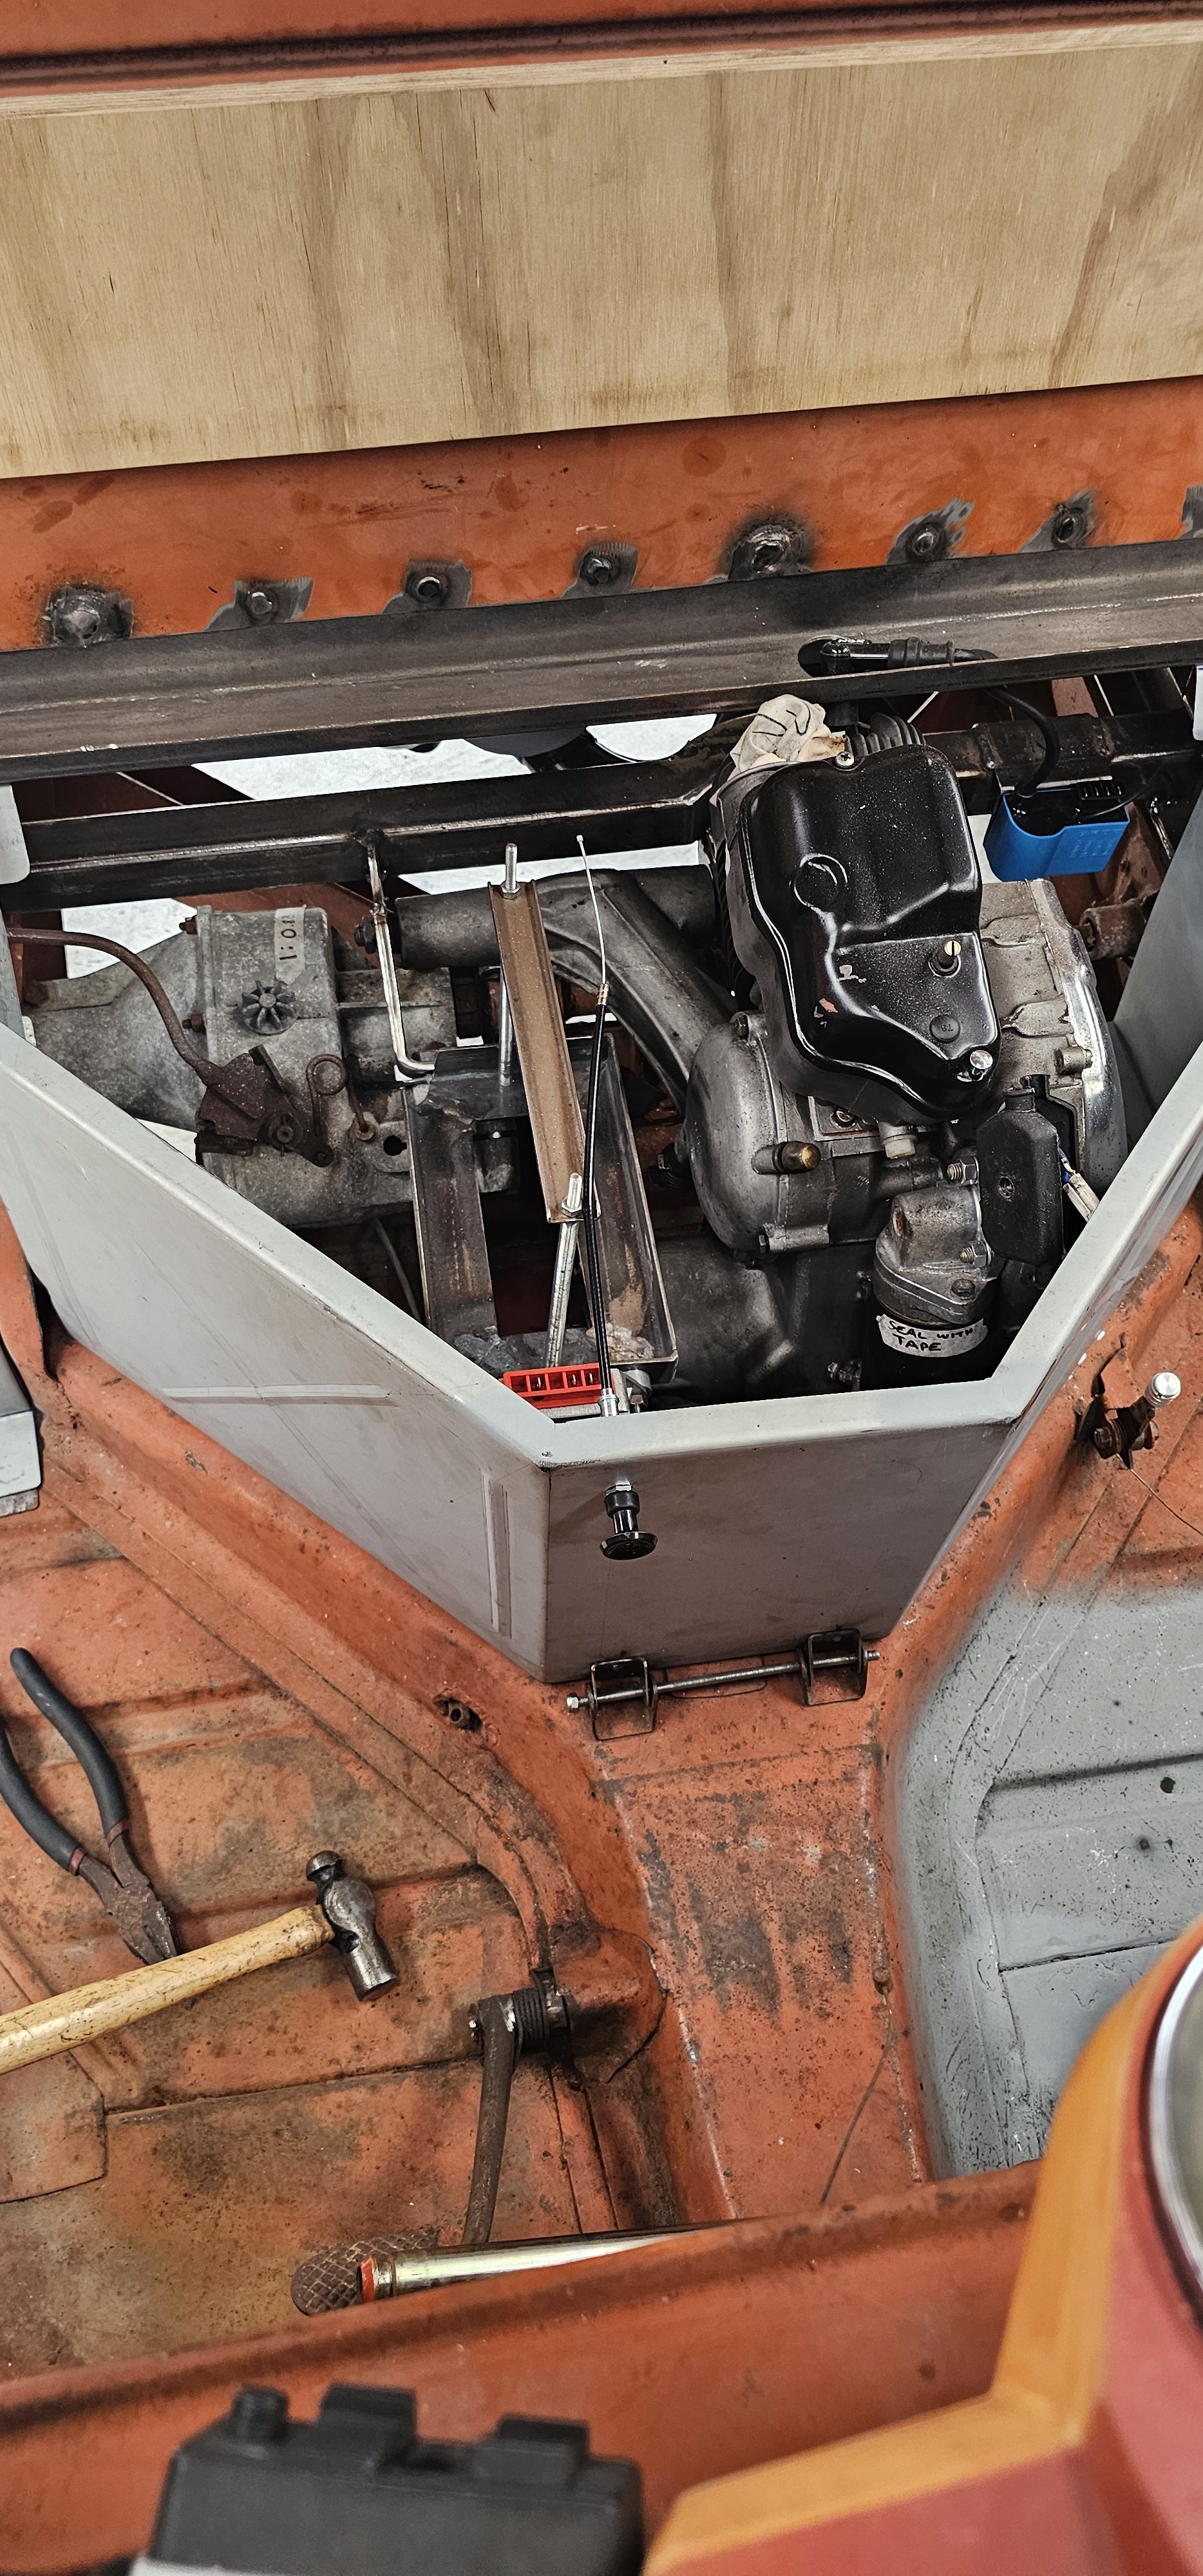
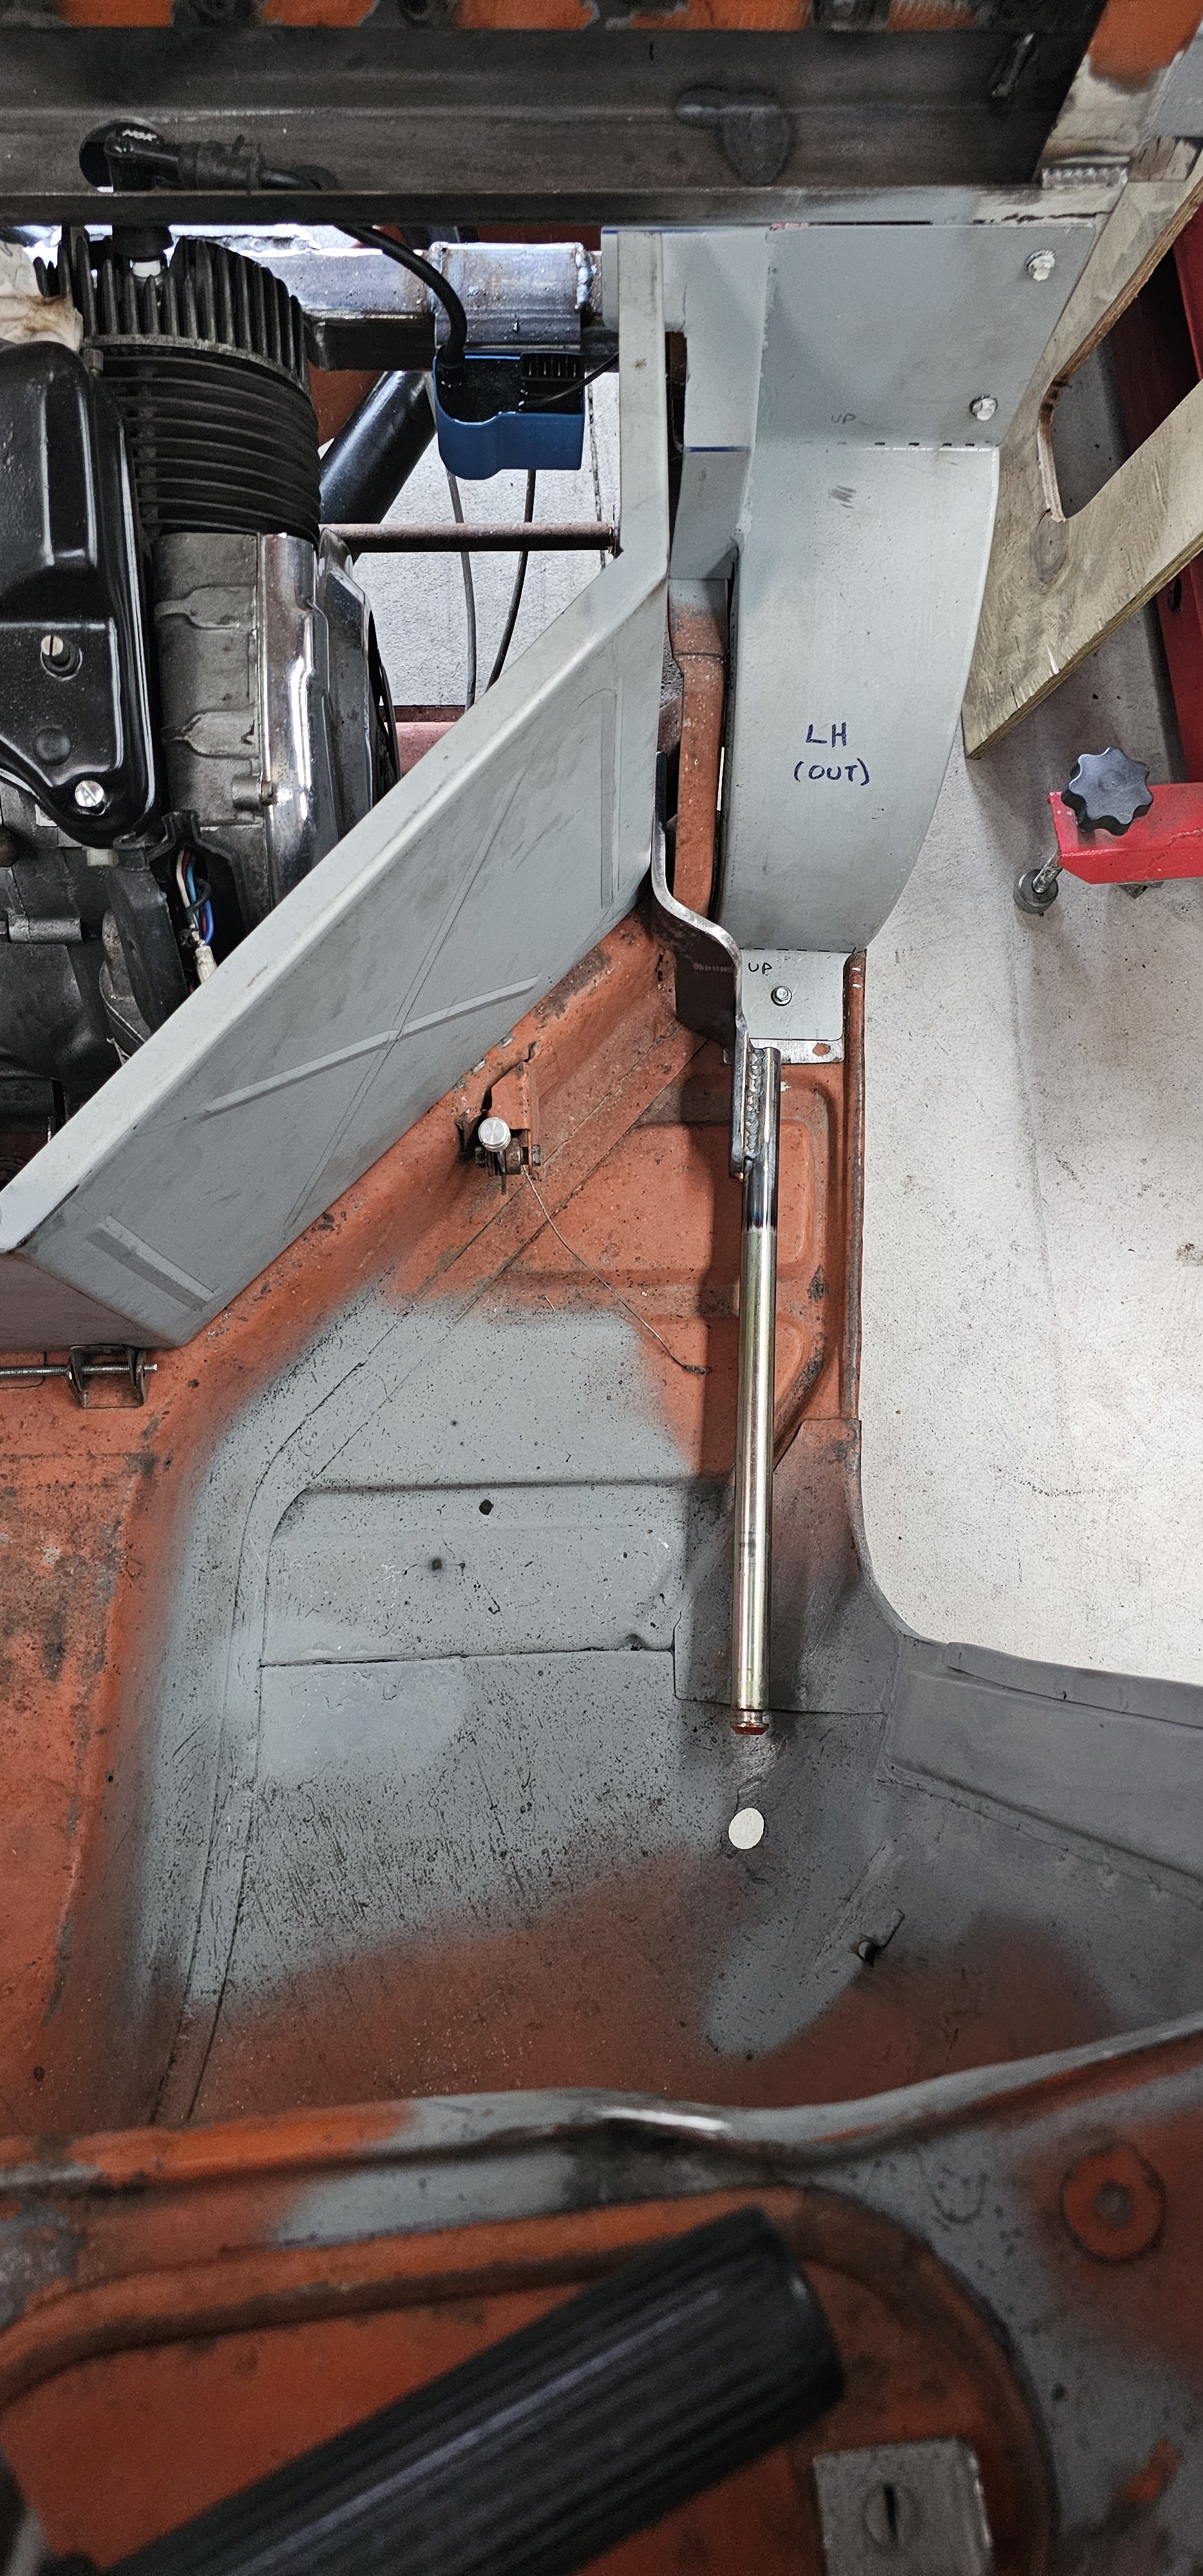
Spent some time getting the engine where it needed to be. Back corner of one head wanted to be in the same place as the footwell/bulkhead. The small amount of intrusion. Flipped the gearbox xmember backwards and it got close enough to work with a couple extra holes. I'll modify it a bit more to lift the box a little. As well as needing extra captive nuts in the chassis. Gear linkage didn't come with the box, they sell it separately, it also sits way too far back, so I need to make one. Or maybe adapt one from a K11 for the lolz
12 points
-
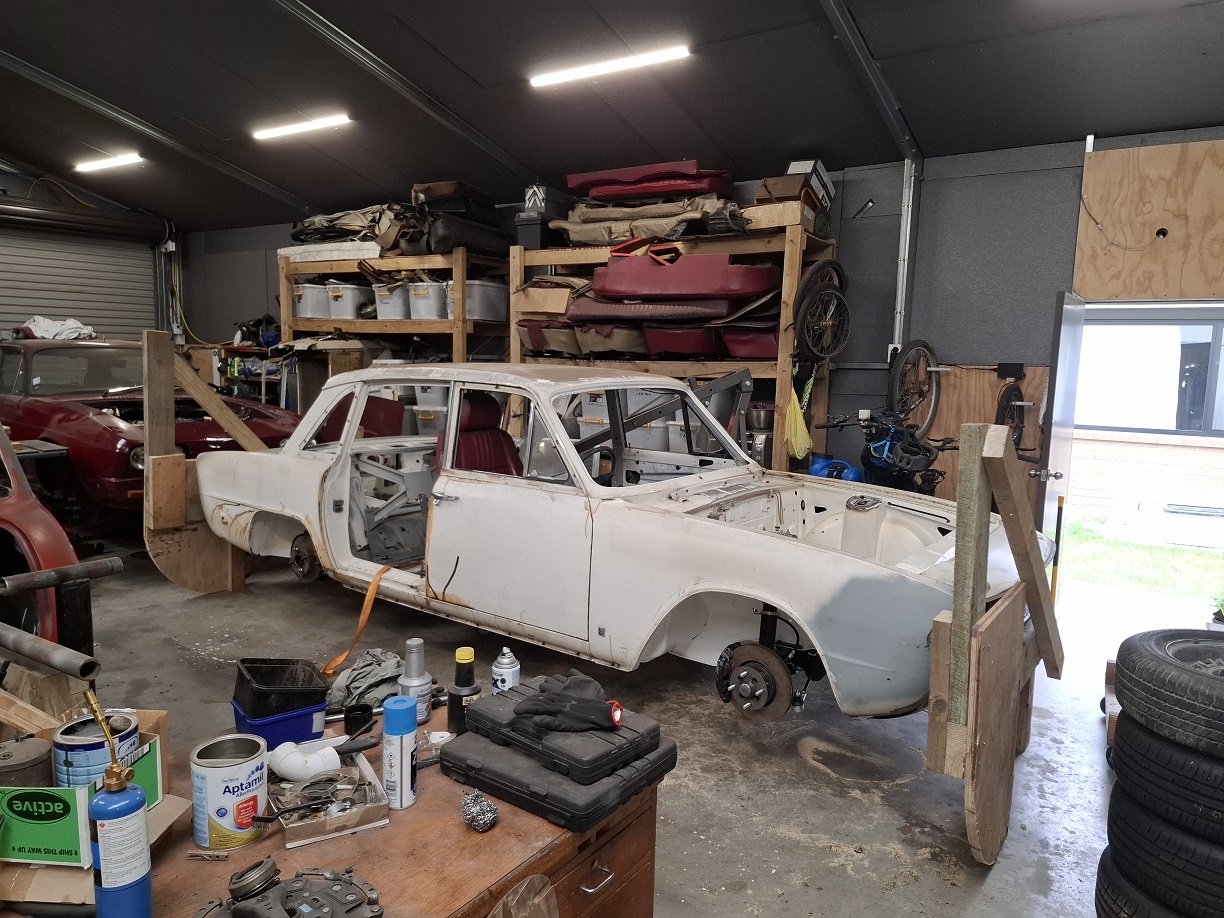
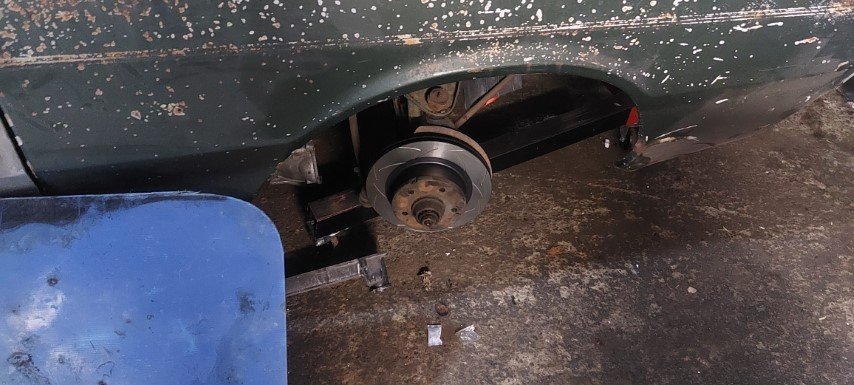
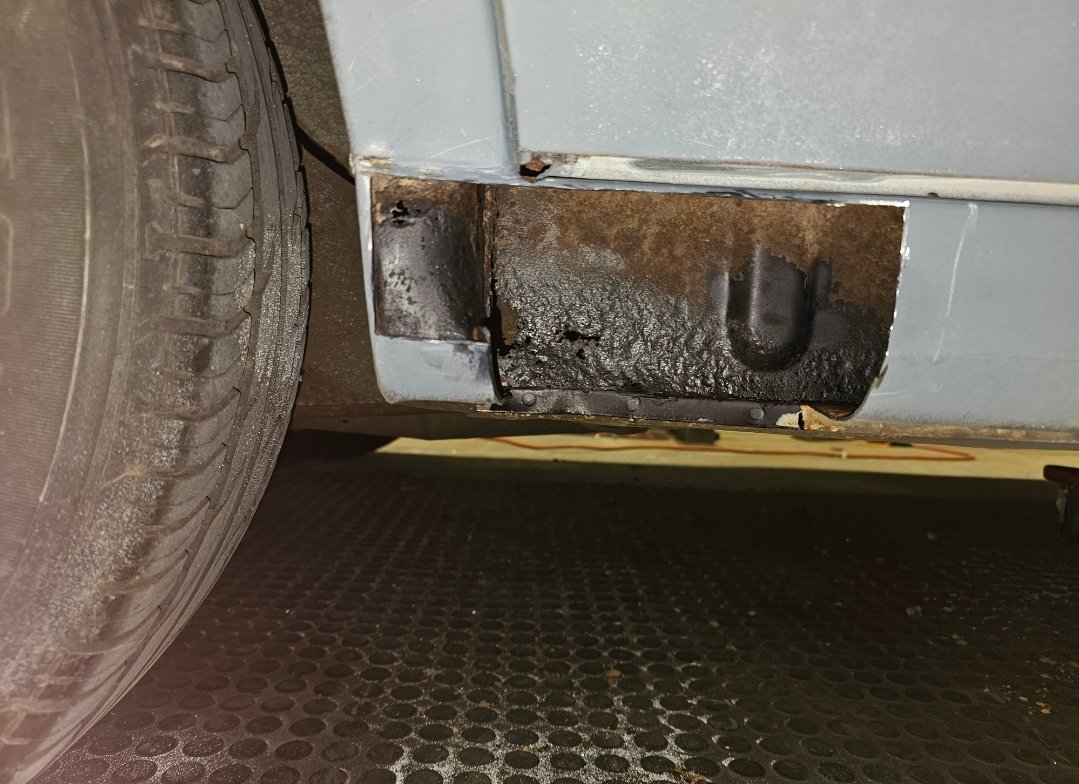
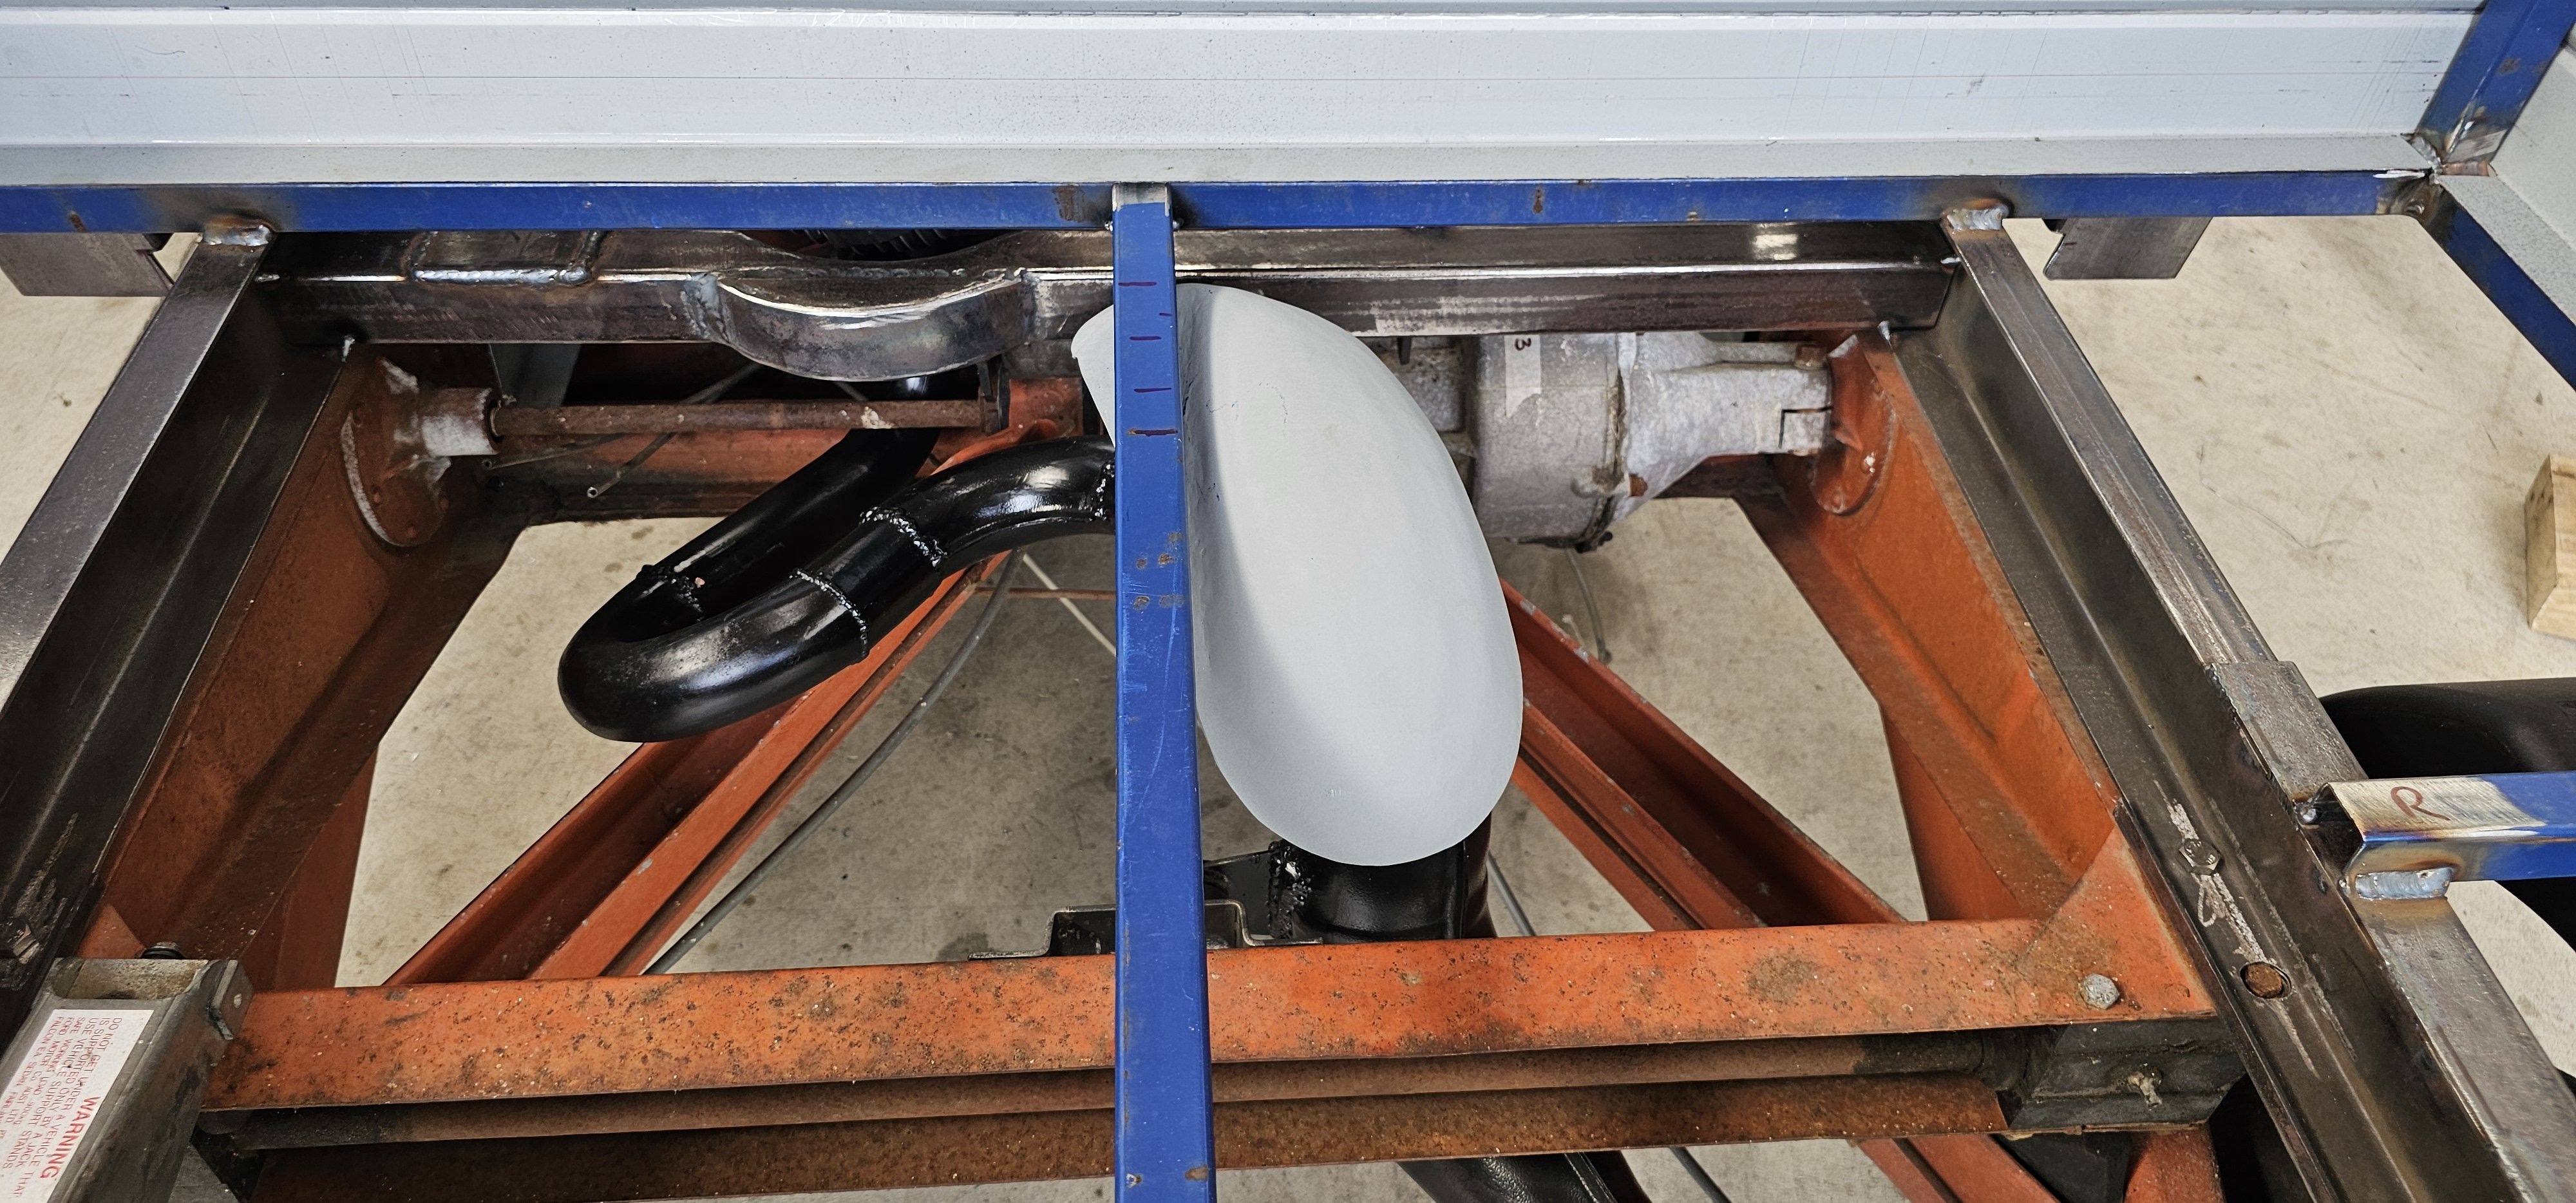
Reinstalled the underbits and put it back down. Now I can test the lines for the rear brakes. And need to make mounts for the passenger seat. It could then go on a wheel alignment machine to see if the subframe is mounted straight. Then put it back up. Take everything back off. Weld the subframe mounting studs so they can't move. Finish the welding on the underside of the passenger seat mount. Seam seal. Then some kind of top coat. Put all the bits back on. Put it back down. etc... etc..
5 points
-
so with the new air seperator cap on, the cooling system has finally been able to build to operating pressure. which of course means all of the leaks have now become apparent. Including the water lines that somebody secured with zip ties, wonderful I ditched the plastic AST at the advice of everyone and fitted an aluminum one as the original one is apparently a hand grenade Then it developed a misfire, and then I got too cute moving the thing around the workshop in small trips and inevitably flooded it, lesson learned. So. Changed the plugs (very wet and very worn), dribbled some ATF into the chambers, and it fired back into life with a hiss and a roar, or rather, a miss and a roar and a LOT of smoke. Decided to pull the leads off and check them. #2 leading was having none of it yeah that'll be the misfire Mazda had the forethought to put the coils in the dumbest fucking place on earth, so I had to pull lots of bits off to get to them. My wife walked past at one stage, saw the mess and said "I guess that's the end of that then isn't it" One silver lining is that I was able to take the throttle body off and get a real good look at the fast idle adjustment (which is on the back side of the throttle body because it was designed by the same guy who mounted the coils). found a wear notch in the idle stop cam which probably caused some of the weird surging idle, dressed it out. I'm conscious that with the age of the car, anything still original on it is probably getting towards the end of it's first life. I don't really want to just clean out that coil and use it as-is. I definitely don't want to put them back in that location. The stock coils are apparently good enough, but they're pretty pricey new from mazda. And the engine bay is cluttered, there's no really obvious candidate for relocation. So again I'm staring down the barrel of spending lots of money modifying a car that I never really intended to go crazy with, because the alternative is spending lots of money building stock problems back into it I'd add more (not particularly interesting) photos but I'm not savvy enough to resize them.
5 points
-
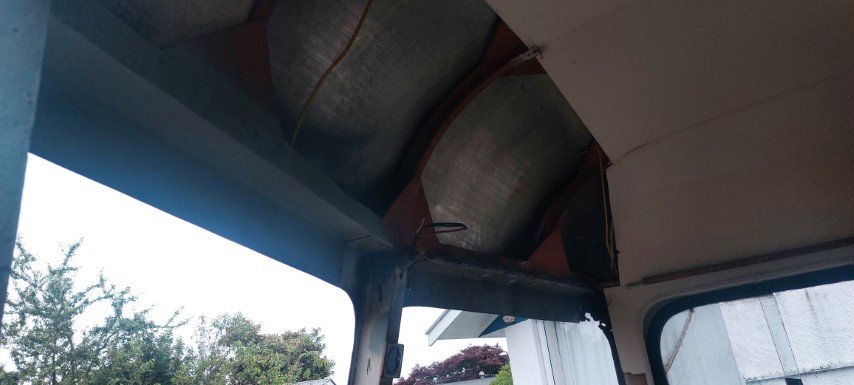
Almost finished the rust around the front windows the last of it in the body yay!, bonnet is going to be a pita to fix as don't really have the gear to shape it nicely, just need to replace the edge's on guards and then they are finished too!
4 points
-
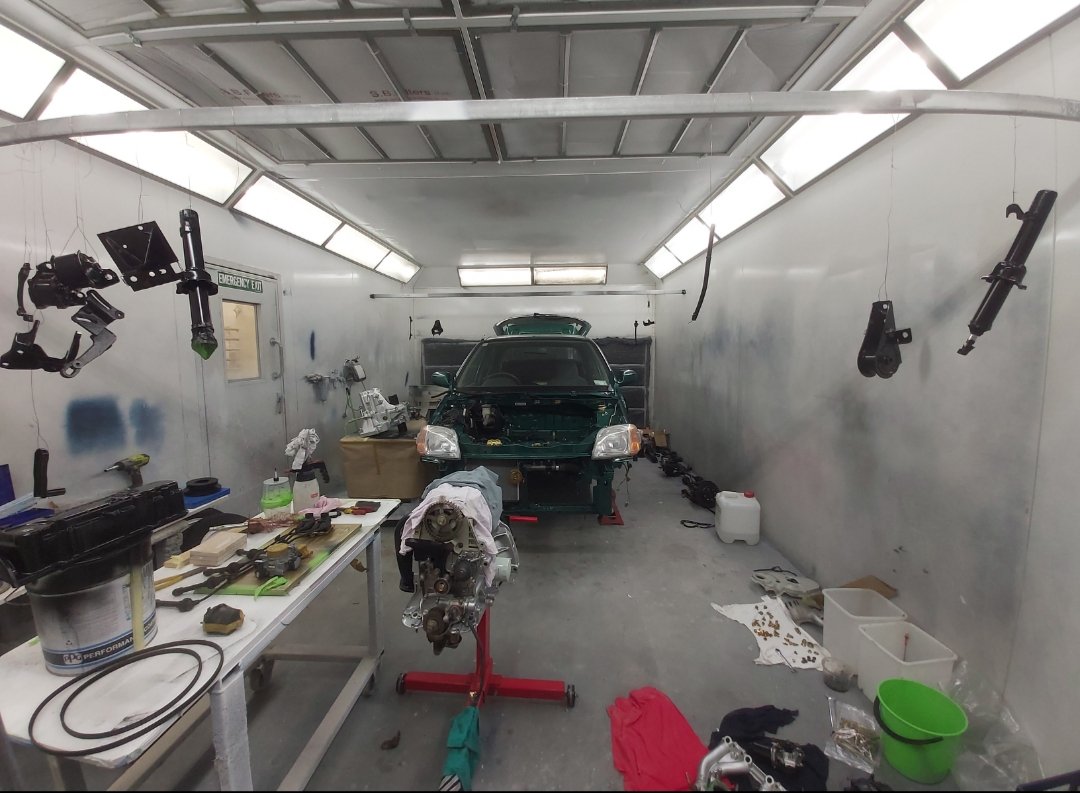
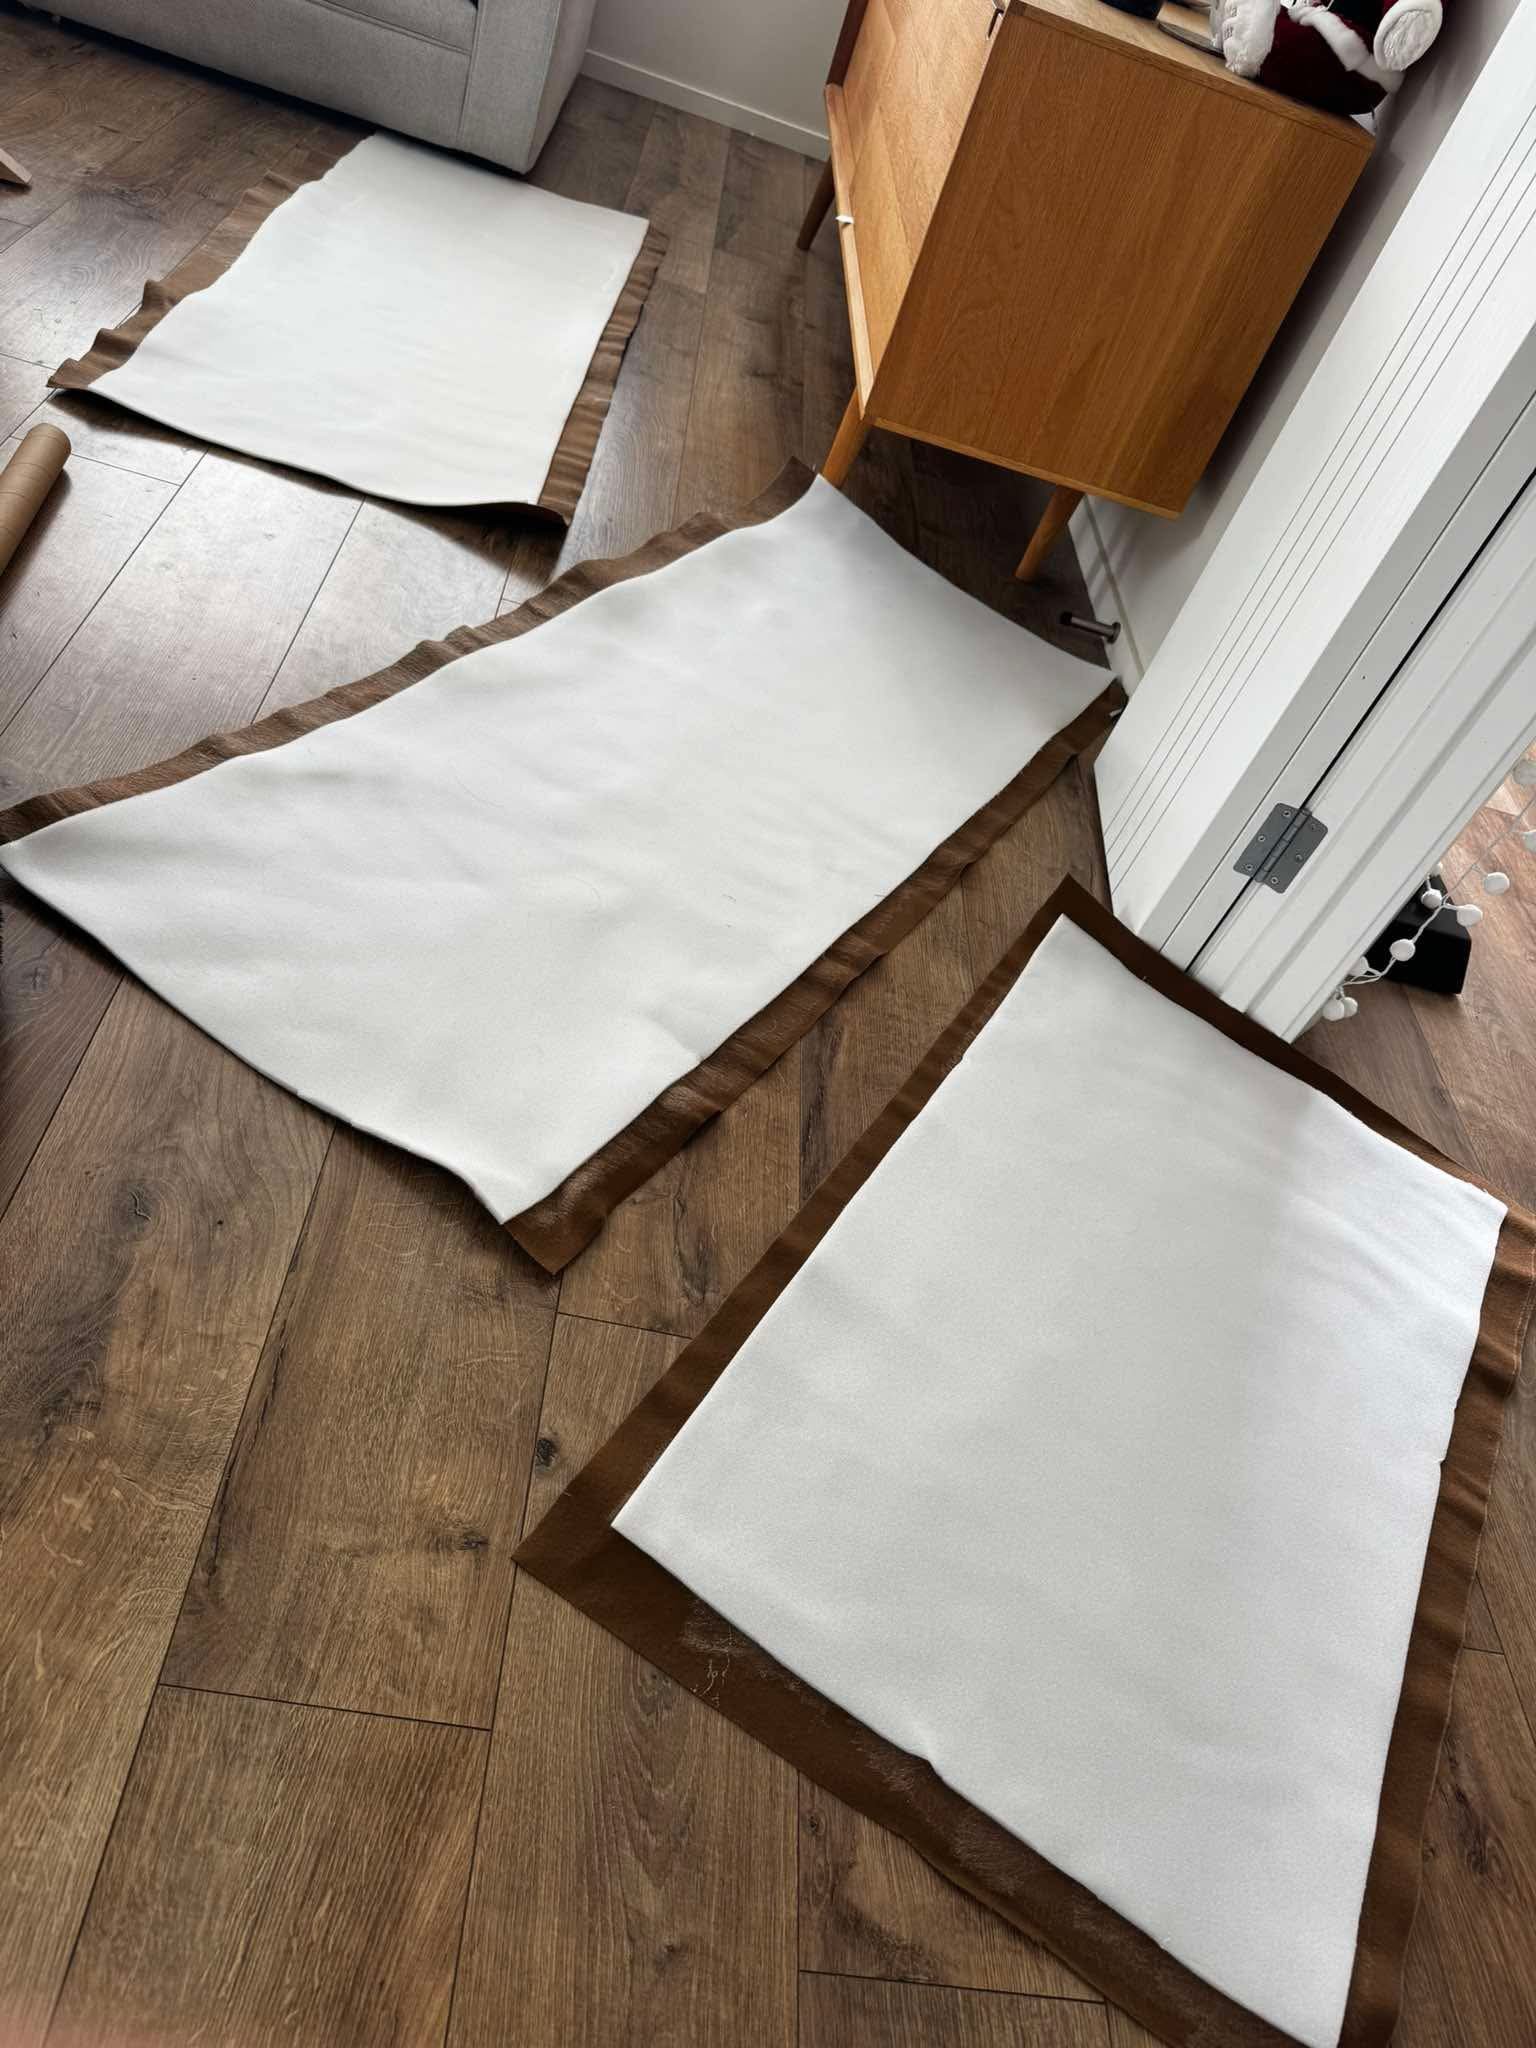
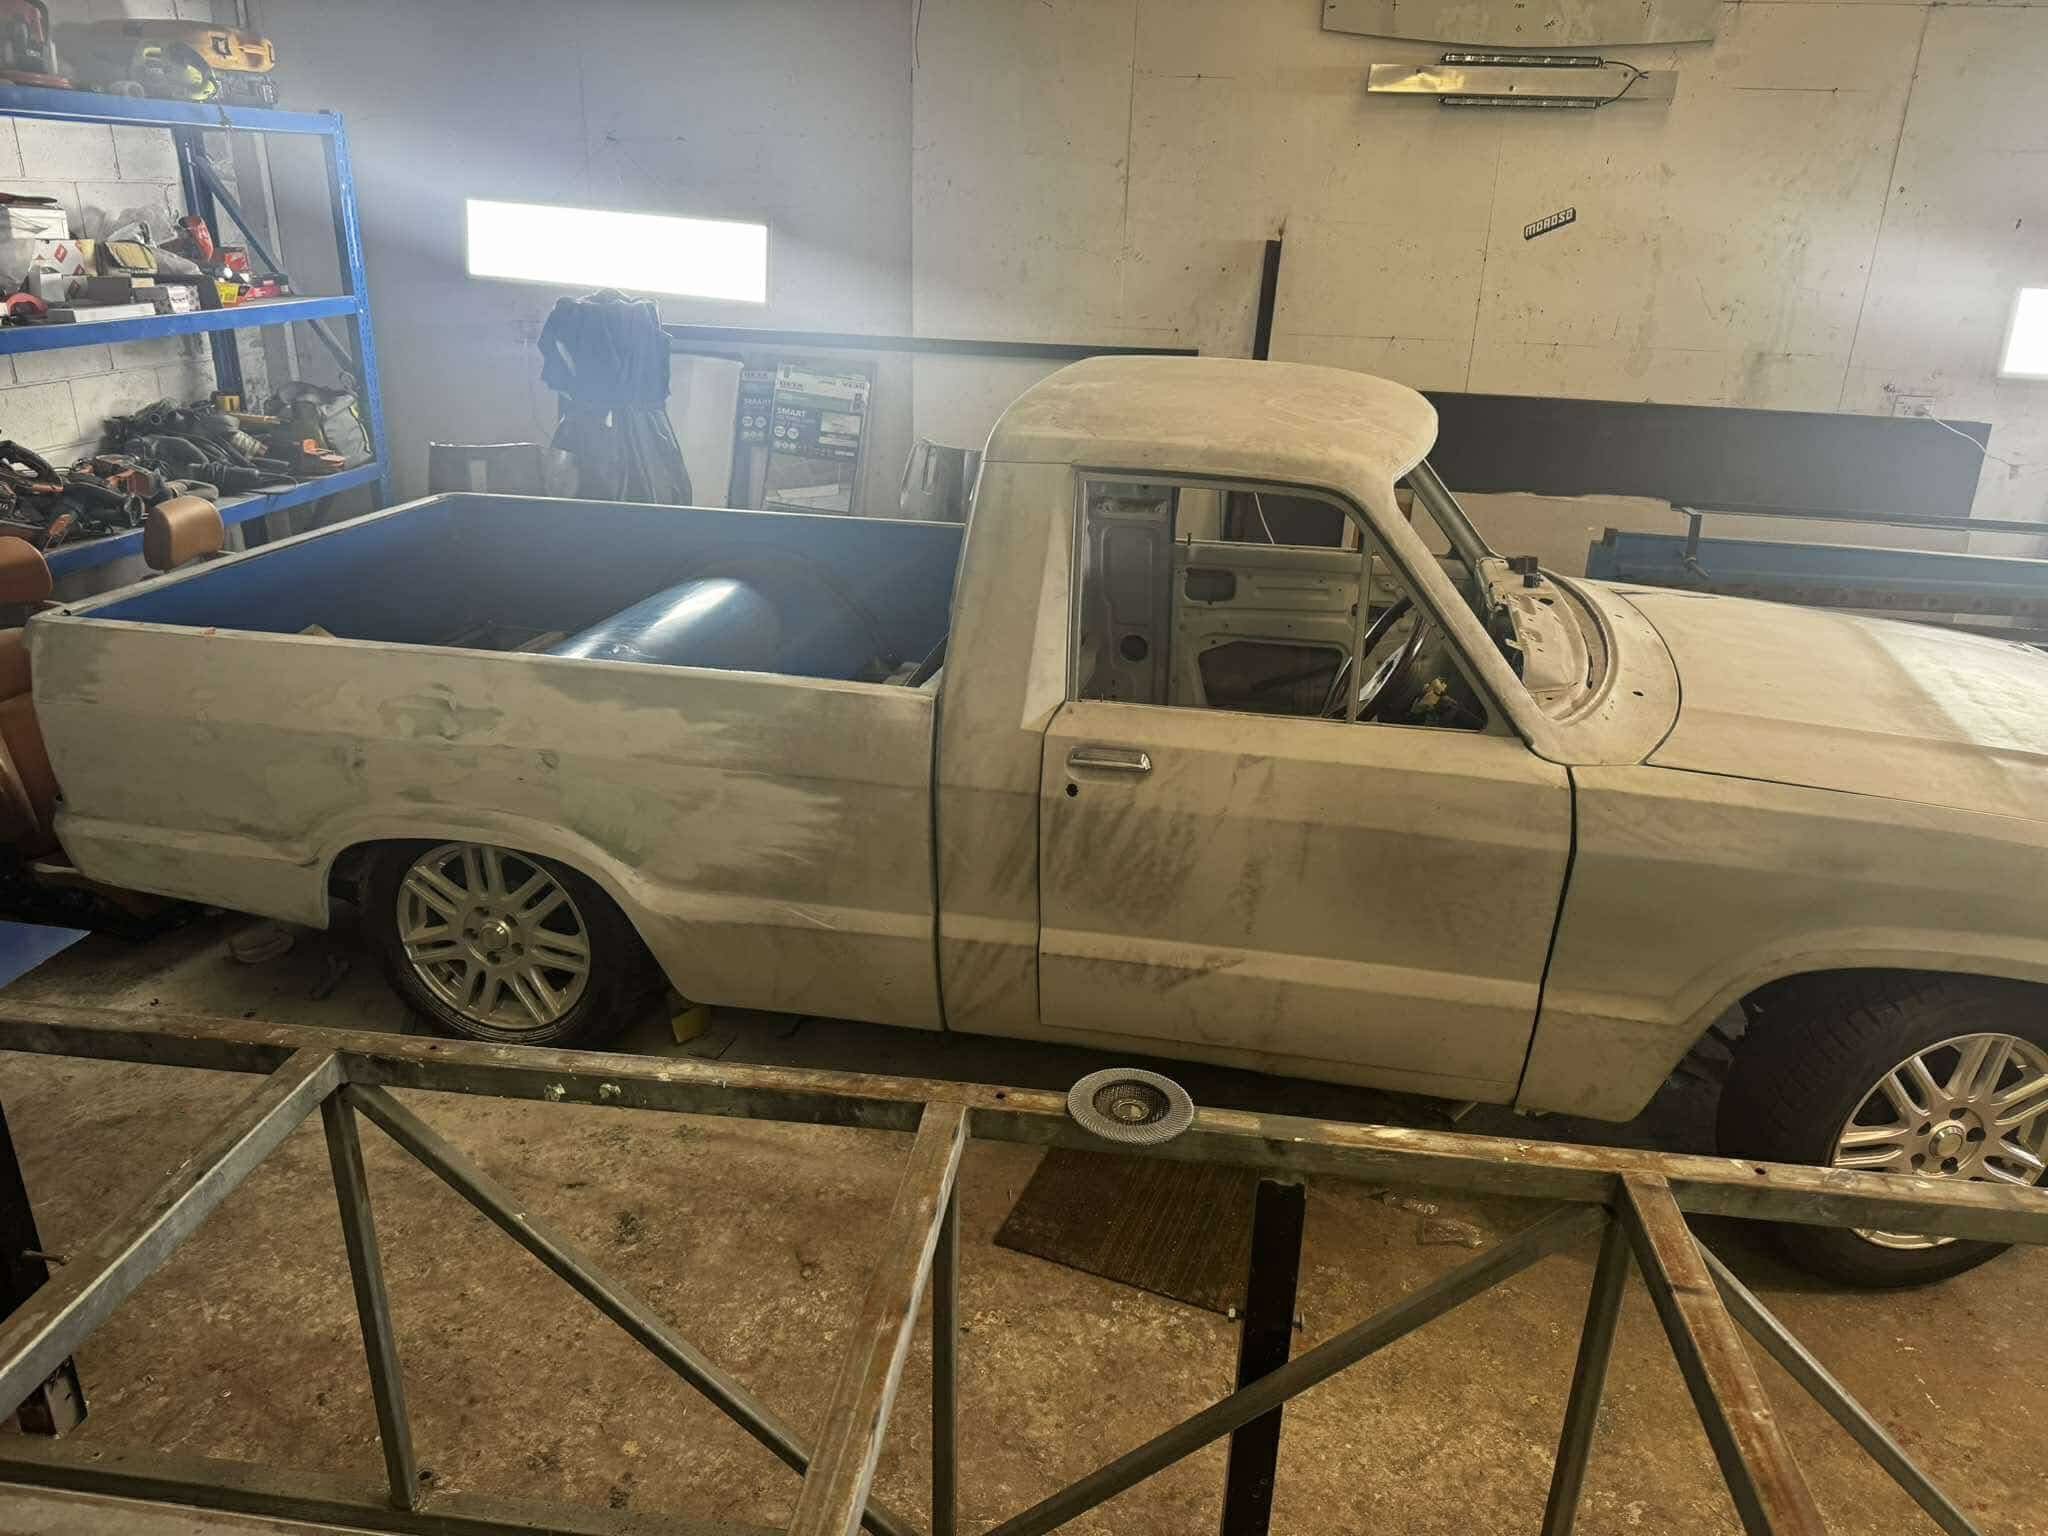
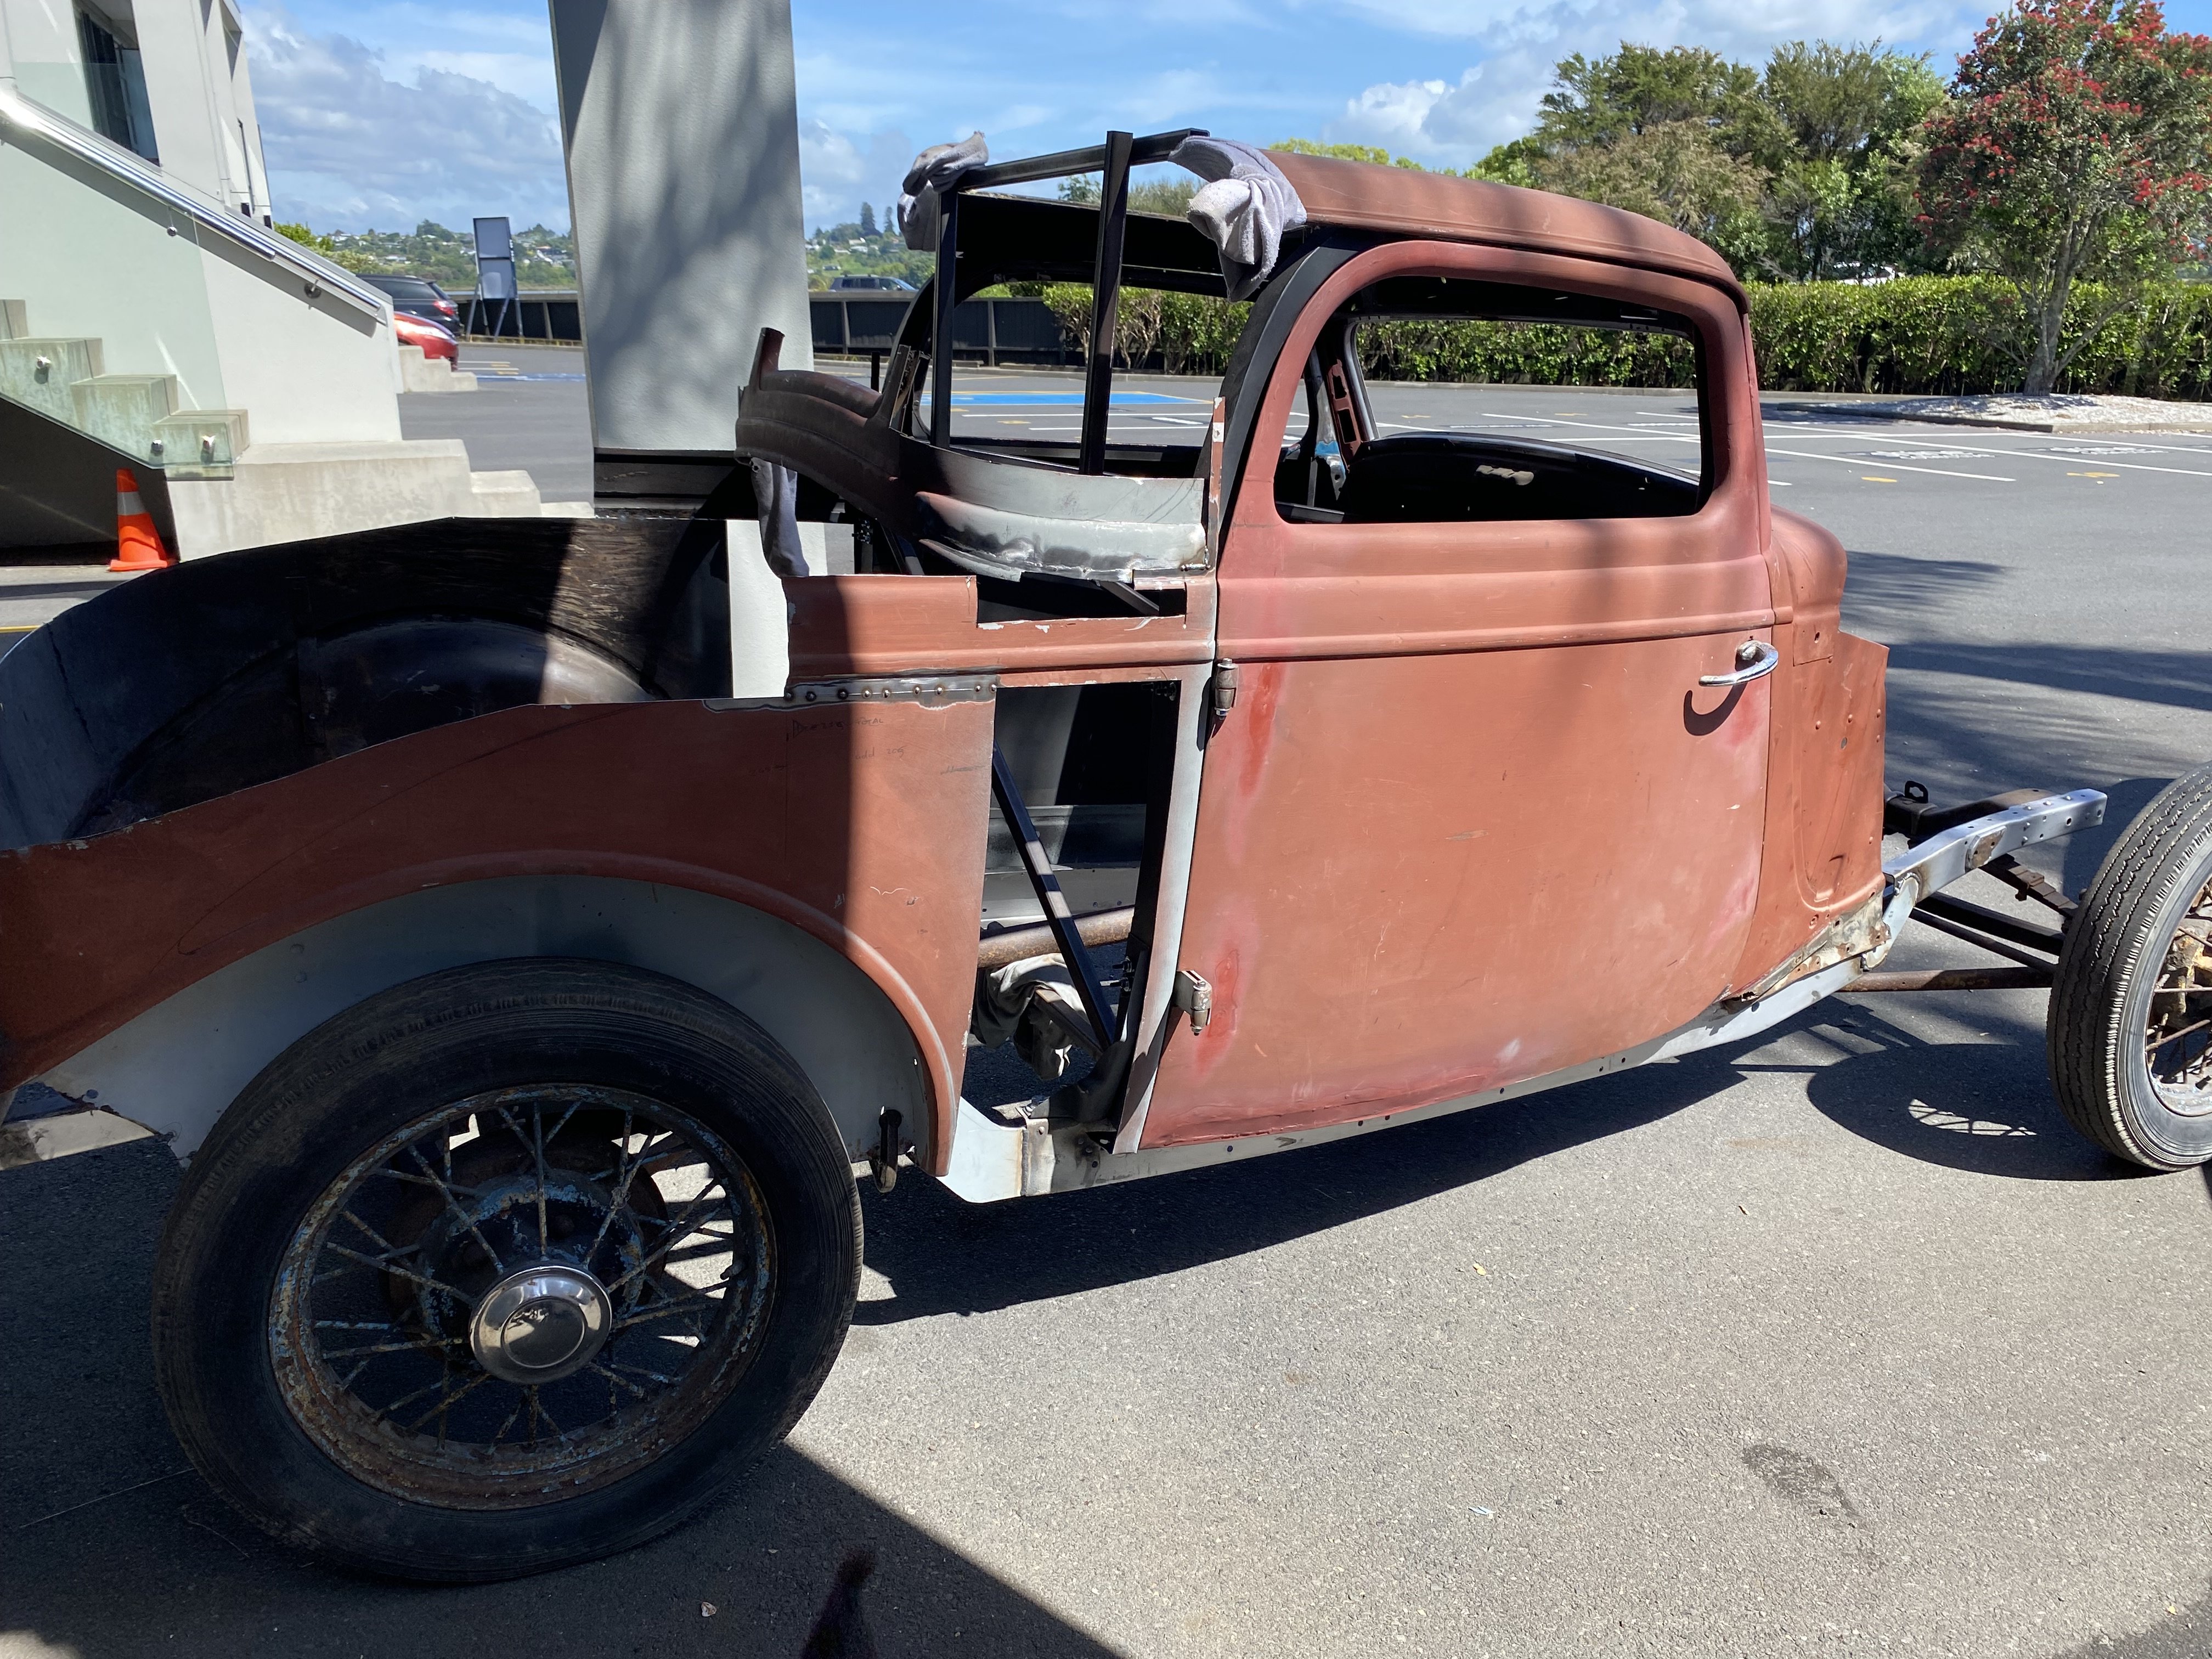
Well she’s ready to go off to paint tomorrow (I hope). its going either way. i guess i need to find some shims for the axles cos when they’re bolted up tight it isn’t free moving, loosen them off and it moves. Joys of putting things together that someone else pulled apart. so apart from the last minute body work i have started on the interior work. this build has really been an in house deal, aided by useless trades giving me the run around. thats ok, i get to upskill and try my own ideas. Im not scared of it turning out crap, I’ll just redo it and learn more along the way. so I cut out the door cards, kick panels and roof panel a while ago. went and purchased some upholstery this morning. went with a plush interior vinyl and 6mm foam backing. have it glued together ready for the patterning phase. Then will get the Mrs to help with stitching. once the ute is back I can do carpets and final fit out. while it’s away I’ll continue with the dash panel and procurement of brake parts (hard line, fittings, hoses, pads etc). I’ve also finalised the deck panels and have some more finishing to do with fit and finish. I added in the roll panel over the diff. This is prep for any future notch/4 link set up. i will complete the floor once the fuel cell is in
4 points
-
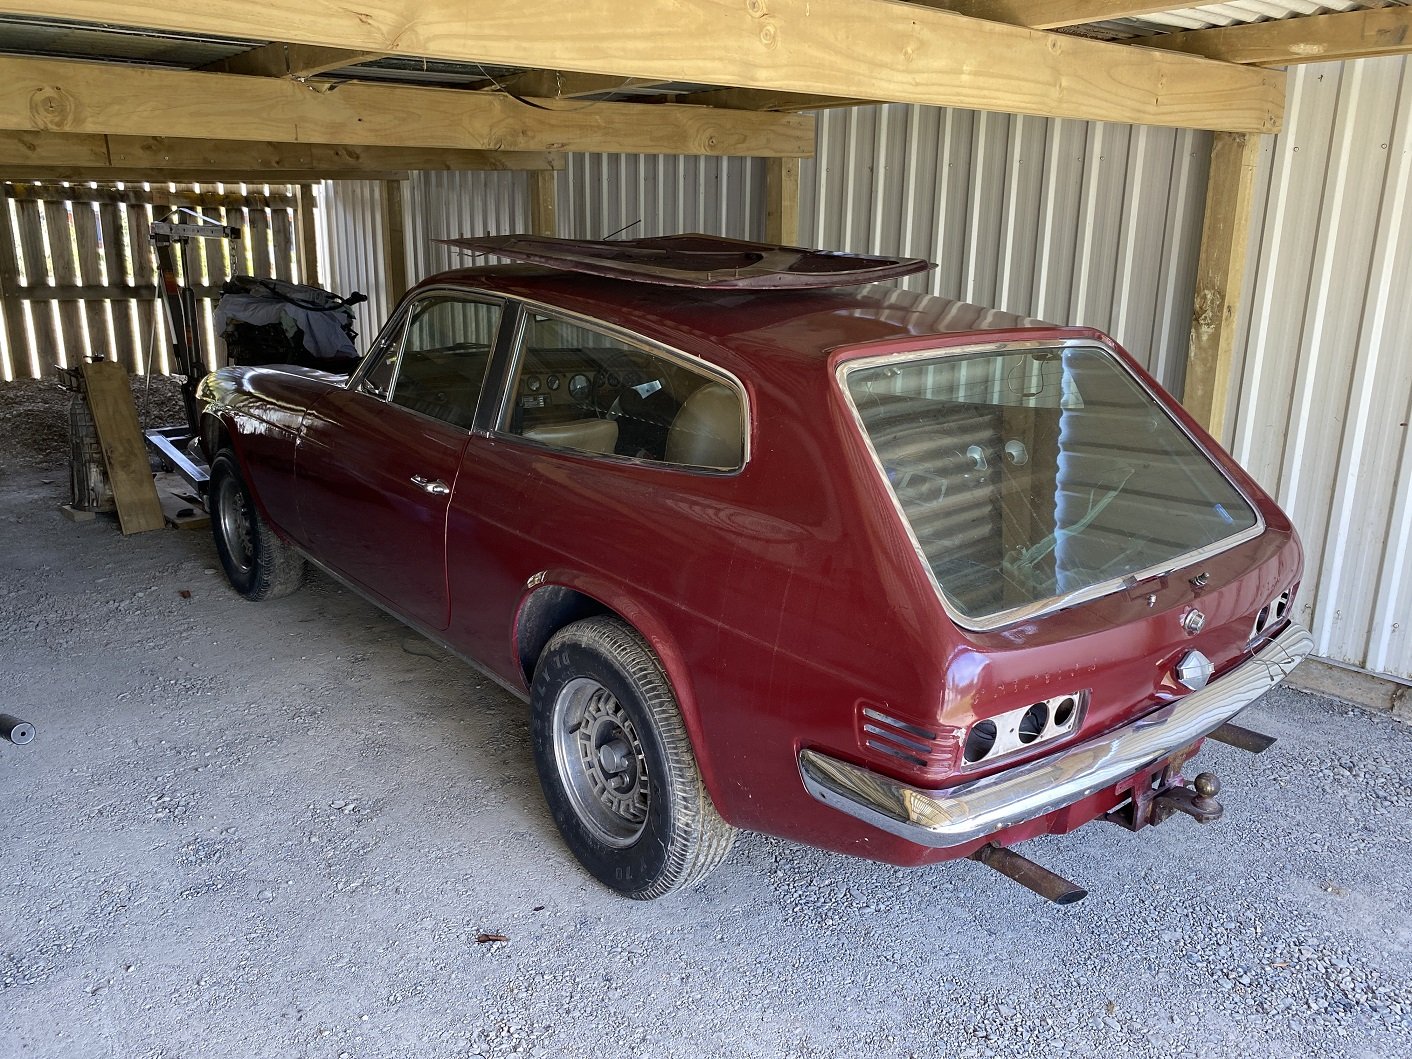
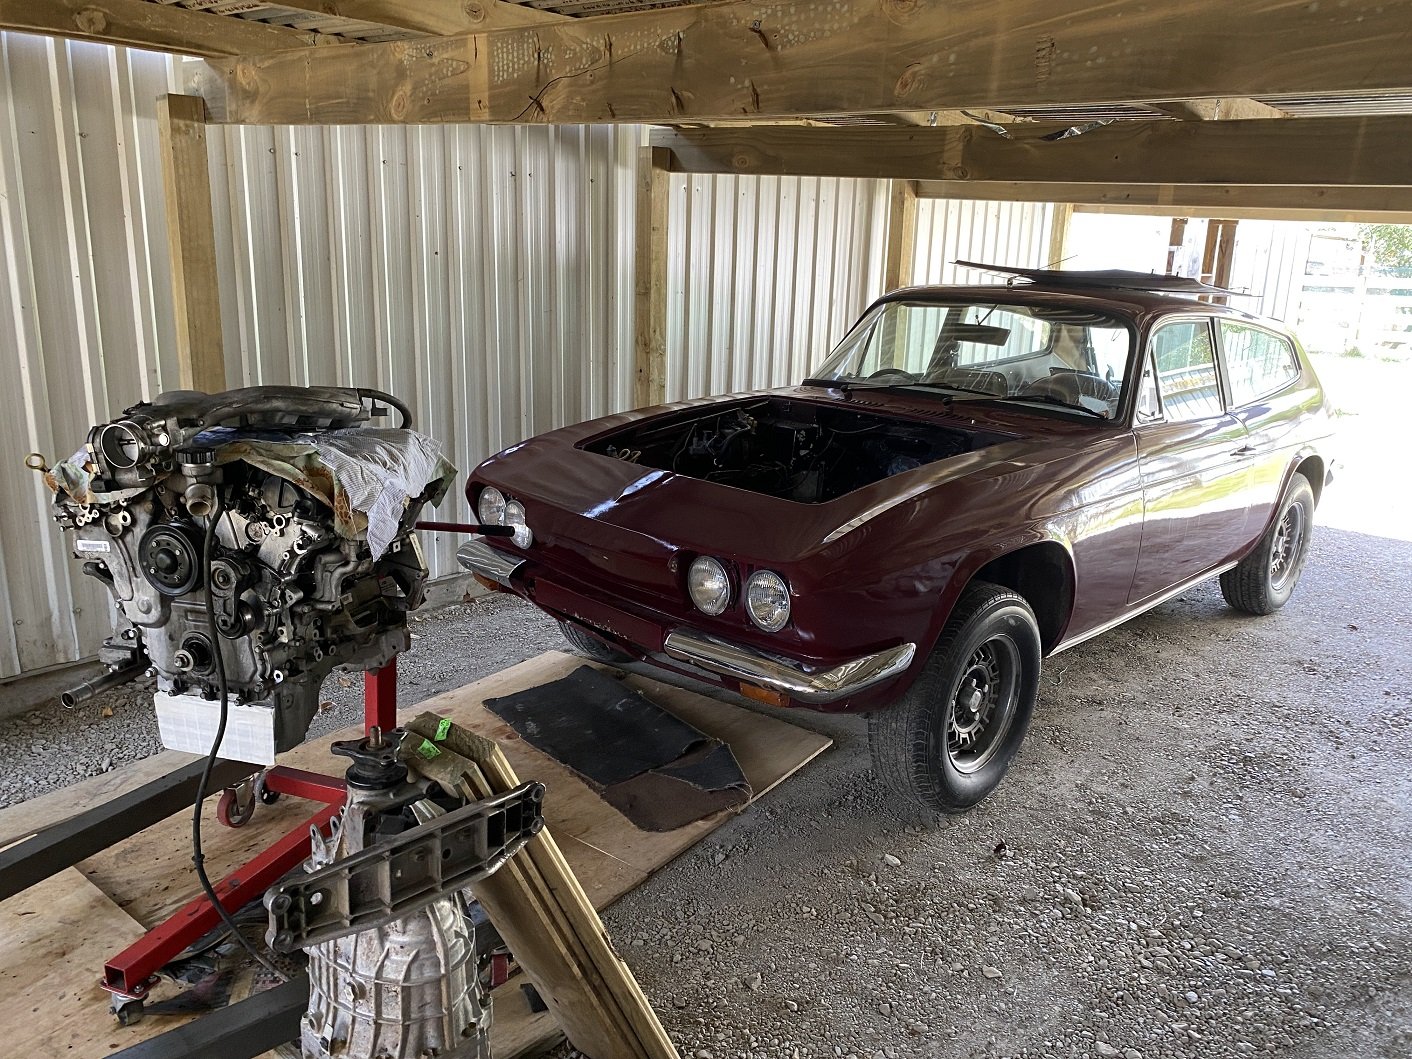
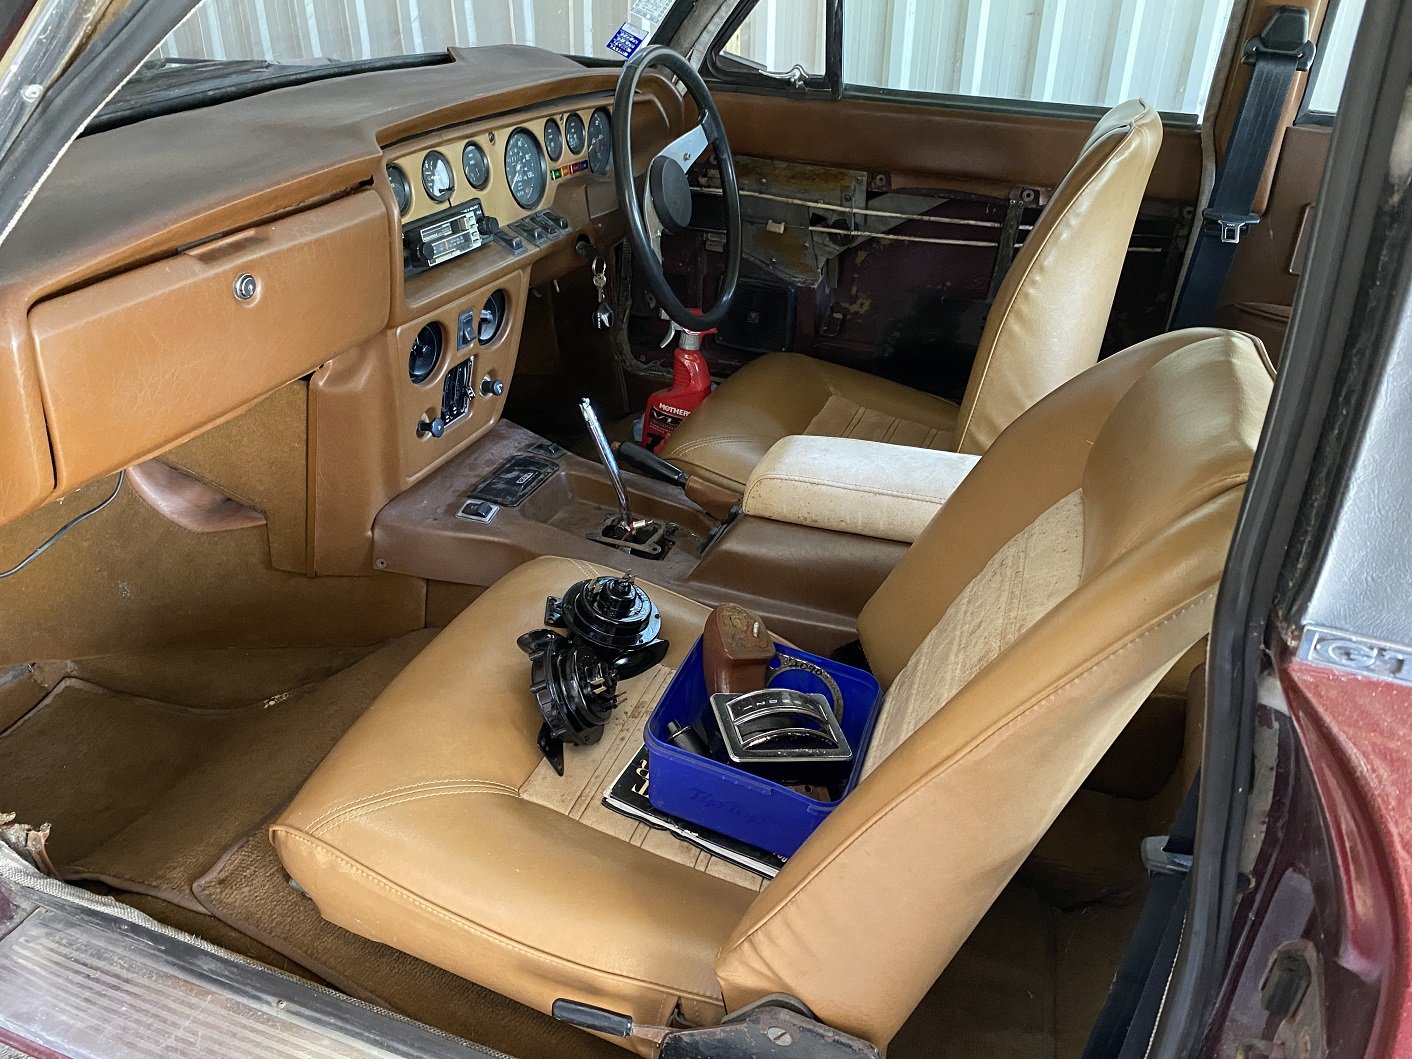
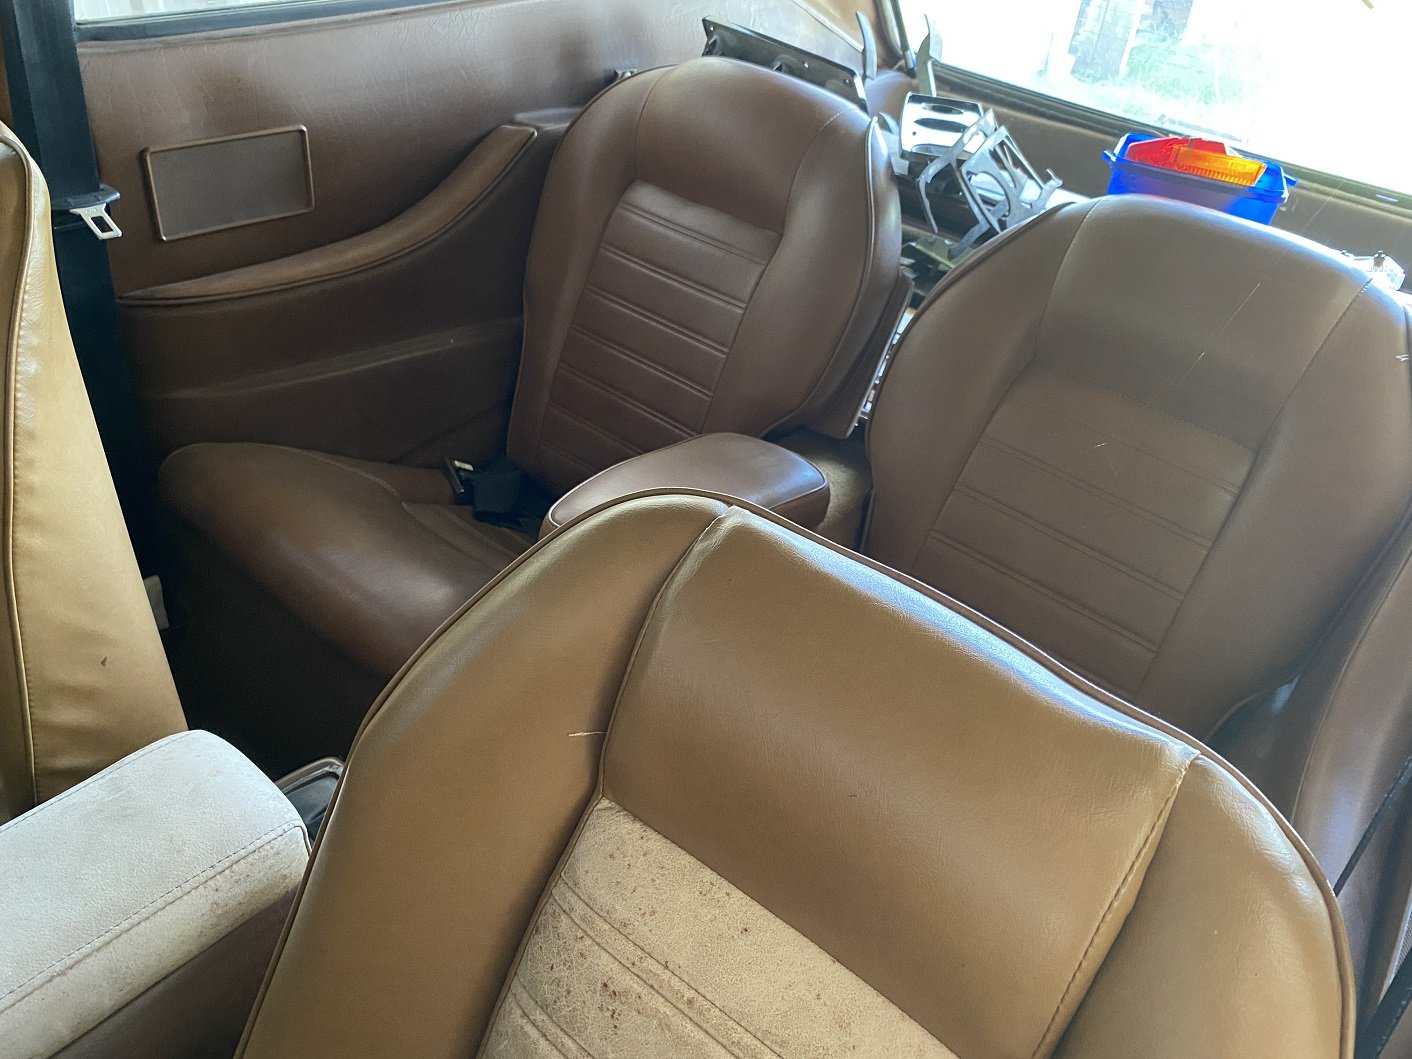
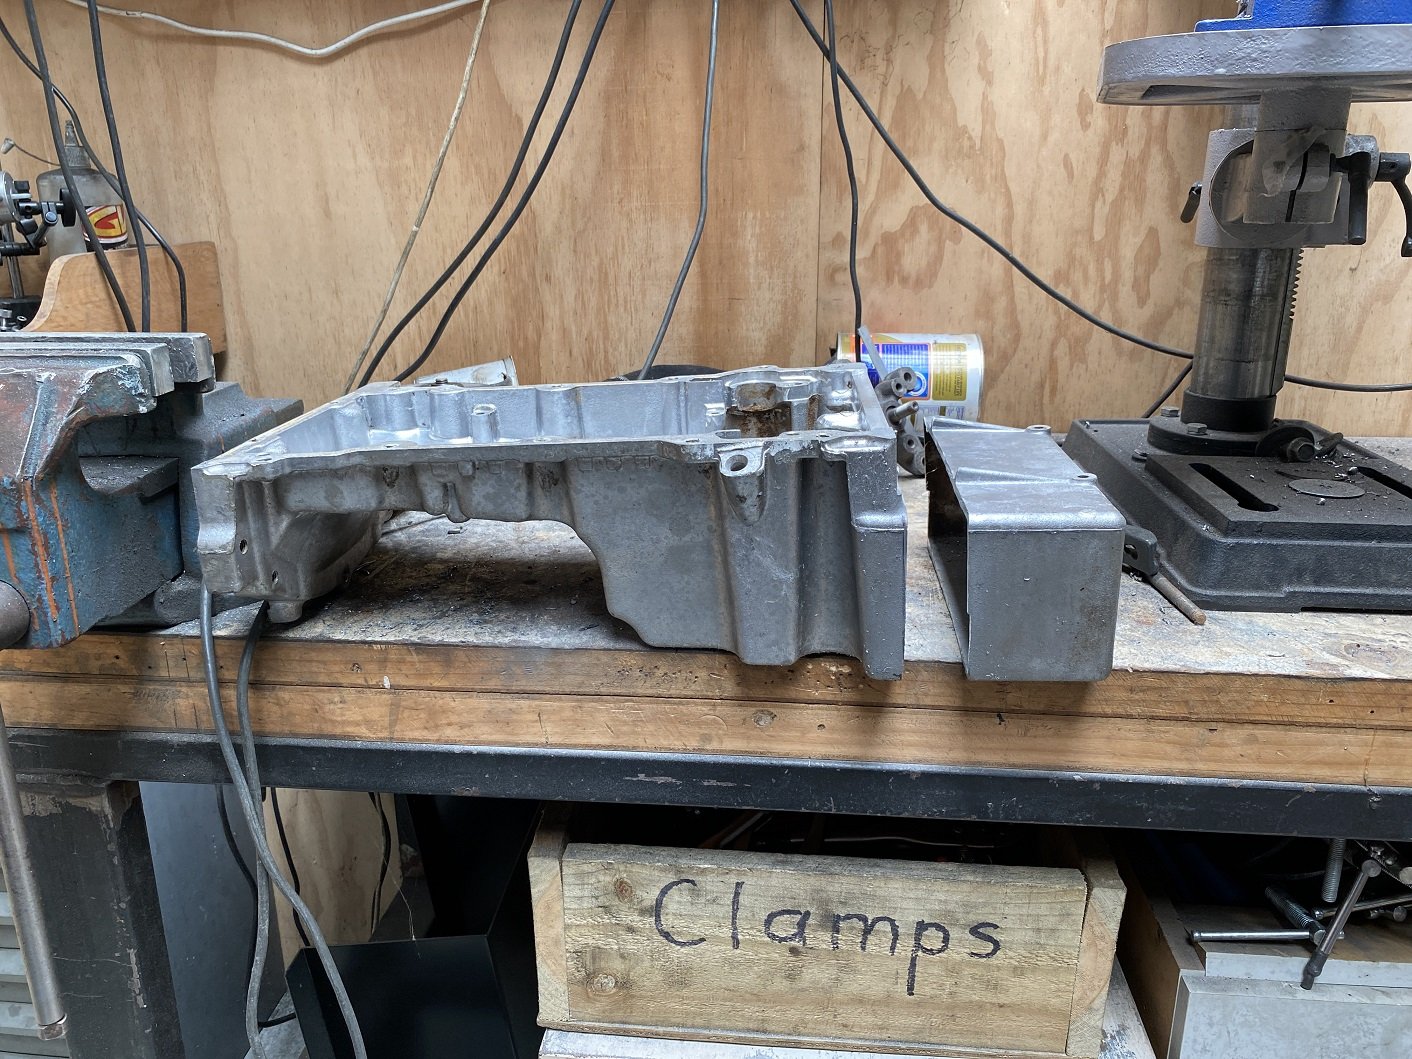
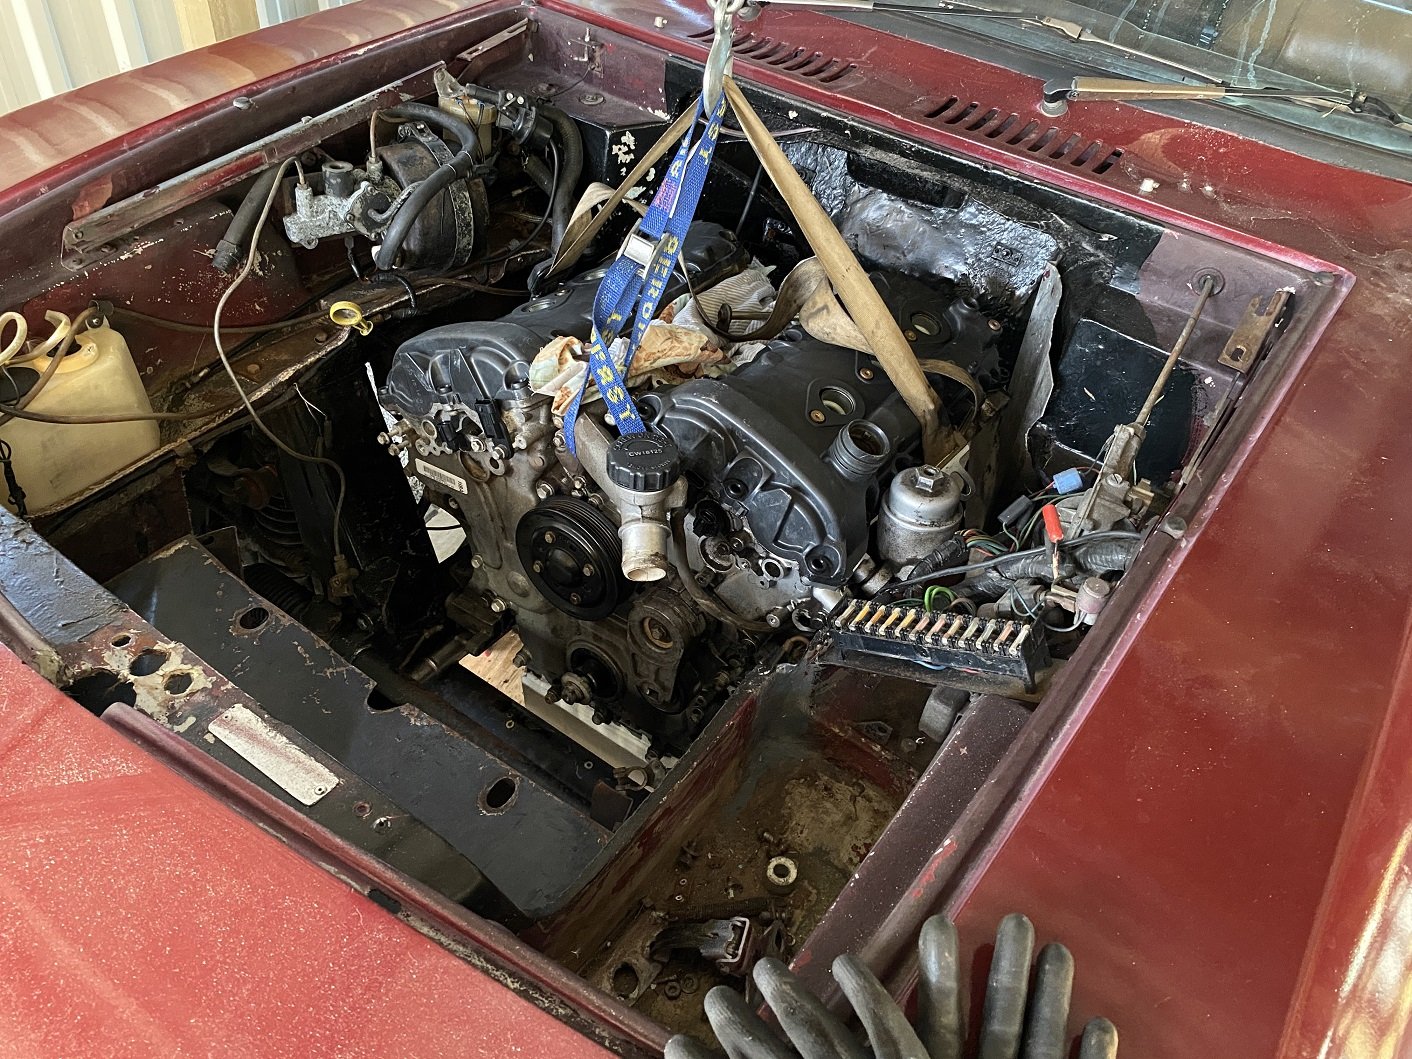
@dmulally twisted my arm... not very hard. But this is mine now. I had to build a lean-to for it to live in because my garage is full. Needs and engine and gearbox. I figured a 175kw Holden 3.6 Alloytec with a 6spd manual should be the business. Damo had a V6 Ecotec in it previously so I assumed there was a fairly good chance it will fit. These engines have issues with the breathers blocking up if you don't change the oil when you are supposed to. The breather is hilariously tiny and so are passages in the baffles in the cam cover, so it's REAL EASY for it to block up. Then the heads start filling with gunge that causes issues with oiling and timing chain wear. The engine I got has this issue so it may be stuffed... but it was cheap. soooo. I got a gearbox from an importer in Auckland as well as a used aftermarket Exedy one piece flywheel and clutch(OEM is a dual mass flywheel). I'll have to run an aftermarket ECU. I looked into using the factory ECU but as far as I can tell, you cannot easily get it to work without also having the matching body ECU. A brake light lens is broken but they are available from UK. The "SCIMITAR" badge letters and the emblems are missing. Damo thought he had the letters, so maybe they will turn up. If not, they are also available from UK. The door is apart because I was trying to get the electric windows to work. ELECTRIC WINDOWS!!! Turns out it was a bad earth under the bonnet. Being a fibreglass body, everything had it's own earth wire and they all run back to the same spot under the bonnet. I also fixed the horns, just chucked them in the ultrasonic cleaner and they started working again. NEWS FLASH, the engine didn't fit. But I did some sump surgery and now it does. Only a oil level sensor is in the front portion, so no need to move the pick up pipe. I'll make up the missing capacity in the rear section. There is a big bracket for the alternator and some coolant pipes on the right side that I'll need to relocate to center the engine. The alternator may need mount backwards out the front of the engine. Otherwise, it seems to fit without issue. Oh and FUCK ME, the front pulley is on TIGHT! You have to pull from the center hub because the outer is rubber mounted. My big puller would not fit so I got a smaller 100mm one. It was not happy. I don't expect it to be able to remove that pulley more than 3 or 4 times before the threads are destroyed. I left it off because I'll need to inspect the timing chain at some point.
3 points
-
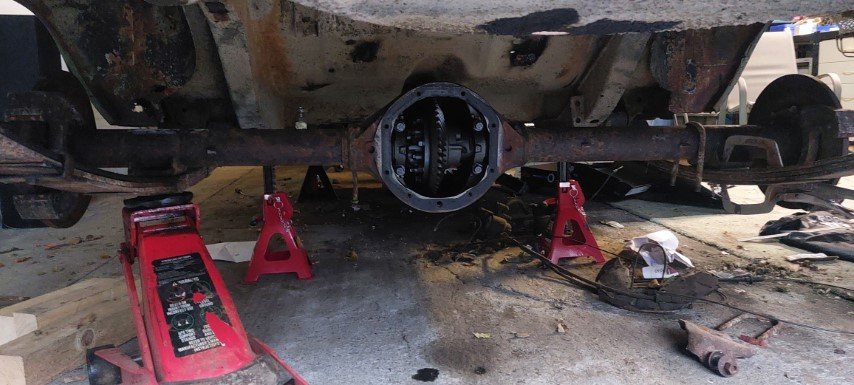
So have my falcon diff sitting in the rear, tempted to put a triangulated 4 link into the rear, just need to find someone who sells the right pipe/end fittings around christchurch any suggestions?, front floors are patched just need to do a few more in the rear....
3 points
-
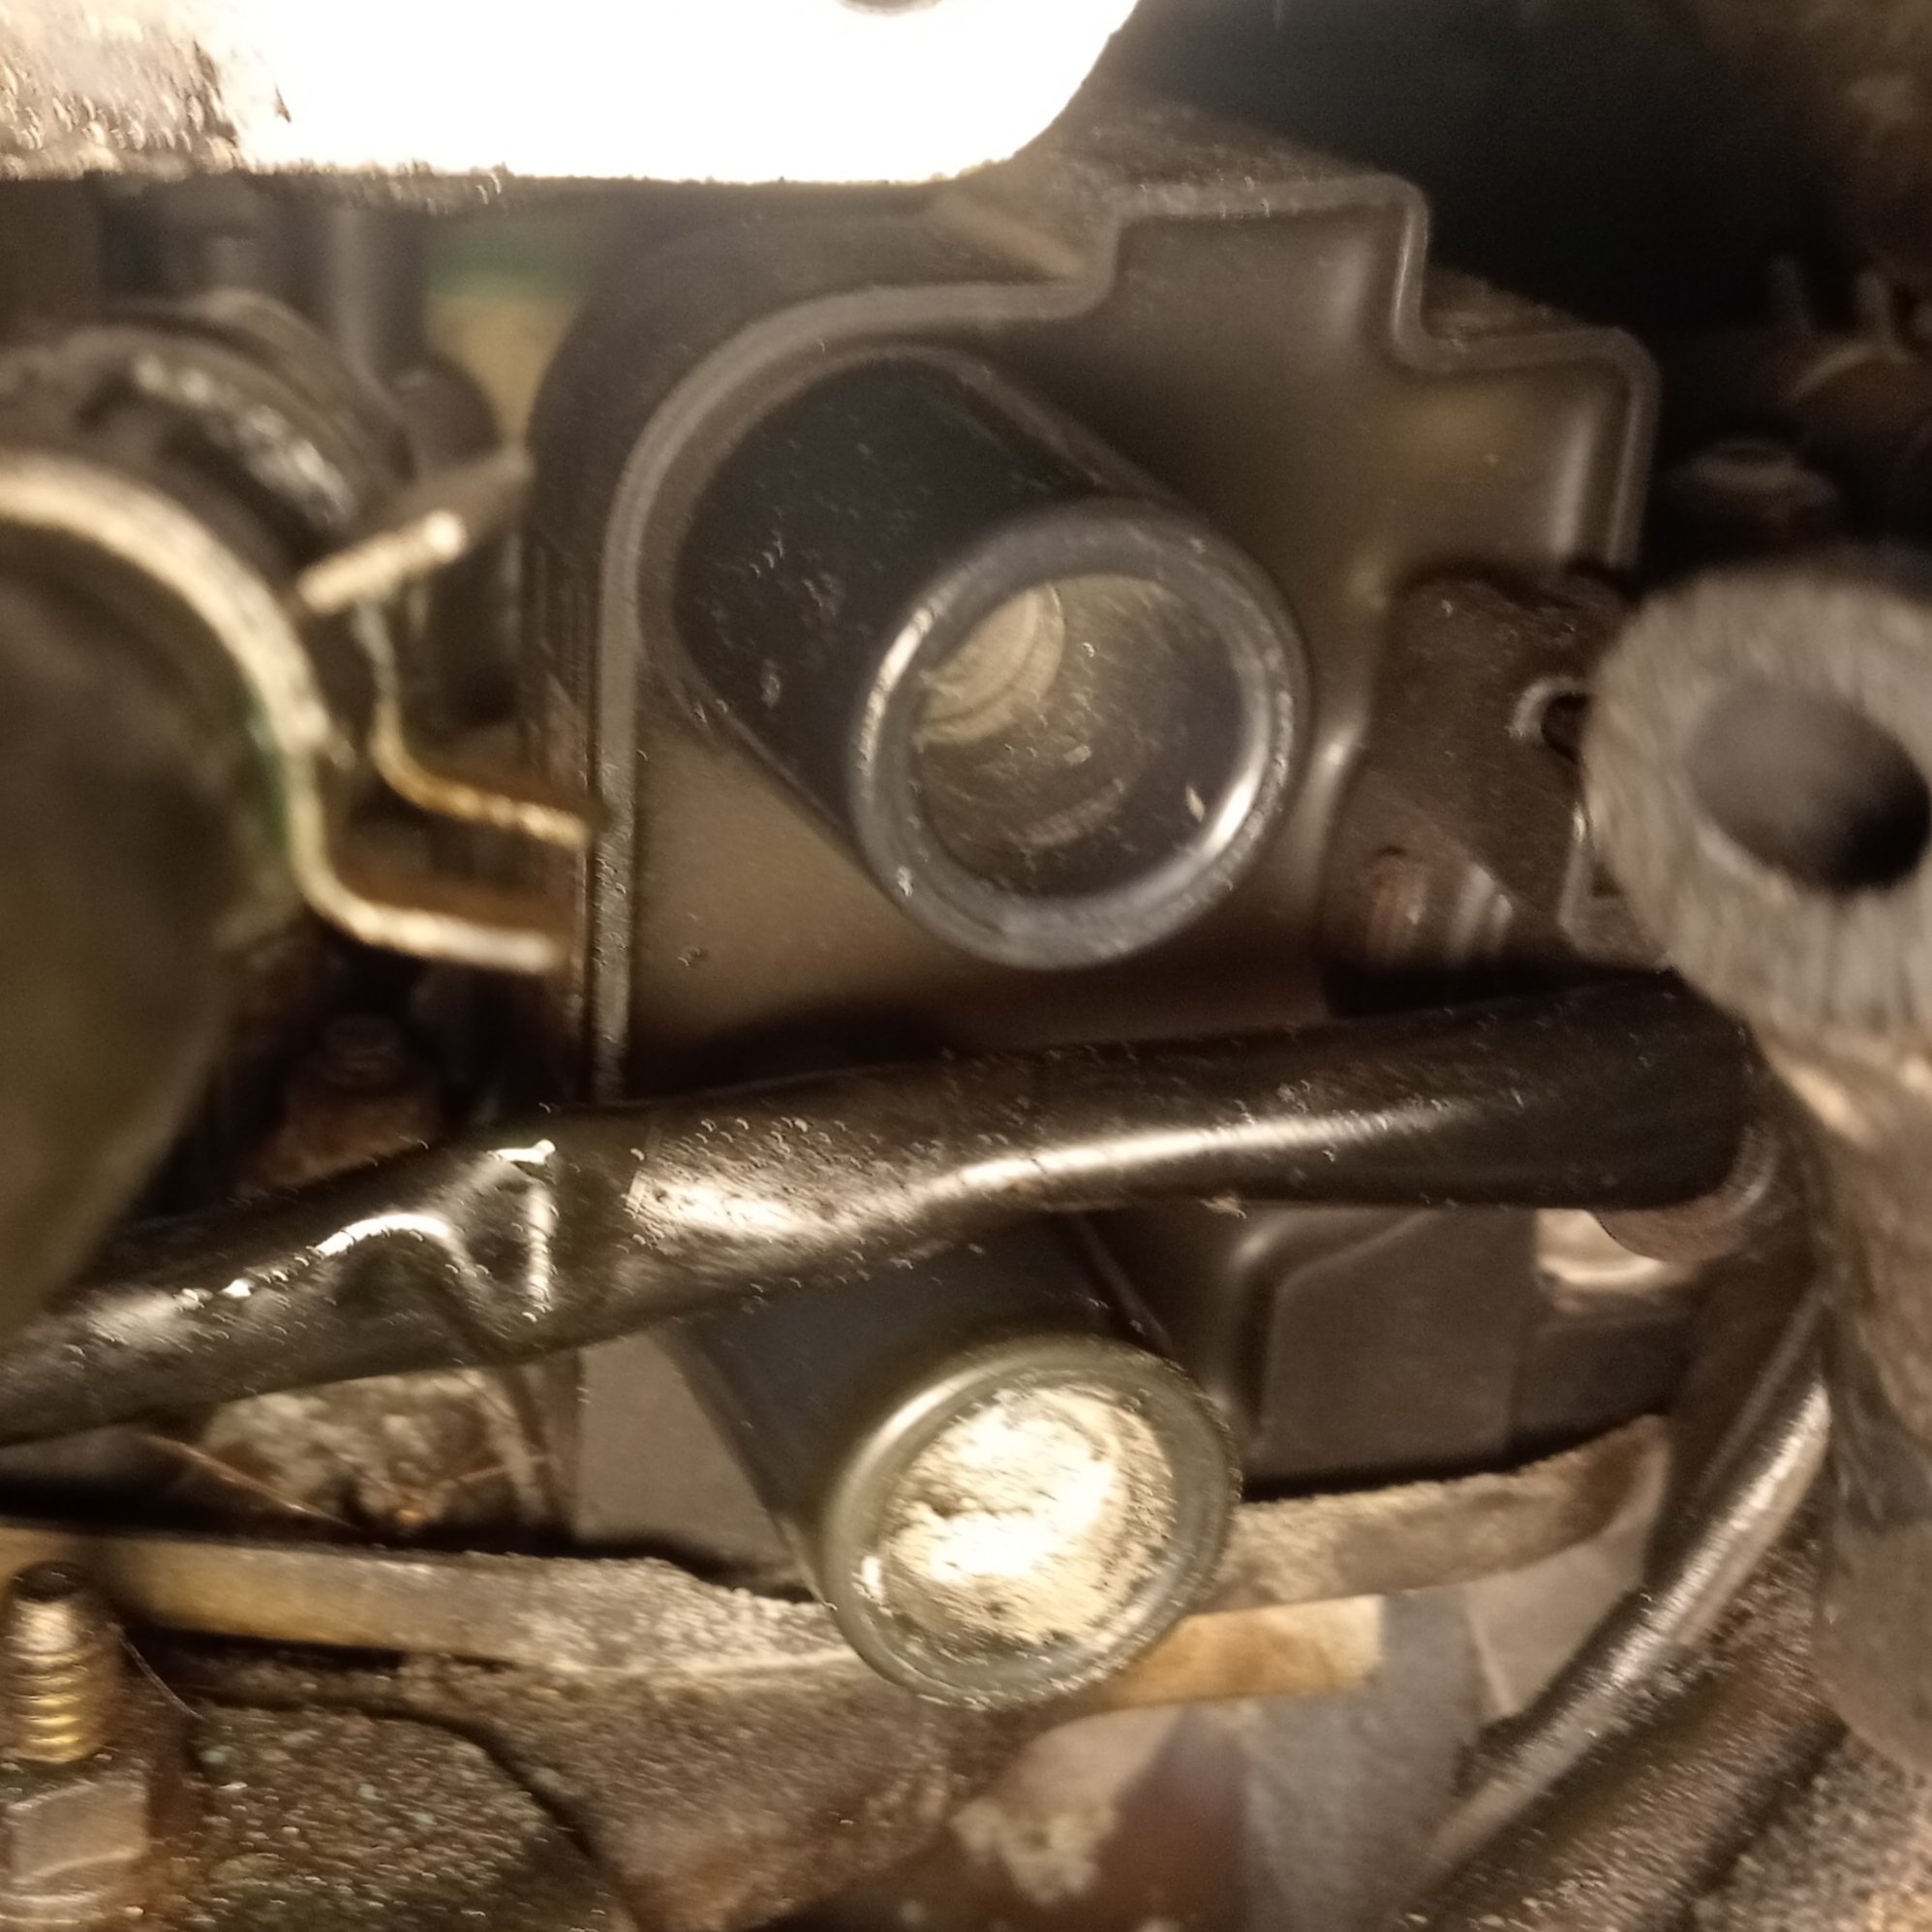
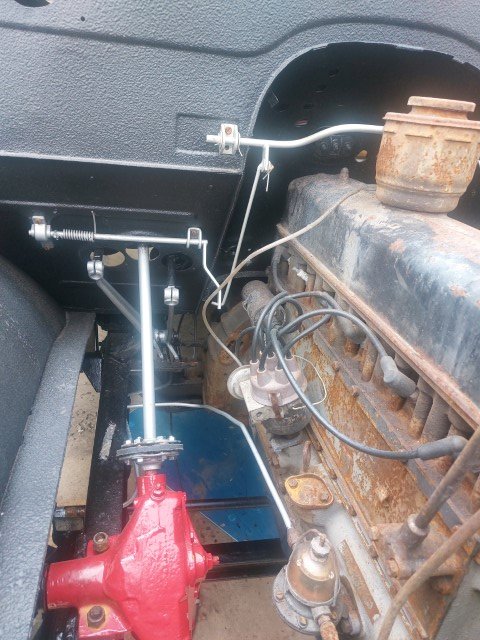
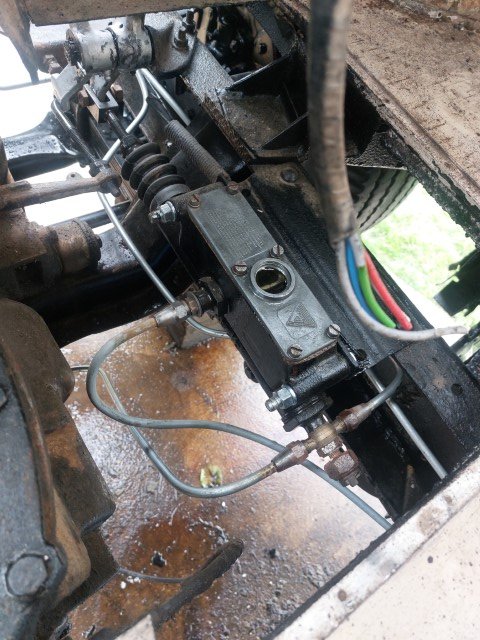
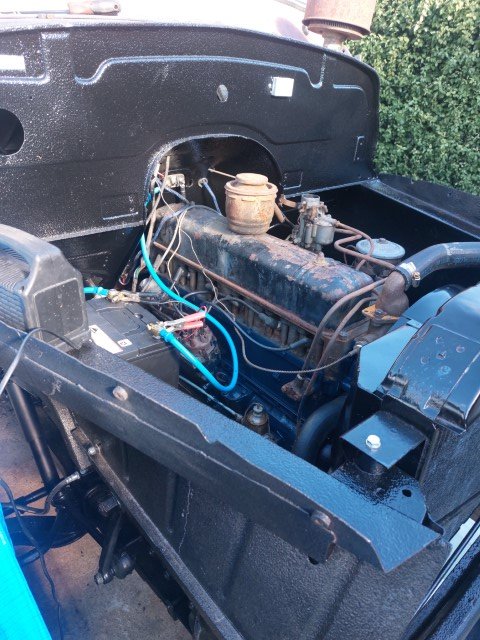
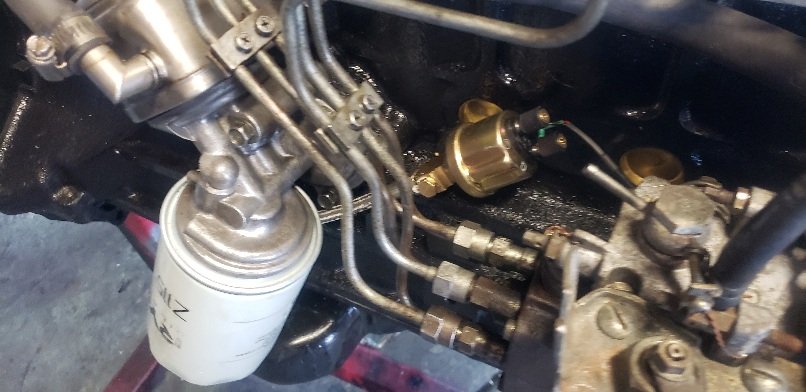
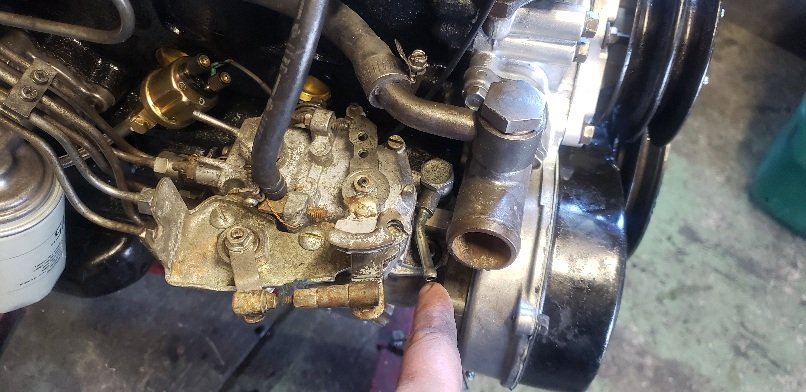
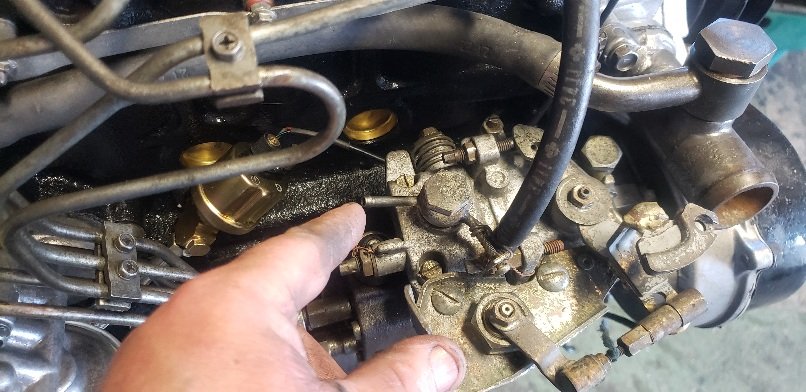
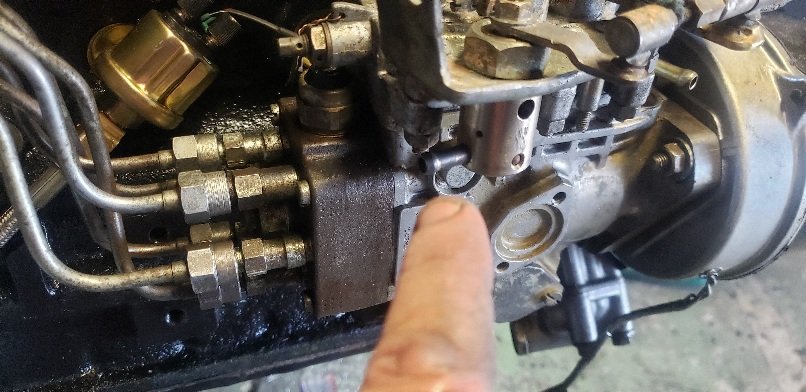
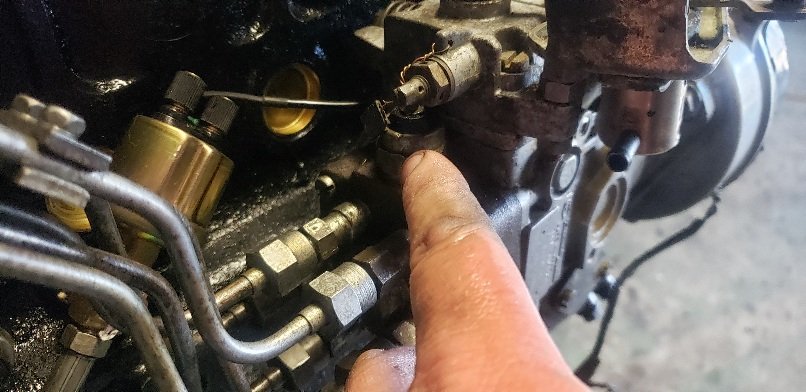
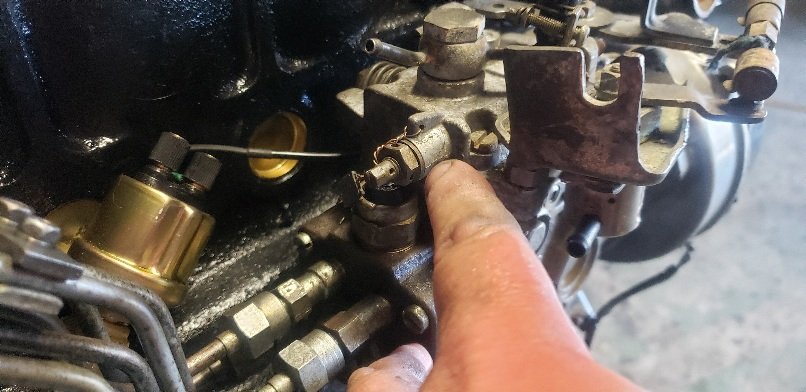
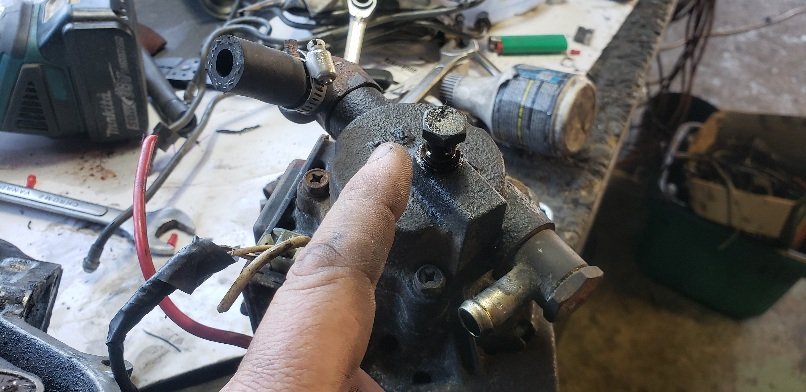
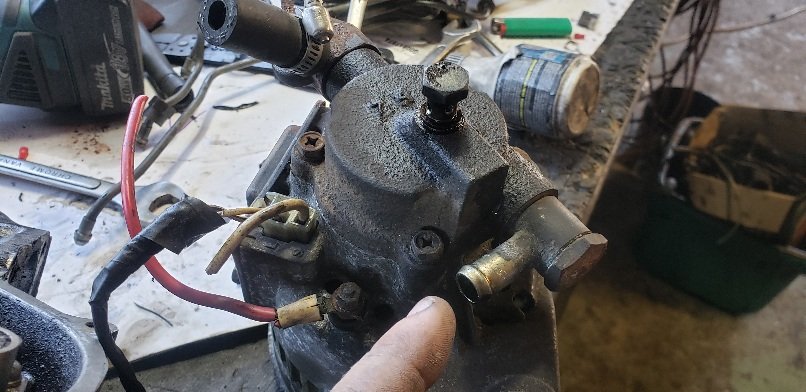
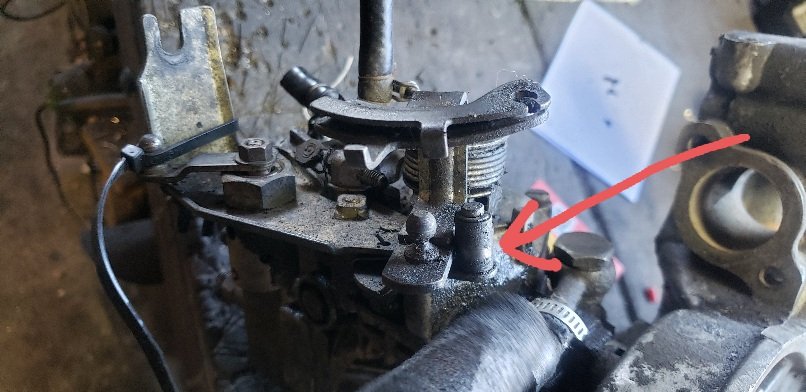
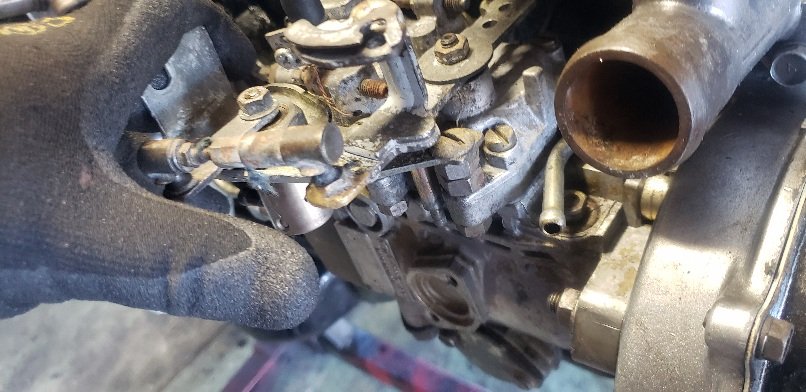
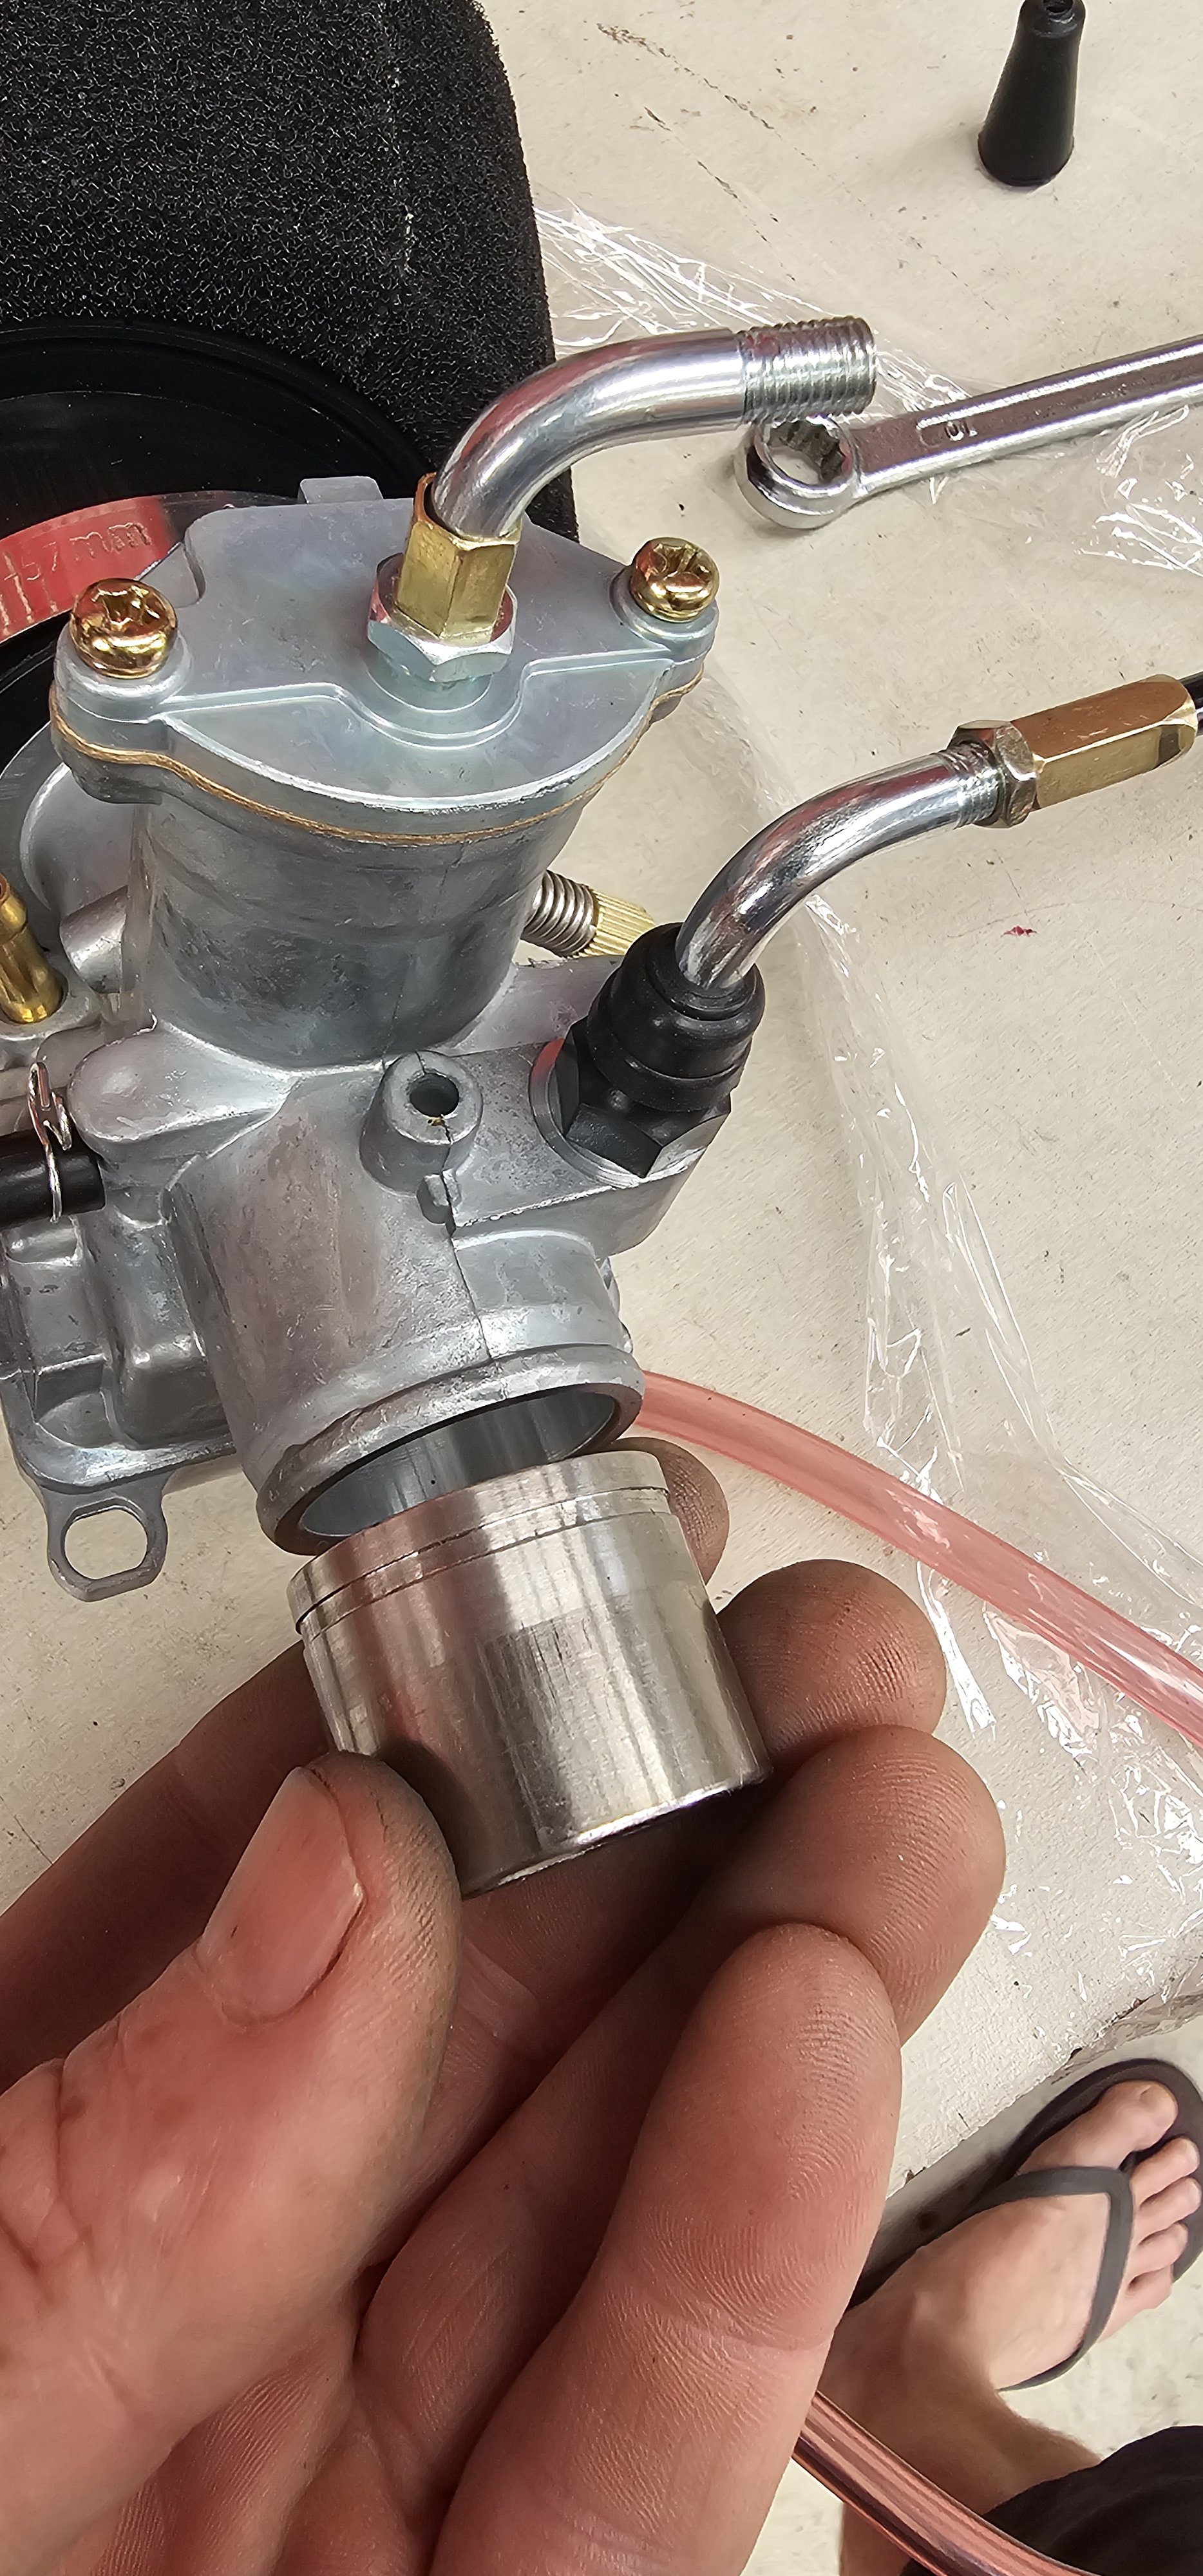
@d.p.n.s 1. Yeah that is the fuel feed Into the pump. 2 that's the return to the tank. 3 fuck knows. Probably something from the original car the motors from. 4 . That's the fuel cut solenoid. Supply 12v to run and remove power to the solenoid to shut the motor off 5 yeah fuel screw. In is more fuel and out is less fuel. Little adjustments at a time . 7. Yeah oil feed for vac pump 8 one is the oil drain to the sump for the vac pump. Treat it like a turbo drain. 9 the other one is the vaccume. It goes to the brake booster or whatever else needs vaccume looks like the one with the hose still on it is the vaccume 10 is your heater hose feed. The heater return is in the back of the block on the driver's side from memory 11. Hard to see what the pic is. 12 no idea. Most of that shit on the pumps is to do with the car it was in original . Could be a fast idle or something like that for cold or ac or anything There is a idle speed stop that you'll need to lower when you add more fuel too2 points
-
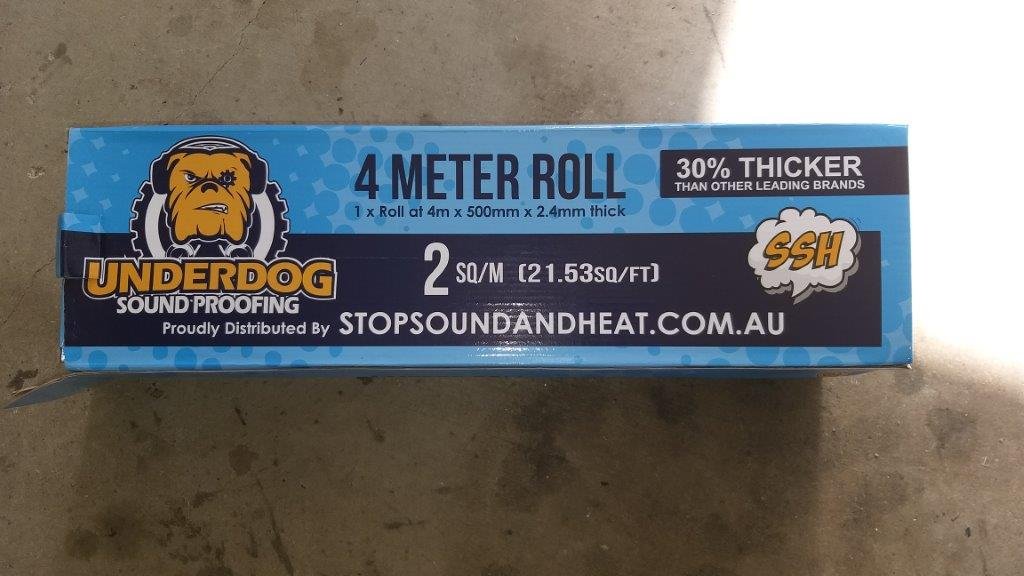
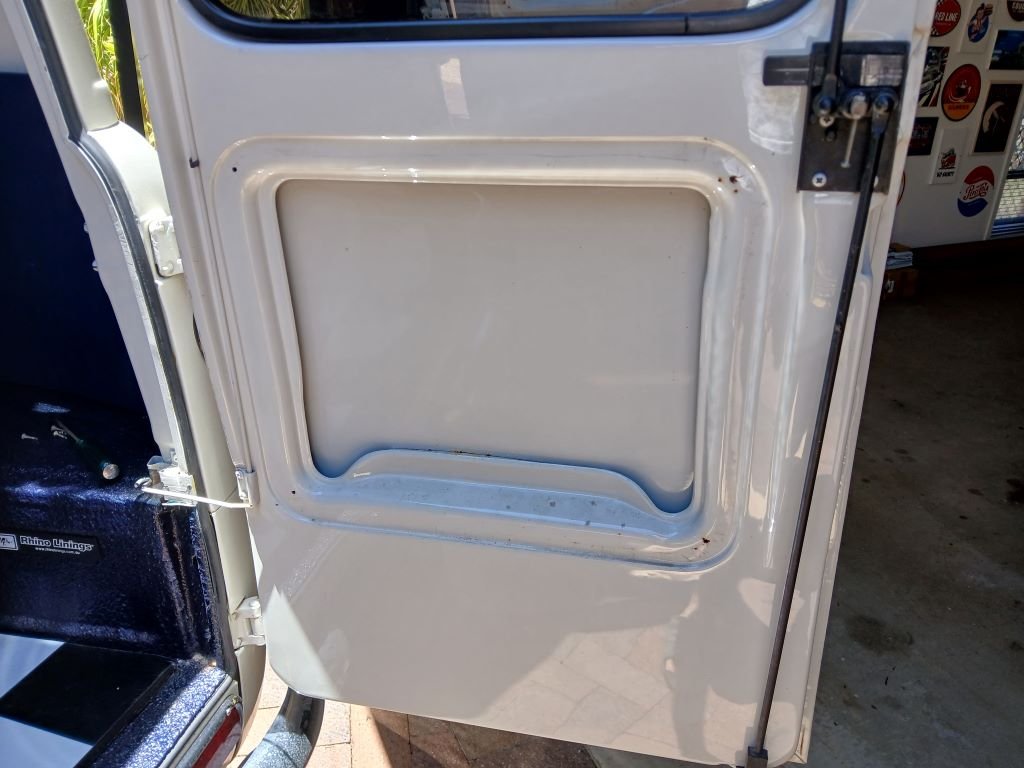
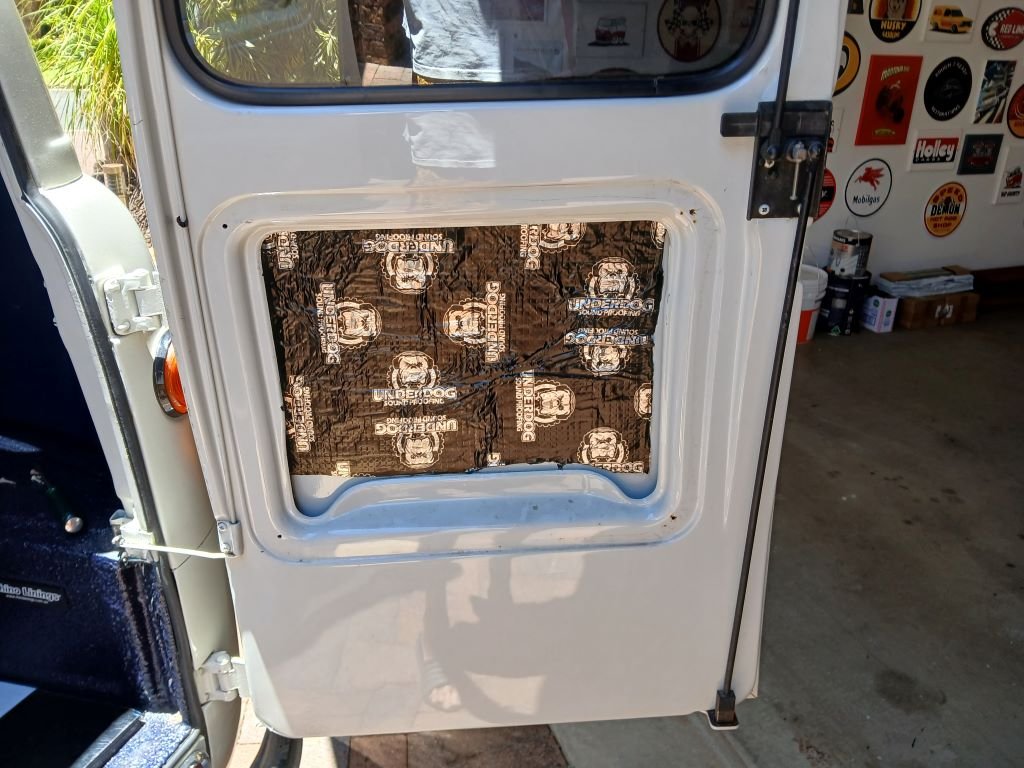
A few weeks ago I ordered a roll of sound deadening so that I can make a start on lining the old Thames. I'm hoping that it will make the van feel less "tinny". Anyway I had good success when I used this stuff to line the Mustang, so I figured I'd give it a go: Made a start today by doing both back doors. Pulled the door cards off to reveal loads of nothing: Slapped on a bit like so: While I had the panels off I gave the rest of the cavities a liberal dose of fish oil to keep old man rust at bay. Each side has 3 separate panels. I pulled the first one off for a look see and discovered that someone has been here before, but with some really cheap and nasty stuff: I'm thinking I'm going to have to remove that before replacing it with the quality stuff, but I'm just not sure how I'm going to deal with the old adhesive, so I'm going to give that some more thought before I proceed, but at least I've made a start. Thanks for looking.
2 points
-
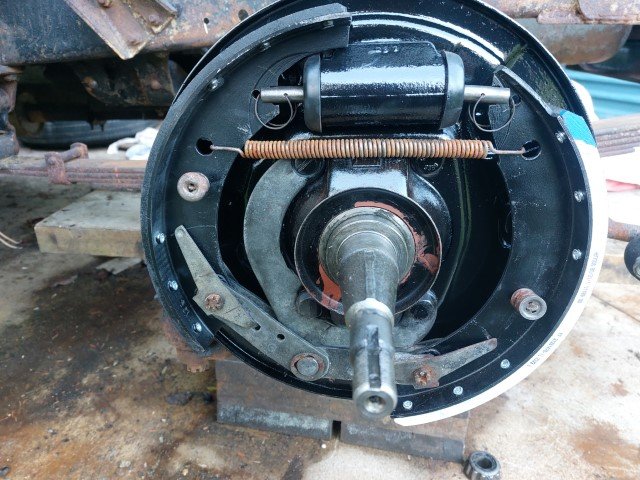
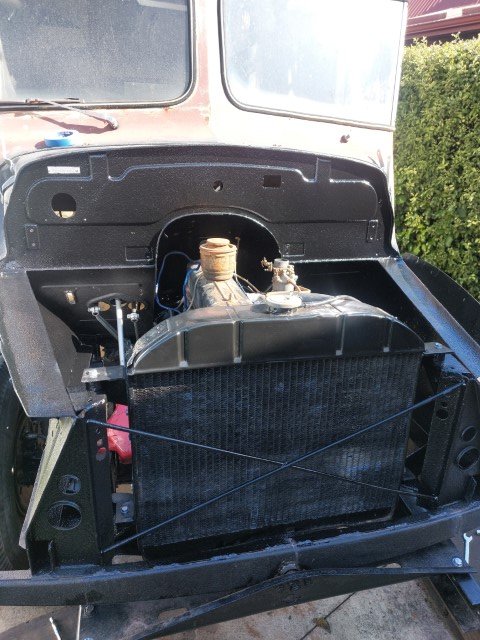
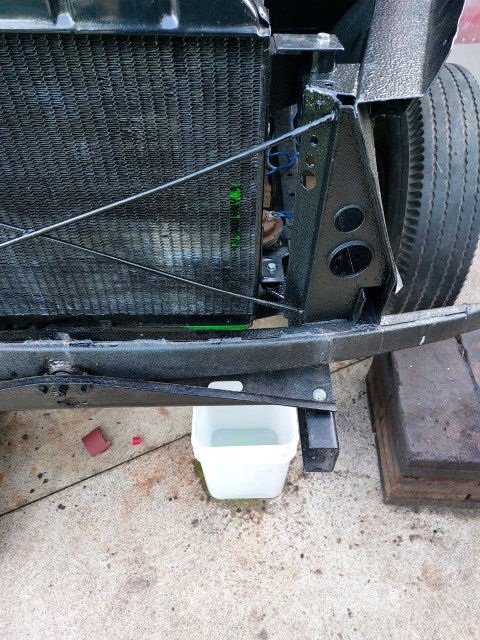
Been slowly working away at things, now has "brakes" they have to get better right? right?, turns out radiator was rotten.... that was F... expensive... good news is i drove it!!!!.... hands down the worst vehicle i have ever driven!!!
2 points
-
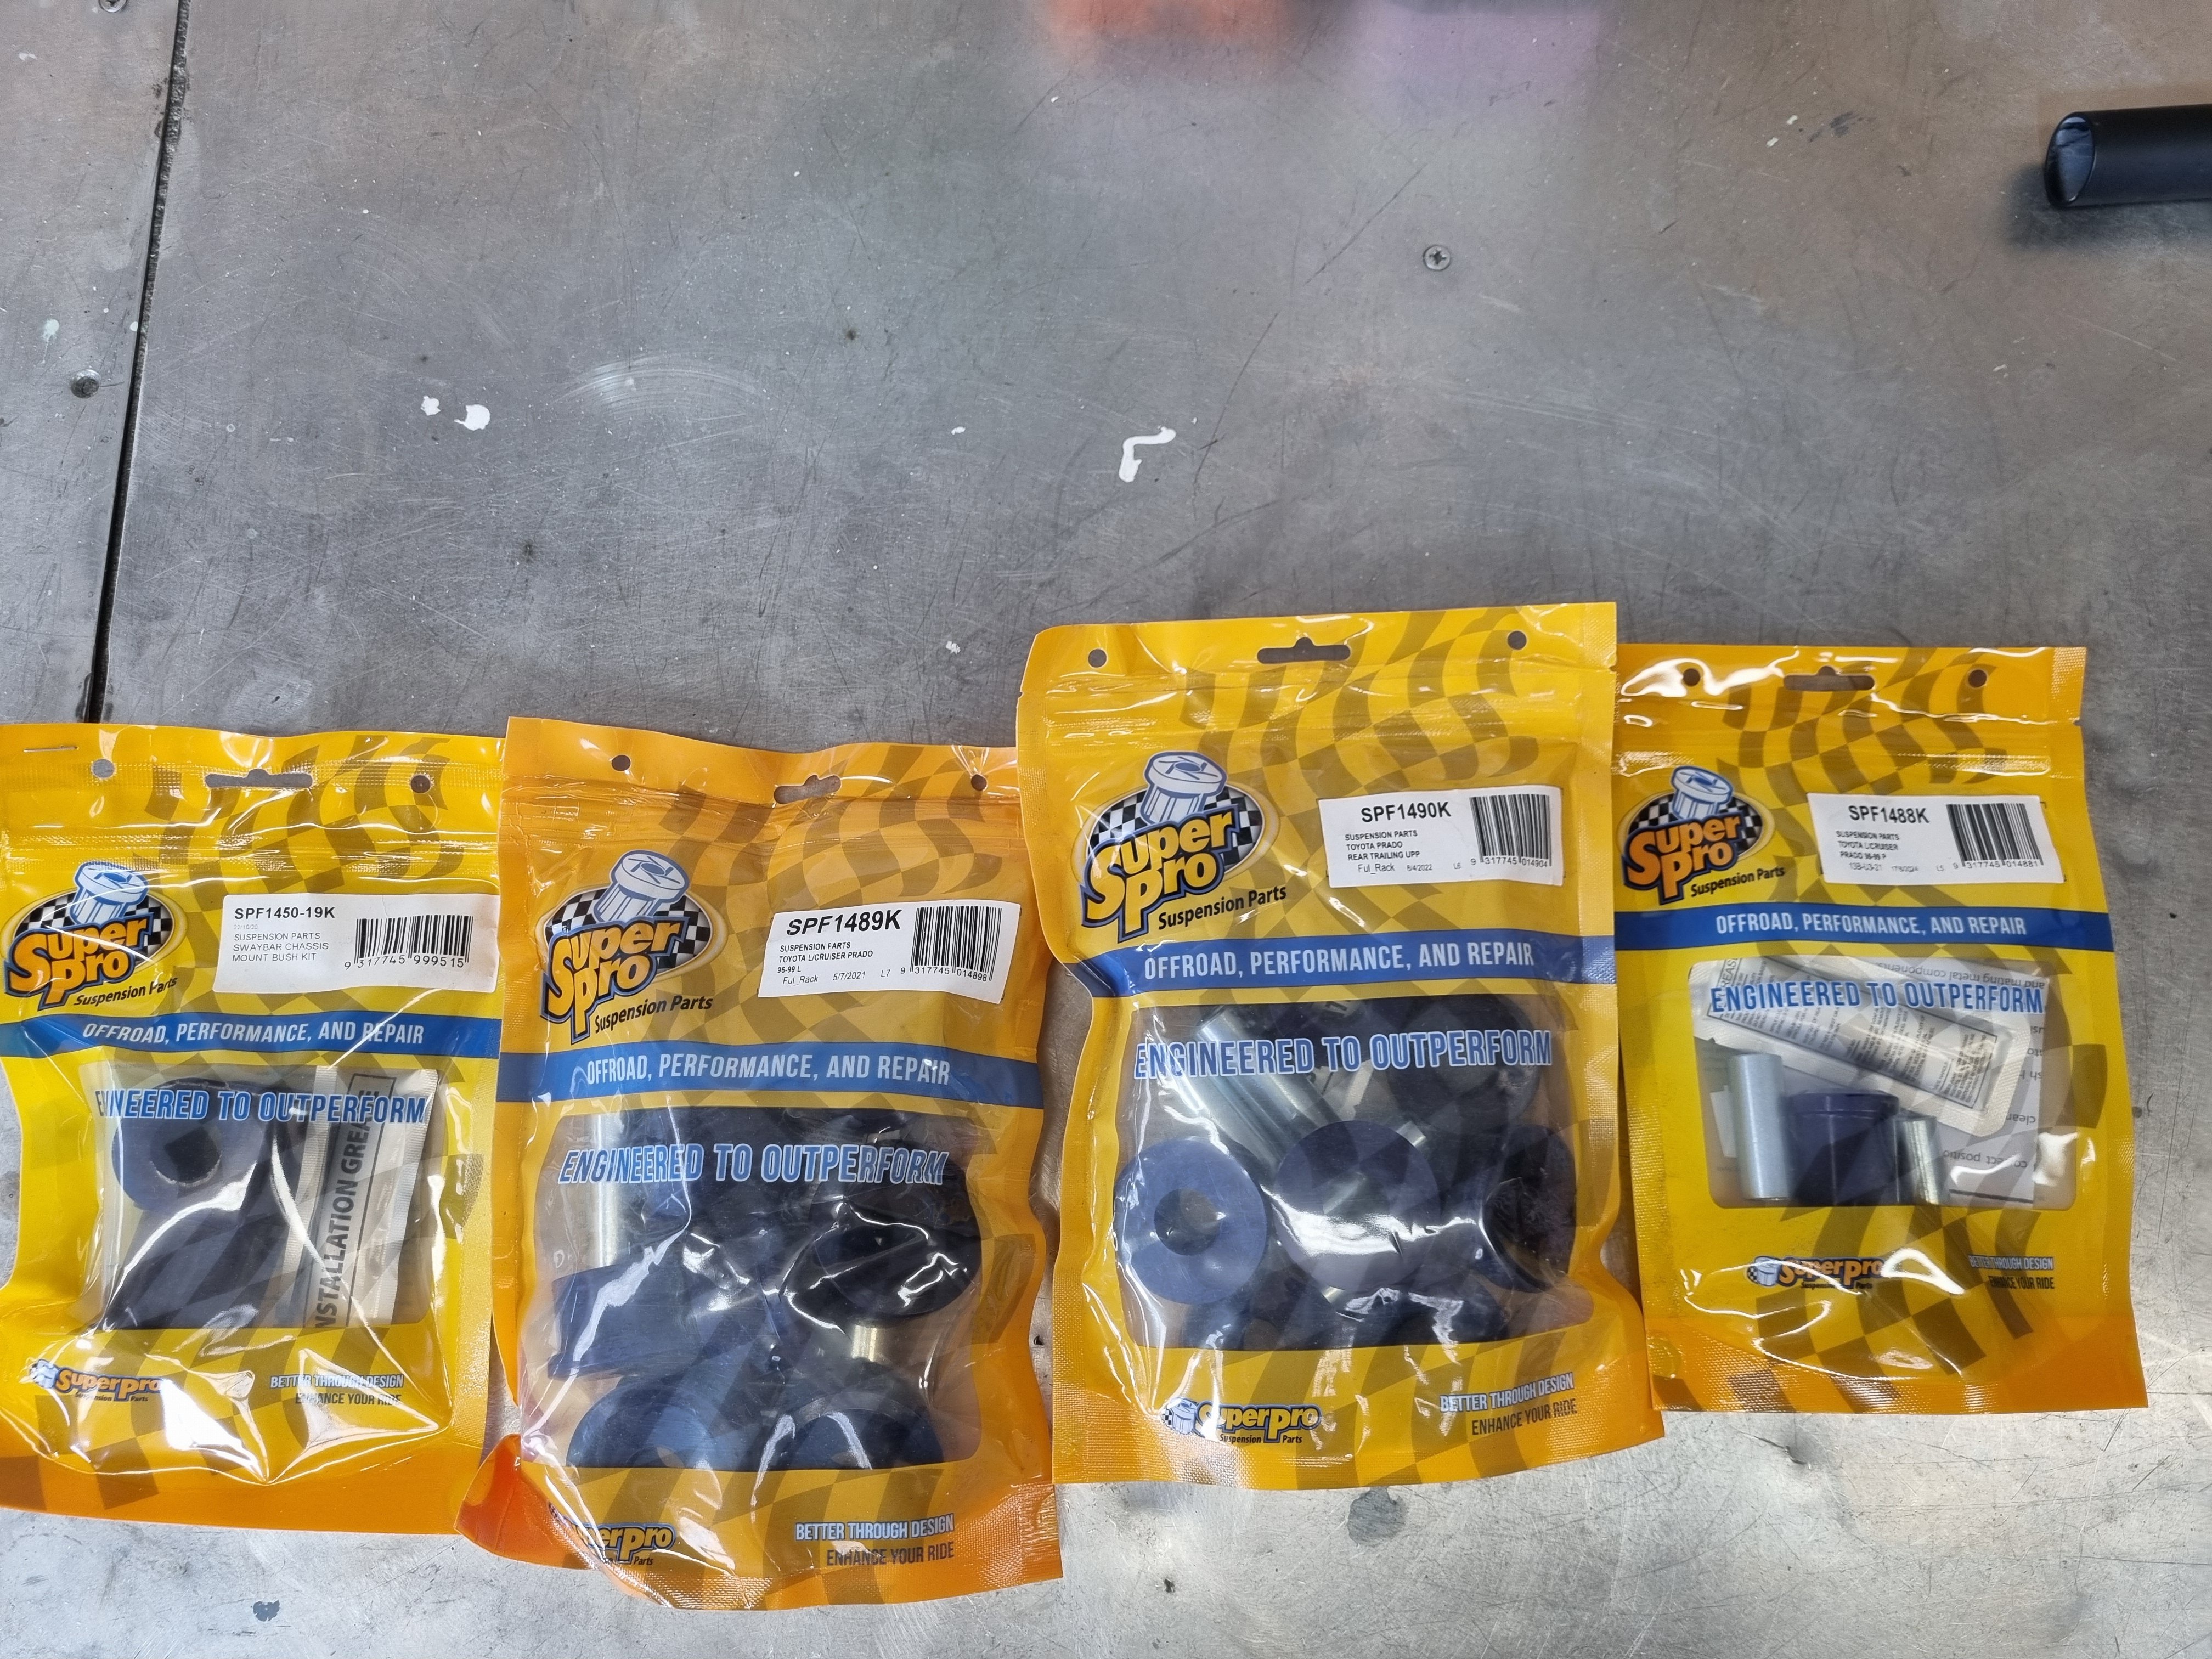
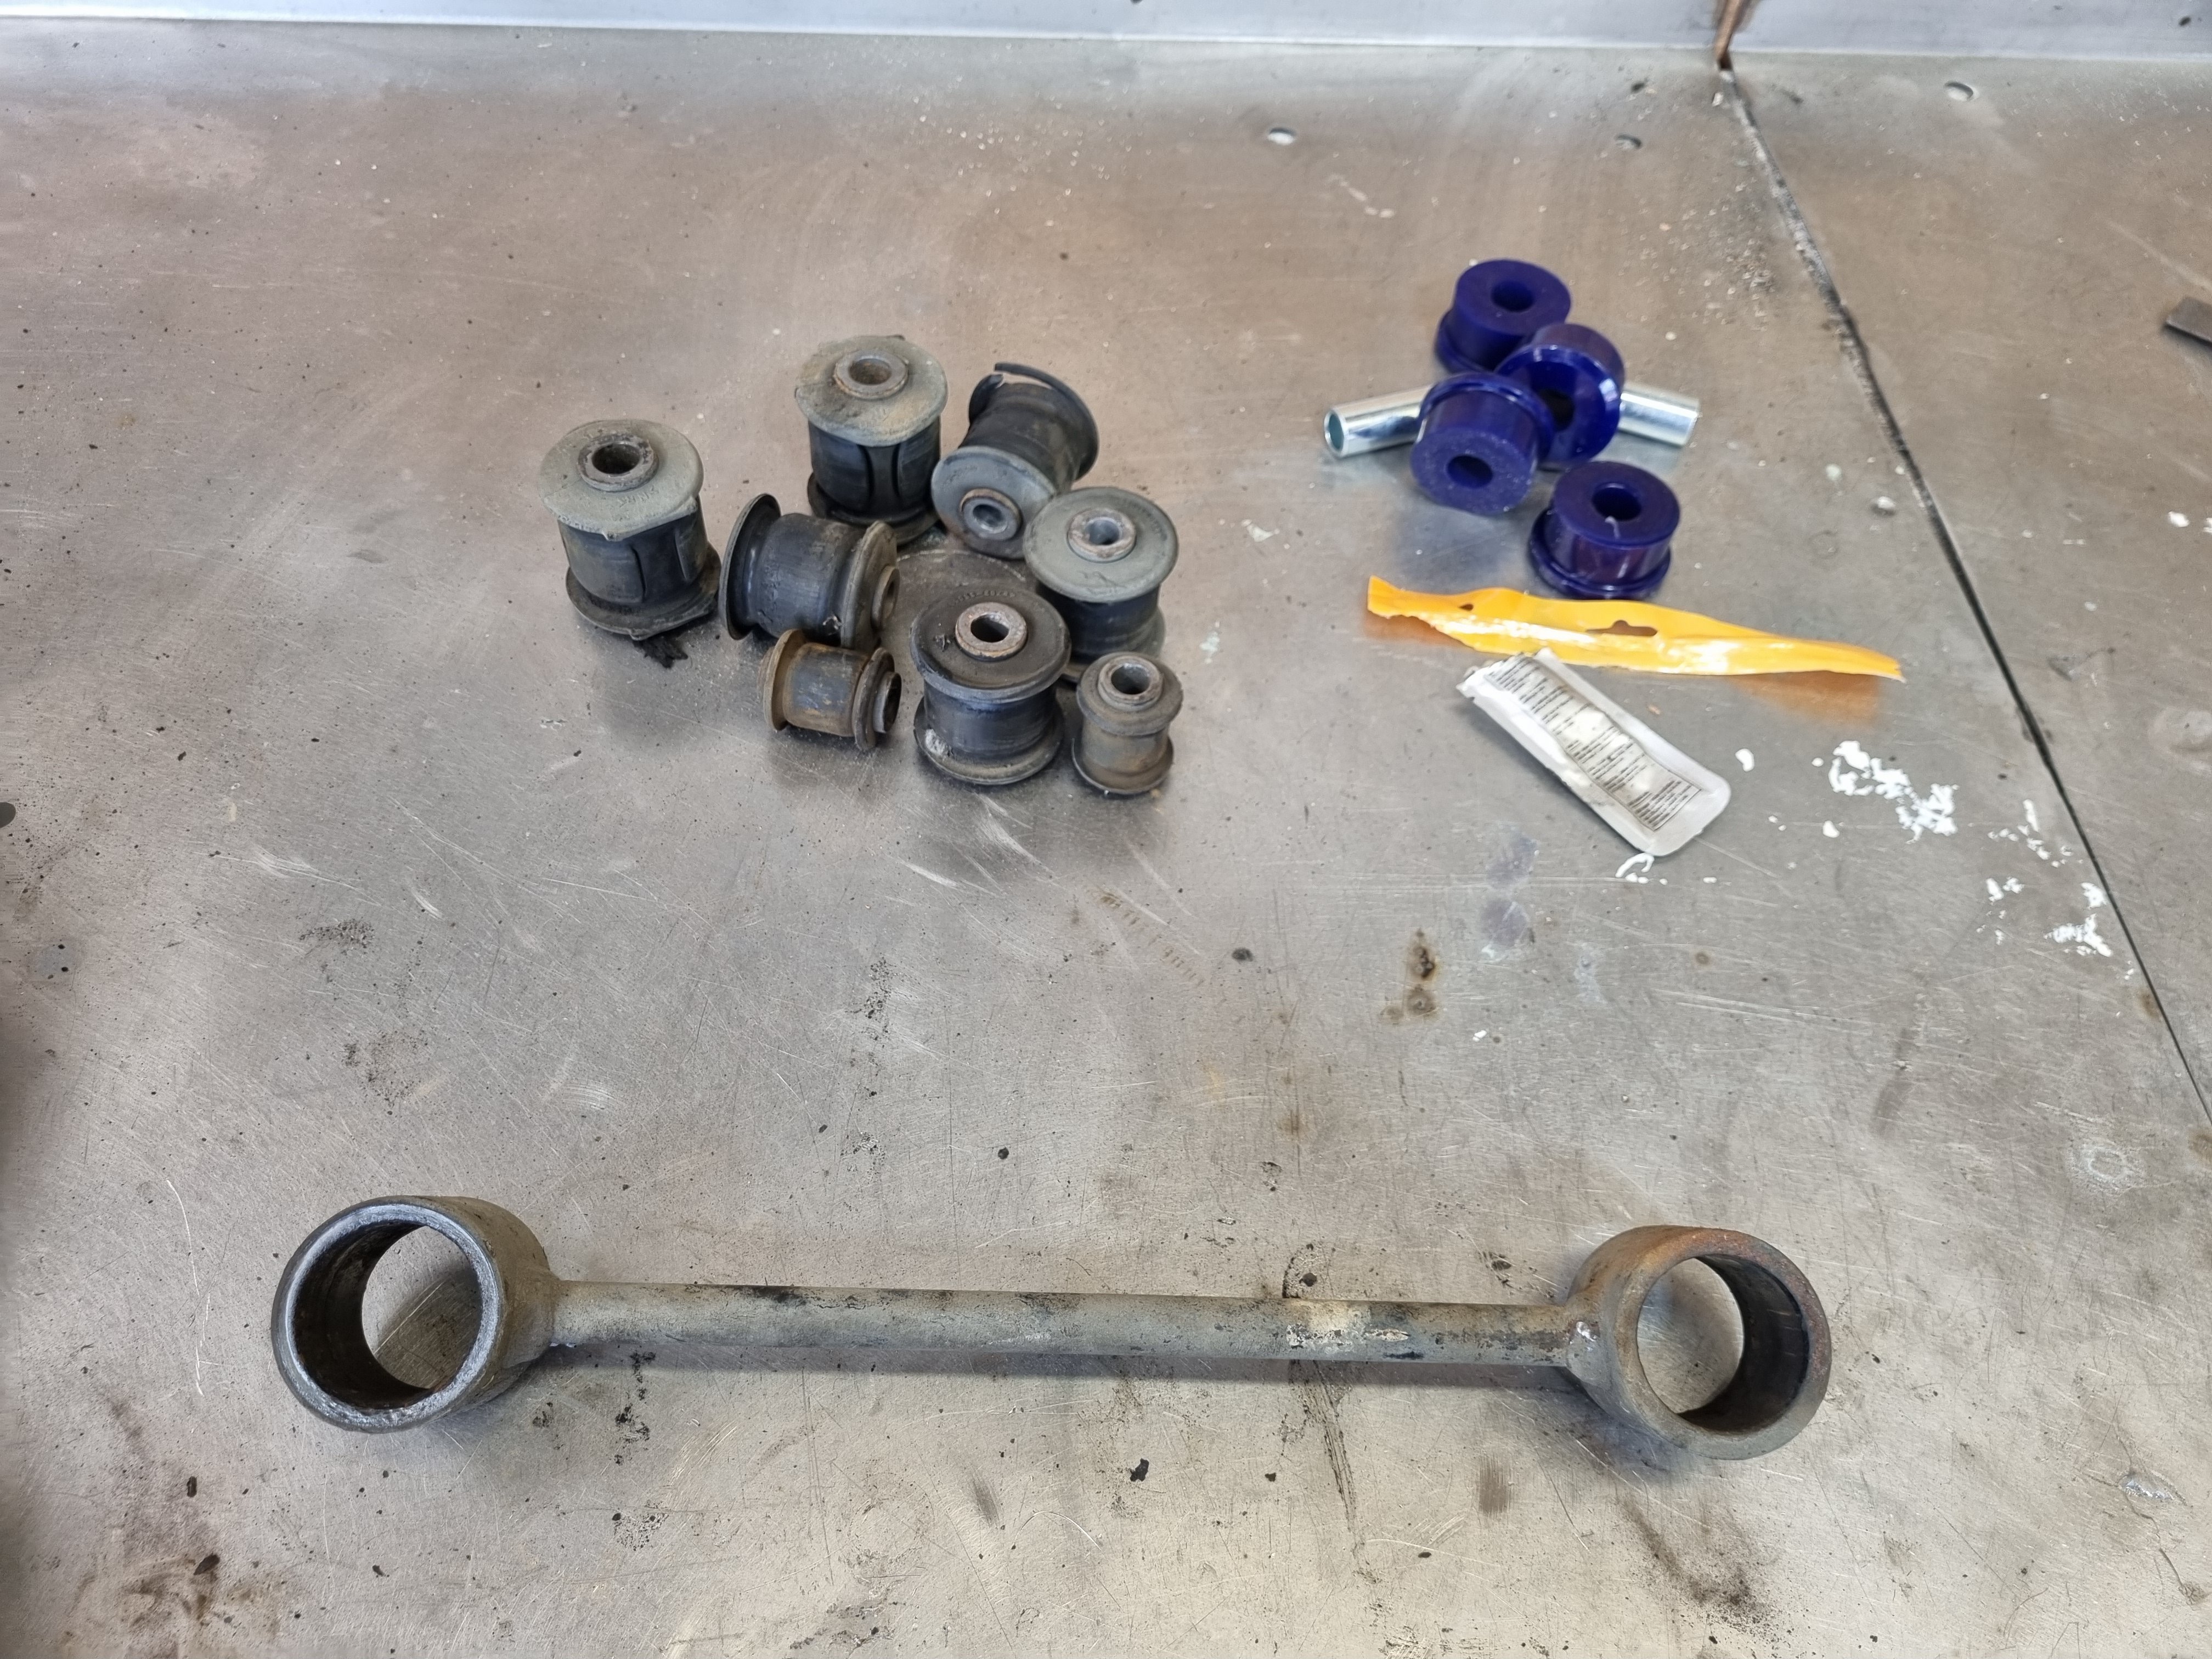
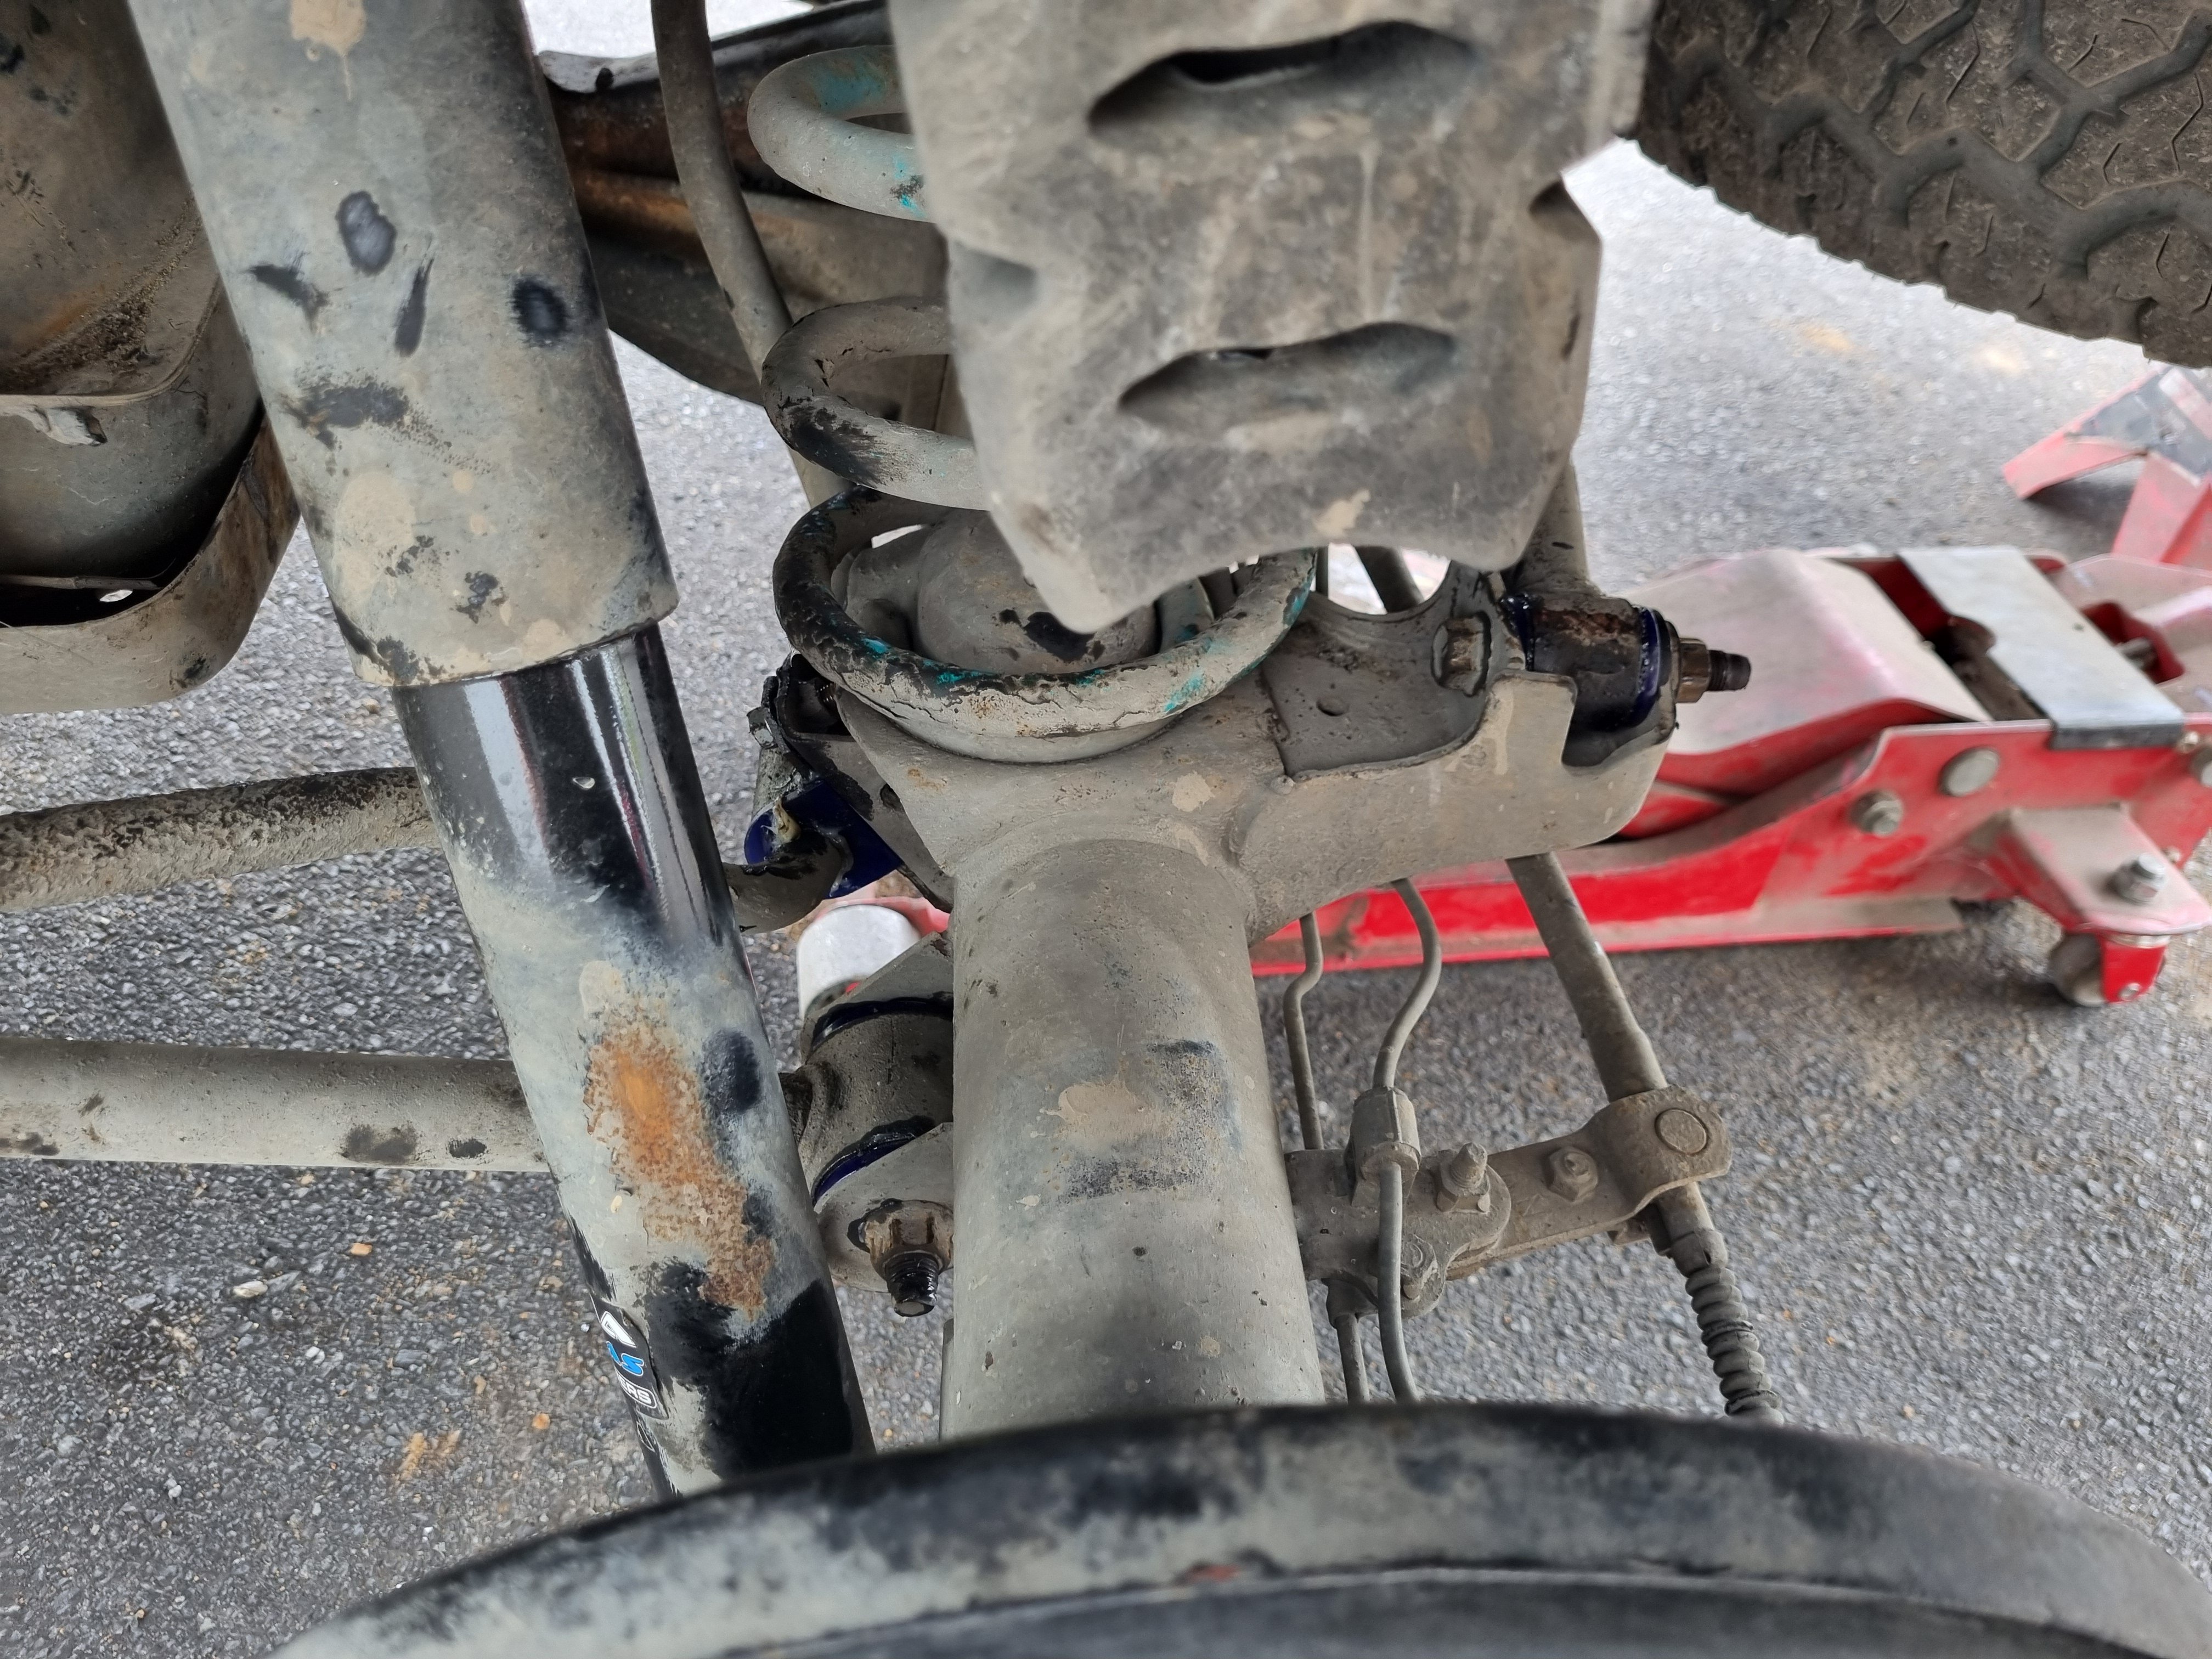
Put all new bushes in the rear. Trailing arms, panhard and swaybar. I think it's already been done once before, the rubber bushes came out fairly easily and they had no outer steel sleeve I had to fight with so I'm assuming not factory. Anywho they were a bit fucked and I changed them. Does feel better in the bum now.
2 points
-
2 points
-
Give her a rev just before you shut her down to clean the plugs out m82 points
-
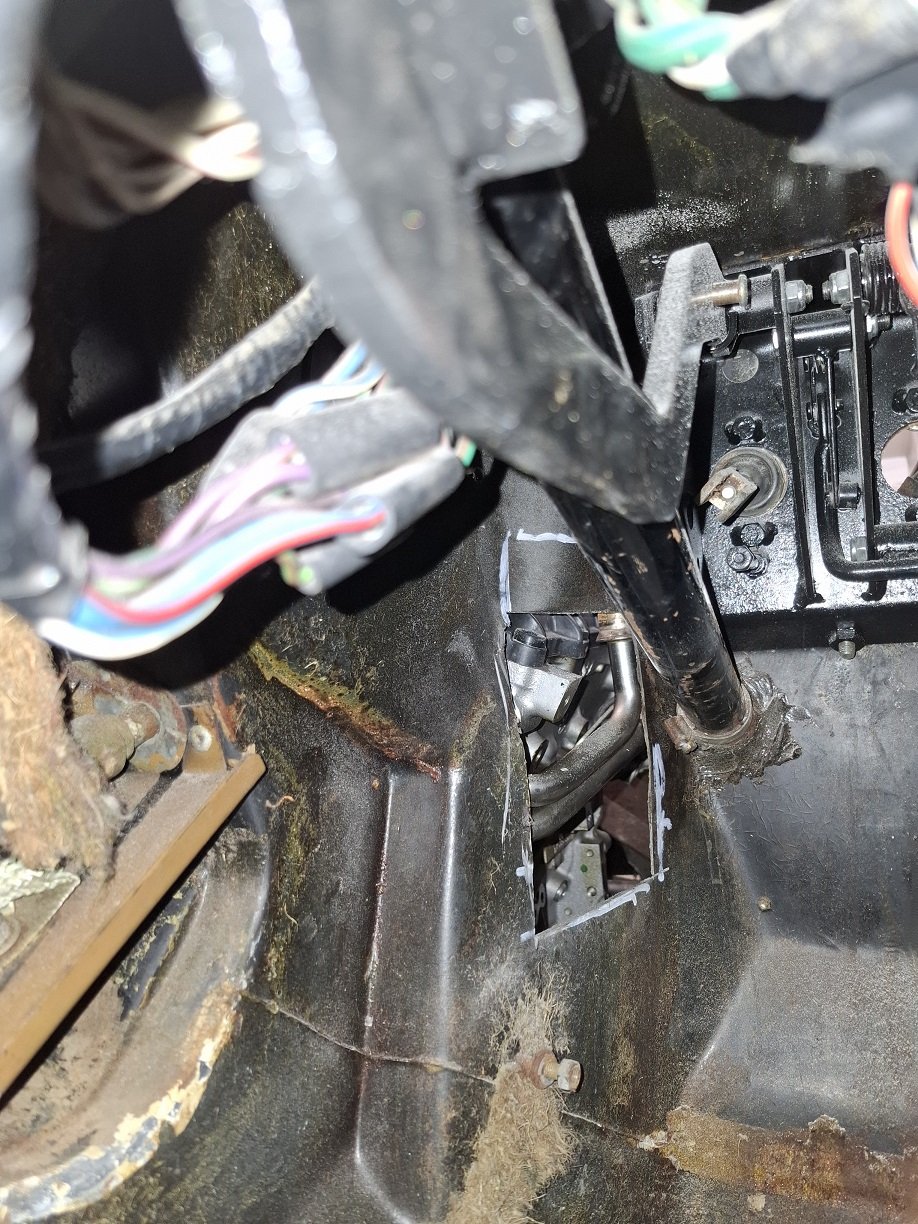
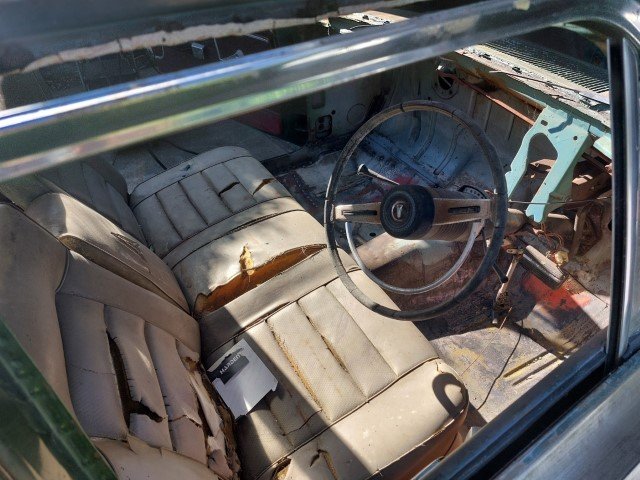
Now it was inside I could muck around with it. First job. I noticed the radio didn't work and the pocket in the second DIN slot wasn't mounted so that should be a quick fix. A loose wire was culprit as to why it wouldn't work. I found two screws to mount the storage pocket properly and reassembled. It's a JDM headunit so only receives one local station and doesn't have bluetooth - but plays CDs okay and also has iPod connectivity via USB so can play Spotify off my iPhone. Second job - while pondering and procrastinating I thought I'd quickly clean up the headlights which were very yellow. Here's the job 50% done for comparison. Last job of the day - why doesn't it start? Intercooler off, coils out, plugs out. Everything is so tiny. Turned it over with plugs out and it was like a water pump - a lot more came out of the bores than I had imagined and I forgot how far it goes under pressure. What's that smell? Petrol. That ain't water. Not sure what was going on but it was a mix with a lot of petrol in it, and it evaporated/flashed off pretty quickly. When I've got it apart I'll clean and check the injectors as well to make sure there isn't a sticky one or some other reason why it may have flooded with petrol. After all that I rewarded myself with a cold beer and thought about what next. Engine out over the holiday break (if not before) and see what is needed. Parts will need to come from Japan but they appear to be readily available. It can sit and wait for now.
2 points
-
fuck this thing uses some gas2 points
-
that trademe listing is pickup only unfortunately, you'd think it wouldn't be too hard to post I'm leaning towards the nzefi coils as they're cheap, local, and do away with the ignitor as well. Just gotta work out where they'd fit! and whether the power FC will be cool with them1 point
-
I used to have 4 Orion Extreme 15" dual voice coil subs in a civic setup in Isobaric many moons ago that gradually unpicked many of the spot welds. It was utterly stupid probably explains why I have tinnitus, it some how had a back seat still and was great at making people vomit as a party trick.1 point
-
I just fitted these today 2 JVC 12" every car in our house bar the work ute has sounds, run off a massive Pioneer Amp i had some 20 year old Focal subs in there but they were losing their punch. Rest of car has 6" components in each door so everyone gets a tweeter pointed at their face It's a real nice place to be a and really balanced, may add another Amp to power the door speakers soon as they are a bit underpowered. My mrs had her brand new Mazda 2 for 2 days before having a $3000 dollar setup installed. And now my daughter has the bug too after I stuck a 12" sub in her car to Annoy her mother. Will be trying my old Focals setup in a isobaric configuration next time she's over.
1 point
-
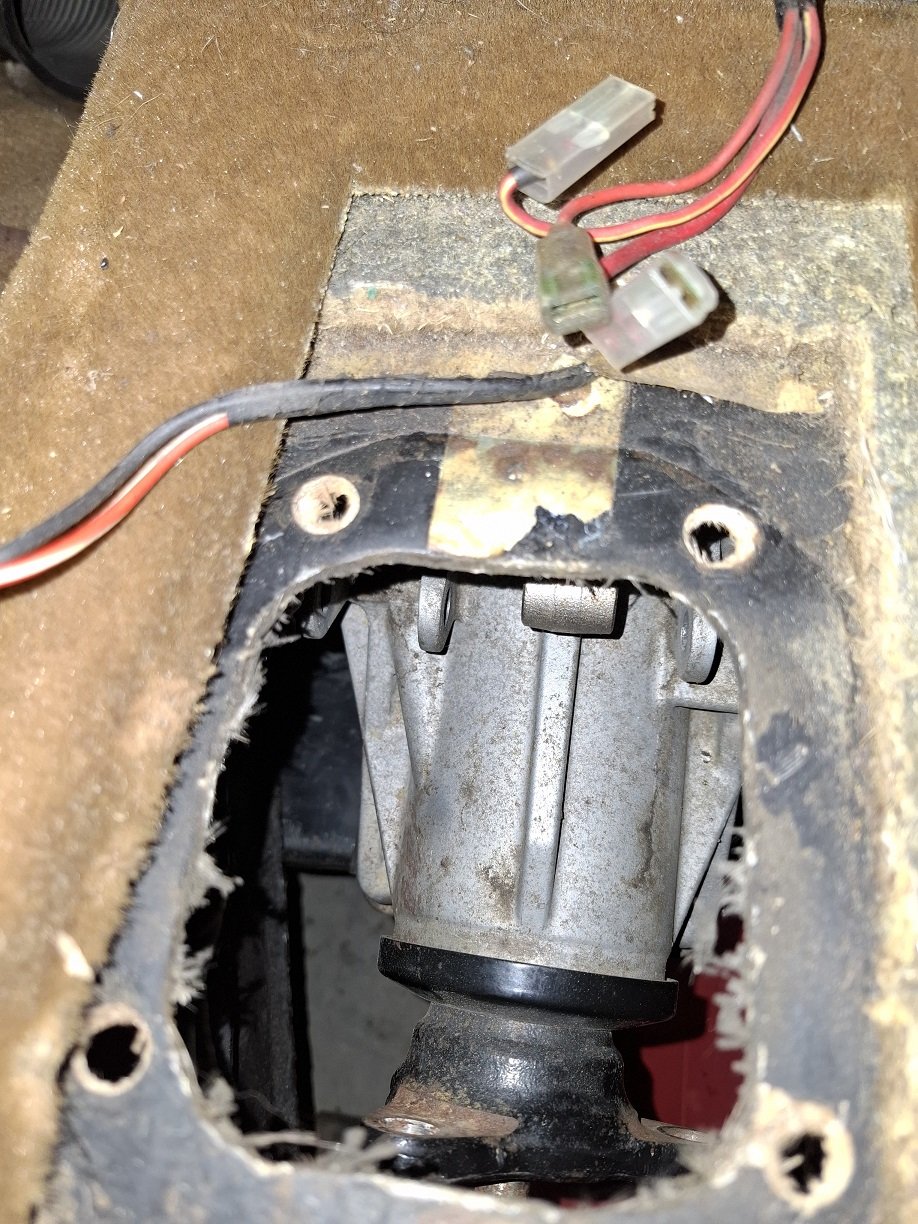
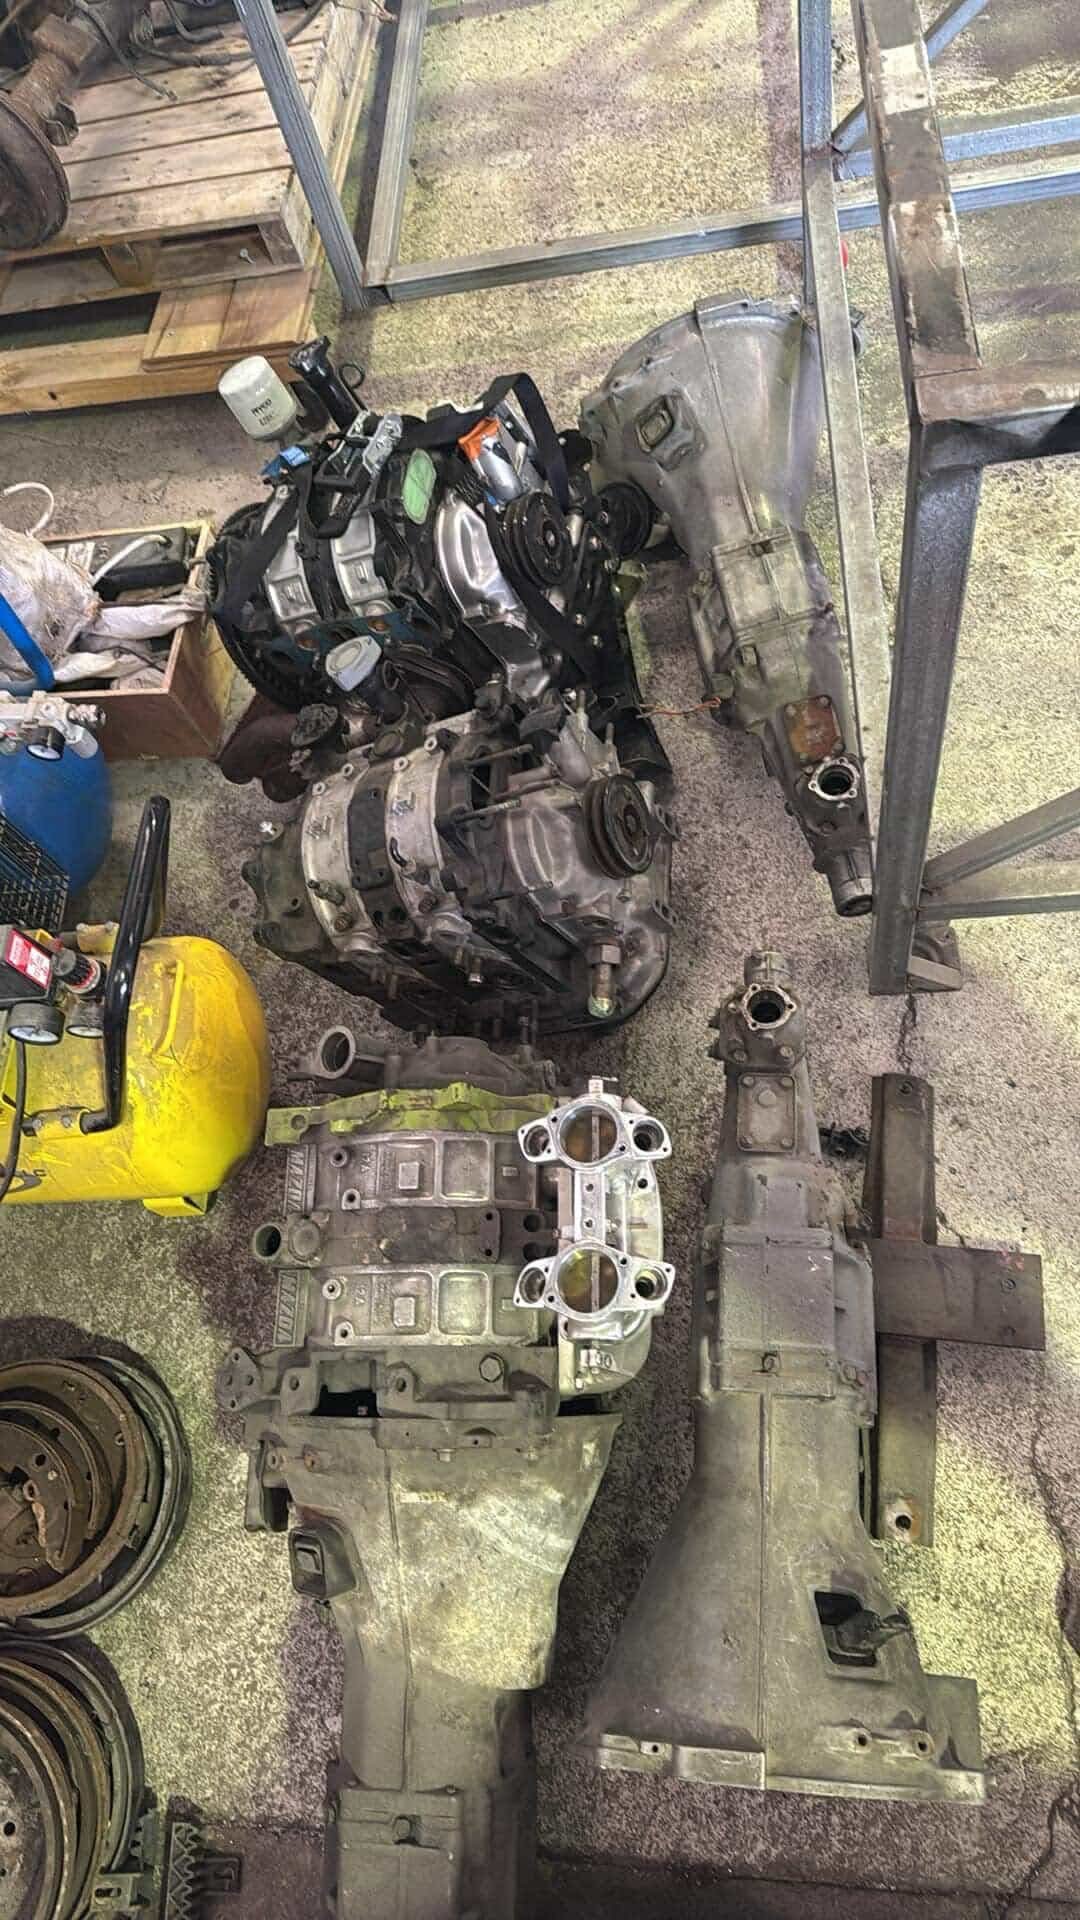
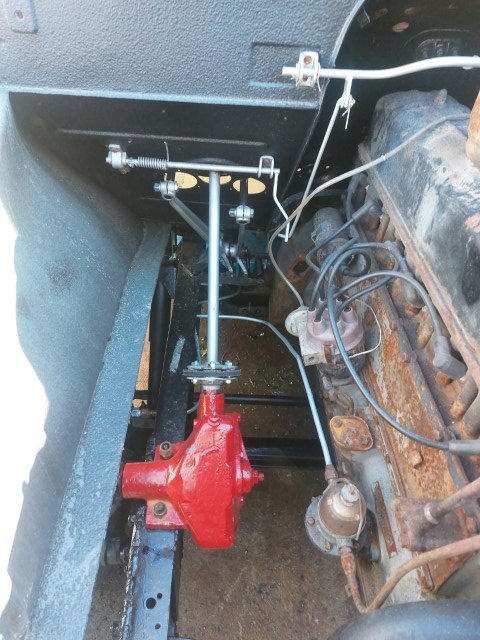
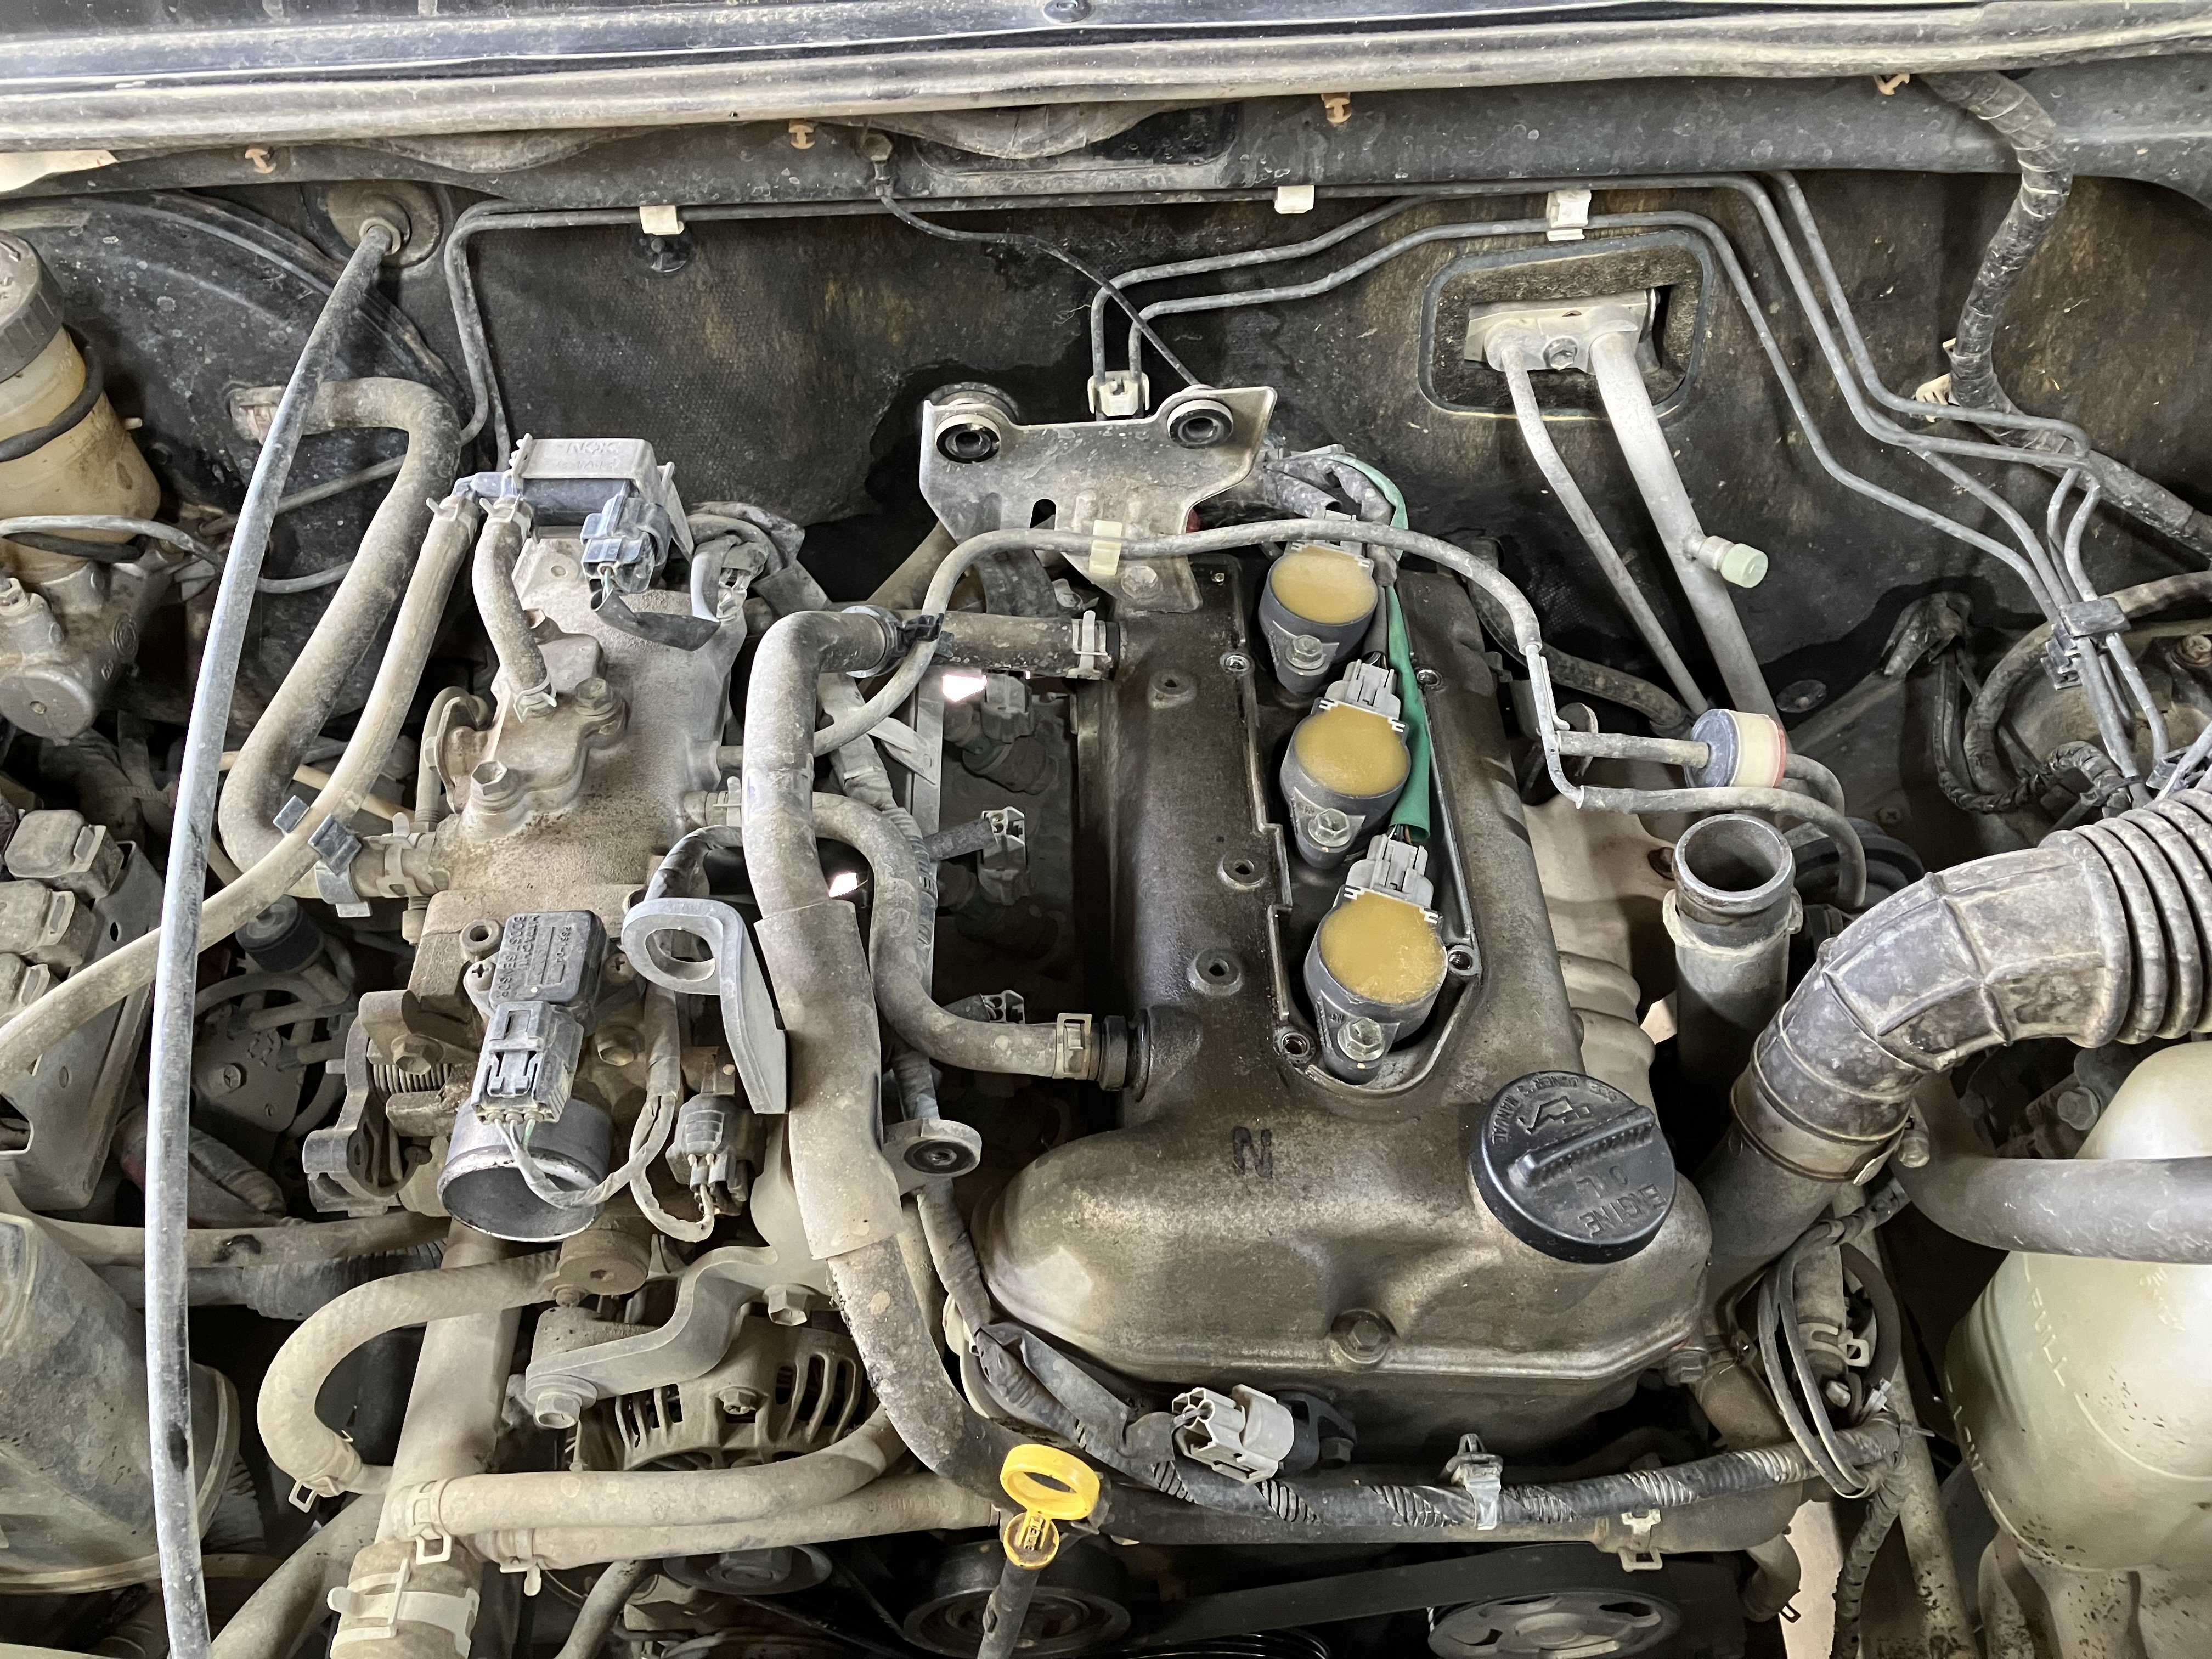
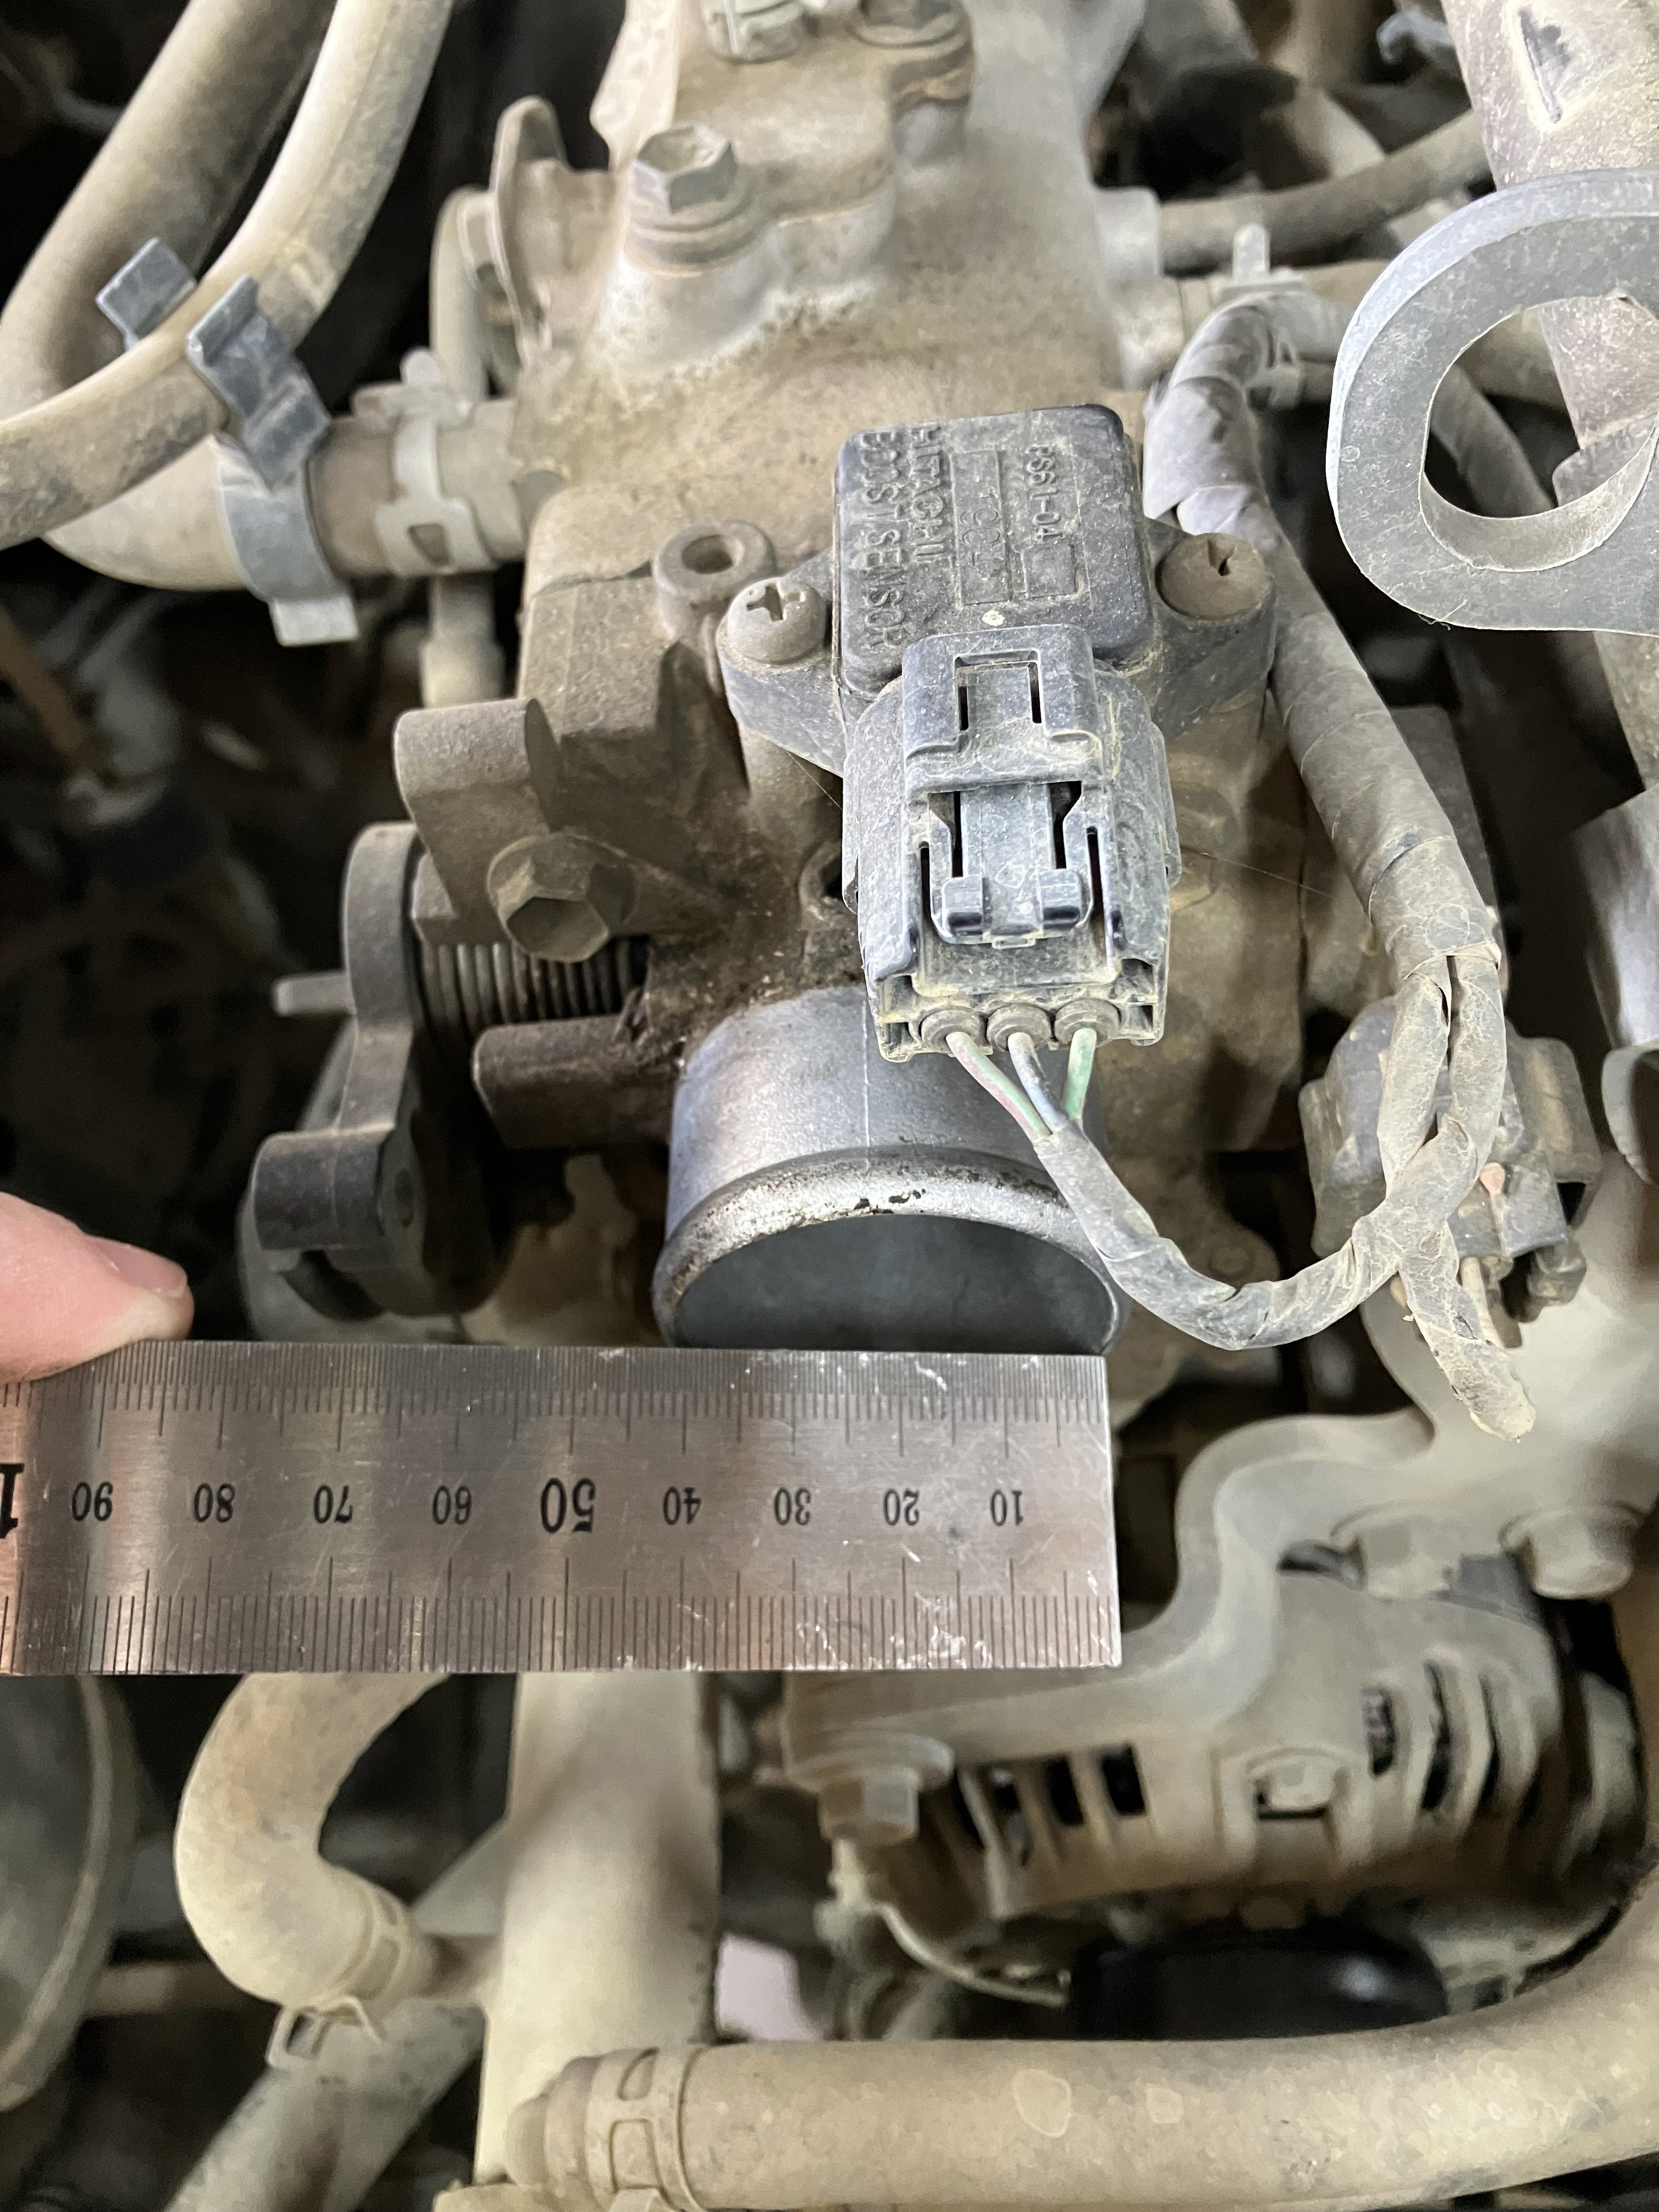
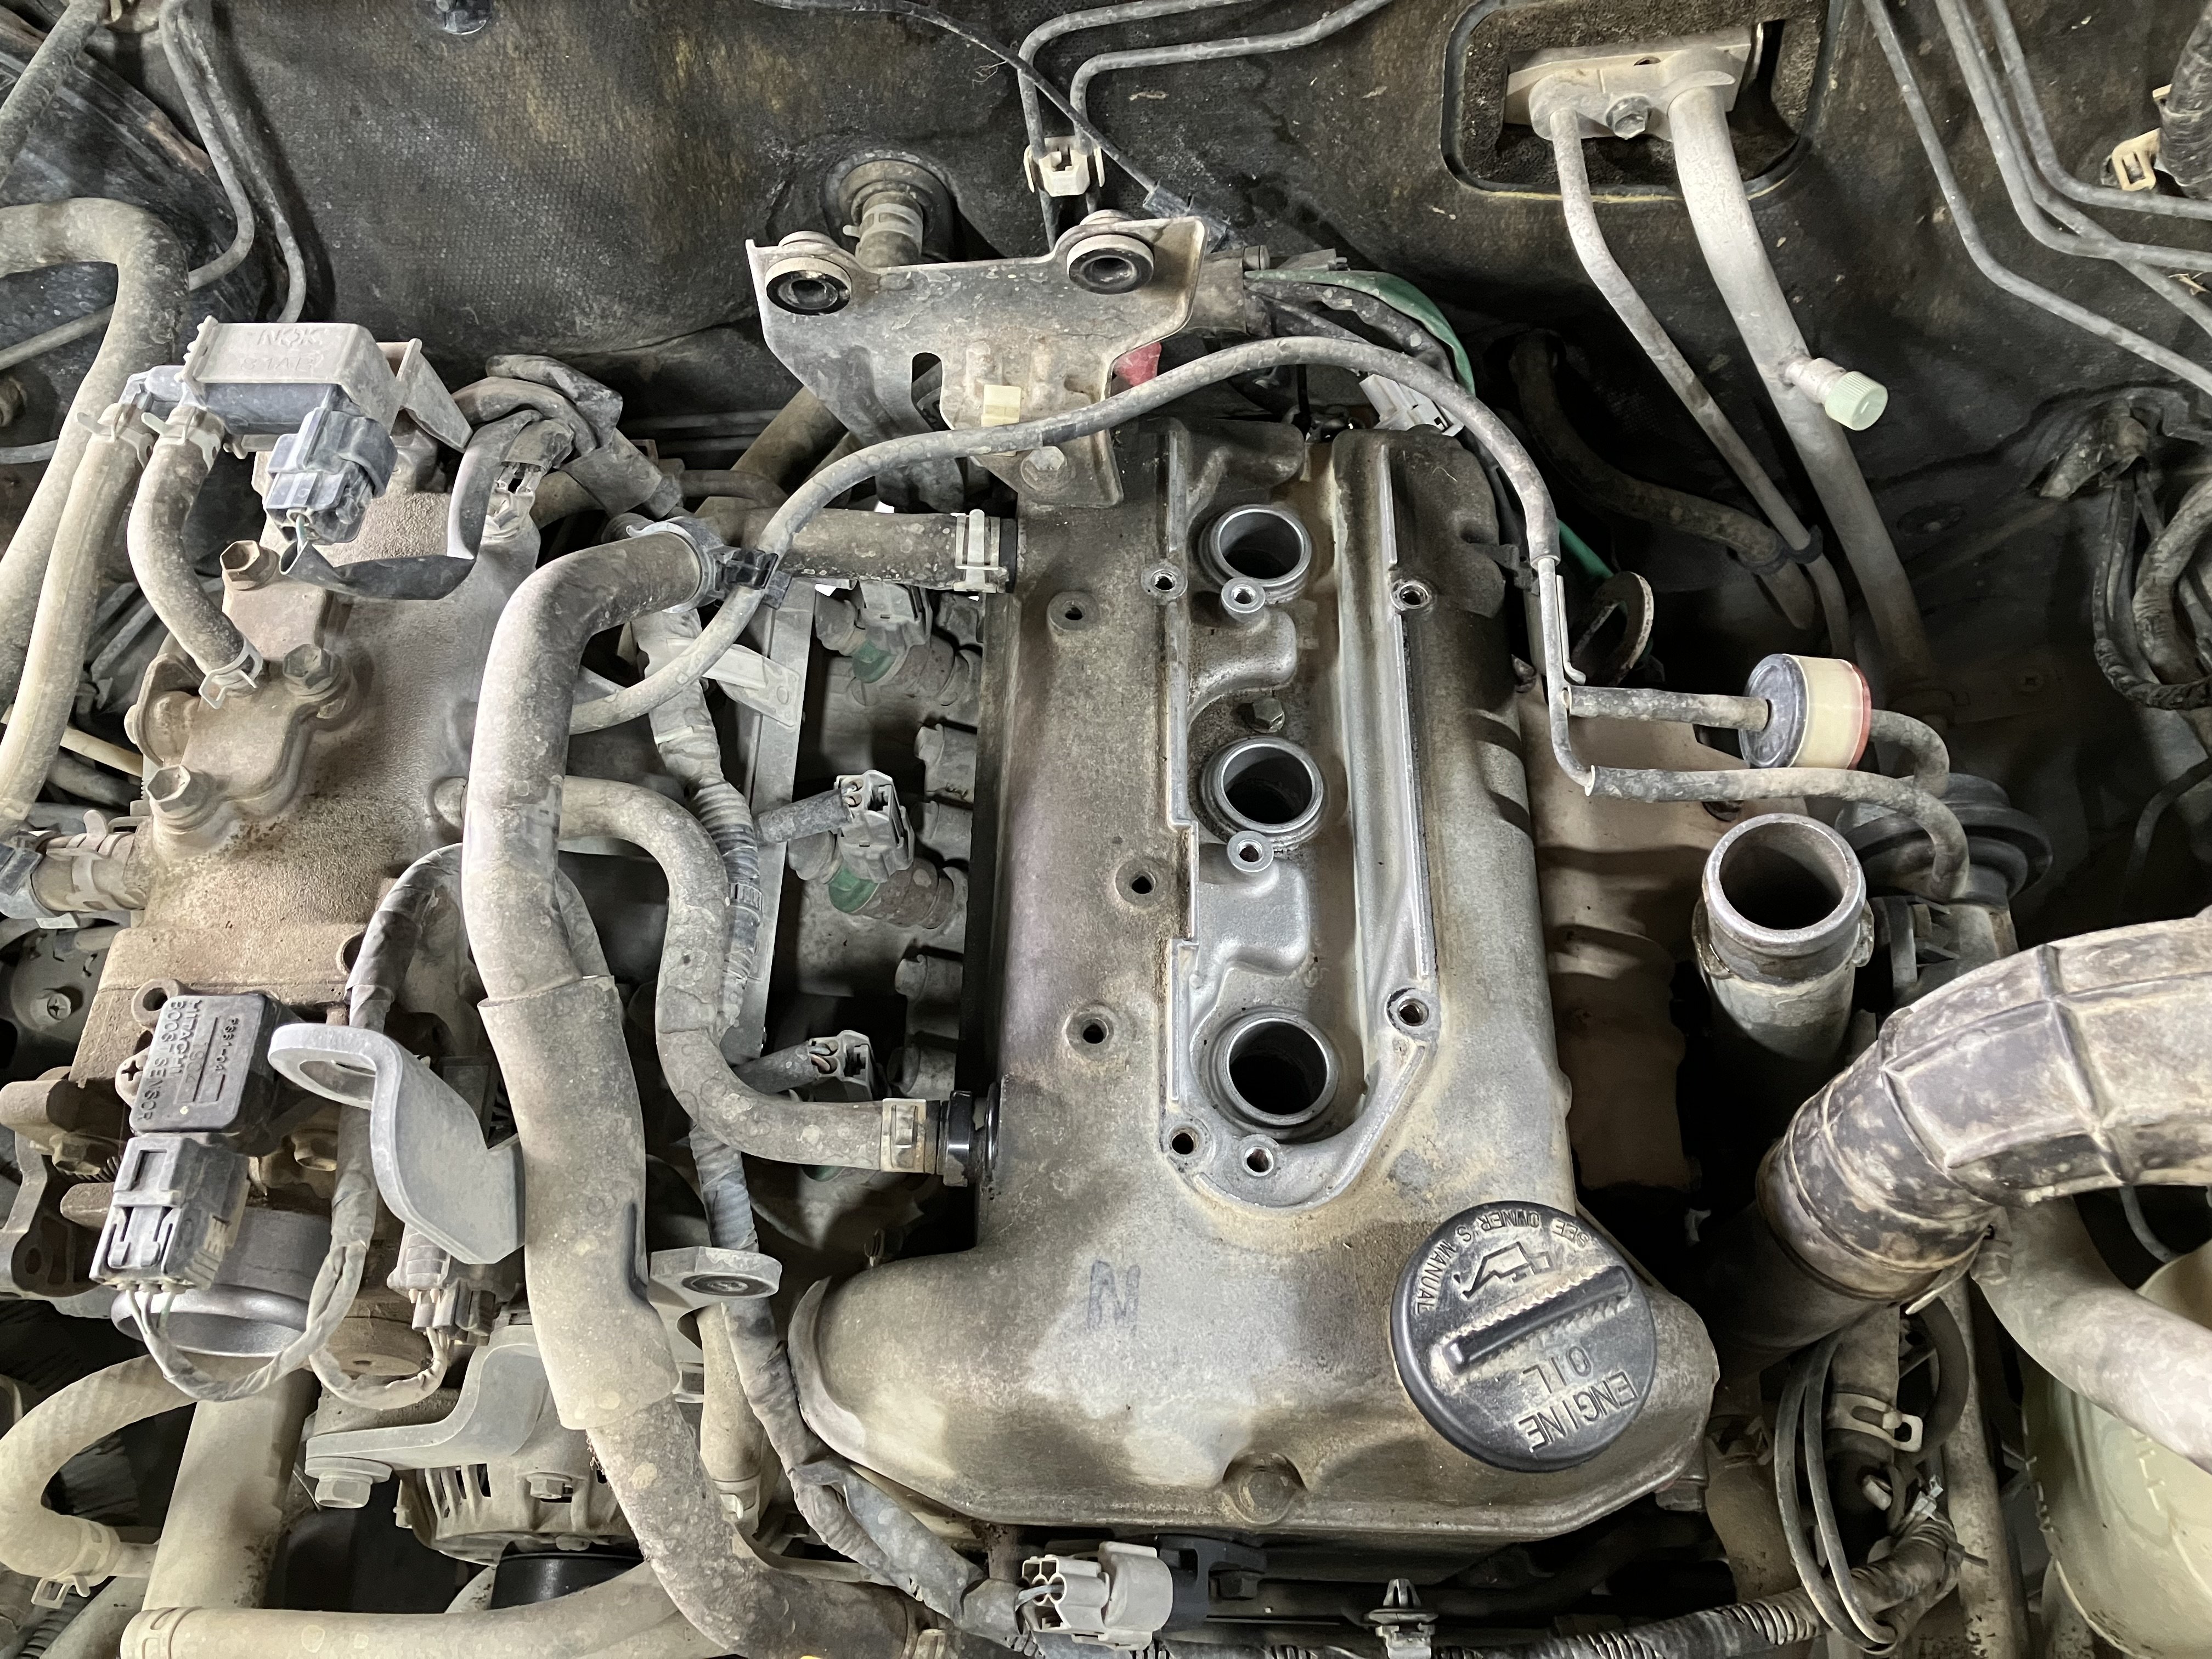
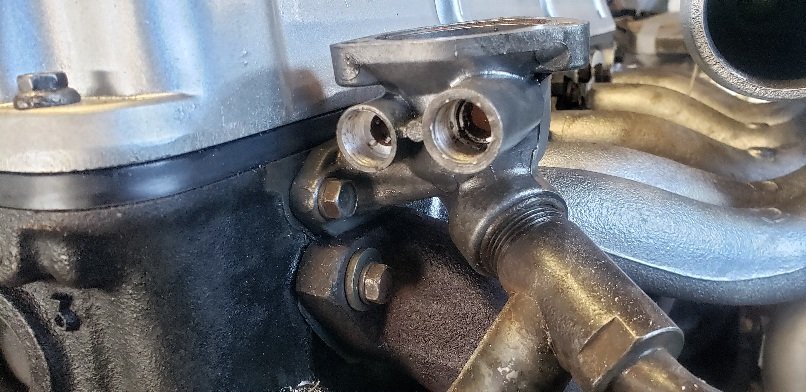
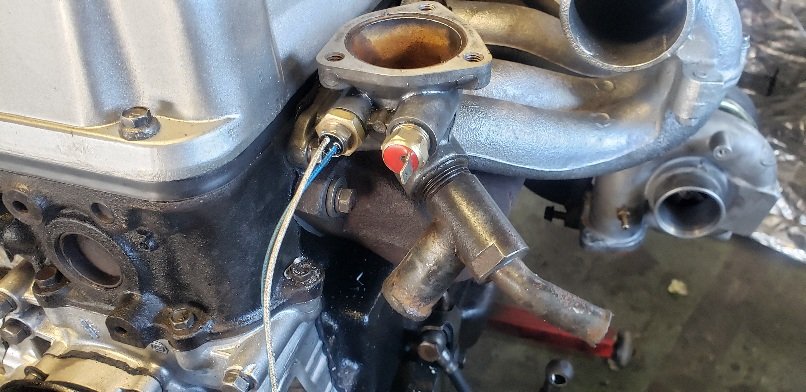
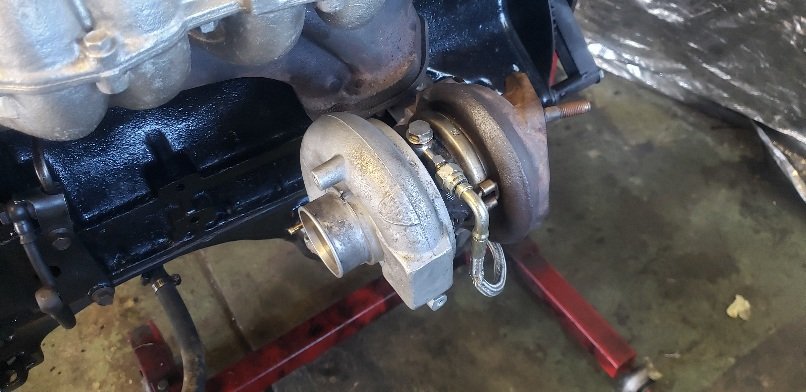
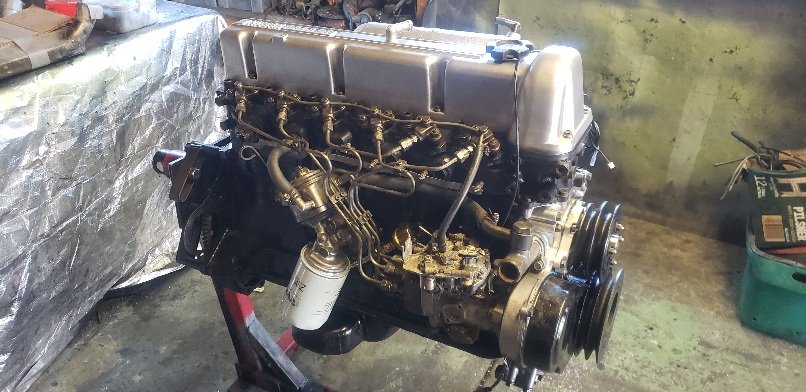
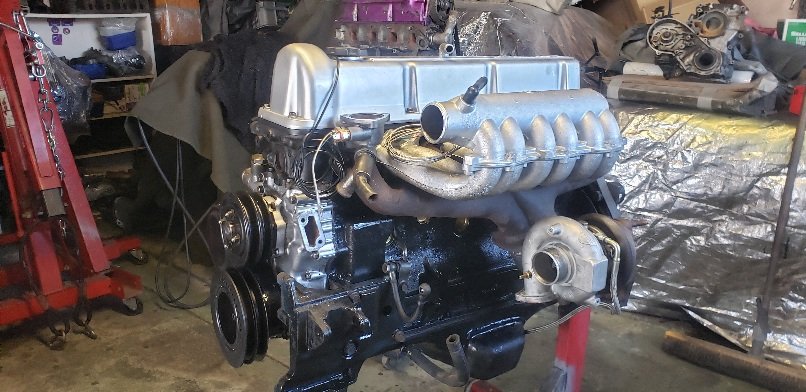
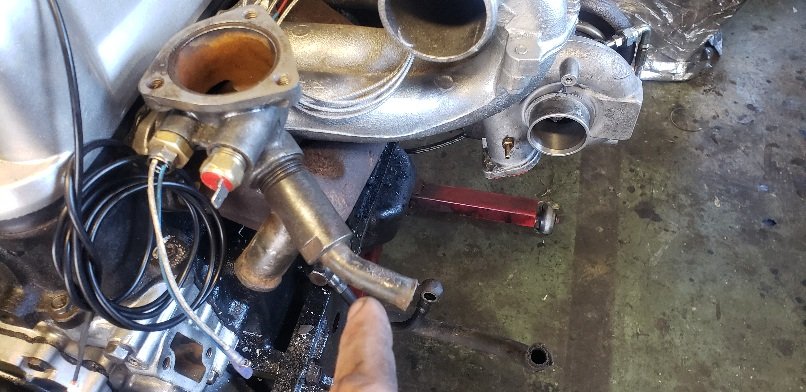
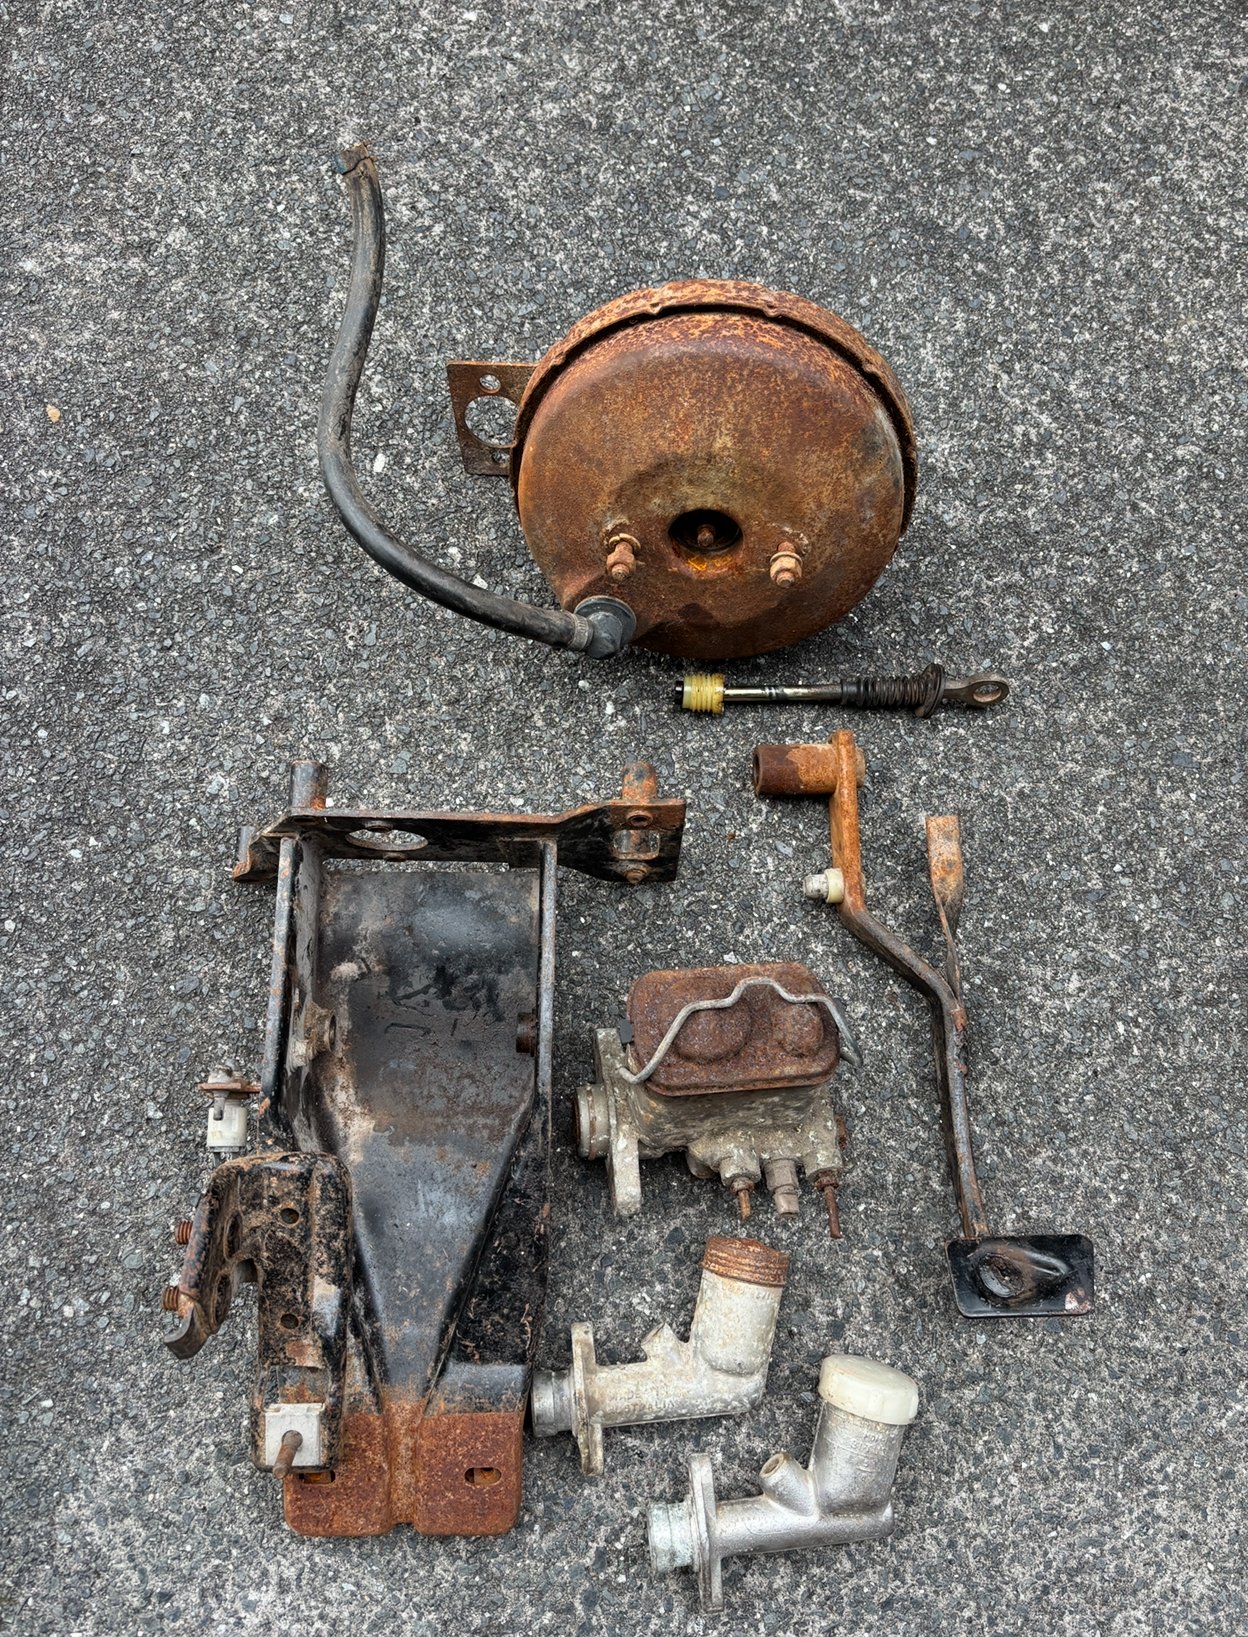
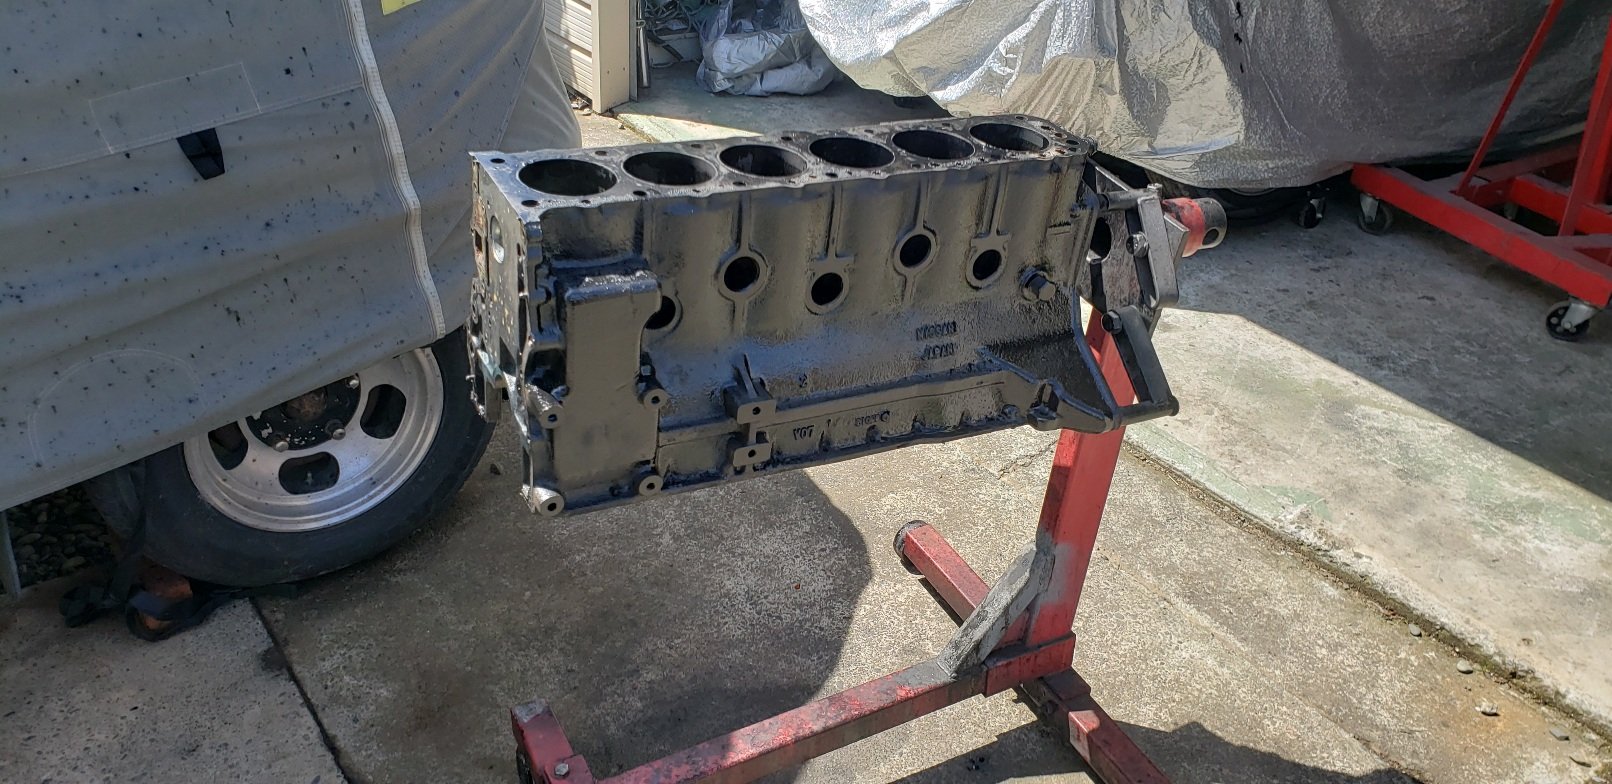
Got a few things done on the old LD28. *thermostat housing on .. drilled out And tapped for *temp gauge and them sensor to turn on and off Fan Oil gallery T in (small one) so I could get the new oil pressure sensor in and turbo oil feed git the oil filter and housing on with new water lines and clamps Starting to come together.... now I took a bunch of photos of things when i.pelled the motor out of the rover and lost of them.. soooooo.... let play *WHAT THE FUCK IS THIS *OR WHERE THE FUCK DOES THIS GO 1.i take it this is the main fuel in 2. Where does this go 3. Where does this go and what is it 4. What is this......and what do I do with it... (pretty sure Harry told me..I forgot though) 5.is this where I adjust the amount of fuel 7. This is oil in right 8. And this is drain back to the block 9.where the fuck does this go and I'm pressuring its water? 10. Does ut go here?.. if not ..where the fuck does this go.⁸ 11. Now where does this go 12. now what does this do. And the motor out of the rover didn't have one Thanks for any help... To late to mention i know nothing about these motors.
1 point
-
And another small job off the list, choke fitted to seat. I've made another much longer cable, so seat can still pivot forward. This is just a dry fit to get it done.
1 point
-
Template for polycarbonate window made. Just need to source some 3mm polycarbonate sheet.
1 point
-
Cutting into the lower sill reveals some more rust, but not as bad as I thought it might be. Will have to spray some rust convertor down through the whole lower sills and make sure the drain holes are cleared as there was a big blob of bog covering the rear one where this rust was. Going to be doing the bottom sills on both sides where rust holes have appeared just to make sure that I can check the whole inner structure.
1 point
-
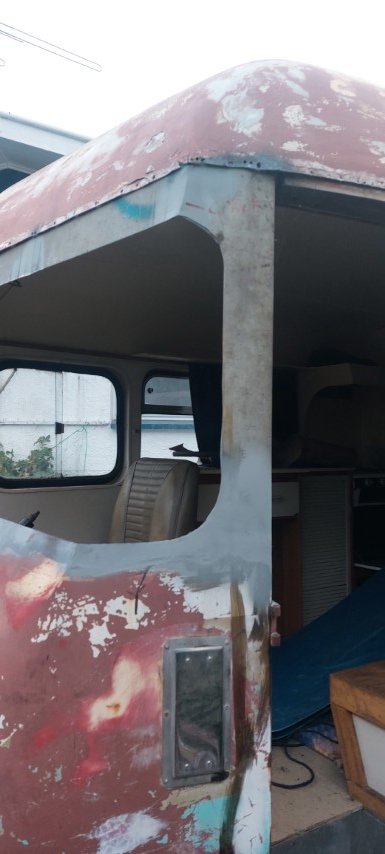
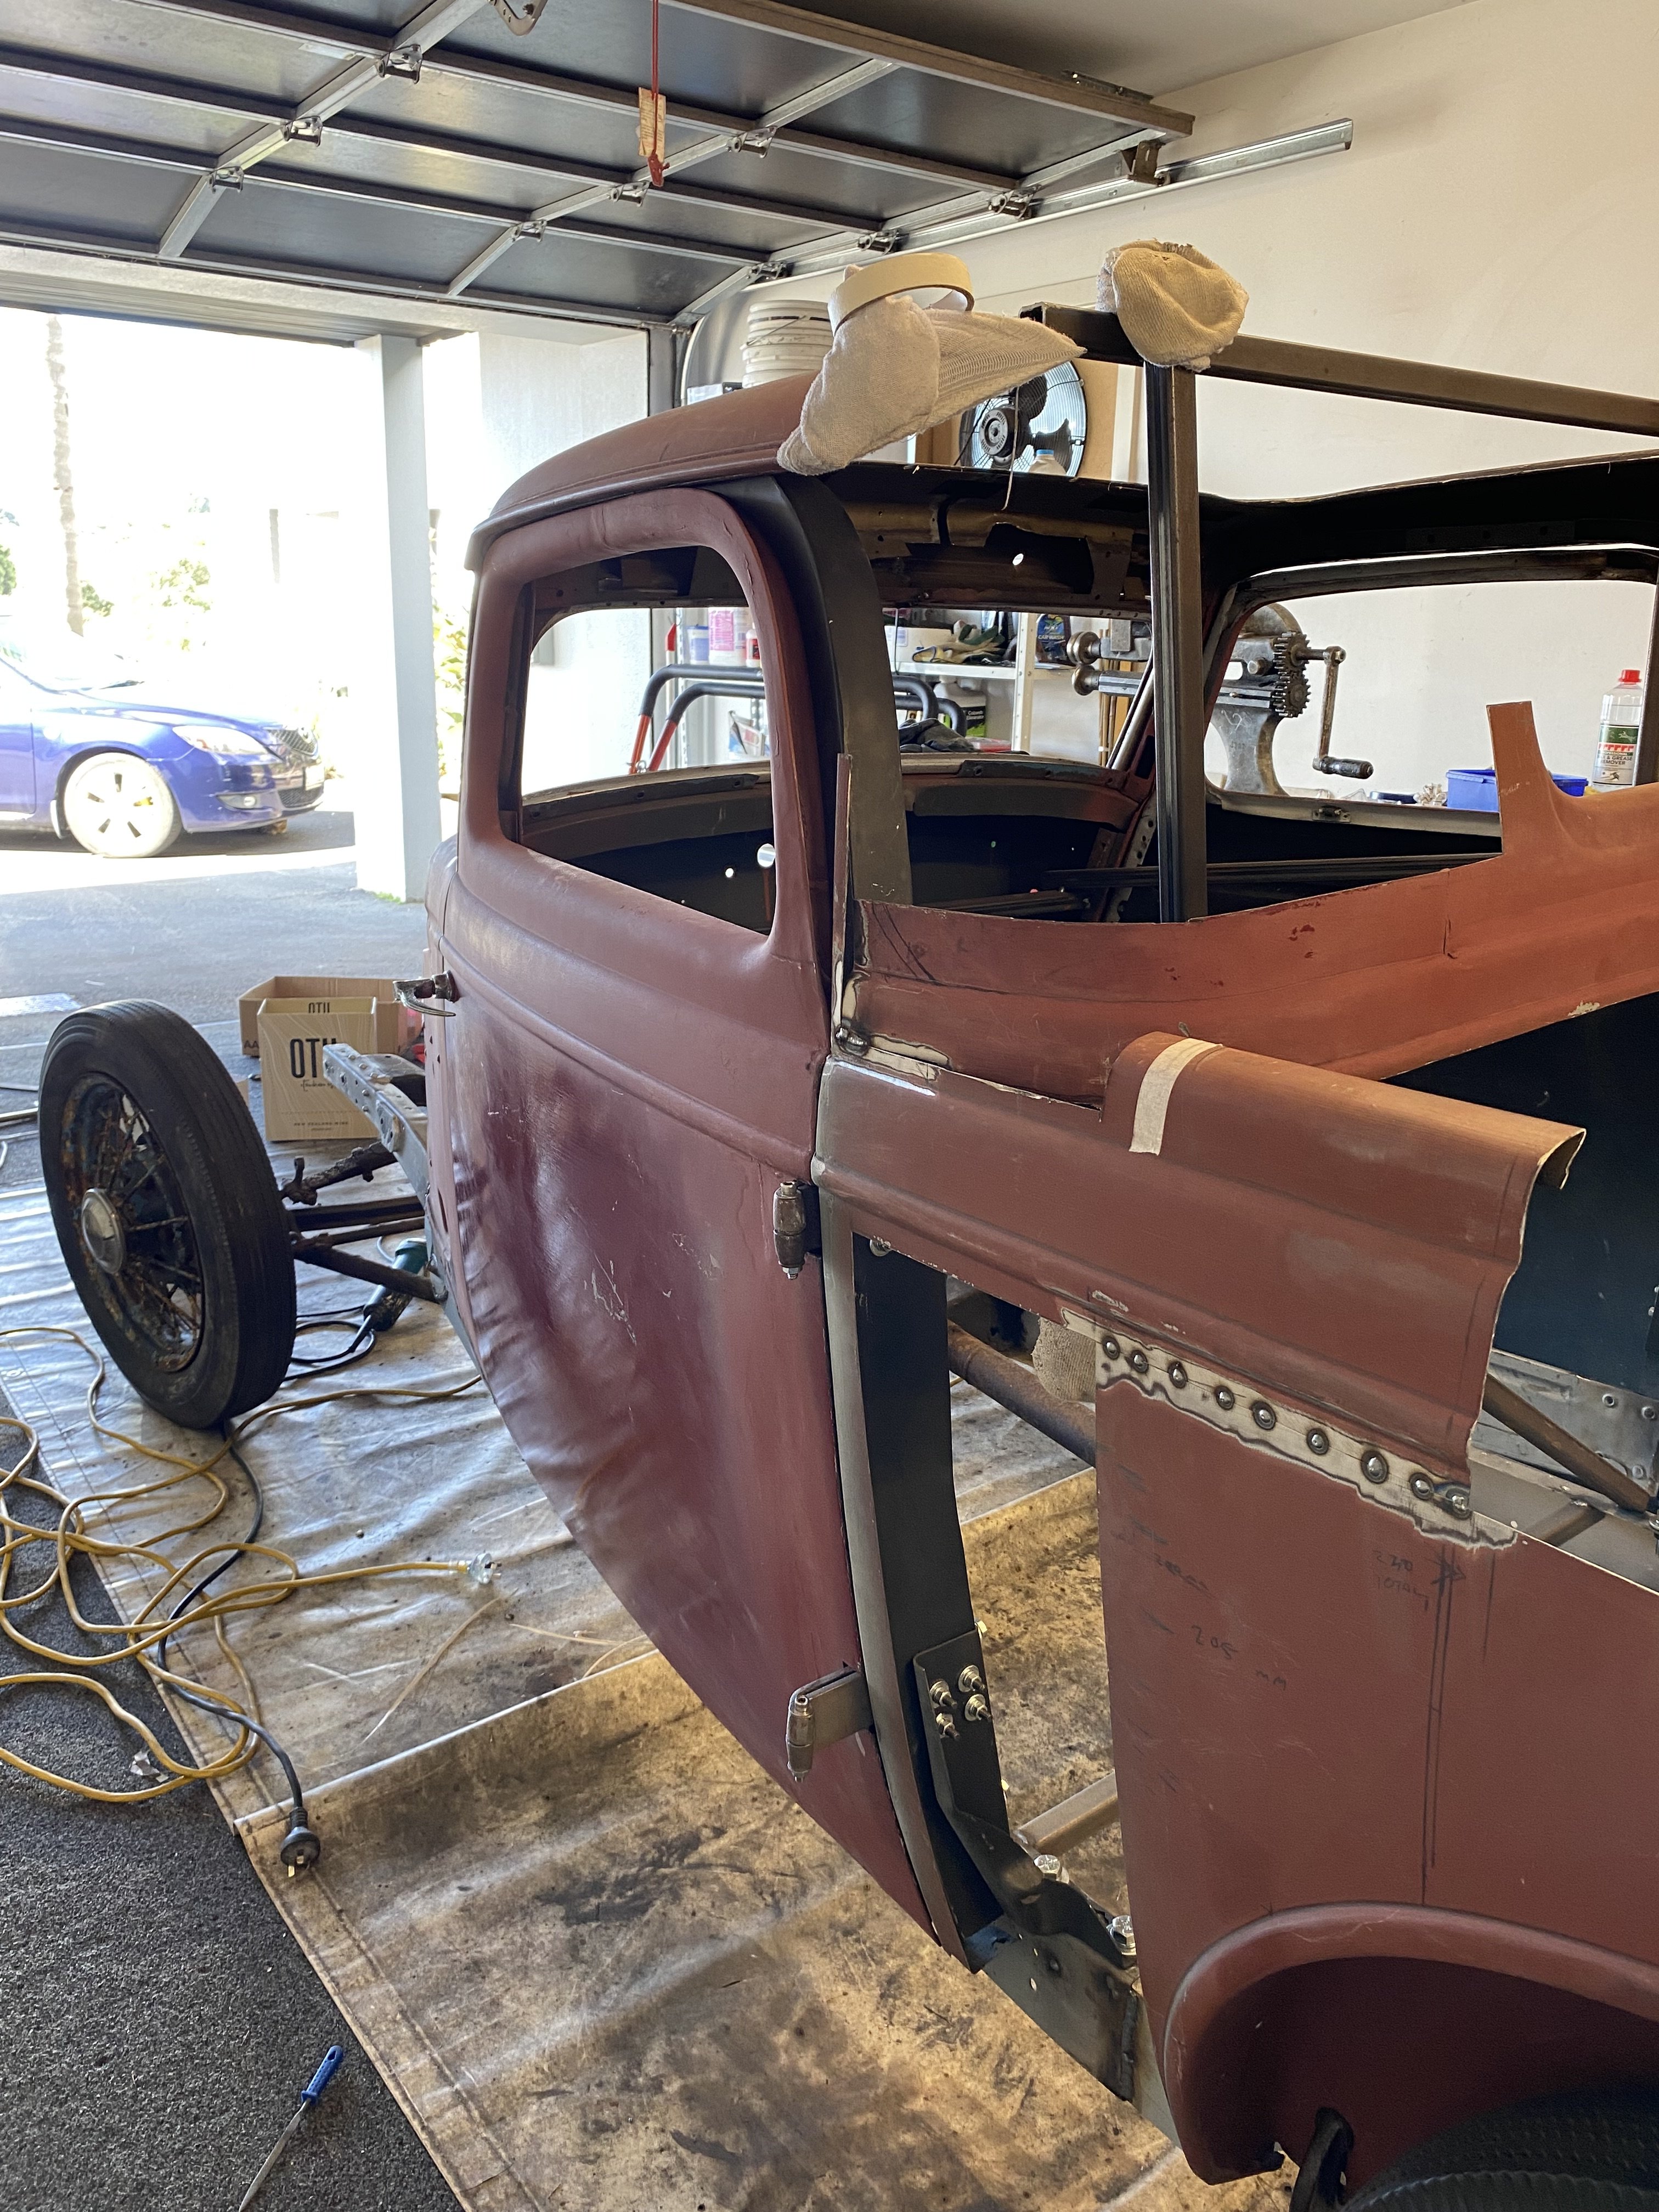
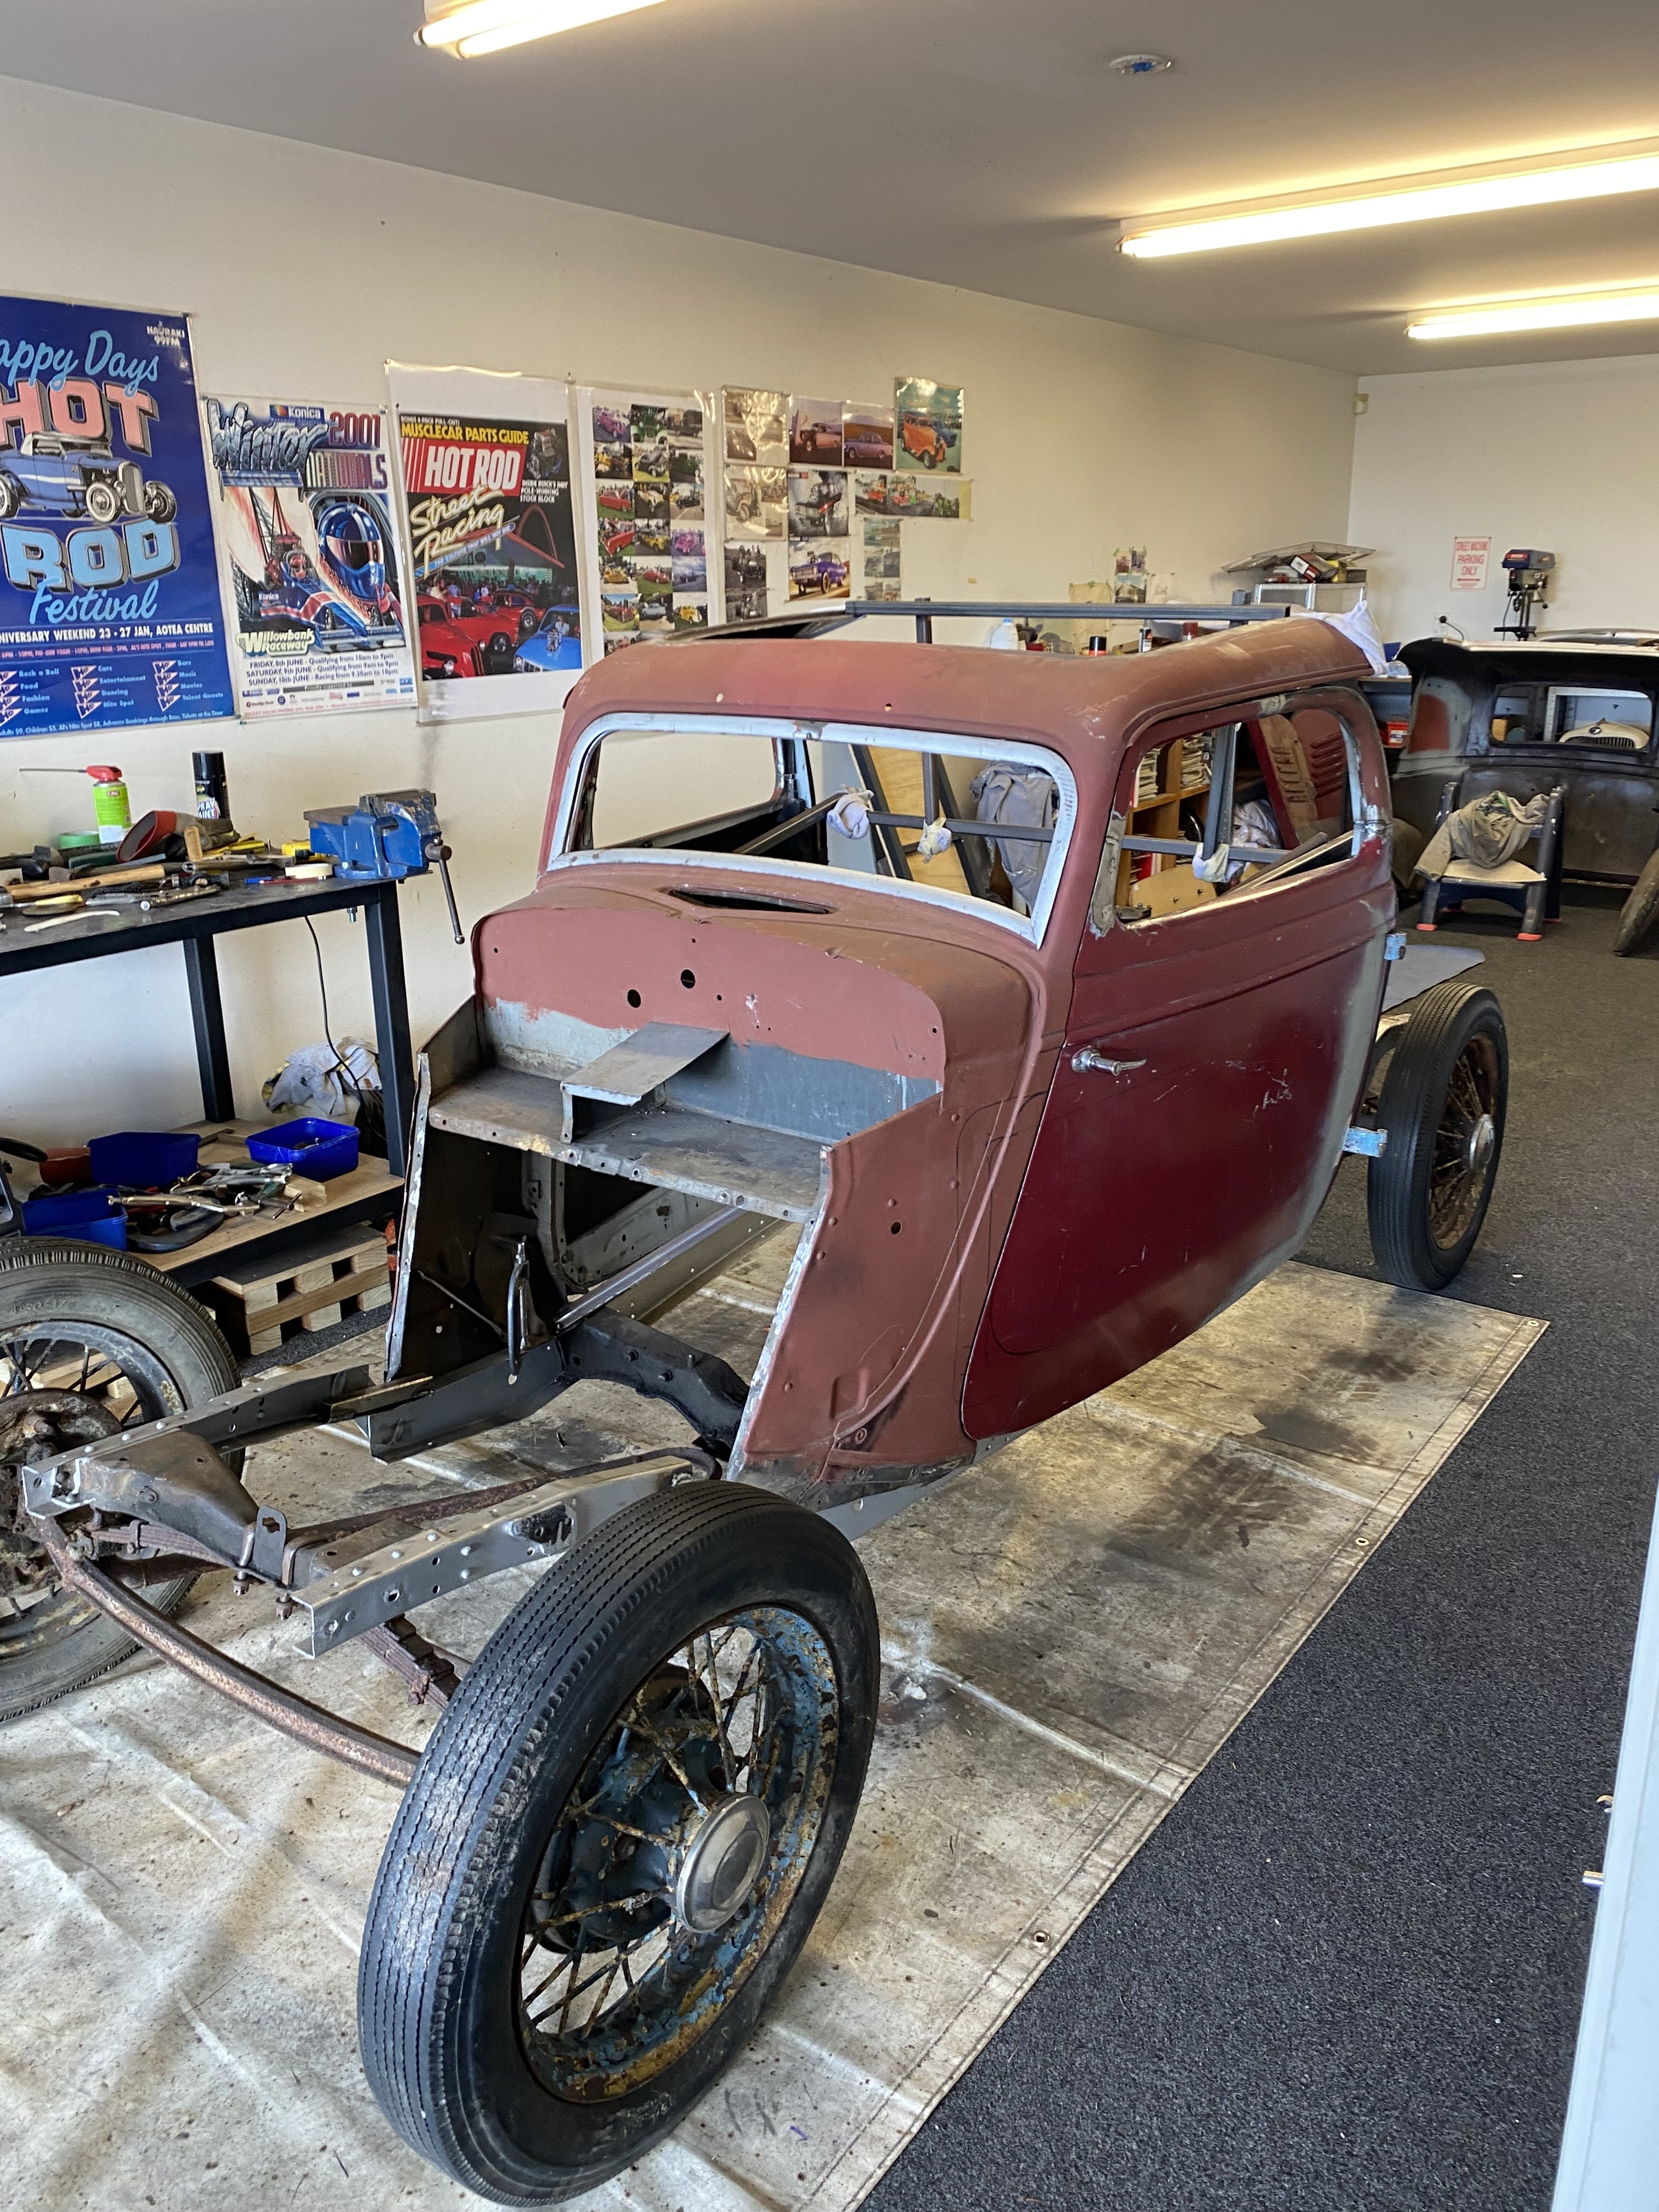
I decided to push the car outside before I did any more welding just to make sure the proportions are looking right. Its hard to tell when you’re working in a tandem garage. I think I extended it the right amount and the rake on the roof line looks good.
1 point
-
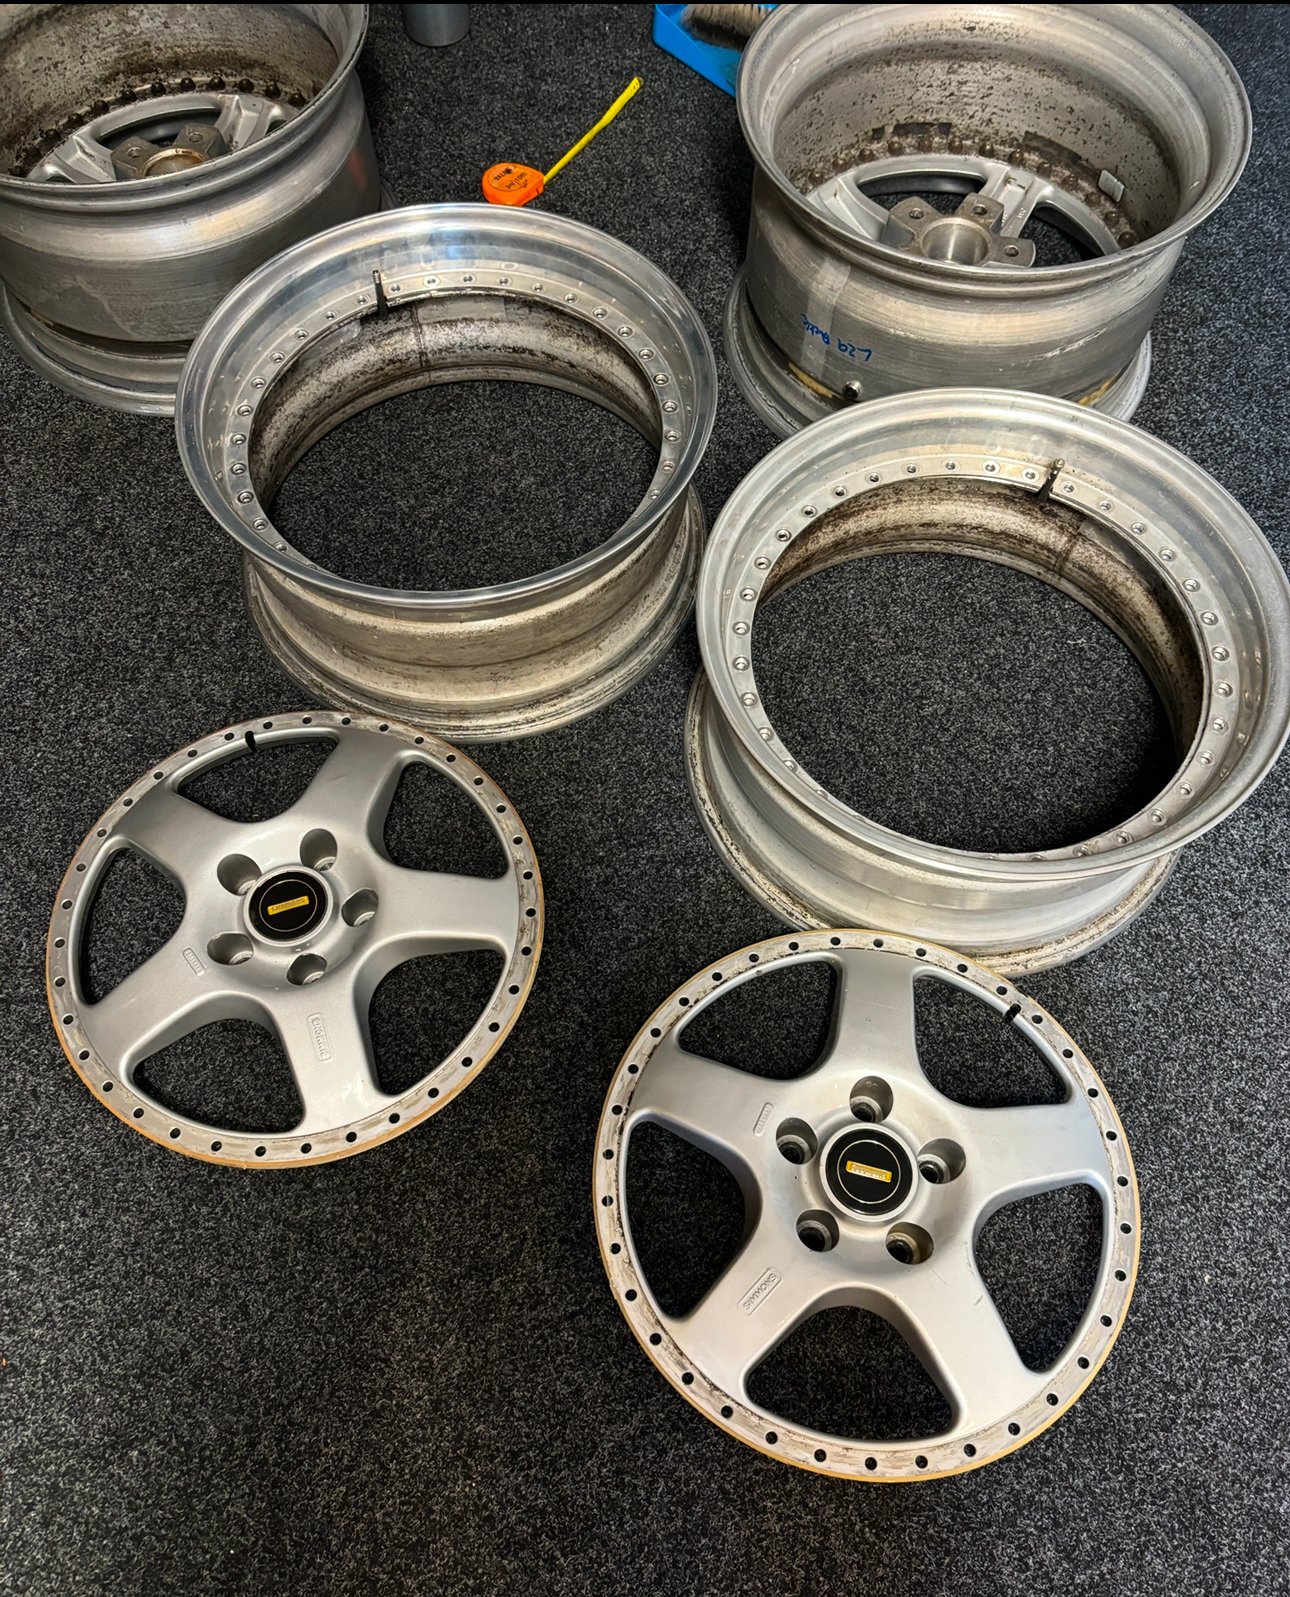
And I’m currently splitting the Simmons up to re lip(when I win lotto)
1 point
-
1 point
-
1 point
-
Could be a high spot on one of the bearing journals. Put some valve grinding paste on the bearing (the fine stuff, not the course stuff) and spin the crank over with a large drill. Barry.1 point
-
Have read the same, the thicker electrodes of copper (actually nickel on the business end, even iridiums have a copper core) erode much faster with the high voltages in modern ignition systems, leading to misfire and other issues. Great for an older none boosted engine running a single coil and leads from a dizzy etc. I had 2 fresh sets of NGK copper nickel plugs die on the dyno in my old Subaru, anything over 10psi boost and they'd start breaking up and misfiring, swapped them out for a set of platinums from memory and then it was mint even pushing 22psi into it.1 point
-
I turned up this thick stainless adapter. Part of the intake puzzle. I'm waiting on Aliexpress mandrel bends for the rest. I also made some custom cables for choke, and made a 90° adapter for the throttle cable, to keep the height down.
1 point
-
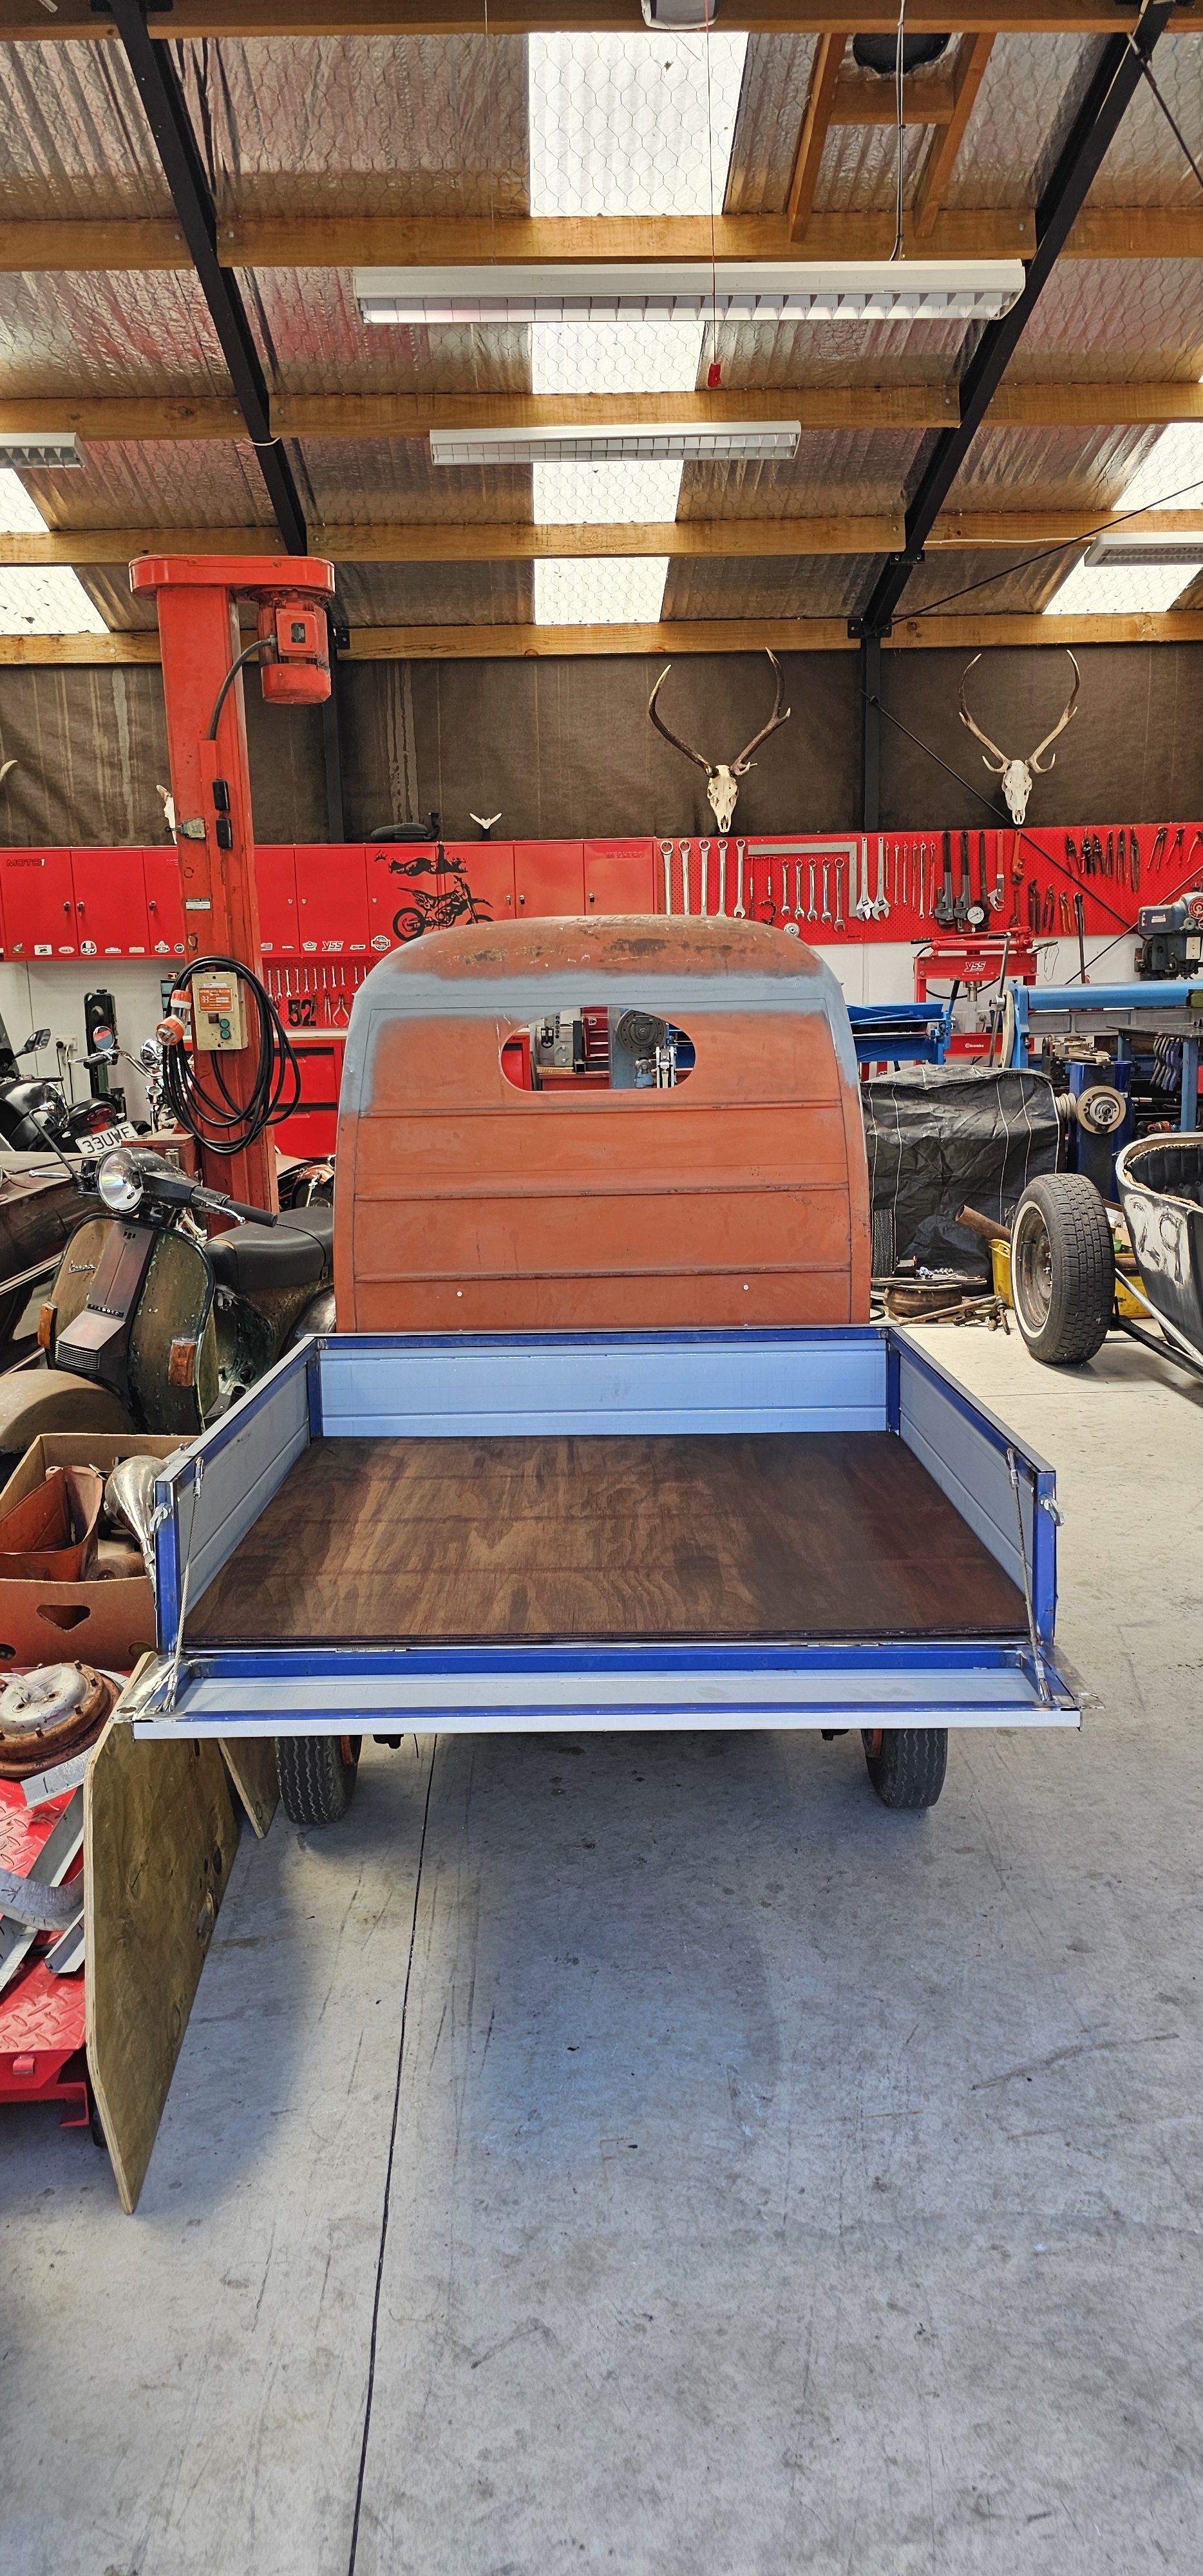
Deck sorted. Once painted, I'll use self tappers to hold it down. I added crimped wire straps to the tailgate. Small steps in the right direction...
1 point
-
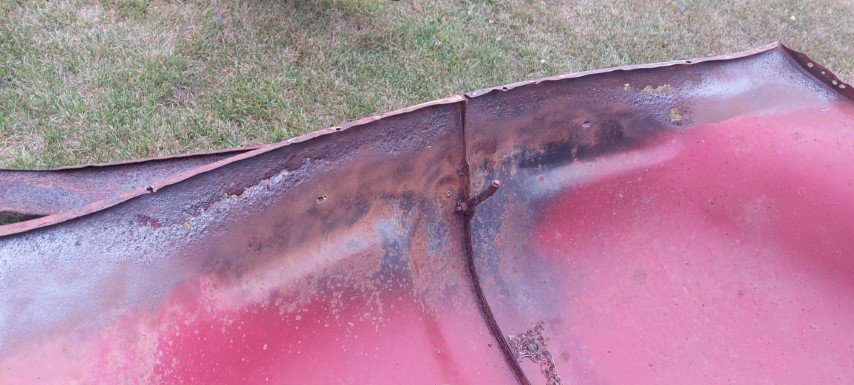
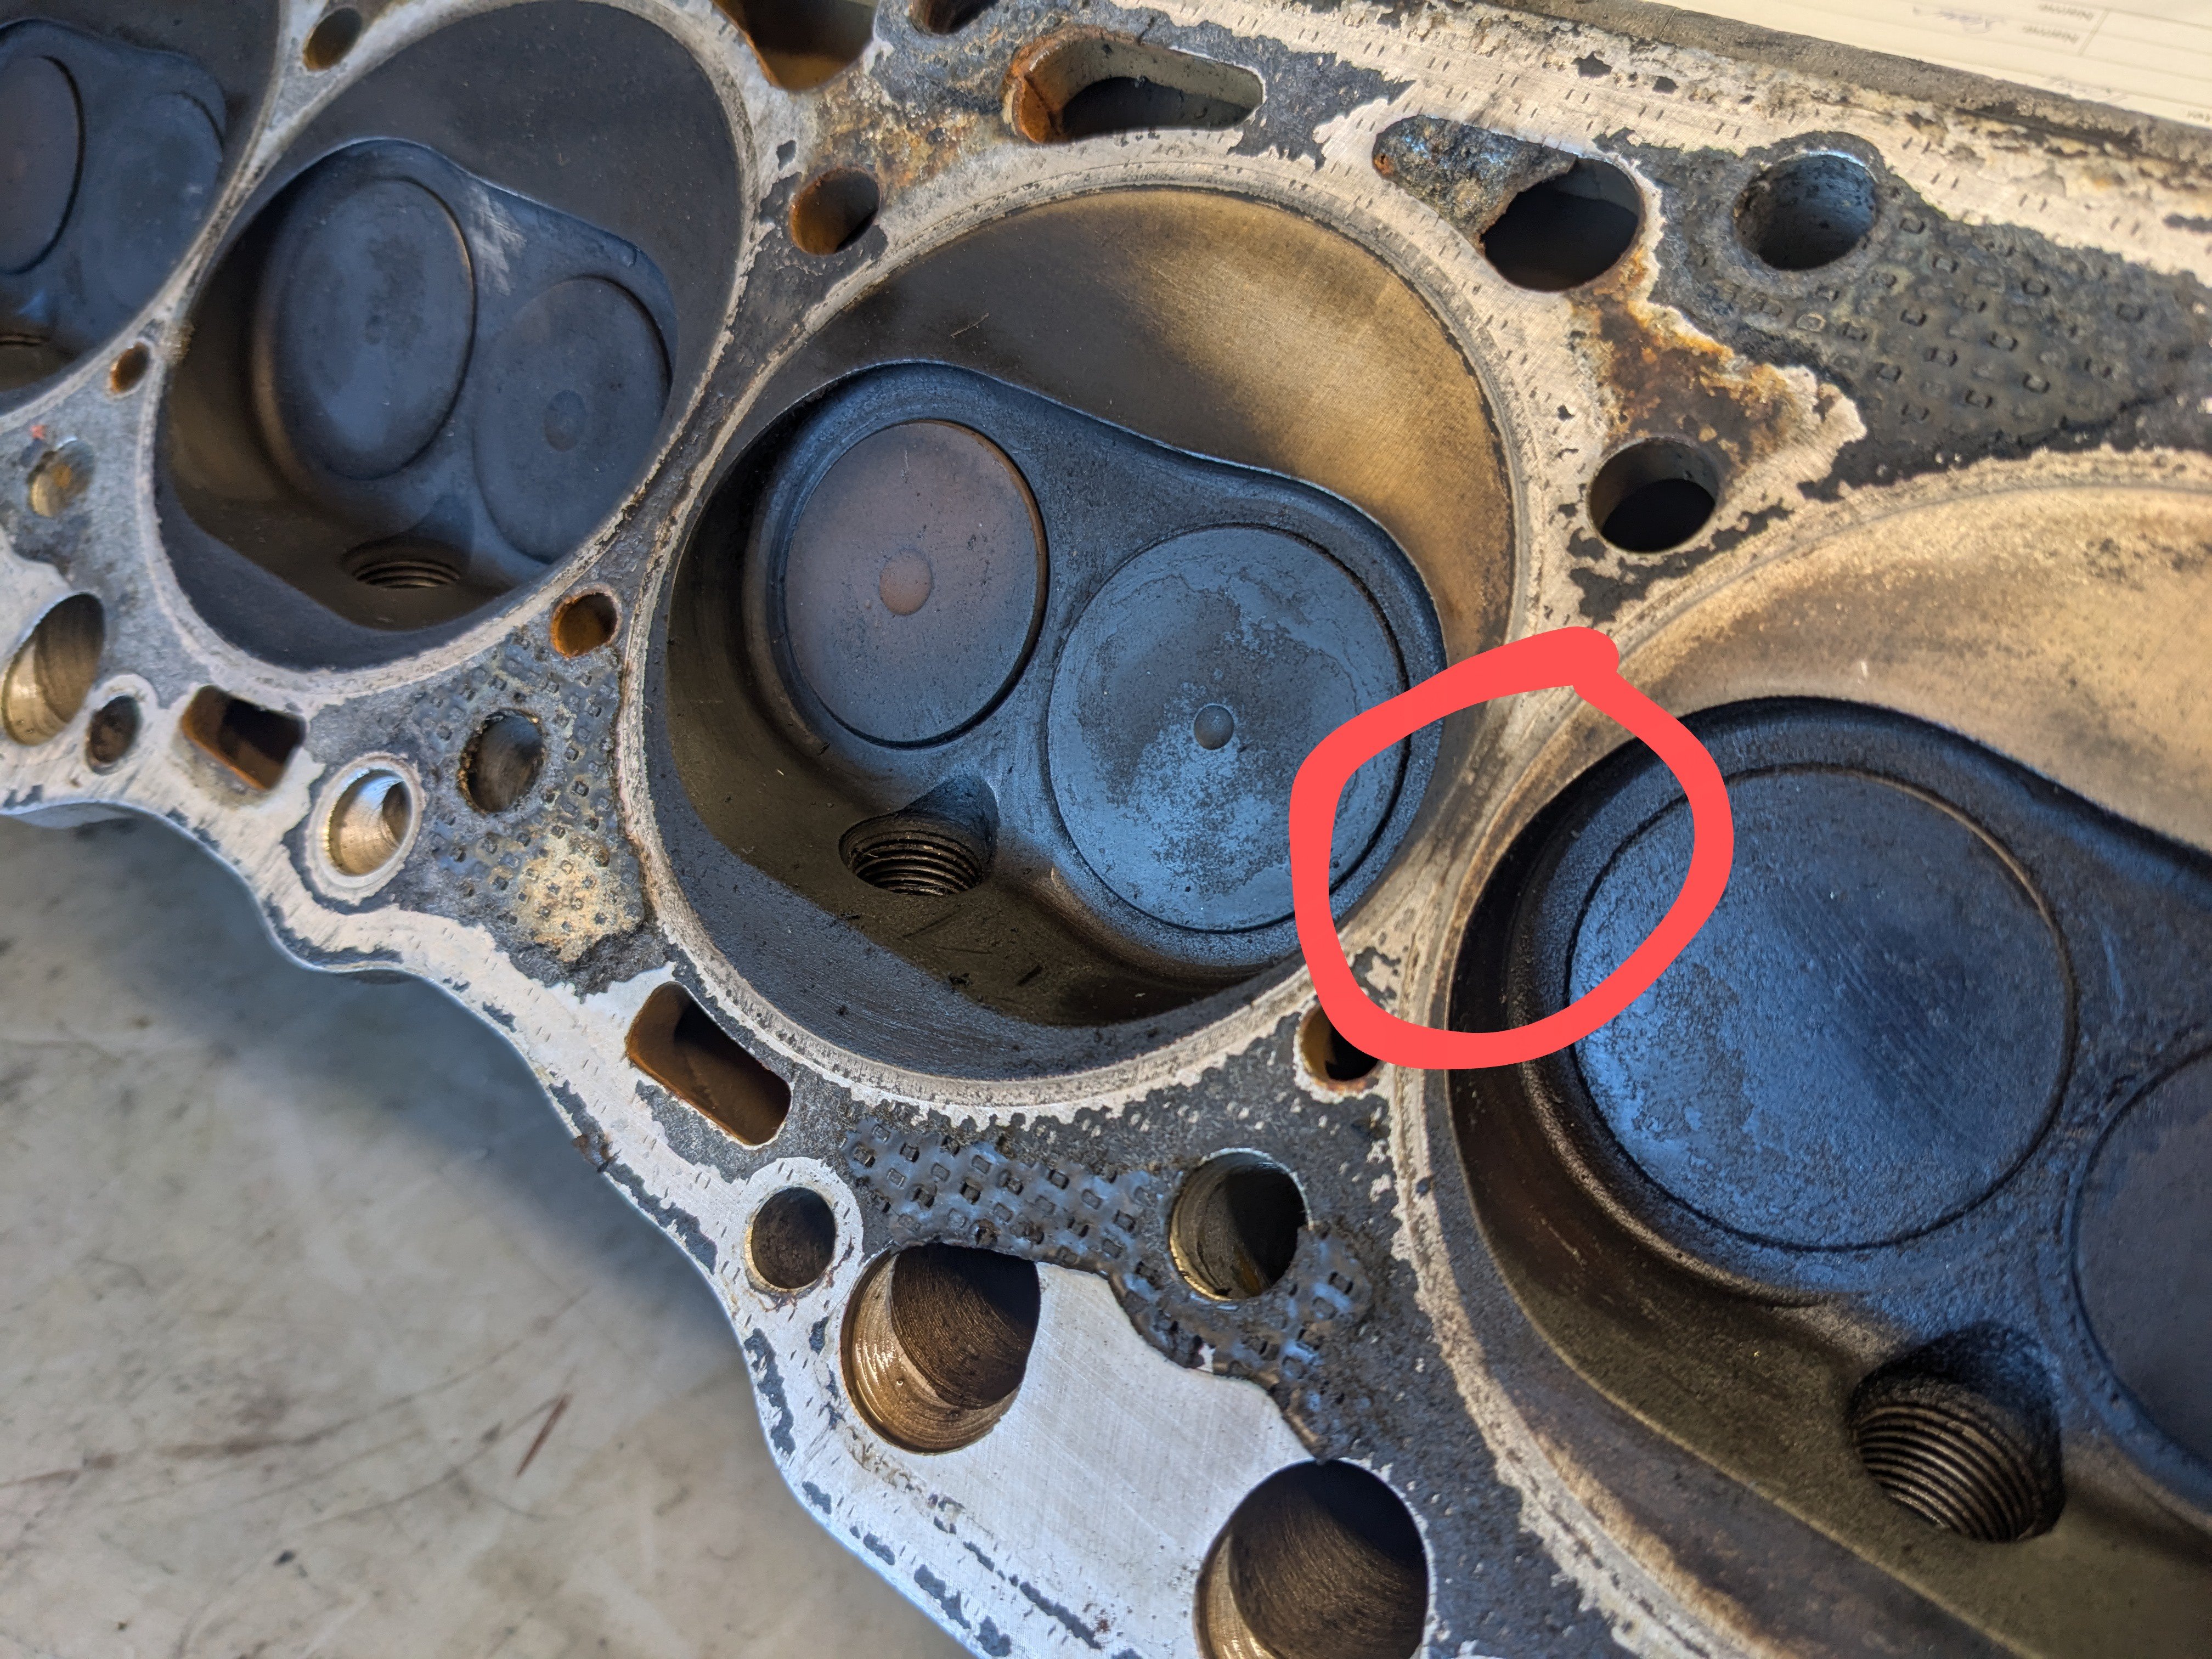
Engine shop mans keen eye pointed this out On the lighter coloured cylinder too, so could well just be the head gasket. They are going to check it and give it a skim. There is a certain amount of scum that forms in the header tank, not much so I thought it was just clag from its long park up getting blown out, but maybe not..
1 point
-
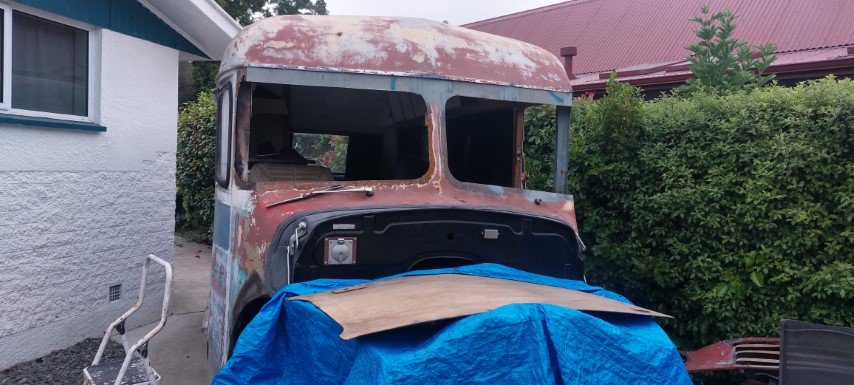
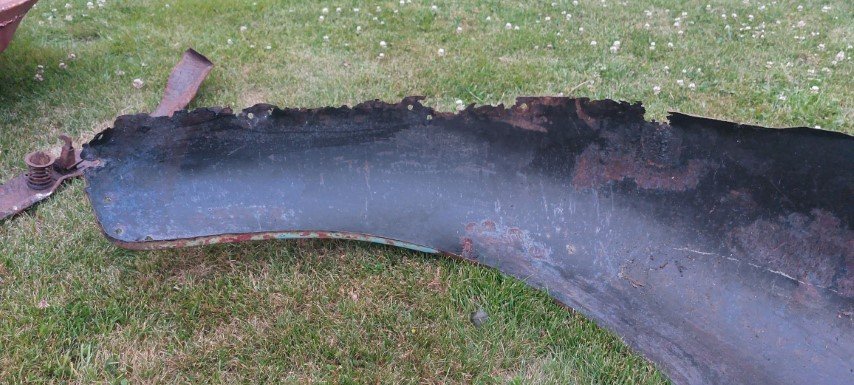
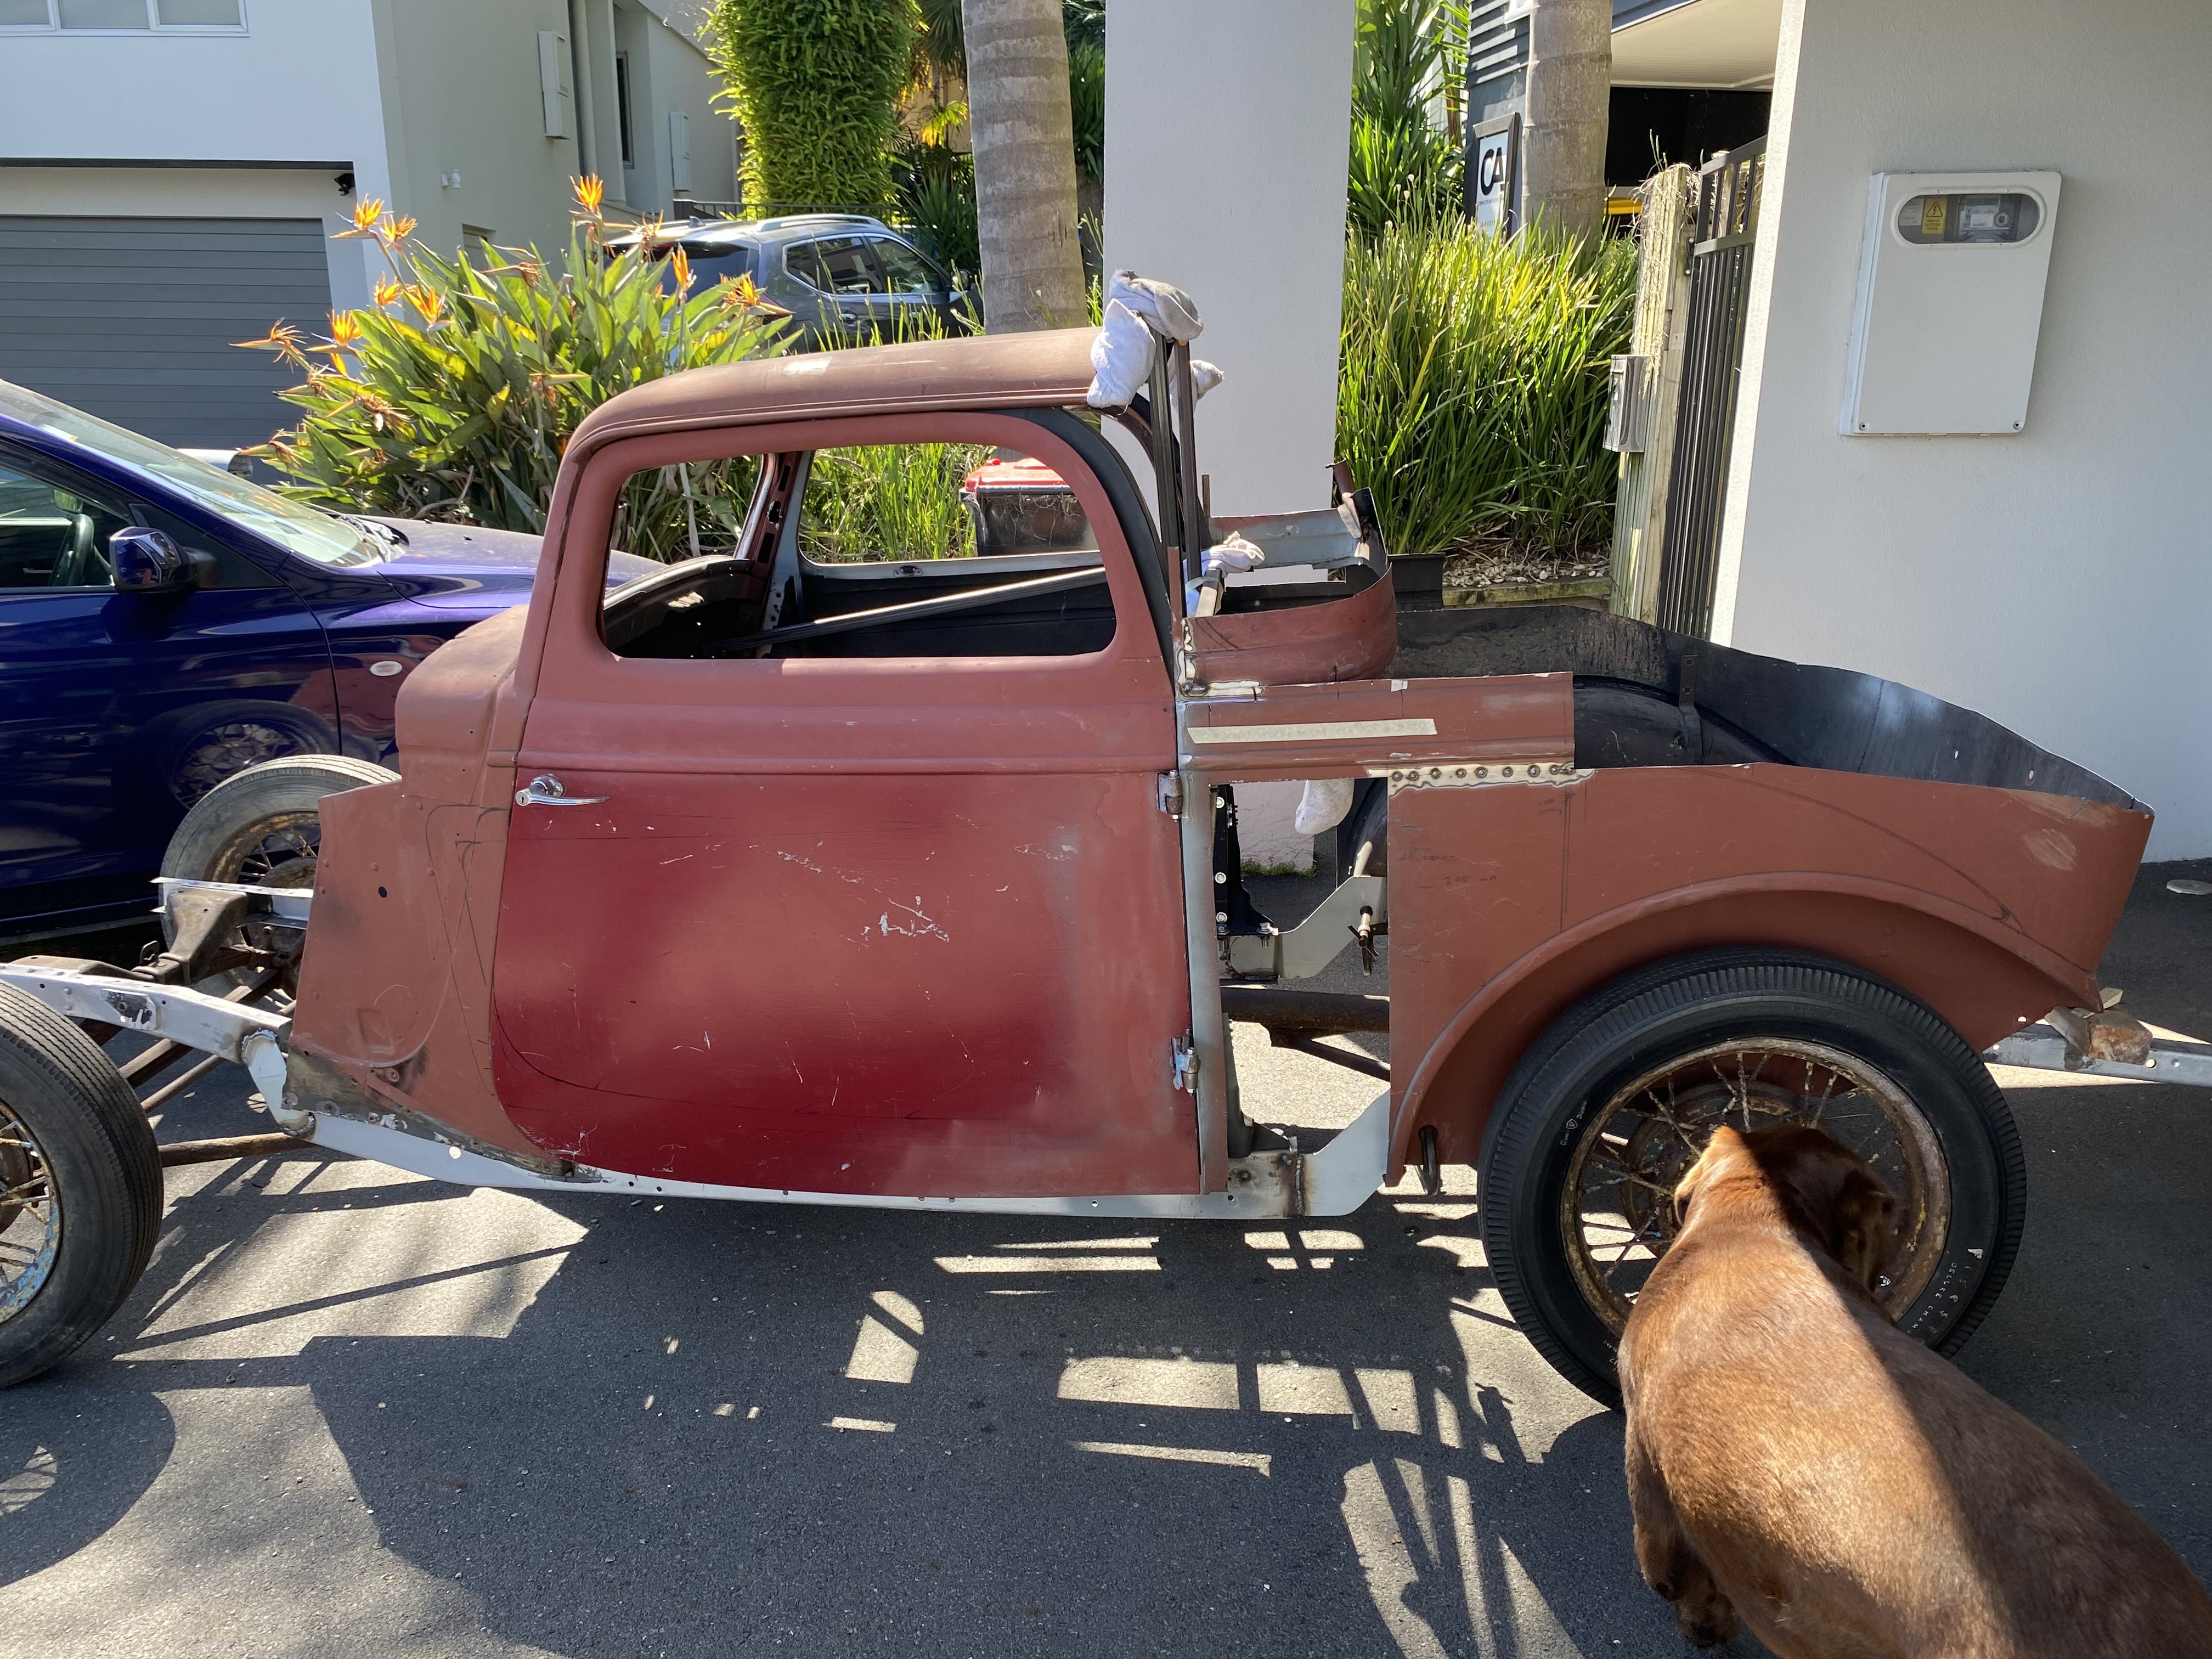
7 years later Two house shifts (only one for the car) Not much has been done apart from engine removal and it's own progression back to being rusty 😔 Now I have to move again, maybe not so close to the coast
1 point
-
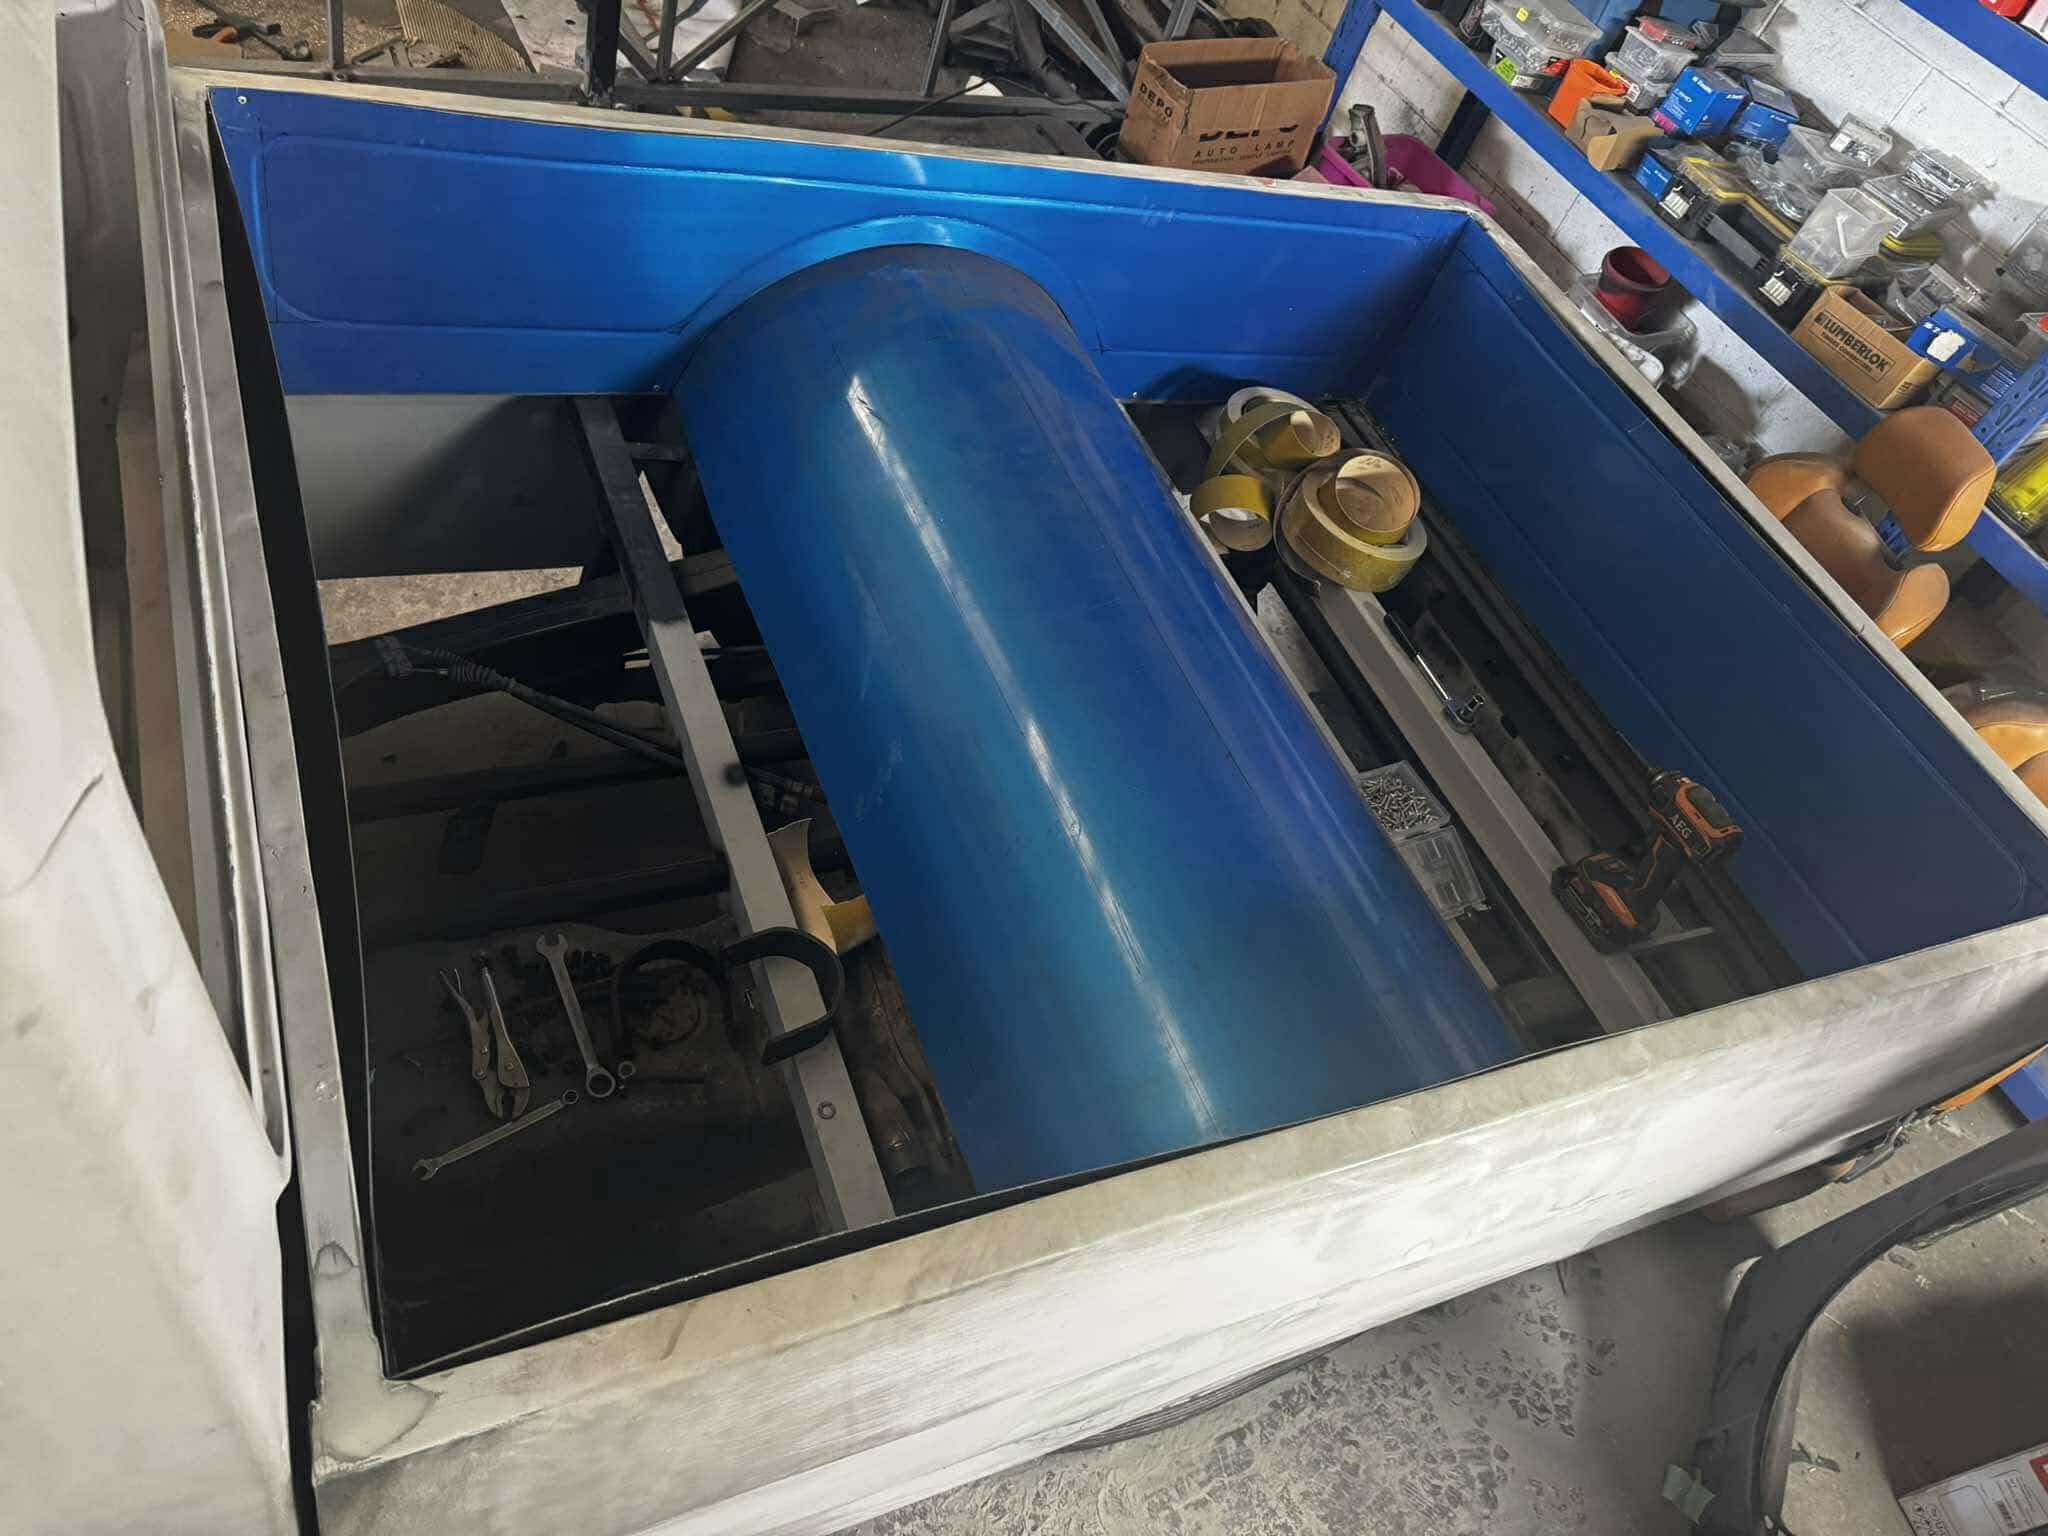
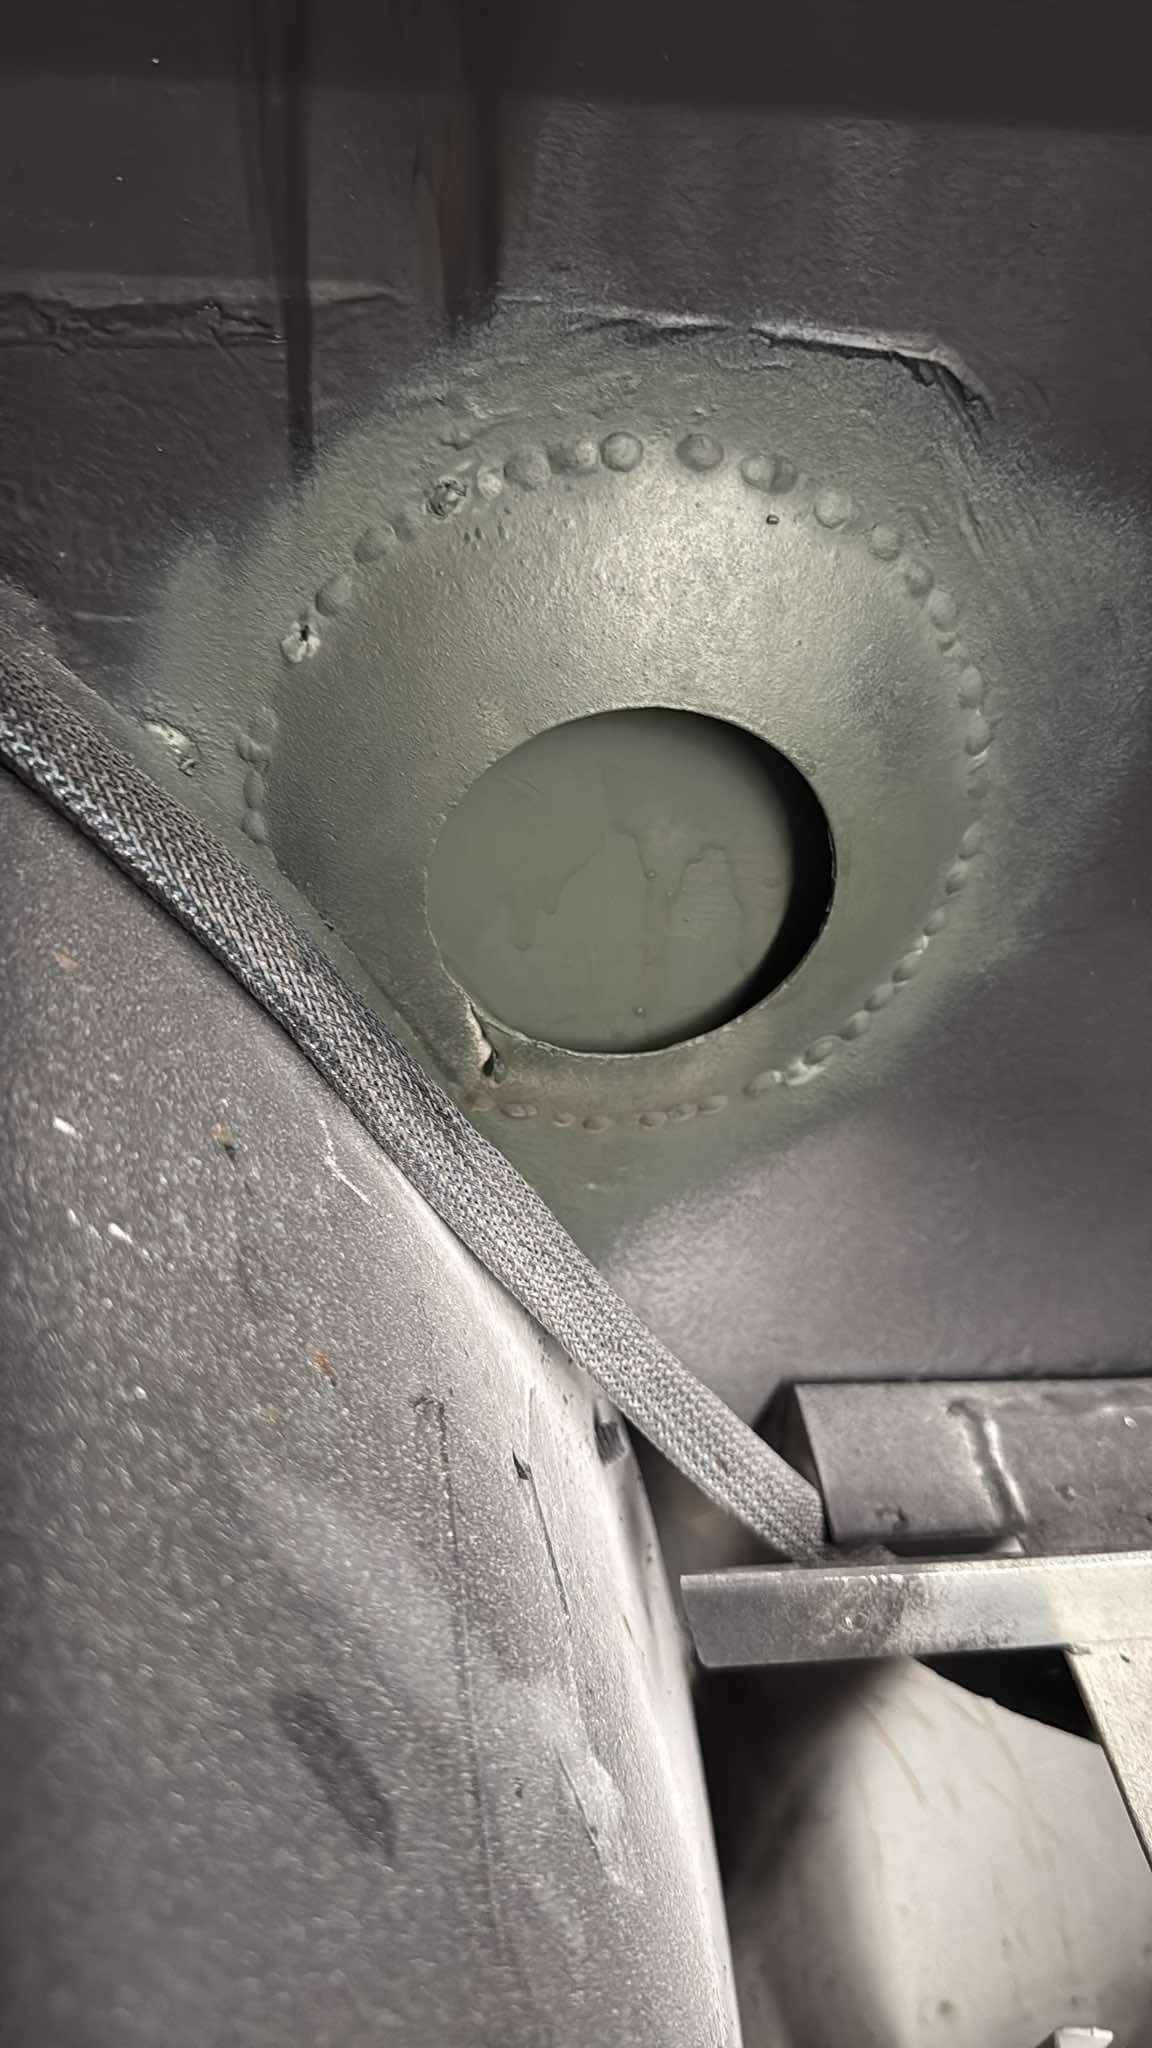
Ute goes away for paint on Sunday. so why not shit the bed and make changes. cant find a filler neck grommet anywhere. It was bugging me. so I decided to weld over the filler hole. will yeet the tank and fit a fuel cell in the rear below the deck. still waiting on my seat mounts to be made up aswell as the new bumper mount extensions.
1 point
-
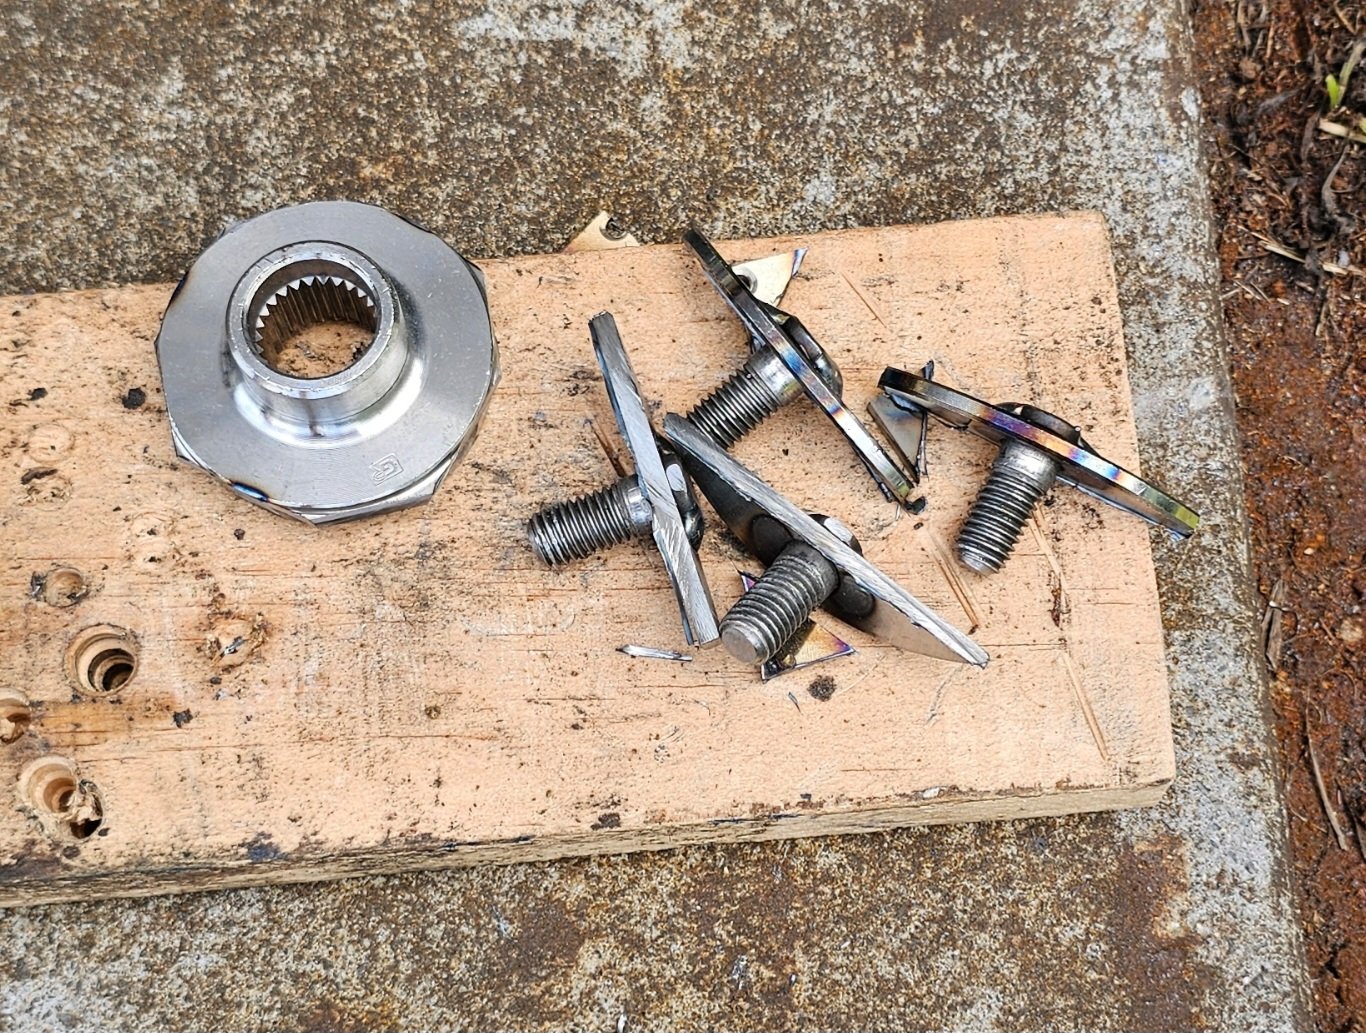
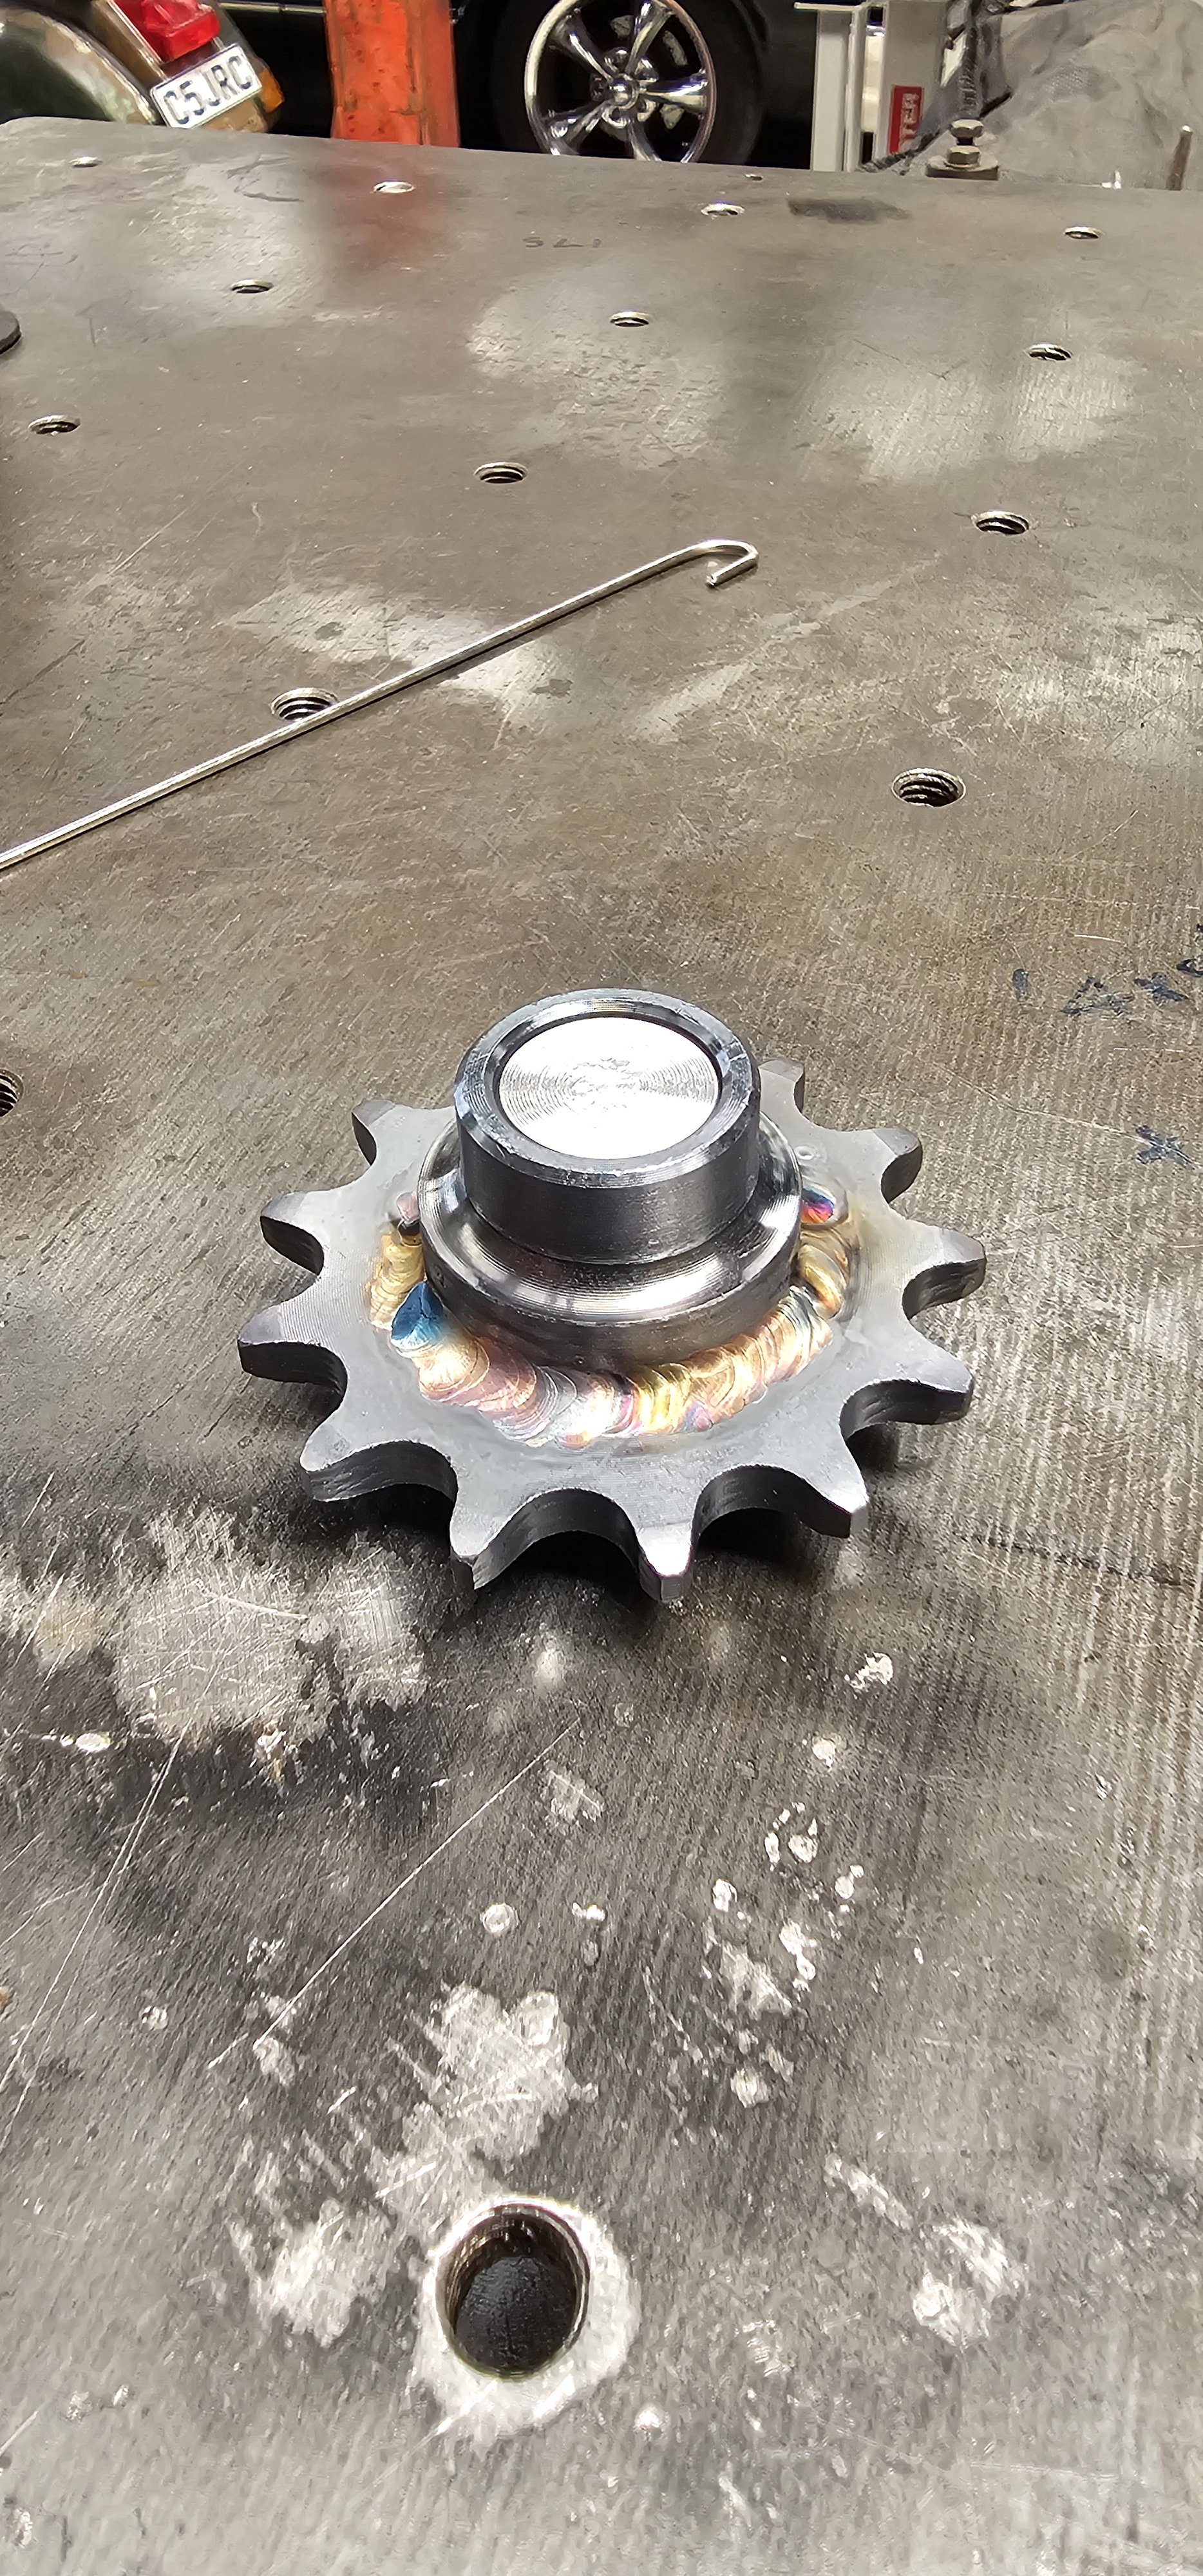
Choppy choppy tig welded the sprocket to the vespa rear hub. This is the motor side sorted. I machined an aluminum plug to hold everything concentric for welding.
1 point
-
What an awesome adventure with an awesome group of guys! Thanks for organising it and I’ll be hanging out for the next one!
1 point
-
1 point
-
Pull start mechanism underway. Over engineering 101. Much like the original ones. However because I'm using a vespa motor (not an Ape motor) it has e start. So the pull start is just a backup.
1 point
-
And I'm too used to running 4ga minimum for power cables, have seen mini distro blocks online, I think possibly at a marine supplier in Auckland.1 point
-
My amp is half that doof, just running components though. But the power feed on the loom had me questioning things for a while. Ended up with aliexpress 4 way fuse box that runs standard spec blade fuses. I'll wire it in one day, it only just arrived in July...1 point
-
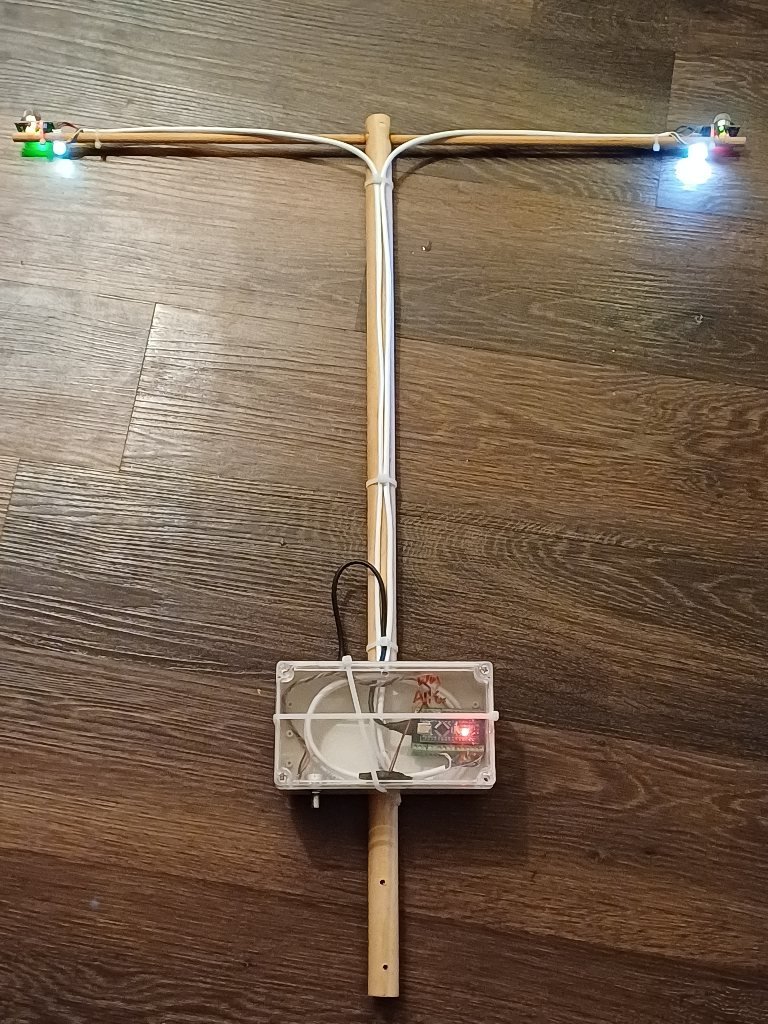
Gas dowser. It blinks, it beeps. What more does a man need? Led at each end changes colour as each gas level rises, and the highest side blinks. It beeps a tone depending on average gas level, (warmer, cooler) to help localize source. I've realised the LPG sensor can be swapped out for ammonia, etc in the same footprint
1 point
-
1 point
-
1 point
-
Done! goes unseen, so im not going to spend too much time planishing it. Thats rough enough...
1 point
-
1 point
-
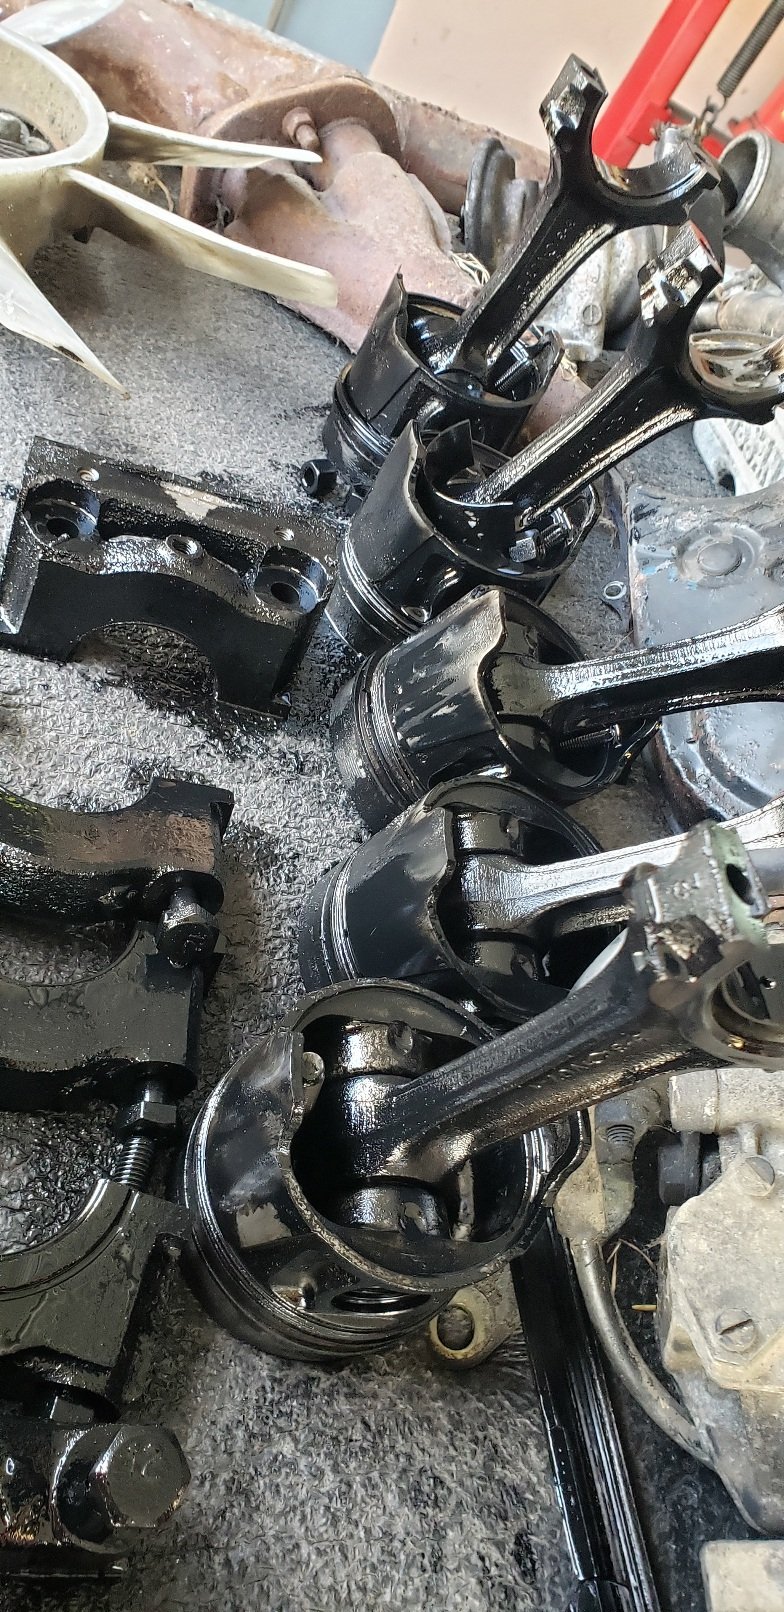
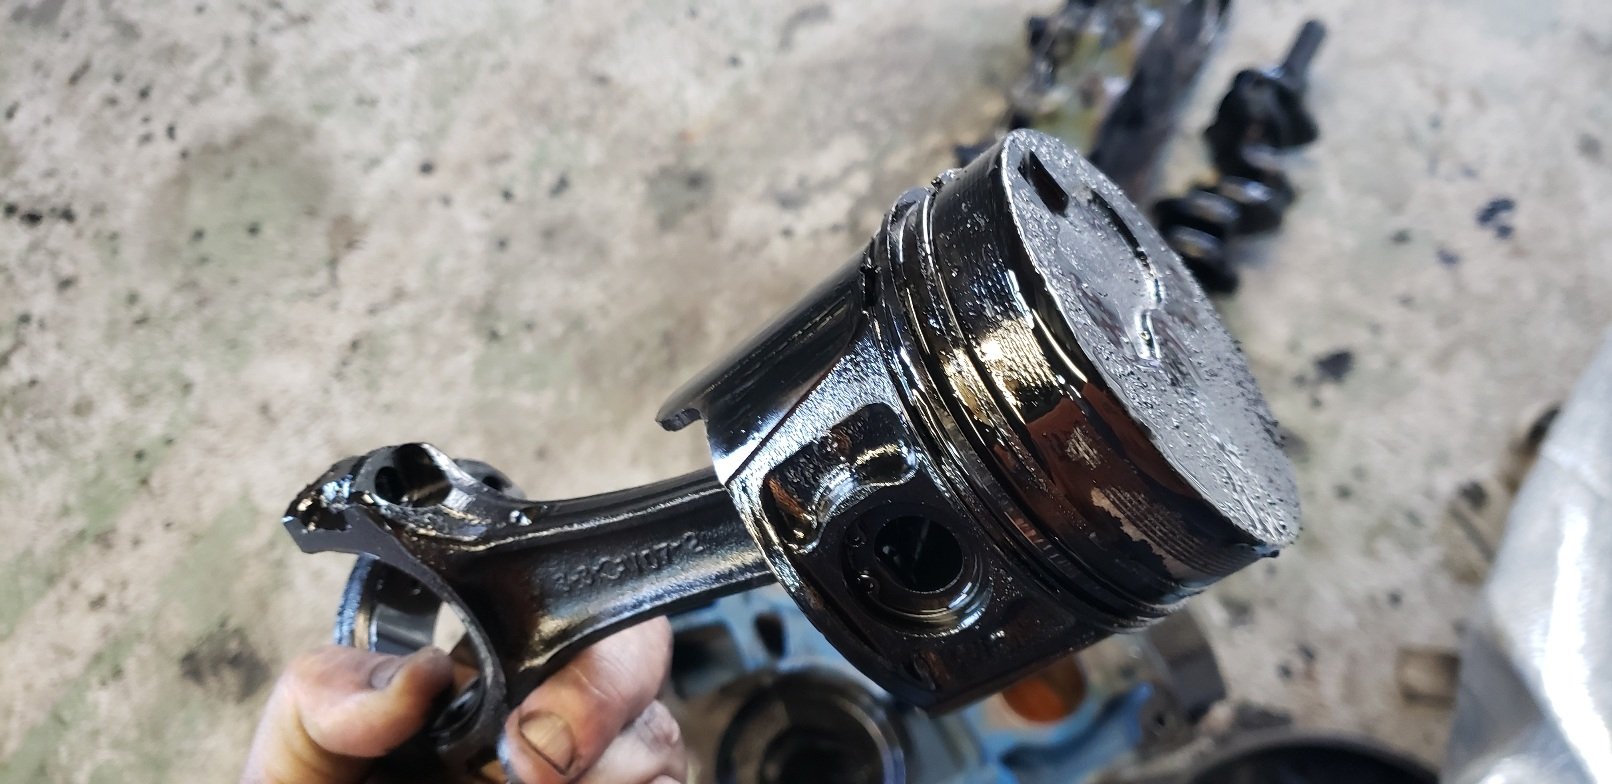
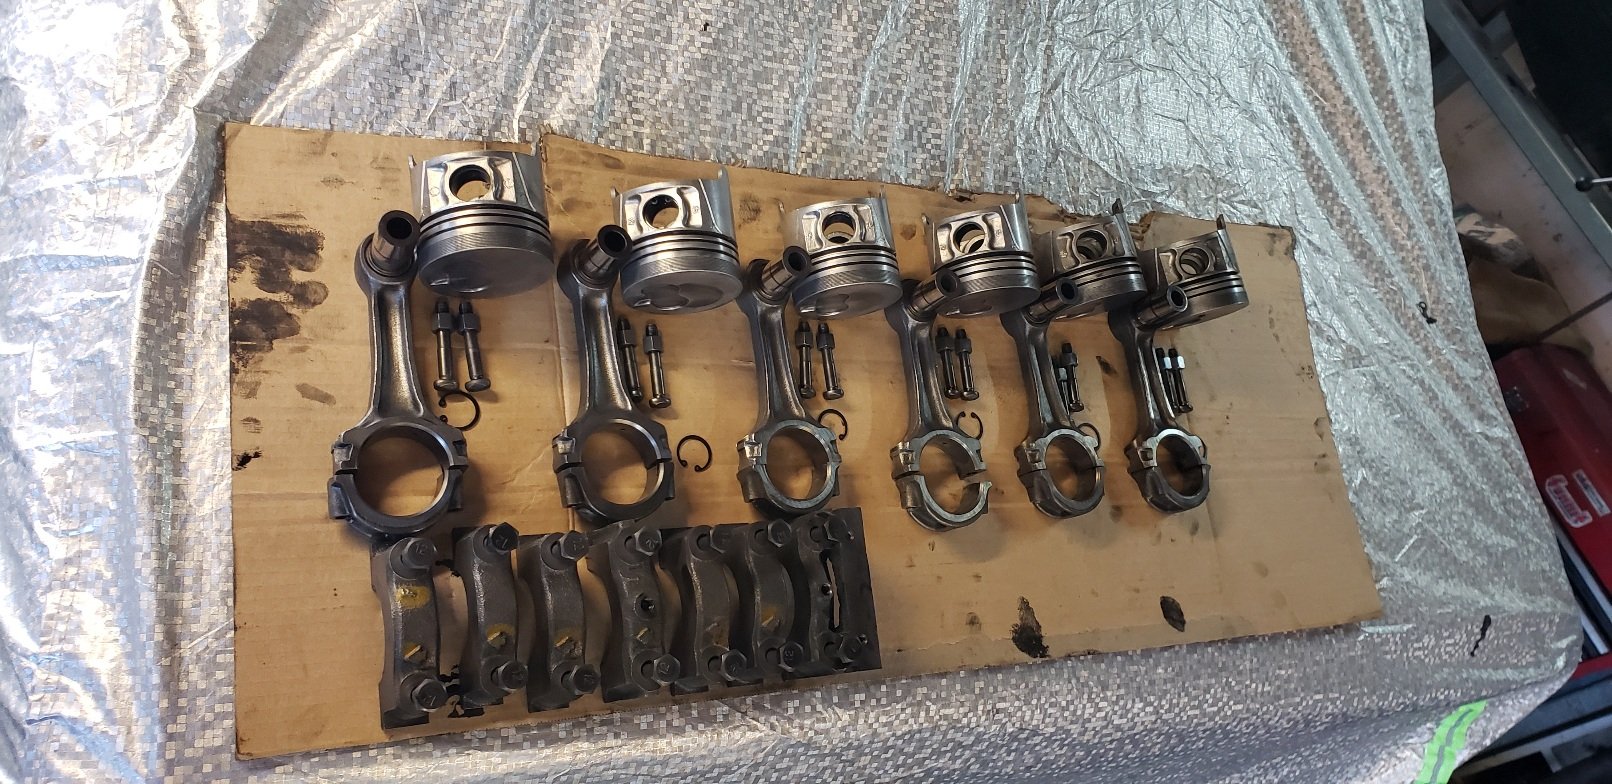
So the #2 motor is STD bore STD rings and bearings . The 1st motor is over sized pistons and .25 on the bearings. The bore in the 2nd motor seems perfectly fine and will be good with a hone. But this means I aming to have go use the dirty shitty black fucking pistons and rods so i stripped them all down, checked them all and gave them a clean and the main caps I'm going to use the crank from the 1st motor as it looks like its had a recent grind and is good condition. The block from the 2nd also seems in good condition and cleaned up well....no cracks found just yet !! A quick paint with some black and ill sort the surfaces out at a later date.. So just need some STD rings and .25 main and rod caps and ill be able to rebuild the block. As for heads the head from the 1st motor is in great condition and even the stem seals look new ..so ill not strip it ...I'll just bolt it on as is. Cheers
1 point
-
Shame it was such a foggy day1 point
-
Wagon is sitting a little lower in the front now and will settle down further, they reckon about another 20mm
1 point
-
1 point


.thumb.jpeg.e0a4bff61111e0c8c7396950fcc94da1.jpeg)


This leaderboard is set to Auckland/GMT+12:00