
Leaderboard


Popular Content
Showing content with the highest reputation on 03/12/24 in all areas
-
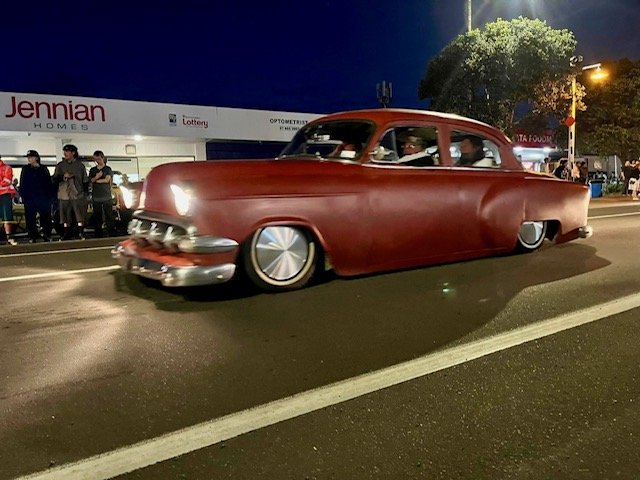
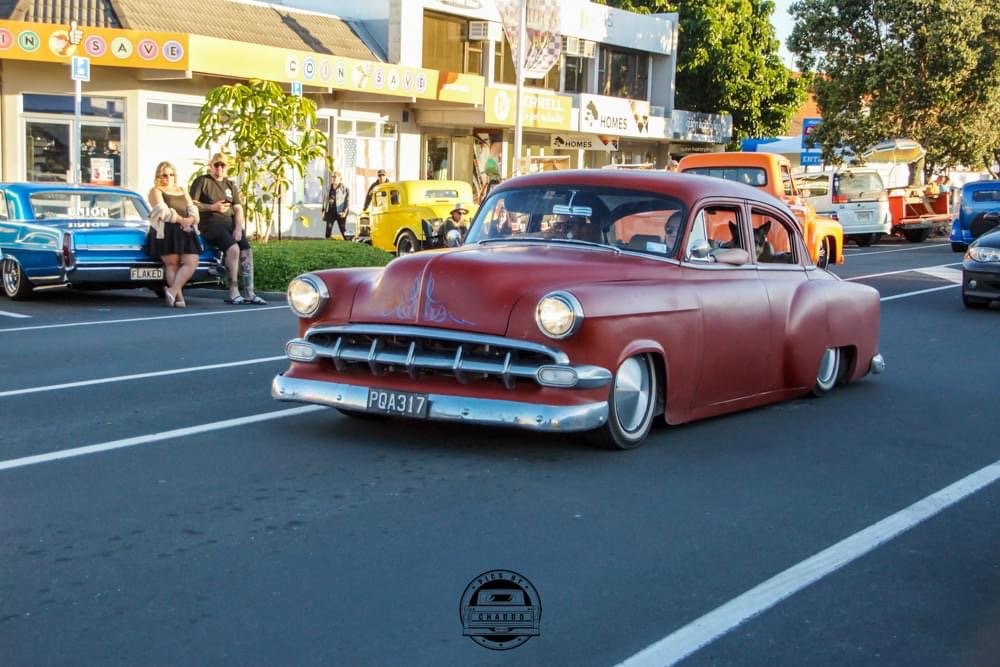
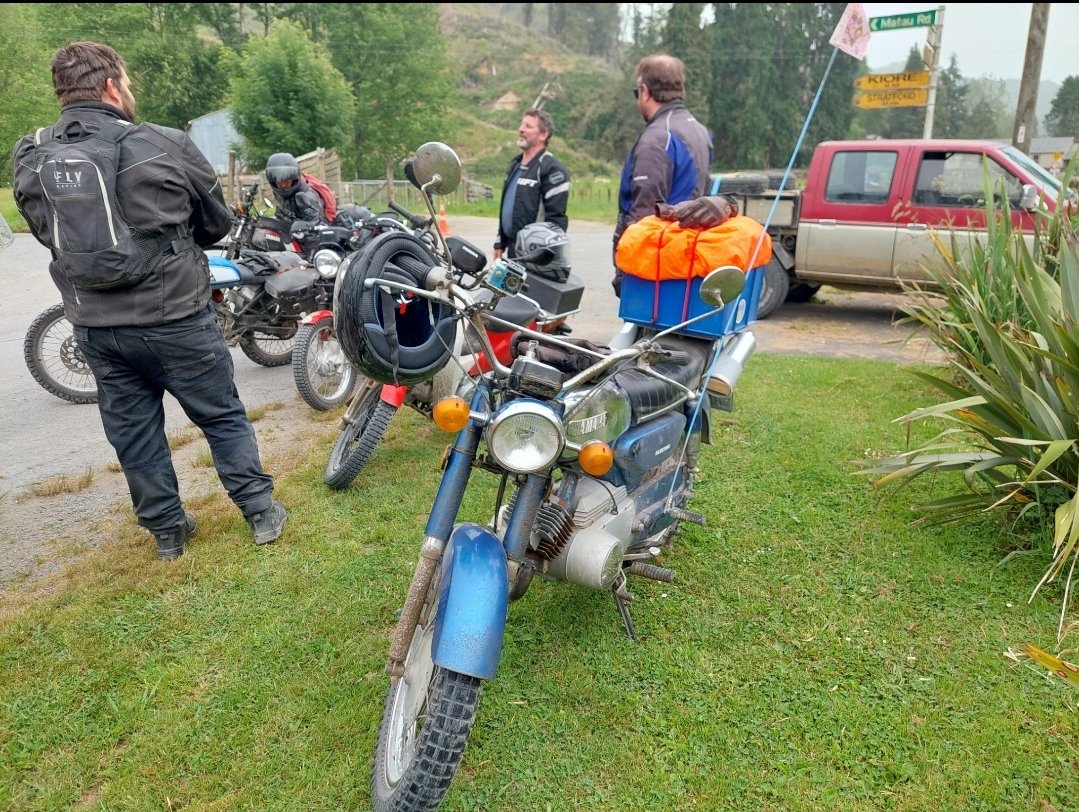
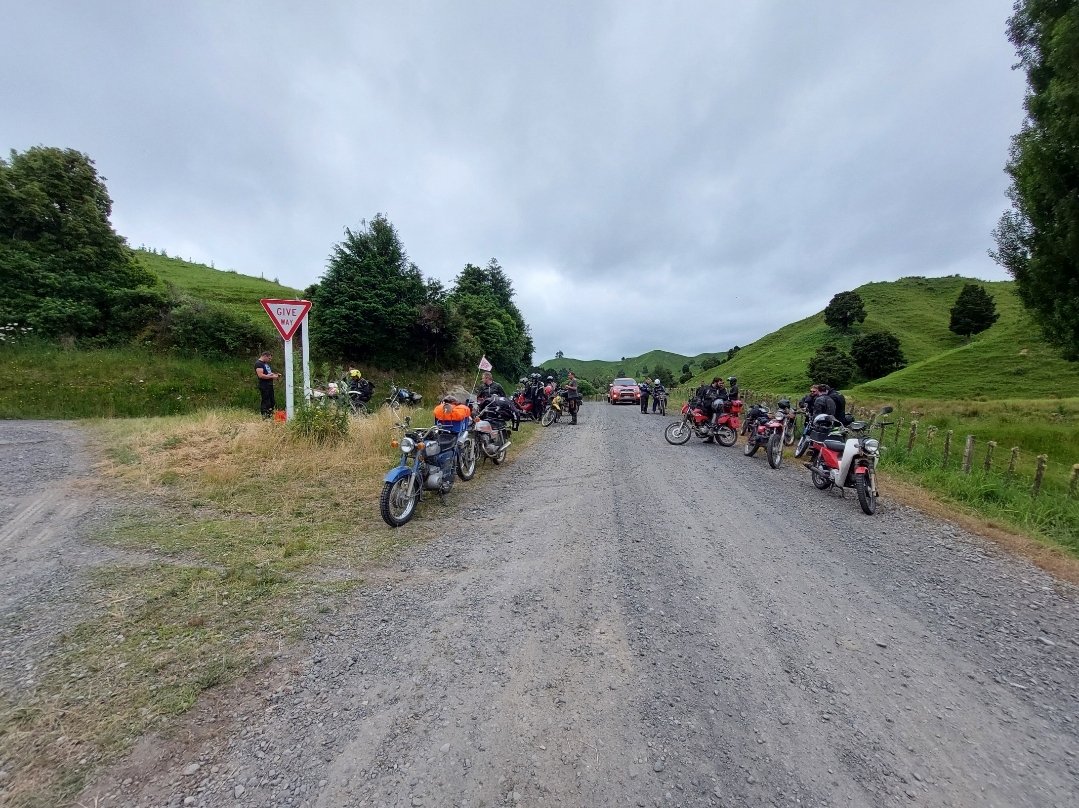
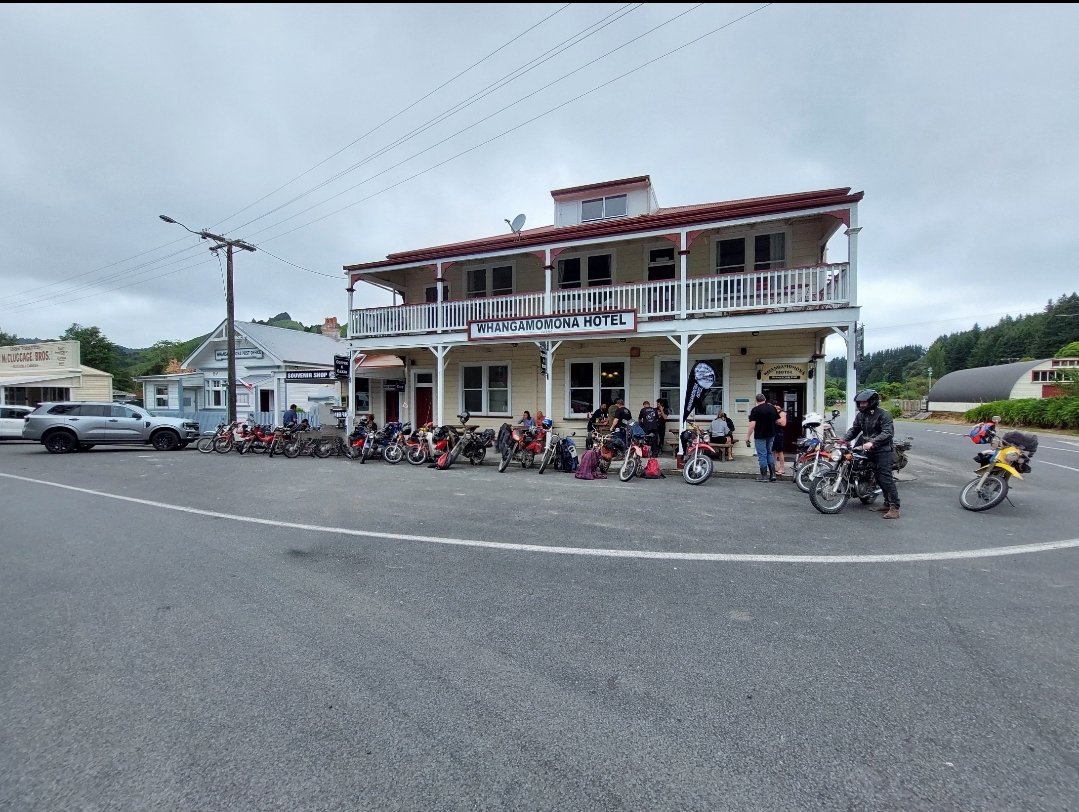
Indeed, it was most excellent. Great bunch of chaps and some outstanding roads, bloody top notch work guys. I didn't take many pics, this is about all I got,8 points
-
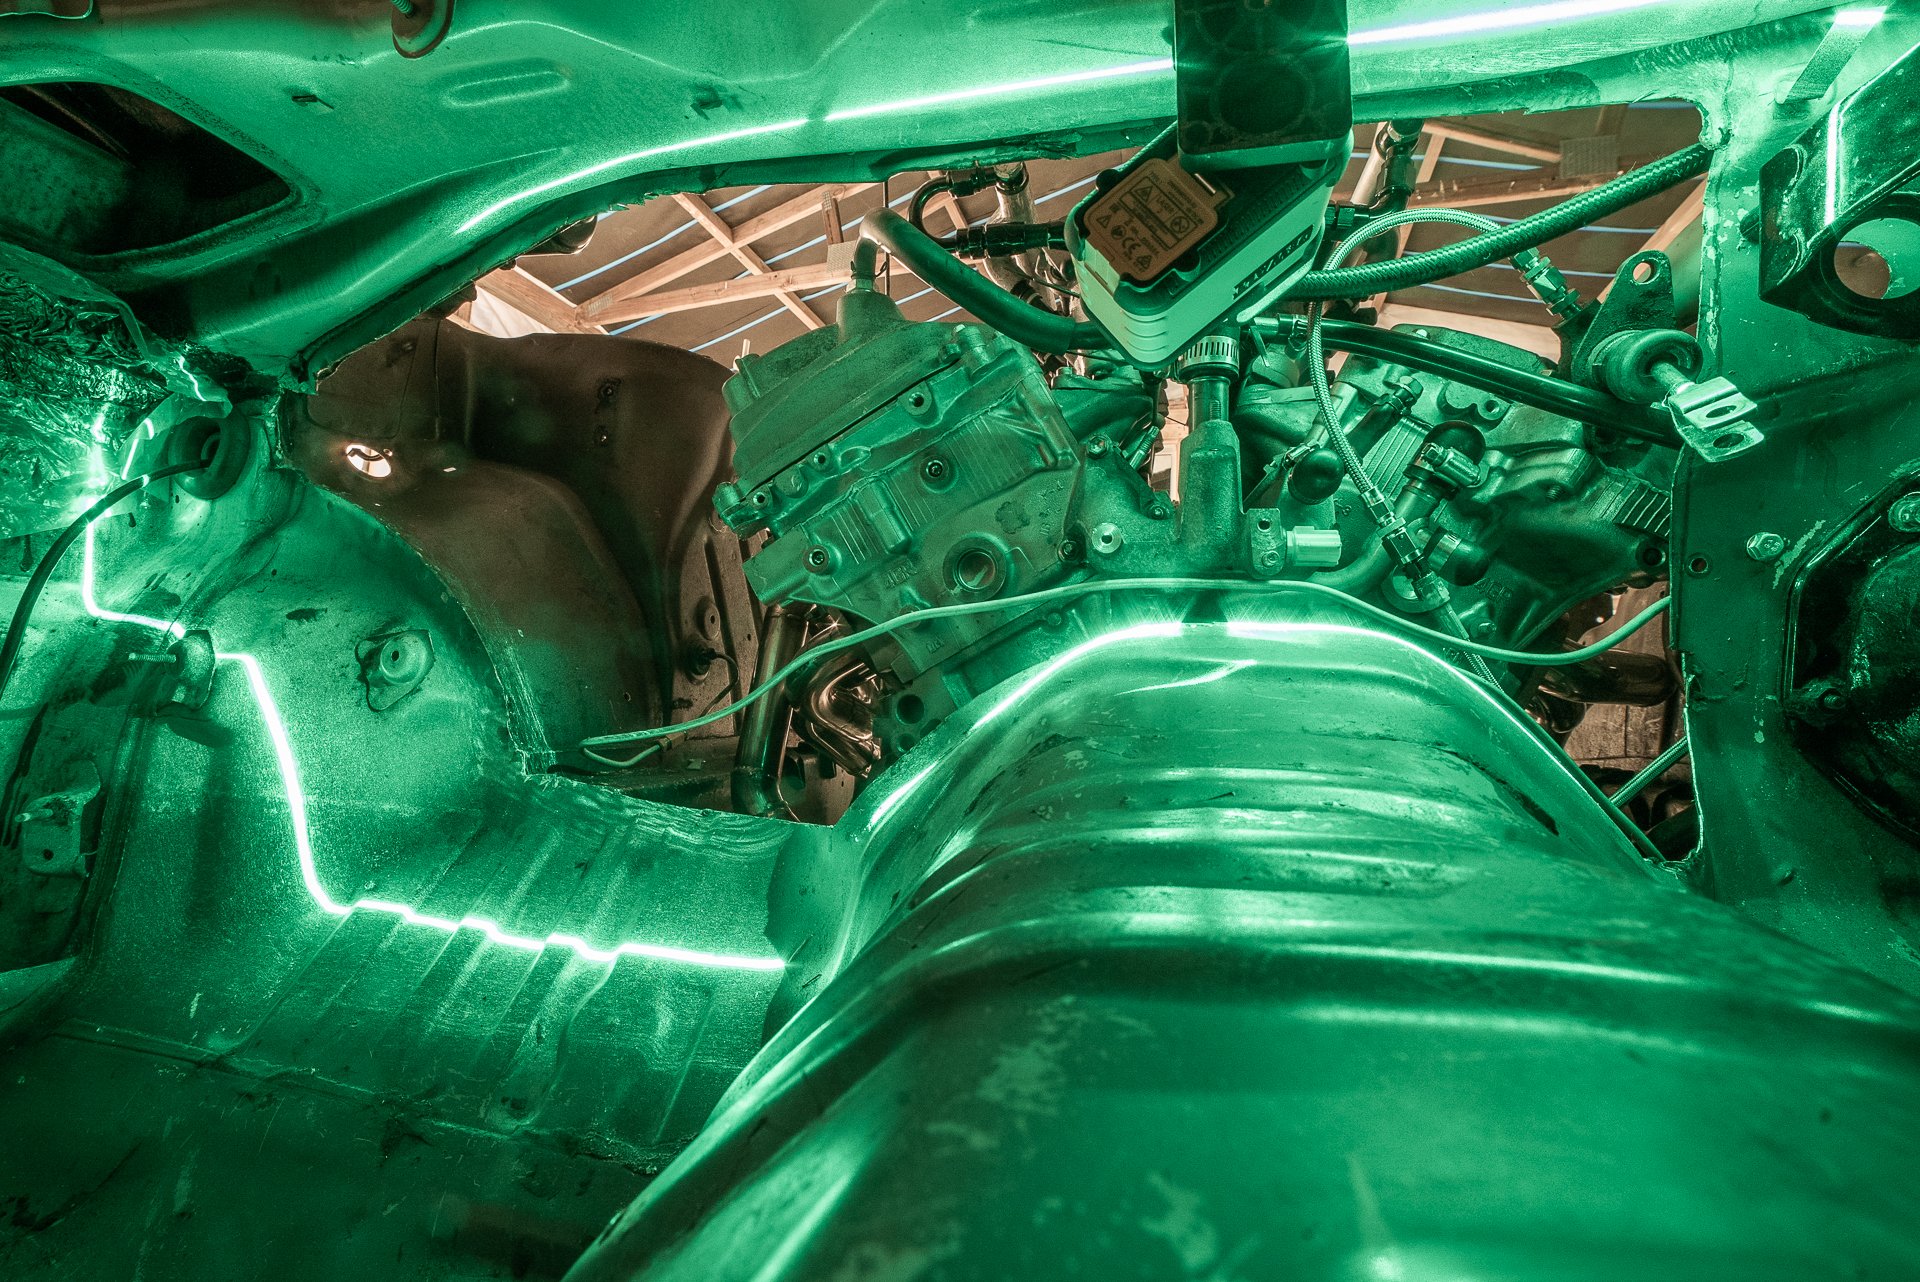
Pulled the drivetrain out tonight and pulled the sump off to take a look. I hope my engine stand won't buckle under the strain lols I can't see any wrong in there, the sump is 100% perfectly clear of debris. And everything looks great, no missing chunks of piston or the like. There is however a noticable variation in turning resistance with the plugs out, I am suspecting a slightly bent valve or broken valve spring. I am waiting for a new head gasket and bolts before I get too carried away. Also: so many gearboxes, this isnt even all of them, I have 2 more.8 points
-
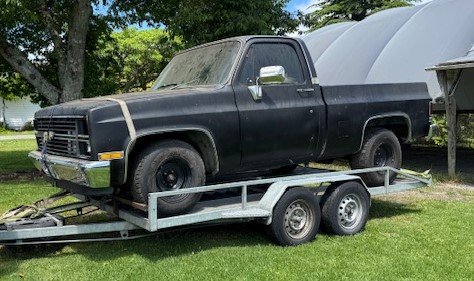
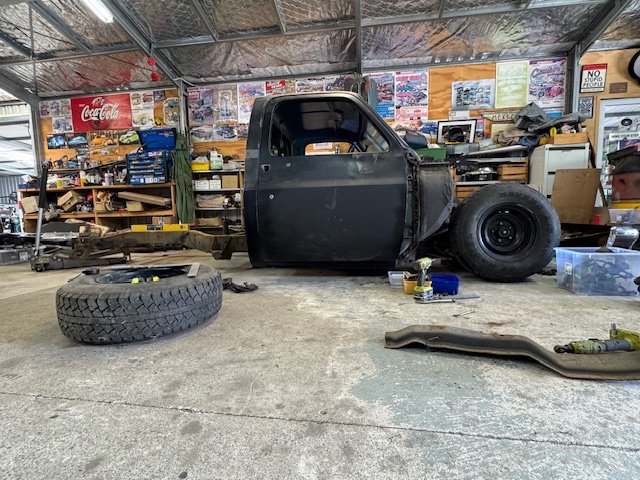
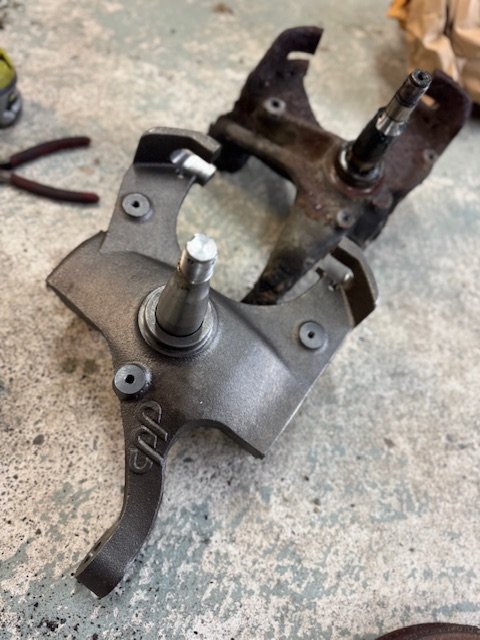
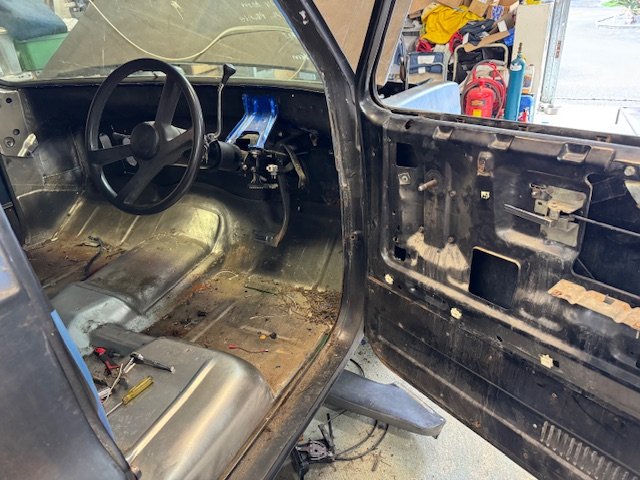
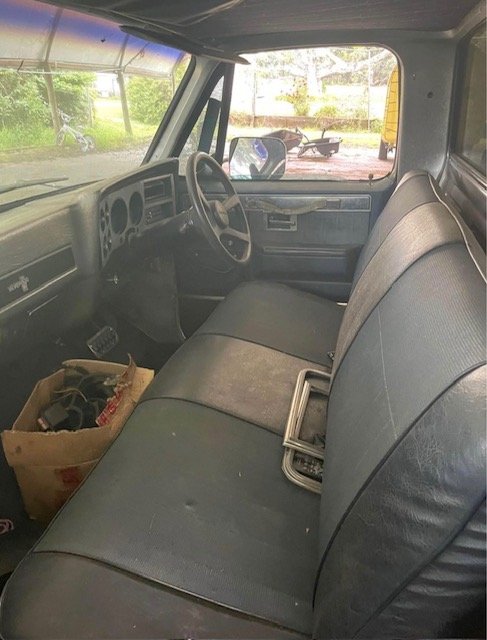
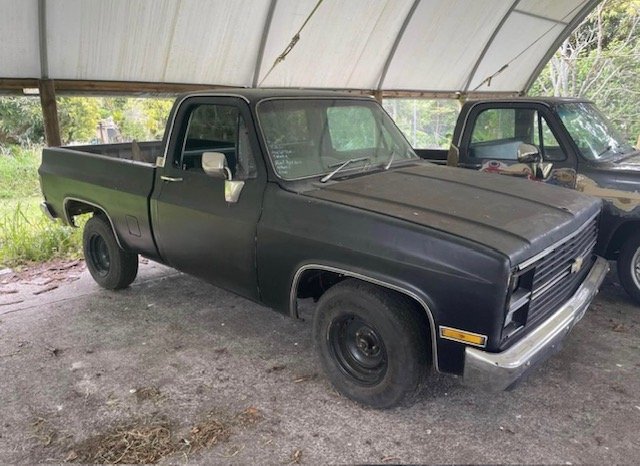
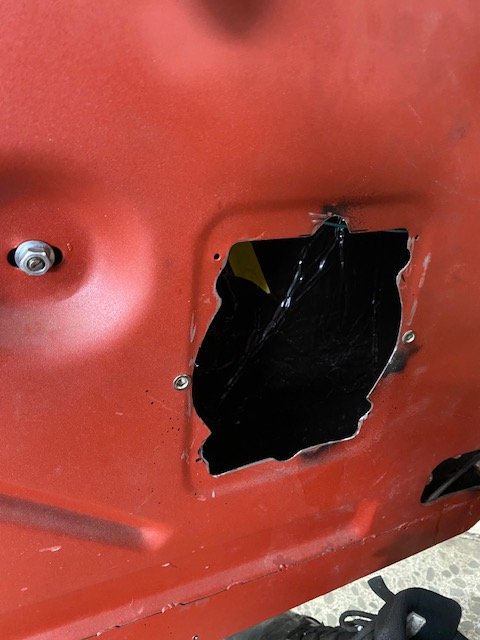
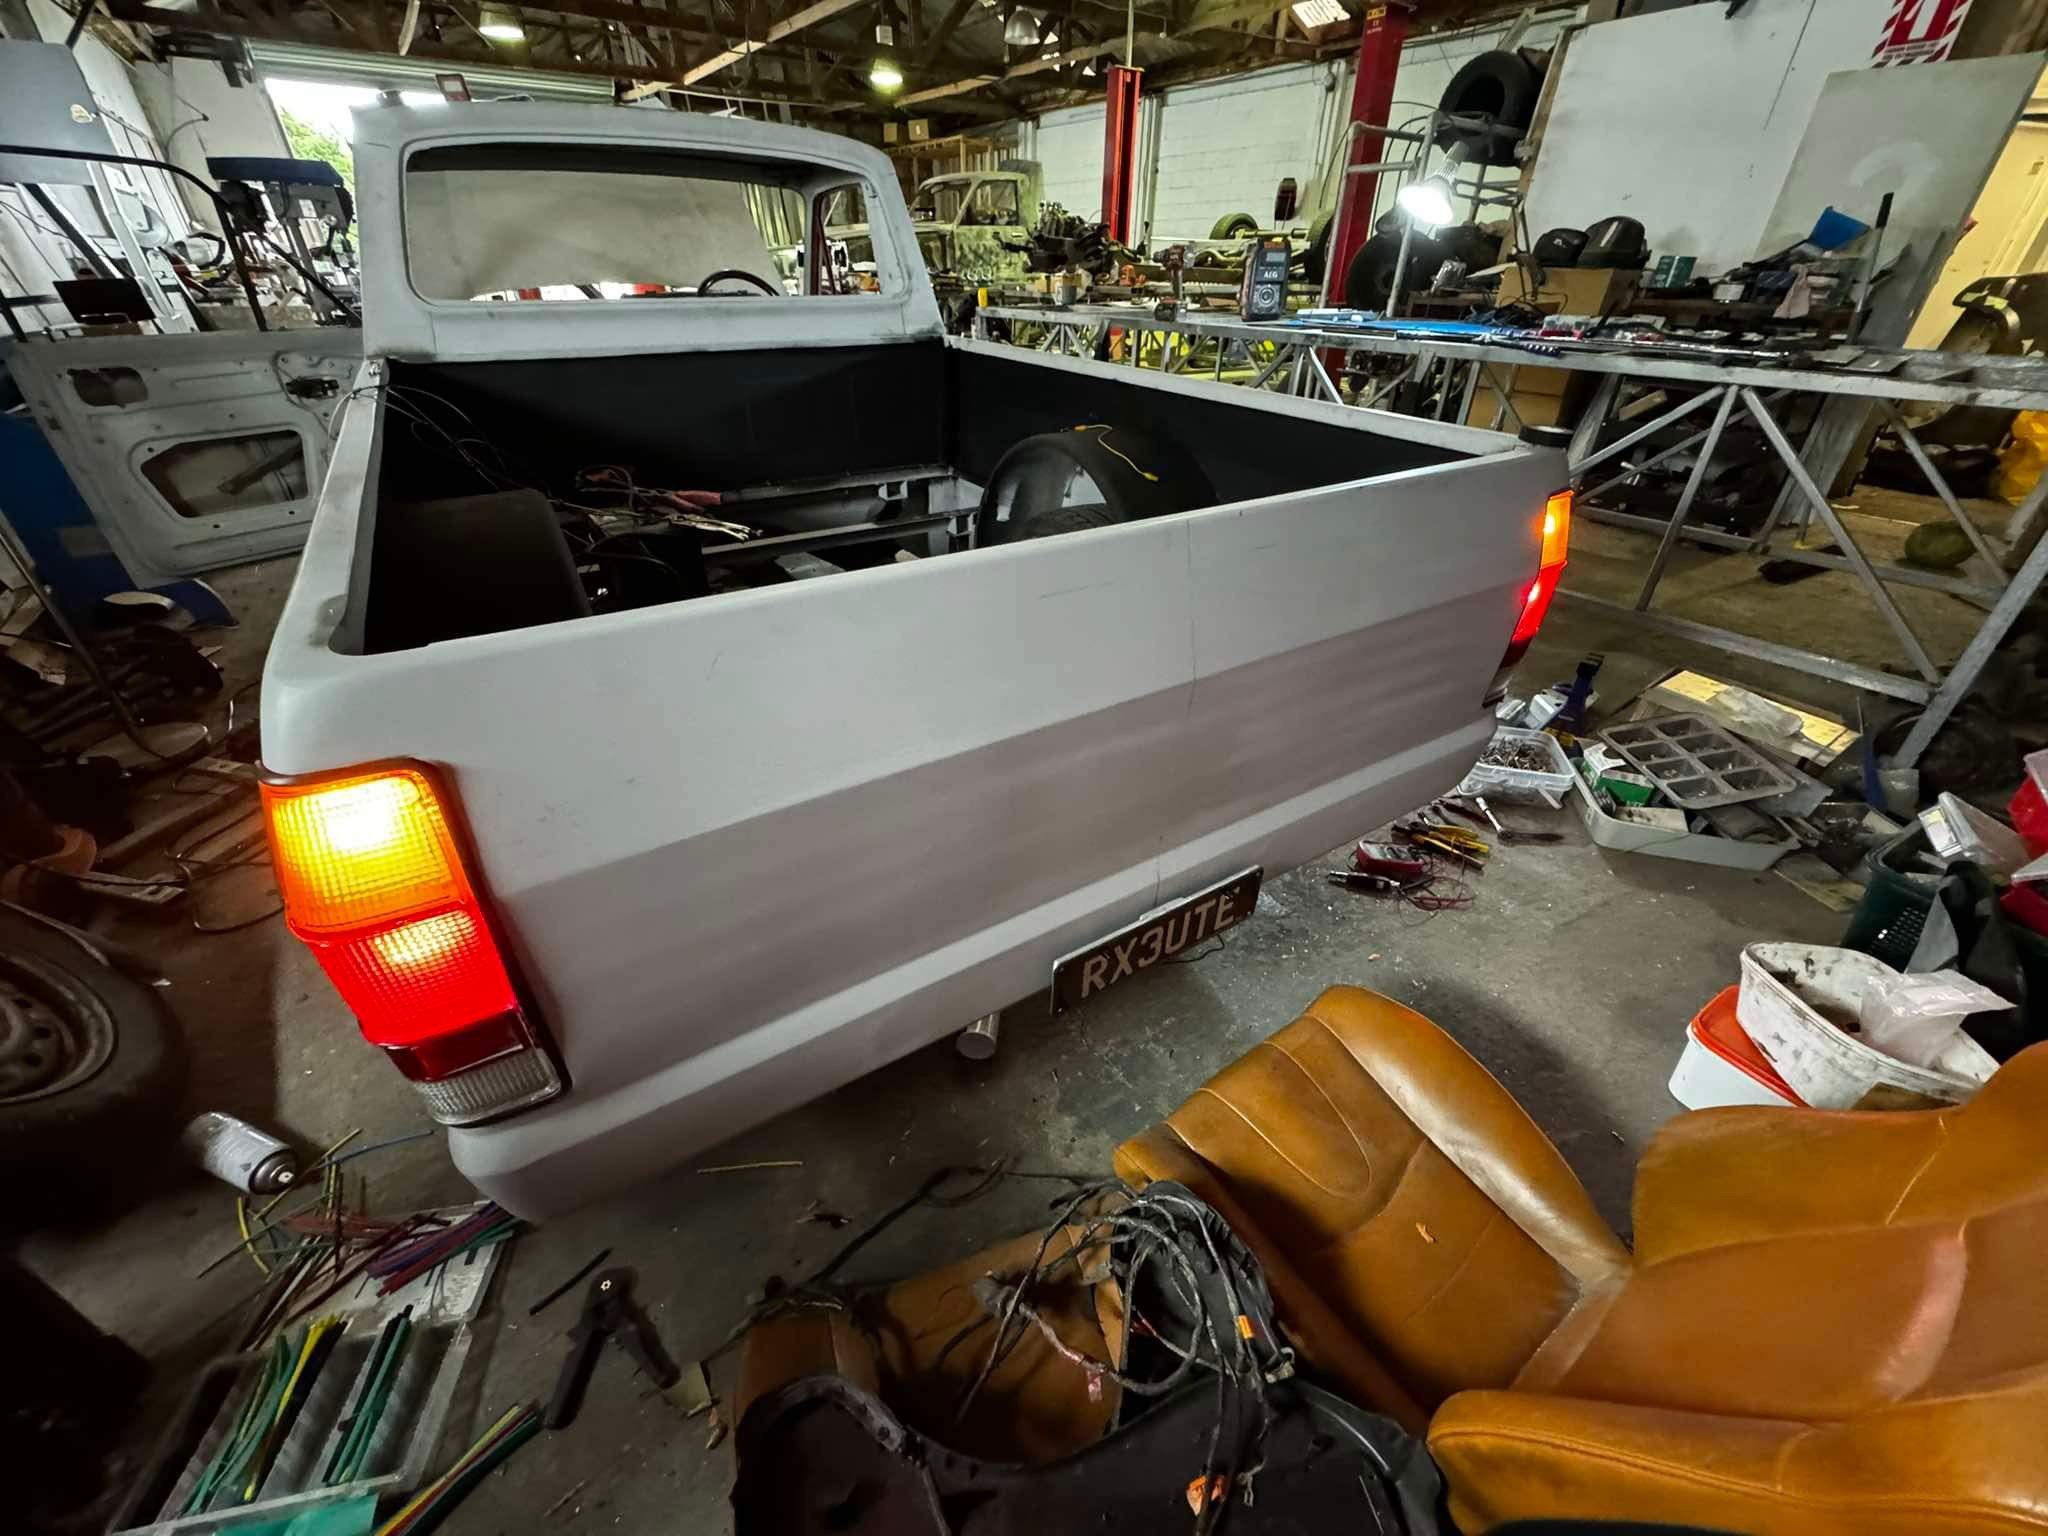
Saw this 1984 C10 Chevrolet on Facebook Marketplace 5 hours away in Tauranga. And had a desire to C notch and bag something. (its actually a 84 GMC High Sierra Classic, diesel) Was priced well with most of it there, pretty much just no engine and trans. The next available weekend, my dad & I shot up and brought it home. Have some Slam Specialties SS7 & Air fittings coming for it. It could do with an LS1 & 4l60e if anyone has one they could let go. Got it stripped down pretty quick to see what I have. Very little rust. Just a decent size hole in the firewall. But that's just an excuse do a shaved firewall. Also missing the hood safety catch/hook if anyone has a spare. Some unused Drop Spindles were on Marketplace in Northland for a bit less than I could get them into the country for. Hard to believe how big and heavy these are. Go them in. The cut springs out. Diff out, and the whole thing a whole lot closer to the ground. C-Notch and a 4 link of some kind to come. I'm think Bags on lower links. Outside of the chassis where the leaf springs were. The front lower A-arms are on the ground. but the Chassis isn't. but a good 40mm?? So it is likely a Frame Z will also be in order to lift the front end up. This could also help in moving the front wheels forward an inch to get them centred in the wheel arches again.
 5 points
 -
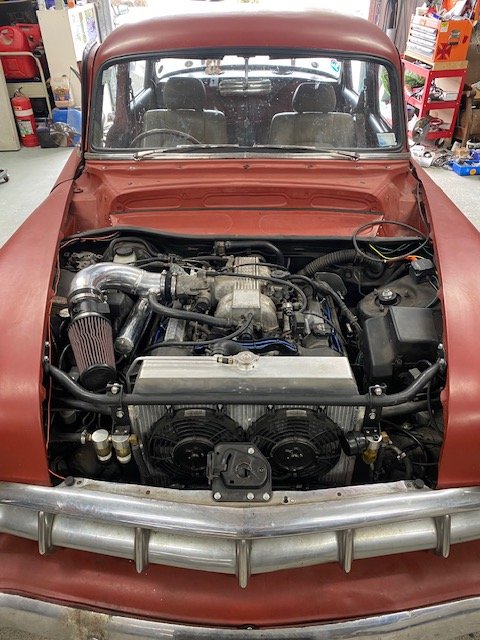
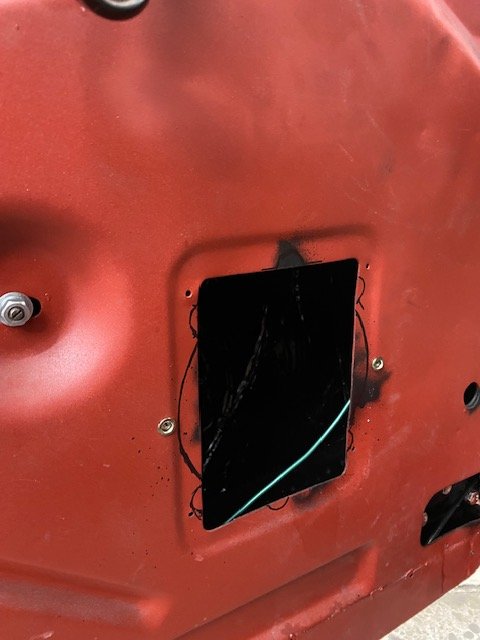
Well I'm making progress towards getting things going. Firewall isnt finished, or pretty, but if it stops my face catching fire for now, that's a win. Has got a severe case of myspace photo angles here, looks fairly rubbish in person. Posting here before it ends up on @cletus's wall of shame instagram story for being crappy things brought in for cert. Also welded up the engine mounts properly, and reshaped the front of the mounts so they look a bit nicer. Then a few coats of only the finest rattle can black. I'm out of town for work for most of next week, but I'm hoping to get the engine back in and fired up by next weekend.
5 points
-
4 points
-
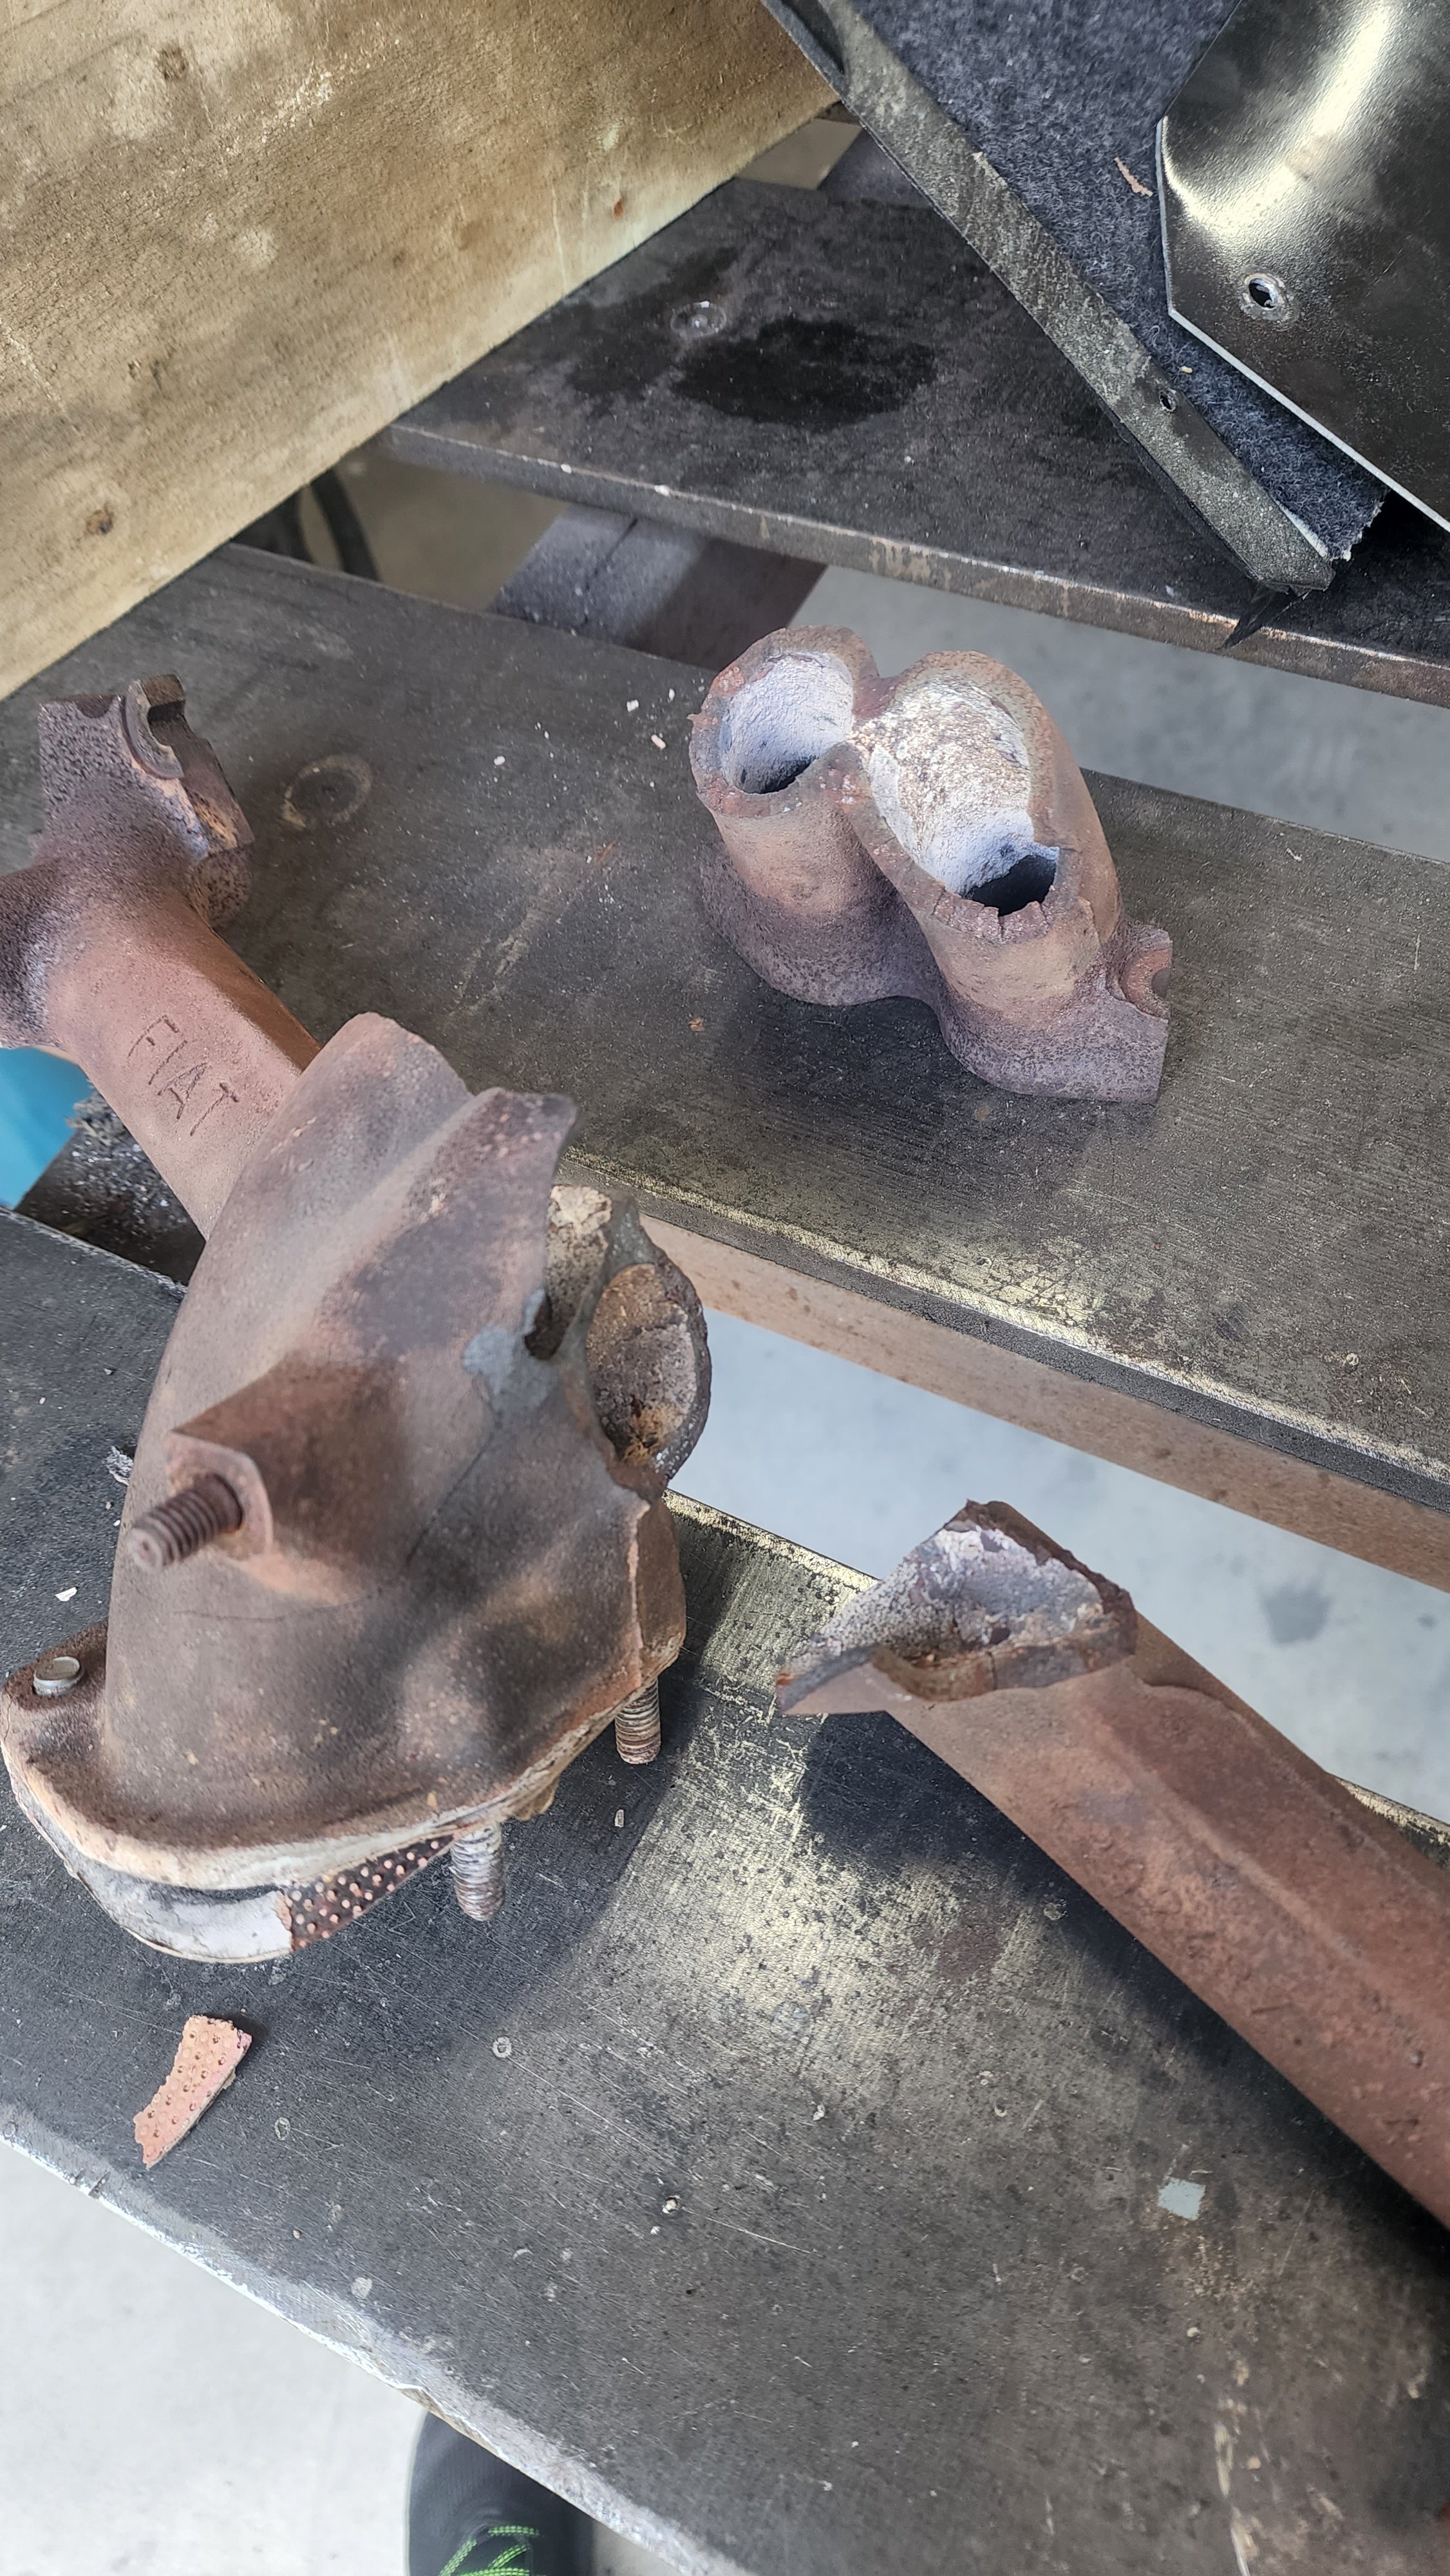
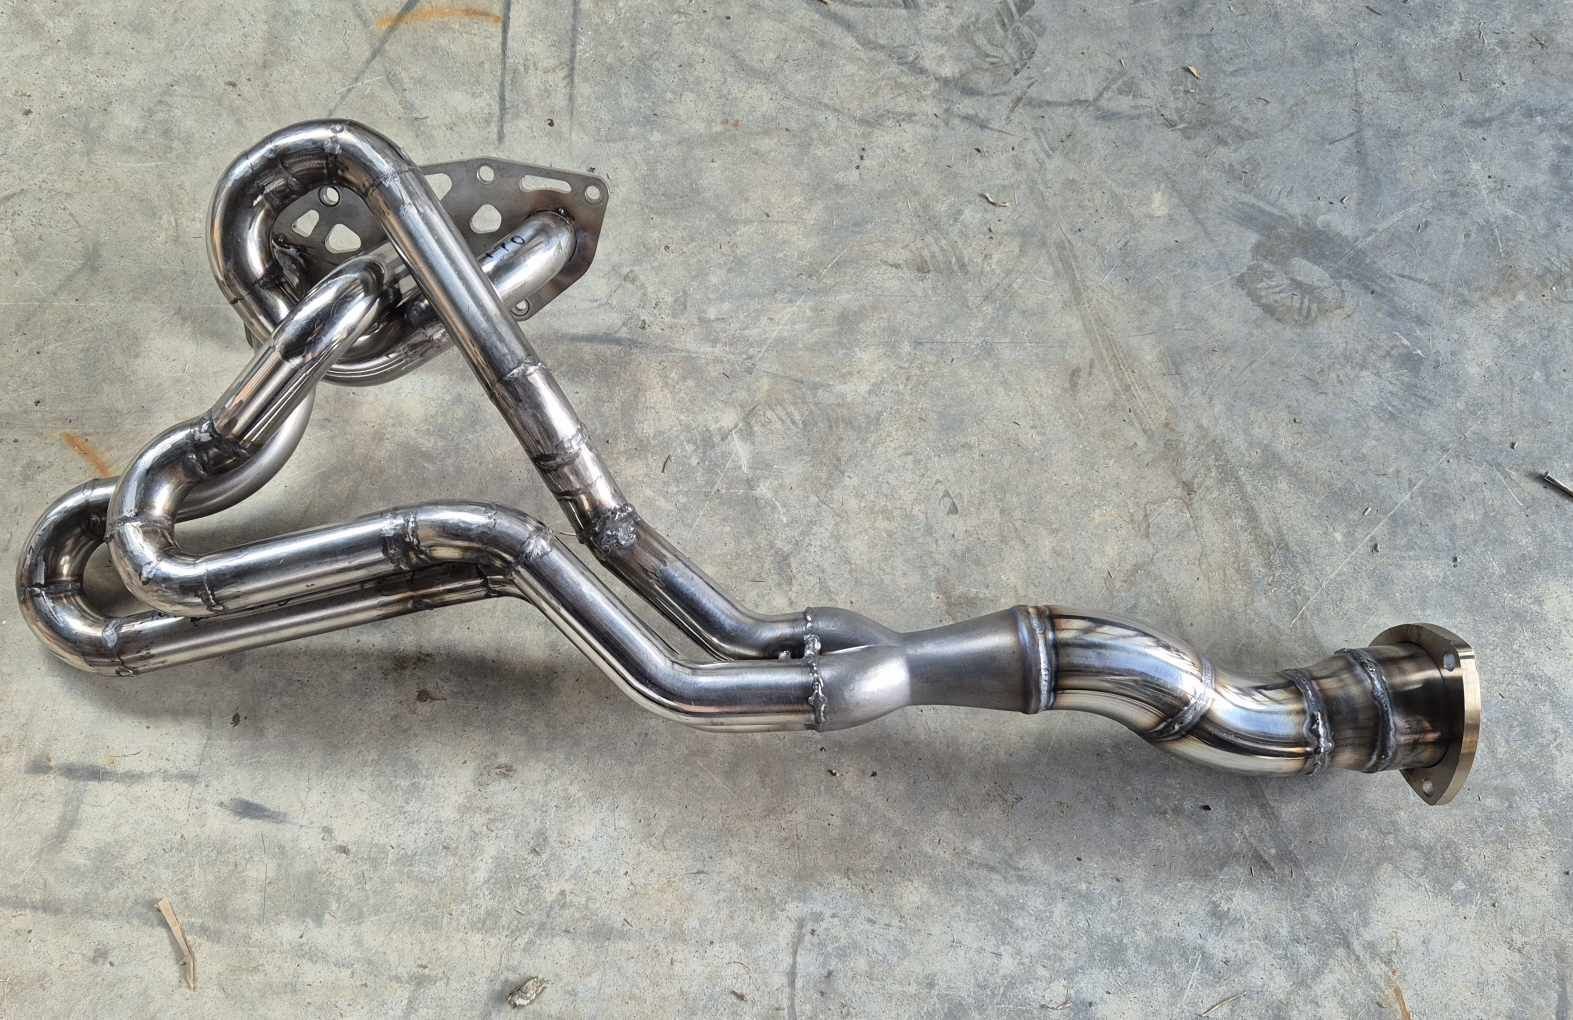
Well thanks to the awesome Dylan I got a new header for Filo, also taking the old one off it pretty much desintigrated into multiple bits and was only being semi held together because it was bolted to the motor check the pics, shit was turbo fucked
3 points
-
3 points
-
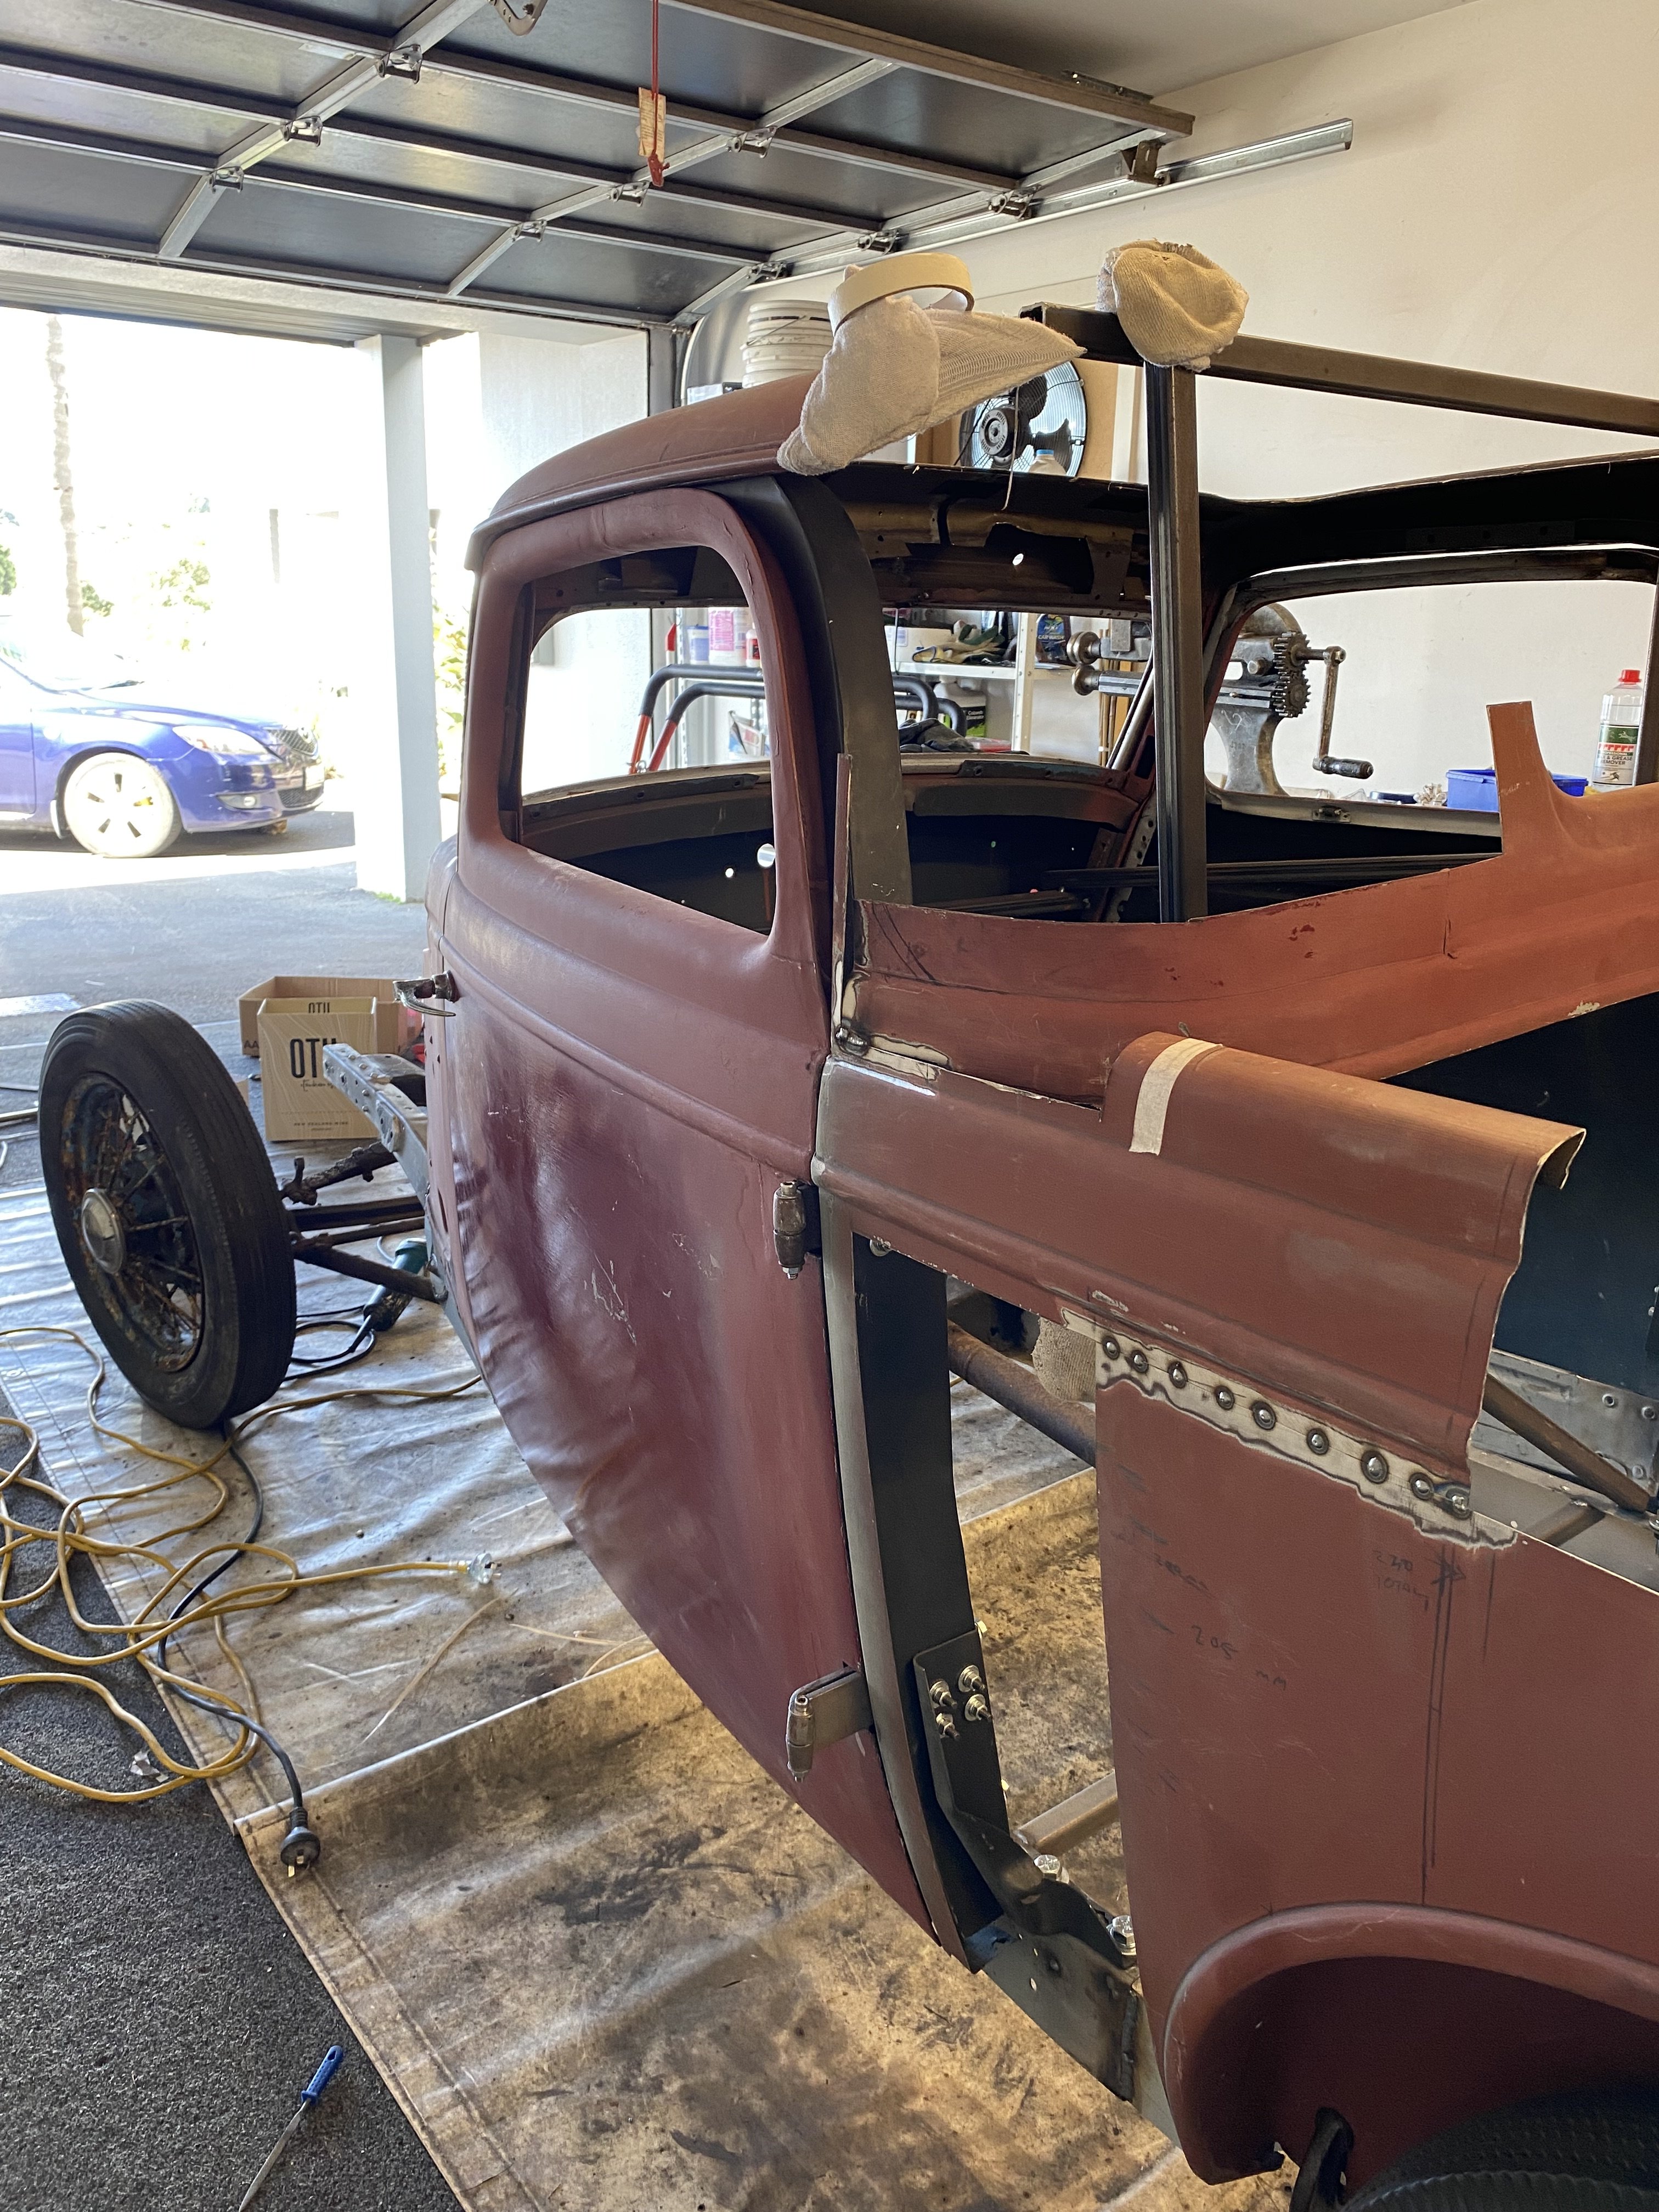
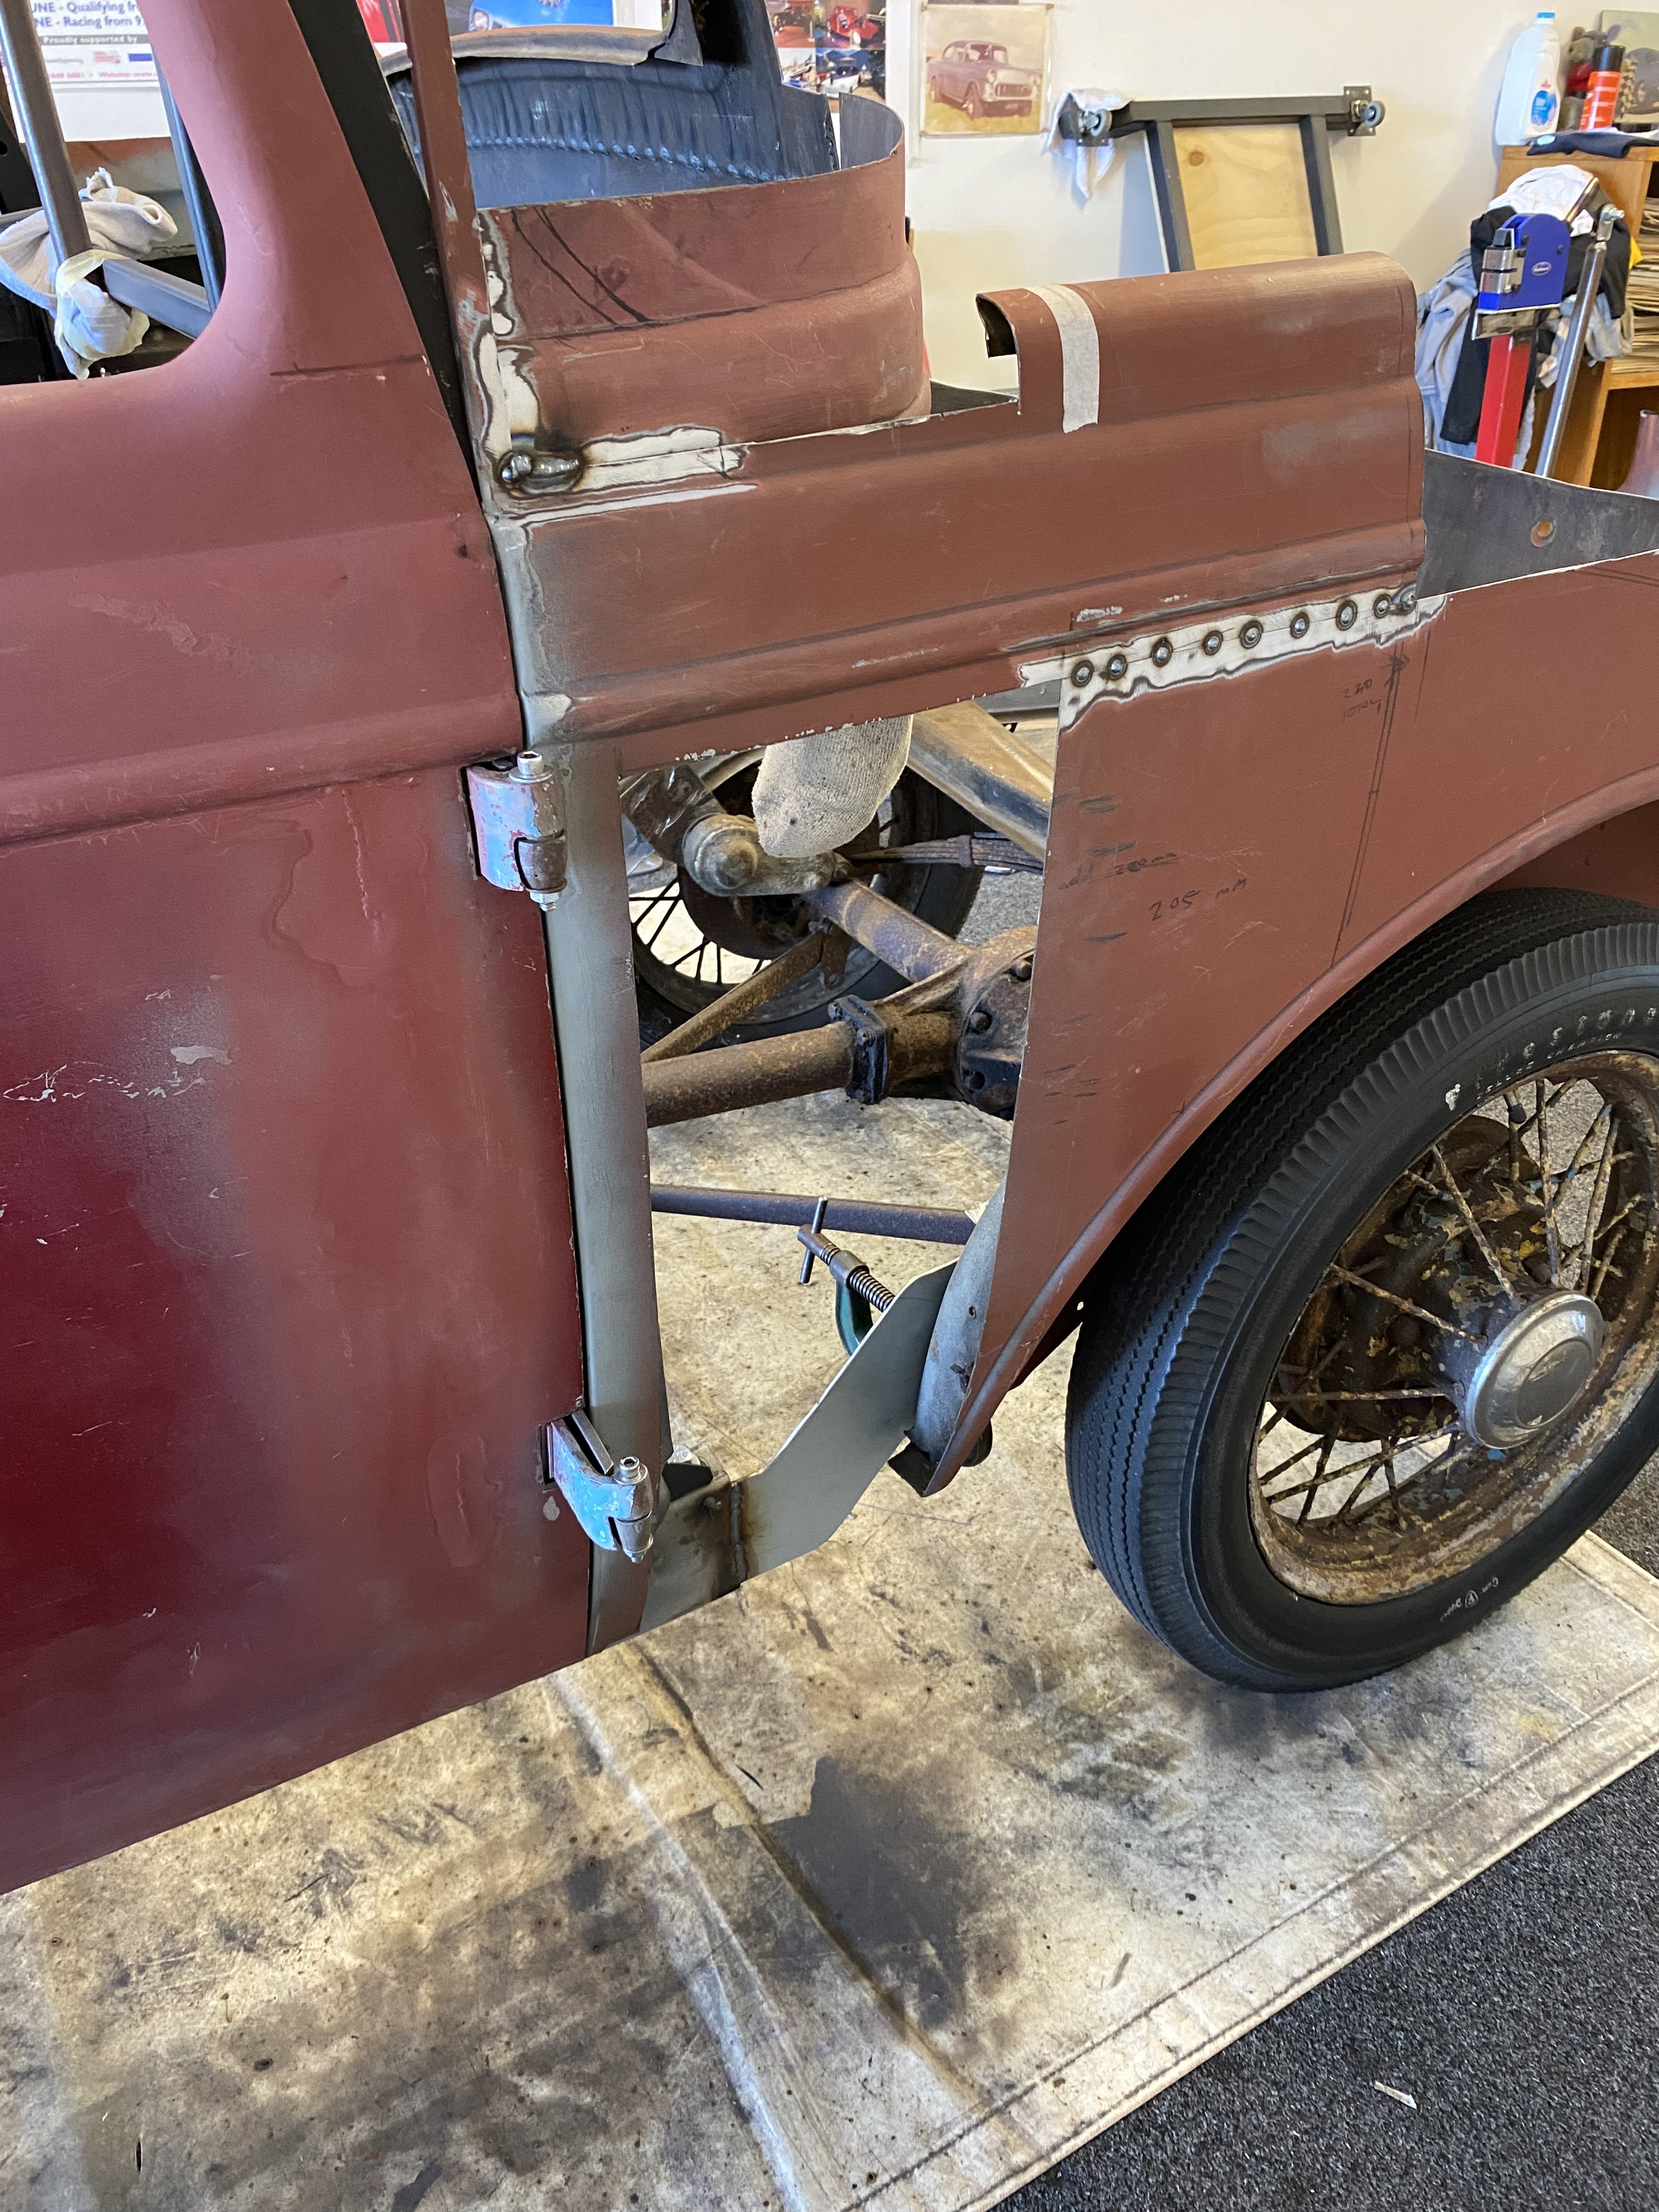
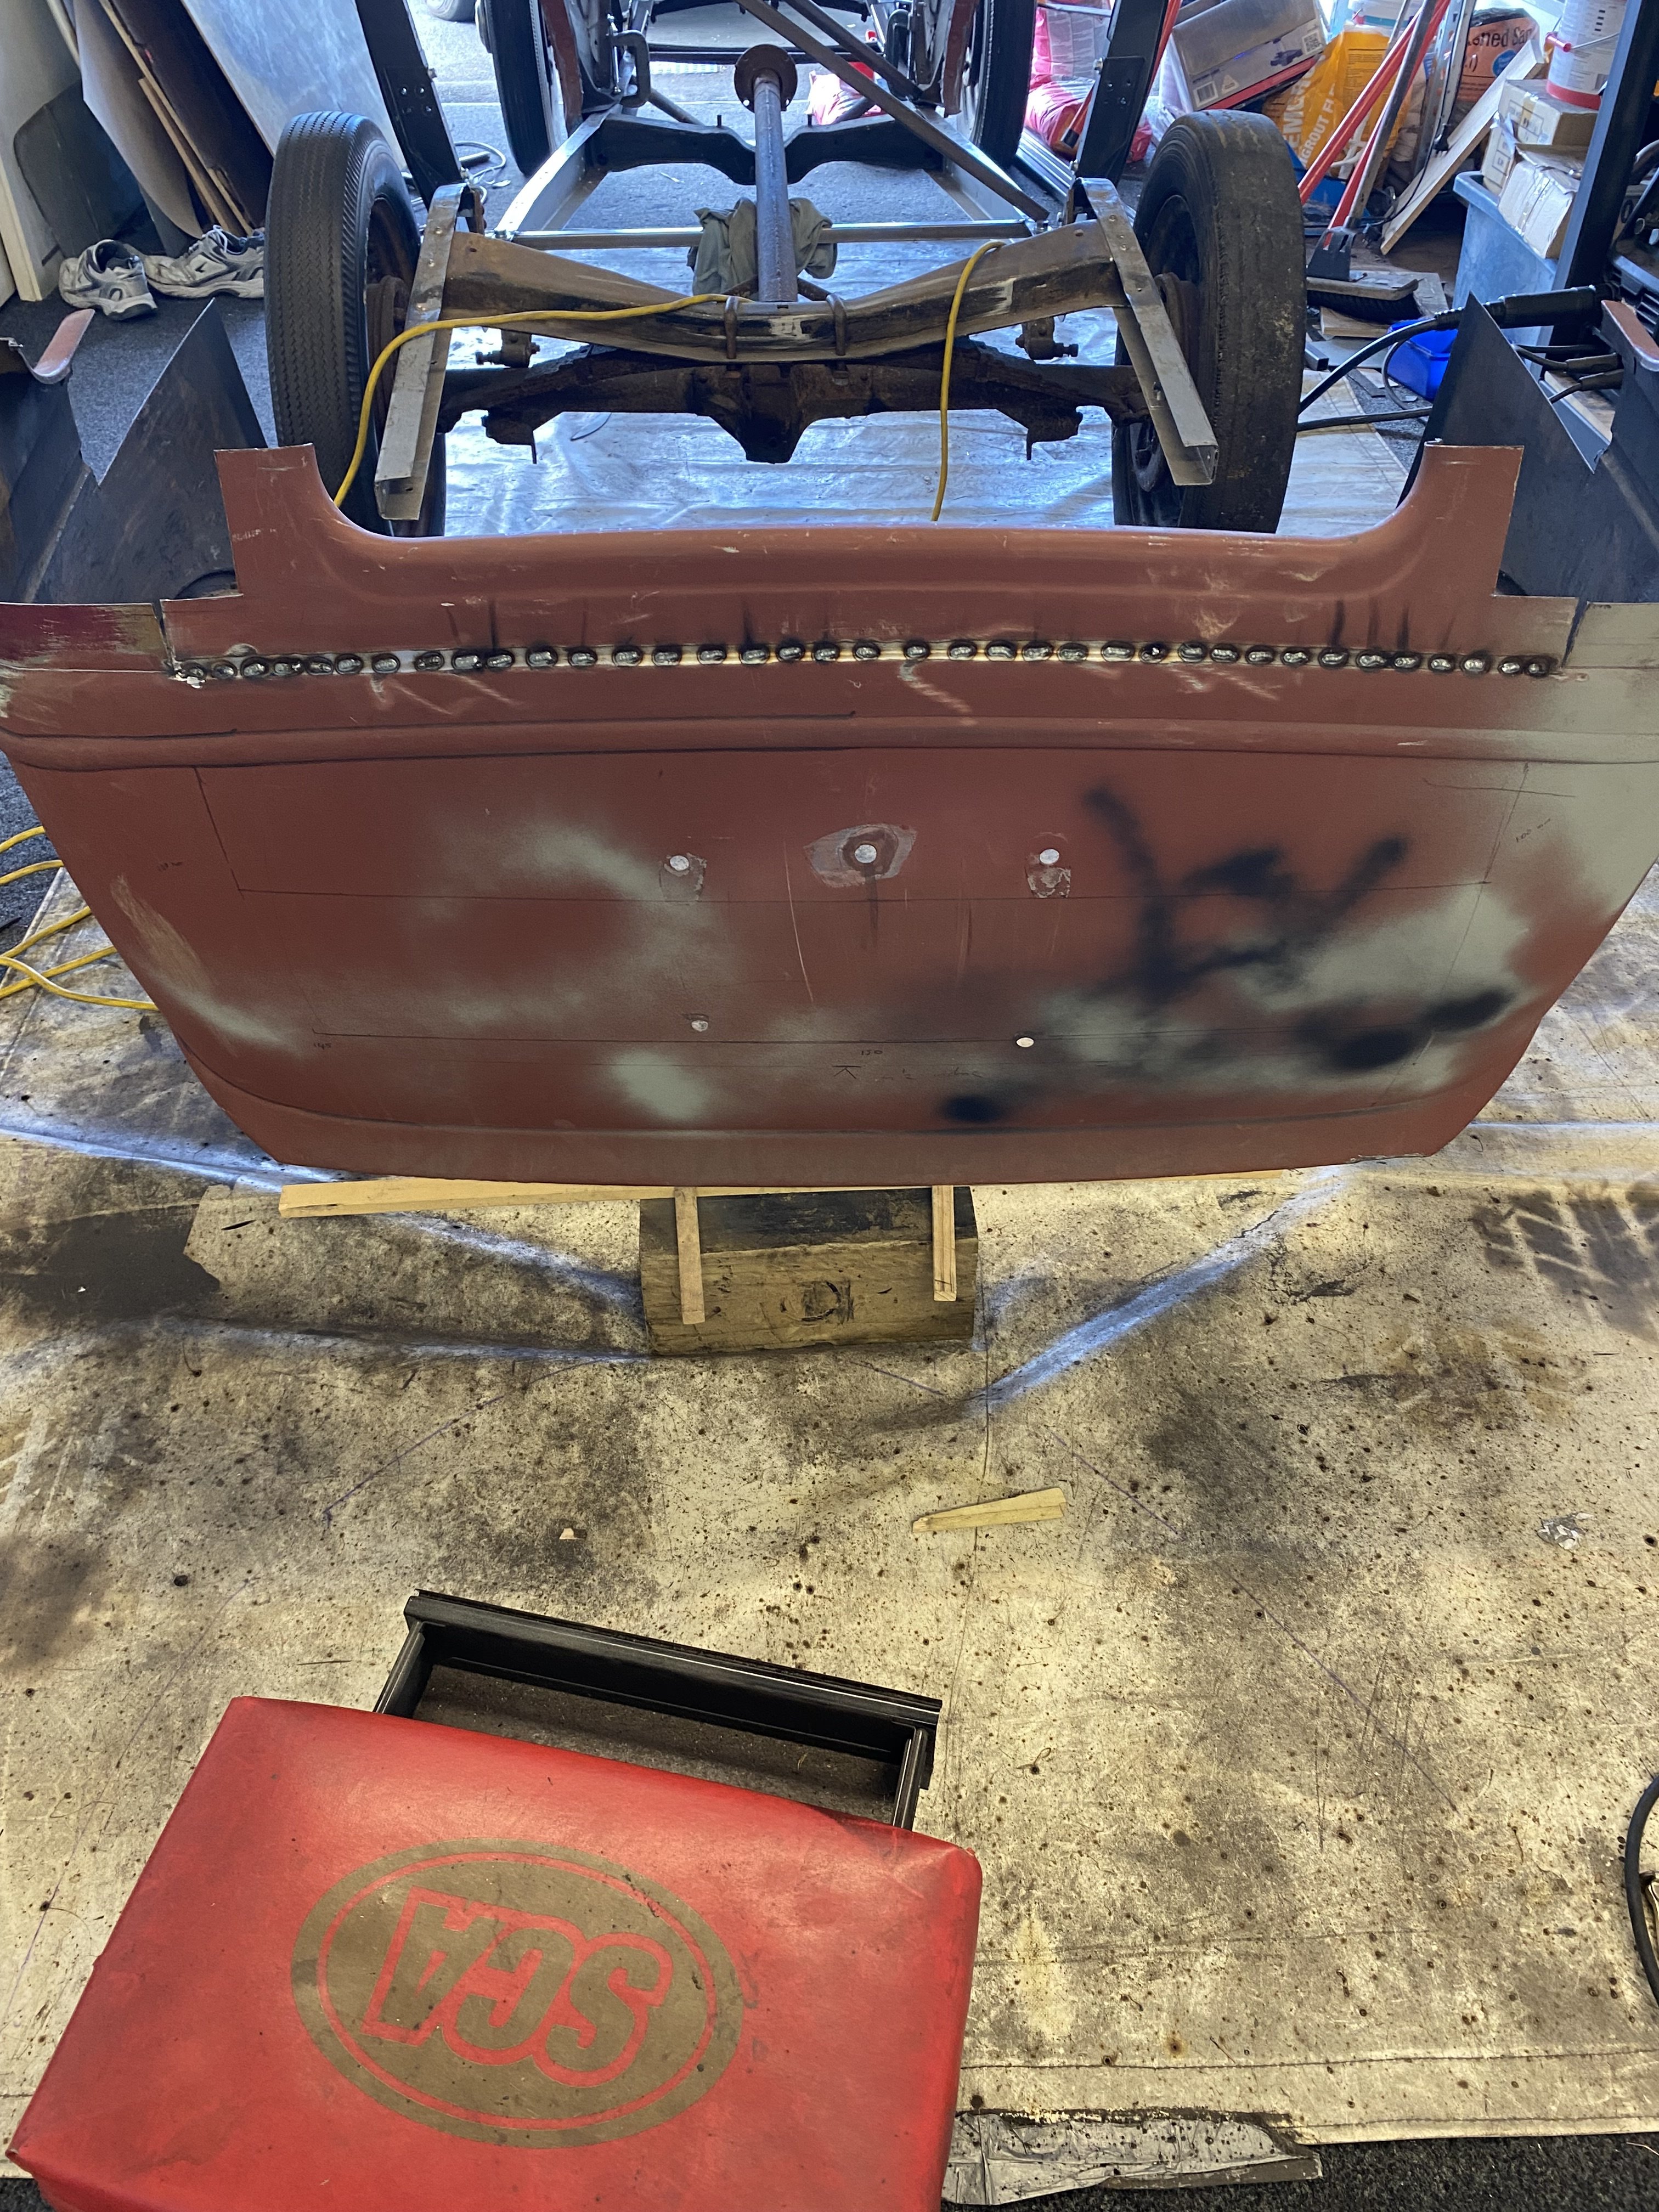
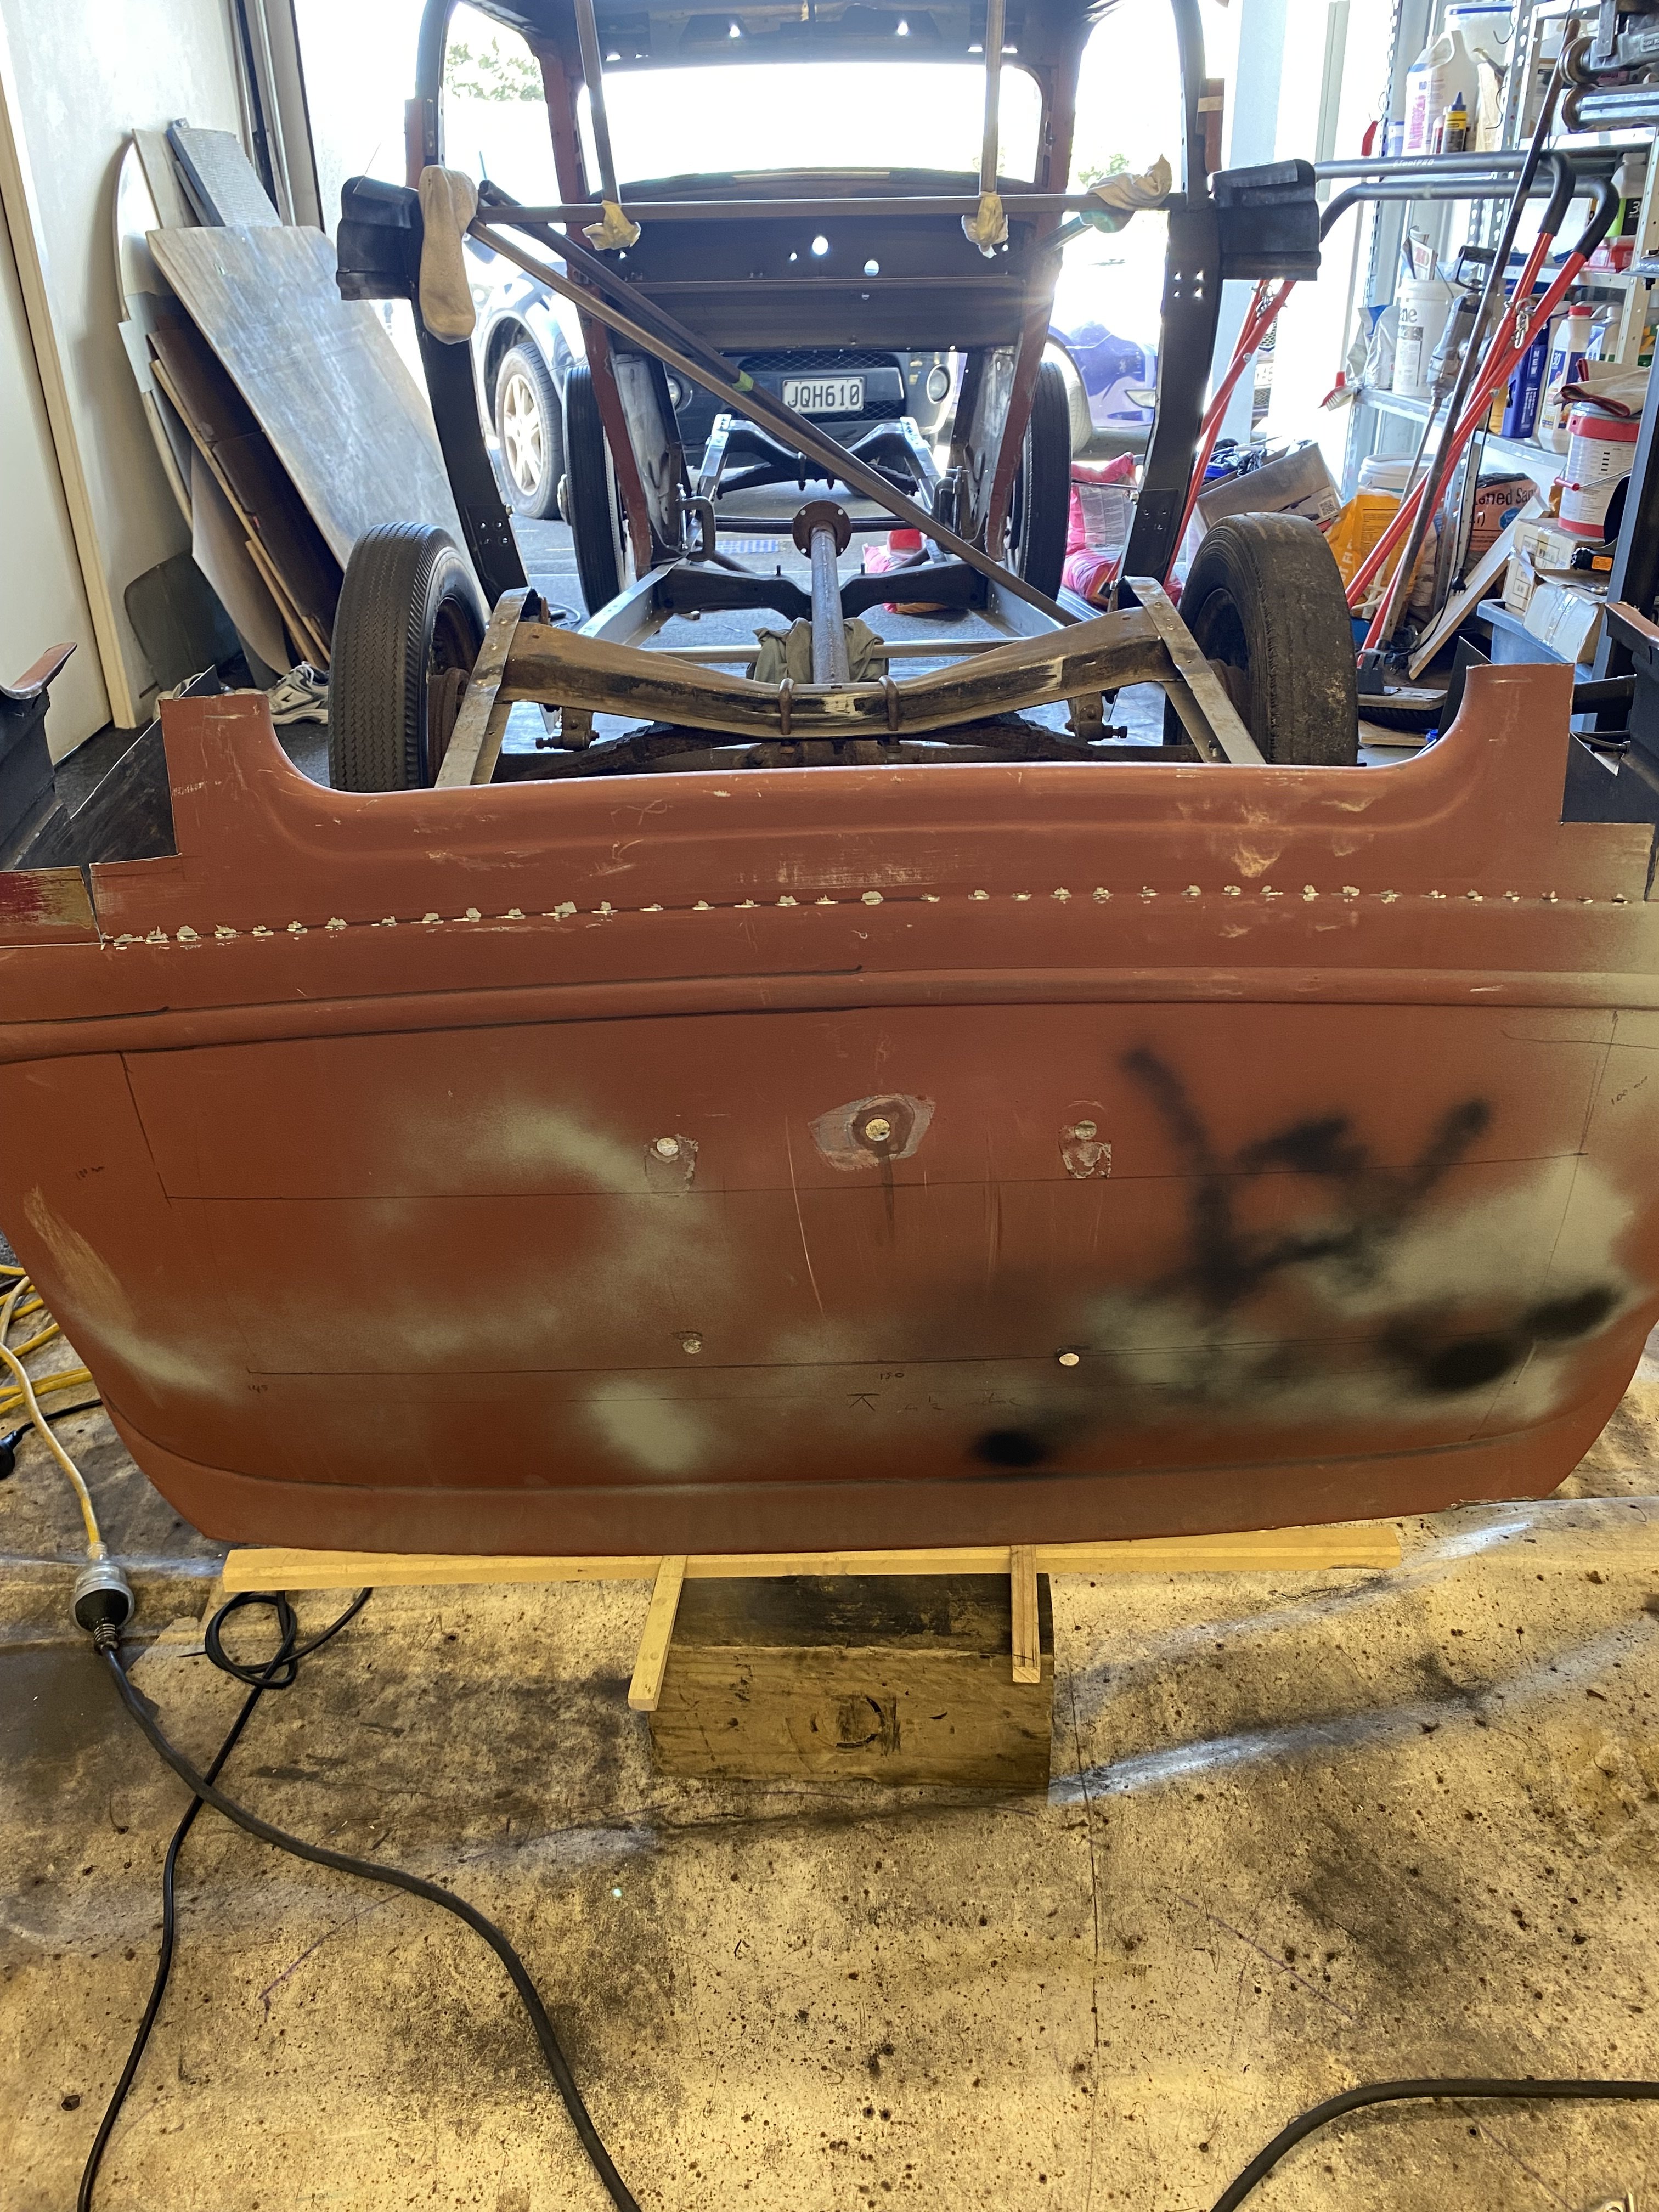
Finally got the rear roof swage line in place and extended the car 205mm. next job is to lock that piece in by welding in the curve of the first bodyline curve above the swage line.
3 points
-
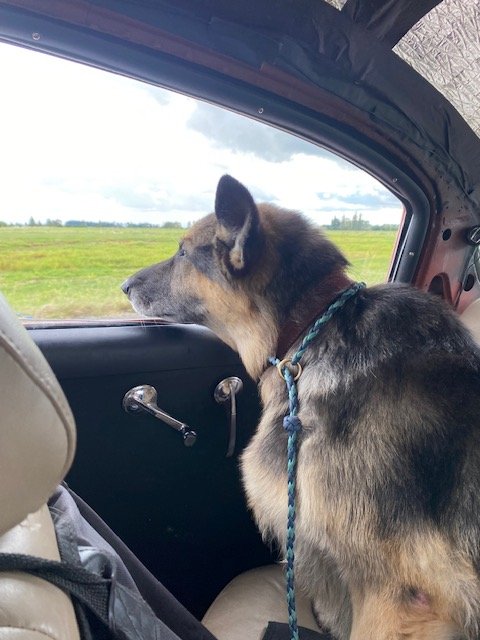
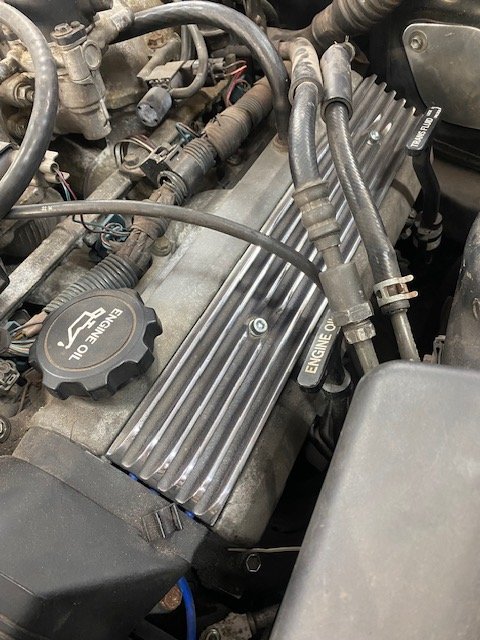
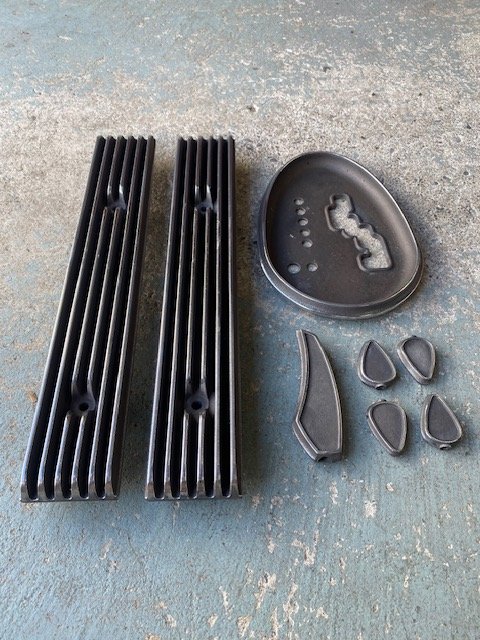
The engine felt sluggish down low with the aluminium/silicone intake i had on it. So I managed to squeeze on the factory intake from Matts 1uz Corona on. And went for a quick drive and the power felt better. So decided to make a new larger intake with a Resonator beneath it. Using the same volumes as the factory plastic 1uzfe one. Wasn't quite as good. But is definitely an improvement. 3d printed & had cast in aluminium some finned Lead covers. Used Bennetts Custom co's method on youtube for using oxy action Vanish in hot water to darken/age cast aluminium. Will need to get a photo of the shifter parts and switch extensions installed. Off on the 6 hour drive to Beachhop, in Whangamata. Skyla the dog loved that we could have the windows down the whole way with no horrid drumming noises. Cruise control was lovely too. And the bags rode like a dream over the Hauraki Plain's roads. Also cut out some vinyl pinstripes before leaving. From 3m 3630 Lightbox vinyl for the matte finish. Faux Pinstripes for the Faux old car.
3 points
-
3 points
-
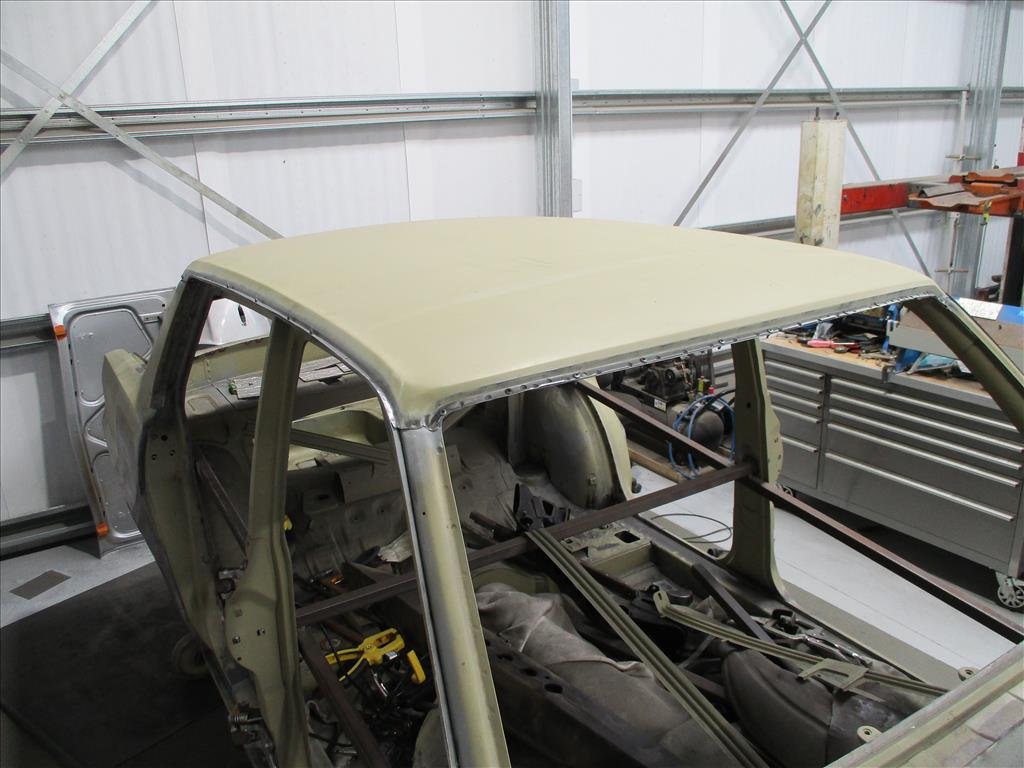
Roof being lined up to get stuck together. Looks like it's coming along nicely. Panel Barry said he was impressed with the reproduction panels for the rear so far which is good to know. Also mentioned car should be all welded up within next couple weeks. We've decided to paint strip the bonnet and doors to see what's hiding underneath. Originally was thinking to dip the whole doors and bonnet and boot but we decided maybe not necessary as the boot is pretty much all good and bonnet isn't super terrible (just around the front edge). Doors have some bog in but cross that bridge when we get there.
2 points
-
Opened things up a bit more, tbh it looks pretty good. Altho number 2 is slightly browner than the rest in the head. The cam spins nice and free so its not that, but the with the head off rotating the crank is still ever so slight weirdly variable in turning force. The bores look basically perfect so maybe that means the crank might be bent? Rings broken?Time will tell I guess.2 points
-
yes. its not very scientific, its either on or off and it runs off a battery charge circuit from a campervan. because the car has some heavy current loads (compressor etc) i wanted to have it switch off if there wasn't enough current to go around. thats it, nothing fancy at all.2 points
-
From what my friend said, who was running the same rails in his Corolla, you're pretty well limited to anything around the age of Fishnets or SR2/3 from something like a Civic/ DC2 Integra Type R. Anything newer, like Evo 5 onwards, DC5R, Accord Euro R etc will be the 4 bolt pattern. He was going to change to floor mounted buckles and use modern rails, but sold the car before that.2 points
-
Yep, pretty sure all of Taumaranui was awake at 7.05am when that fired up! Epic weekend guys, thanks to all that came along and made it such a great time. Who would have thought it was so hard to get back off the beach. A+ Shannon send there too btw2 points
-
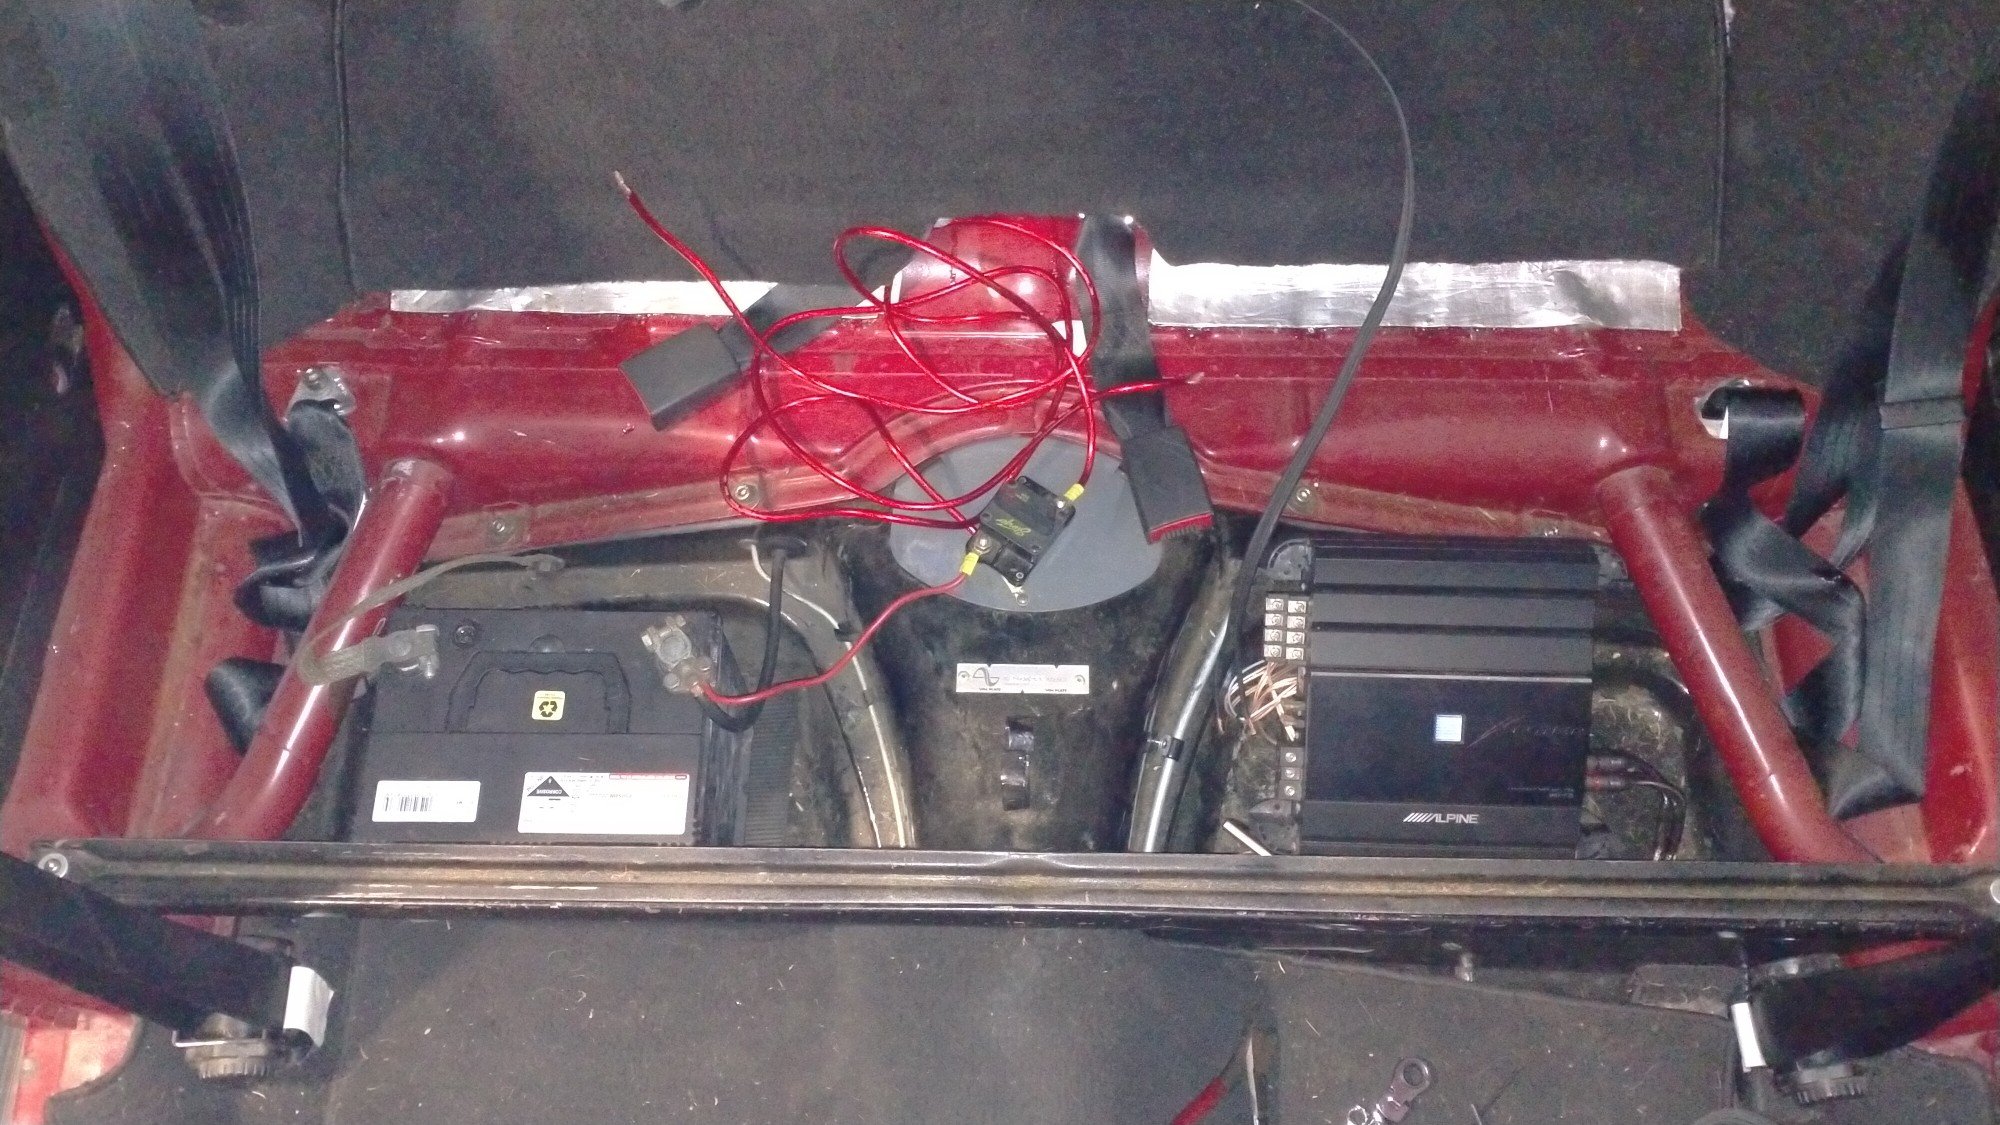
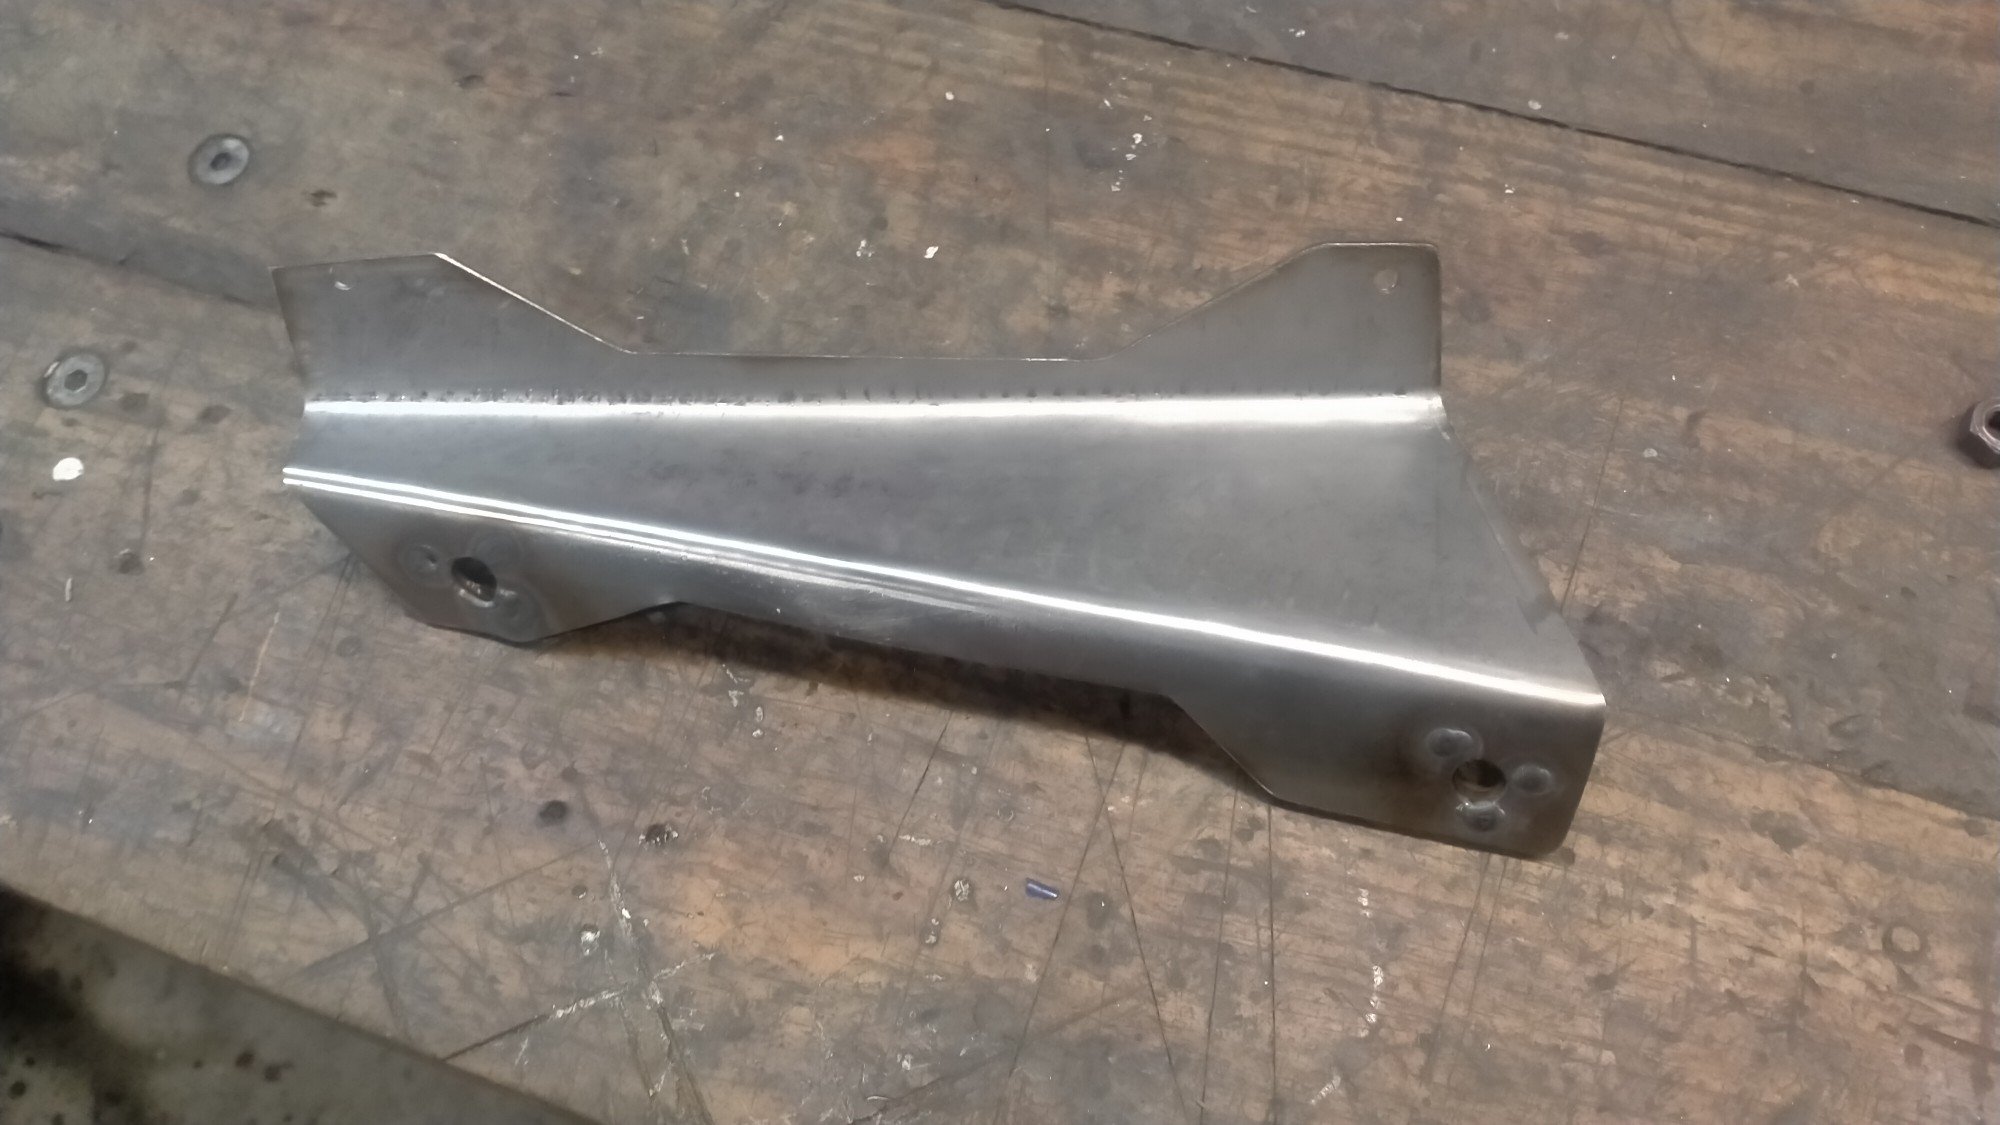
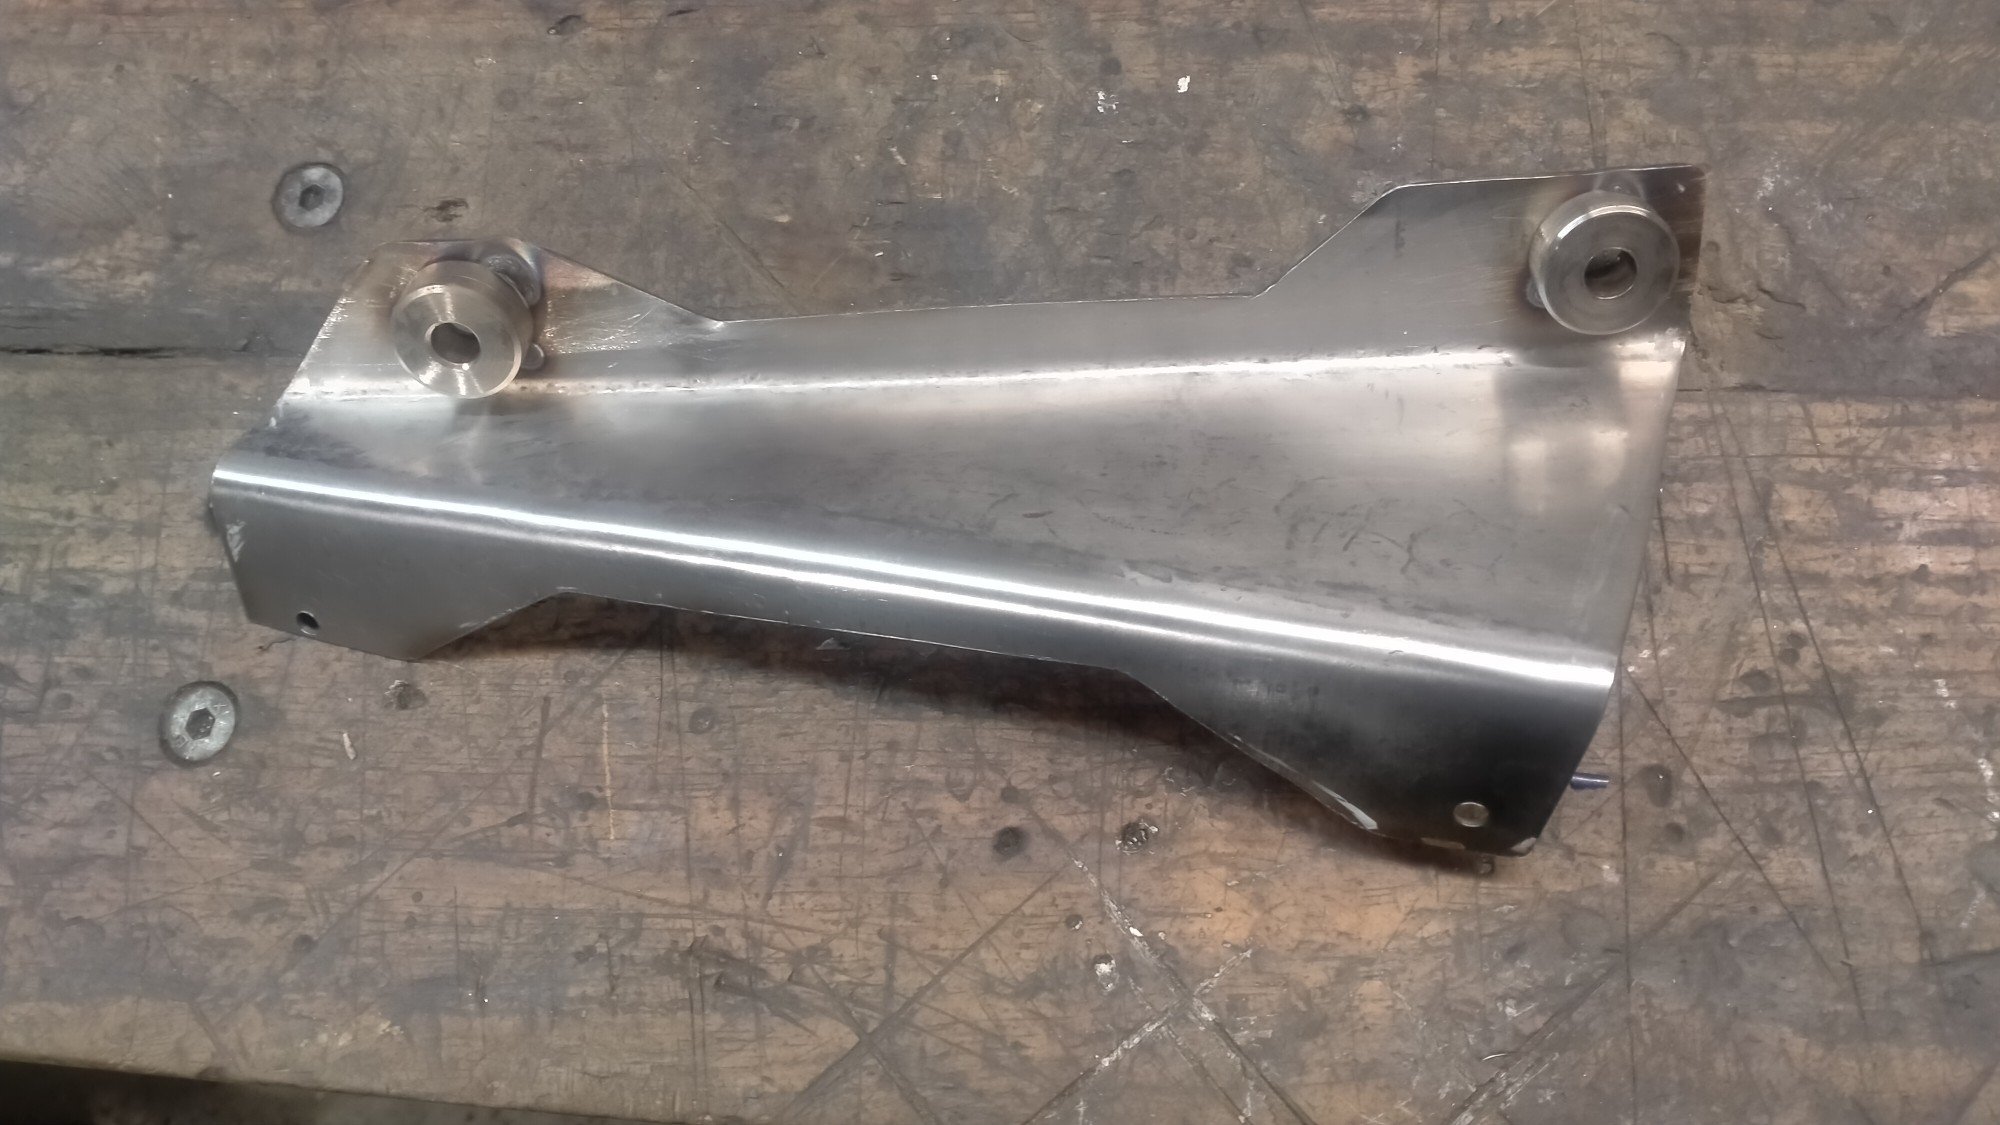
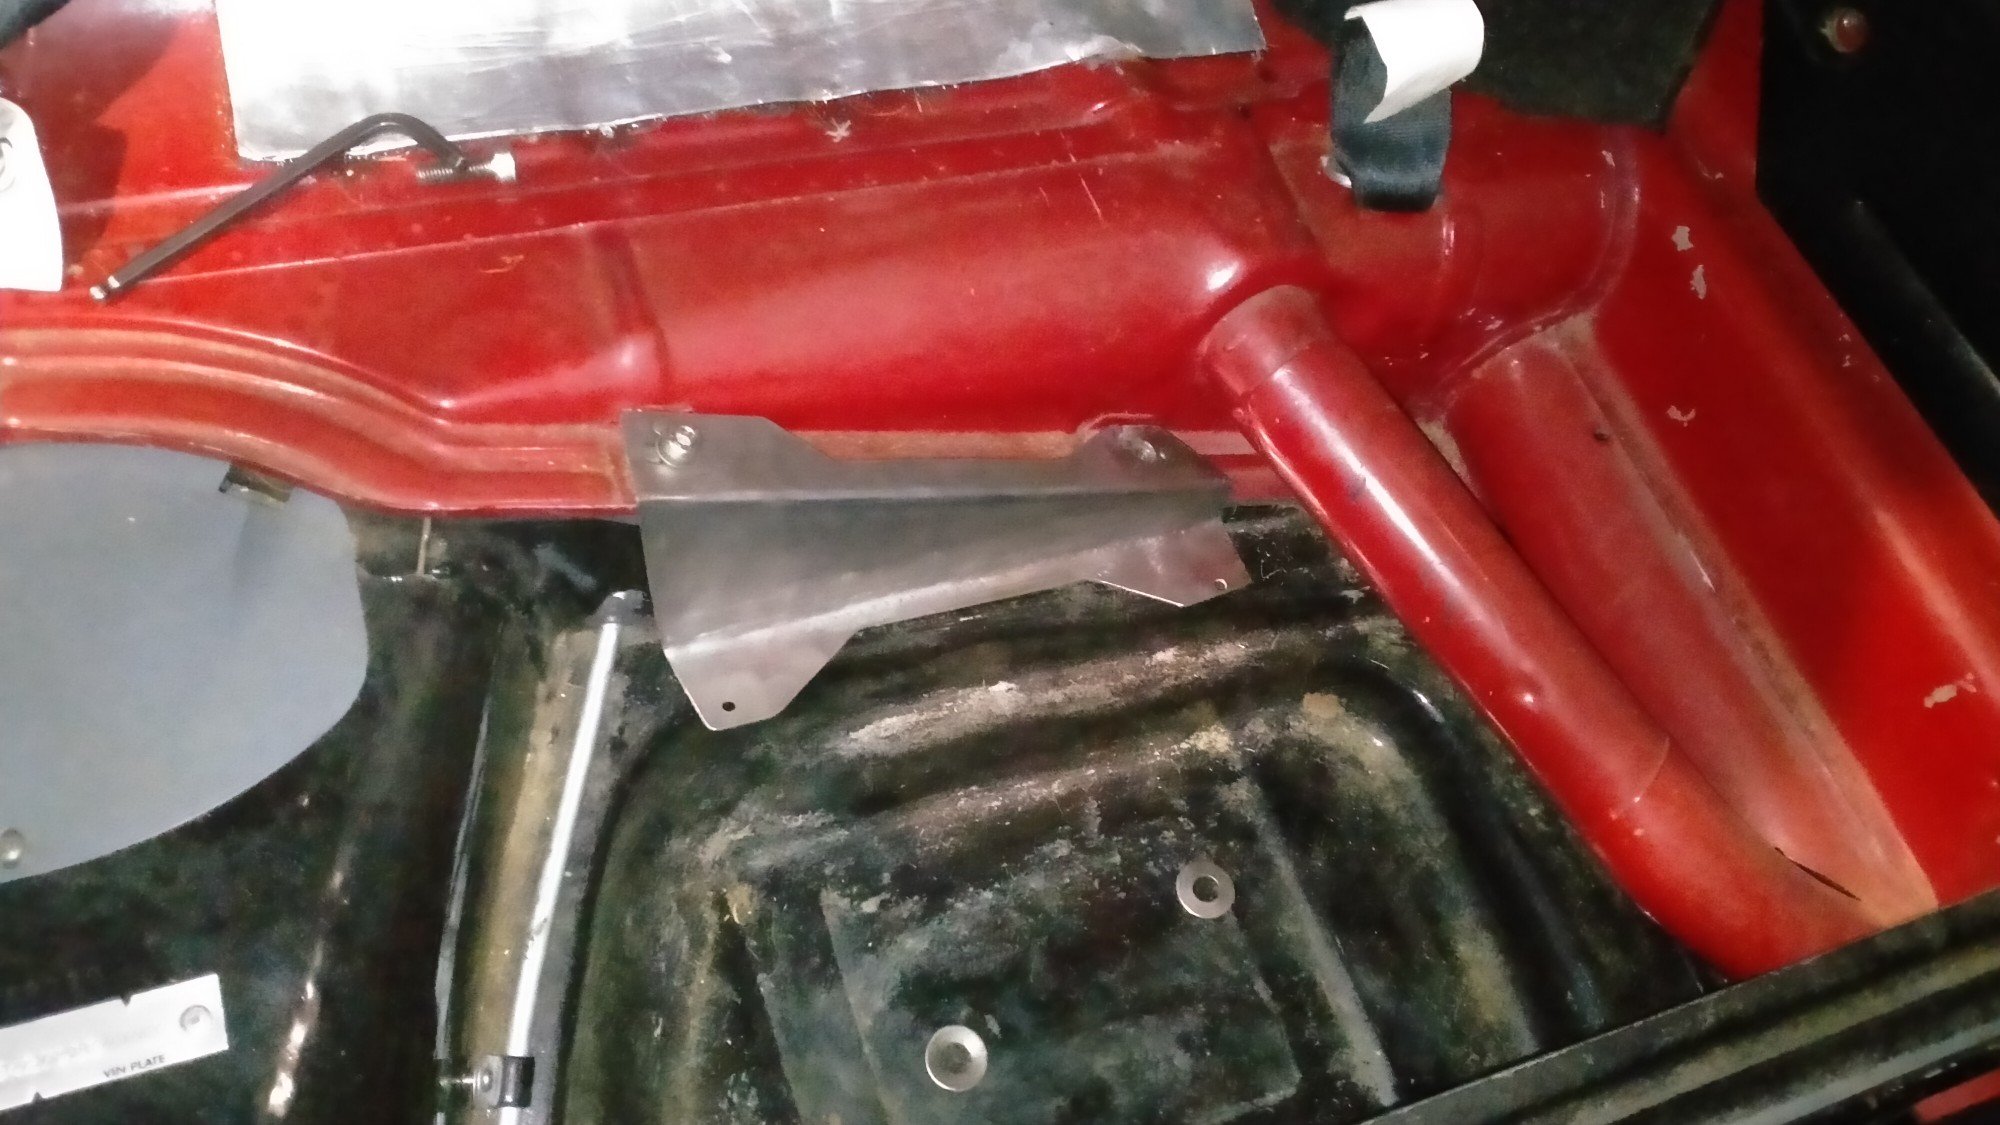
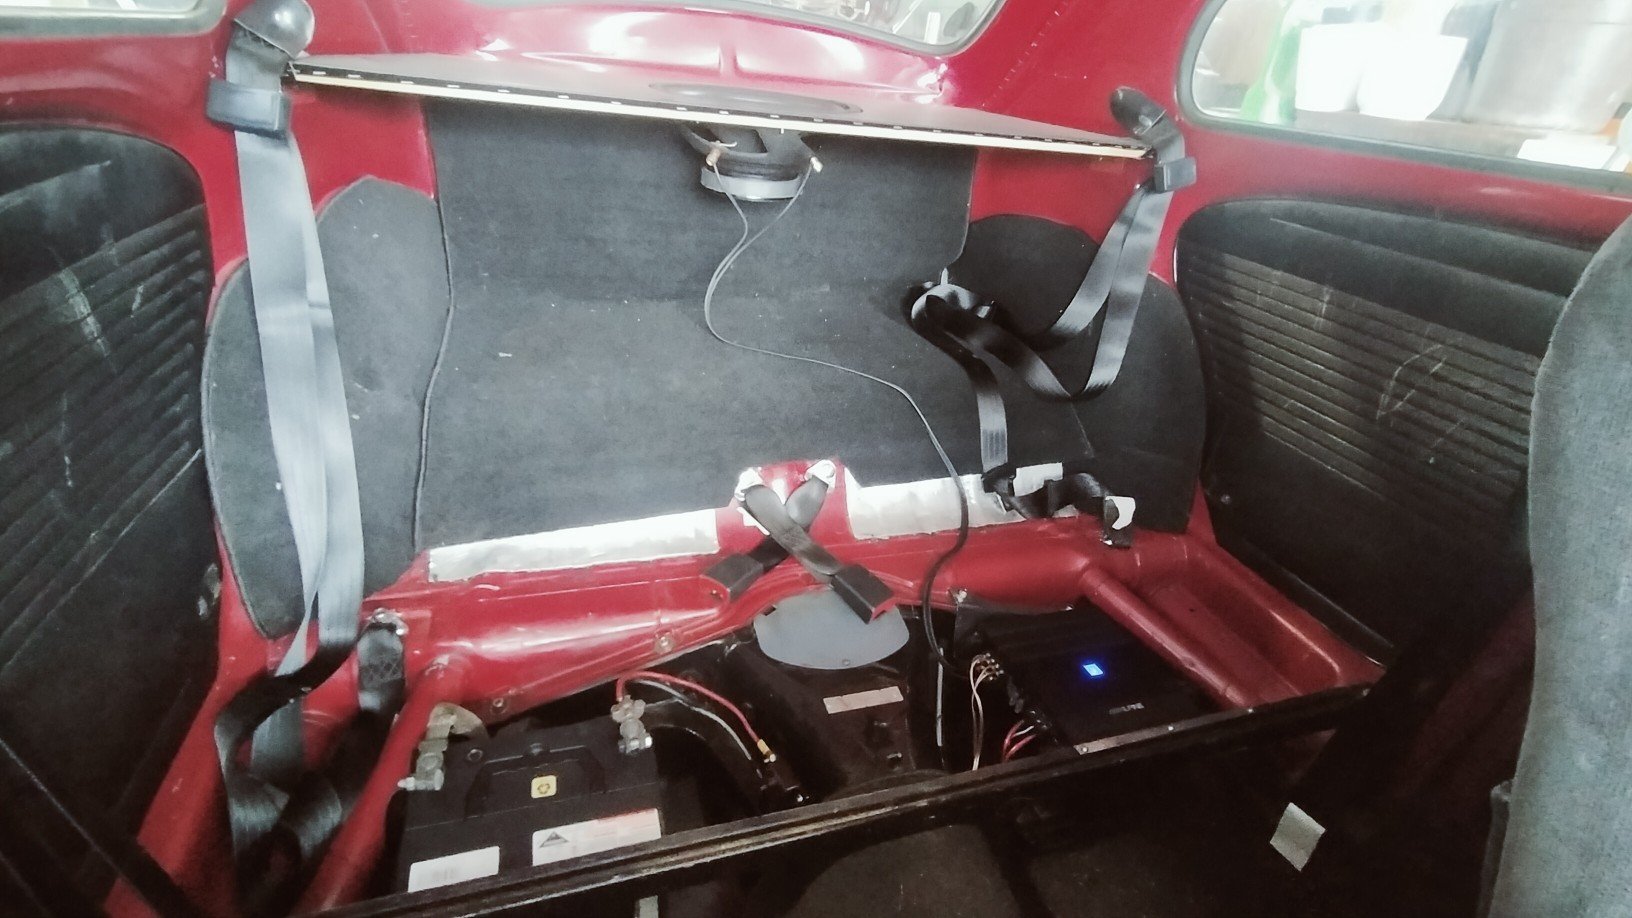
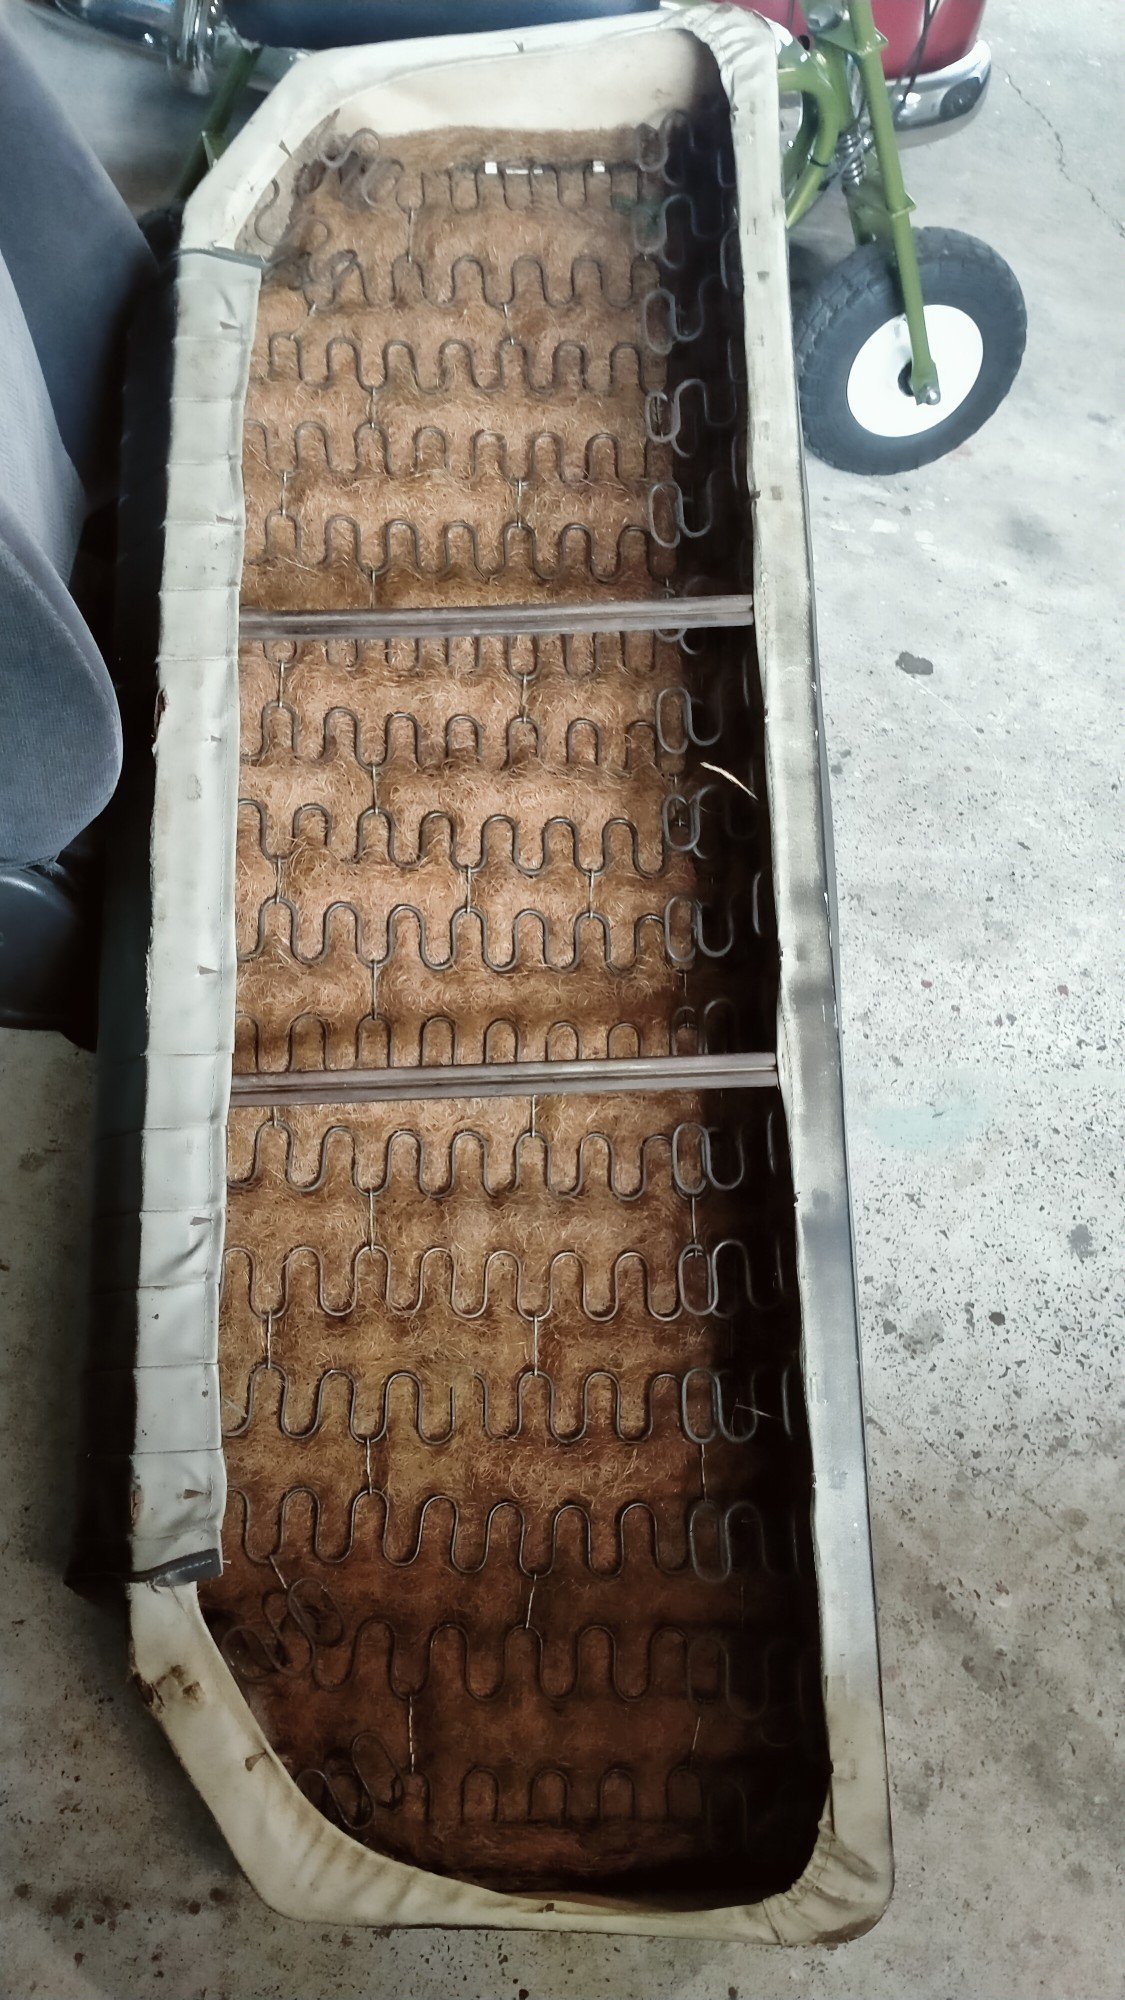
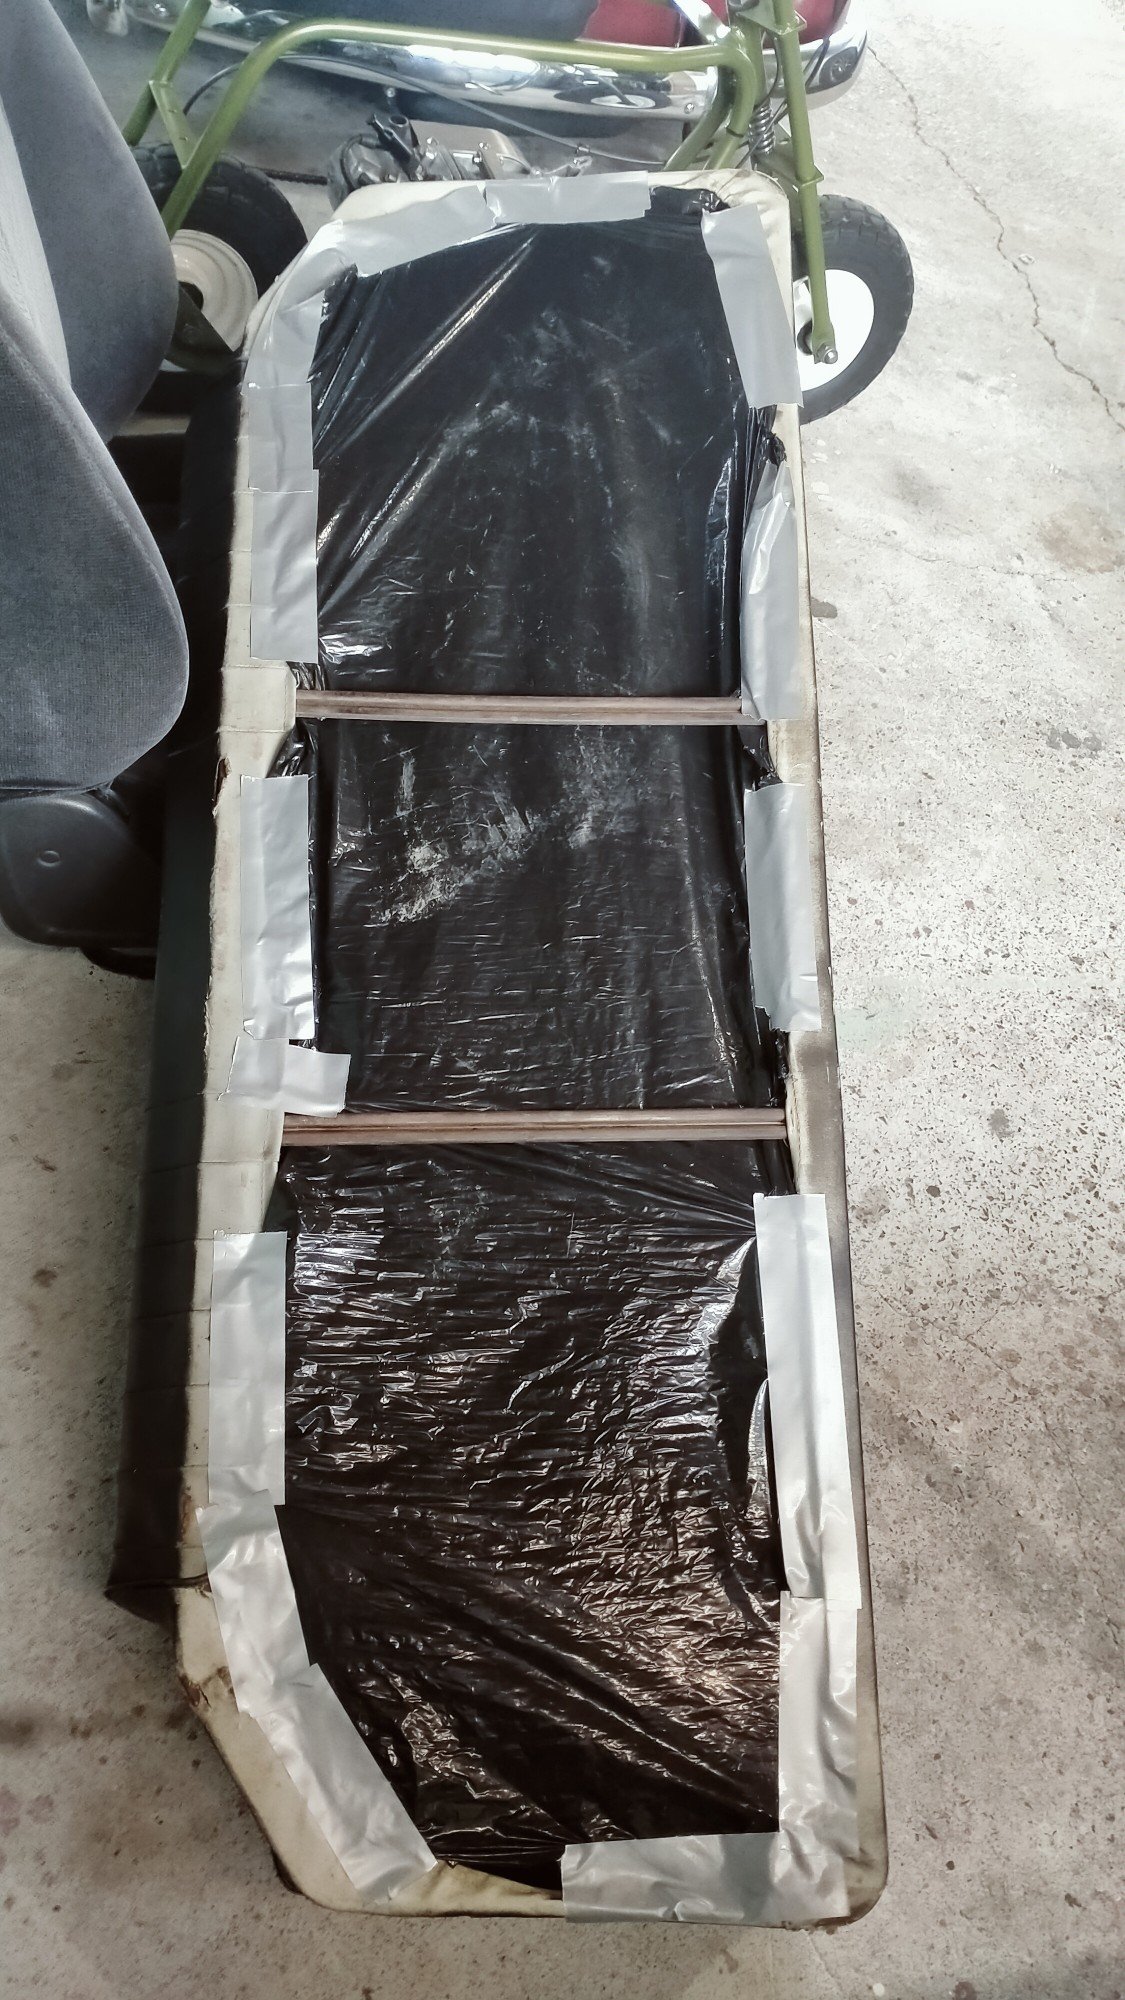
Finally got around to mounting the amp. Great spot for an amp, but there isn't much to actually attach anything to and I was not drilling holes in my floorpan. So I came up with this little arrangement using the body mounts to hang the amp. Spun up some spacers to get over the lip on the body. Was hard work bending 2mm stainless like this. front was a little simpler and just hangs from the seat brace. Also added some rubber feet under the amp to isolate it. Drilled and tapped the tunnel for the earth and mounted the stinger circuit breaker, also hooked up the Bluetooth adapter, seems to work well for $20. Also gave the whole area a good clean, found a couple rust spots in the corners so sorted that. The reason for the dirt is the horse hair stuff under the back seat, shit rains down on everything and seems to have some kind of resin that sticks. Not anymore! So chucked everything back together, all looks exactly the same, had a play with the amp settings, seems okay but Bluetooth is cool, seems to have heaps of range to, was controlling the music from across the street!
2 points
-
made some new Top Hats for the rear. As it went too low and wouldn't raise up high enough. Was a right pain trying to get into driveways without smashing the bumper on the ground. Was a lovely day in Whanganui for their annual show at the high school. Same at Levin's show. Taking a brake from this for a while. We did get a commercial sewing machine, so going to give Upholstery a go. Also needs Painting. But in the mean time ive brought an 84 C10 to try and get just as low. So will just keep driving this.
2 points
-
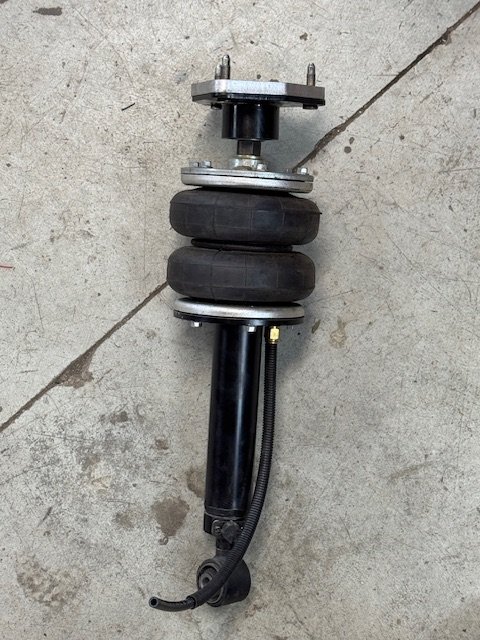
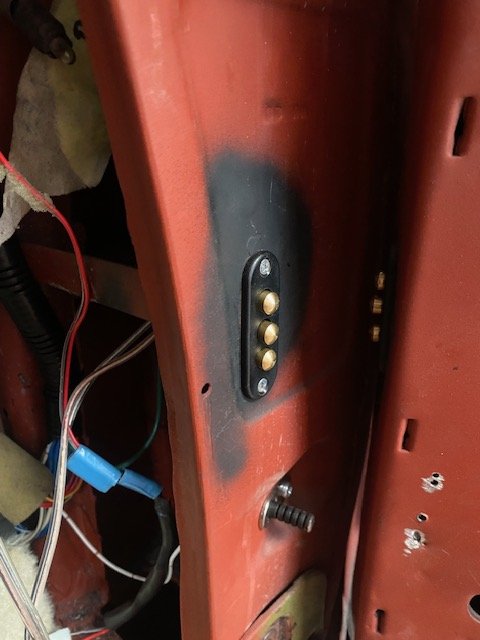
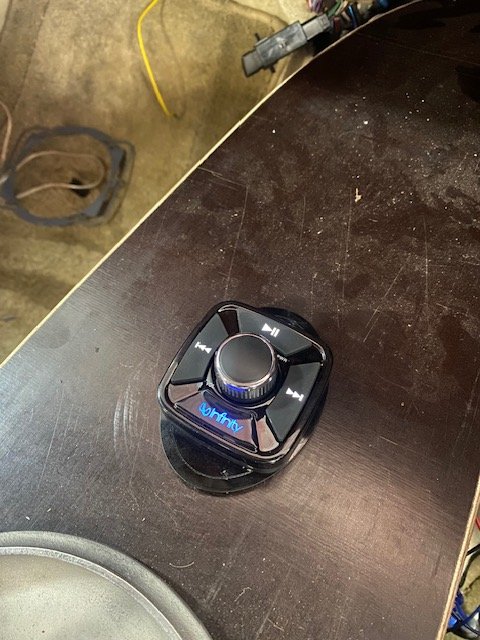
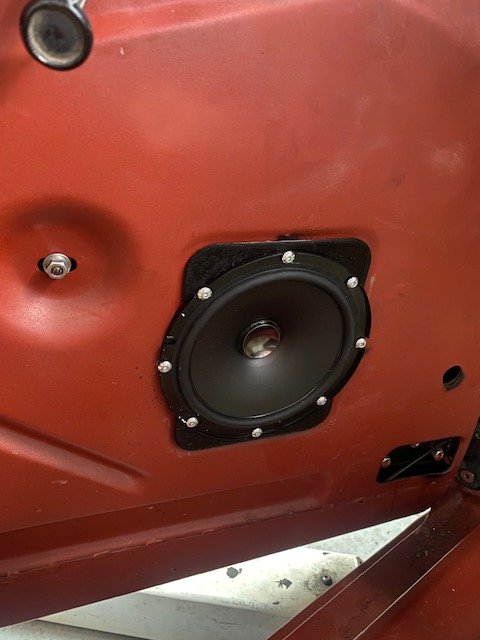
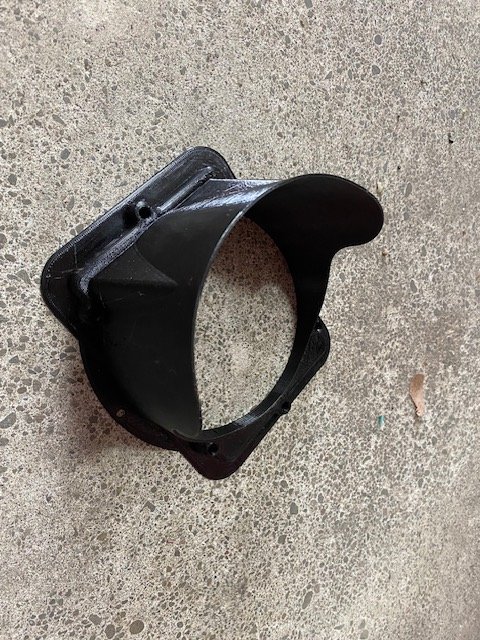
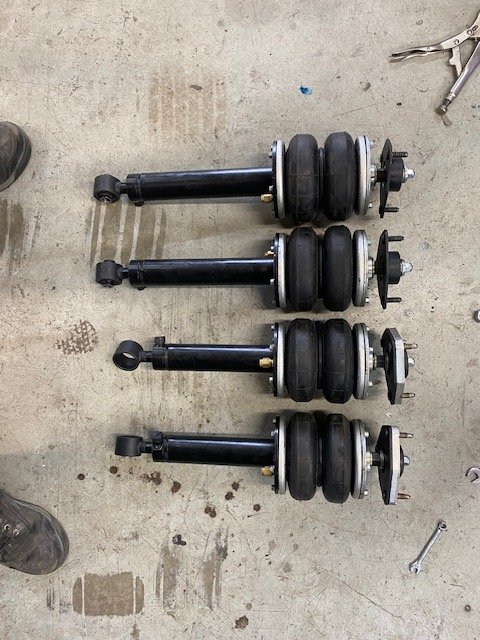
Installed the infinity Bluetooth only "headunit" Its alright. Connects fairly reliably. Auto plays at a default volume which can be a pain. No EQ adjustment, so installed a equalizer in the glovebox. Cost more than a decent Pioneer single din headunit. Probably should of just brought one of those, and installed that in the glovebox... Needed some speakers. so chose this hole. Trimmed it out a bit and added some rivnuts. 3d printed an adapter with a rain hood. Installed some 6.5inch component speakers. Used some Dakota Digital Magnum shooters to transfer the Door popper power and speaker signal through the door jam. Works well. Purchased another 2x of the new Boss Universal Struts. Bit longer than the first pair.
2 points
-
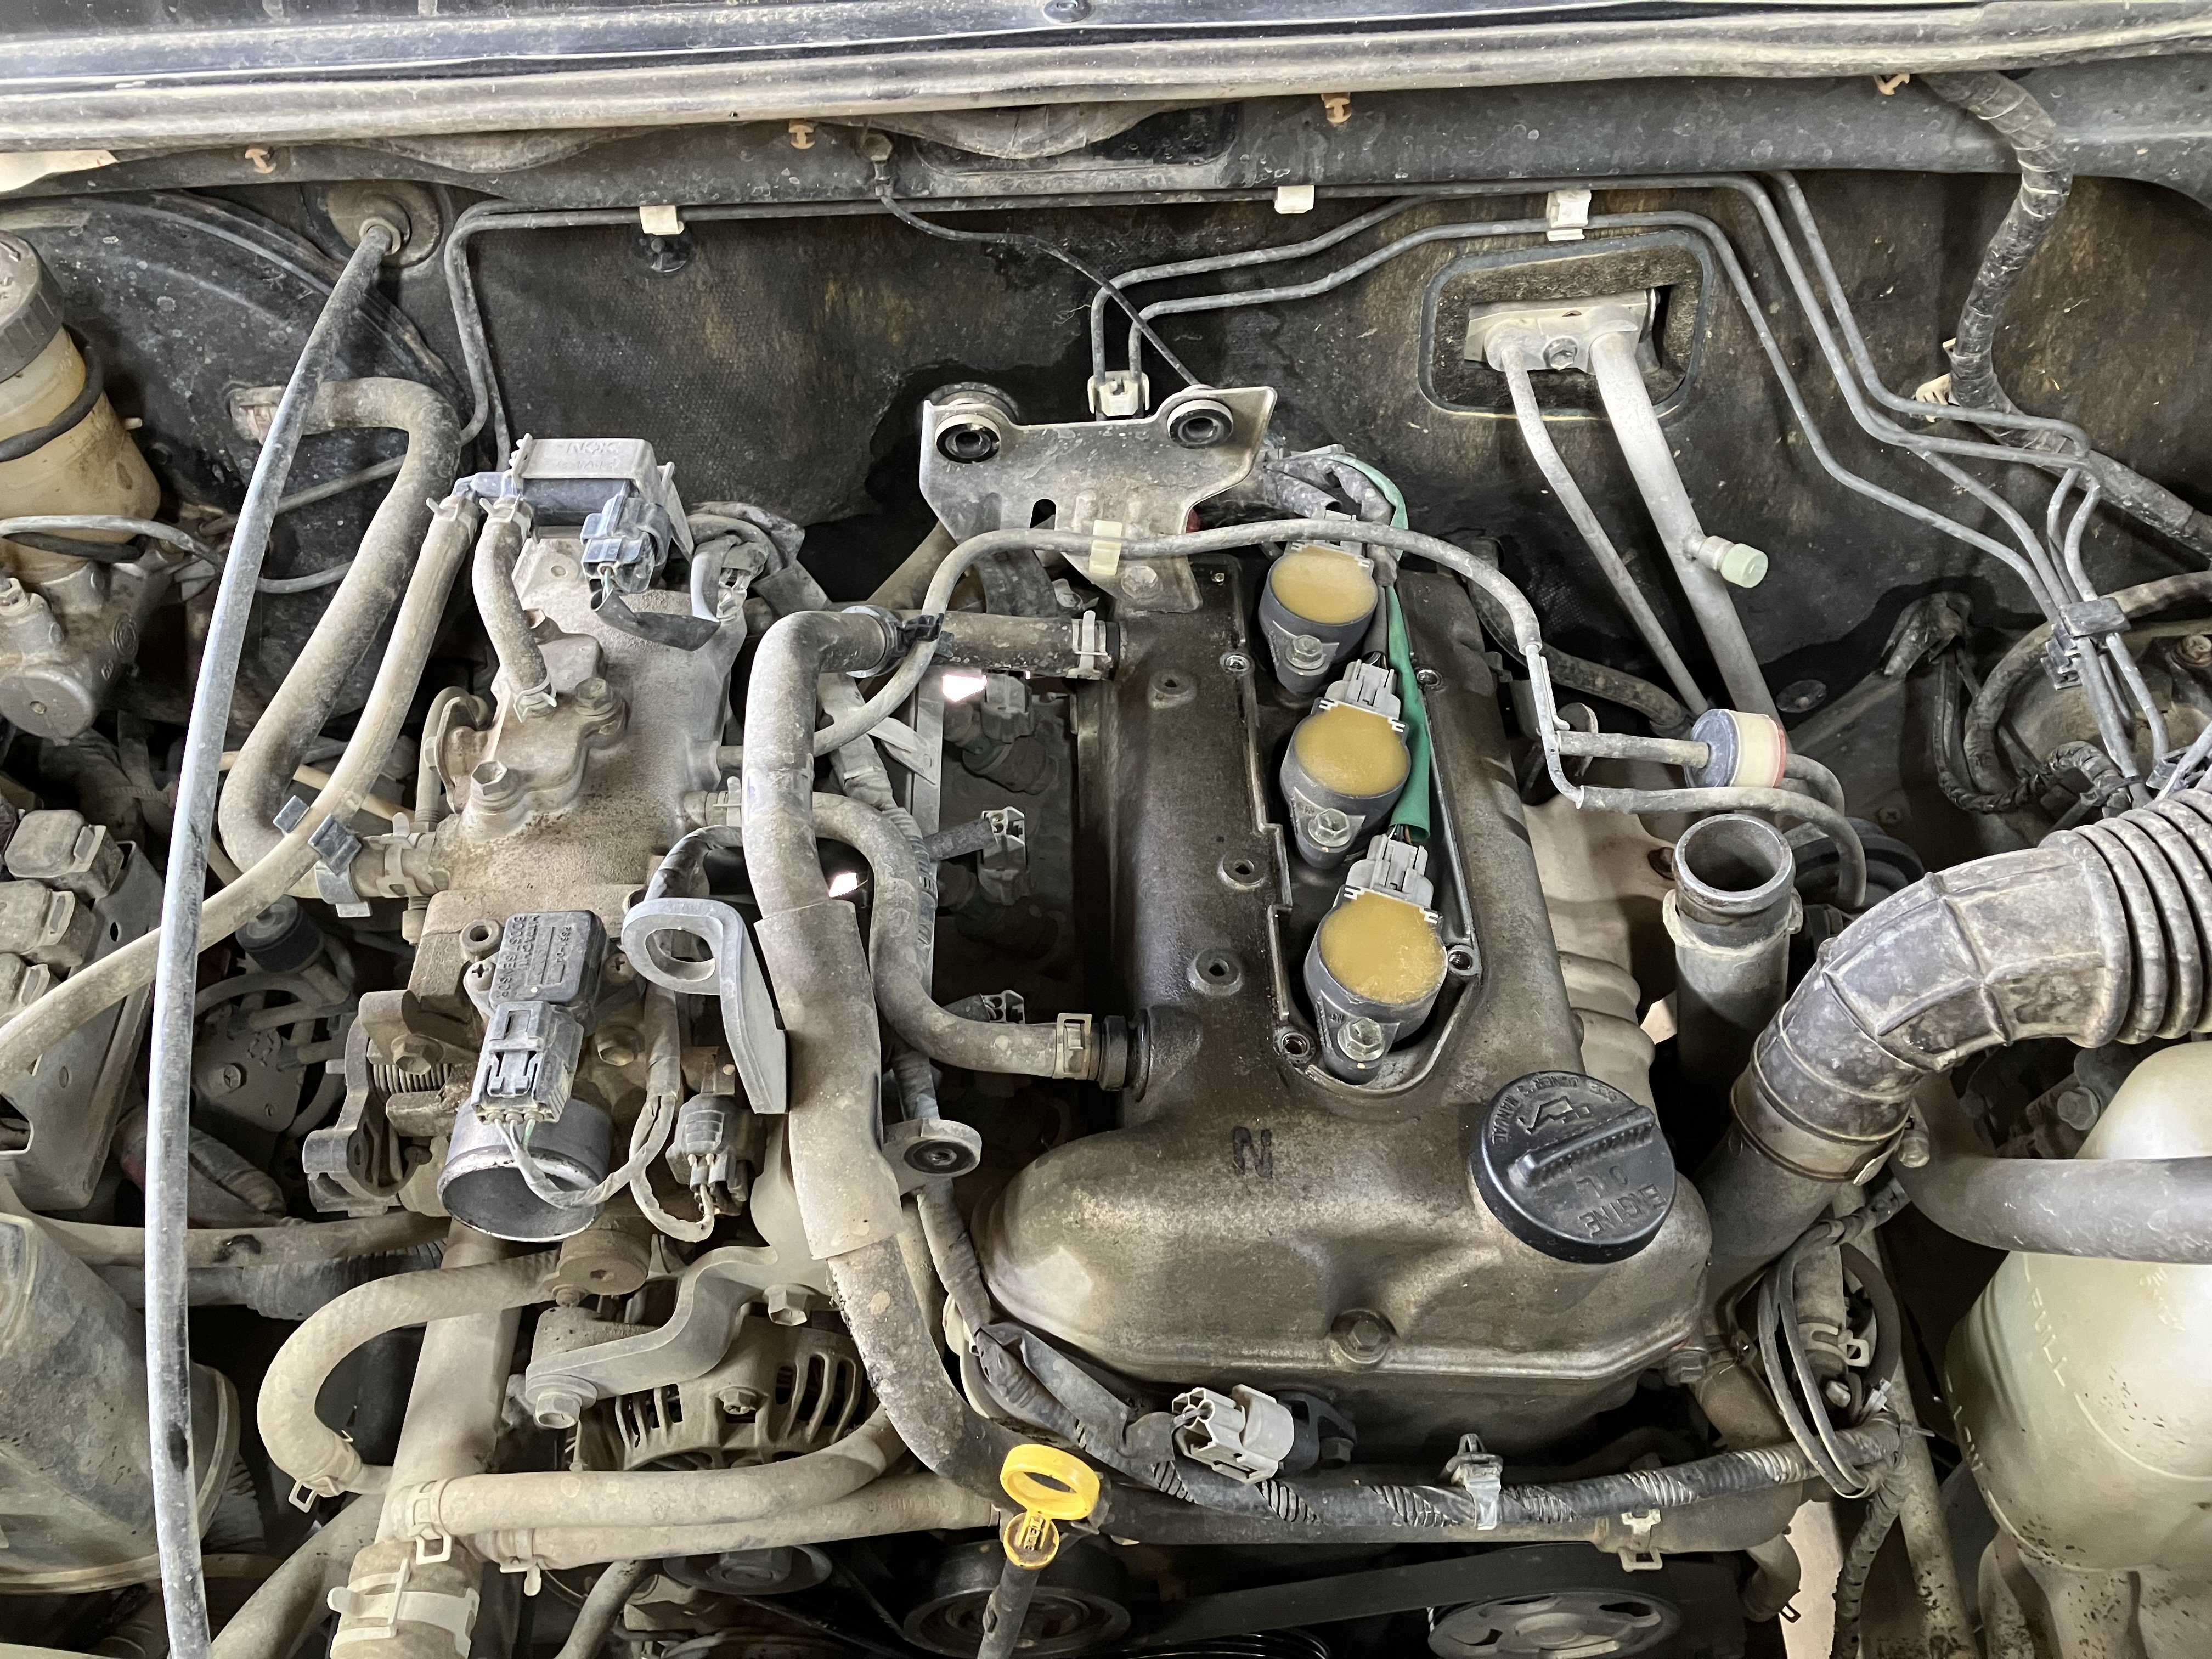
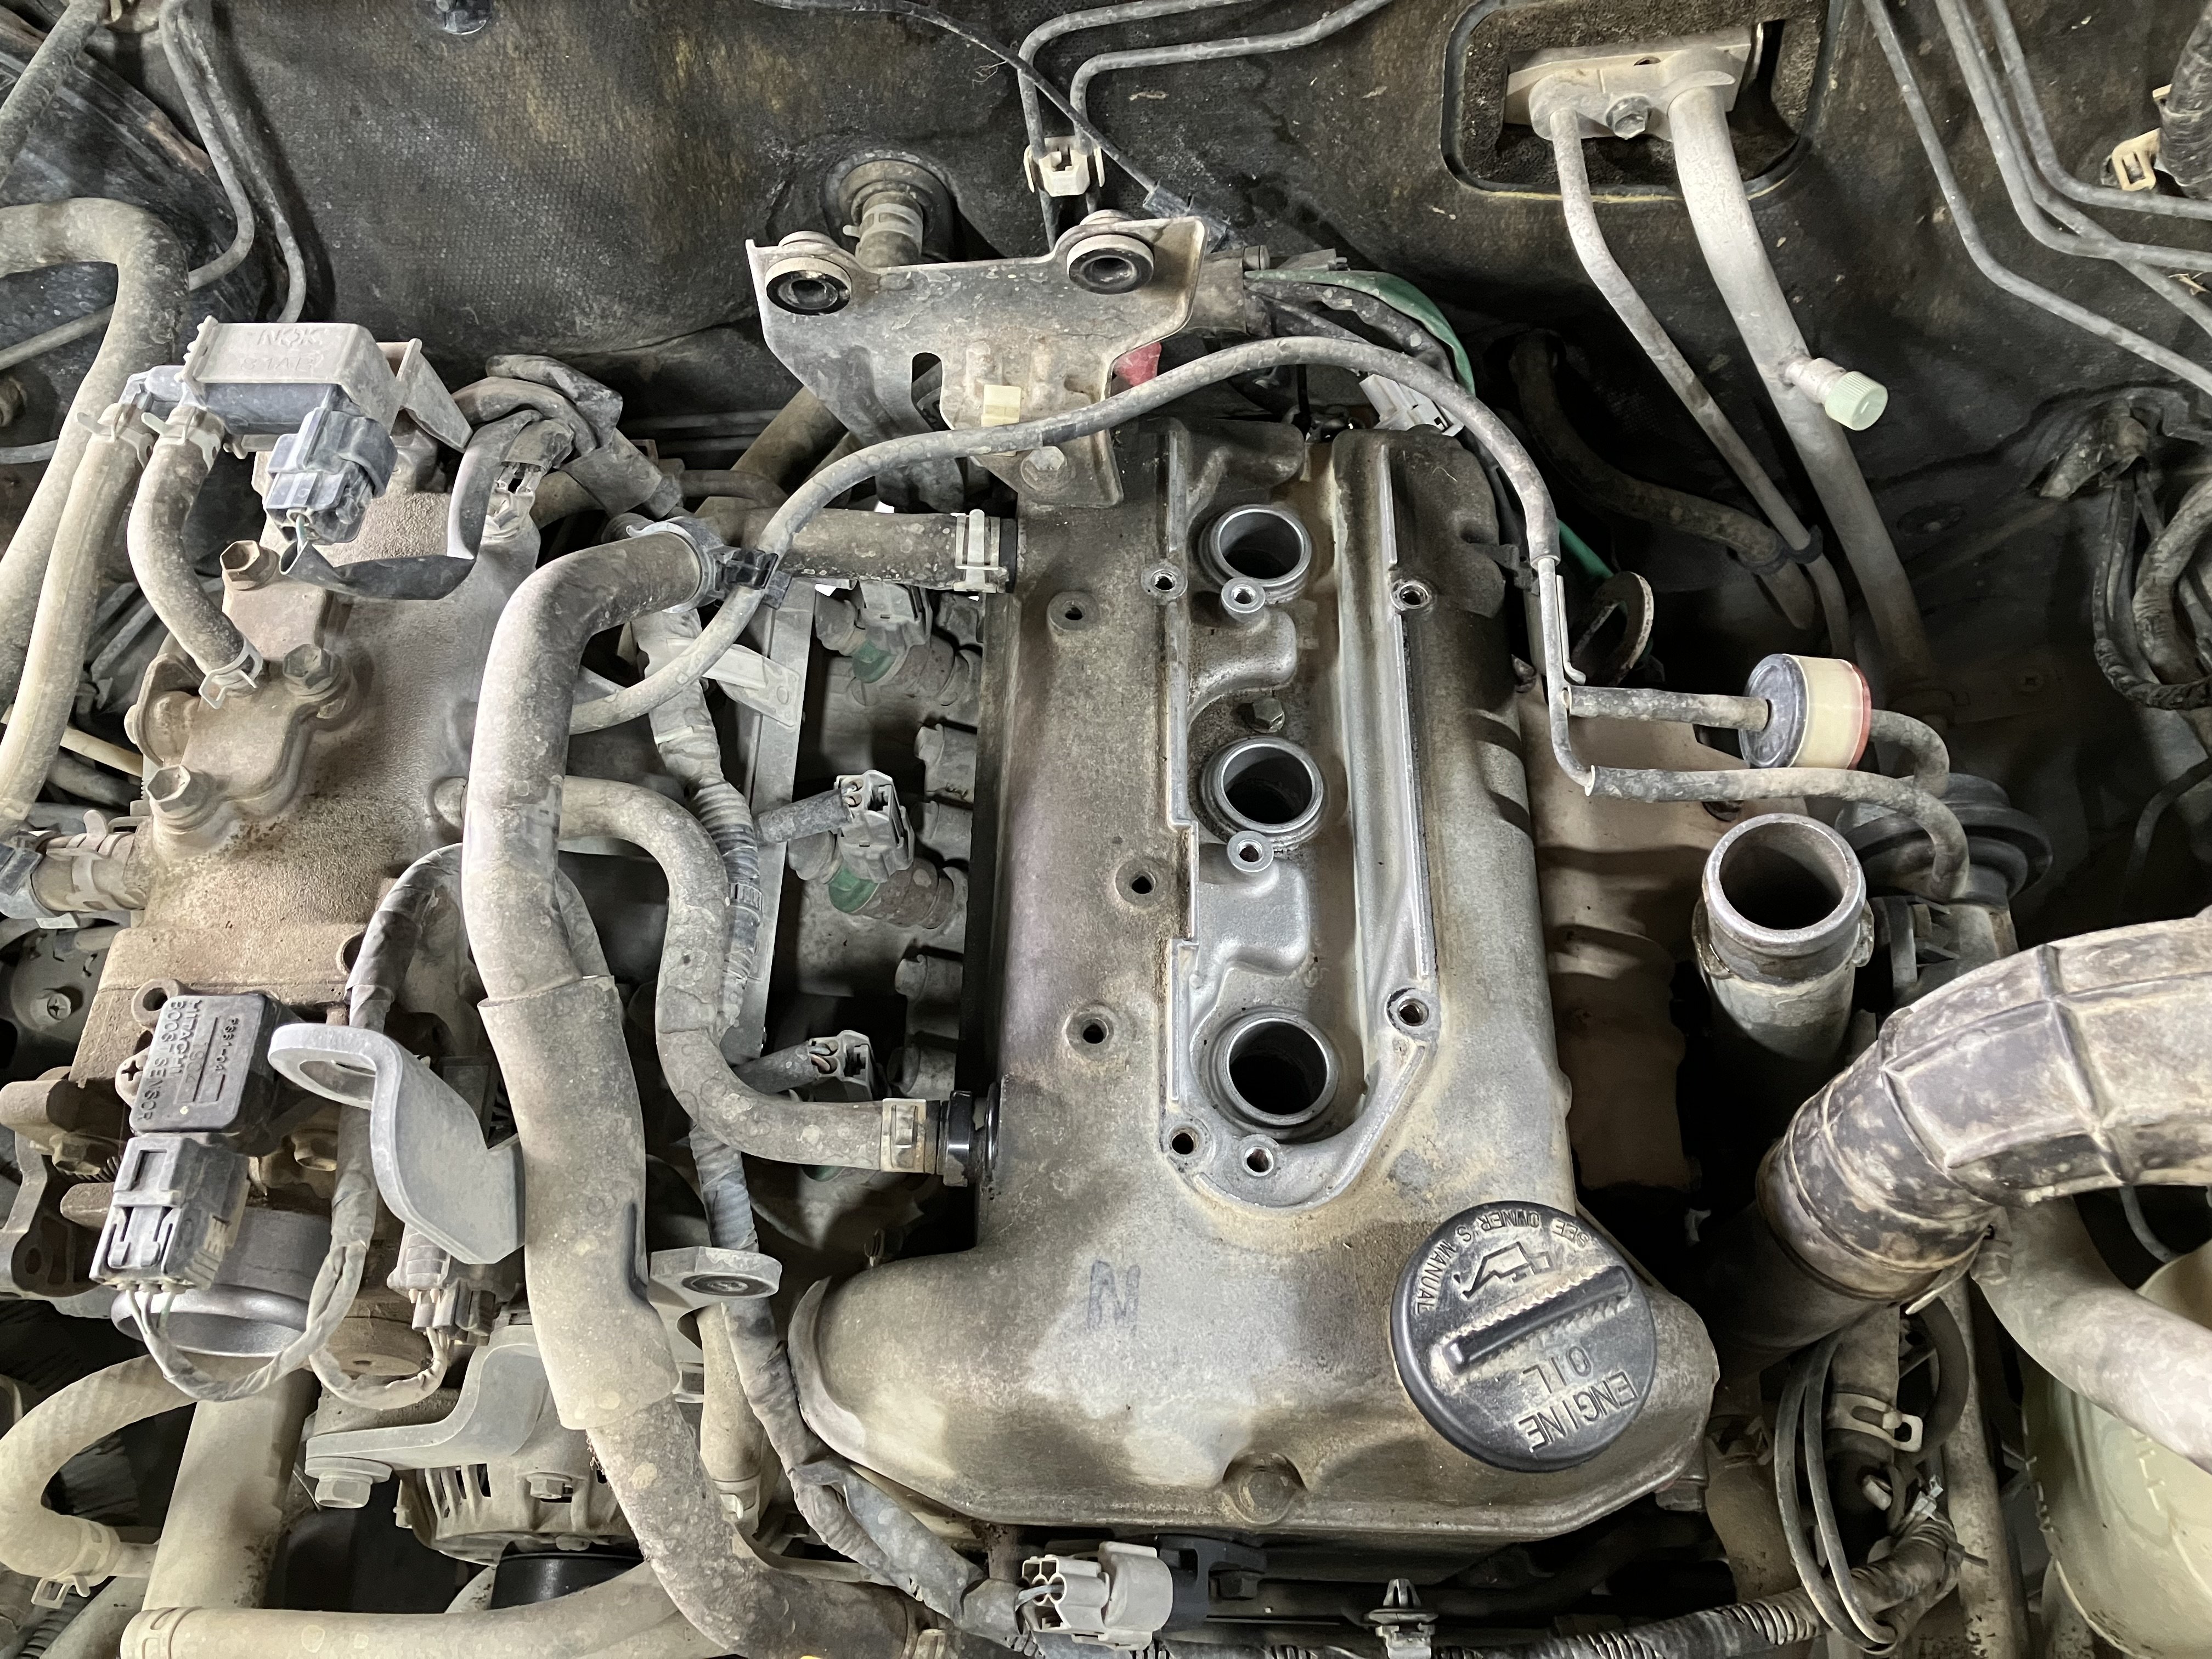
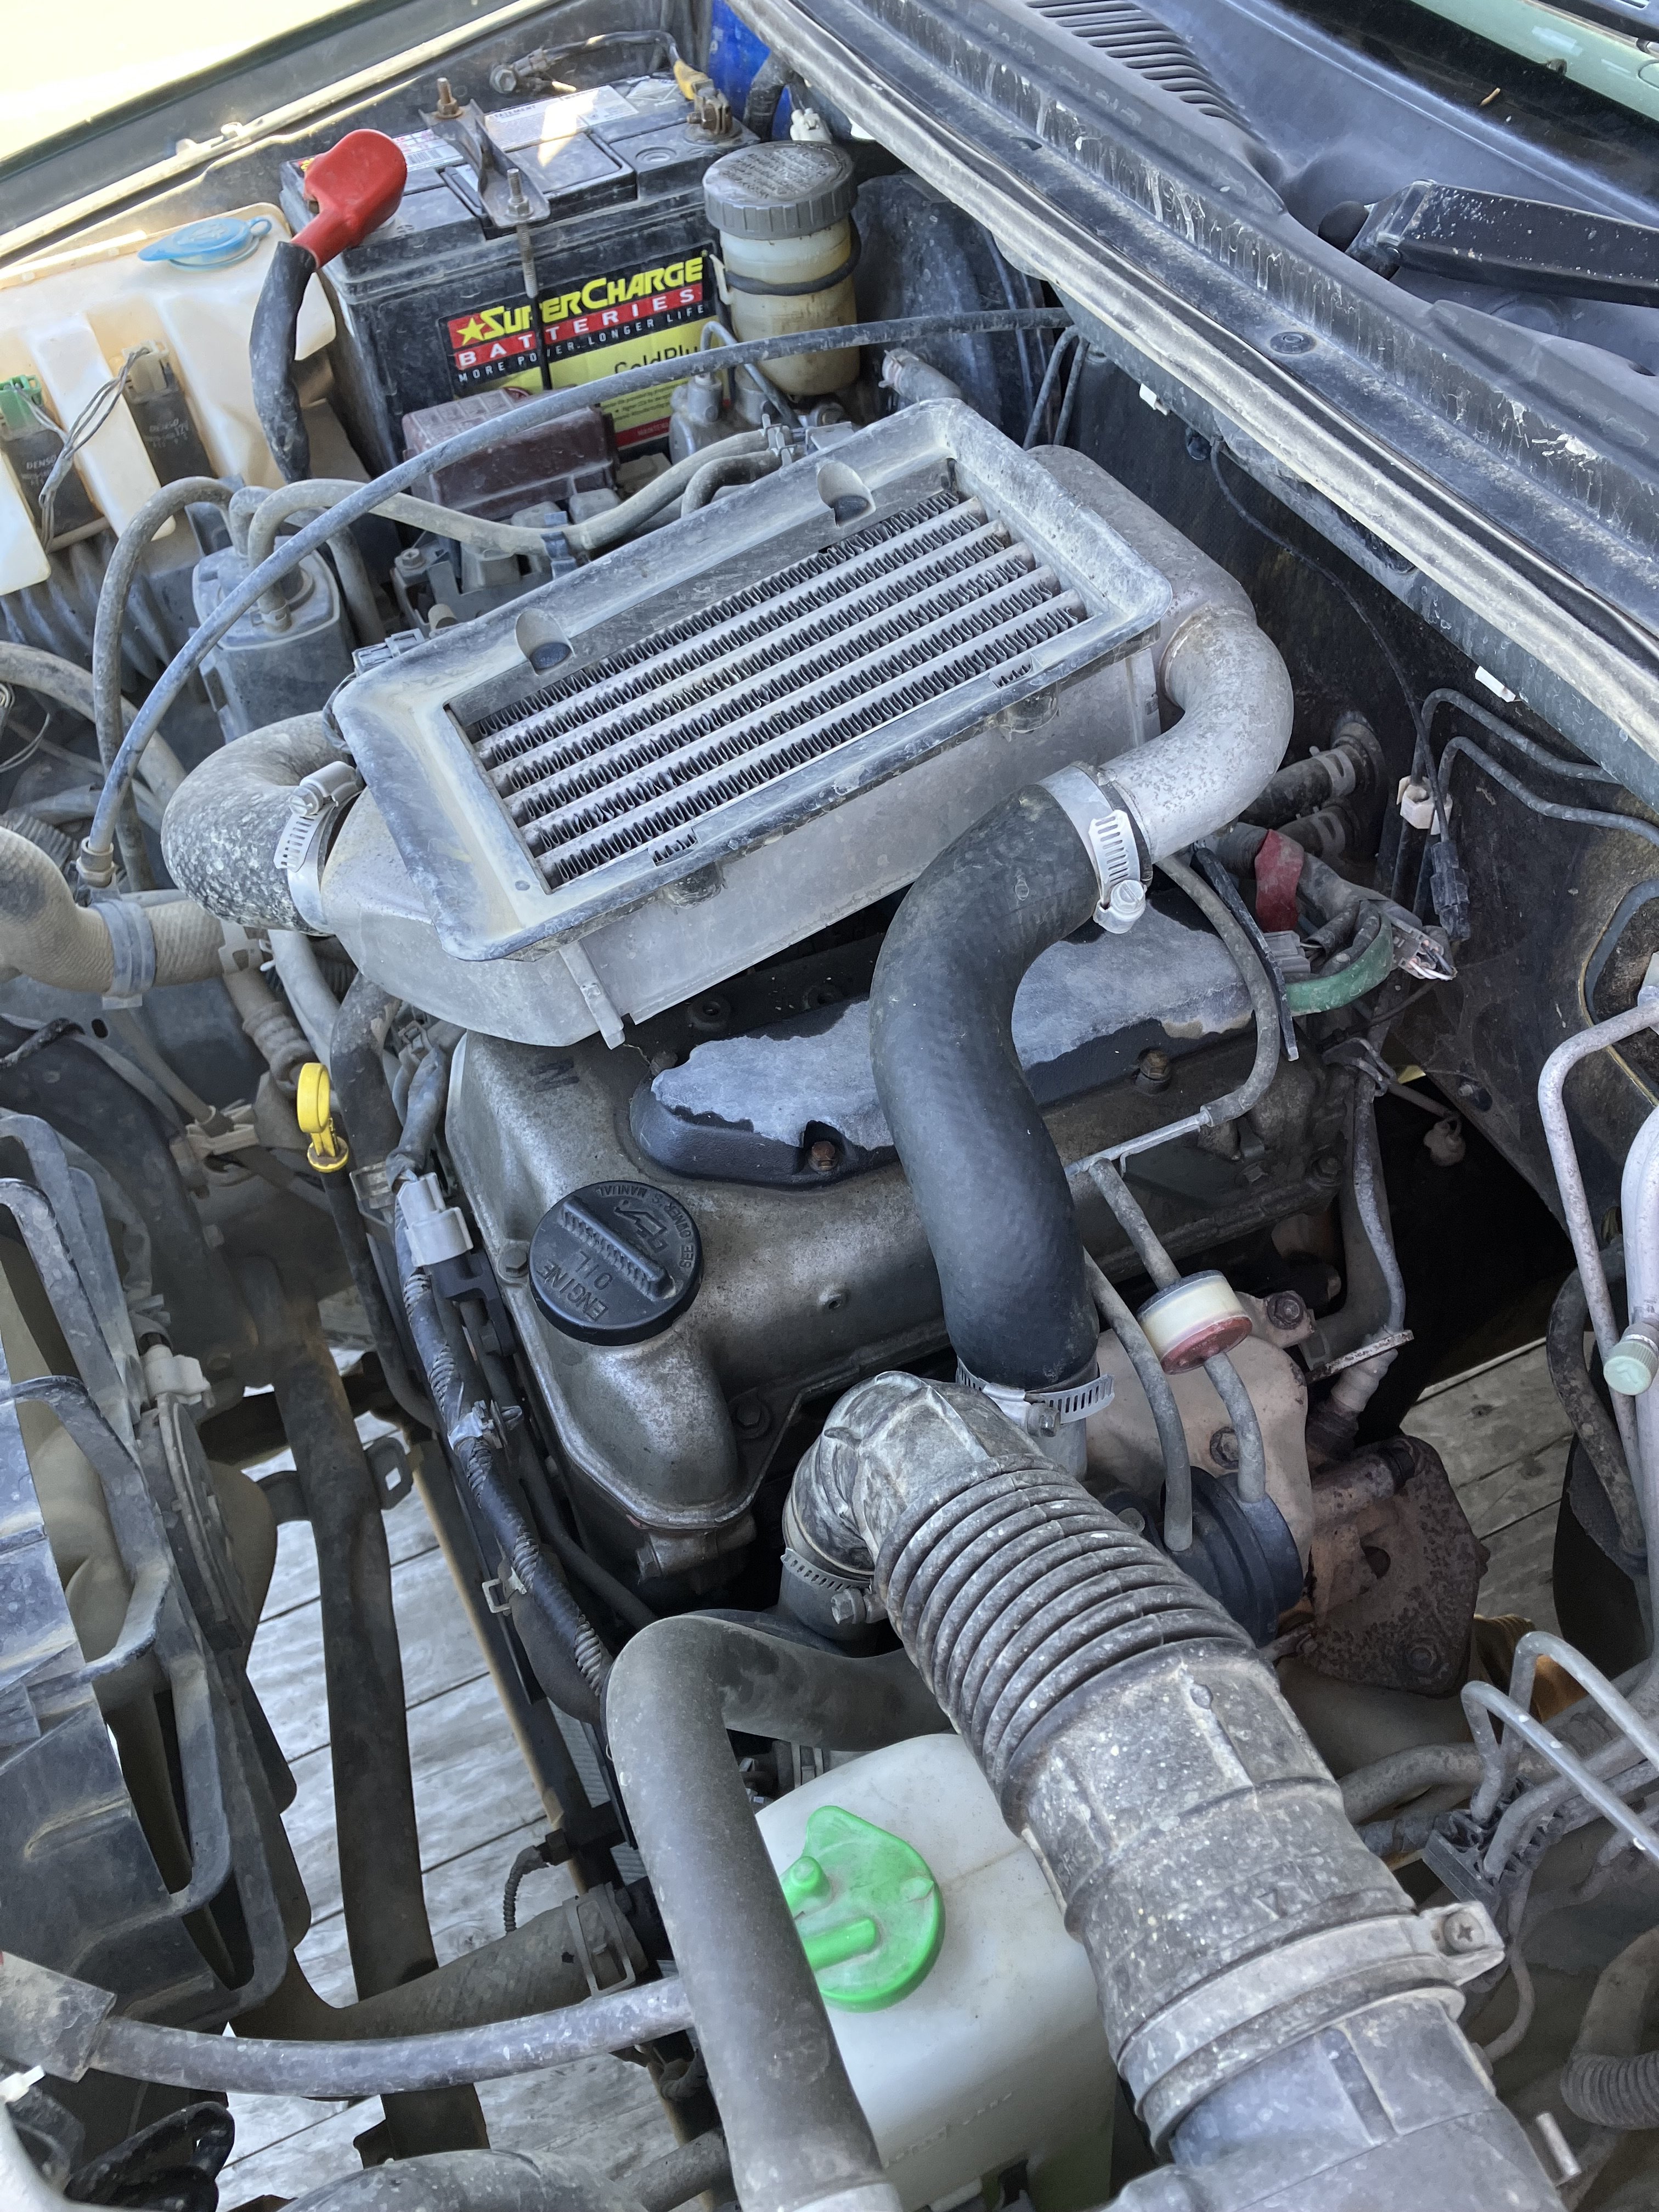
Now it was inside I could muck around with it. First job. I noticed the radio didn't work and the pocket in the second DIN slot wasn't mounted so that should be a quick fix. A loose wire was culprit as to why it wouldn't work. I found two screws to mount the storage pocket properly and reassembled. It's a JDM headunit so only receives one local station and doesn't have bluetooth - but plays CDs okay and also has iPod connectivity via USB so can play Spotify off my iPhone. Second job - while pondering and procrastinating I thought I'd quickly clean up the headlights which were very yellow. Here's the job 50% done for comparison. Last job of the day - why doesn't it start? Intercooler off, coils out, plugs out. Everything is so tiny. Turned it over with plugs out and it was like a water pump - a lot more came out of the bores than I had imagined and I forgot how far it goes under pressure. What's that smell? Petrol. That ain't water. Not sure what was going on but it was a mix with a lot of petrol in it, and it evaporated/flashed off pretty quickly. When I've got it apart I'll clean and check the injectors as well to make sure there isn't a sticky one or some other reason why it may have flooded with petrol. After all that I rewarded myself with a cold beer and thought about what next. Engine out over the holiday break (if not before) and see what is needed. Parts will need to come from Japan but they appear to be readily available. It can sit and wait for now.
2 points
-
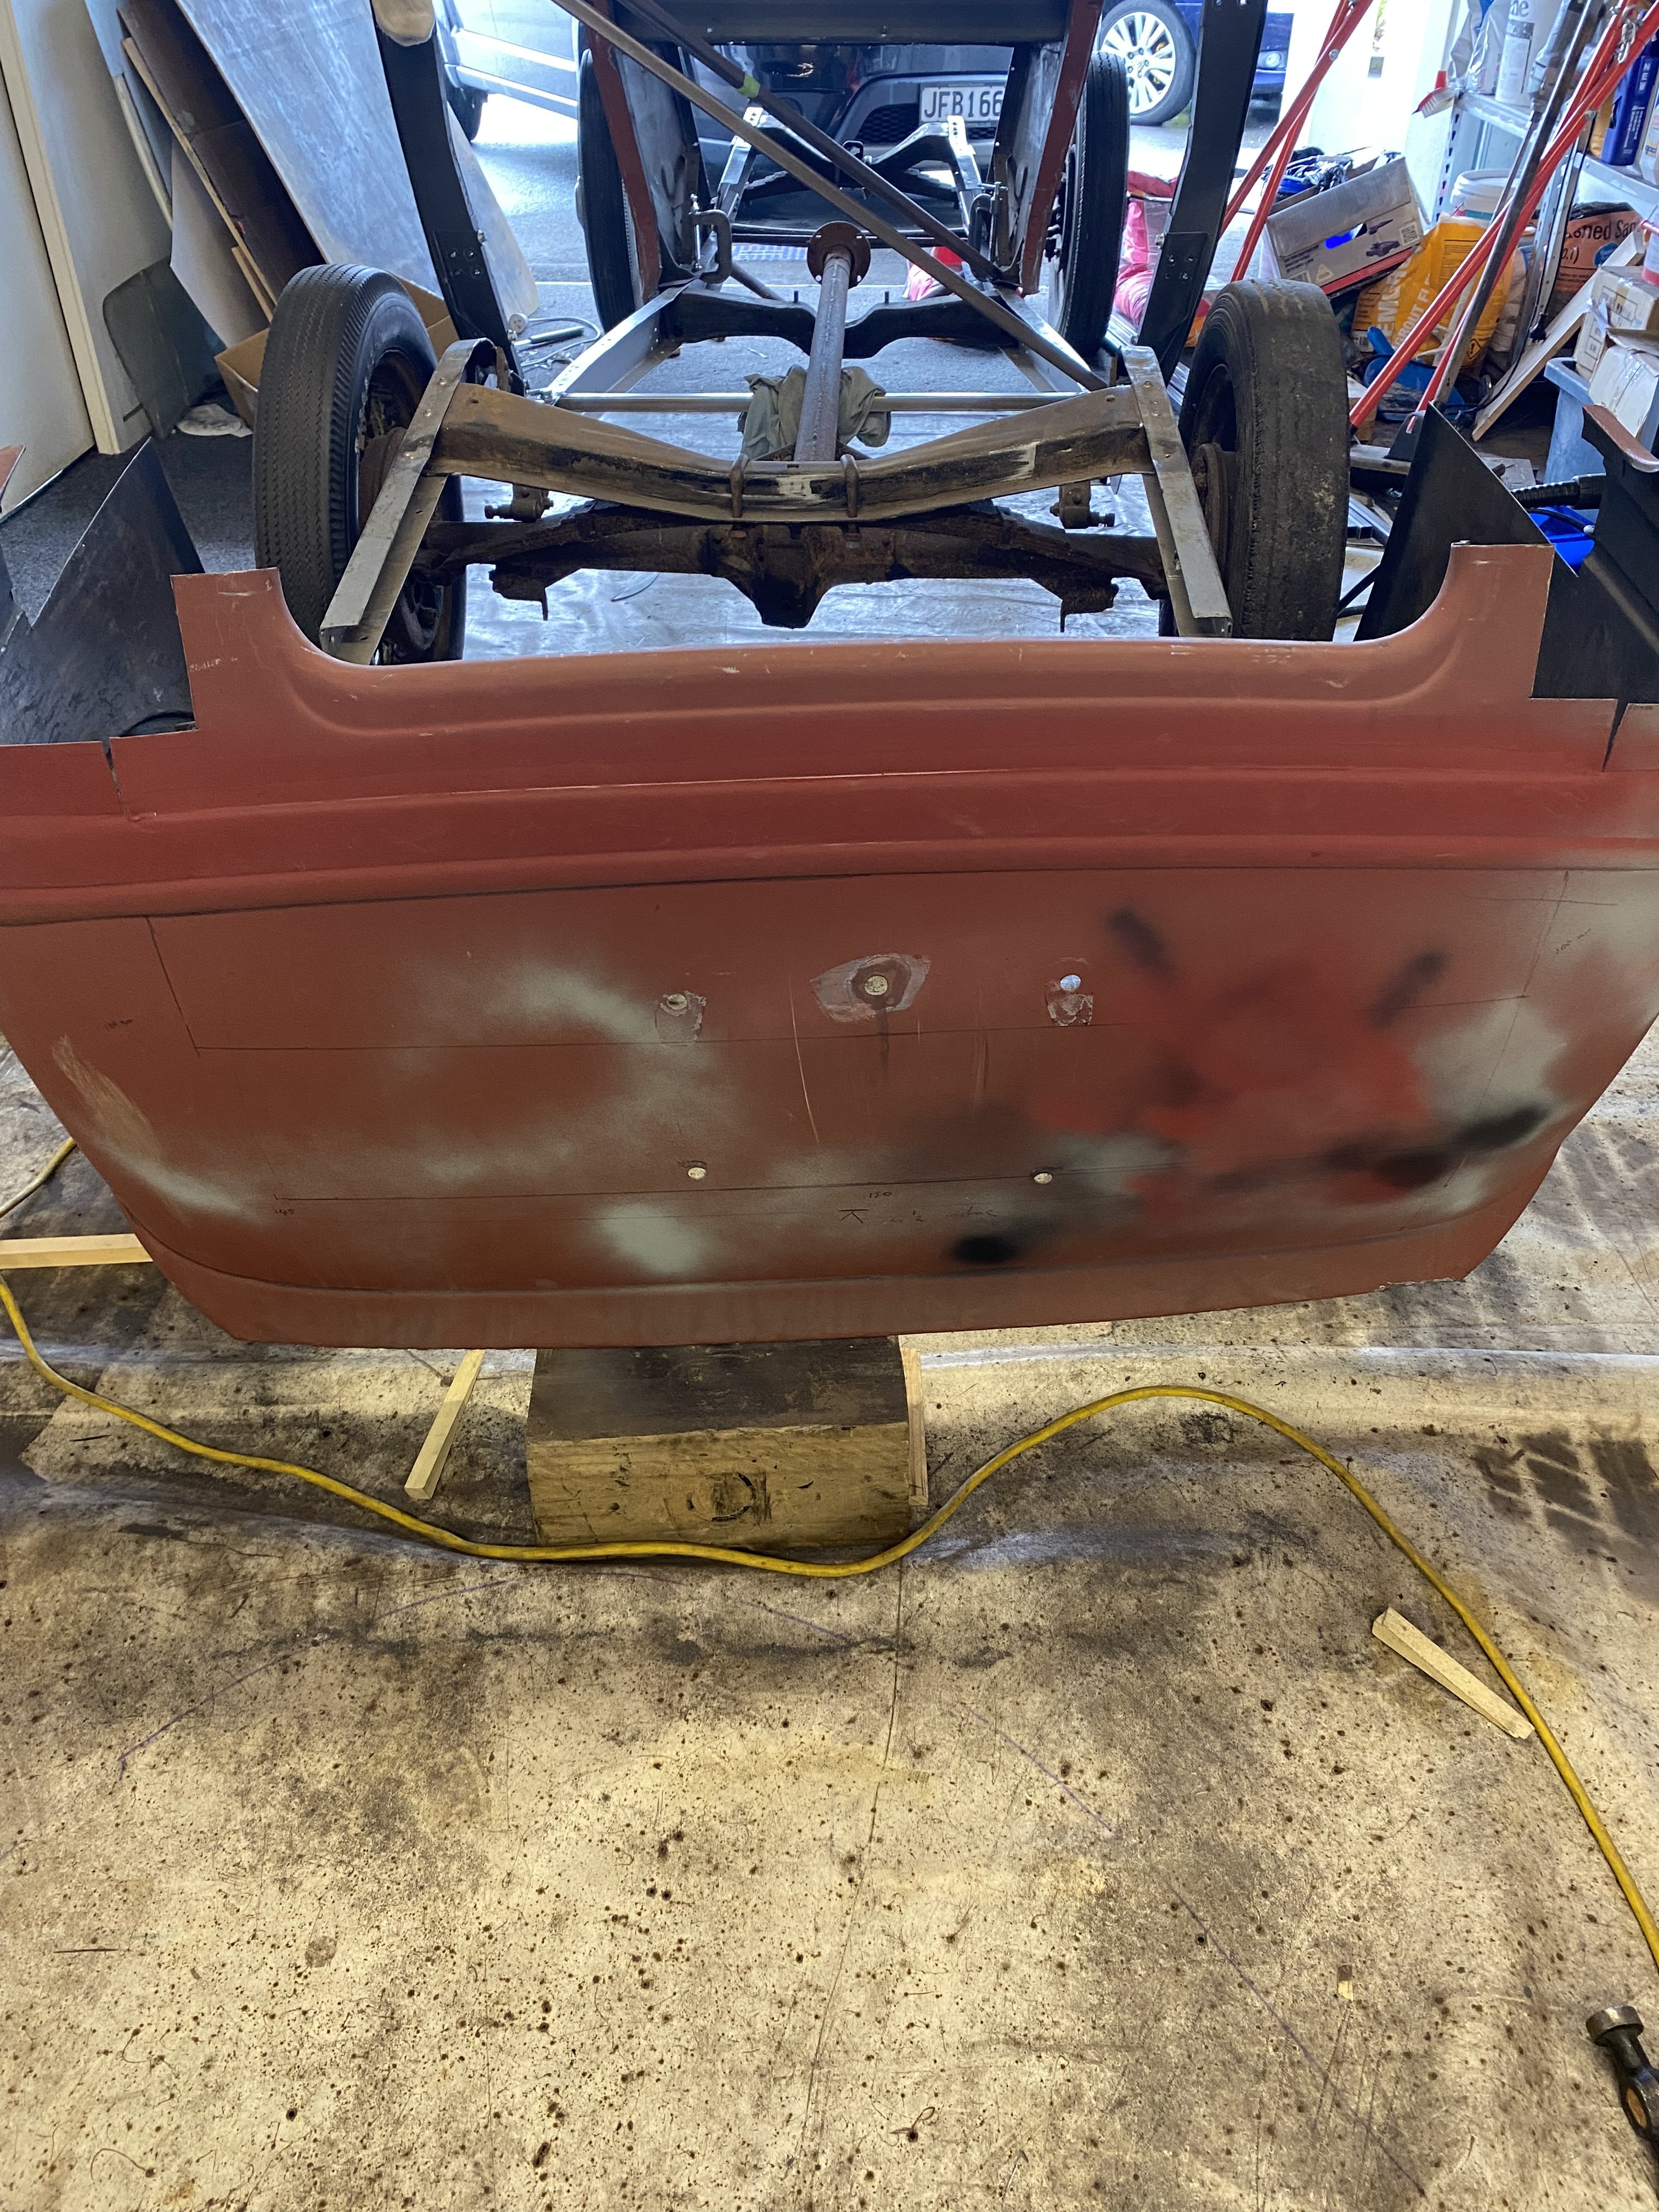
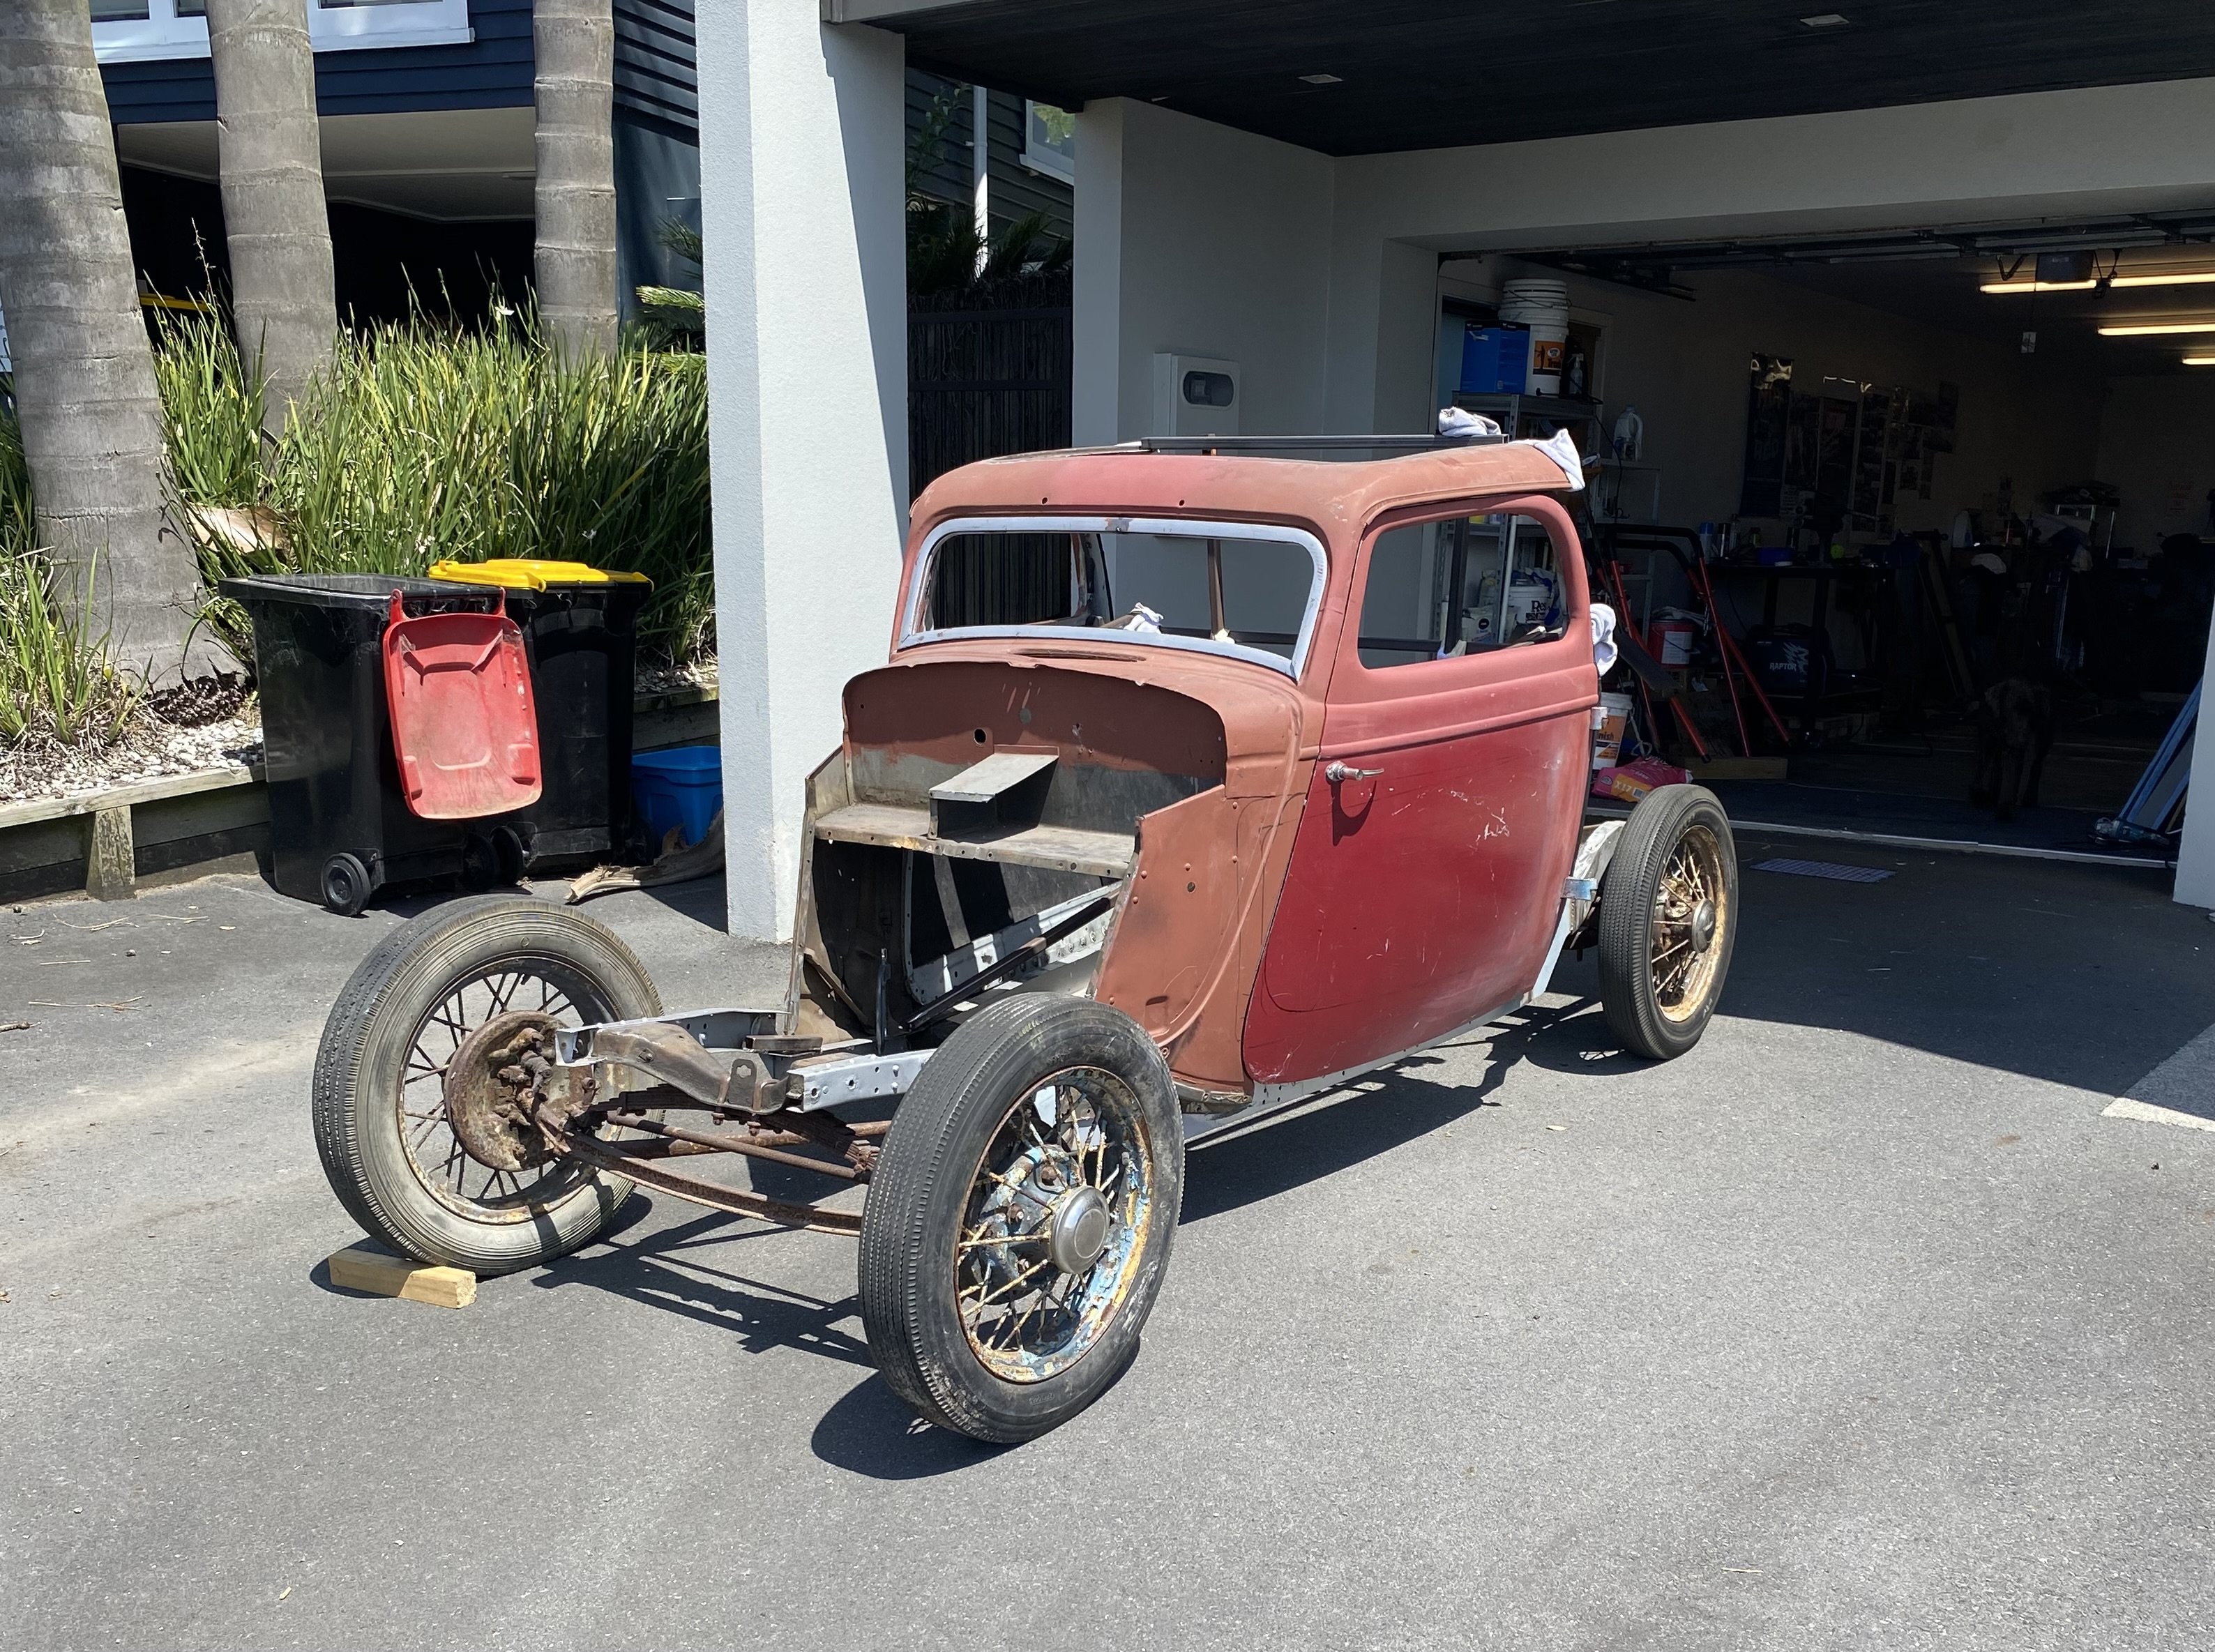
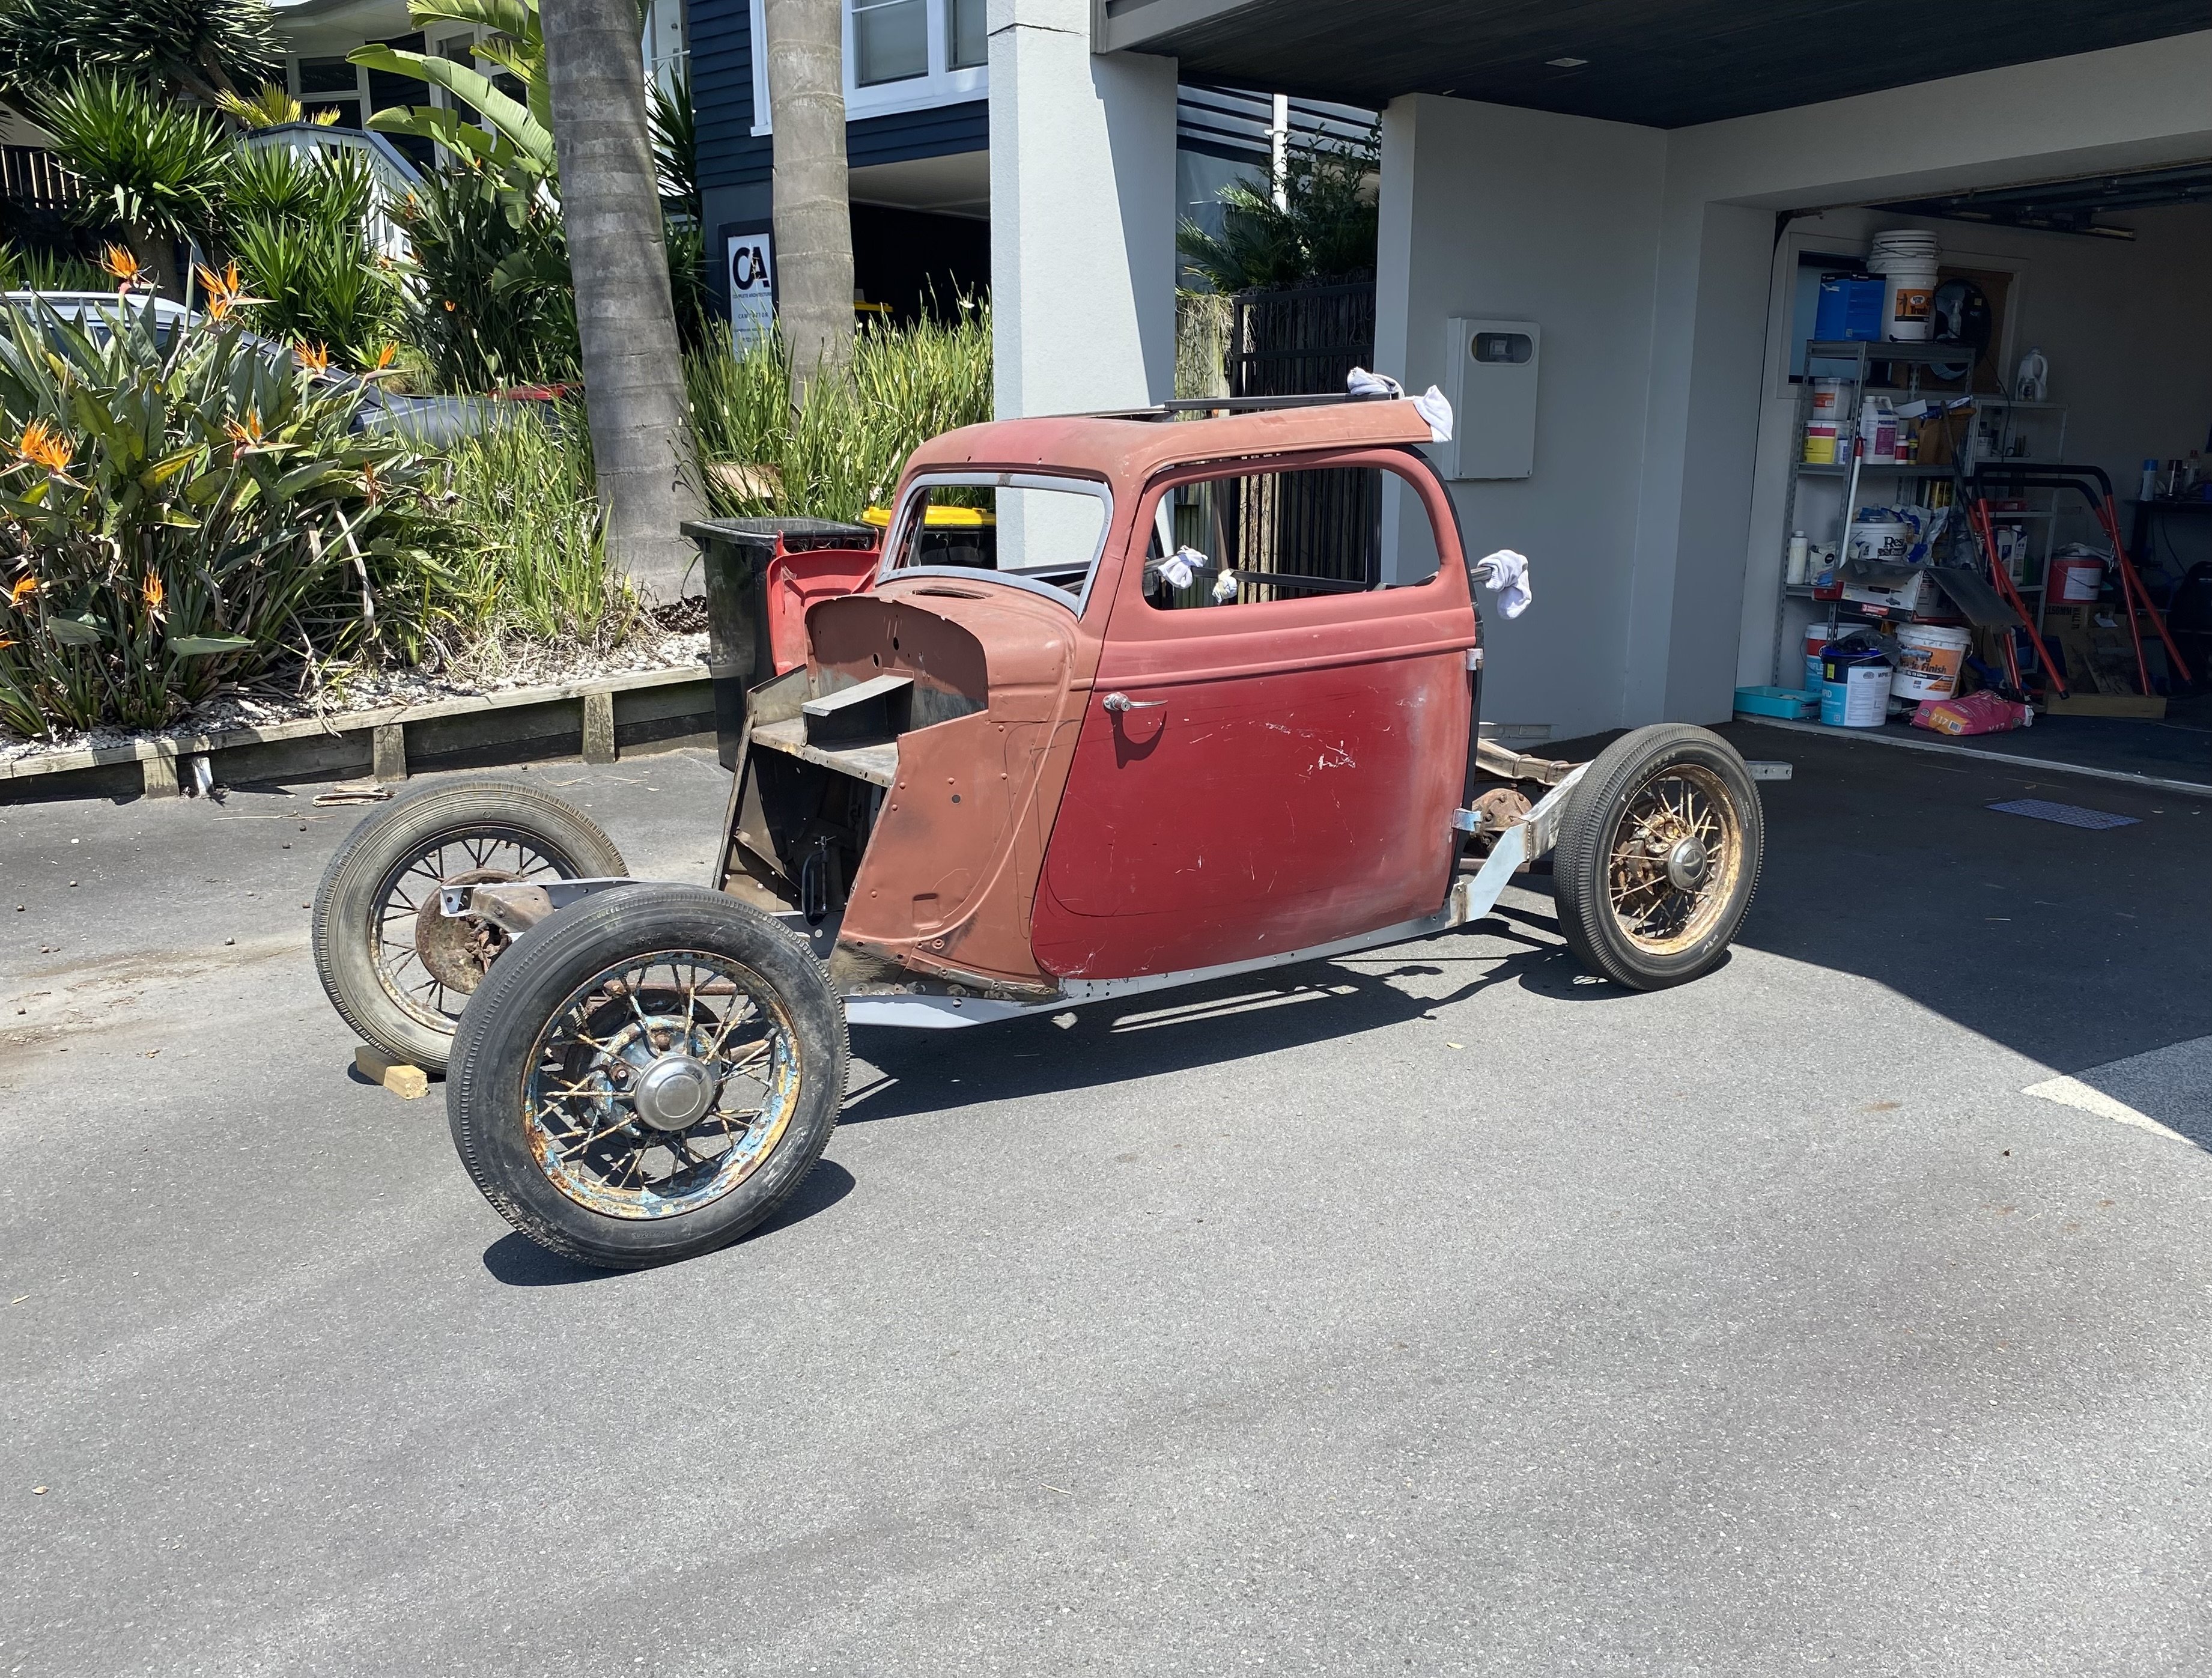
4 years later..... welcome home old friend Those years in a shed haven't been kind, I have some work to do.
2 points
-
2 points
-
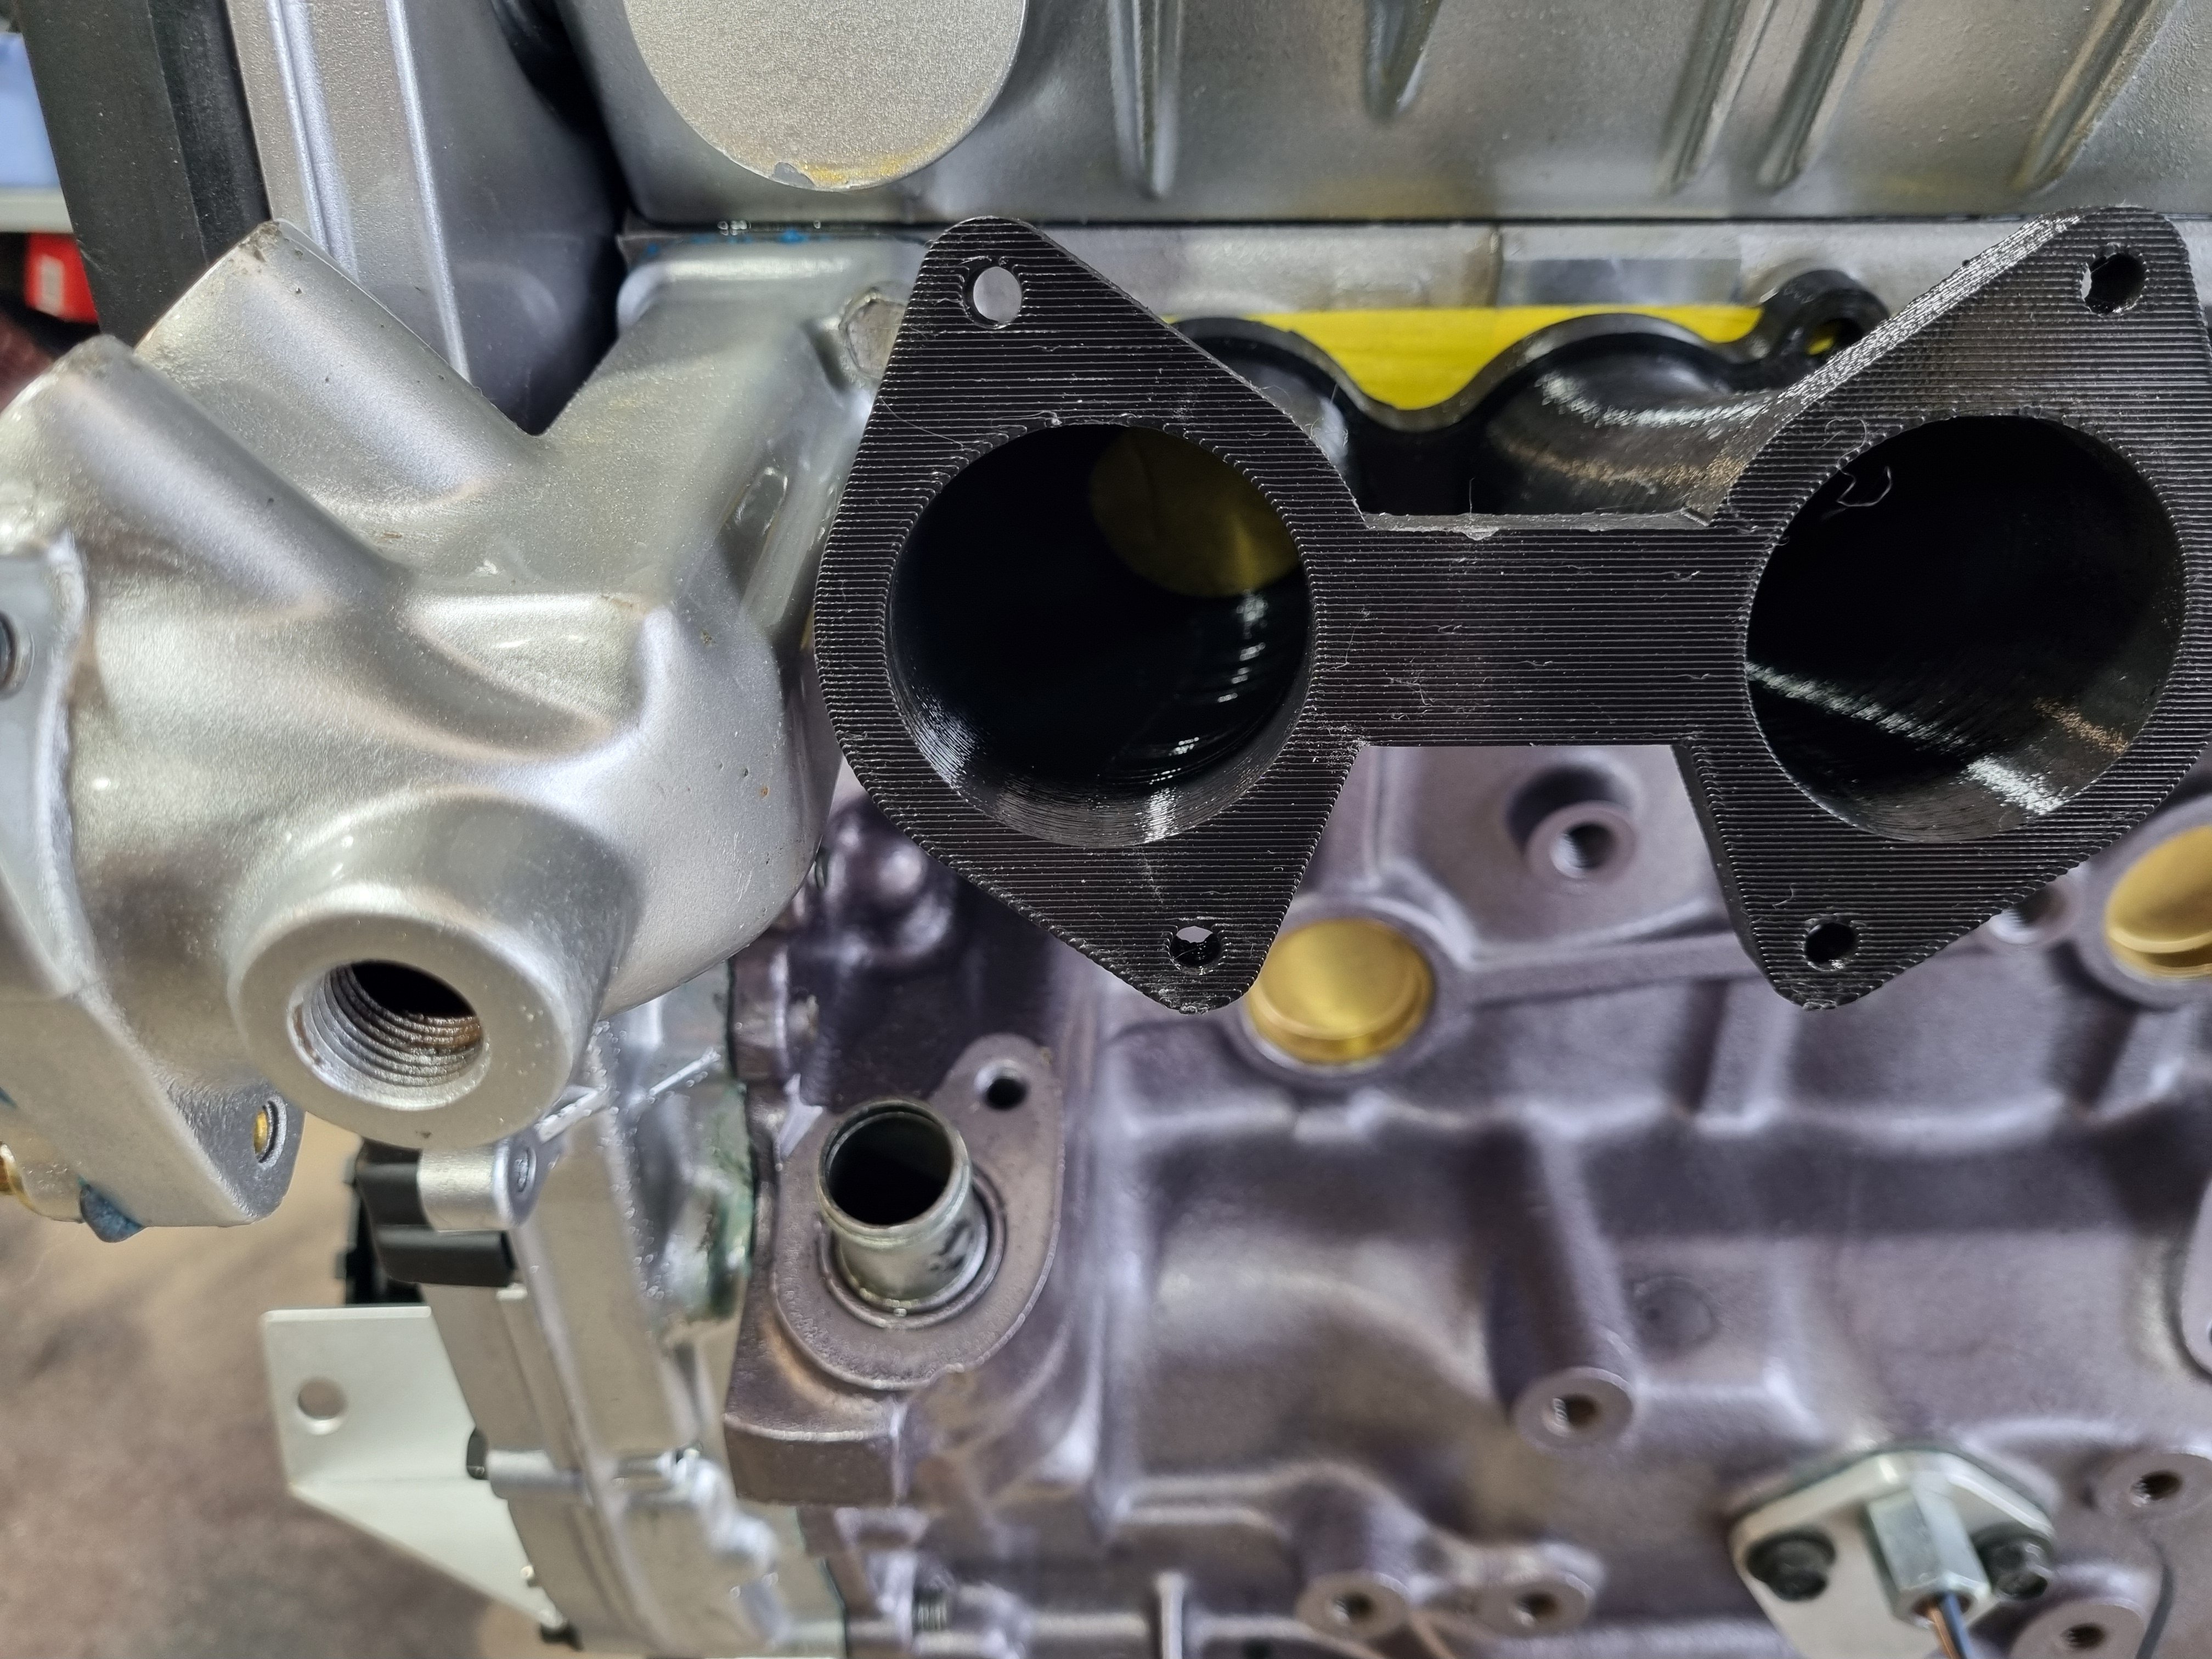
Printed this at work. It fits pretty well considering the sizing was a complete guess. I might angle the throttles up higher a bit? I need to guess what some of the clearances might be
2 points
-
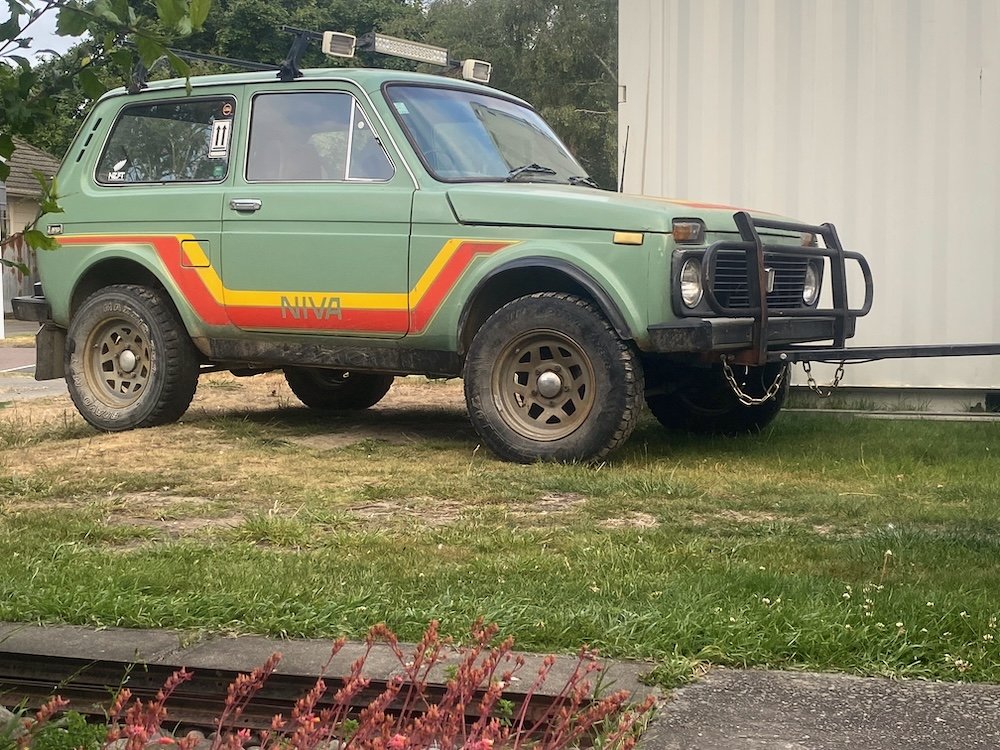
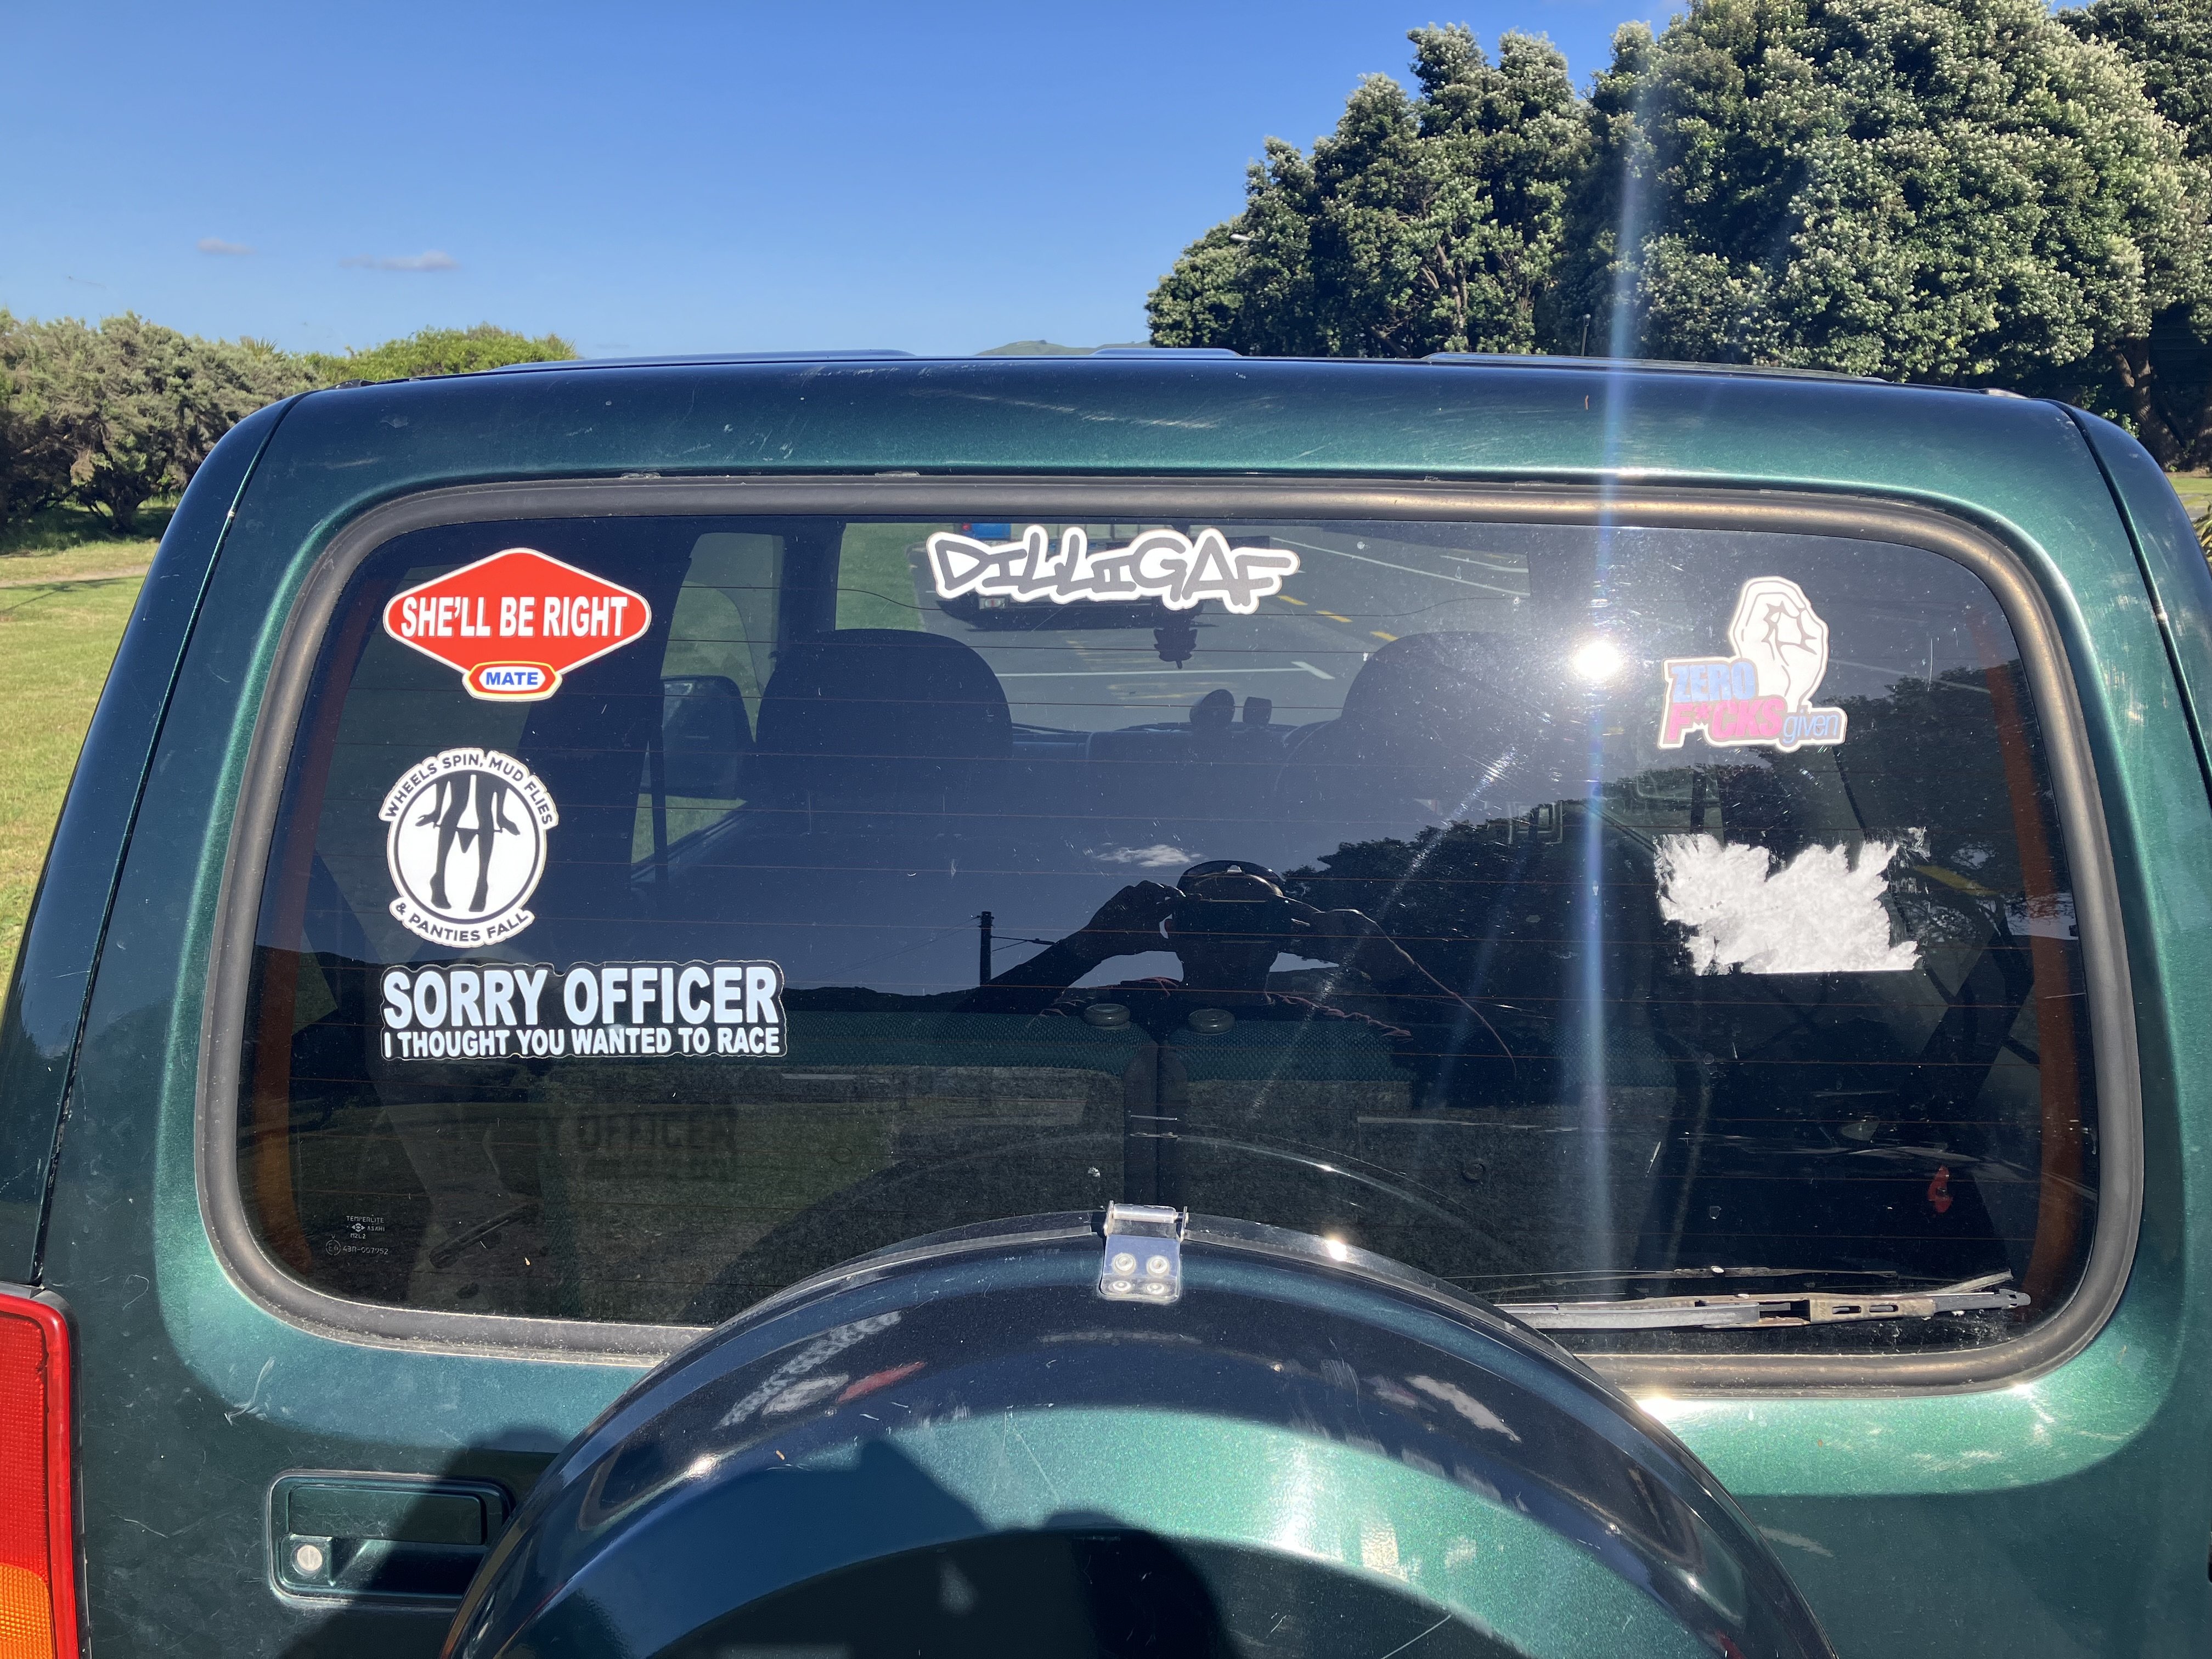
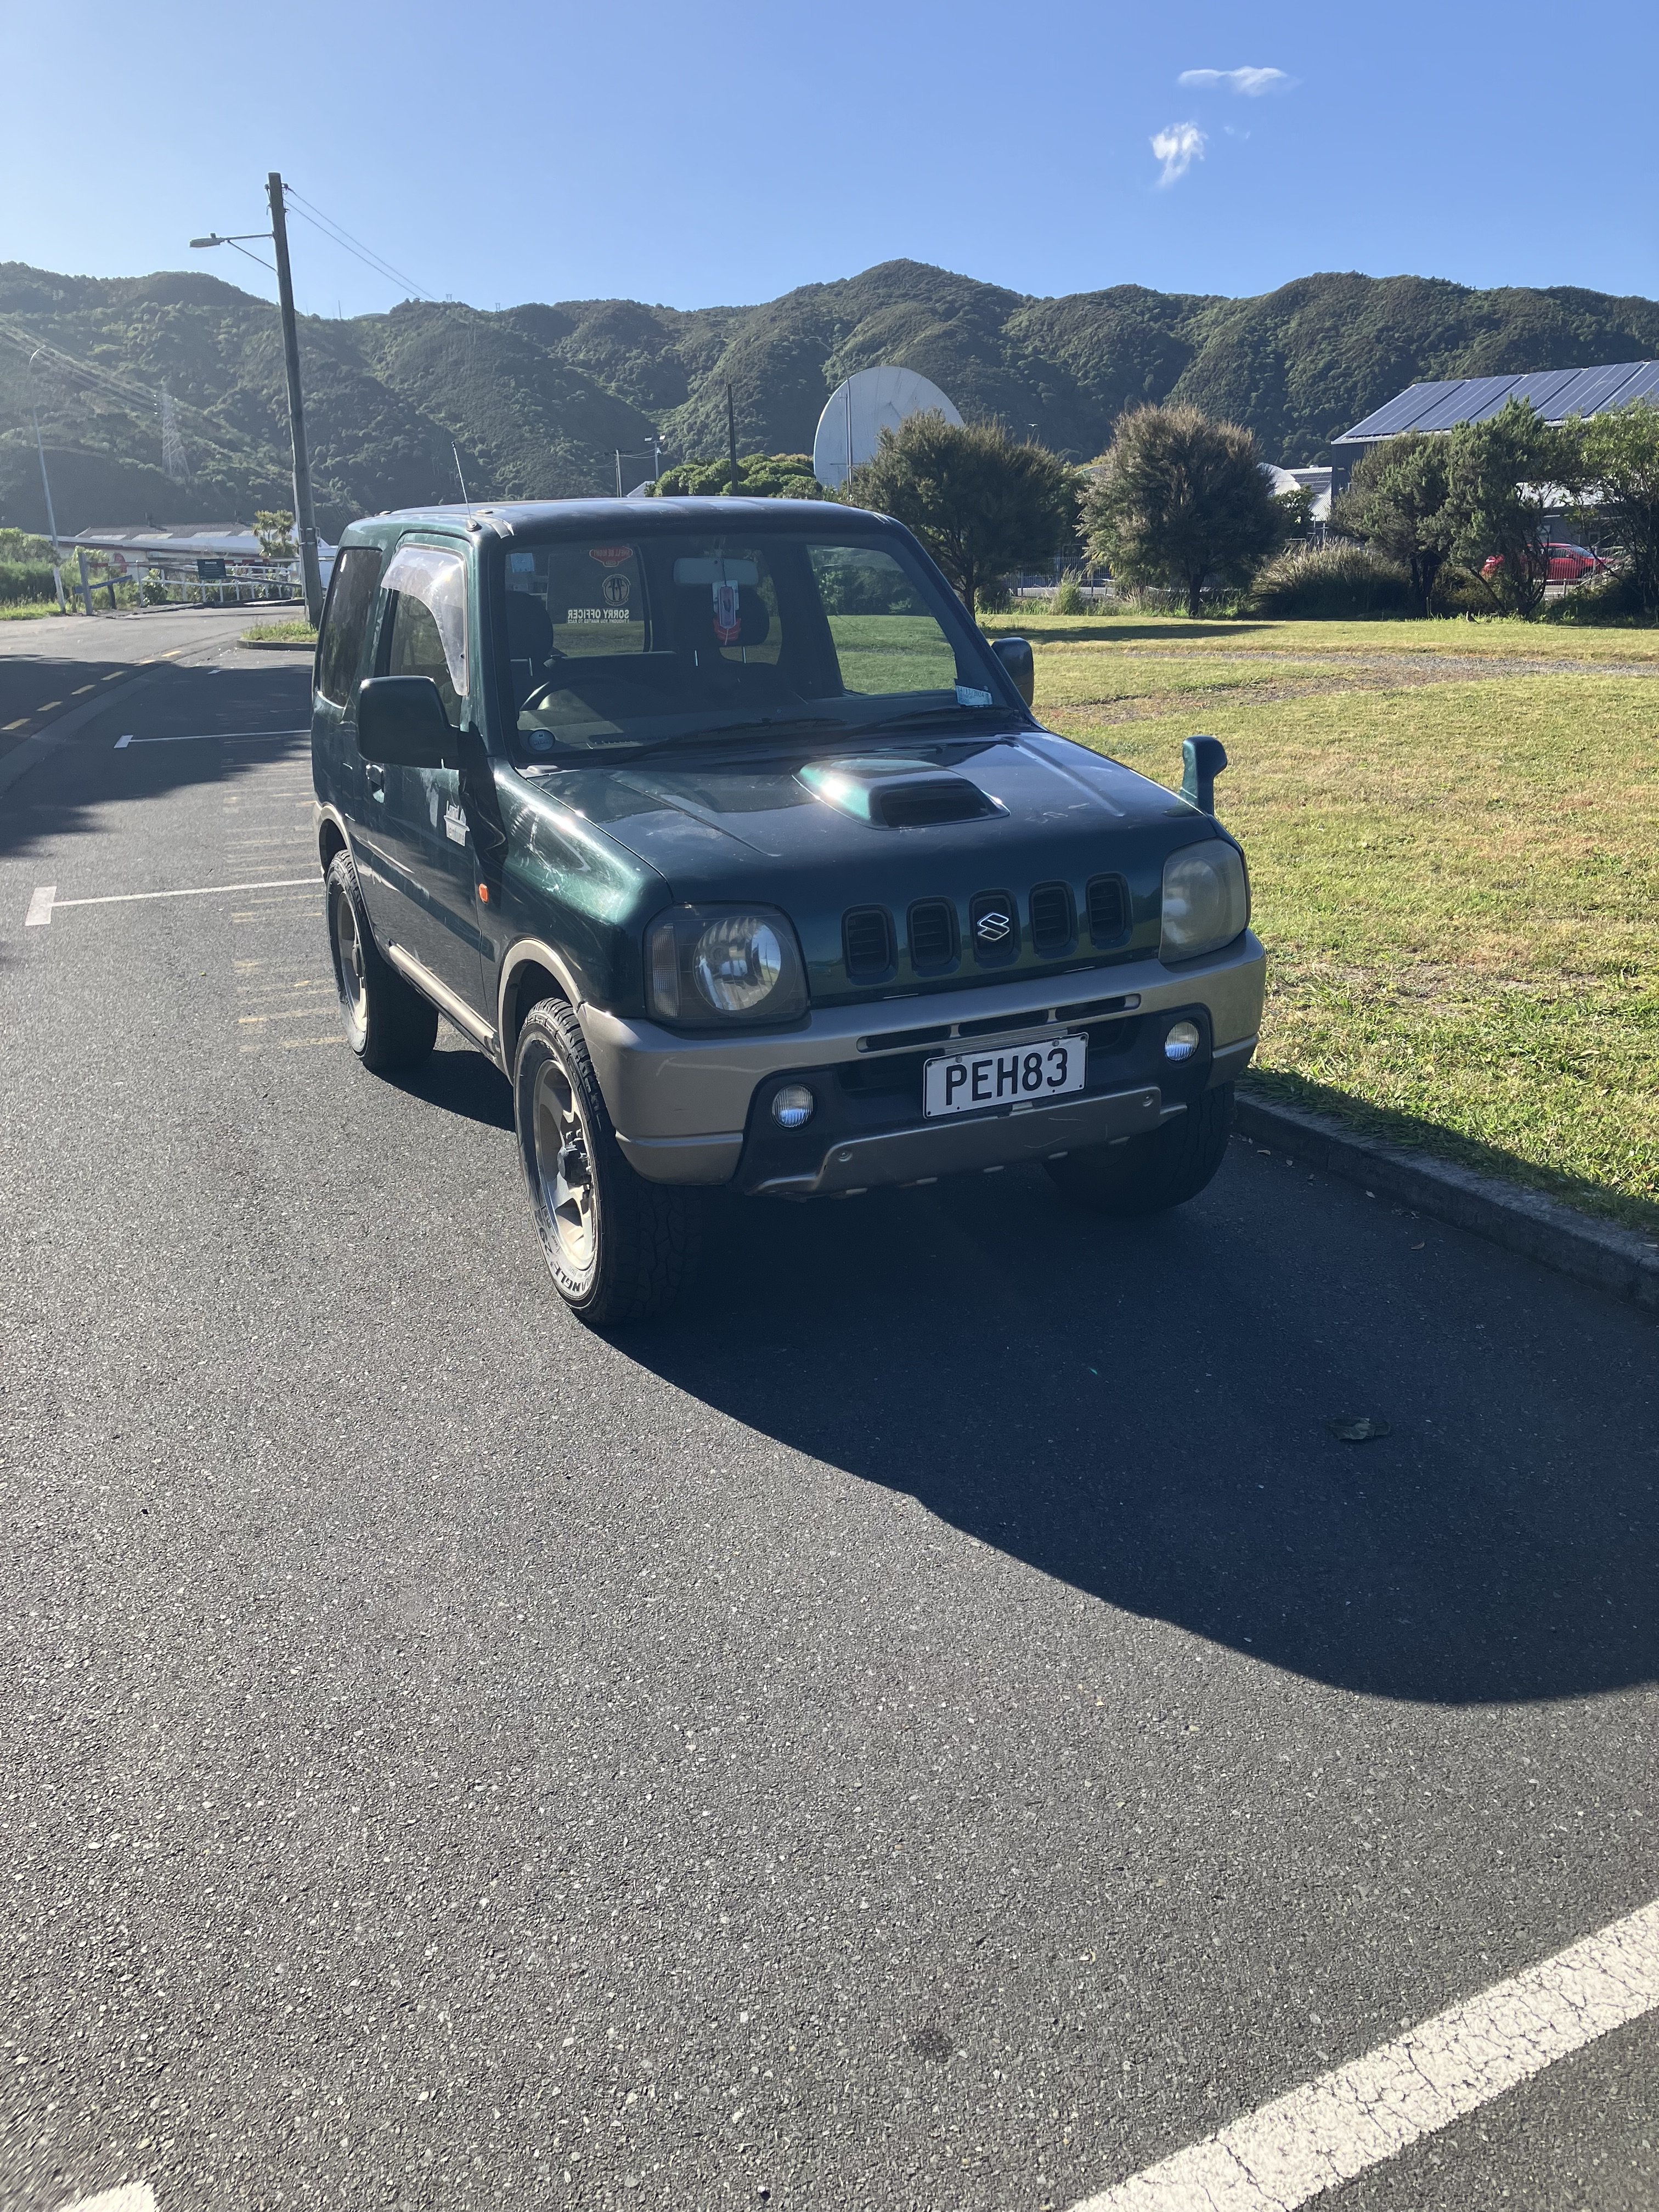
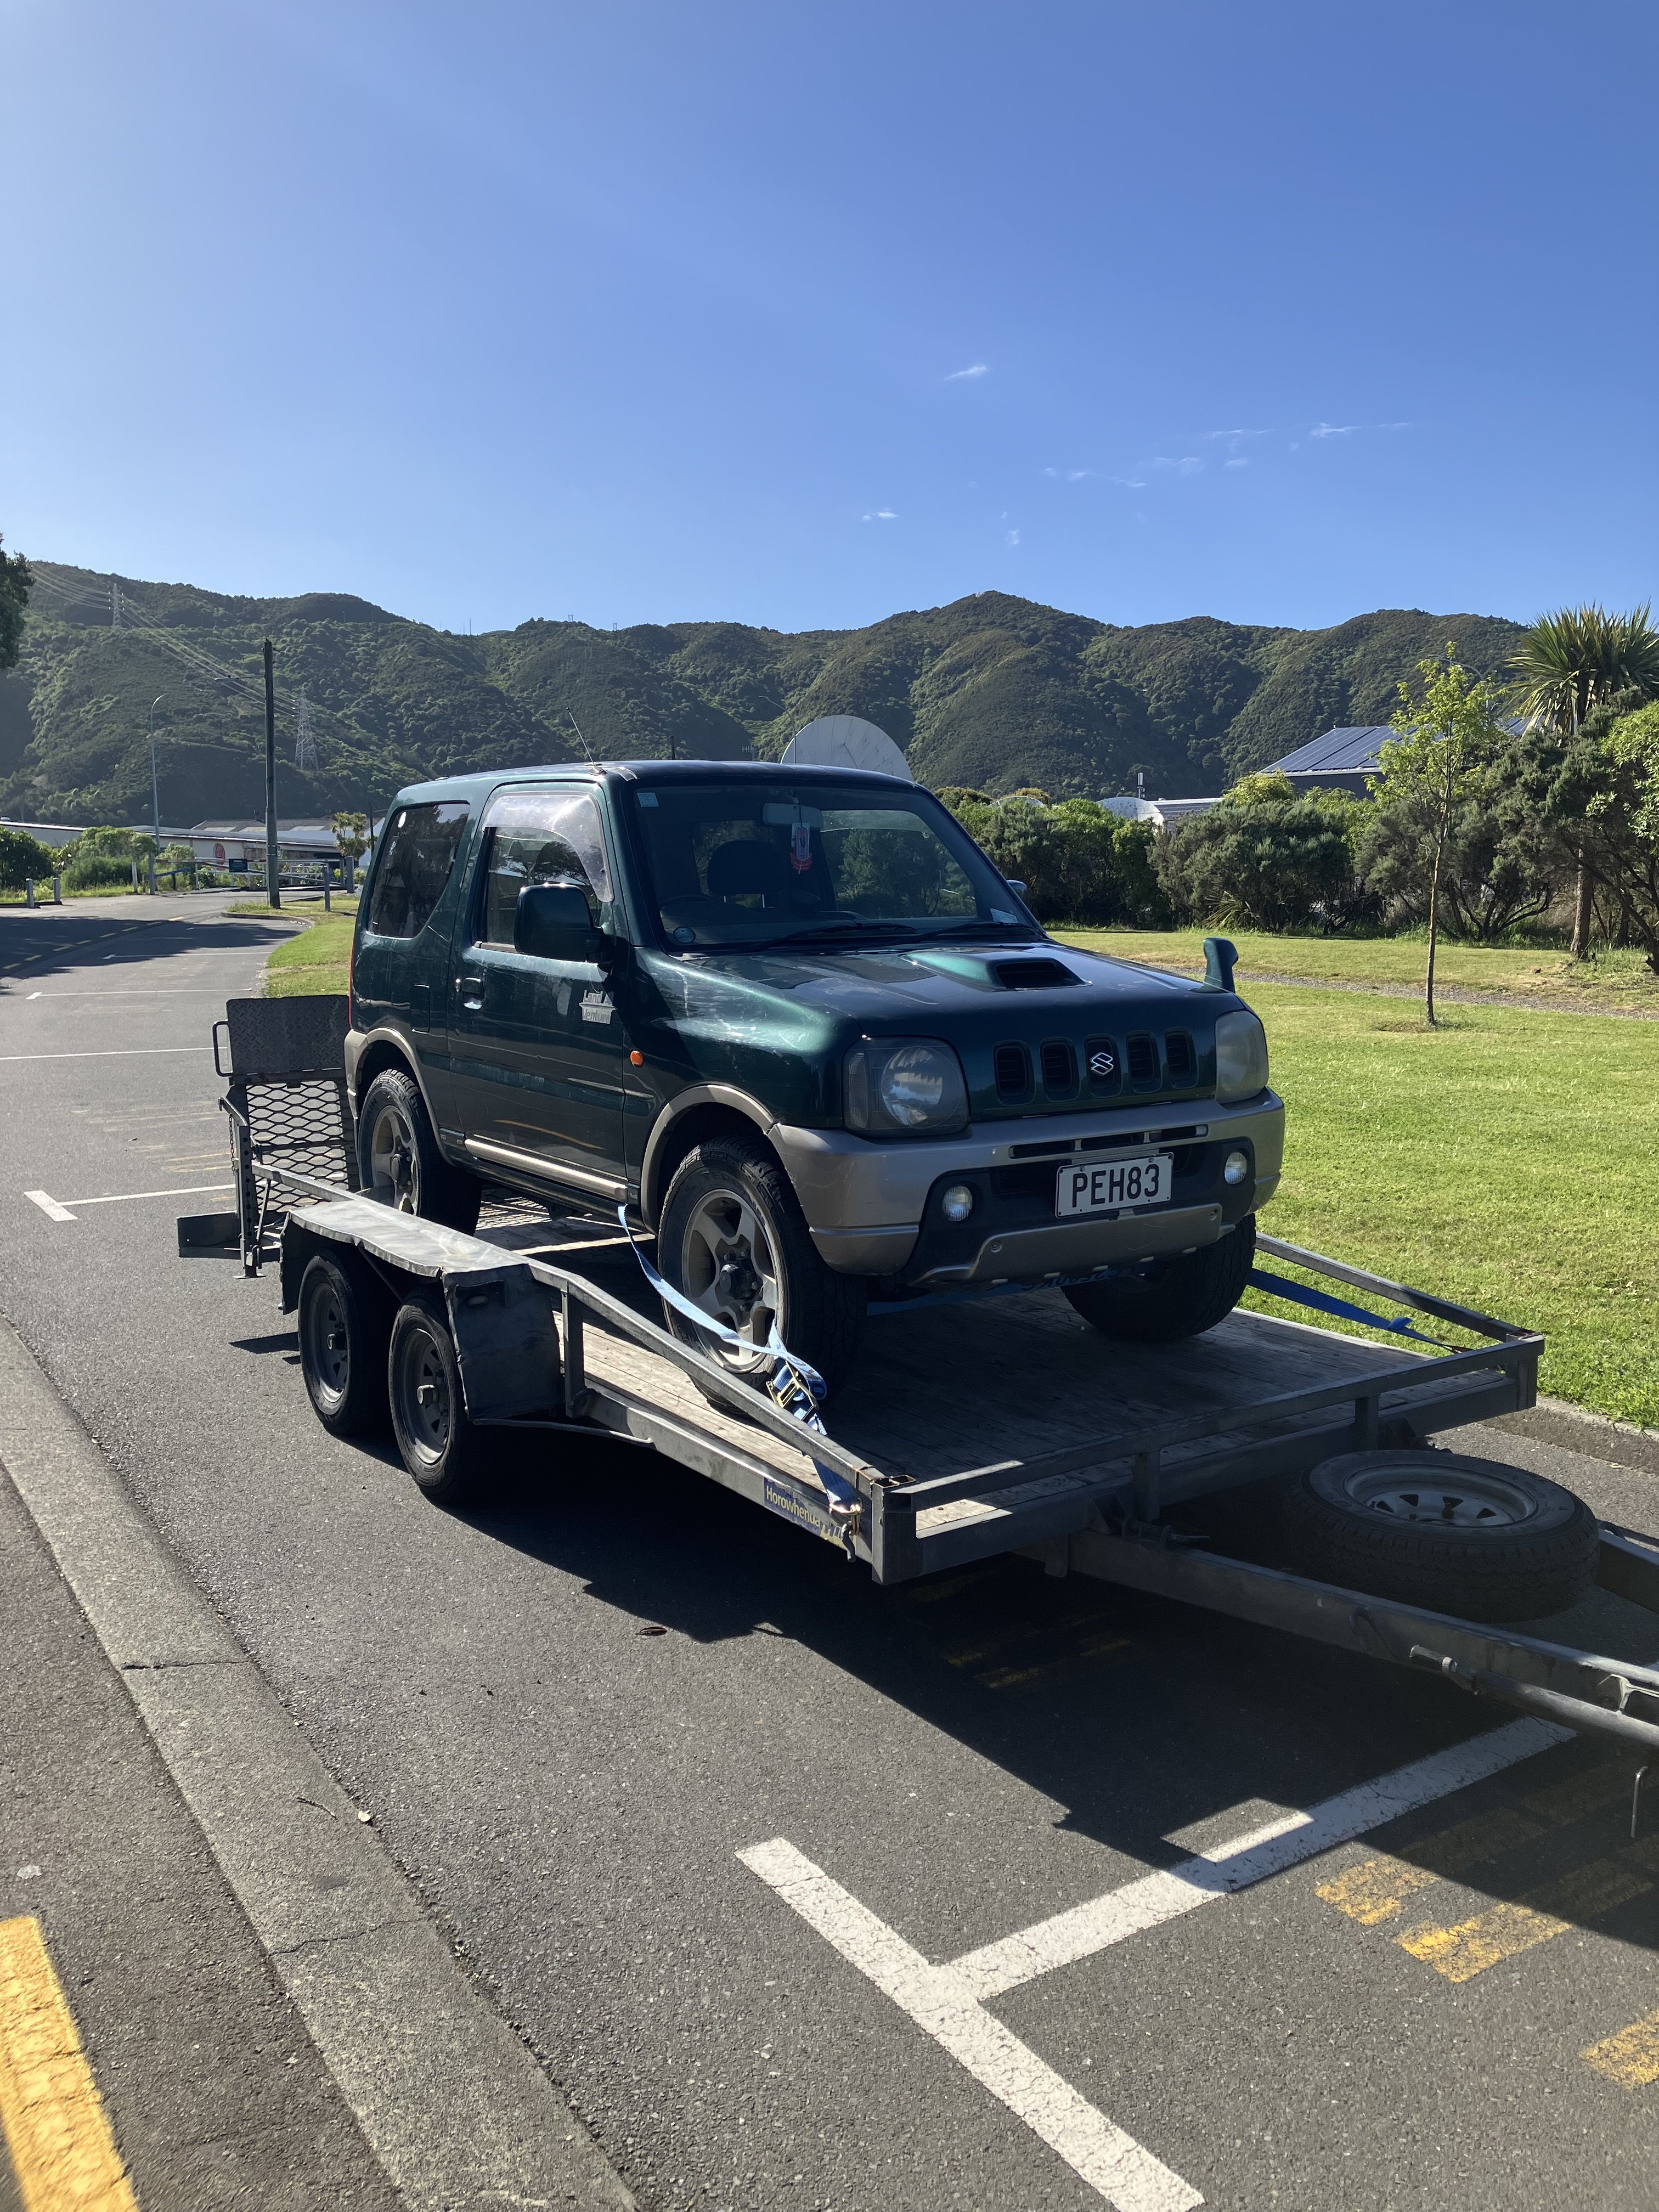
So after many years of wanting a kei car of some sort and also a Jimny, and much exchange of banter and links between myself and my old fleet manager over many years about such vehicles, I became aware of a very cheap kei spec Jimny on Trademe. I thought I'd keep an eye on the auction and see how it went - I didn't need it, but I would be interested for the right price. Anyway, it was pretty rough - seller was pretty honest about the state of it - blown head gasket, cracked windscreen, and it was not in a condition to win any concours events. It was in the top of the South Island so no way I could check it out, but it only came into the country in 2022, and had current reg and wof so I figured it couldn't be too bad. I managed to win the auction for a very sharp price (after a painful '$10 increment every two minutes' bidding war with another bidder). A price sharp enough to justify fixing it or even throwing it in the bin if it was no good. The seller was a GC and managed to hook me up with his mate who was coming over to Wellington and could bring it over on the ferry for me on a trailer. First impressions - pretty rough, the interior was disgusting but overall a solid car. It was definitely BHG with water and clouds coming out of the exhaust so it got driven all of 10 metres onto the trailer. Everything about it is so tiny, especially the engine - a baby 3 cylinder 660cc turbo K6A. According to the internet they produce 47kW so this has now probably replaced my white Viva as being the least powerful car in the fleet. Homeward bound to see what kind of junk I'd managed to buy. Everything needed a decent clean and going over to understand how good or bad it really was. Oh yeah, it also had three different air fresheners hanging from the mirror and a collection of tasteless stickers on the rear winder.
1 point
-
Also, make sure those spindles are 2 piece with a chromo axle, cpp did make a 1 piece version which is no good for cert On mine too I sectioned the saddle tanks by an inch so they weren't hanging below the sills1 point
-
Awesome, that kinda confirms what I thought1 point
-
That thing looks like a solid start, they are a breeze to work on. And yeah you'll want to recenter the wheels with it low or they look goofy as. Once you get it down you also might want to trim an inch off the bottom of the rails at the front, there's a section that hangs below the rockers. So yeah I've skinned these cats 2 ways, first time I sectioned the front crossmember and raised the arms up, it worked fine for years. Bag plates on the lower arms and a bit of.messing with steering and you're way. I got scared away from Zs due horror stories. 2nd time I threw plenty of money at it and went porterbuilt both ends with hydroshox, it drives great and I've done a heap of miles in it. The bagged one I had rode ok with bags on the diff and a 4 link. There's plenty of room for long bars which is good for pinion angle stability but you loose triangulation which these things need, the frames are noodles.1 point
-
This could be the electric parking brake of beds.1 point
-
I probably forgot to say I am doing this because the idle circuit (that controls up to about 3000rpm) is running pretty rich, ie about 10 or 11 to 1. I spoke to Murray...? at Weber Specialties who was prepared to talk about Fiats in general and X1/9's in particular for a looong time. I wanted to source some smaller idle jets but he said that the 45's in it were as low as I should go and that the 5psi the pump was putting out should really be cut down to 2.5psi for the DCNF's. The return line wasnt connected so I reasoned that a restricted return should lower the pressure appropriately. I guess we will see.1 point
-
Had a spare minute so I thought I would have a hack at a fuel return/restrictor. Found some brass hex, put some detail into it including a 1.5mm hole and some probably correctly tapped holes, surely BSP and NPT are the same? I checked the resulting pressure but the needle wobbles all over the place from the pulsing of the pump, averaged out it looks like 3.5 or 4 psi, vs 4.5 to 5psi previously. Ill take it for a spin later and see what the AFR's are doing, then maybe start opening up that hole. I kindof need a way to damp the pressure fluctuations first to get an accurate reading.1 point
-
1 point
-
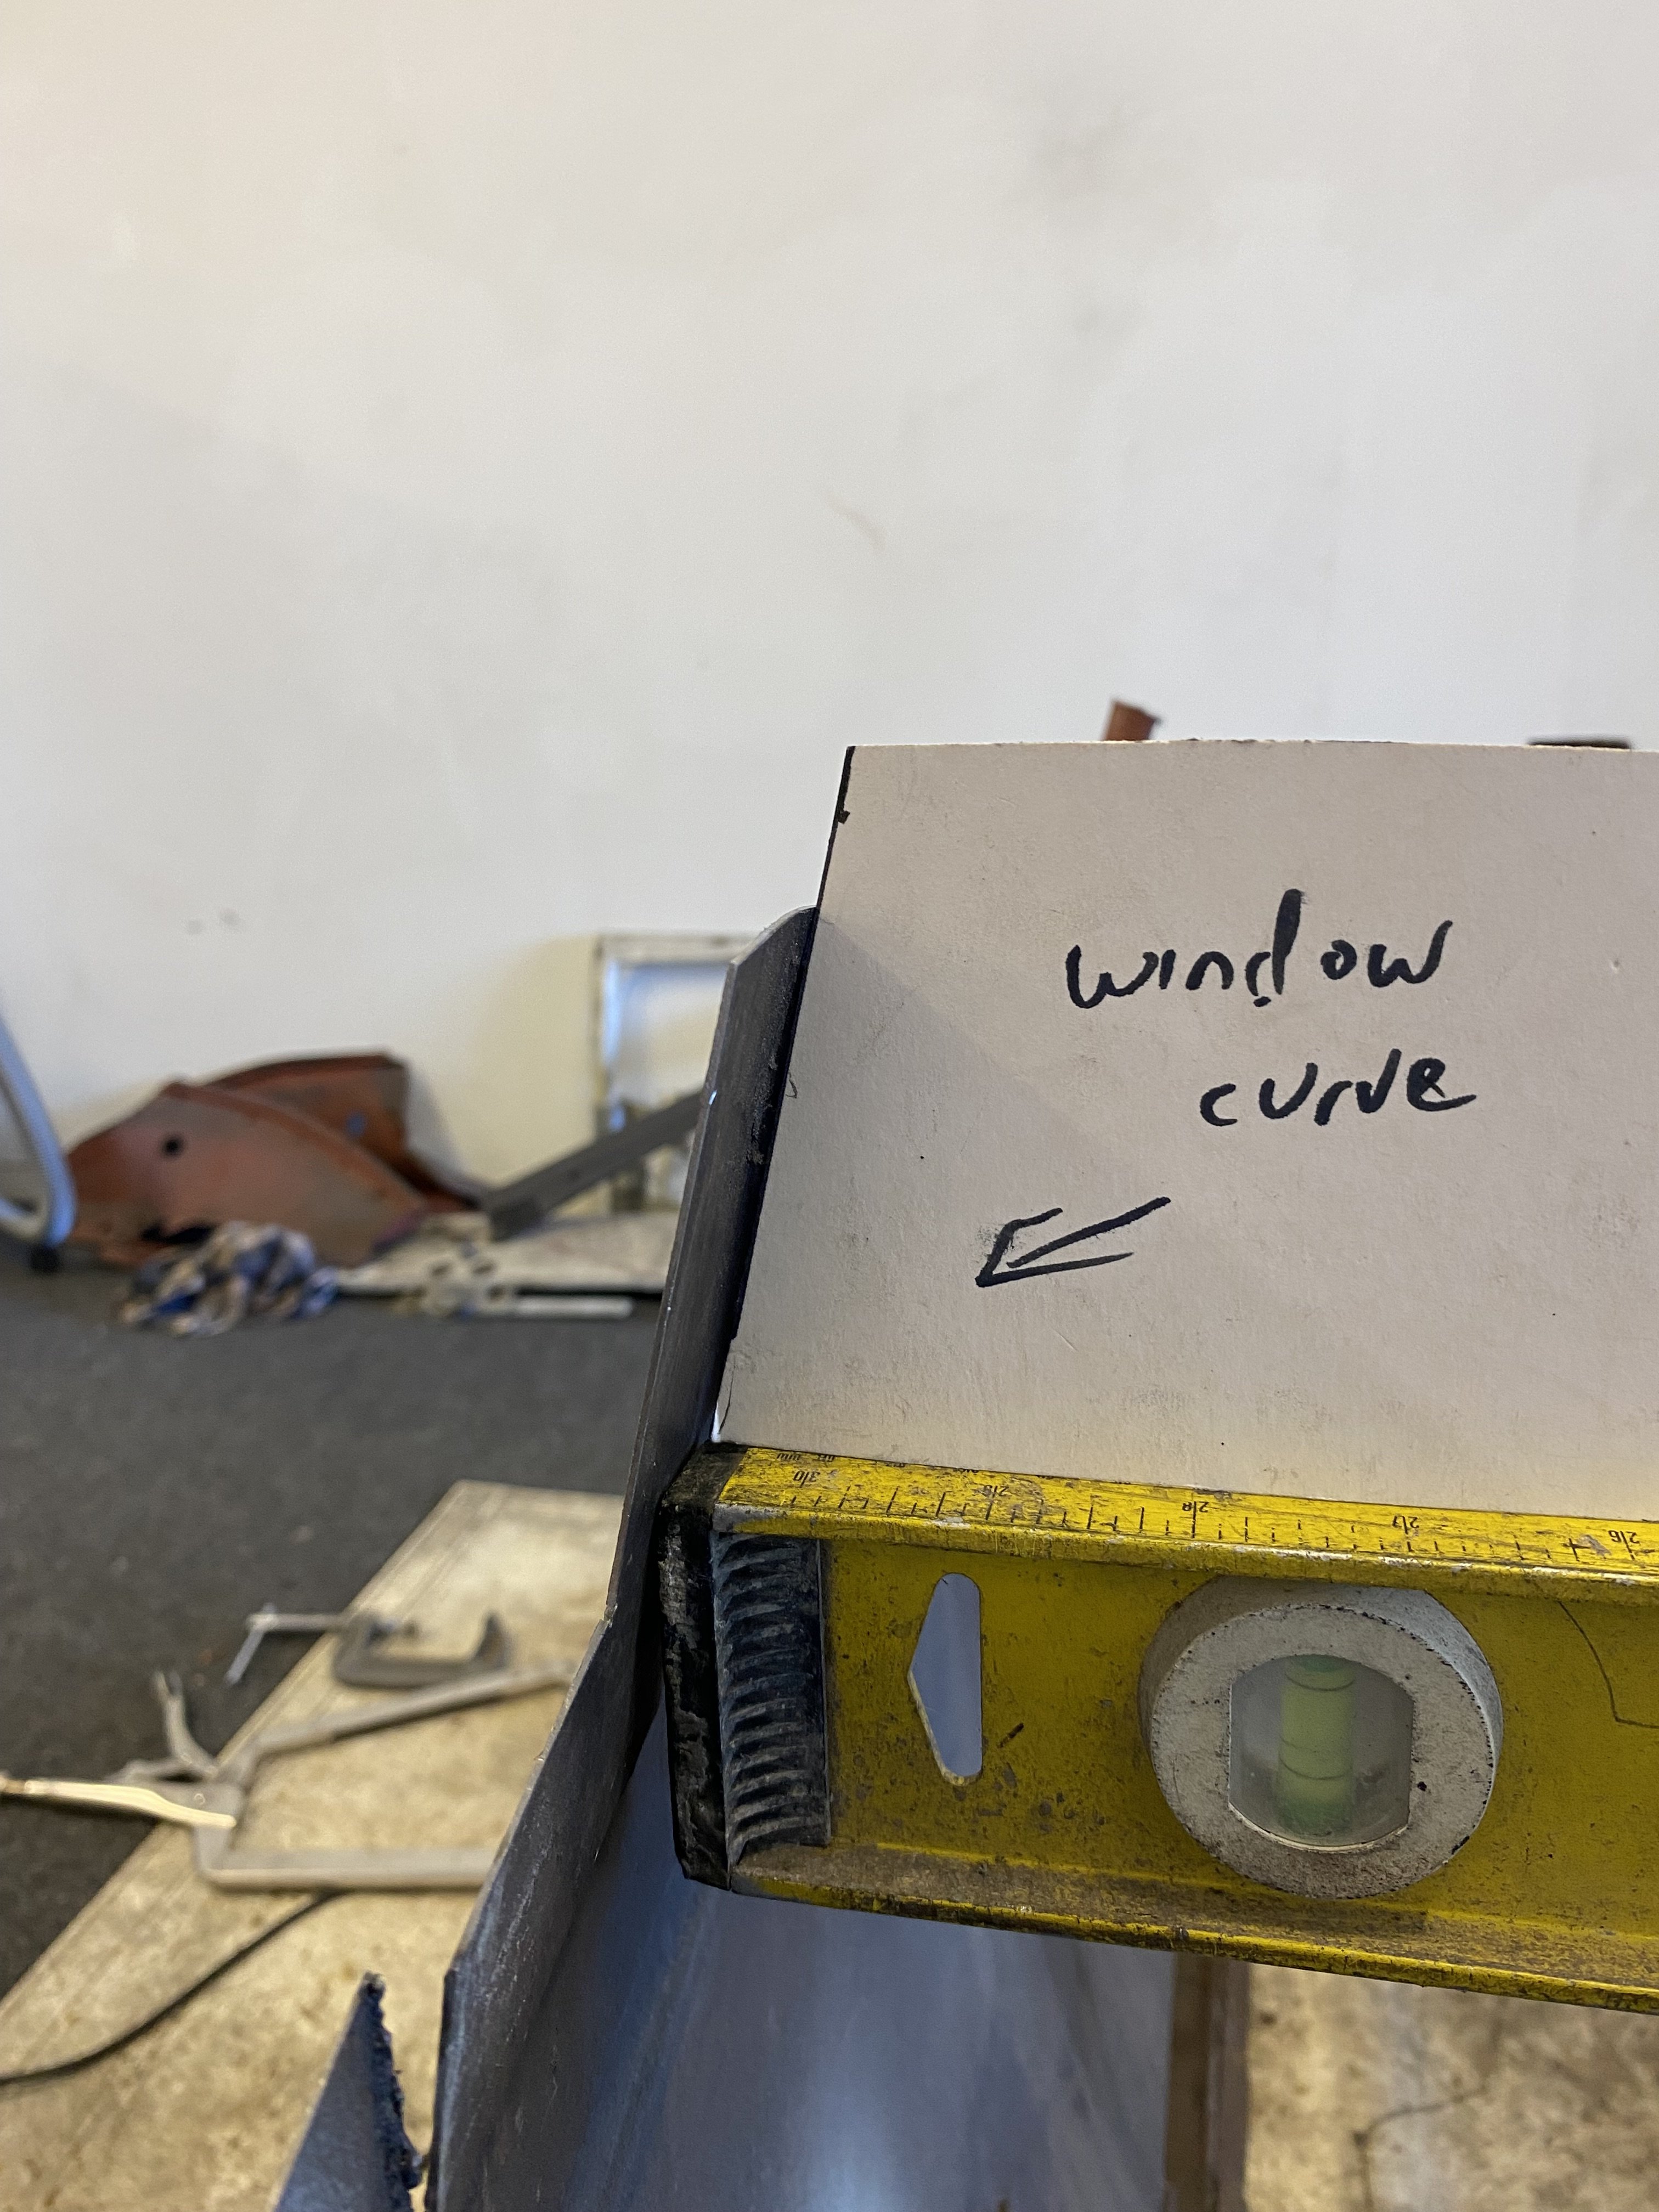
Next job was to split the roof and tilt the bottom part of the window to the same degree of the top part of the door. i just took small nicks out of the top of the swage line then clamped it and and bent it in to suit. Then welded the nicks up and hand filed the welds down.
1 point
-
1 point
-
Been chipping away on this. Lost a few days with kids stuff, family bereavement and work load. plus the exploded lights doesn’t help much. but these lights might be good enough. completely finished the rear loom and all lights actually work.
1 point
-
That first box looked pretty good. But I ended up breaking a bit of the casing in my efforts to get the seriously rusty bit of clutch shaft out. You can probably spot the bit in this pic, it probably would be ok but still. So I decided to use the other casing which was a lot cleaner anyway, but this meant dismantling the second box. This was kindof good as it gave me context to decide that the first box was indeed a goodun. The second one was still pretty good, but it had the keyed shaft that was broken on the one in the car (altho not broken) but the nice box is obviously a later revision as it had a spline rather than a keyway. So I dragged my parts washer out from the depths of the container and cleaned/dried off/inspected everything. Now I just need to find some axle seals and it can go back together. Oh and sort the diff as well, but if I use the good box diff I will need to fix the endfloat situation, probably.1 point
-
Toyota legend Mark Roads has a Spare Celica/Carina GT-T spec brake booster. Which is a little smaller than the Soarer one, and will bolt up. So will go pick that up some time next week. Back to the firewall problem, I borrowed a laser projector tool from @flyingbrick that is a cool piece of gear. It can draw a 360 degree line, all on the same plane. So I'm going to mark where this line lands everywhere, Then I can either cut the metal back to this line so it's all straight. Or, is use it as a reference point for knowing how far a piece needs to bend back or whatever. Makes the problem seem easier in my brain, having some sort of reference point to work to. I'll need to pull the motor back out to do this properly, so will dig out all of my engine crane parts out of storage and make a start on that. Slowly making progress on a few different fronts which is good.
1 point
-
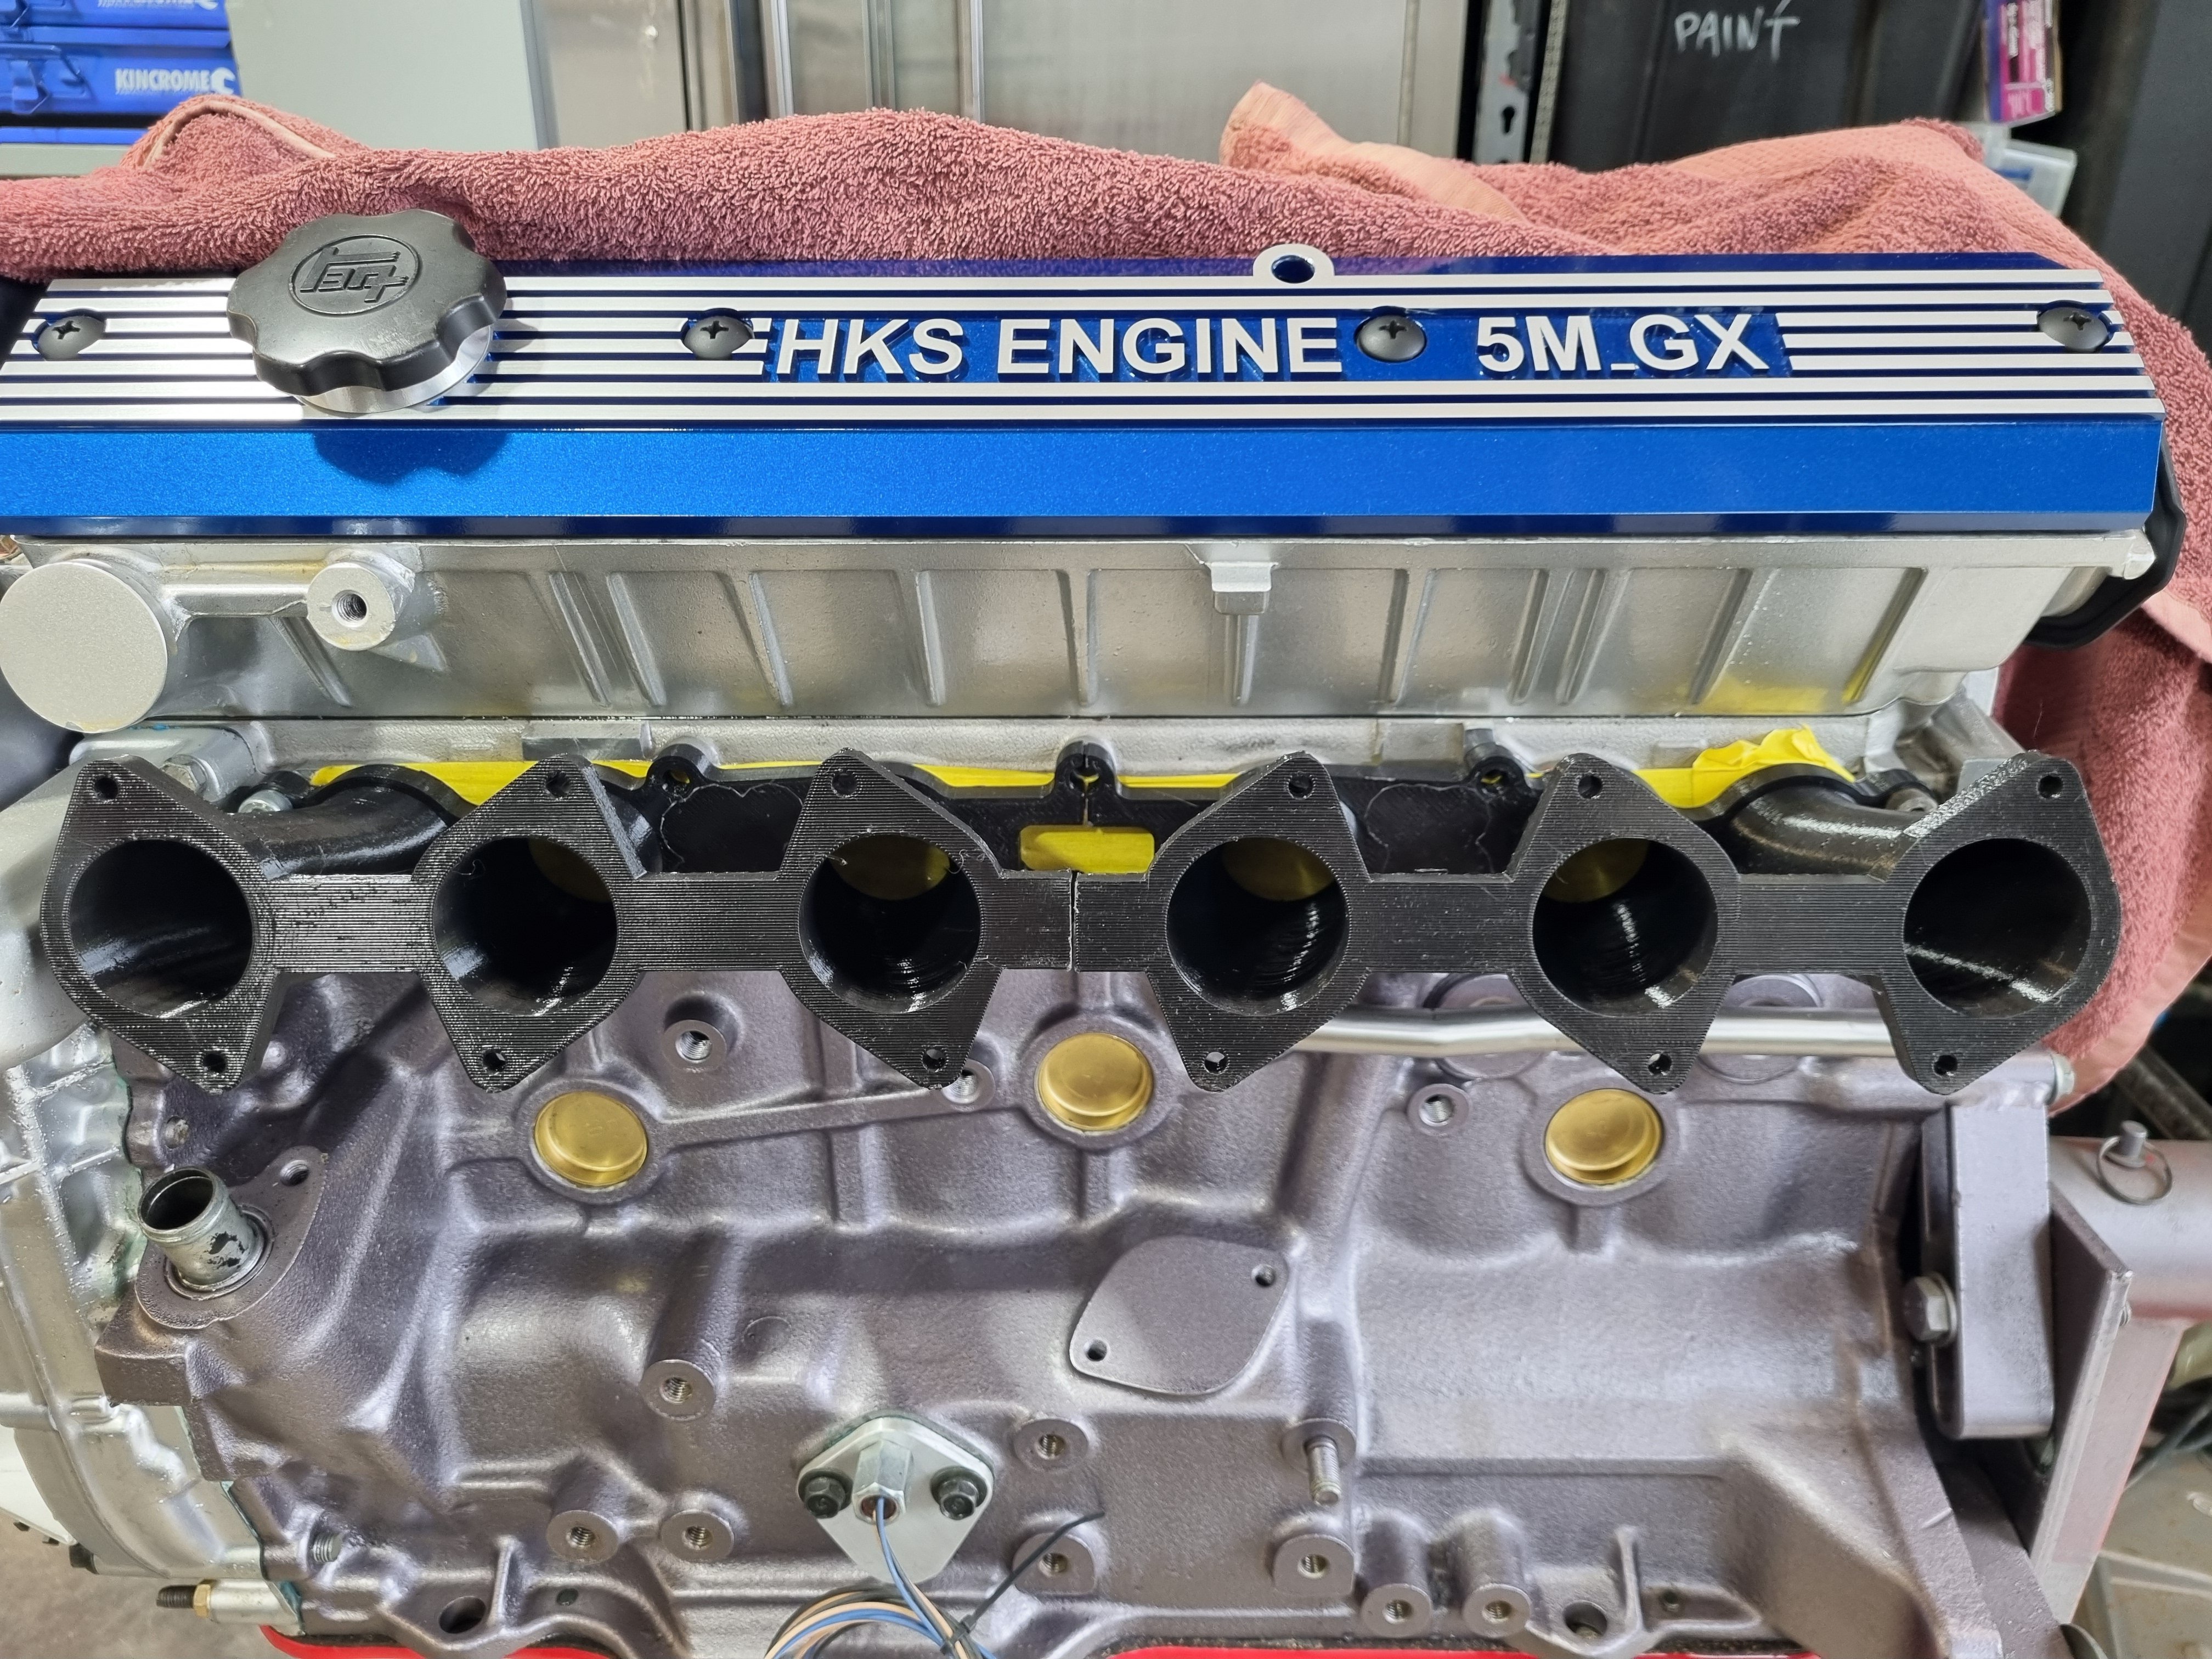
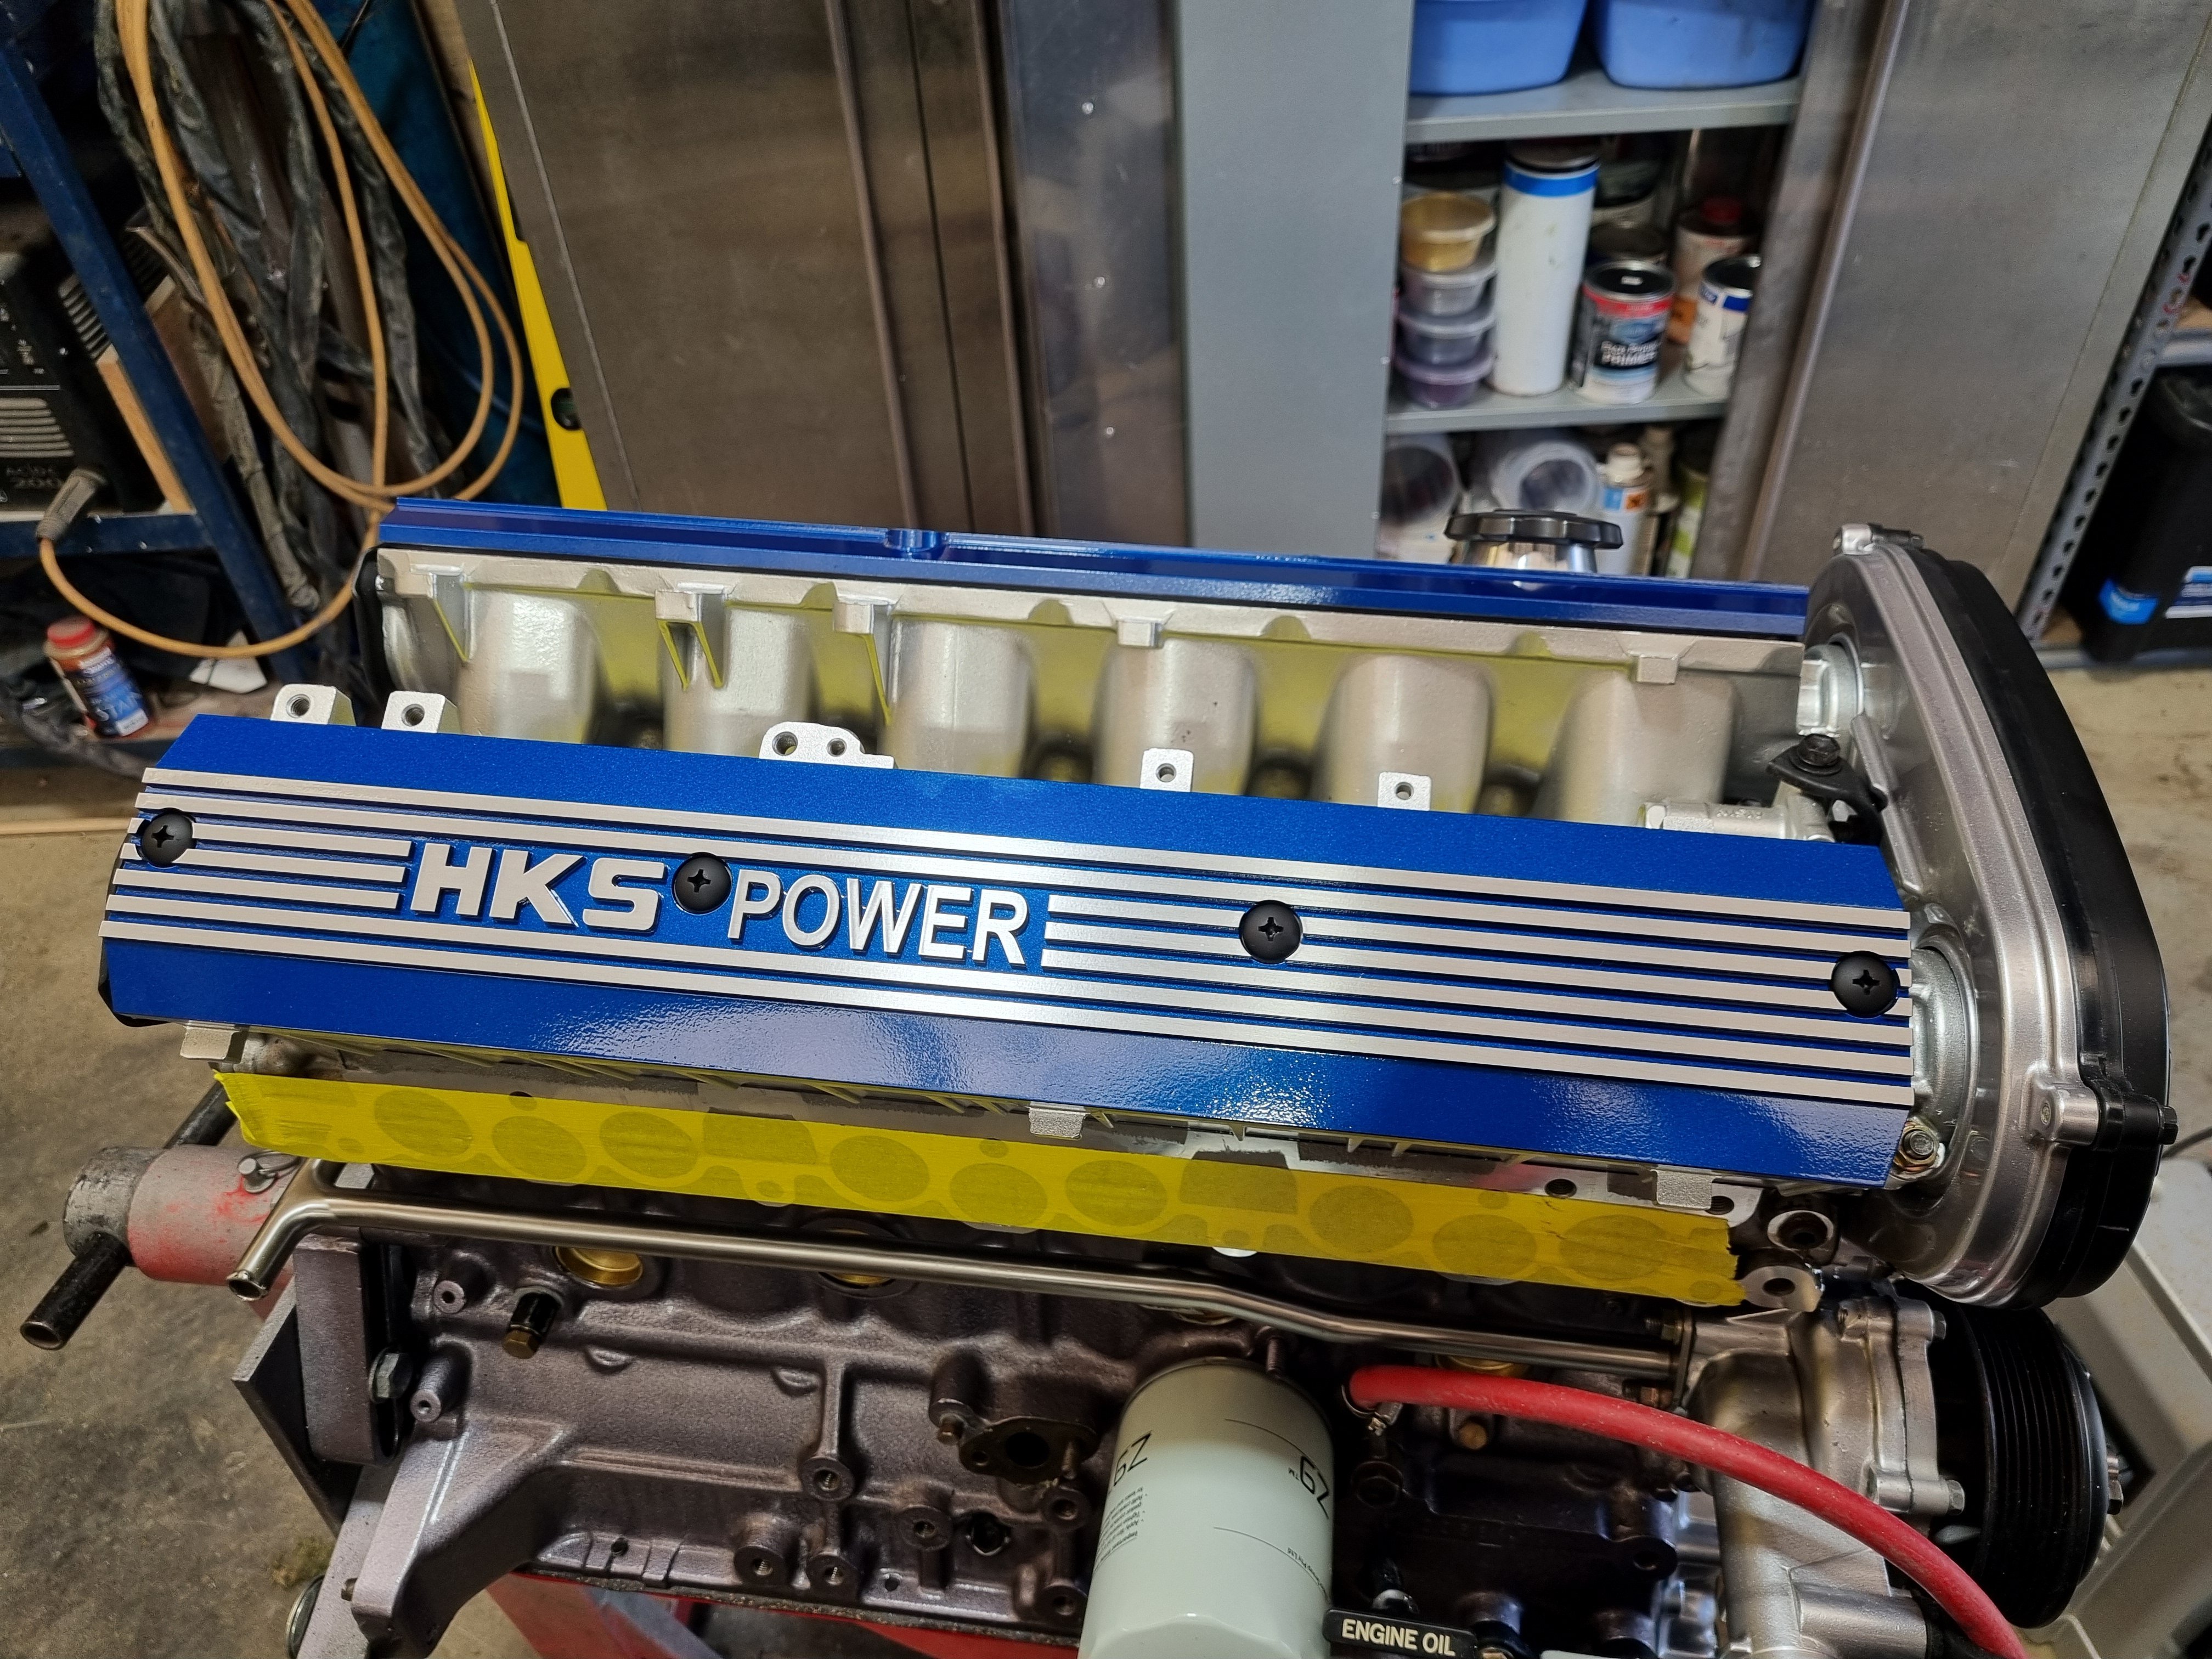
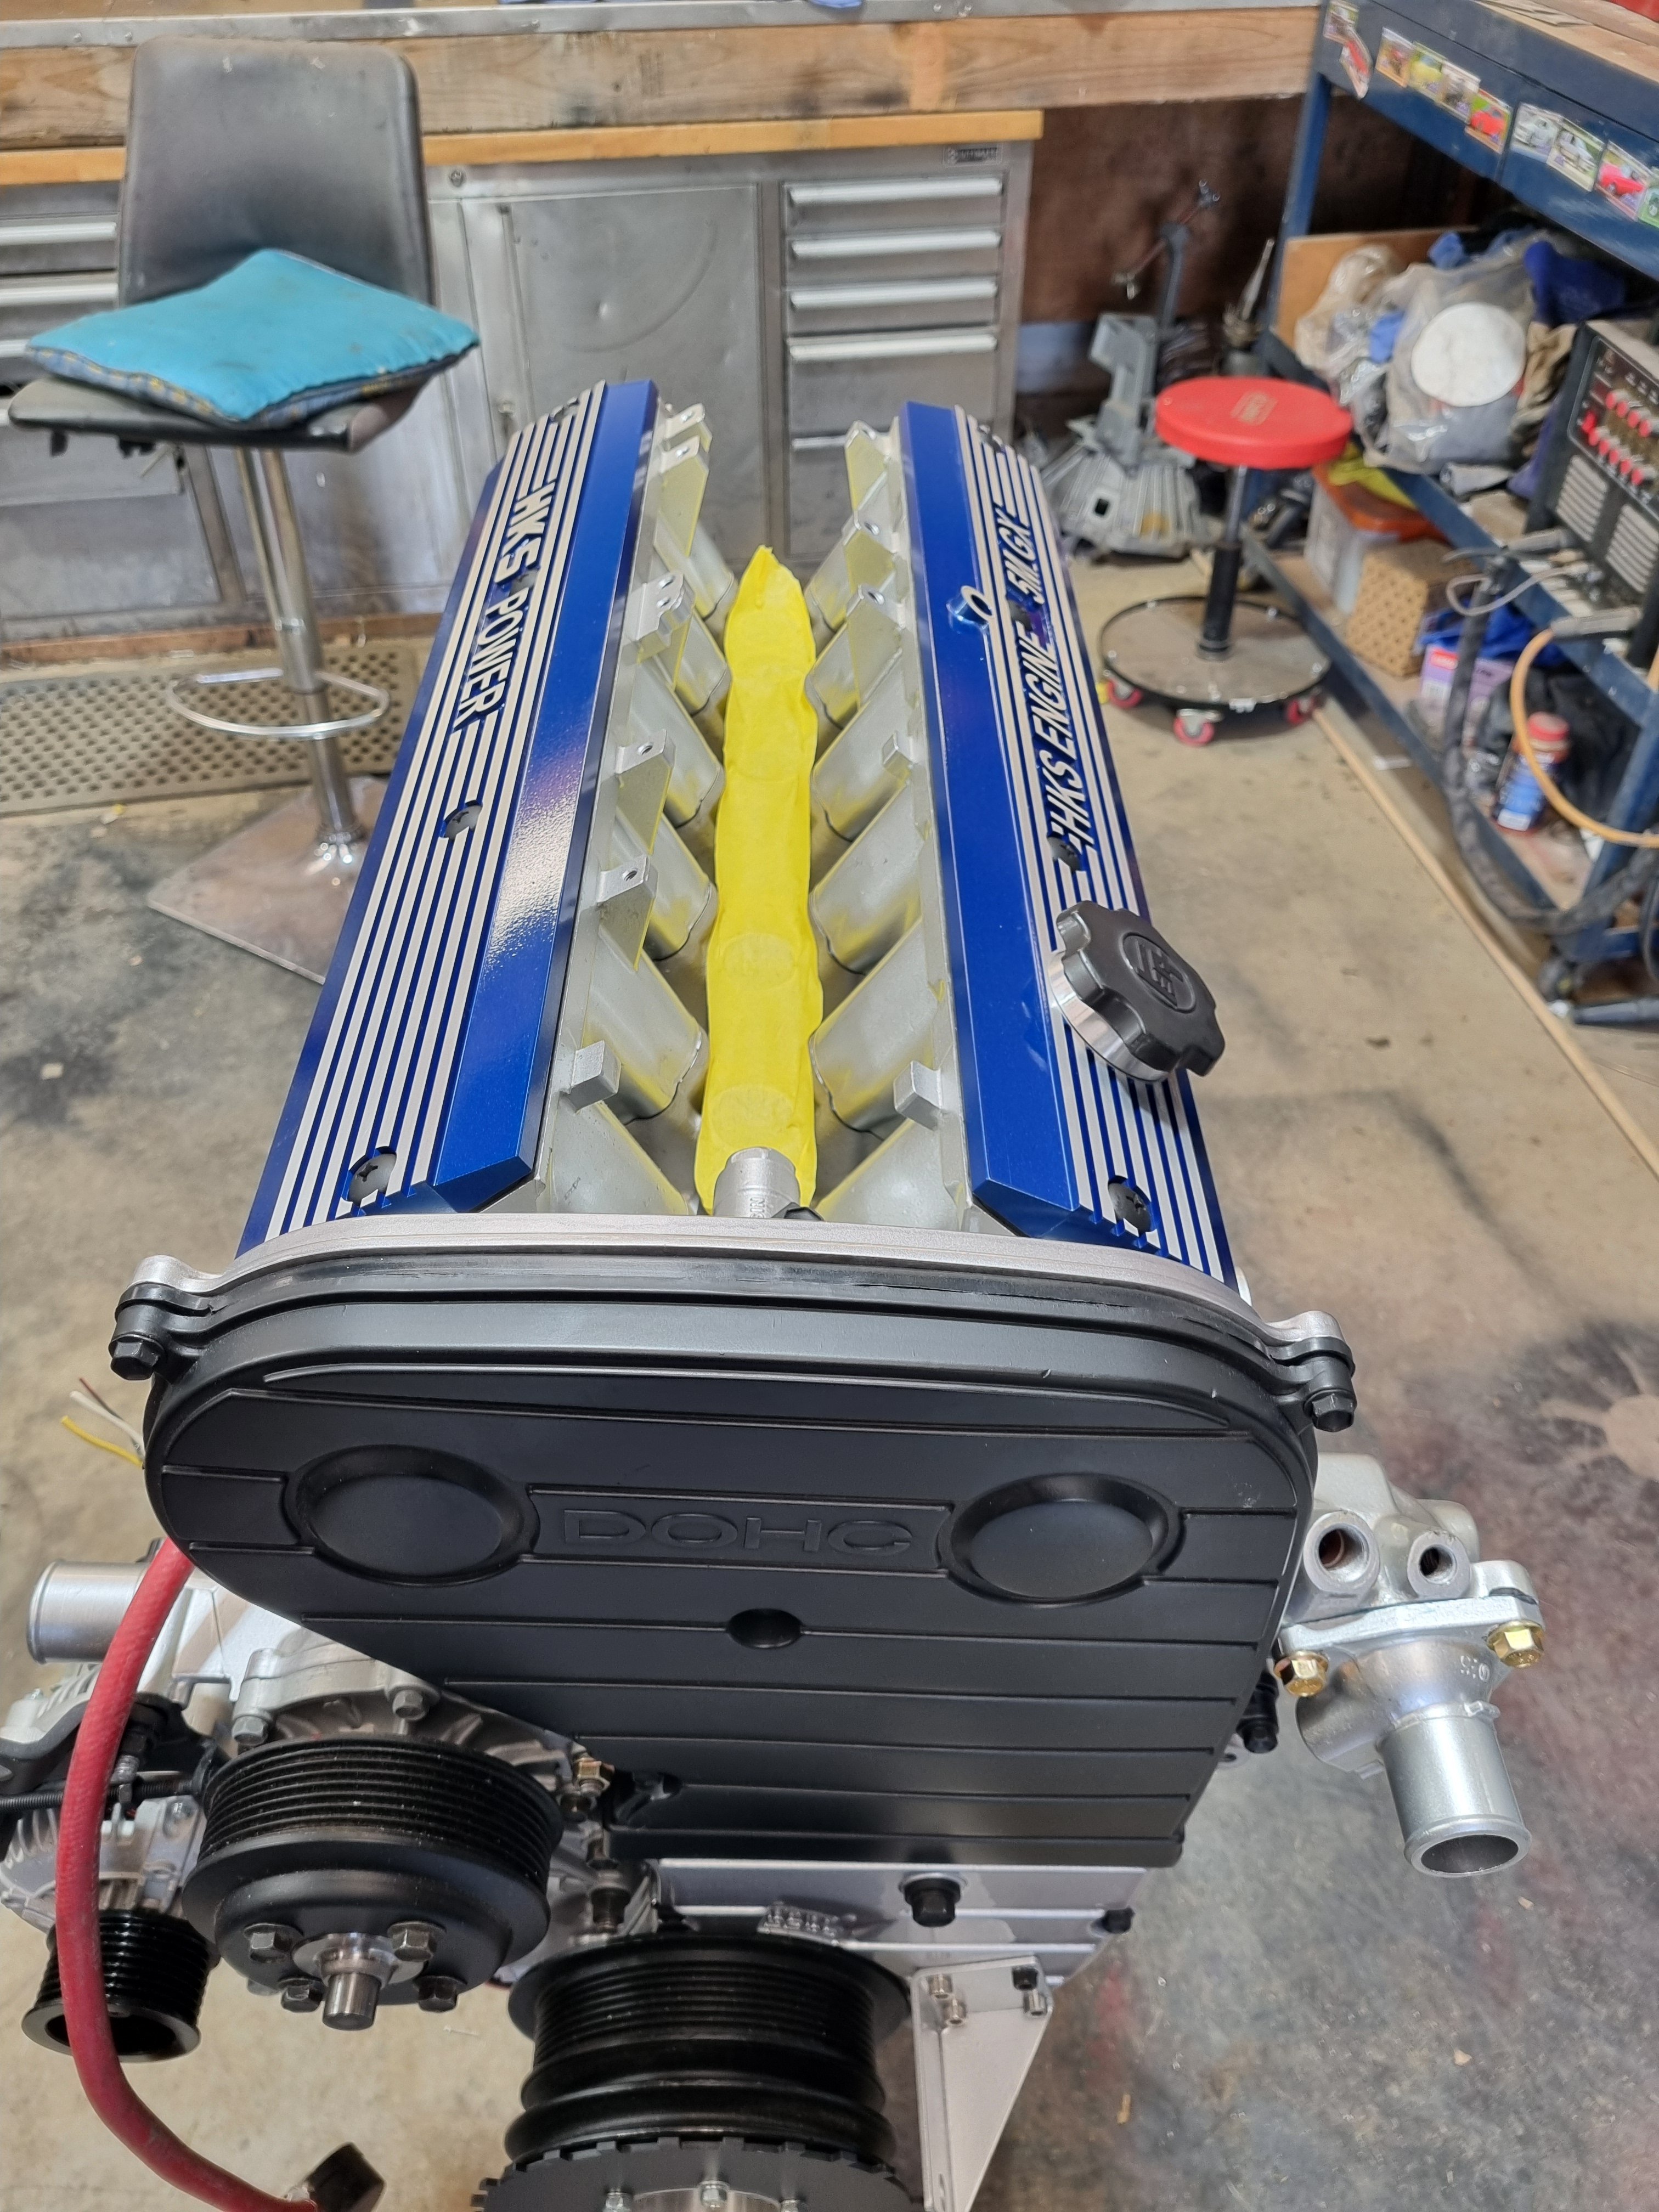
I am so absolutely stoked to have some garage space again. Feels like I've been let out of jail or something! So I have been burning the midnight oil a bit. I got the passenger side manifold all finished, filled it all up with water and no leaks. So hopefully it's good haha. I started on the rest of the exhaust a while back, but will chop it back up and redo it. As I was kinda thinking I'd make the extractors to suit the pipe locations, but it's worked out the other way around. I am so absolutely over the moon to be able to spend nights or rainy days working on things now. The collector doesnt look so tiny/weird now that the rest of the pipe is on it. Just need to add the rear part after the collector onto the other side too, then I can make a start on the 2-1 section and rest of exhaust.
1 point
-
So I needed some new tyres. I did some research, rang around local places and found a good deal. I hoisted the Imp up, removed the wheels and spent some time removing the old stick on lead weights. I then gave them a quick polish.. Took the wheels into the big smoke later that day and left them at the tyre shop while we went off to do very important city things that city folk do, like sitting in posh cafes eating yummy steak and cheese pies, talk about the stock exchange and shopping for outdoor furniture. Later on we picked up the wheels and left the big city behind returning back to the quiet life. Considering this is practically a hypercar there was no expense spared when it came to selecting tyres... Fitted the wheels and out into the sun for a photo.. I took it for a hoon and other than the usual expected bit of 'brand new tyre wandering' I've always experienced they seem fine. Nice and quiet. They'll get better once scuffed off. My old wof test fella that I have used for years has retired. I needed to find another 'sympathetic to old cars garage' so I drove it out to a place up one of the local valleys to a mechanic I'd got some advice from about Subaru transmissions. He really likes Imps, loves Datsuns and thinks the Datsun swap is great. Perfect! Booked it in for a wof test Today I drove out there again. Its a great place. Loads of old cars in the fields surrounding the place and he has his old Hillman Hunter parked up next to the workshop. Tractors being worked on and lots to look at.. The car sailed through the test with the only issue being that it really needs rear reflectors to be fitted. My tail lights don't have any reflectors built in but its never been flagged before. He had some small ones in stock to show me what would be suitable so I picked some up on the way home and fitted them. Made some little brackets for below the bumper mounts.. Fitted in place. They don't look too bad but I am hoping there might be some alternative Lucas rear light that has reflectors built in. Imp is now all legal again and ready for summer.. The tyres were already feeling way better too after having really scuffed off the silicone releasing agent or whatever it is?1 point
-
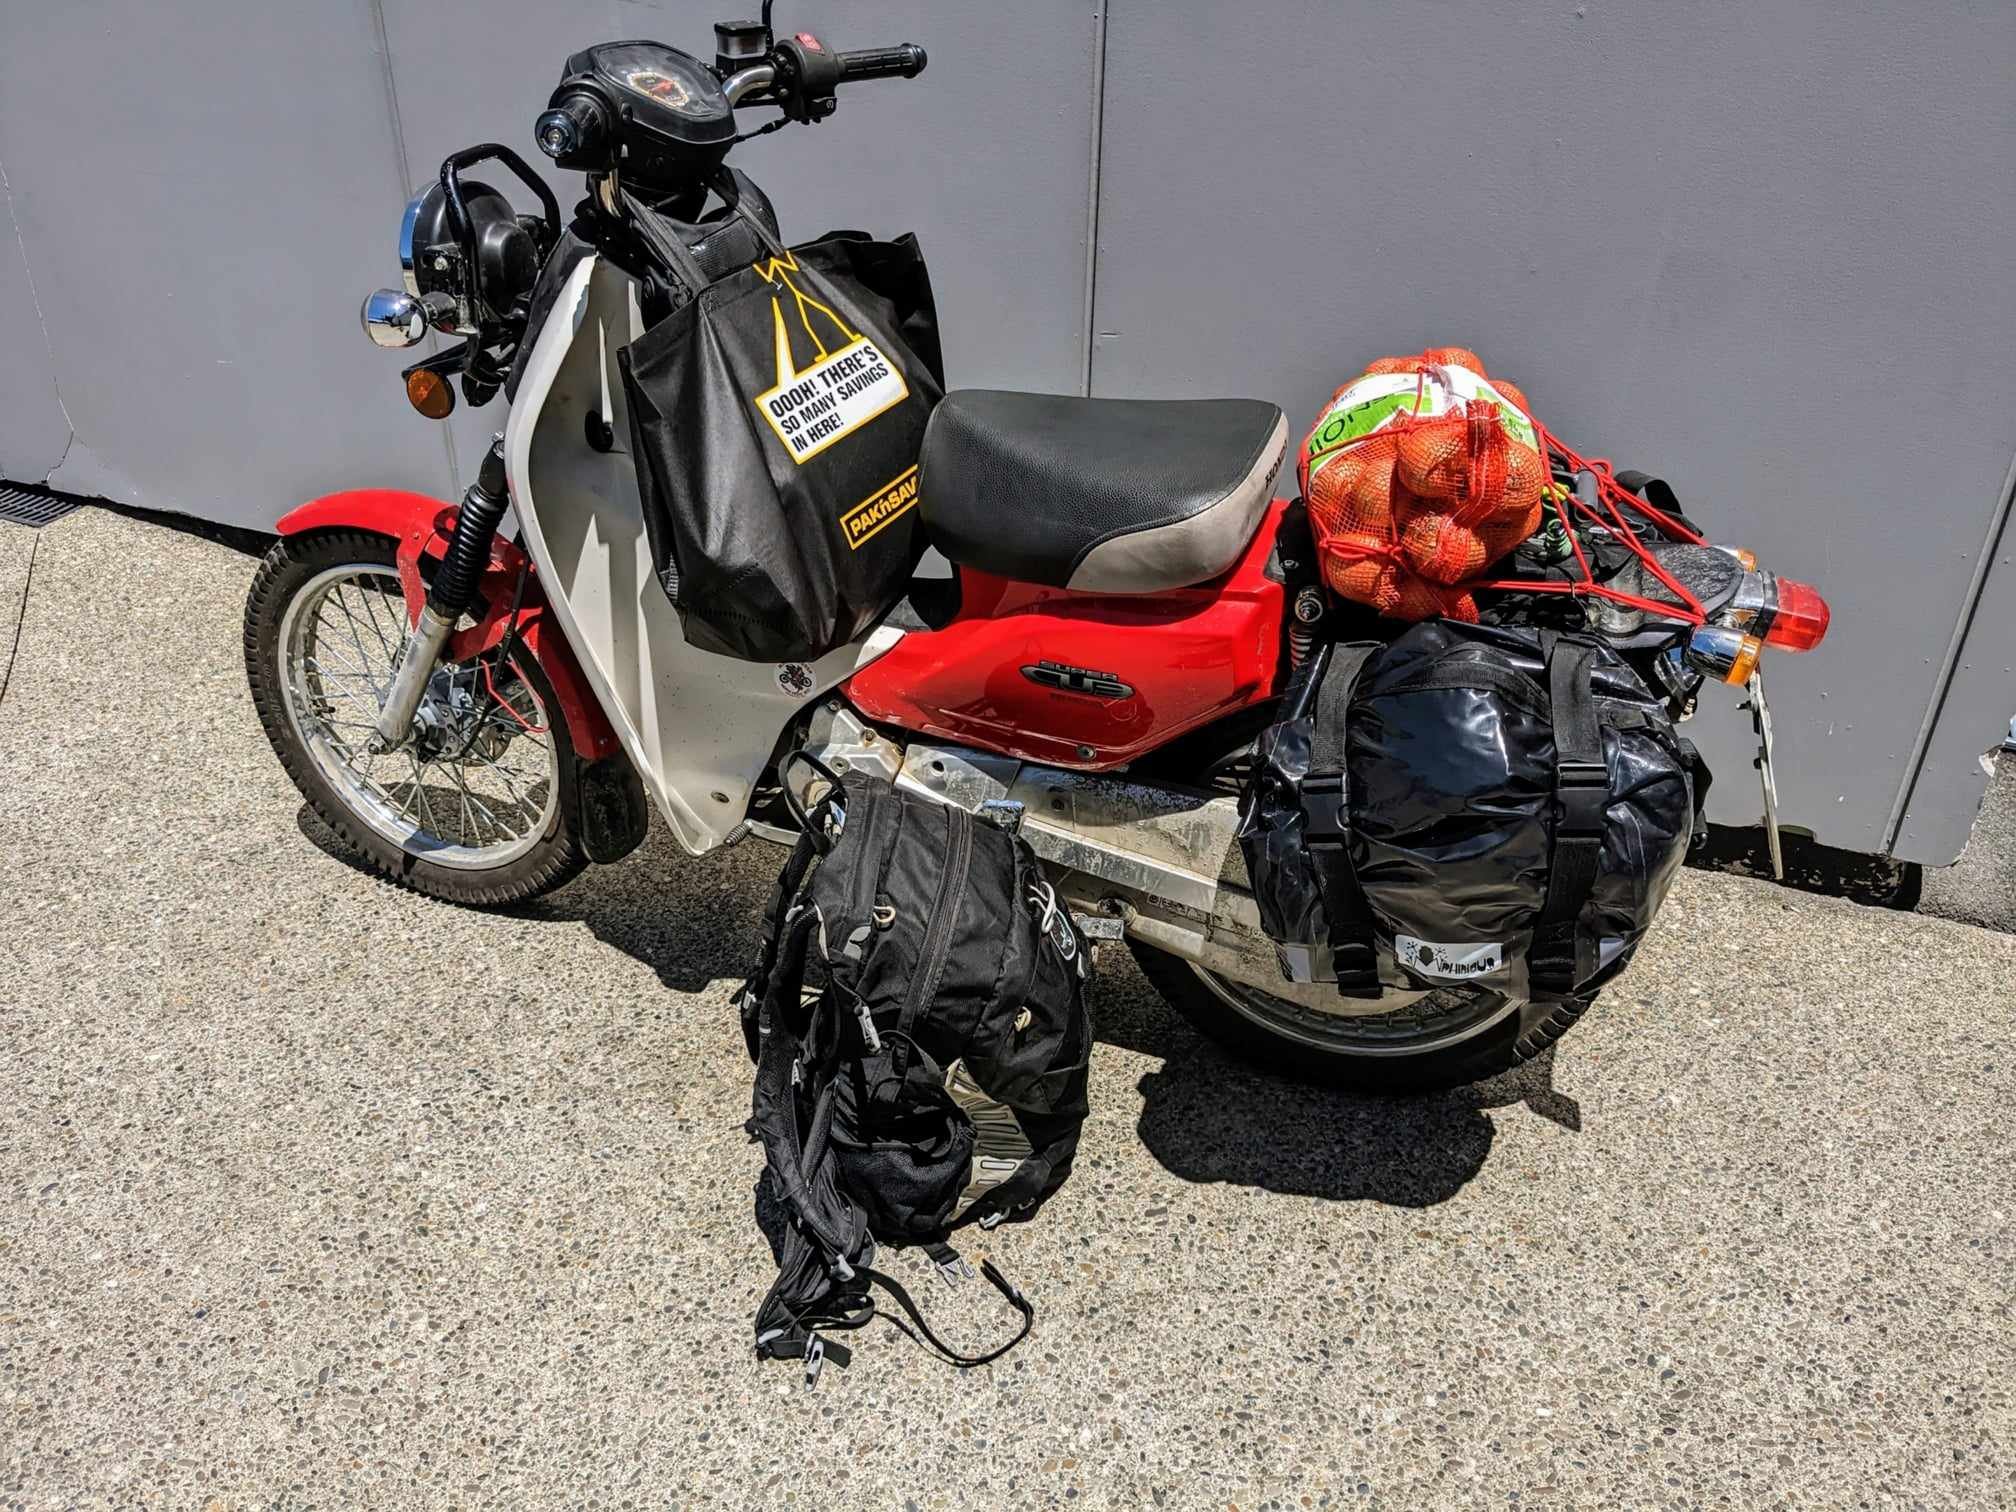
Can confirm, with a disc front end, even better! $300 of groceries on-board here...
1 point
-
They have to be in the top 5 adventure bikes ever made, surely?1 point
-
1 point
-
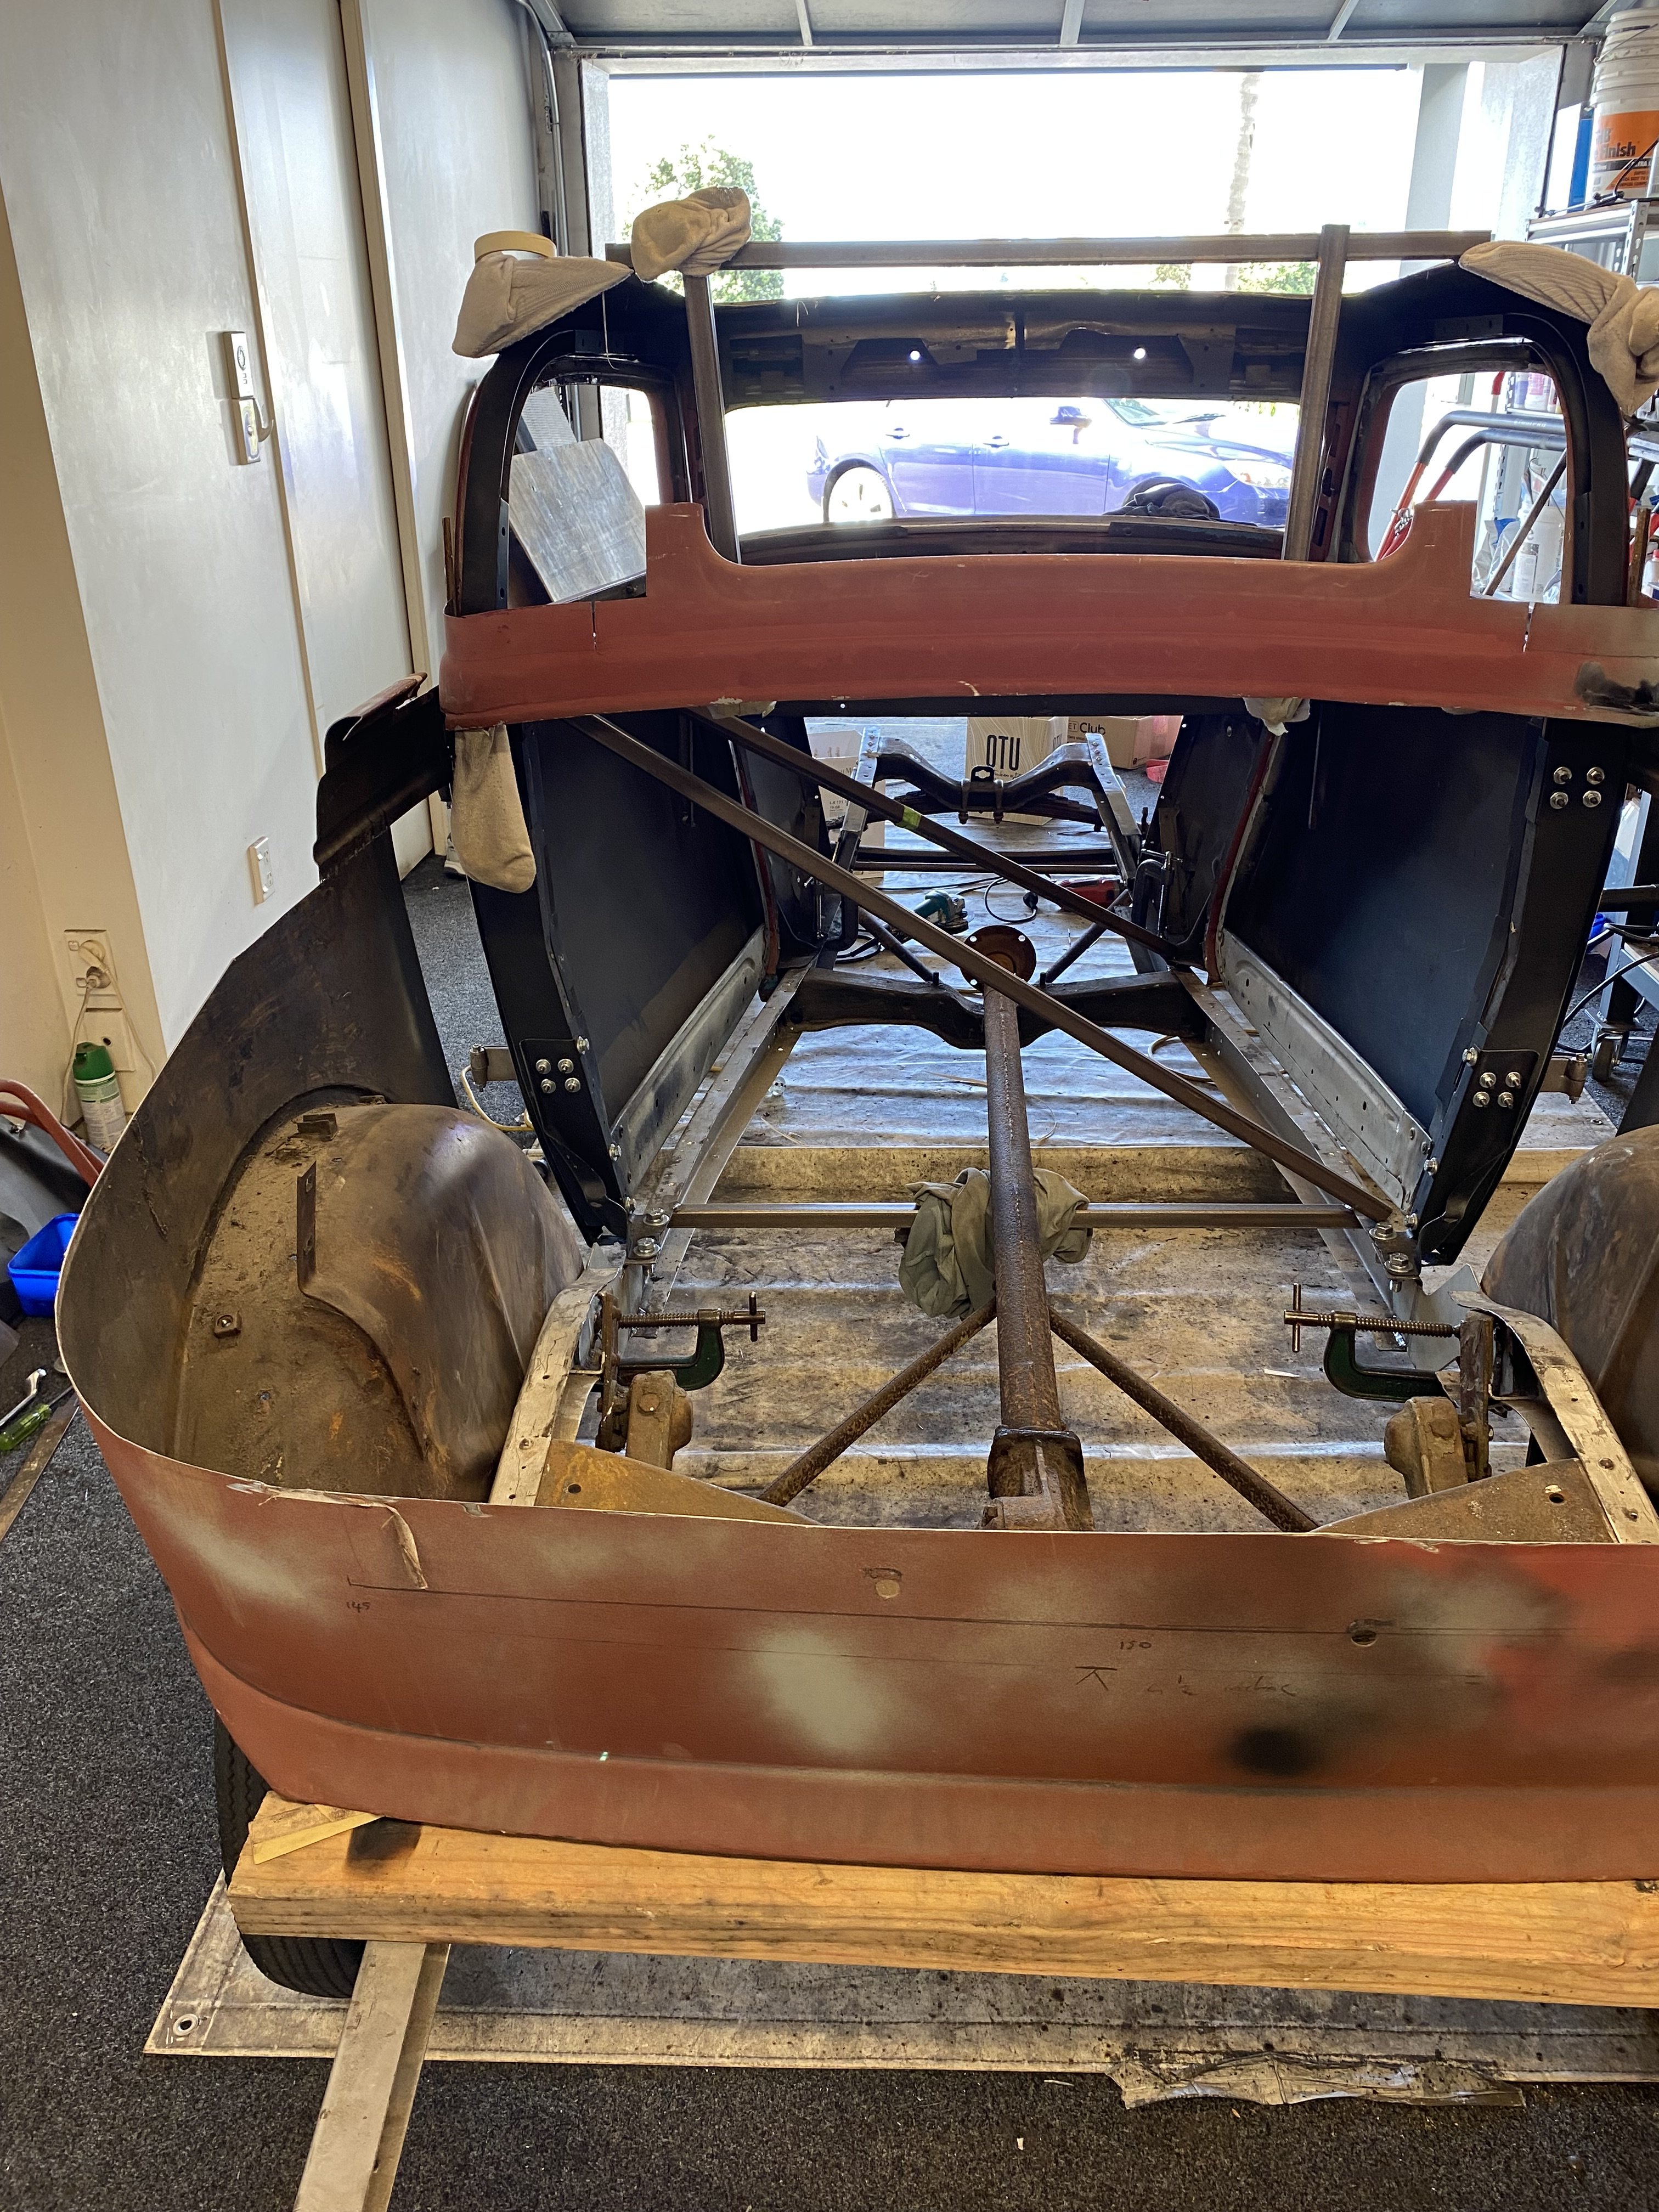
Time to start working on extending the rear quarter panels. This is as low as I can get the back end of the chassis working off a 285 / 60 - 15 tyre size. Should still give me a couple of inches to play with in the wheel well area.
1 point
-
I did the bottom mount, that was piss easy. It then got a clean sheet Wof (apart from a side repeater not working), so that was extremely pleasing. Unfortunately the new stiffer mounts has meant that vibration coming from the motor that was pretty effectively masked by the soft mounts, has become noticable to the point where I kindof dont want to drive it. Its bad enough that I want to pull the engine down and have a look. This is kindof ok, because I should have two gearboxes arriving shortly from Auckland, this means I will have 4x boxes to build one good one out of. Apparently they are straightforward to repair and plenty of the wear items are readily available which is good. This means i can drop the drivetrain, sort the gearbox and have a squiz at the engine all at the same time. I did notice that one of the idle circuits wasnt doing anything when the screw was adjusted, I dont think thats the problem but I bought a cheap ultrasonic cleaner so I can give the carbs some loving, if the gods are smiling it might just be that, but I am not counting on it. Meanwhile I drew up a center console in CAD to tidy things up. Back in the day I removed the factory one so I could actually use the clutch, but it left things looking a bit raggedy. Clearly time to sort it with some cool shit that still gives me legroom. It took 3 iterations and I will probably print it again in a nicer/stronger/more uv resistent material, but it came out so nice anyway. V1 V3 Clearly my aesthetic heart lies somewhere in the last century, cos that looks the tits. I urge everyone to learn some cad and buy a machine, there is so much goodness awaiting...1 point
-
I had a lot to do with brake boosters in the early 80’s working for an authorized PBR agent in Queensland and then setting up a booster repair department and training staff for APPCO Brake & Clutch on my return to NZ. The original VH44’s were built by PBR in Australia; they were prone to push rod seal failure which is the archilles heel of most inline (Hydrovac) boosters. The casting and the aluminium used on the slave cylinder wasn’t very flash and yes the bores did wear. On the plus side they were cheap to make, readily available and in their day were a big improvement on the earlier style of boosters. We were originally re-sleeving them in brass using an interference fit but then stainless steel sleeves became the norm and they were glued in. The problem with re-sleeving was that the circlip groove that retained the push rod seal bush was cut into the sleeve and once in a blue moon the sleeve would crack where the groove had weakened it resulting in the total loss of brakes - in a single circuit system! I recently fitted a new aftermarket (presumably Chinese) VH44 to a mates MGBGT. Being a suspicious, cynical old bastard I stripped it down for a look-see and found it to be quite a faithful copy that did not vary in any way from the original. I obviously had no way of knowing the quality of the rubber components but they looked the part and I suspect most of the brake seals we buy this day come from China? Have to say when fitted, I was pleased with the result. My advice would be to pass on the remanufactured one and go with the cheap Chinese knockoff. I’ll also point out the 1st link in your post, (Hawkswood Car Parts are a great company by the way) is not a VH44- it’s the English Lockheed equivalent that was fitted in NZ to a million and one Hillman Hunters and many other Pommy cars. Slightly less boost and the plastic control valve assembly just clipped together and did not grow old gracefully! Hope this helps.1 point
-
There’s 200cc worth of carbon on top of the pistons1 point
-
A dishonest person might just do the swap and use parts off the 3l to make it look correct and be sure the engine number is sufficiently covered in dirt and oil...1 point
-
Coming back to this, I can mostly confirm this was correct. After a little driving the new bearing is significantly quieter now. Given a bit more use I think it'll go silent.1 point
-
https://brakeperformance.com/rough-feeling-hubs.php?srsltid=AfmBOorpByE41niF0yOxuzYkahRlSIGU9xF3sxIYrcUg6RJ2UbXKYXv8 Tldr. They come with "gritty" feeling grease, Let it bed in for a few thousand revolutions1 point
-
The modern v8 motor of the moment in street car drag racing is the Ford Coyote DOHC v8. There has been lots of development from these guys racing them, but they spin them to 10k RPM and 3000hp on stock ford block and heads which is insane. This guys car is pretty famous in the extreme/outlaw street classes (which are like 3/4 of the way to a pro-mod but steel bodies and street car bits like coolant and headlights). Older video but this thing has gone 6.20's, its amazing, it won like everything last year.1 point
-
1 point
-
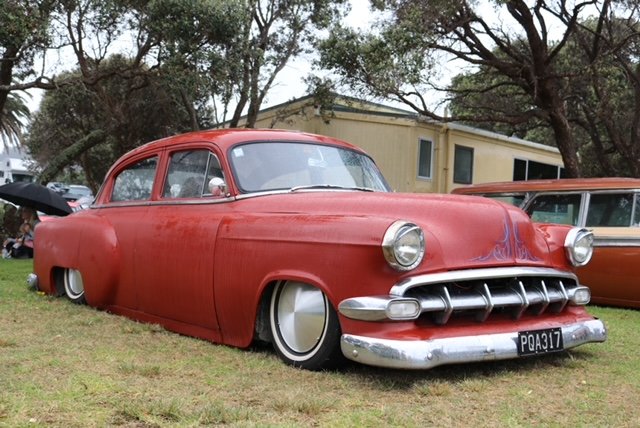
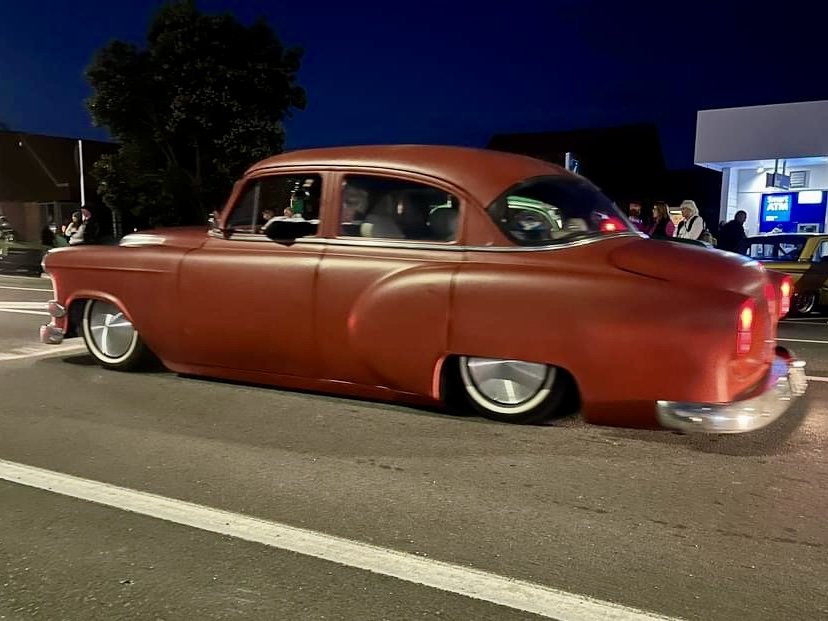
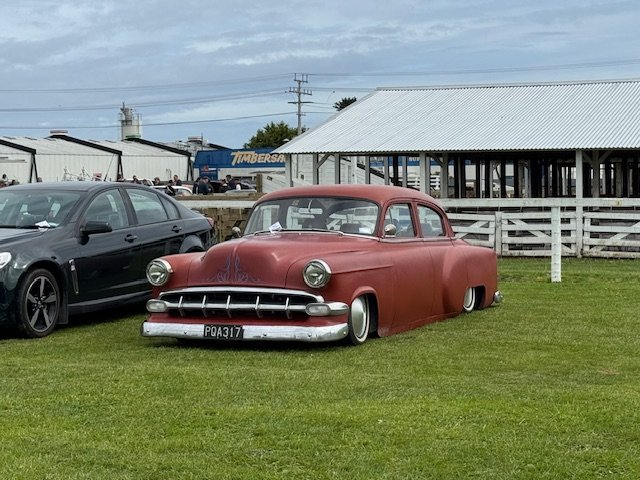
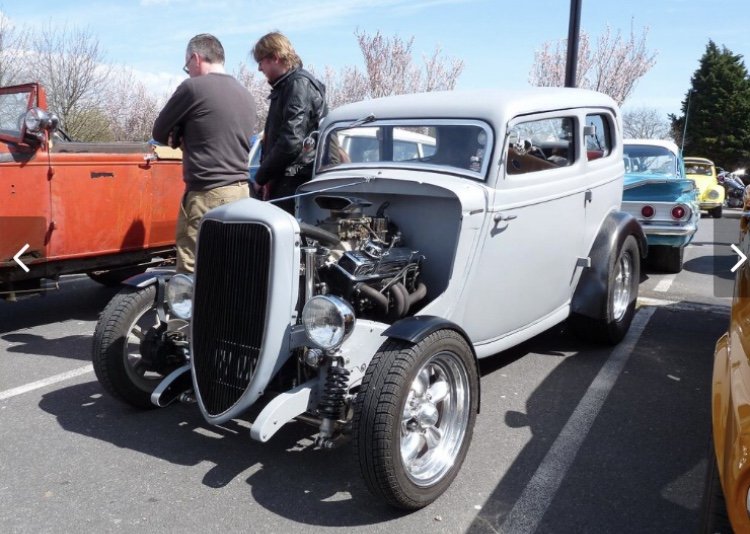
Hopefully turn it into something like this.
1 point


.jpg.6788c72cbbf8d8b8d3ef7034010dbfd7.jpg)


.thumb.jpeg.e0a4bff61111e0c8c7396950fcc94da1.jpeg)

This leaderboard is set to Auckland/GMT+12:00