
Leaderboard


Popular Content
Showing content with the highest reputation on 01/12/24 in all areas
-
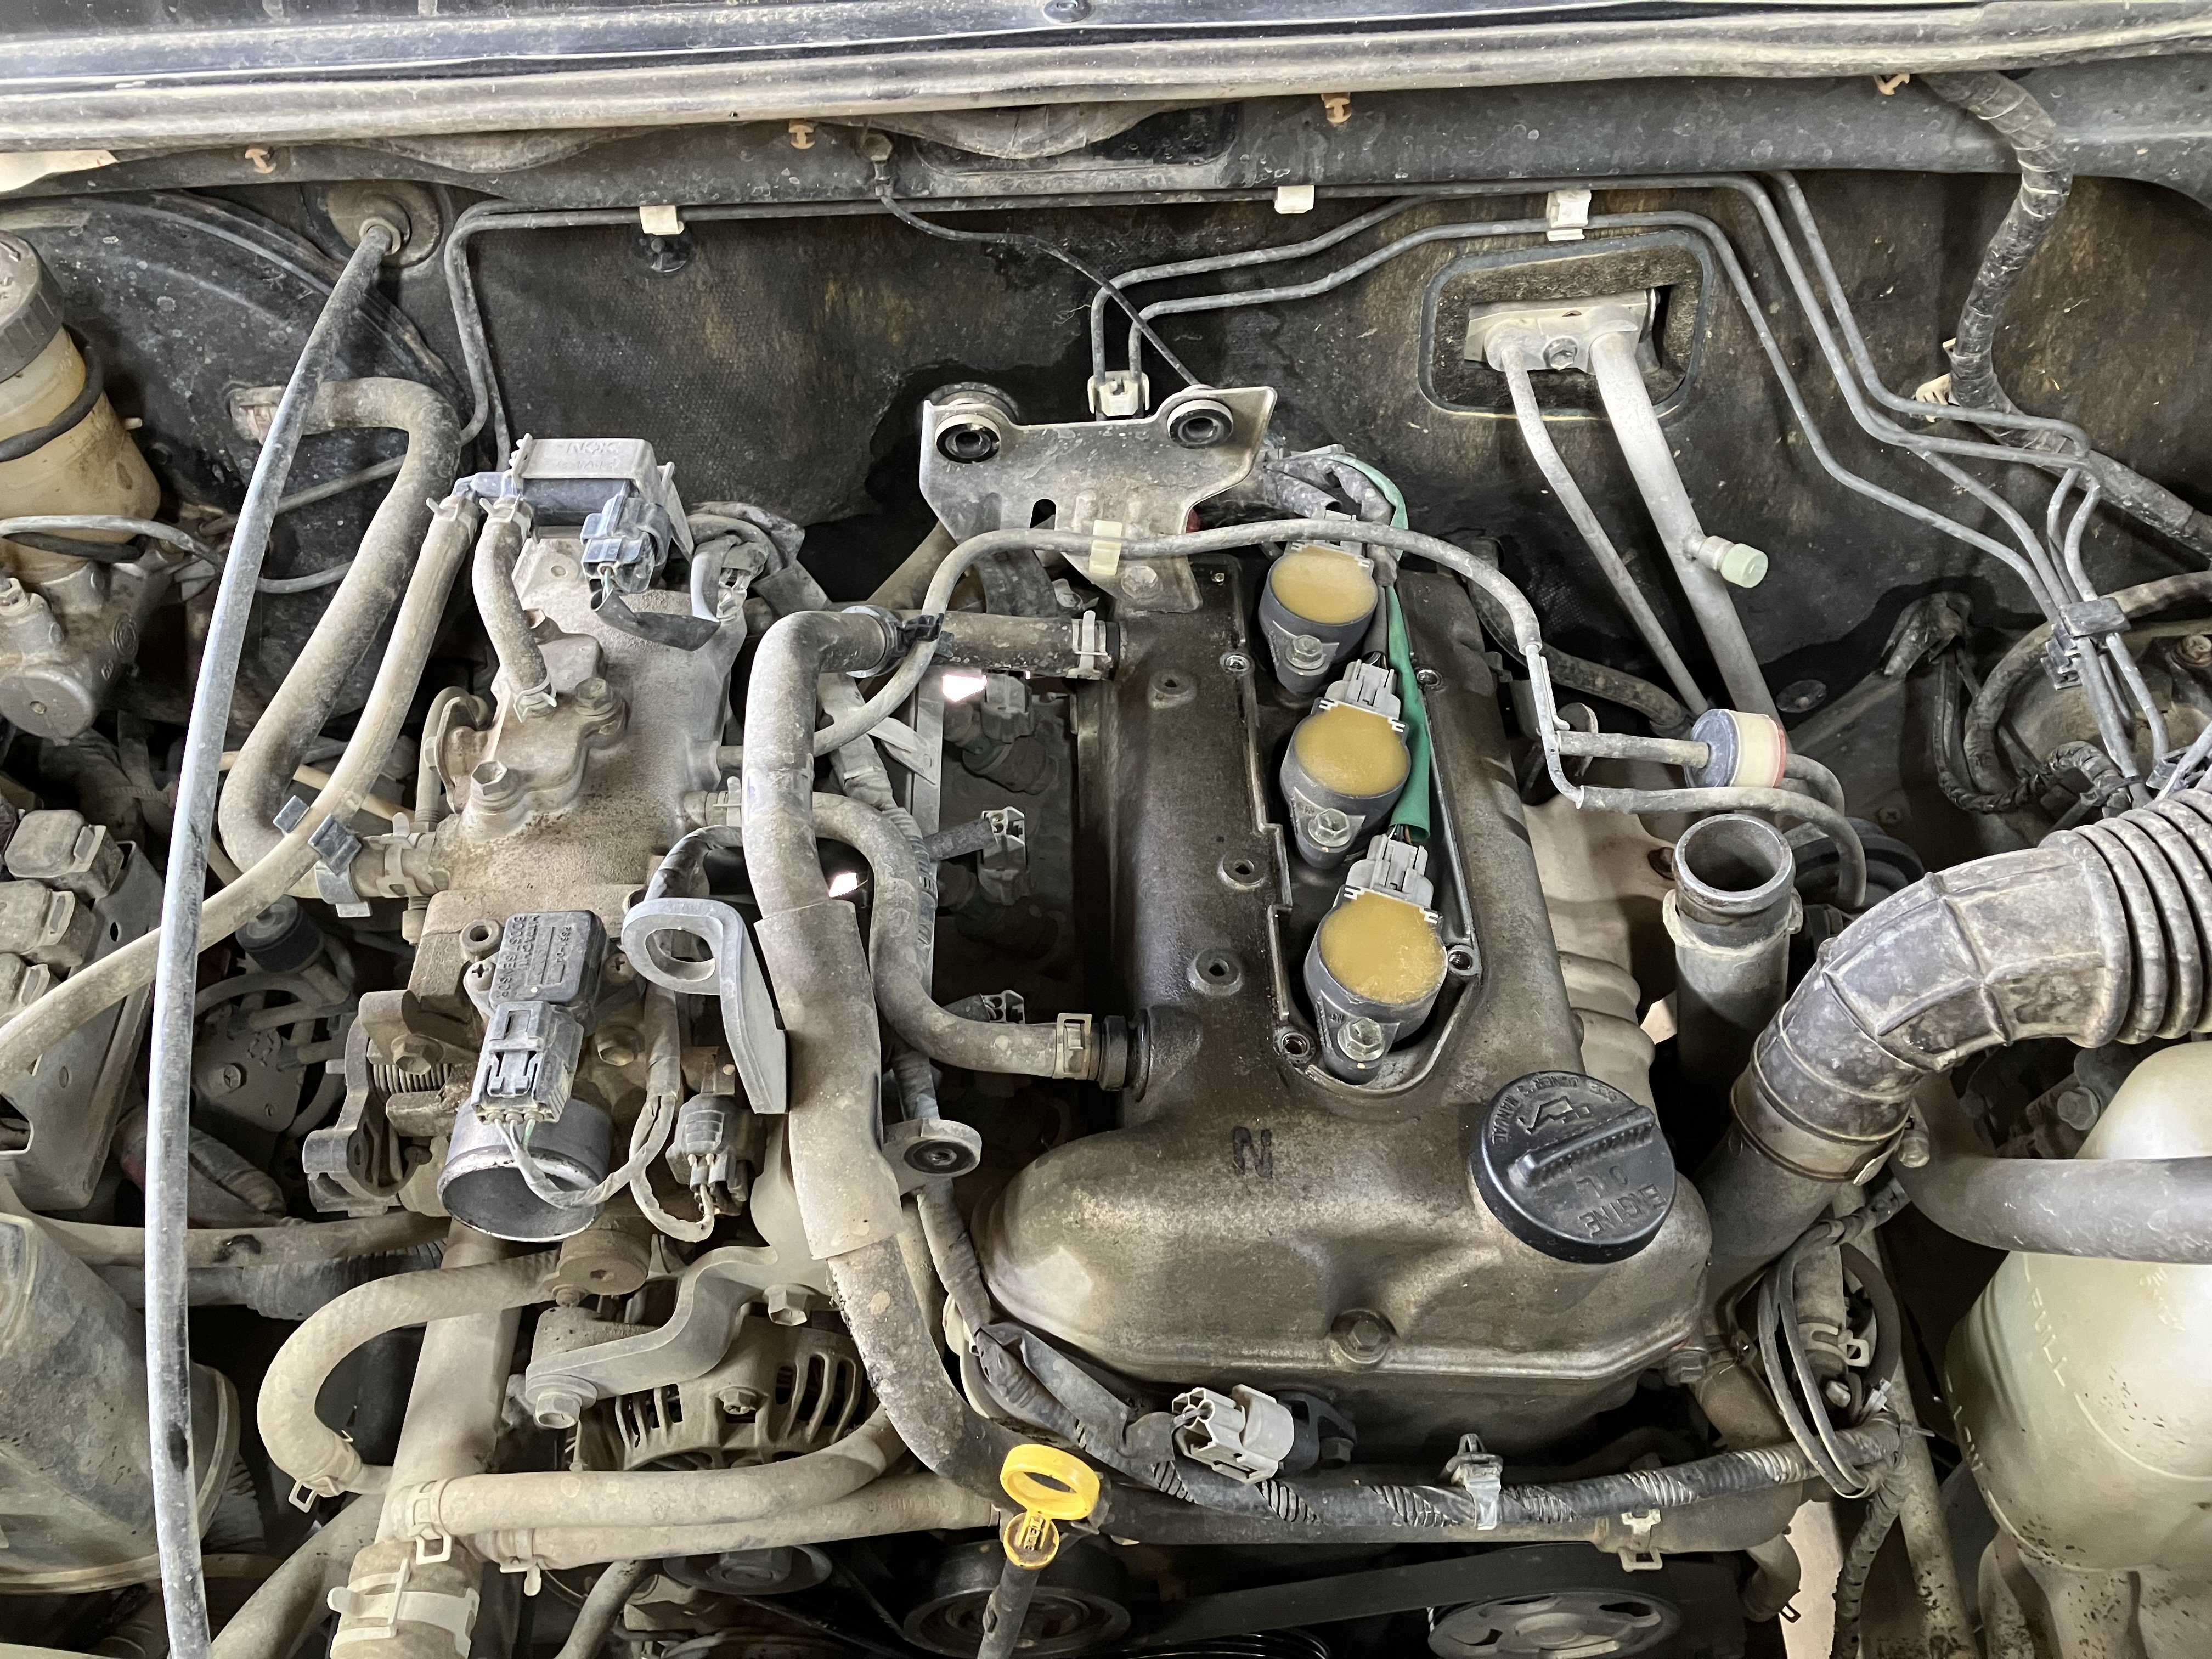
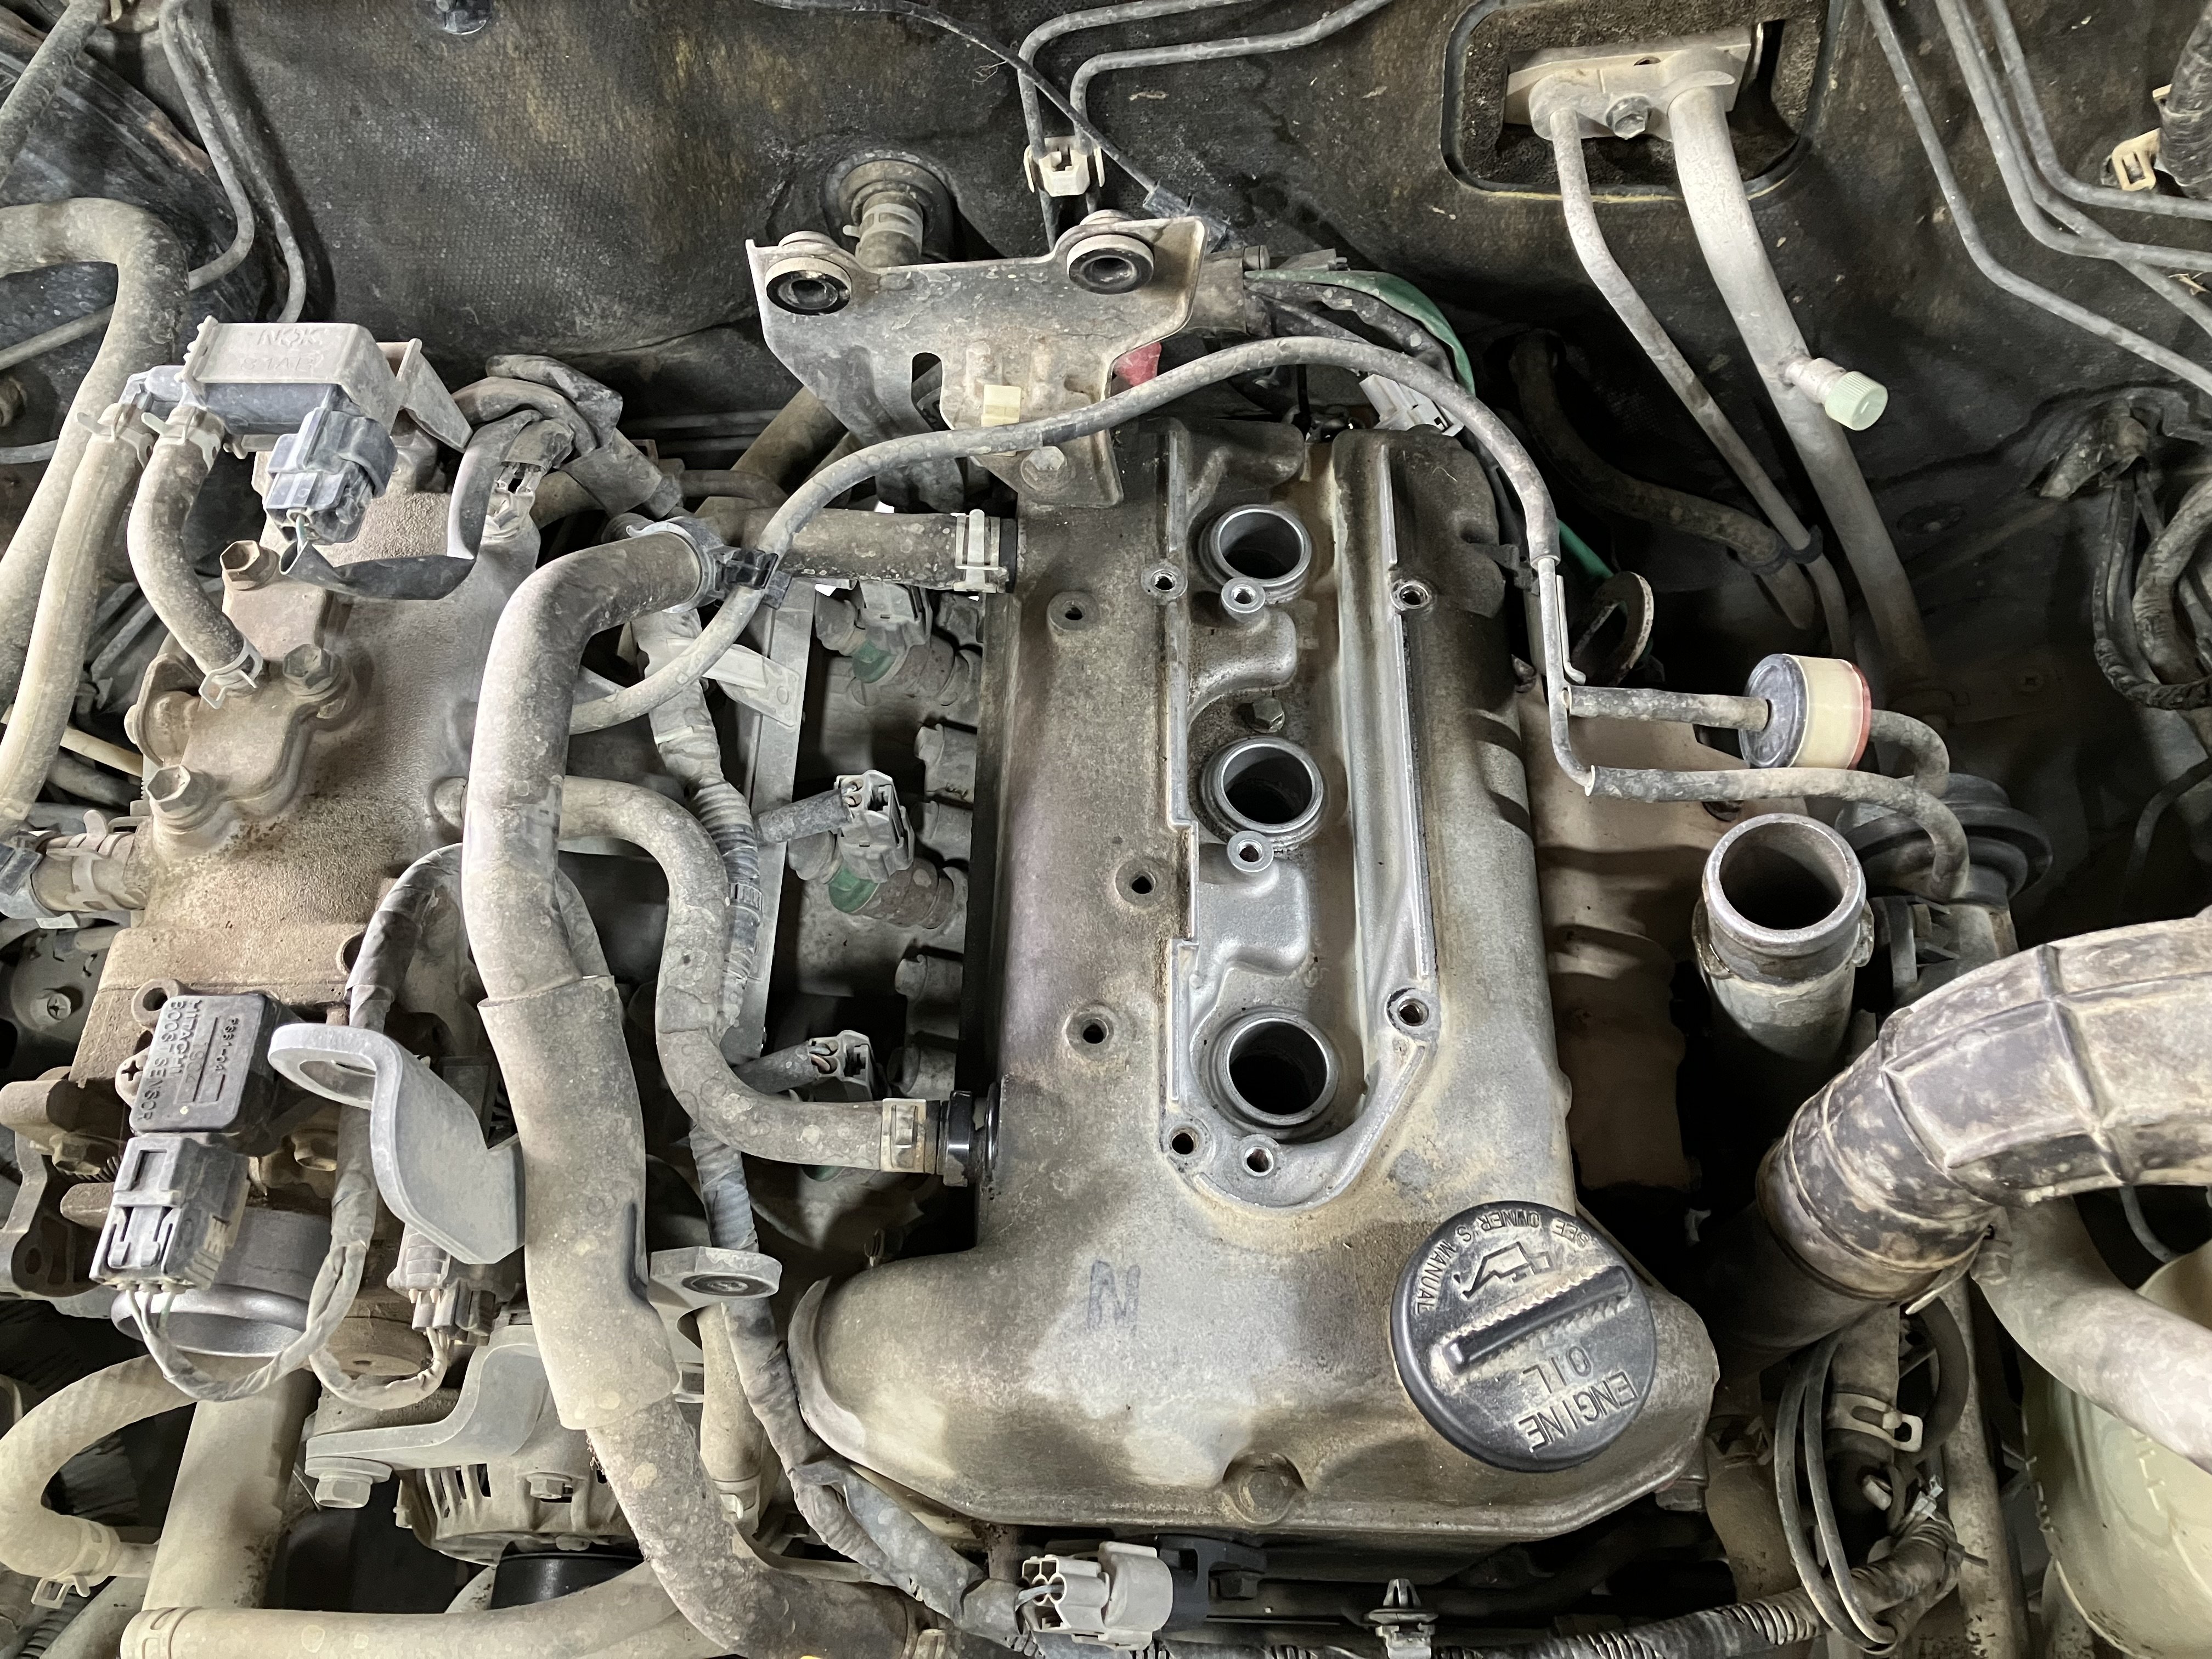
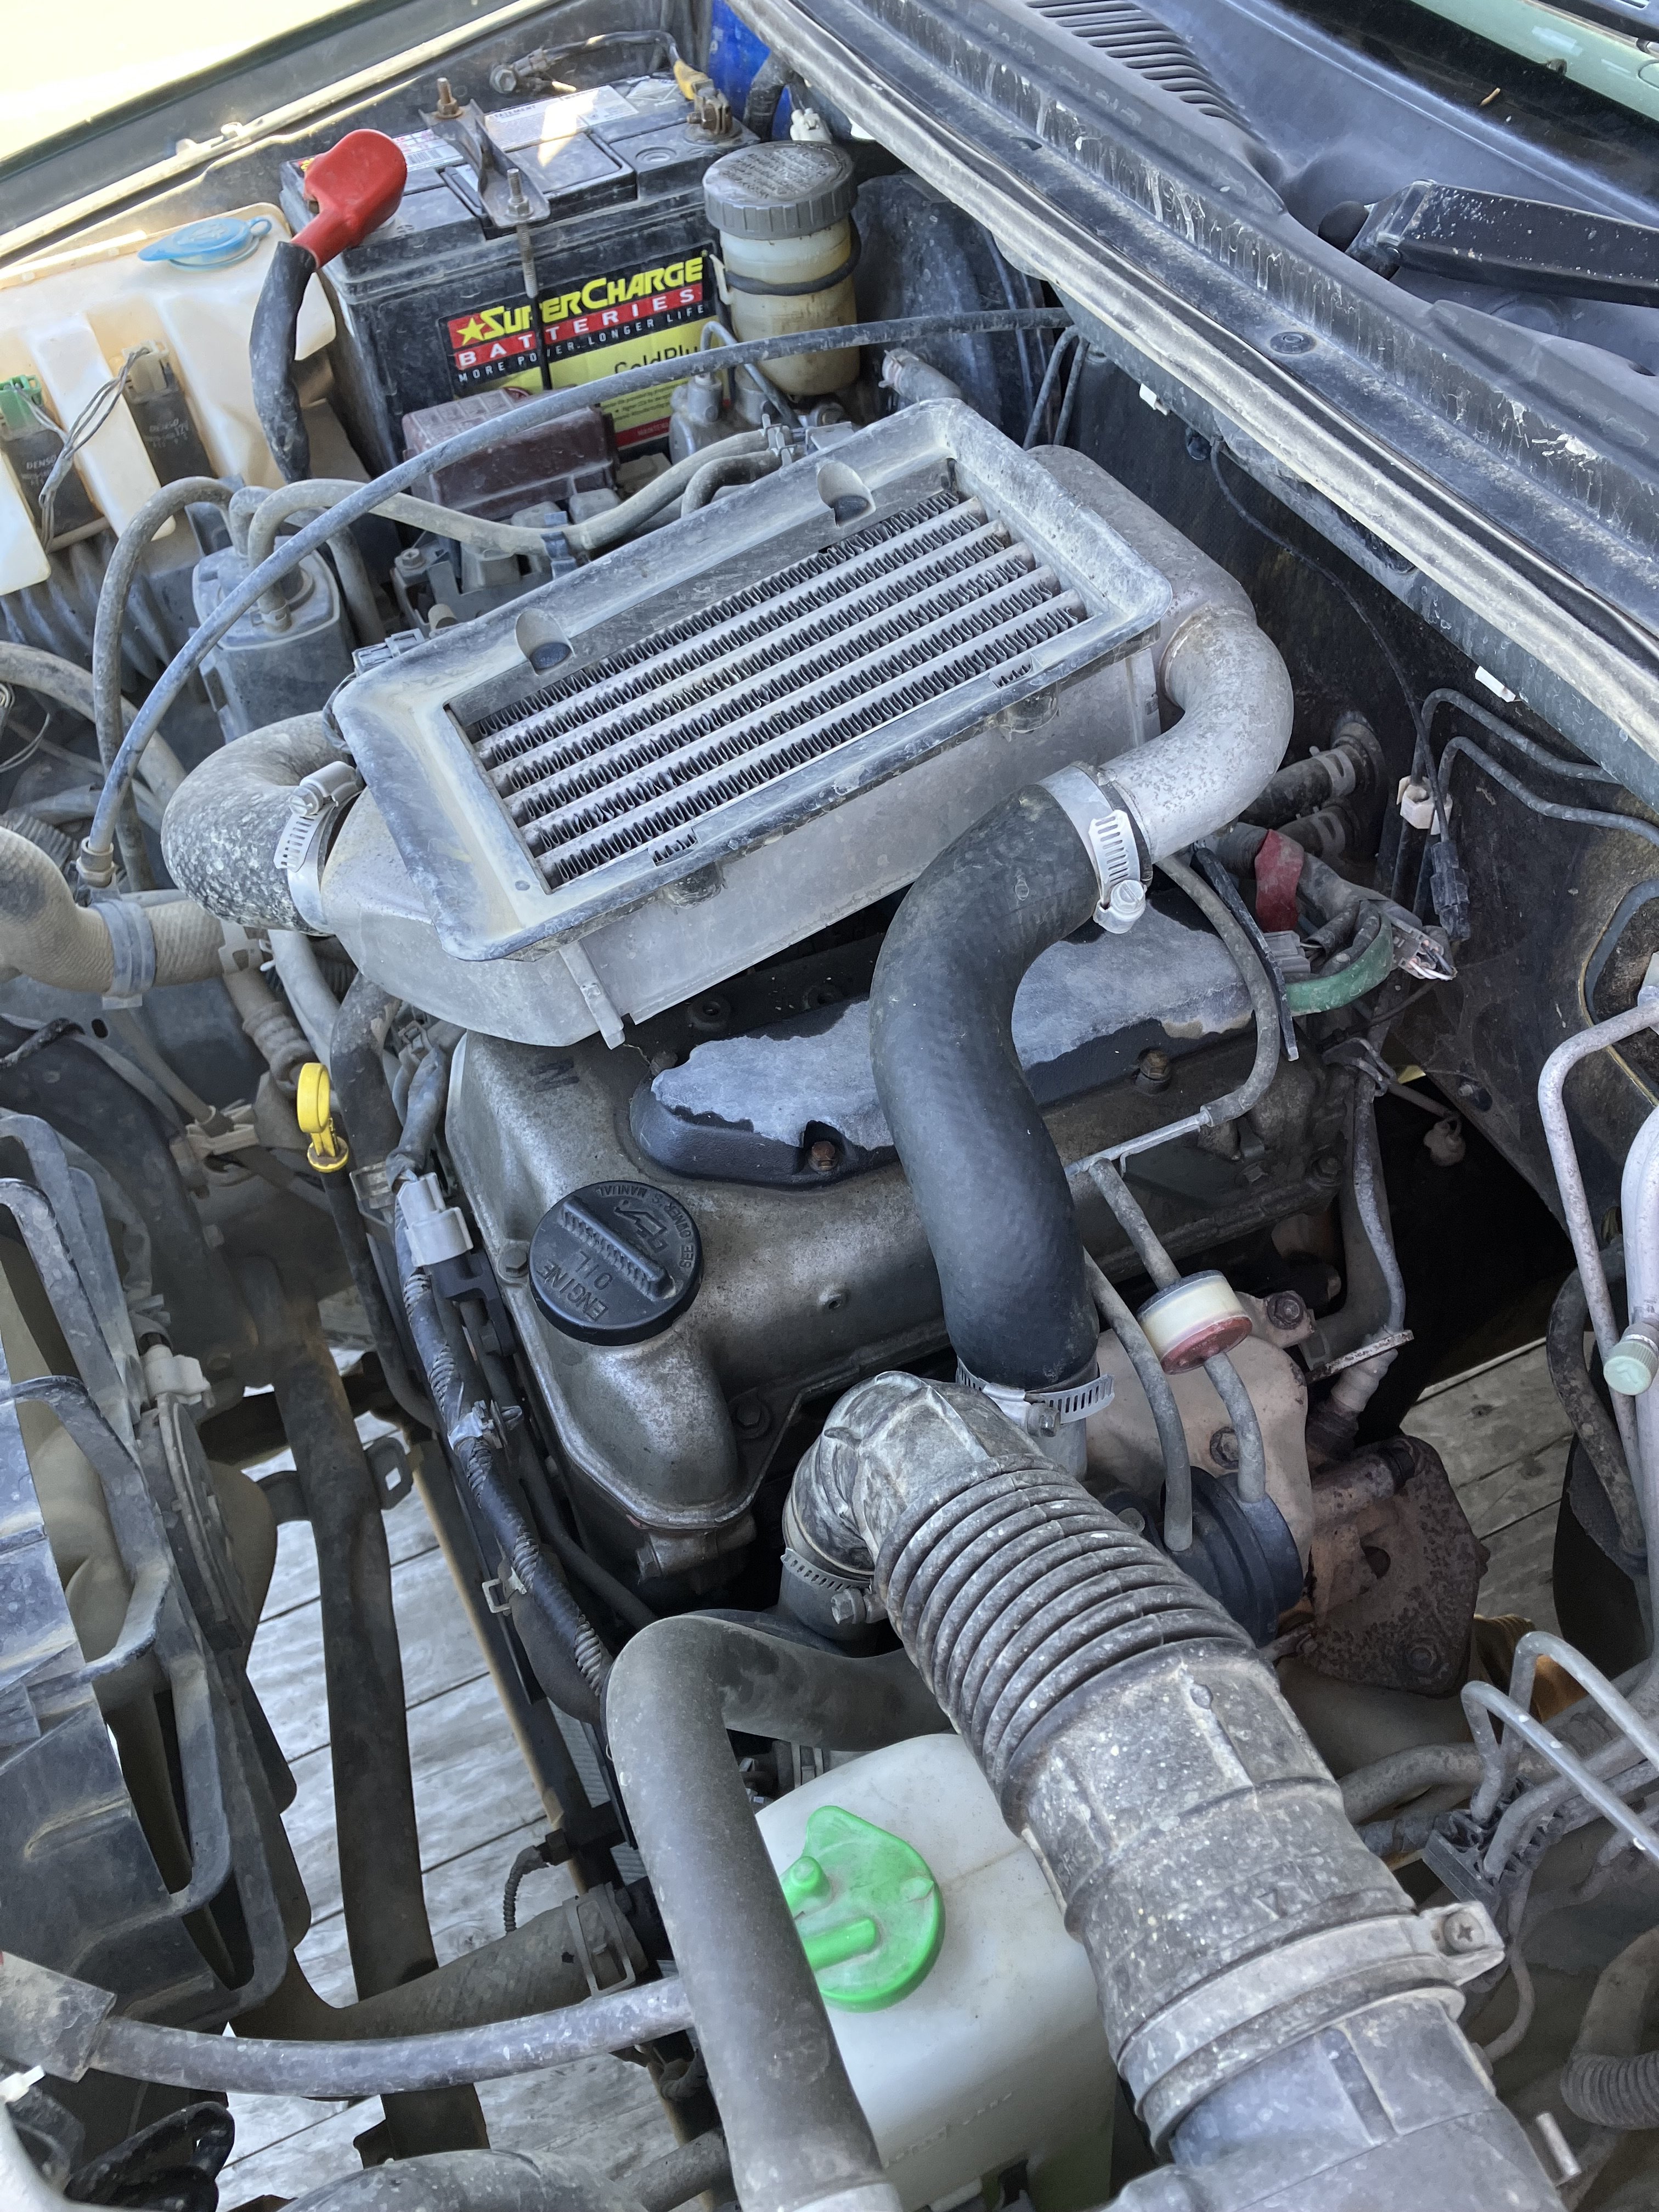
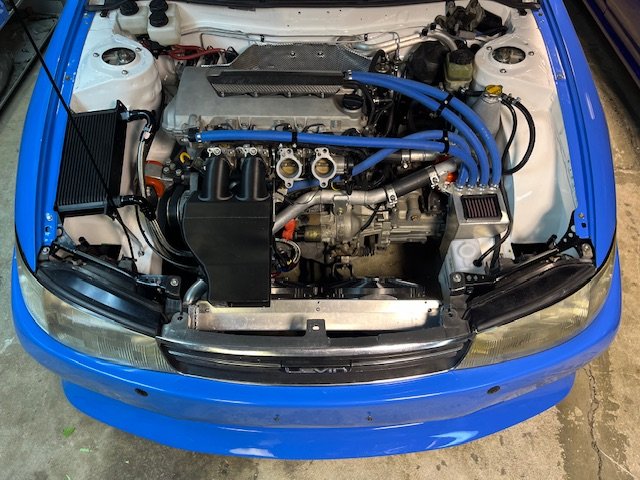
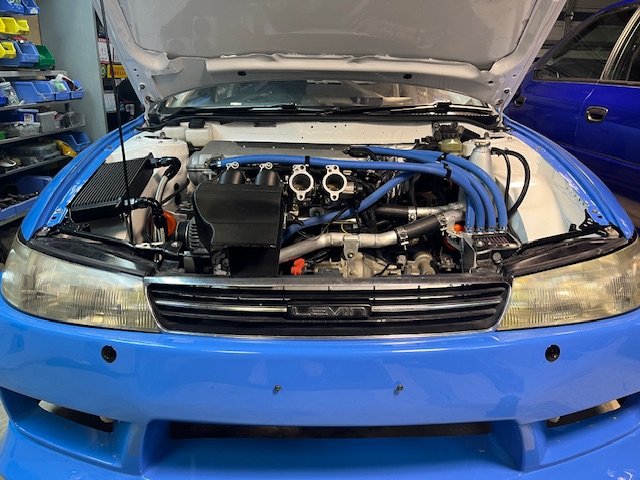
Now it was inside I could muck around with it. First job. I noticed the radio didn't work and the pocket in the second DIN slot wasn't mounted so that should be a quick fix. A loose wire was culprit as to why it wouldn't work. I found two screws to mount the storage pocket properly and reassembled. It's a JDM headunit so only receives one local station and doesn't have bluetooth - but plays CDs okay and also has iPod connectivity via USB so can play Spotify off my iPhone. Second job - while pondering and procrastinating I thought I'd quickly clean up the headlights which were very yellow. Here's the job 50% done for comparison. Last job of the day - why doesn't it start? Intercooler off, coils out, plugs out. Everything is so tiny. Turned it over with plugs out and it was like a water pump - a lot more came out of the bores than I had imagined and I forgot how far it goes under pressure. What's that smell? Petrol. That ain't water. Not sure what was going on but it was a mix with a lot of petrol in it, and it evaporated/flashed off pretty quickly. When I've got it apart I'll clean and check the injectors as well to make sure there isn't a sticky one or some other reason why it may have flooded with petrol. After all that I rewarded myself with a cold beer and thought about what next. Engine out over the holiday break (if not before) and see what is needed. Parts will need to come from Japan but they appear to be readily available. It can sit and wait for now.
 21 points
 -
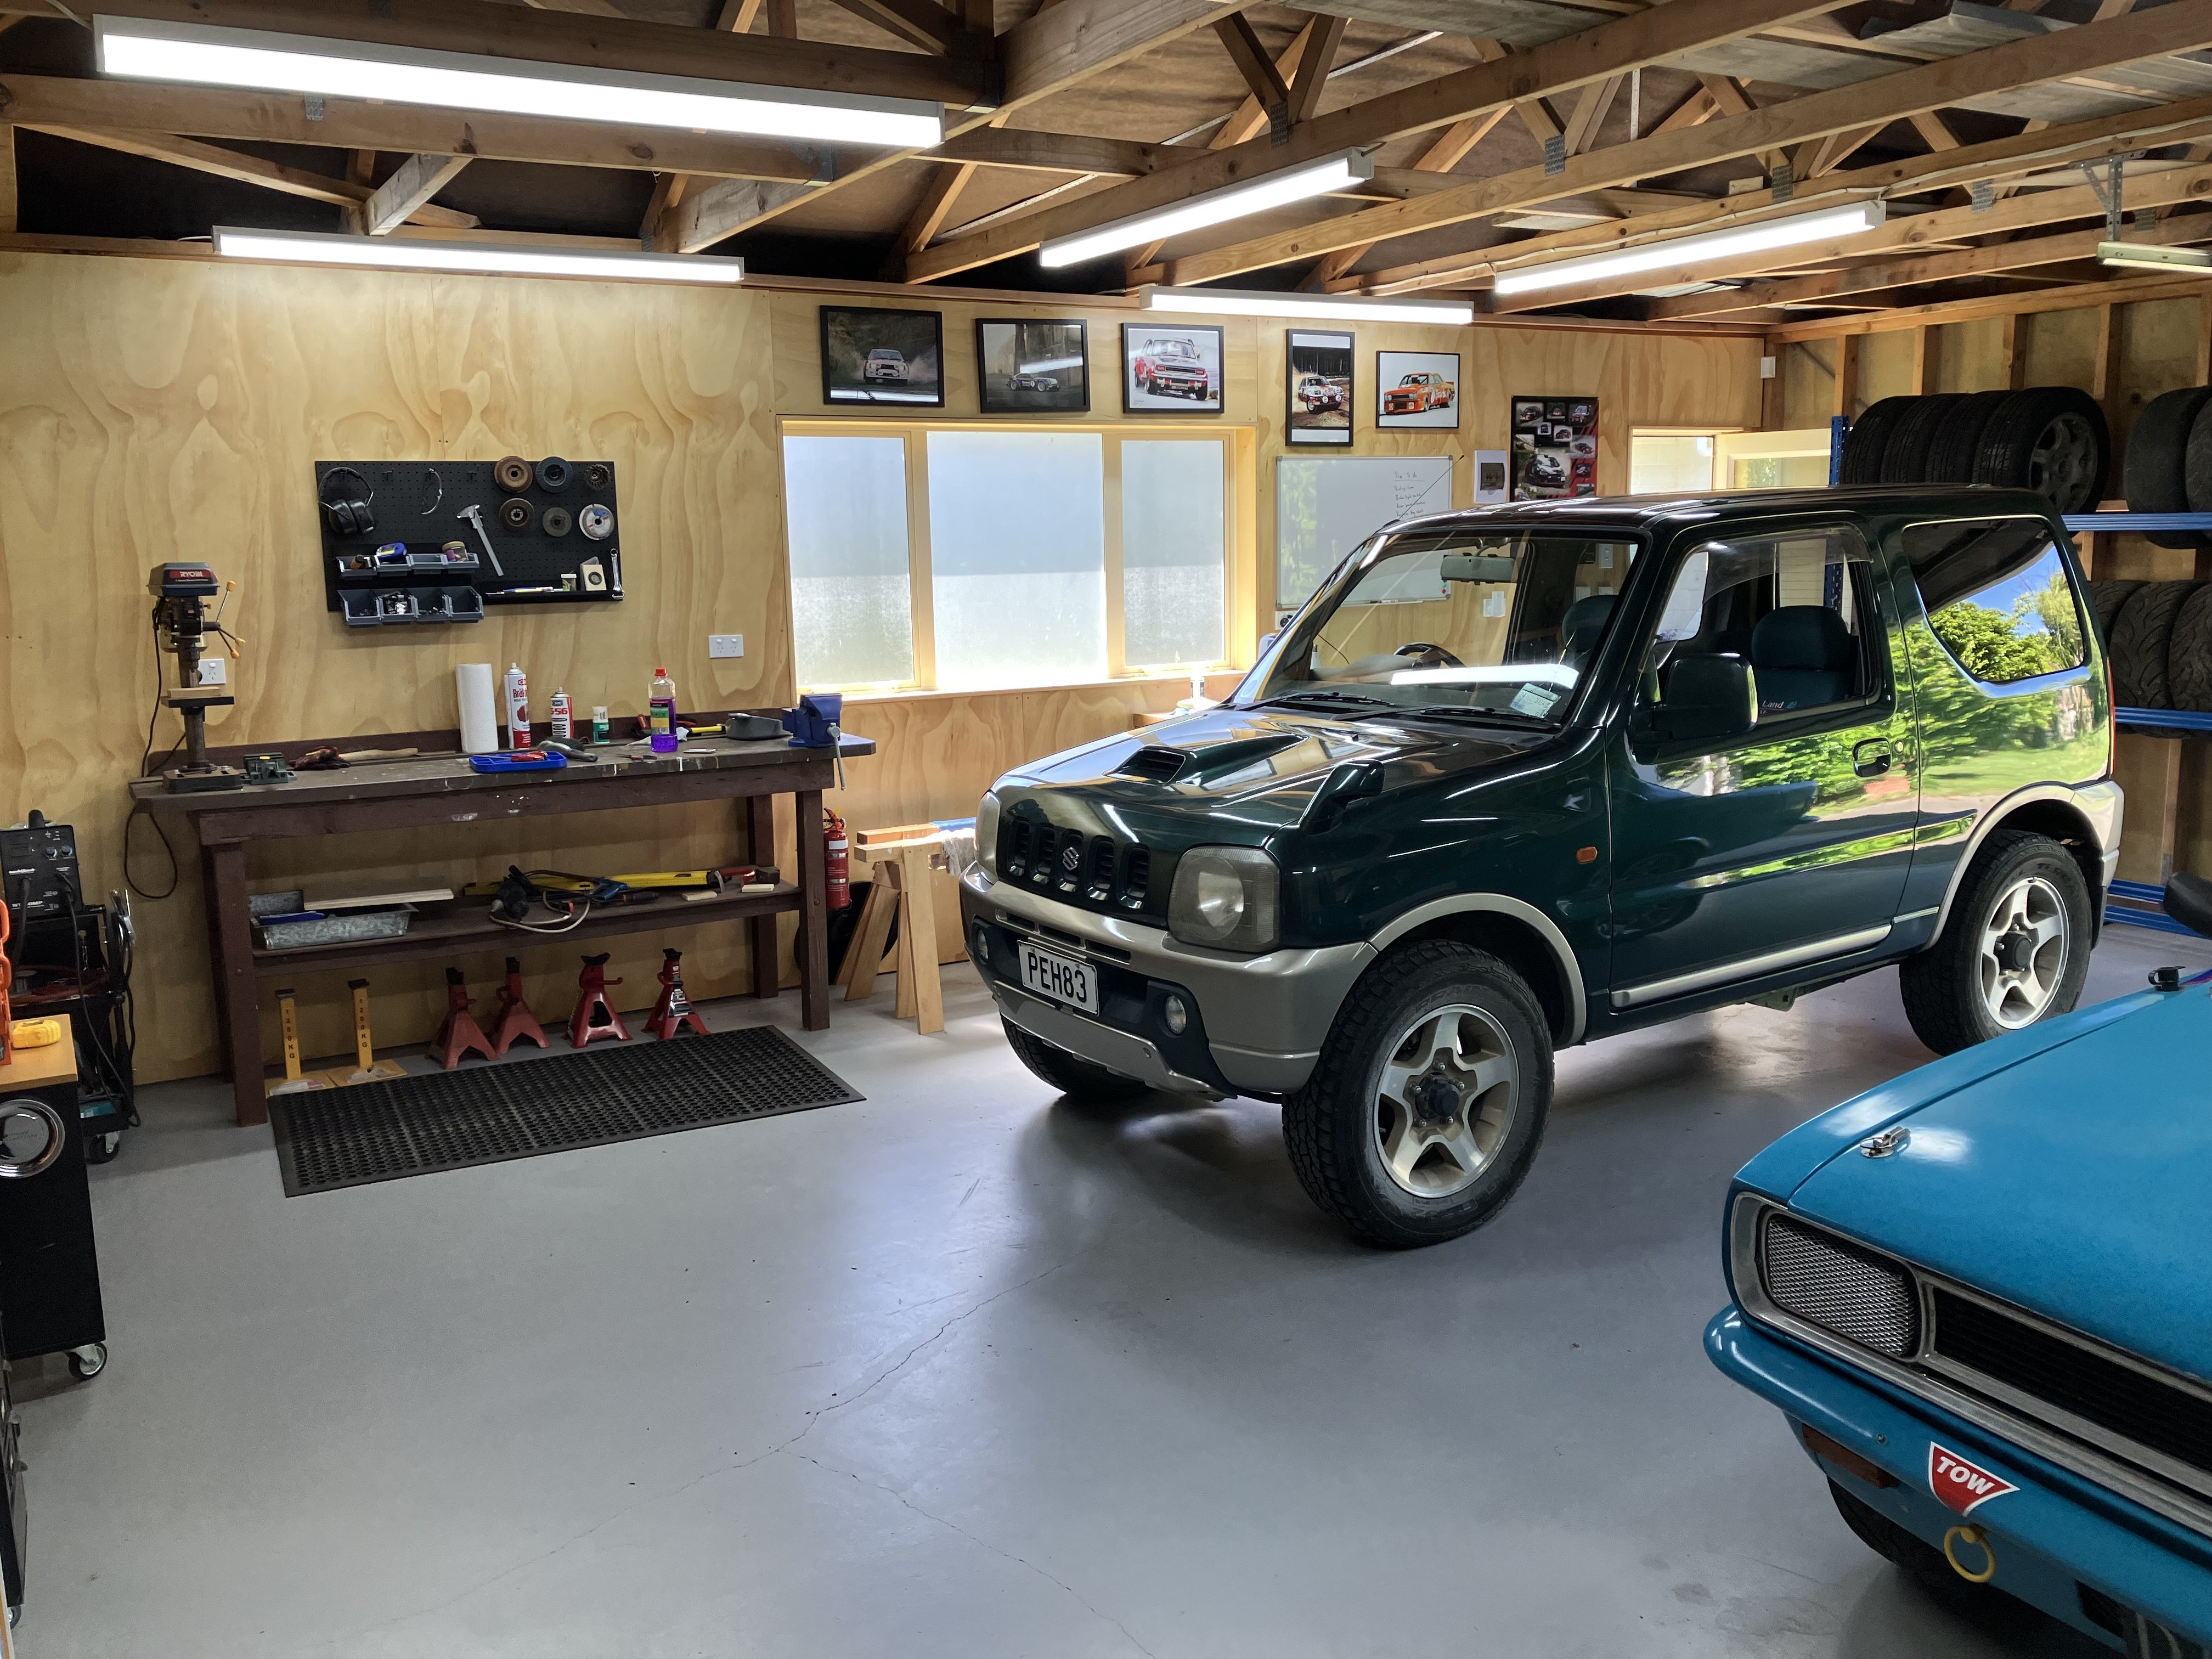
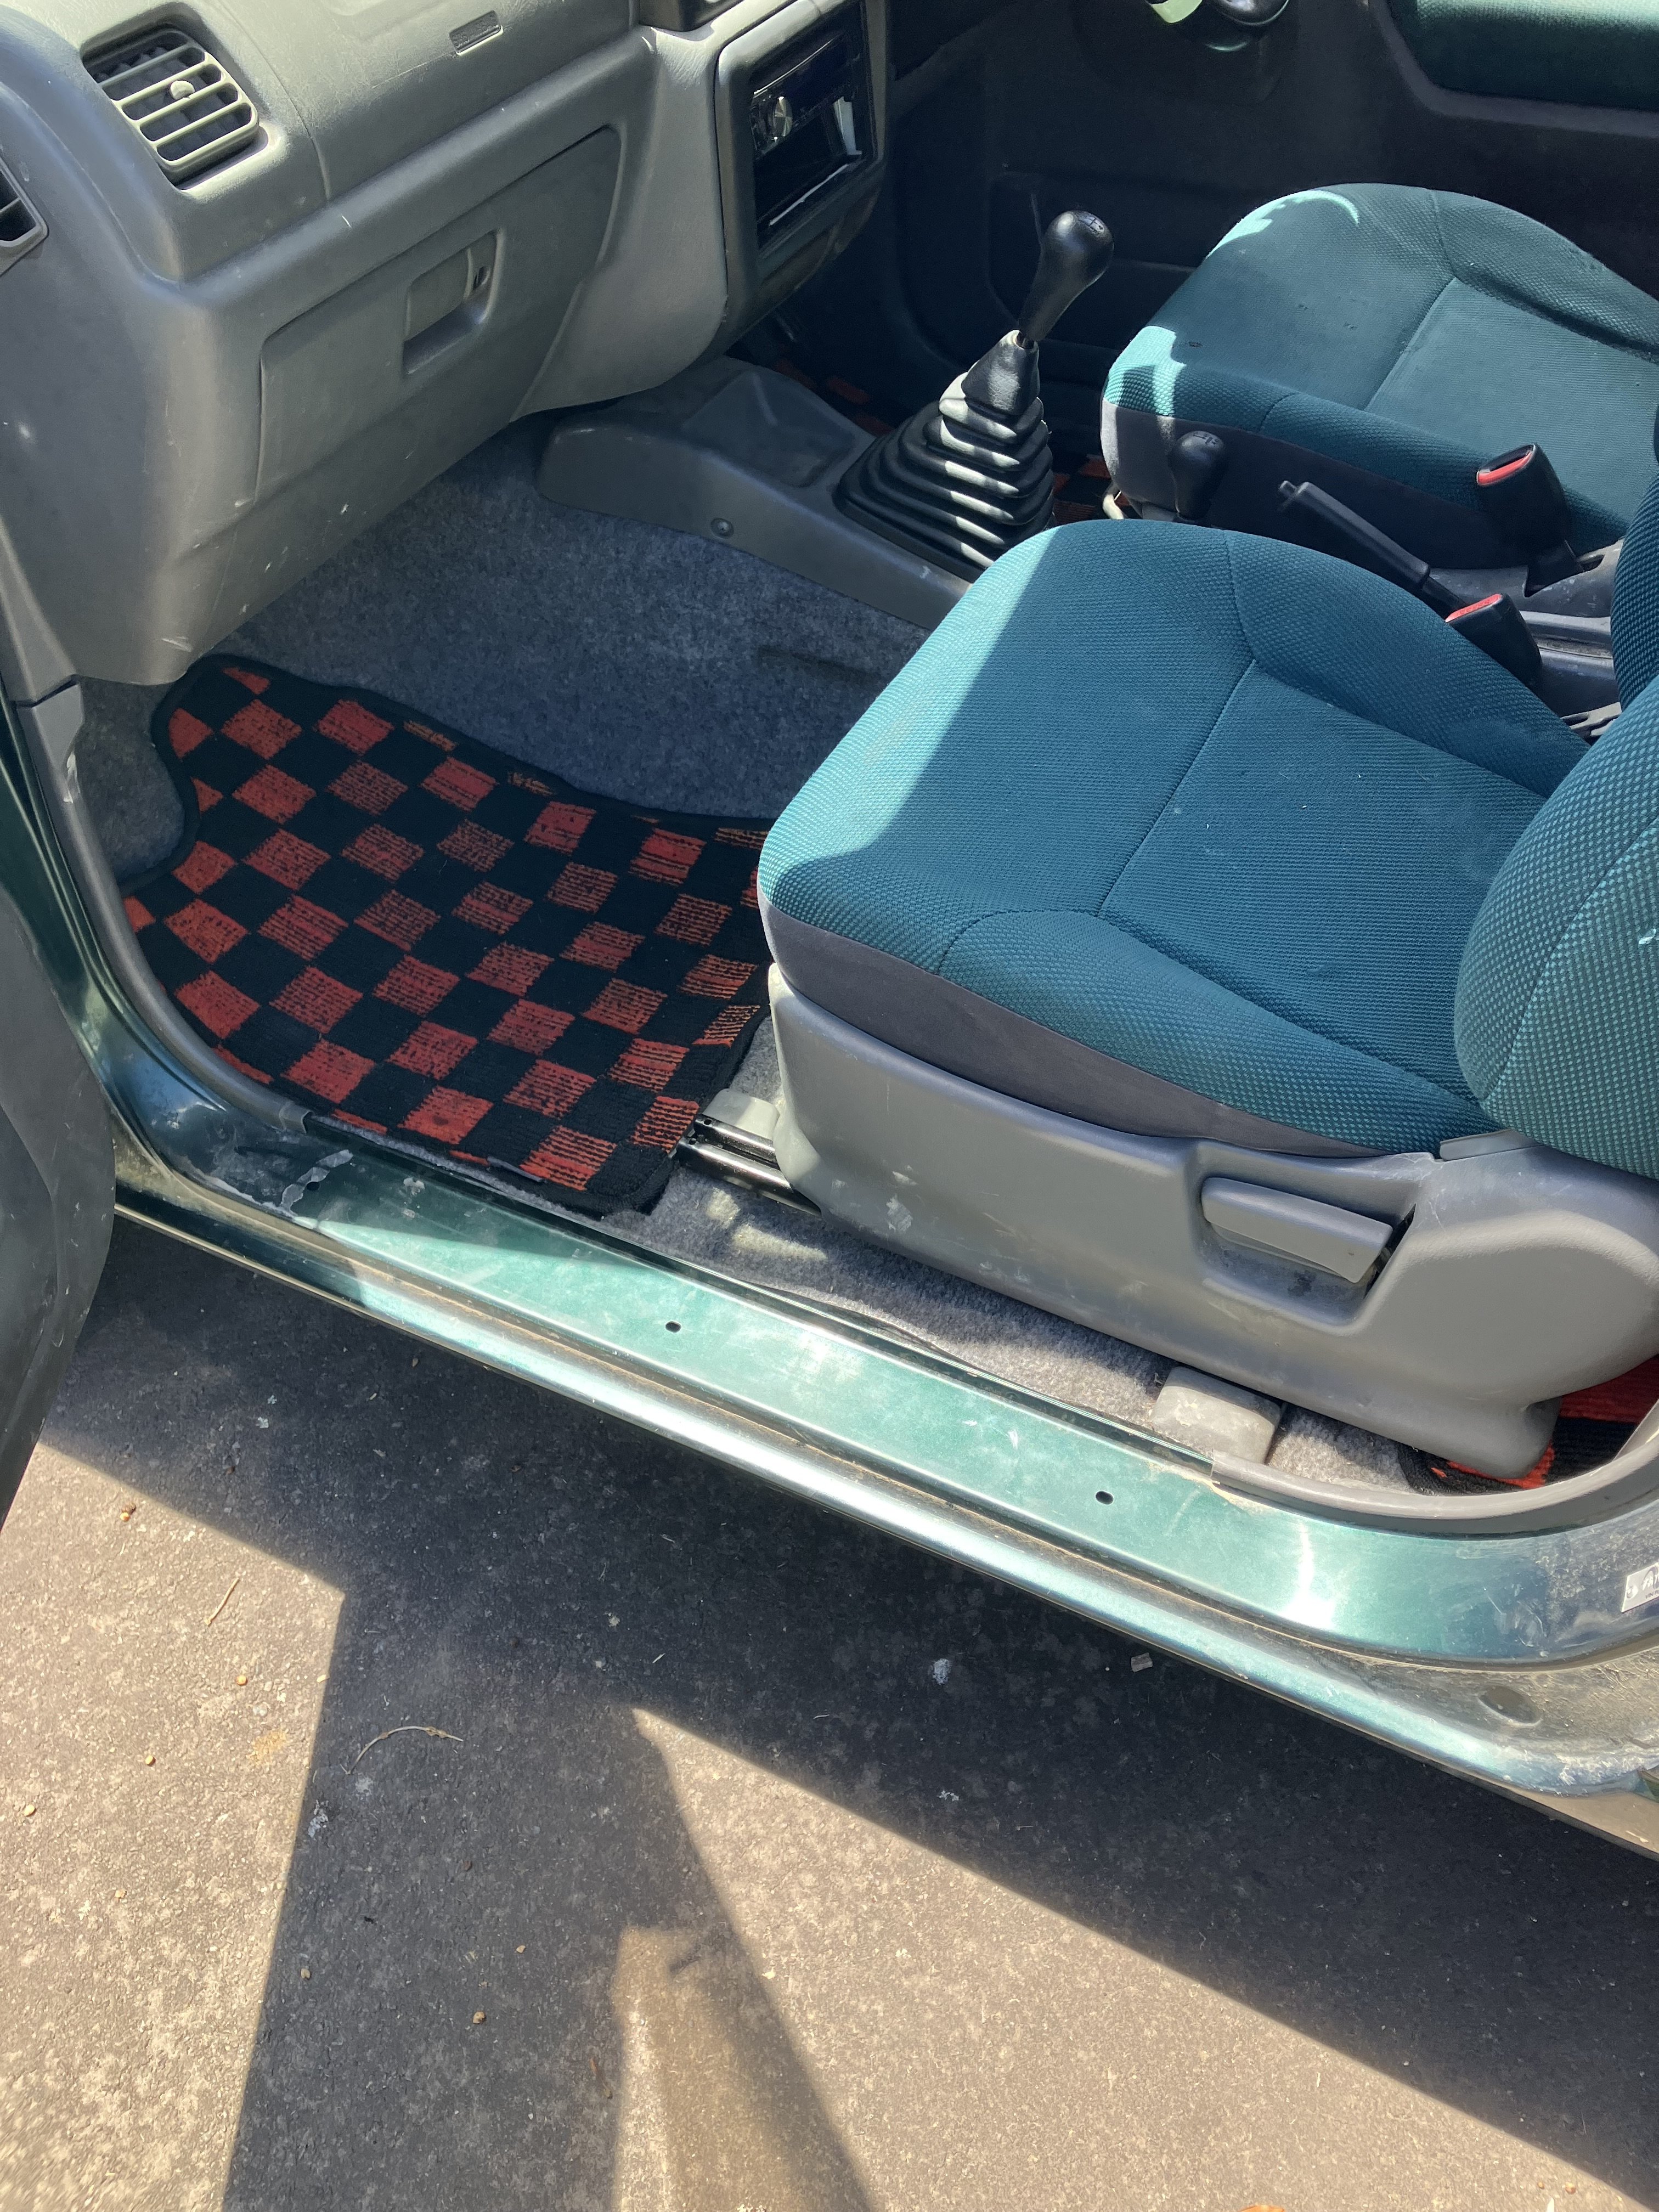
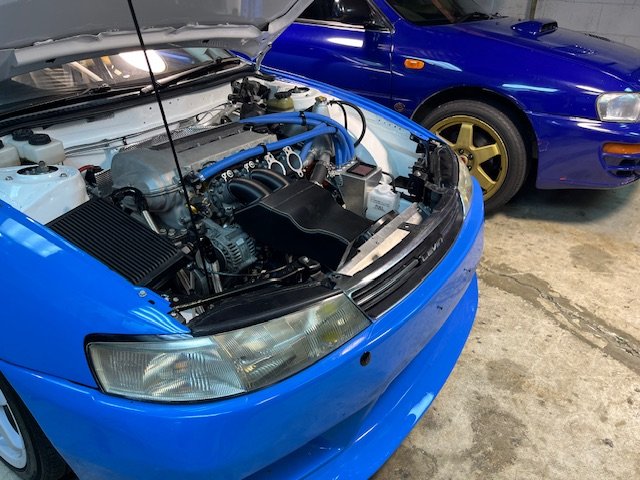
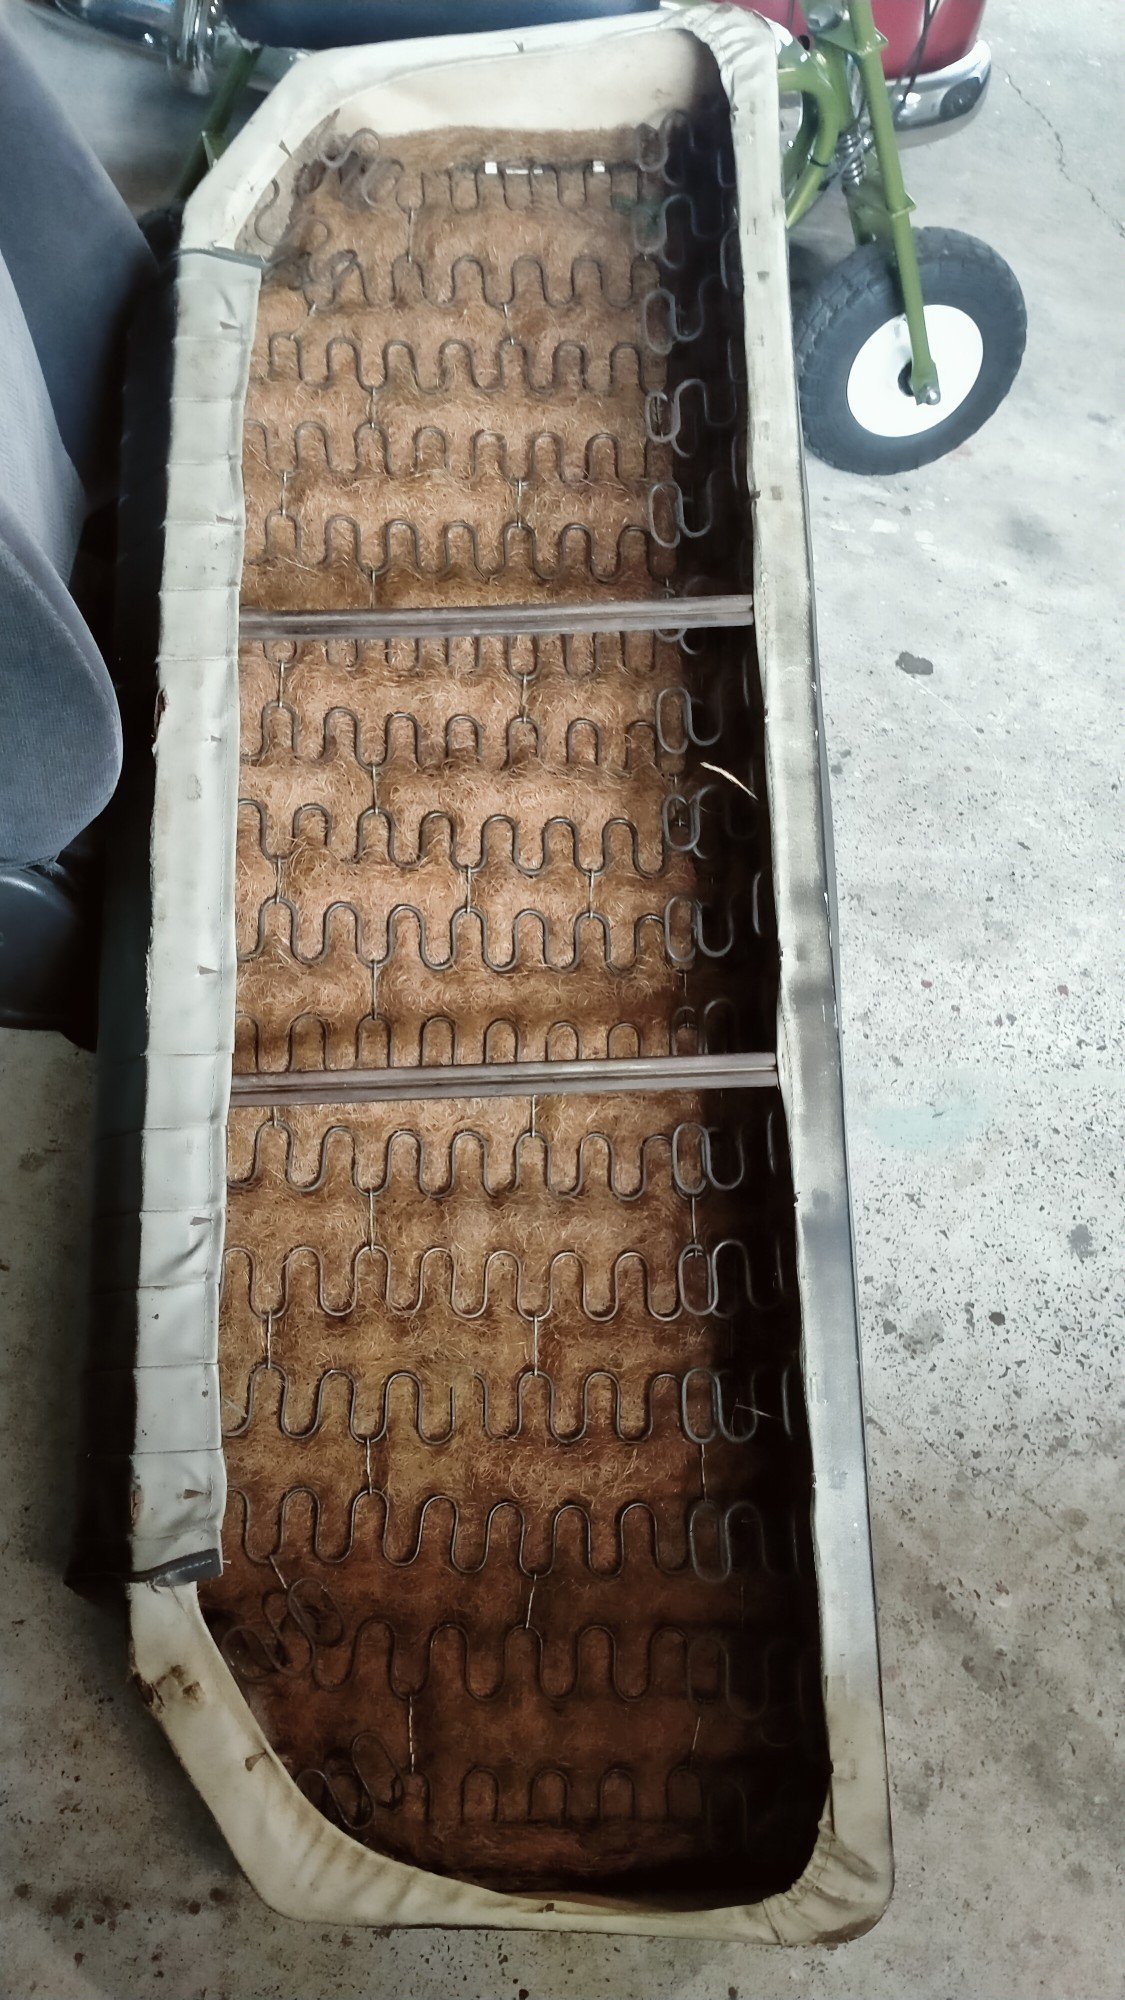
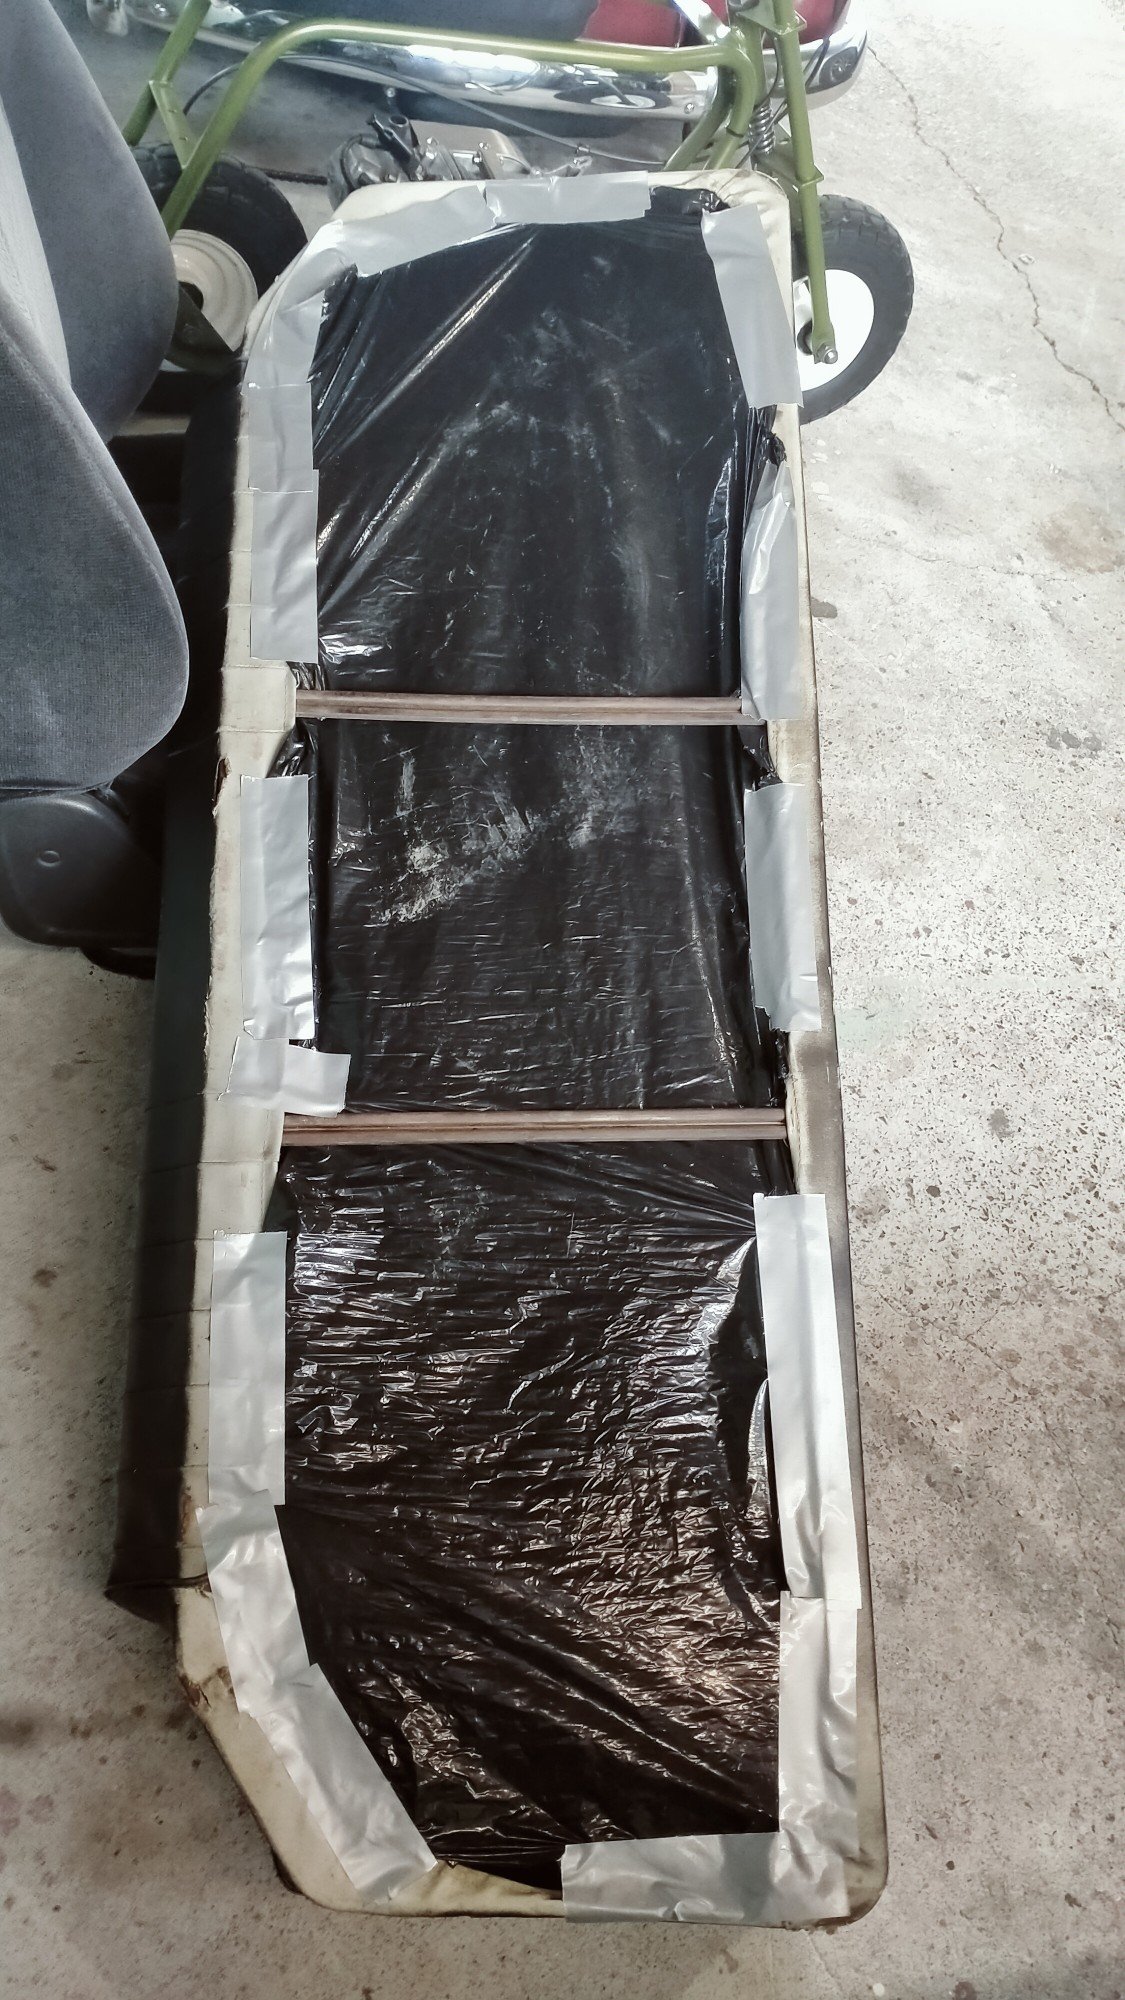
I spent the whole afternoon cleaning it. Started by waterblasting and scrubbing the outside, removed all the stickers and other shit from the glass. It actually looked pretty good when it was clean. The inside needed a decent vacuum and scrub of all the plastics. The door cards had spilled drinks, one side had something resembling dried tomato sauce which had dripped down it, the centre consoles, dash and glovebox were also filthy and all got a scrub inside or outside of the car. I really want to pull the seats and carpets out and give it a deep clean, but I'll leave that until it is running again. We pushed it into the shed so I could look into why it wasn't starting. Putting it inside next to my other 'small' car made me realise just how small these really are. If you are space constrained, buy a kei car instead. After all, that's why they exist.
14 points
-
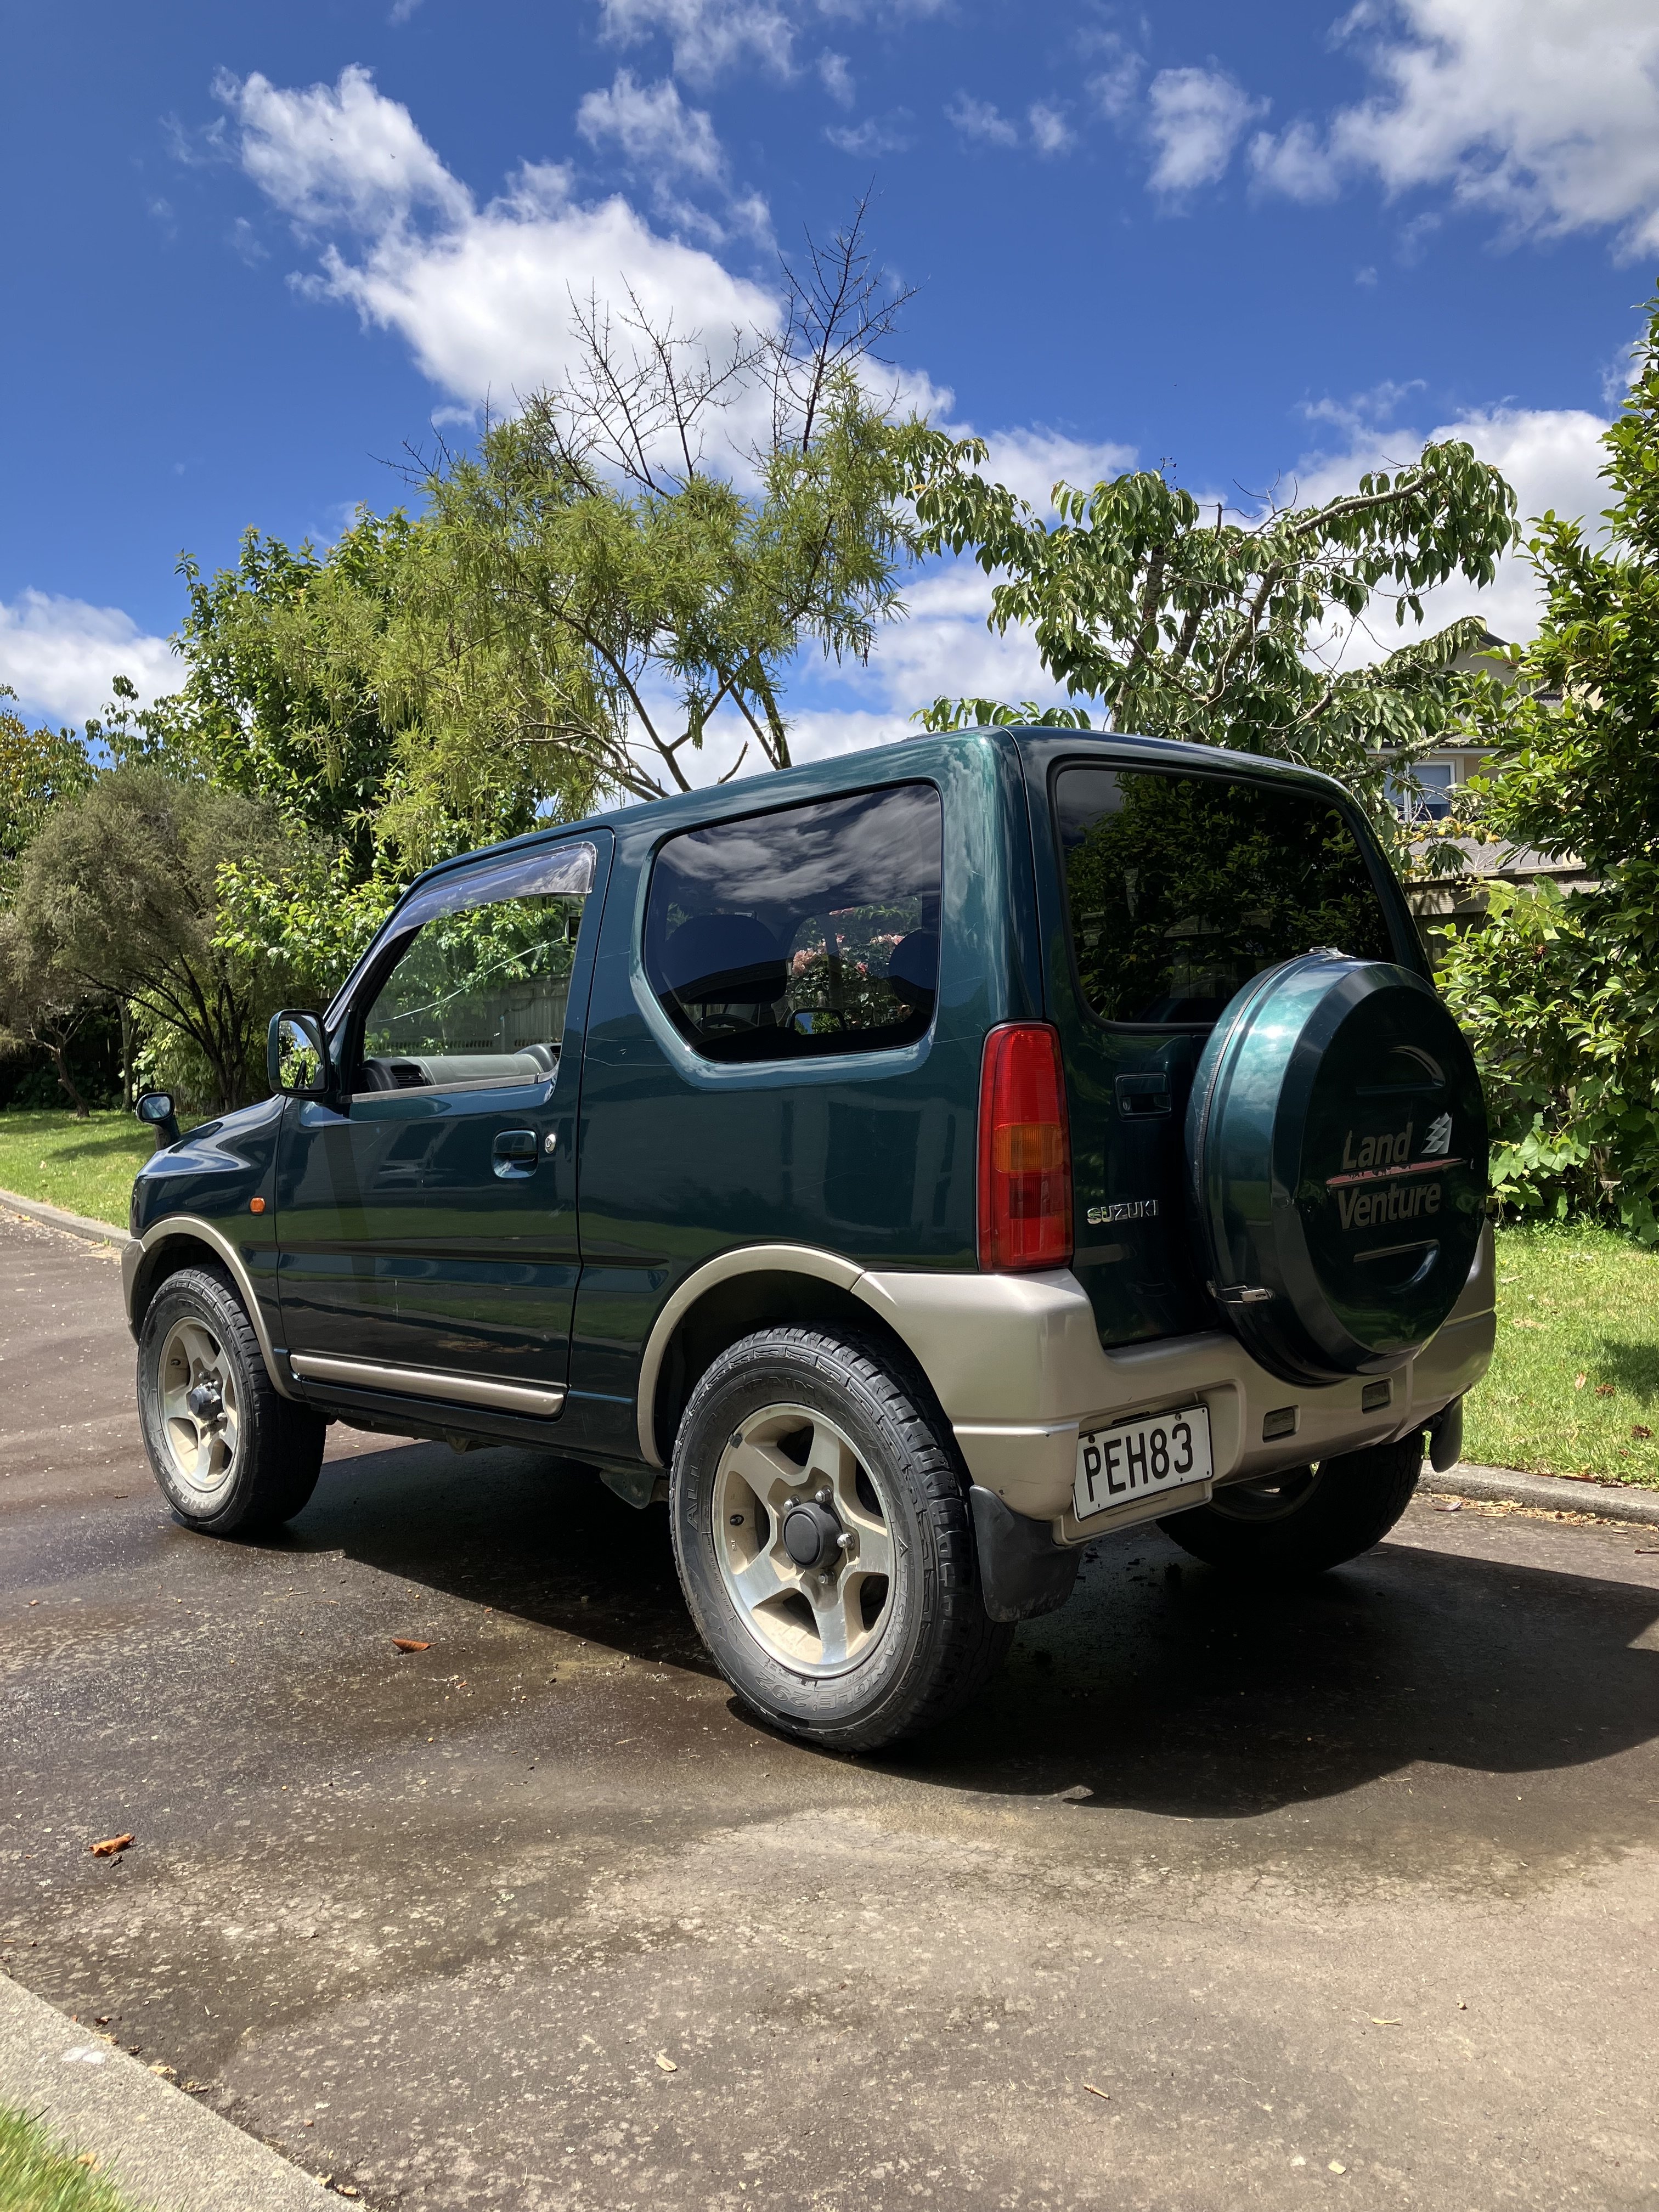
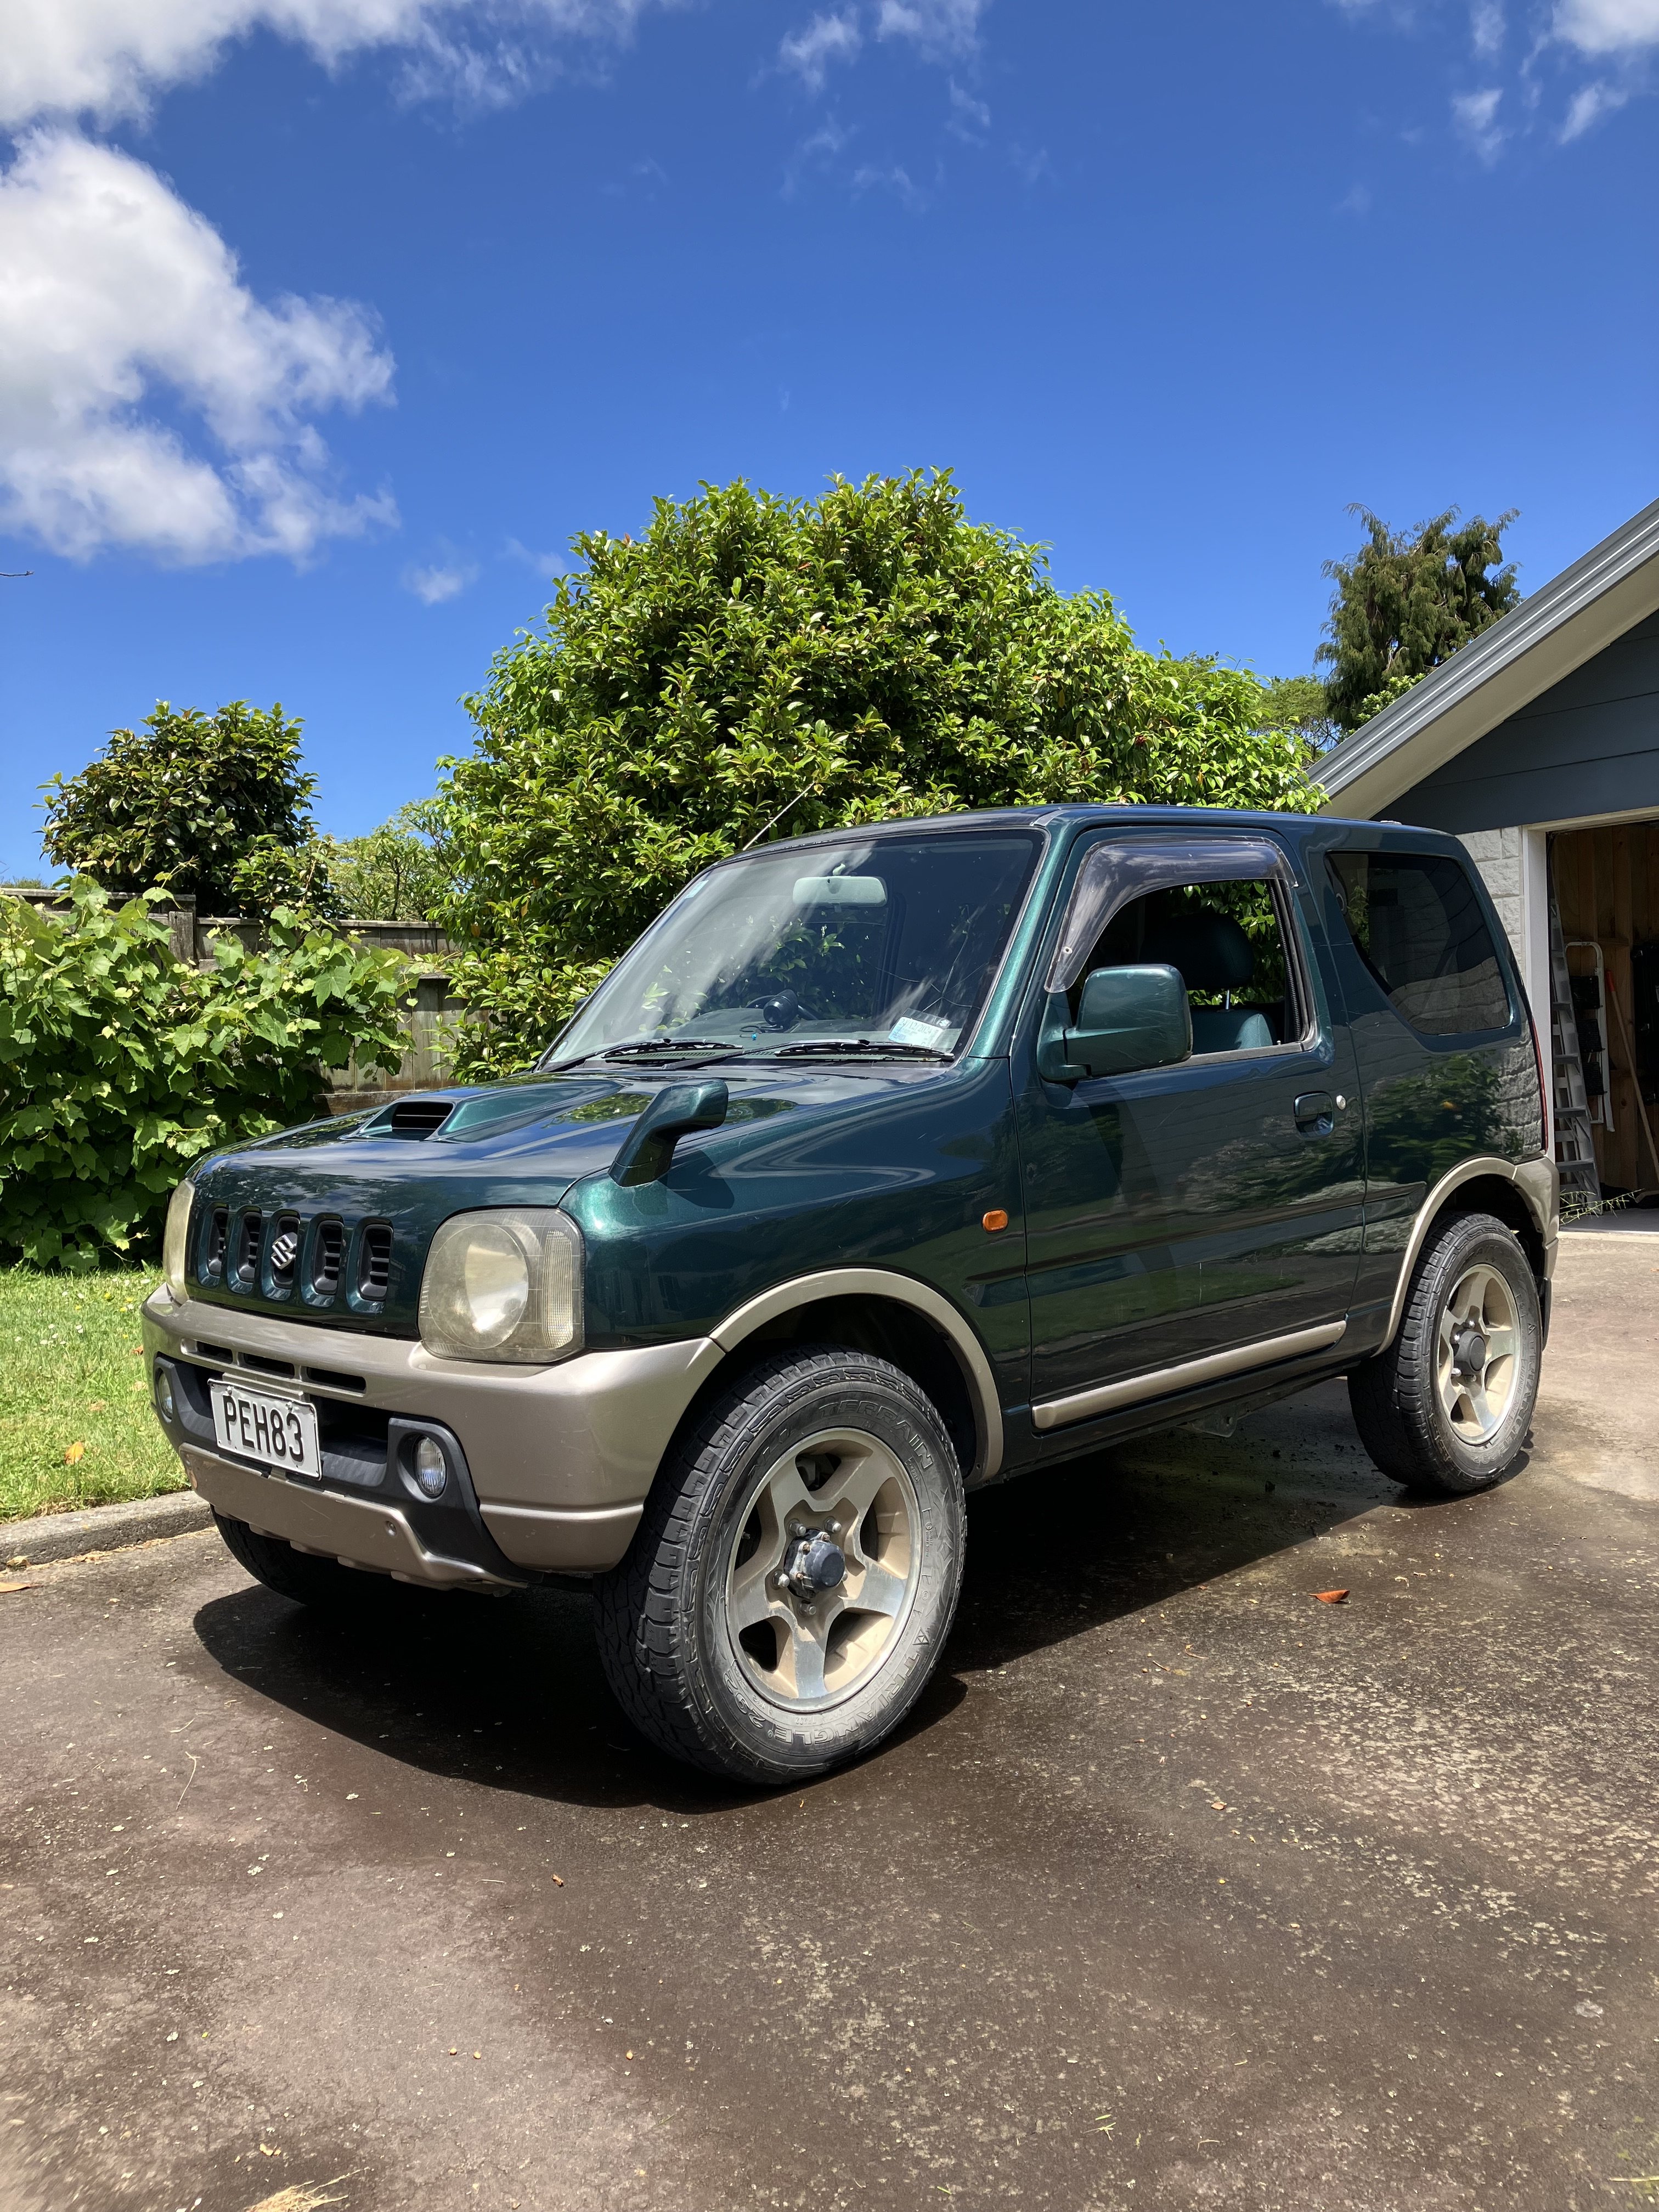
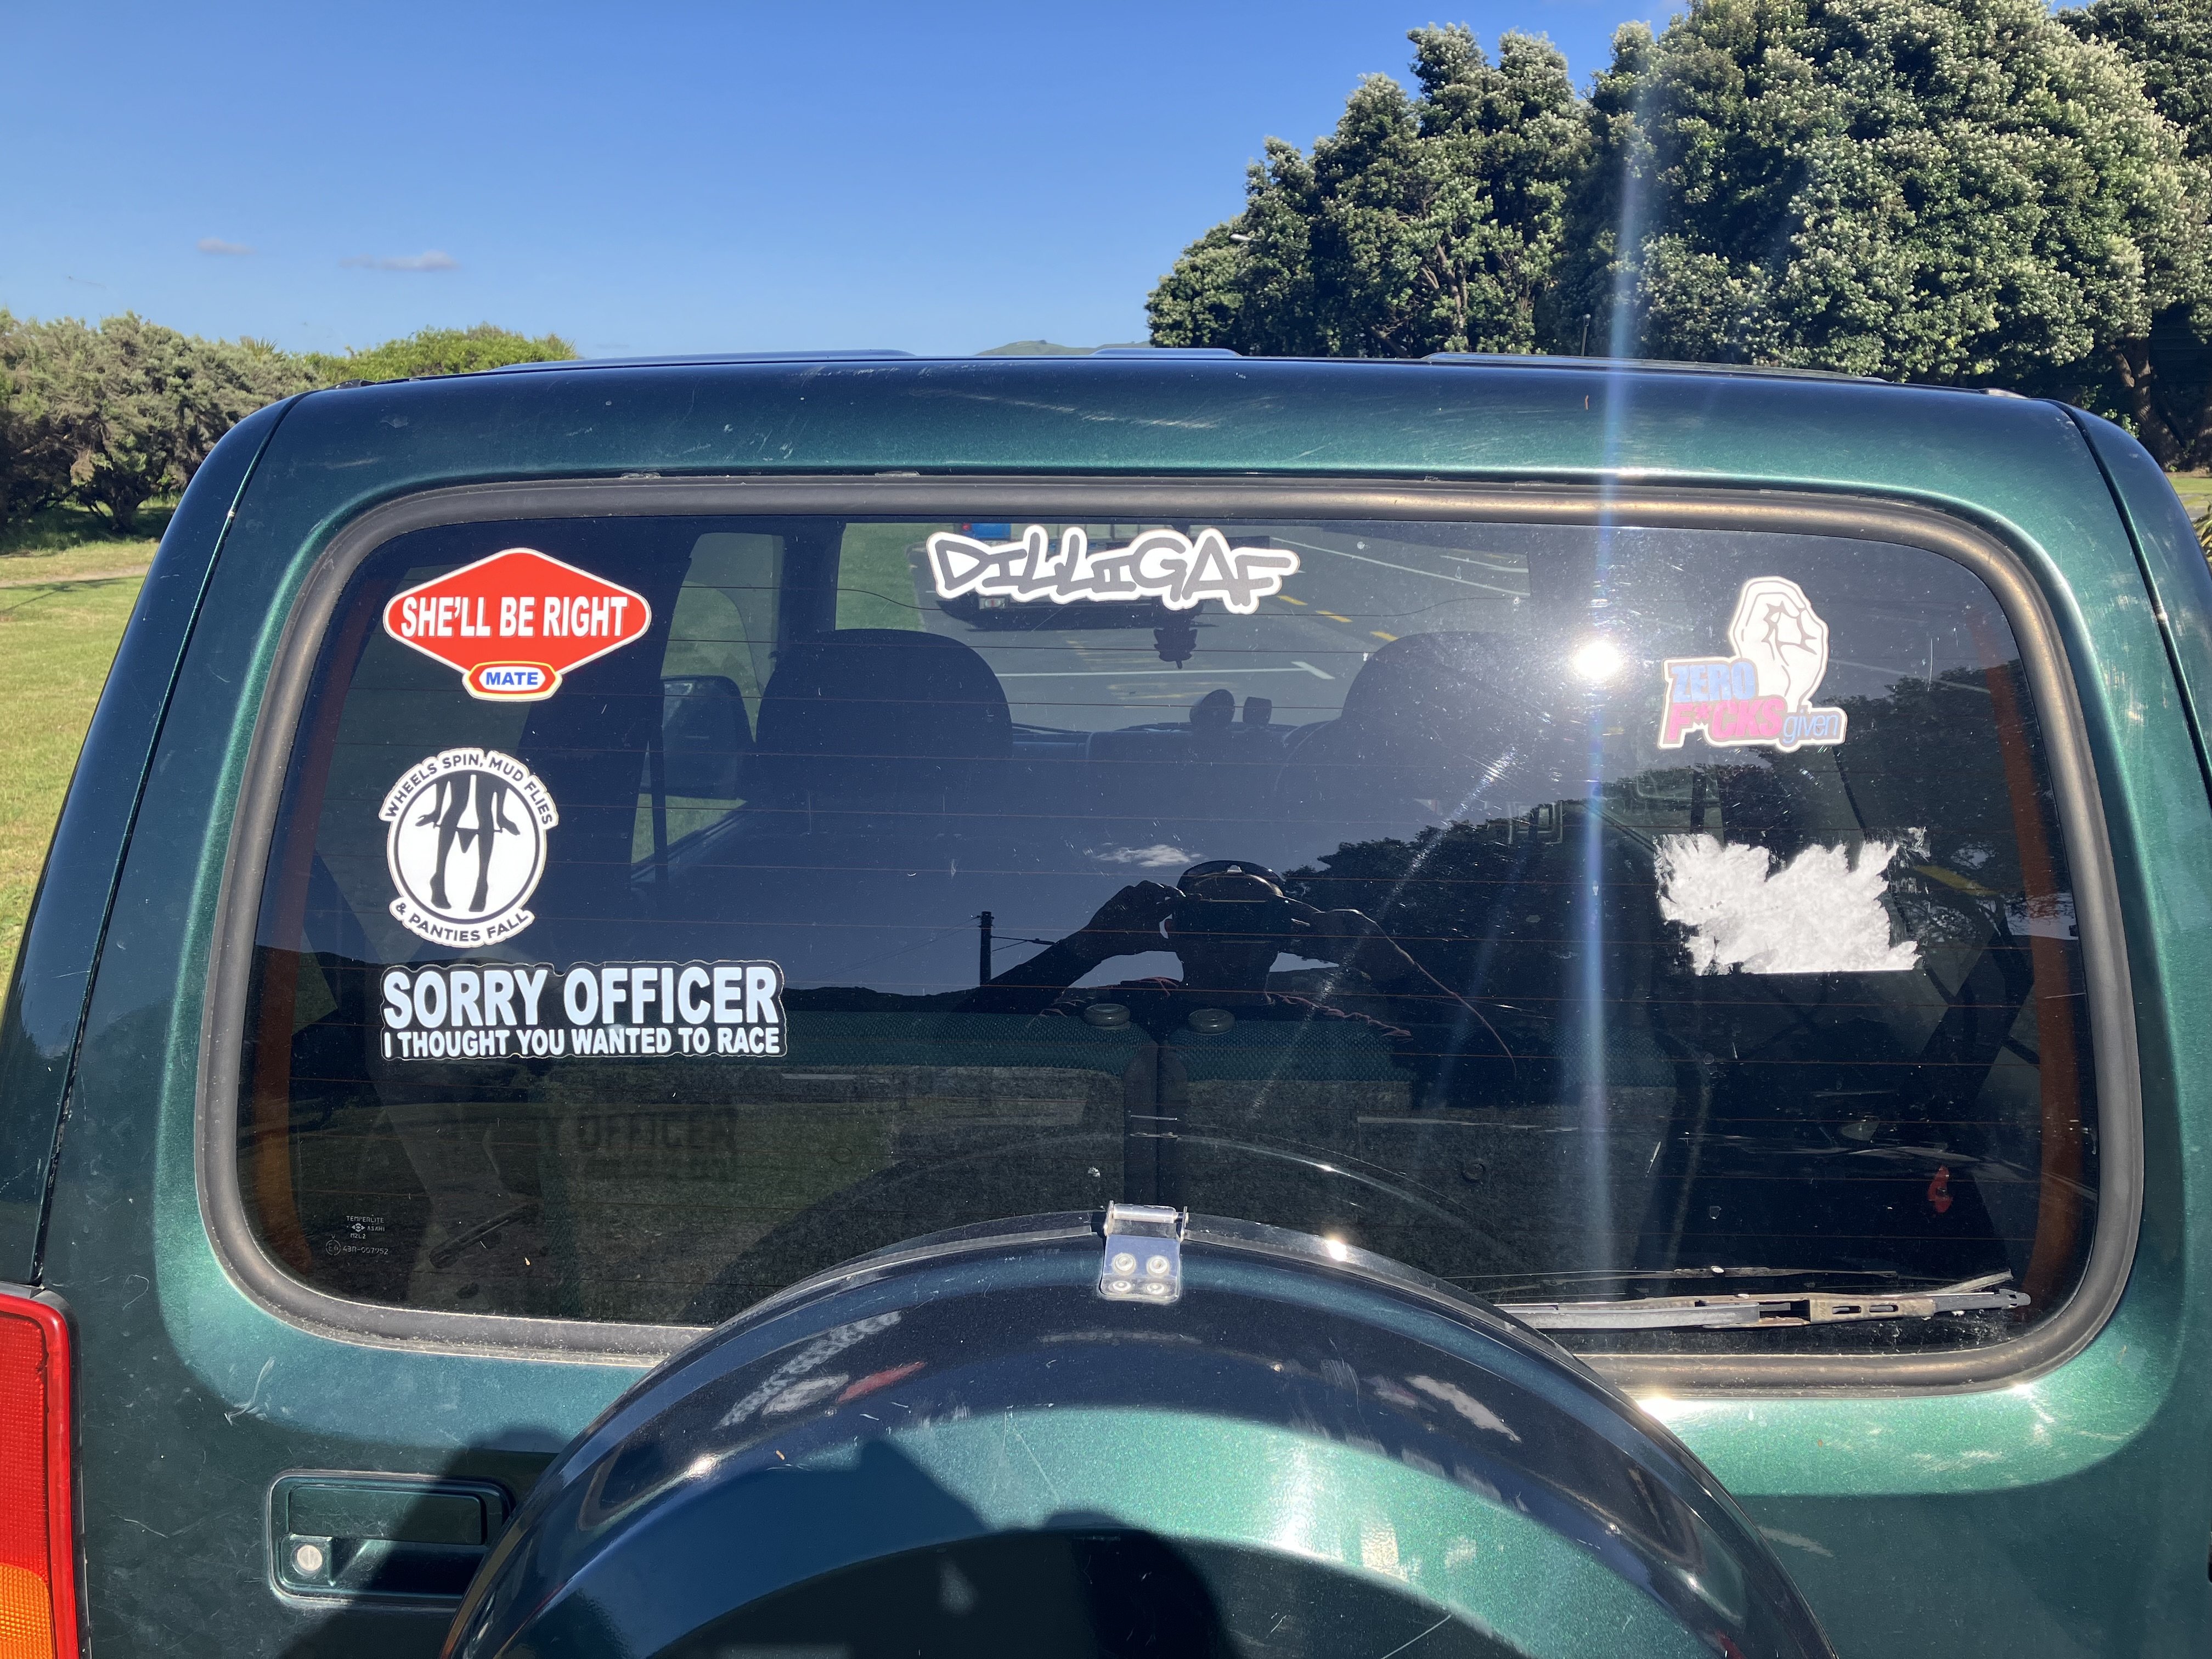
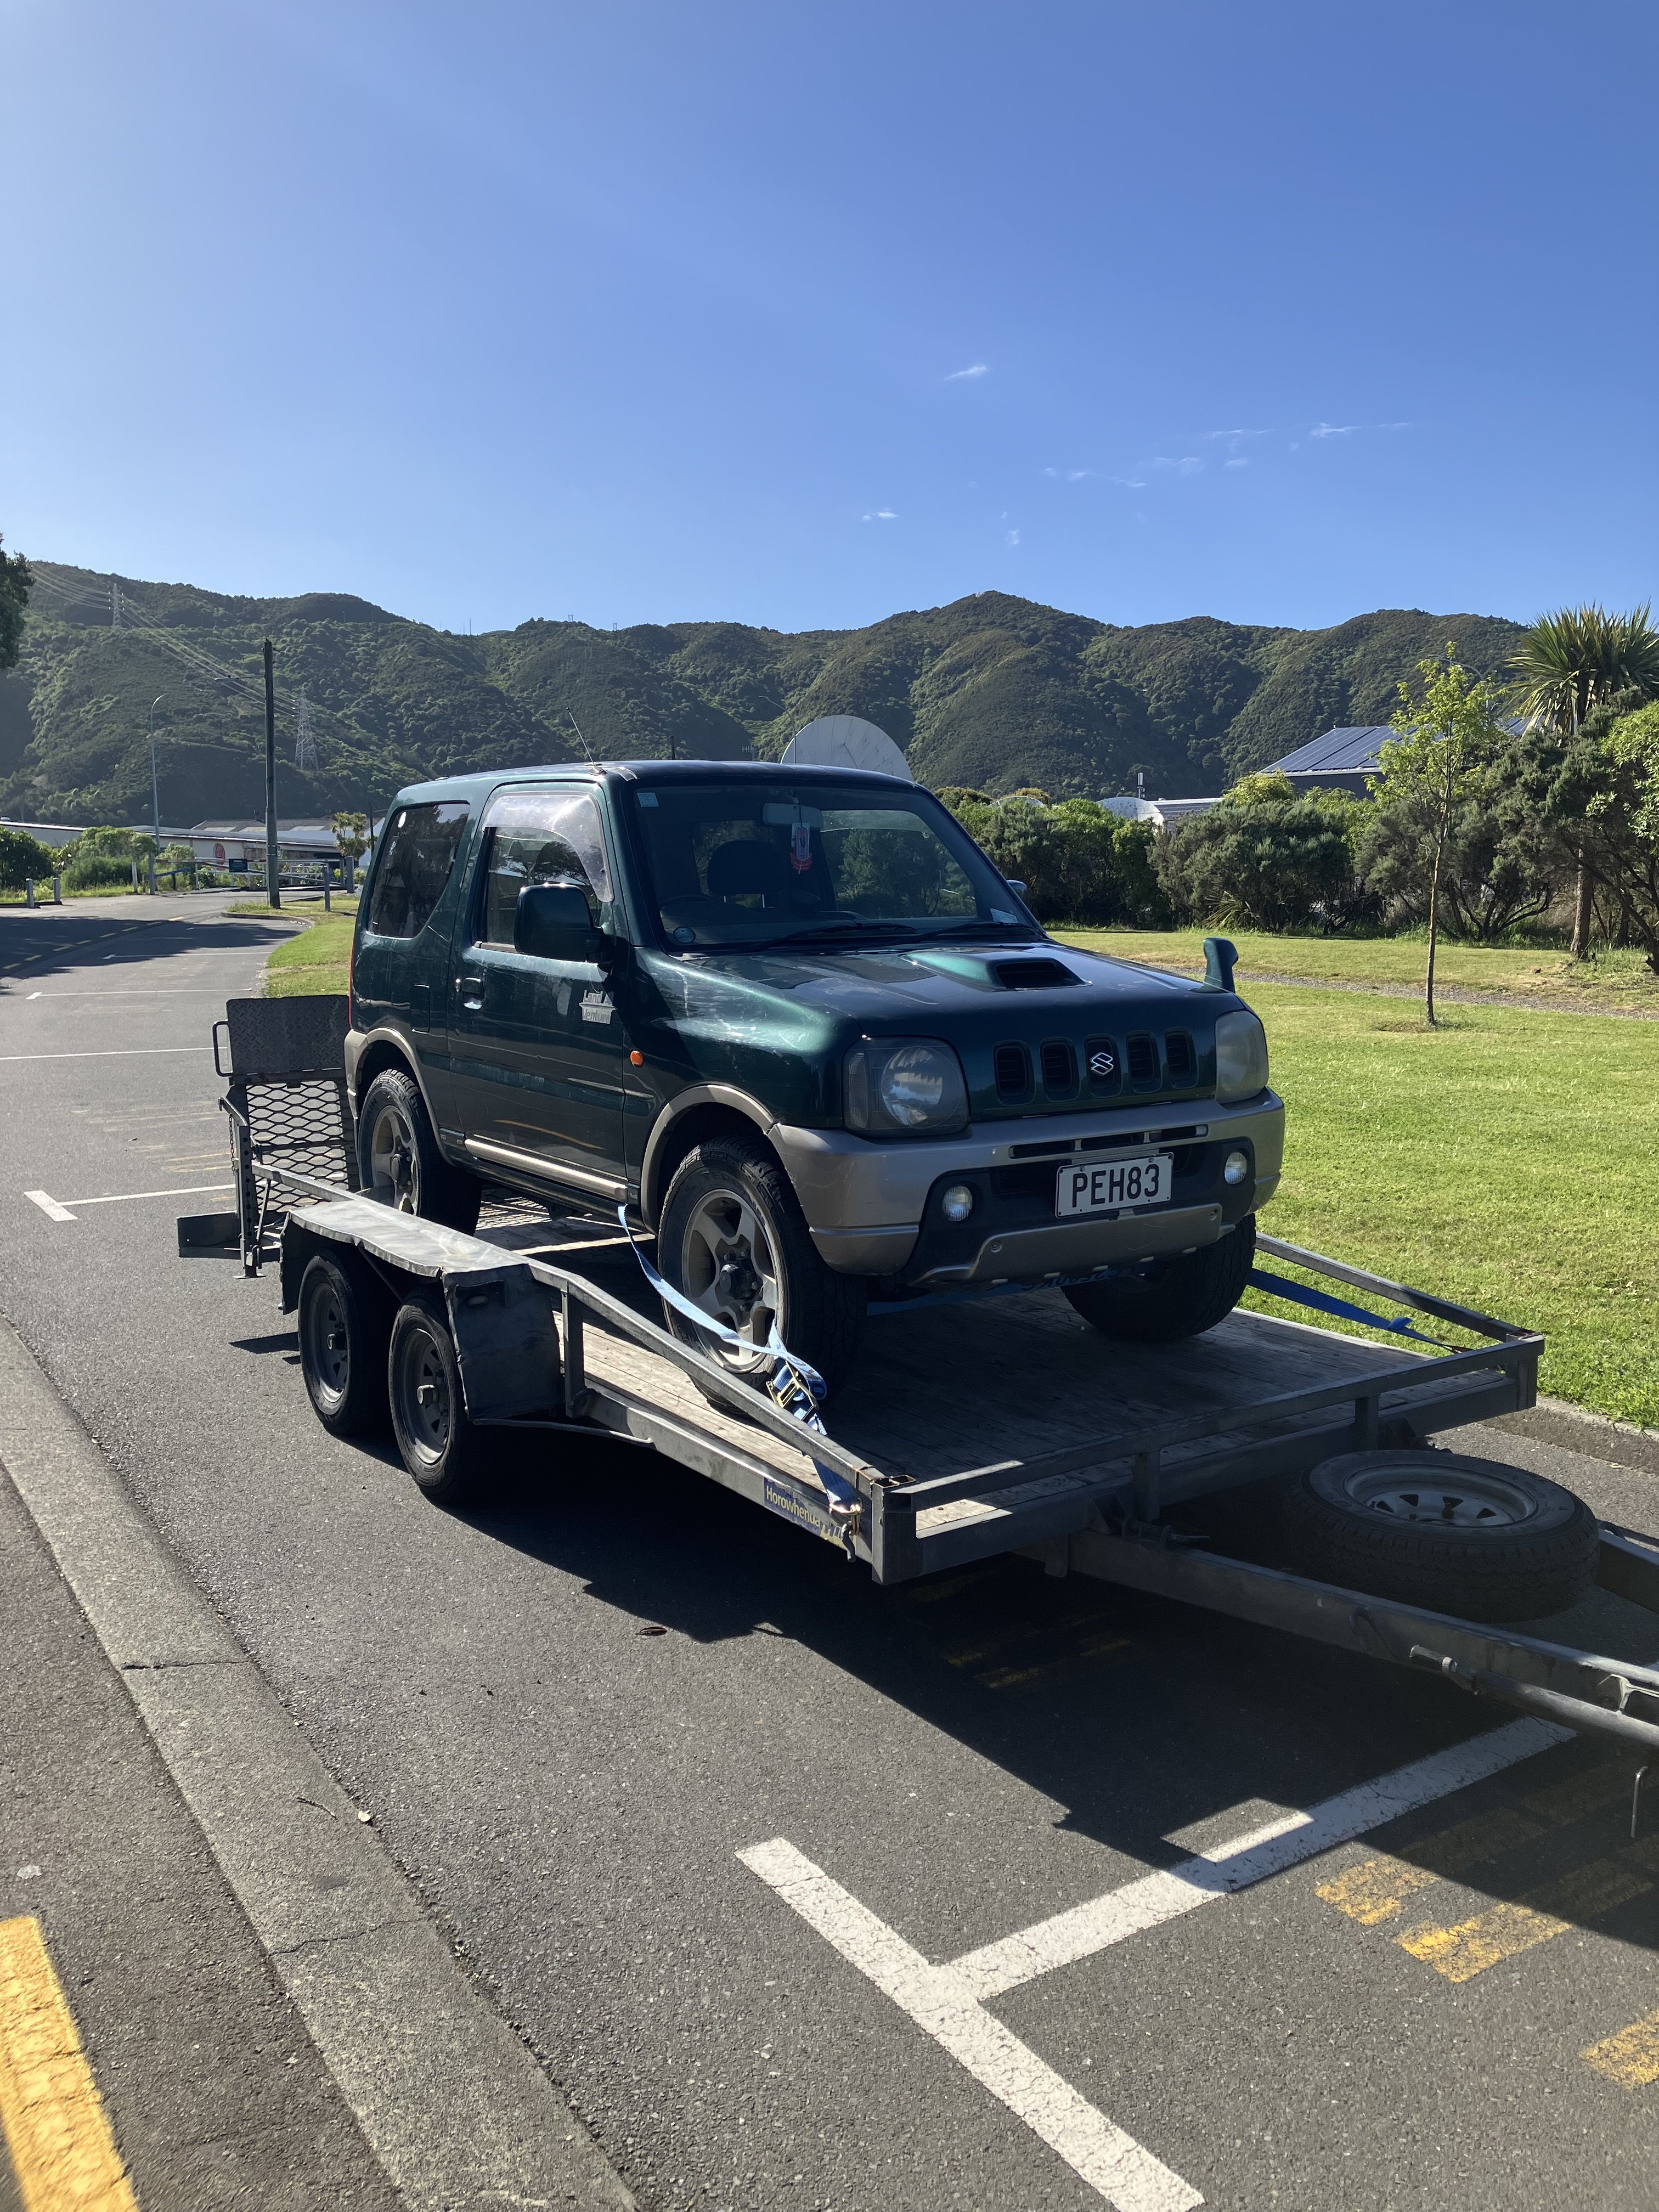
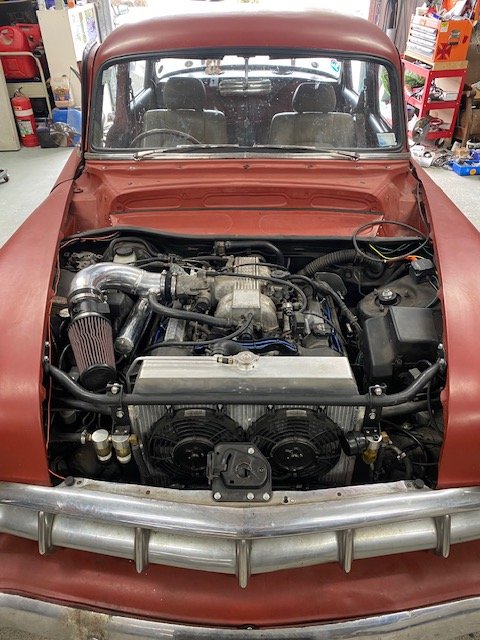
So after many years of wanting a kei car of some sort and also a Jimny, and much exchange of banter and links between myself and my old fleet manager over many years about such vehicles, I became aware of a very cheap kei spec Jimny on Trademe. I thought I'd keep an eye on the auction and see how it went - I didn't need it, but I would be interested for the right price. Anyway, it was pretty rough - seller was pretty honest about the state of it - blown head gasket, cracked windscreen, and it was not in a condition to win any concours events. It was in the top of the South Island so no way I could check it out, but it only came into the country in 2022, and had current reg and wof so I figured it couldn't be too bad. I managed to win the auction for a very sharp price (after a painful '$10 increment every two minutes' bidding war with another bidder). A price sharp enough to justify fixing it or even throwing it in the bin if it was no good. The seller was a GC and managed to hook me up with his mate who was coming over to Wellington and could bring it over on the ferry for me on a trailer. First impressions - pretty rough, the interior was disgusting but overall a solid car. It was definitely BHG with water and clouds coming out of the exhaust so it got driven all of 10 metres onto the trailer. Everything about it is so tiny, especially the engine - a baby 3 cylinder 660cc turbo K6A. According to the internet they produce 47kW so this has now probably replaced my white Viva as being the least powerful car in the fleet. Homeward bound to see what kind of junk I'd managed to buy. Everything needed a decent clean and going over to understand how good or bad it really was. Oh yeah, it also had three different air fresheners hanging from the mirror and a collection of tasteless stickers on the rear winder.
13 points
-
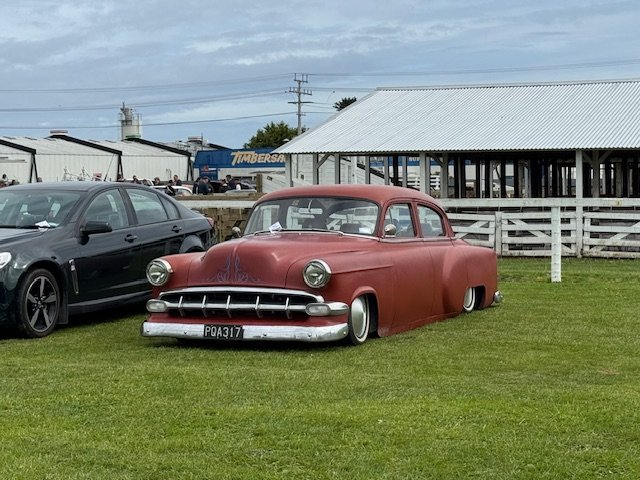
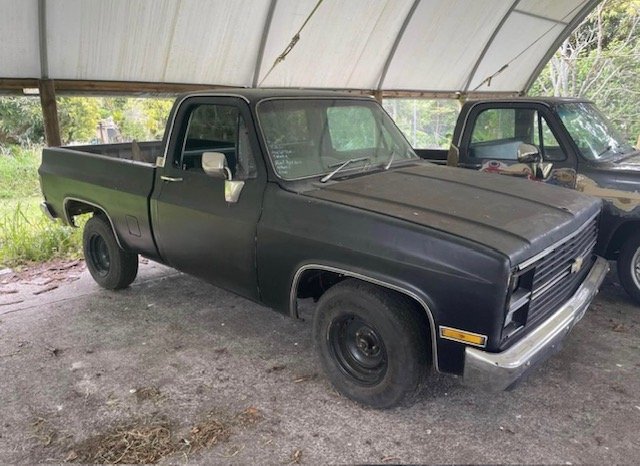
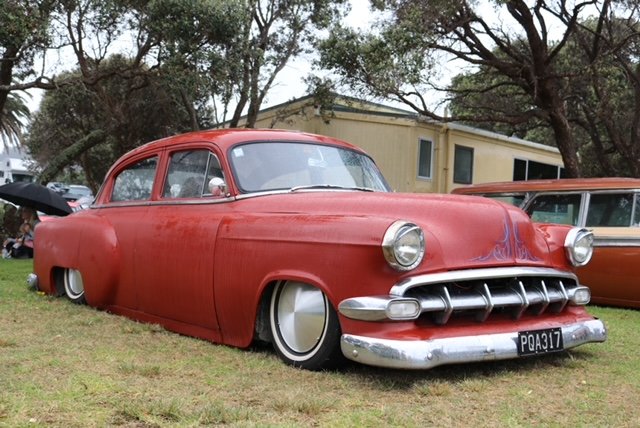
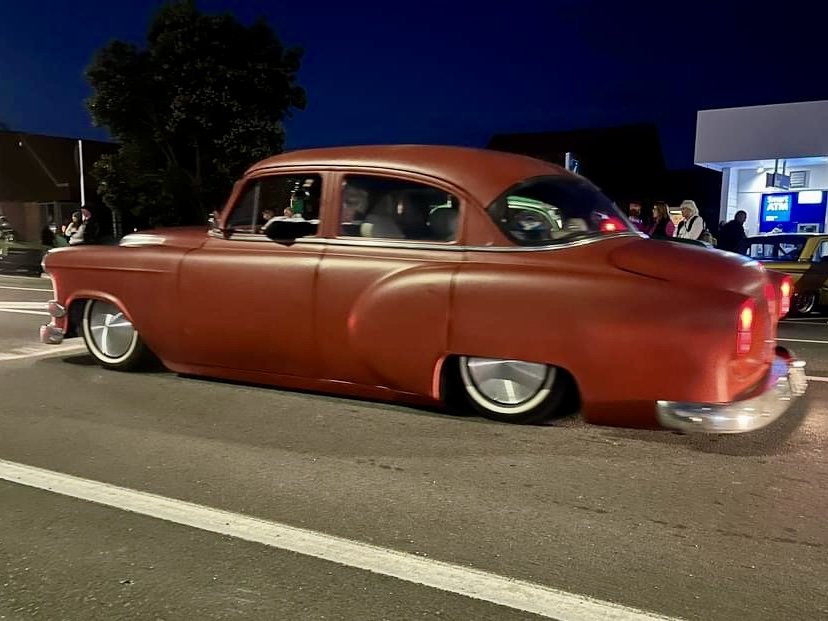
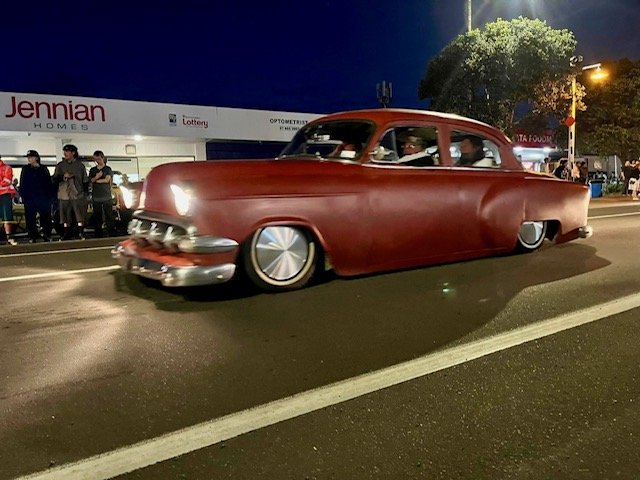
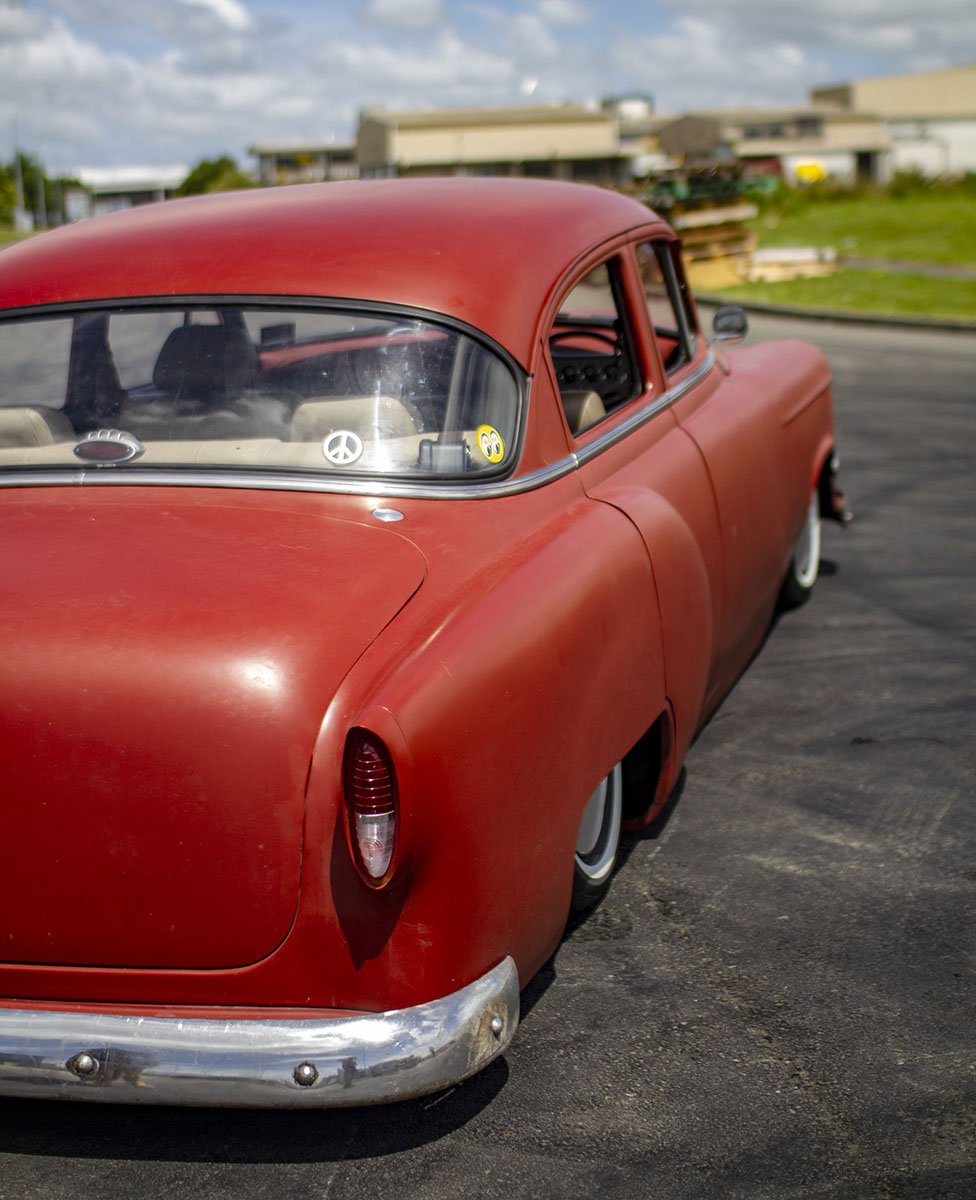
made some new Top Hats for the rear. As it went too low and wouldn't raise up high enough. Was a right pain trying to get into driveways without smashing the bumper on the ground. Was a lovely day in Whanganui for their annual show at the high school. Same at Levin's show. Taking a brake from this for a while. We did get a commercial sewing machine, so going to give Upholstery a go. Also needs Painting. But in the mean time ive brought an 84 C10 to try and get just as low. So will just keep driving this.
11 points
-
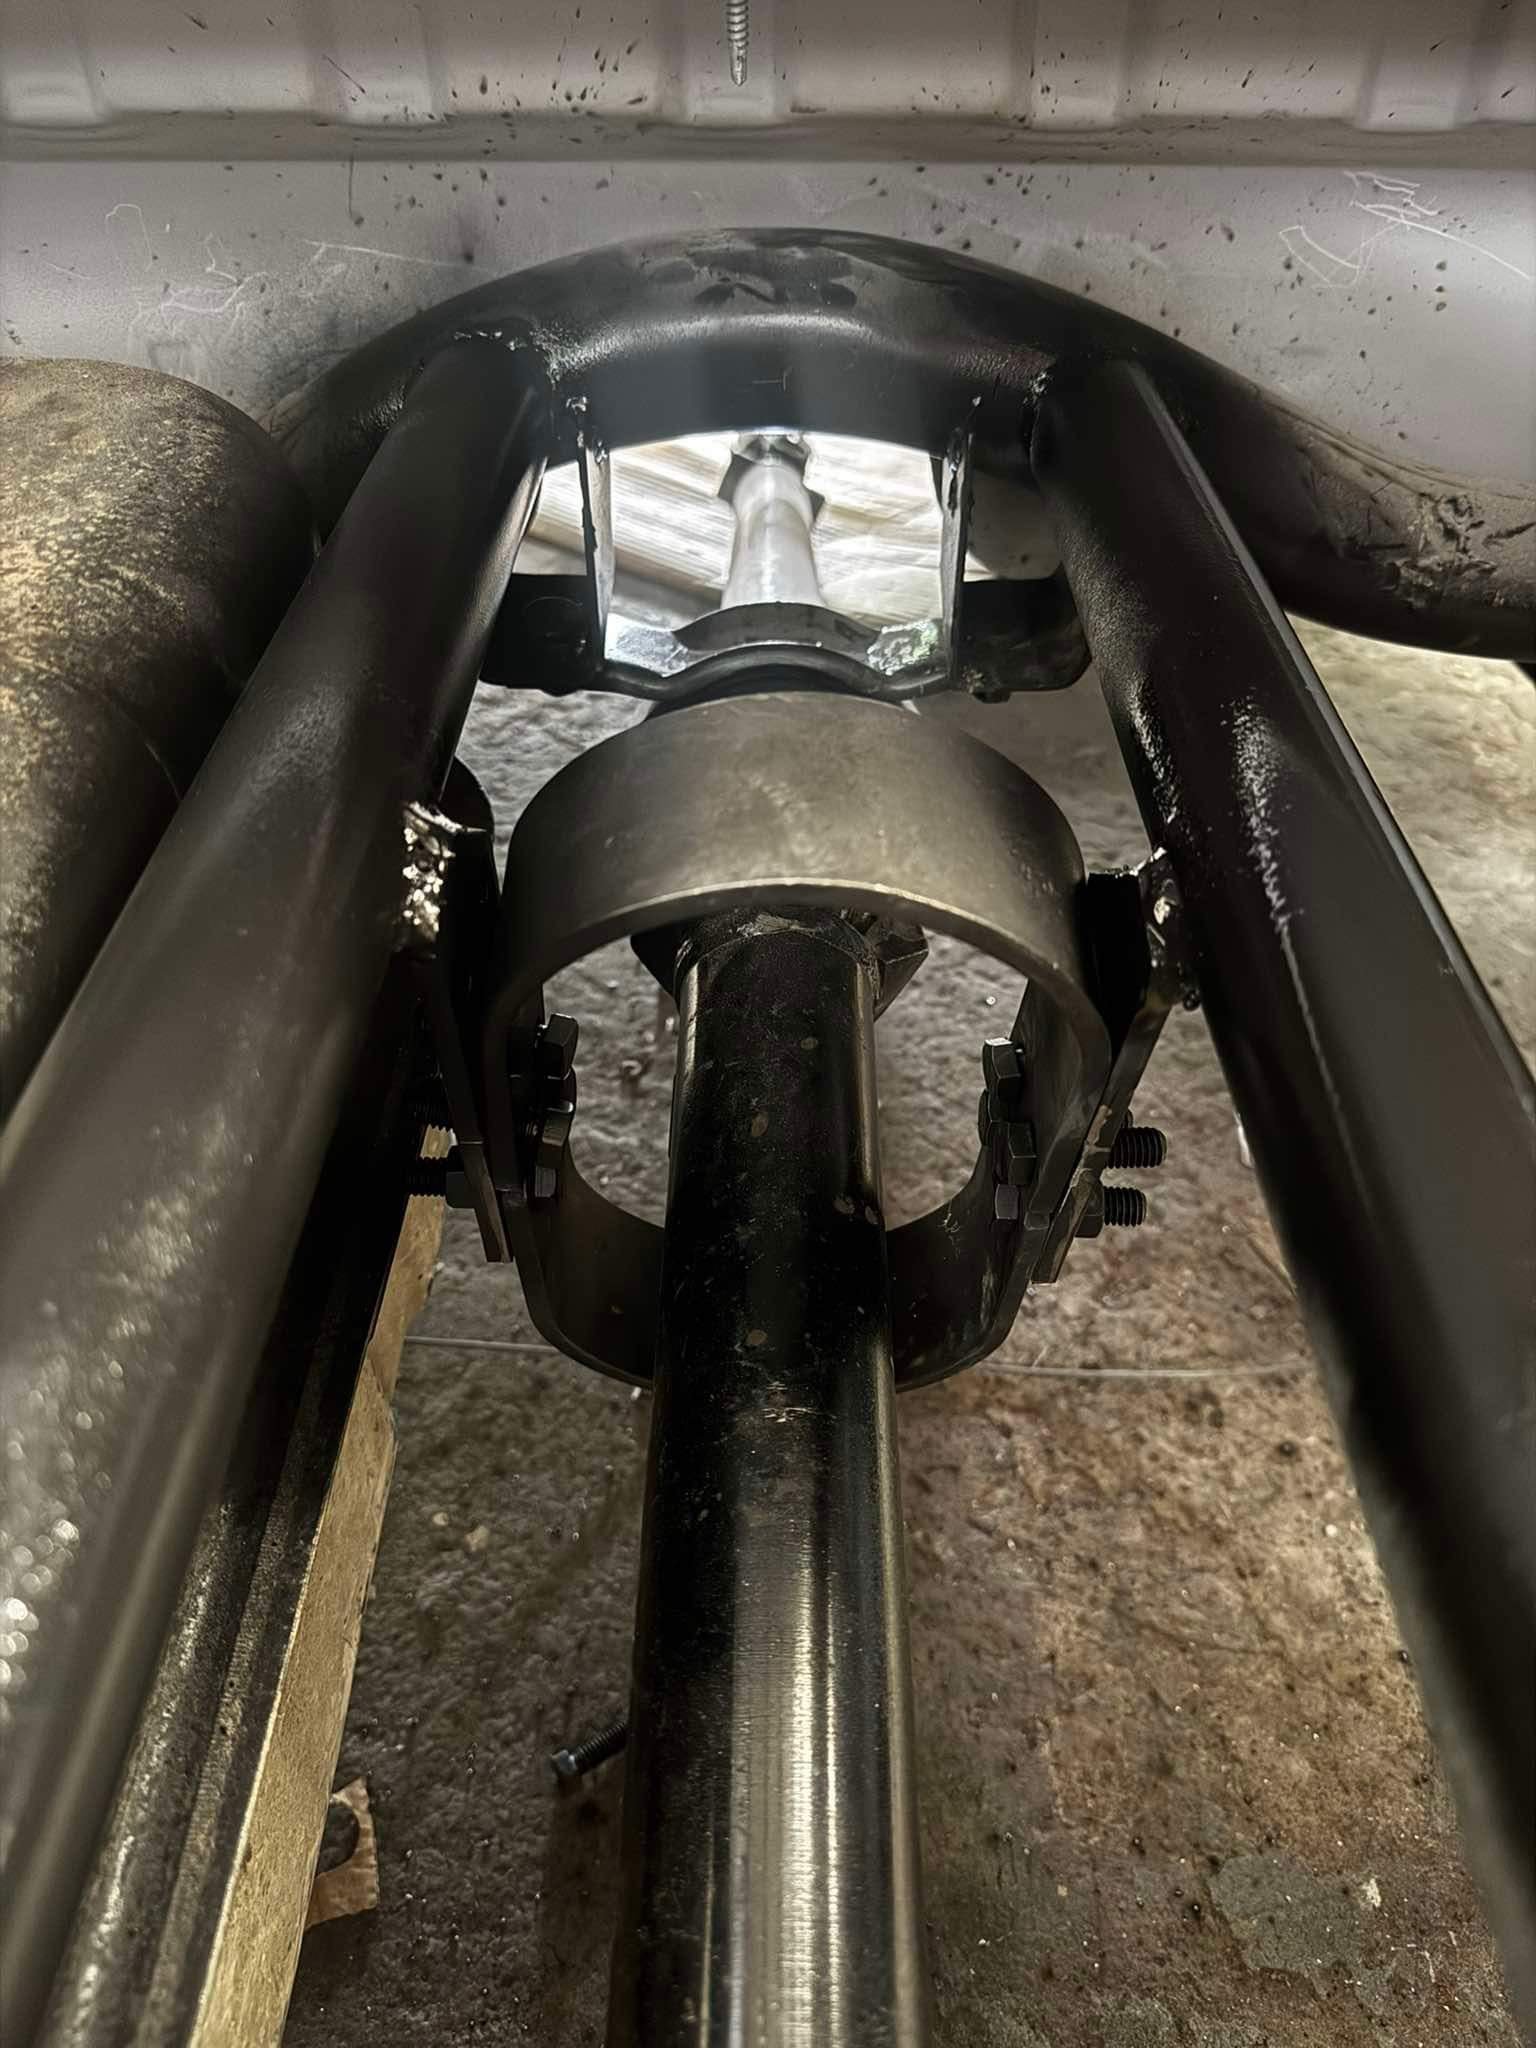
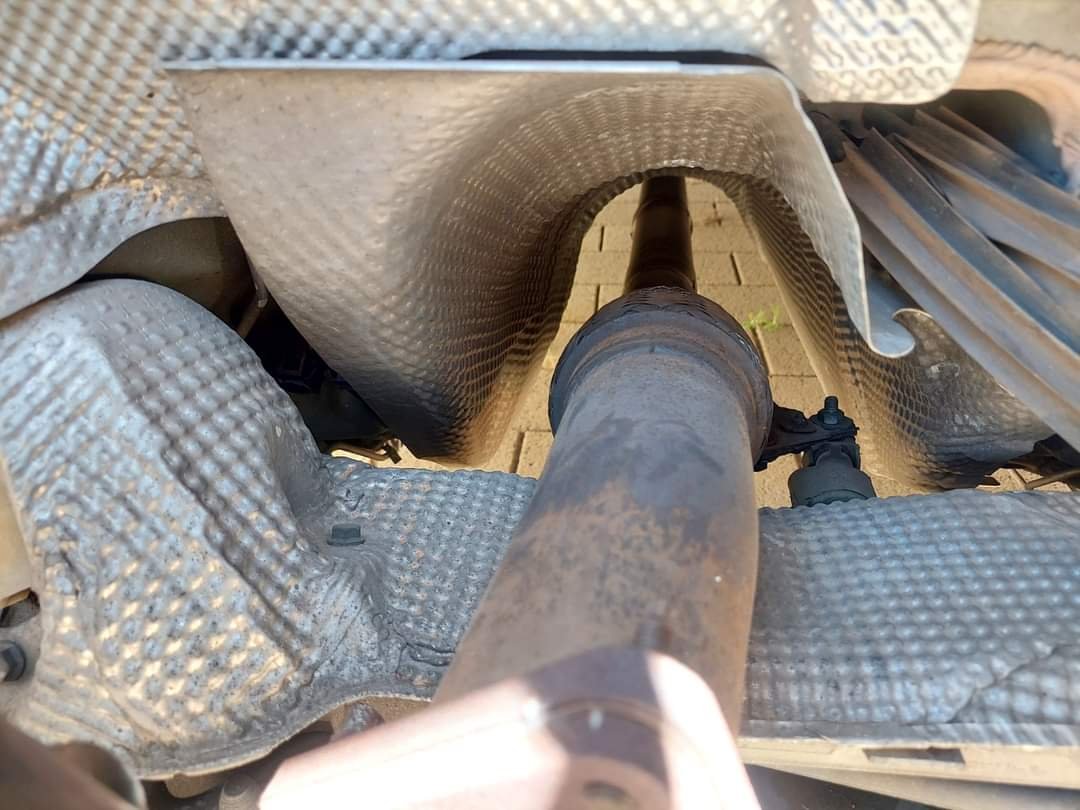
Driveshaft hoop is done!! yeow!!! I had a different method mocked up but hated the way it looked. so thought of how to tie everything together to make it strong , as well as being able to mount other stuff off it like the exhaust and handbrake cables. pretty stoked with the outcome and only took about an hour from start to finish. used 2 x 32nb pipe, notched to slot in between both ute crossmember thingys. question now is can the handbrake cables run between the hoop and shaft? I’m guessing no, so I’ll still need to trim down the generic upper hoop so I can run the cables over the top. then once I get a suitable (low profile) handbrake unit, I can get it mounted, drill the hold through the tunnel and get that finalised. she is ready to go to paint too. had an ulphosterer lined up to do the work but he got back to me finally and said he can’t now until March, what a cuntface. guess I’ll tackle this myself now also ordered many bits from Franklin performance to tart up the keg. assembly should go well once it’s back from paint
9 points
-
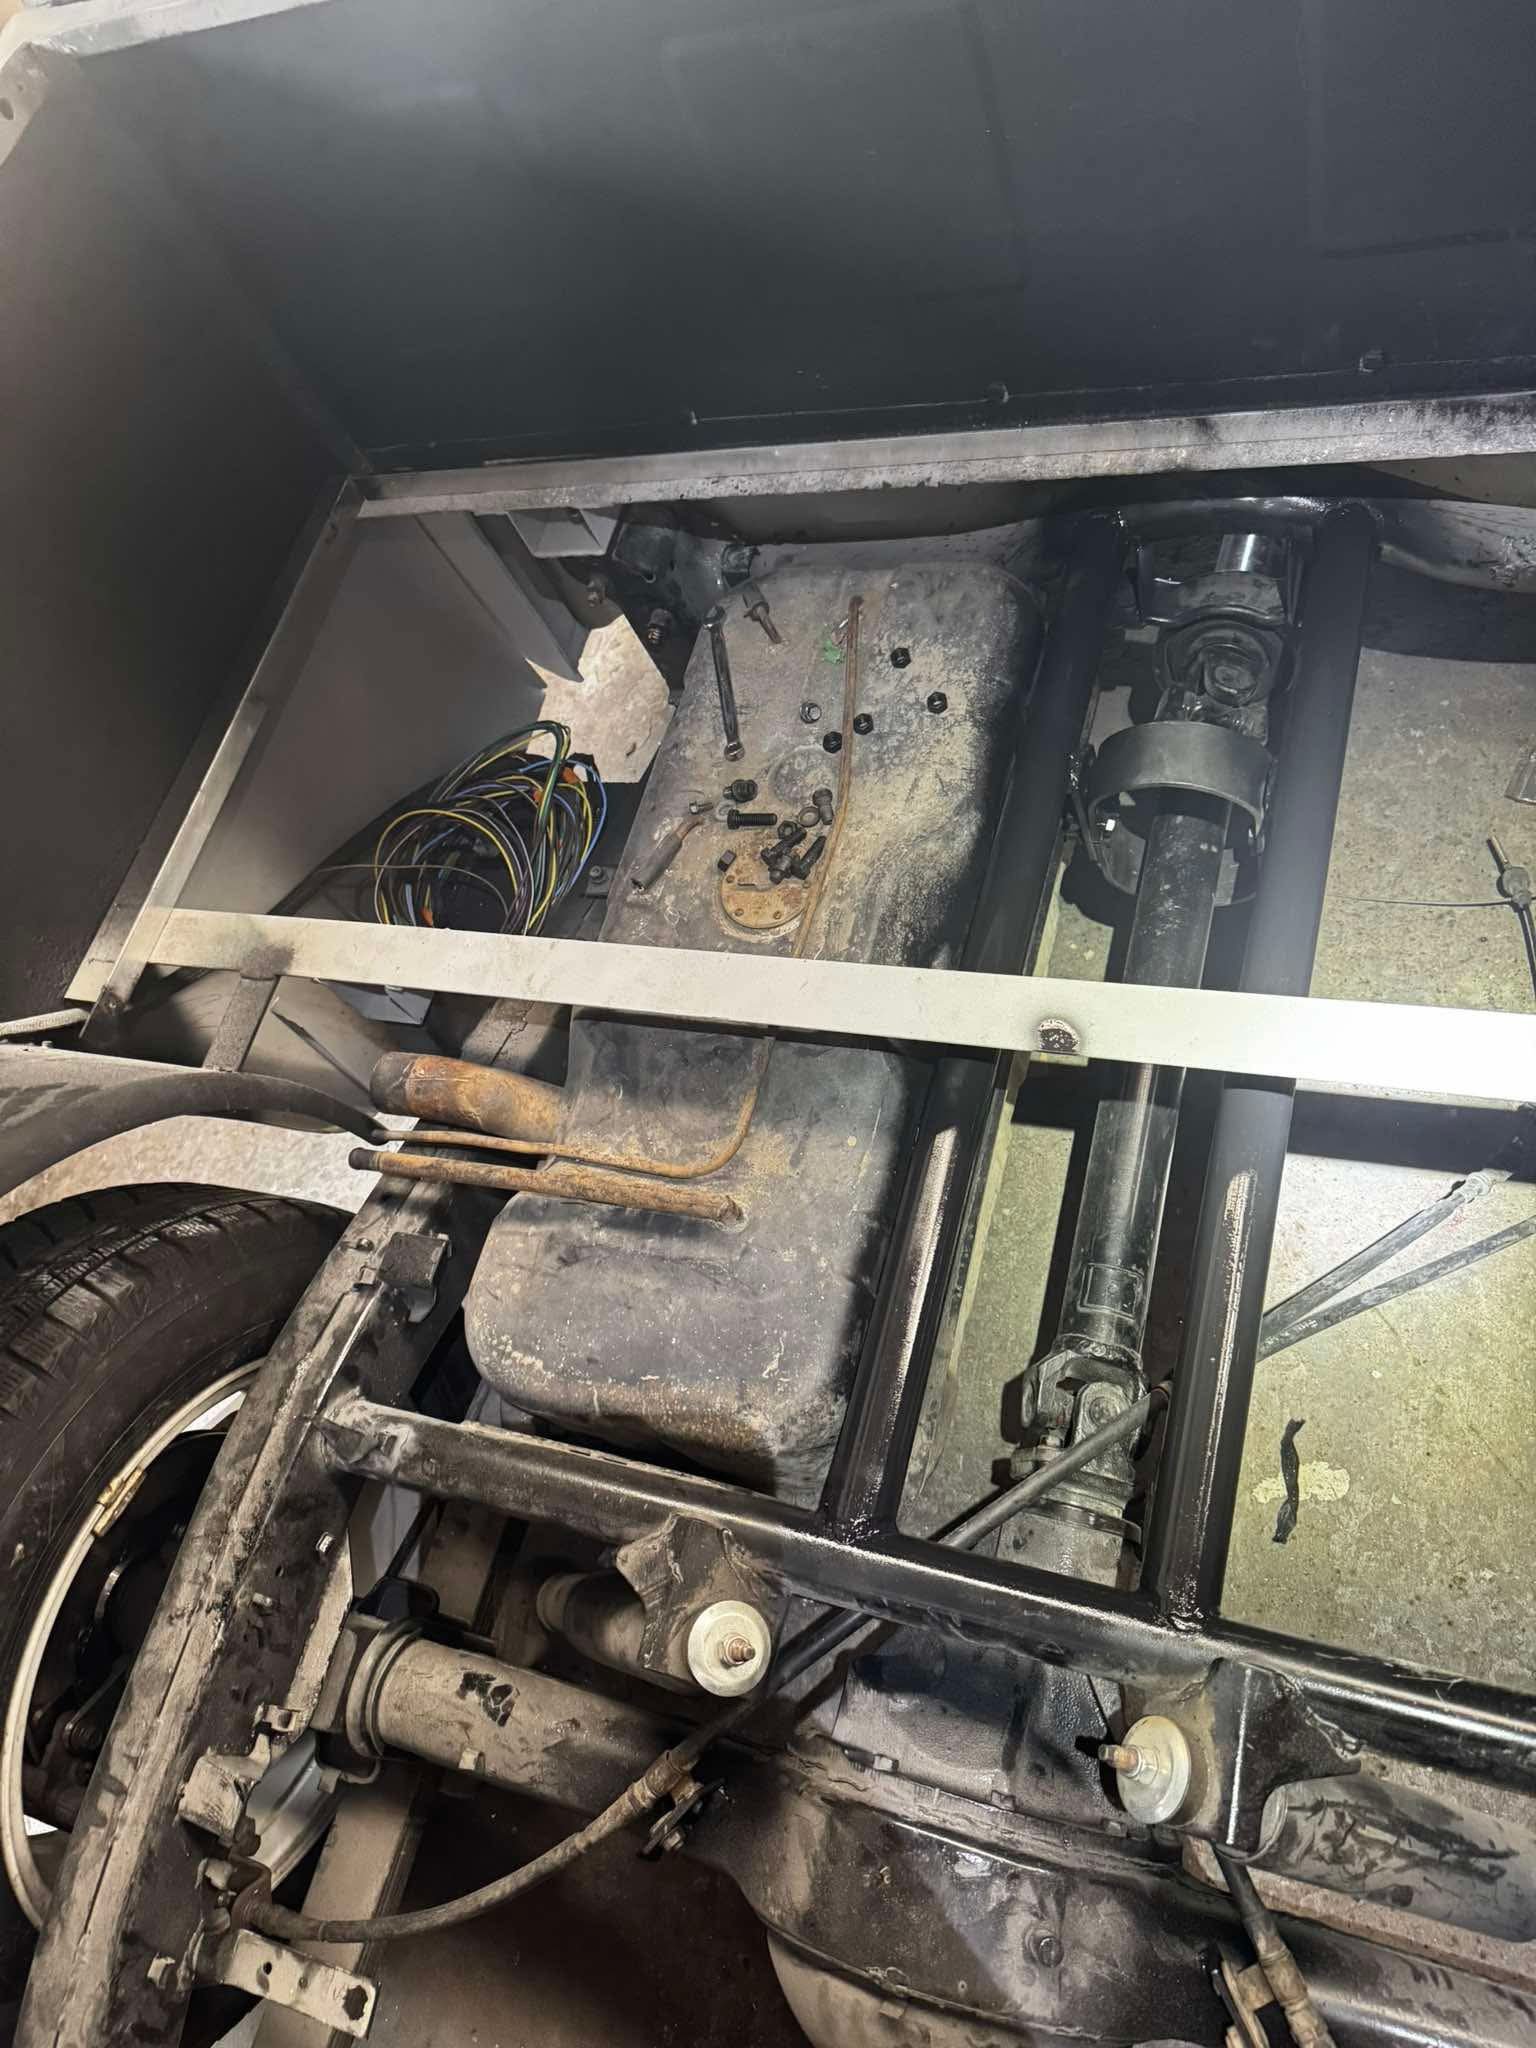
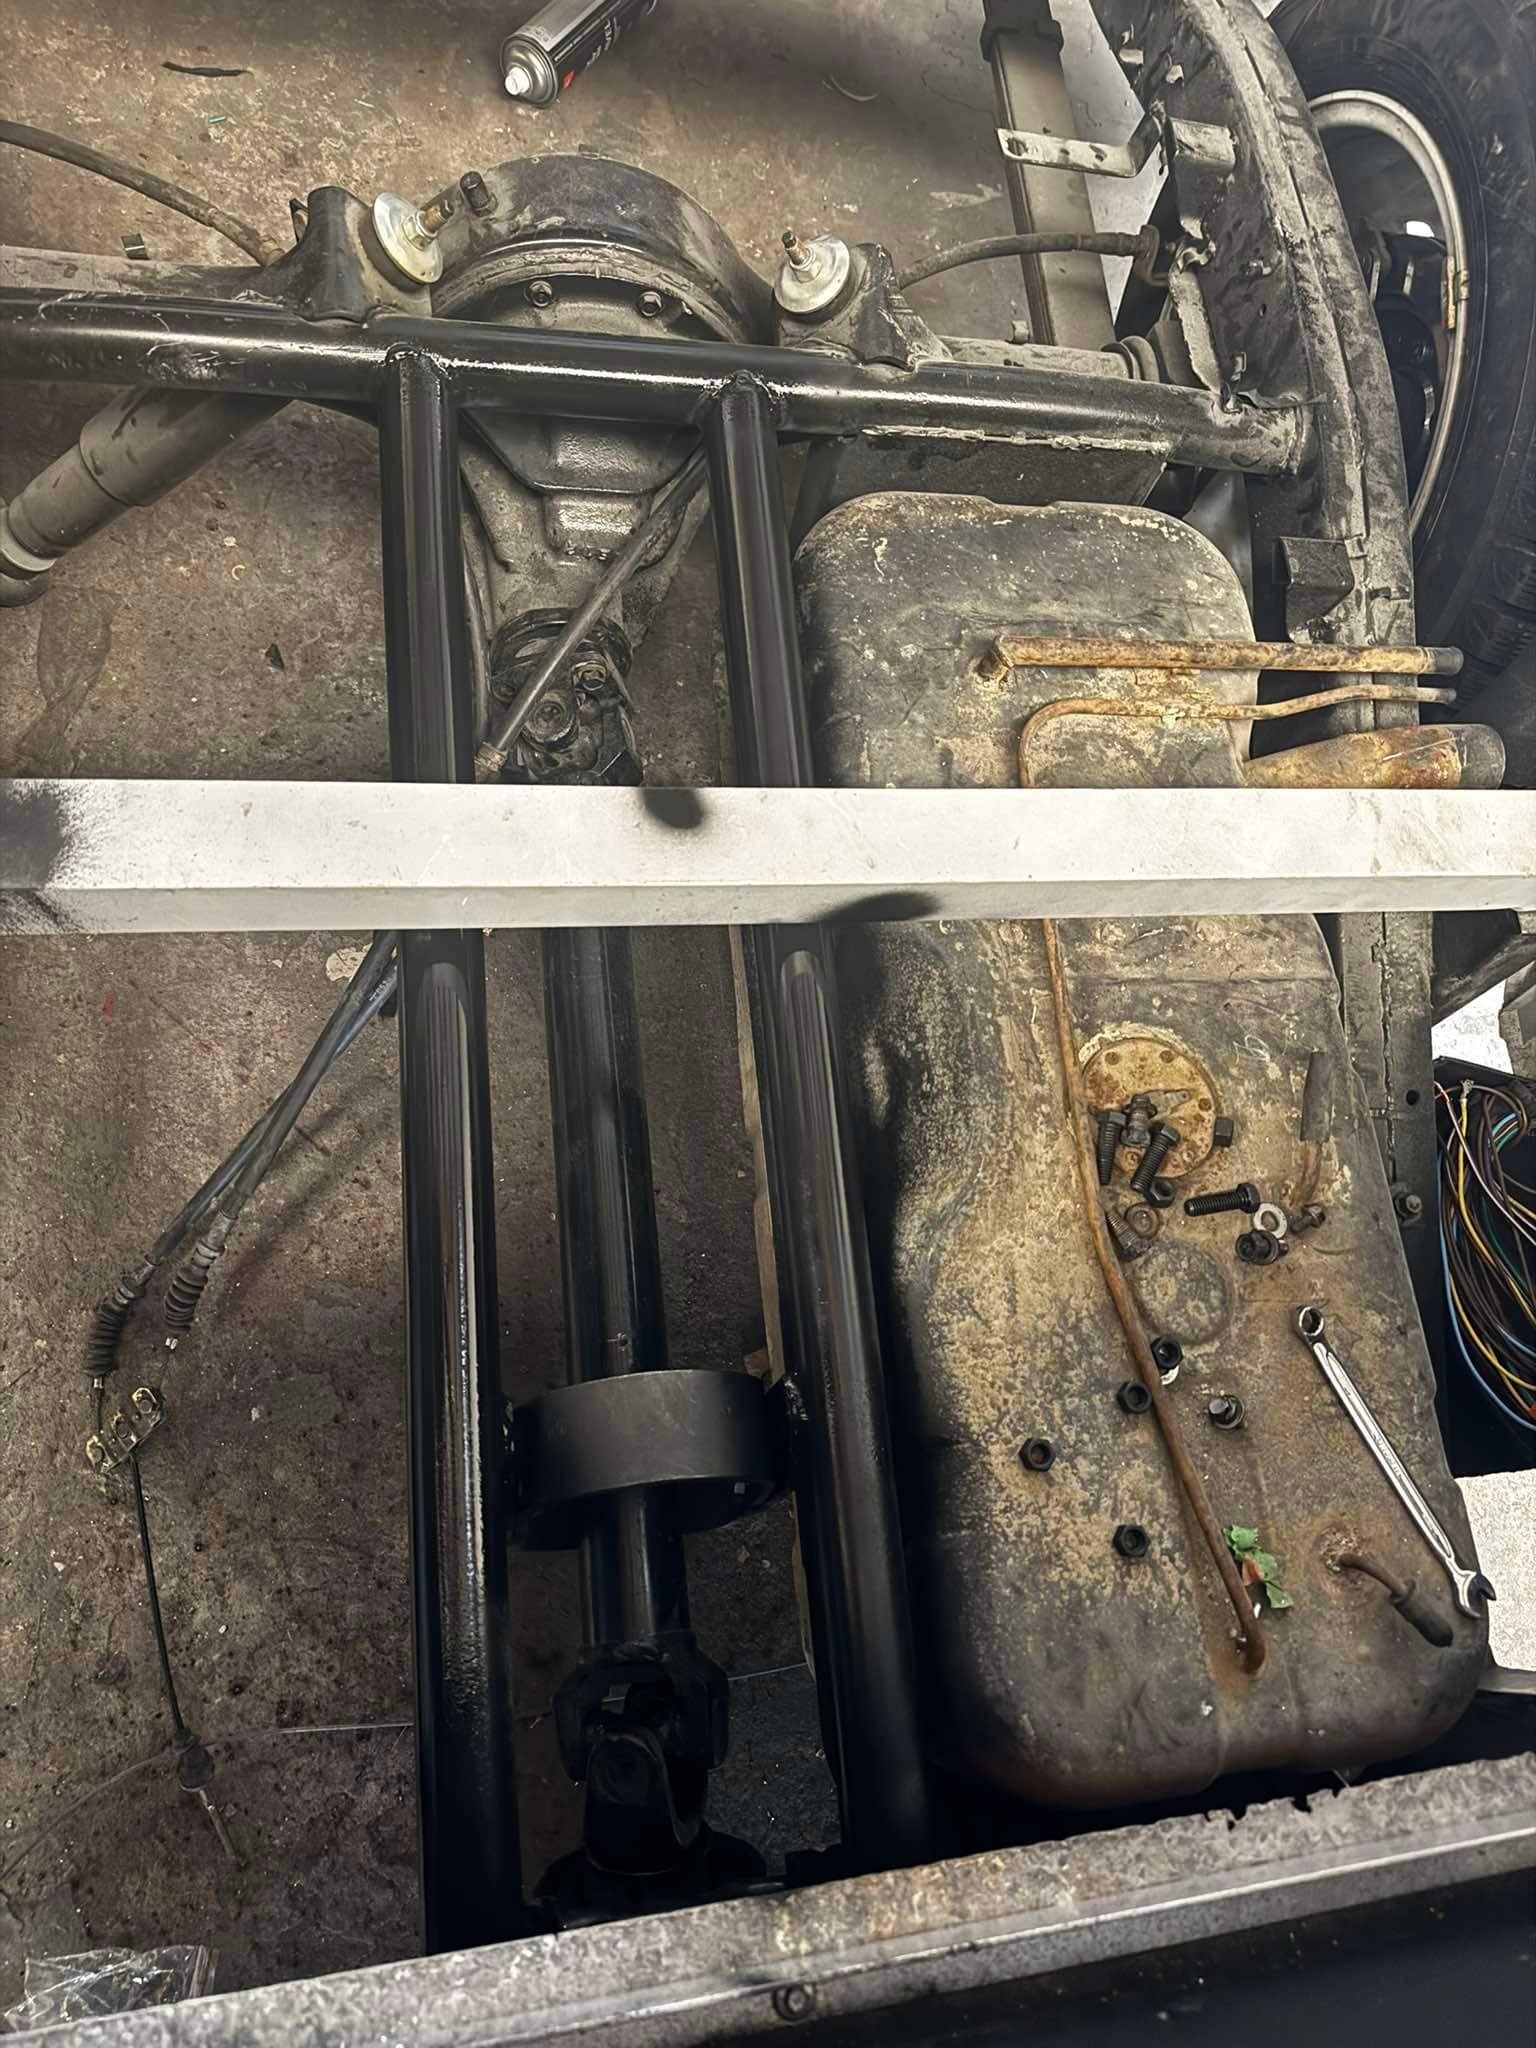
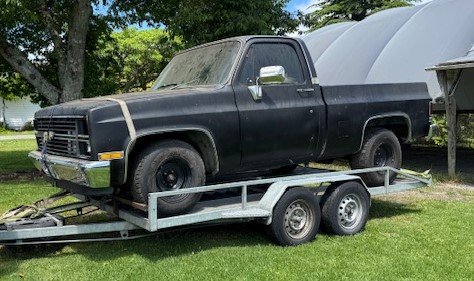
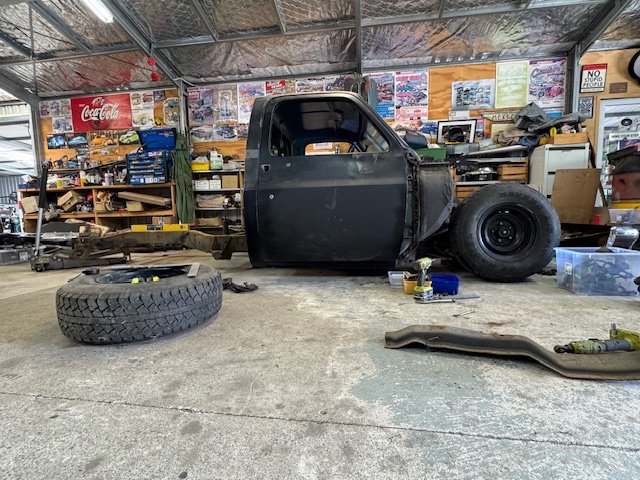
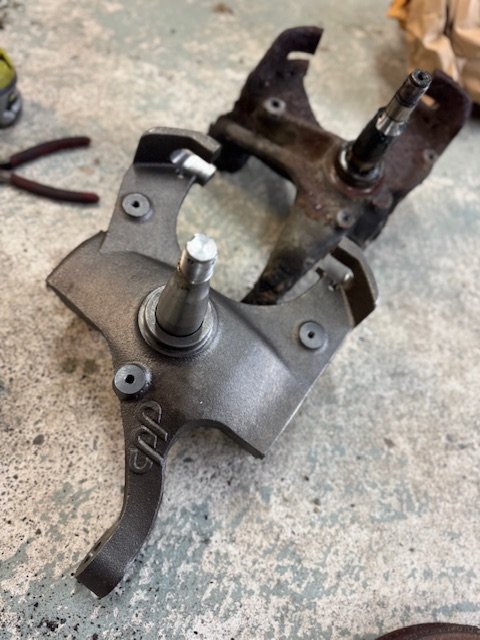
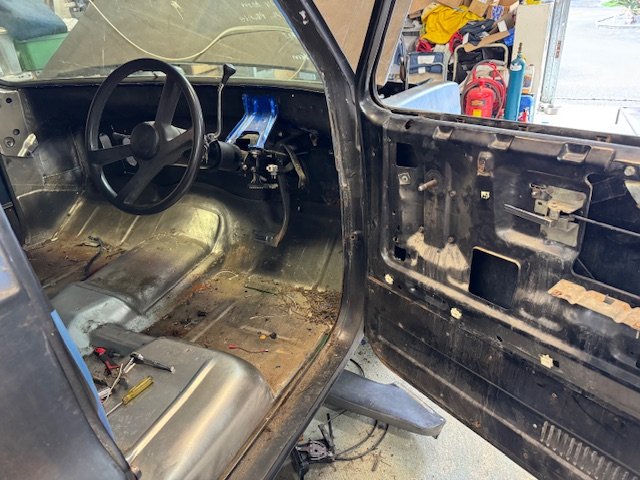
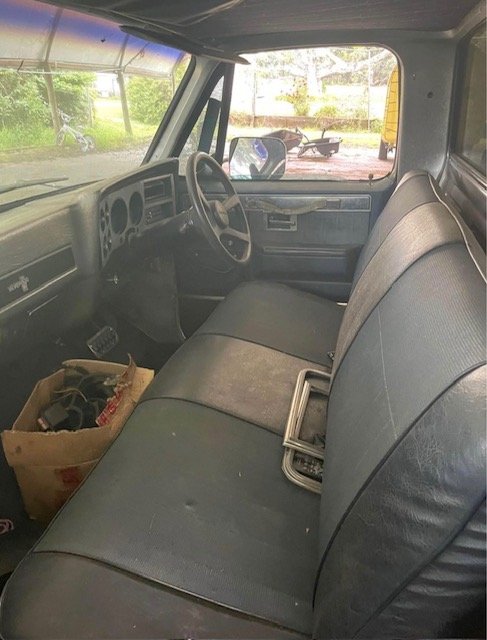
Saw this 1984 C10 Chevrolet on Facebook Marketplace 5 hours away in Tauranga. And had a desire to C notch and bag something. (its actually a 84 GMC High Sierra Classic, diesel) Was priced well with most of it there, pretty much just no engine and trans. The next available weekend, my dad & I shot up and brought it home. Have some Slam Specialties SS7 & Air fittings coming for it. It could do with an LS1 & 4l60e if anyone has one they could let go. Got it stripped down pretty quick to see what I have. Very little rust. Just a decent size hole in the firewall. But that's just an excuse do a shaved firewall. Also missing the hood safety catch/hook if anyone has a spare. Some unused Drop Spindles were on Marketplace in Northland for a bit less than I could get them into the country for. Hard to believe how big and heavy these are. Go them in. The cut springs out. Diff out, and the whole thing a whole lot closer to the ground. C-Notch and a 4 link of some kind to come. I'm think Bags on lower links. Outside of the chassis where the leaf springs were. The front lower A-arms are on the ground. but the Chassis isn't. but a good 40mm?? So it is likely a Frame Z will also be in order to lift the front end up. This could also help in moving the front wheels forward an inch to get them centred in the wheel arches again.
7 points
-
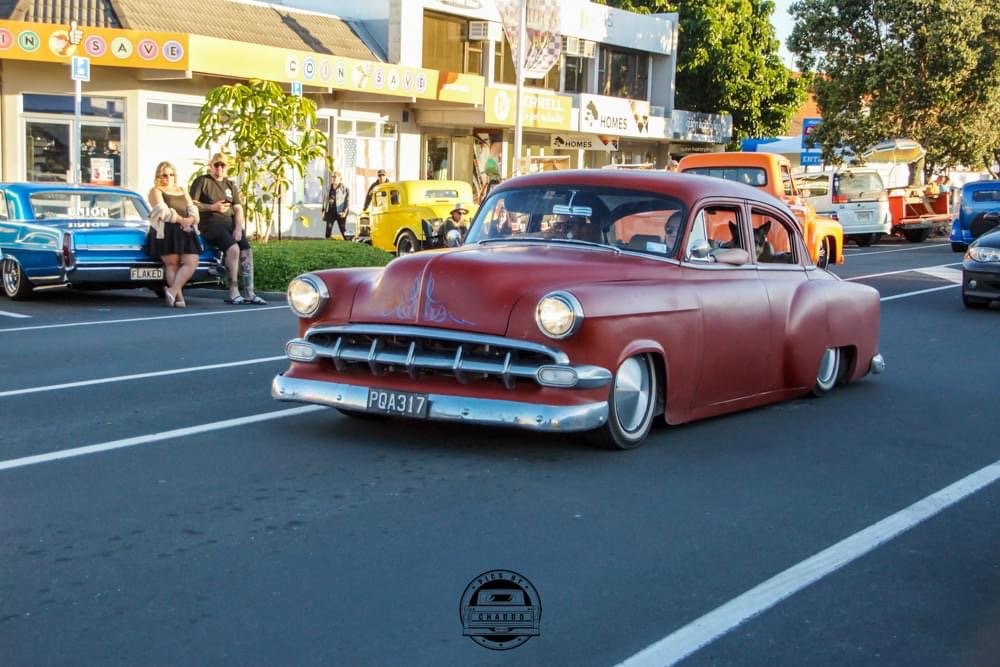
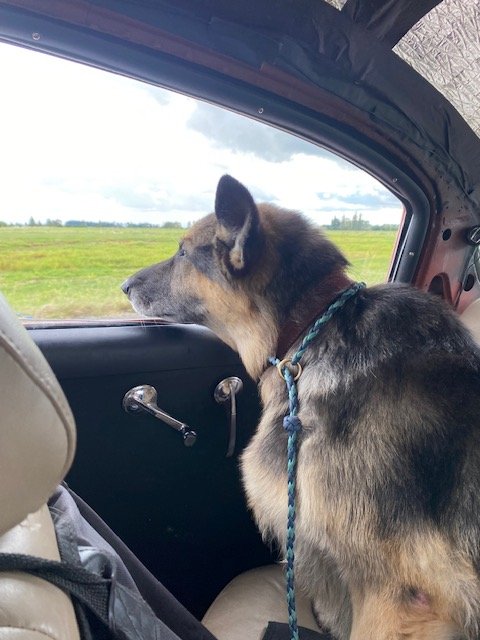
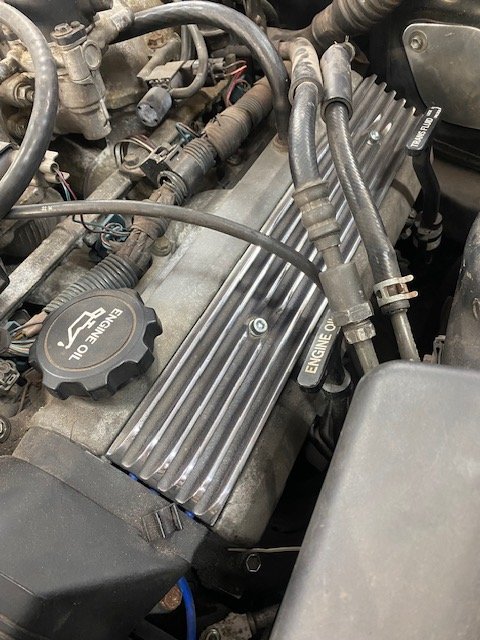
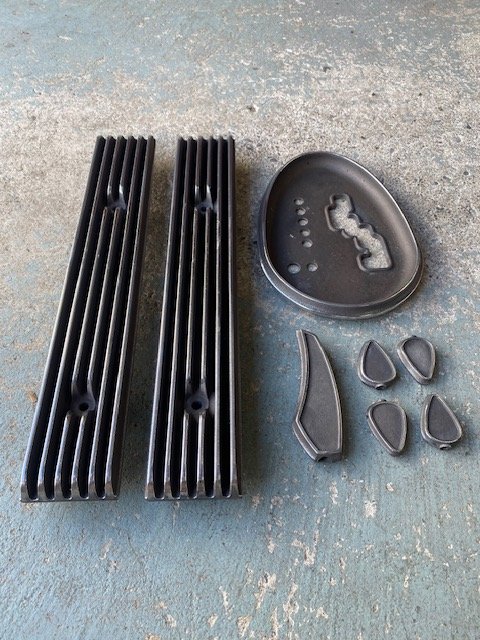
The engine felt sluggish down low with the aluminium/silicone intake i had on it. So I managed to squeeze on the factory intake from Matts 1uz Corona on. And went for a quick drive and the power felt better. So decided to make a new larger intake with a Resonator beneath it. Using the same volumes as the factory plastic 1uzfe one. Wasn't quite as good. But is definitely an improvement. 3d printed & had cast in aluminium some finned Lead covers. Used Bennetts Custom co's method on youtube for using oxy action Vanish in hot water to darken/age cast aluminium. Will need to get a photo of the shifter parts and switch extensions installed. Off on the 6 hour drive to Beachhop, in Whangamata. Skyla the dog loved that we could have the windows down the whole way with no horrid drumming noises. Cruise control was lovely too. And the bags rode like a dream over the Hauraki Plain's roads. Also cut out some vinyl pinstripes before leaving. From 3m 3630 Lightbox vinyl for the matte finish. Faux Pinstripes for the Faux old car.
7 points
-
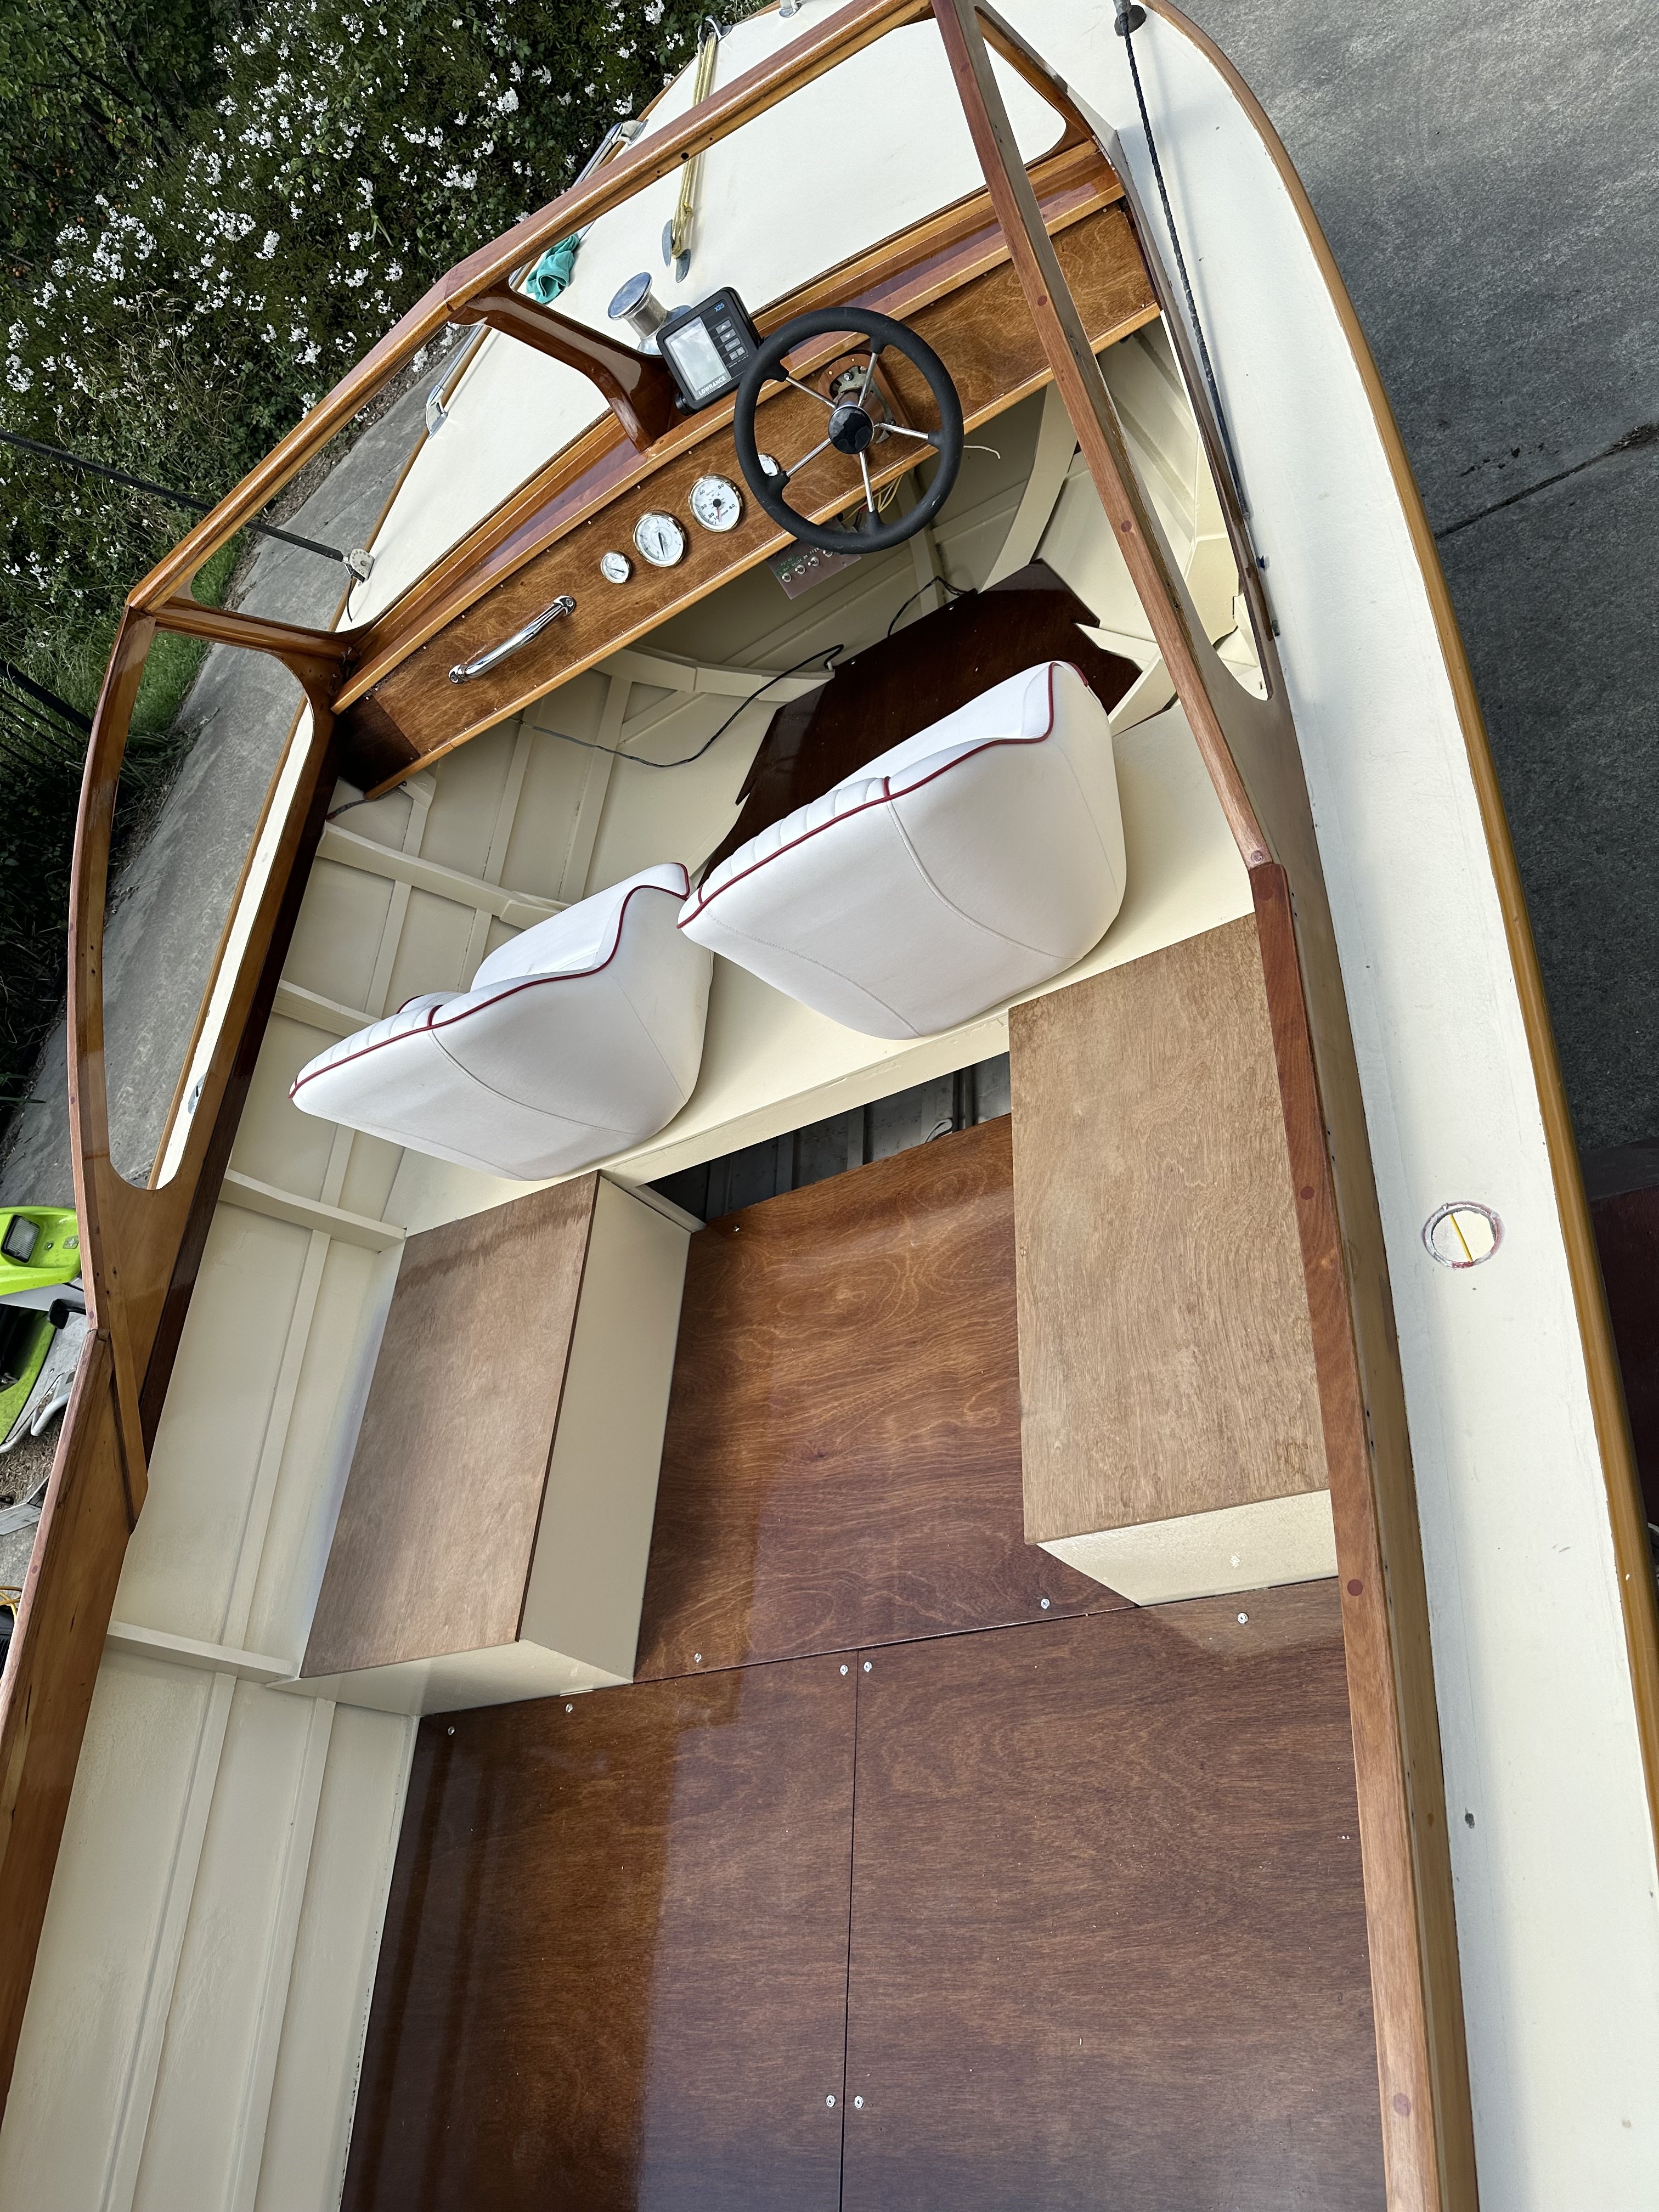
I have the varnish work done now, the floor fitted and seats mounted. The wiring needs sorting so I will get them to sort it out when they fit the engine. I was hoping to fit the windows but ran out of steam. I had my first acquaintance with Covid so I had a couple of days of not being able to do anything. It goes in for it’s engine fit tomorrow.
7 points
-
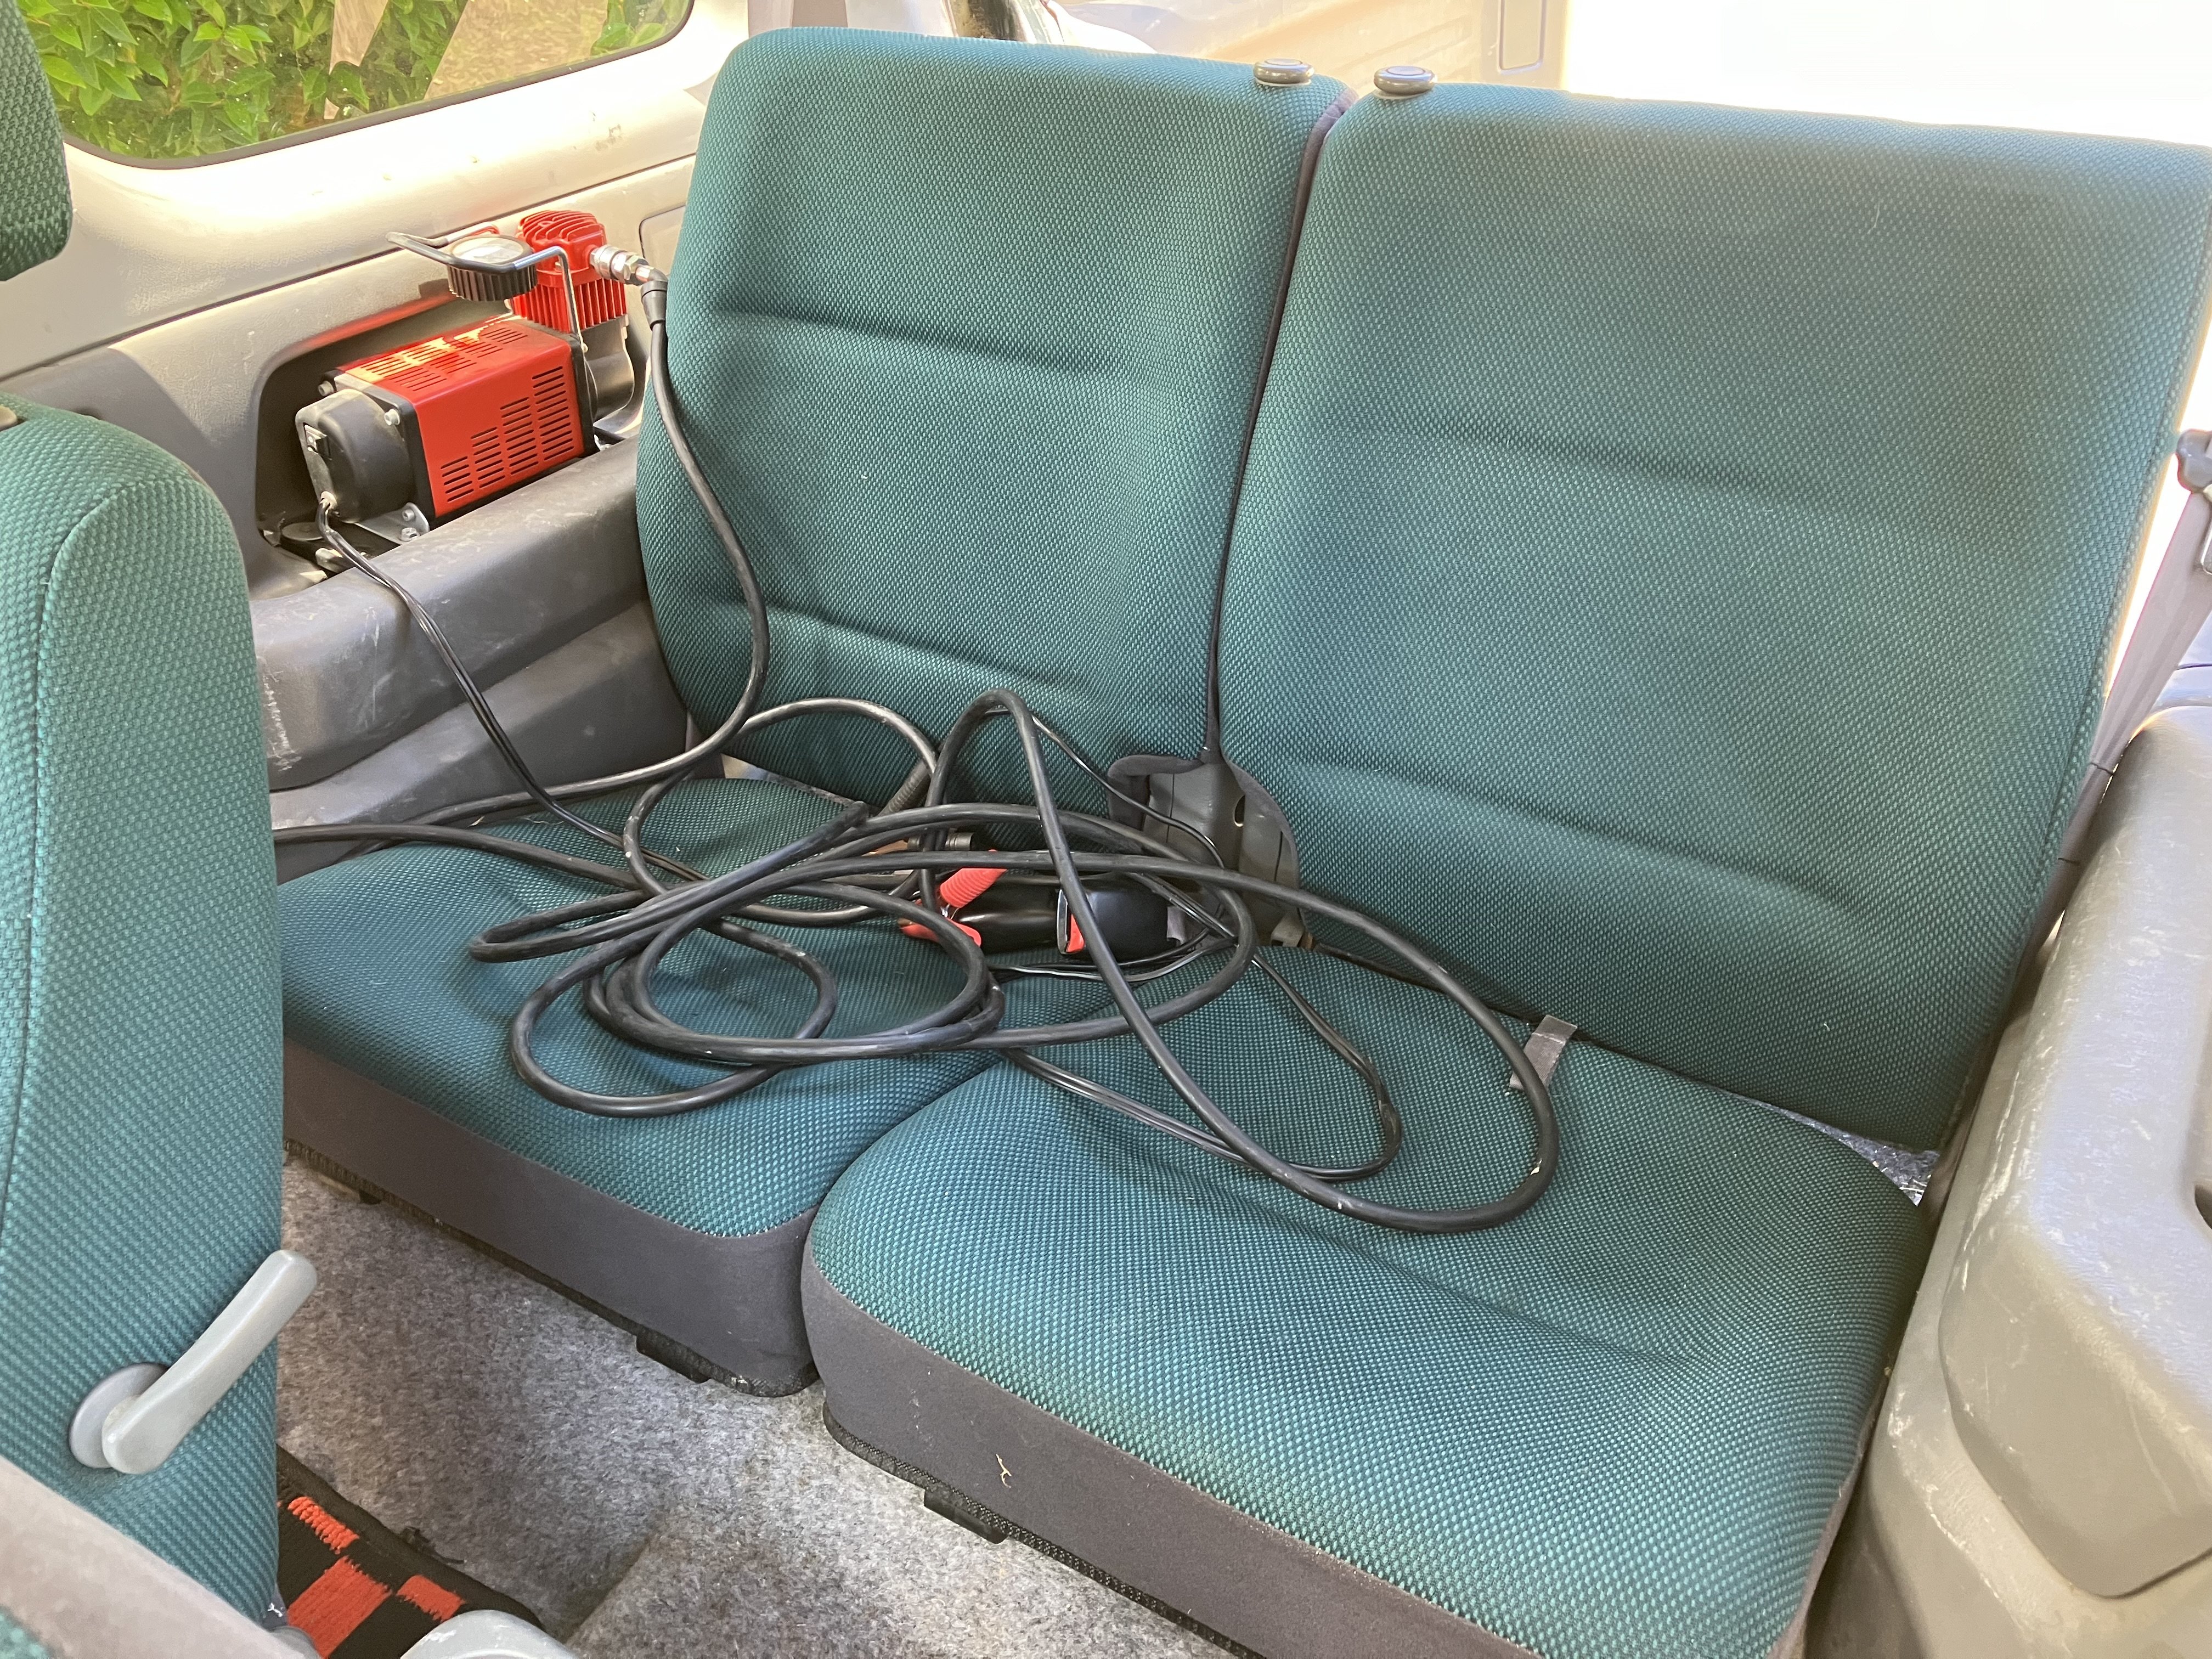
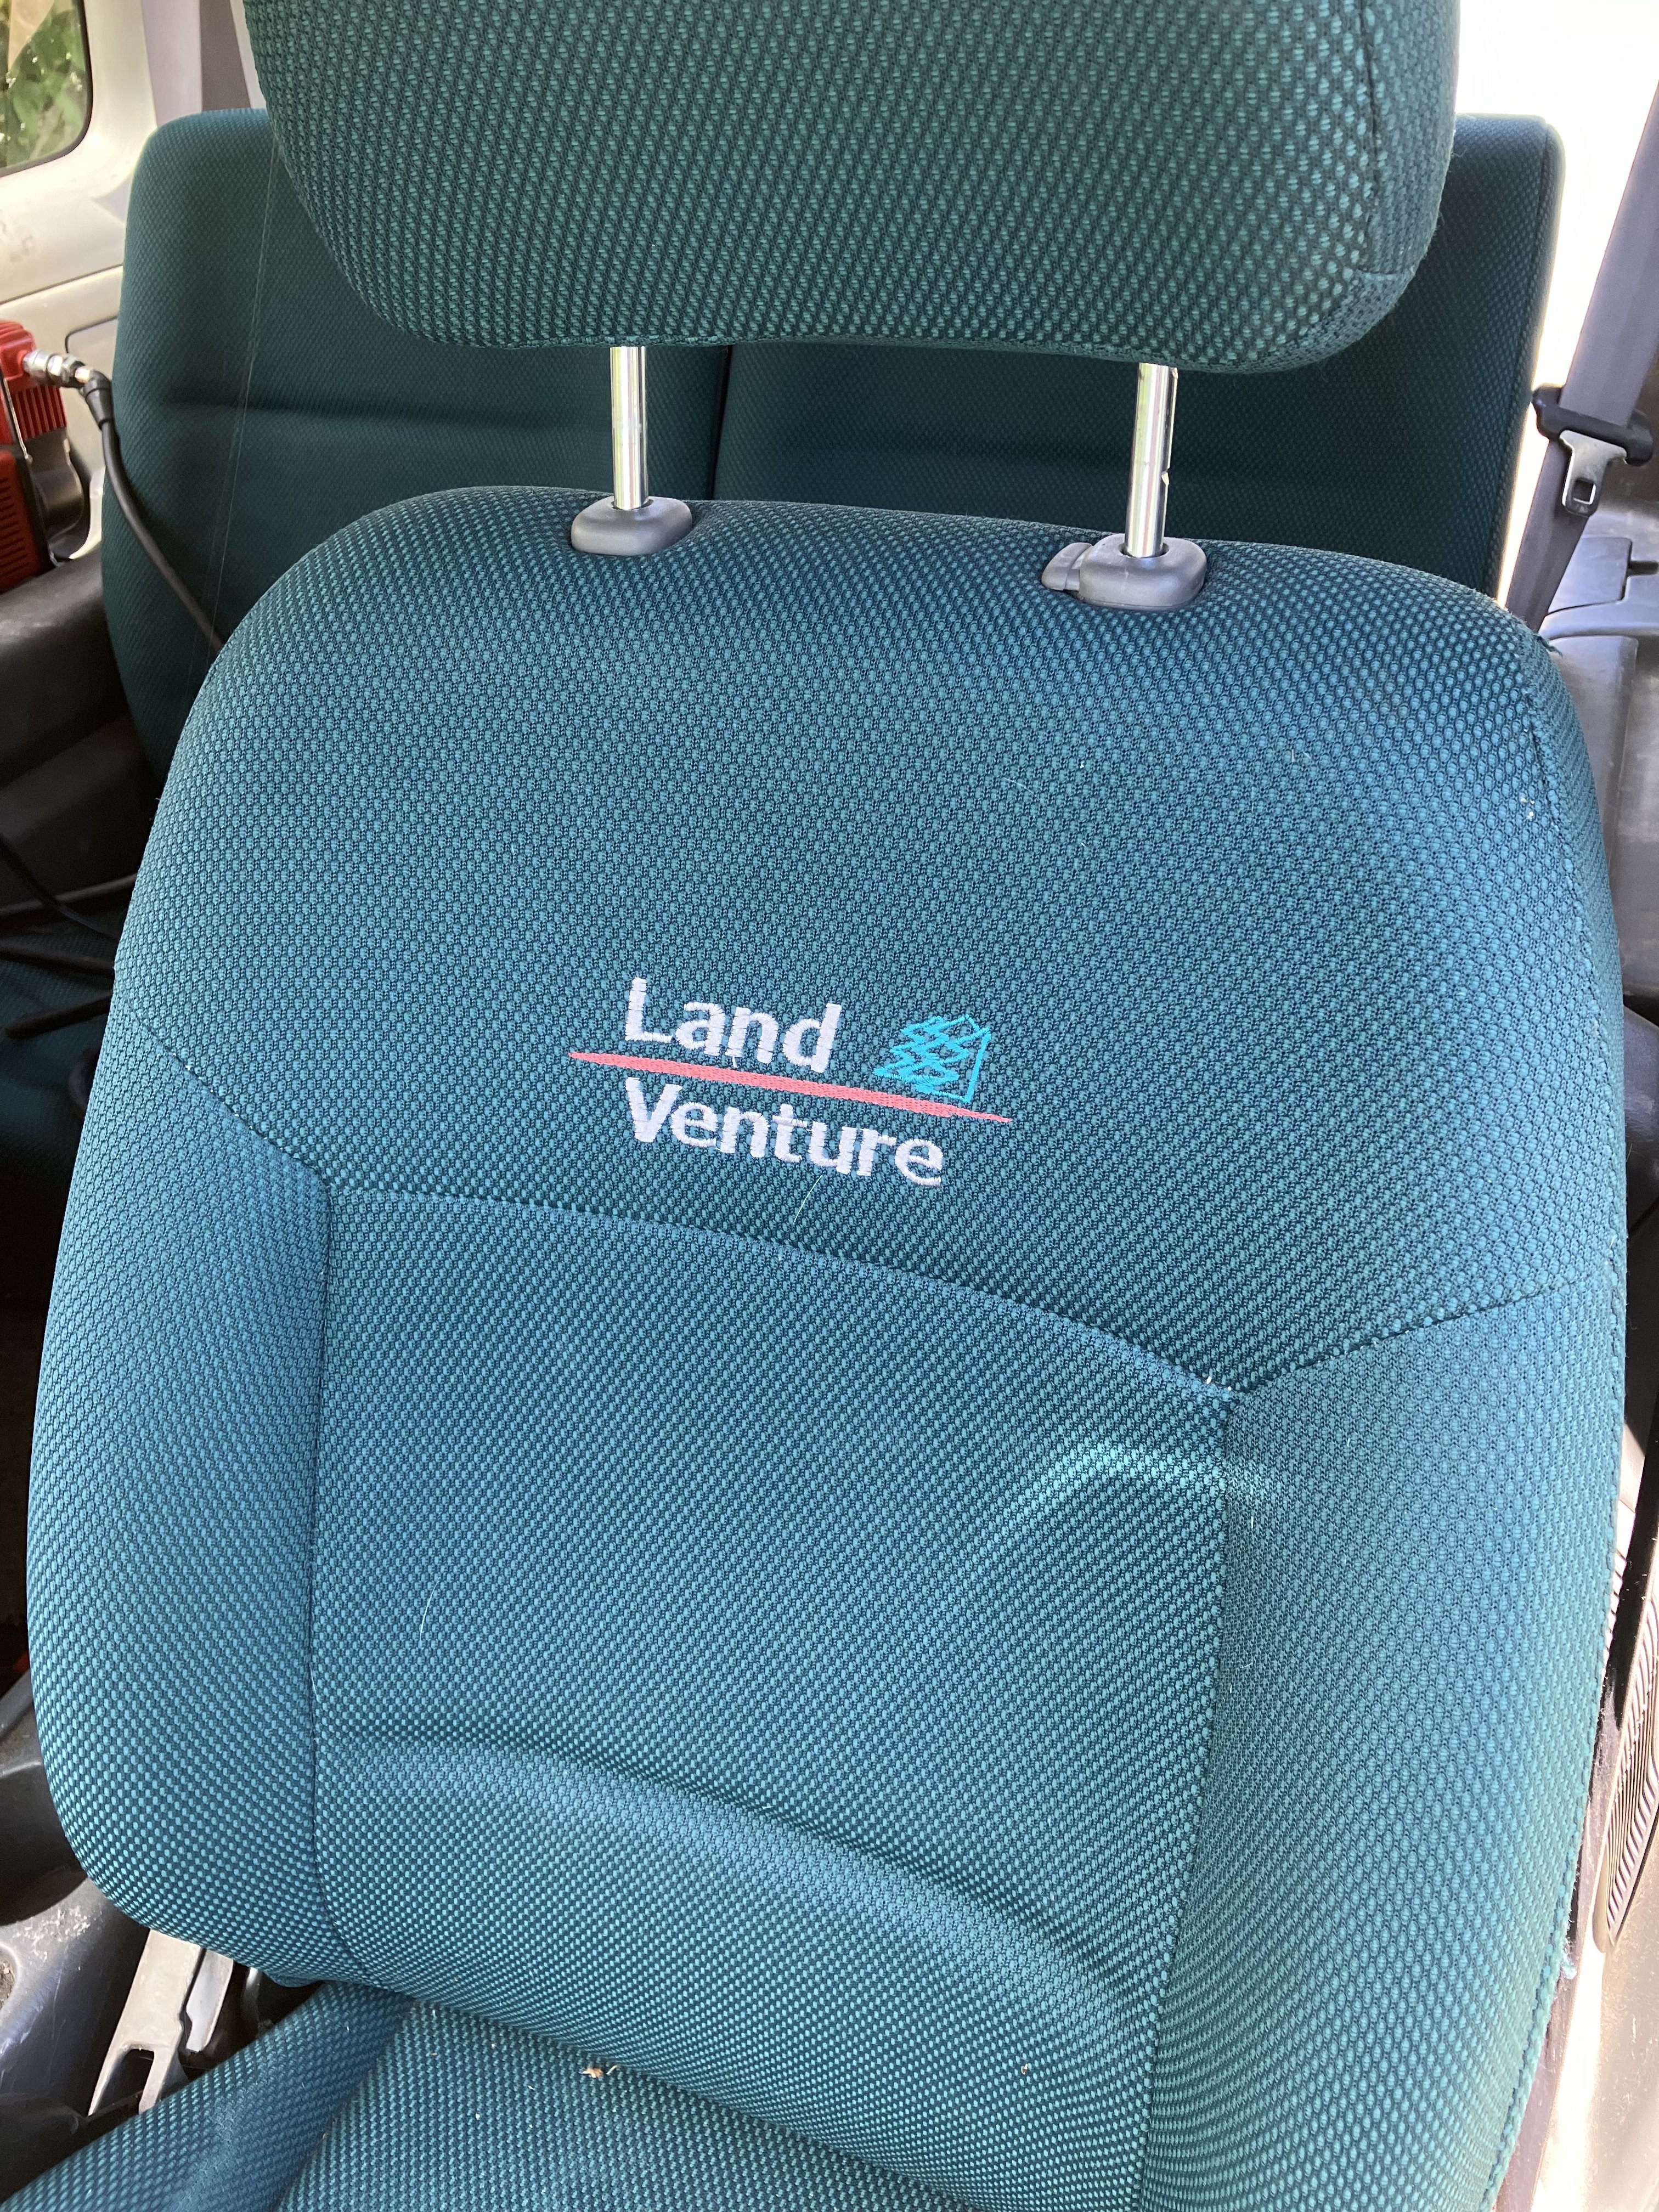
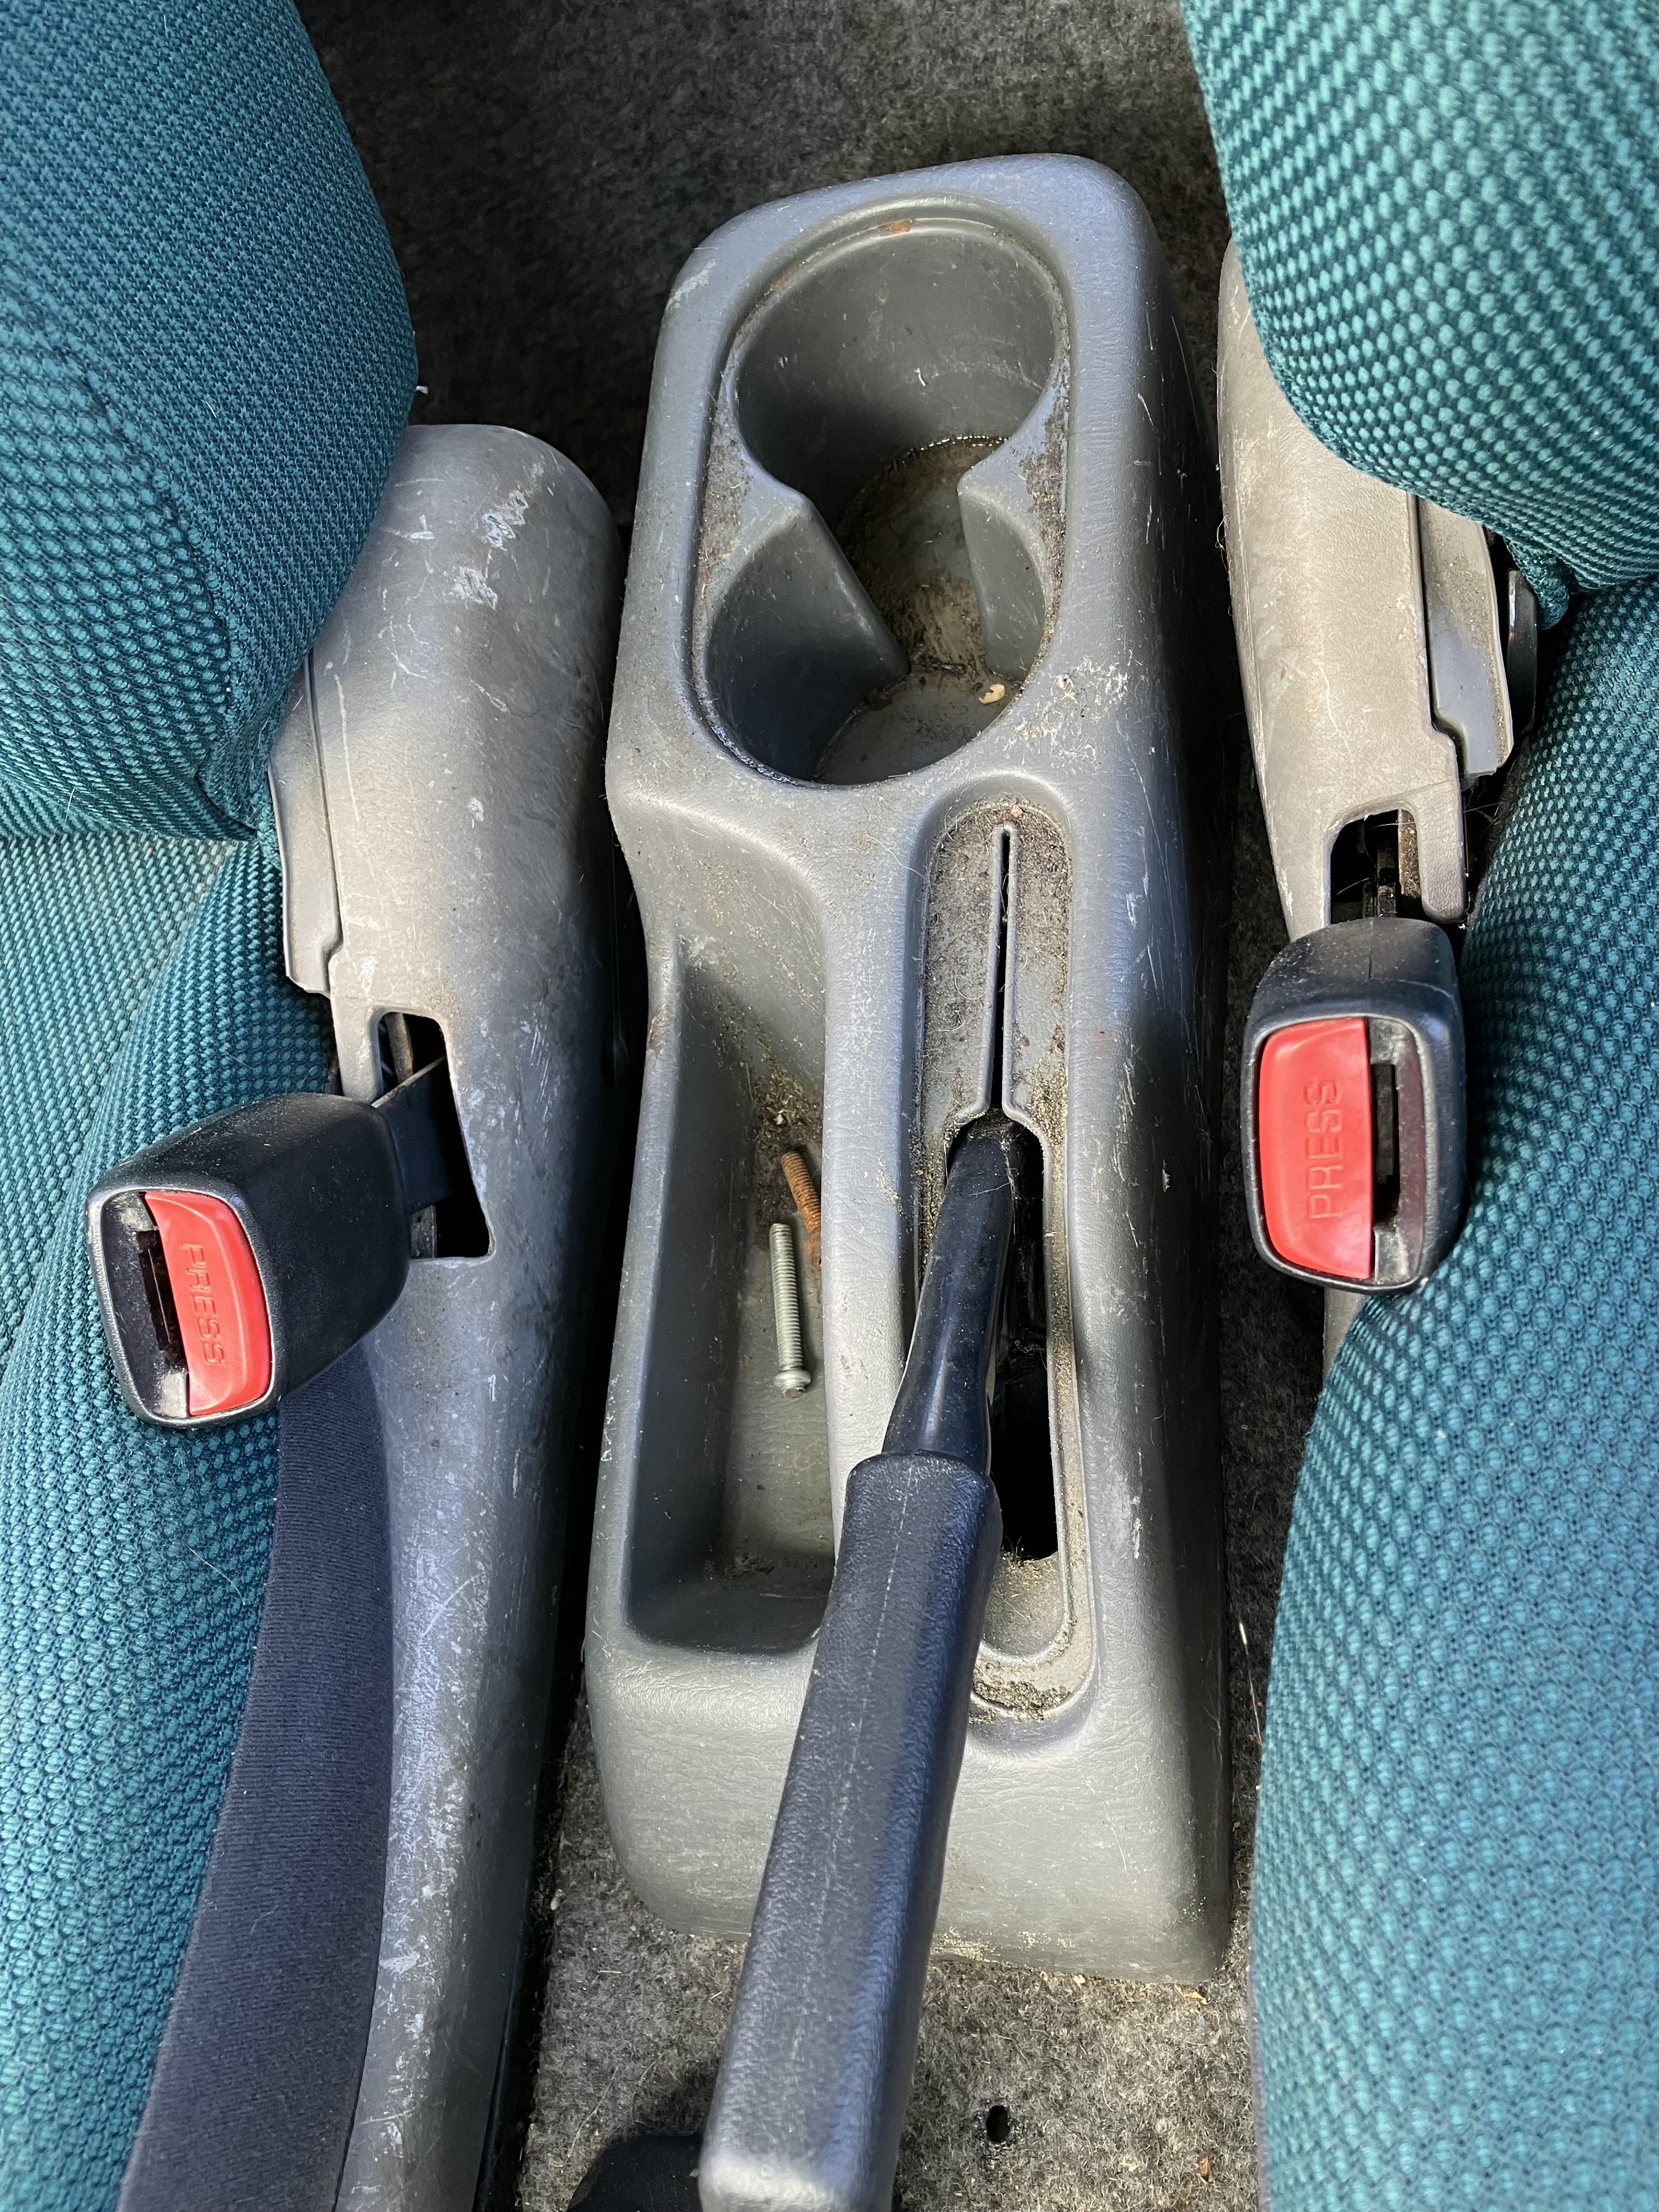
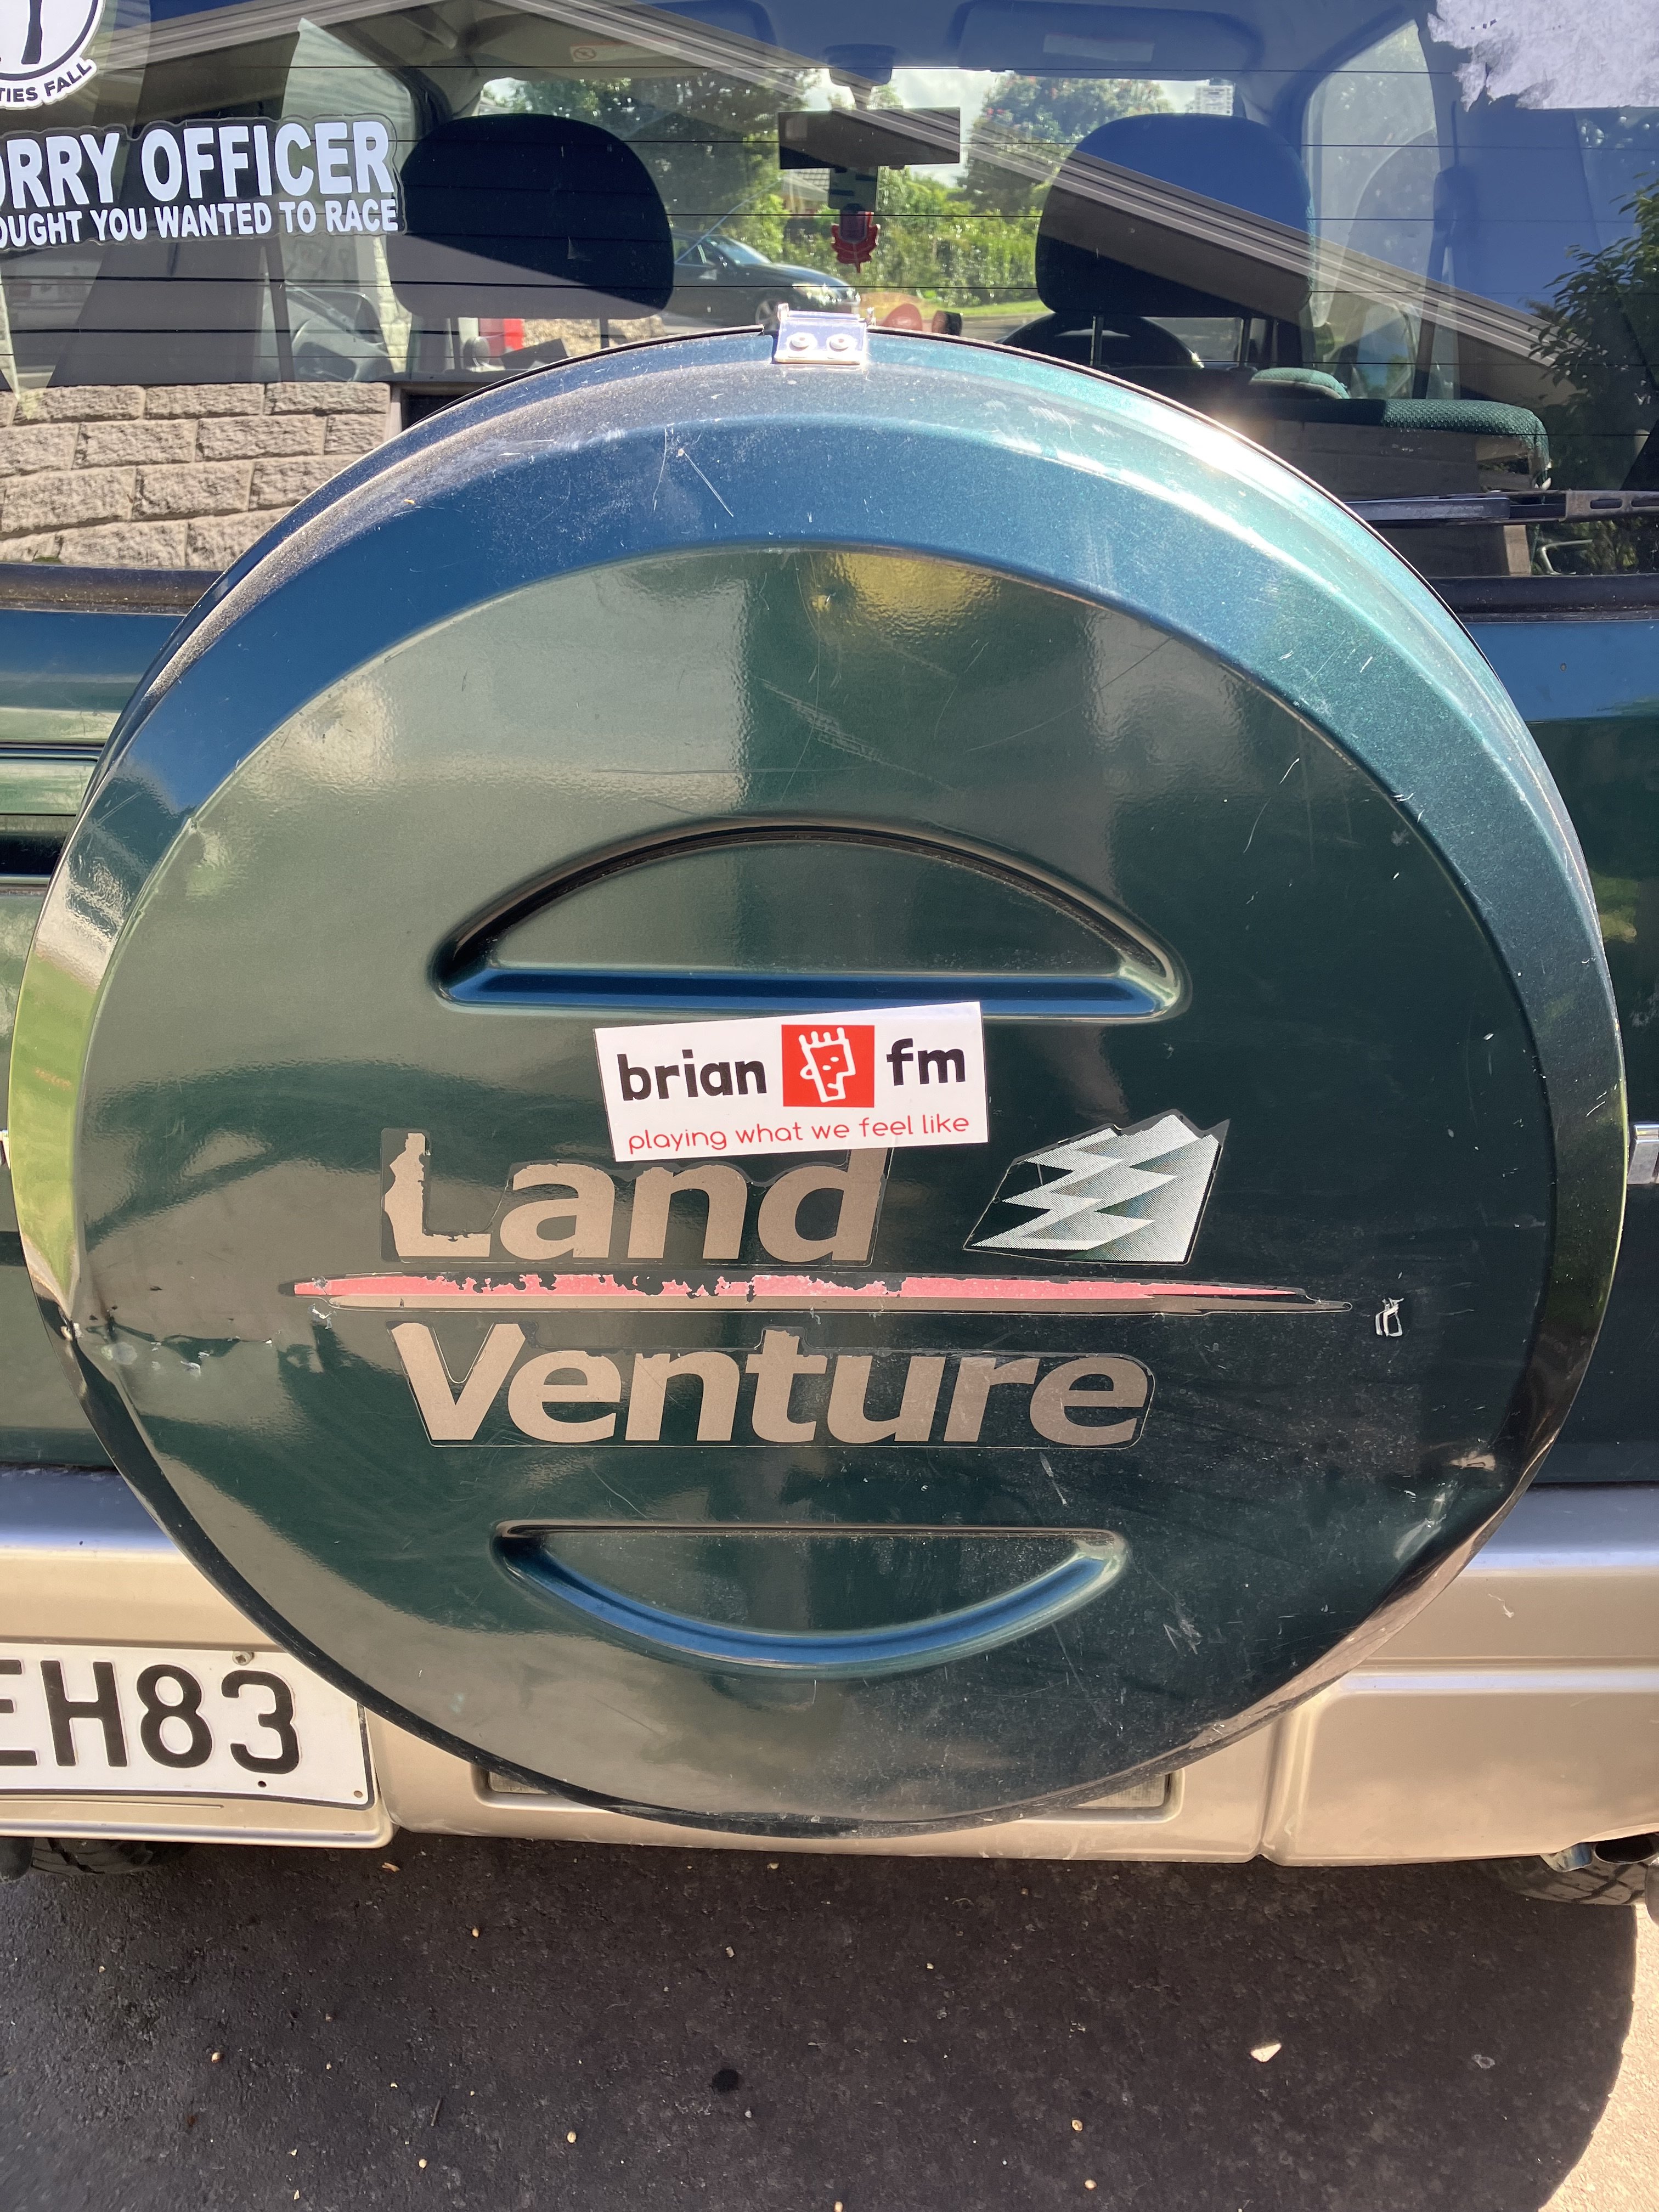
I got it home and unloaded without any problems and dumped it in the driveway. After sorting a few other things that needed doing, I thought I would move it into the workshop and start to clean it up a bit. Problem #1 - it wouldn't start. Despite starting several times already that morning, it did not want to turn over. It wasn't a starter problem and felt like a seized engine so I suspected it may be hydrolocked given how much water was coming out earlier. Cool. It could stay where it was and I'd clean it first. What had I bought? A 2001 Suzuki Jimny 'Land Venture' edition which is some sort of trim spec. It seems to have better wheels than the standard kei spec Jimny, and cool green upholstery. It also has cool checked floor mats. The previous owner must have done some regular offroading because there was the remnants of a CB radio install, extra lighting and also a 12v compressor mounted in the back, and the bodywork was extensively scratched. The bonnet is dented and scratched in a way I can't figure out how they did it, the roof has been resprayed a different shade of green and the original edges have got a lot of sunburn/clear coat failure. The original roof rails have been removed leaving only their sockets. The spare wheel cover is also dented which is a shame but can probably be beaten back into shape. The other feature was an extensive amount of filth everywhere. All the plastics, carpets and seats were disgusting. Exhibit A
7 points
-
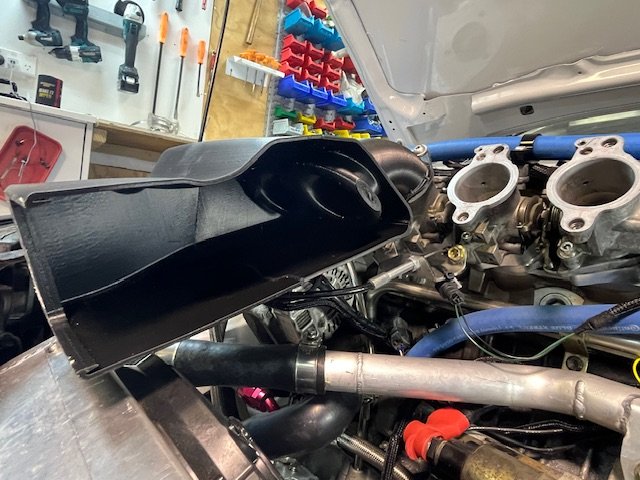
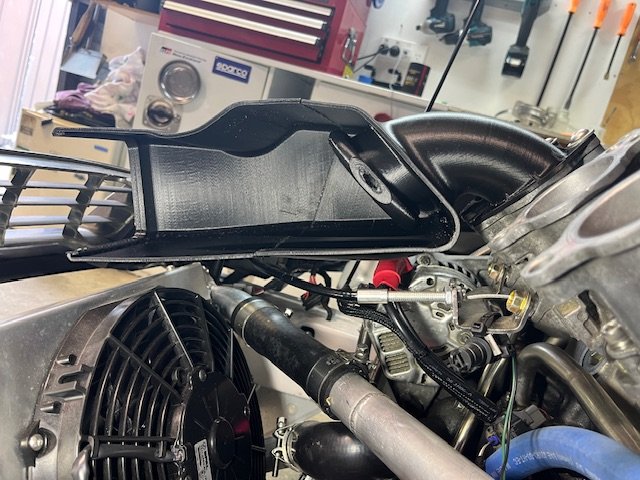
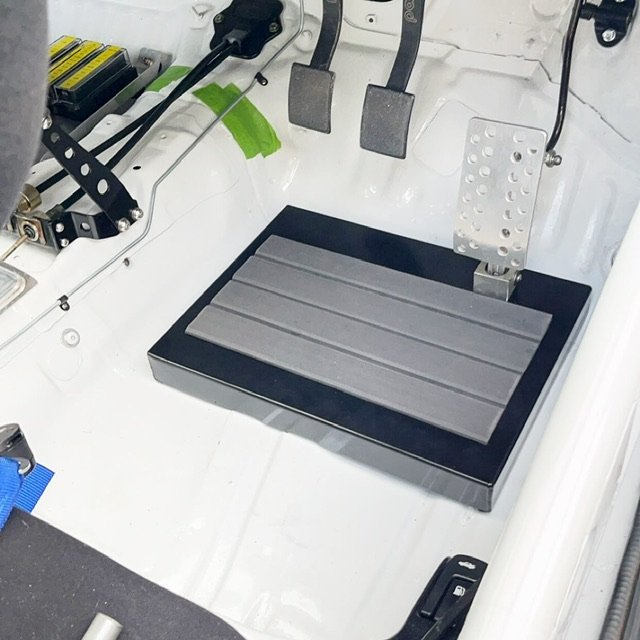
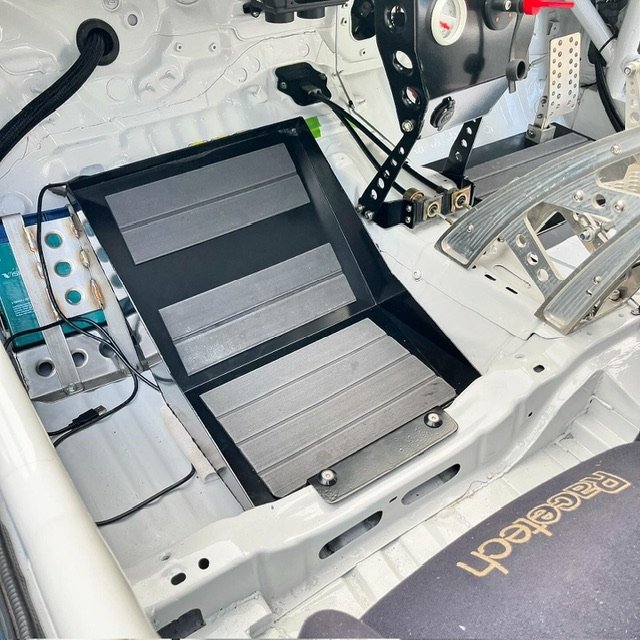
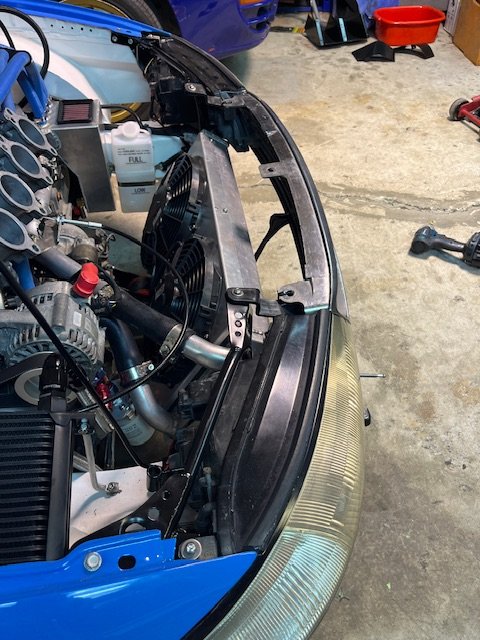
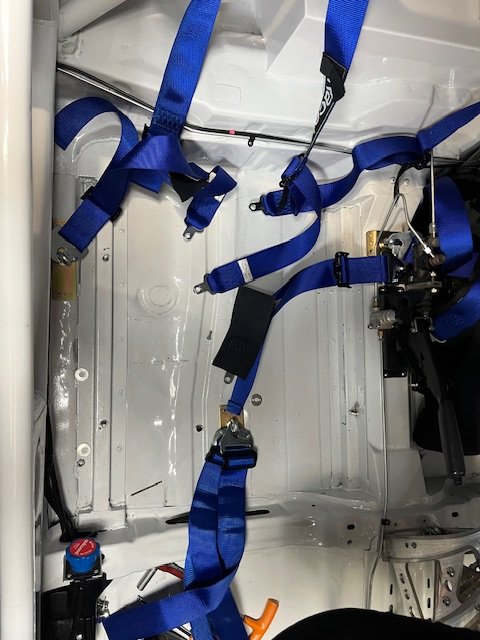
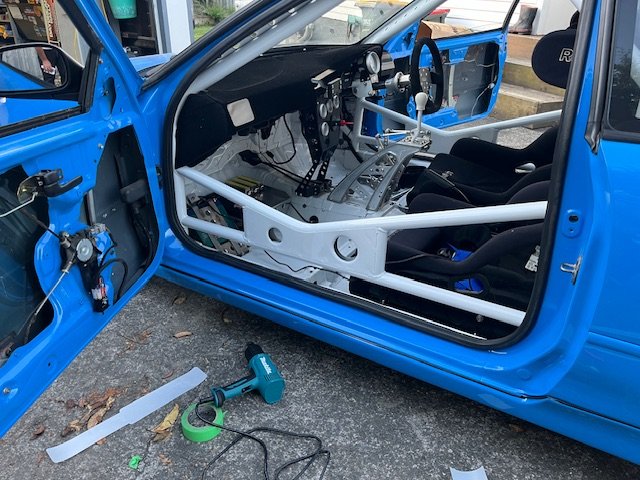
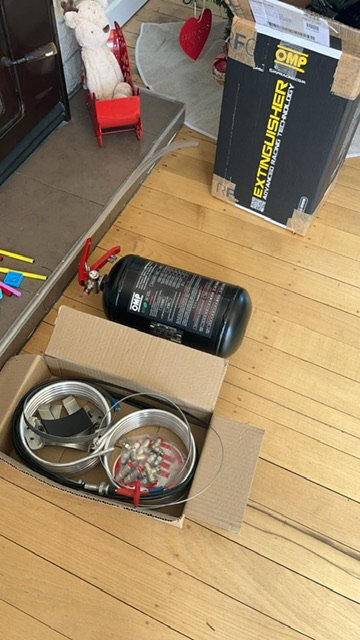
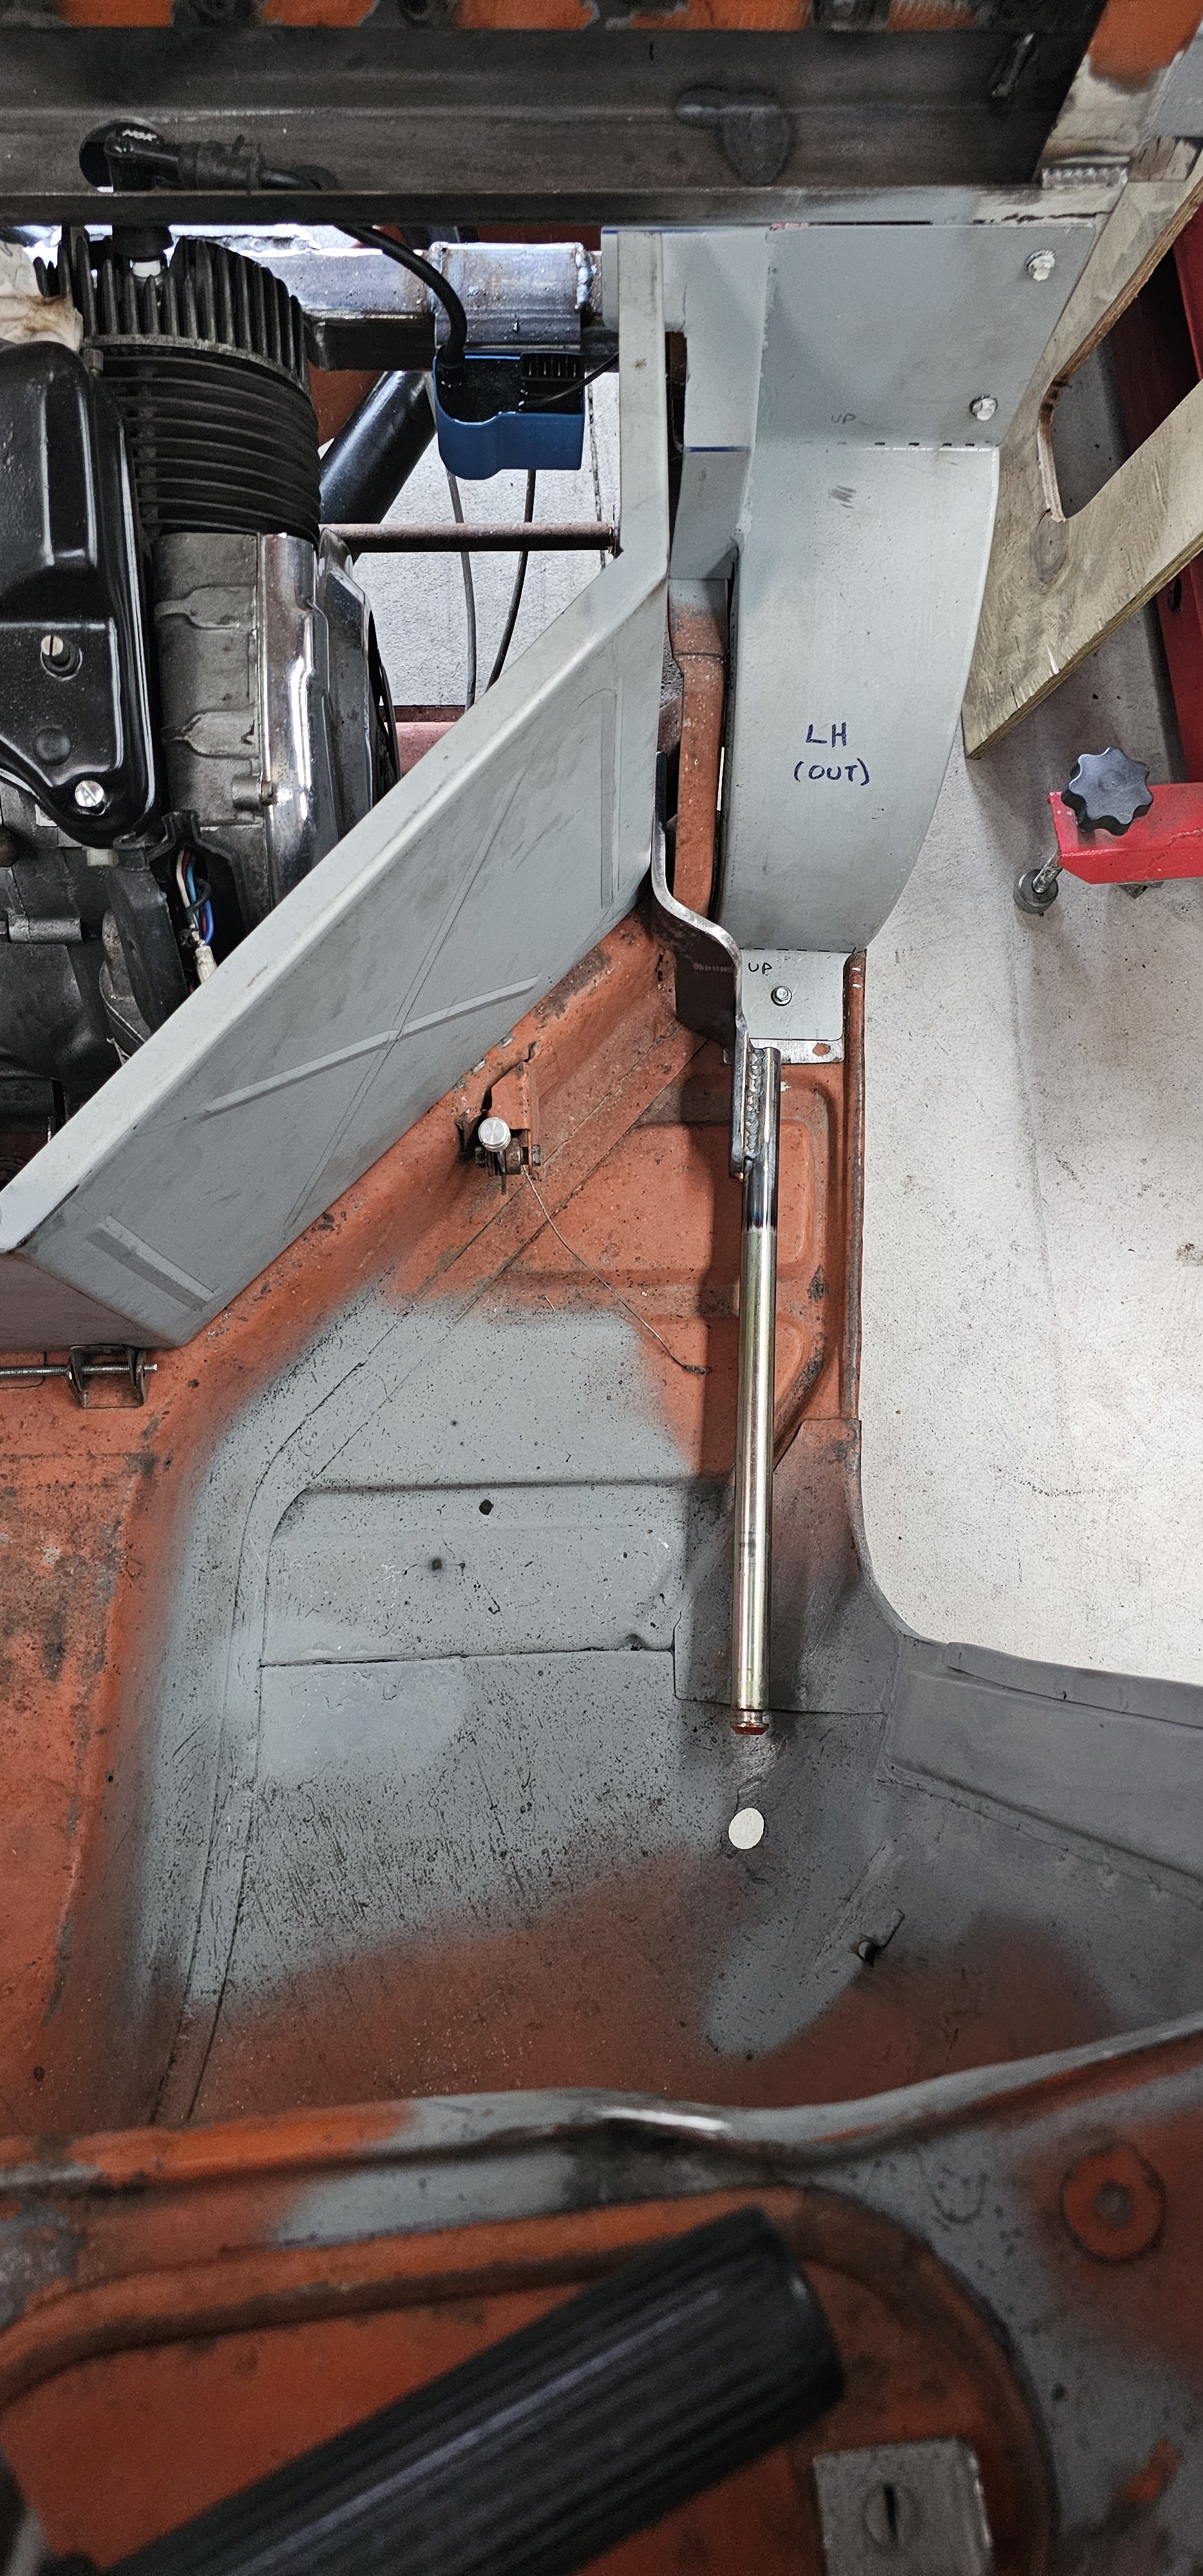
Wow where to start. Lots of little things starting to come together that have been ticking away in the background. First wee job was to apply 3m ppf to all the rollcage members. I knew as soon as I put belts in the car they would be forever chipping the paint. Very satisfying and can hardly notice the film. So next job was to mount seatbelts. I bought a matching set of belts from racetech for passenger seat and started figuring out how to mount these as be schedule A. Was an absolute prick of a job not made any easier by the passenger seat being directly above where the fuel lines run, and the fact that both my seats are slammed so low you can’t even get an eye bolt under them.. because touring car things of course.. Ended up opening a hole in the chassis rail to slide a 40x100mm plate inside for the passenger one. But very stoked to have this done. Have been chipping away at rollcage padding with the hard sfi foam. Quite fiddly to get fitting right and also need to buy some more to finish the job it’s pretty expensive stuff! Sorry no pics because I still haven’t accepted if I’m happy with what I’ve done 😂 Dropped a load of parts off at the powdercoaters. This should hopefully be the last batch and is lots of bits that will make everything look a little more finished. Footplates look sooo good. Used some left over tuff deck EVA foam from a job on the boat. Should be durable and grippy when wet. Headlight support structures look super tidy too and blend into headlight housing well. Also pushed the go button on a plumbed in extinguisher. This will be piece of mind for my over-customised car, particularly around the hot exhaust and fuel systems. It’s a massive job to install these things, so slowly chipping away at it. Last bit of progress has been on the airbox. A friend printed a test piece of my airbox design so I could check geometry and design features. Generally, I’m very happy with it, although I did I get the geometry wrong by 30mm or so. This was an easy way to validate the design so all part of the process. Few changes I want to make to the design; - fix geometry - increase thickness of itb flange to 5-6mm - increase volume. #3 & #4 runners have a lot of extra space underneath. Ideally I’d like to get volume up to 25-30L - incorporate support stays in behind filters to keep shape/hold filters in if I ever create positive pressure in this airbox - Vee the two filter positions maybe 20deg or so to form an air damn in the middle, also encouraging to to flow to the outer corners of the airbox. Should minimise width and maximise filter area. So this is what it looks like currently goddamn it’s going to look sexy once finished, but still a very long way to go!
7 points
-
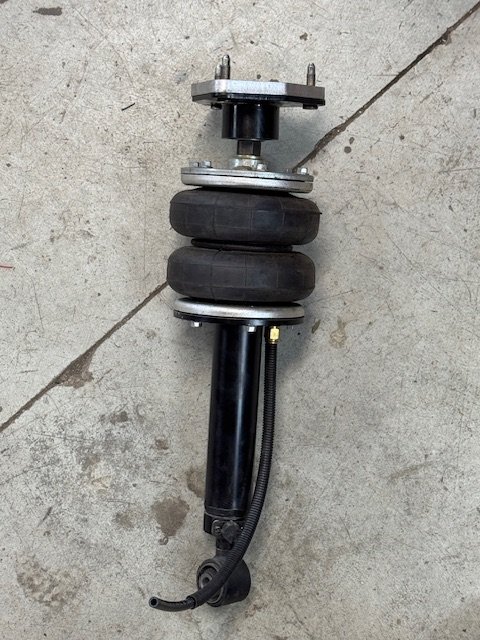
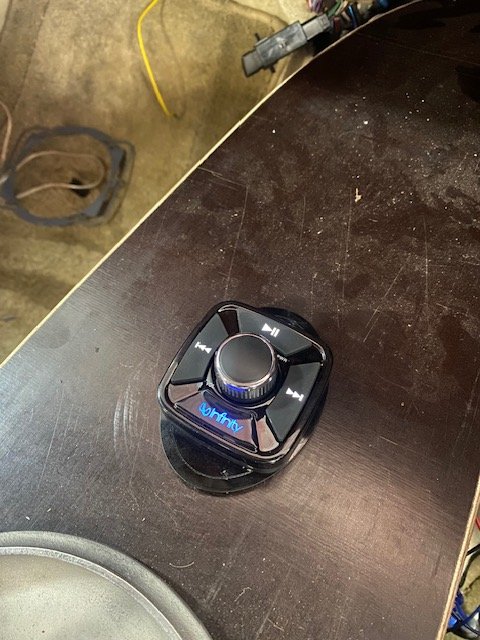
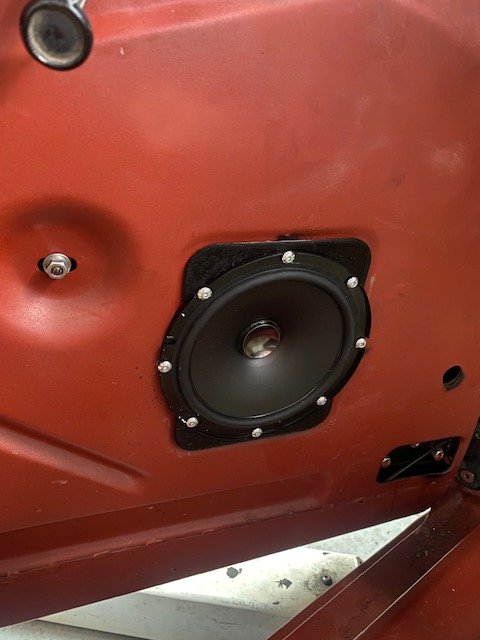
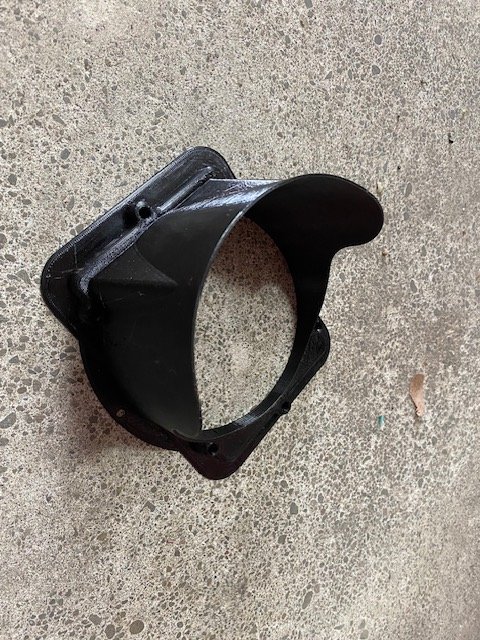
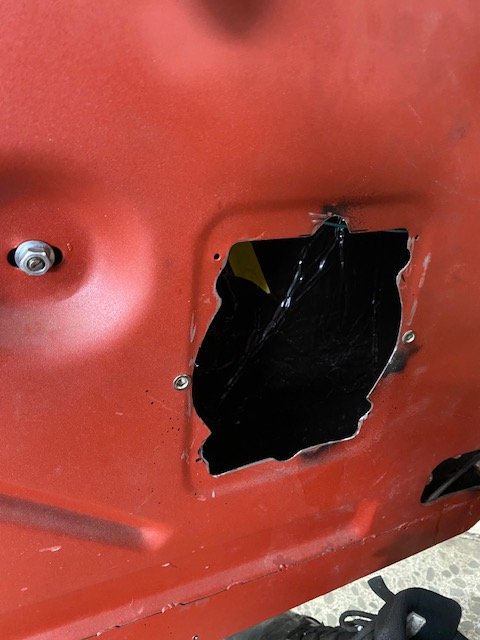
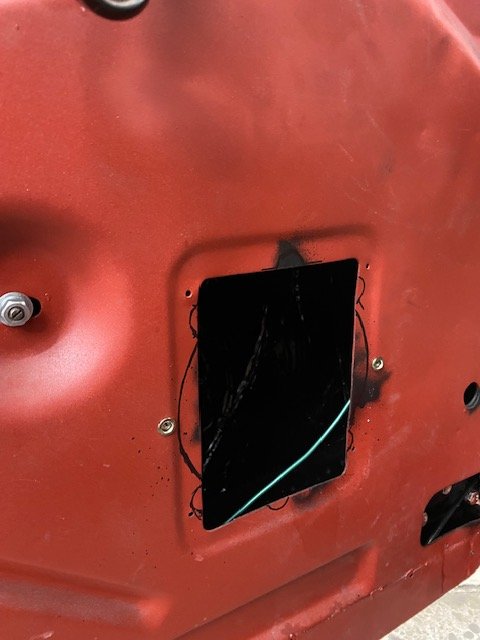
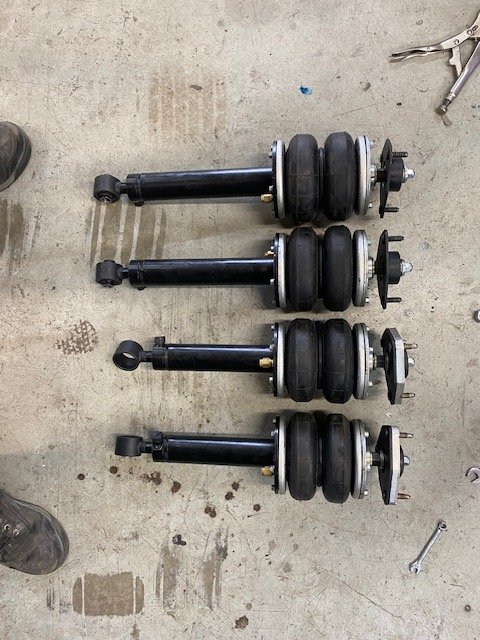
Installed the infinity Bluetooth only "headunit" Its alright. Connects fairly reliably. Auto plays at a default volume which can be a pain. No EQ adjustment, so installed a equalizer in the glovebox. Cost more than a decent Pioneer single din headunit. Probably should of just brought one of those, and installed that in the glovebox... Needed some speakers. so chose this hole. Trimmed it out a bit and added some rivnuts. 3d printed an adapter with a rain hood. Installed some 6.5inch component speakers. Used some Dakota Digital Magnum shooters to transfer the Door popper power and speaker signal through the door jam. Works well. Purchased another 2x of the new Boss Universal Struts. Bit longer than the first pair.
6 points
-
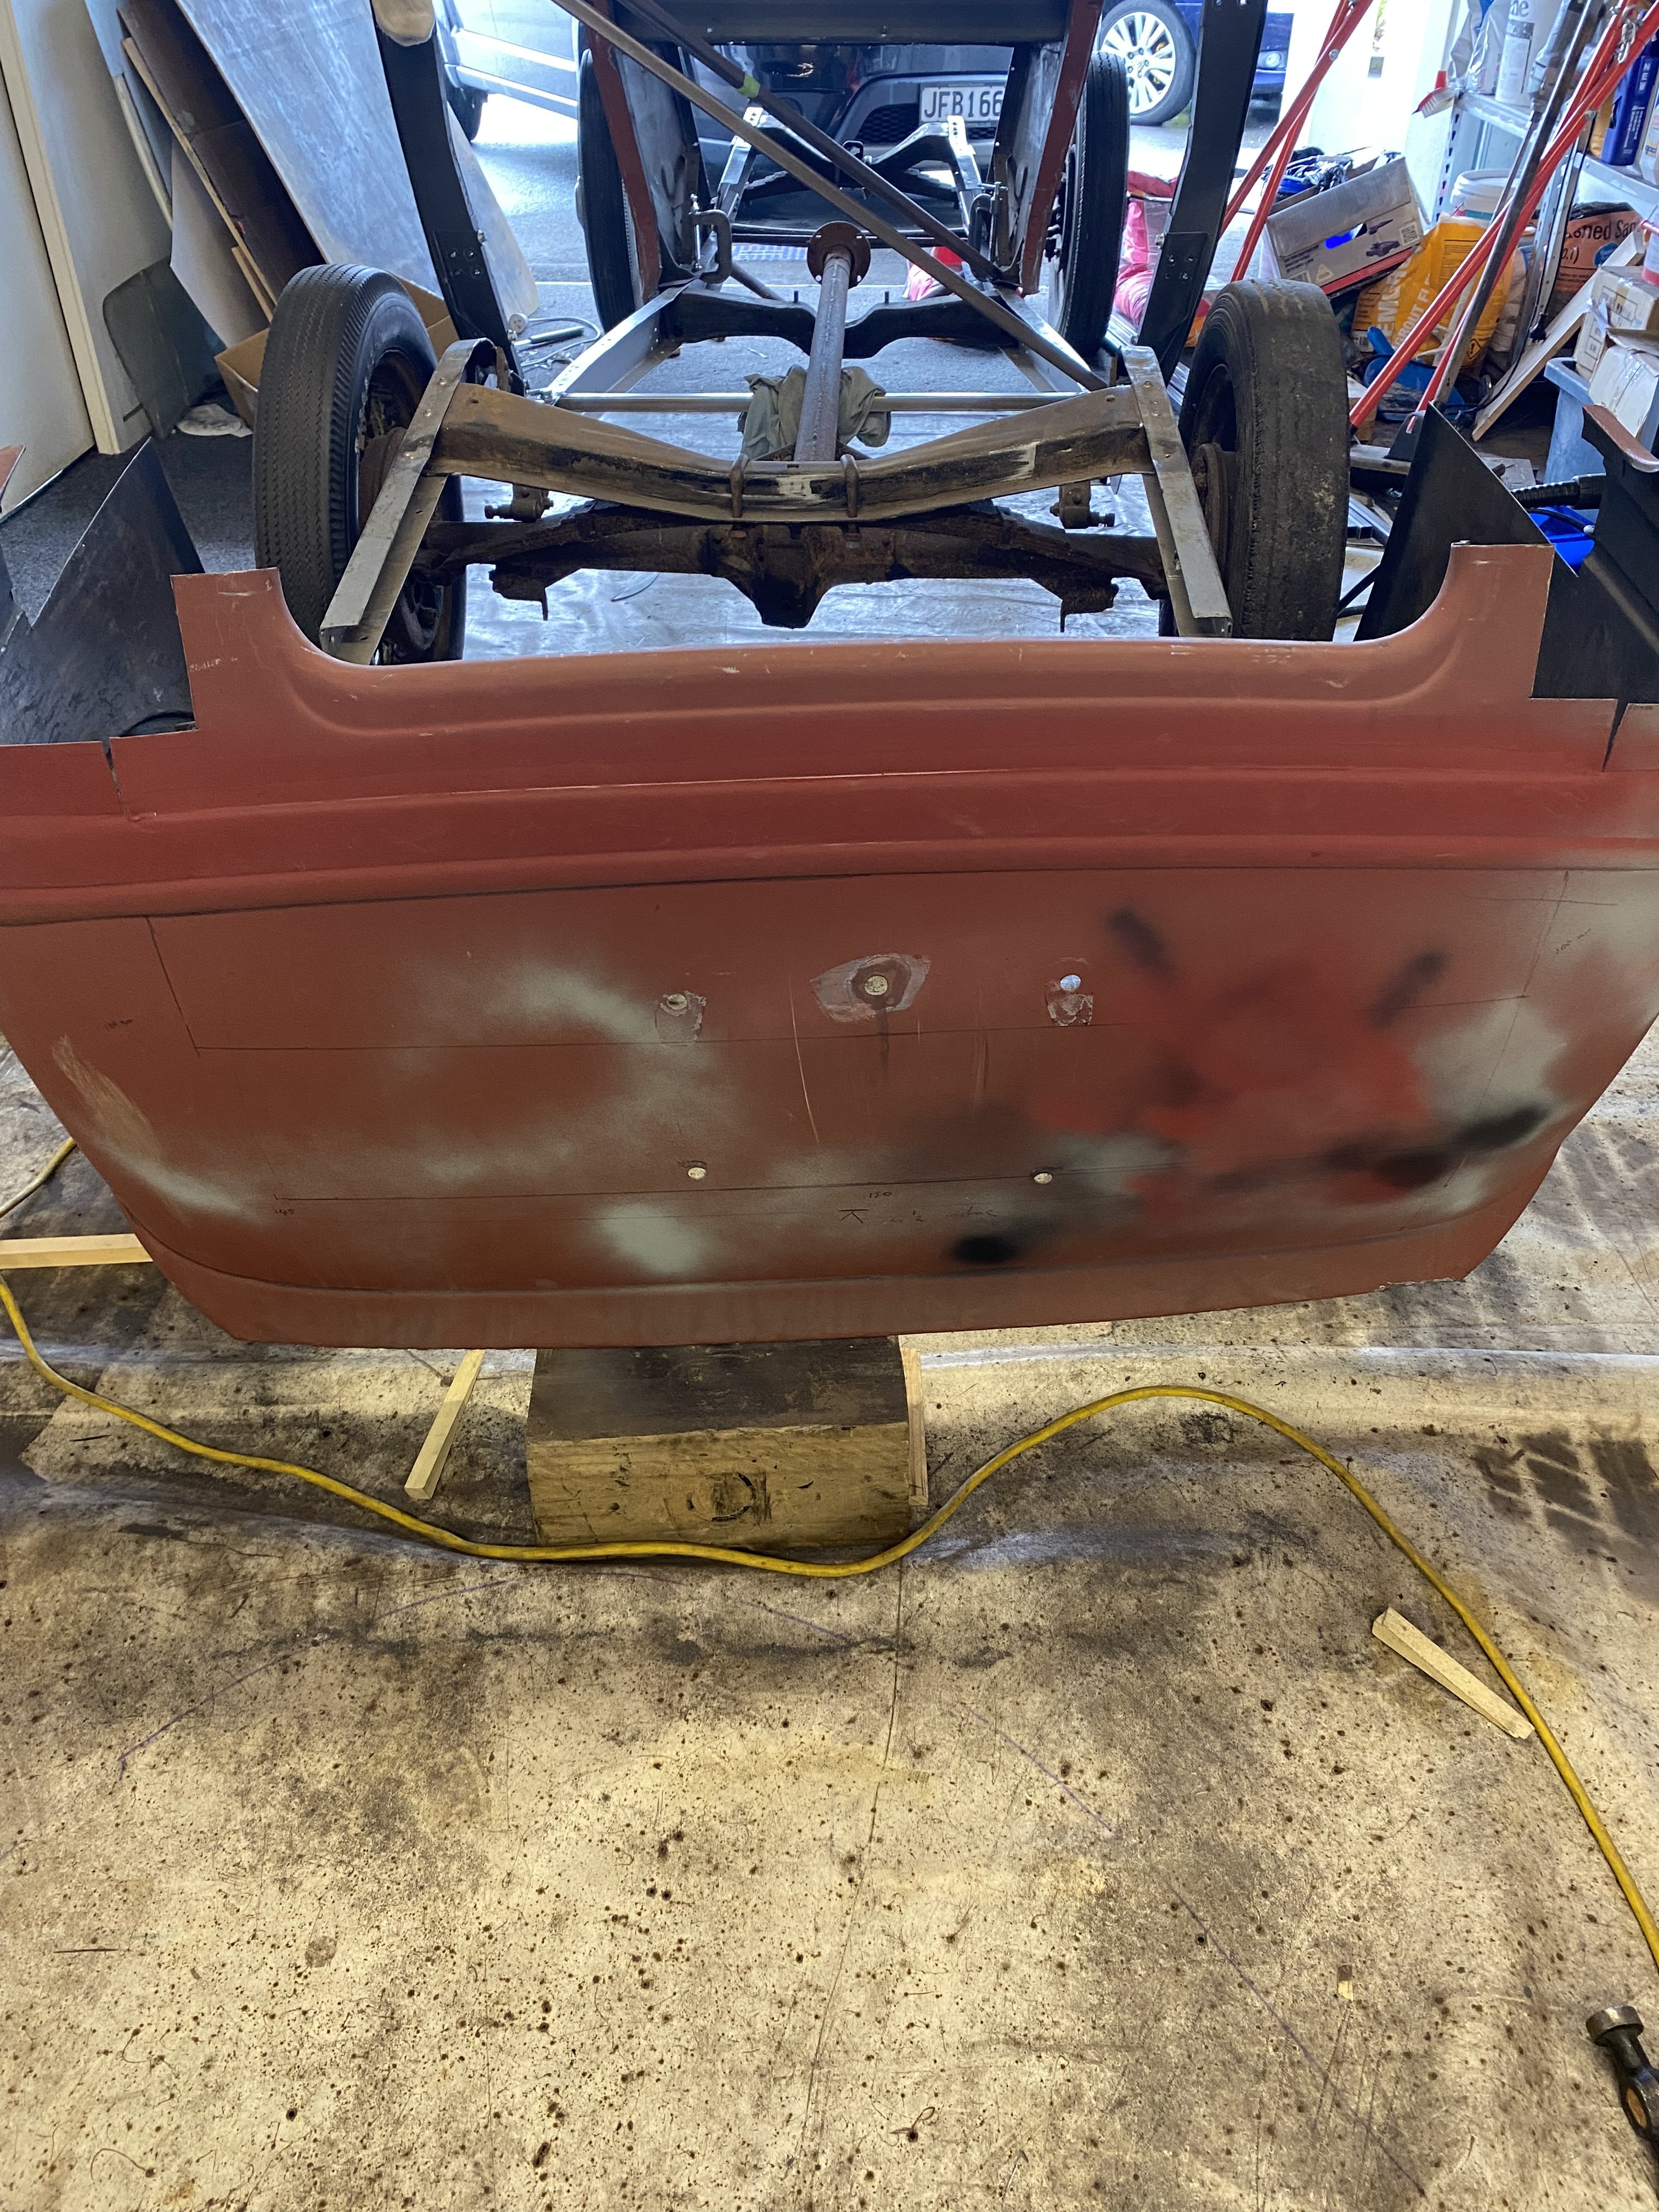
4 years later..... welcome home old friend Those years in a shed haven't been kind, I have some work to do.
6 points
-
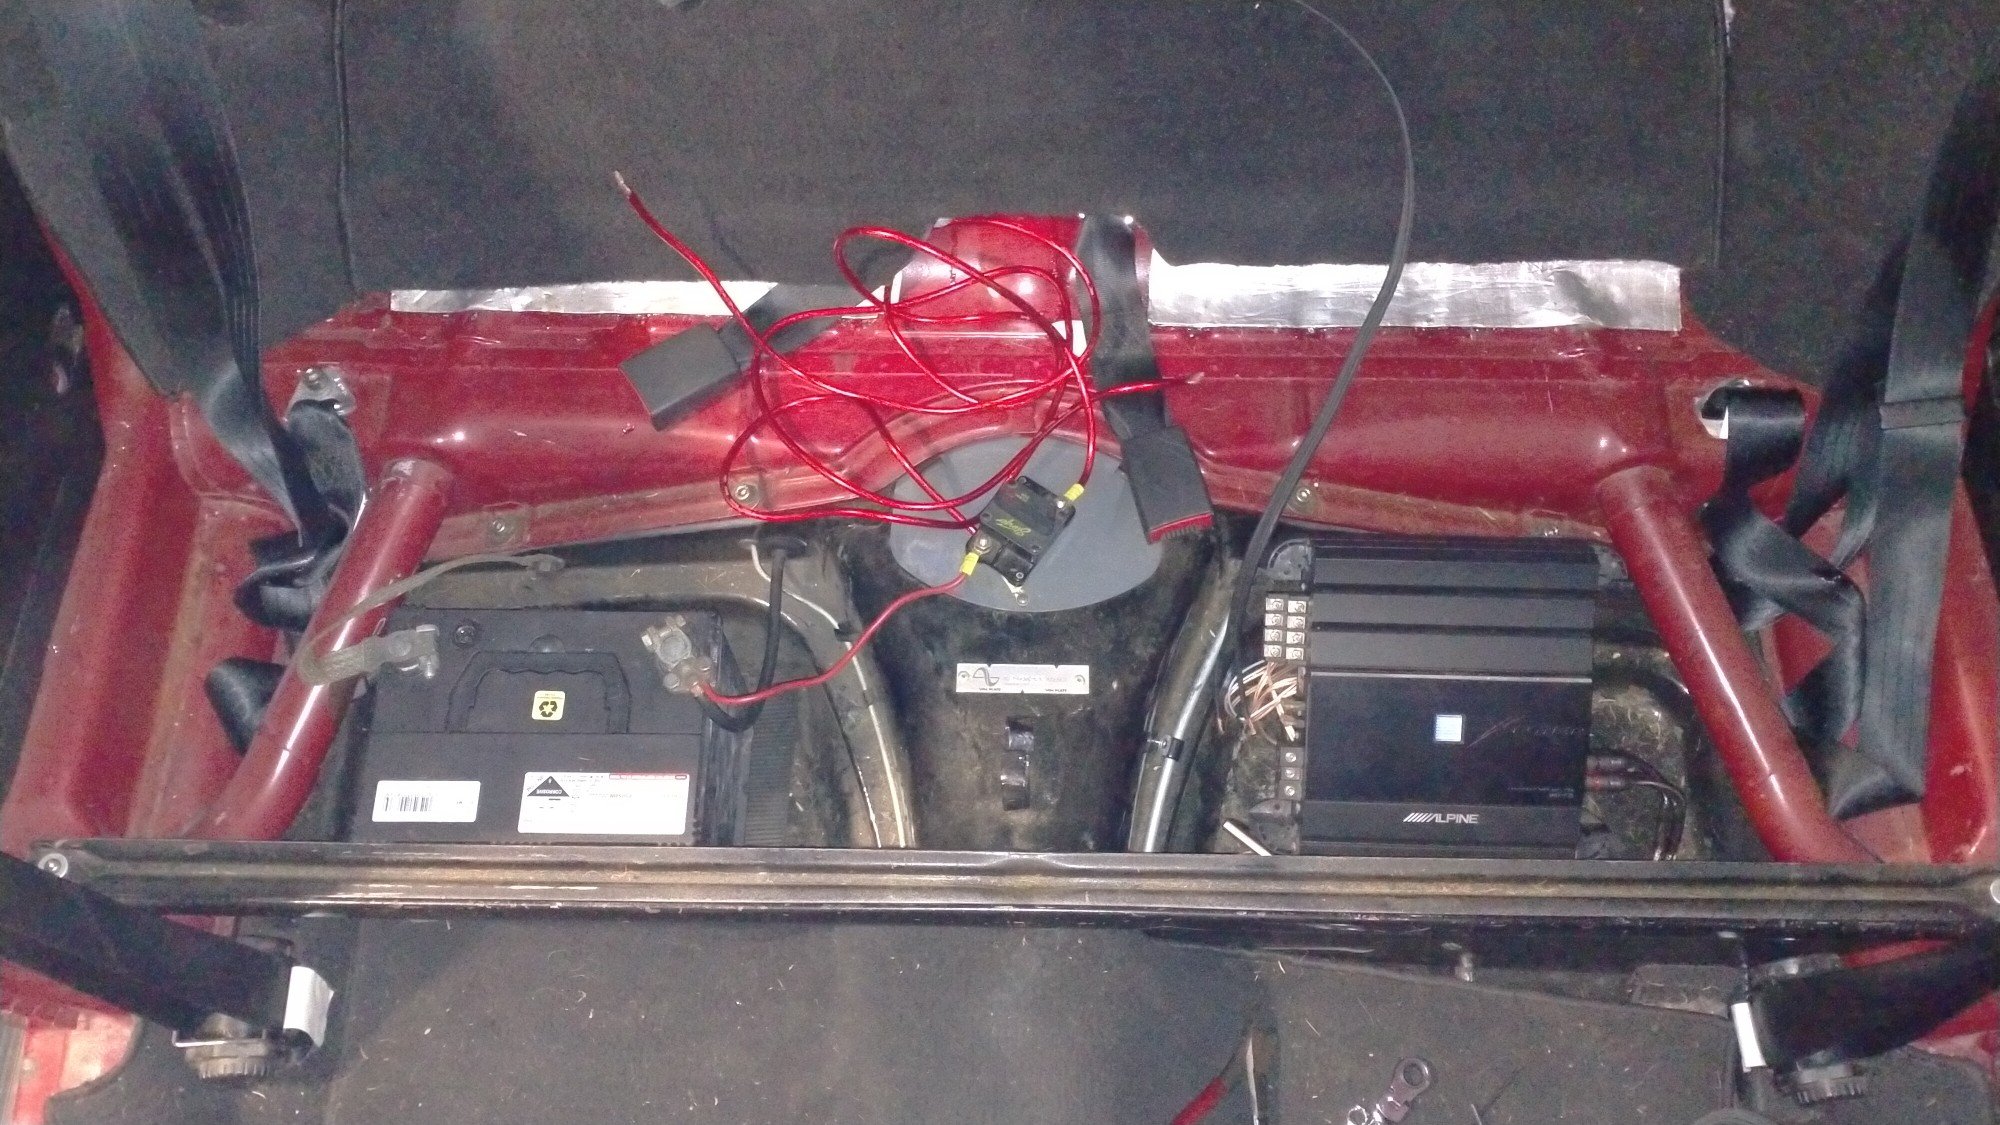
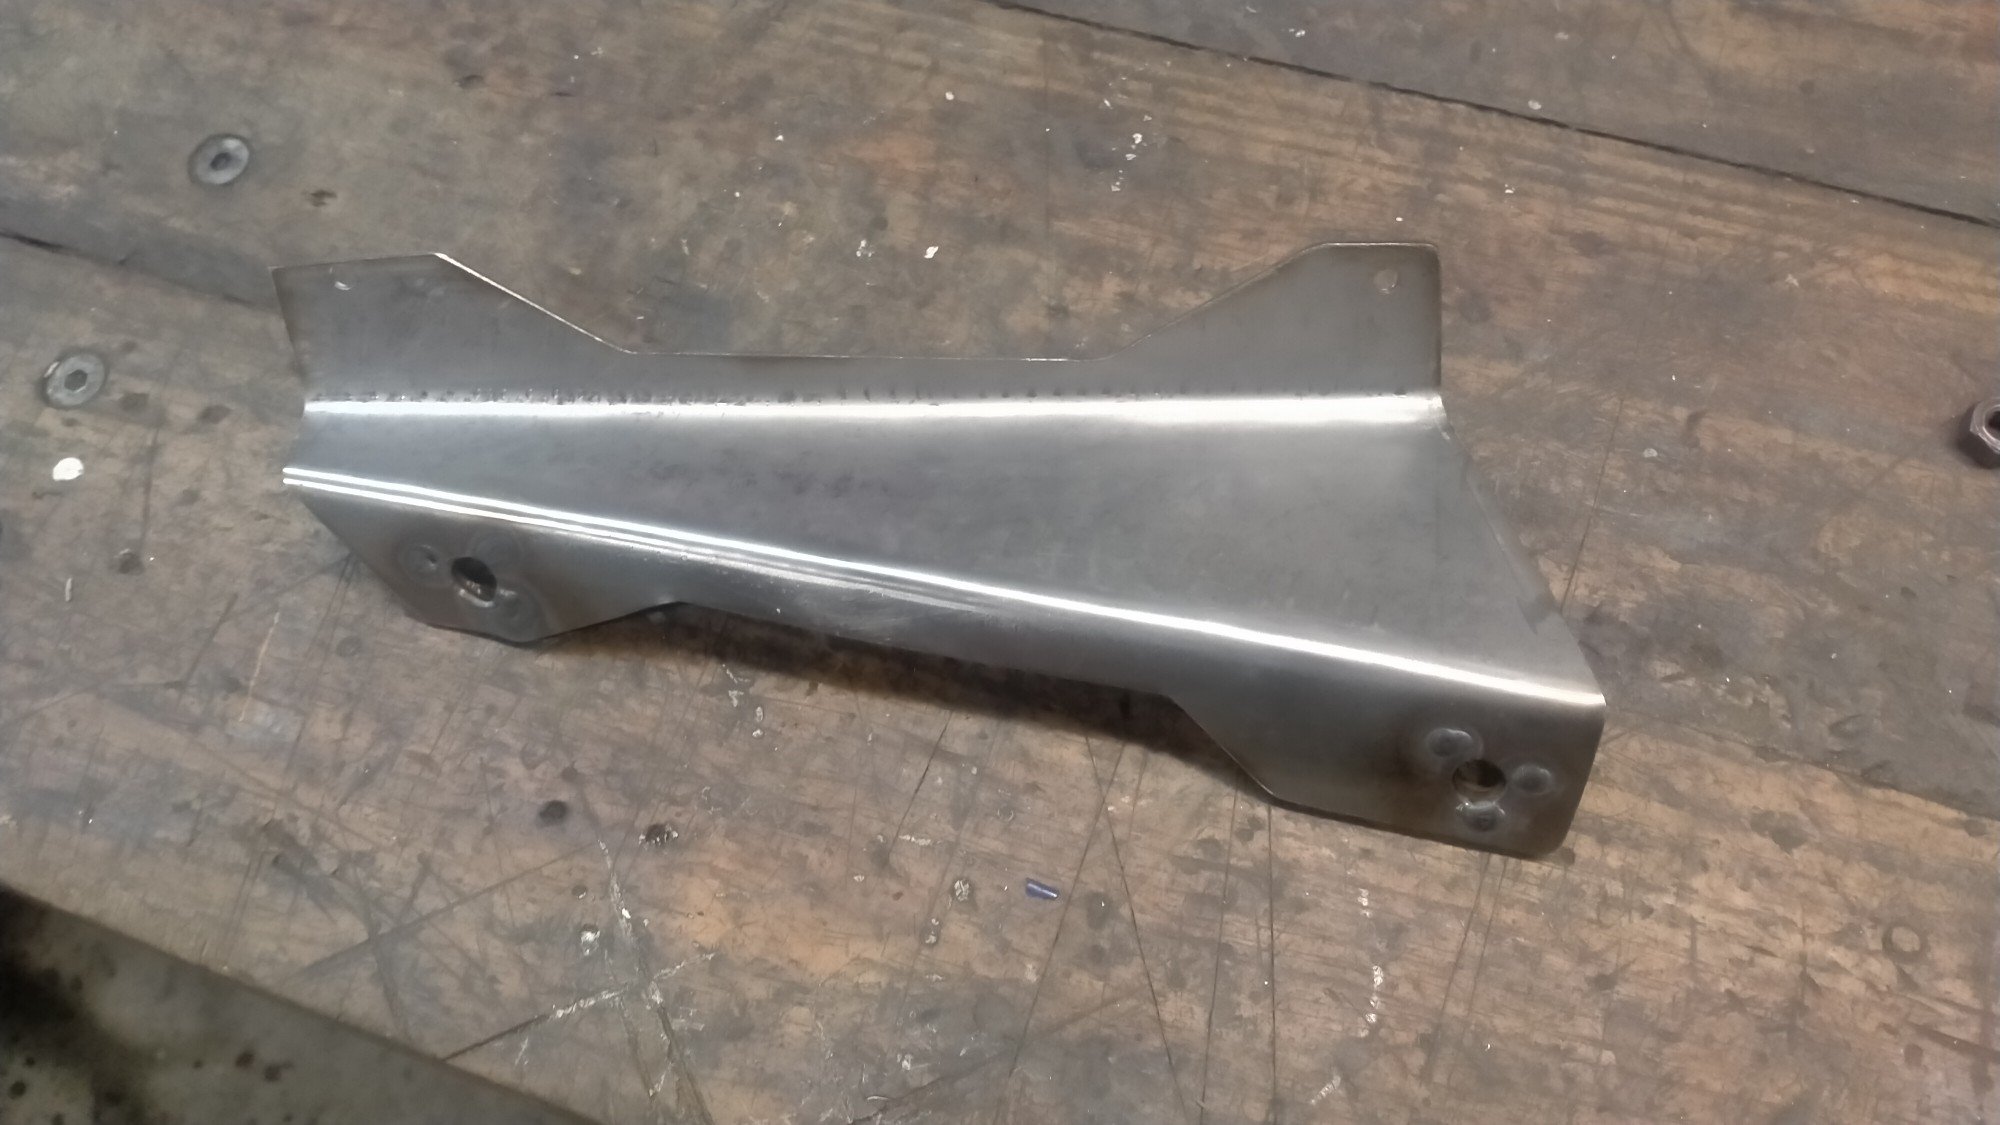
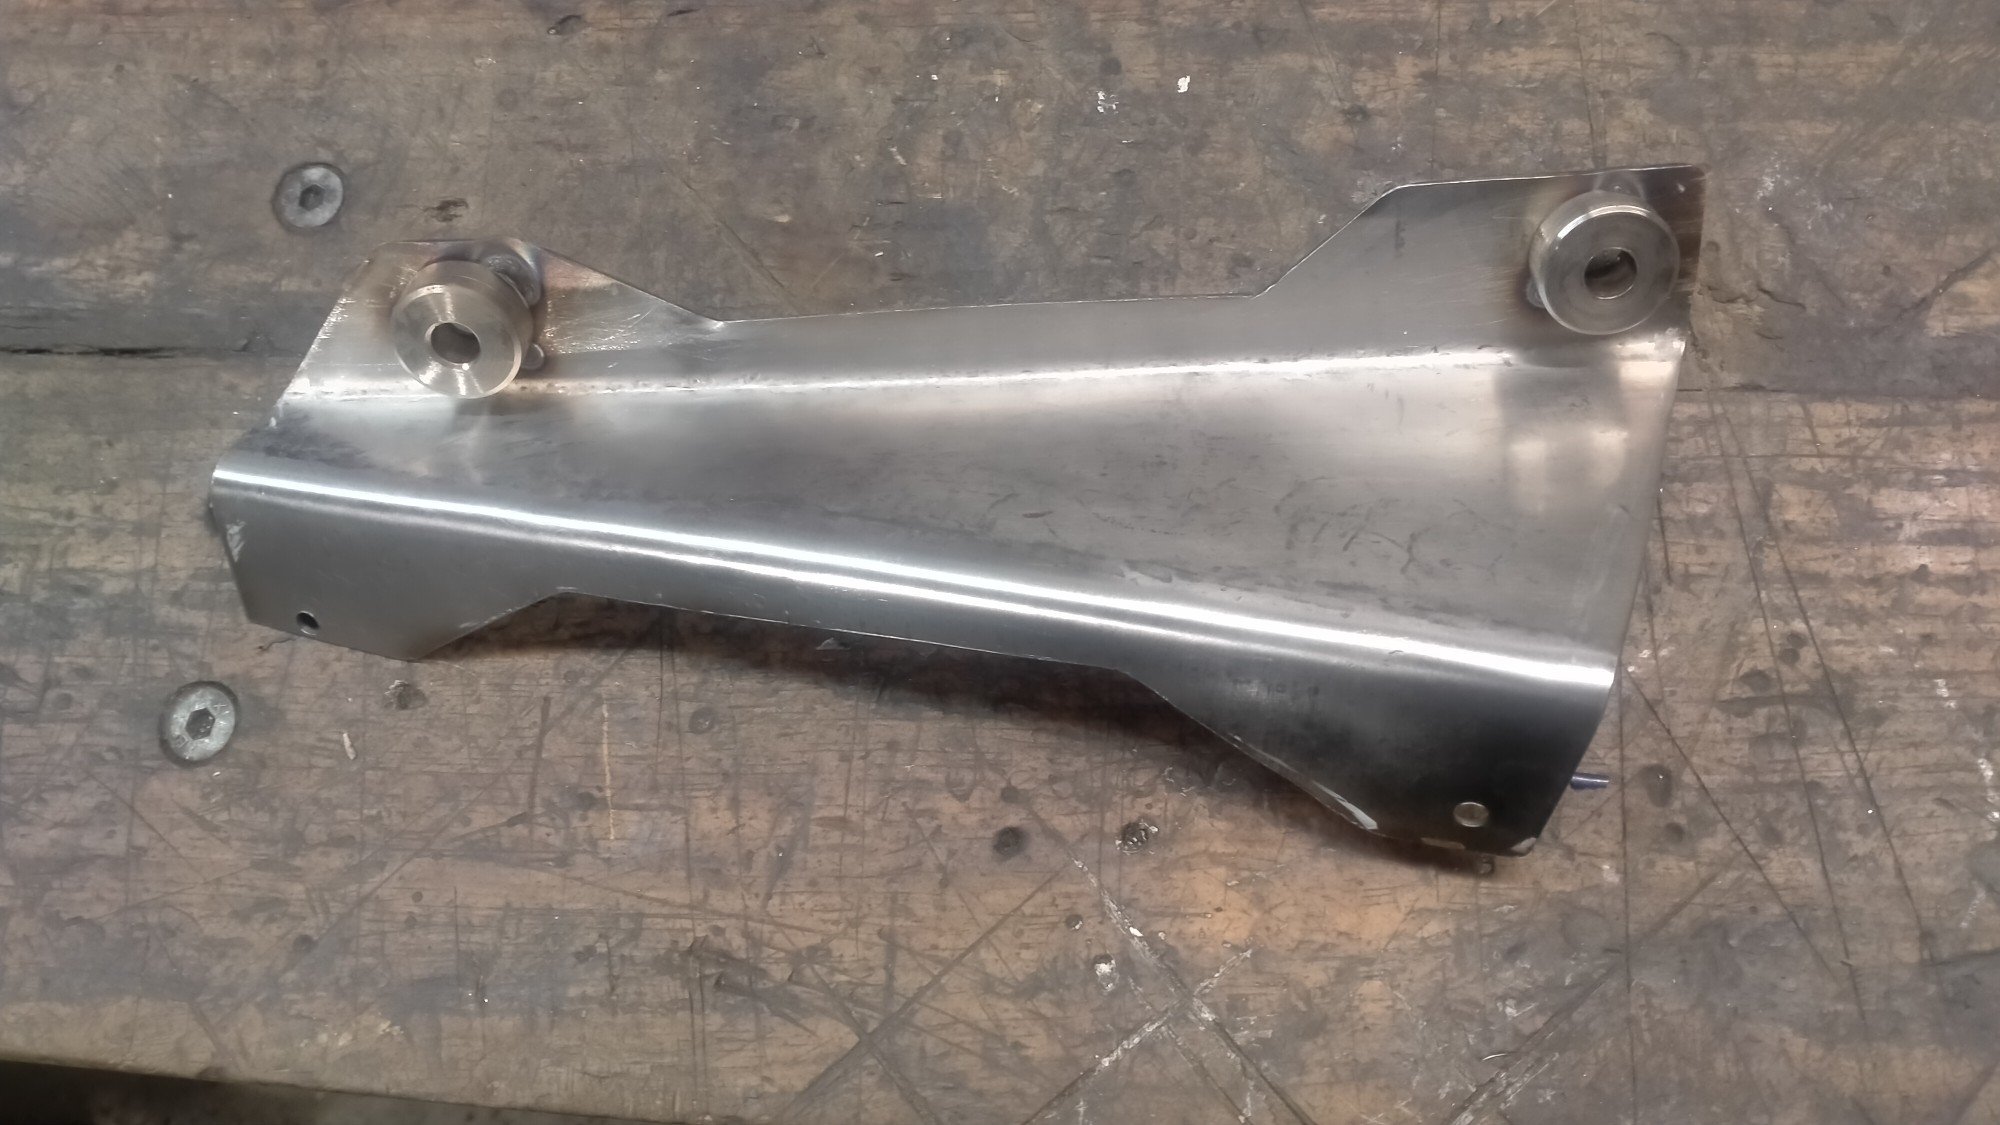
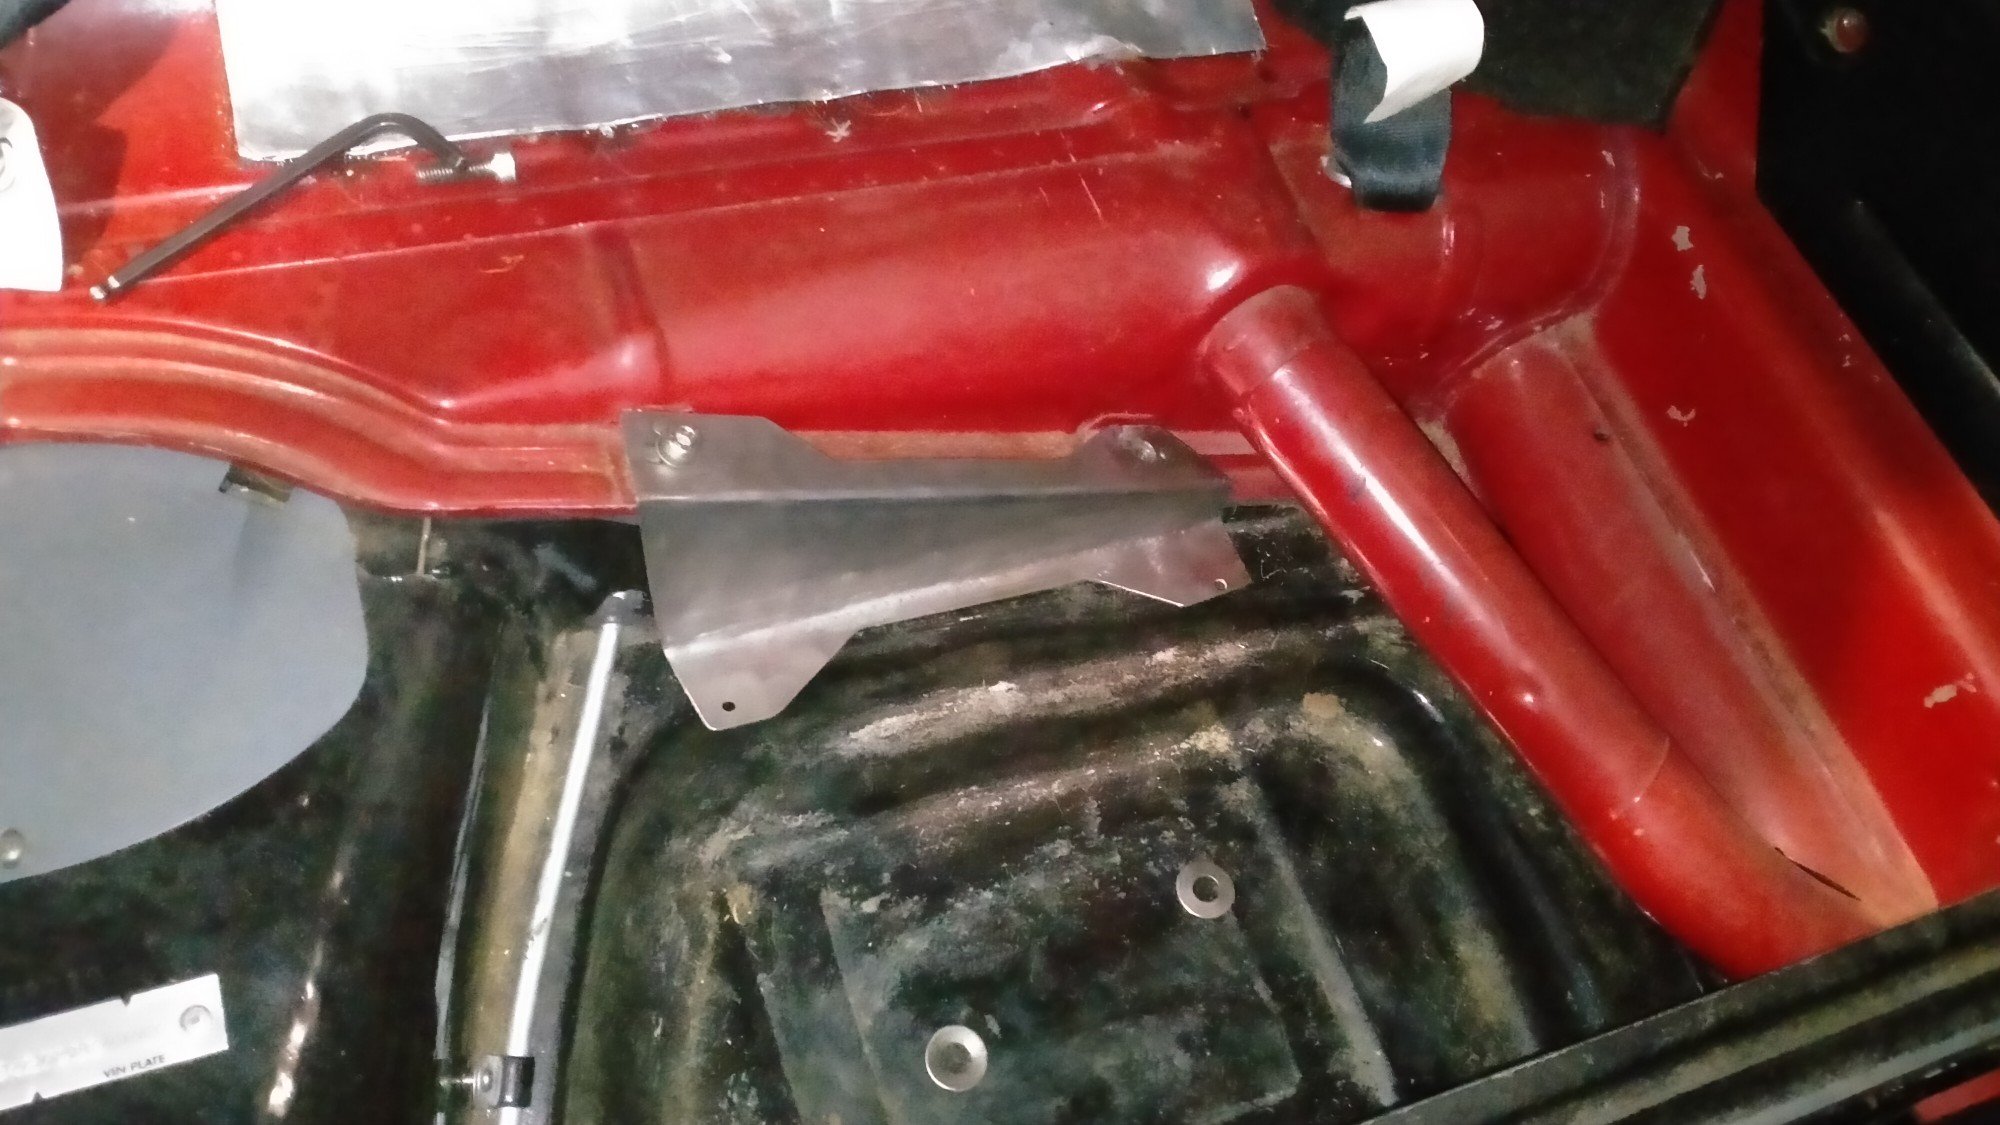
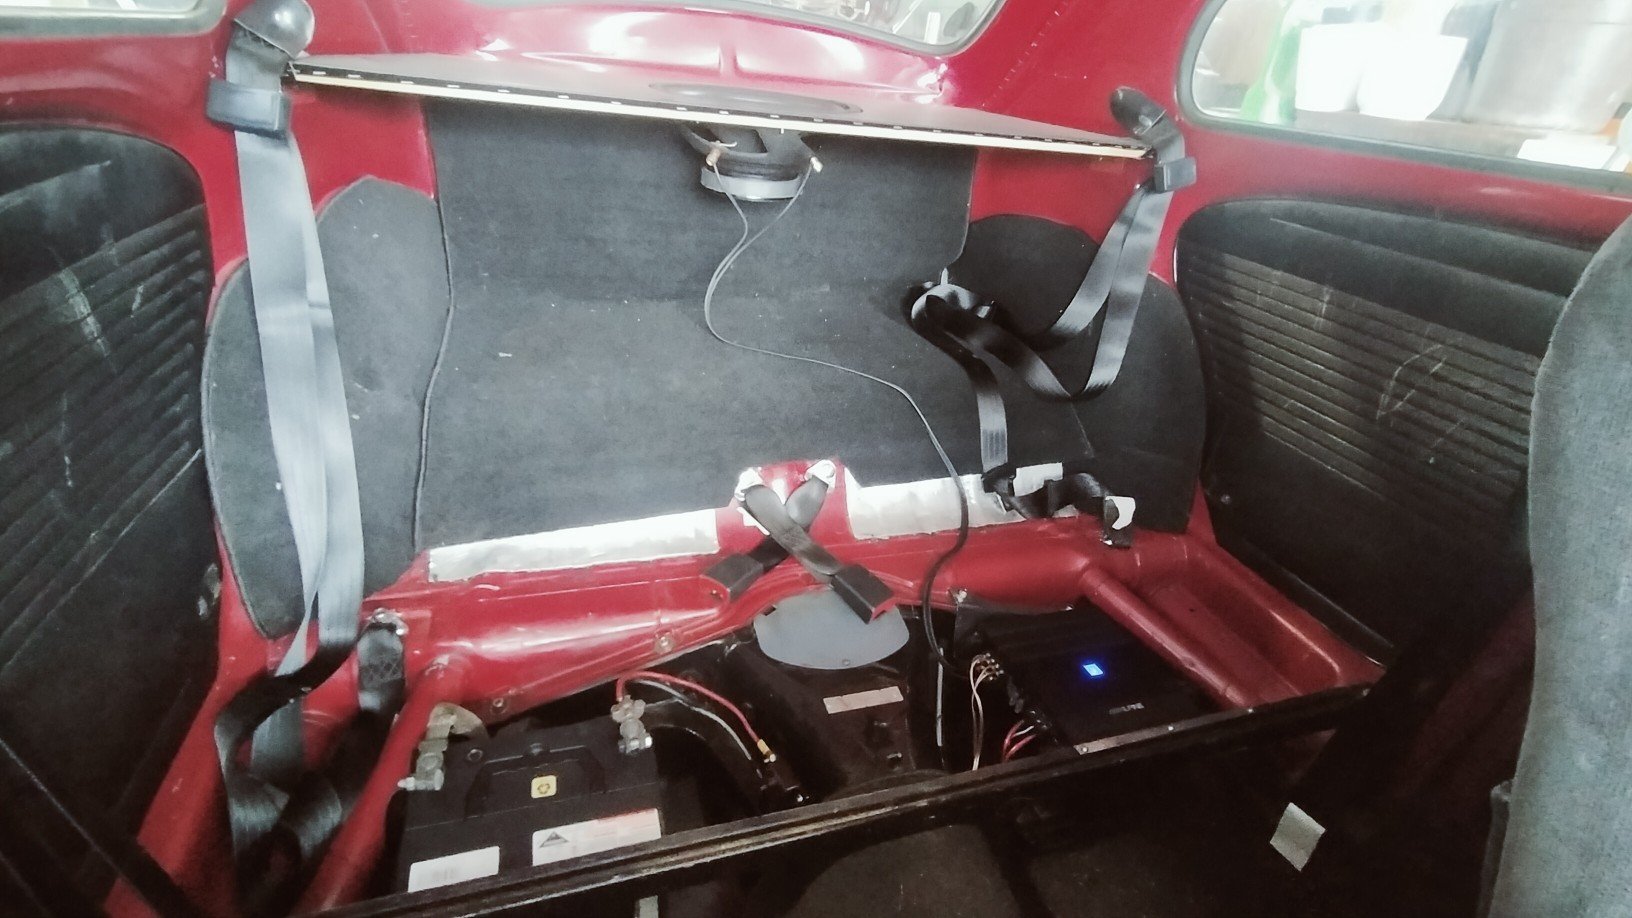
Finally got around to mounting the amp. Great spot for an amp, but there isn't much to actually attach anything to and I was not drilling holes in my floorpan. So I came up with this little arrangement using the body mounts to hang the amp. Spun up some spacers to get over the lip on the body. Was hard work bending 2mm stainless like this. front was a little simpler and just hangs from the seat brace. Also added some rubber feet under the amp to isolate it. Drilled and tapped the tunnel for the earth and mounted the stinger circuit breaker, also hooked up the Bluetooth adapter, seems to work well for $20. Also gave the whole area a good clean, found a couple rust spots in the corners so sorted that. The reason for the dirt is the horse hair stuff under the back seat, shit rains down on everything and seems to have some kind of resin that sticks. Not anymore! So chucked everything back together, all looks exactly the same, had a play with the amp settings, seems okay but Bluetooth is cool, seems to have heaps of range to, was controlling the music from across the street!
4 points
-
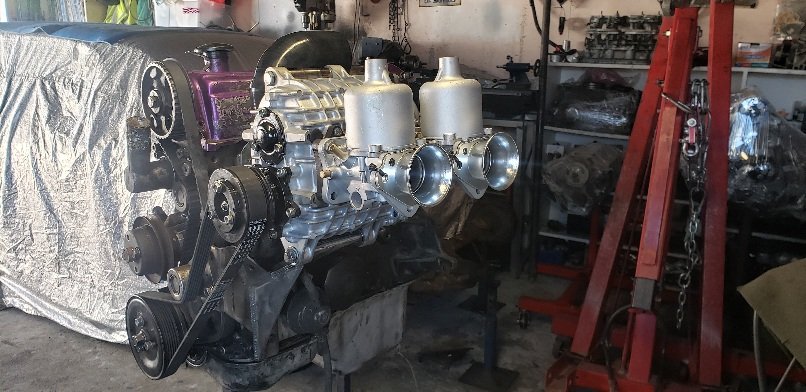
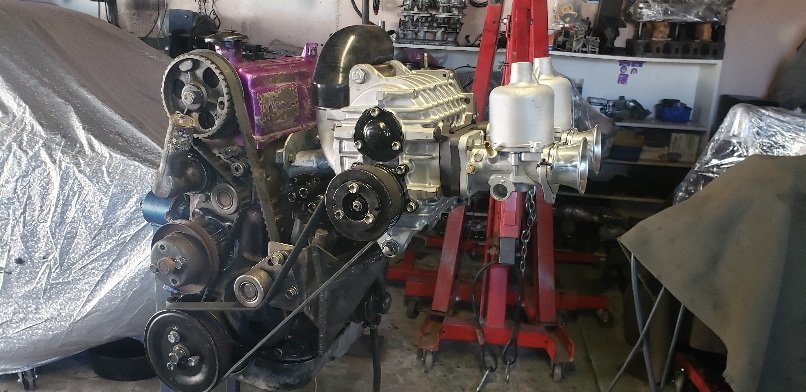
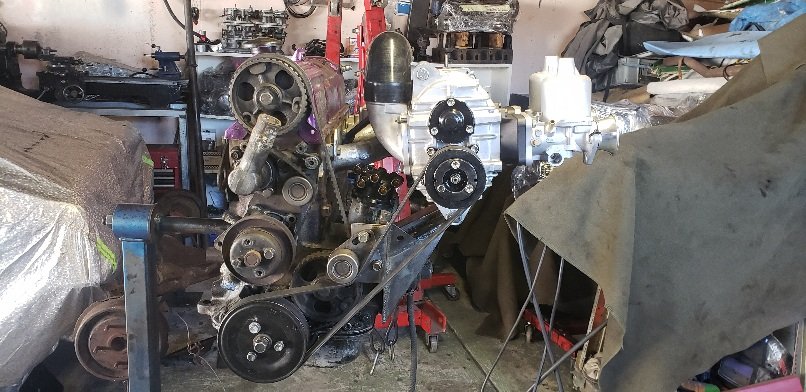
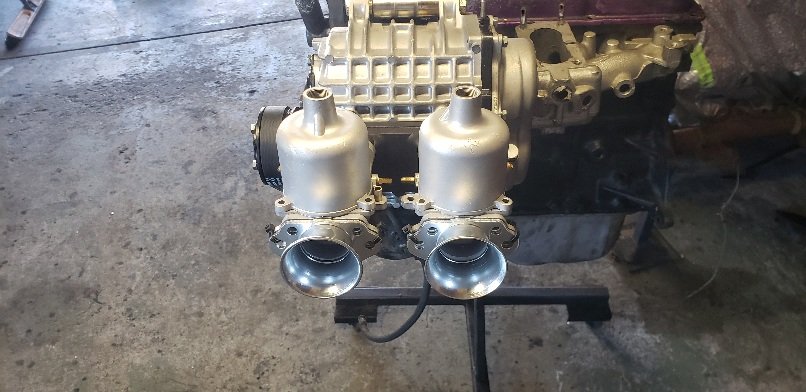
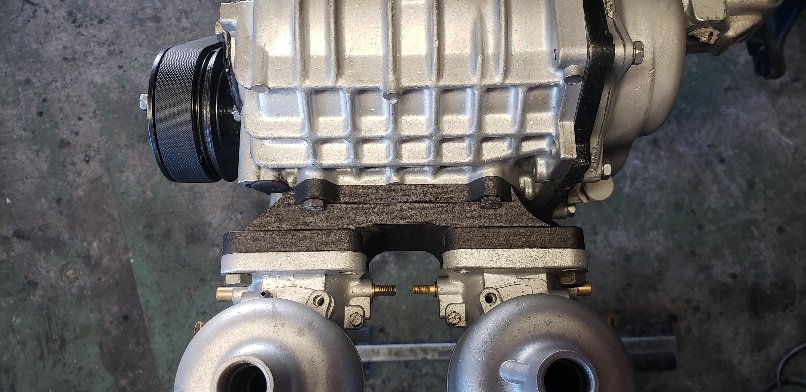
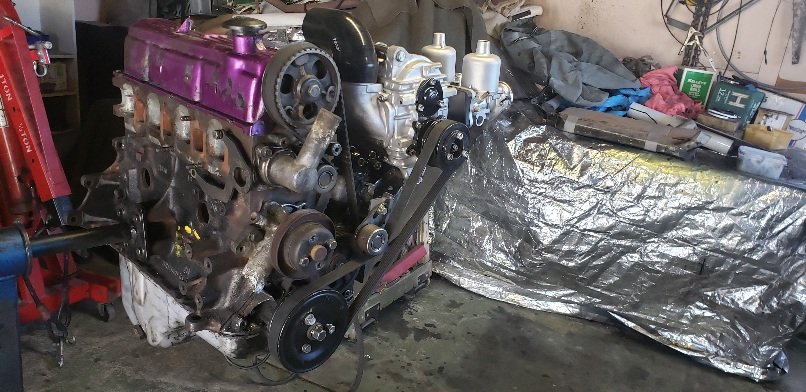
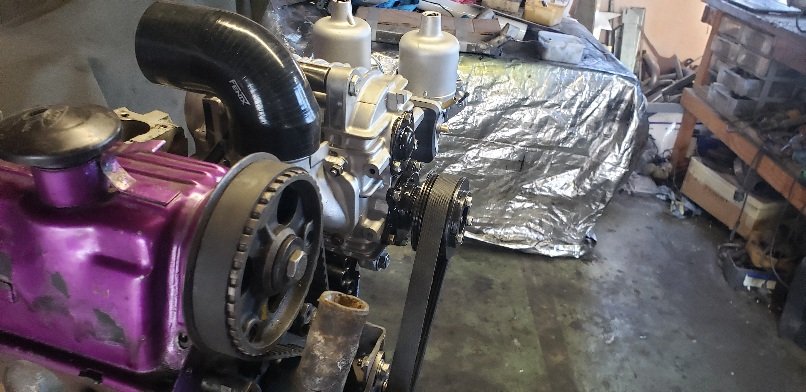
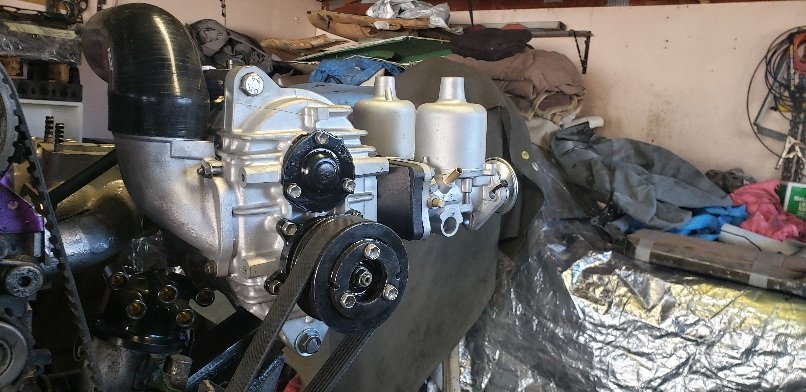
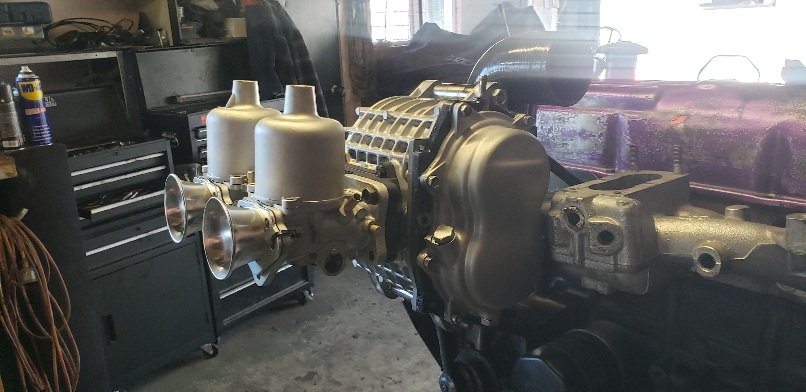
I do play with pinto stuff as well. And this setup if you havnt read some old posts is a setup I qas making for my nephews mk5 before we decided efi and turbo is much better... the process the bits were all siting around and I would like to see if it worked.. ....so I bought the bits off him. I had the 50+ years old carbs and the supercharger vapour blasted . Had a mate 3d print me a manifold to bolt 2 SU HS6 carbs from a p5b rover to the toyota sc14.... once we had it finalized we sent it off to a company in aussie to be made out or appropriate material that isolates the carbs from the SC and is fuel,oil,heat resistant. Swapped a smaller pulley on (thanks again @BlownCorona for that) And a pulley the right size i got at pick a part bolted to a sierra crank pulley and a 6pk belt. I do have a carb rebuild kit turning up this week hopefully... Side entry dizzy cap The cool weeee manifold I jave a test bed I've made to run a pinto on (as I say I enjoy playing with them) so ill be able toasleep if I can get it all running... It woild only ever fit in a mk3 4 5 cortina or rat rod... so i might just sell it all once working or just keep it as an ornament 😆.
4 points
-
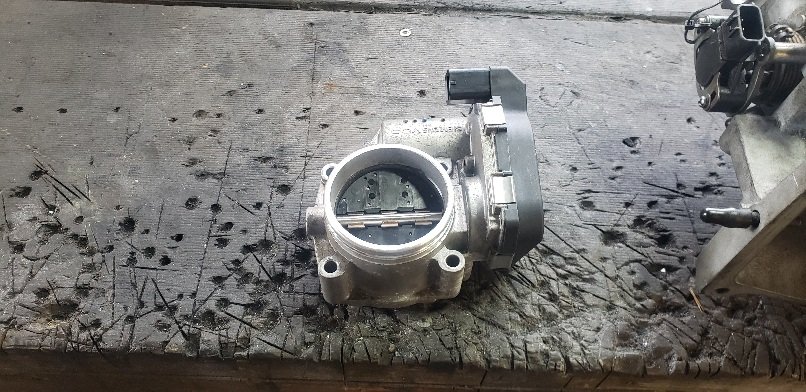
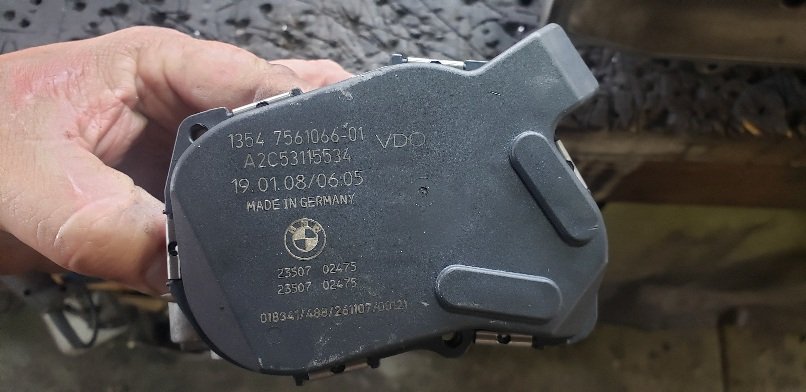
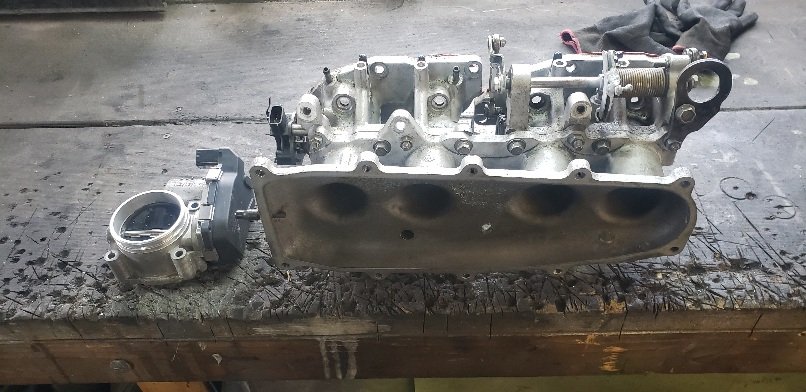
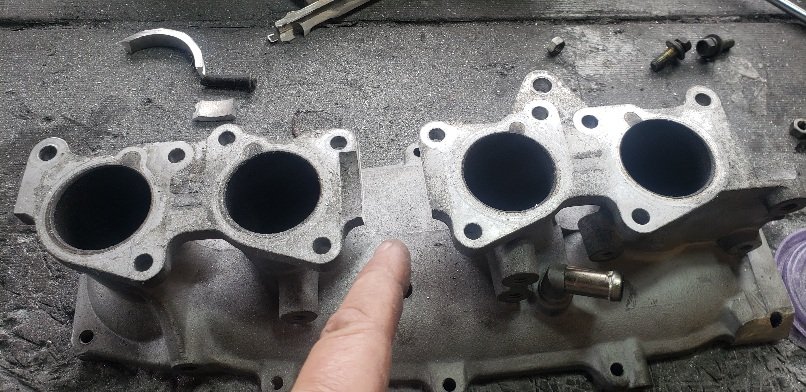
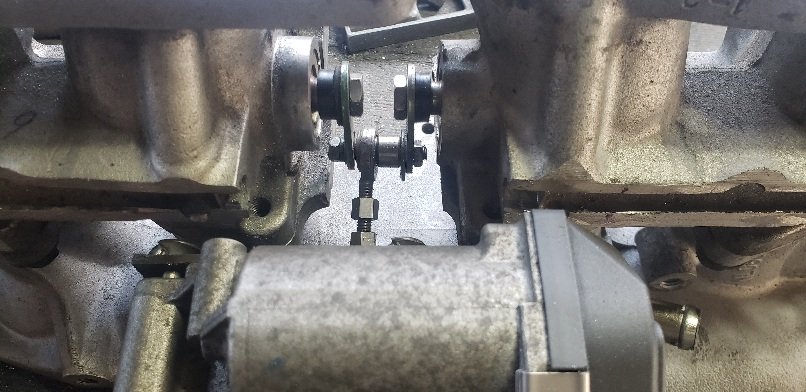
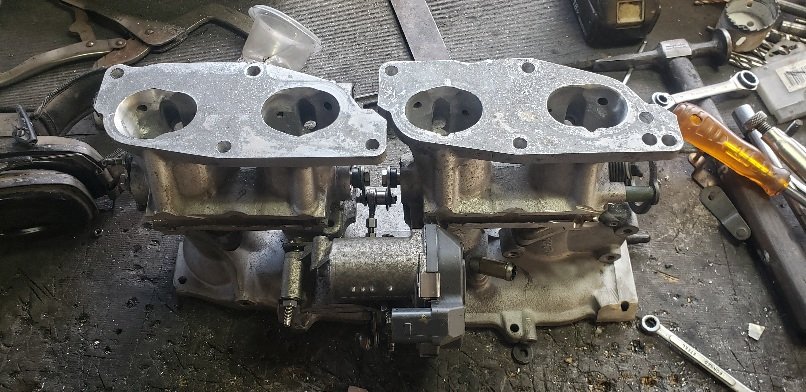
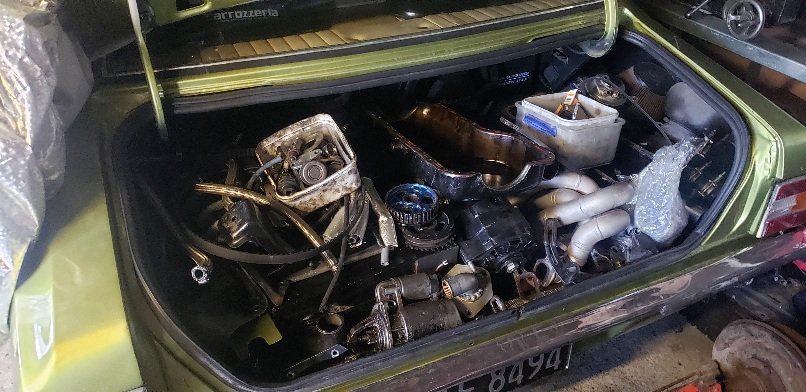
So this car is on the back burner now while I work out all the upgrades I want to do before cert. I pulled the motor out and stripped it all down (the long block is going to be a test motor for me now)...the rest of the parts filled the boot 😆 Some of the big upgrades planned are. *fully built motor ( forged rods,cossy pistons ,oil squirters, big valve and fully ported head ,kenneally cams turbo cam ,evo 9 turbo. *ecu upgrades (going maxxecu this time around). 1 dash for everything *bigger fuel tank *better front brakes *transmission upgrades (something I've been dreaming of for a year or so now.....just need to get my grubby little hands on one) *and DBW. The DBW was something I've been thinking about for a while now and I run nissan GTIR ITBs on this motor and I wanted to keep them...(pain in the arse to tune....but love the response). DBW ITB actuators are bloody expensive even 2nd hand BMW ones... and I'm not a cheap cunt but I also don't have shit loads of disposable income......so I have a tendency to just try and make shit work. ..and I have my time to try and figure it out So I wondered if I could just convert an actual DBW throttle to control them. I looked at so many (different motors,motor orientation, size of the motor, size of the throttle body, blue location... Ended up going for a 2nd hand BMW 3 series one. $35 So I have a complete GTIR inlet that I have been running and a couple of sets of parts...including a set I used to mock the inlet up on the pinto in the 1st place ....thats didn't have the top throttle linkage where the accelerator cable goes to (percent for what I'm about to do) So 1st thing was to cut the IAC setup of the ITBs (for room na dthe DBW will now do IAC )and cut the throttle body up aswel. I also cut a section out of the plenbase side of the inlet manifold so I can run a arm through there Then all I did was cut a 4mm plate of steel and bolt it to some. Holes on the underside of the inlet... Then welded some captive studs for the throttle body. Found 2 arms the same size to link the 2 sets of of ITBs together with the actuator arm (so the move both together) ..I also left the full open stop on one end (with the return spring) and the full closed atop on the other end.. I then used an arm the same size as the other 2 and drilled it to fit the TB shaft and welded it where I needed it . Was a pain in the ass to make sure it cleared oil cooler,engine mount,block breather) and I could get to the plug. Butall fits and gets full open and full closed. Bloody happy with that.... $35 DBW ITs.... hopefully it works 😆
3 points
-
3 points
-
Well, Ive done exactly nothing with 86 in well over a year, but life has been pretty full on so it only seems like a few months. The car itself is still under its cover, but things have been ticking away in the background on a new engine for it. Sooo I can't actually remember if it was peer pressure from @kpr or from me peer pressuring him (probably this option), but a couple of years ago the idea of a building a dream engine was born. From memory the now somewhat famous Garage4age Turd short stroke engine was being punished to all the rpm on the dyno with great results, so the new build is based on that concept but with a hair dryer bolted to the side for max rpm and max boost lols. Base of the recipe was a 7a block so found one eventually: This was stripped down and pistons, rods and crank etc were junked: A brand new crank from Toyota made its way into the mix: Along with some 81.5mm 9.0:1 Carillo forged pistons: Some custom length Garage4age designed rods: All the usual ARP bolts etc were aquired, and a MPR crank girdle, and this went off to the machine shop where it sat in a corner for a year or so. The block was washed and resufaced, torque plate honed and bored, the tops of the main bearing caps were machined, the MRP never again girdle was remachined as it wasn't flat which was a major piss off, refaced sump surface, bored main bearing tunnels, rewashed, everything was balanced and polished etc. Here it is being picked up: New oil pump which got Toda gears, some relief porting and matching to the 7a block: KPR then applied his wizardry and put the whole thing together using ARP main studs, ACL race main bearings, King XP big end brearings, the balanced rods and pistions which were skimmed to 0 deck, SS works oil pickup, oil restrictor mod in head feed, and a TRD 0.8mm headgasket. So thats the bottom end done and I can't thank KPR enough for all his r&d and time put into this engine. The head is next level again and I will post on this soon as its actually 99% done bar a few small things. Till next time...3 points
-
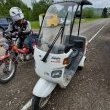
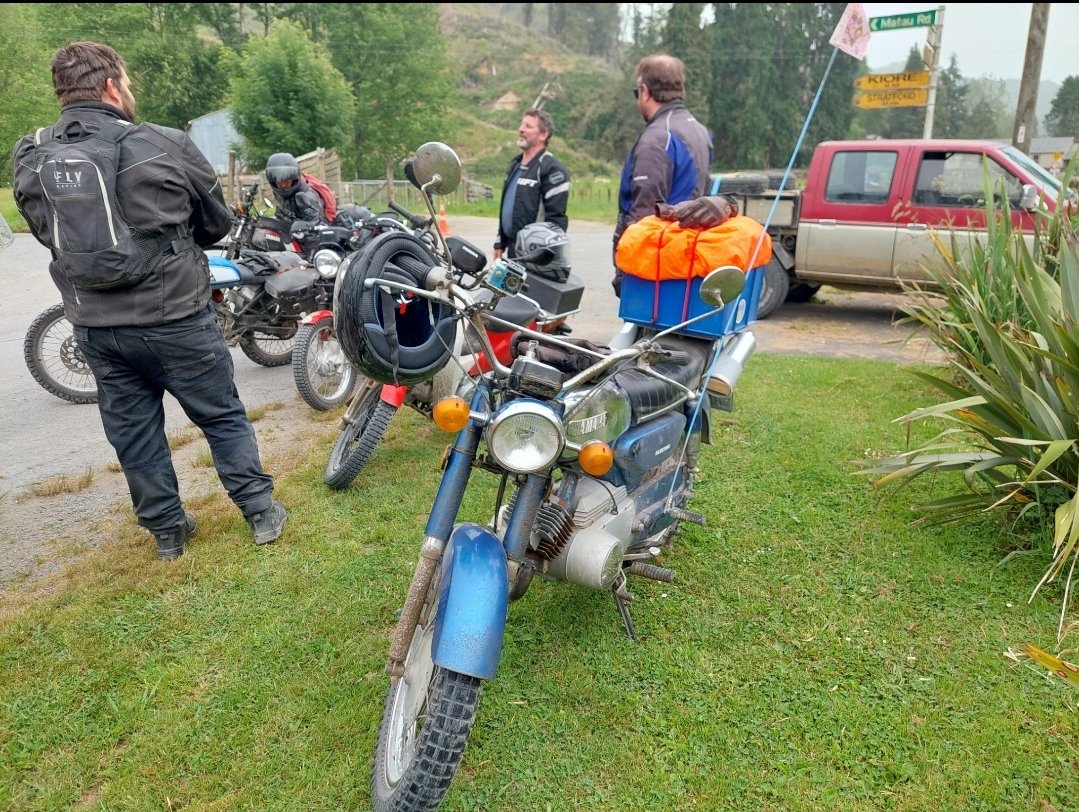
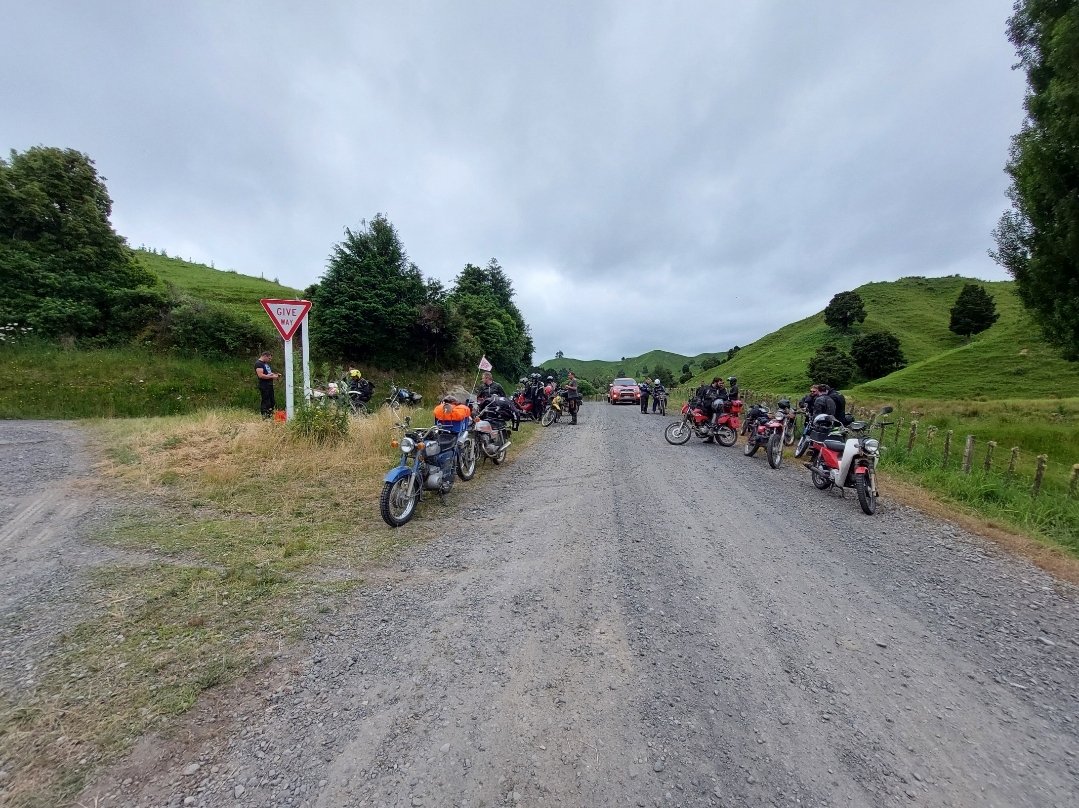
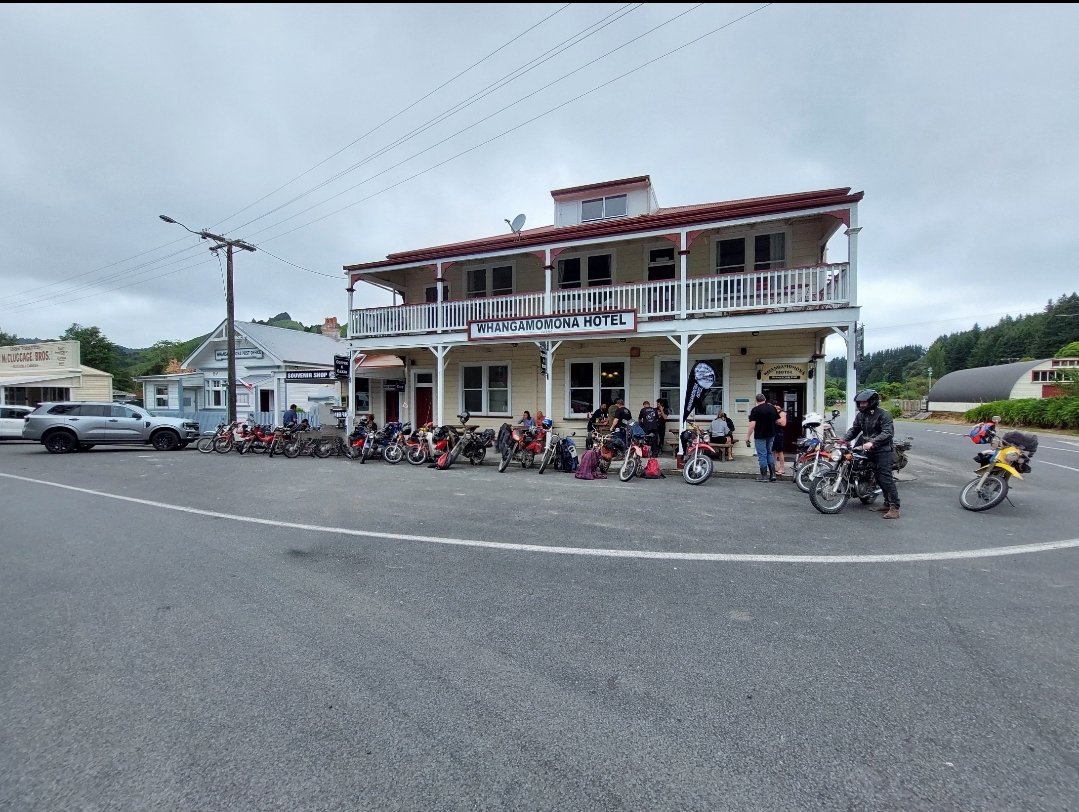
Thanks again for an epic weekend fellas! I think my ears will be ringing for the next week 😂 Still fizzing tho, sooo stoked to be part of it I promise to not bring such an obnoxiously loud bike next year 🤘2 points
-
Pull start mechanism underway. Over engineering 101. Much like the original ones. However because I'm using a vespa motor (not an Ape motor) it has e start. So the pull start is just a backup.
2 points
-
I probably forgot to say I am doing this because the idle circuit (that controls up to about 3000rpm) is running pretty rich, ie about 10 or 11 to 1. I spoke to Murray...? at Weber Specialties who was prepared to talk about Fiats in general and X1/9's in particular for a looong time. I wanted to source some smaller idle jets but he said that the 45's in it were as low as I should go and that the 5psi the pump was putting out should really be cut down to 2.5psi for the DCNF's. The return line wasnt connected so I reasoned that a restricted return should lower the pressure appropriately. I guess we will see.2 points
-
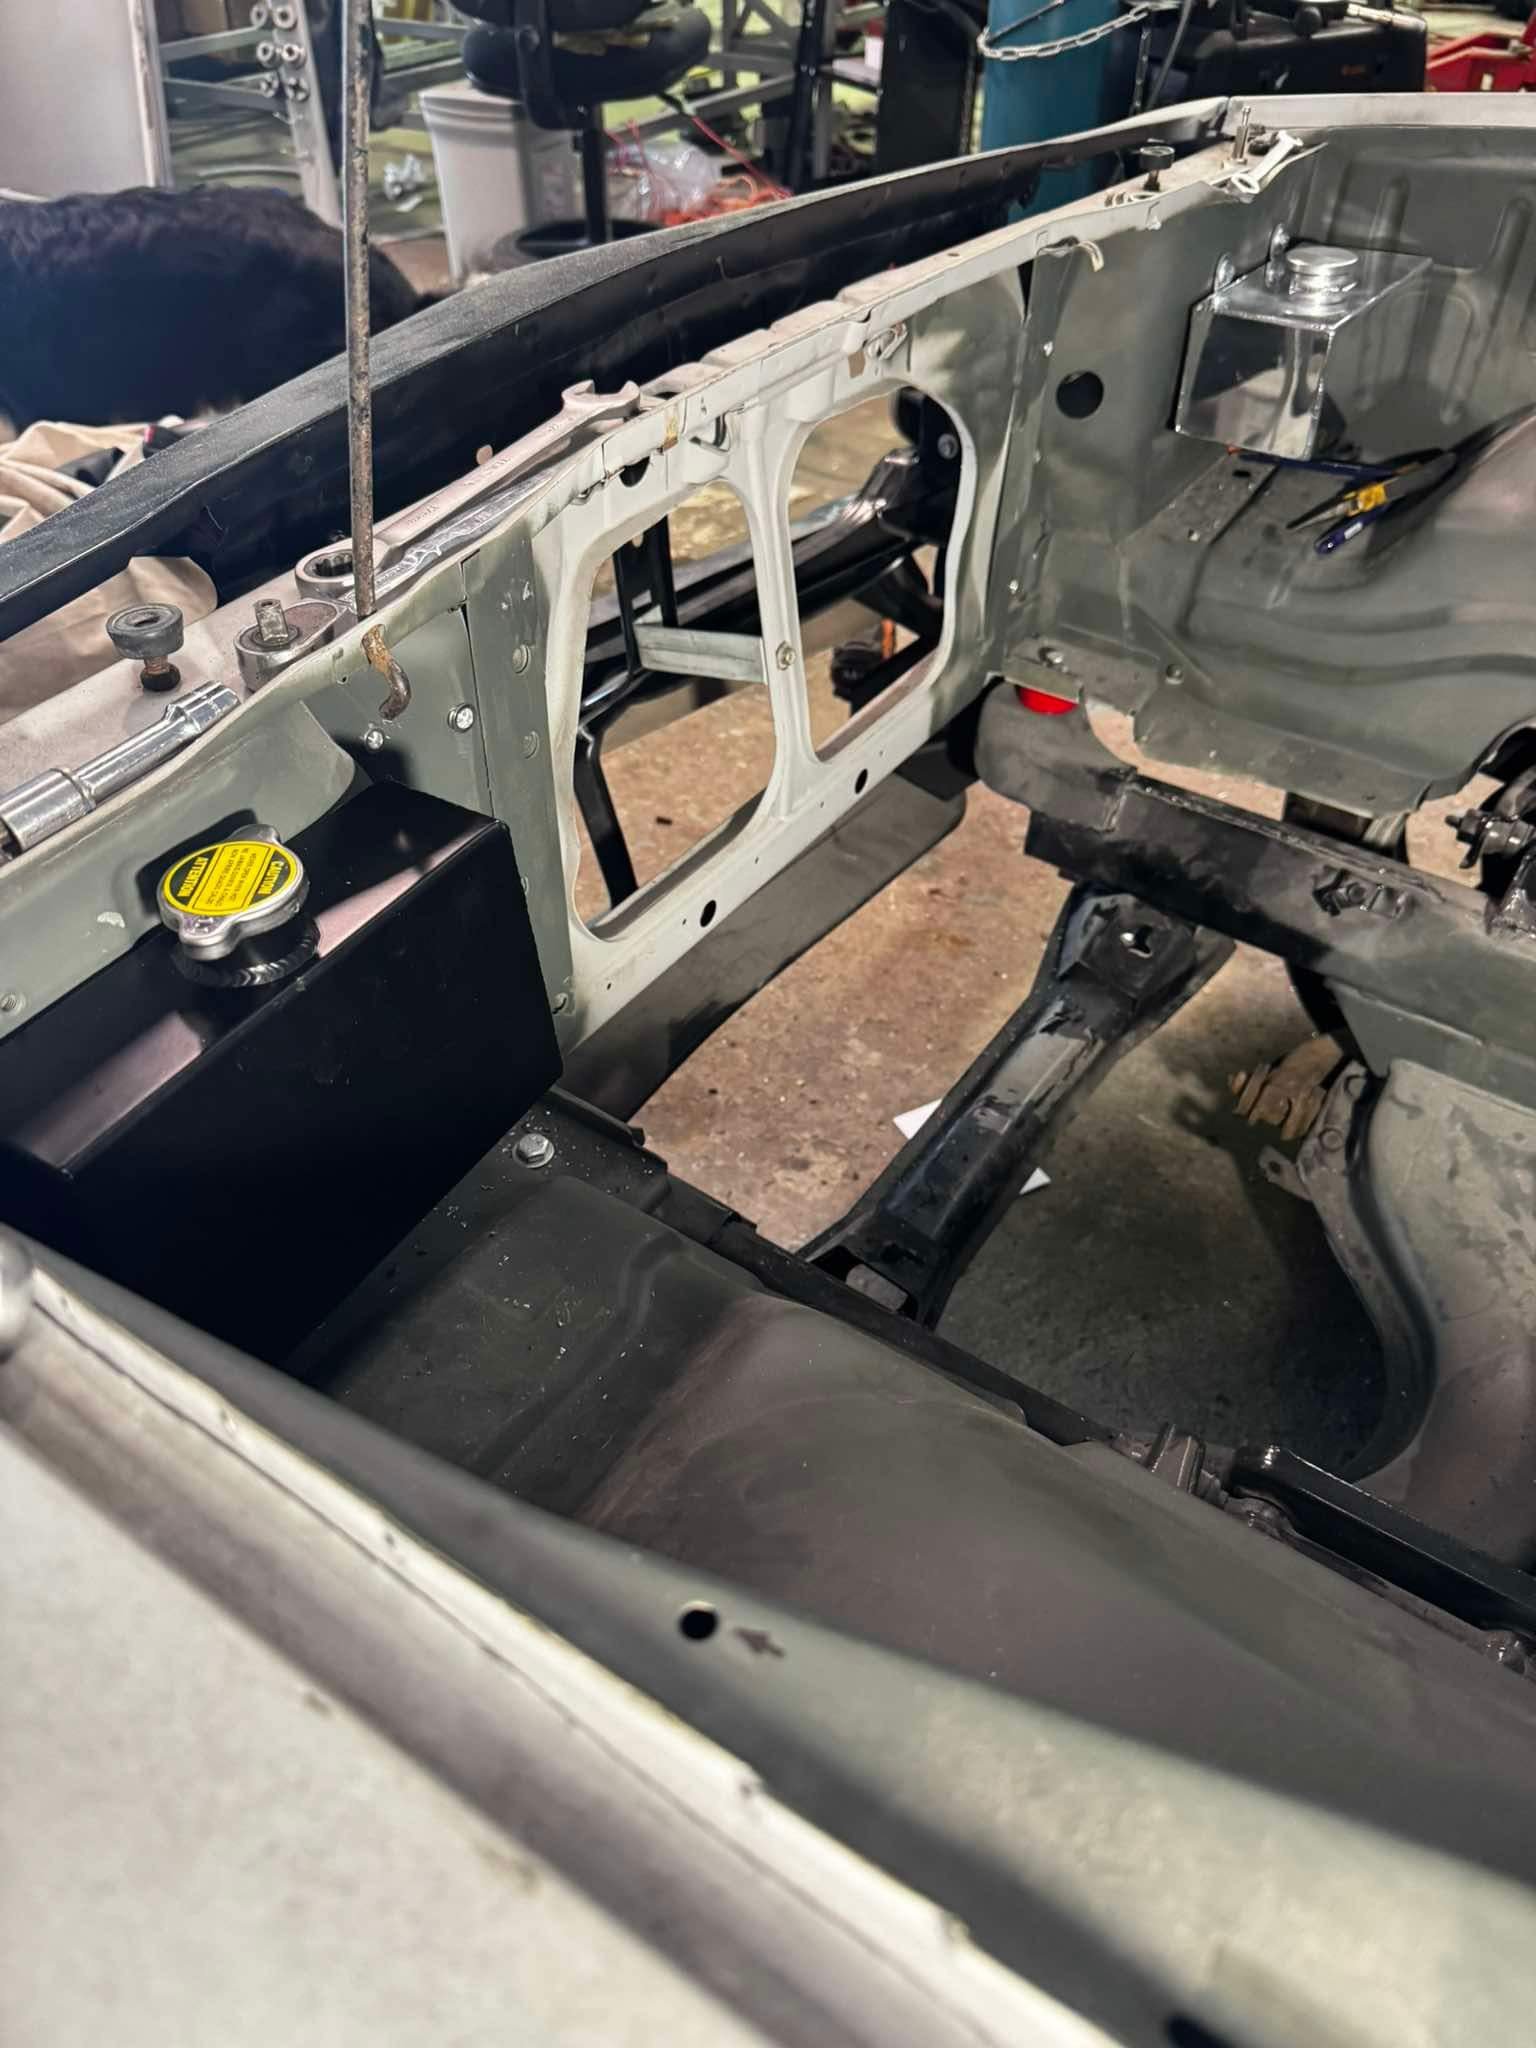
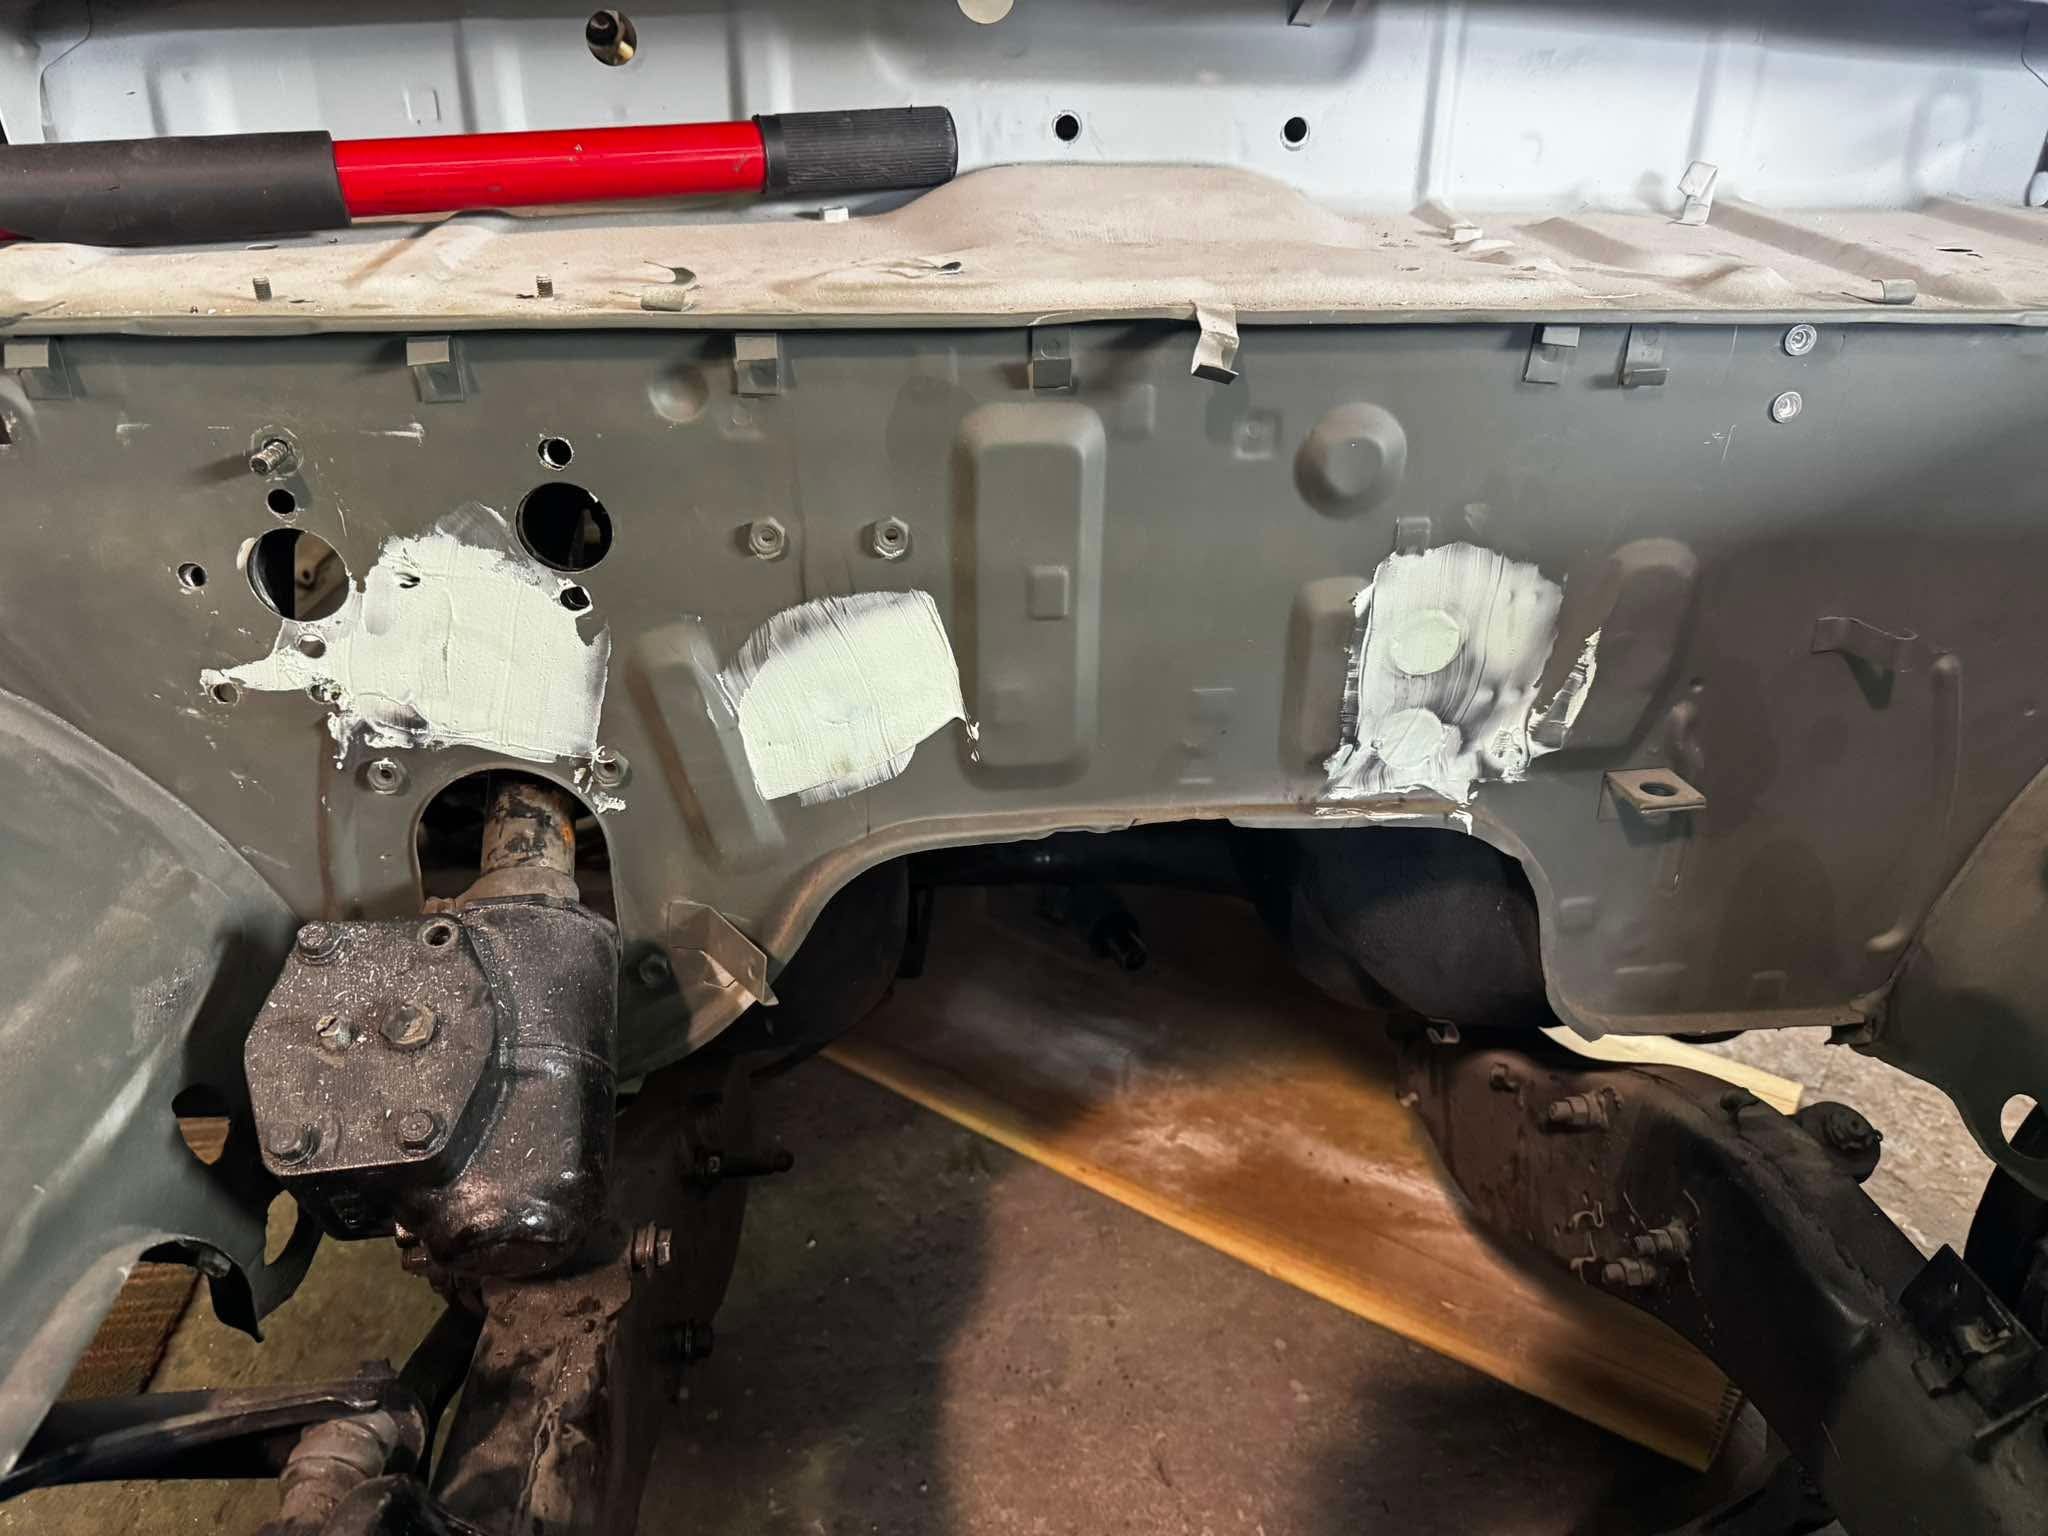
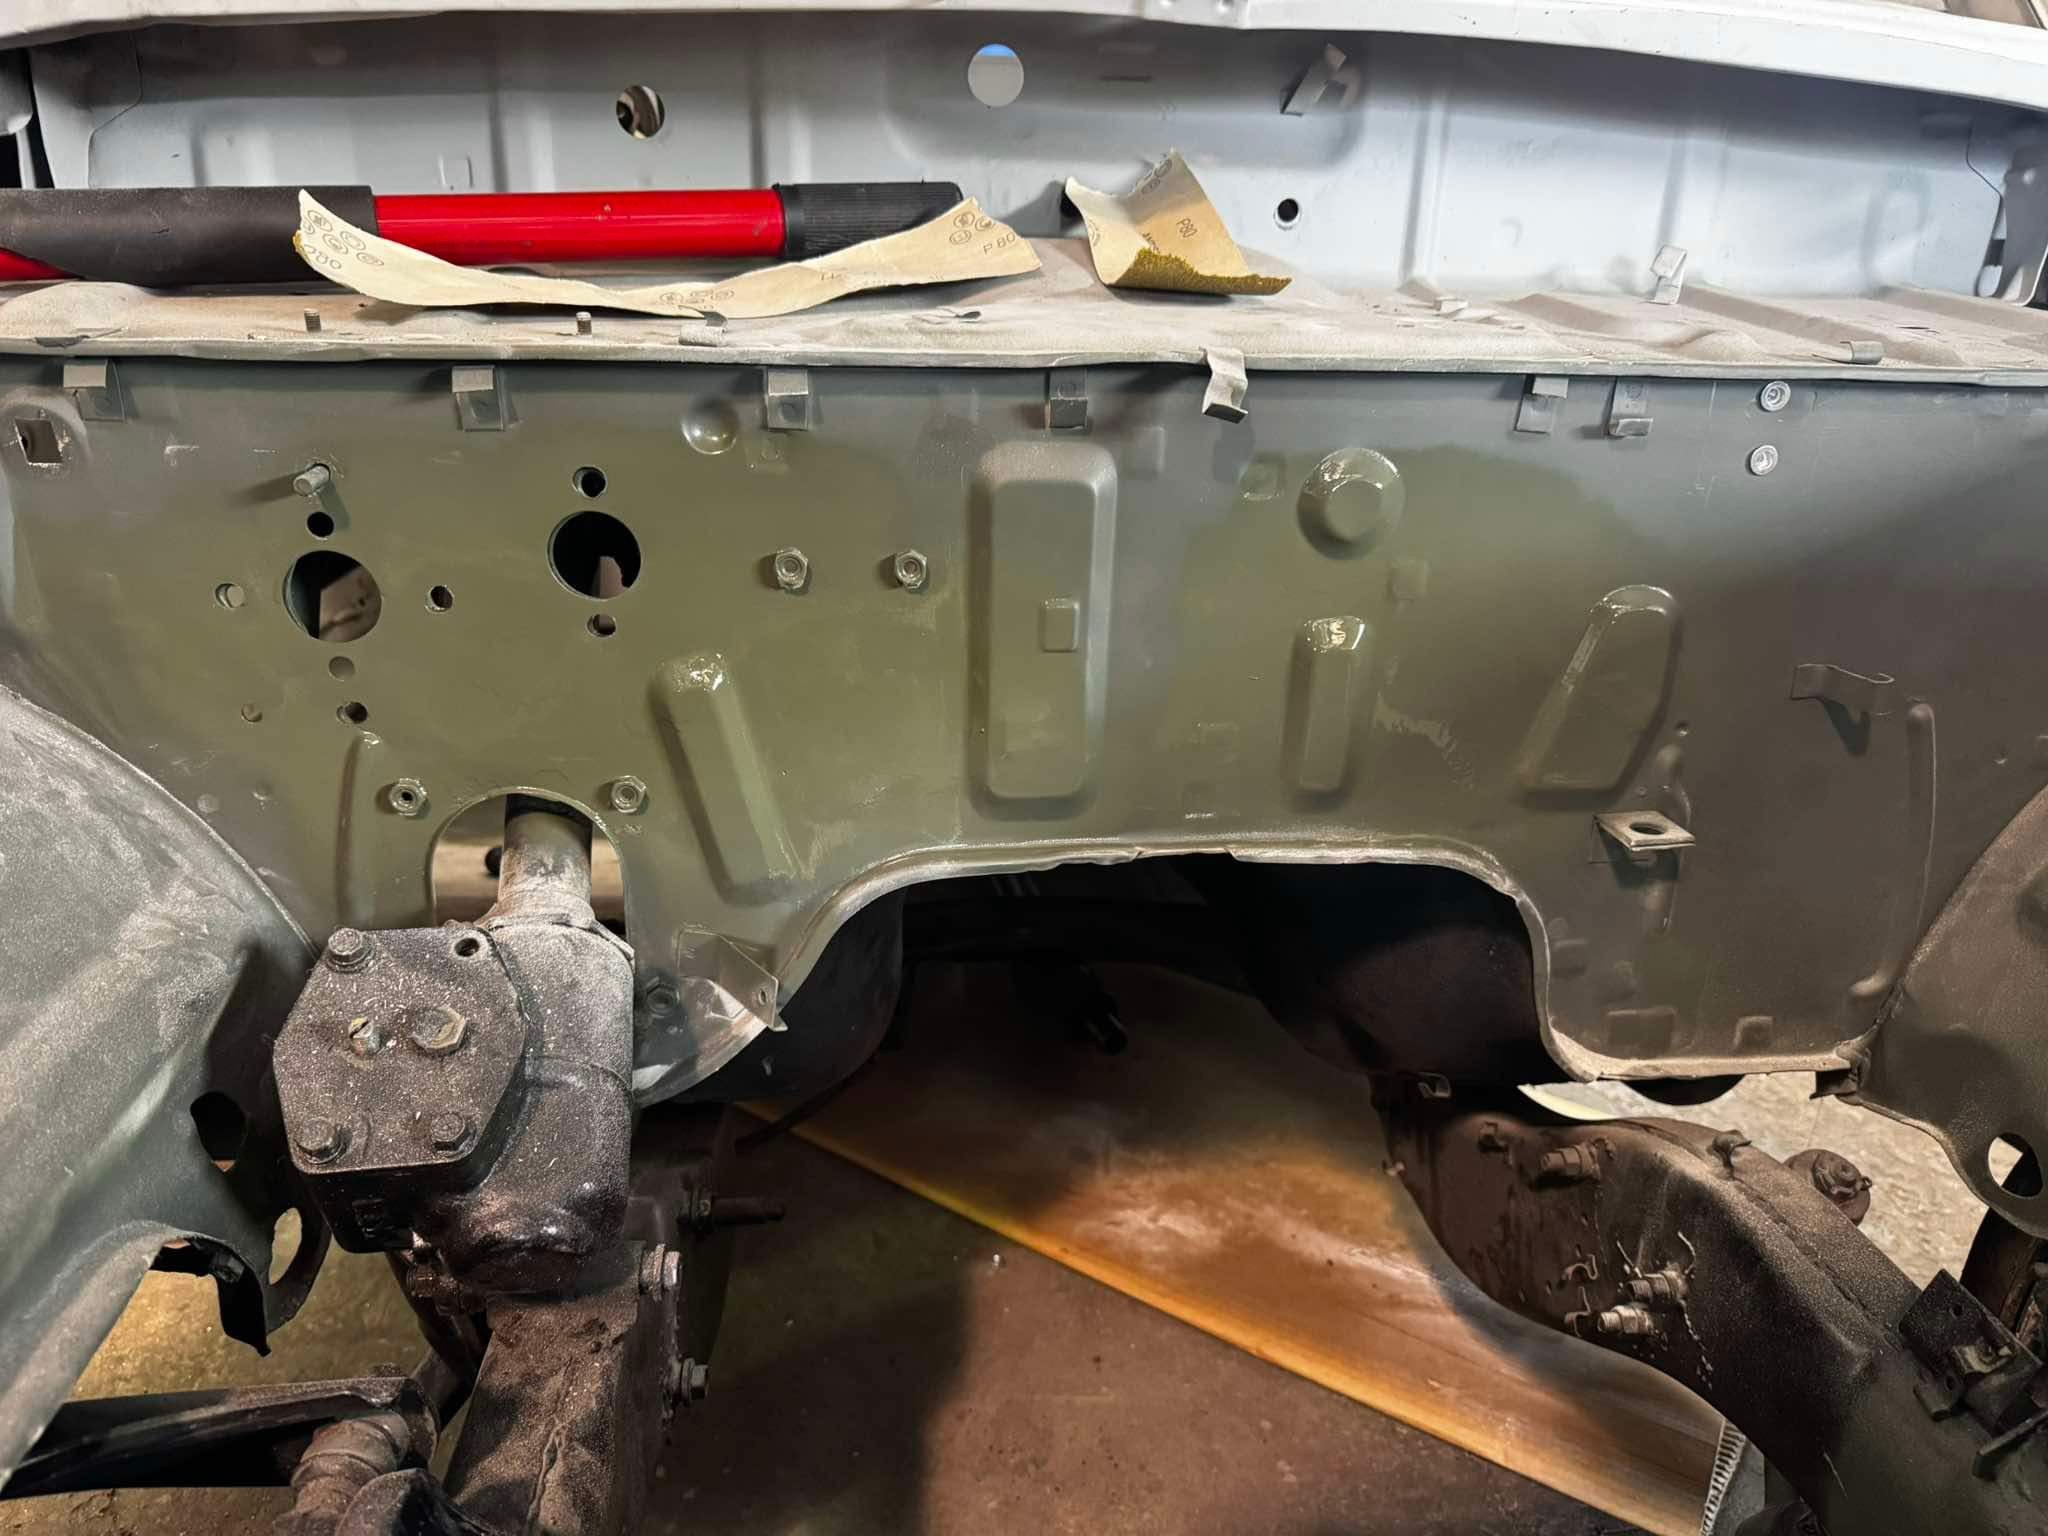
Mounted the overflow bottle and washer bottle. will get the washer bottle powdercoated to match the overflow bottle. Not going with polished stuff. then decided to fill a couple of dormant firewall holes (heater pipe entry’s, handbrake cable hole, column shifter hole). Plated over, epoxied, filled, sanded, epoxied again. made up and fitted all door cards and kick panels. still waiting on my new seat mounts and need a hand to hold sheet metal with the bead roller.
2 points
-
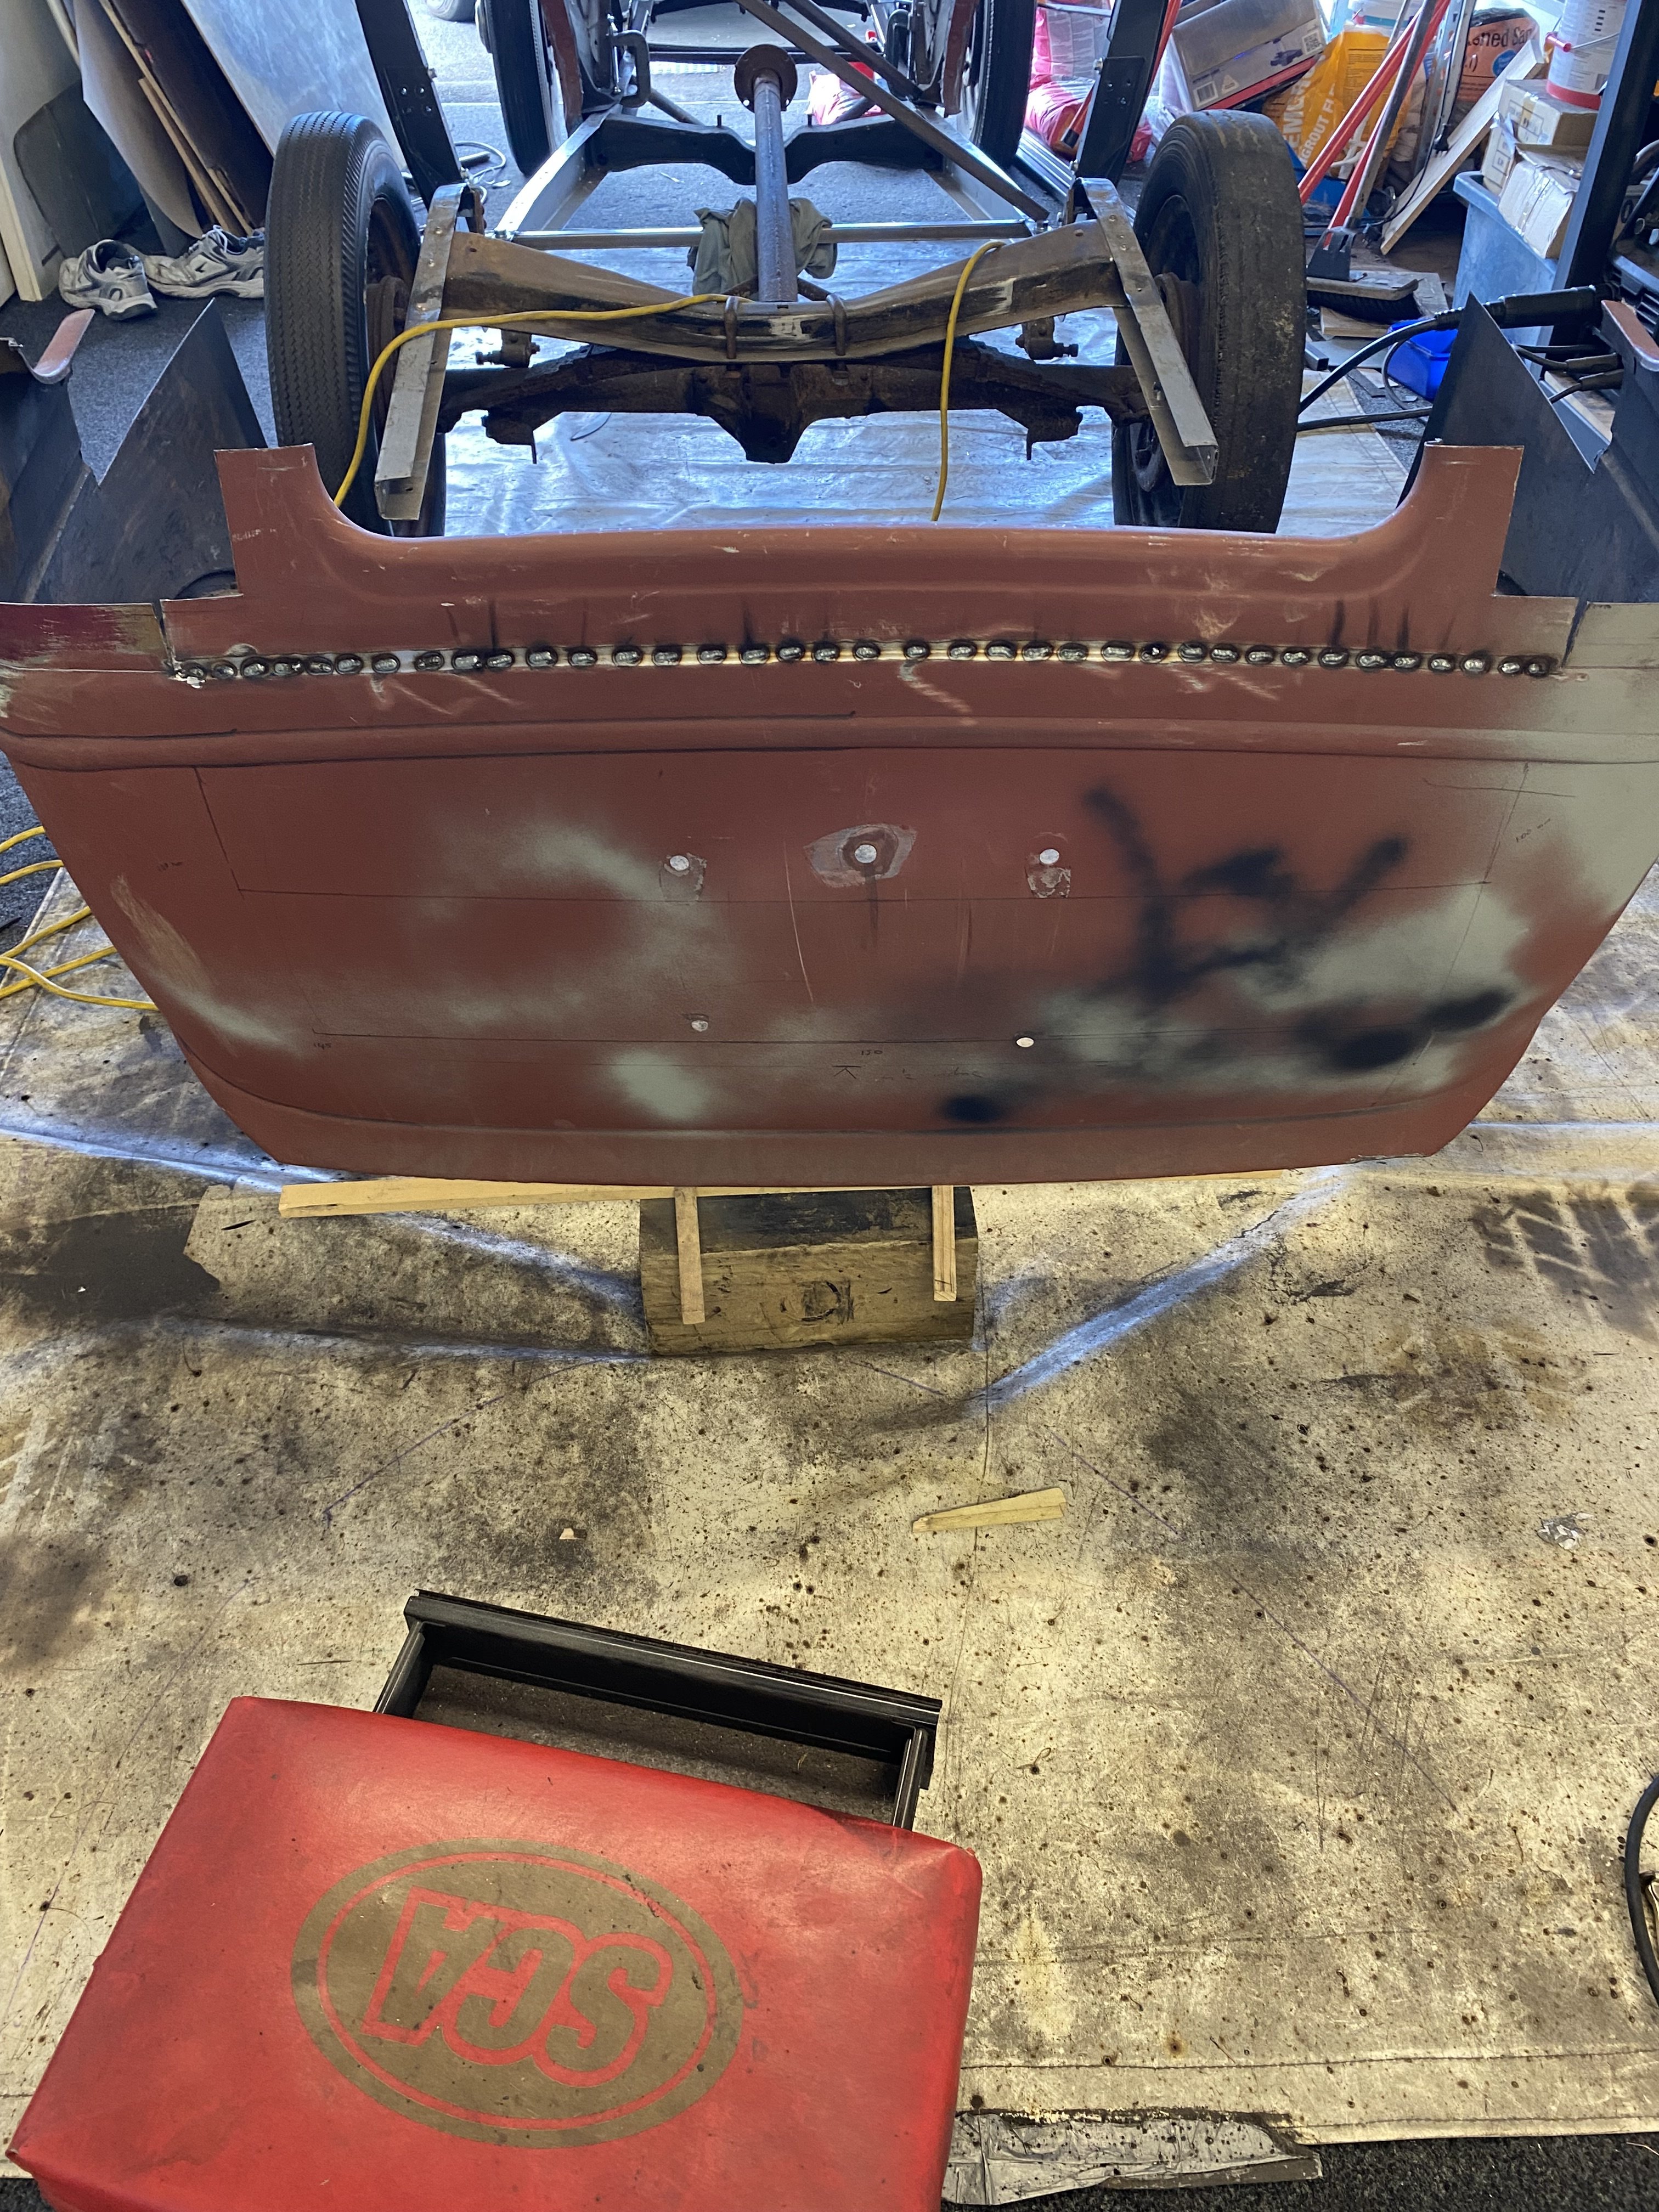
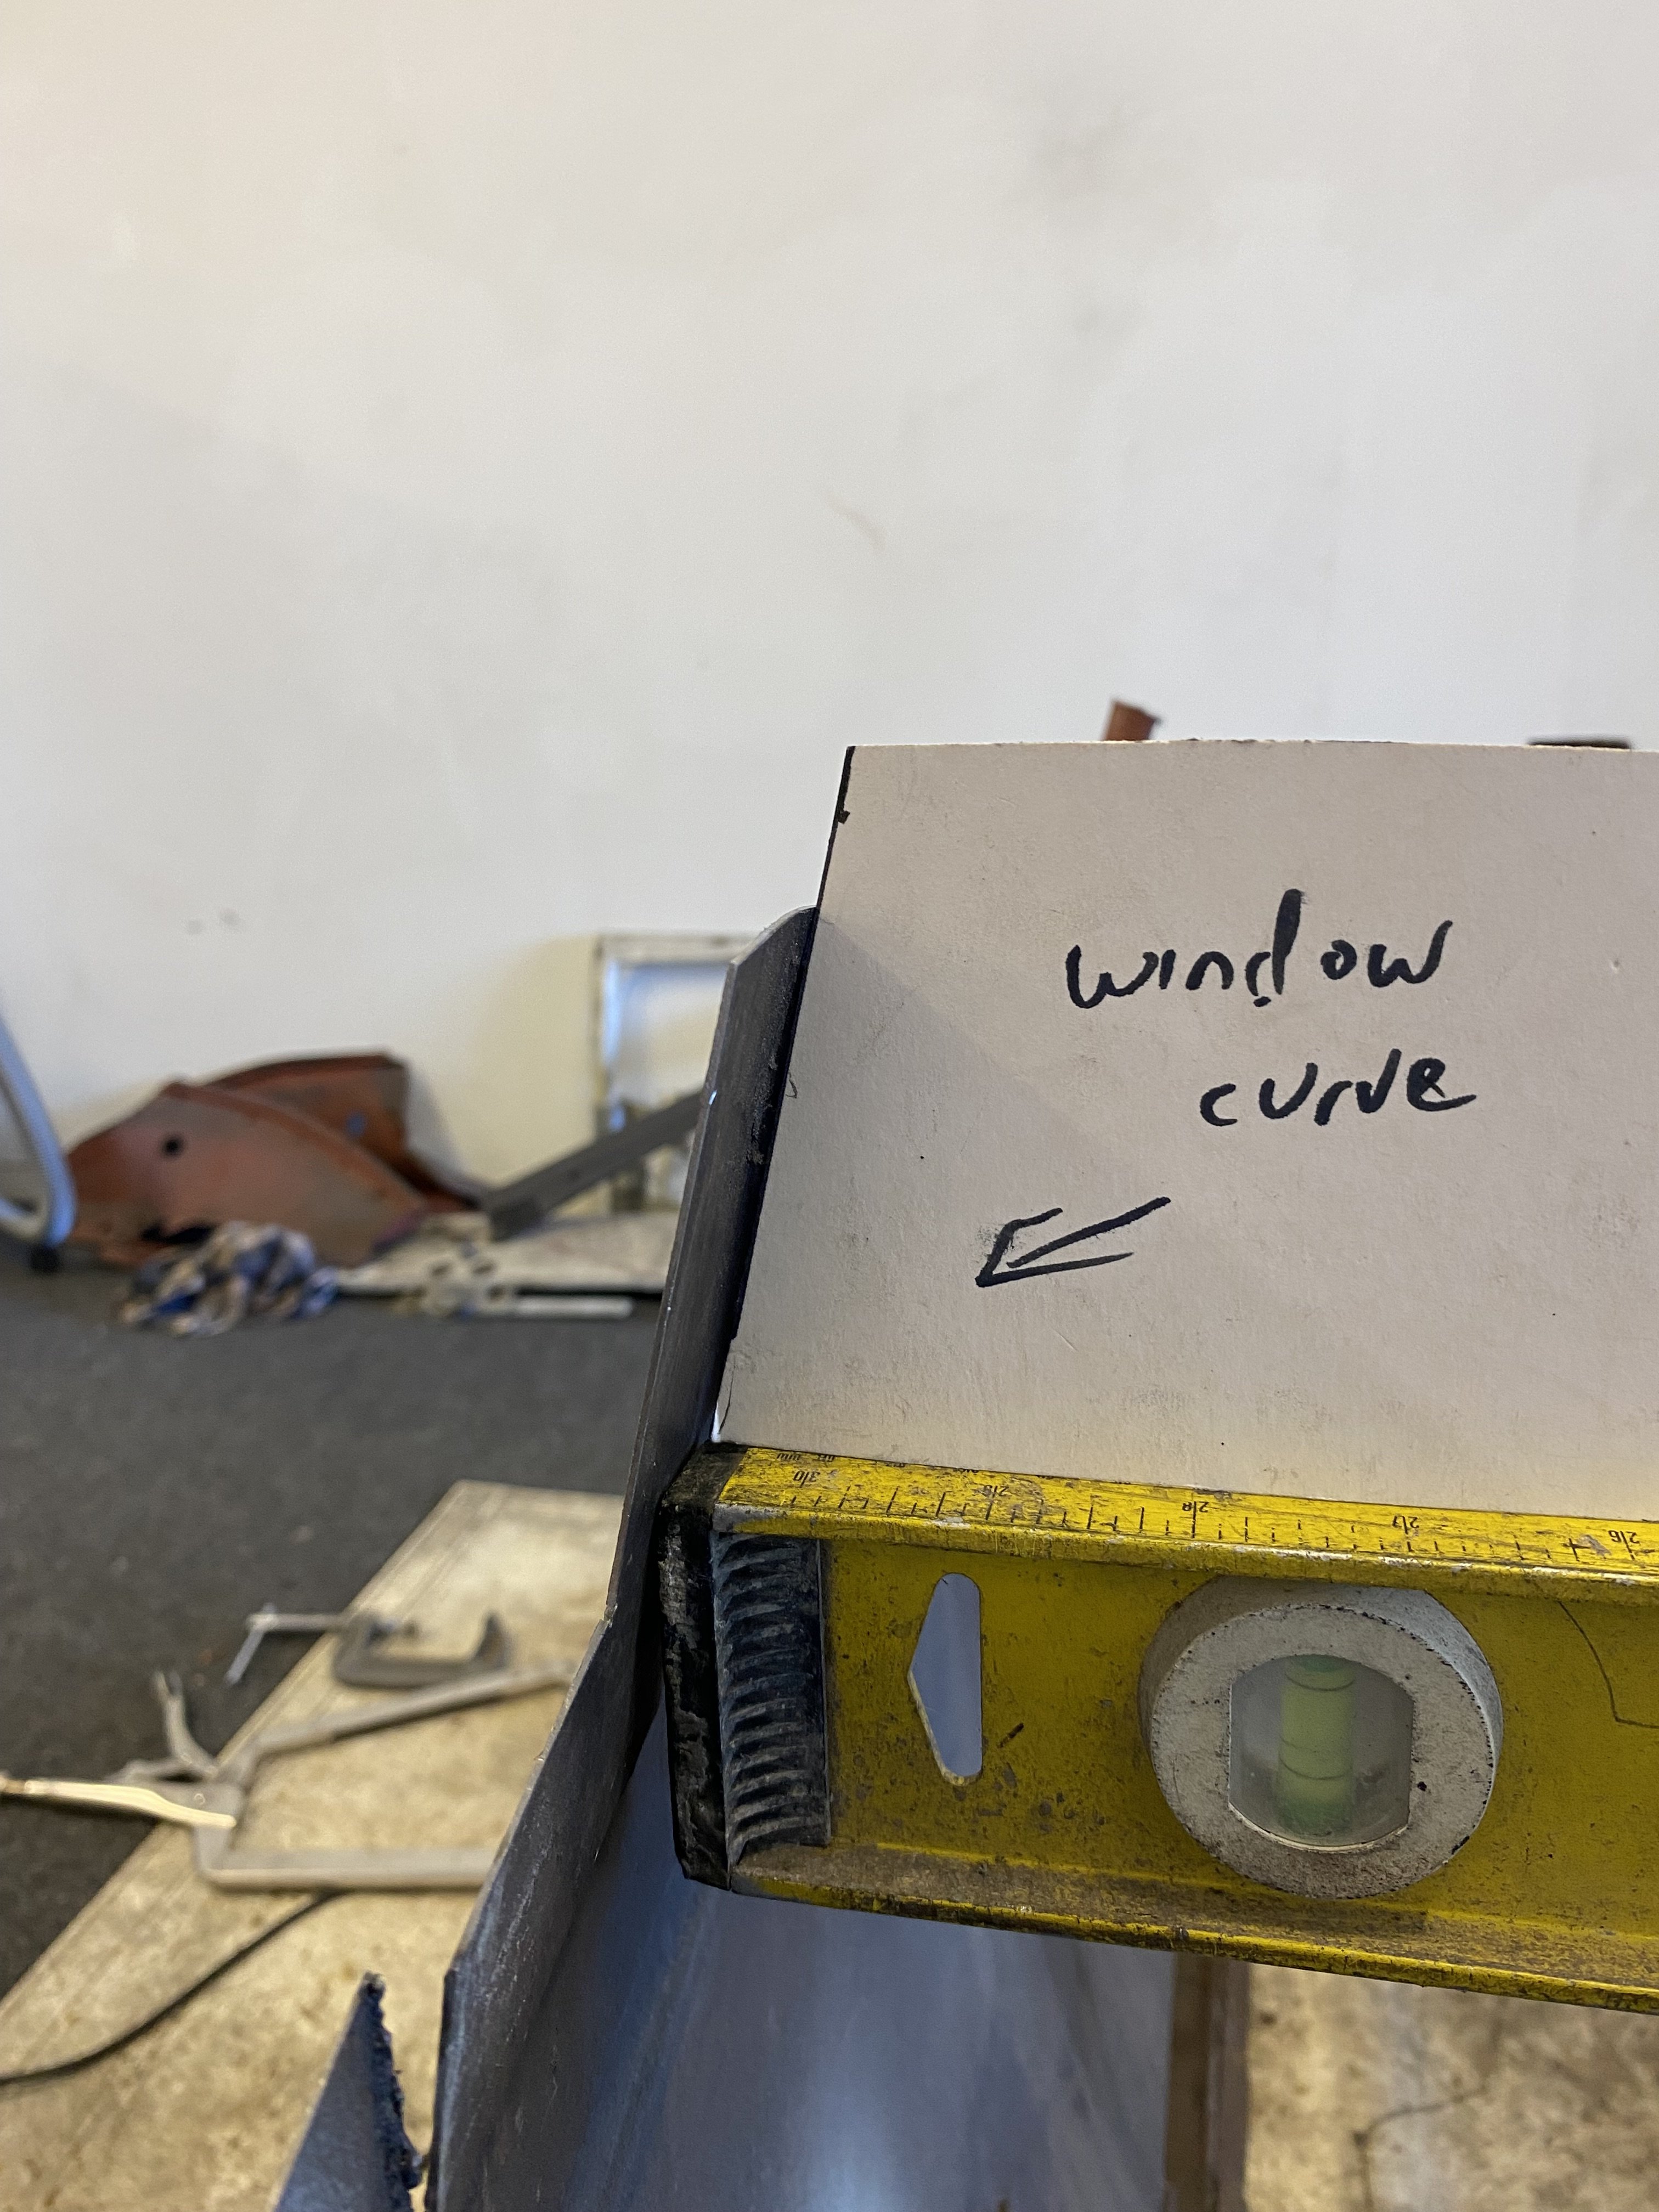
Next job was to split the roof and tilt the bottom part of the window to the same degree of the top part of the door. i just took small nicks out of the top of the swage line then clamped it and and bent it in to suit. Then welded the nicks up and hand filed the welds down.
2 points
-
2 points
-
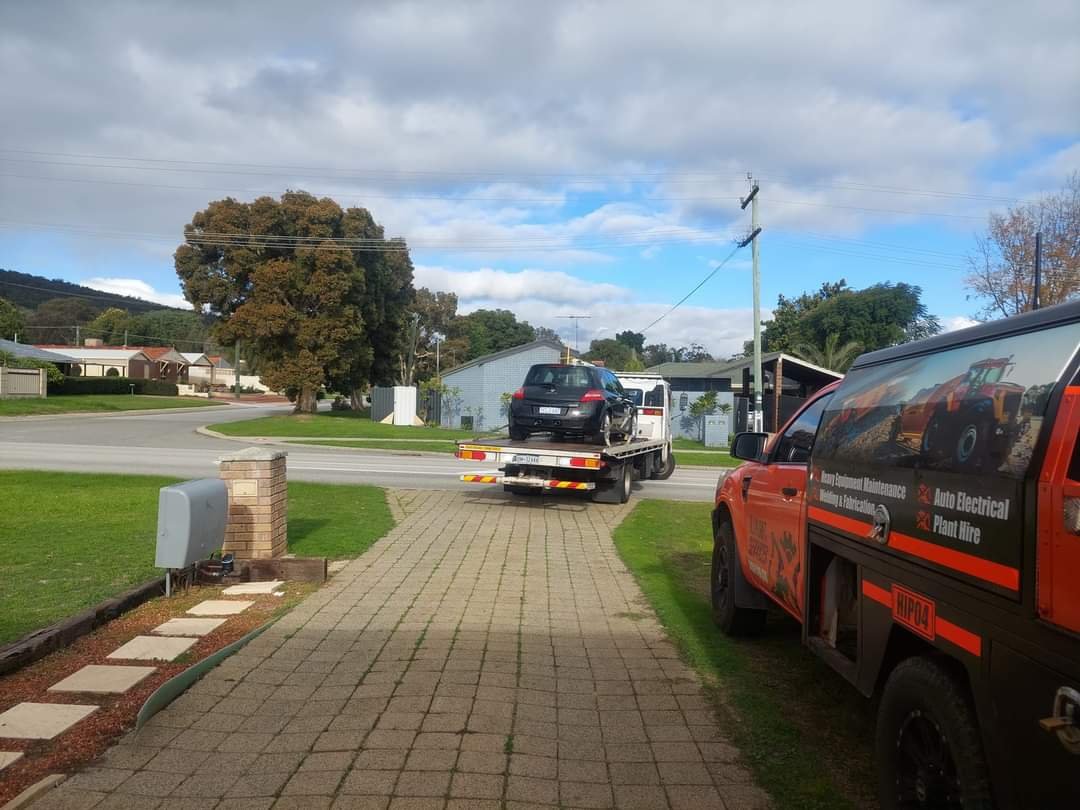
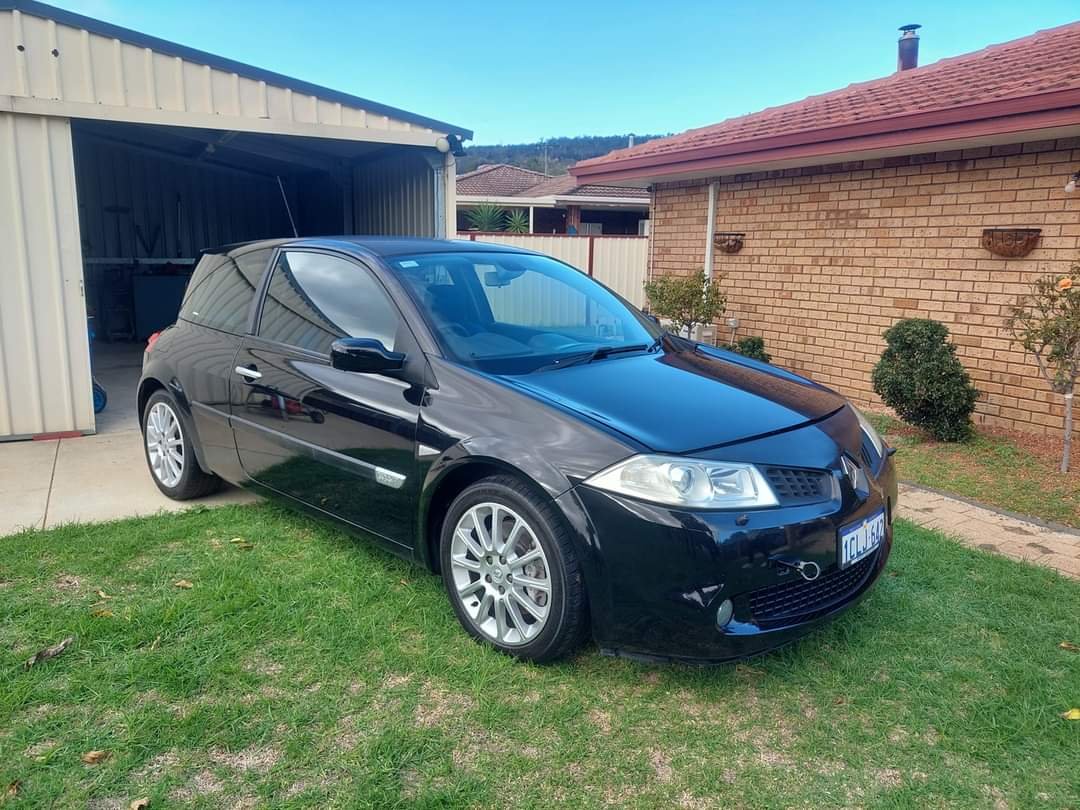
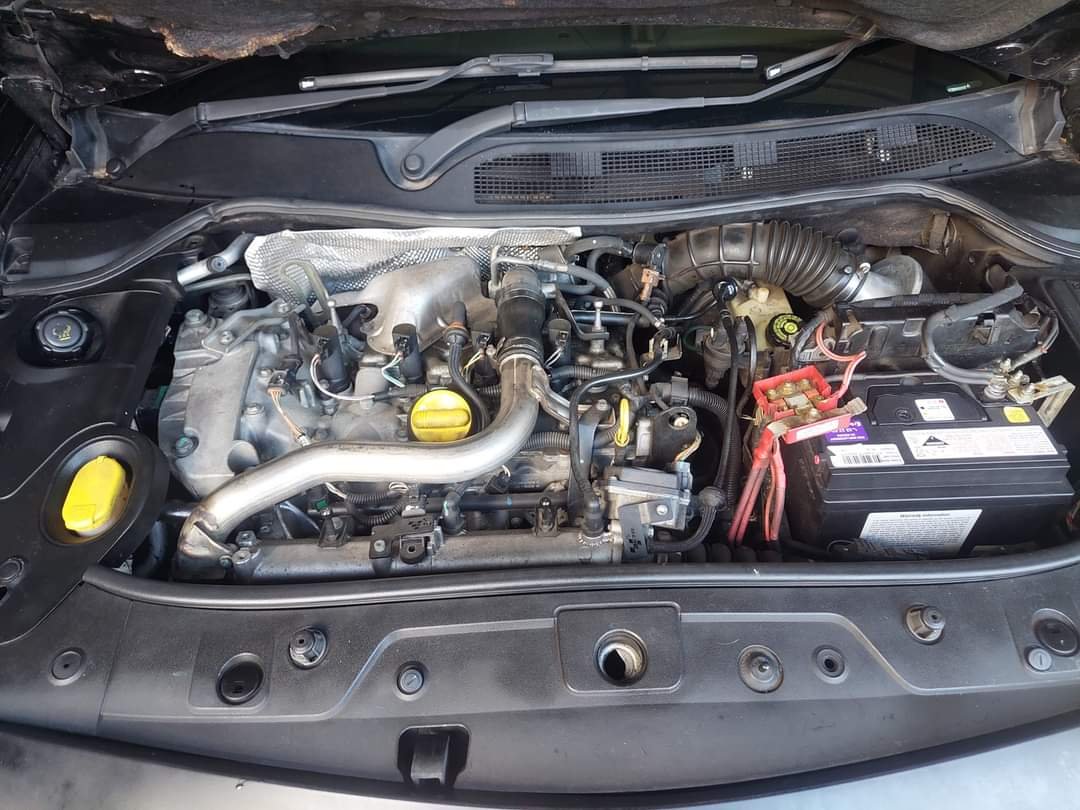
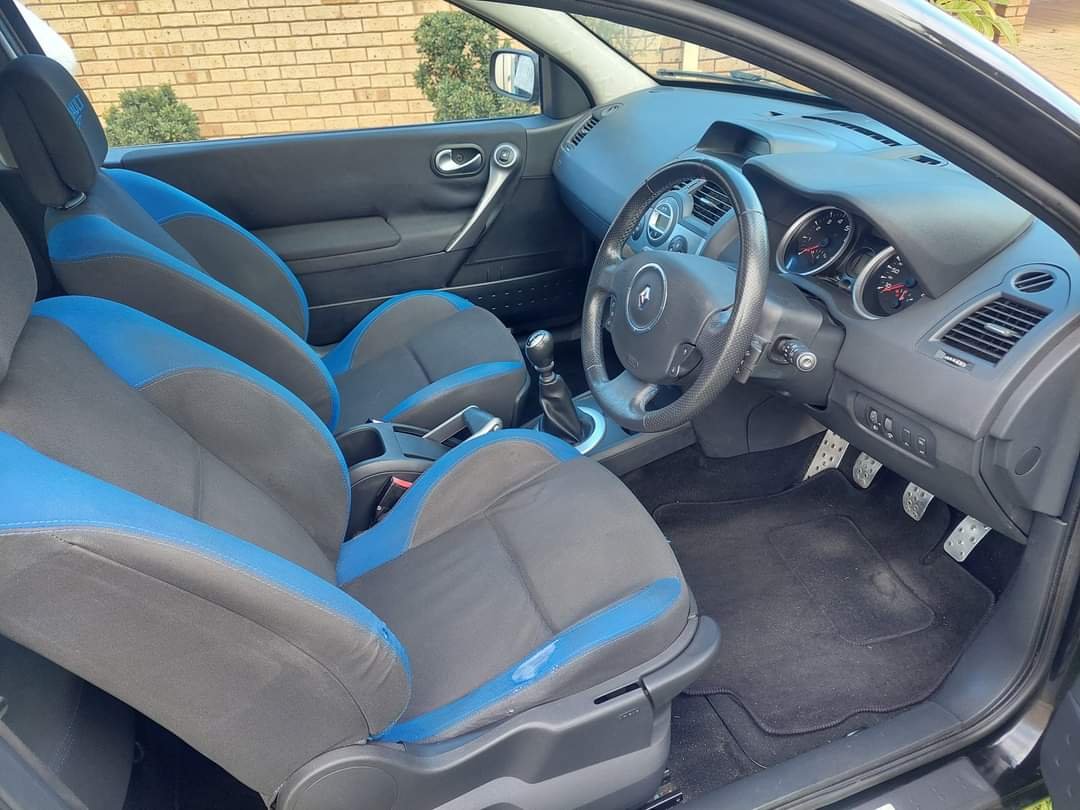
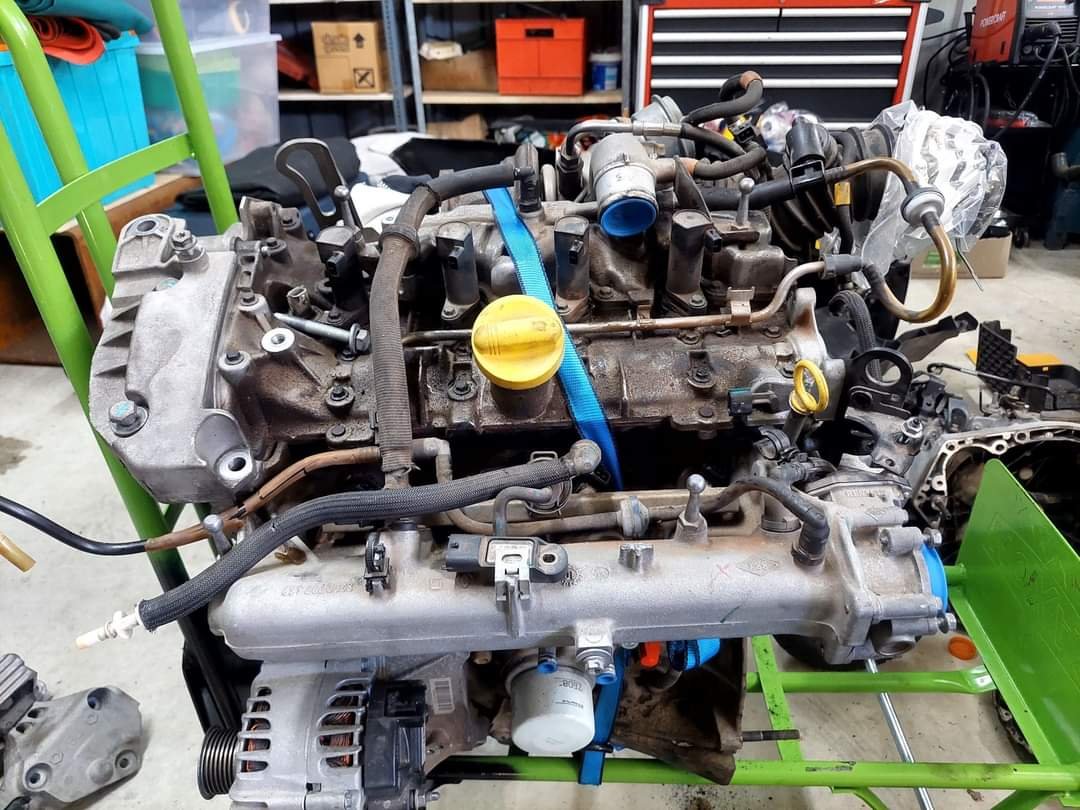
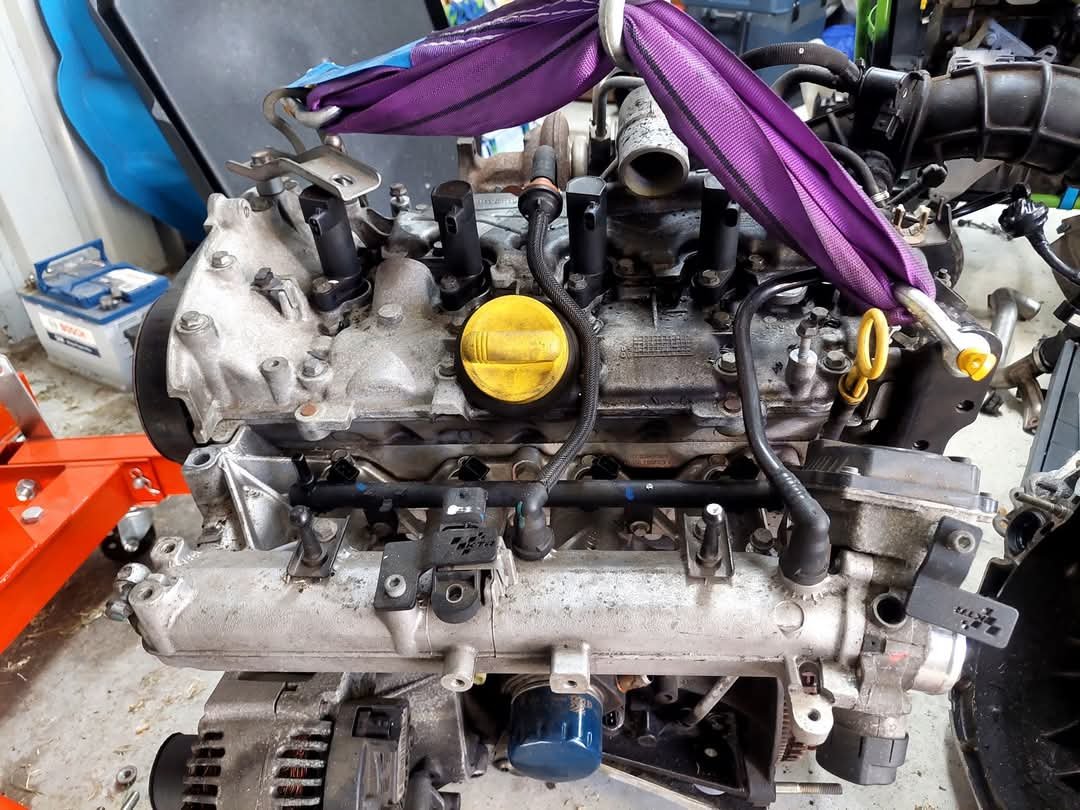
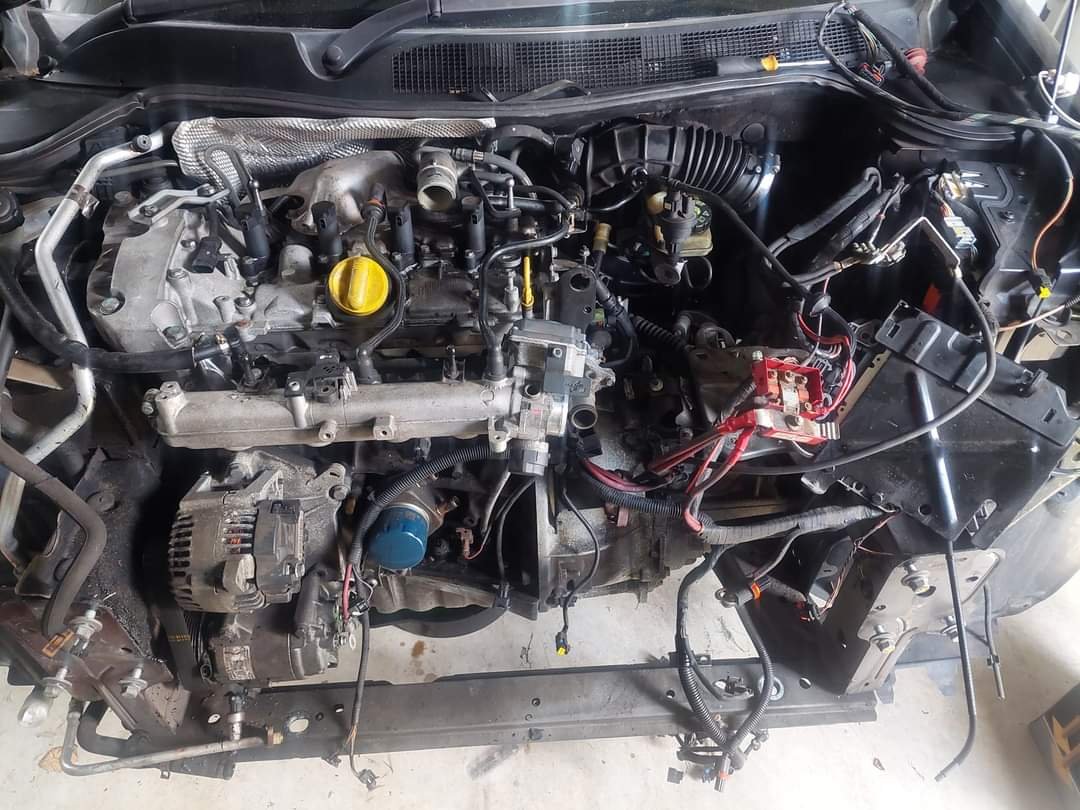
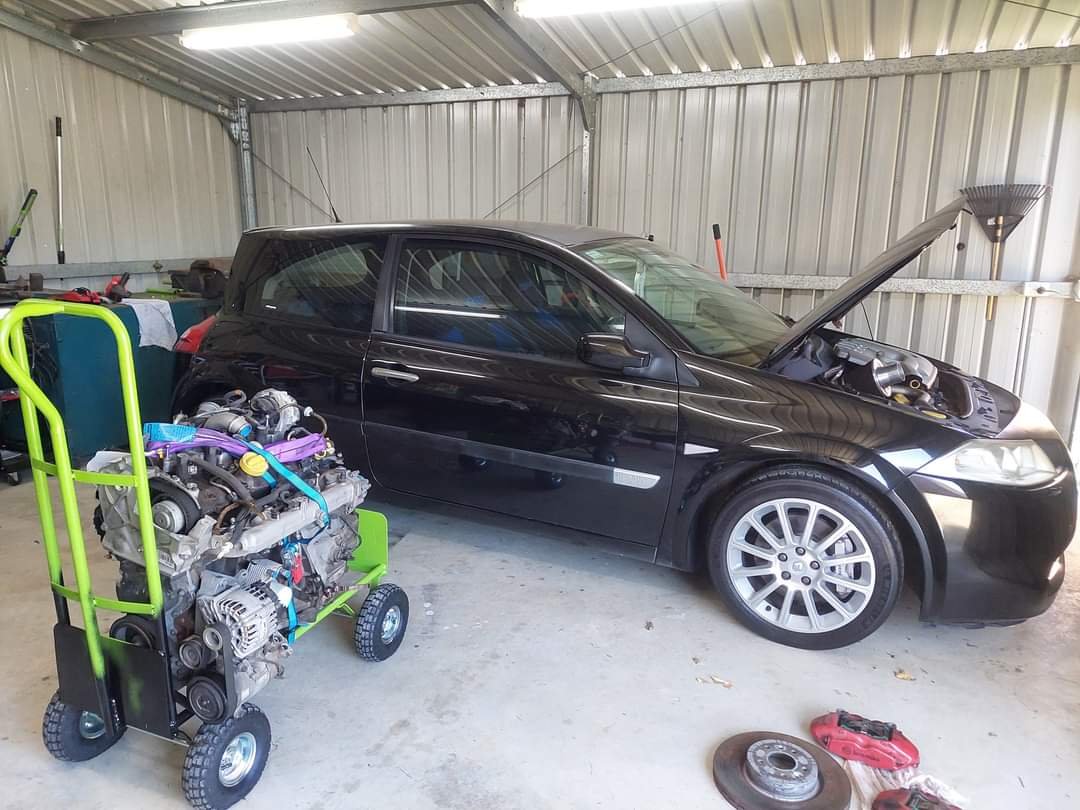
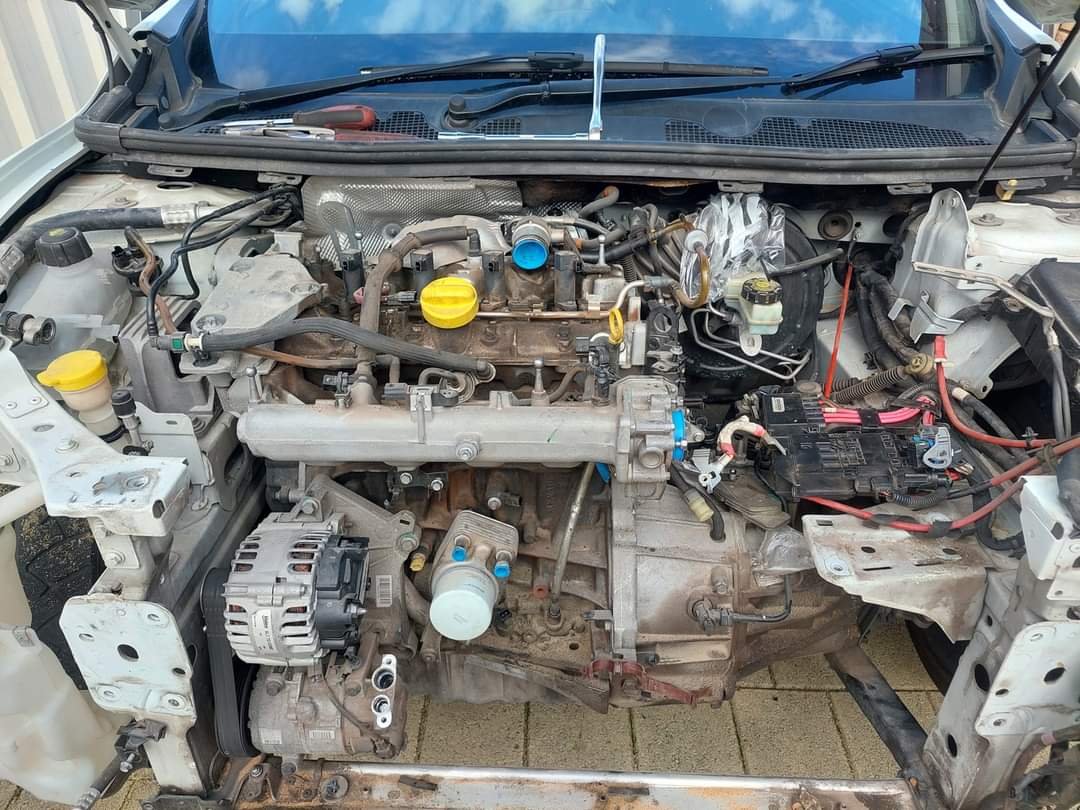
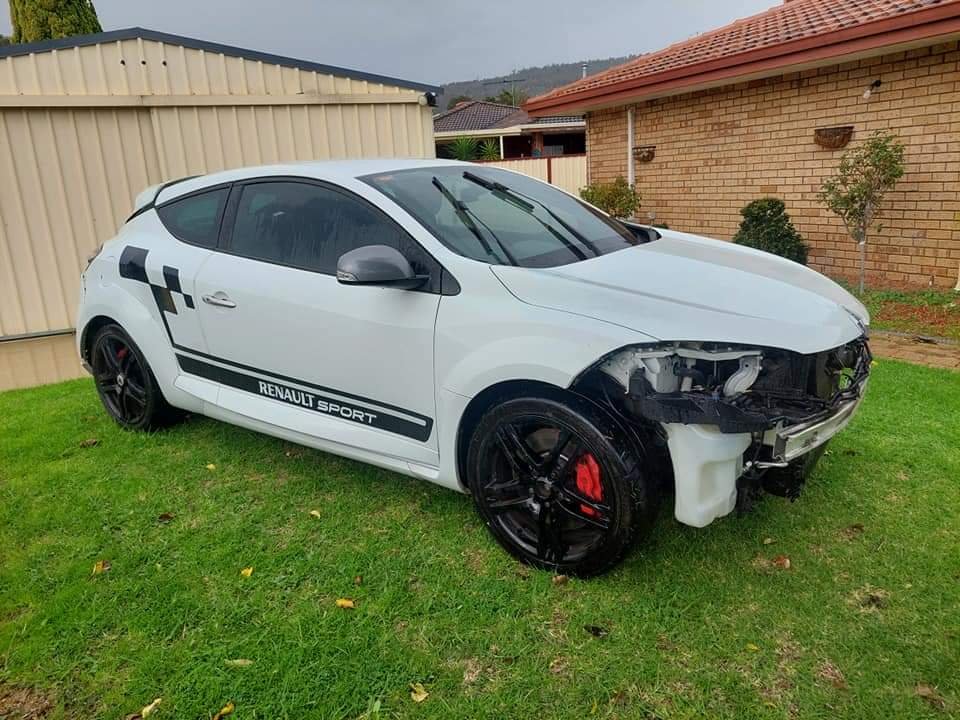
So after moving the Galant on due to many reasons, I couldn't resist the itch for another immobile project car sitting derelict in the shed so marketplace got the best of me and I turned into a weirdo and picked up this 2006 Renault Megane rs 225 for a very cheap price. I figured I need a project that I can chip away at with ease amd crash out in the space of a few weekends/the odd hour here and there and have it running and driveable (also registered). Note: Driveable, which this isn't haha. Who am I kidding? Pics make it look mint but it's not. Tidy enough however with 178,000kms. The paint is pretty faded on the front end, rear end and roof as these are notoriously bad for it. A few minor trim pieces missing and interior pretty good bar slight wear on the drivers seat, faulty passenger window and sagging/lifted trim material. Engine however is a no go. Suspect timing has skipped and has caused interference and engine failure.
1 point
-
This could be the electric parking brake of beds.1 point
-
Built a setup for $35. See if it even works when I get around to building the rest of the motor 😆1 point
-
Had a spare minute so I thought I would have a hack at a fuel return/restrictor. Found some brass hex, put some detail into it including a 1.5mm hole and some probably correctly tapped holes, surely BSP and NPT are the same? I checked the resulting pressure but the needle wobbles all over the place from the pulsing of the pump, averaged out it looks like 3.5 or 4 psi, vs 4.5 to 5psi previously. Ill take it for a spin later and see what the AFR's are doing, then maybe start opening up that hole. I kindof need a way to damp the pressure fluctuations first to get an accurate reading.1 point
-
Next job is to cut this whole piece at the bottom swage line and weld in place to form the bottom of the roof line.1 point
-
1 point
-
1 point
-
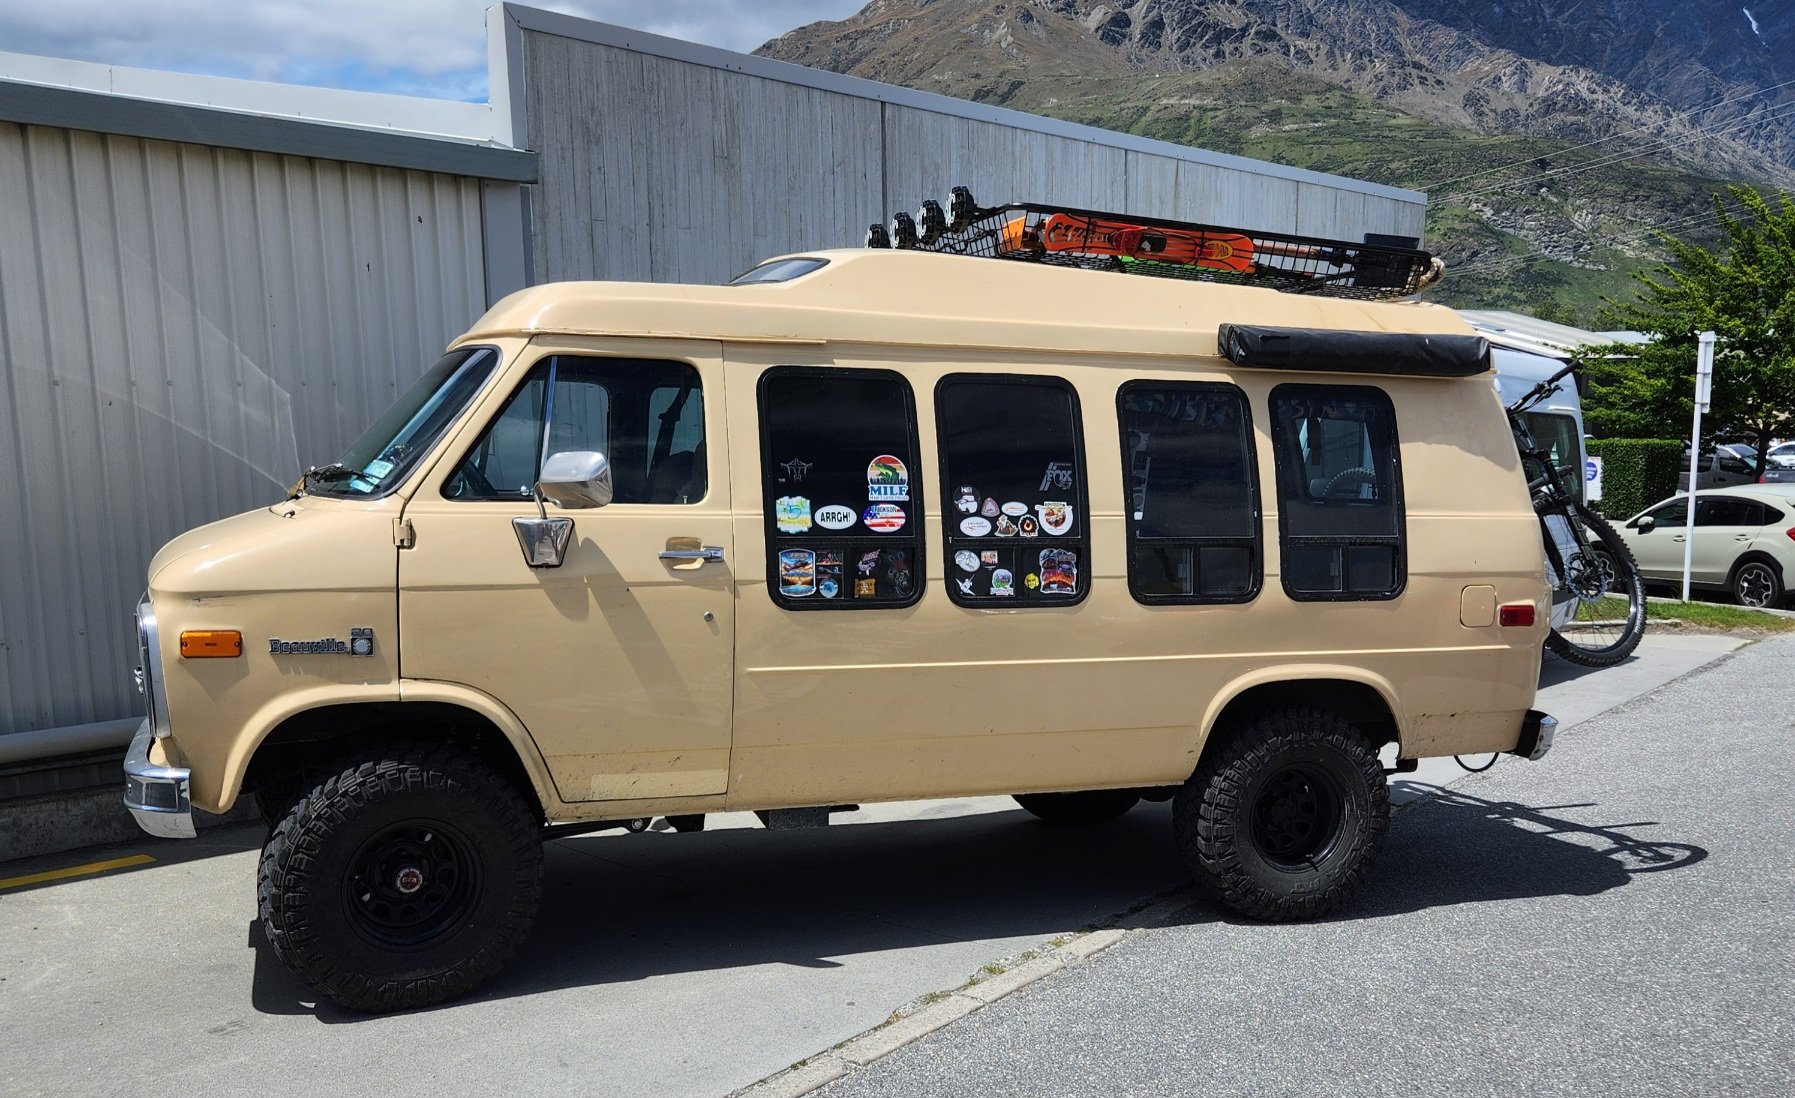
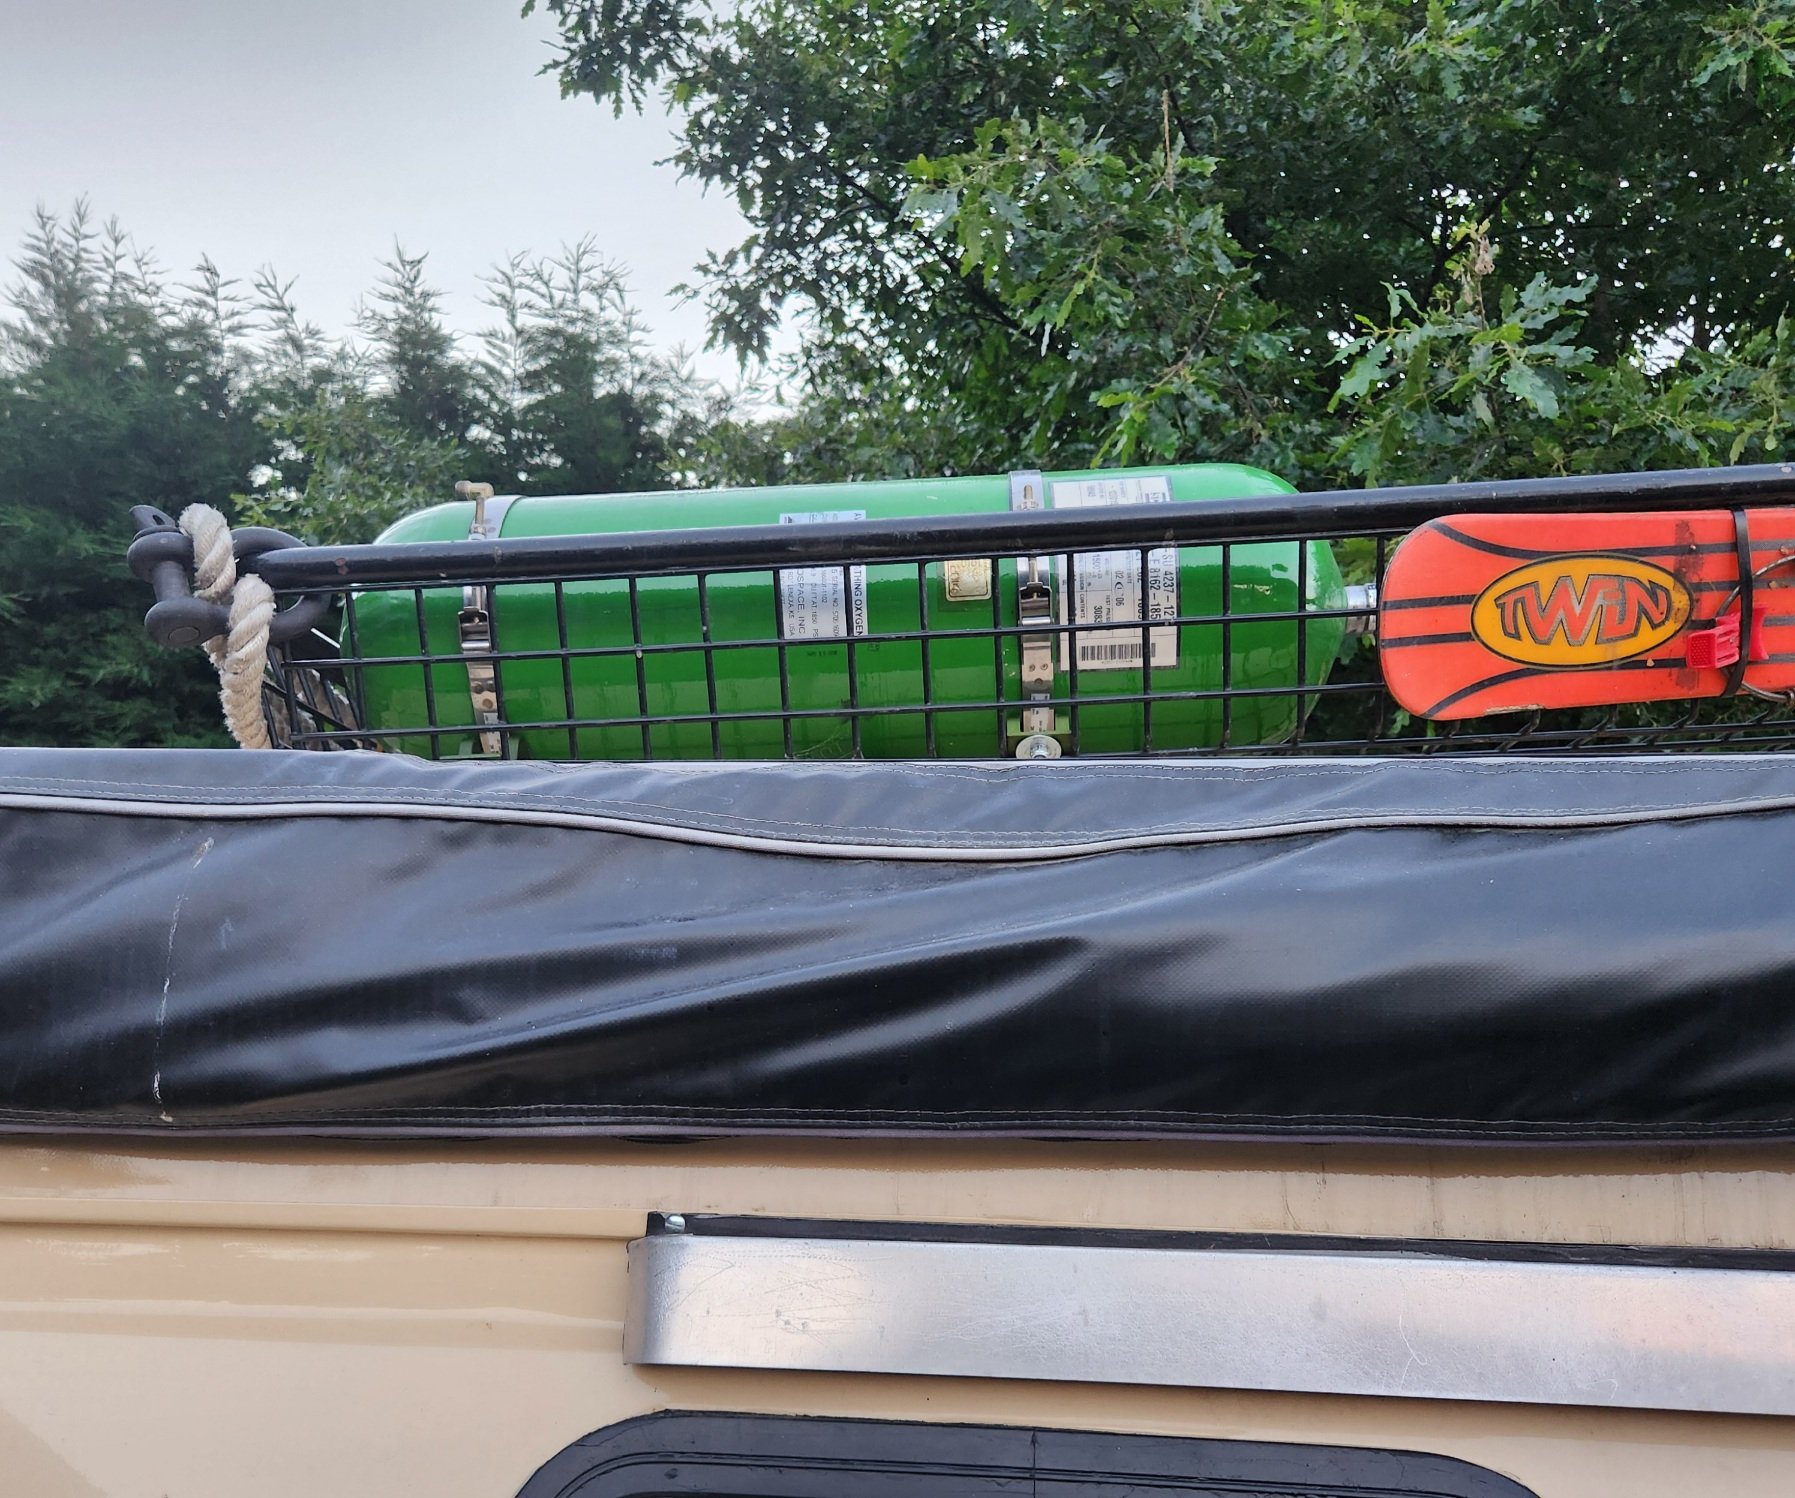
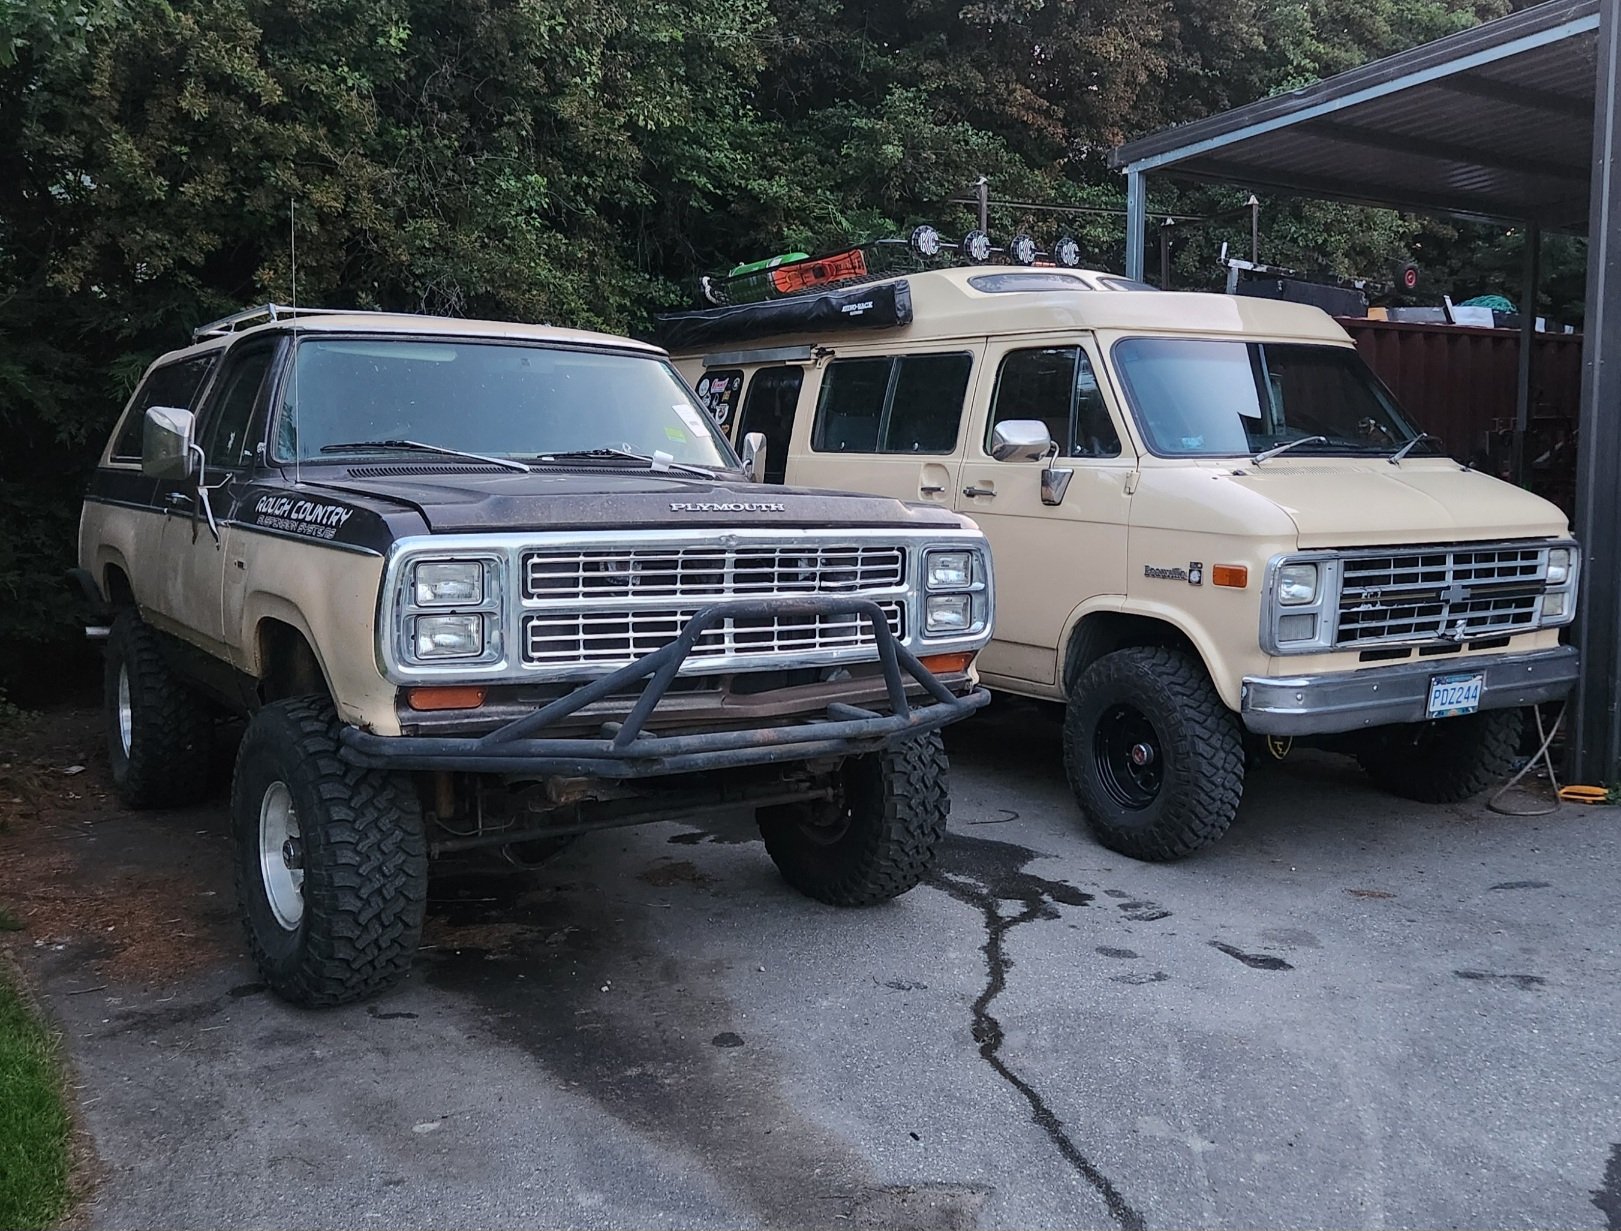
Finishing jobs on this, got the cargo tray back on and put some temu led spots on the KC covers like a real tightwad, the sales figures were some astronomical lumen value but anyway they are bright and will probably never get used I also mounted an old Cessna kevlar wrapped oxygen tank up top for water, it'll hold 25 litres or so, I haven't been game enough to actually drink out of it yet. Drilling into it was scary. Then I took it in for a wof which was triumphant. The only.issue being the steering box bolts were loose which I assume was from when someone who wanted to look at the mounting has pulled them out and out them back in hand tight, not ideal and lucky the wof guy found it. Now woffed and rego and ready for a beating this weekend And also just in time for the next ballache which I picked up today, 79 Plymouth trailduster with a new very grumpy stroked 360 in it.
1 point
-
lol reckon, the fastest way to turning, want to learn how to tig, to yeah nah fuck this, its a pain in the ass and i'll just go back to point n shoot1 point
-
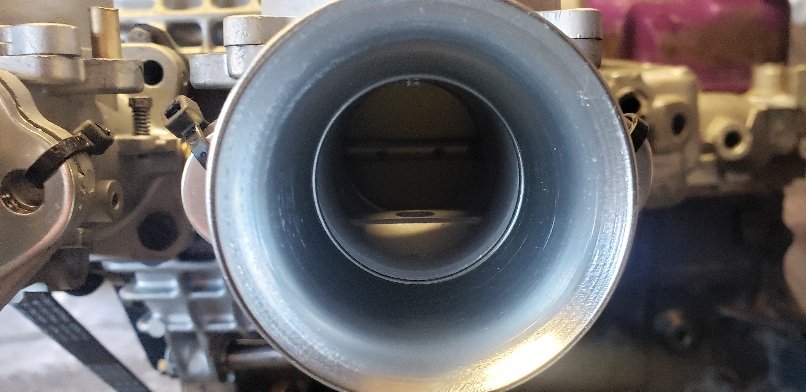
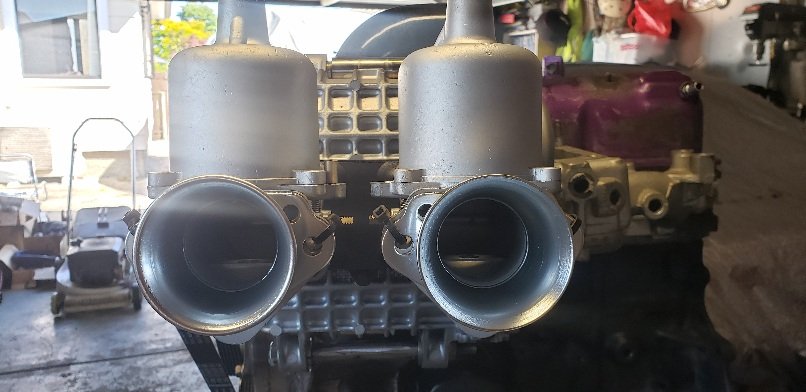
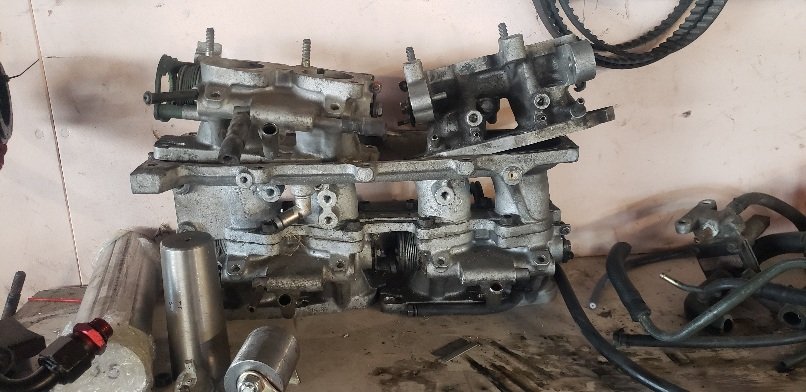
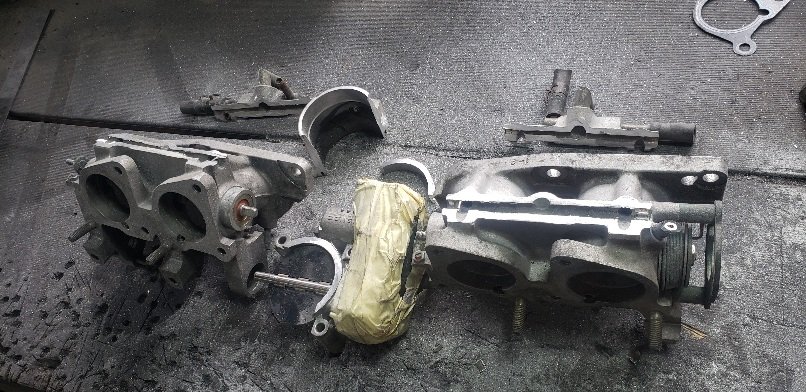
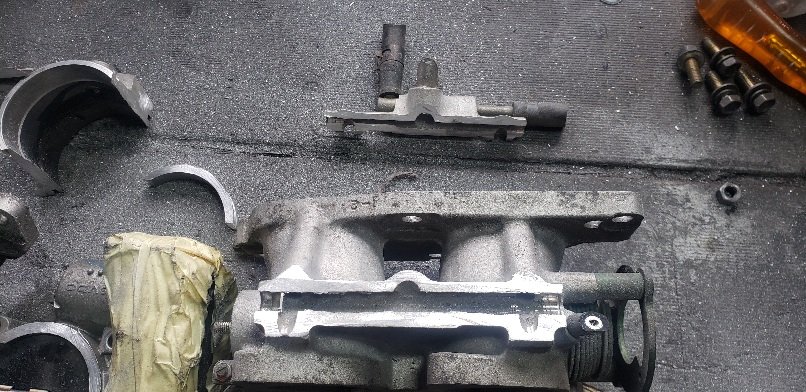
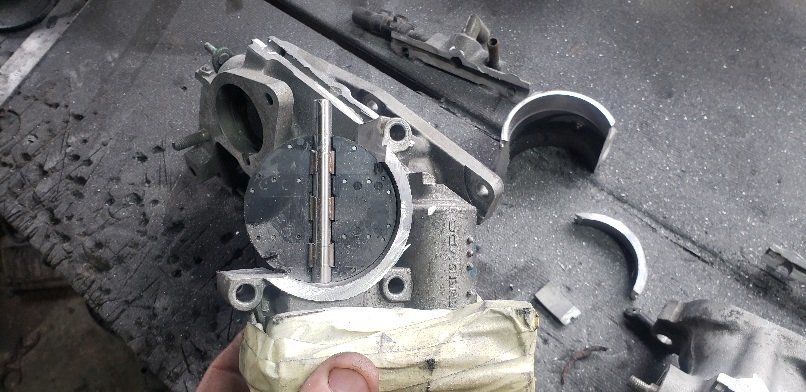
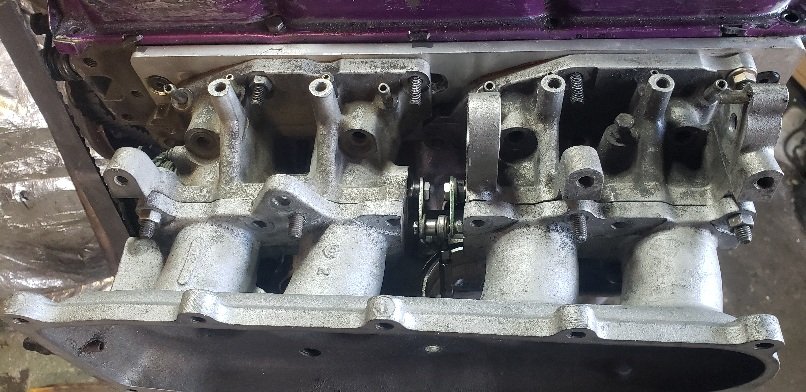
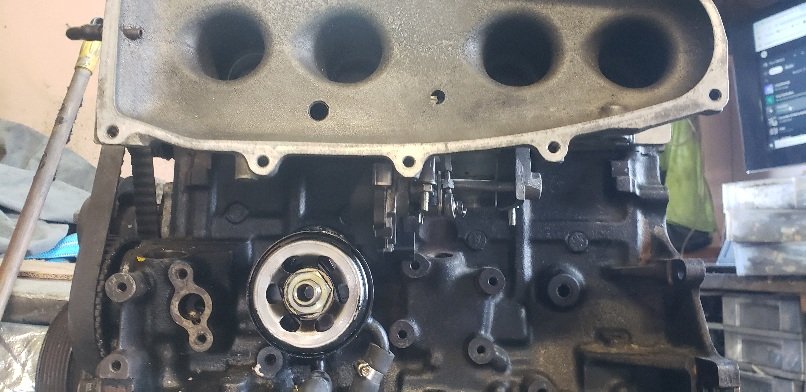
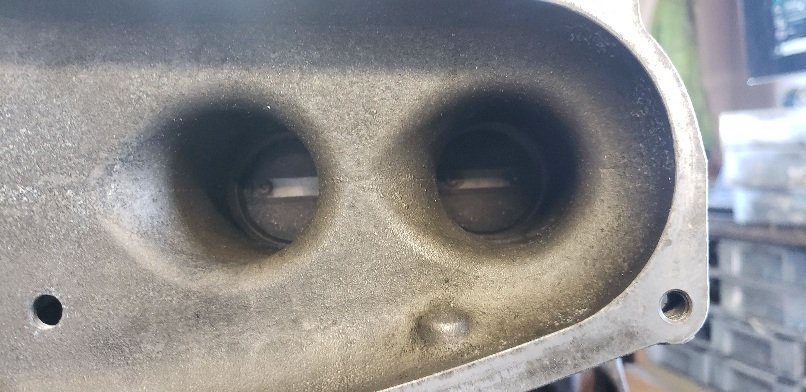
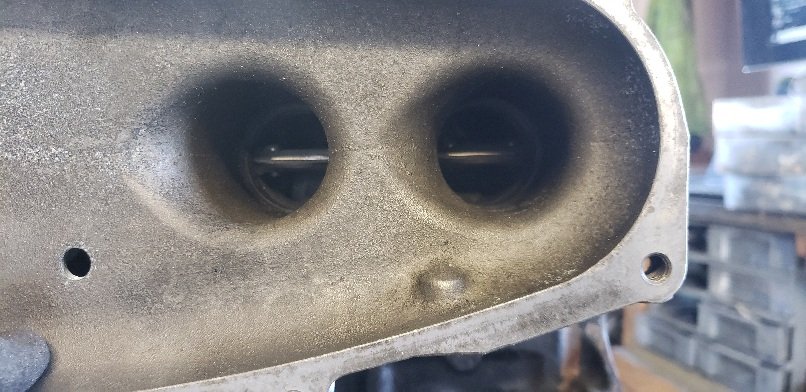
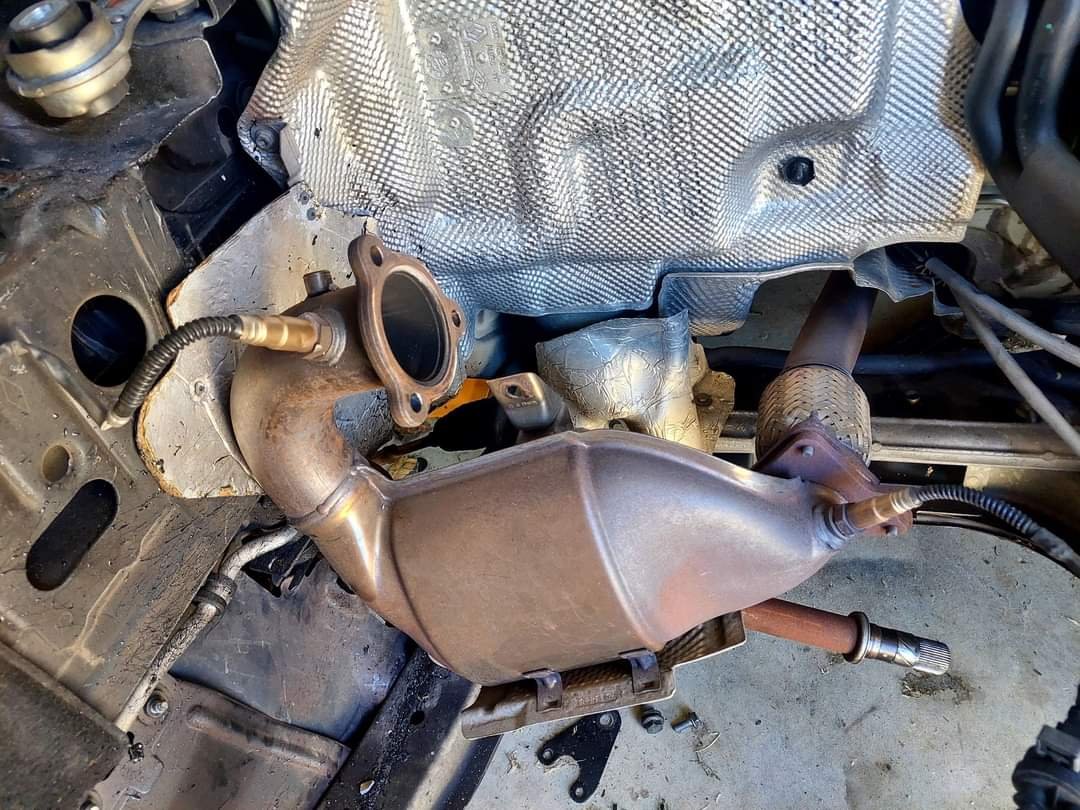
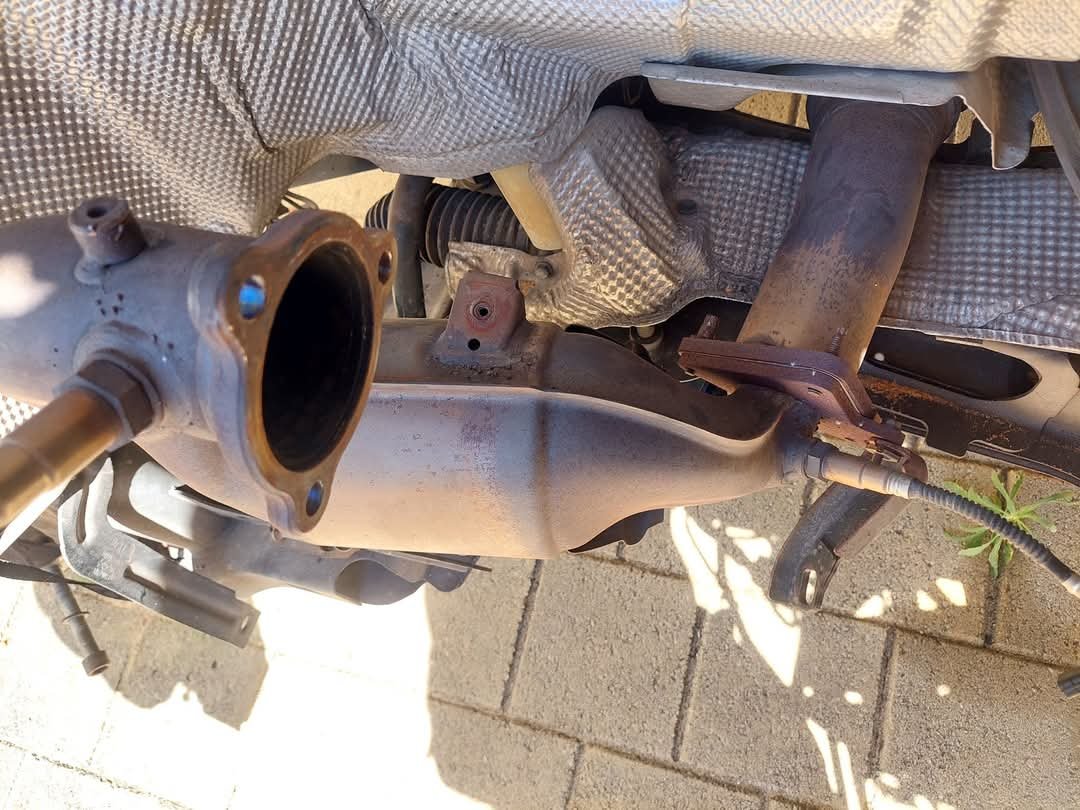
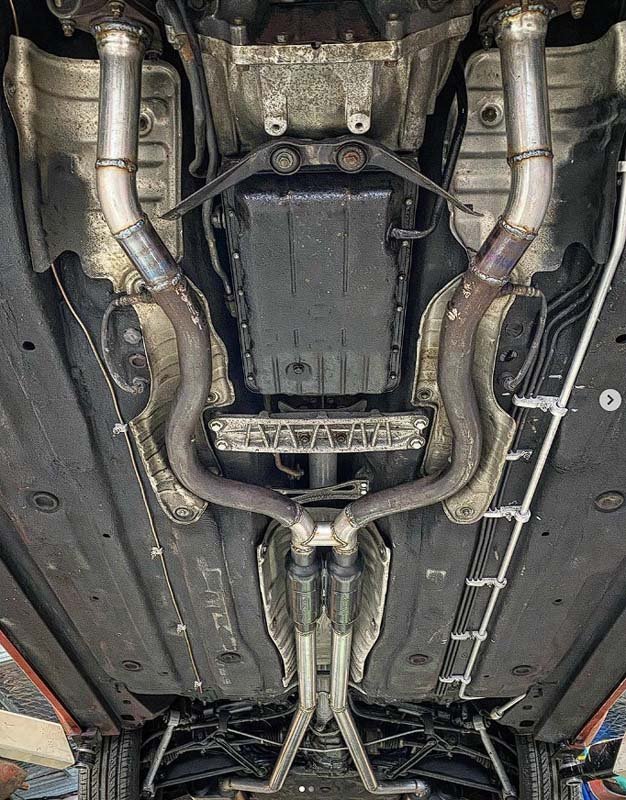
Difference in intake manifolds. 265 225 Also was having a look at the exhaust downpipes. Both 225 and 265 are 2.5inch but slightly different in design. Both terminate to the exhaust in the same spot. As I'm wanting to decat the system as it's a huge restriction on these, if I can't get a second hand one cheap enough I might just by some pipe and bends and do it myself. The factory 225 exhaust is 2 1/4inch and the 265 looks to have an aftermarket 3inch exhaust (flexi is torn and brackets have broken off at the front). Might see if I can repurpose the 265 exhaust and bodge something together for the 225. 225 265 Might order the mounts this week and hopefully get a rear crank seal, gearbox input and output seals as well. Chur, Tai
1 point
-
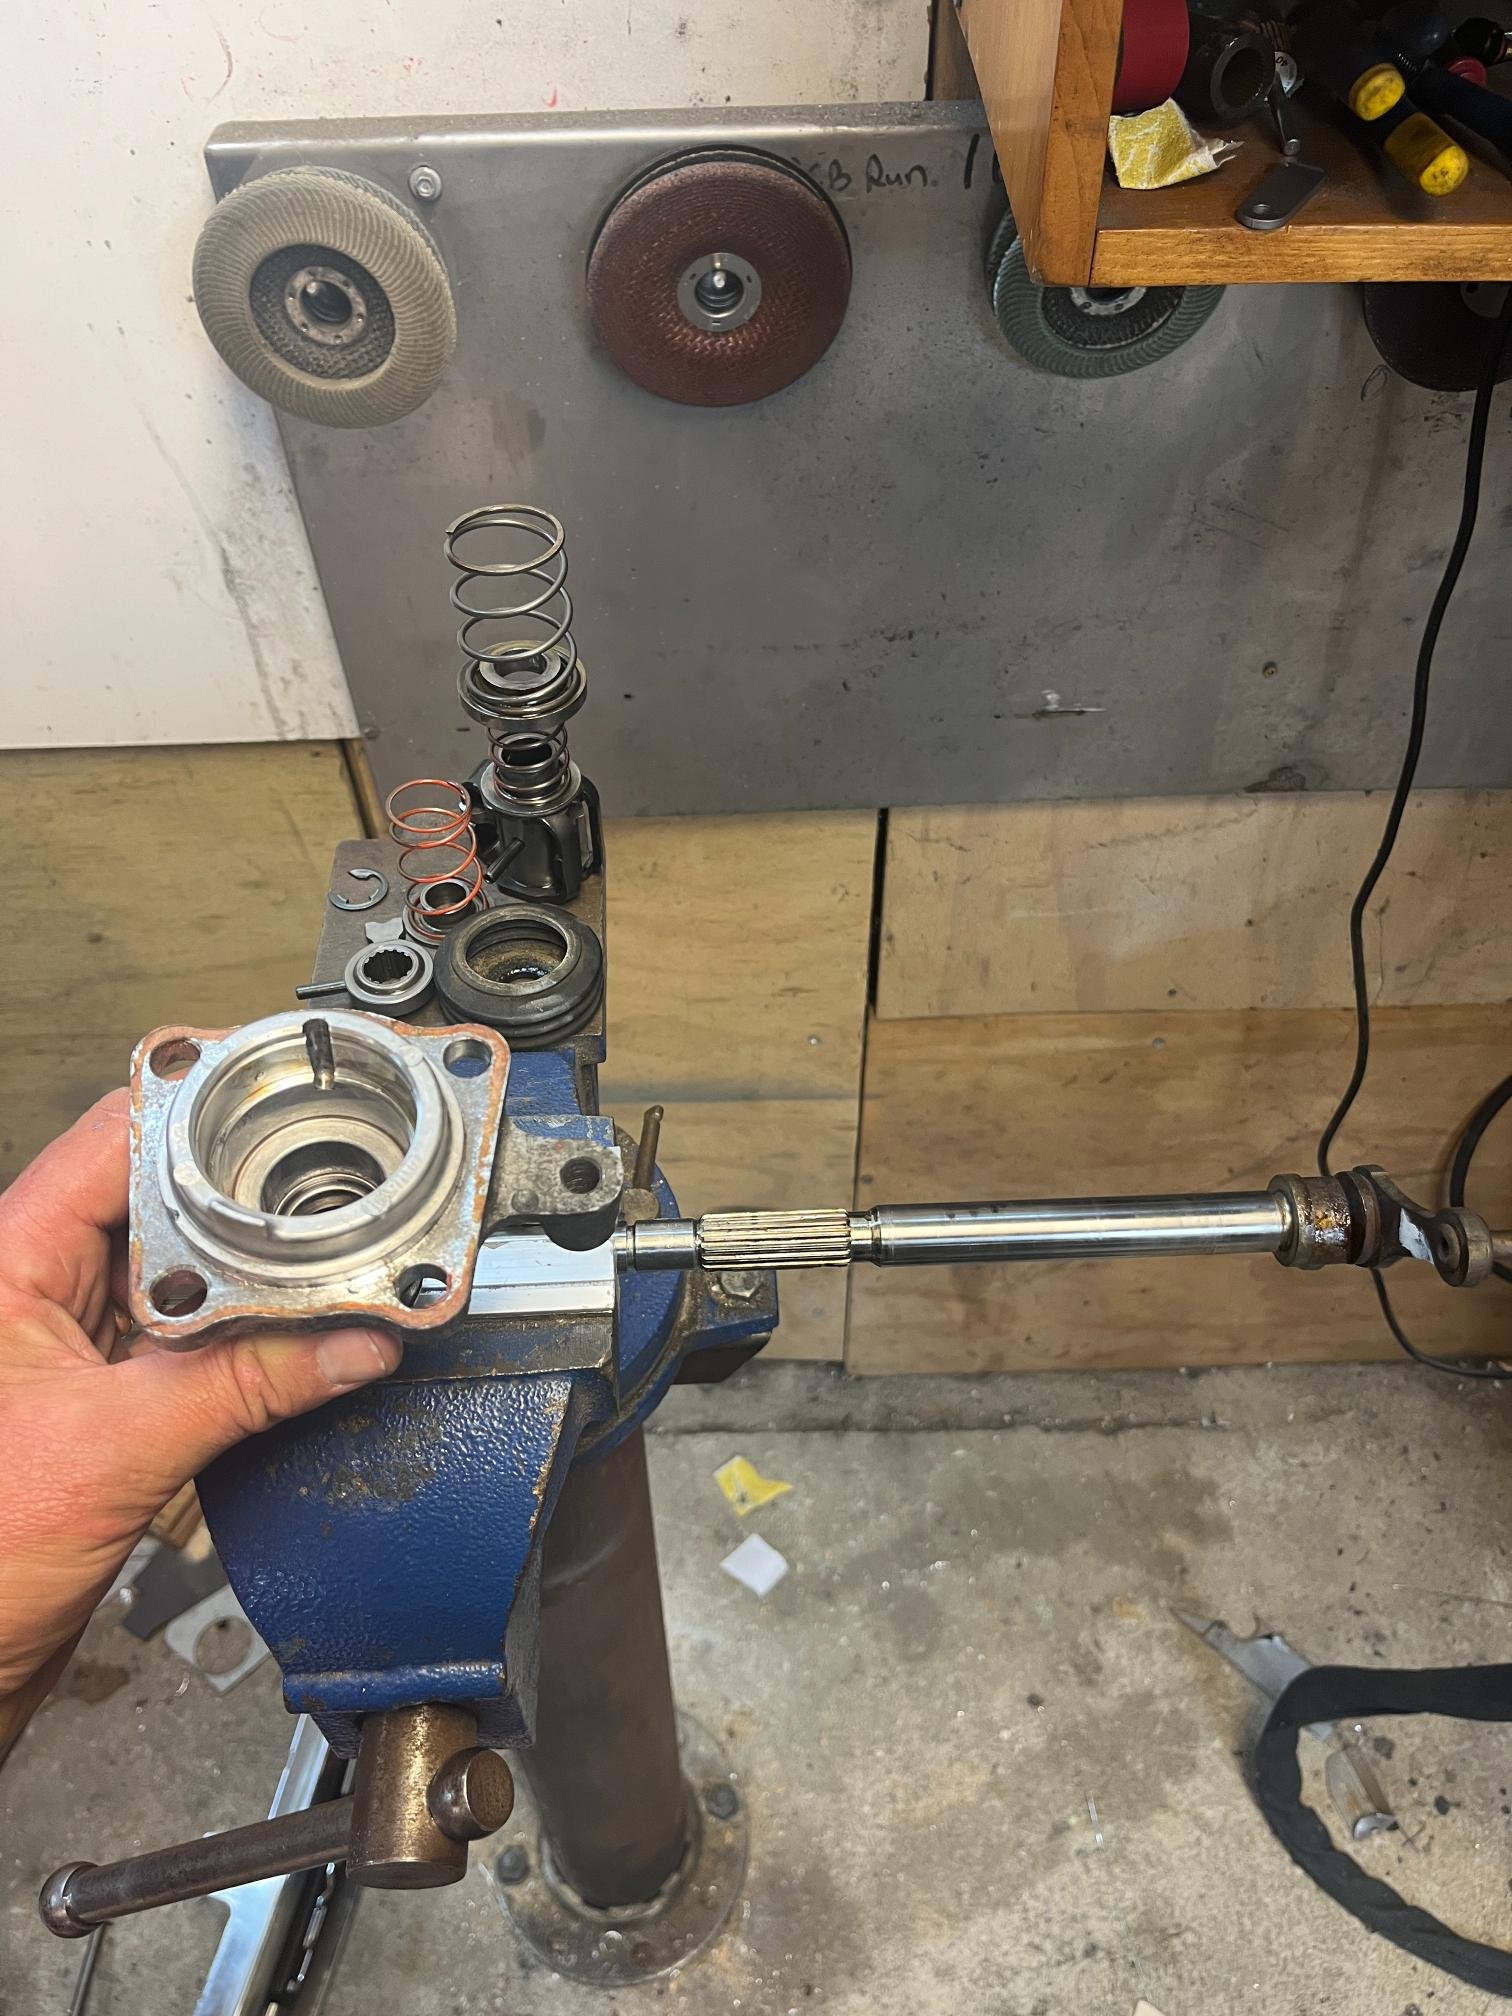
That first box looked pretty good. But I ended up breaking a bit of the casing in my efforts to get the seriously rusty bit of clutch shaft out. You can probably spot the bit in this pic, it probably would be ok but still. So I decided to use the other casing which was a lot cleaner anyway, but this meant dismantling the second box. This was kindof good as it gave me context to decide that the first box was indeed a goodun. The second one was still pretty good, but it had the keyed shaft that was broken on the one in the car (altho not broken) but the nice box is obviously a later revision as it had a spline rather than a keyway. So I dragged my parts washer out from the depths of the container and cleaned/dried off/inspected everything. Now I just need to find some axle seals and it can go back together. Oh and sort the diff as well, but if I use the good box diff I will need to fix the endfloat situation, probably.1 point
-
Sent car to tuner, spent a few hours with him and he had it running far better by the time I left, he's introduced the water meth and intake temps have plummeted which is a great sign, he's done some road tuning since too and is very happy with it. We have found a few issues with the belt drive tensioner, and pulley set up, so currently trying to get that re-engineered asap. All going well it'll hit the dyno next week, and I can get it back to finish off the last bits before MMSB.
1 point
-
Tyres on & bolted up for a look, reused the 235/40r18 nankang ns-20s that came on the front went with 245/40 matching nankangs for the rear, looks like I can do about 20-25mm off each side of the diff on the rear, front needs to come up about 10mm so I'm not clipping the guard all the time, shocks are a bit sad so good excuse of coilovers I reckon...
1 point
-
Omfg big day yesterday. Towed it to Mosgiel due to paranoia about issues on the way, 3 and a bit hours. Sat in truck working for 2 hours waiting for certifier to finish whatever he was doing. Checked off the list, road-test it and steering is good, brakes are not. Get back and rears are cold. So the stupid cuntofavalve I changed doesn't like the cruiser drum cylinders or something and was shutting off the rear brakes due flow being to high and it thinking there's a break in the line. I messed with it for an hour then started swearing. Old mate finds an old residual pressure valve meaning i might be able to bypass the combination valve. Fittings weren't right, but BNT is round corner, but it's 4:45 , BNT doesn't have right fittings. Anyway cobbled it together, had to drill out a fitting and redo a flare in the engine bay, which actually sealed, and got brakes working, and passed brake test. Then I got to tow it home, got back at 11pm. Way past my usual knockoff Goodness me
1 point
-
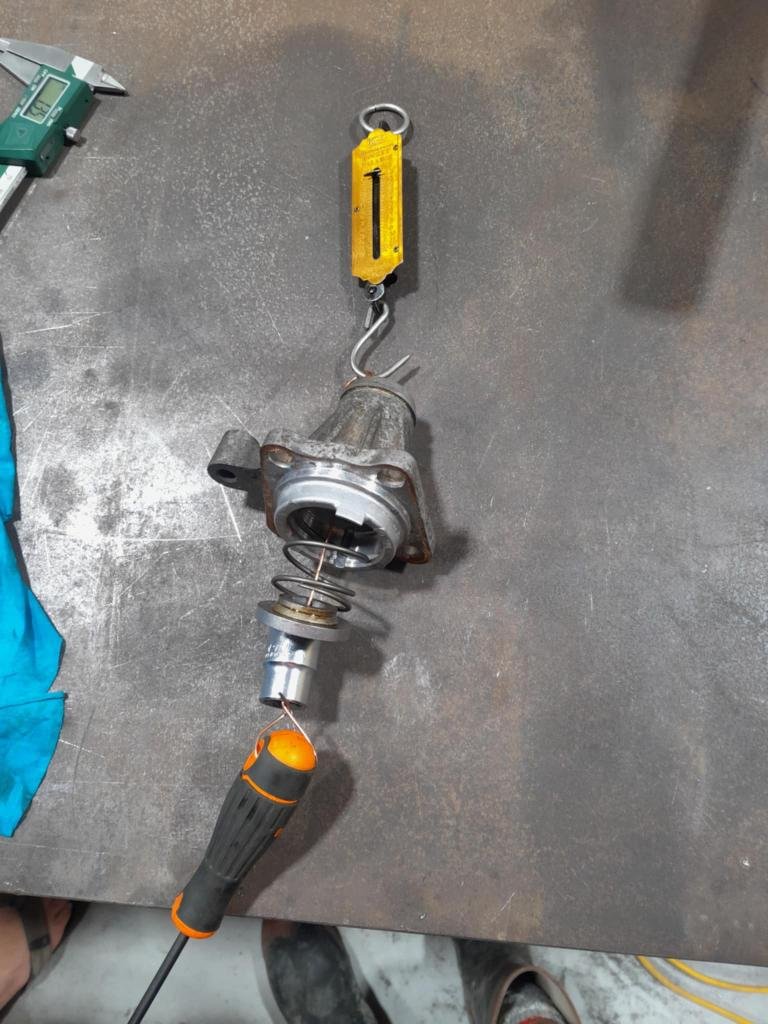
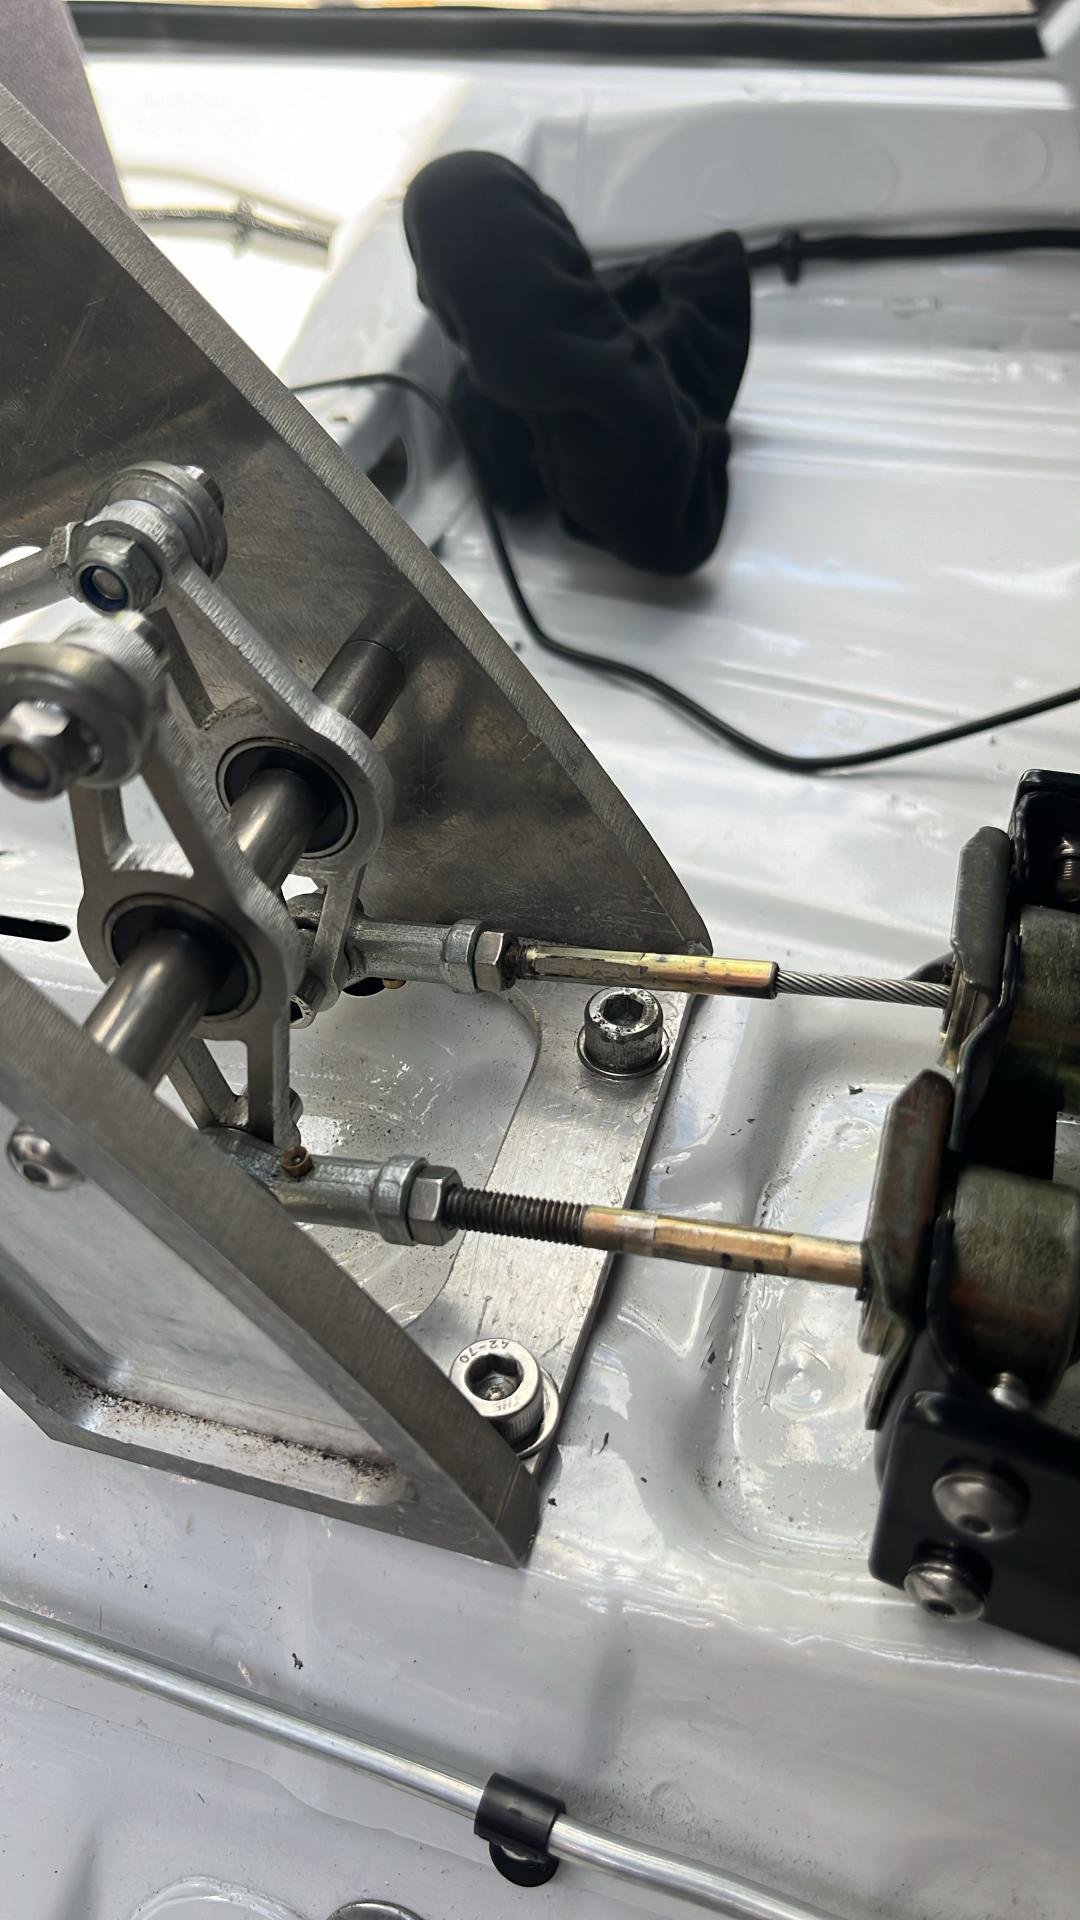
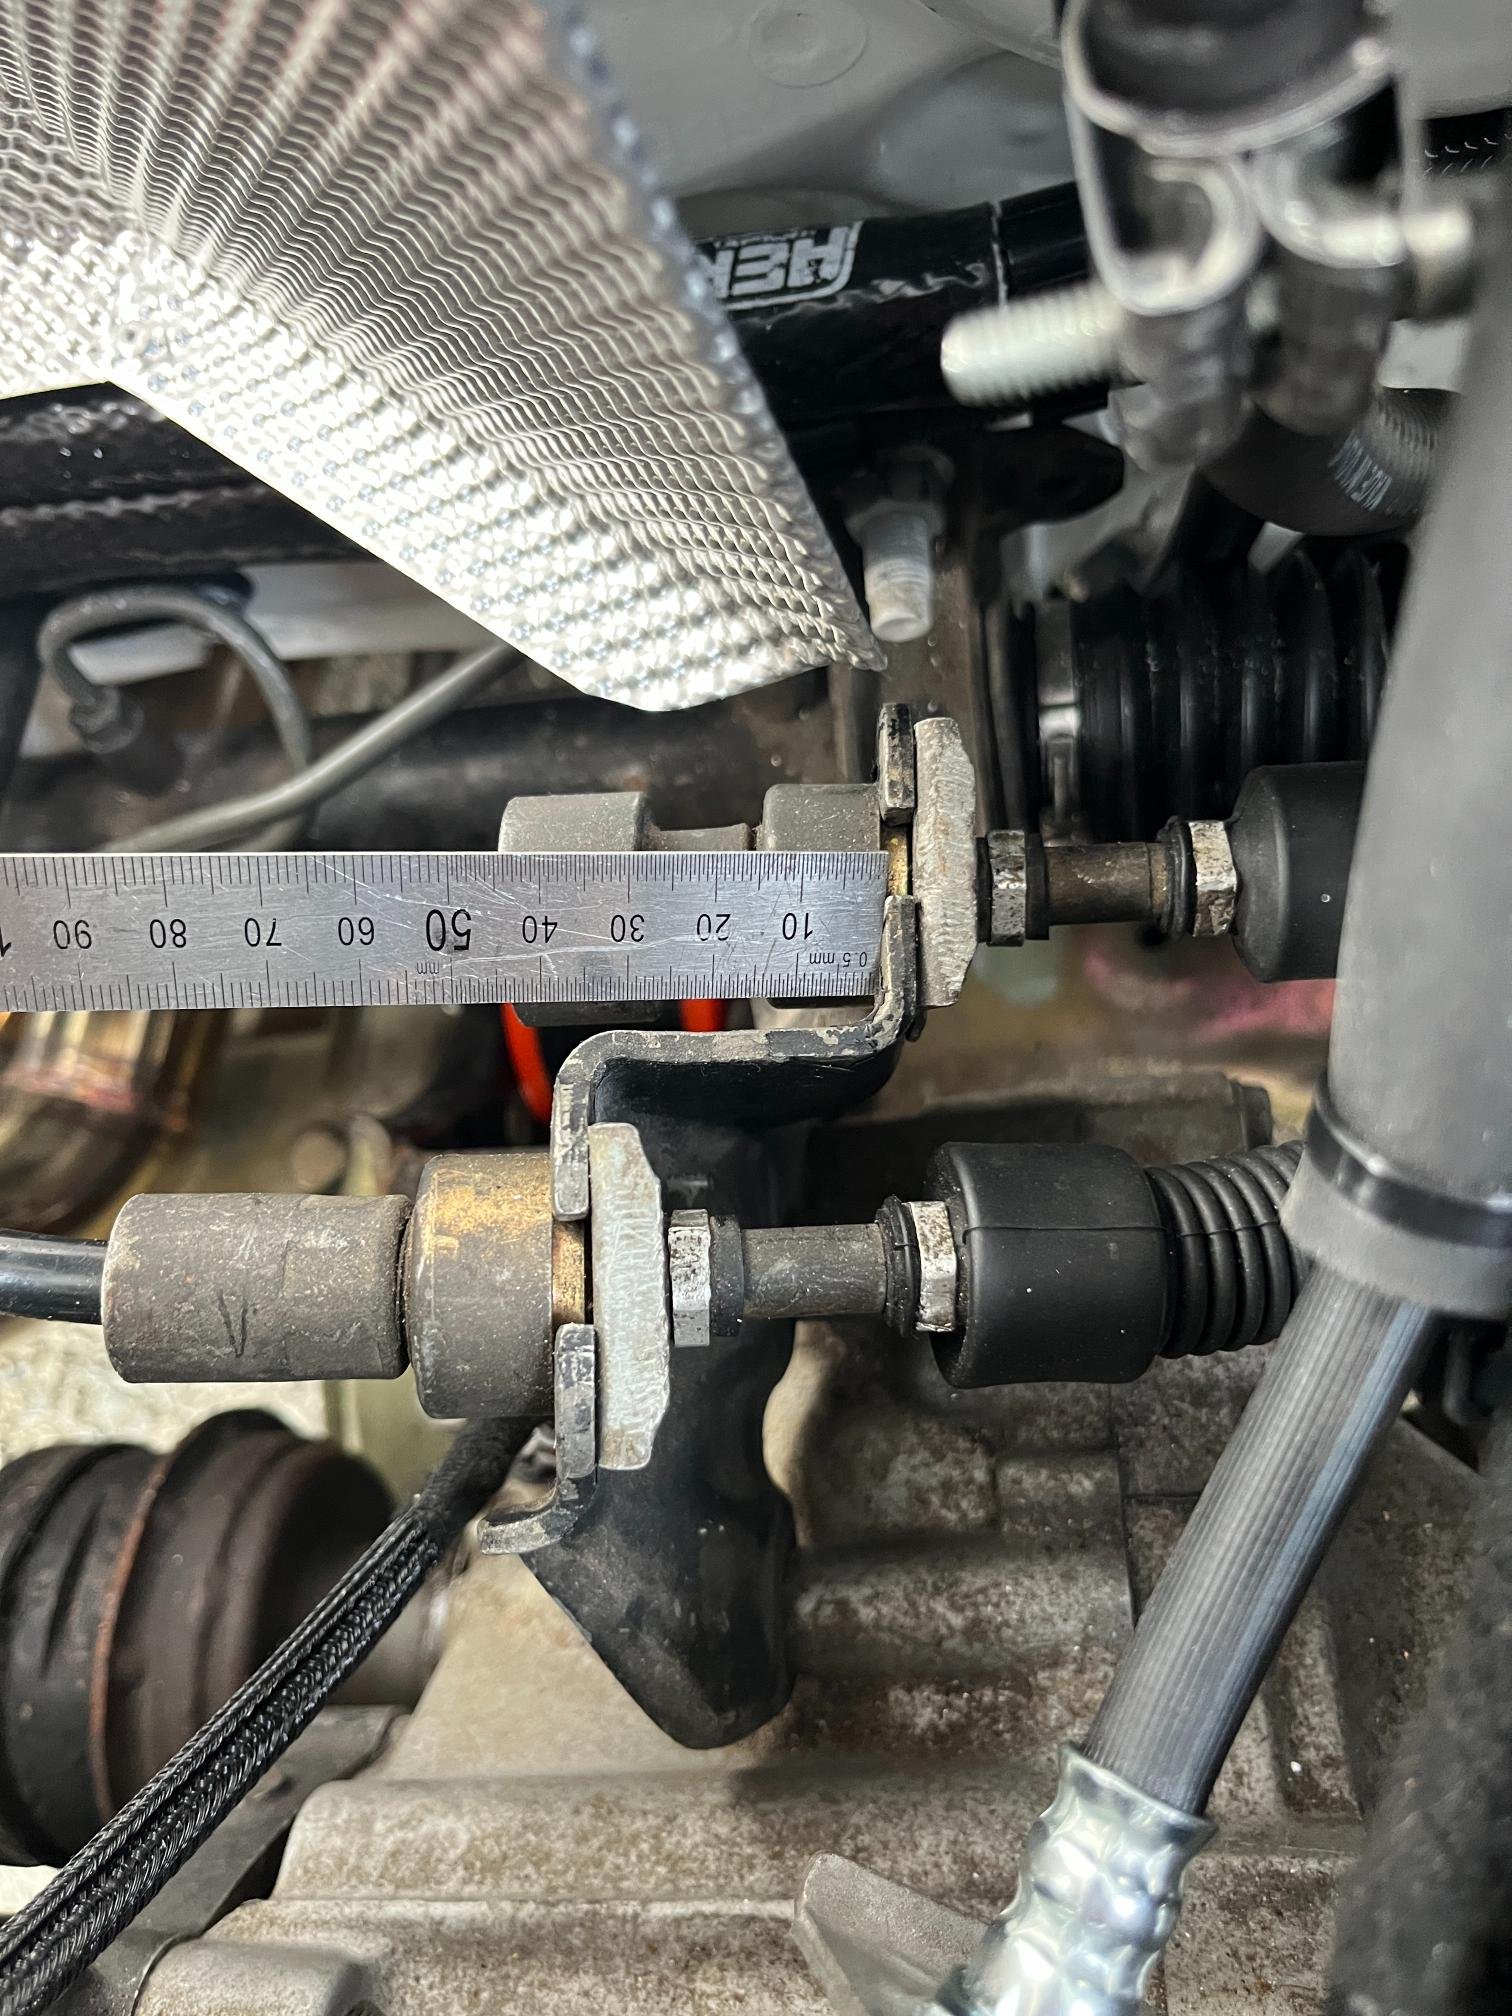
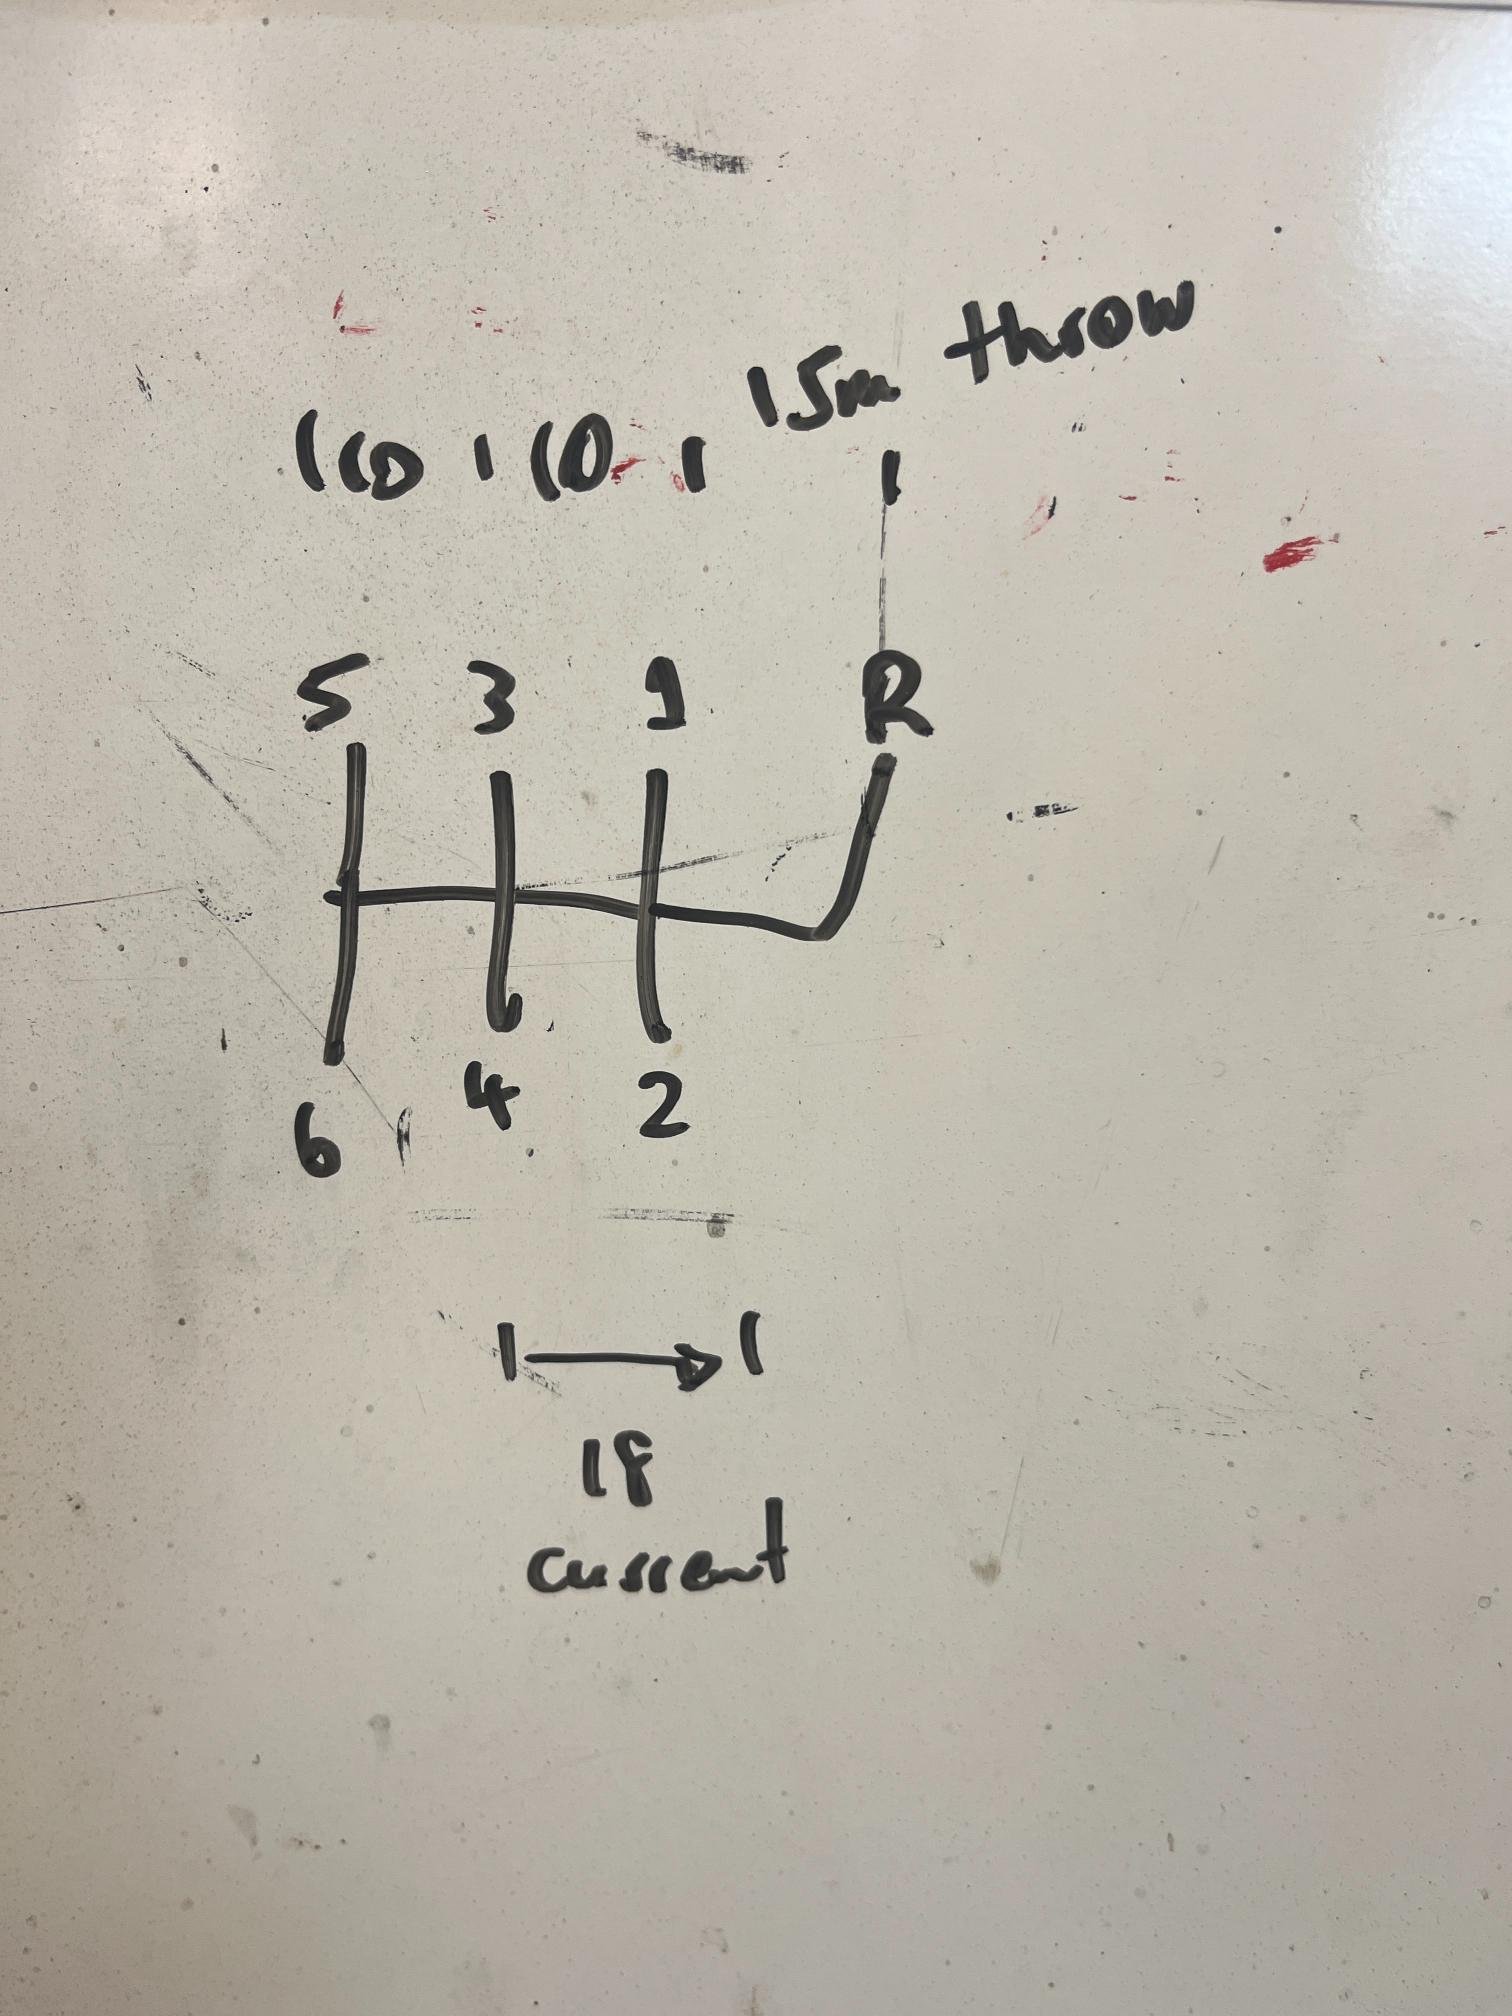
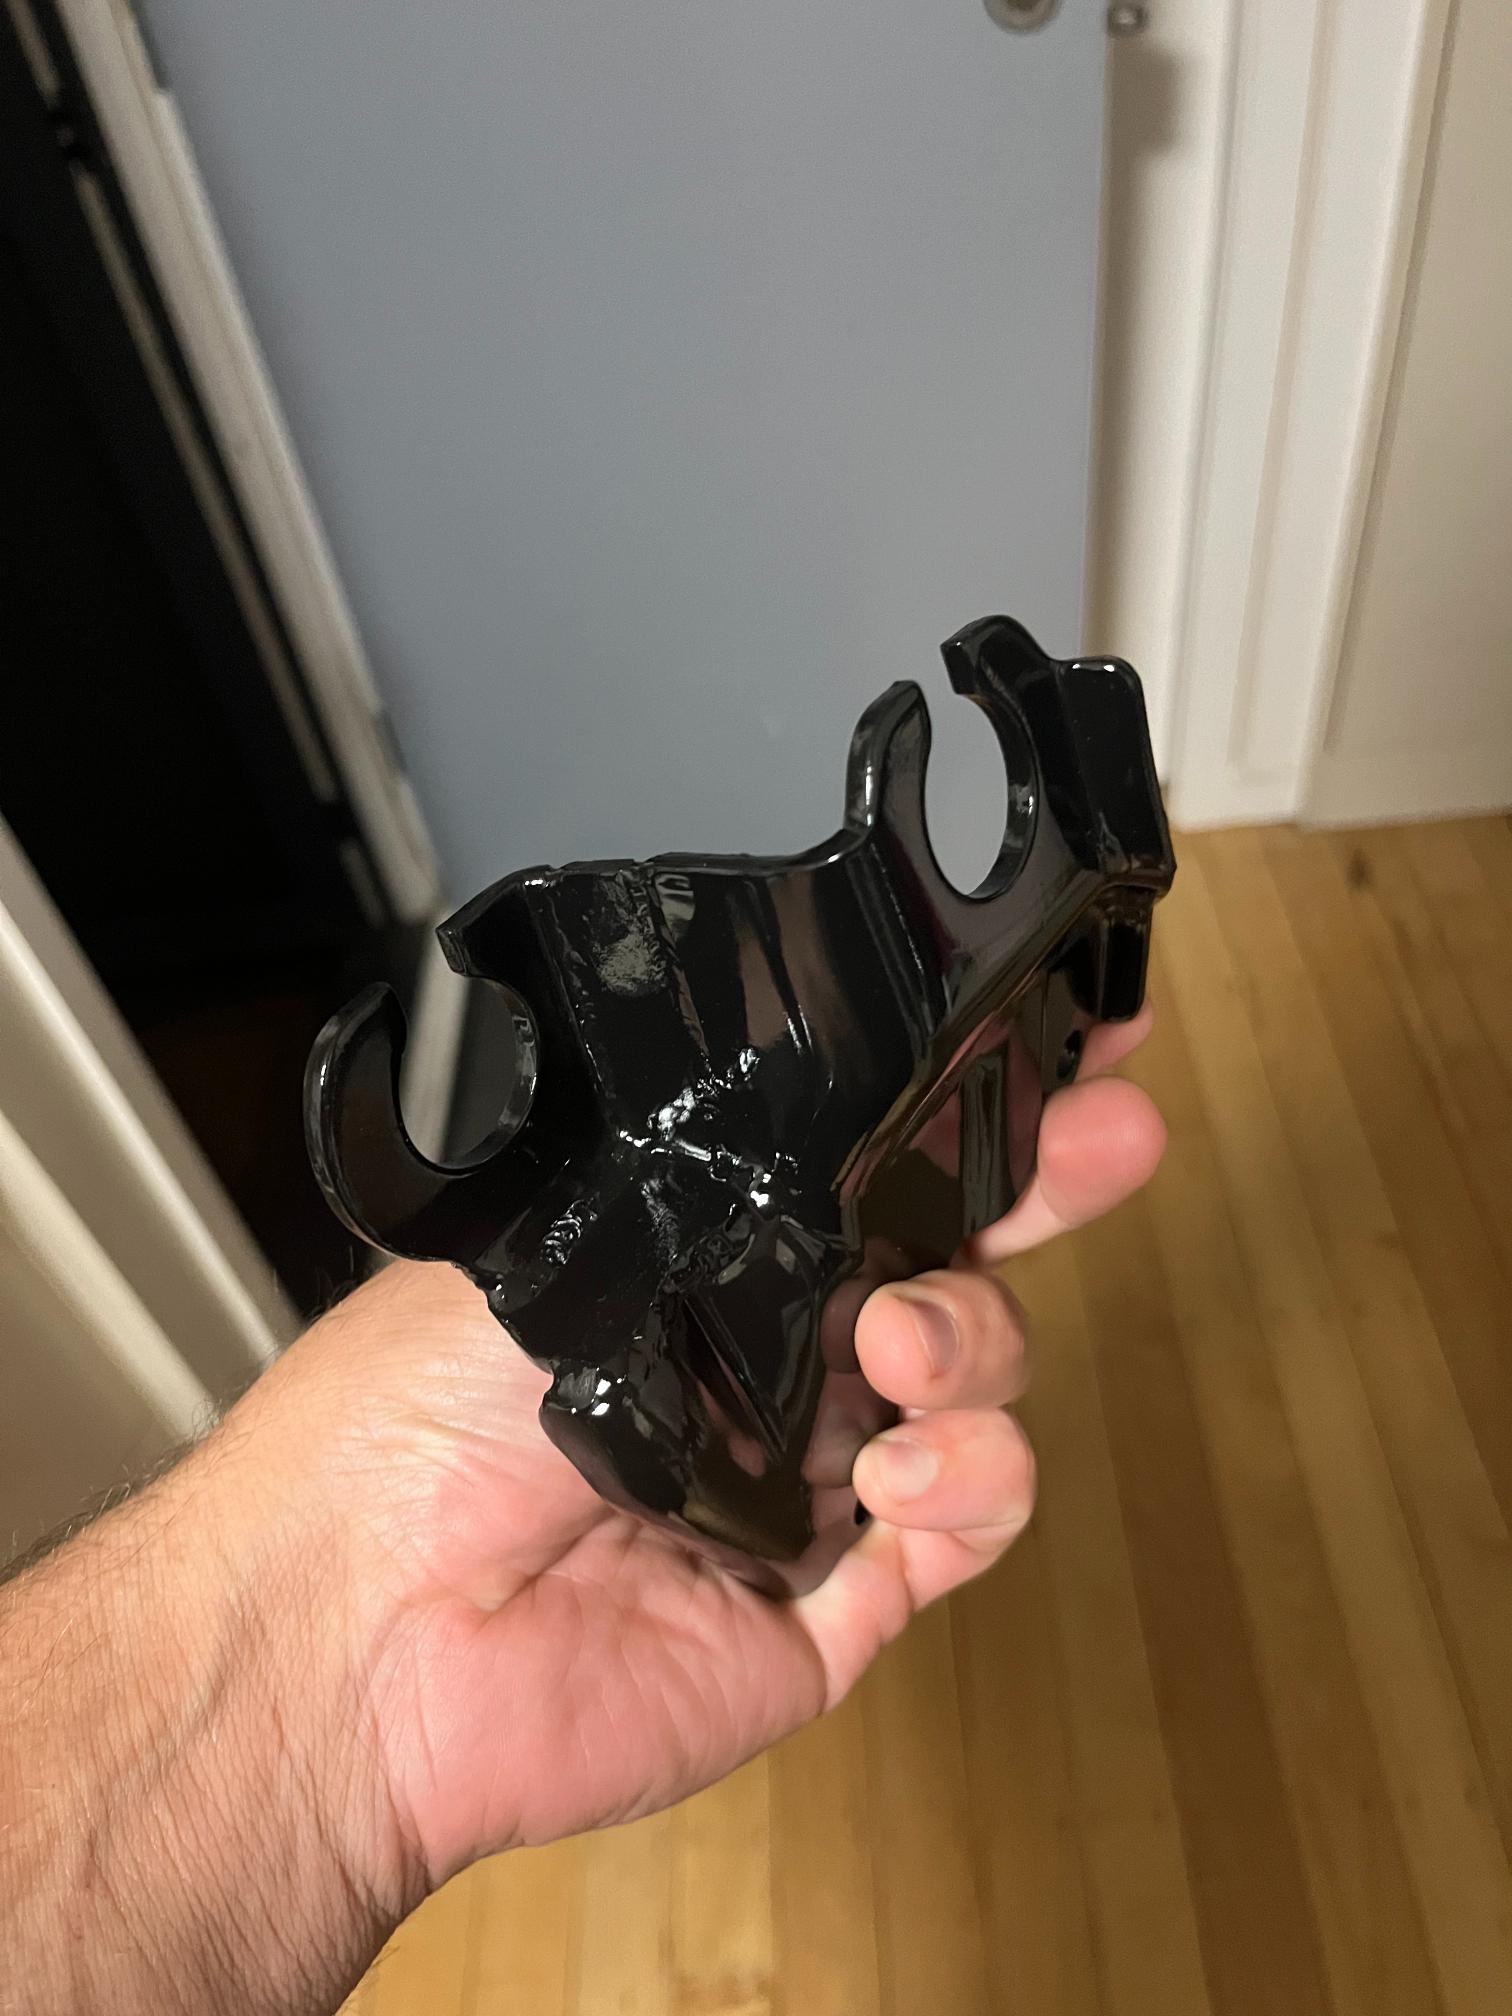
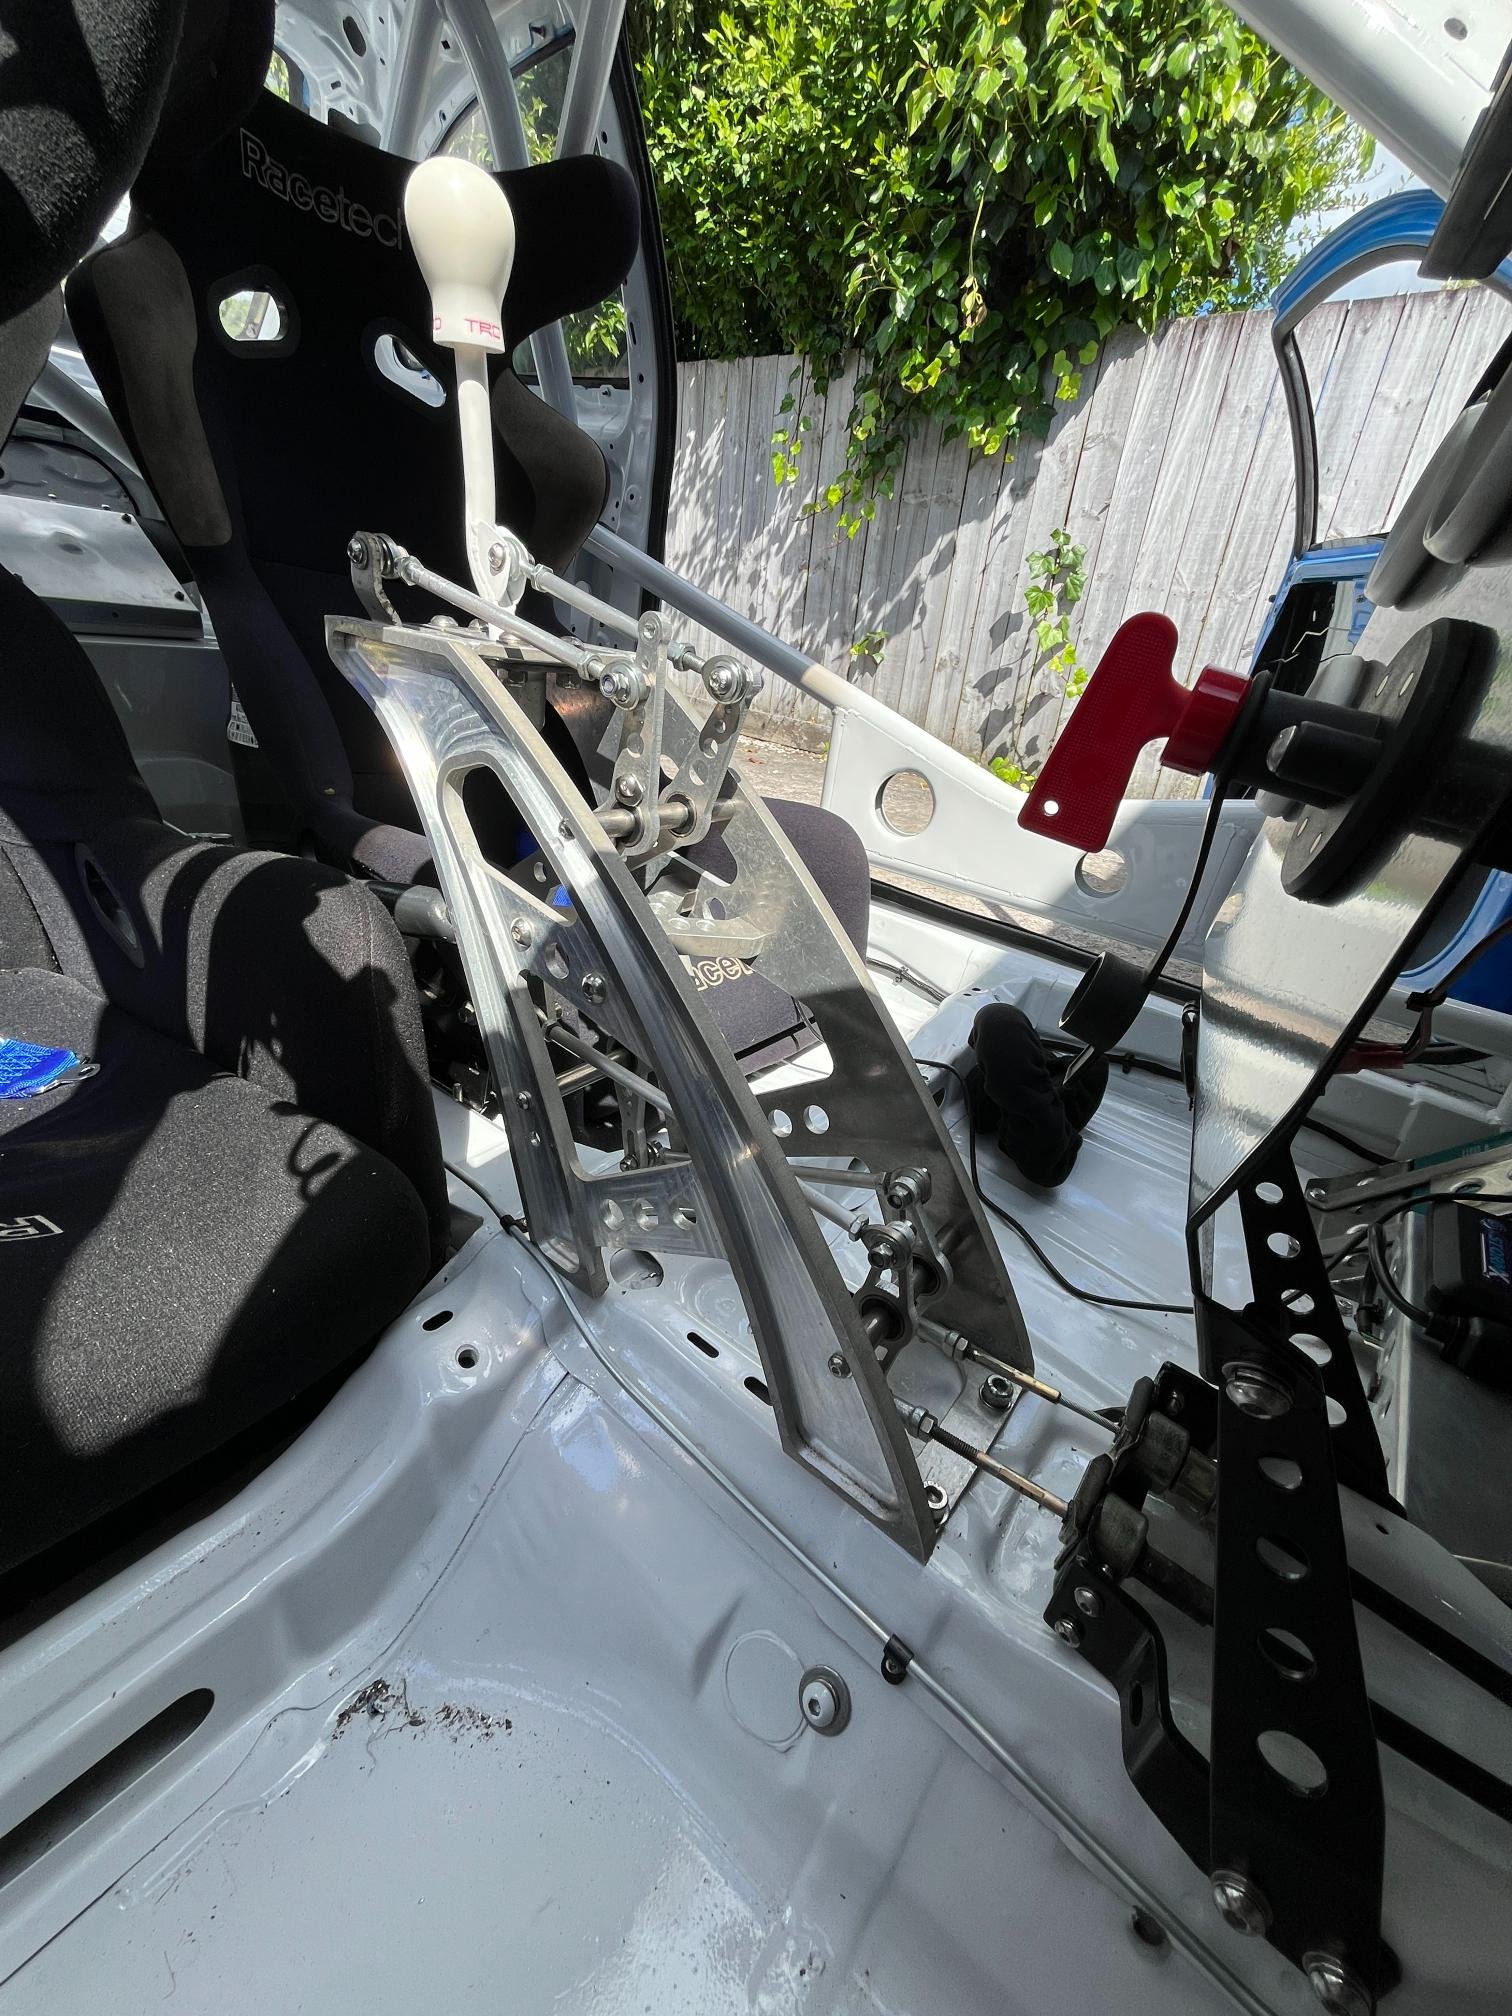
The reverse saga has finally come to an end! So I've been fighting an ongoing battle to figure out the reverse on my custom shifter. Glad to say I've finally got it sorted - although it's been quite a journey. Having to push the car onto the road whenever I want to take it for a quick drive is bloody hard work! First of all, I ended up rebuilding my shifter and swapping the fwd/back & side/side linkages as they have different gain ratios (1.6:1 vs 1:1). This condensed the side/side movement which I was hoping would give me enough movement. It didn't work, although turns out this is the way I had designed it to work in the beginning - somewhere along the way I forgot how to put it together properly. lol. This ruled out the issue being with the shifter throw or angle of linkages etc - provides at least 60mm of output travel without any issues. So I dove into the internet to try look for answers on the gearbox end. Lots of people convert 2zzge's & c60's into 'new' model MRS's, but I found very little info regarding this issue. Mostly due to MRS people being weirdo's and/or not very mechanical.. Reading between the lines of what I found, I decided my issue was the force needed to overcome the reverse lockout spring force. Due to my shifter having a short throw, I believed I didn't have the force to overcome the blockout spring. So @Geophy and I spent an evening removing material from the spring seat, ended up reducing spring pressure by 30% by removing 8mm of pre-load with the use of some handy fish scales. So after this didn't work, I went down the line of trying to figure out if I've got all the right bolt-on bits on my gearbox. It was so long ago I can't remember exactly how I got it and what I may have used from my old C56. Turns out everything was A-OK, apart from my shifter cables. So measured the throw on a factory car which identified the issue Had run out of adjustment on my rod end at the shifter end (reverse needed more 'push') After some investigation, I found the cables were limiting the throw. I think they were from a C52 originally, so no surprises that something about them wasn't right. At this point, the easiest answer (cause replacing the cables is a massive pain!) was to add 20mm to the gearbox end mount - moving the H pattern further along its available 58mm of travel... I went a little more than the 8mm I needed, so I could fine-tune the rest at the shifter end by shortening push rods etc. Also allows for some cable stretch in the future. So end result is that reverse works now and the spacing for rest of the gears is great! Super happy to have a fully functioning gearbox and the shifter actually works fantastic. It's actually very intuitive to use and position is so close to steering wheel. In hindsight, I actually wish I didn't modify the reverse blockout spring as it isn't as heavy as I'd like now. Oh well. Also relieved it isn't a complete fuck up after all the years of effort and thought put into it Best use of skateboard bearings and cheap rod ends I've ever found that's for sure! While I'm waiting for airbox things, car will be pulled apart to finish some stuff off. Won't be making drag day as we've got a wedding that weekend. Kinda nice to have the pressure off to make drag day to be fair. - Powdercoating - Mount harnesses & rollcage padding - Plumb-in Fire extinguisher - Carbon fibre doorcards Hoping to have it ready for dyno and basic trackdays early next year. 2nd child is due early March so push is on to get it pretty well sorted by then.
1 point
-
We went to the MG club's driver training event again (same one from Feb) at Manfield. Most of the same crew turned up and we nabbed the first four bays. I brought tools this time I had been feeling run down so wasn't super looking forward to it, but I knew I should come and would enjoy myself in the end, so I pushed to. I just told myself that I'd take it easy for both myself and the car's sake. The day of the event I woke up with a solid headache which didn't bode well, however it slowly resolved itself over the day. Girlface went out first and had some fun, just in case I broke the car again. Then I went out, with my Ek9 mate in the passenger seat, who I'm very glad who was there - he's a great track buddy and a good teacher. By the end of the first session I was feeling more confident and much better at hitting lines. He then had a go with me as a passenger which was tons of fun and great to see how hard the car can really be pushed, also great to see that my lines were getting pretty close to his. Girlface also got a run with him and did great. I was terrible at capturing any video or photos so this is pretty much all I have. :\ https://i.imgur.com/XHakpcy.mp4 We definitely took the day easy and I'm glad we did. The weather was great, the car was great, we had awesome runs and a bunch of people from Feb wandered over and congratulated us on getting the car up and running again. It was the most ideal way to validate our work returning the car back to health, and to overwrite our previous track day's experience with nice new happy memories. It turns out we had also won car of the day thanks to the combination of our car and story (though we had left by 4pm and missed the organiser by like 30 minutes). He mailed us some swag. He had no Alto stickers but I forgive him for that. Next time we'll can get some lap timing going and go a little harder. edit: more pix from group1 point
-
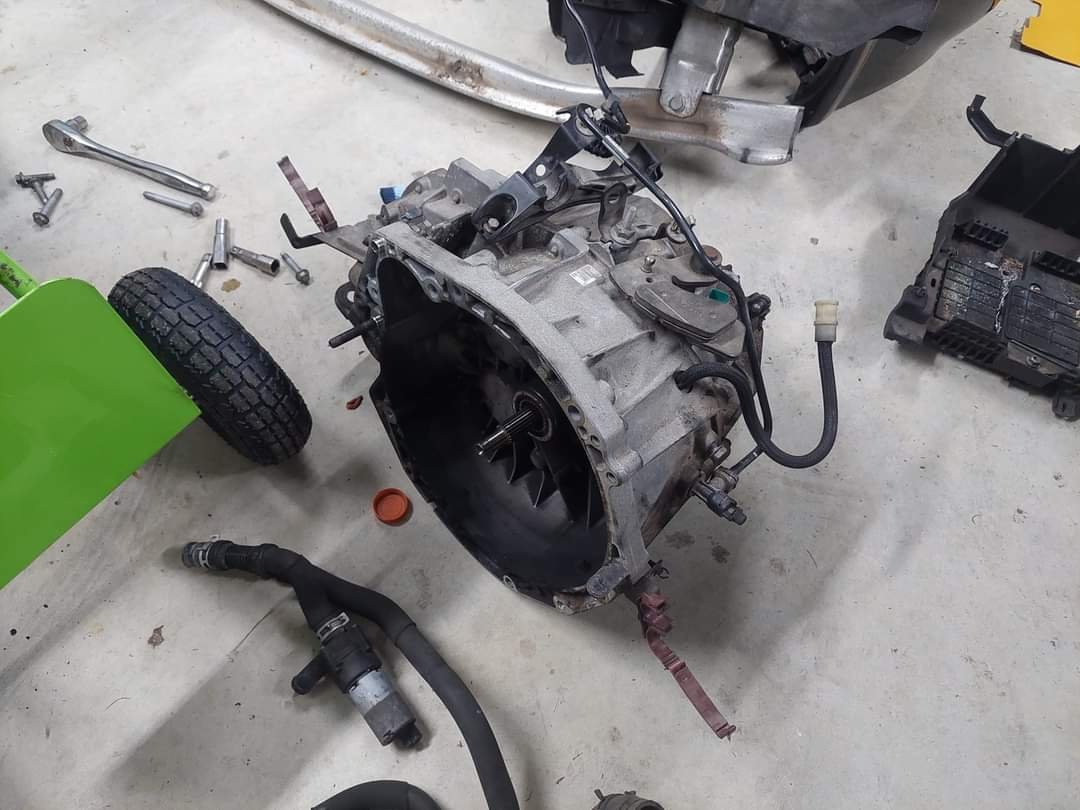
Not a proper update. Haven't really had time to work on this, however I got the wheels and brakes off. LH brake caliper taper torx retainer bolt broke my torx key which was fun. Then it stripped o the other side... Also the battery tray wanted to fight me as the mount torx caps crew stripped so I had to drill it out. Don't have time for this nonsense, have enough of these issues at work playing with machinery haha. Also split the gearbox off the 265 engine to return to the bloke I bought it off. Managed to line up a few parts for sale off the 265 so hopefully the engine will half pay for itself or more which would be a win. Chur.
1 point
-
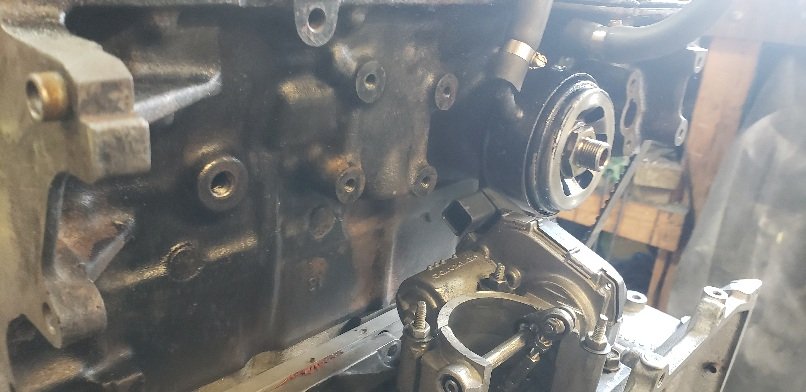
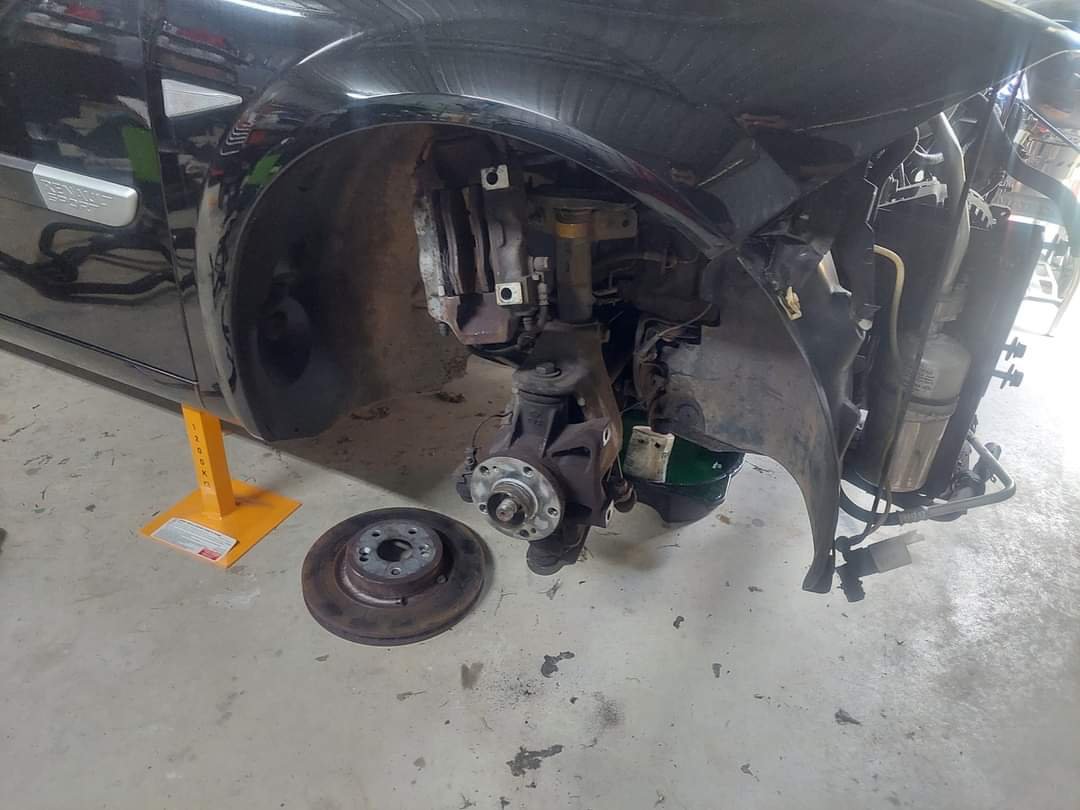
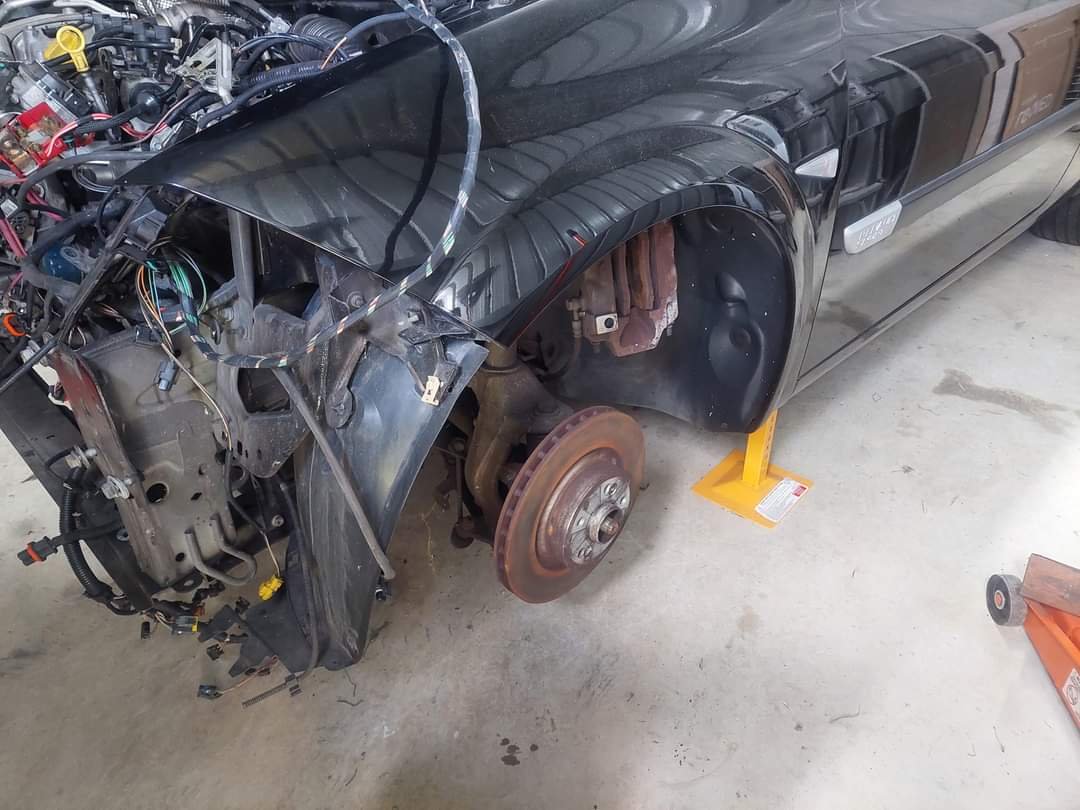
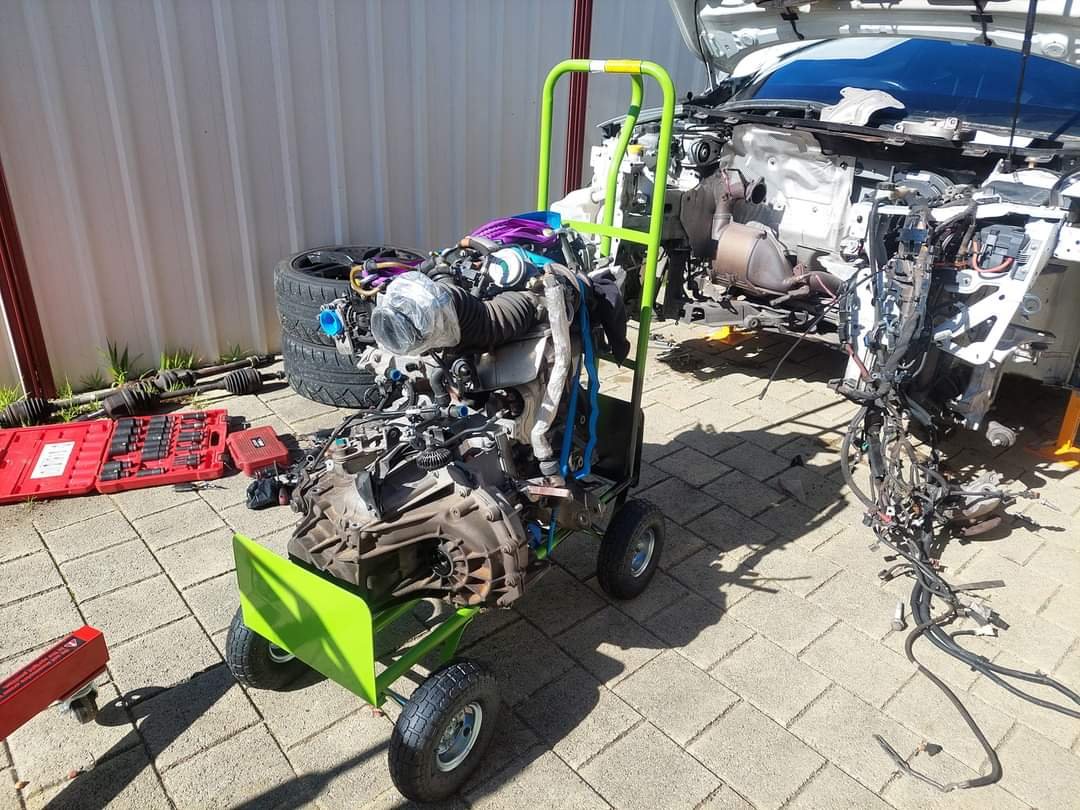
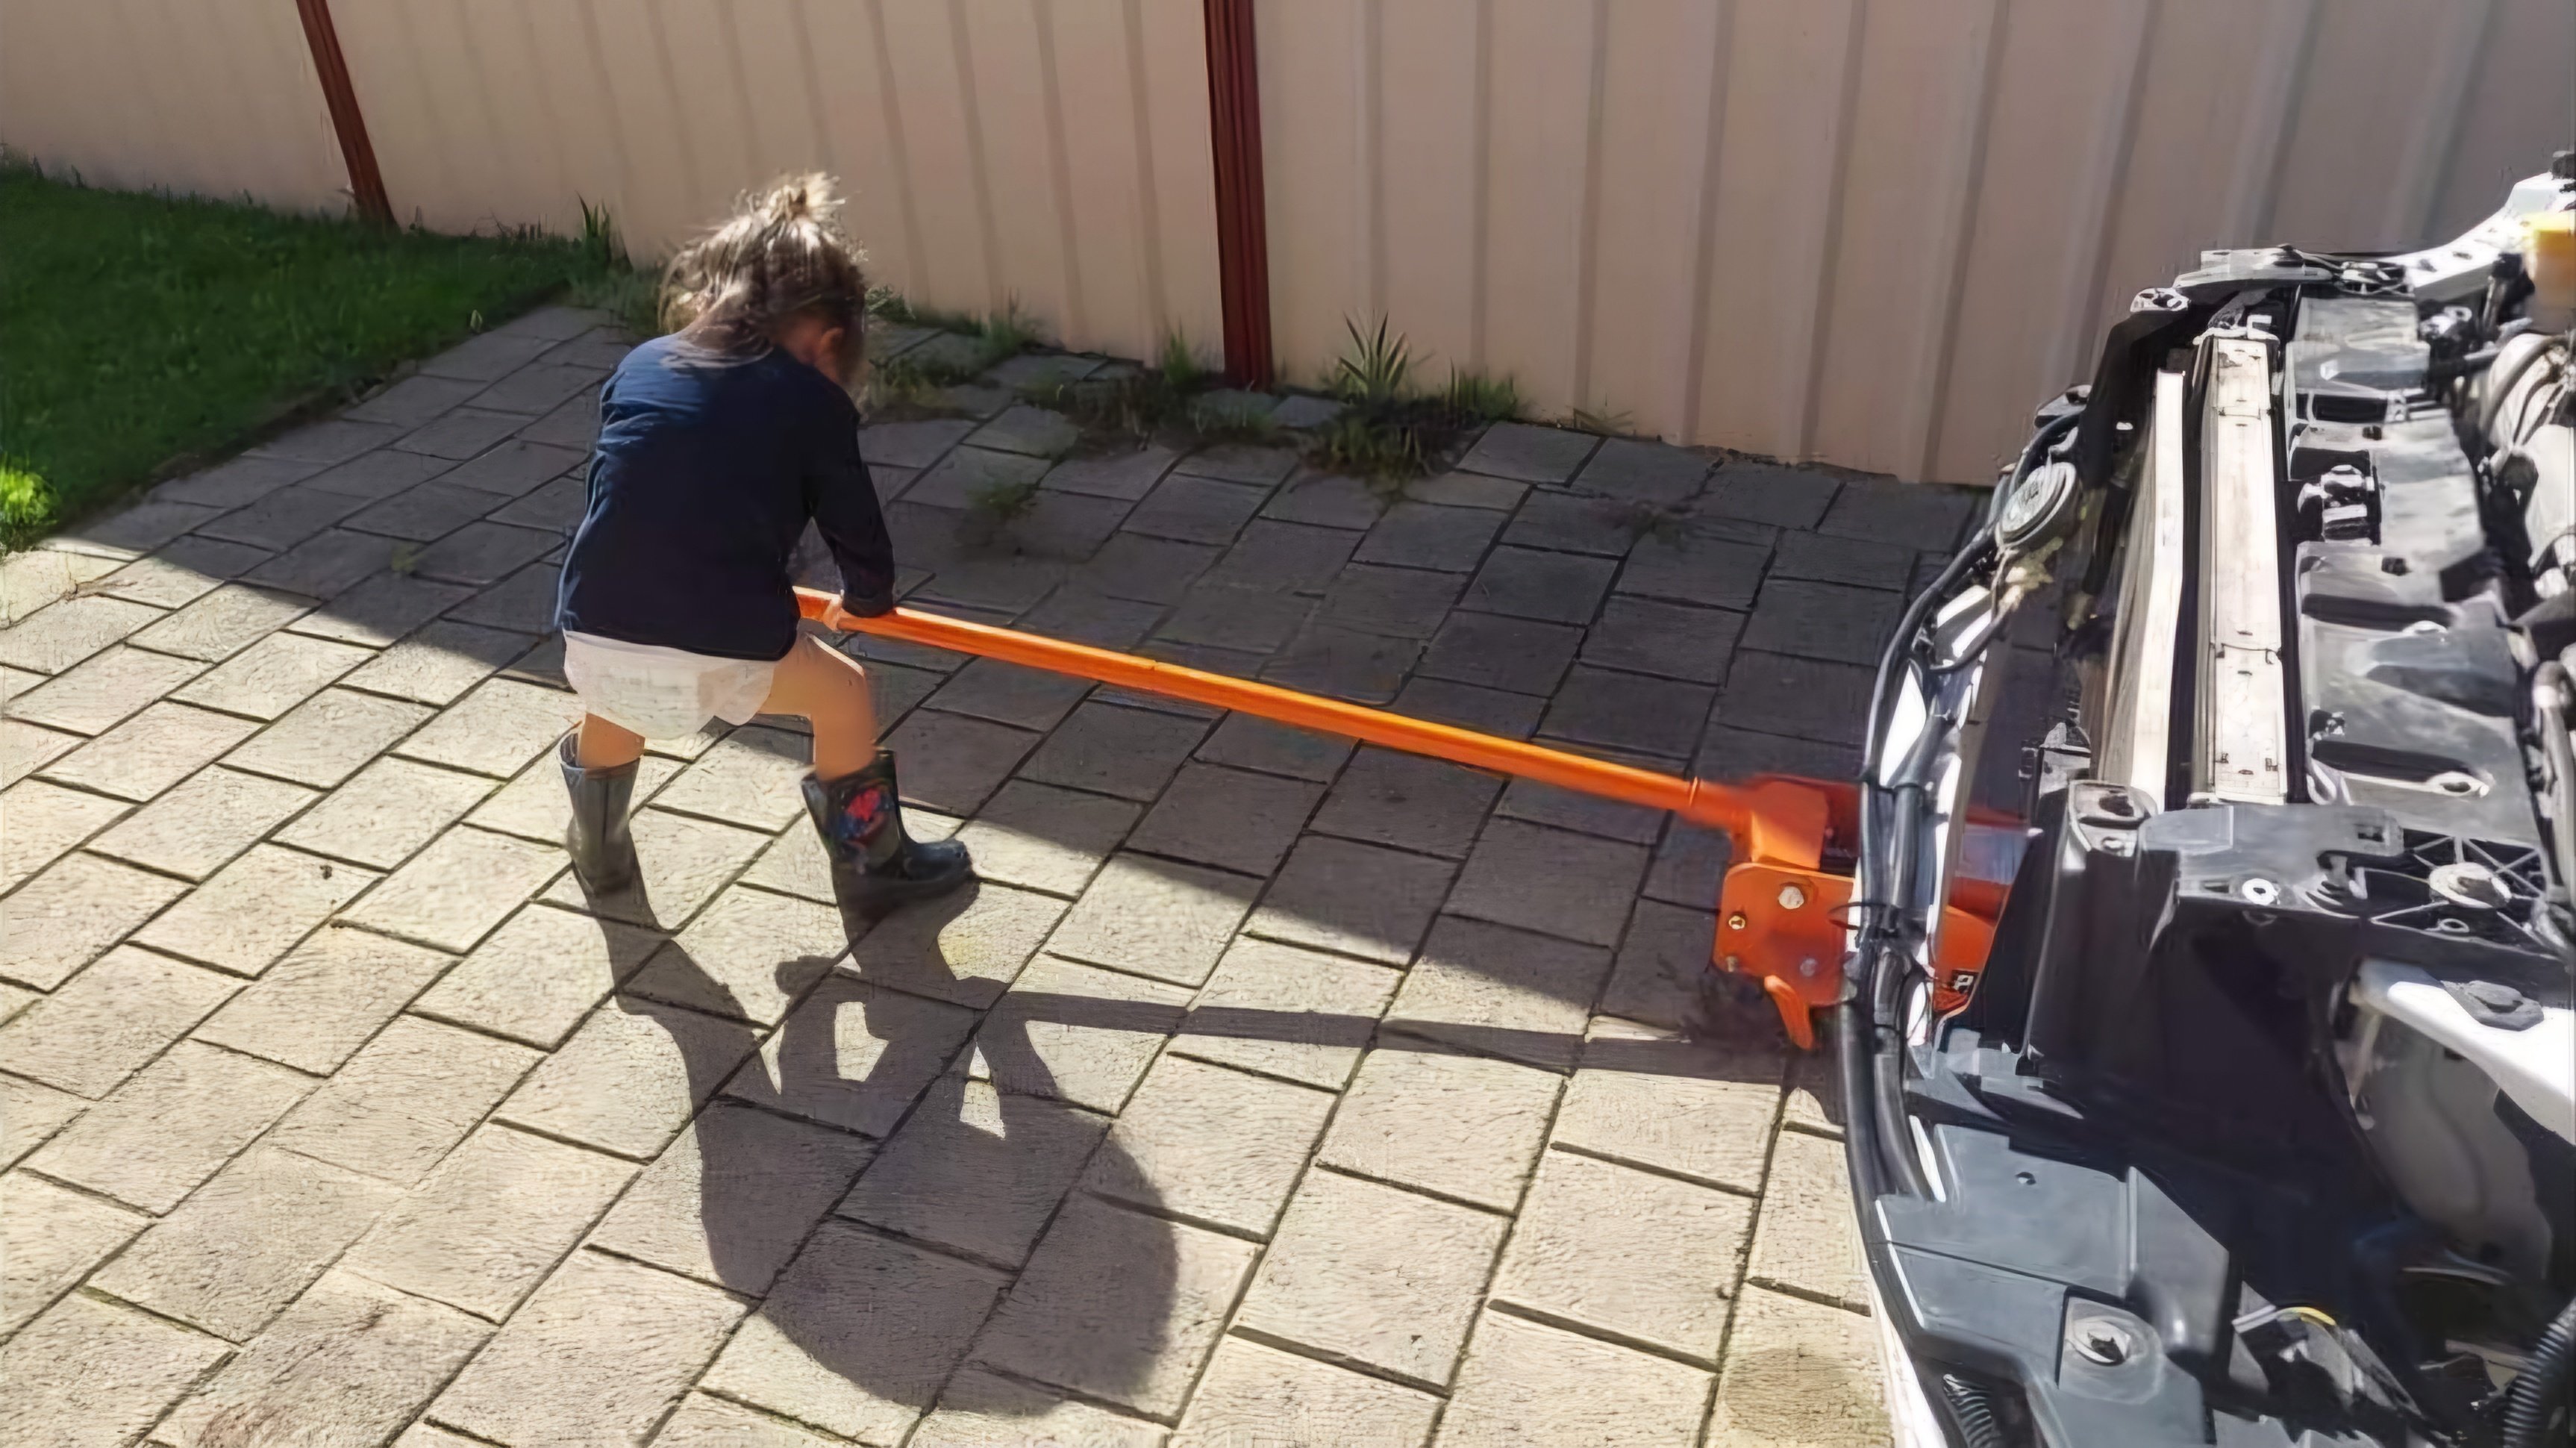
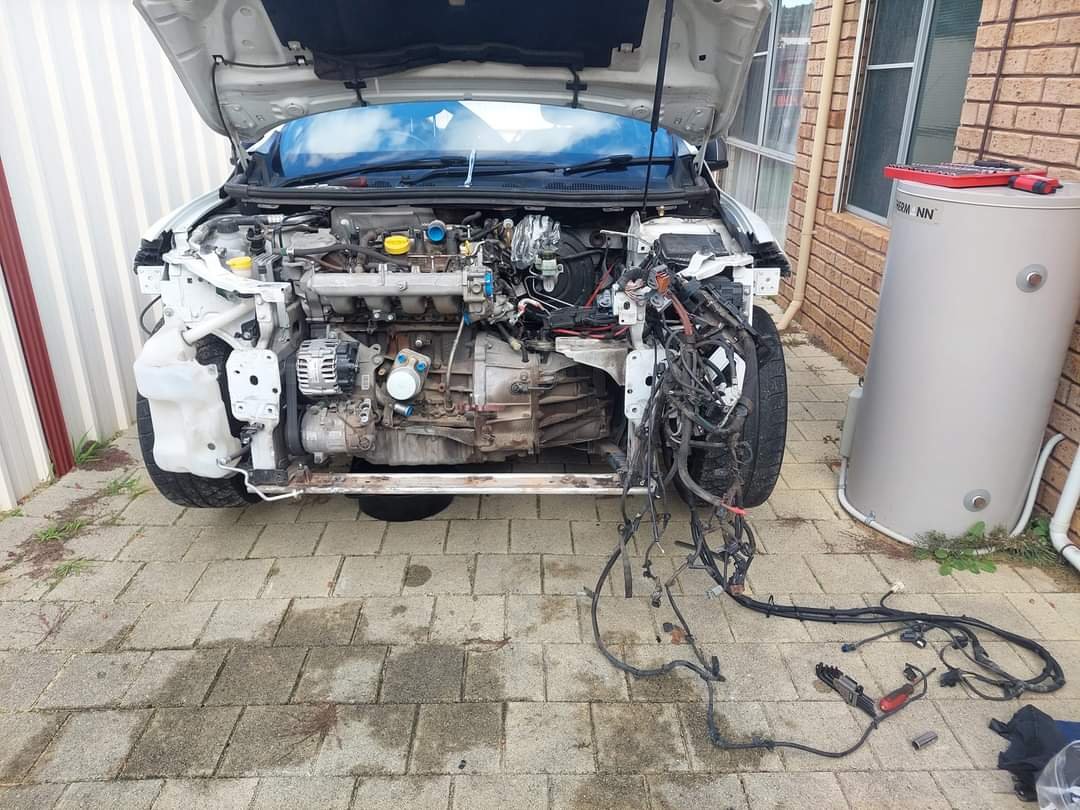
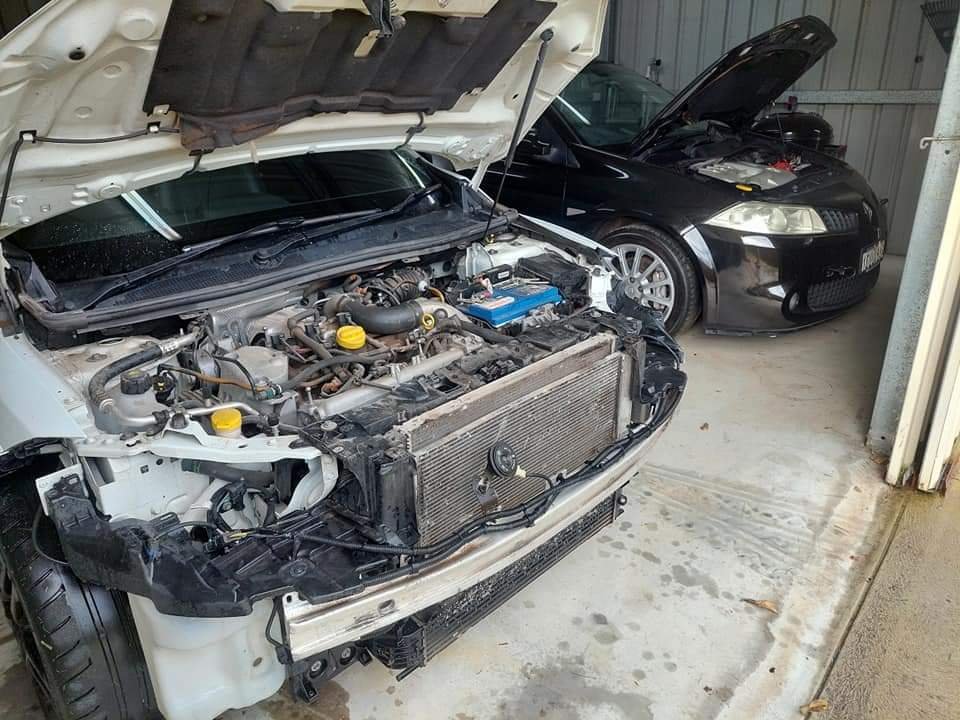
Engine out. What a prick trying to remove the halfshafts. Ended up pretty much unbolting the whole knuckle & strut and everything connected as the lca was being a bitch. Of course half the exhaust fasteners were seized as well, couldn't unbolt it from the bottom side of the cat, so ended up managing to remove it from the top. Out it came though. I will need to grind off one of the cat lower flange studs though. Trolley worked a treat. Had to lift and shuffle it to turn it due to no castor's but it was easy enough. Length was perfect for both the box and engine as well. I might try and do some work during the evening this week but we'll see what happens. Chur.
1 point
-
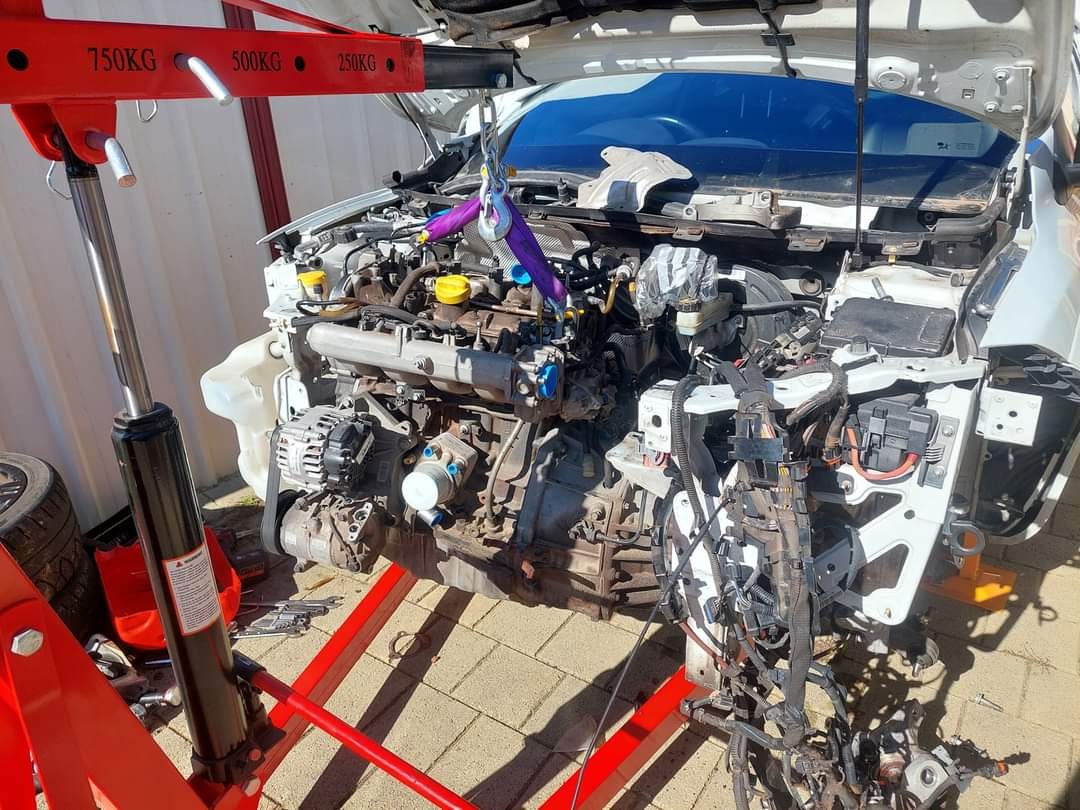
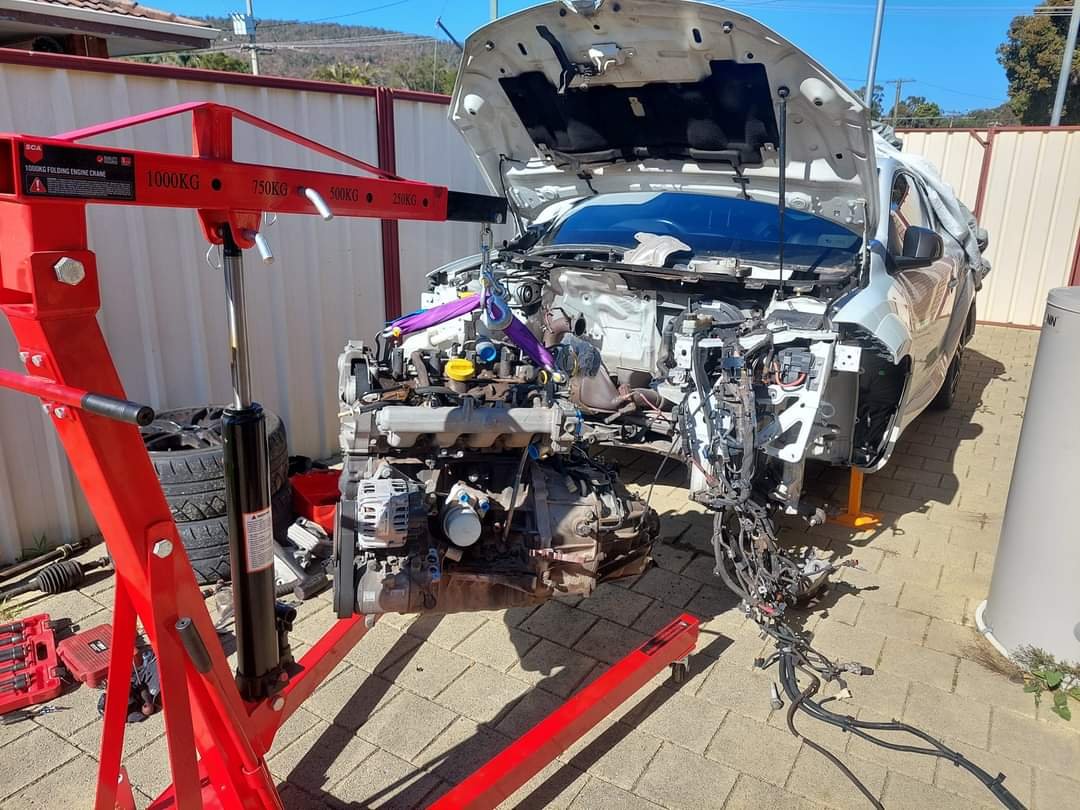
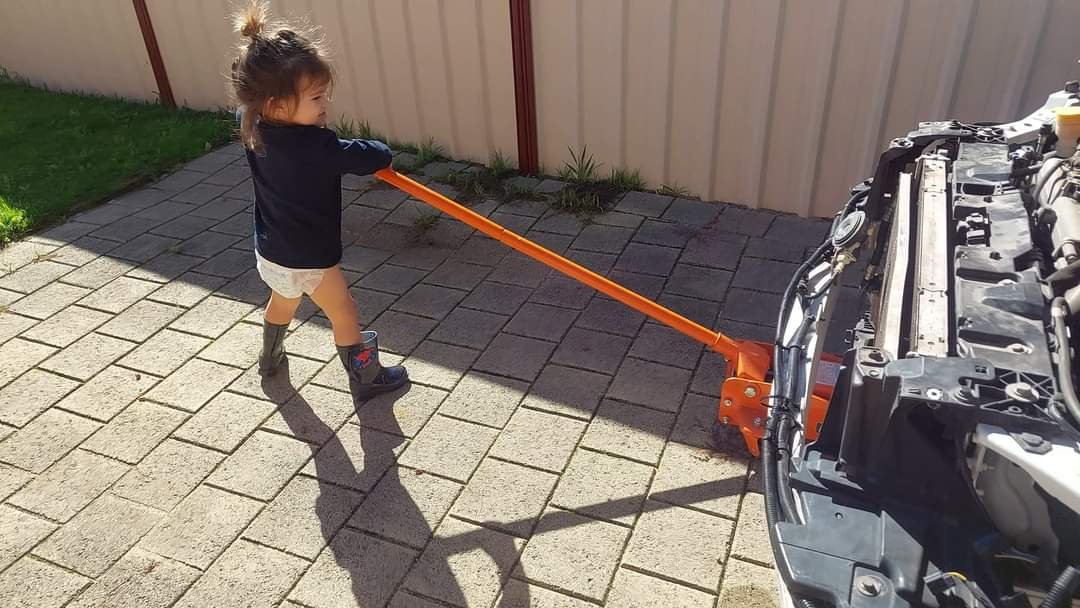
Managed to sneak in a couple hours today. Got the lacky to set her up... Then proceeded to start the strip down for engine and gearbox removal. A little bit more time and I'll have the donk out. Just need to disconnect the fuel lines, clutch line, exhaust and halfshafts. Hopefully time allows next weekend. Chur.
1 point
-
So it turns out when I ordered my $1 crank shaft key, it gummed the works up for all my other parts and my order sat in limbo for almost 2 months before someone figured it out. The way they fixed it was to remove the key order so... I guess that hand-crafted key is the end of that story. I was really annoyed with the export broker but after hearing it explained, I have way too much empathy and understanding for that kind of delay and how easily that can happen when you're understaffed. So whatever. I'll be avoiding small orders from them in the future, or at least being static in what I order and not trying to tack things on. Anyway - this is what I got :). The recent sunny days have made installing these possible. First the accessory belt. Our old belt was sad and had a notch. We'd also gotten a bit splashy with the turbo oil while re-assembling, and the A/C pump had a hell of a squeal at times. I got the old one off okay - access isn't amazing - and eventually figured out the mechanism for adjusting the belt, which I'd still not entirely grasped even though I put the damn thing back on the engine when rebuilding it. I also gave every pulley a thorough spray and wipe down with brake cleaner to get rid of any oil residue. Now, this guy. This guy's the adjustment bolt for the belt. The idler pulley assembly's two bolts are un-torqued, then the adjustment bolt can be used to move the idler pulley assembly to make the belt taught before the bolts are re-torqued to actually hold it in that position. In my infinite wisdom I removed the adjustment bolt entirely to help remove the belt, not realising that instead of fighting just the new belt, I now had to fight the belt and thread a bolt that really doesn't want to be threaded in an extremely tight space. When I eventually managed to get it to grab, it became obvious quickly that I'd cross threaded it. I tried a bunch of stuff to salvage the situation but eventually resigned myself to the fact that I'd have to start over. I took the belt off, took the adjustment bracket off and thread repaired them, then re-attached the bracket and bolt with no belt on. Then I put the mahi into getting that thing onto the idler with the help of a Girlface and a trim tool, and finally it was on. The car is turned on for a hot couple of seconds to distribute the tension, then the adjustment screw is tightened until tension is all happy. The idler bracket bolts are re-torqued to hold it all where it should be. Finally, the wheel well trim goes back on to prevent it from getting splashed with road shite. The belt has a minor amount of deflection when pressed until fingies hurt and the shortest run isn't quite able to turn 45 degrees with fingie pressure alone. There's no squealing anymore and everything seems to be running happily. Job done! The stereo surround. As a reminder, the previous owner got happy with a craft knife to make their previous system fit, and to hide the damage our stereo sits proud. Suzuki OEM parts are cheap as chips so I got a new surround. Of course, the previous owner has copper tape on the inside of this thing... The old vents are popped out and swapped into the new surround with just a little elbow grease and some care taken with where the rotating tab is aligned. The stereo's mounting bolts can then be moved in a notch. And now I saw why the previous owner hacked theirs up. The surround didn't clear the stereo at all, and the walls are quite stiff with backing structure. I thought about how to rectify this. A cleaner cut using a dremel or just being careful with a scoring knife? Corner relief cuts? Remove the backing structure to make it more pliable? Before I made any permanent changes, I first simply tackled it with a trim tool and patience - and fortunately, this worked. The sides had just enough give (with a lot of pressure) to be forced around the facia of the stereo. Now it sits nice and recessed like it should. This also makes it easier to steady your hand on the trim while you use the touch screen. Yup, it's meant to be two different colours of trim. I think. The mirror covers and escutcheons (new word of the day) help tie the black in with the rest of the car as accents. The window covers do too, though I would like it if they were tinted a little darker. But they should still help. The mirror covers come off much easier than you'd think fortunately; simply jab a trim tool between the indicator light and the lower trim, and that gives access to get a trim tool up into the clips for the covers. Yup - copper tape. How fucking deep did this last owner go??? Assembly is just as easy as it sounds. Here's a before and after of the other side. Next is the escutcheons. I wasn't expecting them to be quite so glossy / carbonfibrey. They're simple to install, but the element of positioning them with extremely sticky glue tape makes it a bit stressful. Annoyingly, I got given four of them - aftermarket escutcheons include one for the boot. I think the look is okay, but I would have preferred if they weren't so glossy. They don't have as much of the desired effect of bringing the black accents across the car. Here's some good angles. I might follow these up with some kind of black vinyl covers or something, and DIY the boot escutcheon at the same time. Penultimate job is to install the window covers. Fortunately we found some guy online who had some reference photos to go along with our shitty translated printouts of the installation manual. First, remove the rubber door seals from the top and thoroughly clean the areas and polish the ceramic coating away before isoproping it to total cleanliness. They went on without a hitch, but as with all things of this nature, sticky glue + positioning is stressful. But we absolutely nailed it first try for all four windows. Finally, I wanted to install a foot rest. Kelvinator has one in his Alto and I never knew I needed it. My foot barely fits between the pedal and the tunnel and I often find myself flicking the clutch pedal when I go to rest my foot. Amazon JP delivered the same model to me in two fucking days. First we start with a nice vacuumed carpet sans-mat. The foot rest uses one factory nut and requires two holes to be drilled. The carpet is peeled back to find the factory nut so that I can poke a hole through it. Then the pedal is temporarily installed using this hole to locate it. It's pretty fiddly with an allen key here. Wish I had those round-ended ones. It's very red. The other two holes are hole-punched through to locate them through the carpet, then the carpet is peeled back. It turns out that this sound deadening and white padding is not typical, and is likely from the batshit insane previous owner. A quick drill, debur and a dab of rust converter to oxidise and protect the bare metal and we're ready for my first ever rivnutting. Yes, I'm just going to go through the sound deadening. A follow-up re-drill, re-debur and re-schmoo after I realise that the M6 rivnuts require larger holes than M6 bolts do, and I nut into my car. These things are so cool! I cut some of the padded cloth away, refit the carpet and stabbed two new holes through it to install the final two bolts. Et viola! It's well designed, and allows for the mat to be tucked in under it. Did I mention how red it is? Monster also make a clutch pedal kit which moves it over a tad to make for a better position in terms of tunnel clearance, but it's a bit spenny so I'll leave it alone for now. So yeah, that's where we're at! Aesthetically I think the only big thing left is that I'd like to replace the rims but that'll have to wait.1 point
-
Man I've left this too long. Back when we bought the car, one of the first things we did was order a wang we saw while in Japan that we loved. We joogled around and just... couldn't find anything that was as cool. To us. Mileage might vary. It arrived as unpainted FRP and so needed some paint. It also had a lot of rough-finished edges and pin holes that needed sealing. Sanding them flat also reveals more holes the more you sand... :X So, let's see how well I can putty. ... not very well. Or maybe it's normal to miss a bunch of holes / create more while sanding the putty flat. More putty, more sanding, more holes... The rest of it gets sanded too to get nice and flat for paint. At some point I had enough pinhole-chasing / was happy I'd gotten them all and went in for the primer, some durepox, which should work happily with fibreglass etc. This disabused me of my belief I'd gotten all the holes. More putty, more sanding, more paint... More holes... And one of the sheets got free in the breeze and landed on the part... But eventually, I arrived at a nice primed and hole-less piece. I was originally suspending it from the ceiling but I think that made me a bit less likely to get enough on the trailing edge of the wing, so I instead constructed an internal mount using bunched up cardboard. I opted for 1K base and 2K clear, apparently there's no issue with this set-up. No issues at all. It came out alright, but very orange peely. I'd also slightly under-done one corner because of how I'd mounted it; I guess I just suck at mentally mapping where to spray from lower angles. Next up: wet sanding while the 2K was not fully cured. Holy shit I'm glad I didn't wait any longer because this stuff is hard to sand. I started with high grits but moved down eventually to 1500 then 1000 just to be able to make progress on the large sections. However, disaster struck on the edges: I blasted through to the basecoat, and even the primer in a couple of areas. I think I didn't apply enough clear coat to the edges, even though it felt like I'd over-done it on the clear at the time. Additionally, even with buttloads of effort, I really struggled to get down to the deepest valleys in the clear. I didn't want to go too hard seeing how easy it was to blast through the edges, yet somehow the main faces took low grits like an absolute champ without getting totally flat. The wet sanding process sucks as well as it has to be totally dried off with towels and an air gun to be able to see how I was progressing. And because it's so easy to go overboard, it has to be done often. As my results unfurled, that just made me more and more paranoid (and upset). It might be hard to see in these pics. Then my car blew up. I decided I'd get back into it eventually and either try and touch up the exposed base/primer and see how it looked, and if it looked really bad, just re-do it all again. But for the time being, the engine rebuild occupied my brain space. ~~~ Fast forward to a working car and I'd internalised the value of "just because I can do it with lots of effort, doesn't mean I should always do it". I really didn't enjoy the process on this wing, and I was dreading what the vortex generators would be like to wet sand with all their hard edges. I also wanted to broaden my horizons re: paint people, so I took the lot to a local shop and agreed on a reasonable price. They ran into trouble re-spraying it: apparently, the base's 1K solvents reacted with the previously-applied 2K clear and made it all bubbly and strange. In the end they used their own 2K base and got it looking hot, though the vortex generators have some texture to them if you look close enough. No pic of that so here's one with the old spoiler. They also told me that it all looked pretty good prep-wise, and that the orange peel was likely because I didn't use enough thinner. I'd used the lower end of what the tin recommended, so I guess that's a lesson, experiment before committing. The old spoiler had two bolts plus a lot of very strong glue keeping it on, and this glue gave us a hell of a workout getting rid of it. But eventually we had dry-fitted the spoiler enough times to be mentally psyched enough to apply tape and get it on for-realsies. The kit came with a bunch of double-sided glue tape and two bolts to fasten to the captive nuts set inside the spoiler. This was teeth-gritting. Then the vortex generators.... We did pretty well. A couple of corners on the spoiler weren't perfectly seated against the body likely due to miniscule misalignment while positioning, but some gentle clamping overnight sorted that out. It makes us laugh every time we see it. It's so stupid and cool.1 point
-
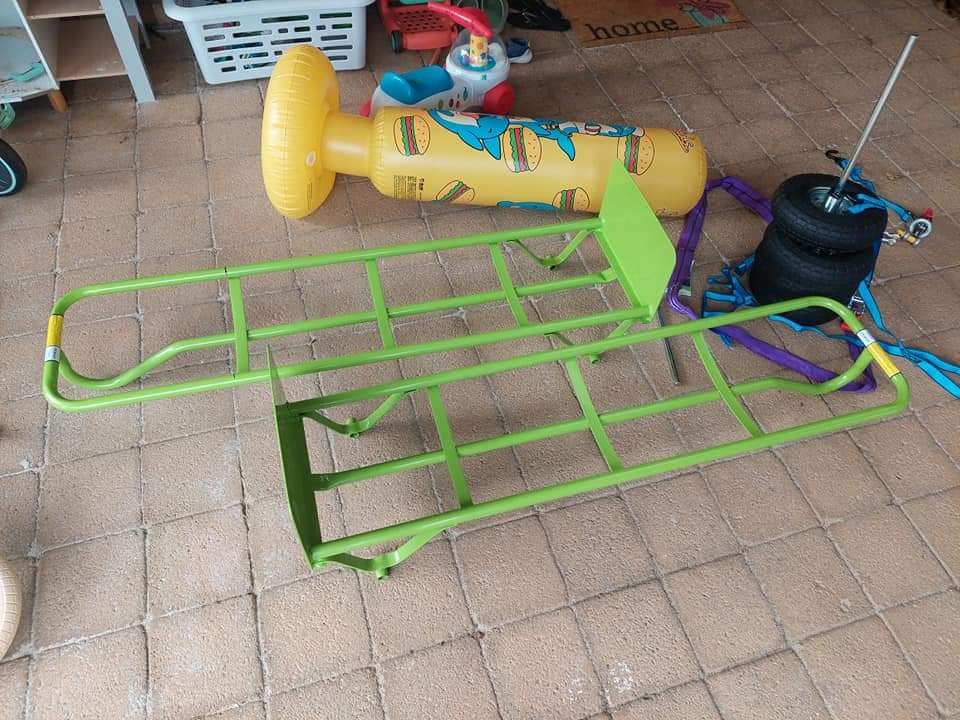
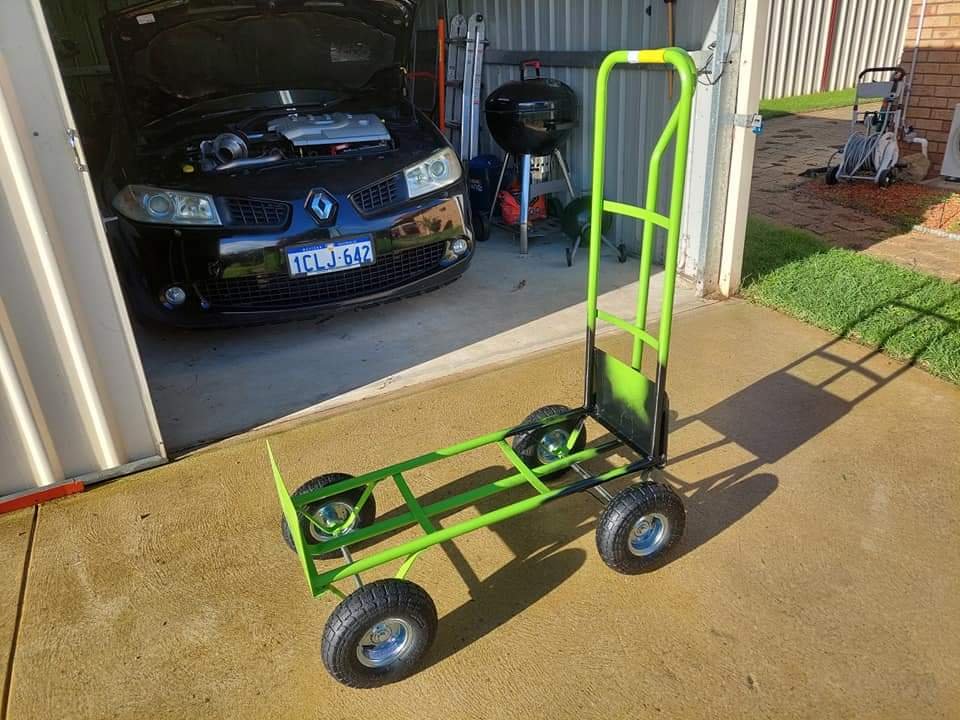
With anticipation to start ripping out the engine of the 265, I built this little trolley out of 2 hand trolleys for shifting it. Reason being is the parts car will be up the side of the house and I need to get the engine over pavers and grass at a higher level into the shed. No castor's but im sure it will manage. Pretty stoked for a couple hour hack job haha, don't judge. Cost me a measly 80huk. Hopefully will get the engine out next weekend, but we will see if time allows. Chur
1 point
-
However I stumbled across this RS 265 being wrecked - Old mate didn't want to part the engine unless the whole thing went so we worked out a deal and now it's here. About 180,000kms, runs and drives but has been in a mild nose to tail. Sounds like it's running pretty well, just has a minor oil leak around the pcv piping and probably needs the timing belt done. From what I've gathered it's a pretty simple engine conversion. Looks to be an updated version of the 2.0L F4R turbo engine with stronger internals and variable valve timing. Just need to modify and swap over the top and rear engine mounts. Swap over all sensors and throttle body, run the 225 flywheel, clutch, gearbox and ecu then modify the fuel pump to suit the rising rate fuel system then a remap. Pretty weird to be crossing over to this Frenchie but I drove a 5 door about a year ago (which I should have bought) which was stupidly fun in standard form. Turbo pulled from 2k to redline, handled pretty decent, big brembo brakes and factory exhaust popping and banging. Hoping this will be a bit of fun.
1 point
-
Thought it might be interest to y'all, a little side project that's been going on at Shuzz Towers. Stepson is a bit of a blacksmith/welder so we thought a forge in the paddock might be a good idea to keep him out of trouble & off the PS4. Building it out of cob blocks with a lime render as it's a traditional method round here & we're also banking on getting away with it coz it's pretty. Planning wise, it's a "field shelter" so we may be OK but also hoping that Clarksons Law my help us avoid a bollocking. Built onto the bedrock/ well drained brash & ultimately it'll have a live roof. Last image is the rough coat of course lime applied today, followed by two smooth coats in a week or so Pics..1 point
-
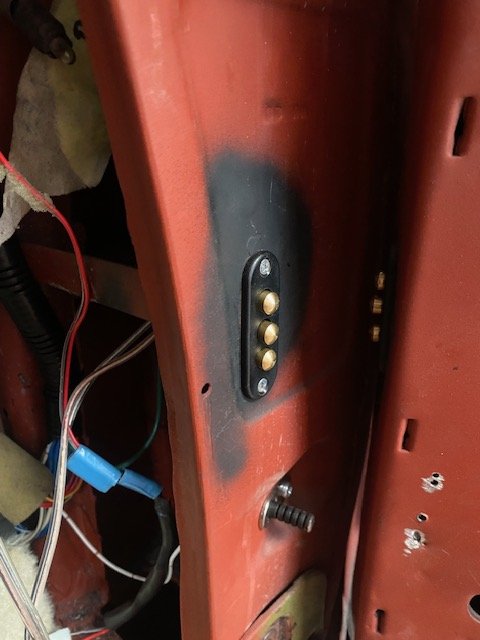
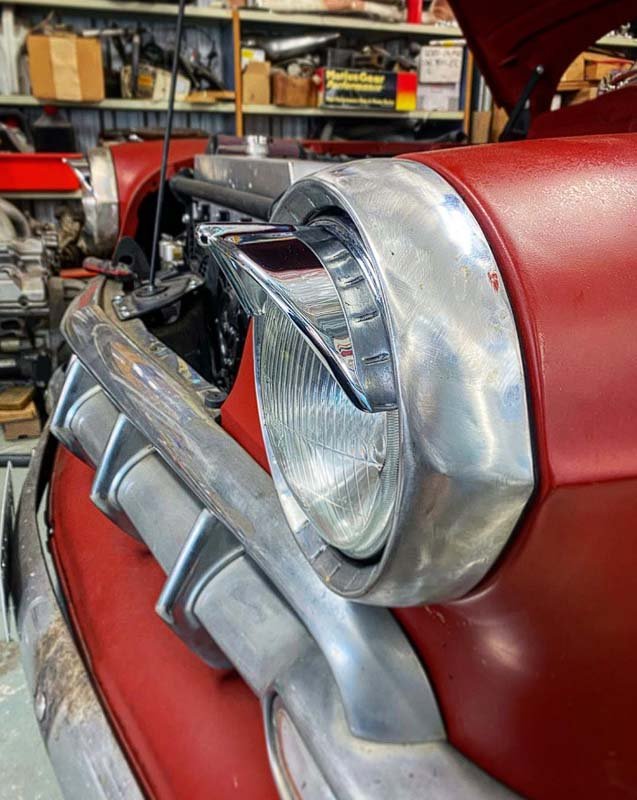
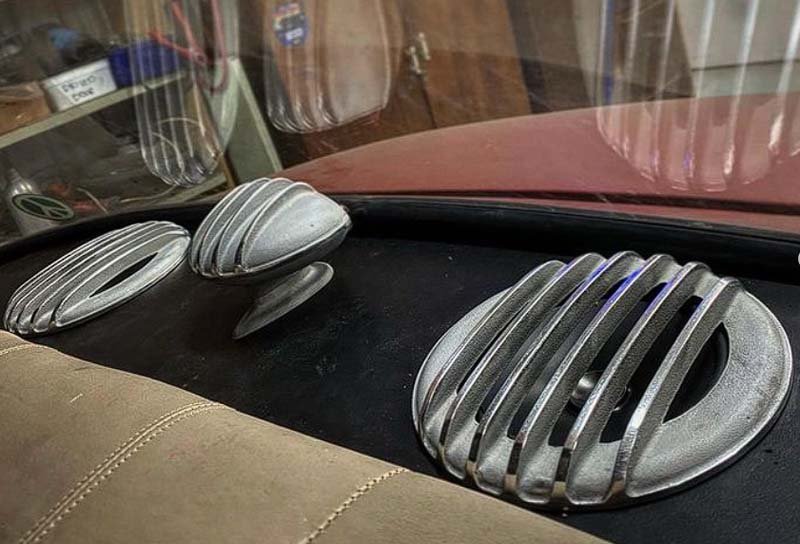
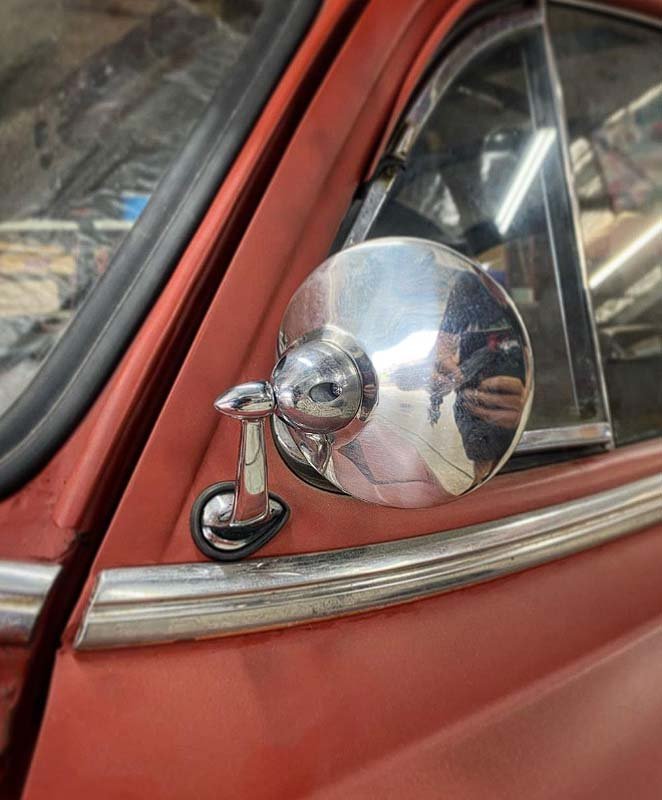
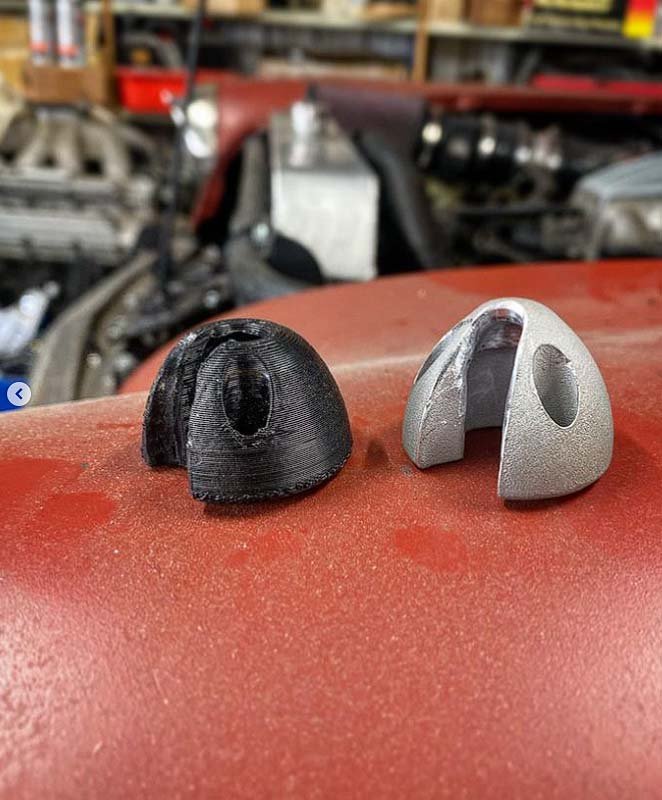
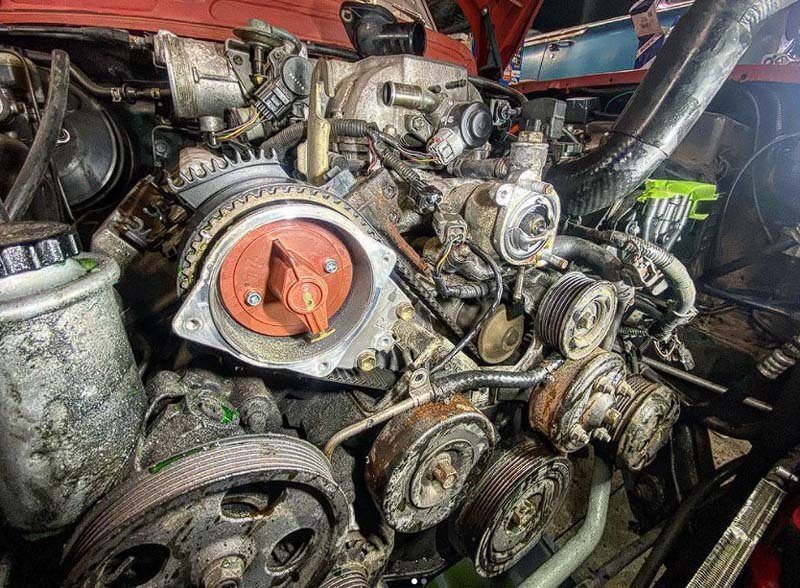
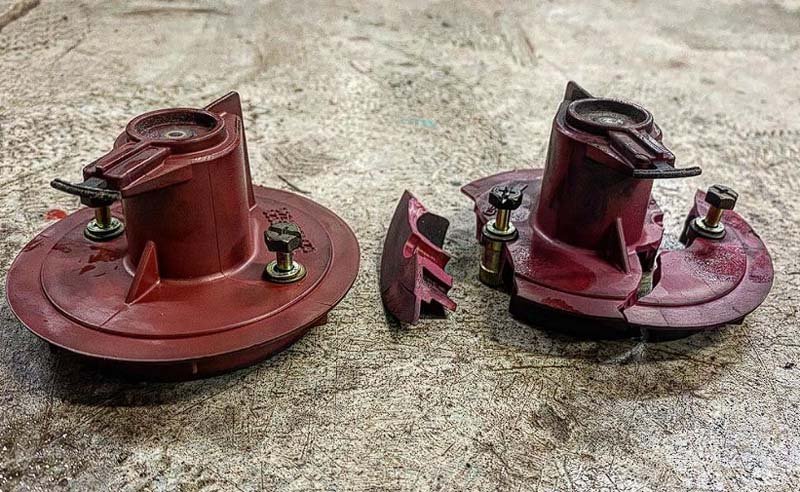
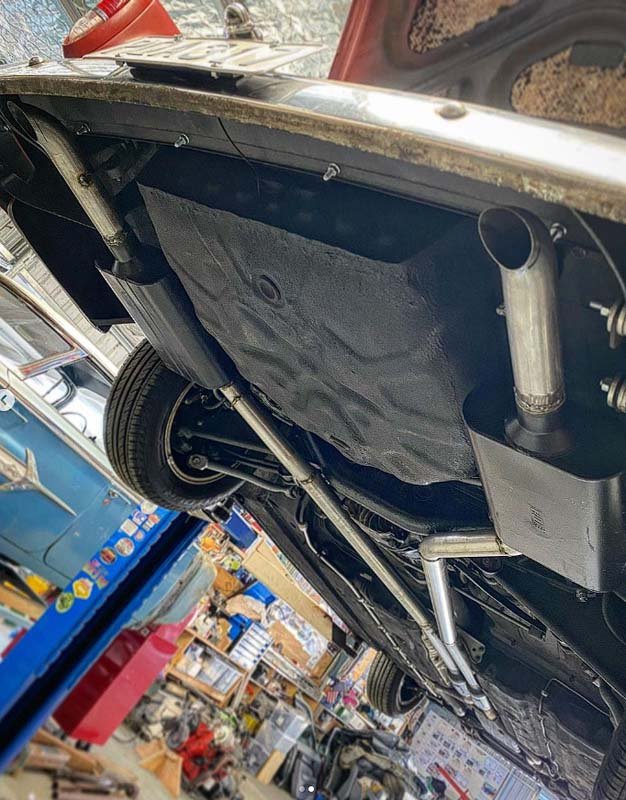
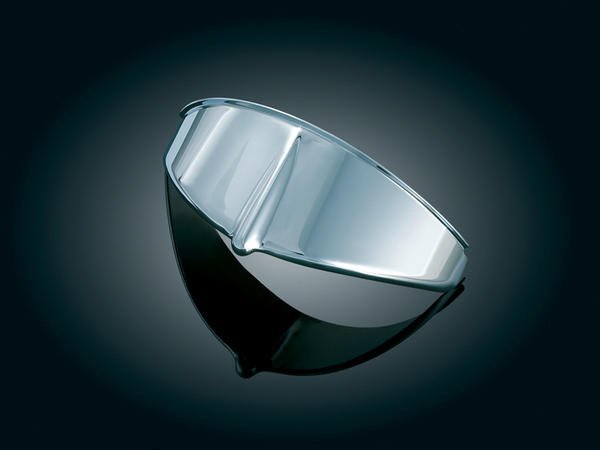
Few things have been happening over the last year. It now has side windows. So I needed a way to get in. These knobs are pulled up, spring loaded they trigger a switch to open the door. Hopefully eventually hooked into the lexus central locking. A pair of component speakers were fitted to the parcel shelf with a couple of our speaker covers next to the freshly polished high stop light. I Ordered a aluminium, laser 3d printed mirror spacer from pcbway to replace my PLA printed one. Polished up really nice. And the print was super accurate and clean. Had the urge to replace the coils, leads and distributors. So brought the whole lot in NGK from rockauto. Luckily i did as one distributor crumpled in my hands as I removed it. A new dual 2inch exhaust was also fitted. Most of it purchased from STA. So affordable. And sounds more like it should now. Also purchased some very very nice, but rather pricey kuryakyn Headlight visors. So much nicer than the cheap generic ones.
1 point
-
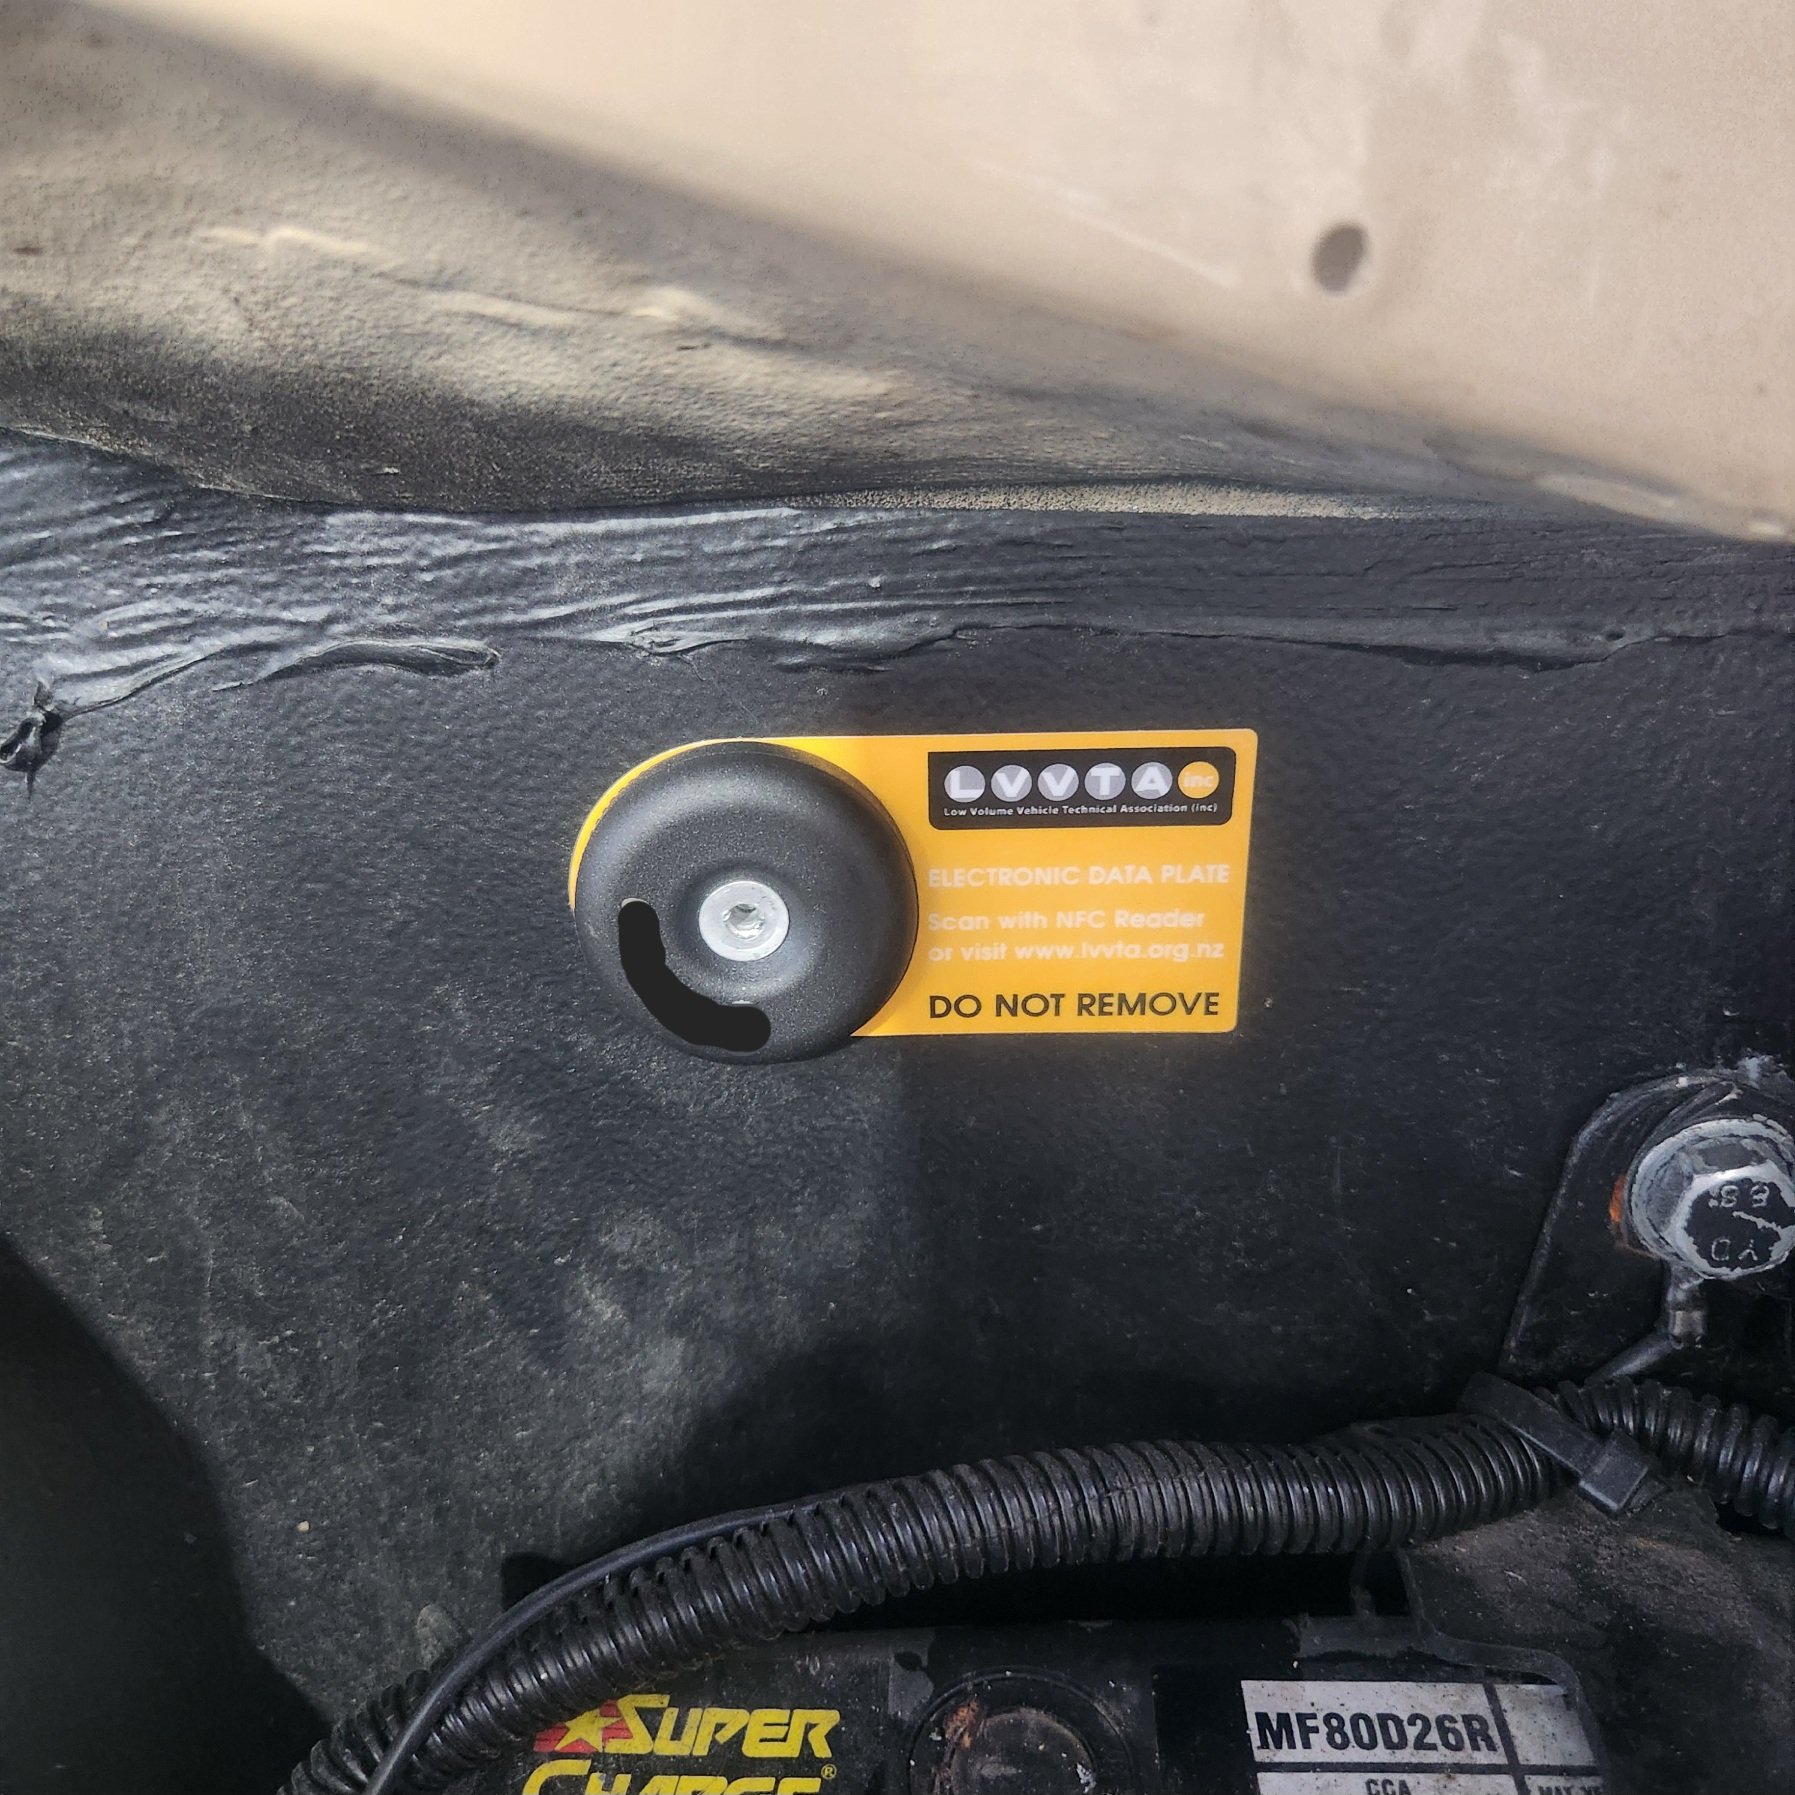
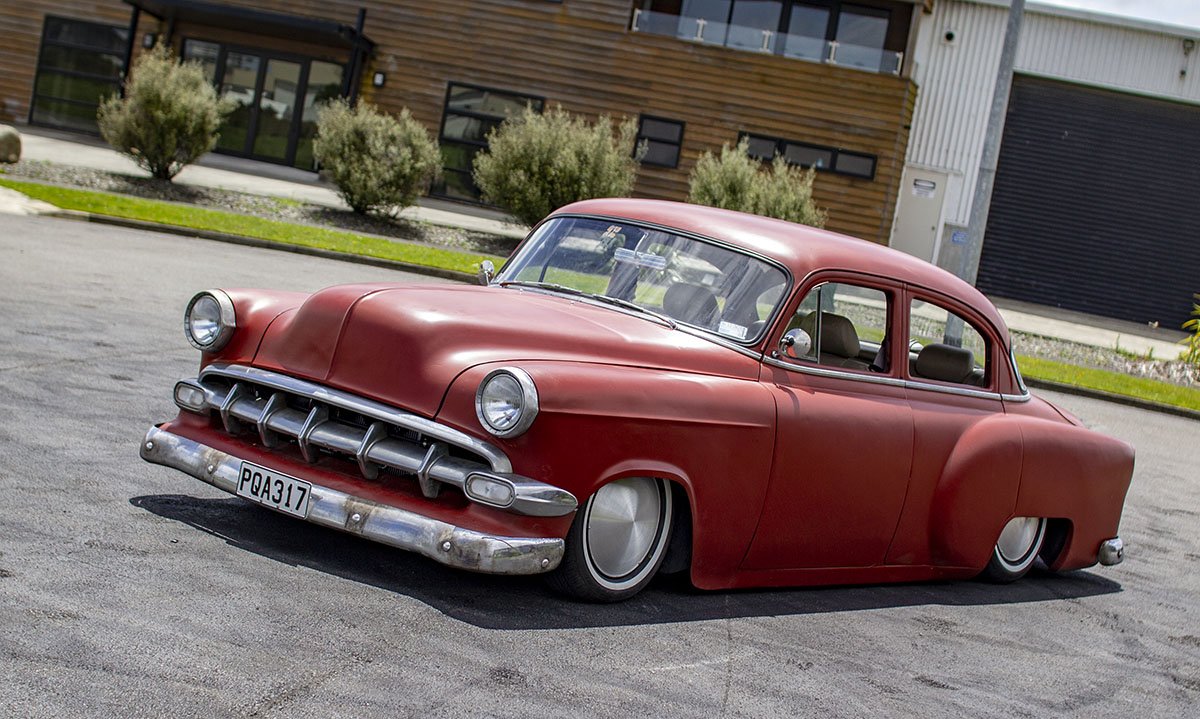
Stage 1 is complete. She has a Certification, 3 year WOF and a Years Rego. Time to drive it. Figure out what needs to be changed. and slowly fix/change things over the next few years. First up will be side windows. and a way to open the doors from the outside. As well as finishing the gas struts to hold the bonnet open and closed.
1 point
-
#ingredients #broke So yeah, short of the injectors turning up I should have everything for the engine wire up now. Huge thanks to DaveScienceTM @Roman who 3D printed me a super sweet mounting plate for the CAN-PWM fan speed control module. Just gotta find some time to wire it - there might be a few "sick" days off work coming up...1 point


.thumb.jpg.570970b401ac8d26ce9af7c1bf2bd8cd.jpg)


This leaderboard is set to Auckland/GMT+12:00