
Leaderboard


Popular Content
Showing content with the highest reputation on 03/21/24 in all areas
-
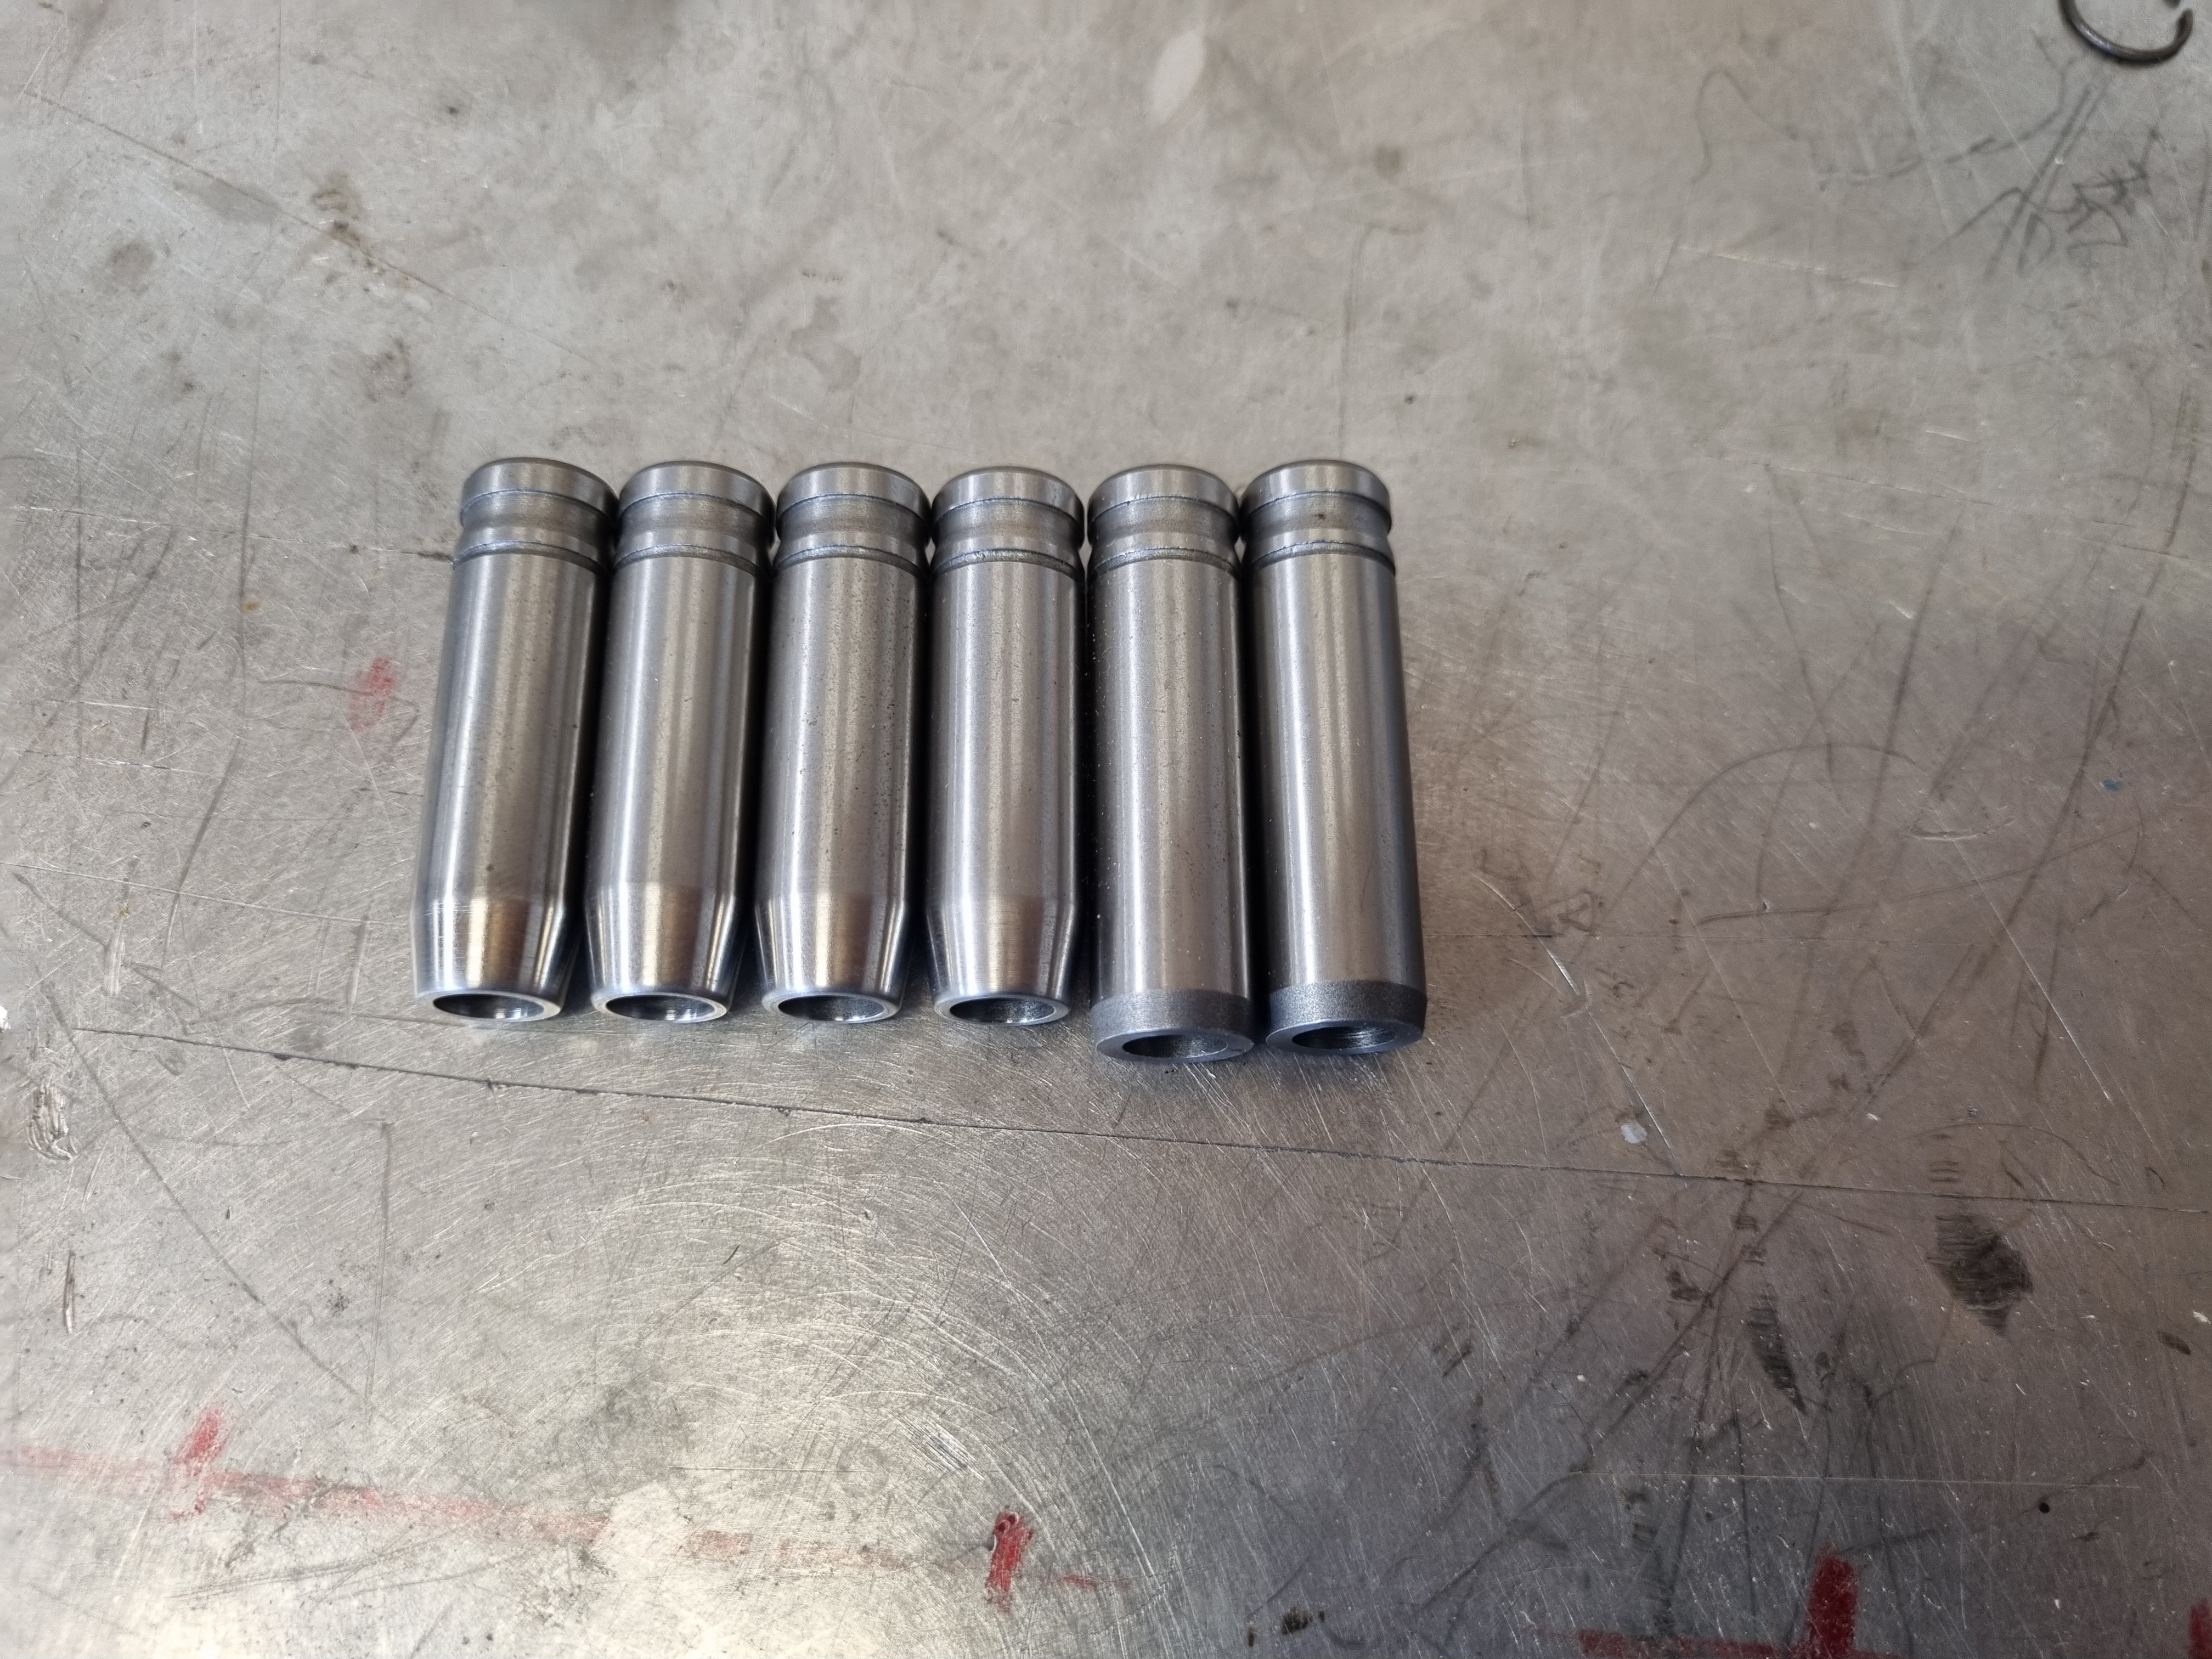
So when I left off the motor was back to completely disassembled. I got the cap machined and now it's back together with the correct crank end float. The other thing is that I got the head flow tested with the porting and bigger valves. It shows about an 11 percent increase over stock. I was kind of hoping for a bit more but using the "no science just hog it out" method is probably why 11% was the result. Anywho, now it's time to get the head all sorted and I can bolt it on. Need new valve springs, new spring washers and retainers - all of which will need to be custom or at least sourced from some other engine. In preparation for this I shortened the valve guides to suit the machining that the head needs to clear the higher lift. 3mm off the exhaust and 6mm off the inlets
 17 points
 -
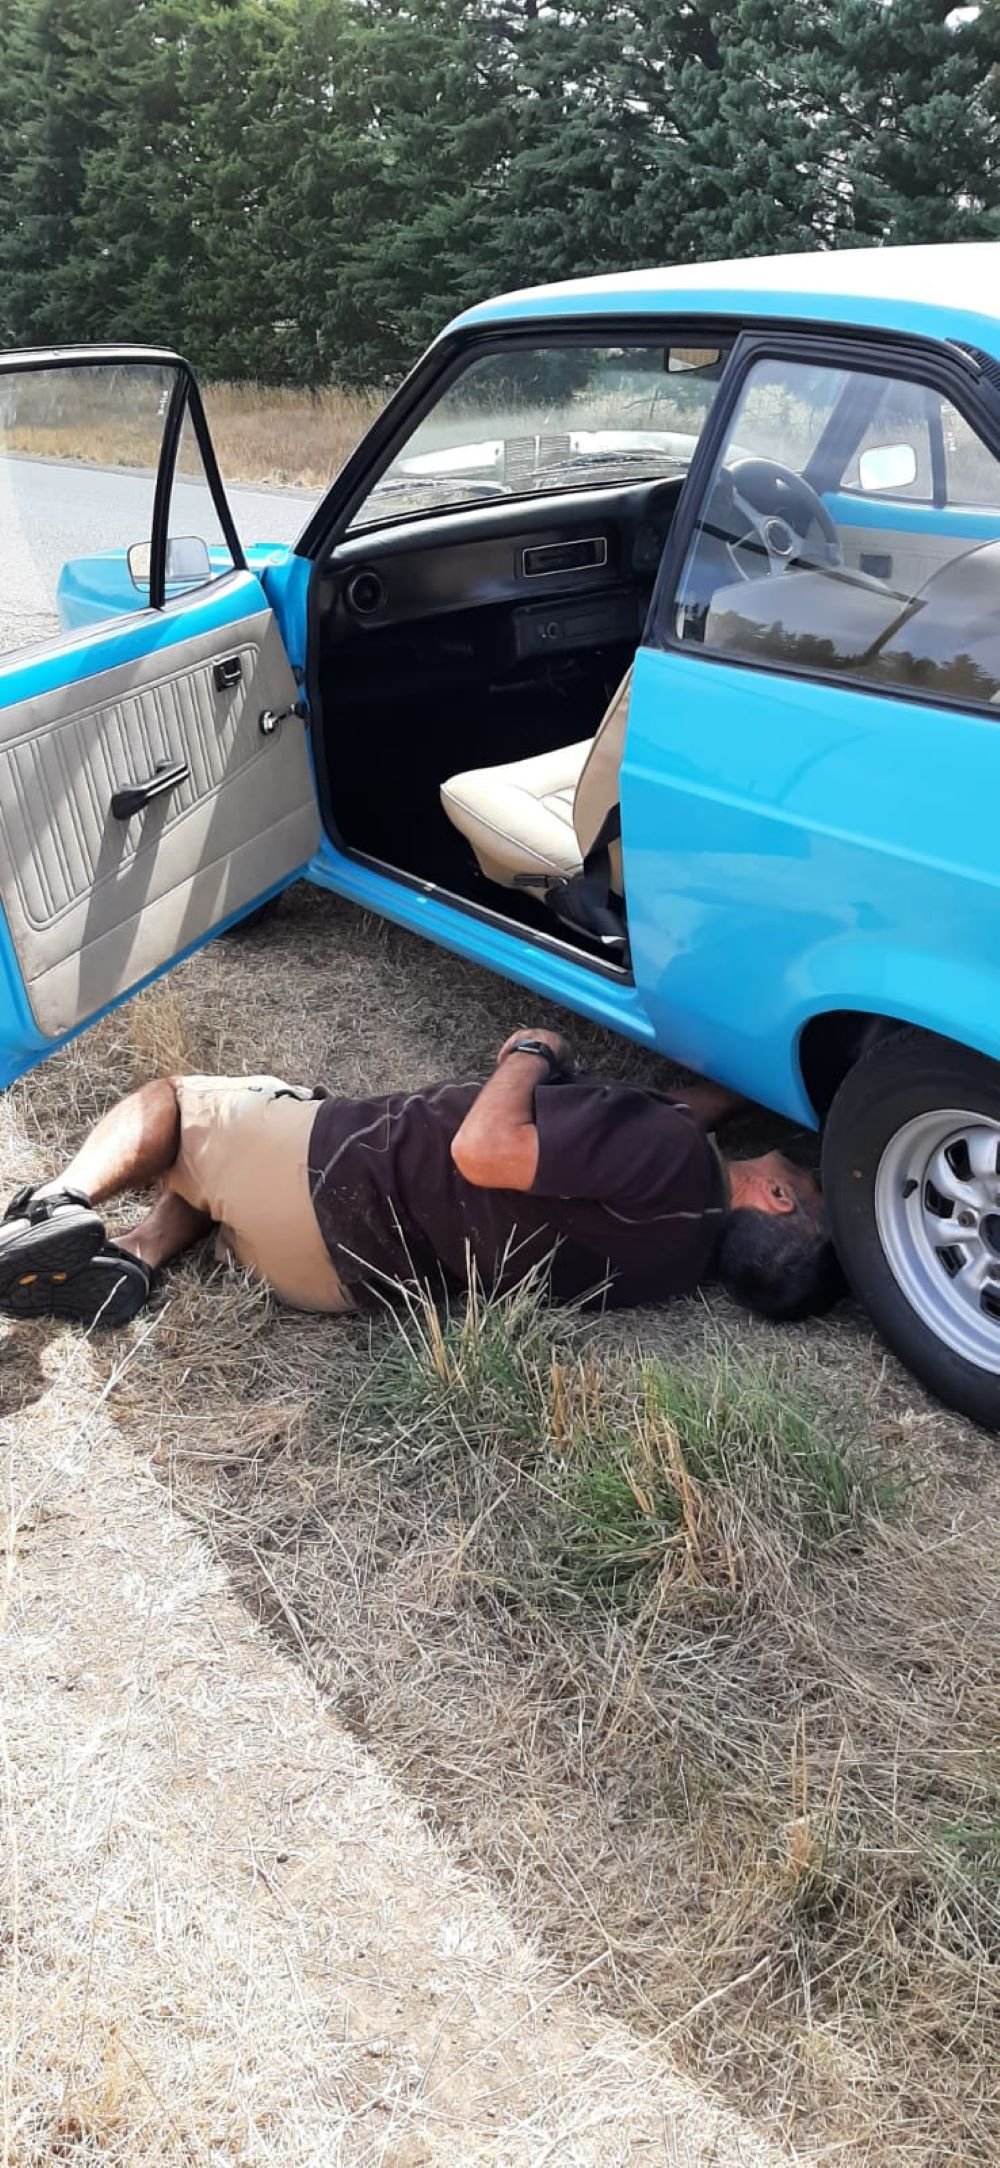
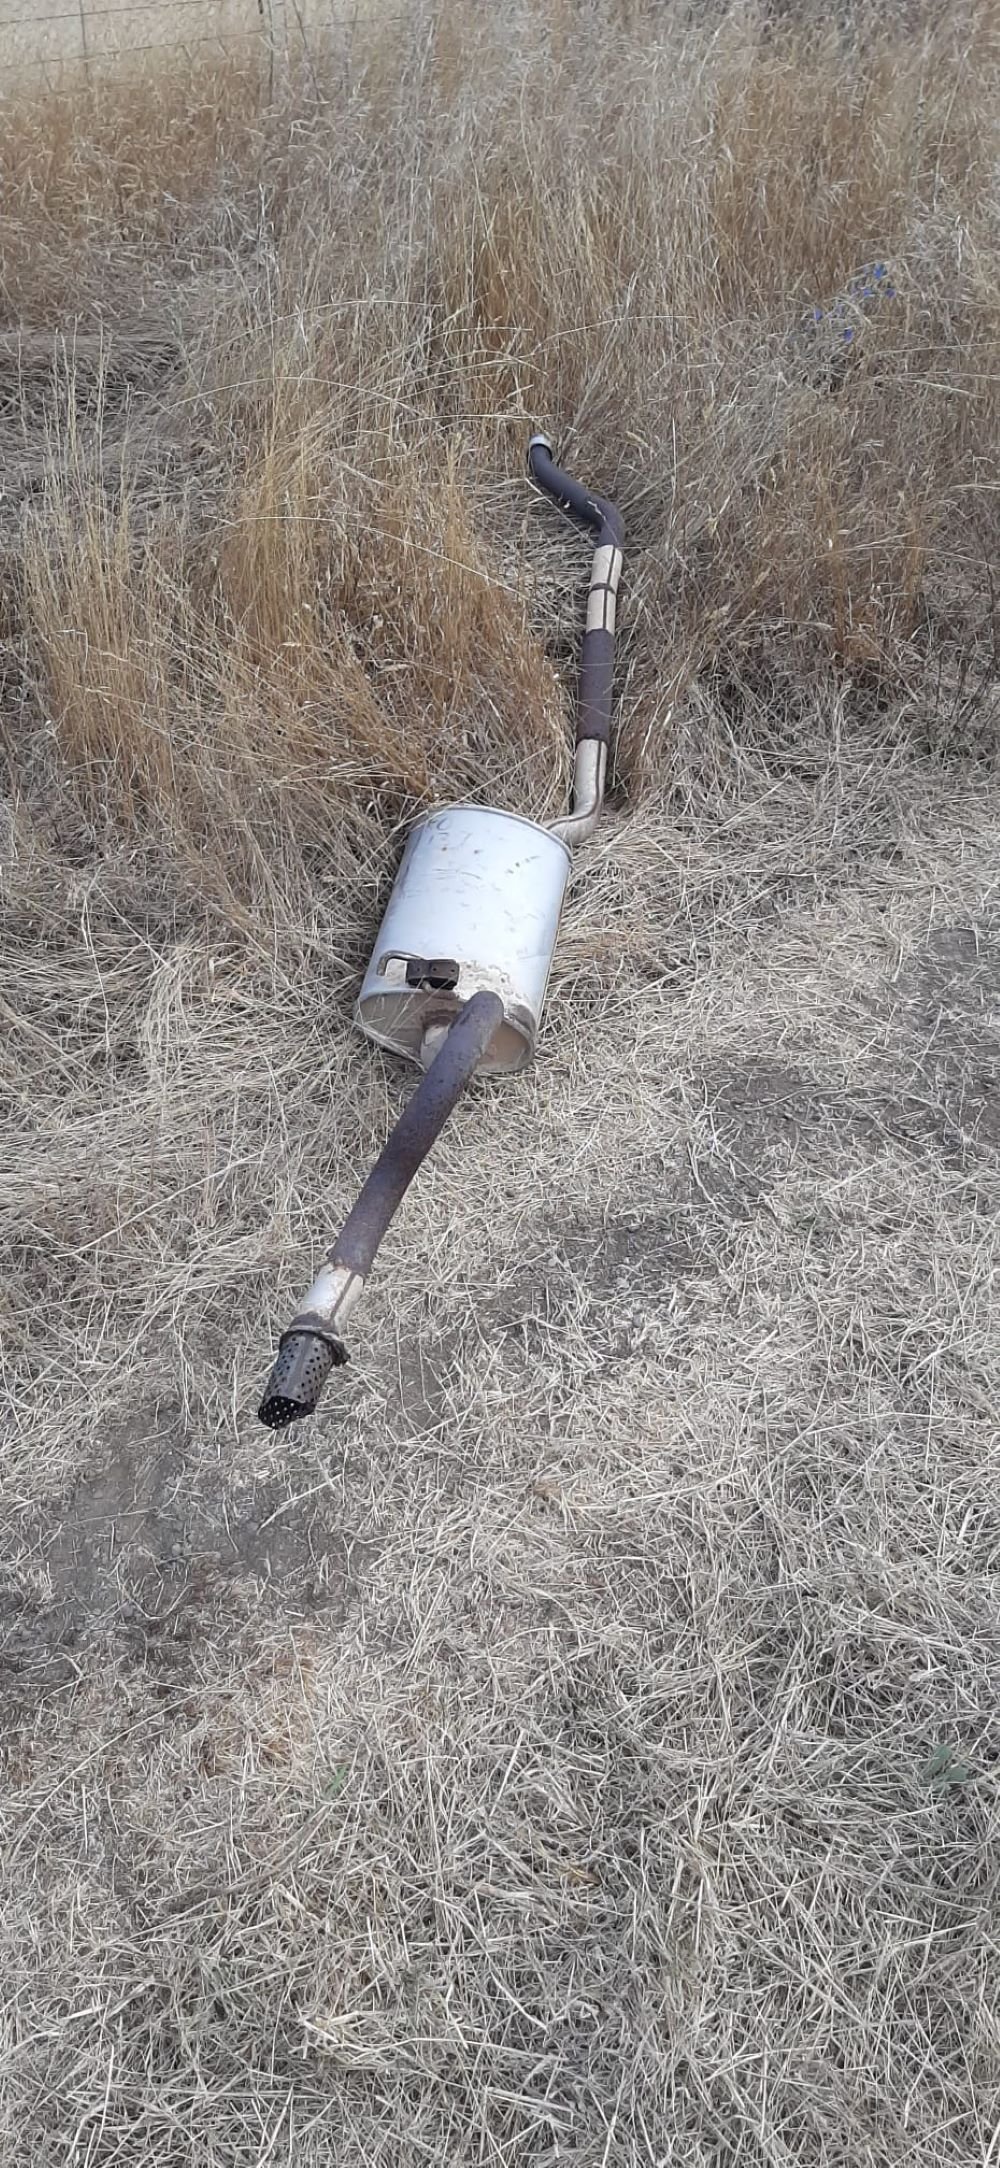
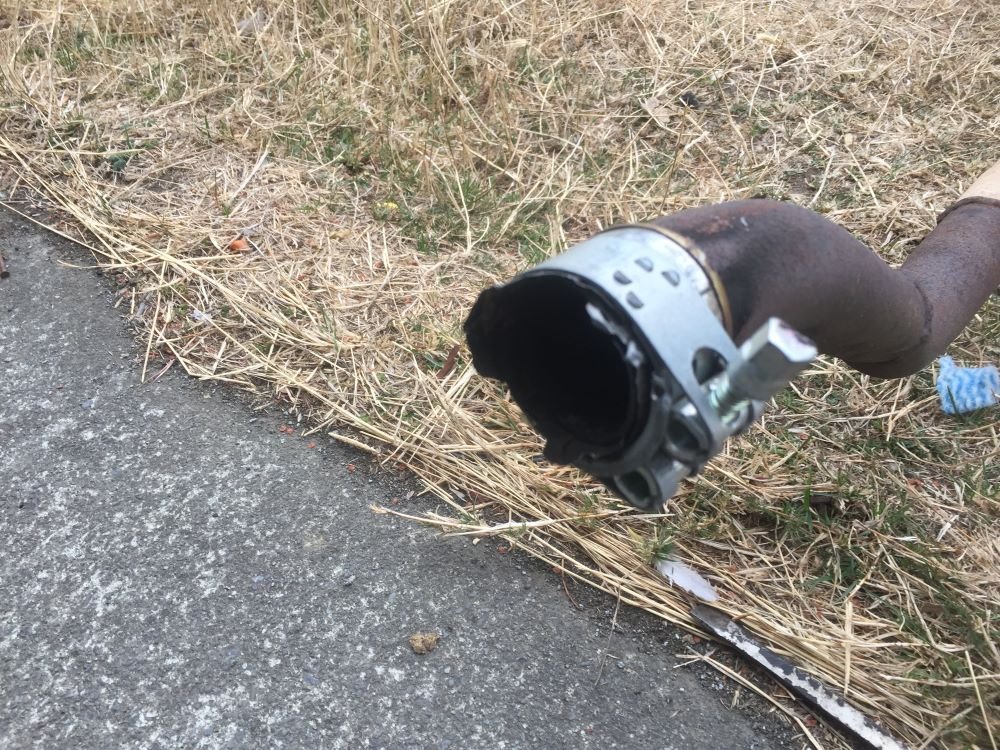
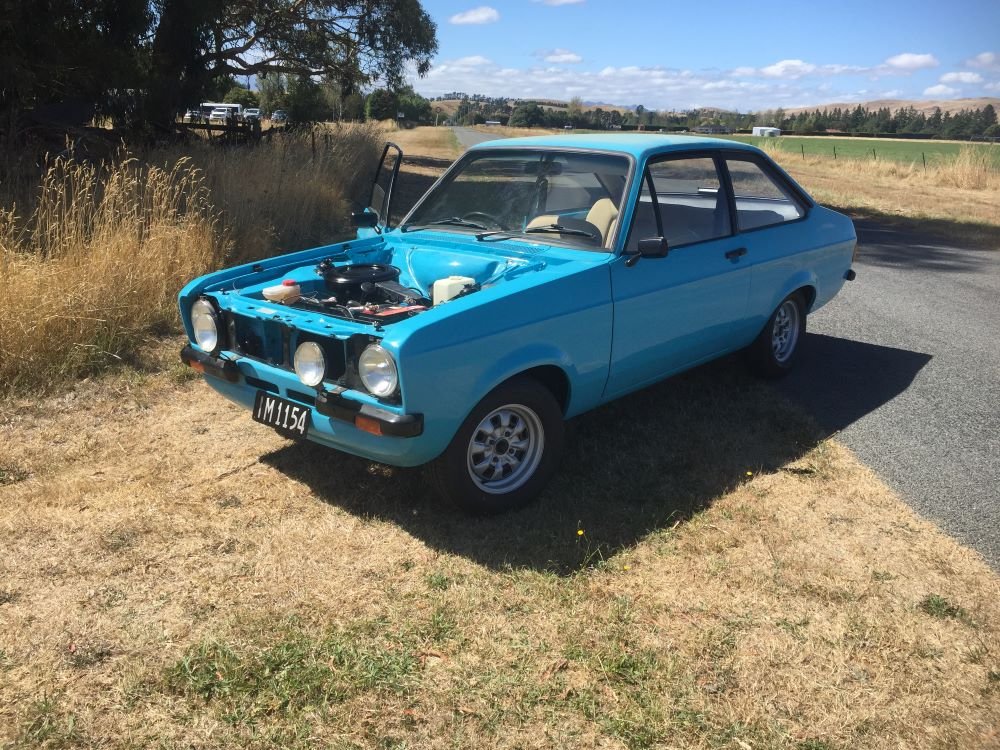
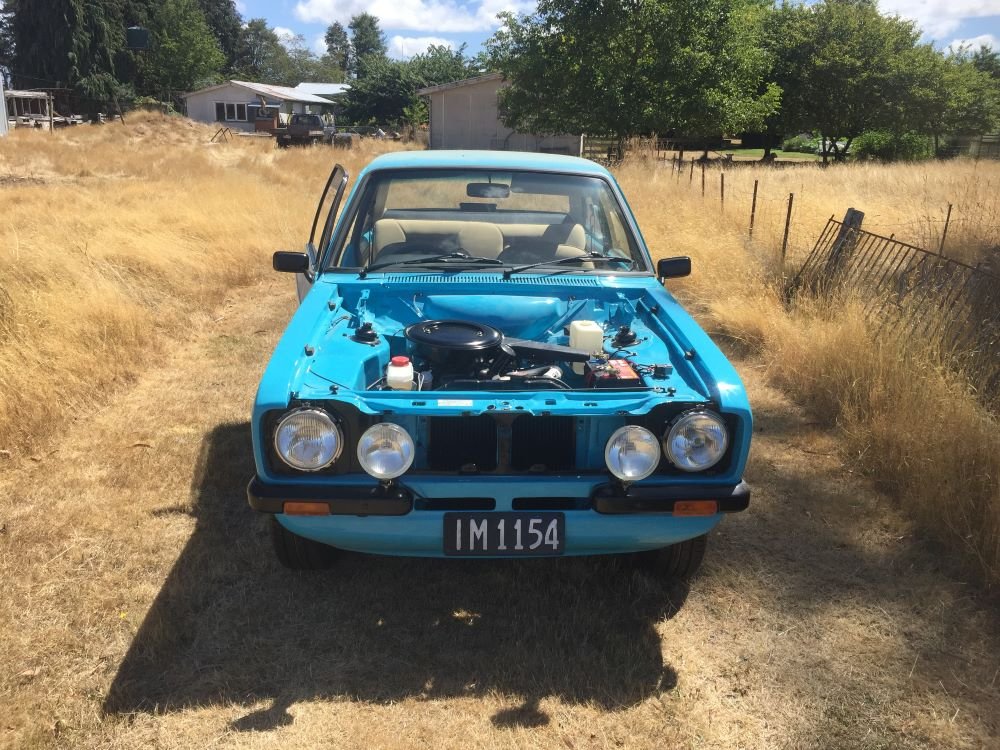
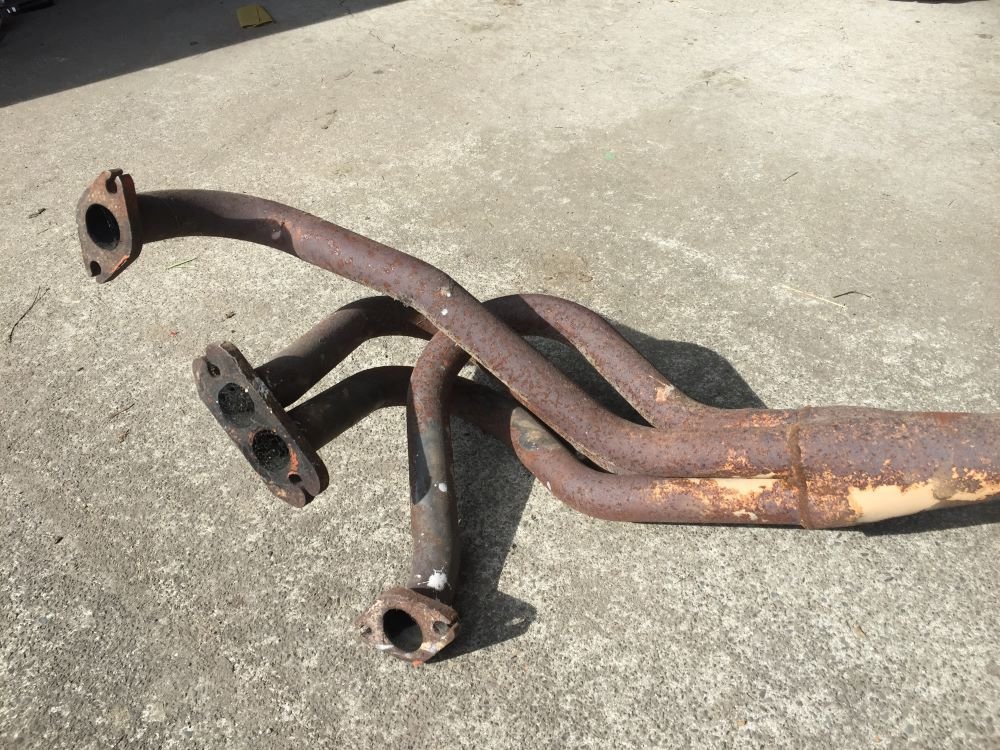
We had great weather in the weekend so decided it was time to take Jenny, my long suffering wife out for a drive in the escort. Things wrer going really well until I noticed a change in the exhuast sound followed by metal scraping on road. Quick stop and inspection shows that they don't make baked bean cans like they use to. Managed to remove exhuast from under car while jen was busy taking photo's and letting family and friends know how her first outing in the escort went. Needless to say it was a very noisy 8km trip home. Lucky we live in the country so left exhuast on the side of the road to be picked up later and booked in to get new exhuast fitted. Project Discussion https://oldschool.co.nz/index.php?/topic/84912-petes-mk2-escort-1600-sports/page/3/#comment-2625686
10 points
-
So im having a bit of a tidy up now, removed the turbo/intake area... happy to report none of that was leaking at the flange again so thats promising, decided to give throttle body an inspection, the tps was real sluggish to return and on further investigation not in spec in terms of resistance readings, some wd40 and compressed air cleaned out what ever gunk was holding it up and it now returns quickly... The ohm readings at closed throttle were off, and i needed to adjust the screw and bend the bracket slightly as i had run out of adjustment screw.. 1k ohm at idle, 5kohm ohm WOT. Im assuming some wear happened or someone bent bracketry previously to cause it to be misaligned... a lot has been deleted off this unit, including cold start functions, secondary throttle blades and linkages, but it should all work good now... i aint forking out $300+ for a new tps... Its now in spec and im going to clean/weld up some unused ports on the intake and throttle body to prevent unnecessary leaks, at the moment everything is blocked off with plates, gaskets and hoses with bolts shoved in them... a little agricultural, tig should sort that out when i get argon tomorrow...
4 points
-
Hey good news I've fixed all the broken image links in this post.... Soon I'll update it on everything me and the wee car have been up to.4 points
-
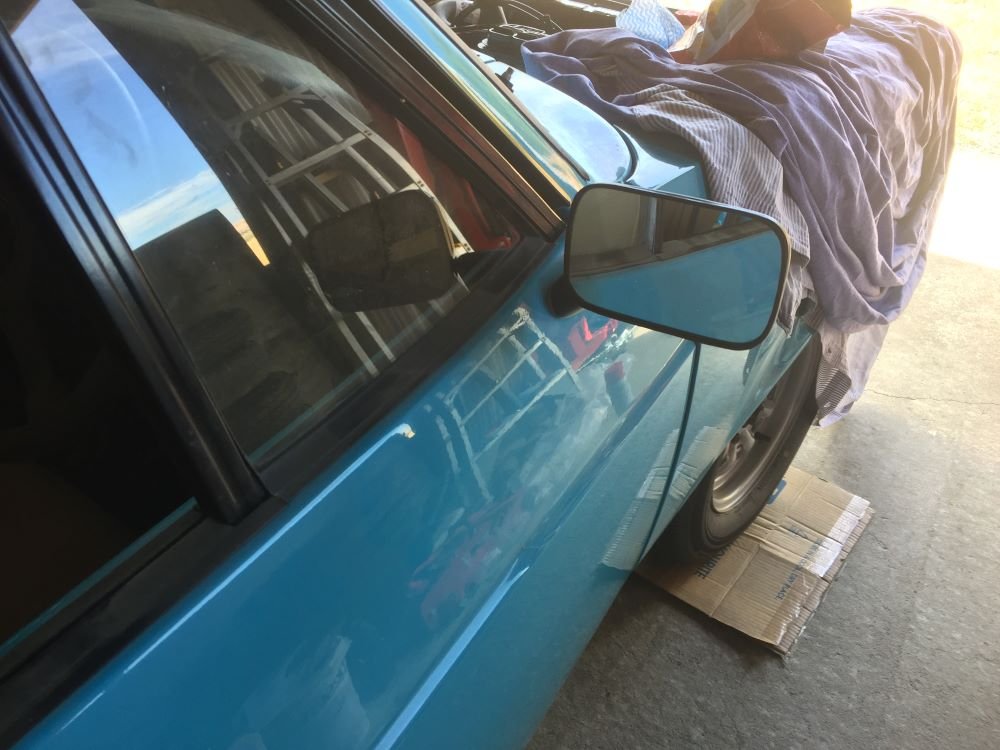
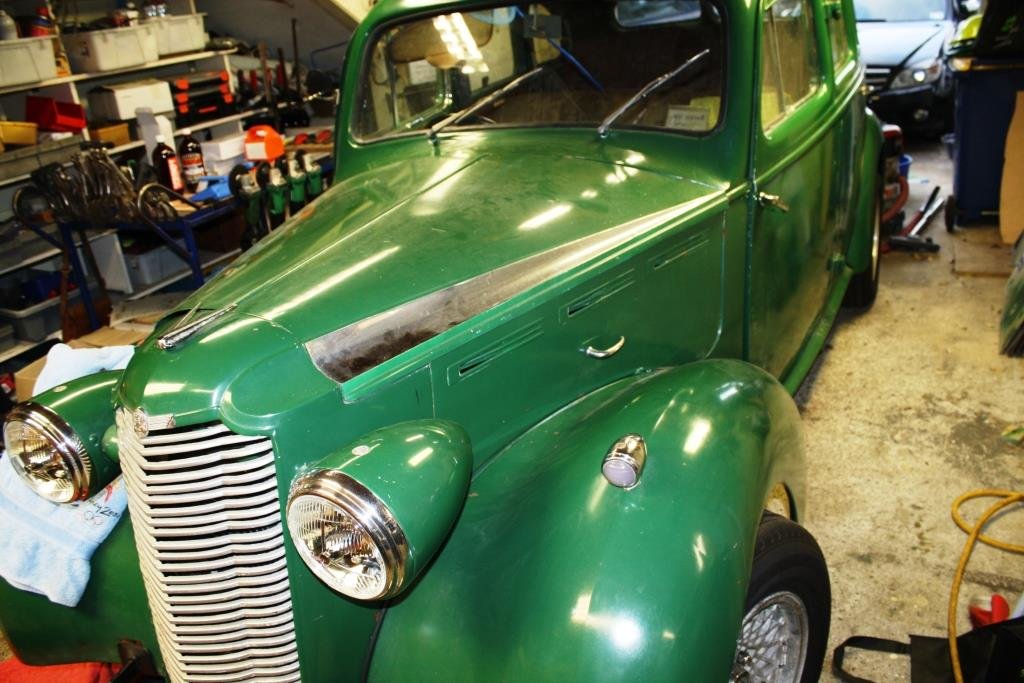
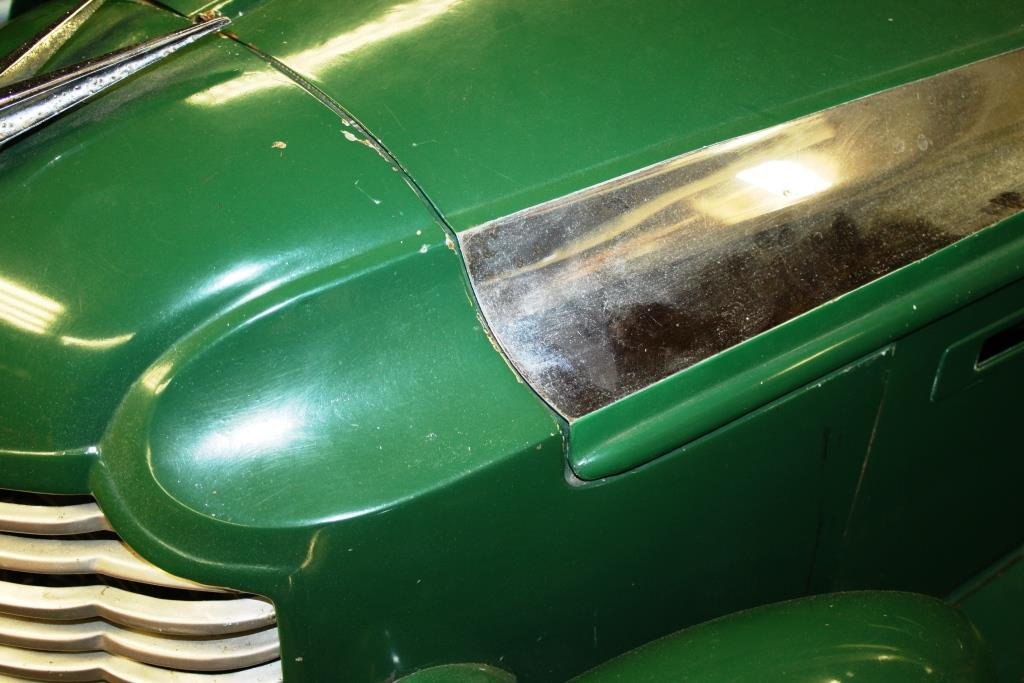
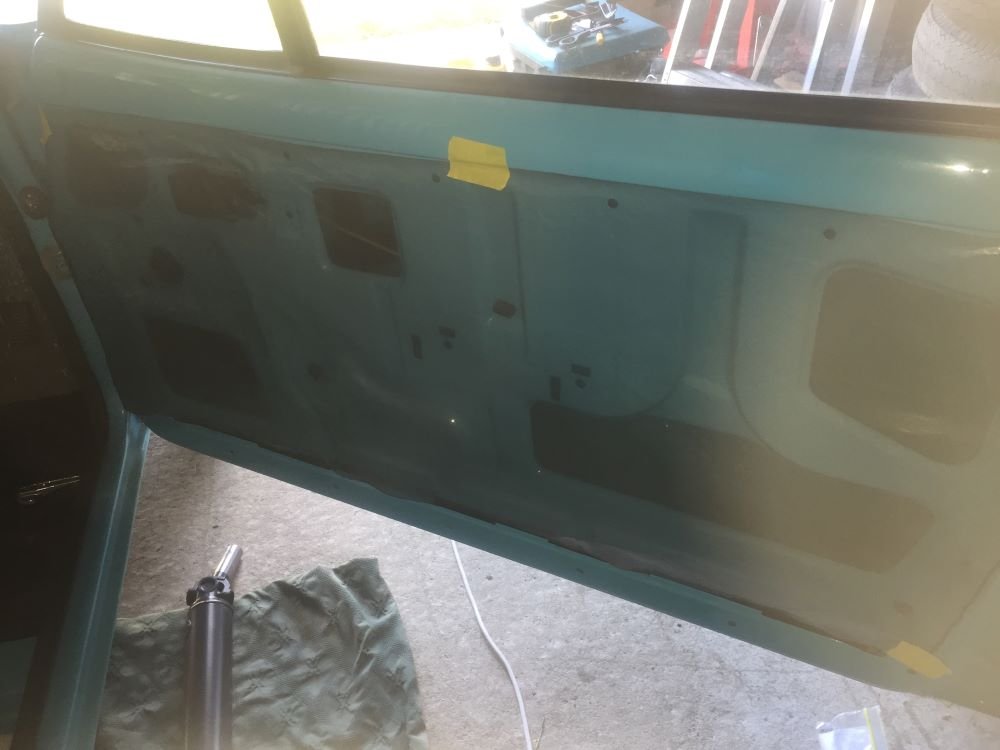
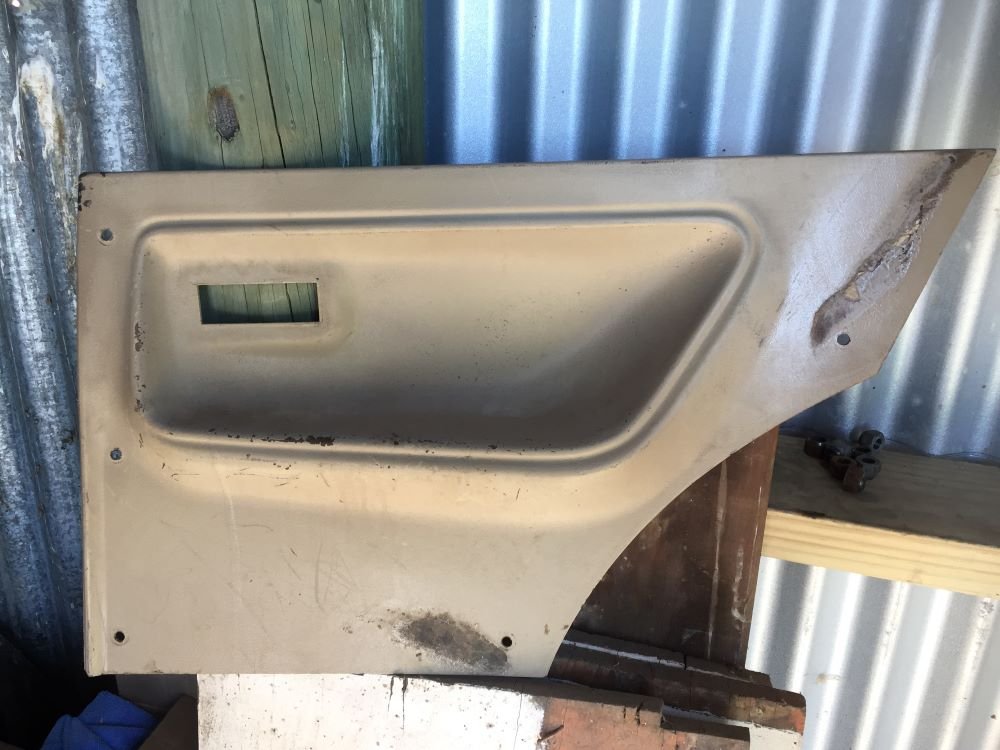
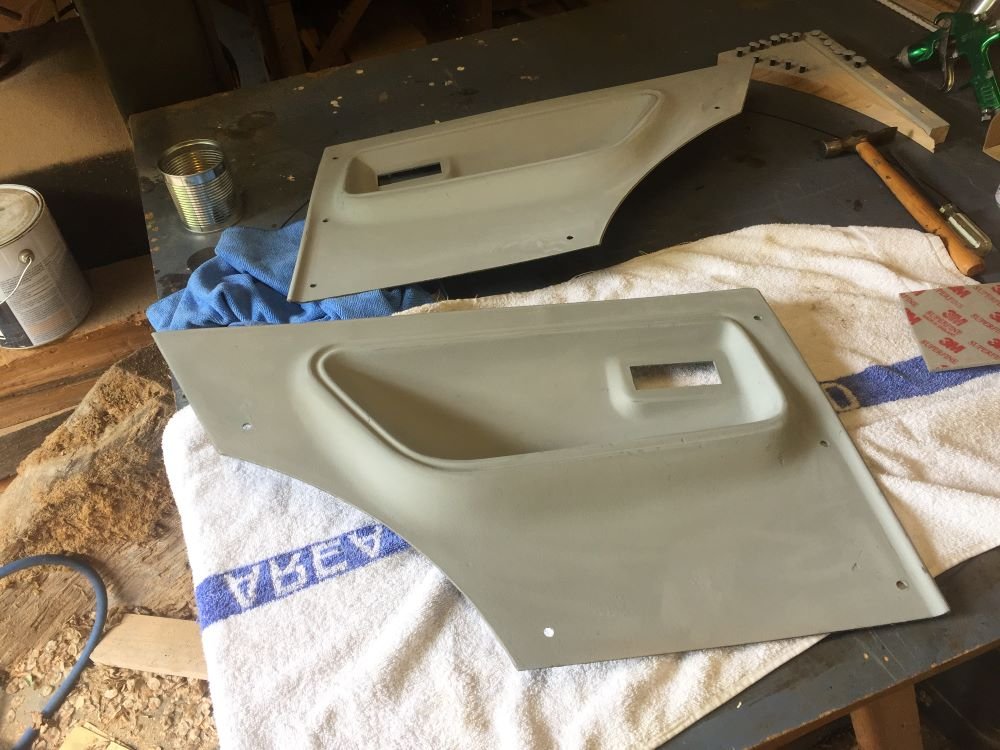
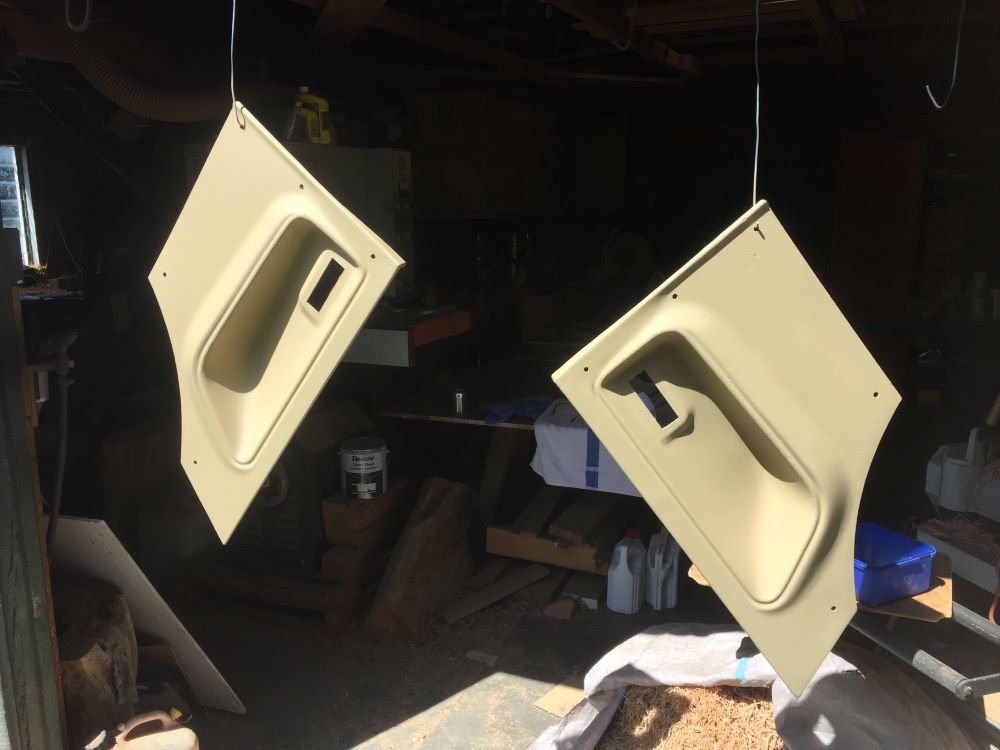
So it turns out when... your daily/operational fun car breaks down and you decide to take on a huge DIY job to fix it that you know eff all about you specifically lay out your mortgage repayment strategy in front of you and truly understand the ramifications of paying off even tiny amounts of principle early in the loan and decide to restructure to get every little spare cent going into it that you can scrounge up you pick up a second job the remaining work on your project car kind of hinges on either a stupid amount of unappealing and tricky skilled labour, or collar-tuggingly large amounts of money to pay for said tricky skilled labour ...things on your project car tend to slow down. But I figured I should post something because otherwise I'll totally forget everything that I've done and I don't want this project to fade away. Before I put all the fuel tank stuff back, I was messing with panels. One of the pre-reqs for the panel work is obviously that it needs to be all stripped back, and I decided (with panelboi's blessing) to do it myself rather than mess around with the local acid dipper or with transport to a more reputable one hours away. The idea is to just pick some reasonable panels, strip them, fit them, and then I've got a clean no-surprises job I can show around and get some better quotes and info on. I test-fit the rear bumper from the original black car and it didn't quite sit right - the panel gap was inconsistent no matter how I fudged the fastenings - no pix unfortunately, so I went with the red's bumper. It fits a whole lot better! Next up is all the front panellage. The two bonnets have their issues so it's really a toss-up, but I opted for the red one as it seemed to be a bit more contained in its damage. Both nose panels are totally fucked so... not sure what I'm doing there just yet. But fitting the nose panel reveals some fun. Uh-oh. Fitting the bonnet and popups makes the problem a bit more obvious. The black ones are just as bad - no pix soz - so it's not just a "different donor car" thing. The frame repairs were done with the fenders and bonnet available, though not the other panels. I need to get in contact with the panelbois to sort out a warranty claim, but the last couple times I tried they didn't pick up or reply. Hopefully this doesn't become a struggle :\ Anyway, forging on. Key and clean. Apply stripper and keep wet with plastic. Create murder scene. Scrape. I probably should have applied more stripper here but newb. The fenders are all pretty crap. The one I've already lightly beaten into shape and stripped and durepox'd is the one that had a minor collision, so you'd think it'd be the worst, but it's actually probably the best one. There's no rust and it's otherwise totally straight. All other fenders... well... So I decided to just keep the fender I've already epoxied, because it's probably easier to bang it into shape than any of the others. The red driver's side fender seemed marginally better than the black one so I went forward with stripping that. I busted out the paint stripping wheel for the grinder to finish it up. I'm not really sure this was a good move - it's nice and shiny, but possibly a bit tricky to spot the imperfections in the panel now? Then the nose panel and popups.. Everything back on. You can see here what I mean about the swirlies making it hard to gauge if things are okay. I'd already taken a sanding block to the driver's side fender in this pic to try and make the flat bits even. As you might be able to tell, there's a fair bit of damage to it... there was quite a bit of bog at the front and the rear of the fender. I think it worked, so I did the rest as well. As you can see, there's a few low spots and dents, but I think they'll hammer flatter without any major headaches, and even if they weren't, they could probably just be straight filler'd without failing. The chunky spot is the part I already knew about - the front corner which had a giant slab of filler applied and has subsequently received a lot of pitting. There's also a spot on the front edge of the bonnet that has numerous rust holes, hidden under a small but deep patch of bog. Honestly, it seems saveable - though I'm also far from an expert here! The pop-ups are fine, no dents. As expected, the nose panel is worse than the surface of the moon. It's probably not worth trying to save and I should just find another one. It's also super easy to dent these to begin with; they're the most natural place to push the car from, and there's almost no structure to them. If I do get a new one I'll try mod some gussets into the back of it. Side quest to put the very first thing I restored on this car back onto it: the fuel pump access panel, which a few years ago was extremely rusty. The CRC black zinc has held up strong . Spot the fasteners and grommets stolen from the red car... Speaking of the red car. It's door time. On both cars, passenger sides have a couple of dings but nothing crazy. Also on both cars, the driver's side is absolute dent and bog city. I have pix but they suck so just hold on till the strippy bit to see what I mean. All the doors also fucking suck at the bottom. So I just went with the black doors since they're both right there, already half-stripped, and the red car is currently sealed from the elements. There's a few holes at the top as well. Annoying, but the rust seems fixable. I completely stripped the doors - which was a massive PITA when it came to the door latch, only removable via black magic / the completely wrong method. The mirror blanking was just gooped in place to fix a broken bracket. Also there was a little protective metal edging strip along the open edge of... just one of the doors? The red doesn't have these. Japanese mod + replaced door? Anyway, it's strippytime. This time I put it on thicker, and did several passes. It made the job a bit easier. The starion makes for a decent workbench... <.< I haven't finished these yet, there's still some bog to remove and then get it all nice and flat. And that's where I'm at. If the panelbois are kind with their warrantying, and the lack of surprises makes the price right, then I might be able to eek something out in this space before we pay off the mortgage :P. If not, I'm buying a welder and the scope of the project shrinks from "like new" to "guy in a garage job but the engine bay looks sweet"...4 points
-
Aaaaaaannnnddd car is still in the weather outside. But i just found and paid for something i have been looking for since 2005ish..... AN INTERMITTENT WIPER SWITCH!! This may not seem like a big deal but only having a 2 speed wiper switch in rainy reporoa is a problem. And yes while i could have wired in an aftermarket timer that wouldn't have felt right. So long as david from gumtree doesn't let me down.....3 points
-
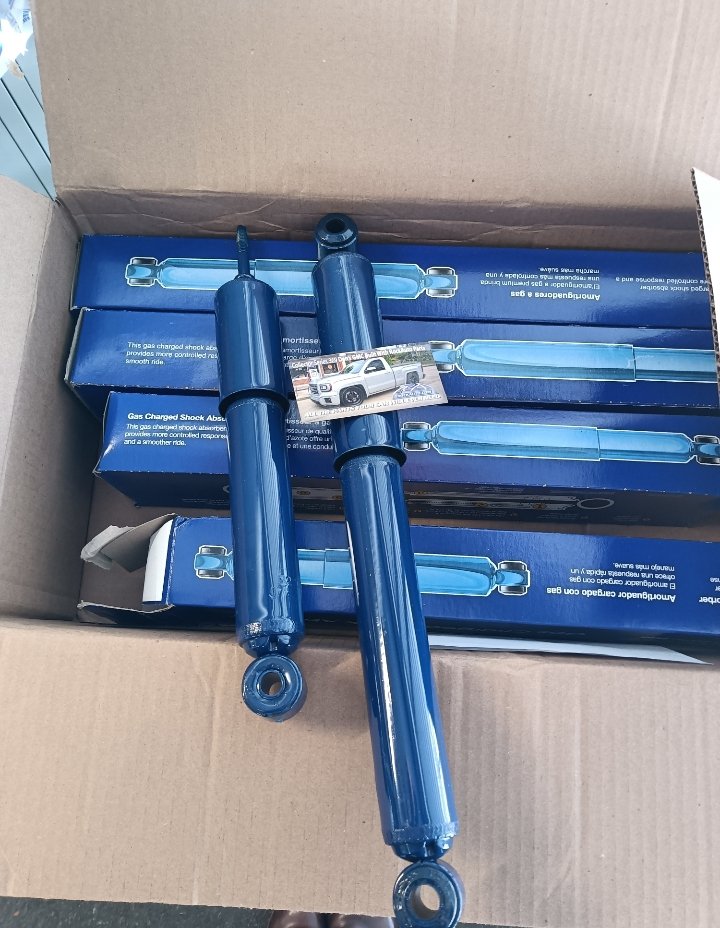
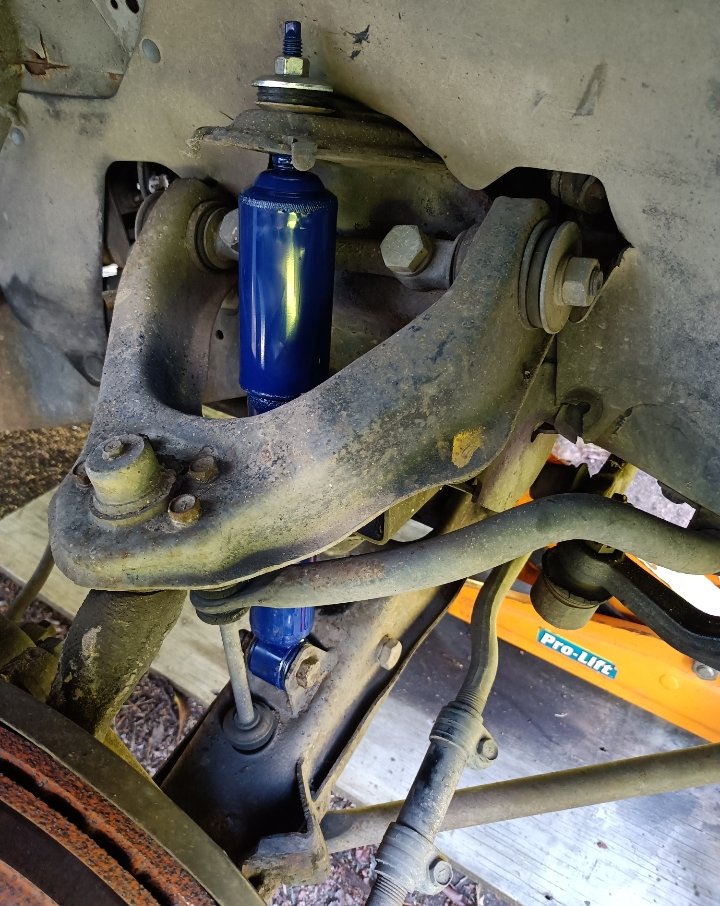
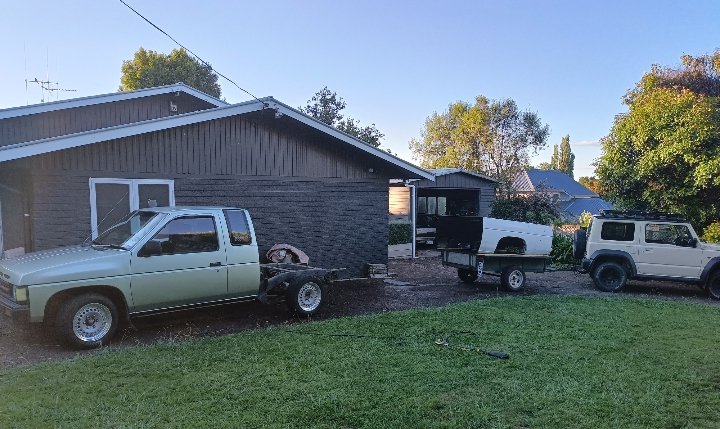
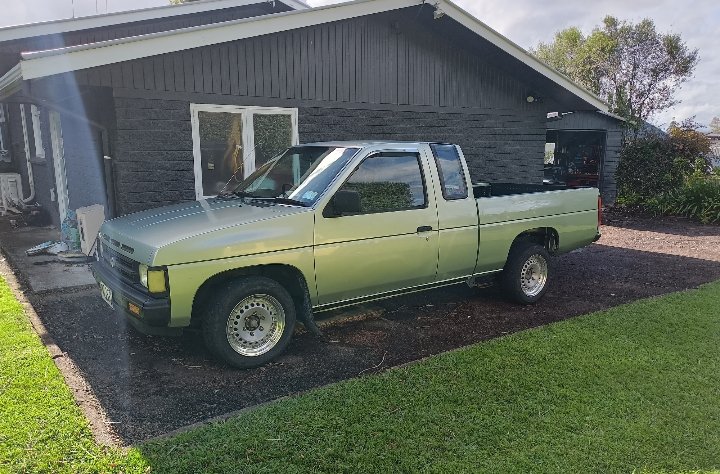
And new shocks all around. 4x4 d21 up front (shorter than the 2wd ones) and Nissan Quest rear shocks in the back which are shorter than the factory ones as well. All bolted straight in and feels as good as a 35 year old truck on bumpstop should feel like ...haha. Front is touching bumps, rear not quite. So need to have a play there.
3 points
-
Pulled the tappet cover and sump, all looks well; Printed a new faceplate for the heater mech with the knobs set back a few mm as the cables were pulling it a bit, plus I printed a white insert for the indication to make it tidier, this just got coloured in with permanent marker for the red and blue bits; Clutch arrived; Also my younger self had bodged something for the top engine mount as the original one didnt work with the new engine, this was an unconvincing effort. So I spent some time with the lathe and the welder and made something much nicer with replaceable standard bushings;3 points
-
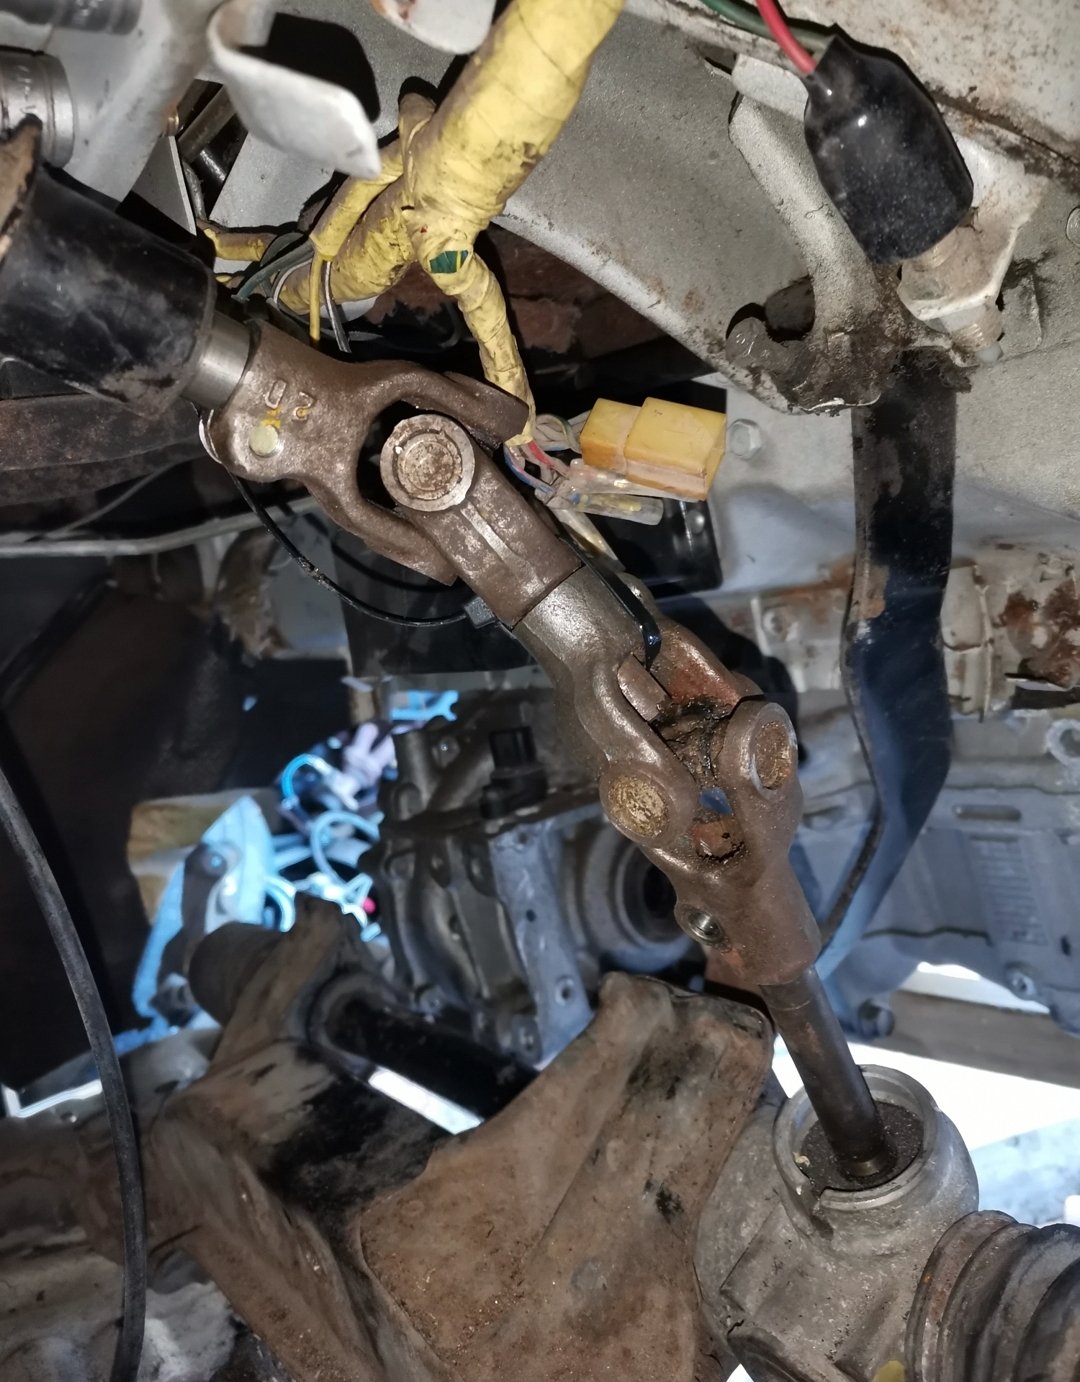
Rack in, u joint angles aren't stuffed.... Be it a touch short. Everything rotates and doesn't bind. Tried jazz axles, too long by about 10-20mm both sides, need to trip to pap and conduct some research. Passed pictures and vid to Julian cert man, so we'll see if this is going to the metal recyclers or not soon
2 points
-
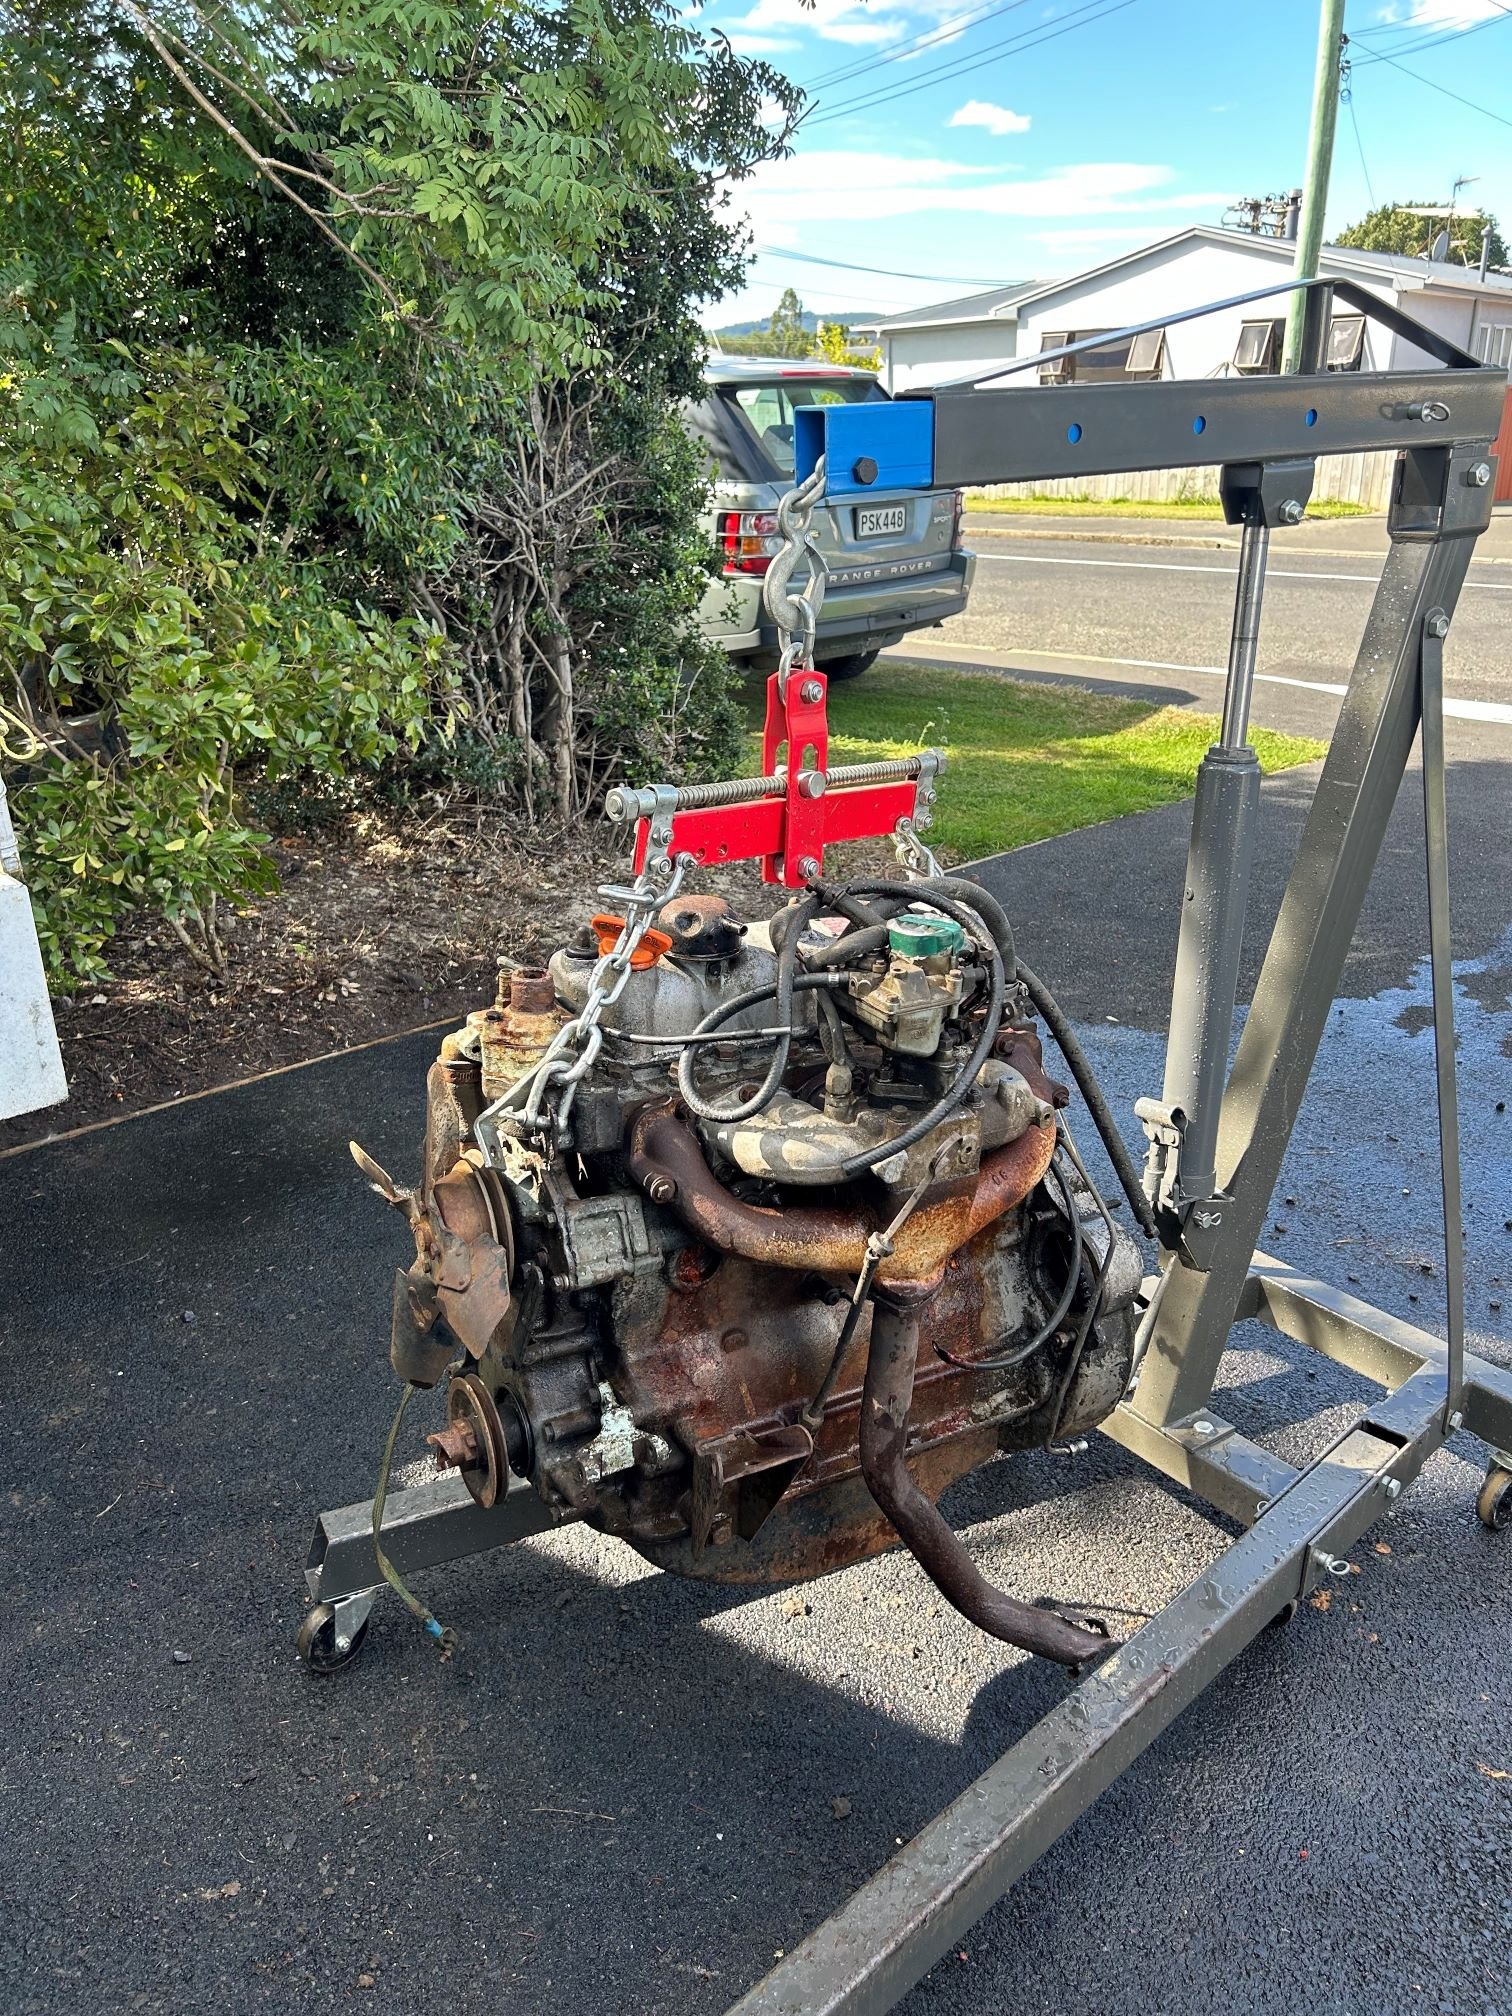
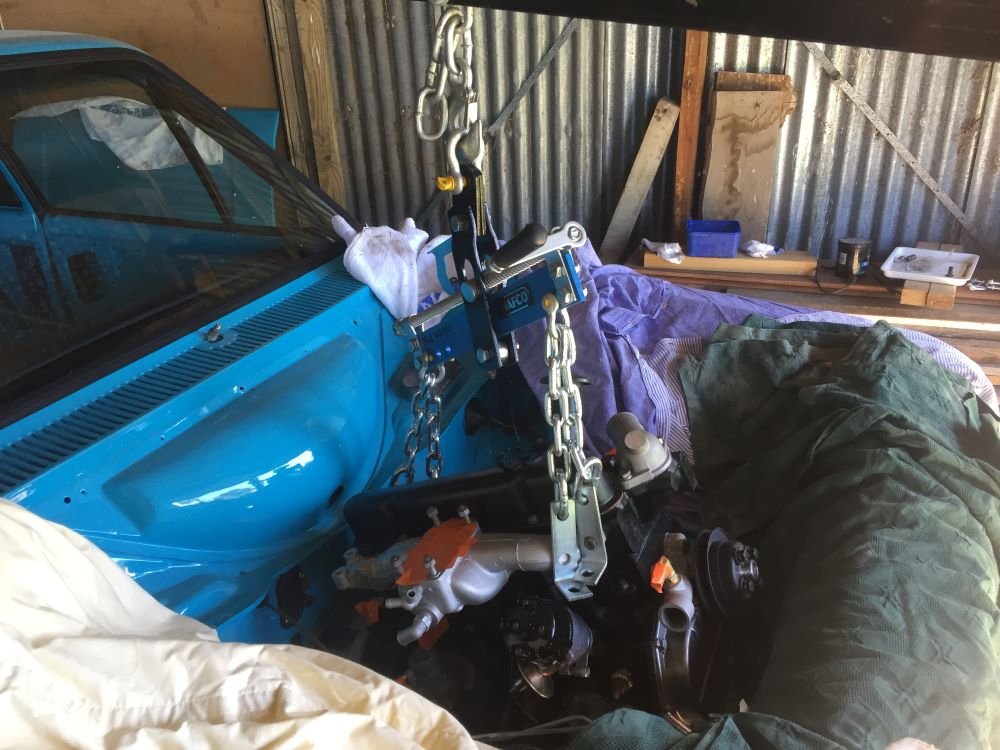
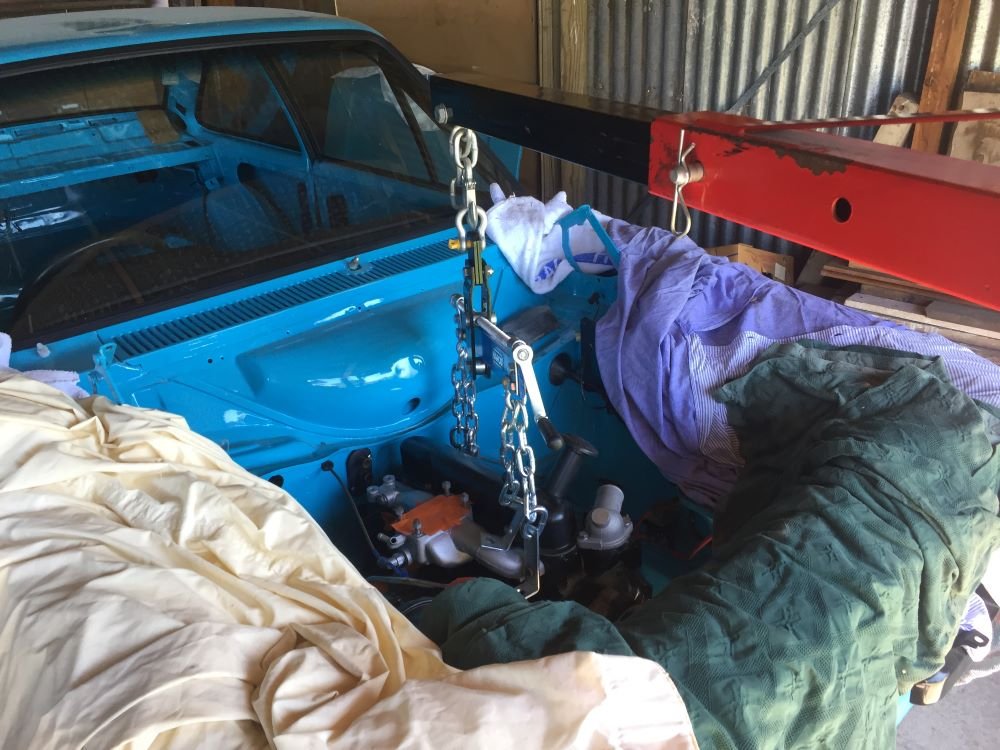
Here is a wee update. The fist job was to sort out a couple of issues on the hydraulic clutch setup. I realized that the slave cylinder I had that came with the bellhousing fowls on the headers. After a bit of head scratching and hunting I found another slave cylinder that just fits. I heated the headers then tweaked them out about 15mm to give a bit more clearance, it is still very tight. I still only have about 10mm of clearance. I'll make a heat shield I think. That is the new one, only problem is that the bolt holes don't line up with the holes on the bellhousing. So I milled slots in it. I was going to TIG the bellhousing holes and tap them but I decided not to just incase this new slave cylinder doesn't end up working out. For the master cylinder I welded a backing plate to the fire wall and mounted it in the engine bay between the booster and the header. Tight fit but it works. That picture makes it look much closer to the header than it is. I couldn't have it directly behind the clutch pedal unfortunately, so it's off set from the pedal. I used some steel rod linking them all together and threaded the ends. It's nice and smooth, I'm hopeful it will work well. Engine in for hopefully the final time. I couldn't mount the gearbox as when I went to fit the fly wheel I realized I don't have any flywheel bolts. Doh. ARP ones are on the way. Next I'll start wiring her up and put the dash back together. Cheers guys. P.S. Pro tip... Don't spray a car in jandals. That was taken after 2 showers.2 points
-
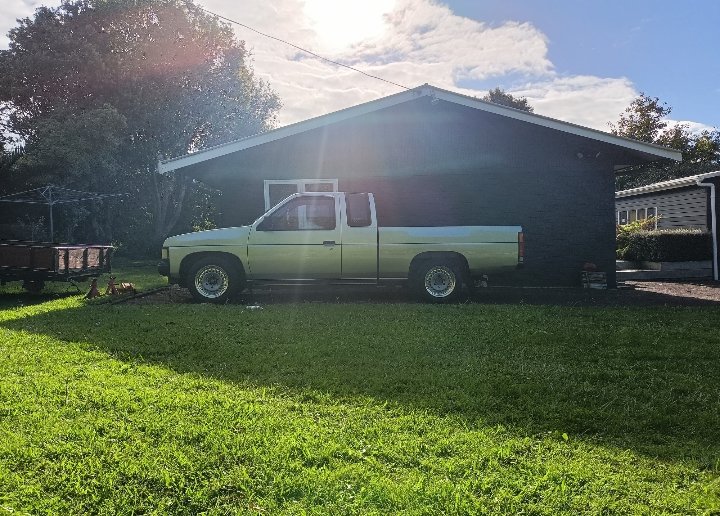
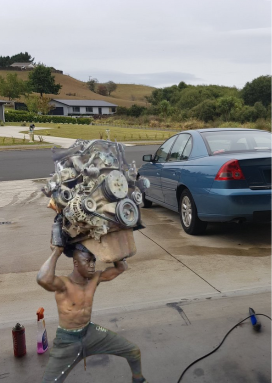
Great hardbody, great magnet, even greater Pro-Lift jack. That is all Edit: enjoy your new page, /Ling out2 points
-
Camped every other hanmnats It was intents2 points
-
As a seasoned camper there it's really not that bad when you're well insulated. Would definitely trade again...2 points
-
We'd have to go speak to the people who are now running the camp very nicely before getting too excited about a hanmeet. The people running it are all new now. Karl and i have met them when we jacked up leaving vehicles/trailers there for a couple of the moped melee. Theyre good sorts. We told them how we used to book the whole place out back in the day.2 points
-
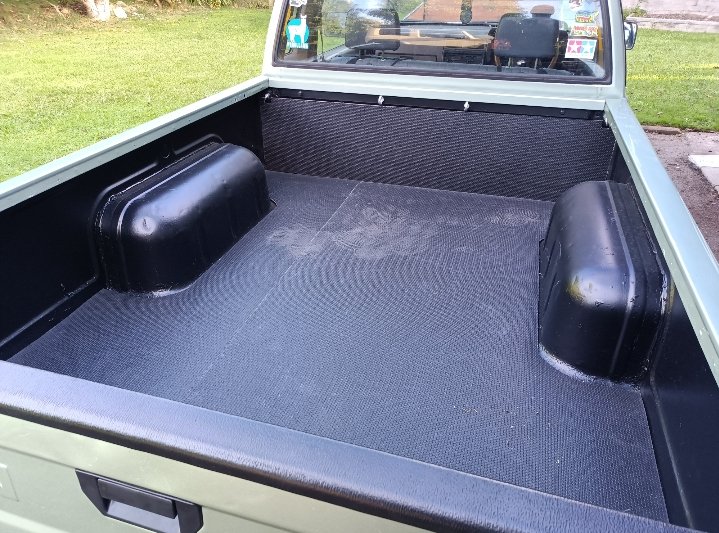
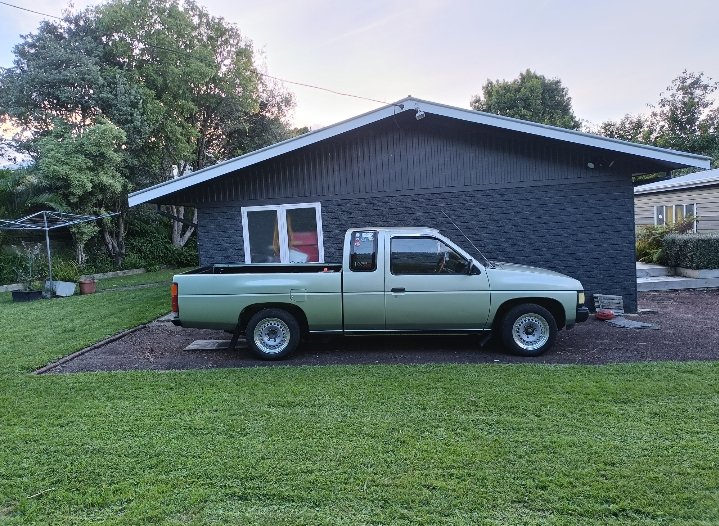
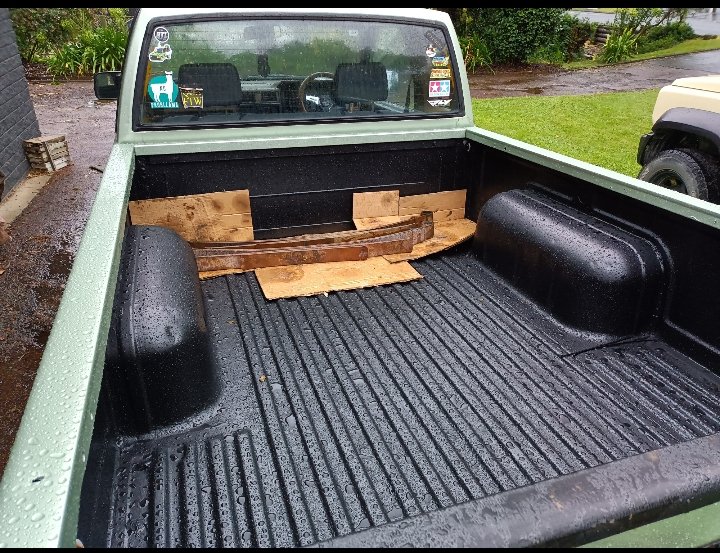
Lowered the front another 20mm or so, shitty pic sorry Added some foam matting to the tray
2 points
-
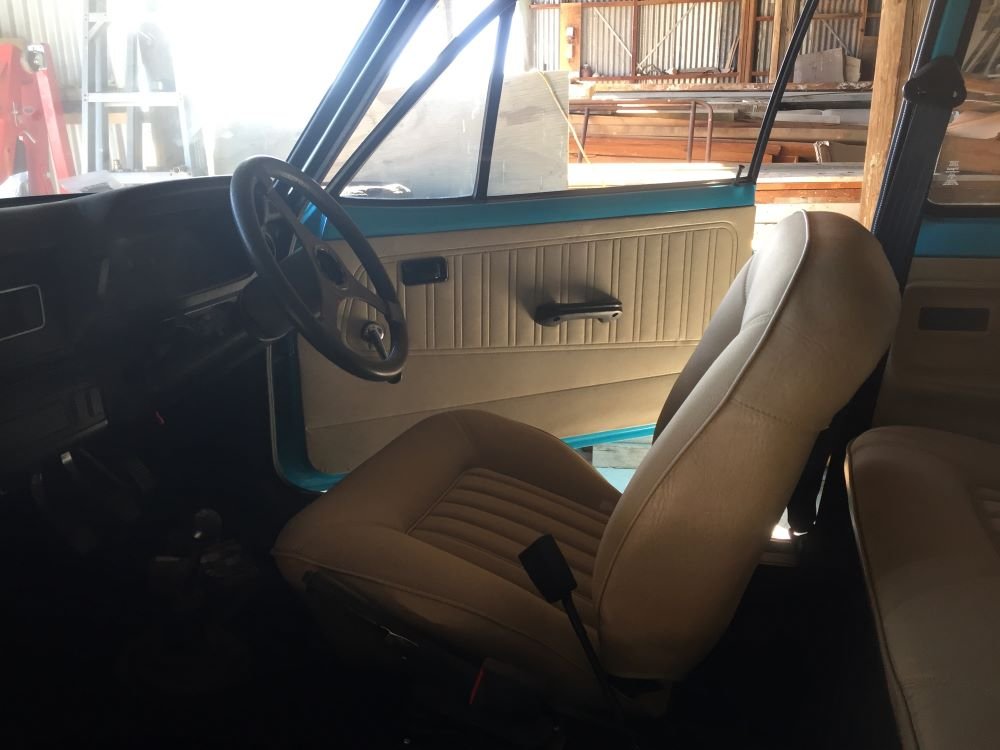
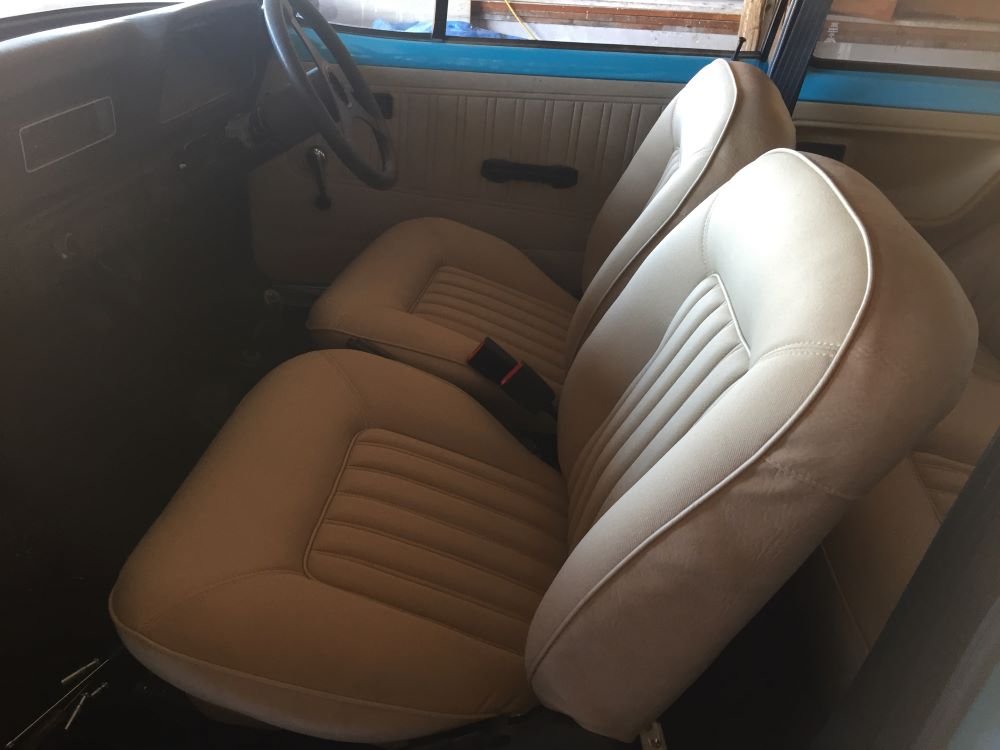
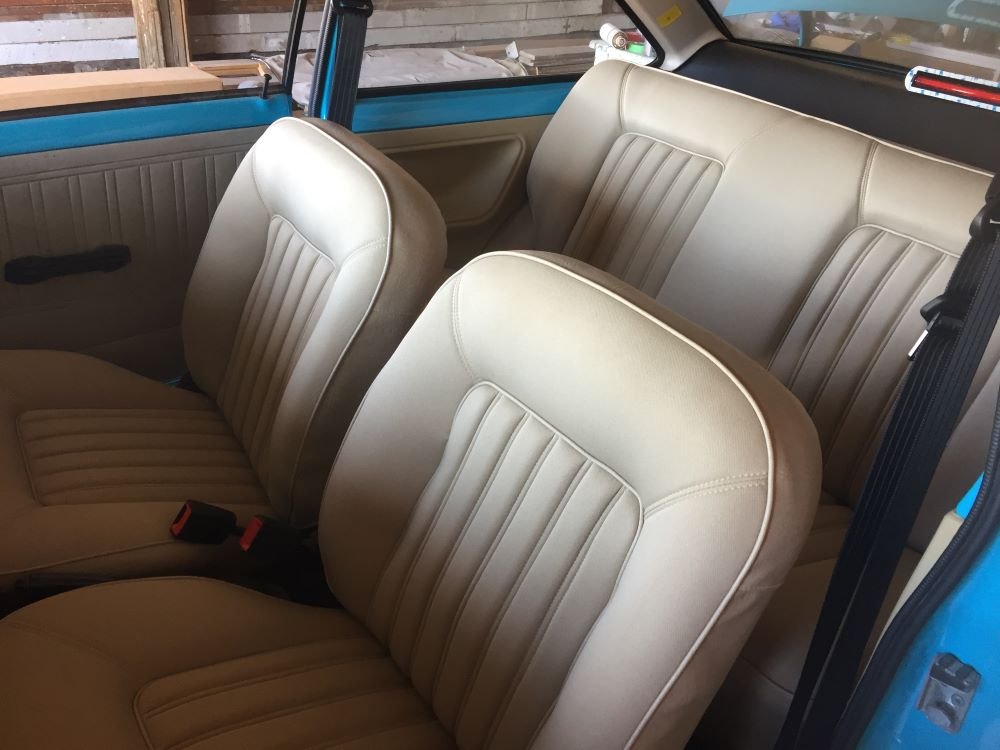
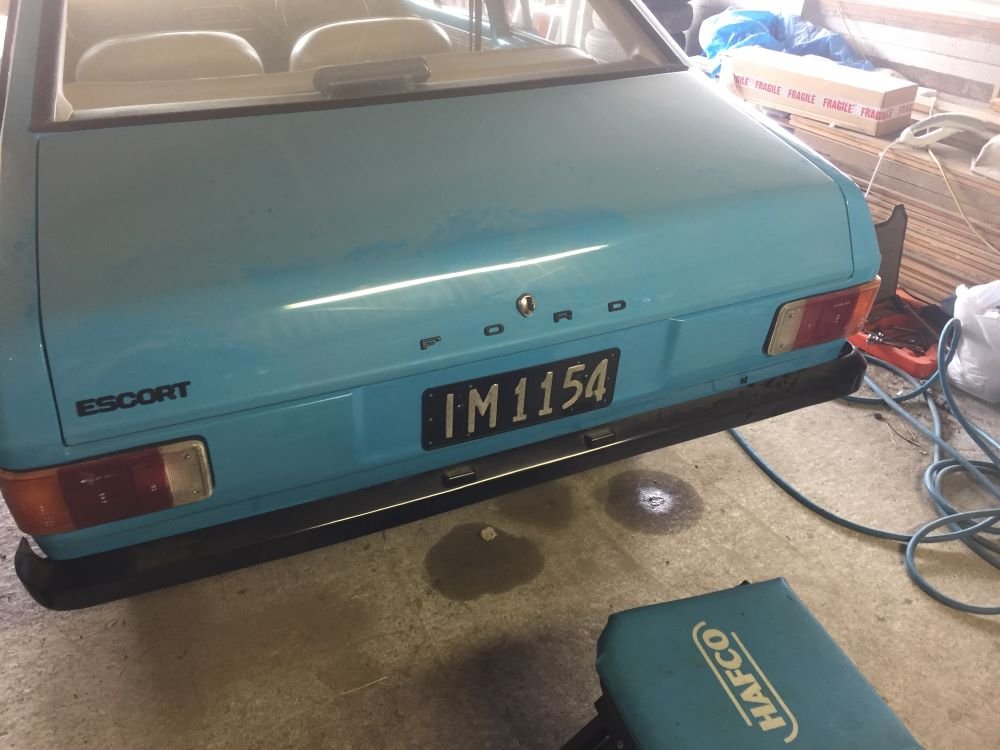
Just slowly picking off jobs as time allows. Fitted the carpet and cut all holes for seats, seeatbelts, gear stick, brake handle. Installed gearstick and rubber gaiter. Next put in seatbelts and also fitted door cards. All looking pretty good. Next in was the seats which took a while as quite hard to line up holes I had cut in carpet. Starting to look like a new car. Next put badges and number plate on rear also mirrors on doors. Time to put some petrol in the tank in anticipation of startup but it all ended up on the ground. Didn't see that coming and had to take tank out to find hole. Rust never sleeps. Luckly had another tank which I checked more carefully. Cleaned, painted and installed. No leaks Result Project Discussion https://oldschool.co.nz/index.php?/topic/84912-petes-mk2-escort-1600-sports/page/3/#comment-2618039
2 points
-
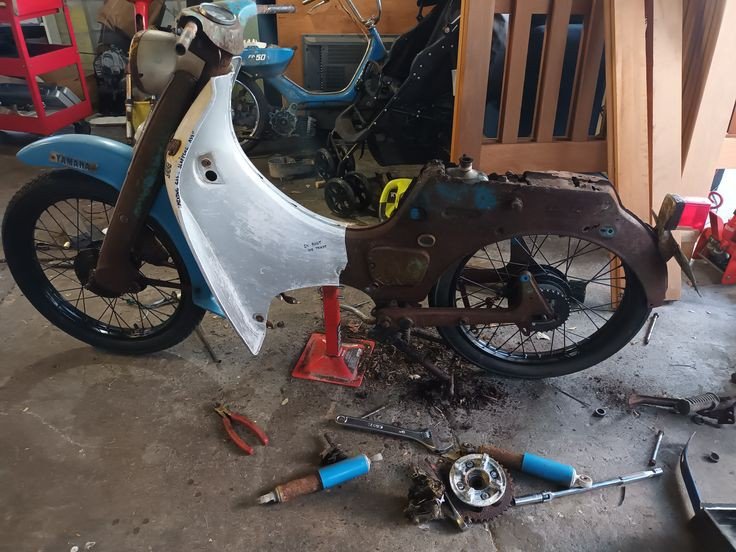
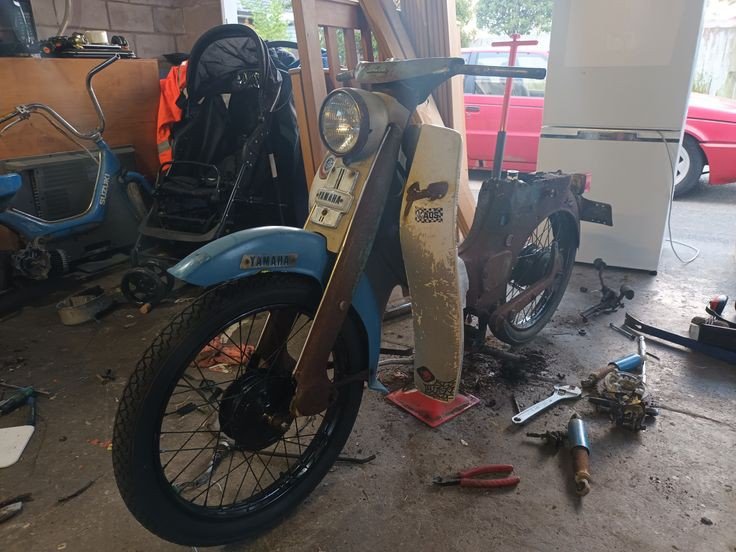
Wheels aquired, from a suzuki fr50 but are a 90% fit. The best bit though? Freeeebie...Zip, Zero, Naadaa Need to de spring the front and get the whole bike as low as poss, might be able to scrape the leg sheild on turns (doubt it) Also removed the motor, its well cooked so if anyone wants it for whatever reason its yours for a crisp high five Anywho heres some pickys
1 point
-
If the oiling system allowed it, and if I was chasing driveline perfection I would be setting the engine to as flat as possible and remaking the manifold/tunnel etc to suit. Just depends how much work you want to do I guess.1 point
-
had to do some editing for class and they said anything so i made this hah
1 point
-
@nzstato Naseby is great. I've stayed there a fair few times for mtb racing back in the days. Cool trail network. But no *hotpools for winter warmth *exorbitantly priced1 point
-
Two more options for future https://www.kurowholidaypark.co.nz/ Owners are old family friends https://nasebyhp.nz/ Bit of a regular of mine, not busy at all out of summer peak. Pack your winter woolies....1 point
-
@yoeddynz https://www.ridersrestroxburgh.com/ Also southnats option?1 point
-
You wanna camp there in winter? Thats a Tori level of misery.........1 point
-
Also the other camp a little up the road? They have a very nice big tent area/ frostpot area under trees1 point
-
Here’s the daytime running lights I’ll be fitting: same as what I had before, but this time I’ll spray some 2k clear on them to keep them neat. I like them because I want that mouth breather who’s still half asleep scrolling through tiktok to see me at a roundabout. the major challenge I had was that they have three wires. Red : DRL; Yellow : Indicator, Black : Ground. I previously had given up trying to make the indicators work, and just settled for this method of wiring, courtesy of my good mate and former president of the MR2 nz owners club, Charlie: however for those that like a little more pizzazz, after much head scratching and Coke Zero, I’ve worked it out - a simple 5 pin relay: the electromagnet is controlled by the headlight switch. The relay can be either normally open or closed; for the 87 open pin, I’ve connected a 12v positive that’s only hot from when ignition is on, the red wire from the DRL is spliced into that. The ground is then hooked to the 30 pin, which has the black wire from the DRL spliced into that. The 87a closed pin is left vacant. I’ll have a proper diagram up soon when the headlights are flicked on, the relay is activated and the DRLs no longer work. the indicators just get power from an indicator on their side, and use the same ground as above. shine bright like a diamond With the indicator on and drls on: I was a little frustrated when i saw this, but upon closer inspection, all indicator leds flash, it’s just some led wizardry that it flashes the white leds on and off With headlights on: should be 100% road legal, as wof virms state maximum 2 front pairs of indicators, and the corner ones are more side than front so should be legit did a bit of test fitting just to see where every wire would go, and how the harness might look: shouldn’t be too hard, just a whole lot of planning, fitting etc, I’ll make the indicator harness longer than needed. Removing the bumper should not pull on the wires too much.1 point
-
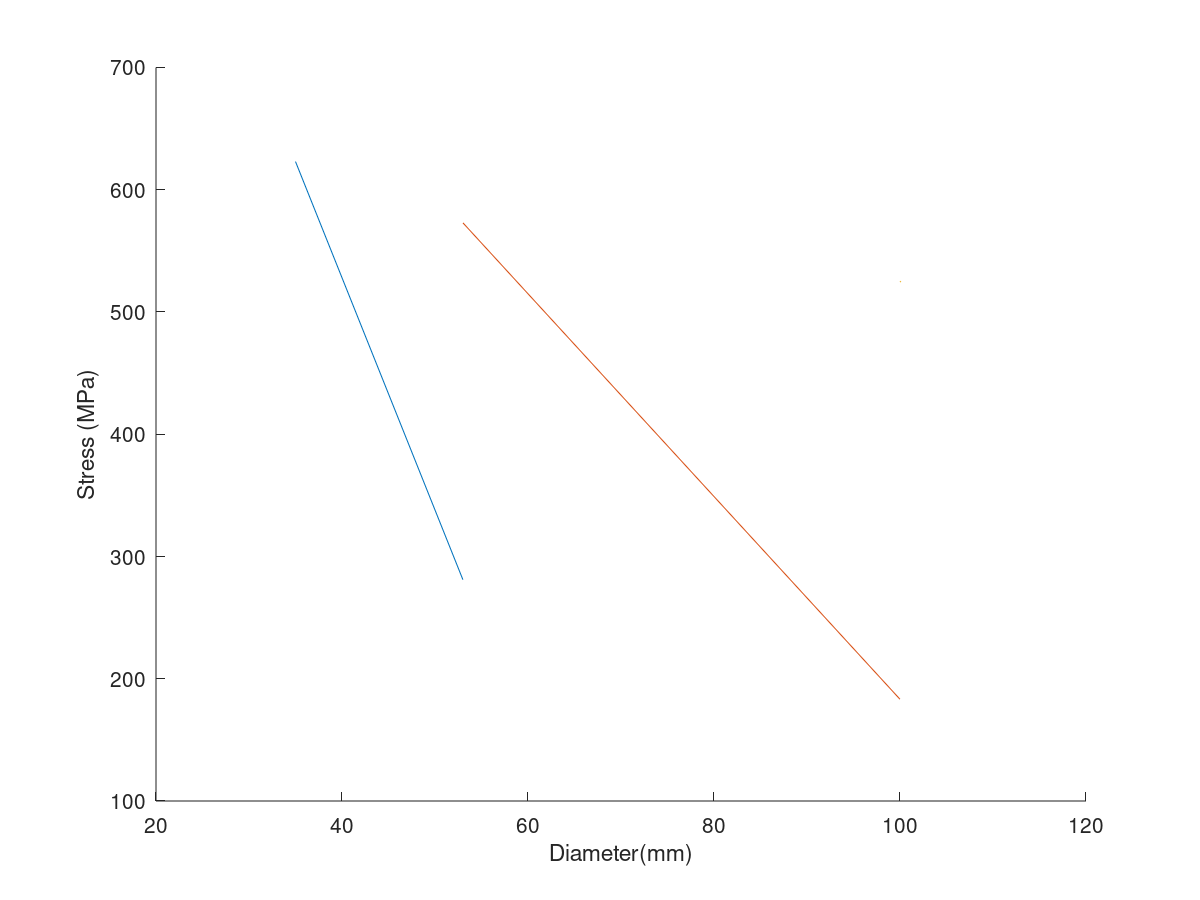
Shrink fits are legit. About 4 or 5 years ago I had to design an extrusion container for making magnesium rods, the container needed to be made of multiple shells of high strength (H13) steel that are shrink fitted together to get enough strength. The shrink fit was used to put something like 600 MPa of compressive stress on the inner liner, giving almost 2000 MPa of pressing capacity. I think it was something like a 0.15mm interference on about a 53 mm diameter sleeve, required temperature difference was about 250 or 300C to get it to all fit together. Was quite stressful as the liner was about 150mm long and had a nitrided surface so any lathe tooling would just bounce right off if it grabbed and needed to be redone.
1 point
-
+1 hanmer West coast will be all rain in winter1 point
-
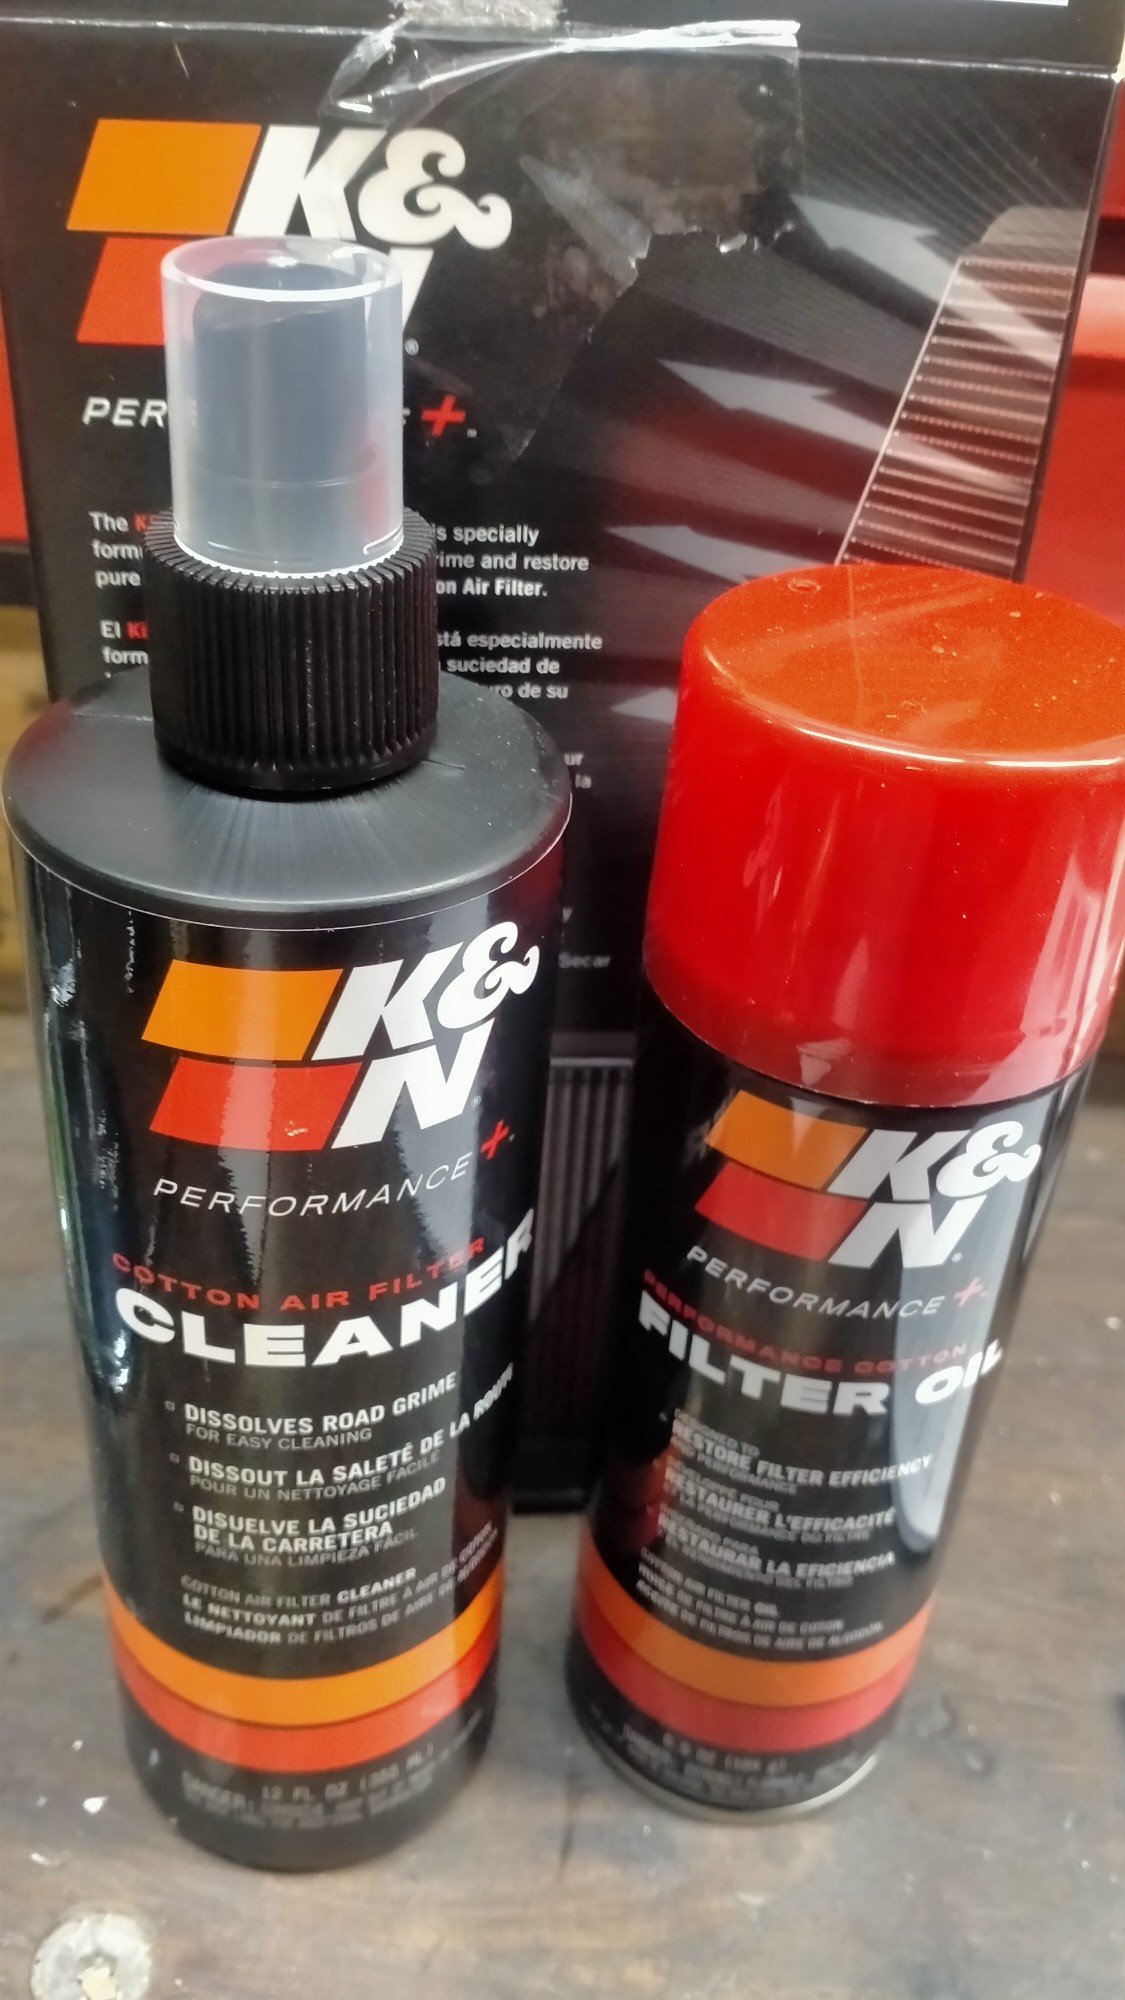
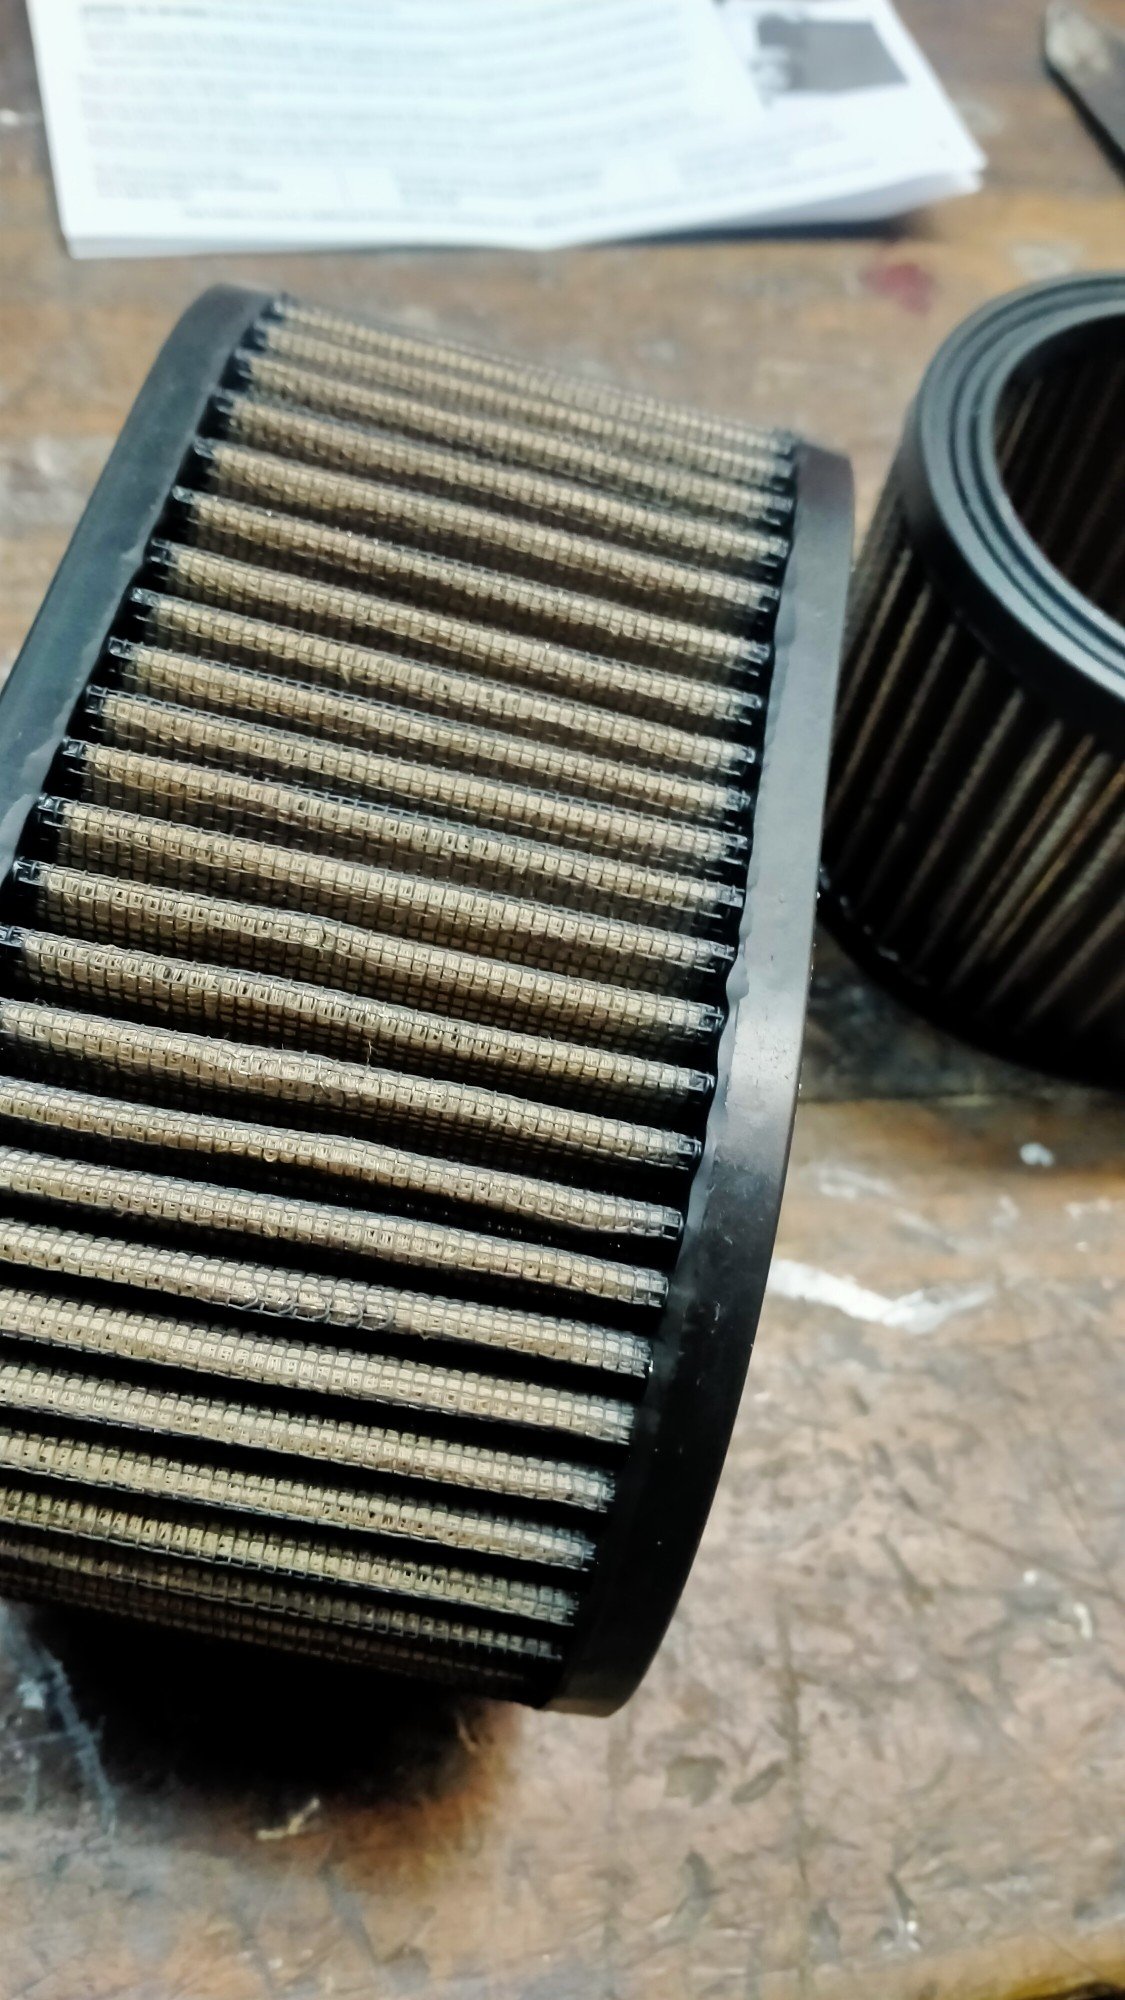
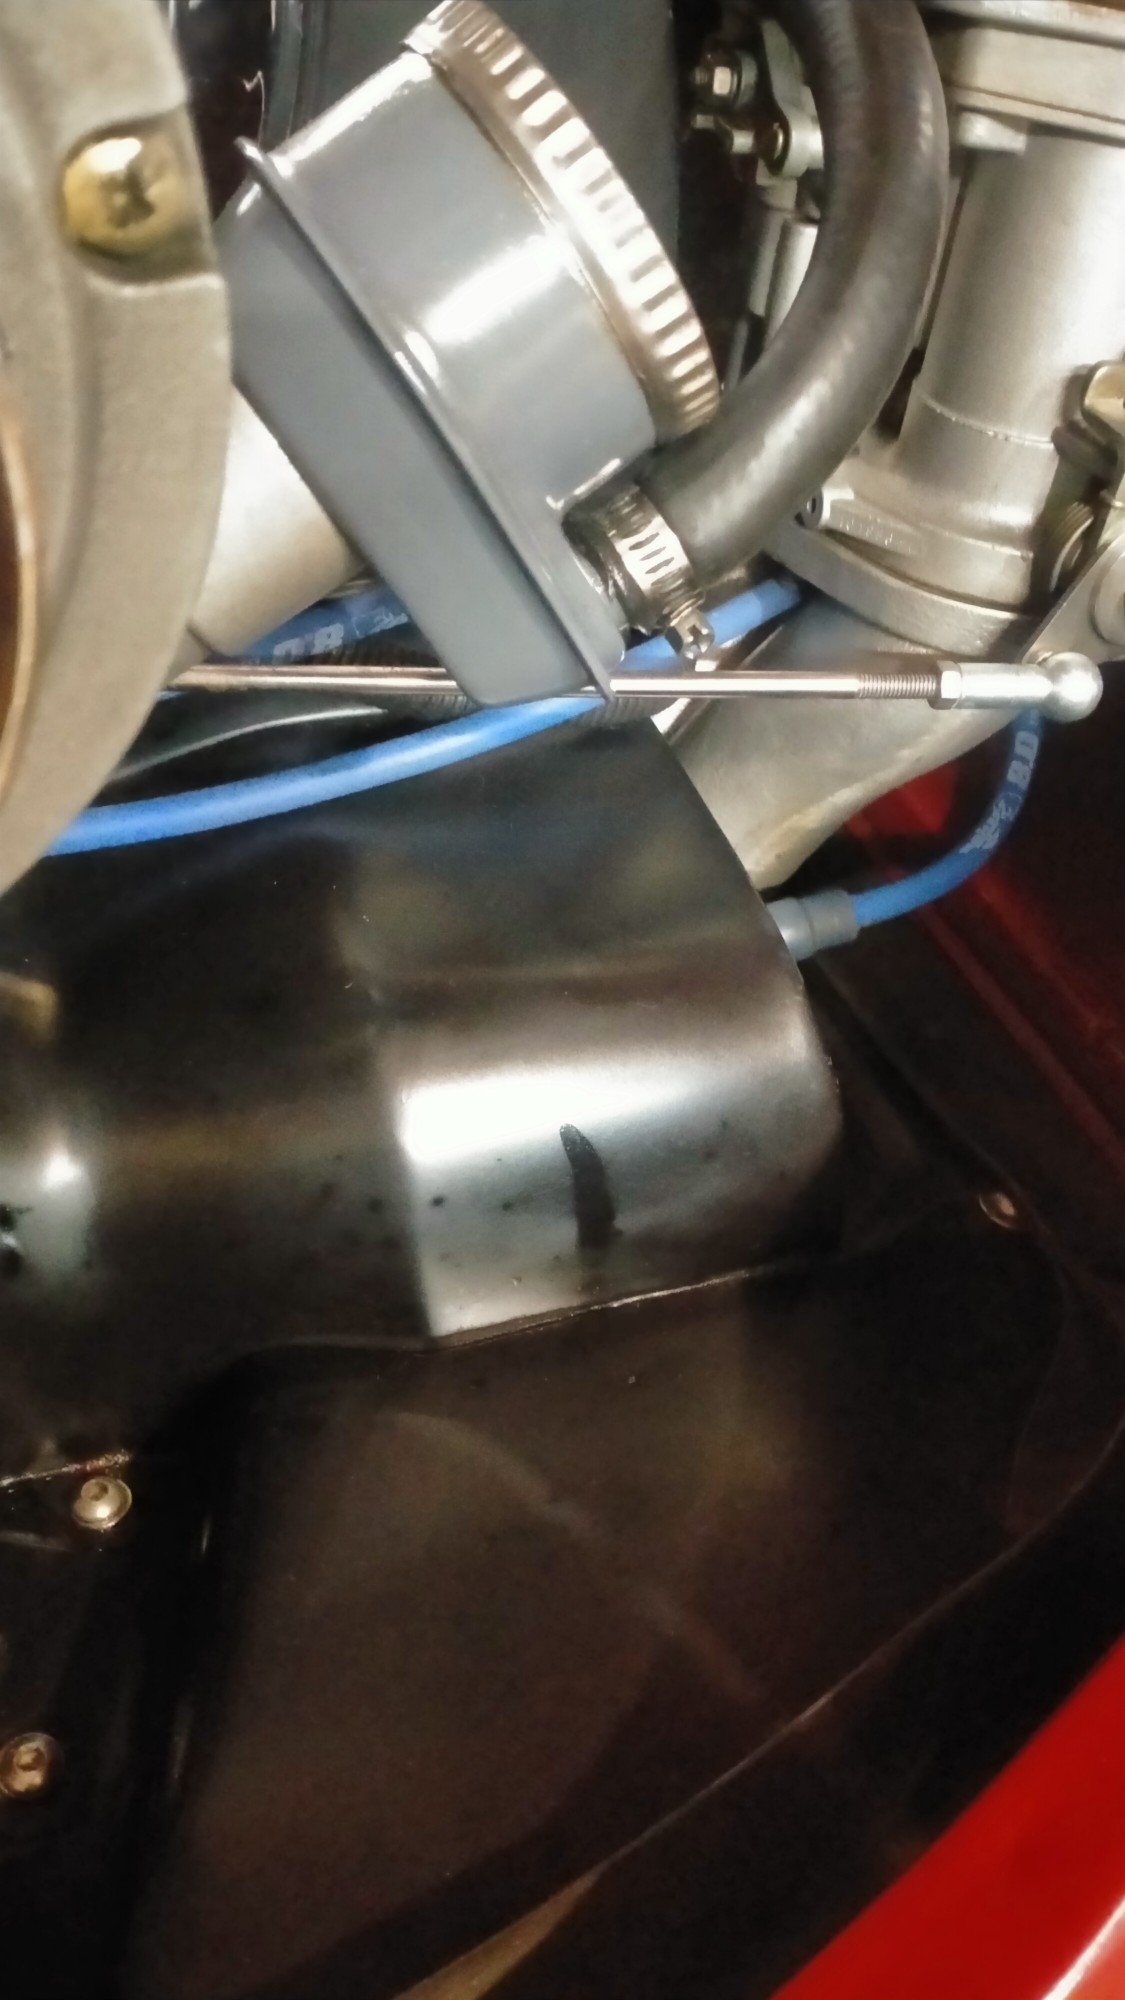
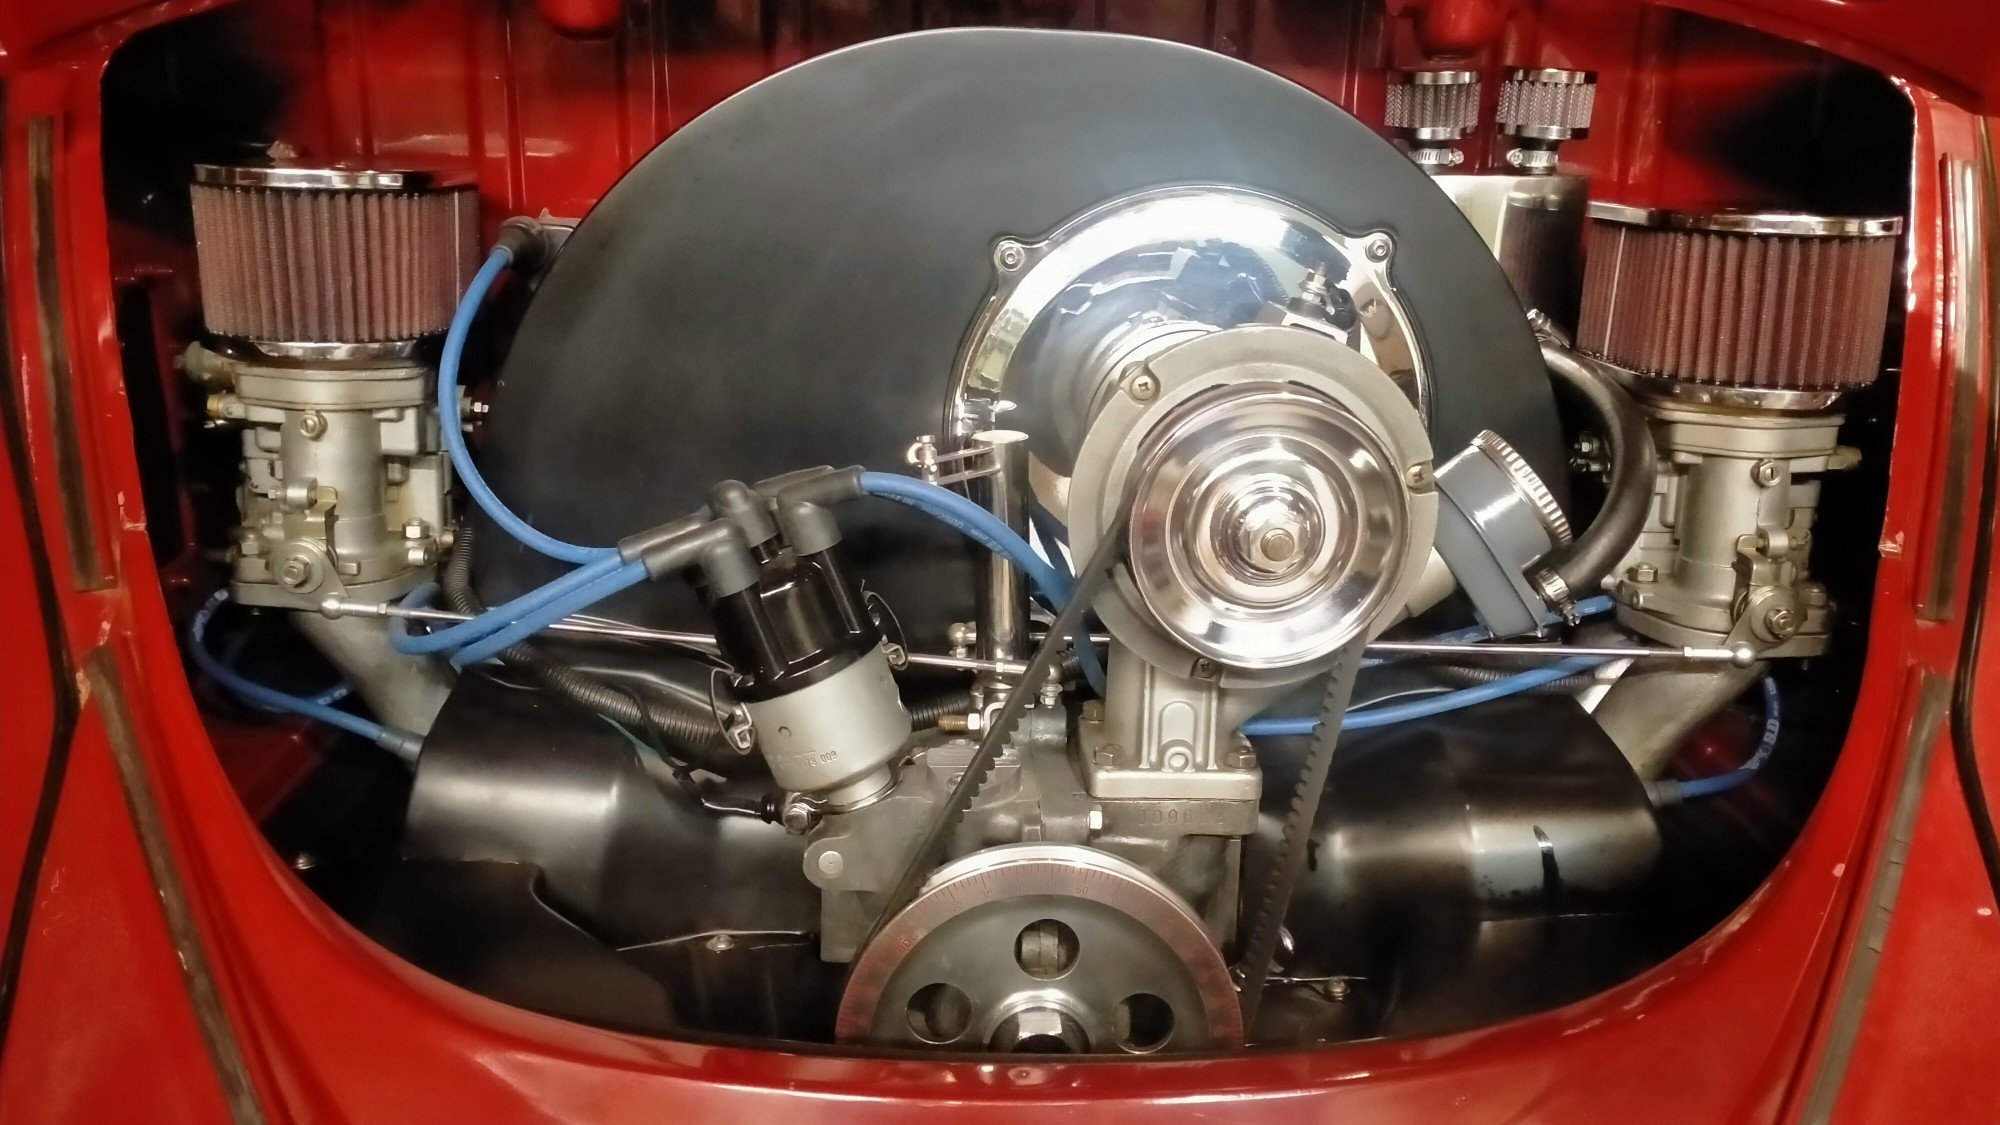
Minor maintenance tasks update. Thought I'd give the air filters a birthday day to protect my newly rebuilt Dells. Cleaning kit is only 40 bucks from ripco/supacrap autos. Stage 1, clean all the nasty. Once dry, stage 2, re-oil and done! Colour match filters. Other thing I've been chasing is this very annoying oil drop from the filler/breather. I wasn't sure exactly were it was getting out from. Pretty sure now it's from the breather hose connection as it's the factory fitting is slightly smaller and doesn't have a barb like the ones I put on the catch can. I had hoped just hooning on the hose clamp would work but no so I'll ad that to the list.
1 point
-
Go take a marketplace Hilux for a test drive and switch them out. Thats what Billy T would do.1 point
-
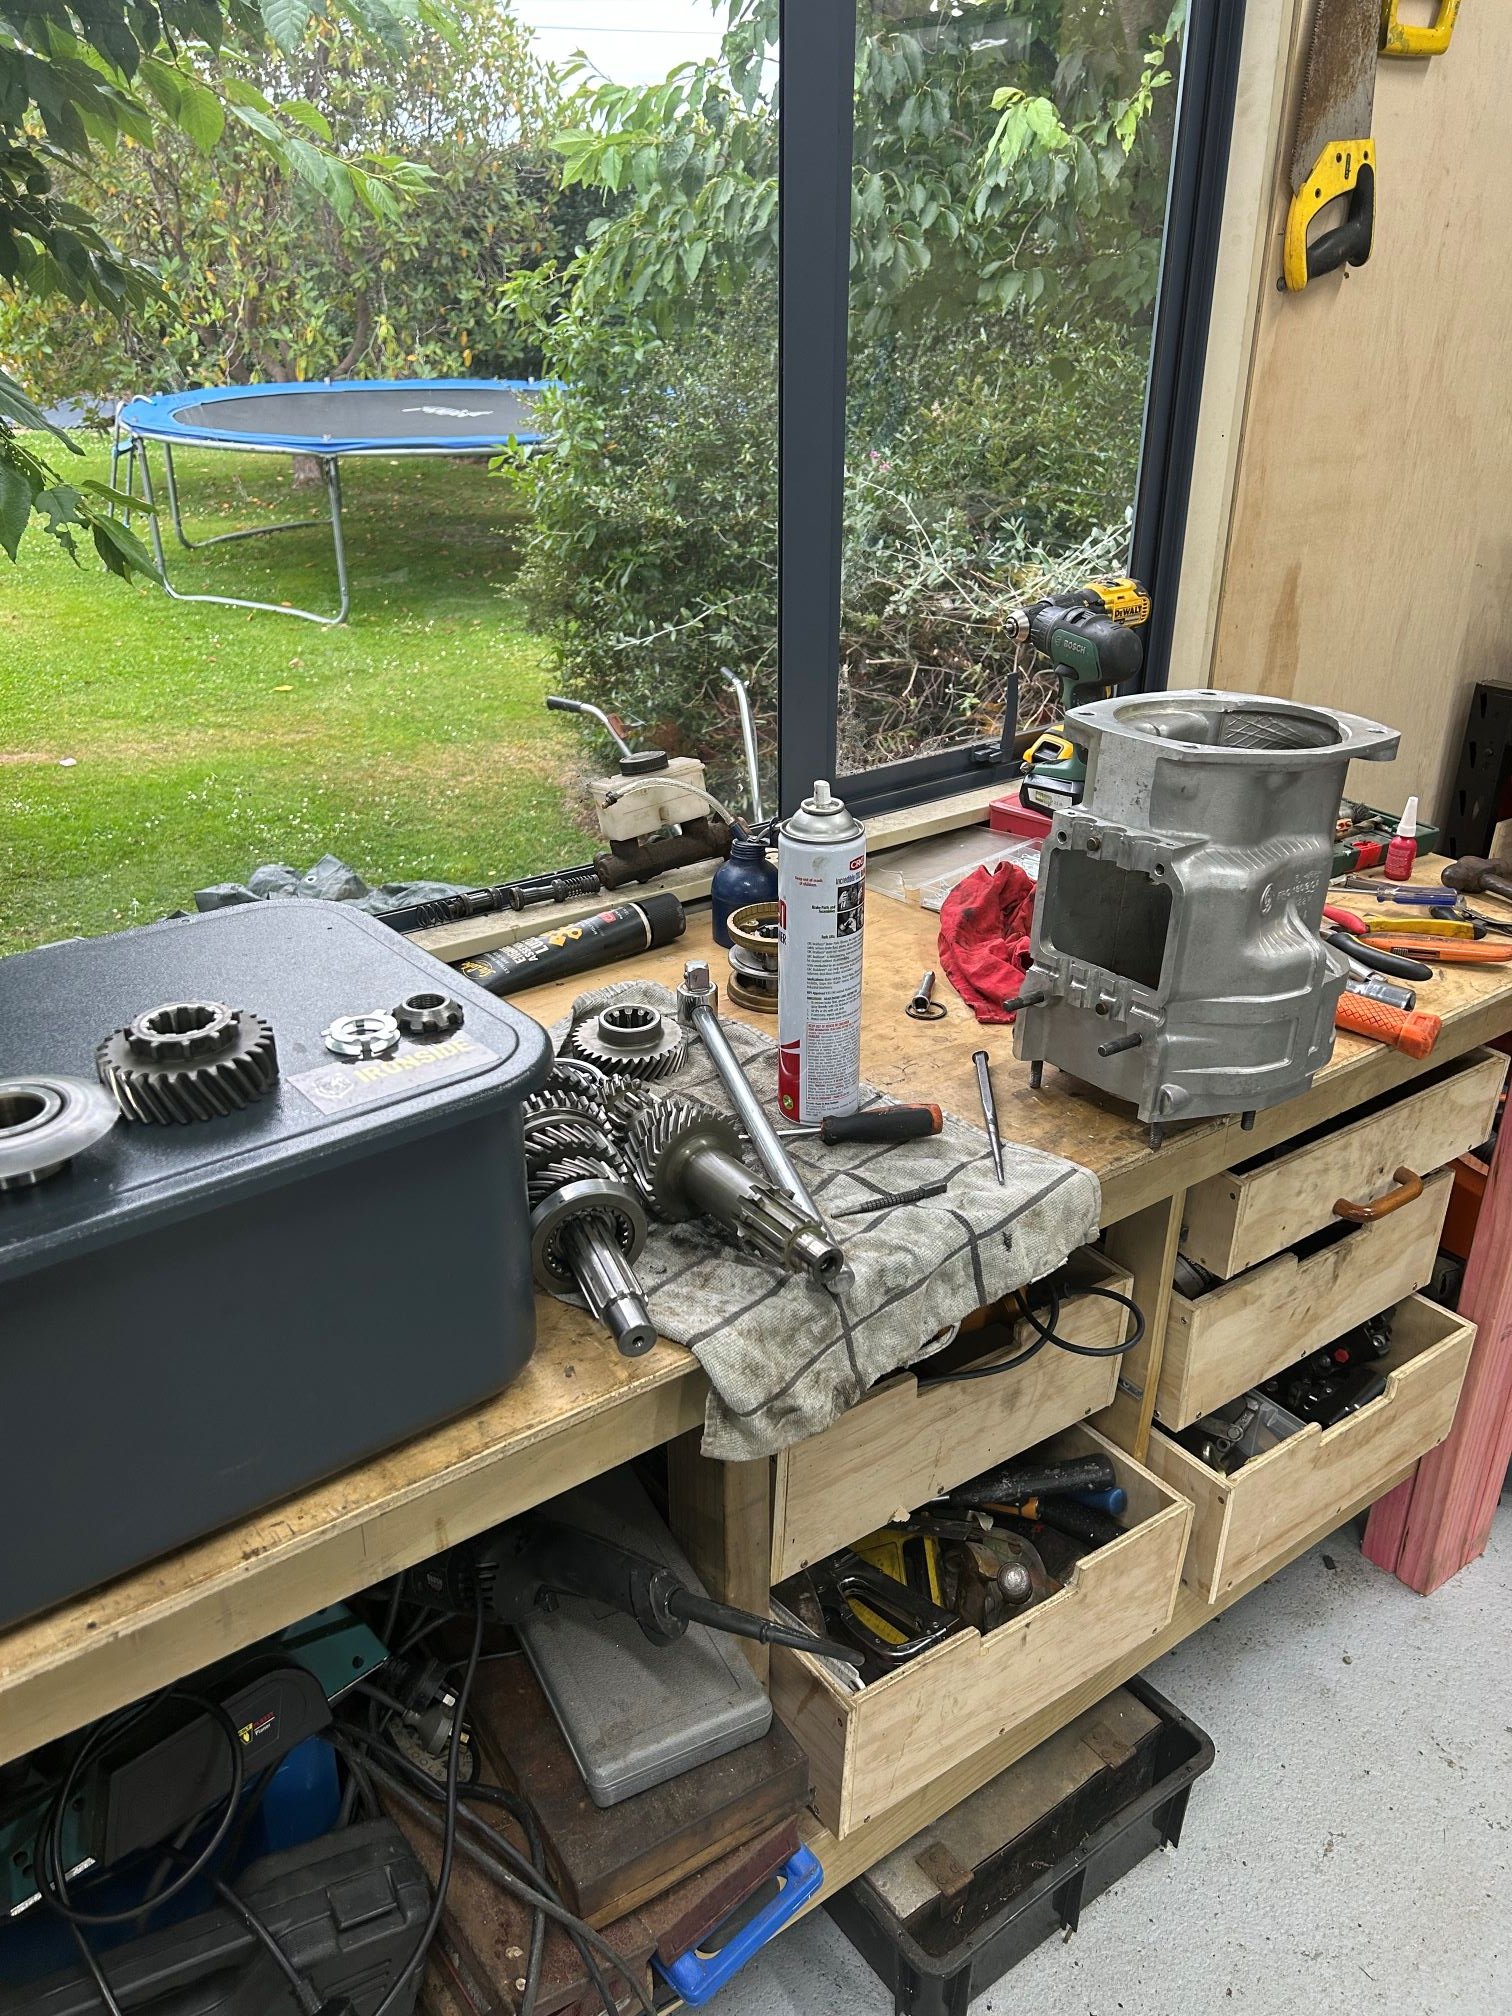
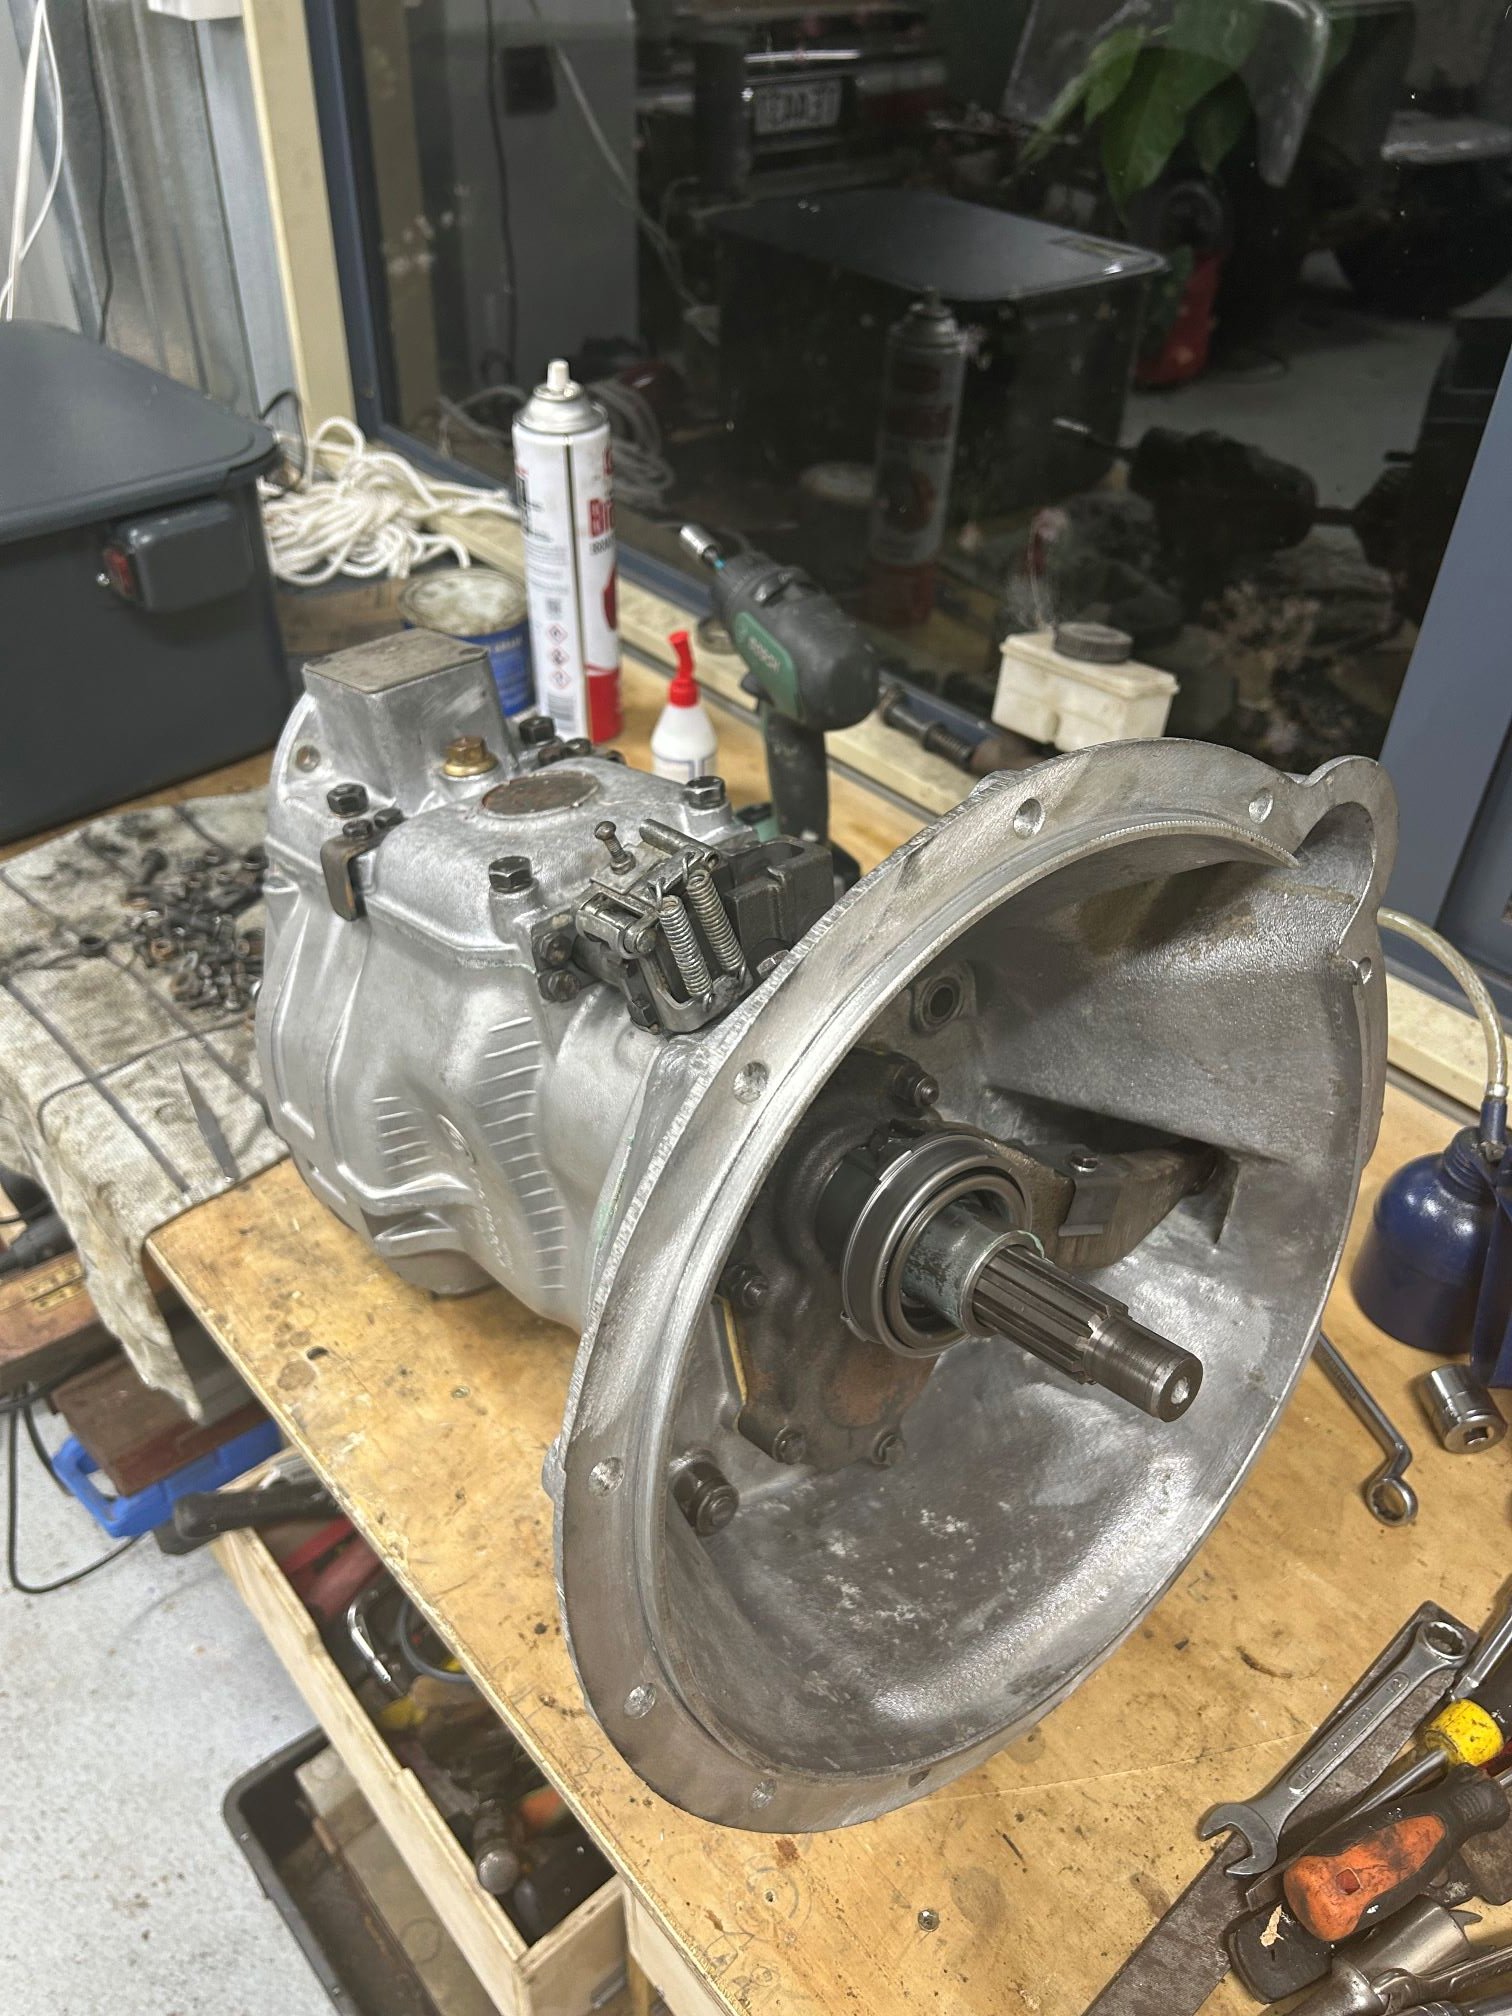
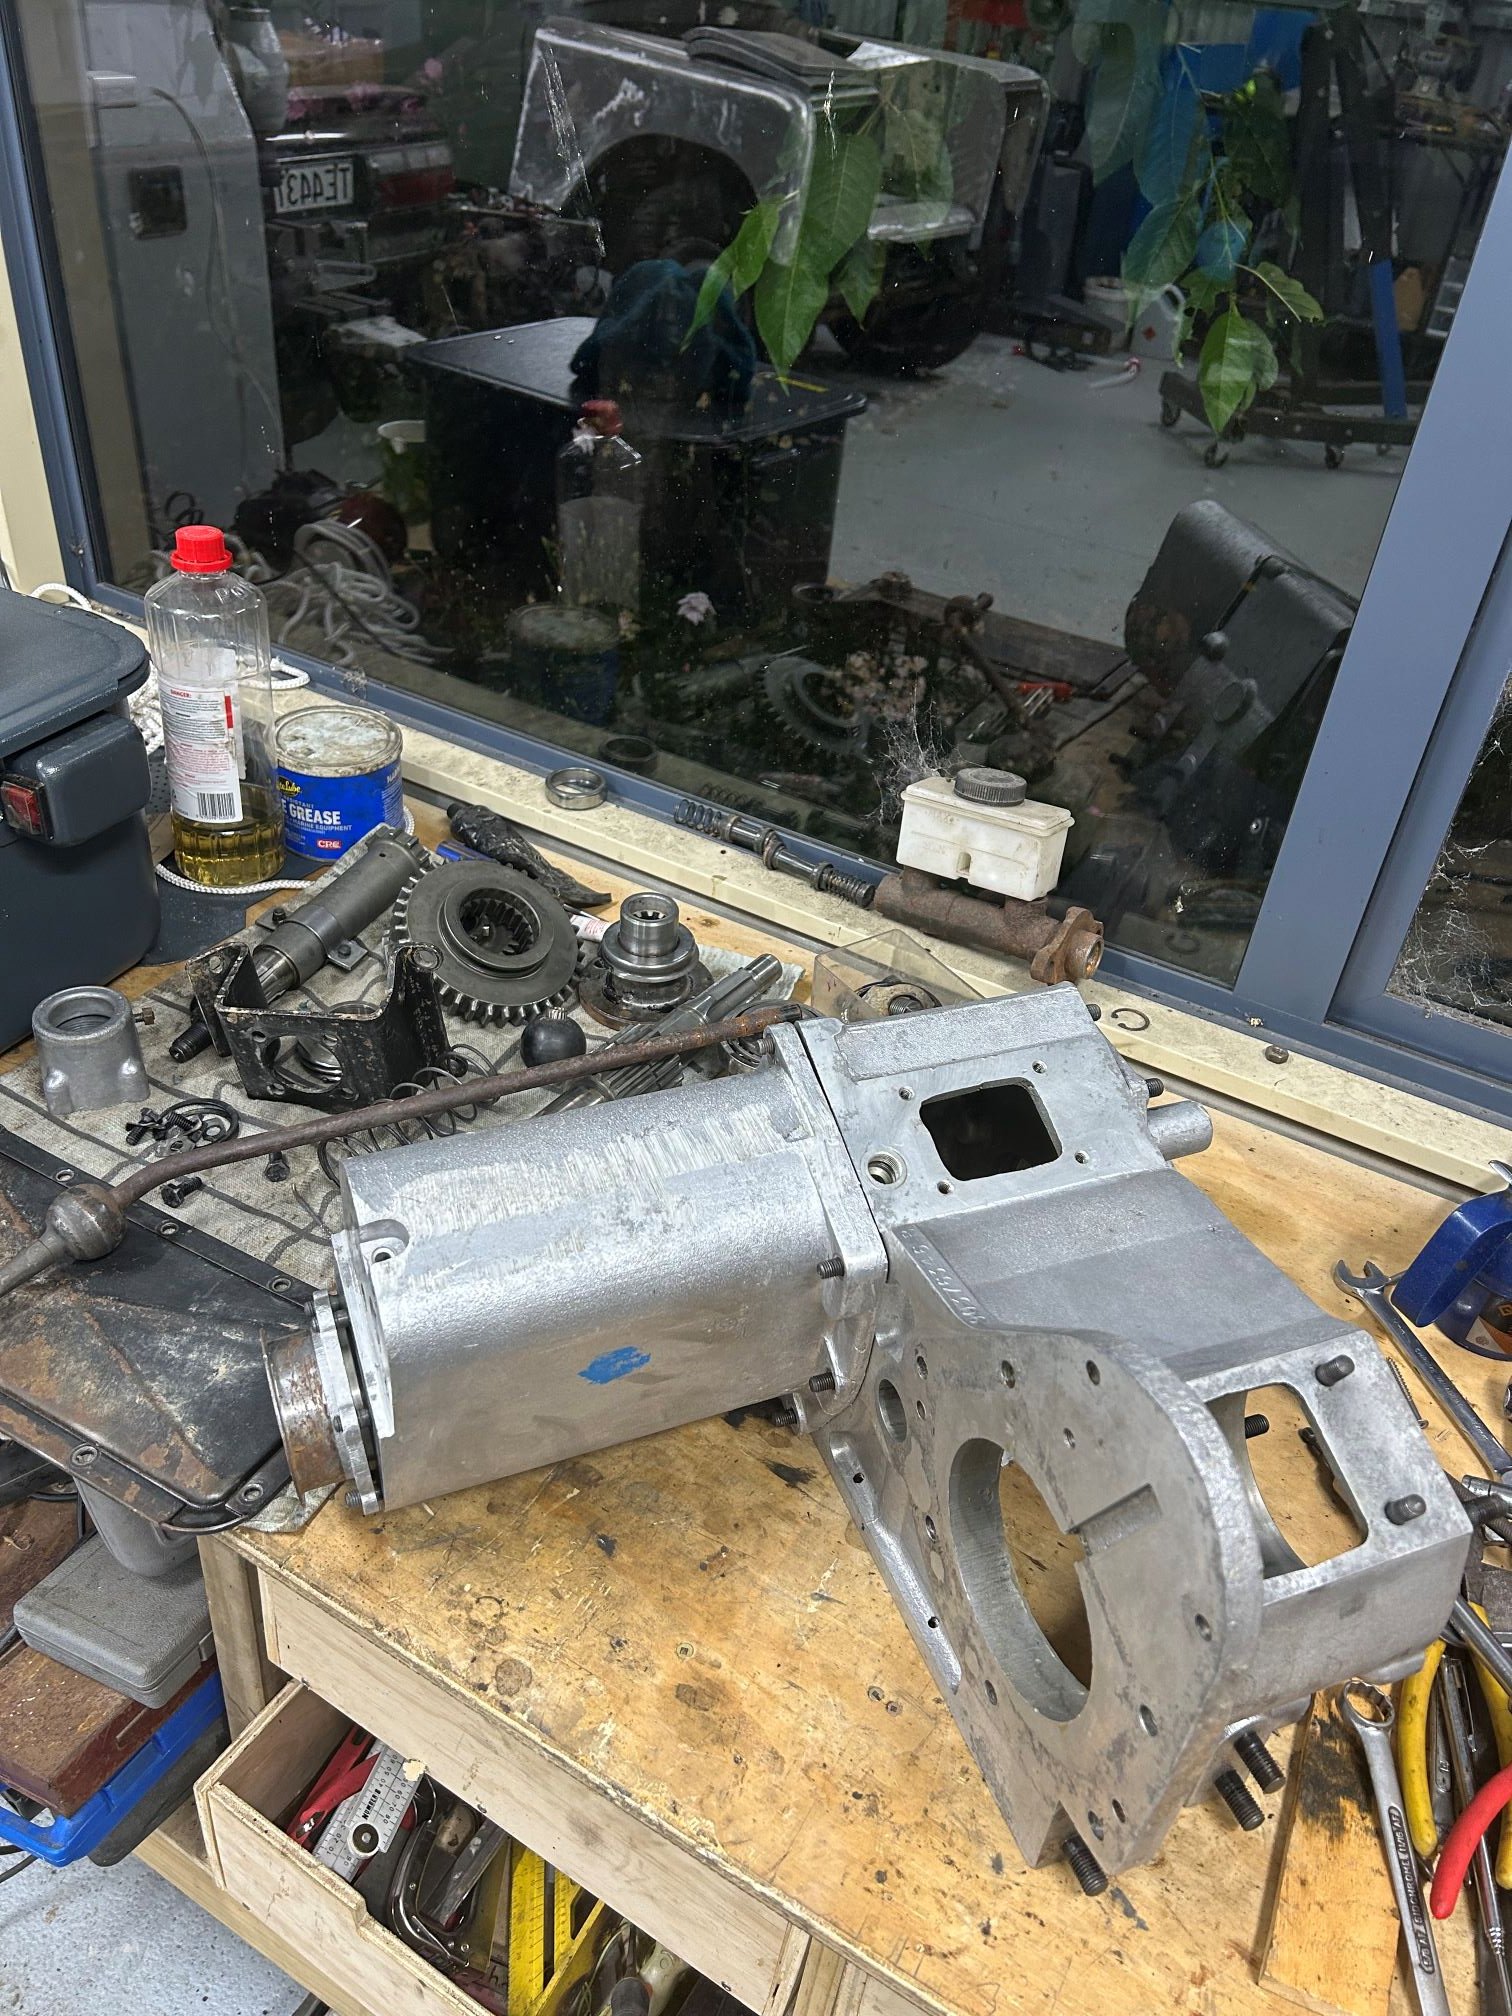
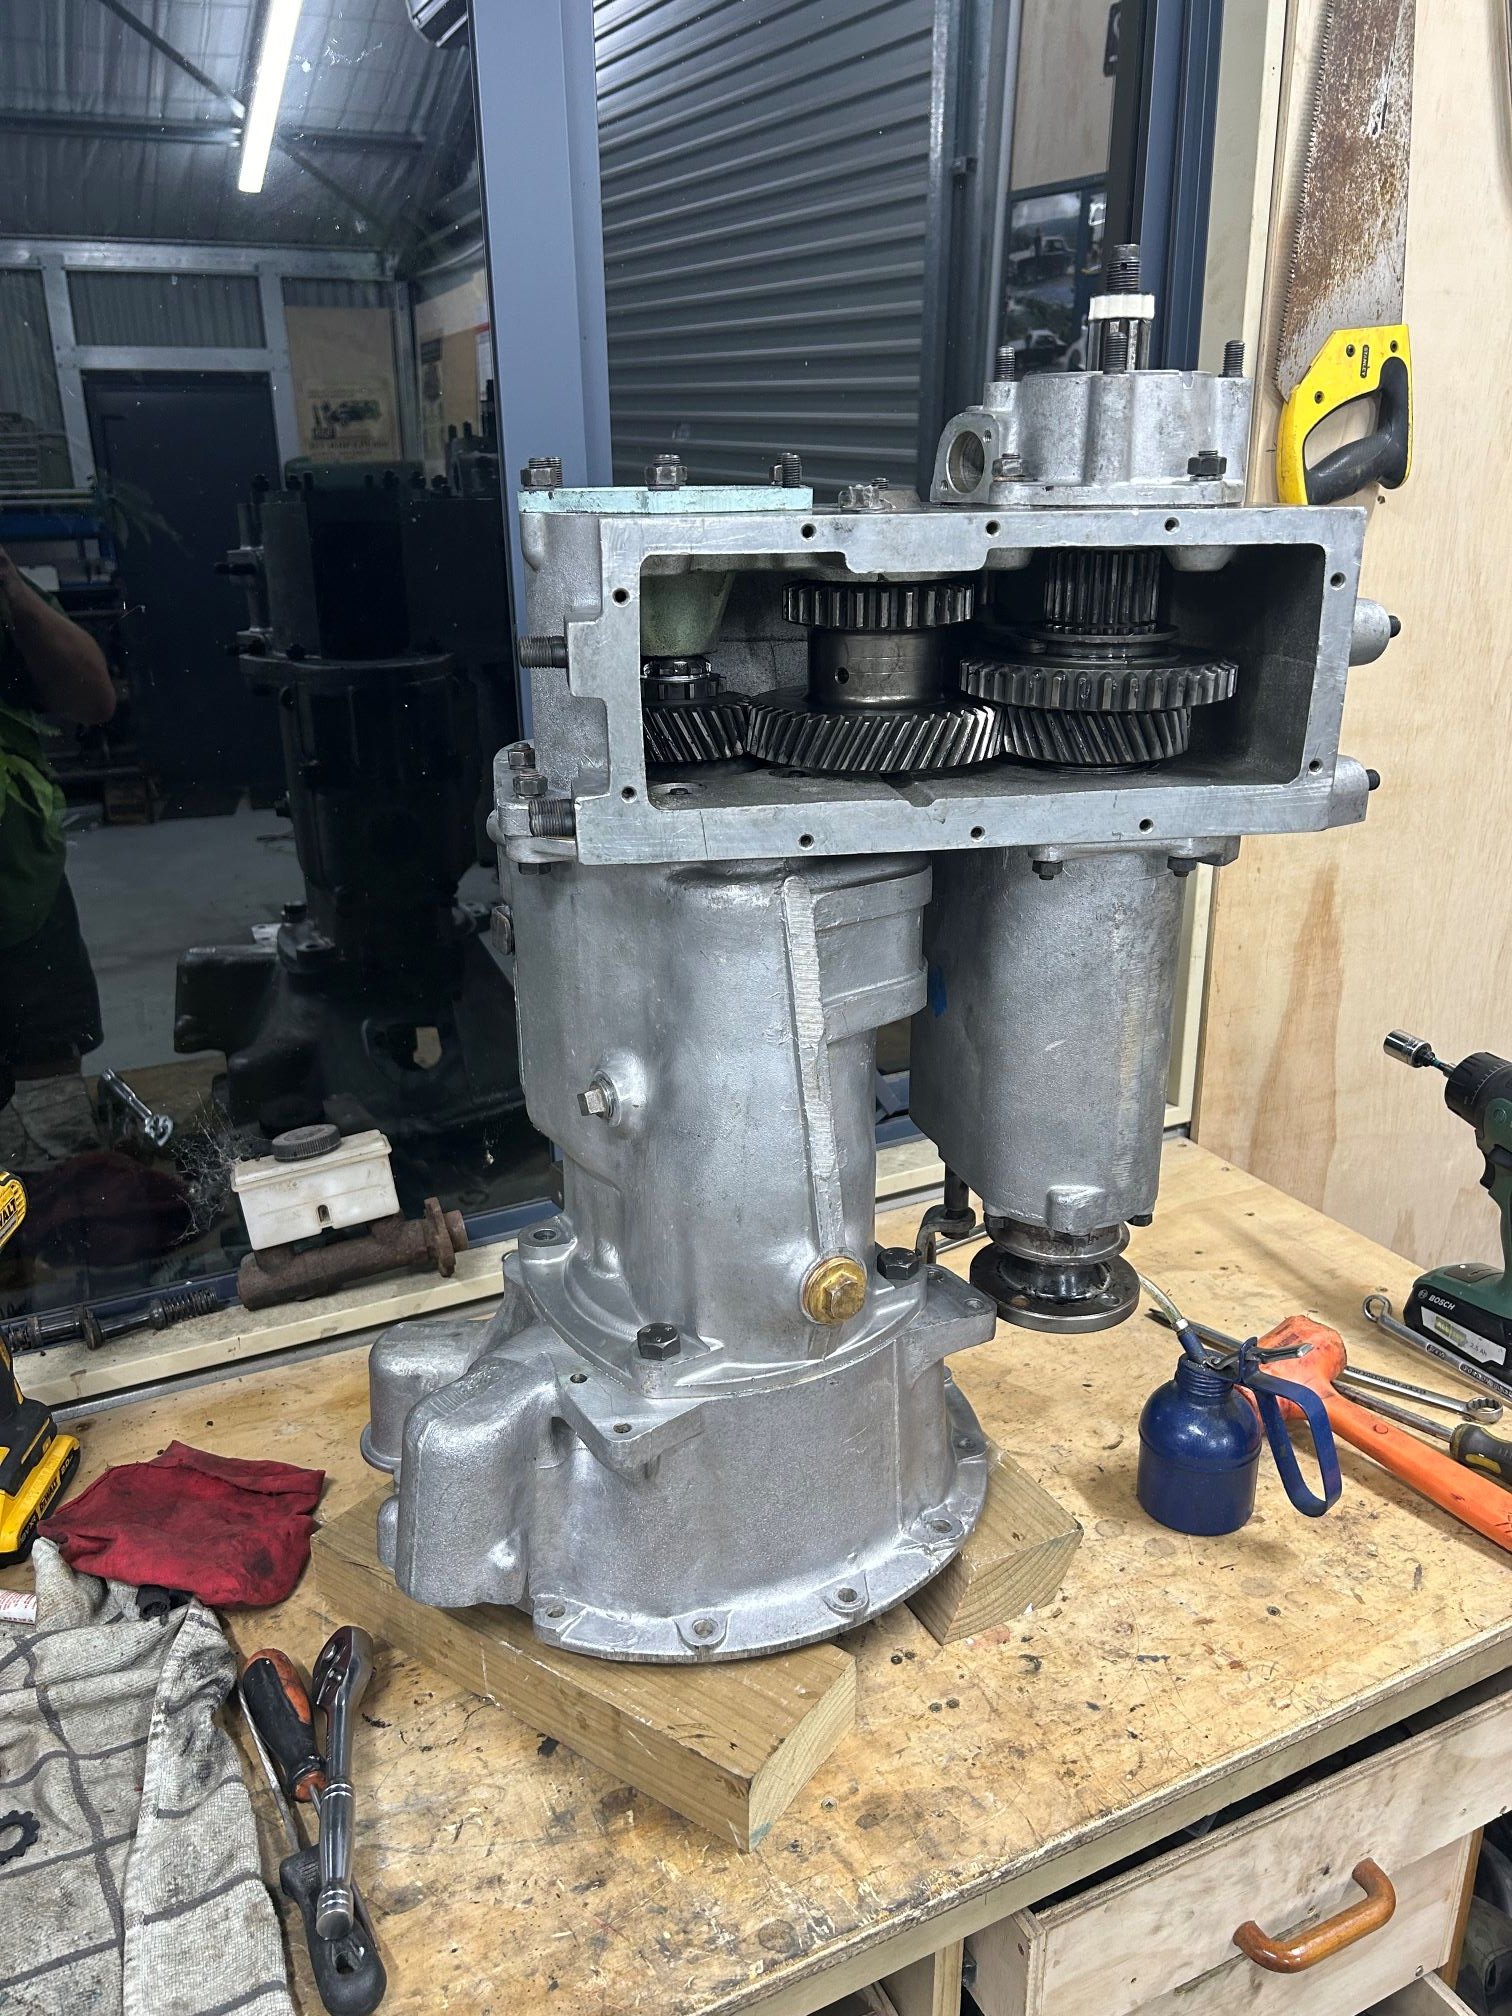
Better give this an update... Yes I did find some genuine replacement parts, and so back together it goes with new bearings/syncros etc.... While I have a transfer box I rebuilt for the back end of the conversion I thought it best to rebuild the one I had here. Needed a new set of main bearings (which cost a few $$$) but everything else was in fair condition. Its way easier to assemble vertically on the bench. Though I havent yet gone to the effort to move it off yet.... With that done I need to give the engine a good clean up and external refresh, more soon.
1 point
-
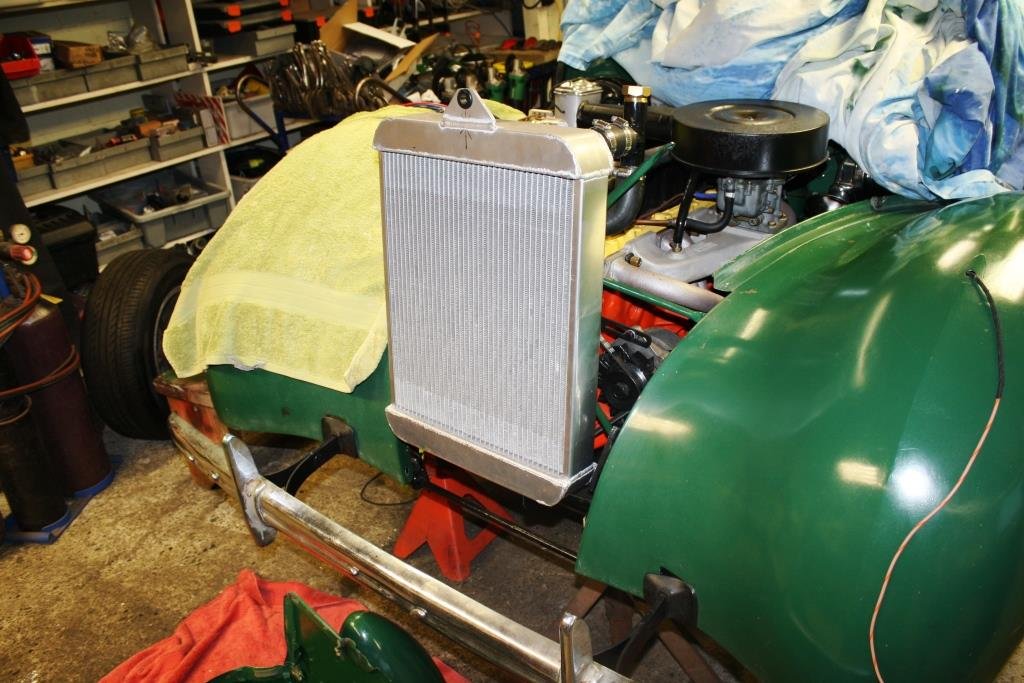
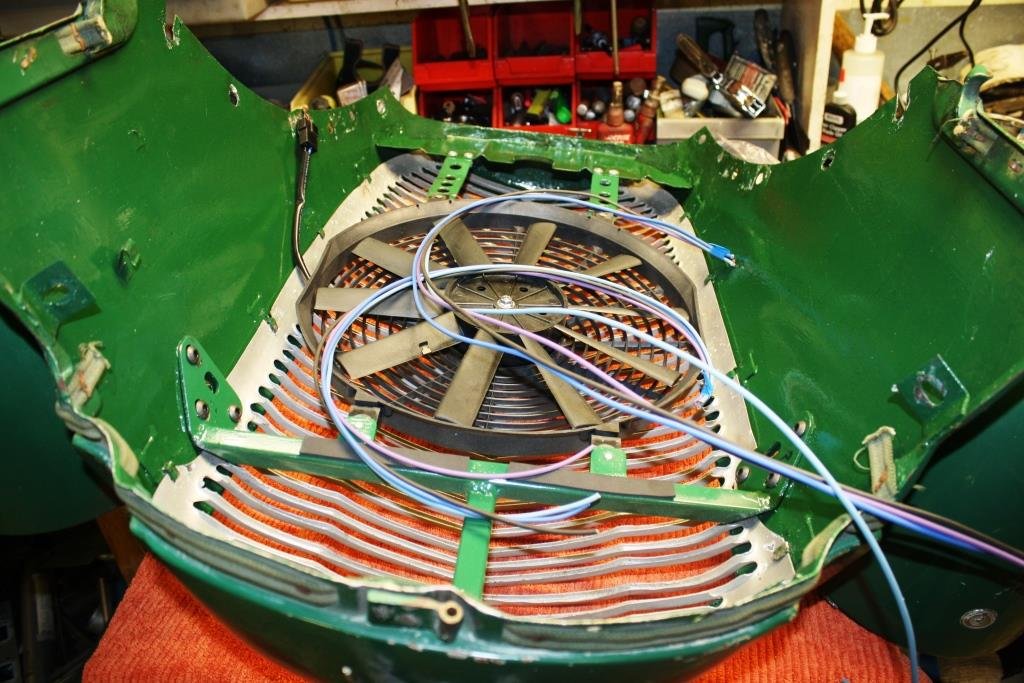
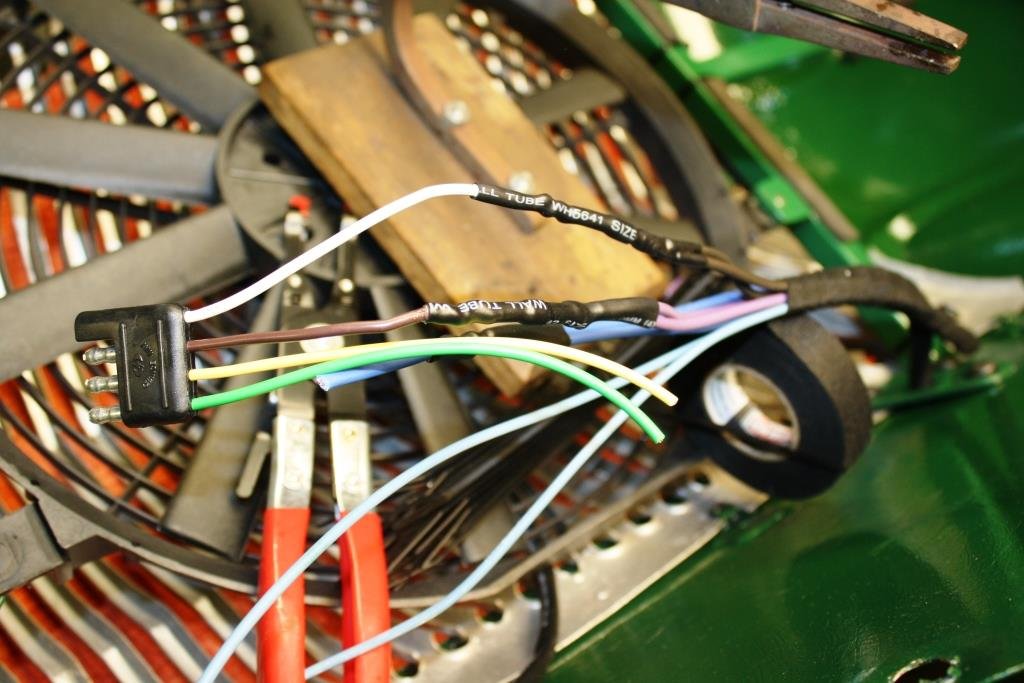
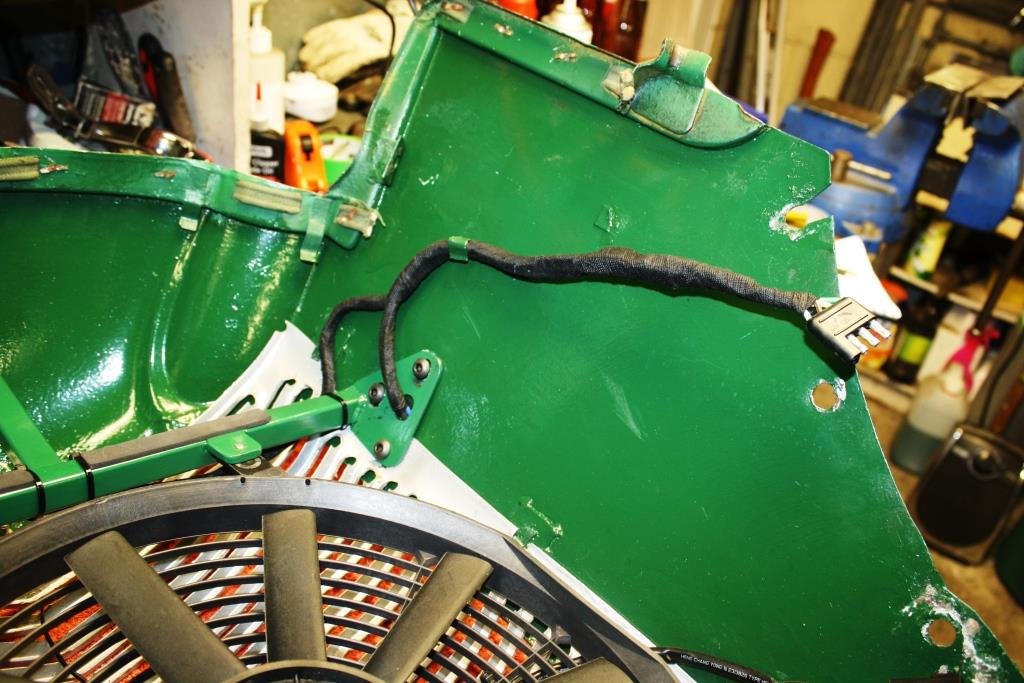
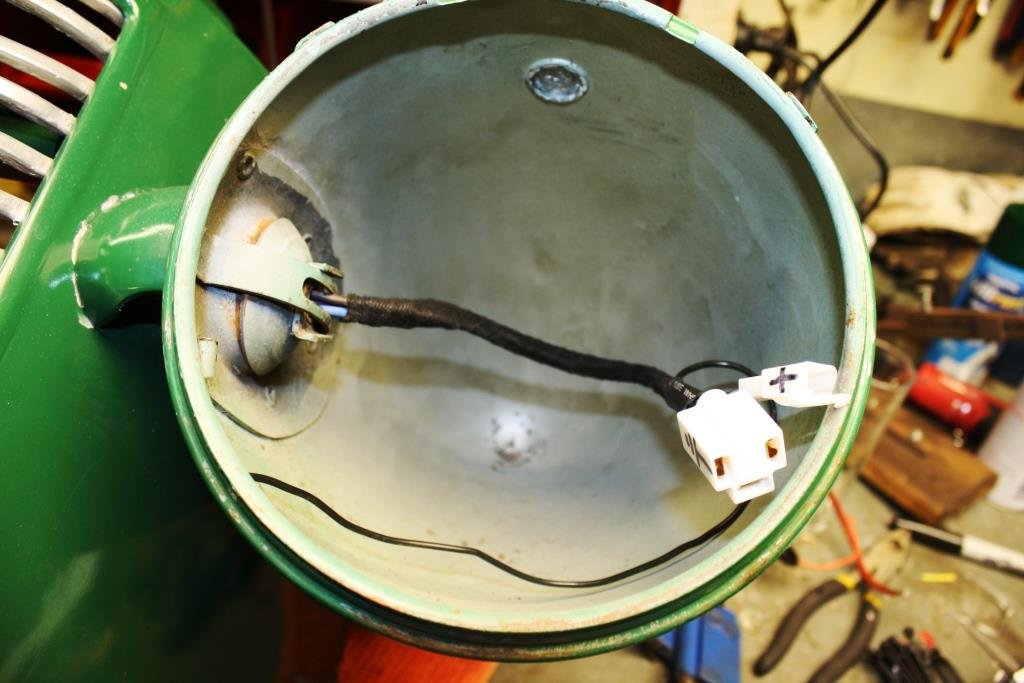
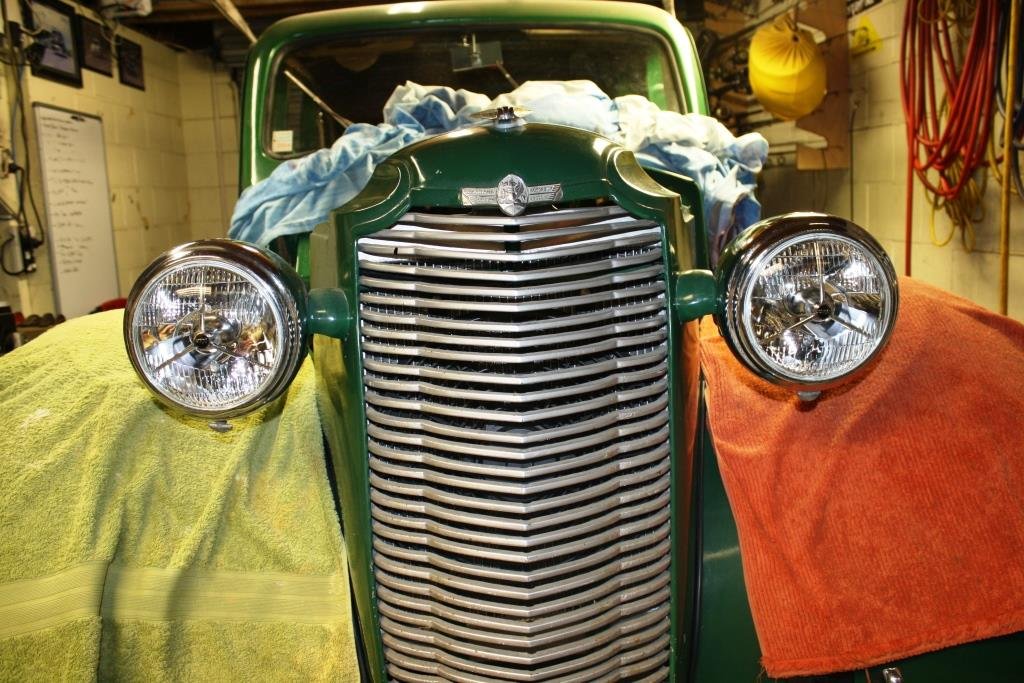
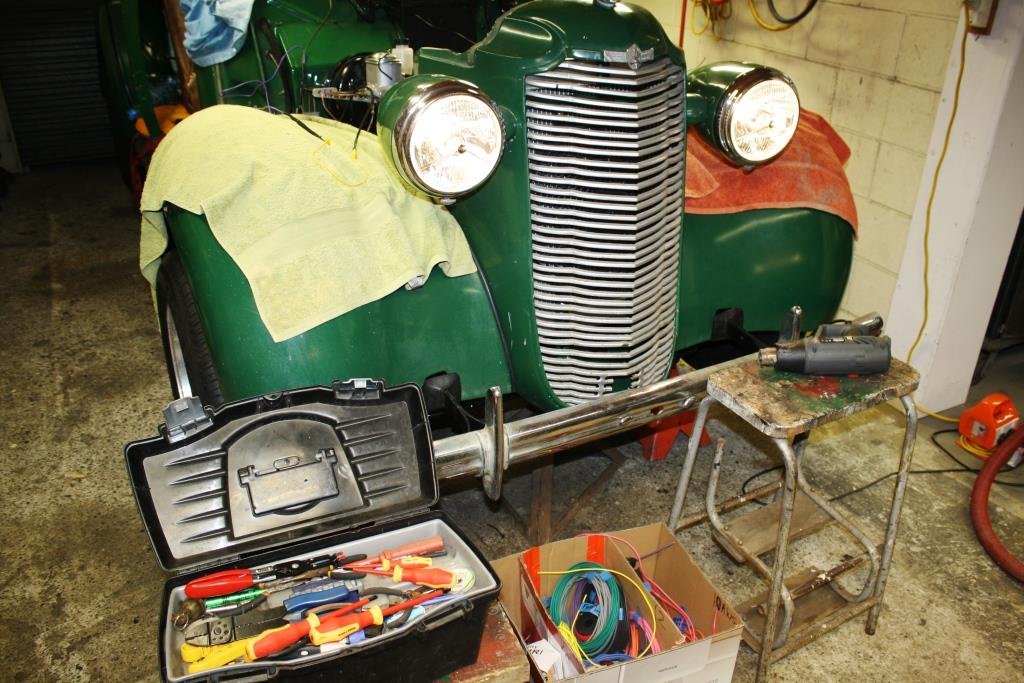
With space in the nose cone so tight the only way to wire the headlights and fan was to take the front off for the umpteenth bloody time….grrr….! So much easier to wire on the bench. Found some heavy connectors to make disassembly easier in the future. Love using the old school fabric wrap. I’d bought a big box of connectors off Banggood for a price that was too good to be true…….. … so I wired up the headlights. I refitted the front………. I installed the gorgeous over-priced P700 headlights…. ……..and started blowing fuses whenever I powered them up! After an evening of uttering nasty horrible words and throwing thinly veiled insults at Rigamortice re the marital status of her parents at her time of inception, while going round and round in circles with a variety of test lights, test probes and multi meters - I discovered the f****** “too good to be true” Bangood connectors were………. You guessed it ‘too good to be F****** true’! After a quick trip to Jaycar the following day, I paid through the nose for the right connectors…and we now have head lights. And as an added bonus they even worked in the dark! So I stuck the bonnet on and discovered it didn’t fit…. I loosened it off and started pulling things into line before re-tightening. Finally, it all fits, (sort of).
1 point
-
Exhaust box....An empty tube - say 4inOD 1.6mm wall. Across the back of the car. Your two sides discharging into it straight in 90deg to CL. Discharge pipes from each end. 1 1/2in OD. Length inside box to be perf tube same 1 1/2in OD. Close/blank off the inner ends of this and make them overlap with a figure 8 support in the center of the box. 90 deg bends outside the main tube for the discharge pipes to point them out the back. This will work - and not be too noisy.1 point
-
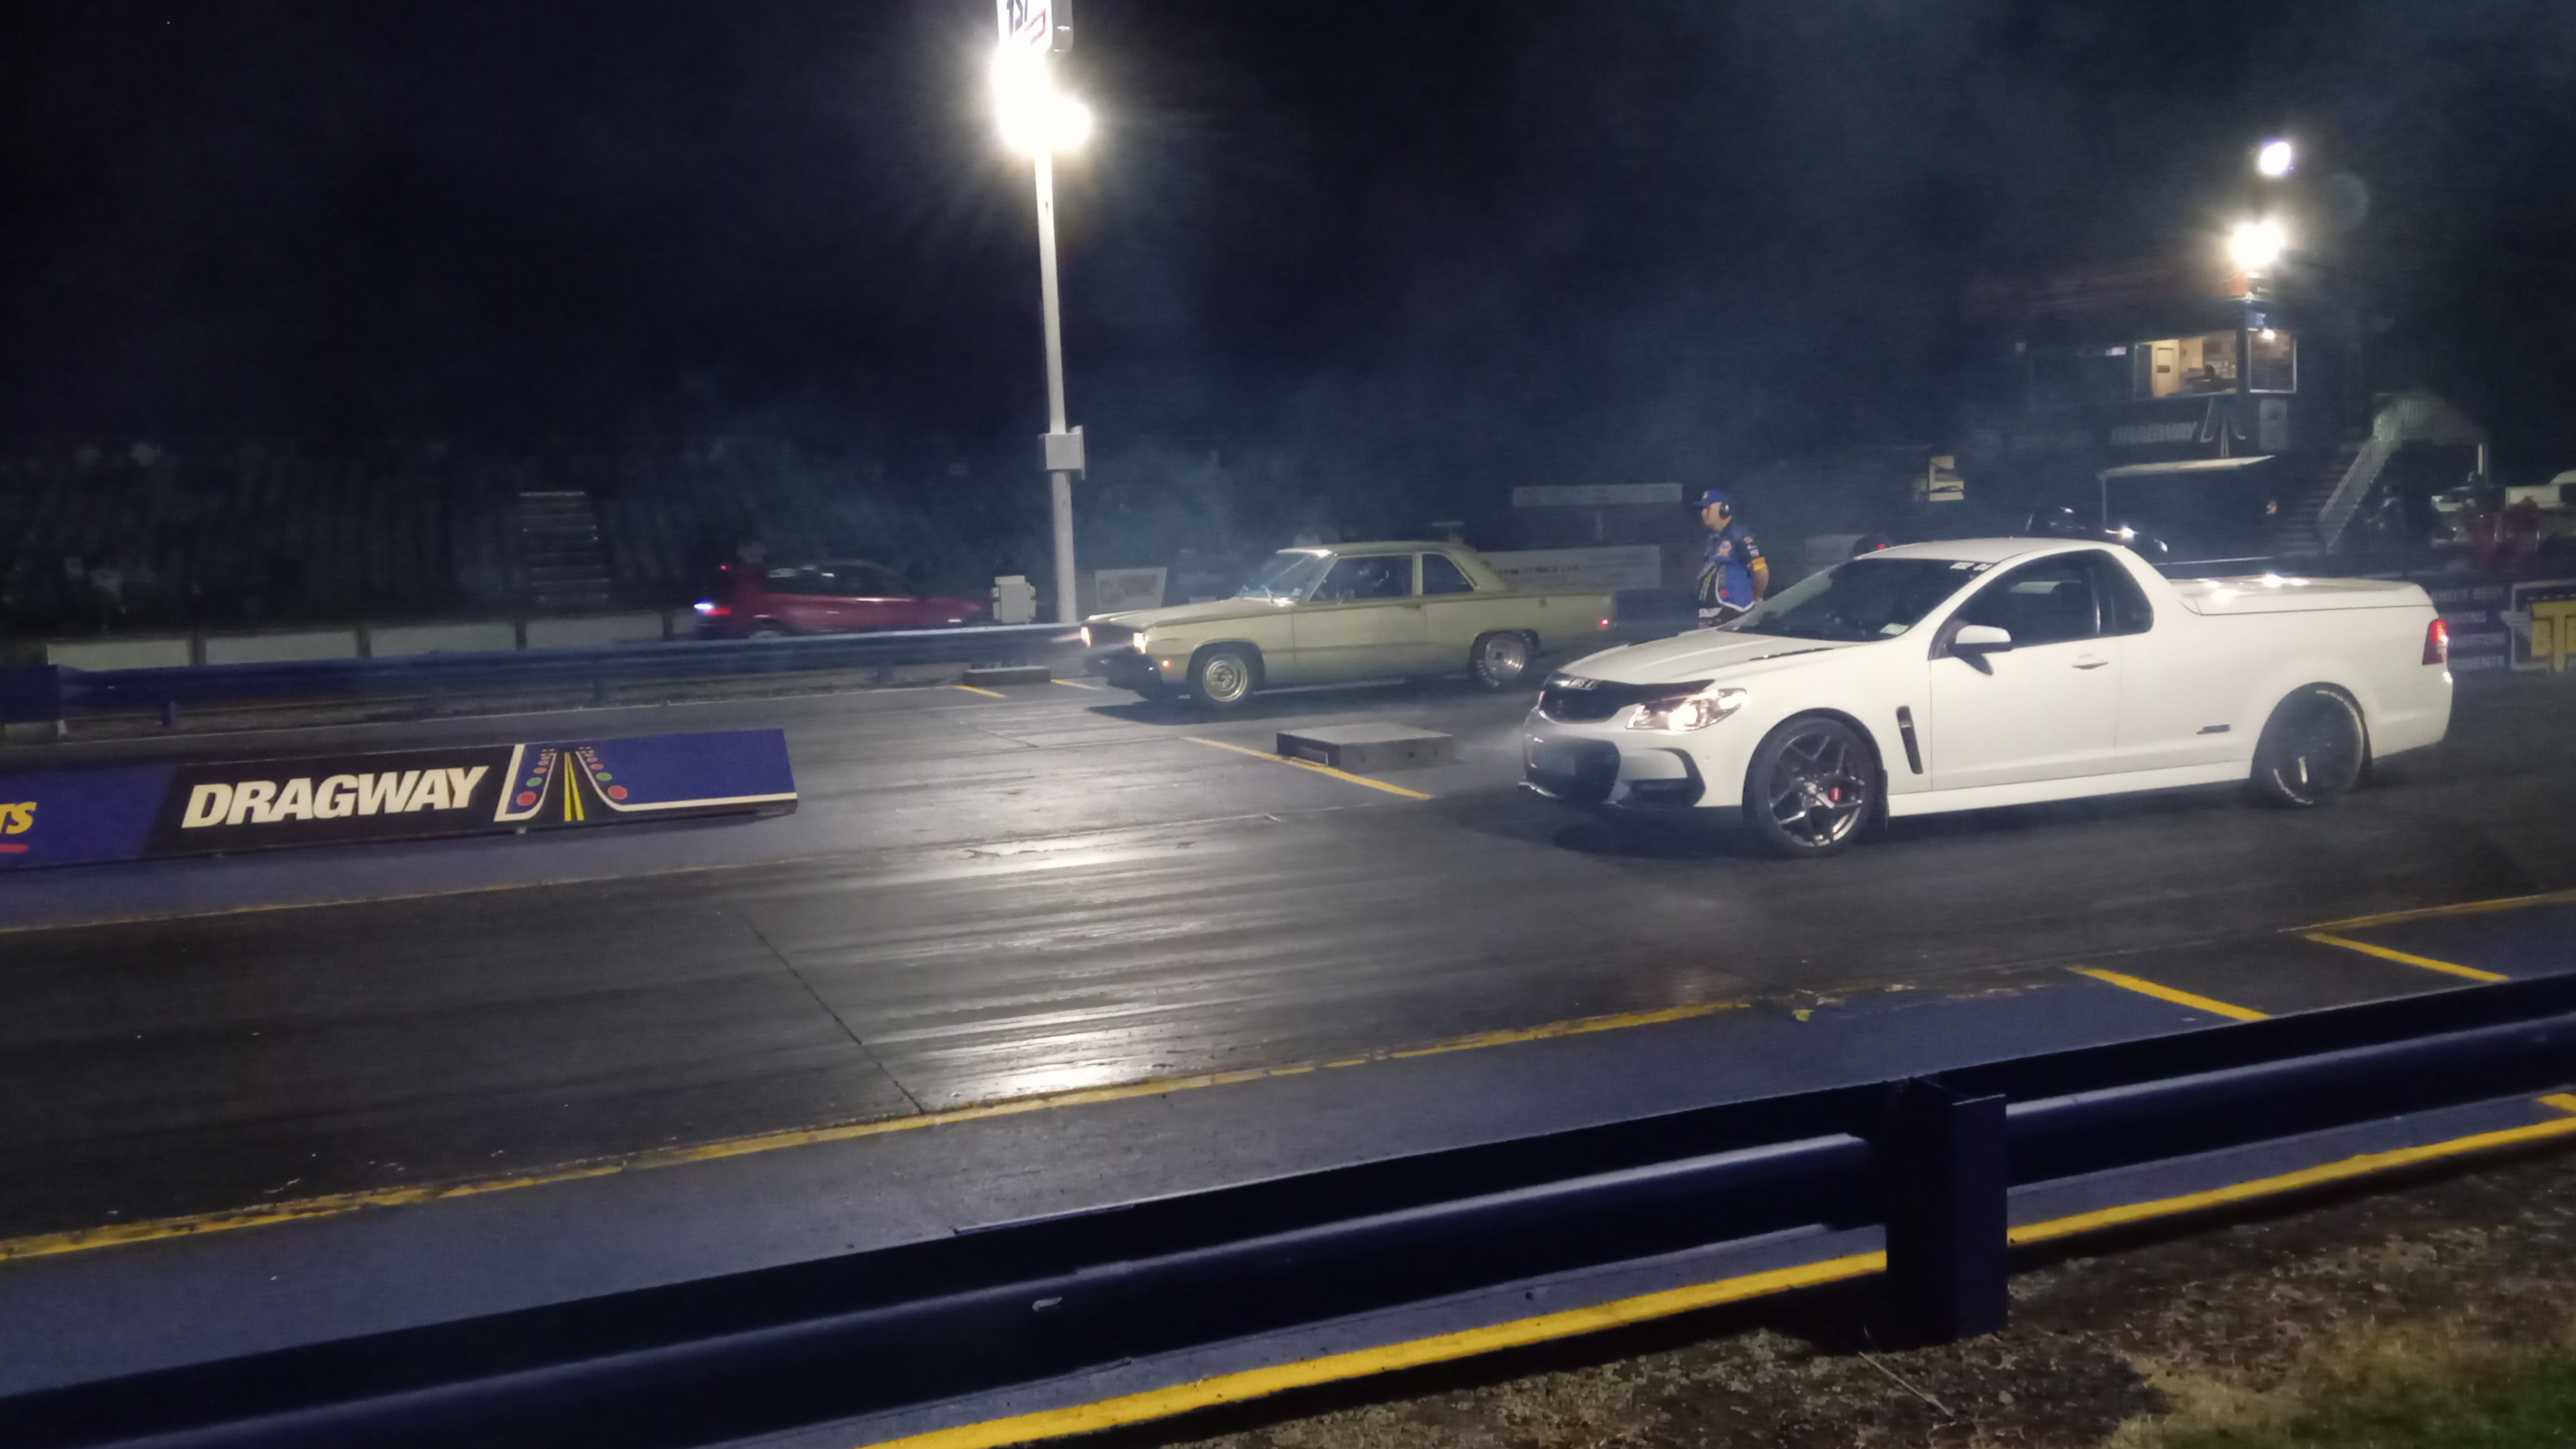
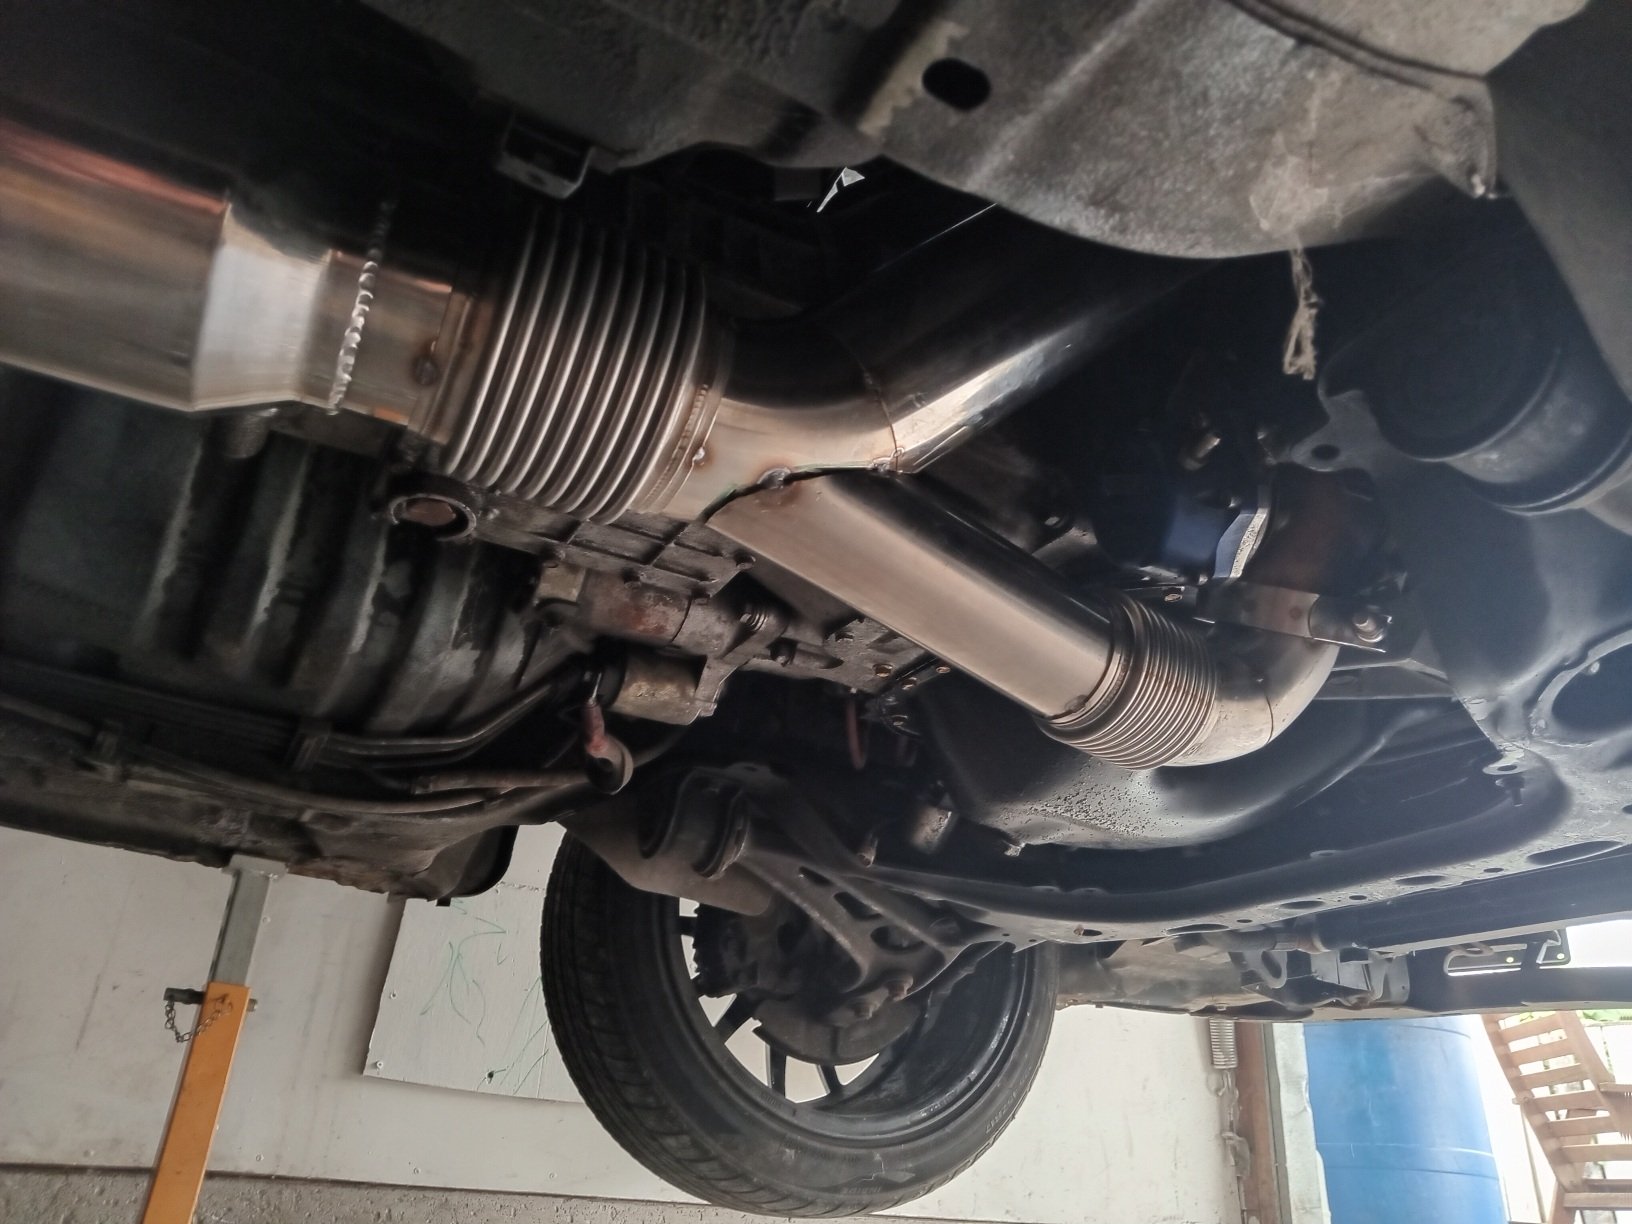
New springs made it more consistent,although slightly slower. Different wheels and muffler off when it did the 11.35 previously 11.5@118 every pass I have turned the 2 step rev limit down slightly as it was having trouble holding on the brake which I can probably fiddle with to improve I'd like to get it down to 11.0 so it's more competitive at the night drags https://m.youtube.com/watch?v=kdfGgT2pKHw&pp=ygUMVW5kZXJjYXJ2aWV3
1 point
-
Nearly ready for first startup. Just a couple of jobs to do, one being to attach old exhaust to new headers until i'm able to get a proper system made. Don't laugh but I cut both ends out of a baked bean can, slit it down the side and with the help of some hose clamps, made a sleeve and clamped over both pipes. Should be ok for a while. Checked all fluid levels and filled radiator with hot water as mechanic suggested as been sitting for a while since build. Removed plugs and cranked motor until oil pressure light went out. Replaced plugs and turned key. Motor started straight up and sounded really good. Ran it up to temp and checked for leaks of which there were none. Time for a trip around town. Goes well but needs a tune. Brakes are good and everything else works except fuel gauge. If anyone has a suggestion of where I could get my 32/32 weber carb tuned around Christchurch could they leave a message on Project Discussion page. Cheers Project Discussion https://oldschool.co.nz/index.php?/topic/84912-petes-mk2-escort-1600-sports/page/3/#comment-2618039
1 point
-
Reset springs in. It's not actually low but it sites level now now and looks a lot better. New shocks are on the list, these don't have any shock left in them.
1 point
-
Springs off to the shop. Can't scratch the new paint just yet..
1 point
-
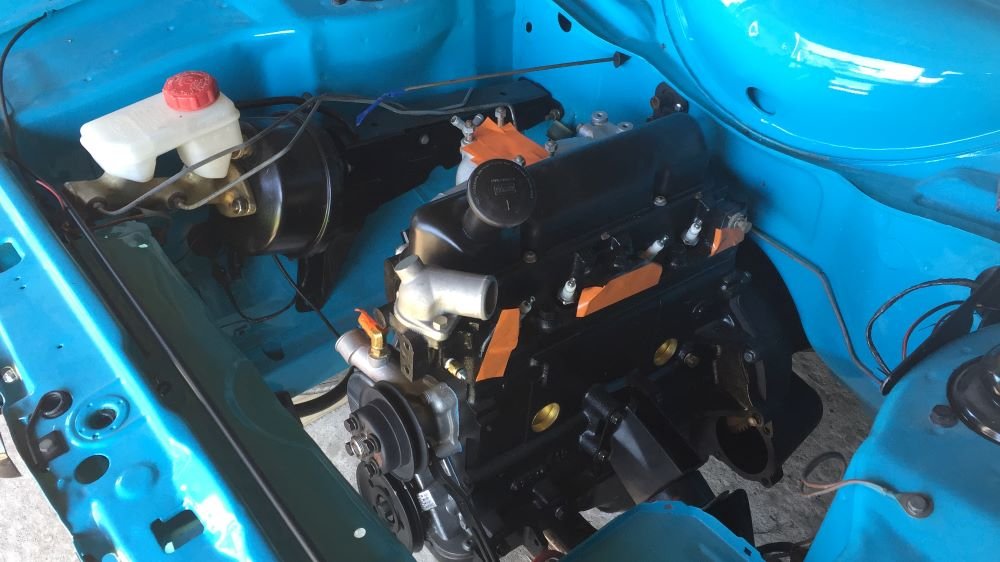
I've been chipping away a fair bit lately. I managed to find some radiator suport panels. This was my first time doing any sort of panel work, after a fair bit of tweeking I managed to get them good enough to where I was happy. I also filled in the 2 big holes in the engine bay. Years ago I hacked off the washer bottle mount to make room, luckily I kept the remains of it. I made new ends for it to replace the bits I hacked away. Replaced the battery tray. I did a test fit of the engine to sort a few things out. The main things were the gearbox cross member and where to fit a clutch master cylinder and sorting the exhaust. Not a hell of a lot of room, but it worked out OK. The wee fella helped modify a toyota gearbox cross member. I've just finished painting the engine bay today. It's not going to win any awards, but I'm happy enough with it. I'll start the final reassembly now. I sorted out the flywheel/clutch issue too. The guys who did the engine work (Kennally Cams) did some magic to the fly wheel and machined it to accept shouldered bolts to locate the pressure plate as it's being torqued down. Hopefully this week I'll get the engine in for the last time.1 point
-
Some stuff happened
1 point
-
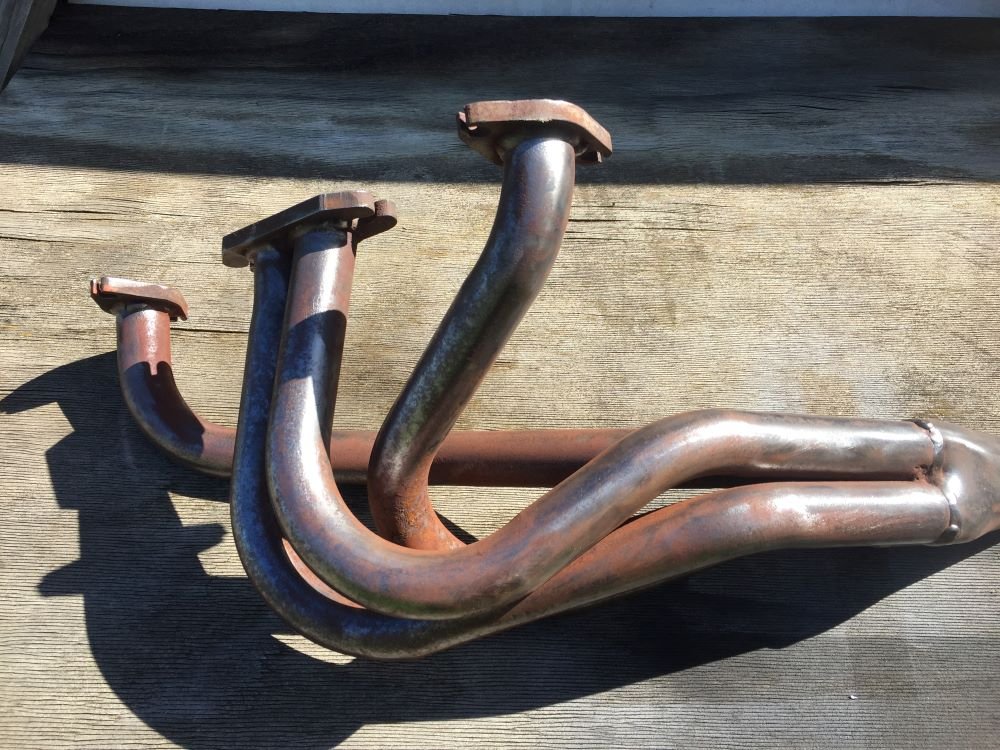
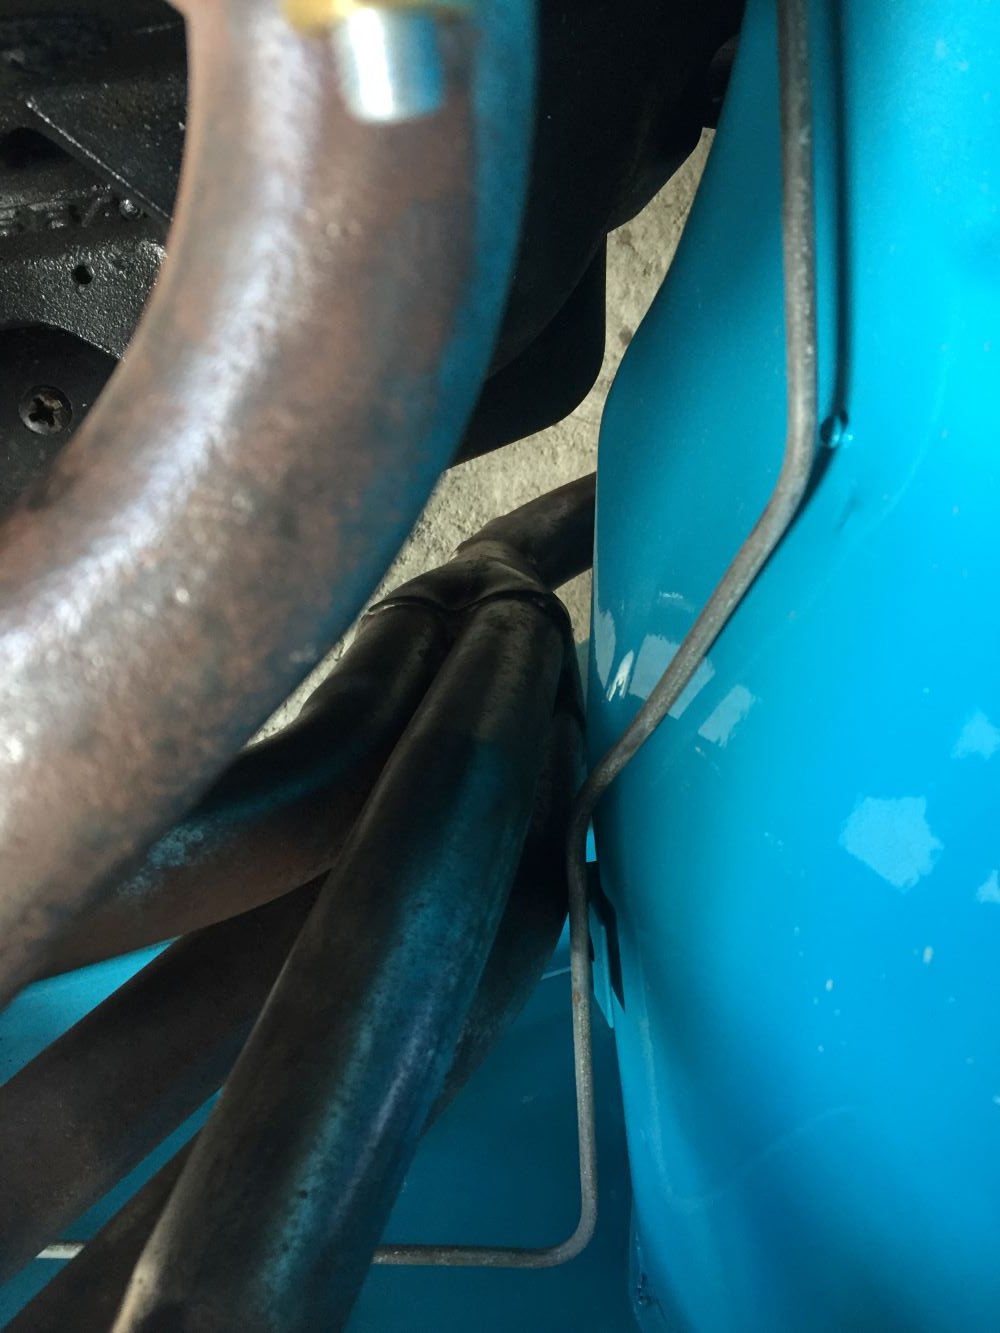
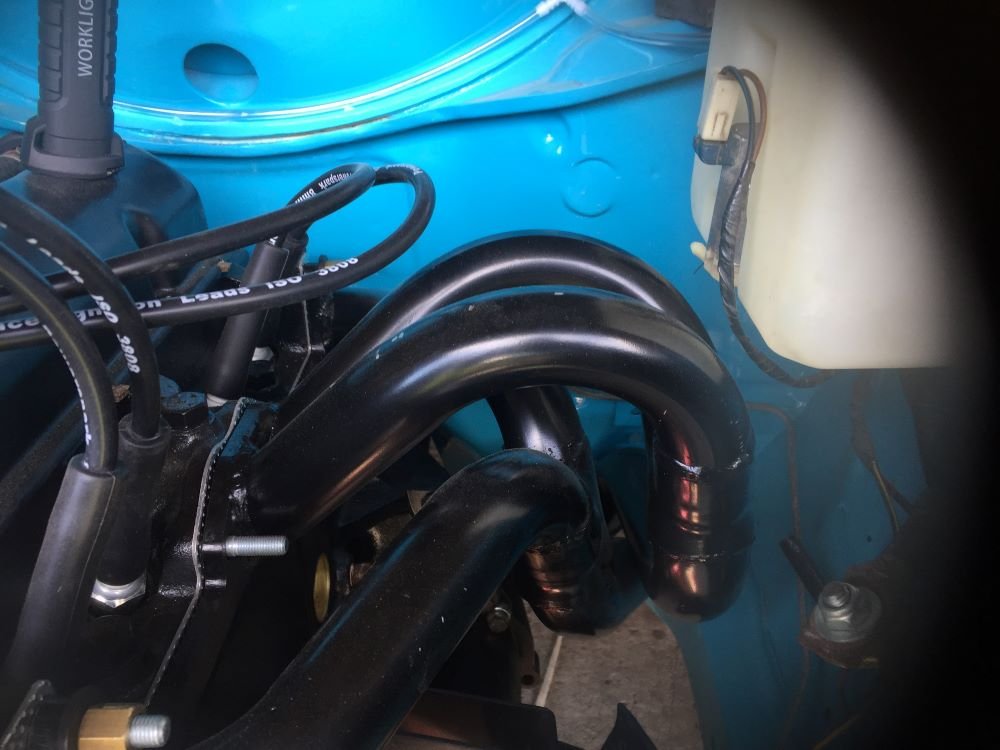
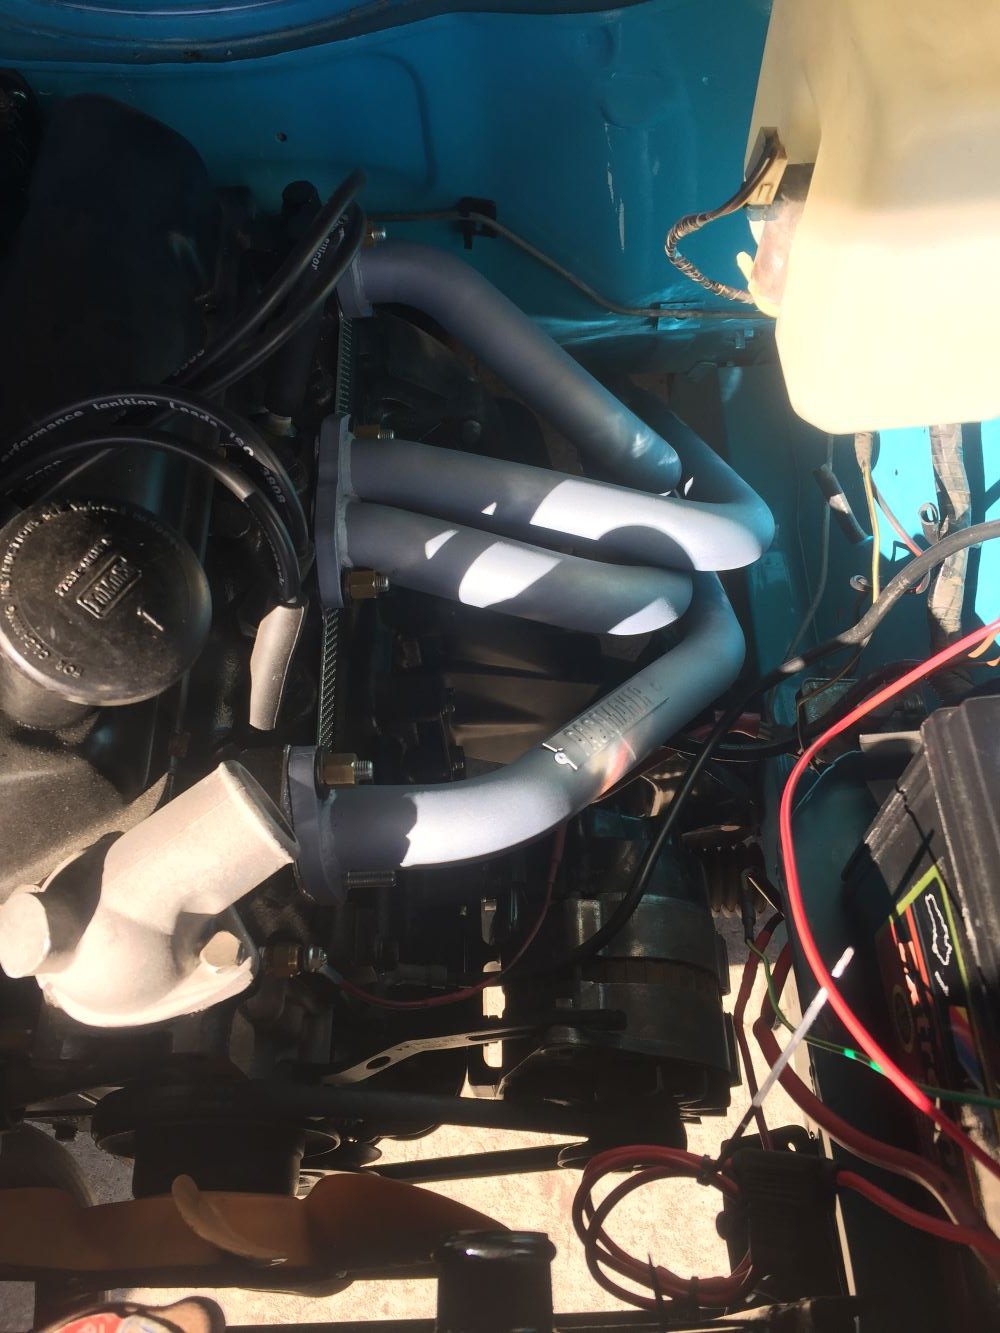
One of the last things to sort out is the exhaust for car. Started out by cleaning up extractors that came with car but on a 1300 motor. I think they are coby's and cleaned up really well. Winner I thought until fitted. They are hard up to firewall and very close to washer bottle. Not going to work, so onto the next option. A set of Ashley extractors which were not much better. Not sure why these are not working for me . After a 6 week wait for a set of Pacemakers which are now in place I'm very pleased with alignment and clearances from other componets. Will hookup to old exhaust for startup and get it replaced later. Just have to sort out what size pipe I'm going to use. Project Discussion https://oldschool.co.nz/index.php?/topic/84912-petes-mk2-escort-1600-sports/page/2/#comment-2614933
1 point
-
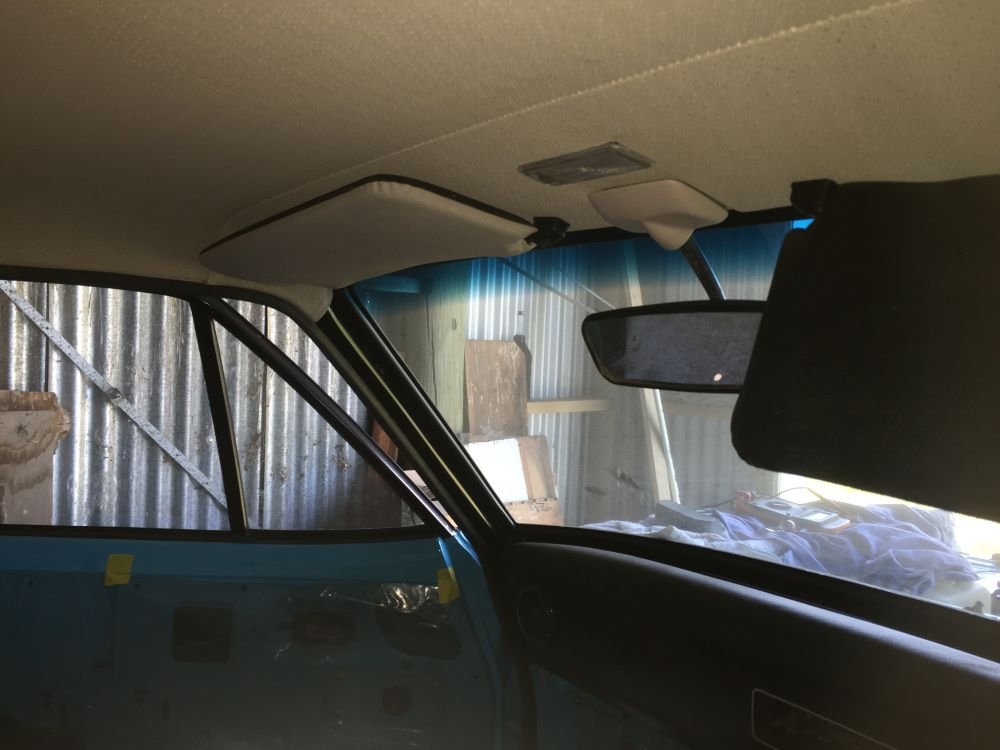
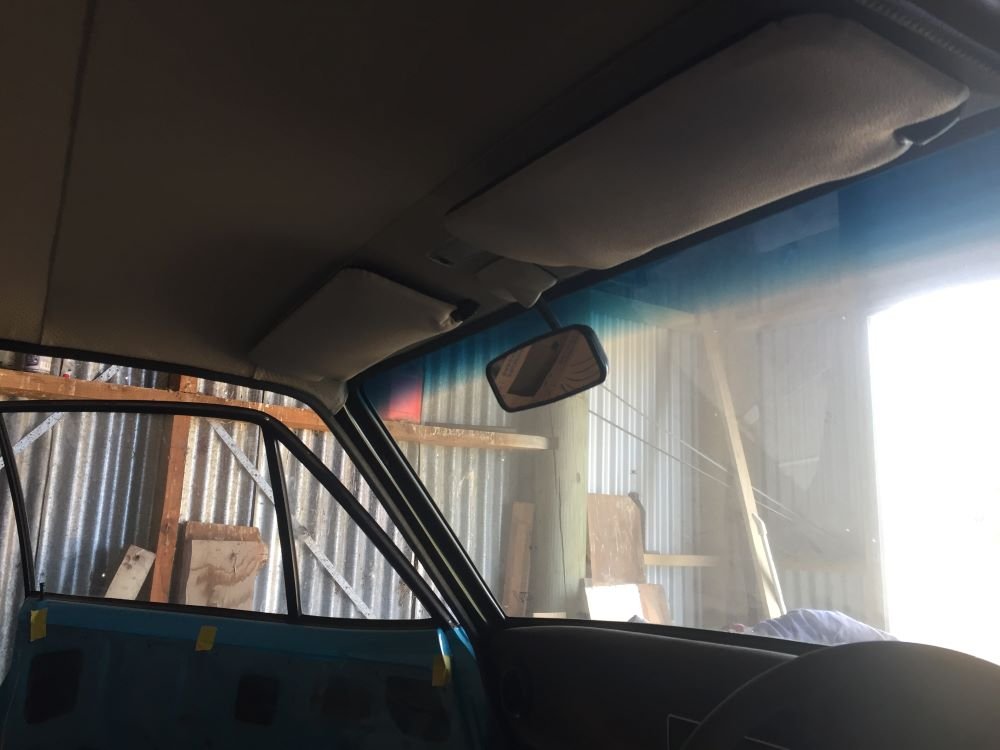
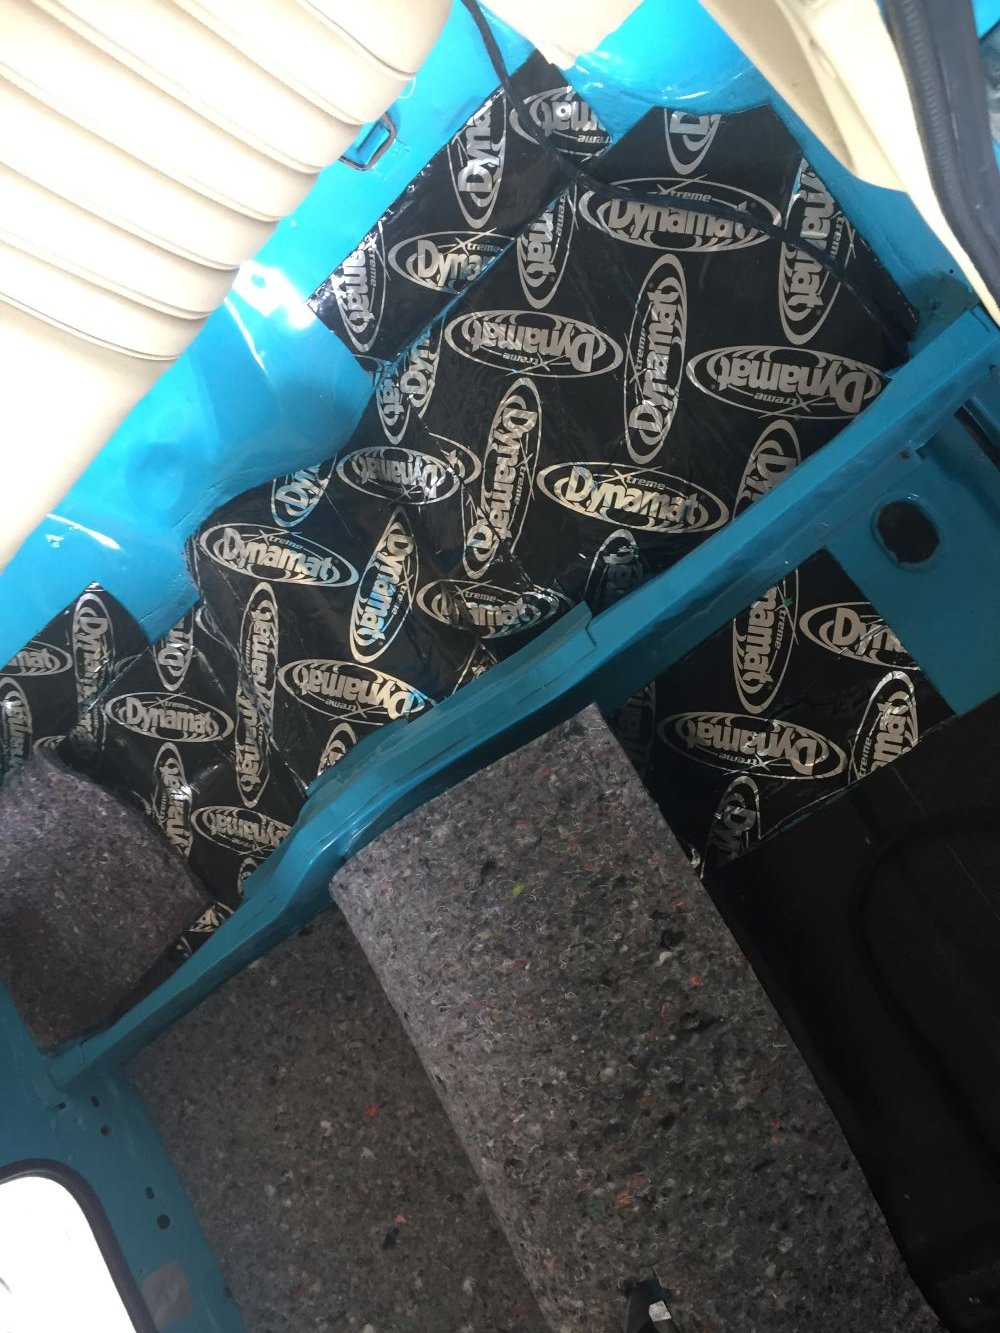
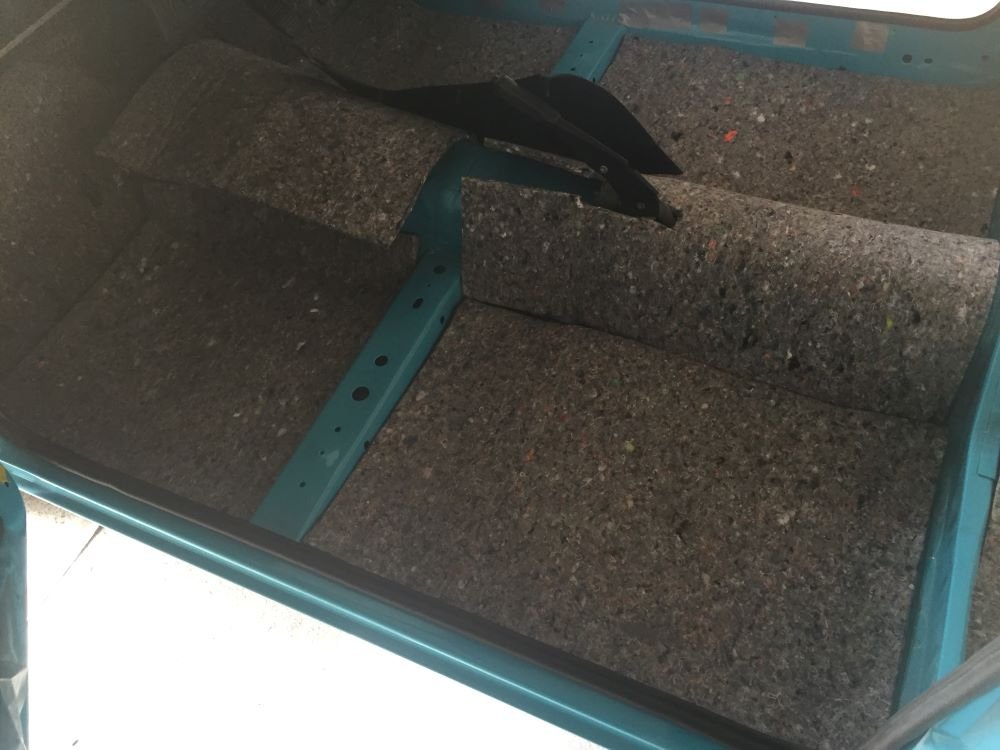
Now for the visors,mirror and interior light. Had located all mounting positions when i put up head linning and also checked interior light worked. Only problem I had was one of the visors wouldn't stay up. Someone suggested that I use some heatskrink on the pins. This works well but you have to be carefull not to split female part in visor. Put new cover on mirror mount and all looks very tidy. Next onto the floor which has been covered in sound deading and then underfelt, making sure to locate all seat mounting points. Not sure if i should attach this somehow to stop it moving under carpet. Also got ready to attach door cards by first fitting plastic liner as miosture barrier. Project Discussion https://oldschool.co.nz/index.php?/topic/84912-petes-mk2-escort-1600-sports/page/2/#comment-2595759
1 point
-
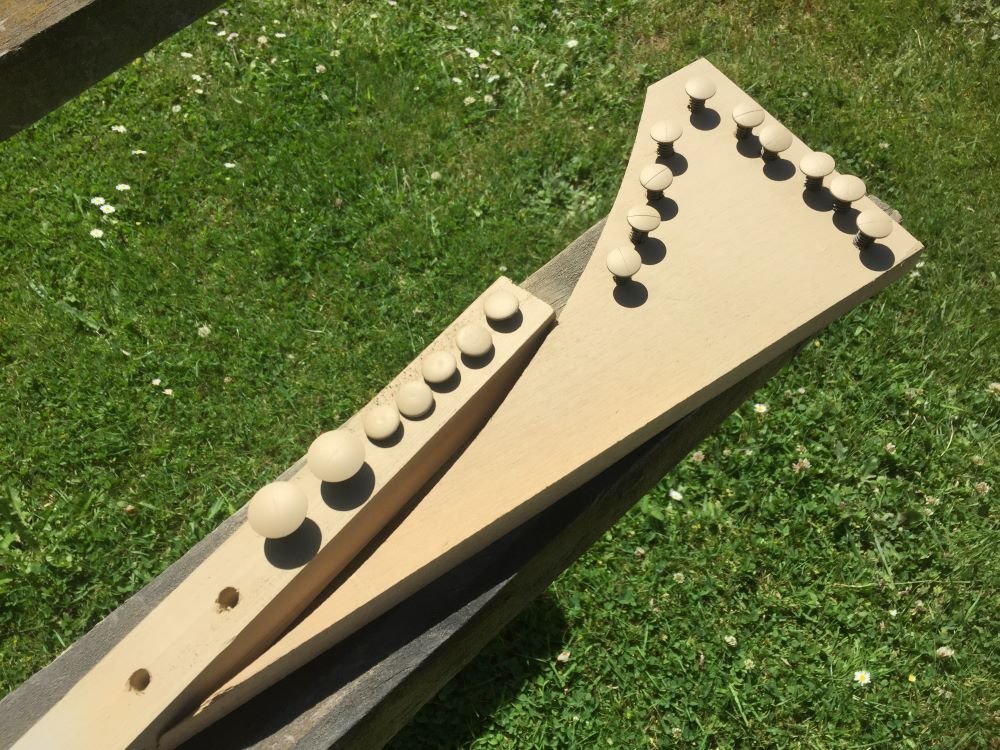
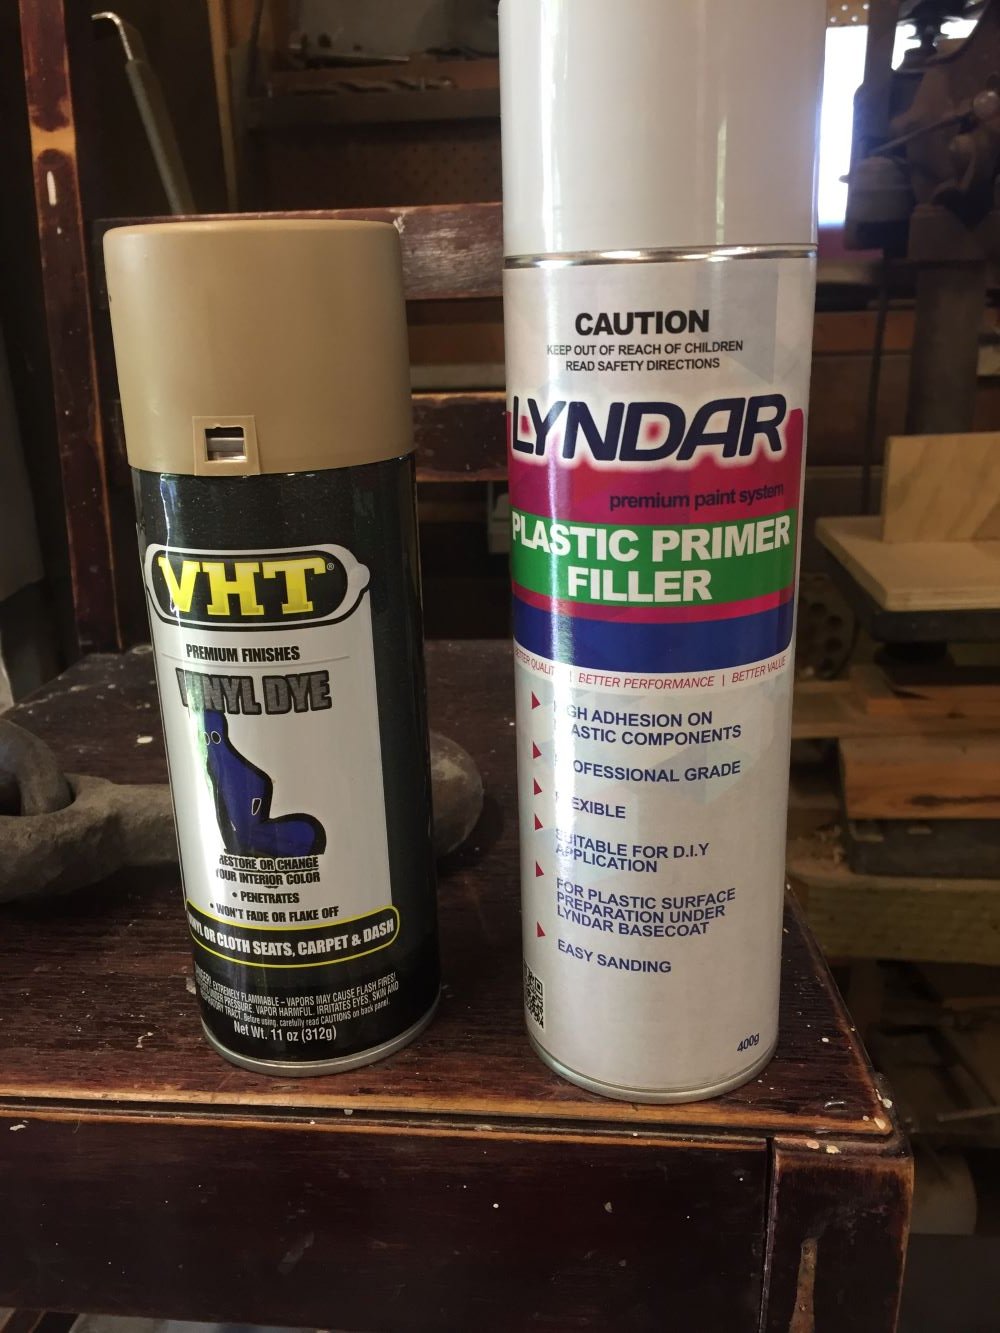
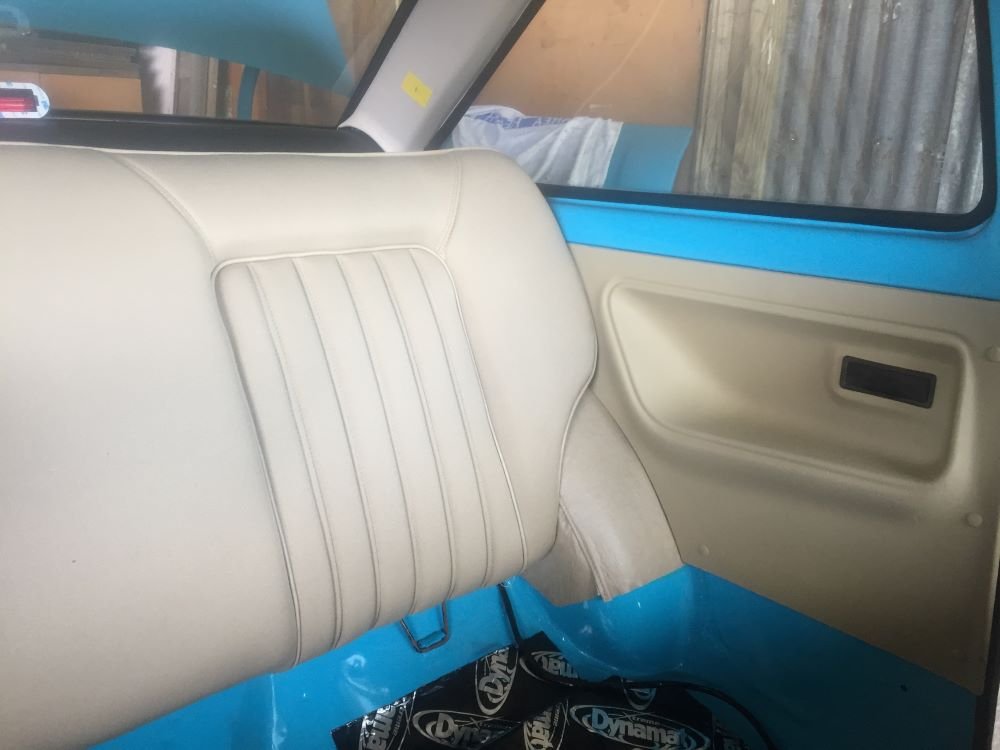
Made a start on the interior of car by refurbishing back seat trim. Removed ash tray and lightly sanded panel. Next sprayed with plastic primer filler then lightly sanded again. Finished with vinyl dye which came up really well. Did the same process for clips. Fitted ash trays after spending some time getting them to work properly. Now to install parcel tray and boot divider panel and also vinyl wheel arch trim. Fitted new c-pillar trim after marking seat belt mounting points incase I put seat belts in the rear. Finally put in rear seat back. Looking smart
1 point
-
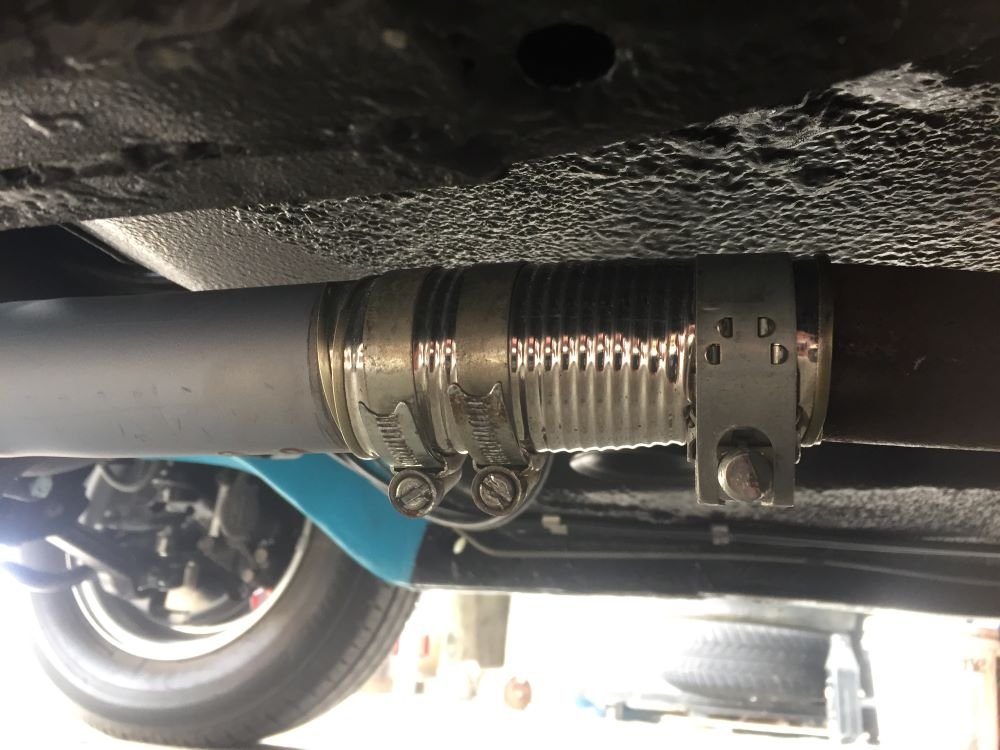
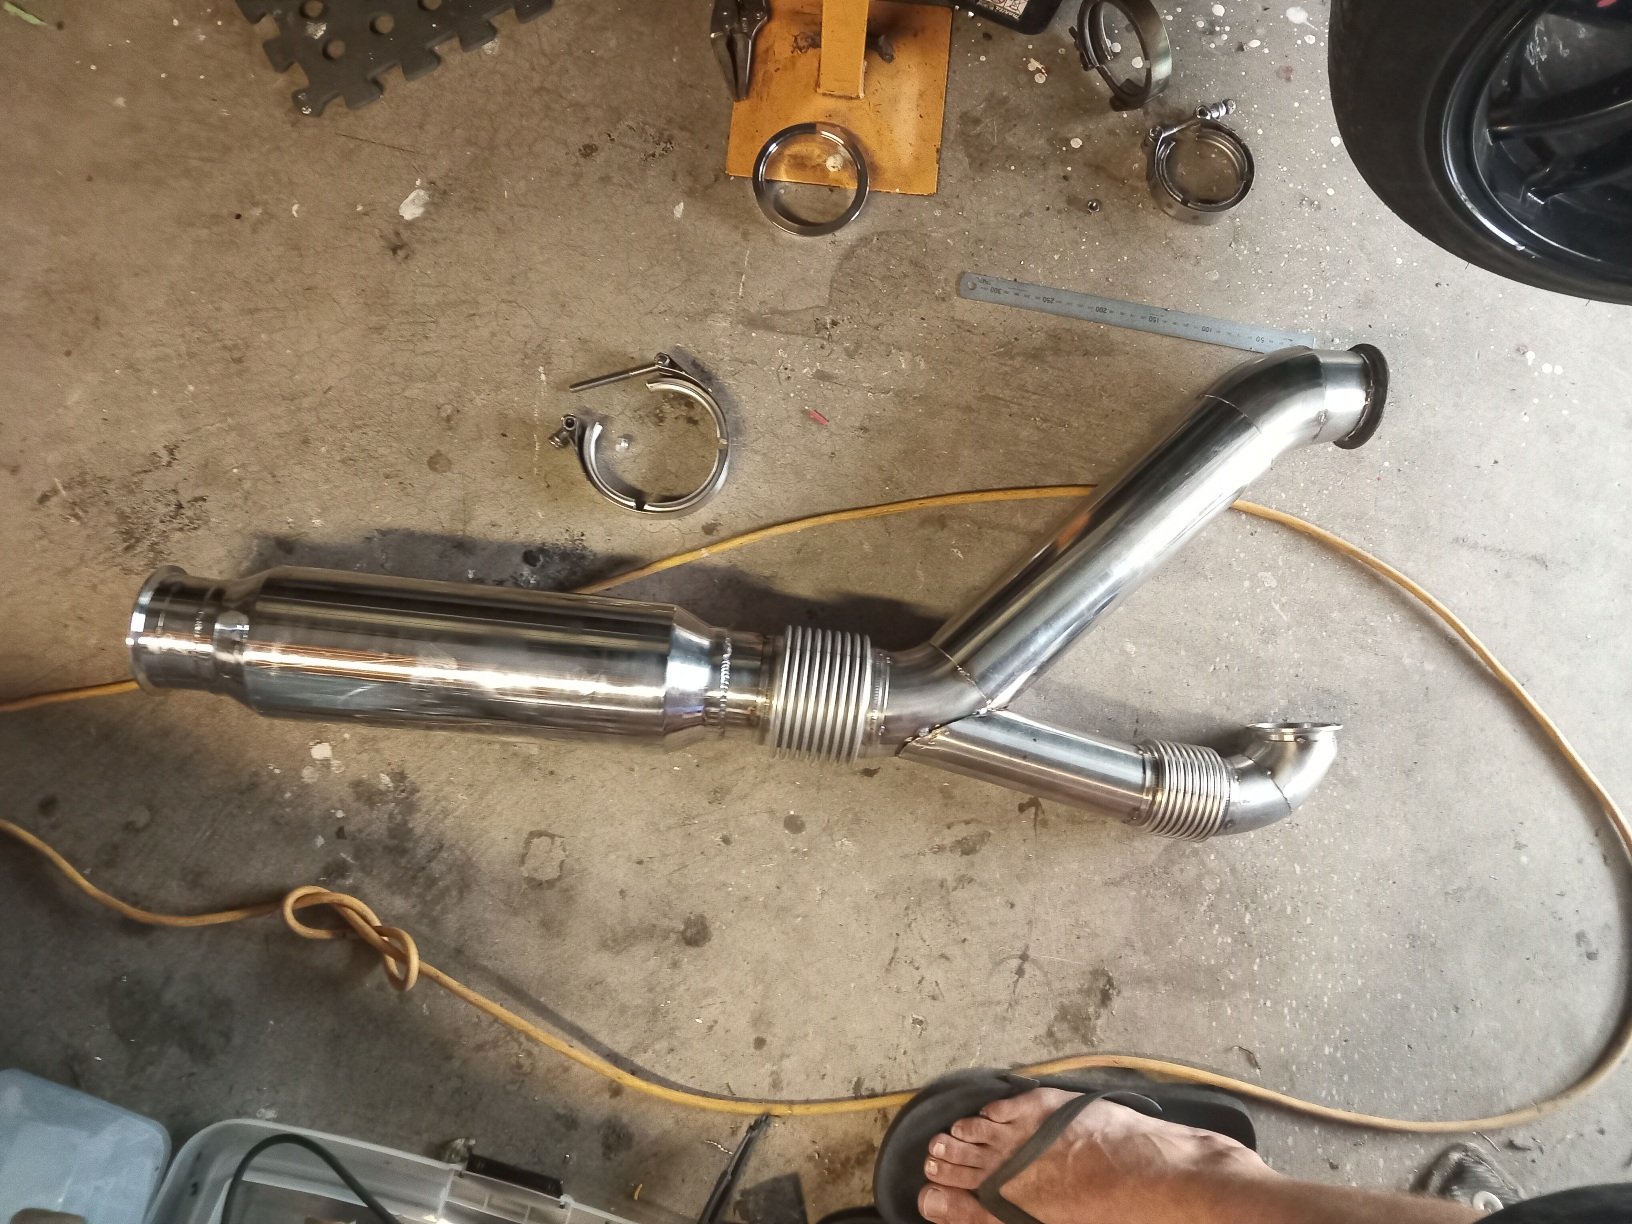
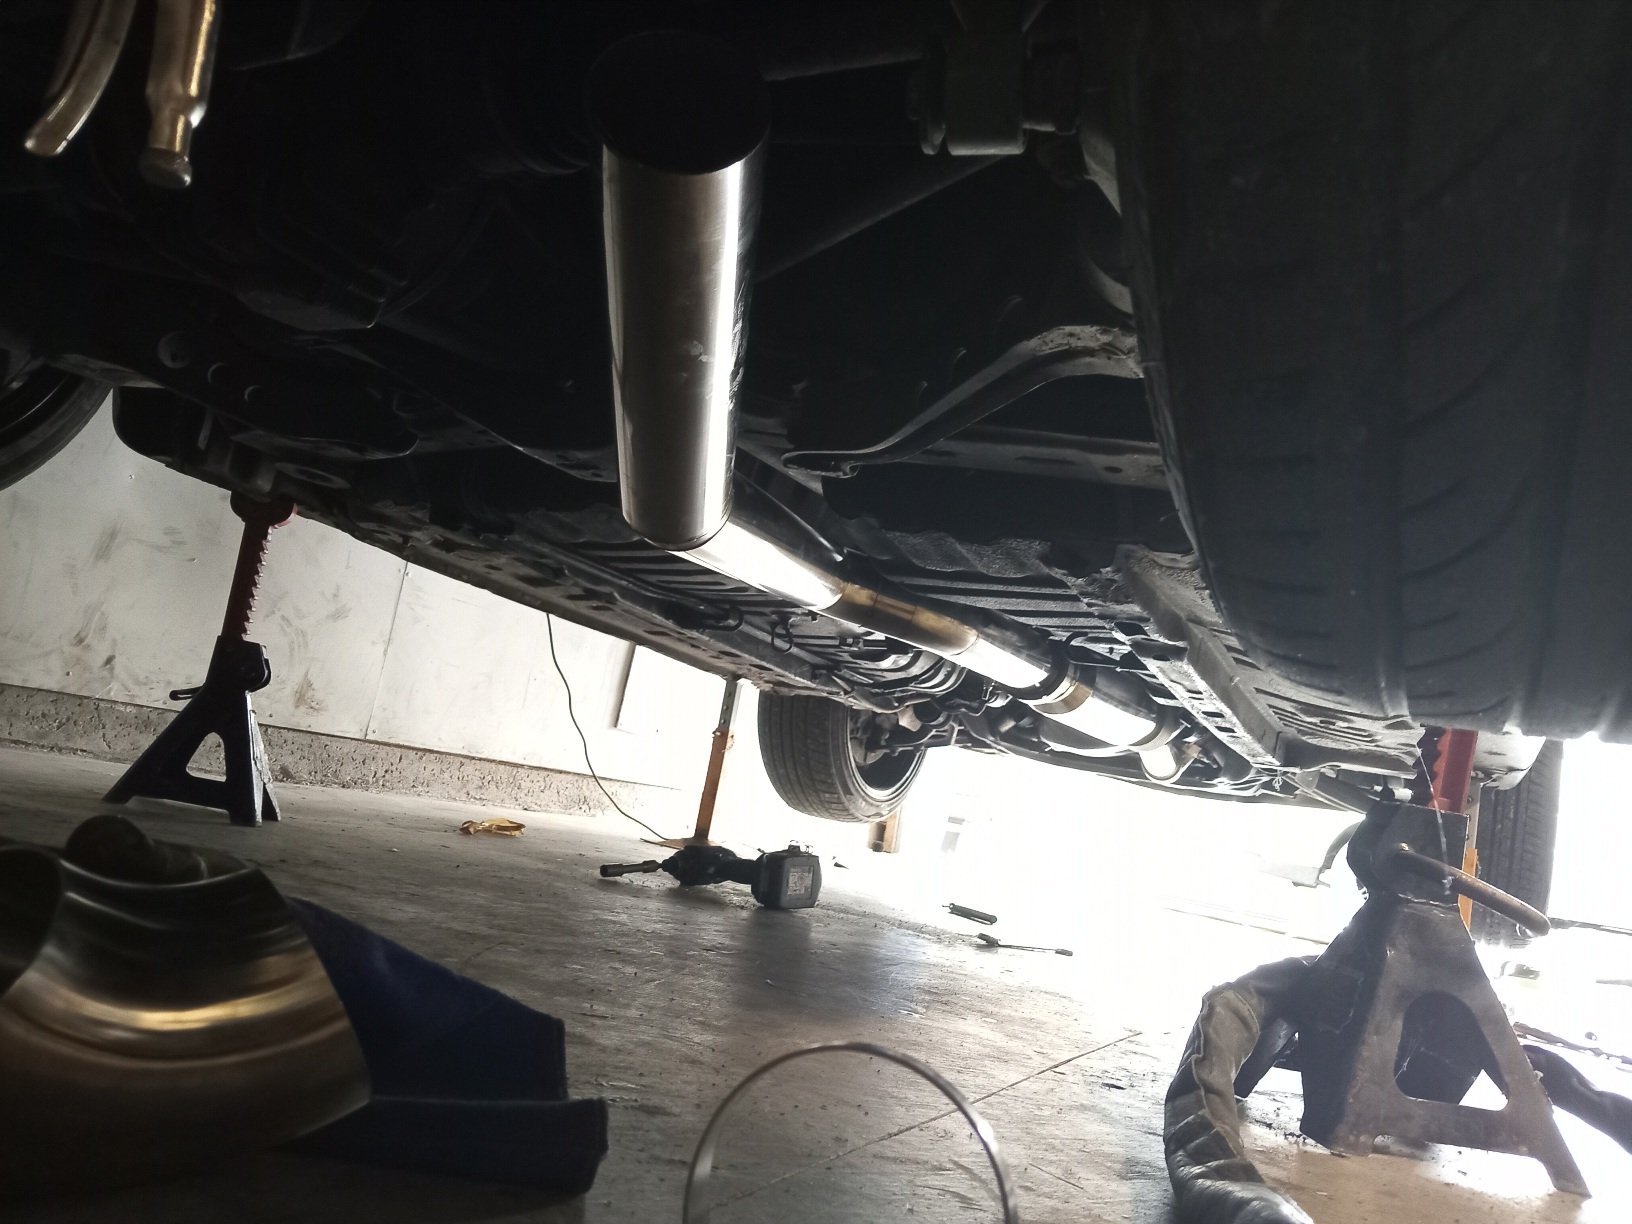
Spent today welding up the 3.5 inch exhaust, got to the diff end, will have to finish muffler up and full weld in couple days, maxfab kit is pretty good quality for 800 or so $ for everything inc resonator vbands, shipping etc. Trying to keep it all flush to bottom of car, the diff area is only place it has to dip down a bit but im happy with it ..
1 point
-
Okay maybe not entirely done. Since the previous hoses leaked everywhere I really wanted to get the high pressure EFI ones redone professionally, so I took them to the same place I went to last time for the ruptured hose in the engine bay. They presented me with two lovely EFI rated hoses <3 The one on the right is the one I care about for now, it goes from the fuel pump to the hard line. The banjo fitting needs copper crush washers and I decided to re-use the ones from the red starion. I gave them a quick go on some sandpaper on each side, heated them up to a stupid degree with a propane torch and quenched in water to anneal them. There's a chance I melted one of them a bit and used the black car's washer. A chance. Then, with difficulty, jammed everything together as hard as I could. The manual I have explains every detail of the fuel system EXCEPT for the fuel pump, which is quite both surprising and annoying. I thought for a lil bit over the next day about testing this. The last time I did this up, it leaked everywhere - mind you I was told bad info on how tight to make it, but still. It was also super easy to access at the time, thanks to it sitting in its L&P bracket instead of sandwiched between a fuel tank and a car. I could have hooked up the loom to a 12v battery and fed the hose into some isopropyl or something, but I don't have anything handy on me to block the other end of the line and create pressure, so in the end I just sent it. The tank's bolts were all underbody coated so I chased them, Then began the arduous task of lifting this asshole into place. It's not that heavy, but "not that heavy" is still too heavy when trying to connect the hard lines up to it without actually bolting the tank in. There's a lot of space for activities when the tank is dropped and I wanted to try and make things easier on myself. However, I couldn't quite get the right angle. The jack was in the way, boxes I used for additional support were in the way, and the EFI line had decent flex but didn't exactly meet perfectly so was a biatch to try and wrangle whilst also wrangling a large unbalanced tank on a jack. In the end I just jacked it all the way up, put some nuts on and dealt with the shitty access. This image does not adequately convey the amount of bullshit it took to get those lines on. Then I used new nylock nuts and washers to get the tank into its new forever home. I really hope I don't have any leaks or I get to do all this in reverse, then forwards again. I'll leave the rubber boot etc for the fuel filler until the body is properly zhuzhed.1 point
-
I've been stripping But enough about money, I got sick of being in the doldrums about body work so decided to take a quick breather and get this fuel situation sorted. My relined tank has been sitting under the bench for a while so I dragged it out and went hunting for all the bits and pieces. Found the electroplated pickup/return pipe and my NOS filter. And my MKS-sourced fillter pipe replacement - the goal is to try avoiding old rubber. But the new neck was too long. I used a variety of tools to get it down to size, strangely a dremel with cut off disk (and ventilation) worked the best without any proper pipe-cutting tools at hand. We wanted to check out the level sender from the red starion - and use it as a visual guide as well - so we drained its tank and dropped it. The sender was no better. But both senders look like they'd be totally functional - all the electrical bits and contacts haven't corroded, it's just the mild steel structures, and even then they still hold their shape. I've been wondering about how to best tackle this problem. I know someone in the states is making new ones but last I checked they were quite spenny. I know that there are some cheap aliexpress pickups for the mighty max which apparently have all the right bits, just the wrong cap - I could get something fashioned from that. But for now what I've done is just wire wheel the heck out of the original black starion's sender and put that in, if only to plug the hole. There's a little inline fuel filter that sits at the mouth of the pump which is extinct, so I either need to re-use it or fashion a new solution. I opted to try the former. The mesh is intact and it just had a bunch of funk at the end that I was able to extract with isoprope, gentle compressed air and some copper wire. The pump was working fine when we last used it. We have an aftermarket spare but it means hacking up the wires and why do that if it works okay? It's also very accessible on the car if I need to replace it in the future so decided to just keep it. It was sitting on rubber vibration-isolating feet that had absolutely disintegrated on both cars. Fortunately the part number is the exact same as the vibration isolators for mounting the pump bracket to the tank, and these had all survived just fine on both cars, so I stole some from red. I also wrapped the pump in some closed cell foam to further help dampen it as whatever was previously there had disintegrated. I might come back and trim it a bit though to avoid overheating. Finally, because this is a high-vibration area and I can't torque the bolts that have nothing but rubber on the other side, I used the evil loctite to make sure nothing wiggles free. This time around I used new nuts and bolts instead of restoring the old ones as I had returned the loaner sandblaster I was using to my mate. And after finding out how easy it is to get new ones and how cheap they are, fuck, I really should have just been doing this from the start. The electroplating kit is great (when it works) and will continue to be great for unique parts that need restoring, but hardware is fiddly and frustrating/repetitive to prep. And there we go... The fuel ventilation/breather lines were doing well for their age but there was evidence of perishing in a couple of them. Not to mention that we already know that two of the high pressure lines had already become sieves by the time we got the car. So, new hose. I intended to use the old clips as I was able to salvage enough reasonable ones from both cars, however the new hose is thicker, so I had to source some new ones. I think the red looks nice. The only hose I reused is the pickup hose going into the pump. It's a unique shape and the last time I looked it seemed like it was going to be a PITA to find the correct diameter as well. It seems to be in good shape on both cars. And now,1 point
-
Two steps forward, one step back, Finally got new front screen fitted and looks really good. Next was a big step. Bolted gearbox to motor put into car. Ony took two of us an hour. Was quite a steep angle but pleased to say no damage to paint work. Now lots of bits to bolt on. Now for the step back. Two piece driveshaft needed a universal joint replaced so took apart, measured up and tried to find one. No luck. Apparently they are a special size and not made any more. Looks like I'm going to need one piece driveshaft made. Bugger Poject Discussion https://oldschool.co.nz/index.php?/topic/84912-petes-mk2-escort-1600-sports/page/2/#comment-2589465
1 point
-
Not much updates over winter sorry, but it's really hard to motivate myself to get into an 8C shed late at night! When we first got this car, the idea was to DIY as much of it as we could. After spending a bunch (too much imo) money getting the frame fixed up, a little switch flicked in our heads. Like we were okay with the idea of just handing off the harder stuff to experts, even if it cost us. So to then get a rough emailed estimate for $25,000 to complete the rest of the bodywork and paint... well, let's just say the switch got flicked back to its original position. Bodywork is a massive job with a lot of skill involved, I'm super new to all of this but I know that much. I really wish I just had $25k to throw around willy-nilly. Surprisingly, Girlface is okay with dropping that, but it doesn't sit right, but it'd look awesome, and I'd save a bunch of time, but really $25k is an entire new registered Starion in good condition, etc etc etc... The shop I got the estimate from has been well and truly disposed of the notion that they can get anywhere near $25k from me, and I believe that they didn't correctly realise what condition the car was in (fully stripped, no rust, half of the shell already prepped, multiple spare panels to choose from). So I'll be getting them out for an in-person inspection after I've fully stripped the paint and bog from some doors and bonnets. I'll also get another couple estimates because customer loyalty is nice and all but not when it can be measured in ounces of gold. So, to ease into the bullshit of potentially doing all this ourselves I've just kind of tracing around it by first sizing up what we have and what panels to strip first. Bonnet! The black car has some substantial rust around the edges. A while ago I gave it a quick paint strip + CRC zinc to get it to cut that shit out. Apparently I didn't get photos, so here's a before. oh nm found a pic! I know that there's at least one bog monster hidden underneath so I phoned up Wolverine to check for them for me. Only one bog monster, but it's a biggie, in the middle of the bonnet. The red car arrived with a huge plate of bog peeling off of its crappily-prepared substrate. It's basically the only bog monster on the red bonnet but it's also quite large and is all along a front corner. The rear side of it is mostly understructure, so I can't really hammer+dolly it (assuming I want to). The black one at least has access at the back and the overall shape is okay, but will the pitted edges count against me? Things to ponder. Fenders and front bumper I fully bolted two of the front fenders on, with much fettling of bracketry. The original right fender is good as far as I can tell, but the original left had been in a collision. The red's left has a better shape but the lower portion is a little worse for wear. Then I offered up the bumpers. The black bumper fits the sides well but the frame attachment brackets are mangled. They're also for the old destroyed frame so they don't line up anyway. My noob-beaten left fender clearly has some beating left to do to straighten out the attachment point. Being that the red bumper matches the new front cut, they line up well.... ... but now the skin doesn't fit. It's seen some repairs in the past so I guess it has been fettled. The driver side of the red bumper actually physically can't make it around the fender properly. Not only that, it doesn't even line up with the body lines. I got a bit down but then realised, why don't I just swap the skins and frames over? The black one's screws all whizzed out np. Skin off in a couple minutes. Only one red screw whizzed off. The remainders required a cut off tool, hammer driver, drill in Arm Twister 2000 mode, swearing, grunting and a chisel. And the underside is.. really bad. I think it might be salvageable since it's just an internal bumper frame and most of the meat is still there. I didn't bother attaching it to the skin just yet so there's still a chance I'll be extra sad, but the skin has slots to mount in the fenders so I at least just test fit that. Pics make it hard to judge but it does line up a lot better. It needs some positioning and holding but I think that's what the frame will achieve once it is installed. Even though the black frame isn't rusty I'd still rather not use it as the attachment points are truly messed up. But maybe it'll be better to bribe a friend with a welder for an afternoon than try and salvage the red ones..1 point
-
The paint only wrinkled in places that I'd sprayed with brunox. But not all brunoxed areas. It only wrinkled in places that I'd sprayed the old durepox. But not all the oldpoxed areas. It only wrinkled in places that have been both brunoxed and oldpoxed. But not all of them. After dissecting the wrinkled paint, it's definitely wrinkle in the new paint, and not just pre-existing wrinkle being coated. But the paint under the wrinkles is usually brunox, as if the old durepox was compromised on those areas. Experiment: do a quick shallow sand, brunox and top coat on a test patch. I dialled in the gun properly this time, probably thinner than it needed to be but I'd rather err on that, and gave it a spray. Wrinkles? Maybe, but the surface wasn't perfectly flat - I just did a quick scrape and 240 grit scuff without aiming for maximum smoothness. So I suspect it's mostly just the (extremely thin) top coat Verdict: I don't know in the slightest what caused this. I know they weren't there before the original brunox, and I believe I cleaned and degreased well. My absolute best guess is that I didn't actually dodge the durepox bullet and maybe some wrinkling occurred that was trickier to spot, or it left things open for the top coat to interact with it poorly, or something like that. So I guess I dodged a bullet and hit my head on the ground? I don't want to sand all the wrinkles all the way back, I think that's too much fussing even for me. I'll just live with it and call these areas The Pox. But it's suspicious enough that I didn't want to spray directly back onto those areas. I needed to buy some durepox anyway for some other bits so I nabbed a couple litres and recoated The Pox in 100% fresh durepox. I know it's not filler primer but I laid it a little bit more thick in my test patch corner just to see what it can do. It vaguely filled some of the wrinkles I guess, but mostly no change. As expected, the top coat conformed 100% to the wrinkles on the surface - and highlighted them extra well thanks to its sexy metallic shininess - but the silver lining is that this coat didn't add any additional wrinkles. The plan now is to just top coat it all, 2 coats, and just live with the fact that the underlying surface in areas with The Pox has some imperfections that will be visible. I estimated I only needed like 250ml to finish it off but could only get it 0.5L minimum. Glad I did because I ended up going through 375ml to re-coat the freshly durepoxed areas in two complete coats and get the second coat on the rest. But it all came up well this time. No runs, no additional wrinkles. Anywhere that didn't have The Pox came up perfectly. I needed to come back and revisit some spots for a third coat so could probably lay it on thicker but I was quite happy to err on the side of caution. Calling that a win. Interior paint complete (these emojis suck )1 point
-
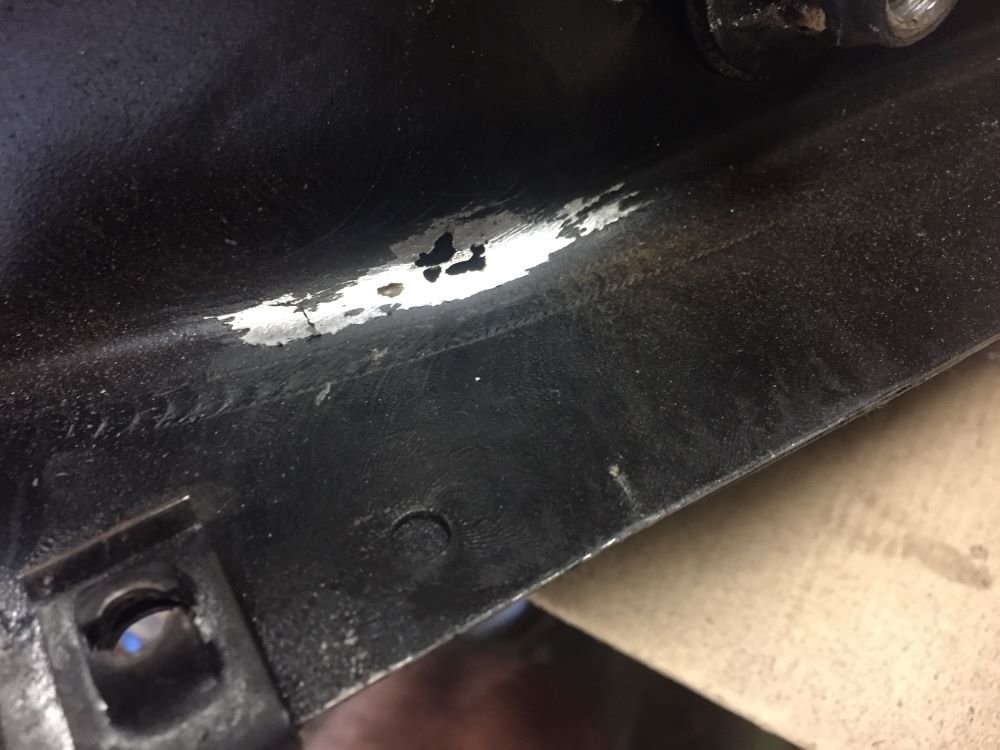
So true to word I finished trimming and cleaning the ends of the chassis rails. I plan to trim these tabs off and replace them with some facing outwards instead. That will let me get inside the rail to clean it out properly and get some good rust preventative paint in there before the valence gets welded on. Before that though, I decided to make up the valence panel itself. I had planned to make a cardboard template to base my replacement panel off, but then I realised that if I just tacked the original panel back together it would make a perfectly good template itself. I had sliced it in half to get better access to the spot welds for removal but that was nothing the welder couldn't sort out. Finally, with the "template" back in one piece, I cut out some material and took it to a workmate's to borrow his swaging jenny. In a perfect world you'd make the whole panel out of one piece and reap all the mad cred for your panel beating skills. I realised though that I don't actually have anyone that I need to impress and it makes no sense doing something the hard way when the easy way reaps essentially the same result (cough cough sump cough cough). Also there was the fact that the swaging jenny's throat wasn't deep enough to reach the center of the panel if it was in one piece. So it came to be that the panel would be made in a total of three parts. I used the jenny to raise the long edges of each of the rectangular swages that run vertically up the panel. While I was there I also borrowed the sheet metal brake to put in the two flanges on the top and bottom, as well as the slight horizontal kink in the swages, about 25mm from the top flange. All the stretching and folding left the panel with some considerable internal stresses which gave it a fairly substantial twist along its length. Rather than trying to hard to correct it at this stage, I carried on forming each of the features in the hope this would help to relieve some of the stress and help straighten everything out. To finish each swage, I hand formed each end with a hammer and dolly, while using the vice as something of a stand-in anvil. I know that's one of the cardinal sins of vice ownership but I don't really have a lot of choice. They're not perfect and there is some bruising from being a bit overzealous with the hammer but it's good enough for the girls I go out with and it wont be visible when everything is painted and undersealed. These alone were enough to take the majority of the twist out. Next it needed a bend in the top flange to follow the original panel shape. The flange itself is around 25mm wide in the centre where the bend needs to be. That would be a fairly ambitious shrink even if I did have access to a shrinker/stretcher, and now without it's even more so. Happily one of the rear door catch bolts wants to exist in the same place as this centre shrink so by adding a cutout to go around the factory captive nut, similar to the factory panel, I made hand shrinking the flange much more doable. So the top flange is bent slightly while the bottom remains straight to weld to the outer rear valence. The top flange front edge was also trimmed parallel to the vertical section meaning the outer edges are narrower than the center. Looks pretty good so far. The last thing that needs doing to this centre section is the addition of the water drain points in the lower flange. The panel gets some speed holes from factory and wiring penetration points, all of which will love to scoop up water. Without some way to let this water back out you end up with a substantial rust trap. Ford knew this, hence there are these water drain points in the factory panel that I am going to attempt to recreate. Making my life easier again, rather than trying to form these points completely with a hammer and dolly and deal with mind bending shrinking and stretching, I opted to chain drill out the space above where the flange will be moved up into, then weld it back up once the desired shape was achieved. I don't think I got any photos of the welds but suffice to say I'm still getting my eye back in after the extended break. Nothing a grinder and paint can't fix though. That meant the centre section is more or less complete. But there are still the two outer pieces that need filling in. Starting with the driver's side due to its more simple shape. This one I did start with a cardboard template before having a go at the steel. It has a tricky double bend where the two folds are in opposite directions but overlap each other which the cardboard doesn't really conform to very well. This translated to similar problems with the steel and as such I didn't take many photos as I battled to fettle the panel into shape. Eventually though, I got the end piece tacked in place on the end of the centre section and fully welded up. Finally I gave it another test fit. I also folded the lower edge over to match the centre section but I guess I missed the photo of that. It ended up fitting really nice and tight up against the chassis rail and where the flange would be on the outer edge so I'm quite pleased with the result. Moving to the other end, the shape required is quite similar but the panel behind it is a bit different. On the passenger side lies the spare wheel well which had a flange on the rearmost edge for the rear valence to weld to. When I went to start working on the shape of the last piece of the inner valence, I realised just how poor of a state the wheel well panel was in. Being completely honest I fell down a rabbit hole and completely forgot about the rear valence for a while. The first thing I noticed was the signs of weld penetration from a patch panel on the inside. Next was the panel tacked on the outside, presumably covering a rust hole. So switching over to the inside of the wheel well, I hit it with a wire wheel to knock off a lot of the rust and shitty underseal and have a proper look at what I'm dealing with. Which wasn't pretty. There's at least two patches on the tub, one on the outer skin, one on the bottom, and one coming partially up the inner side of the wheel well. So rather than try to unpick everything and try to repair it, I threw a new slitting disk on the grinder and ran it next to the lower seam and bing bang boom, Yeah that's not going to go back together very easily. In any case, here's the panel I'm going to need to recreate somehow: Can you count the layers of patches? This one might be a palmside jobbie yet, but they only have the saloon version available so I might has well have a go myself first since an off the shelf panel will need modifying anyway. She's gonna be a pretty big job. If you made it through that, thanks for reading my typically over explained and lengthy post. Be sure to pipe up in the discussion thread if you have anything you'd like to add. Cheers.1 point


This leaderboard is set to Auckland/GMT+12:00