
Leaderboard


Popular Content
Showing content with the highest reputation on 02/27/24 in all areas
-
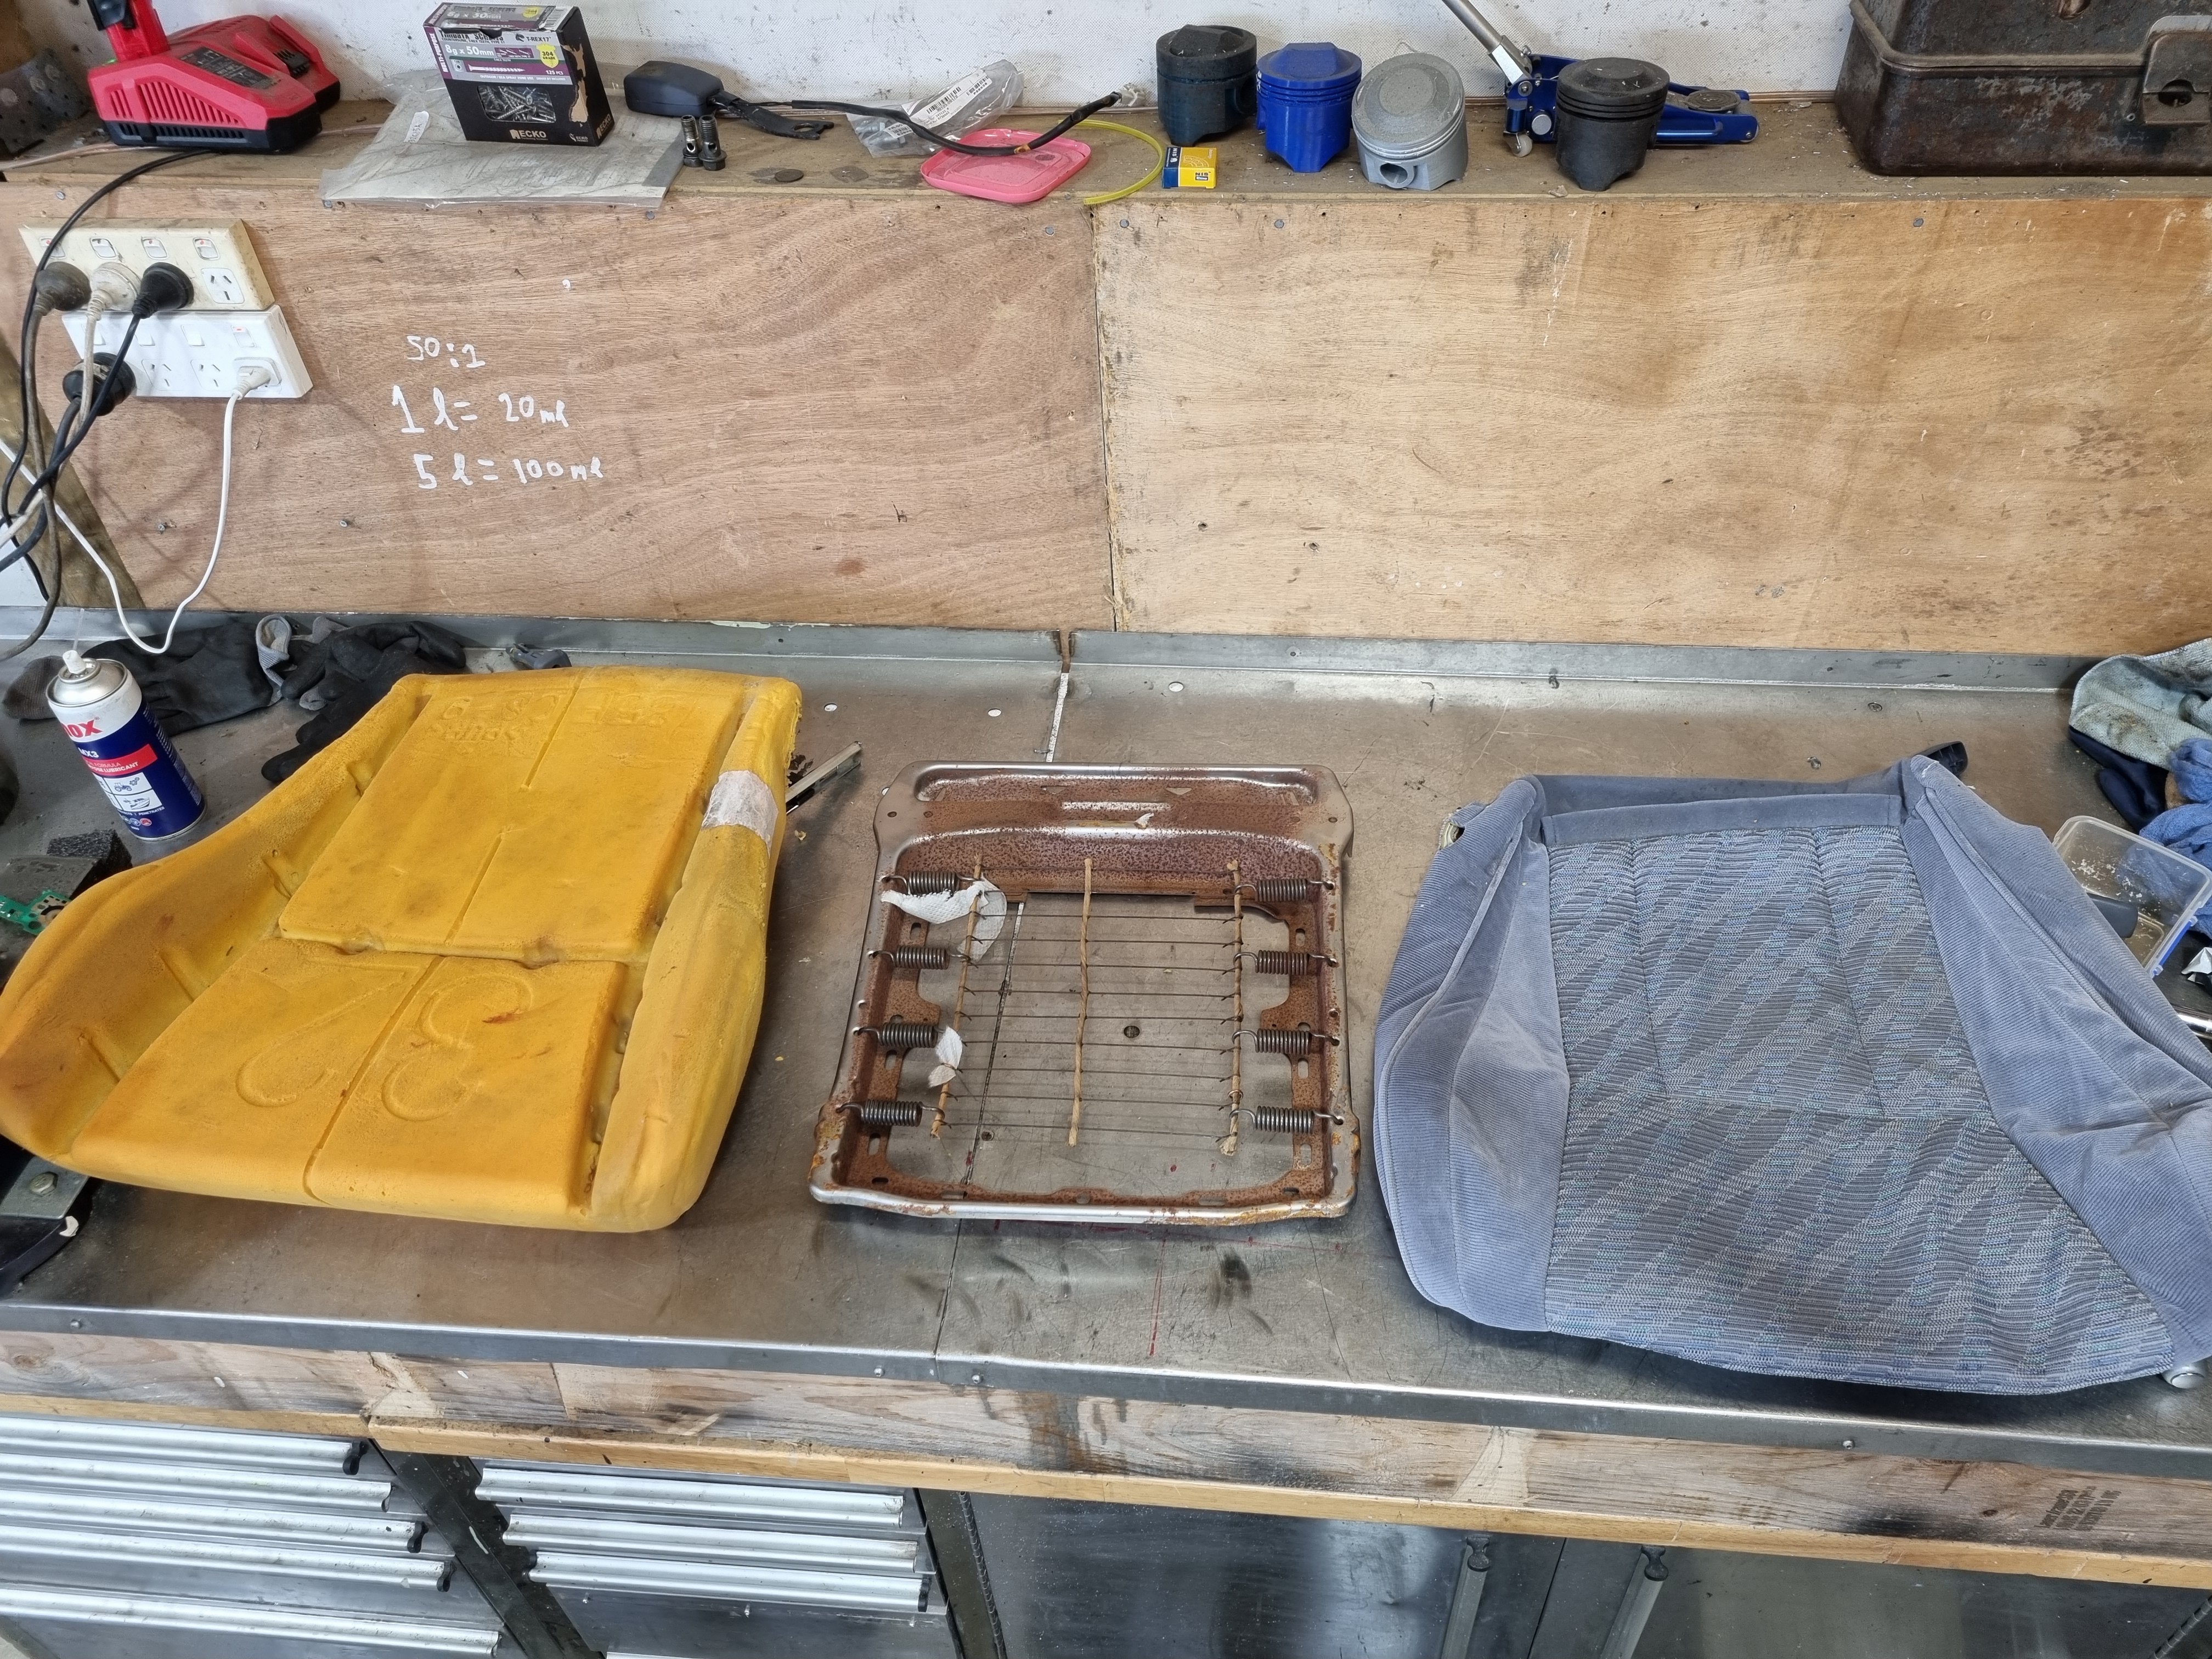
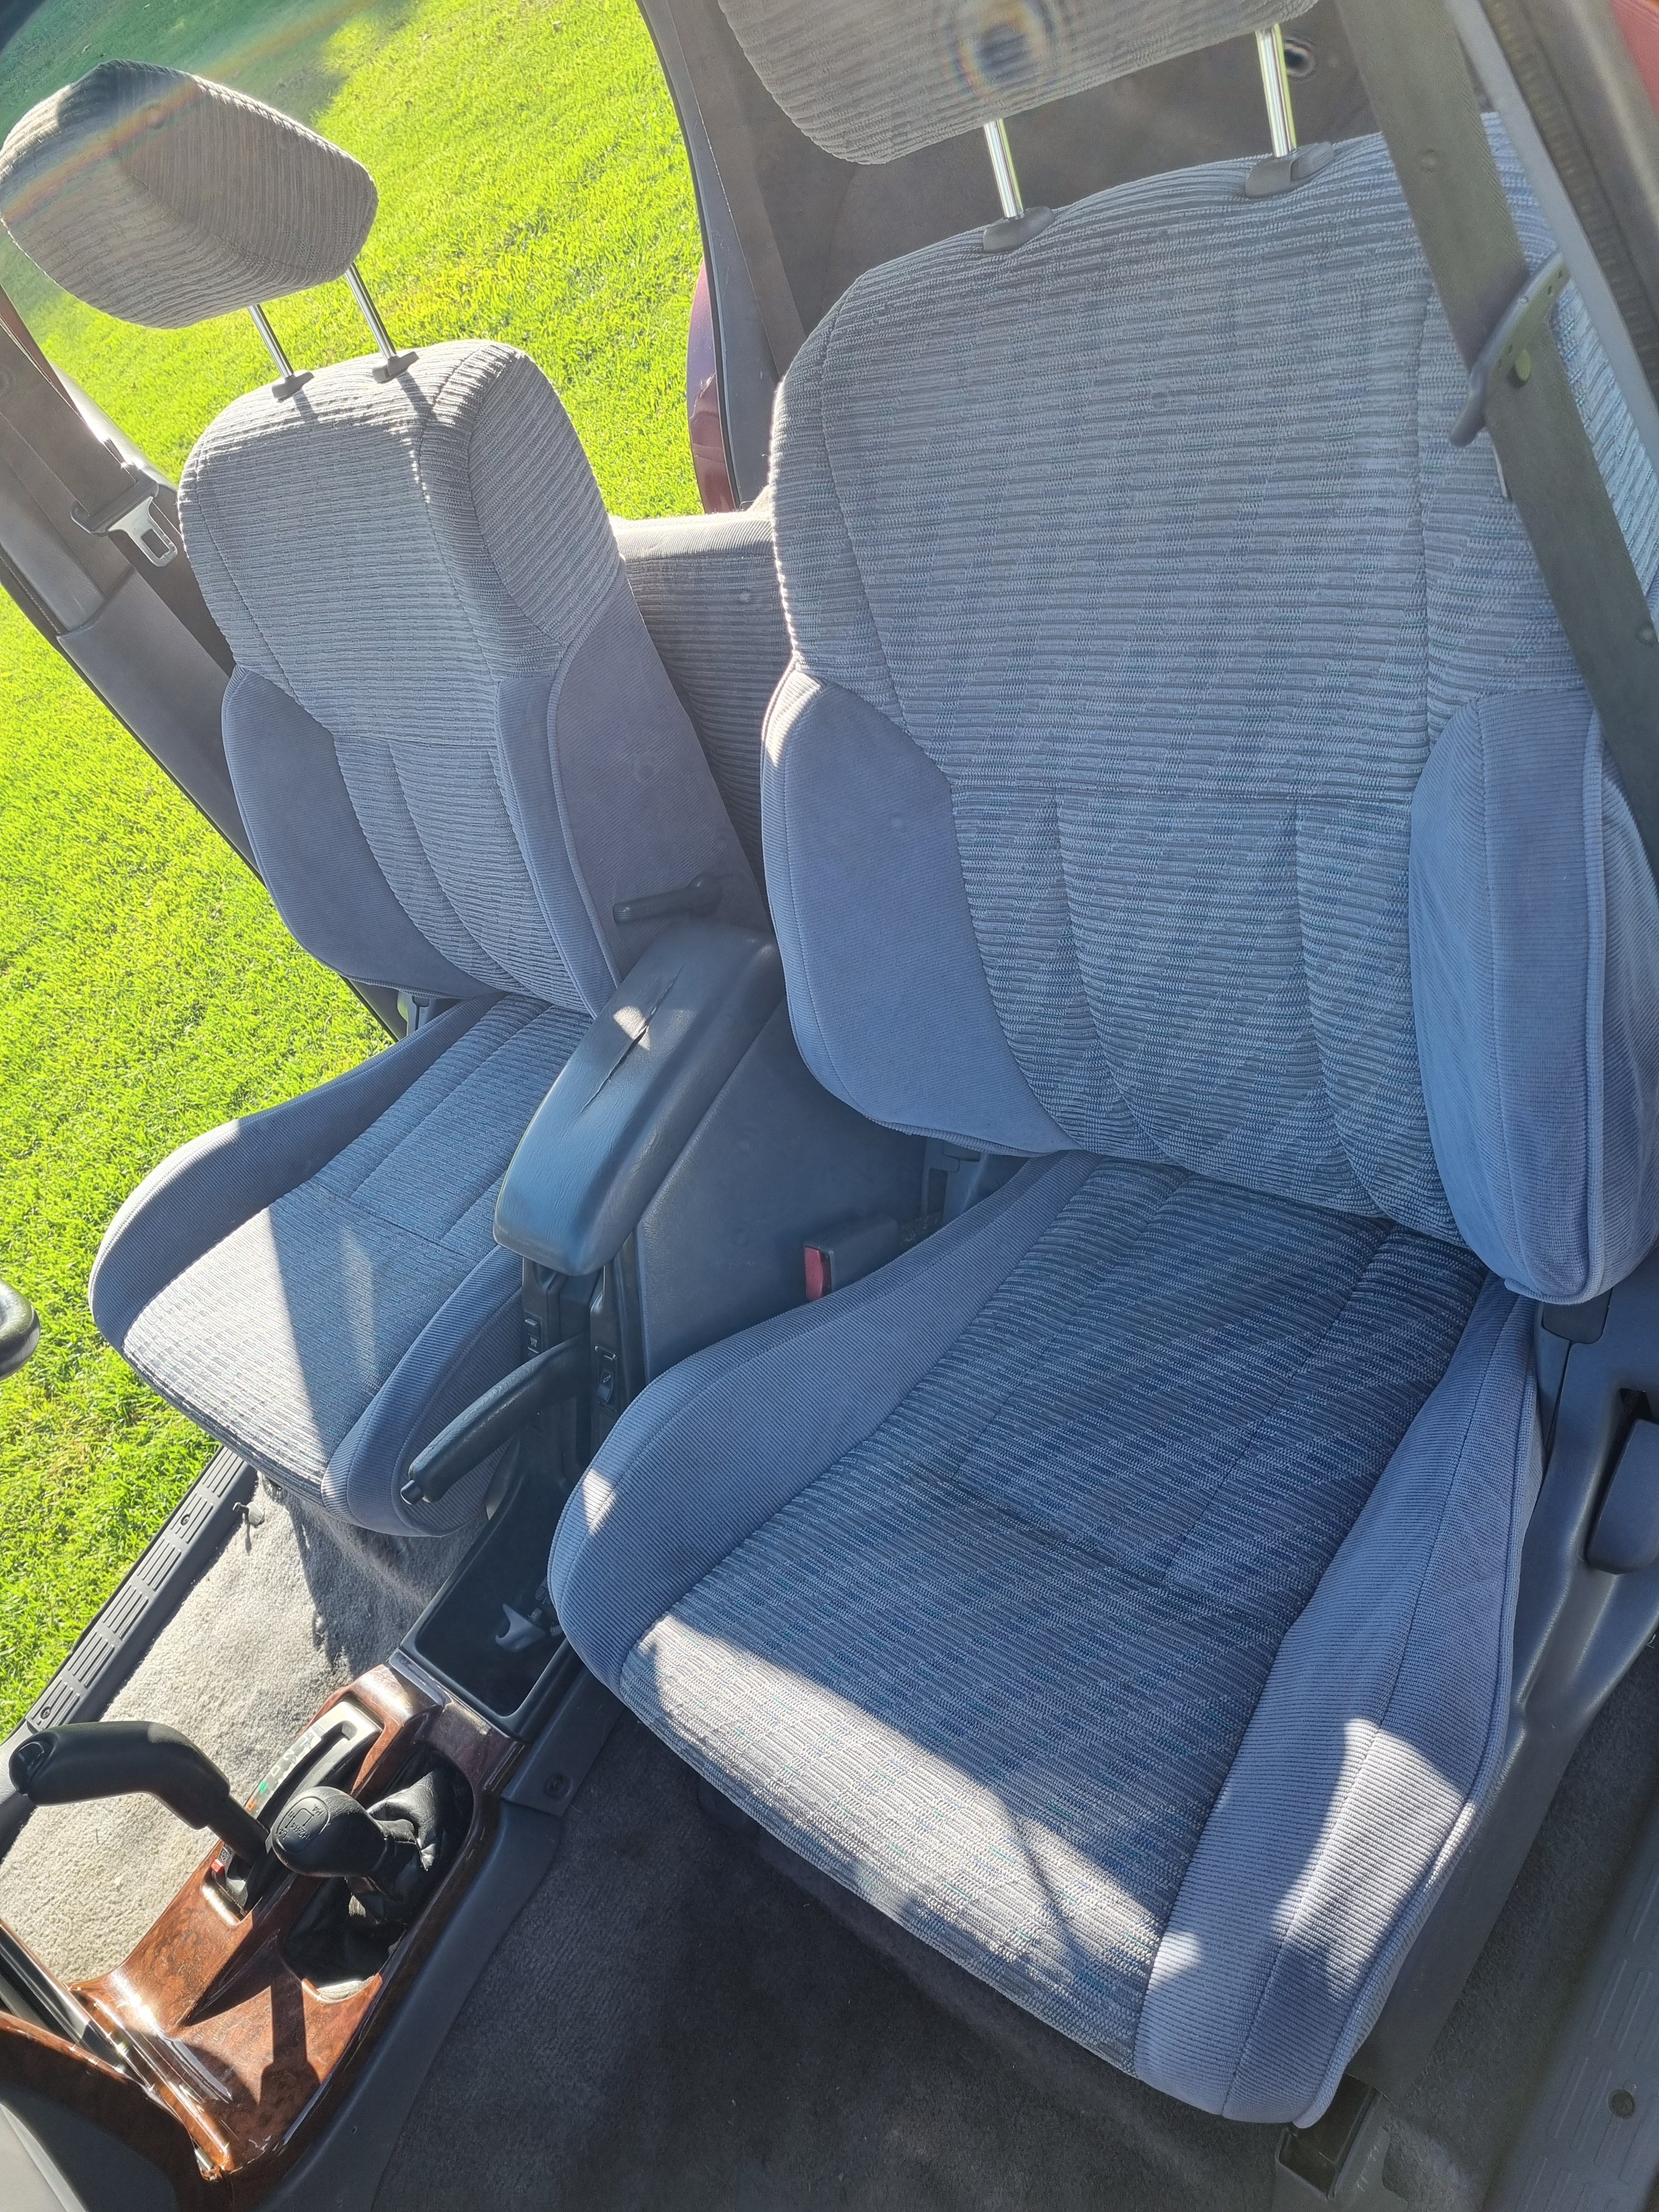
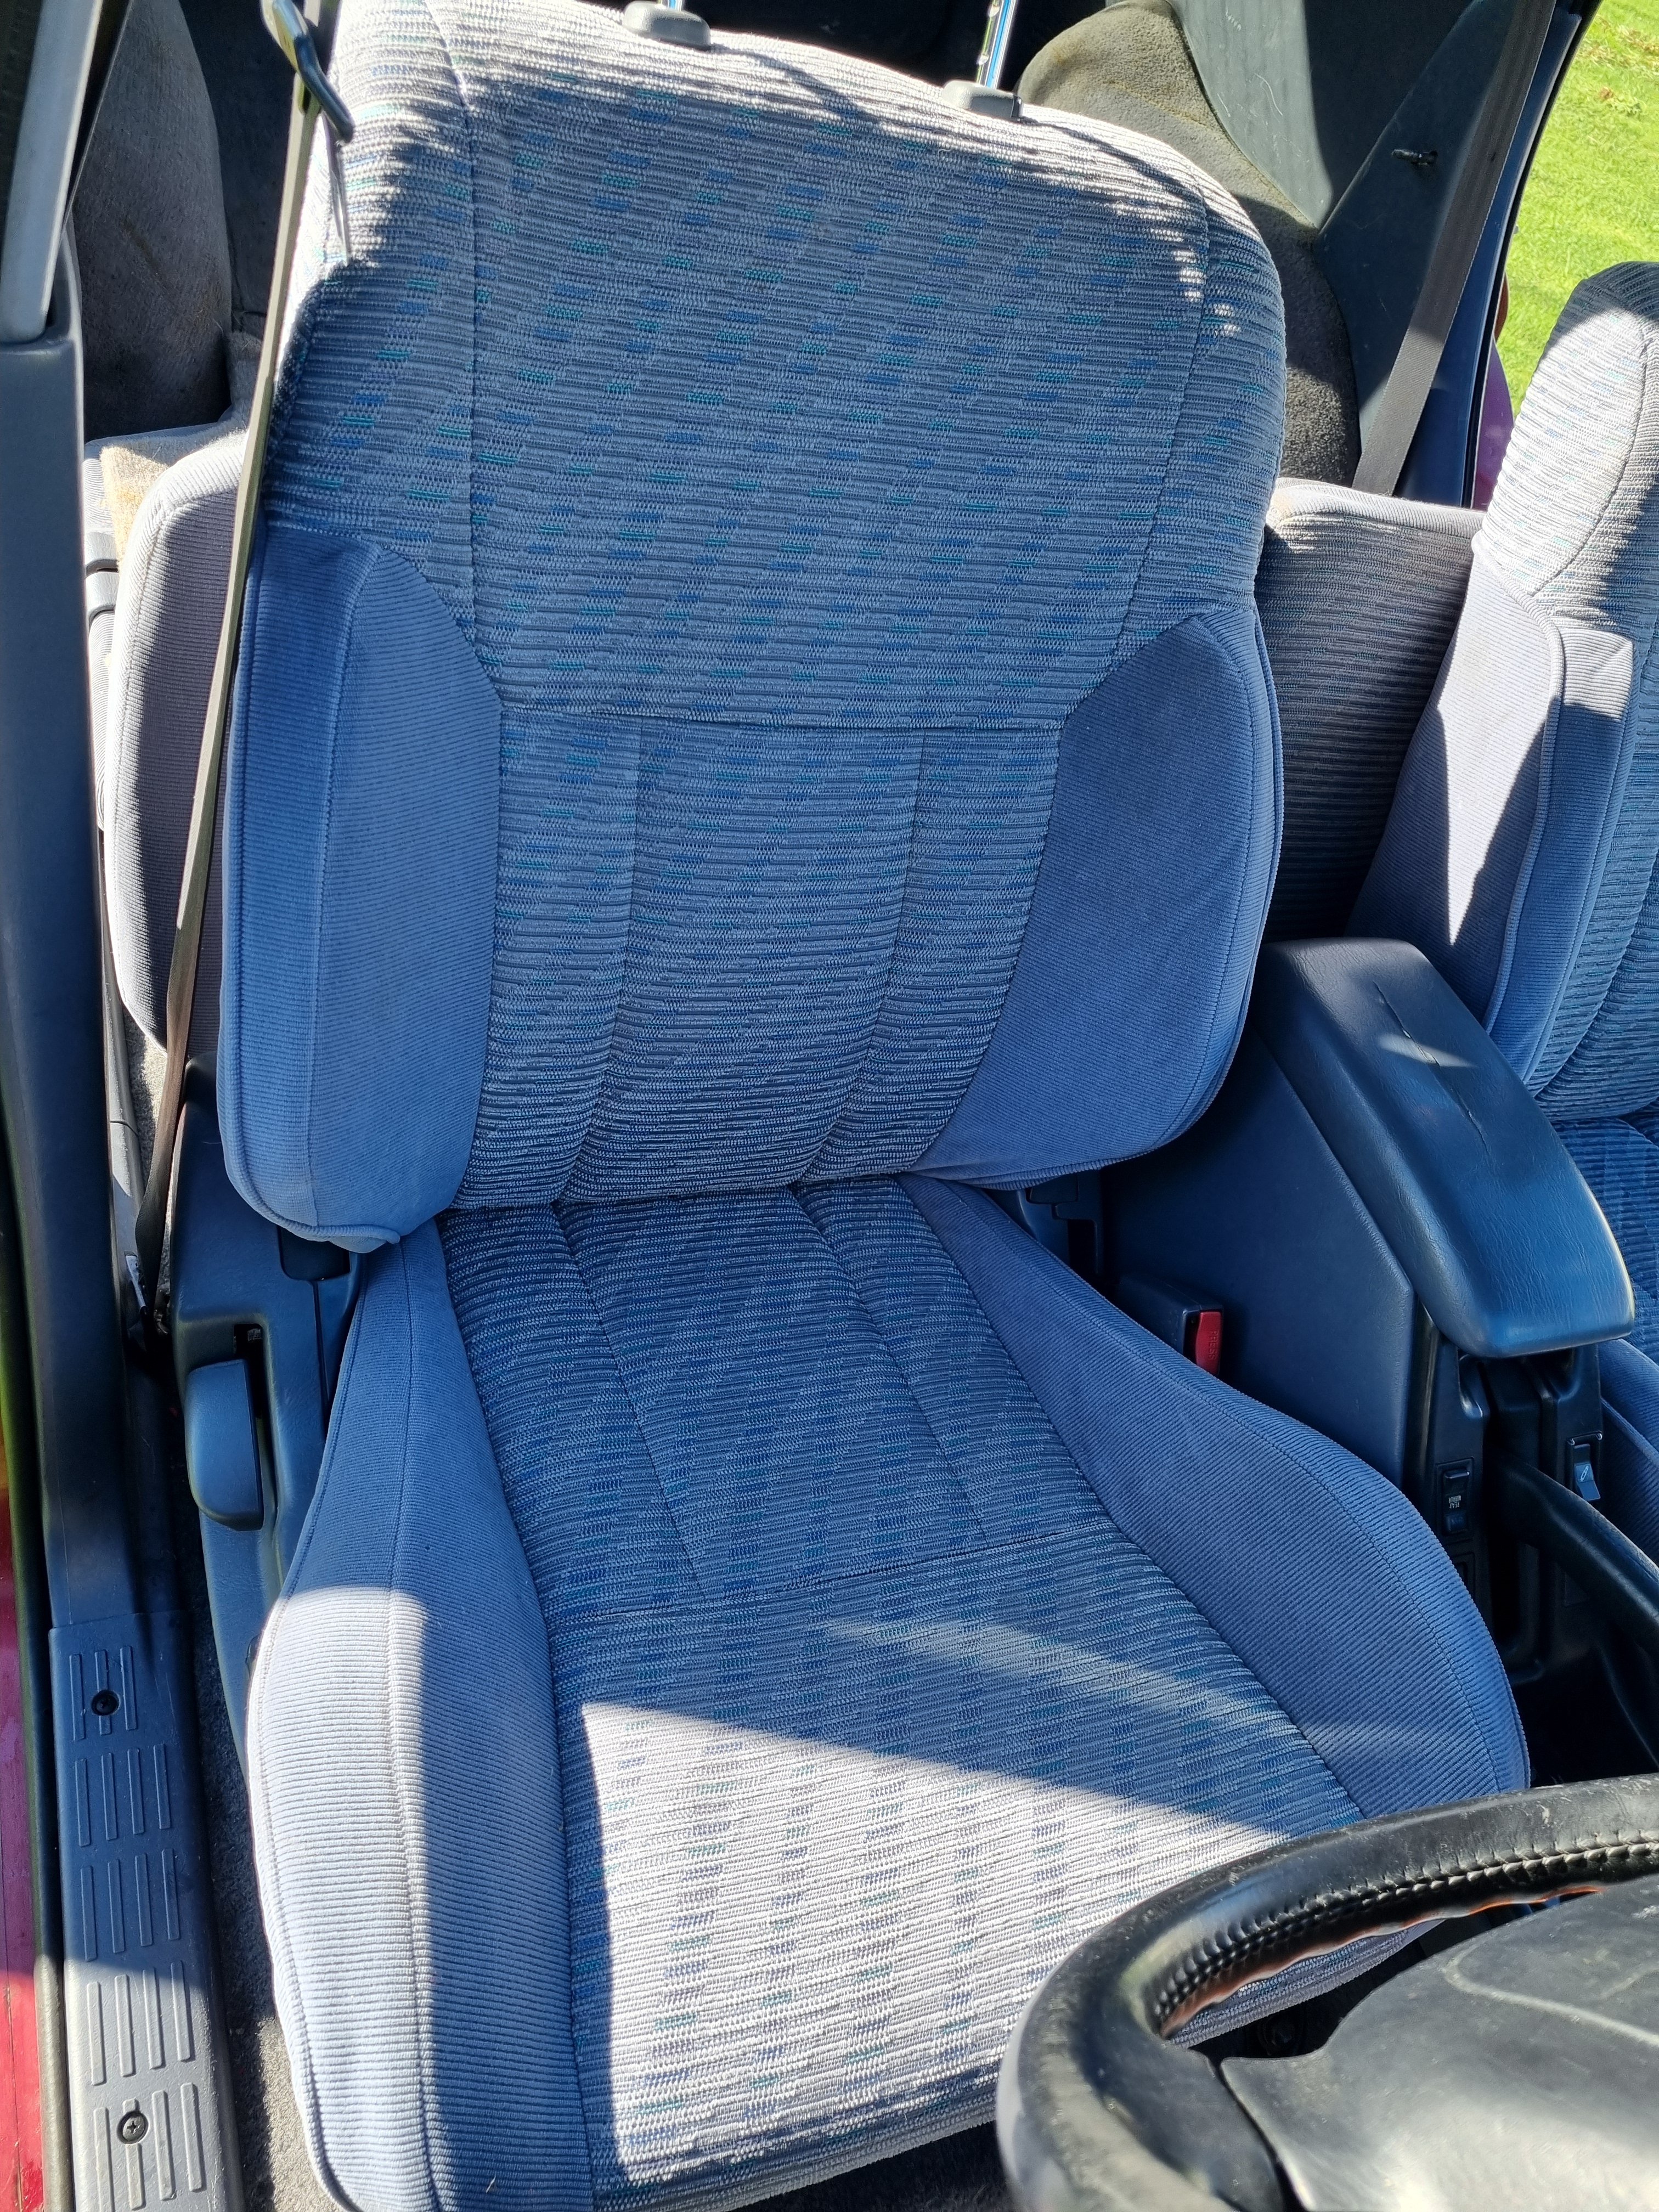
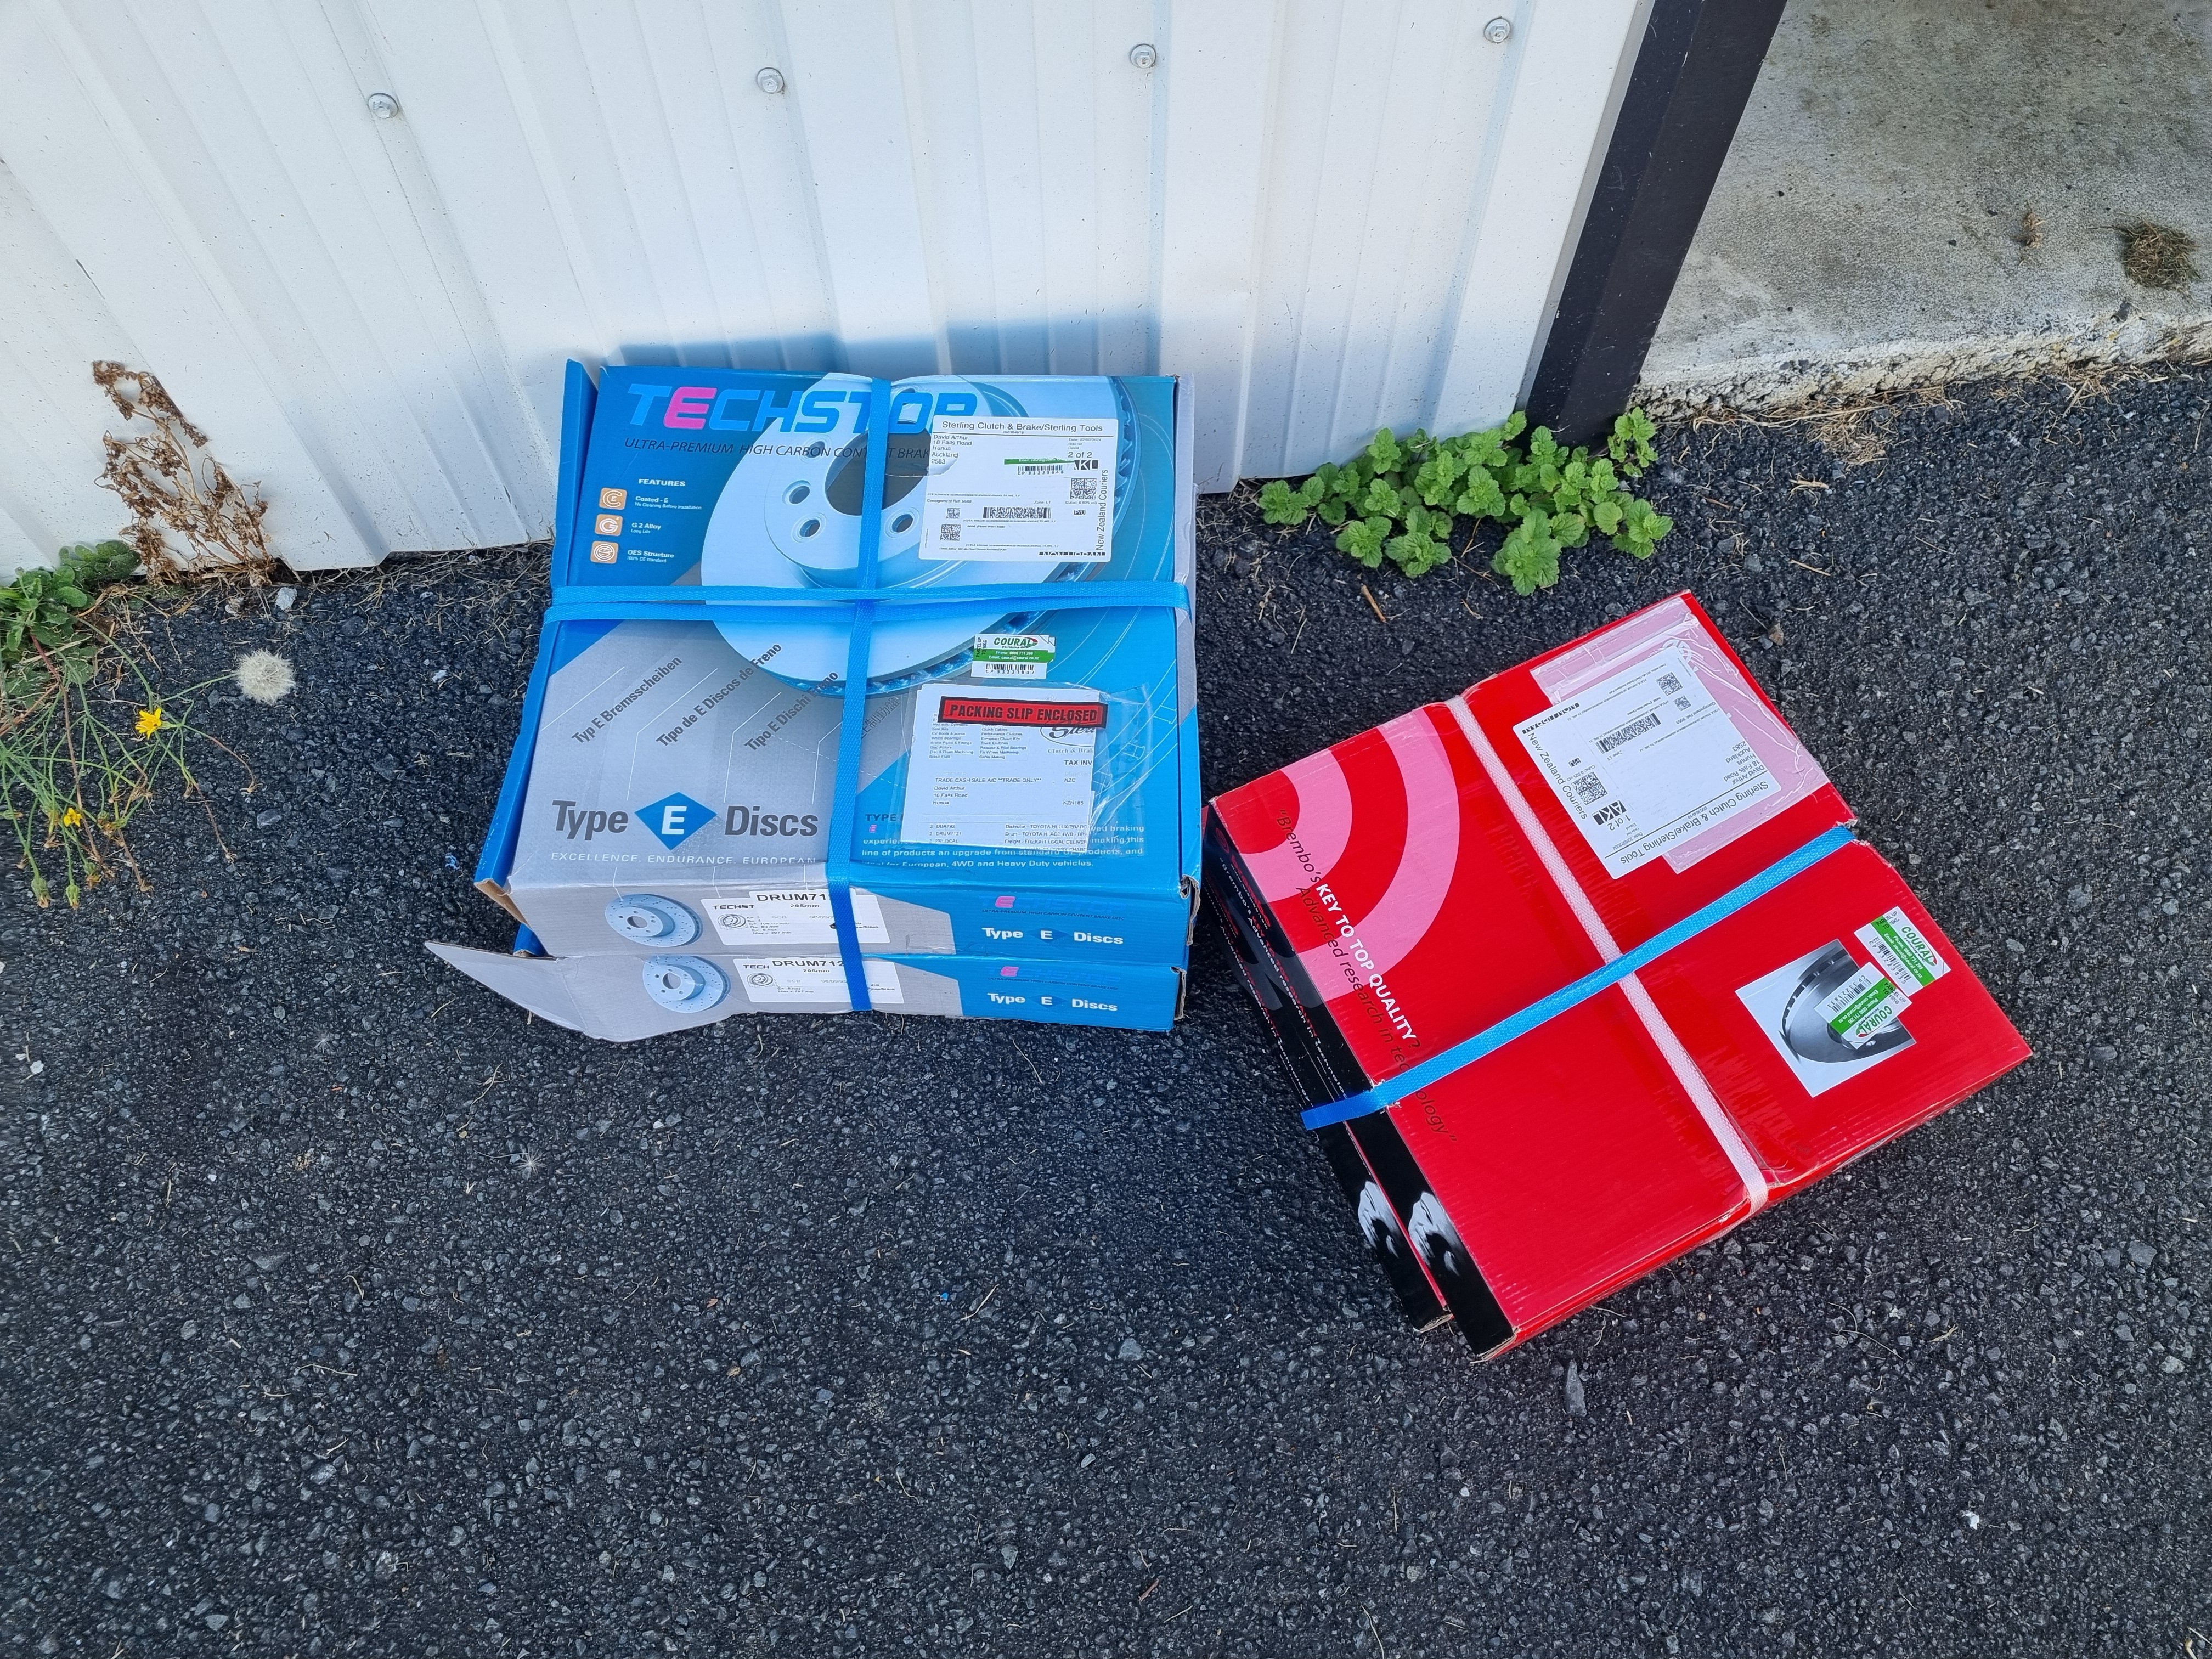
The seats actually came out looking quite good. So I put them back together and put them back in the truck. Fuck, so much more comfort. And now both seats have adjustable lumber support. Then I fitted a cooling fan I had to the AC condenser. I made a bracket and it's in there pretty good. I made up the wiring loom for it but it got dark so I'll fit it tomorrow. Also I bought new discs and drums for it.
 8 points
 -
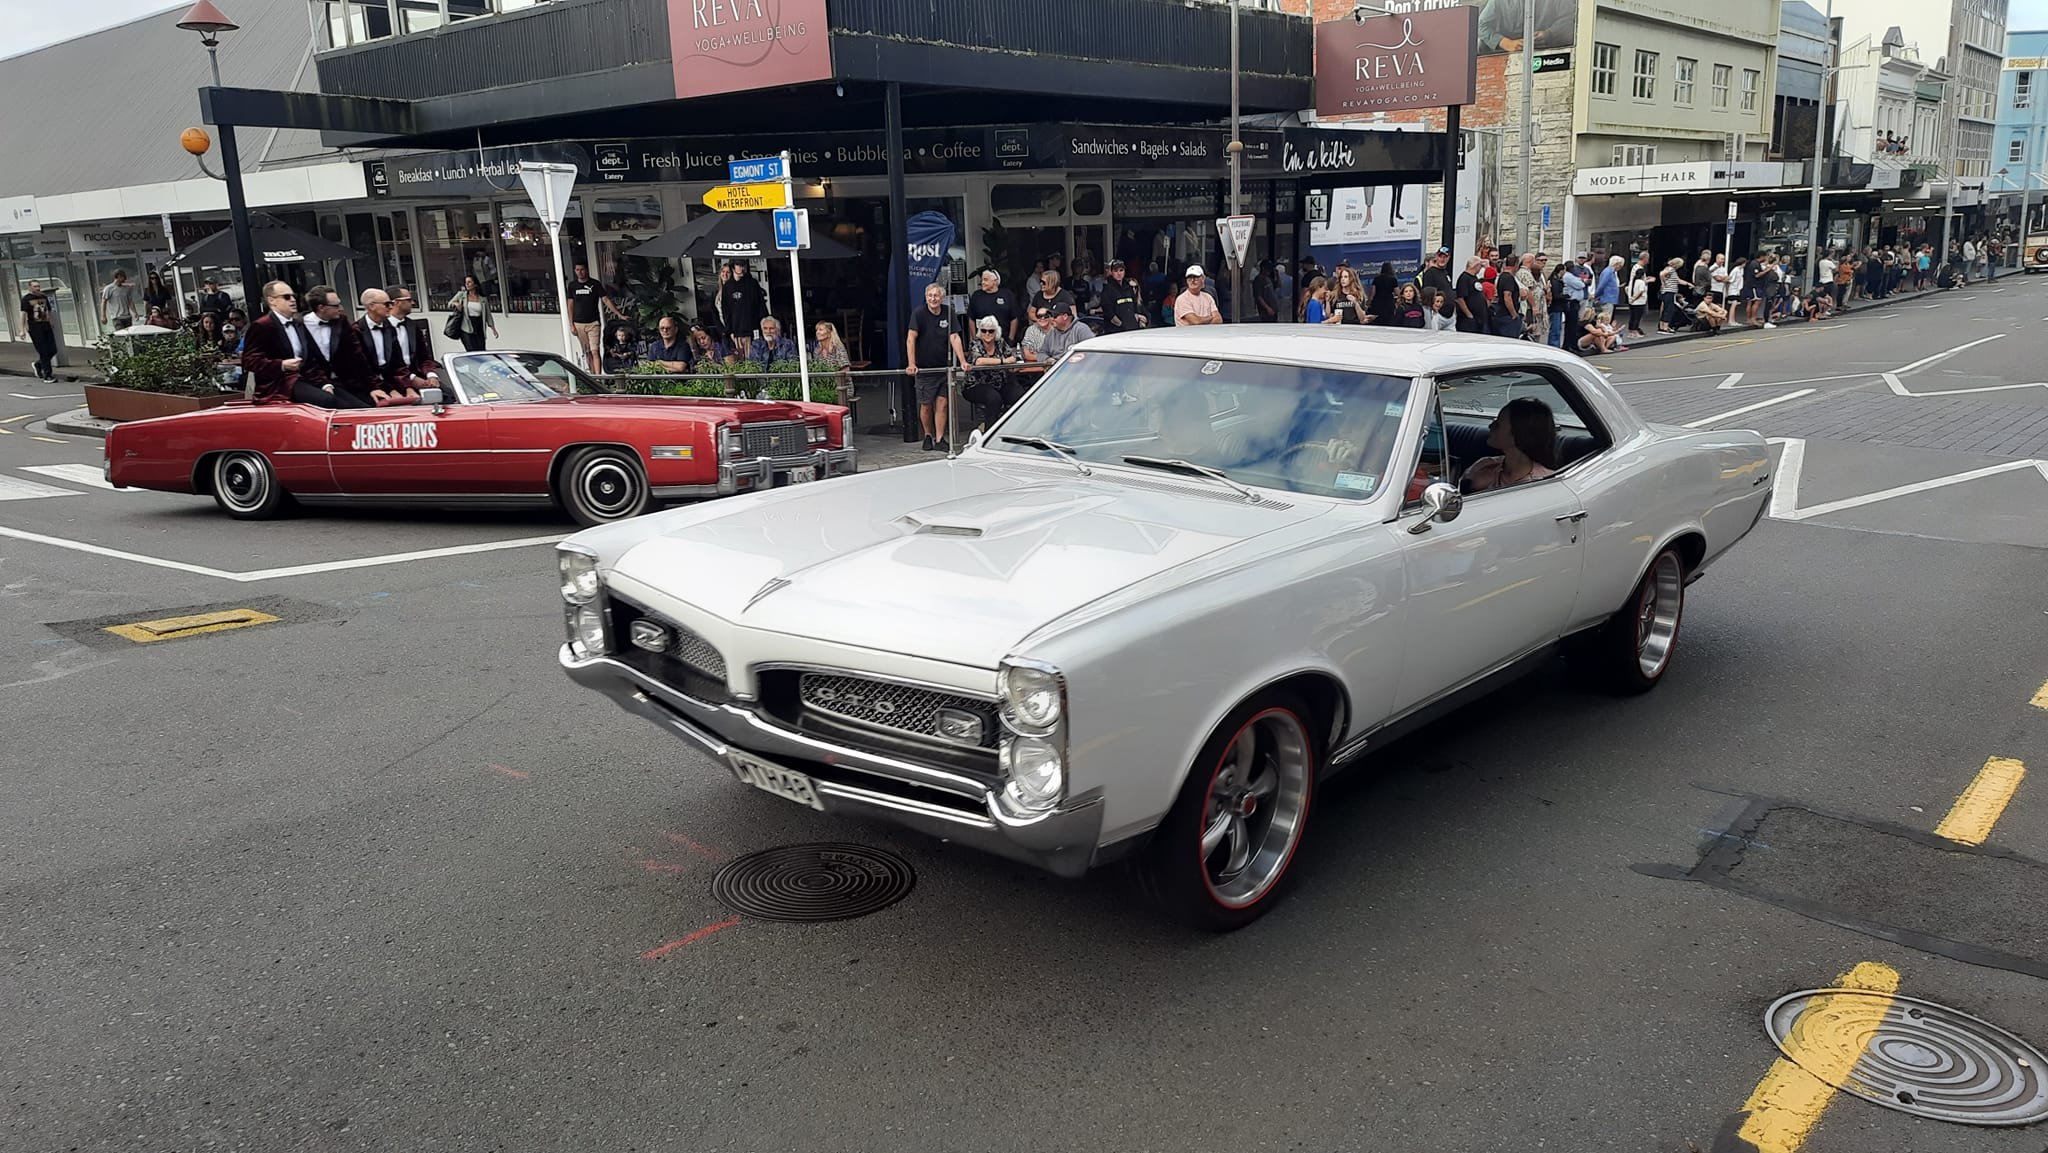
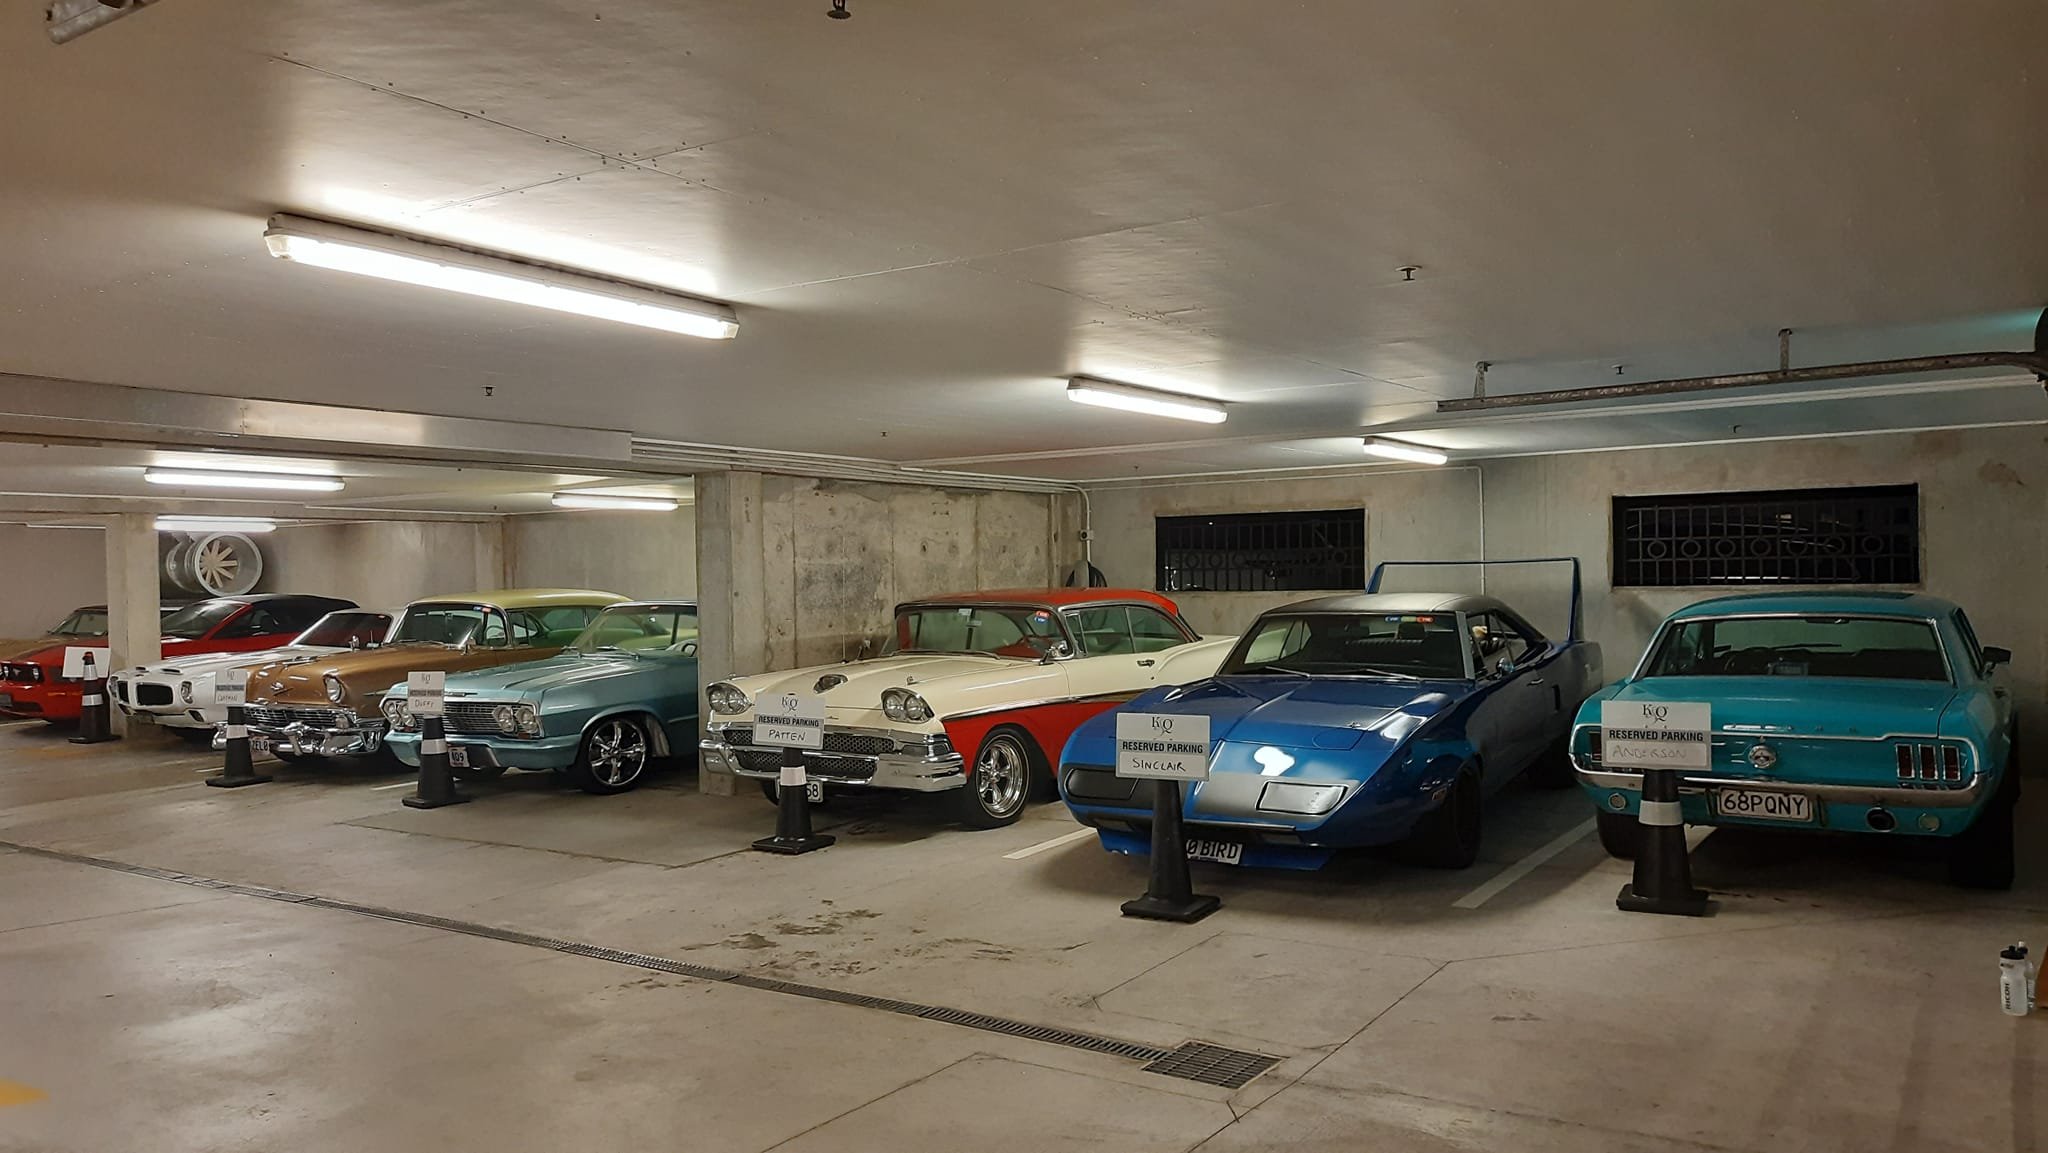
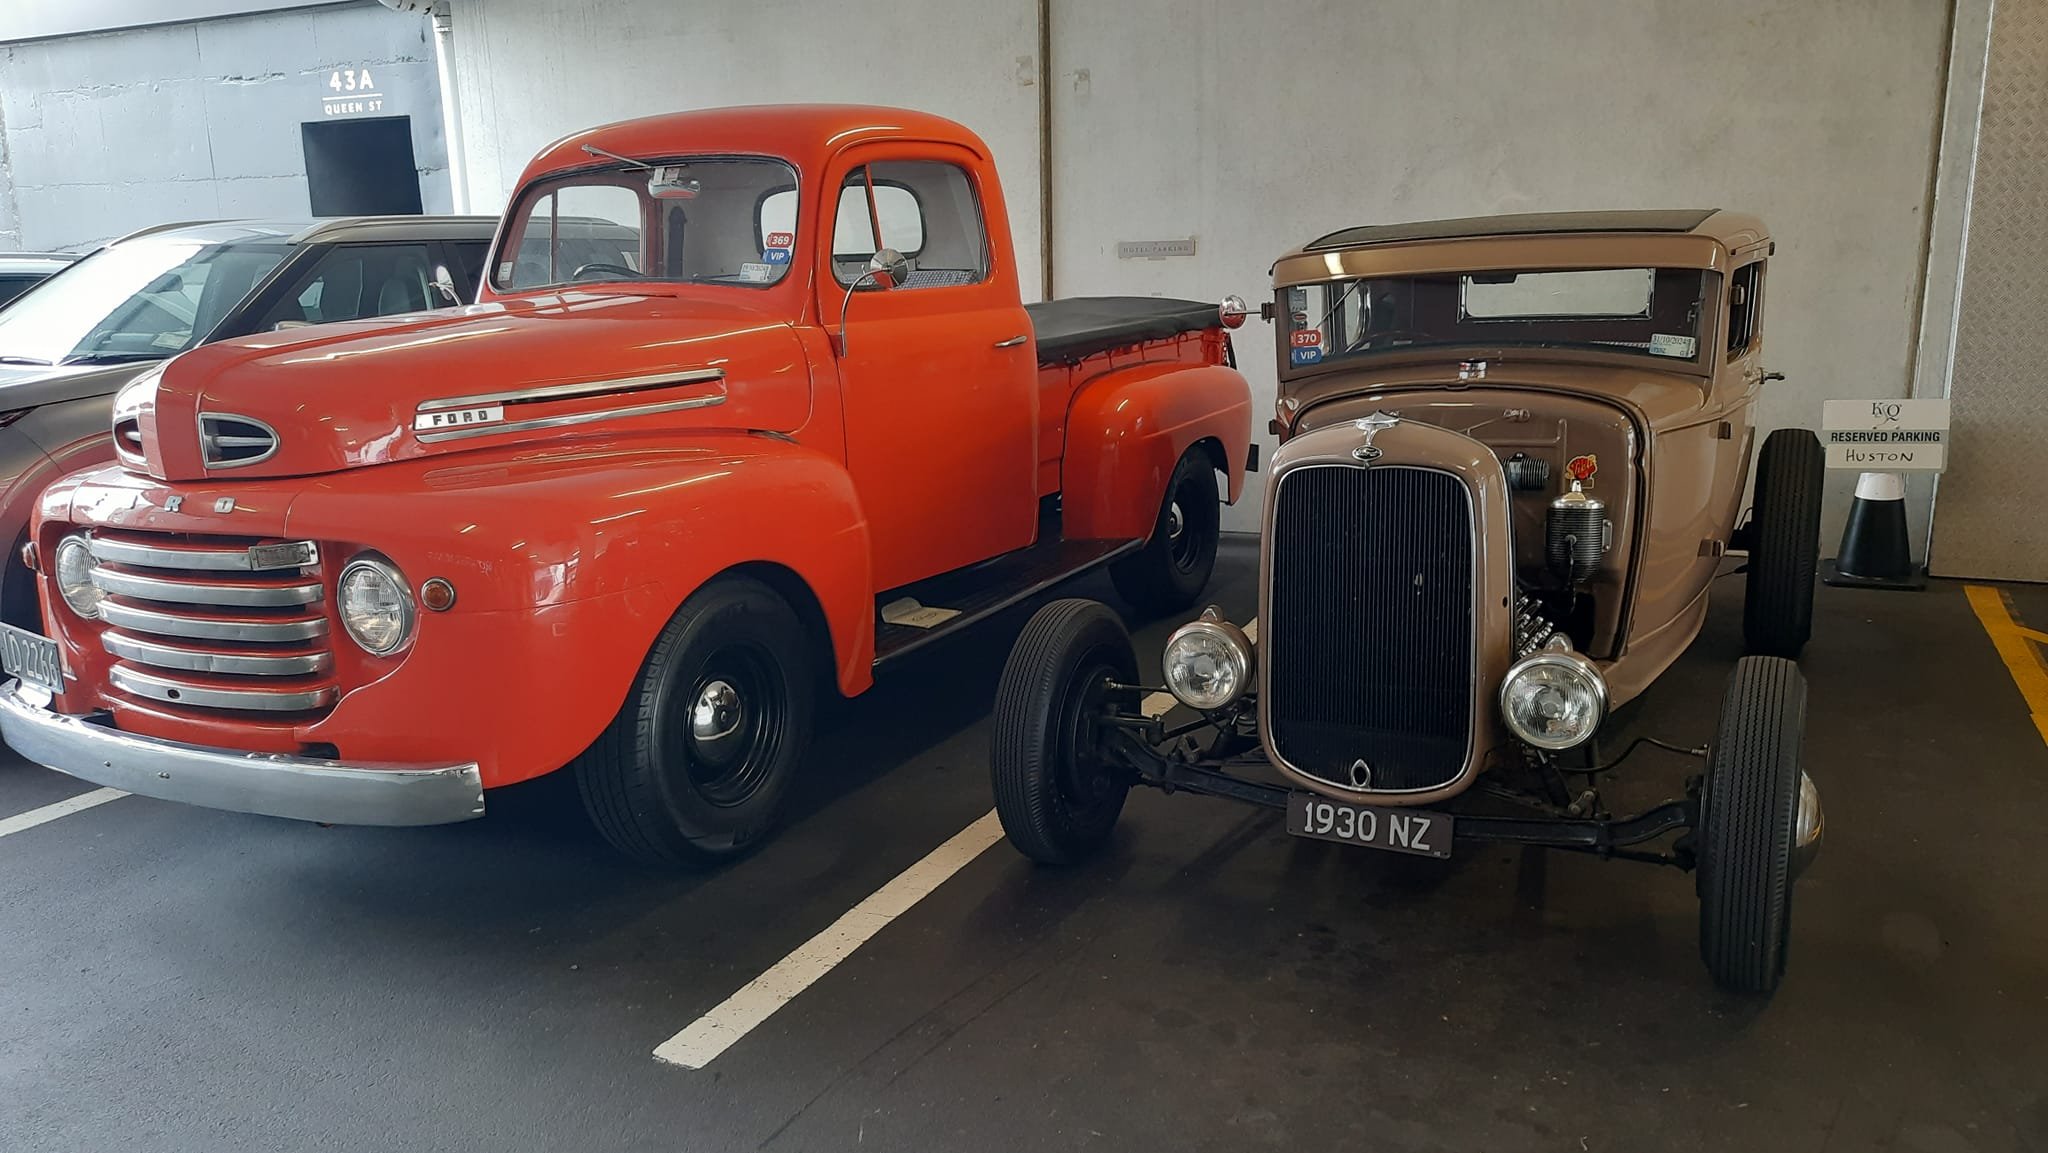
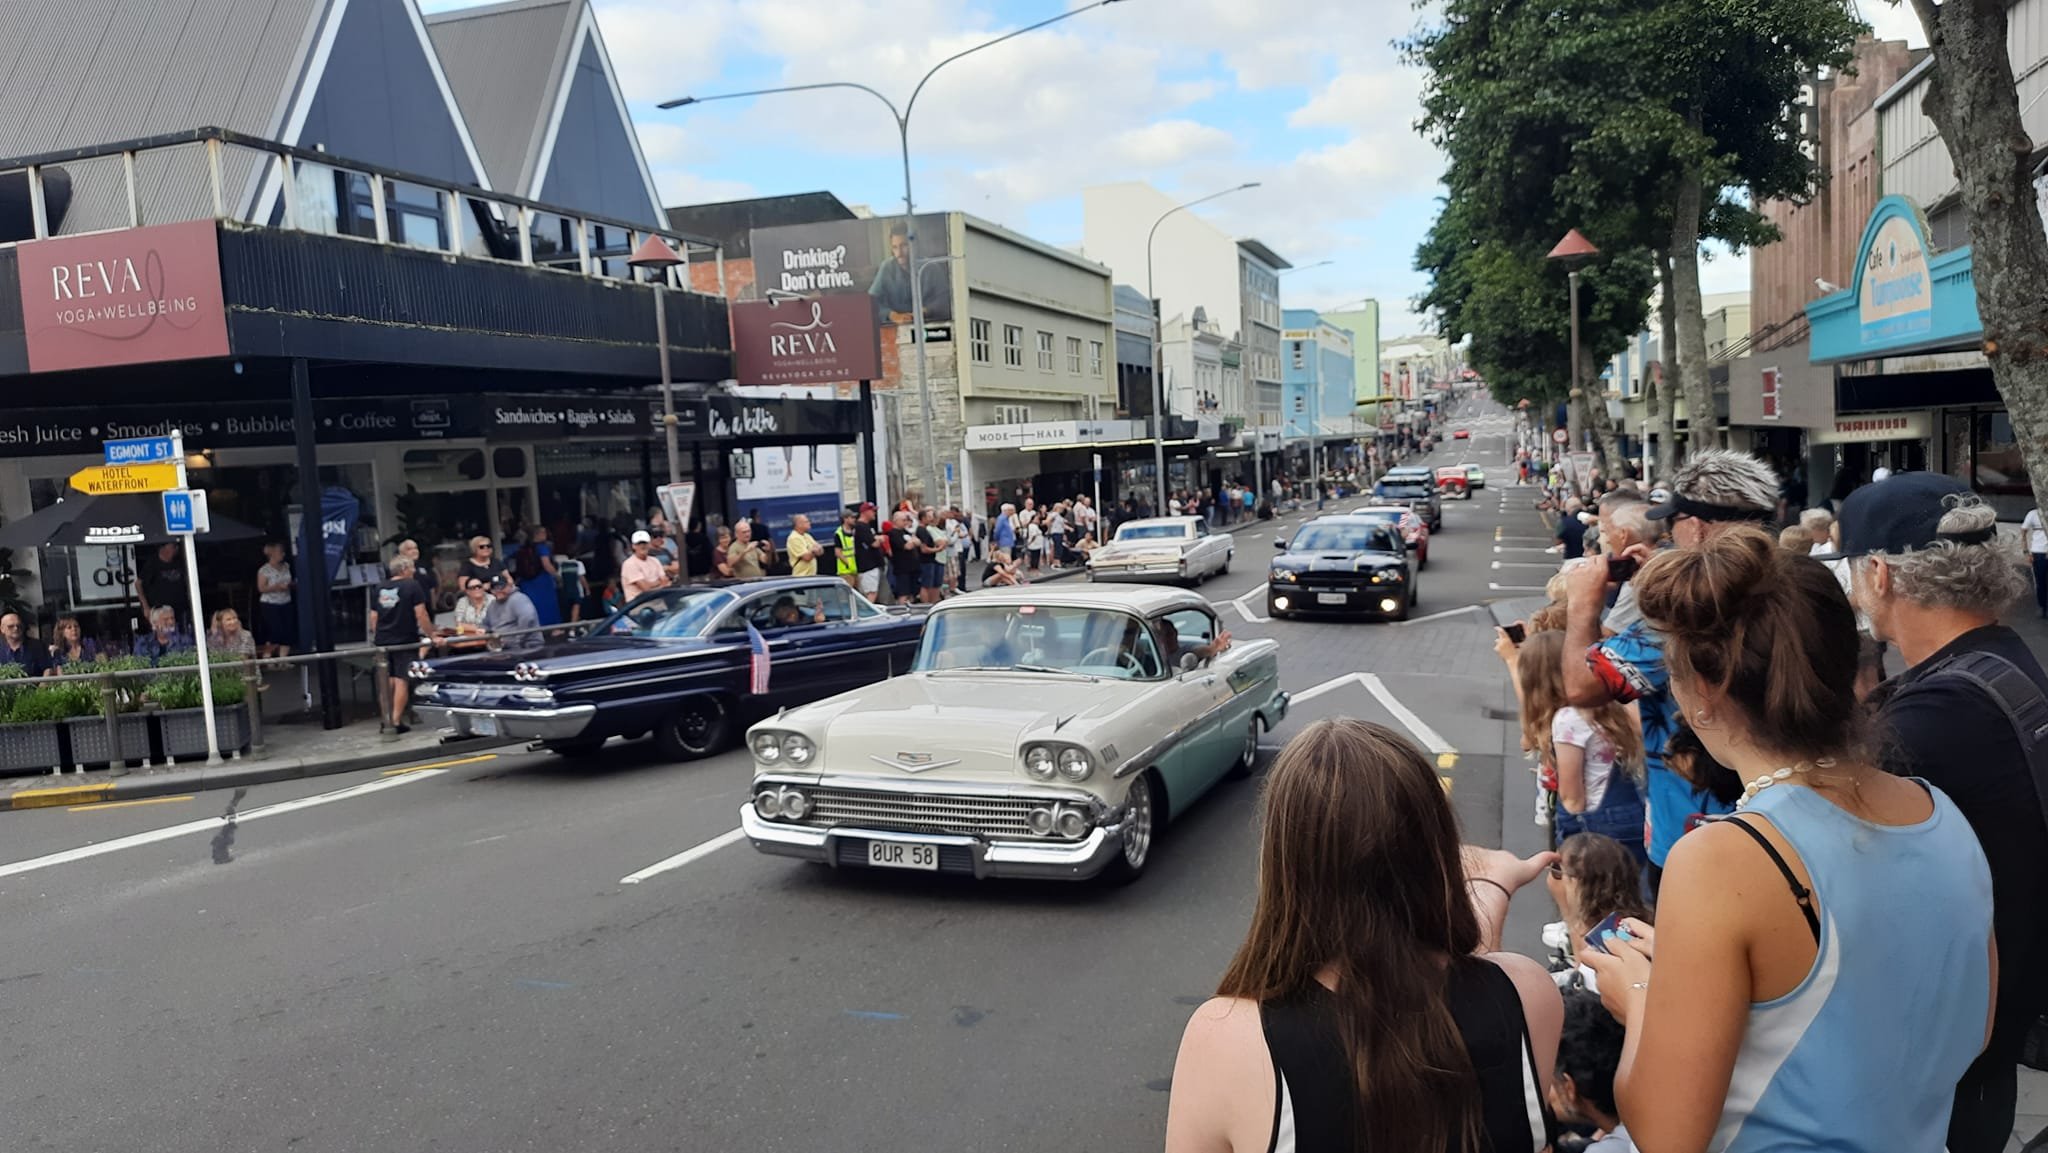
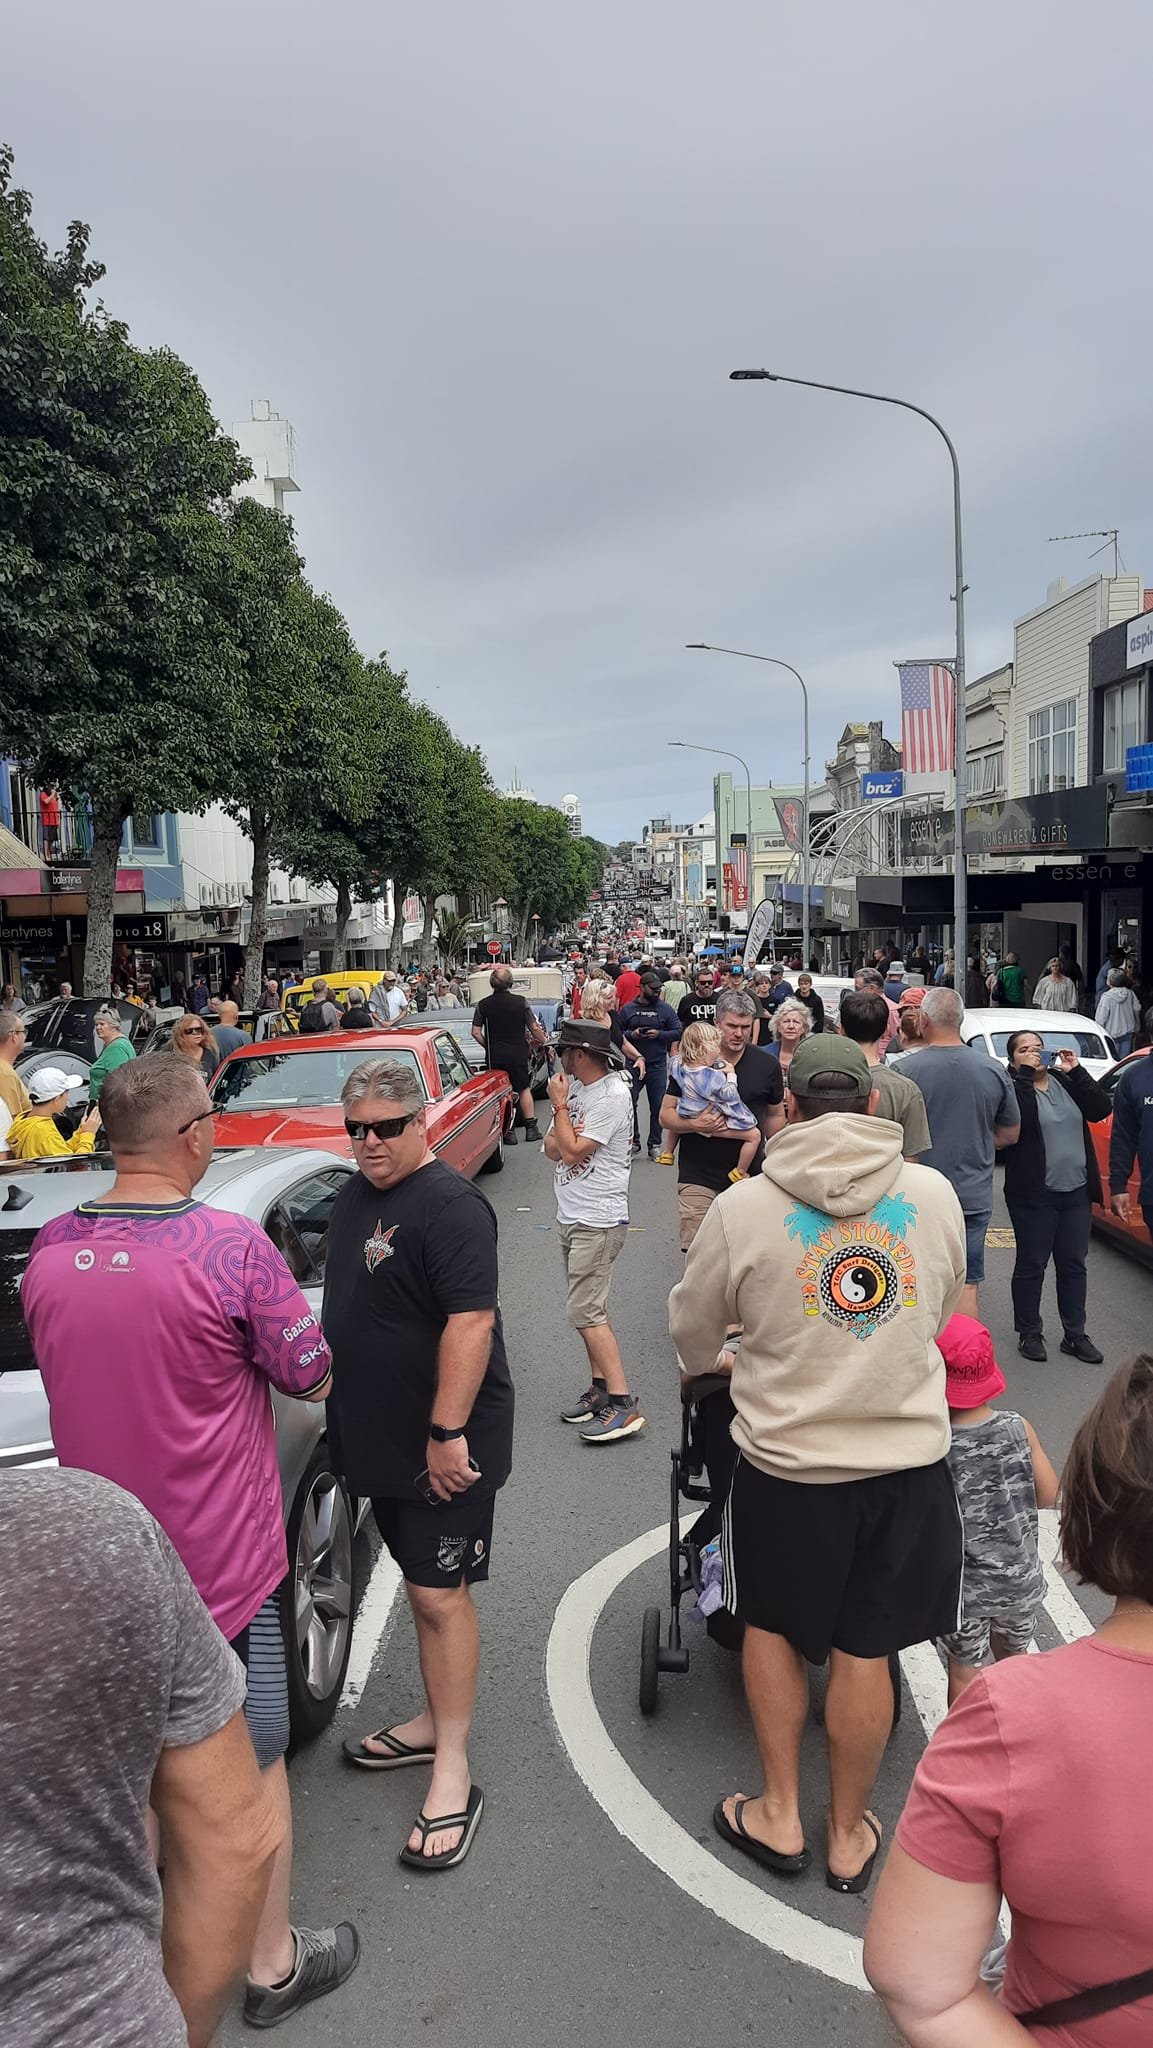
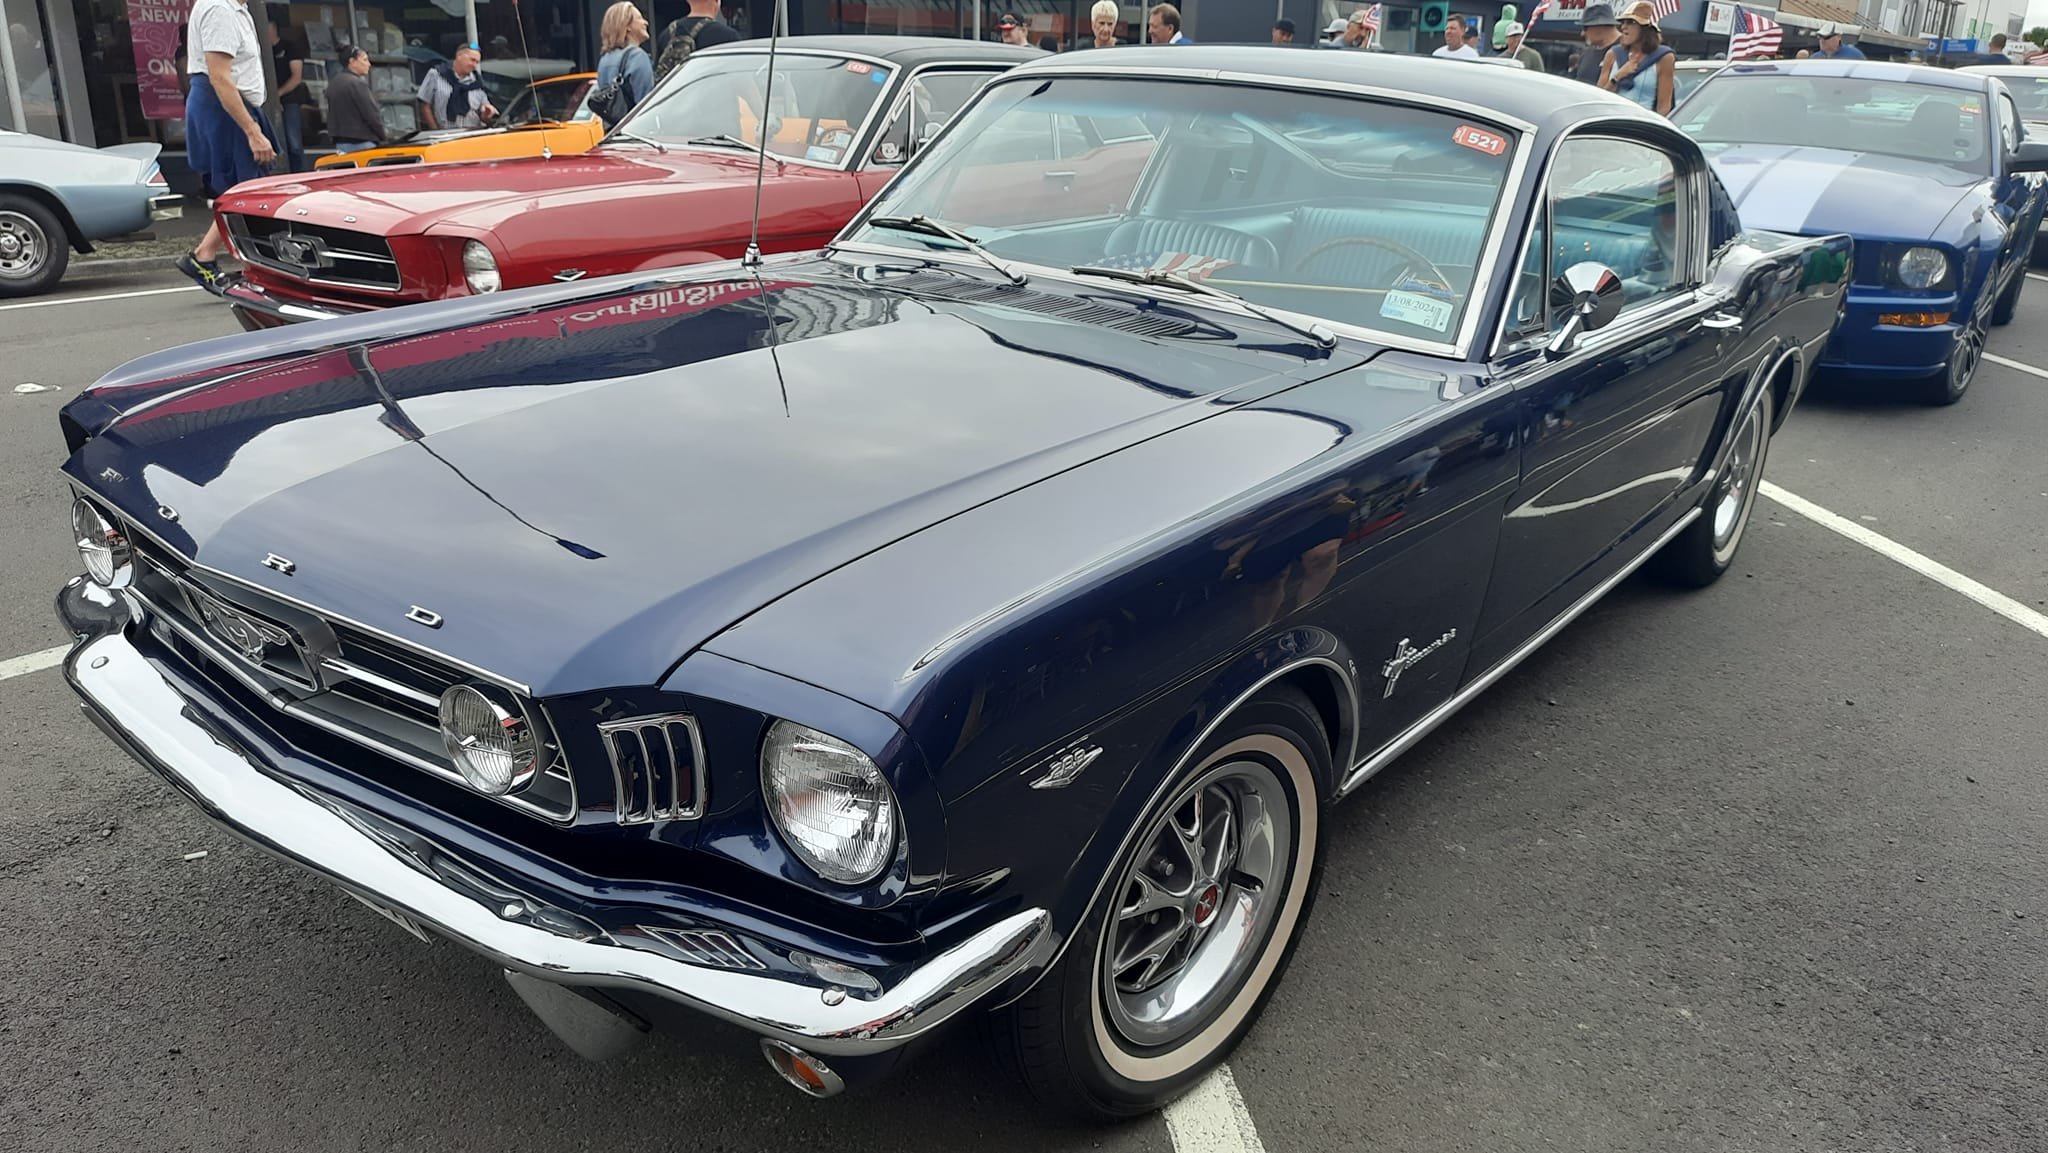
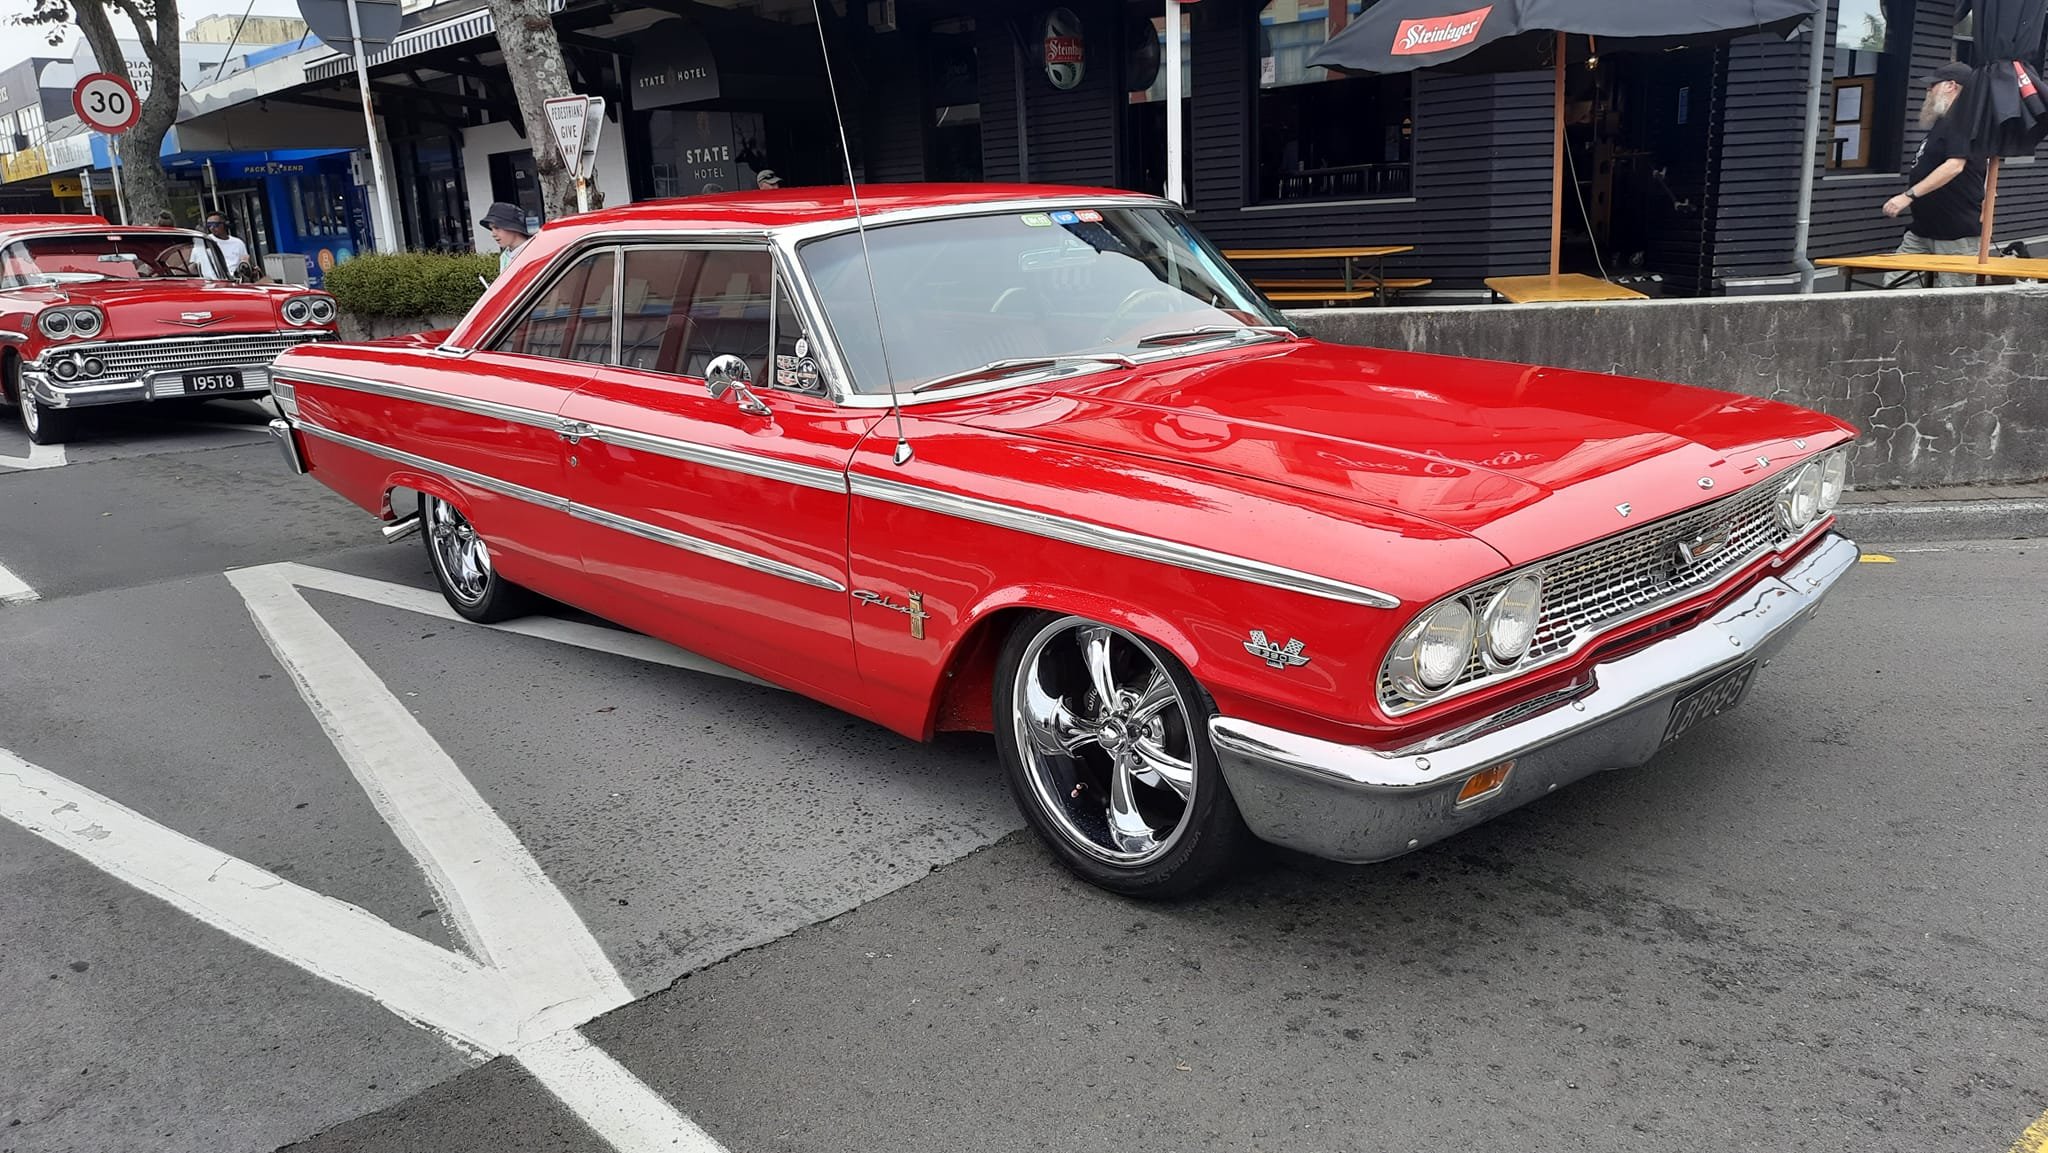
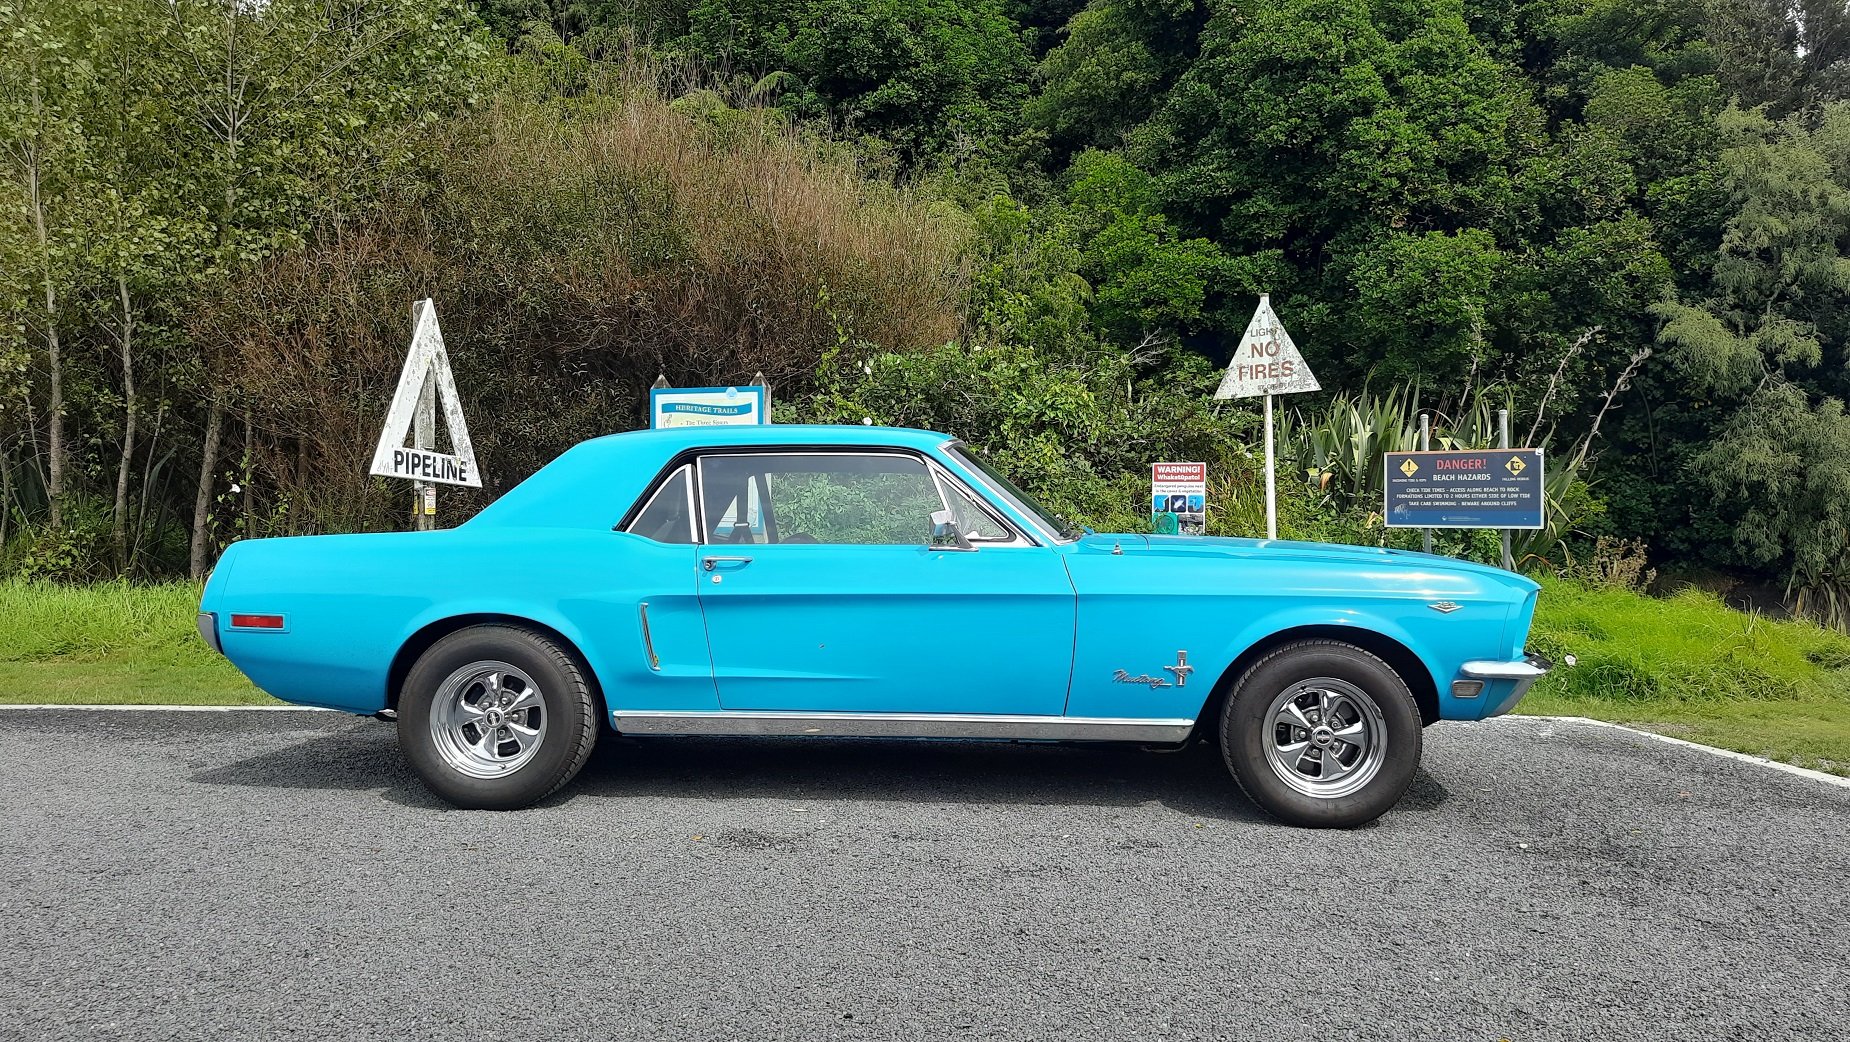
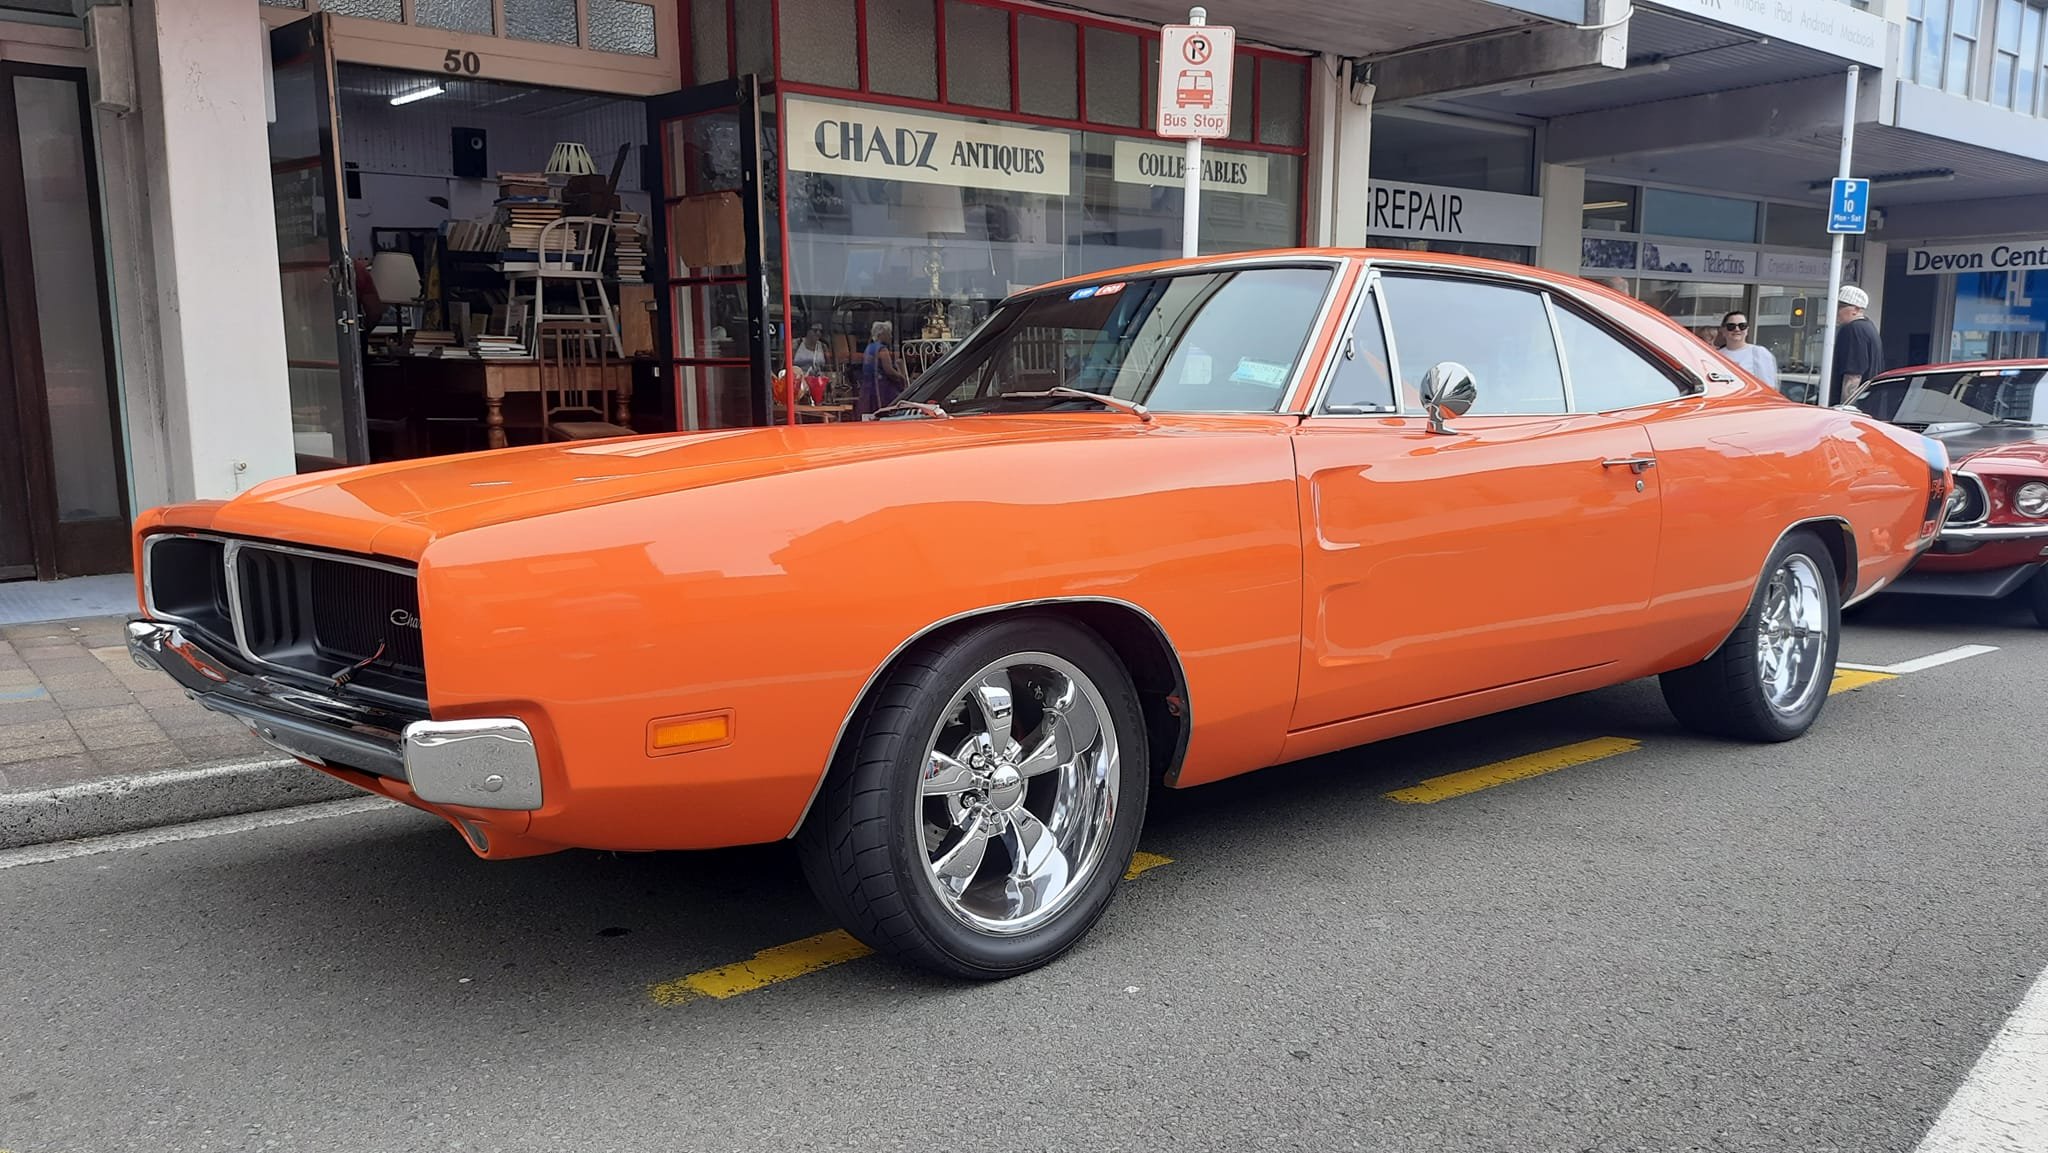
We made it down to Americarna after months of mucking around. We headed down to Puke on the Thursday afternoon and headed off to New Plymouth from there. First stop, gas and coffee at Hampton Downs The Mustang runs really nicely on the motorway and Waikato Expressway. No problems overheating in traffic and cruises at 60mph easily. No more vibes and it is nice having the steering wheel centered again. Without aircon we got a bit toasty ourselves so from Hampton Downs we had the windows cracked to let in some air. It's a bit noisy and the wind is almost as noisy as the (not subtle) exhaust. Also noticeable with the exhaust though were the fumes. You don't notice so much on a normal short cruise but after 4hrs we were smelling of burnt dinosaurs. The steering is still pretty notchy around centre at speed. Low speed it is not noticable and through the twisties on Mt Messenger it was great, apart from getting a bit sideways on a crappy pot holed corner. Made it in good time though. Got ourselves a hotel with a secure carpark too Put the muzzy to bed and off for a beer. I've only been to the Beach Hop but Americarna was great, didn't feel as busy but still heaps of cars. We got a beer from a local micro brewery and stood on the curb outside watching the cars go past in the Friday night parade. We did get fumed out for the second time in the day. 100 big v8s doing laps on a city street will do that. Came home after dinner and found the mustang had good company And some cool ones up stairs too. The truck is an original flathead from Rotorua.
6 points
-
This has now been postponed due to everyone saying WTF to NZTA. Especially for trailers.6 points
-
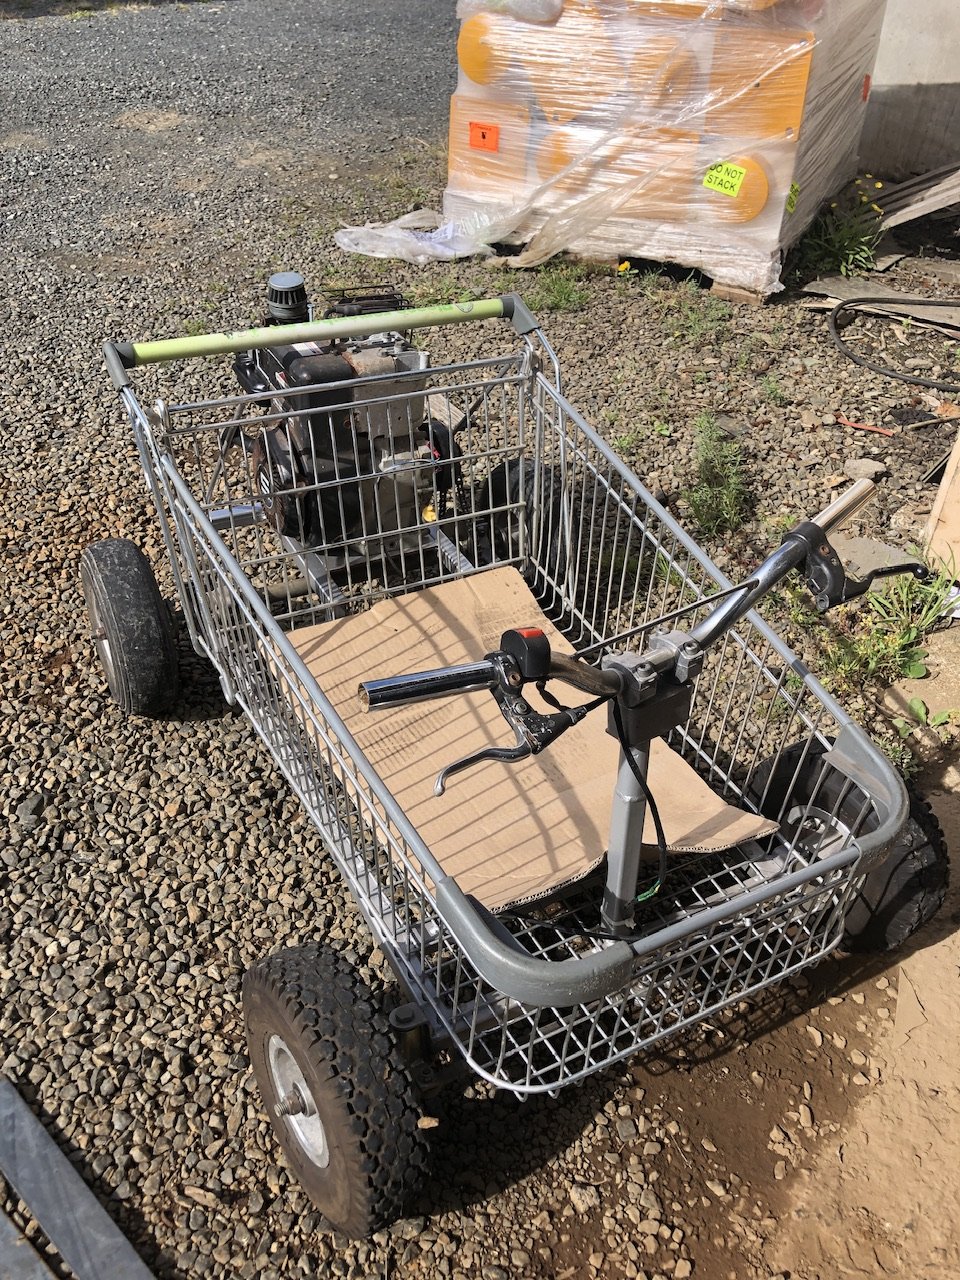
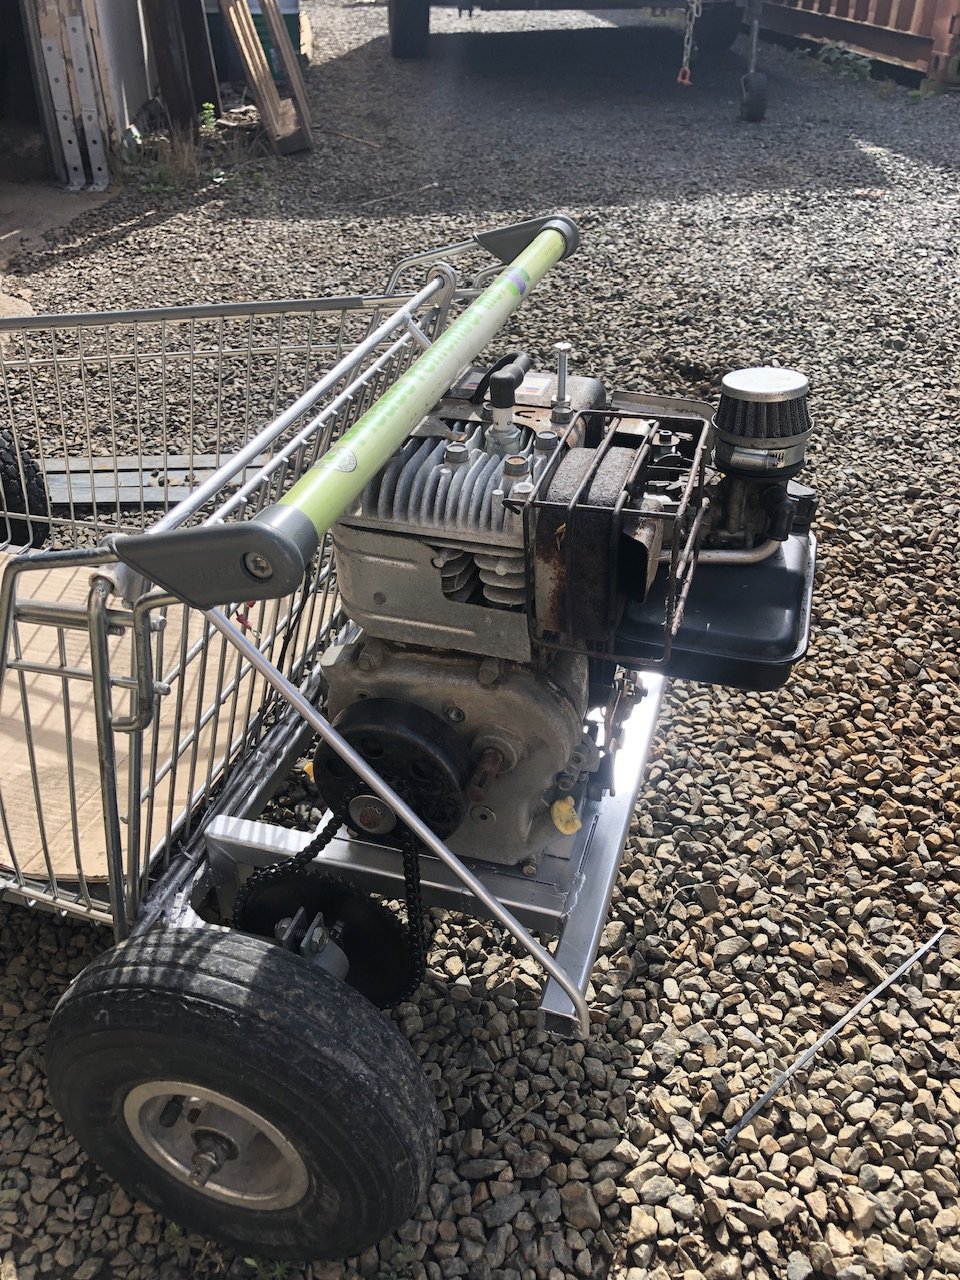
This has been sitting at work awaiting some love. The boy had water polo practice early this morning so I had some spare time at work. Chucked the chain on and started it up. A little squirt of gas and it shot across the workshop. Sweet as I’ll jump in and try it up and down the side street. Holey shit it hooks up fast and does an easy 50 clicks. At this point I see the errors in my actions. I’m kneeling and steering with one hand. The other hand is on carb throttle duties. I have no brakes hooked up and it free wheels with the clutch. No engine braking what so ever. So I’m now doing 50 plus kph, kneeling on one knee while the other leg gets thrown out onto the road for desperate braking. It works, just. So I rinse and repeat a few more times because it’s great fun and why not. Anyway, I didn’t die. Did just go and buy some long cables though to get some brakes and proper throttle set up. Pics as hooned.
6 points
-
Keen for real life bren gun carrier6 points
-
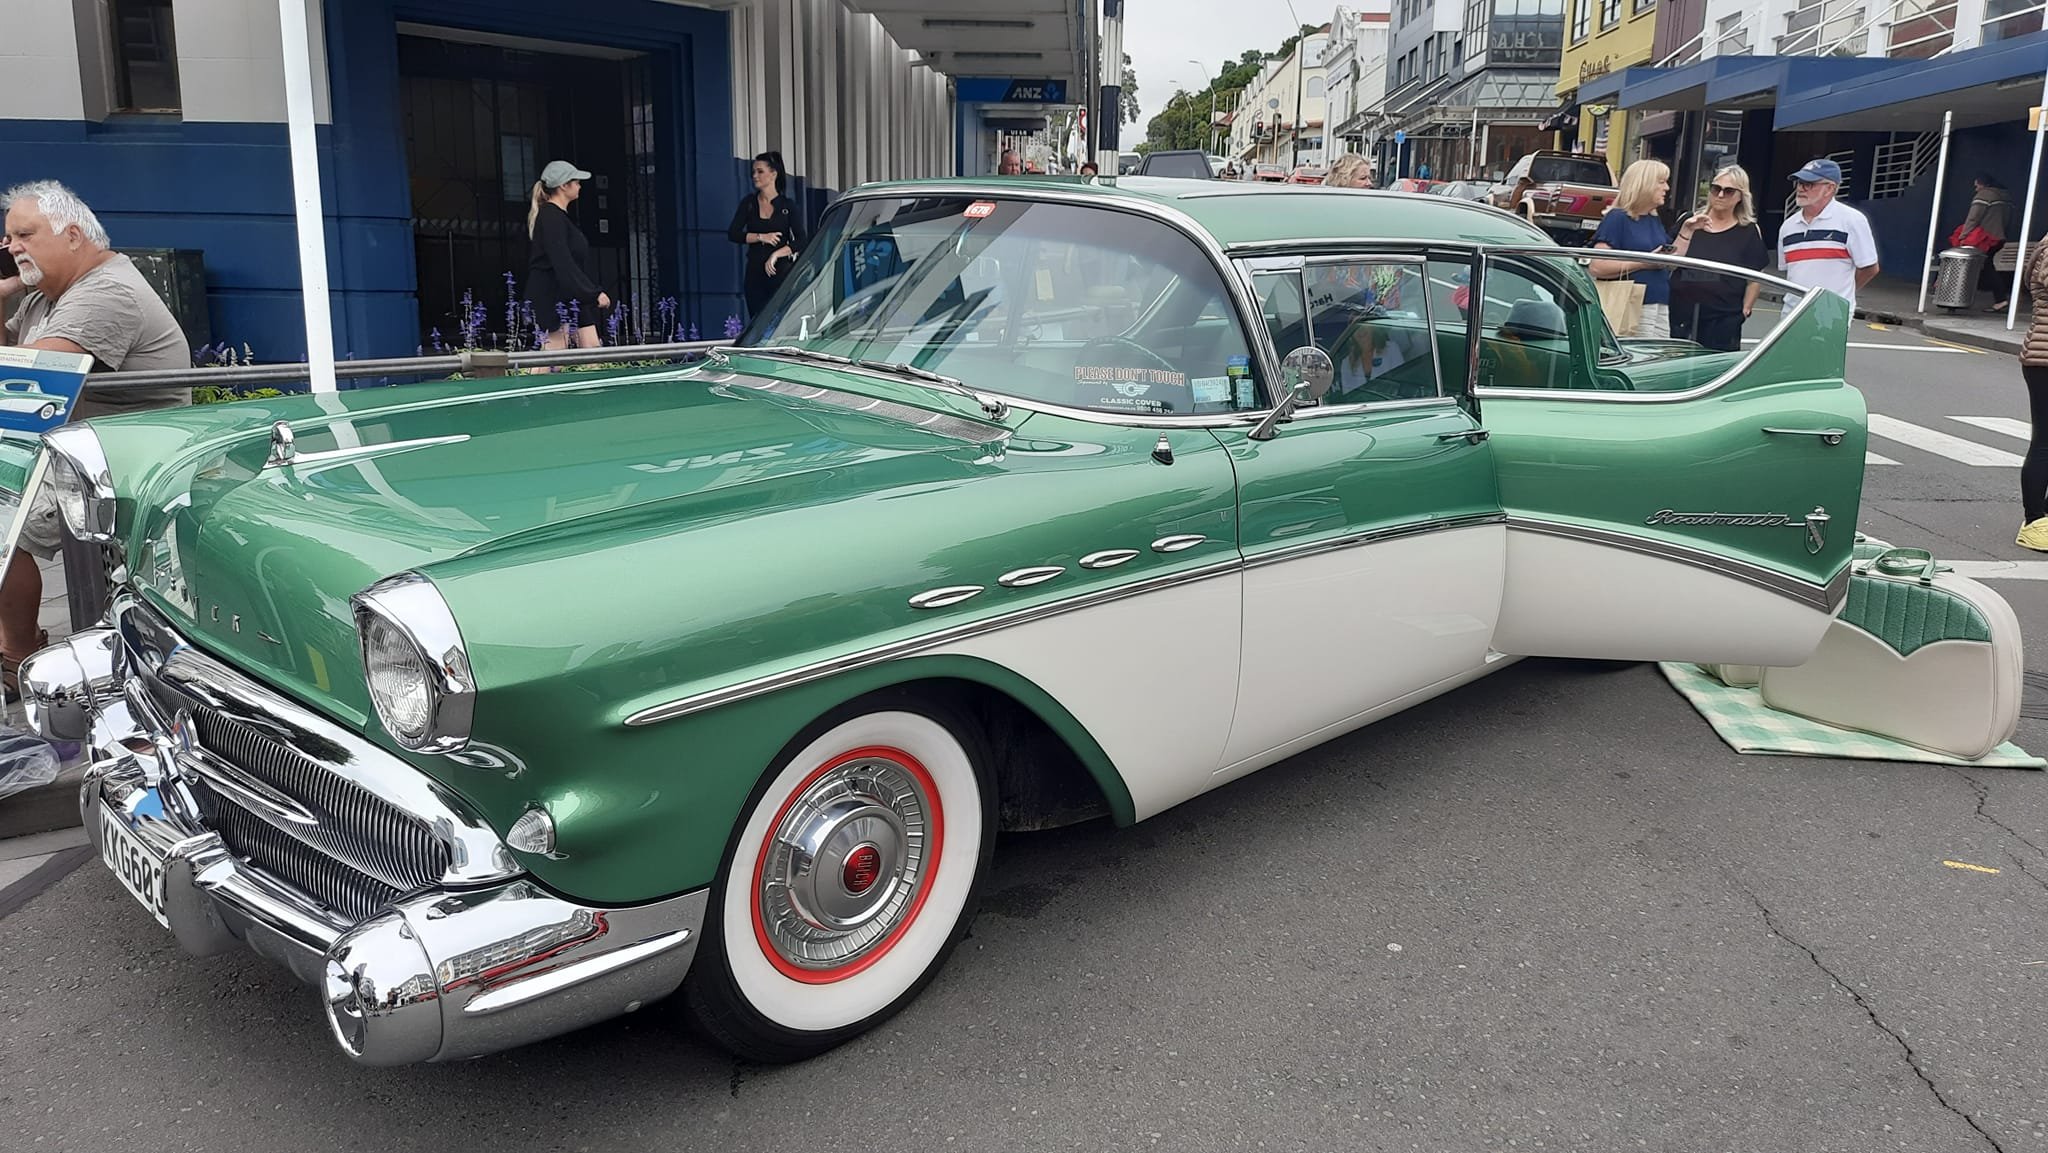
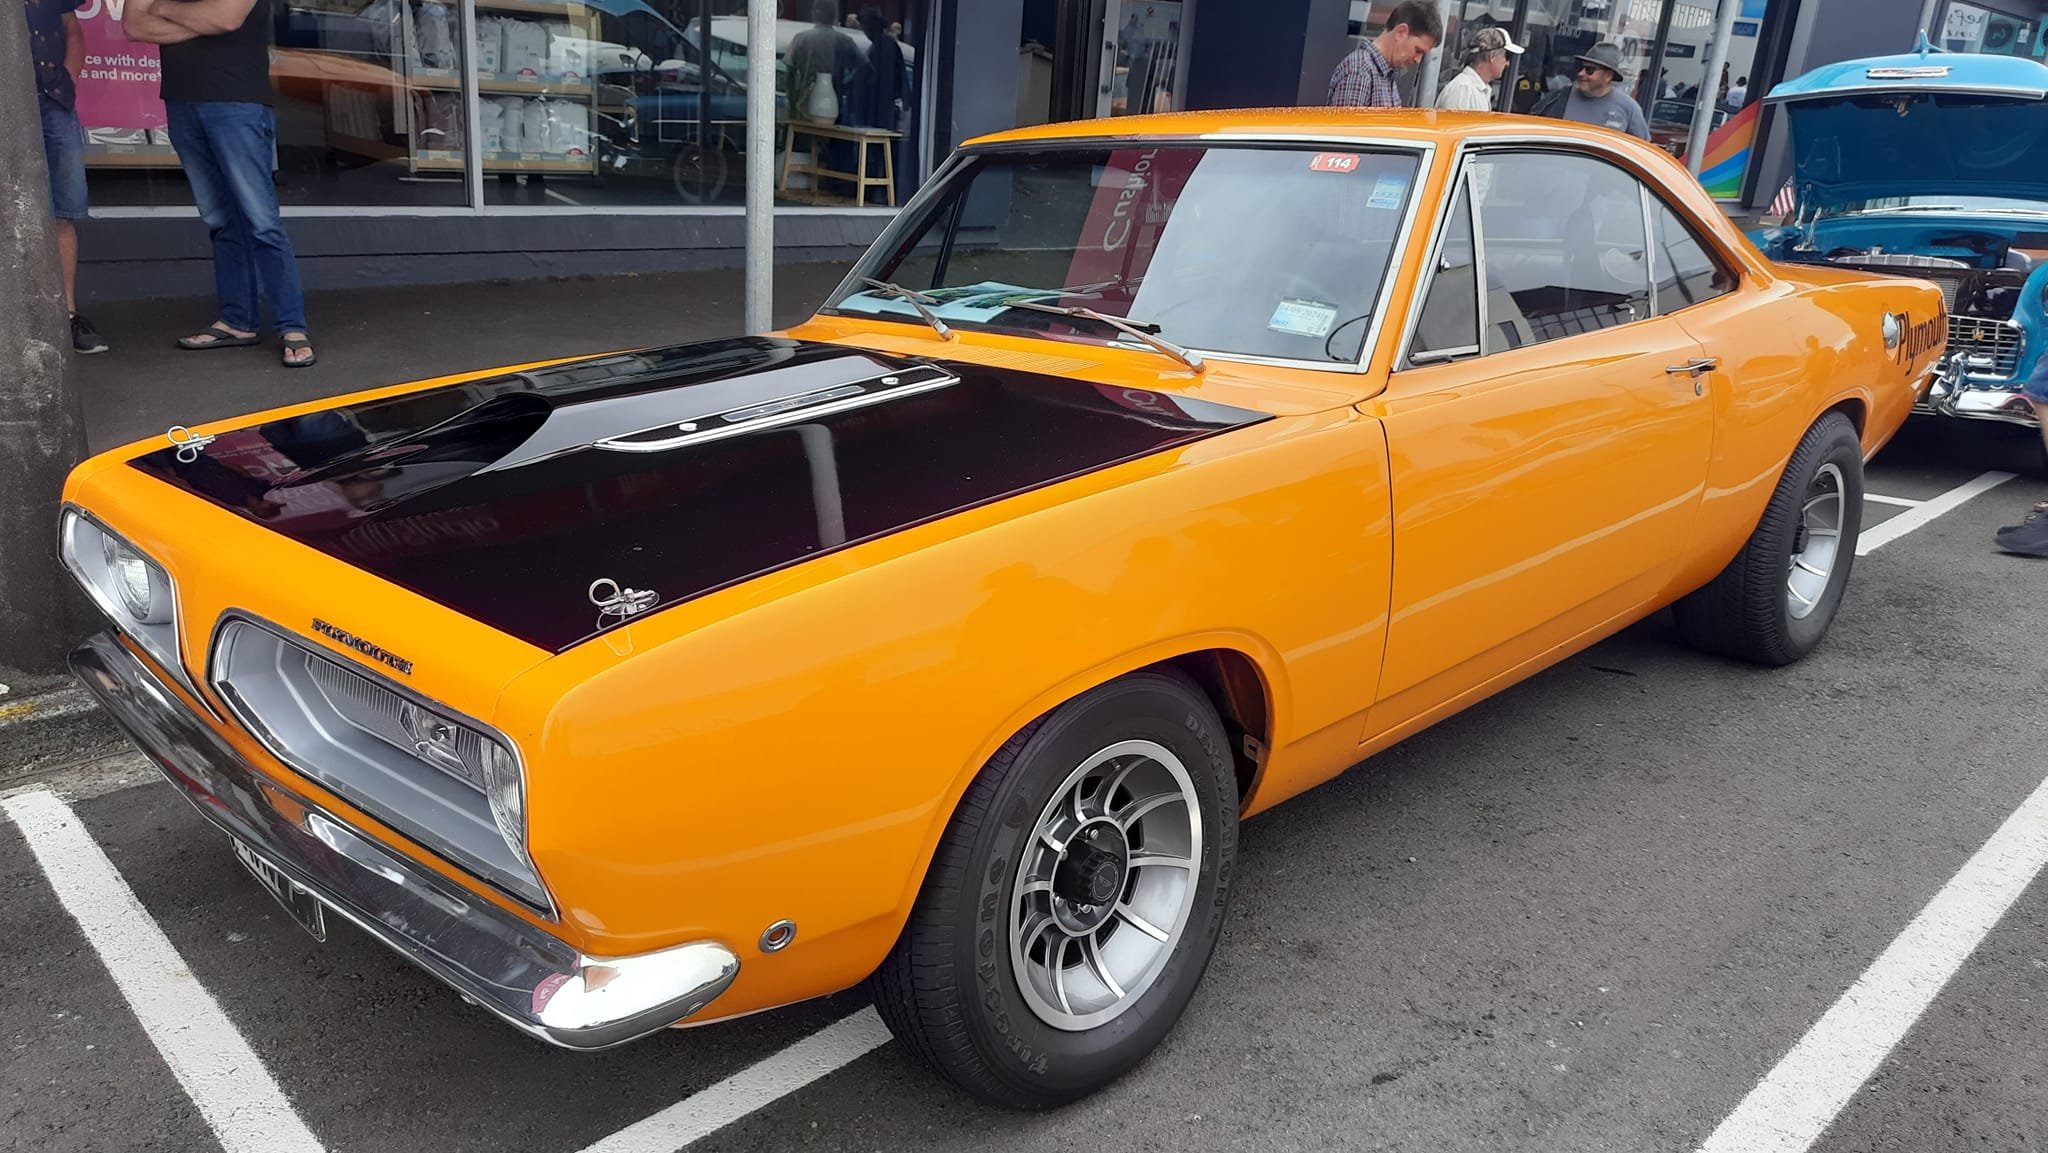
Americarna day 2 (for us at least) and the cars were all parked up on the main street. Heaps more people around but still plenty of room to move and look at cars I'm pretty sure this on is an original GT Nice galaxy. I should have taken a picture of the chev in the background, turned out to be a mate. Imaculate everything and 600hp 510. I quite like the notch back Barracudas We headed home on the Sunday after a false (non)start. Not sure what drained the battery but I didn't even get a click. To make it worse I had spent 3 days trying to charge my jump kit to no avail so it was worthless as well. Luckily a local had some leads just up the road so he drove home to get them and came back to give us a jump. Good bugger. I was a bit nervous stopping at the servo a few minutes up the road but it started first pull. Lucky. Enjoyed the scenery on the way home and used the quarter windows for ventilation rather than the main ones. Quite a bit better on the fumes front. Still some work to do but when is there not? I might give it a rest for a while but I think the steering will need to be sorted before the next big road trip.
5 points
-
Don't you threaten me with a good time!5 points
-
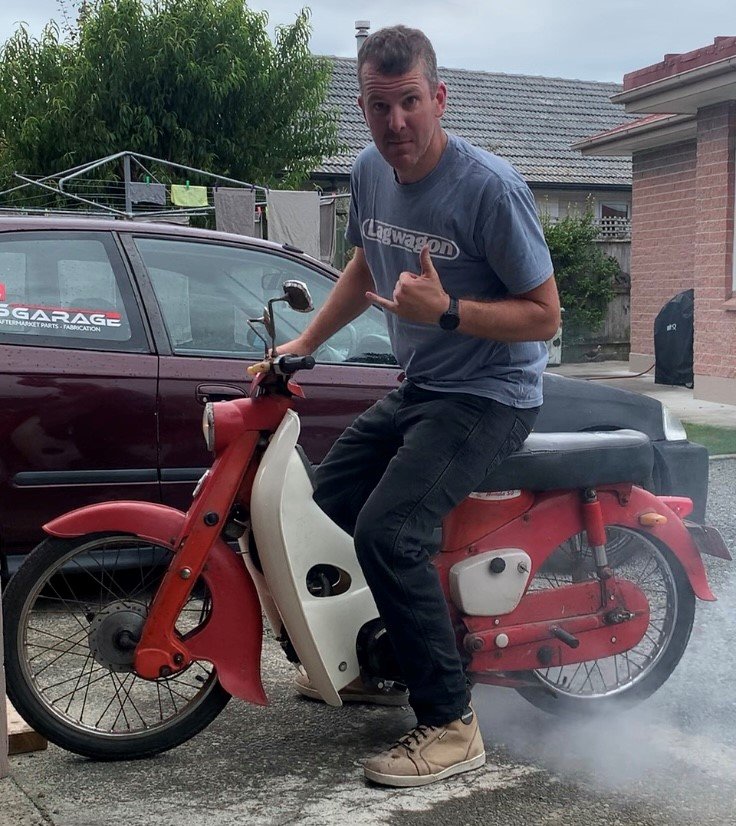
I'm quite looking forward to riding a bike with suspension this weekend after cutting around on my slammed out C102 for the past week. It wasn't much fun on gravel, but does skids with a bit of perseverance, haha.
4 points
-
I hope everyone likes scurvy
4 points
-
I had Lets Get Graphic re-make my side billboards in proper vinyl..much better! Accordingly the duraseal peeled off the adhesive and then they had to thinners off stubborn glue..oops. Took it for its biggest run out to rangiora MCM show.. went great until the needles wiggled and it stumbled then the Amp gauge read drain. Parked it up and left it until the trip home couple days later, it did it again but didnt hinder the journey. Few hundred metres from home it backfired and the needle came back to life and it was charging again! By the time id washed it and drove back in shed it wasnt charging again. Tore it open and spotted a broken field wire so i soldered it back on and not change. Weird. Fucked aroubd with tests and bypassing things, external reg tested ok. Left it with a customer whos a sparky, could tell he wasnt into it but said hed take a look but his test bench wasnt working. Few weeks passed so i went and grabbed it back. He did say the wire sheath looked like it was degrading and it might be earthing. Put my pick under the other field wire to tweak it into open space and there was no pull resistance..broken too. Was a bit awkward but soldered a new wire in between the broken ends and threw it back on, Amp gauge working! Then it stopped. Decided it was the centrifugal forces throwing it out and the wee bare wire patch was touching so dripped epoxy glue in/on to make a protective sheath and its been great since. Will get another Alt cause its pretty fragile and old.
4 points
-
THEY TURNED MY BOY INTO A BOX, A BOX GODDAM YOU
3 points
-
This is why I keep my dreams small, like so: https://www.trademe.co.nz/a/motors/cars/chevrolet/other/listing/4481721865?bof=SXaDZccp3 points
-
Anyway, they'll have to catch me first / gutless3 points
-
Can only have a quick release if it's a competition vehicle with cage/authority card, or in a special case like a tiny sports car where you need a removable wheel to get in /out3 points
-
I've also got a cabin booked for Sunday night if anyone requires a bed.3 points
-
Lost about 1 minute over a week, which is about as new for one of those, certainly pretty great now that it's 75 odd years old. Suits me, Just roll it forwards a minute at church on a sunday3 points
-
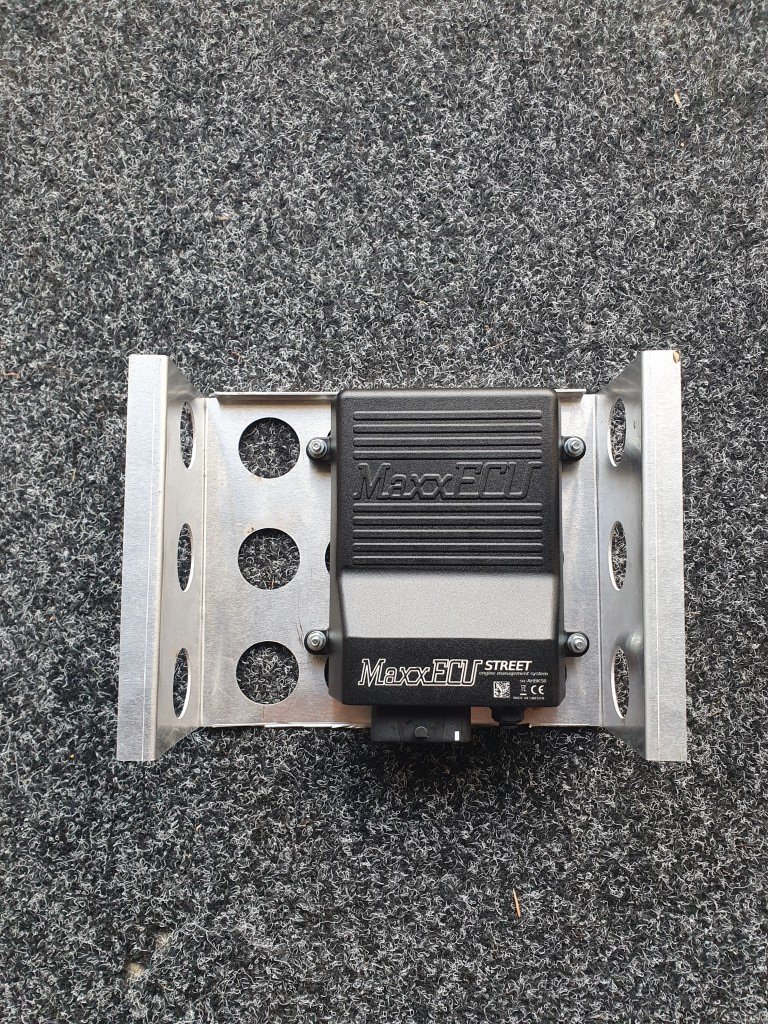
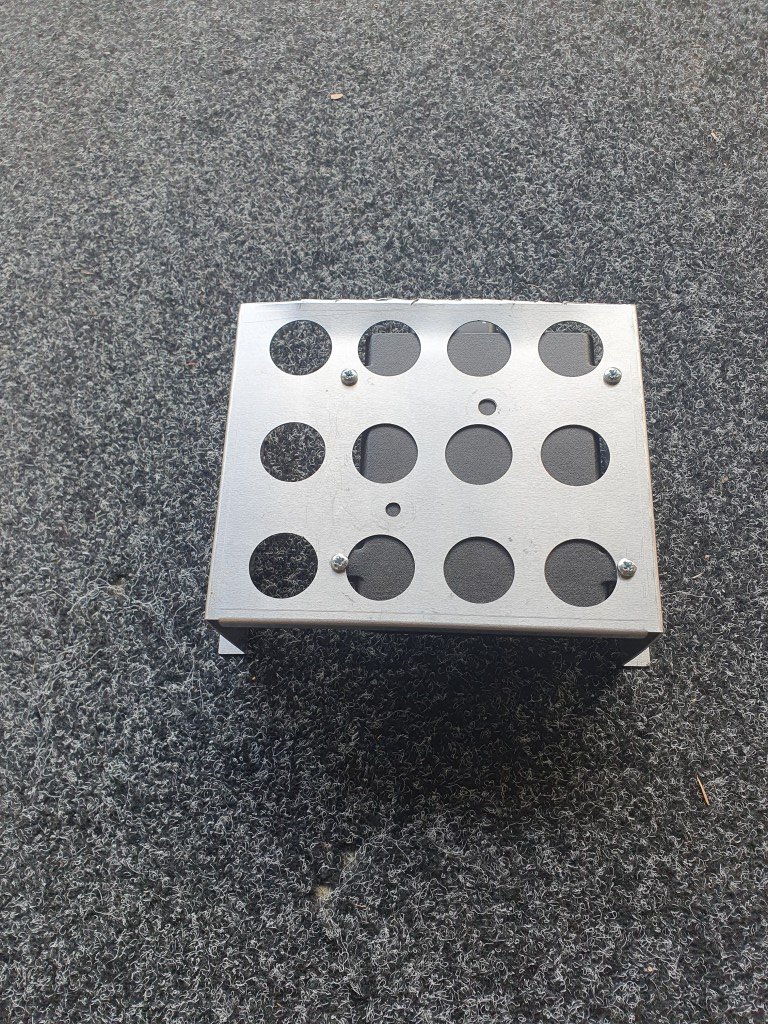
This build was never supposed to make it to a "next page", oh well. ECU mount which will be tucked up behind the glovebox/footwell. Needs some rubber isolating washers and fixings. REVISED, now attached to the back of the glovebox for even more space saving. Its got a nice locking plug but also needs to get the vacuum feed with minimal kinks to the MAP sensor from the vacuum block. Also its nice and close for the wideband as the wideband plugs into the ECU. The plug is bigger than the actual sensor so the cover plate for the gear lever hole will have a wideband sensor sized hole with a grommet. Working on a mild wire tuck, battery all wired up and will be unnoticeable once carpet is in again. Other than that, motivation is at an all time low so updates will be slow. Turns out getting married is quite expensive so not sure if the KP will be driveable this year. The Mini is currently in for a small birthday, new tyres and a once over. Working towards paint. I think a nice orange for both cars eventually would be nice. Inspo:
3 points
-
Gave the orthia a oil change and quick look over, have dyno booked for tomorrow afternoon. Will be curious to see how the B16a intake cam and new headers compare to the old setup.2 points
-
Keen for a real life M4 High Speed Tractor, Haven't got 120 grand though. sigh. Crowd fund anyone ?2 points
-
“A vehicle fitted with a quick release steering wheel must always be referred for LVV certification and is only permitted within strict criteria.” https://vehicleinspection.nzta.govt.nz/virms/in-service-wof-and-cof/general/steering-and-suspension/steering-and-suspension-systems#tab22 points
-
SO was I until mate who is into military vehicles told me how much heavy kit you need if something goes wrong. Youre talking a completely new workshop.2 points
-
The only real 'controlled' way to shrink is oxy/acet heat shrinking. You were kinda on the right track, but most likely heat up too big of an area with the butane. Firstly find a dolly thats either the same crown or slightly less of a crown as the panel/area you are shrinking and grab a flat faced panel hammer. Onve you have identified the area thats too full and needs shrinking, use a small gas welding tip (not a big cutting tip) and heat up a small 5c coin sized spot til cherry red, then while its still red, start lightly hammering it. I set myself up something I can safely chuck the torch over so I can drop it and start hammering. The initial blows might have to be a bit harder to dress the swollen centre down, but then for the next 20 seconds or so, just lightly dress the surrounding 50mm radiused area down. It should now be cool enough to touch. It will still be warm, but nothing crazy. The light hammering just helps control the shrinking while cooling in that area. It may shrink slightly more once its completely cooled depending on the location, but at least it won't do any weird shit because you kept it localised and told it what to do. The idea behind the lower crown dolly and flat hammer, is to dress the material into itself, rather than stretch which is what would happen with a higher crowned hammer and dolly. The concentrated pinch would just start stretching again. Don't use any form of wet rag or air to cool it. Just the hammer/dolly, then let the rest cool naturally. Shrinking discs work ok sometimes but it has to the 'perfect' high spot. Once you get good at heat shrinking you'll be set.2 points
-
https://www.ebay.co.uk/itm/322311293881 Gwan get some mitsi parts Probably available used as they are the only part that won't rust off
2 points
-
Dredge. Hello gang, I know that coming here for any kind of advice is silly, but here goes. I've found a company here that can supply new galvanised tubs for my Hilux from Thailand. They're not cheap, but the car doesn't owe me much after all these years. Problem is, they can only get 2WD ones. They can supply 4WD repair patches that I could weld in but they're over 25% extra on the price. So, do I suck it up and spend the cash or do I get the bed & a pair of 2WD front wings for that full on '70's sticky out tyre look ? / pics2 points
-
Saw the remains of, I think, three at a farm clearing sale in Southland about sixteen years ago. Have seen a restored one being driven around at Edendale Crankup at least once also.2 points
-
I did upsidedown lawnmower and dog hair transporter wingroad seats with a water blaster and thr carpet shampooer machine, then water blast till water ran clear. Big difference2 points
-
A heap of those Bren gun carriers ended up as farm hacks down my ways. #sharn Here is part of my current pile of shame. I might dig out that LRDG truck and have a look…
2 points
-
If you ever need a new rear door latch cable I have a brand new one here I was to put in ours before it got nicked. The cable in ours would jam up and not latch properly, Rosie took it for a wof up here, the back door opened while he was doing the brake test and a bag of apples fell out.. still passed the wof tho #cuntrylyfe2 points
-
I mentioned in my last post that I had new shocks on the way, well, they arrived, so let's get them fitted. I began by jacking the rear of the car up, putting it on stands and removing the rear wheels. This gave me access to the shocks and springs. Both the yellow stripe and the part number on the shock indicate that it was a poverty spec shock from a low spec (not Works) Alto. Note the missing lower rear spring pads, the spring shouldn't be sitting on the metal like that. The spring also had the incorrect colour code, yellow and white, not blue and white like the Works spring has. Other than the paint mark they look visually the same, I don't know if the Works has a higher spring rate or anything. Removal is really easy. On my car the side boot trims have been cut, I believe for the damper adjusters for the adjustable rear shocks the car used to have. This gives me perfect access to the nut that holds the top of the shock in place. Because I didn't care about the old shocks, I used a rattle gun to zip the nuts off. Before completely removing the nut I supported the rear beam with a jack under the spring, so the force of the spring wouldn't ping the arm downwards With the top nut removed, I removed the lower bolt on the shock and removed it. This one was very dead. Because they have gas in them, once compressed by hand they should extend to their full length again. This one had no resistance to compressing it and made no efforts to extend. The other side was only marginally better, where if you left it for about 5 minutes it would have extended in full (it should extend to full in a matter of seconds). The new shock has the correct KYB sticker and P/N on it, but it appears the new replacements don't get paint codes like factory-fitted ones do; the factory paint code for a Works is purple and green. I ordered these from the parts book to Works part numbers, so I know they're correct. With the shock removed, I could push down on the hub by hand and pull the spring out. I then fitted the new lower spring pad, in the correct orientation based on the service manual I then replaced the old upper spring pad and fit the spring The new shock slips into place next The top mount on the shocks is interesting to me. The top of the shock has a captive rubber mount and steel sleeve. There is then a top bush and metal washer that sandwiches the shock tower into place. On the underside of the shock tower there is a metal cup that locates the captive bush Even the top bush is weird, the shoulder goes face-up The washer sits on top of it and the nut is placed on top As the nut is tightened, the bush squishes and flattens out under the washer I guess compressing the bush like that creates a fair bit of tension, so the shock won't be rattling around in a hurry. Other than jacking the hub up to ride height and torquing the lower shock bolt, that was one side done. I copy pasta'd the other side. and then onto the ground it went. With the combo of fresh new zero km un-saggy springs and the lower spring pads being fitted, the rear ride height has increased a touch. It's only a couple of mm higher and should settle a little as the springs bed in. I know why they put the KYB sticker where they did now The Suzuki lineup at work the other day Looking clean sans tow hook now too So, how does it drive now? Well, the blown shocks explain a lot! I thought it was just lame povo spec shocks, but even that wouldn't have been as bad. On the road at low speeds the rear feels firmer, but there is a huge difference in how the car feels on the open road, the rear is much more planted and doesn't pitch and dive so much. In the corners, it's a lot more controllable and the rear doesn't feel like wobbly jelly. I still think it needs the extra stiffening of the rear swaybar to balance it, but cornering speeds can be higher than they were beforehand and the rear follows the front wheels like it should. I reckon it'll be good for a second or two off my laps at Manfield next time, particularly if I can get it to rotate as the Jazz did (no hope for trying to do that when I was lacking any confidence in the rear end). Some more (boring) bits should be with me soon to tidy the interior up further, and other than that I'll just keep driving the pants off it. Should hit a milestone soon too...2 points
-
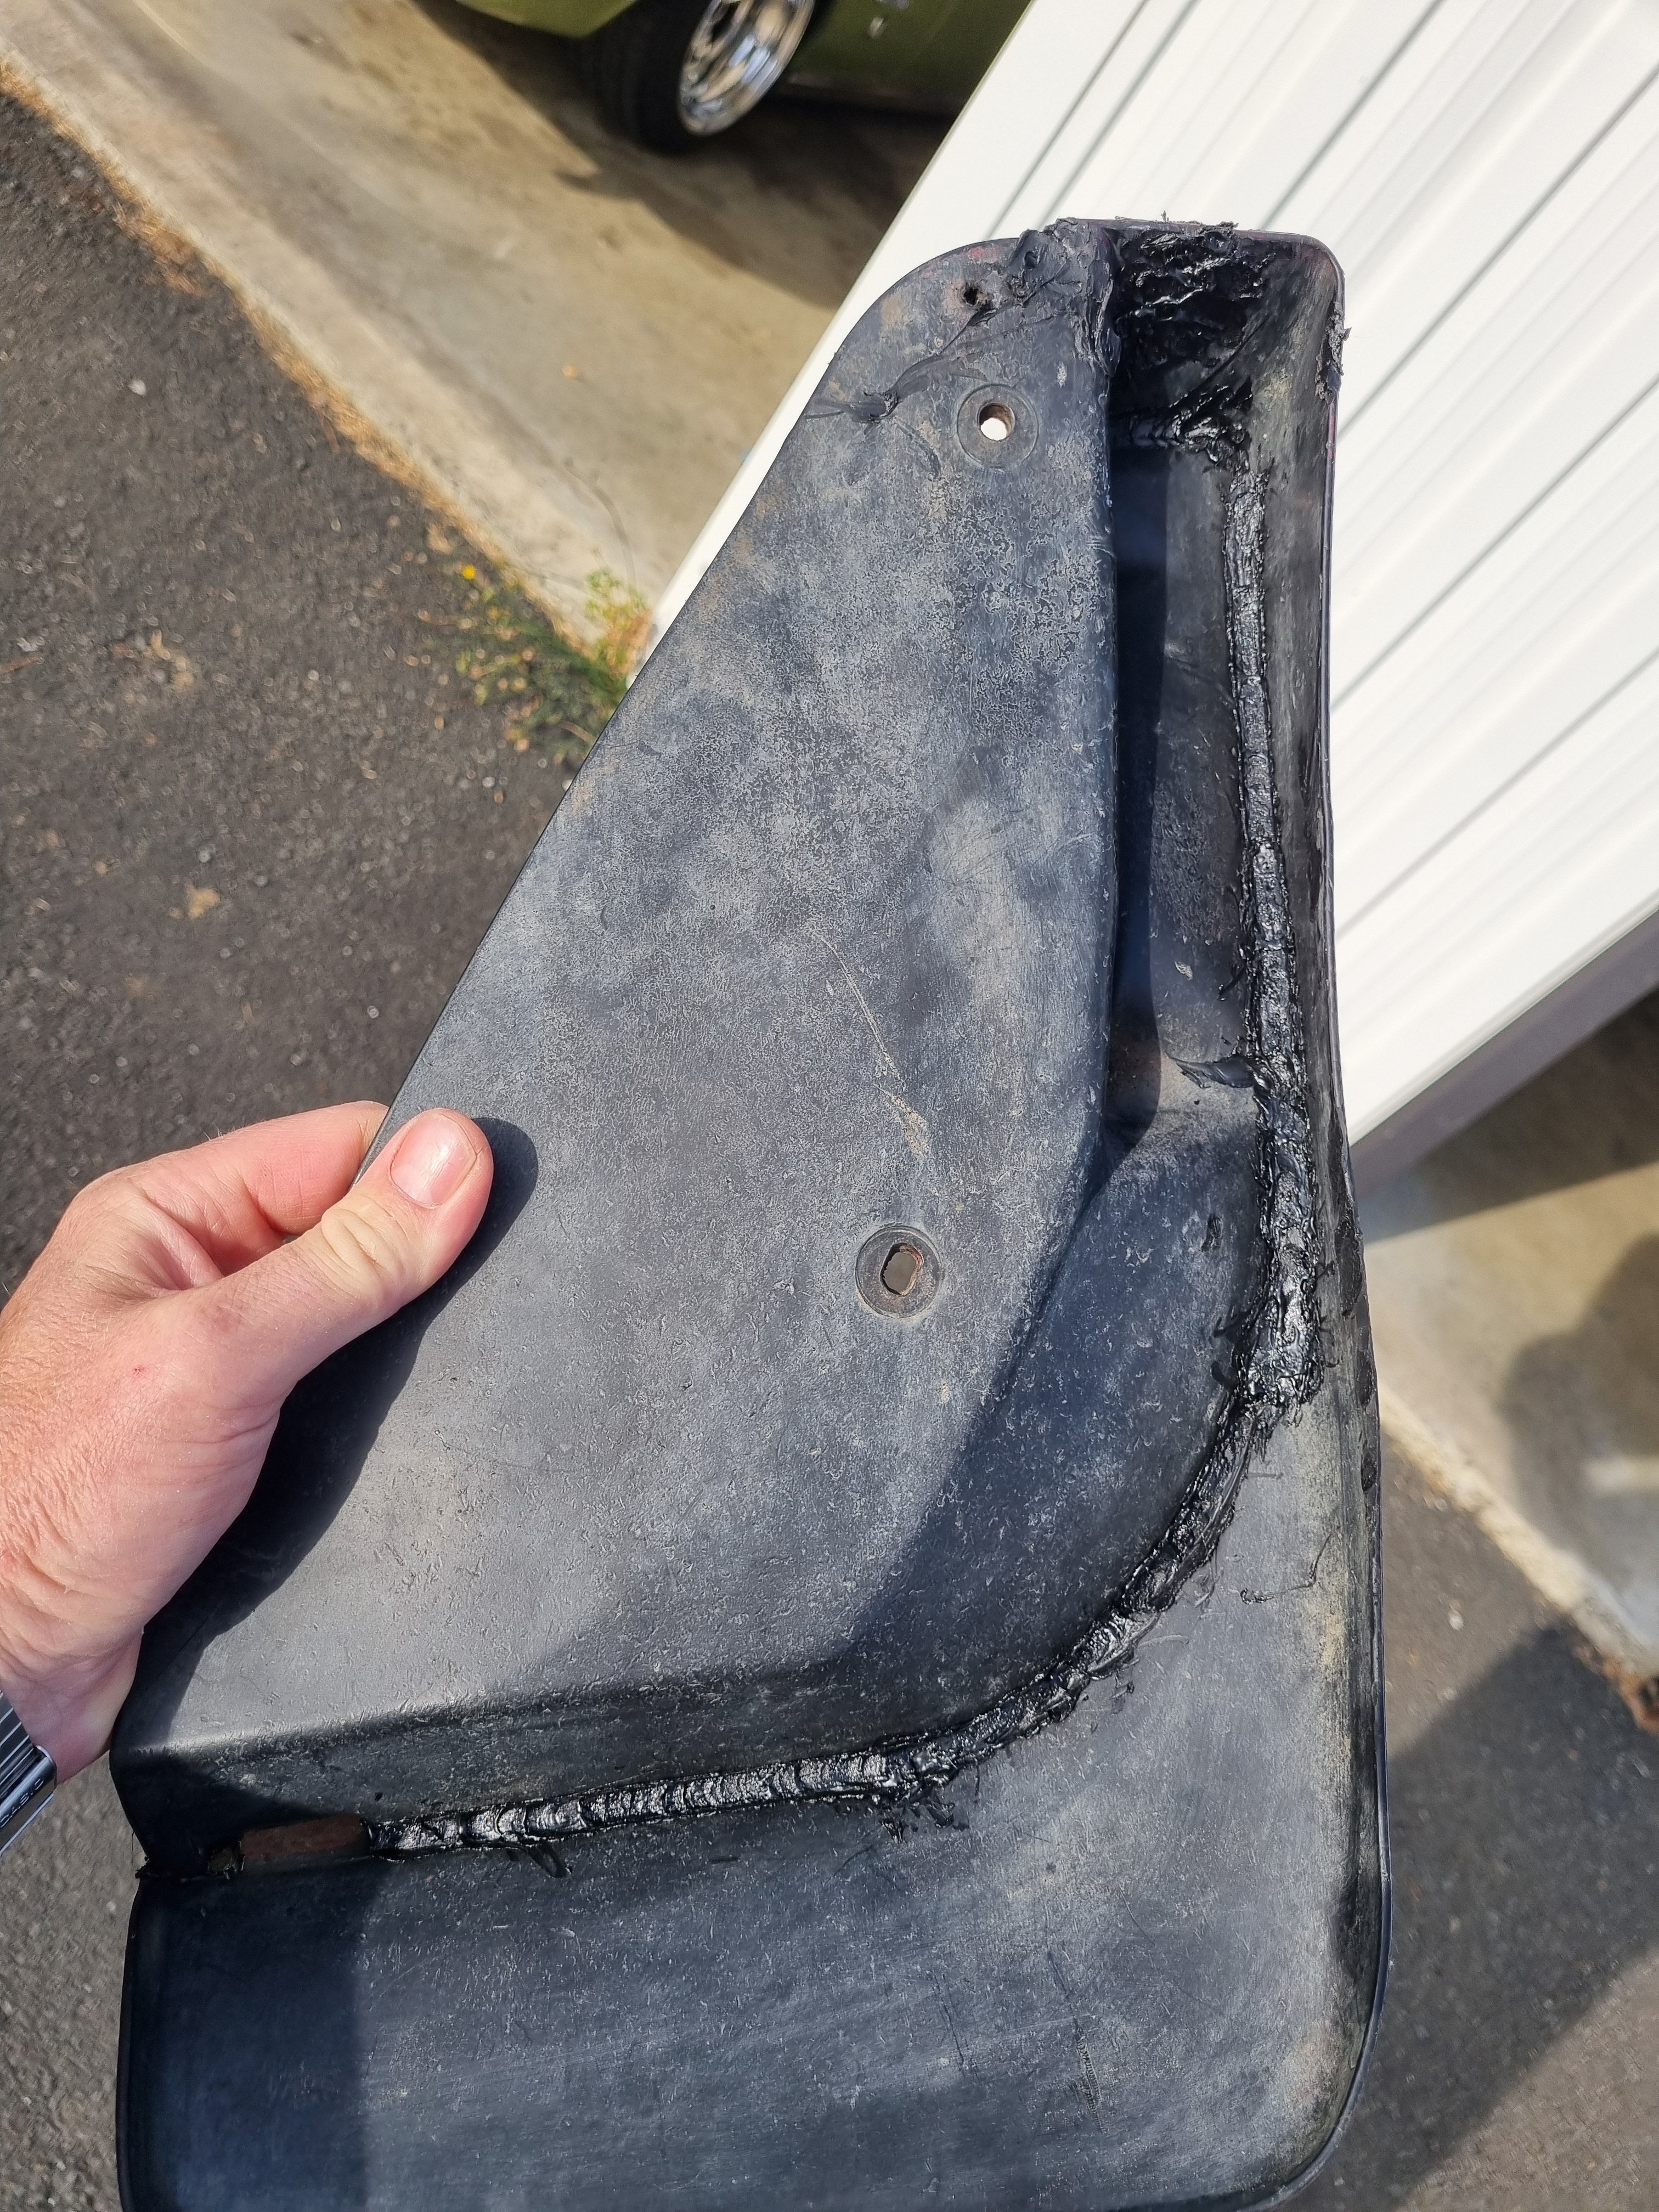
Also shit I forgot to mention that I put the rear bumper back on. This was harder then it sounds but basically I pulled all the brackets apart, soaked them in evoporust for a few days then painted them all. I beat most of the dents out of the side bits and then bolted it all back in. One of the mud flaps was broken in two so I welded it beck together with a soldering iron using cable ties for welding rod. Is it good as new? No. Will it last a thousand years? Also no But it's back on the truck and works until it doesn't so I'm calling it a win.
2 points
-
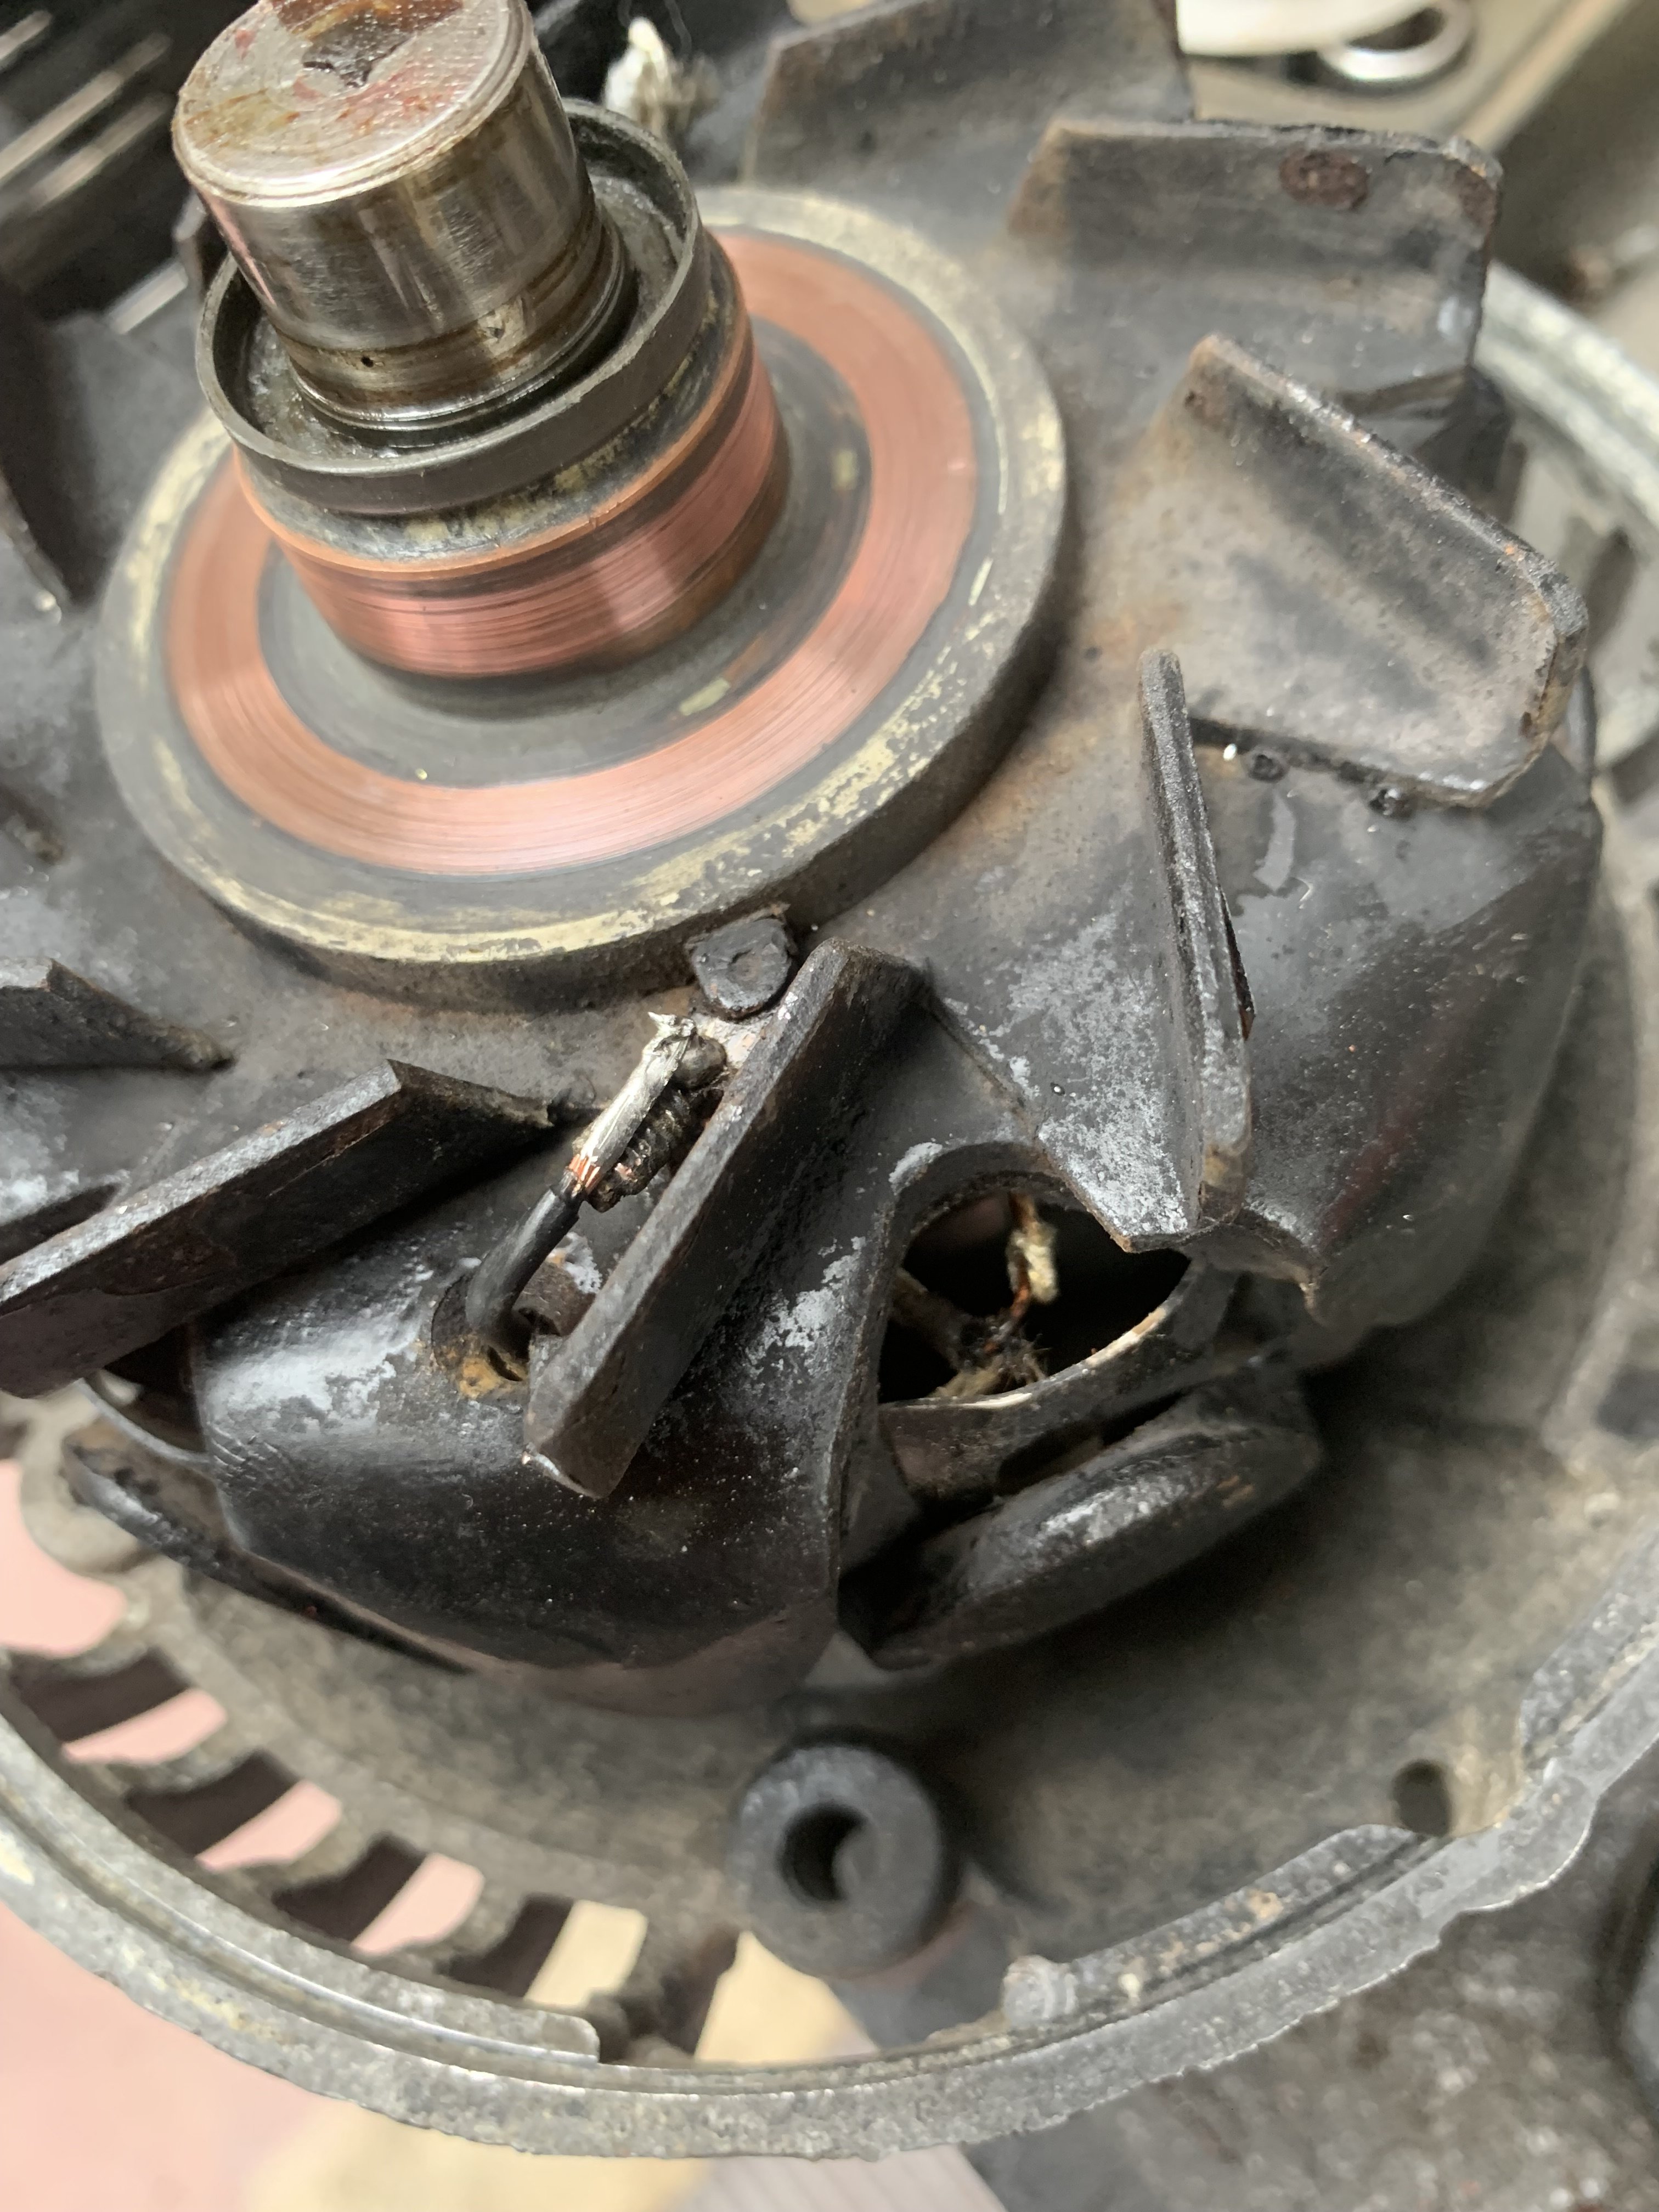
Ha. So pretty much the day after I had cleaned up that old alternator up and got it running on the engine the second hand replacement for my original unit turned up in the post. It came with a 3 month warranty so I'd better check it works before stripping the engine of its ecu etc. Started to fit it and oh.. Poos. It wont fit. So I took it apart, along with the original.. Discovered its just the front housing that's different and I can swap them across.. So while its apart it would be rude not to clean all the parts up and polish it all (tempting fate just a bit...) Fitted to the engine and started it up. Yay - it works and it looks great, which is really quite important given its right there, in the middle on display. I'll keep the other one in storage just in case I need it one day. Now I could strip the engine back down, removing all the cooling, wiring and fuel lines that I had installed just for bench testing. Then I removed the transmission and put the engine back onto the engine stand 2000, stashing it away because its gearbox tinkering time. This Leone transmission has a few little issues that need sorting out in order for it to run in reverse rotation and not potentially turn itself into an expensive insinkerator or coffee grinder. I could probably get away without doing these modifications because the box is overbuilt for the application but I wanted peace of mind. Remember I had acquired the two gearboxes, 1600 and 1800 items, before getting the engine. Ages ago, in fact 4 years ago I think!!! I had wanted to know if it was feasible to run these boxes in reverse. This pic I posted up way back then gives a good idea on what's going on inside... I had already worked out some of the issues back then and knew what I was up for. With more study I found a couple of other areas that need addressing. Here's another bit of wonderful scribbling I did this evening.. The pink arrows show the new axial forces that are being imparted onto the main (driver) shaft and pinion (driven) shaft. The circles are areas that I think needed attention to make sure it doesn't throw it toys from the cot. 1 : the blue circle. Under high torque loads this area could possibly create the sound of nashing teeth but with much messier consequences. The top left one being the third gear driver wants to move to the right and clip the teeth on the bottom right second gear. In normal rotation they would move apart. There's 1mm of clearance there which is probably enough tbh. But I wanted a bit more and had already worked out how I could get it with no other issues and just a bit of tool making. Which is fun. 2 : The yellow circle. This ring was no going to take thrust loading. It is a strong ring and has a deep groove but I wanted to make sure there was no way it could ever shift. 3 : the green circle. In this area there is a thrust bearing that also acts as a neat little oil pump and squeezes oil through the gear hubs/bushes. Under the new loading the thrust aspect is removed but I still wanted to it pump oil and it was going to be the wrong shape to do so in reverse rotation. So I set to work and checked off each job. I made a bolt holder for ease of reassembly - several different sizes and lengths. Once apart I started with the gear side clearance. First off I needed to split the mainshaft assembly down. 4 years ago I had out of interest tried using a puller on the spare 1600 box, which shares the same layout and design but with smaller parts in many cases. The puller didn't work. But this time round I have the rather handy workshop press I made. I just needed some extra tooling to do this job. Starting with some press plates... Allowing me to carefully press the shaft out... Because I'm not posh (or rich) enough to own a surface grinder I needed to make one. Yes its a bit basic but it will work. I made this... Which allowed me to do this.... I ended up with this gear having the 0.5mm more clearance I wanted. Super happy with the result. Now onto number 3 - the little oil pumpy thingee. I went to my friendly engineering workshop in town and got a big lump of 4140 steel. I drilled it out... Machined out a ring which had to be an exact width. Just in case it needed finishing after the hardening process I made an abor to take it.. I carefully machined it to the right profile, cut the sides down and filed the shapes in, just like the original but in reverse. Happy it was going to work I heat treated it. I have not done any heat treating for over 25 years since I spent a fair bit of time in the blacksmith department while doing my apprenticeship. But it wasn't a super loaded critical component and just had to have a durable hard surface. I didn't take any photos. Hannah was there helping as I carefully heated it up with the oxycet to the austenitic stage and agitated it in some lovely rice bran oil (because I can be posh sometimes) then slapped it in the oven to temper it... Following morning I polished it. It came up sweet and the old file test showed it to be as hard as the oem item. You can see the reversed design here... Here's a little vid I took showing it in action... While stripping the mainshaft down I was also pleasantly surprised to discover that this 1800 box has needle bearings in all of the gear hubs unlike the 1600 box which uses bushes on the mainshaft. So oil starvation would not have been as much of an issue but I'm still really happy I did this modification. Last issue to sort was number two - that ring on the bearing. It would hold fine I'm sure but if could make it bulletproof then why not - it's just a bit of extra machining. I started with another lump of high tensile steel and machined out a ring to suit... This fits over the other ring and then the main thrust plate that sits over the bearing was machined out to suit my reinforcement ring. Its all held in place by the end housing which I have yet to fit. All the potential issues covered I set to cleaning out the casing and then started reassembly. In doing so I discovered that the original axle seals are sided on these boxes. They have those helical lines on the lip surfaces which aid in pulling/pumping oil back into the oil side of the lip ( the lip does not actually touch the steel when the axle is moving and in fact runs on a tiny bed of oil) which I had not realised before I'd bought plain lip seals from an engineering supplies. This pumping capacity is shown to be twice as high in helixed seals. Subaru fit left and right handed items. But I'm running mine in reverse. Luckily the originals were in excellent condition anyway so I machined up a stepped tool, popped them out and swapped them to the other side. The diff axle seal surfaces came up good after a clean. Cute little diff.. I'm now about ready to put some 3 bond gloop on the case half and drop the other side in place. Its looking all very nice, clean and shiny in there...2 points
-
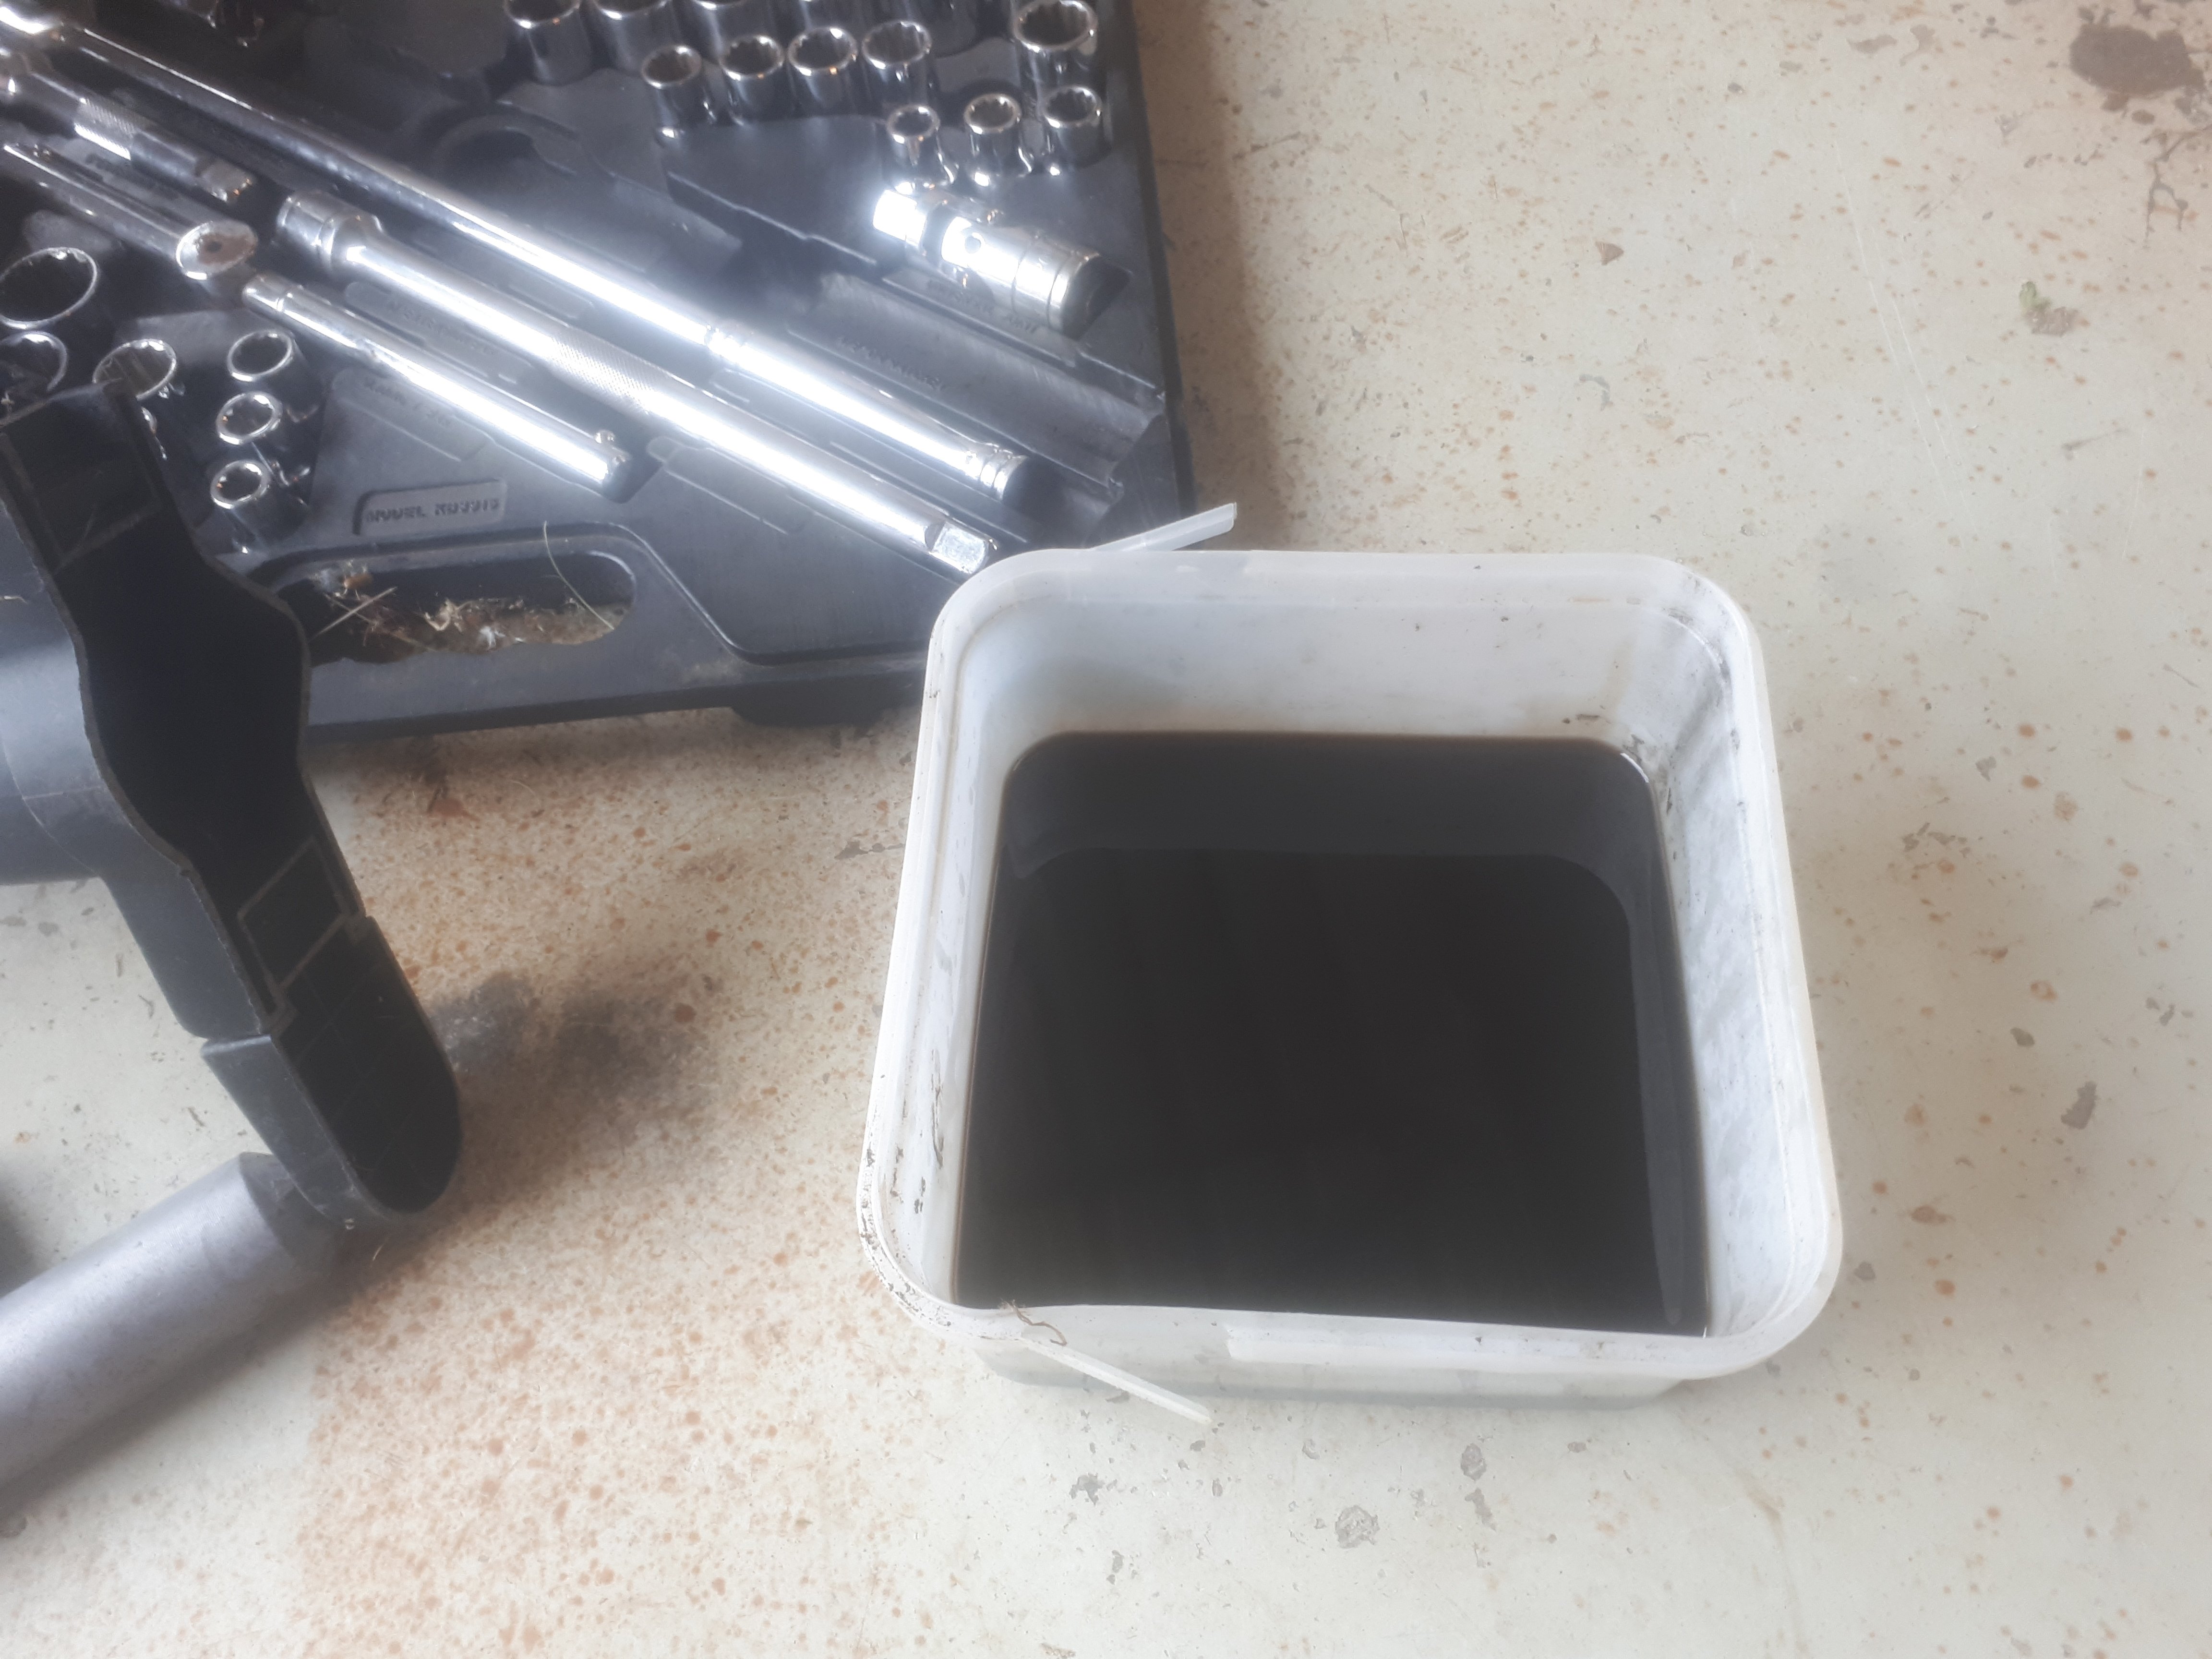
Oil change completed
1 point
-
Yeah that's where I got mine. Better than an old pot lid for sure1 point
-
There is a lot of info online that might help identify where you need to shrink or stretch. I like the allmetalshaping site as there are some very experienced people on there e.g. first result off google e.g. https://www.allmetalshaping.com/showthread.php?t=11929 Kent at tinmantech, MP&C and John Buchtenkirch are all worth listening to (reading)1 point
-
Can you get fine tip for lpg? For me at least an oxy act rig is a bit much admin Also, practice on something else first. My ute was evidently the apprentice practice rig when it was built by the workshop judging from, well everything.... The roof had been shrunk with a torch, but they fucked it up, lost most of the crown, ended up just pushing it in and carving a new one out of bog A disk is certainly fairly amateur friendly, it doesn't shrink too much in one go sort of thing This was a good video1 point
-
No worries, hit me up, they have bedding for hire but since we're sleeping out I guess we don't need any.1 point
-
Yeh any areas I'm able to get at are being dealt to with strip disc on grinder and wire wheel, the hard to get to areas as in pics are getting blasted. Have a heat gun and scraper and a butane torch to help get shmuts off as it clogs strip disc on the thicker areas of tar or underseal. Not in a big rush so sections only will soon have it sorted. To prevent rust im coating with crc weld thru zinc paint.1 point
-
OK the P rating says that P1 is basic P2 is OK and P3 is the best... il check on the web what else is available but yeh thanks for looking out.1 point
-
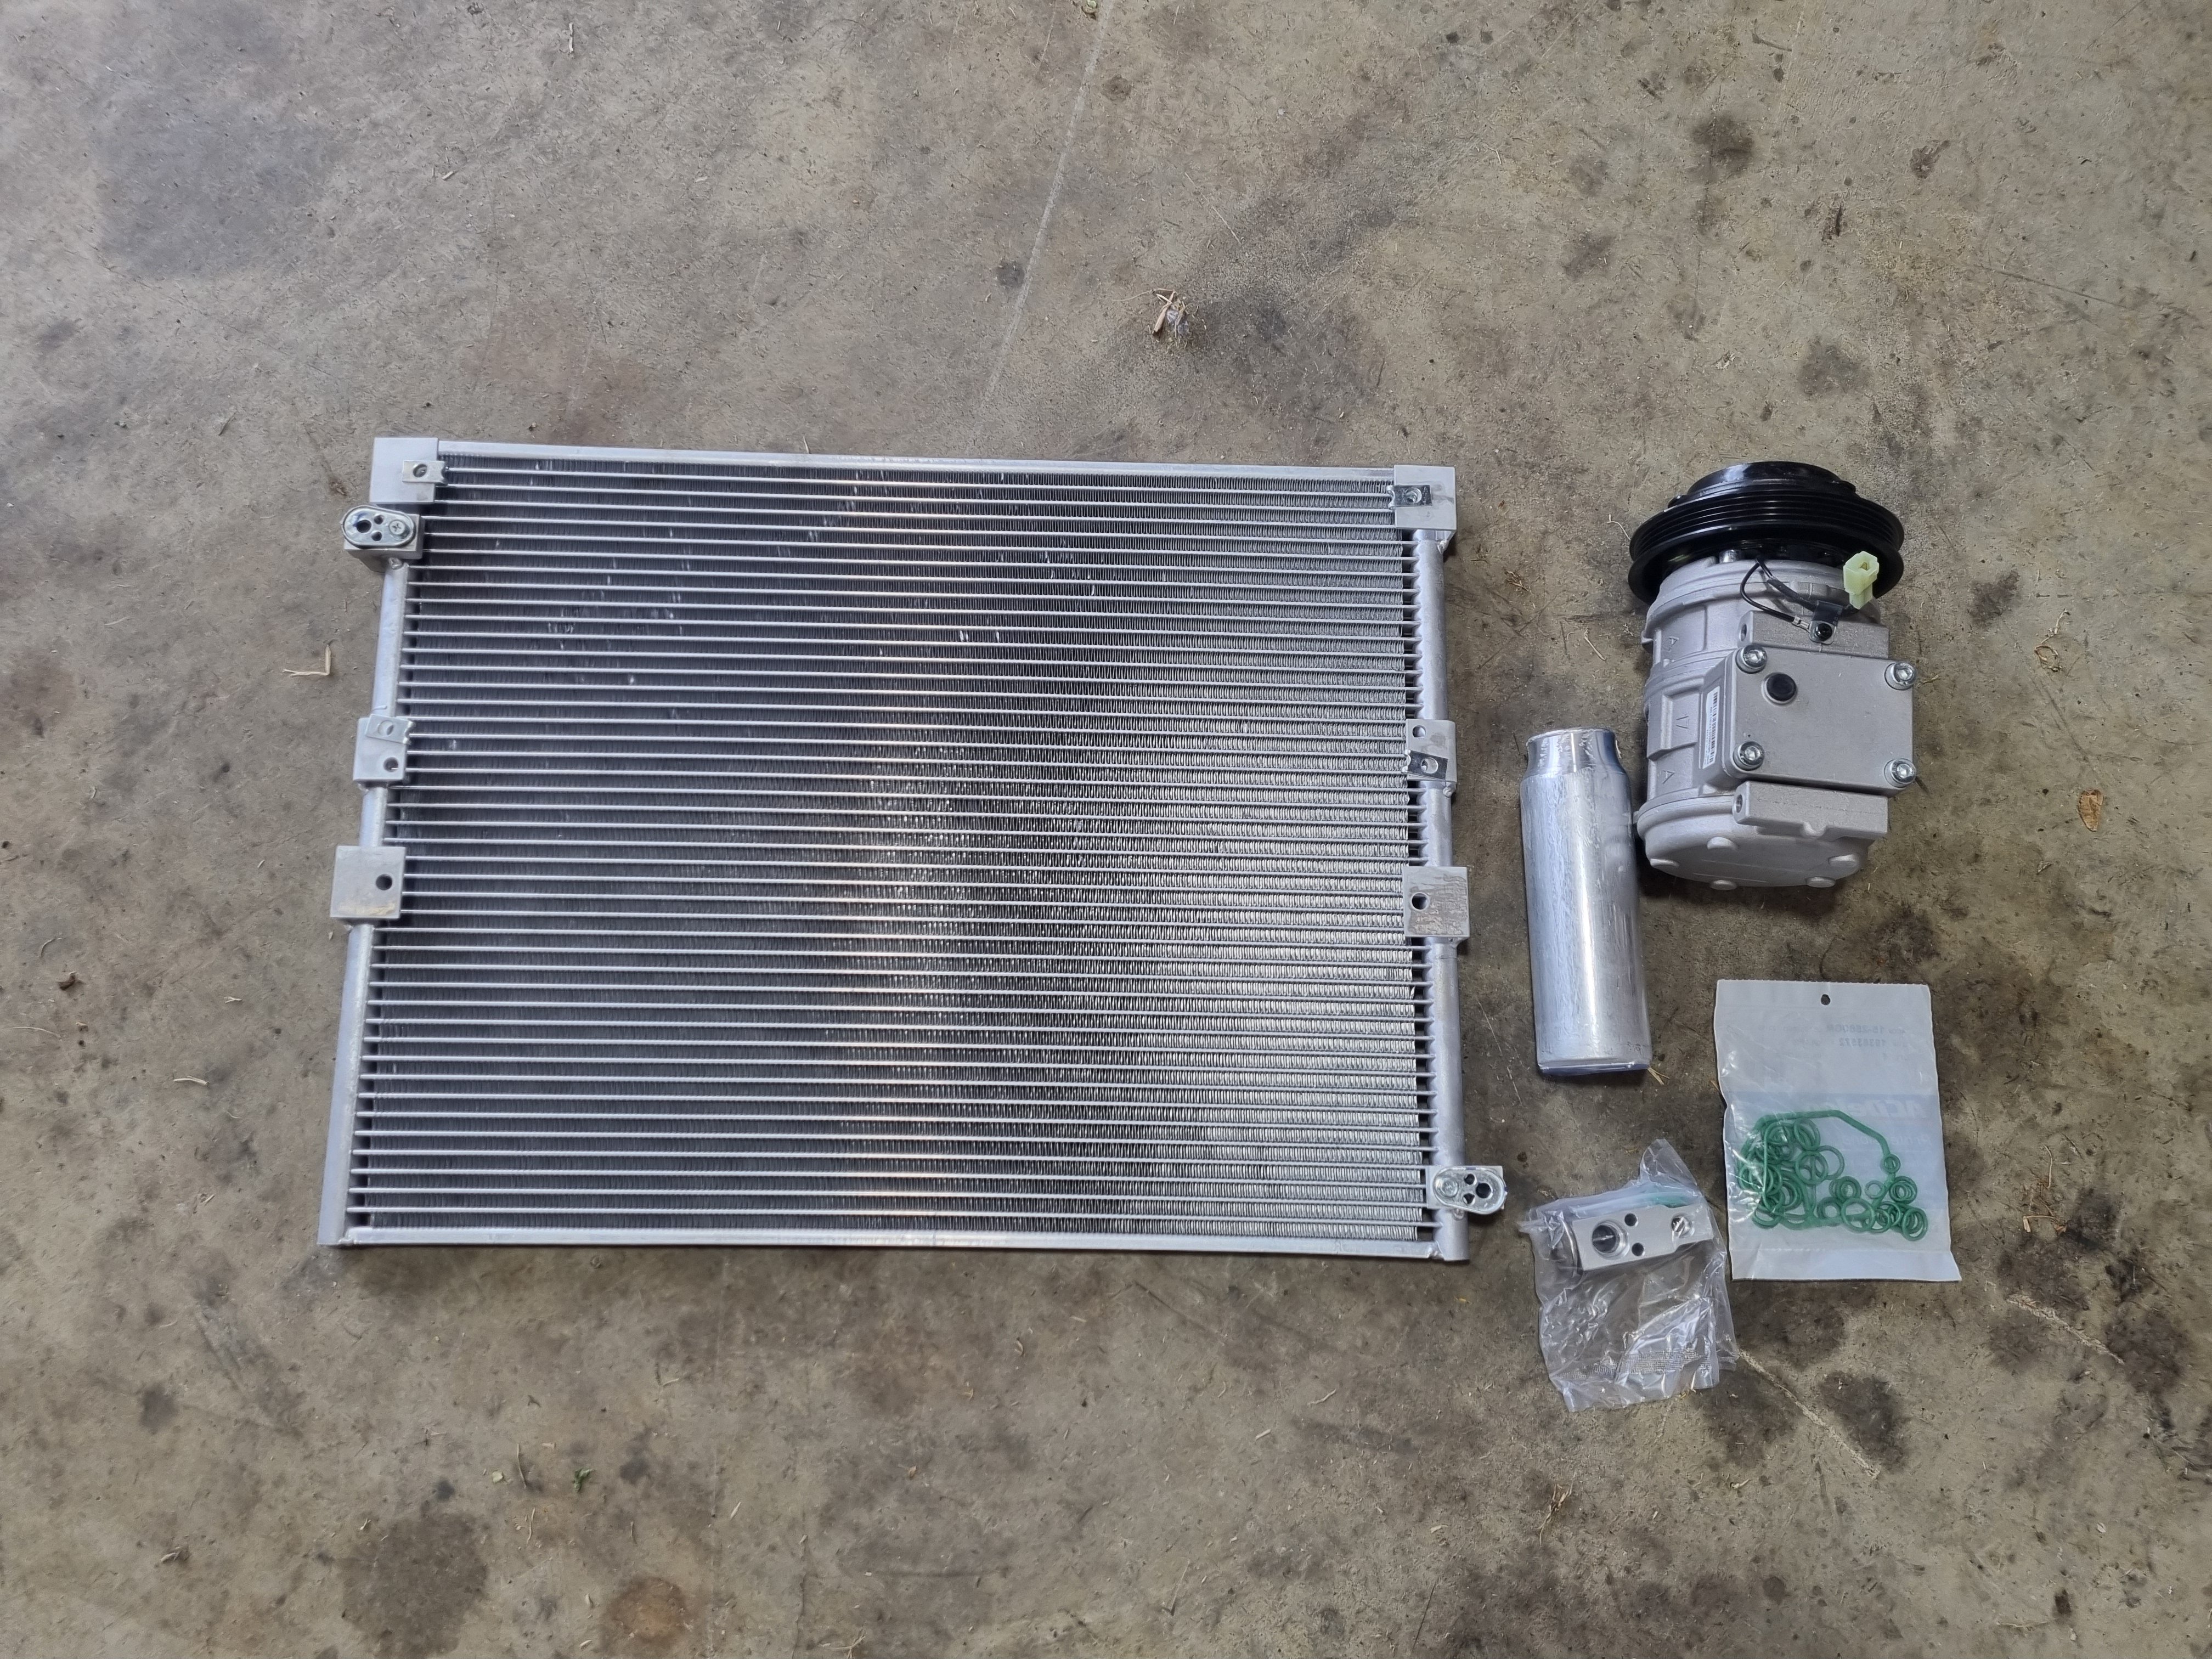
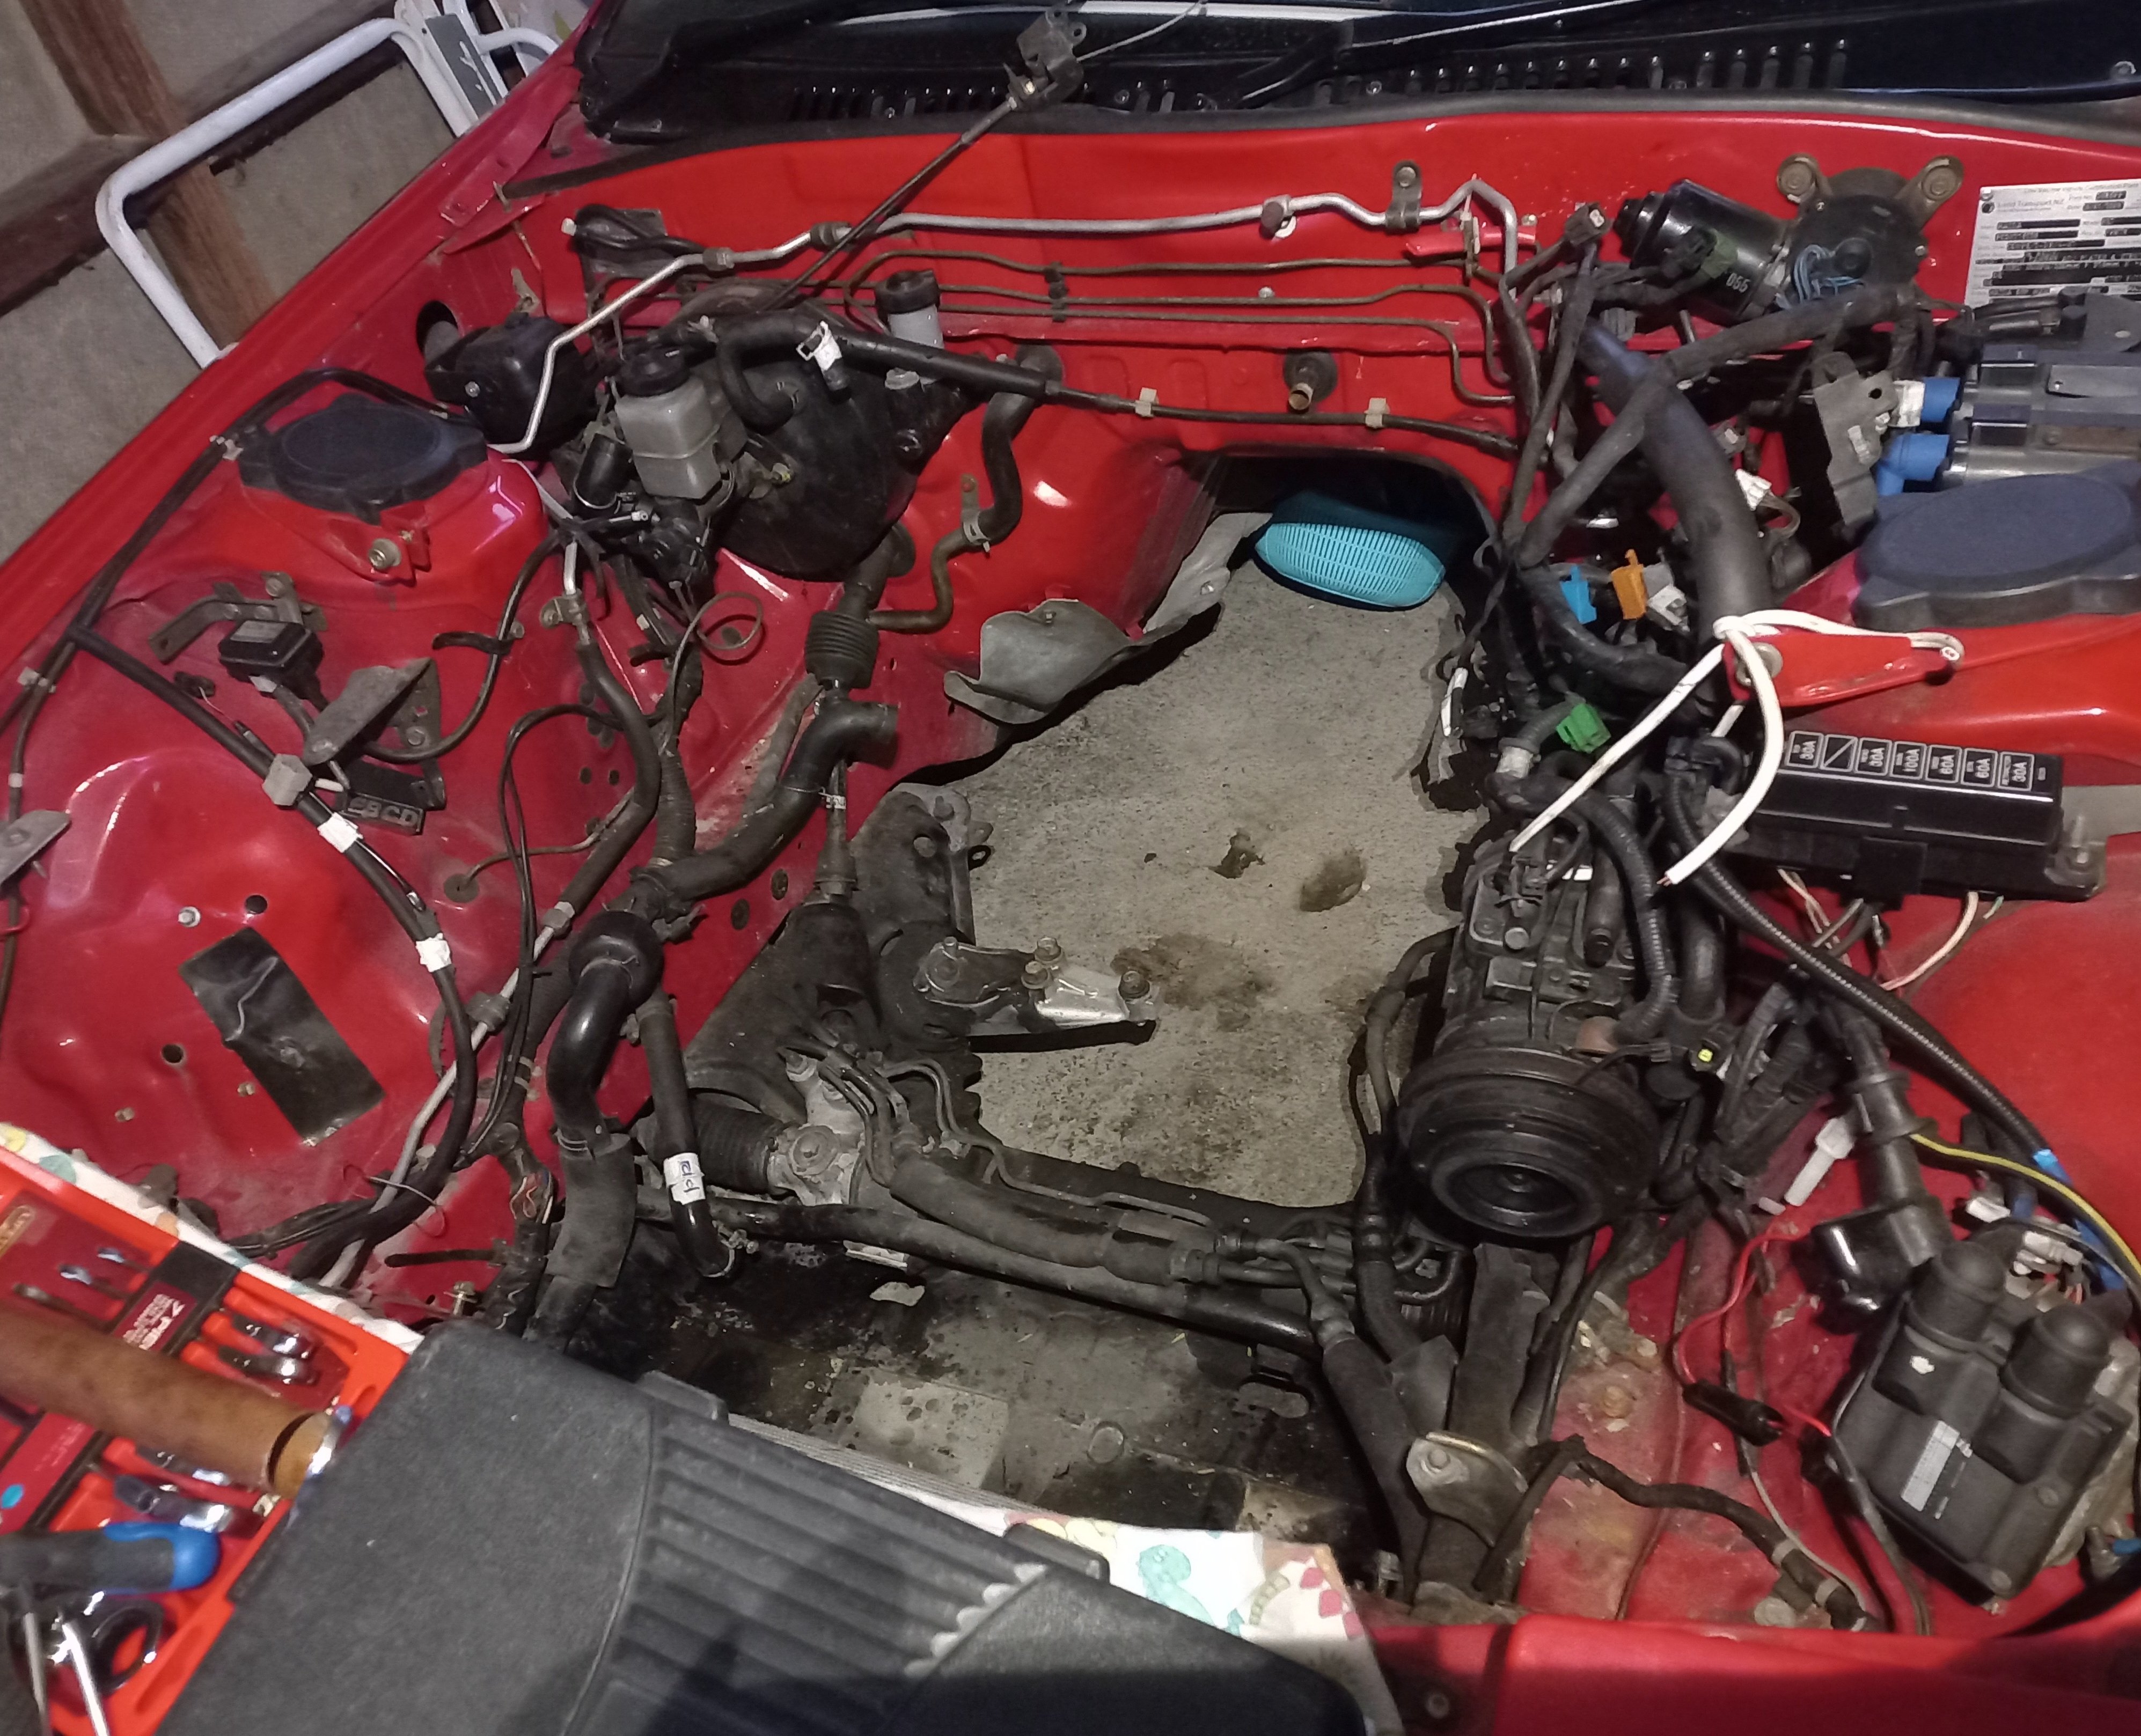
New AC system. As previously I bought one of everything from rock auto. Then I installed it. It was quite the job to get the TX valve out but yea whatever. I still have to fit a fan to the condenser, factory they don't have one which doesn't do the rest of the system a lot of good and is the reason why the TX valves shit themselves.
1 point
-
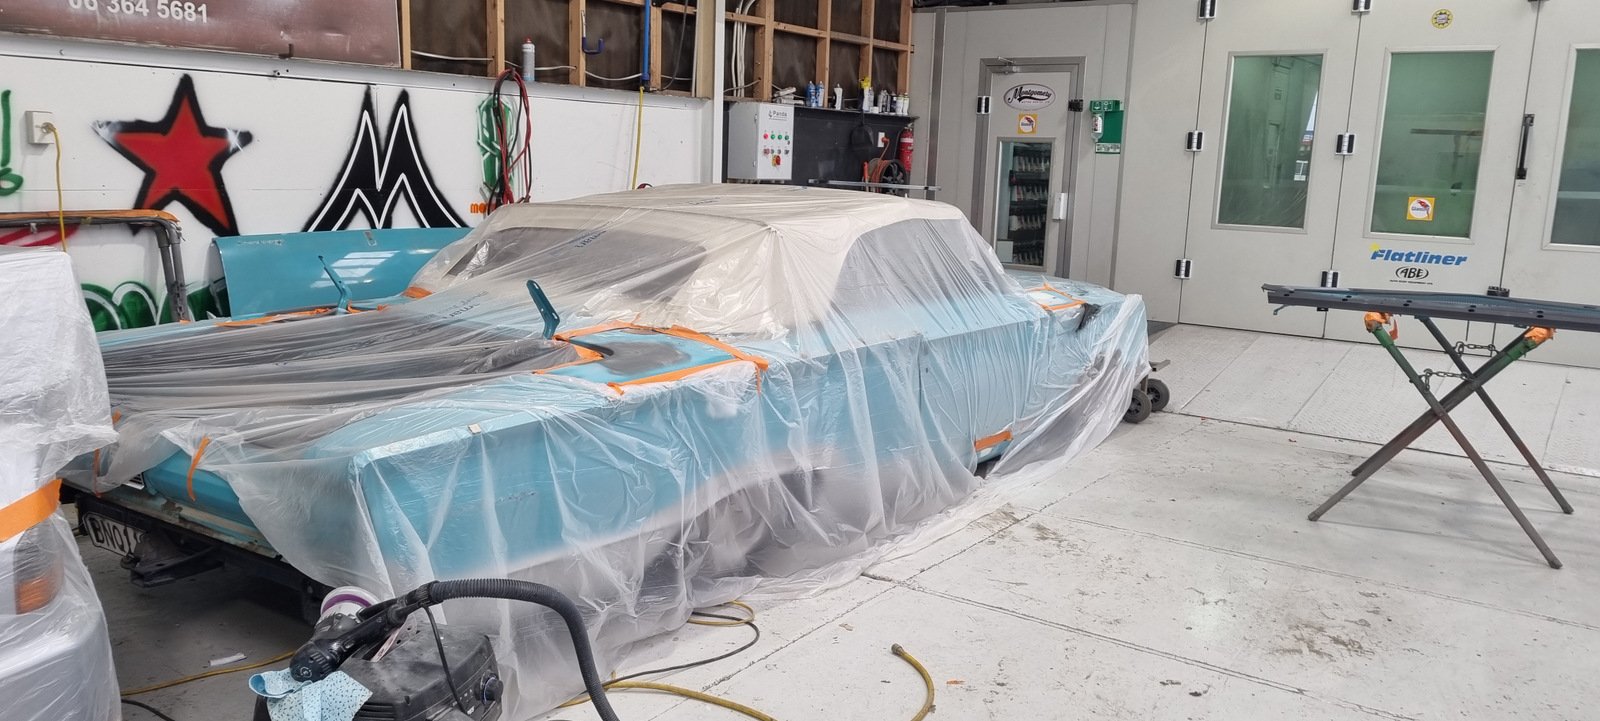
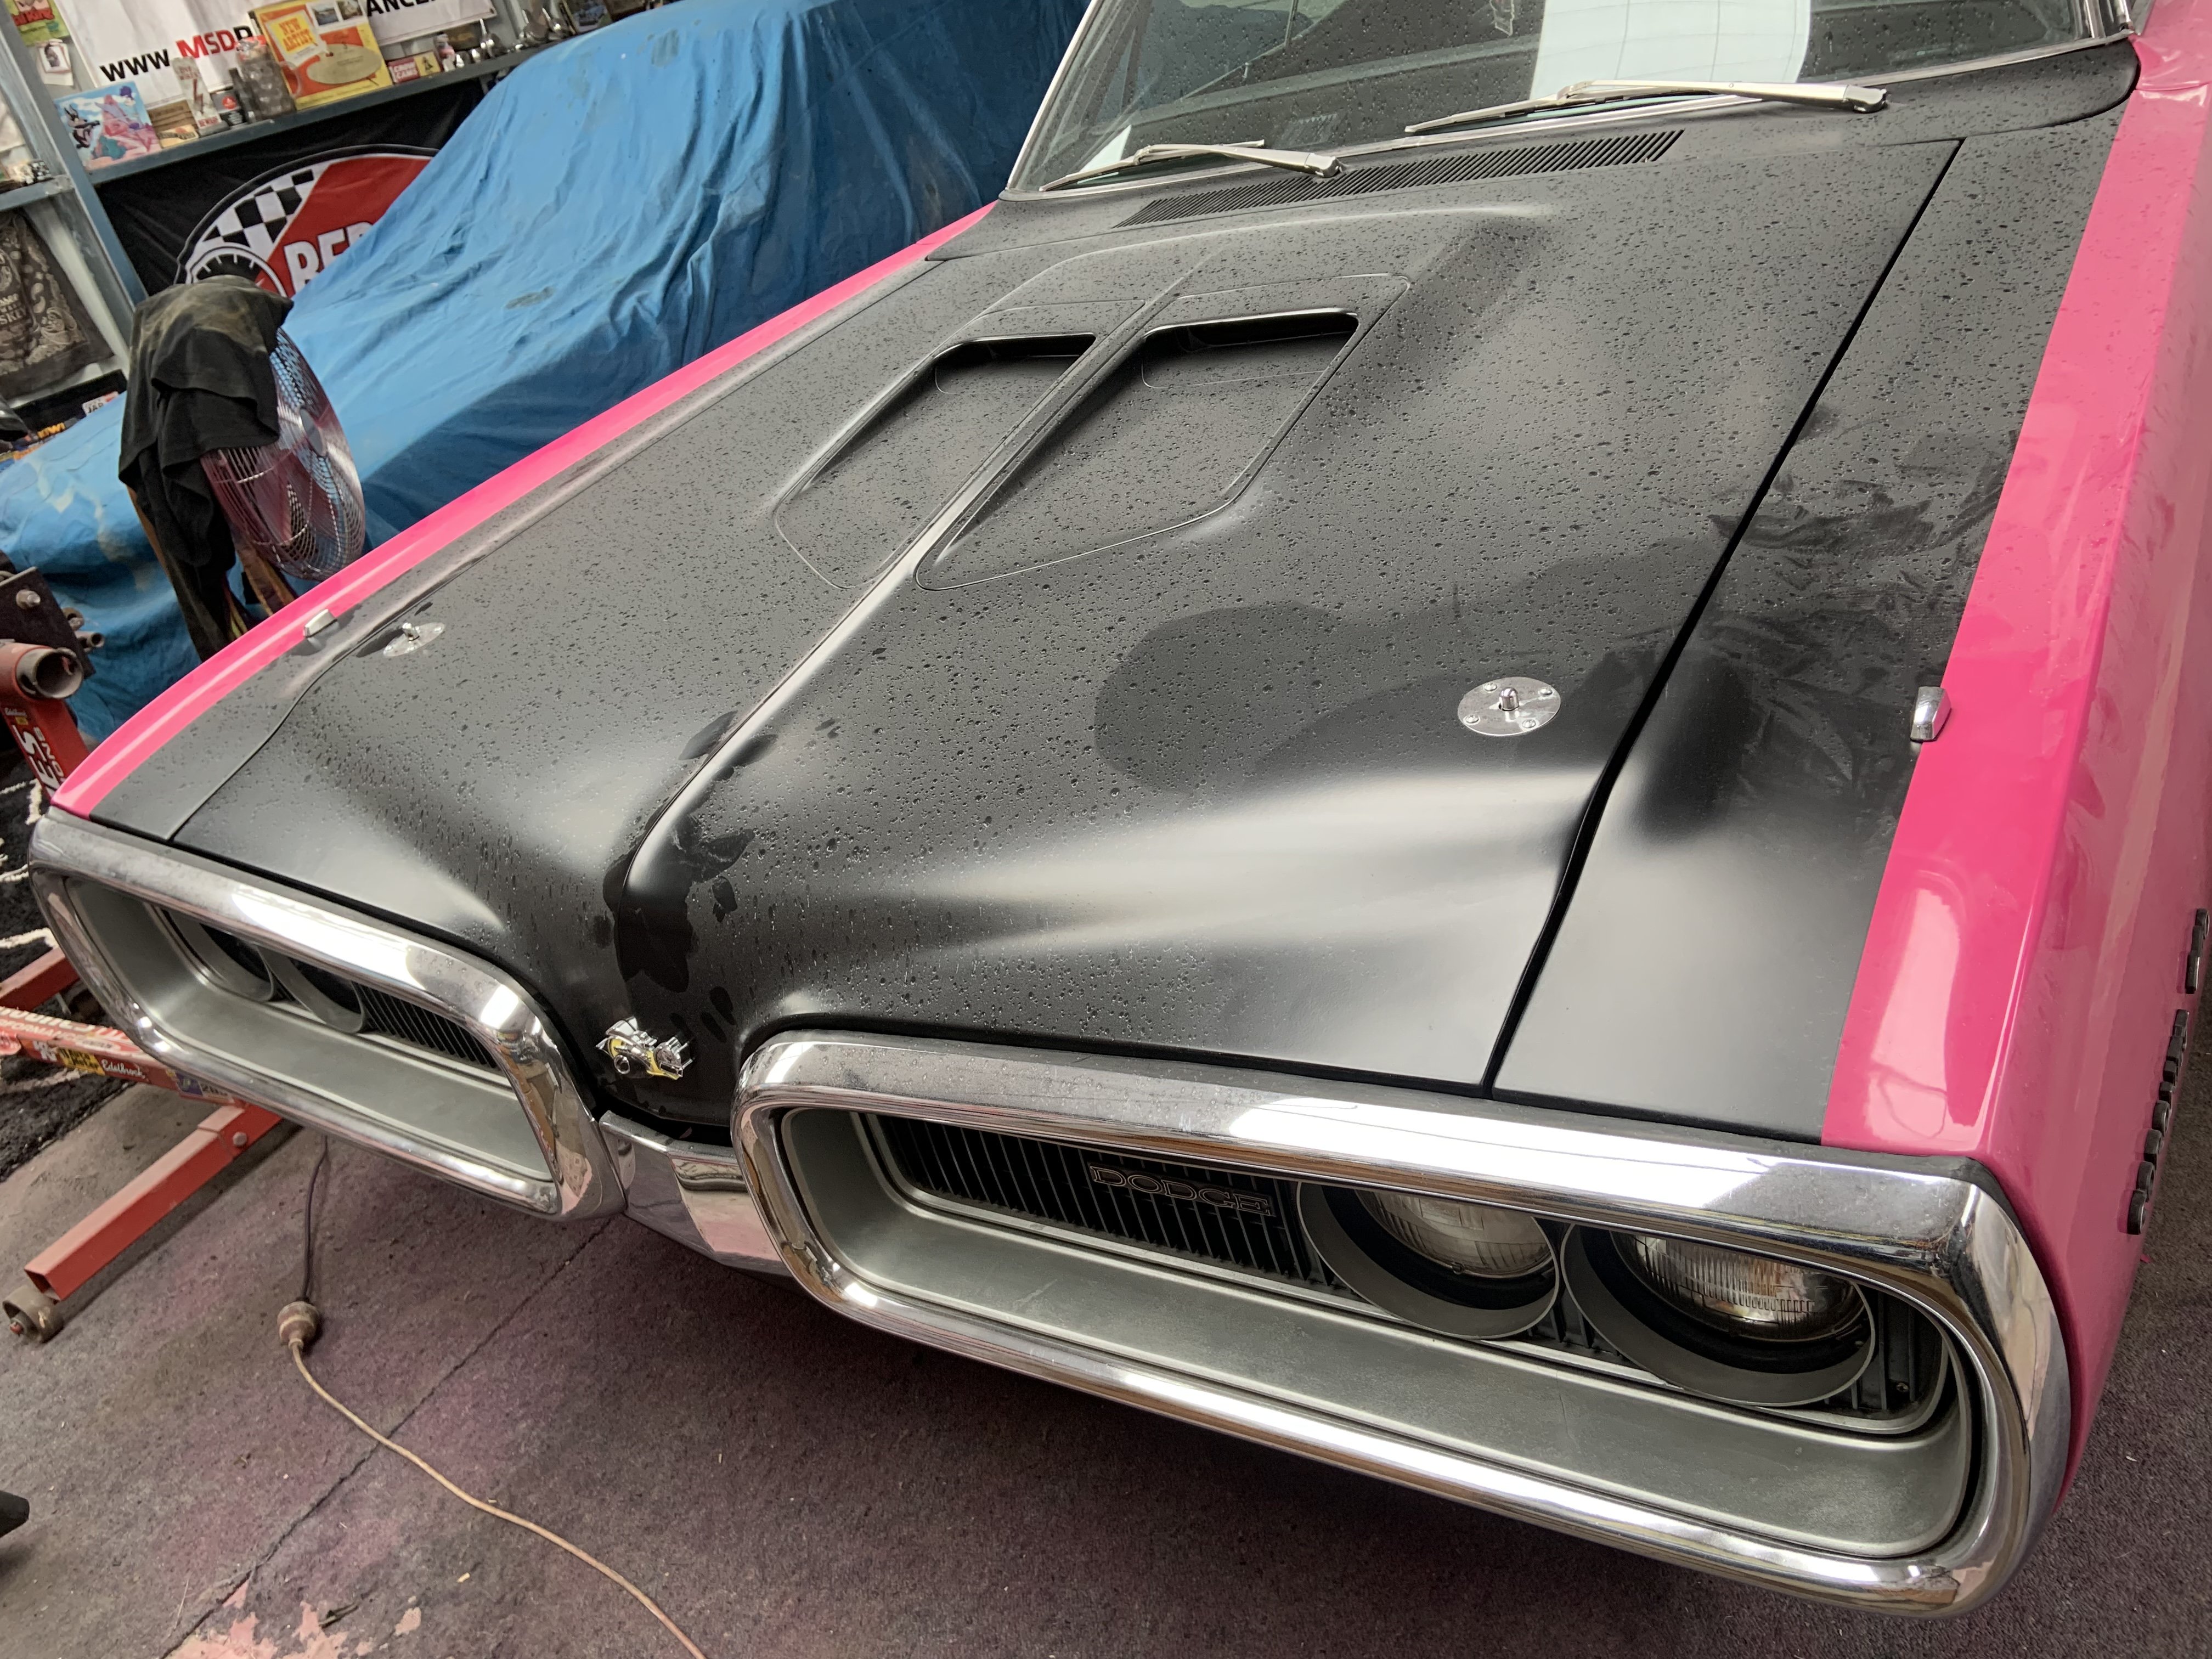
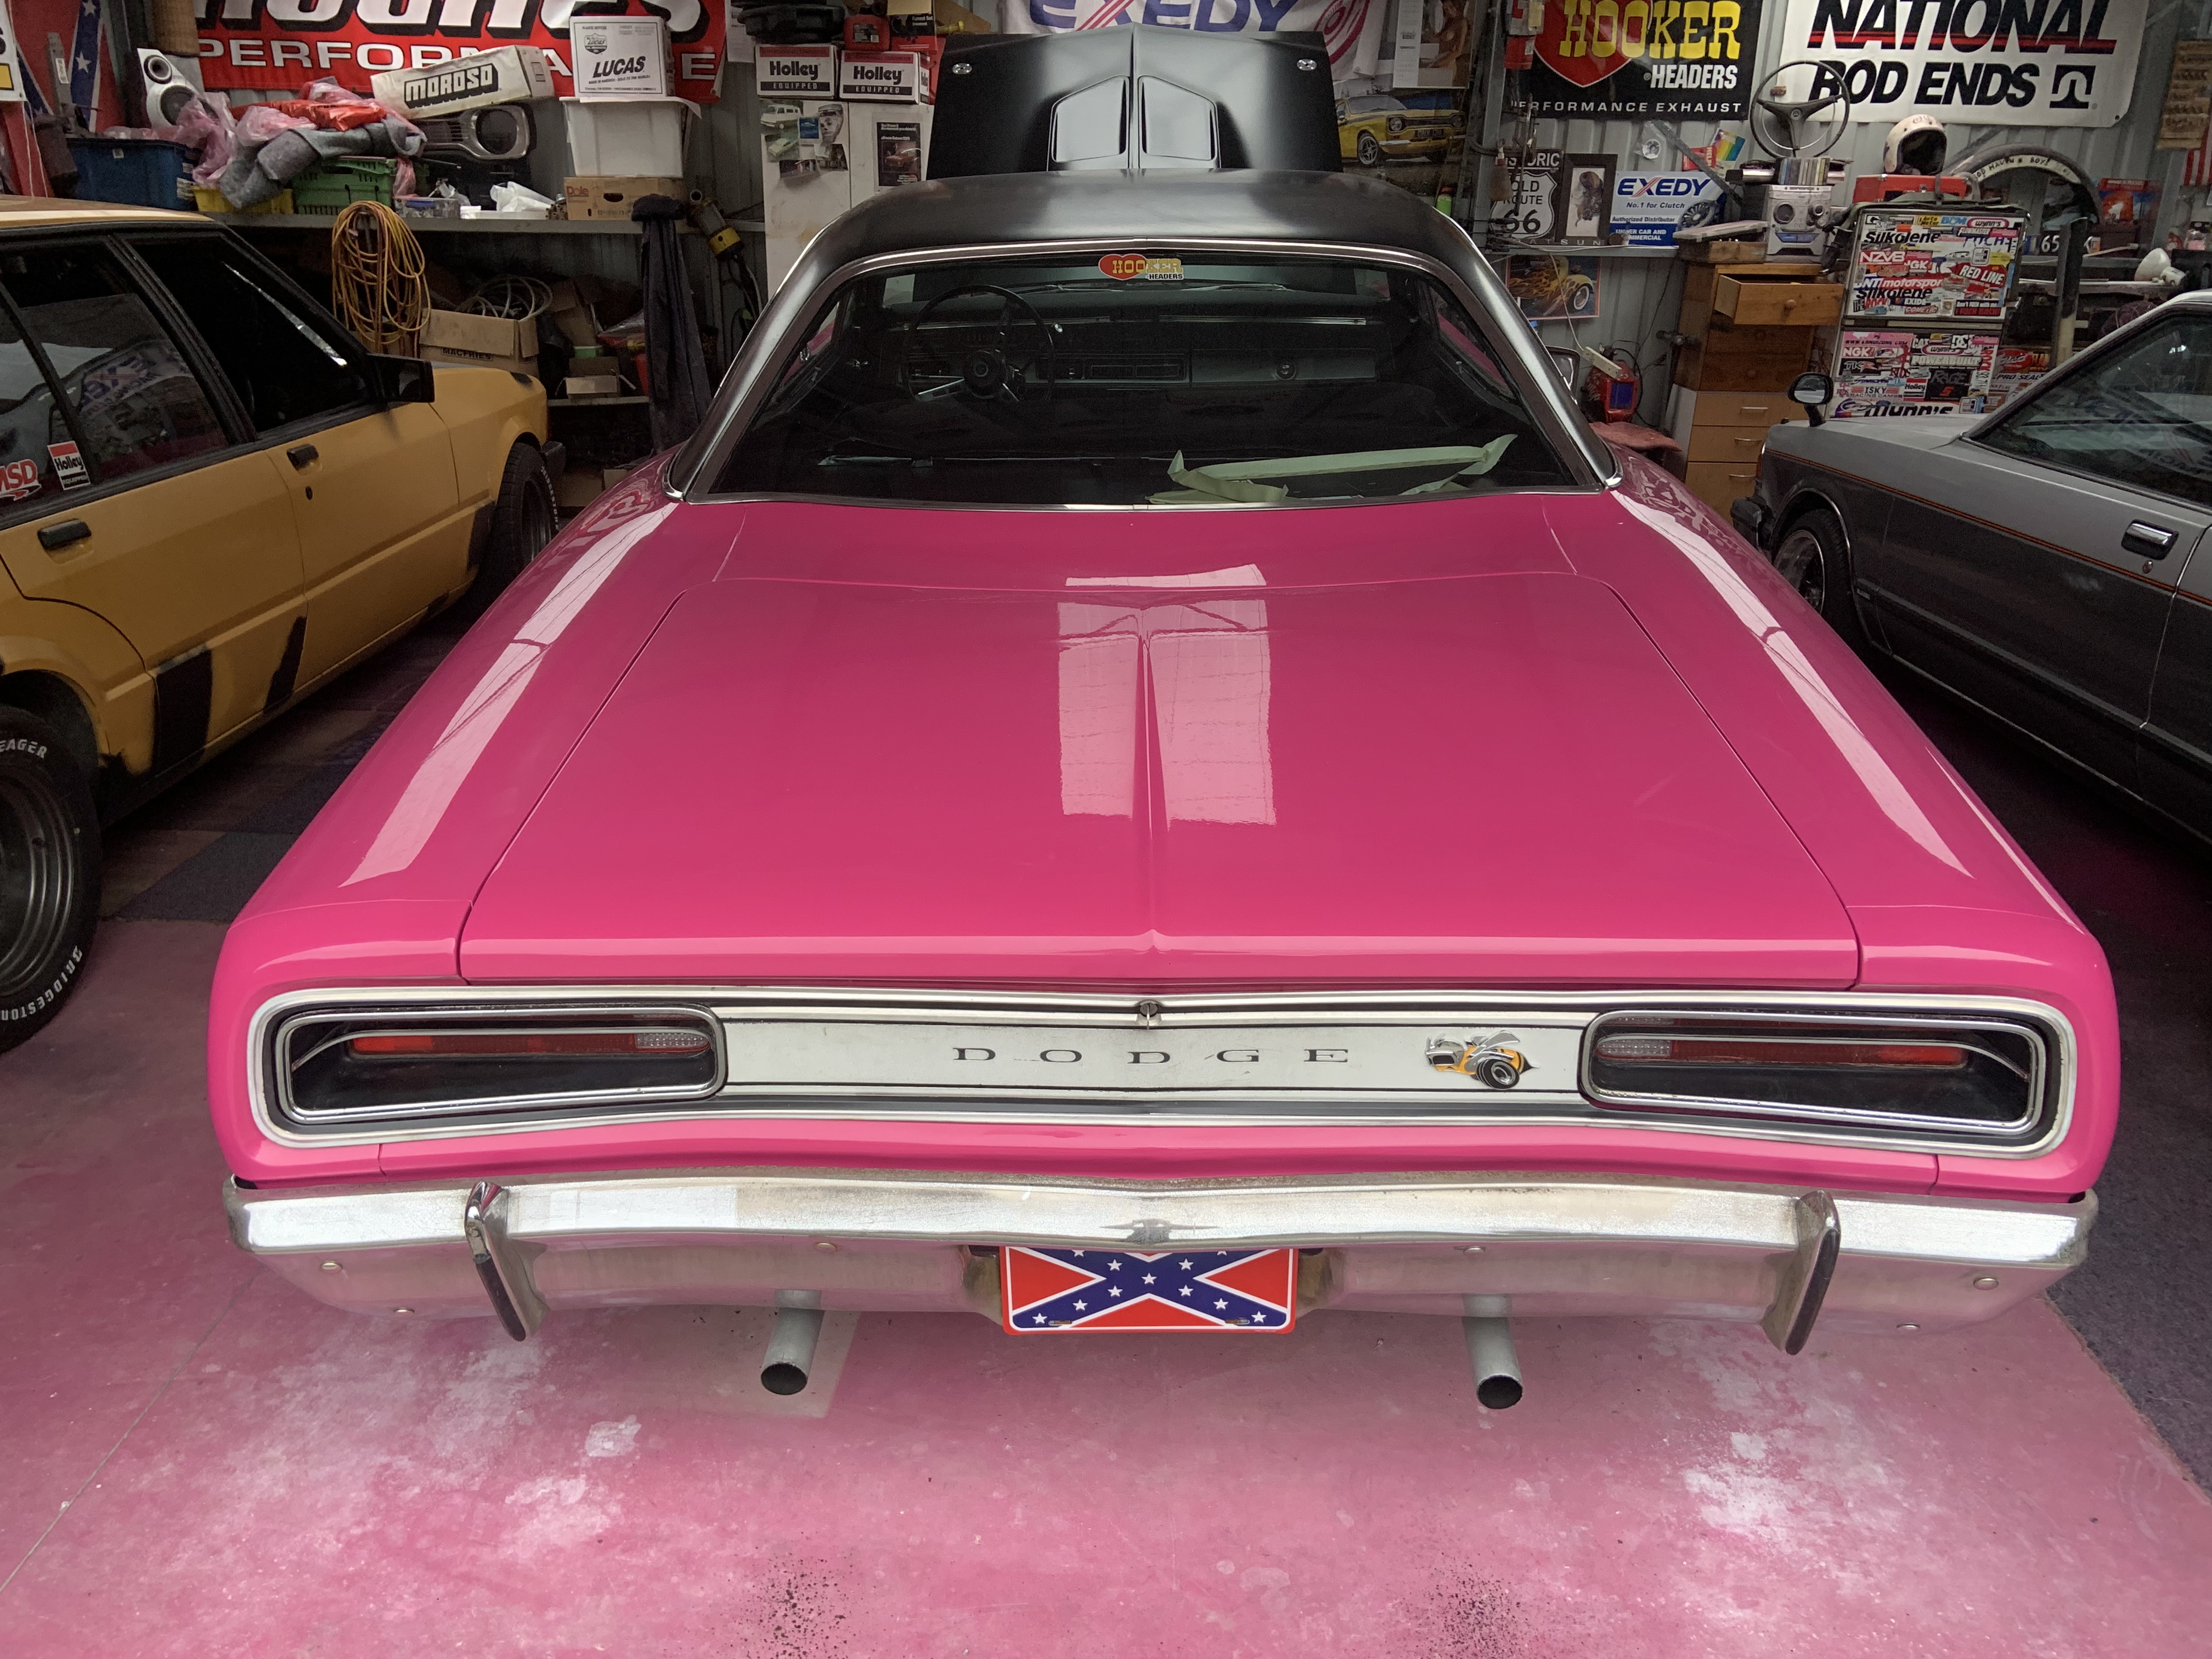
Progressing, should be painted next week.
1 point
-
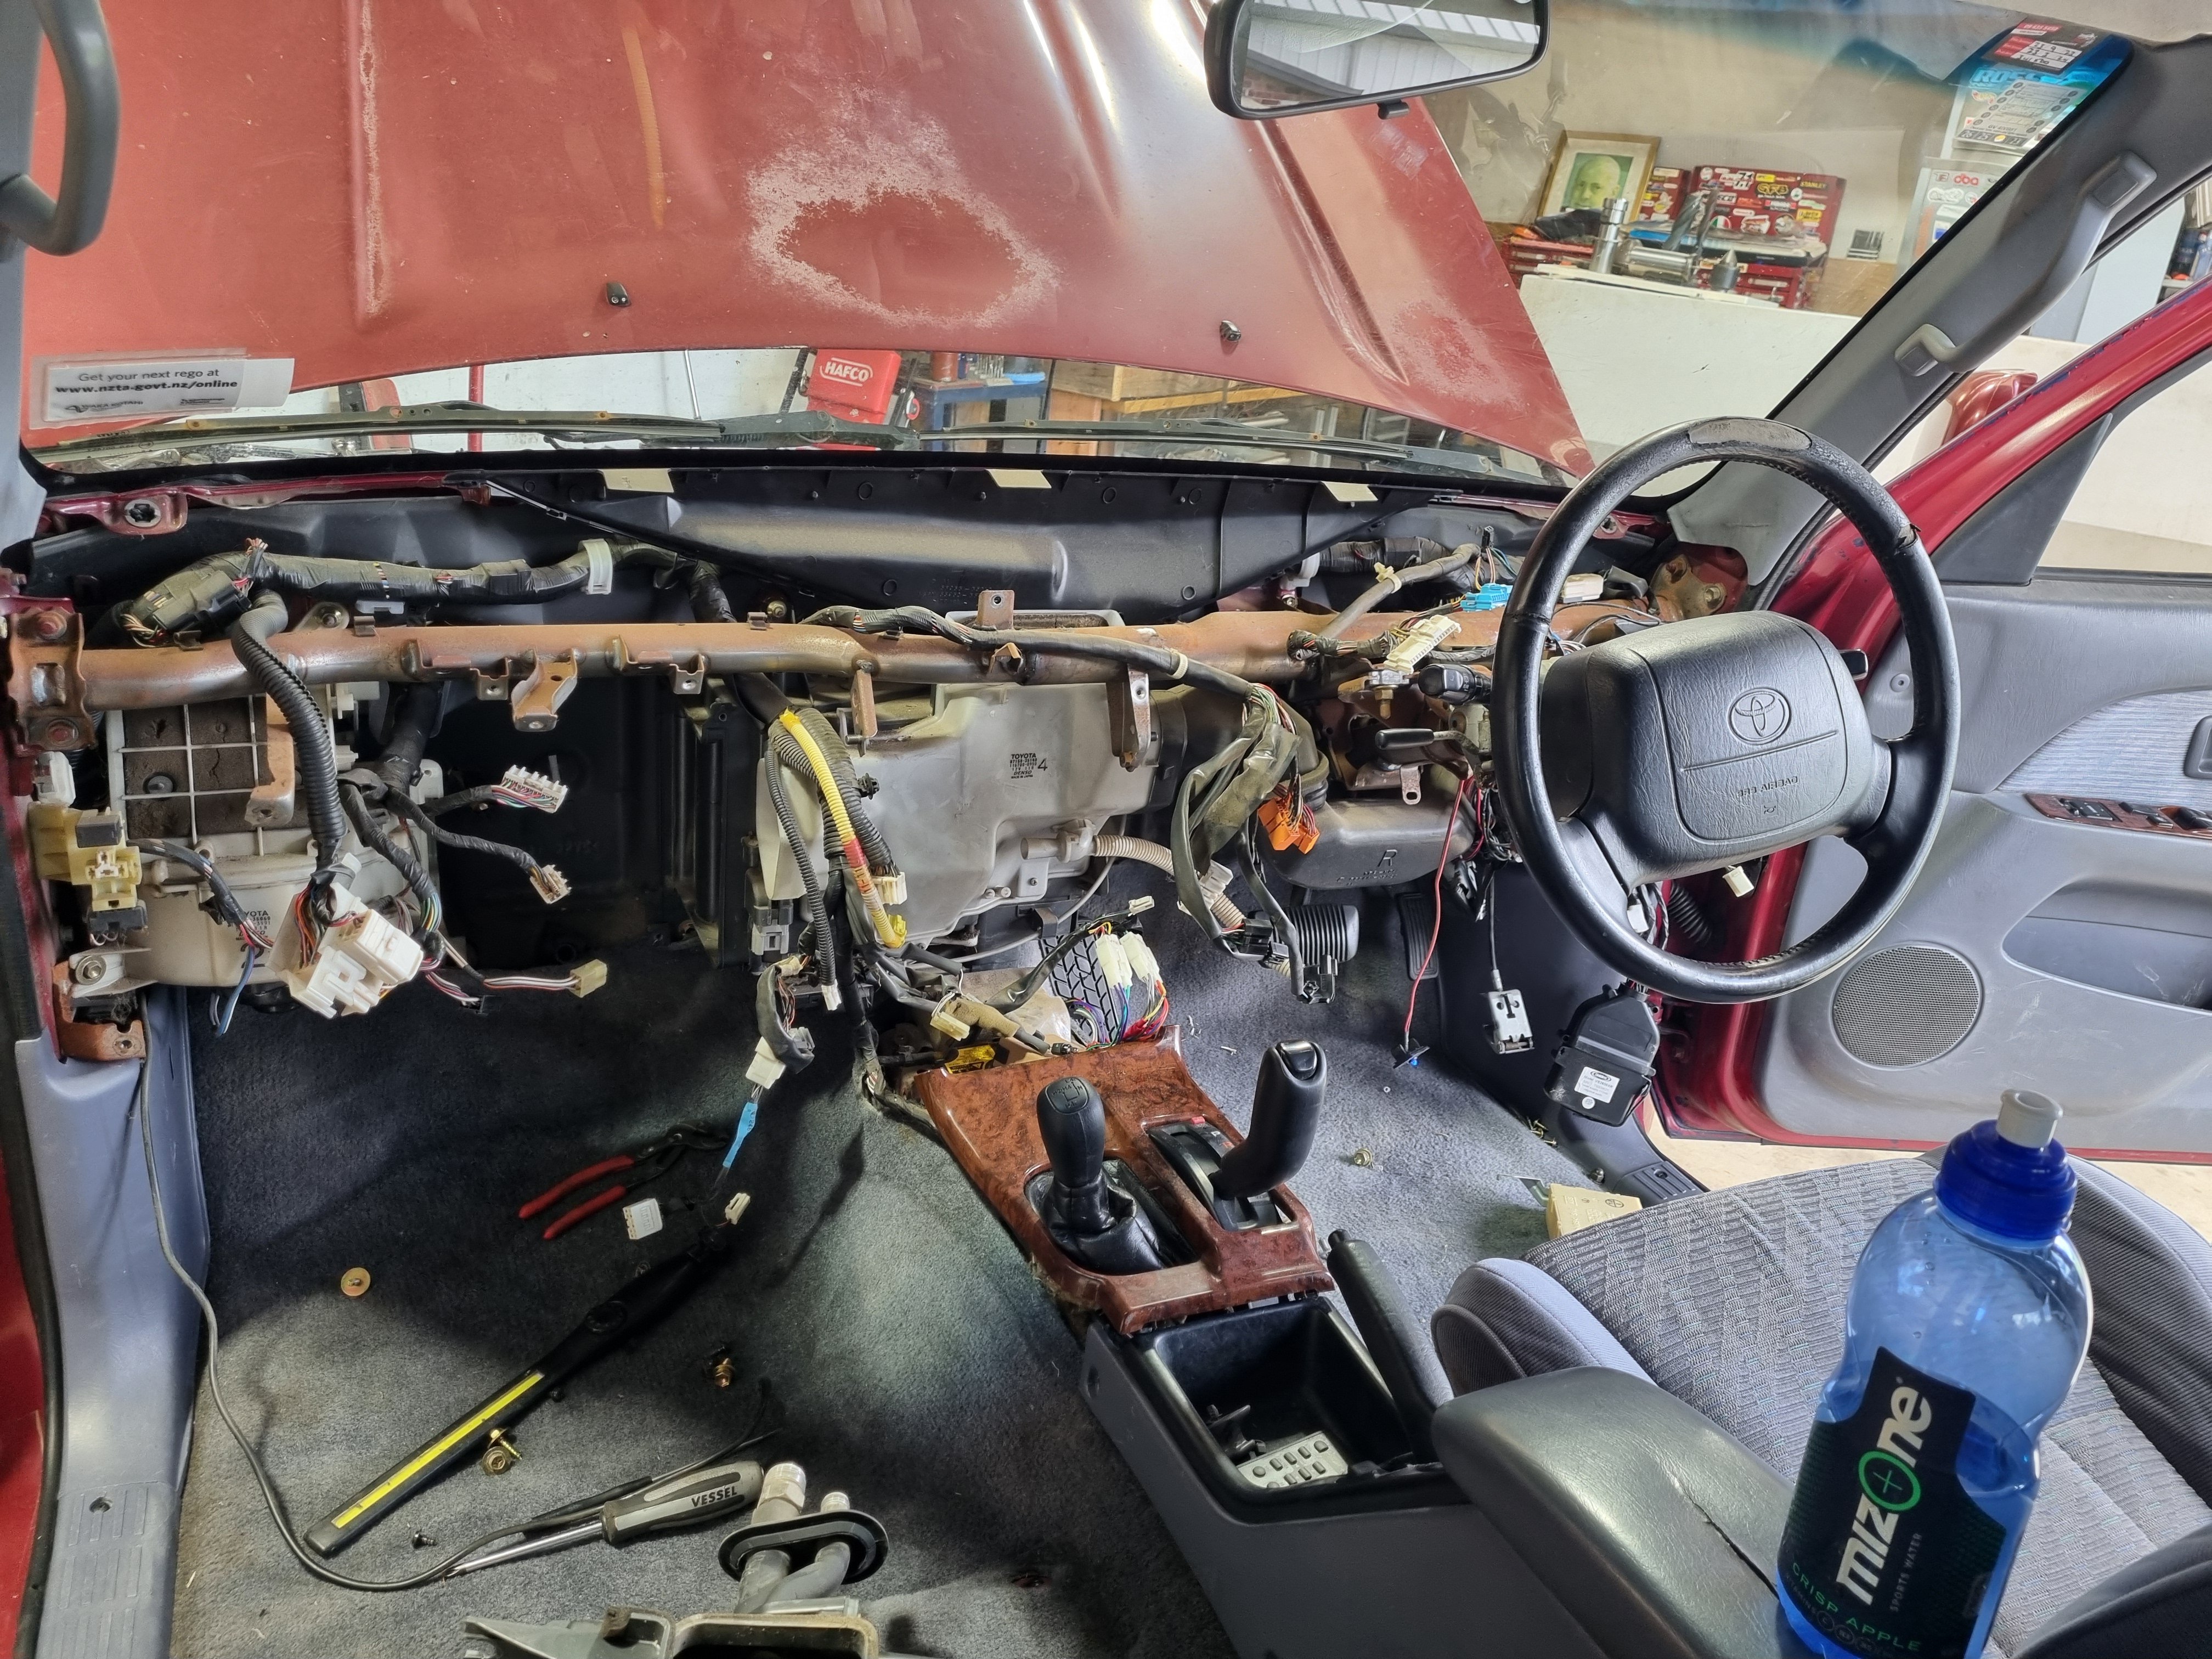
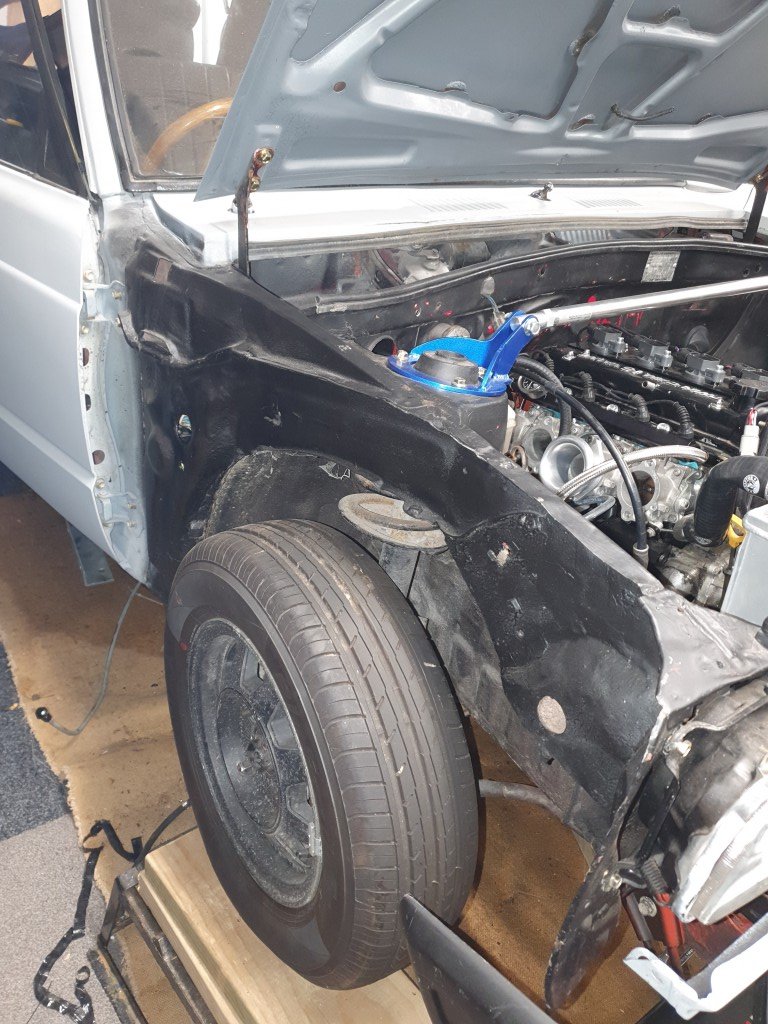
As always, everything takes a life of its own so here we are.... Stripping the body loom right back and tucking it as best as possible. Battery to sit in the boot, ended up with a Vertex battery. The mount is to be modified to allow for the circuit breaker to mount to it too. Decided to get the engine mounts modified (along with gearbox) to move the engine forward. Heaps of room with the single row crank pulley now, and will help alleviate all sorts of clearance issues. Fuel lines all done, cant rave enough about the Koul Tool, made things MUCH faster and easier. I thought swapping a 4AGE into a starlet was meant to be easy...
1 point
-
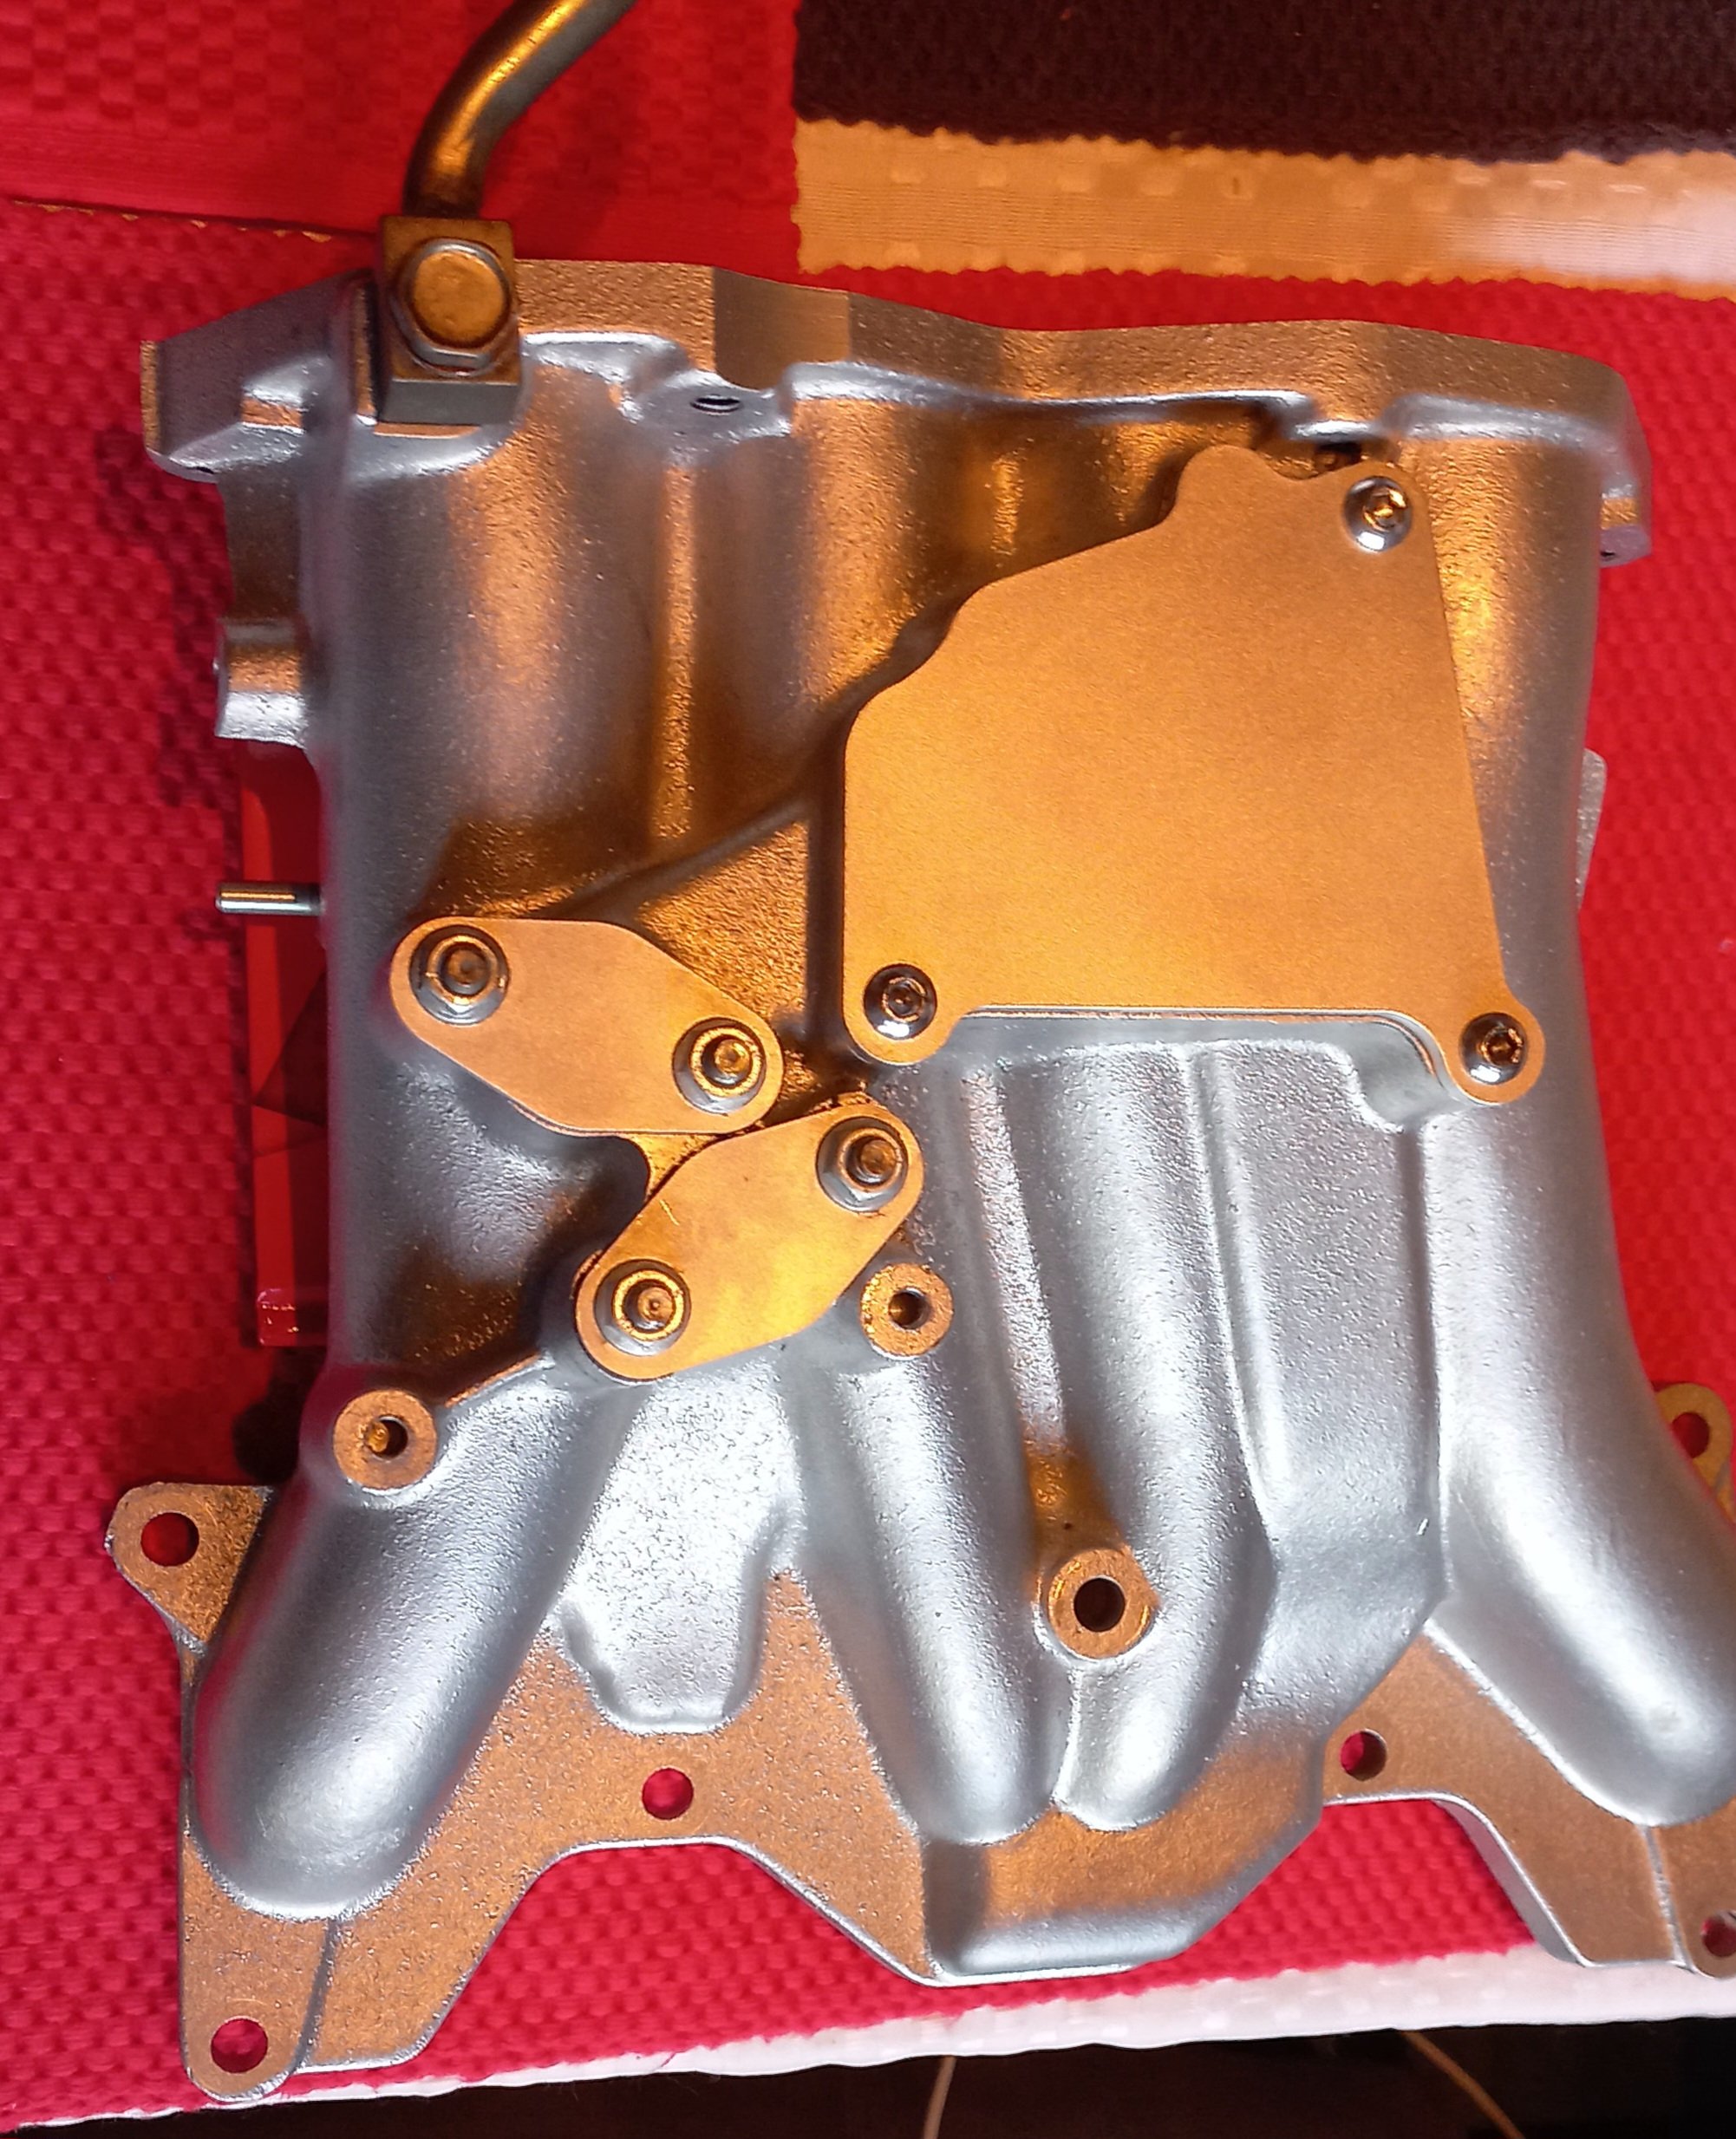
Also replaced the EGR emmision plate for the more shaped green bros one...Irked me way too much. Top half of manifold ( 'dynamic chamber' and factory throttle body/greddy intake tube etc) are now surplus to requirements moving on for reasons I will divulge another time..all that frikkn hard work vapour and reassemble/mod throttle body wasted Also a change of direction, twice the fun perhaps?
1 point
-
This gives you an idea of the size and proportion of this thing. It’s quite rear heavy, will be interesting to see how well it turns.
1 point
-
JUST like the ones on the front? Exactly like those ones? I think you’ll find they are your old ones! They were delivered buy Karl iirc. The rears come from smokinjoe, (is he still around?) I don’t think the rear axil will last long with the 5hp to be honest but I can make a better one when that happens.1 point
-
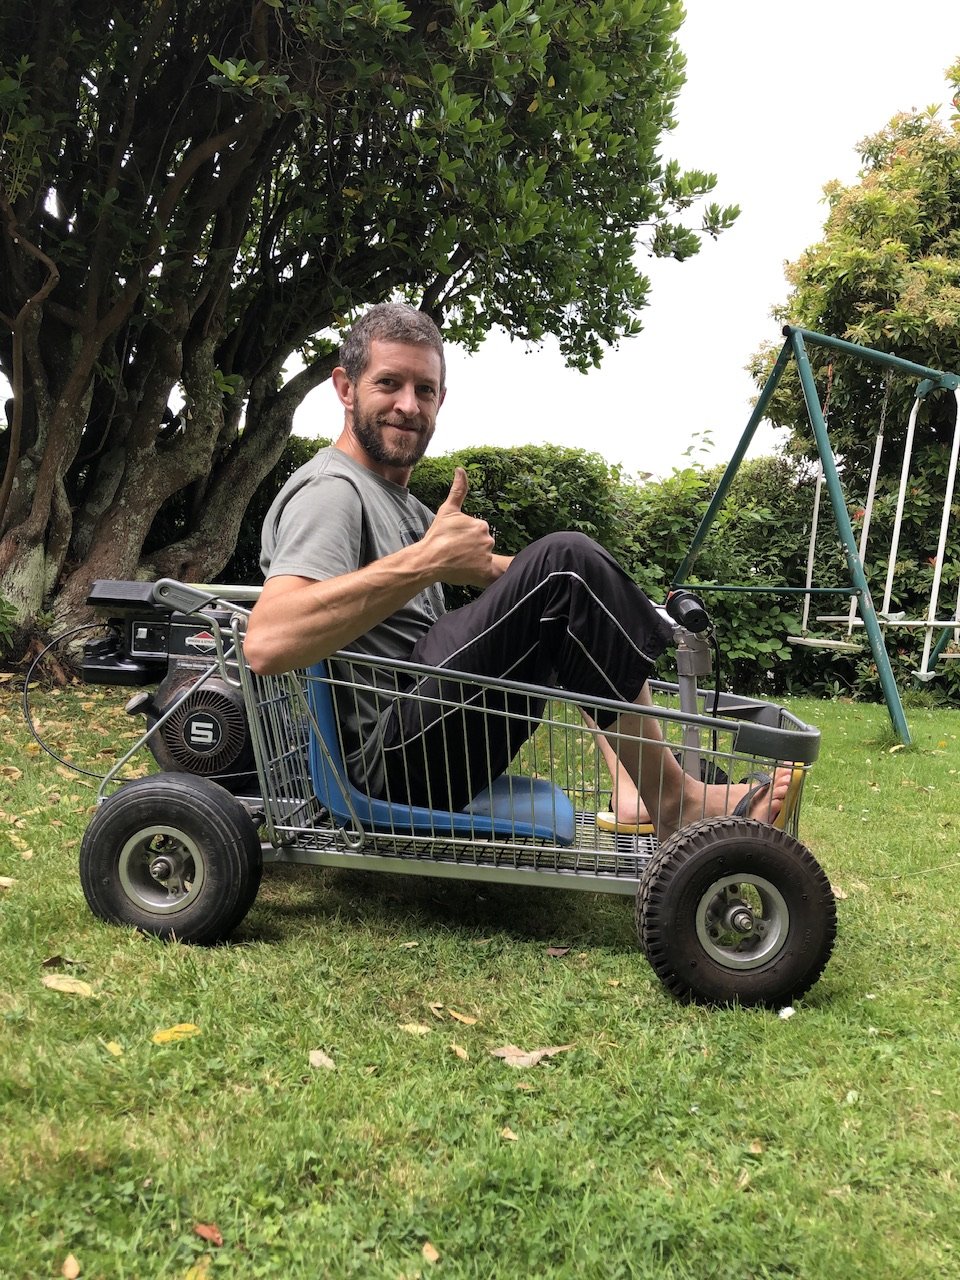
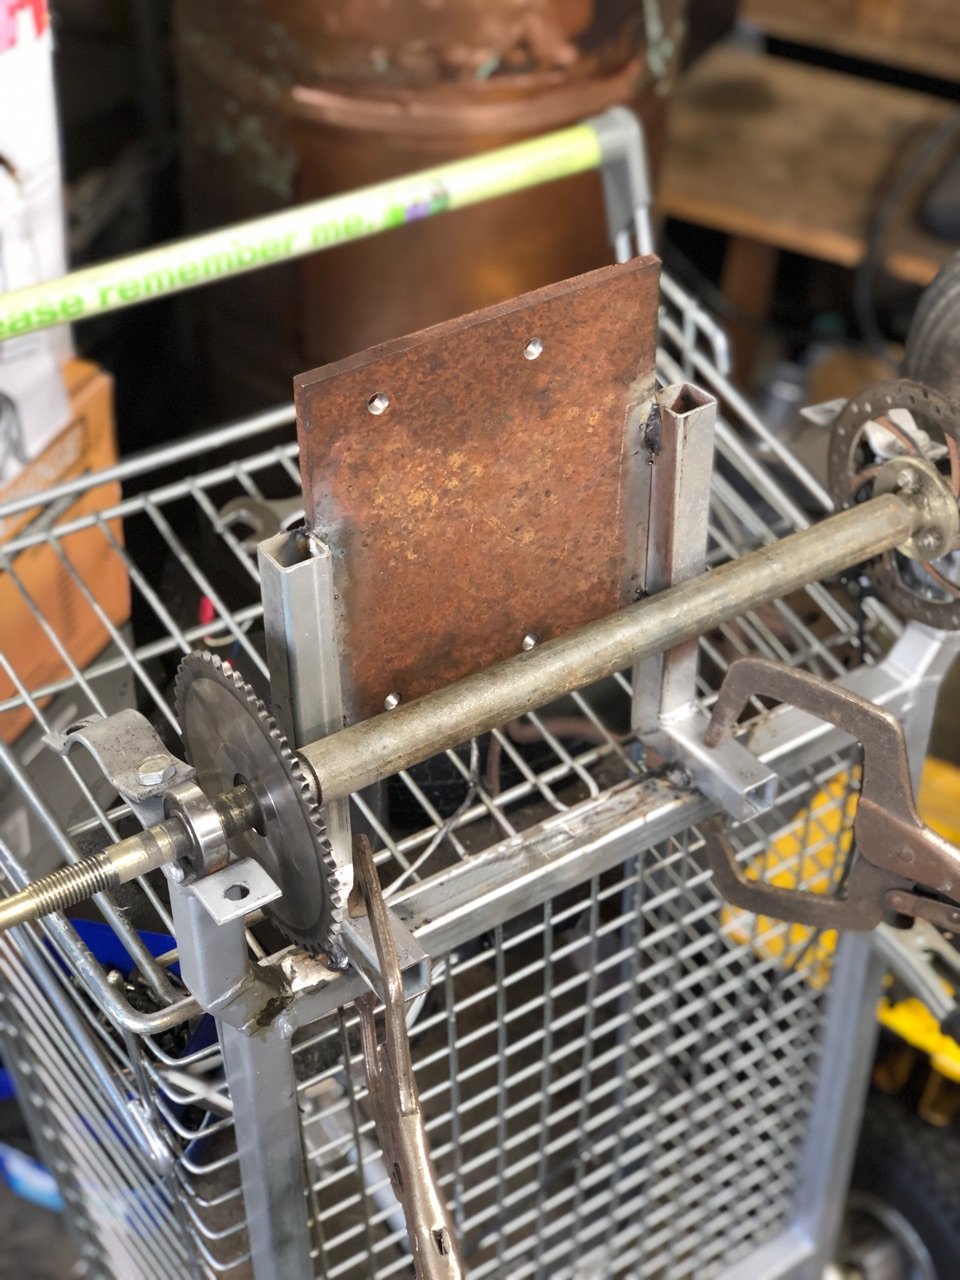
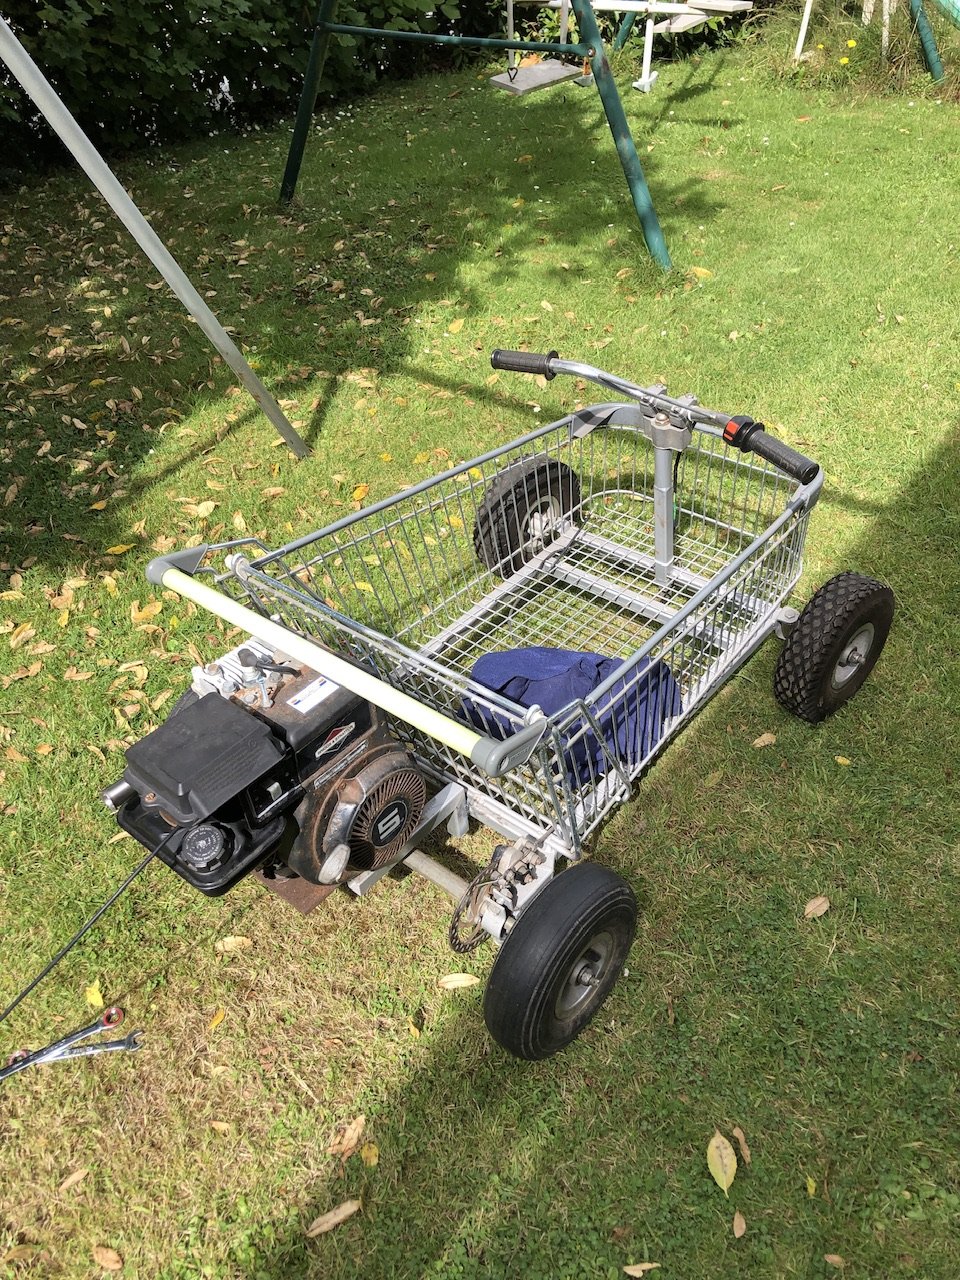
On child care duties so left them unattended and got some workshop time. Measured sprocket alignment and set up motor mounting plate. Welded and motor bolted in place. Will brace the mounting plate to back up under the handle bar. I have a video of the motor running. It’s stupidly loud. I may or may not do anything about that. Just need to drill and mount the sprocket and sort a longer throttle cable.
1 point
-
Rethinking a few things. Turned down FD housings over FC due to cost. Been playing on my mind a bit cos inside chroming better finish hence longitivity. Lucky my FC ones not notch yet for bridgeport but oniy vapour blasted. So will bag up and put in their boxes for the day that NLA and worth heaps. Also rethink throttle body. SCR has a much better AM flowing product which bolts onto the lower FC intake. So all the bother vapour, modding throttle and expansion pipe for nout now hahaha. Its only money, todays effort pulling out plugs/loom and other deleted AC, emmision and factory turbo bits..happy cos only have coolant lines for engine block and heater core moving on..much nicer, cleaner and no risk of leaks. Boring pics.. old post engine pulled and current look.
1 point
-
Made it to an Oldschool meet! Was a nice wee catchup. We went for the tune up with Wayne at Pitstop Burnside. Started well but ended quick when he noticed the dizzy advance weights were seized so not much point tuning around that or tearing it down after 5pm the week of Christmas. Was hooked up to a huge scope what was $45k in the late 80s. Tech as, even used a stylus on the primitive touch screen! Found my timing was 10deg retarded not 10 advanced.. either my timing light is fried (my mate had an incident when he borrowed it) or the dizzy hold down clamp wasnt tight enough (possible, cause its in a cunt of a place and can only get a click of the wrench each swing if lucky) Was lean and lumpy at idle + rich everywhere else. He sent me home and said to get a Bosch GT40R (my rad MOPAR coil was like 30 years young) gap the new plugs tighter and maybe a set of leads (if they show more than a max of 1300 ohms. I tried 10 times and couldn't get a reliable reading.. they aren't old but are an ugly colour and stain easy) After pulling the dizzy apart and lubing up to see if mechanical advance comes to the chat. Well the next day i was off to get a new coil after work, missed my slot in the 5pm traffic and it got hot. Was stalling, idling at about 250 and really hard to start again and wouldn't run unless pedalled. One was peaking at 100% panic mode so as soon as it fired i slammed it in gear to keep moving, tyre screeching. Did this 5 times and then saw smoke. Props to the Koba battery, it got reefed on and kept coming to the party. Decided to slip into (the same carpark i did when the slave cylinder failed in the bluebird) to cool it off and saw a big ole trail of trans fluid. Hmmm. I think the lurching into gear fatigued the trans cooler return line brass fitting. The mrs came to the rescue with the XD and we towed it home on the short rope and it took YEARS off my life. Next day i rolled under and started taking the cooler bundy off, with all of the 2 inches of space available ,about 2NM exertion and it snapped off flush with the trans housing. *foetal rocking* Driveshaft out of pinion, trans mount out and lowered down for some access. i knew an extractor was a dumb idea cause they use outward force but fully had to try. Cut itself a new thread but nothing moved. Then it spun. Oh god. Air ratchet on reverse with pliers forcing outwards didn't catch. Big guns employed, drilled a hole in the (welded on) socket and attached slide hammer. Didn't appear to make any headway but when i marked it with vivid it did show outward movement, onward we go then. Thank god. Put a slice in the fitting with a wee cutoff Dremel disc to try and use a blade driver but the brass shattered as soon as you put any pain on it. Last resort drilled it out but tagged the alloy case and thread a little. Fuck it, ran a tap through whatever was remaining and wound in a new fitting ( mrs poached from a used trans at her work) with my good liquid thread sealant and left it for 2 days. Re-installed everything. Fired up and re-set timing after pulling dizzy down and inspecting/lubricating/gapping. Topped up trans fluid, none flew out again! My xmas present was a moon-style bare foot pedal for the dip switch and Im hell stoked! I had one my brother gave me when i was a kid but probably sold it off. Tidys up that area loads Re-scheduled for the tune up next month. Rapt im not doing any damage, its just not optimal. Knew it but needed to hear it from a pro1 point
-
60 miles down and it’s feeling pretty good, brakes are repeatable after having hard spots the other month while testing! The Speedo is accurate, fluke! Odo passed 44444 Trans needs an educated going over, would like a second opinion with engine timing and carb adjustment. Fuel and Temp gauges need tested, think I’ve fried the bimetallic strip while troubleshooting. Or the soldered wire somehow failed, because last time it was working, it’s was twisted together. Will then see how far I get on this lot of fuel and check how accurate it reads when It starts to cough. Surprising how sedate it is in the cabin with no carpet or anything.. I’m going to take a shitty Chang Bluetooth speaker to work tomorrow and see how feasible that is during the commute. Happy household!1 point
-
Finally collected the guard marker lamps. Made new rubber gaskets, cleaned them up and fitted them..they even work!
1 point
-
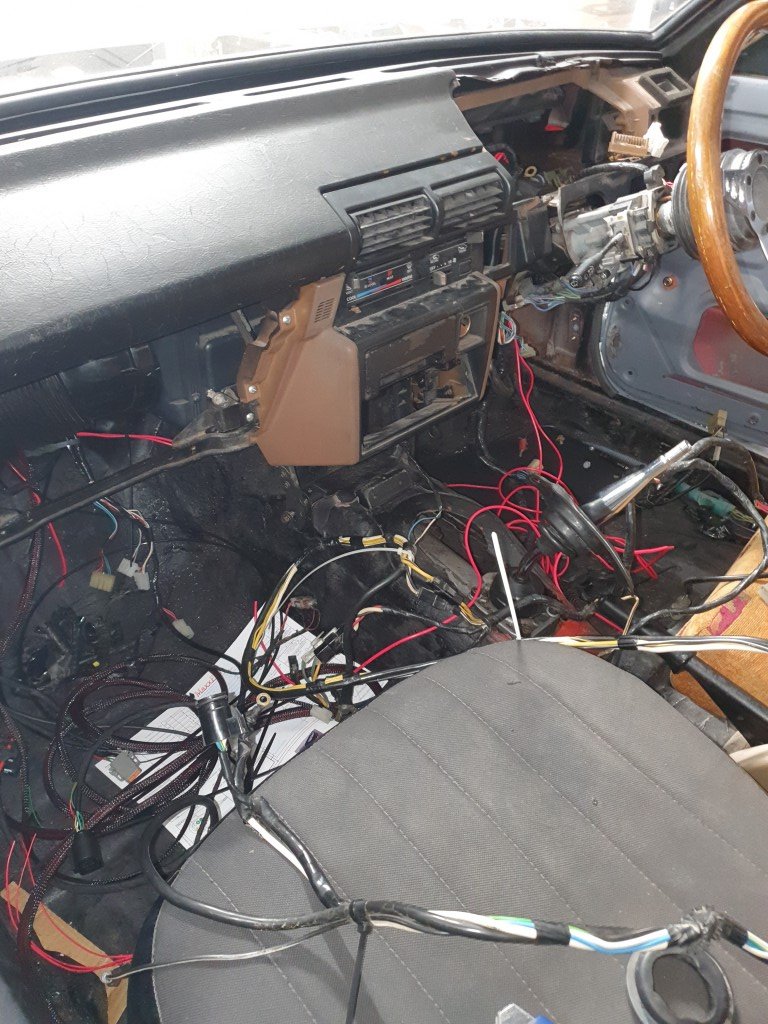
I’m still here, still chipping away! Deep into the electrical gremlins now. Not much worked when I first got it other than headlights, amp gauge and interior lights.. now I’ve coaxed out of it: reverse lights, charging, heater blower, wipers, brake warning light functions with e-brake, horn, all lights go but not properly or reliably when it comes to hazards and indicators. Ive got no dash lights and that means a broken circuit so that’s the main killer.. I dare say things will start to improve when they come back on. Still need dash dimmer,temp,clock,gas and the rest of the back-lighting eg radio and ash tray. I also hooked up all the vac and PCV stuff roughly so I could give it more of a time up and set an idle
1 point


.thumb.jpeg.e0a4bff61111e0c8c7396950fcc94da1.jpeg)

.jpeg.9bbbe9303ae71975d6df72a07366b7dc.jpeg)


This leaderboard is set to Auckland/GMT+12:00