
Leaderboard


Popular Content
Showing content with the highest reputation on 07/03/23 in all areas
-
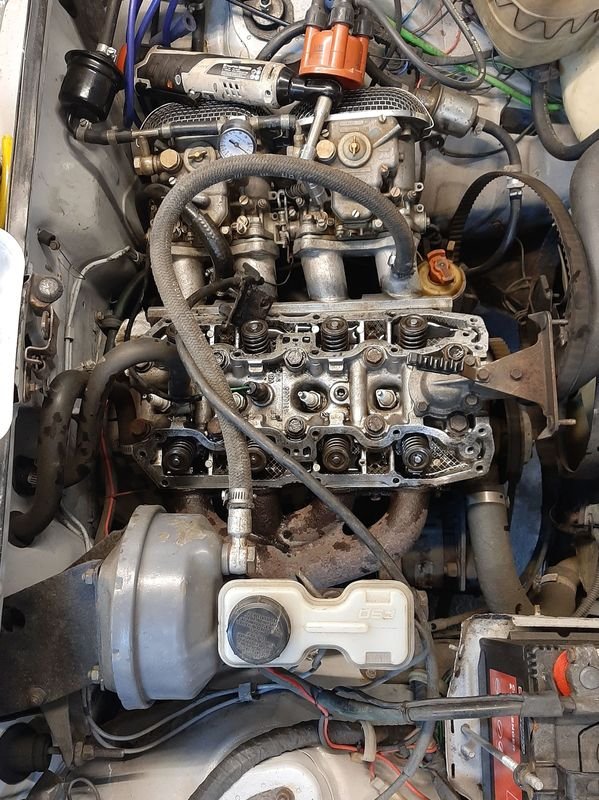
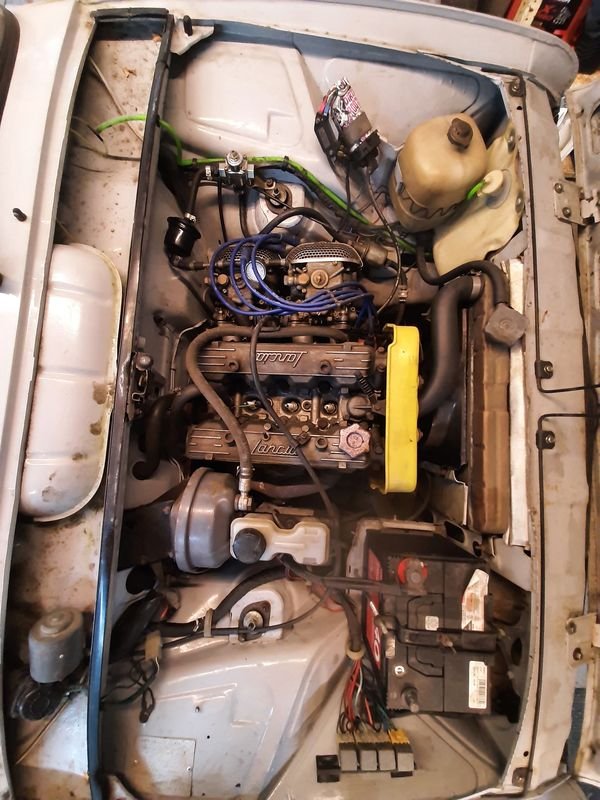
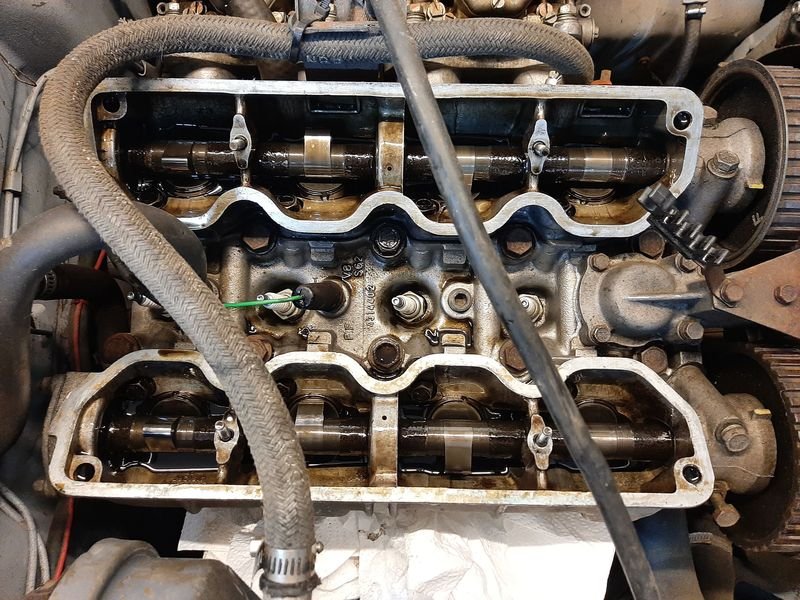
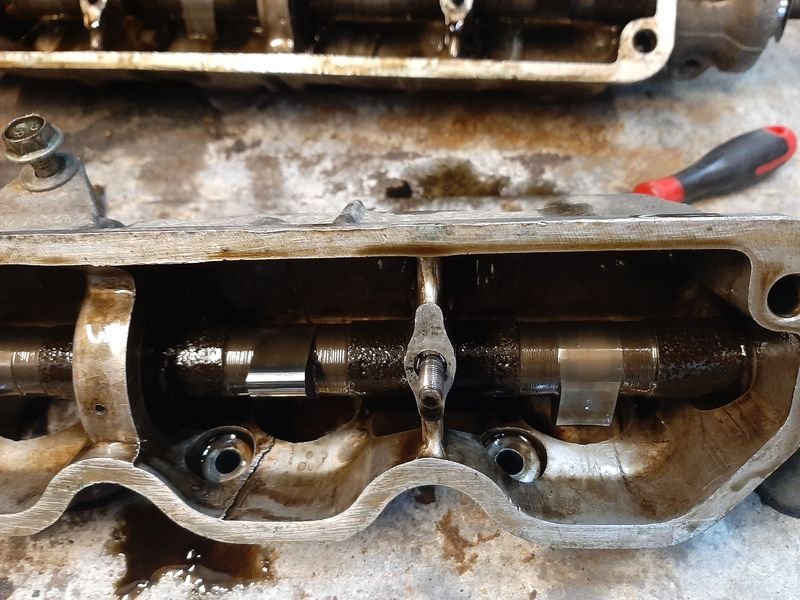
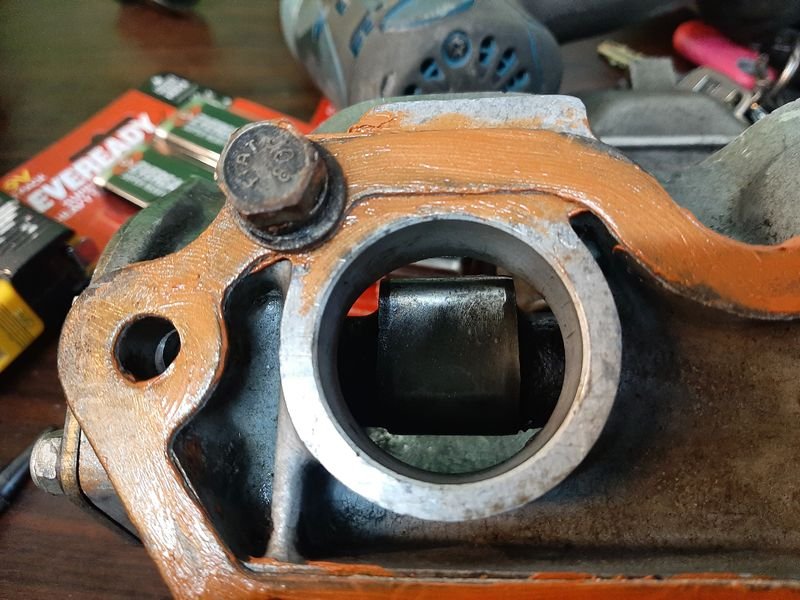
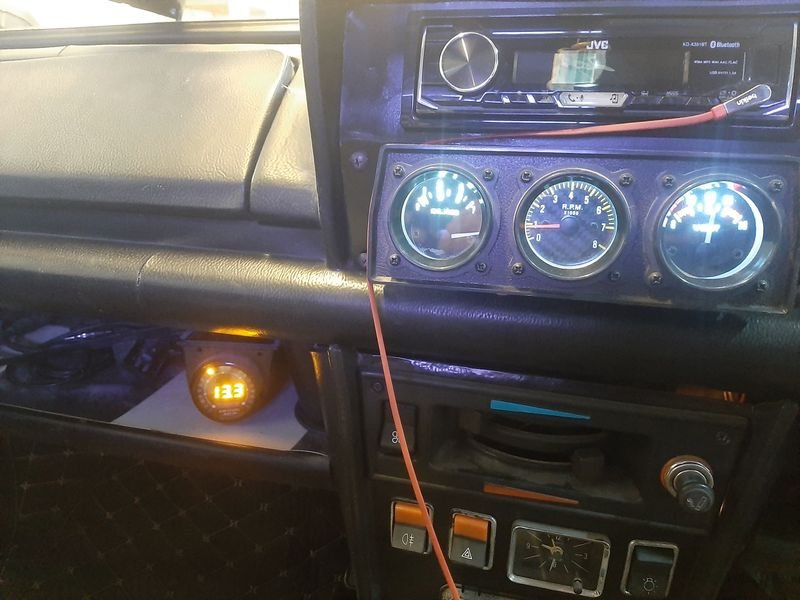
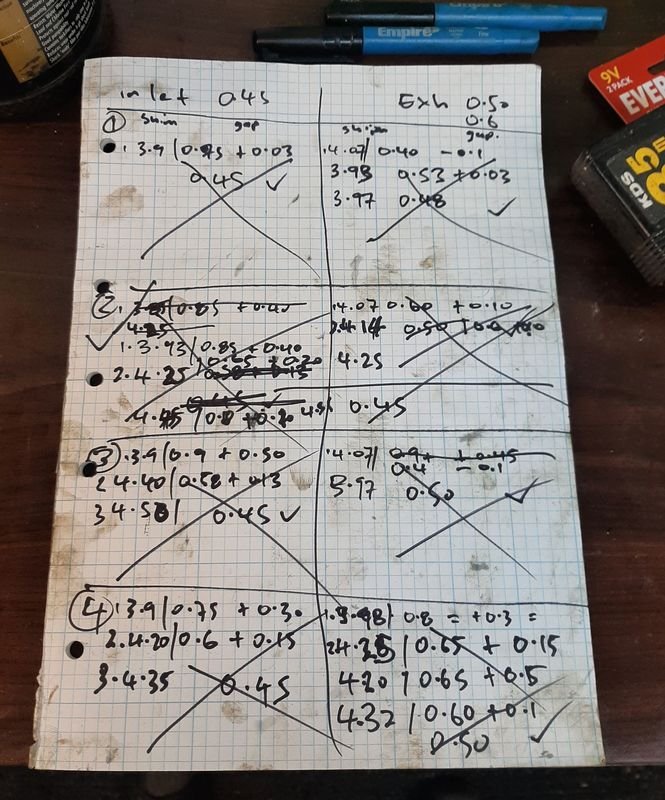
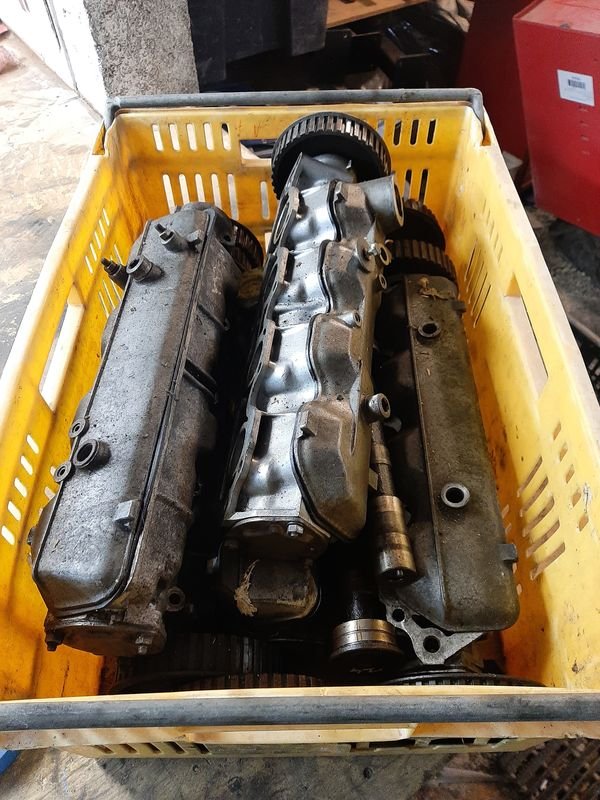
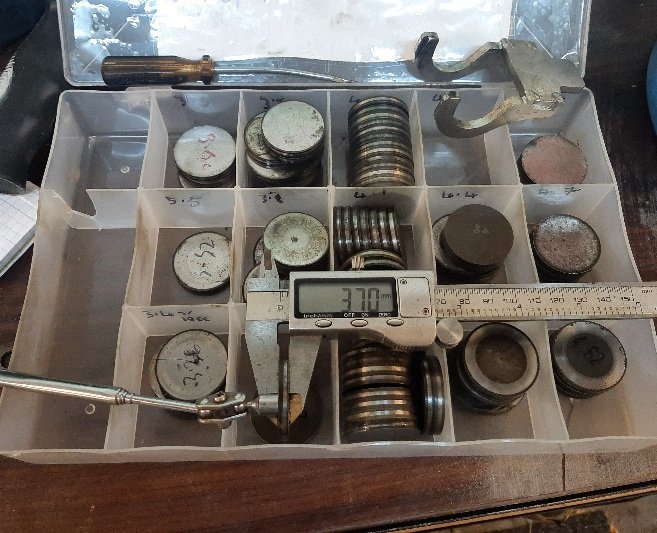
Drove this on some errands the other day and then my 125 and was reminded how different they are in terms of drivability despite being pretty similar set ups The 125 sedan has a 2 litre twin cam with twin 40 deloorrtos, and its smooth around town and has torque like an electric car, This wee truck on the other hand has a 1598cc twin cam with twin weber 40 dcoes, but it's never run quite right on any carb set up ive tried especially flakey at low speed, off idle etc, and no amount of carb fiddling would get a smooth idle, and not as much torque i would expect (accepting the 2l vs 1.6 makes a big difference) and an annoying tappet noise i could never shim out. So kicked Little Blue out onto the driveway with the van (update coming soon) and drove the ute into the cave for some engine work. --- When i tidied up the engine in the truck a few years back - and put a new 'big valve' head on along with the cams that came in it as per this post ... I should have swapped out the cams then for any number of good standard ones i had (still have) , but i didnt, i guess thinking it might be a hot cam or some such, hoping it was not just a crappy regrind So anyway, finally dug out my box of cams and cam boxes - most factory cams are pretty similar profile - but there is a nice set of late model 132 2l cams in a pair of boxed id cleaned, greased and regasketed when i got them ages ago in anticipation of eventually getting round tuit Time to dive in - cam covers off, can see the shims and buckets Cam boxes and buckets off, showing the valves ' Reground cam boxes on the bench - can see how the regrind reduced the base circle, and these are early 'narrow lobe' cams too, i measured ~8mm lift There is no obvious damage or wear (probably only driven a few 1000km since new), and while i didnt really measure anything (nor do i have the tools or patience to do it properly) i think just from feel the ramp is a lot flatter to me seems like they would 'slap' like a rolling triangle rather than smoothly roll like the eggier shape of the factory ones (which would explain the noisy tappets) and could be imagining it but i suspect the lobe points not all exactly 90 deg from the others making one cylinder (or more) not quite perfectly in time with the ignition and cylinder which would also explain the choppy idle and poor running generally - crappy warranty regrinds... Looking back up through the cam bucket guide at later 'wide lobe' cams (note how the cams just clear the buckets), probably ex a 2 litre 132, with ~9.5mm lift relative to base circle - what looks like rust is my copper rtv finger prints in the storage lanolin grease the shims for setting valve clearance (inlet 0.45, ex 0.5) are on the top of buckets, need a special tool to hold the buckets down, a pick and a magnet and sometimes the air gun to pop them out, as well as a bunch of shims Tiem to dig out the shim box! including special bucket holding down tool, specially bent and ground down screwdriver/pick for poking the shims out of the bucket, and handy dandy magnet. as you can tell from my collection, most standard scenarios are in the 4.00 to 4.20 range, the ground cam i took out were in the larger end Set all the clearances - following my 'foolproof' system... As above its a bit of a faff to adjust the valve clearance, not so much the actual swapping different thickness shims on the cam bucket, but mostly the admin of rotating the cam shafts and fiddling with a bunch of quite different tools - verniers and 19mm spanners at the same time. A bit easier with teh cam belt off and pistons at half mast, but still a faff. rotate camshaft so lobe is pointing away from shim surface Measure the gap with feeler gauges, largest able to fit without forcing (say 0.65mm), write it down calculate required shim size target on these cams is 0.45 inlet and 0.5 exhaust, so if our gap is 0.65 the gap is 0.20 too big for the inlet cam, measured gap MINUS target gap = the difference from the current shim you need, positive = thicker to close the gap, or negative value means you need a thinner shim to open up the gap. required shim that is the current shim (4.05) PLUS the difference (+0.20) = 4.25 in shim collection (if we needed a thinner shim, 4.05 plus -0.20 = 3.85) Rotate cam shaft so cam is pushing bucket/valve down, insert special tool, rotate a bit more so tool holds the bucket down, dig out the old shim shim with a pick, and a magnet, a blast of shop air will pop most of them if they are vacuumed in install new shim, write down size in book rotate camshaft to release cam tool see step 1 Proof of how simple it is, i think i did each valve at least twice, one up to 5 times Next day, tuning Fired up first time and a lot quieter, and even idled from cold. Thats better than its ever done (it had always needed some throttle feathering before) After adjusting the ignition timing and good 2 hr fiddle with the Manometer, ir thermometer on the exhaust and teh wideband i even as i've ever got them. Dropped the idle jets down to 50s (from 55s) before, should be on 45s for an engine of this capacity Managed to drop the idle to (a stated) 900 at 13-14AFR, previously wouldn't run smooth under 1200, at about 11.5-12AFR but also have a mean lean spot off idle (plugs were pretty dark before) Seems to run a lot better now, need to give it a run on my 'test track' to see if it actually is, but i decided probably not ideal weather for fiddling with carbs on the side of the road today
 22 points
 -
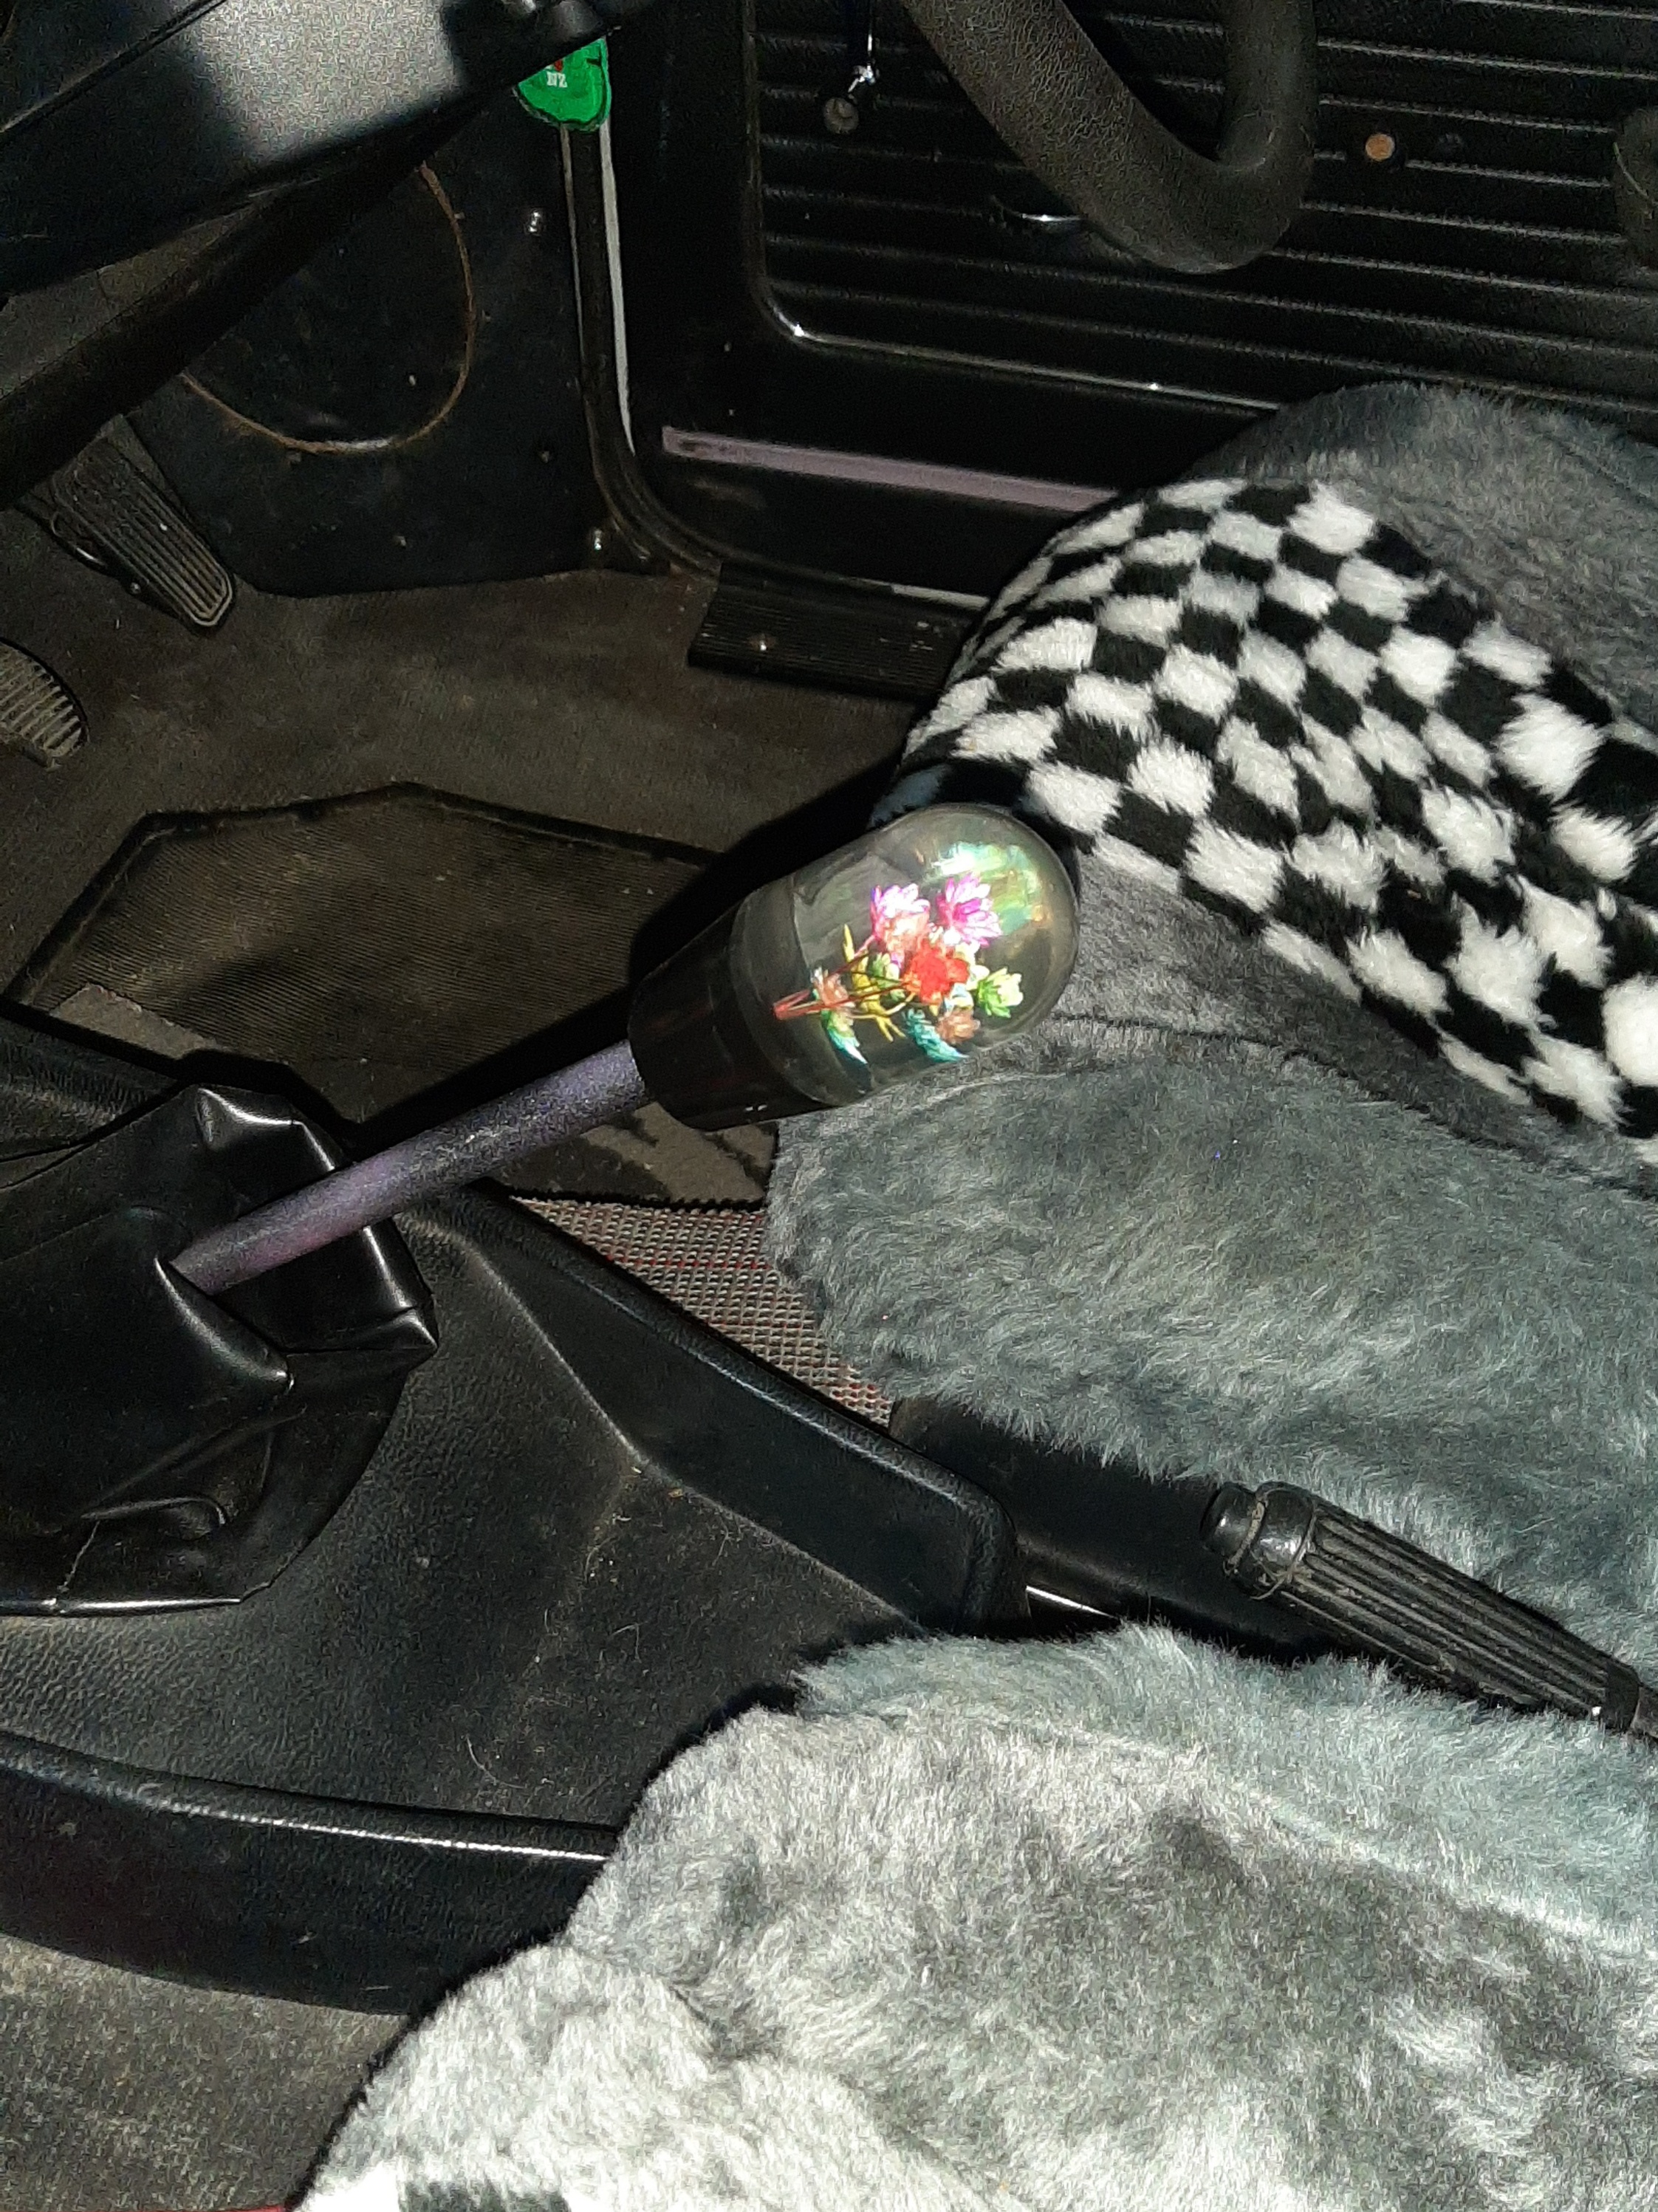
Did this for the lolz with my new printer;15 points
-
so it should fit 15x10s at -44p, 33x12.5 MTs and poke out 15mm so ill run plastic fenders , omg Im good at photoshop
11 points
-
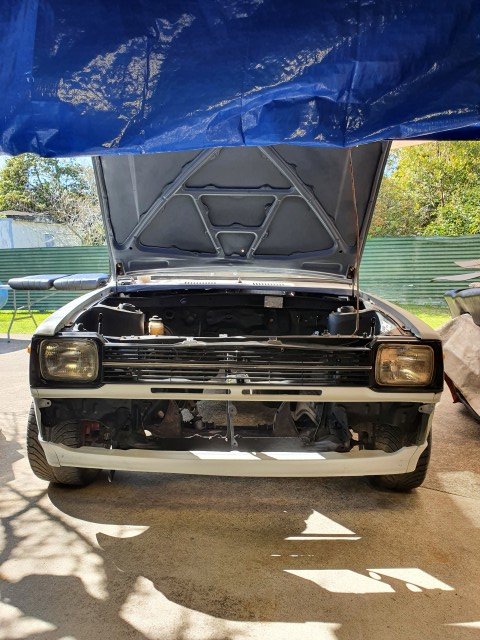
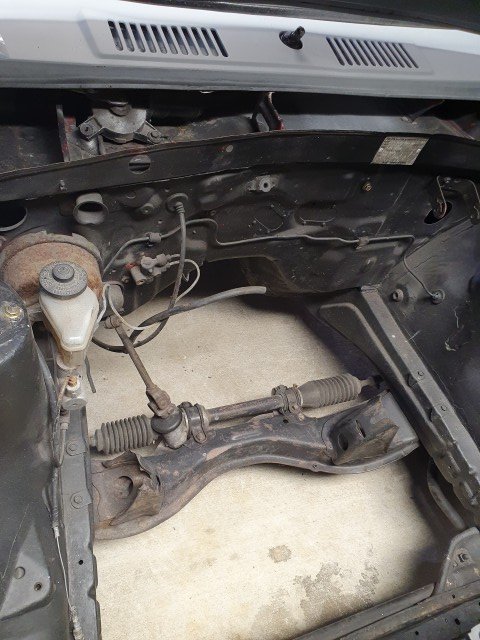
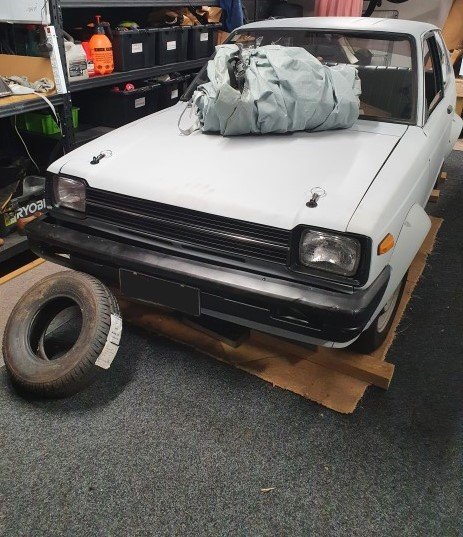
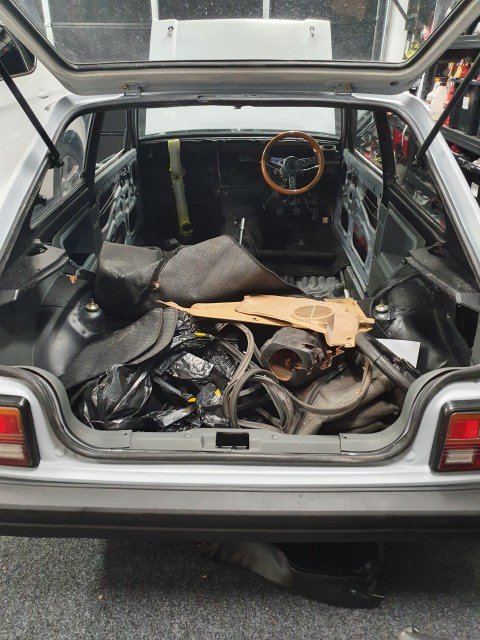
Discussion thread: G'day team OS, Owning an E30 in my youth meant we made terrible mistakes in usernames, but now getting close to being thirty, I guess its kinda fitting. Maybe, just make better choices when choosing usernames. Anyways.... We thought it was a fantastic idea alongside having a half completed Mini Clubman (a project, but legal and runs well. Just looks like a POS) and just having a newborn that we buy another longer term project car. In consultation with my better half of course, we bought a rego on hold, primed shell of a KP Starlet because you know, we naively thought there would be time to take on a project like this. Its arrived with all the interior bits floating around, about 3 different cut up body looms in a rubbish bag and some other extras. No running gear. Most the rust has been cut out hence the primer. The big sell was, it is a live shell and certed for a 4AGE & modified suspension. All we needed to do was source the running gear and we'd be in business? Famous last words. As it sat on the PO's driveway (Note: didnt come with the wheels pictured). Gregg was an absolutely great guy to deal with, have still kept in touch for bits and pieces. He owns a VERY well built turbo 4AGE KP now. After a quick discussion over a pie out at a lovely beach in Beachlands with my very good Toyota Century owning friend, I decided to take the plunge. The plan was to borrow our builder's car trailer and head up the following weekend out East to collect it. Its at this point im glad I had a Triton with a towbar, as I dont think our new glued together Haval would be capable. The following weekend, we drive down. Load up. Lose my hi viz along the road, but we make it back home. The Mini got reshuffled and here it is sitting in what will be its new home for the foreseeable and unforeseeable future. Boxes of parts. Mini: KP: I've always loved these. Prior to looking for a KP, I was keen on an Imp but they were either too far gone or just unable to be made road legal. I prefer the slant front, however the flat front has grown on me especially while following Ritchie's built which is somewhat a source of inspiration (this wont get to that level of build, but we can all dream). The idea was to build something road legal we could use on autocross/grasskhana/skid pan type events and not worry too much about breaking it. As always, my goals arent ever to make much power, its about reliability more than anything. Plus I could live out my dream of having fender mirrors and small Japanese wheels. Mainly documenting so its online for all the bits and pieces I couldn't find too much information on in the hopes it helps someone along the way. Build Overview: 4AGE 16v with ITBs, COP T50 22 Spline gearbox MaxxECU Street Standard diff (although have a good lead on a T Series) T Series RA29 diff Stripped out but tidy interior Reinstate half cage (Can see where the old one was due to the foot plates) Recaro Fishnets Generally put the thing back together
10 points
-
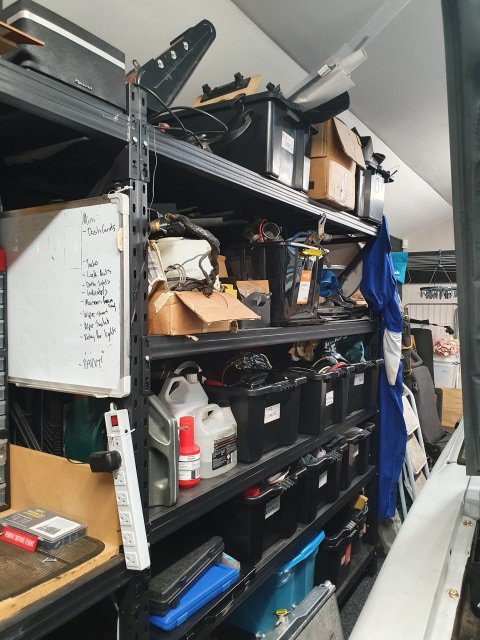
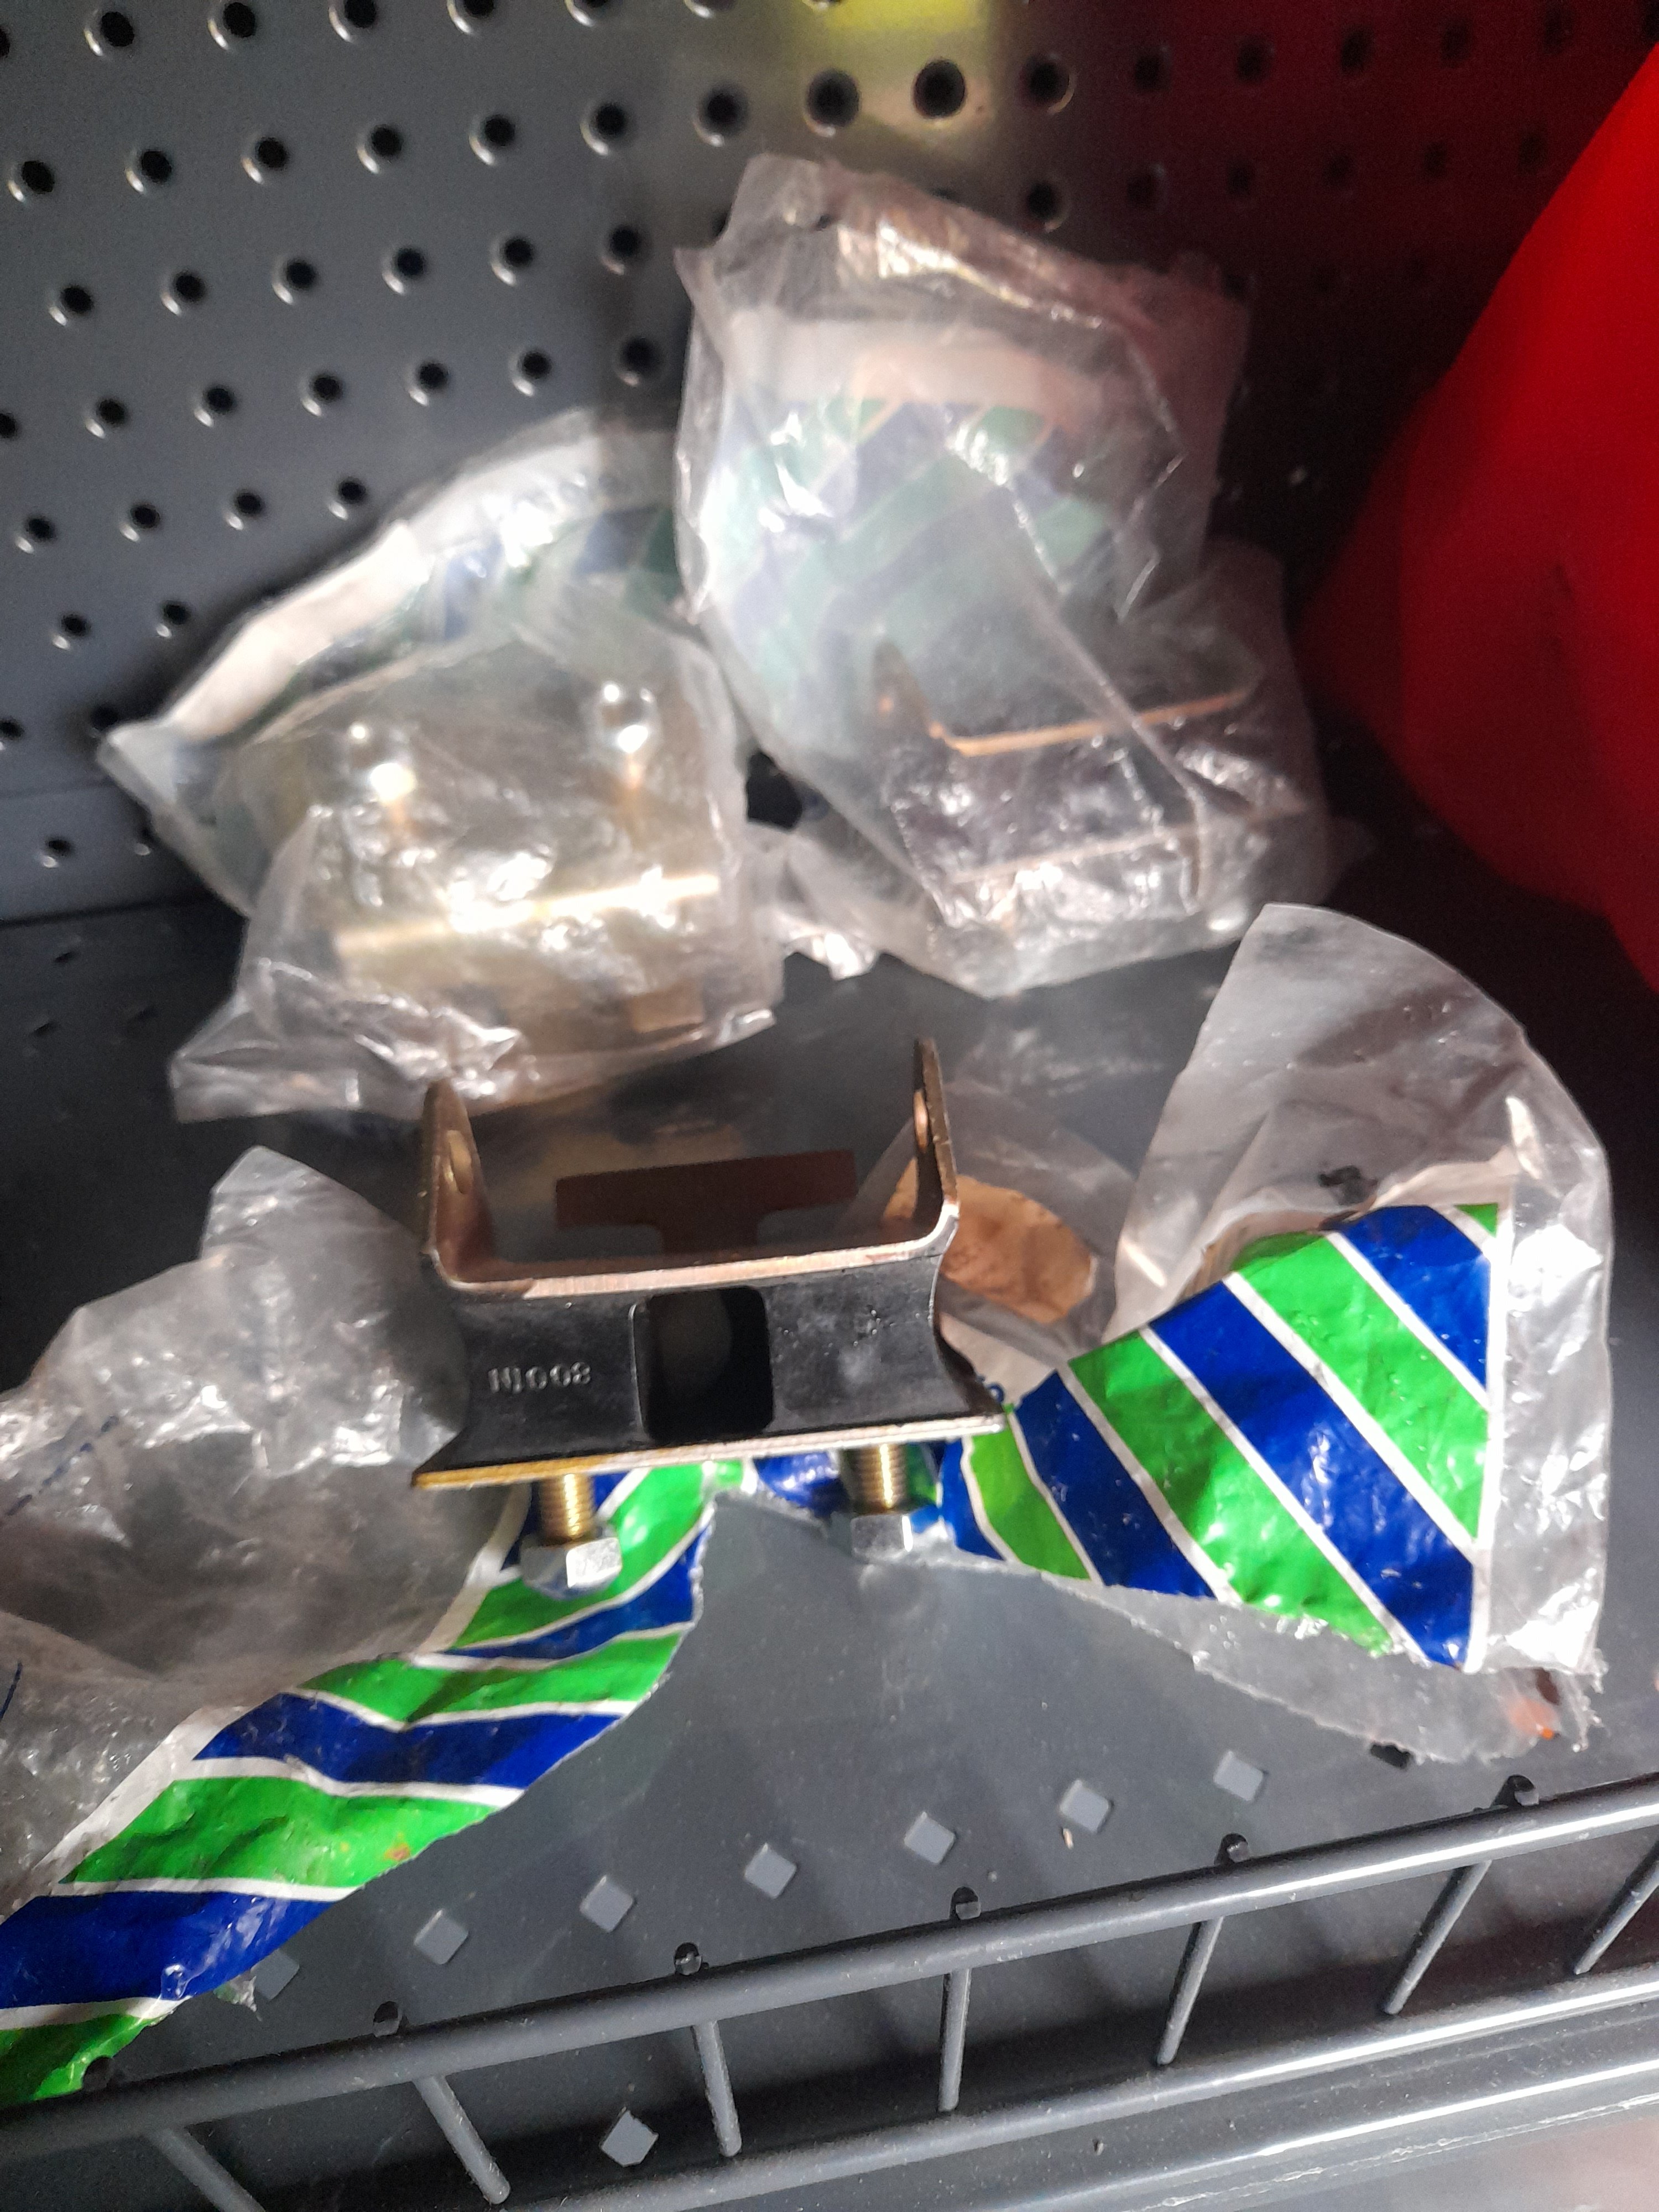
Car is still outside. Having a shed refit and cleanout currently so hopefully that will change soon. Haven't completely been neglecting the car though, found these urethane engine mounts on clearance so bought the last 3. Can't hurt to have a spare.
10 points
-
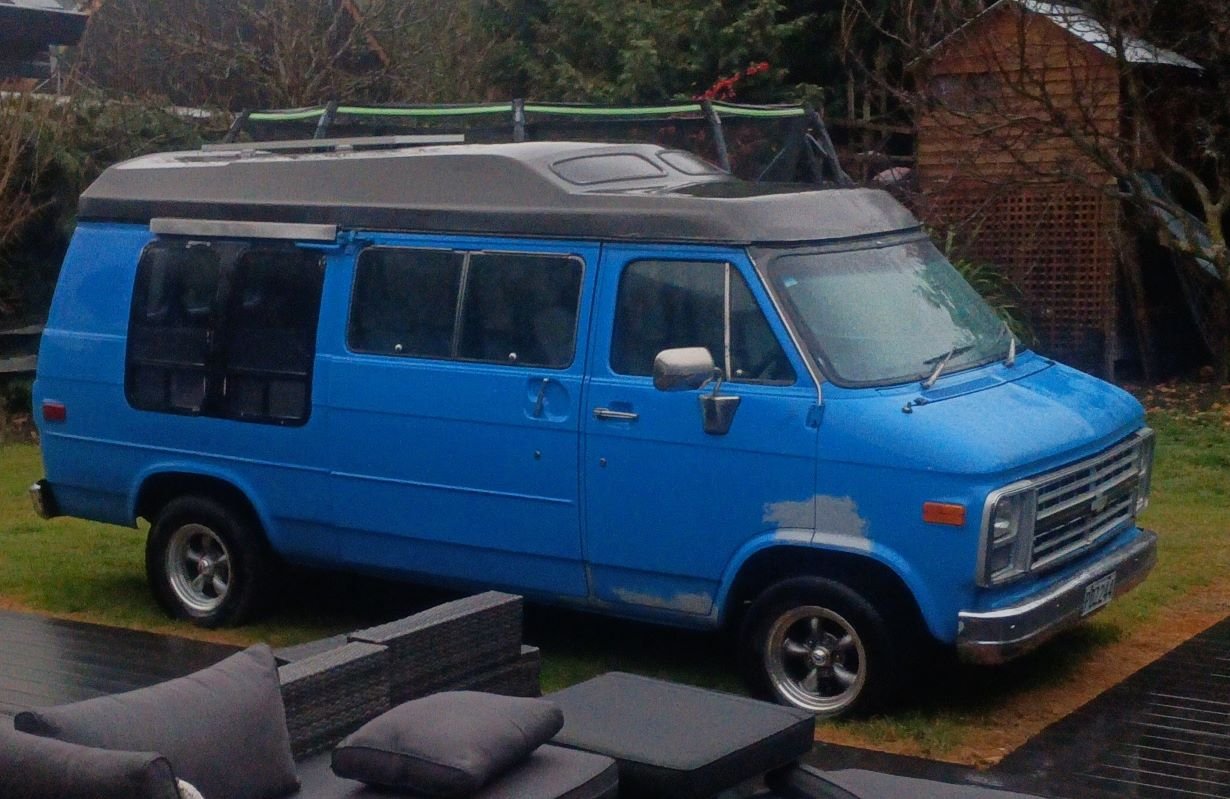
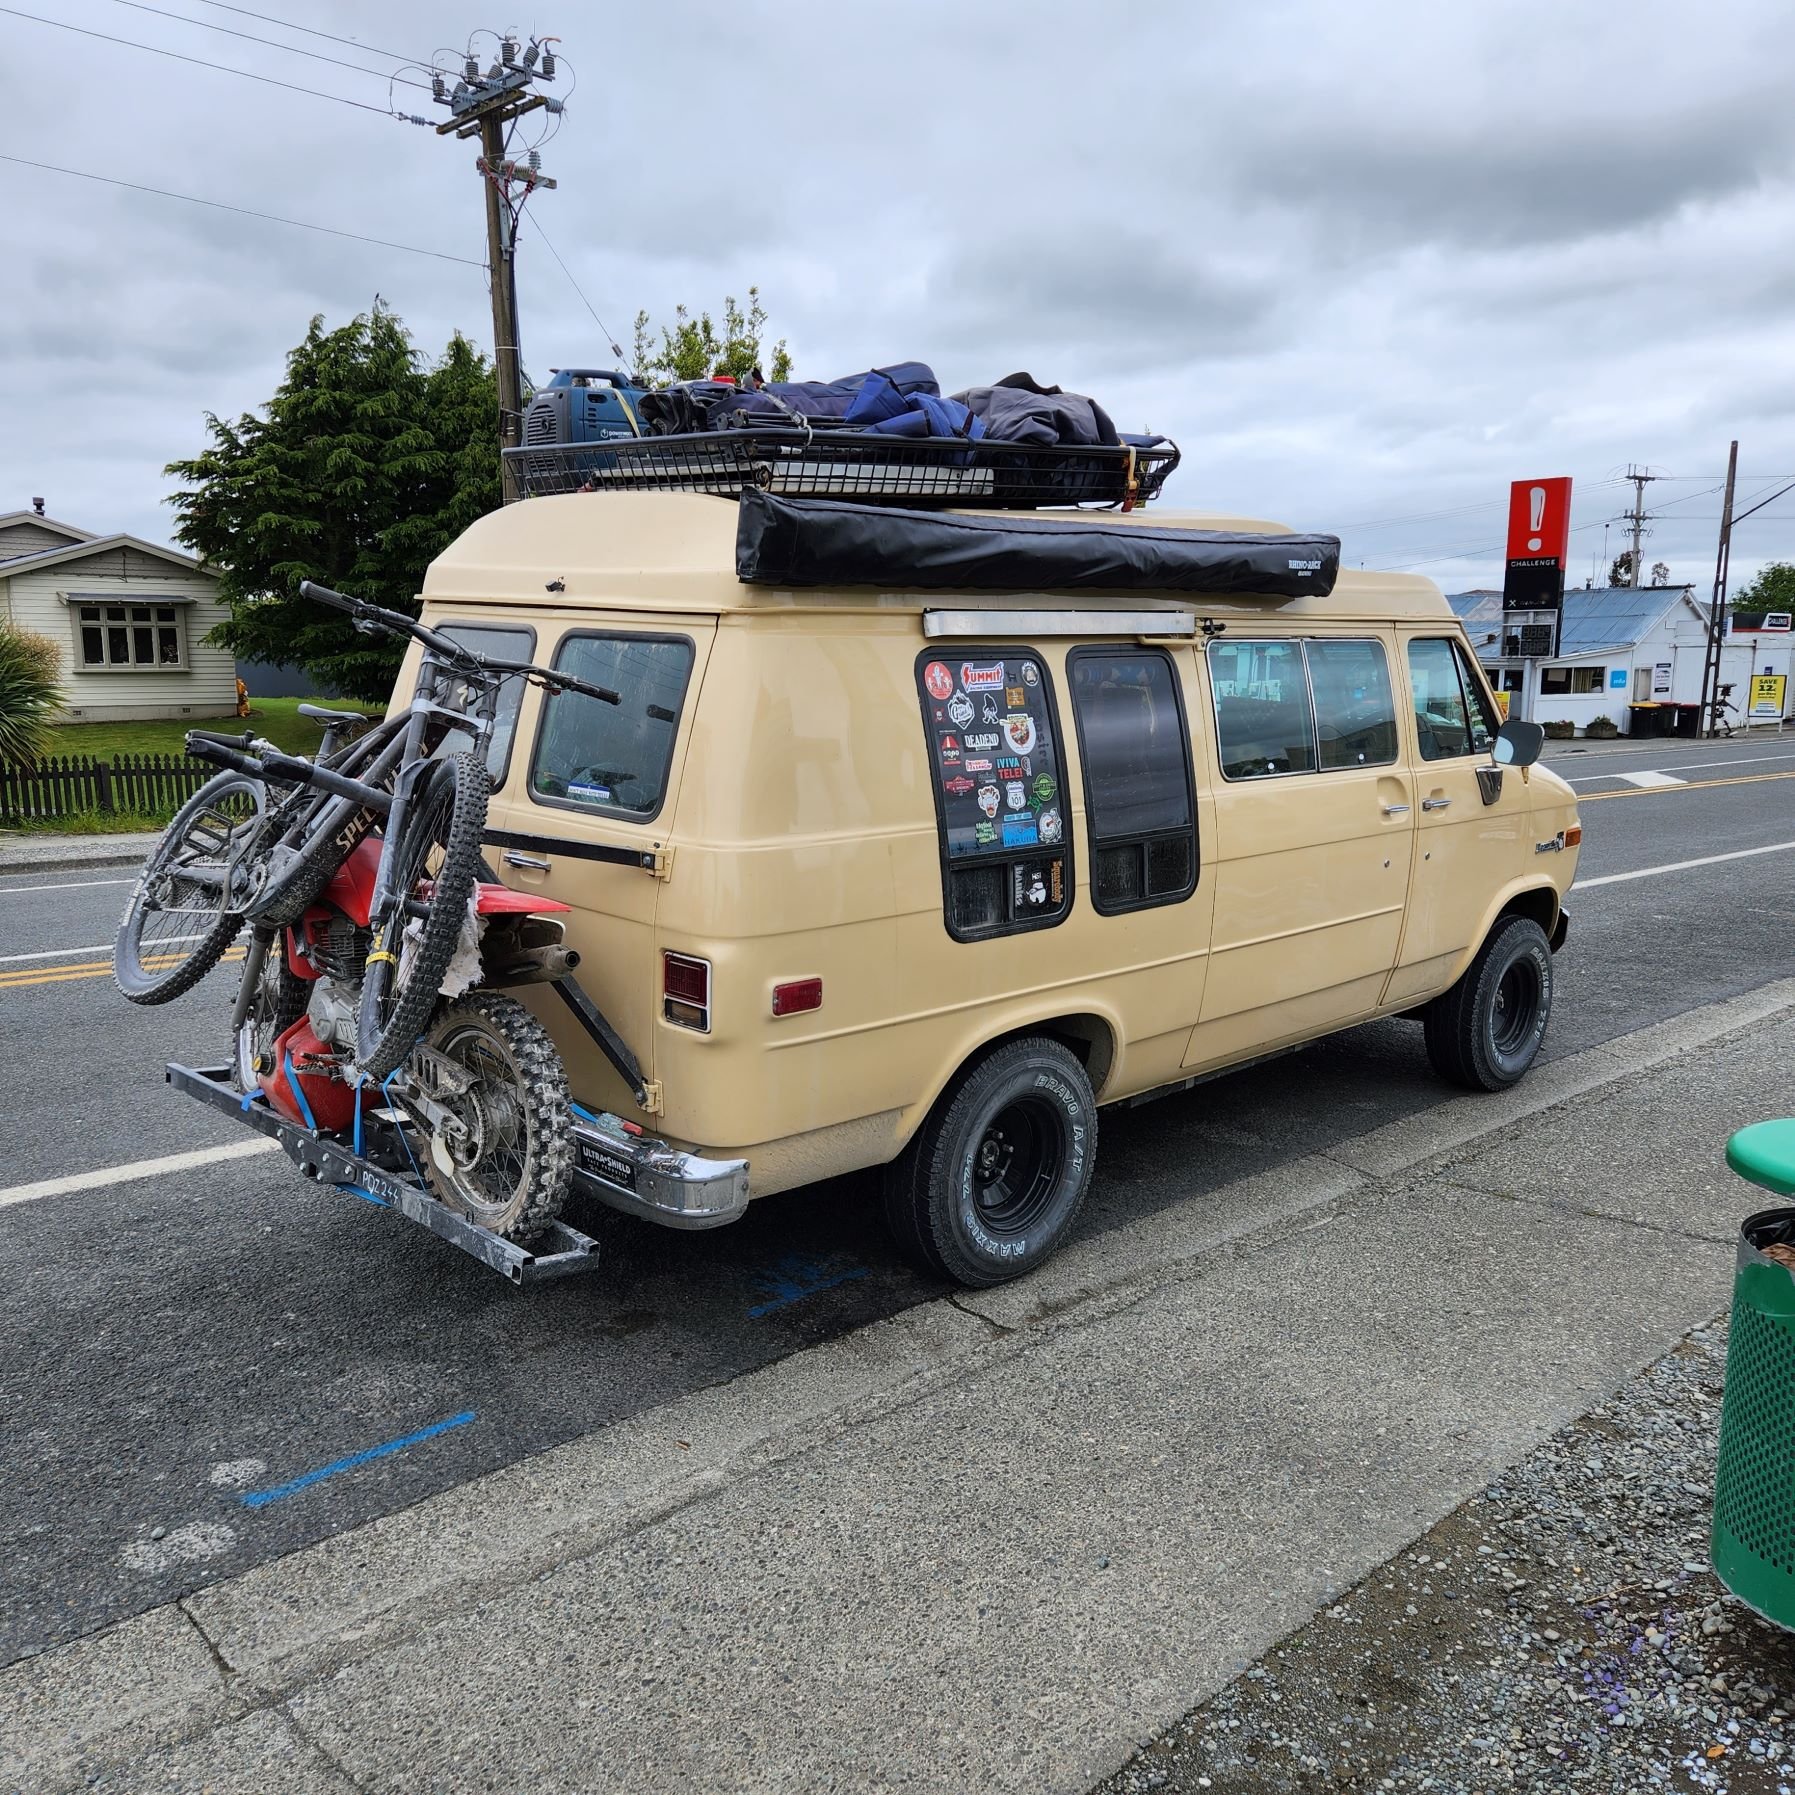
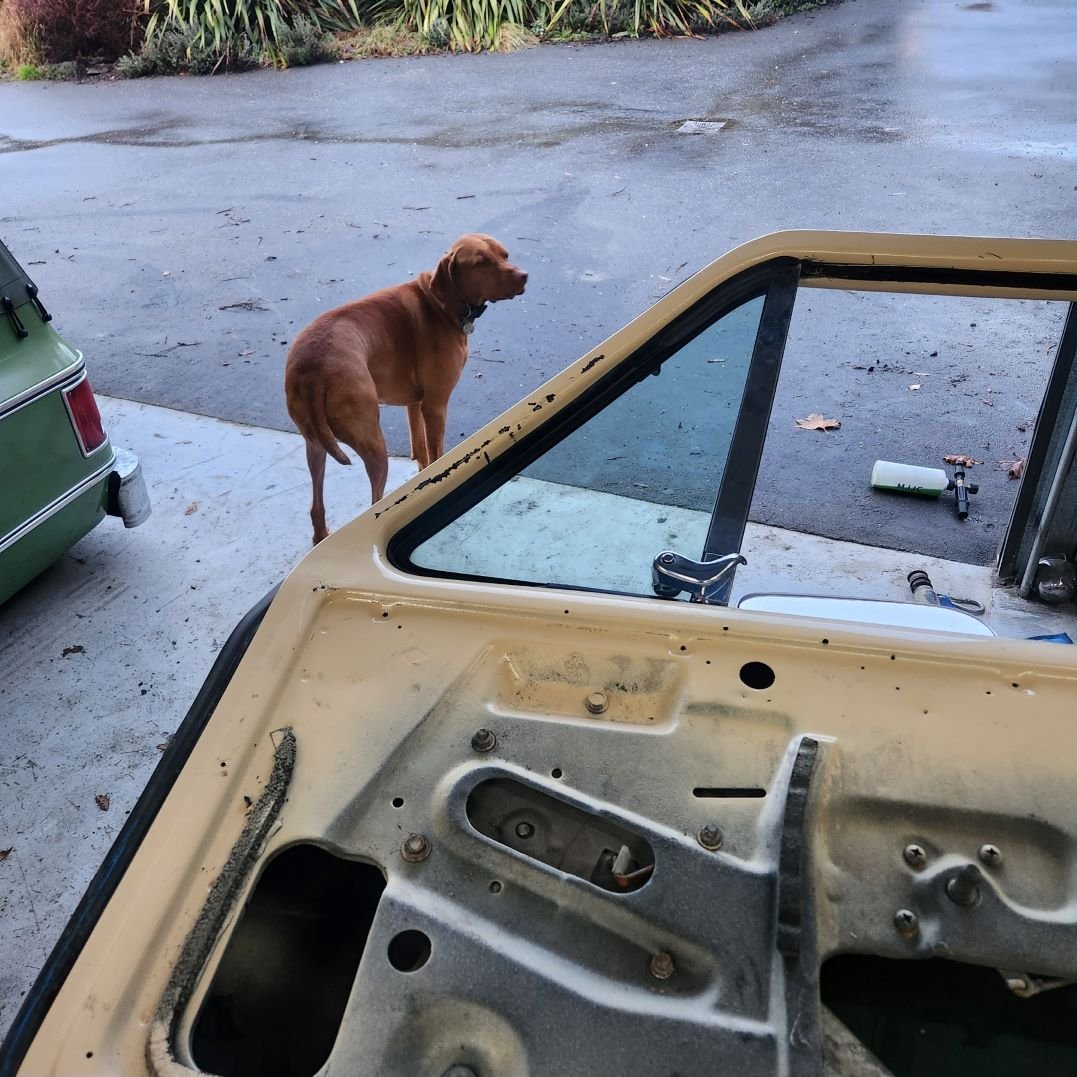
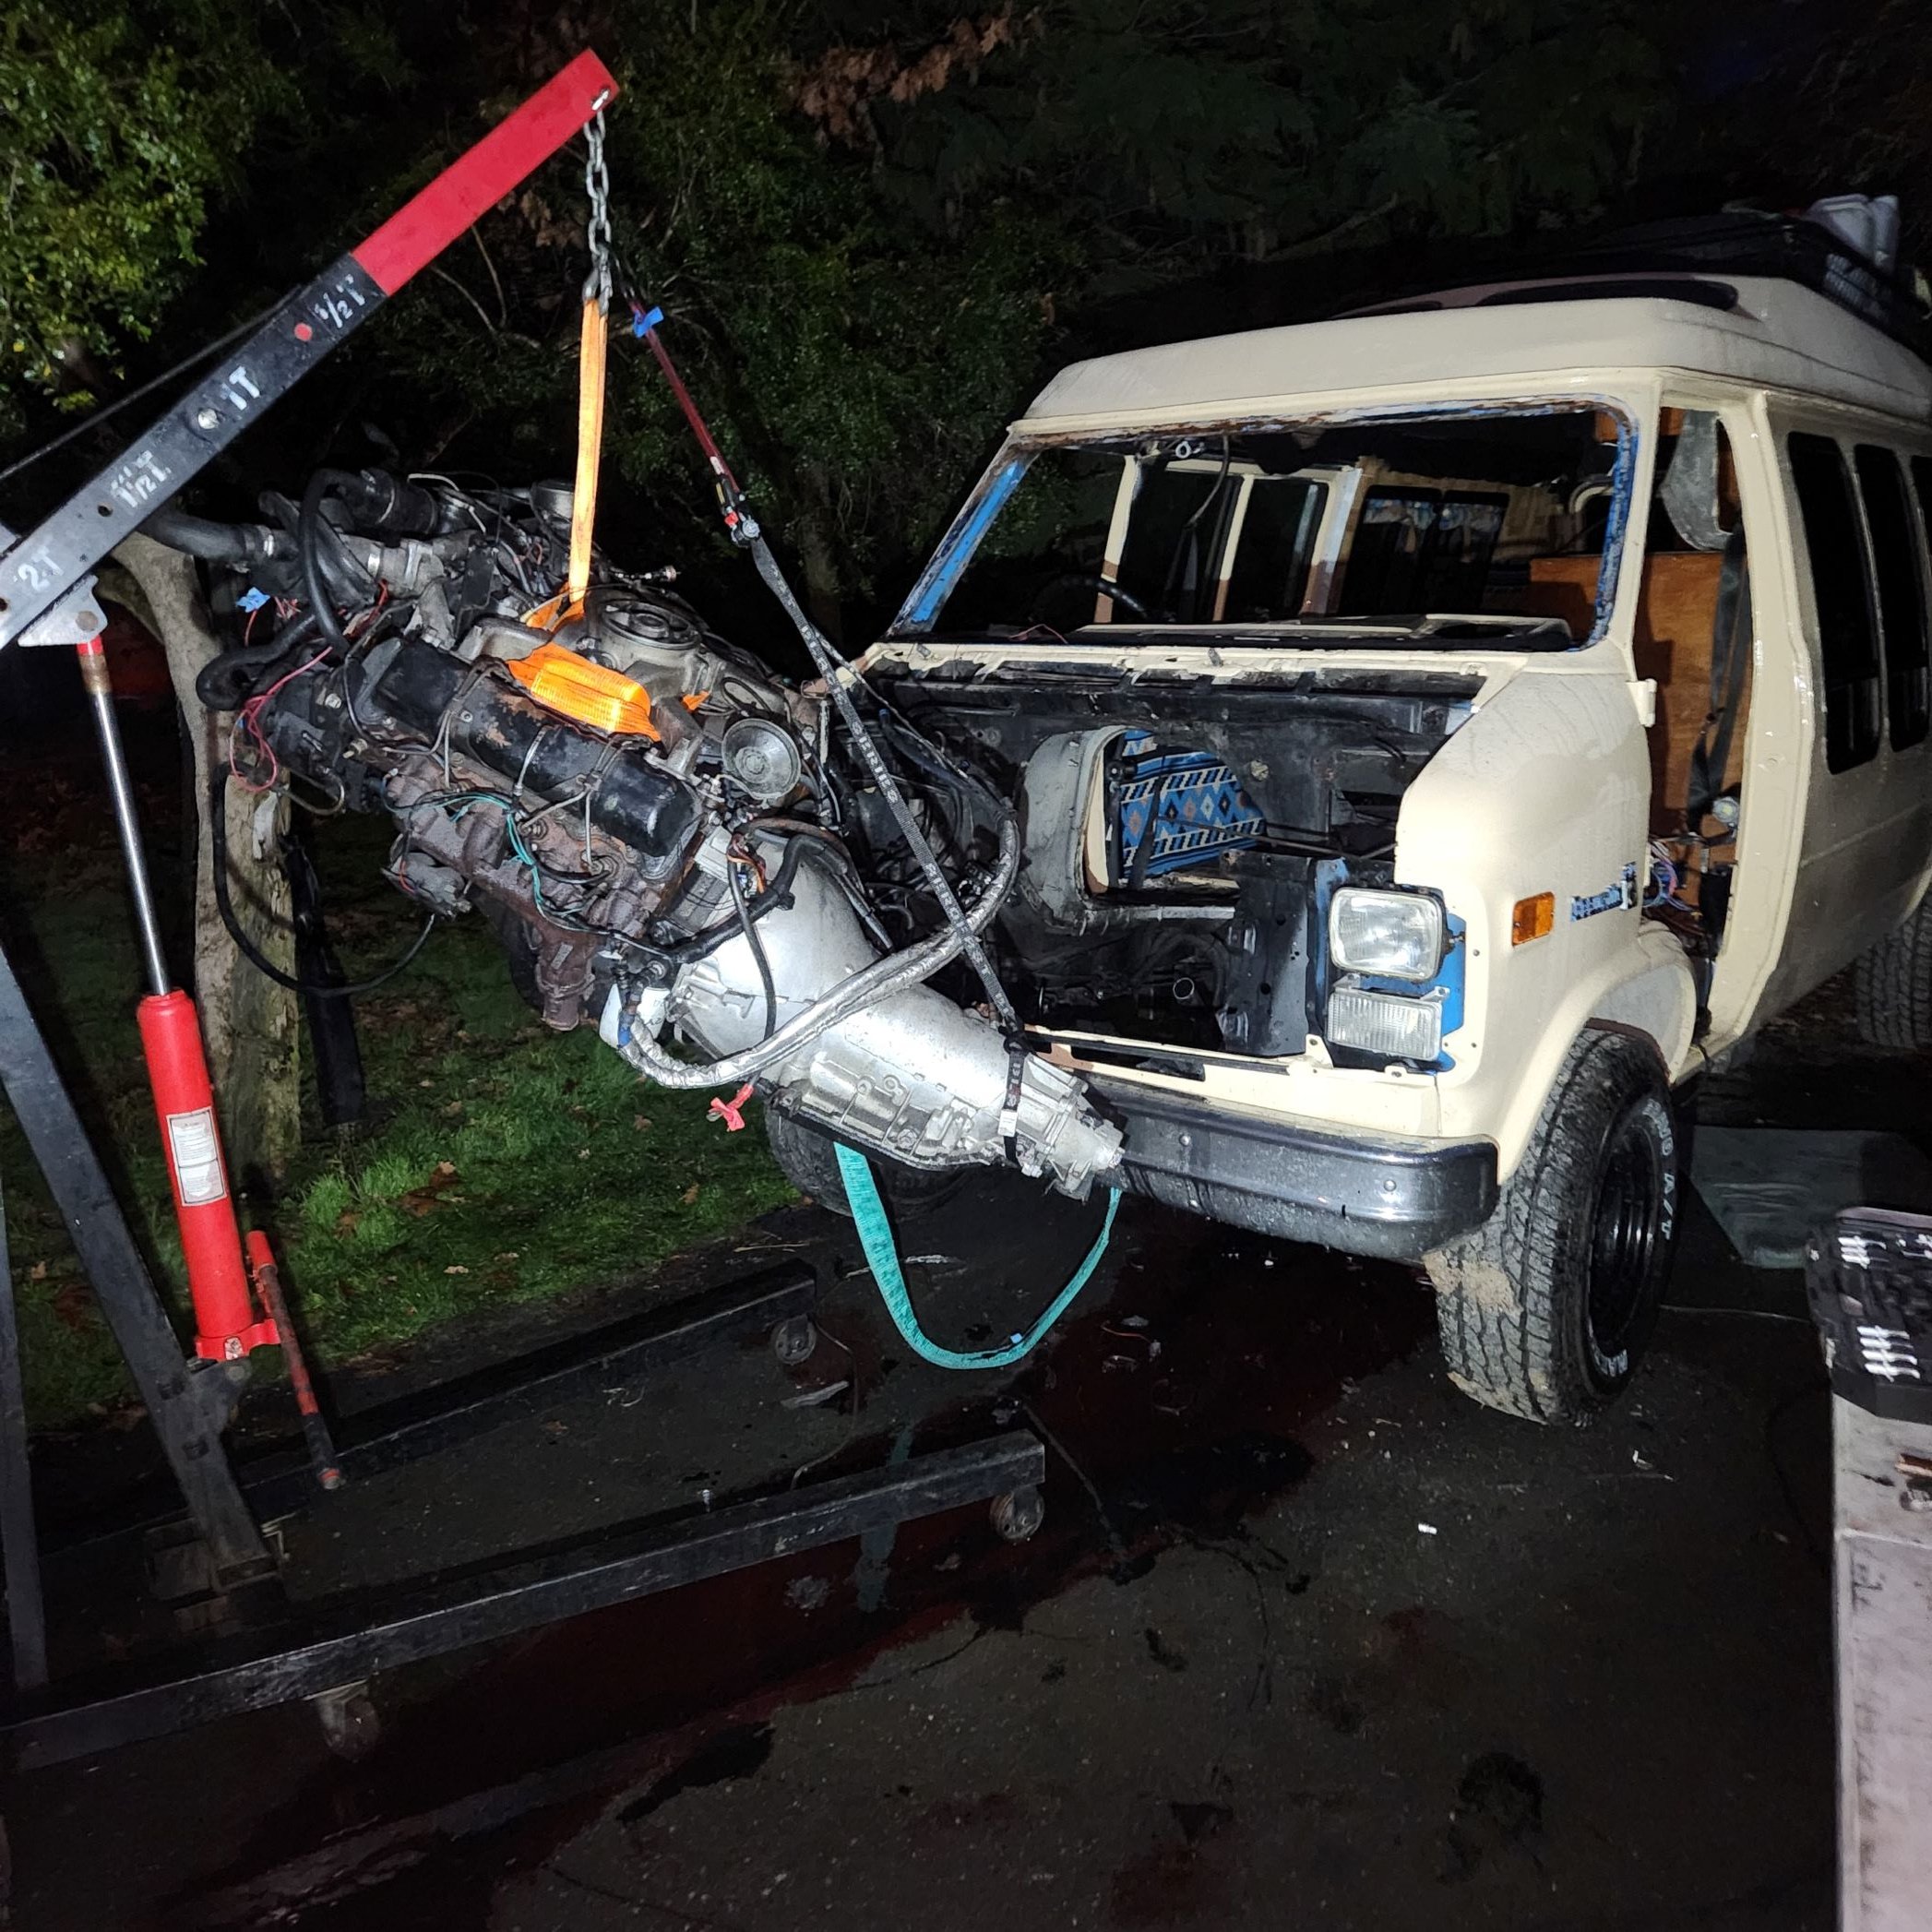
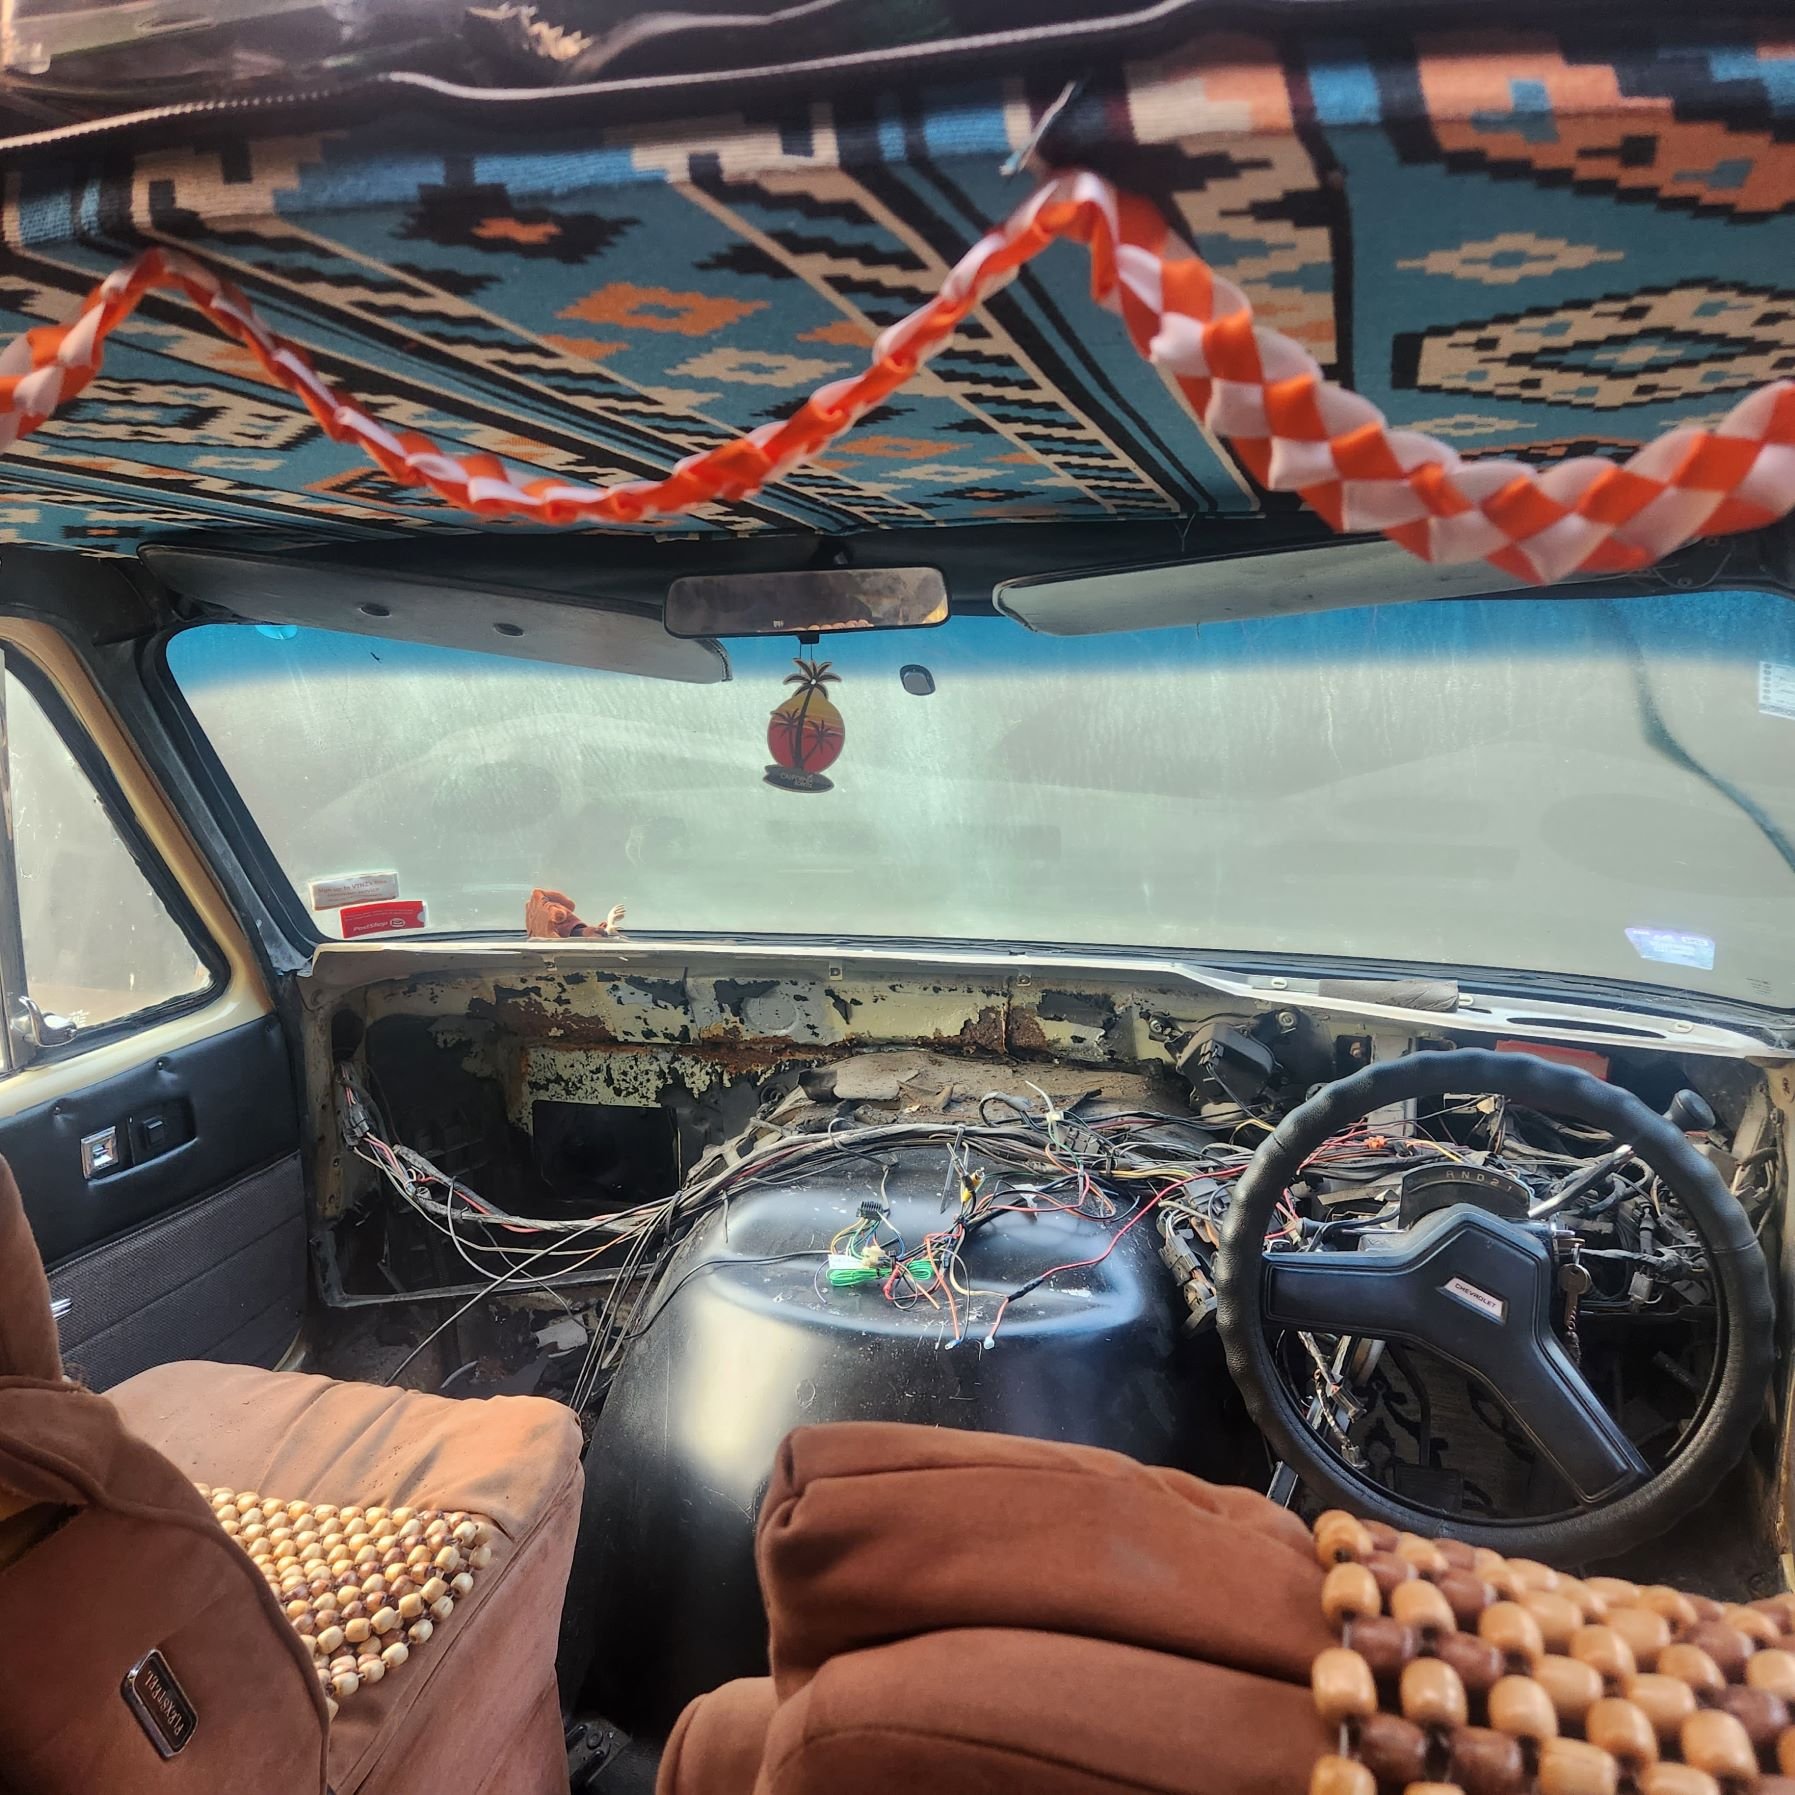
This is my G20, I got it a year ago after a trip to the US and deciding I couldnt live without one. Originally I looked at importing one as I wanted something 4x4 but alot of the conversions looked pretty shit and I didnt fancy my chances of getting one road legal here, that and the 12k odd shipping cost put me off. There were a few for sale here but mostly newer with TBI engines and just werent quite right. Then I found out a mate down south had one, road legal, diesel 2wd, 84, RHD, cheap, you beaut ! main issues were the colour and it smelt like soup kitchen, some dude had been living in it apparently, and sounds like he enjoyed a dart or 10 Plate I wasnt allowed So I drove it home and started planning, gutted the inside and got it over to the painters, similar colour to and old car I had and made new kitchen and beds etc, drove the shit out of it last summer, so good having a bit of space and sliding door. I drives good, stops good, steers good
8 points
-
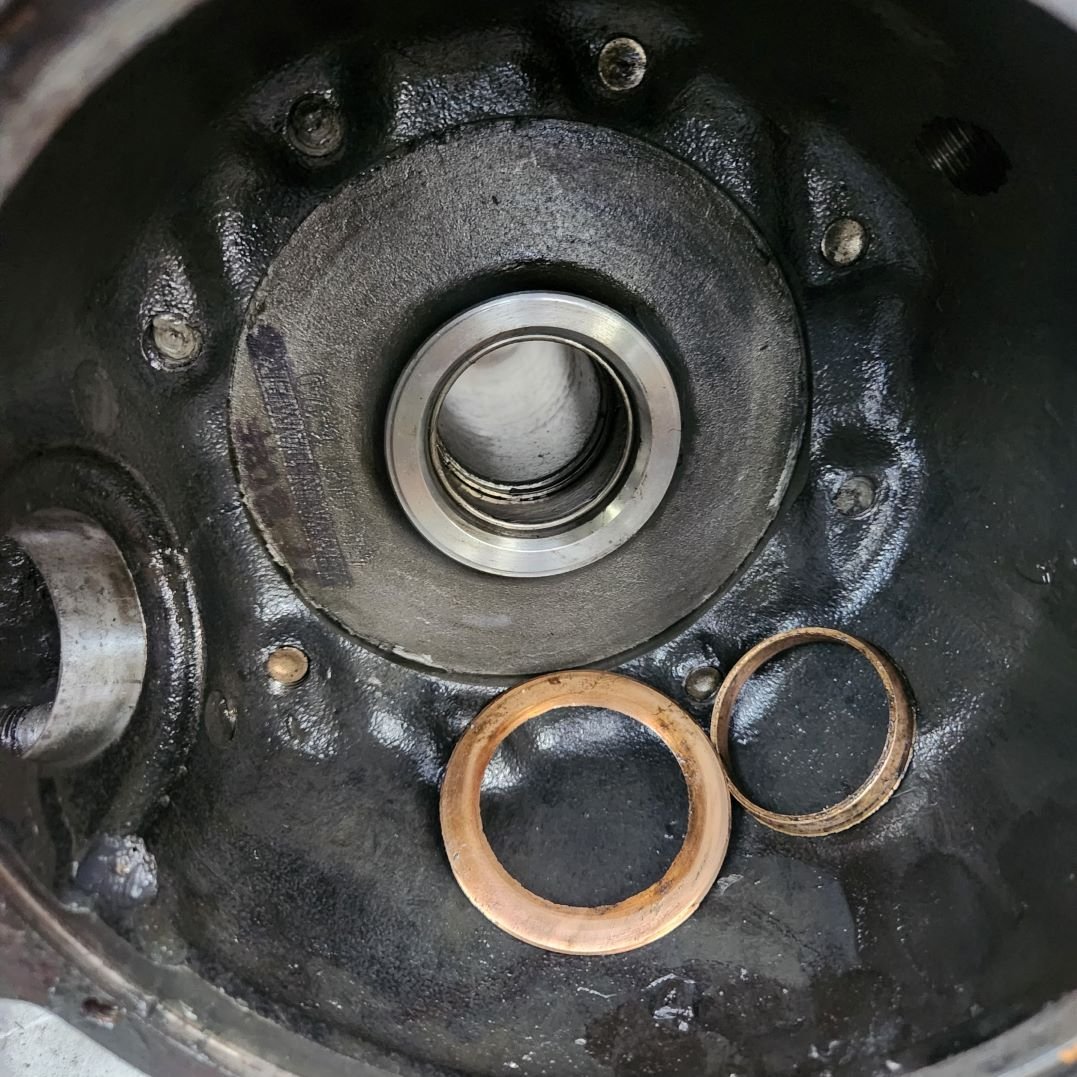
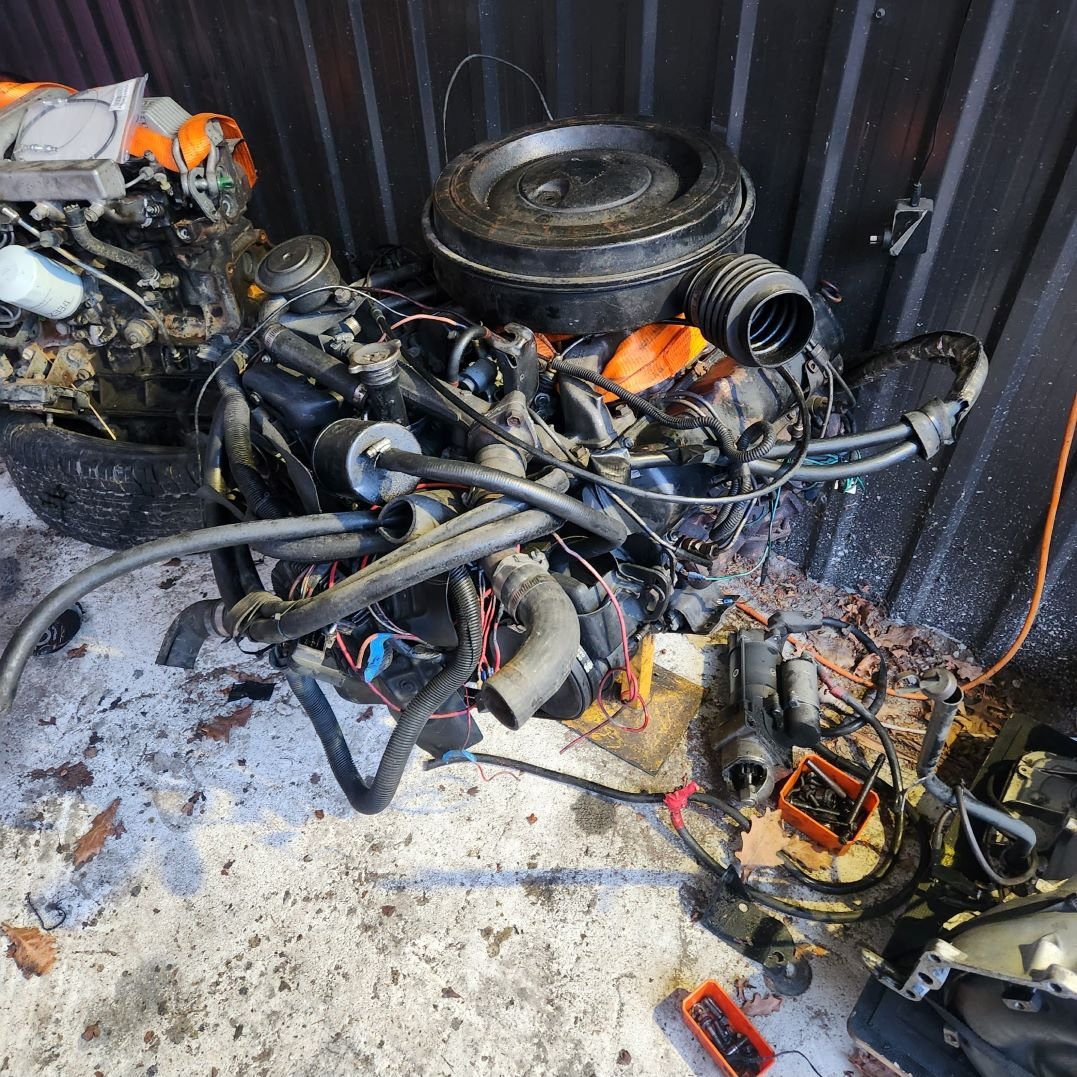
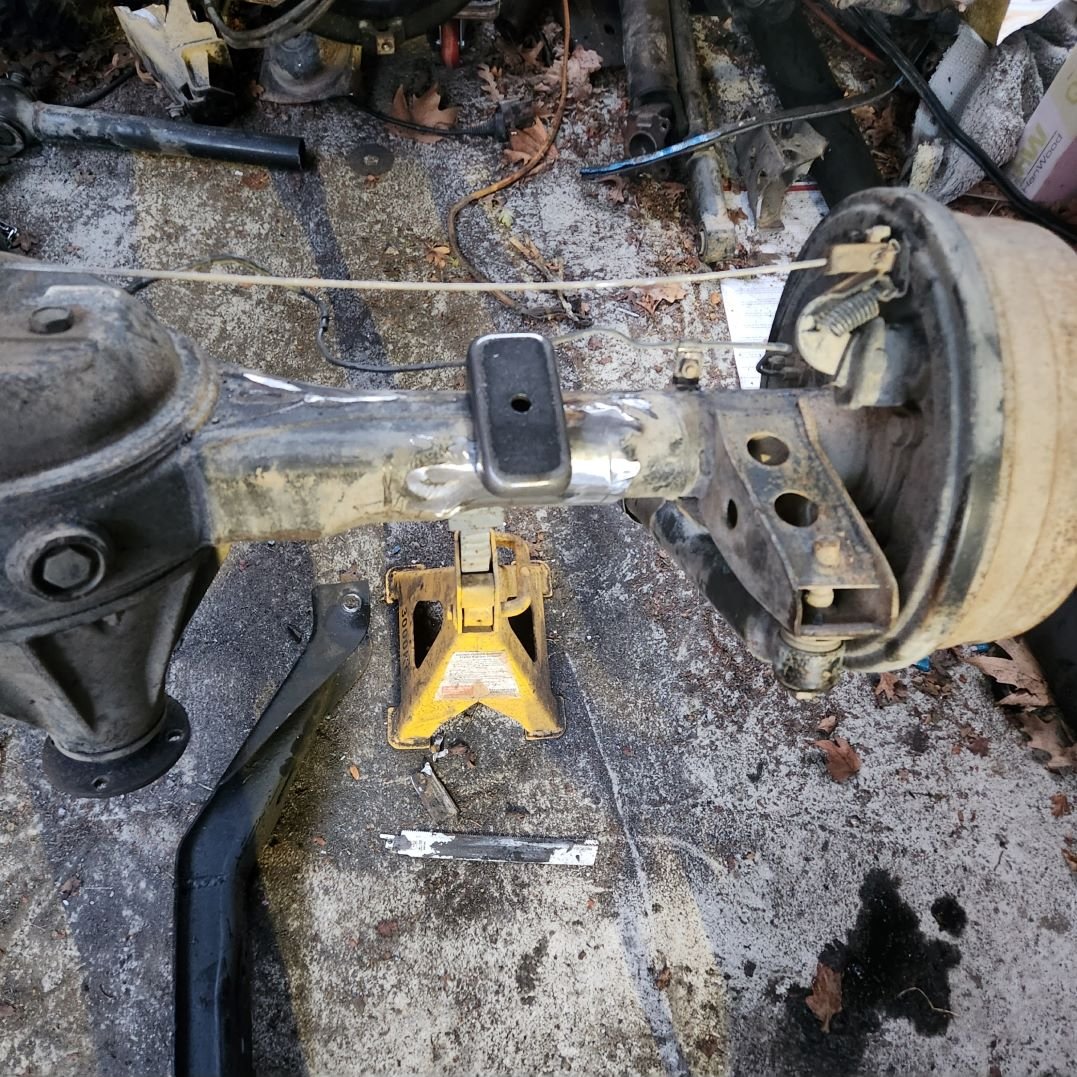
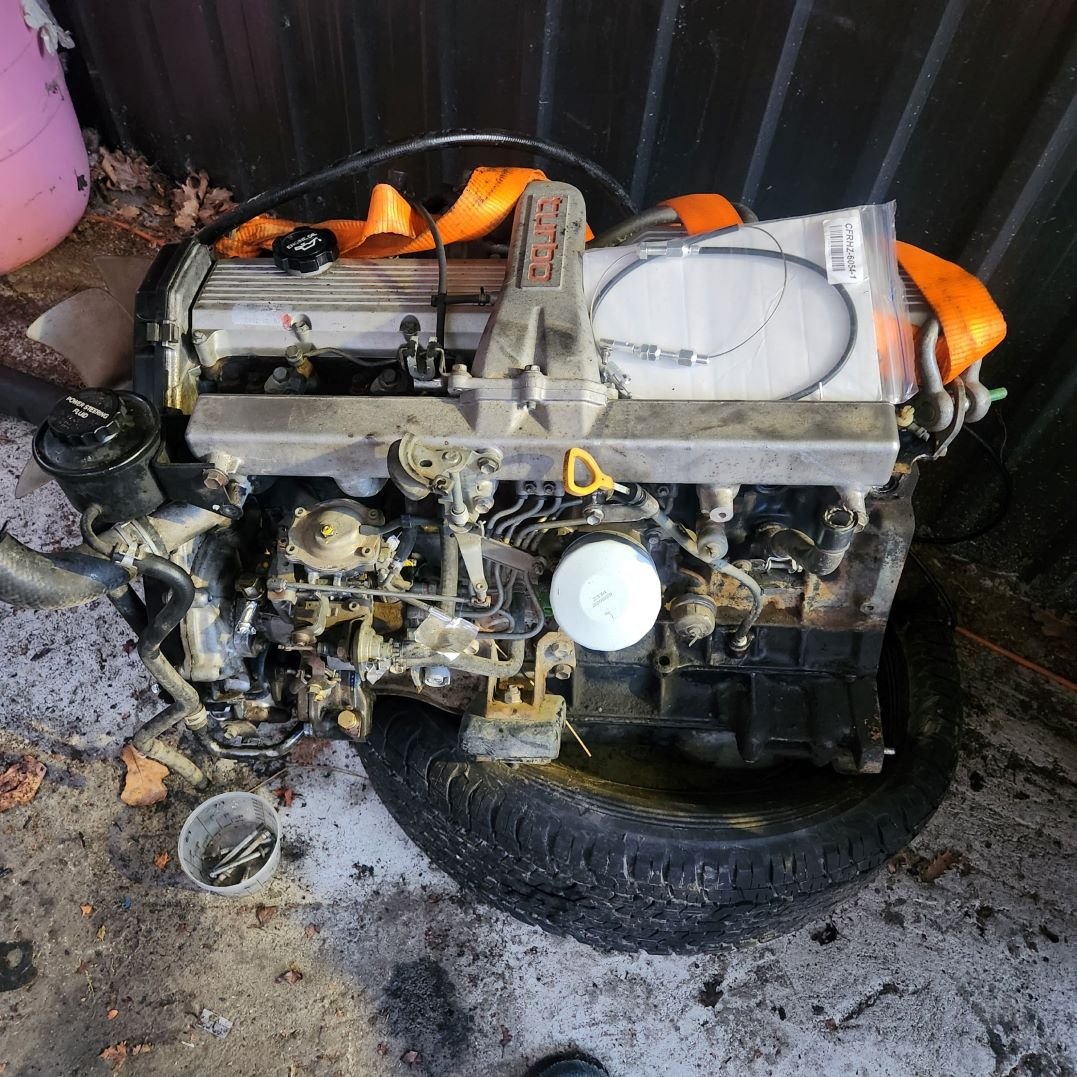
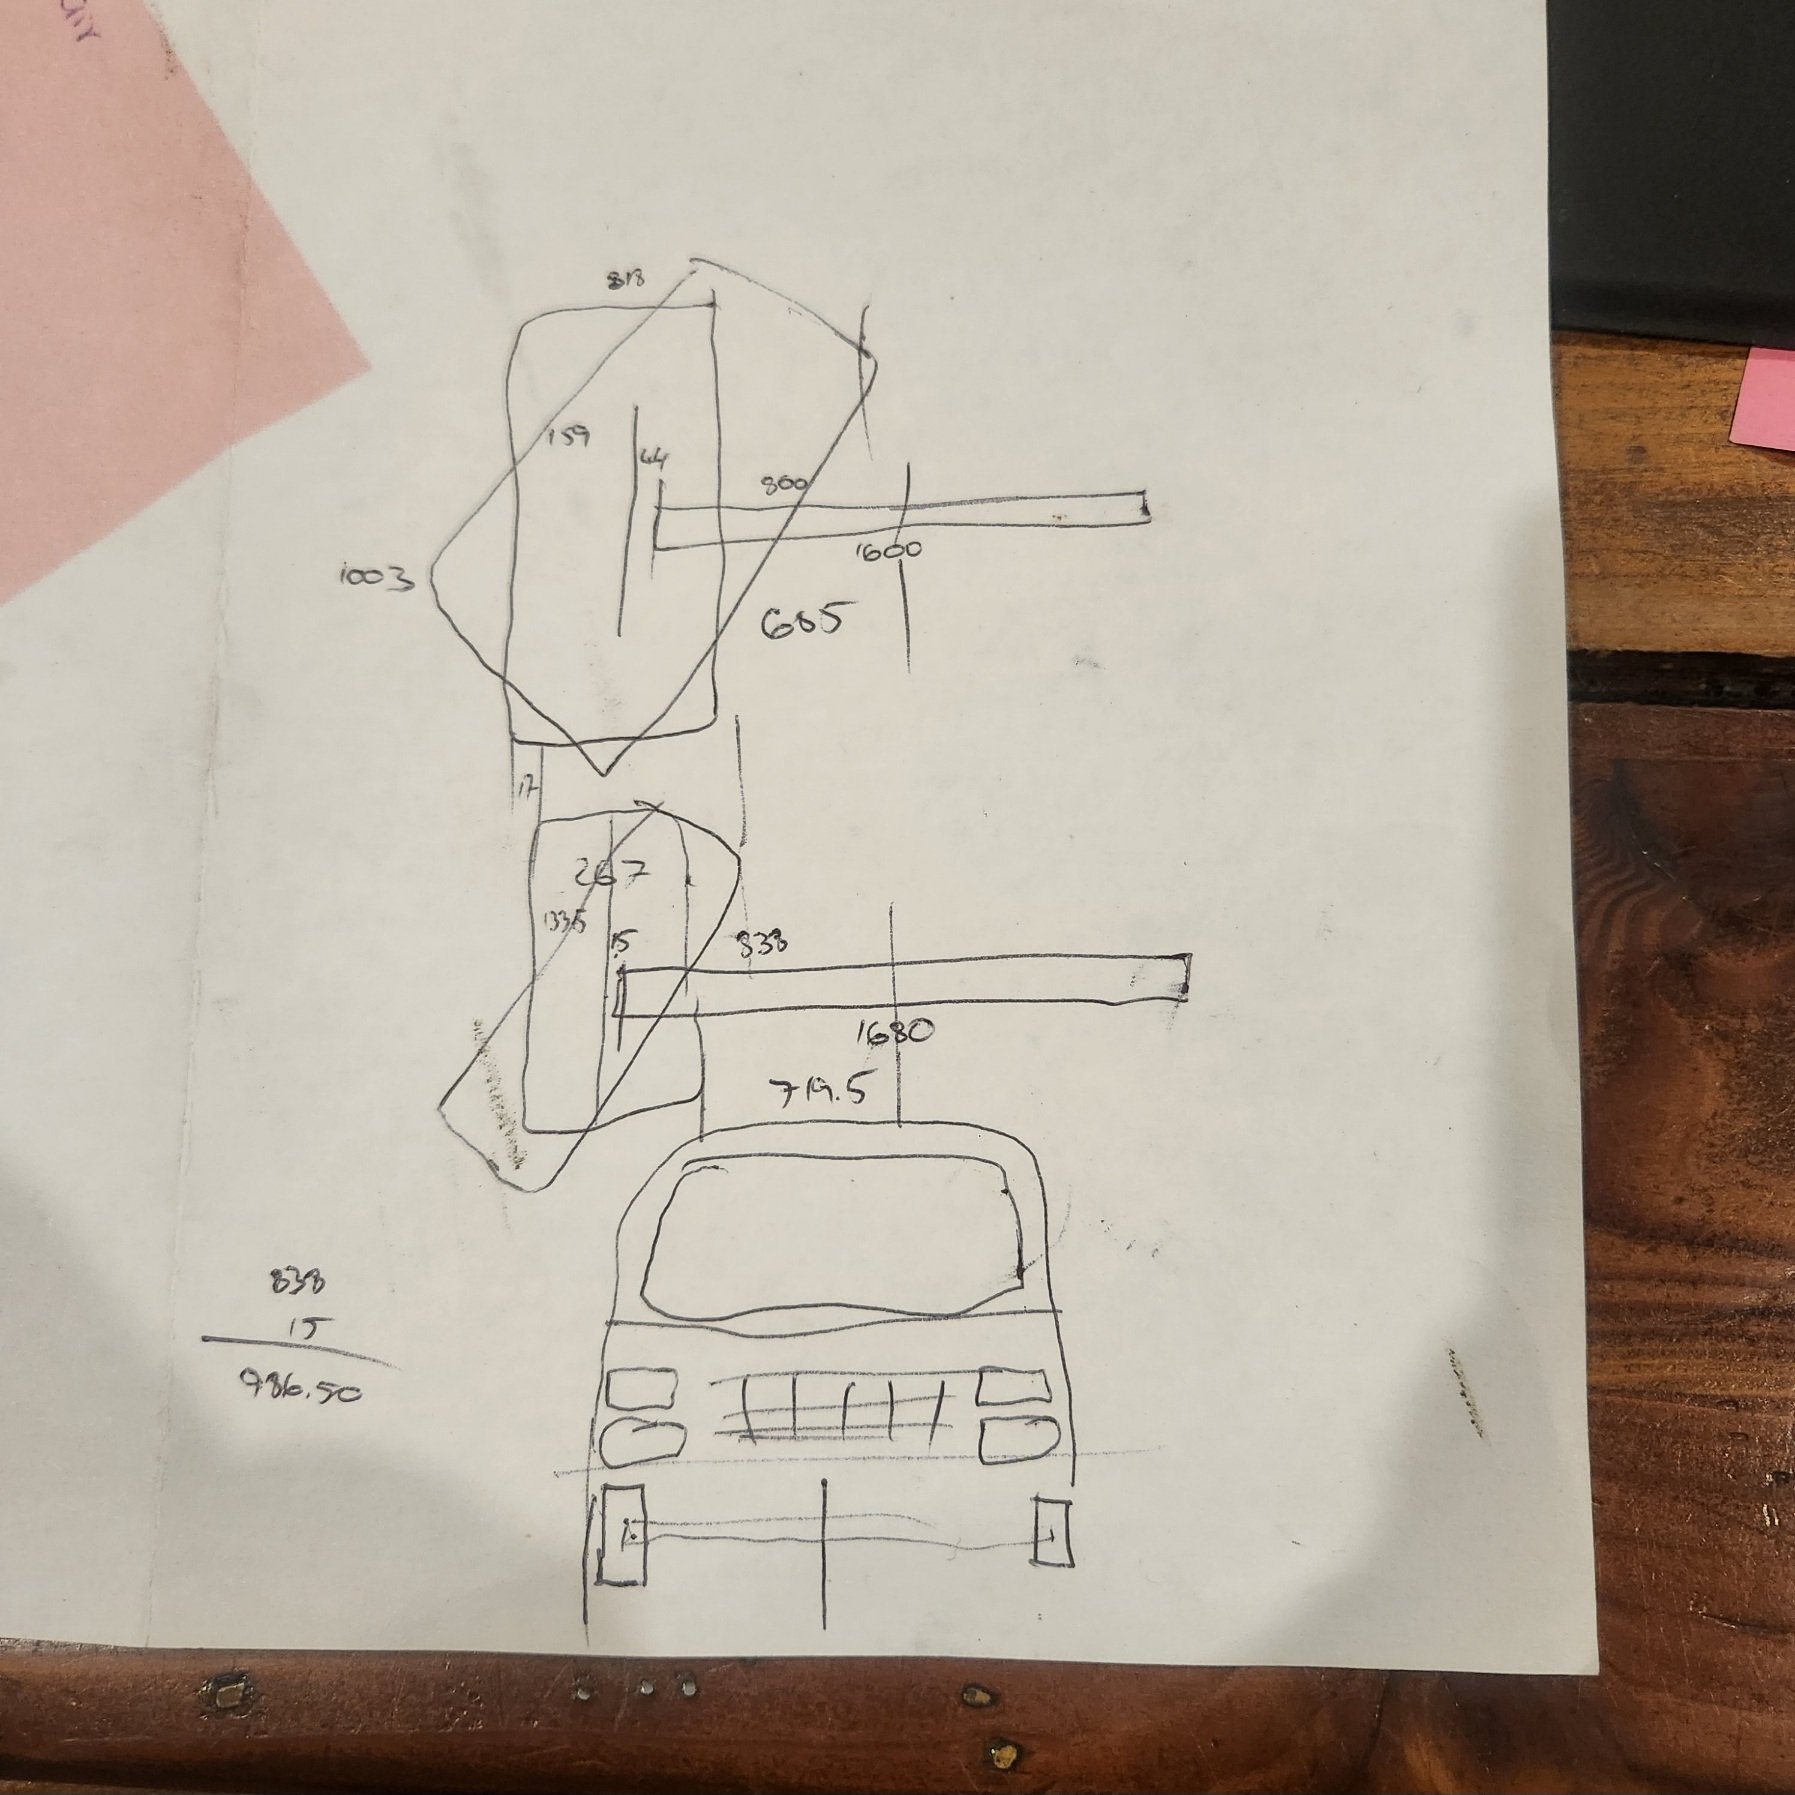
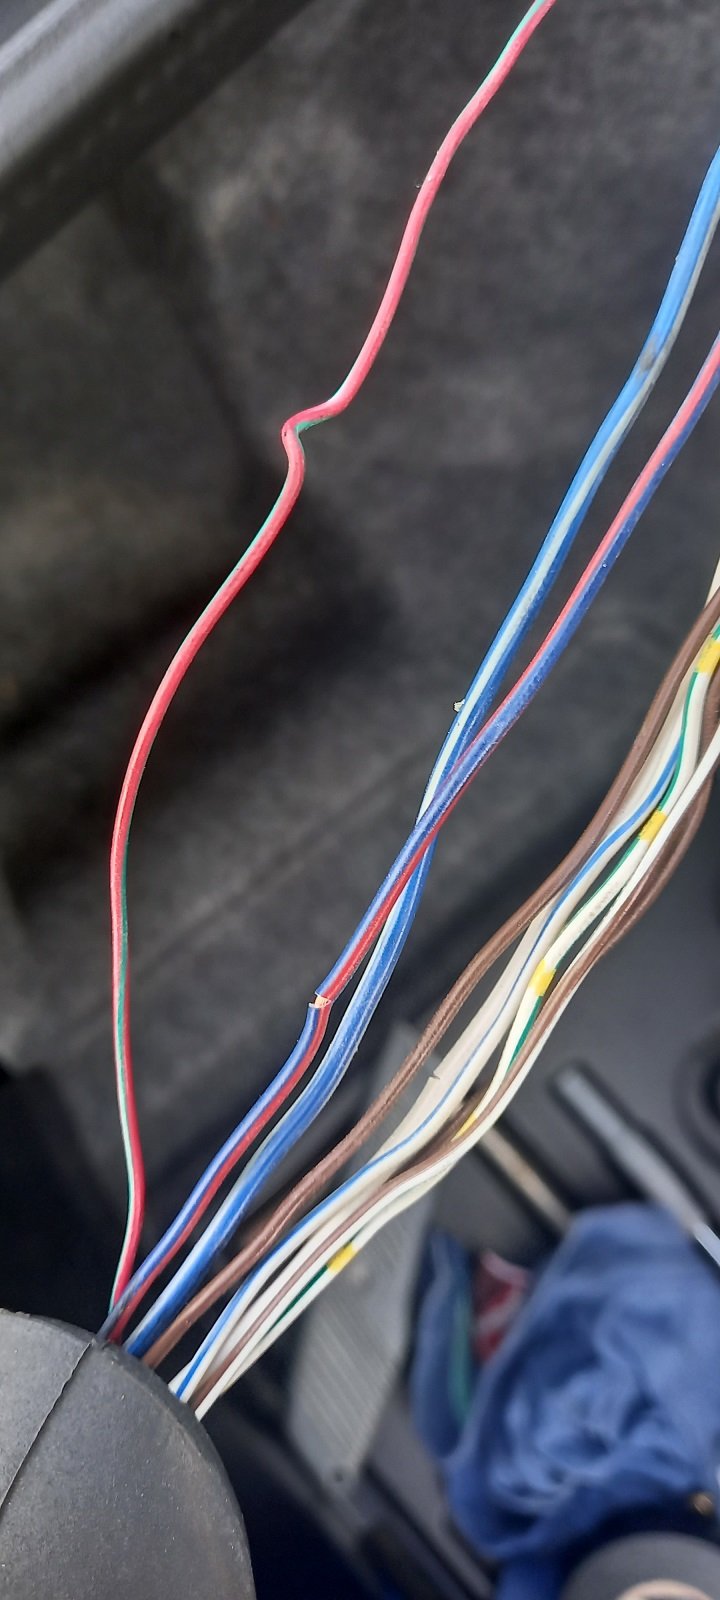
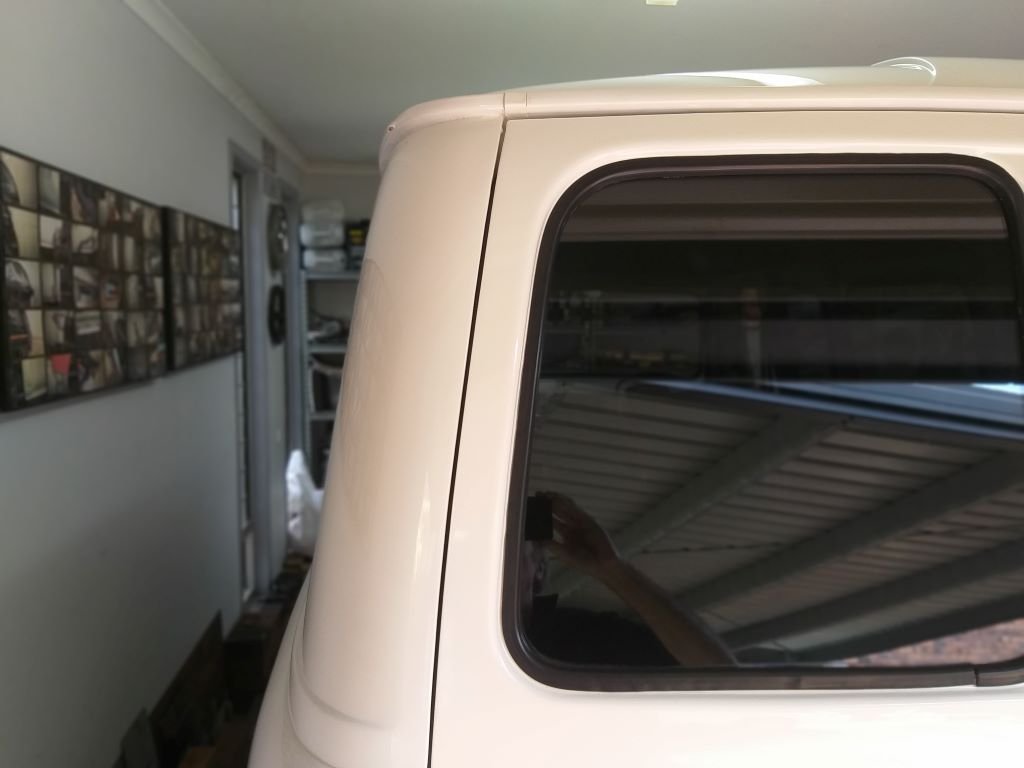
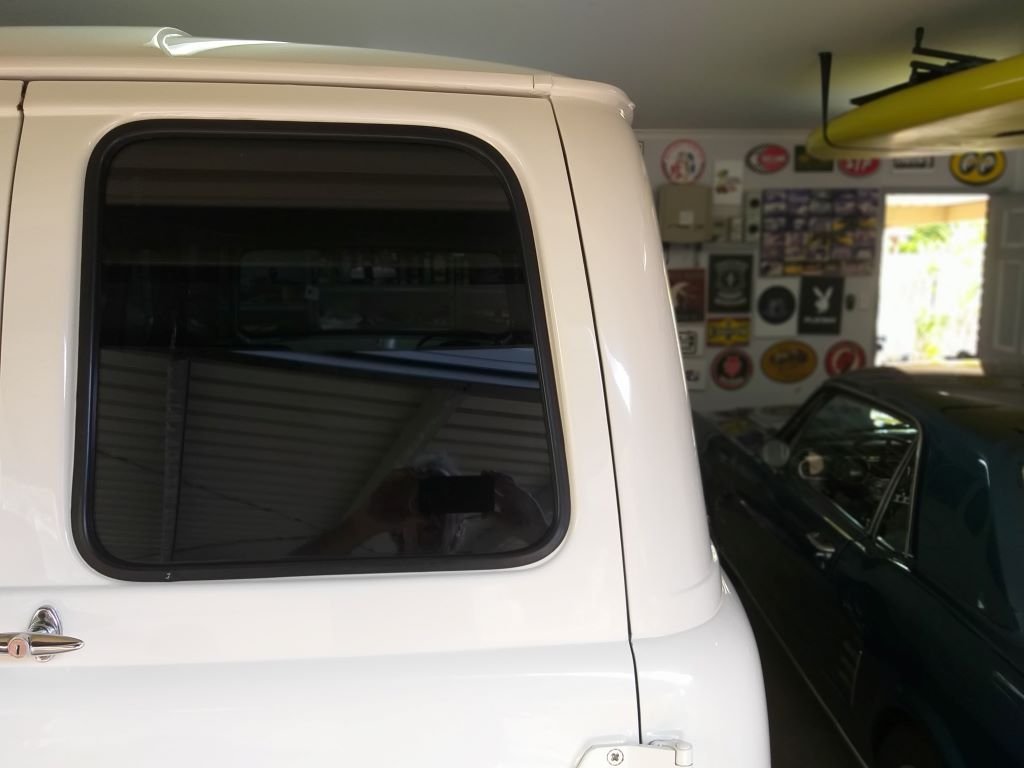
So it needed a bit of work, the RHD conversion hasnt aged well with leaks and the wiring was just flat out shit, tape covering soldered joints everywhere, 3 feet of extra loom in the engine bay where the fuse box and AC had been moved, then leaks around the windscreen from the AC box install etc. And the roof had just been chopped out for the glass top. So I got the shits with it and listed it, figured Id sell it and get something newer and dump some cash into a pointless but fun fwd rx323 which will now be on hold for a bit I had a guy. lined up then took it in for a wof and it failed on sketchy details around the RHD conversion and cracks in the filler / sealant around the roof. I got upset for about 3 seconds then decided Id keep it and fix it. This was on friday Friday night / sat morning : Sunday night : I wanted it 4wd but couldnt find axles wide enough in NZ ( 66" ) , the conversions Id seen mostly used Dana 44s and 60s and leaf springs up front, not ideal from a handling and turning perspective but easy enough to fit. I have a 460LE with transfercase from a suburban which I planned to use but was going to have to import axles, not keen. So off down a google hole I go and the widest diffs I can find were 80 series cruiser at 63". Theres room in the fenders for a narrower front end and itll fit and turn 15x10s I reckon ( see below ) I found pair of axles, engine ( 1HDT ) and trans close to home ish for a good price so got it all home ( sunday before pulling van motor ) 6.2 dinosaur after 110ks : 1HDT after 300ks , I did timing belt etc yesterday and it all looks clean as inside I probably run a modified pump but these things and a piece of cake to get running, needs alternator wiring and power to fuel cut solenoid. Ill rewire the whole van, have a harness on the way. Back axle will go back on leaves, ill just weld new perches on it Front is the fun bit. The van has a big crossmember which holds the motor and upper and lower arms, spring hats are in the right places but new diff will hit the crossmember so ill cut it right down to clear the diff and put the new ( offset ) engine mounts in. Im rebuilding the swivels now, one of the hub bushings / bearings had disappeared so will get those done this week. Ill run coils on the chev upper mounts and cruiser axle mounts, im pumped on the coils. Then trailing radius arms with some mounts with vertical adjustment ( lots of holes ) sio I can correct caster while Im sorting ride height. So this static rollover threshold with LVV for lift limits might be an issue but once I sort the crossmember itll give me some space to drop the engine and get crank down. The van is over getting the rust etc done now, meantime Ive put new vent windows and frames in and will make up the roof stiffeners itll need for cert
6 points
-
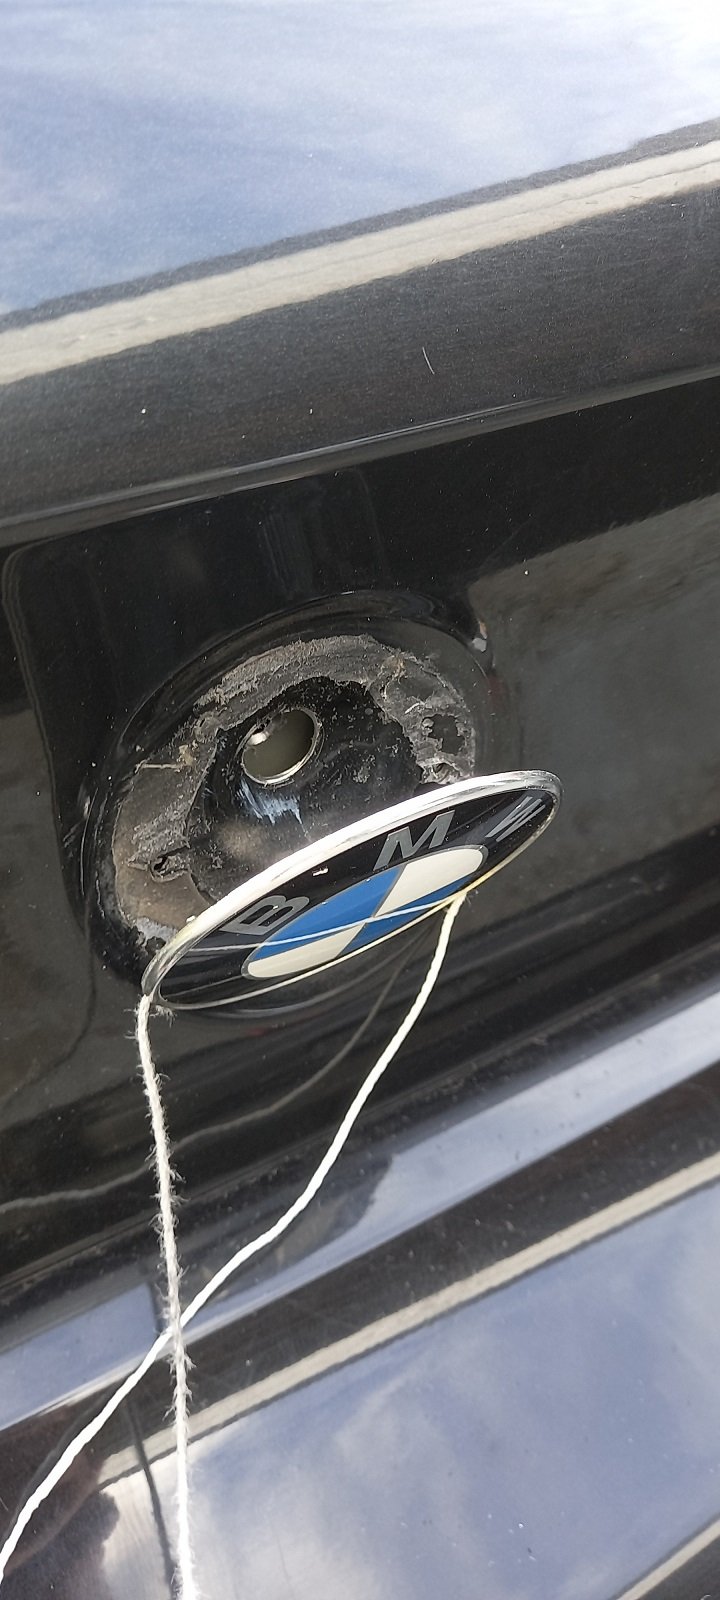
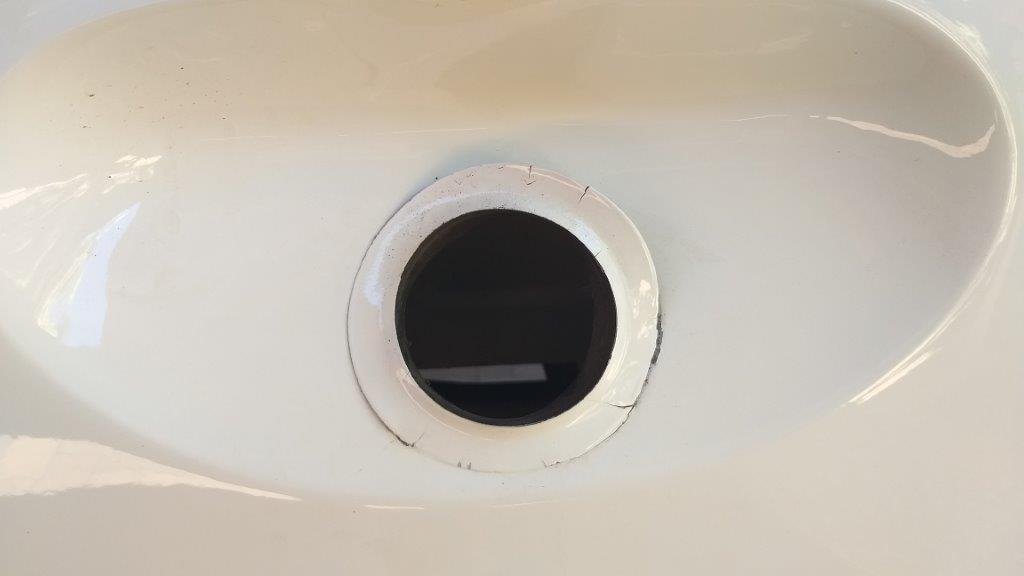
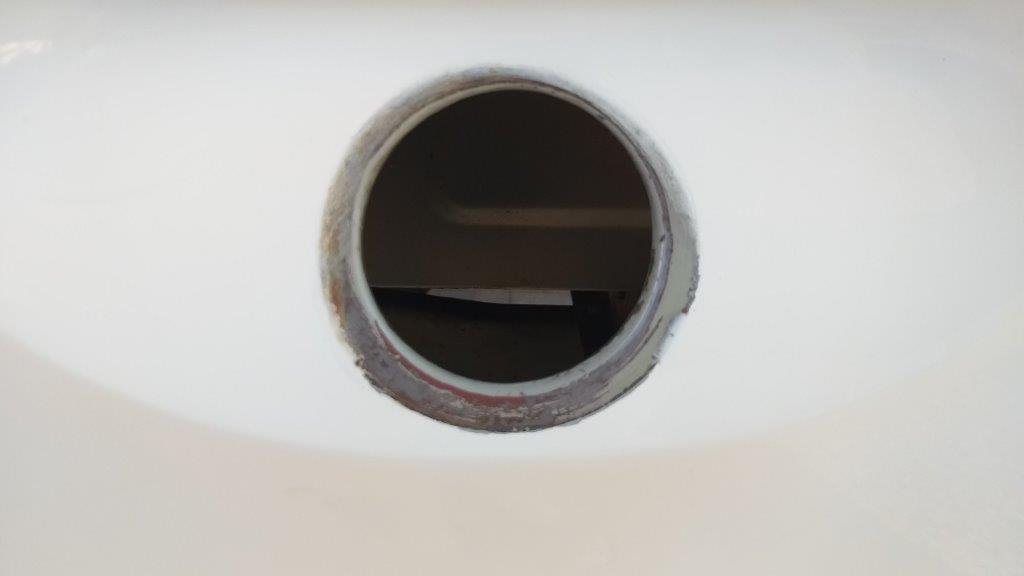
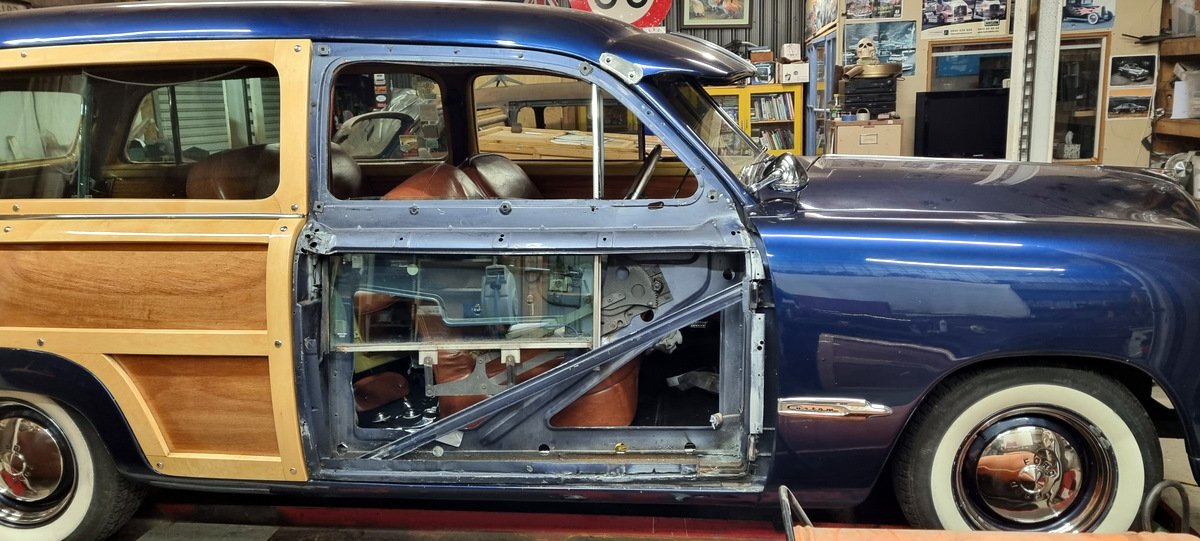
Finally had a full day off work so decided to try get into the boot The hole in the middle isnt supposed to be there, so someone has had this problem before..... Stripped all the wiring loom out and found some dodgy cores Taped all those up and tested it and it works, but the rest of the central locking doesnt. So when you lock the car the boot stays unlocked unless you manually lock it. So still some digging to do. Its pretty straight forward as the BMW Electrical Troubleshooting Manual is easily available online and has full wiring diagrams and component location pictures. Boot is fairly small but big enough for a weekend away Also swapped out the big long aerial for the little stumpy one in the above pic, I think its the OEM one off the CRV. Also pulled the headunit out to see why the radio wasnt getting any reception and found it was because nobody had plugged the aerial in...
5 points
-
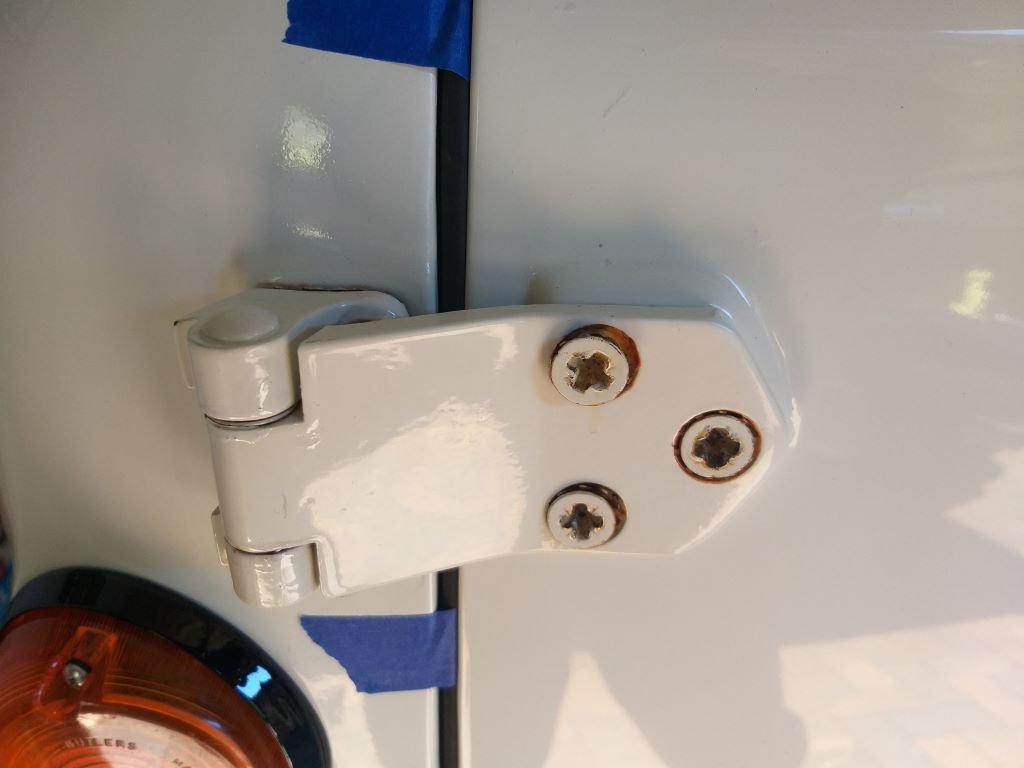
Thanks for the feedback @Tiger Tamer Yep, it was a bit fiddly and I did have to rope in Mrs Flash to help me push against the seal while I climbed inside to tighten the nuts on the back of the hinge. Would have been a much easier task if I had done it before fitting the new seals, but I always seem to do things arse about face. Around 12 years ago the previous owner commissioned a well know Brisbane based outfit to do a bare metal restoration and whilst the paintwork has held up really well, I've found a few paint related things that I can't believe a professional place would do. The worst one was the original rubber grommet around the fuel filler neck that not only survived the sand blasting process but got painted over too. I couldn't believe my eyes.
4 points
-
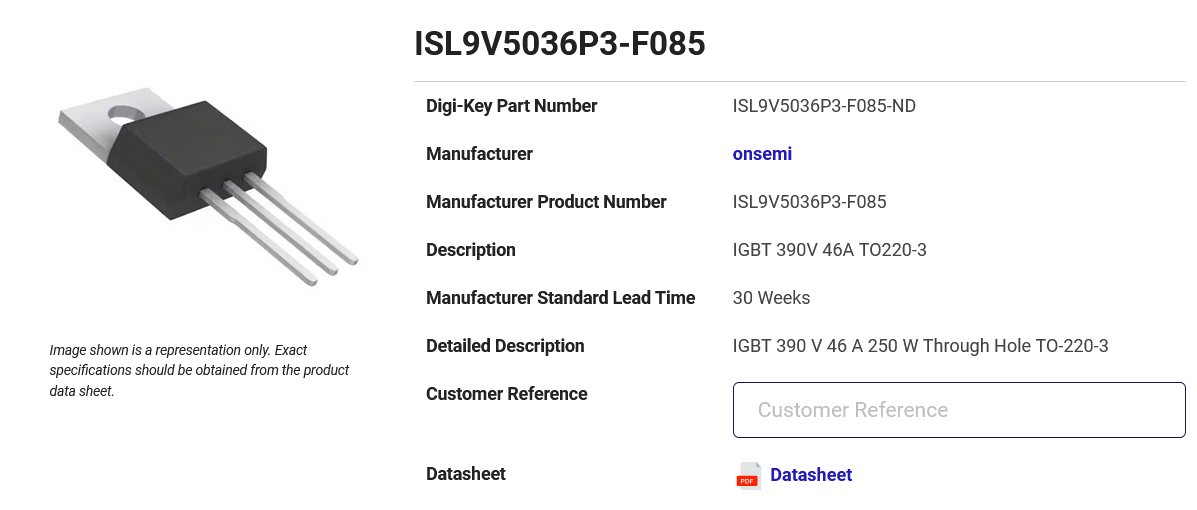
Bugger, - I don't, maybe @Ned or @kempy? If you've a little time, I can con a client into ordering some on their next buy (a month or so). Anyways: (adjusts Barrie (tm) personalised cap): Digikey has a really good parts selector thingy: you can see they have 50 kinds of those family IGBTs https://www.digikey.co.nz/en/products/filter/transistors/igbts/single-igbts/279?s=N4IgTCBcDaIPIDsDKBTAtgSwAQFEDGA9kgAoCCASgNJYCSA4gEIAqIAugL5A these guys reckon https://www.msextra.com/forums/viewtopic.php?t=57426 this goes one OK https://www.digikey.co.nz/en/products/detail/onsemi/ISL9V5036P3-F085/2509749 (though - no thermal protection - probably ok to just chuck a 15A fuse inline?) Narrowing for 400V ish to 100V, and 23A upwards in to-220 and the slightly bigger TO-262-3 gets you these 8 options: https://www.digikey.co.nz/en/products/filter/transistors/igbts/single-igbts/279?s=N4IgjCBcpgbFoDGUBmBDANgZwKYBoQB7KAbRABYwBmMcgDhAMqvMpAF0CAHAFyhADKPAE4BLAHYBzEAF8CAJjAAGCNBDJI6bPiKlwSpQAIAgoxDyqJsxYB0AVisLyj8w9MLYL%2BbBsBOLwDsXnRe-u4gVEbhNC5U8rGW0c7RbmZUntFBmfaxATZZaSHRYWbkUaVgLuTx4eSJpcmlqUwZpQVMRaUlBHblPZXhdjVmdvU9jT3NIHatPe3TnT3dILB9KwNmsMMEsGMrEytTsLMr87CLK8sBawEbBAHbIAF7AQcBUwEnAfMBFwHLdDWdDuIDojzoezoBzoUzoJzoF18a18IN8j18e18B18U18J18iJKnBAvH4AFVxKIeAB5FAAWRwaCwAFdhDhZAplFQEOpUJhcARiJAyFQkYYAGppHES0oGGVMMAOSVMeRGZUUeRK0qReUUKhaphlXWseLq1gGii9Y2rY2A41i9W9NWbOXq2BW9XXZ33D1mJHekA4gPKV0cbh8SAgClU2kMpms9lyEAAWnIPI0WgFumF0yo%2Bt8HBkRaAA Anyways, if your MS is something like the one described here: https://www.diyautotune.com/support/tech/other/troubleshooting-ms-injector-driver/ i.e. has Q14, R37 and Q15 and R38 (current limiting) section and Q3, Q11 sections, then probably most of these will do (287 options) https://www.digikey.co.nz/en/products/filter/transistors/igbts/single-igbts/279?s=N4IgjCBcpgbFoDGUBmBDANgZwKYBoQB7KAbRABYwBmMcgDhAMqvMpAF0CAHAFyhADKPAE4BLAHYBzEAF8CAJjAAGCNBDJI6bPiKlwSpQAIAgoxDyqJsxYB0AVisLyj8w9MLYL%2BbBsBOLwDsXnRe-u4gVEbhNC5U8rGW0c7RbmZUntFBmfaxATZZaSHRYWbkUaVgLuTx4eSJpcmlqUwZpQVMRaUlBHblPZXhdjVmdvU9jT3NIHatPe3TnT3dILB9KwNmsMMEsGMrEytTsLMr87CLK8sBawEbBAHbIAF7AQcBUwEnAfMBFwHLdDWdDuIDojzoezoBzoUzoJzoF18a18IN8j18e18B18U18J18iJKnBAvH4AFVxKIeAB5FAAWRwaCwAFdhDhZAplFQEOpUJhcARiJAyFQkYYAGppHES0oGGVMMAOSVMeRGZUUeRK0qReUUKhaphlXWseLq1gGii9Y2rY2A41i9W9NWbOXq2BW9XXZ33D1mJHekA4gPKV0cbh8SAgClU2kMpms9kyOQrHmiAAm-AAtMoIOH%2BGYeABPLjsyNM5BJoA Octopart is great for finding who has the thing, and at what MoQ and price: https://octopart.com/search?q=ISL9V5036P3-F085¤cy=USD&specs=1 Cheers3 points
-
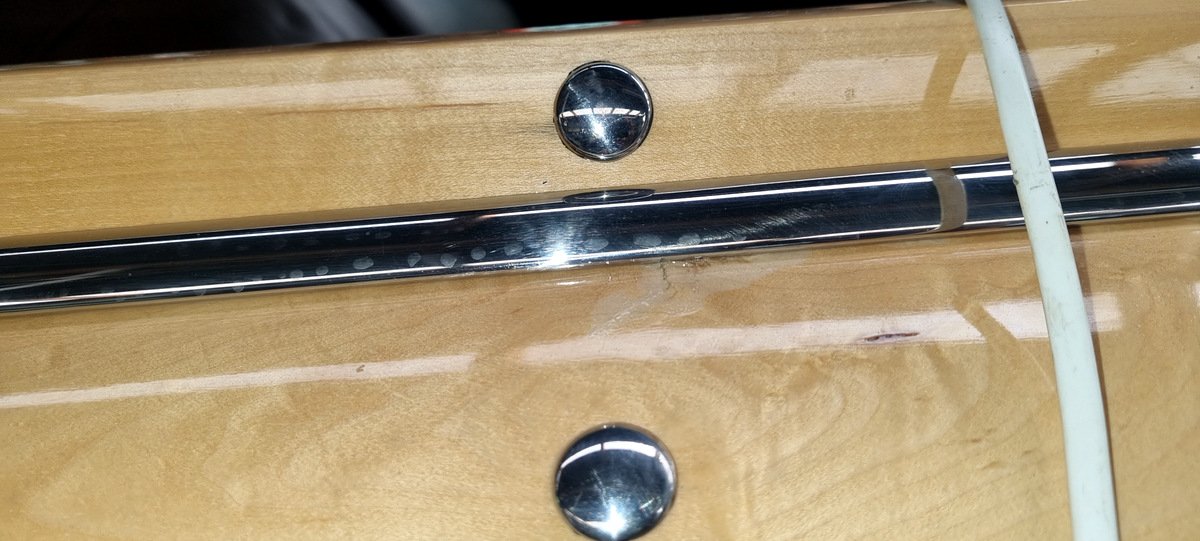
I purchased 2 rear door chrome trims and now I’m on the hunt for the fronts. I also painted above and below the indicator black as it was woefully faded
3 points
-
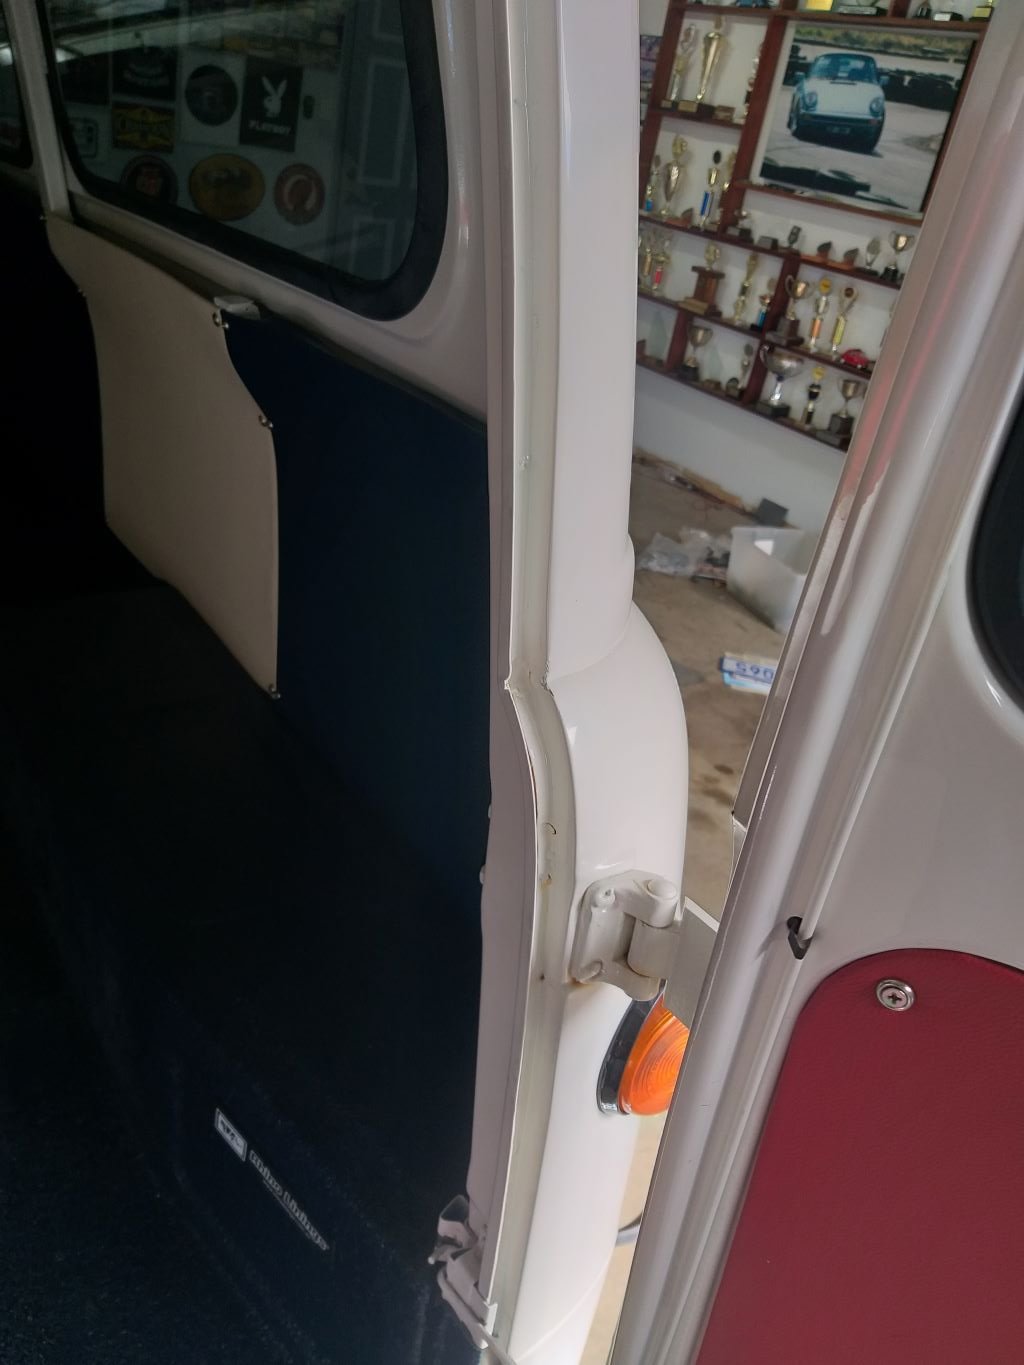
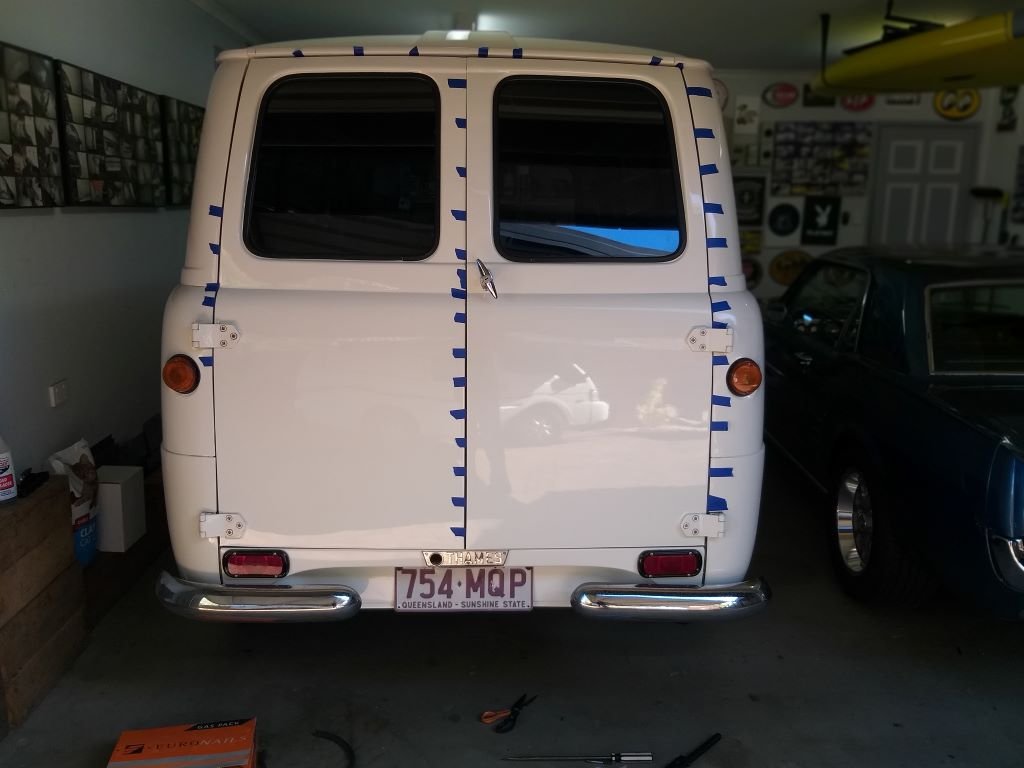
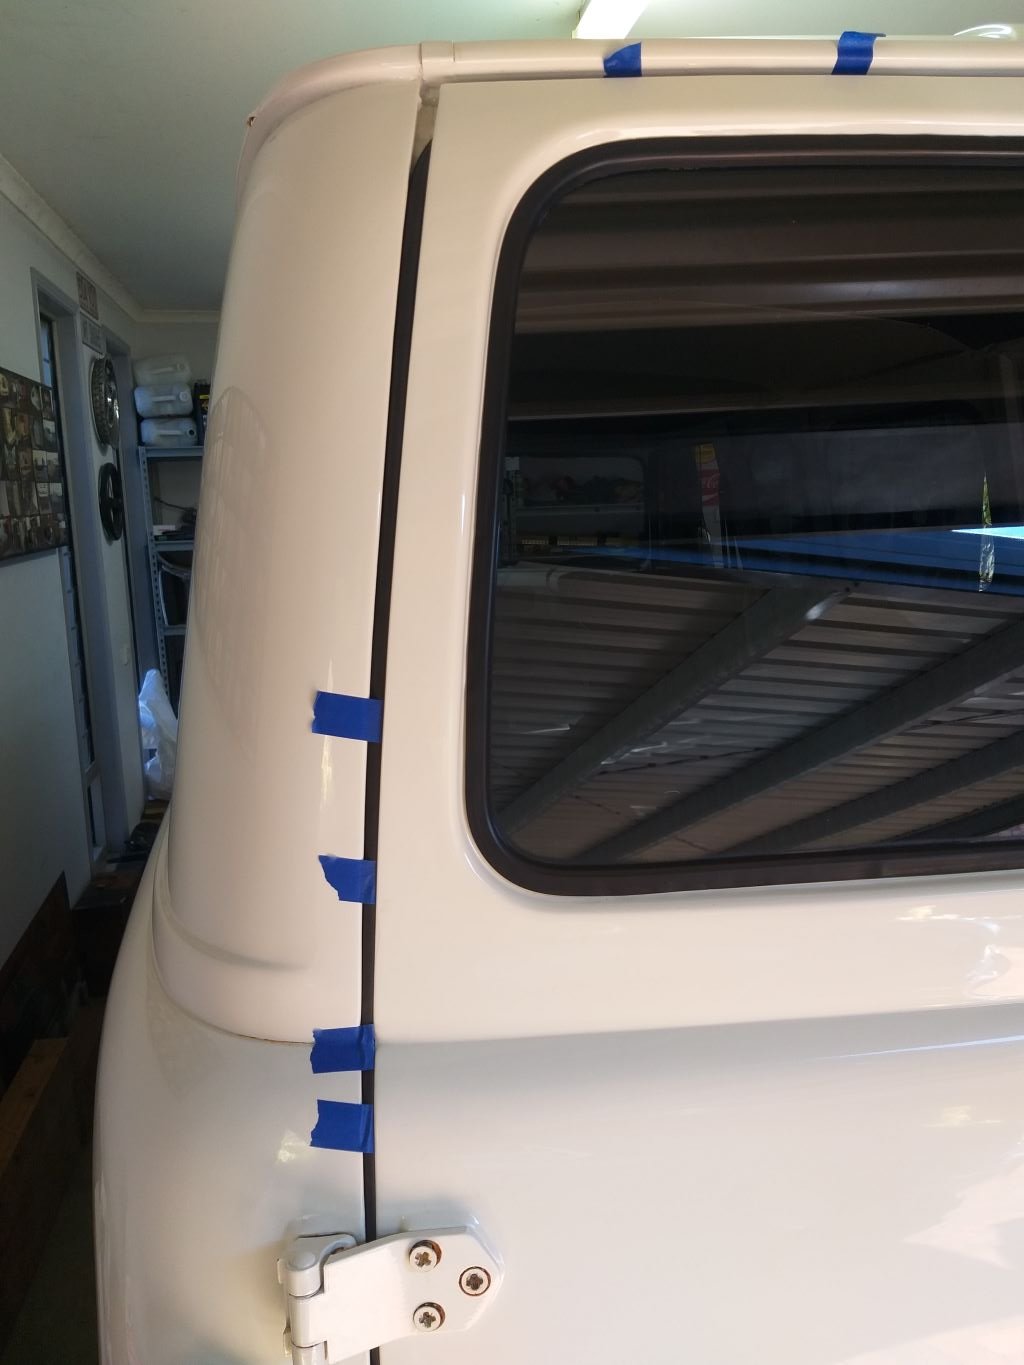
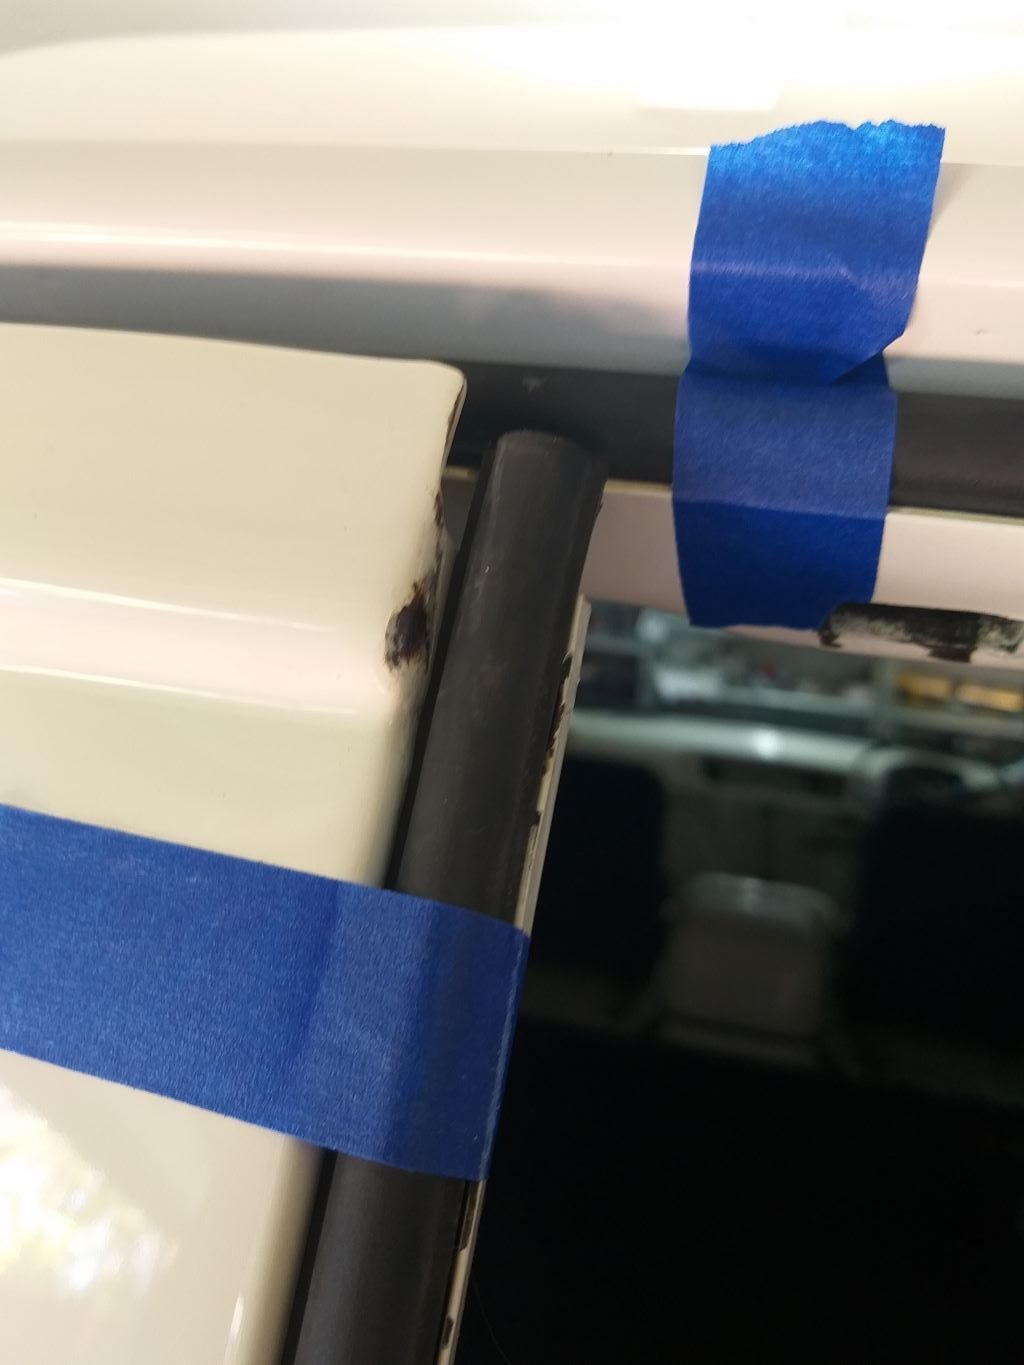
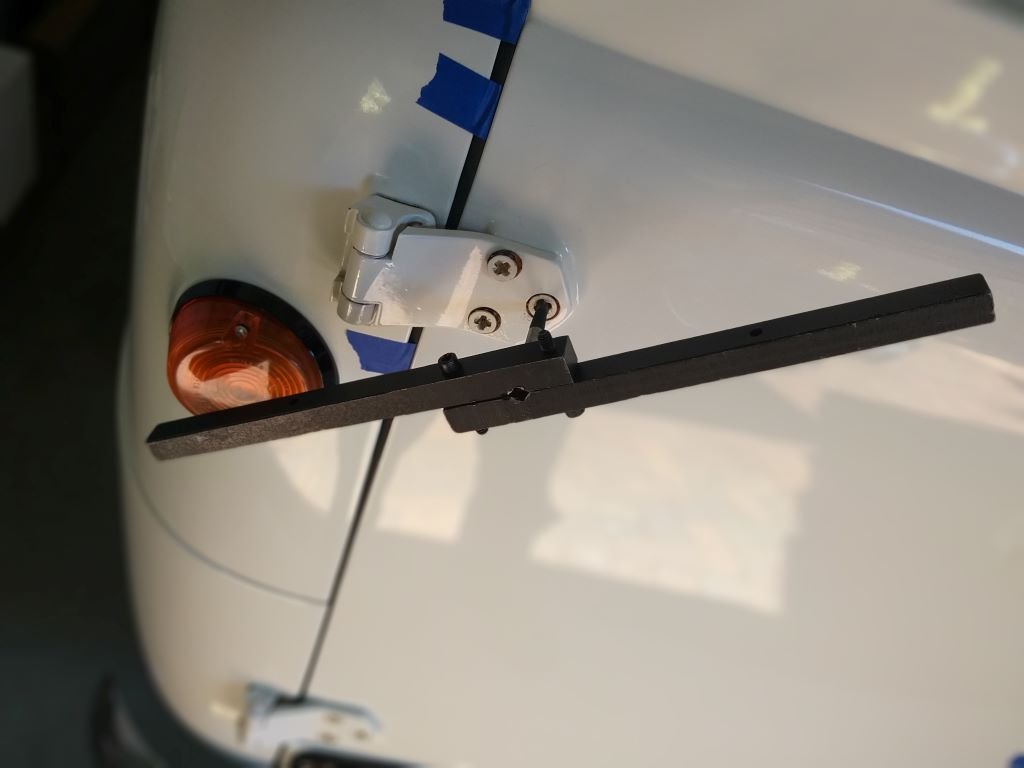
Rear door alignment - Chapter 3 I had to elongate the mounting holes in the body in order to move both top hinges out slightly. But after a bit of fiddling about I'm much happier with the door gaps and the top corners no longer touch, so I'll take the win. Luckily, I've got some touch up paint, so I'll give the grazed corners a go, but that's for another day. Thanks for looking.
3 points
-
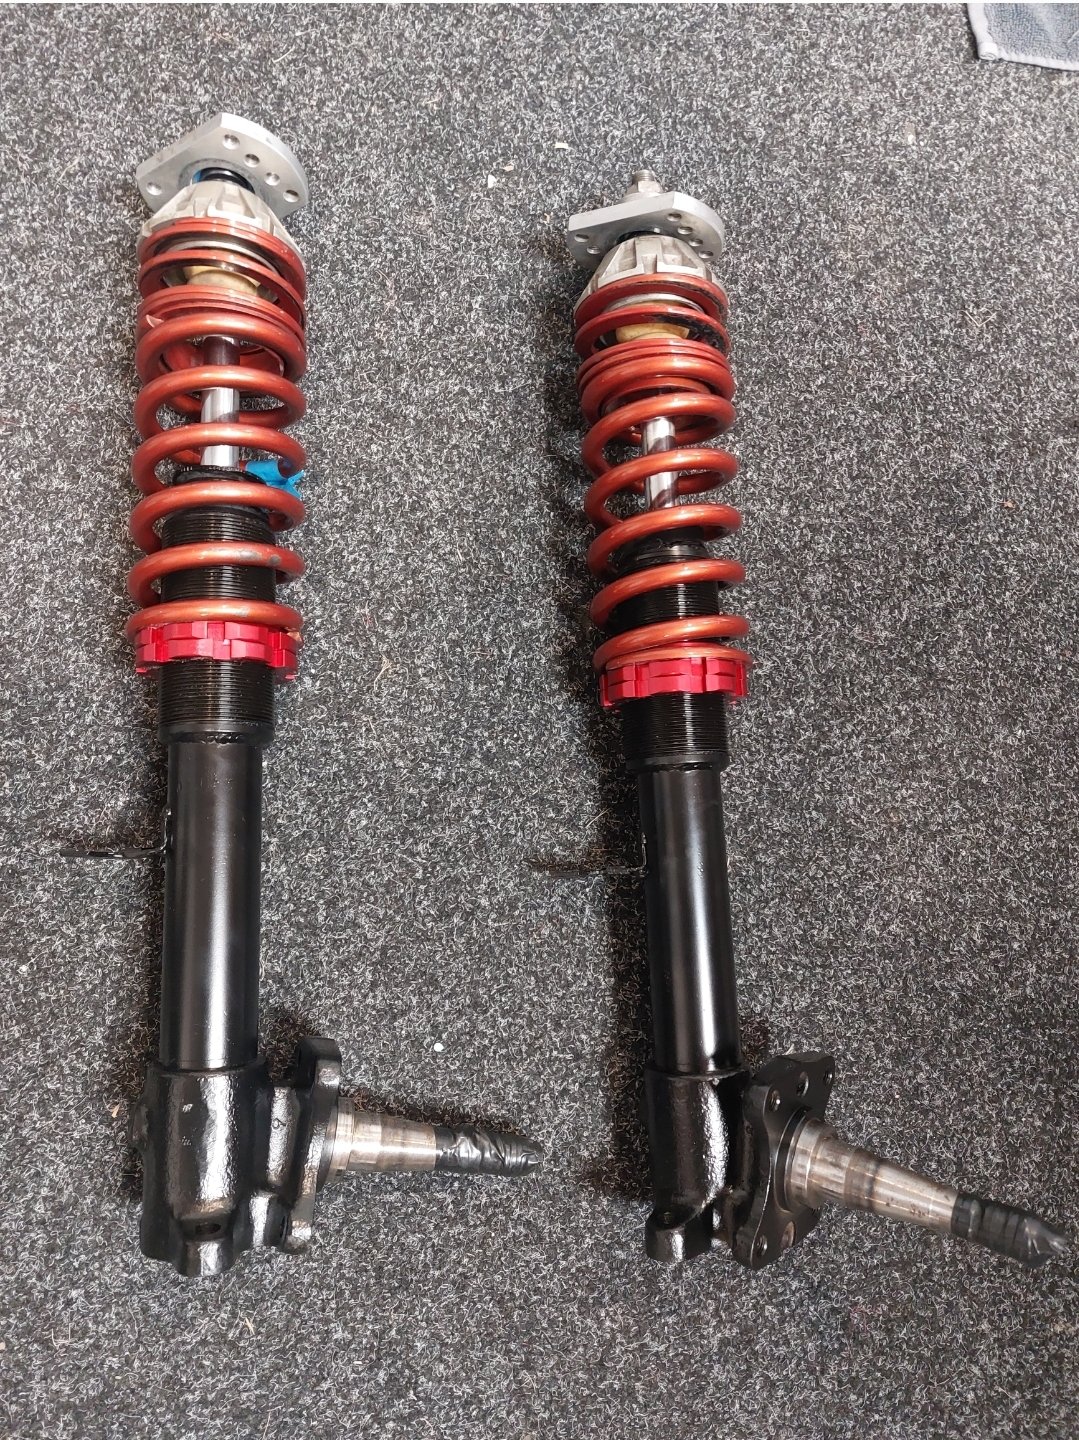
Coilovers are back from remanufacture, had to supply another set of struts, and he has rebuilt to 2023 specs, with new shocks, reused the old springs and camber plates, but all machined correctly and the proper spacers added so the top actually pivots now. After finding the wheel bearings nearly void of grease, and cranked up waaay too tight, I bought a new set of bearings, greased and fitted up the hubs in anticipation for the struts to come home. Once they arrived I attempted to fit the hubs to find that somewhere in production mazda upped the inner stub axle from 25 to 28mm (new struts must be 2nd gen), meaning the brand new inner bearings were now useless, which also meant buying 2 more at a price 3x as much for an uncommon size ffs! Anyway, all sorted now
3 points
-
It’s a drop hatch with a front swap. You can tell as the fire wall are different above the tunnel and the heater hoses go through in a different area on bug/flat front cars2 points
-
Well the good news is that if that is actually a 1984 then it is a slant front that has had a conversion done. Does it have the slant front hatch and interior? If it doesn't have slant front hatch on the back then it is almost certainly plated and tagged2 points
-
Two days late...
2 points
-
The problem with monitoring EGT is that it's a function of both lean/rich but also ignition timing. If you reduce ignition timing, the motor runs hotter - as less of the combustion force has been spent in the cylinder, more comes out the exhaust instead (as heat and more noise) If you want to run as accurately as possible without closed loop monitoring with a wideband. Then using a MAF as the load source is 100% the way to go. The accuracy of a maf is crazy, through changing conditions without any compensation tables for altitude, temp, etc. (which is why OEM loves them) That's as close as you'll get to closed loop for minimal headaches.2 points
-
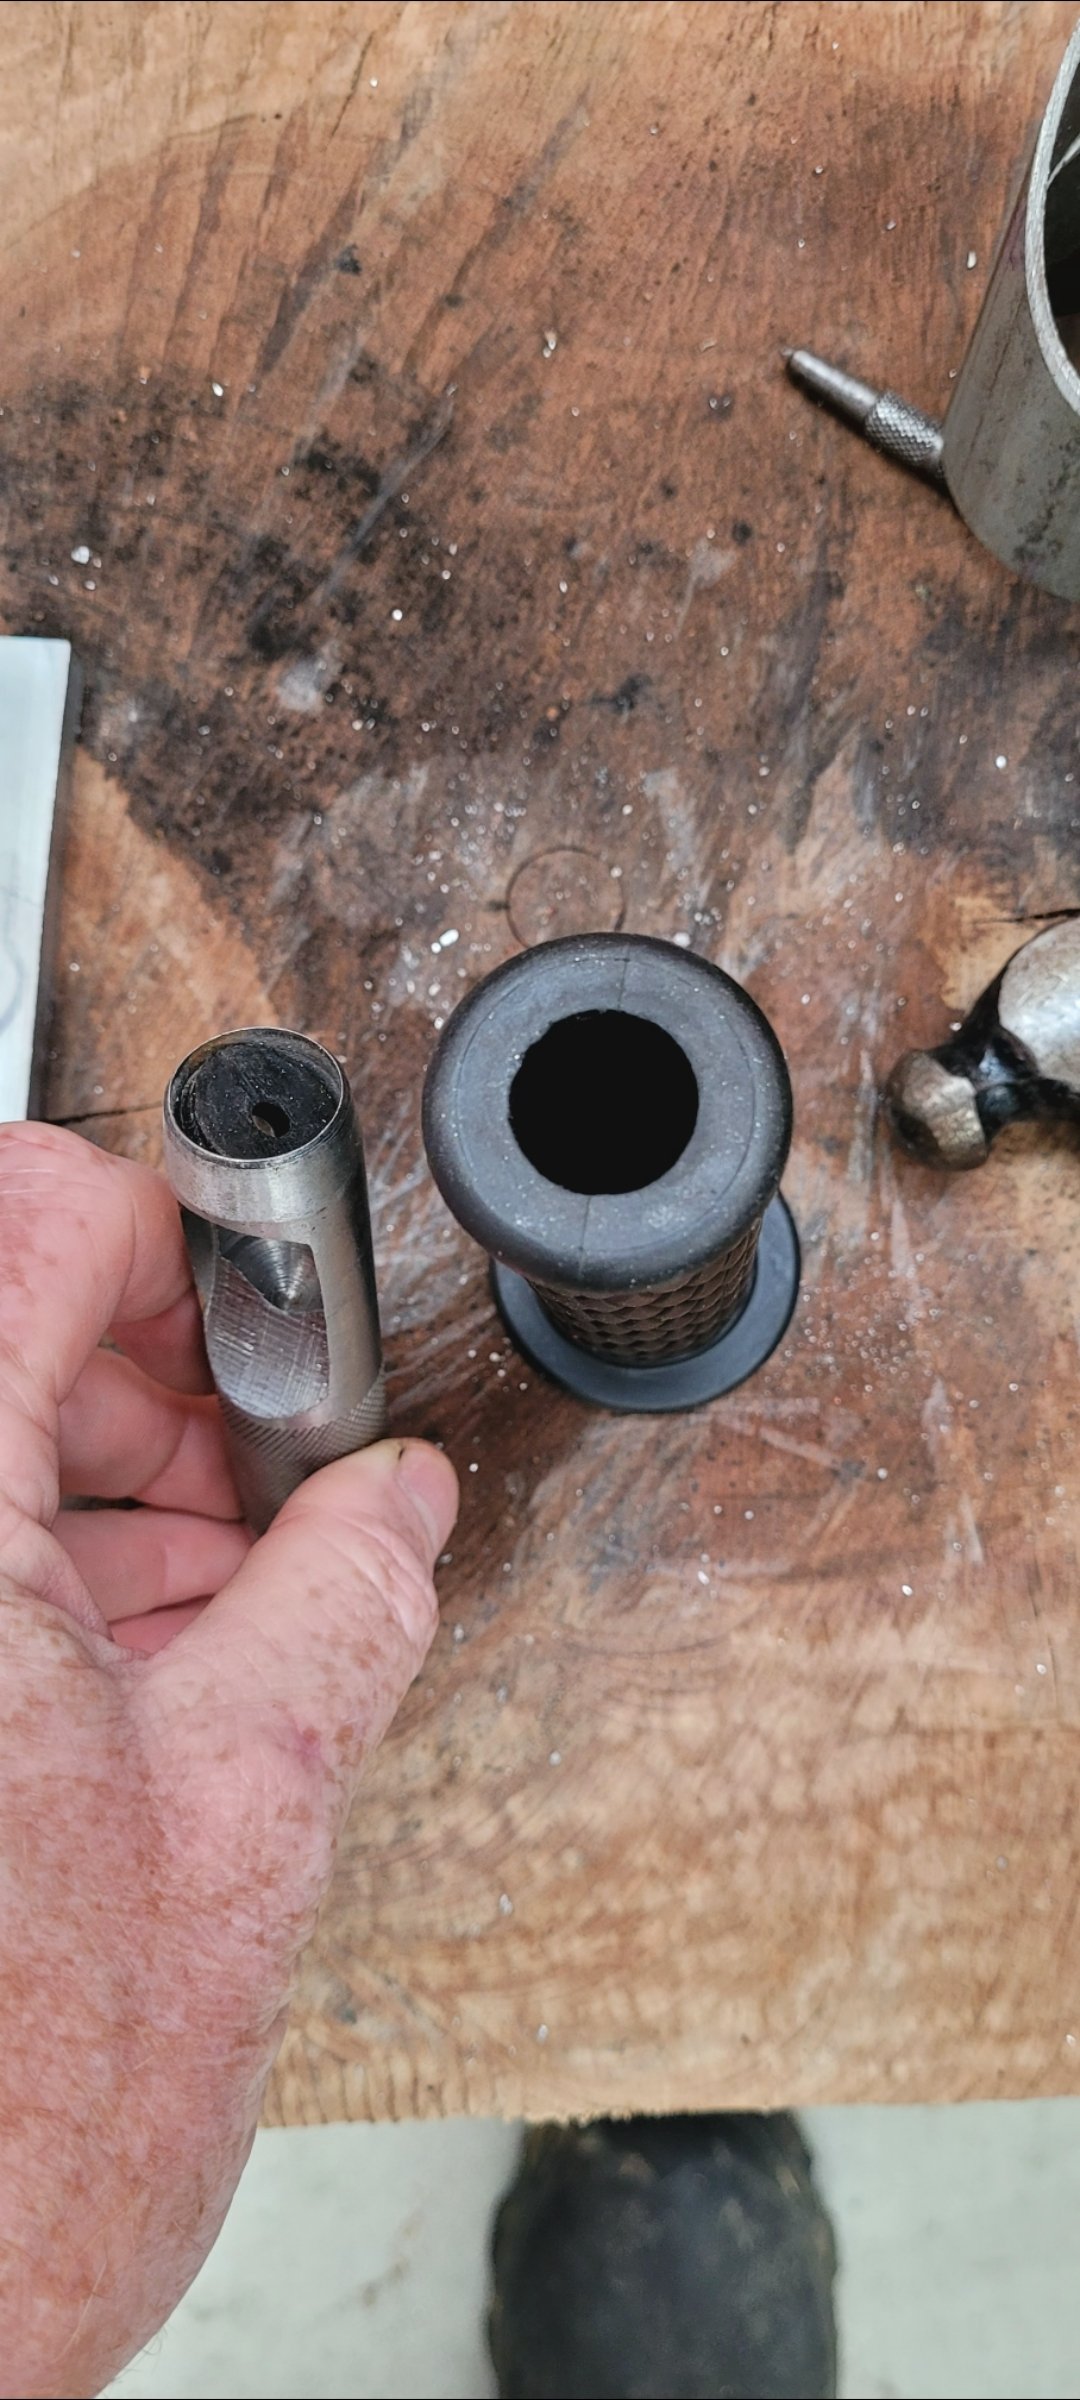
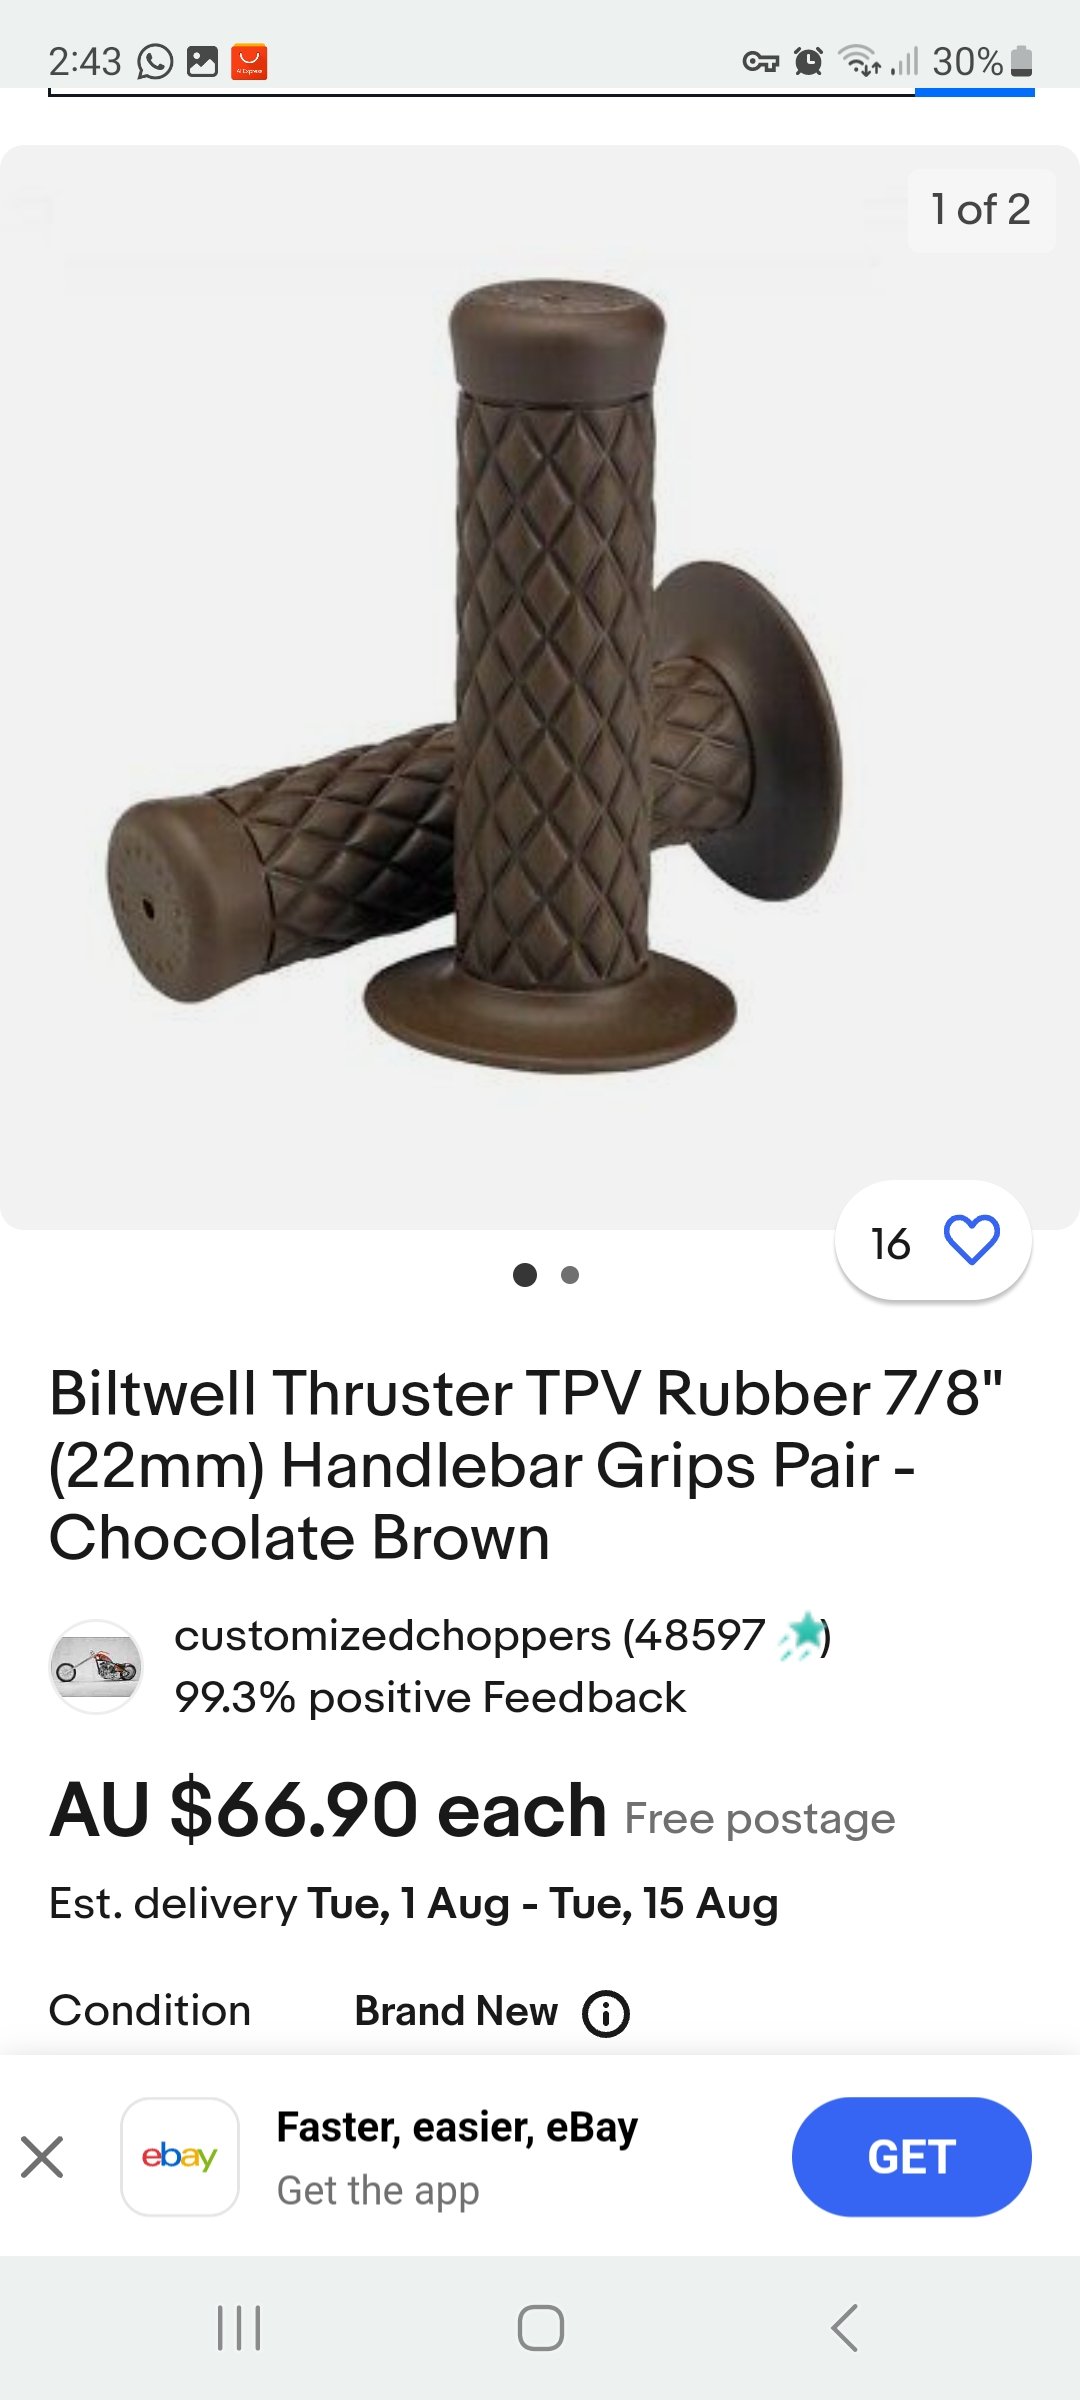
So, I ordered these without the hole. Didn't want bar end indicators then. But now I do. Oh well, this oughta work...
2 points
-
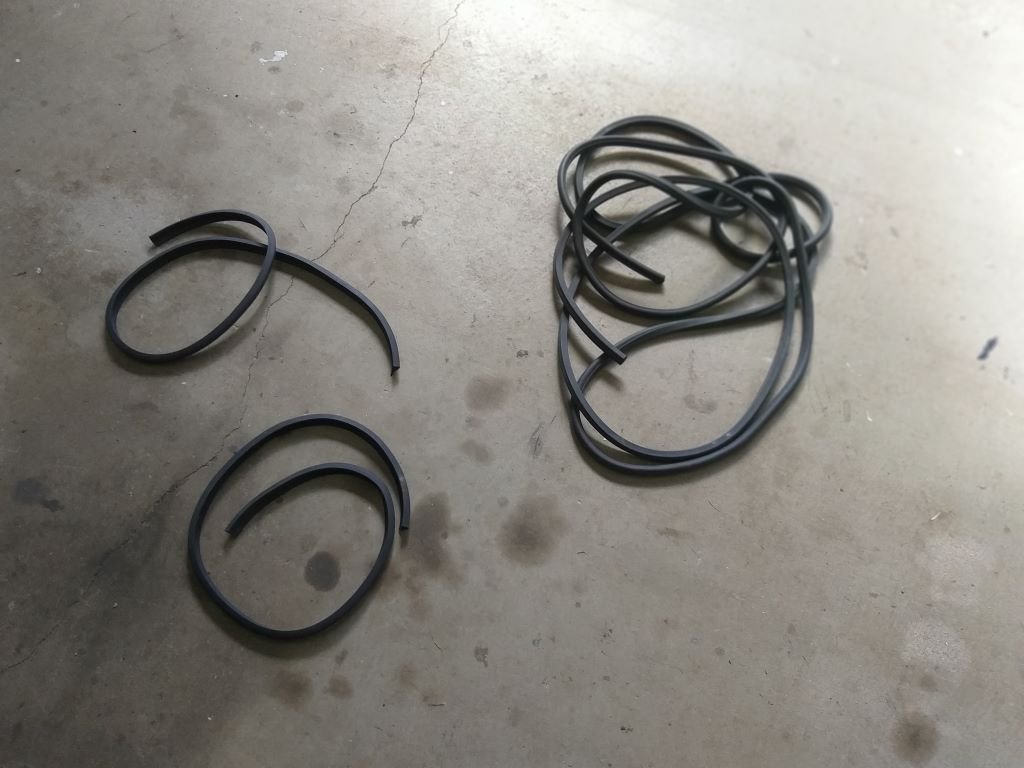
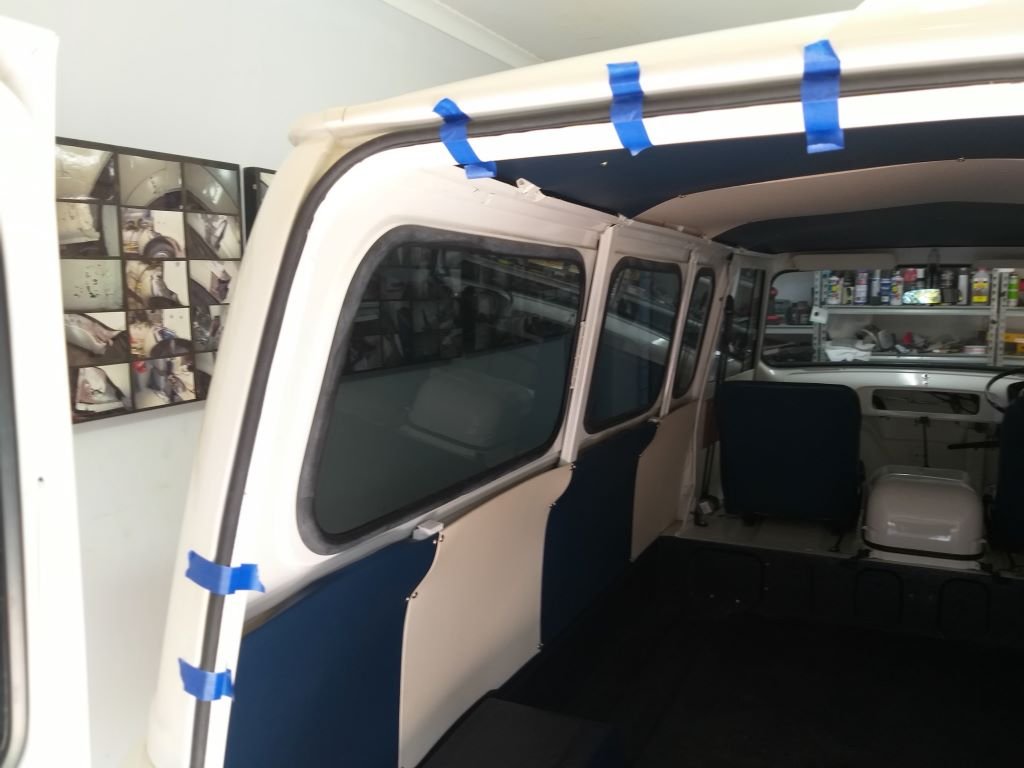
While cruising around the neighbourhood I couldn't help but notice how rattly the rear barn doors are. Then when I gave the old Thames a bath the other day the back was absolutely saturated, so I figured it was about time that I fitted some rubber seals. that will hopefully solve both issues. I rummaged around in the box of spares that came with the van when I bought it and sure enough there was a length of seal with what looked like the perfect profile for the job. Offered it up to the door surround channel and it was perfect. Only downside being that it needed gluing into the channel. Yuk, not my favorite job. Anyway, took the bull by the balls and armed with a tube of contact adhesive and a few other bits and bobs, I cracked straight in. I'll let the glue go off overnight and can then strip the bits of masking tape that I used to hold the seal in place. Thanks for looking.
2 points
-
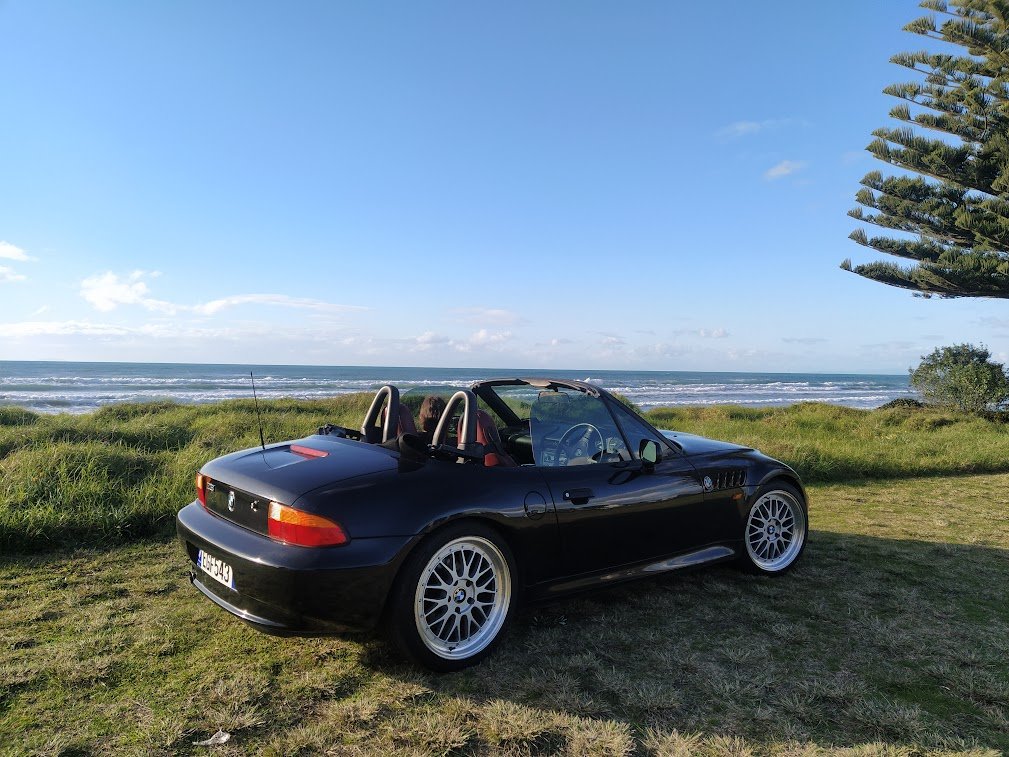
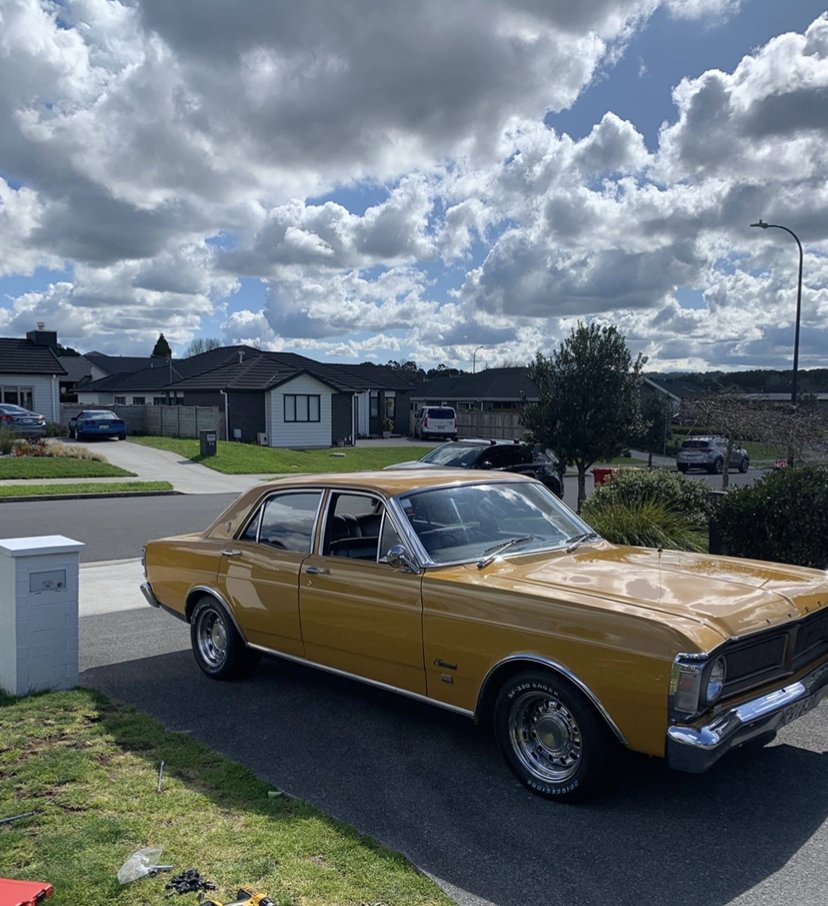
Ok so every single car Ive ever bought has ended up being sight unseen, and so far its worked out ok (all the ones ive looked at before purchasing have been lemons that Ive walked away from) Imported my first car and second car from Japan, first time seeing them was picking them up from compliance. Next car was my old Honda Shuttle that was a $1400 trademe purchase that a friend picked up in ChCh and drove 15 hours home for me, then a trademe $1 reserve CR-V that I sold 2 weeks later for profit, then a Manual CR-V that was in Auckland, then a trademe $1 reserve Caldina for my wife, then imported a Vitz to replace the Caldina, then to replace the second CR-V a newer CR-V that was also a trademe $1 Reserve deal... typically the first my wife knows of them is after the auction is closed...... So not one to break with tradition, on Sunday I was at work and got a trademe notification on my phone that an Auction on my watchlist was due to close. For a 1997 BMW Z3, and most importantly it was cheap. There wasnt a plan to actually buy it but with 2mins to go there was no further bids so I put one on it, half hearted bidding war that raised the price $80 and Id won. Fuck. So I dutilly made sure there was no money owing on it and transferred the money, an hour later had confirmation it had been received so txt my wife to see if she wanted to go for a drive to Rotorua because Id bought something I shouldnt have, her first guess was a car and when she found out what it was was more excited about the purchase than I was. Finished work at 2pm, picked up the car at 3:30 and was pleasantly surprised it was in better condition than I was preparing myself for. Drove it straight home (wife with her AA memebership card following) with the roof down and froze my ass off, home at 5 got one pic and then it was dark.
1 point
-
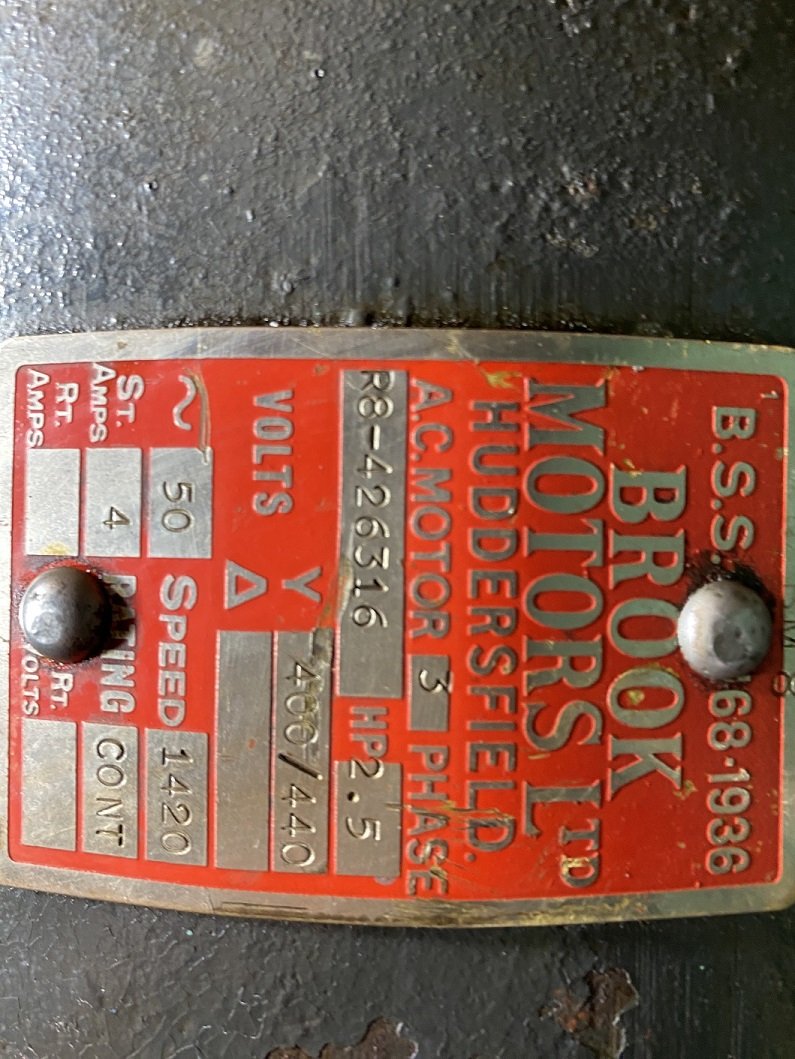
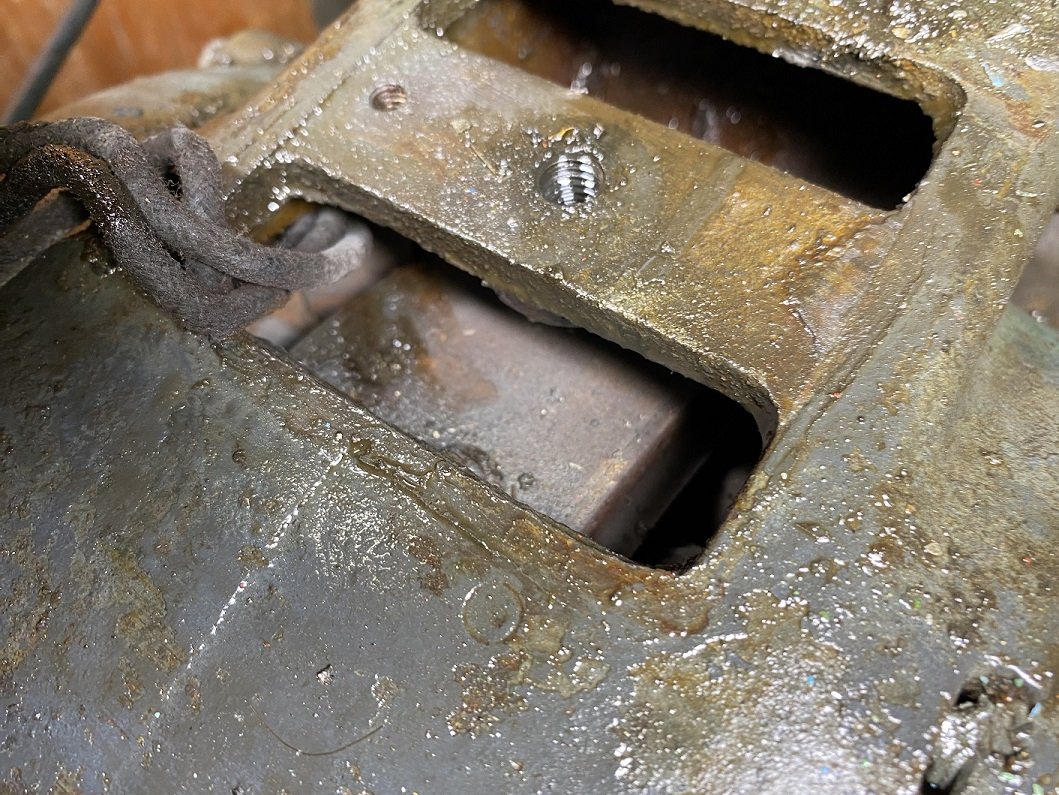
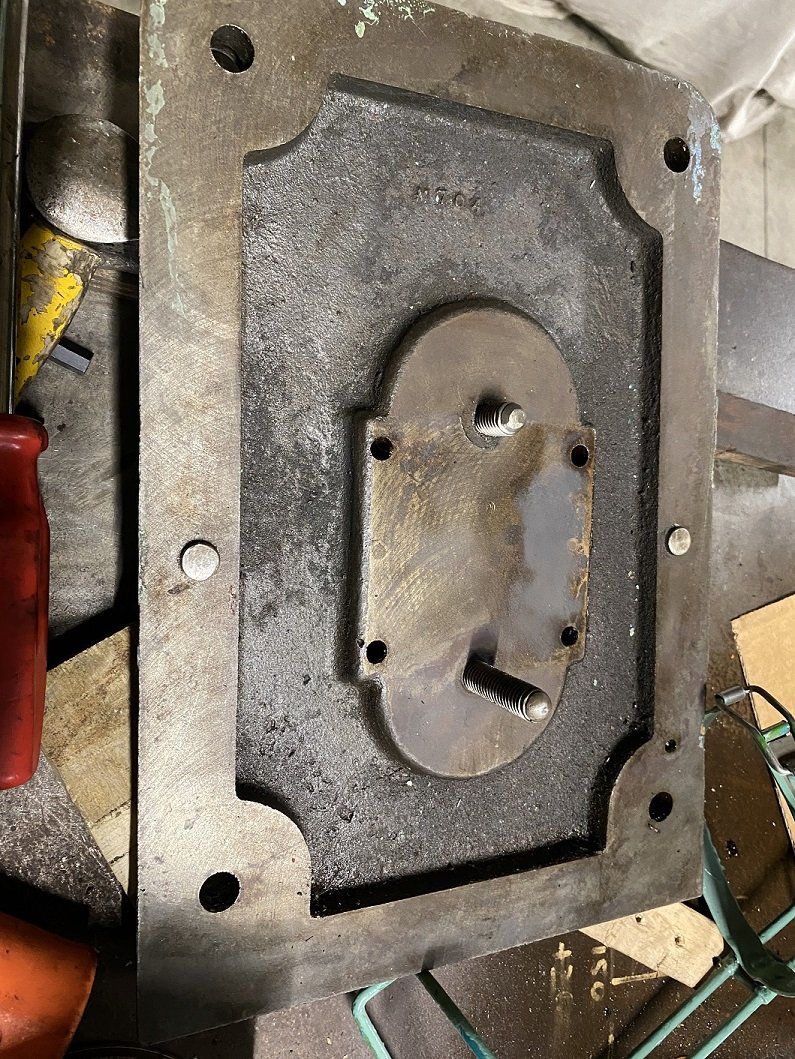
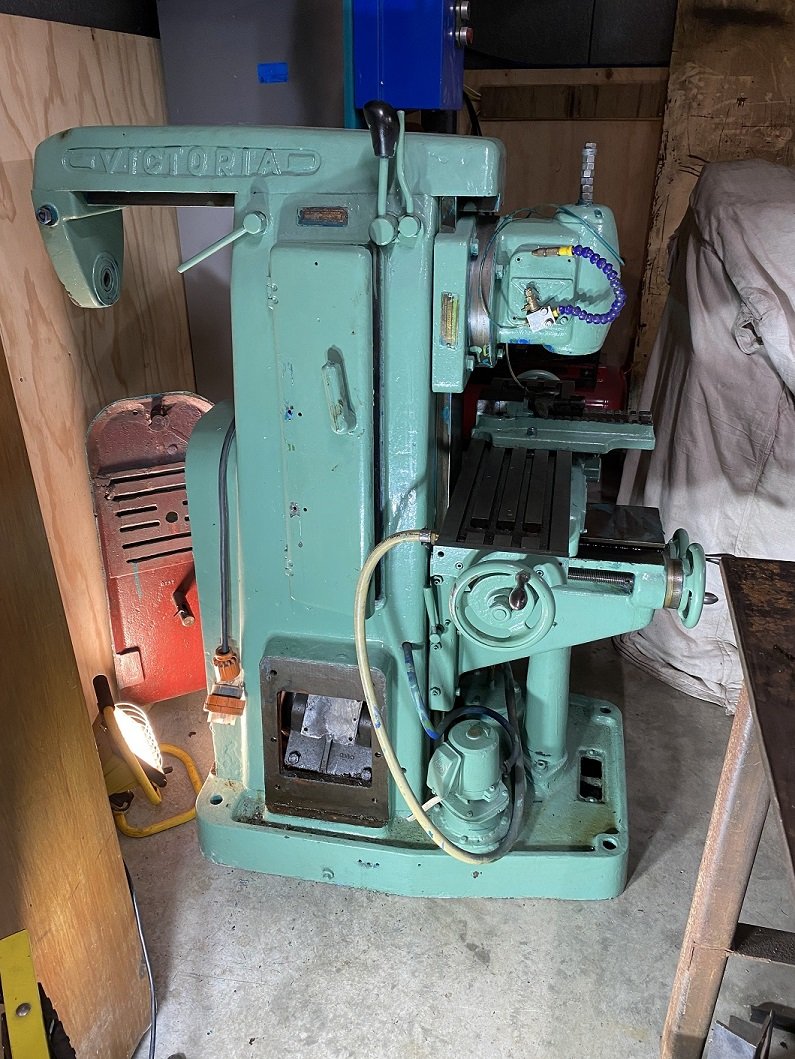
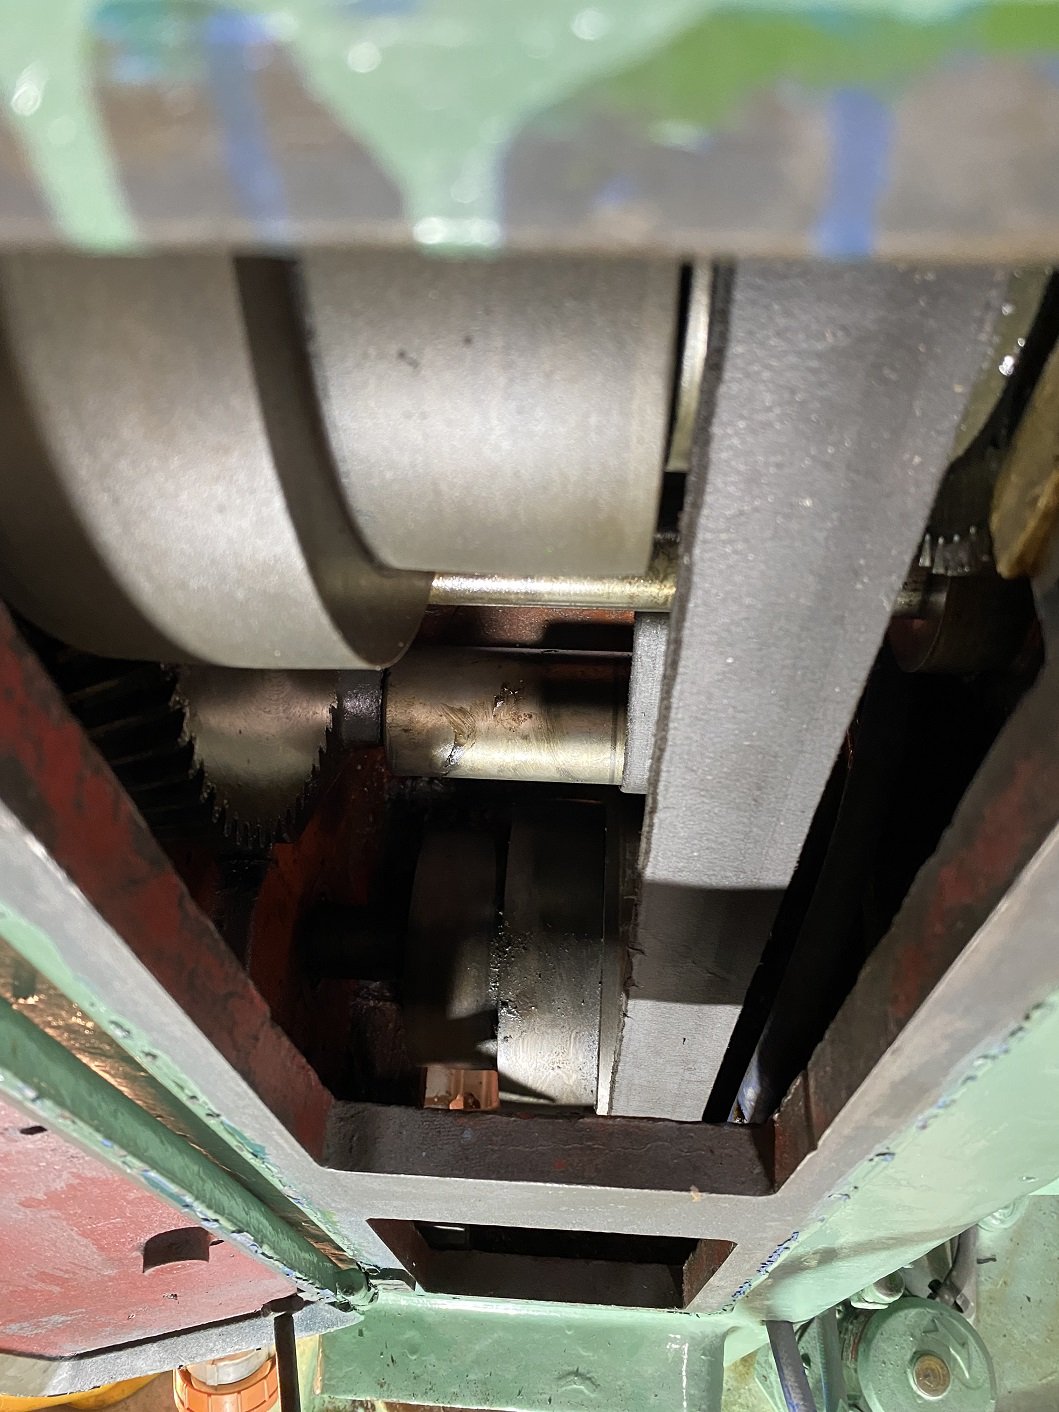
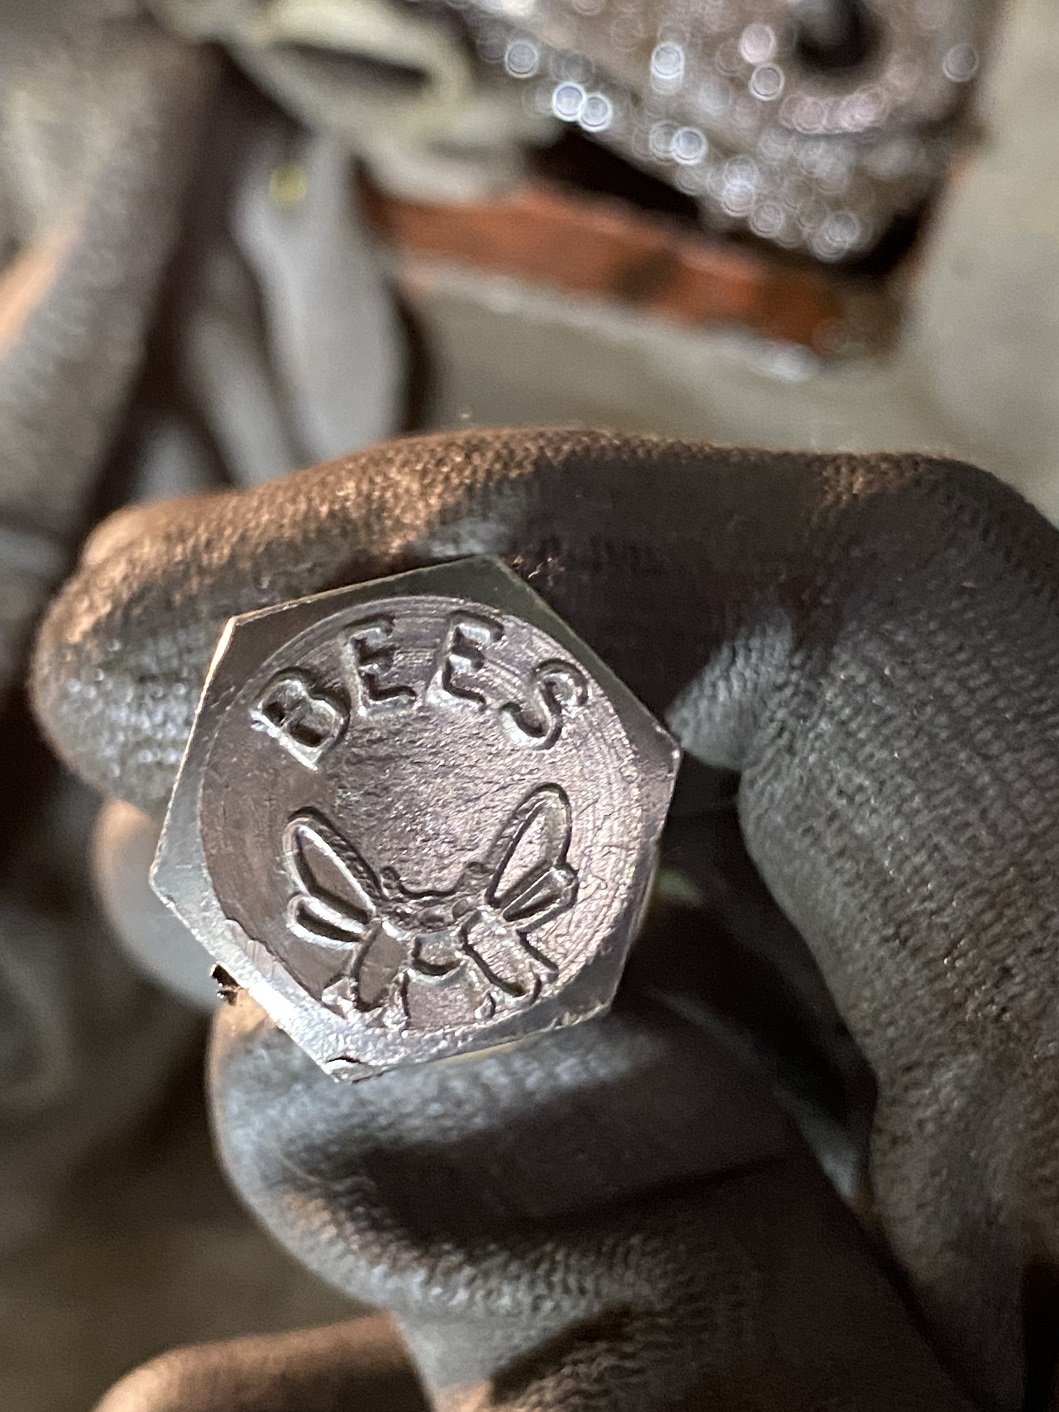
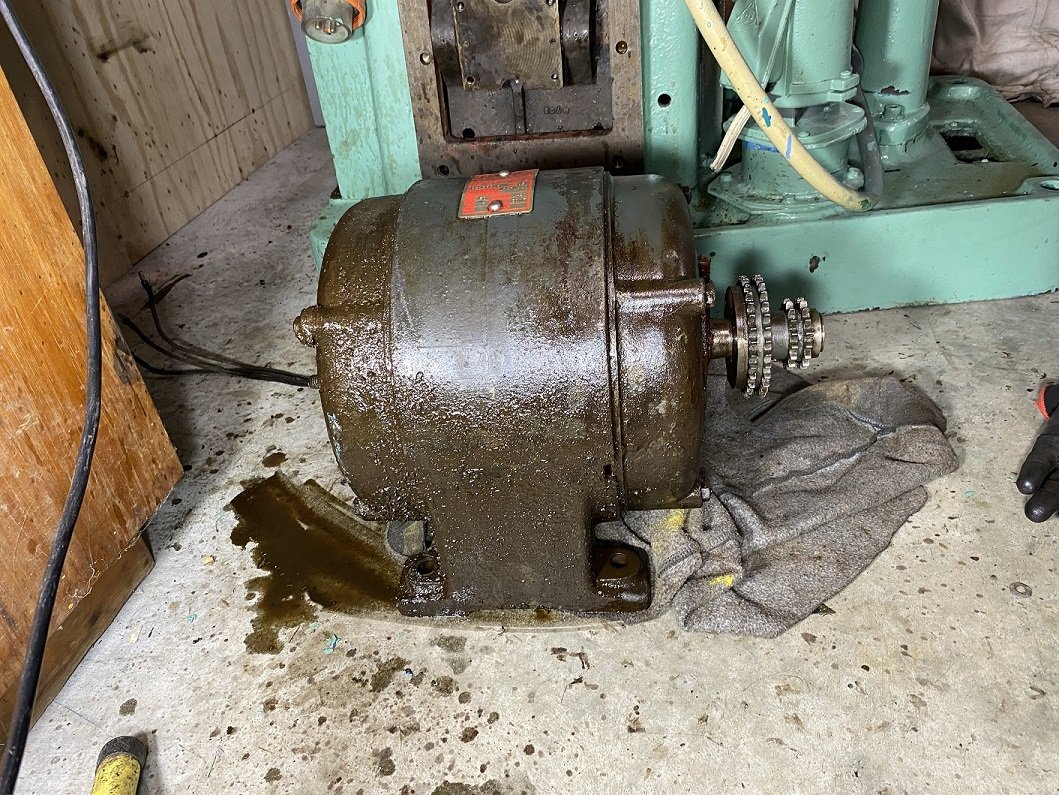
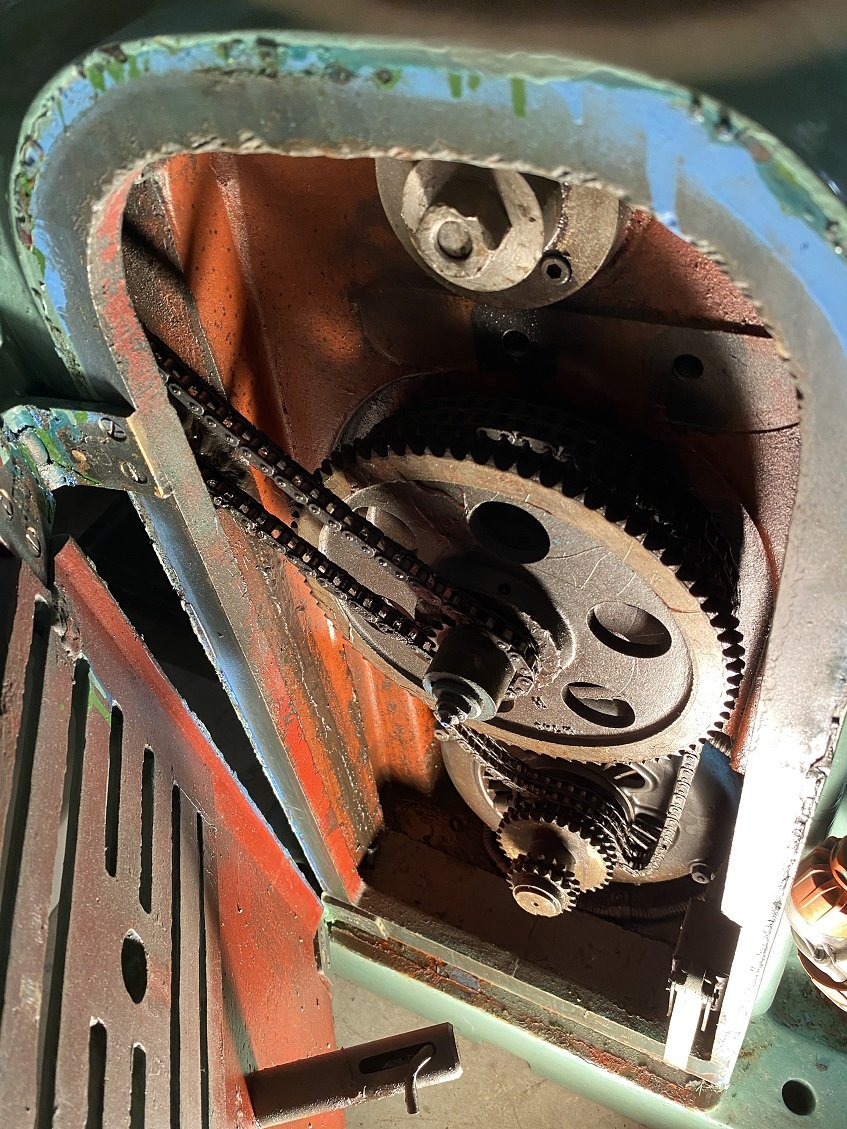
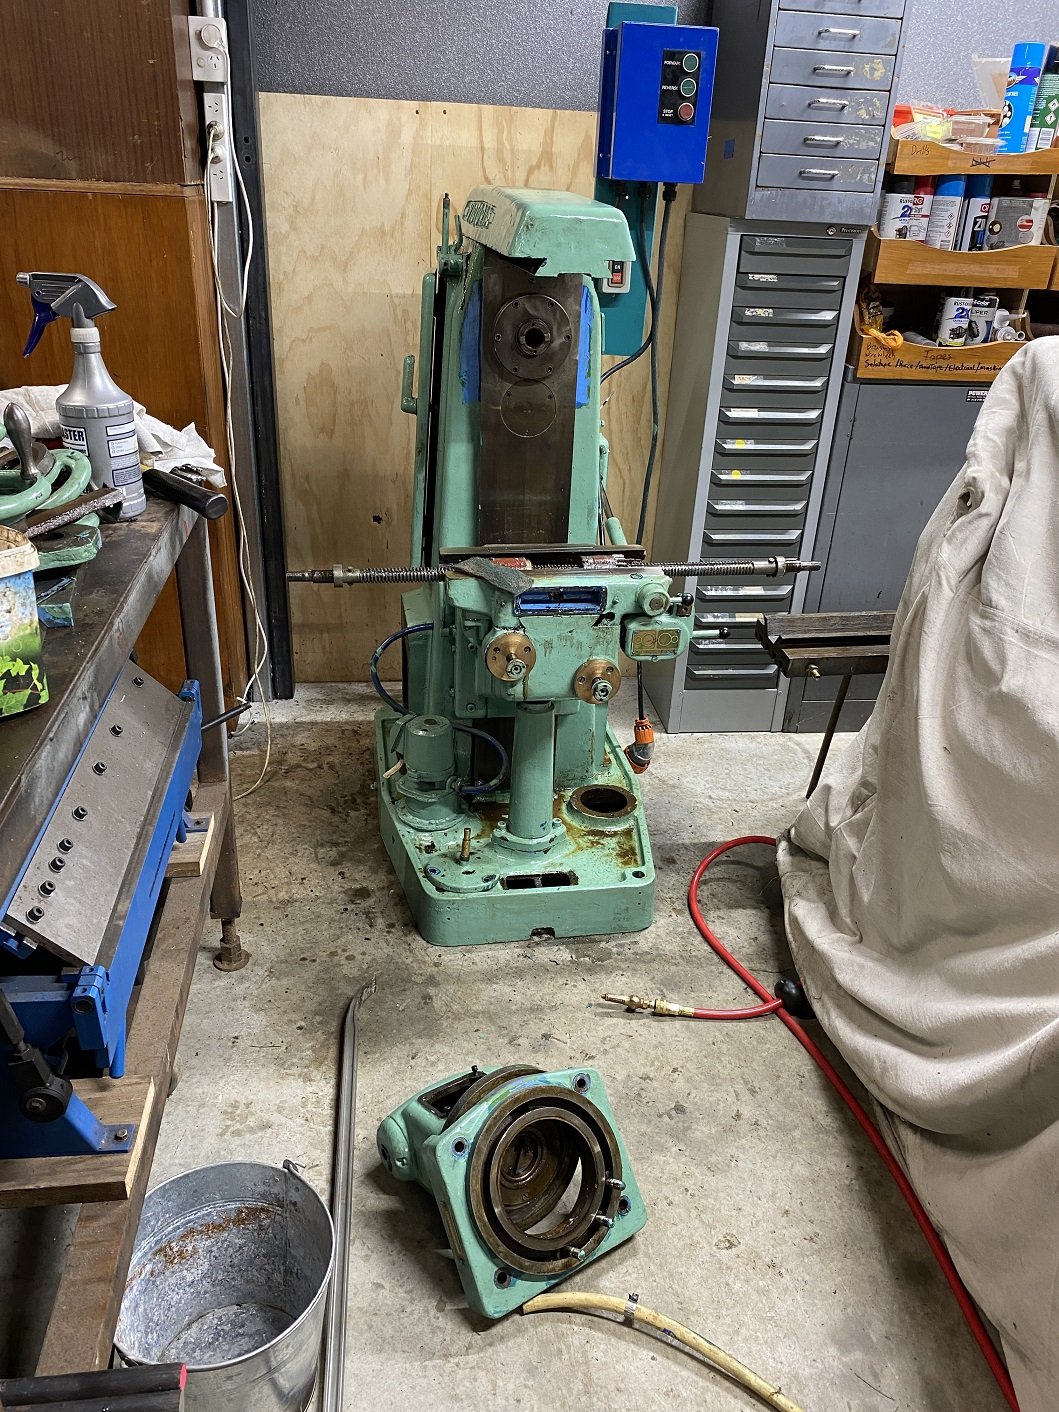
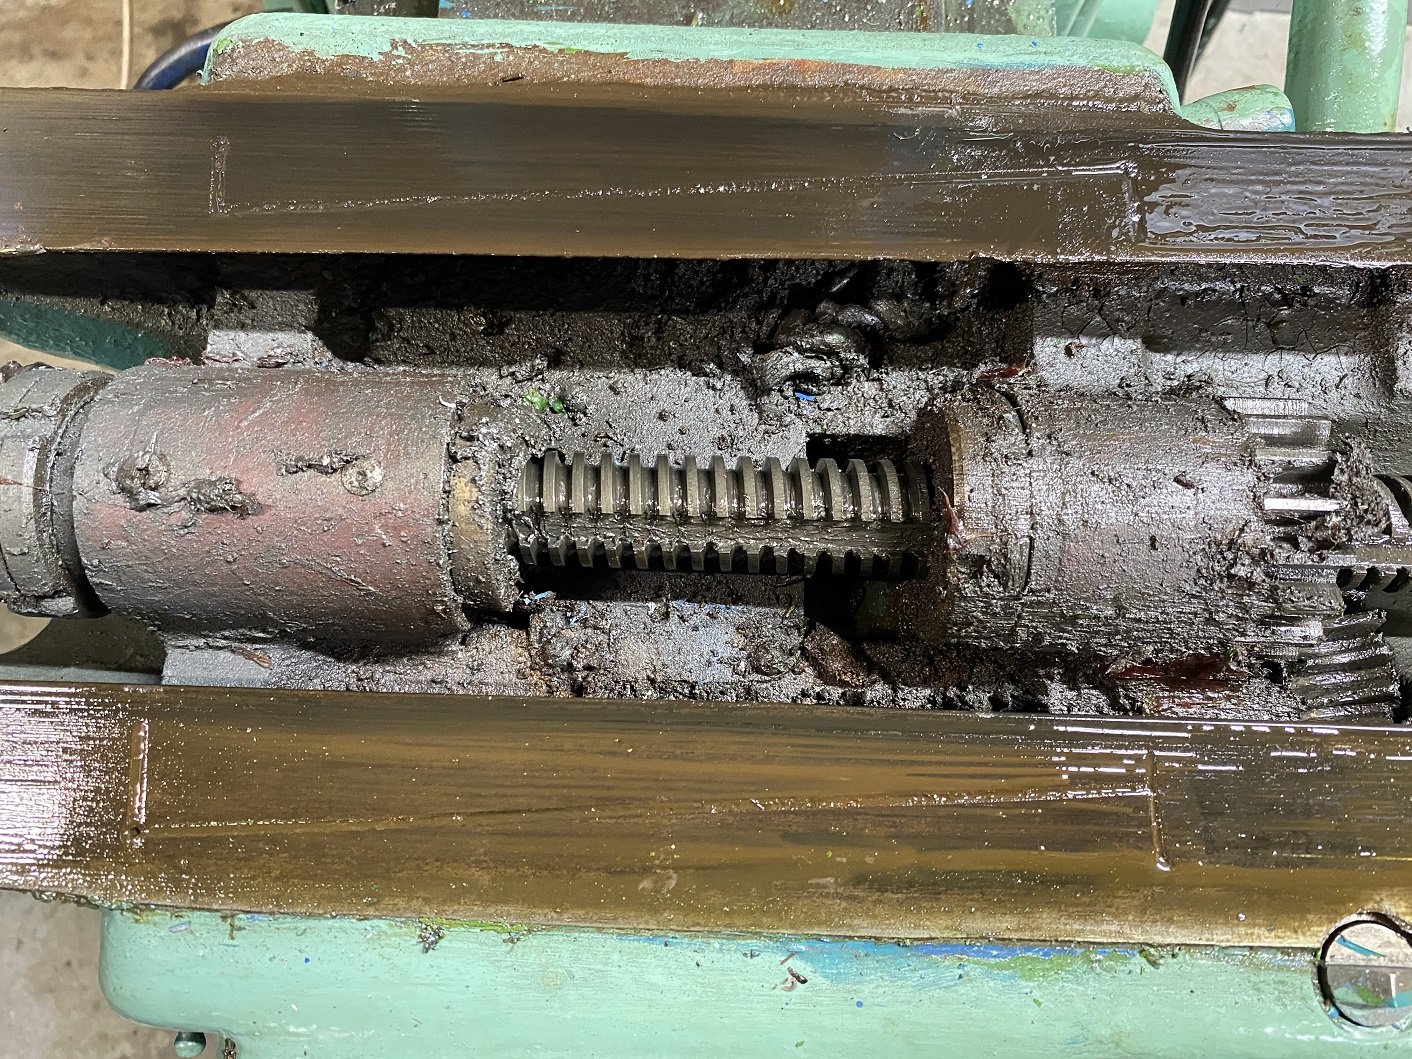
I just picked this up last weekend from one photo on Trademe from a guy who took 9 days to respond to my emails. It seems to be in okay condition. But there seems to be grease where I would expect oil, so the wheels are a work out to turn. And all the oiling nipples have been painted over. The inside is full of old oil and grease and dirt. So I guess I'll pull it apart enough to clean the grease out. First step. Get the motor out to find the info plate so I know what VFD to get. The motor is mounted to a rocking mount. That's bolted to this cover with a couple of threaded adjusters to adjust the tension on the drive chain. Yeh, CHAIN... The chain going off to the left is for the axis power feed gearbox. The motor BARELY fits through that hole, and it has to be at the right angle too. That big gear then goes into the column to some flat belt pulleys. I assume Everything has to come out of here to replace that flat belt. NFI how this is supposed to come apart, the manual I have is for the MK2 and 3, which are quite a bit different to my MK1. They changed to V pulleys instead of chain, and a gearbox instead of those flat belts. But I managed to get the motor out. It seems real big for 2.5HP. But it's short maybe? And after cleaning the filth off the info plate. I'll need a 400V 3 Phase VFD, it can't be wired to use 230v 3 Phase. Because the motor doesn't have separate terminals for the coils. It does have these cool looking BEES bolts.
1 point
-
Yanks claim they last longer than you might expect, so no biggie for racecar1 point
-
Ahhh yes- Cheers HandofWayne. I had already found that thread a while back when looking. I'm not sure if no thermal protection is a big deal, especially if like you say I can use fuses instead. So yeah - this one you've linked to could be the go.. Details here.. https://www.digikey.co.nz/en/products/detail/onsemi/ISL9V5036P3-F085/2509749 I've only just setup an account on RS. Not looked into digikey yet. I presume joe bloggs can create an account and order just a few bits ? That thread is for the 'lesser' models. I'm running a ms3x I plan on building the same setup I had on my Viva V6 - three ignitors mounted to an external heatsink separate to the ecu. It worked well. The barely got warm. I won't be asking much of them, same as on Viva it'll be a 6 post coil running wasted spark.
1 point
-
@gibbon ask @kws just how much difference a wideband can make - if only to economy.1 point
-
I've been taking it to bits to clean. The overarm support is really bloody hard to move, I've been using the sledge with a block of wood, then once it was forward enough, there are some holes I can get the prybar in. The part of the gib strip I can see looks suspiciously like aluminium flatbar..... Hopefully it's not. Just because they look like grease nipples on your mill or lathe, doesn't mean they are used for grease. OIL! OIL! OIL OIL OIL OIL !!!!!!!!!! No wonder it took so much effort to turn the wheels. I cleaned up the top surface and it's real dark, like black, but I can't feel obvious scoring, so I'm hoping it's okay.
1 point
-
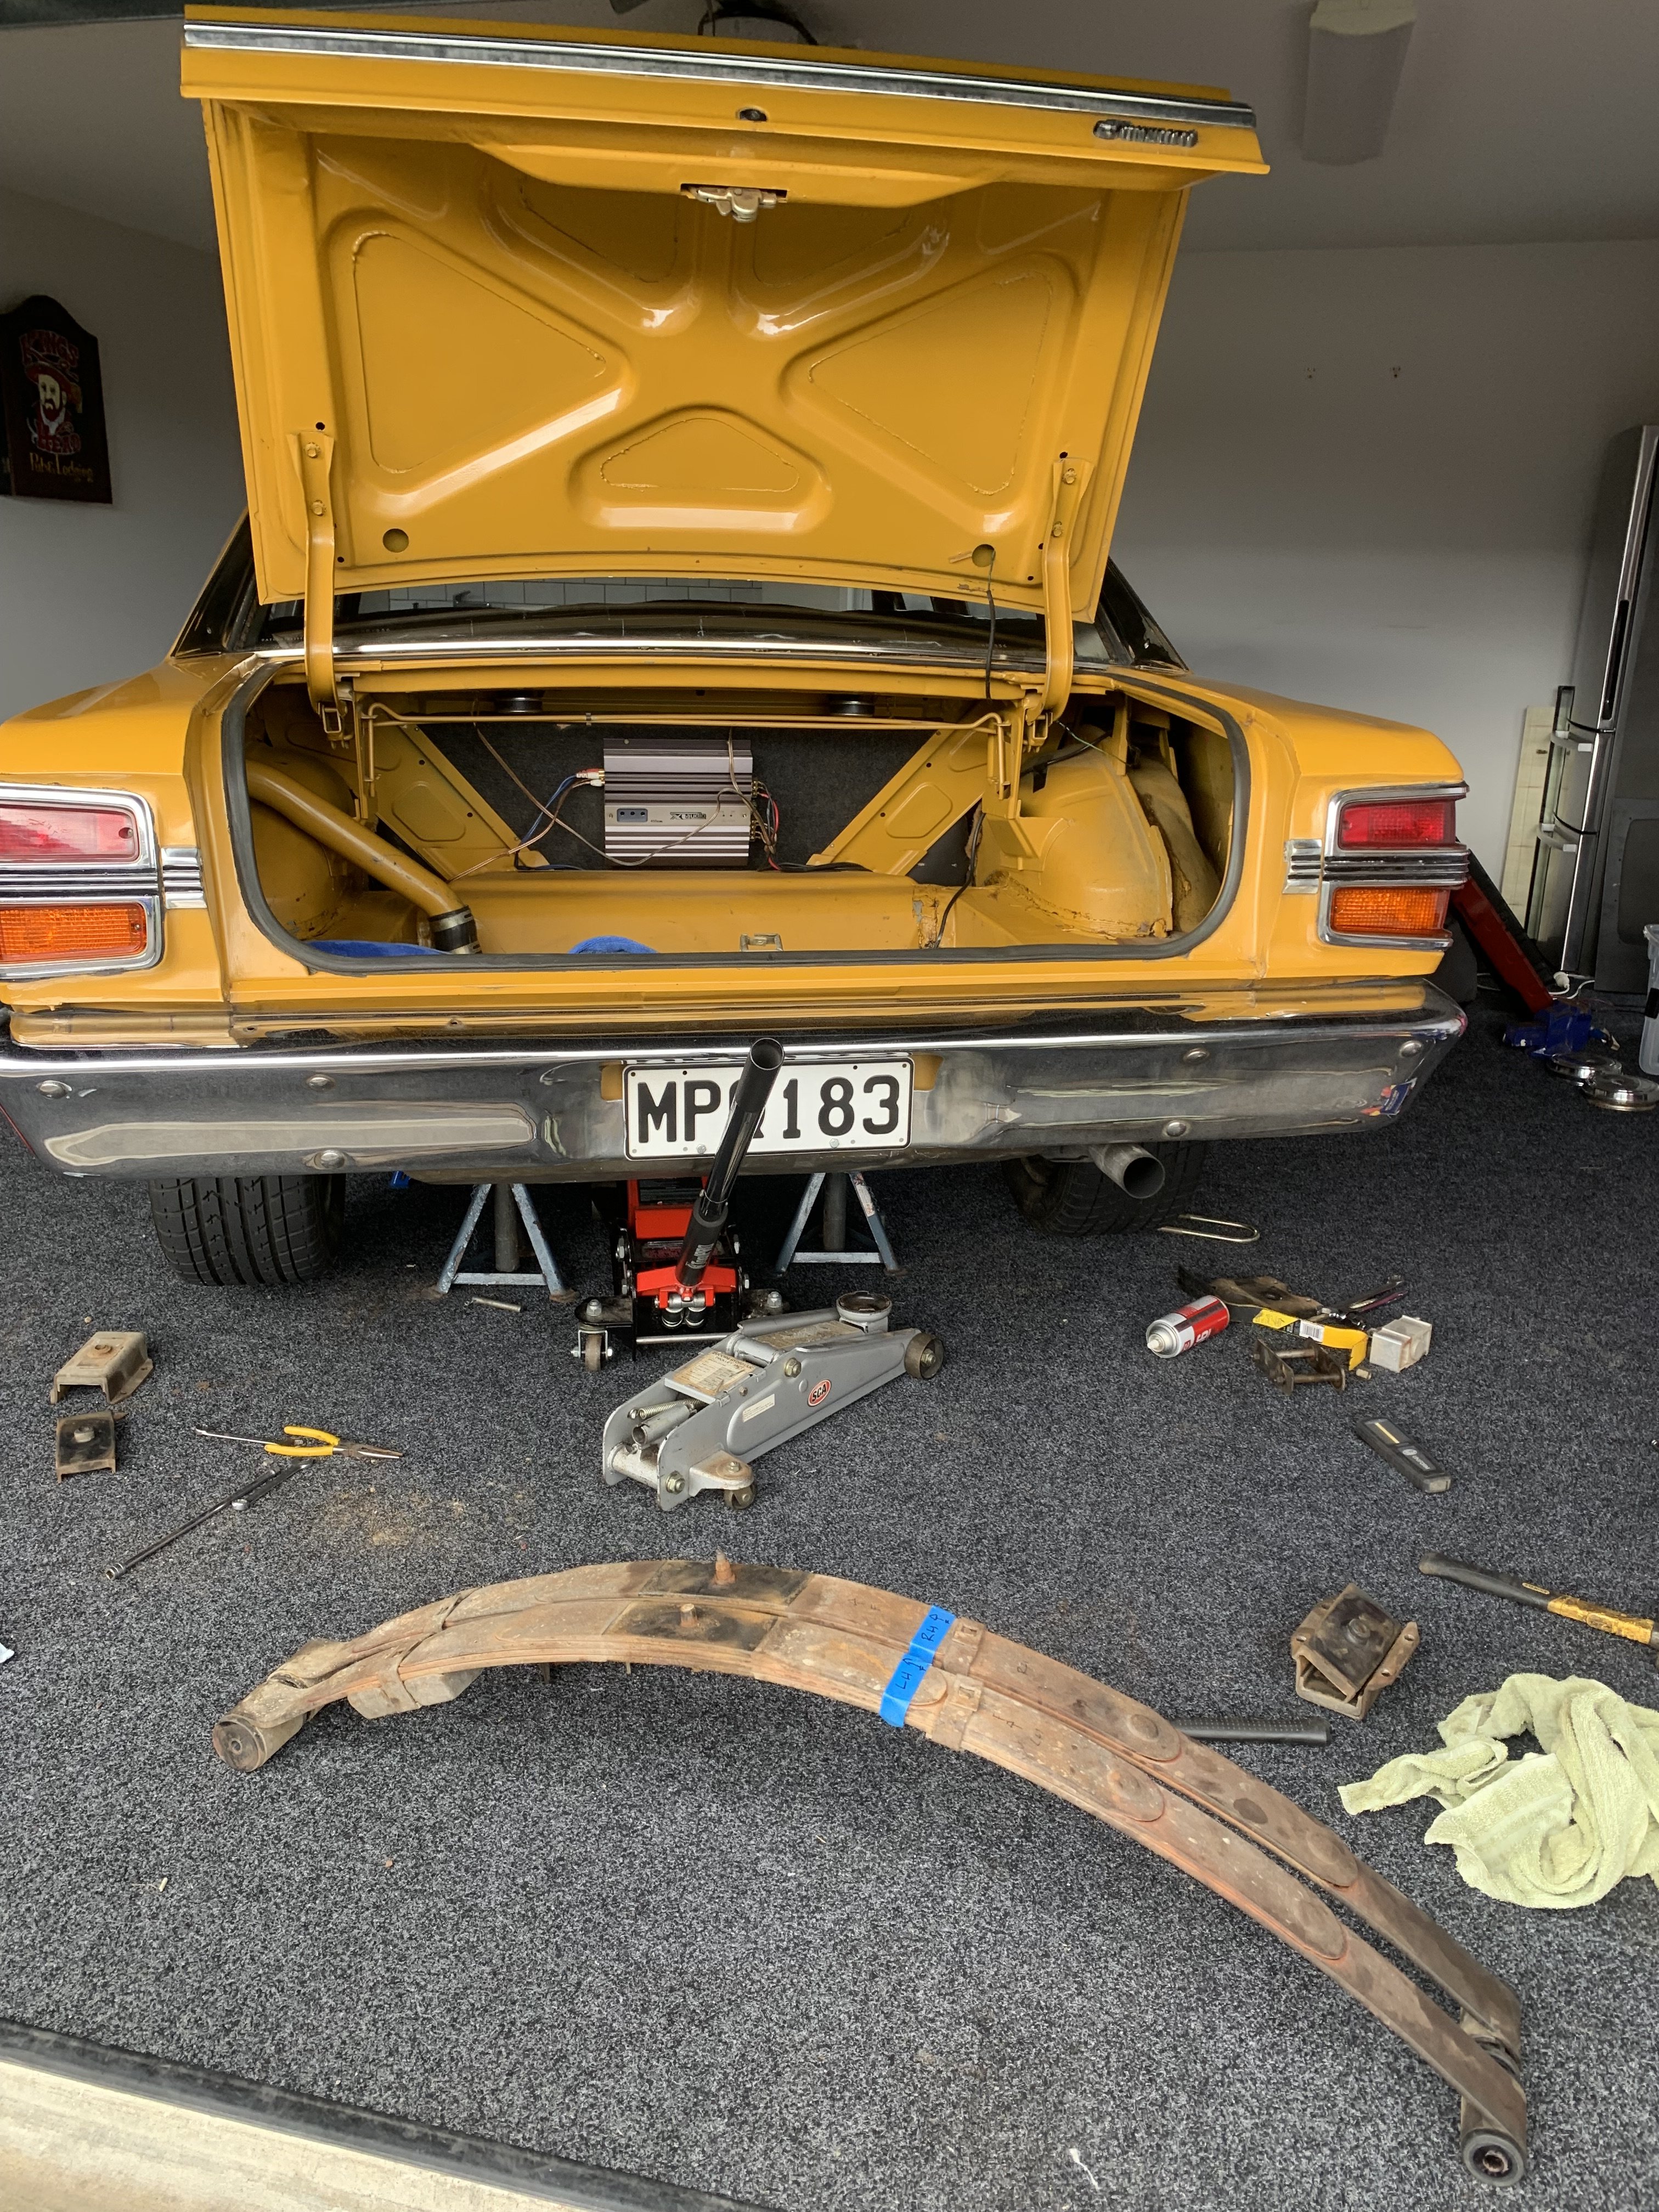
Leaves are out and will be off to old mate to flatten them out. New shocks ready to go in and I guess I best order new bushes for the hell of it now and paint the components.
1 point
-
Rear door alignment - Chapter 1 While I'm focusing on the rear barn doors, I figured it was time to see if I could sort out the door gaps. From day one they have been all over the show with signs of rubbing on the two top corners where the doors meet. Now in hindsight this job would have been much easier without having to fight against new rubber seals that still need to bed in, but it's too late for that now, so I just had to crack into it. First step was to loosen off the old door bolts. I hate these things with a passion as they always look crap with bits of flaking paint and weeping rust and the star heads make them a real bugger to get out if they haven't been moved in a while. Long term I'm thinking I'll do the same as I did on my Bedford van and replace them with stainless steel machine screws, but that's for another day. So as is typical with these things all but one of the bolts backed off okay. Ended up having to use an easy out for the last bolt. Did I mention how much I hate these bastards.
1 point
-
I think they are slightly bigger than a MX5? Or maybe thats compared to a NB rather than the earlier NA ones. Certainly small though, I lost it in the work carpark the other day as it was parked between a AU Falcon Wagon and a Ford Everest. As for storage, not much in the cabin, has a parcel tray when the roof is up and a little storage compartment between the roll bars but thats it. Havnt managed to open the boot yet, that was the plan for yesterday but ended up getting called out so ran out of time after id given it a wash. Cleans up pretty good (apart from the bonnet which has been painted by a blind man)
1 point
-
They're PA12 nylon. Ideally would have a radius there, but modelling program was being a dick about it. If it starts to crack there I'll lay carbon sleeve over it like my other ones. However, with an e-throttle manifold and vertically oriented throttles. There's actually very little load on these. The throttles being a single piece ties it all together and add strength. Where as with a cable pull manifold you have to make them really strong, to resist cable force from pedal. Especially like 4AGE throttles where each individual throttle wants to move relative to the next. Each one tries to twist away from the others.1 point
-
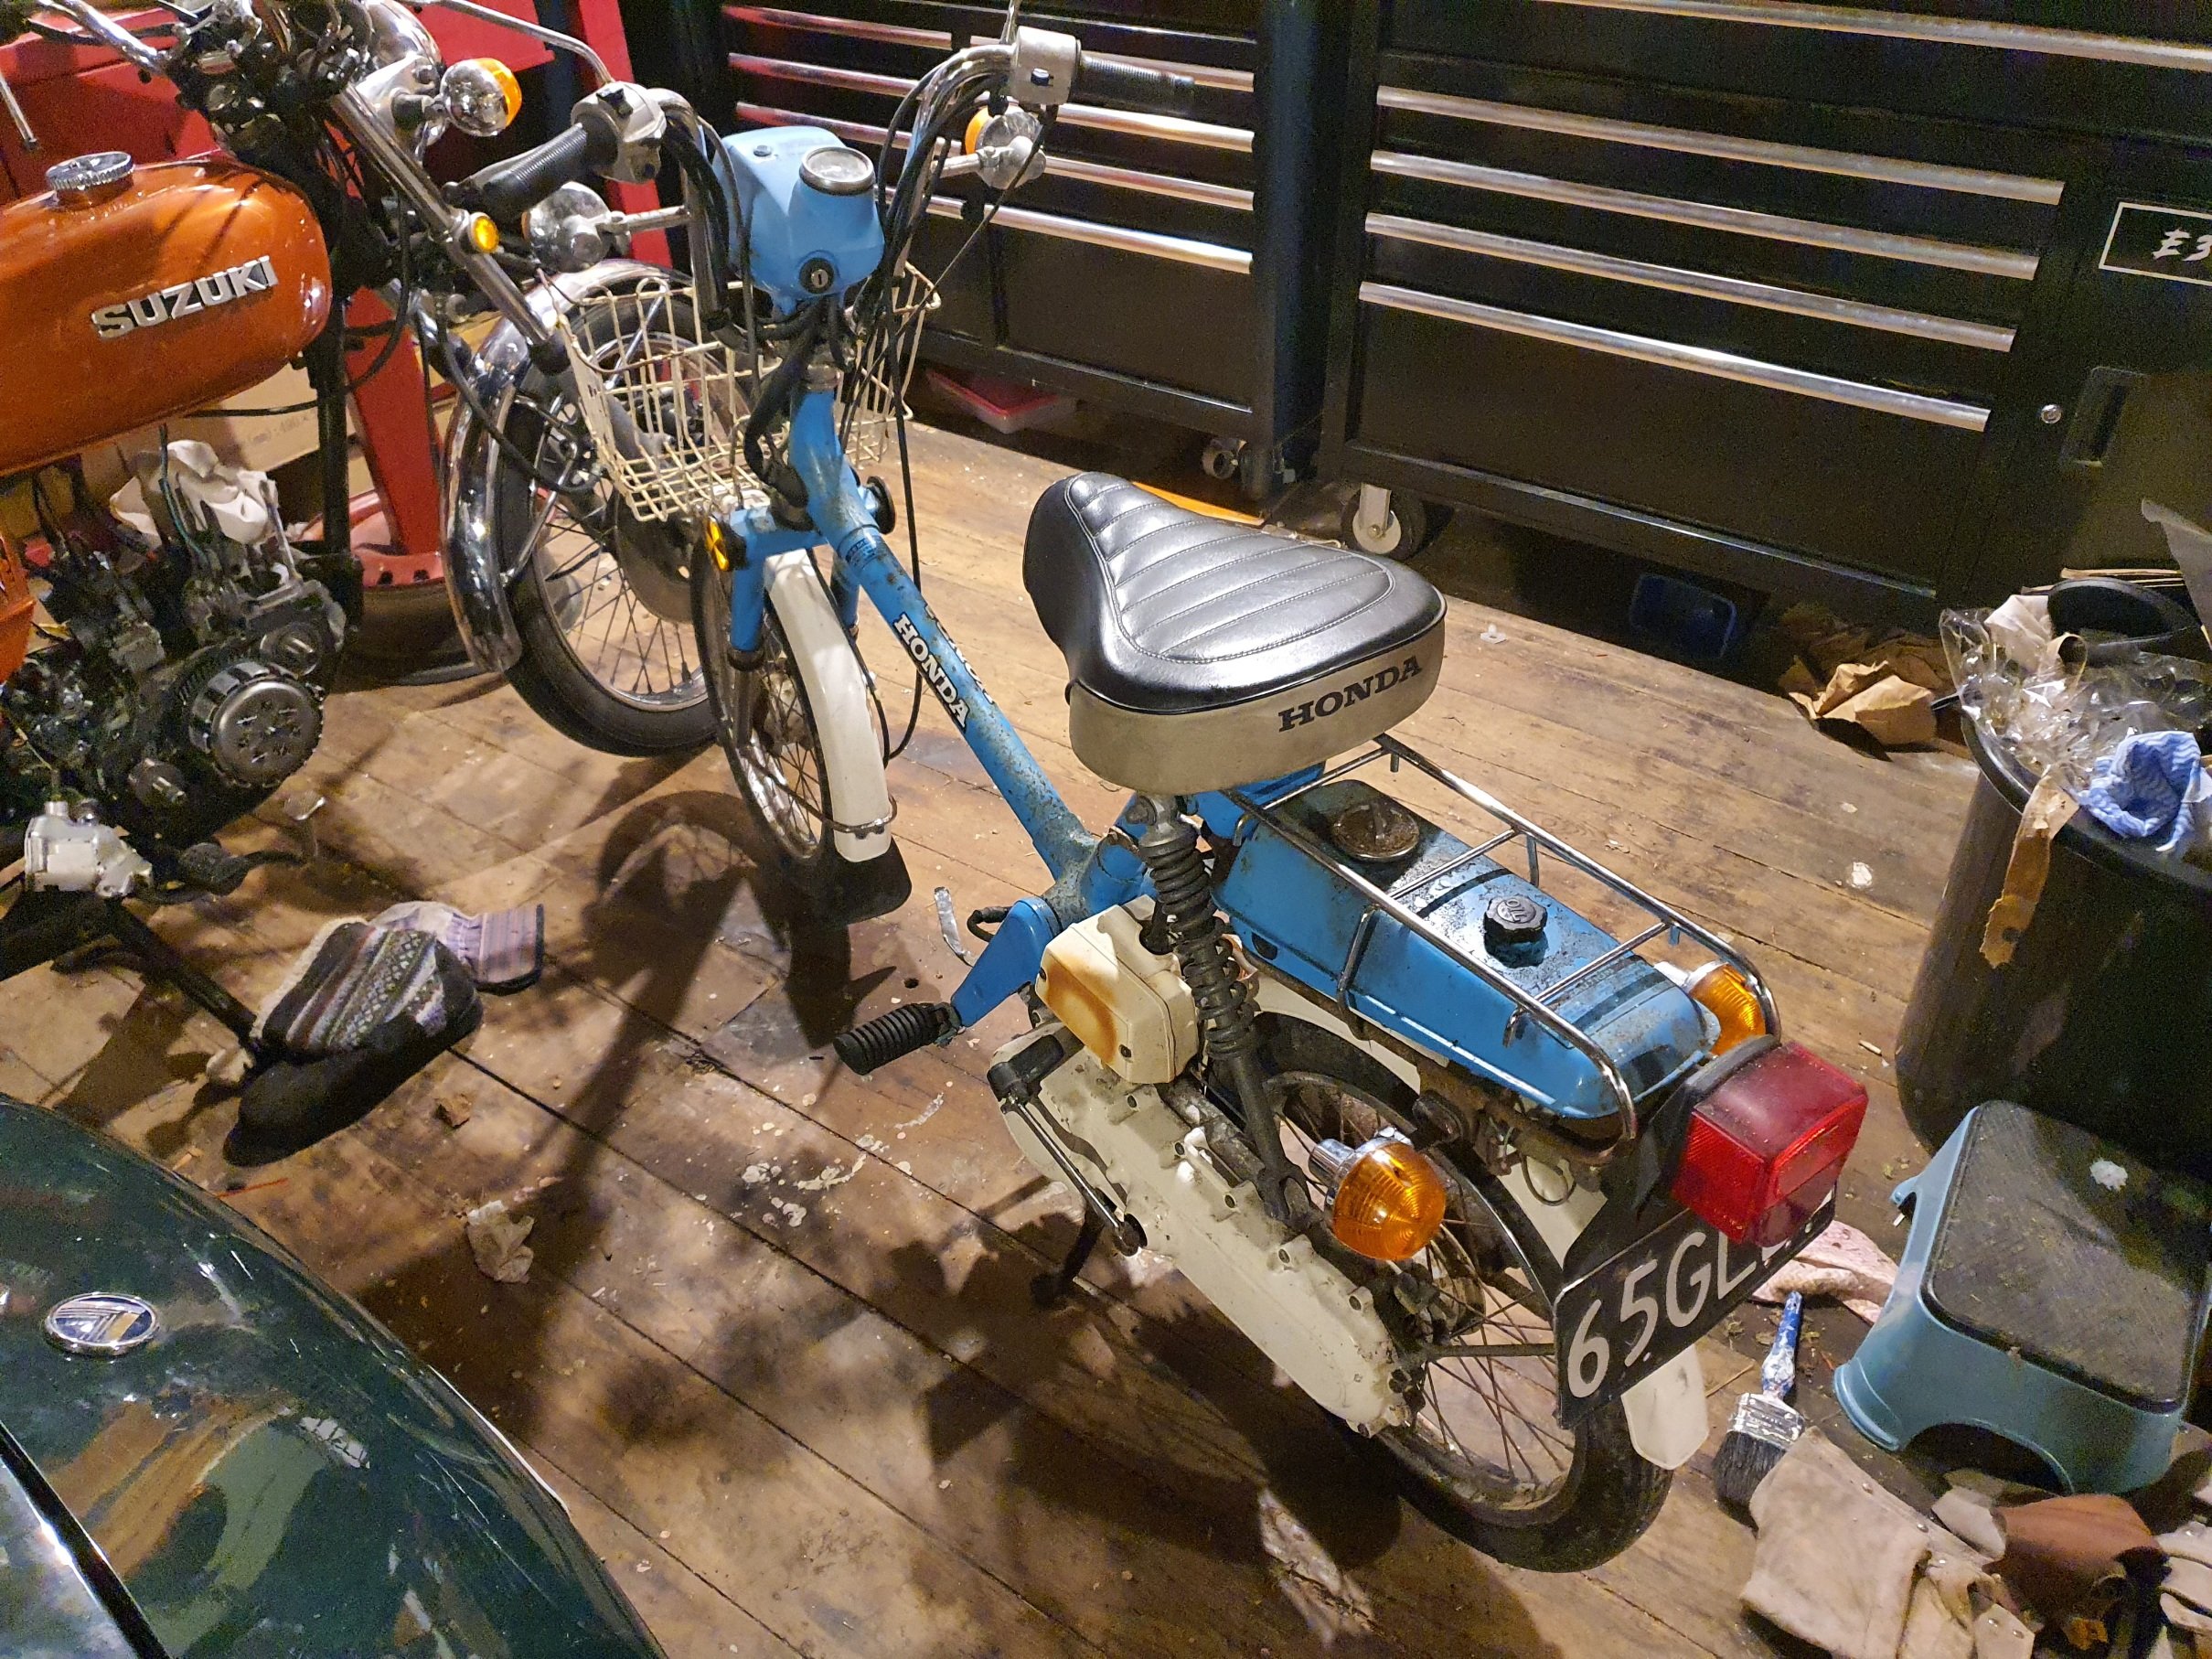
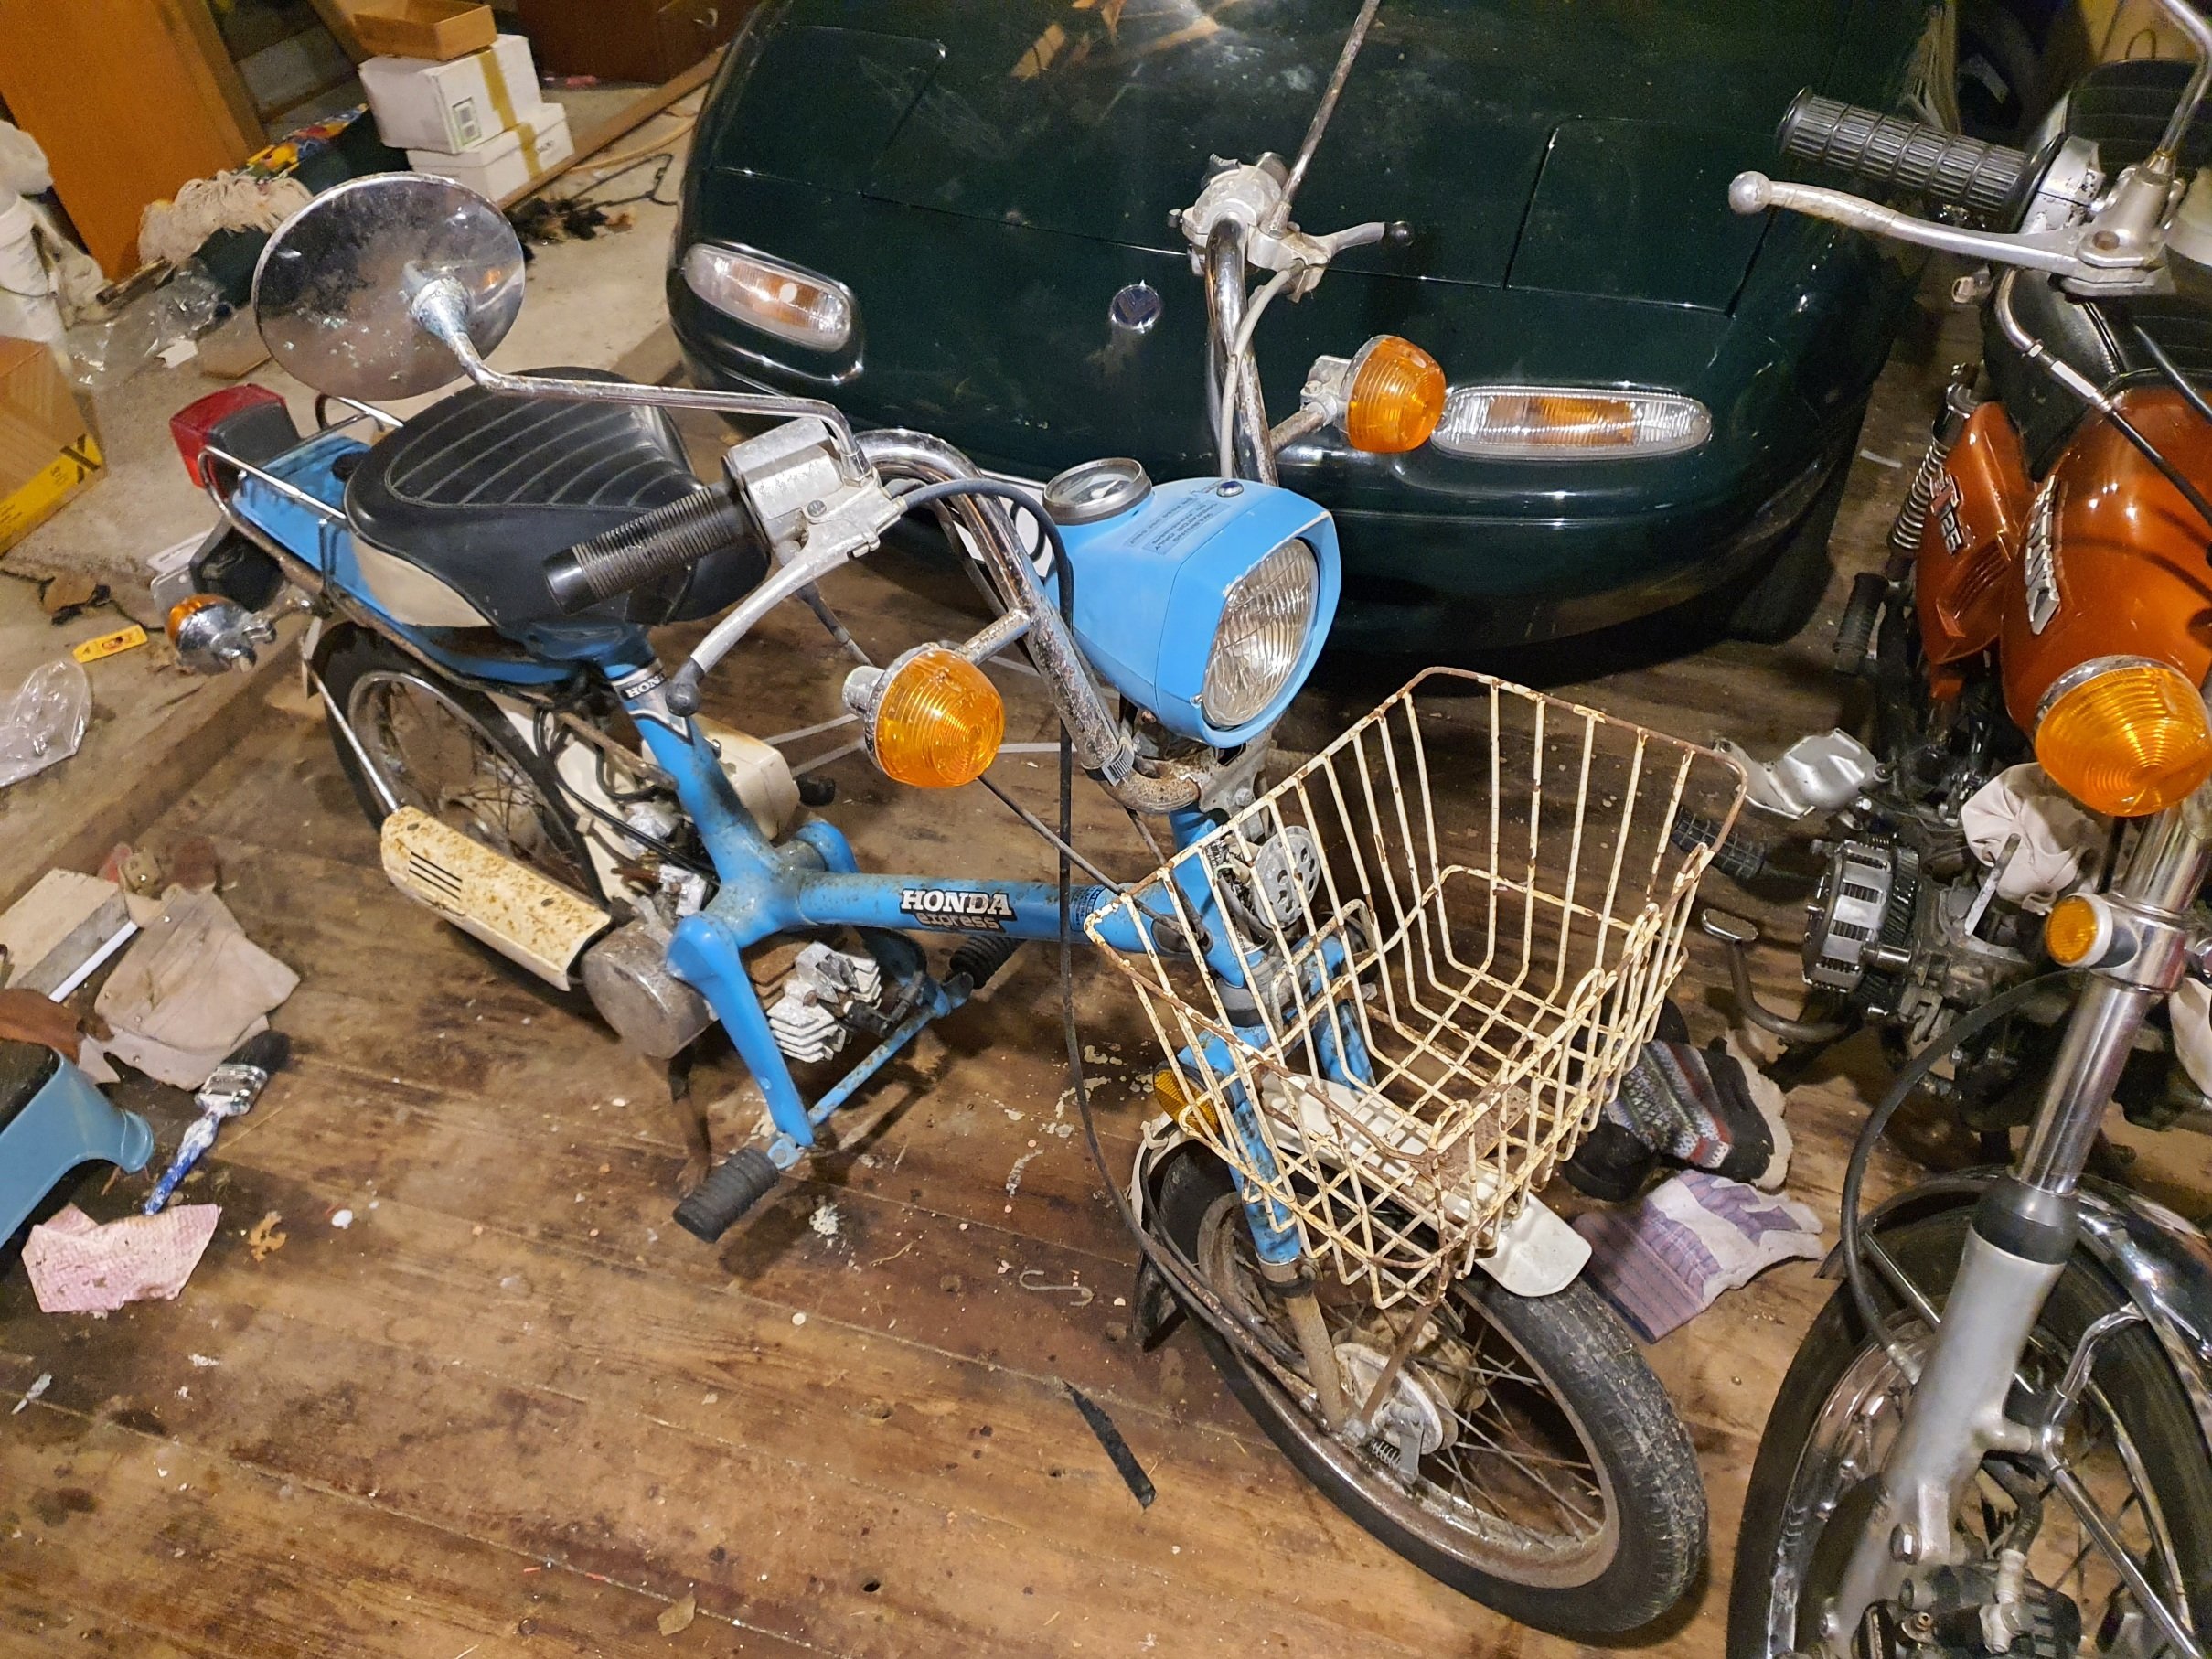
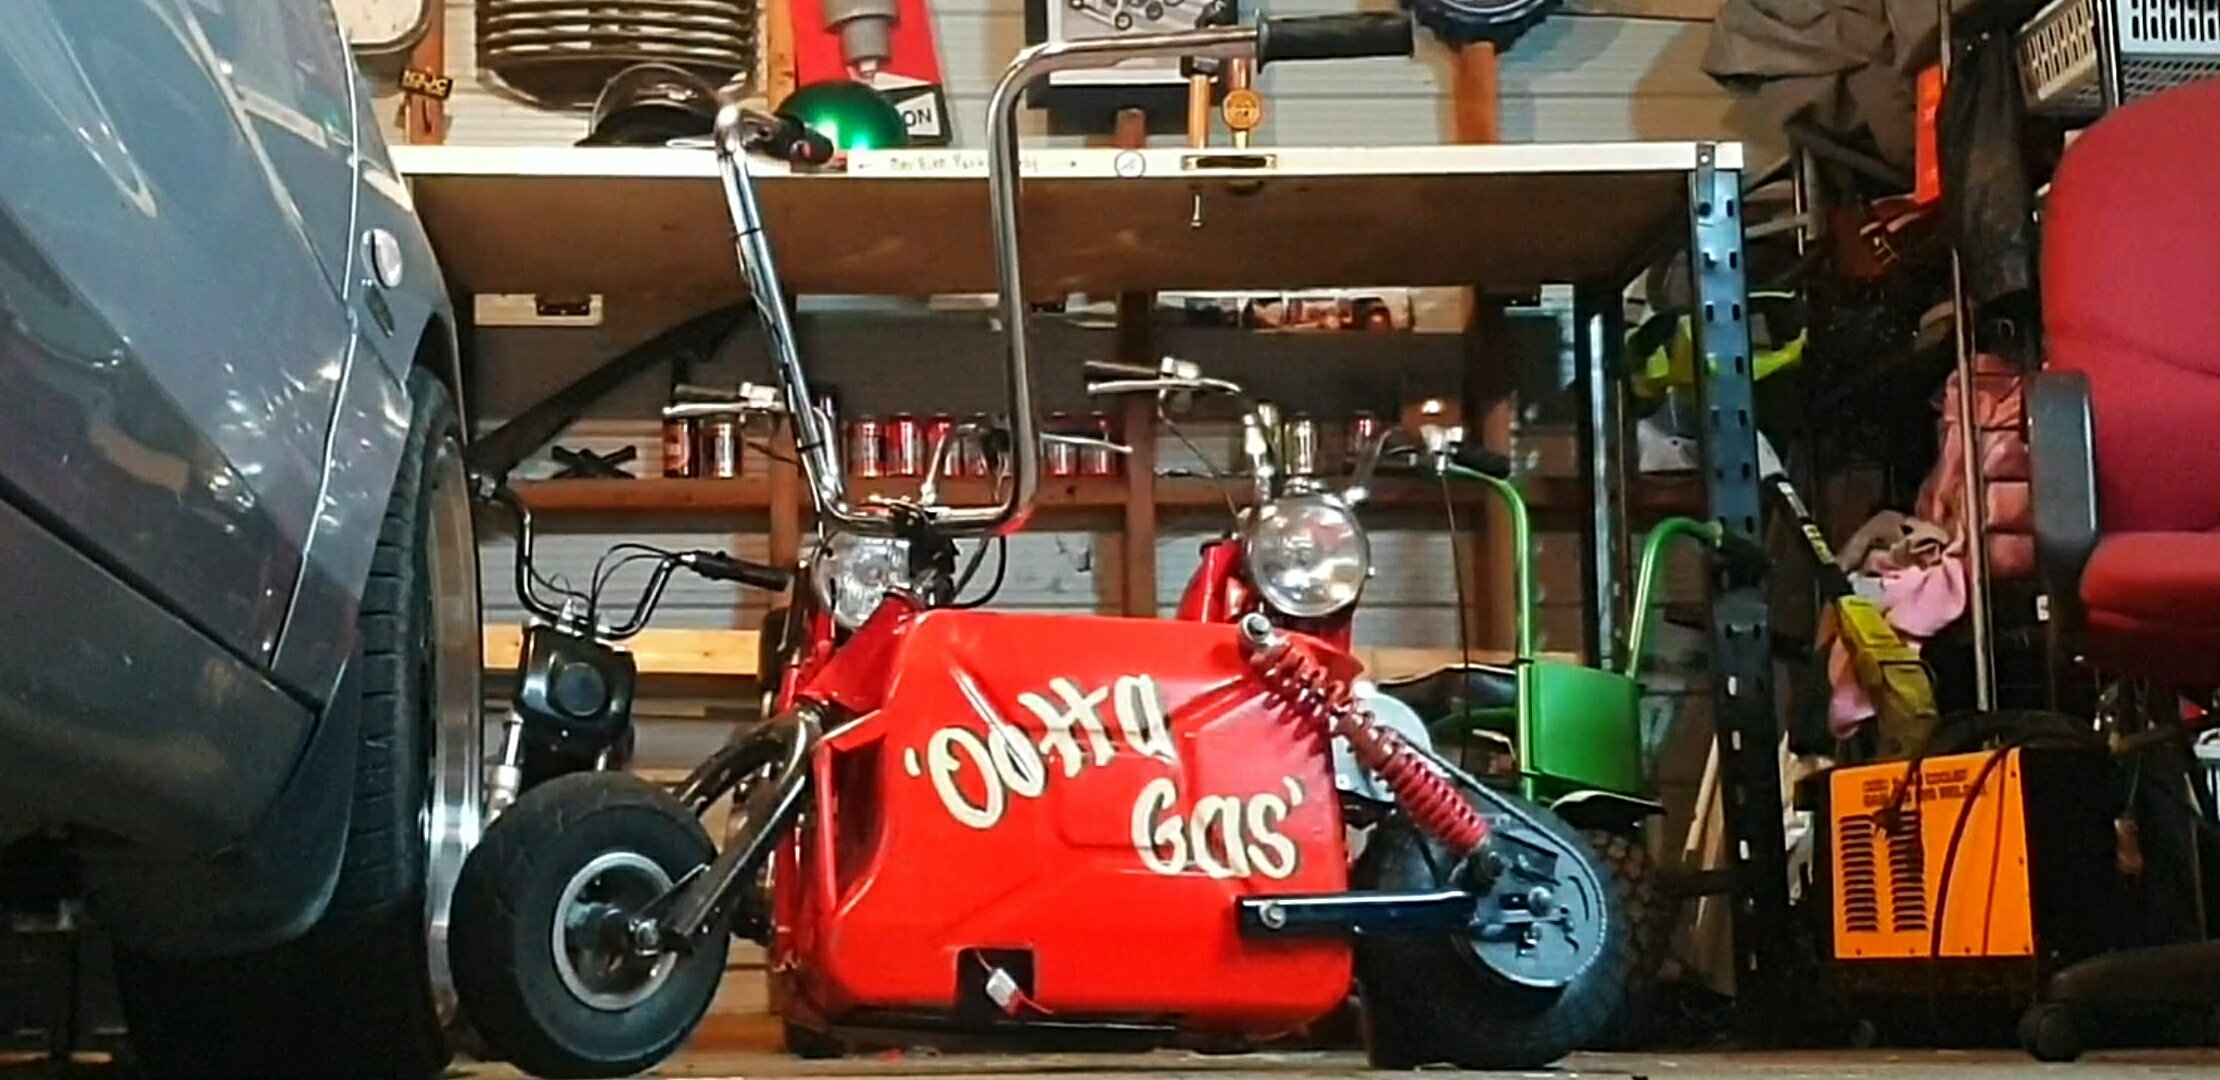
So I accidentally did this. It's beautiful. I've been trying to find a C50 or C90 to do stupid trips on, this is not that. My life is almost complete
1 point
-
The fella I picked it up from was off site and had the key (he is sending it to me) But I can't wait for play time. Threw the young one at his bed and ran to the shed with a rum. Popped the ignition barrel out and gave it the trusty gentle screw driver. Pump the wind up kick start, grab the brake lever and it's a runner! Perfection1 point
-
1 point
-
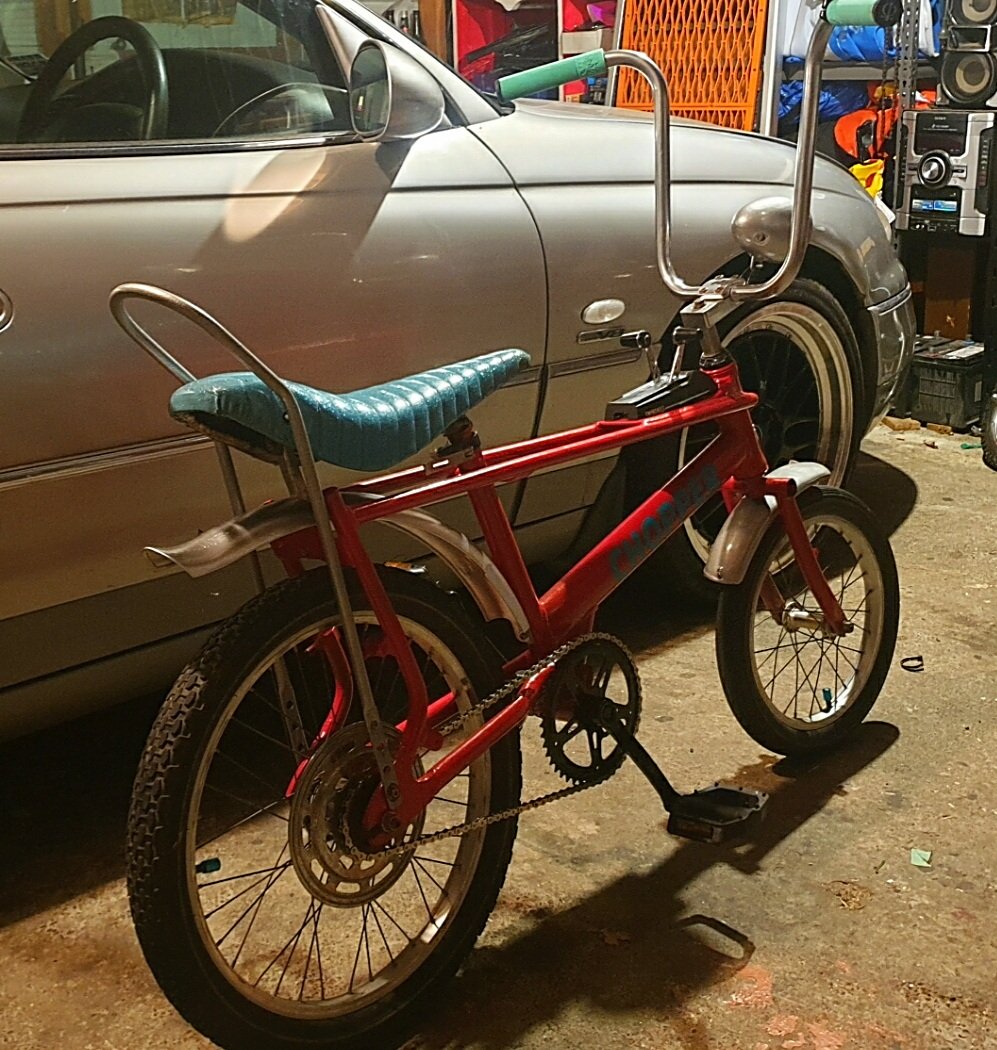
Oh yea a metal rear guard
1 point
-
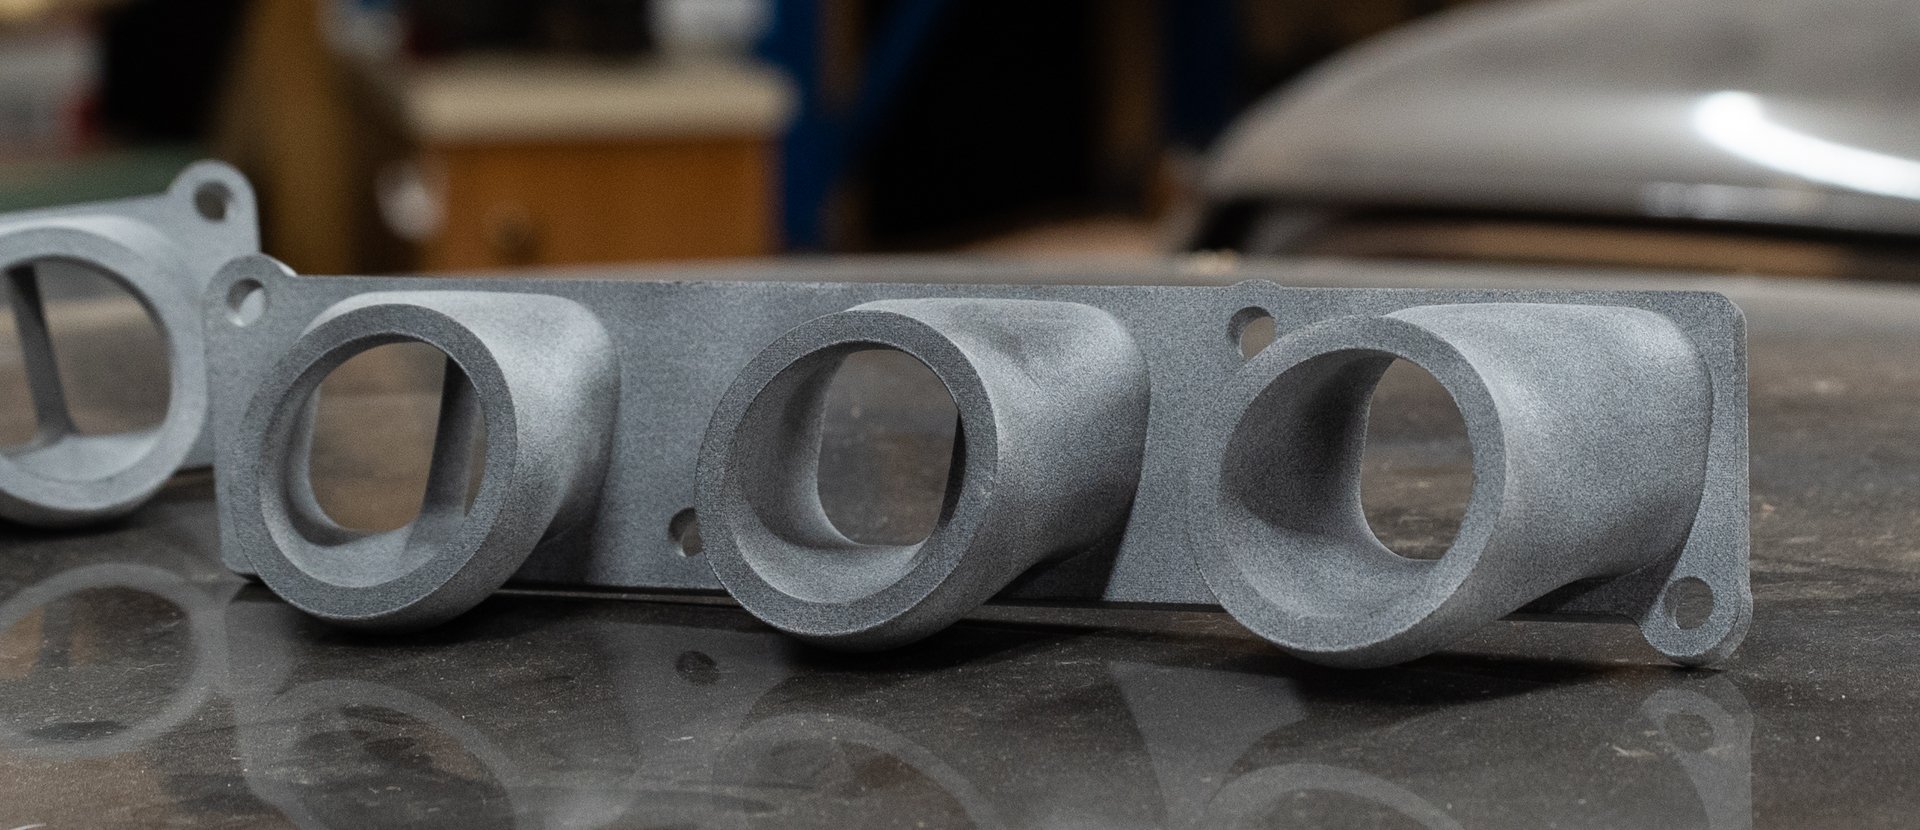
New manifolds turned up, and hooooly hecka they are amazing! No infill, no layer lines - fully solid so they feel really strong. The dividers have a super sharp leading edge on them, and all the details are great. I think from now on, I'll keep using my printer mainly for PLA based prototyping, then will have final parts made this way.
1 point
-
The rear chassis crossmember was a bit beat up, so made up a new one and welded it in. Bought some shorter shocks to suit and remounted the original shock mounts. Made some handbrake cable and brake hose mounts since the original ones were removed with that old crossmember. Pulled out the engine and front suspension/steering so I could flip the chassis up side down to finish the underside of the c-notch. Absolutely no idea what happened here. Seemed like it was hacked out for the driveshaft to hang lower through, but it went no where near there at full droop. Grinding marks look like the lost control of a 9" grinder haha. Cut the old bit right out and made a nice new replacement piece. Underside of the c-notch plated. All welded up. Made some notches for clearance around the shock on either side. Changed my mind about the top arm and having the y-bone style arm after reading lots of people having issues with them breaking caused by the diff twist. Didn't seem like the best way to keep the diff central either. Maybe okay for a bolt in job, but everything else has been cut up and modified, so I thought I may as well make something decent. Decided to go with a watts linkage on the back of the diff and keep the single, two point arm on the top. Seems like the best way to keep it all central with no binding throughout all the travel.1 point
-
Looking like a barn find but atleast the sheds tidy. Found all the bits I need for the engine swap and its ready to get trailered off the fab mans house1 point
-
1 point
-
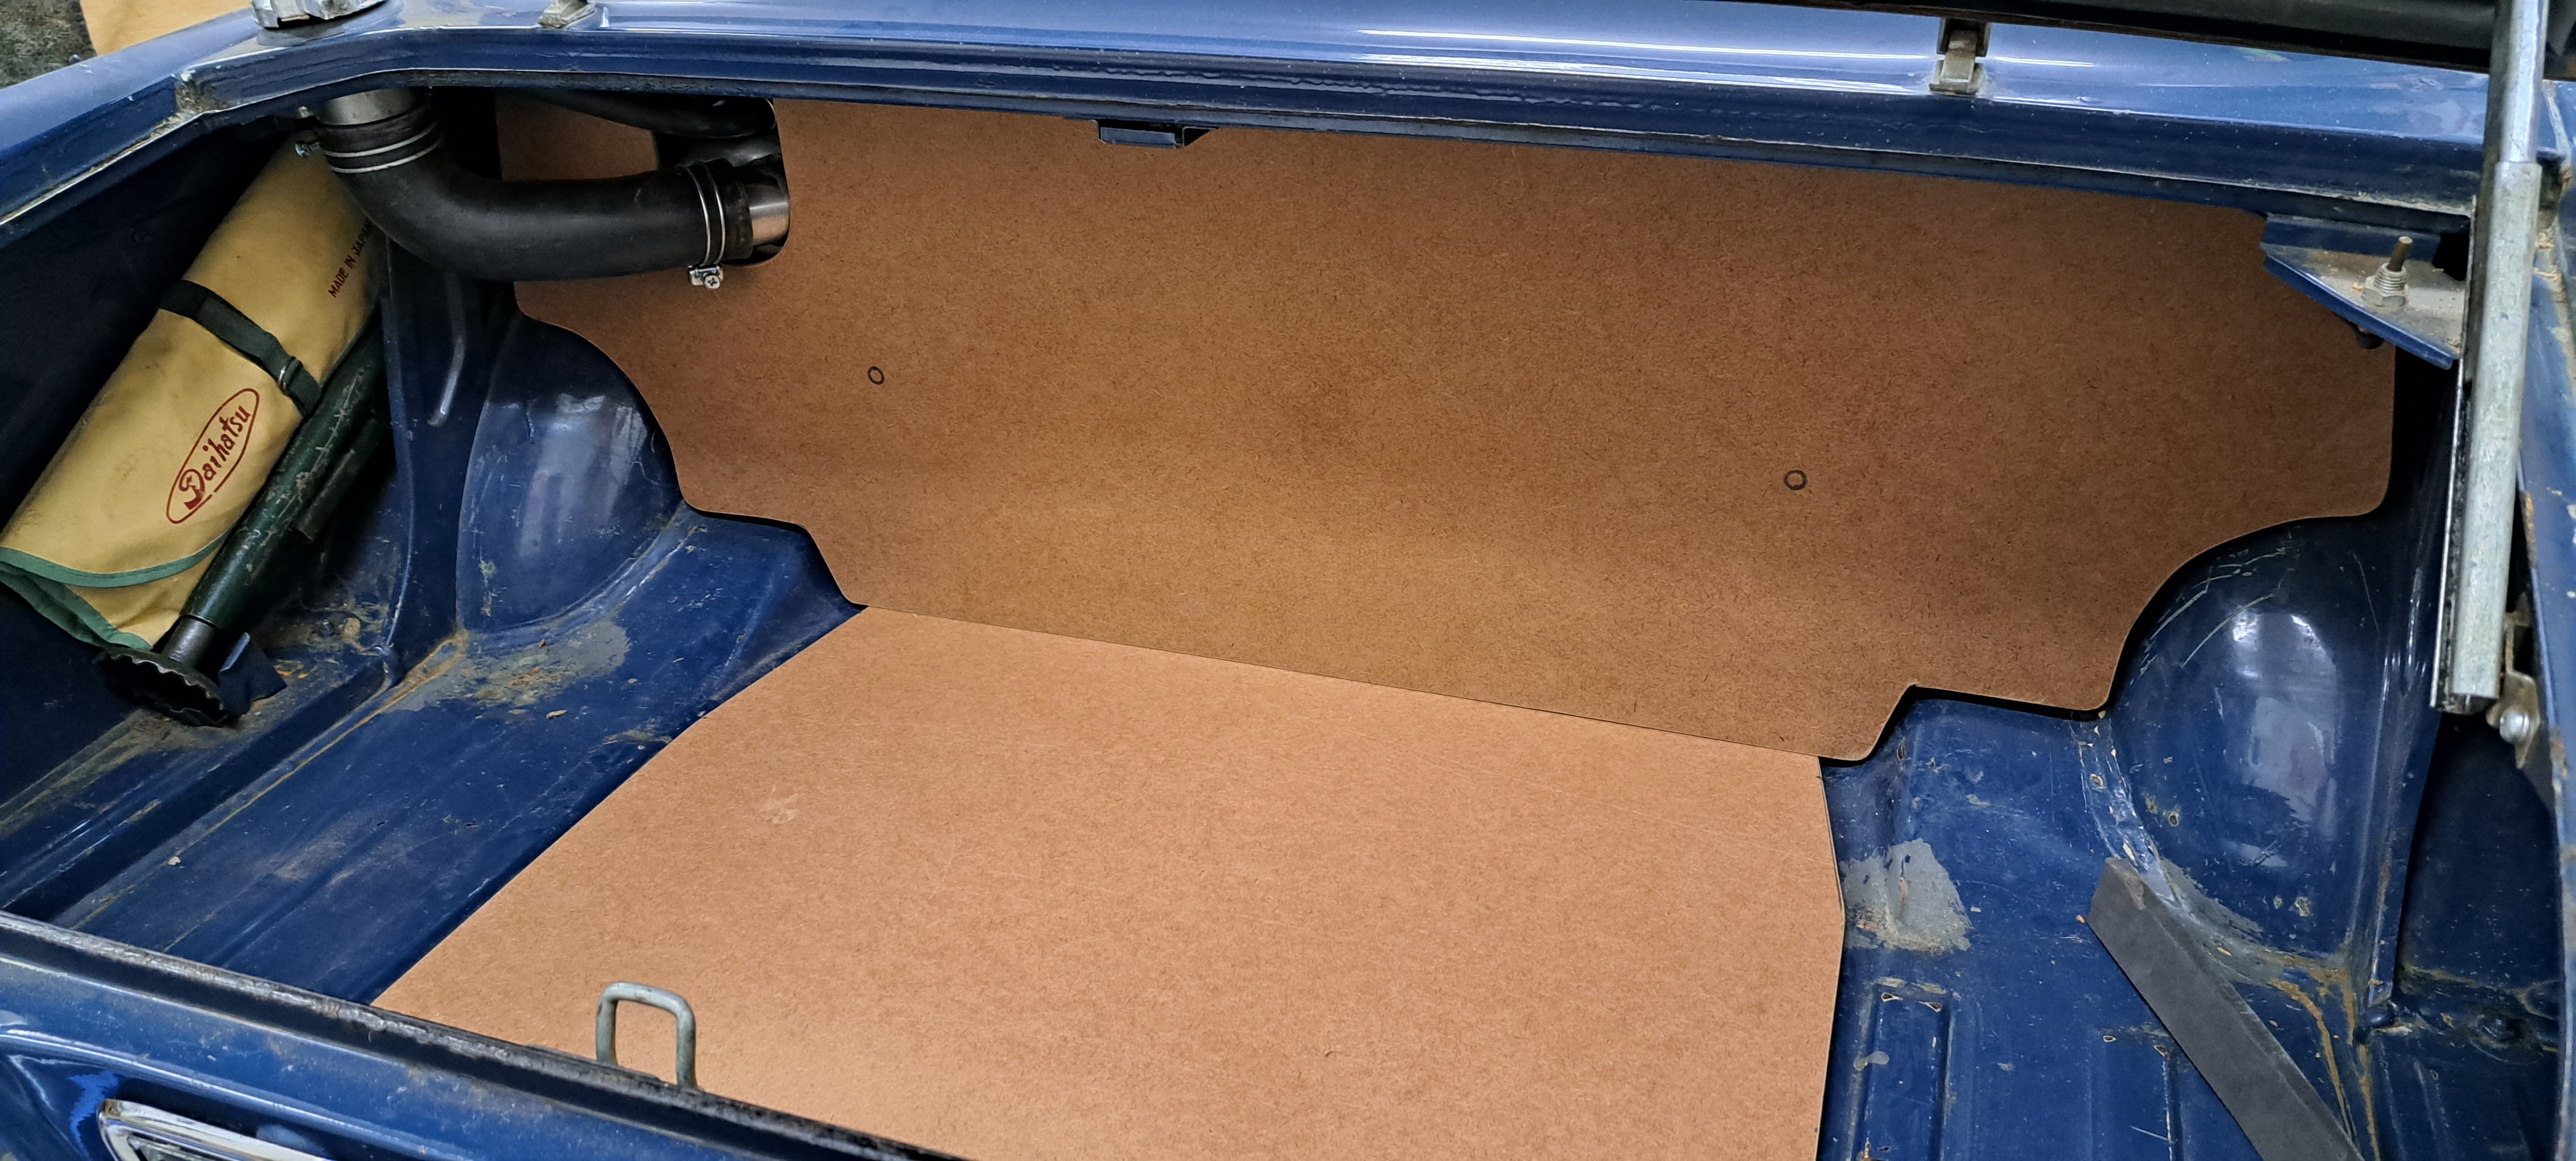
Hardboard cut today. Fits well.
1 point
-
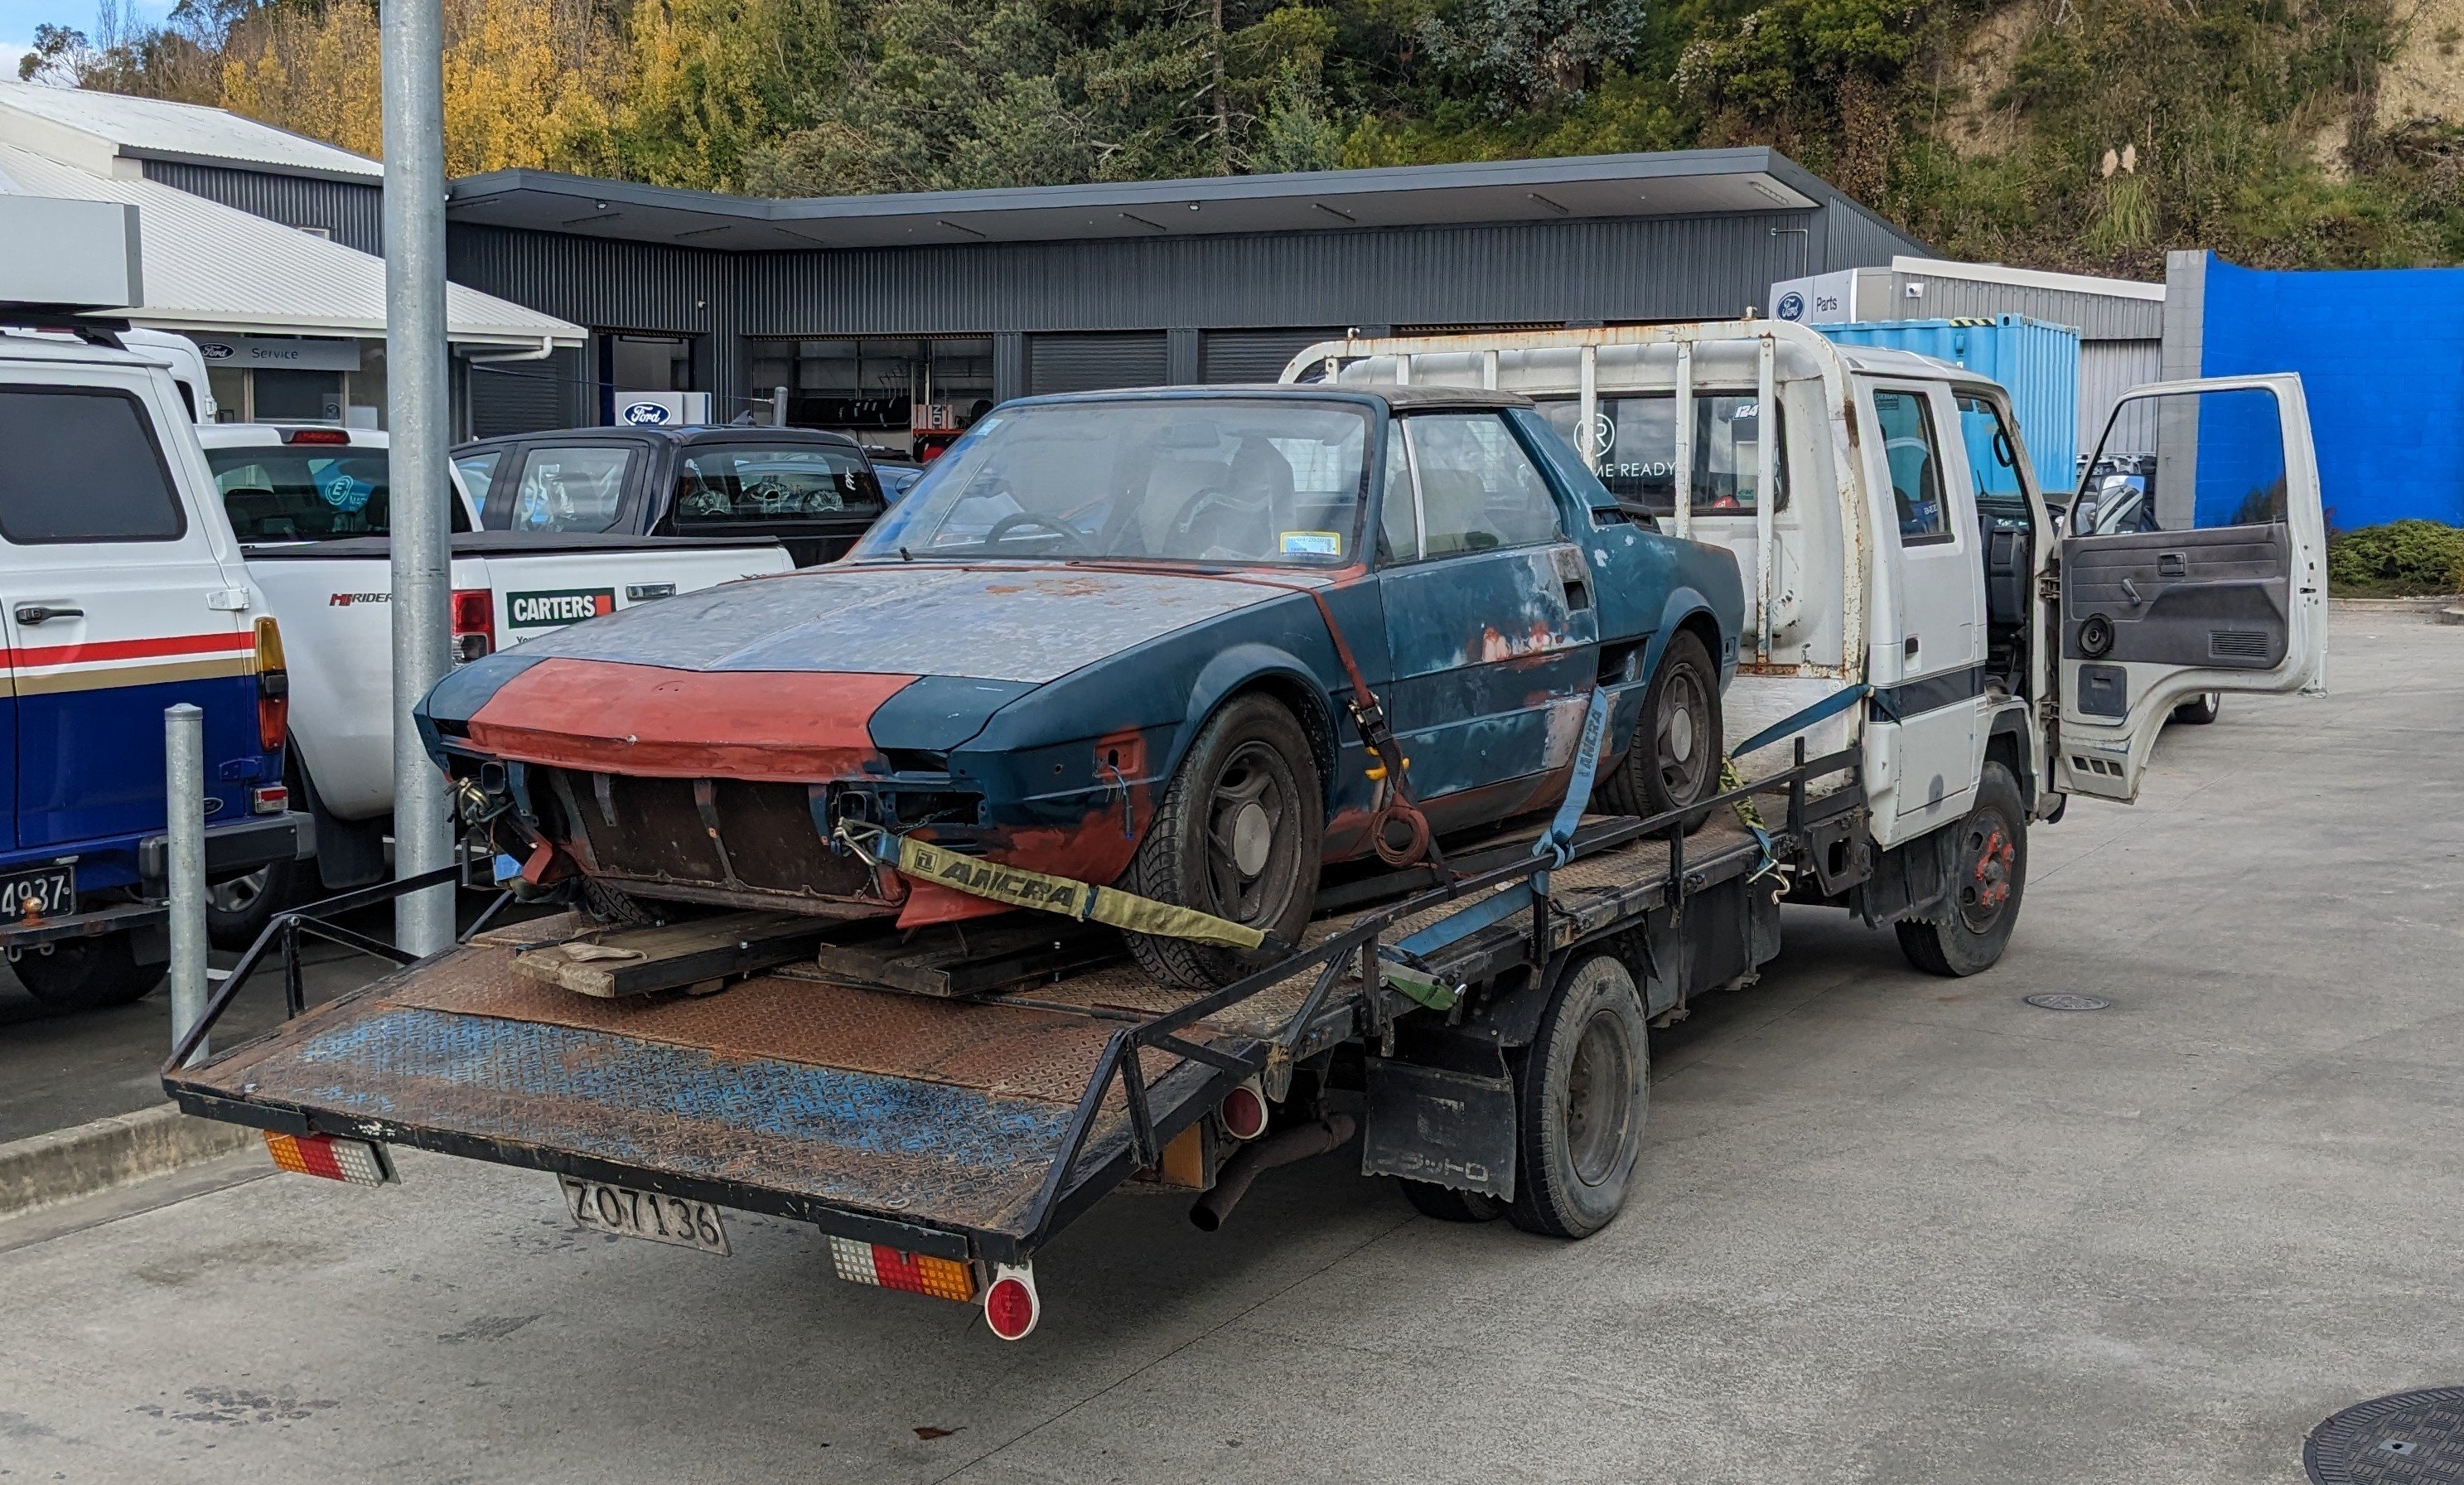
Well well I may have made a bad decision. The old girl is looking a bit worse for wear. Wife is slightly unhappy. I am foaming.
1 point
-
Last photo for today...time to switch off from designing and building stuff. I feel its beer o'clock
1 point
-
Hello ThePog I believe I have come into ownership of your old x1/9. I'm sorry to say it has come to me in rough shape. However I thought I would get in touch to see if you would be interested in it again?1 point
-
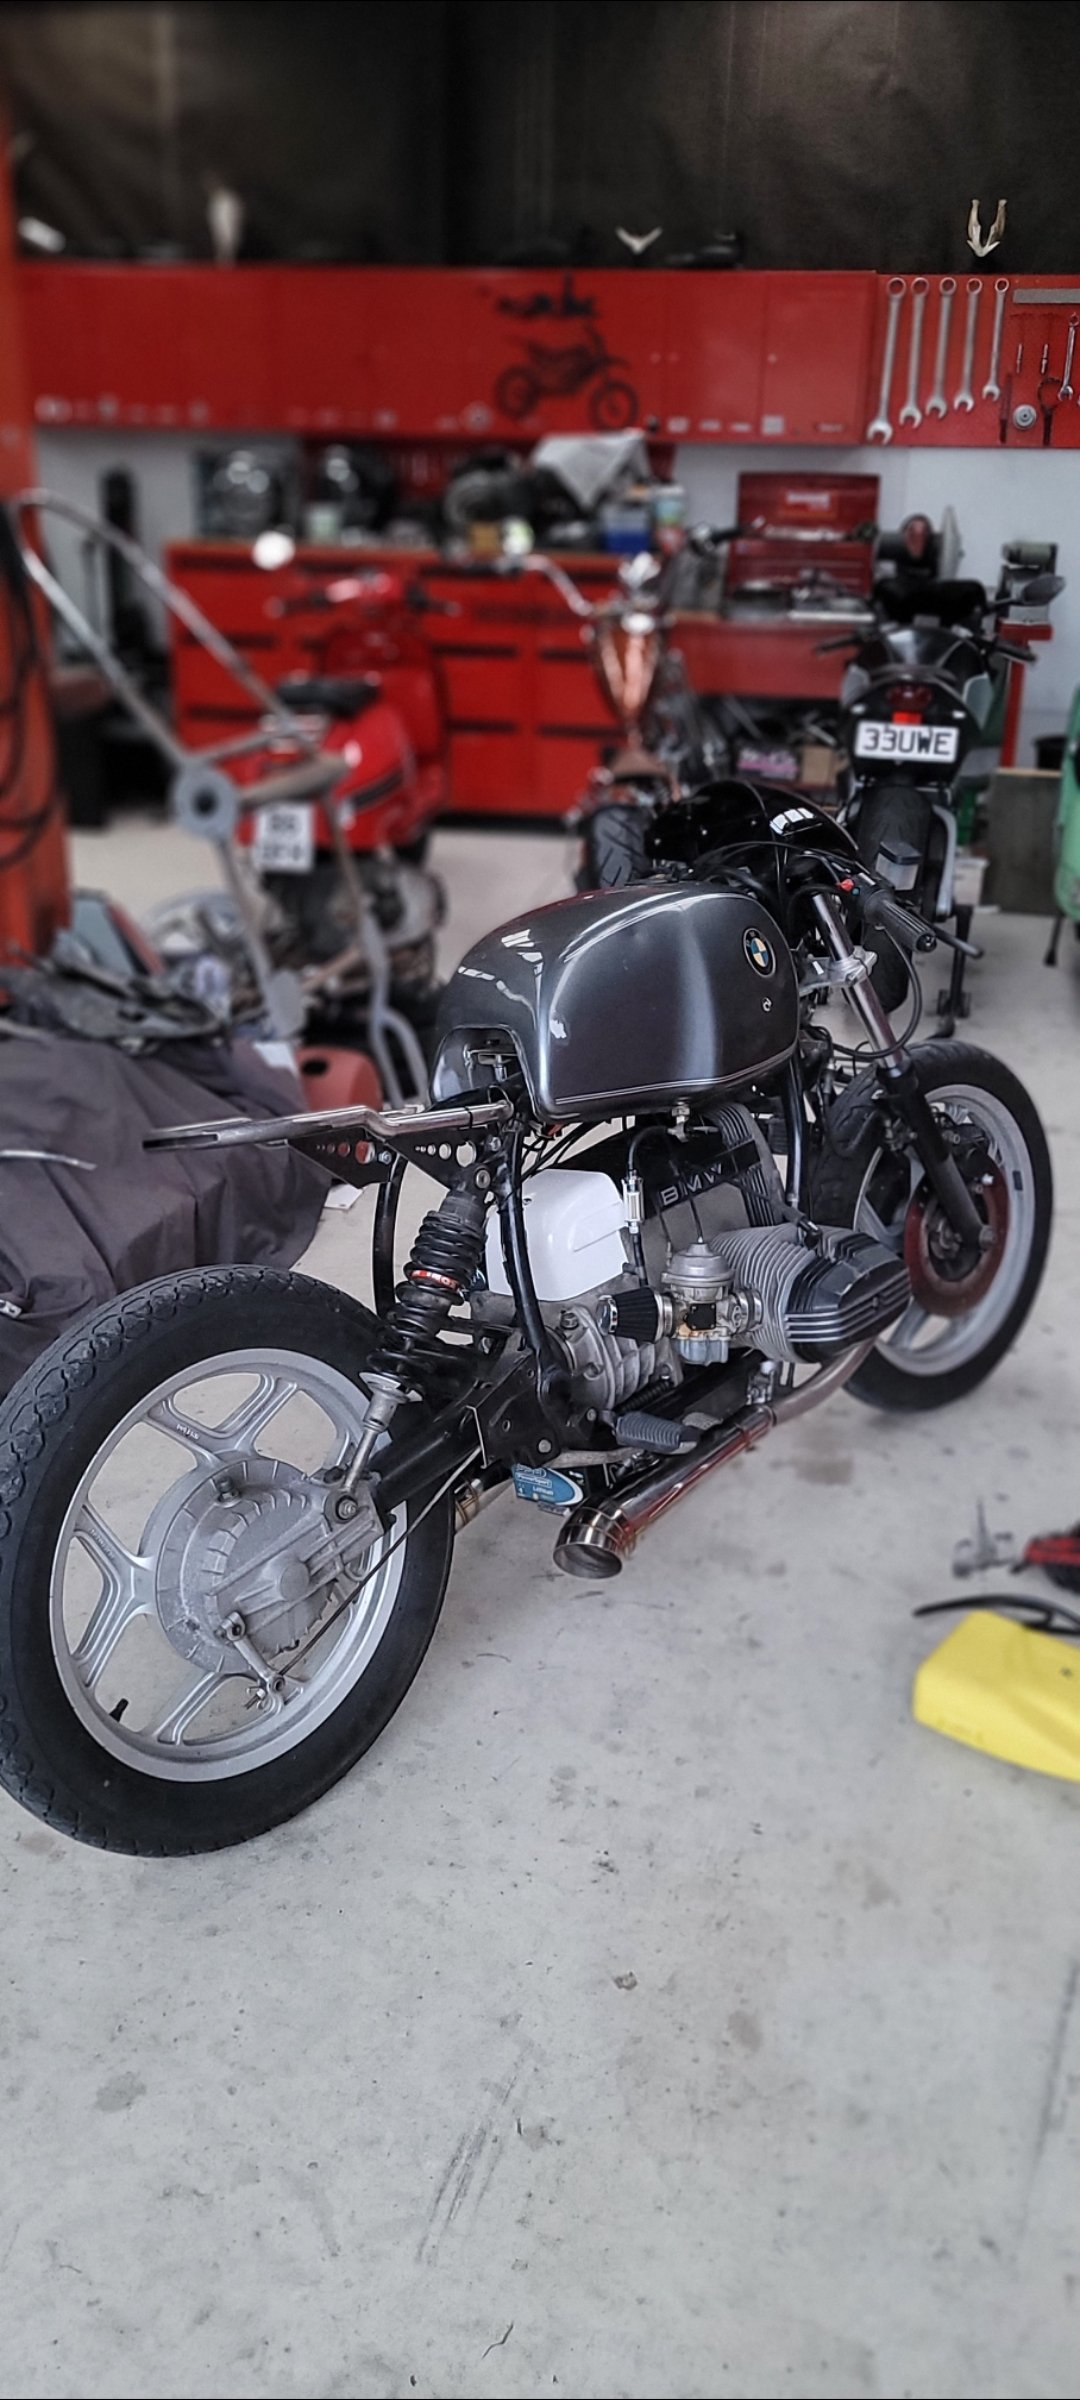
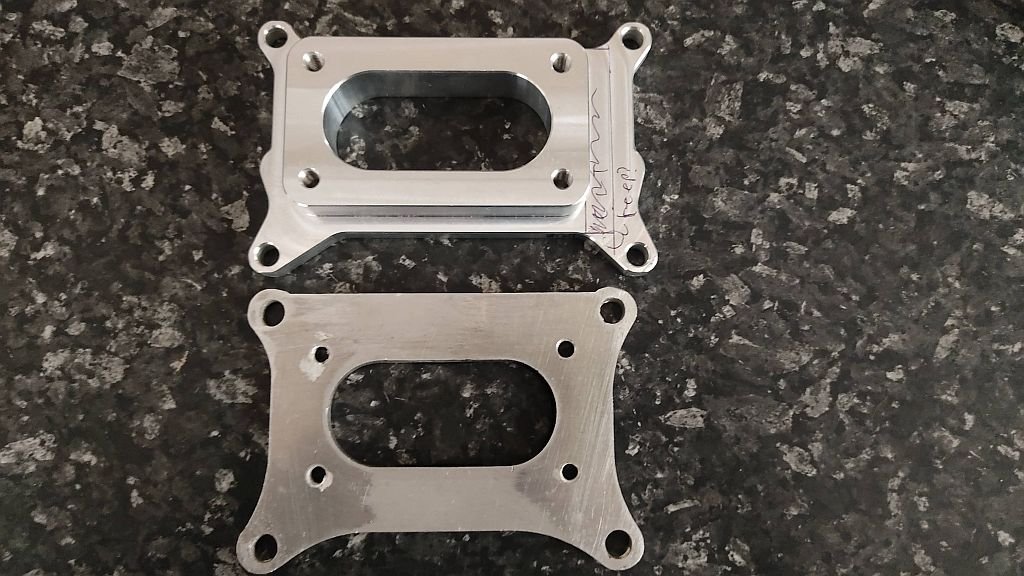
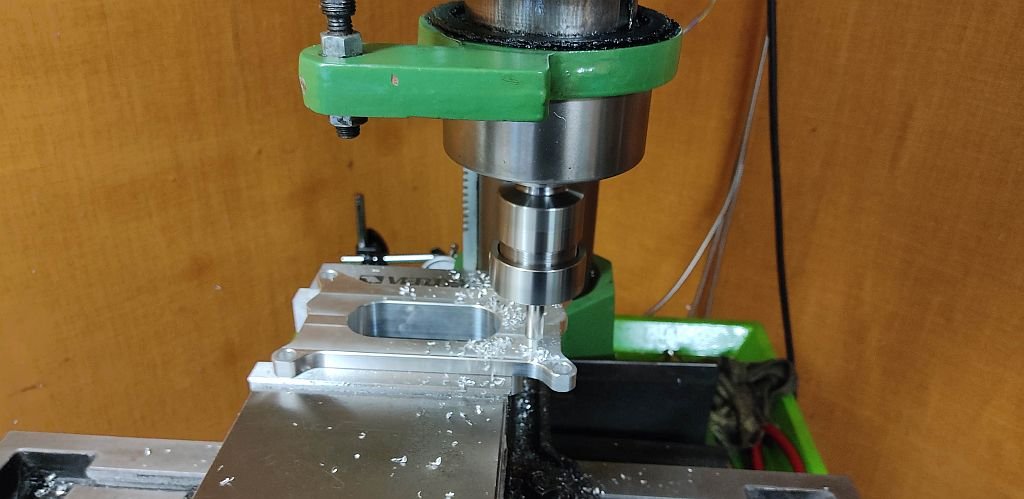
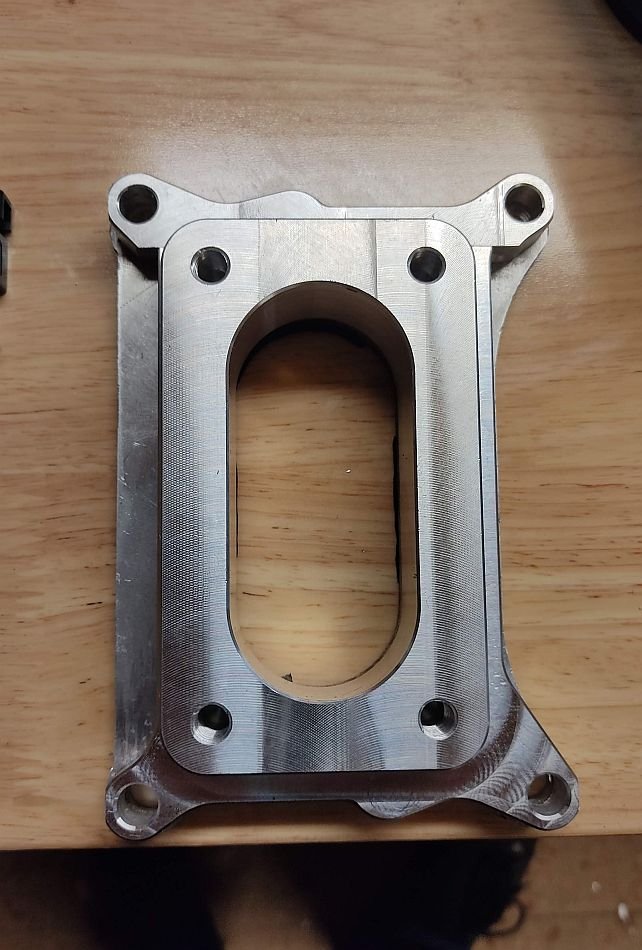
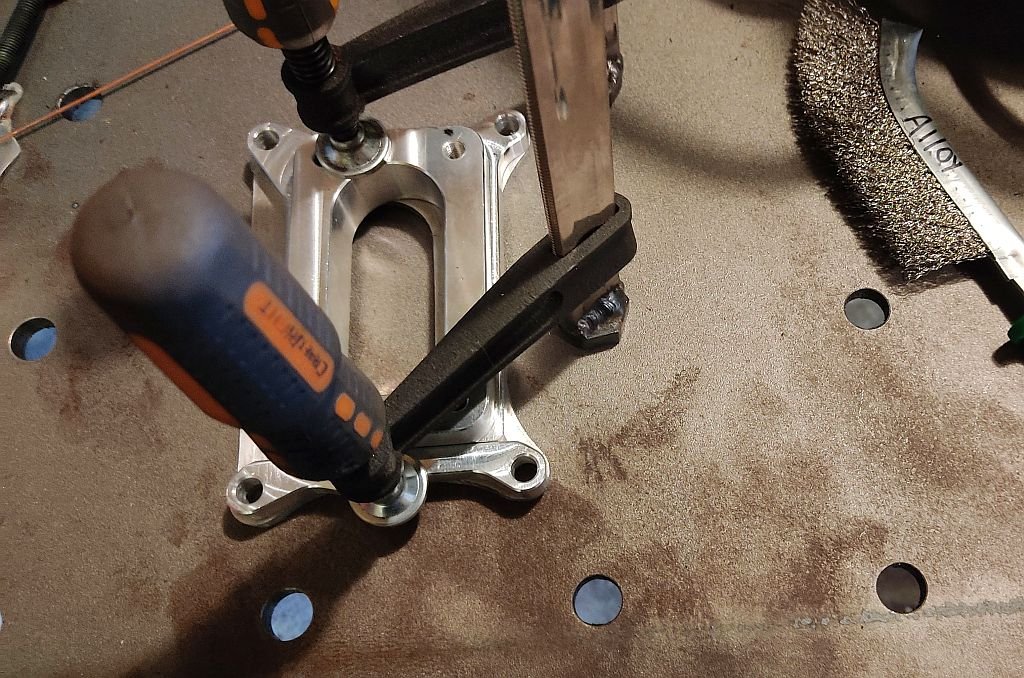
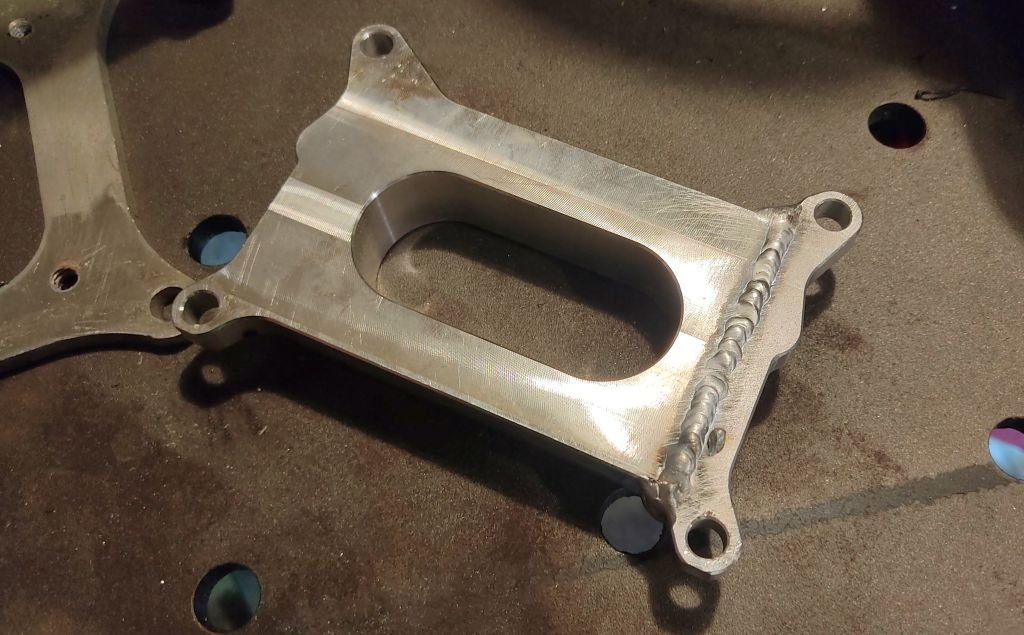
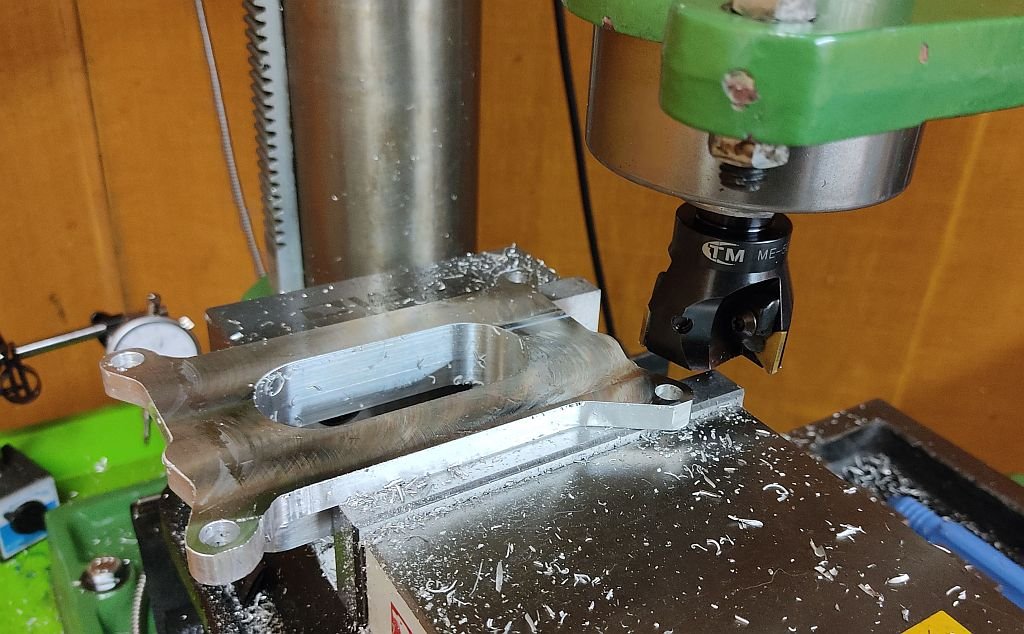
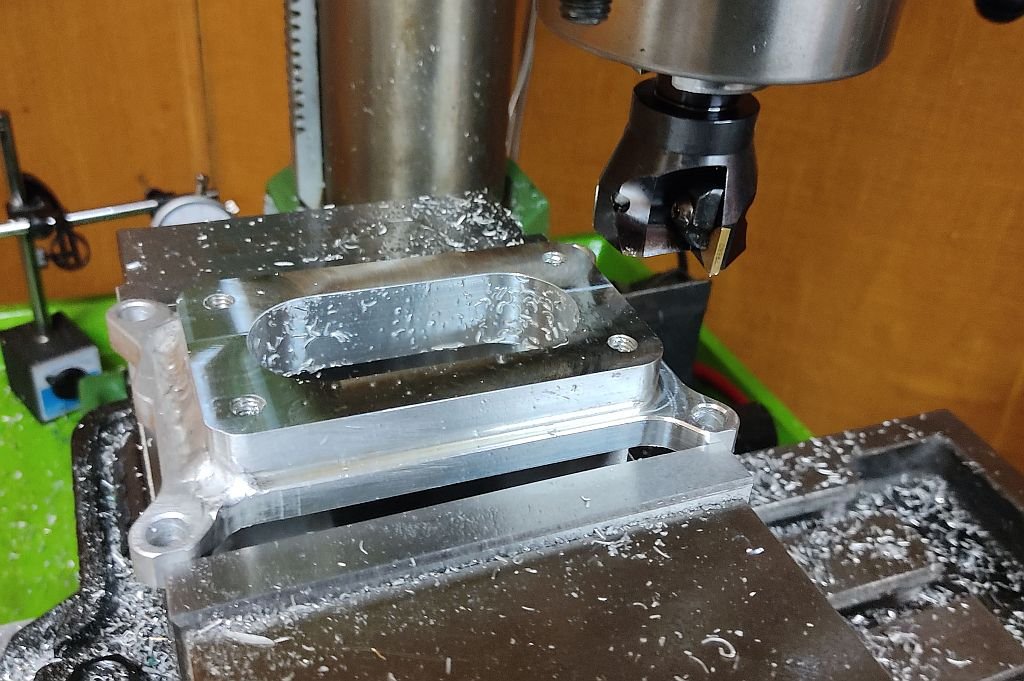
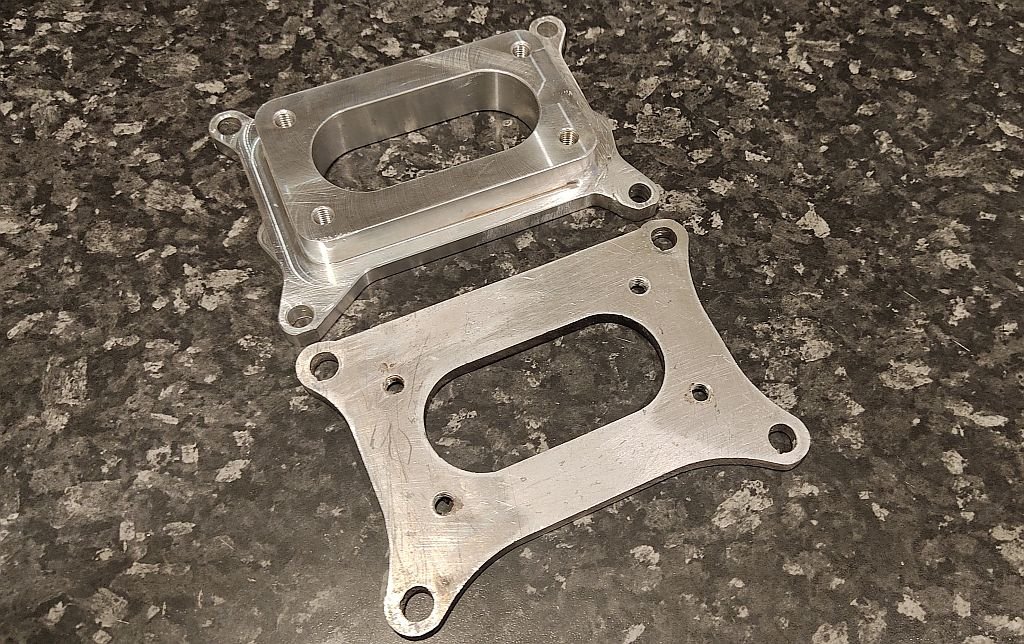
@chris r had a fancy Weber adapter CNC machined, but somewhere along the way it gained an extra 10mm in the base. So I made it a lot less fancy but a lot more functional. I haven't welded alloy in way too long/needed to preheat more, but it's solid!
1 point
-
Still going strong a lil skid in the shed
1 point
-
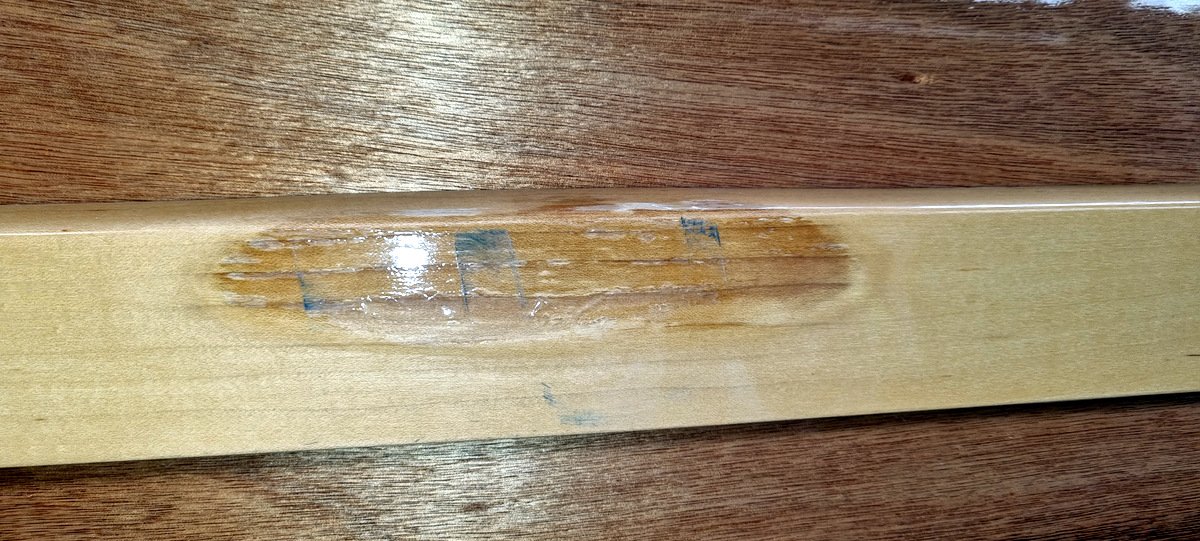
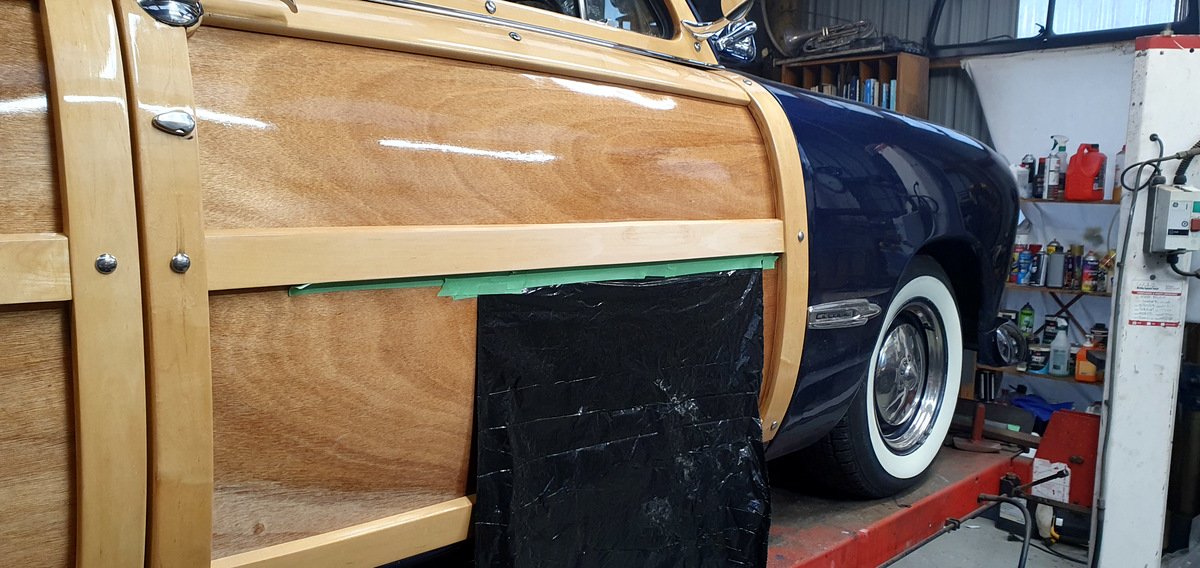
So, after a damp Whagnats I was a disappointed to find some varnish issues. This first patch was where it was damaged by falling over in the garage, so OK, but the water got a lot further under the finish than I liked. This piece was not so good, where there was a pre-existing crack in the wood. I sanded back the damaged areas where I could and re-coated, but I'm going to have to take the doors apart again soon and re-do them better. I had a chat with my BiL who is a boat man and he recommended this book. Brightwork is what they call unpainted wood in the boat world. It's helping me be more philosophical about dealing with wood.
1 point
-
The boot had a few little holes, got a bit worse once I pulled off the trim and started poking at it. The next big job is the footwell floor pans. The previous owner thought it'd be a good idea to sit the panels on top and go crazy with urethane. Must of used a good few tubes of it! Cut out the b-pillar braces to gain access underneath of them and to tidy them a bit. I found 3 of the 4 patch panels locally and imported the missing one with the car when I brought it in. Got sick of rust repairs a little bit a go, so got stuck into some of the other bits on the car. Removed the dent in the right rear door trim and gave it a bit of a polish. Needs a bit more work, didn't have the right sandpaper grits and polishing bits, but will revisit more of the trim later. Made a start on tidying up the mess of wiring and the numerous things that didn't work. It had no indicators to start with. The column switch must of seized at some point, so instead of fixing them, they pulled out the flasher unit and used the terminal to power up some gauges. Gave the switch a good clean and put a flasher back in and it works as normal. Next up they had installed a push button start, all because the inhibitor switch stopped it from starting as the shifter linkage wasn't set up properly. A quick adjustment to that so that the selecting between the column and trans lined up. Plugged the inhibitor back up and it started off the key. I have also replaced all the locks in the car, as they were all mismatched with multiple keys. Moved into the engine bay, had a look at the dizzy and its got a Pertronix unit in it, but still had the original coil that was wired up weirdly. Had a wire going to the alternator dash light output. Put the suited coil in for the Pertronix and simplified the wiring. Found the cut wire that went to the alternator (gen) dash light that used to go to the old voltage regulator and hooked them up together, so the dash light works as it should now. The window wipers didn't work, had no power going to them, the power had been used for the electric choke instead. Put power to the wipers but still didn't work, the switch is a bit dodgy too, so might replace them both later. The excessive use of earth straps all over the engine and elsewhere is quite hilarious too! Now most of the dash lights work after replacing a bunch of blown bulbs and actually having things plugged up. Even managed to disassemble the clock and get that going again. Got an Accuair system to replace the airbag valves and controller. Also gonna ditch the early 2000's audio haha.1 point
-
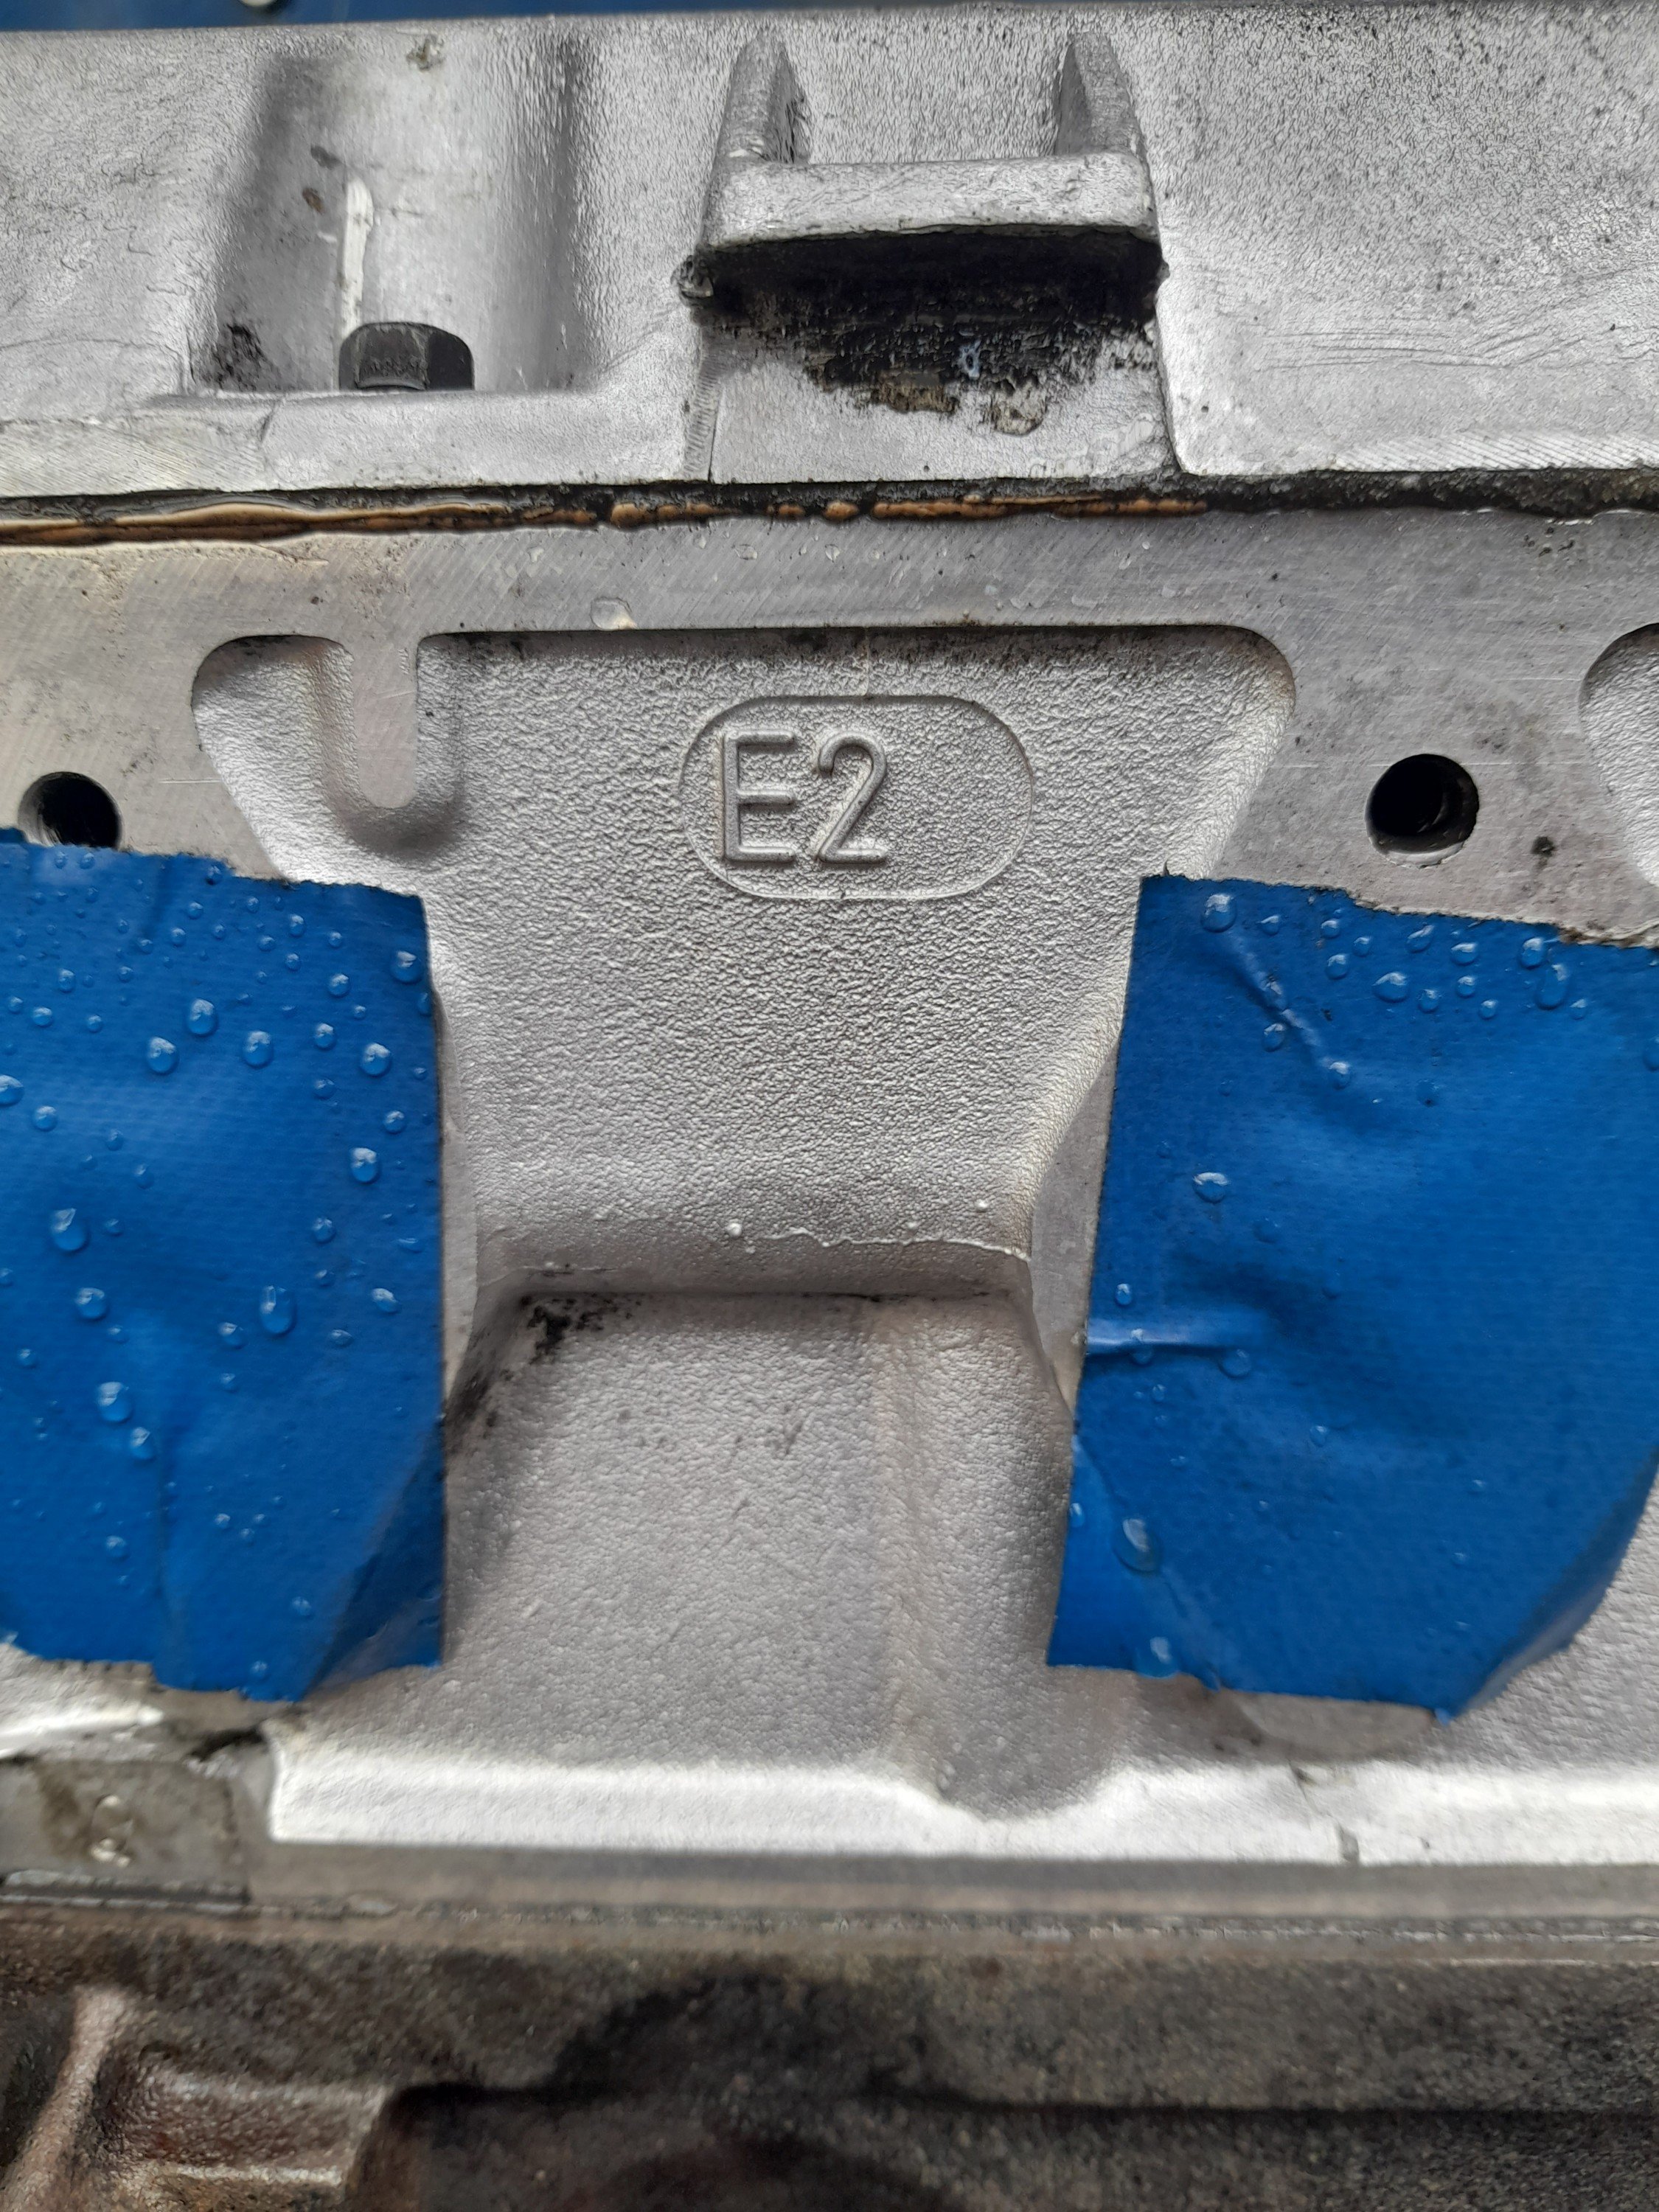
The magic stamp. These heads only came on the late xf falcon efi motors from what i can find. And after 4 or 5 different versions of the alloyhead, they made the chamber shape and size of these ones similar to the old ironhead. Also the E2 alloyheads have slightly larger intake valves which is a nice bonus. From 1.8inch to 1.84inch.
1 point
-
Yea so I wasn't amazingly happy with the oil pressure on the new engine. I took it down to chch on a hot day and while the light never came on the gauge would sometimes be showing nothing at lower revs. The safari gauges are a bit shit but it wasn't confidence inspiring as you can imagine. I started to think about putting a new turbo oil pump in there as they have higher flow etc, and while looking at threads about it it came to light that one reason for low pressure was if you forgot to put the timing gear oil squirter in, it would just pump the oil out that hole. For the life of me I could not remember putting that fucking thing back in when i put the engine together. There was also potentially an issue with the orientation of the idler gear in its bearing hole. Sigh, time to dismantle much shit. It wasnt too bad really, just time consuming. There was a lot of shit stacked on the deck by the time I got to this stage. Turns out I had put the squirter in so that was kindof good and bad. I put the new pump in and got it back together without too much drama except for trying to find a water pump and thermostat gasket; *Rings Repco like a fucking stupid cunt* Whats the reg number there mate? Its a custom vehicle, the reg wont tell you anything. *under his breath but clearly audible* Ah for fucks sake. What do you want then? *Me now unhappy and sounding prissy* Water pump gasket Na Thermostat gasket Na Oil pump seal Na I hang up before he could say any more and make it worse, then punched my balls repeatedly as this is more fun than that conversation was. So I remembered i had some gasket paper and made what i needed, and found a good oil pump seal on the old engine. When I put it back together the pressure was significantly better but not where i thought it should be, so I went to Supercheap and bought a mechanical oil pressure pump. And it turns out that the factory gauge is kindof ok in the mid range but is way inaccurate down low, and the pressures i am seeing are pretty much where they need to be. Should have done that first I guess. All is well now and the old girl is back in service, knocking on 20kms now.1 point
-
1 point
-
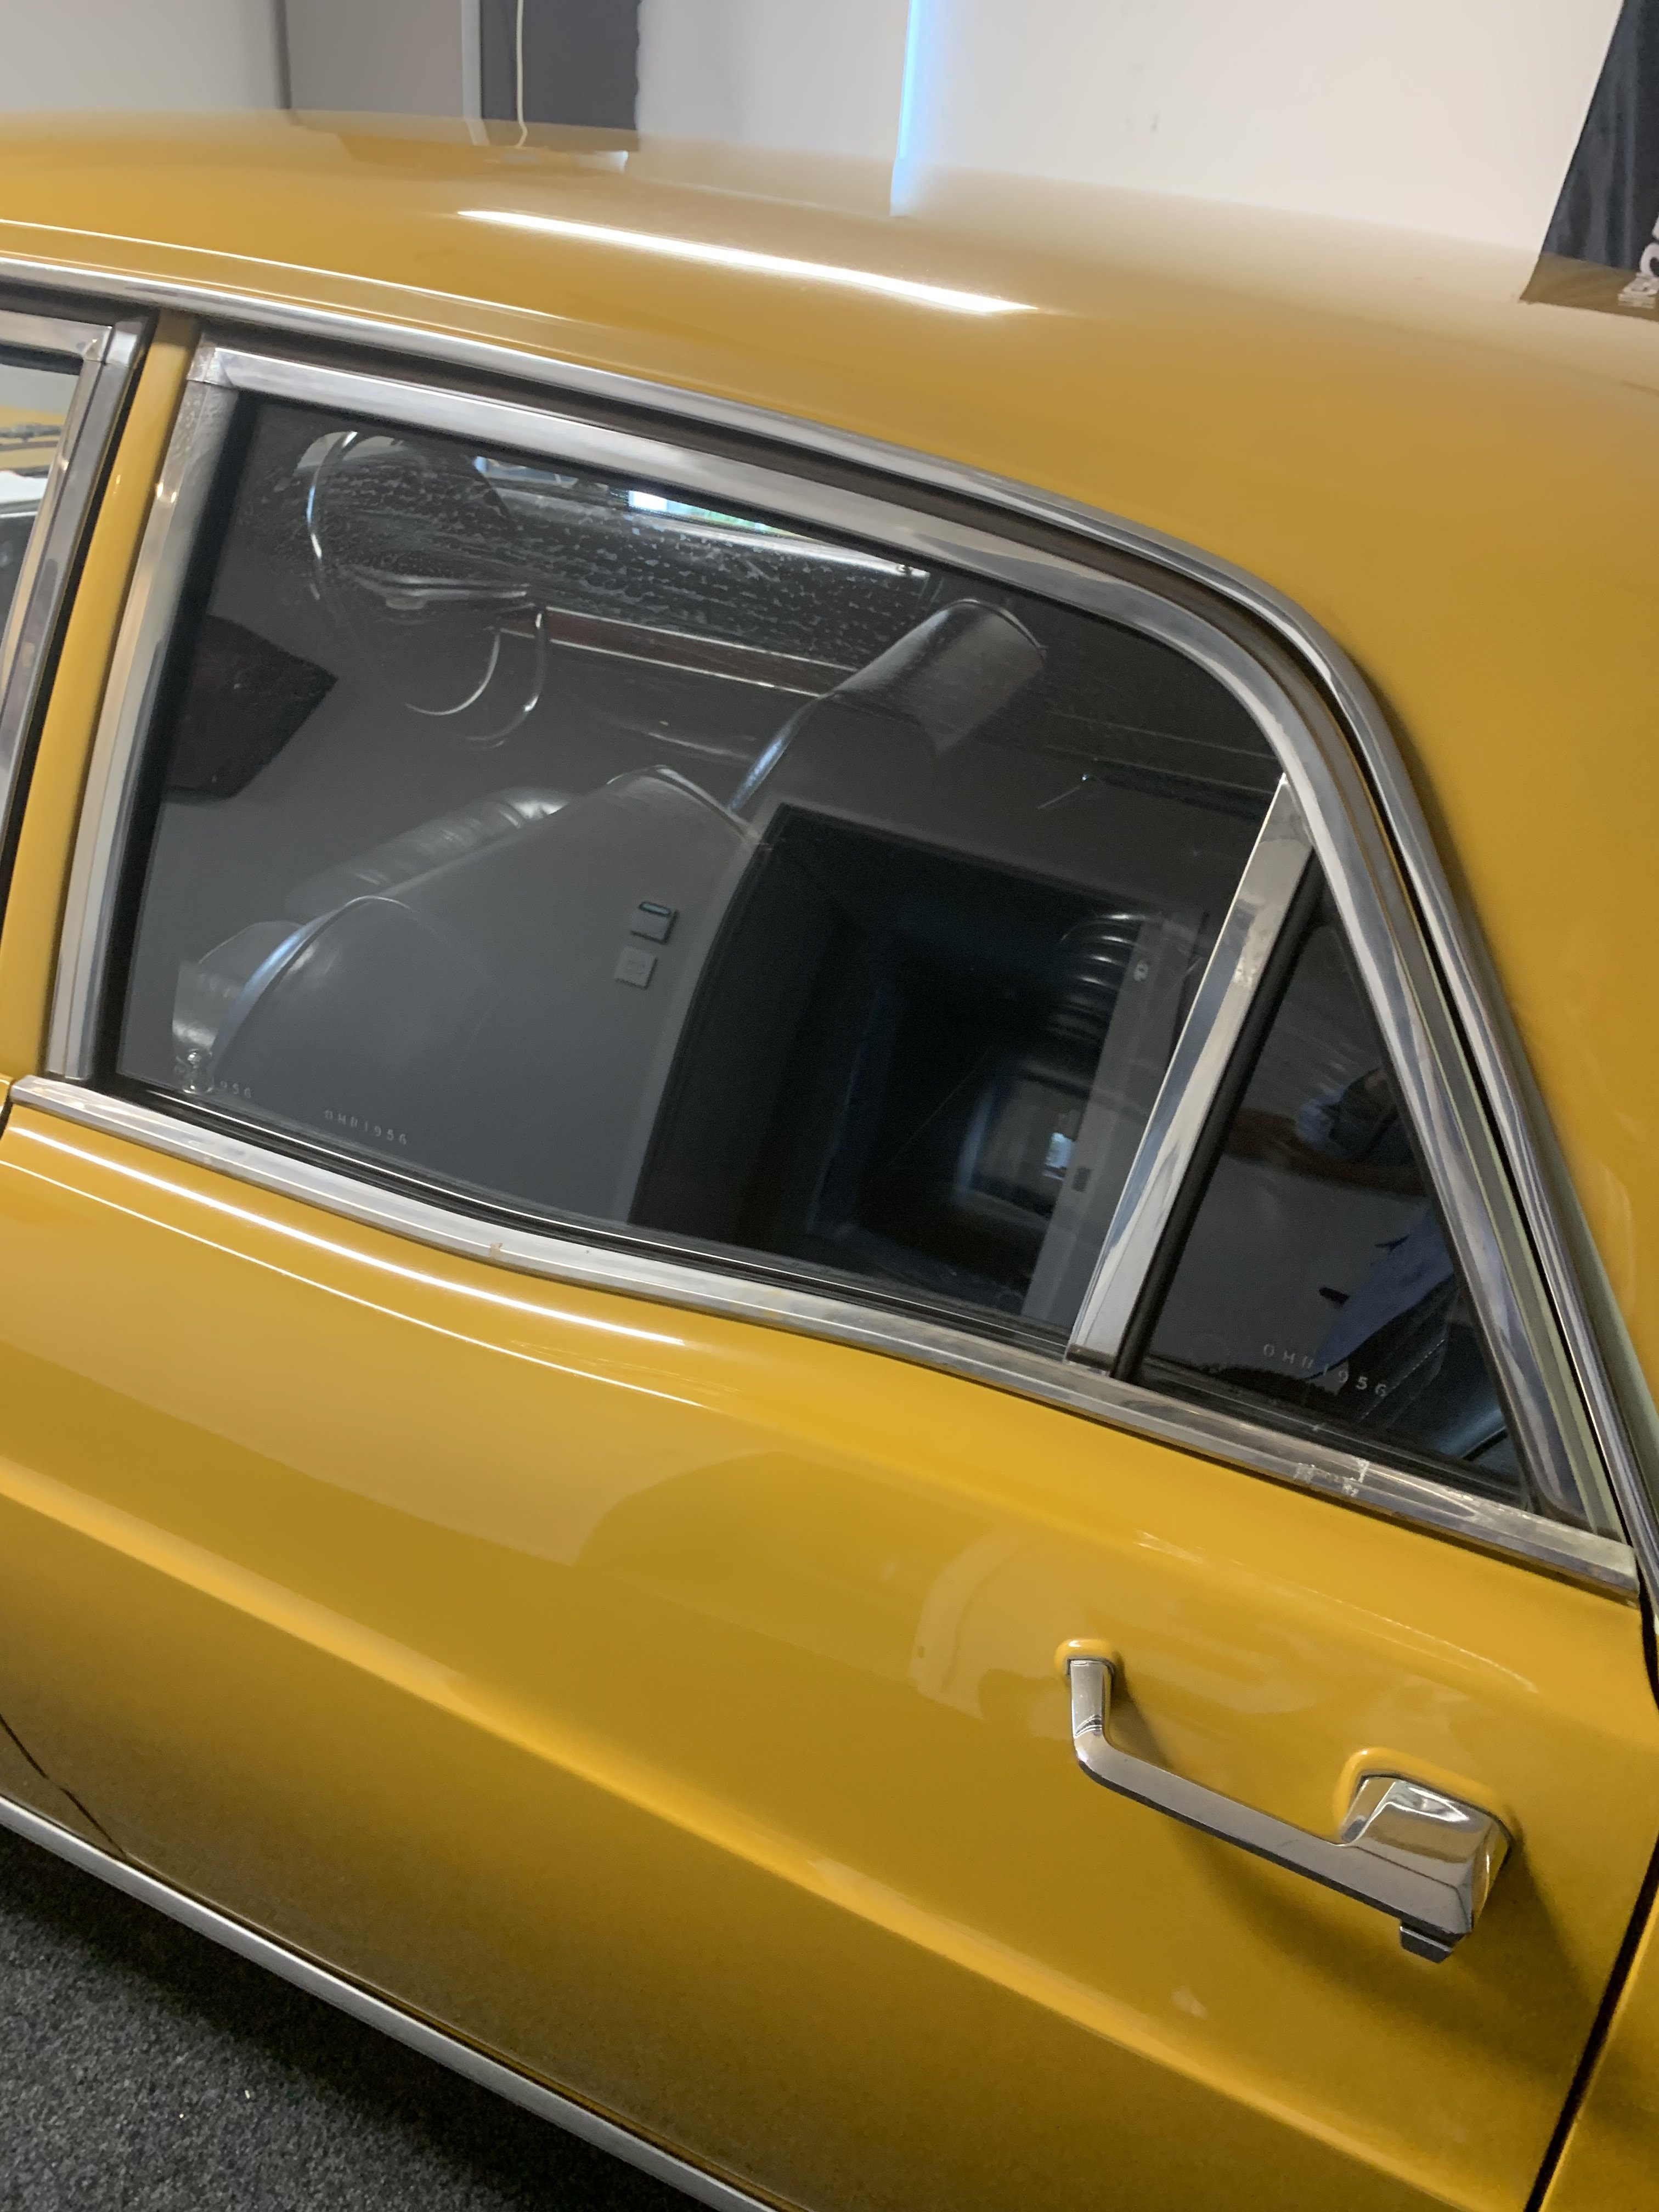
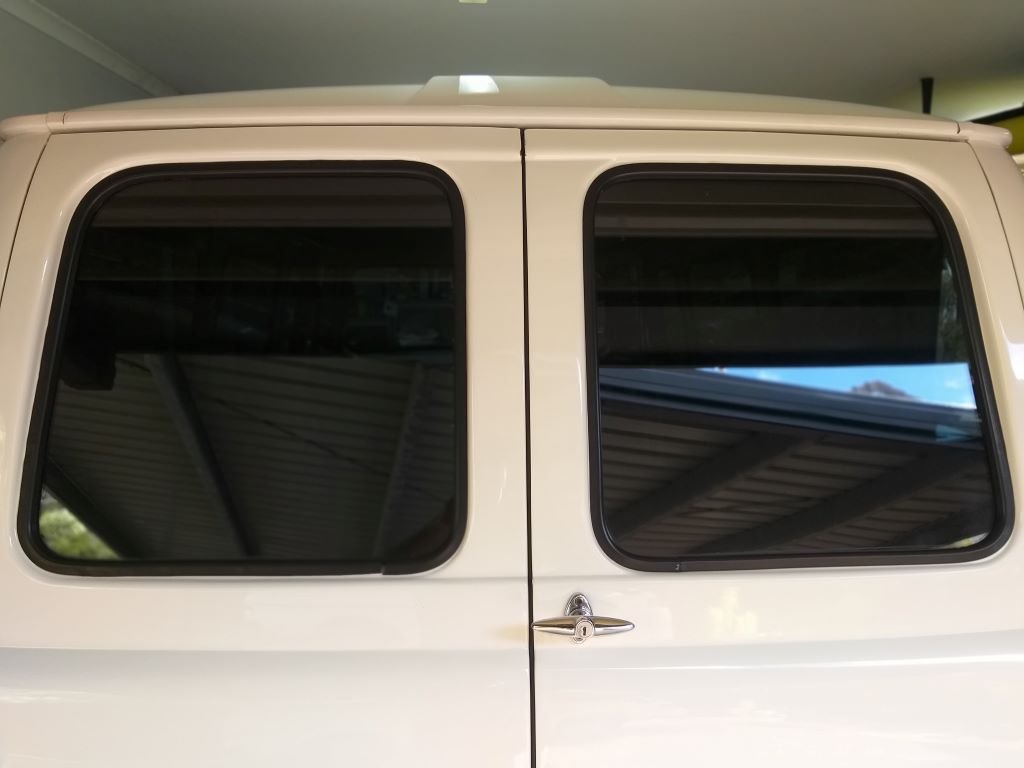
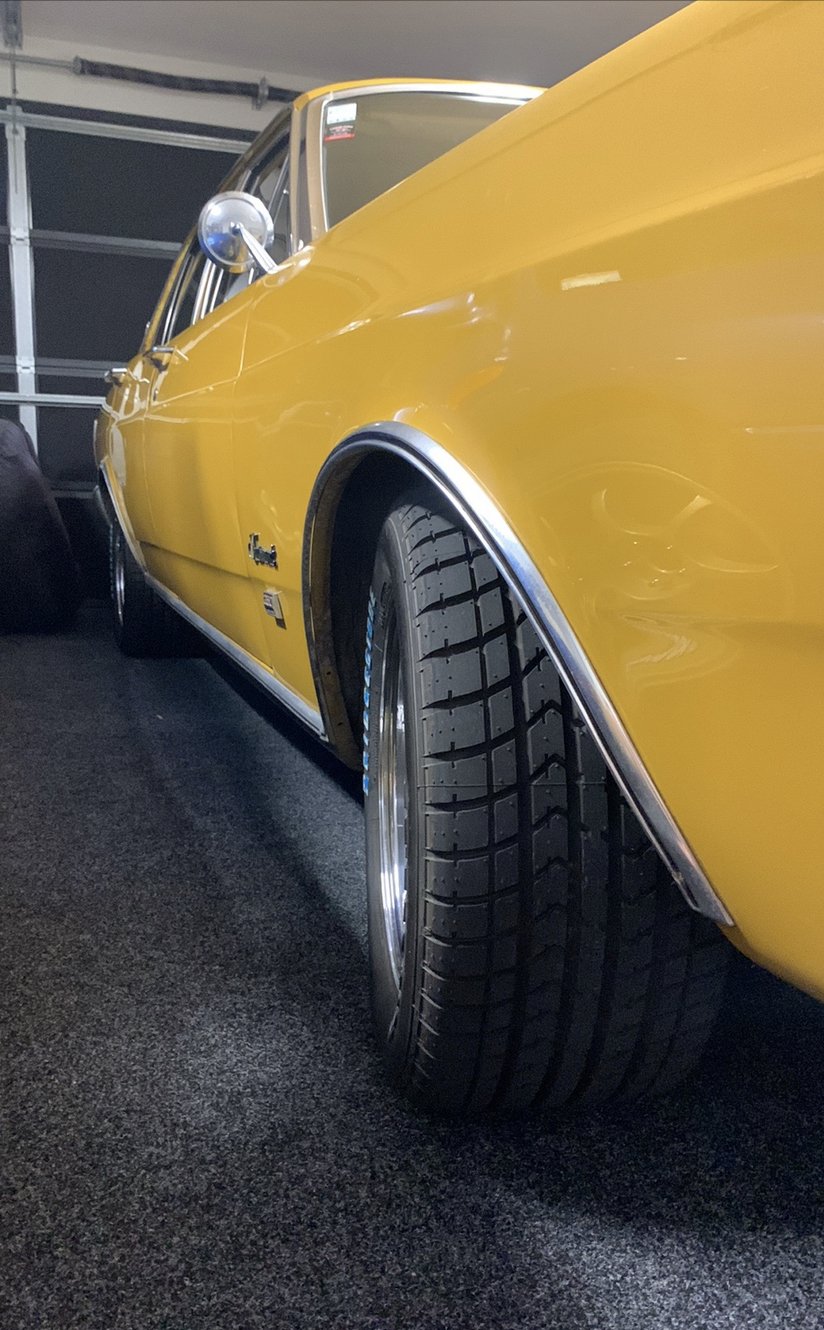
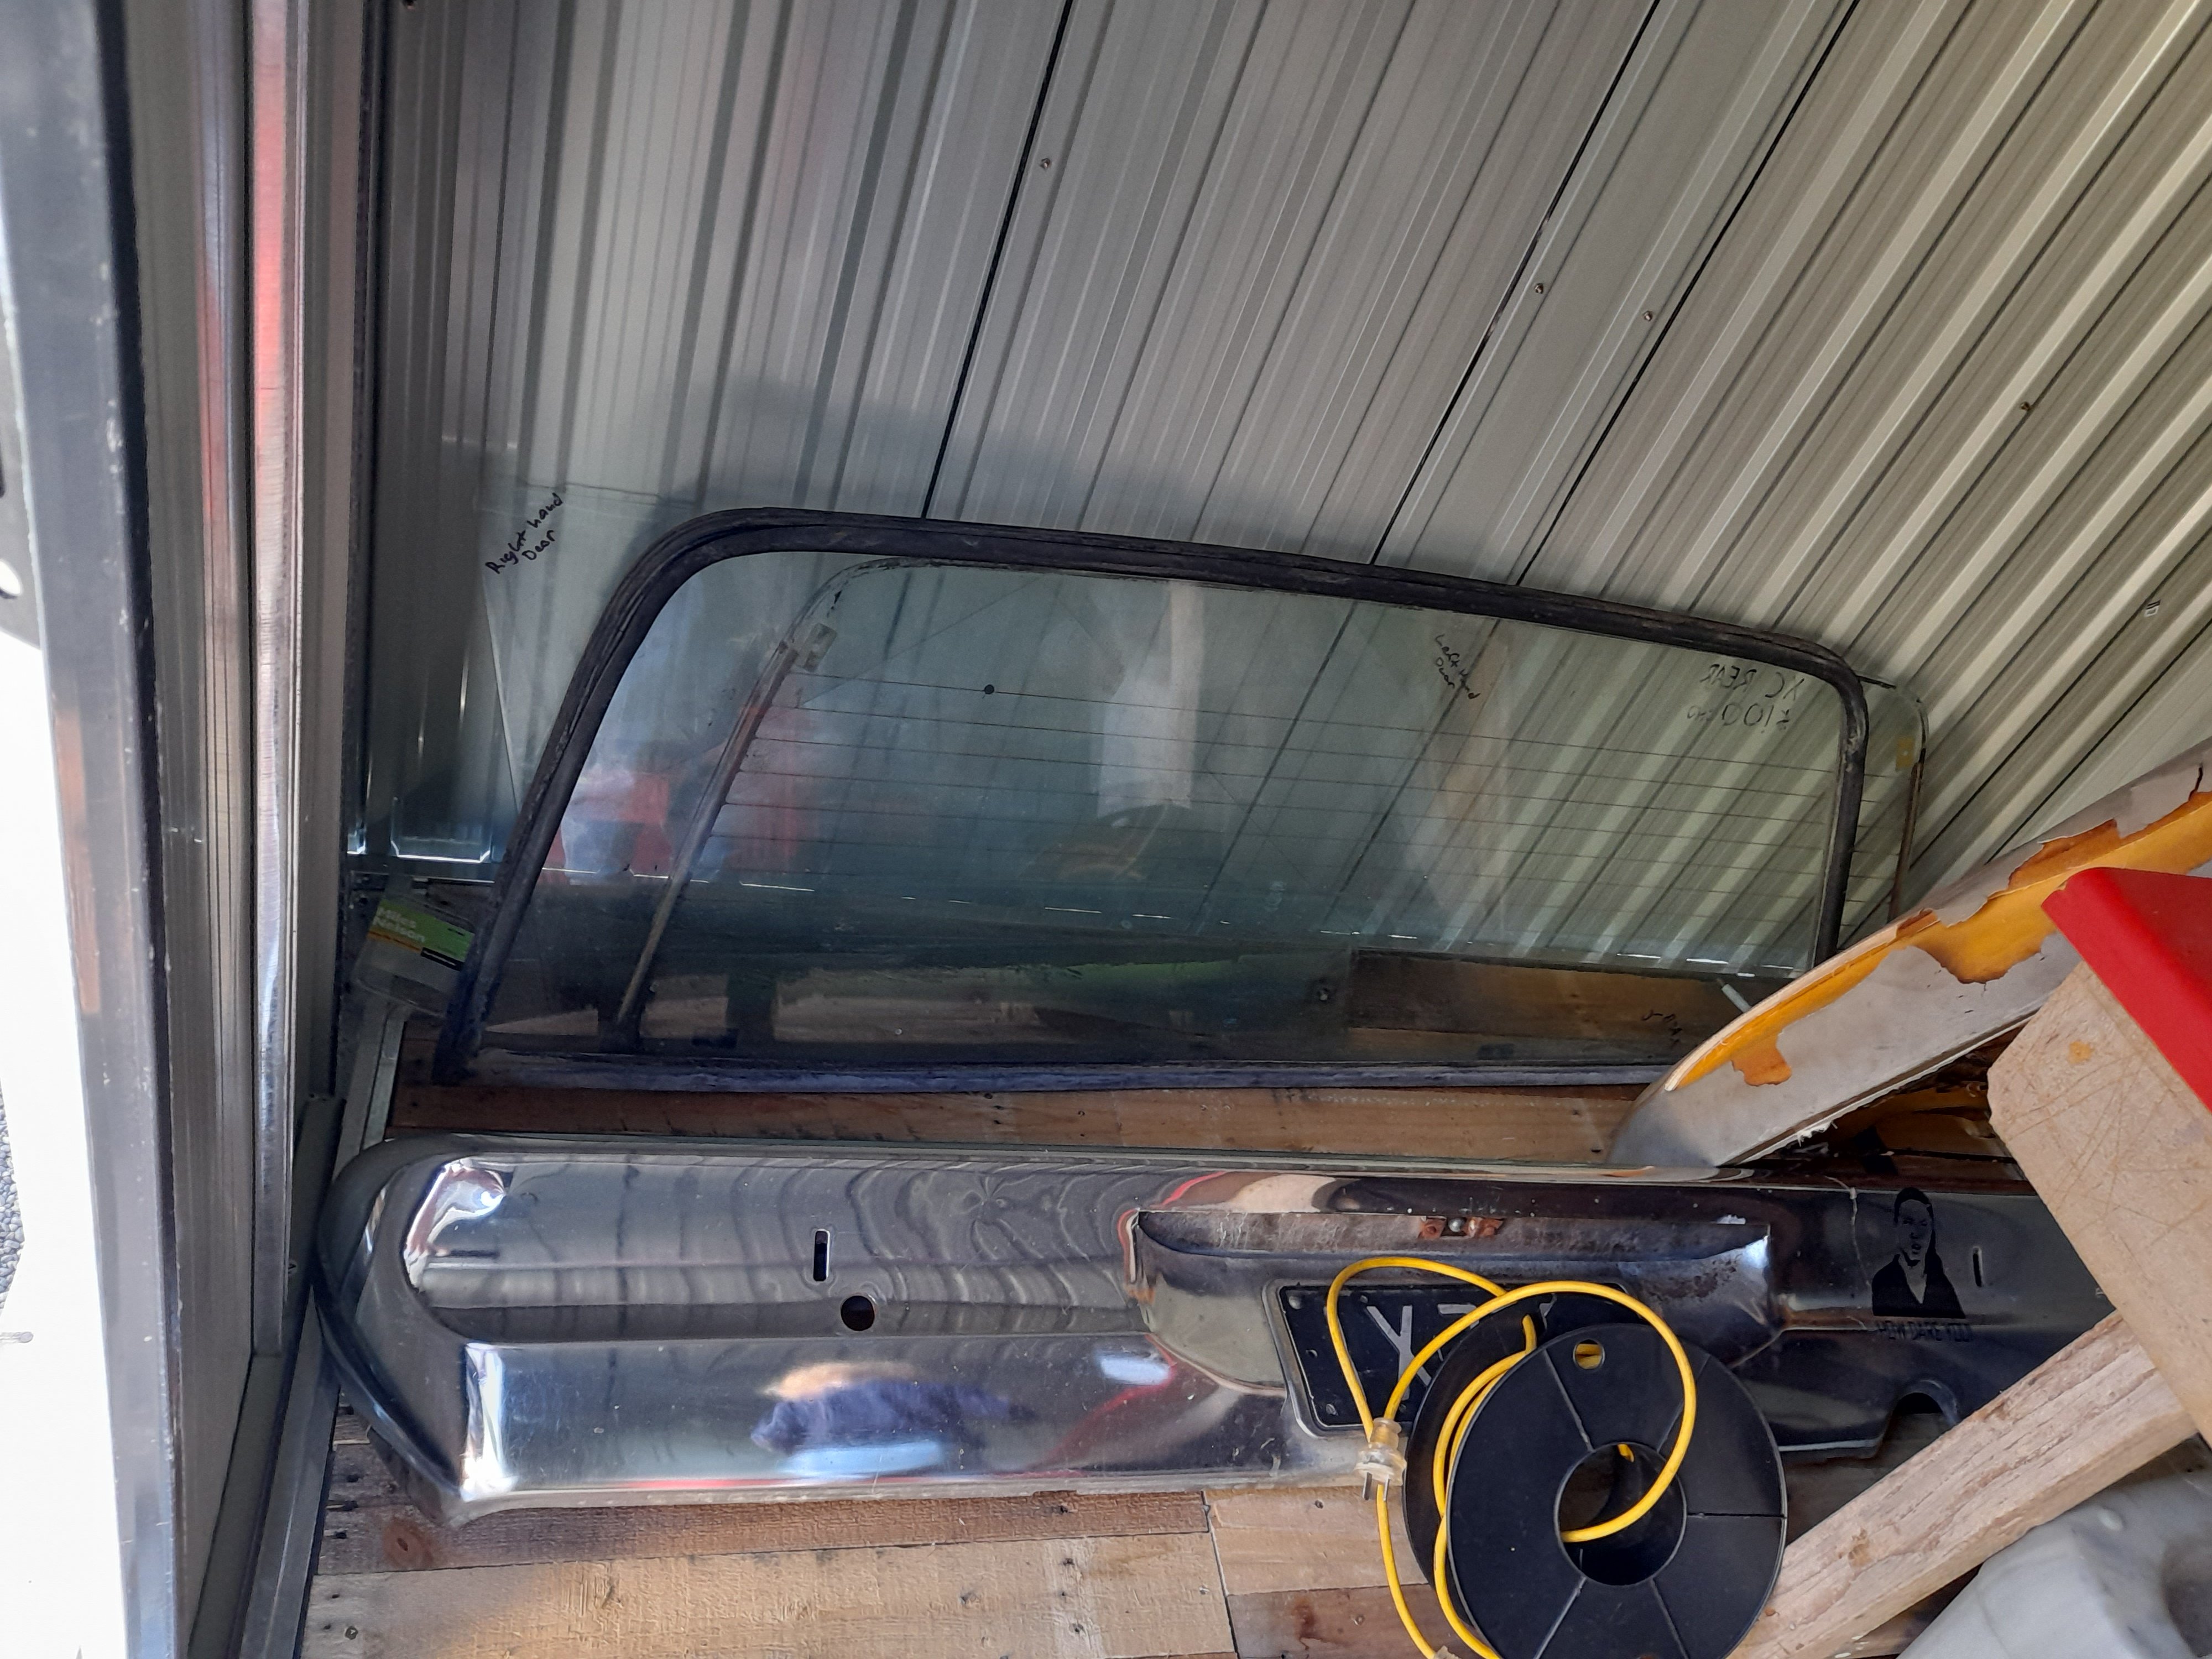
Car got relegated back outside so i could use shed to build a kids playhouse then mucked around with the ute a bit. Quad bike is next for a quick refurb before winter missions so car will be outside for a bit longer yet. But i did a deal the other week for some spare glass. Now i have 3 spare rear screens, 2 spare sets of rear screen chrome, and 2 spare front door windows. Need to find a set of rear door glass then i will be happy. Ish.
1 point
-
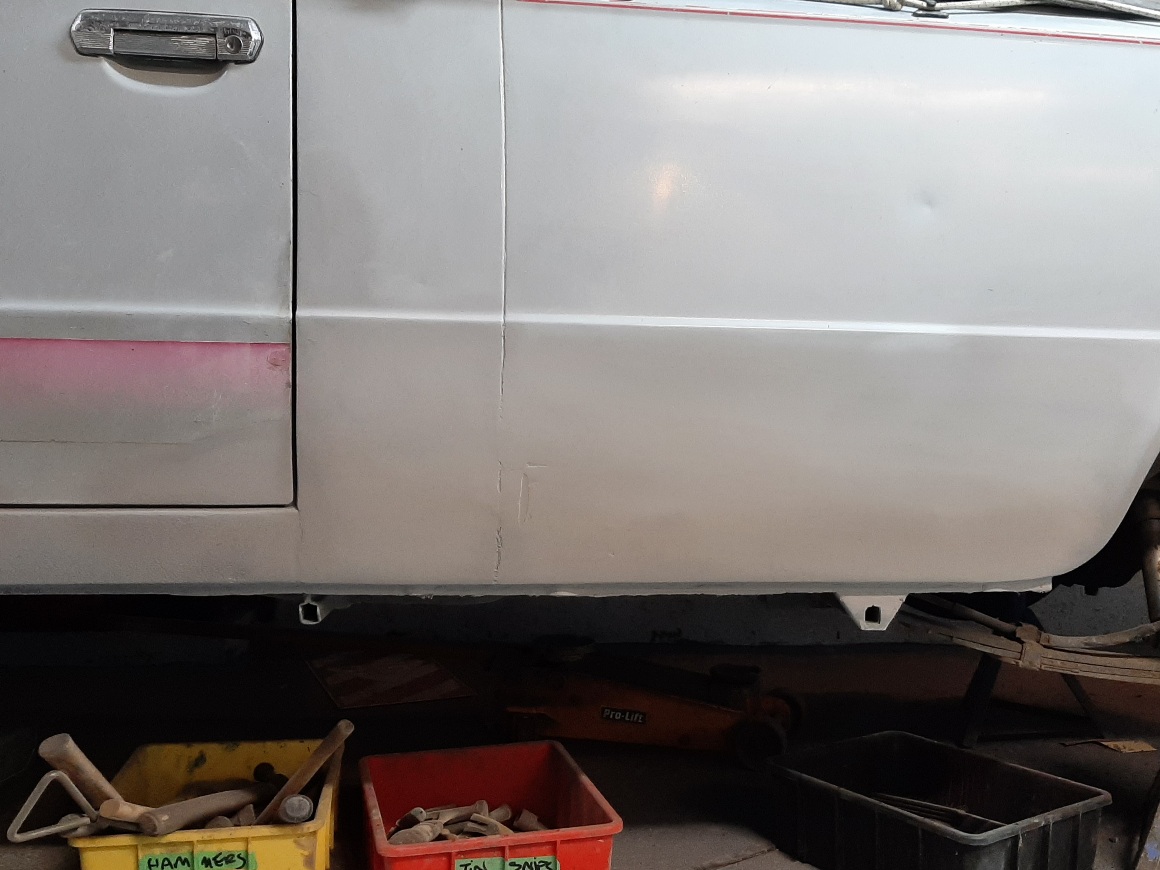
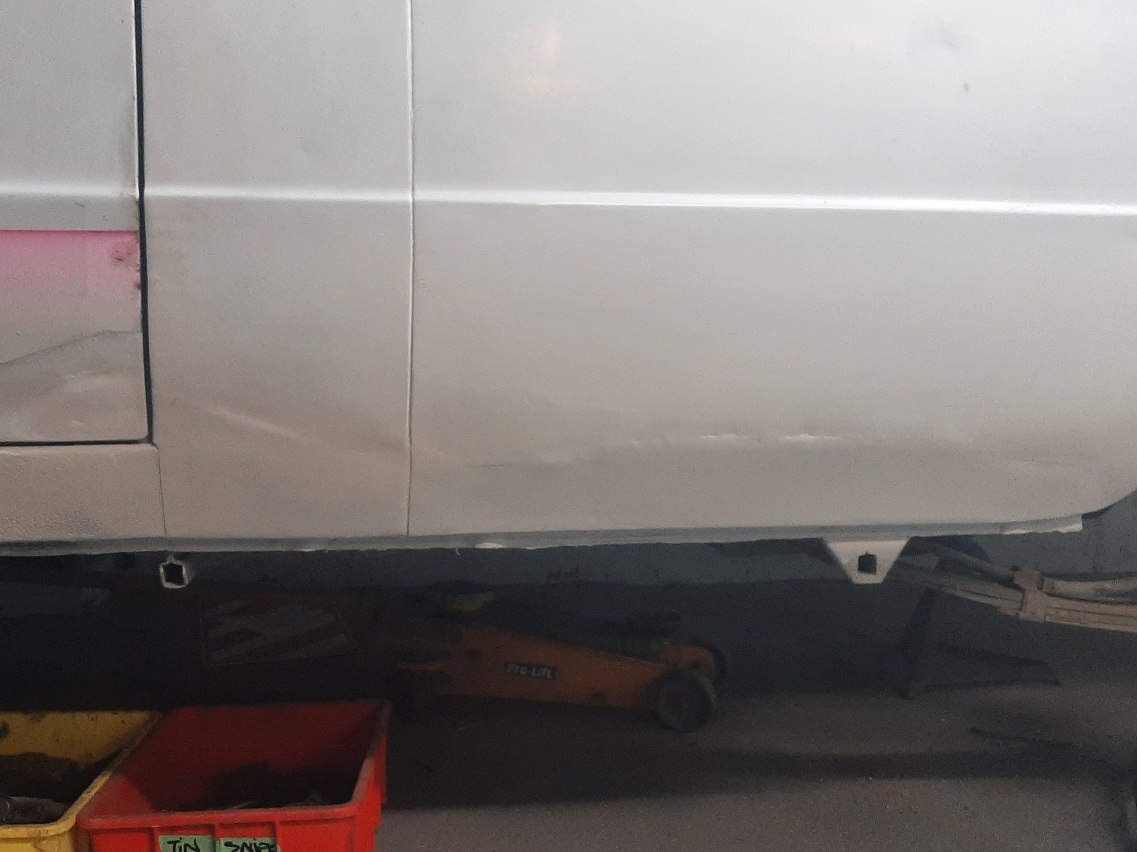
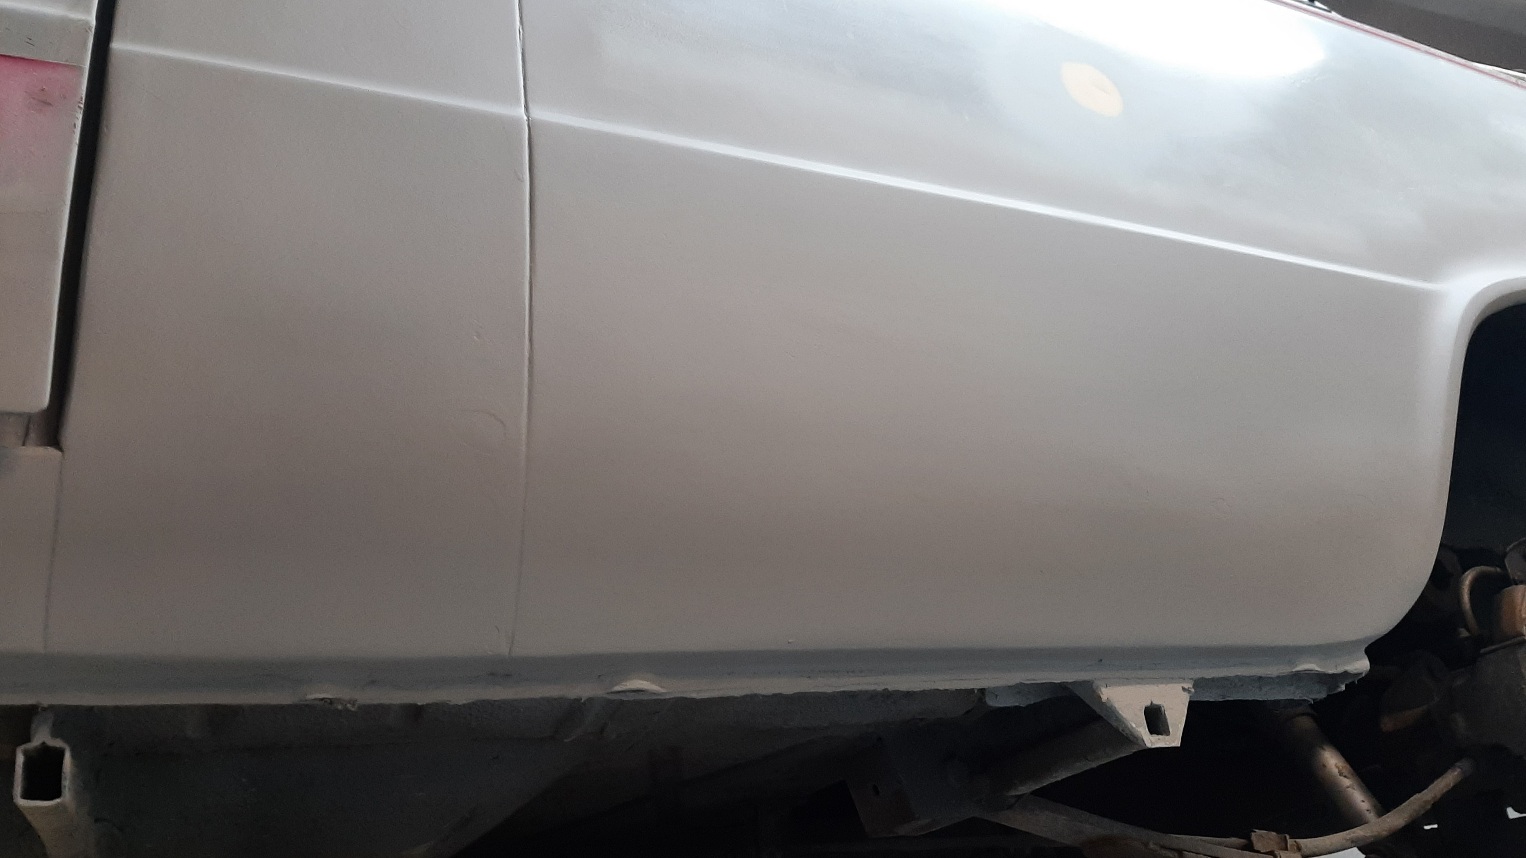
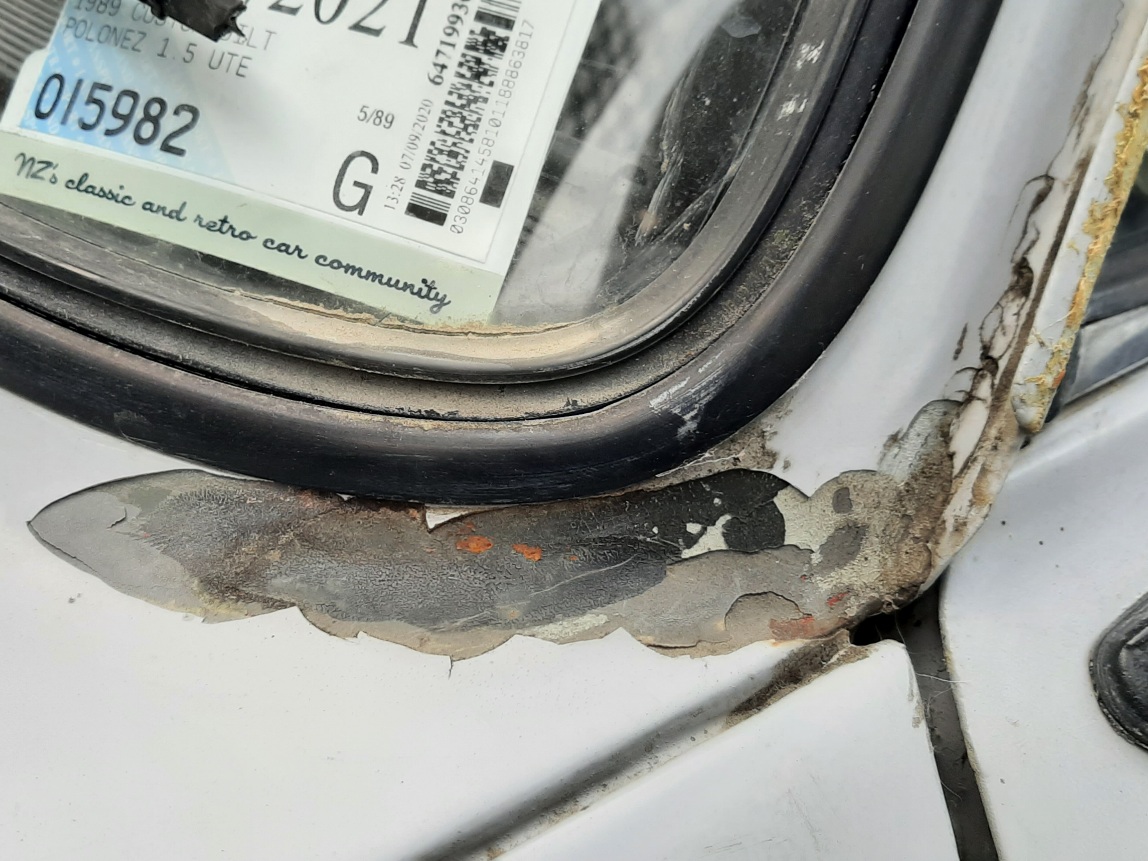
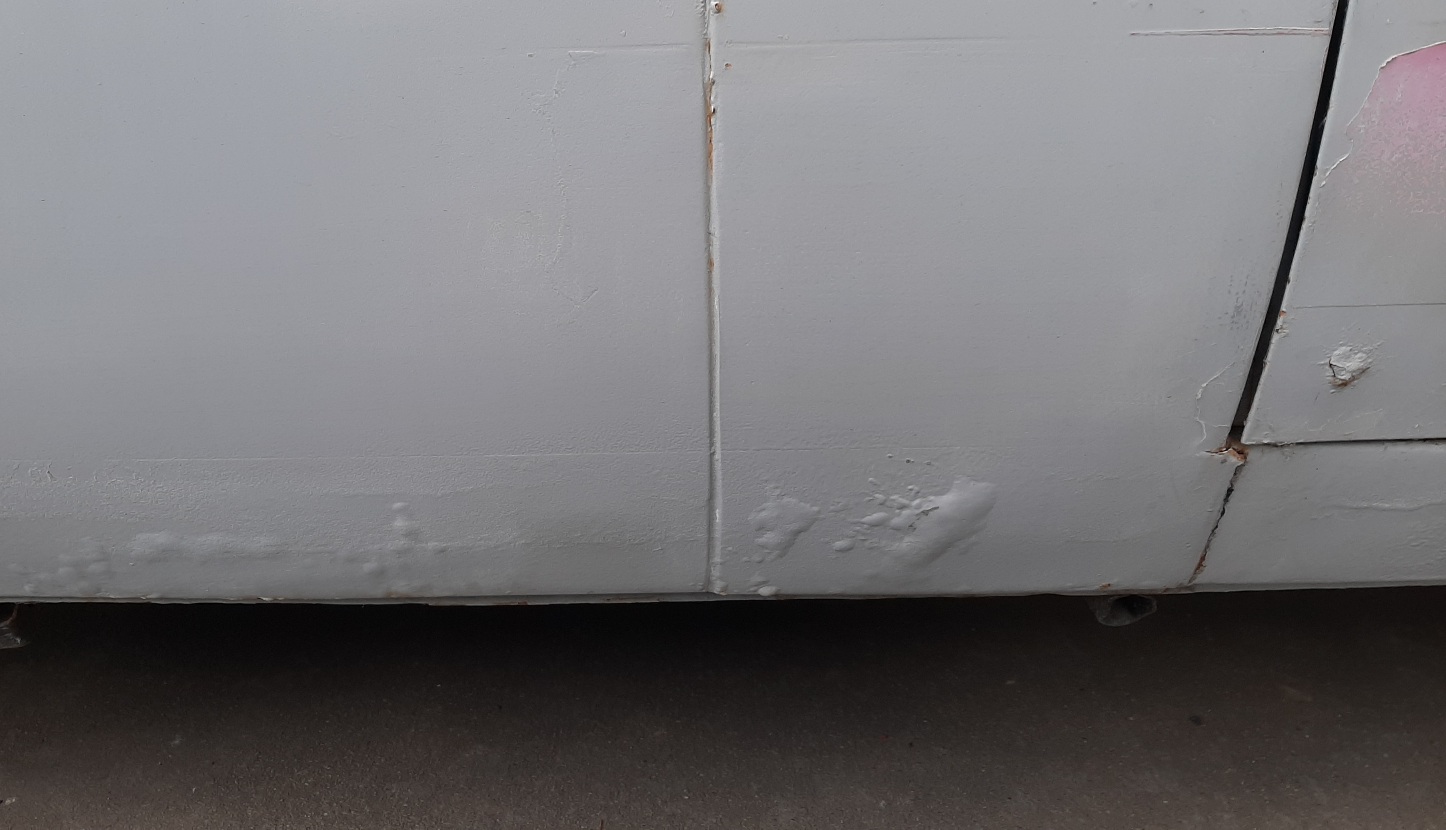
All ground back. Few wonky bits to fill, but its all going over solid metal. Getting there. Bog sand bog sand... Good enough! Some aliexpress treasure turned up Which i chucked on and drove it around the block to blow the dust off and turn it around. swept out the garage ready for the drivers side... I also need to pop the windscreen out and redo this corner, got some sort of paint reaction, rather than rust i think its rustkill primer on the bottom making all the layers seperate
1 point


.jpg.bdb27949293e2c67d33394ab0dfd3f43.jpg)


.jpeg.b4acce918a4838110b8199102d3ed8d8.jpeg)


This leaderboard is set to Auckland/GMT+12:00