
Leaderboard


Popular Content
Showing content with the highest reputation on 05/16/23 in Posts
-
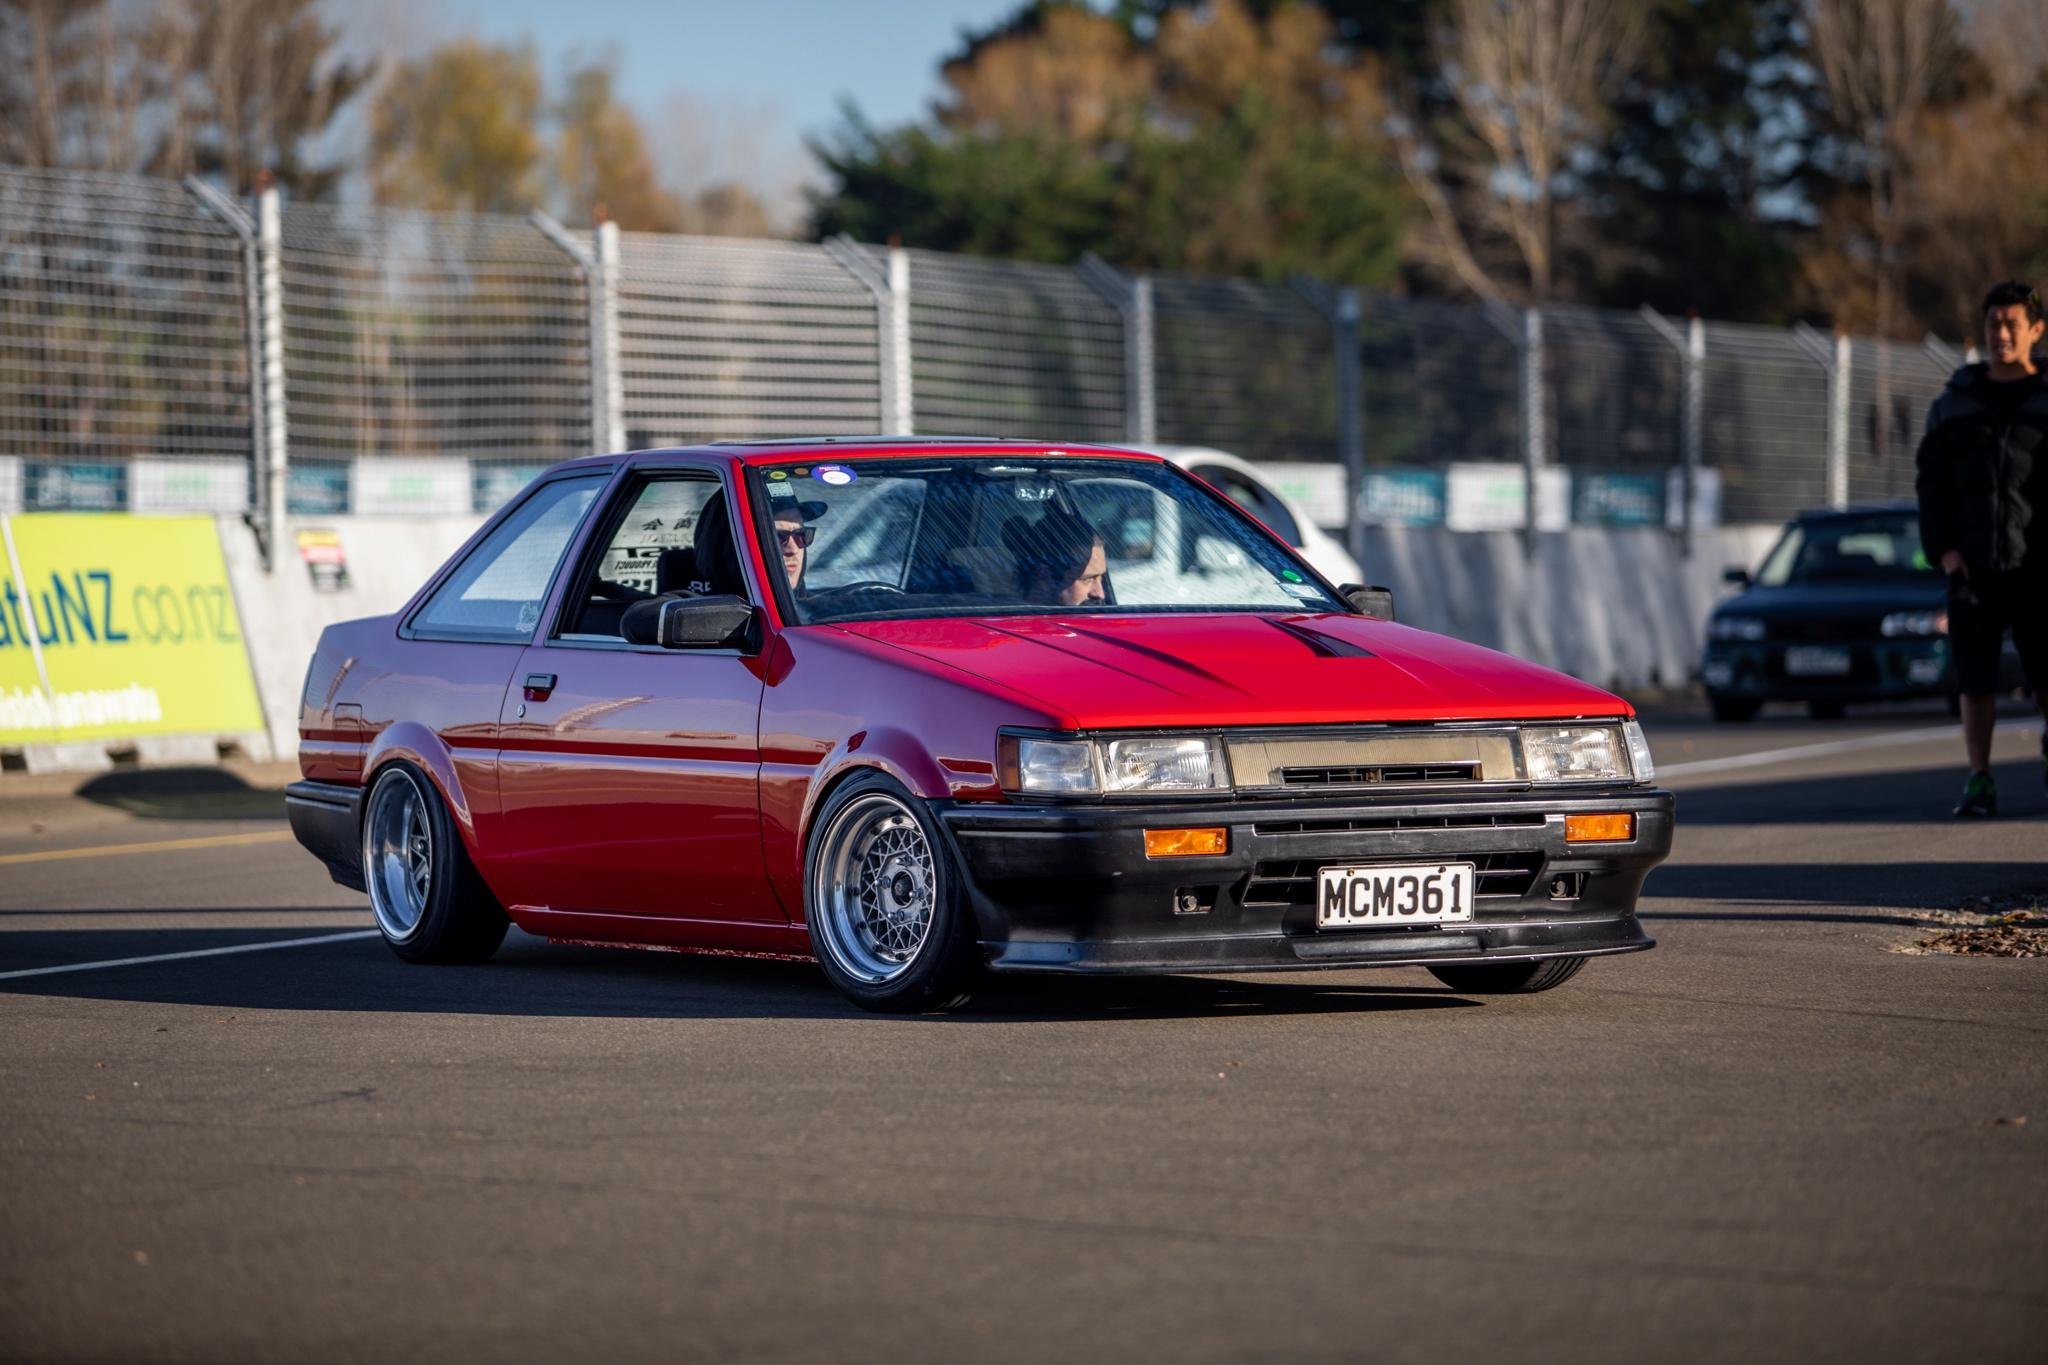
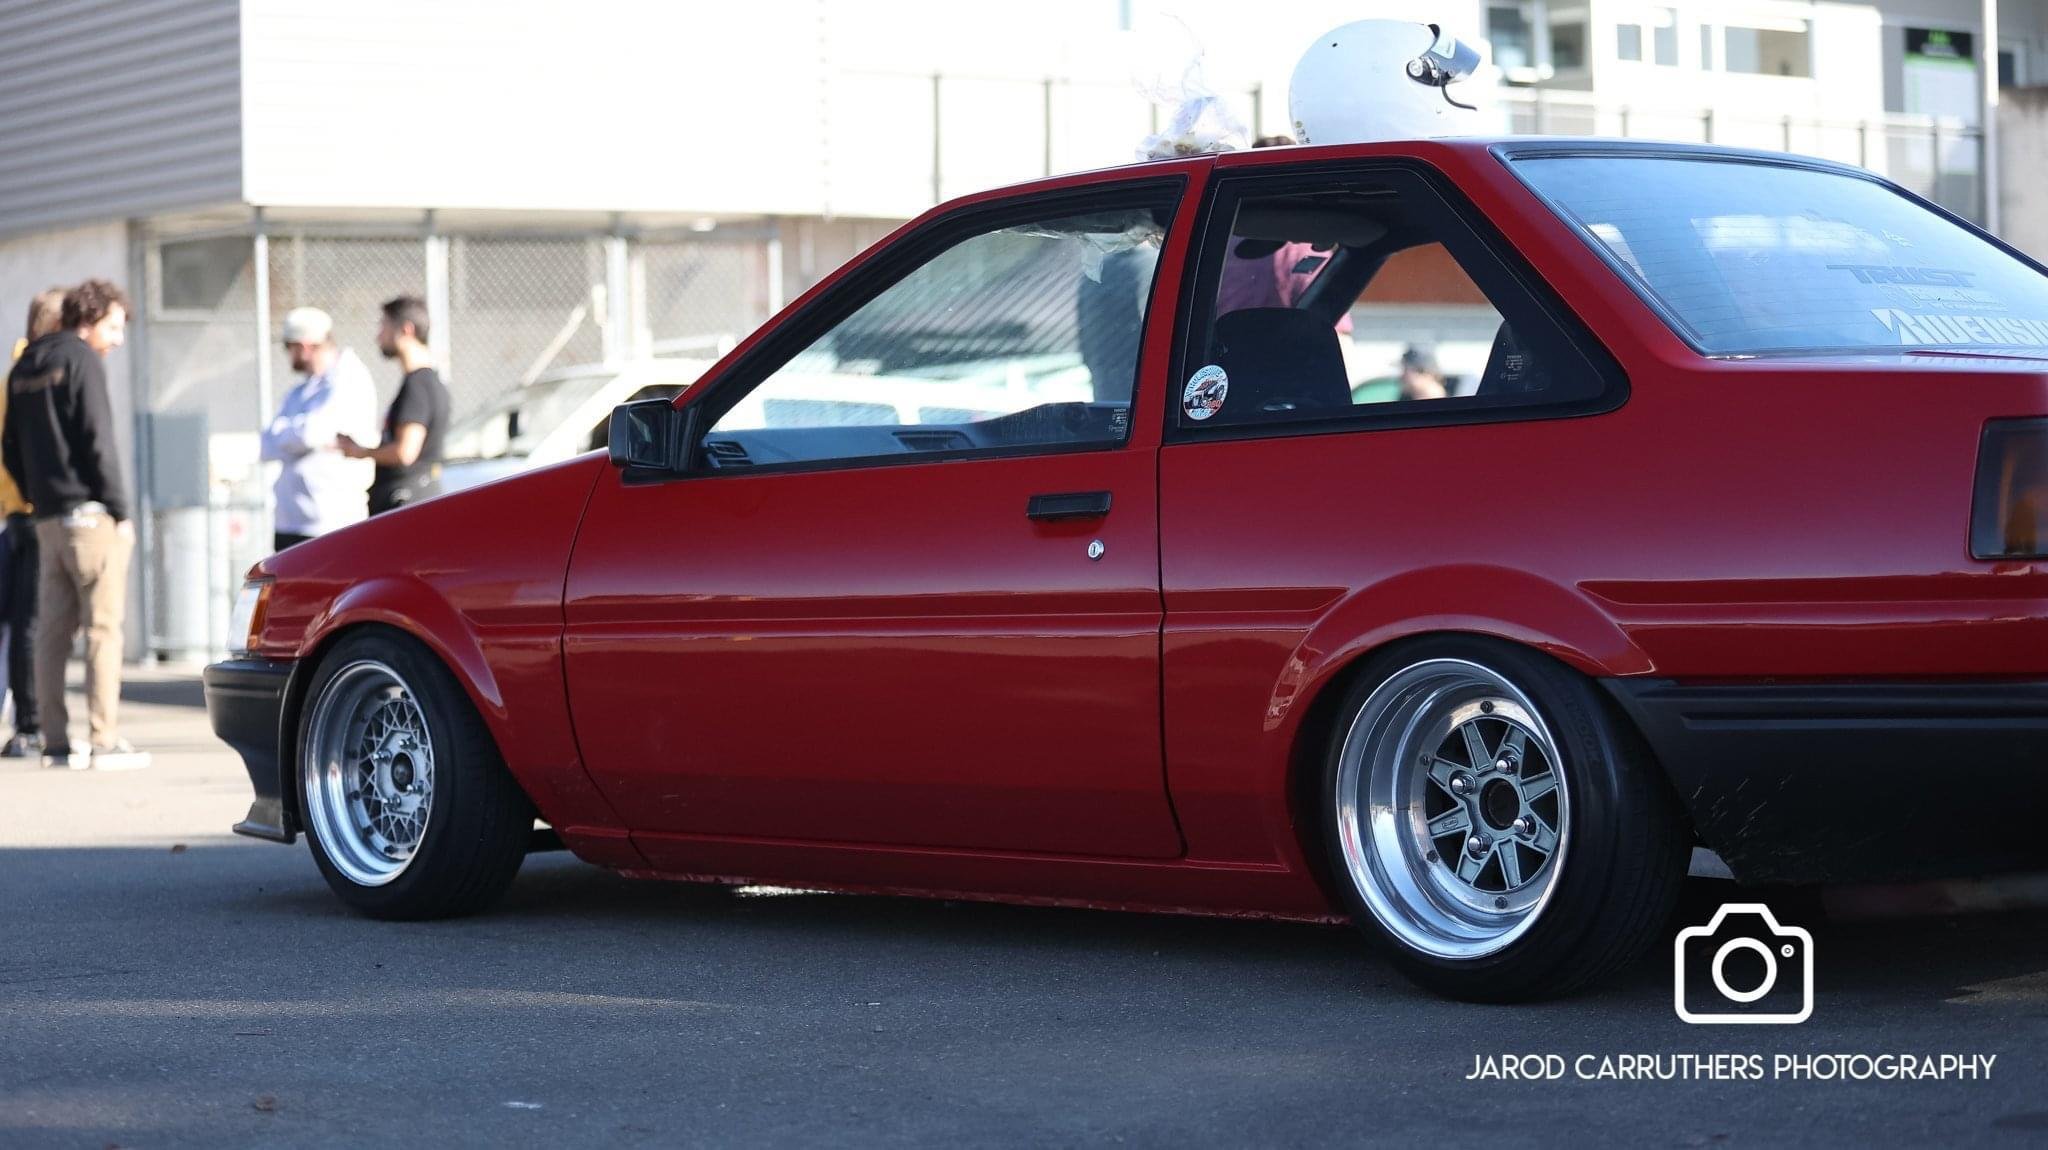
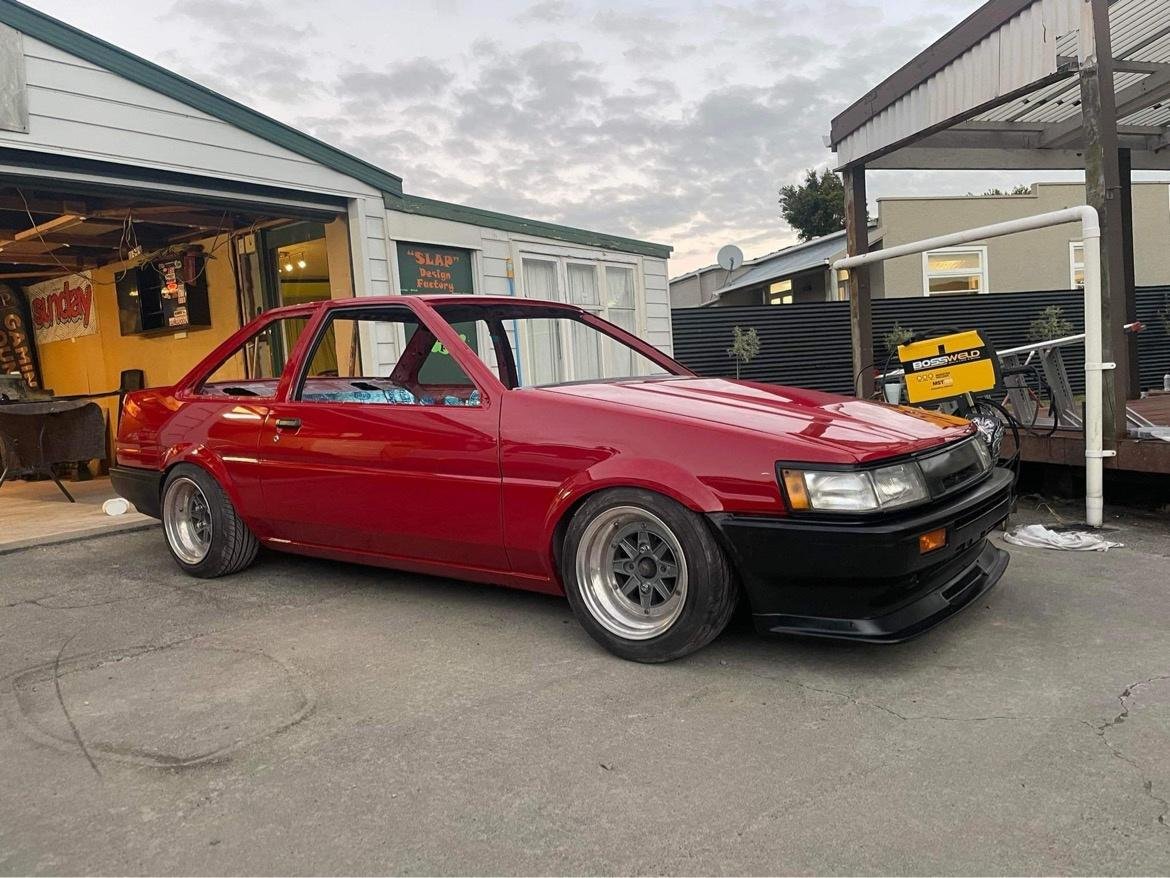
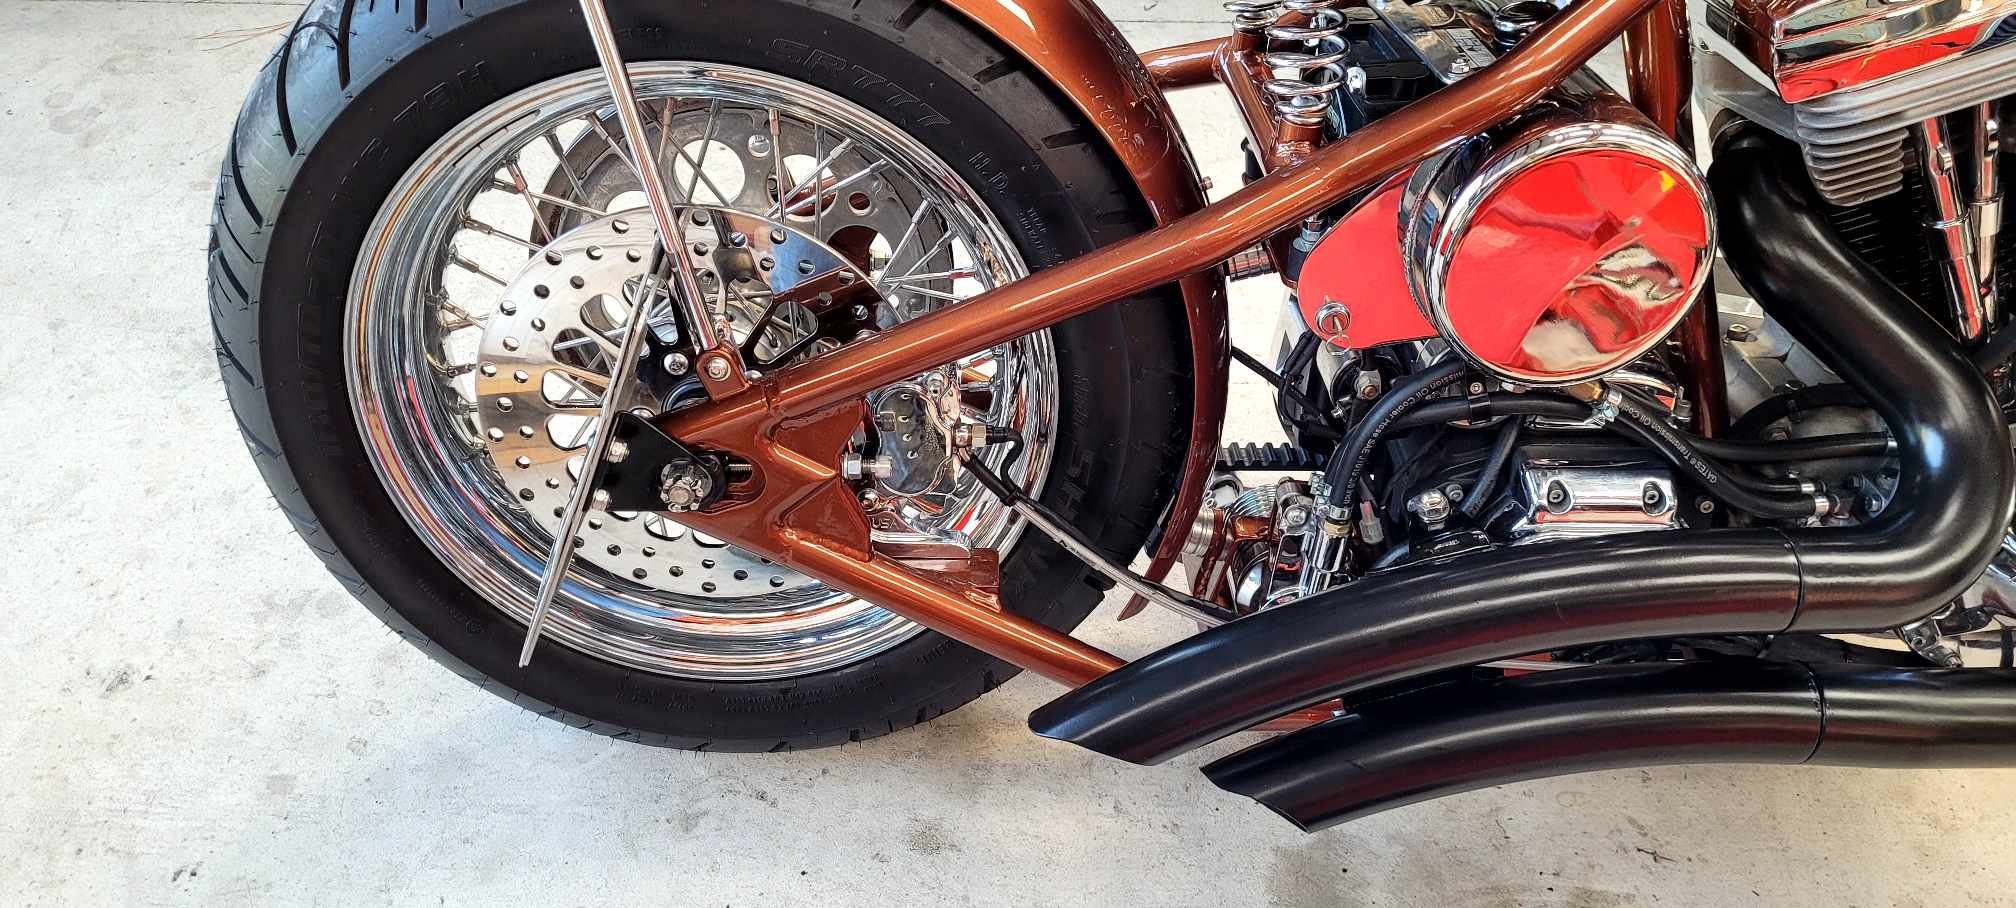
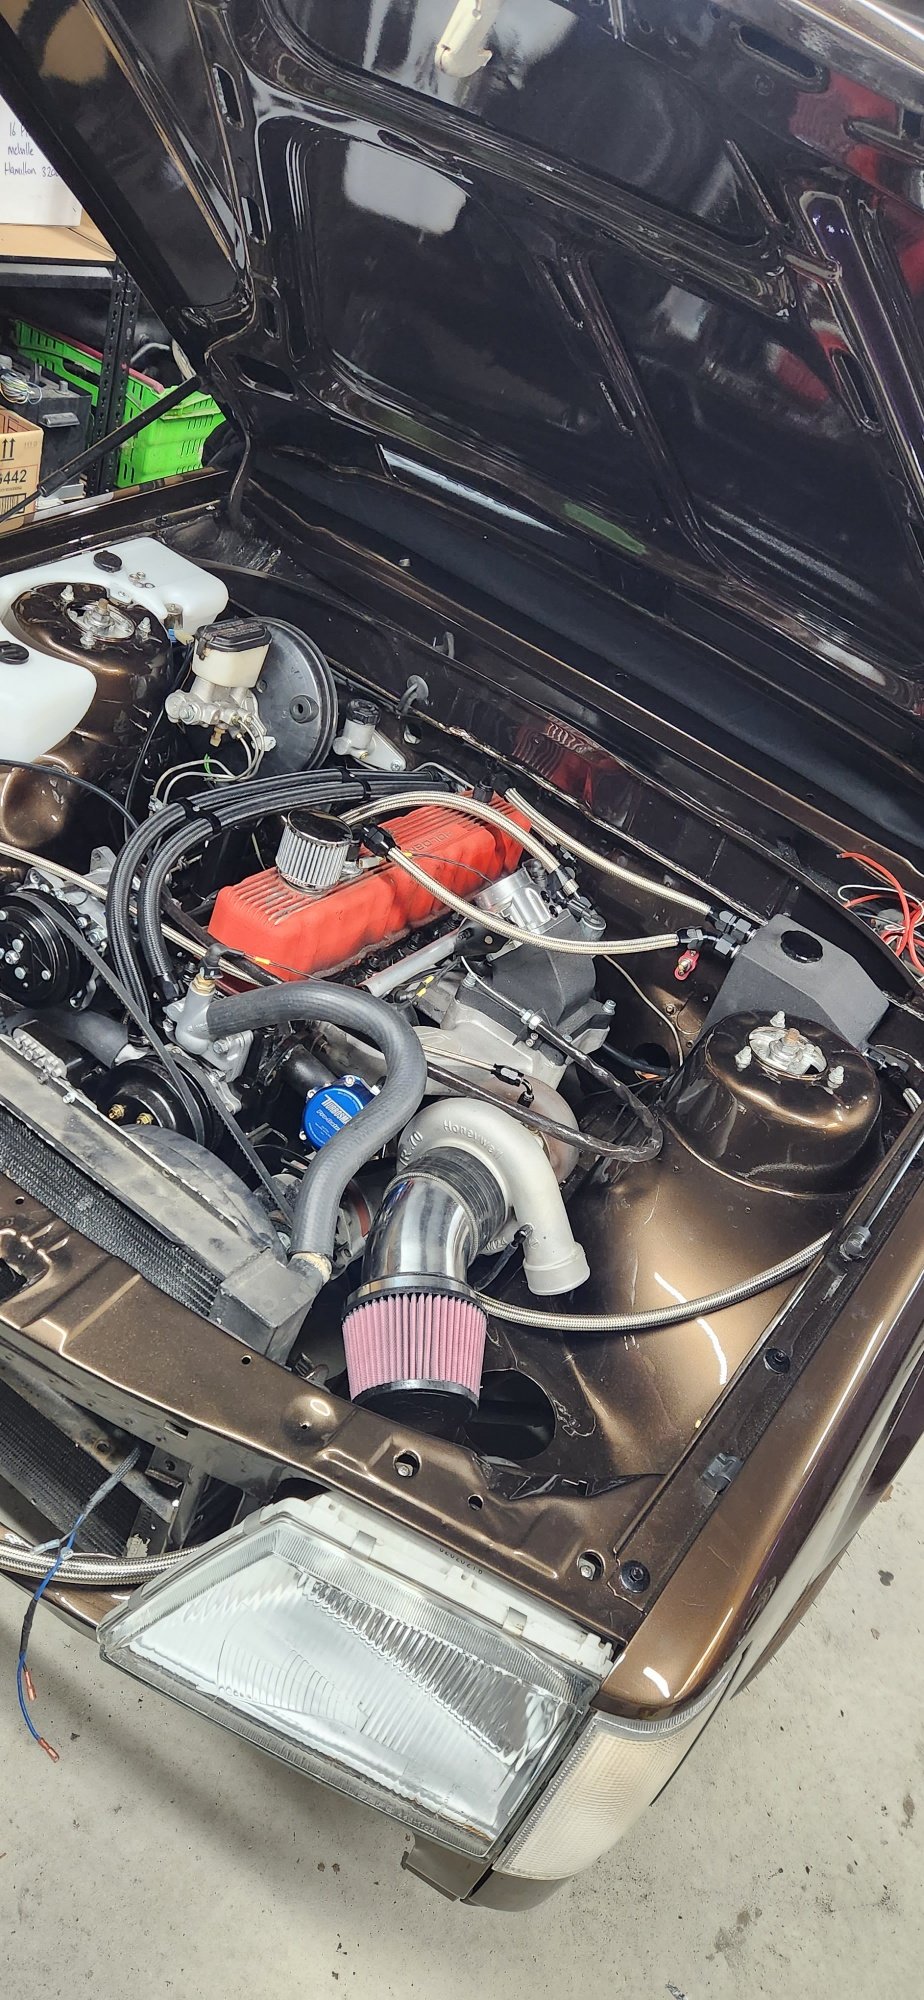
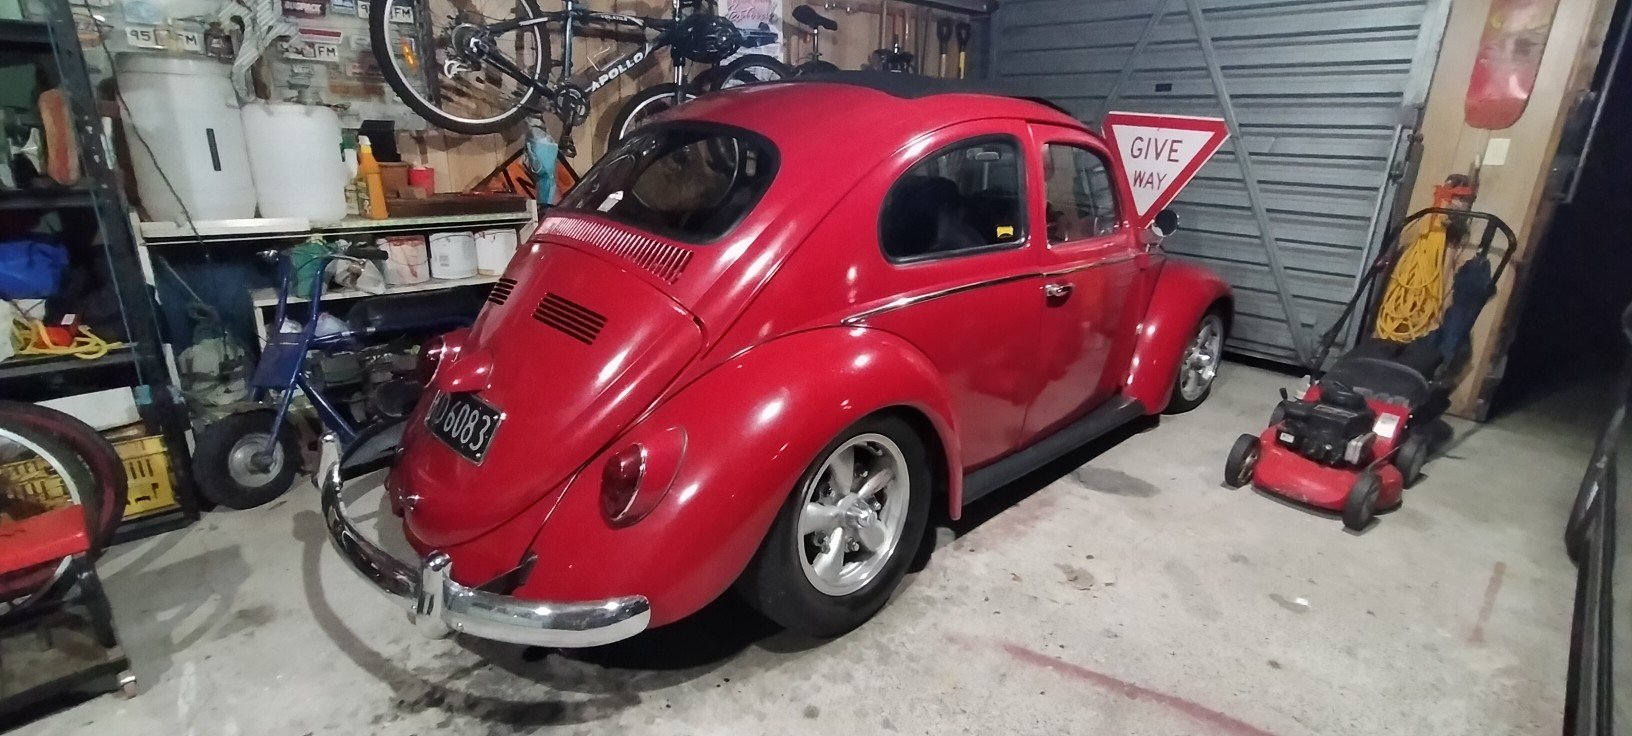
This is how it currently looks, i raised it up as i got sick of how it handled and it made a massive difference. I also too advantage of a Watanabe 40% off sale and picked up a nice set, loving how the car looks now. The car currently has oil leaks like any good 4age does but the rear main leaks and the burning oil smokes out the cabin when i'm drifting which is less than ideal so dropping the motor for a refresh and keep enjoying. The dream of FCR's and some cams is in the pipeline as well as a shaved/repainted engine bay would go down a treat. Discussion19 points
-
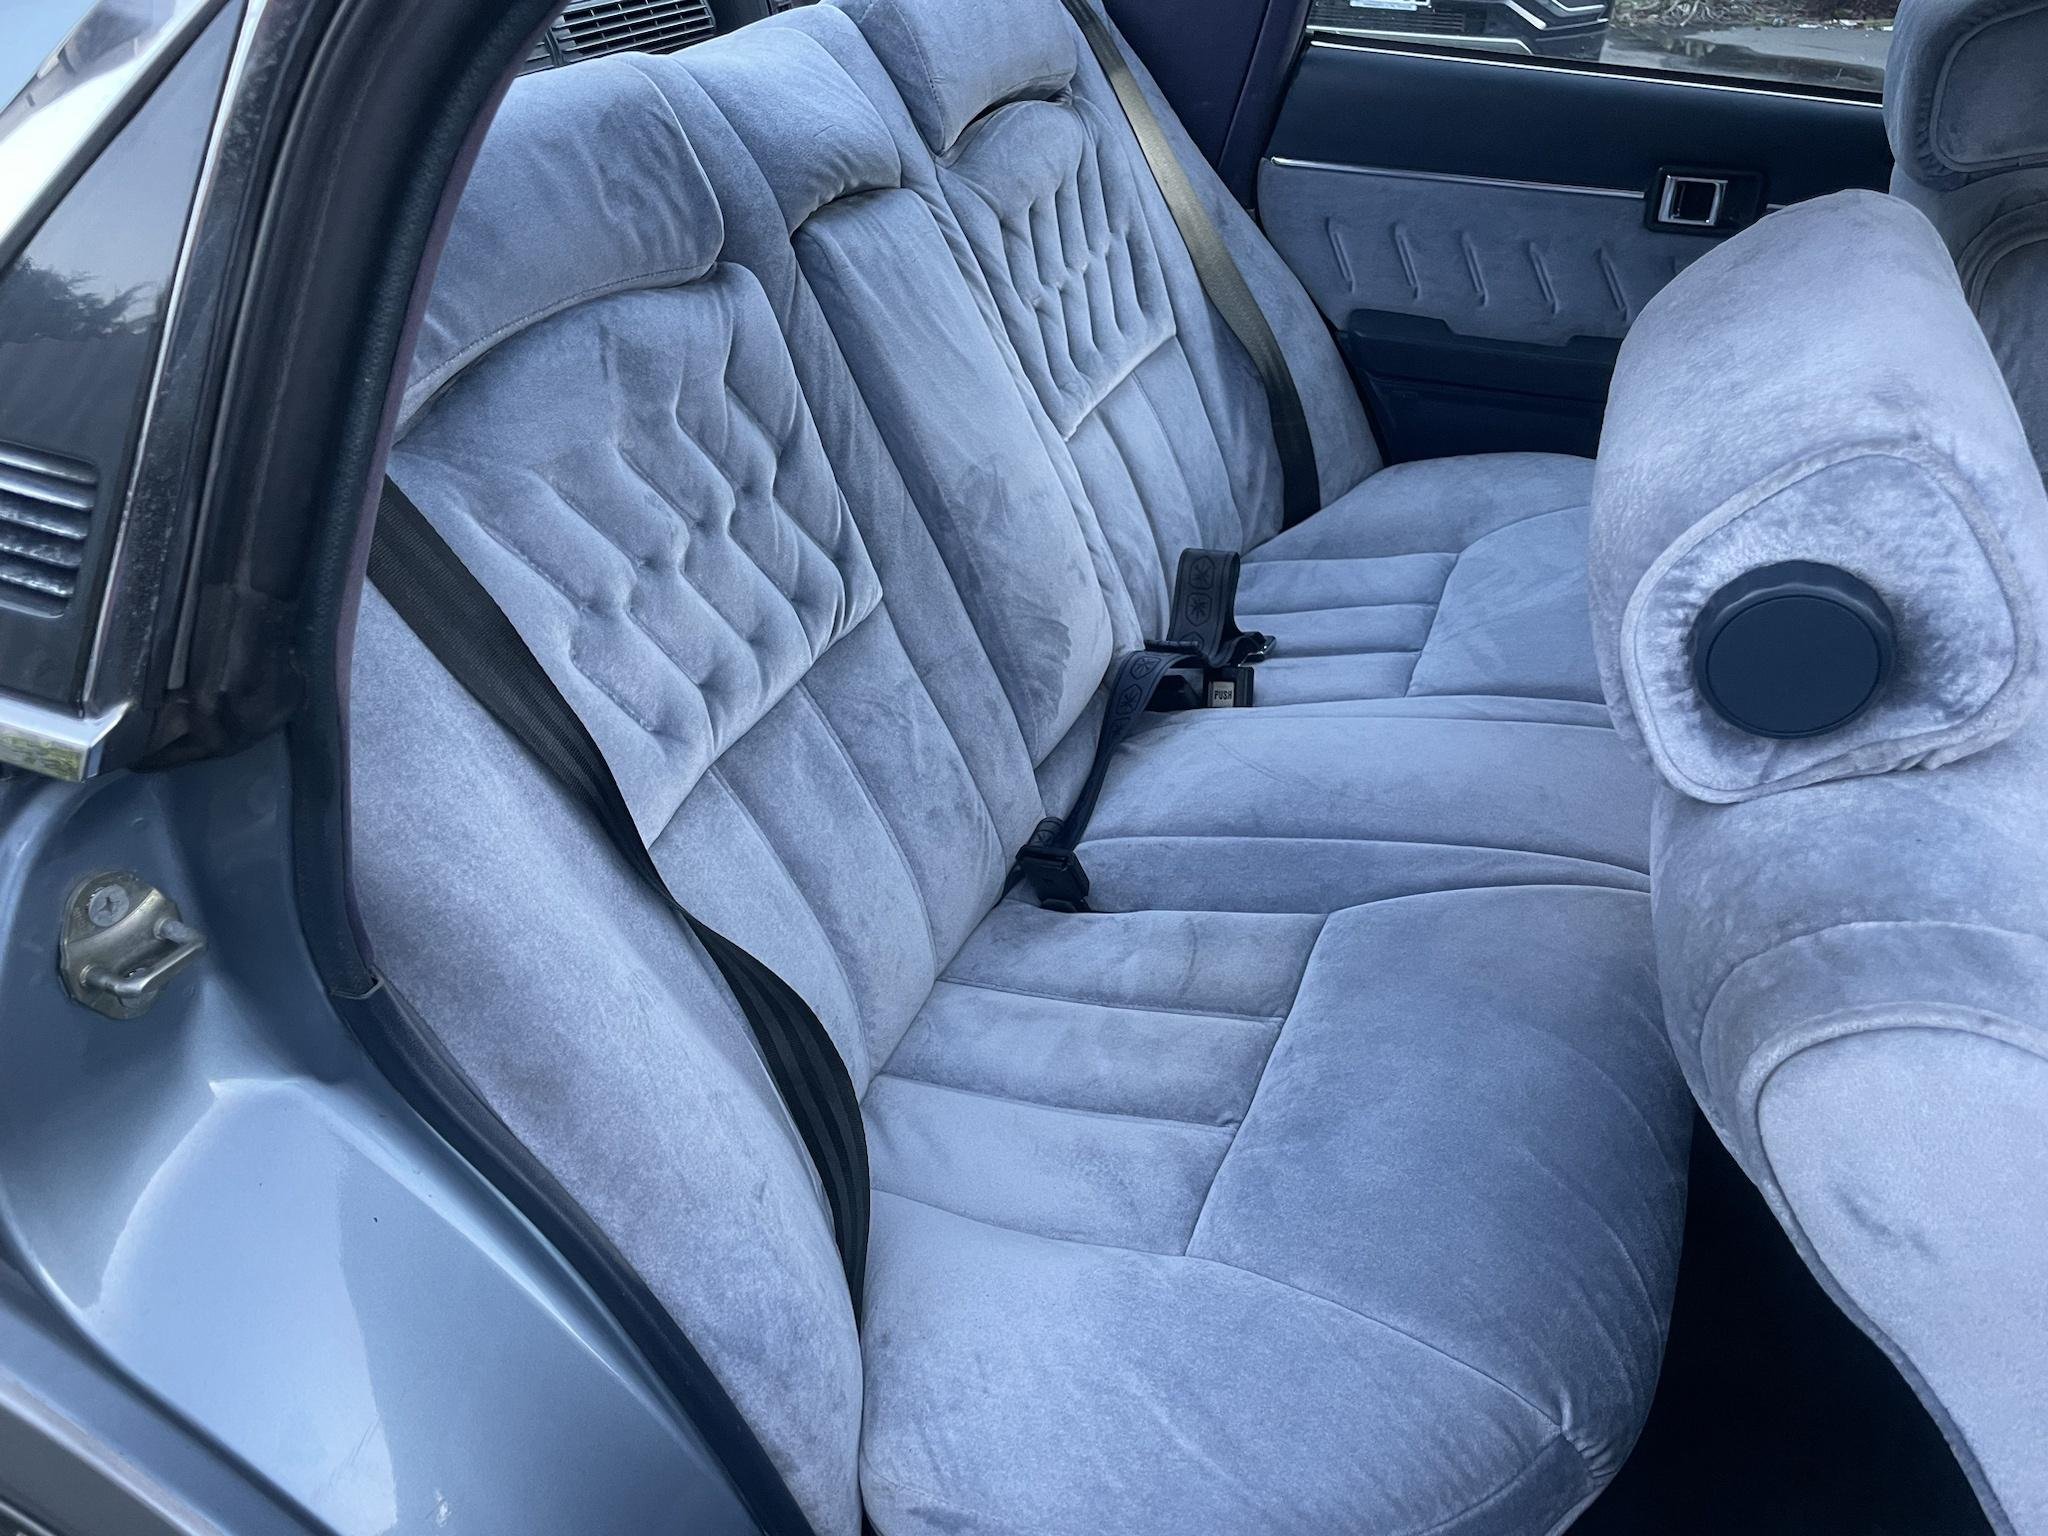
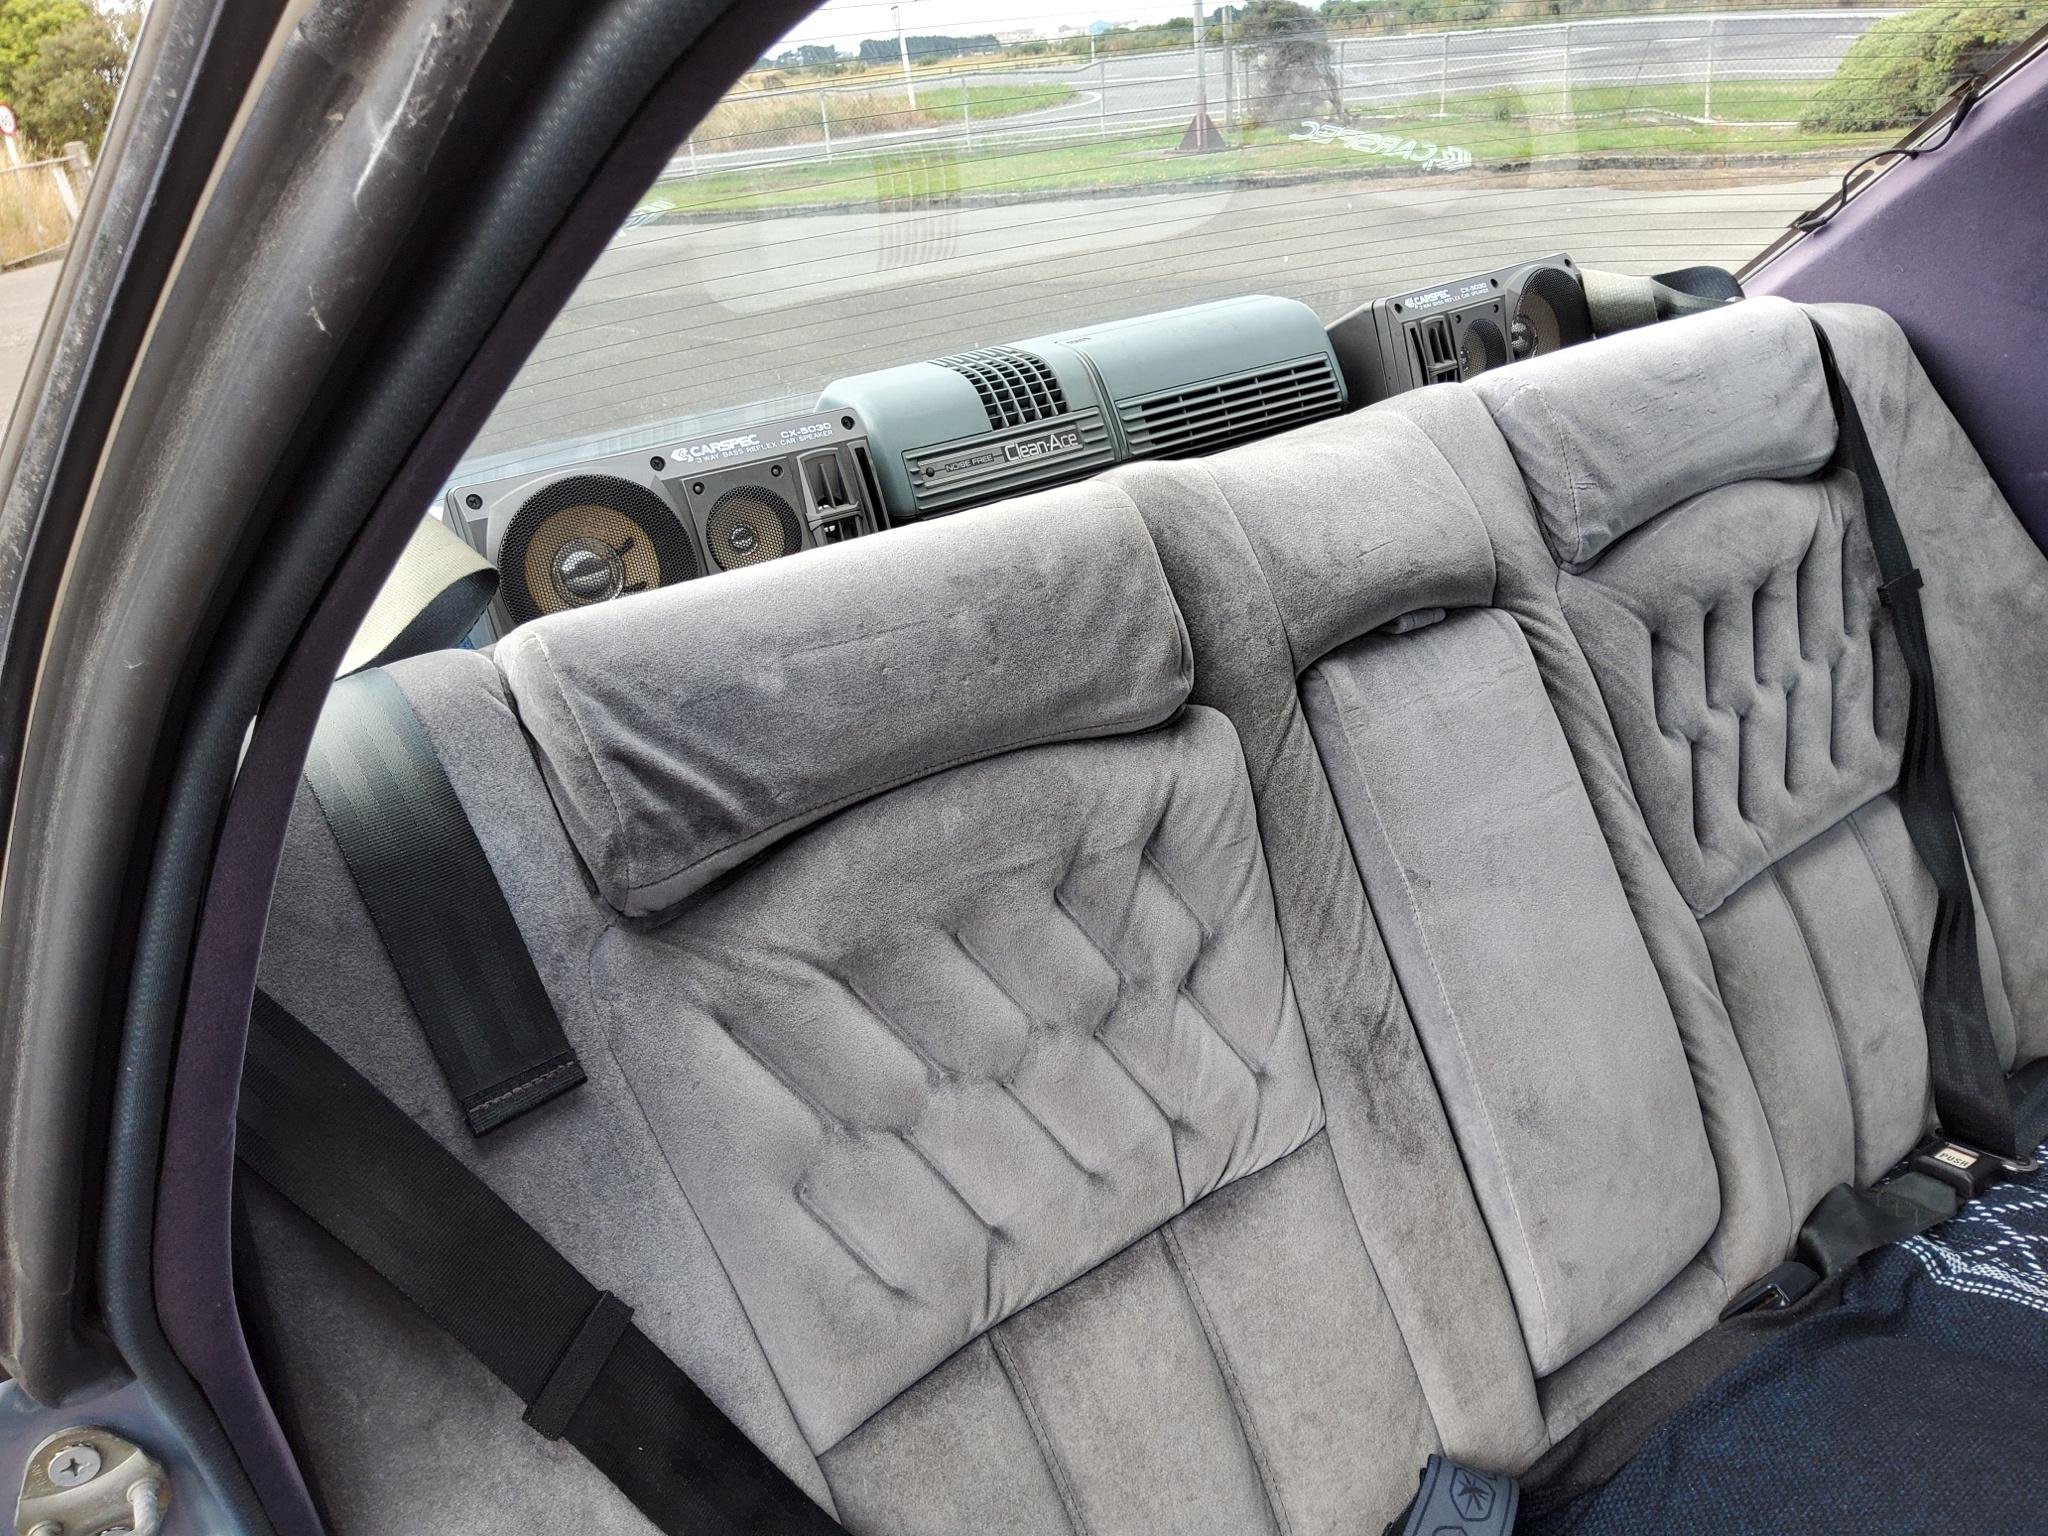
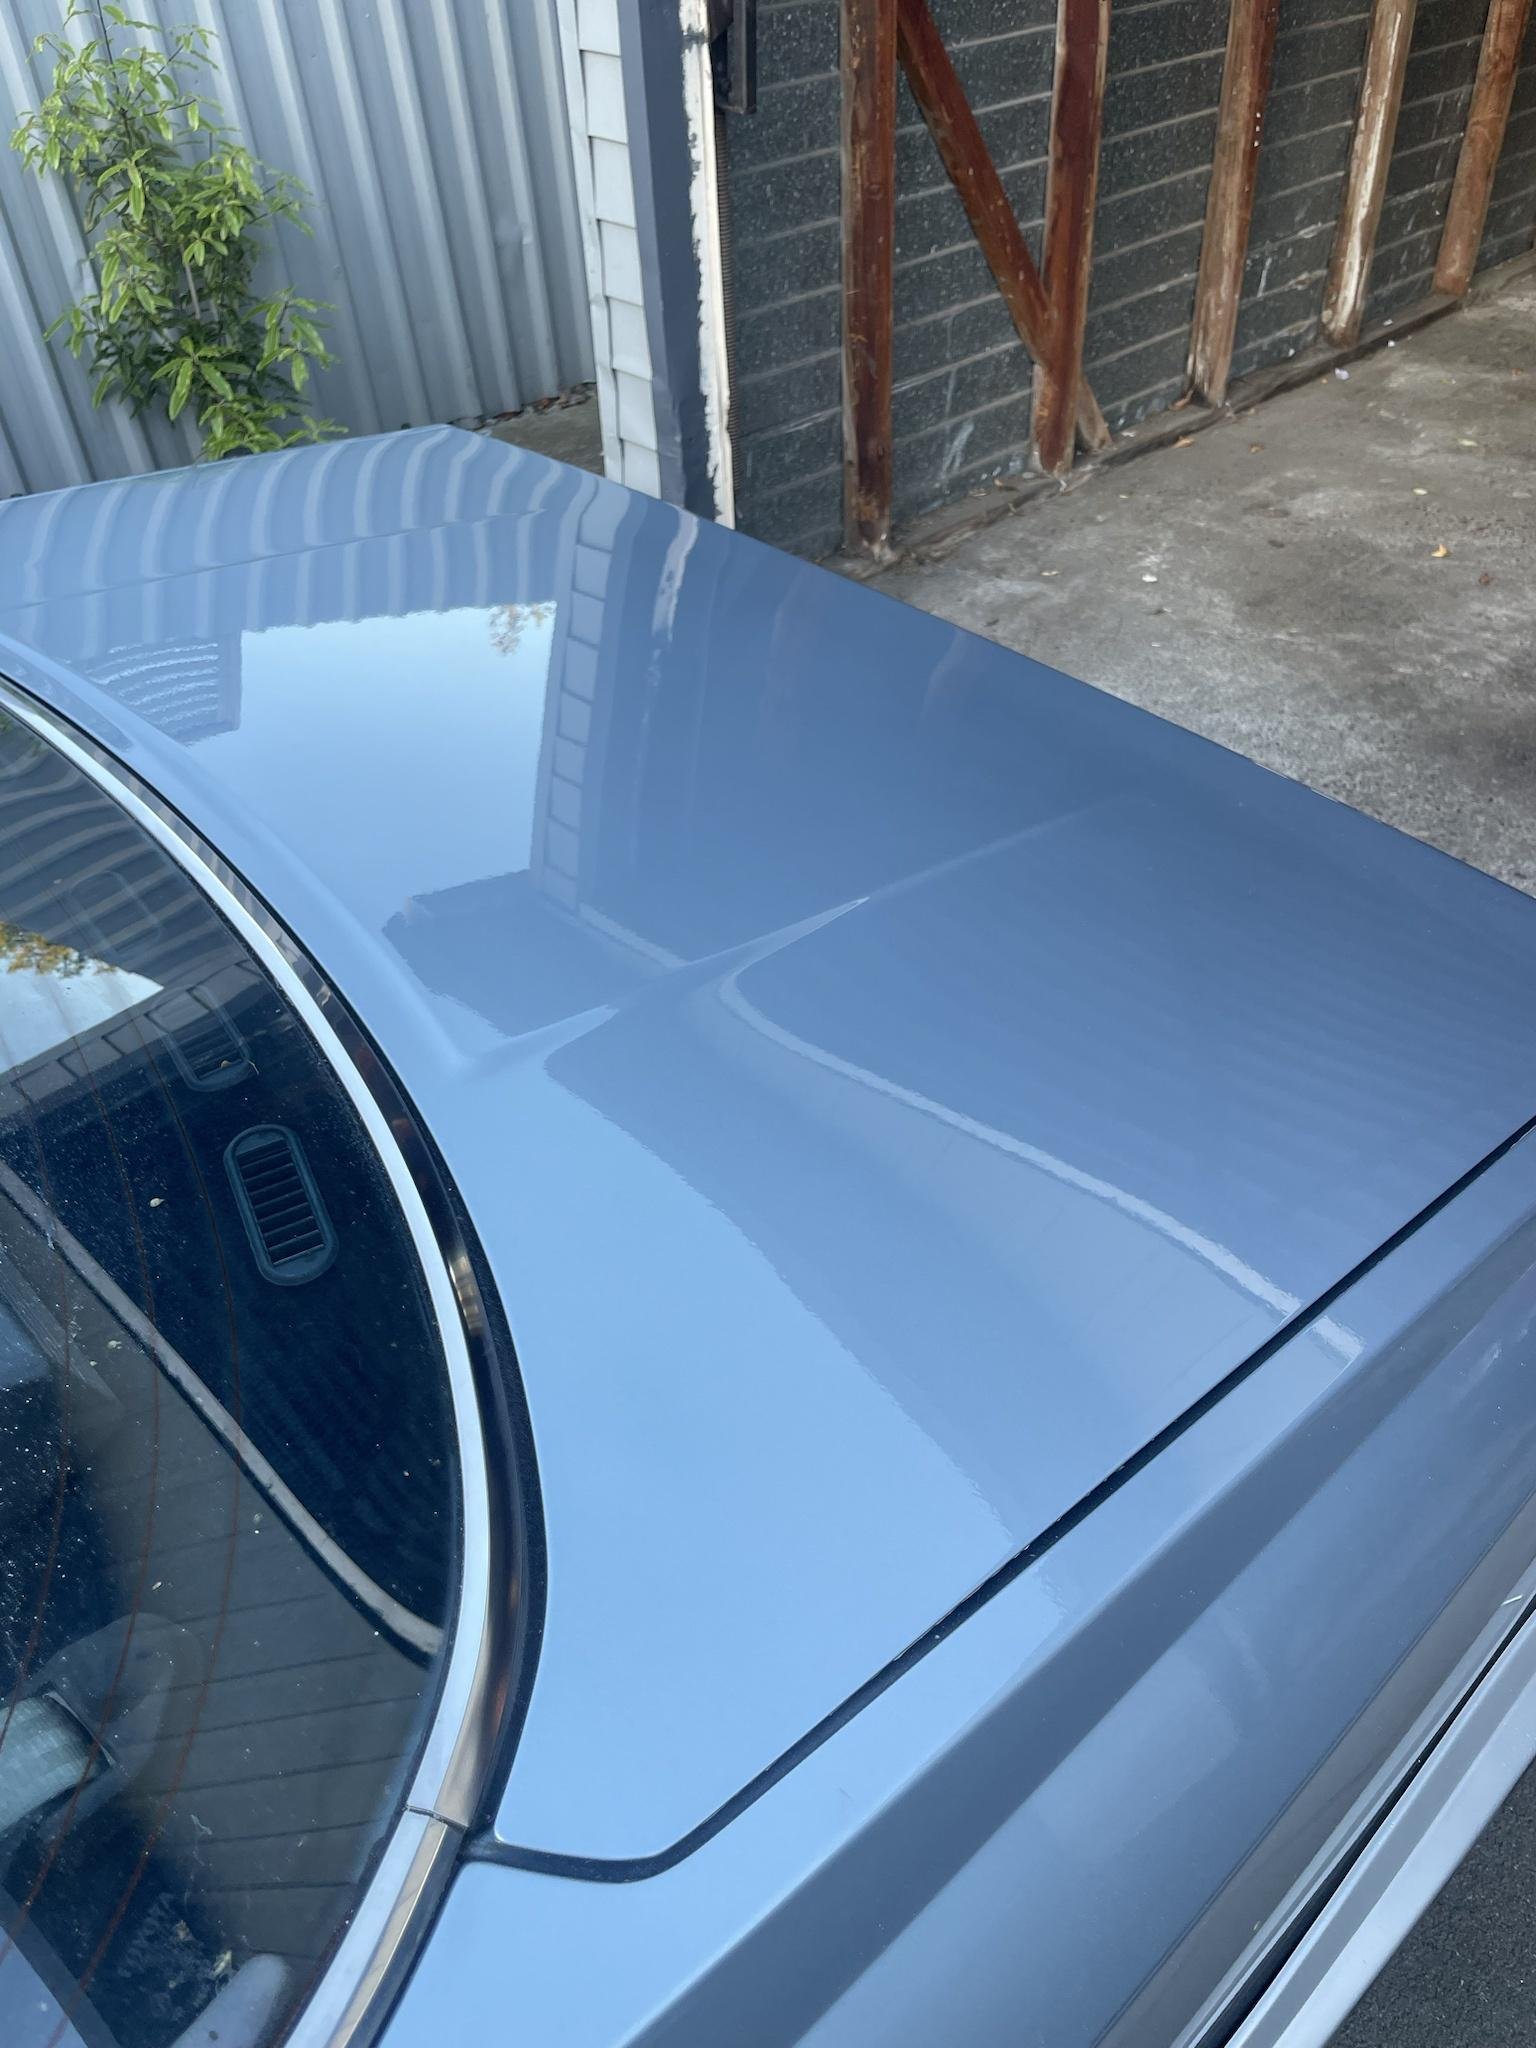
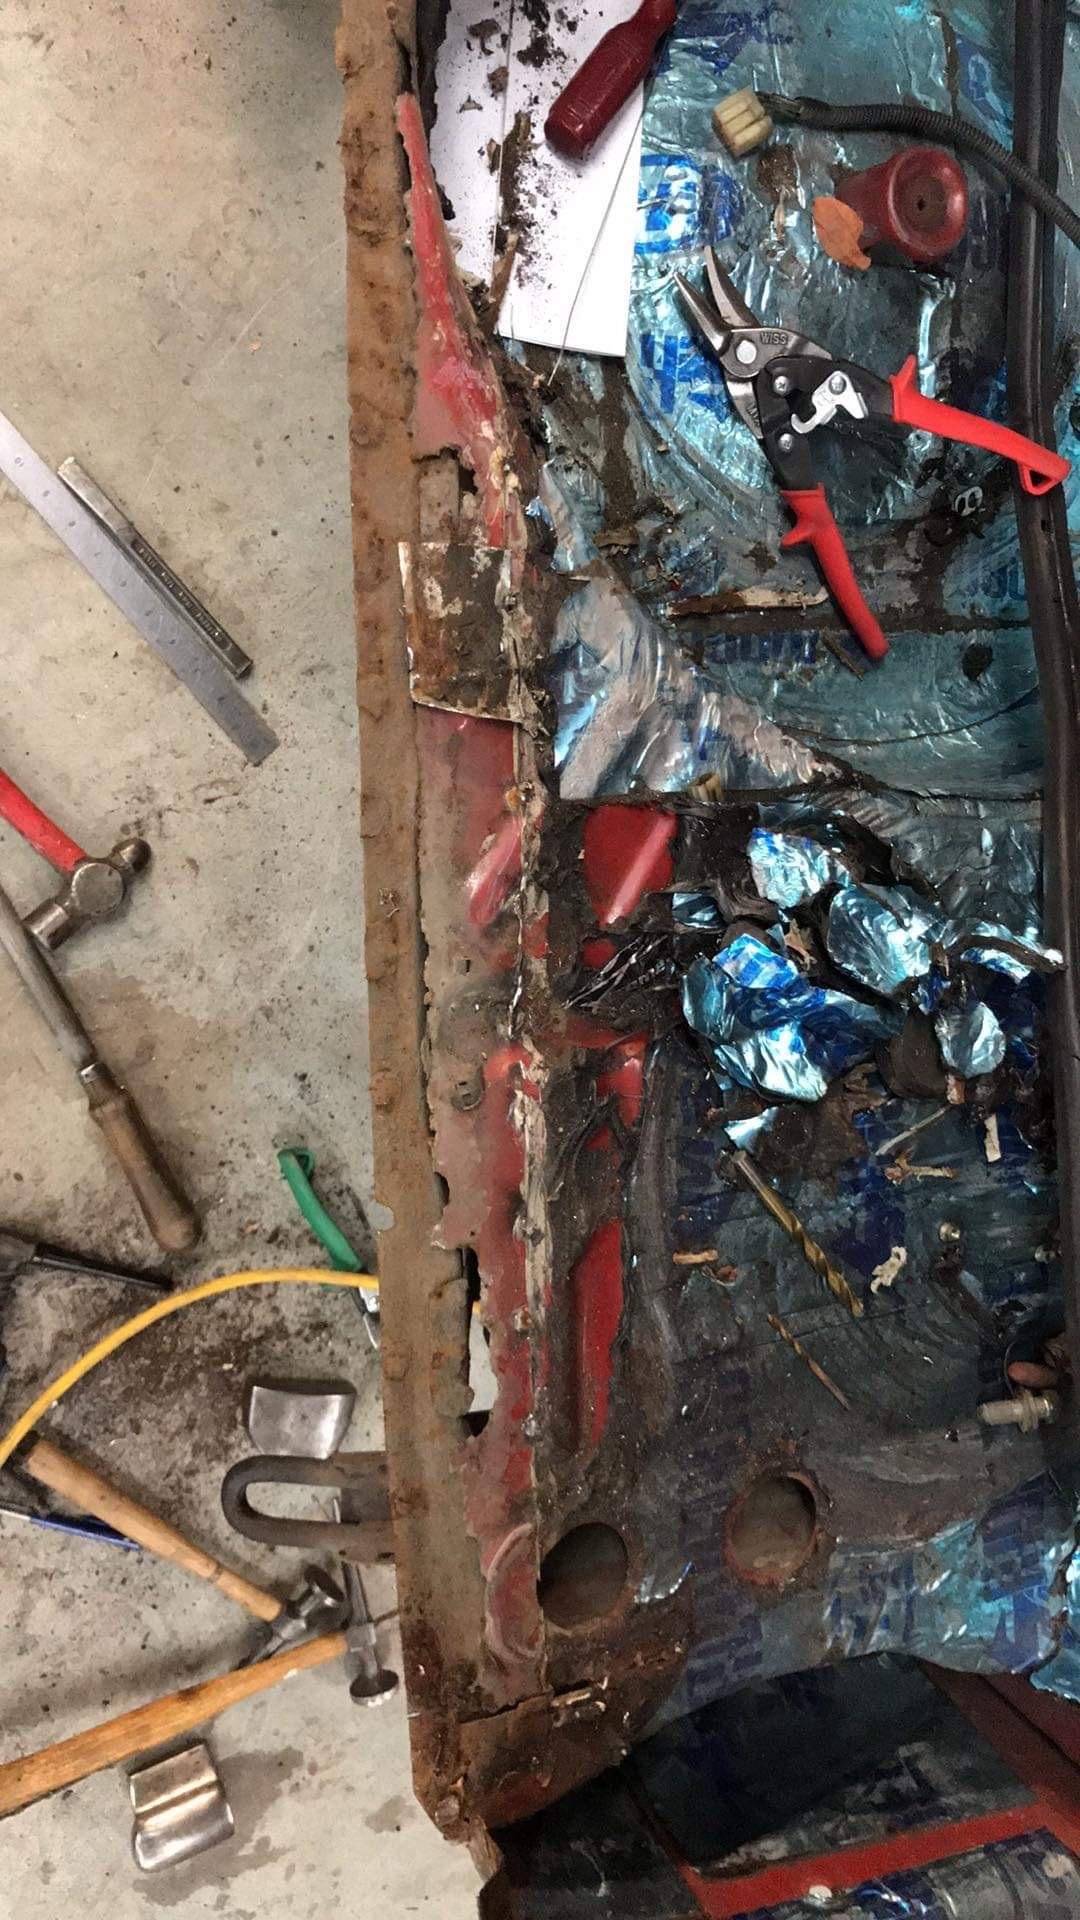
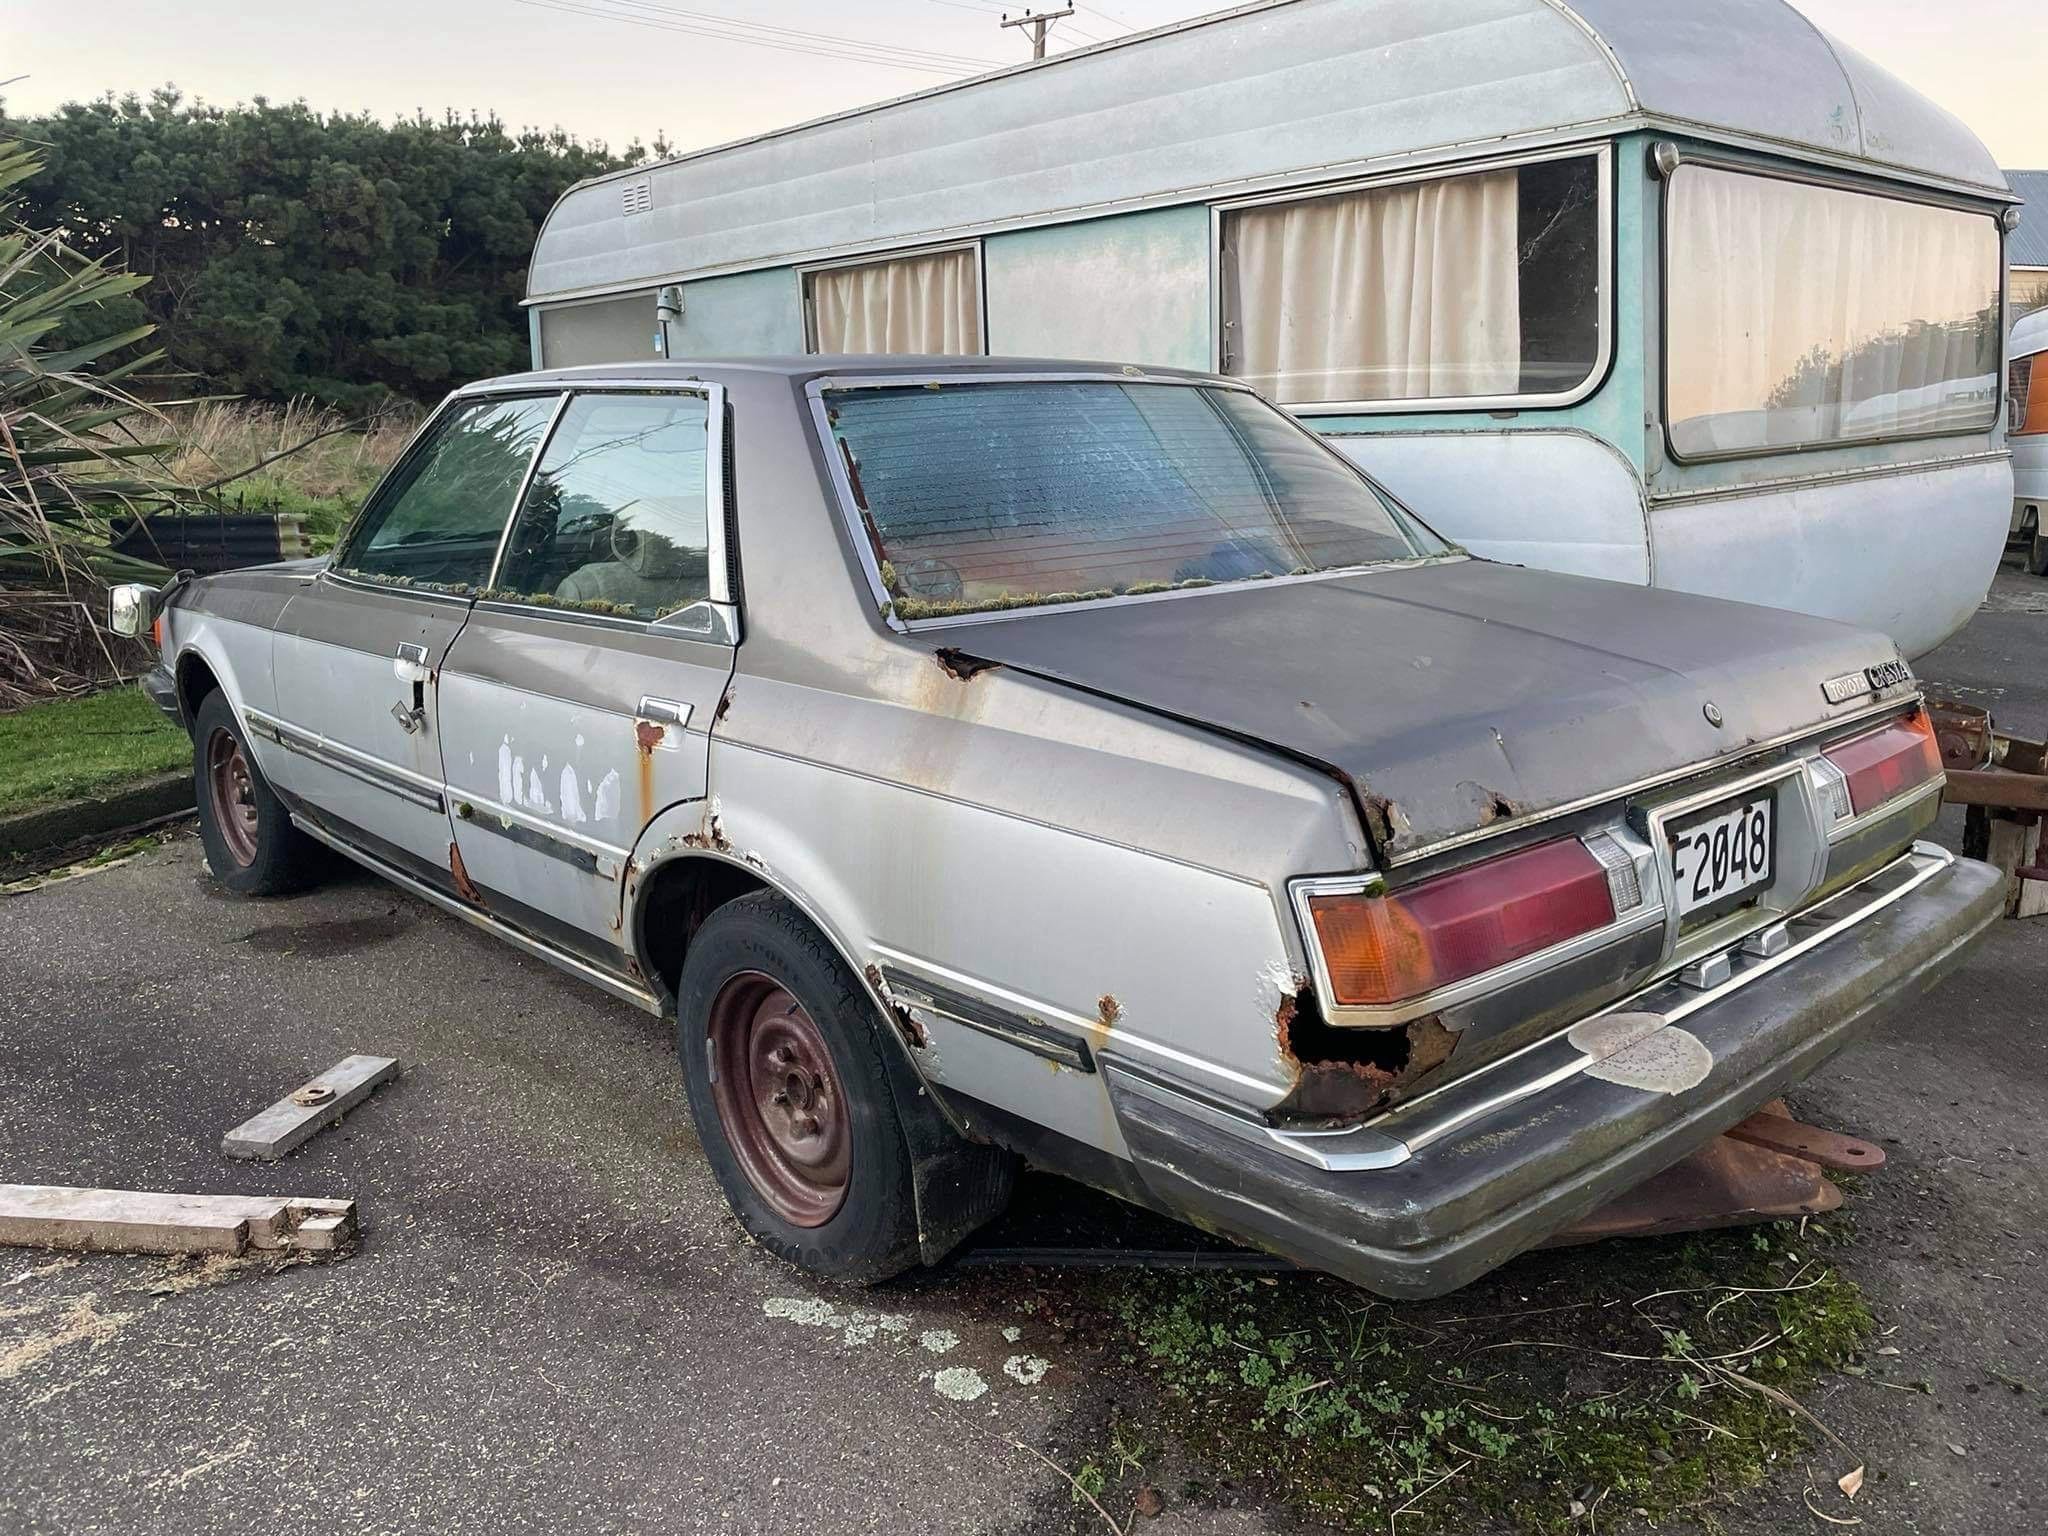
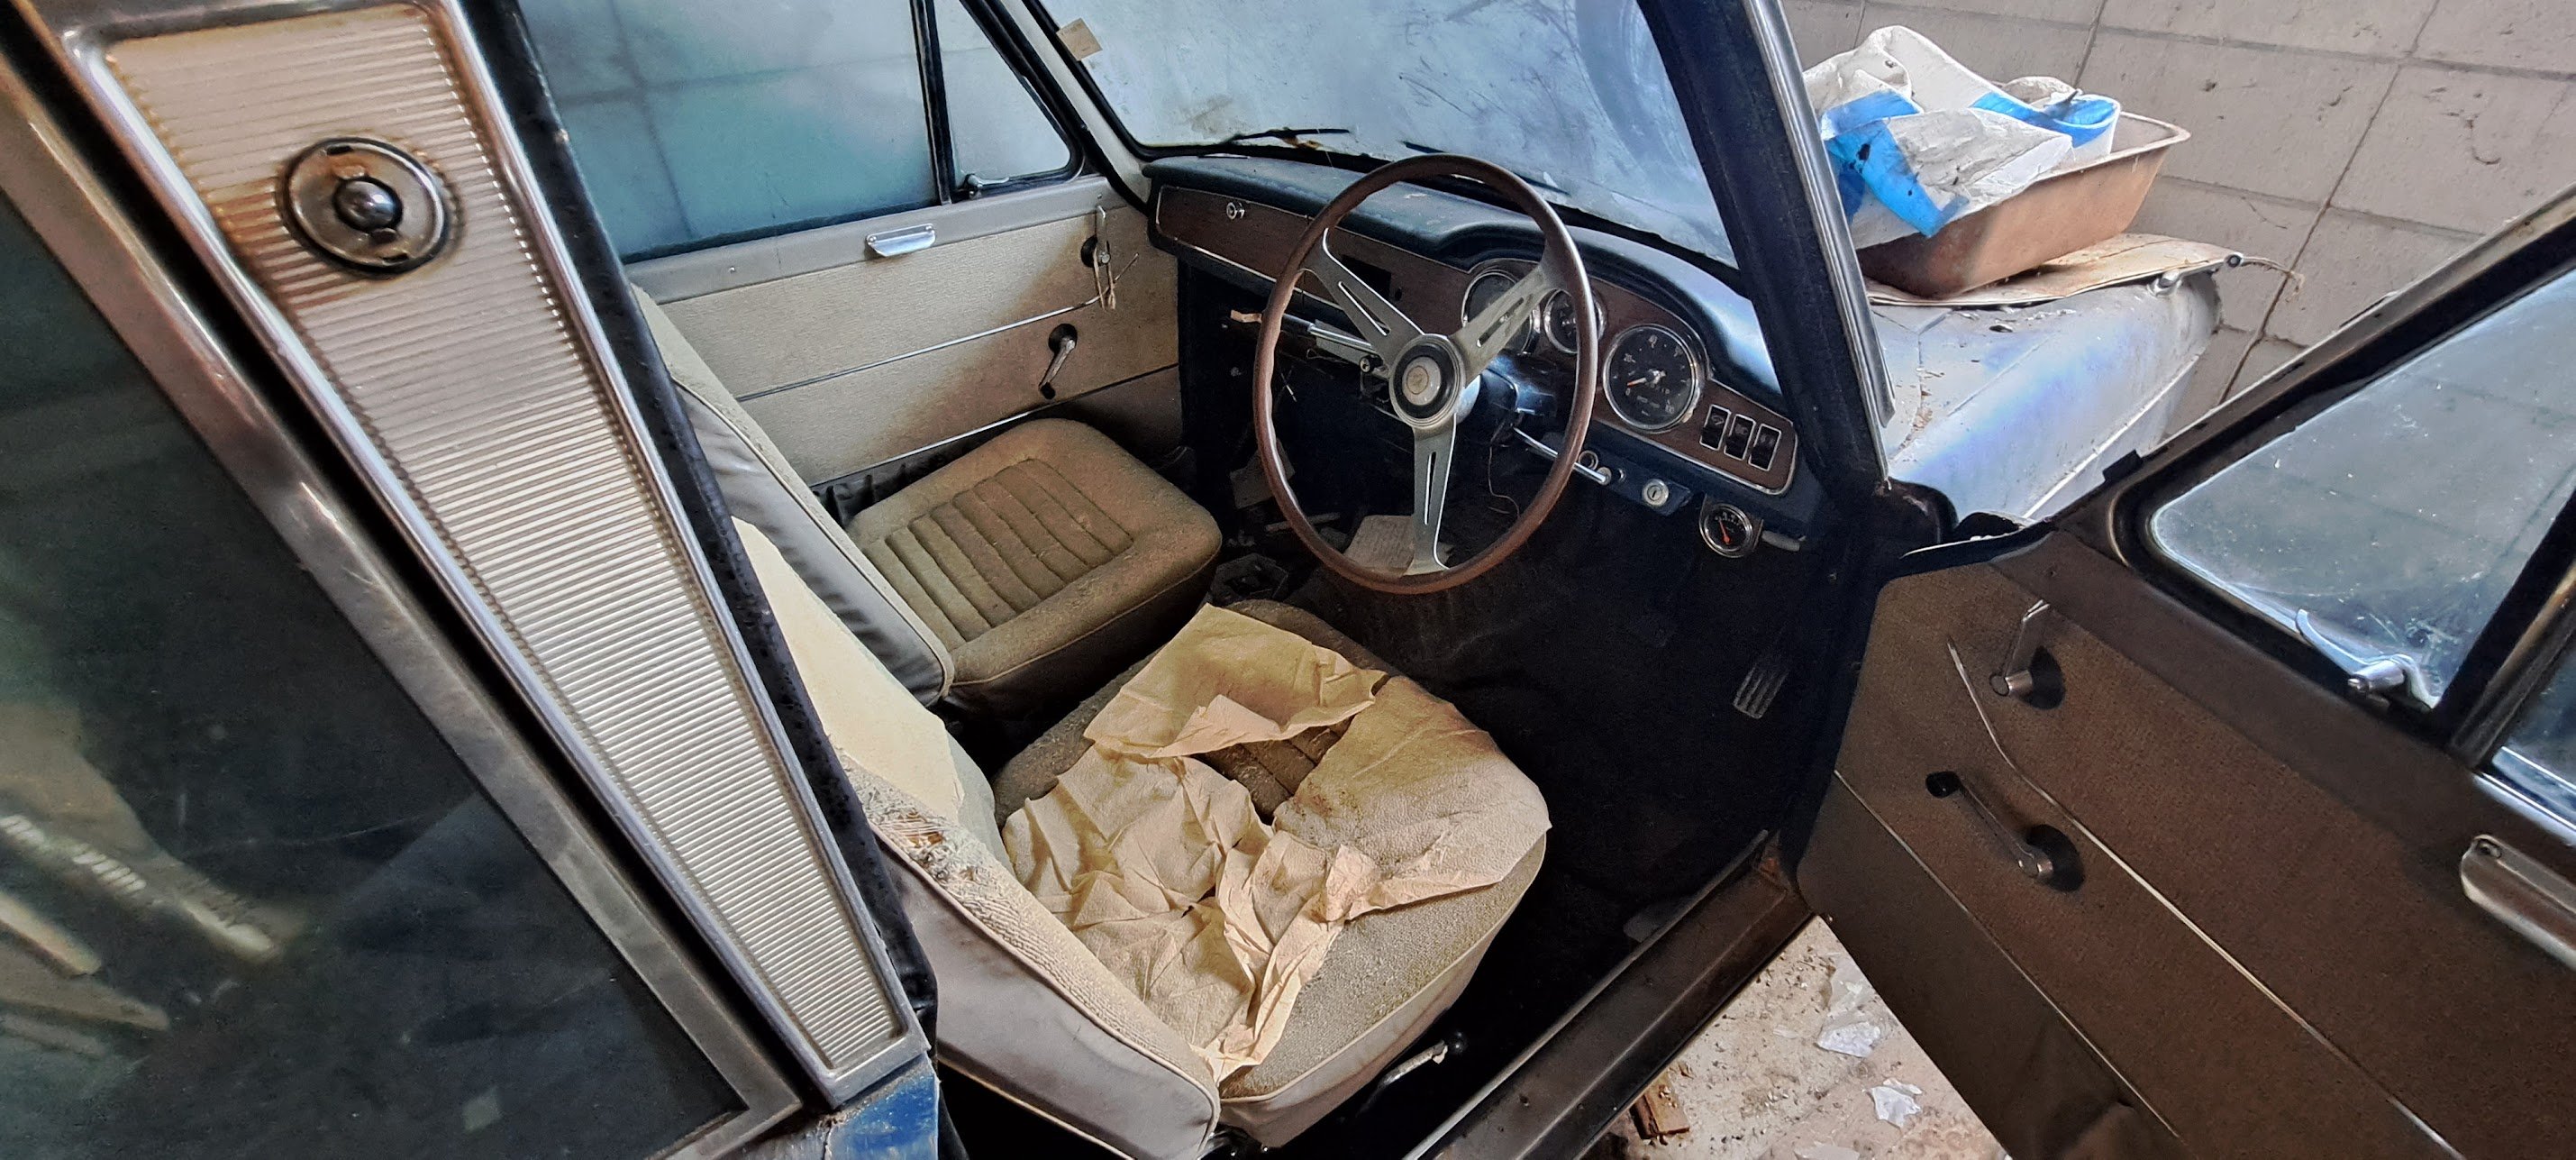
Got the car home and unloaded it, first thing first was to clean up the interior which looks like it hadn’t had a clean since it was new. after a good water blast and bissell, with some other chemicals the difference is unreal. got really pedantic with it and cleaned the floor under the carpet, still happy to see no rust. other boring stuff like polishing the car trying to make the paint look as good as it can while I’m waiting for my savings to grow and parts go arrive. it came with a really cool old TRD gearknob that he said it had been in the car since he owned it Thats about it all Caught up, working on finding another pair of SSR mk3 for the rear but i want original lips 9j A type which is proving difficult but OEM lips are so much nicer, also saving for an airbag setup because im too old for low cars now. If anyone has a good 1gge kicking around it would be great too.
 16 points
 -
15 points
-
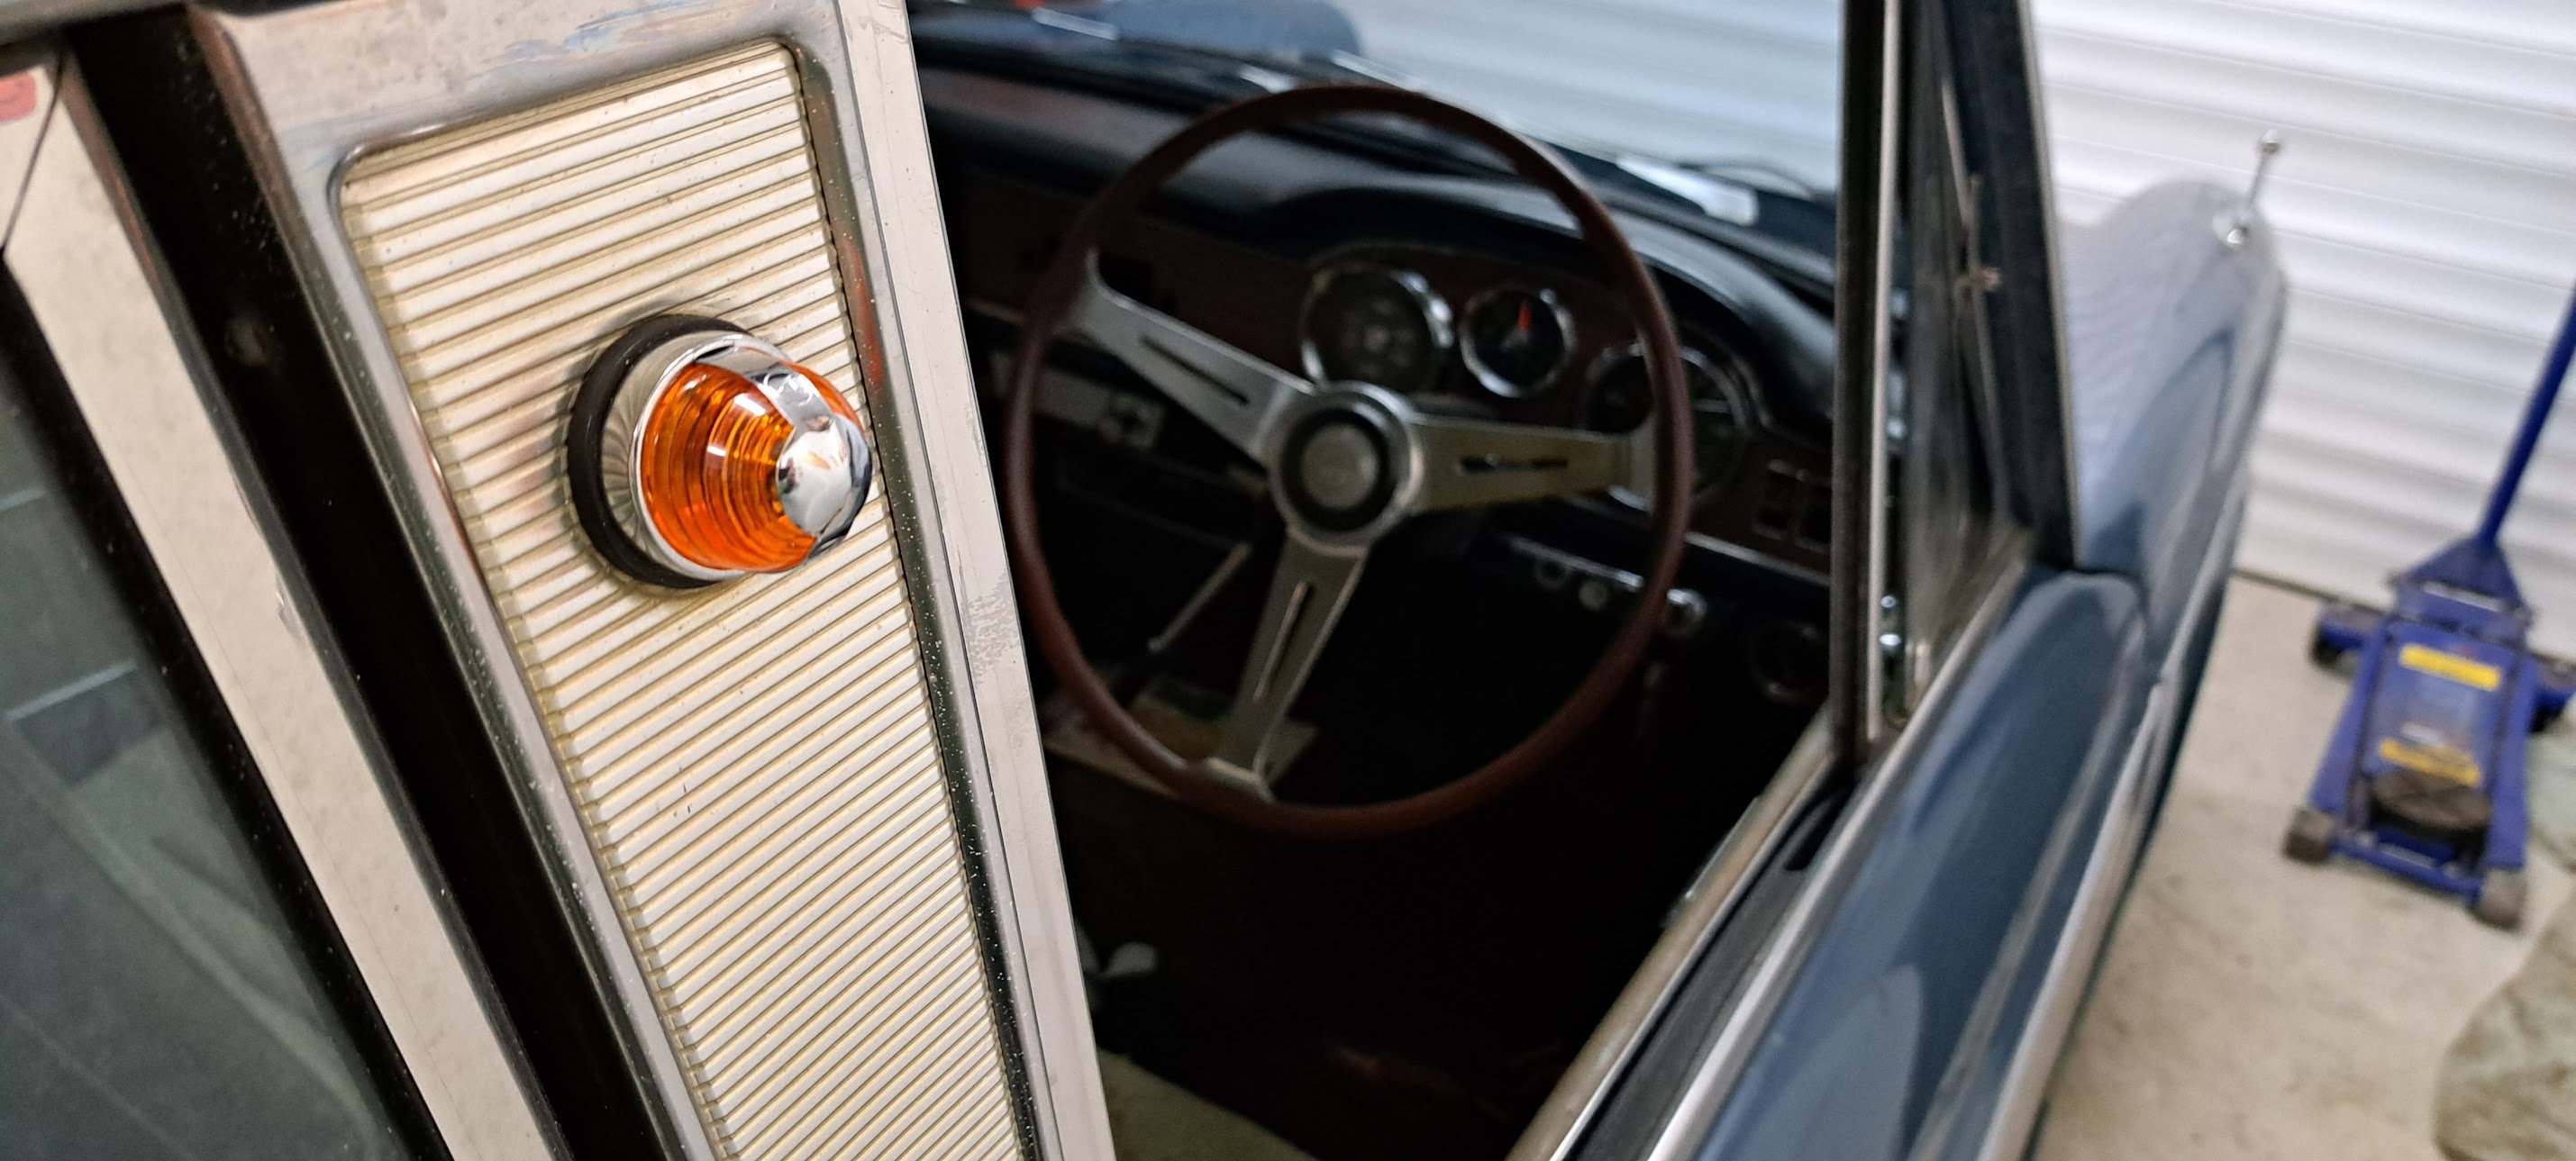
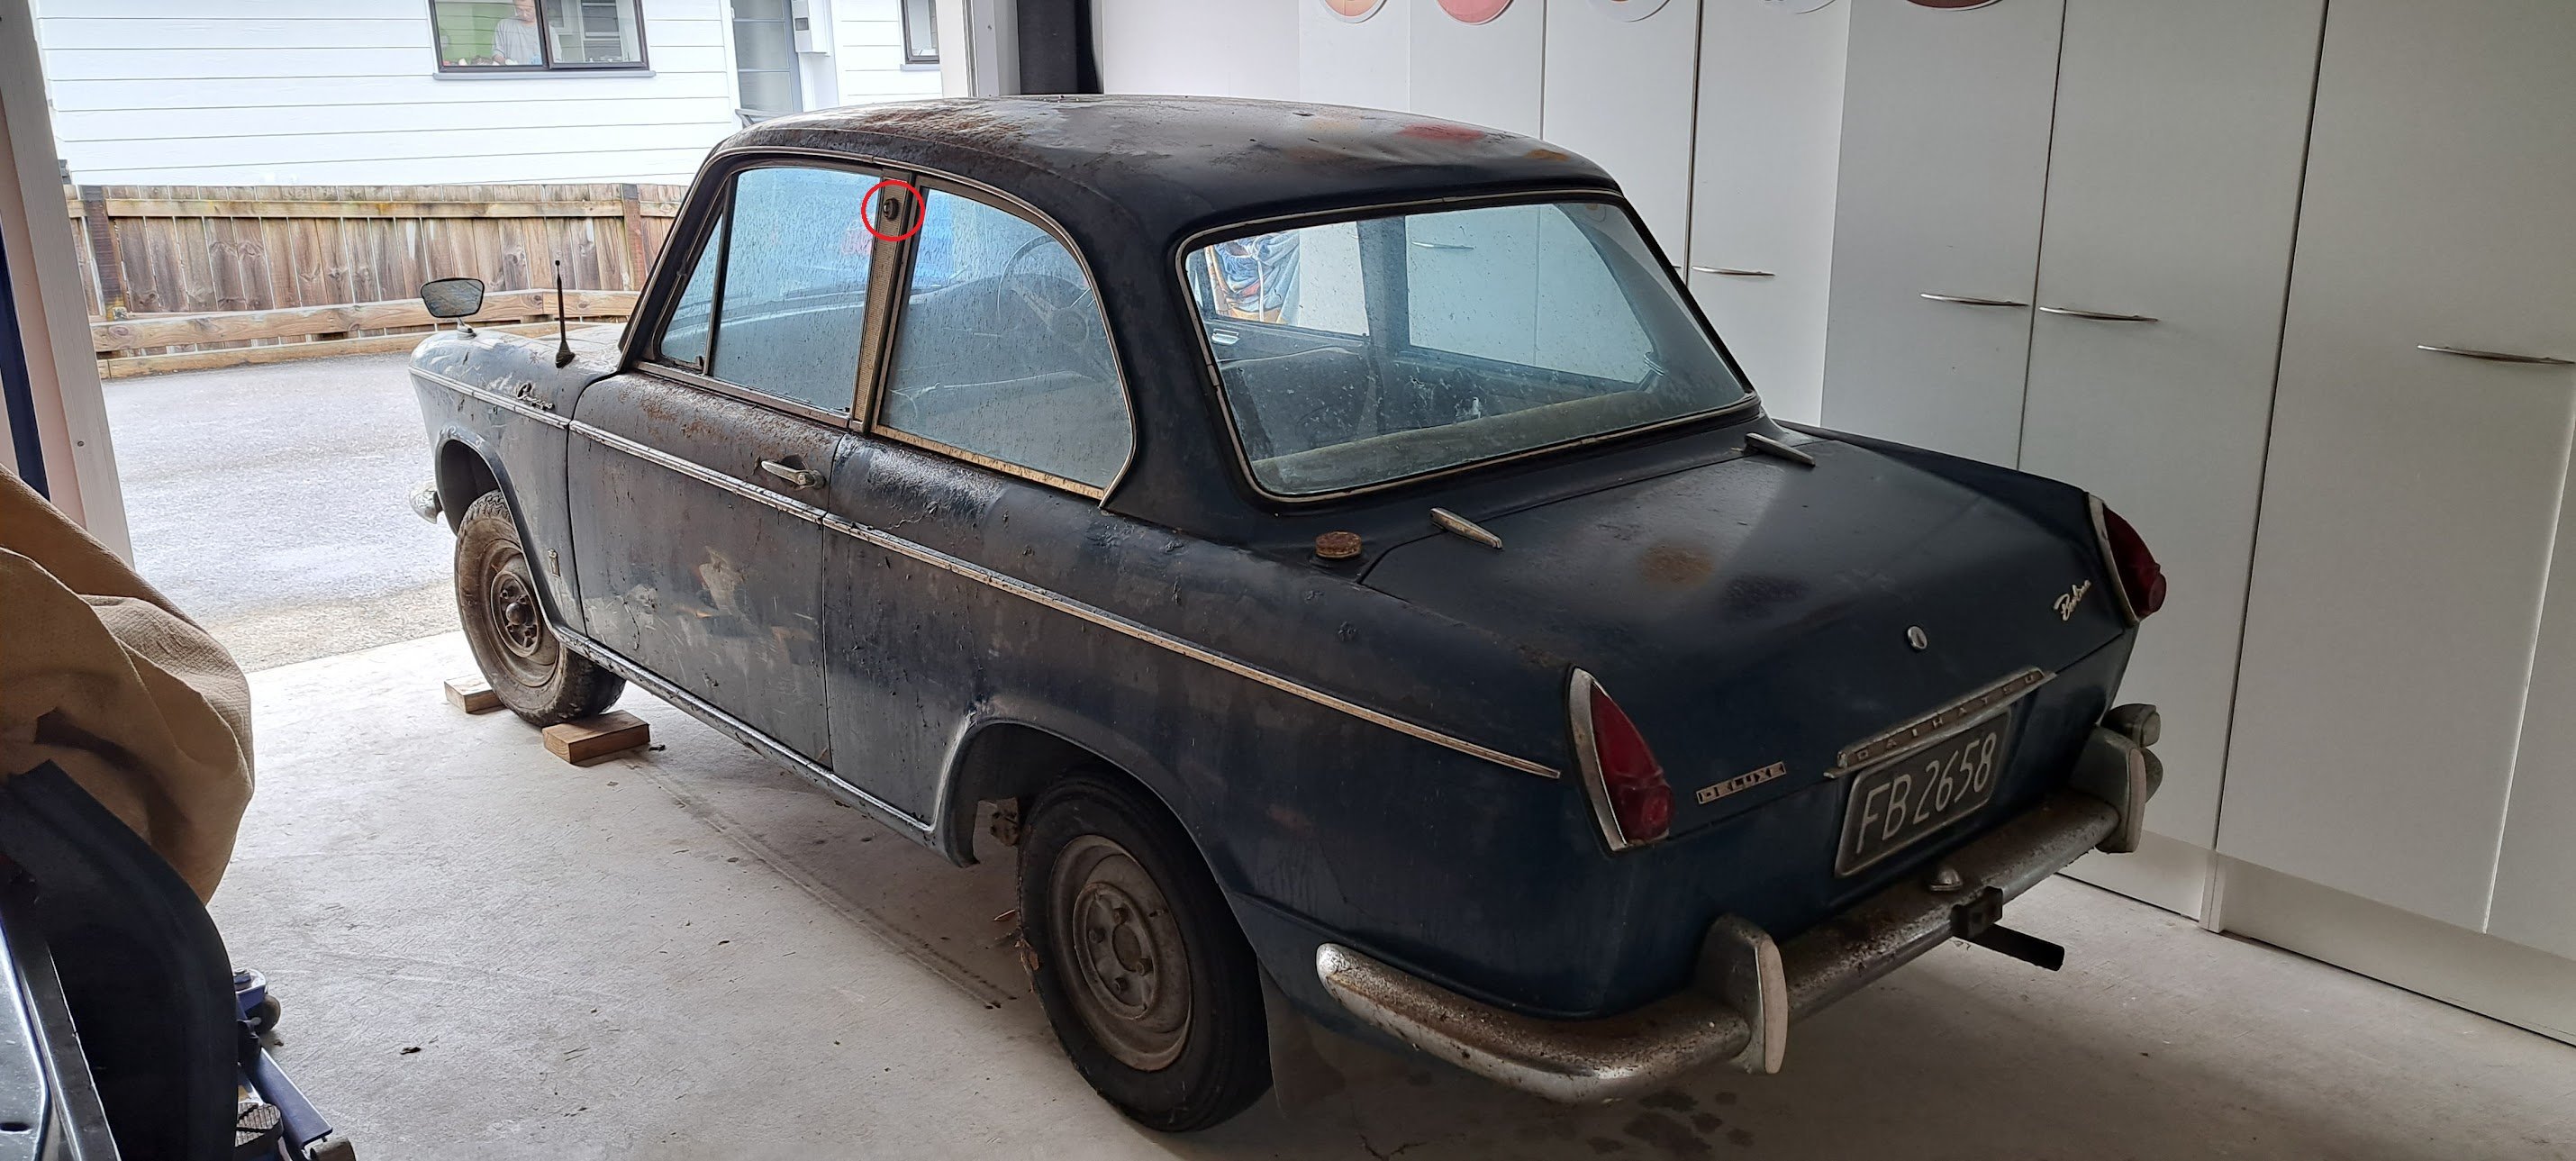
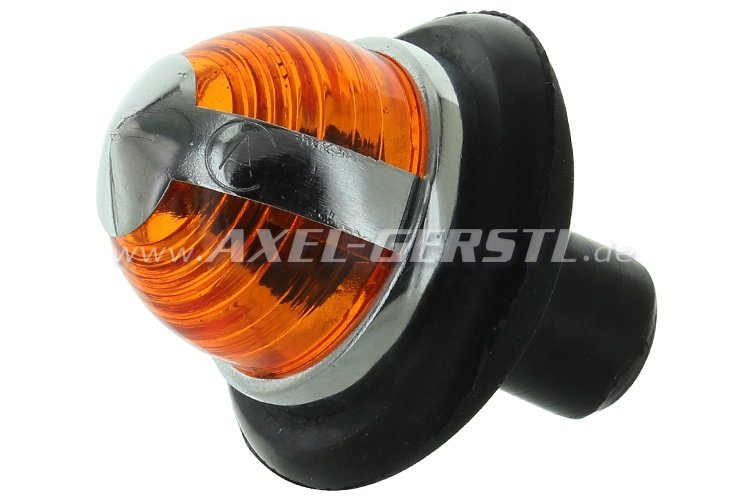
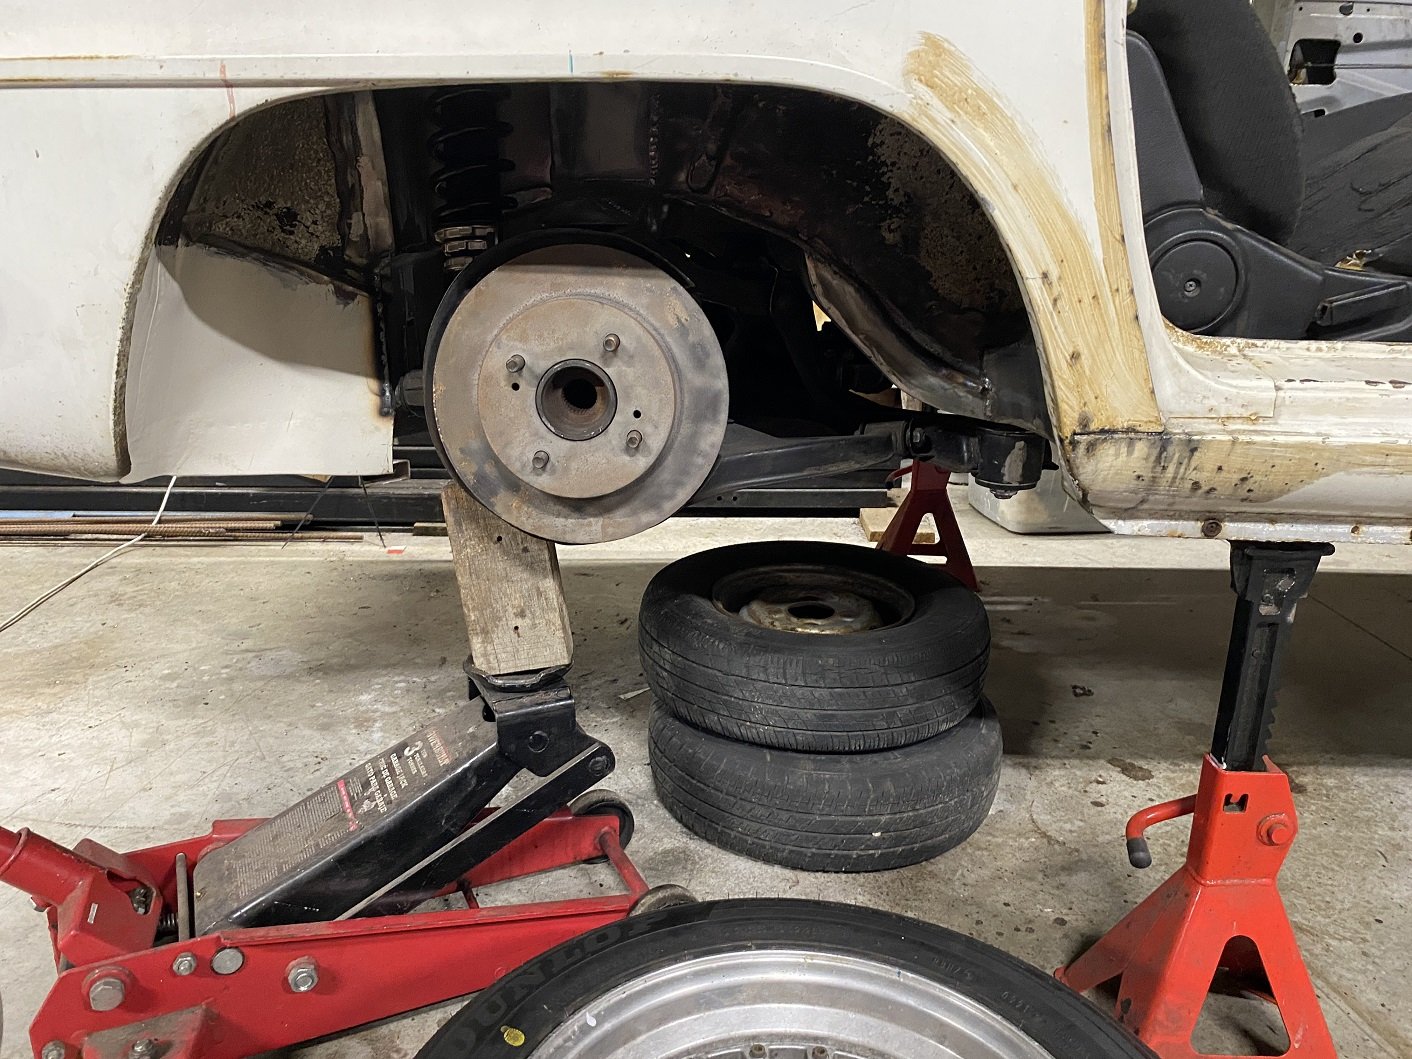
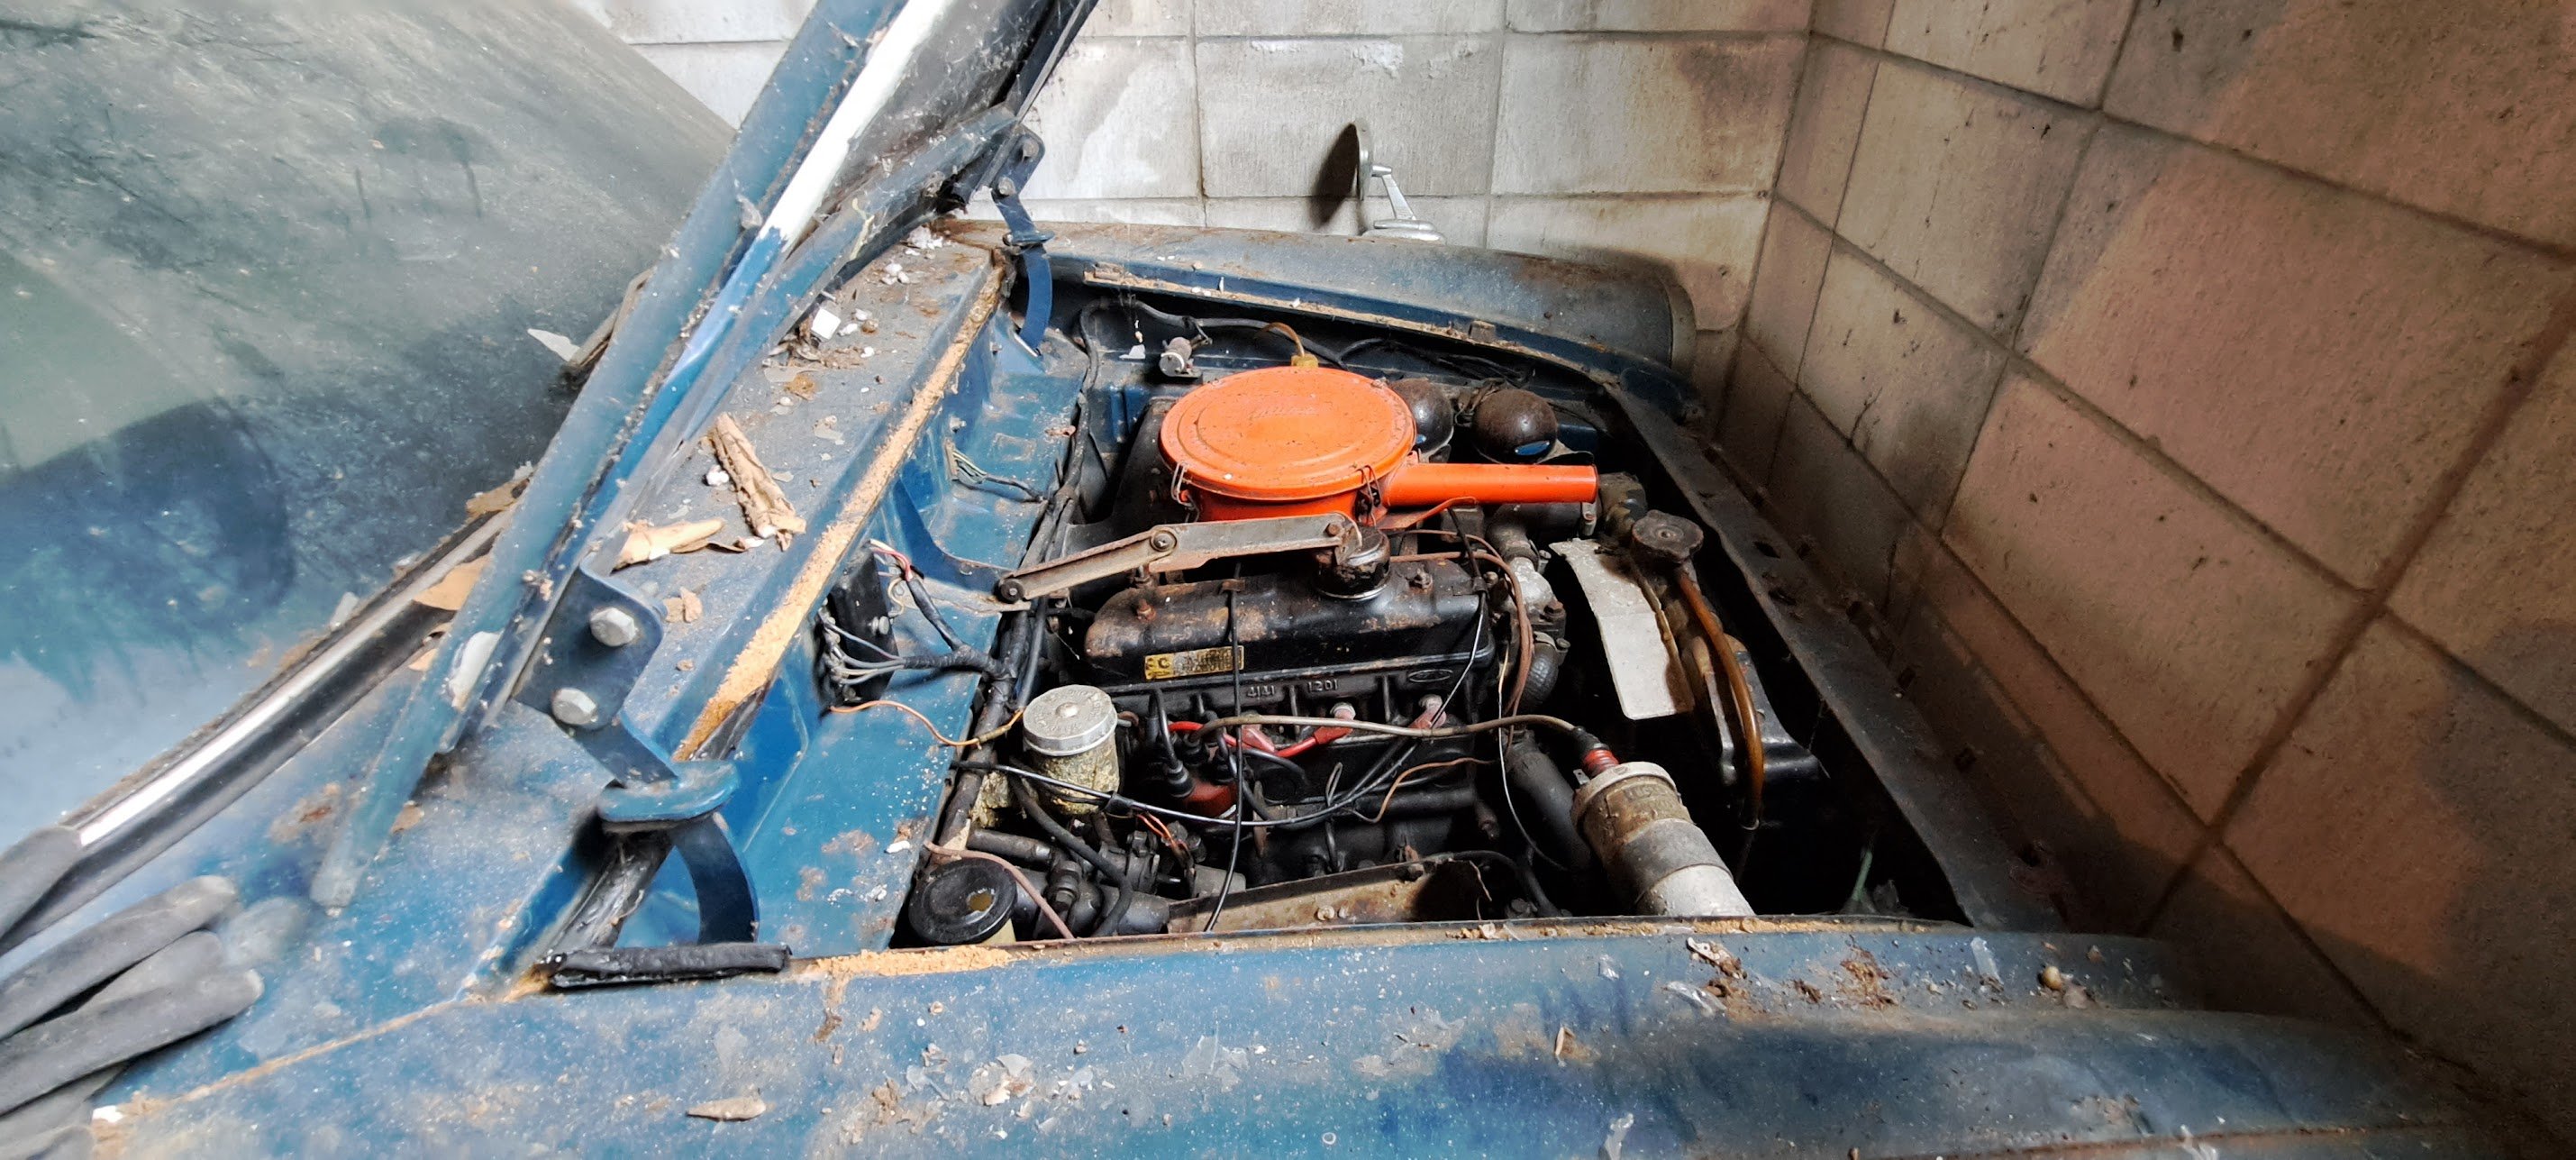
Front suspension and brakes all complete and its back on the ground. Almost ready to add brake fluid and give it real brakes for the 1st time in 45 years engine pistons .. waiting... waiting... waiting... The little side "trafficator" lenses were missing and I spent a great many spare minutes looking through the entire internets for replacements... I finally unearthed an Italian company selling replica Fiat 600 indicator lenses almost the same as the originals. A pair ordered and duly arrived today and were instantly fitted to the original bases ... so happy with this result
14 points
-
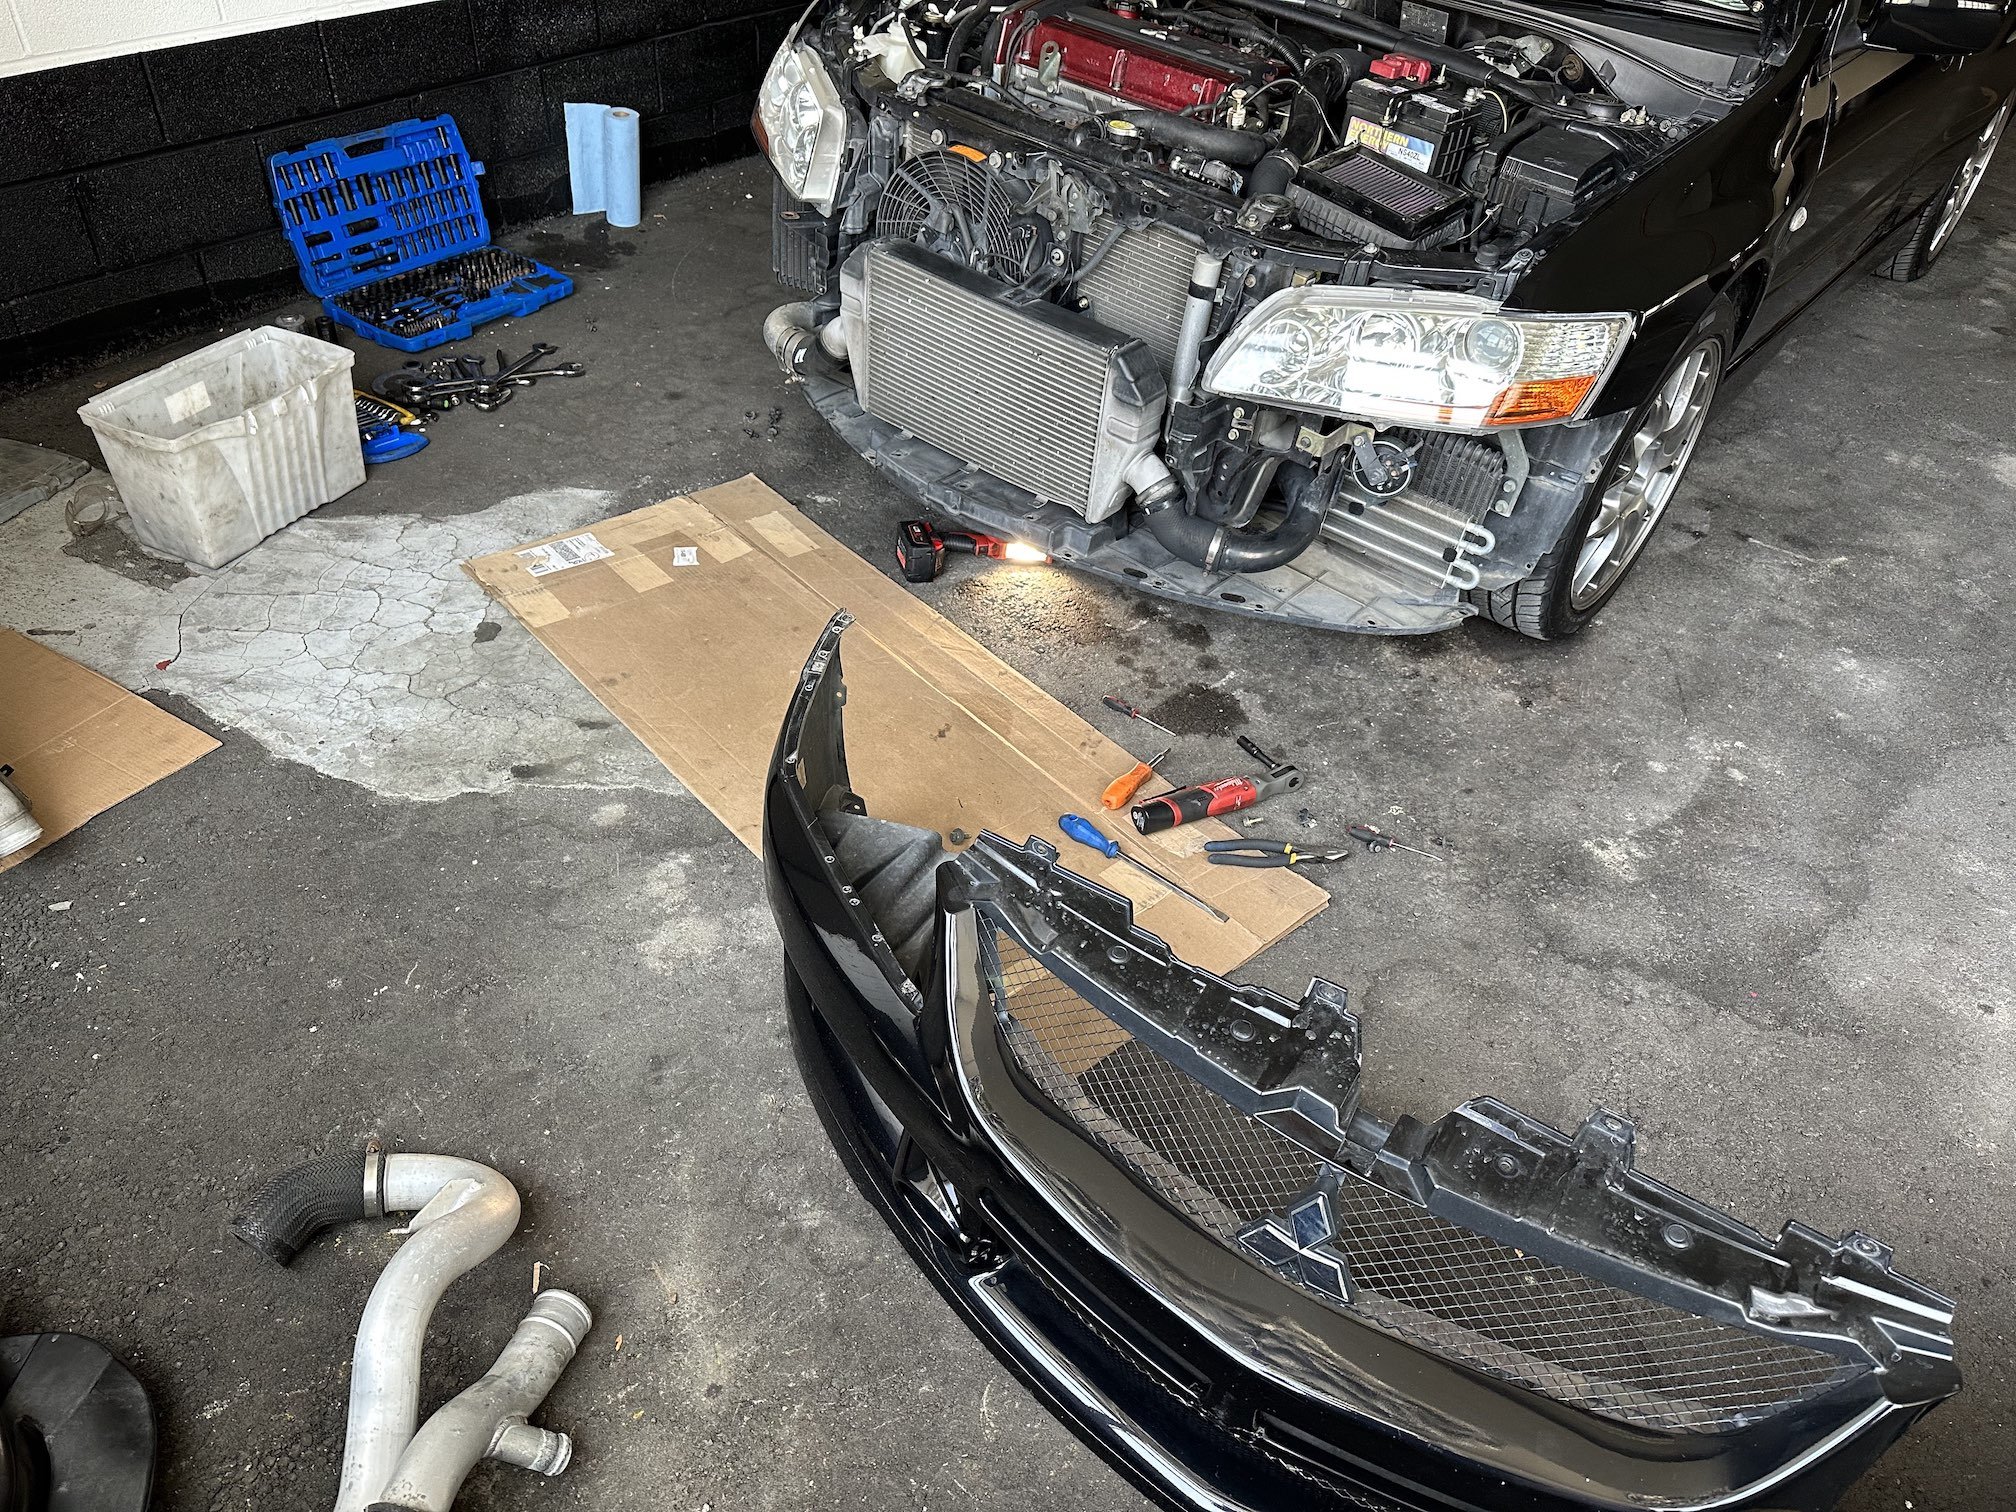
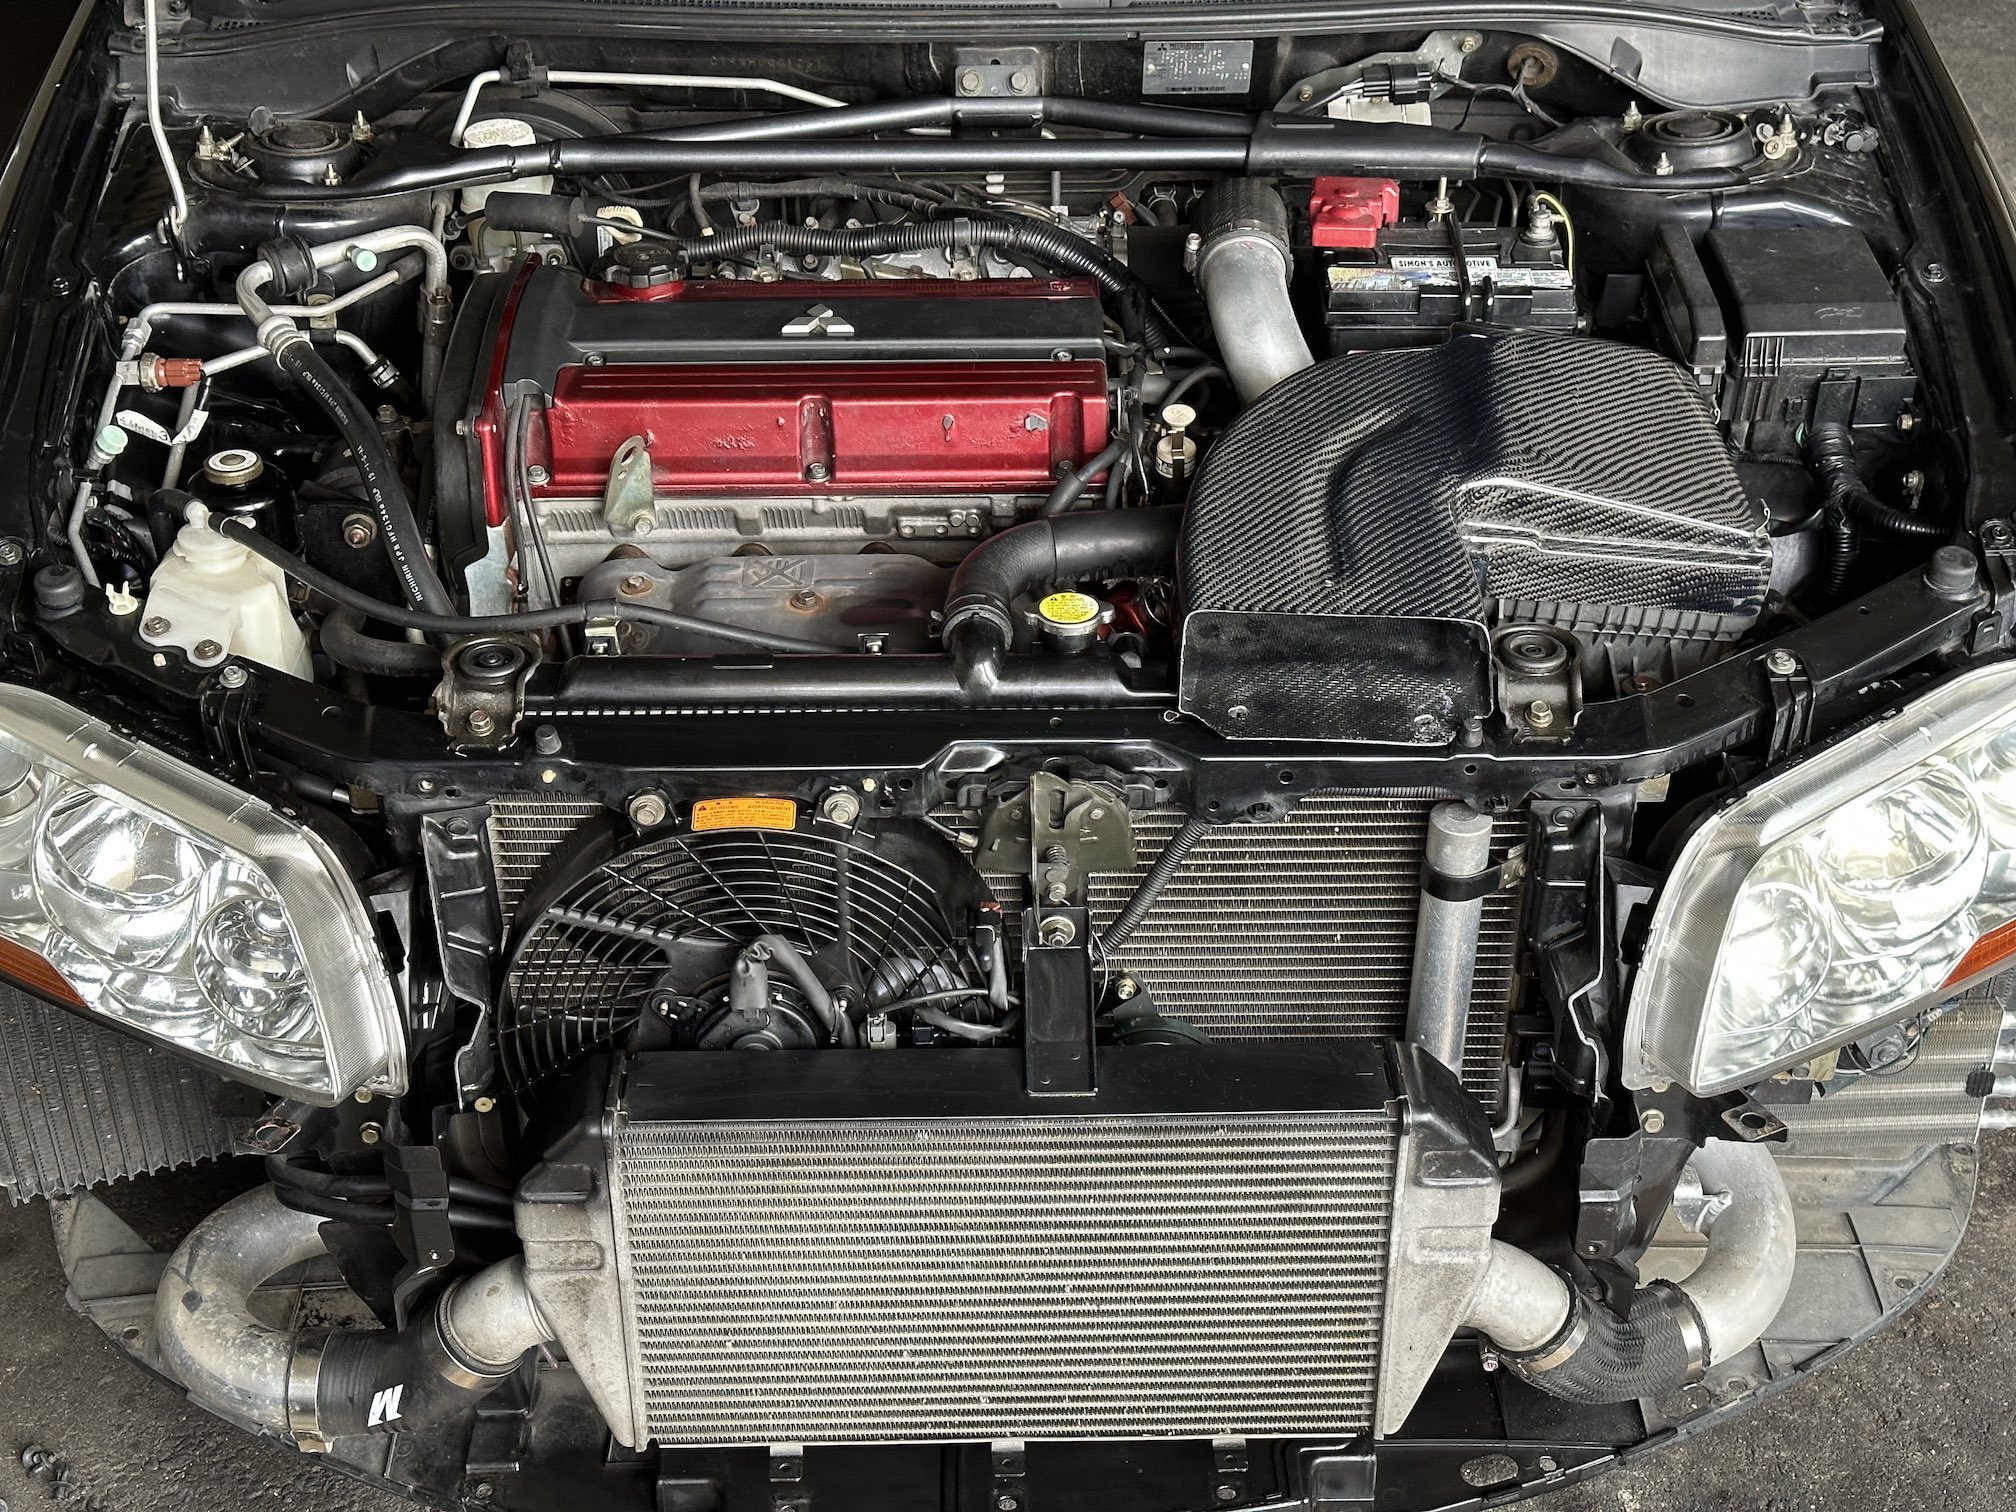
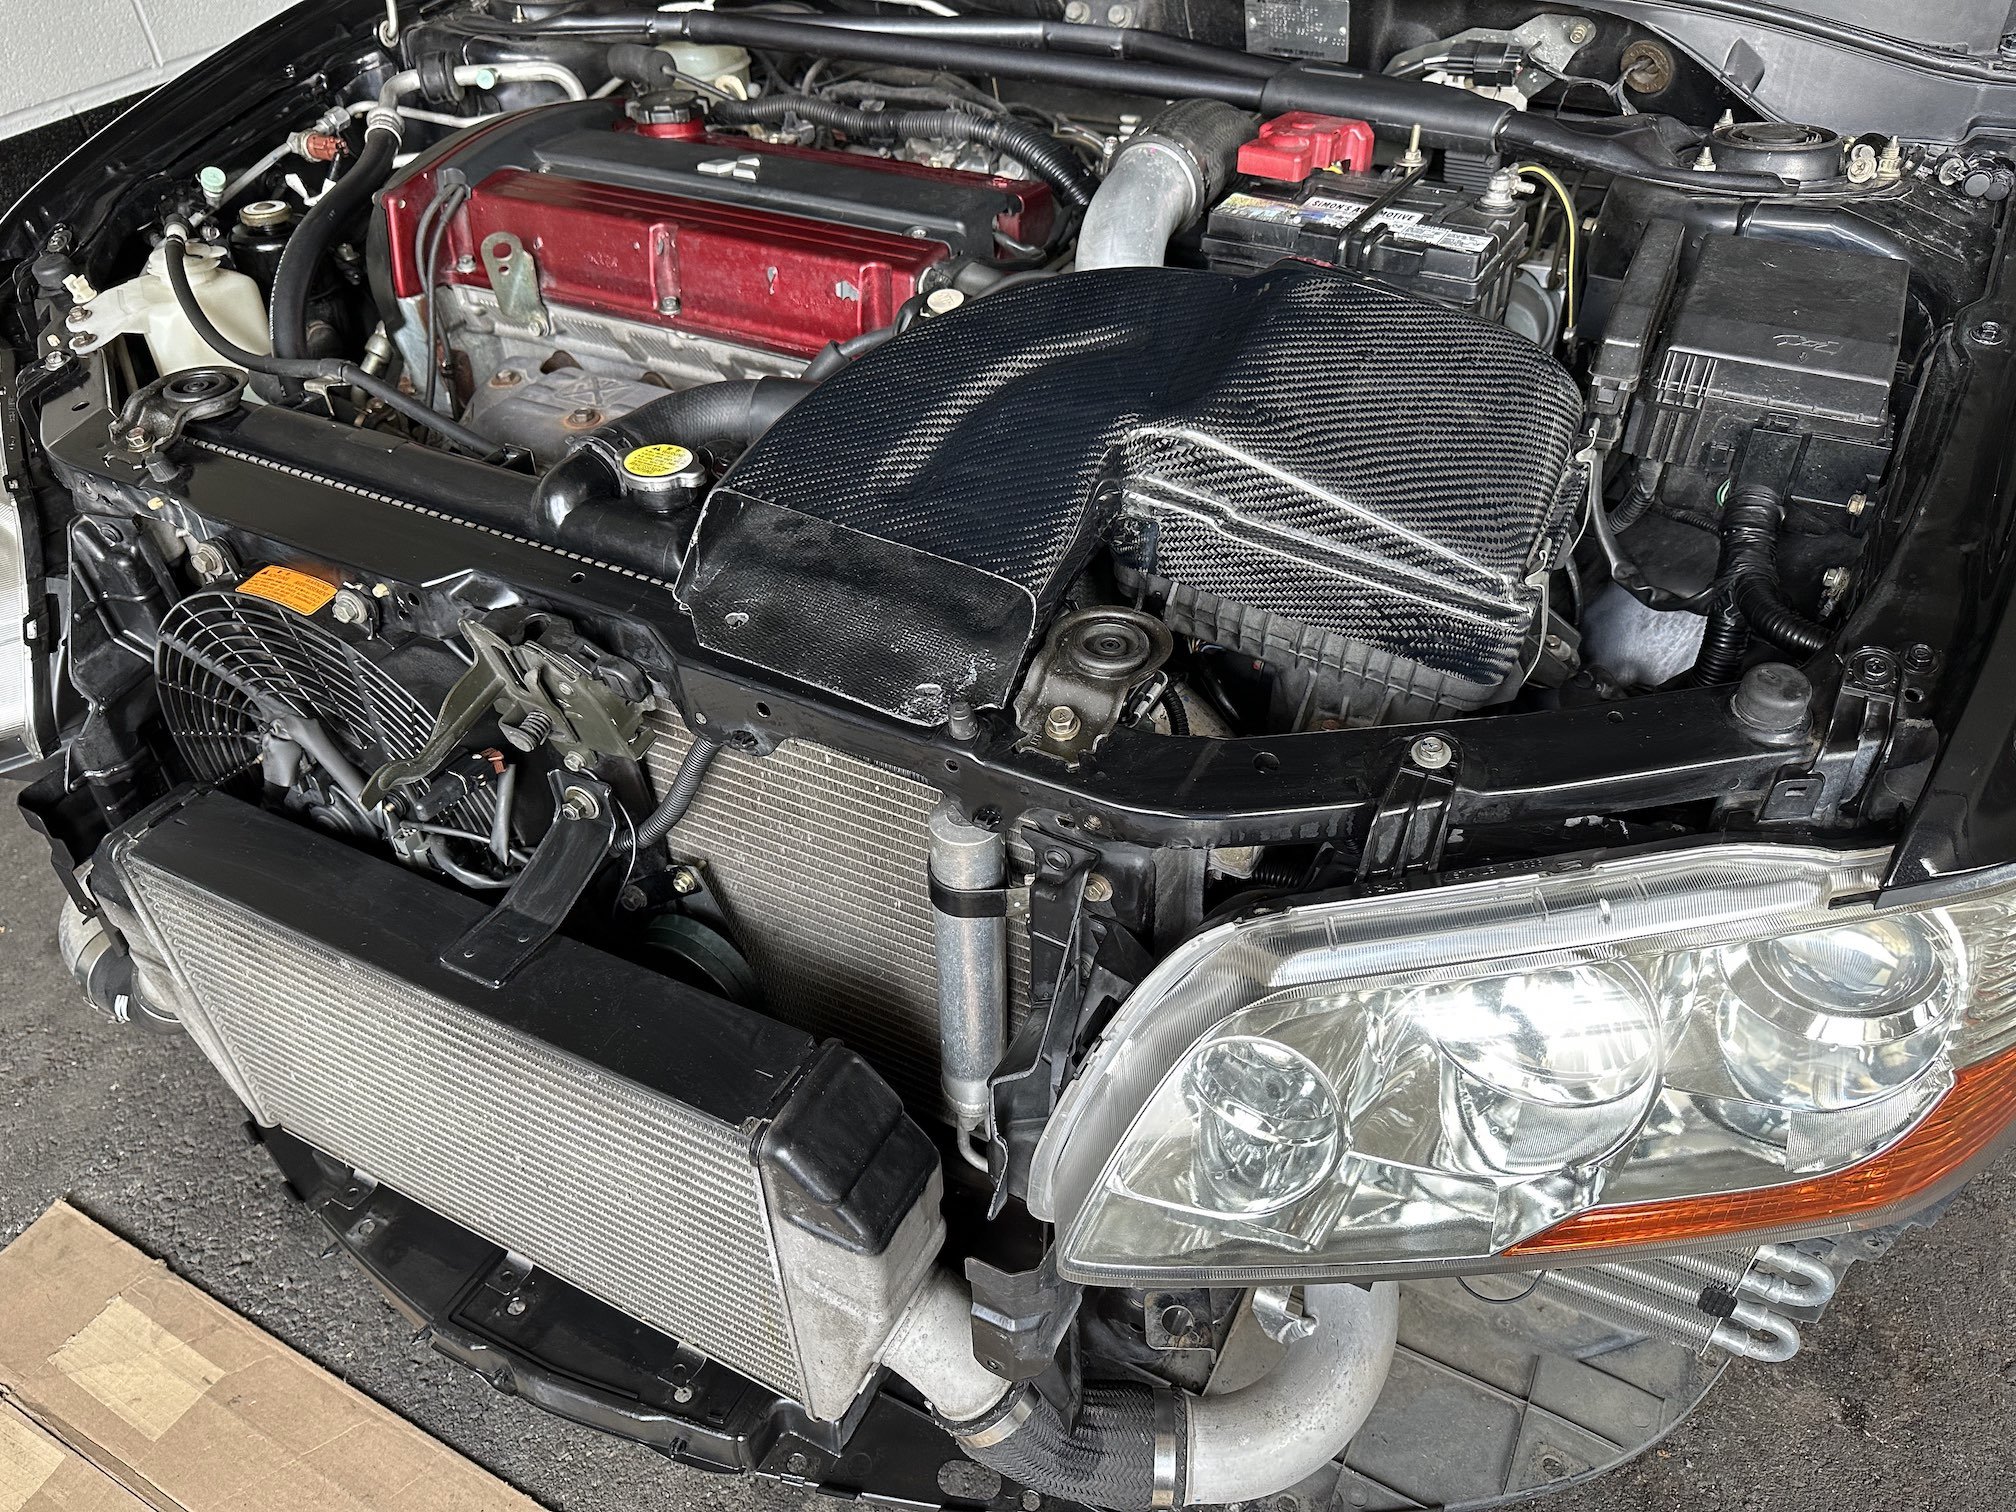
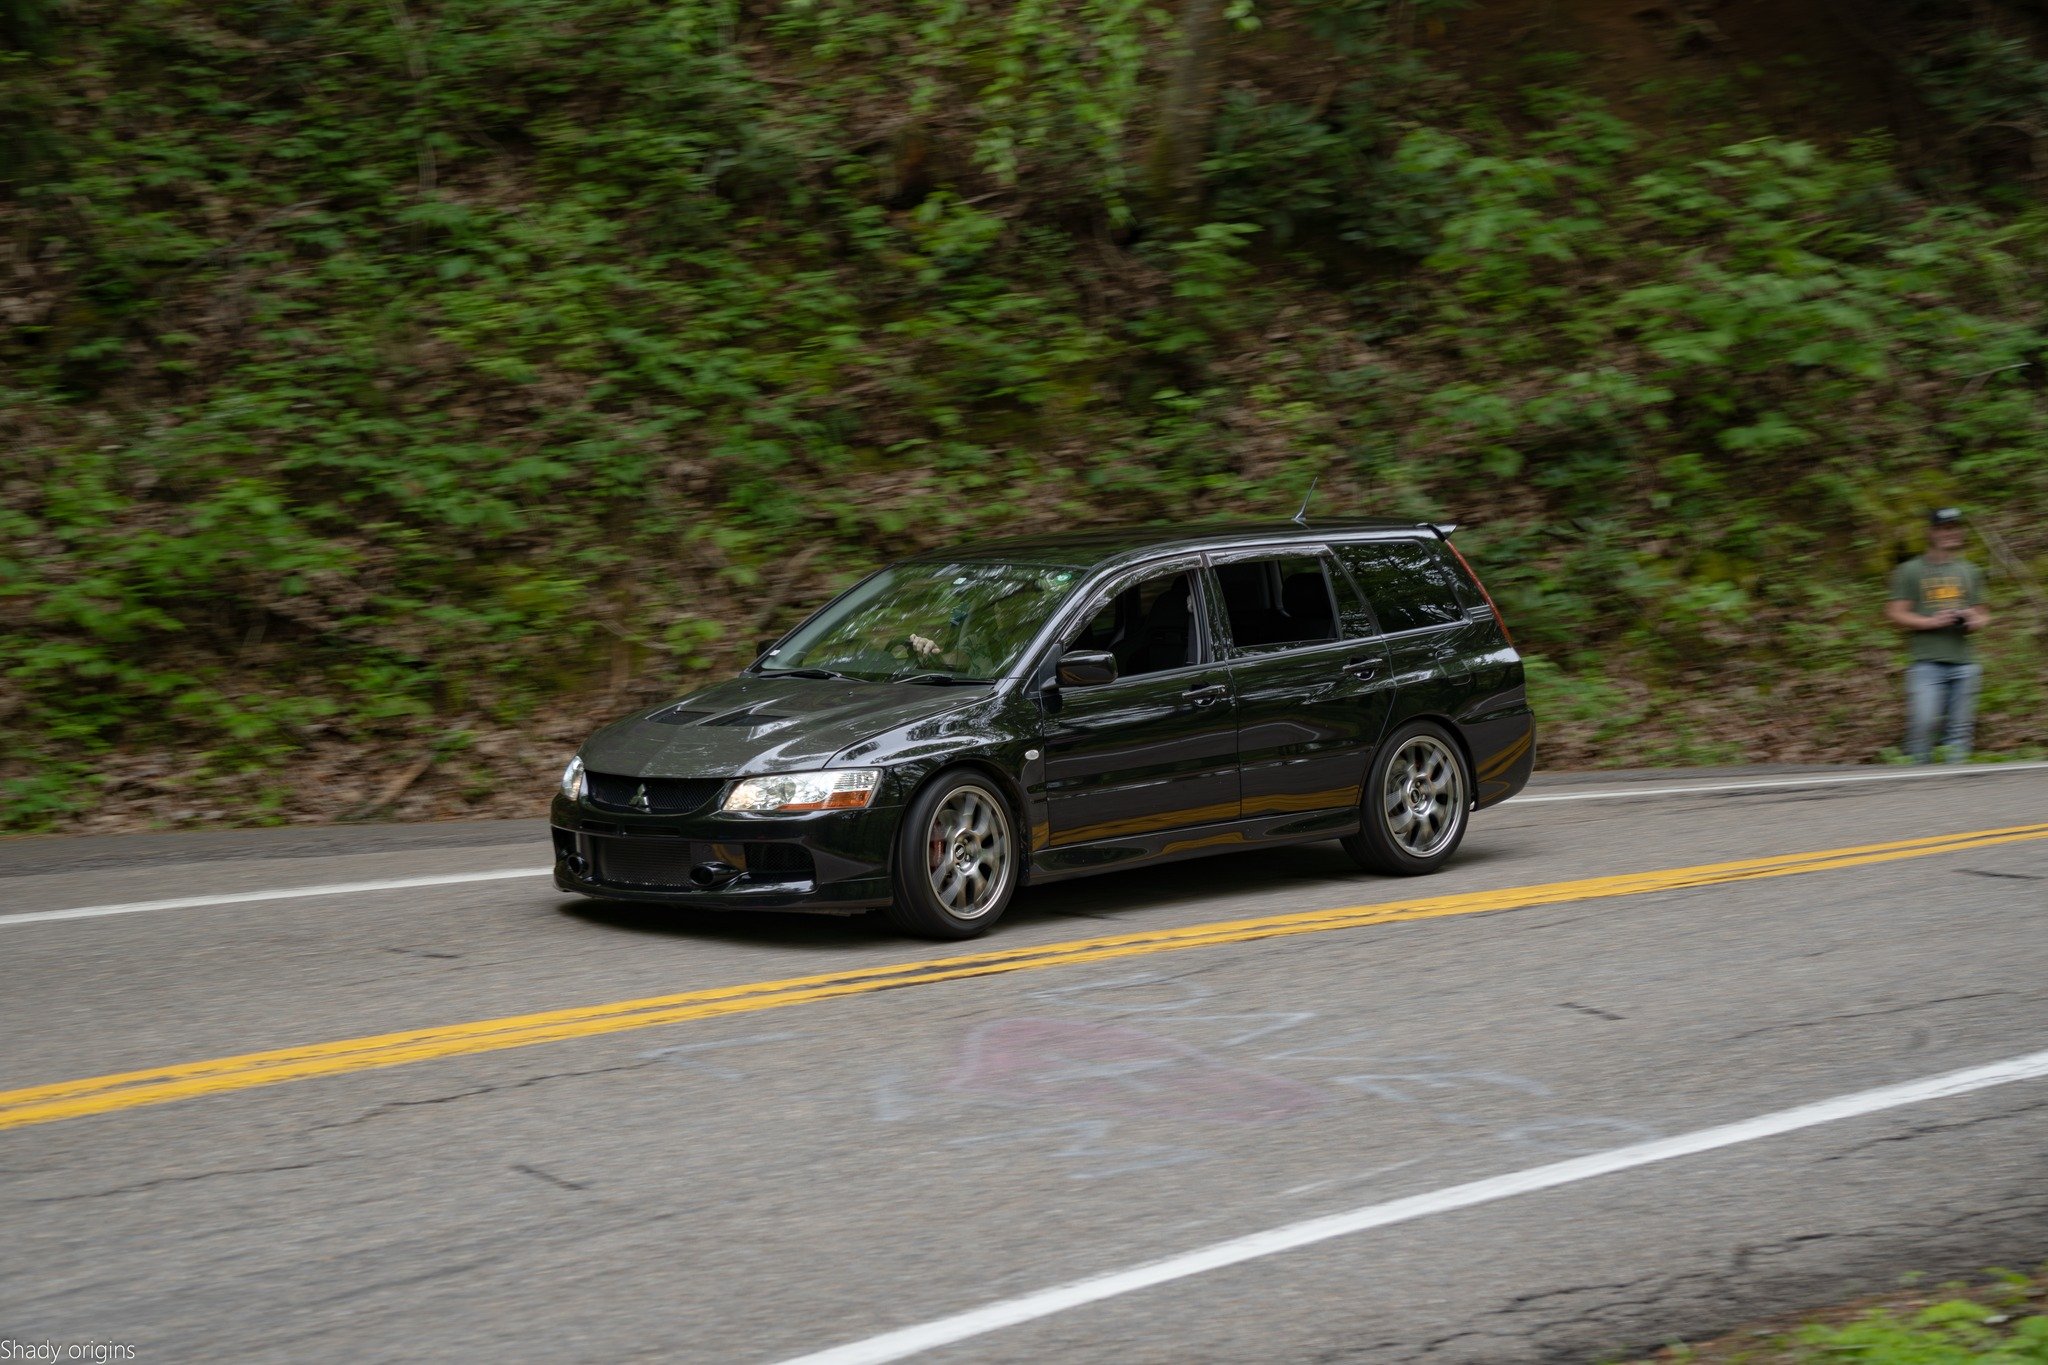
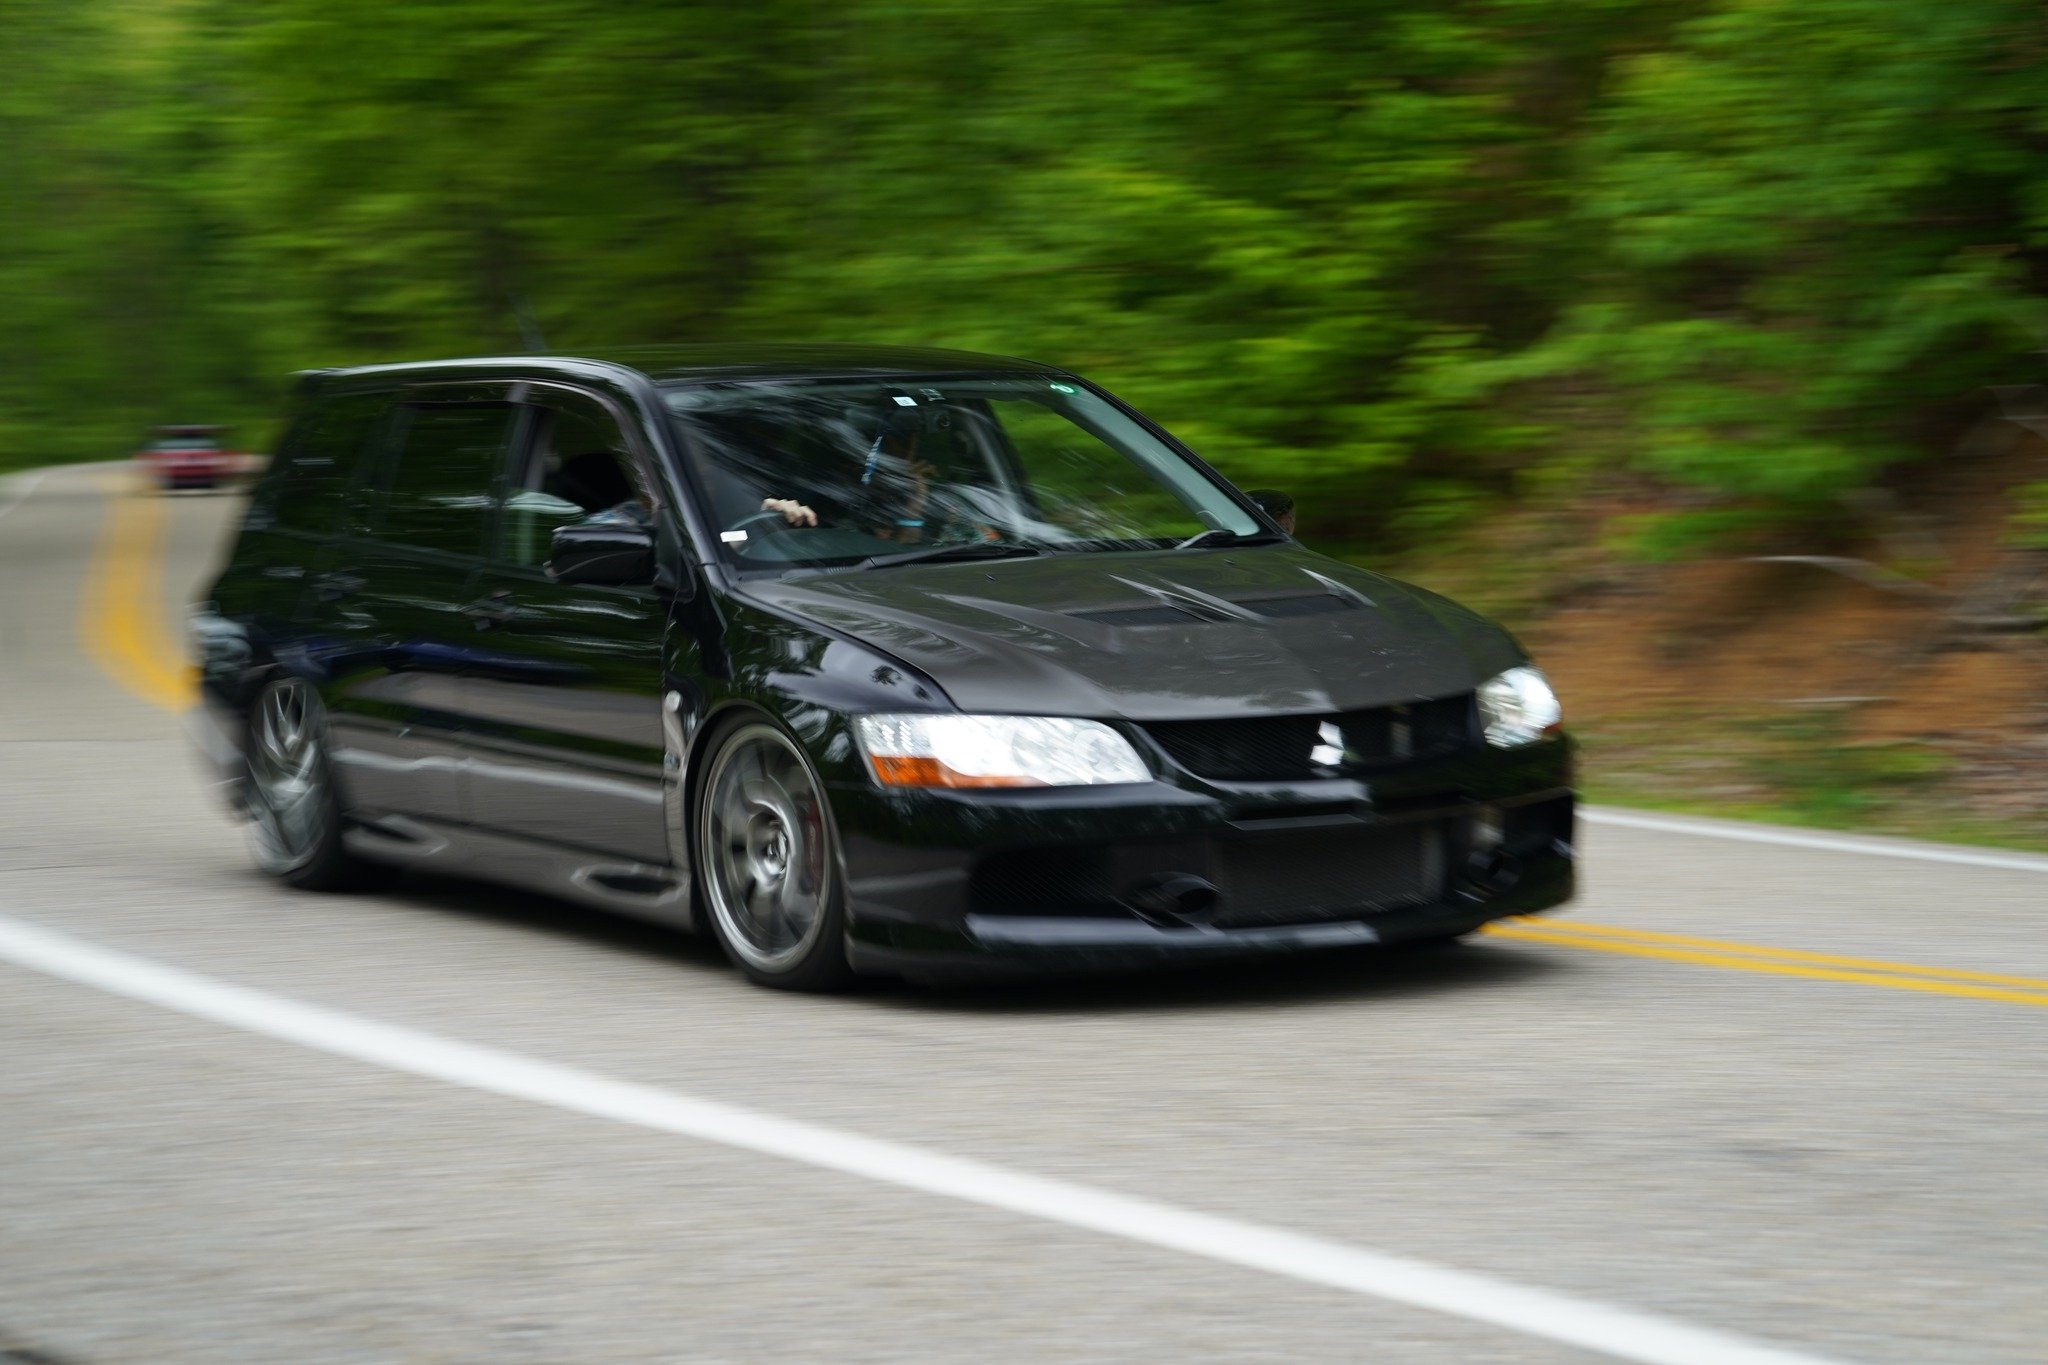
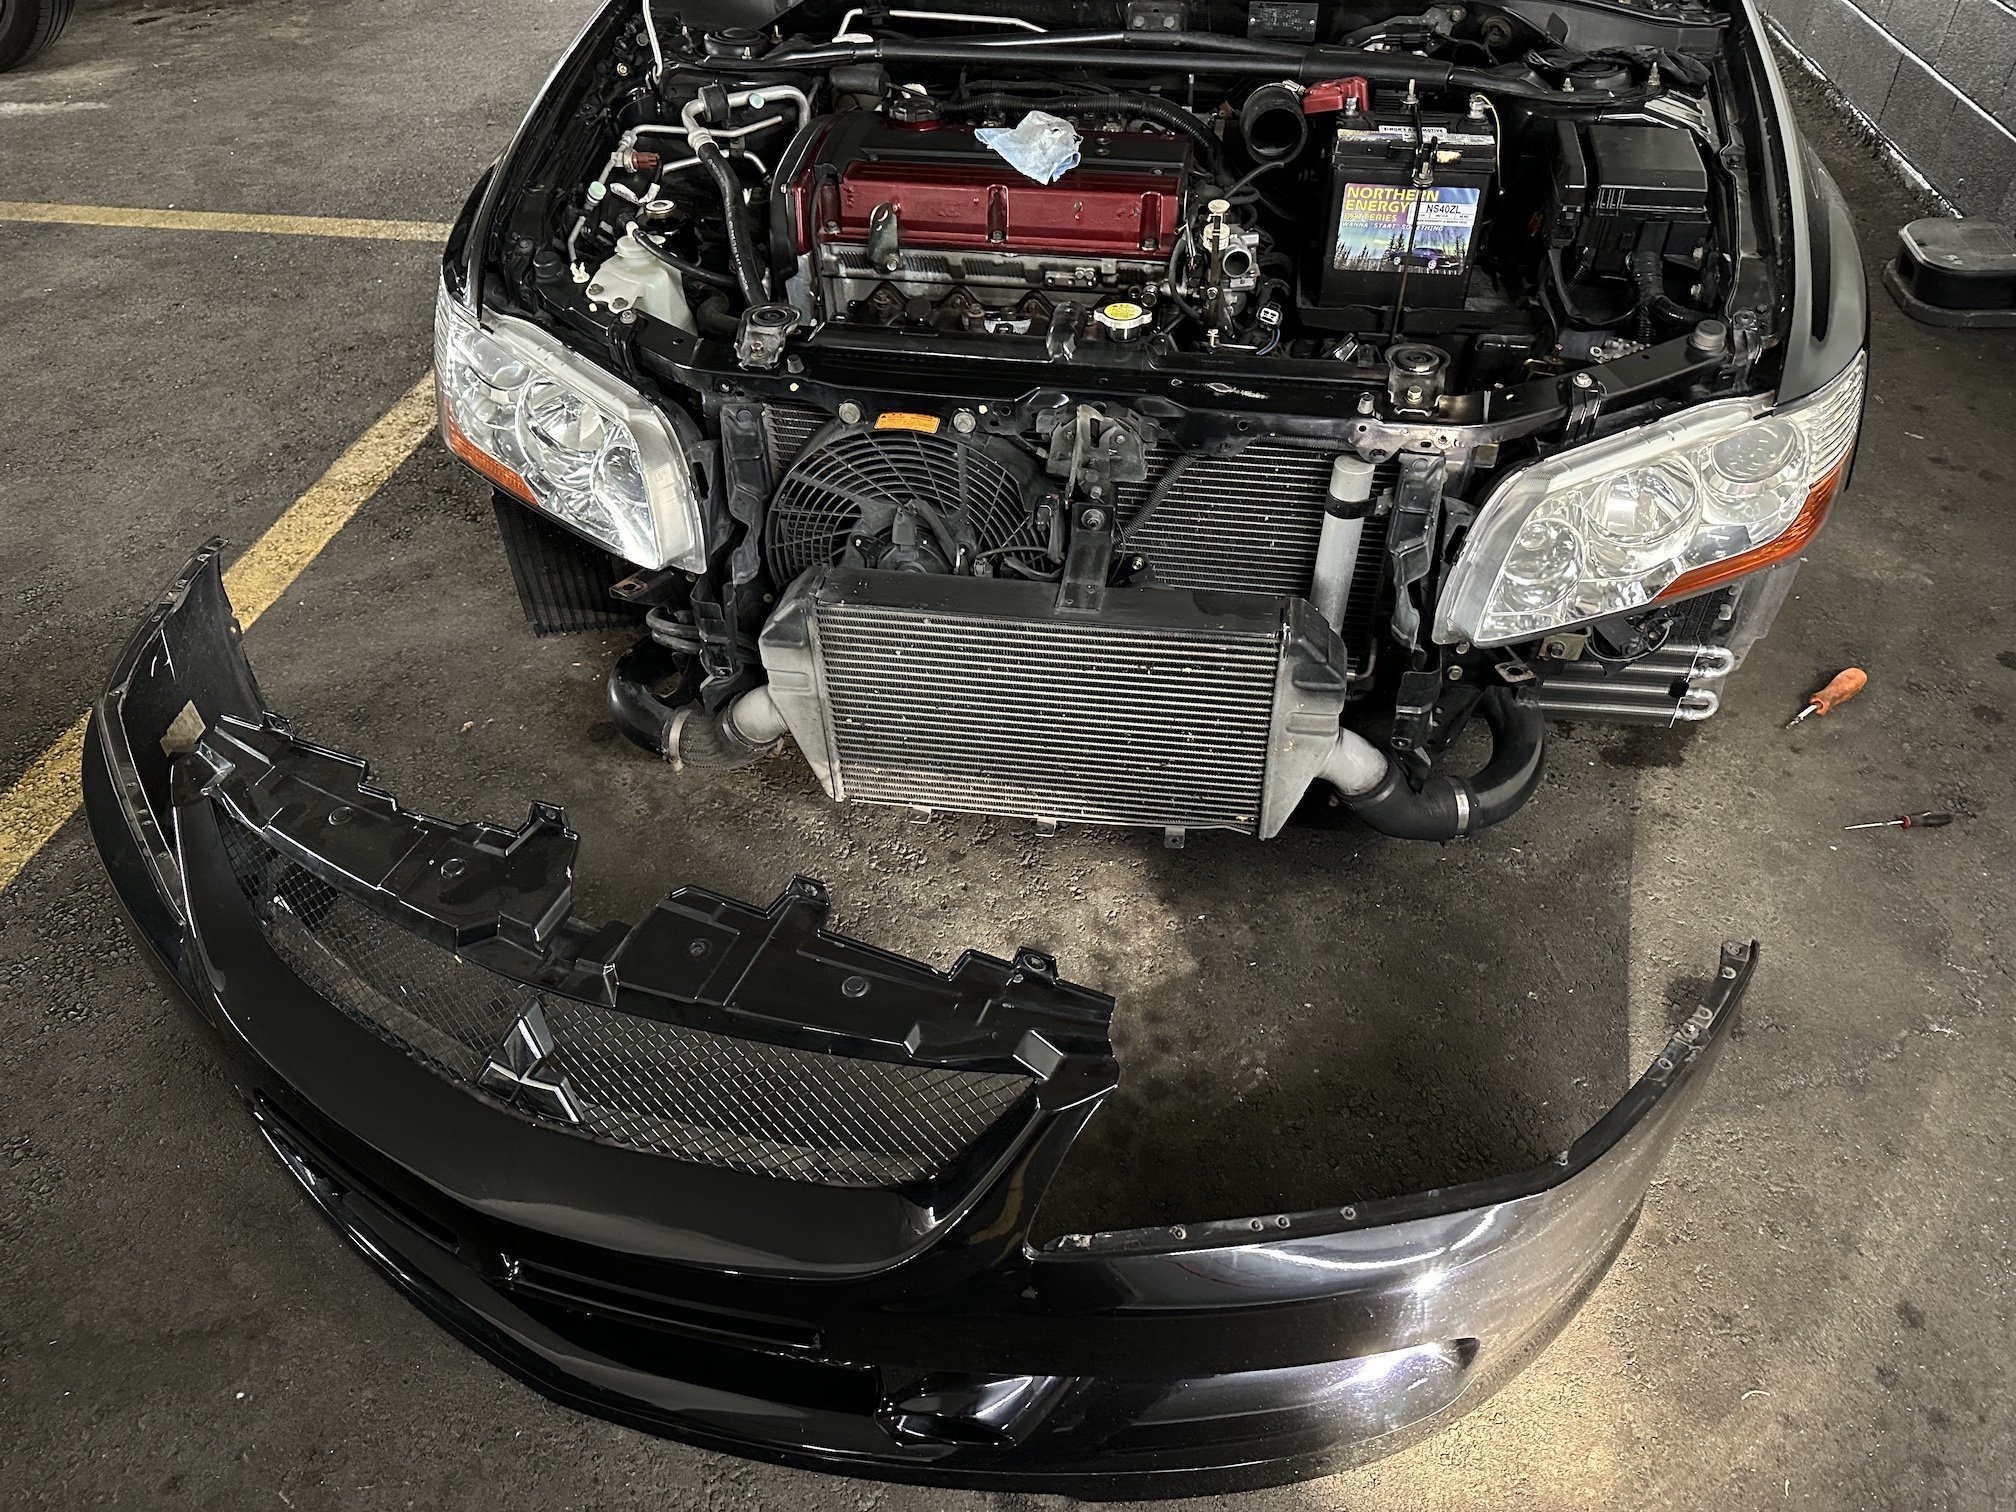
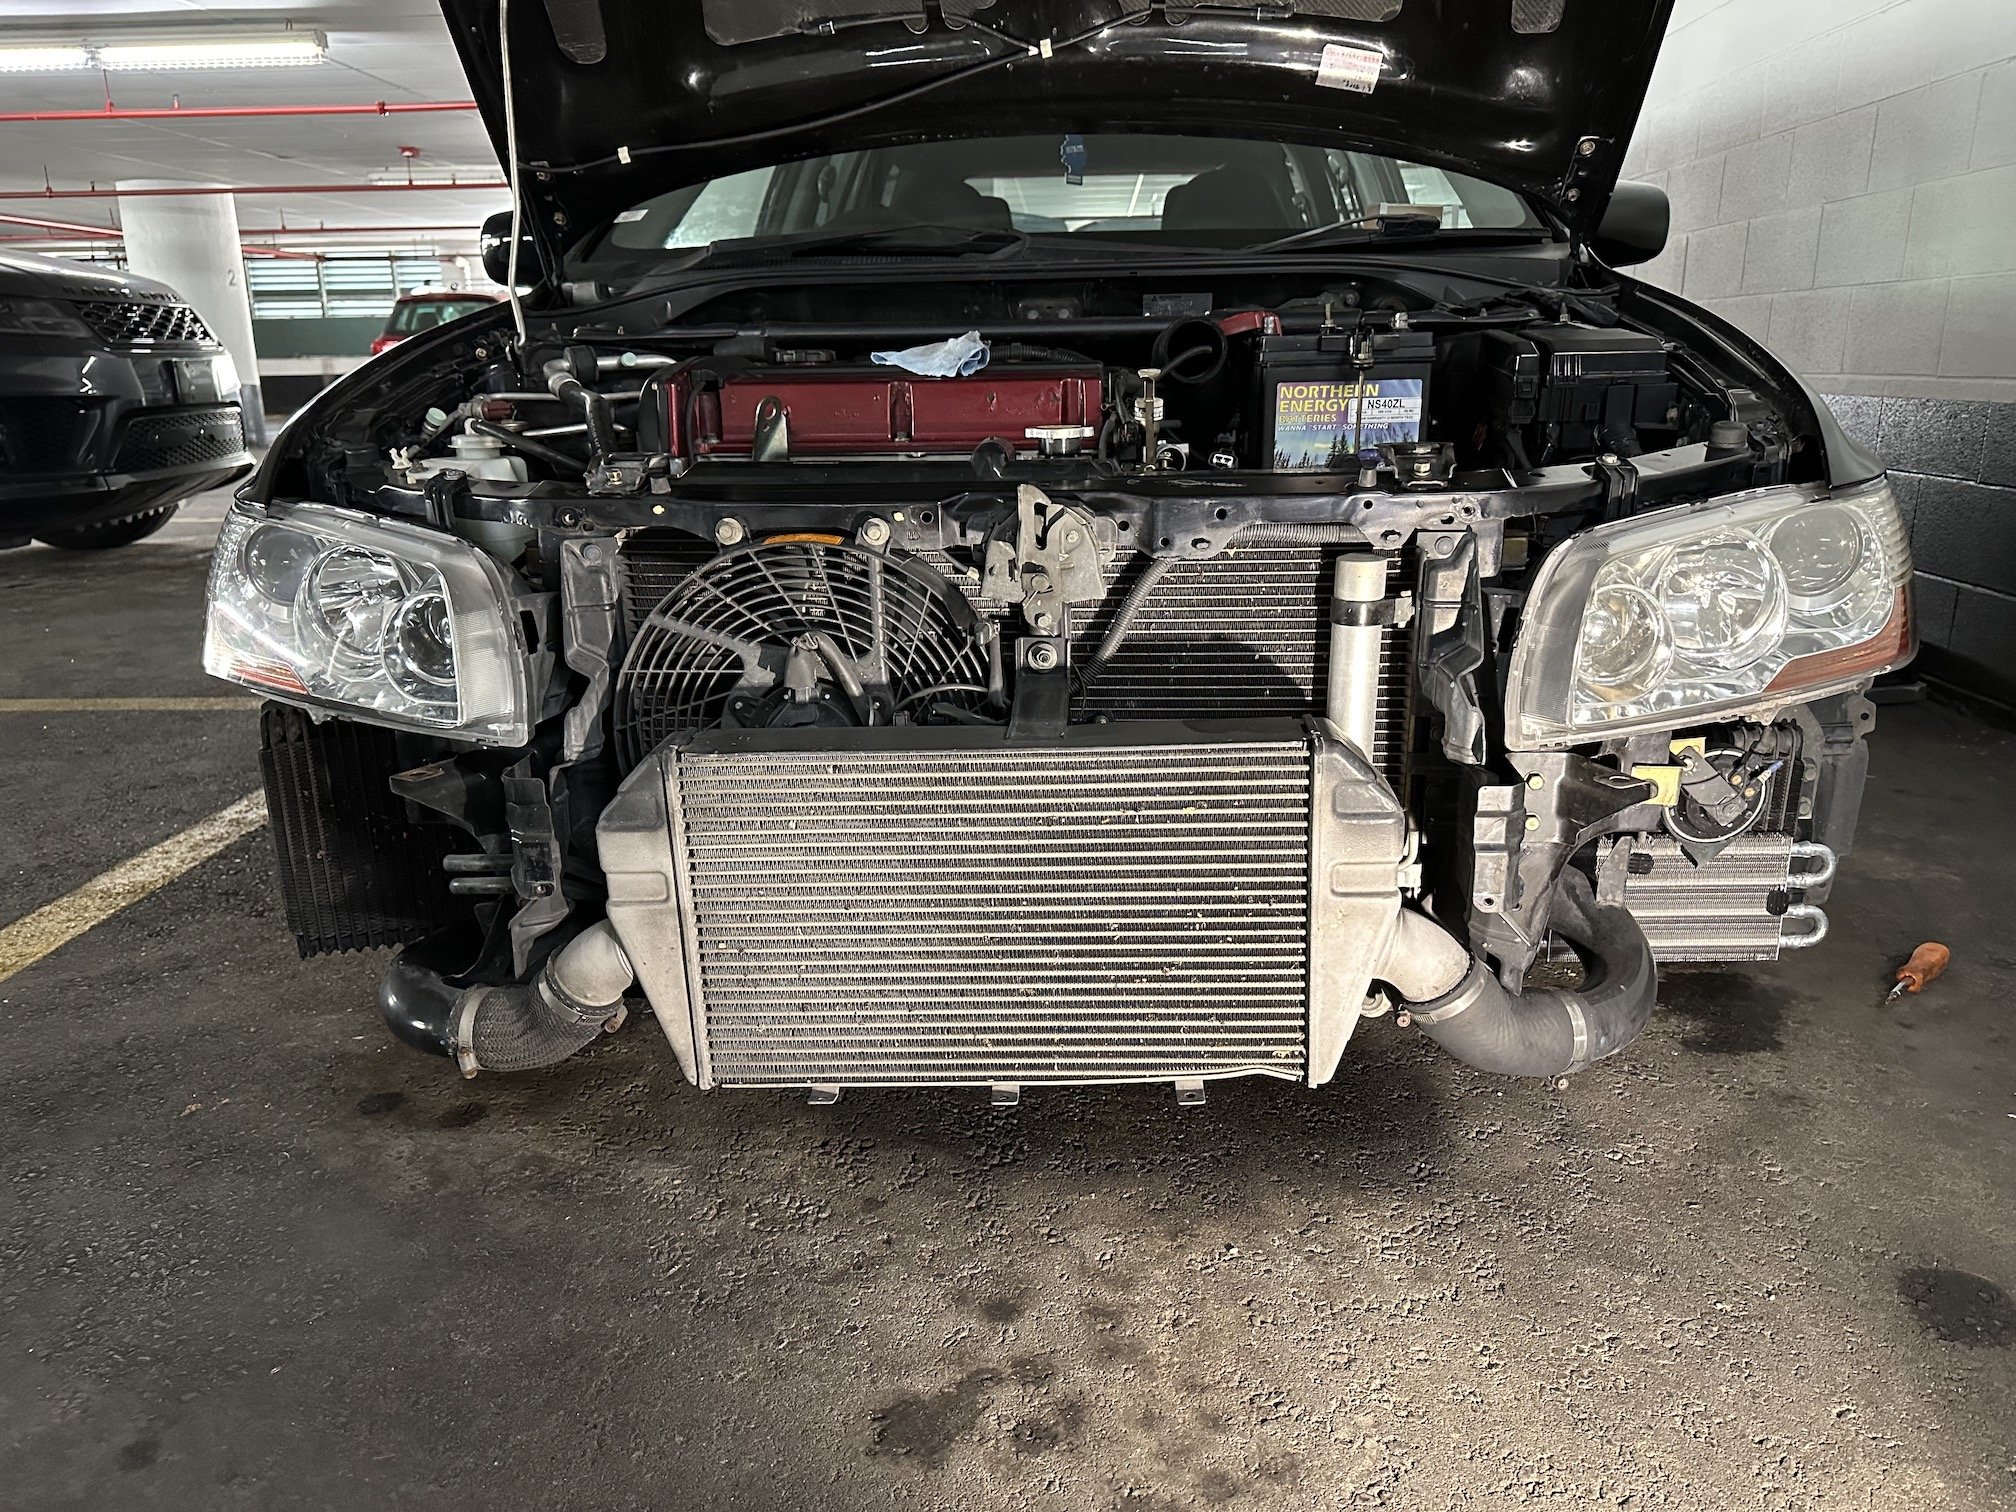
As mentioned above, I was able to pick up a mint intercooler & the M/T aluminium piping while in the US a couple weeks back. That means bumper off again: Replacement intercooler & piping on: These pics show the Ralliart CF air box lid/snorkel however I can't quite run this just yet as it actually fouls with the vents of the Varis CF bonnet - so either I run stock snorkel & air box or I remove the vents from the underside of the bonnet leaving just the mesh there. Not quite sure what to do just yet - I am wondering if I can get creative and cut away just a portion of the vents for the one third or so of the area that it does foul. Next up is swapping on a 3" downpipe I also picked up on the same trip.
10 points
-
Man I’m so keen for this! Have ridden most of these roads either on the dusty butt or on other SI trips on the Africa twin, will be amazing on small bikes. I’ve just picked up an old ct125 that will be perfect for this. ive got a big work trailer that has bike chocks, had 5 big bikes on it plus 2 on the Ute for dusty so the trailer would likely fit 7-8 small bikes plus 2-3 on the back of the Ute. If people could get bikes to palmy then I can be freight and we can just split ferry costs, should work out cheap, can take 3 people also of keen for the drive. I’d just smash palmy to fairlie in a day, I’ve done it on a drz400 so I’m sure a v6 ranger will be much more comfortable8 points
-
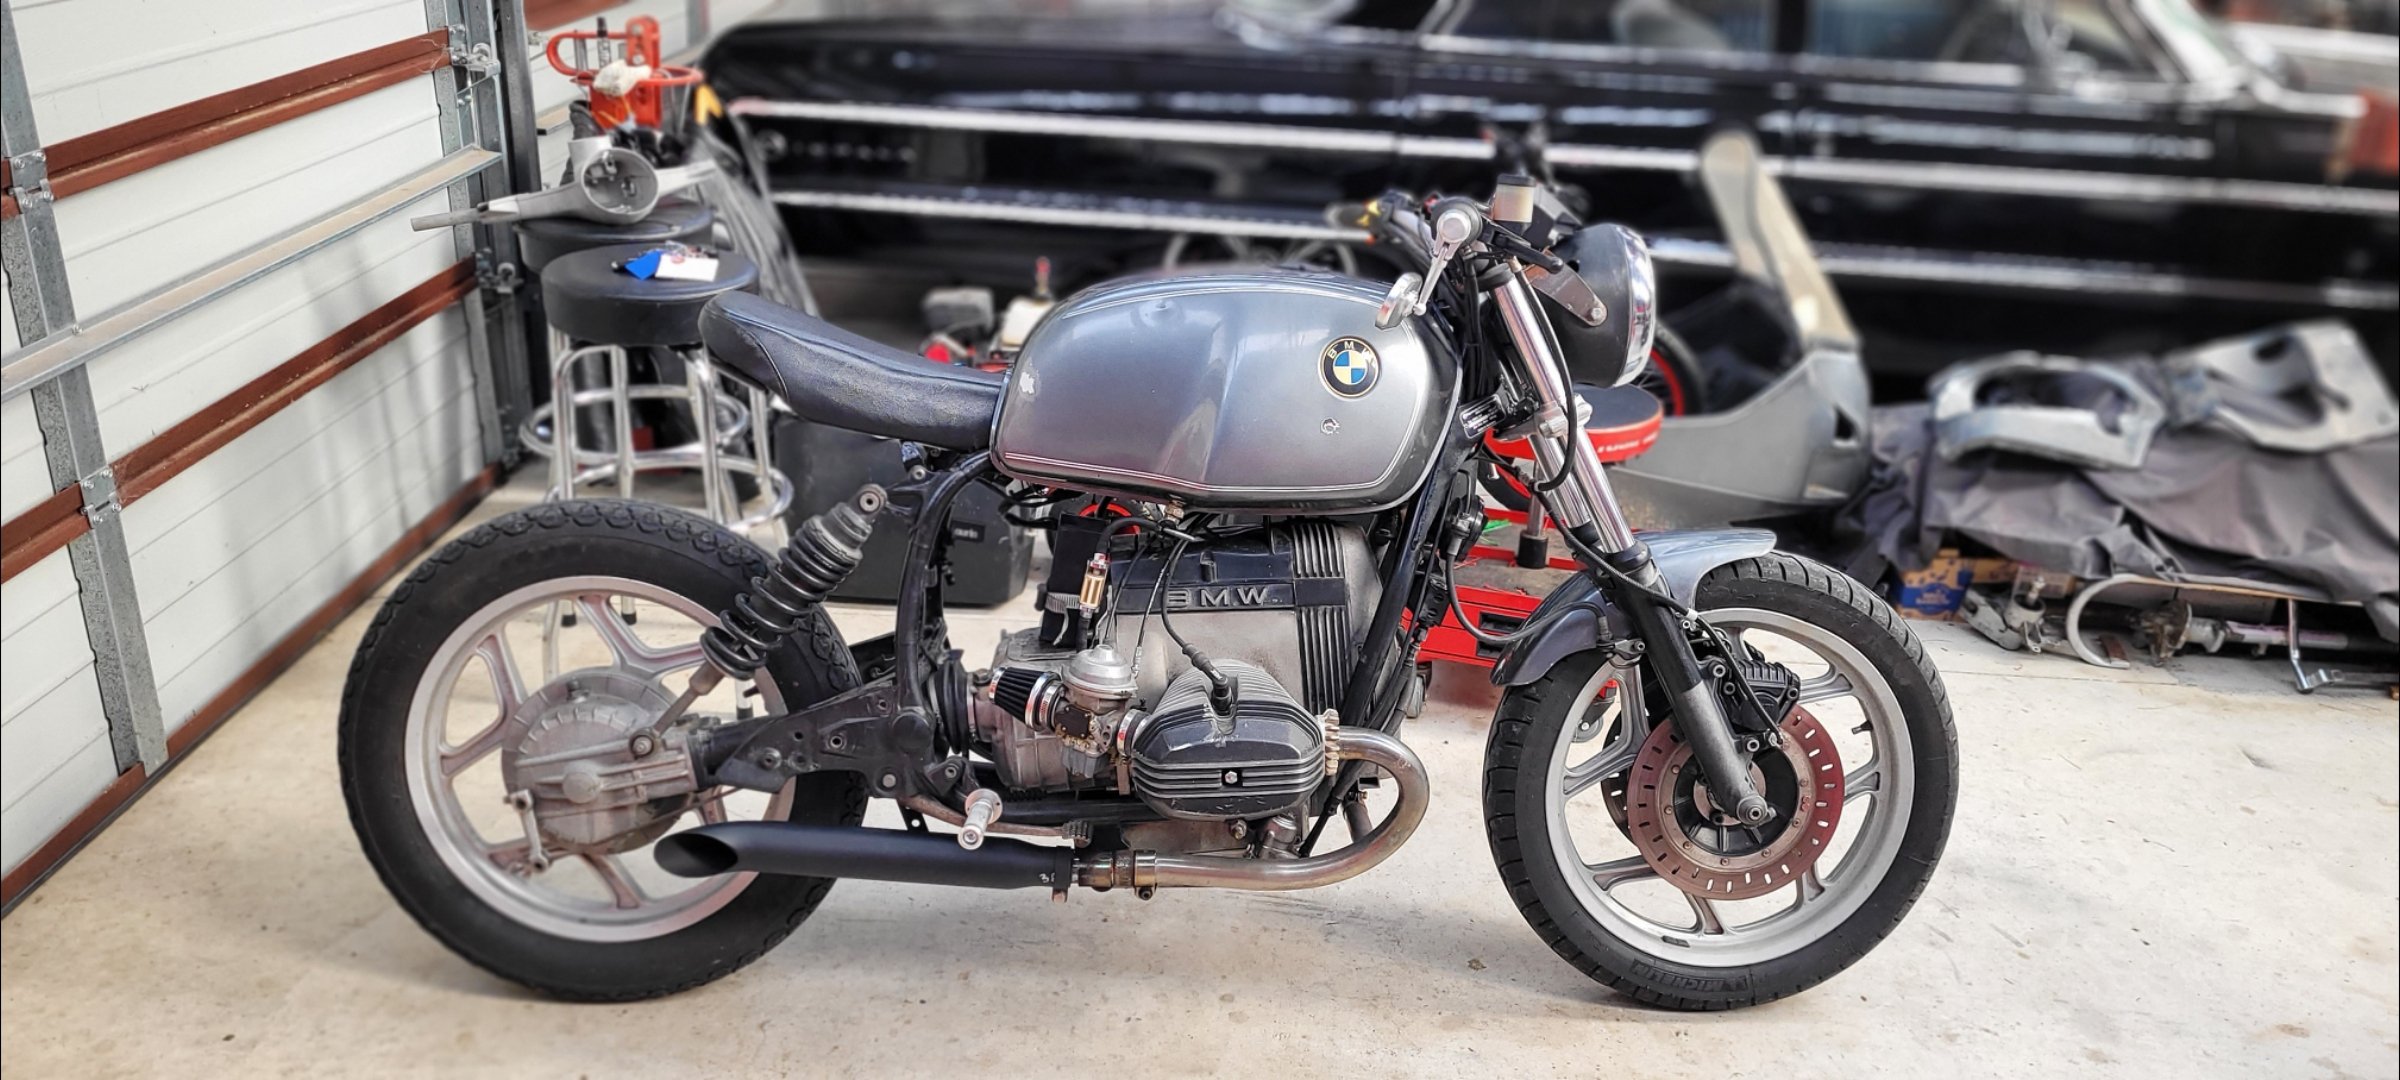
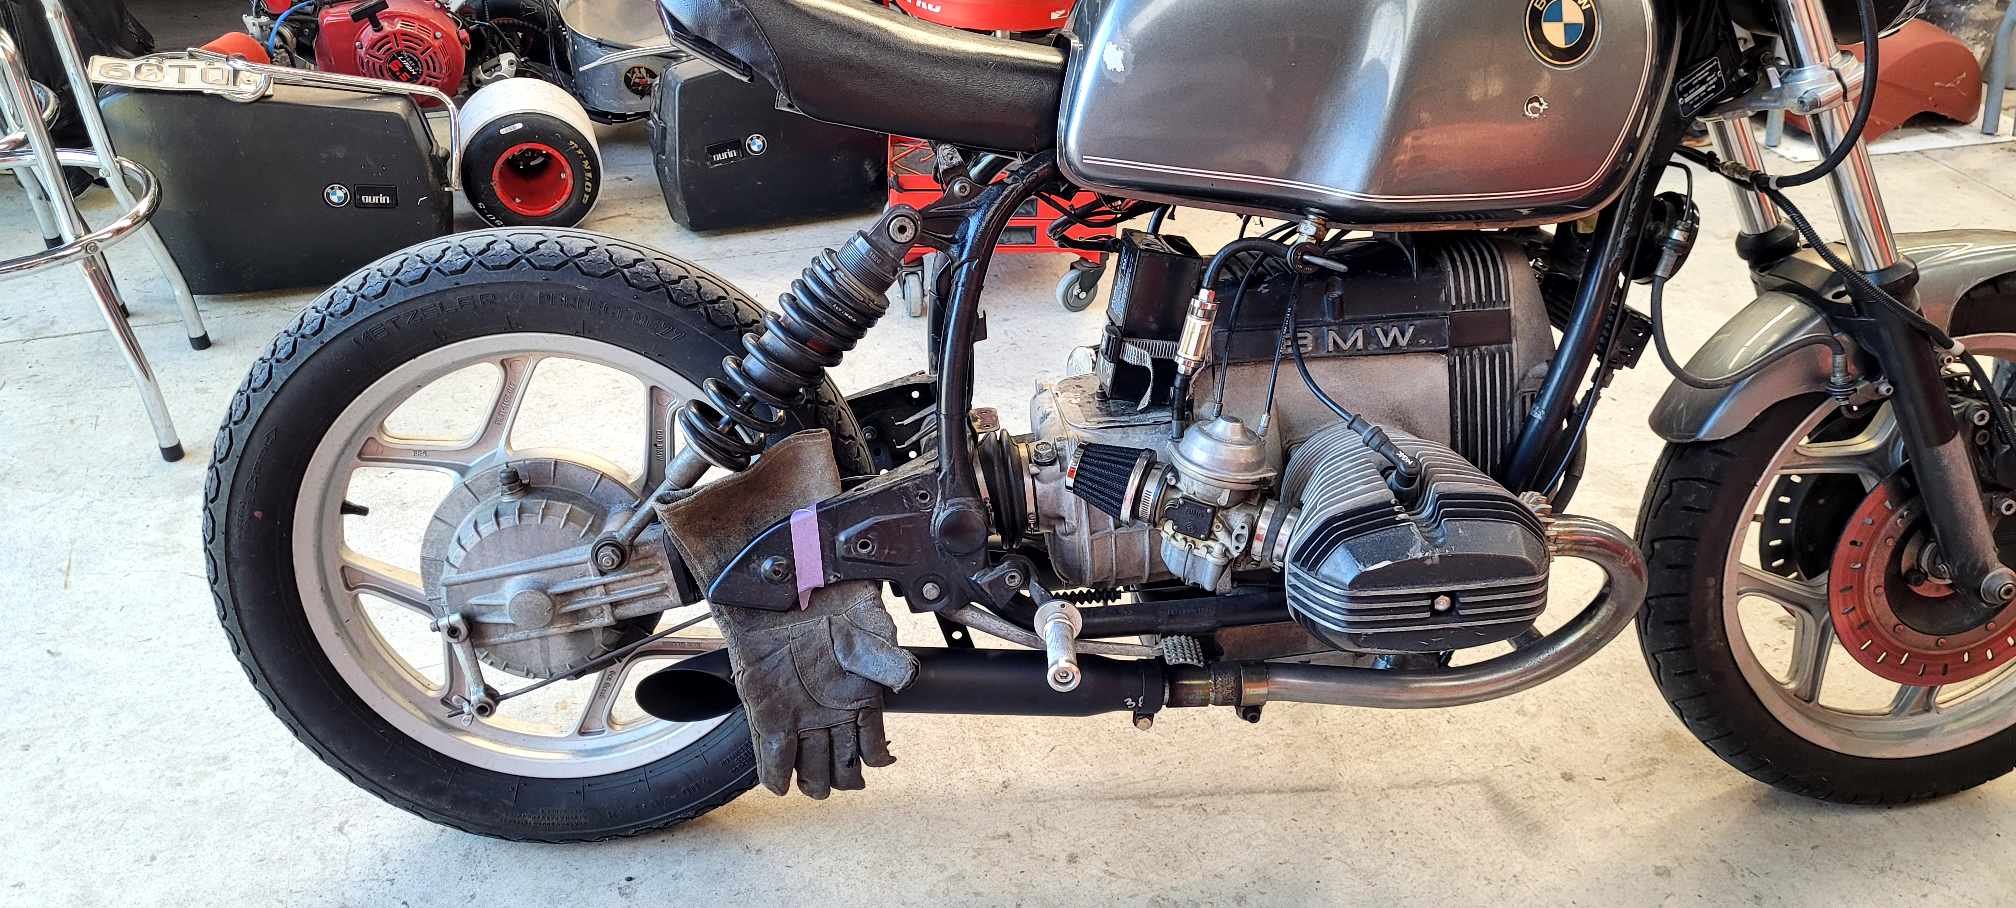
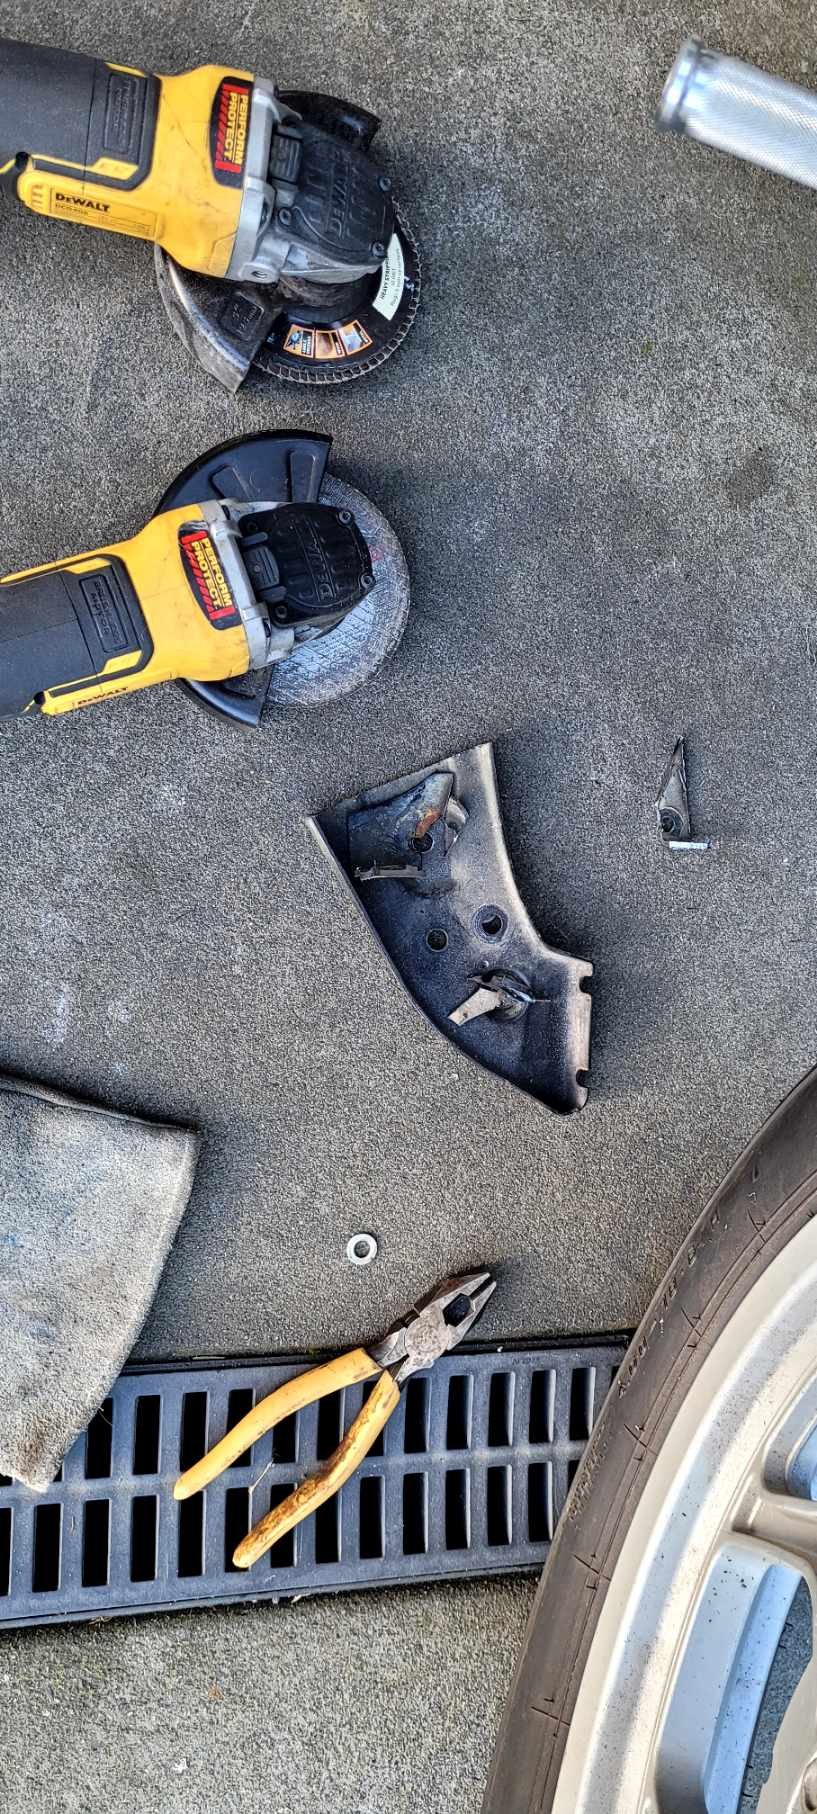
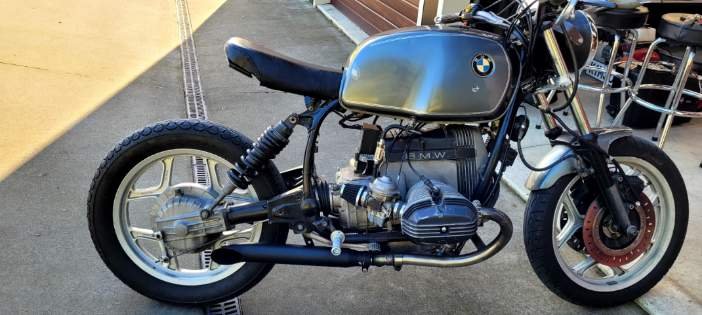
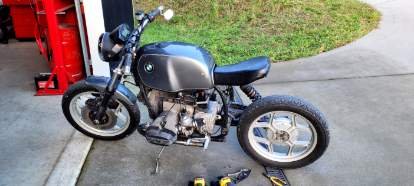
Ive given it a good going over, sorted out a few wiring gremlins etc. Removed a heap of stuff that didn't need to be there, swapped out fuel lines, sorted out linkages to brakes and gear shifts, fiddled with carburetors some more etc etc... Its purring now, everything is working as it should. Actually looking pretty sweet, especially given no money spent - just my time. I've orderd a few parts from overseas, that will tidy up the motor area. I'm relocating the battery and will probably go with a lithium one to reduce the physical size. But yeah, loving the ease of these project.
8 points
-
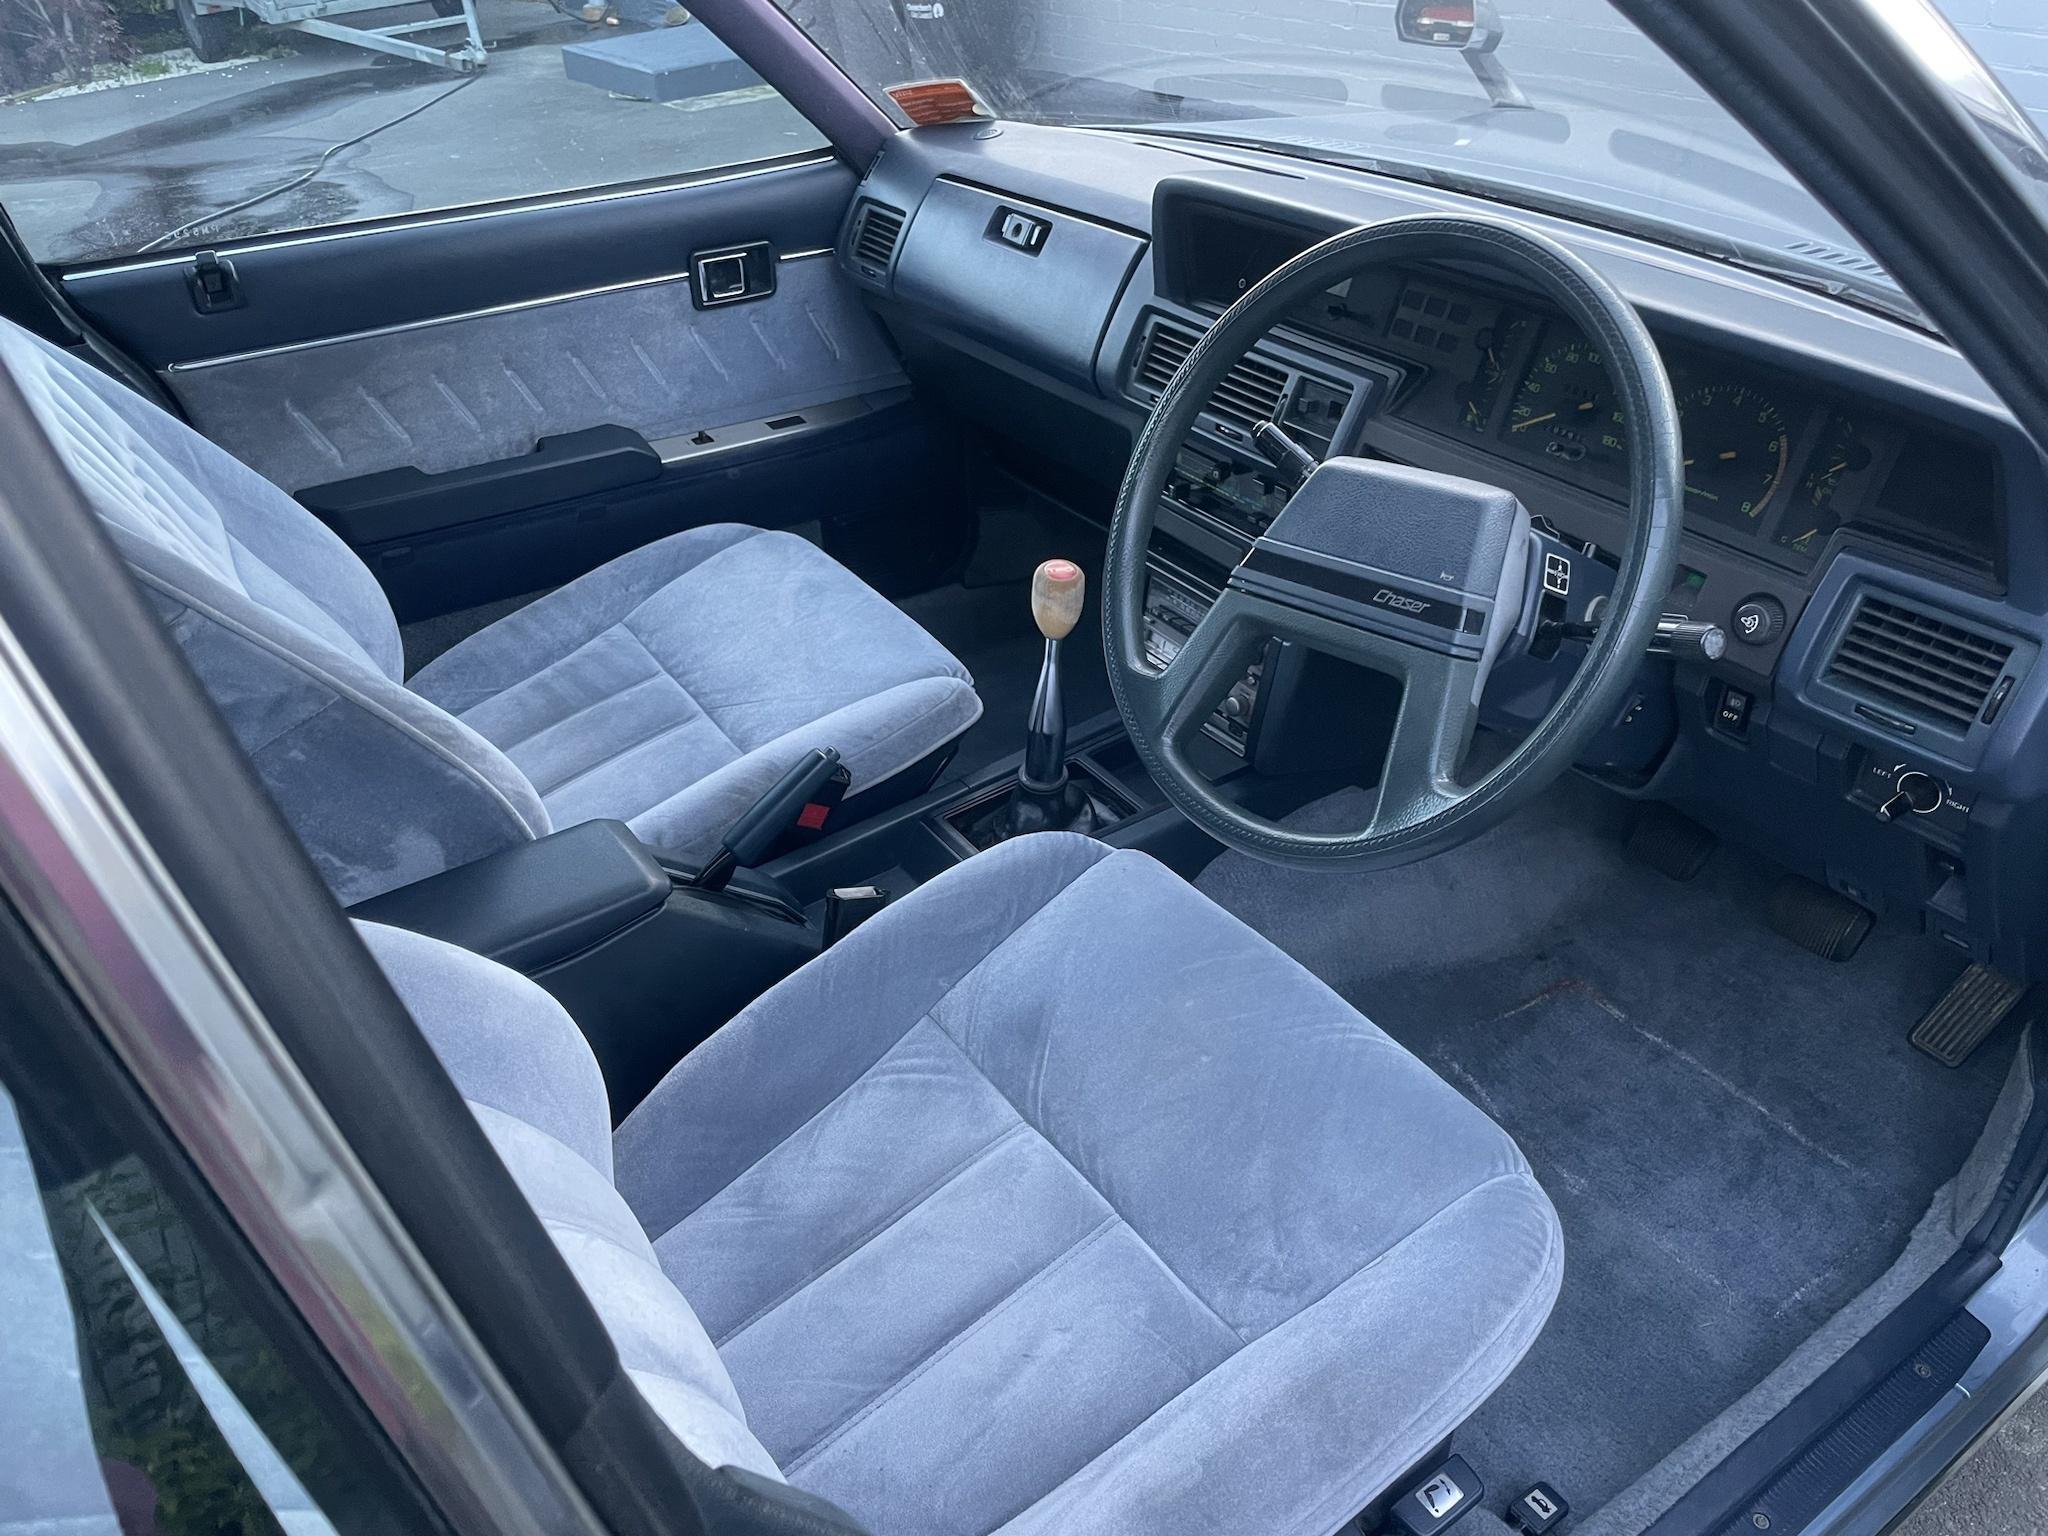
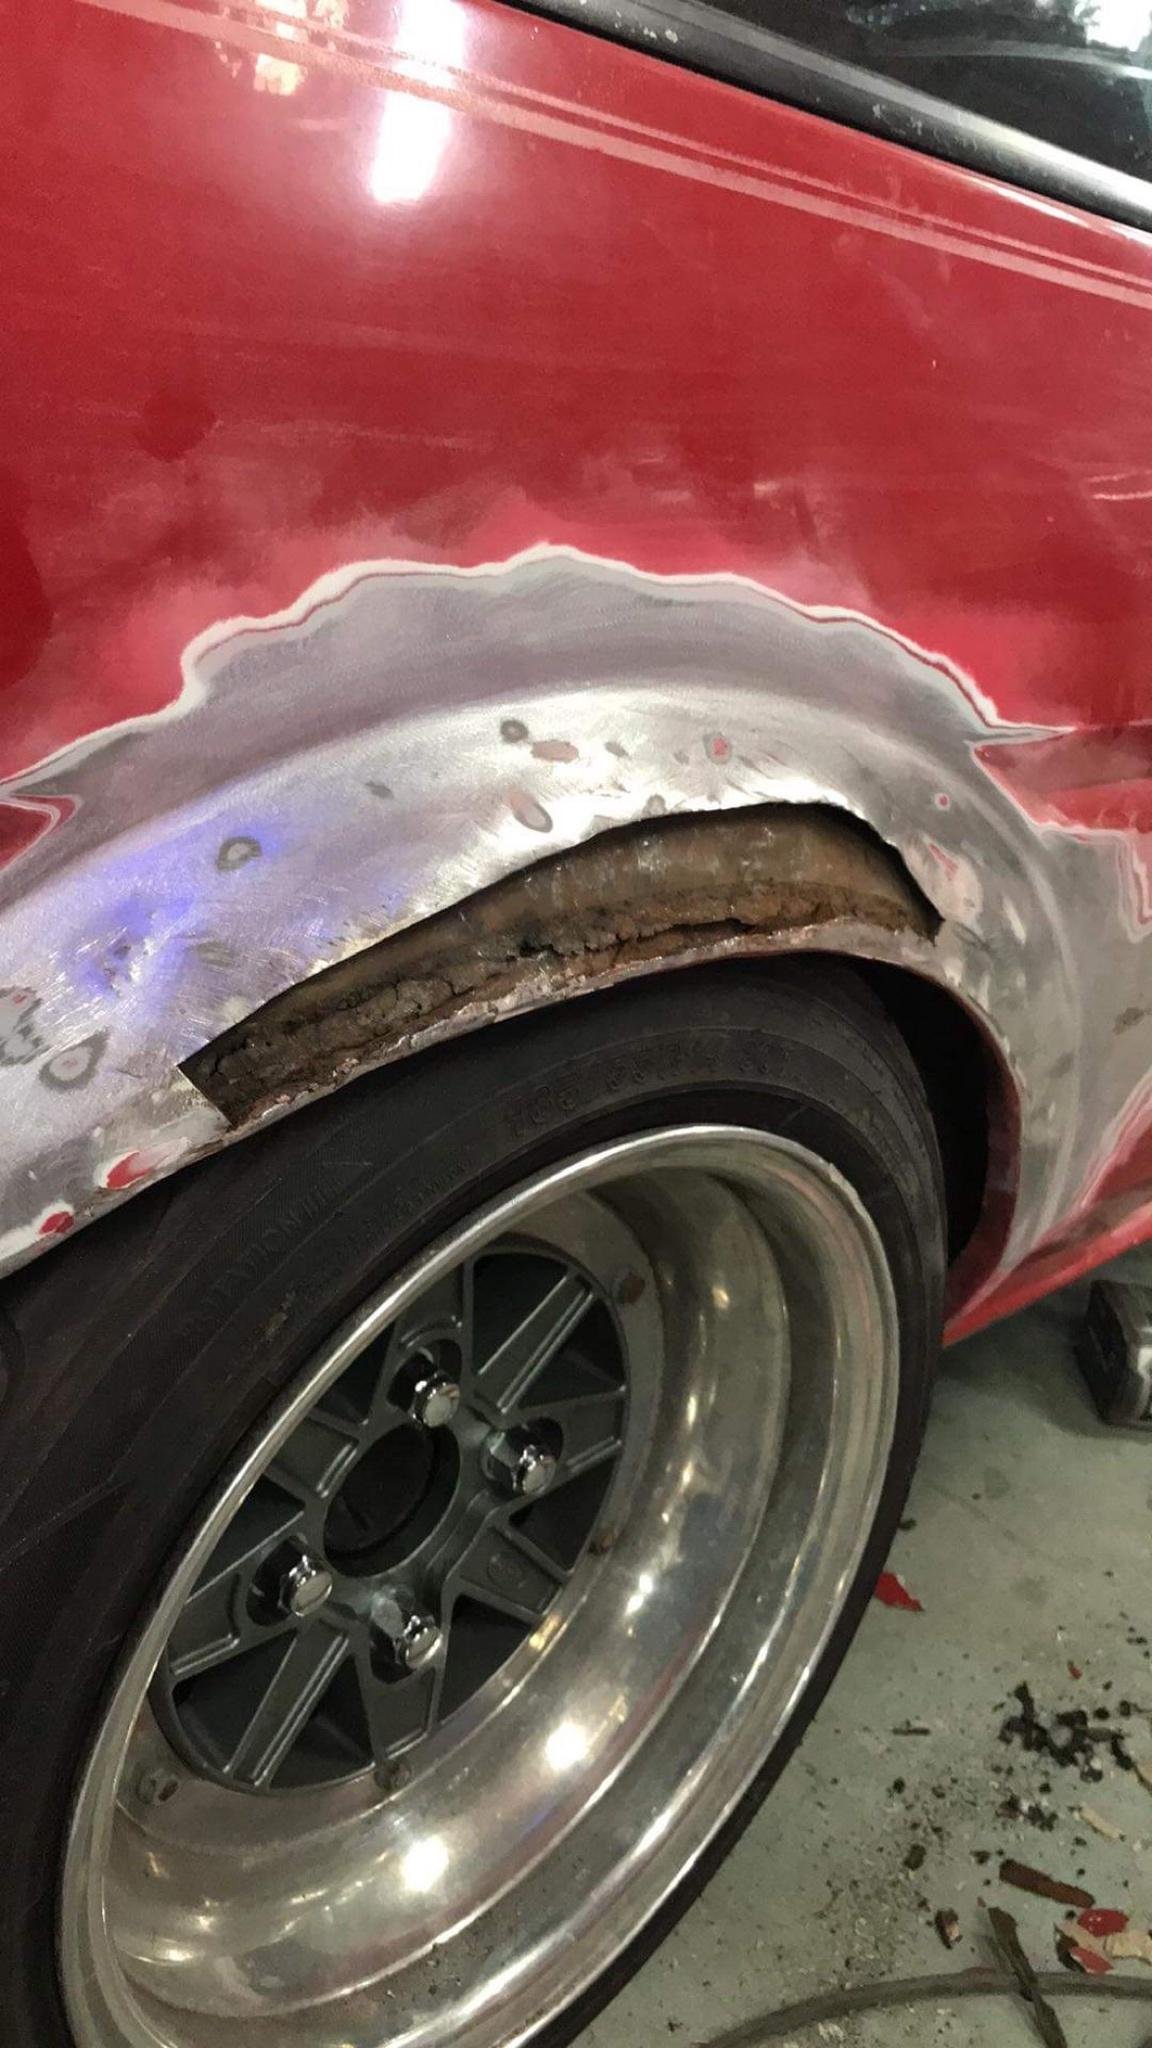
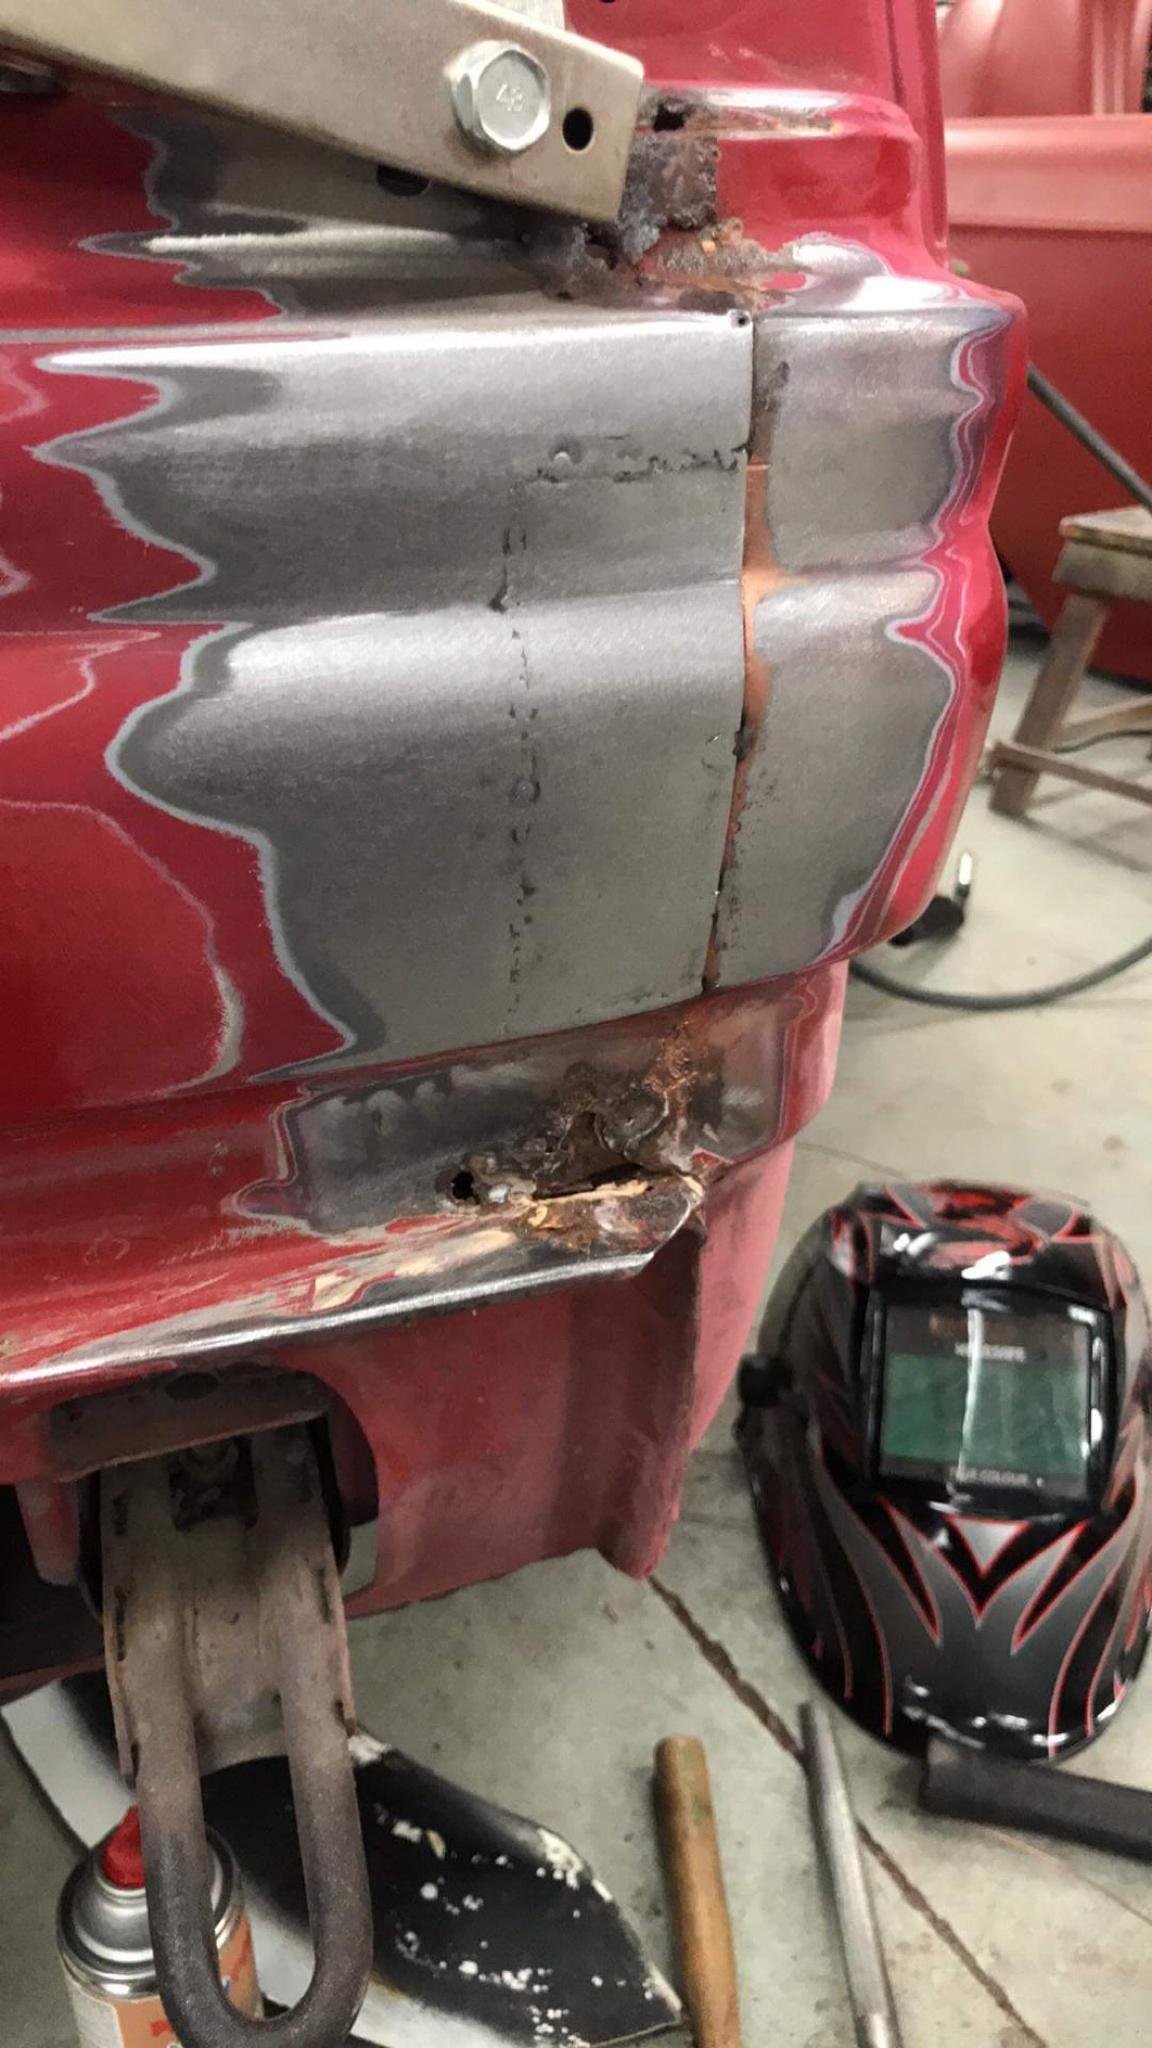
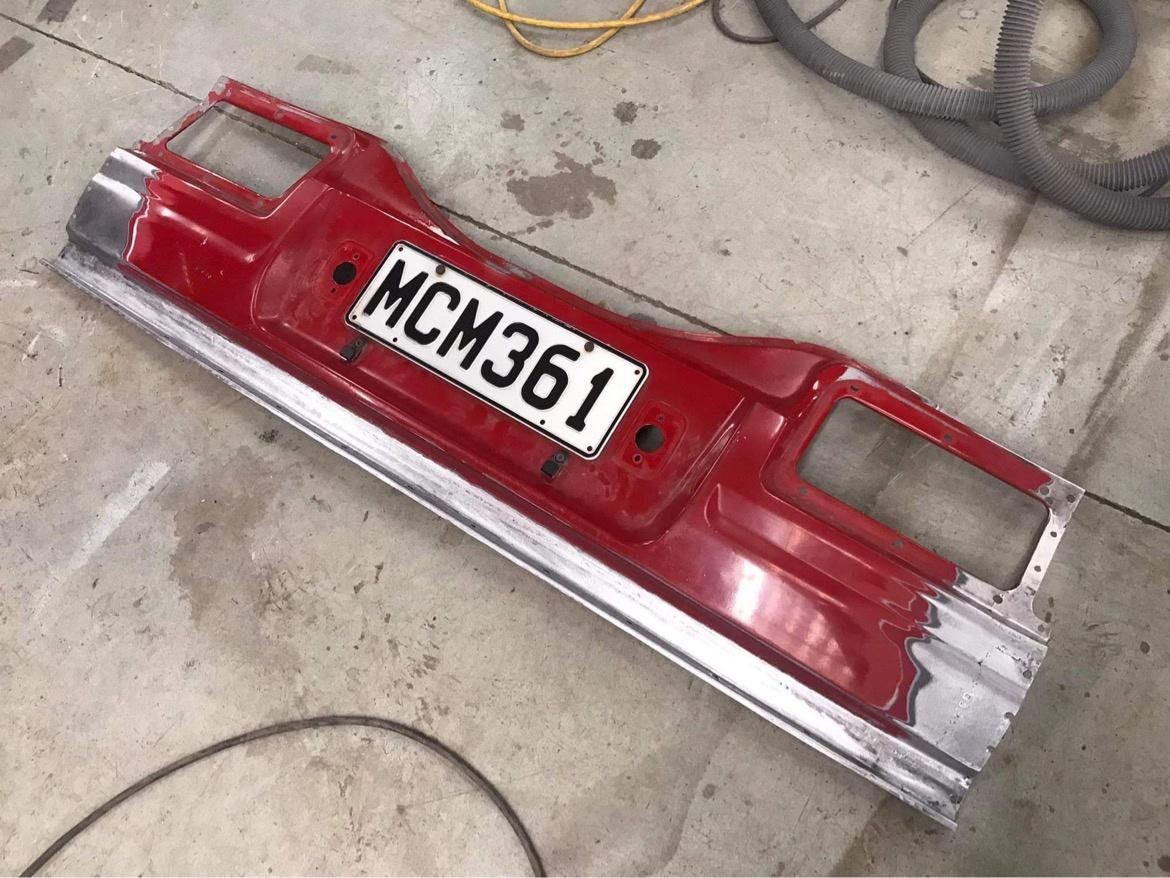
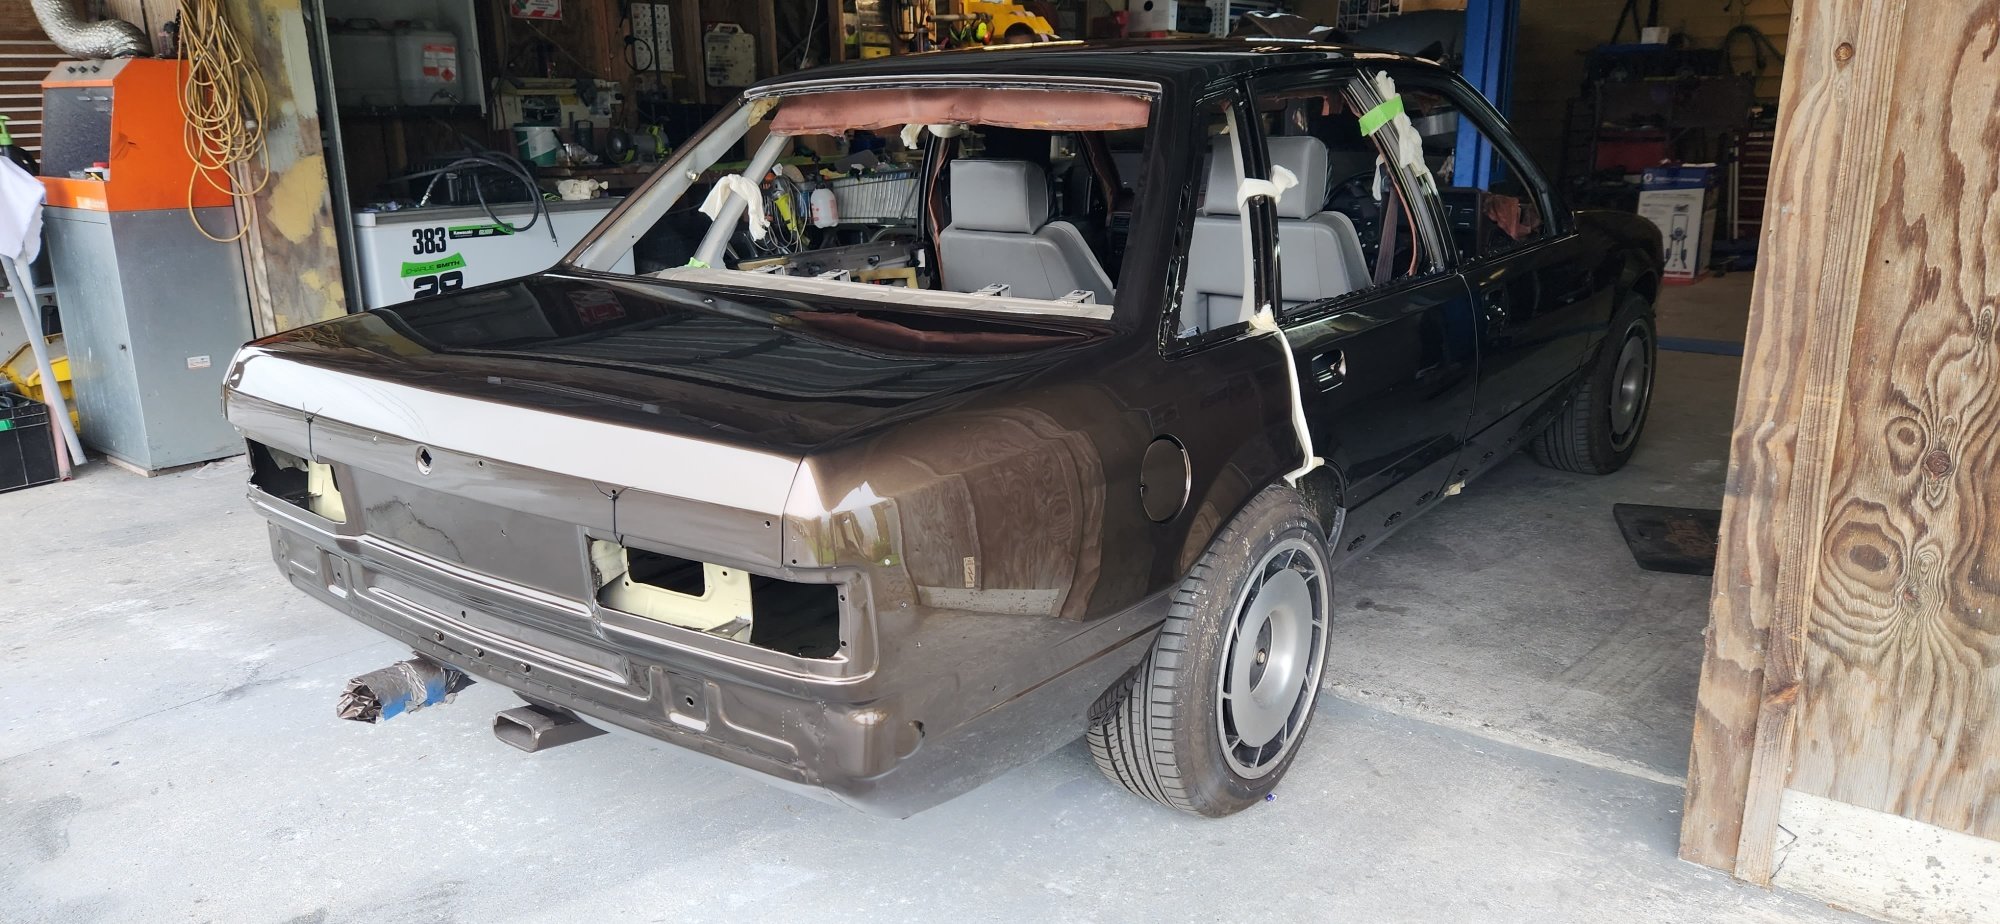
It continued... Then it was all back together and mostly rust free, The car sat for awhile more while i tried to find a panel beater to tidy the car up, ended up flying a good friend up from Chch to palmy one weekend and we had the car panelled and primed in 1 weekend, ended up doing all in the door jams, all windows out etc and painted it in the OEM red Chucked it back together and started to enjoy the car again During all of this i swapped the cars wiring to all AE86 wiring so it was all oem plug and play with the 4age and in tank fuel pump which was nice, i also sourced almost everything for a black interior out of japan in hopes of completing a full GT Apex interior swap on the car too which is much nicer than brown.
8 points
-
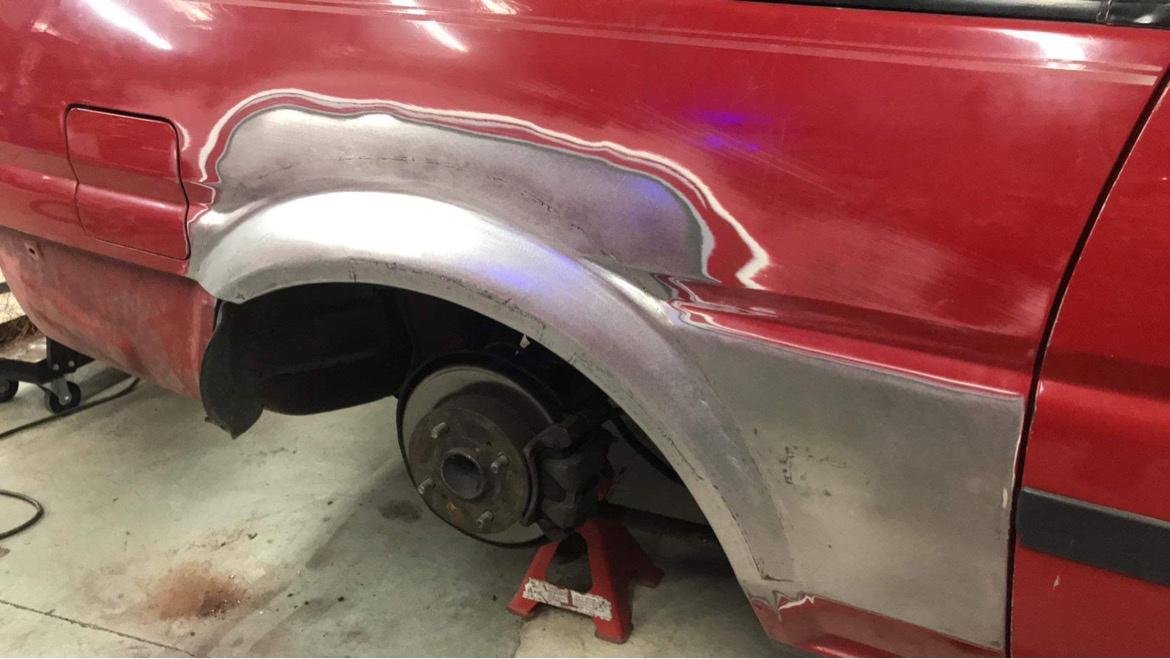
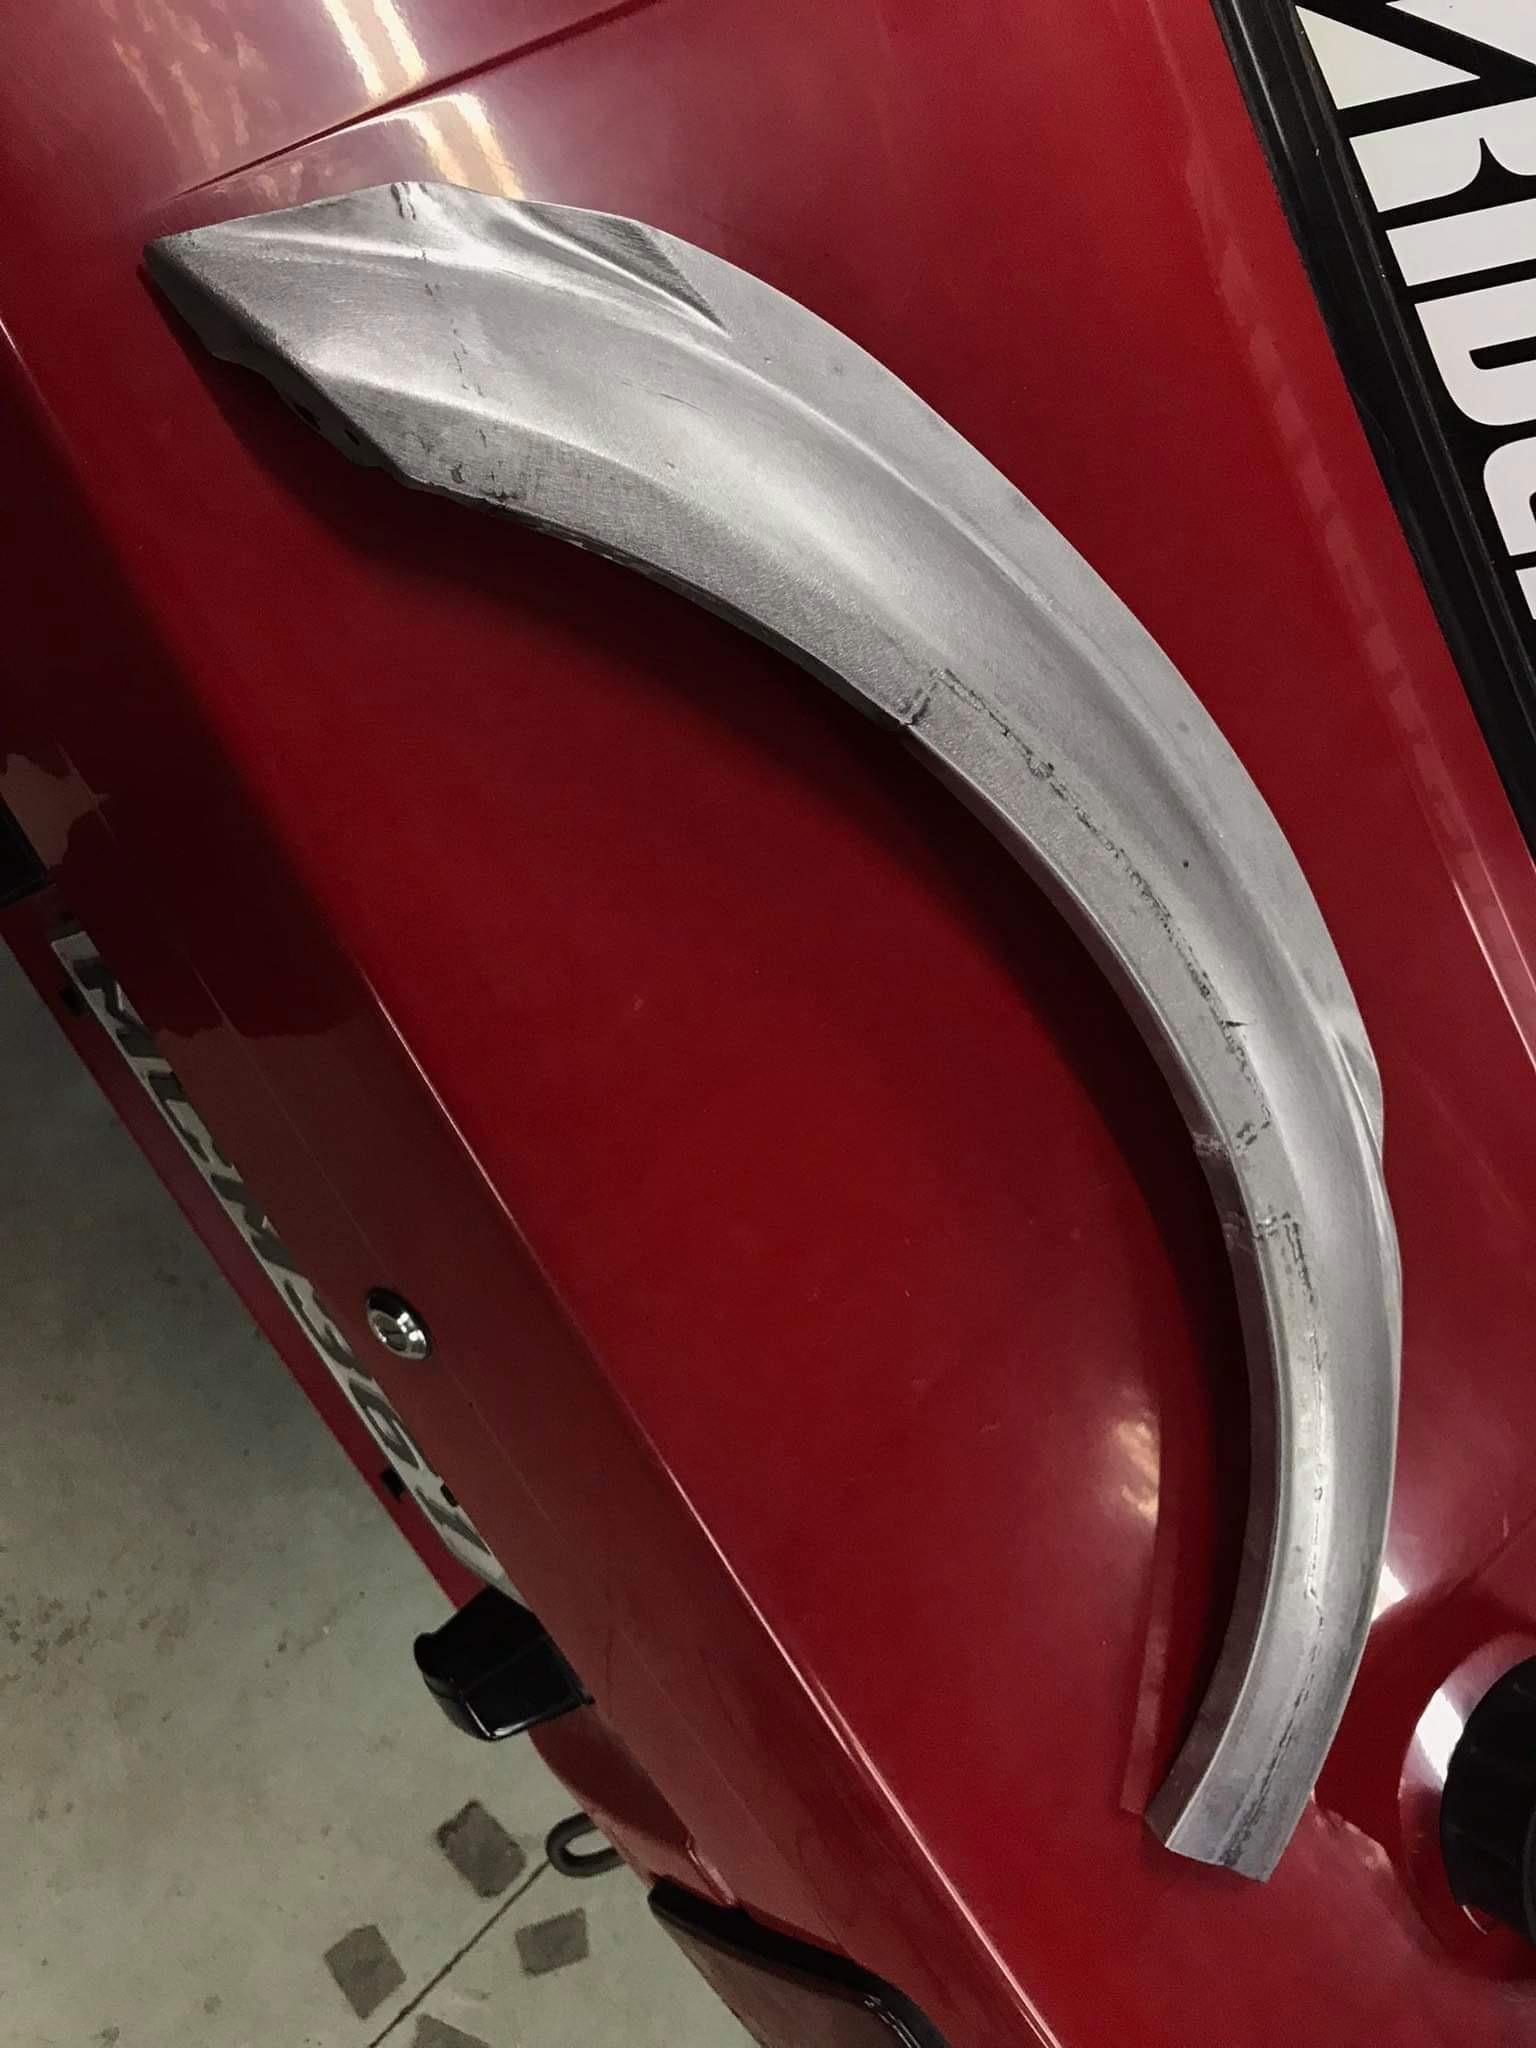
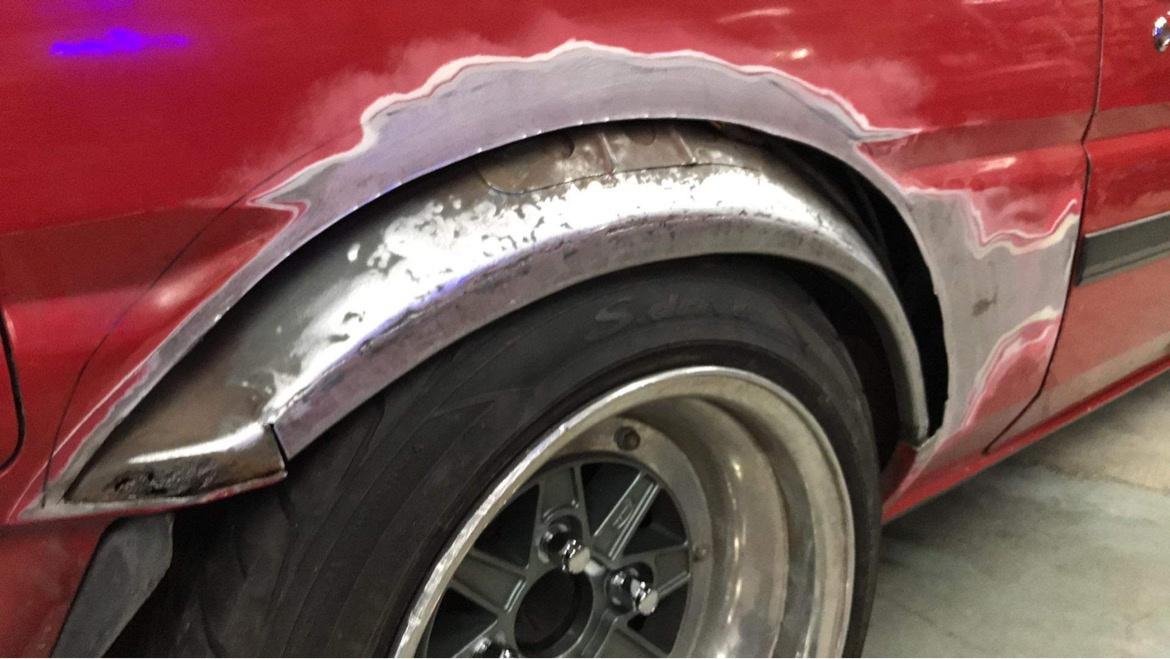
so, afew years later, basic run down, got the new motor and j160 in, being doing plenty of drift days around nz in it and having heaps of fun Then i decided it was finally time to tidy this car up, i had always wanted a levin notch so swapped the front end over to facelift levin parts and purchased a goodline bonnet. i somehow managed to twist Matts arm into working his magic and doing rust work on it for me during the 2nd lock down, what started off as "just 2 little patches under the tail lights and some bog in the guard" to the rear end of the car off and 70 hours or so of work.
8 points
-
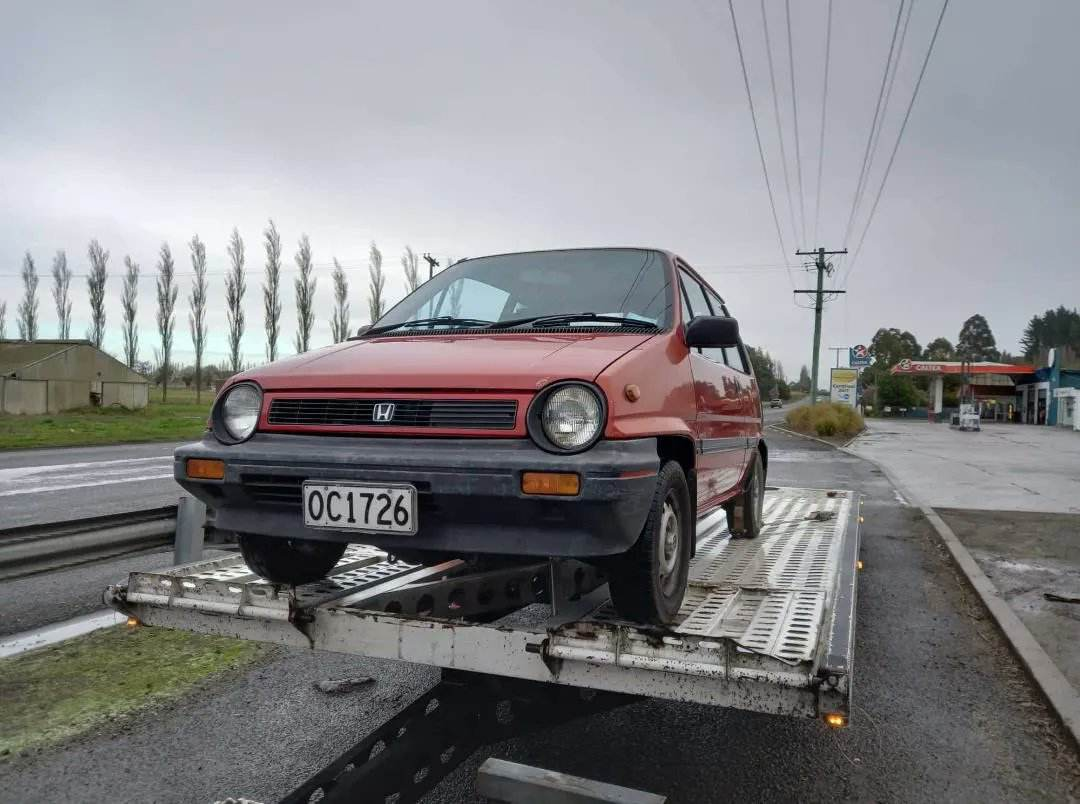
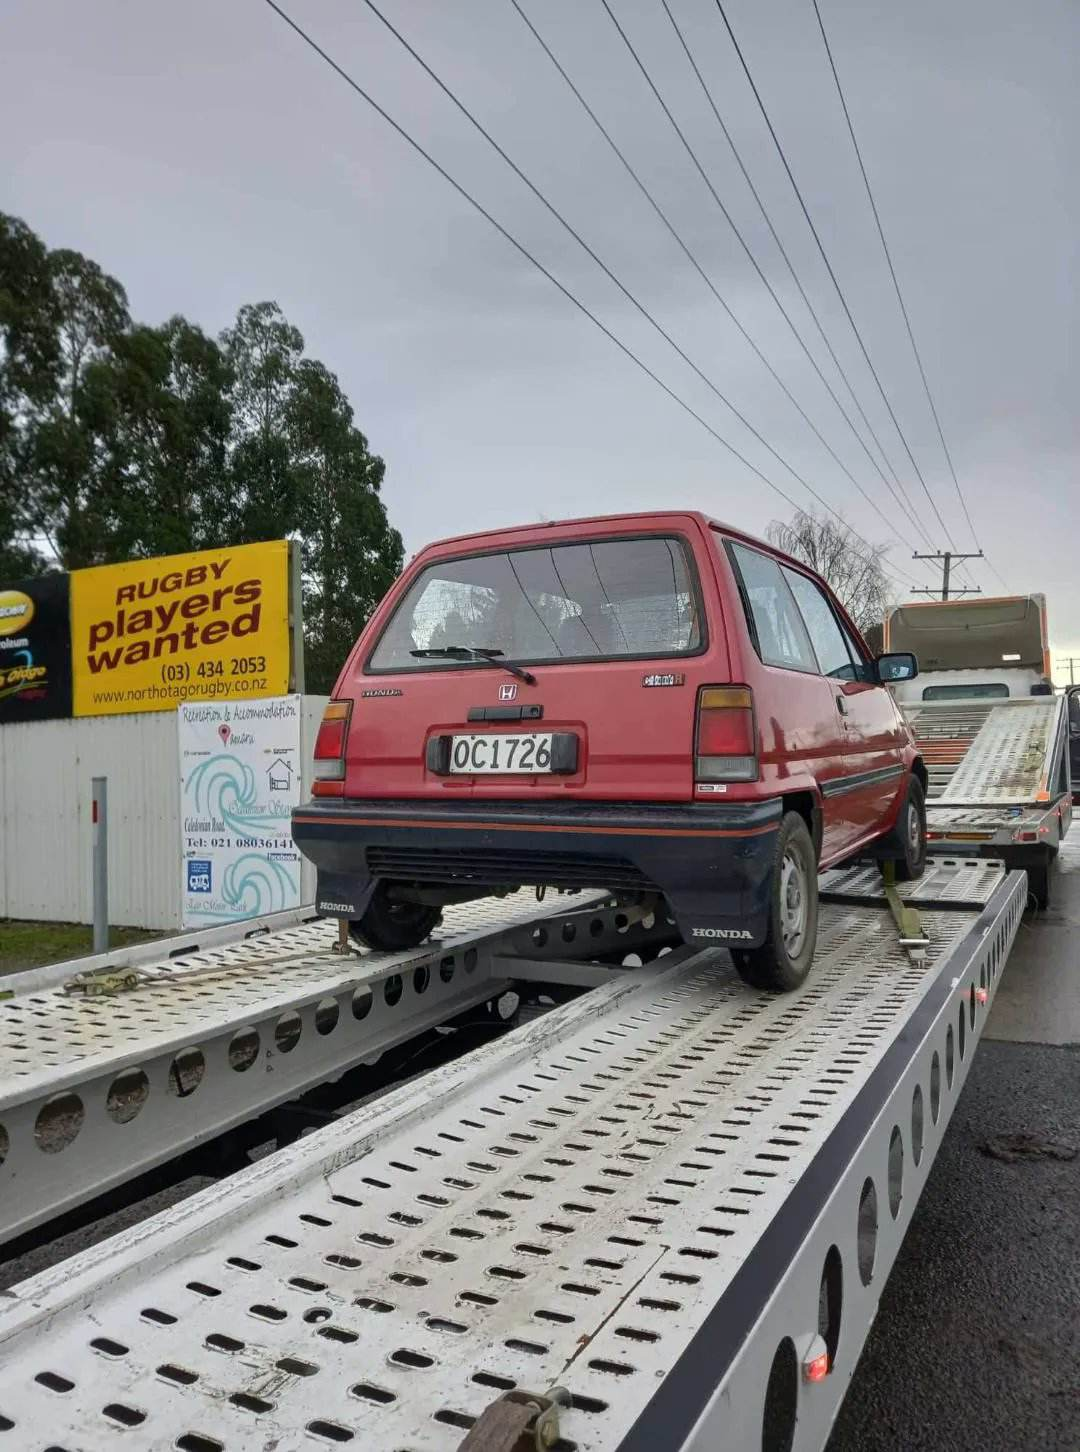
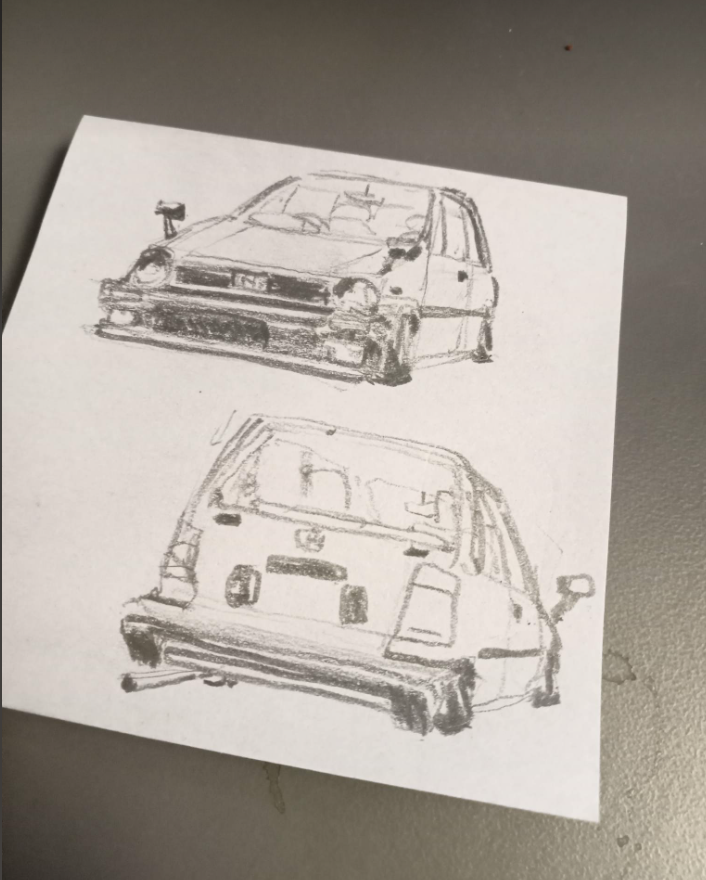
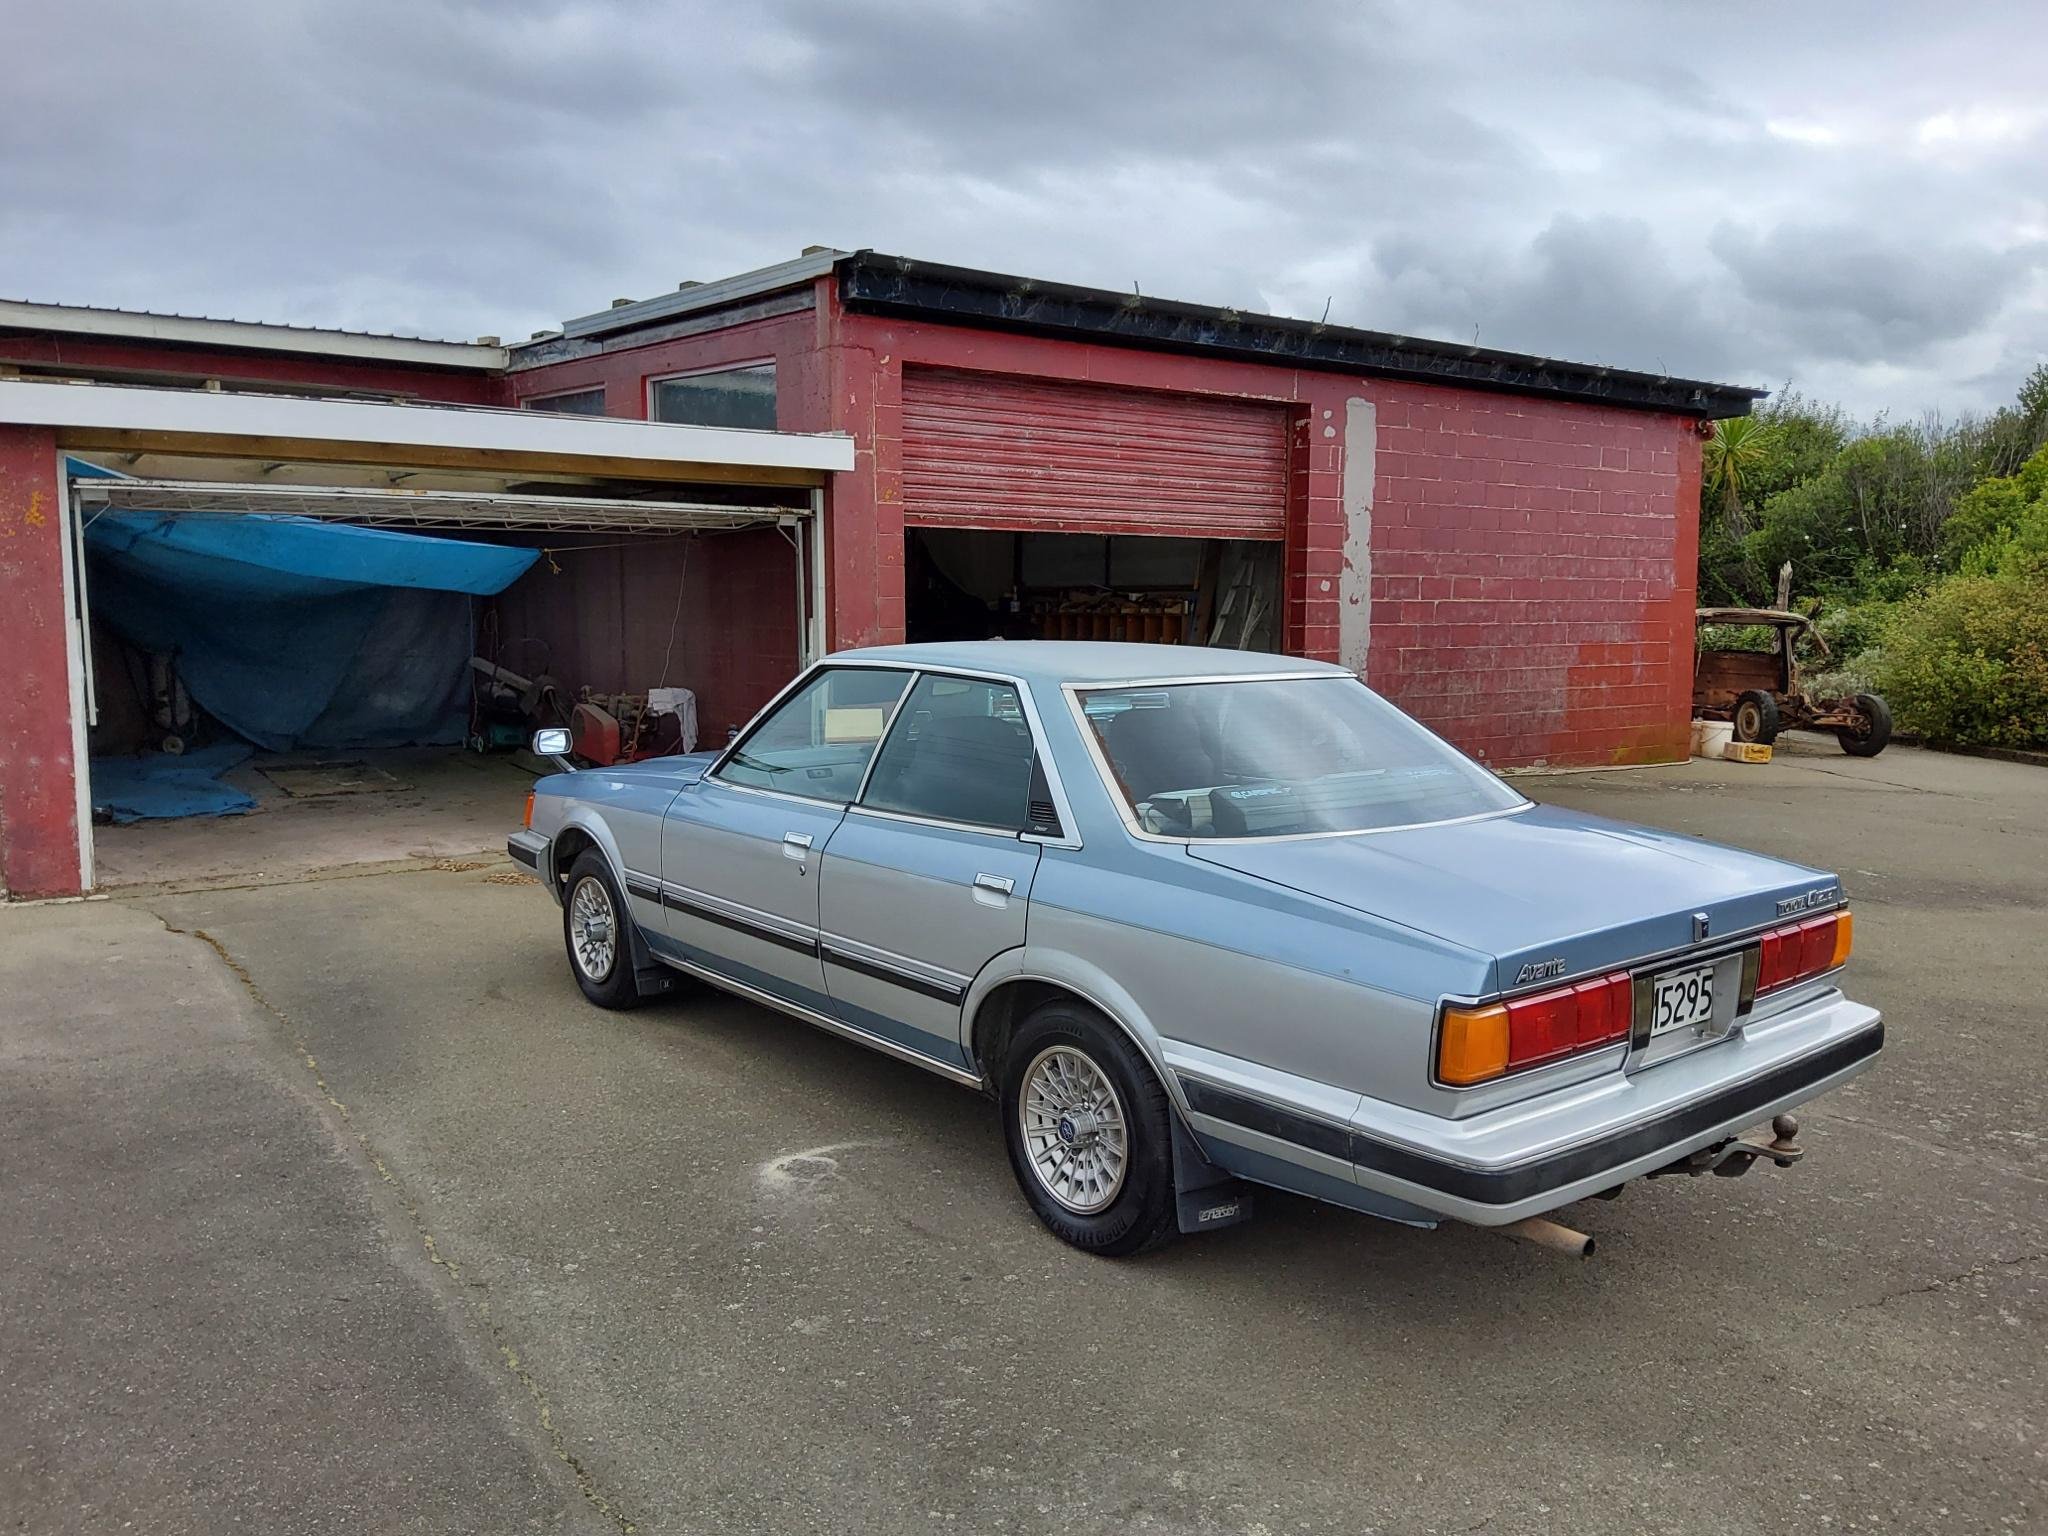
A few months back I picked this up: It's a 1984 City R, jdm model. I bought it sight unseen off a retired couple in omaru and had it shipped to wellington. These jdm ones are pretty hard to find, I had been searching for a while. I won it on a trademe auction for cheap. here’s the plan for it: low as possible, widen the standard steelies, fender mirror conversion, turbo bumper, parcel shelf speakers and twin stainless peashooters. I'm actually a bit of a ways through now but I'll post all the progress up to date. should look pretty phat.
7 points
-
if your valve clearance is going to be close enough that the difference between torqued and non torqued gap is a deal breaker you got way more problems. just assemble it and nip up the bolts, if you want to get super pedantic take 0.5 off your measurements (if you can measure a piece of plasticine that accurately)7 points
-
Put a fork in it, I'm calling it done!!
7 points
-
I measure mine with the head gasket off, so if I can see a thin area of plasticine when I pull the head off then I know its going to be fucking close, but I still have the thickness of the head gasket clearance. If I can see through the plasticine, I call it a problem. Not very scientific but hasn't failed me yet.5 points
-
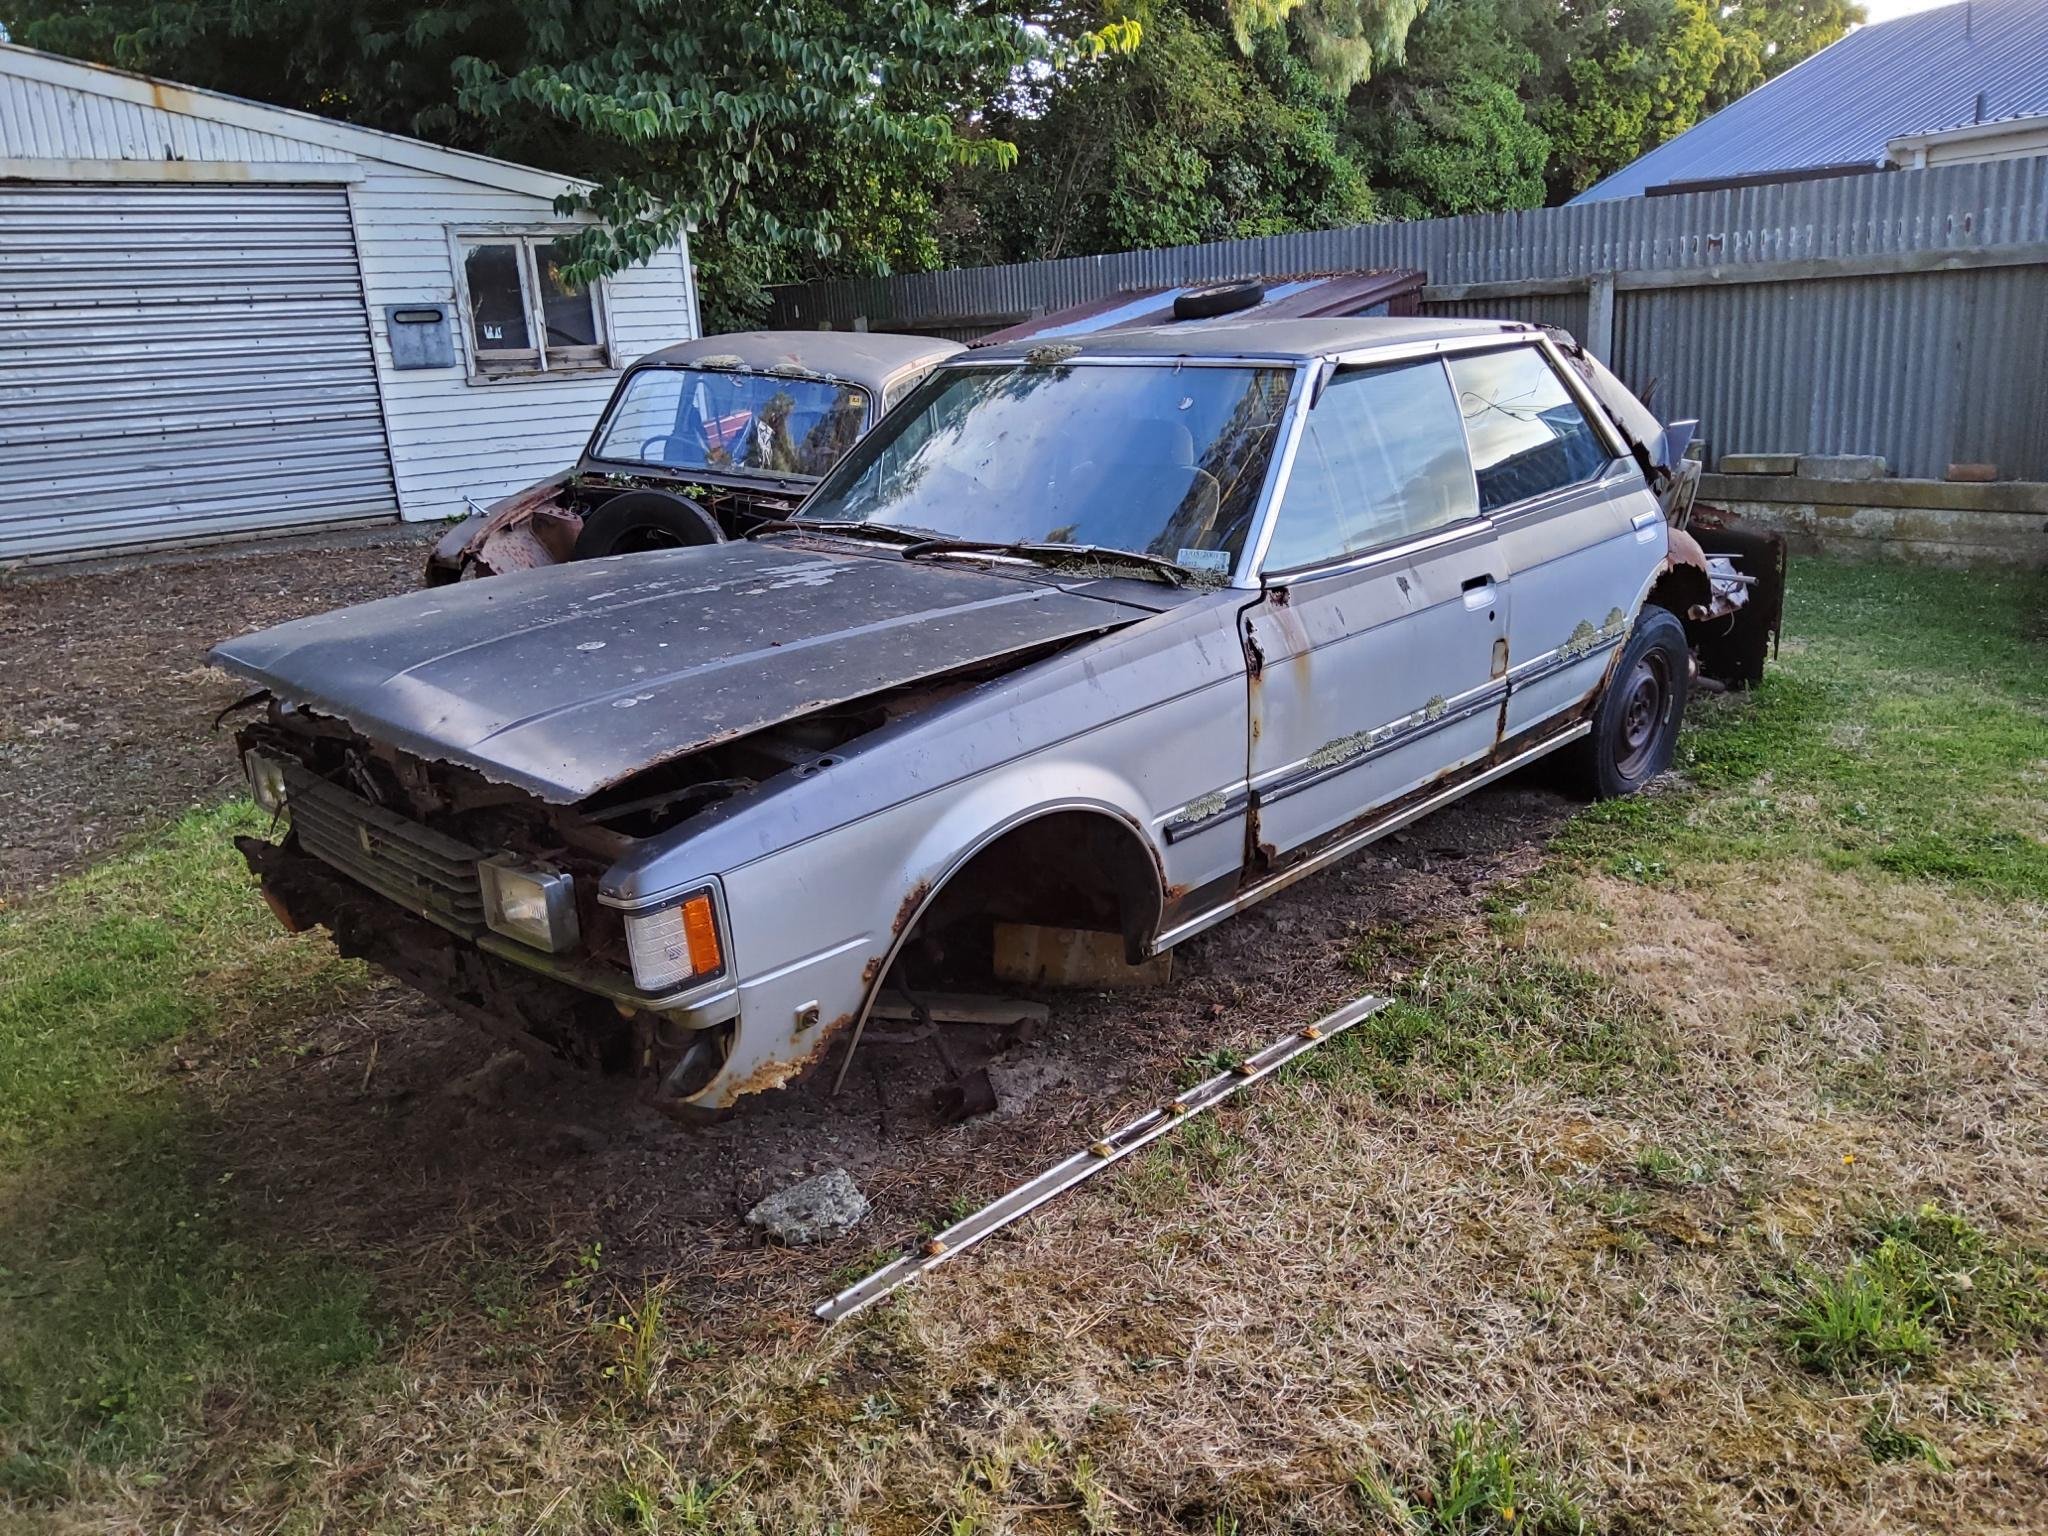
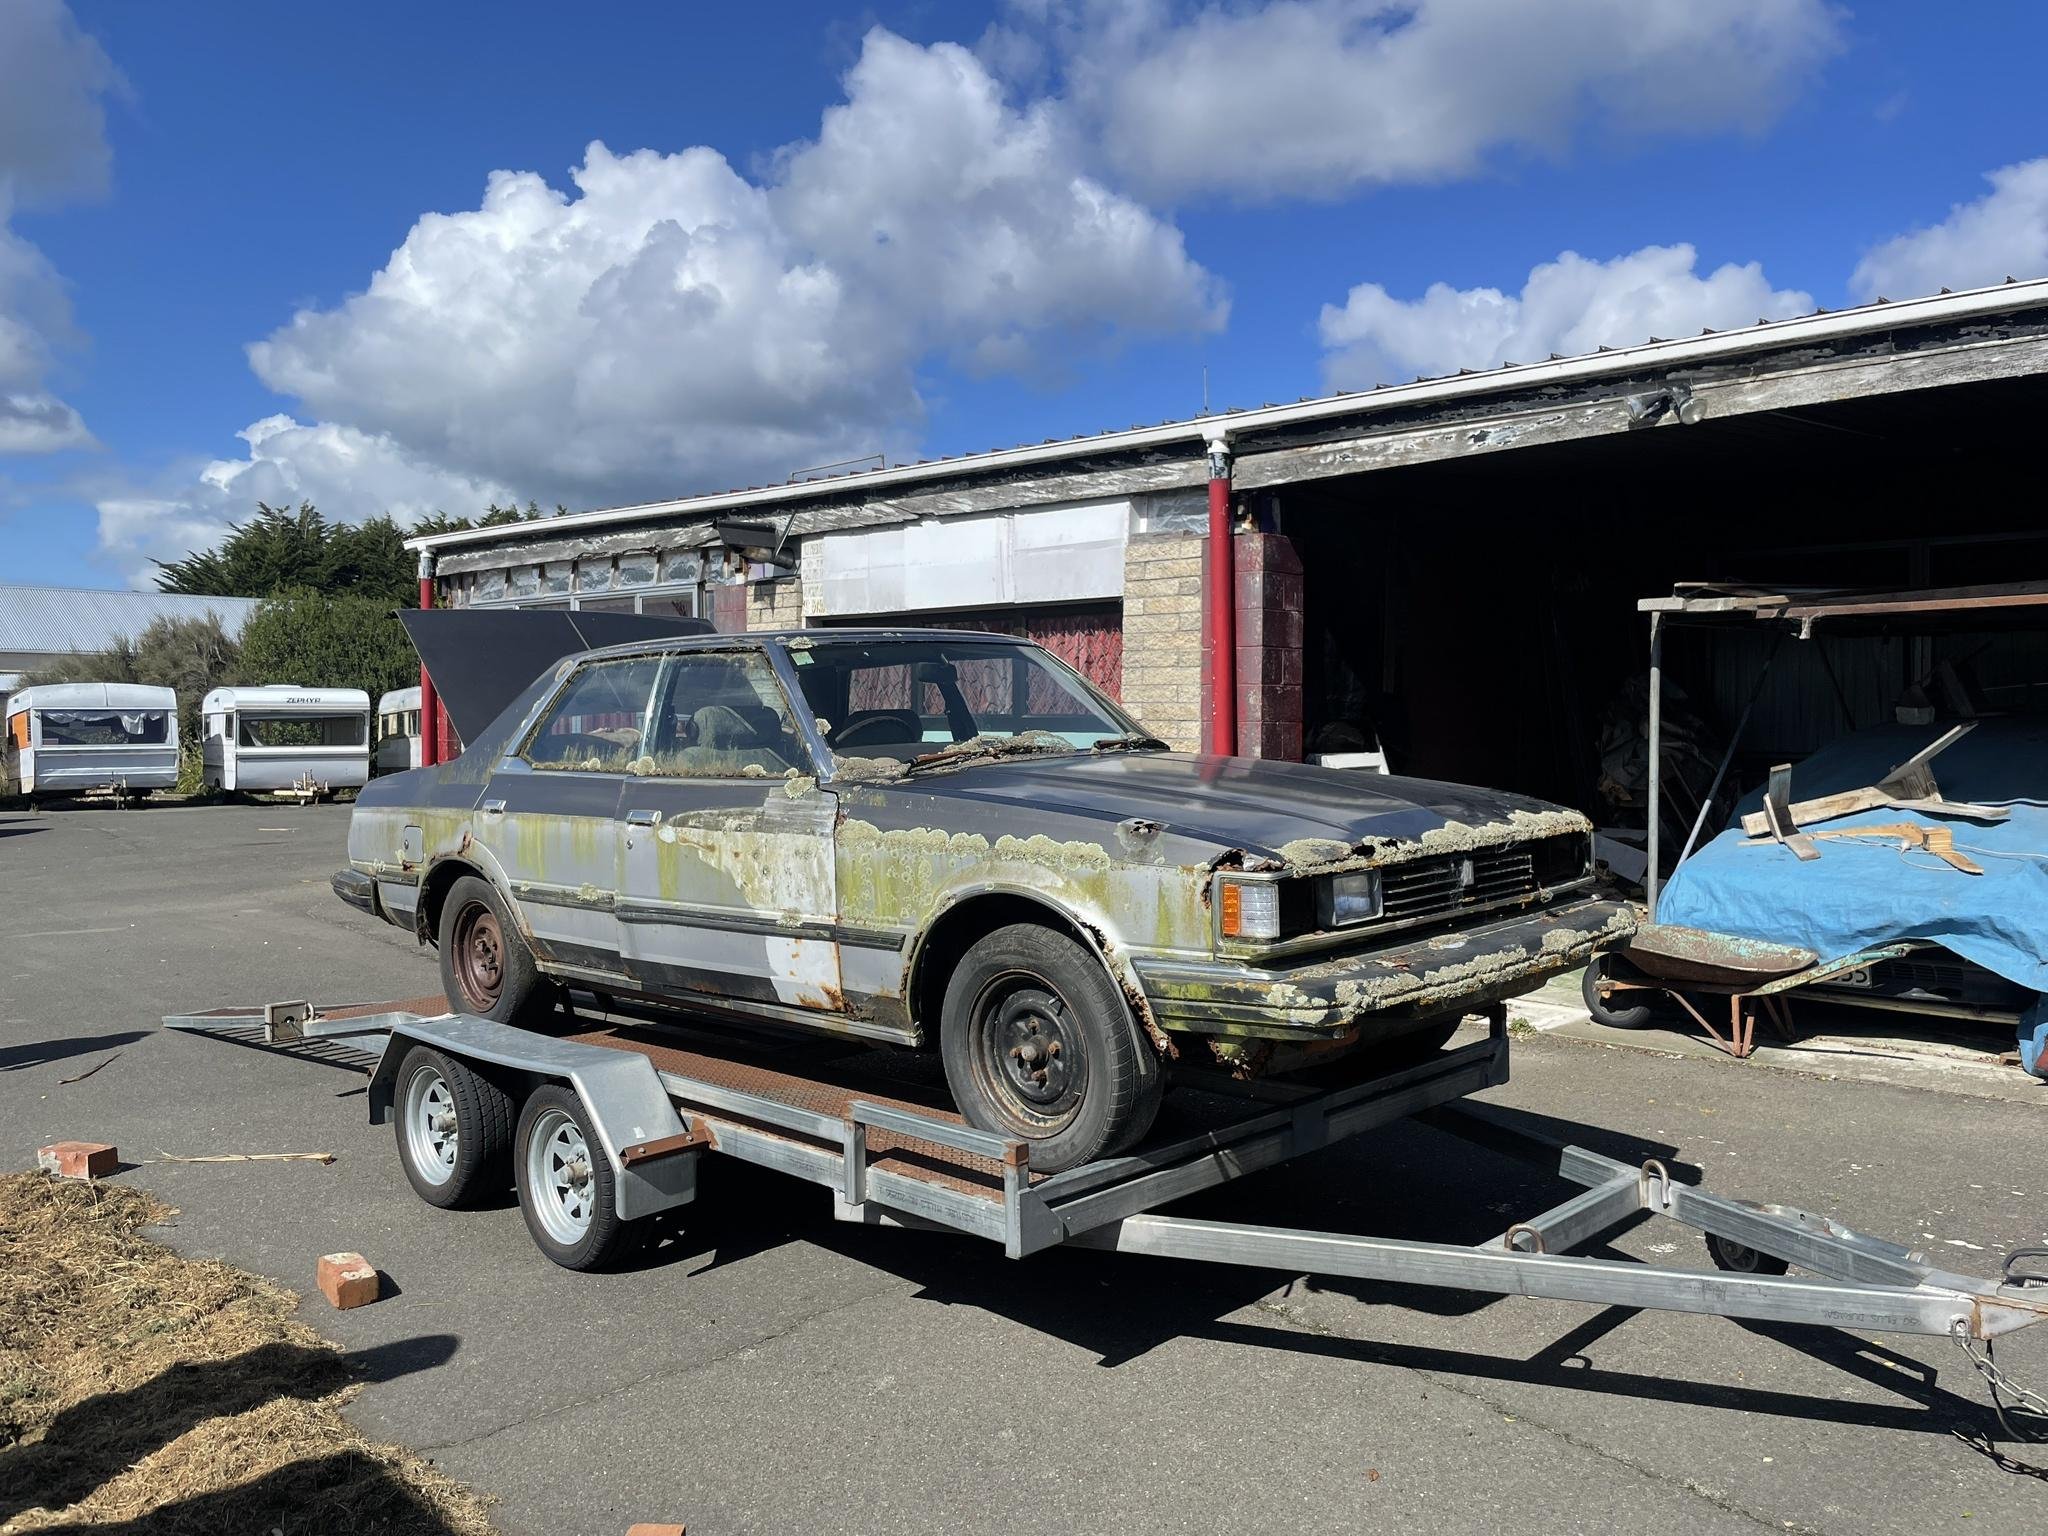
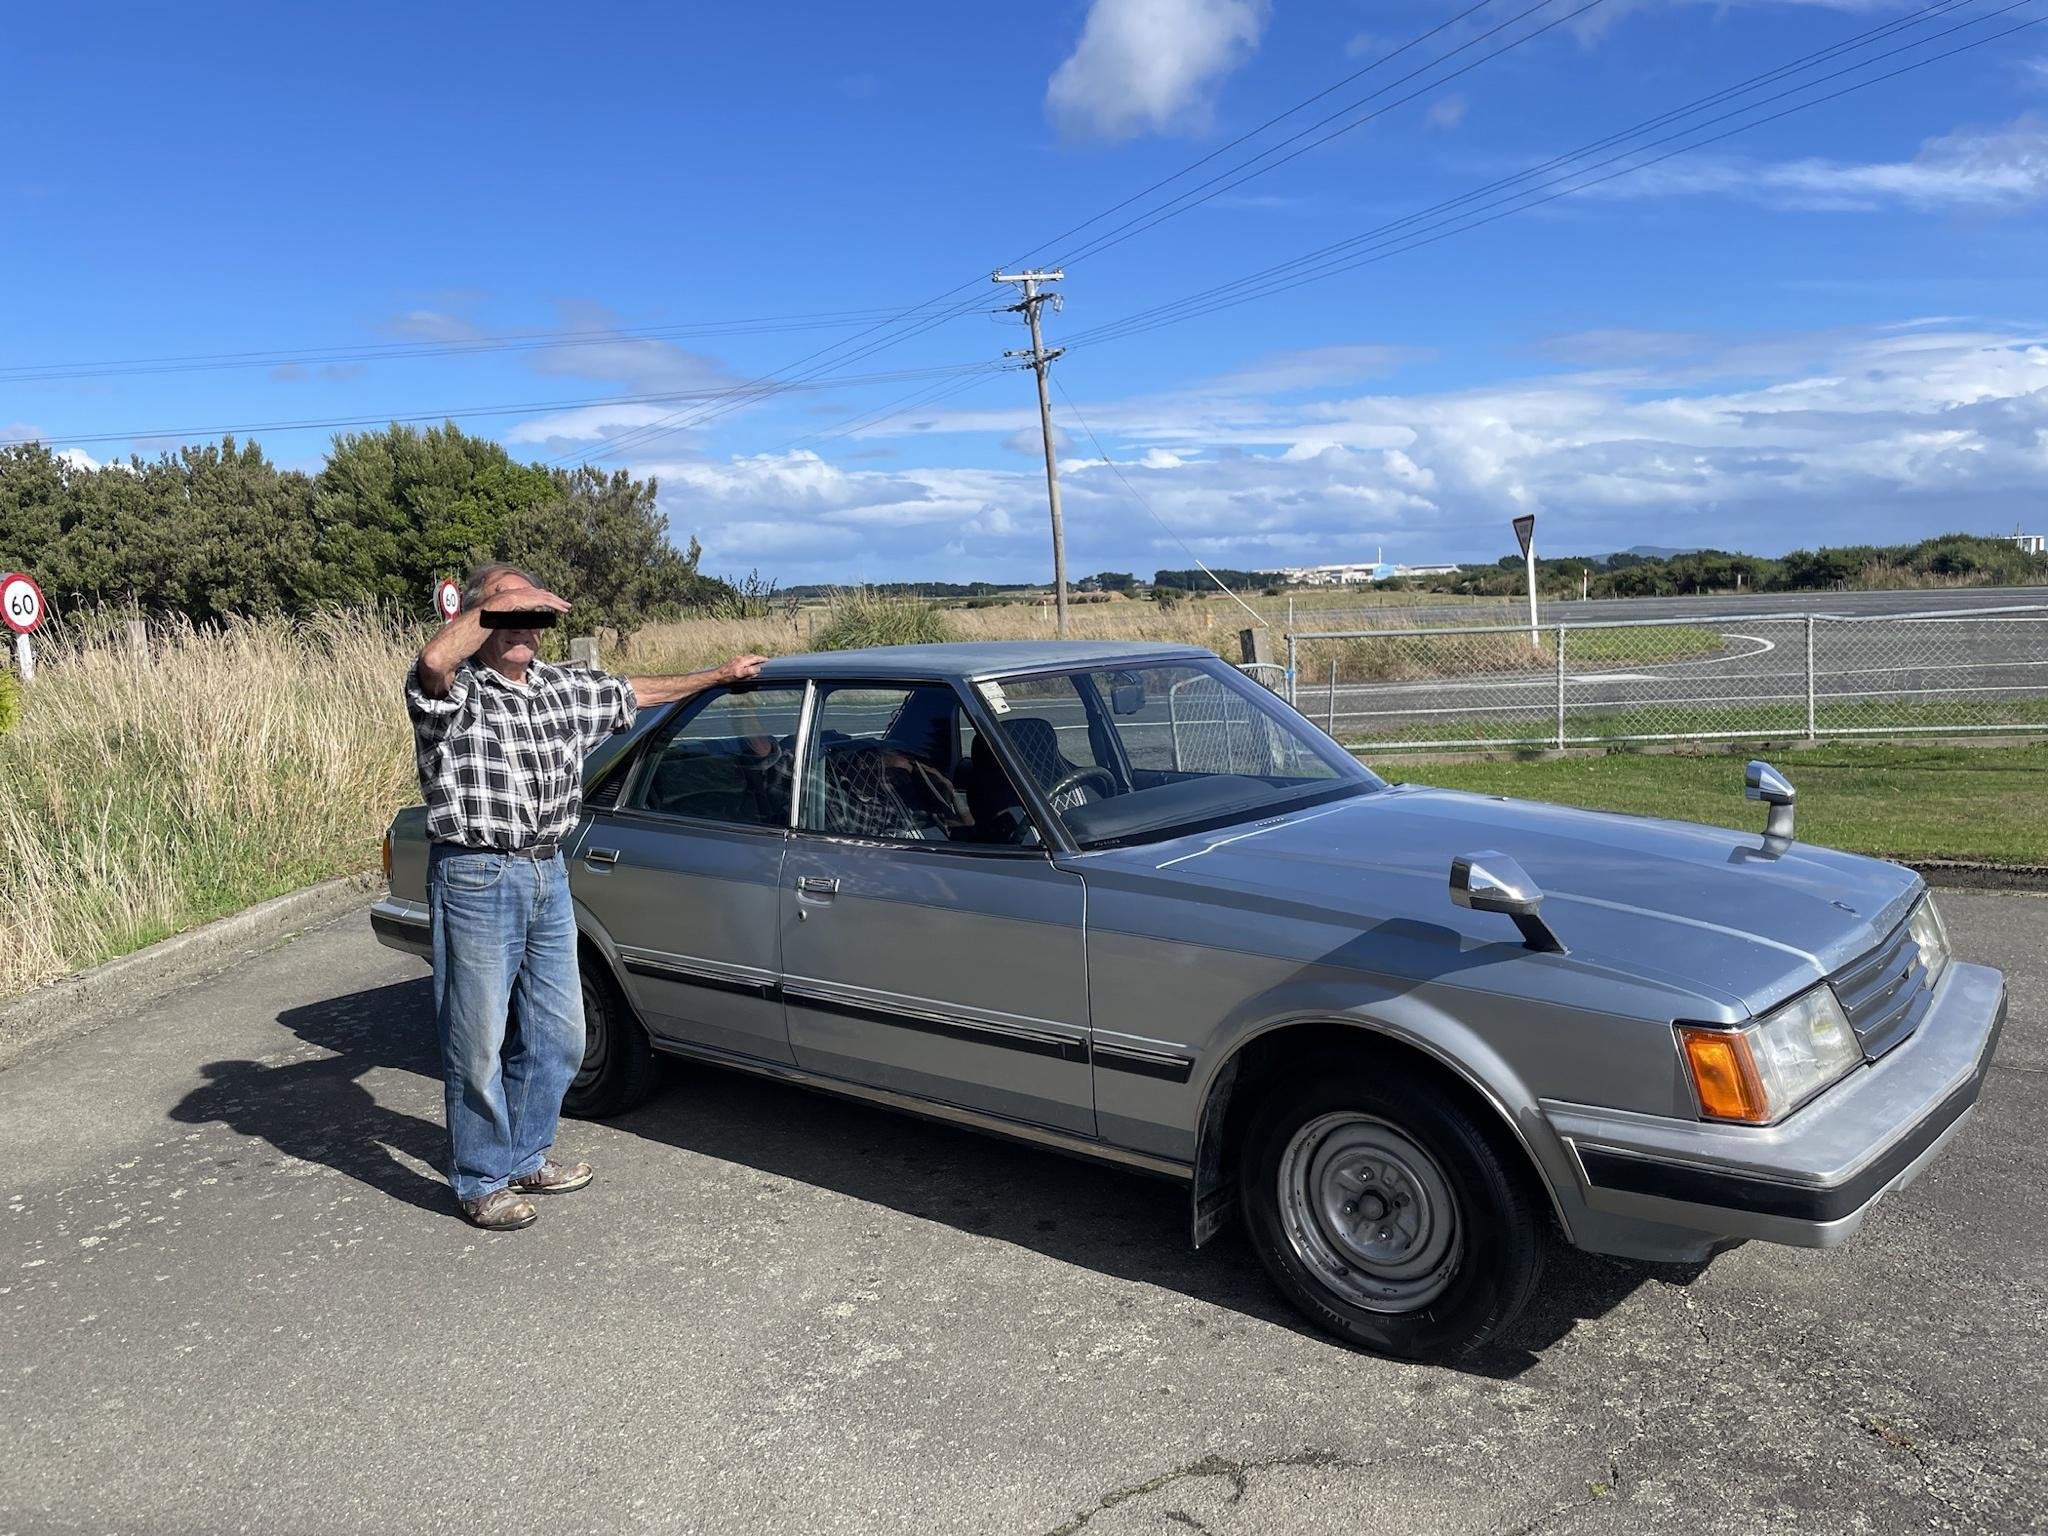
Its been a long time coming, i've been wanting to get back into the X chassis game for a few years but finding a nice spec car these days is super difficult. i decided my only otion was to try and hunt down some of the ones hidden away in the corners of nz with owners that don't know what they have. 2 years ago on a motorbike trip around the south island i was told of a gx51 in Invercargill that was sitting at a workshop, so i stopped by and there it was, door rusted off, fist size rust holes in panels, weirdly rego on hold for the last 20 years, i decided not to pursue this and still no sign of this blue chaser i had heard of. I had seen and been sent photos of a blue and silver gx61 chaser and a friend had met the guy at a swap meet 6 or so years ago but at the time he wanted "too much" by todays standards it would have been a steal. funnily enough, if you google search "GX61 Chaser" this exact car pops up on the Wikipedia page as the main photo, unsure who actually changed it to this car. so i had a rego number and knew he lived in southland somewhere, i started investigating managed to pull some strings and got a name, good start. I went onto the white pages and started cold calling everyone with the same last name with not much response, until i was met with an older lady on the other end of the phone, i had the name of her father that had passed away 20 odd years ago (turns out this car was still registered in his name), She mentioned her brother looks after it but he is very hard to get ahold of, she gave me his phone number and just hold me to keep calling until he picks up as he is useless at answering the phone, after a day or so of calling each hour he picked up and after a bit of an awkward conversion he started to come around and was interested in selling, he said he had 2 other cars that i have to take with it also. Turns out he also owns the gx51 i went and found years prior to this. He sent some photos through, we talked numbers and managed to convince some mates it will be a great way to spend a weekend driving to Invercargill with car trailers to pick up a bunch of rusty toyotas. when i arrived i wasn't disappointed, the car is incredibly tidy for something that has 340,000k's on the clock and has been used to tow trailers around most of its life. one of the parts cars the rear end had rusted completely off, we salvaged any good parts and scrapped the rest and dragged the "good" parts car home Bruce the owner for the last 30 years or so kept it garaged, fish oiled it everywhere and kept it in pretty good condition overall, i didn't really let him know my true intentions with the car, he had a garage full of 20-30 perfectly restored american cars and some in the process. Discussion -
4 points
-
I split this up because I couldn't fit all the photos in one post. I also thought I'd get some weld-on coilovers or the front struts. Through pure random guessing, the first strut I looked at was for an AE86, I found out the od of the AE86 strut is 51mm. I measured the od of the Triumph strut with a micrometer and got 50.85mm. So the weld-on coilovers should fit my strut tubes. So I asked the supplier if they could get the id of the weld-on bit and the length from the top of the mounting plate to the bottom of the weld on bit when the body is adjusted as short as possible. "I need to to be no longer than 460mm". They emailed the supplier, BC in Taiwan I guess. The id is 51.1mm, so that's all good. And the shortest length was 459mm. Not stocked, order from Taiwan. But something must have been lost in the translation. The shortest length was 480. There's no way to make it any shorter. Where it welds to the original strut tube, the weld must be at least 10mm from the casting and at least one diameter length of the original strut tube must be up inside the weld-on bit. That's ~51mm, but with the damper screwed all the way into the weld-on bit, there's 55mm left for the original strut tube. I thought I could maybe turn the thread off the bottom of the damper, so it would fit down past the threaded section and into the original strut tube. But on inspection of the damper, that's not an option. Here it is with the original strut. Like this, it's actually 10mm shorter than the original strut at full droop, but on the car the original strut needs to be 30mm shorter to prevent the inner tie rod on the rack from binding. So it's 20mm too long. I thought I could probably use the same solution for the front as the rear. I'll have to modify the top plate of the strut tower to allow for the camber adjustment to clear anyway. So I chucked the bonnet back on to see how much room there is. 40mm is how much higher I could go before those nuts hit the bonnet. Will that be enough?
3 points
-
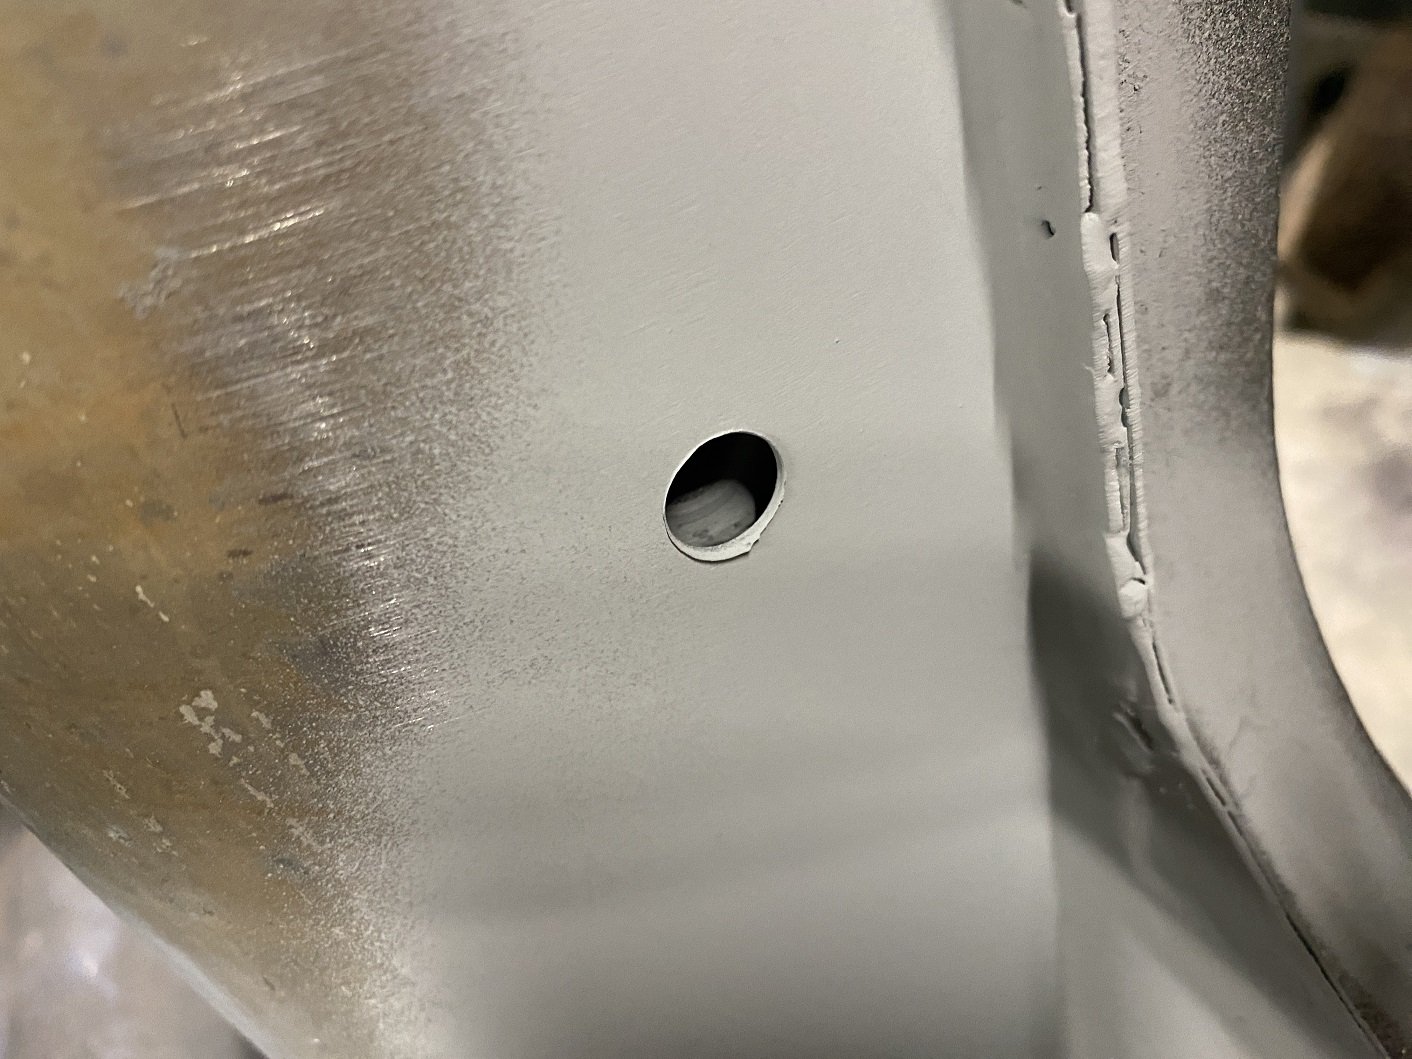
And done the other side. Also stripped off some more glue and tar seam sealer off the seat panel with turps and the brass wirewheel. Buuuuuut, when I drilled the hole from the inside using the boss in the seatbelt bracket to align the drill..... I discovered that the boss is not flush with the panel like the other side. There's a 7mm gap Le sigh. Well, I'm not cutting all those welds off, I don't think the panel will survive the operation. I think I'll try slide a washer of the appropriate thickness into the gap and drill a couple small holes in the panel so I can spot the washer to it. The bolt just needs to be a little longer.
3 points
-
Cutting up a classic...full send I cut the wings off it both sides. 100% better already. Huge win for zero money.
2 points
-
There's still controversy in Laverda world. What does it say about head stud torques ? Cam blocks have head studs going through them. One side of the alloy block has a 9mm stud - about 30ft/lb - the other side has an 8mm - about 18ft/lb. It's very easy to break a cam block if you fuck it up. Some editions I hear say 30 or so ft/lb both sides.....the 9's are through studs to the top case. The 8's are short head to barrel studs.2 points
-
Do you know roughly the thickness of gasket you will be using? If so just shim the head off the block by that thickness using thin material in a few places and then do your checks.2 points
-
You're pretty limited as it's only certain inspection places that can do it, not just any old workshop. I used VTNZ, and even then not all branches do it. My best advice is to go over the vehicle with a fine toothed comb and fix anything that could be an issue, now - especially anything rust or structure related, and not give the inspector anything to write down. That extra time now will pay dividends later when you don't need to get a panel beater report for rust or something.2 points
-
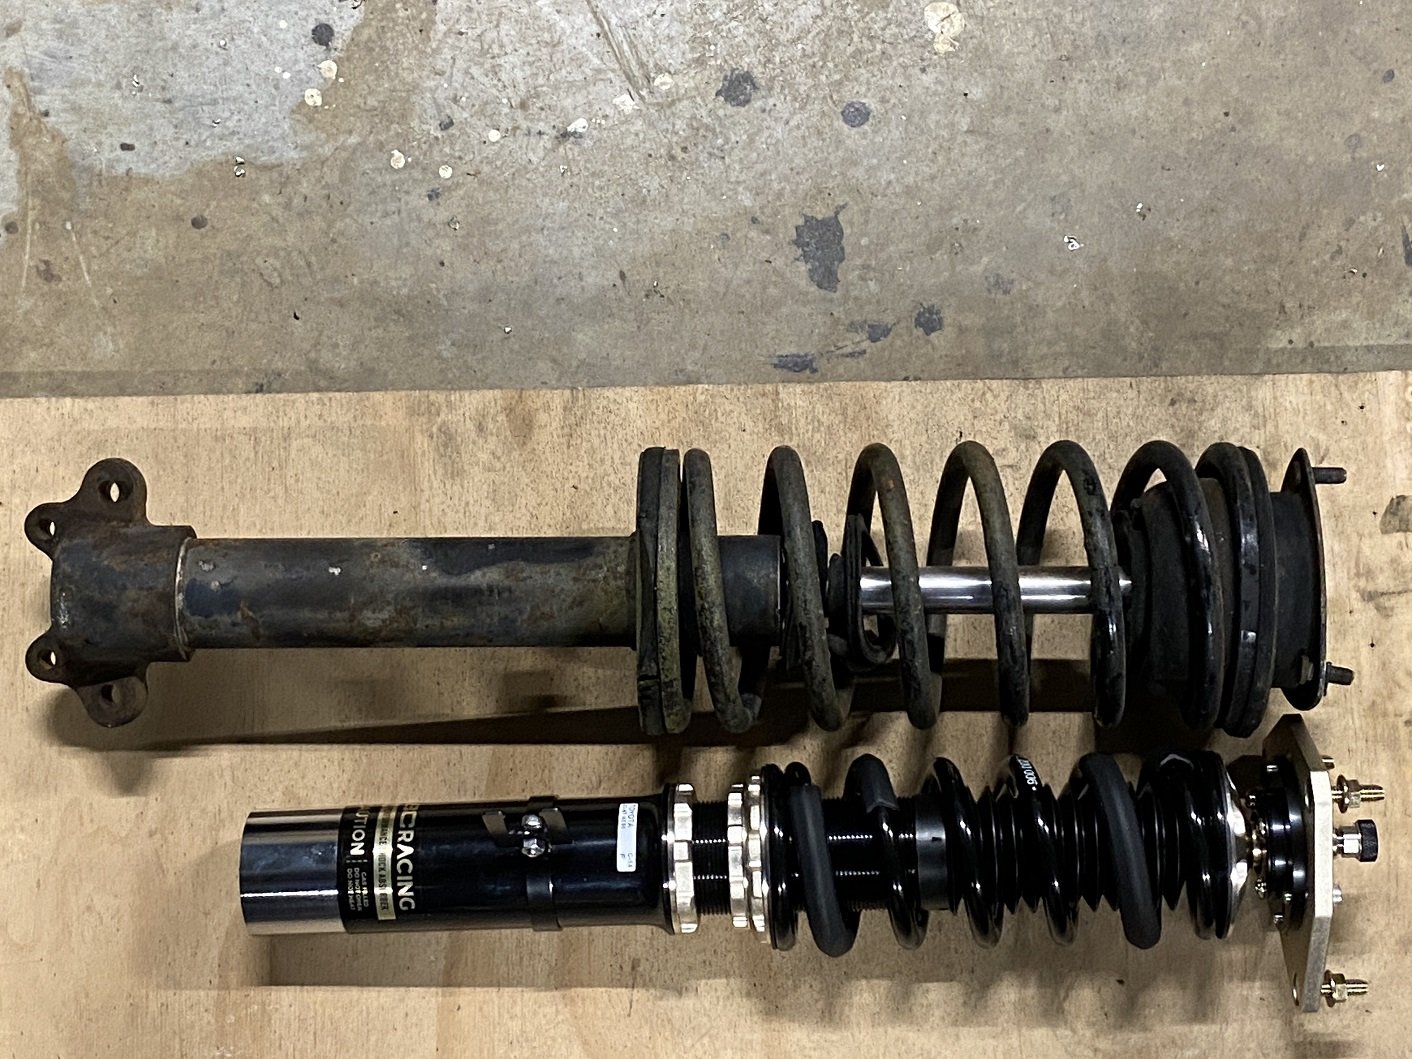
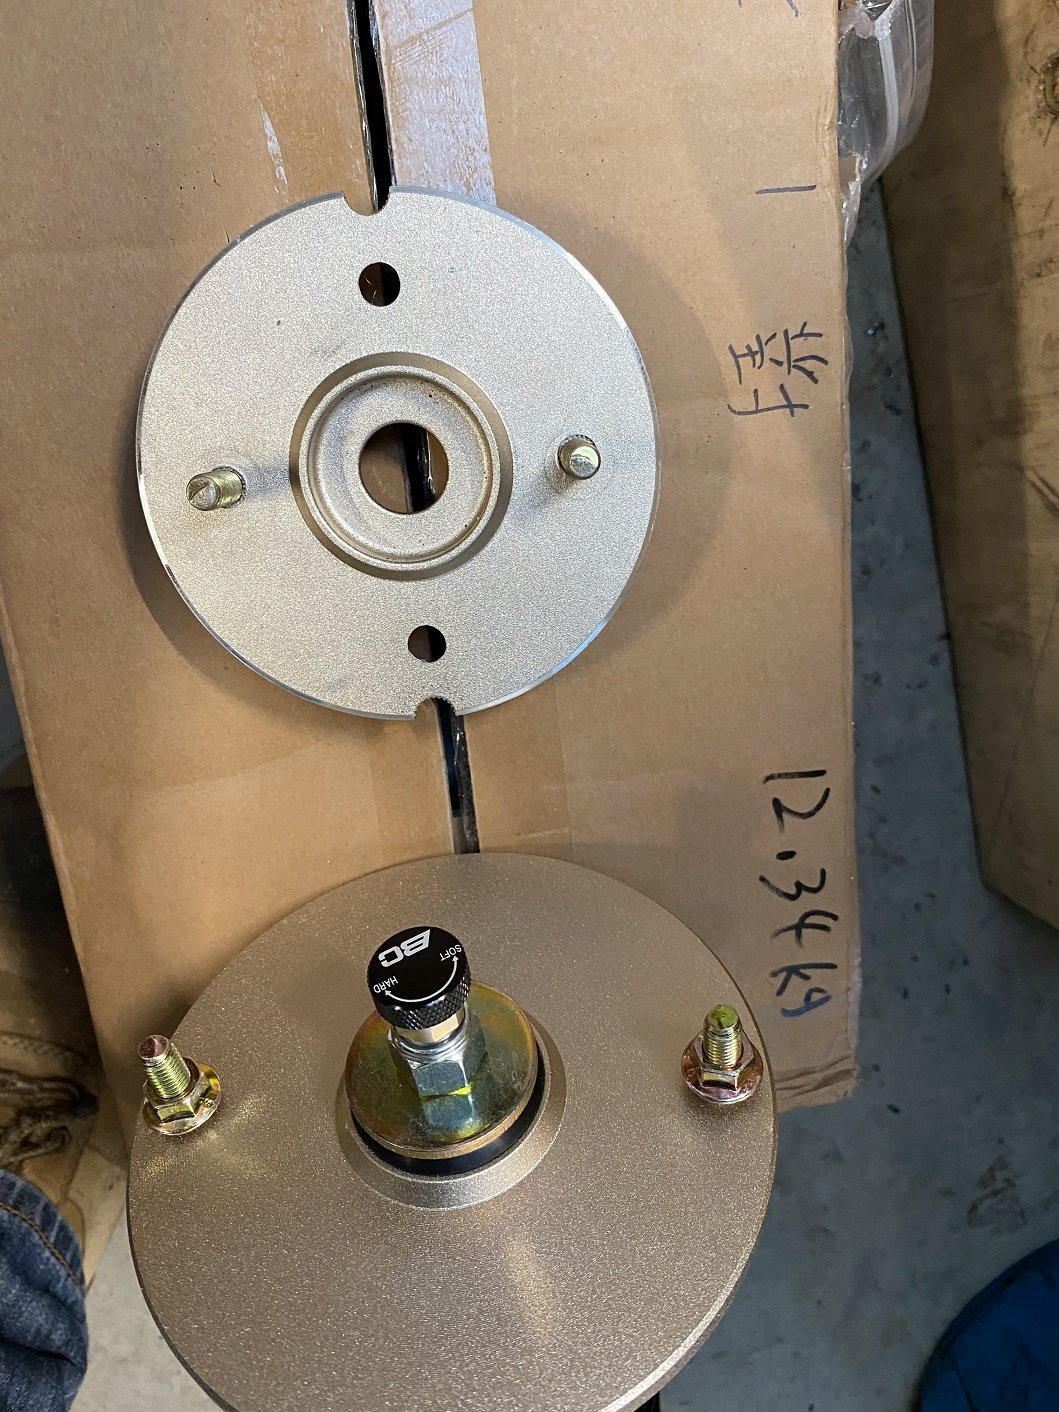
So I thought I'd look into getting two new coilovers for the rear because the Teins I mocked up with were old and knackerd. I went with BC racing because they would sell me only the rears and they were just barely affordable but still decent quality. The subframe is from an S14 Silvia, so I'm like "sell me S14 Silvia rear coilovers", assuming, these fit, so those will fit. Not stocked, order from Taiwan. "I'll put them in today. these will be the easy ones". They were a little longer than mine when the strut body was adjusted as short as it would go. "It'll be fine, a little more droop is not a problem". Oh, damn, maybe the teins were from an S13.... The Teins are 79mm pcd and the BC are 116mm. Those big top plates also don't fit in the strut towers I made. "No worries, I'll just make new stud holes and turn down the plate". The extra holes are because I didn't notice my 11mm drill was bent and because I had to clamped down in the mill, it made a 12mm hole. Well, that problem's fixed. Now to install the coilover. This is where I plan for ride height to be. The wheel center is actually the same height as the top of the sill, but the photo angle..... Buuuuuuut, to get to that ride height, I had to wind the spring platform right down...... and the coilover is basically out of travel and on its bumpstop. Fuuuuuuuuuuuuuuuuuuuuuuuu. So I was thinking that I'd have to look into different BC dampers that are shorter. The damper body is LONG, more than twice the travel. How much was this mistake going to cost me??? After working on the mini instead, so I could feel I had achieved something on the weekend. I realised.... my strut towers are totally custom fabricated, I could just make them taller! There's at least 80mm there that I can raise it and still get to the adjuster knob. The idea I had so I don't lose the reference of the strut tower top plate is to bolt spacers to the existing bolt holes, then build a new top plate off the top of the spacers as well as the top portion of the strut tower that would slide over the top and overlap the existing strut tower top. I'd then use tek screws or something to attach the new top to the old top. Then I can cut the old top off, refit the new top, using the tek screws for alignment, then weld it inside and out. Wheew! I supposed I should work out if 80mm is going to be enough.....
2 points
-
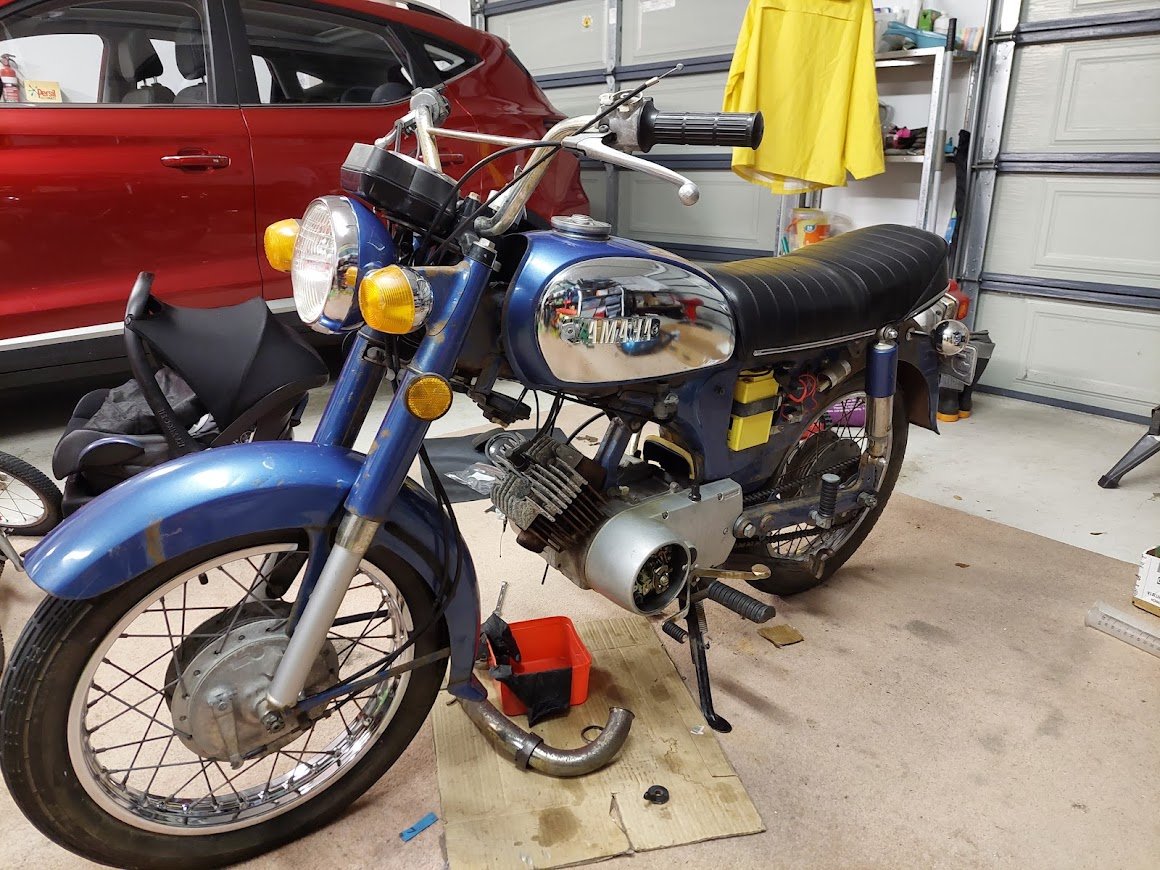
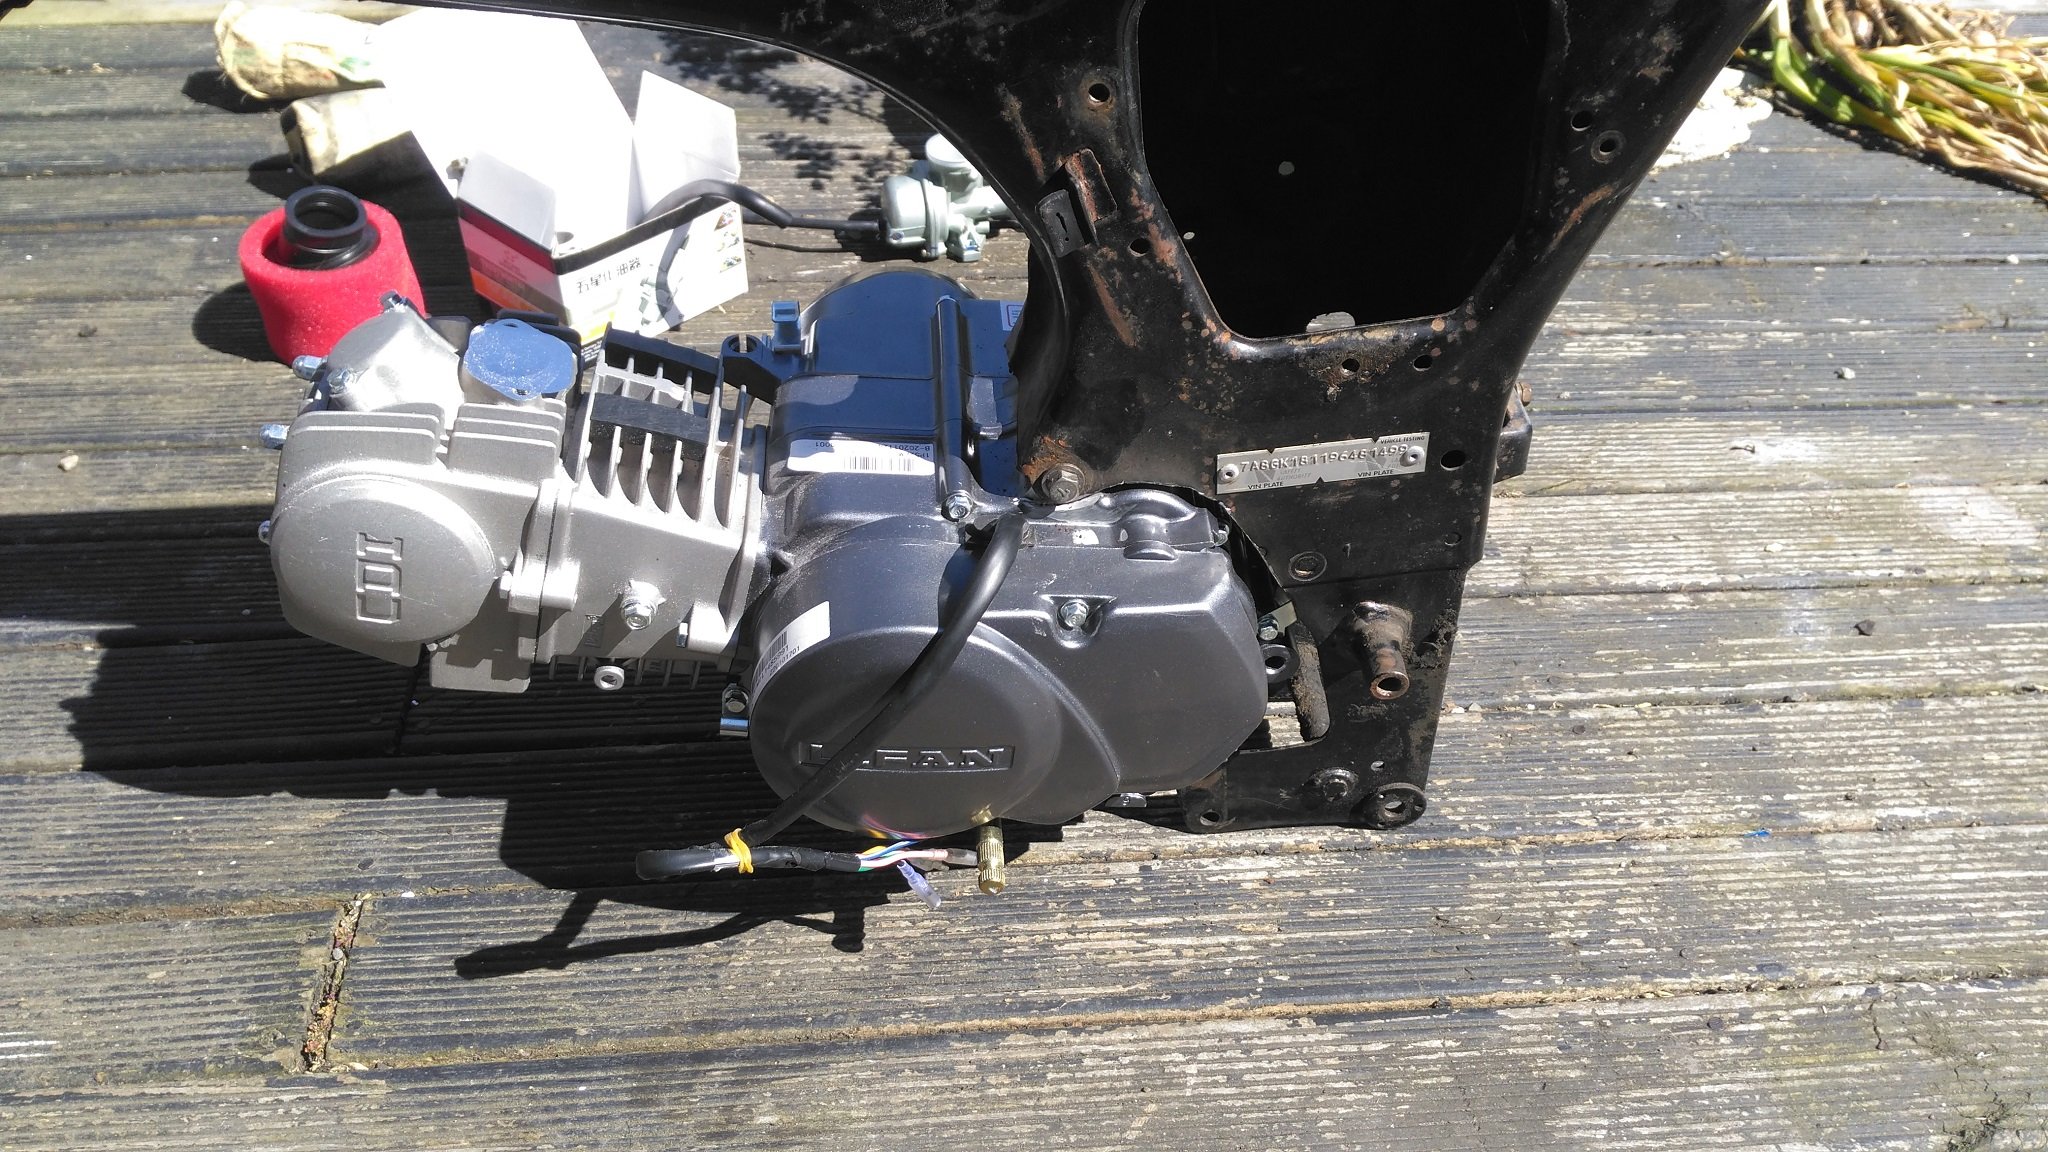
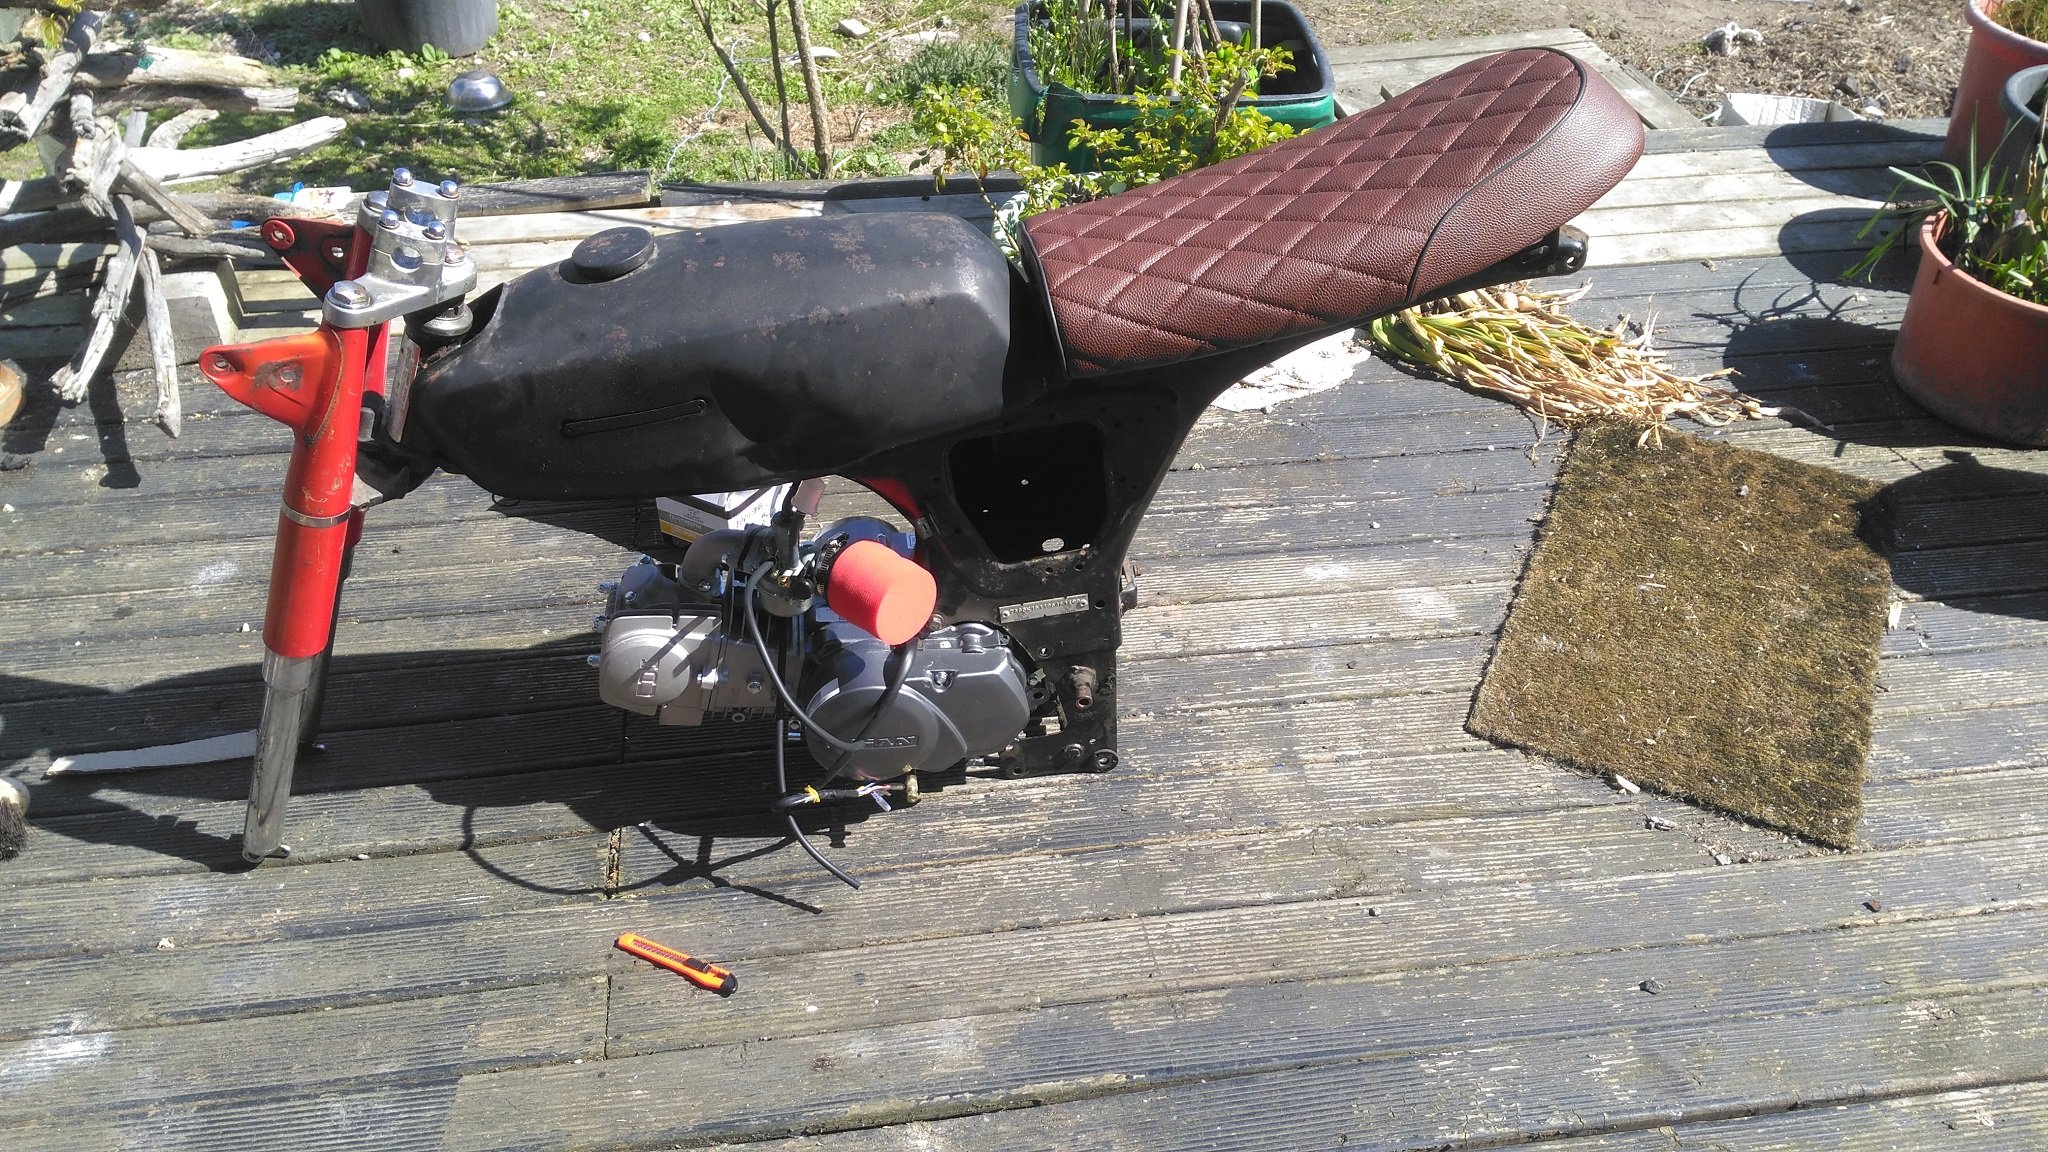
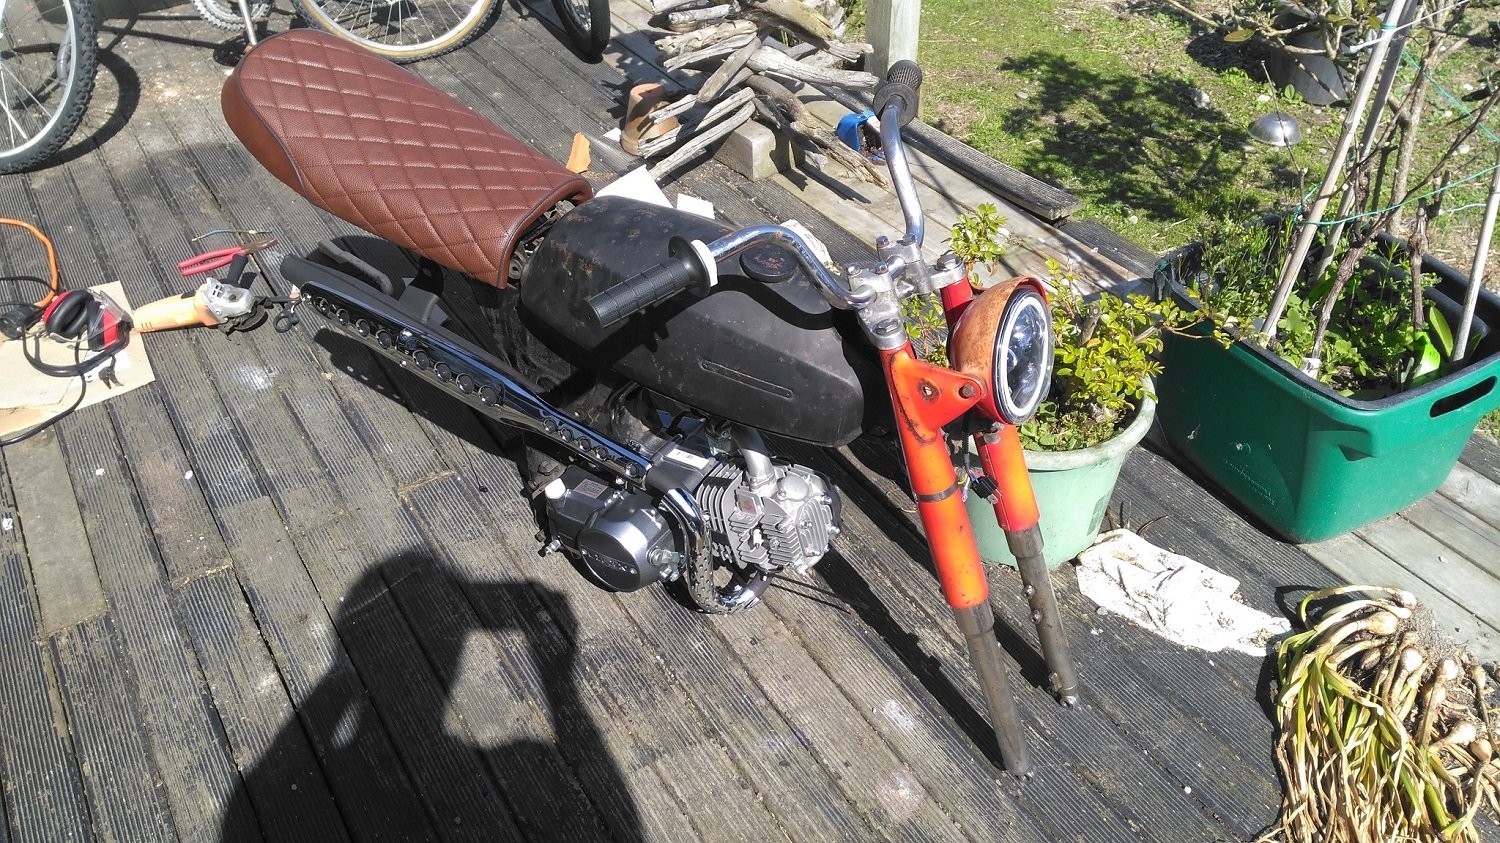
So I’ve been pottering away on this since rolling it into the garage. I'm rubbish at taking picture while working on stuff so this is mostly words sorry (not sorry). Locksmith took aaaages to cut a new key so I couldn’t do much on the electrics/starting/running side while I was waiting for that to happen. In the meantime I pulled the carb off, stripped and cleaned it and reassembled. There was a bunch of varnish and crud in the bowl so gave that a good scrub out. Gasket still looked good so reused it. The main jet currently in it is a #190 which is 2 sizes smaller than the factory spec #210. I think I’ll get some extra jets to bring it back to stock so I can tune from there rather than have it be (potentially) too lean. New AGM battery arrived. Connected up and slotted in nicely. All of the control cables were either extremely stiff or completely seized up so I squirted some lube down them and worked back and forth until they were smooth(er). If these go bad again I'll look to replace. Sprayed/brushed some phosphoric acid rust converter gel stuff on the header pipe and muffler which actually worked pretty well. The chrome is quite pitted but not too worried about that at this stage. Finally got the ignition and new key back so it was time to fire it up. Connected everything and put some premix in a syringe connected to the carb (fuel tank still locked shut) and she fired up 3rd kick! Was a bit rough at first but settled down to idle pretty nicely. Stoked as, so good to hear it ring-a-dinging away. All lights and signals work. Charging system is putting out 13.5v at idle which is a little bit below the 14.0v @2000rpm spec but no worries? The 2T oil tank had a bit of rust inside and around the outside seams. I wire brushed and scotched of the loose stuff from the outside. The oil that was left in there had gone real gross and started to separate with some big globs of gross suspended. Sloshed some petrol around to try and dissolve it and it cleaned up ok. Still some crud on the mesh filter around the outlet so I got in there with a very long toothbrush and some more petrol and got it pretty clean. Poured in some evapo rust to deal to the rust spots and left it for a few days. Cleaned up really good, that stuff is magic. Also threw miscellaneous rusty fasteners and other gubbins in a jar with evaporust to clean them up. I cleaned up the autolube pump and had to add quite a lot of shim washers to get the idle stroke set correctly. Bled the air out from the supply hose and checked it was pumping oil through into the case. All good! Then I looked at the petrol tank again. The new ignition key didn’t fit in the tank lock (boo) so I had a go at making a tension wrench and lock pick from some old wiper blade spring steel but obviously I’m rubbish at lock picking as this didn’t work. Screwdriver time. Put one in the keyway and started turning it with a spanner and the whole cap twisted open :o. Turns out I’m also rubbish at checking things properly and the cap was unlocked the whole time but seized up just enough to not open easily by hand when I first checked. Good news though, it’s mint inside so quick rinse out and chucked it back on. The chrome side panels came up pretty well with some autosol and elbow grease. I will redo the white lettering on the Yamaha badges at some point too.
2 points
-
2 points
-
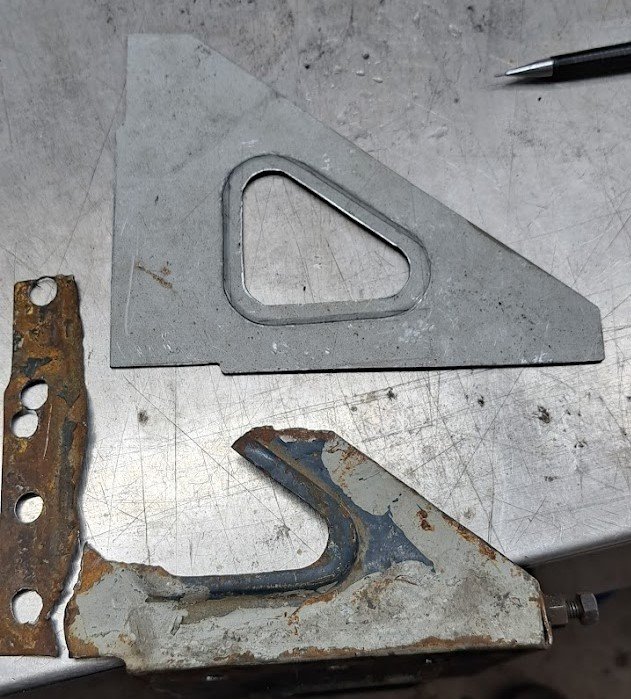
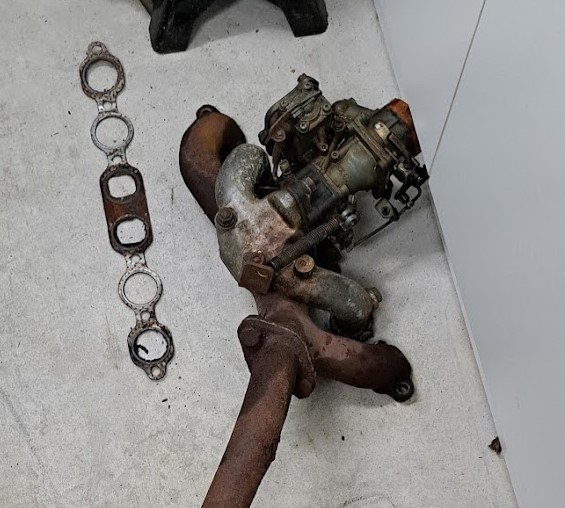
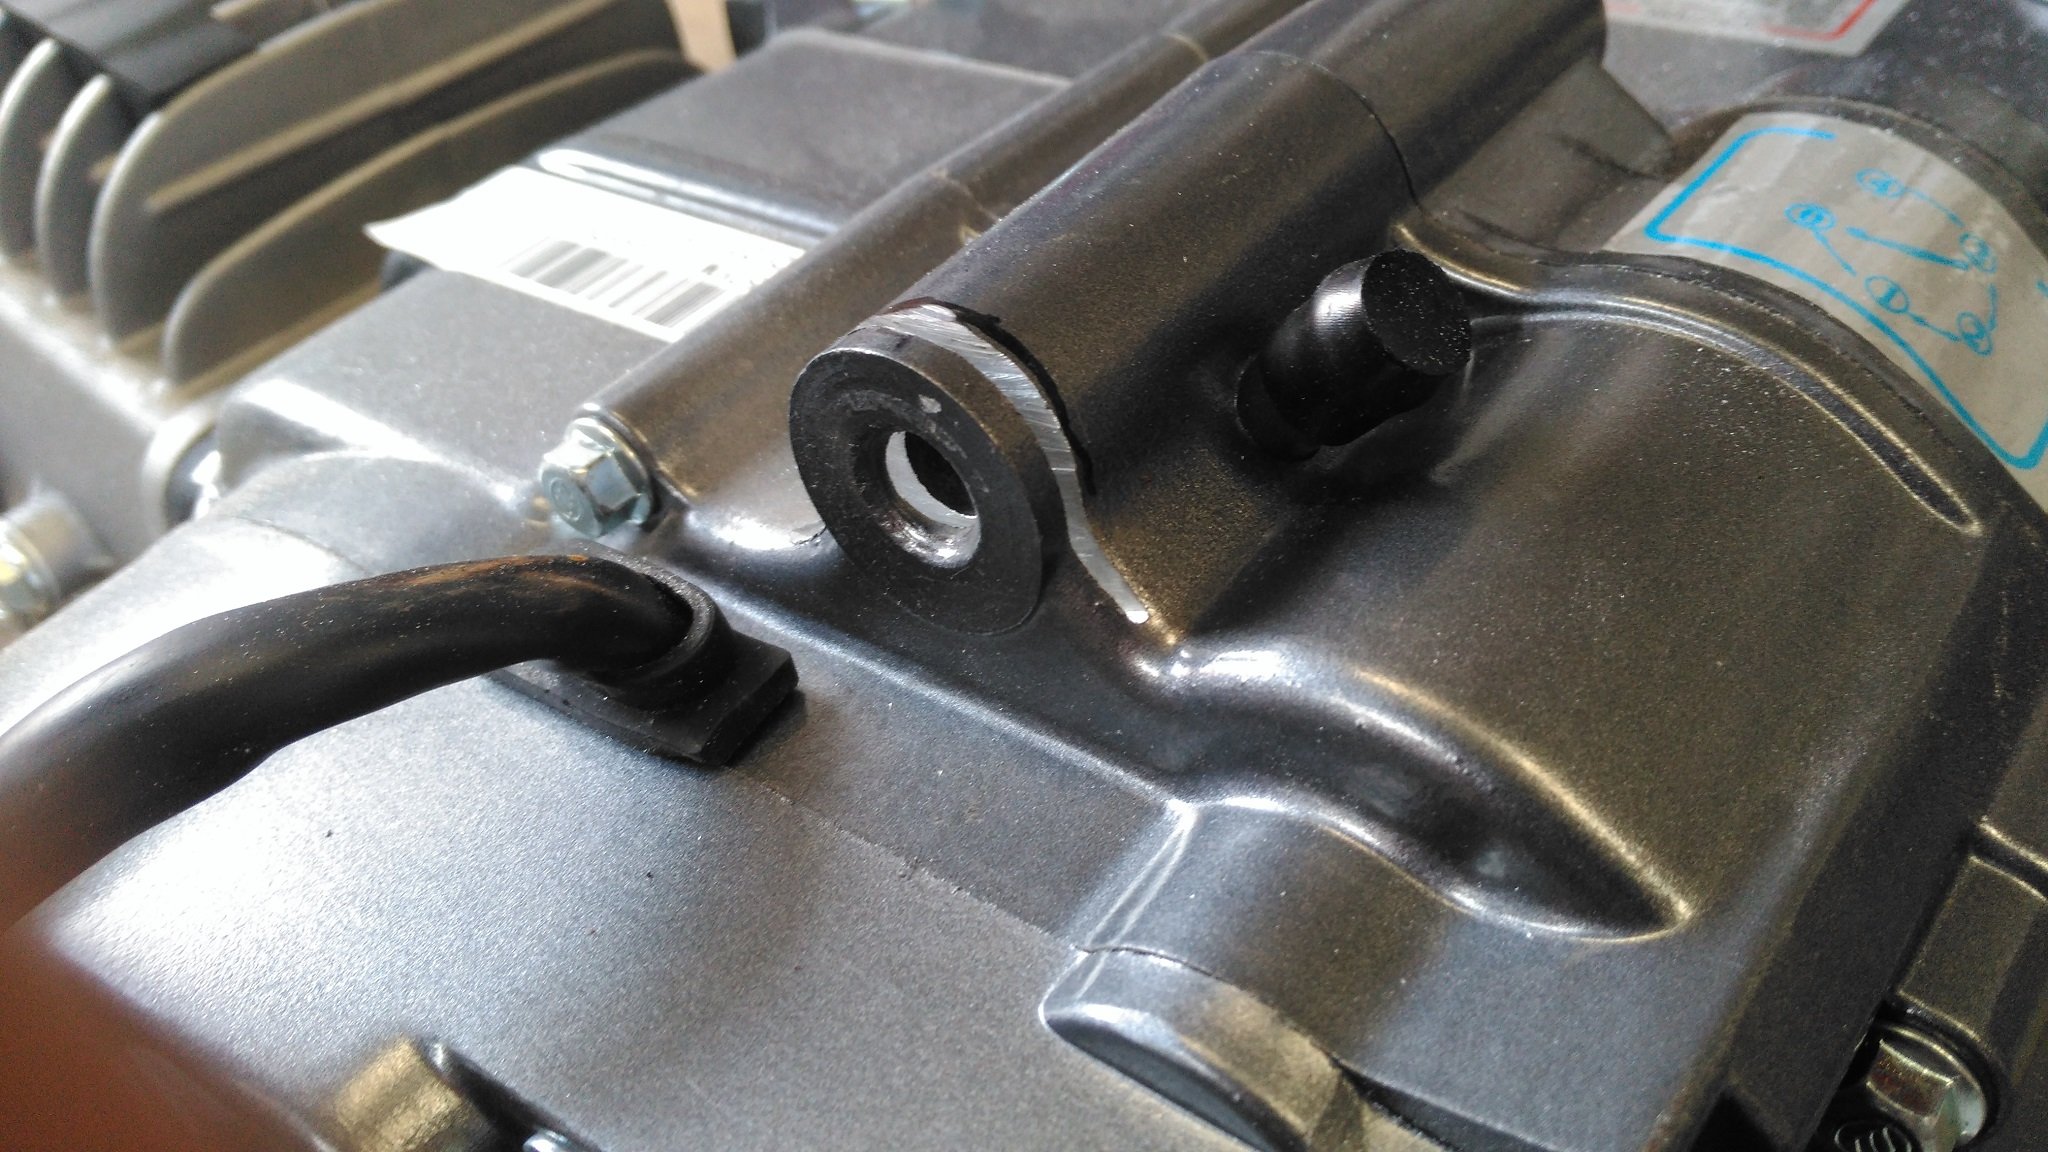
Whilst working on acquiring parts for the motor, i figured tidying up the engine bay is worth doing. Battery tray was mangled in the past to fit a std size battery So removed it Made a template from the remnants and made some new ends and glued it all back together Came out pretty good - i'll get some matched paint and colour it blue at some point Also cleaned up the exhaust/inlet manifolds and gave the carb its 1st bath in 50 years Waiting on a new pump diaphragm otherwise the carb was good condition.
2 points
-
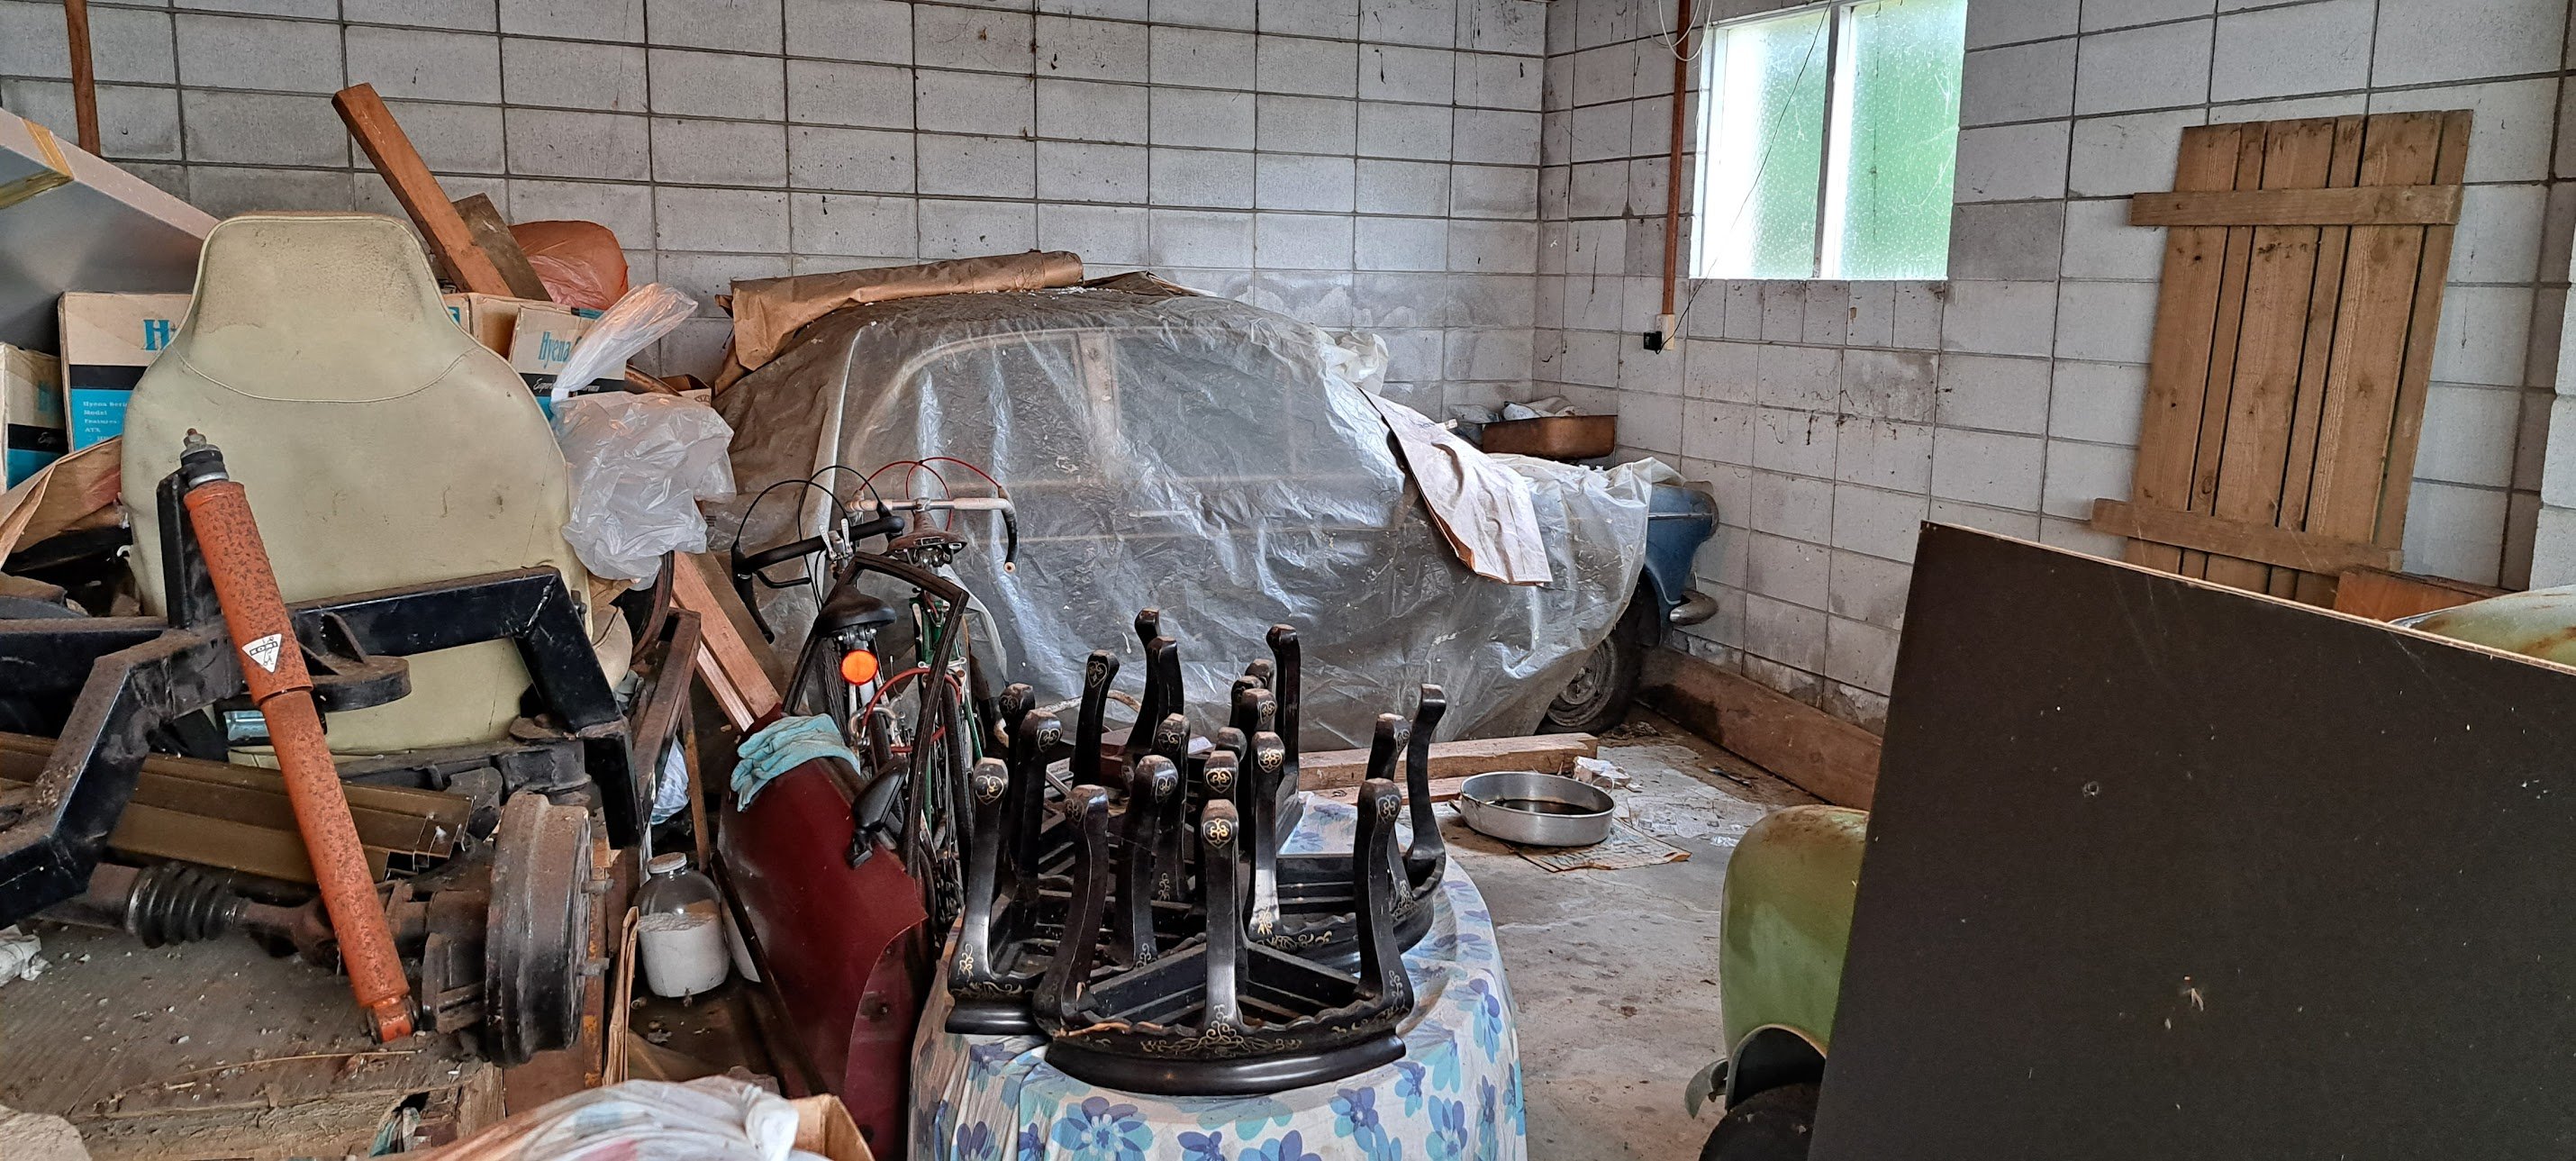
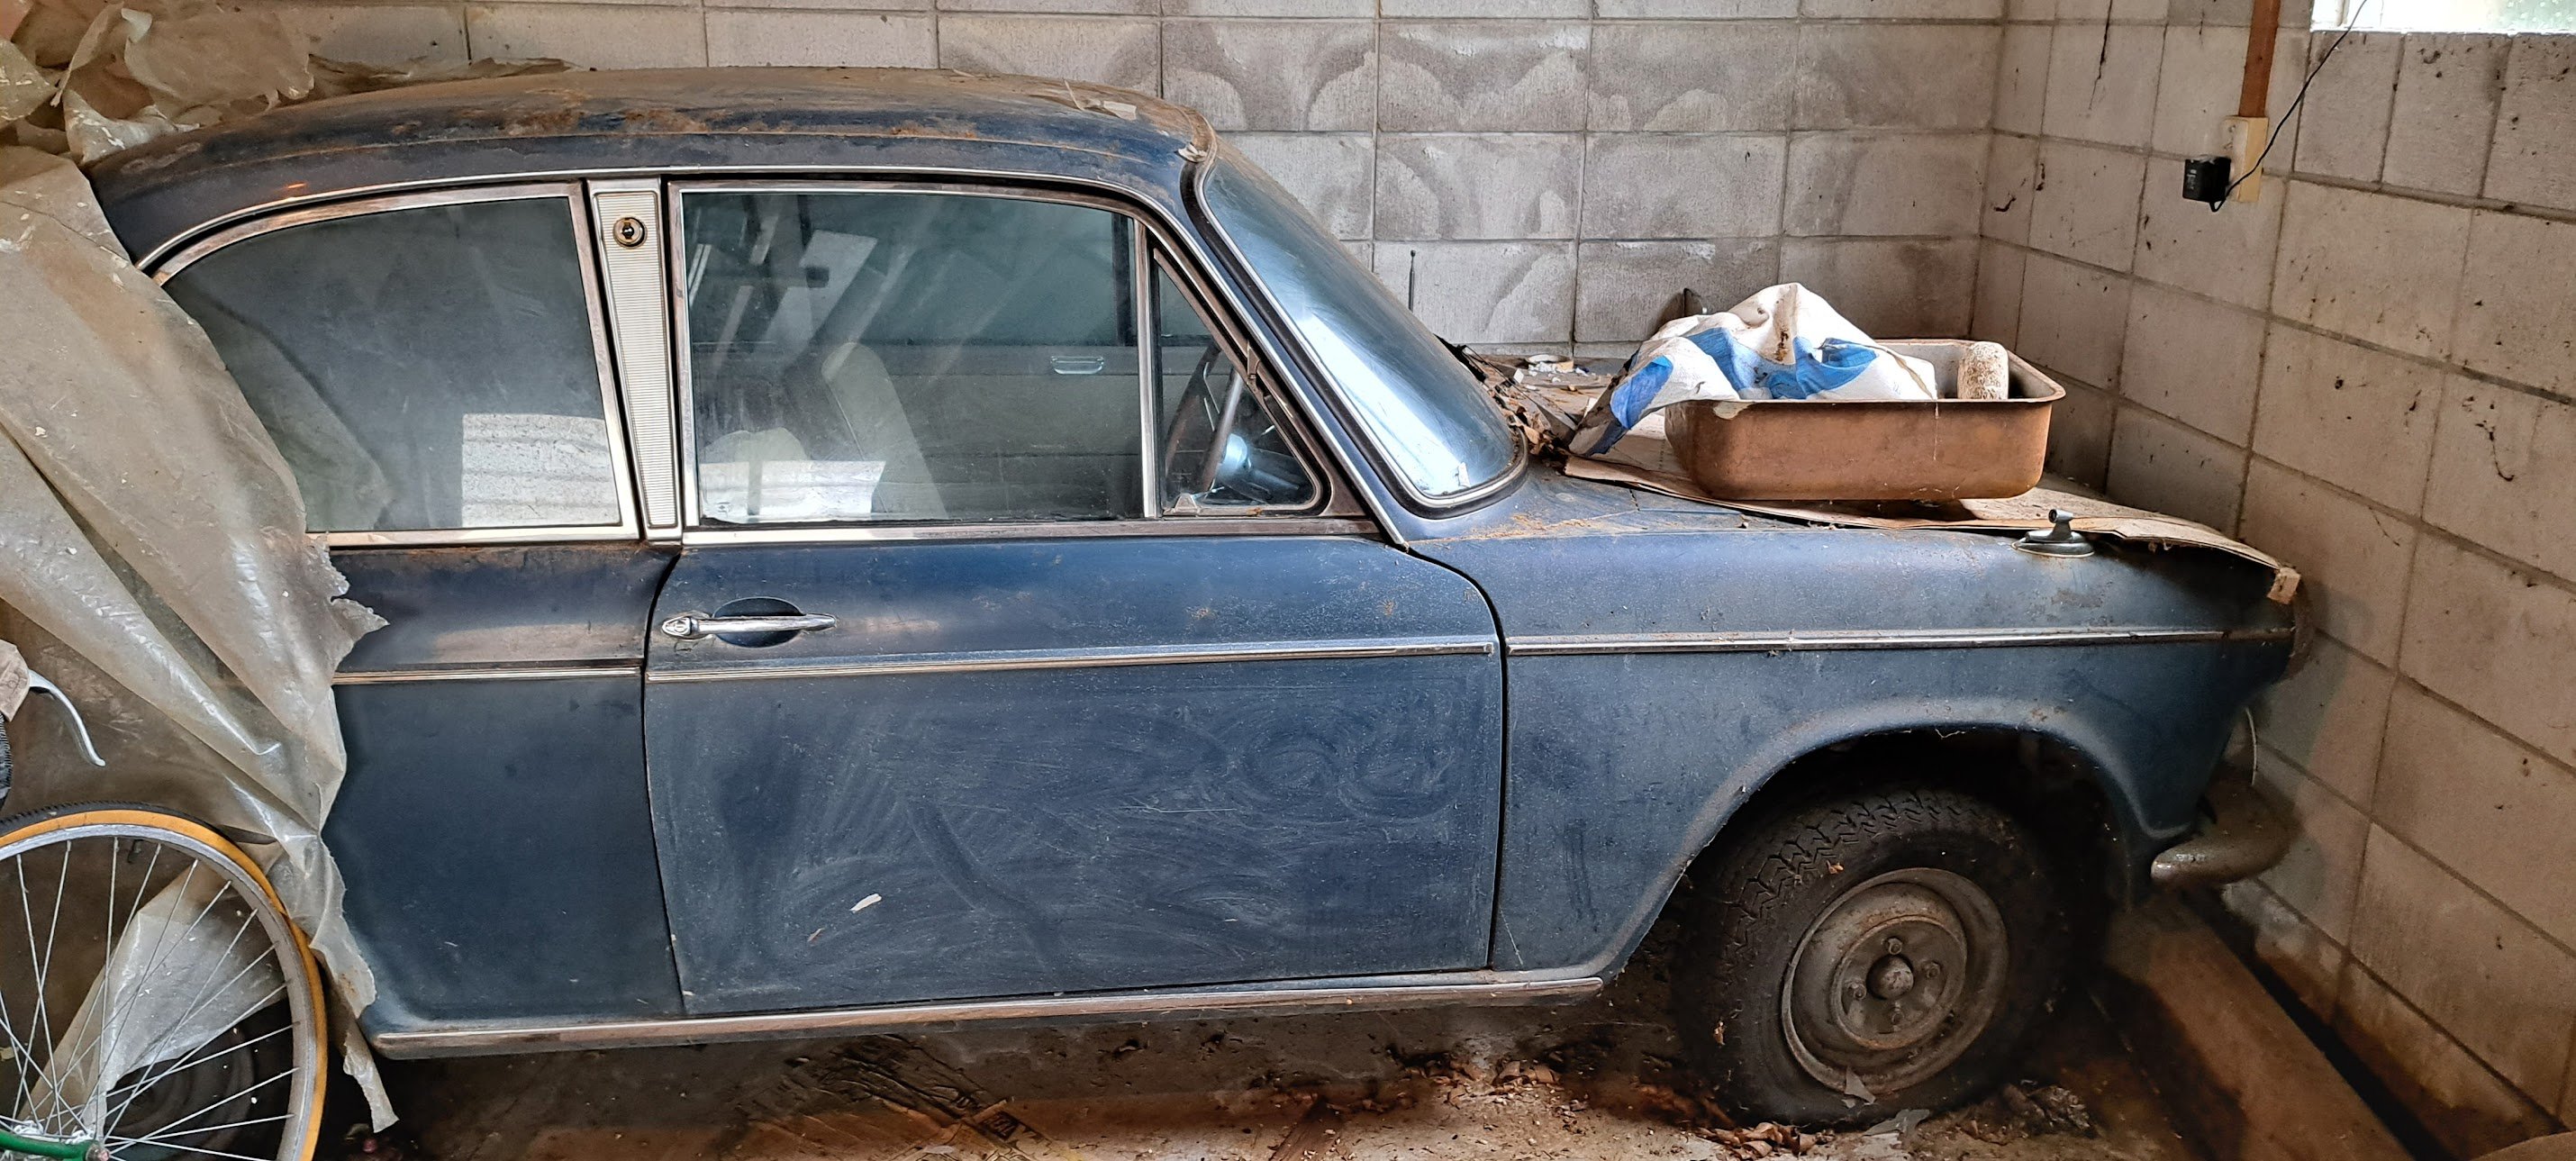
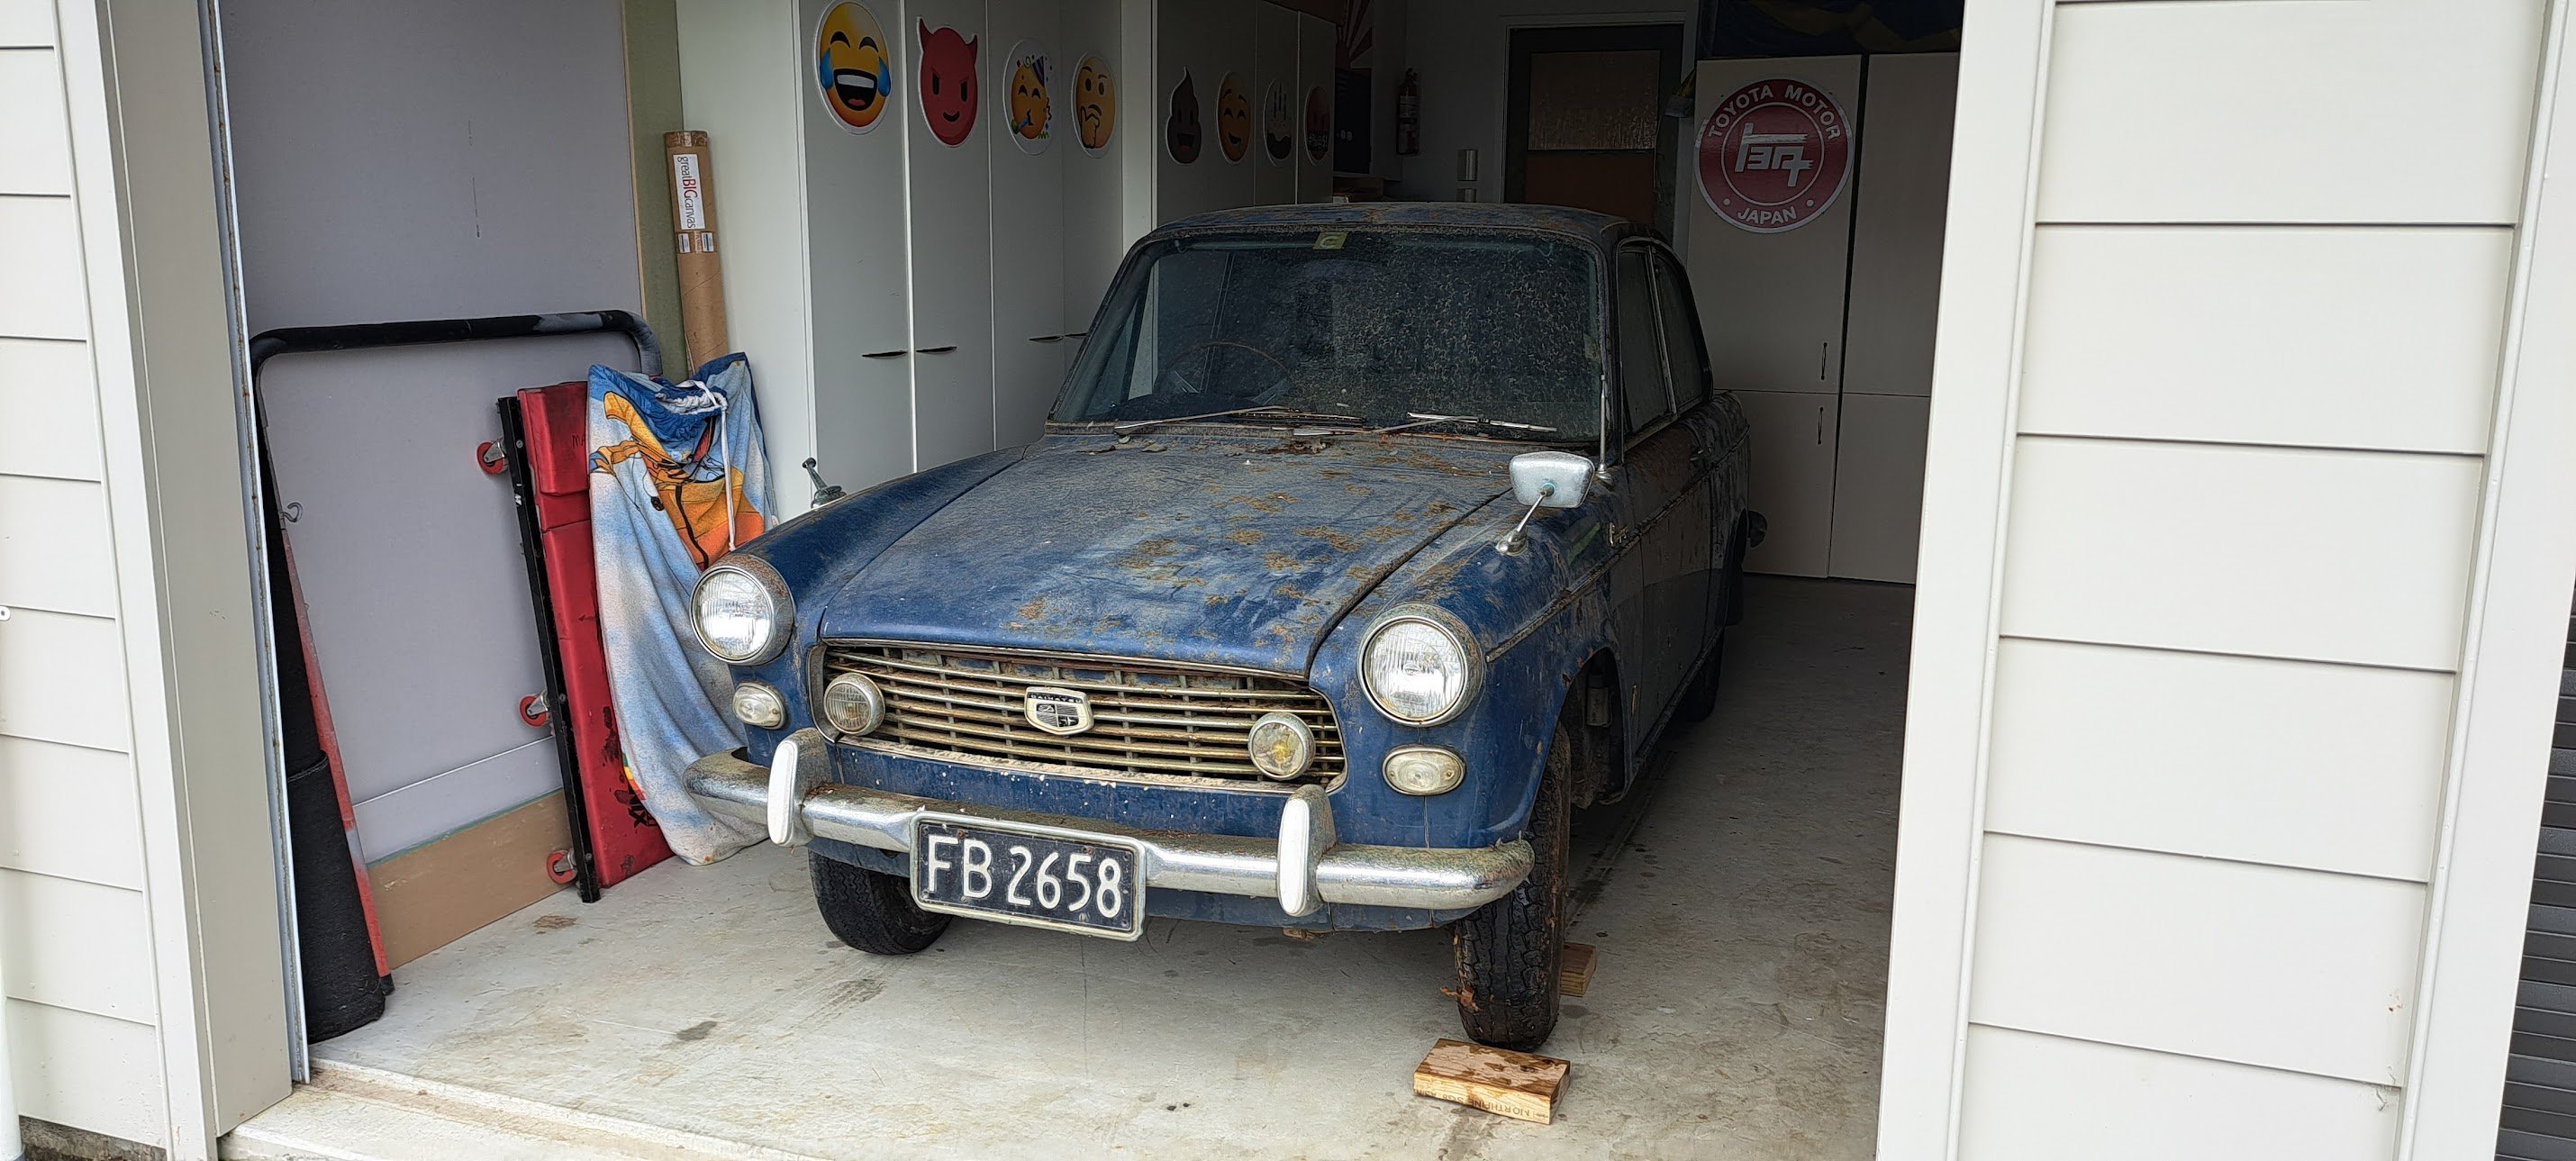
Around 25 years ago i worked with someone who mentioned they had an unusual Daihatsu in their shed. Owned since the early 70's. I'd kept in touch and occasionally asked about it but not much happened. A few months ago i ran into him at a car show and mentioned the car was now available. A "barn find" viewing and unearthing from 45 years sitting in one spot. And I was the proud new owner of this rare little beastie. The details: 1965 Daihatsu Compagno Berlina Deluxe 2 door 2 other owners from being sold new in NZ in 1965 by Campbell motors 53000Miles. Stored since 1977 due to front brake failure and dead alternator. 800cc "FC" motor IF ANYONE KNOWS ANYTHING ABOUT THIS CAR OR THESE COMPAGNO'S OR PARTS PLEASE PM ME For now it will be assessed, and things like brakes and clutch hydraulics will be rebuilt. Motor is locked so freeing this up will be tried. I have the original ownership papers and other details so it should be able to go back on the road relatively easy once mechanically sound.
1 point
-
How did you get on? Take a look at the hugong welders from Duroweld in NP, I've had a good run from my 180a DC and they were well priced. He might have a used machine too. Good place to buy consumables etc as well.1 point
-
Pics are fine for me1 point
-
Pics no work G1 point
-
1 point
-
I really have an issue... So somehow this rusty pile of turd ended up in my possession. It doesn't look that great but it does however supply me with all of the small bits and pieces that I've been looking for. The back of it is filled with a myriad of parts so once Ive used all the bits I need I'll aim to move the rest on to get my money back. It actually runs and drives and the rego is on hold, buuuut she's well beyond saving. Being an Si Limited its actually quite rare and I've had a couple of people show interest. First swap over swapping over the front end. The head lights are way better than the original ones... The bumper and grill were also much nicer so got swapped over and lightly cleaned. Also fitted the lower front grill which is super hard to find these days. Indicators are also not too bad once cleaned up. I didn't really give them much effort so will properly polish them at a later date. Also swapped in heaps of small stuff like the boot trims - none of which have been cleaned properly yet but its starting to take shape. Worked on heaps of other small bits and pieces then got a bit bored and swapped the wheels over. Im not convinced I like the look but they are marginally better than the old TSW's although weak width and offset. Also dug my Wedsports out for a trial fit - they are filthy and the tyres are garked but 15x7 so a little wider. White on white Im not sure about. Anyway, this is how it sits at the moment - will keep ticking away as time allows. The new coil overs should be here in a month or so and ideally want to fit them then take it for a WOF so theres a fair bit of small stuff still to go.1 point
-
Hey mate just happened upon this thread-suddenly been a bit of FG activity in NZ (the deals on wheels tow truck resto and the awesome race transporter) and the duck island truck-all of which I missed being distracted elsewhere last few years. I have factory workshop manual I’m happy to get you a copy of, though they are pretty basic and logical to figure out. I bought a couple of these back in the mid to late 1990’s off NZTS, (now alsco) who ram them as laundry trucks up until 96 when transits took over. The ones I purchased had been converted to Falcon 250’s with 3 underfloor CNG tanks. Could go AL to Welly for about $50 with a $26 fill in Taihape. one long gone I’m in the protracted restoration of the other-need to stop procrastinating and building other cars and finish it… single rear axles. Yours almost certainly started life as a 4cyl, 2.2 (or 2.4 if it’s 74ish or later which is unlikely) and likely ratio is 5.9:1, I swapped 4.58:1 rear crown and pinion into mine, and they are a v strong rear, but the options you mention would make it a lot easier. Badges on side should be 360FG 350FG, or FGK30. This is the model dual wheels were on the Fgk40 upwards which also had the 6cyl Austin donk, through to the FGK100 which were usually big diesels.1 point
-
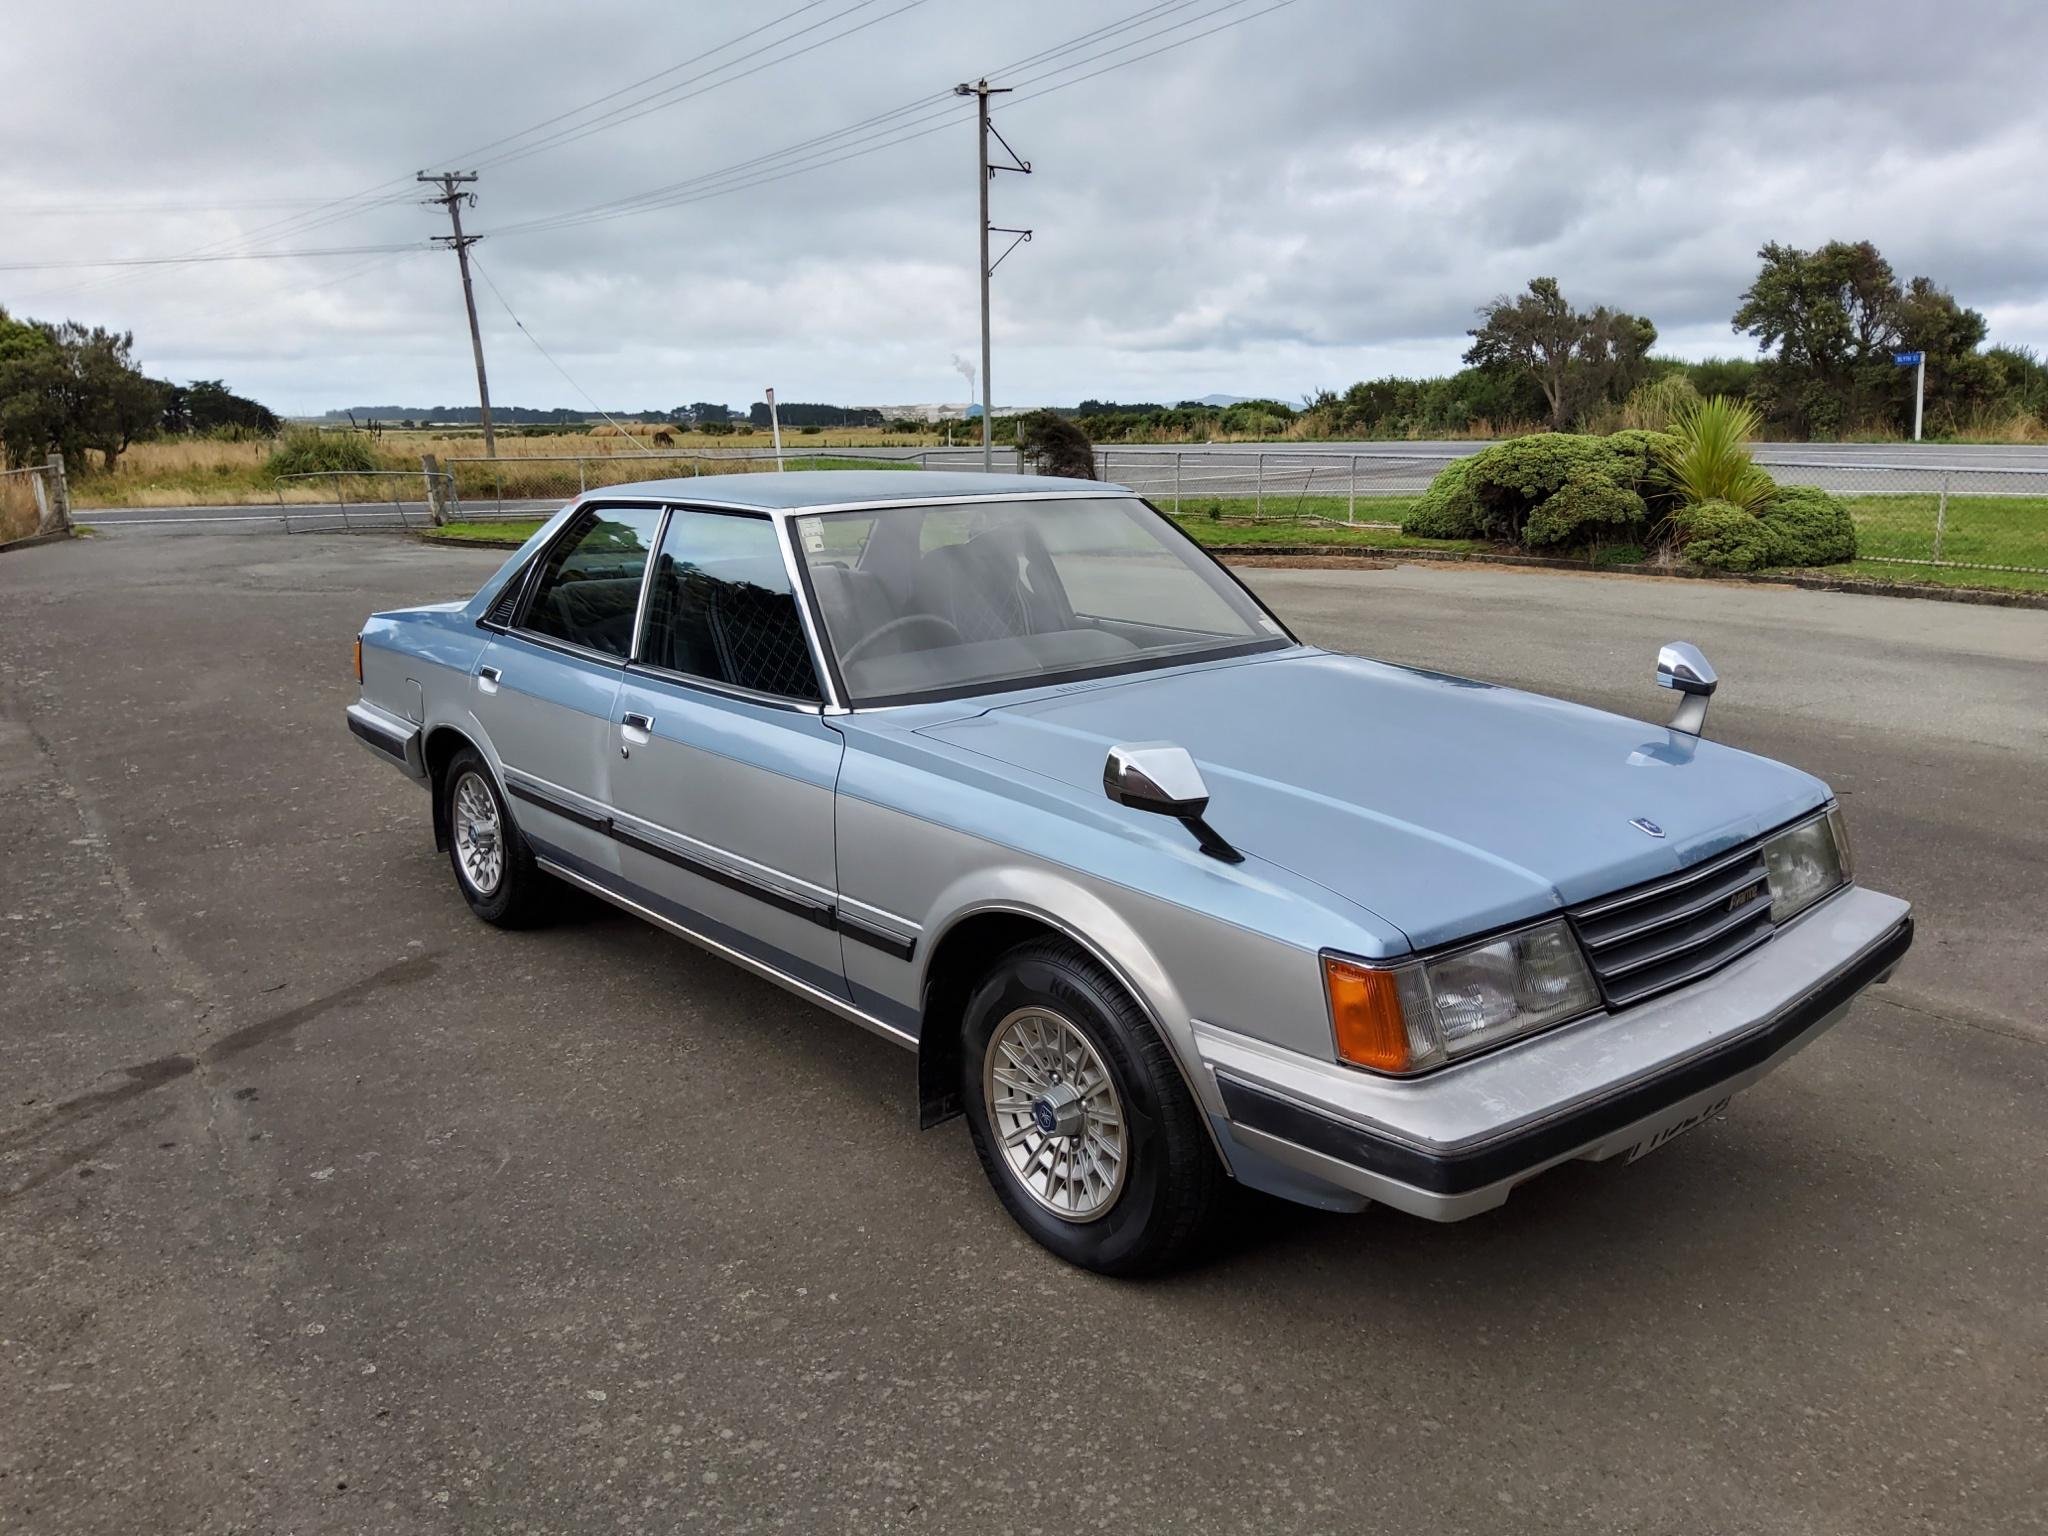
Just a couple weeks ago got it back from the painter looking super sharp in BMW pyrite brown, and running the lower trims and bumpers in vl MX grey, onto the fun task of putting a fresh painted car back together https://oldschool.co.nz/index.php?/topic/61662-vk327s-1986-vk-royale-with-boost-discussion/
1 point
-
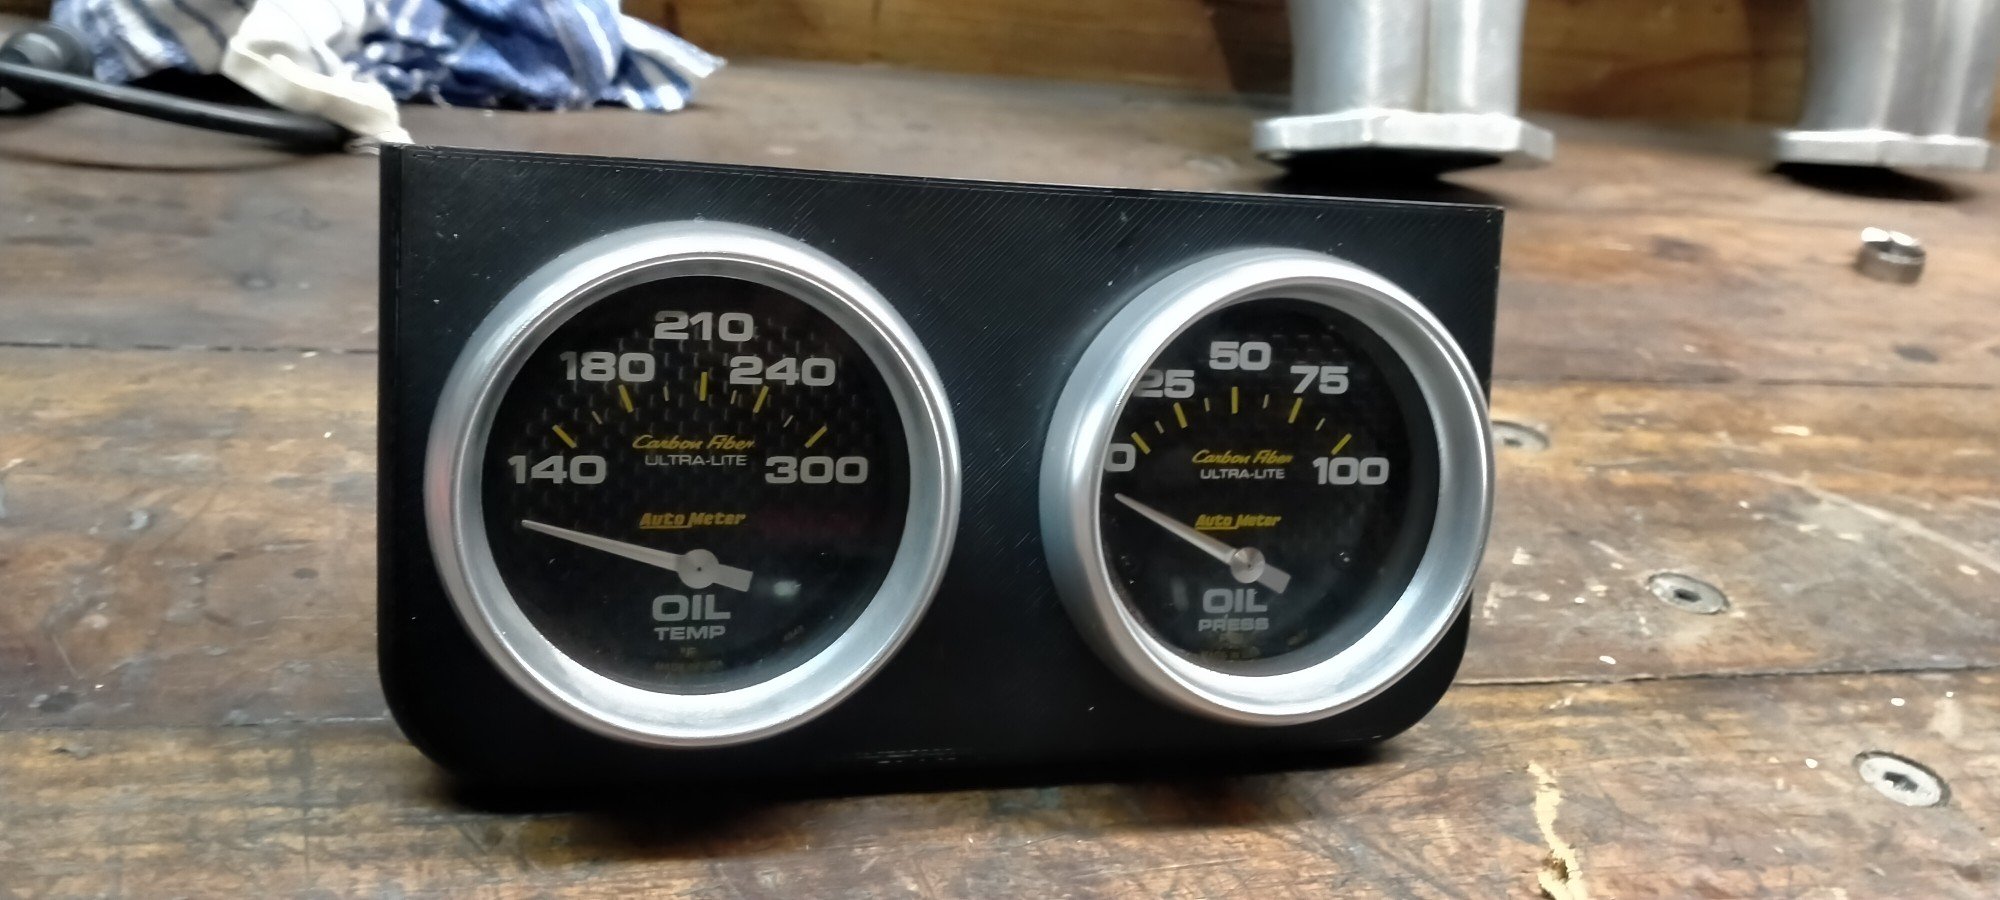
So, oil cooler replaced, old valves and springs installed, cleaned everything again, reinstall everything again. 3d printed gauge mount prototype. Plumbing in the other end is going to be fun. And after getting the number 1 and 2 sparkplugs wrong, again. Let's just say, so far, so good.
1 point
-
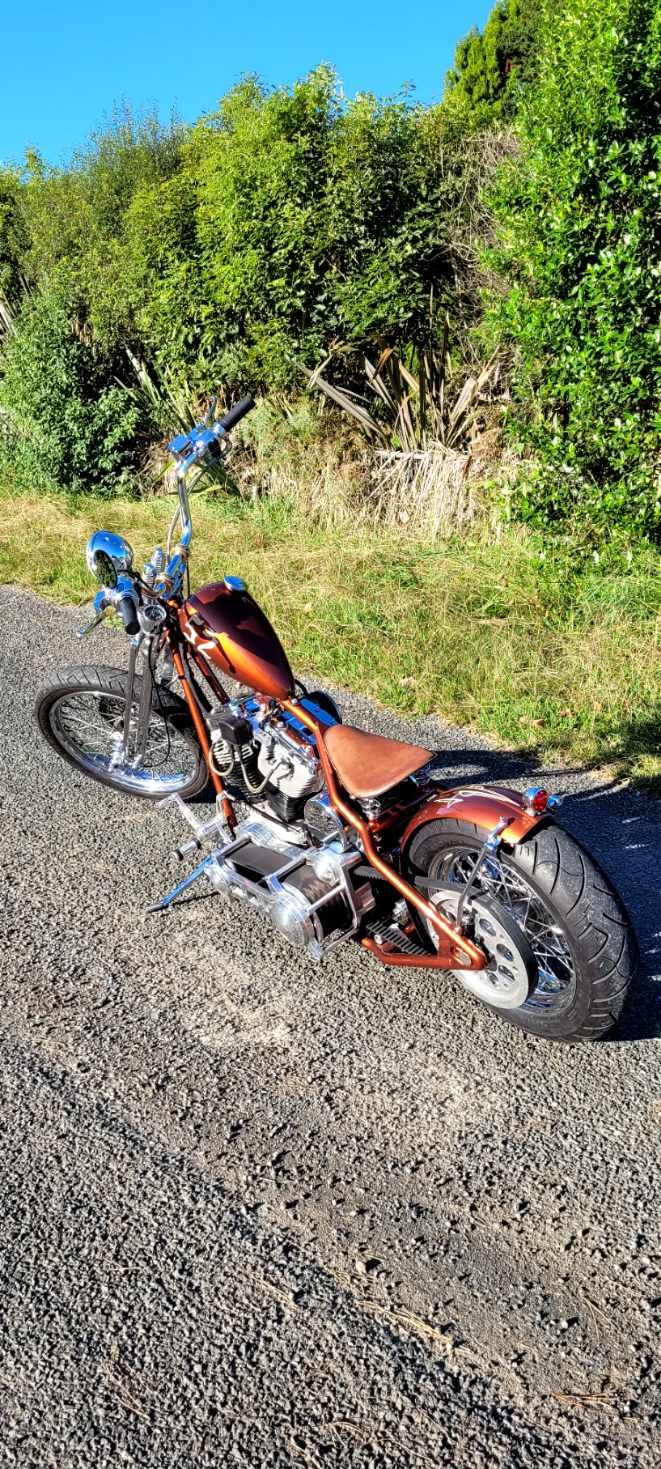
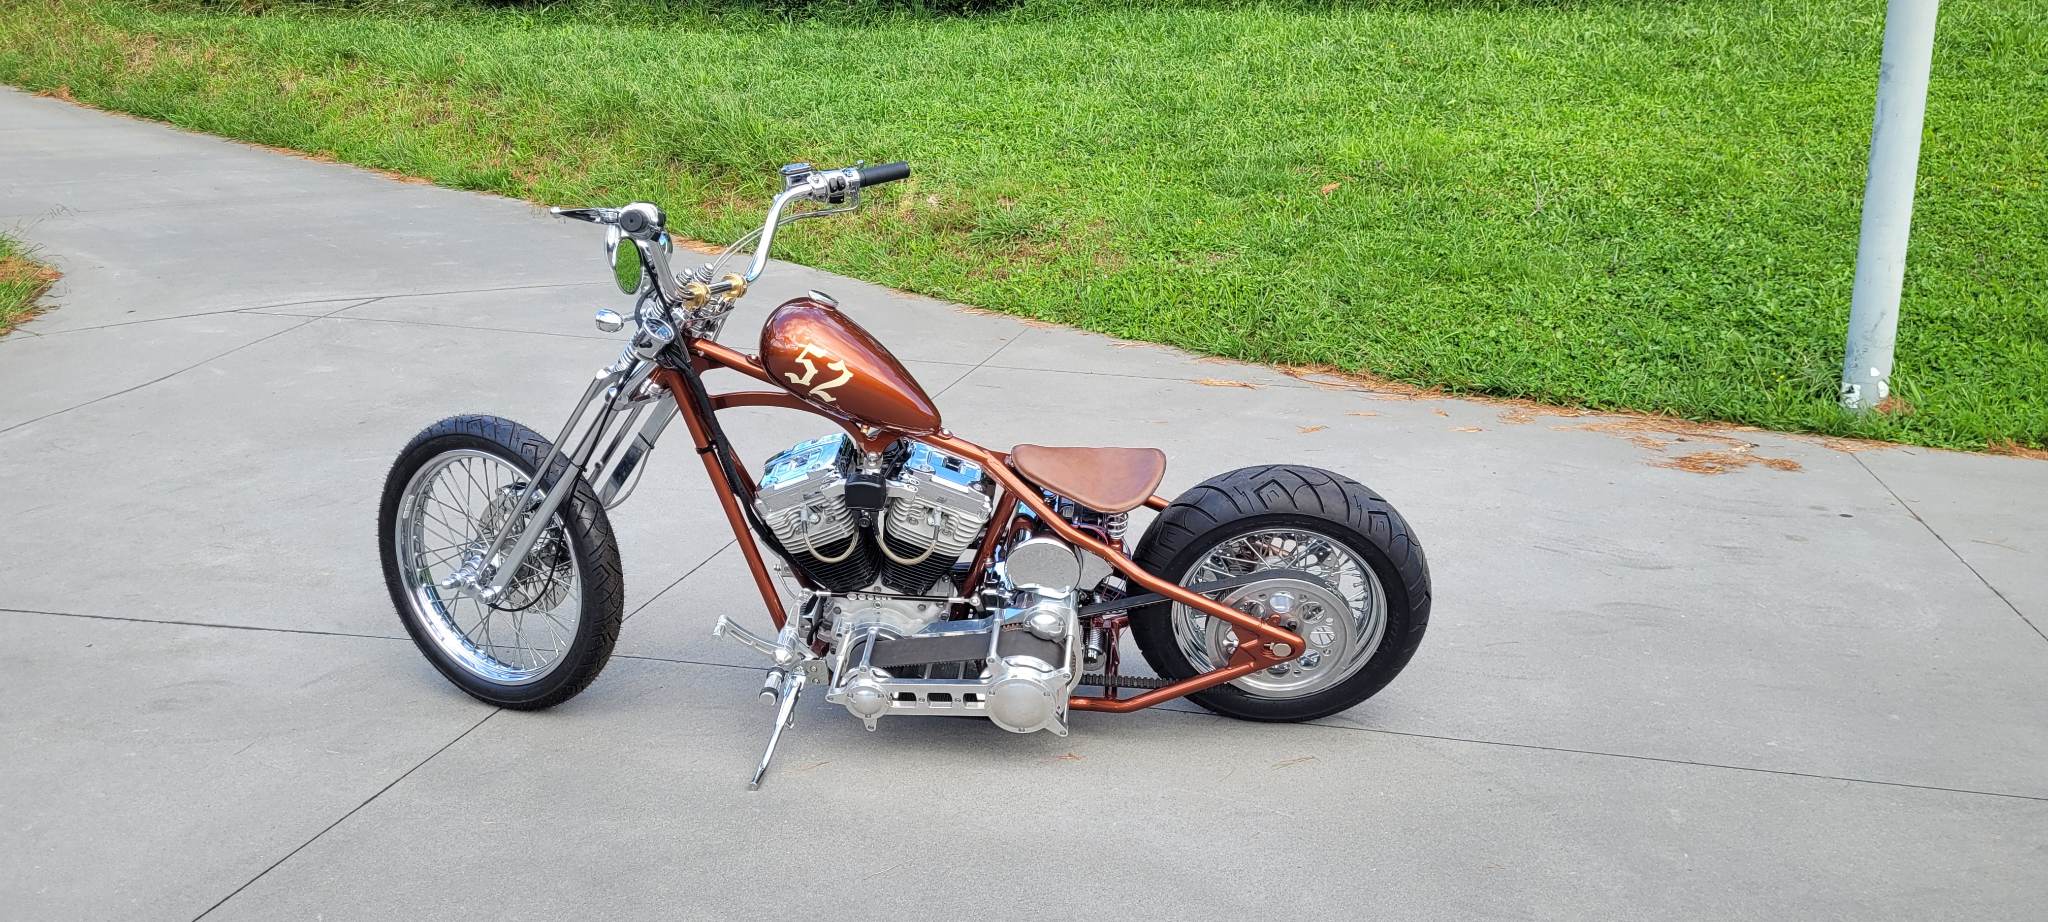
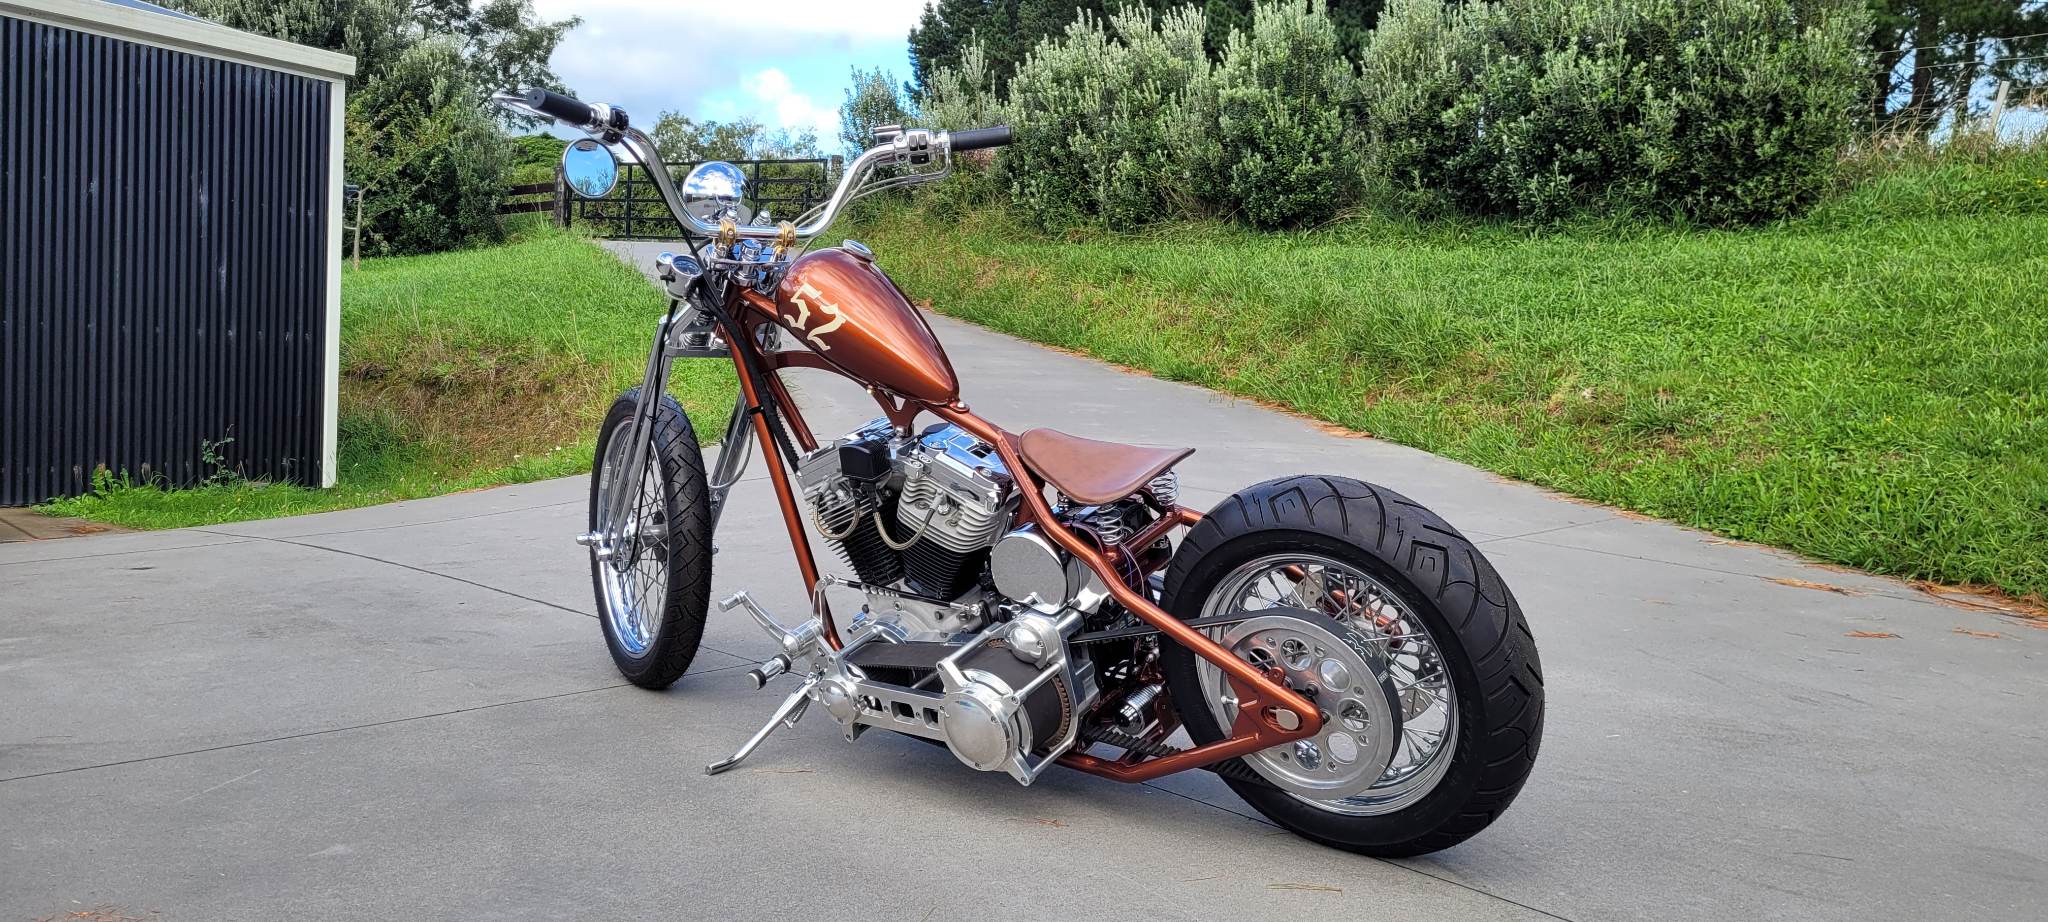
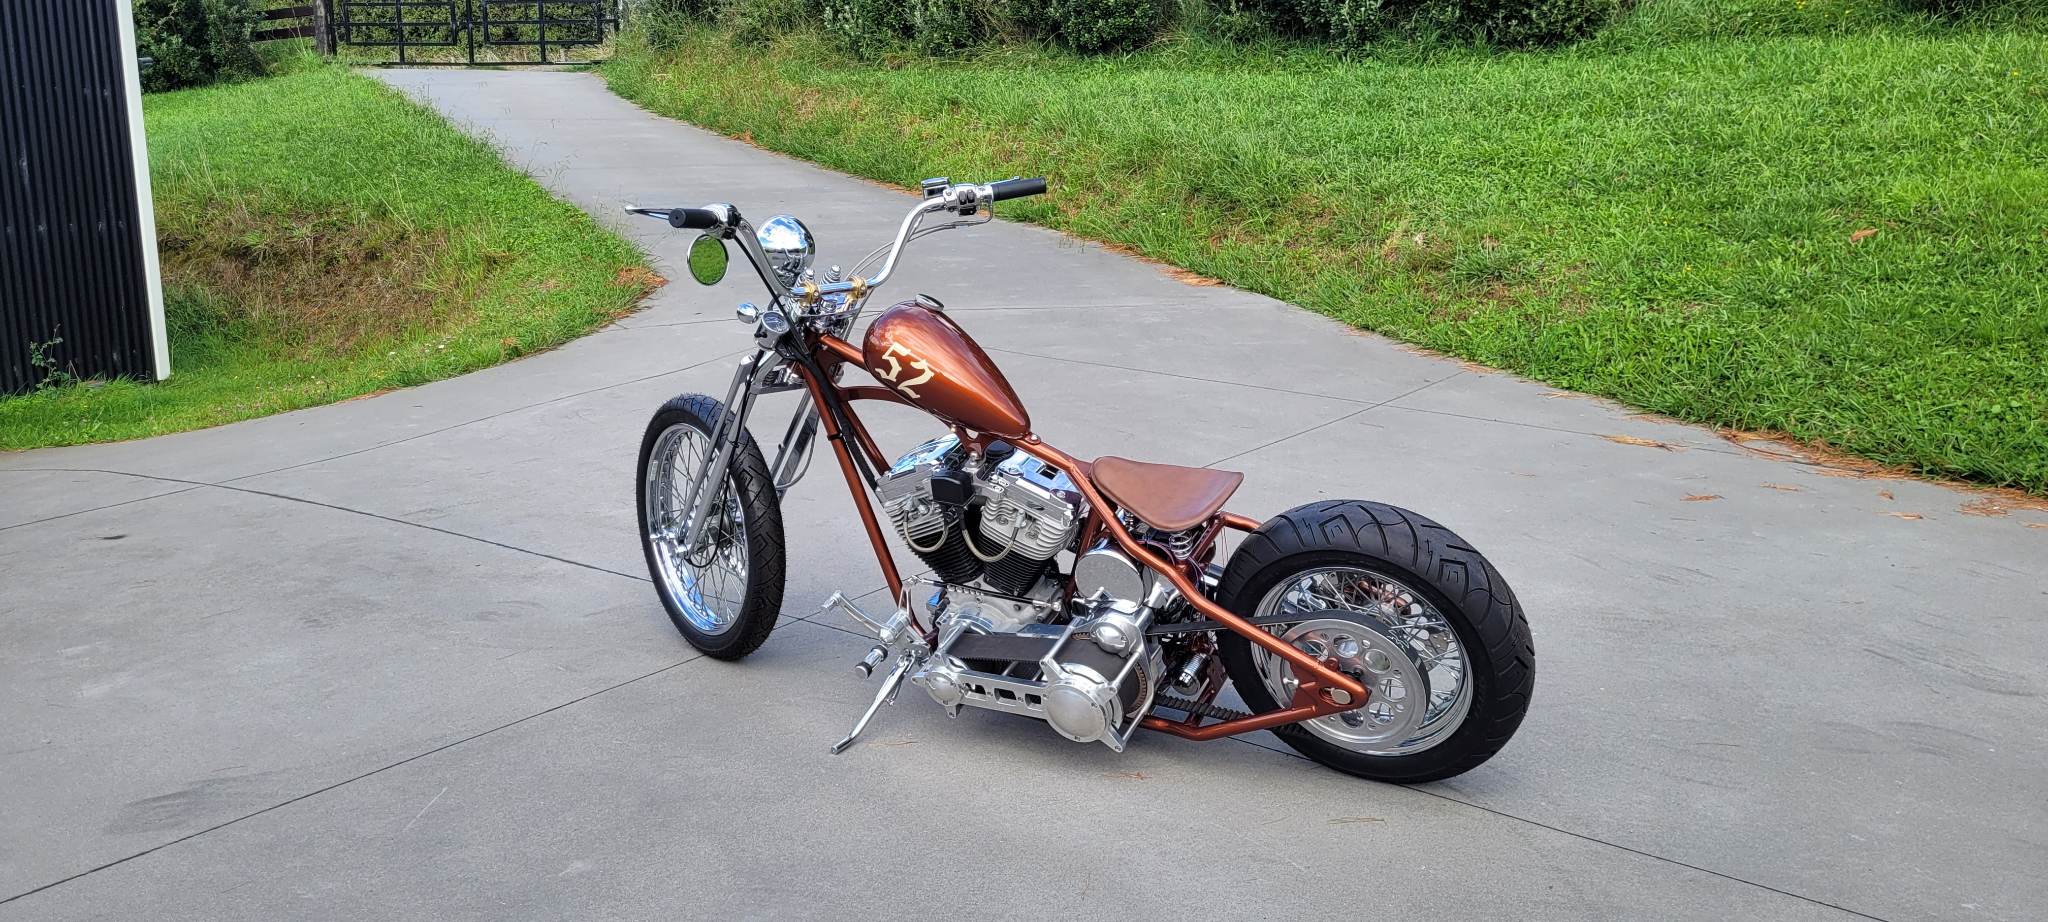
its just not getting old for me. So good. Im in love with this bike, its kinda the best/worst of everything, like a buell but not as fast, has the charm of an old carburetor harley, so much fun to ride like a vespa, seating position like a dirt bike, just such a unique bike full of character, its got what makes a bike fun to ride...the X-factor.1 point
-
Shes now pn legit skyway tuffs 2s were painted black so i painted them up recon shes looking good. Just needs a skyway rear sprocket then boom
1 point
-
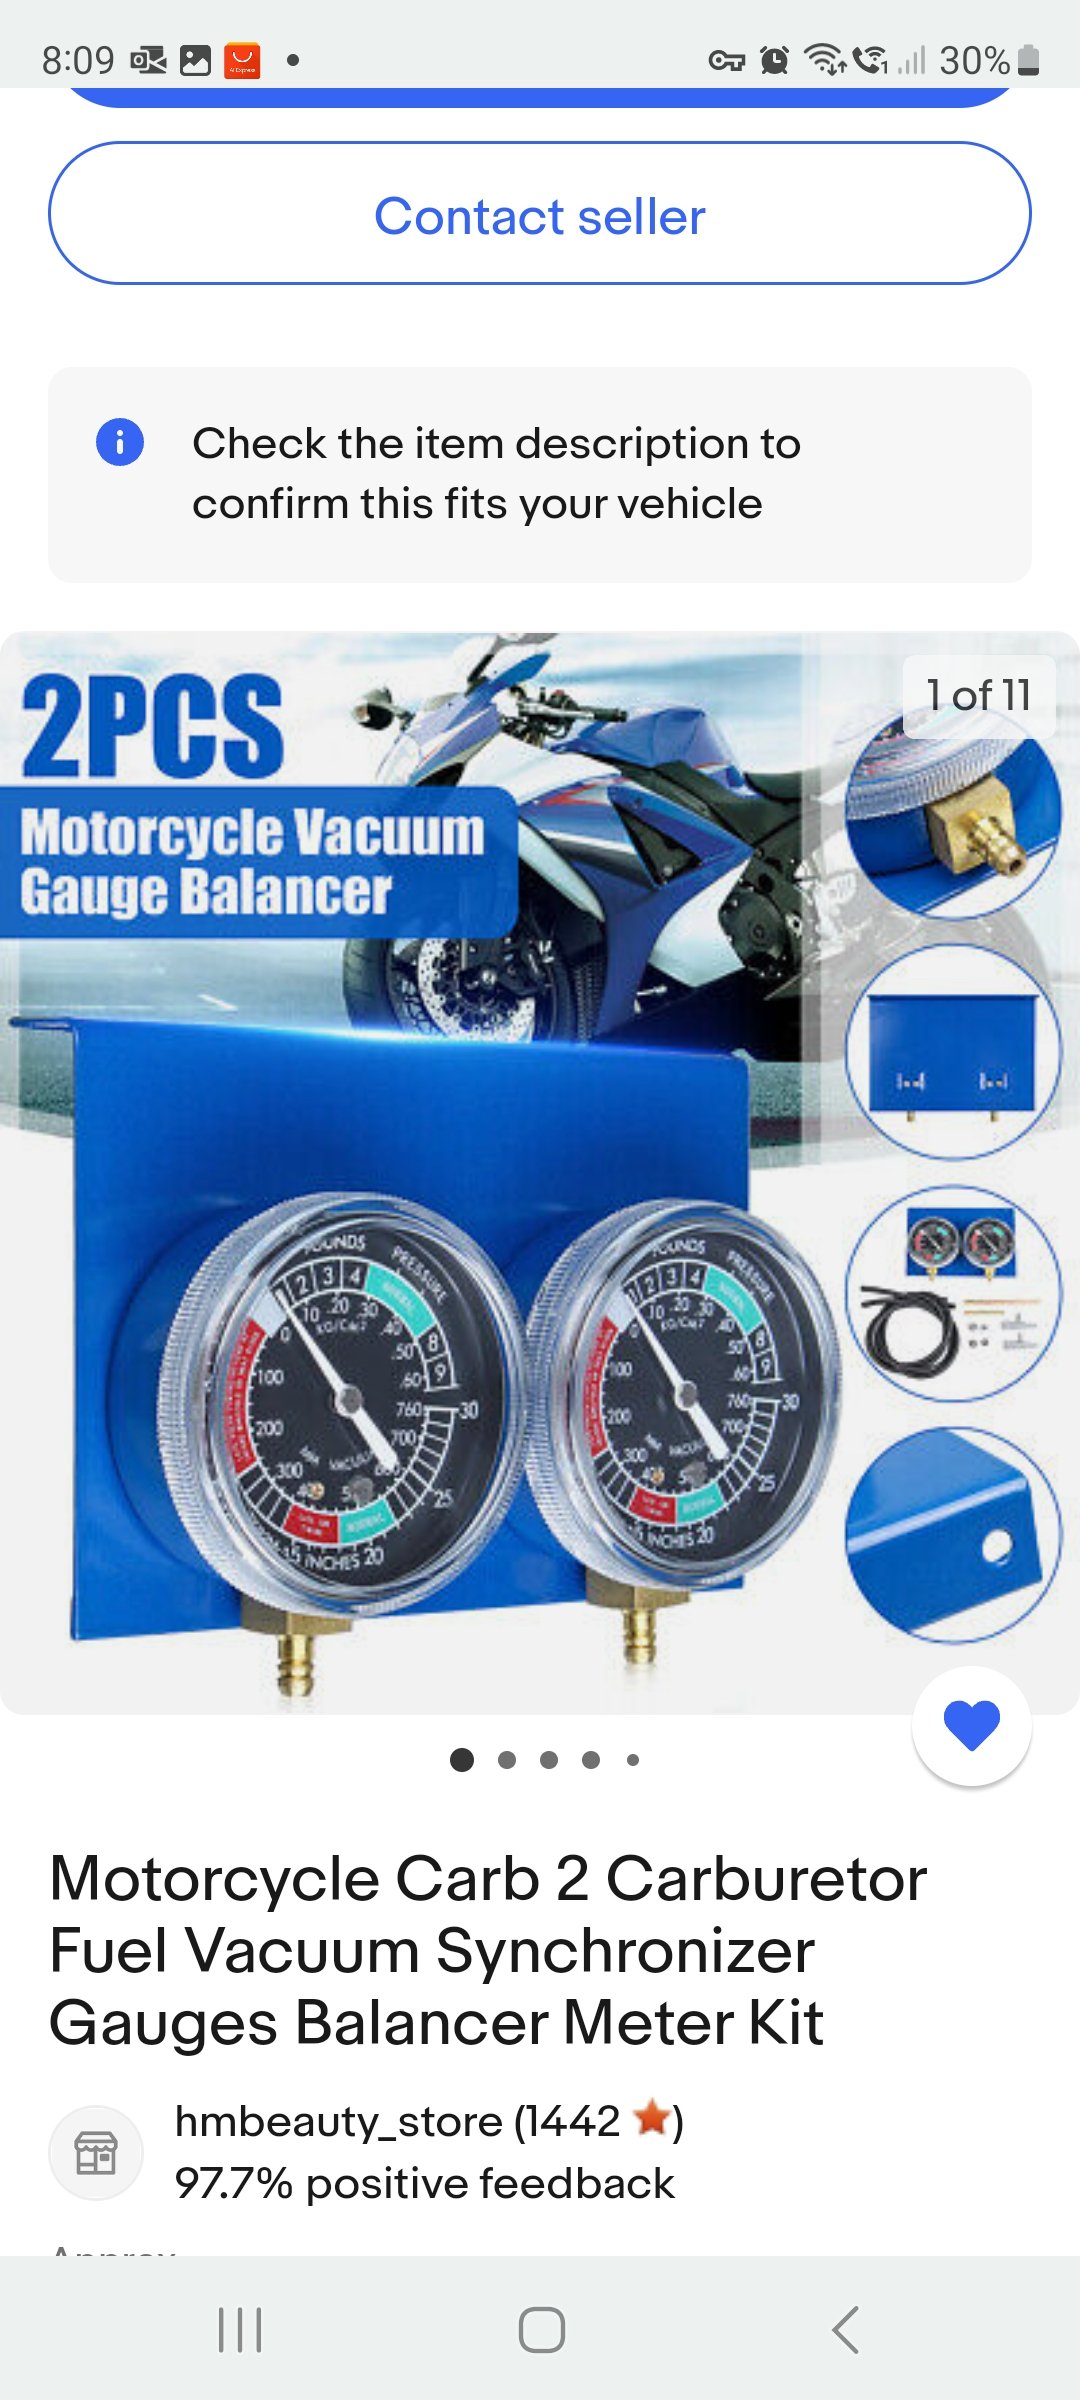
Thanks for the advice, really appreciated. Unfortunately I brought mine as is, so working with what I've got. Hard to know what the baseline is/was as I never started at that point, however its running a little rough for sure. The exhausts on it now aren't even clamped to the headers. They're a size to big, ie the header is loosely sitting inside the exhausts with 2mm of clearance around the pipe...lol. I visually set the carbs, by getting approximately 1mm of throttle cable play in each slide. Its now a lot smoother than it was. So I ordered a set of vacuum guages to try balance the carbs better than they are now. All that said...fuck yeah, this thing is fun!! Its not modern bike fast, but torque like a tractor and certainly enough power to be interesting.
1 point
-
GRRRRR .. Pistons arrived from the UK... wrong size Stern words later and it turns out their supplier put +040 wrong pistons in a +020 labelled box!!! And to make matters worse they had correct +020 rings so that combo doesn't work so another set of triple checked correct ones are on their way via pronto post... albeit after some dude gets a crown on his noggin and they get a day off for it! In the meantime... Yucky, mucky, sucky front suspension Is now all black blingy goodness
1 point
-
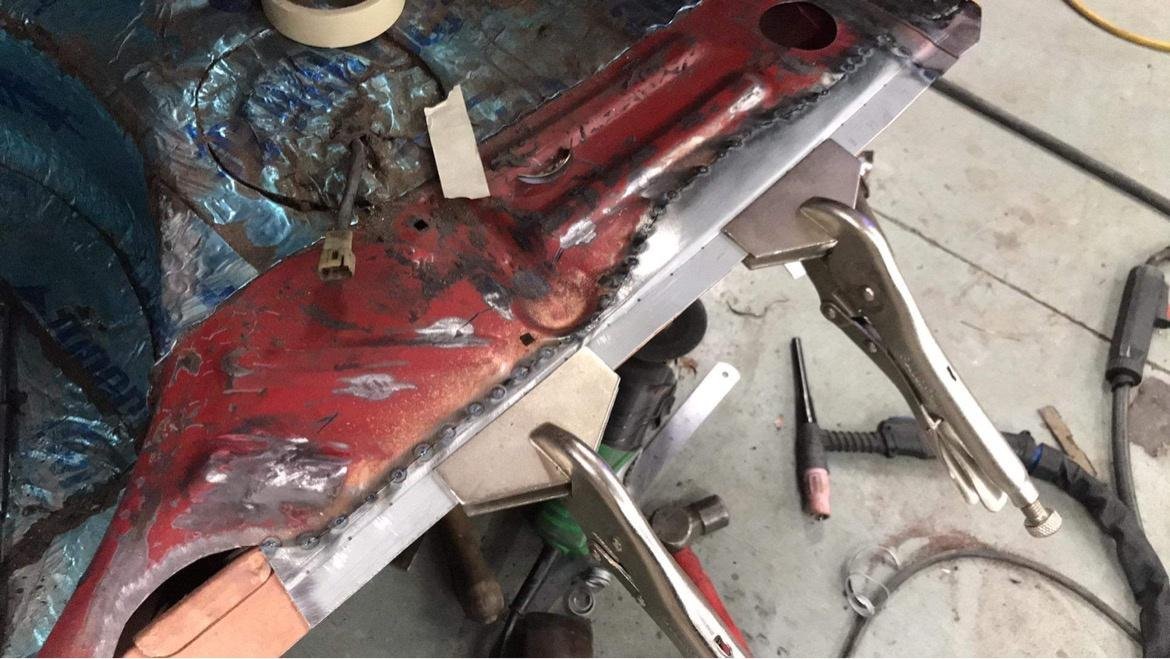
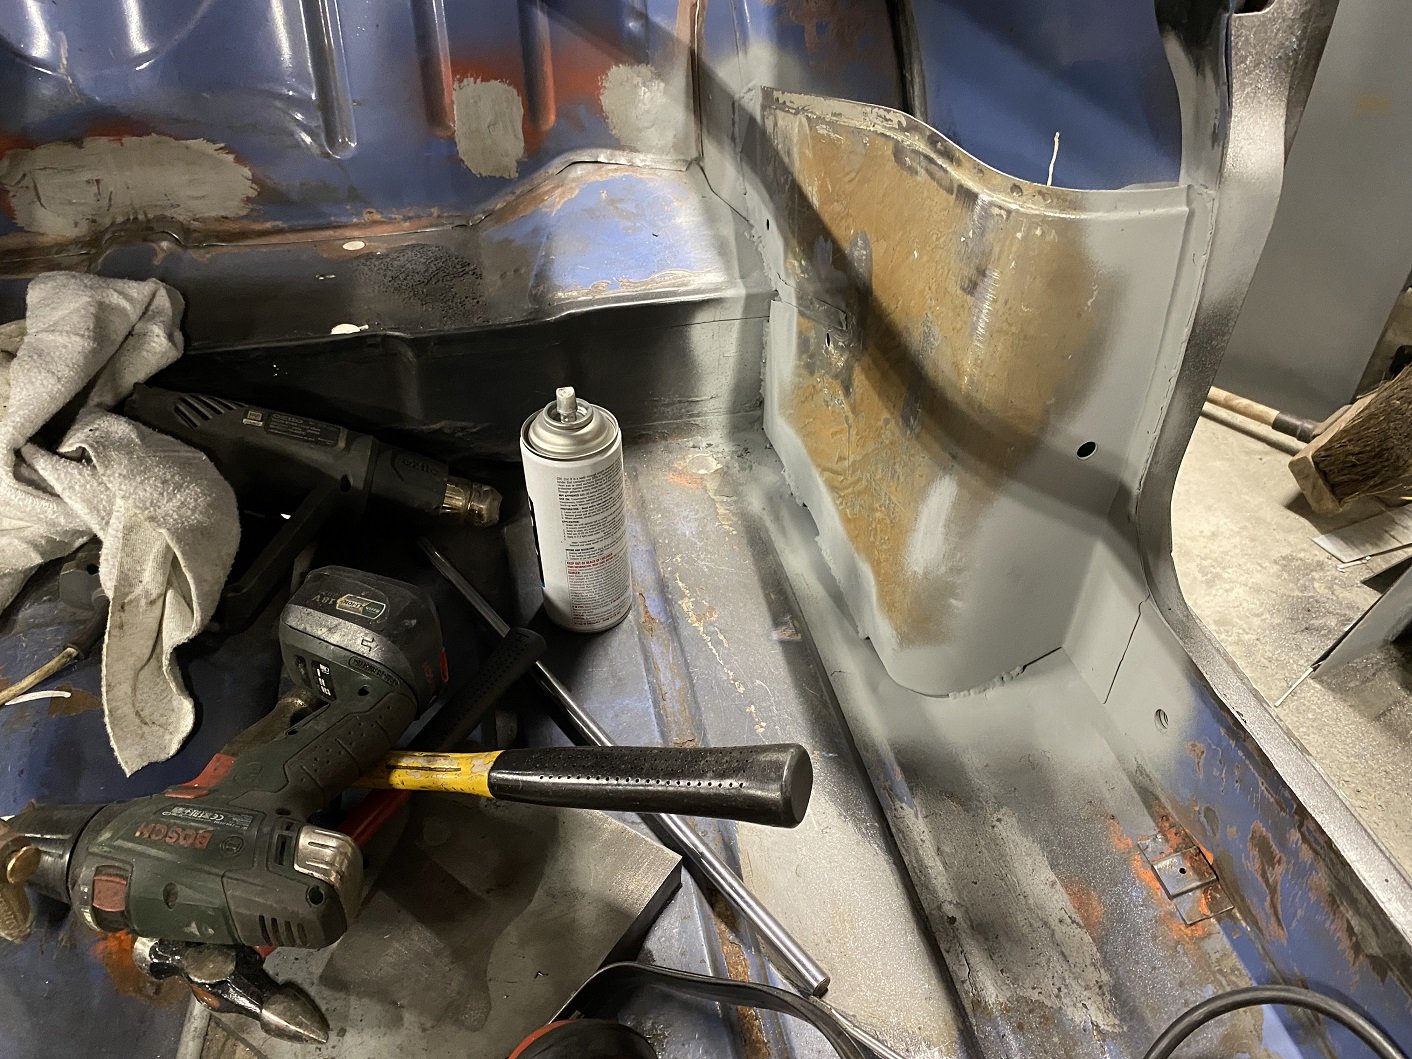
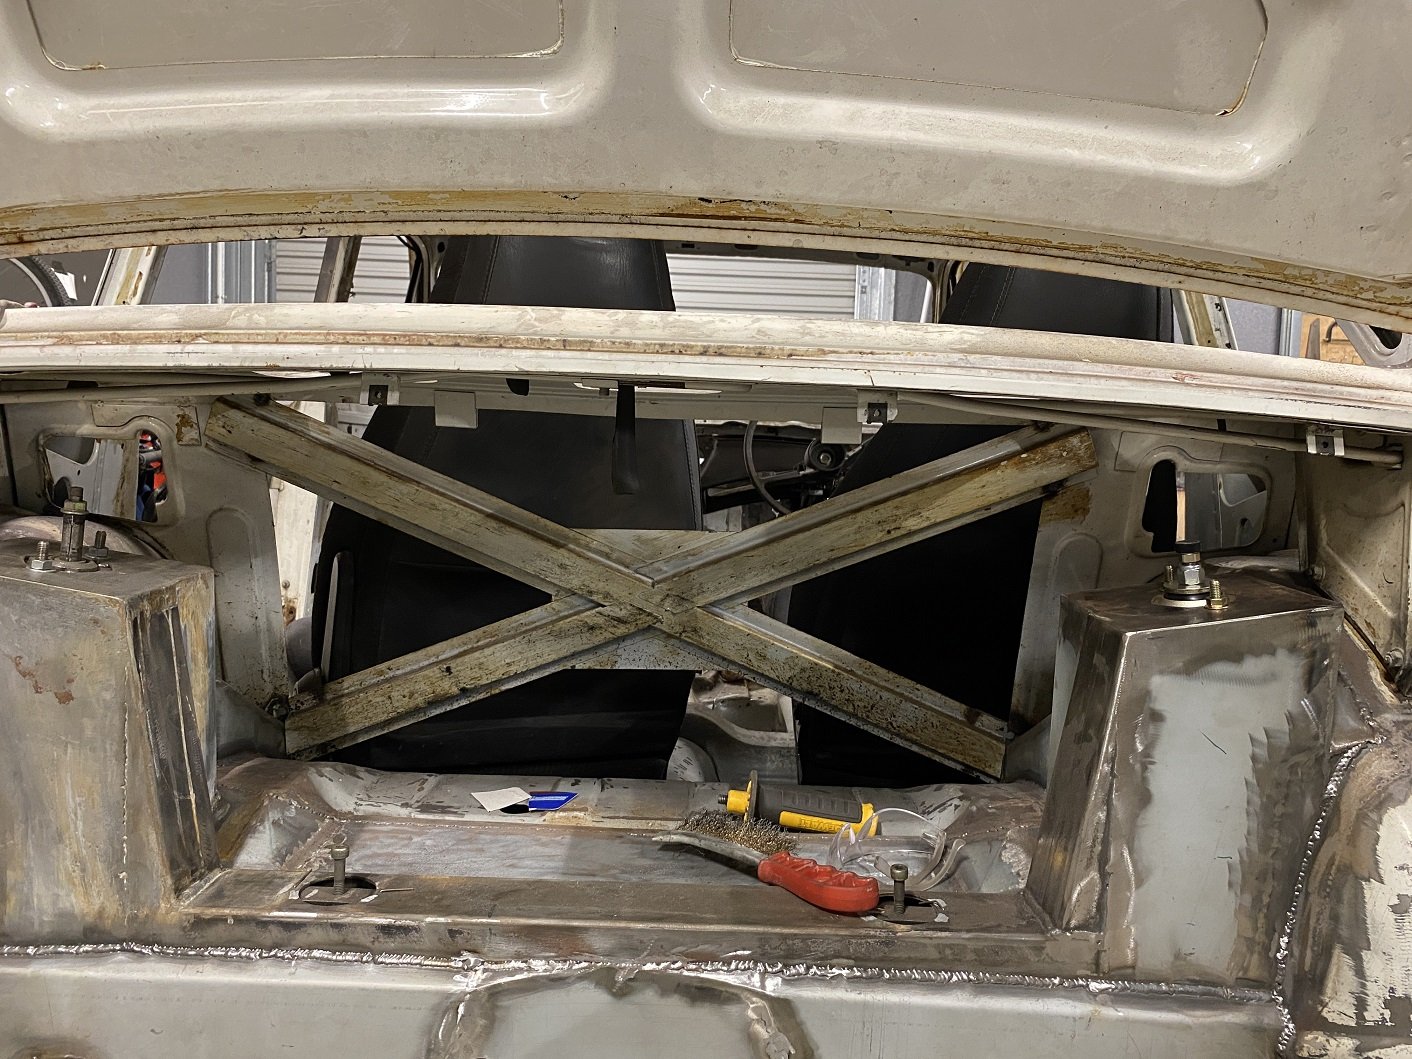
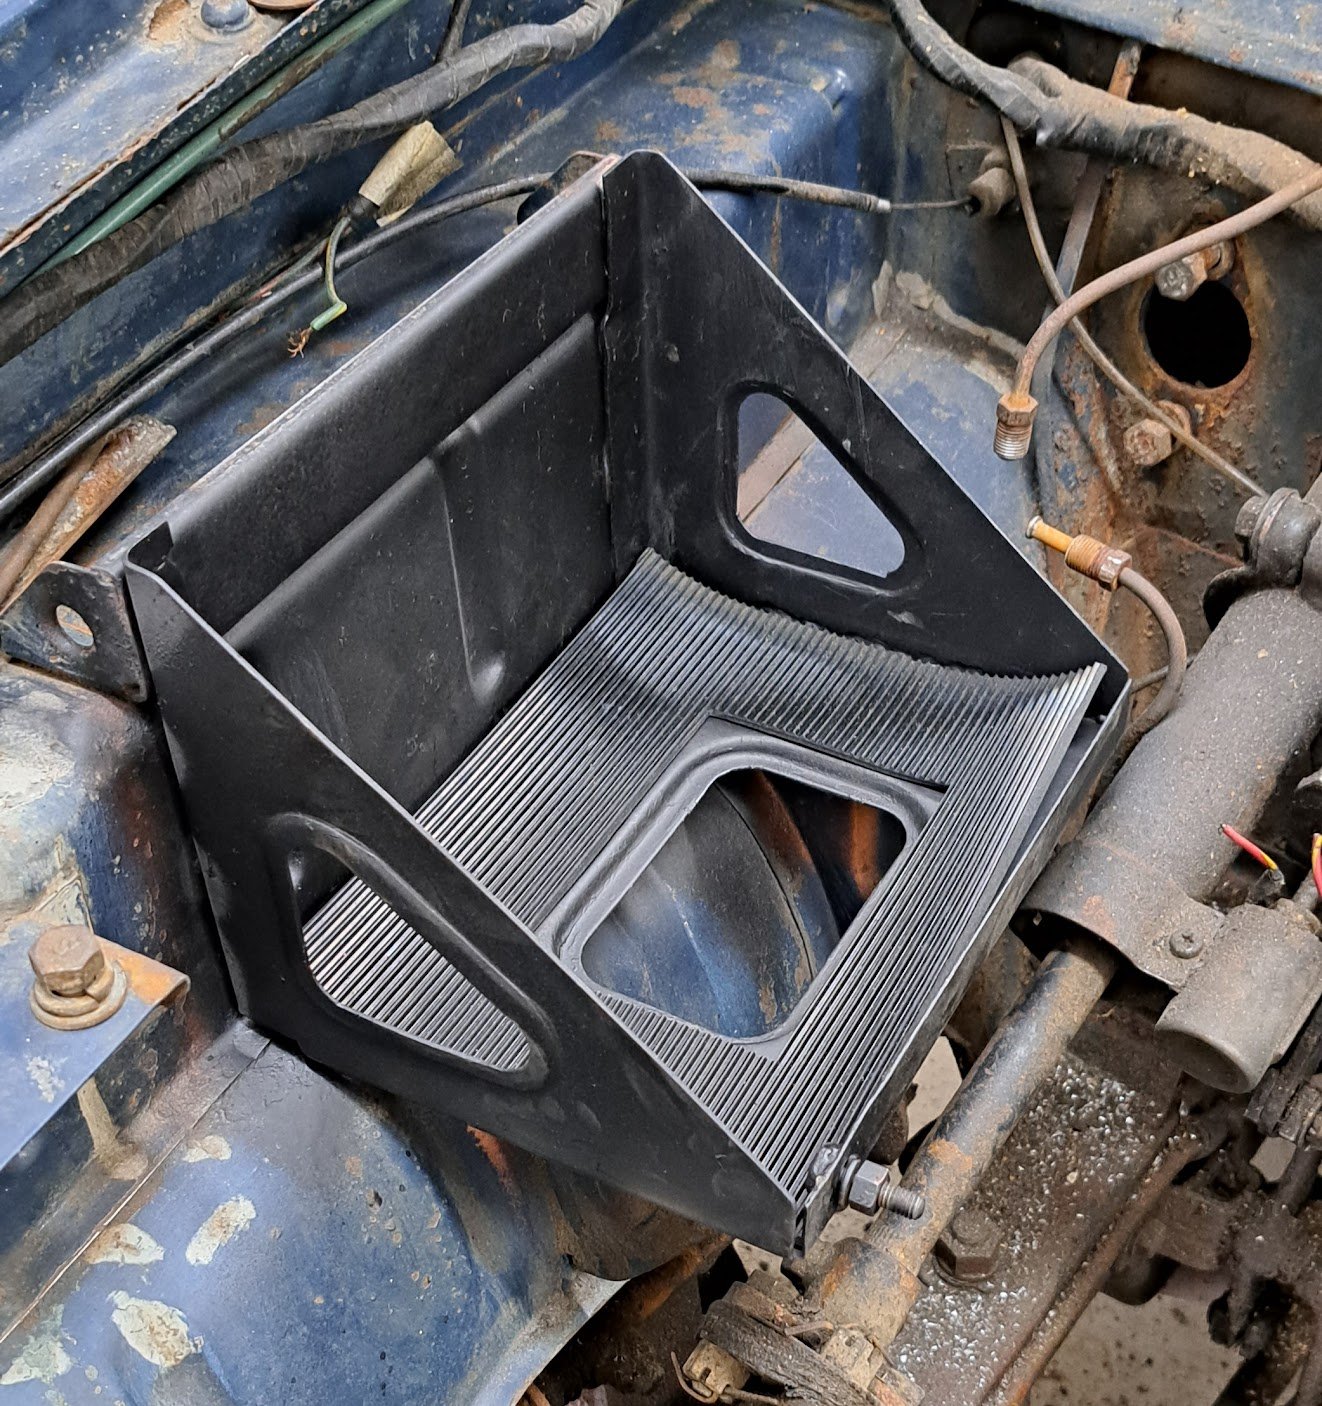
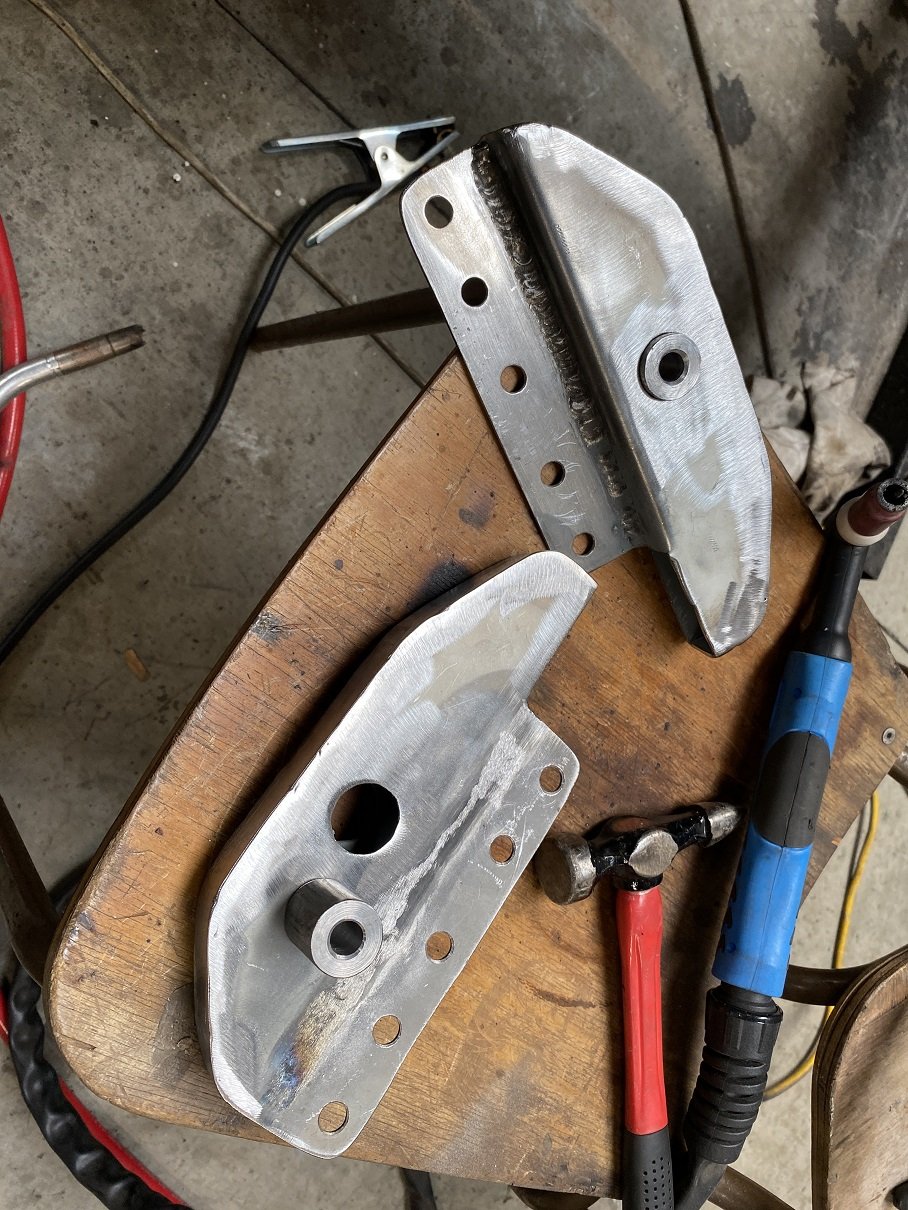
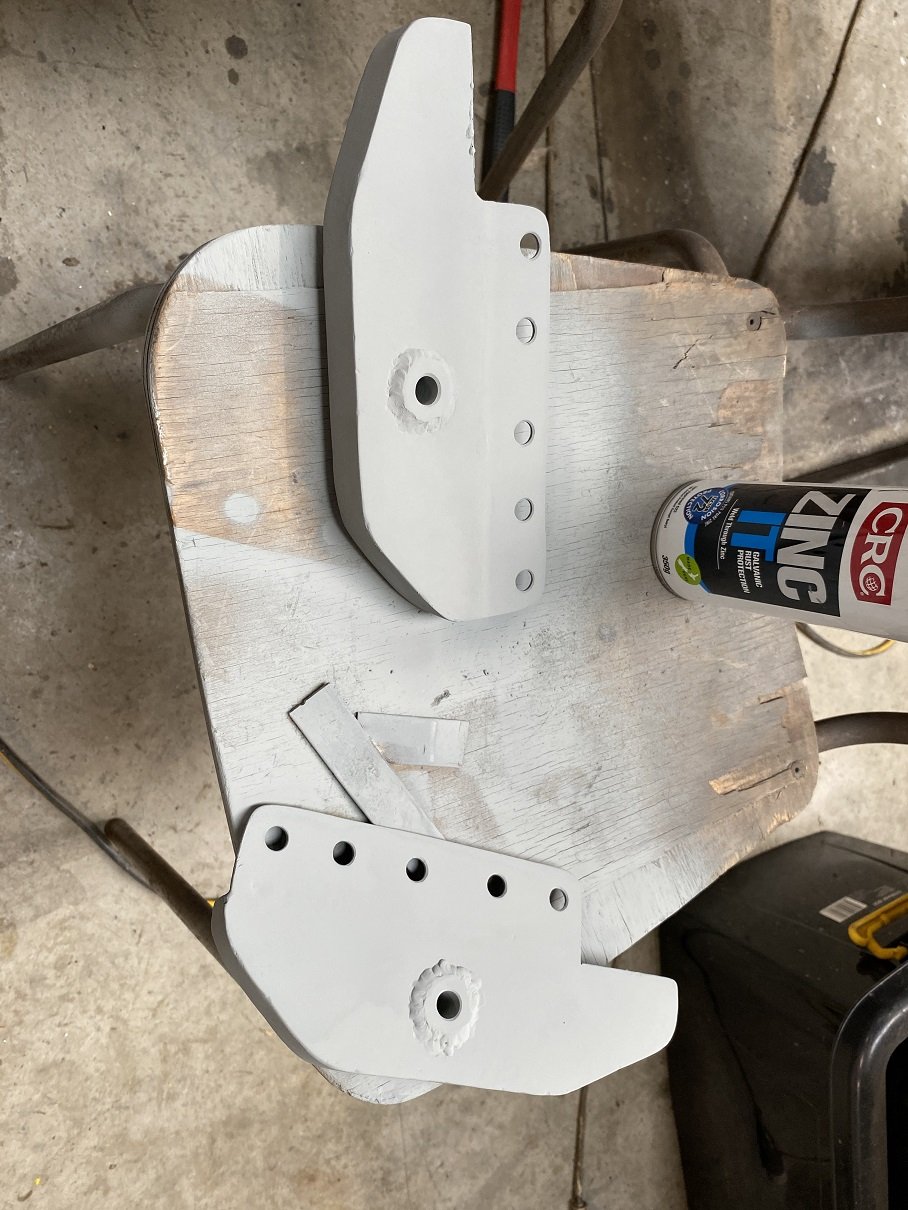
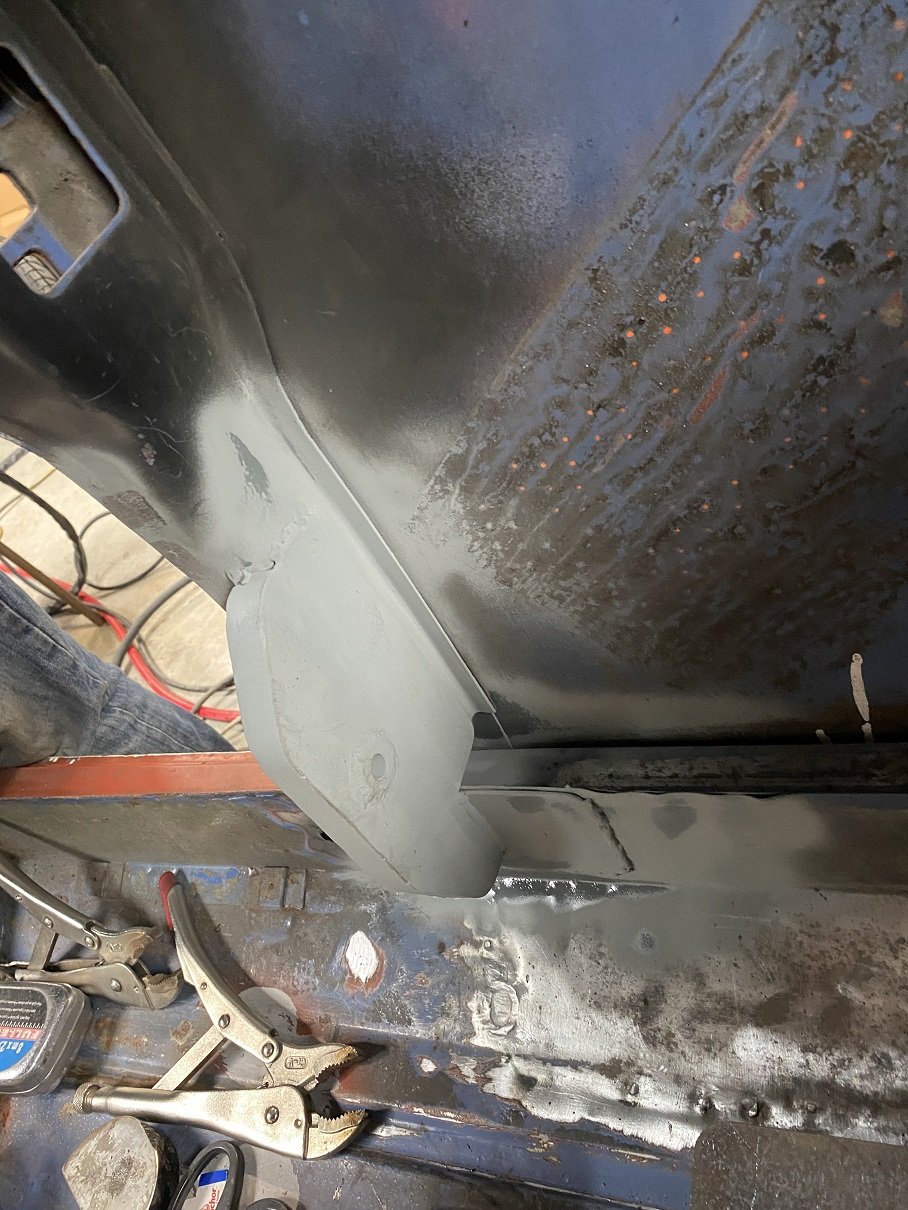
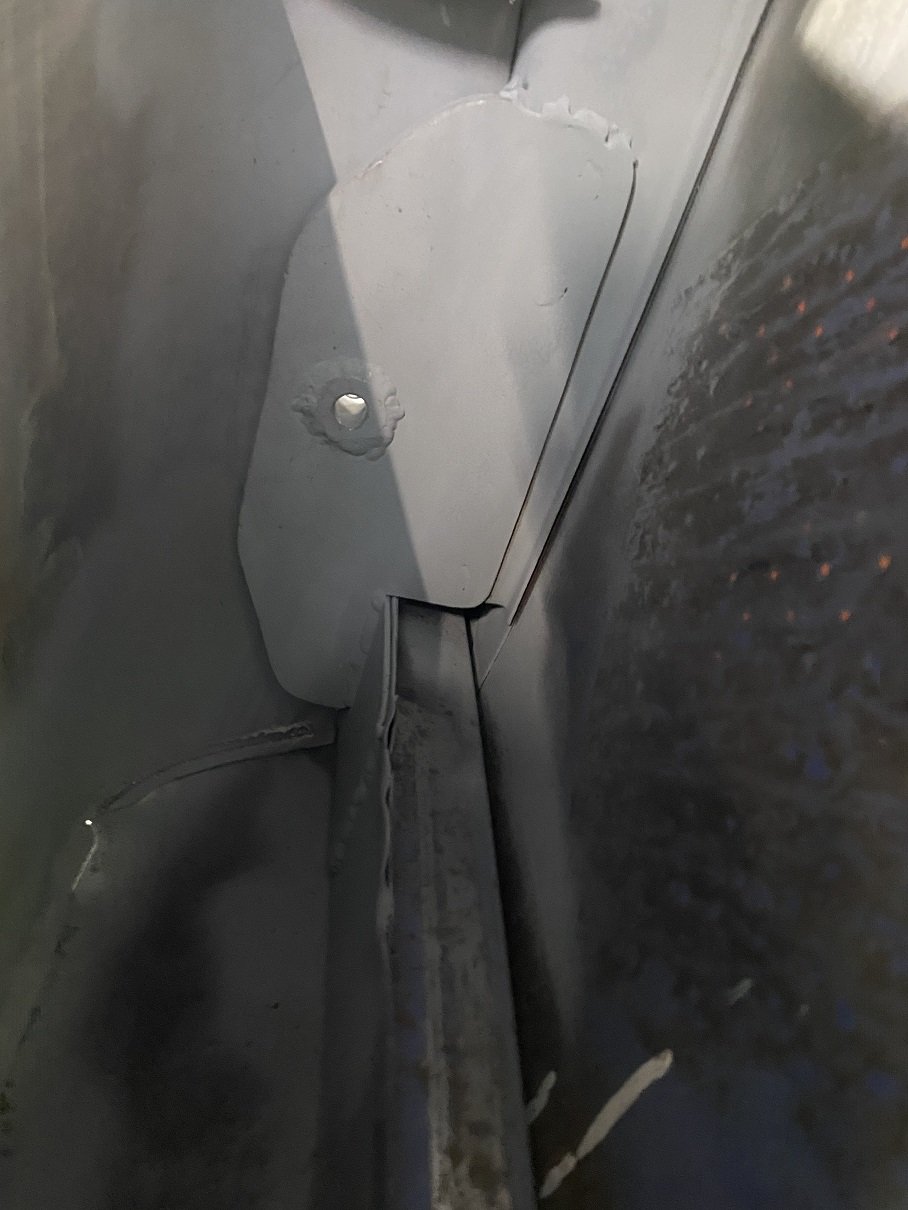
Before I could weld the companion boxes in I needed to sort out a mount for the seatbelt reel. The companion boxes came from a MK3 which had static belts so there is no mount for the reel. MK4 onwards had a mount like an inverted bathtub that was spot welded only to the sheet metal of the companion box. It always seemed a bit weak to me. My mounts might be a bit over-engineered. 2.5mm thick, the crush "tube" is 25mm round bar. It's spot welded to the b-pillar and welded to the inner sill with a reinforcing plate.
1 point
-
Half an hour of limibashing will have the same effect1 point
-
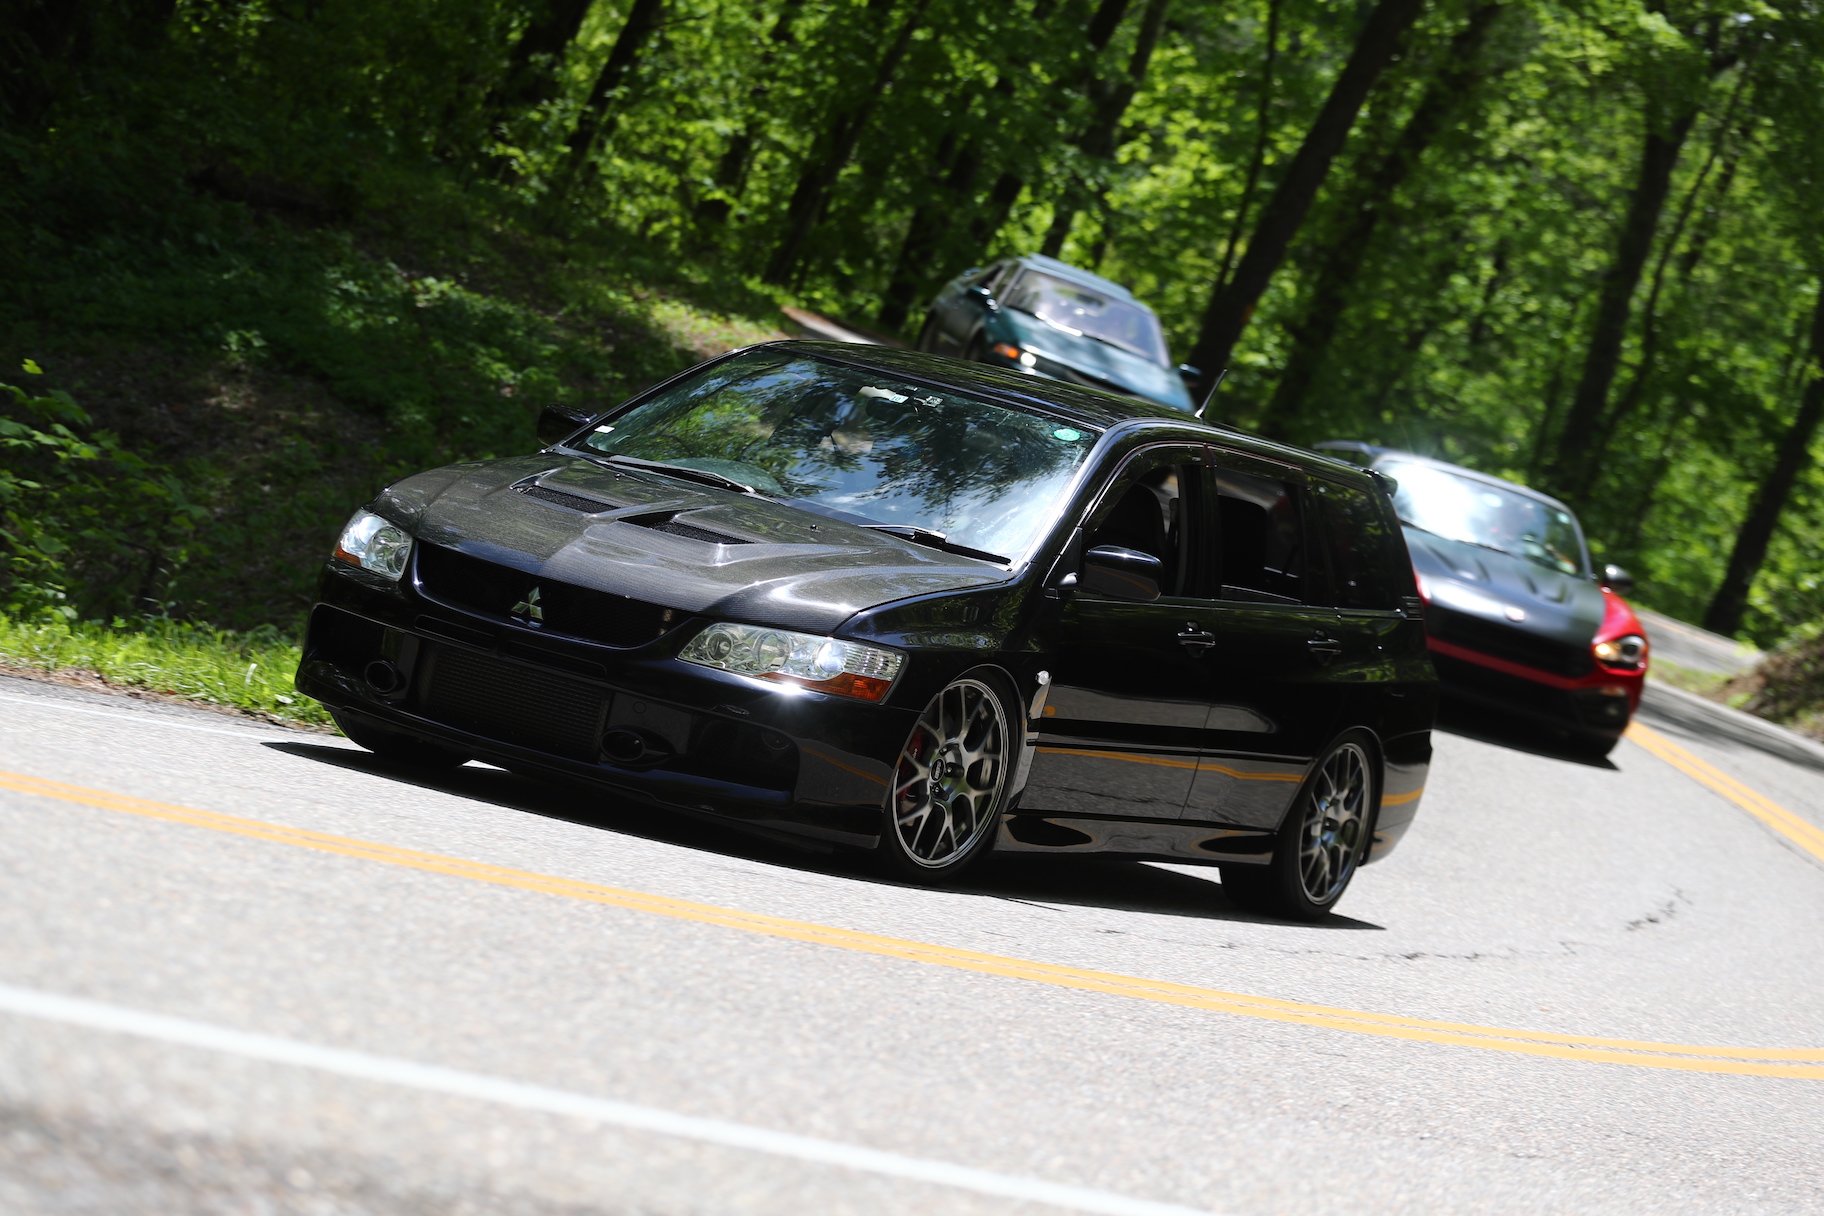
So once I threw it all together I drove it an almost 4000km round trip down to the Tennessee and North Carolina border for the Tail of the Dragon and had an absolute blast
1 point
-
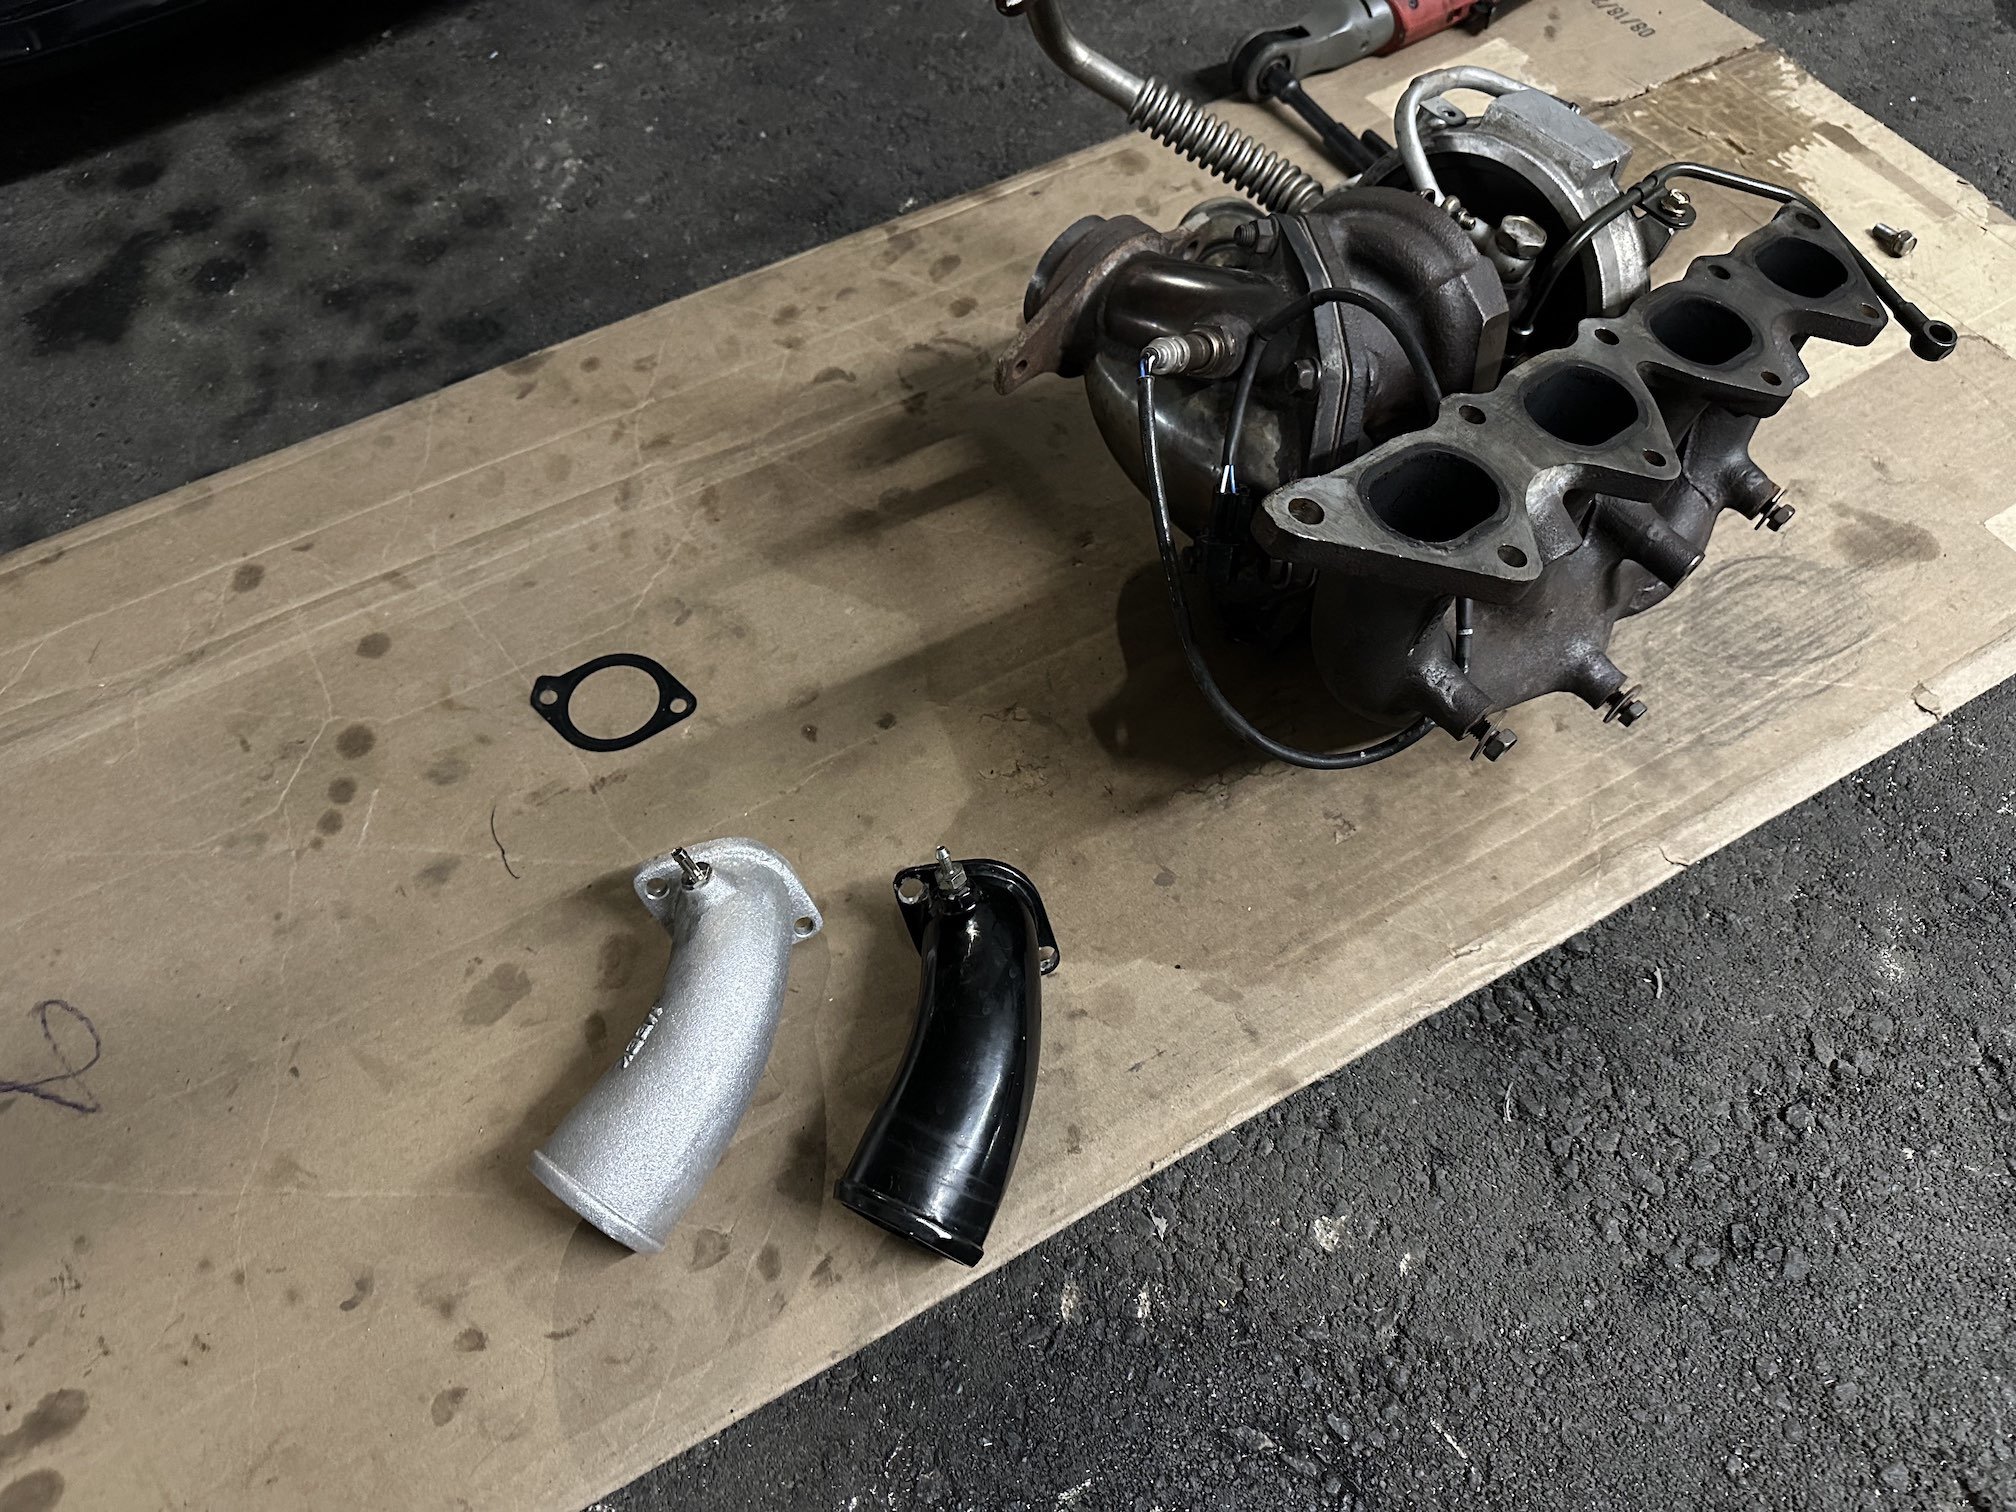
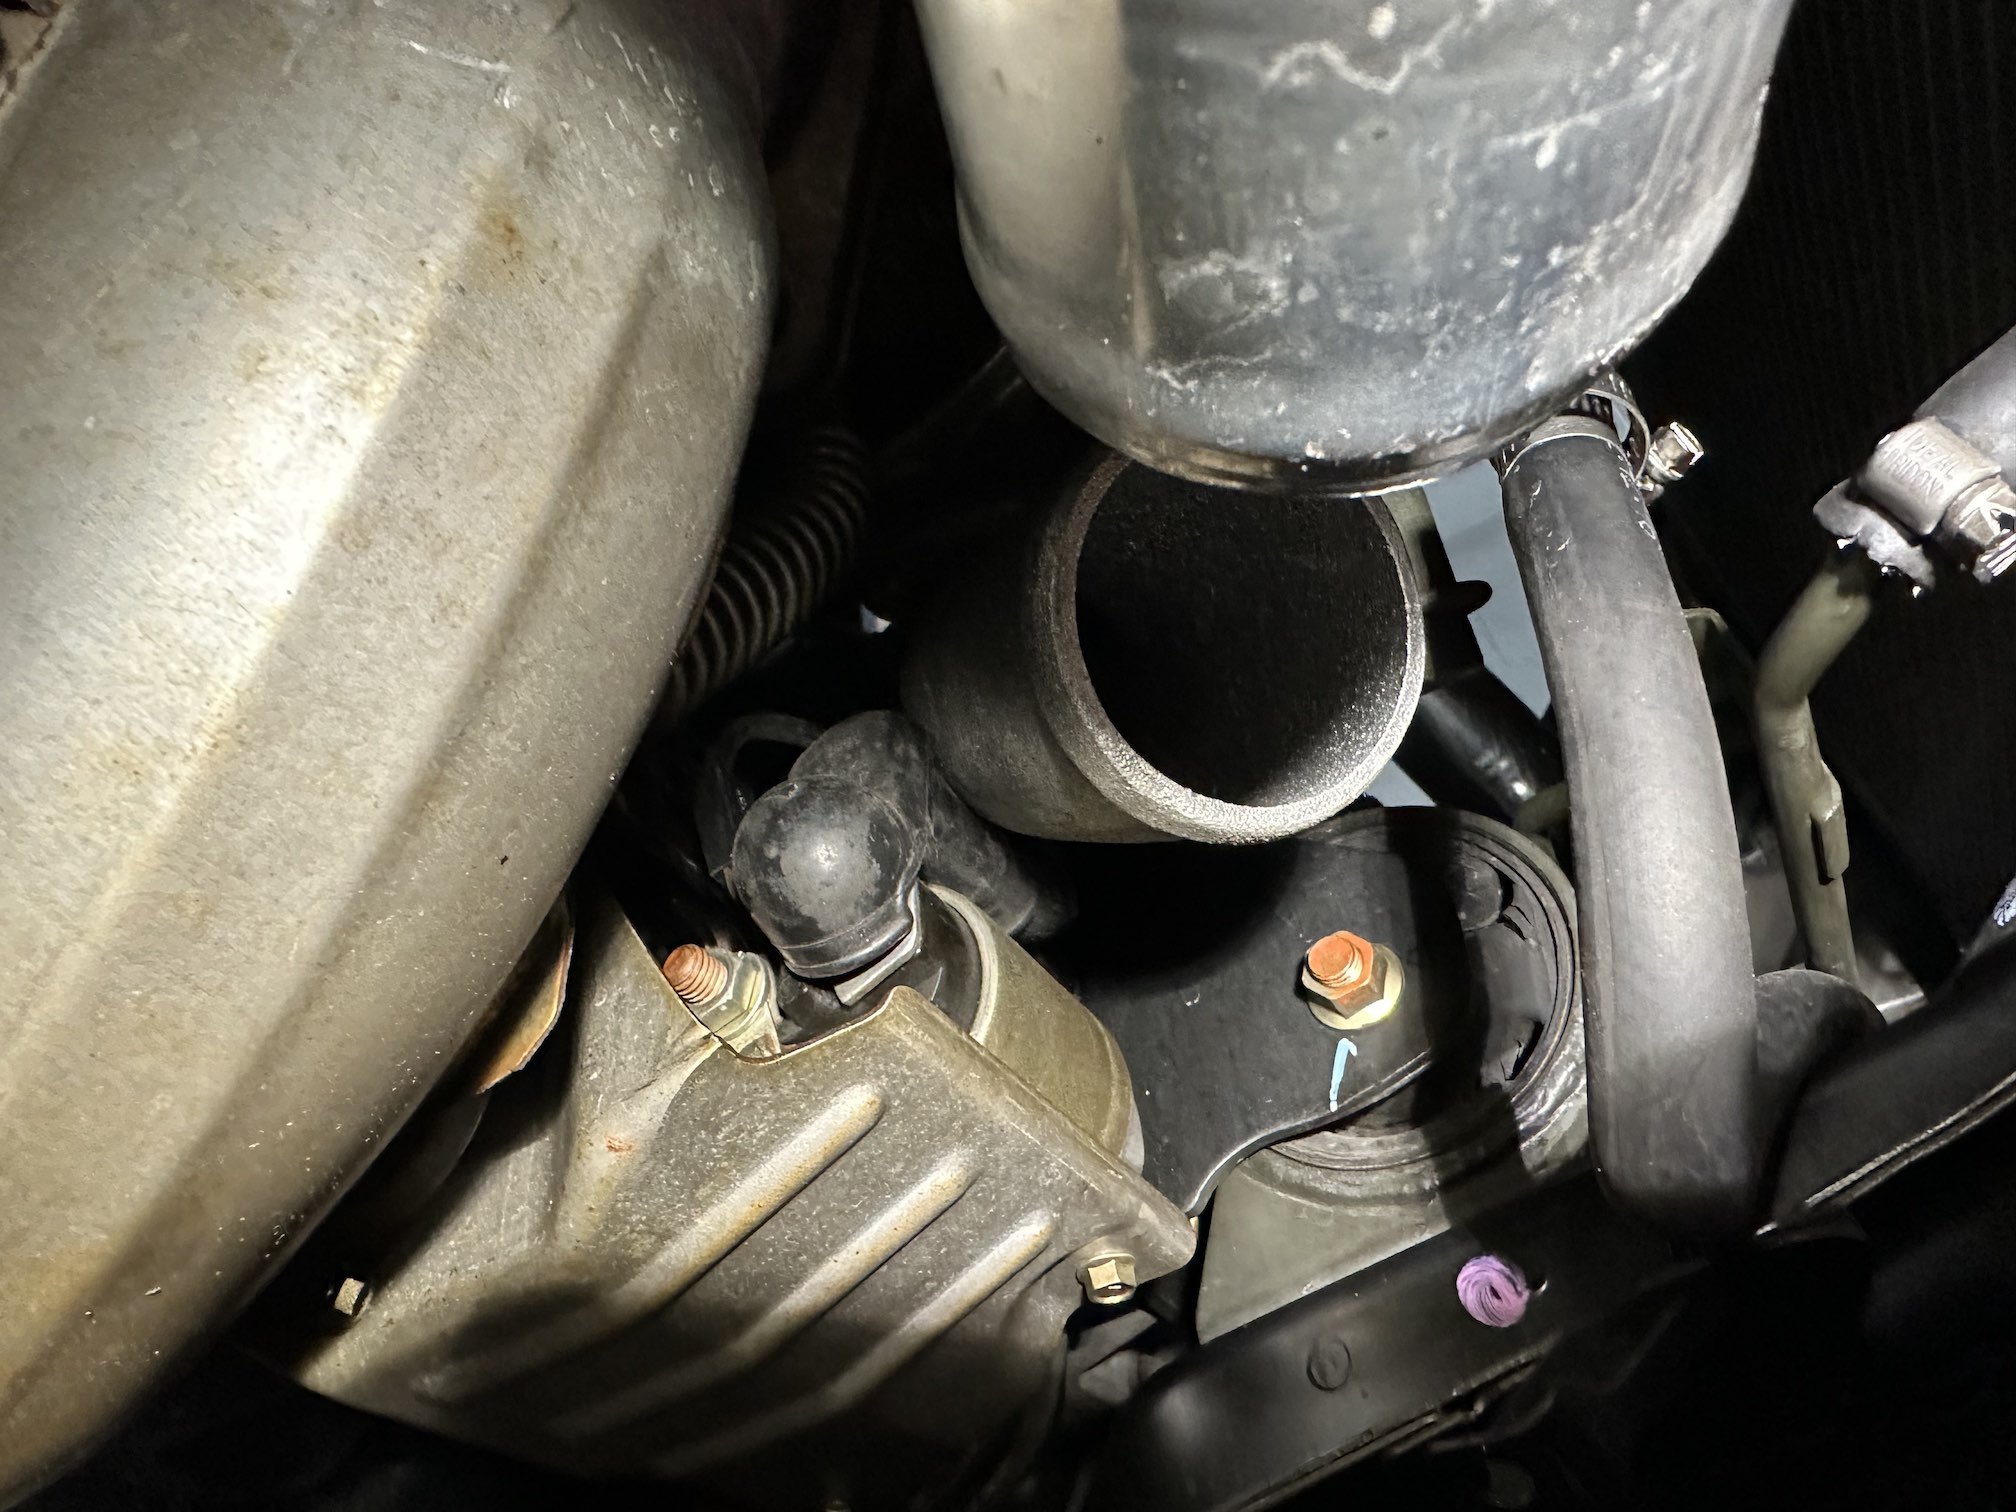
So in order to get this sorted I ended up buying a Meek Evo 9 J-pipe from Australia and also a stock Evo 9 J-pipe from across the border in Ohio and they were both shipped out on pretty much the same day. The Meek J-pipe arrived within 5 days whereas it took 12 days for the one to arrive from the US, and they both cost approx the same to send too - go figure. Turbo out once again - can compare the two J-pipes which are similar but different enough No longer hits starter solenoid! And lines up great with the Mishimoto lower intercooler hose
1 point
-
would something at the other end of the cc scale but equally inappropriate be in the spirit of the event? ie a roadglide/goldwing or some other massive thing1 point
-
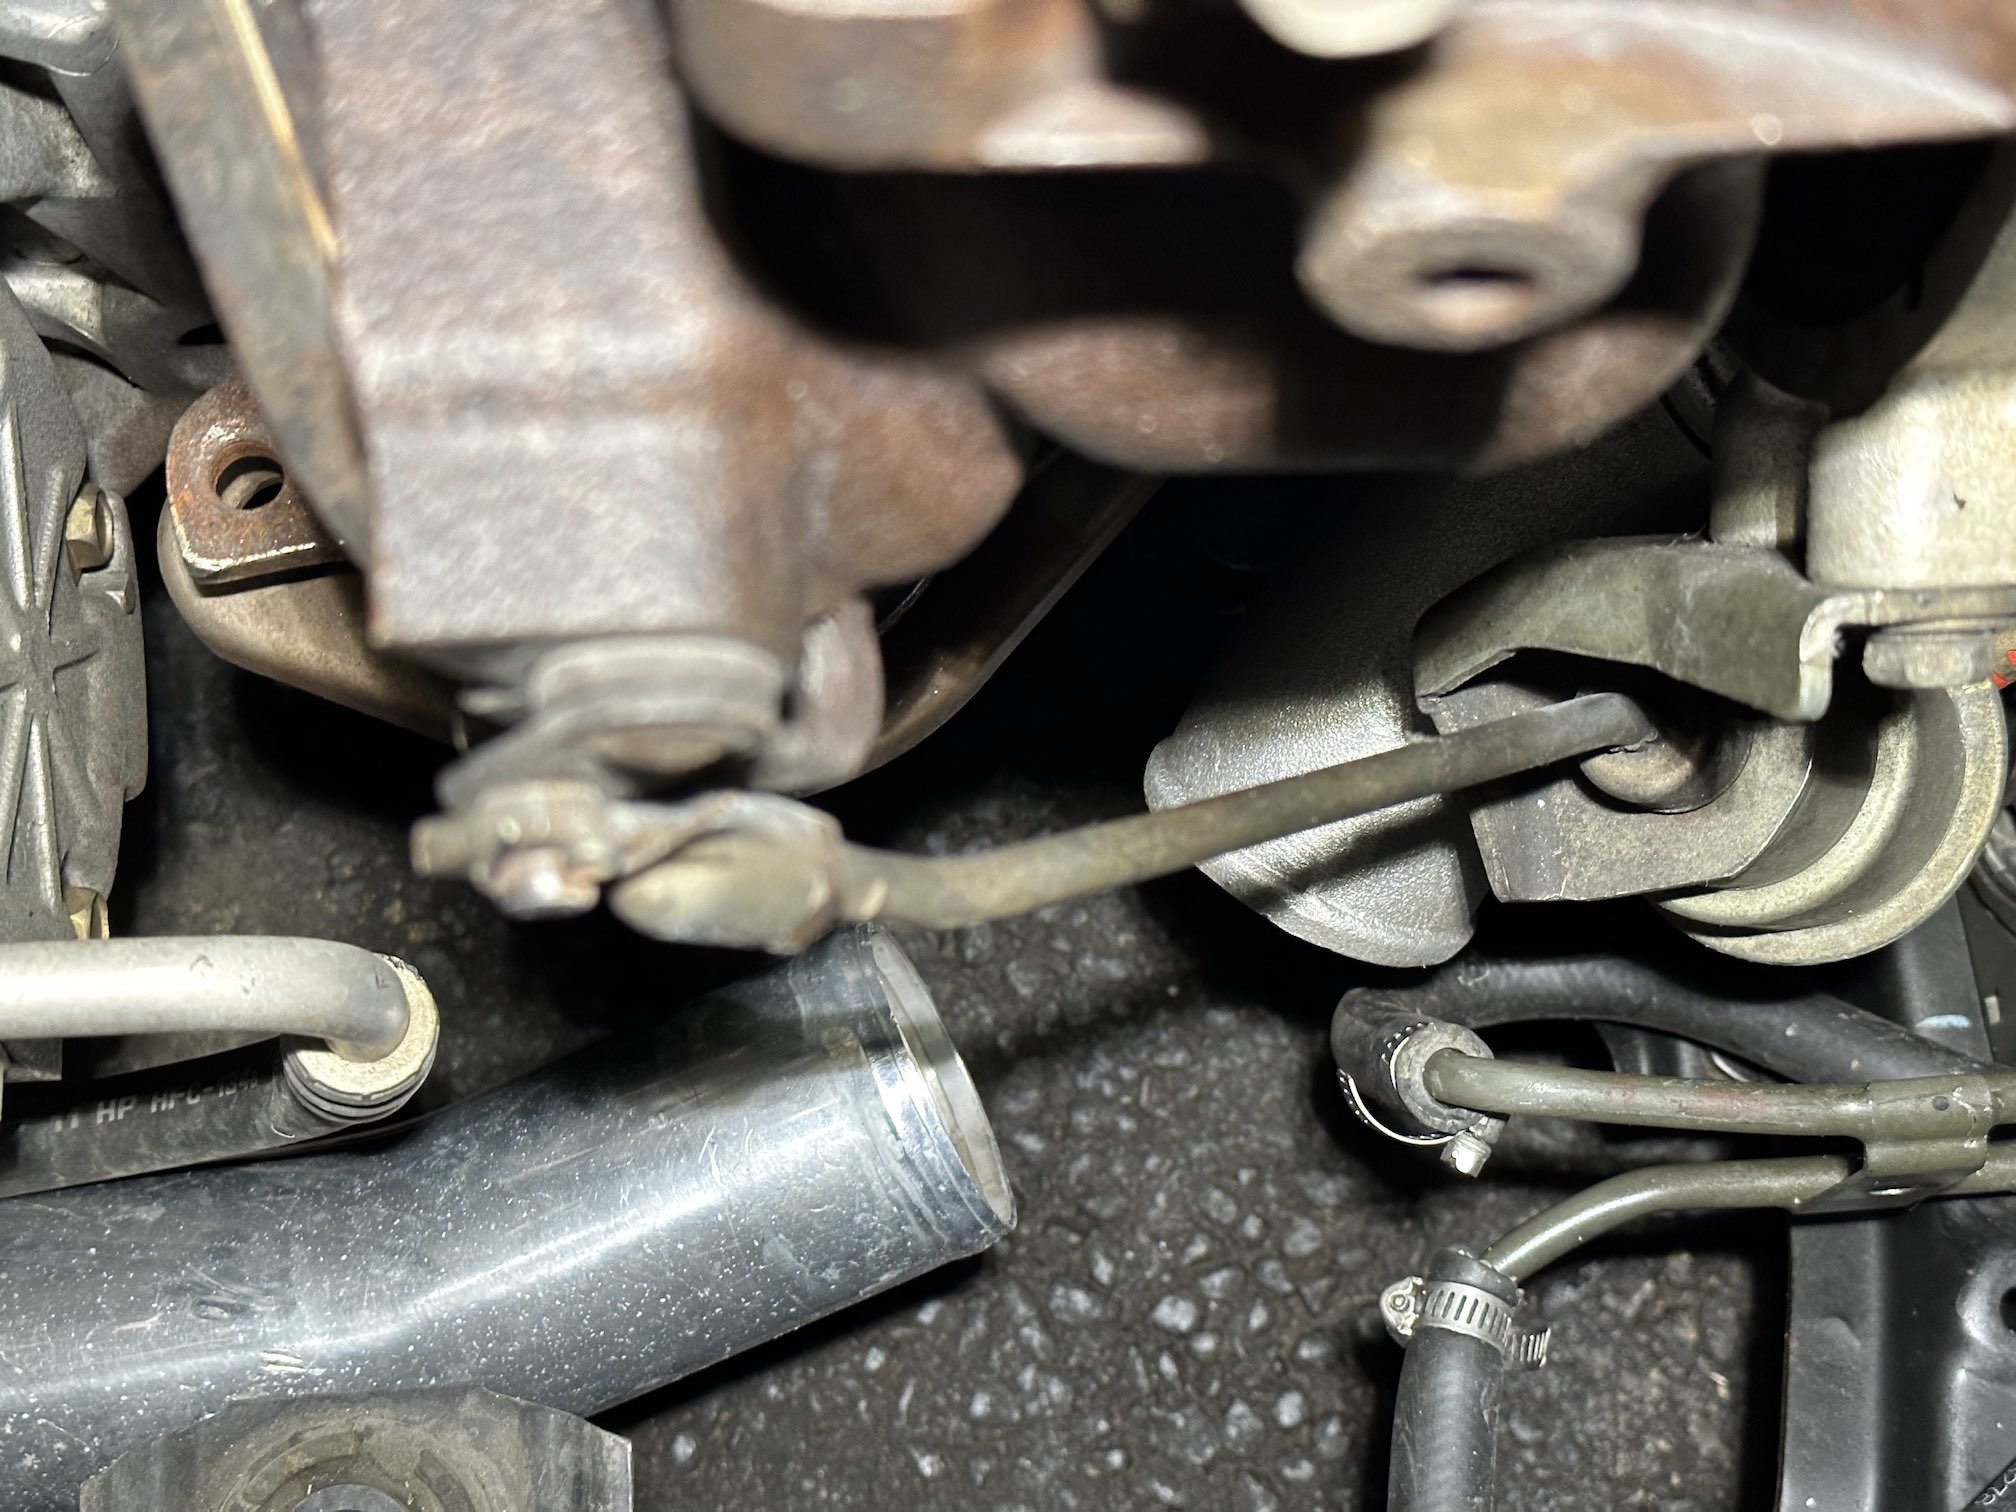
Small update - pulled the bumper off again (can get it down to a couple mins now provided the under tray isn't attached) to swap out the stock lower hot side intercooler pipe and was easier with the bumper off. bit of a difference here - the 40mm/1.8" section of the stock pipe is responsible for an easy 10-20hp bump in power when going to an aftermarket 2.5" pipe. Also wanted to check out more closely the small ding in the lower passenger side of the intercooler - it looks like perhaps someone has accidentally jacked it up from the edge of the intercooler as I couldn't find any corresponding damage to the bumper/lower lip or under tray which both look to be factory original. I have found a lead on a mint replacement low mile intercooler that I can pick up when I'll be in the states next, along with factory M/T cold side piping (the auto GT-A piping is heavier steel for supposed "noise reduction") and M/T turbo inlet pipe for when I do the M/T swap.
1 point
-
Anyone done this before? I realize it's not cost of time effective compared to welding pipes together. But it's also bloody cool / oldschool method. Not planning on doing it myself, just wondering if anyone out there has had a play with the idea. Basically the concept is that you pack a pipe full of dry (important to be dry...) sand, then heat the area you want to bend with a blowtorch. The sand ensures the pipe doesnt fold or crush. Here are some cool looking sand bent headers from an old timey Grand Prix car popular with bike guys
1 point
-
Big day...big fucking day... Some outside shots:
1 point
-
Checked the diff and rear suspension when fitting the rear cylinders and found the shocks stuffed and the springs chronically squeaking. so pulled it out cleaned all the crud/dust/rust/oil and added paint. Awaiting an oil seal for the diff and it will all go back in soon with new brakes. new drums have arrived too - they need machining but from all measurements will fit
1 point
-
Unobtanium has been found!! Chatting to another owner of a convertible one of these in Aussie and i asked about the wheel cylinders. He mentioned all his were re-sleeved but had heard that some Subaru ones matched. This little titbit of info sparked some research and I found a Subaru Brat/Brumby/Leone rear cylinder that looked the same. I purchased a pair and compared them - the main housing is the same but the piston/rod setup is different. However swapping in my old pistons to the new housing and using the new dust boots works perfectly
1 point
-
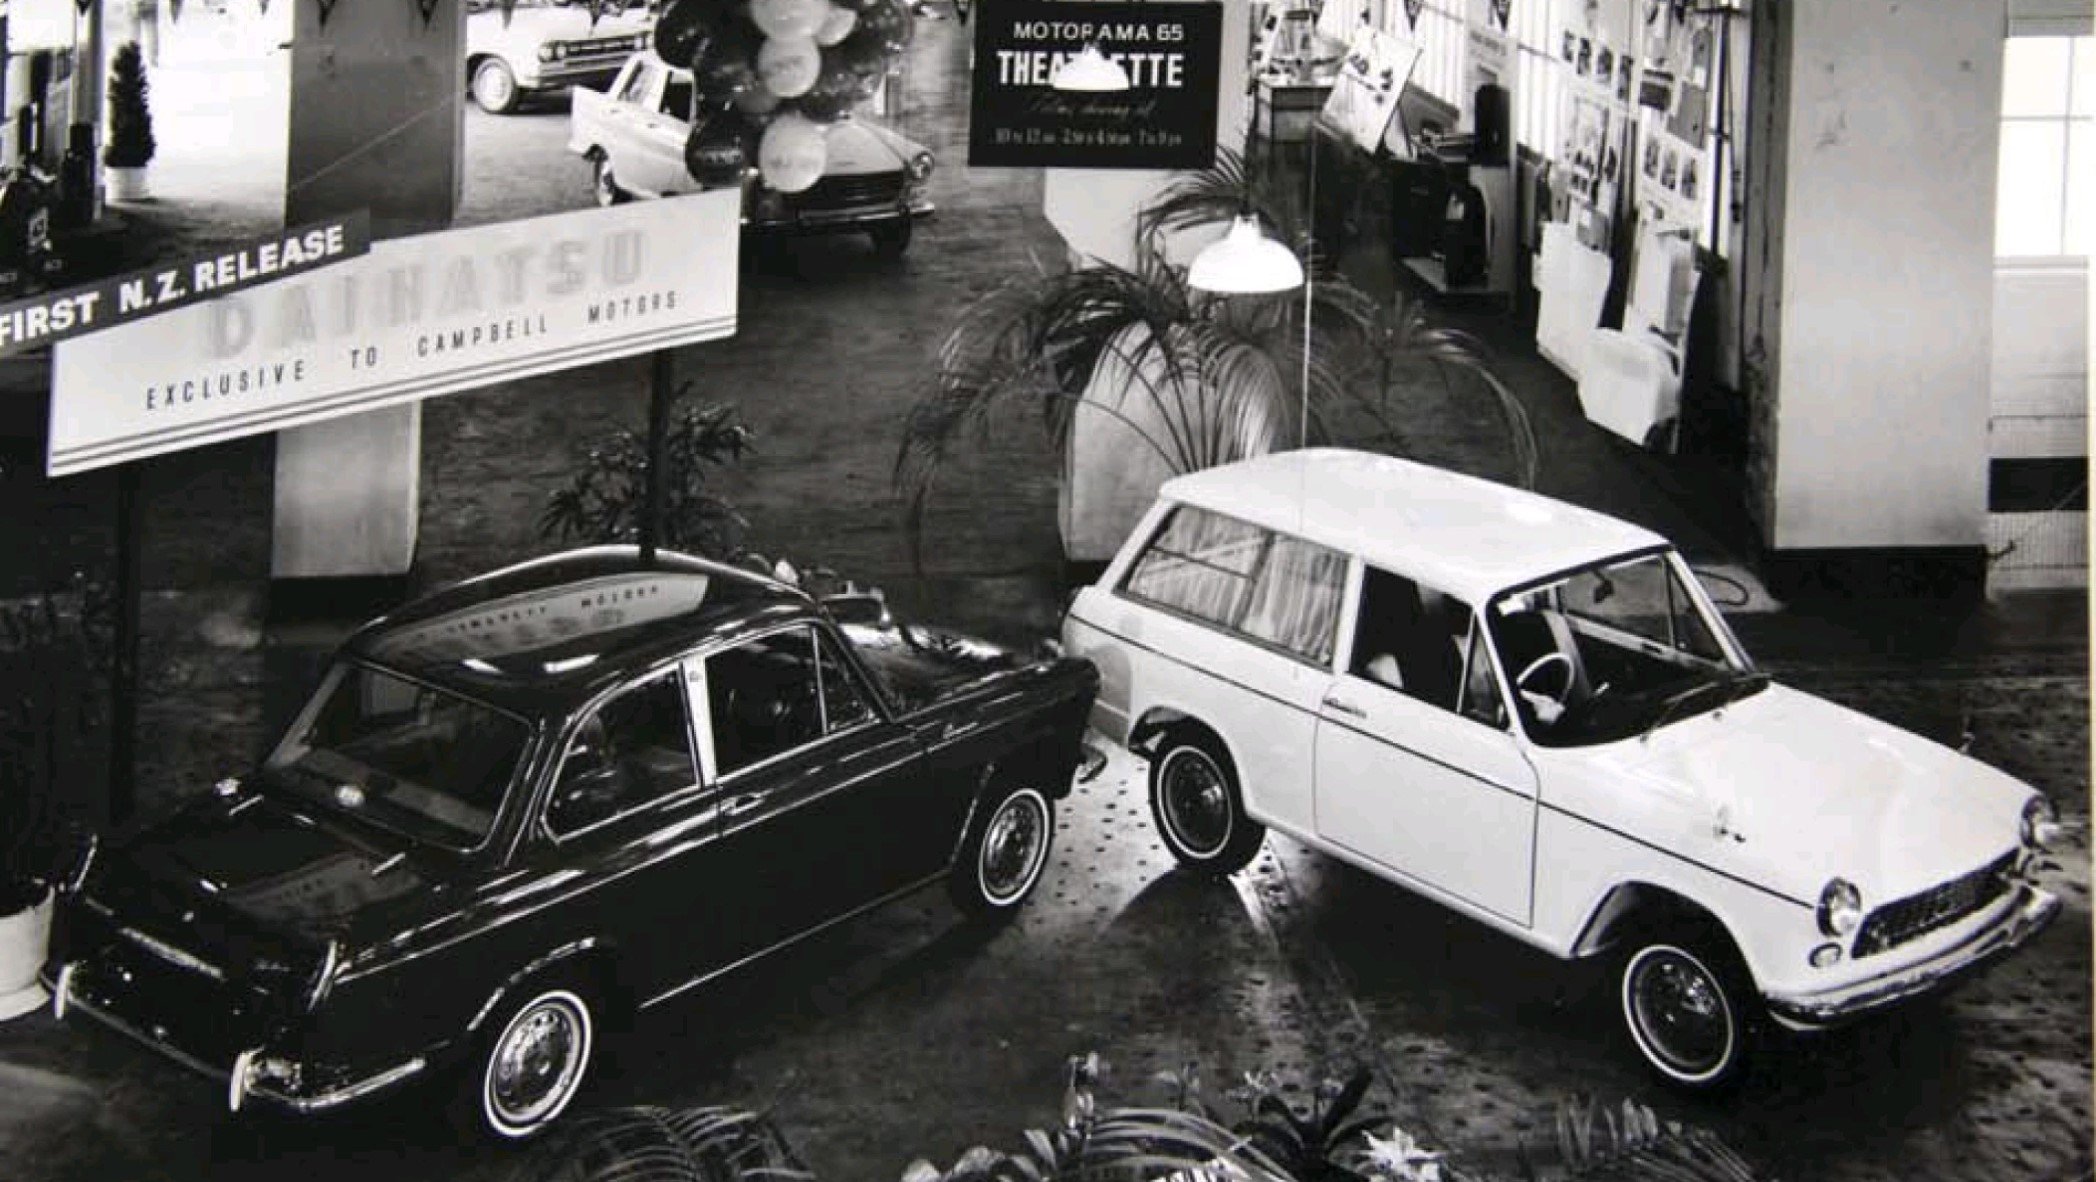
This is the actual car on the Campbells stand at the 1965 Motorama - the wagon was last seen in the 80's by the old owner of mine. Possibly these two were the only ones sold here.
1 point
-
Beaut day in the 03....so time to get to it! After visiting Andy @ mBike to swap my 19mm carb for a 22mm one, it was off to @h4nd's with the frame and motor in the back of the capacious teutonic hatch. Much hilarity with a grinder and dremel ensued. First job waas to cut back the upper mount by about 8mm. Finished off with the dremel...(Hands by @h4nd) And with much fettling....progress! Although the angle was all wrong and there was no room for the carb under there. So it was back home with some purloined tools to carry on the fight. Initially I was just going to slob around in the sun and forget about it, but curiosity got the better of me......and in the best trditions of CAD I made a start. Bloody Hell!!!!! It looks like it will need a bracket to allow the back mounting hole to be used (at the moment its just out in the breeze). Ive been conversing with Jeremy @ Kaos Kustom works who is plannng on doing an A50 swap so might see what he can do. I've taken lots of photos of what I've done so far for his reference. And then......silly season ensued and all manner of parts made an appearance. Please note I was just making it up as I went along so the fitment and placement probably wont be final. So thats where we sit. The owner has already been gushing over it and has pronounced it "Good".
1 point
-
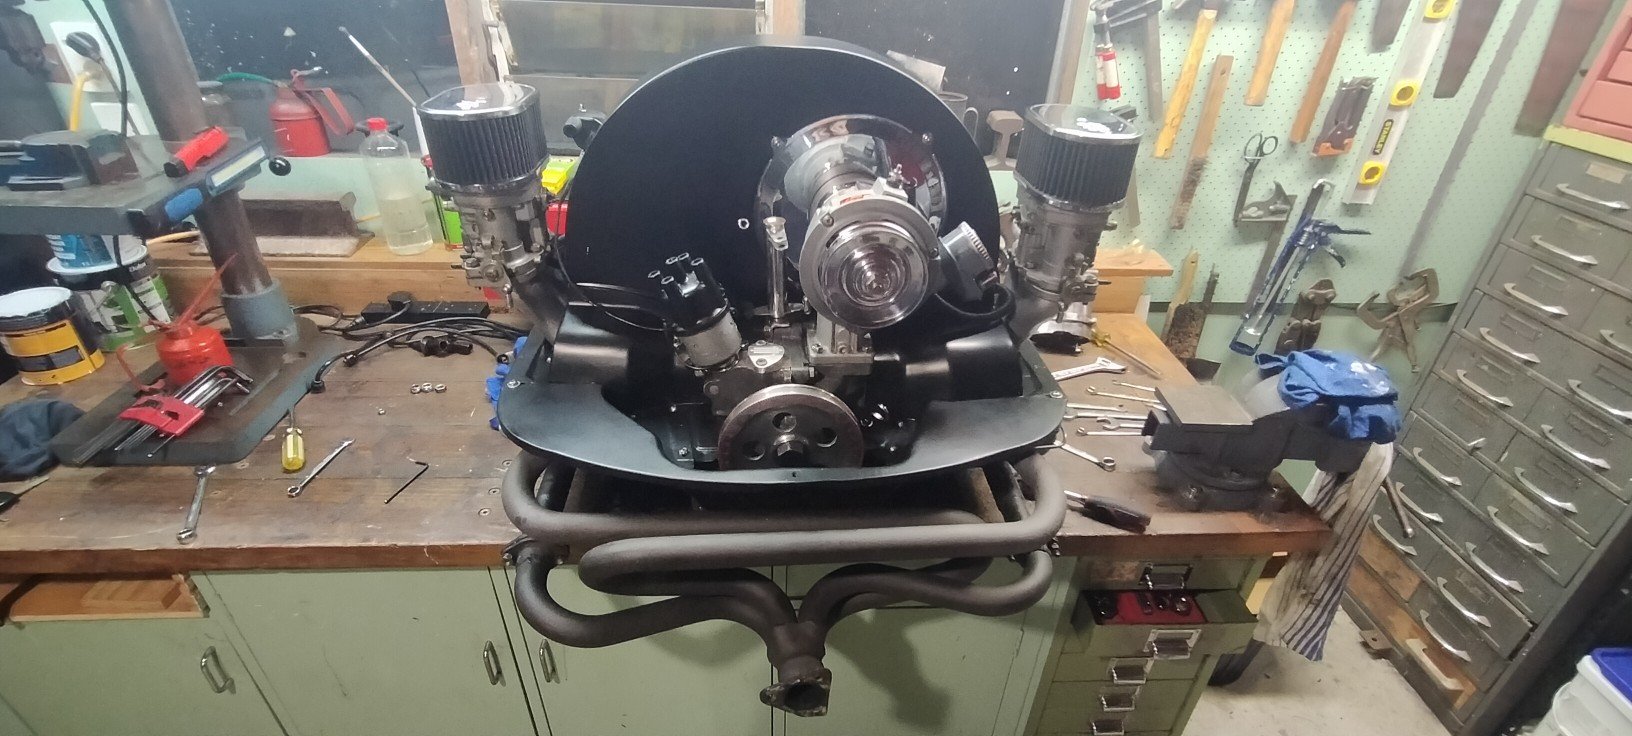
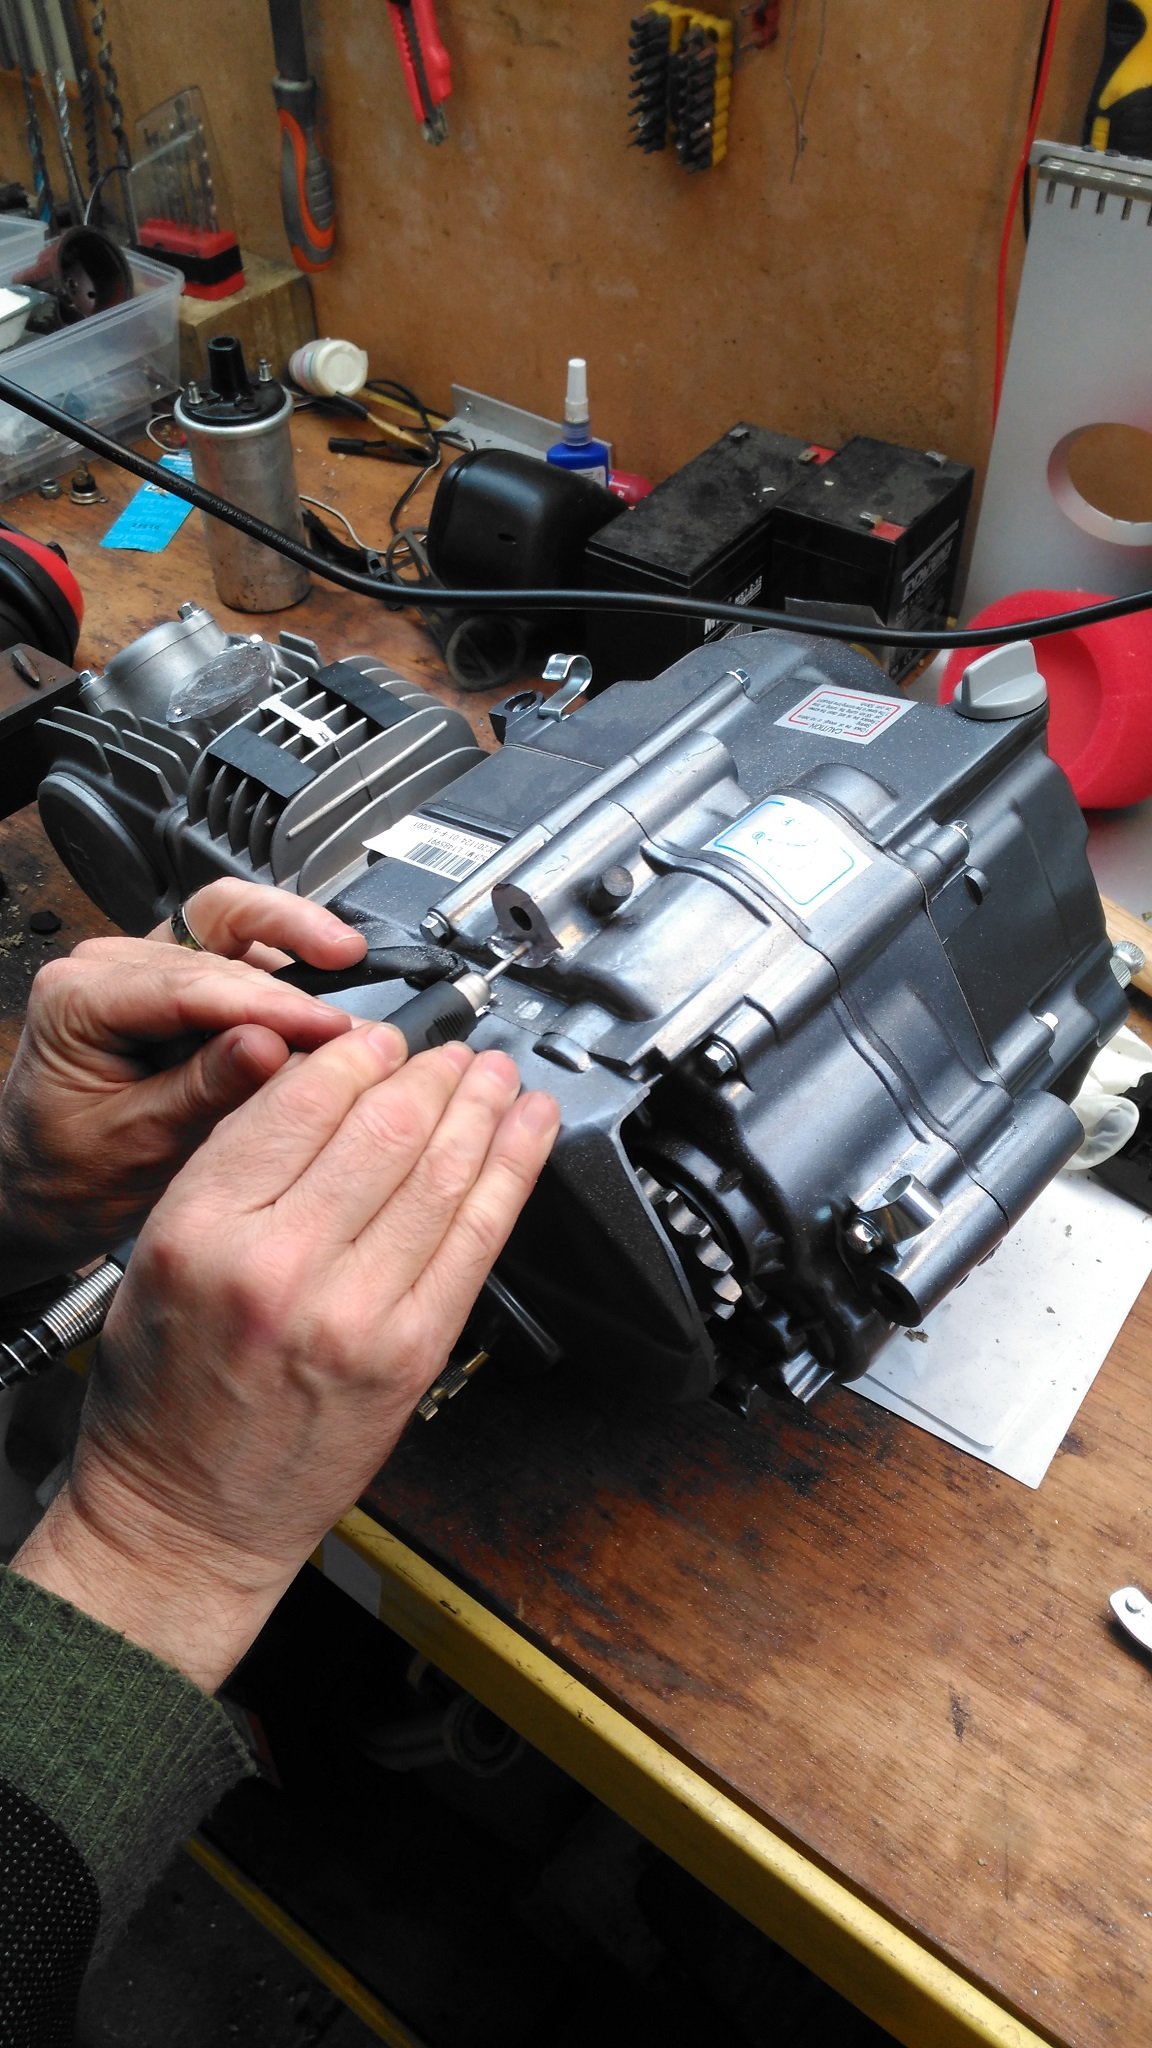
got a bit carried away, ended up with a freshly rebuilt late red top motor, j160 and some Niteparts headers. ended up doing a rwd cooling system conversion which was wayyyy more involved than I ever thought and cost far too much for some crusty old parts. I have no photos of the new setup in the car but its all running and driving now. I just happened to order a set of Whitley tune itb's for my setup, and some kelford cams and a few other goodies to get this thing humming.1 point


.thumb.jpg.b5aa15b7d5c7bde2c277b6e7cda7e7f8.jpg)


This leaderboard is set to Auckland/GMT+12:00