
Leaderboard


Popular Content
Showing content with the highest reputation on 11/06/21 in all areas
-
16 points
-
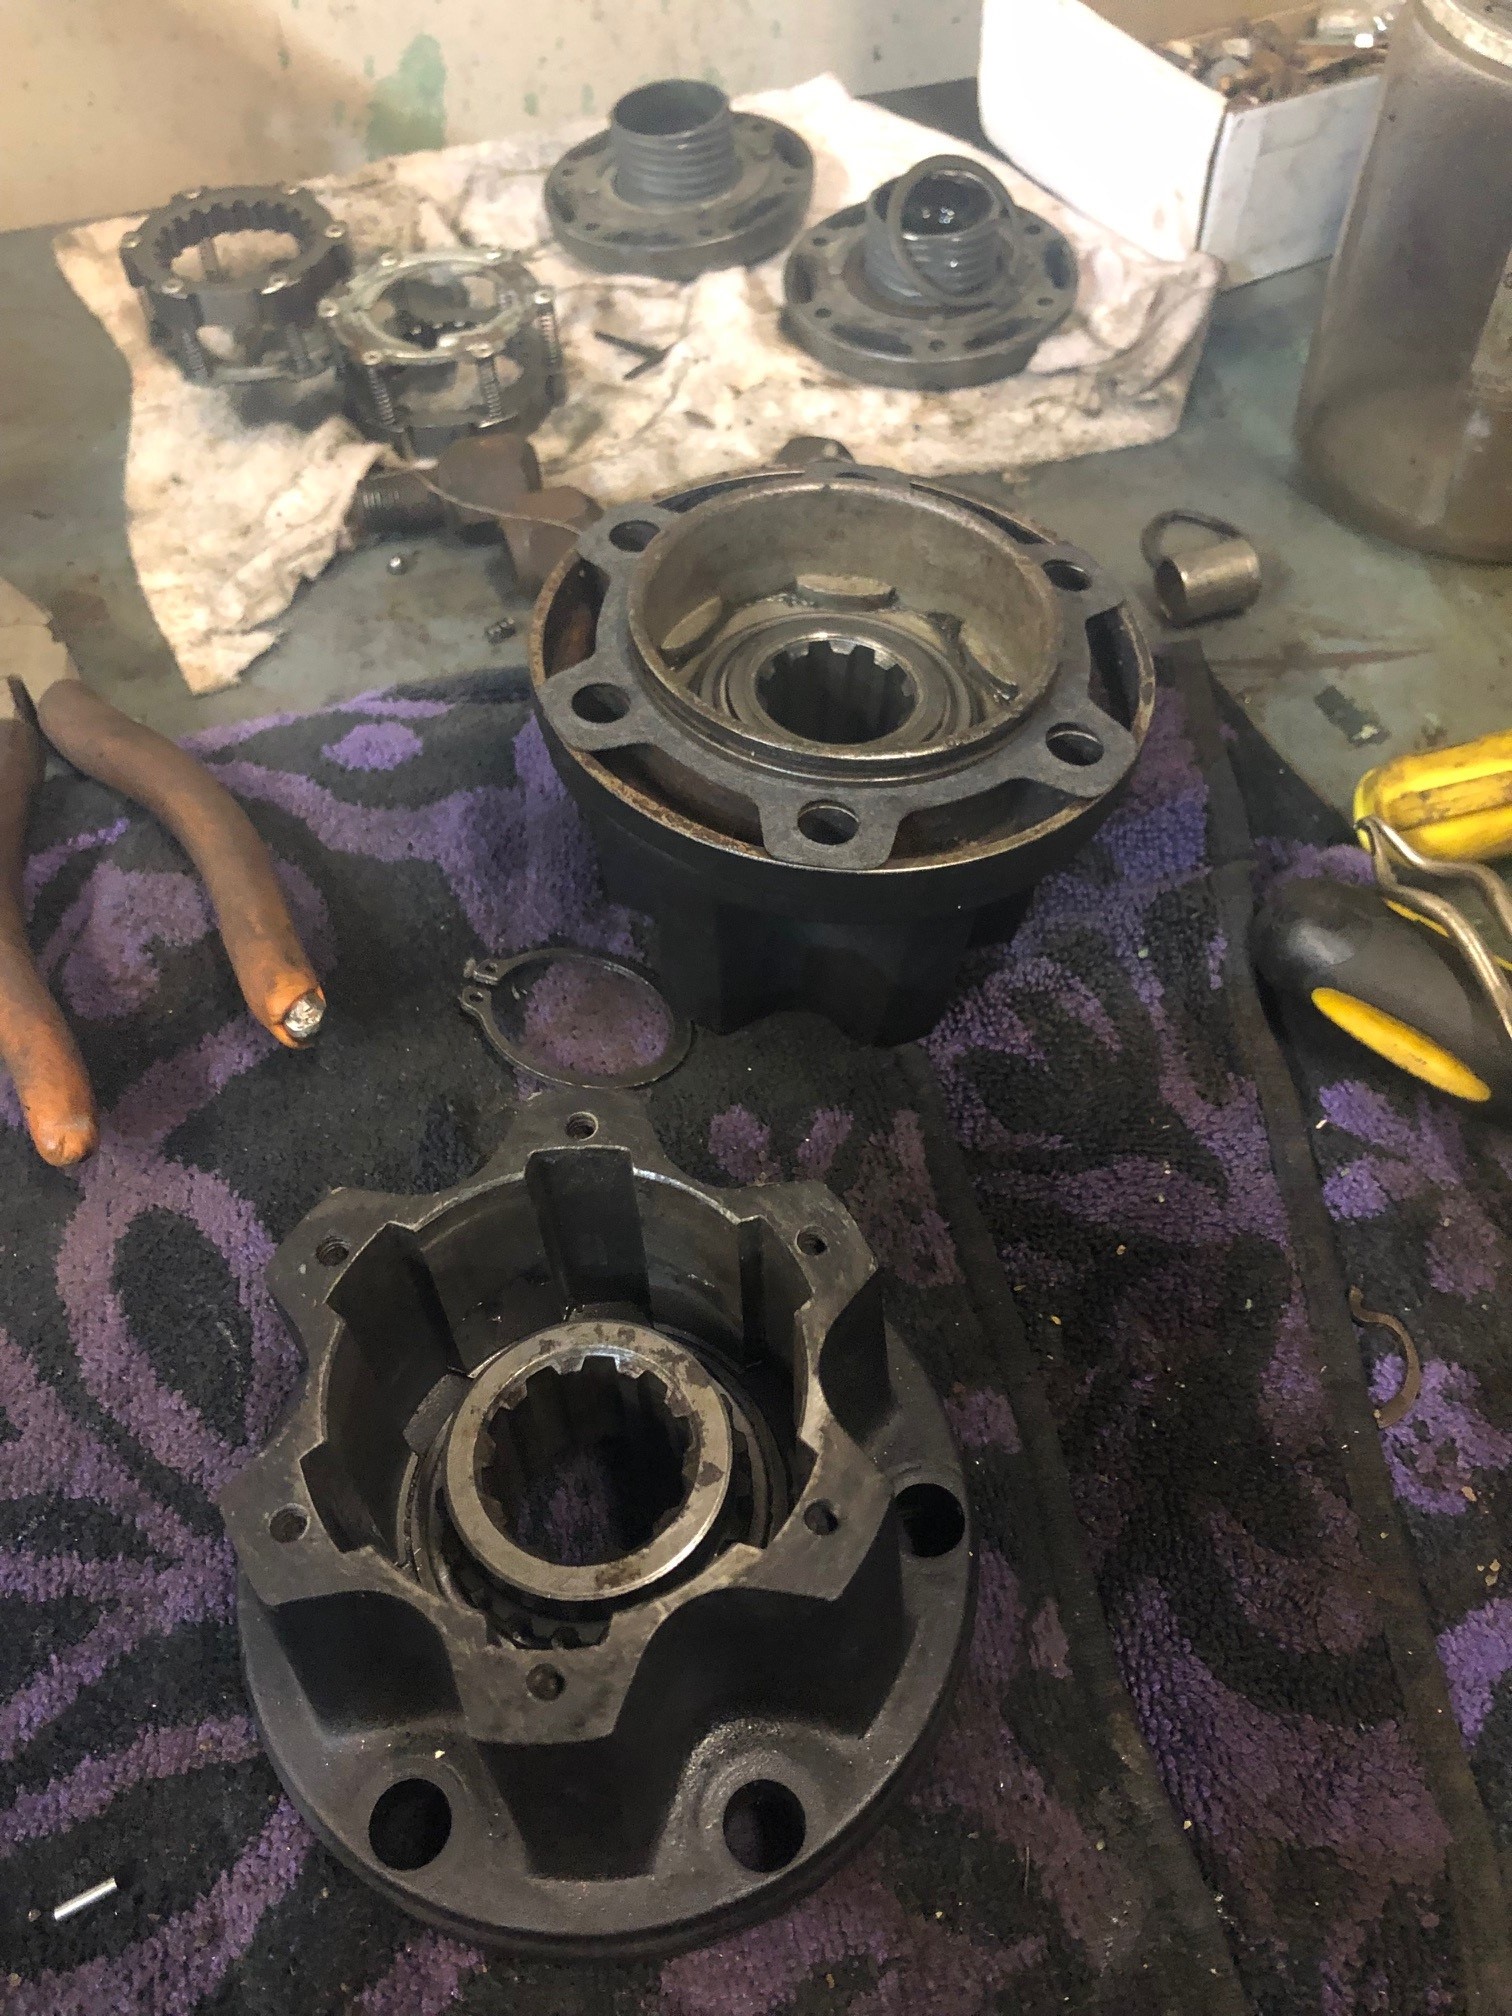
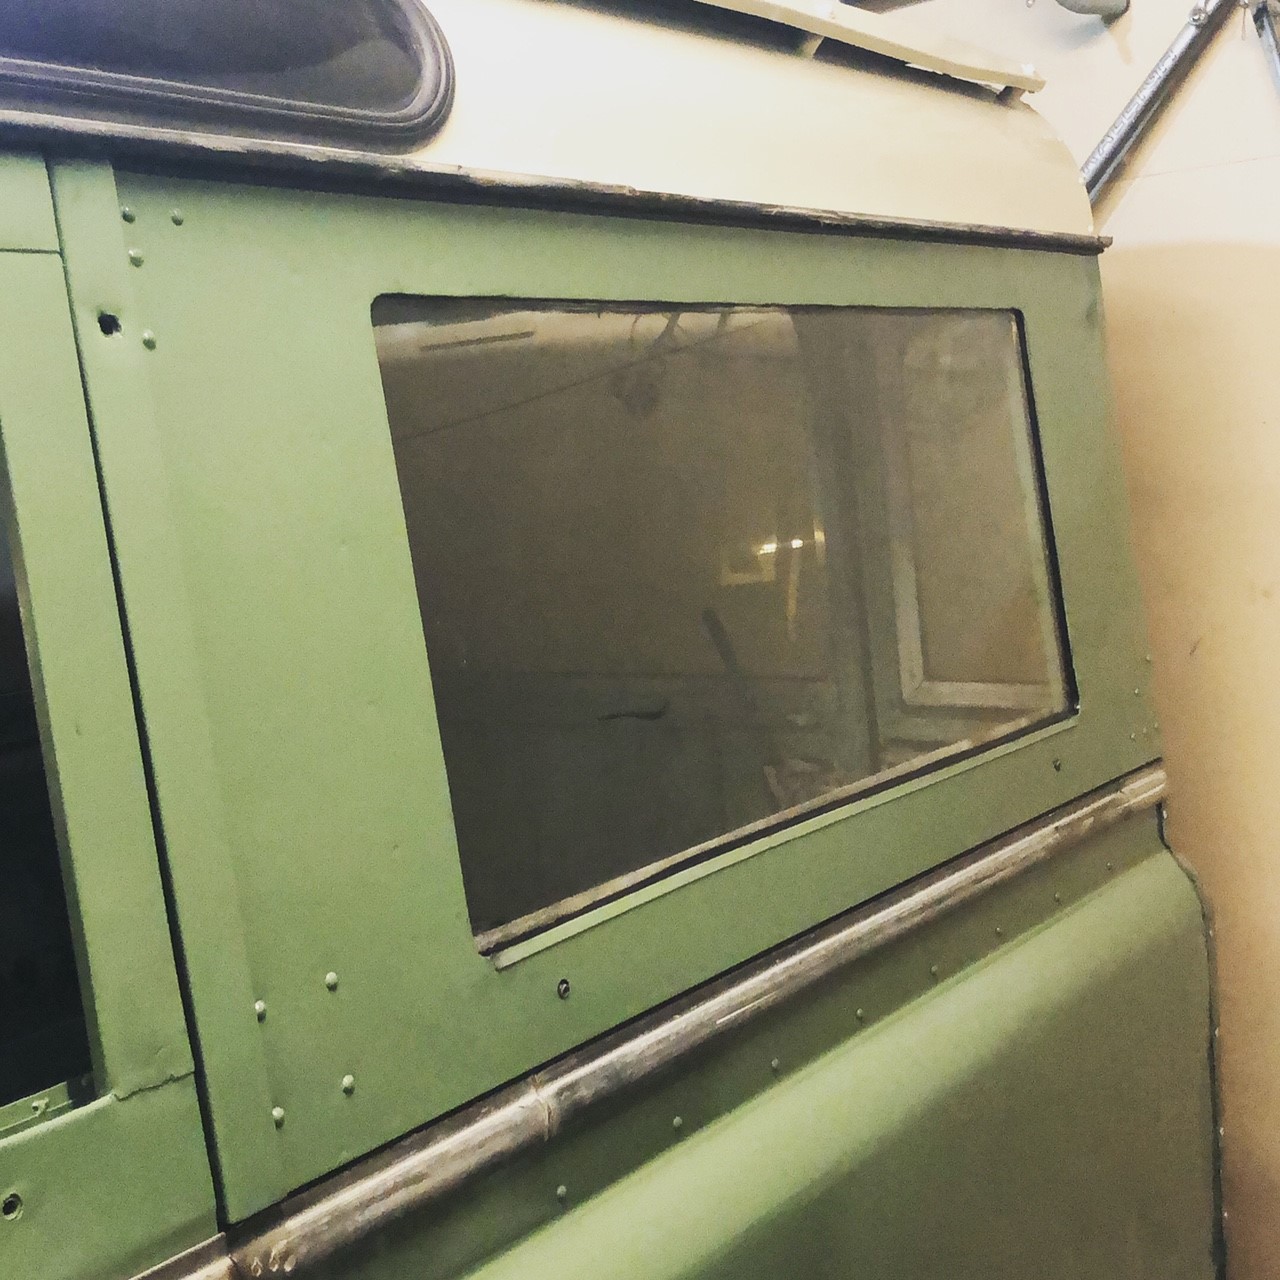
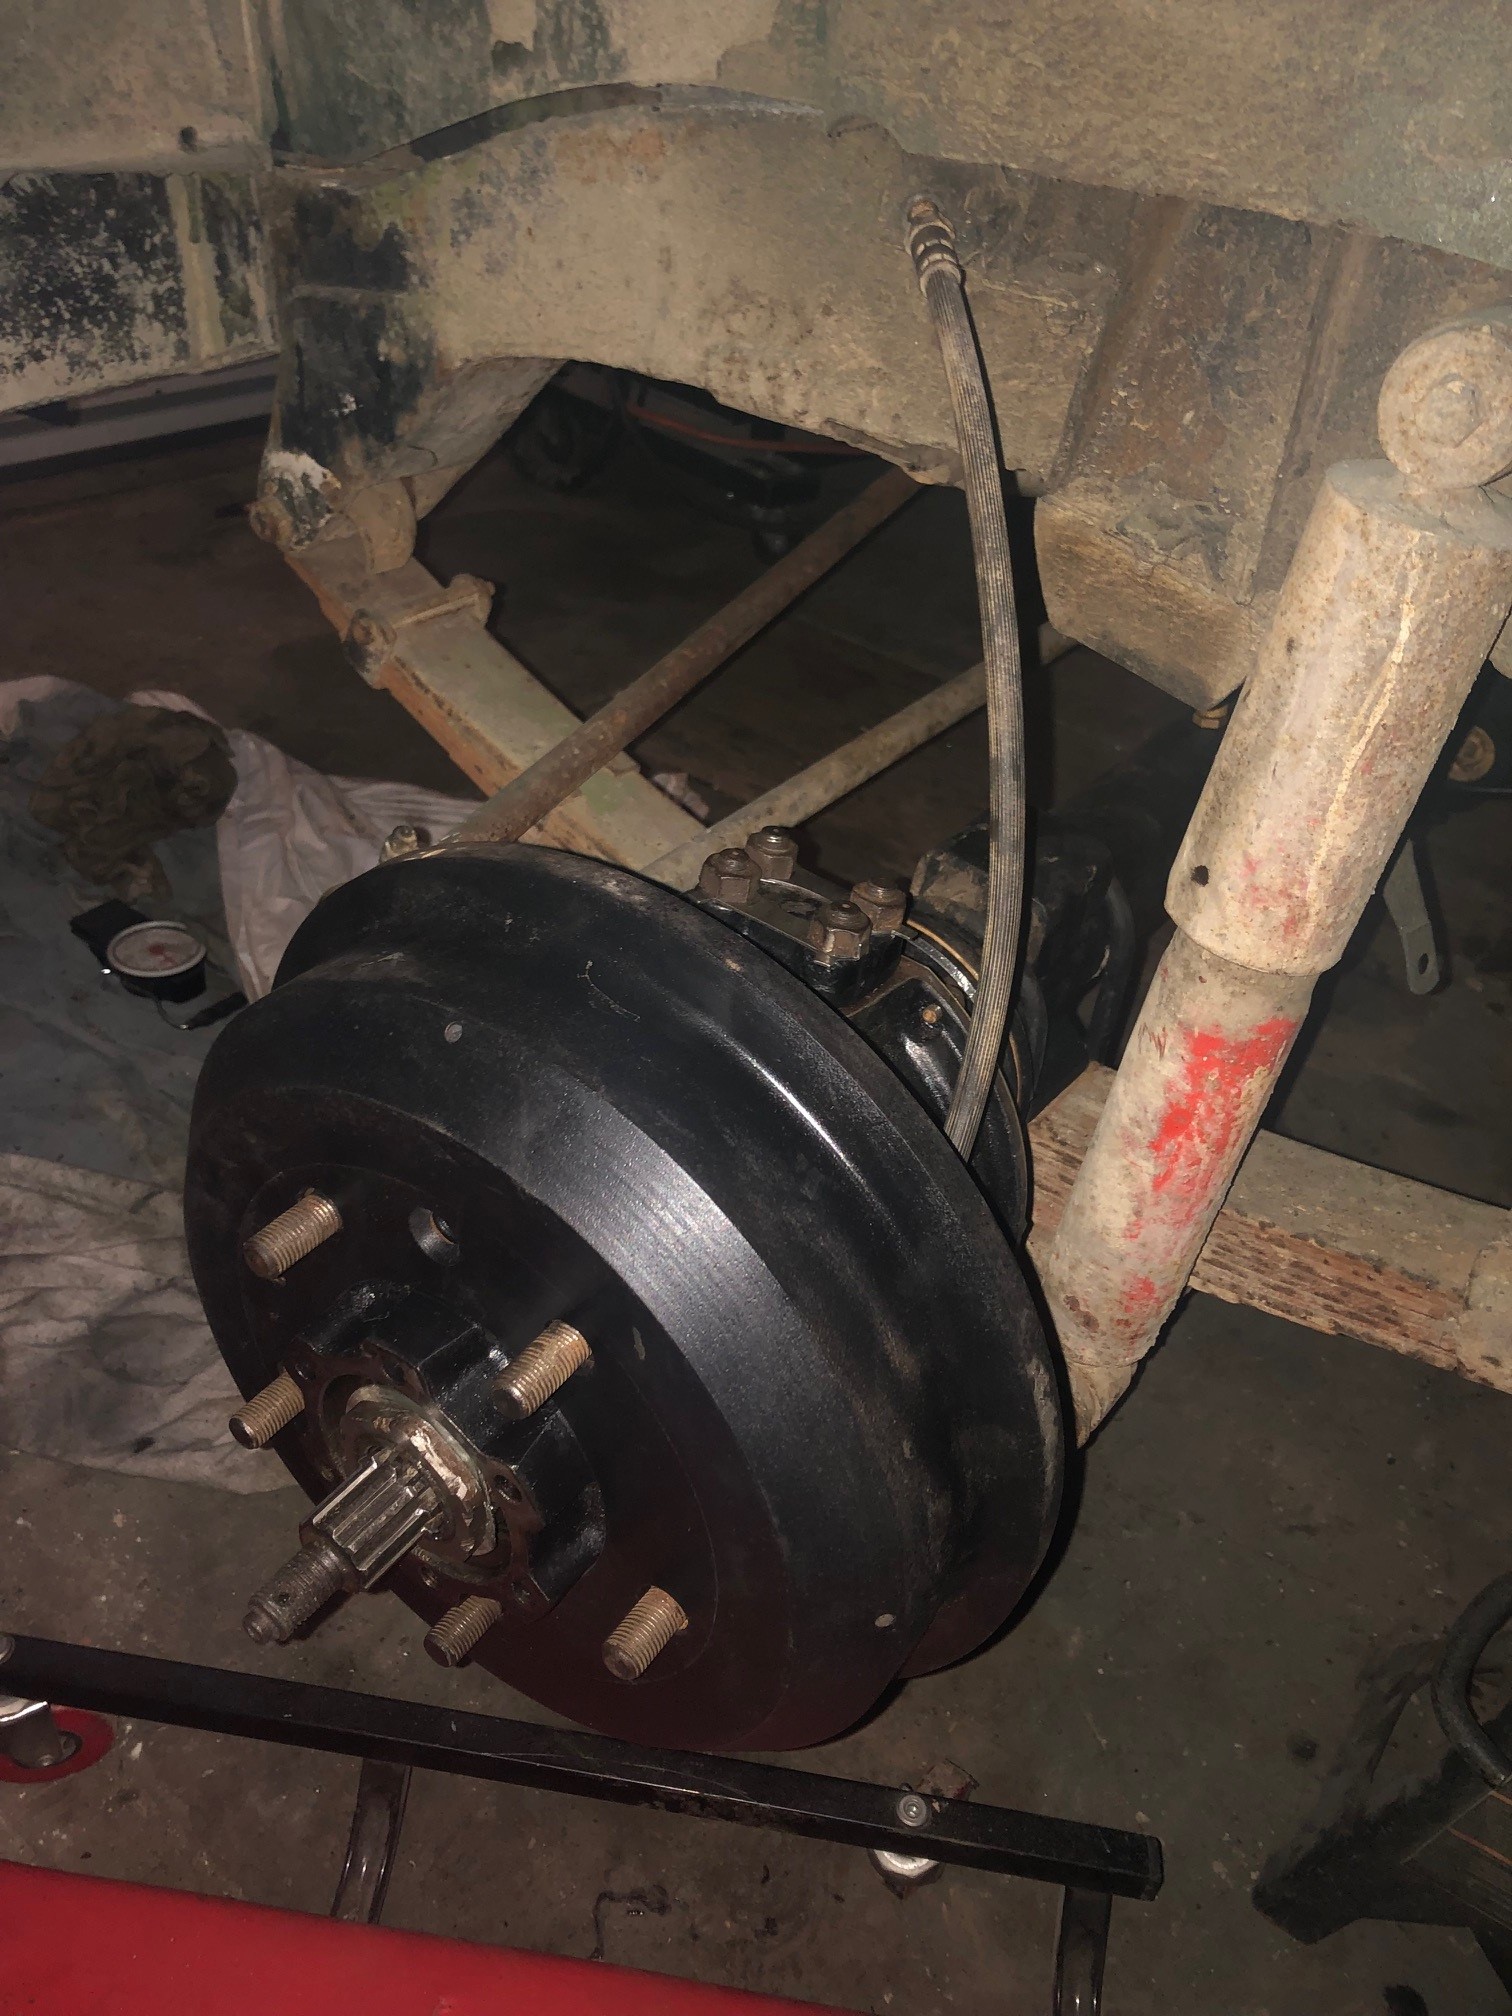
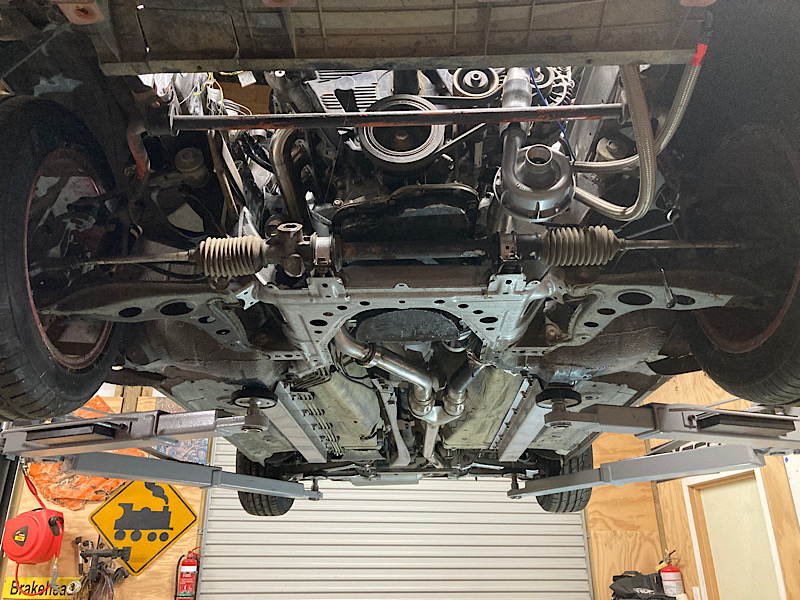
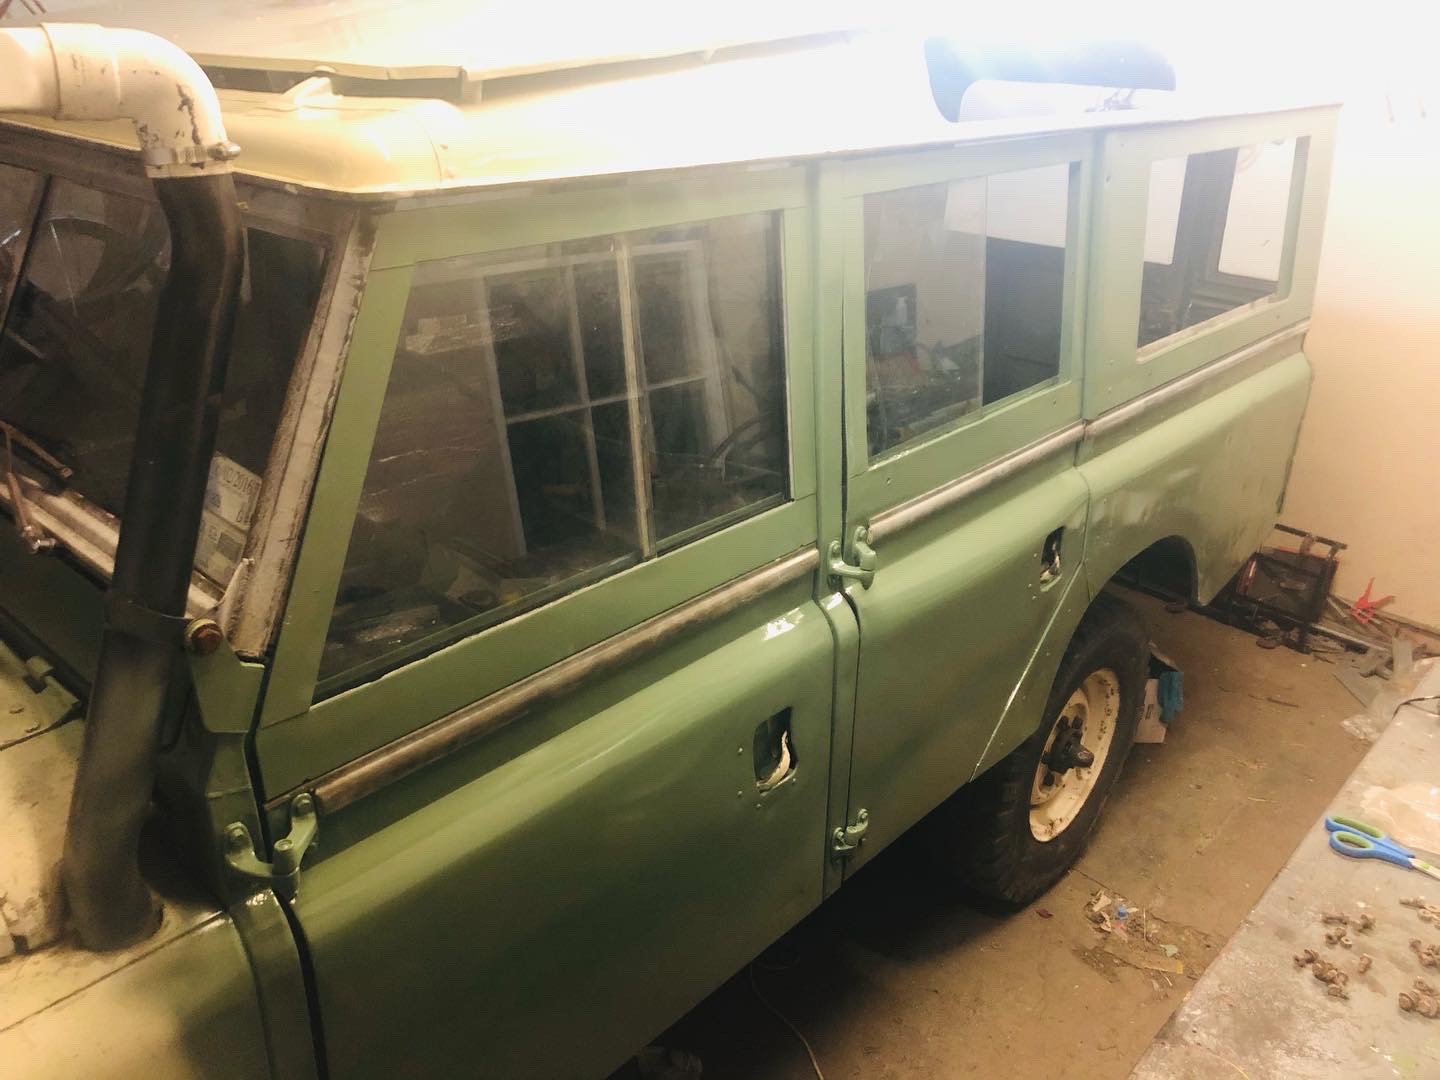
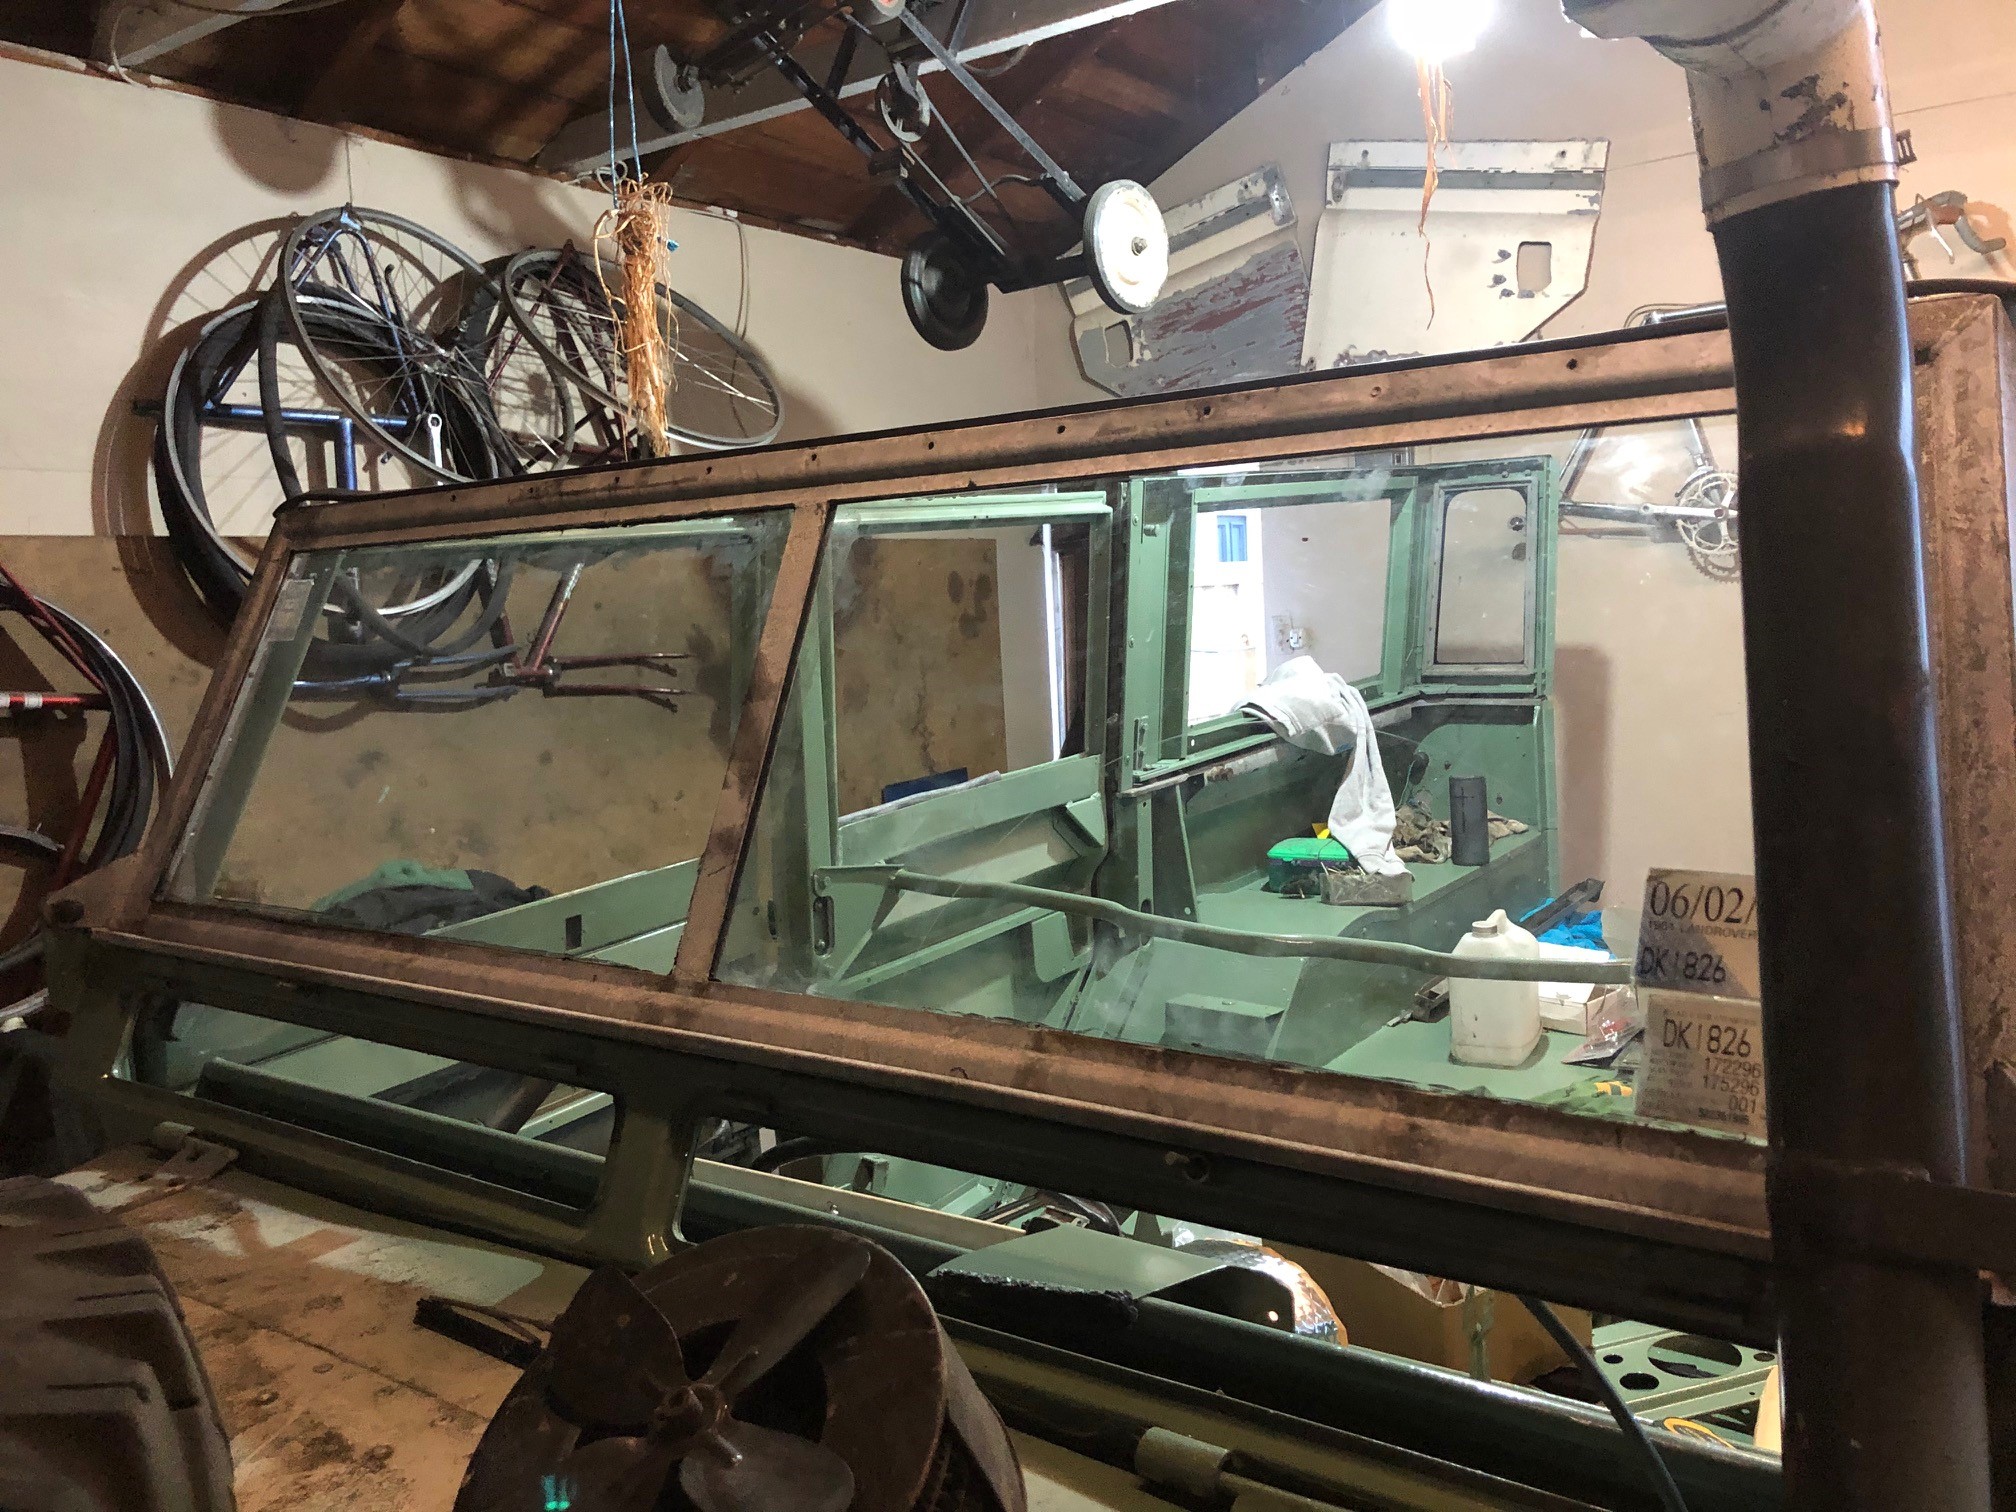
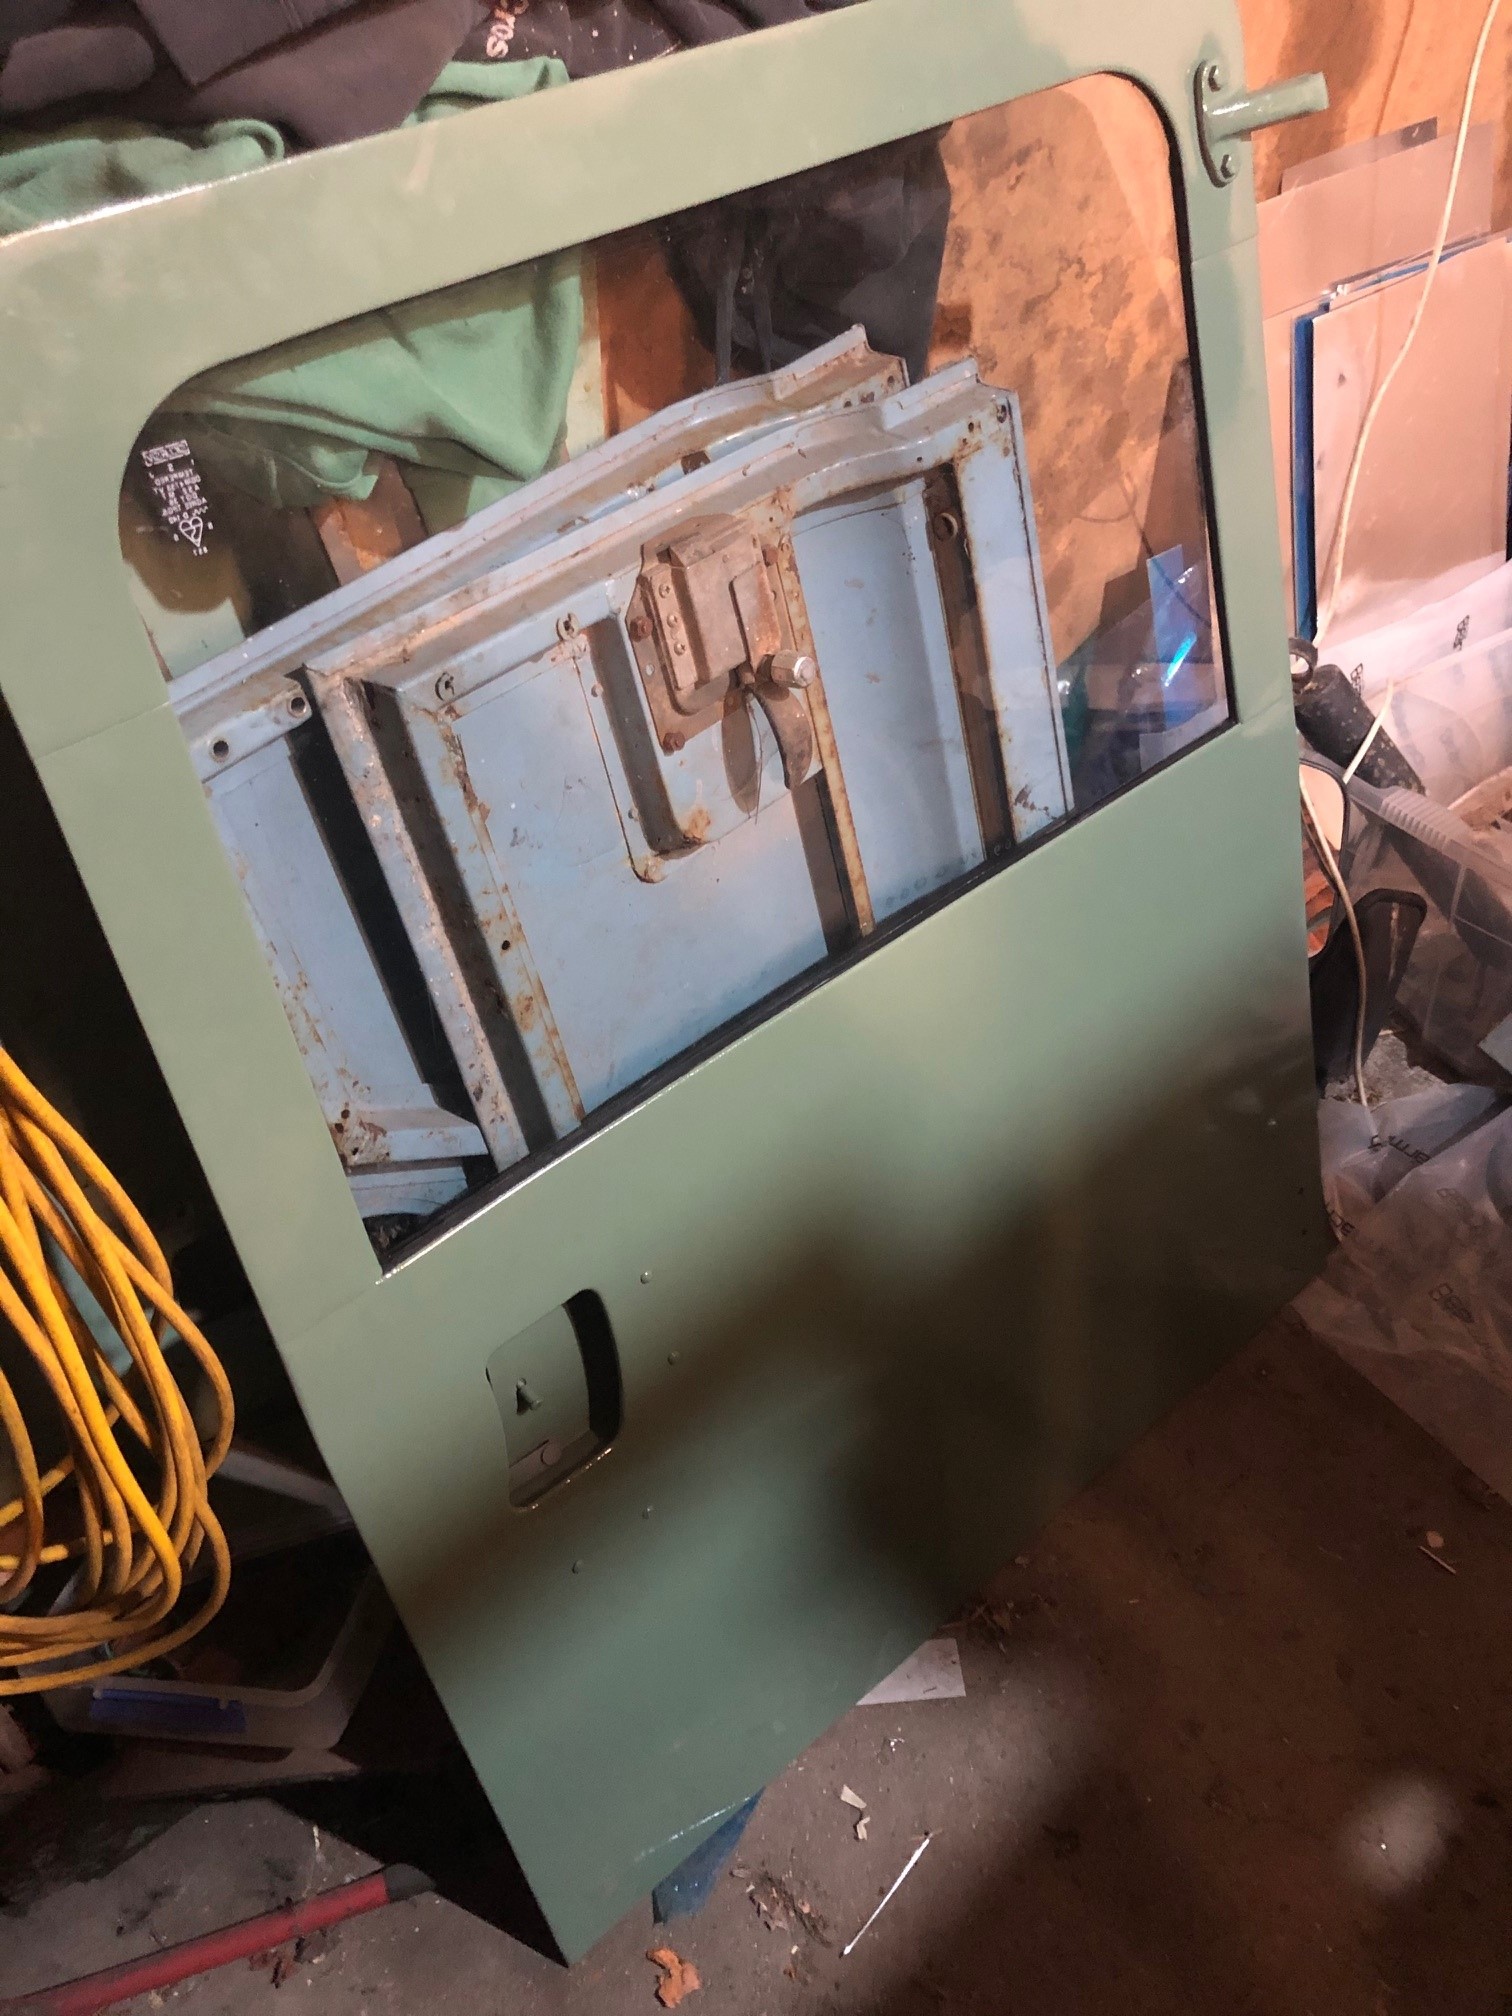
Continuing the process of reassembling this front axle Also giving these free wheeling hubs a bit of an overhaul. Think I mentioned I wanted to go to a fixed rear glass. I got some glass cut to the required size and bent up some simple brackets to drill into the frame, very much how the rear door glass is fixed. Pretty happy with the result TBH.
 10 points
 -
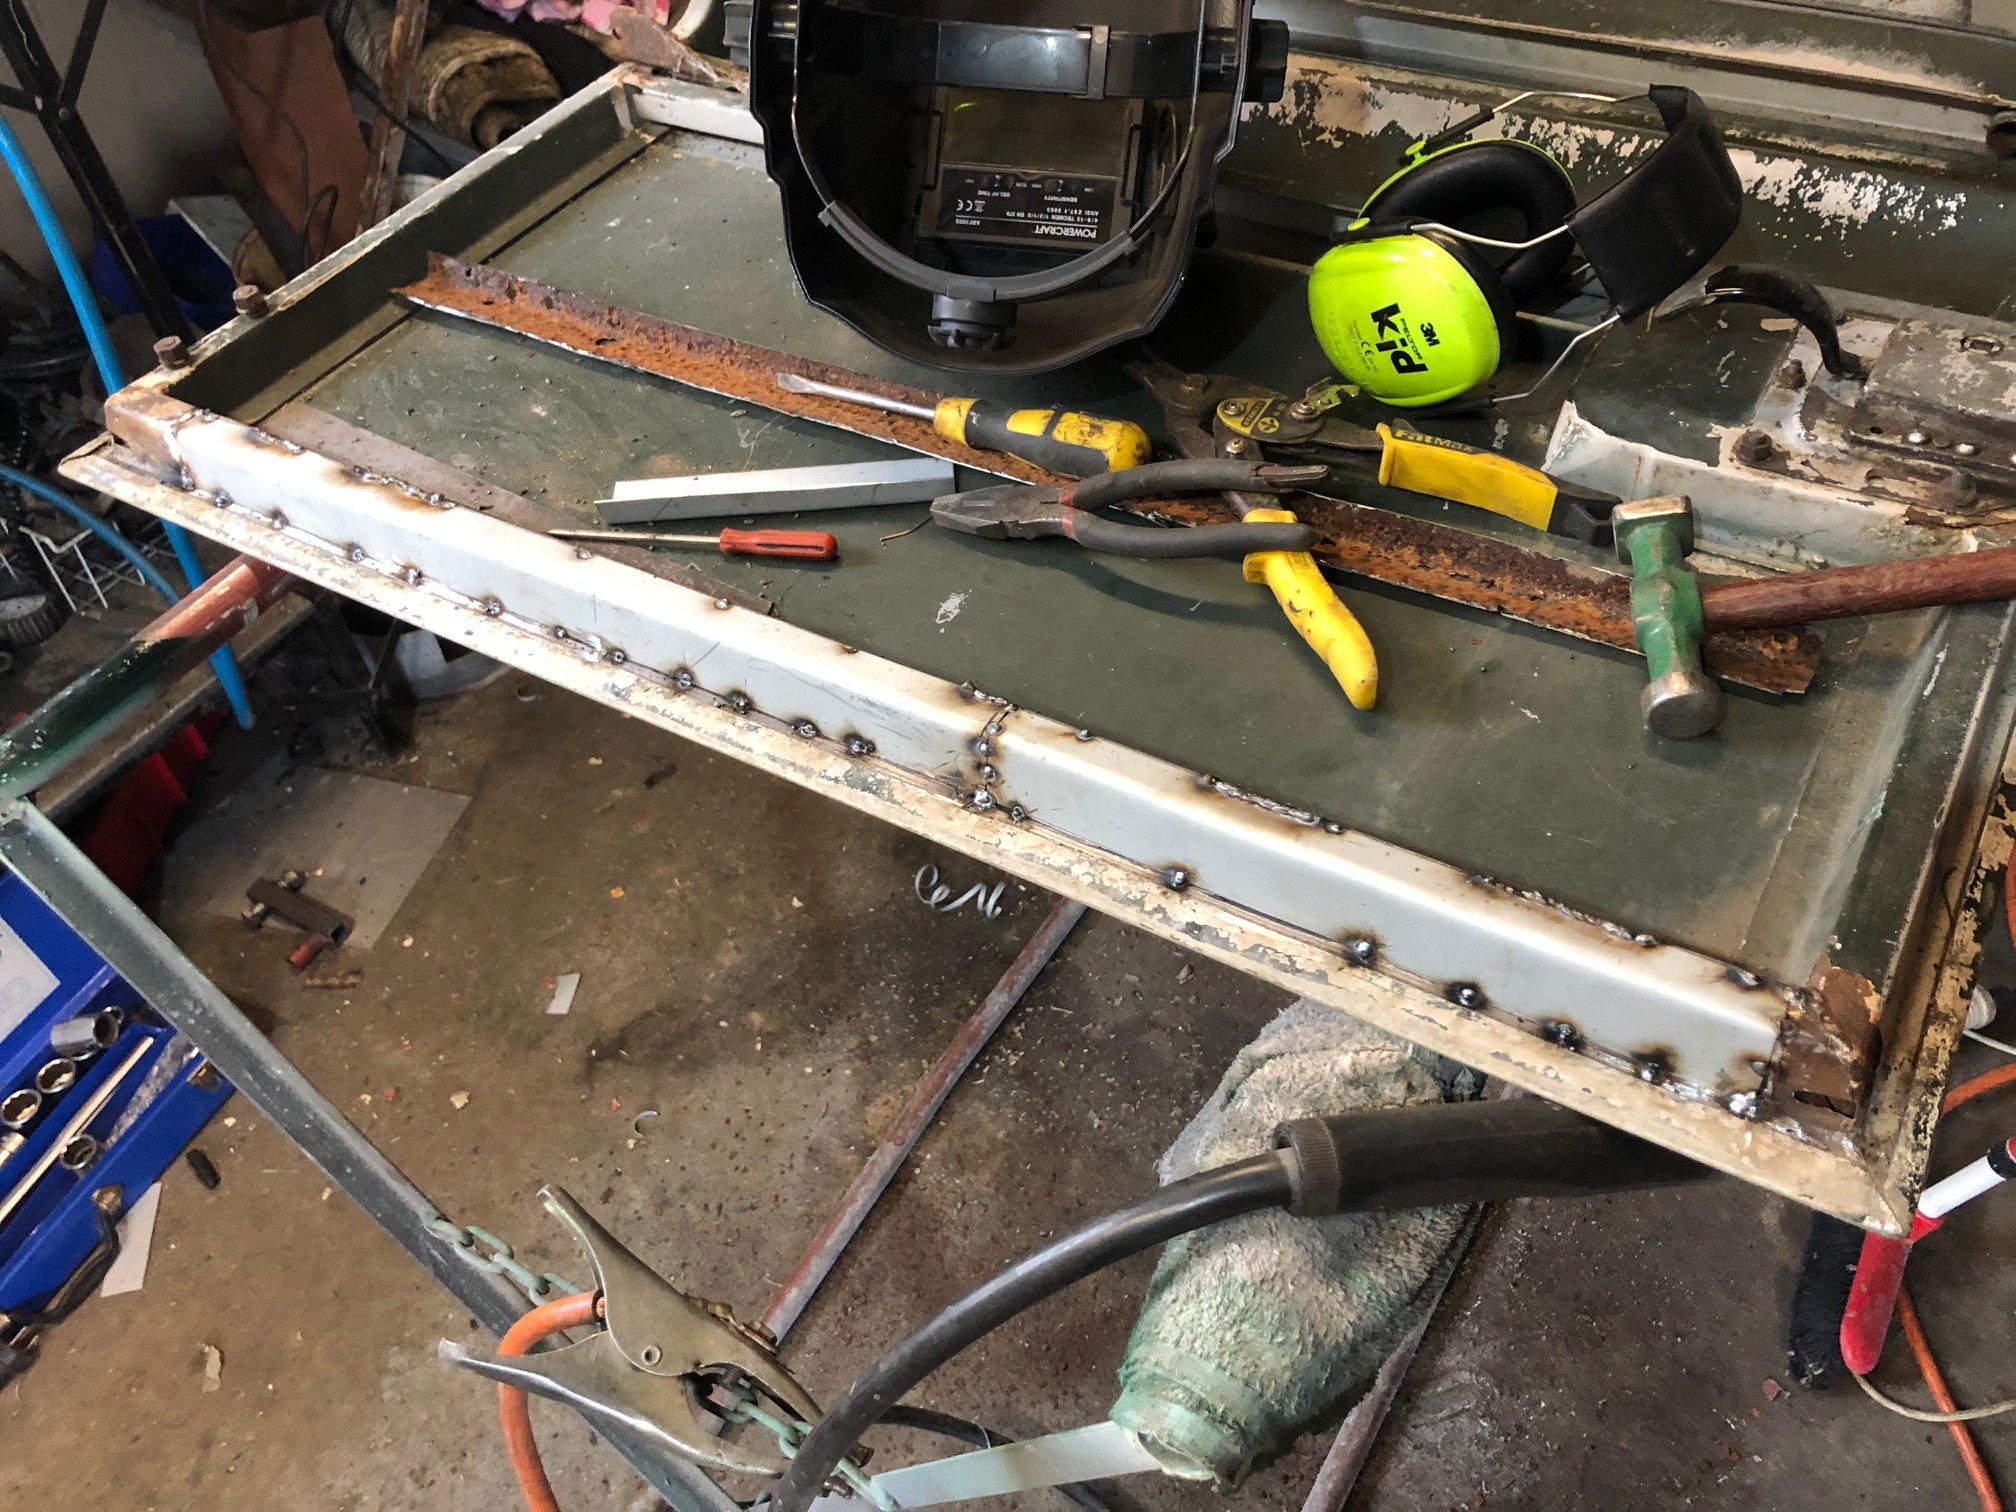
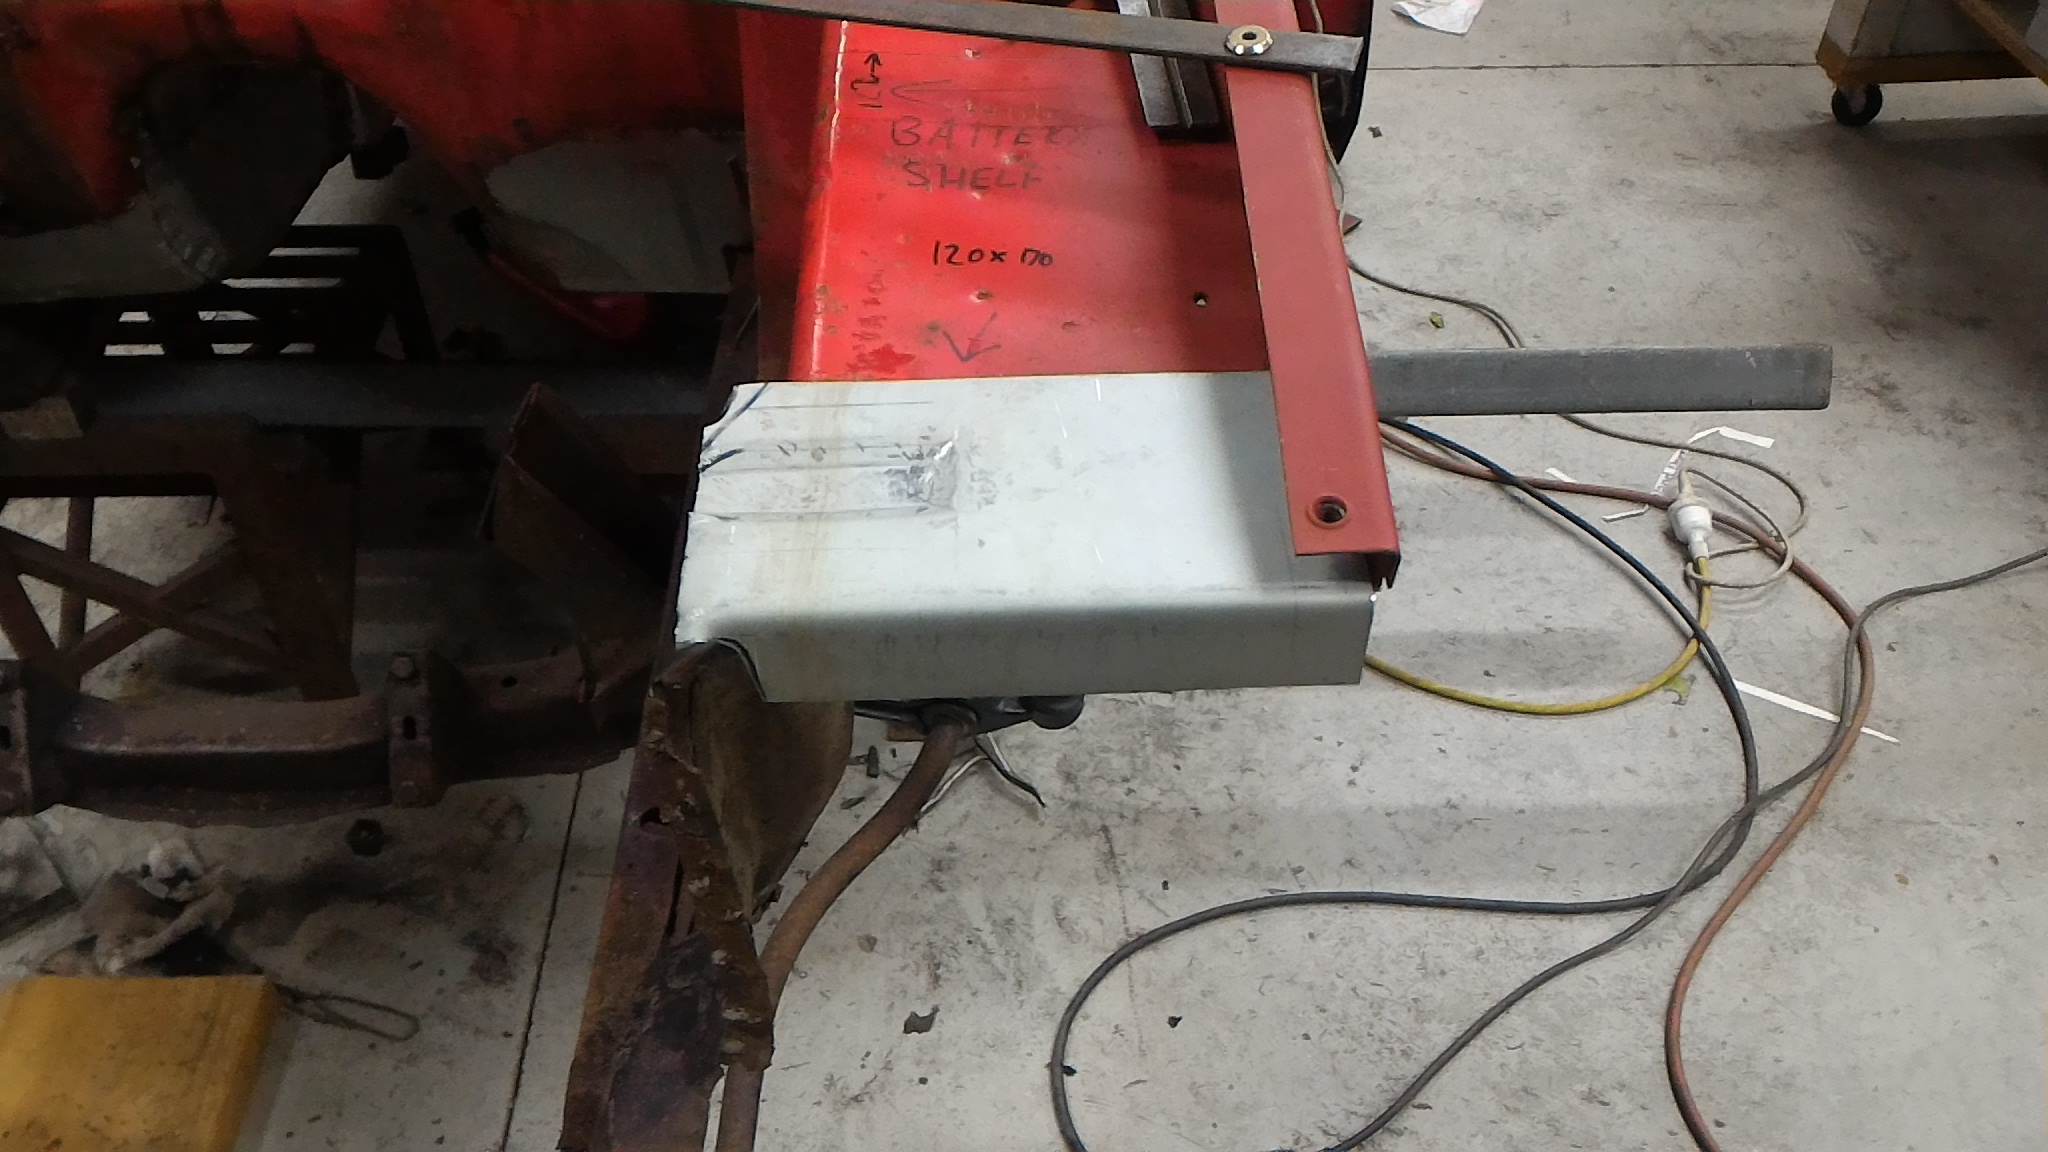
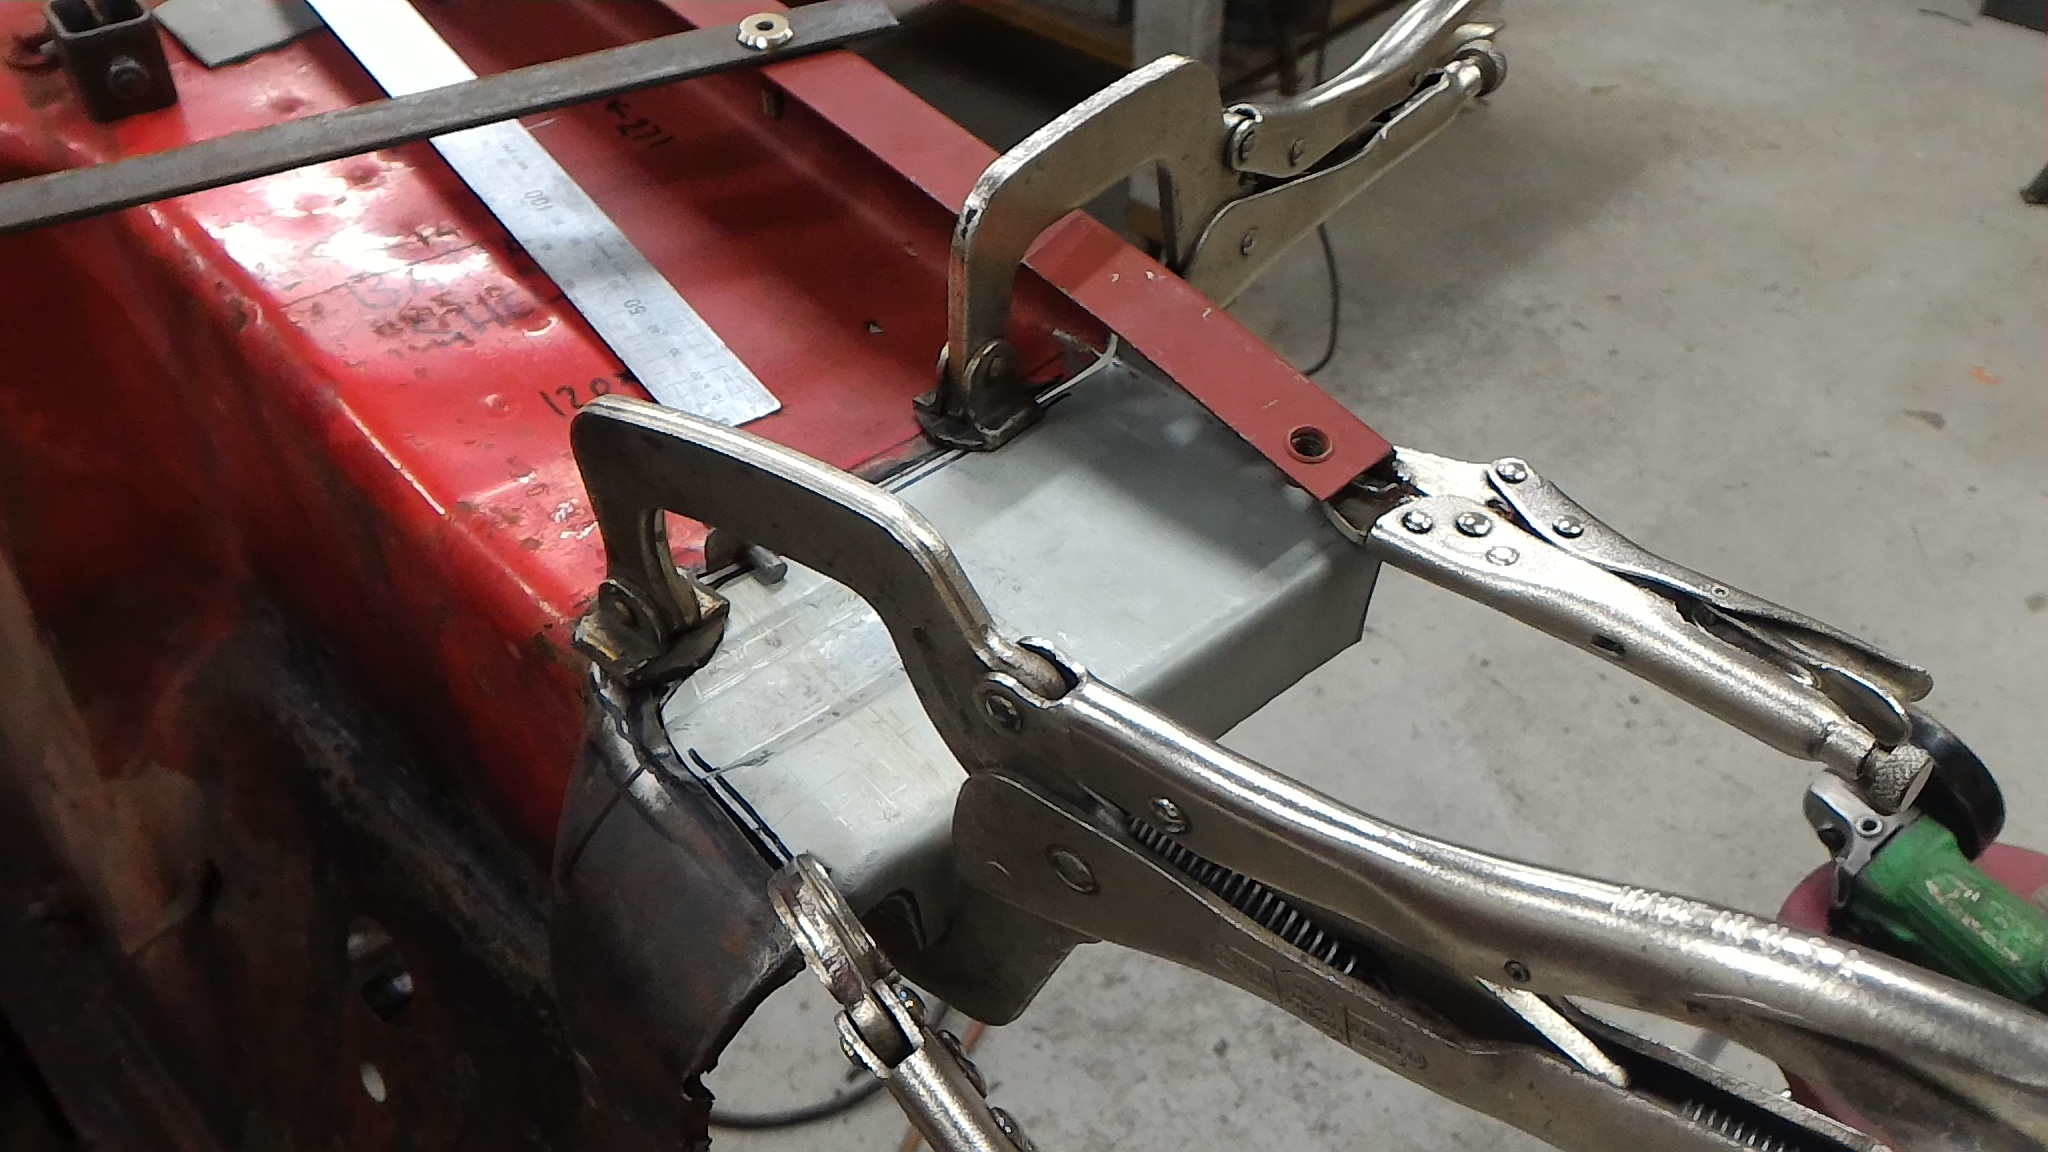
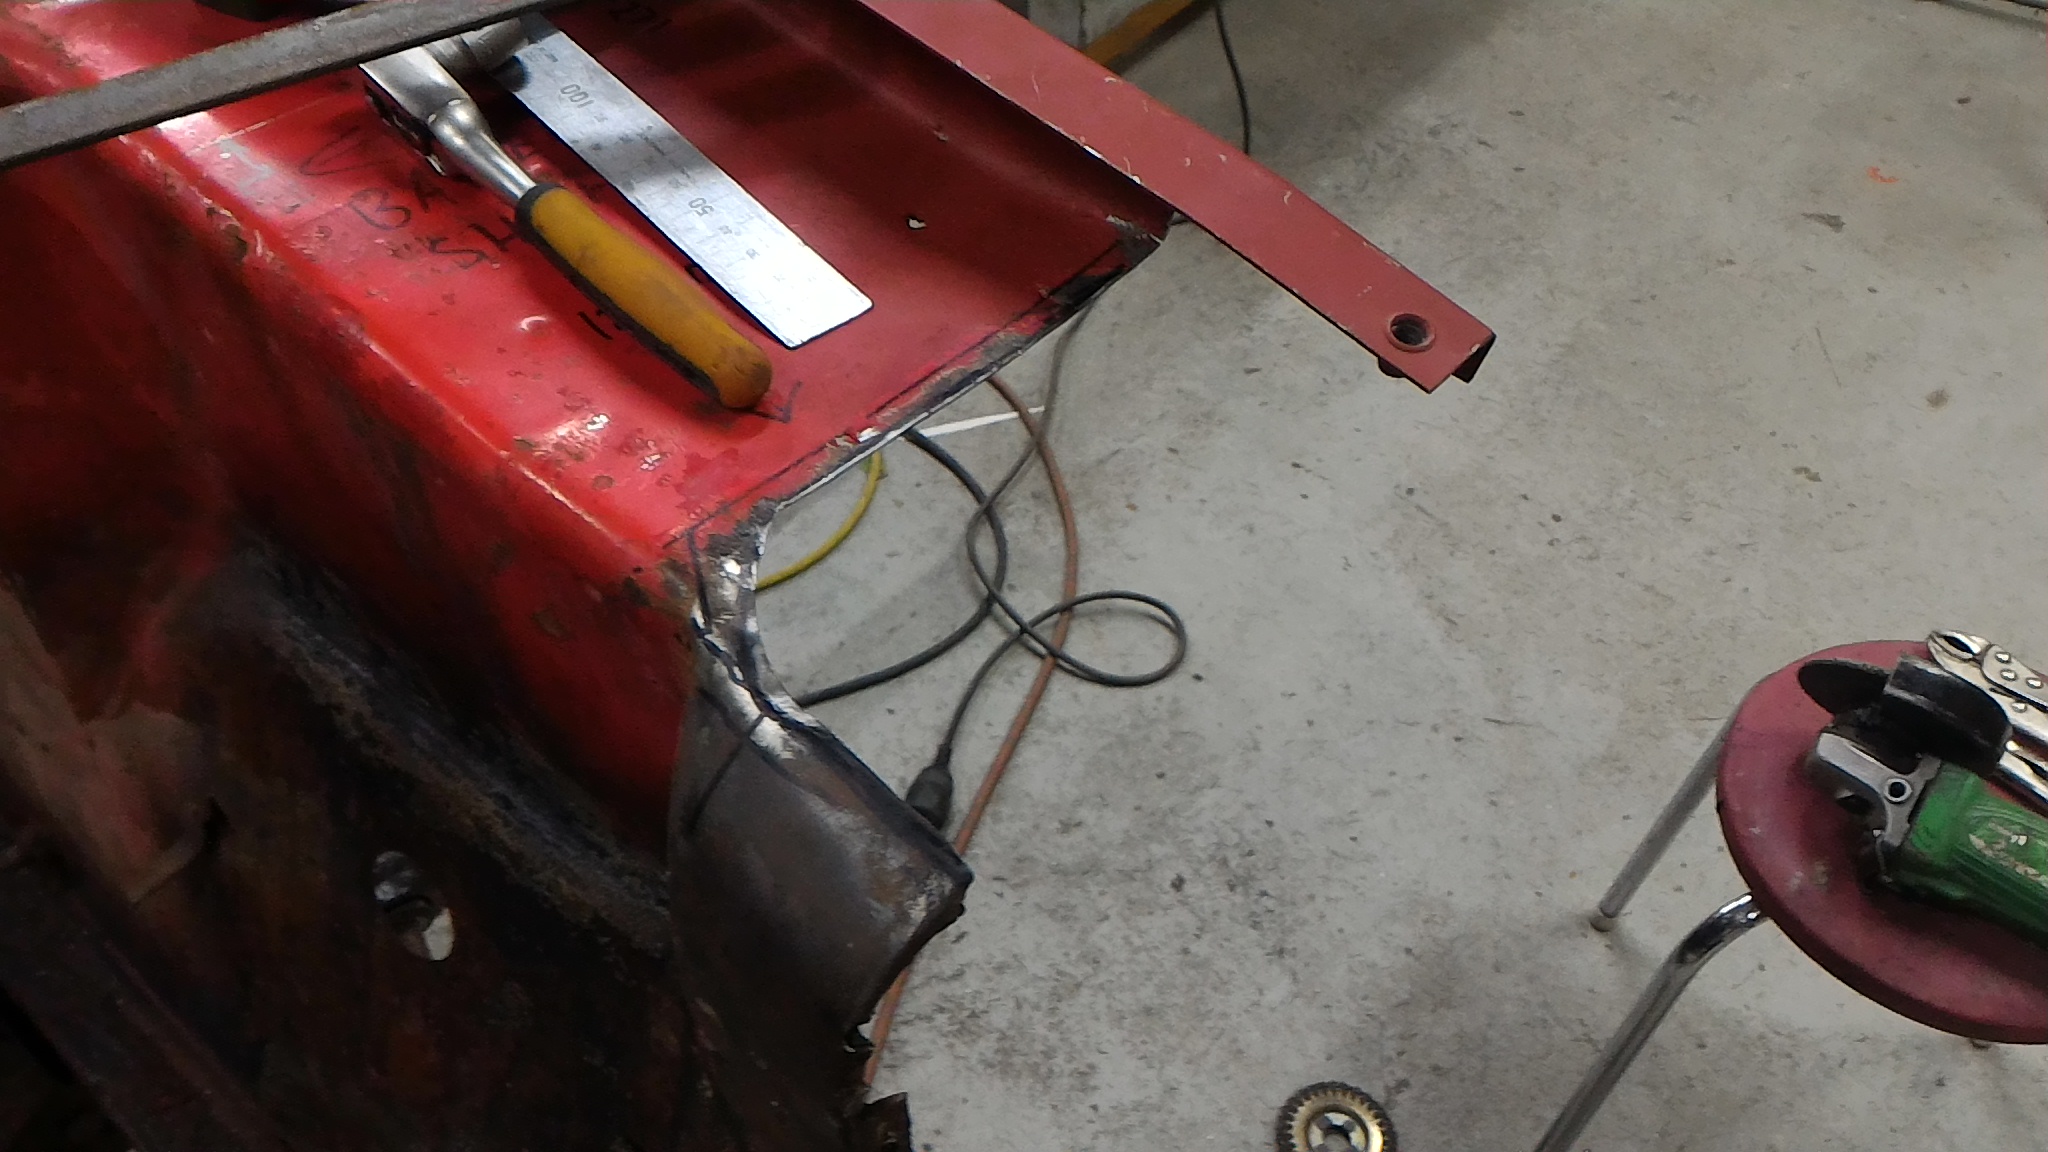
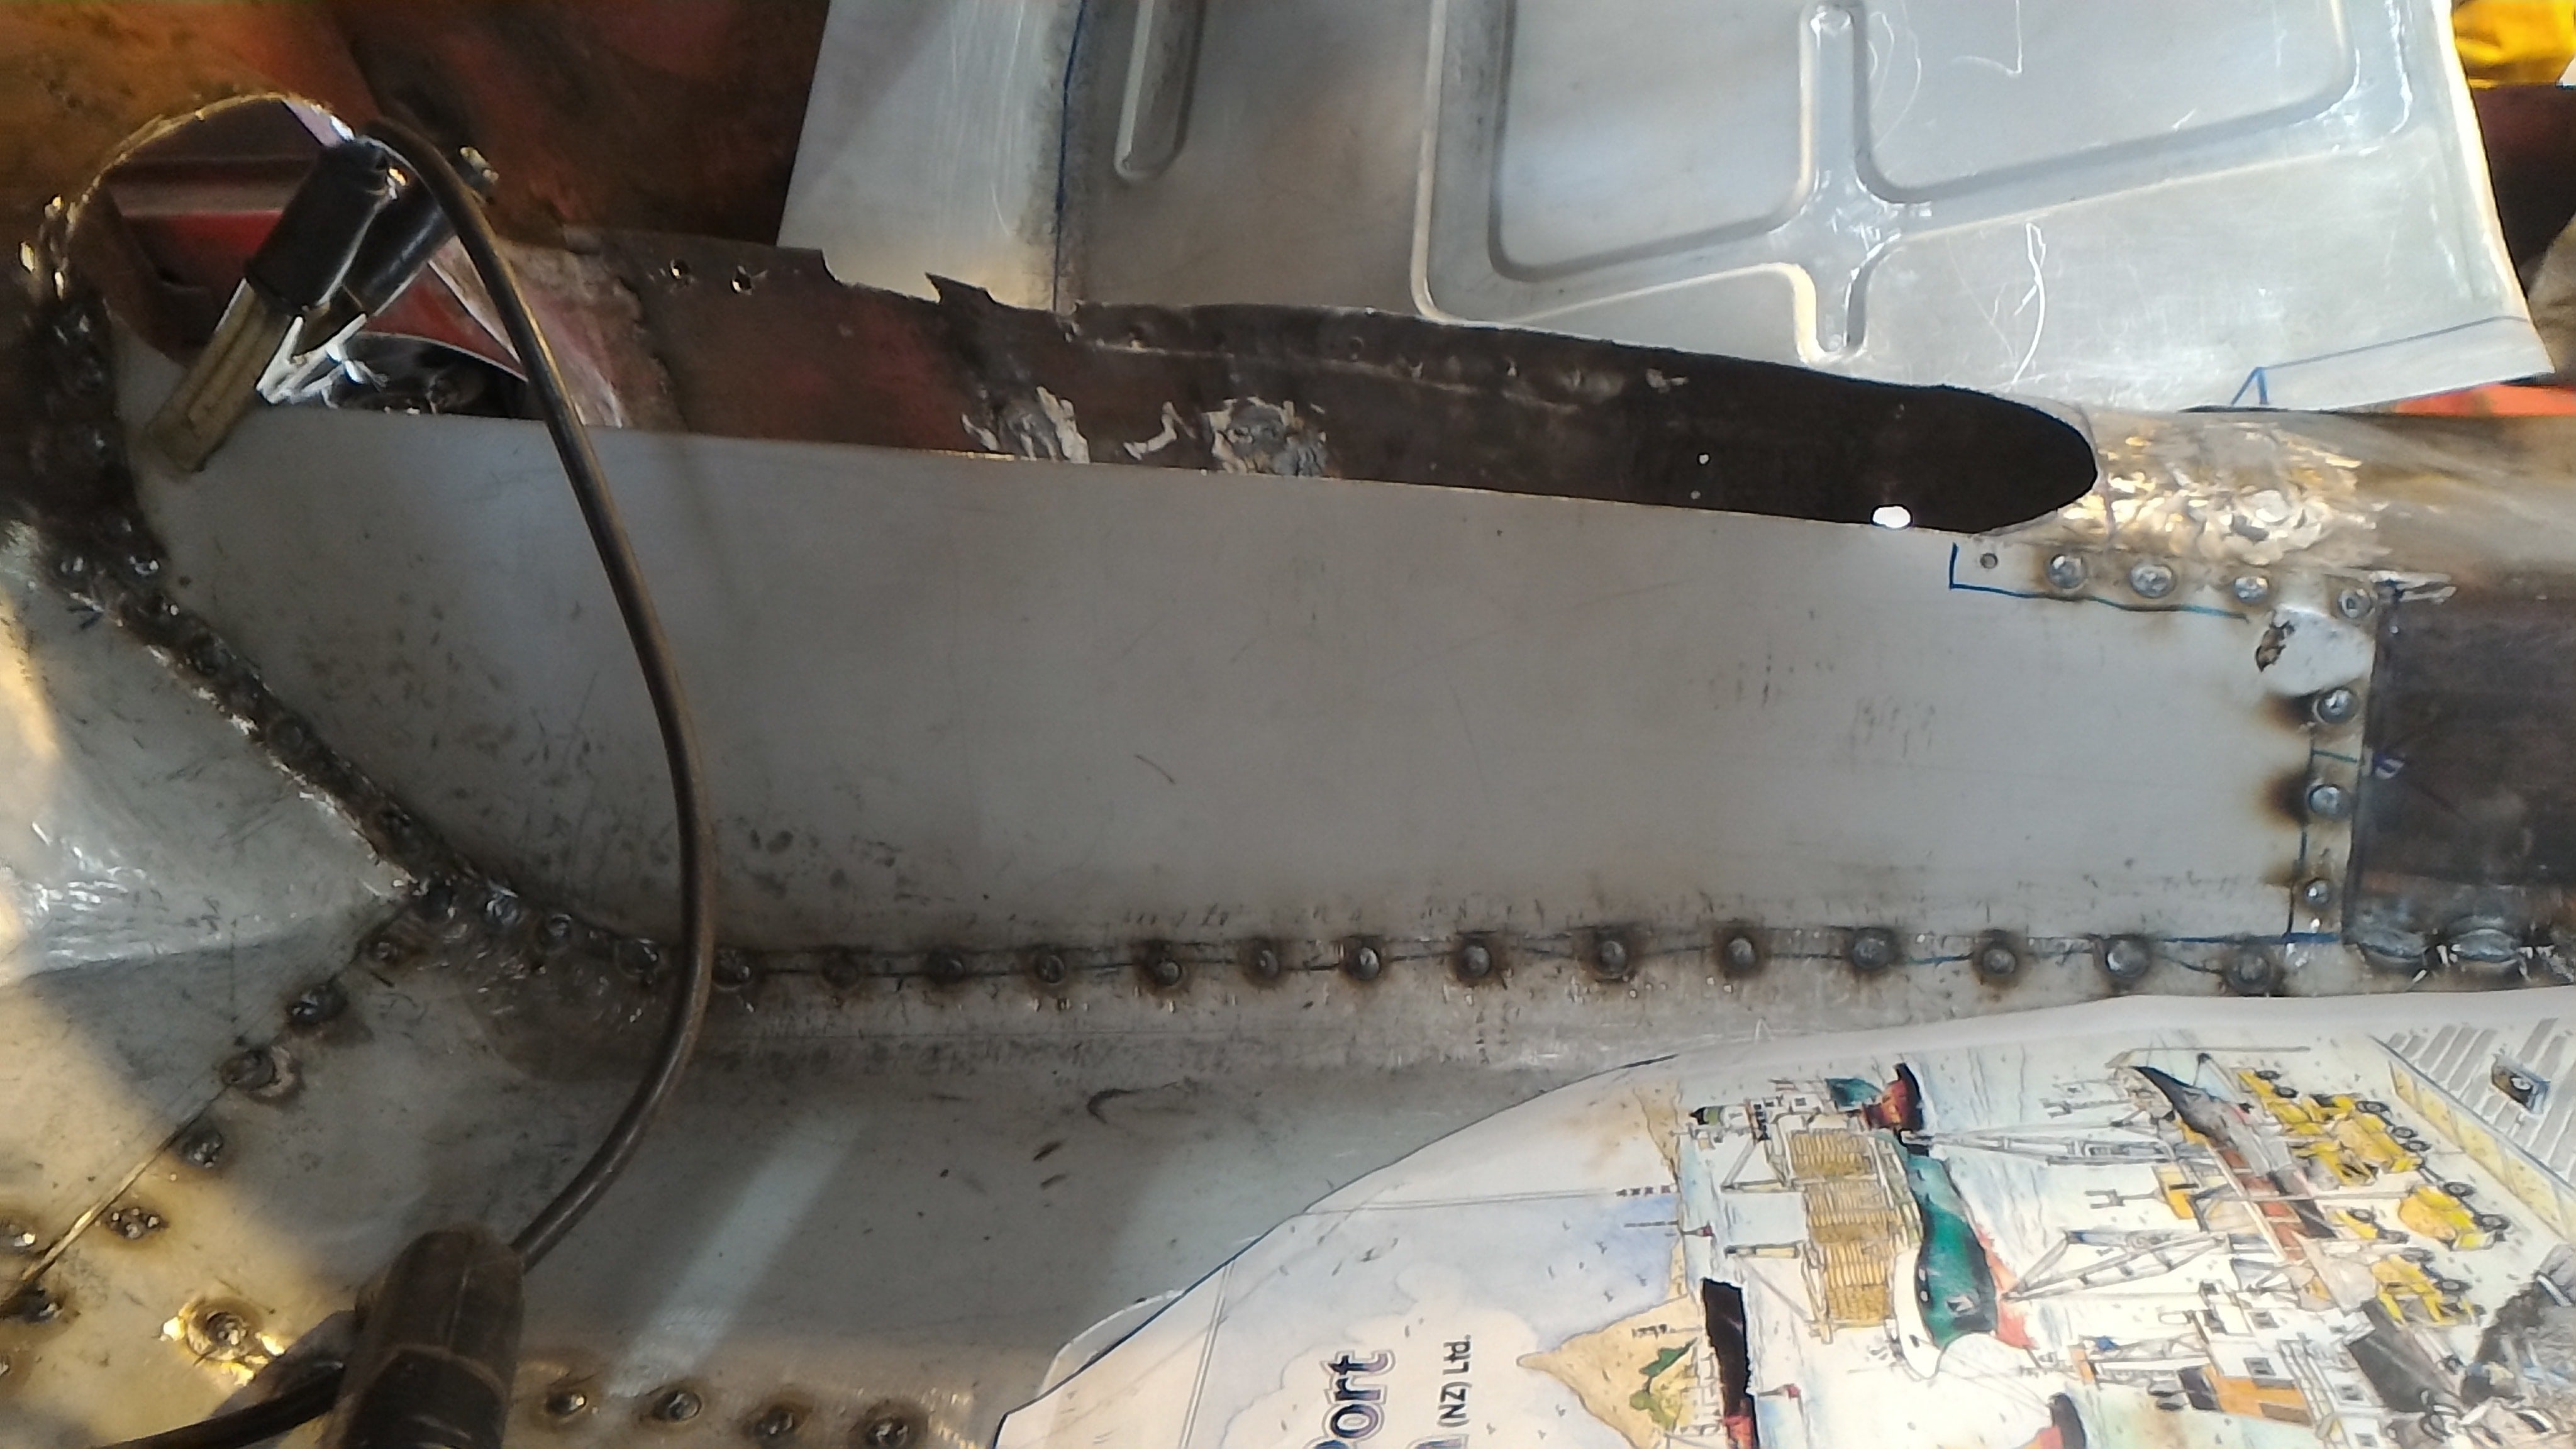
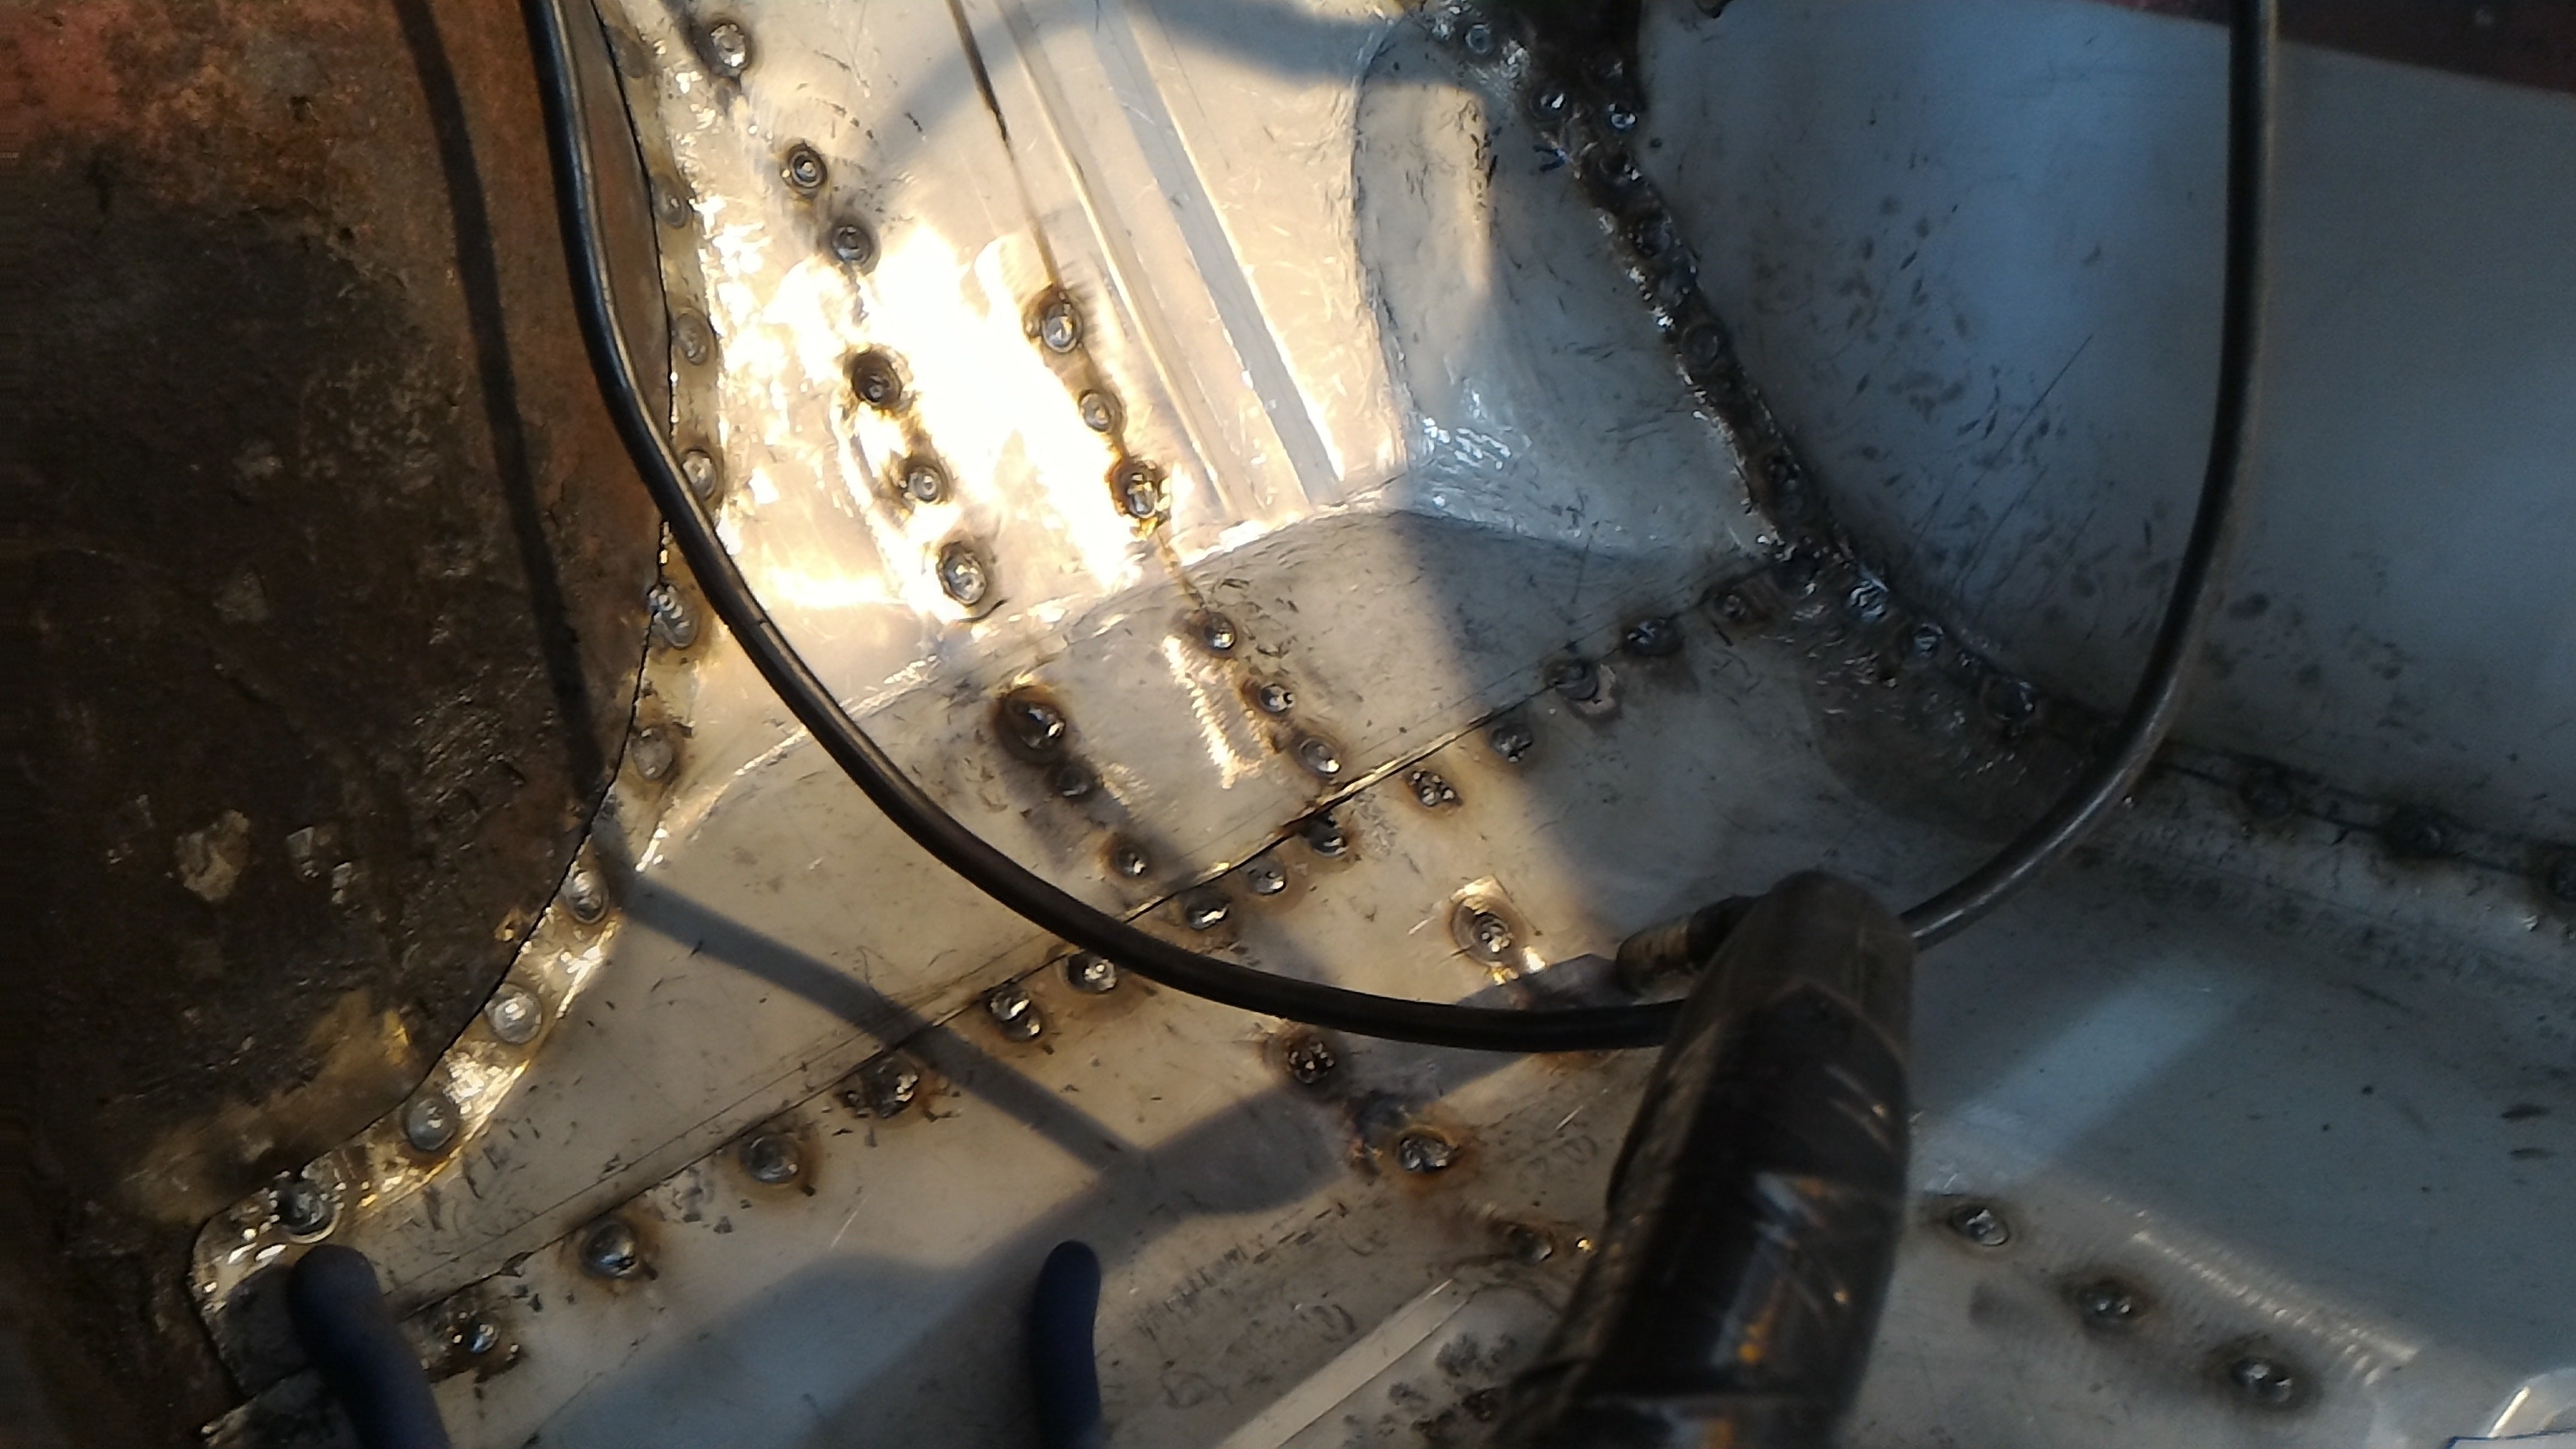
New toys! We are extremely grateful to have a space to work on our truck - it's not a small project. However, there is no power at the part of the property where it lives. We've reached this point using 18v DeWalt powered aggression, but that won't cut the mustard when metal needs sticking together rather than chopping to bits. Enter this big bastard. This is hopefully punchy enough to run anything we can chuck at it, and after the build is finished will serve as the backup generator for our solar setup. However, quality control was a bit sub-par. While testing the generator I noticed it was dripping diesel, and it was pooling inside the case. Removing some of the panels revealed the culprit, a poorly placed hose clip. Snugged up and reassembled, we had power! The next big box to arrive was this: Which contains one of these https://www.thetoolshed.co.nz/product/560-toolshed-metal-cutting-bandsaw After the saw was assembled, it started to earn it's keep straight away by sectioning bits of angle iron (cut from the massive frame that originally housed the pump). Combined with a stainless steel roller from the hose reel, it spawned a roller stand for easier handling of the 8m long steel box section that is supposed to be arriving imminently. Another job that got ticked off today was what to do with the isolation wood that lived between the chassis rails and original tank body. You can see one of the original wood runners modelling the bandsaw setup above. When I discovered this originally I thought it was a bit of a bodge, but research revealed that it's a pretty common practice to use wood for this for a few reasons - isolating harmonics, stopping metal/metal squeaking as the chassis flexes, and allowing a convenient standoff for the raised rivets and captive nuts that dot the upper surfaces of the chassis rails. After some mulling, we've decided to stick with this setup for our build too. If it was good enough for Mills Tui and lasted 3 decades... The frame we are building will be longer than the original body, extending forward through where the pump section (between cab and tank) was originally. The contact area will be just under 3.7m long, while the current wood sections are just over a metre short of that. A tour of the local timber merchants lead to one of them rummaging through some shelves out back and finding the perfect piece of hardwood timber - exactly 3.7m long, the same thickness as the originals, and wide enough to get 2 strips from. We will use the originals as templates for the holes, then drill more at the 'front' ends to accommodate the lumpy bumpy chassis rails. Steel box section for the body is (allegedly) arriving any day now, current plan is thus; Ignore the lack of roof, luton floor, and incomplete 25x25mm wall verticals - the former two are hidden on this view as the picture was too cluttered, and the latter hasn't been finalised yet until we pick up some doors and windows to plan around. Following the chat in the discussion thread, we've decided to follow @yoeddynz's sage advice and have the body pop-off-able incase of spectacular mechanical failure. Should make construction easier anyway! Thanks for the discussion and tips so far.10 points
-
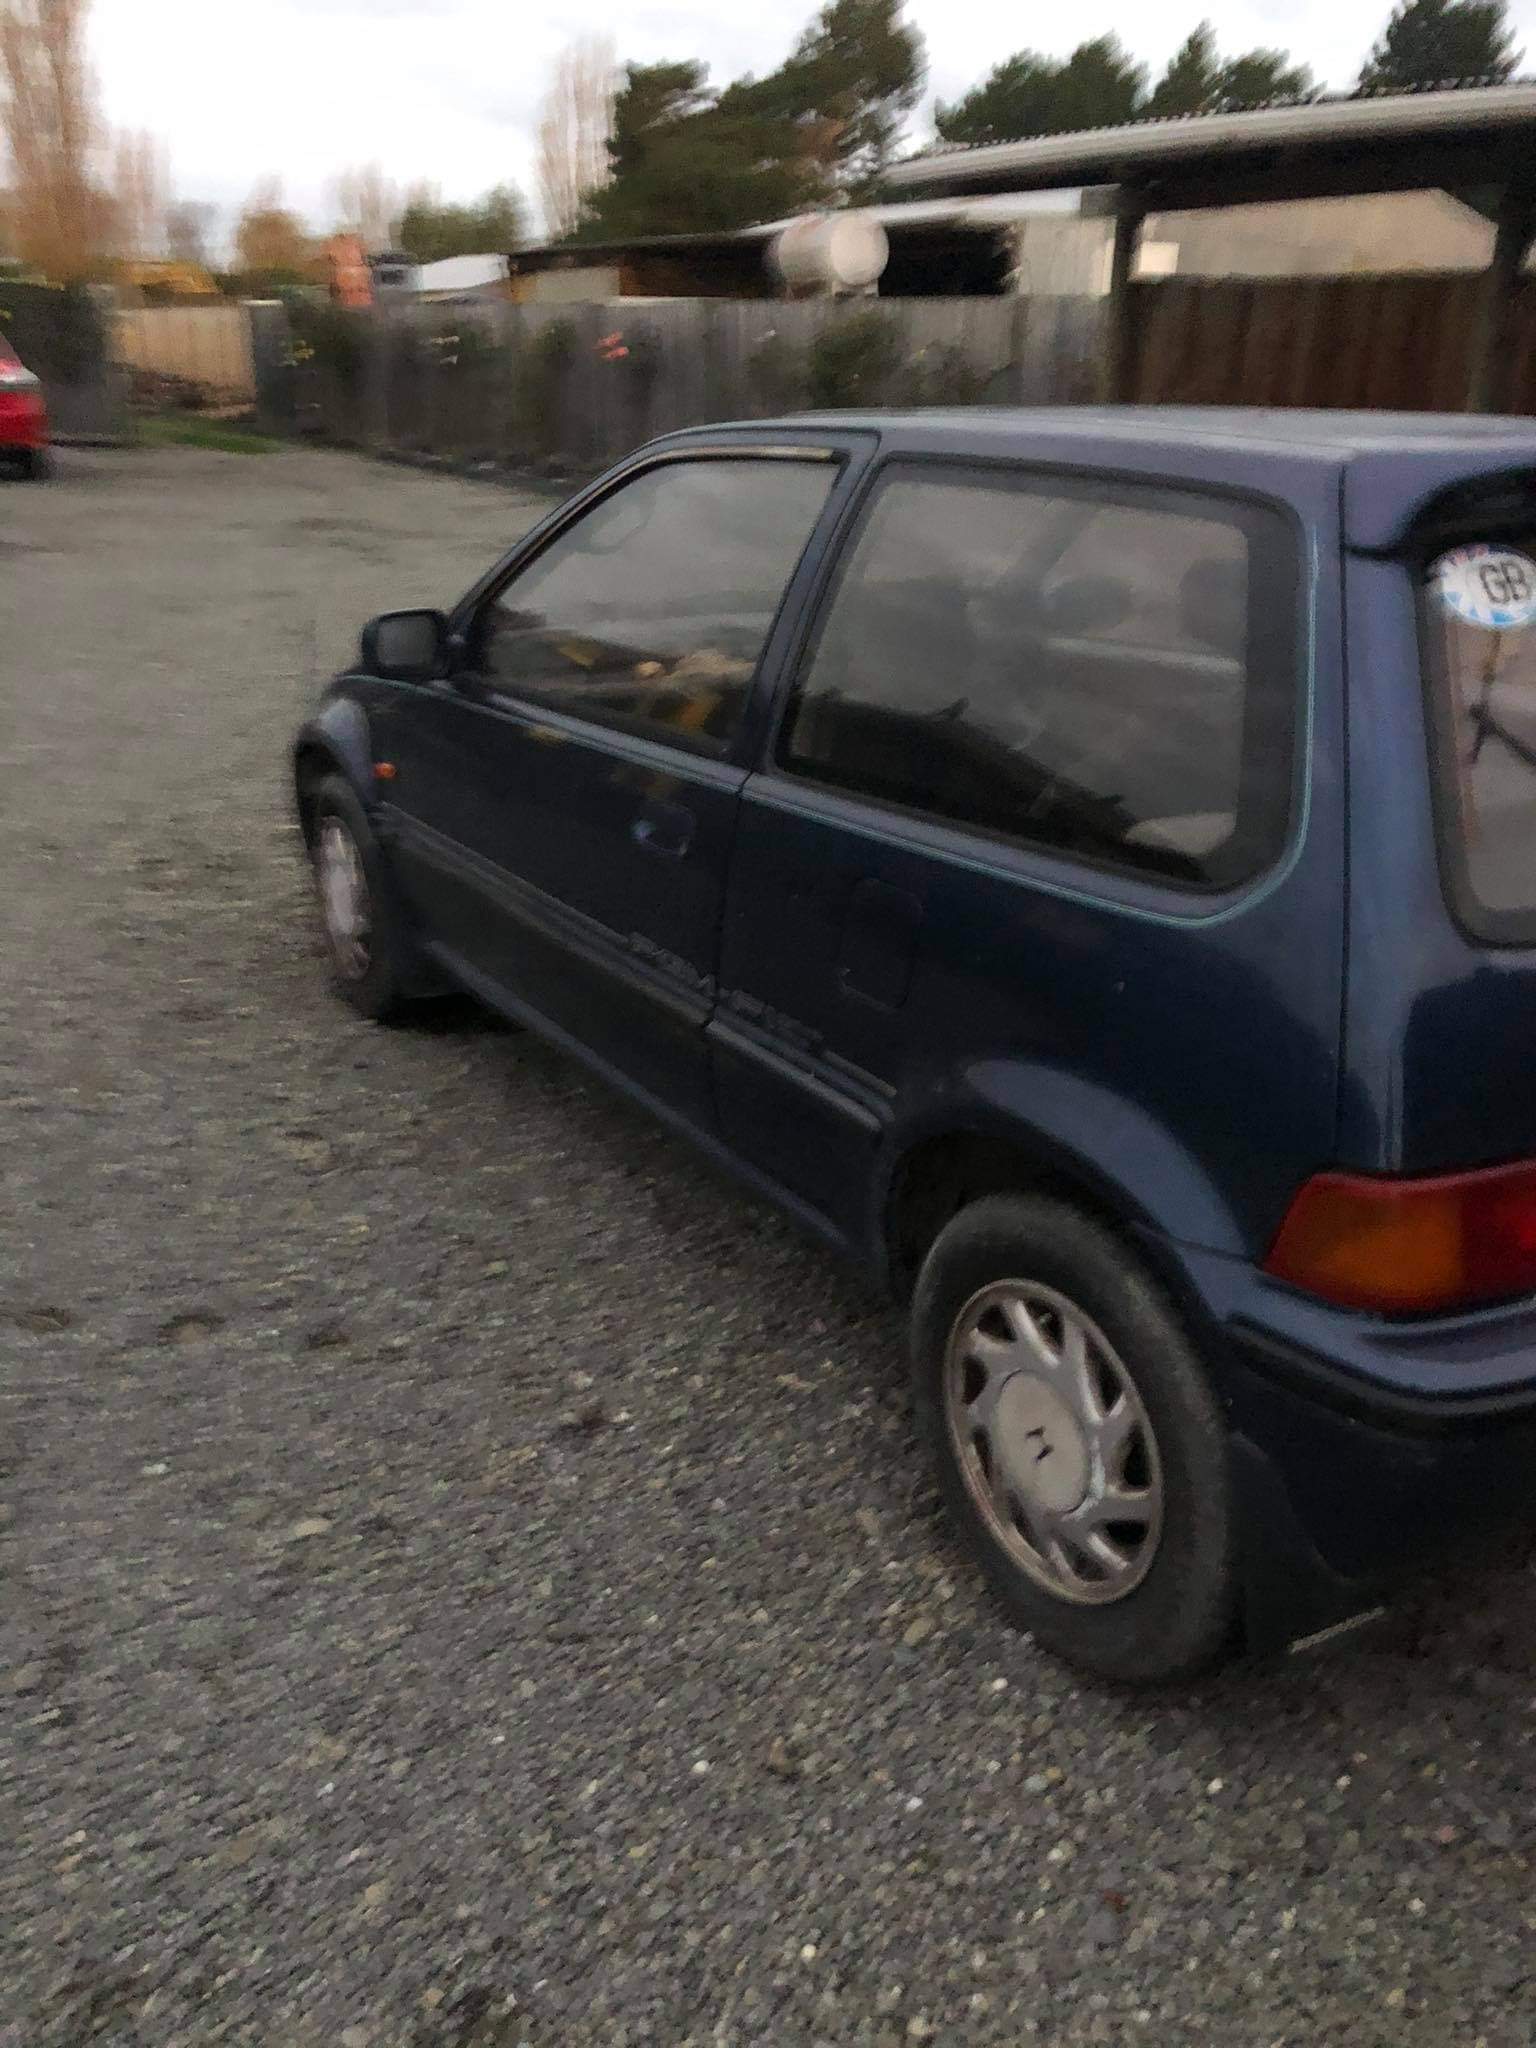
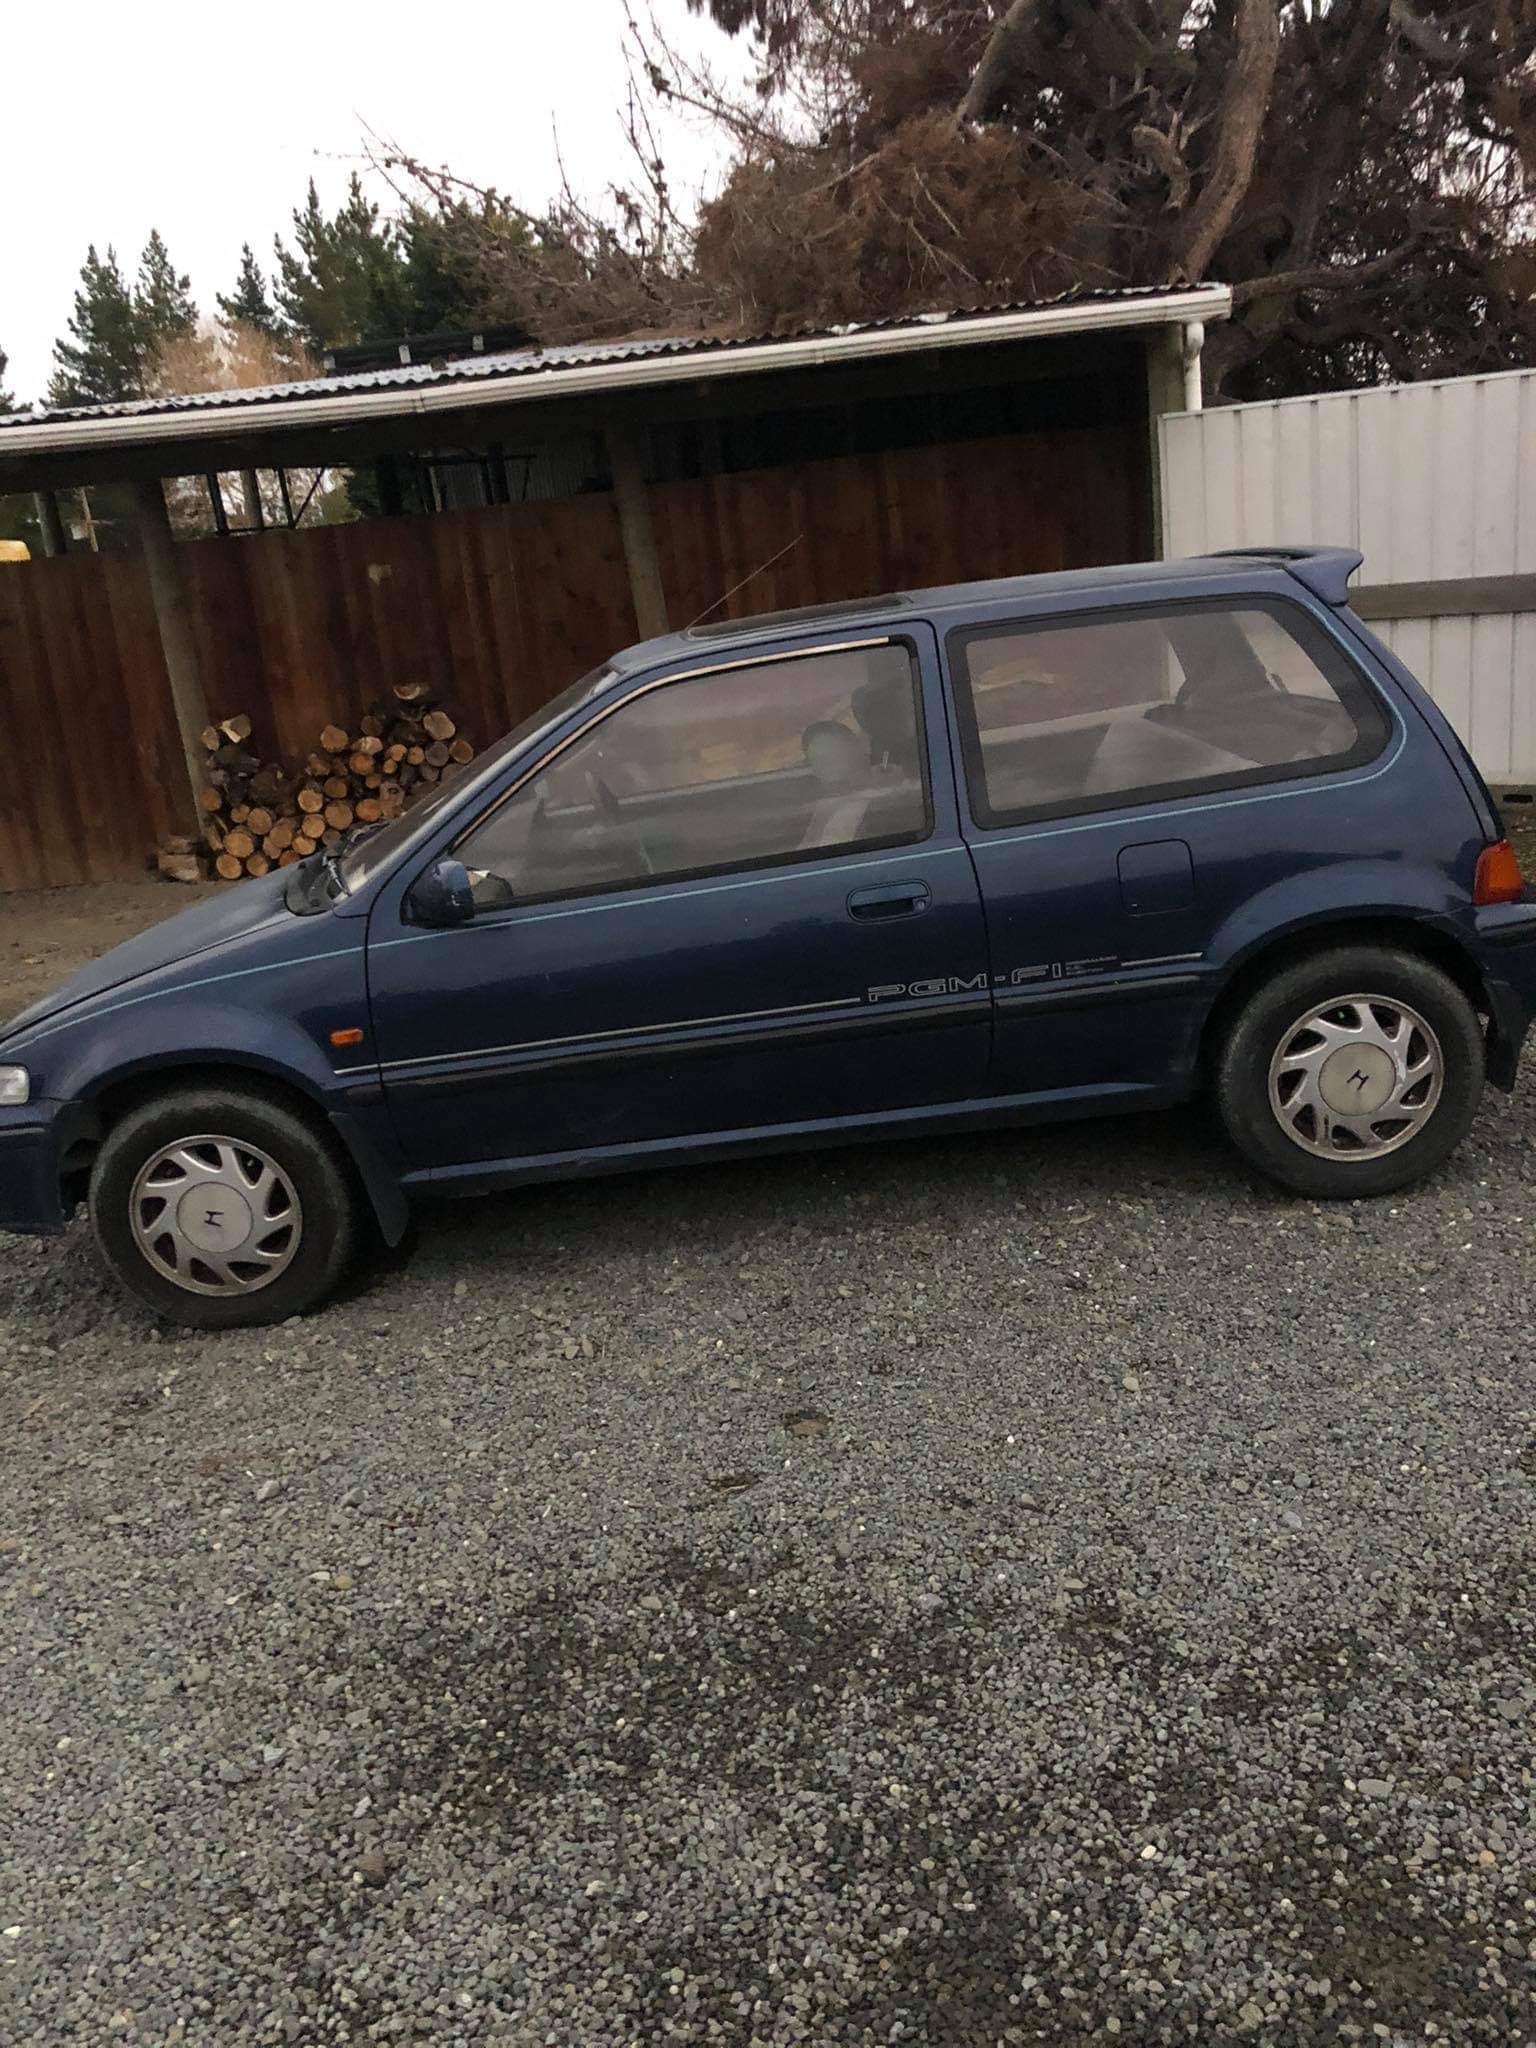
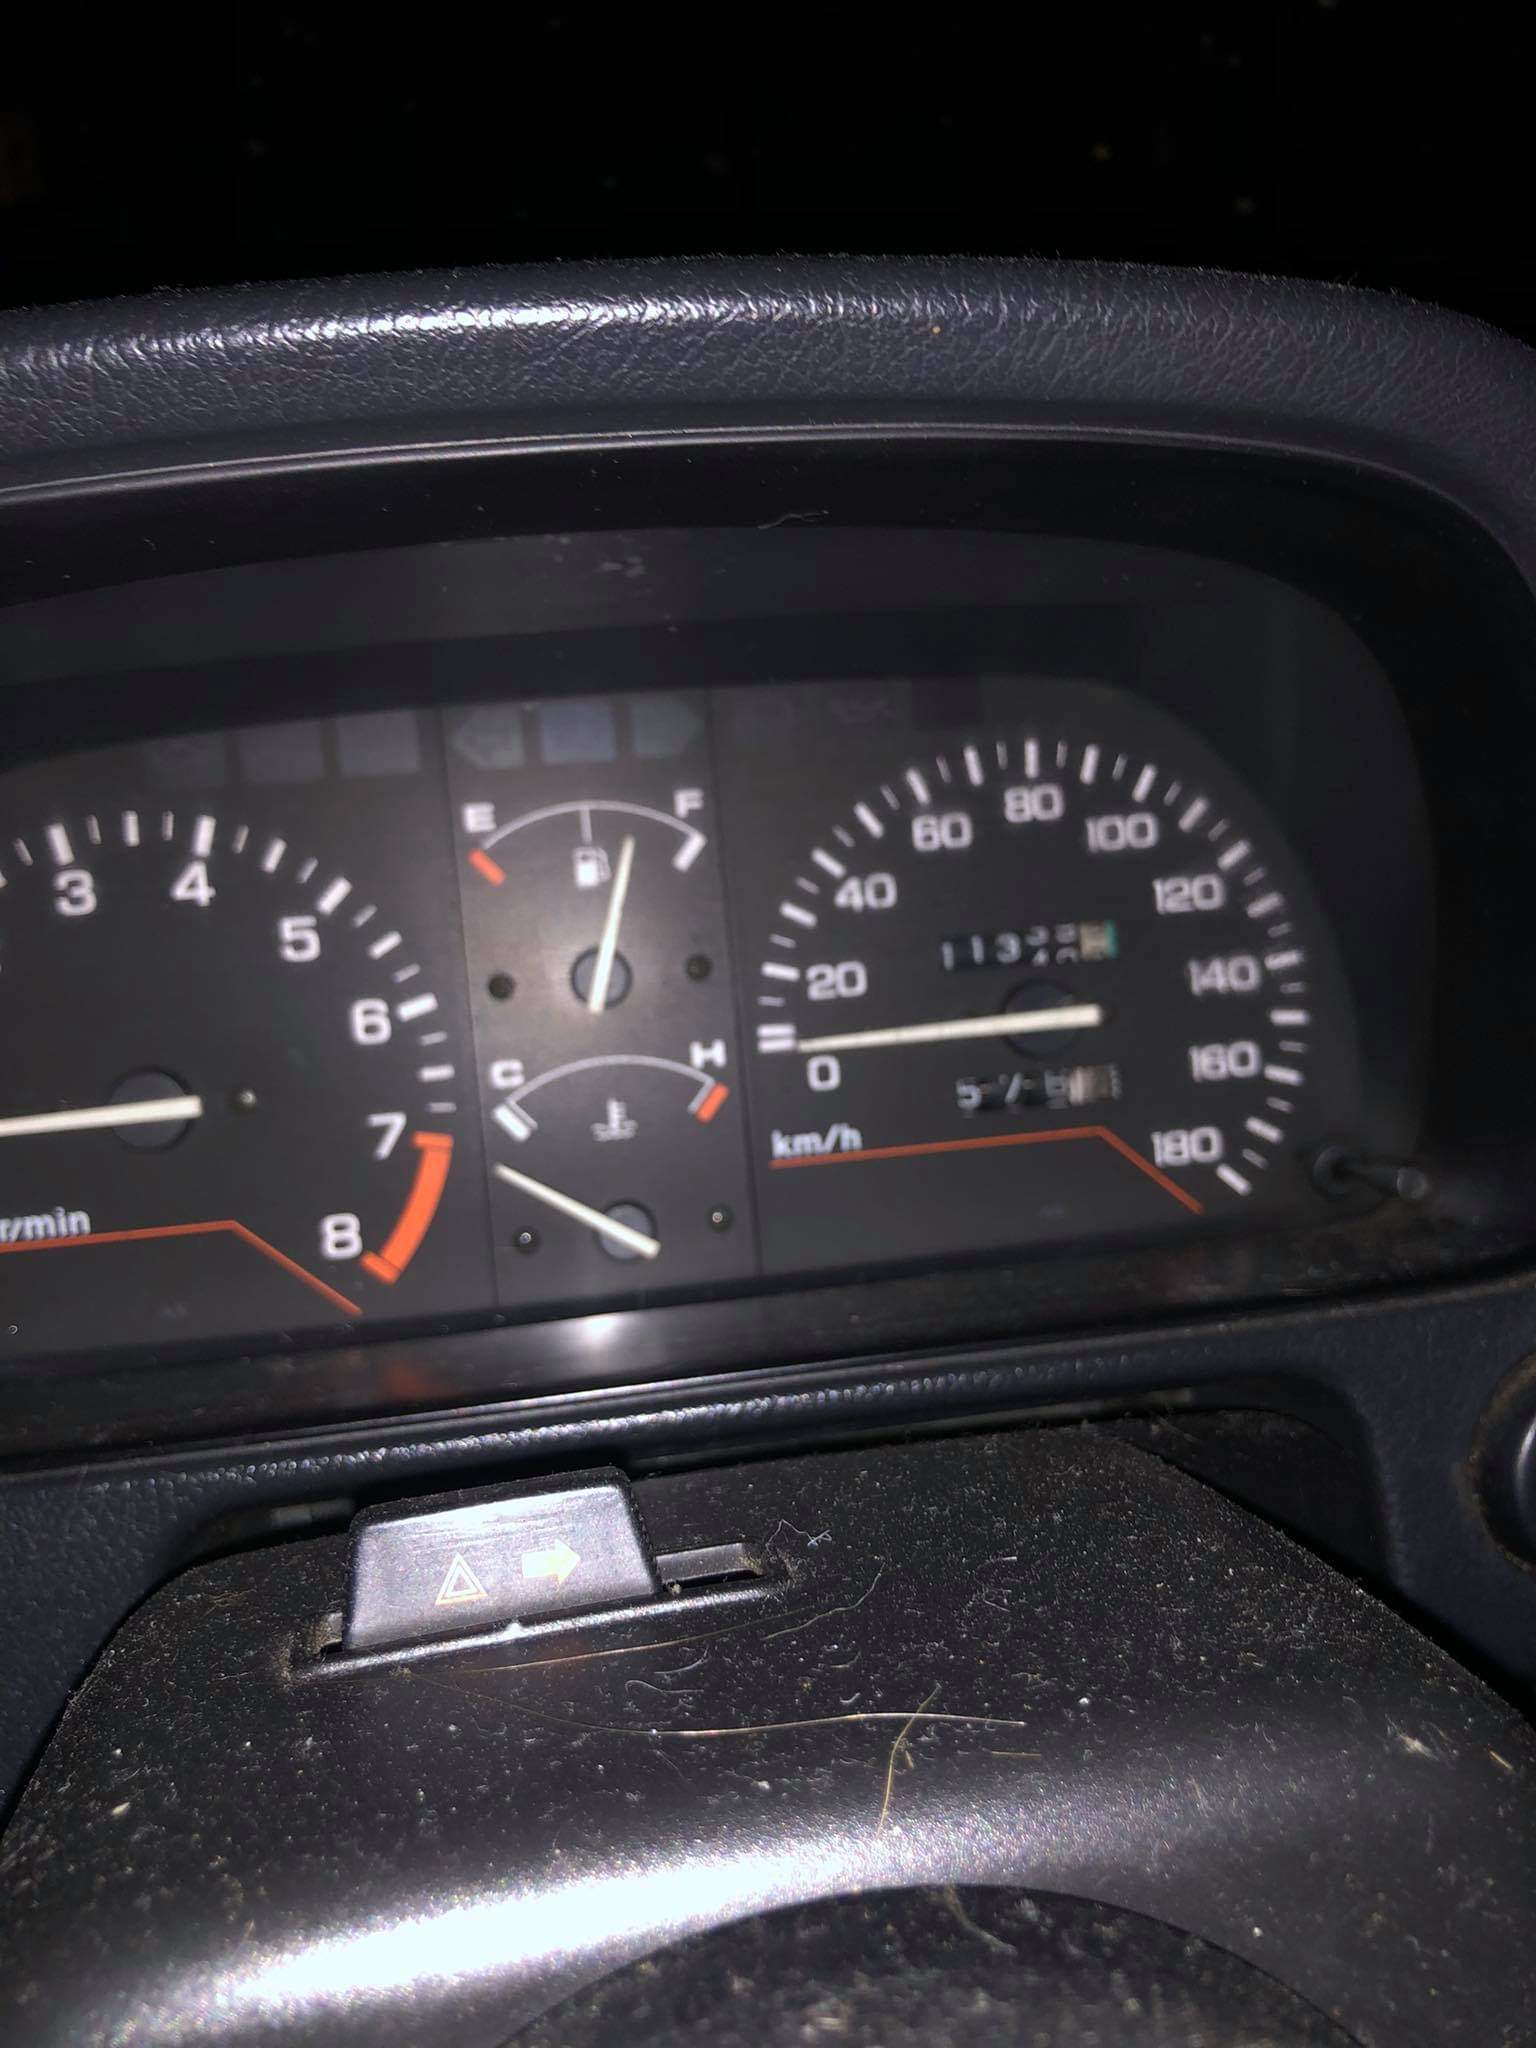
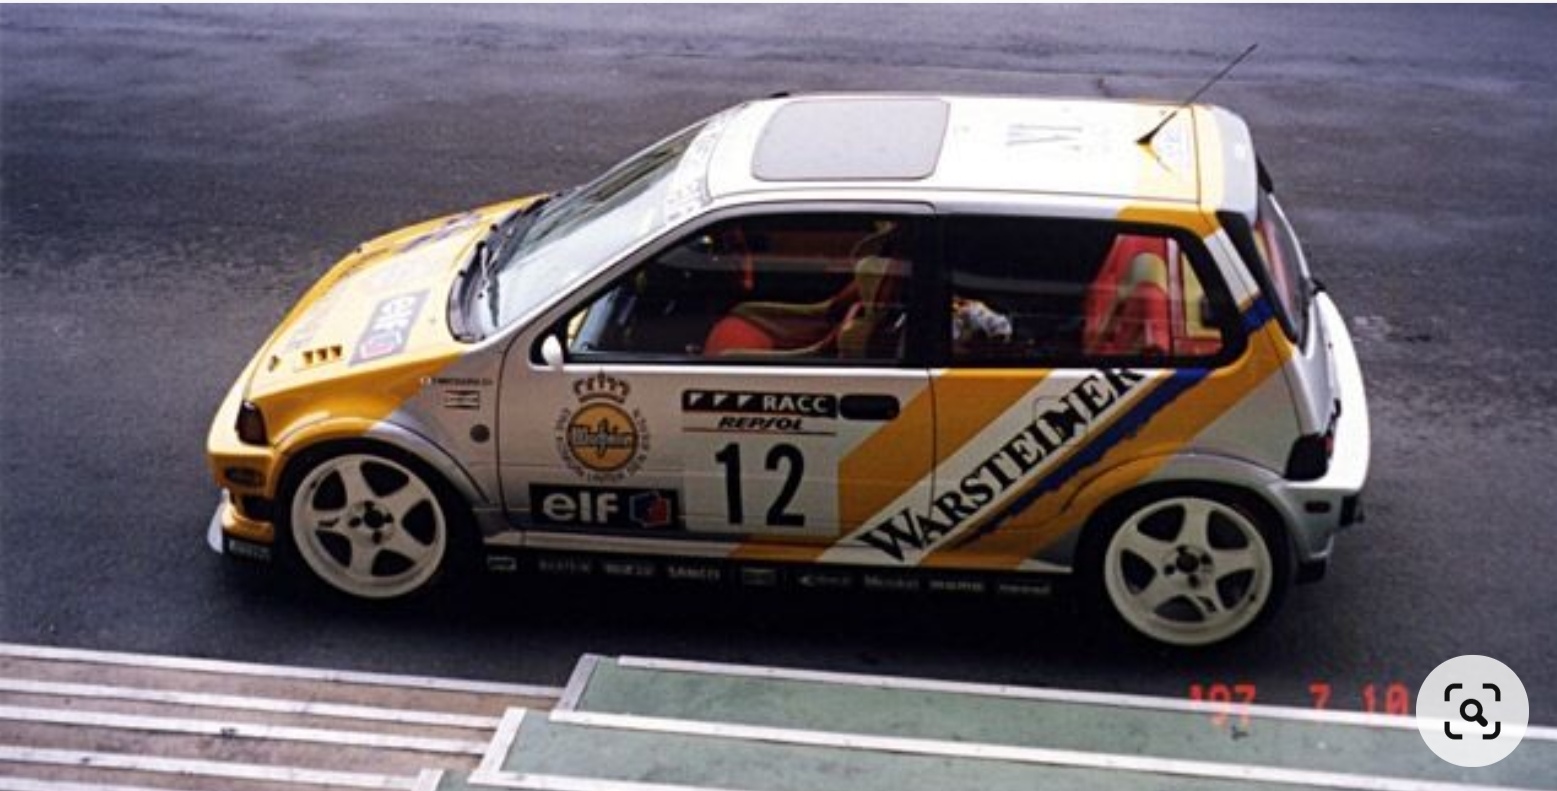
Picked this machine up recently. Its stock standard, original 94 thousand km's... Even better, rego on hold! Discussion:
7 points
-
Didnt know where else to put this so will put it in here. As I mentioned wanted to give electrolysis a go . after trying to use a battery charger by itself and it not really doing what I wanted ( it kept shutting off , no doubt because it did not detect voltage as the manual says it must detect). So decided to get around this by running it thorugh a battery, i was worried a battery worth of current would end up cooking something but nah , its just very aggressive, so if you are wanting delicate rust removal you will need to get a dc power supply. I read up and found the reaction will remove the red rust, convert some red rust to magnetite ( black rust) and evevn turning some of the black rust back to iron given long enough. also that one electrode will produce oxygen or something. Anyhow , pretty impressed, tbh the phosphoric acid did just as good job buuuuuuut would get very expensive for large bits, where you could buy a 60L tub or even IBC and the only real cost is the washing soda which is cheap as chips. also you are not dealing with acids. Im pretty sure citric acid is cheap enough too so whatever process you choose i spose. I noticed that anything left in the phosphoric acid and then just left to dry had a coating which can help it to not rust again. so maybe could be an idea to electrolysis then paint in phosphoric acid? iunno depends on what you want i spose.. anyhow , pics! Bubbling away Yesterday arvo , maybe 4 hours in? After a rinse and bit of a brush down , def a difference This morning after running overnight And after some brushing, big difference photos dont really show how good it is , starting to see native iron too, the bubbles are still raging so there must still be quite a bit to go The Anode, brushed that off and its mainly rusty fluff , but you can def see how its being eaten like threads are there but chunks missing. 5 mins after cleaning it and putting back in the tank. goes cray cray. So because this is working so well I decided to hunt for another piece of steel and add another anode because it was really olny treating one end and tapering off towards the other, used light duty cable to do this and its not even remotley warm so must not be a massive amp exercise, the charger is more then keeping up with the battery too . drops to 12.4 then charger pumps it back up to 13..then back down etc. Would still like a dc power source to dail in some lushness though. also just watched a video on youtube were some crazy german used a dc arc welder and was putting like 30amps or something through it.. wholy fuck it was ruckus, seem to work very quickly but. im not keen to die though so a battery will be fine.7 points
-
So put a cheapo battery revitliser on the Aux batteries over the course of last swing off and they now take charge and are sitting at a happy 12.4 volts, stoked. so have bought a dumb linear charger just to pump them up good. then most of the light in the rear started working! yay. so last night i replaced the broken shitty ones and re-attached some otheres to the roof . so much better , need some more in certain areas like above the roll cab top for working surfaced etc, but pretty impressed, also going to get rid of the spotlight style ones in the front body and mybe mount them to be used as exterior facing lights. the spottie in the rear section of the body still isnt working either , so need to look into that too also forgot to turn them off so they were still going at 11pm when i wombled outside so batts must be ok pic on dusk.7 points
-
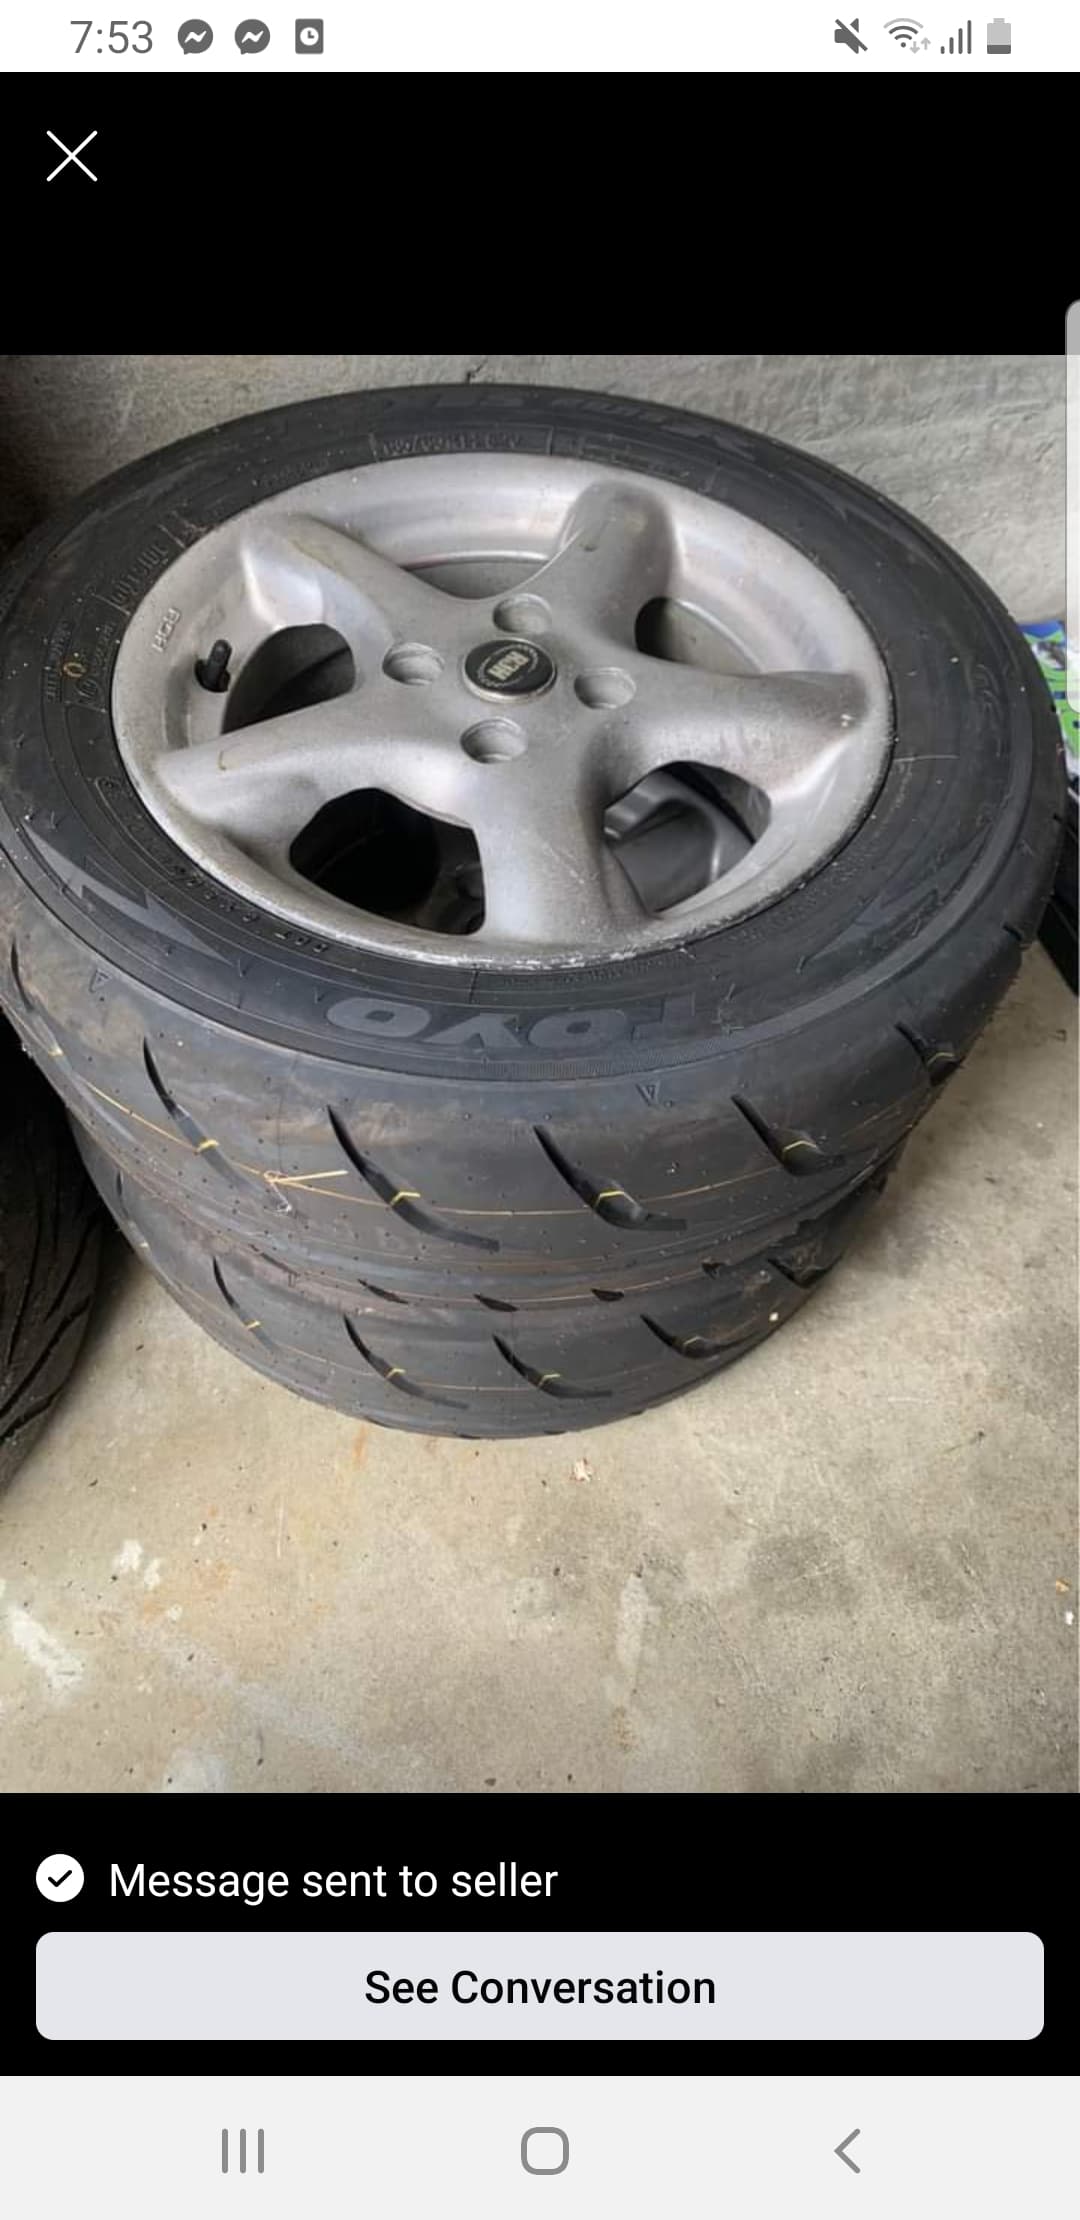
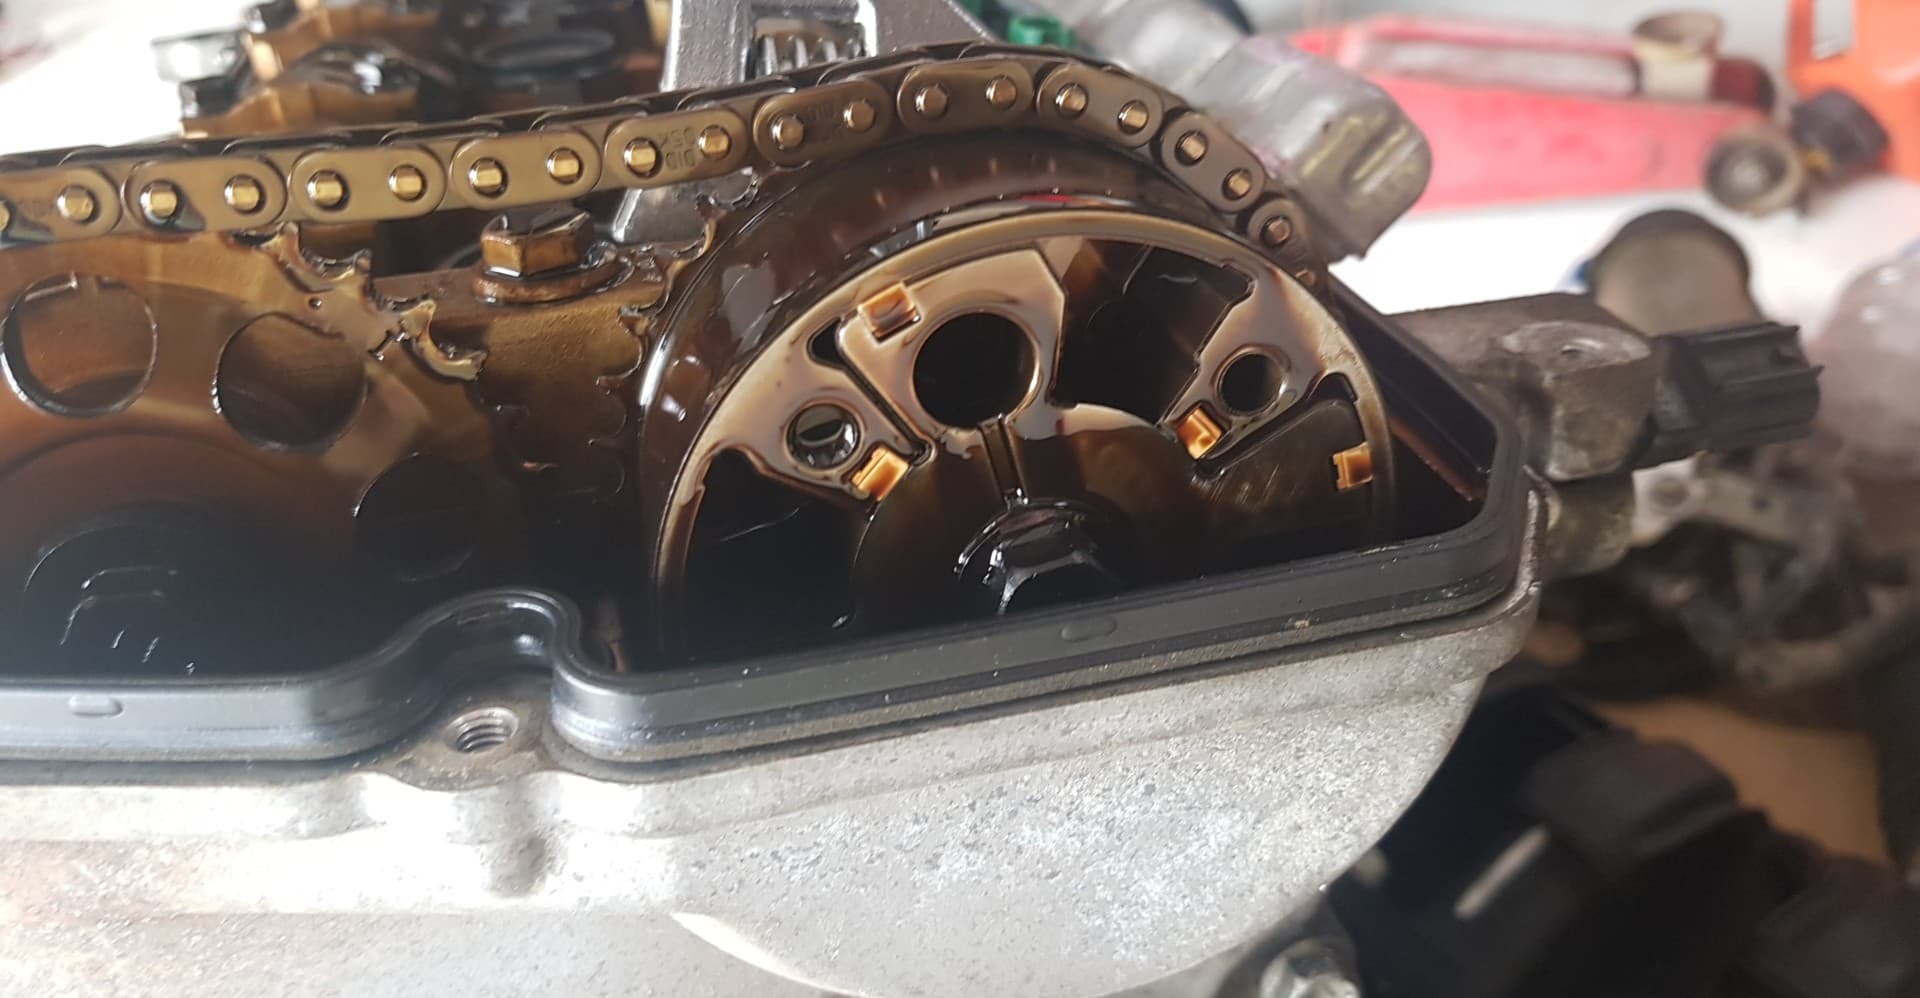
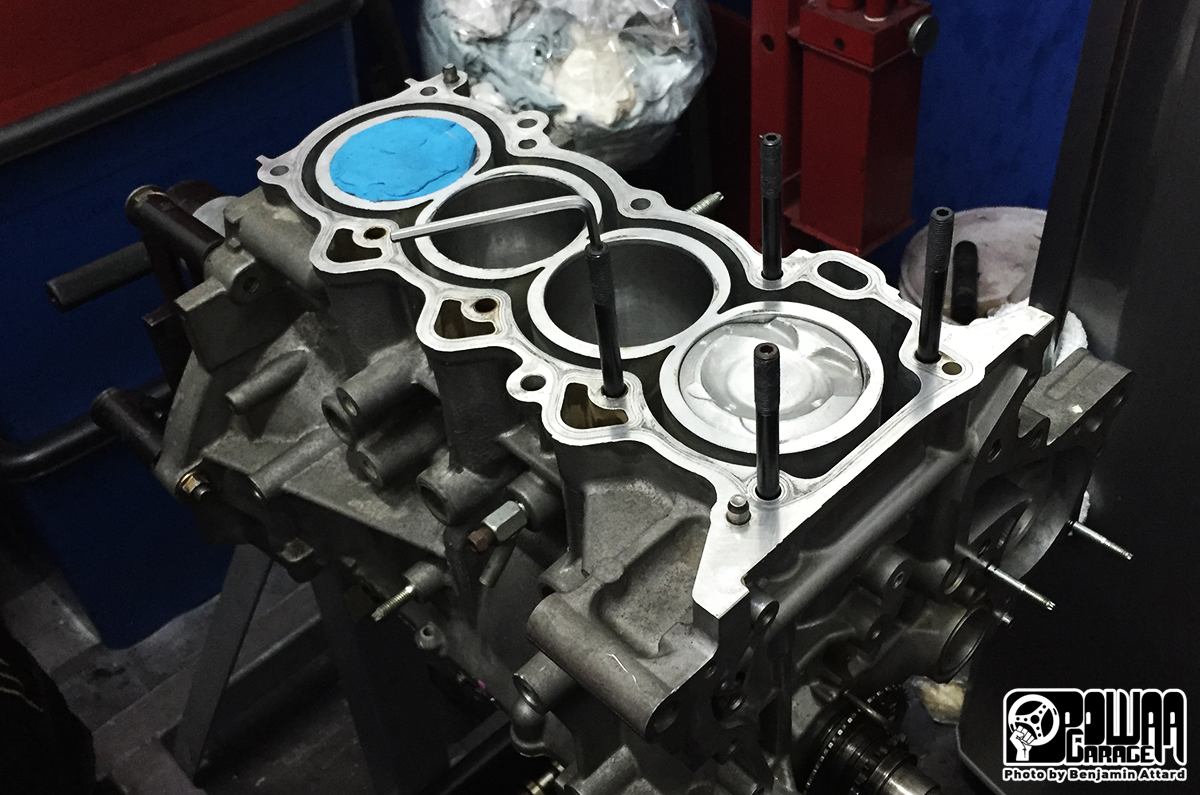
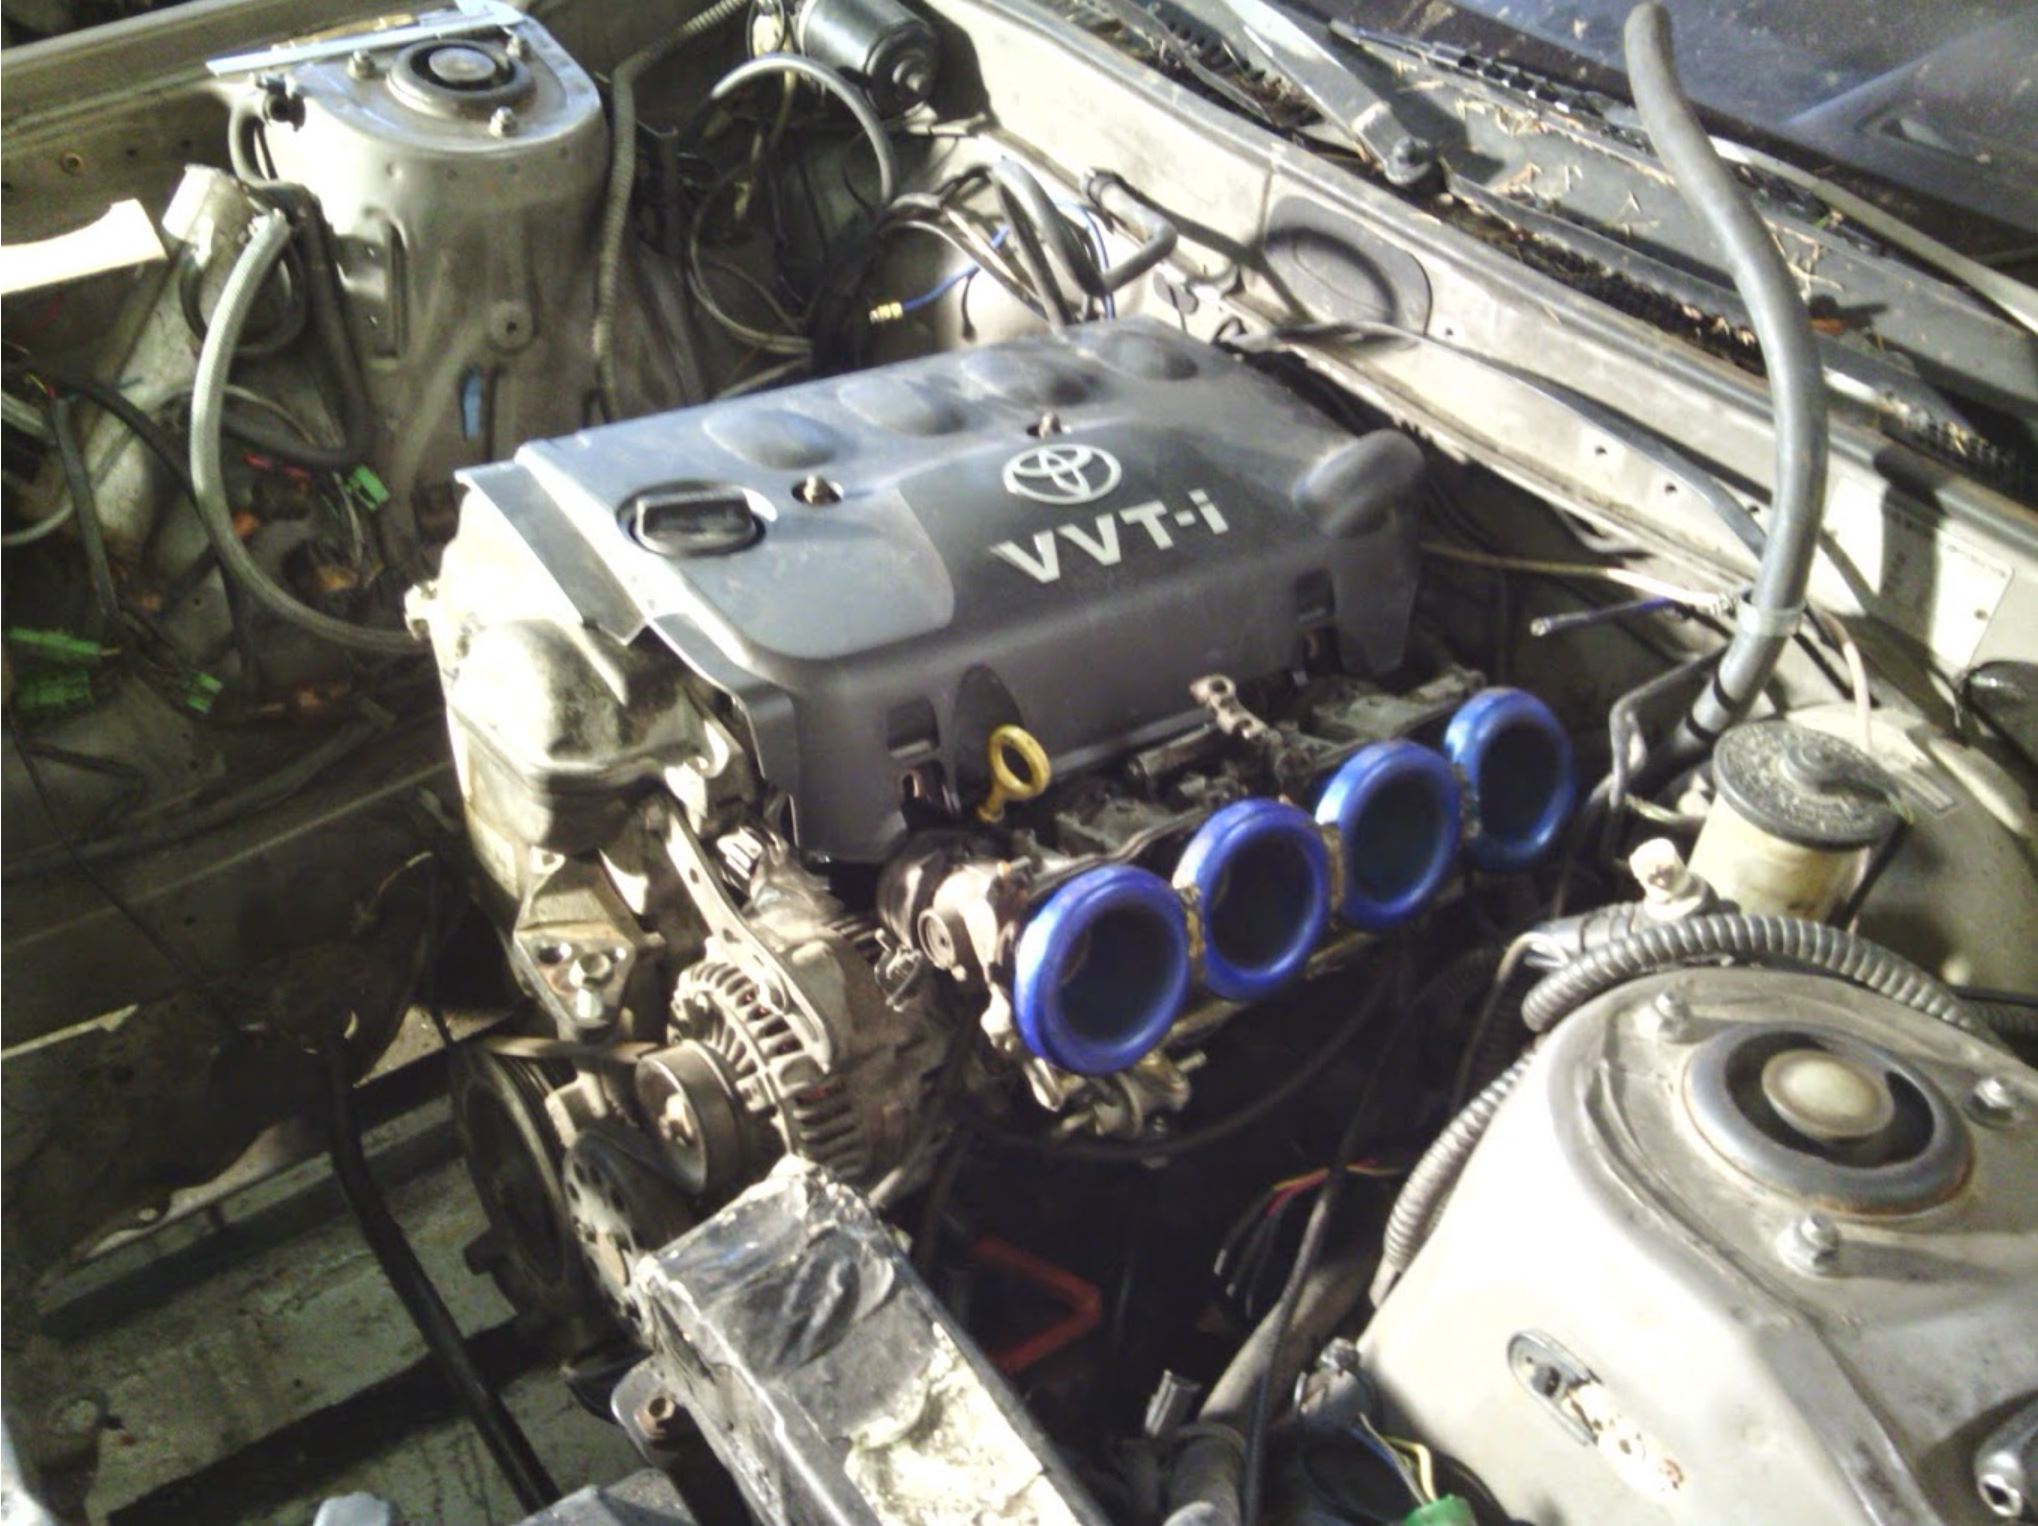
Time to work on car stuff has been stretched a little thin, but have made some slow progress. Took the head off, and found yep, valves bent. But no other damage. Valve seats looked fine and so did pistons. Cool! So for now I'll just fix it up and drive without VVTI. I pulled the valves out of my 2NZ motor (same part number) and sent the head off down the road to the engine place to lap the valves in and refit the valve springs. Hopefully get it back by the weekend maybe. There was another Vitz RS at Zebra so I went and pinched another C56, hopefully this one is a little more enthusiastic about going into gear. I'm getting pretty good at pulling motor/box out of these things. It's much easier once you know the order of things. I will keep current box in for now, and fit LSD into this spare one and check all of the synchros in it while it's apart. If they're bad, I will pinch the ones from my standard Echo gearbox as that thing shifts gear wonderfully. Assuming they're the same. Also just before my valves went asplode, I bought these for some lols / traction. Two of the tyres are a bit chooched but will hopefully do a trackday or three with them on the rear. (that does hardly any work anyway) Havent tried them yet but should be a laugh.
7 points
-
We have a screen rubber! And if you zoom in, cancer it seems. knocked out these two wee bits in the bottom of the front window channel. i friggin lost the other piece I cut out, but at least I know it’s not inside the scuttle6 points
-
Righto so while i was away on my swing some more parts showed up , an axle set of wheel nuts ( i dont know why i didnt just get a full set) a belt and the brakes pads! So over the last couple days I replaced the front end brakes. new calipers,bolts, slide bushes etc, and hoses. what a right cunt the hoses were until I remembered an ancient technique.... a chisel to convince the securing speed nut on the inside to wind off. little bit mangled now but the thread part was fine so that's ok. and vice grips cracked the lines. I kind of want to redo them at some point ... totally get how a weekend job turns into the vehicle being pulled apart forever. Anyhow while that was happening i was also playing around with de-rusting options. i got some phosphoric acid and threw all the rear brake stuff in to see the go. i actually worked far better then i expected and the results were on the order of hours. then I got excited and tried to set up a electrolysis rig but my simple trickle charger was dead. Boooo anyhow pics. Old brakes rotors werent done beacuse they have millions of life left and are spensive to get over. And done , all of two items , they took way too long to do . pro tip, dont lose the locating clip that holds the inner brake pads onto the piston. because they are octupus arms spec otherwise. The 'seized' caliper.. piston popped clean out. of course that would happen The inside of the caliper.... gross. then some rust removal experiments One of the adjustors, it got split so the acid could get into everything. After, cant remember if i put them in last night or this morning. soo Bolt and nut for holding the brake lines onto the upper control arm Fizzing away Bolts all done , pretty impressed and for little effort. Next is to do the suspsension bushes because they look so hideous, and the engine mounts because they are f-f-f-f-f-f-f Fucked After I get my own place, because things. Thank you for visiting4 points
-
Doesn’t apply to every product but read the labels next time and check out who actually makes it.3 points
-
We are moving this months meet to accommodate a visit from the lovely dam engineer, Beaver. 7pm Parrotdog in Lyall Bay. Rock on up and grab a table. We'll see you there!3 points
-
Ooooof manual conversion at pickapart too....
3 points
-
Few pics the guy sent me. As soon as I saw the "PGM-FI" stickers I was like HNNNNNGGGGGGG.
3 points
-
To get to Kohatu, go over Spooner turn right at kohatu café, go up small climb and turn right onto Rabbit gully road, will have NCC sign at T intersection, then follow red arrows. Or if coming from Mot go up mot river and turn left just before you drop down to the Kohatu Café, will have sign out saying NCC event, and follow red arrows. Will be on unless its pissing down. check FB See u on Sunday2 points
-
This is what you want, shame it's auto. But it is a rare boi 100hp injected d13c. Majority seem to be carby. https://www.facebook.com/marketplace/item/139759601507001/2 points
-
IM not sure why this is a big deal? coolants these days are pretty damn good for all applications. running 75% is silly, water is a far better conductor of heat. the 50-50 distilled water is fine. Choose your brand . and be done with it2 points
-
This chapter is called: I blew up my motor but shit that was good . So the VVTI issue. I realized that I would be able to get the front plate off the VVTI pulley, and then hopefully wiggle free the spring and the locking pin without removing anything else. Thankfully it worked! Then put that front plate on, and done. Then fire the motor up, advance the cam 5 degrees - success! The cam is moving, finally. Excellent. However - with more advance I ended up hitting valves into pistons - at around 20 degrees advance. Bummer! This motor must have smaller valve cutouts than the non hybrid engines I guess. I should have checked this, rookie mistake. So in some ways it was good that the locking pin was stuck, otherwise I probably would have done this on day one instead of lots of fun doorting around. It doesnt sound catastrophic, I dont think any valves have broken off. But the motor turns over like it's got no compression now. So probably tweaked the valve heads. But it's not crunchy sounding and it turns over freely. If anything I'm a little dissapointed that it's come to a fairly inglorious end, rather than sent to valhalla at 8800rpm blaze of glory. The options from here once the head is fixed or replaced: -Keep as is, run with no VVTI (boooo) -Cut bigger reliefs into the pistons so full VVTI can be used (hooray) but slightly less compression thanks to cutouts (boo) This all sounds like a bit of a downer, but my general mood right now is I'm fizzing about what an awesome success this all was. As a proof of concept, and a reasonably cheap project to keep me entertained this has been completely excellent. What I've learned is that there's no way I'm going to have the discipline to keep the revs on this motor below 8k when it loves to still rev up past that. So it would have been a matter of time until rods exited block. Also since I now know that I will have to remove pistons for machining some cutouts, I can replace rods at the same time with cheap stronger ones. This gearbox is a bit clunky and it could really do with an LSD. So while it's all apart for LSD install I can see if the shifter forks are a bit beaten up or something, and replace with parts from my old box which is buttery smooth to shift. So I've learned some stuff that would necessitate engine/box removal regardless. There will probably some slow progress for a while, but I'm super happy with how it's all come along. My goal is to get the car awesomely sorted for a December trackday and OS drags if they'll let me pest peoples eyes and ears with an Echo again. A++ would do hybrid motor doorts again
2 points
-
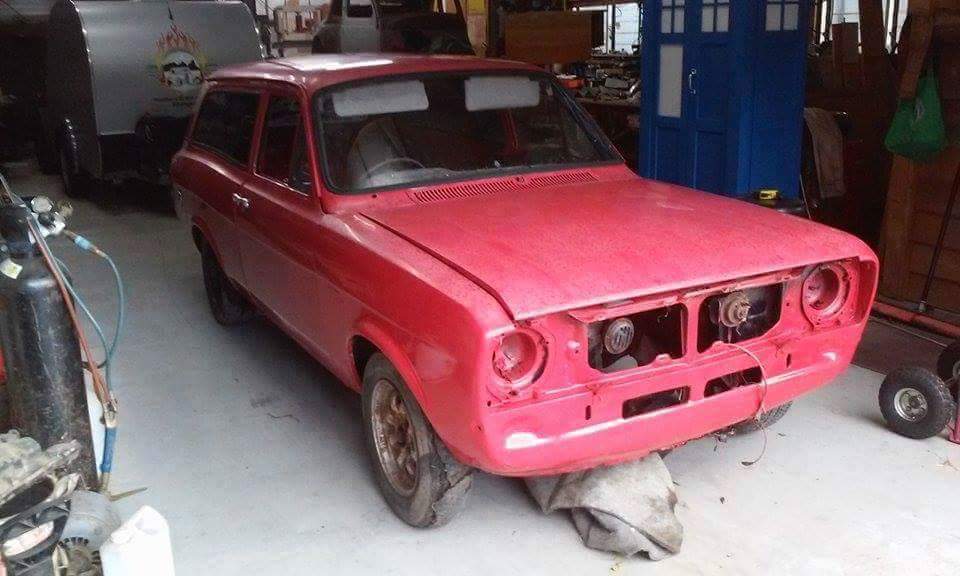
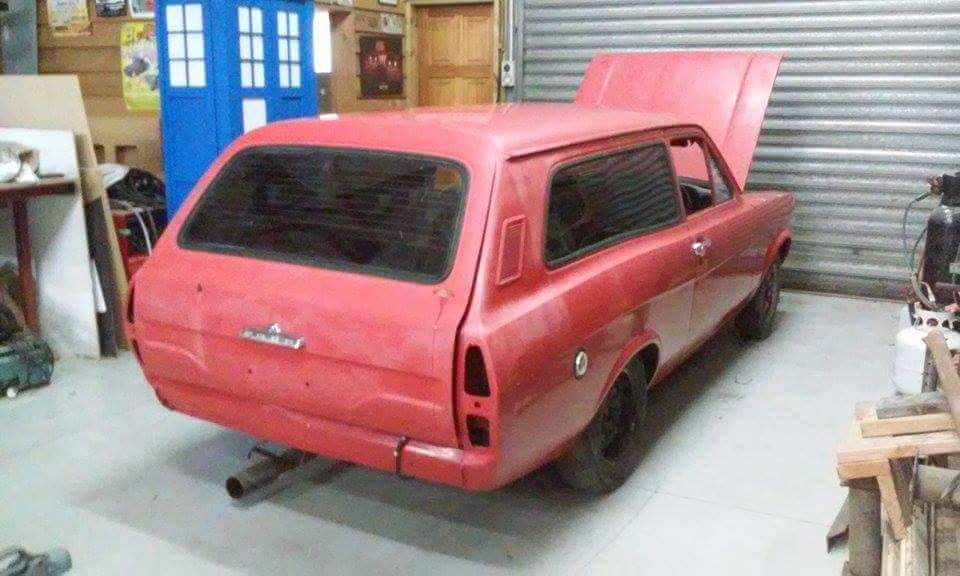
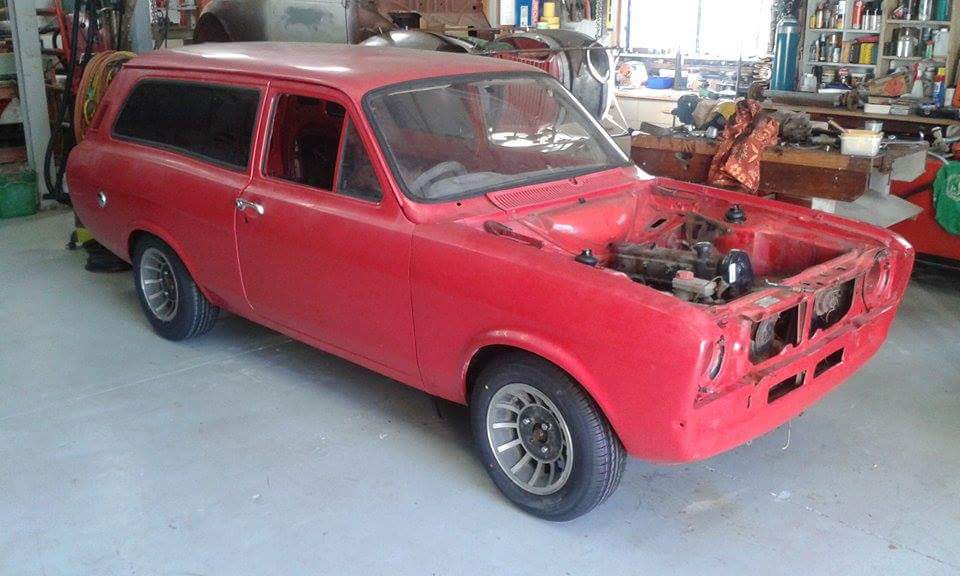
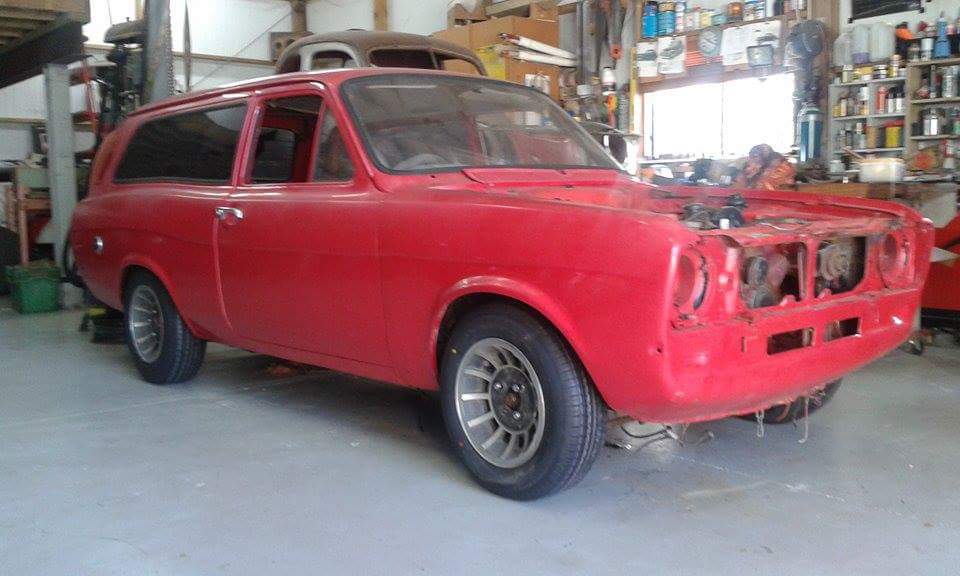
Back in 2015 dad and I took a road trip to Gisborne to pick up a Mk2 escort estate after buying it for $450. Put it on a trailer behind the Accord and made a 12 hour road trip home. This is the next morning after giving it a decent water blast and getting rid of the cockroach infestation that was living in it. The car came with no motor, a gearbox hanging from the rear engine mount, a fart cannon exhaust, little to no interior bar the headlining and dash cluster, steering wheel, column and pedal boxes, full glass, escort steelies all round, plus some other crap in boxes in the tray area. The plan at this point was to put a 2l pinto in it and a type 9 box. I very optimistically (read: naively) hoped to have it running in time to drive it as a daily once I got my restricted (six months later). A couple of years earlier I was given a 205 block pinto of unknown history from an ex-workmate of my dad's with the intention at the time of putting it in a 1928 ford pickup projects that never really got off the ground. So instead it sat around on a pallet until that morning when we dropped it into the hole and bolted it up to the 4 speed that was already in the car to check clearances and see what would have to be done.You'll notice too the set of cheviot turbo mags wrapped in yu-long-dong brand 175/60/13s front and 185s rear (these will be changed to a decent set once it's on the road). The mags were given to me by another friend of my dad's as payment for him rebuilding a front cross member for his genuine Capri Perana. After dropping the motor in and standing back to have a look and fizzing about it, the door was shut and so ended day number one. Discussion here:
1 point
-
I'd totes be keen to have a sub 1300cc track car if and when they finally build the circuit at kohatu/tapwera.. And have a big enough garage...1 point
-
Class A is 0- 1300cc. That's where I play with the Uno, other cars are mid 70sToyota Corolla, early mazda 323, Toyota starlet, Toyota Vitz, and occasionally a Citroen GSA, Suzuki cappuccino with a 1300 twin cam in it. Would be great to see a Nissan march rushing around. Adding a turbo multiply original cc x 1.8, so to stay on 1300 calss you need something with about starting with 720cc, If anyone keen happy to take them for a ride in the Uno.1 point
-
Something like this..
1 point
-
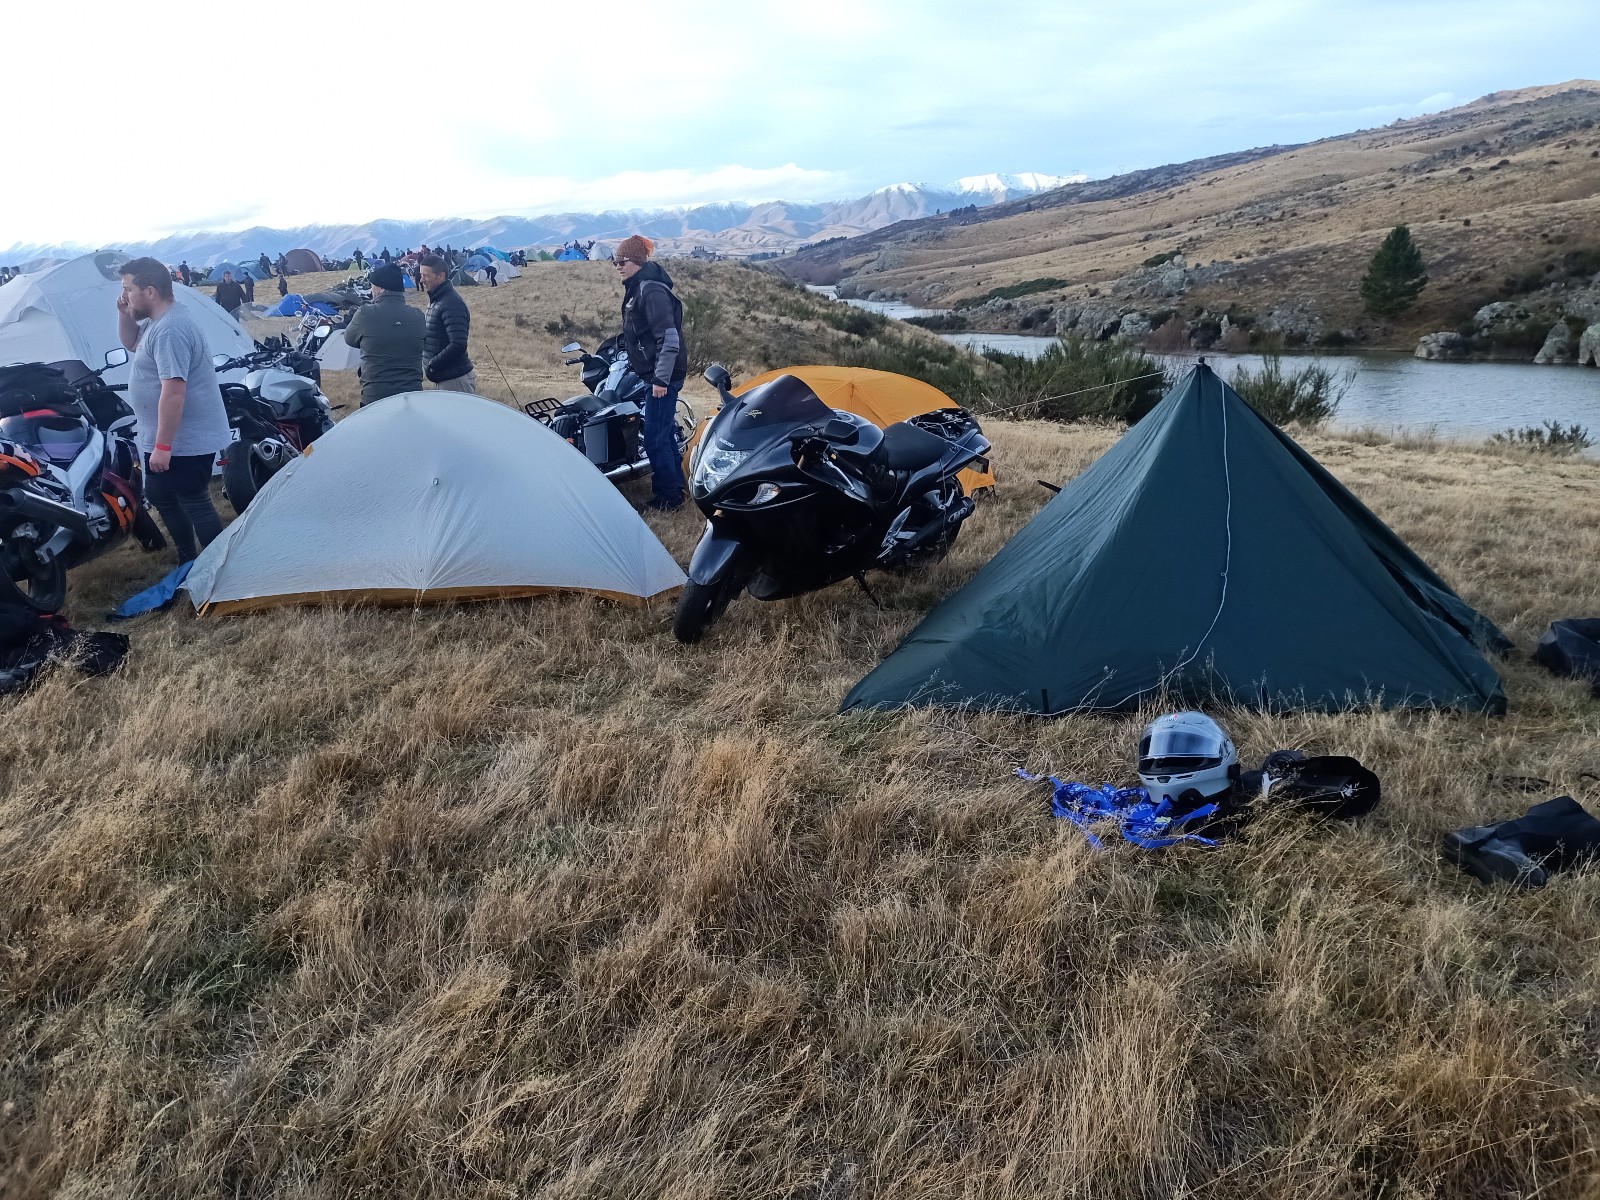
So took this down to Brass Monkey. Was an epic 6 days of riding with good people on some great roads. Was excellent not having to worry about anything bike related (except fuel) during the trip. These things are so tractable, comfortable and easy to live with. Bloody magic. Gear selection continues to amuse me. At 100 you can choose any gear from 2nd to 6th depending on how rapidly you think you need to be accelerating. 6th gear at 100 is still going to pull away harder than most cars so usually no point in changing down. Cruising through town at 50 I tend to choose a gear based on how much noise pollution I feel they need. The rack worked flawlessly and it was handy being able to access the storage so easily. My stropping down on gear was not as flawless and I lost a spendy camp matress somewhere between Blenheim and kaikoura...but was a small price to pay for an otherwise great trip I really need a new chain now, shits fucked.
1 point
-
Also consider what you are hanging the chain hoist on, this being potentially the weakest link. I have seen a 302 Cleveland and C4 trans hanging from the bottom chord of a roof truss made entirely from 100x50 pine. The creaking sounds it made did not fill me with confidence.1 point
-
shouldn't be lifting suspended loads over your, or anyone's elses head full stop no matter the gears rating. 99% of legit construction/industrial sites "never go below a suspended load" is a golden rule that shall not be broken. yes there may be some particular job specific exceptions, but you get the idea dont go under anything that might fall on your head if someone strapped it wrong or pushed the control knob the wrong way etc. - any of those exceptions have be accompanied with a specific plan as to why how/exactly what is being done and how that is being made safe and risk being minimised as far as reasonable practical. /safety rant m10 will also probably tell you than what they are selling is not for lifting but for towing or load binding. for lifting a normal car engine with a normal engine crane you can use whatever as long as you are certain its not going to fail - whats reasonable will depend if its a 90kg 1NZ or a 400kg 6BT. use as large a strap/chain as practical really. try not to put your foot under it etc. and try to get things balanced within reason.1 point
-
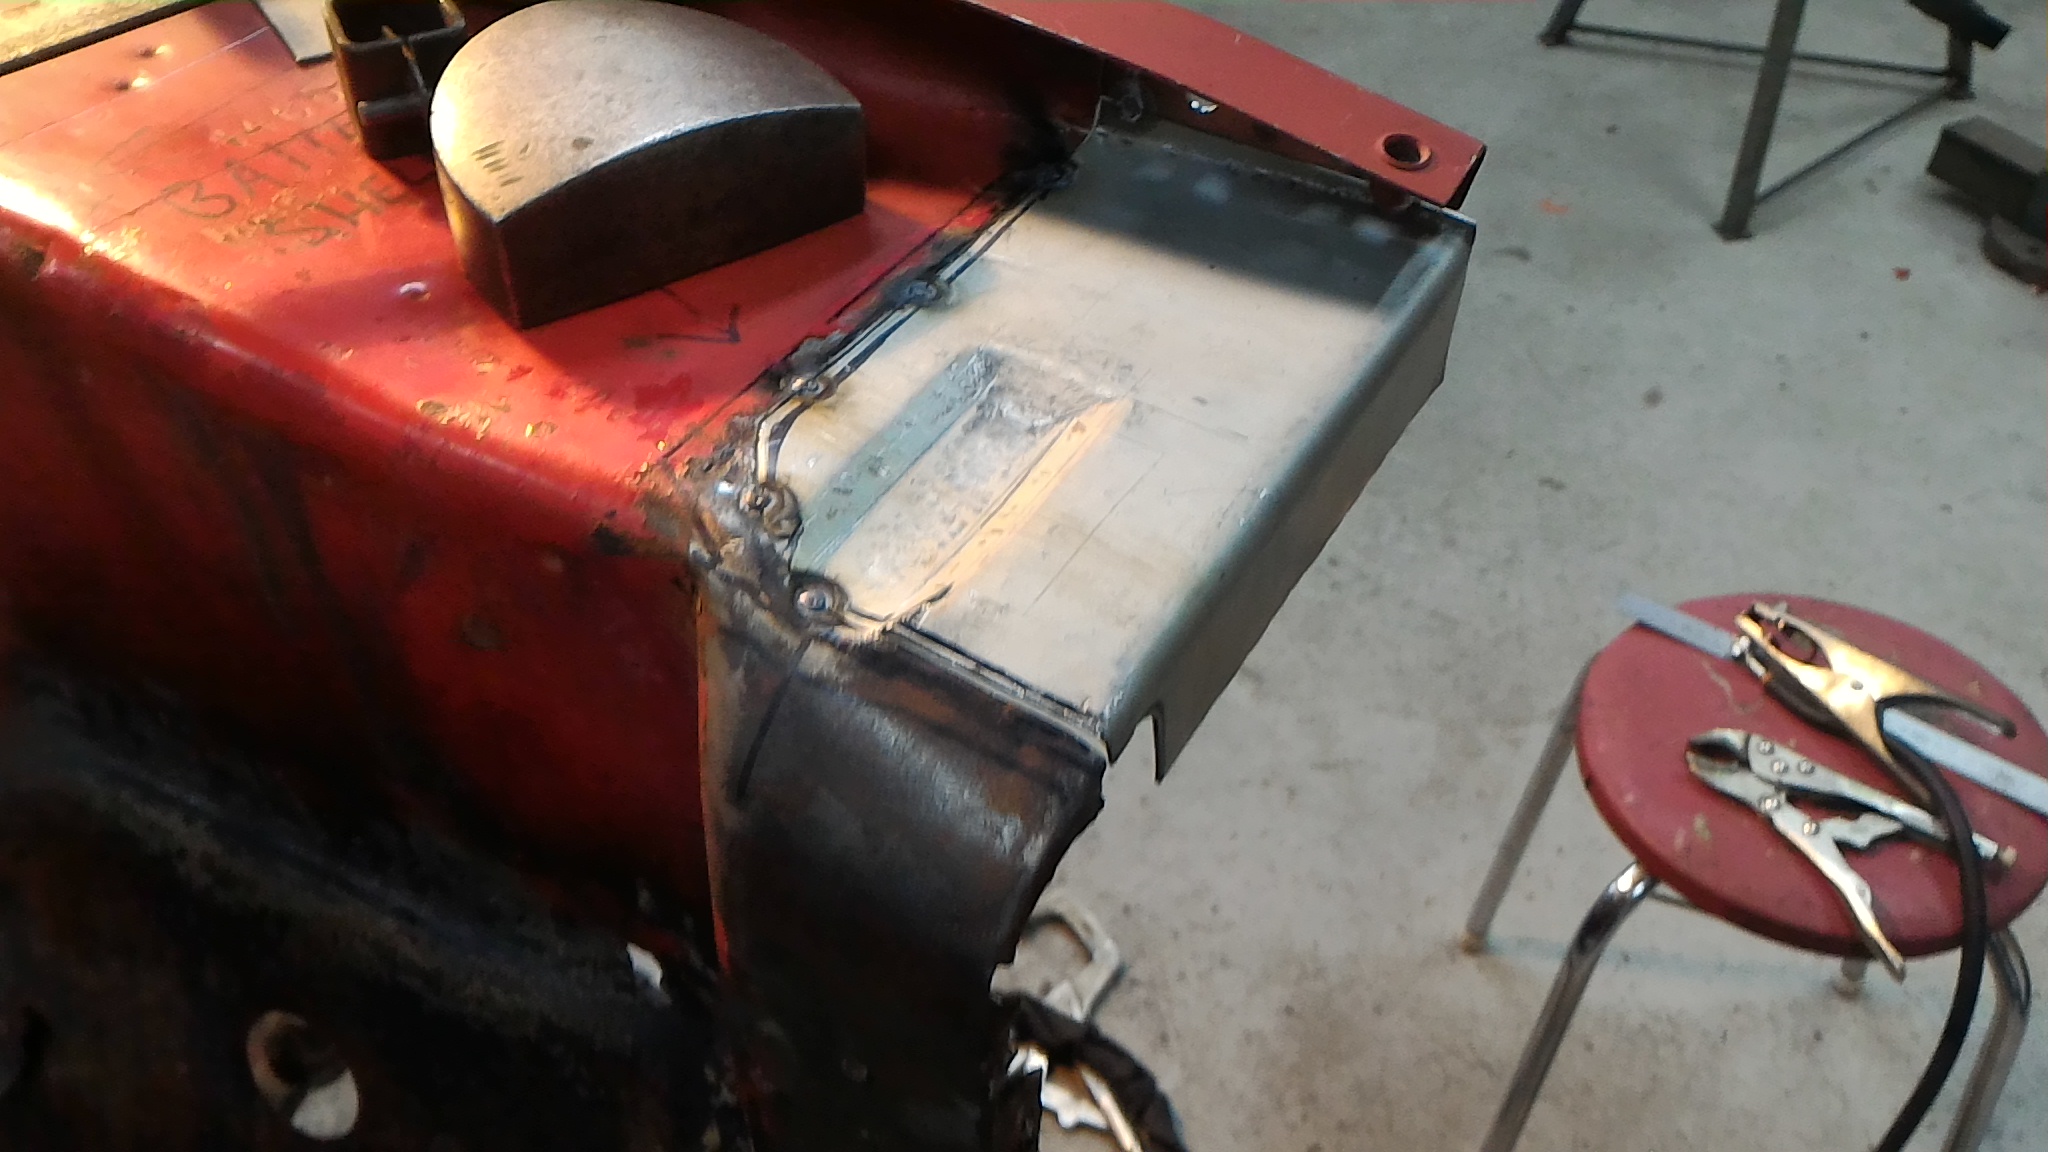
Quick tidy up and etch prime. That's me done for tonight. Hopefully this is the last welding I'll be doing on the shell.
1 point
-
I dunno why you're complicating this, just goto the tyre shop and tell the guy what you want. Buying second hand tyres can get fucked for a daily tbh, you gotta check the date code to see how long you got till they fall apart. I've used motor treads in the past and he's been great for doing exactly what I asked of him.1 point
-
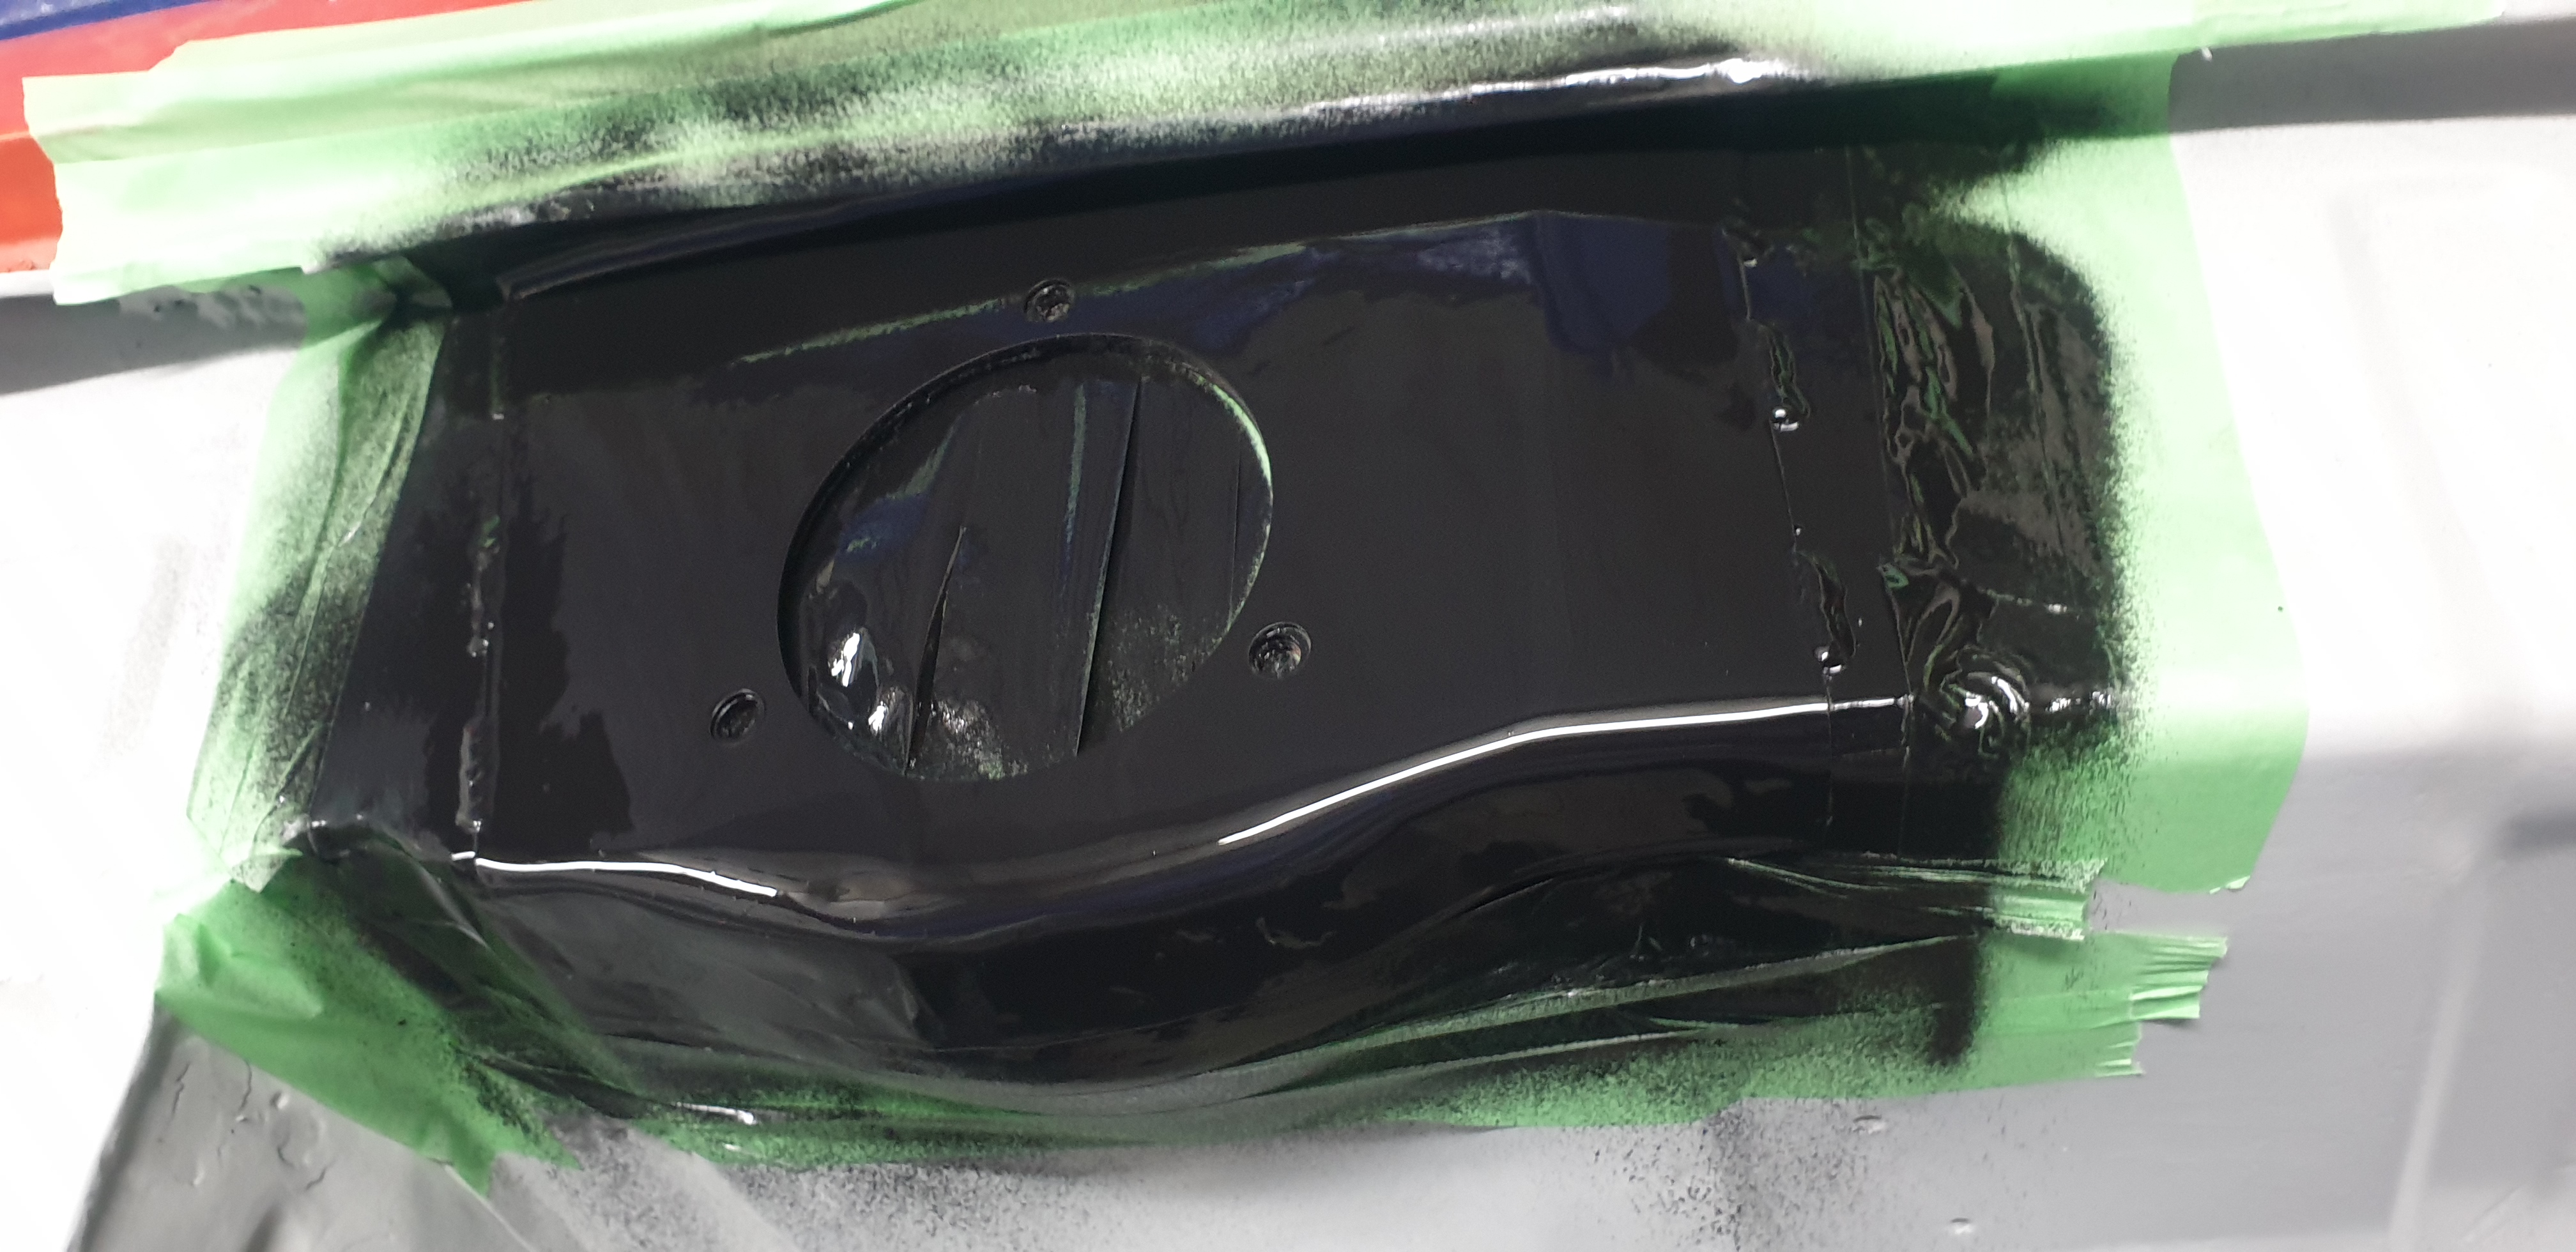
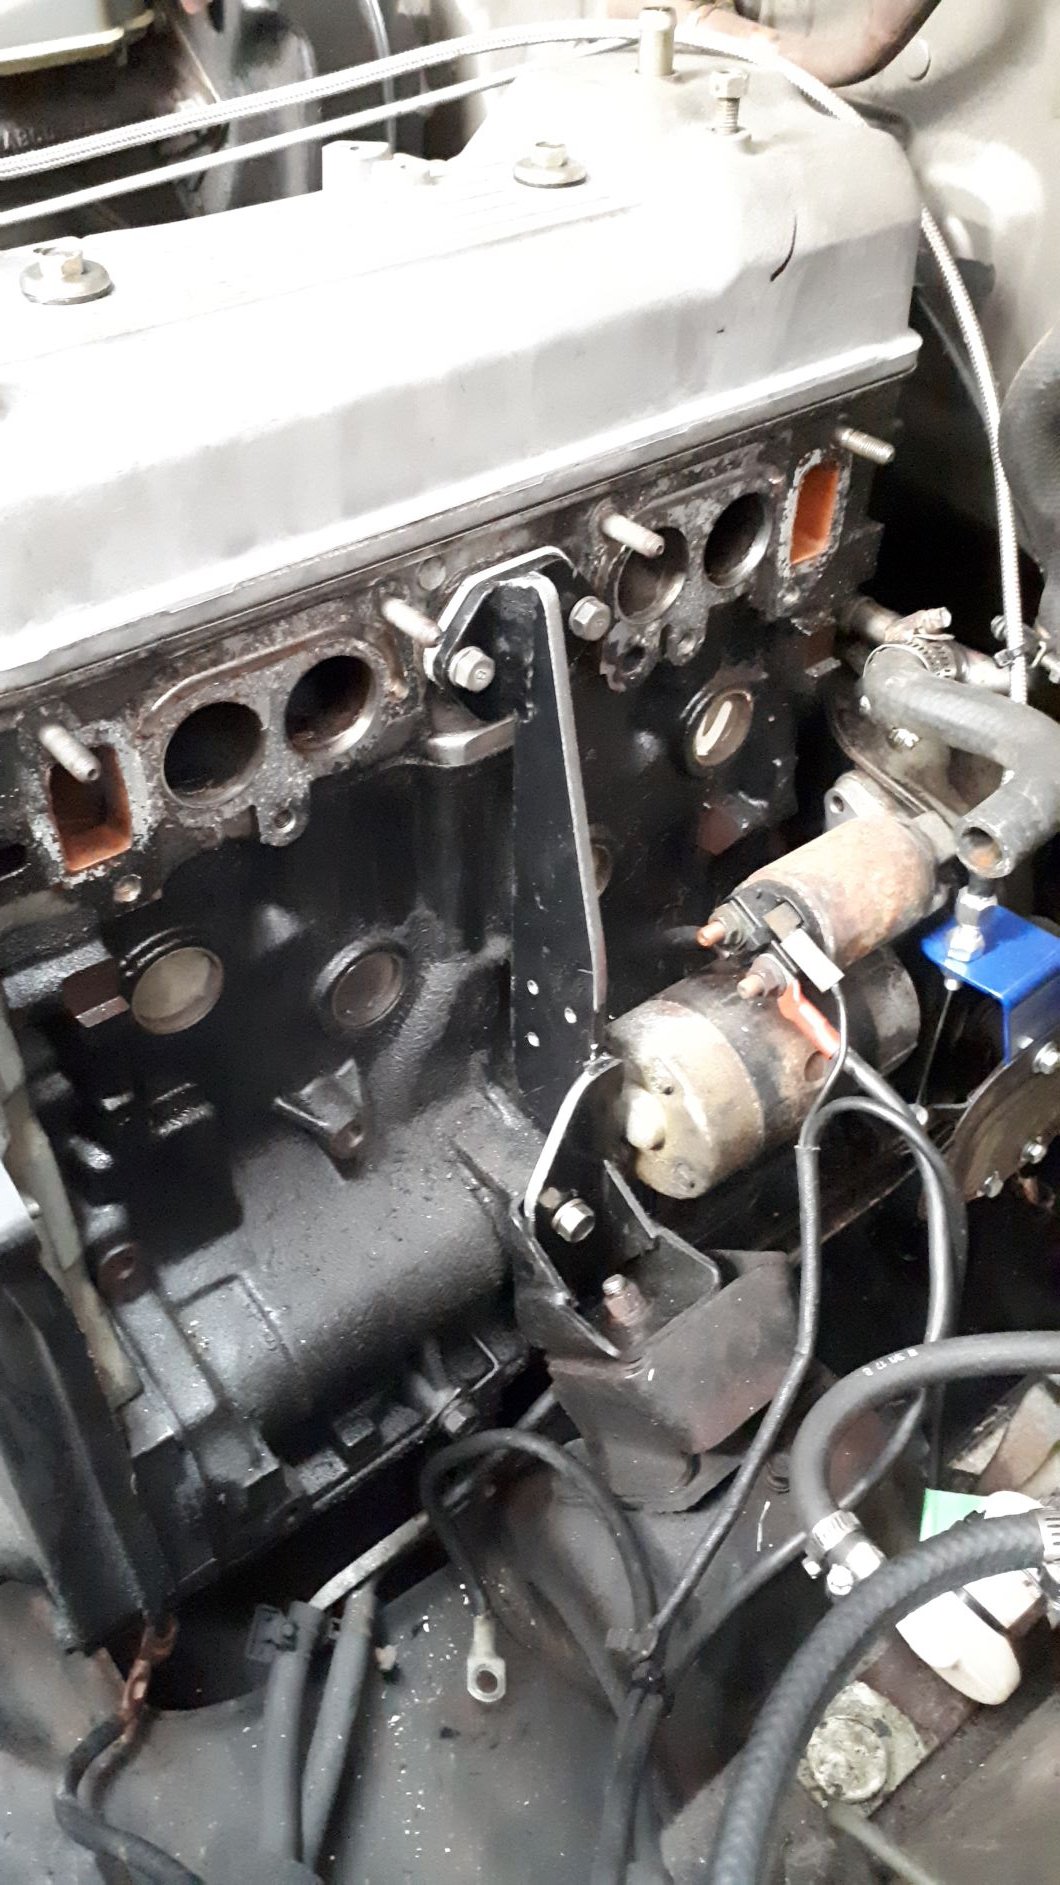
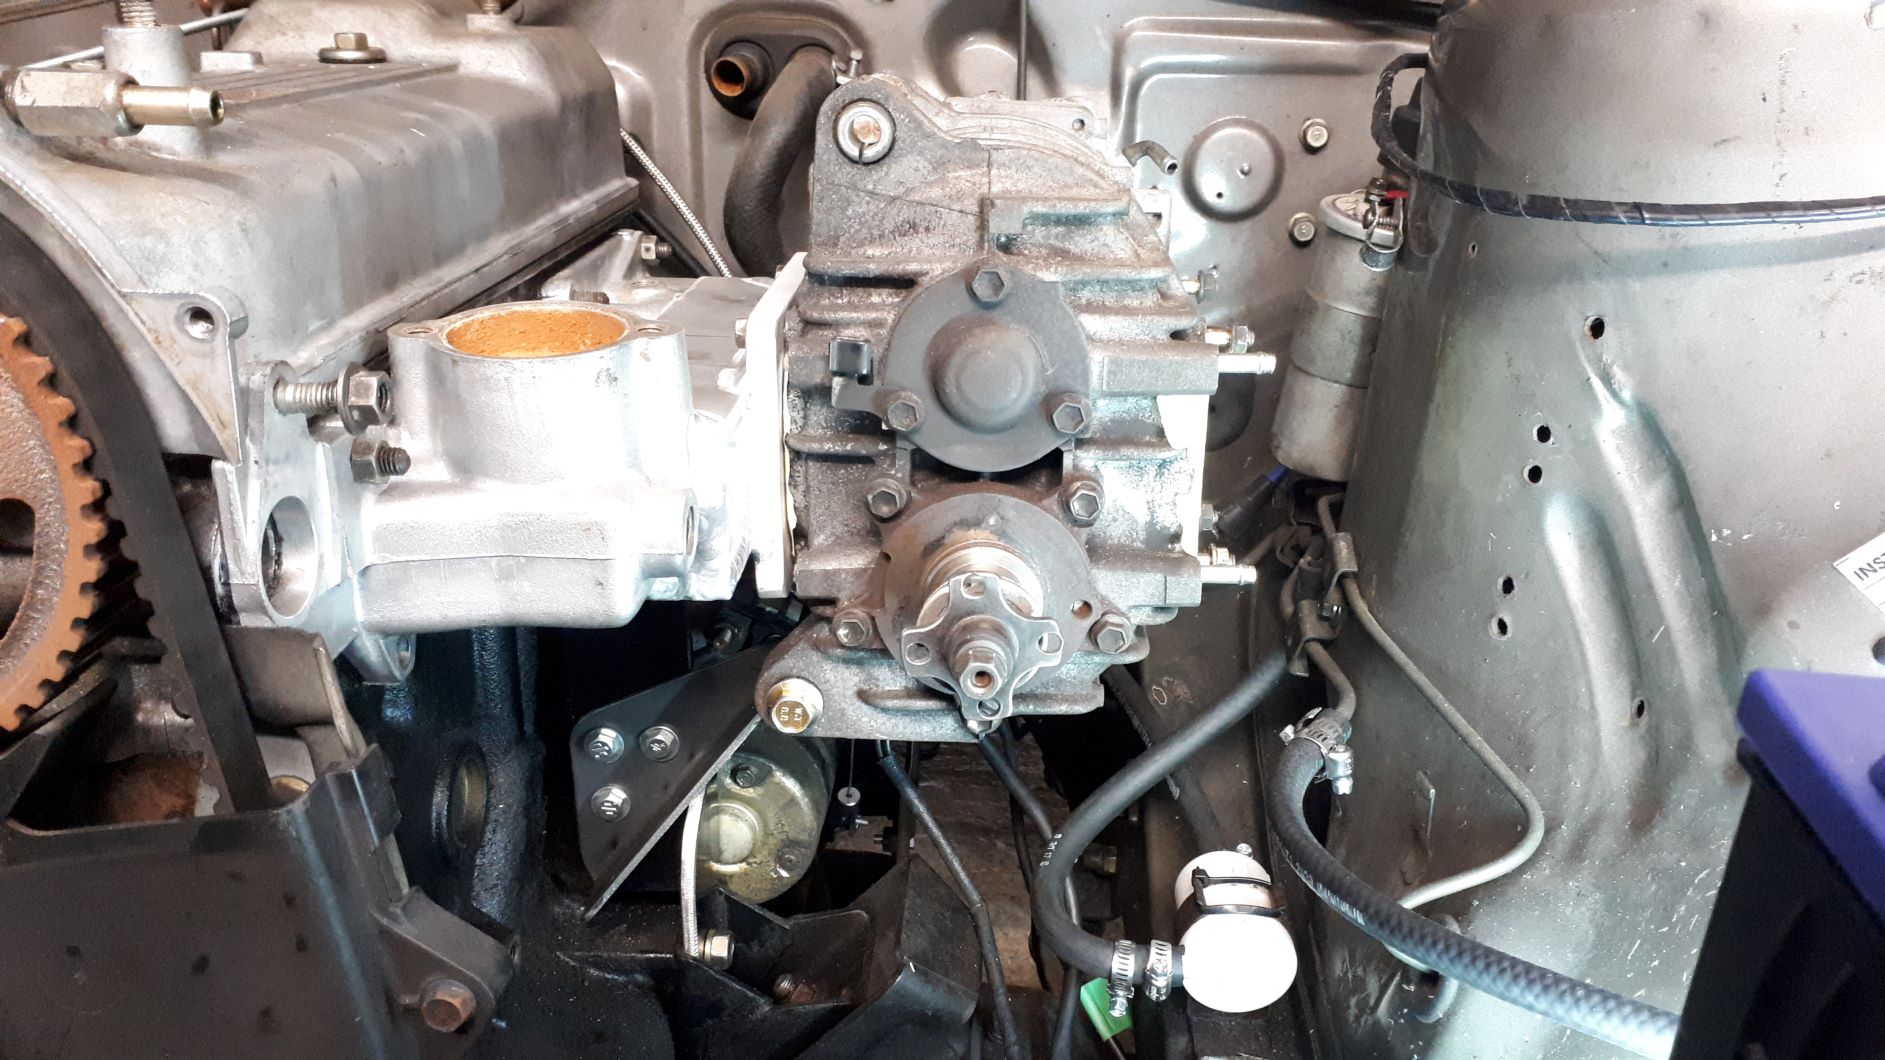
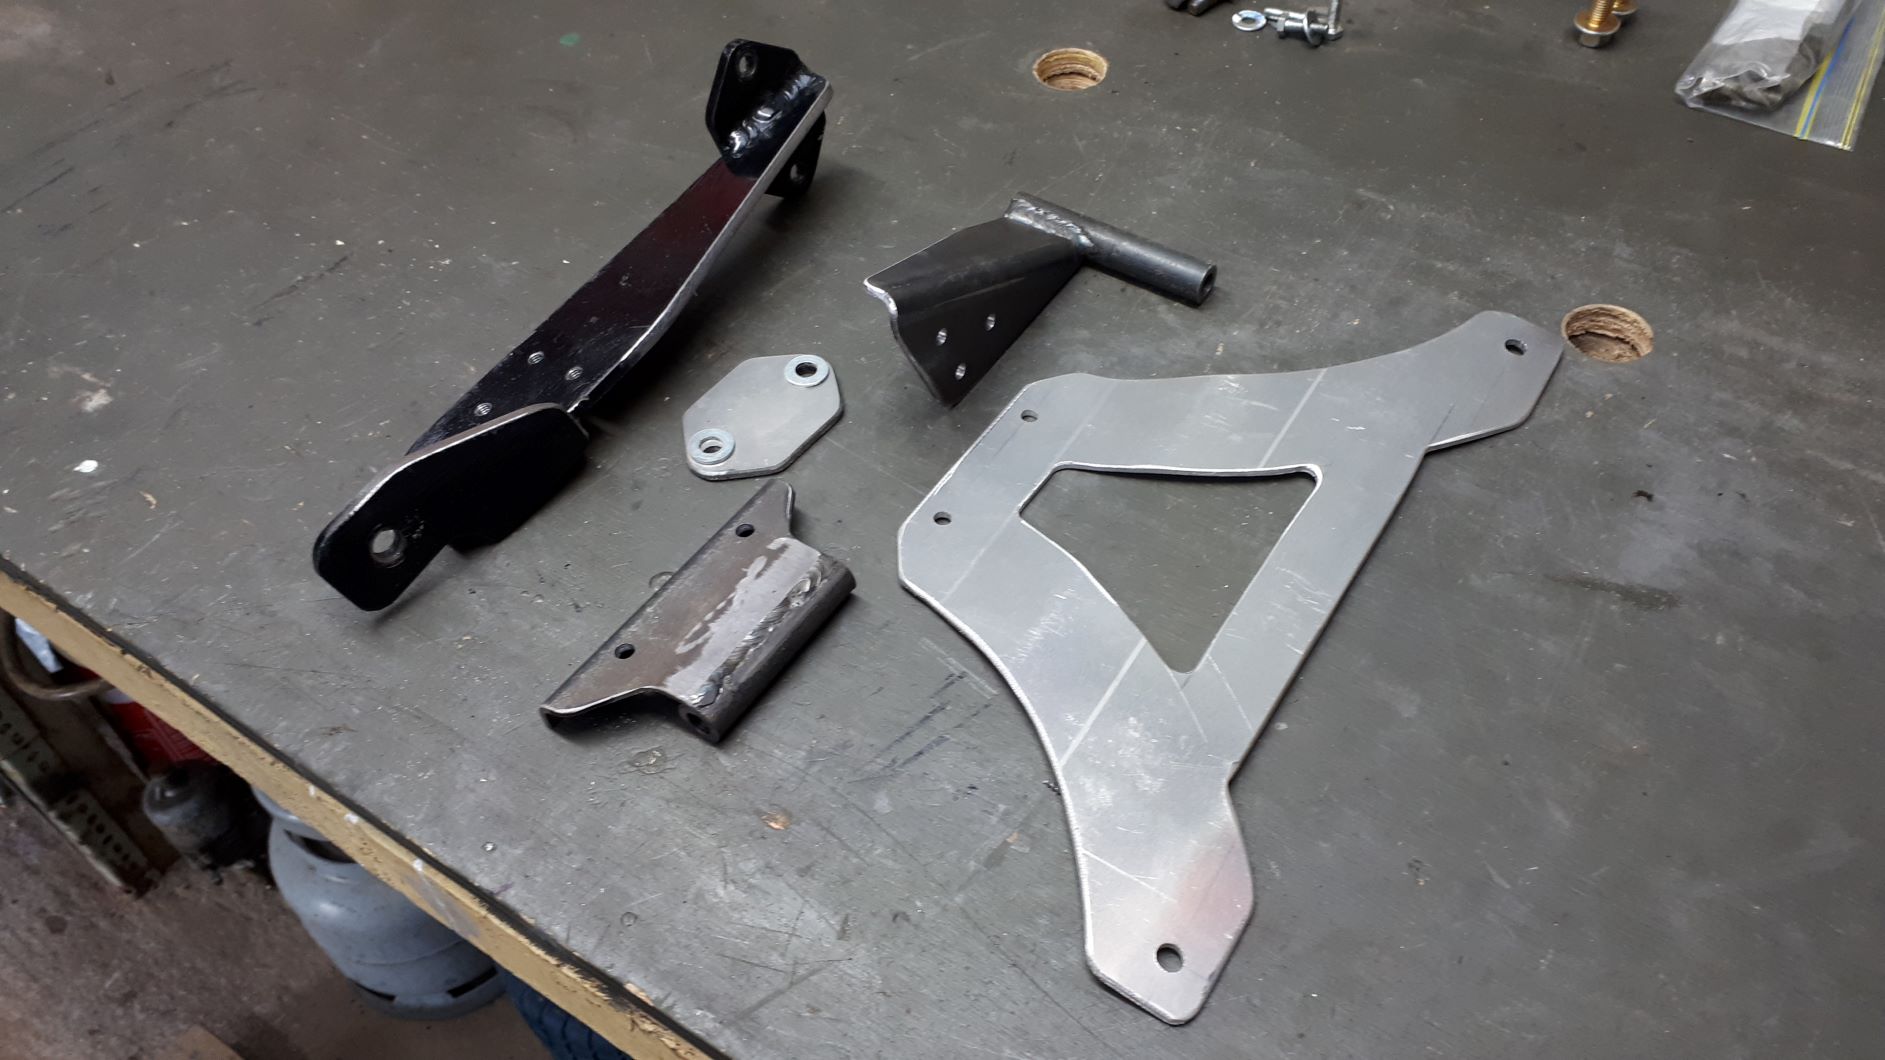
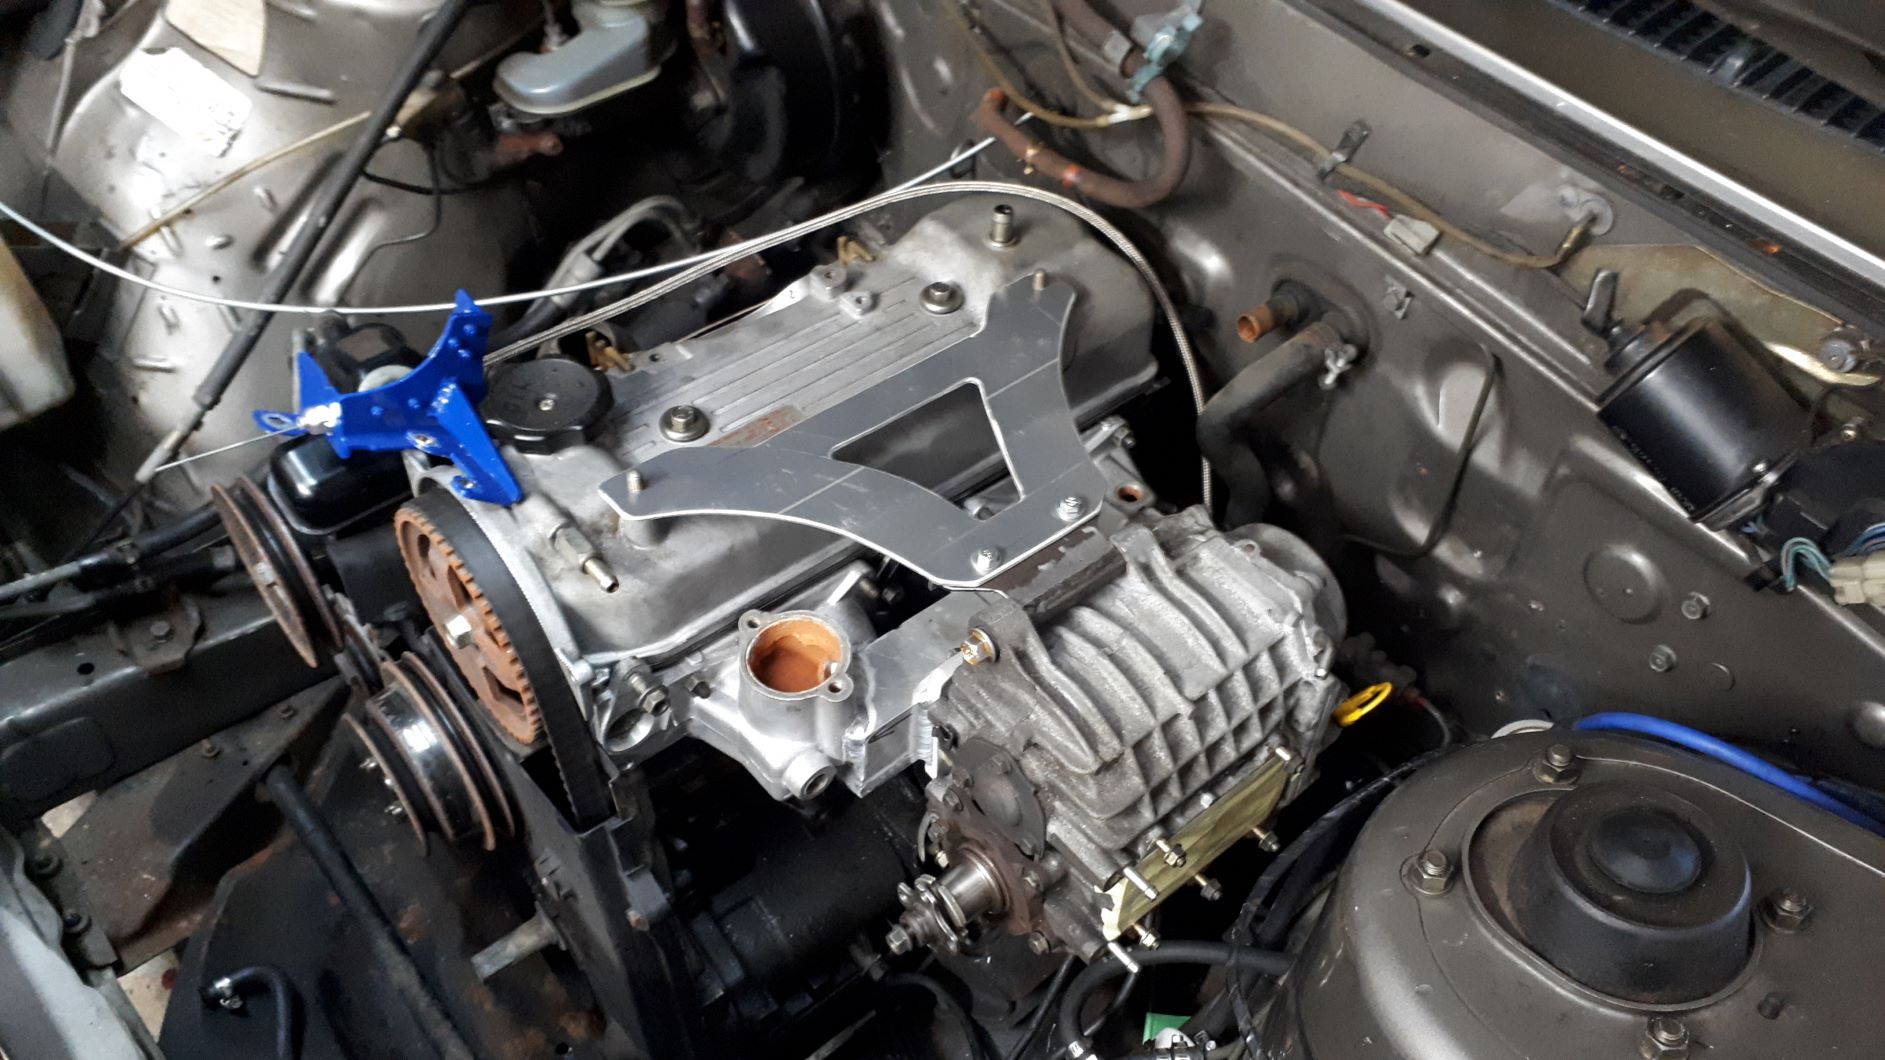
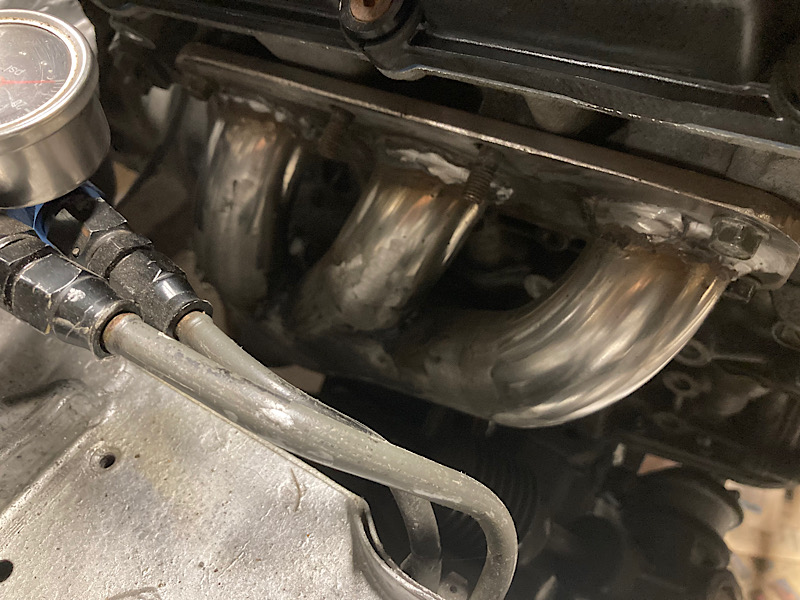
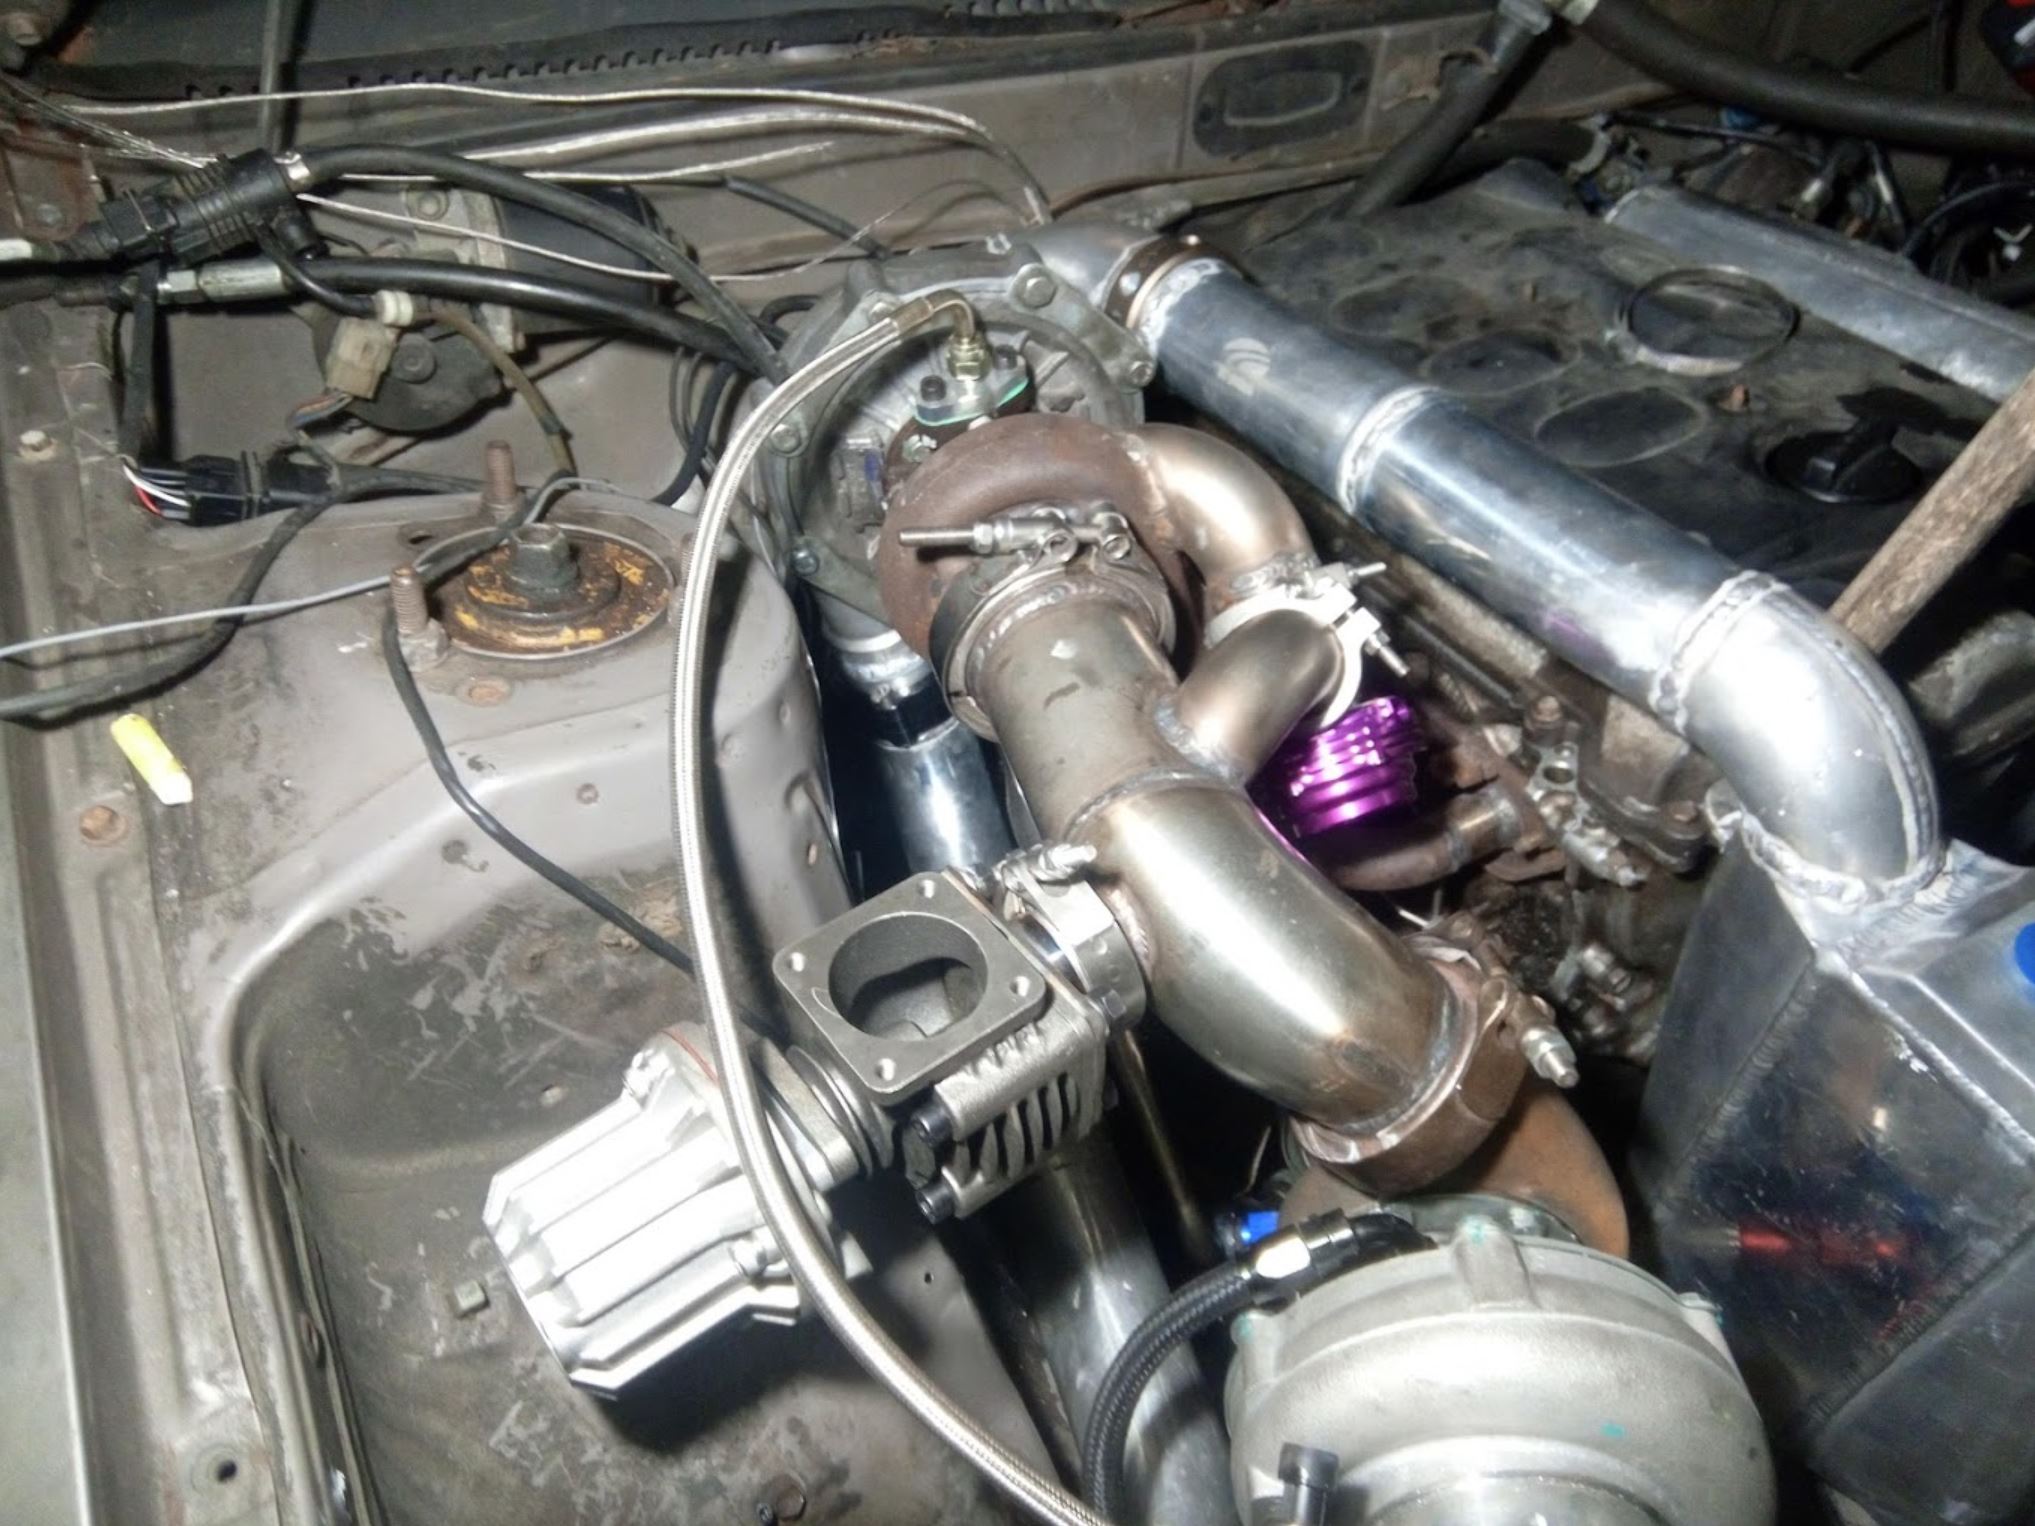
This weekend has been all about making some brackets so the supercharger isn't just dangling off the manifold. I am going to use an electric fuel pump so I decided to repurpose the fuel pump mounting location and made a bracket to support the lower supercharger mount. The upper mount is fastened back to a couple of studs on the engine that used to support the air filter assembly, I hope this is strong enough but didn't really have a lot of other options for this one.
1 point
-
Get a good brand all season tire and get your brakes checked and adjusted.1 point
-
Yeah they just as shit that’s why the don’t pass compliance1 point
-
Snow tyres are for the snow, not for rain Tho good quality winter tyres do OK on wet roads now, you are still better off with an OK set of normal tyres1 point
-
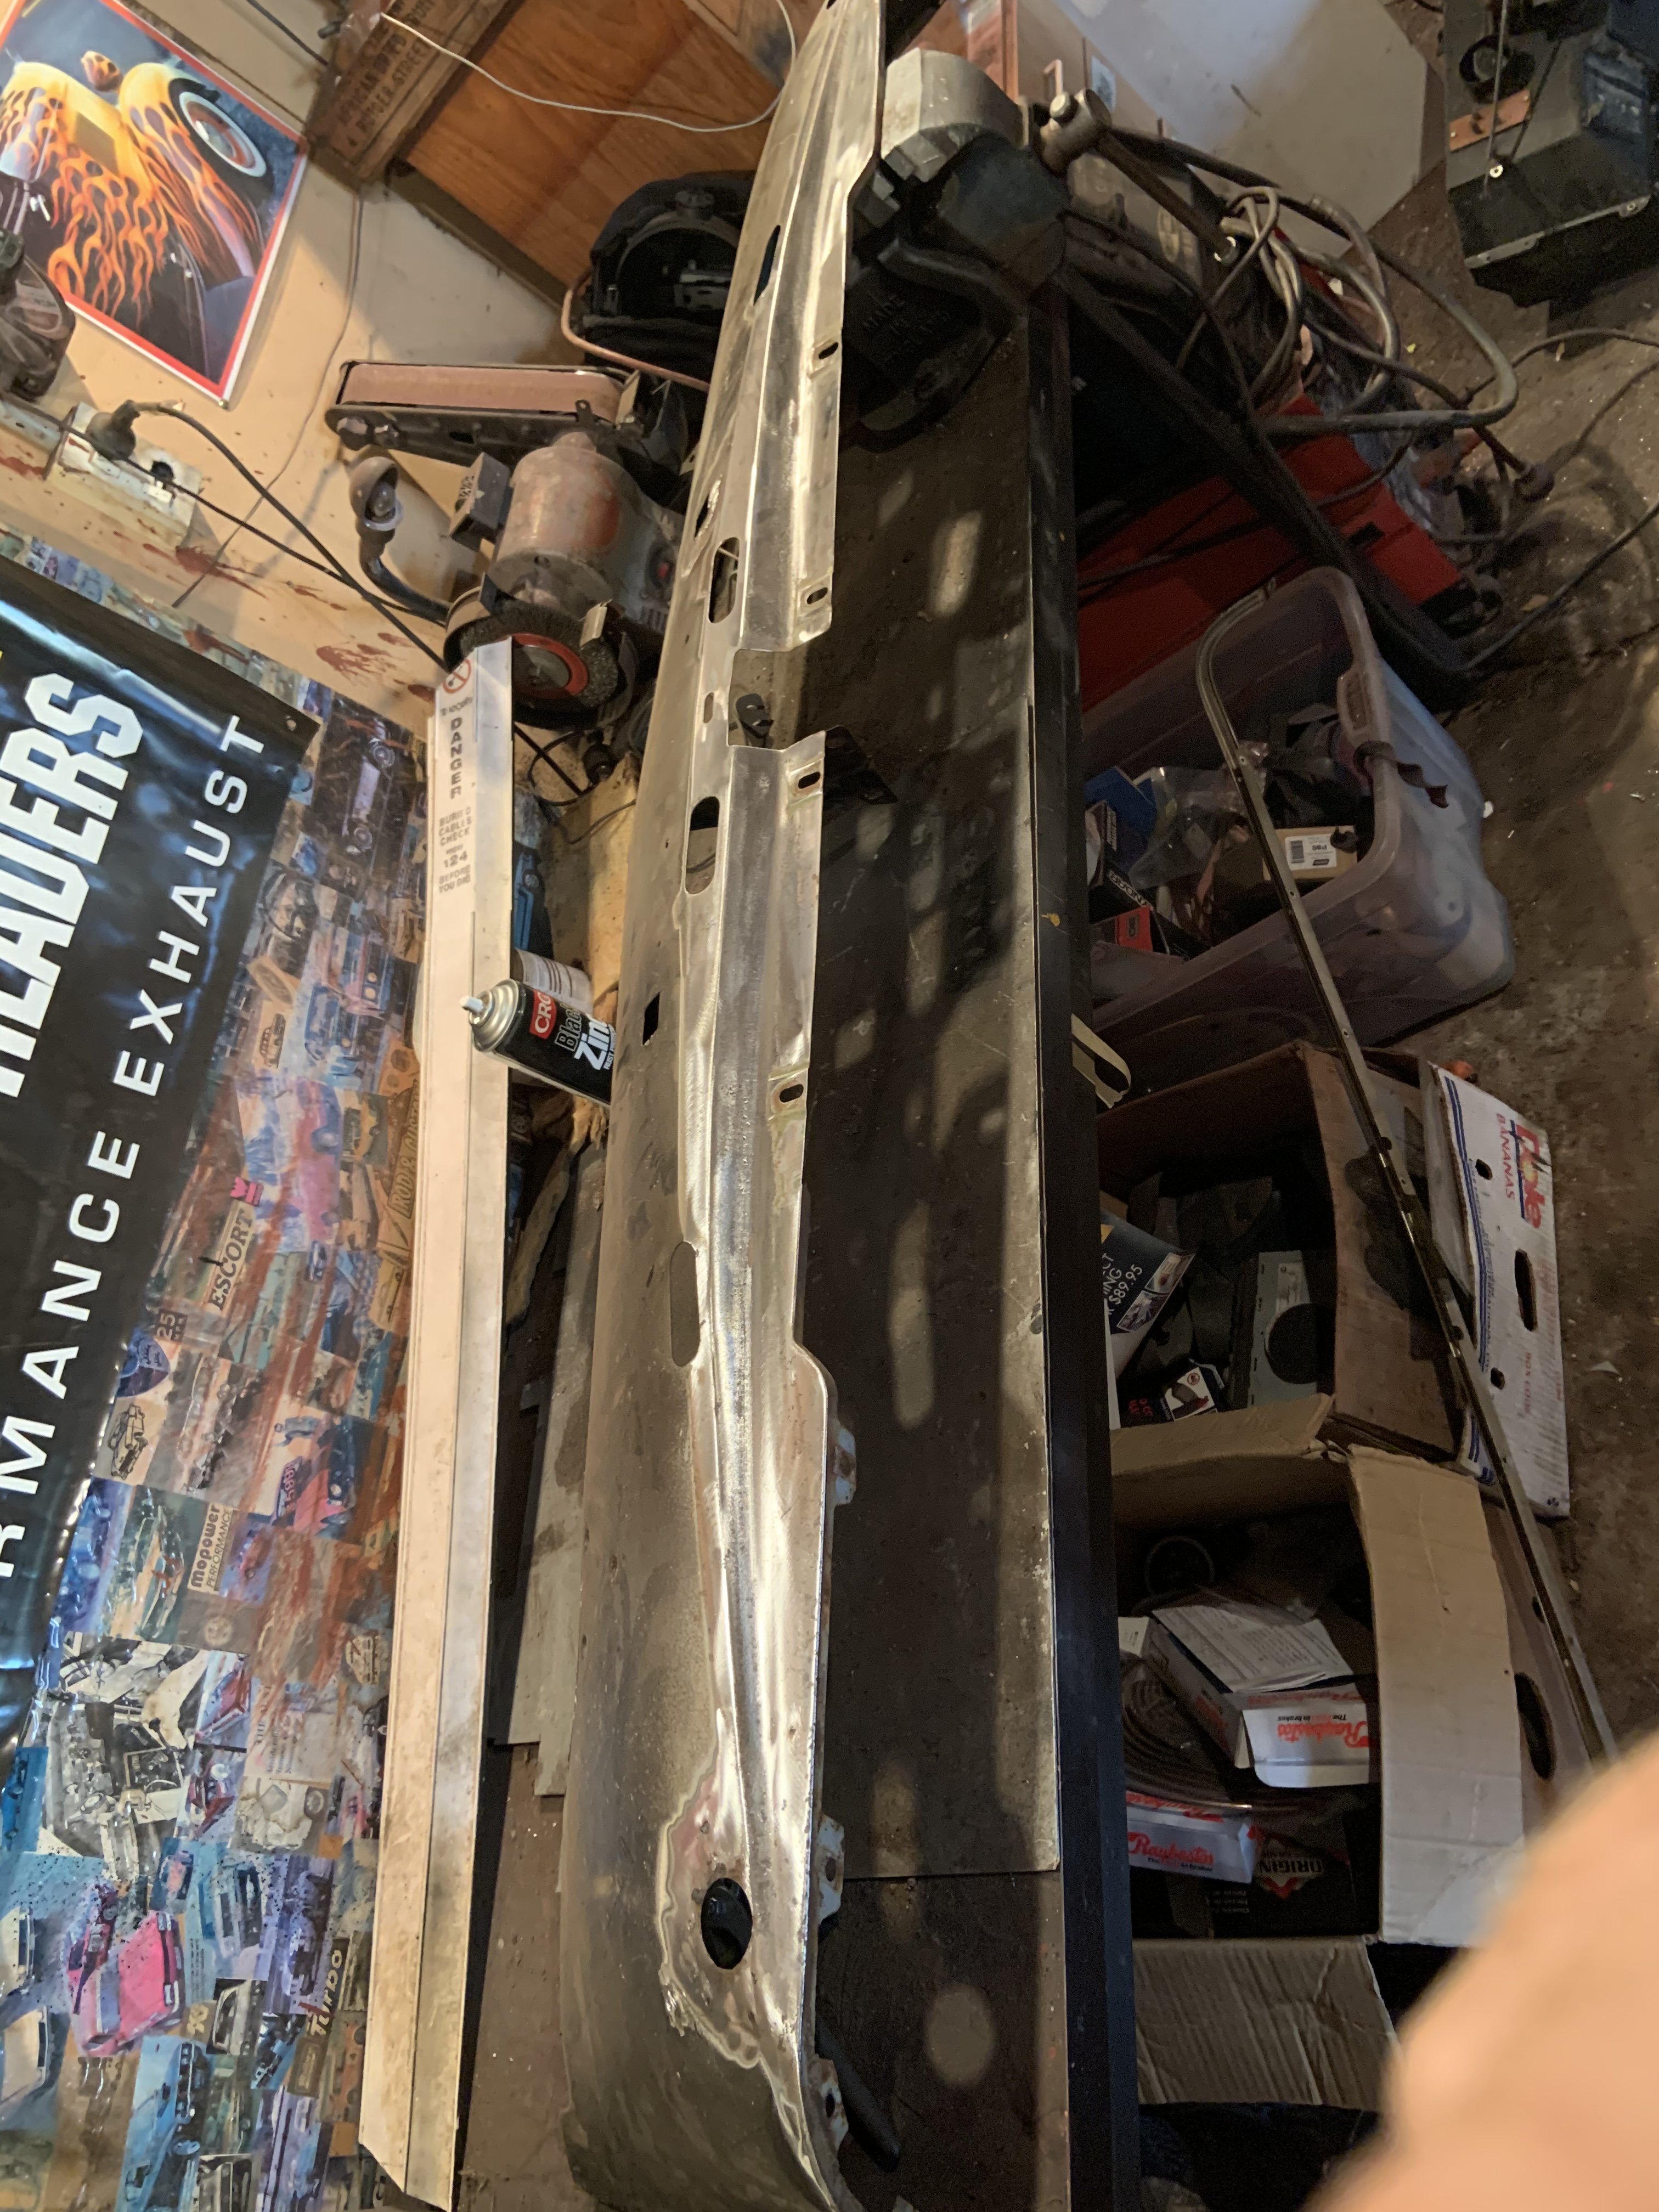
Been a while - it’s been exhausting ... built some very dodgy 3-1 headers to fit thru the incredibly small gap between motor and front subframe - down into a pair of flexys and then 2-1 was aiming for a crossover and twin pipes to the back but nope not enough room thru rear subframe - wideband goes in the top of the 2-1 join then piped to one big muffler at the back Needs to come back out for a tickle up and paint then I’m gonna call the exhaust done
1 point
-
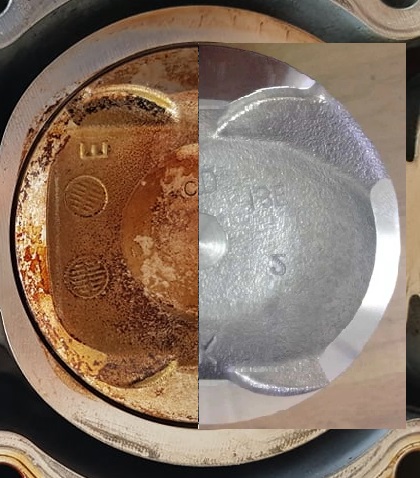
I've had a look through another person's build who managed to use Prius pistons okay with same cams, and apparently VVTI working without any trouble. It looks like the important difference is that they used the earlier version of the engine with the 13:1 piston, not 13.4:1 So I tried to find some pictures of an early 1NZFXE piston. Aqua motor on the left, early prius motor on the right. Top of the picture is intake valve cutouts, tells the story! Can see that its definitely got much bigger valve cutouts and pretty much the whole piston shape is a bit different. It almost looks like the shape near the intake valve would give better flow around the valve perhaps at low lift near TDC? Although it would be a bit of a bummer to have to use 13:1 pistons instead of 13.4:1, (Even though both of these numbers are ridiculous) I guess if I machine the valve recesses on current pistons it might end up at that anyway. But with all of the hassle of getting that done. One additional benefit would be that I dont think the earlier motors used the troublesome low tension piston rings. If that's the case then it also solves a bunch of other potential long term issues. So, if starting this over. An earlier prius motor really would be the better option in every way. Dont need to drill the block and swap the sump to match up to the manual box. The engine mount bracket fits properly. The normal engine accessories can fit in their normal spots. Valves do not hit pistons. Mechanical water pump, so blowing a fuse doesnt blow your motor! So there's no real advantage to the 2012 motor at all. Apart from that I found one for cheap with exceptionally low km on it.
1 point
-
So I learned this from a bloke whom's Mercedes 230SL I shot for NZCC. He was discussing his car collection, and mentioned he didn't have a nice old Toyota yet. I thought this was kind of strange, given I was shooting a Concours-winning Mercedes... turned out he had an AMC Javelin, Hino Contessa, a few Peugeots, an an Alpine. I said "that's an eclectic collection that seems to have no real theme." Then he explained they were all marques (not specifically vehicles) that had been handled by Campbells. Blew my tiny, misinformed brain!1 point
-
So it turns out if you use factory cams which have a less aggressive ramp rate, then the BC springs work. But then they run out of puff at high rpm.... So you need the big cams... Which will valve float without the springs, but cant use vvti with them.1 point
-
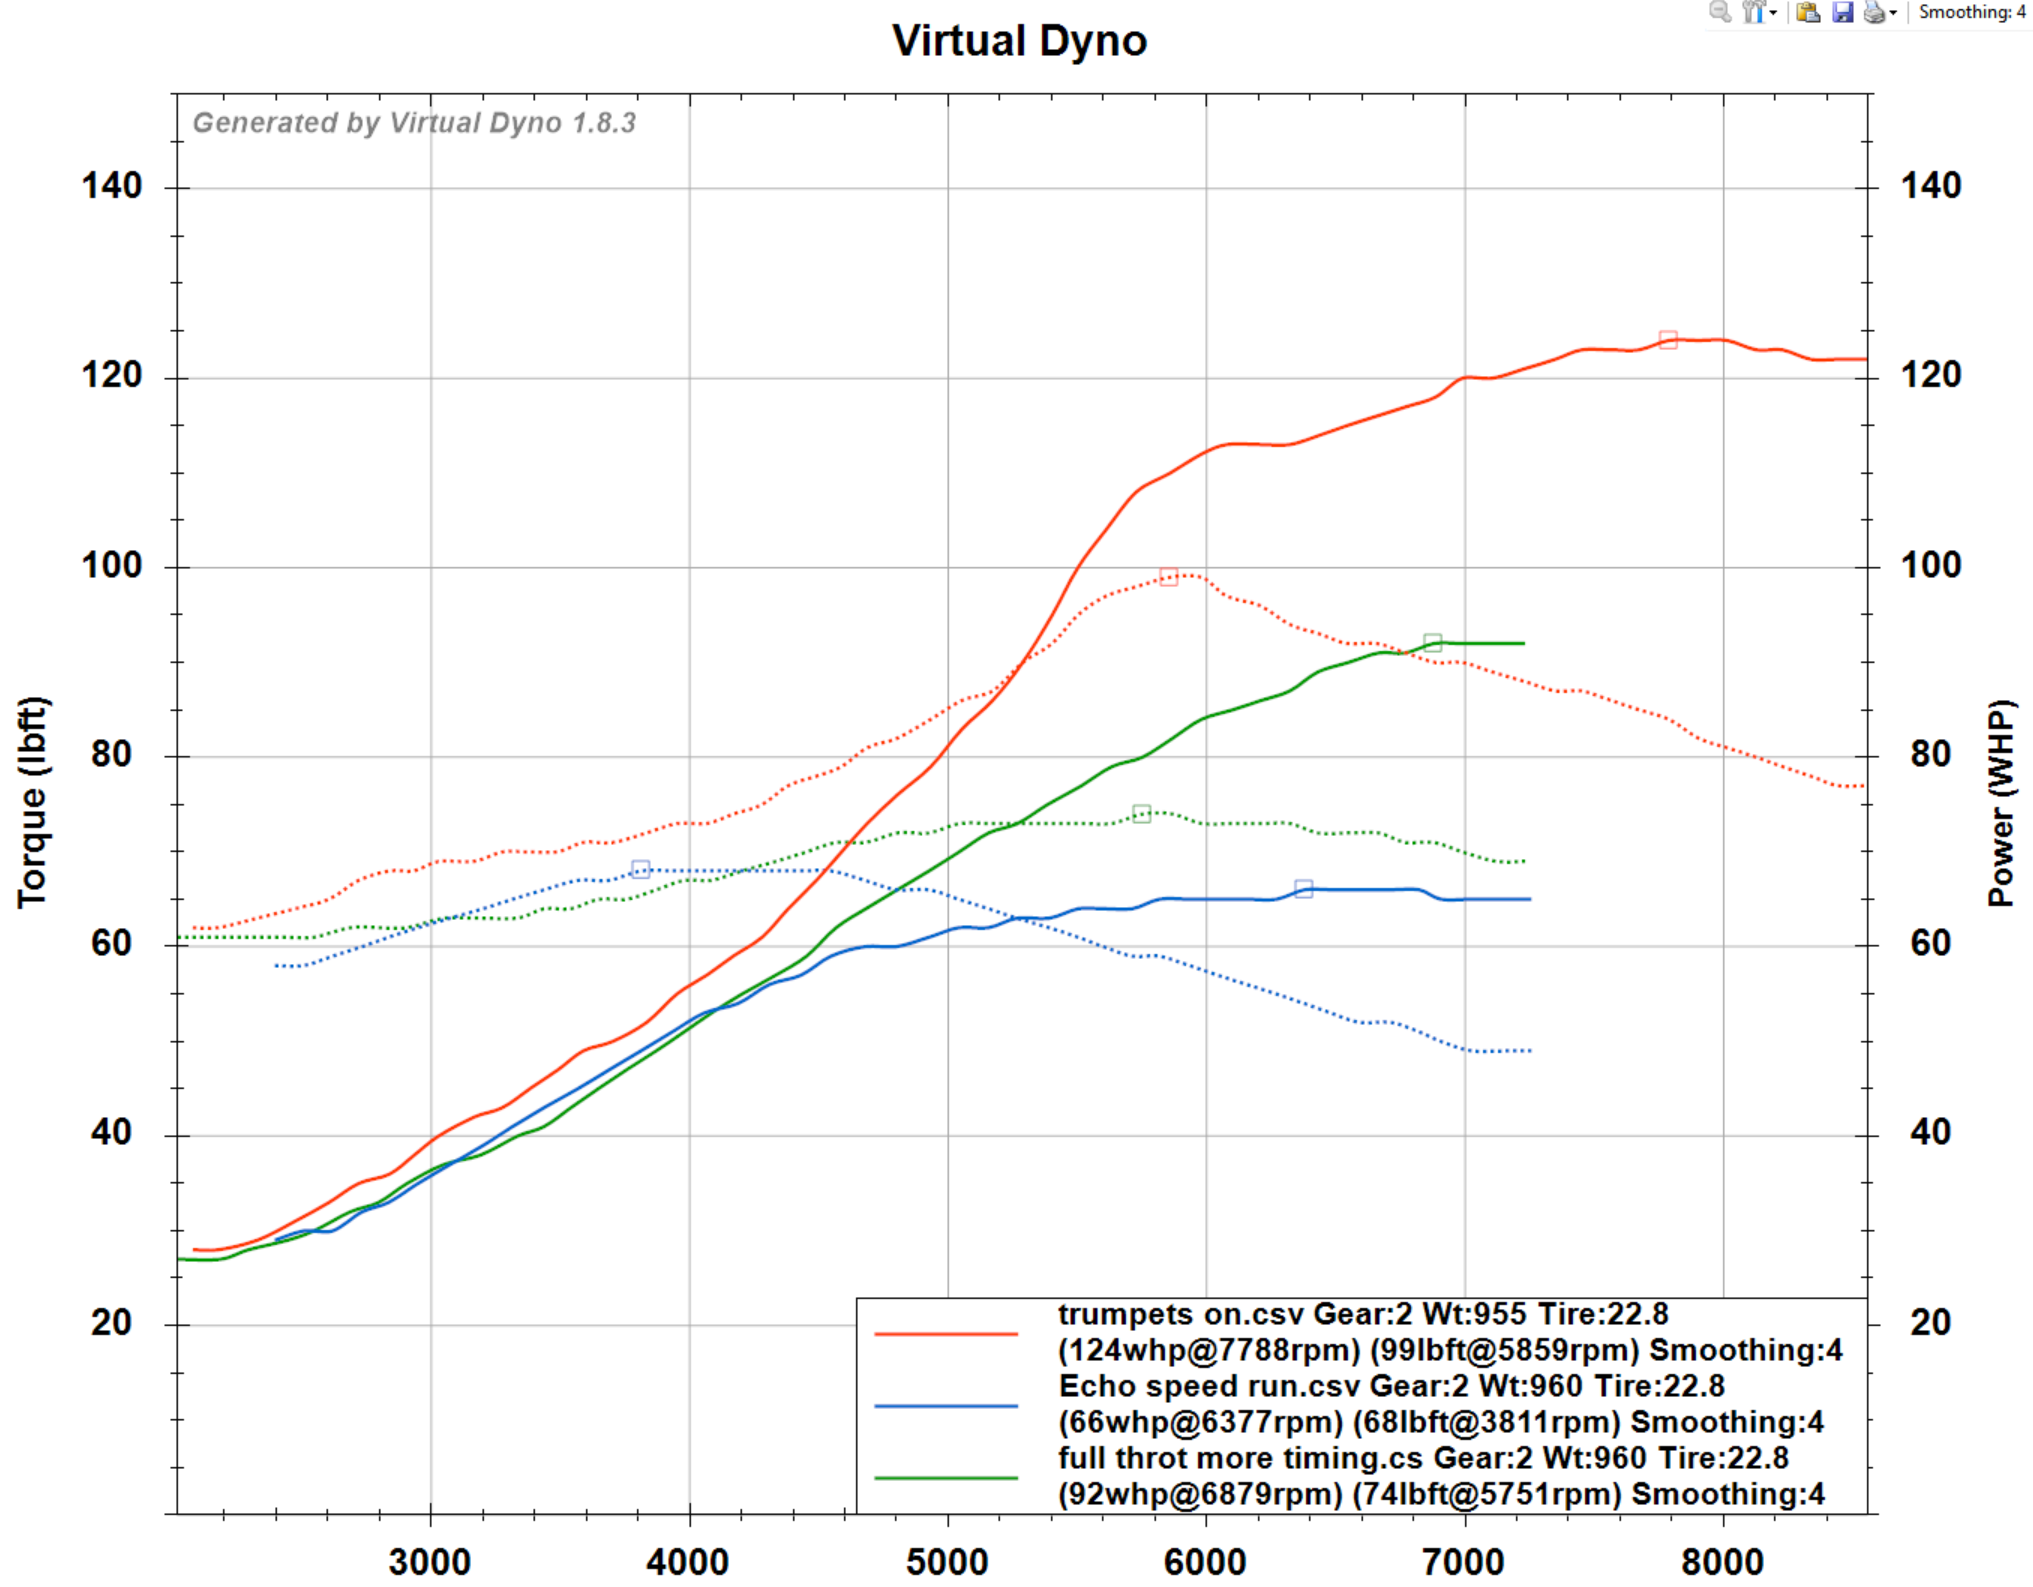
More shit news, because, reasons So it turns out that because these valve springs are so rediculously stiff compared to factory (double seat pressure) it overpowers the VVTI solenoid. And this is a reasonably known about issue, except for me because I'm stupid and didnt look into it first. So unless I swap springs again, to (unknown compatible spring) I'm stuck without cam advance which is super lame. And I need to take the head off to be able to change the springs, which basically means its a monstrous fuck around. So for the meantime will just get everything else sorted and try figure this out later. I bodged together some super shitty trumpets that were short enough to not hit the bonnet. Made a pretty wild difference around the 6000rpm mark (confirmed on fuel map too) And then this is where we are at since I started. Blue line is standard manifold 1300 motor Green line ITB 1300 motor Red line is new setup. So obviously there's a completely hideous amount of advantage to being able to rev higher thanks to the springs (well, and the cams of course) But I really need that VVTI working! I think ~124ish wheel horsepower isnt too bad of a starting place considering there are still a lot of non optimal things going on (shitty intake, shitty exhaust, and no vvt, no ignition timing tuned yet)
1 point
-
Yay , got the brakes done , the other side was actually easier after a couple beers, found the lack of brakes for the rear, one cylinder let go so thats cool. anyhow started bleeding it... spew. And the new stuff And a couple pics of the interior Chur1 point
-
Way to make a working dog look like a handbag dog. Cripes. Turn to the left... Turn to the right.. Fashion.1 point
-
Took some more shots since it was out of the shed. She’s now at the blasters. Cancery upskirt1 point
-
This week turned in to week after next week so dropping to blaster tomorrow! kinda been in limbo so not much progress (vinegar soaked and painted some clips + bolts) but today I said fuck it and knocked out the first 2 of MANY patches to come. firewall passengers footwell ..and figured since the blaster is passing over, I’d expose these bulges around the shock towers so it’s nice and clean behind. also blasted the crusty bits on the front valence and made a few holes. I just zapped these up and rust killed.
1 point
-
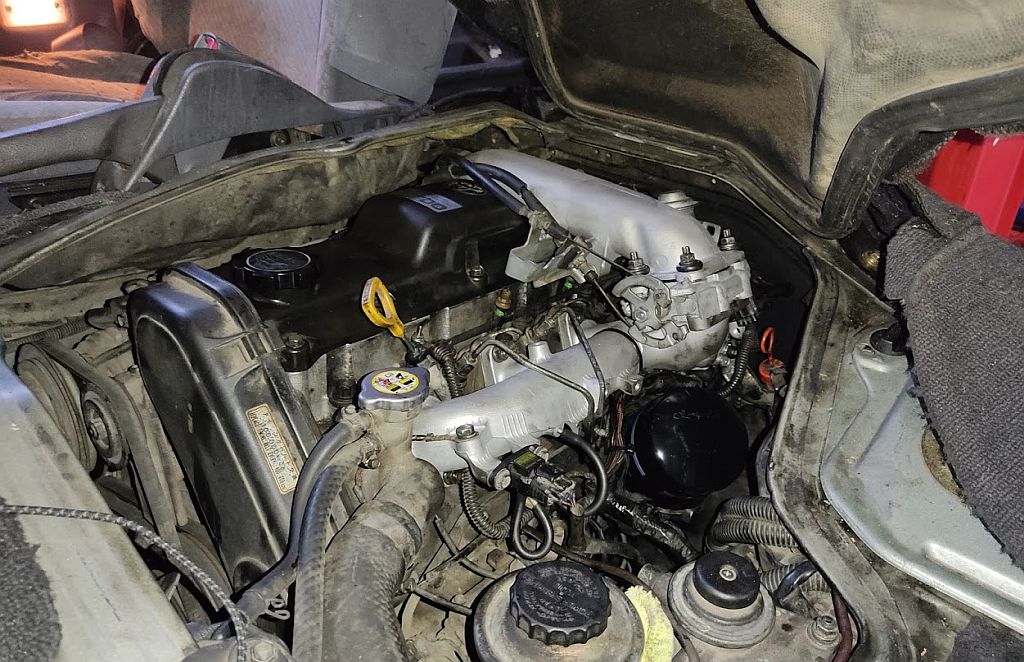
Took 8 odd hours, but I gave the 1kz in my van a bit of a birthday today, main issue was a leaking rocker cover gasket but since the floor has to come out and the boost pipe had to come off I figured I might as well ditch the EGR, cleaned a good 5mm thick layer of scum out of the intake ports, swapped the intake manifold, TB and boost pipe for ones that I had already cleaned out (+ my TB had a boost leak from fucked spindle seals and a hard/cracked gasket and the small butterfly linkage fell off years ago so was jammed open all the time) Also new glow plugs and a catch can (cheers for that @chris r) along with fresh oil etc etc. Turned out I had at least 3 boost leaks so with them fixed and the ports now back to full size it really goes a lot better than it has in years, back to being able to accelerate up decent hills from 100k rather than just hold 90 if I was lucky haha Rerouted the vac lines to get the small butterfly shutting on shut down, forgot how nice it is having smooth shutdown with these things! 3" exhaust next and if I can track one down I'd love to get my hands on the W2A intercooler set up from a 99-02 Super Custom.
1 point
-
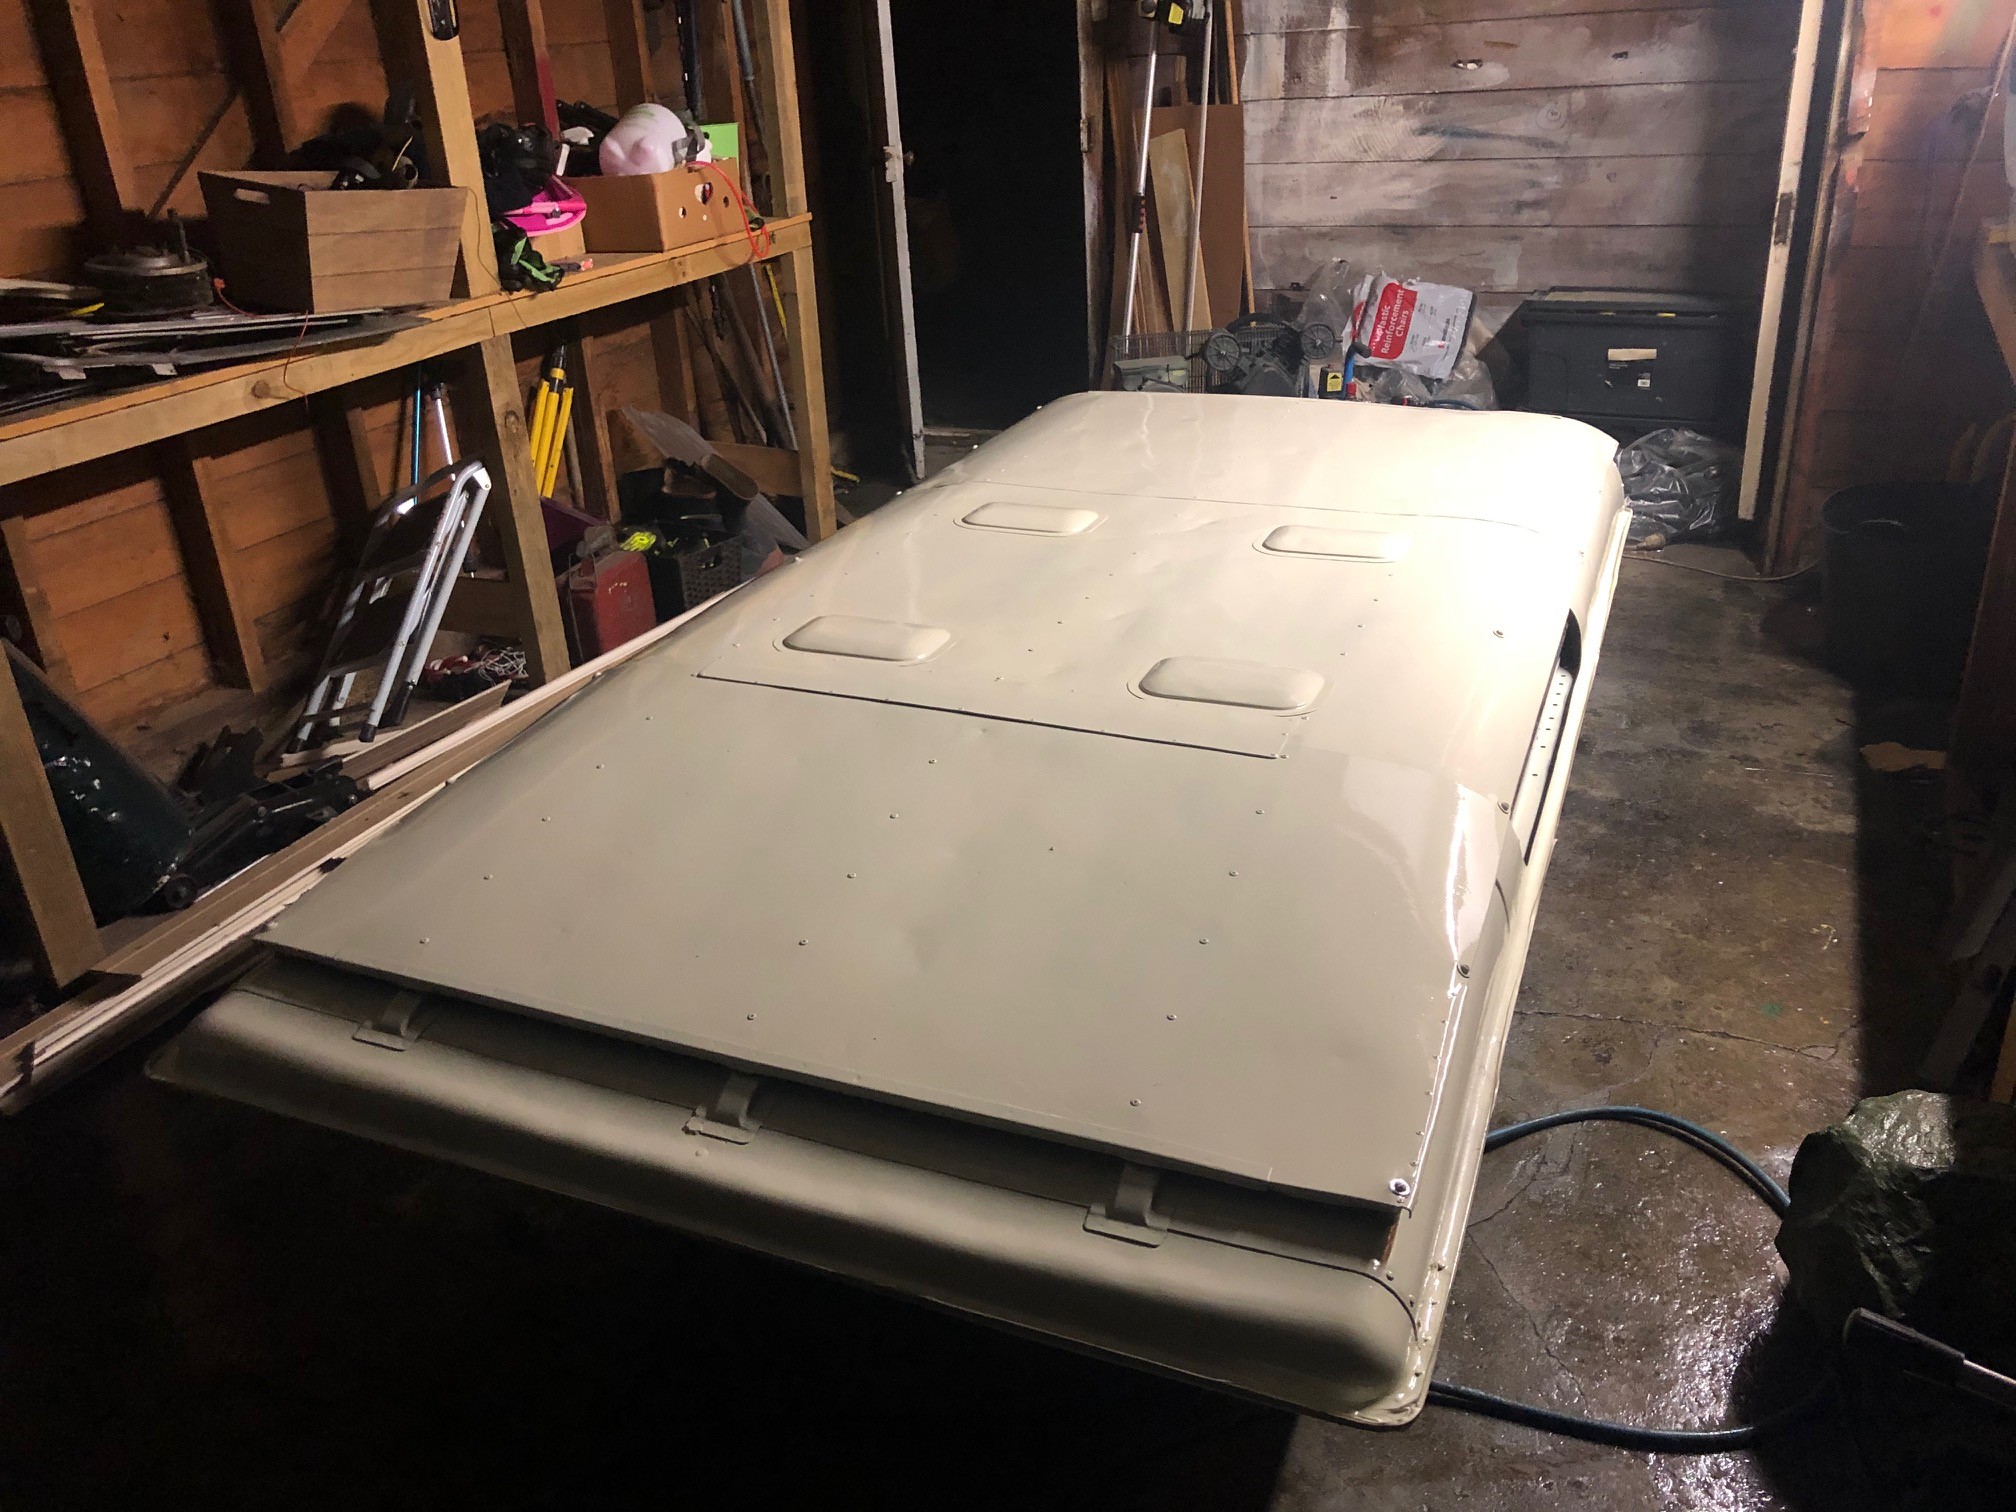
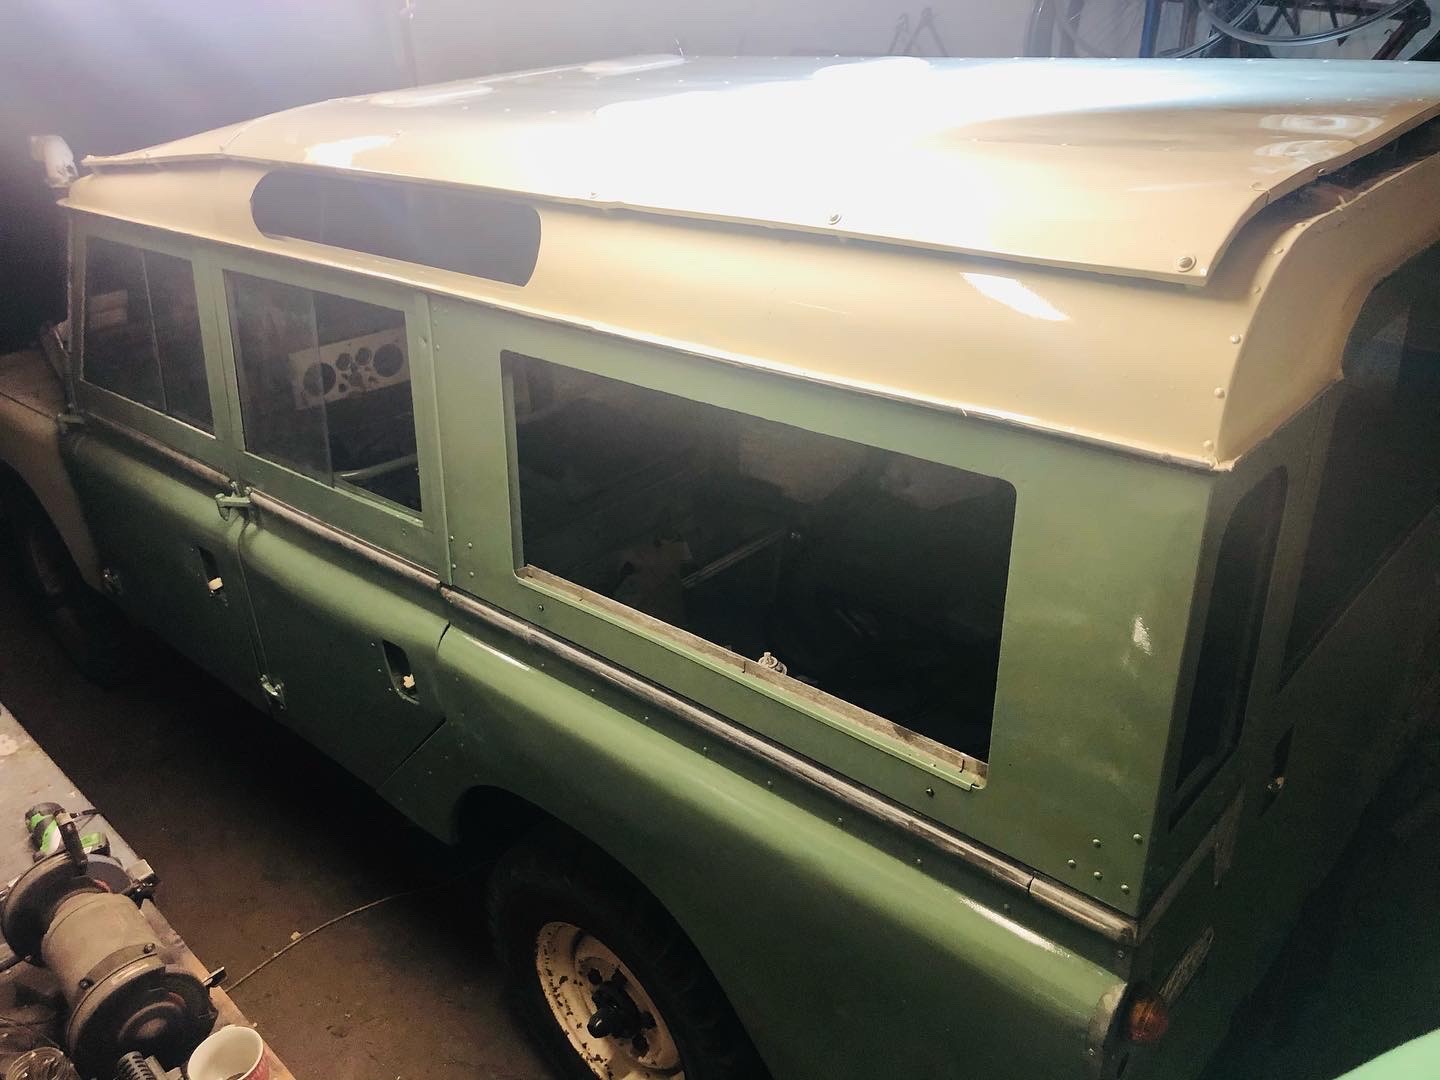
Not my best painting in the world, nor the best photos in the light but I got the roof done and back onto where it is suppose to be. Looking alot more like a truck now...
1 point
-
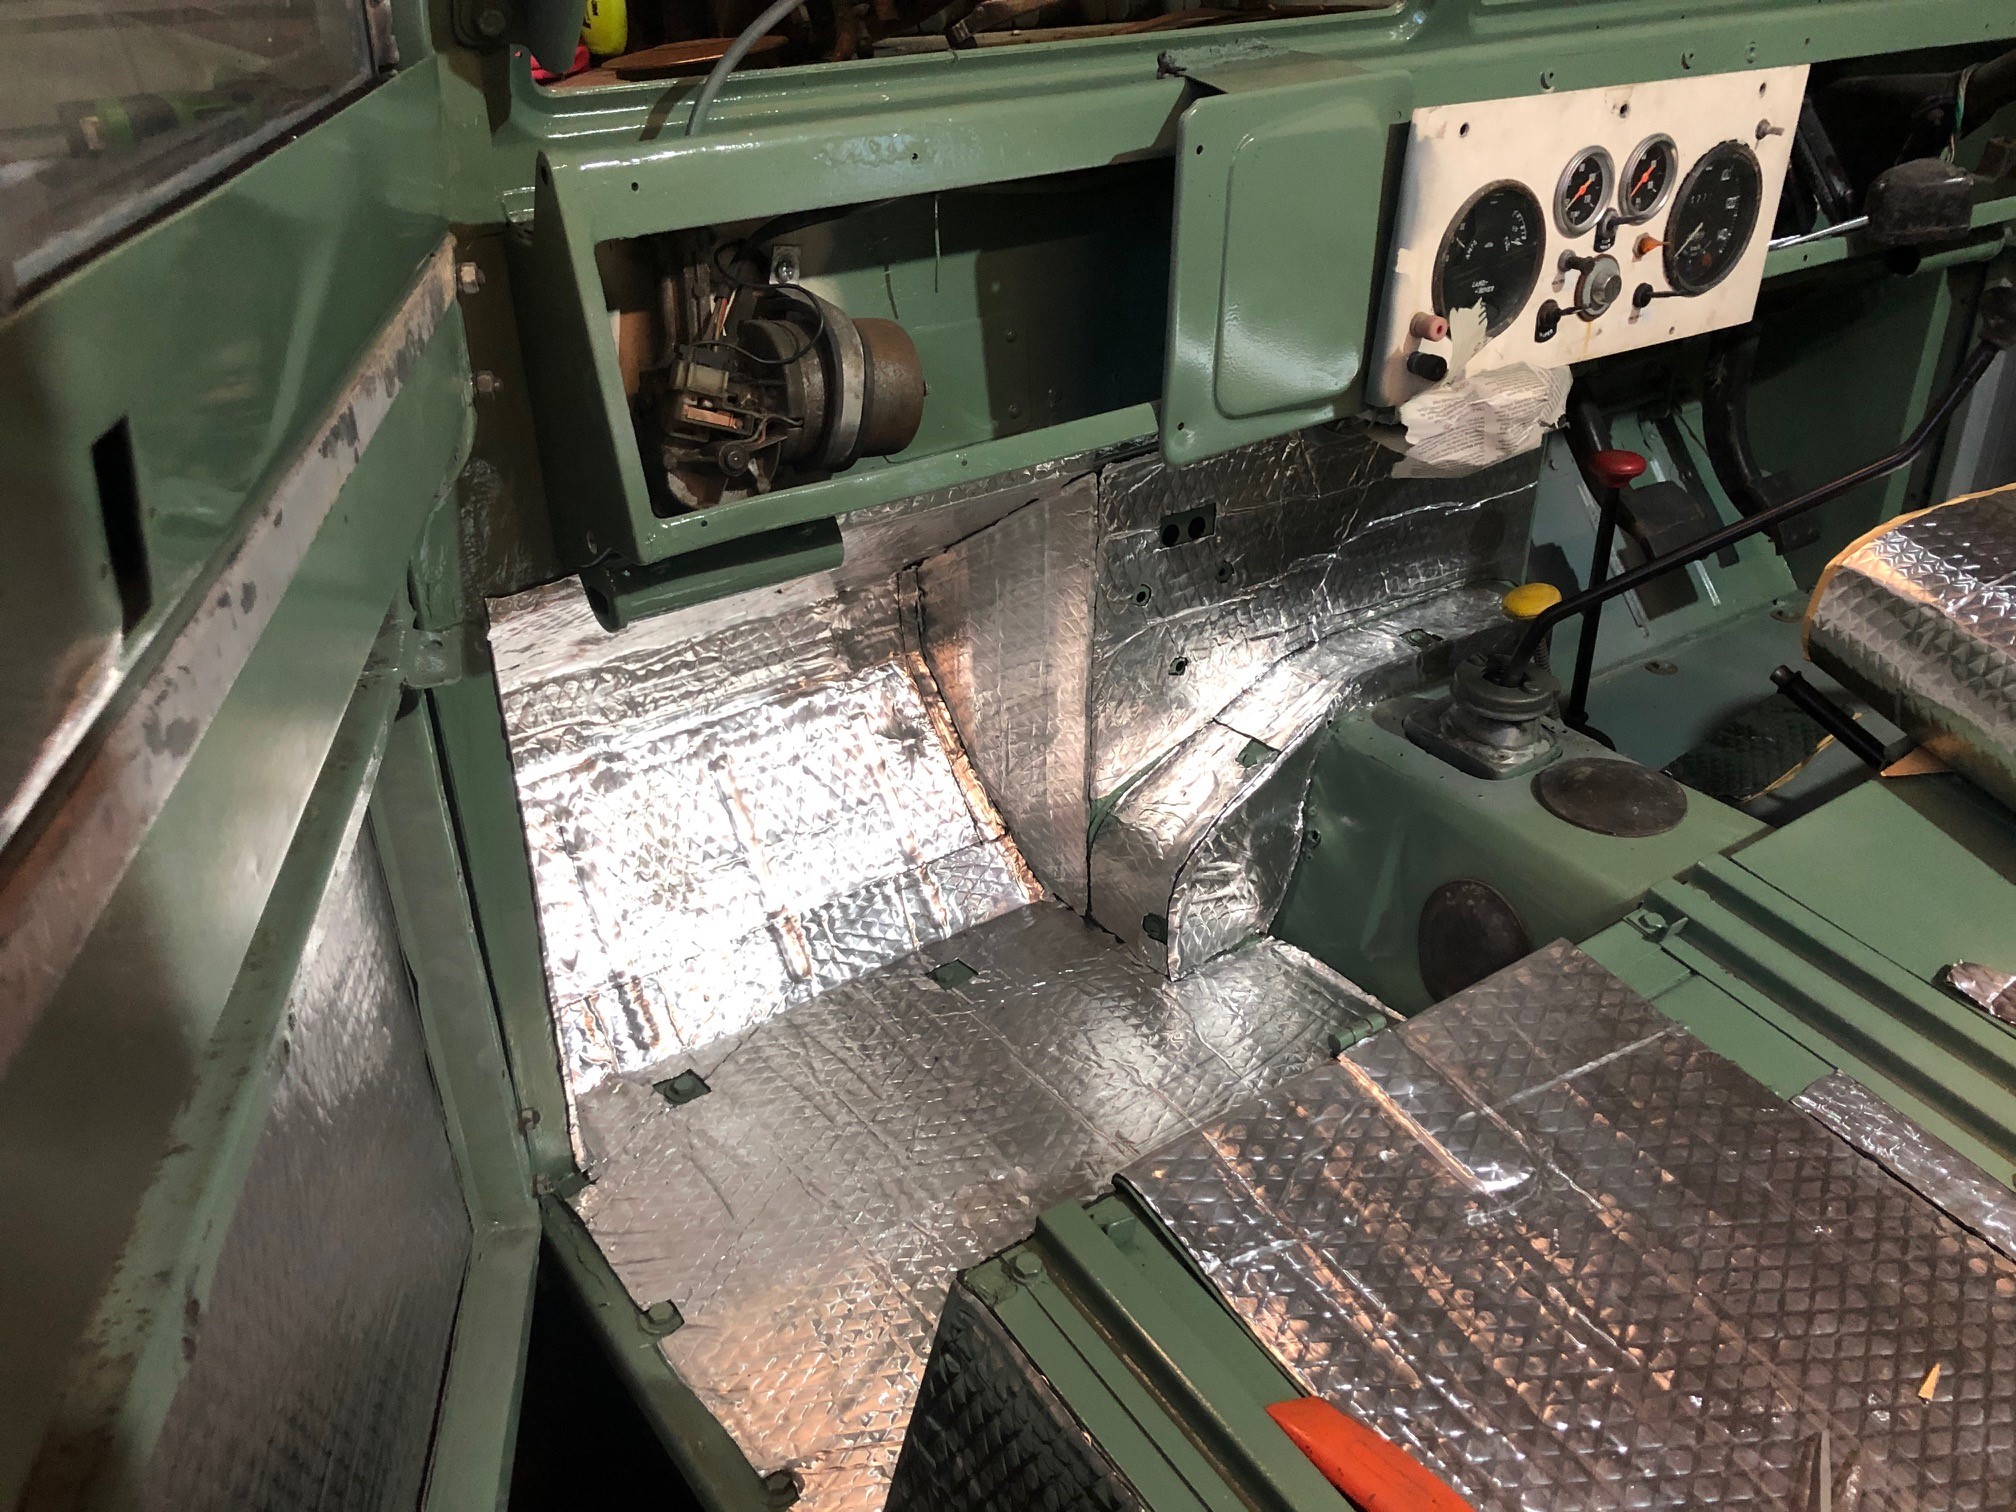
Not terribly interesting but making some progress.. A tube worth of sikaflex to seal up the roof join. Also replacing the rubber donuts for where the safari roof bolts on, hope to get this all in colour soon so I can mount it. Windscreen back in with new seals Going old school glazing with the butyl tape (which I actually like working with) Bought a roll of sound deadening off TM (cheapest option I found) and working through layering all the internal panels. The roll is better than the flat pack as have less wastage.
1 point
-
And the rest....
1 point
-
Heading to Toyota Festival tomorrow to pest around at the trackday. Gonna be good! I'm gonna take my GPS along, as I've got my suspicions that this thing might actually be faster than the Carina through some of the tighter corners. So since I've had all of this going on, and seeing how parts are cheap etc etc and I've been trying to make my other car as light as possible. I must admit I've had some sick thoughts about changing motor in the carina. A beams 3SGE motor is ~160kg. A 1NZ motor is ~87kg. That's just an absolutely incredible difference. So figure with a downsize and turbocharge I could probably still be a good 40-50kg better off? I've been scratching around to try get a KG or two out of it here or there, but that's just a rediculous difference, and it would be super easy to make the same power level with a budget setup. And it's a little bit further back, and it would get better fuel economy, and thanks to being turbo I could keep a better final drive ratio for low rpm while cruising. So this is all just wild speculation / probably just get it running with beams motor and enjoy it for a bit. And then I had a hearty chortle when I was reading another forum and saw this chap from Finland: I'm not sure if this validates my idea as being a good one, or there's someone else equally perverted out there haha. He only had a time slip for 1/8th mile but was banging out some 1.8 sec 60 foots which is pretty sweet. Was originally NA 1300cc and he says made 100hp with ITB setup Then after a few iterations looks to be twin turbo and water to air intercooler. He only dynoed an earlier single turbo setup that made 192kw atw, and speculates that by change in injector duty has likely gone to around 350hp. It's completely hilarious that I've never seen anyone do a RWD NZ motor before, and happens to be a in a Carina of all things.
1 point
-
I really never know how to start these things, especially if it's been a few weeks between posts. I put a few layers of mould release wax on the trumpet mould since now was as good a time as ever. Then I started working towards the base plate mould. Using my drawing as a guide, I had a go at making the complex shape where the trumpet reverts back in one continuous path to the filter clamping surface. I figured I'd start by making the straight sides with slopes tangential to the trumpet radius such that I could drop the preformed trumpets into the mould, trim them to shape, and lay up the rest of the base around them. Then I turned up a ring with a taper and sliced it in half for each end, with spacers glued on to offset them from the bellmouths the proper amount. It didn't take me long to realise just how much of a mission it was going to be to finish off the complex transitioning curve at each end with the limited MDF supplies I had to hand. Had I some expanding foam, or perhaps that hard cell refrigeration foam, I could have shaped and carved the whole thing and sealed it somehow, but of course I didn't. So I didn't. Instead, I decided to change the design and make a simple flat base. The pre-made trumpets would then be placed through this base and I could finish the lay up around them. I liked this idea but I thought it prudent to do the simpler top plate first, if only to validate the theory. This would be essentially the same, though this time a male mould and with no holes for the trumpets. I made it in two pieces, a straight central piece, and a turned disk that I split into the two ends. They both received a few quick coats of primer, Before I sliced the disk in half and set everything up to glue. I didn't have a big enough F clamp so I used the load binder to provide the clamping and PVA for the sticktivity. The pieces of cereal box are there to make up for the saw blade thickness I forgot to account for with my initial measurements. Next I gave it a coat of epoxy resin to smooth everything out a little and then blocked it until I couldn't be bother to do any more. Happy with that, I did much the same process for the base plate, besides making all the raised parts depressed and adding the holes for the trumpets to eventually penetrate. Finally, I gave everything a few coats of mould release and called it good. While I was there I made a little alignment tool to keep the trumpets square to the base plate while all the glue set up. It's all waxed up and ready to go as well. That was as much as I could do at the time. Not long after finishing all that we went back to level 3 and we came back down to Auckland for me to go back to work. So finally I had a chance to check my work against the real thing. I offered the trumpet up to the throttle bodies to see how it was going to look. That's tight. So's that. That's got a decent gap. And a PCV port that wants to be in the same place. This one actually doesn't look too bad. Minus that gap obviously. So as you can see, some adjustments required. I'll be able to extend the mould a little to make up the length problem on the driver's side, and then trim the final trumpets for the passenger side down to fit. Then of course comes the base plates. I used the mould of the top plate as a dummy air filter to see where I could make it fit, or even if it fits at all. It may be a little hard to see in the photos, but to make it work at all the filter is going to need to be parallel to the inner wings, rather than the throttle bodies. This means I'll have to compromise with either penetrating the trumpets through the plate at an angle, or putting a small bend on the throttle body end of each and making them parallel. The angled penetration should get me a little more space for the filter, but then the small elbow may give better clearance around the cam covers and PCV outlet. Obviously no matter what I do it's going to be extremely difficult to keep all the runners equal length, but that said, I don't think chasing every last available horsepower is the goal here and the length is hardly my priority. In any case, I'm going to put this to rest for a bit and let it stew in the back of my mind while I try to decide what the plan is. In the meantime, there's always more rust and butchery to sort out.1 point
-
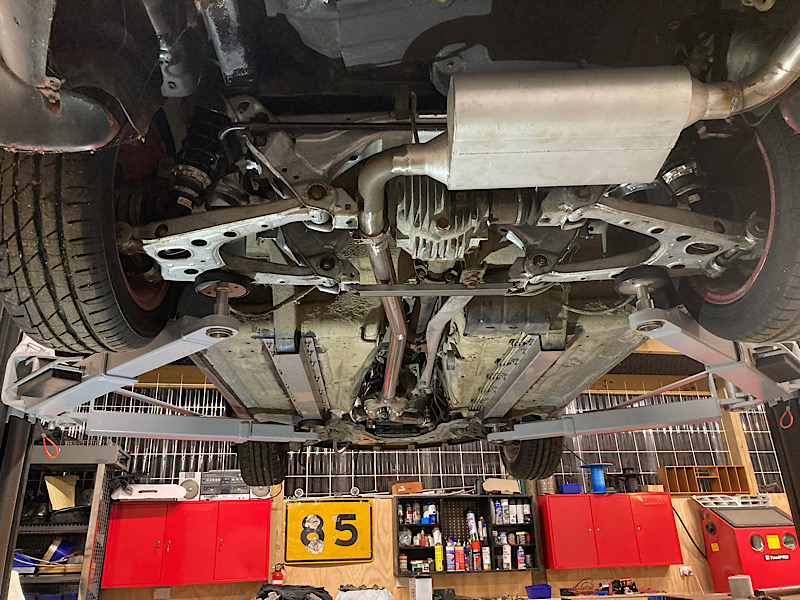
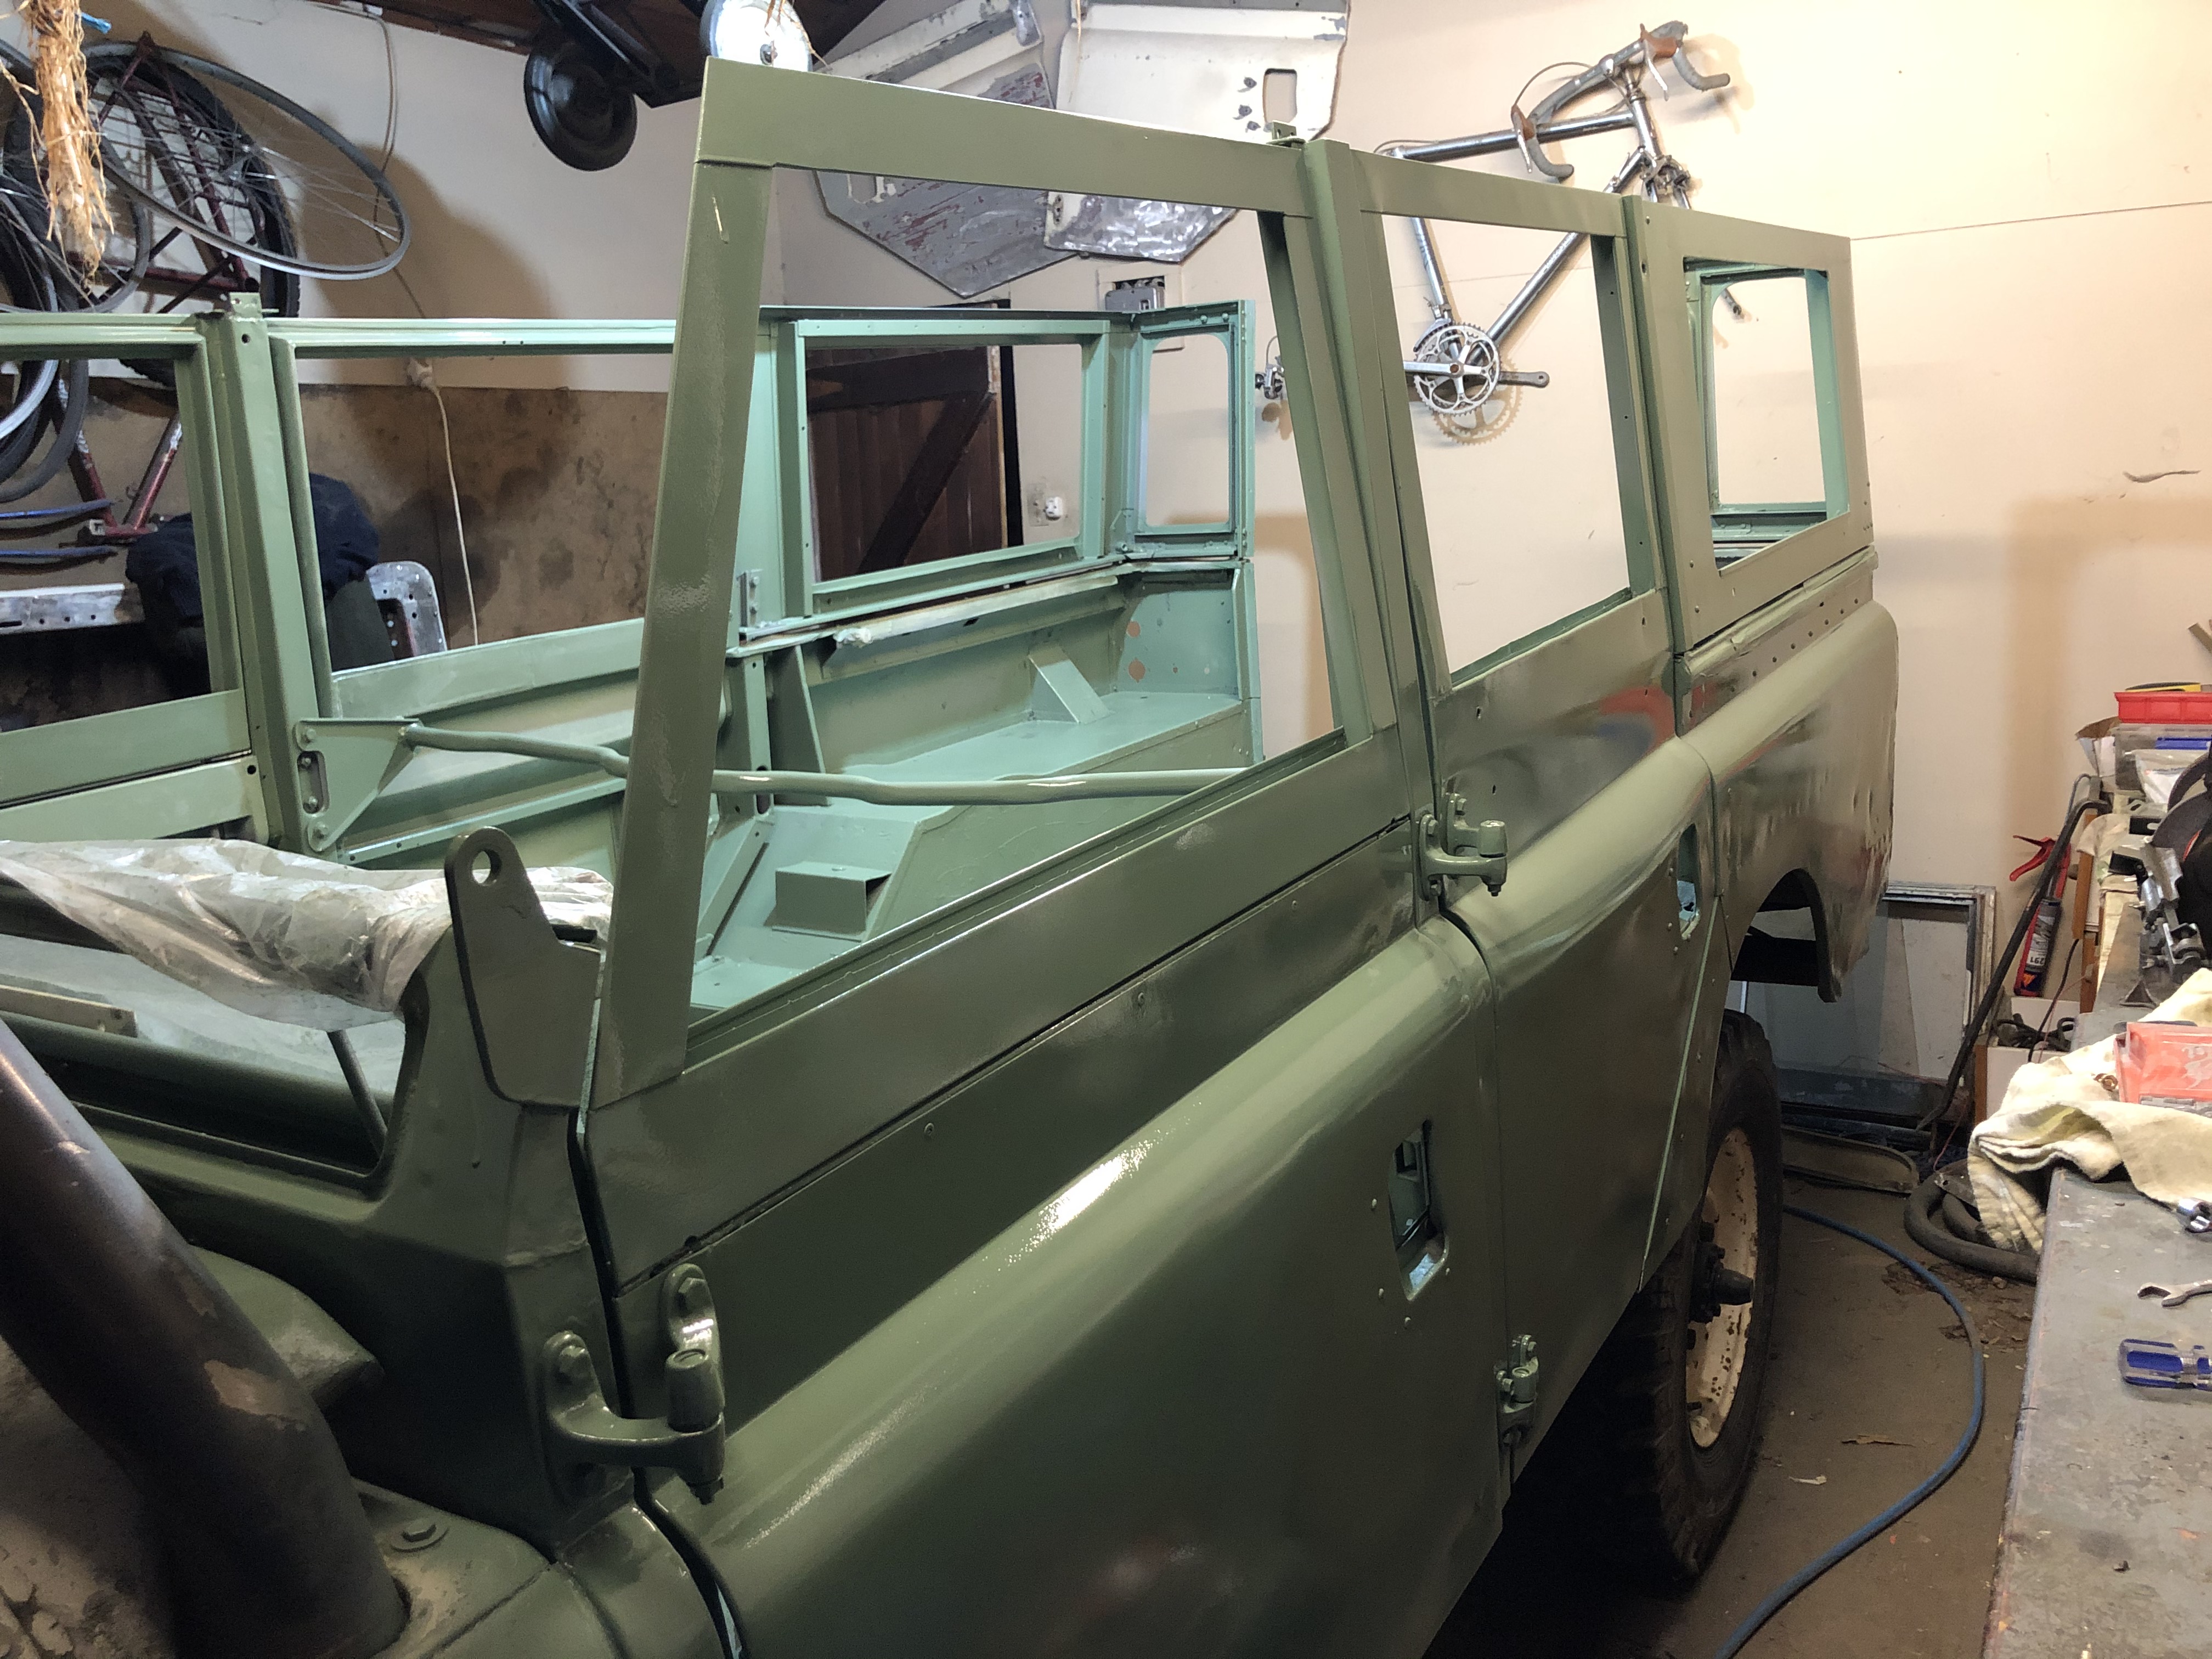
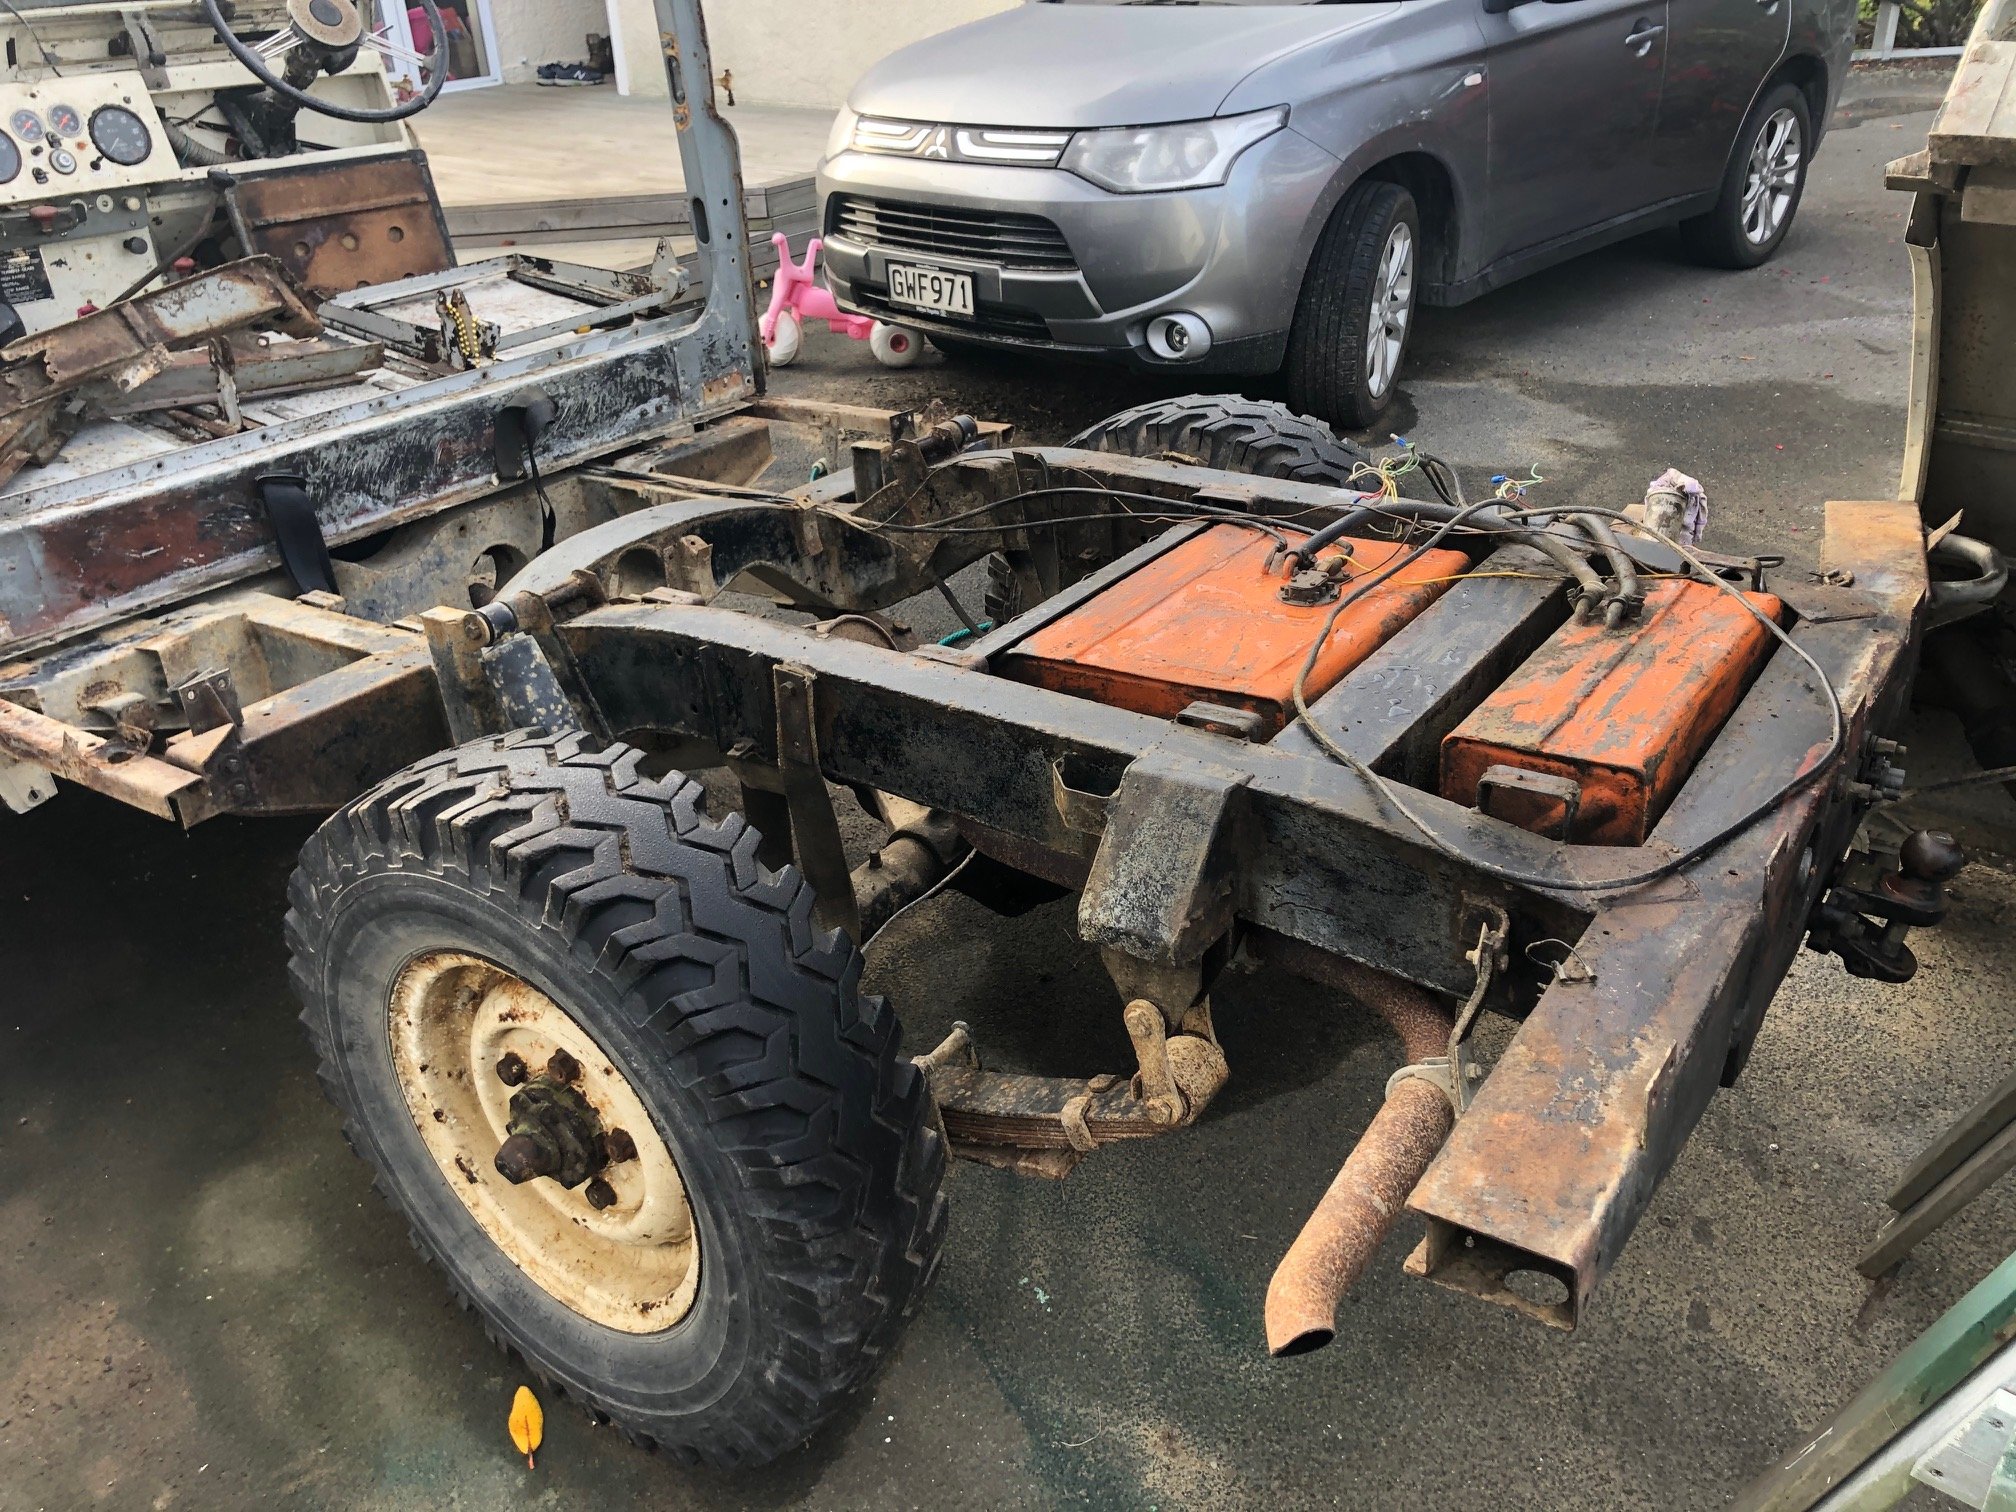
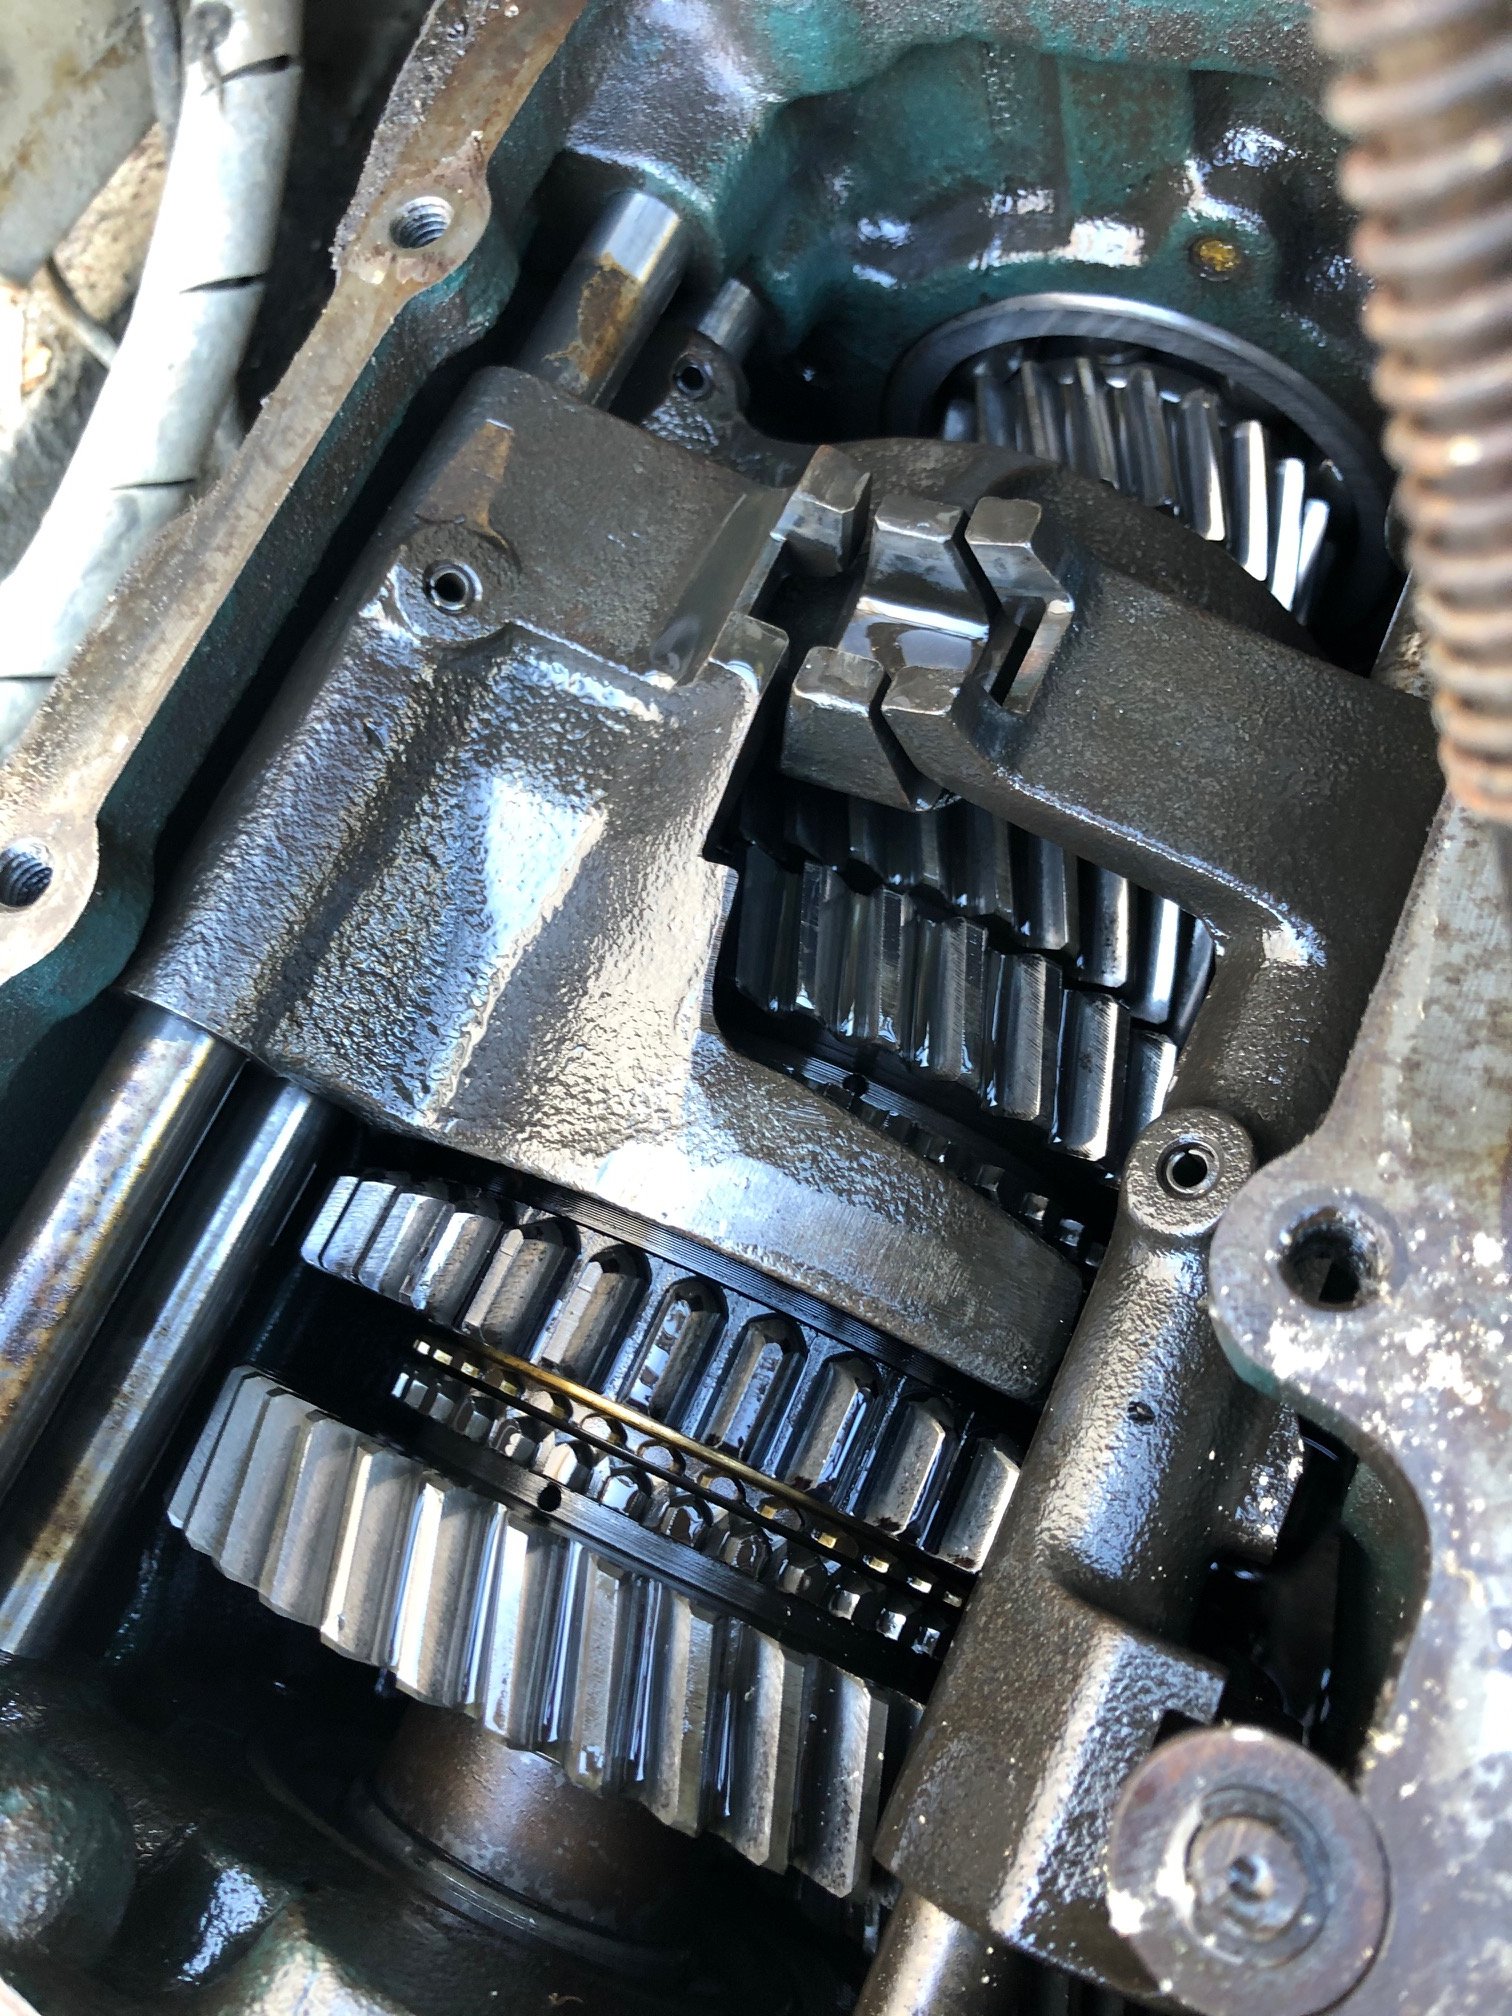
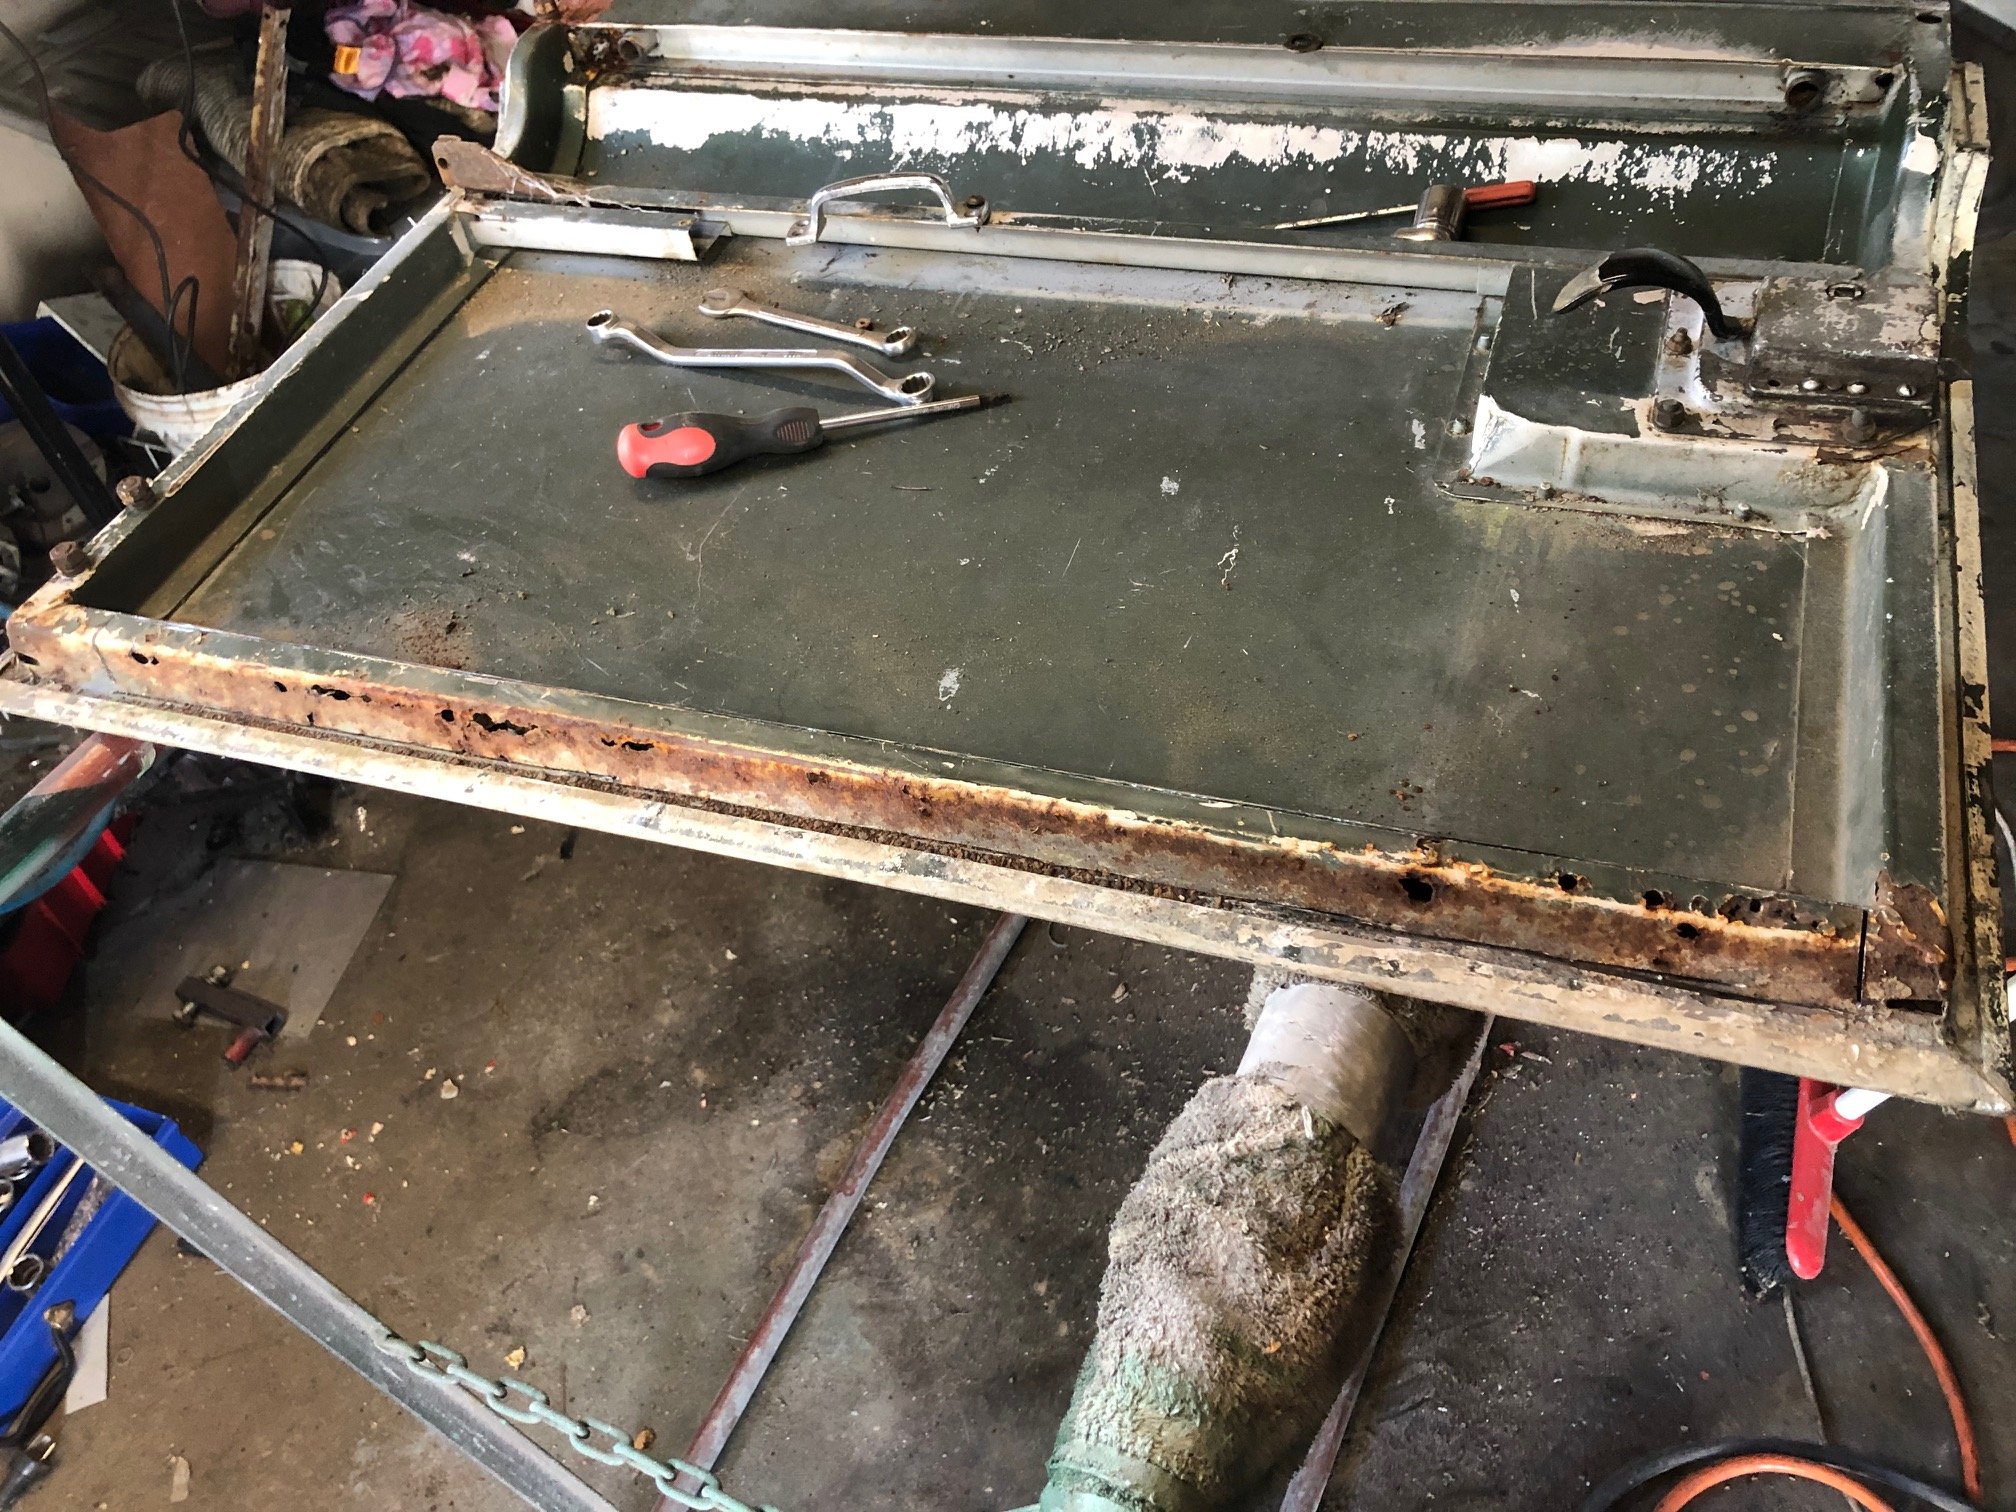
Did a a bit more... Hosed most of the crud off. Pulled the diff/spring assembly off and lowered the tank out. Noticed that it has a hole in the corner that someone has tried to goo up so that will have to get fixed... Also pulled the top cover of the gearbox (I still have no idea what model it is) and was quite pleased, considering the work this thing has probably done its in good nick. The shifter assembly is a custom job so I have some ideas to make the whole thing work alot better. LR transfer box has all of the seals leaking (no surprises) so will end up pulling it for a basic refurb. Onto some more of the fun stuff... Steel frames in all of the doors need work. I'd make this in one section if my folder was wide enough. Thinking about not going through the hassle to filler/prime the body and just metal finish as good as I can and go epoxy/colour...
1 point
-
So I've been working 70 hour weeks for the last month and a half, meaning not a huge amount of fabrication had been happening for a little while. Rest assured though, there has been progress and I'll do a proper long winded update soon. For now though, I need to ask a couple of favours. Firstly, I did end up acquiring the R31 diff housing and axles. However, as I mentioned previously, I'll need to get it shortened to fit. Can anyone recommend somewhere to get this done? Bearing in mind I live in Whangarei so I'd prefer it to be no further south than Jaffaville. I plan to strip the whole thing down myself to the bare axle and weld on the spring perches once the work is complete so all I need done is the physical shortening of the housing and axles themselves. Any help would be greatly appreciated as per usual. Secondly, by extremely exciting happenstance, I stumbled across a bona fide KL-ZE in a wreckers in Auckland! (Excuse the blurry photos, it was pissing down and I wanted to make like a shepherd.) Since I don't want to let this opportunity slip through my fingers again, I'm planning on going down with a mate on Saturday morning to pull it out and bring it home. If anyone would like to come in, help out, and spin a few yarns at any point during the day, we'll be at the Zebra yard in Wiri for most likely the whole day. Let me know by private message or on here if you have any advice or are able to help out: Here's to less month long blackouts.1 point
-
I started with a plate roughly the right size with a bit to spare. Put a fold in it to form a nice big flange and used the bead roller to start forming the dimple that was in the original panel. Put a bit more shape into the dimple and started to trim it to size. Then I cut out the rotten part leaving plenty of extra material to spare. I decided to drill out my nice new spot welds and remove that extra little piece of original material since I'm cutting out everything attached to it too. In hindsight I should have drilled them from the other side but oh well, I can fill them up later. I continued trimming and fiddling until it fit nicely and clamped up. So I zapped it in.I didn't tack the front edge ahead of the dimple because I'm replacing all the steel forward of there anyway later on. That's today's progress so far. I'll probably head back out in a bit and form up the other side too.
1 point
-
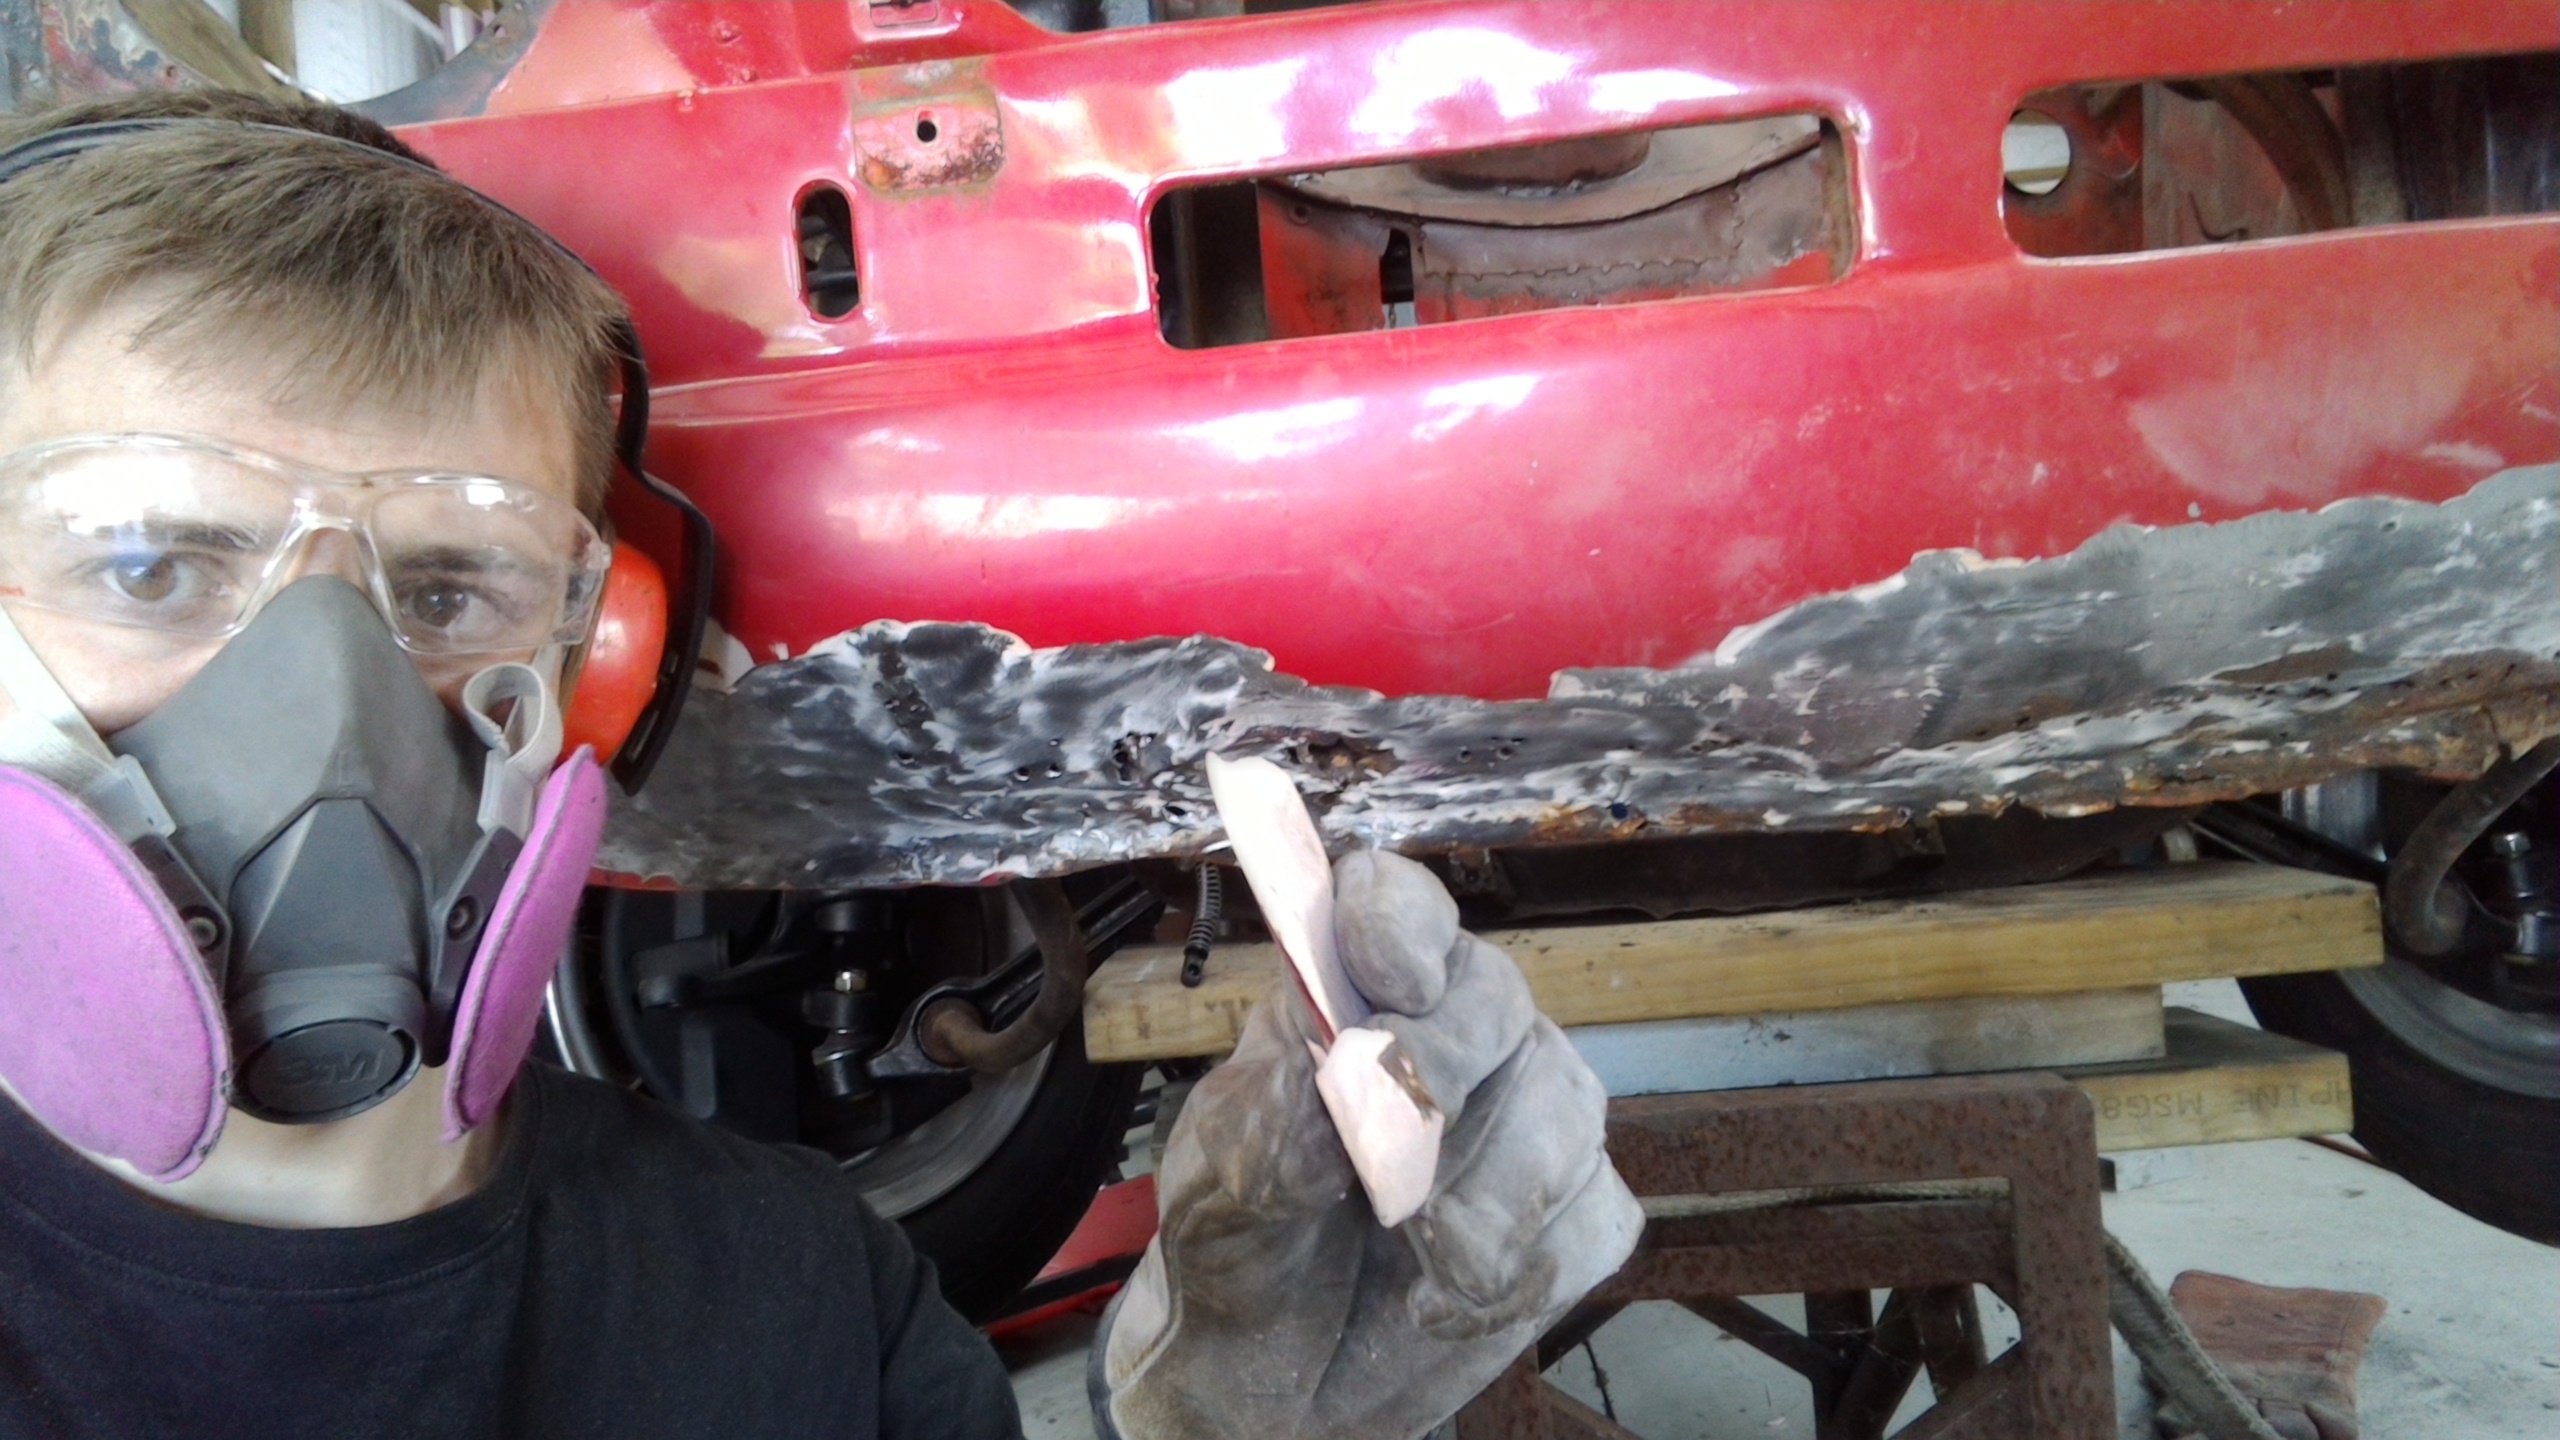
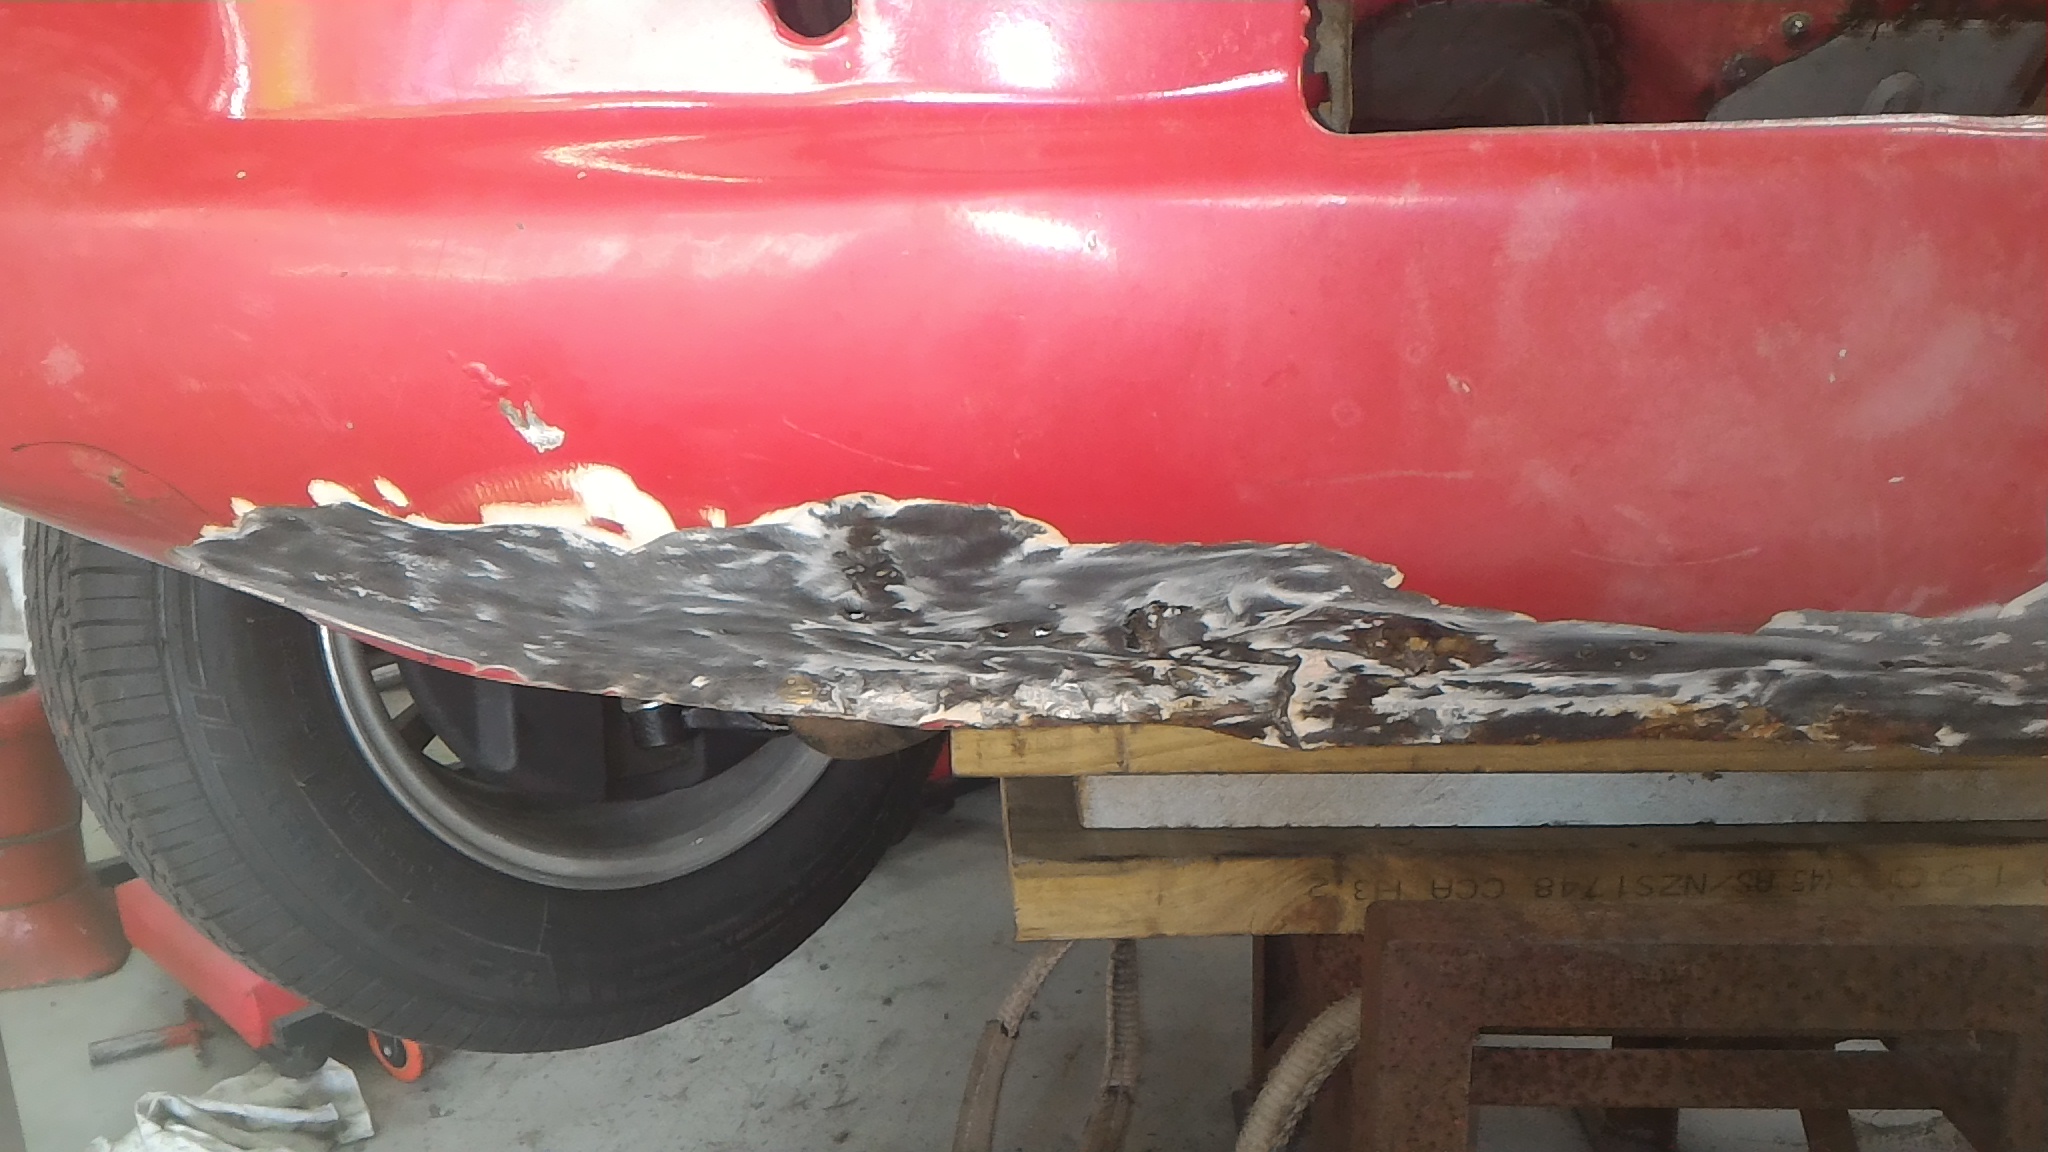
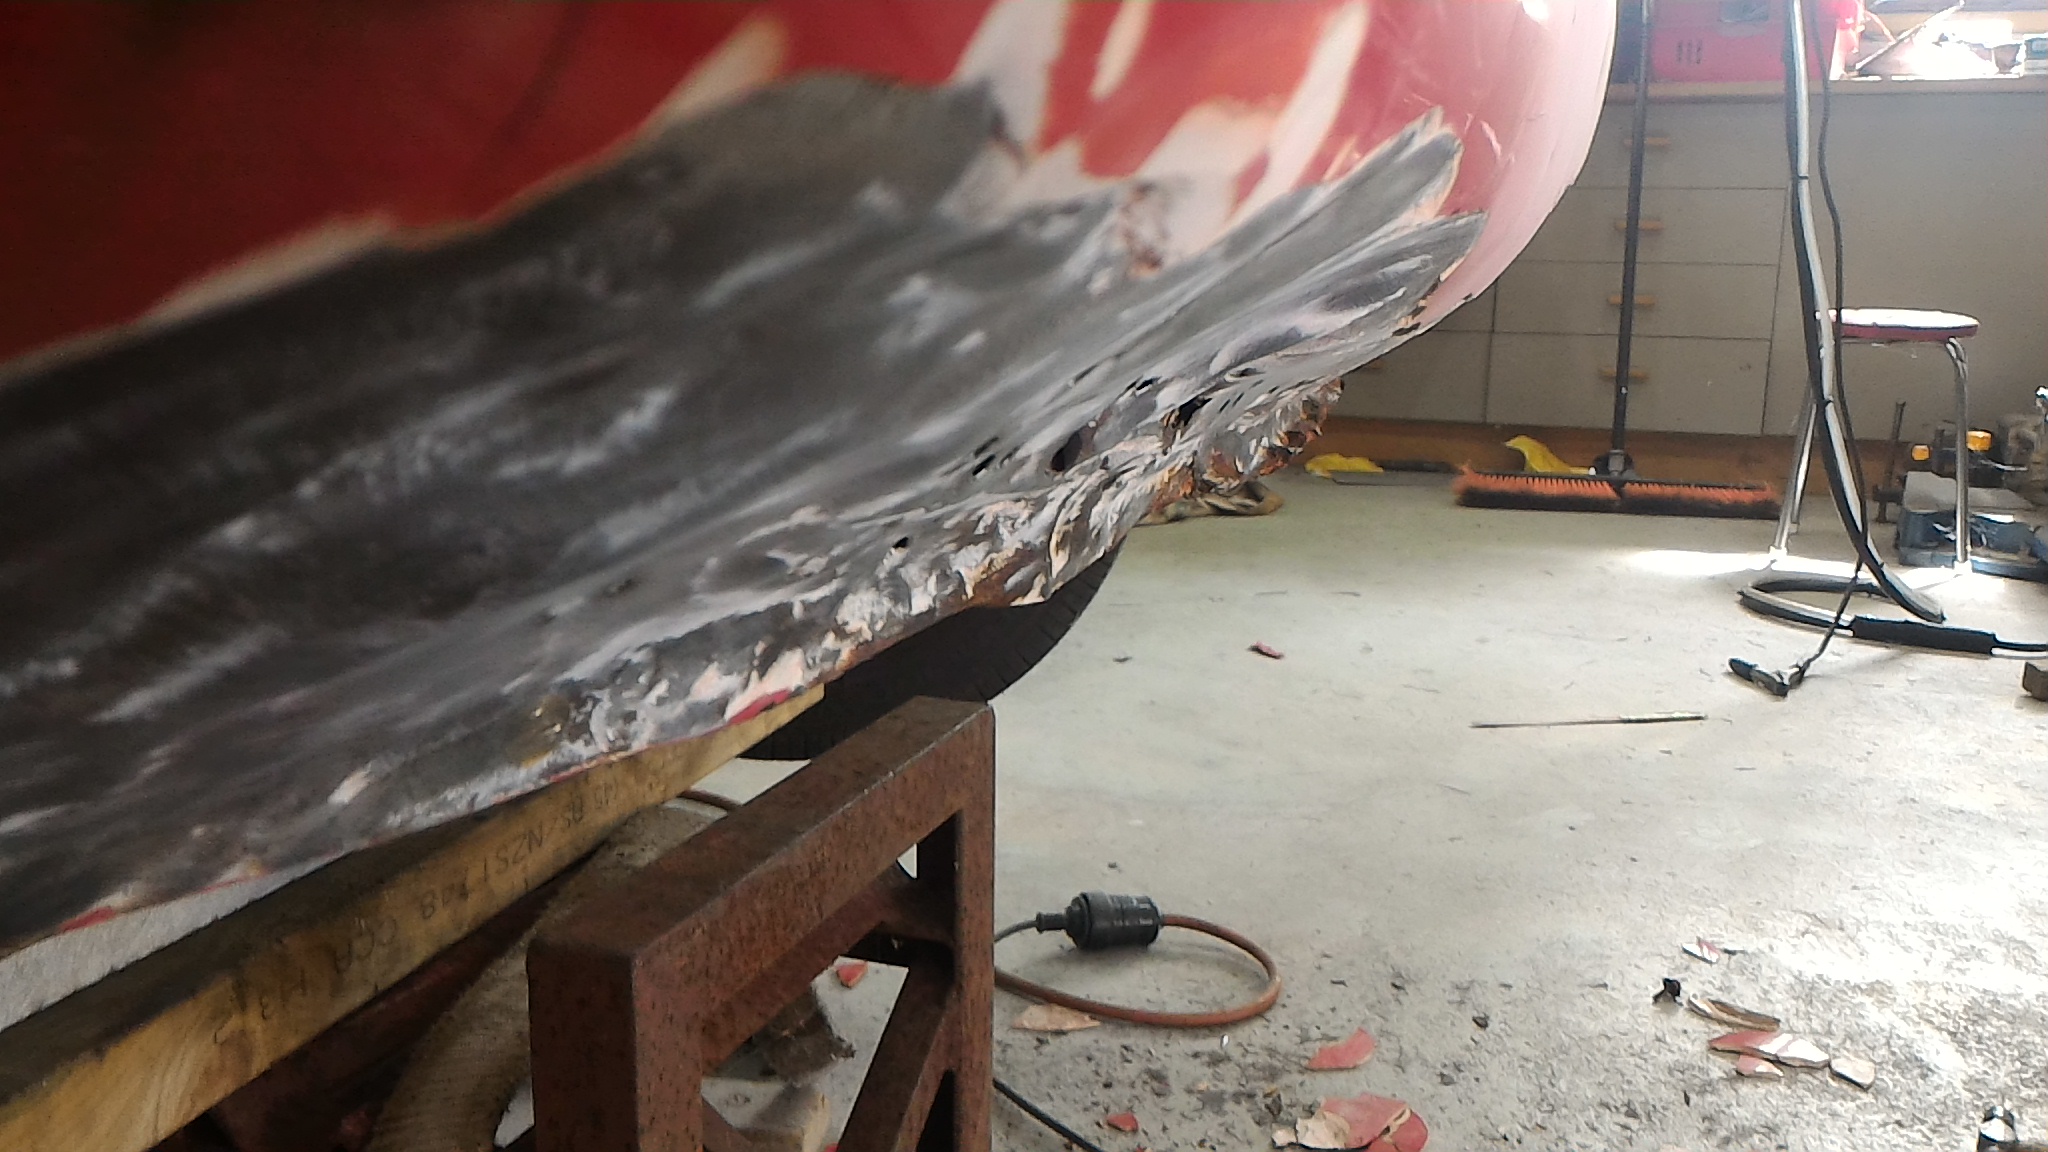
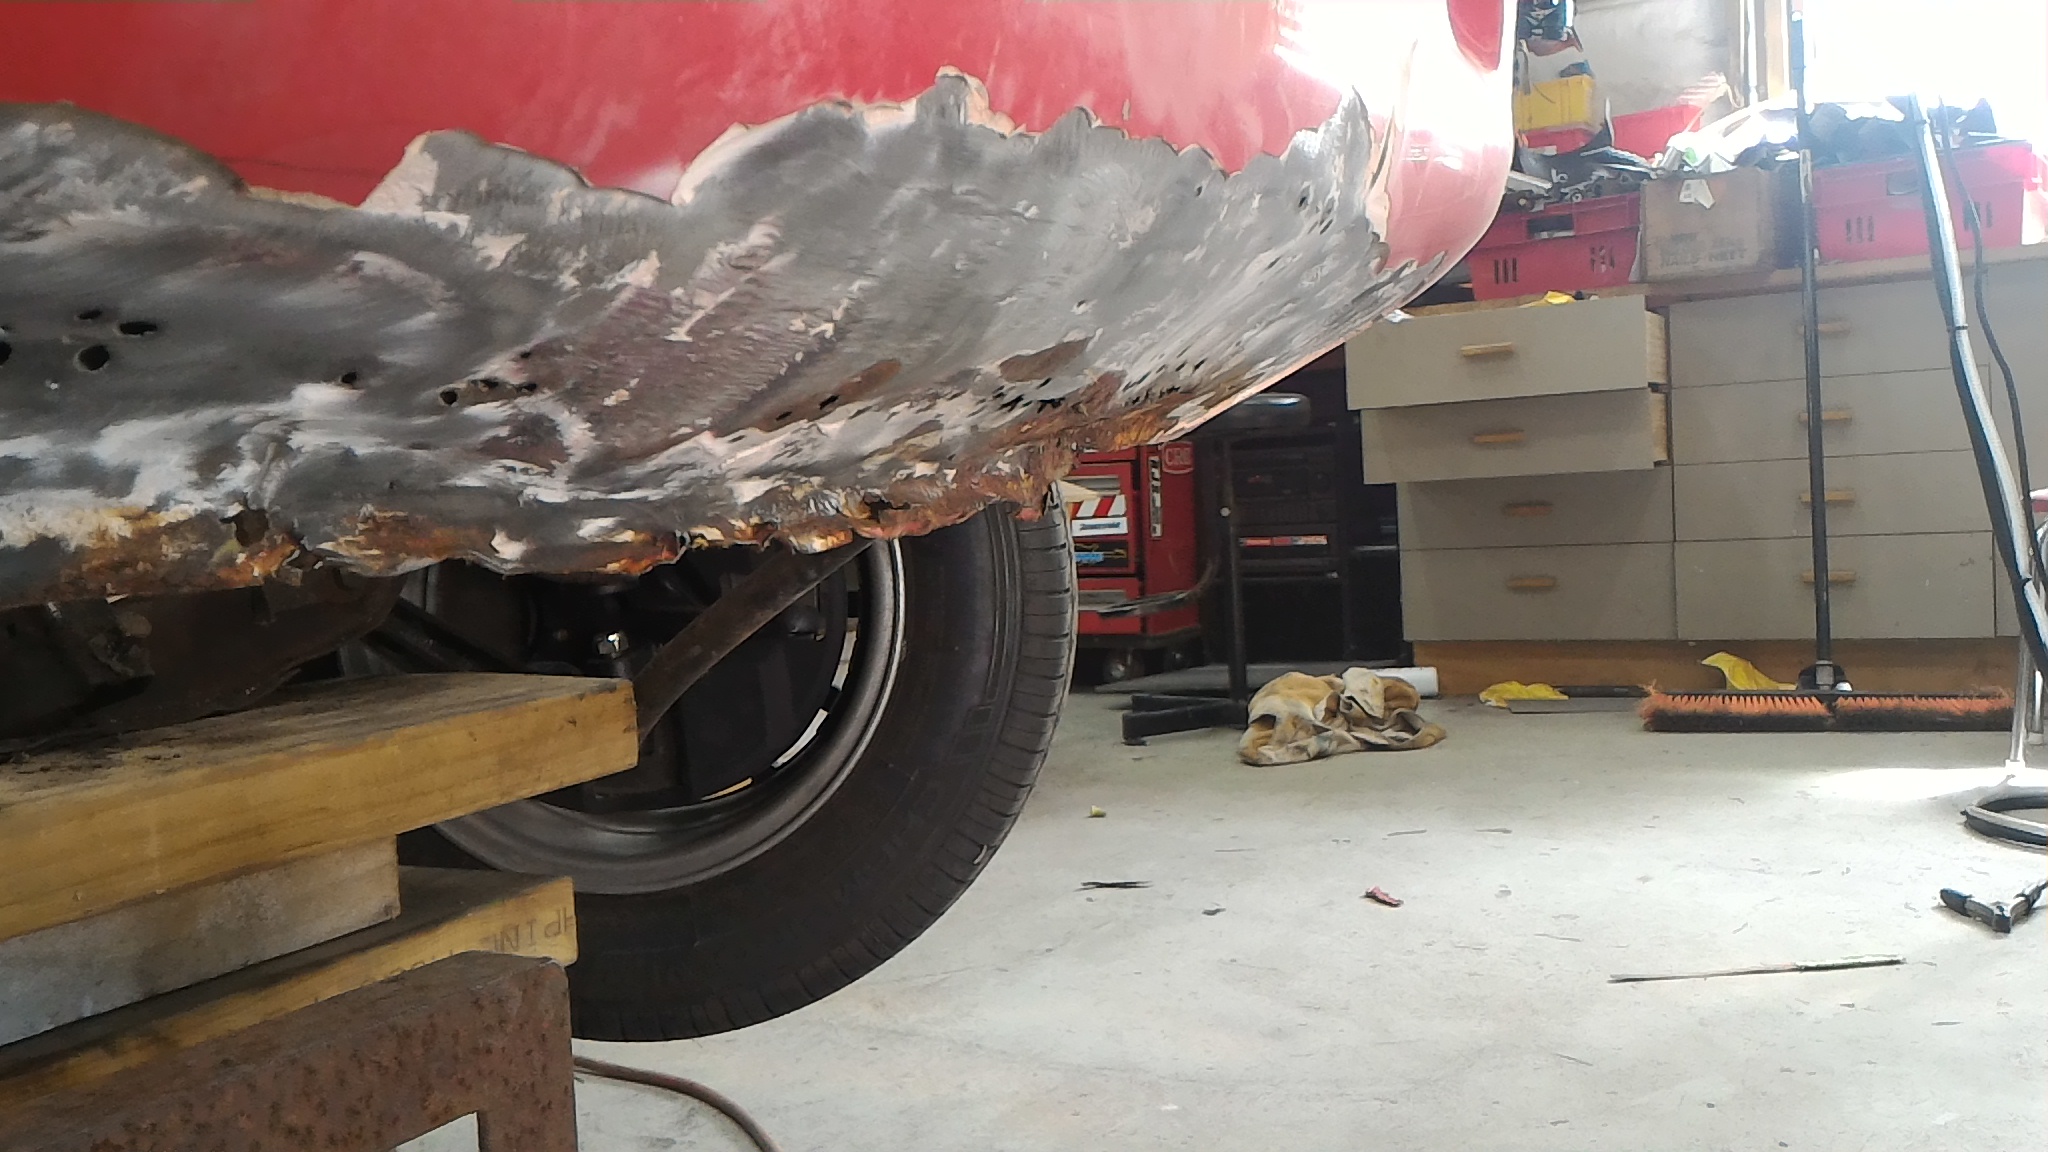
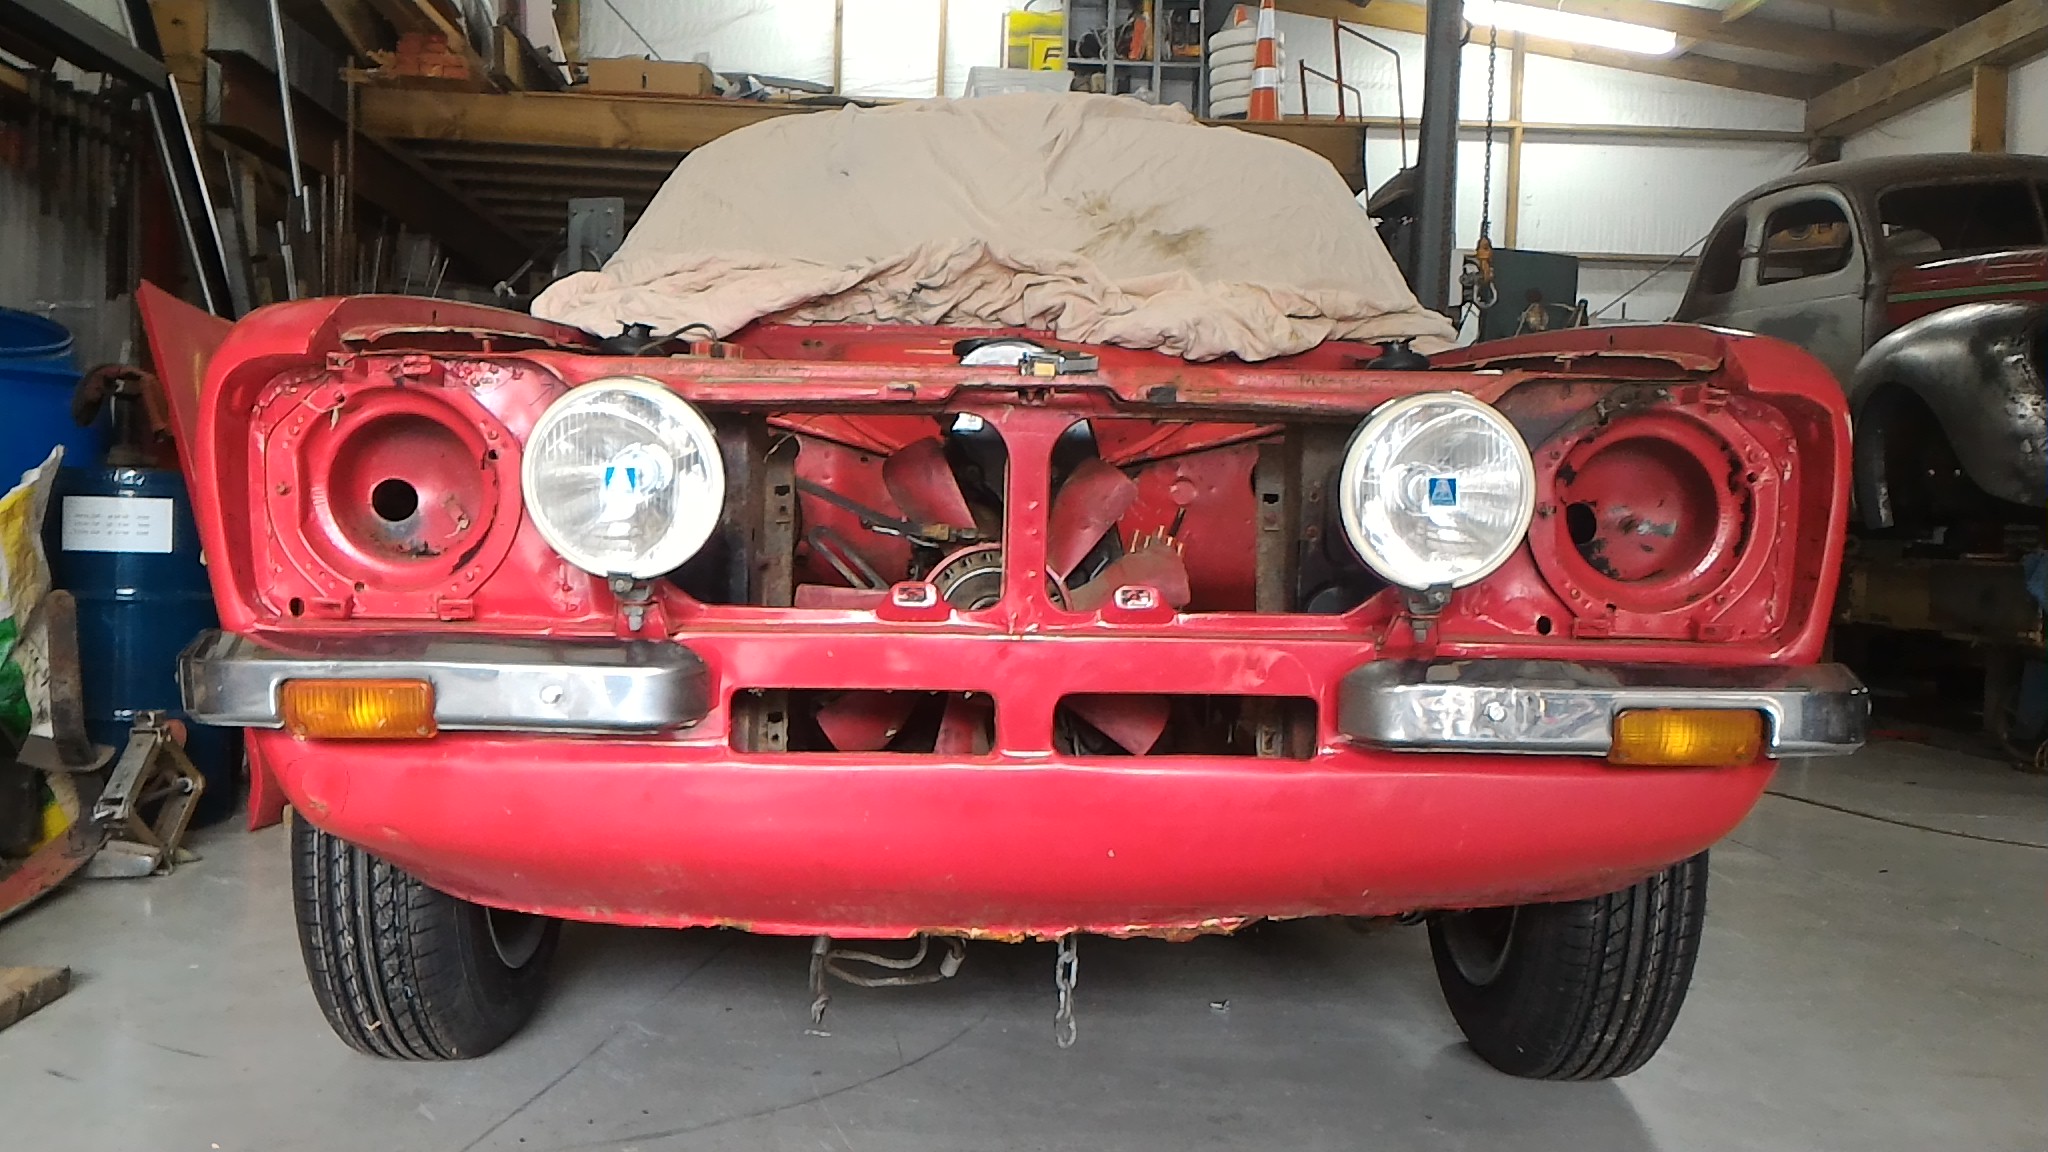
Next thing I got on to was investigating the small amount of rust you could see on the bottom of the front valence panel which you can sort of see in this photo. I could see a bit where there was some bog lifting away from the rusting steel underneath. So I put a screwdriver in behind the bog and chipped it out to see how far the bog went. And went. And went. There was a bit of bog on there actually. That's a size 10 boot and the pile is as high as the top of it. This is the state of what the bog was covering. The photos struggle to portray just quite how much the panel is pushed in. It was a mess. This is some of the thicker chunks of bog that came off. Please note that they're directly end on to the camera. That is actually how thick it was. There really are some gifted "panel beaters" out there.
1 point
-
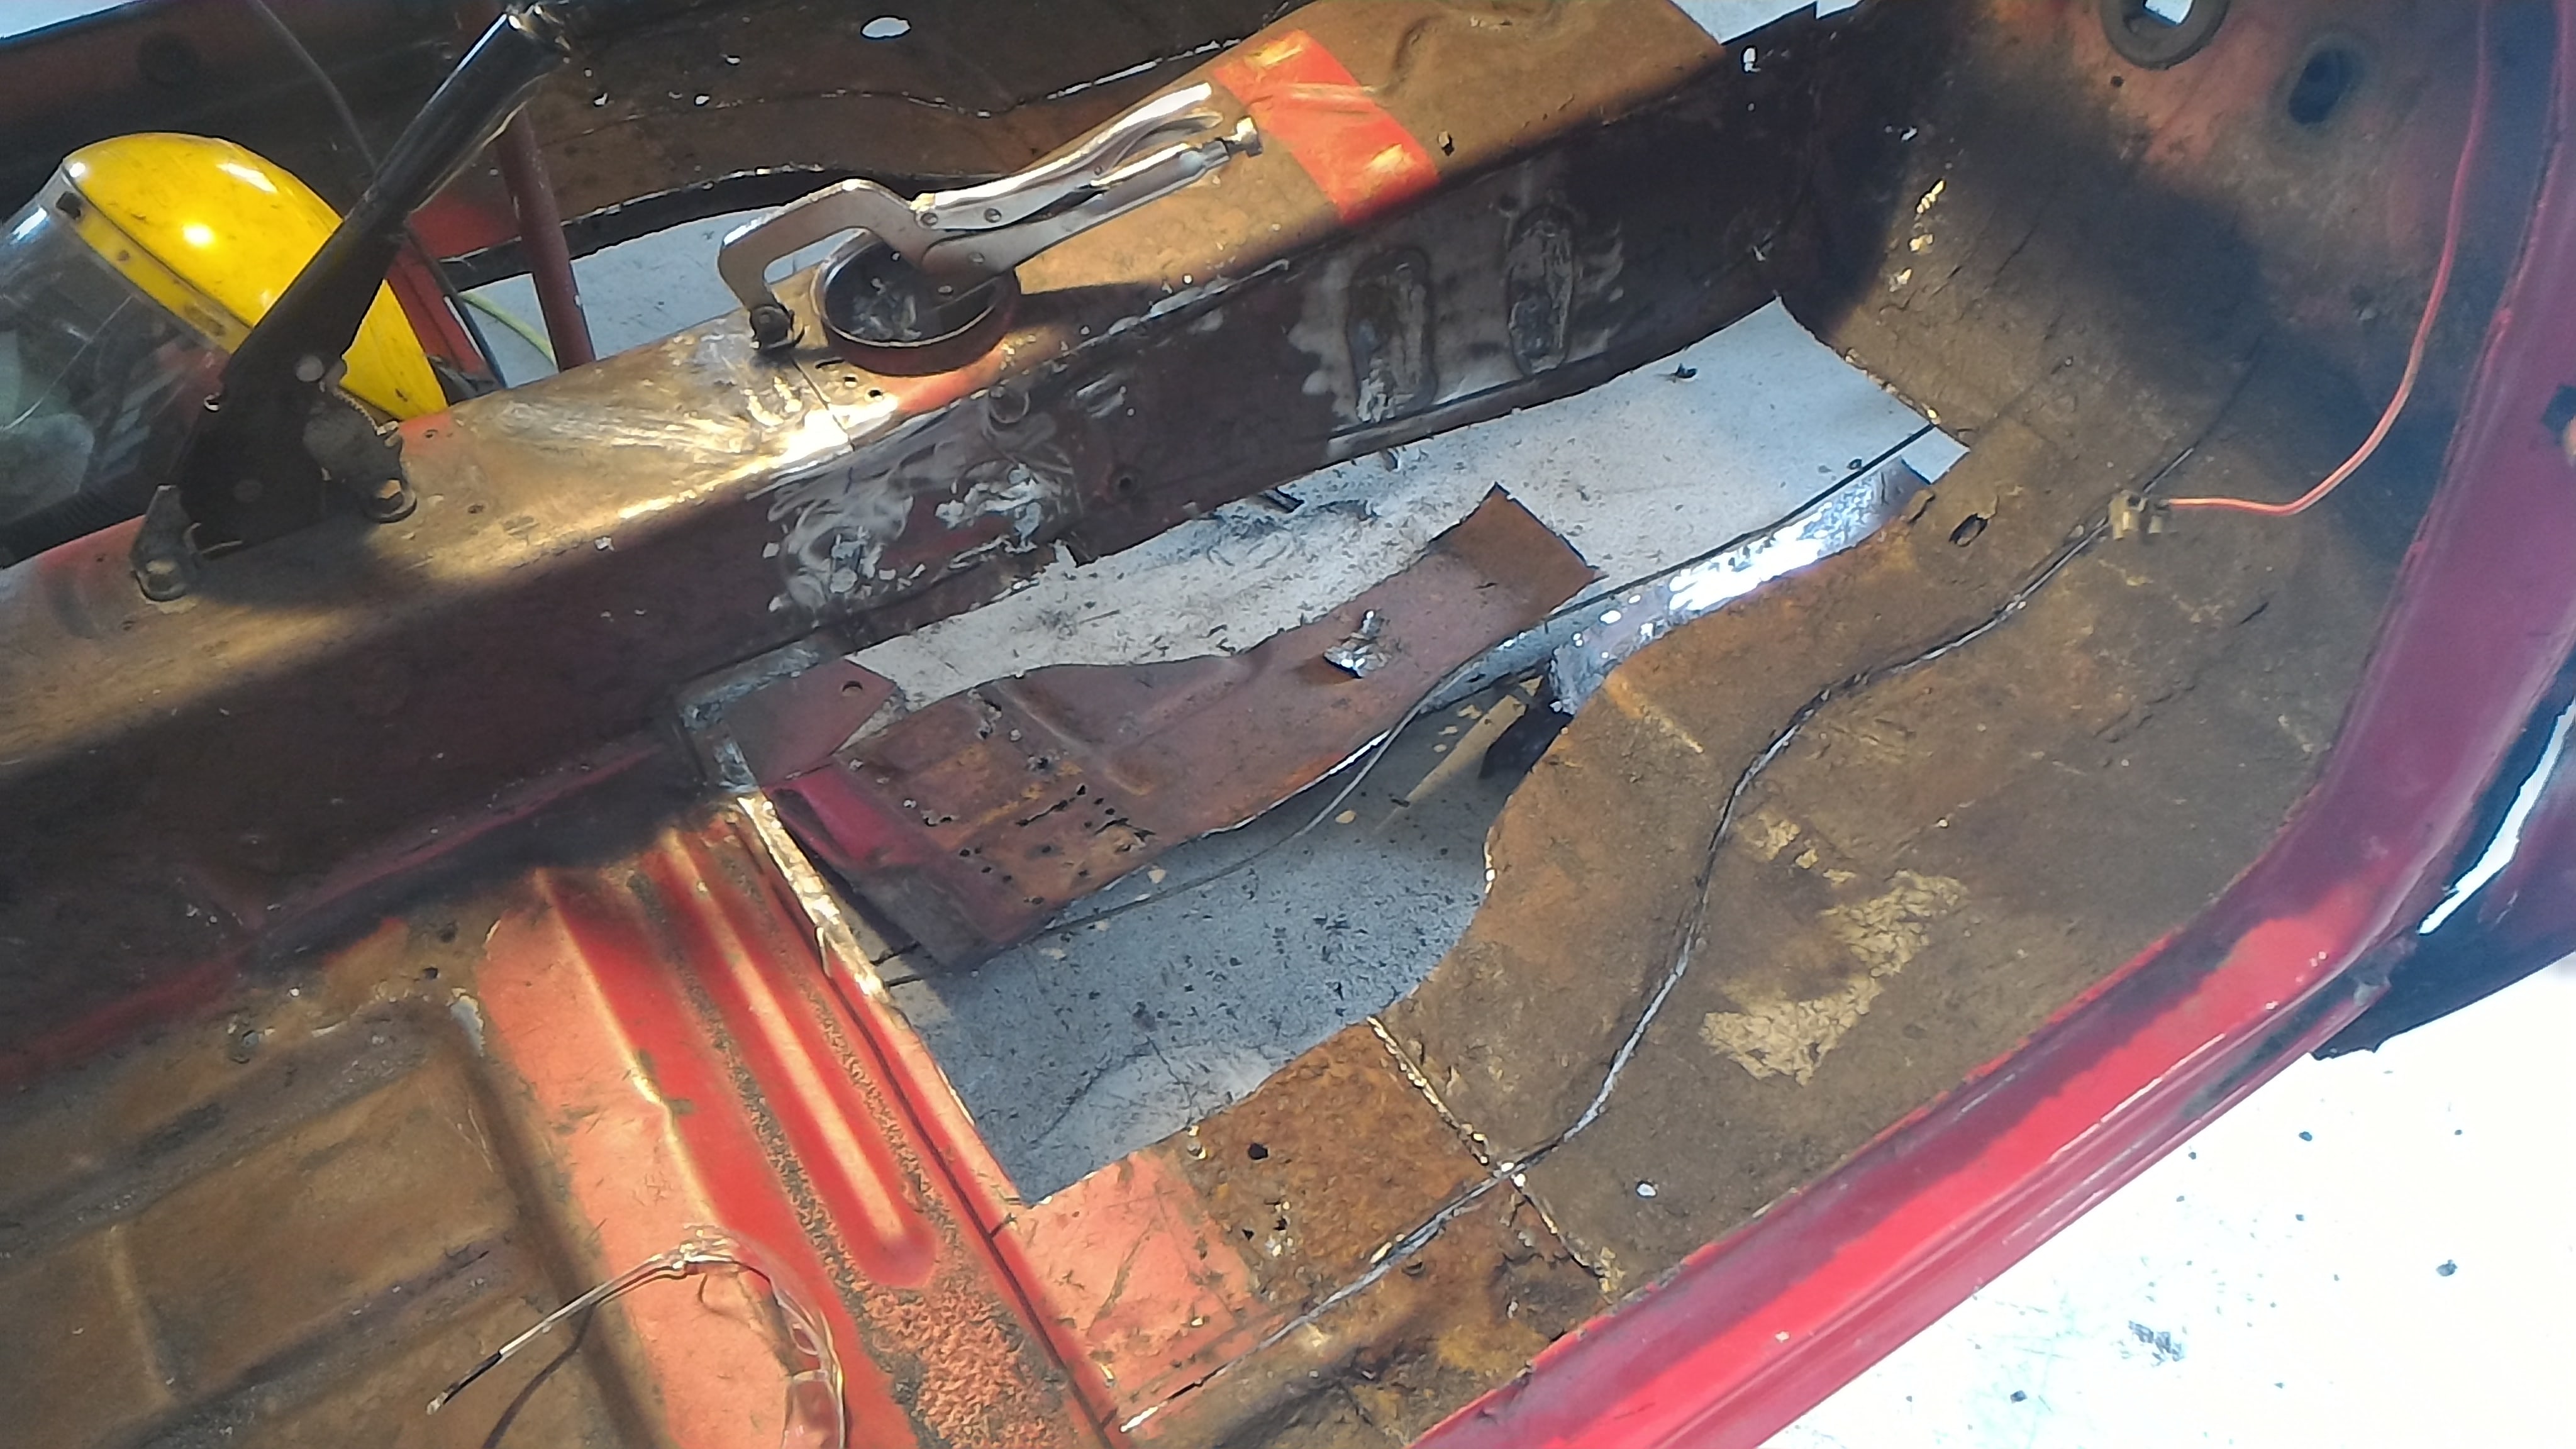
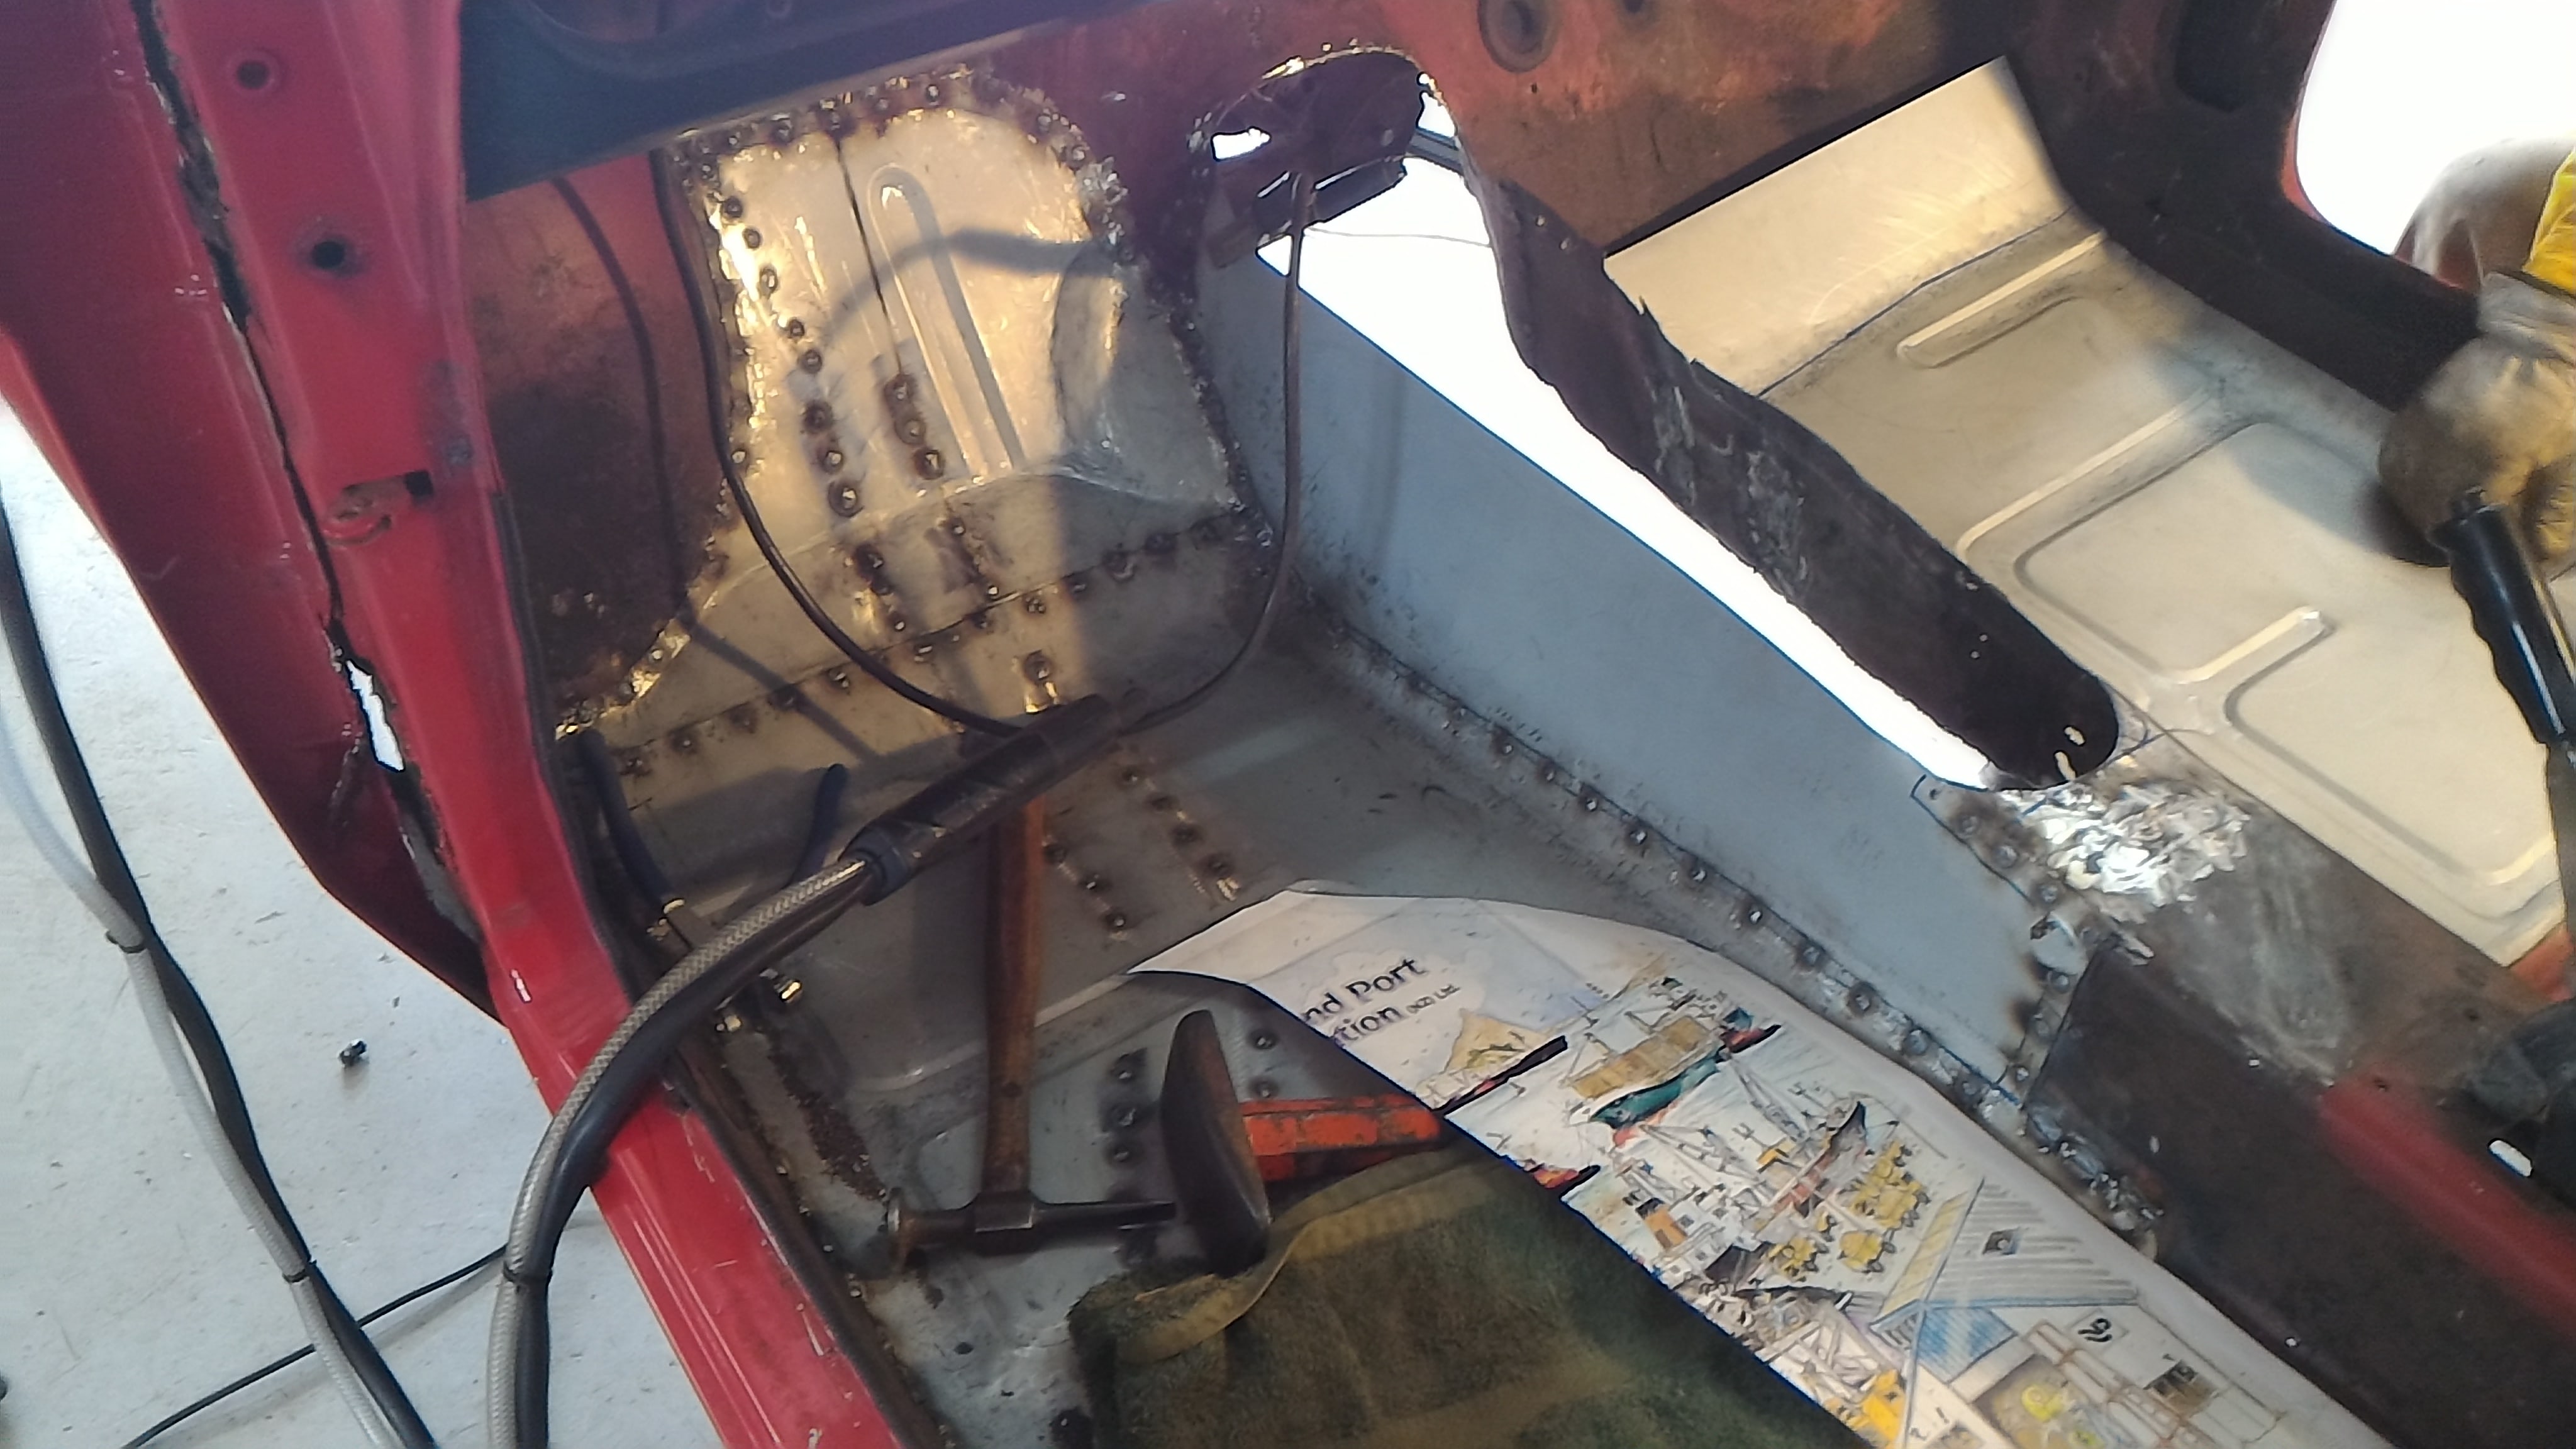
Now was the point where it was decided that the pinto was simply too modern and complicated for what we wanted. We needed something simpler, more prehistoric. So Flintstones power it is! Saves a bunch of headaches worrying about complicated stuff like fuel and electrics and so forth this way. Before we cut the floors out we lay some poster paper down on the floors and made up some templates to then be transferred to 1mm sheet steel to make up the new floor pans. Then after my dumbass forgets to take any photos of the process, you have two floorpans with close to stock swage locations. Then it's a simple job of filling up ten billion plug welds and viola, one floor pan welded in. You'll notice the side of the tunnel was cut out and replaced as well. This wasn't the original plan but after taking out the gearbox mounts and seat boxes it was in such a state that replacing the lot was much easier than trying to fill each hole individually. It also affords the peace of mind of knowing there's some decent gauge steel in the car rather than ford's paper mache. A massive thanks to my dad for all this. It was a while before I had the confidence to start doing this sort of stuff myself.
1 point


.jpg.b0dea00a77a11bbe6cd4af4e21b8fb60.jpg)
.jpg.bbb4bd5fe7a2a28422a0b82a2cc85c31.jpg)


This leaderboard is set to Auckland/GMT+12:00