
Leaderboard


Popular Content
Showing content with the highest reputation on 05/11/21 in Posts
-
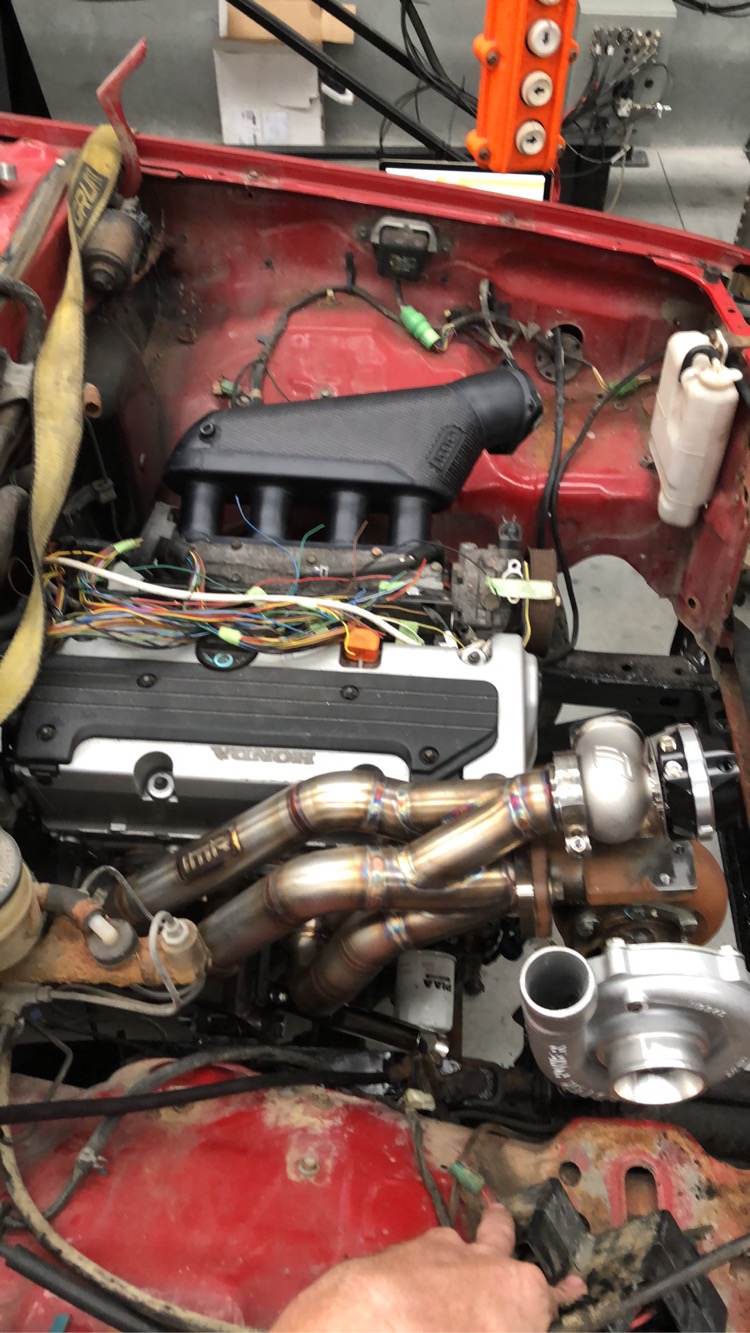
So, I still own this It got used for a daily for about a year or so, and I made a few more changes to it - t3 knuckles and modified the tension arms for more caster. And changed out the rear end to an 4.11 F code center from an mx73, with an Altezza torsen. Here's a terrible, old, cellphone picture of it about then; A little later while I was taking a short break from possessing a license I pulled the windscreen(s) out to fix up the rust that was coming along nicely in the lower corners of the rear screen frame, but didn't actually get around to actually doing that for a long time The 4a was getting pretty tired too - at some point i'd lost one of the filter socks and gave in and just ran nothing at all - so a life of hard work and then that, it was starting to experience pretty heroic levels of blowby. So was looking at doing a rebuild on that, but then I happened to be at Zebra looking for something unrelated, and found this in one of them mental WiLL VS doodads; A 2zz. No real idea what condition it was in but being zebra, it was cheap enough to get to just stuff around with Id actually already bought a j160 to put on the 4a - had a look at that, and the way a few key things on the 2zz were arranged (simple steel sump/pickup, easy waterlines etc) it actually looked pretty straightforward to make work in a rear wheel drive arrangement. Did a very rough 'adapter plate' to the j160, for a sort of proof of concept and threw it in the engine bay, it all fit a little too well I figured they already make 190hp standard, is all aluminium, has vvtli, gain 200cc, so why not really This is going back a little while now, and progress has been glacial (had a kid/wasting my time with other projects) but it looks something like this at the moment; Ignore the 20v throttles propped up with a bit of wood for artistic purposes but yeah it's mounted, the headers are now done, the j160 is more or less adapted, and the rust is fixed too I'll put up some more detail on that stuff soon discussion\tell me how stupid i am22 points
-
I Zebra'd a new engine mount and also put the factory exhaust manifold back on, as the other one was leaking horrifically from everywhere. Then did a bunch of other things and got it fired up! Pretty chuffed with that, it's a nice feeling to not have it all blow up immediately. I reckon it's gonna be pretty rowdy with these cams haha. I then mucked around for ages and bodged together water and heater lines, filled it up with coolant, then.... fucked up. Despite my previous efforts I managed to wire the waterpump backwards and I think I let the smoke out. I fixed the wiring but now it doesnt work. Will be lame if I have to buy a new one, as they cost as much as this bloody engine did haha. Depending on the motor type I might just be able to bodge this one to bypass the variable speed and just run it full speed full time. Dunno. Aside from this. I really need to pull the wiring loom apart a bit, because currently the alternator wiring is baked into the loom up top, but it needs to move down lower. Also because the block is taller, my trumpets hit the bonnet now. So will need to make some new ones. However will all 3 of the polyurethane mounts in, it's now super rigidly mounted. So I can hopefully push it close to the available space without issues. But it was awesome to get it fired up anyway. I'm still a few tasks away from being able to drive it, if the water pump isnt fixable it'll be next month that I can buy a replacement.11 points
-
Yeah.. He is retired tho right? No dependants/mortgage? Gets a pension.. The opposite of my situation, I'd be doing what he's doing in a heartbeat if I was able.8 points
-
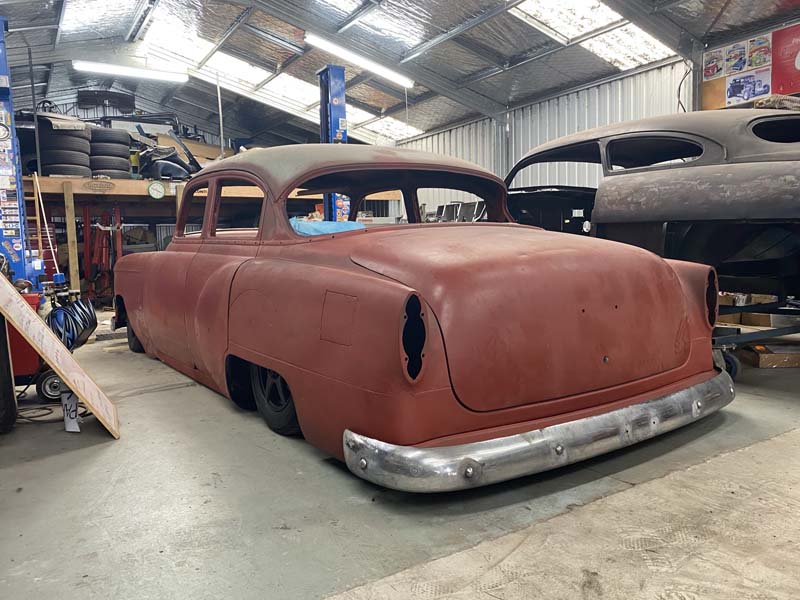
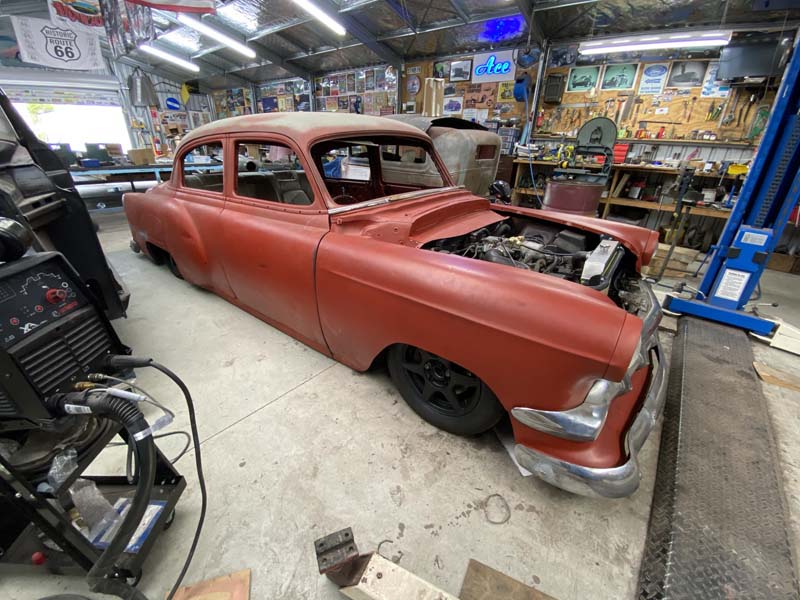
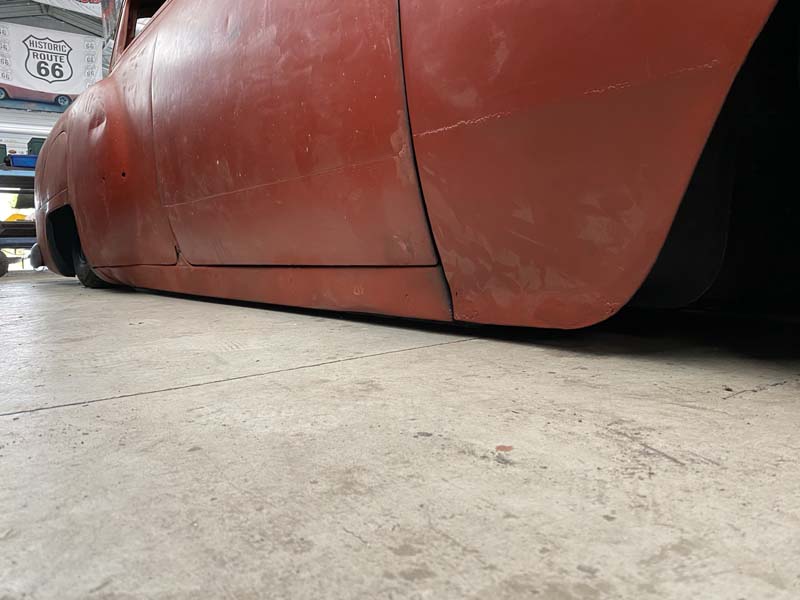
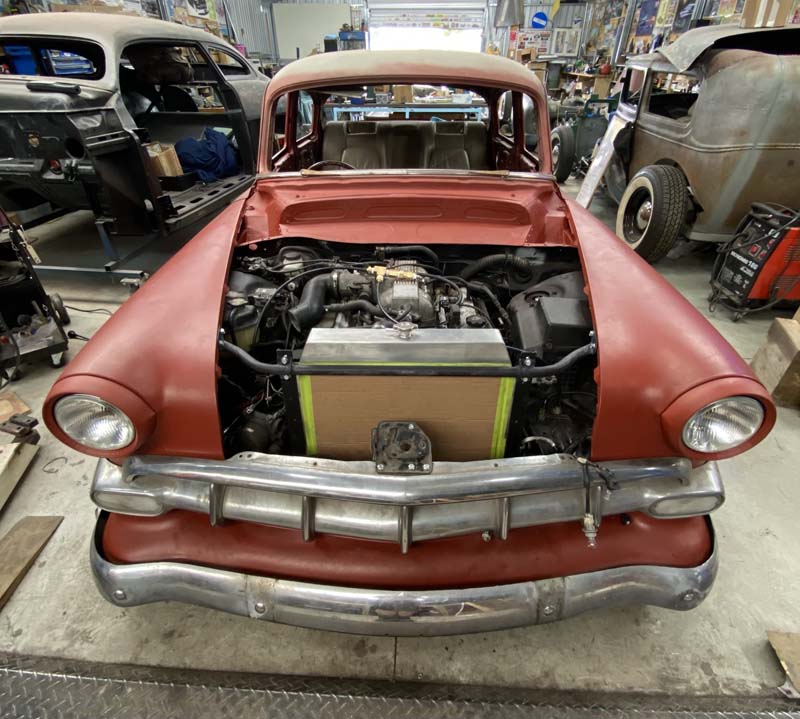
Took some more shots since it was out of the shed. She’s now at the blasters. Cancery upskirt6 points
-
pulled it to bits and got it ready to remove the motor. ive ordered some parts which willtake ages to get here so im in no hurry. i thought id tidy up some stuff while im waiting. water return pipe from the turbo went into the original spigot and the second one was just blanked off. it looked a bit dumb so i pulled the stainless tubes out, welded up the holes and welded a dash 6 nipple on lower down. 2021-05-09_07-04-13 by sheepers, on Flickr 2021-05-09_07-04-05 by sheepers, on Flickr then i thought id make a new, smaller radiator reservoir and windscreen washer bottle because real-estate in that area is real tight and its a pain in the arse to get to anything in that space. not finished yet but getting there. cut some 75mm box section put a pie cut in the bottom to help clear the body work better weld caps on each end sand them up a bit weld the screw caps in still got to put the inlet outlet fittings in and mount the little electric motor for the windscreen washers but that shouldnt be a drama. ill just hide it underneath like i did for the V8 2021-05-11_08-14-23 by sheepers, on Flickr 2021-05-11_08-14-29 by sheepers, on Flickr 2021-05-11_08-14-35 by sheepers, on Flickr 2021-05-11_08-14-41 by sheepers, on Flickr5 points
-
Gotta start thinking about rad and intercooler soon
 5 points
 -
Gidday, me again with the crappy volkswagen. so last time we left off that i got it out side. WAHHOOOO the next thing on the list was tires and to dial in the ride height. i had messaged seedy al a we while back and asked what size tire he ran on the front and i run these also but this time i fired him a message to see what he was running on the back, and yikes it was a small tire compared to what i was running, which was a 205 70 14, i done some tire comparisons online to find something that would give me a smaller tire but nothing to small. I ended up with a 205 60 14. this is 22mm smaller in the side wall, allowing me to go a little lower with out having to ram the tire up into the guard. but since going lower i now have a lot more toe in, now causing the tire to catch on the spring plate adjuster. so i got some shims from bunnings, yes bunnings stock shims for vw kombis (washers). what i needed to do is shim the spring plate out a bit from the arm to help correct the toe in being this is one solid arm with no adjustment. this required a bit of fucking around, with the 1st attempt having to much toe out. so i removed a shim (washer) and put it all back together and it seemed pretty much bang on. So i got my 3 meter straight edge and drew some lines to the front and back and chucked a tape measure over them. i had the wheel alignment 5mm toe in. this measurement was comparing 2 meters behind and 2 meters in front of the wheel. so i thought my 5mm was pretty bang on for something that is not really adjustable. picture of the solid arm which i placed shims on to correct my toe in issue ^^^ this is the rear i placed spacers where the arrow points With that all done i was able to actually drive it out side and down the road a couple of times. was good to finally have it out side. I was using it a bit here and there to see if anything was an issue or i would need to adjust anything a bit more. My biggest issue was i was not able to select gears that well, i was really starting to get pissed off about this. got talking to the guys at v-dub shoppe and they gave me a bush to replace in the gear linkage system close to the gear box. fucked one this little guy was toast, it was ment to be solid and have no movement but it had about one 8th of adjustment in it causing it to no select gears correctly. replaced that and OMG what a change! while i was up there i got this image of it all done. next up i proceeded to loose my drivers side hub cap about 4 times with in 10kms from home, found it each time which was a bonus. next i needed to sort some shocks out for the front, while i was out at @Fuckedifiknows house i was talking about what i needed to do and he passed me these. and then i got some shocks but i was going to need to do something as the shaft was to big for the bush on the shock. well we had @Kimjon pop in and take my vespa for a ride and he suggested he take them home and chuck it in the lathe and take a few mm off it to make things easier. finished result! next up i needed to tap the shock tower so these could go into them. she was a tight squeeze but we made it work. time to make some bump stops for the front and the rear. front ones go a little like this. put some holes in them make sure the holes line up then you get them lazer cut and leave them for 2-3 months back ones go a bit like this remover rubber dog chew toy (way before we started this) Get smaller rubber chew toy make small rubber chew toy screw into metal thing thanks to @Geophy make metal thing that rubber chew toy screws into be one with George the kombi glad i still know how to melt metal together not that well. so paint metal thing black and screw little chew toy in also removed the big cup thing off the rear control arm for more clearance so i have a bit more travel before bump stop hits, this was only held on with 2 little tac welds so i feel like i done good here. now when it touches a good solid peace that wont fall apart. done some other things to make clearance issues not an issue but i wont show those as i didn't take photos....... but here is a photo of it allll done. do you guys like the no hub caps? or with the hub caps? visited my mates out at the v-dub shoppe to show of and thank them heaps for all their help. and our next adventure was to the bay of plenty to see some vdub people and inquire about getting the kombi checked over for a wof. the bay of plenty was great to us. chilled out with beth and tayla before visitng the wof place. re done my wheel bearing while i was at the wof place cause it was making some noise and then headed out to catch up with a vdub mate brought some rego and went to take a comparison photo when i got back home. thats it for now. next time on adventures with the 64valiant family and George the kombi we head to beach hop and vw nationals. stay tuned4 points
-
things are pretty great with this car. just got to sort out the seats and some carpet but thats for another day. i bought some new rear disks for it a while back because the ones i had were turbo fucked. minimum thickness is about 11 mm and one was down to 9. so yea, in they went. not a big job but still. 2021-05-01_12-59-34 by sheepers, on Flickr 2021-05-01_12-59-28 by sheepers, on Flickr4 points
-
Potentially, people should be getting out more for sure but there's many limiting factors some mentioned above. I'd love to be retired so I could drive around constantly though. How good?4 points
-
Tbh he's putting everyone on this forum to shame. We should all be doing this sort of trip more often4 points
-
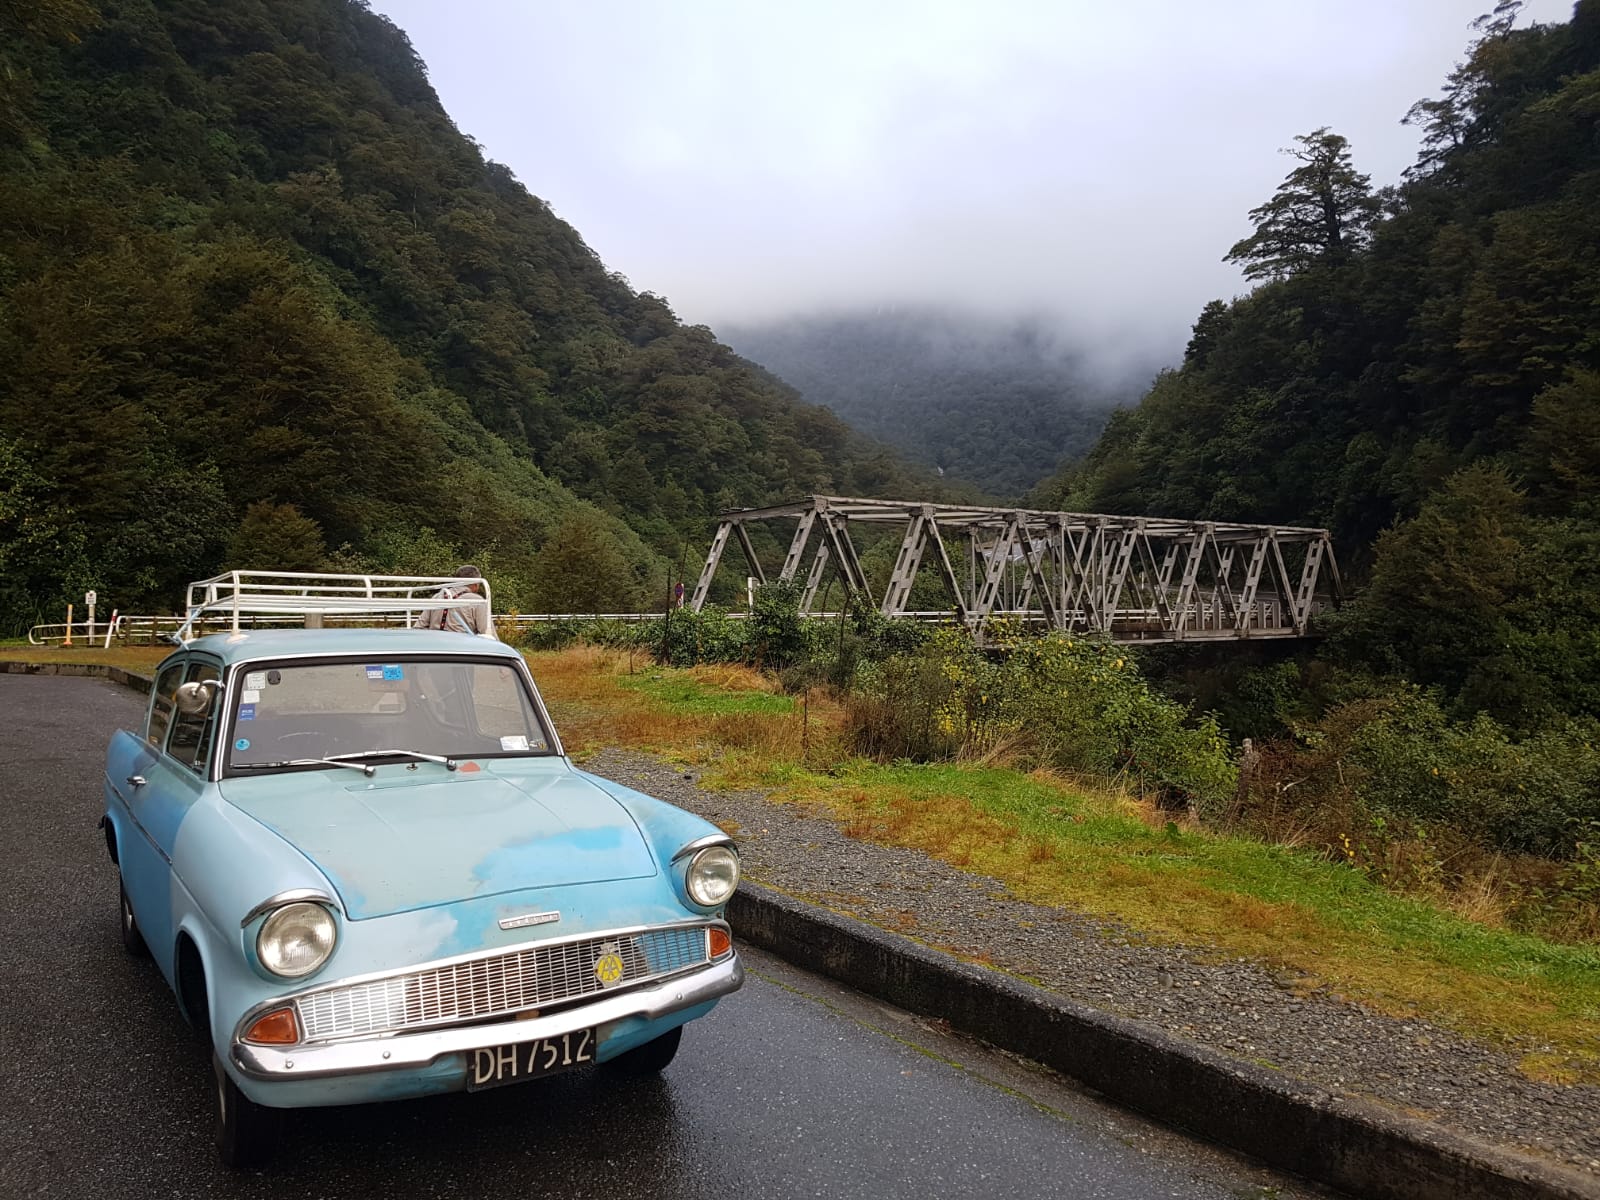
They've begun their trip north now. I think they are in Hokitika tonight. My dad said it hasn't lost a drop of engine oil so far. I call BS. He reckons someone wanted to buy it from him in Wanaka but died when he stated his asking price
4 points
-
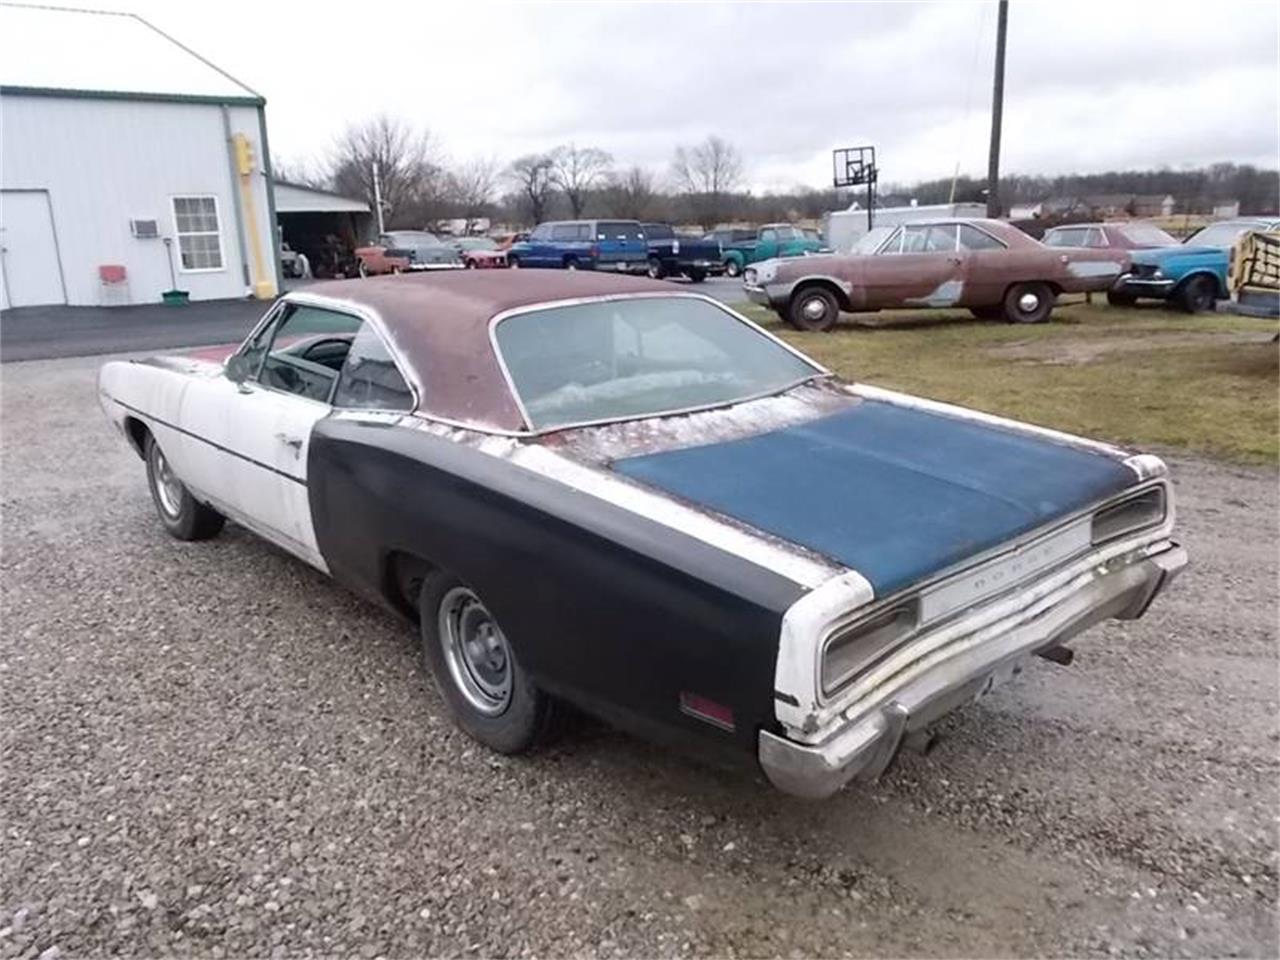
It came from the states with new quarters screwed onto/over the existing ones. Great idea instead of trying to jam them inside then have them chaff through your interior etc/ slide into the glass but it sure did a great job of masking the despair aye
3 points
-
I'm glad this is still alive and fucking 2ZZ? Gawd damn. Awesome stuff.3 points
-
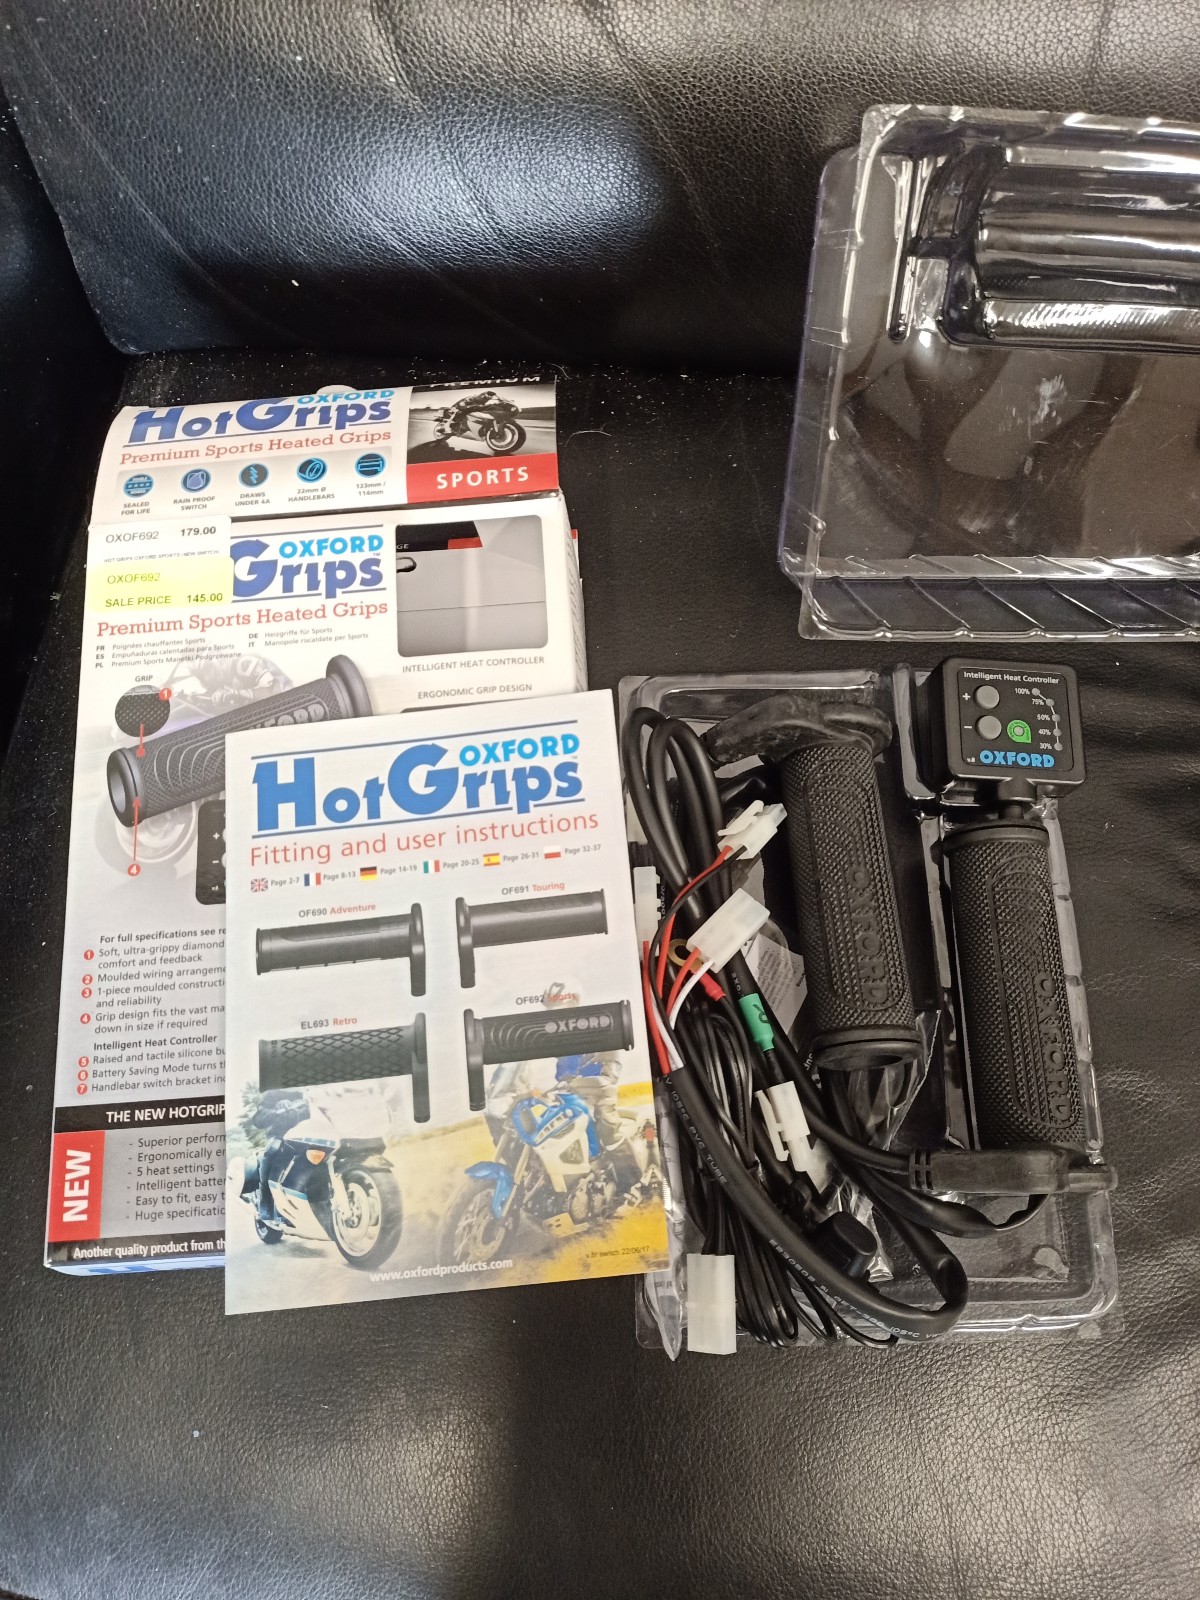
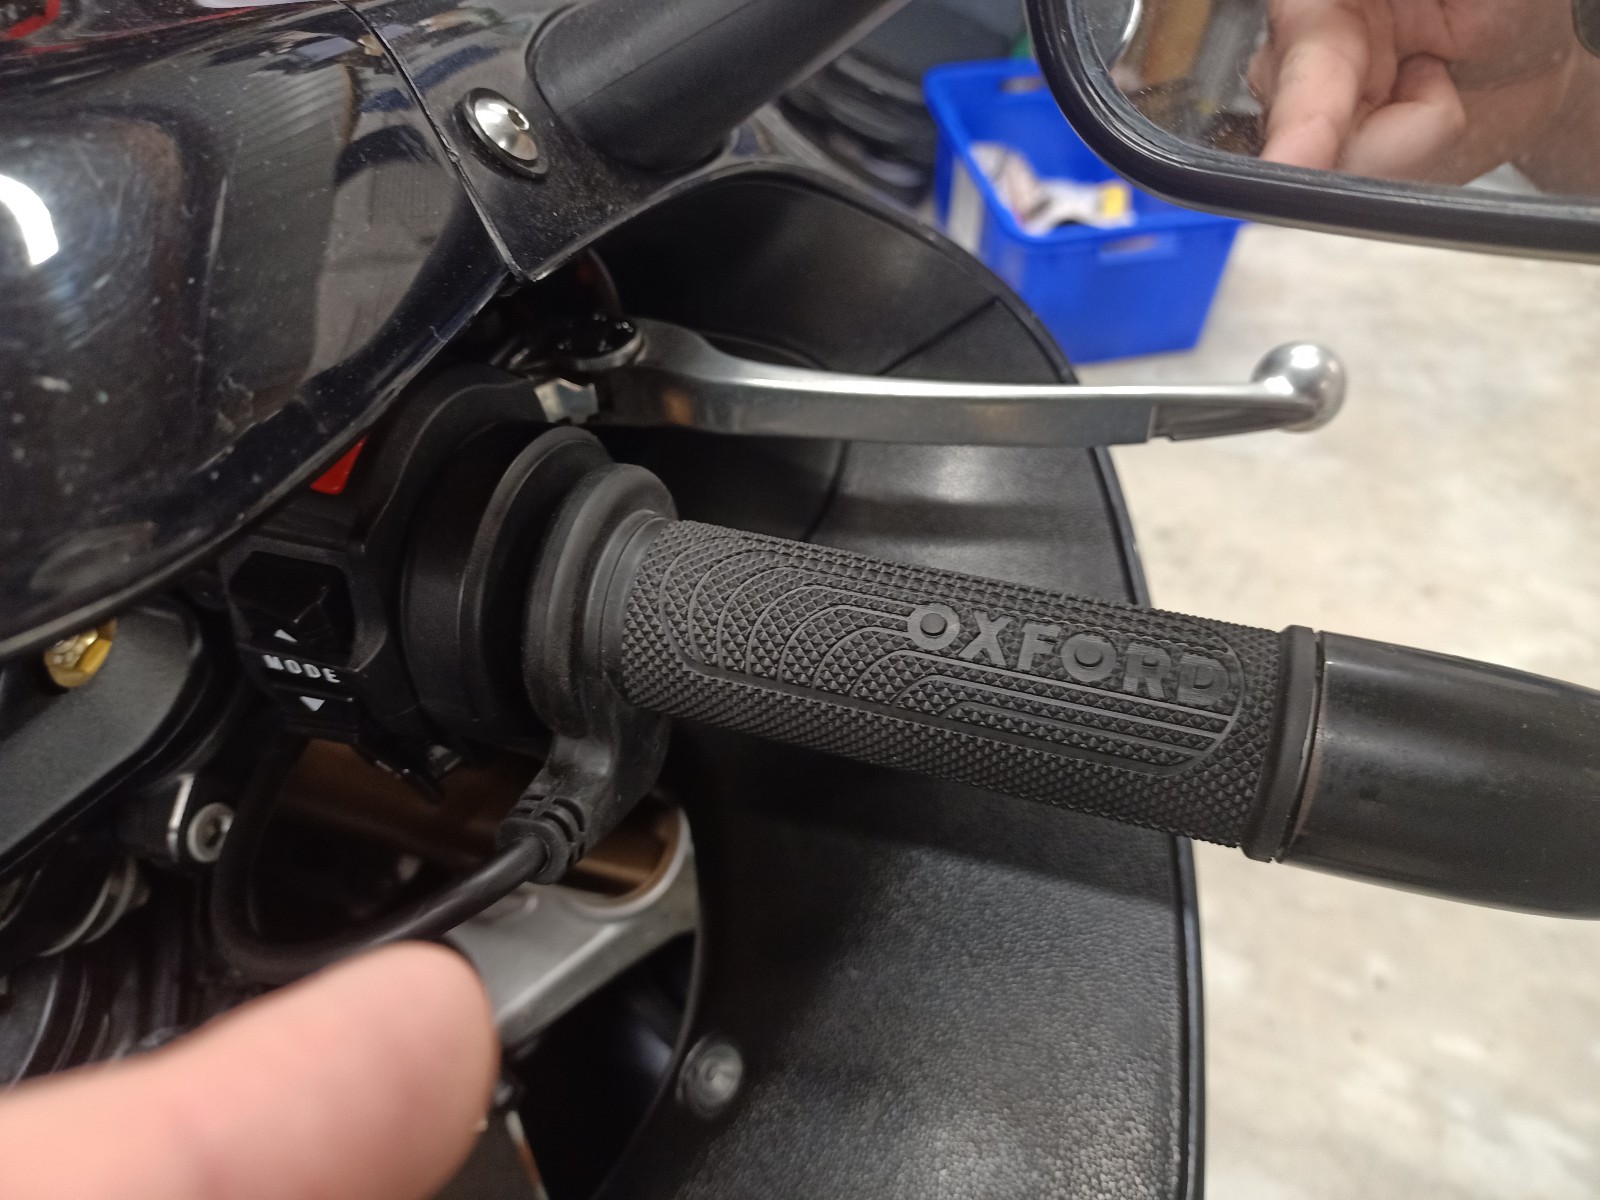
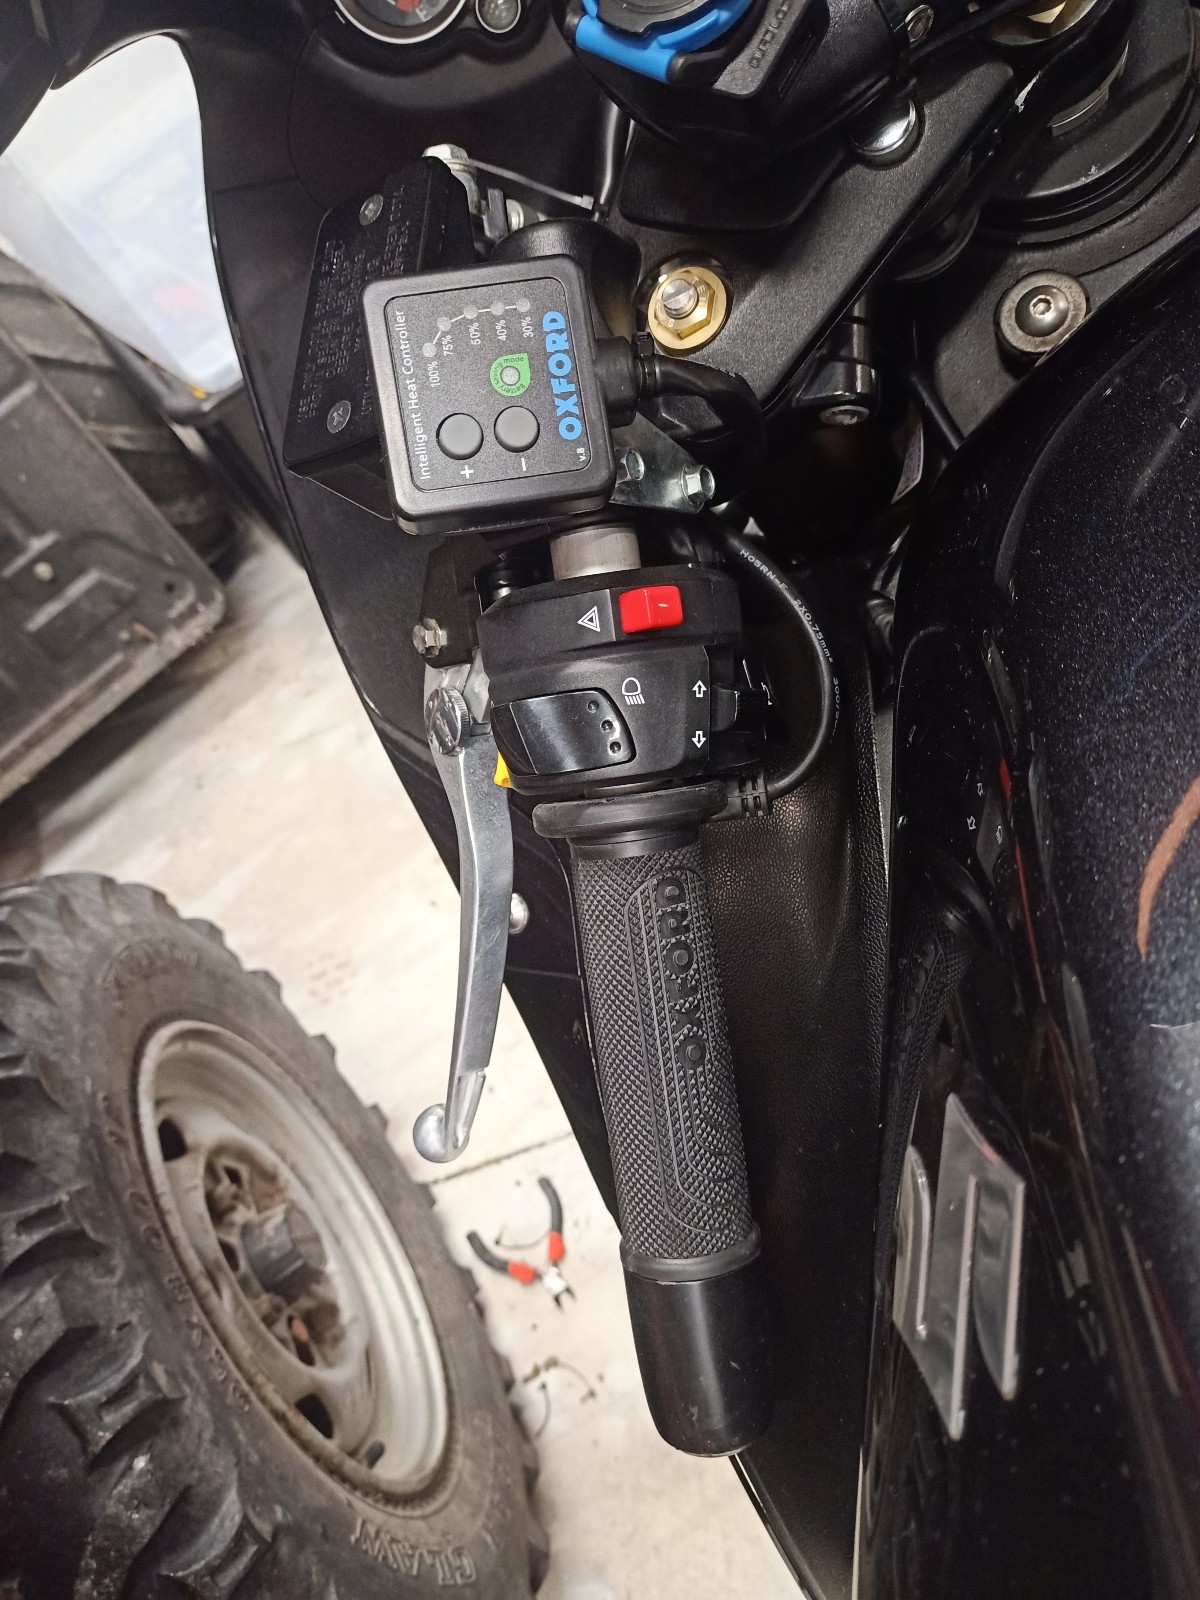
Installed some Oxford heated grips- the grips and controller/wiring is all quite nice but the included tube of superglue is a complete waste of time as both grips came loose before I'd left the drive. These are not like regular grips and have a hard plastic inner sleeve which does not shrink against the bars like usual. I pulled the grips off again, roughed up the bars and plastic sleeve, then glued in place with a thick smear of liquid nails. Completely the wrong application for that glue but it seems to stick like shit to anything and everything, and the grips sure don't feel like they are ever going to move now. Let's hope the glue doesn't soften with heat.. Lol. The controller has some voltage sensing thing too. Its connected direct to the battery but will not operate unless the motor is running. Guessing they need a minimum of 13v or something to turn on. This is a great feature because I'd say they could drain a battery pretty quick if the motor wasn't going. Check out the huge factory bar end weights which screw into the solid aluminium bars. They entire handlebar plate thing is also rubber isolated-lots of consideration given to comfort and one of the many reasons they are a bit tubby.
3 points
-
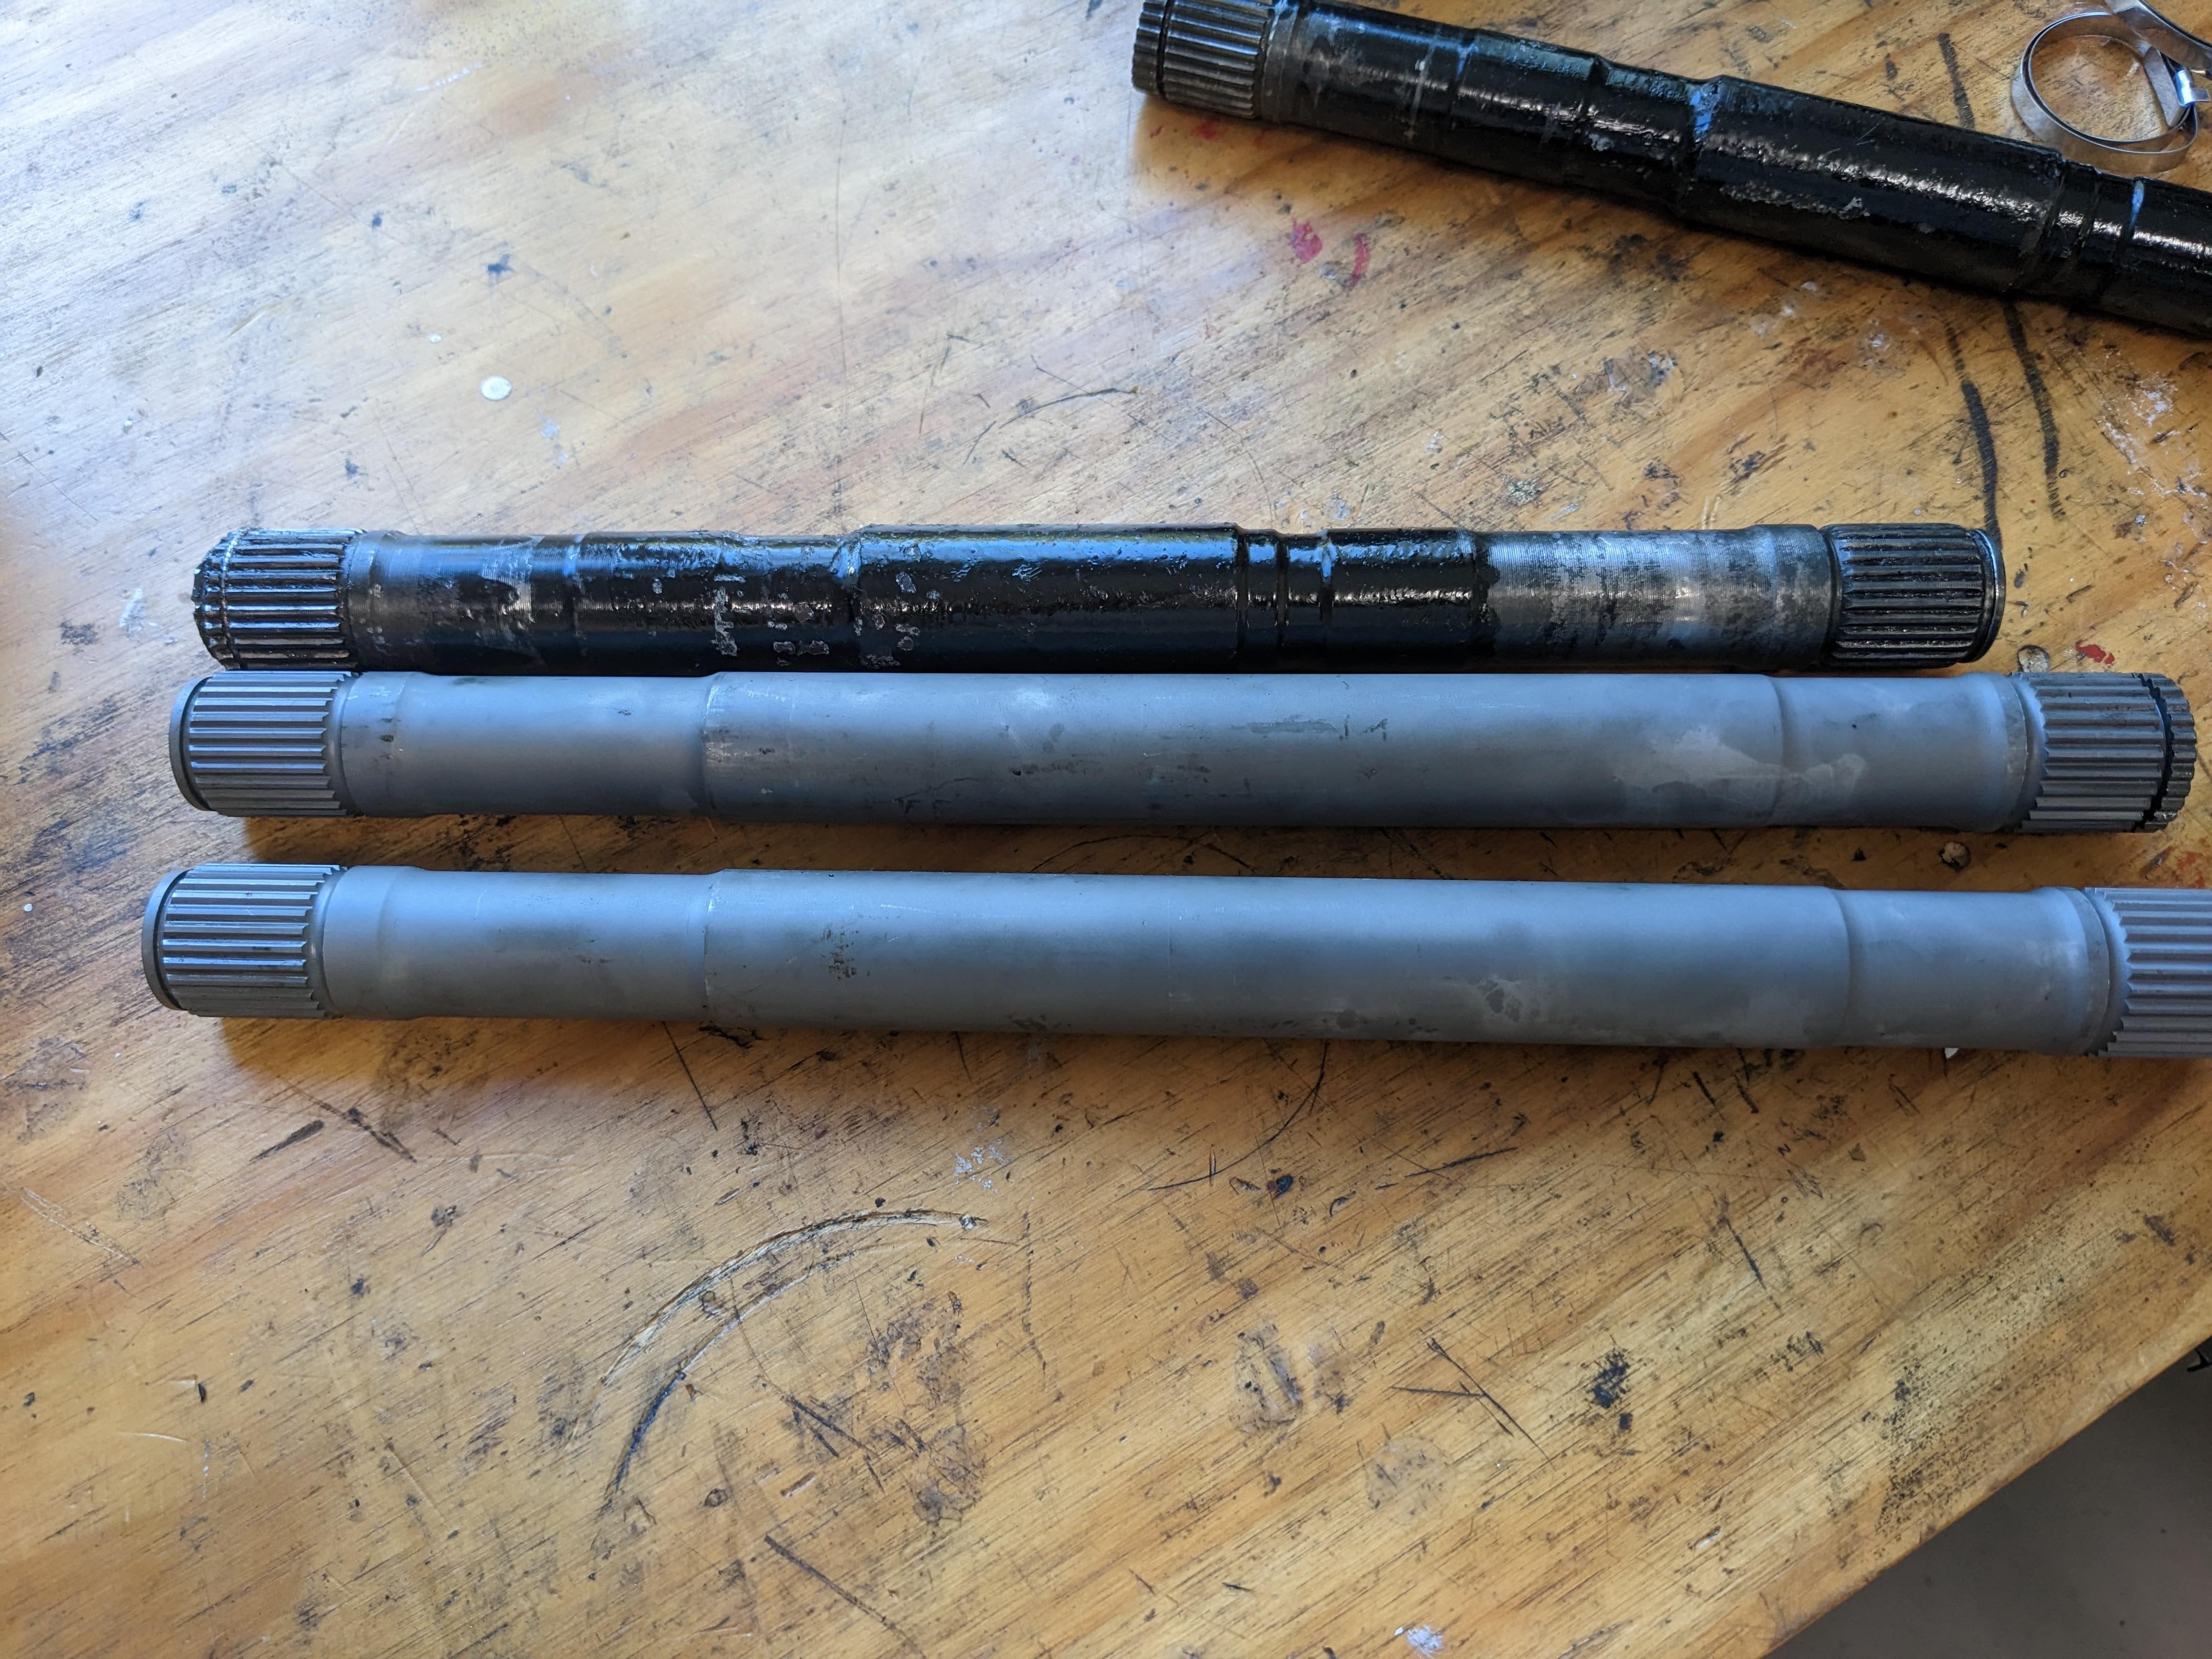
Got some new axles made by Gearcutting Services and she's all go.
3 points
-
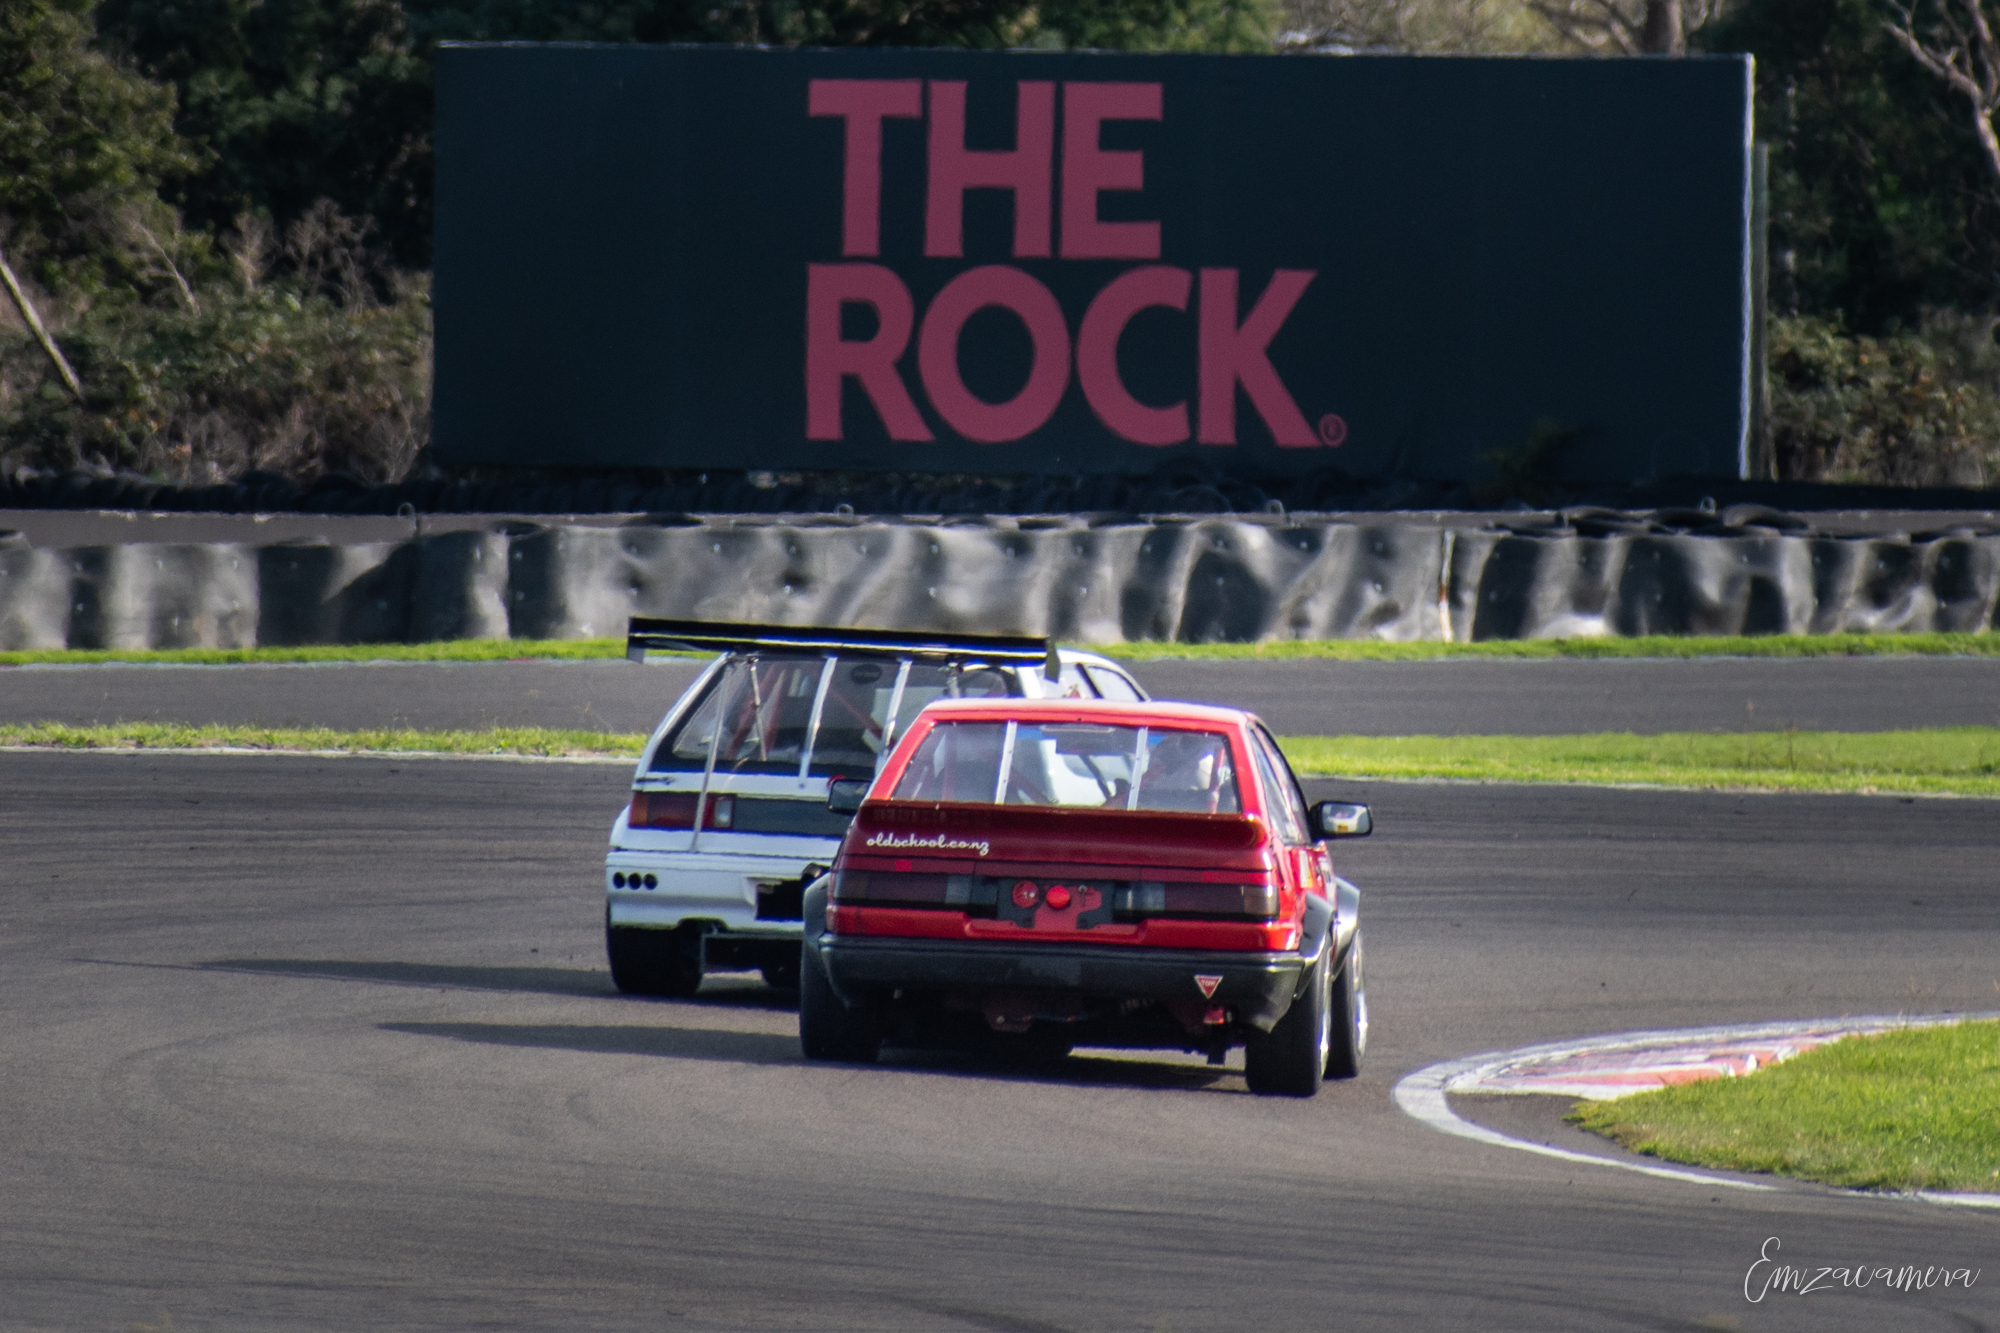
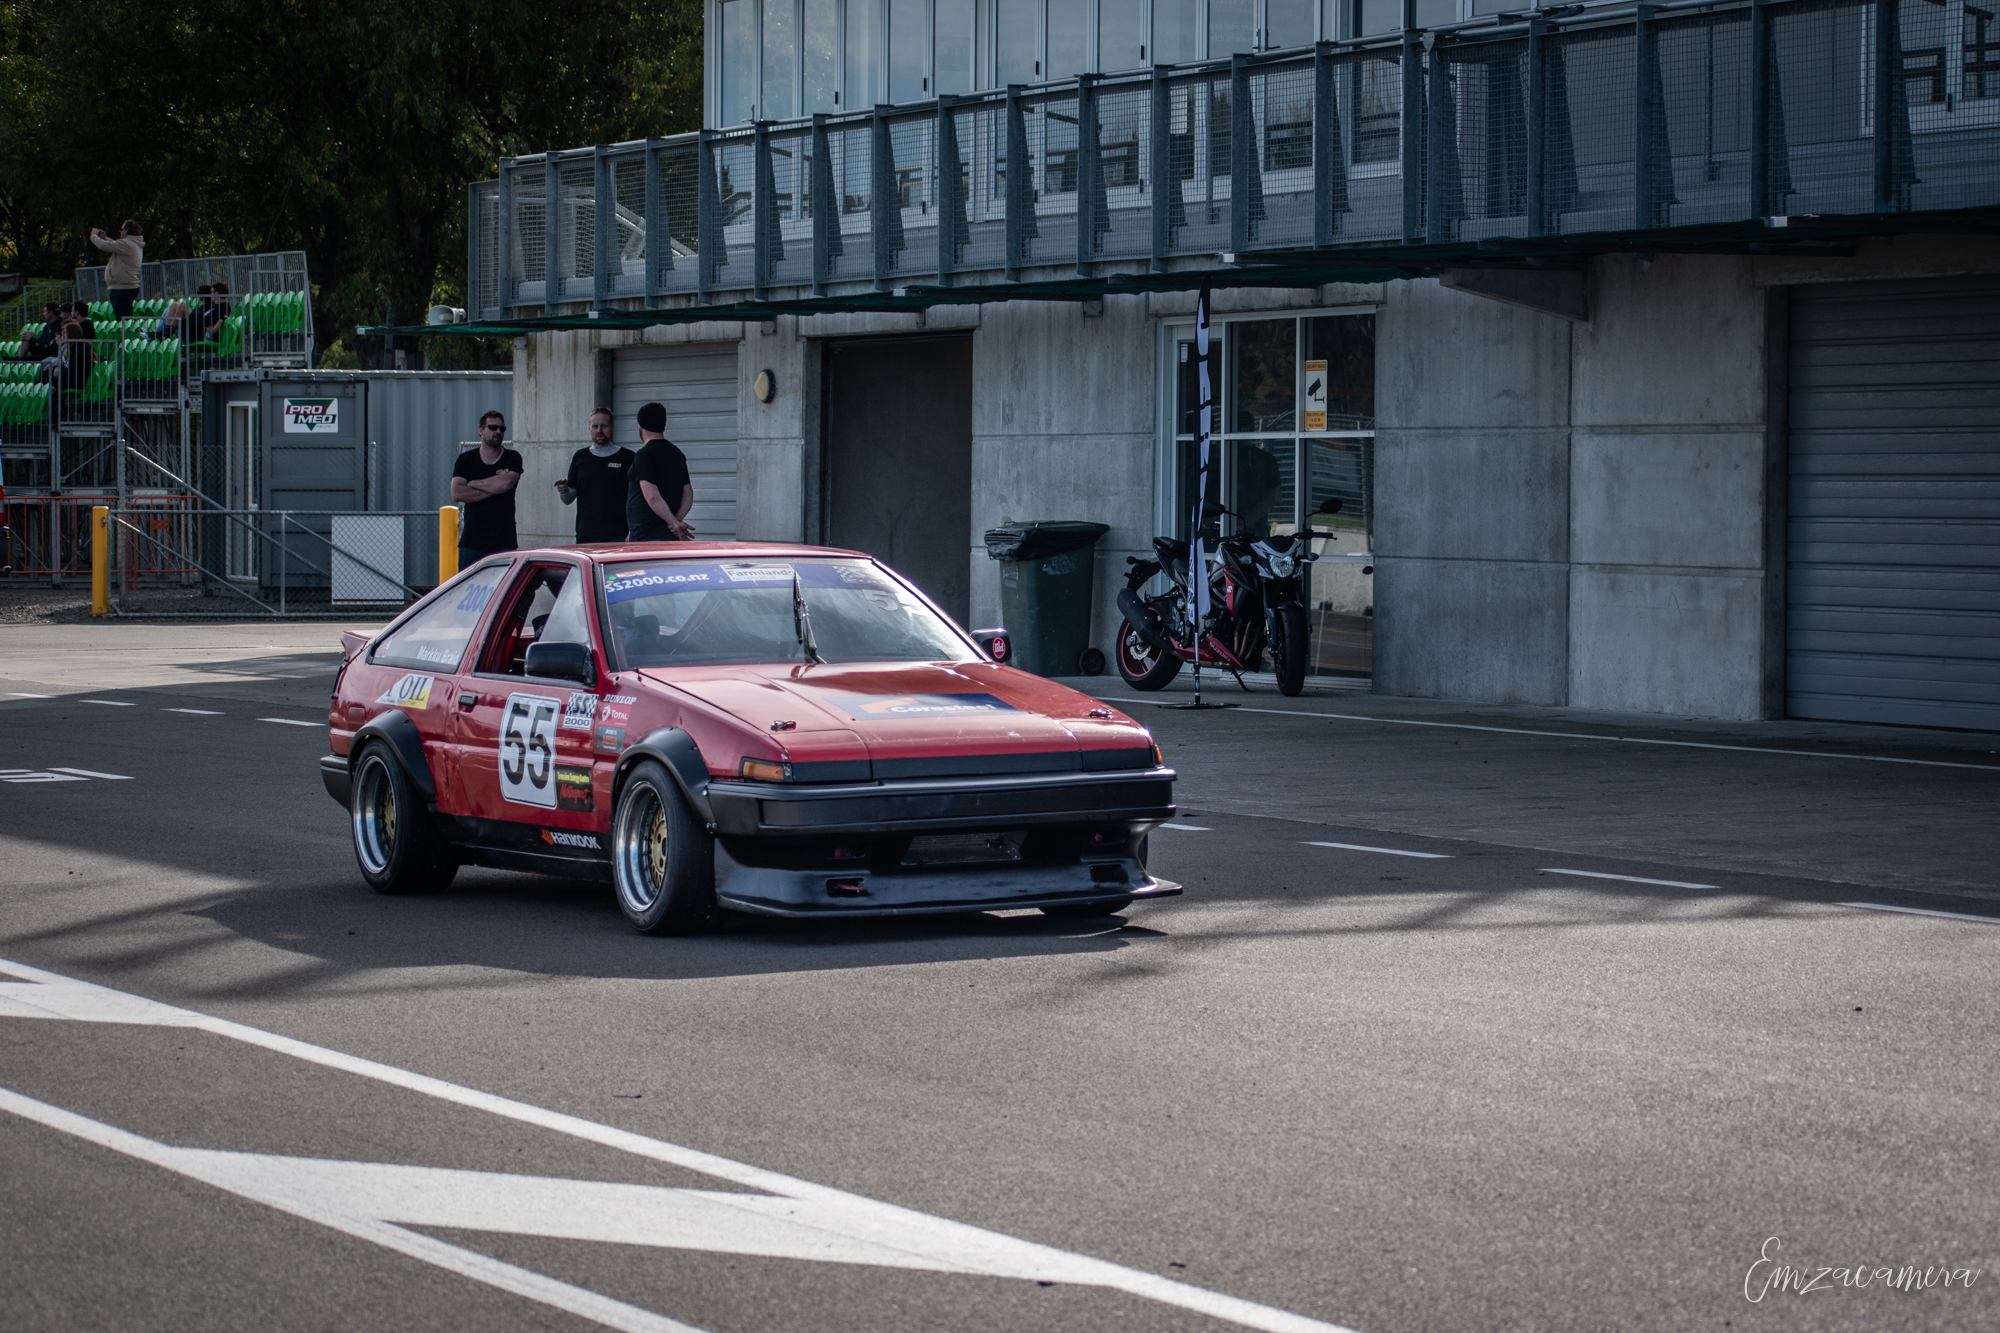
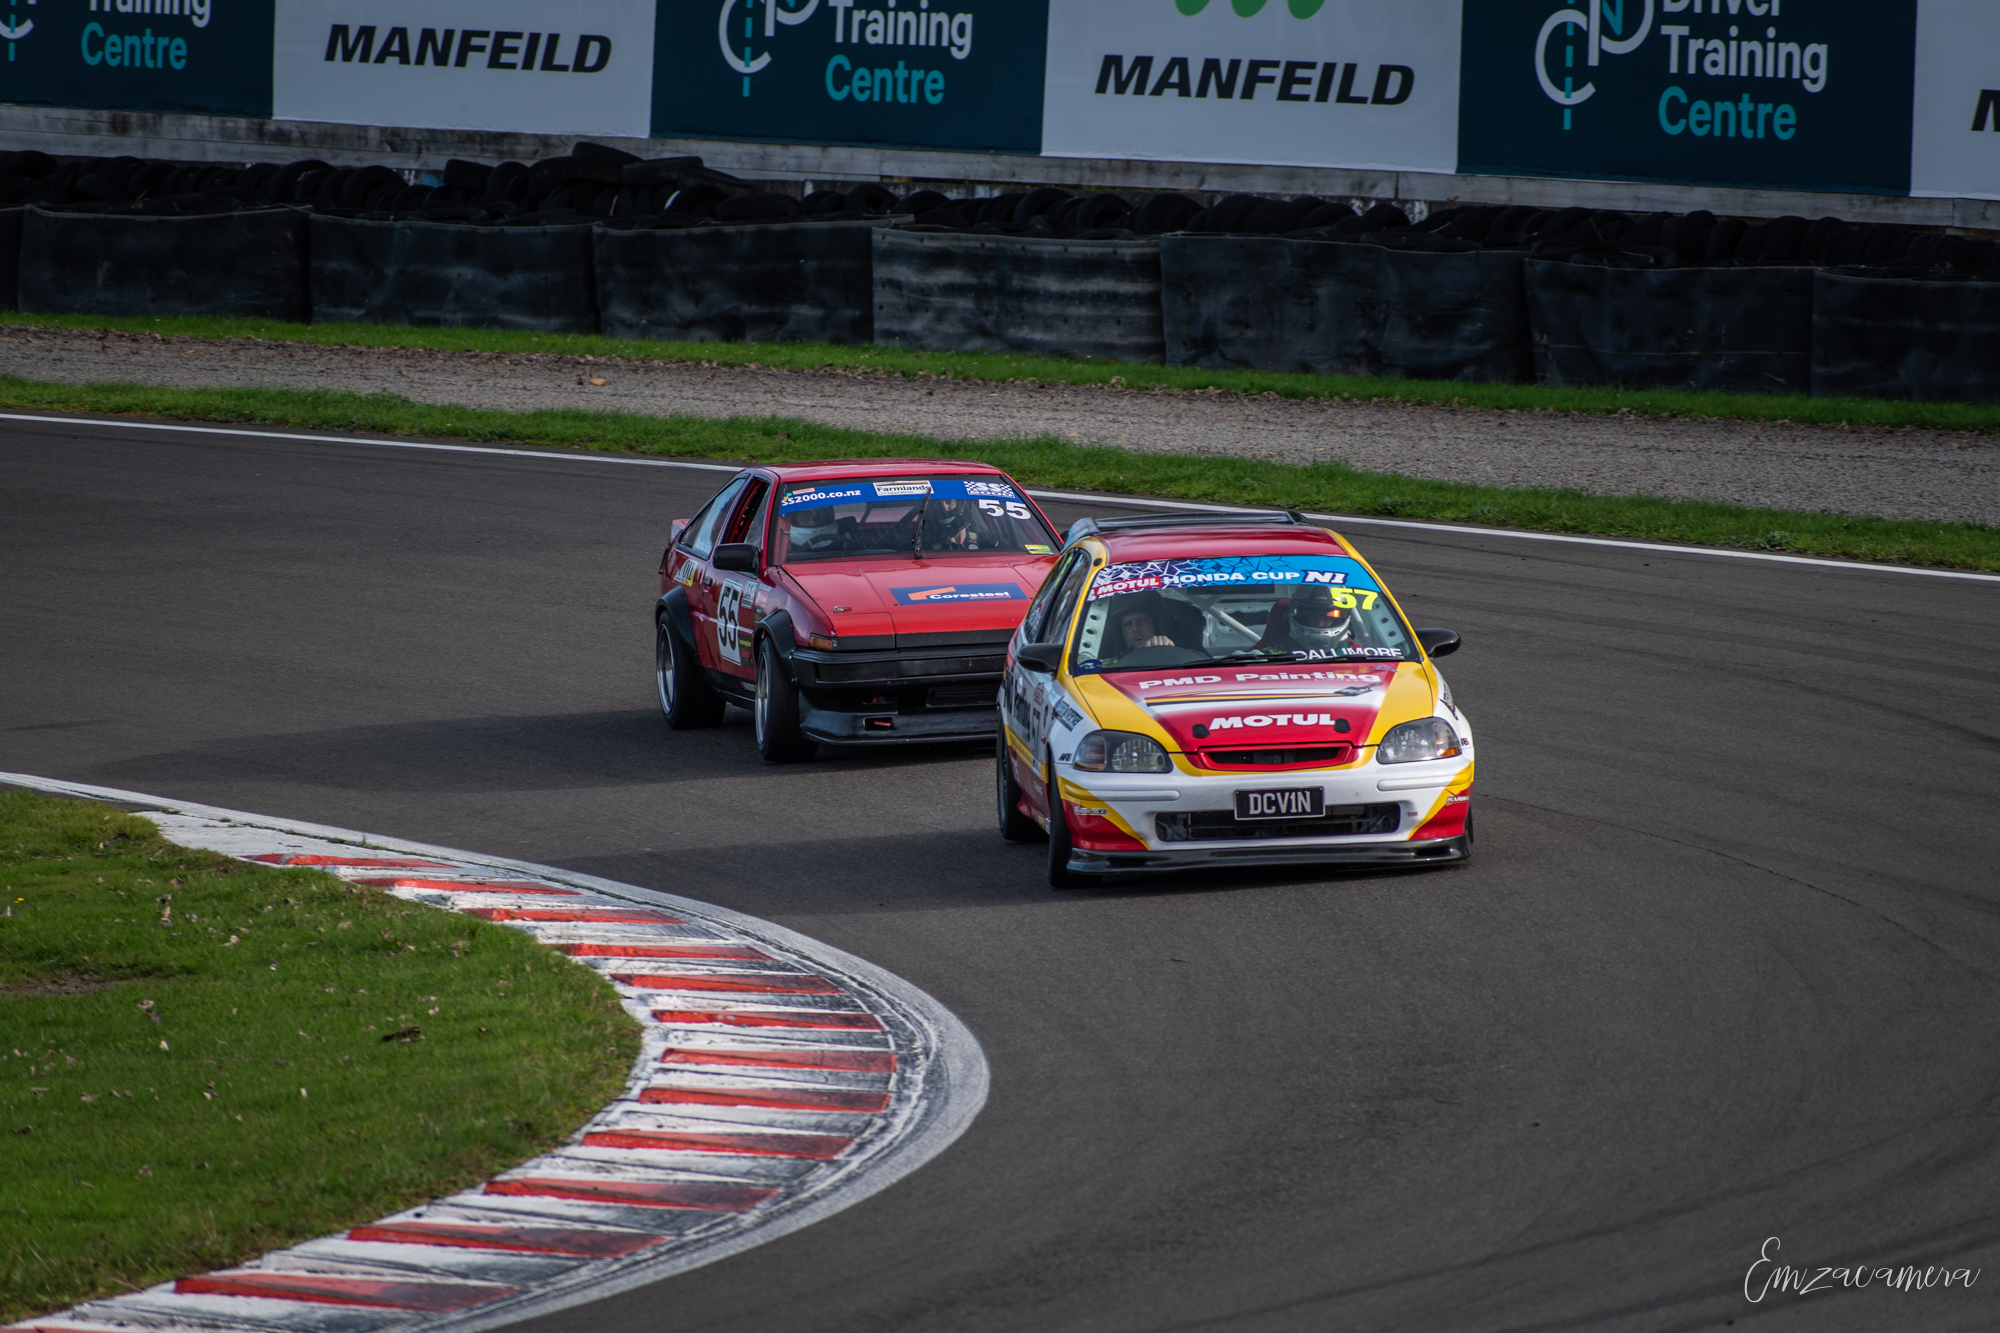
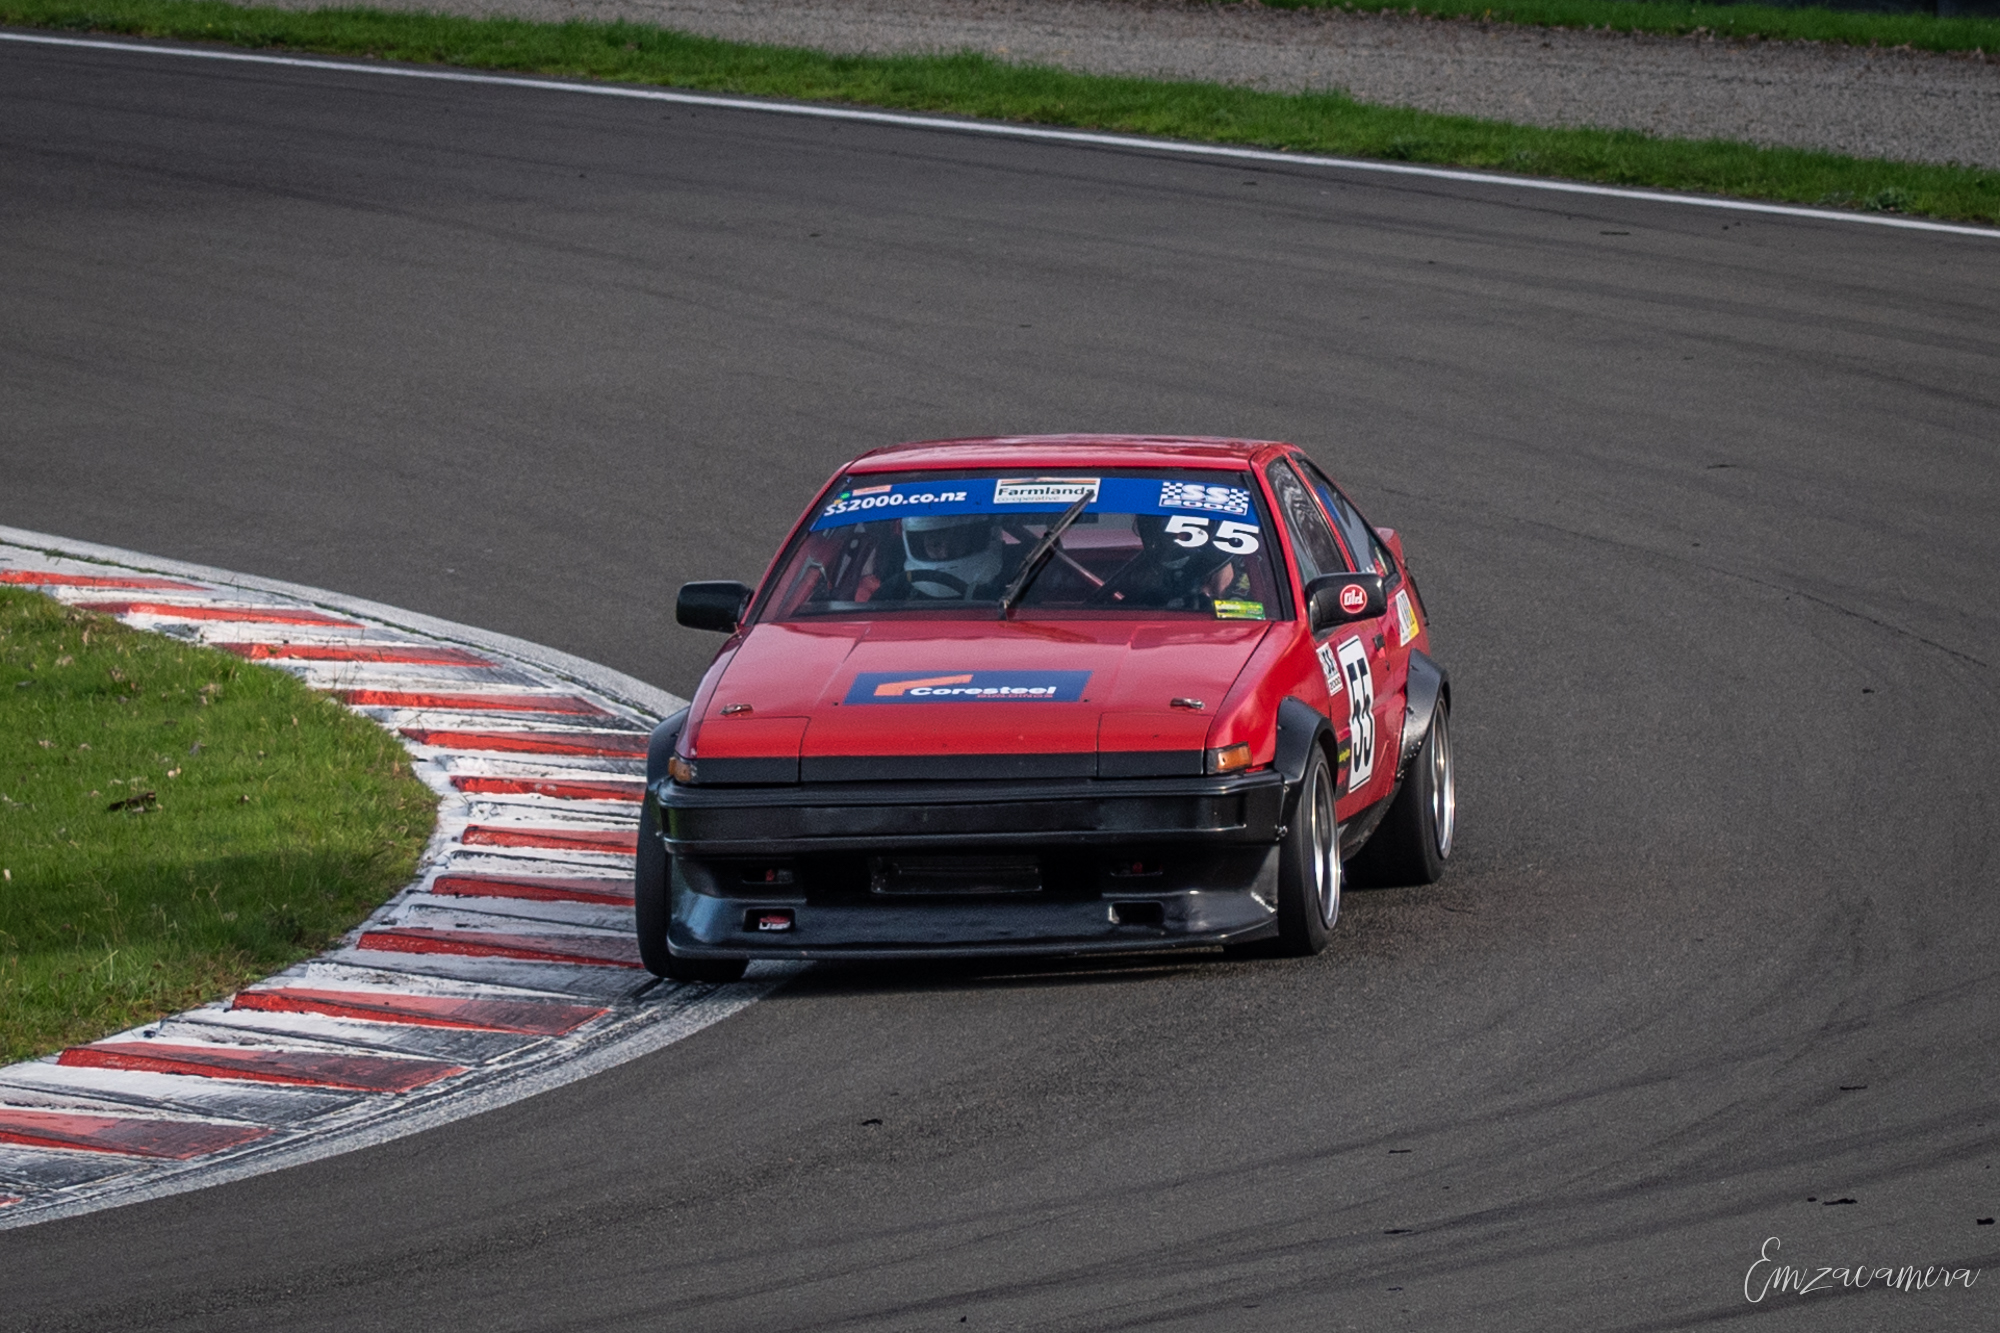
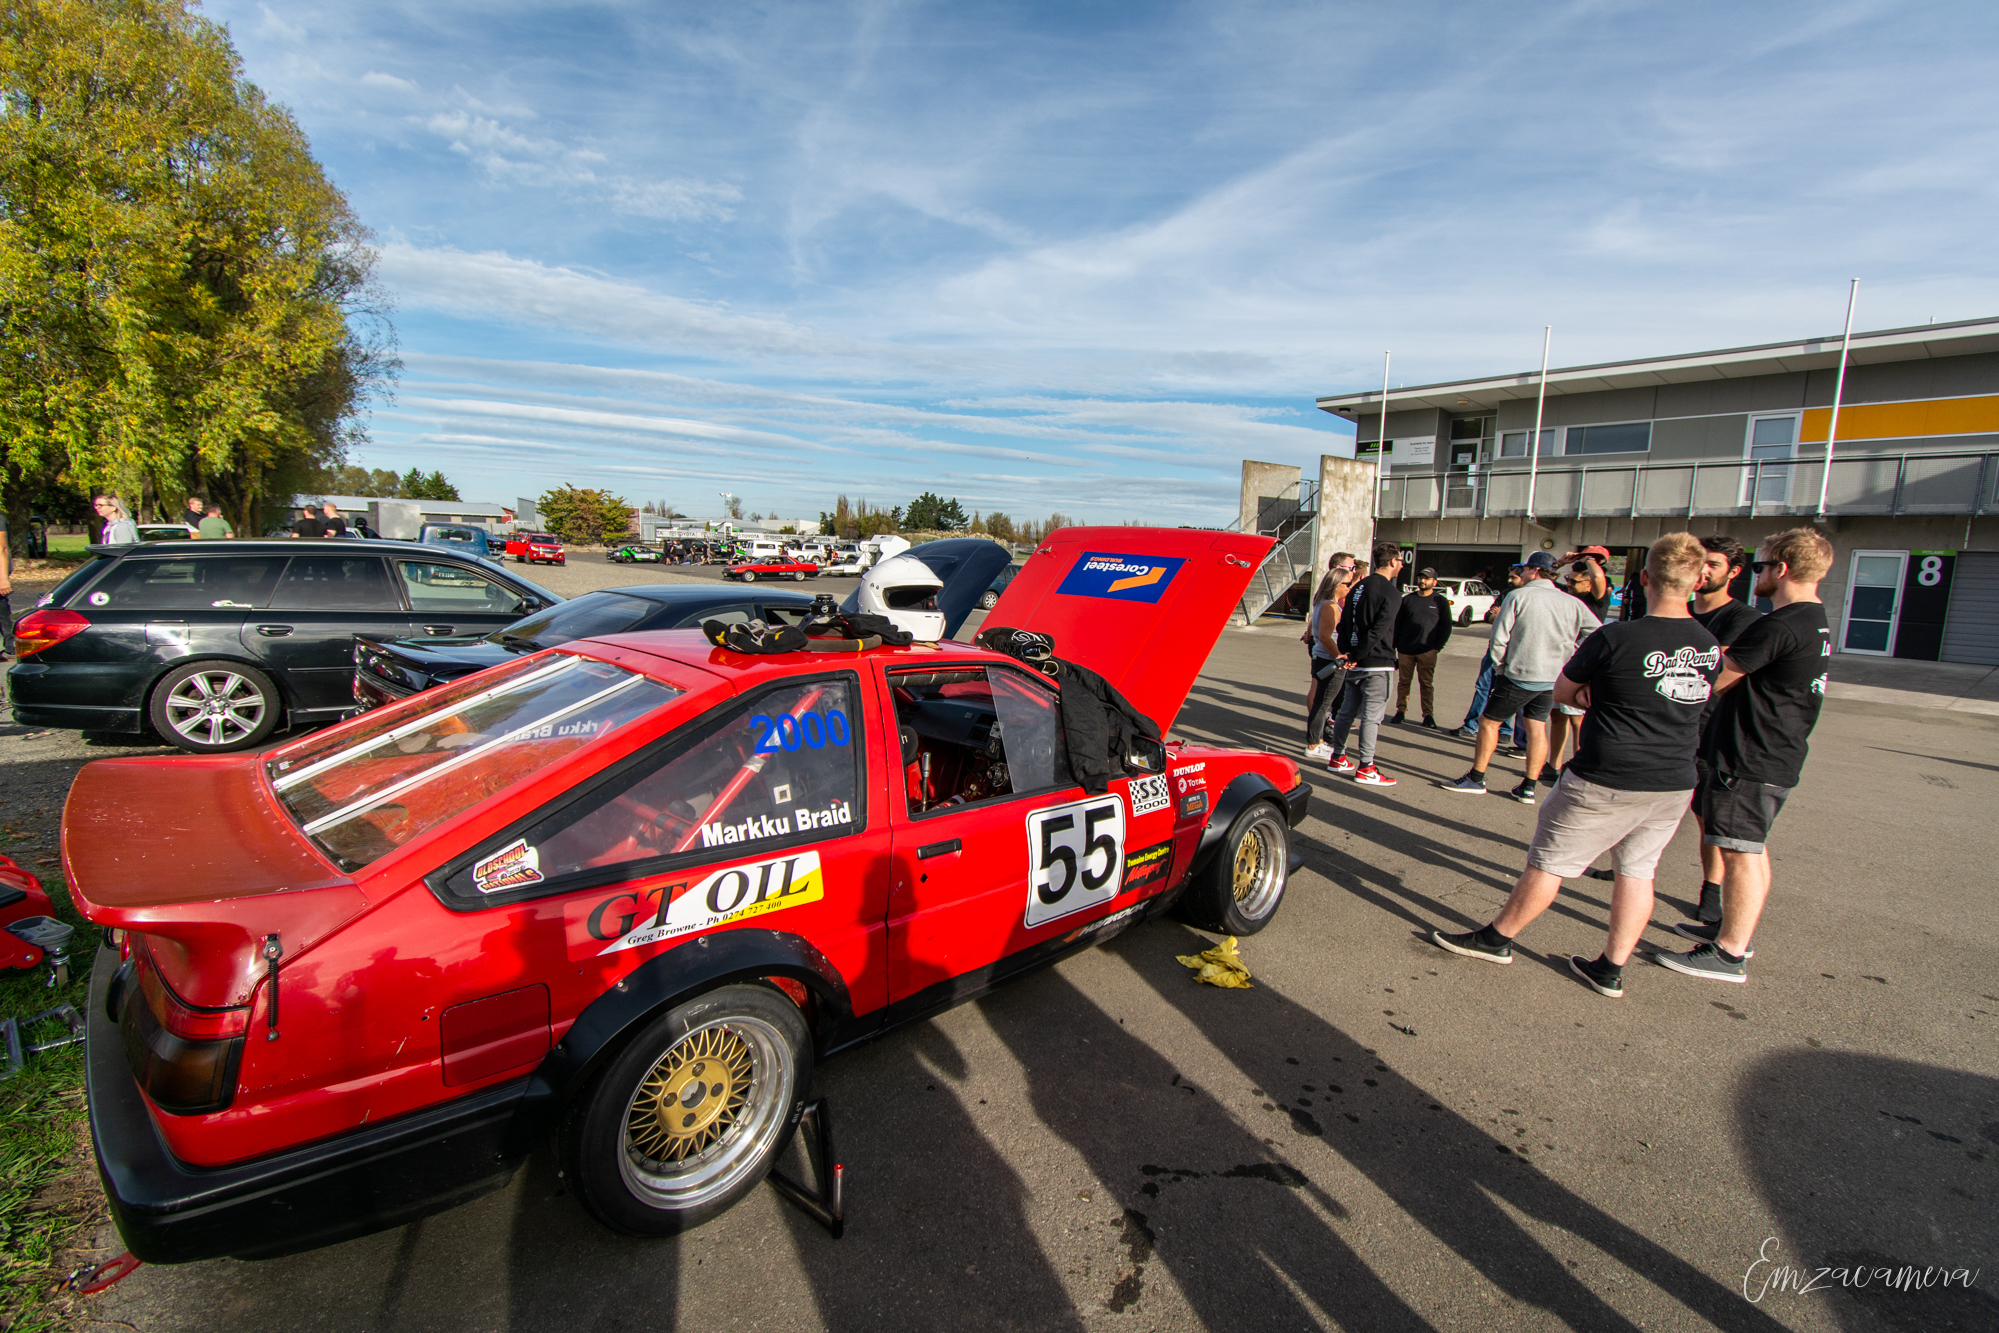
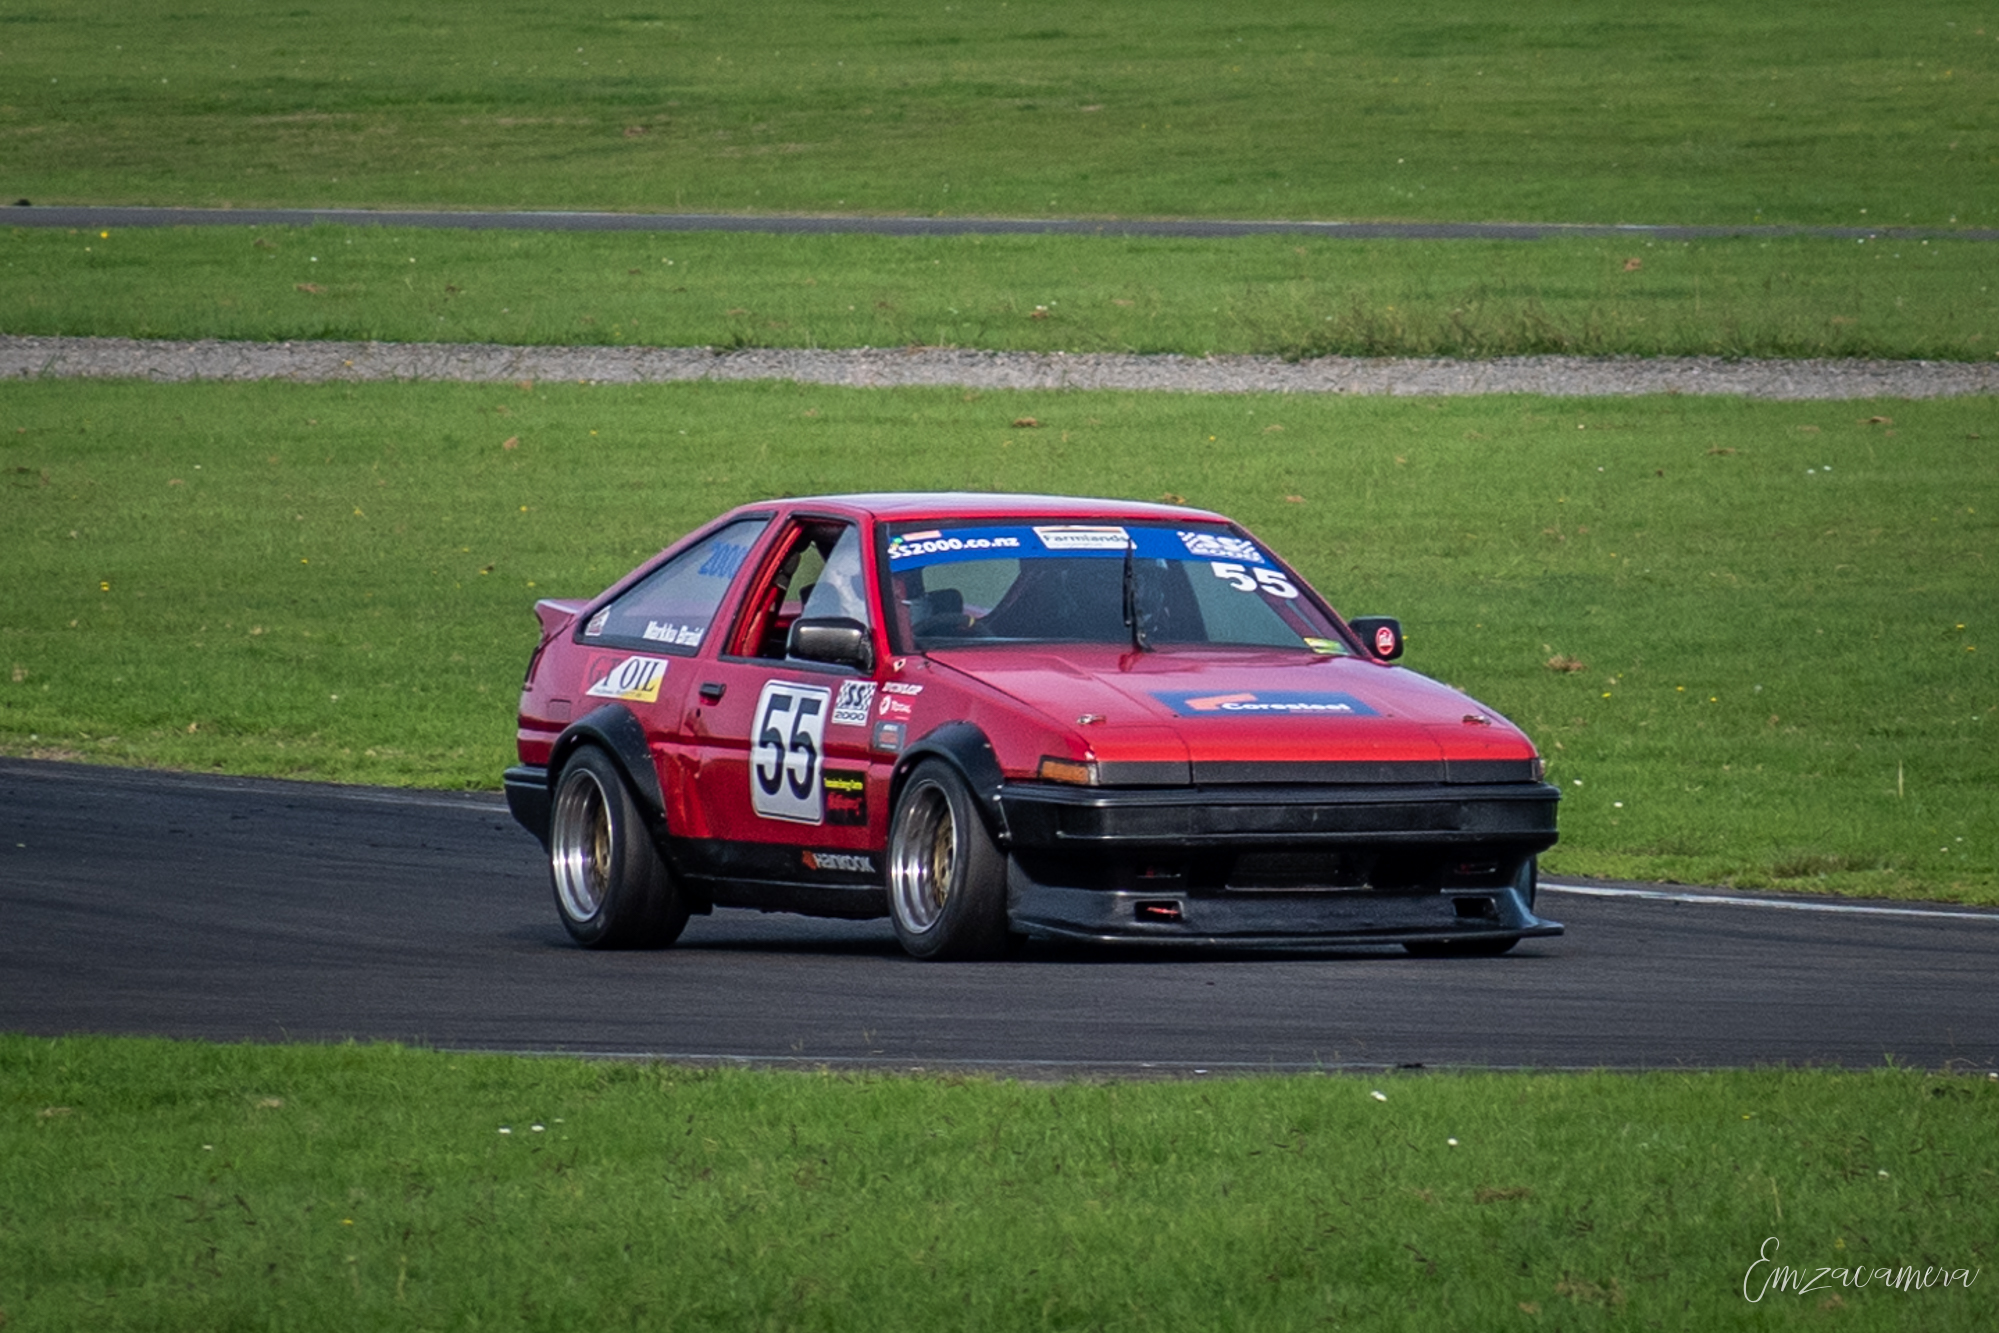
Got the car back together just in time for CJC Gripfest at Manfeild. I mounted a passenger's seat and took a few people for rides including @Mitch.W and @Snoozin. It's the first casual trackday this car's done since Nats 2013, so was nice to get out there and have fun cutting laps. There were a few cool cars to play with! Scott embarrassed me by passing me in his EP71 Starlet (looks like a regular old EP, but is B18C powered). The front bumper is still a work in progress, but I'm happy with the over all look. Thanks to Emma for the photos and videos .
3 points
-
car went to the paint shop to get the runs out of it and get the final cut and polish. i went and picked it up last night and it looks amazing. anywho, today i wanted to fix the exhaust where the flex joint had worn through because its the lowest point and its had a fucking over judder bars and whatnot and subsequently has a hole it in. step 1 - jack up your car. this is where things went wrong. 2021-04-25_02-55-42 by sheepers, on Flickr car slid off the jack on the way up. given what could have happened i got off extremely lightly. it bent the radiator support up and bent the bottom of the radiator real bad. it also bent the bottom of the front bumper. however, the radiator isn't leaking and the crank pulley is unscathed which is a fucking miracle given what happened. i was able to bash the rad support back down and i got most of the bend out of the bumper so it looks fairly normal again. fuck it could have been WAY worse.................. so yea, after dealing with that i moved on to fixing the zorst. cut out the fucked bit, made a new bit, tacked it in place, remove zorst from car and fully weld, add 4mm thick bash plate and put zorst back in car. 2021-04-25_02-55-49 by sheepers, on Flickr 2021-04-25_02-55-55 by sheepers, on Flickr 2021-04-25_02-56-02 by sheepers, on Flickr 2021-04-25_02-56-09 by sheepers, on Flickr 2021-04-25_02-56-21 by sheepers, on Flickr then it was time to wax the newly polished paint. that went well. it looks pretty ace tbh and yea, i cant take a photo that justifies how good it looks. but it looks good. take my word for it. 2021-04-25_05-34-27 by sheepers, on Flickr 2021-04-25_06-18-48 by sheepers, on Flickr 2021-04-25_06-19-23 by sheepers, on Flickr 2021-04-25_06-32-09 by sheepers, on Flickr3 points
-
Yep absolutely! “She’s a 20 footer, and don’t slam the door!” When sourcing parts I kept coming up with ‘repair caps’ that you just zing over your chassis rails. impending doom!2 points
-
In some cases in the land of freedom, that's the repair, lol I have a customer with a first gen camaro that didnt quite look right, he had it blasted and it had double rear panels, the original rusty ones were still there2 points
-
Yeah, I didn't actually mean to offend anyone with the earlier comments. It would be great if we could all get out and do stuff with no commitments2 points
-
I did one similar not that long ago and another similar not long before that along with several other forum members. So ahh.. Not true?2 points
-
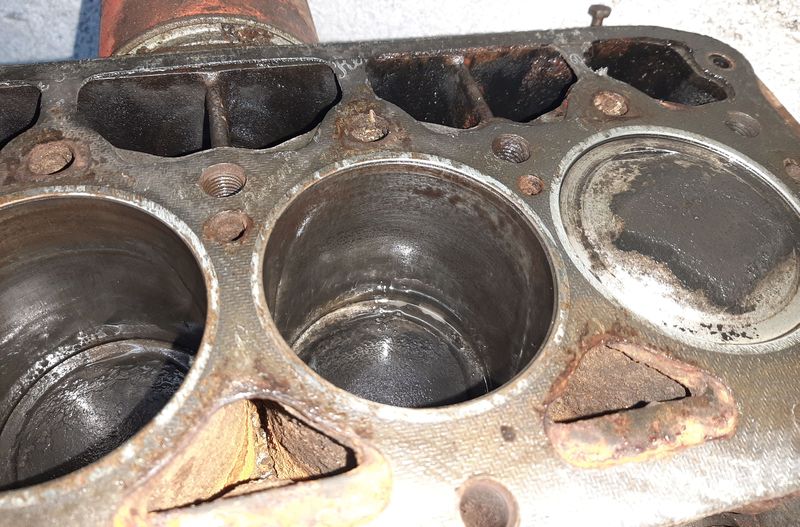
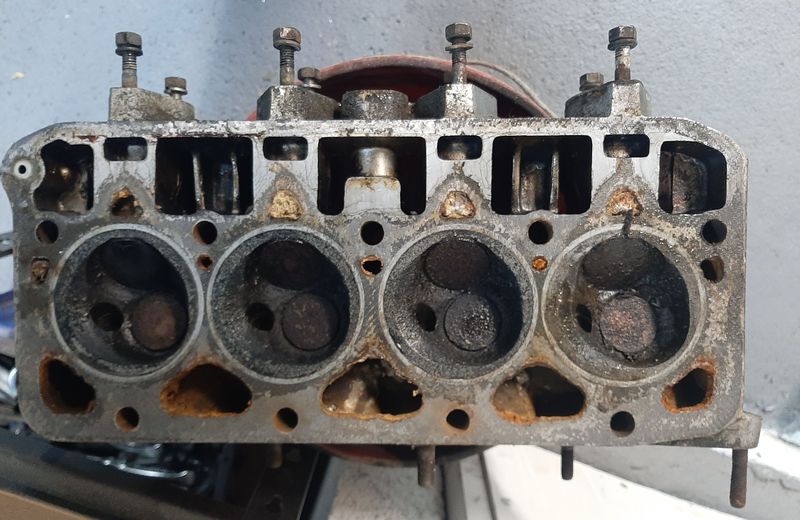
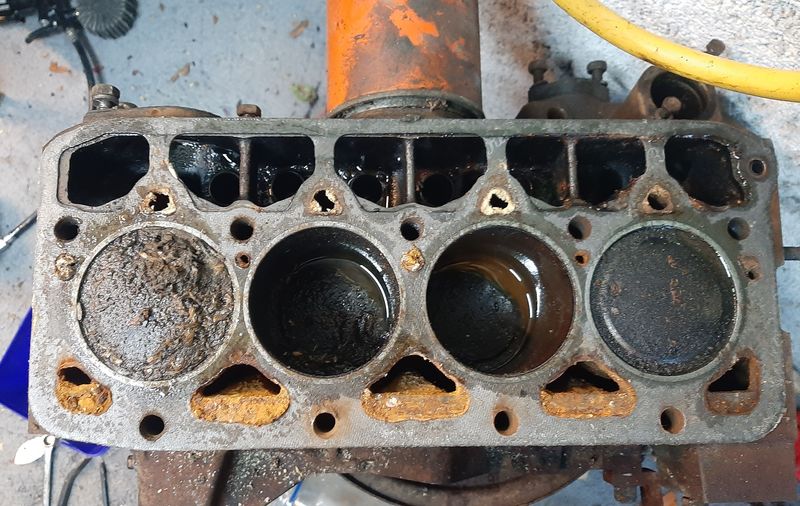
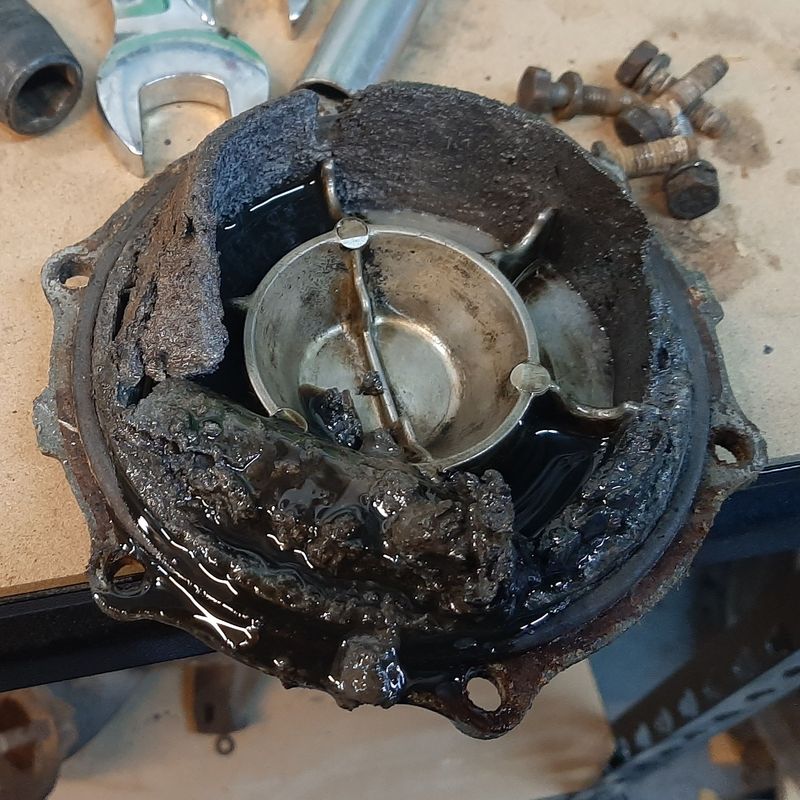
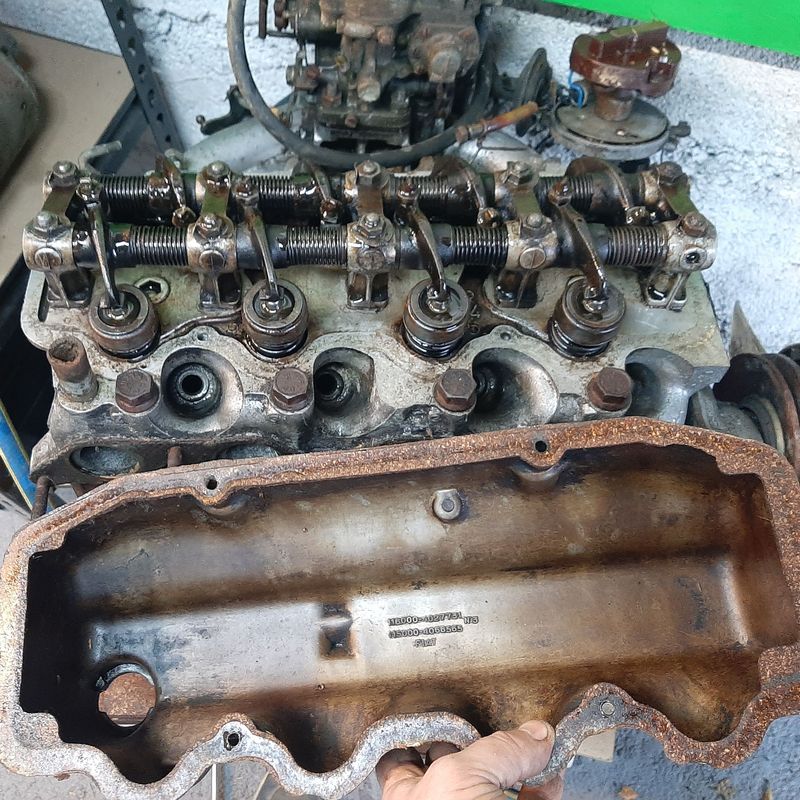
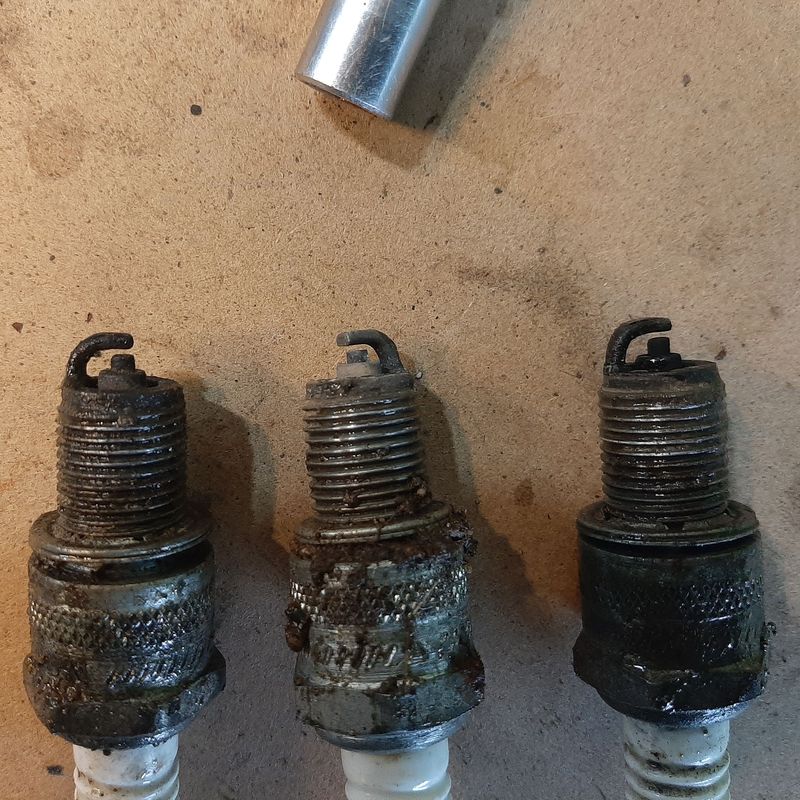
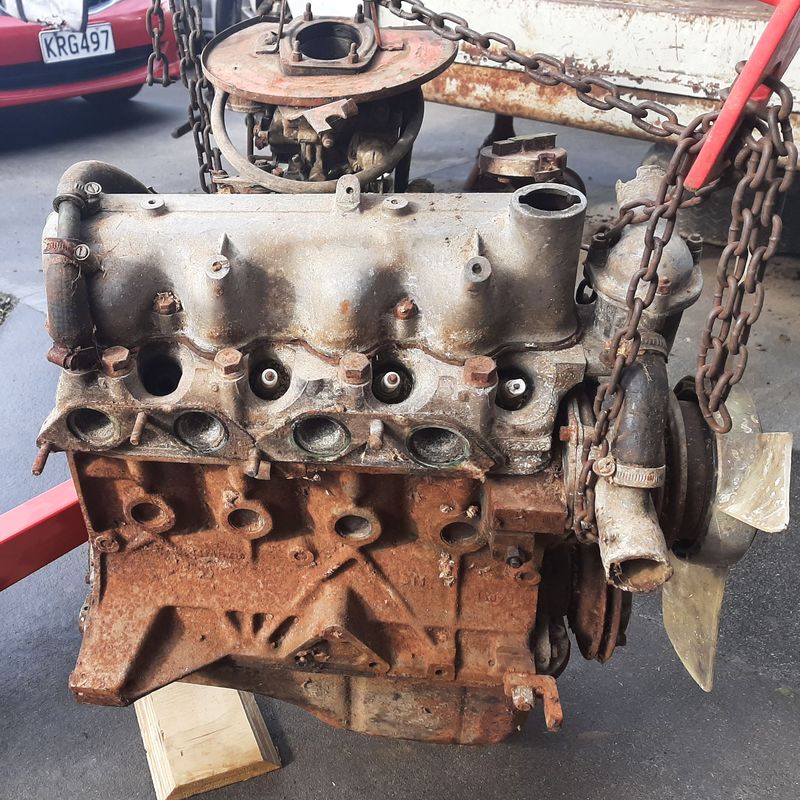
I got a engine crane for my birthday, so i yoinked the spare engine from the boot out and ripped into it. Its a 115.000c engine which was probably from a Fiat 1500 sedan or Crusader based on a Solex carb it has. This would have been the factory engine in my 125P Ute and is also the 2300 engine less two cylinders, so shares a lot of parts and design It only had three spark plugs, no air filter and no oil cap, with grass seed and mouse nests everywhere, and appears to be seized. Perfect. Remaining park plugs out look not bad, not too bad at all, not bad. Hmmm. Valve cover off, well, would you look at that. Bit of crud under the open oil cap, but otherwise clean I guess? Centrifugal oil filter says, well maybe you shouldnt get too excited, just yet... At this point the effort of getting the crank nut loosened the engine shifted. Some more oil down the cylinders and it moved nearly 360 both ways. Couple of the valves were sticking so Head off, Mouses grass seed and fluff so tightly packed in on the inlet valves it was actually stopping the valve from closing again. Ill chuck it in the vinegar for a bit it should clean up i reckon, no damage, just grub Guess which cylinder had a and a mouse living in the spark plug hole! However thats a pretty new head gasket, can still see the writing A bit more brake clean and the pistons look shiny! Bores are a bit surface rusty in a few spots as expected but no scoring, i reckon a hone might be all it needs. This is after some worn out wet and dry and wd40 for about 20 seconds on the worst bit Need some M12 x 1.5 bolts to put it on my engine stand, then ill remove the pan.
2 points
-
oh, hi!! so yea things have been great with this car. except the output bushing on the gearbox is flopping around and subsequently the output seal is leaking and flinging oil all over the exhaust. this is shit. the gearbox has only done a couple thousand Ks since it was brand new from Toyota. apparently this is fairly common on the new R154s which fucks me off even more. I've fucked around with changing the seal multiple times and all the other usual checks but it just keeps on leaking. cool. so to fix it i have to take the motor and box out because of the whole massive drive train/small car thing so out the motor comes. its fairly depressing taking a motor, that you have worked very hard on to make as new and shiny as you can, out of a car and seeing all the road grime and shit on it, as well as all the crap that goes everywhere when you start taking things apart. well, its what has to be done so away we go. not sure what else ill do while the motor is out. im not 100% happy with the clutch i put in it. its juddery and grabby at take off which sucks so that may change. fuck knows.............. anywho, first step, jack up your car. 2021-05-04_05-59-44 by sheepers, on Flickr2 points
-
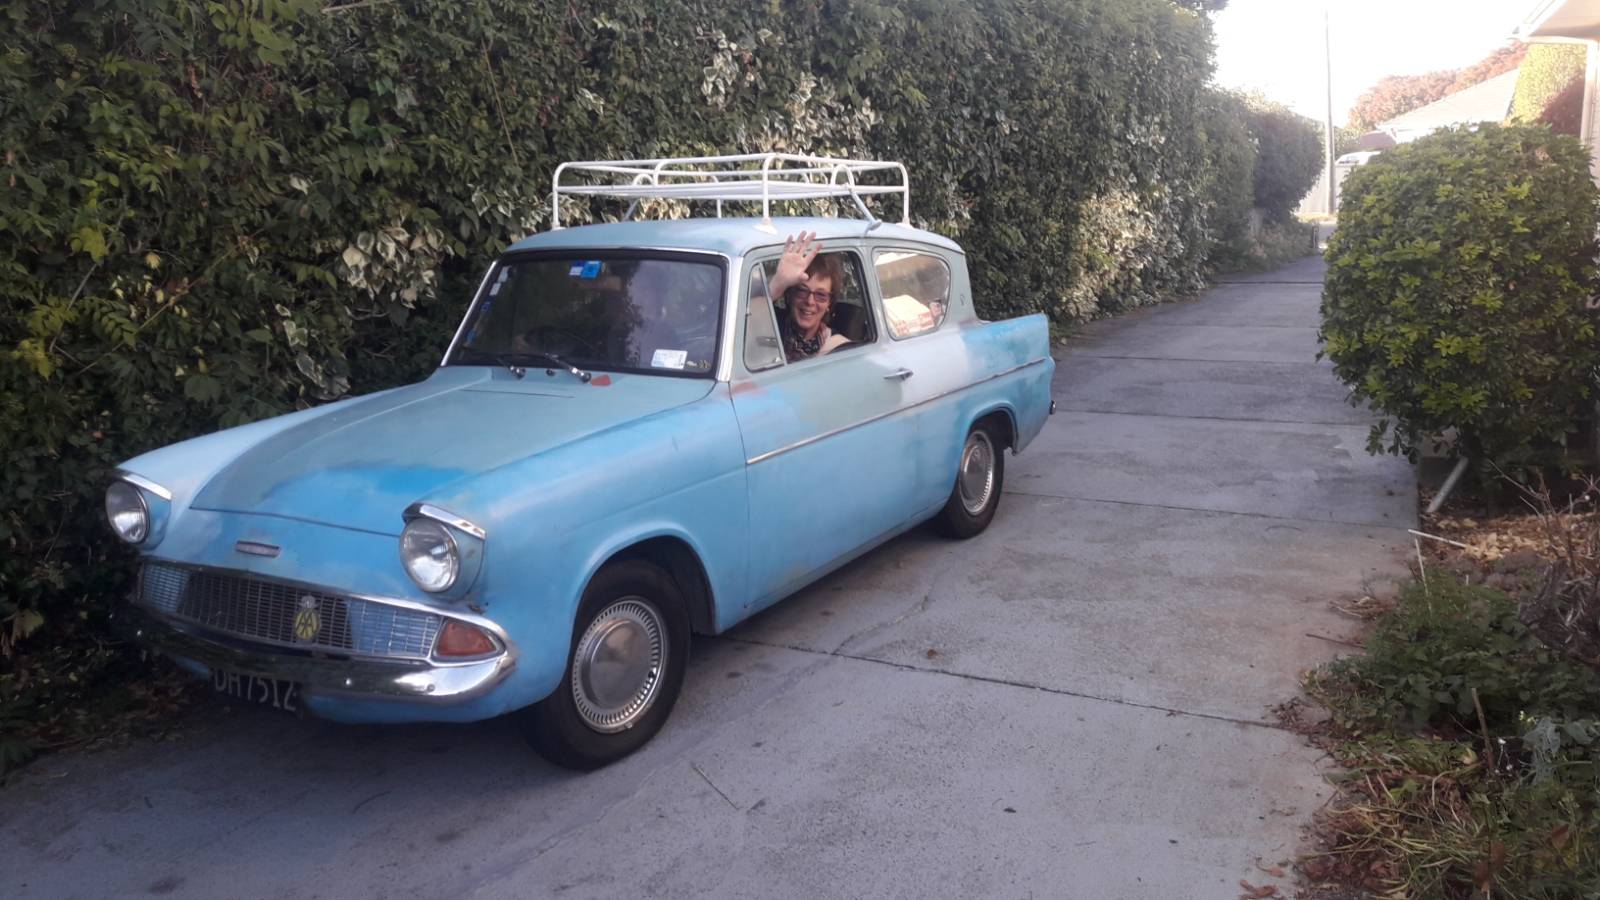
They say the two happiest days of Birtish car ownership are the day you get the car and the day it leaves your life. Well the other day it left my life (at least for now). My dad is taking it on a long road trip. He is taking it to Auckland, via the bottom of the South Island. They're staying at Lake Hawea tonight. I think their trip will be complete by around about the 15th. Hitting the road: Somewhere in Mt Somers I believe: Lindis pass (actually surprised it still ran up there): He insisted on taking the roof rack with it. I bet it uses 25% more fuel now. When it gets up to Auckland my brother will paint it and we will try to track down the few remaining bits that it needs to be complete and then will stick it on the market. I'll keep this updated as the photos from the trip come through. Feel free to add any spotted photos if you see him on the road.
2 points
-
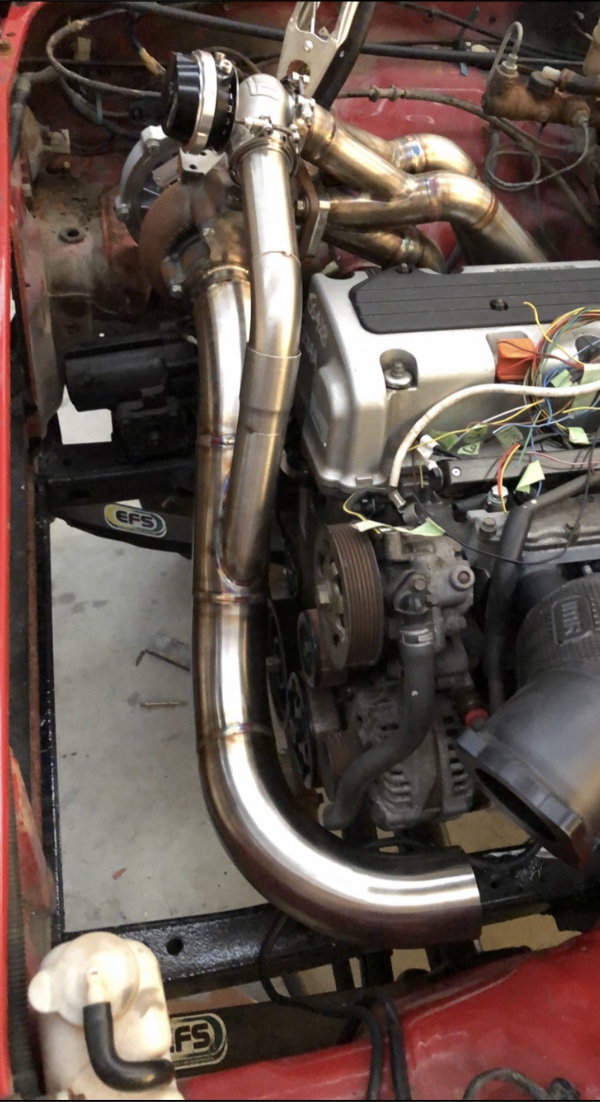
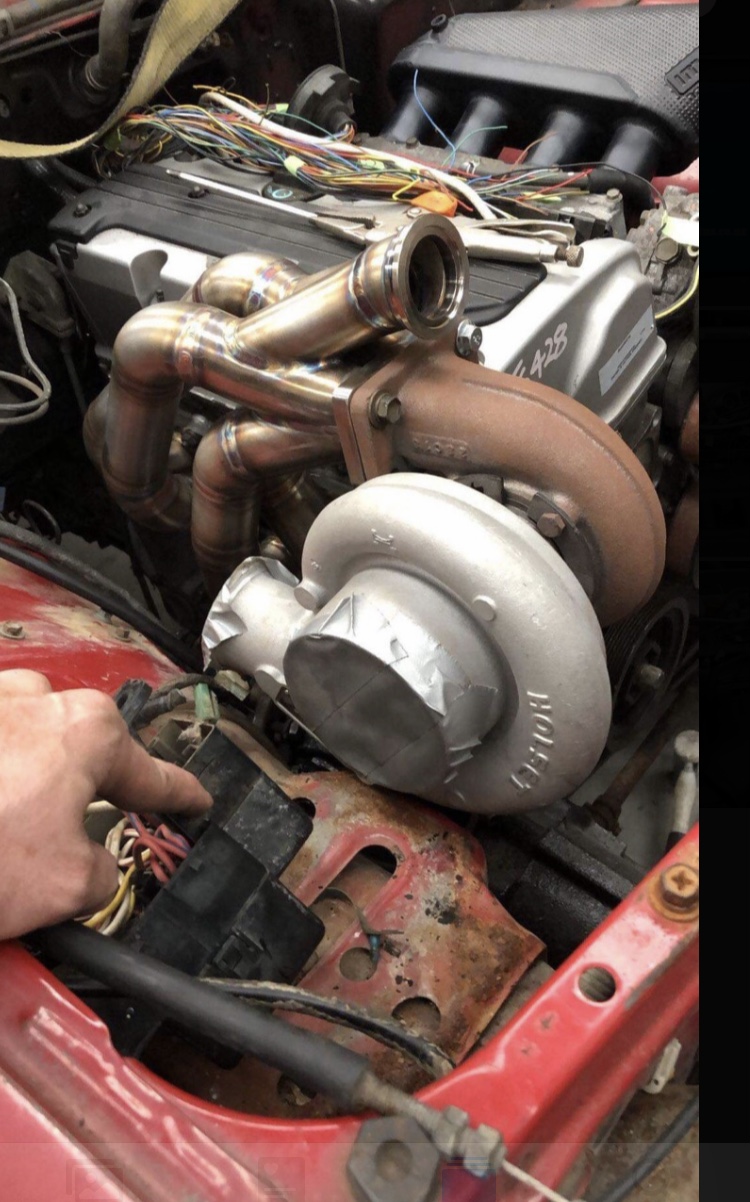
Was expecting this to die 18 months ago thrashed snot out of it ran it on kerosene while i got it for free. Played with tuning etc its been through a lot and just keeps running doesn't burn oil or use water....... now ive said this it'll probably blow a head gasket on way to work tomorrow. Just needs to last till i get new engine in.1 point
-
Id just like to have a job that meant I could daily my shit, but still get free gas.....1 point
-
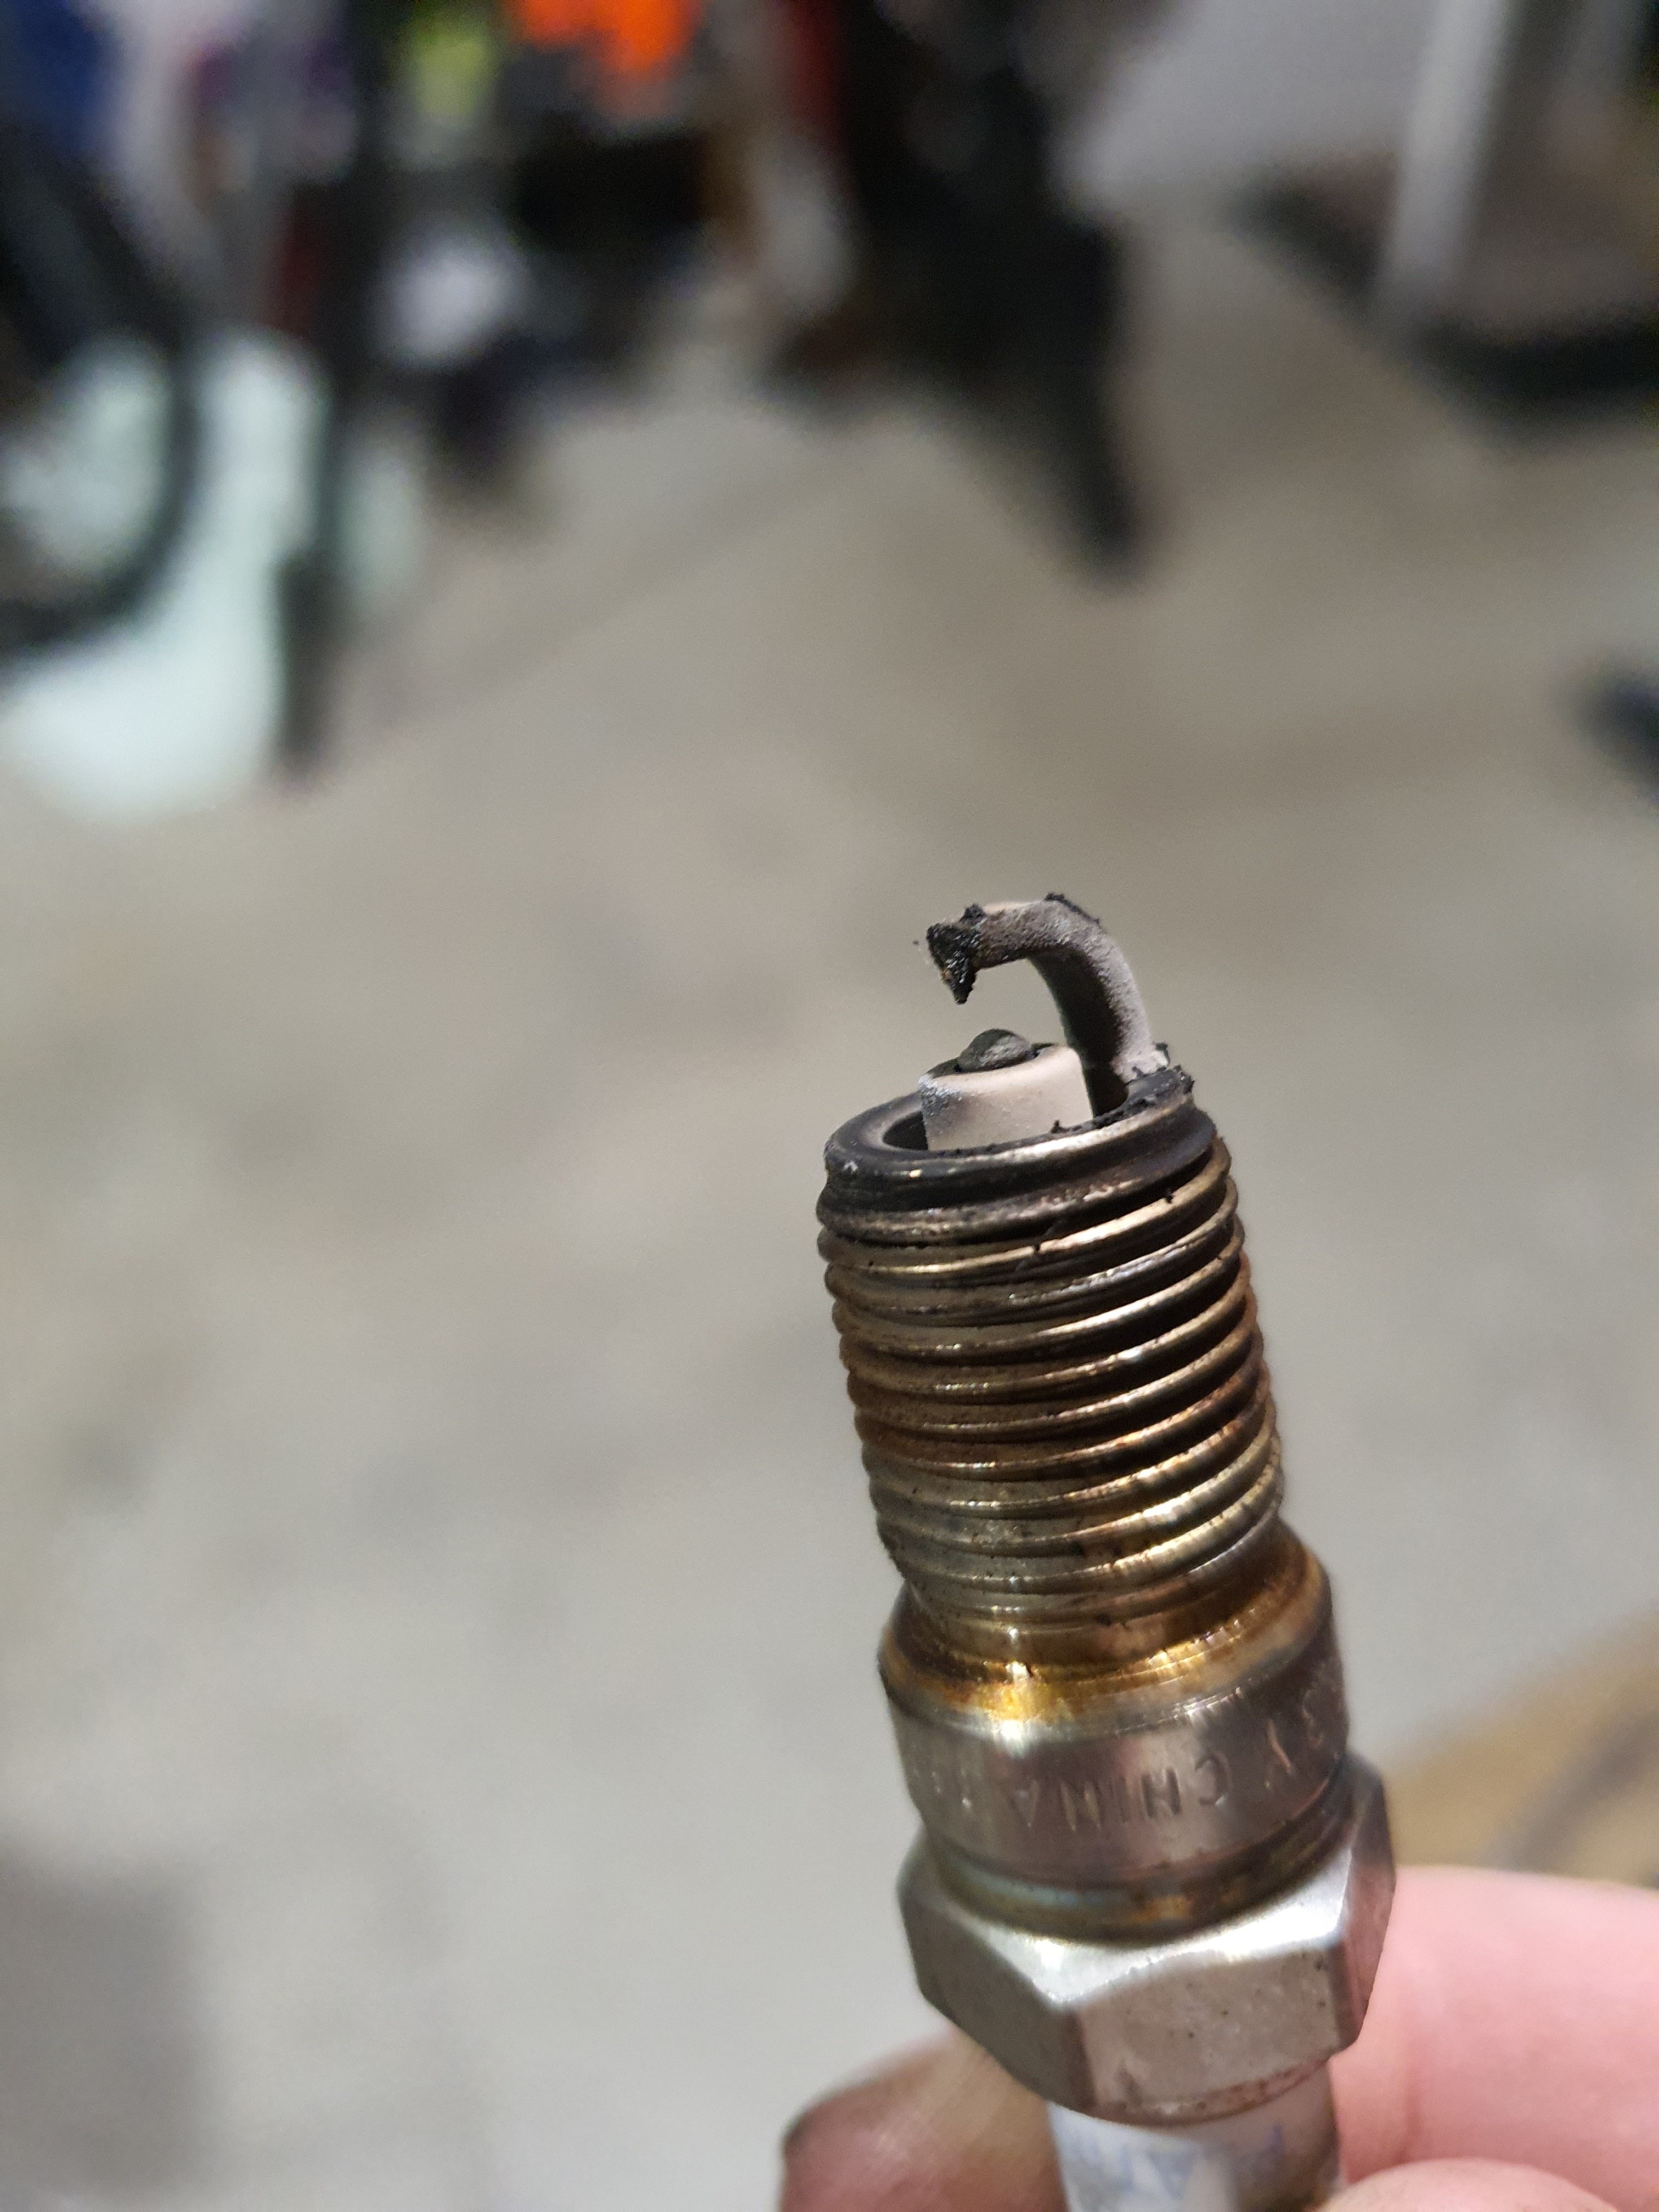
Randomly shit a coil pack on the ecotec last week limped home running on 4 fitted a spare complete ignition module from my hoard back in action and only hour late to work. Something must of caused it though so rockauto'd some new plugs what do ya know 2 melted electrodes so probably 2mm spark plug gap that'll do it.
1 point
-
Yeah I'm just happy I found something to stick them down securely. The Inner sleeve is a shit greasy plastic that the superglue had zero adhesion to. It just flakes off. I think I'd have died of old age before these grips will need replacing from wear, knock on wood lolololol1 point
-
its more no car than mopar look foward to some big black panels1 point
-
crikey! good thing you're the man for the job. will be well worth the effort!1 point
-
This is most excellent. 2ZZ will be super sweet in this!1 point
-
1 point
-
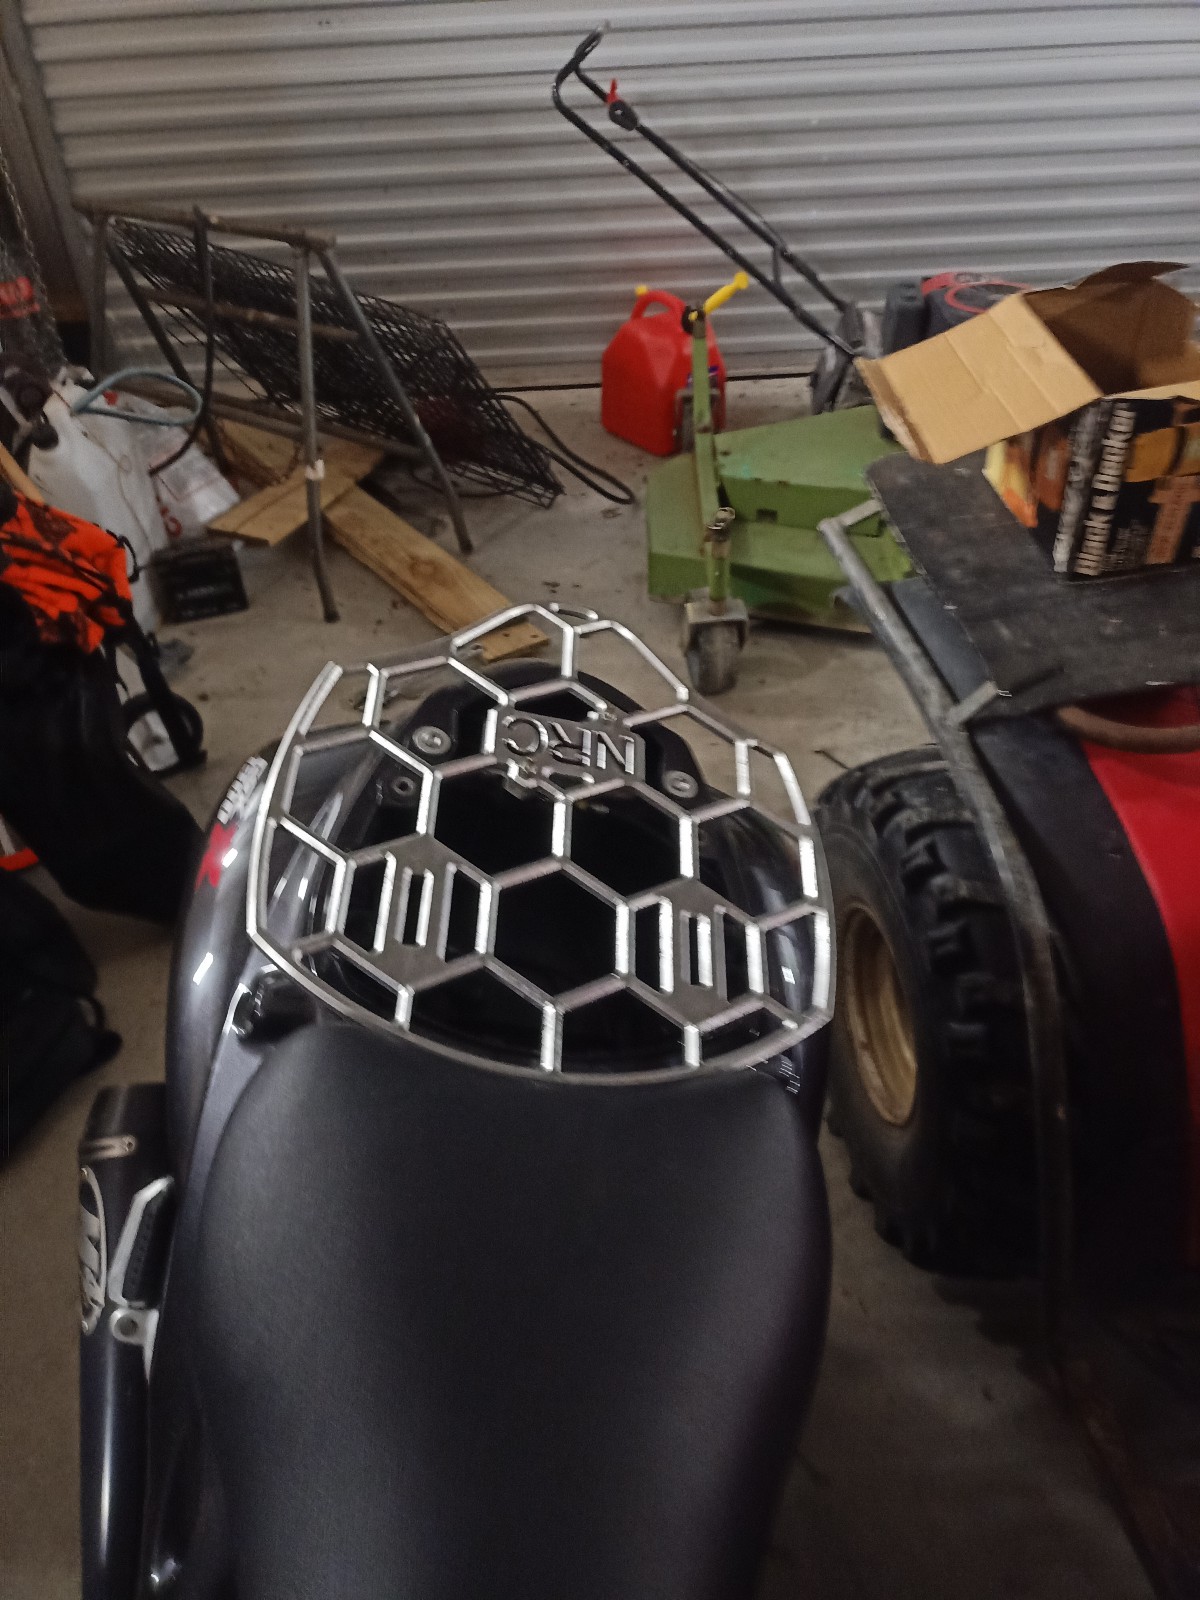
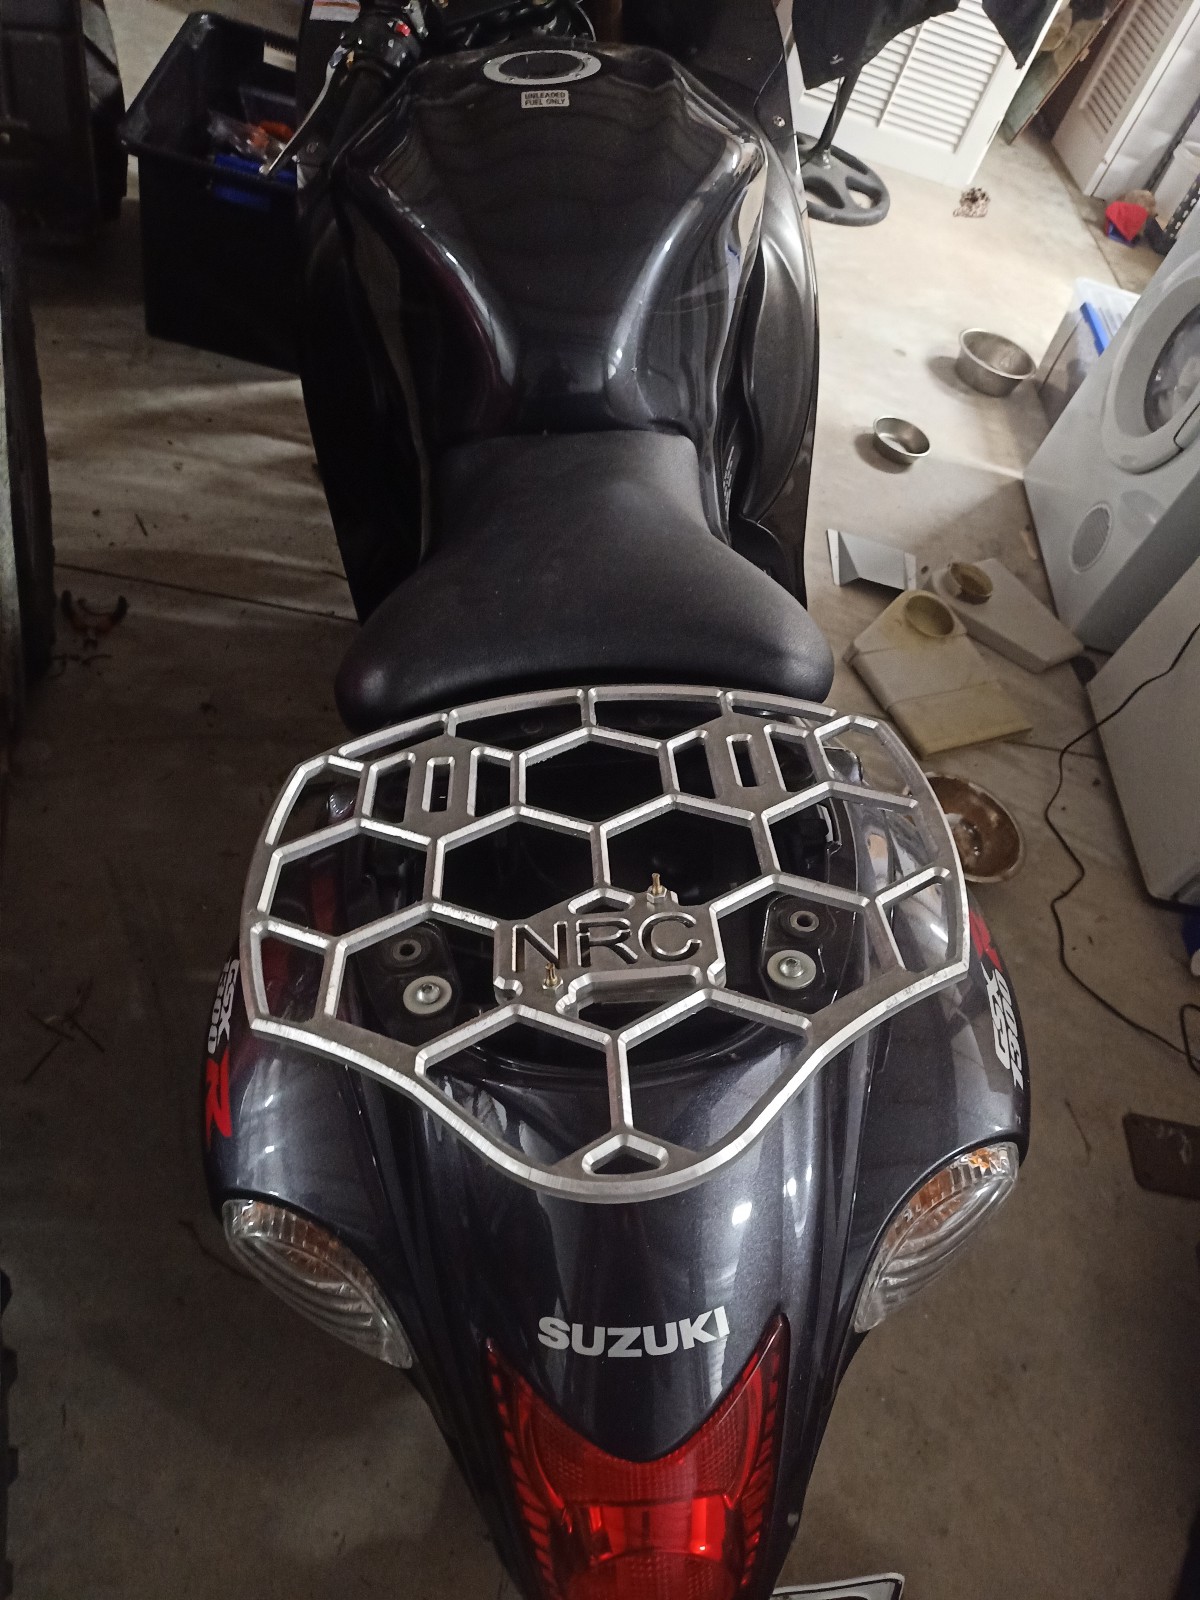
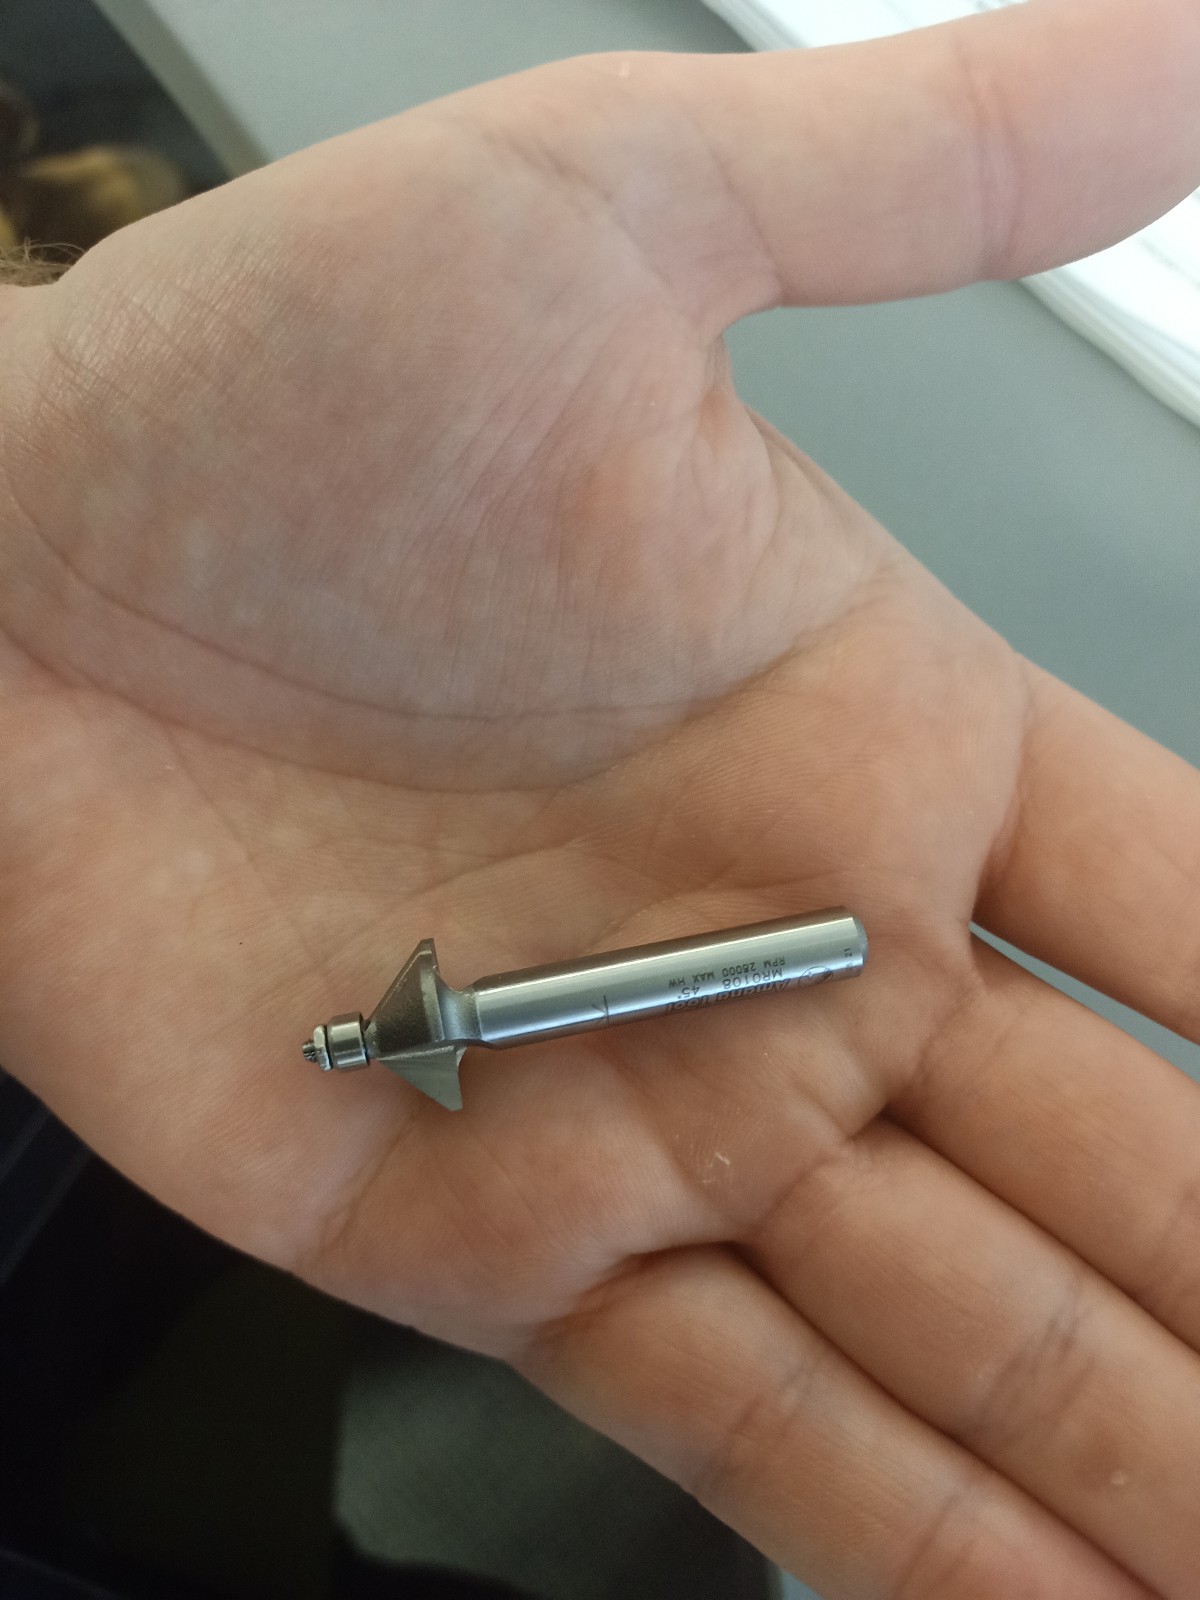
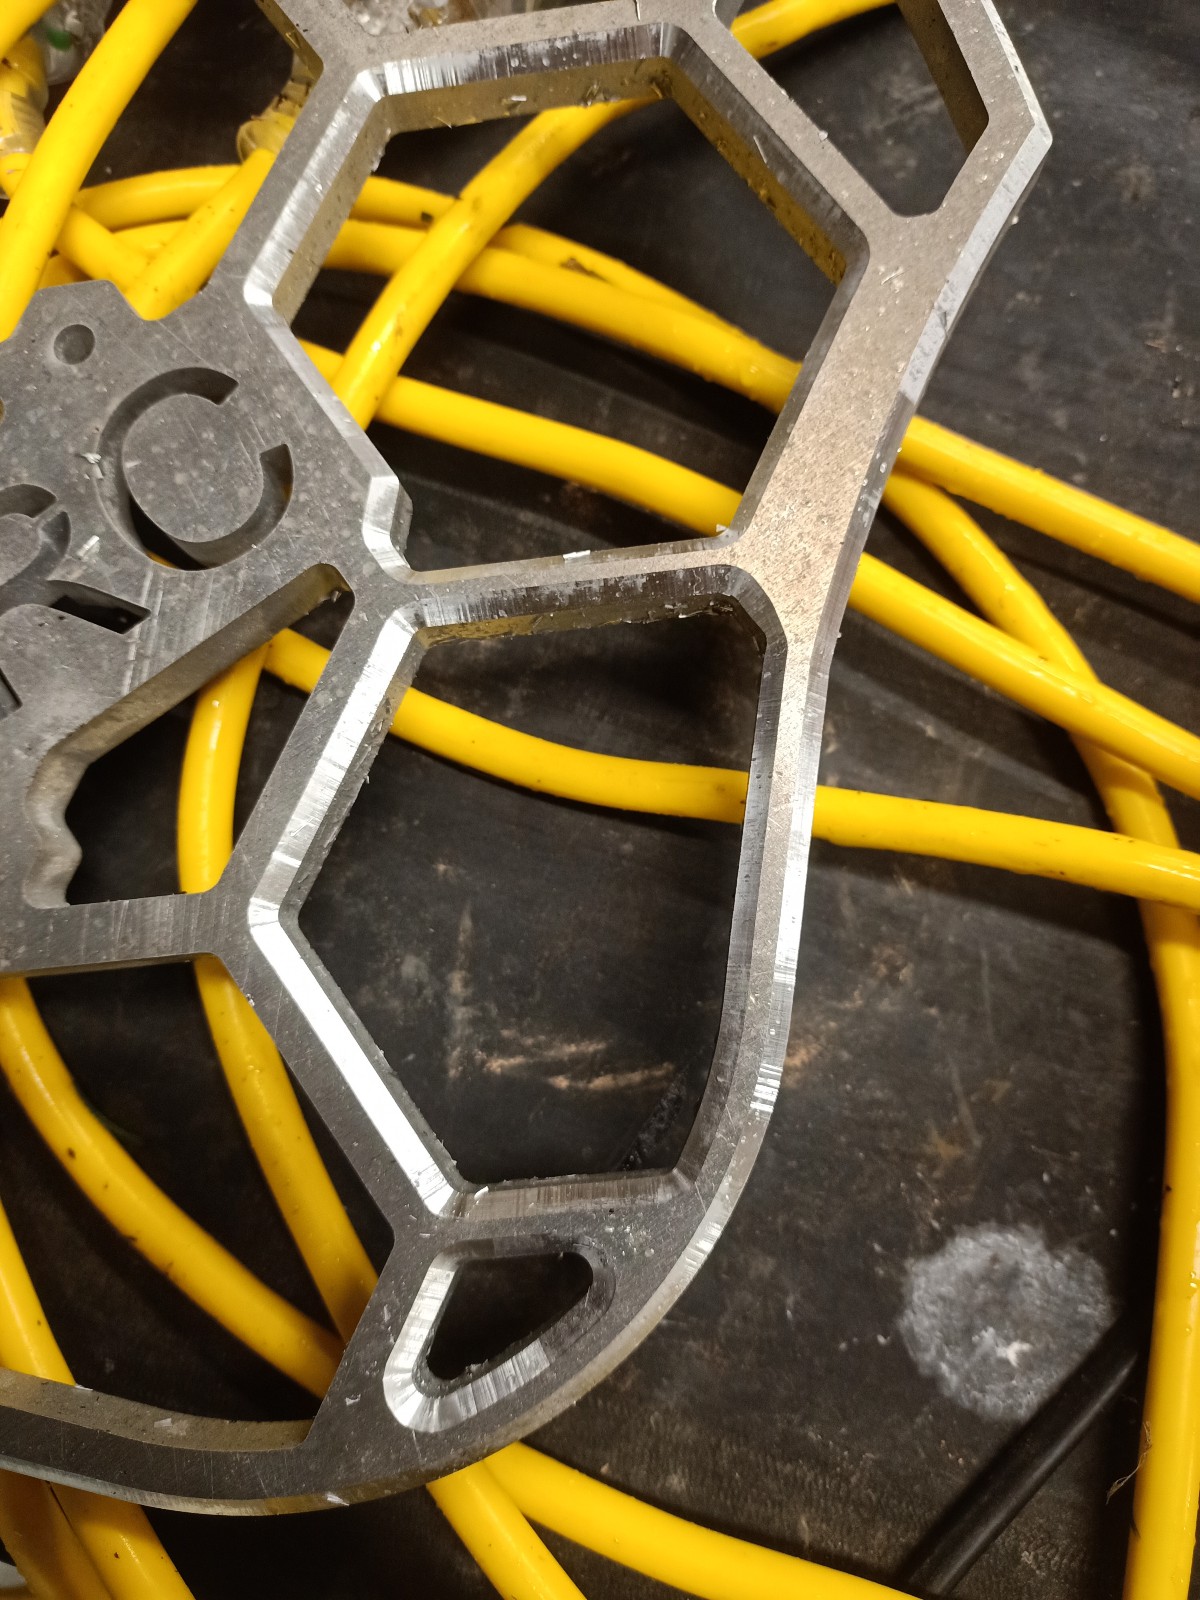
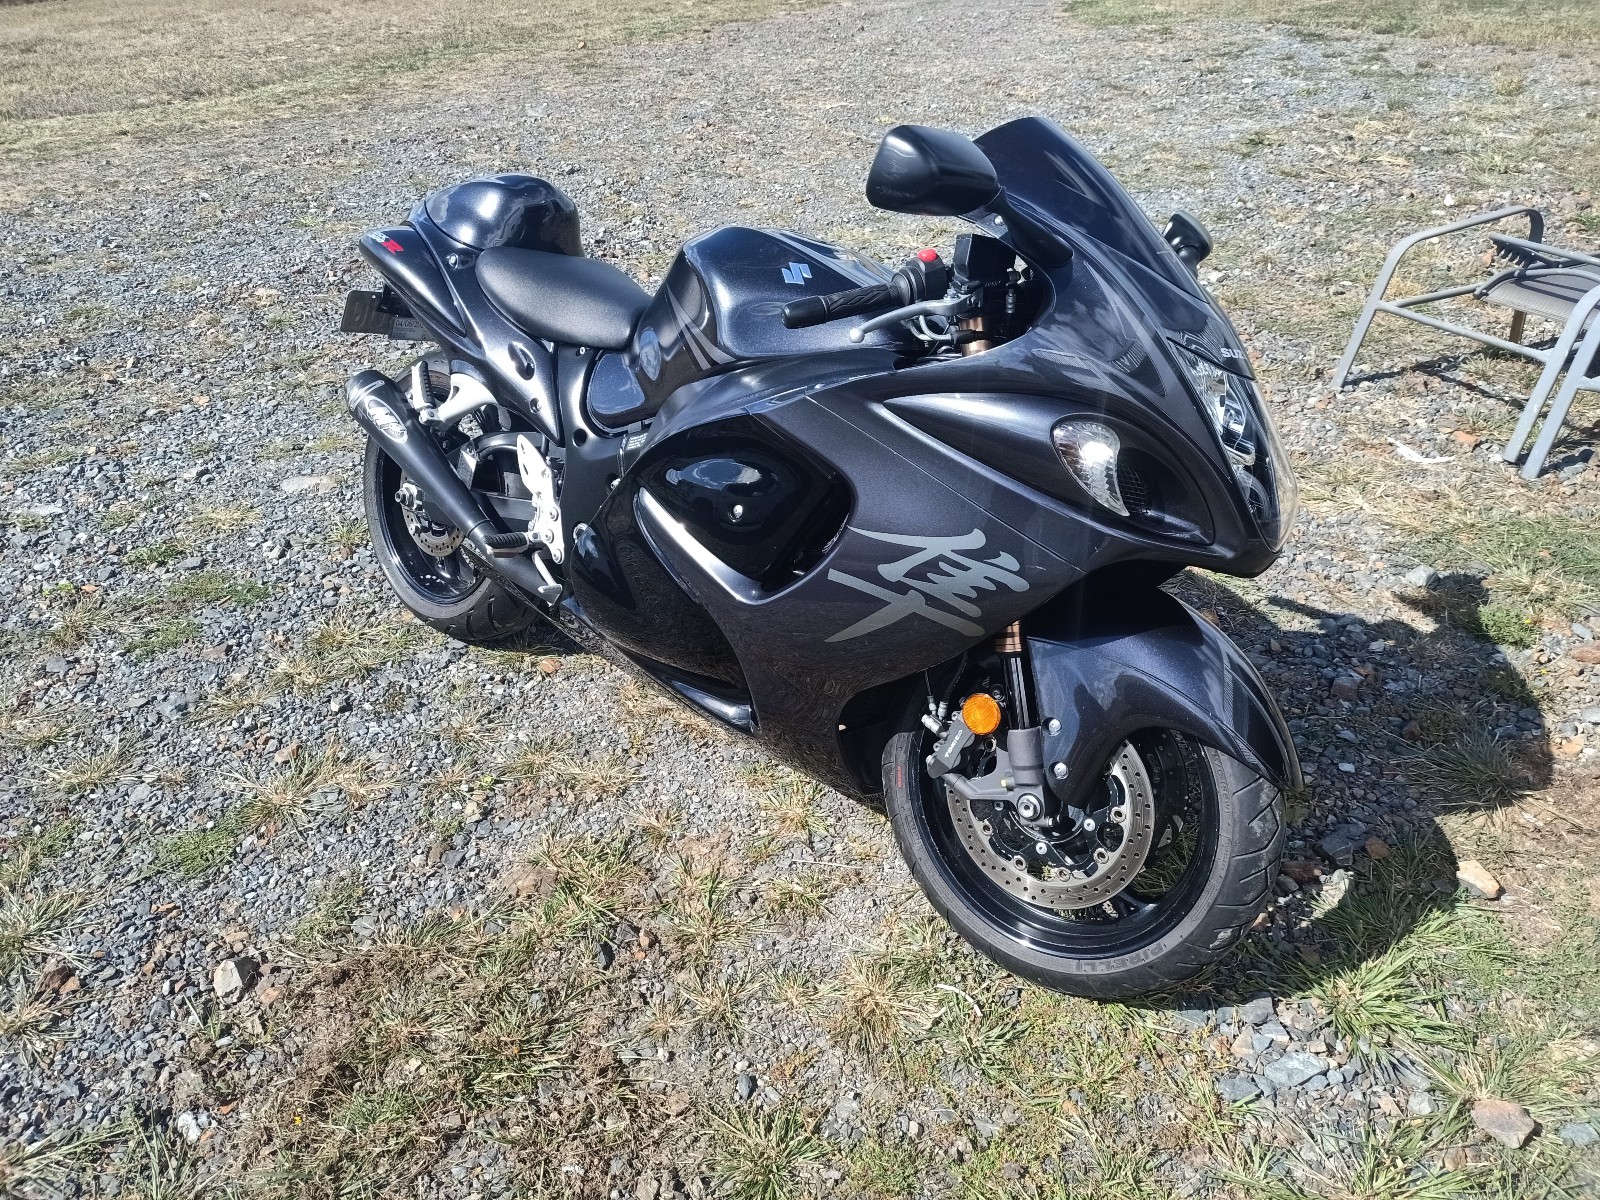
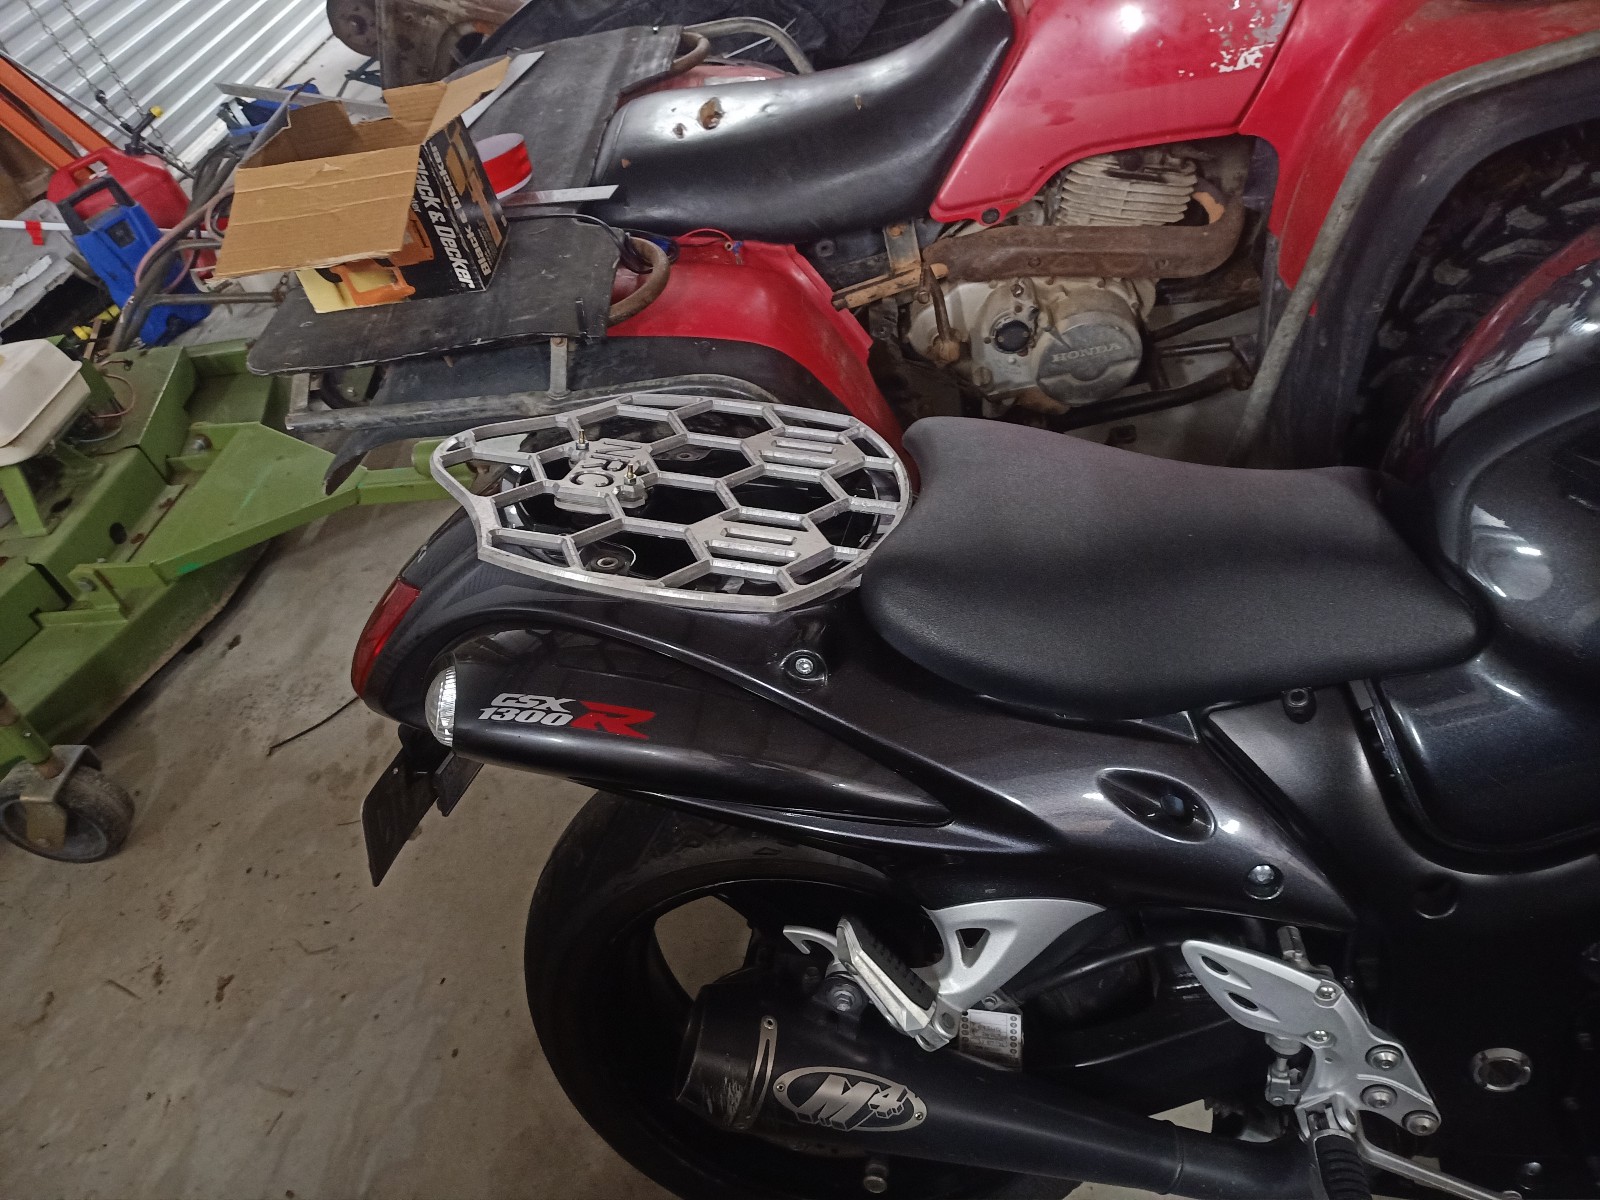
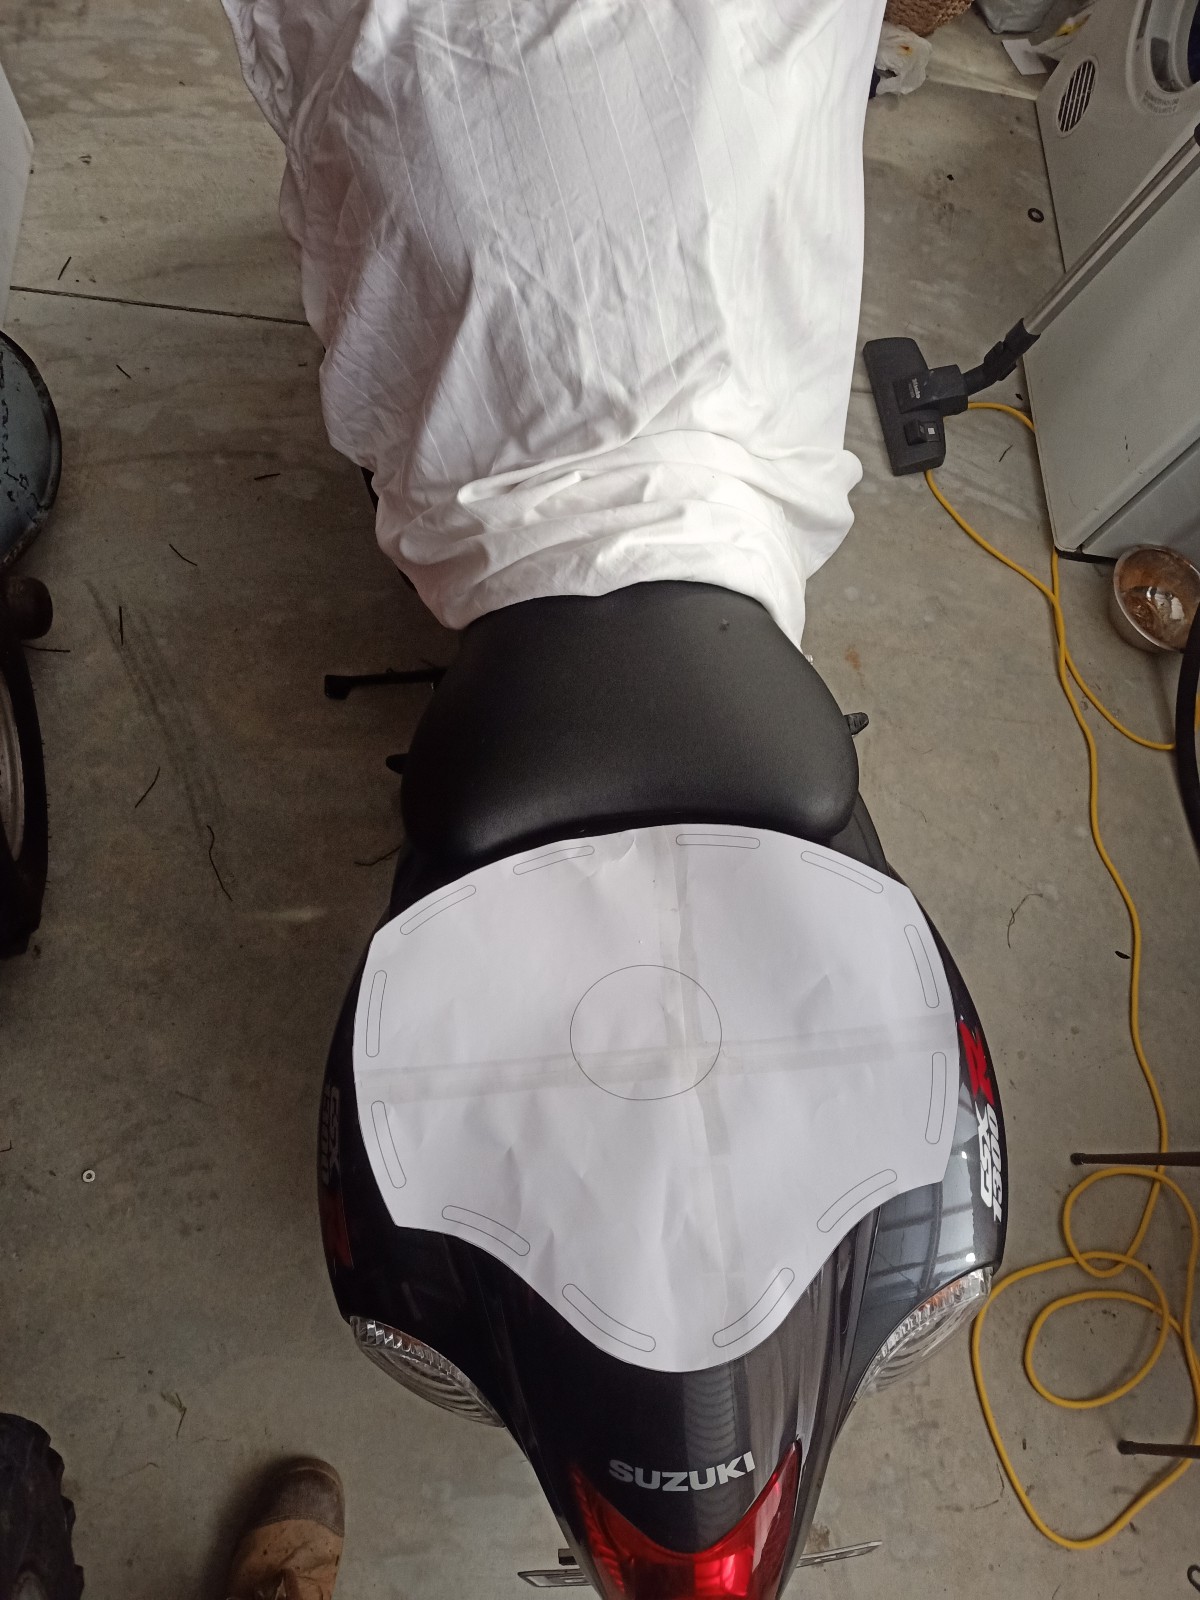
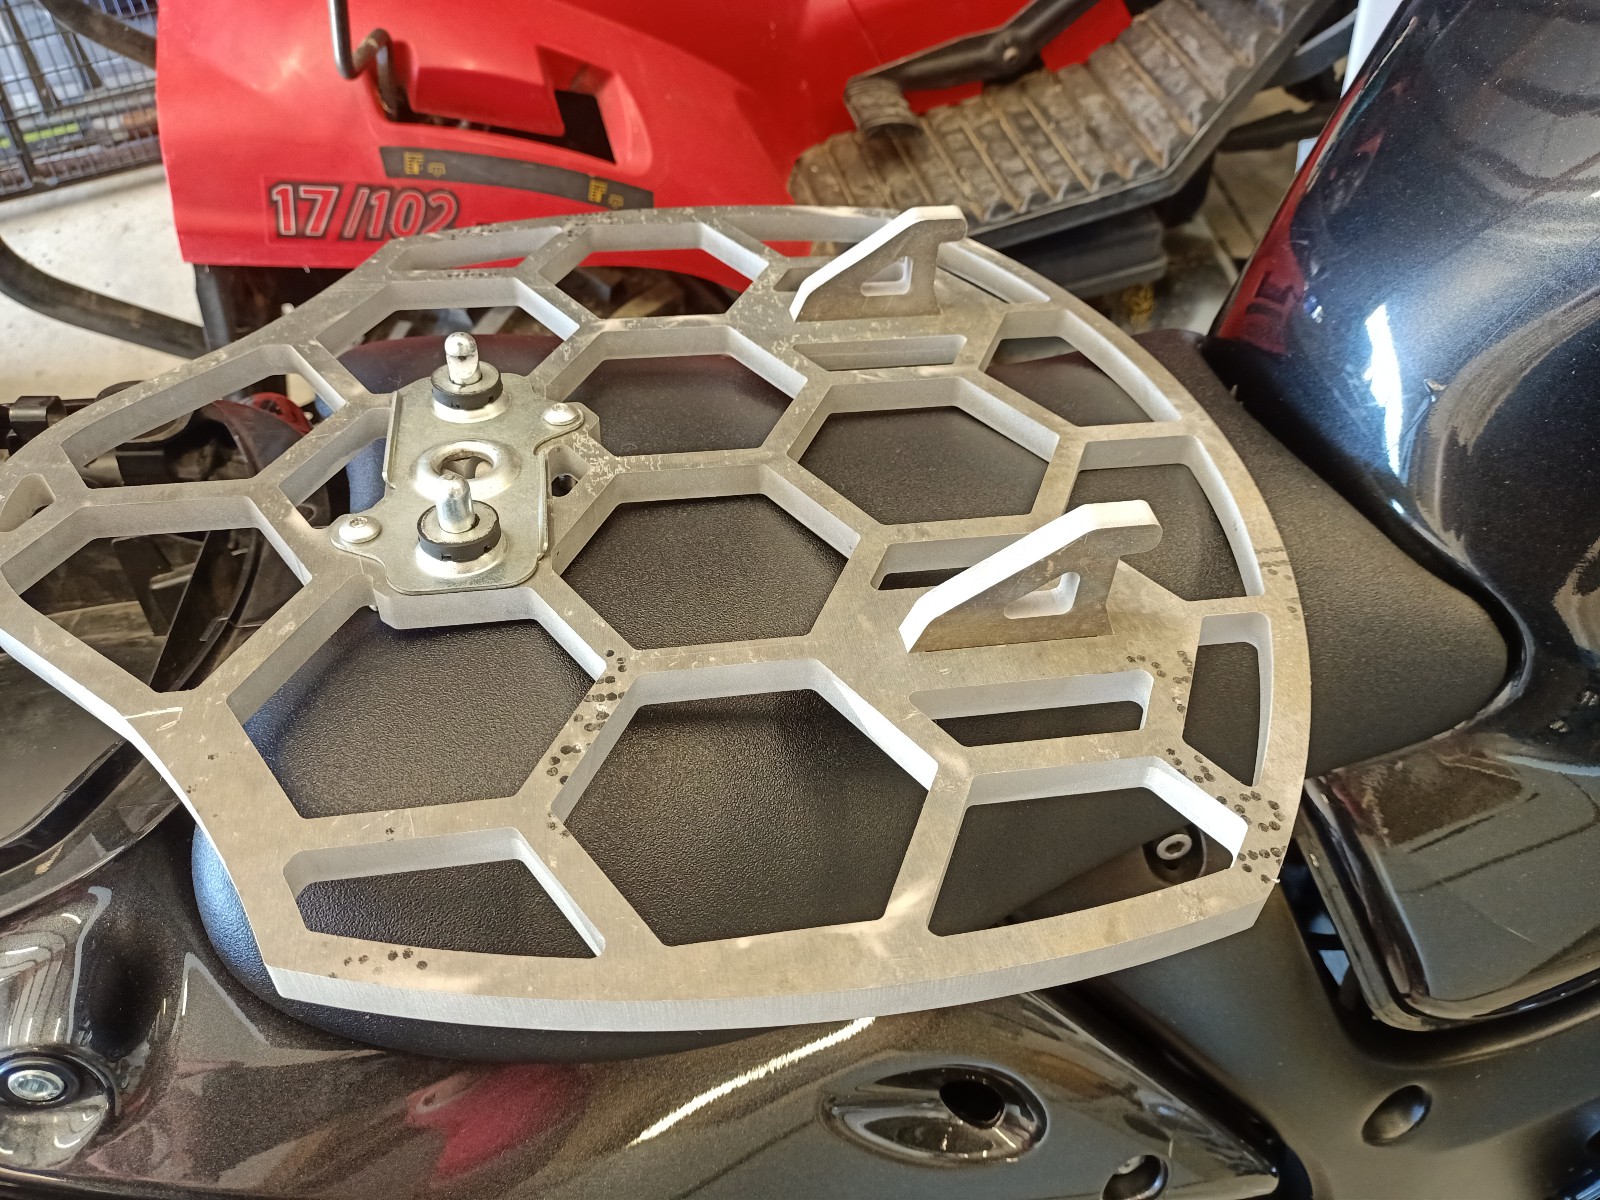
Got my cast off 1.5 weeks ago and have had bike out for half an hour since then. Have been pretty cautious as after 12 weeks restrained there was very poor muscle control and it felt super super fragile, but grip strength is improving very rapidly. We know this, but god damn shits amazing. In general I don't speed, but like acceleration and the sense of unlimited power- and this thing delivers for sure. Also very easy to see why these end up with huge kms on them compared to most 600-100cc superbikes-so easy to live with and manage. Big trip coming up and so of course i had to make the acquisition of a luggage rack far harder than usual. I had time on my hands and like a challenge, plus thought I could make something a little more aesthetically Drew outline in cad and printed/test fit then made alterations. Had a good friend cut from alloy. Ended up being done from much thicker aluminium than originally planned but this gave me the confidence to get a bit artistic with the design and weight removal. Then got a tiney router bit with tiny 4mm guide bearing and ran it over both sides to cut a sweet chamfer. Its had a fair bit of finish sanding/filing since these pics to remove hard edges, but now want to DIY anodise it dark grey/black. Its turned out pretty good so far I think. Swaps between aero hump/passenger seat/rack in a few seconds just with a key (all other racks use bolts, but they do allow a pillion where as mine doesn't, and they are also big square things with no real thought given to design) Also started it last weekend and had a really loud and alarming clutch rattle. Shut it off pretty quickly, opened up the clutch and ended up loctiting and torqueing all of the fasteners (this particular year omited factory loctite and loose bolts there is a problem) Sounds gone now but research tells me that these things are renowned for having rattles there due to their variable clutch torque limiting shit being pretty sloppy. Anyway, until next time Bye.
1 point
-
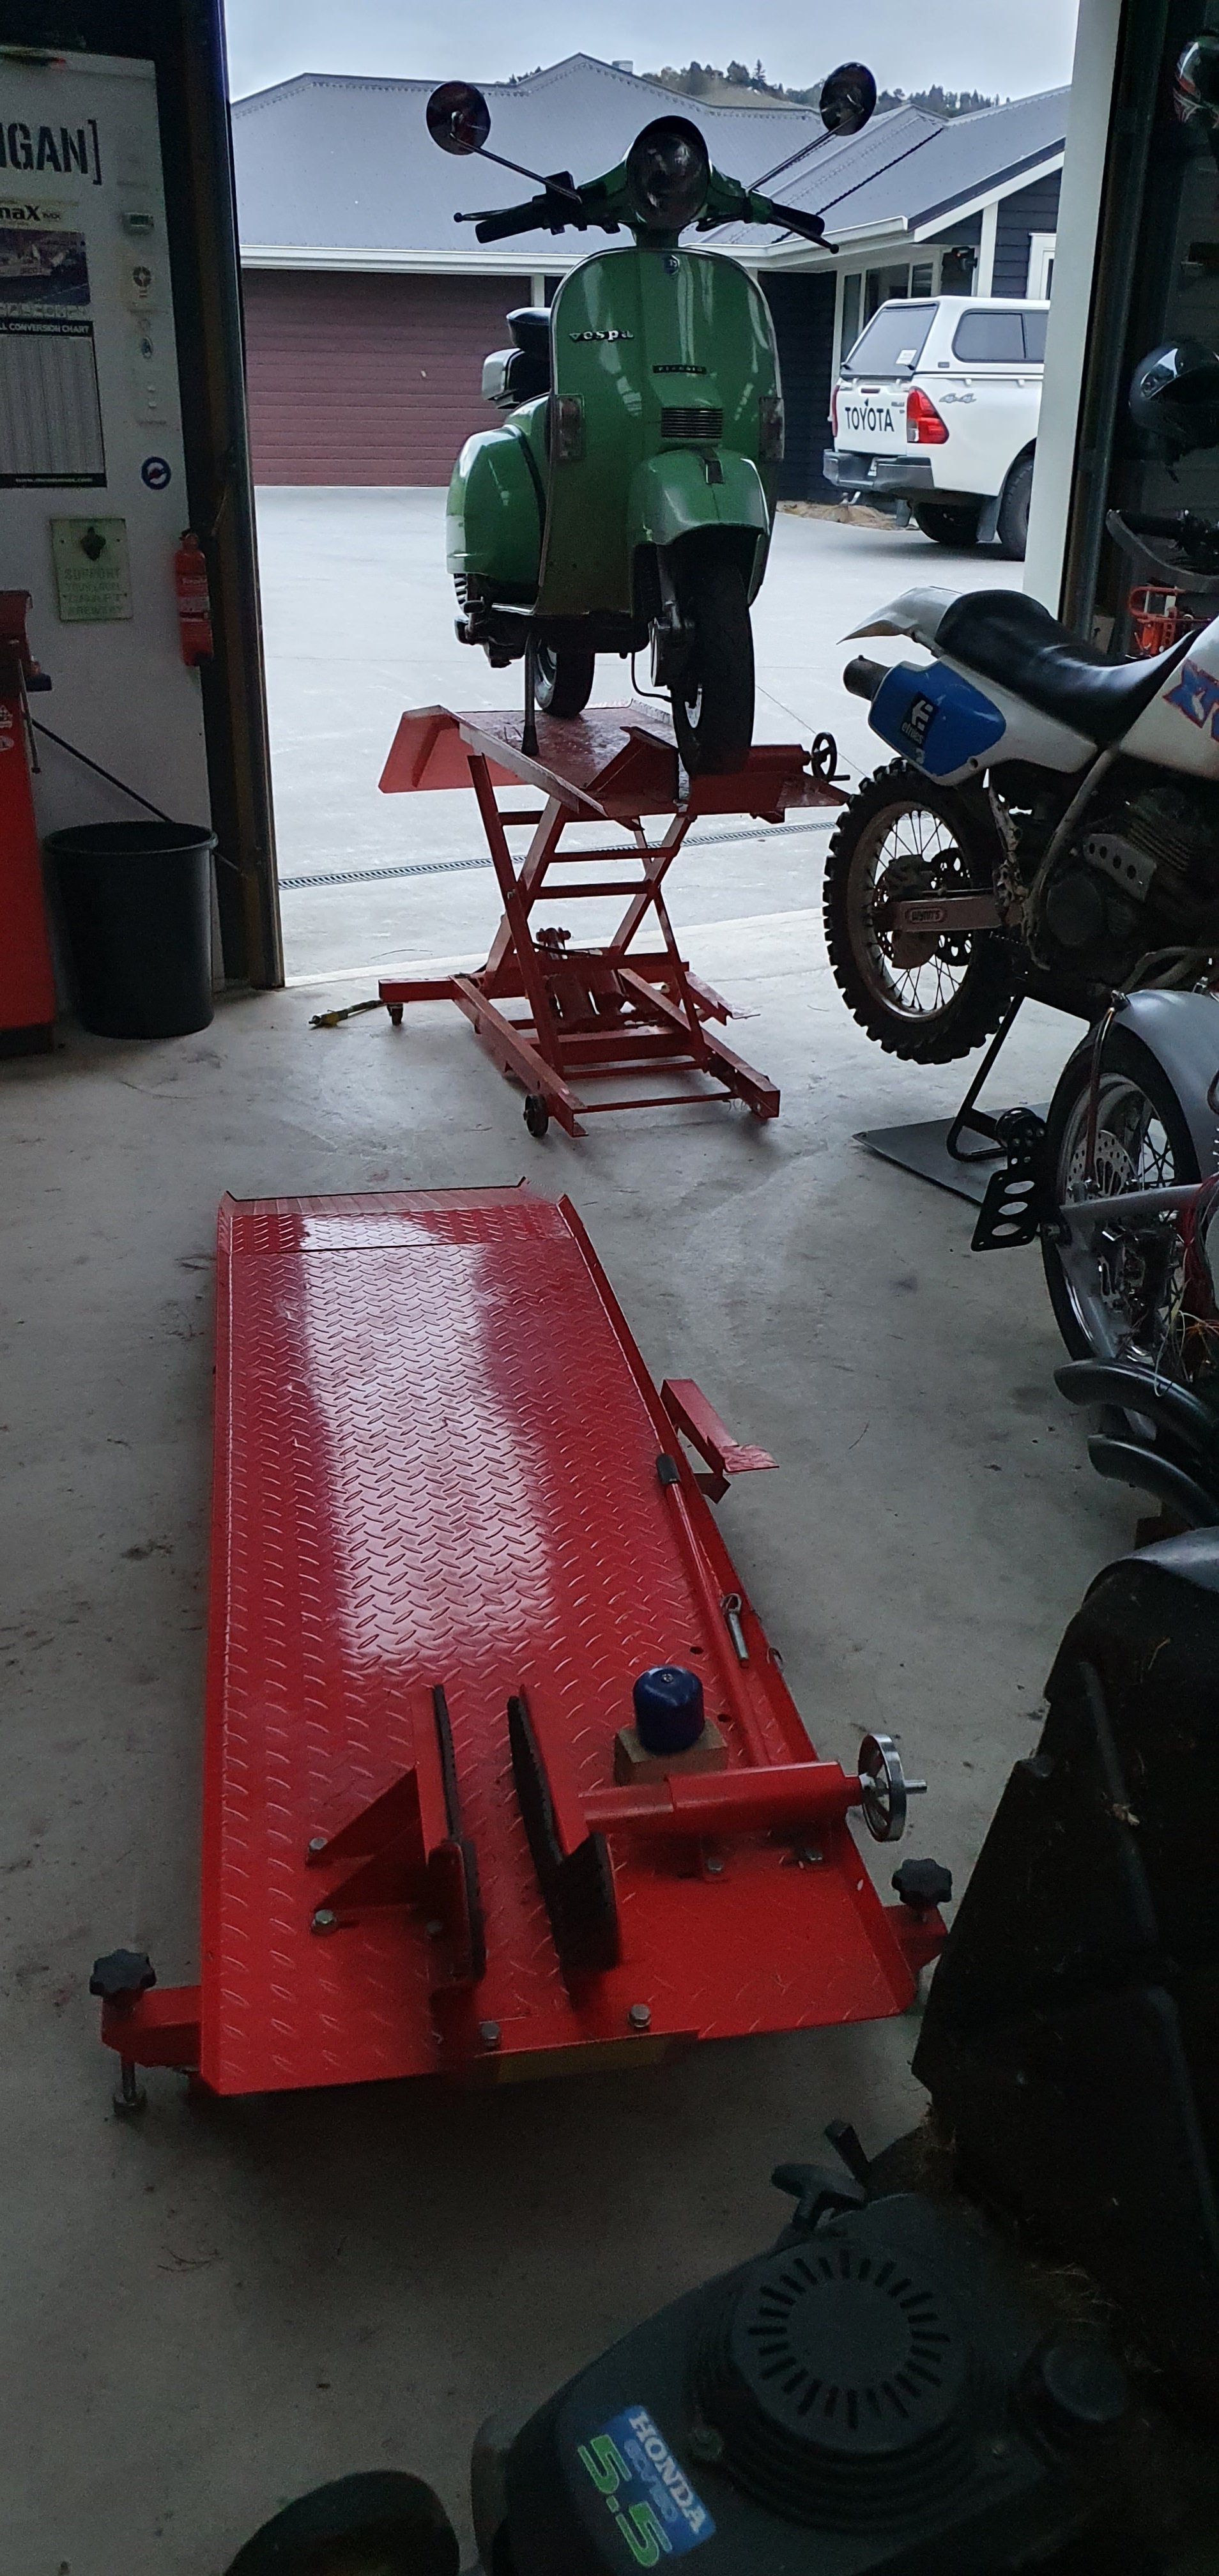
Whats better than one awesome bike lift platform...2 of course!! Oh, and its air over hydraulic for the super dope street cred. I was half pie tempted to post a photo of my bigger one, lifting the smaller one, with the vespa on top...
1 point
-
Coming together
1 point
-
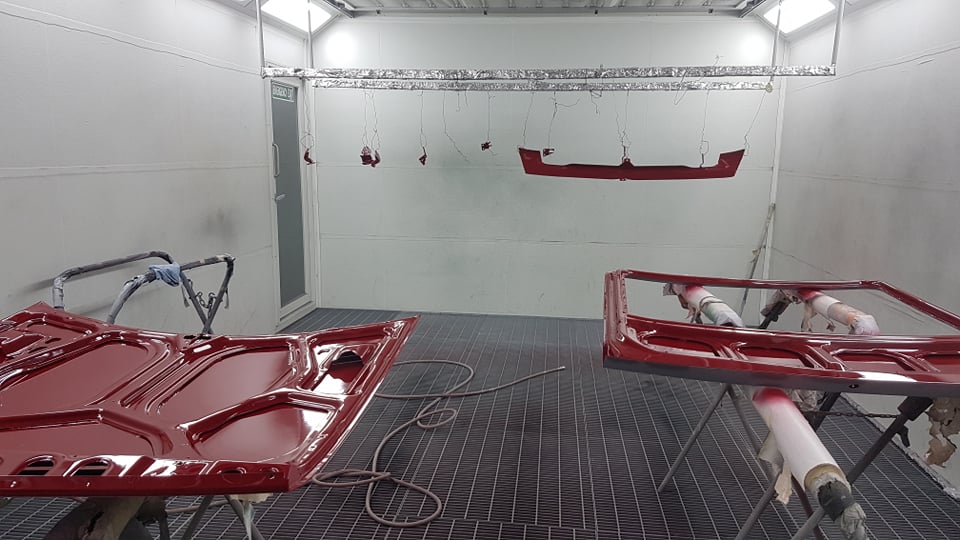
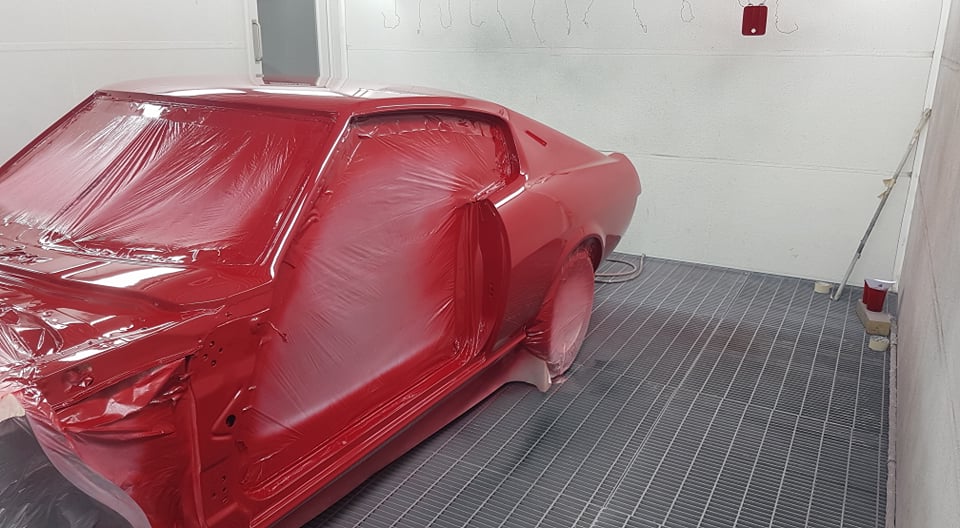
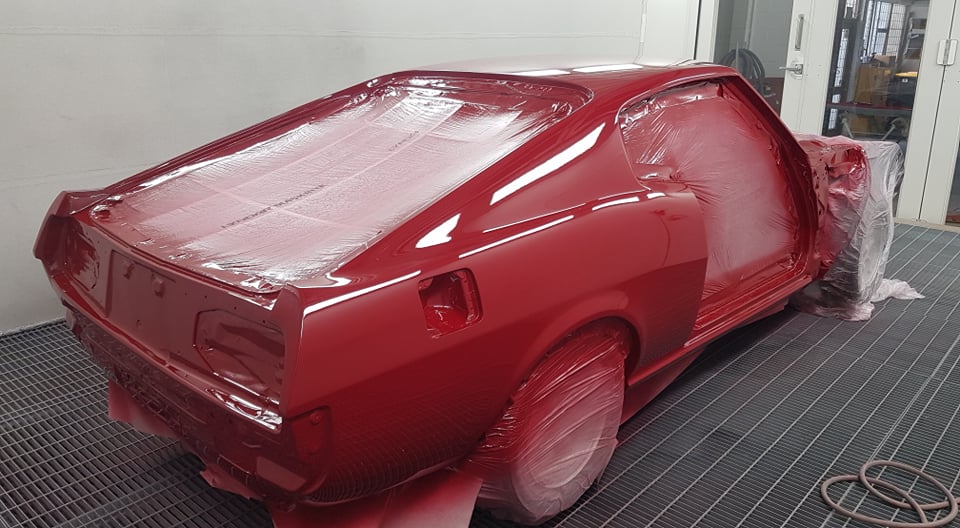
so... the painter told me he had a bit of an incident with my car. . . . . . . . . then he said he spilt a few litres of paint on it. . . . . super duper pleased with the result. .
1 point
-
I didn't even get it in garage before waterblasting the shit out of it! Less greasy its obviously had some love in past as it looks ok. Now to plan, do i pull the heads and clean the ports up fit studs and new head gaskets........ or just get it in hmmm.
1 point
-
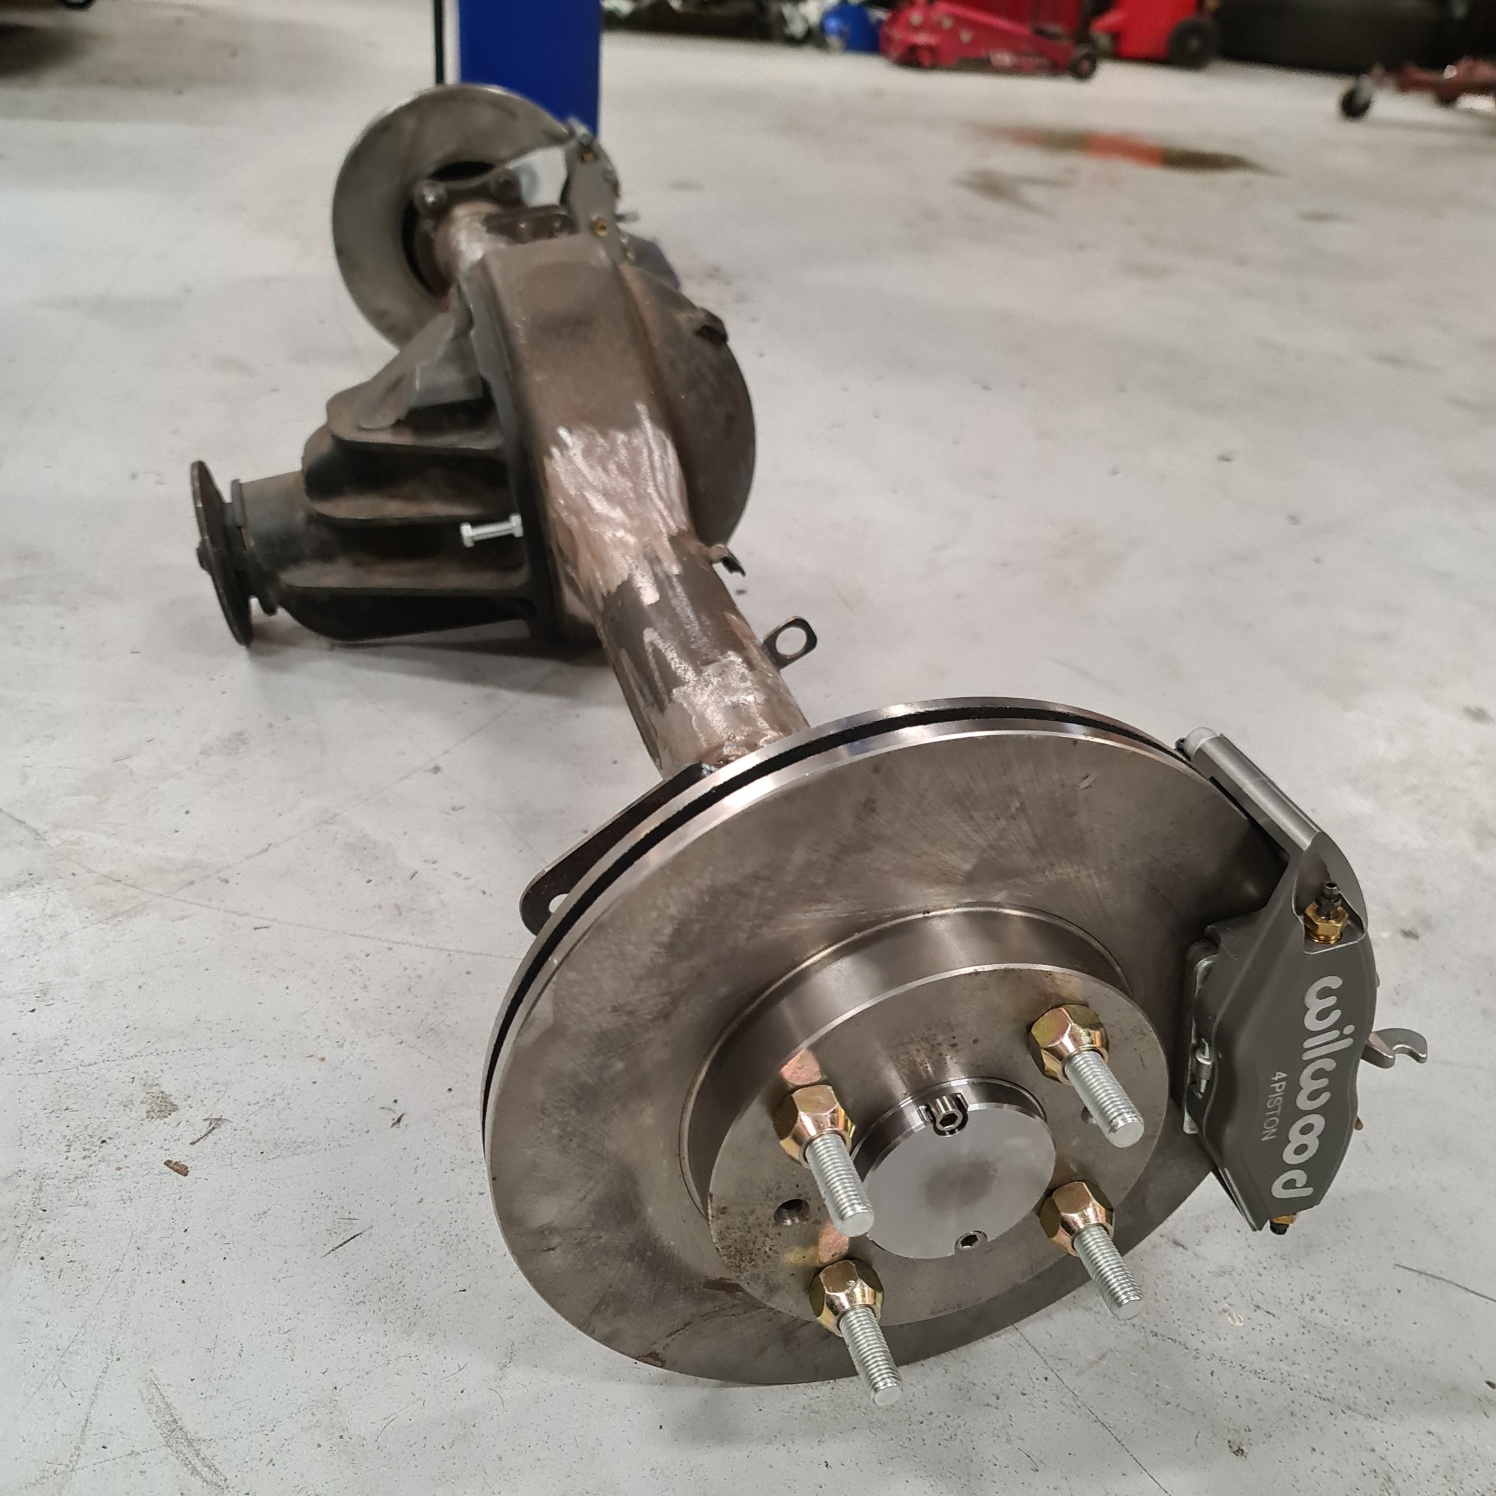
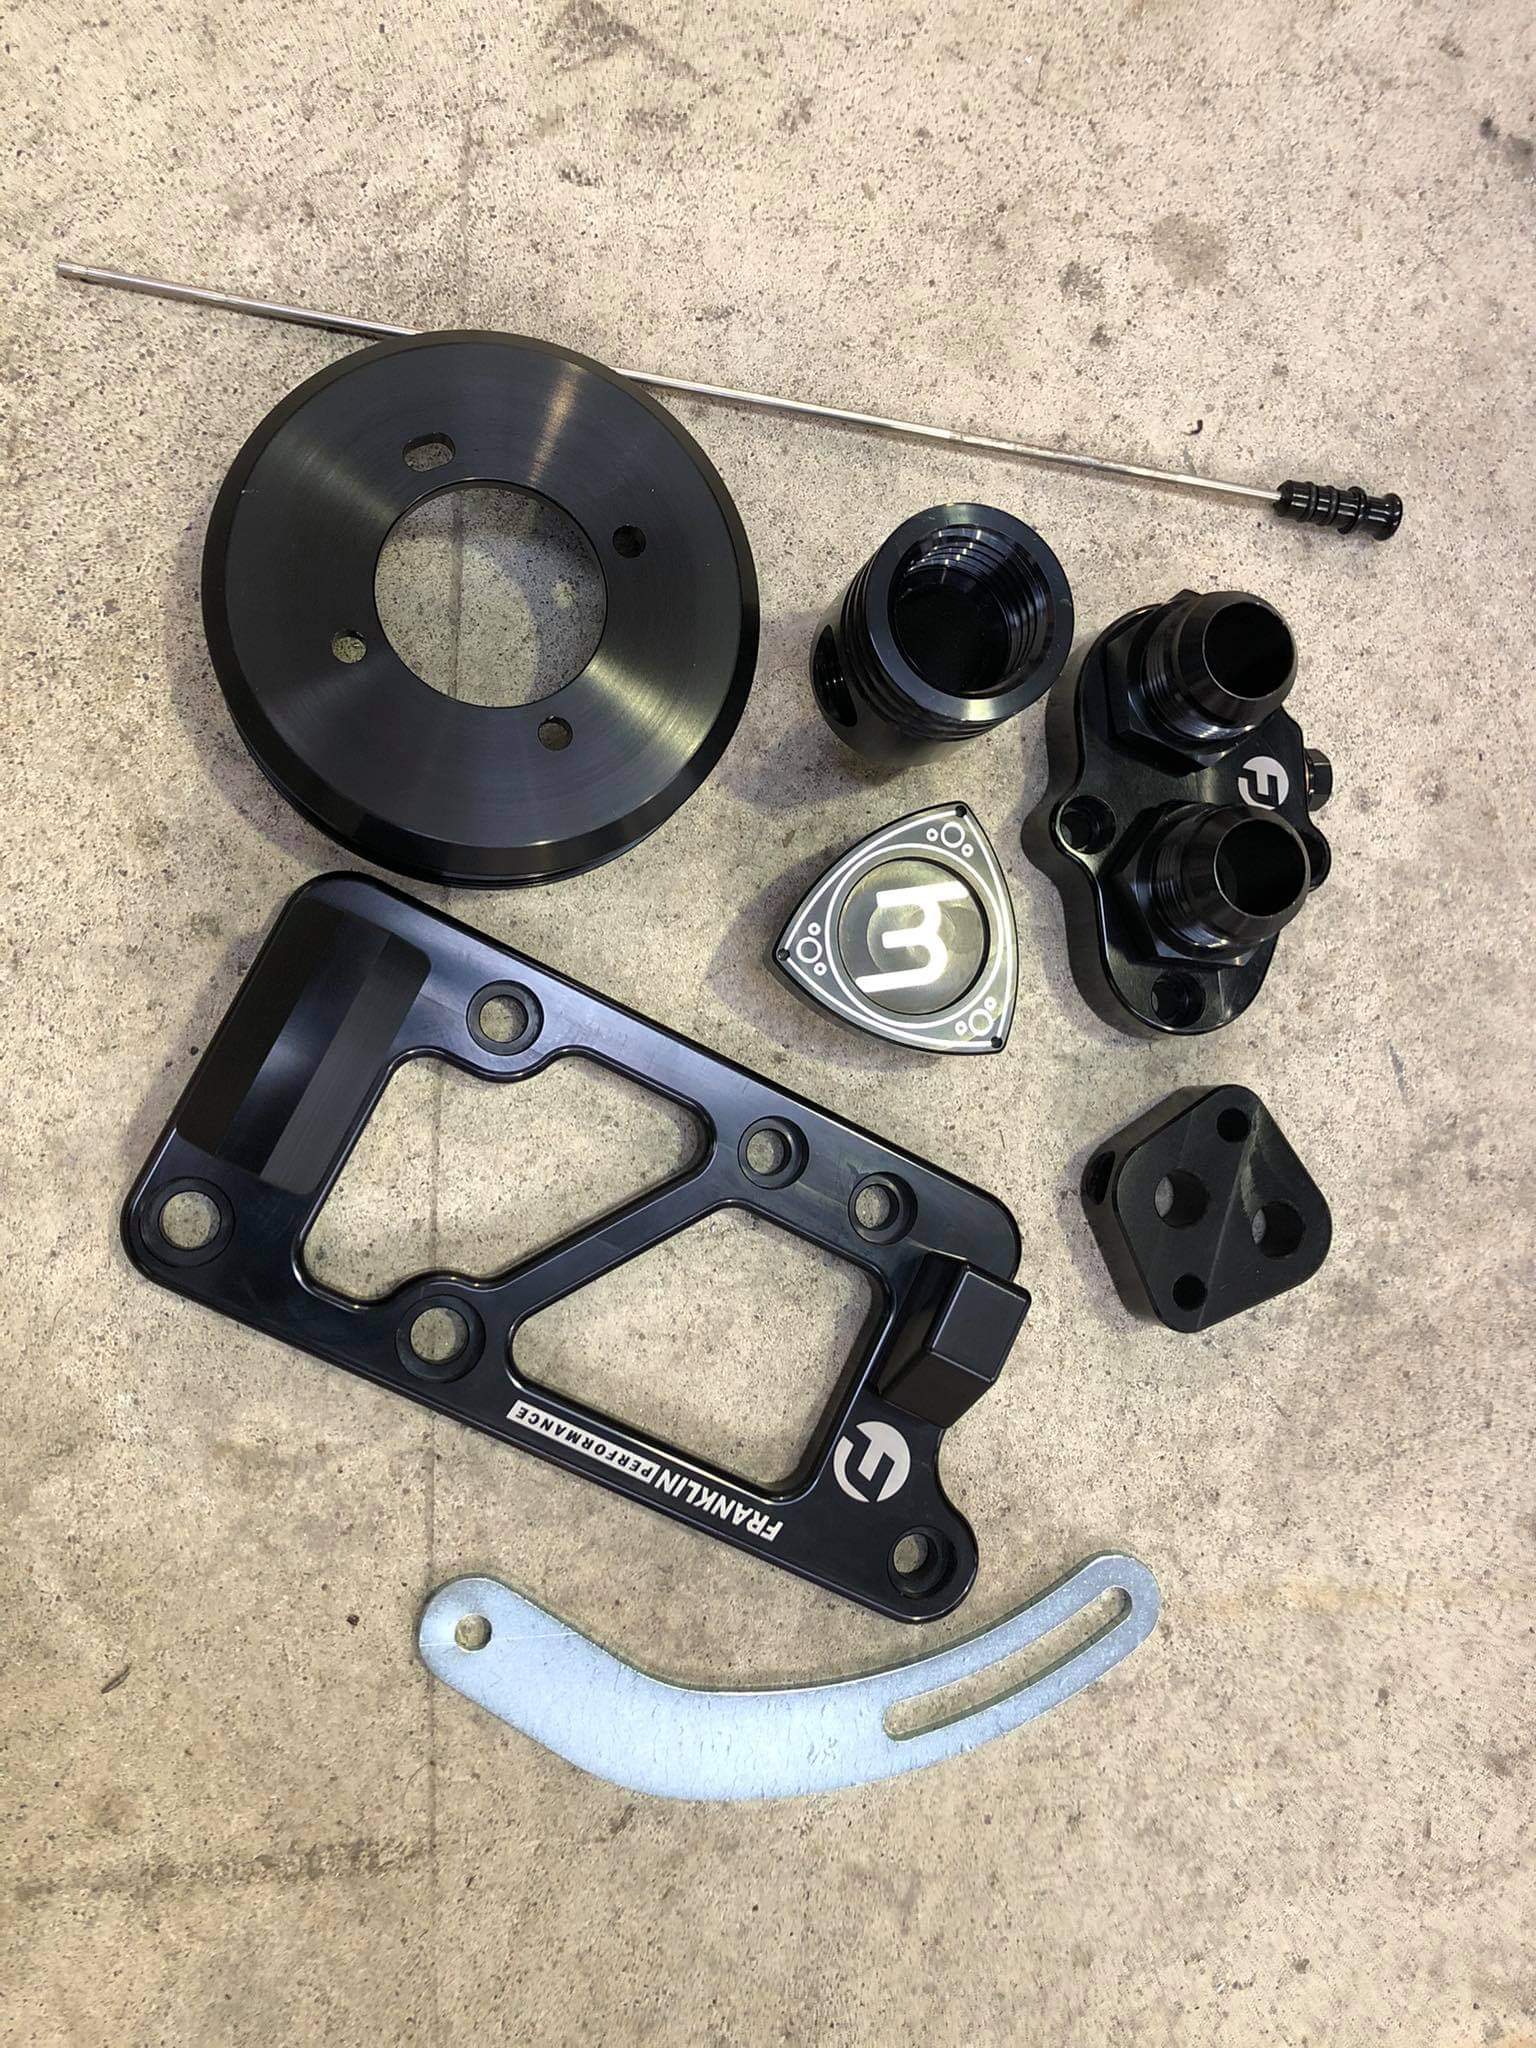
Bit more progress. Mate Gav just finished up the brake brackets for the rear calipers on the diff this week so i got that in, First issue was U bolts for RX3 diff are much smaller so had to get a set of B2000 ubolts and blocks. Chucked those in and got it fitted up last night Have ordered a heap of bits for the wiring, sensors (water temp, oil temp/pressure, fuel pressure) as well as a new alternator, starter and electric water pump which are all getting stripped to go to Toby for polishing. I also picked up a few goodies from Franklin Performance for the motor so they are ready to go on once assembled. Also test fitted a set of 17x7.5 ROH Z's for some nostalgia! Got plenty of space to run a 8.5" at least on the rear so will keep a eye out for a set of those.
1 point
-
Gave it a bit of bog and a sand, then hit it with some primer to see the over all shape. So far I'm really happy with it. Still a bunch more sanding required, but I think it's going to look pretty good.
1 point
-
Have had a few really dodgy ones over the years, a "mitsubishi lancer 1500cc" that had "been converted to a makkinen evo replica" And a "V6 commodore with a LS swap" that had really low kms and lots of weird rust almost like it had been hidden in a damp shed for 10 years and you could see where the SS stickers on the doors were and the engine number had been attacked with a chisel and the date tag on the belts didnt match the year on the rego and the vin tag under the glass had heaps of weird scratches on it Or the VE commodore that had a different vin on the bit under the carpet on the floor to under the glass and in the engine bay because whoever the crackhead that stole it didnt realise there was a chassis number in the floor1 point
-
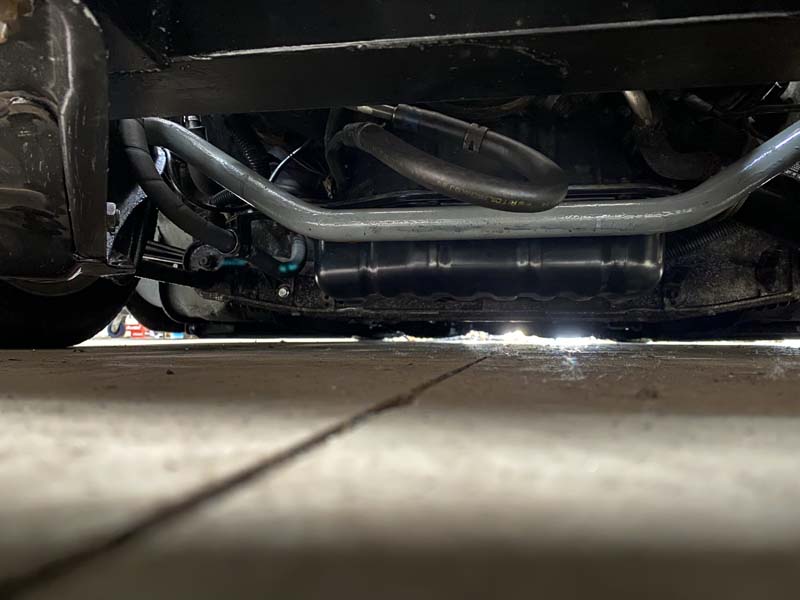
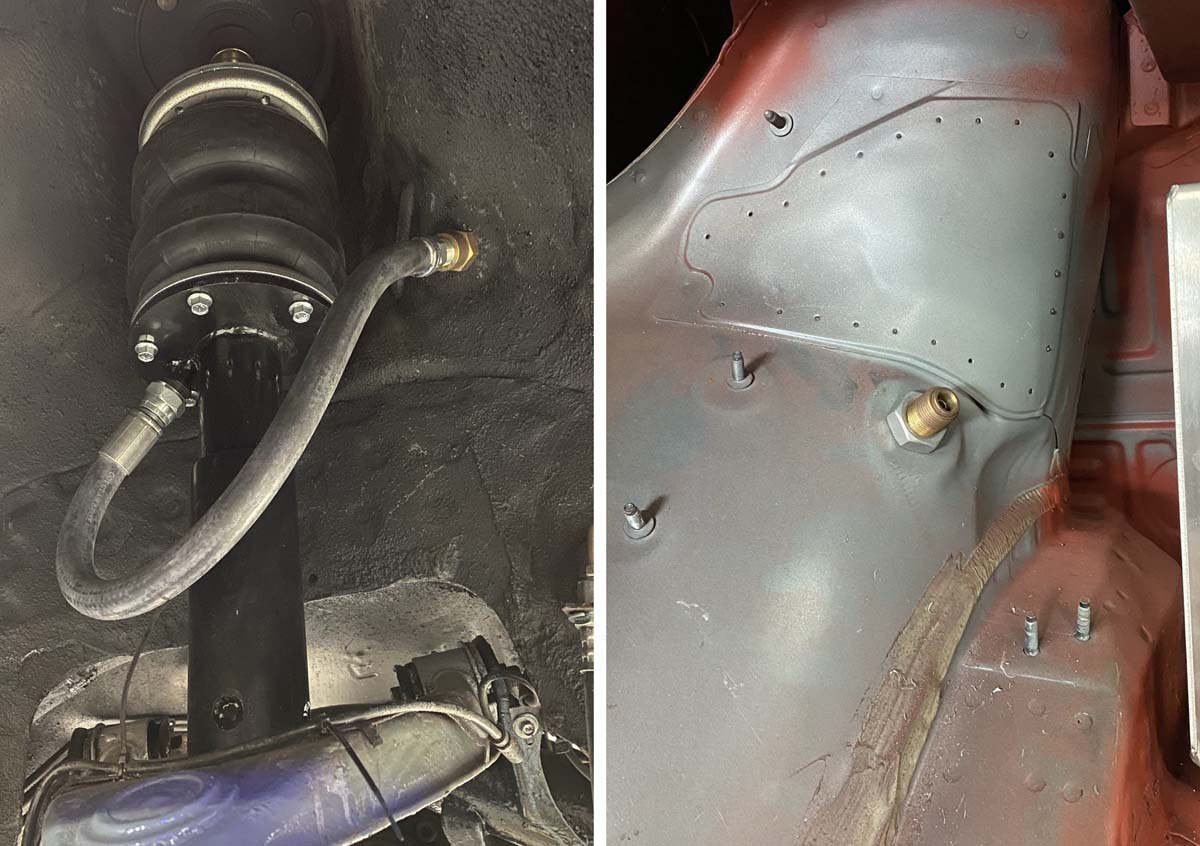
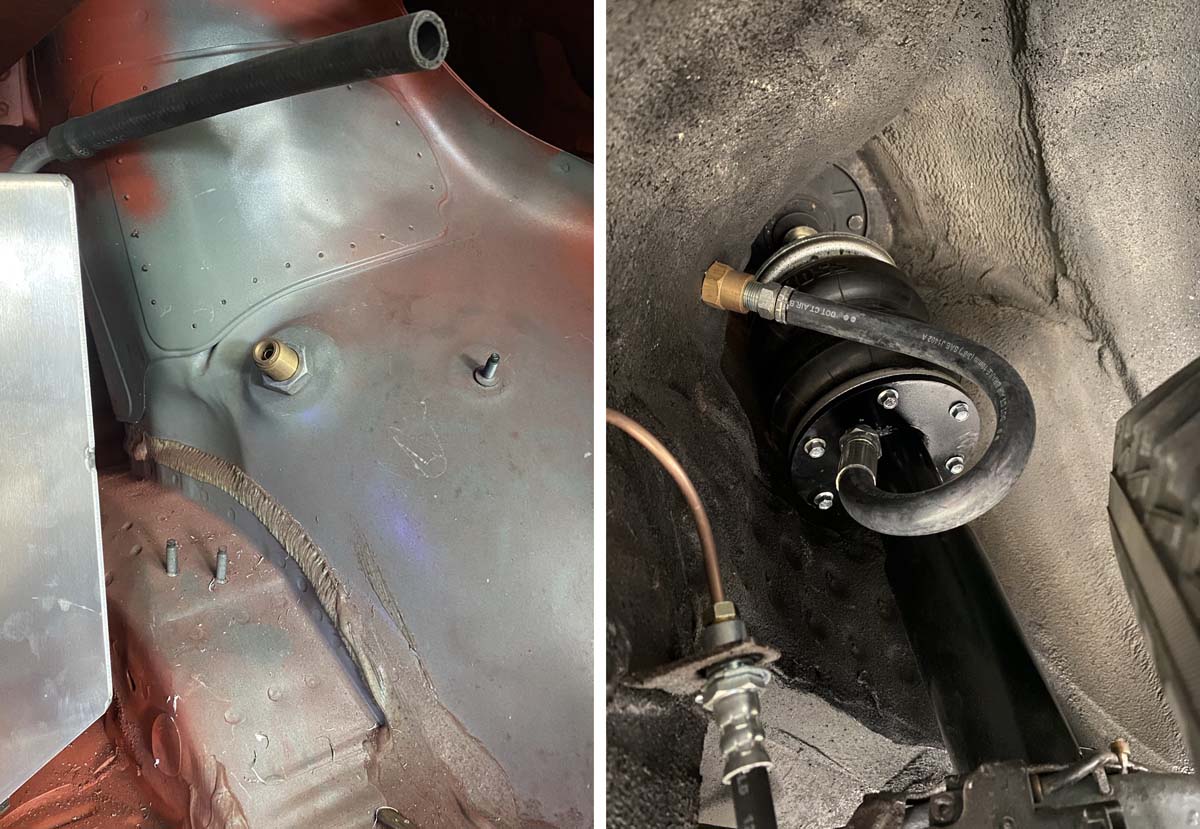
Plumbed up some lines and tee's temporarily. and managed to get her off the hoist. She's not quite touching at the sills. x-member and sump is well up off the ground. above the sill height. The front doesn't seem to have as much travel as I would like. only picks it up about 80mm off the ground?? Moving the strut inboard further on the lower control arm should help this. hopefully without making the front too stiff.
1 point
-
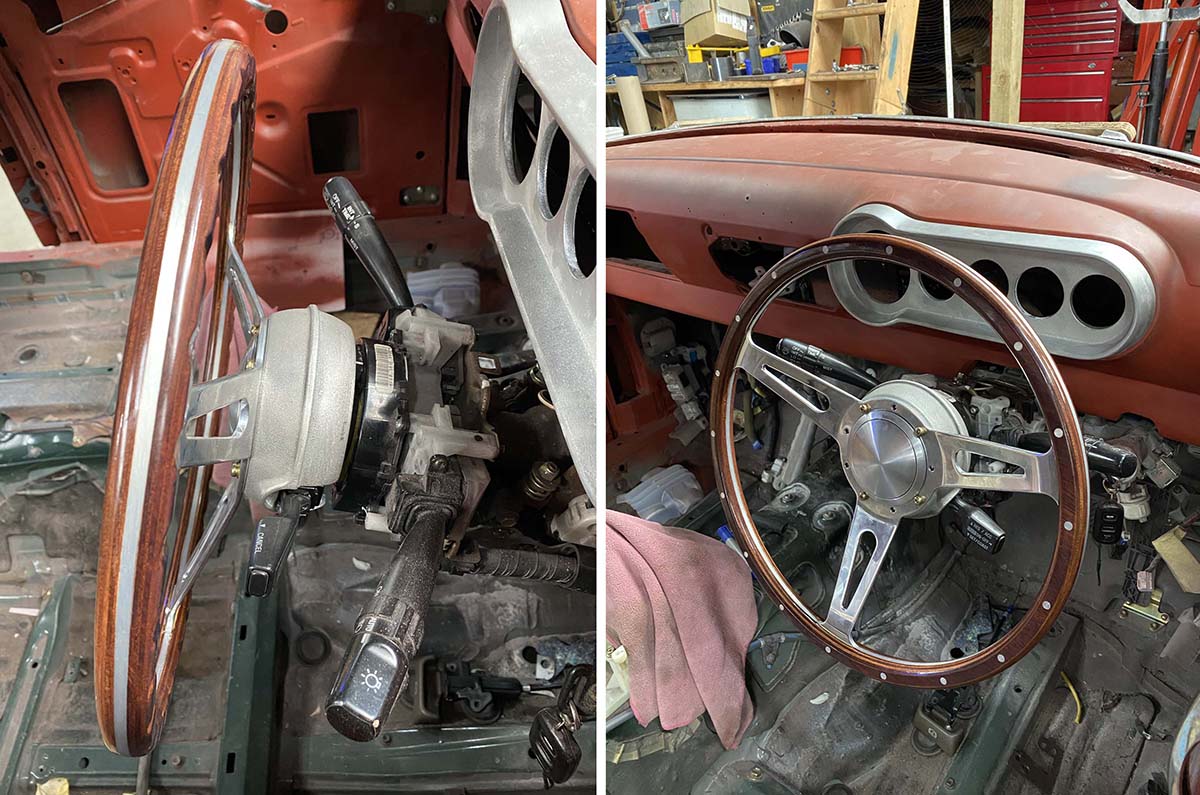
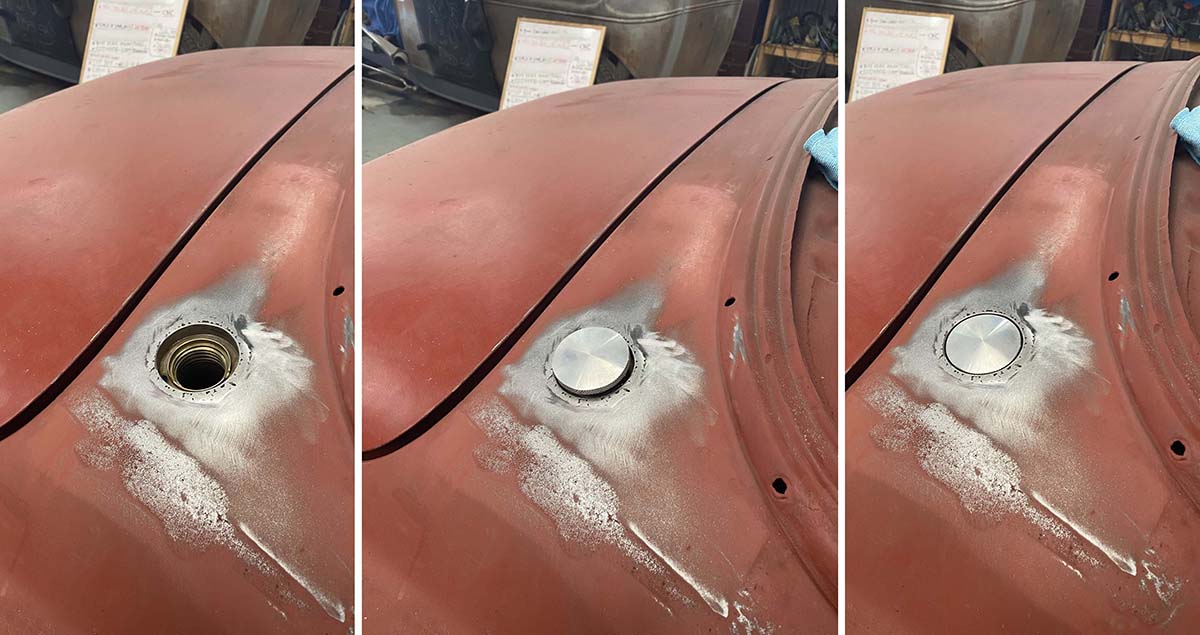
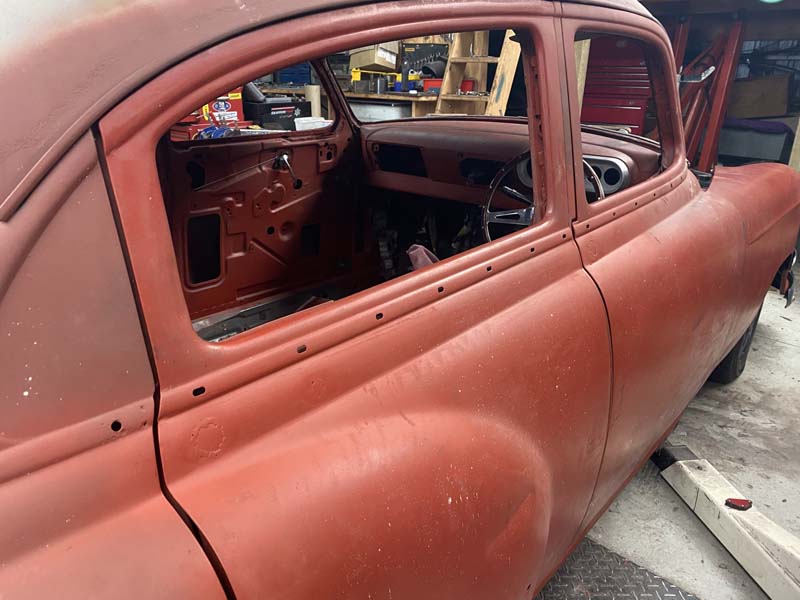
A cast boss kit. With factory lexus cruise control stalk in place. Cast straight off a 3d print with no prep. We didn't even bother putting it on a plate for the foundry. Scaled up to 101.2% Contraction. Came out absolutely perfect to within 1/2 a mm. Dad also cast up the dash cluster a few years back, when he built his belair. Both with be dark rough sandblasted finish, with a polished lip. Finished welding in the gas cap. And shaving all the door handles. Not the flashest. But should do the job.
1 point
-
Installed the rear bag's bulkheads today. Not overly happy with the hose routes. But they don't touch anything through the suspension travel. I believe the flat spot I drilled through is for the Optional factory air suspension on the ls400.
1 point
-
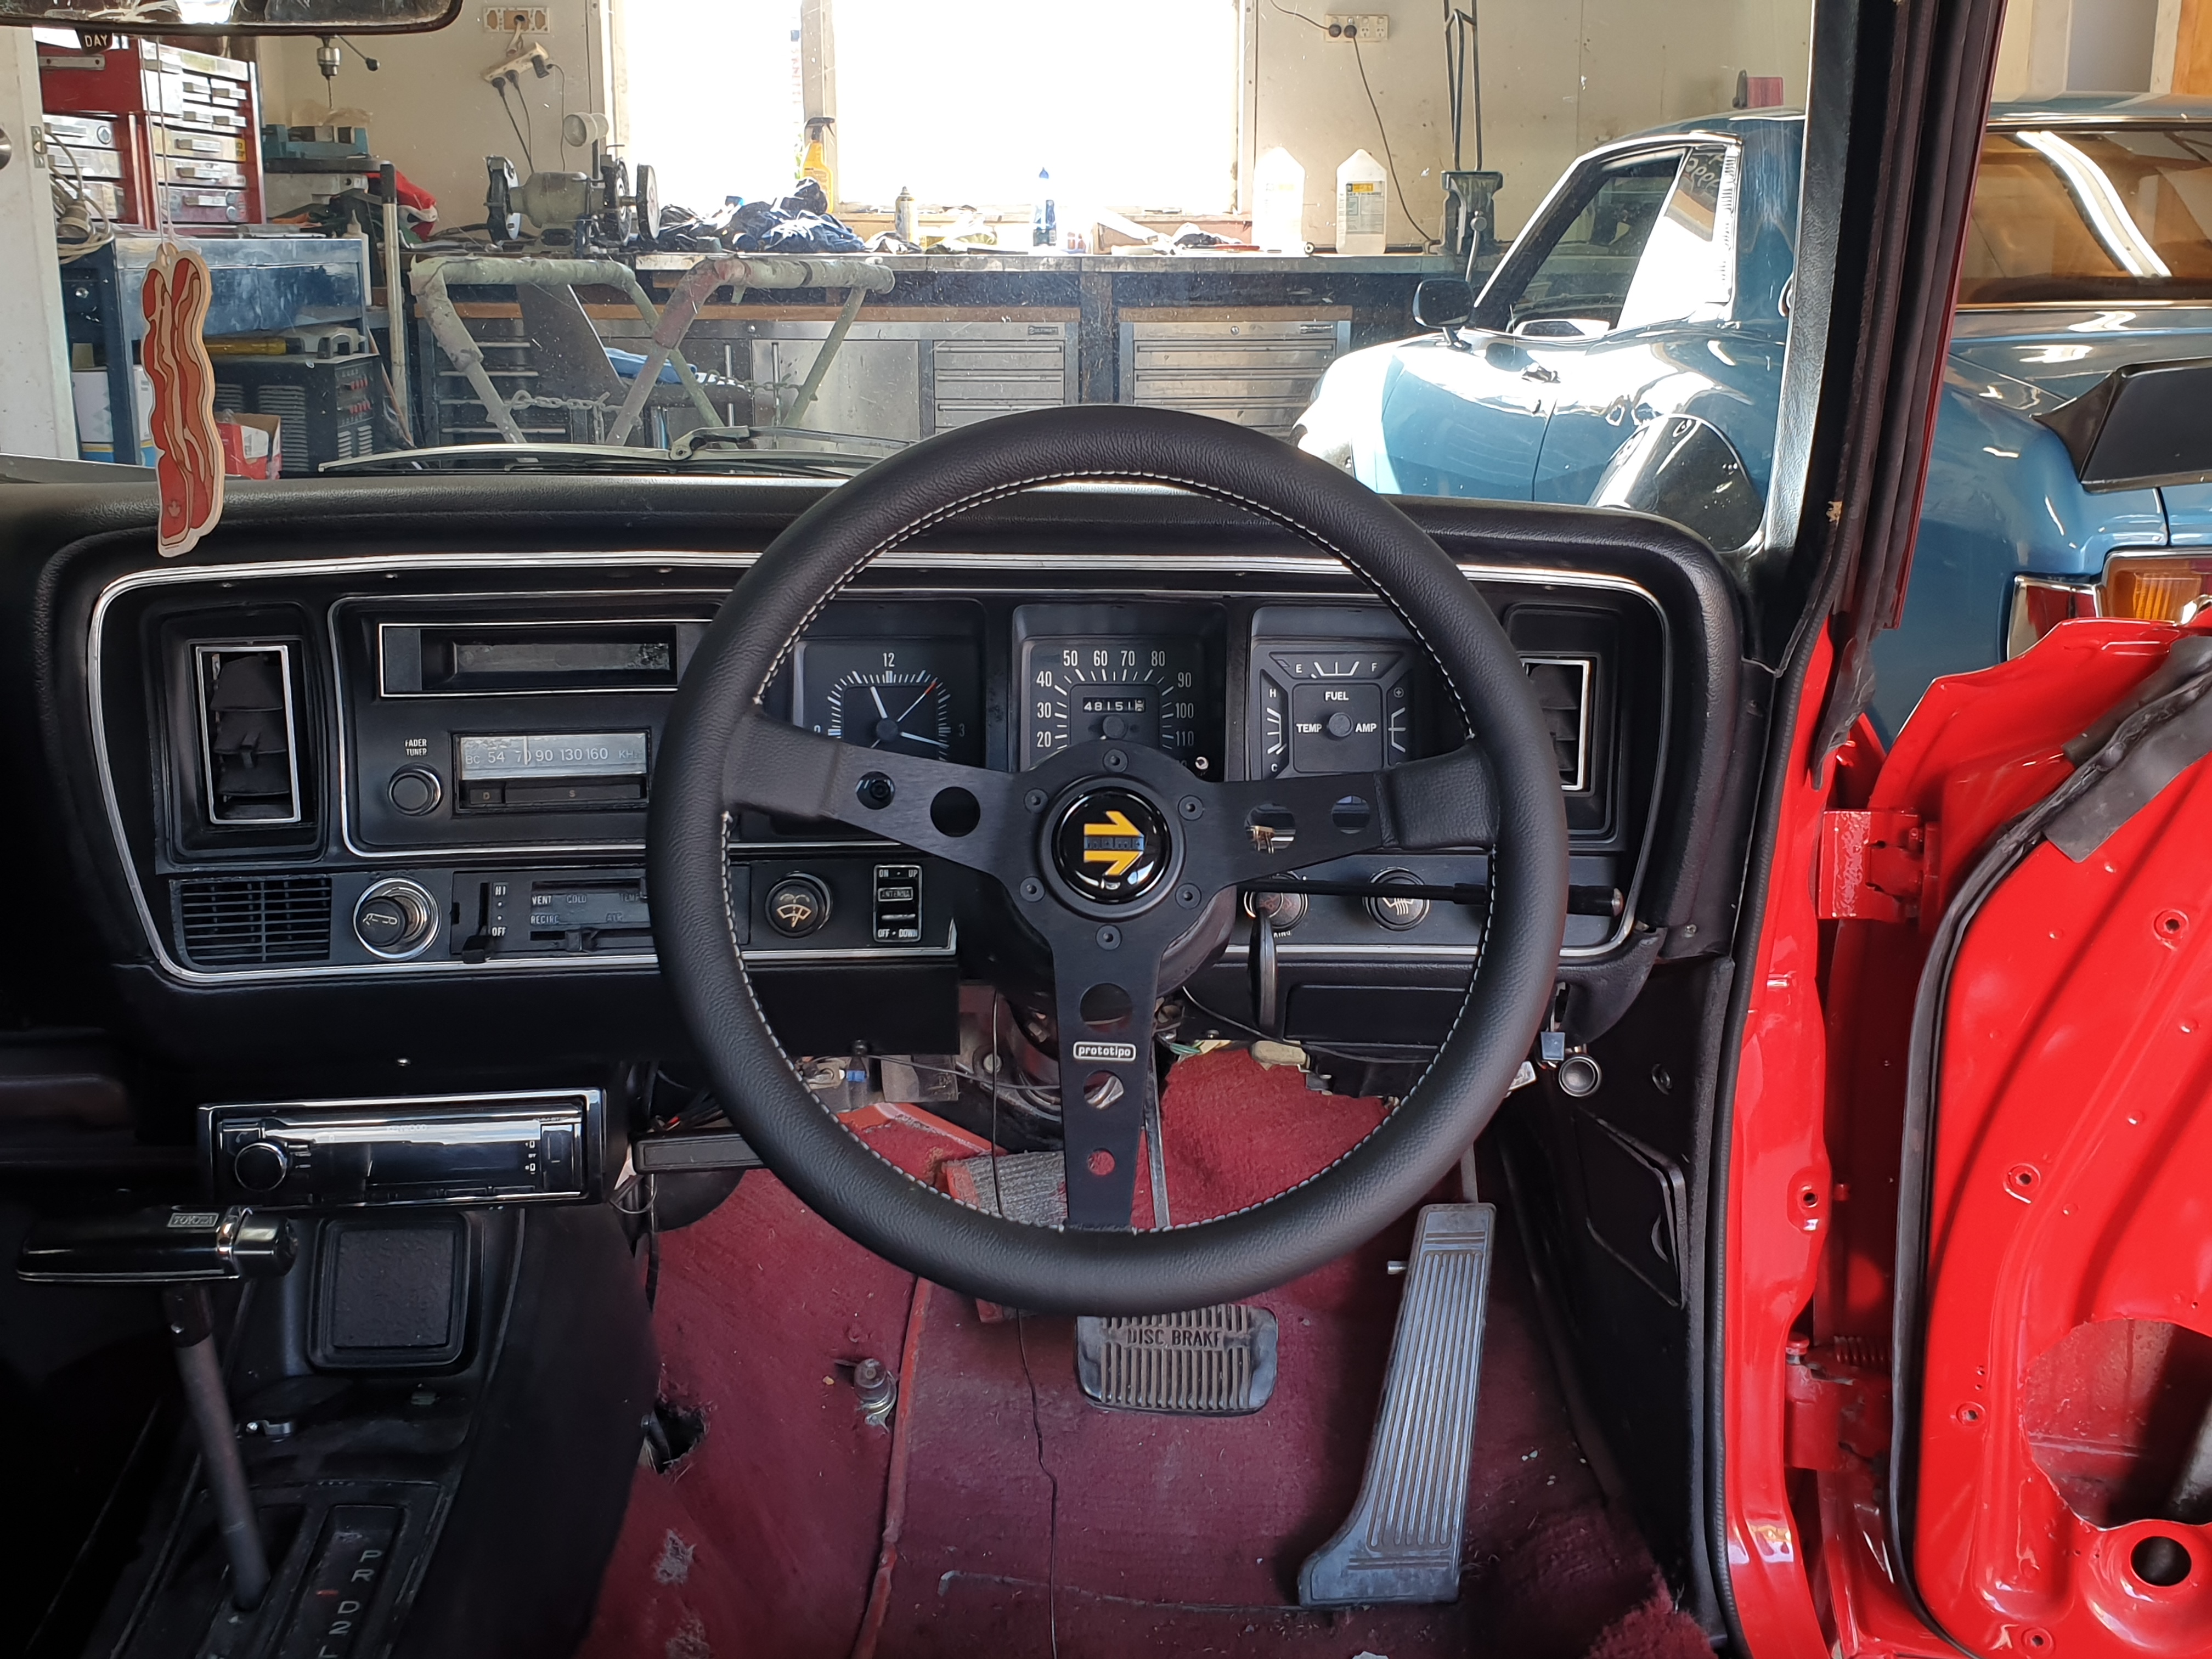
Bought a momo steering wheel for it. I am actually in love with it. Also I'm posting this from my spa pool.
1 point
-
its coming along. im just tidying up all the little things that need doing. ive got some generic belt line rubbers coming for it then i can put the door cards back on. the bumpers are away being chromed and ill get them back in a week or so. not sold on the black center caps and i have another set on order should be here middle of next month. i drove it up the road to get some milk and i fucking love driving this thing, its fucking slow but its cool to just cruze along in and i can see myself doing a bunch of Ks in this as soon as i tidy u the last few things. believe it or not its still got a warrant! 2021-03-18_07-56-27 by sheepers, on Flickr 2021-03-18_07-56-37 by sheepers, on Flickr 2021-03-18_07-56-45 by sheepers, on Flickr 2021-03-18_07-56-52 by sheepers, on Flickr 2021-03-18_07-56-58 by sheepers, on Flickr 2021-03-18_07-57-04 by sheepers, on Flickr1 point
-
and now this. massive thanks to the people who made this happen, @JustHarry for hooking me up with the joker who had it. Owen Flawes for agreeing to sell me his spare rear screen @nzstato for collecting it, packaging it up and sending it up to me, what a good cunt. but not @sheepers for breaking the first one like a fucking dick. 2021-03-08_05-49-15 by sheepers, on Flickr1 point
-
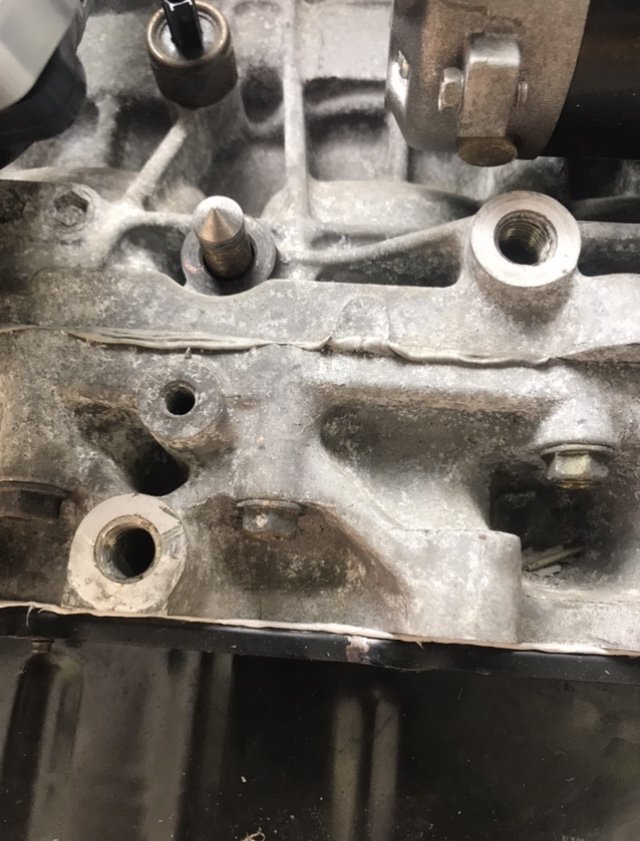
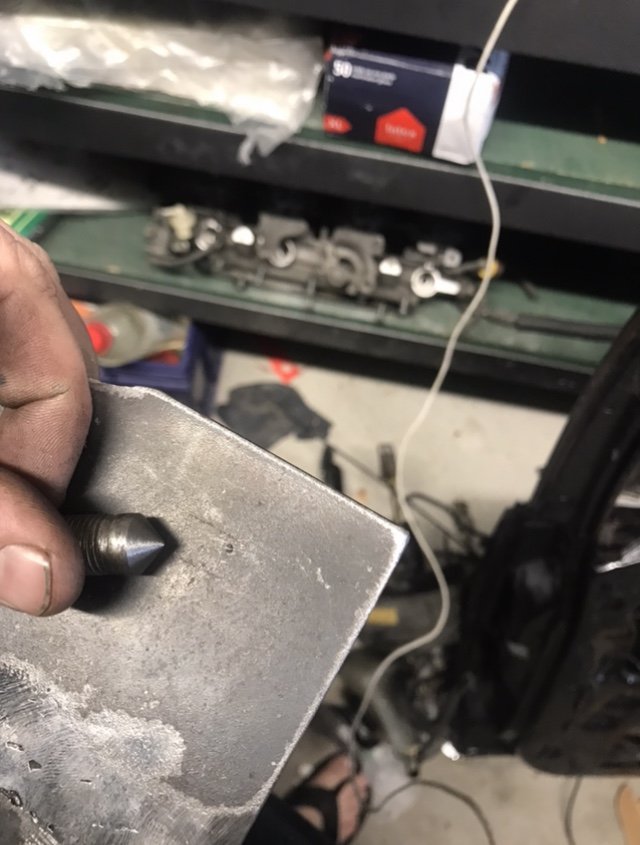
These different depth mount holes are a real pain in the ass ye old battery lathe saved the day
1 point
-
185 also came with original registration and story which I enjoyed. The mans work told him not to drive the work vehicle home at night, so he bought a bike, shortly thereafter they told him there wasn't enough room at the depot to park all the work vehicles, and that he needed to drive it home at night. Looks like he bought bike in '97, and WOF expired in '98. Sounds like he'd used it here and there to ride around the yard and up and down the driveway, but pretty much sat in the shed since. IMG_20200314_200224 by John Bell, on Flickr1 point
-
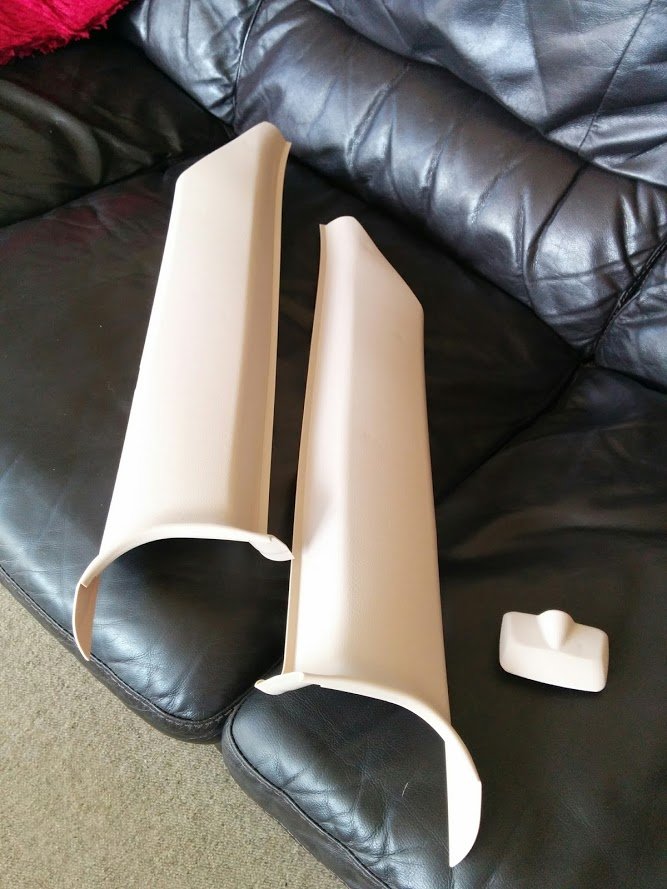
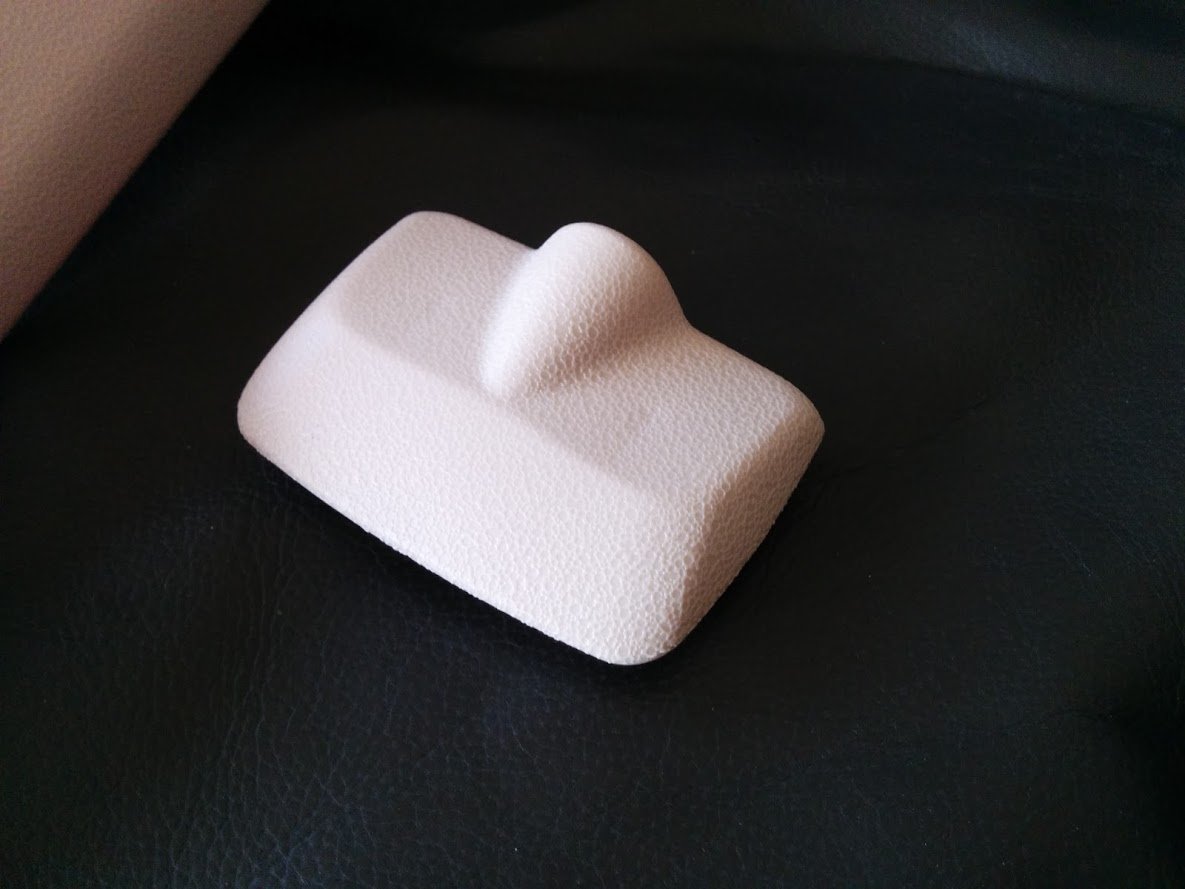
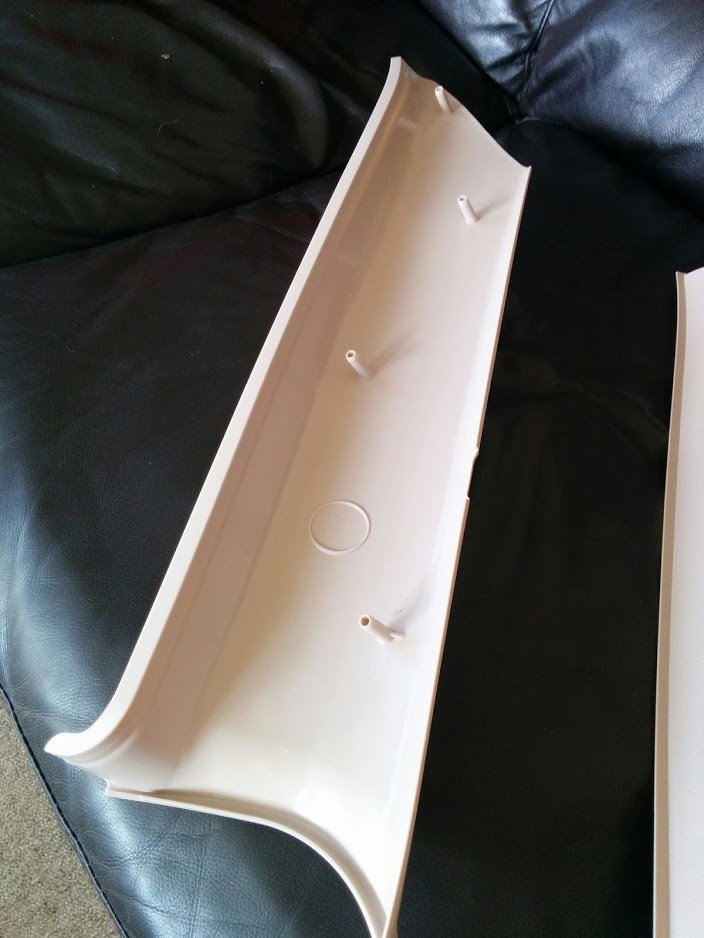
Reproduction c pillar trims and mirror cover, look bloody good
1 point
-
Heres a few tips to avoid or identify a car that has had its ID tampered with. In my line of work, they are quite common, this relates mostly to later model stuff that has the chassis number stamped into the firewall. Some are done poorly and are obvious, some are tricky to spot. 1. Biggest giveaway is a firewall thats been painted in the area around the chassis number, when the outer panels or engine bay hasnt been painted. Cars dont often rust around the chassis number so dont often need painting around there. 2. The chassis number should look clear without sanding marks or evidence of primer or filler buildup in the digits. 3. VIN tags that are bent or crinkled up from being removed, they are riveted and stuck on so usually get damaged when they are removed. 4. Non original rivets holding tags on- eg nissans have a plastic clip thing to hold the tag on 5. The etched in vin number on the back window should match the vin number on the car- look for stickers covering it or if its been ground or sanded off 6. Check the year on the seatbelts matches the year on the rego 7. Check the car features match what it should be- ie a car I saw the other day said it was a 96 but had the facelift lights and twin airbags that were not fitted on 96 models 8. If the stamped chassis number looks like its been fiddled with, you can usually get behind it via the cowl panel, check for weld marks, also check the thickness- i have seen ones where the 'new' chassis number was stuck straight over the top. giving it a good push with your thumb will sometimes crack the filler holding it on. One of these things might not mean anything, e.g if the car has had the rear window swapped out of another car the vin number wont match. But if theres more than one thing, start getting suspicious....... Older cars that only have a plate riveted on are harder to pick, plus are more likely to have been painted at some stage. Make sure the car matches what it says it is, ie if says its a VK commodore but it doesnt have the little c pillar window........ heres one that hasnt been fiddled with, note the faint red stripe over it from factory and one that has been this one was glued in, cracked when I pushed on it...... here you can see different rivets, and where the old ones were. hiding that with the alarm siren wont work. tags cut off belts to remove date 'new' chassis number stuck over the top of the original hard to see, but there was a weld visible from behind and the etching on the window sanded off1 point


.jpg.2c3492693f786143c1820d132a7275ab.jpg)
.jpg.74f74e0b06892d5a5a9022a53ed4170a.jpg)
.jpg.9b4e4f5a2a91f5f4c81babcd06be6c27.jpg)
.jpg.0e6a4298a464a5498127fe6e03e1a699.jpg)


.jpg.b1d574b58ea1fc660d4ad2eeff6c2529.jpg)
.jpg.46acd8f1c0ab30373676b9a8fa30e0f8.jpg)
.jpg.9522e115b6ce42a0f1fa54ee8be88c1b.jpg)
.jpg.60725e6f3e2ef8e76802543785b76c6f.jpg)
.jpg.b356316fc88b188730b9a0eed71e2dc6.jpg)


This leaderboard is set to Auckland/GMT+12:00