
Leaderboard


Popular Content
Showing content with the highest reputation on 04/05/21 in all areas
-
oh, hi!! so yea things have been great with this car. except the output bushing on the gearbox is flopping around and subsequently the output seal is leaking and flinging oil all over the exhaust. this is shit. the gearbox has only done a couple thousand Ks since it was brand new from Toyota. apparently this is fairly common on the new R154s which fucks me off even more. I've fucked around with changing the seal multiple times and all the other usual checks but it just keeps on leaking. cool. so to fix it i have to take the motor and box out because of the whole massive drive train/small car thing so out the motor comes. its fairly depressing taking a motor, that you have worked very hard on to make as new and shiny as you can, out of a car and seeing all the road grime and shit on it, as well as all the crap that goes everywhere when you start taking things apart. well, its what has to be done so away we go. not sure what else ill do while the motor is out. im not 100% happy with the clutch i put in it. its juddery and grabby at take off which sucks so that may change. fuck knows.............. anywho, first step, jack up your car. 2021-05-04_05-59-44 by sheepers, on Flickr17 points
-
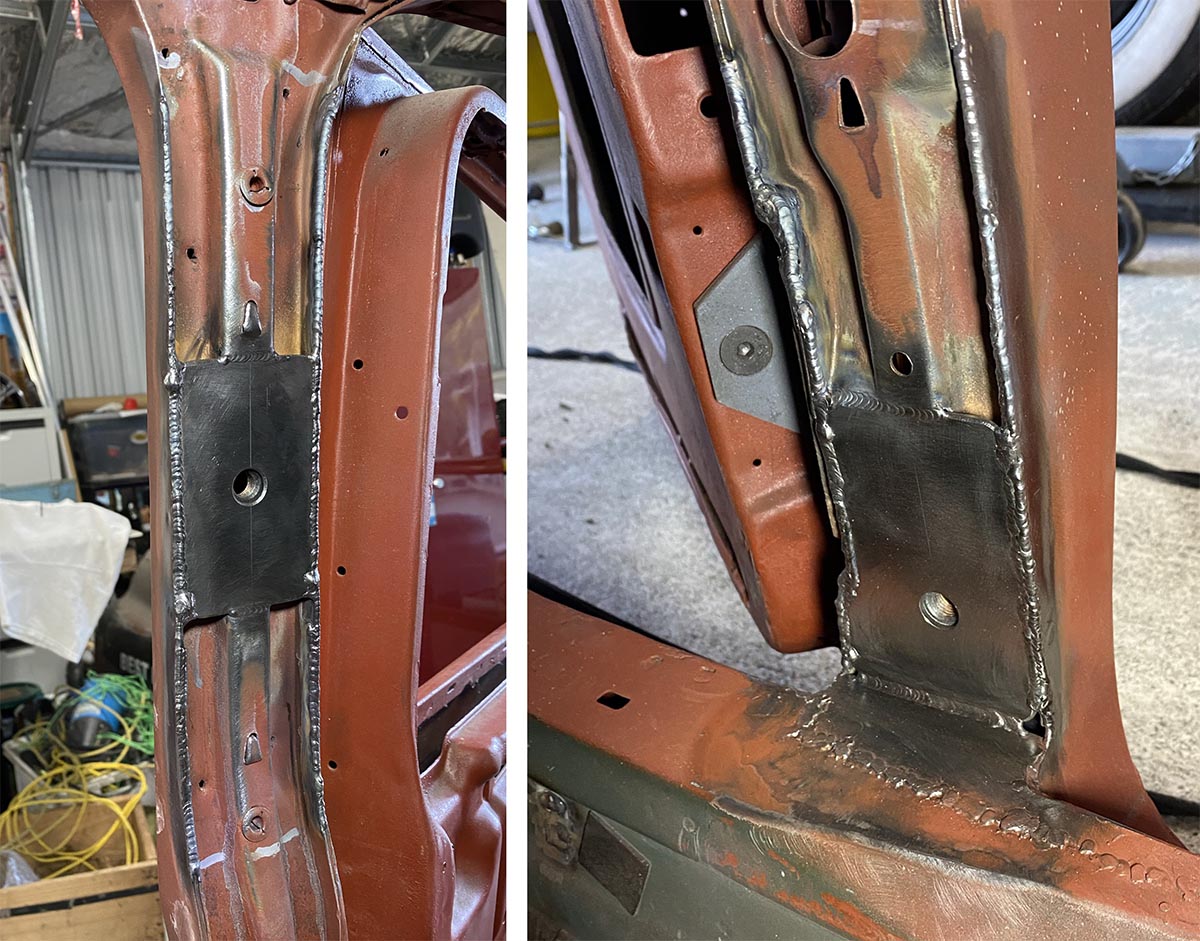
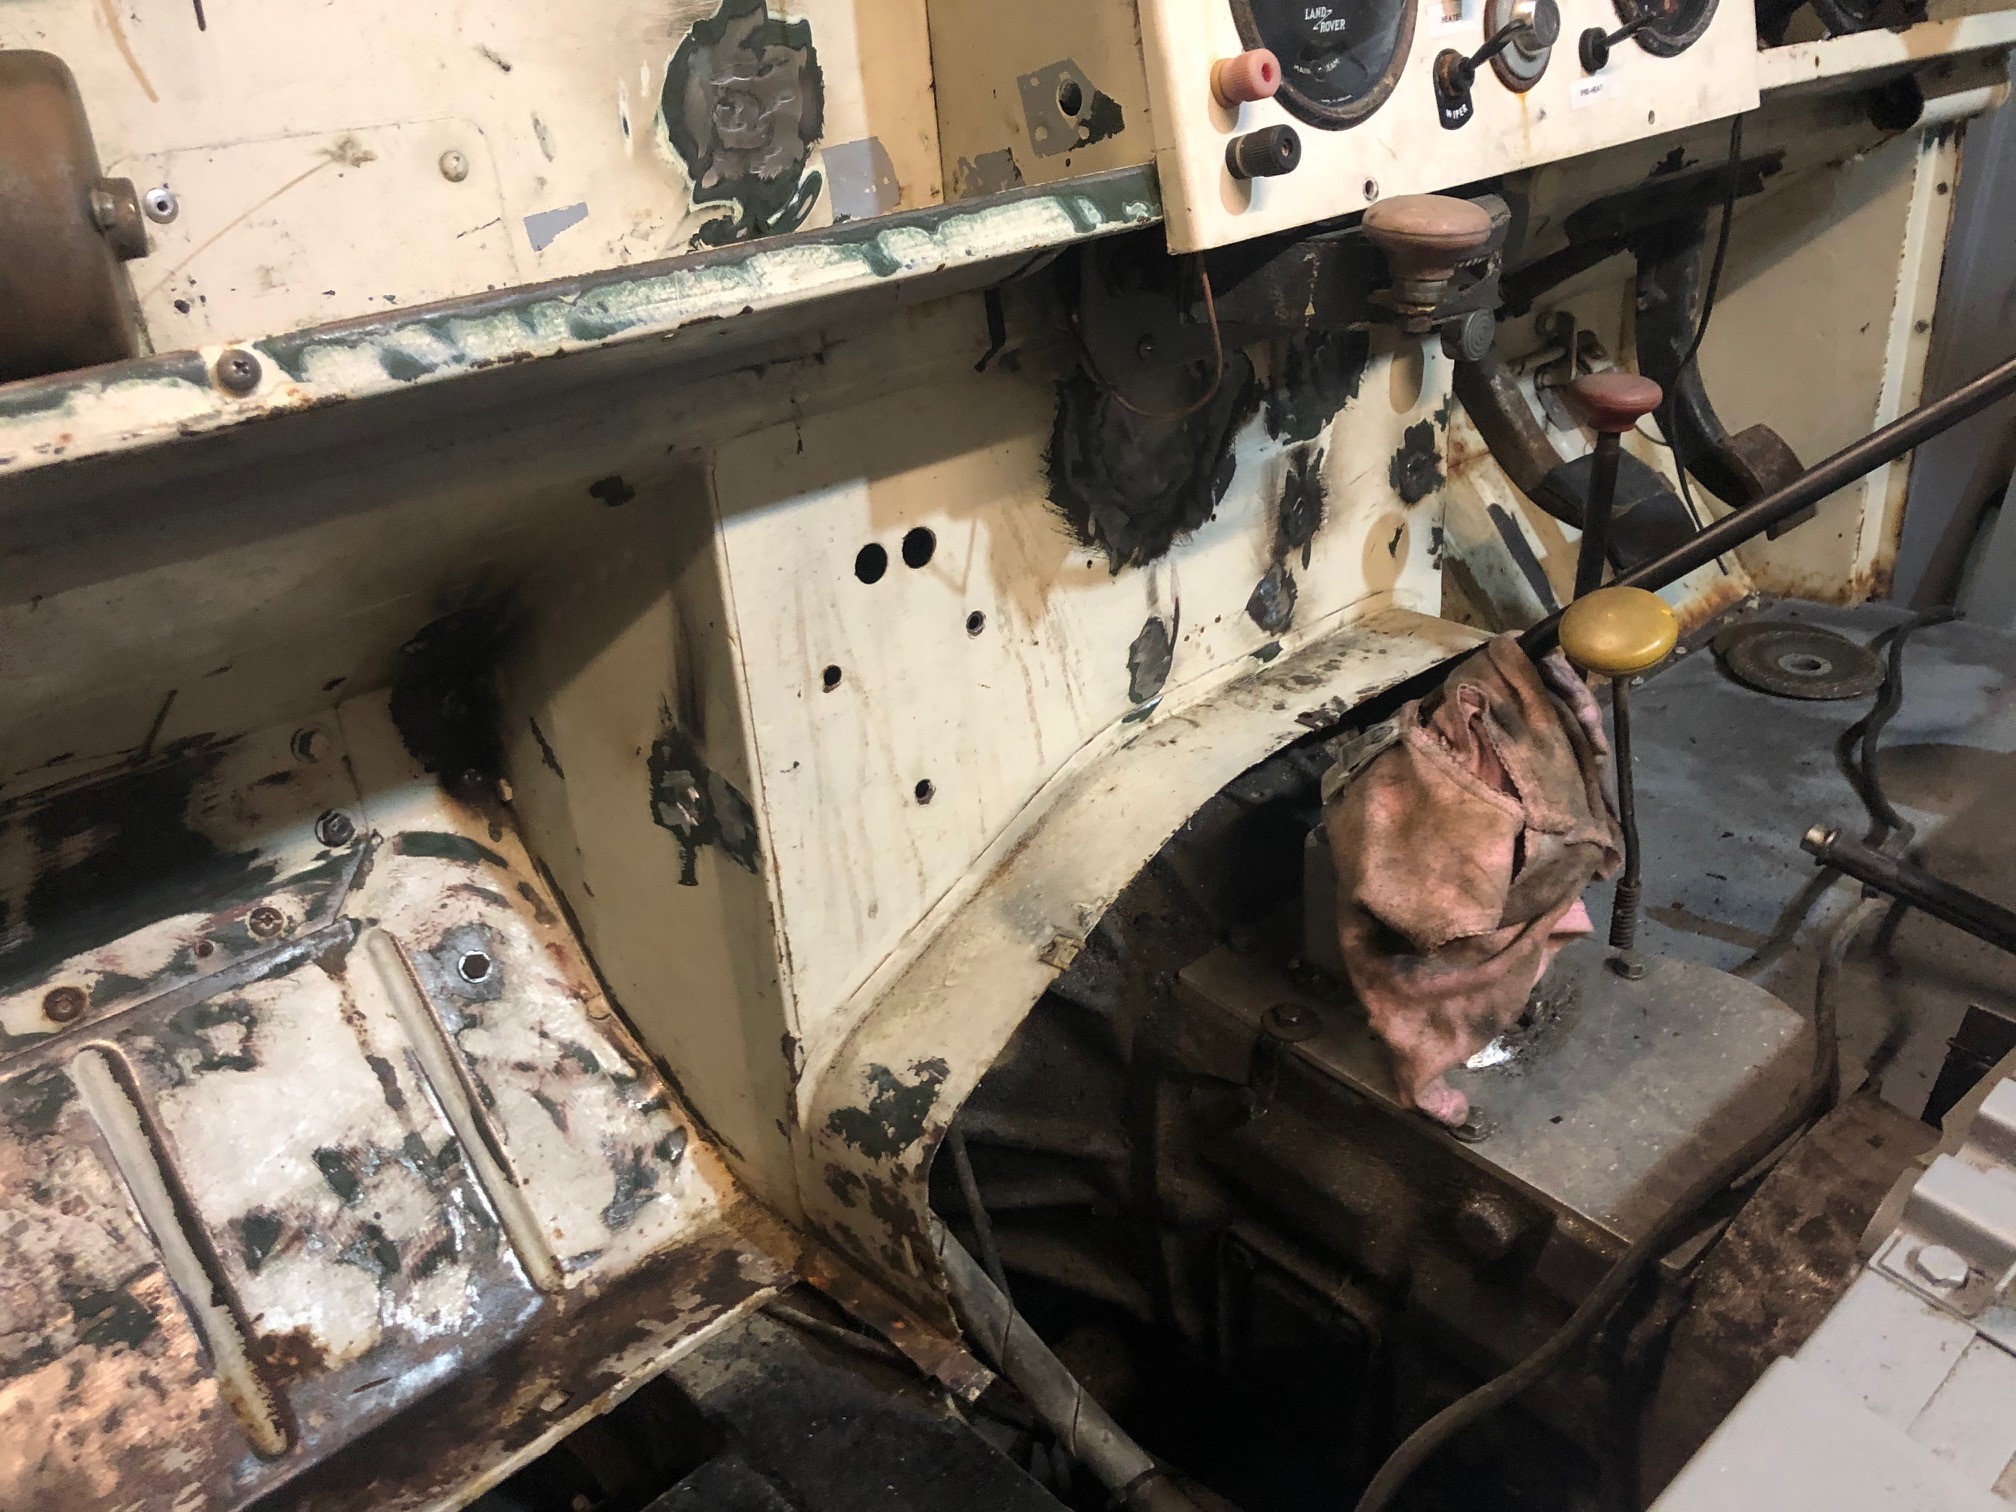
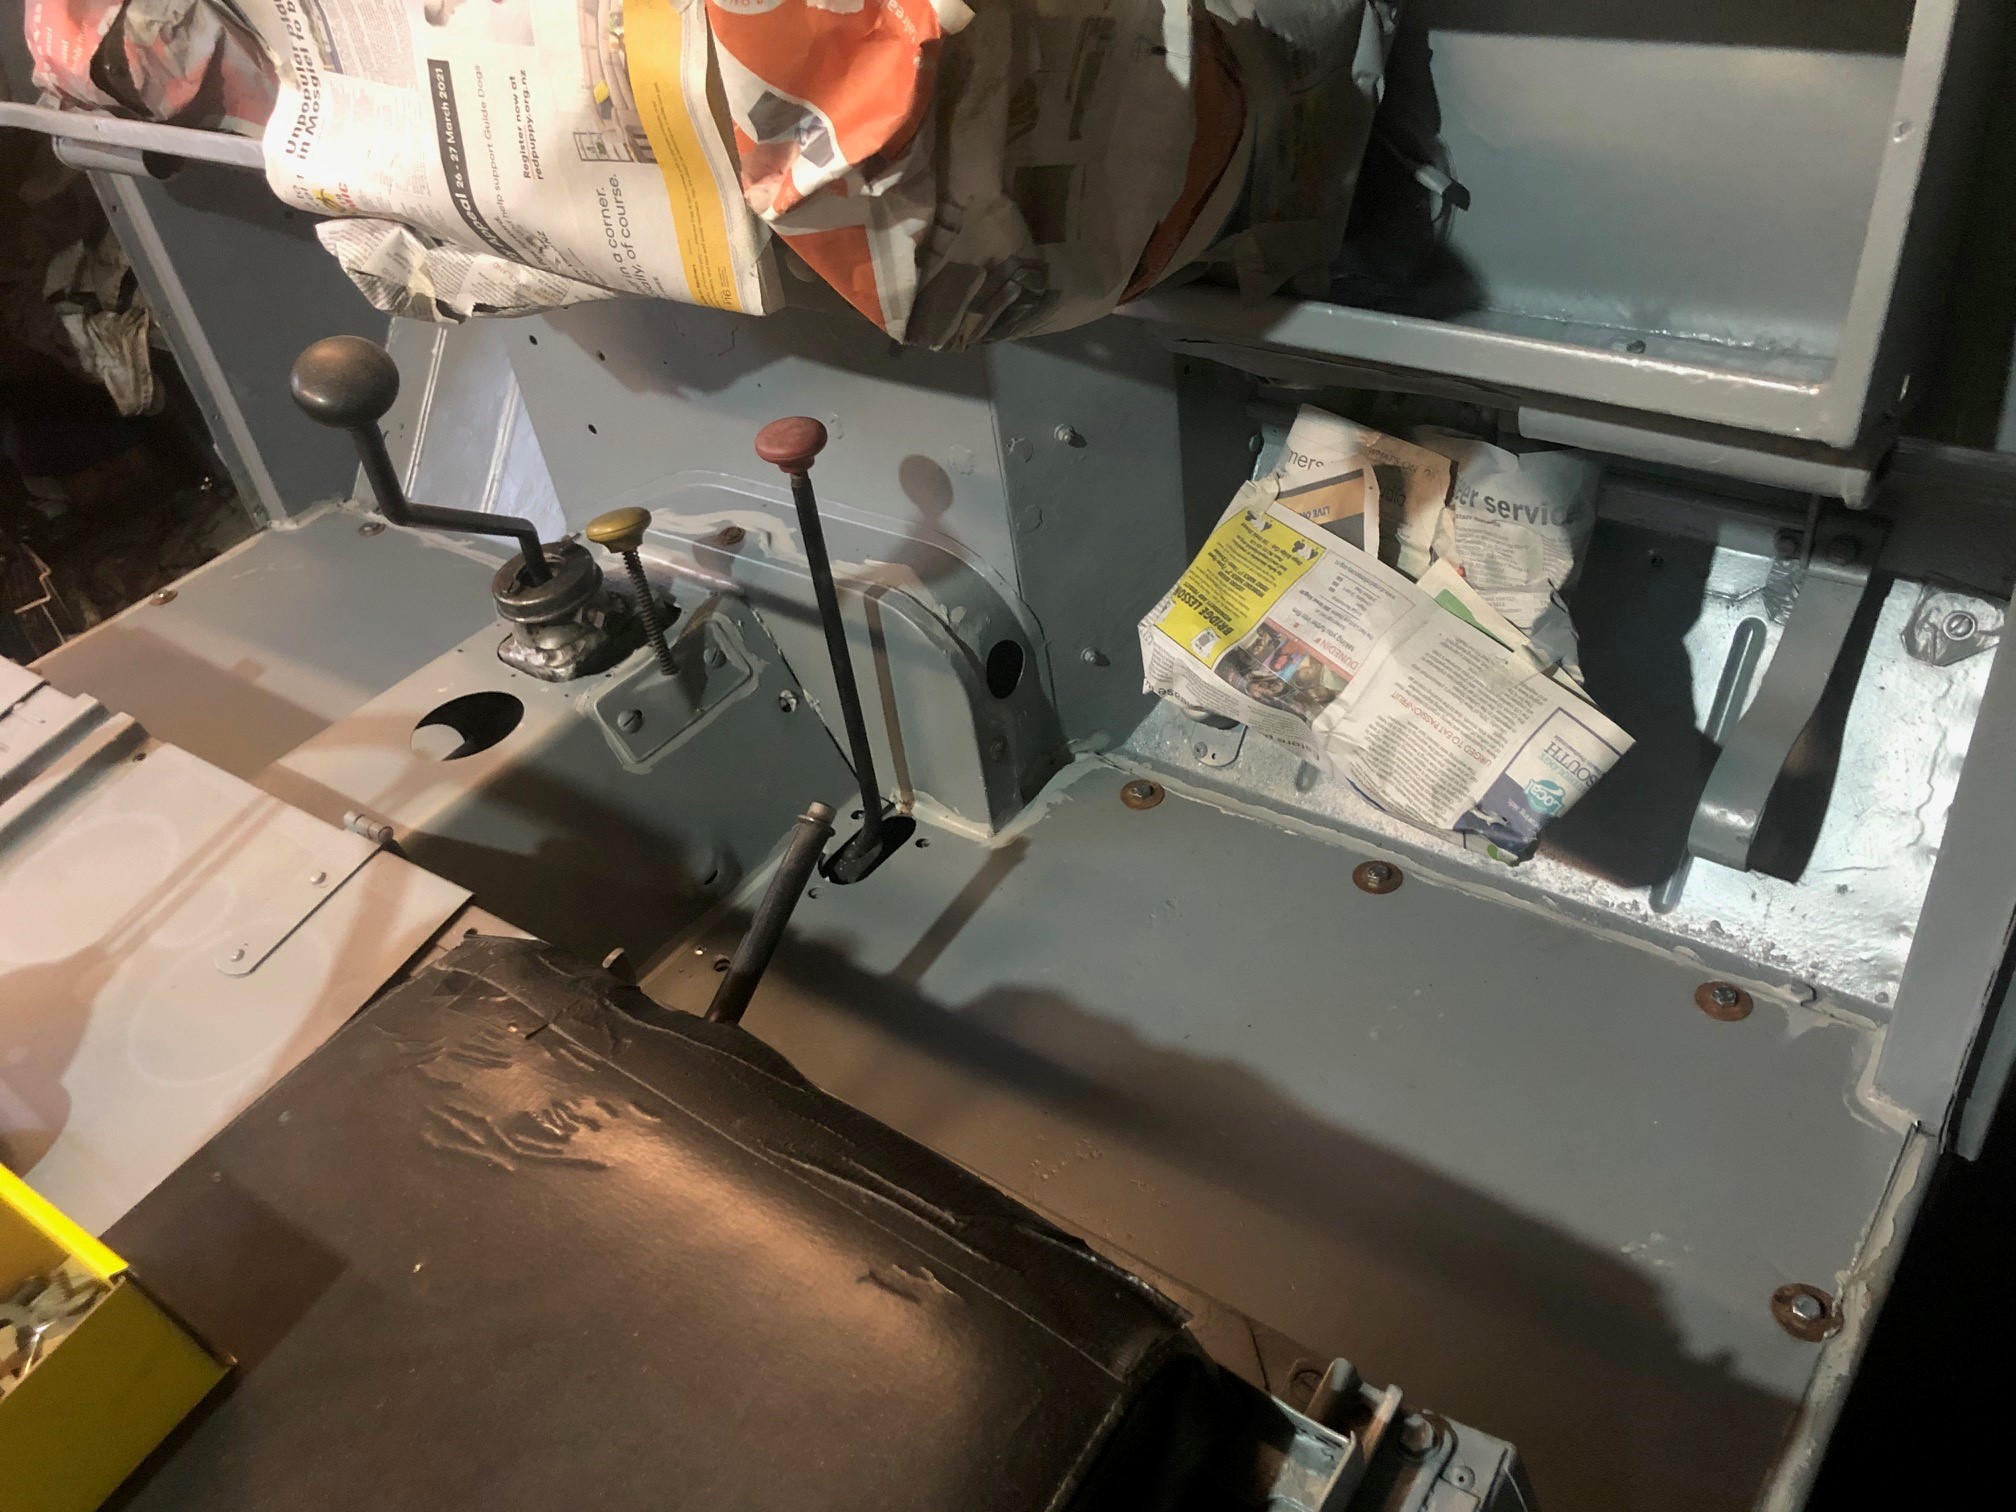
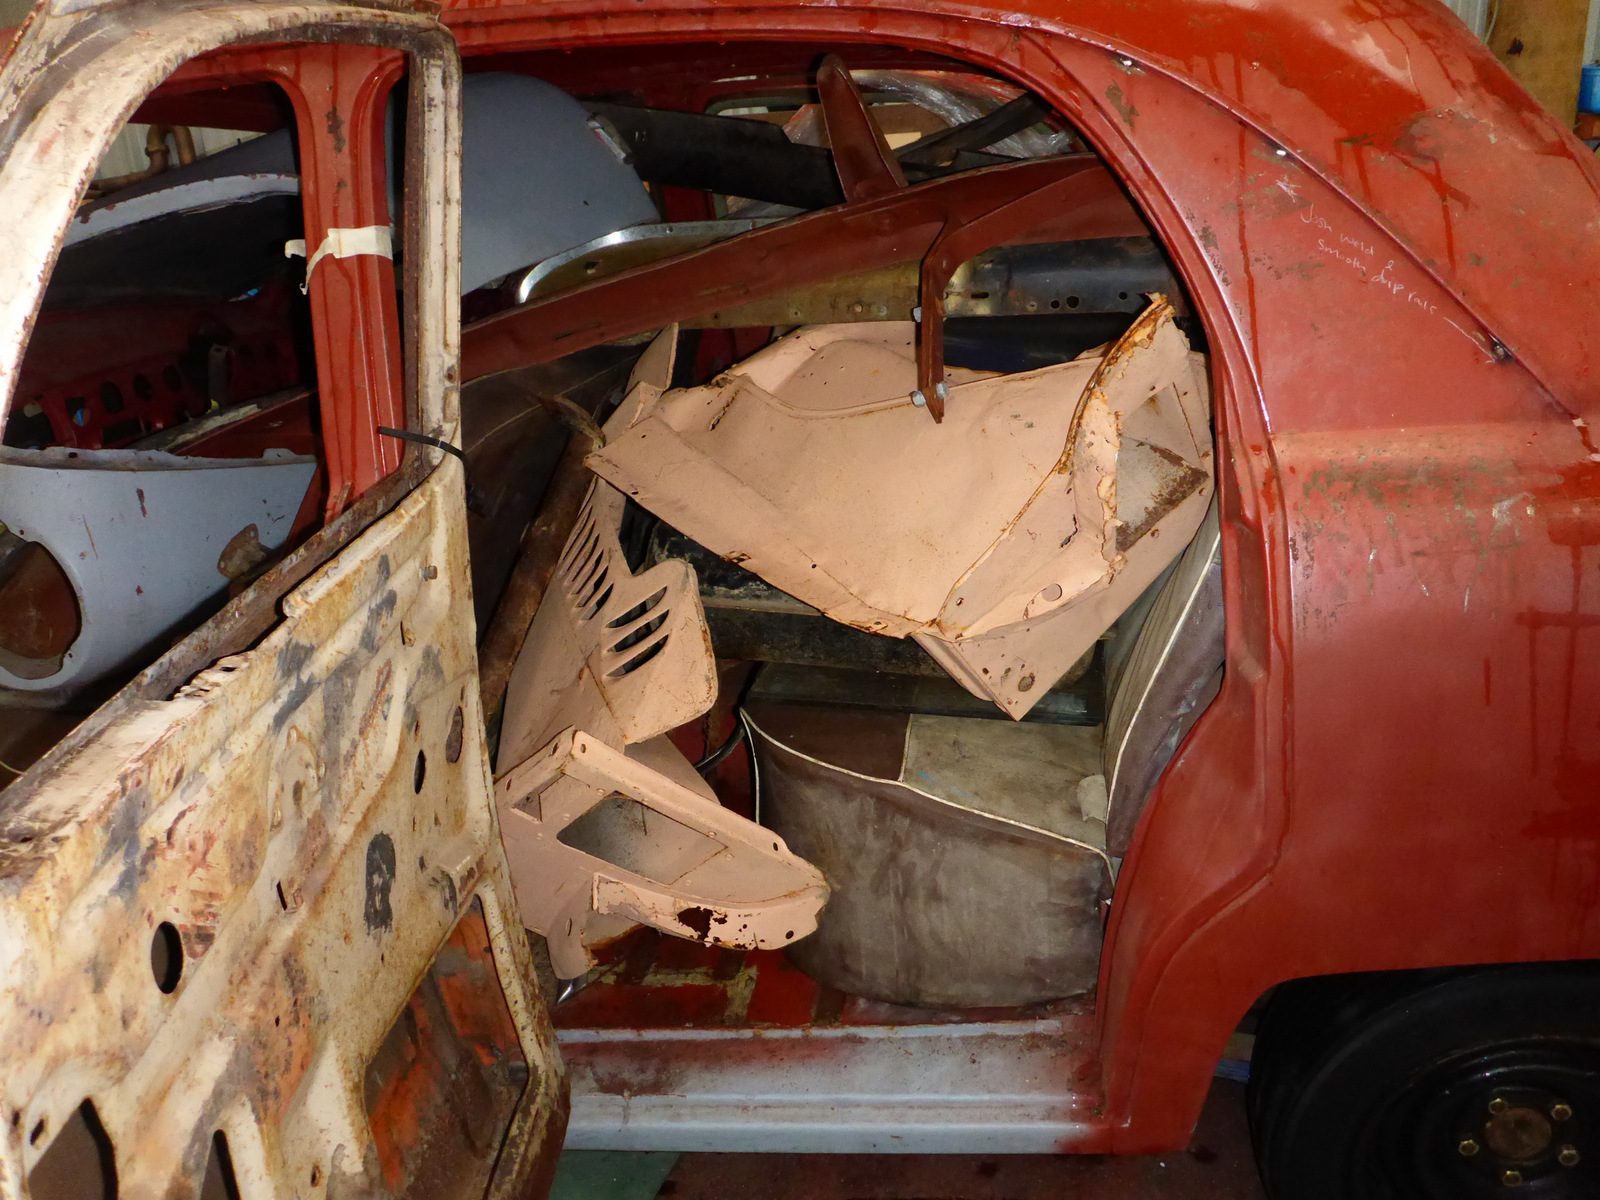
Cut and reinforced some better speaker holes in the parcel tray. And purchased all new seatbelts so was able to make and have Matt Tig in some OTT anchor plates.
 11 points
 -
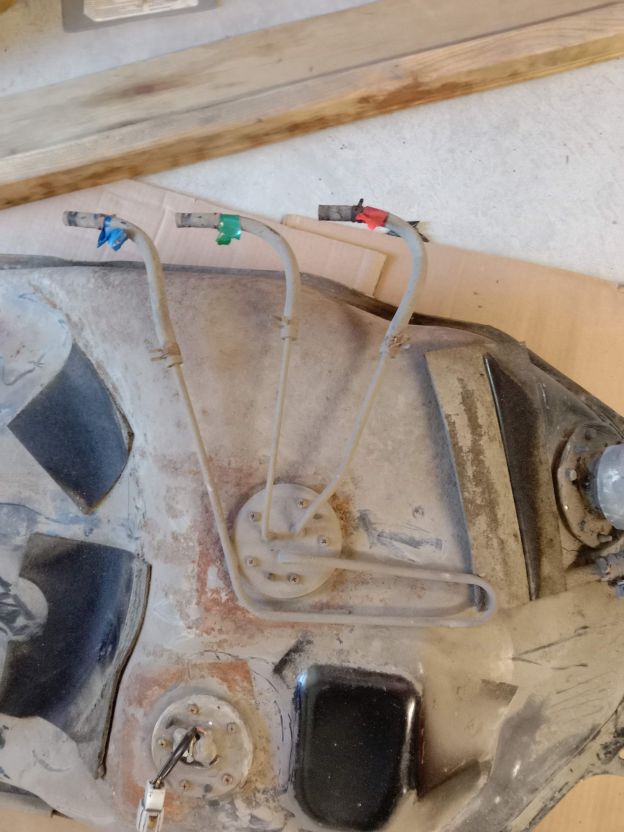
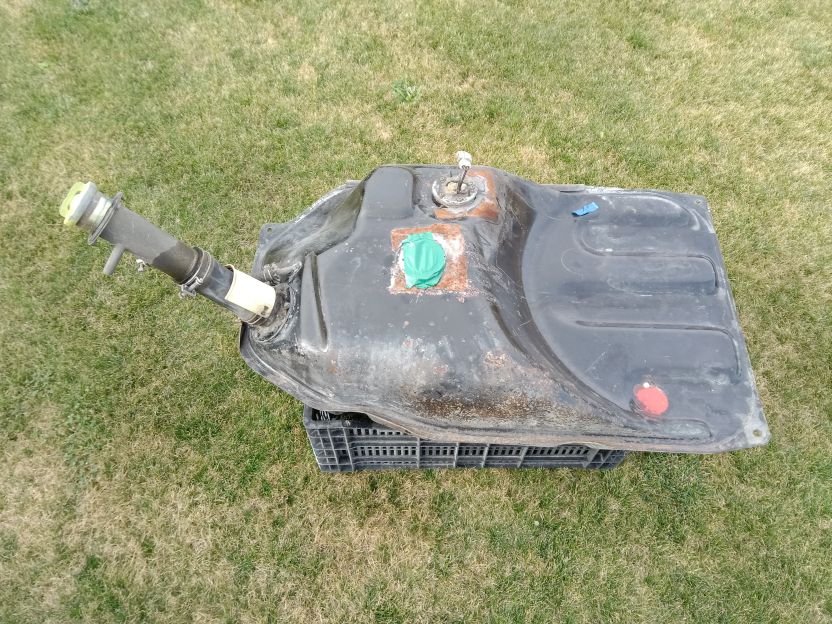
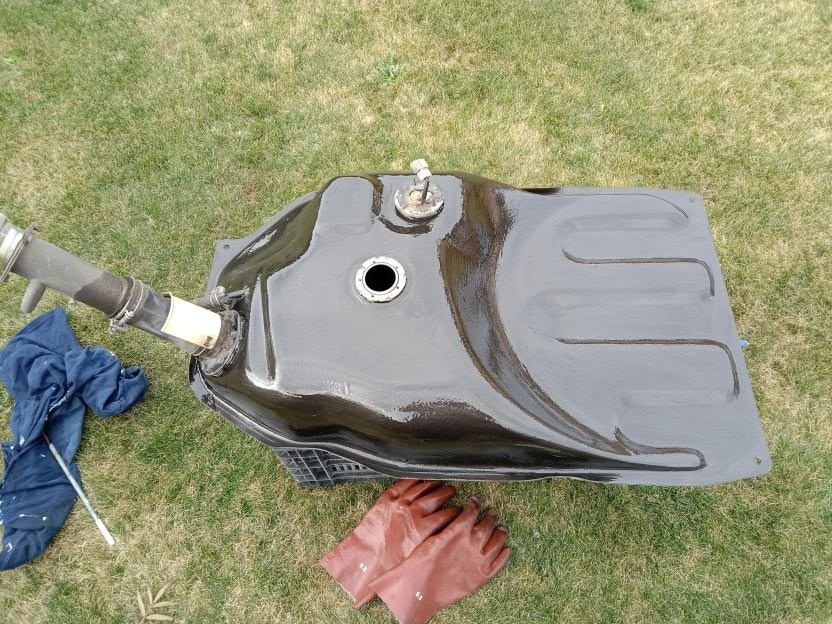
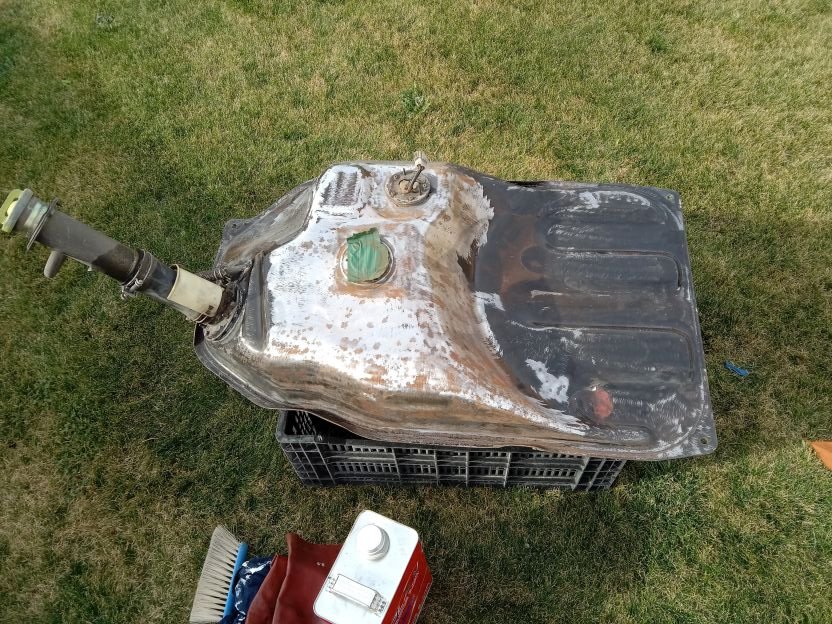
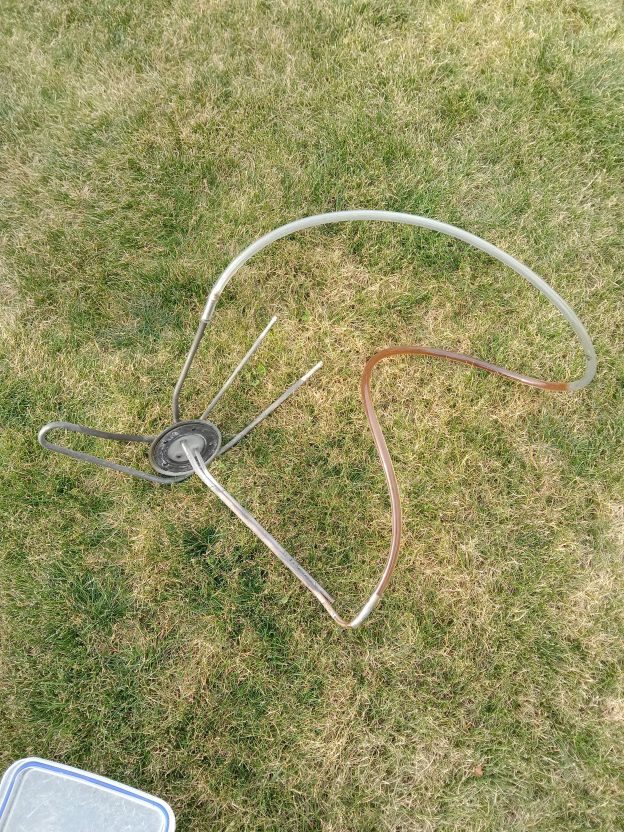
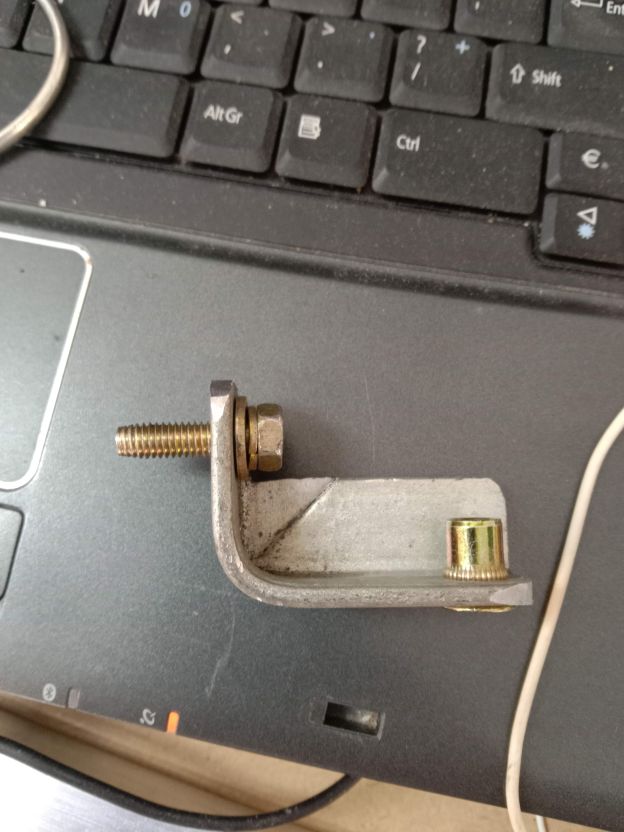
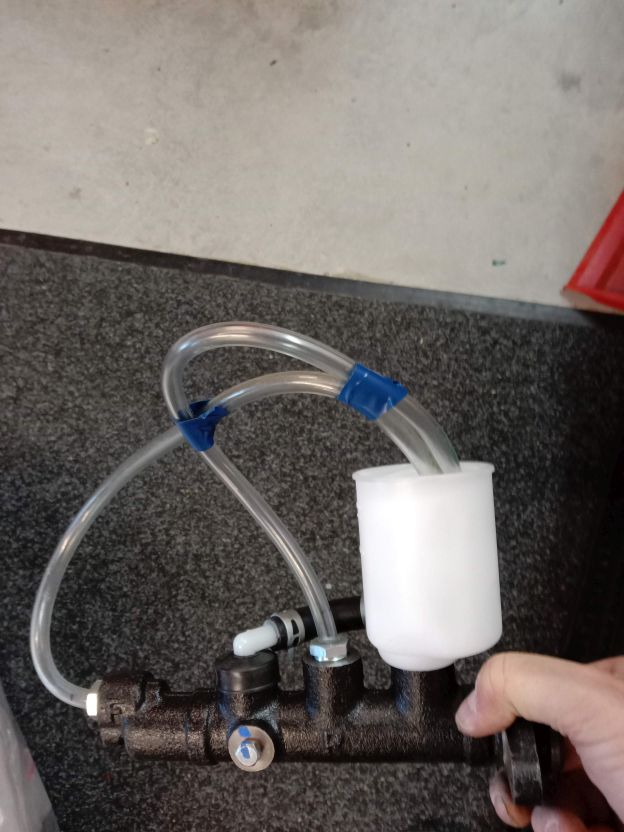
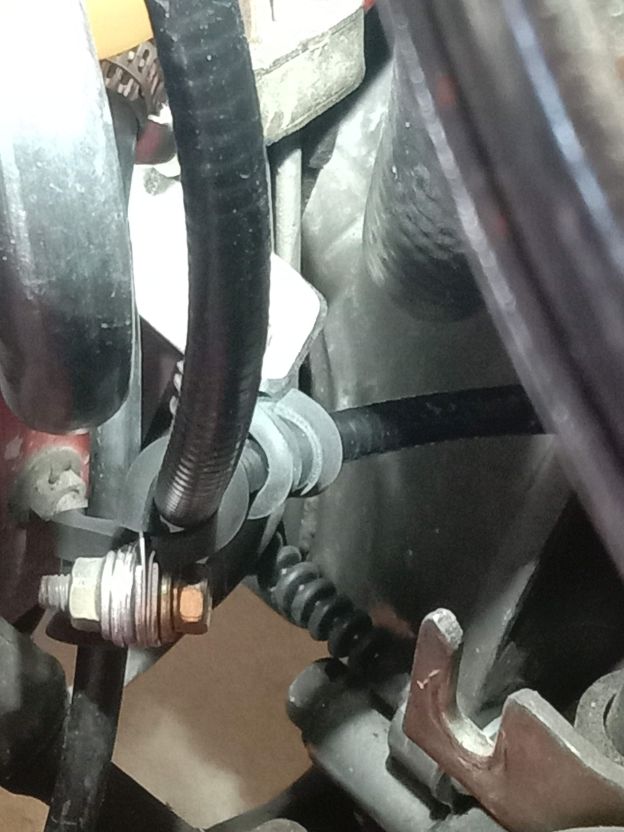
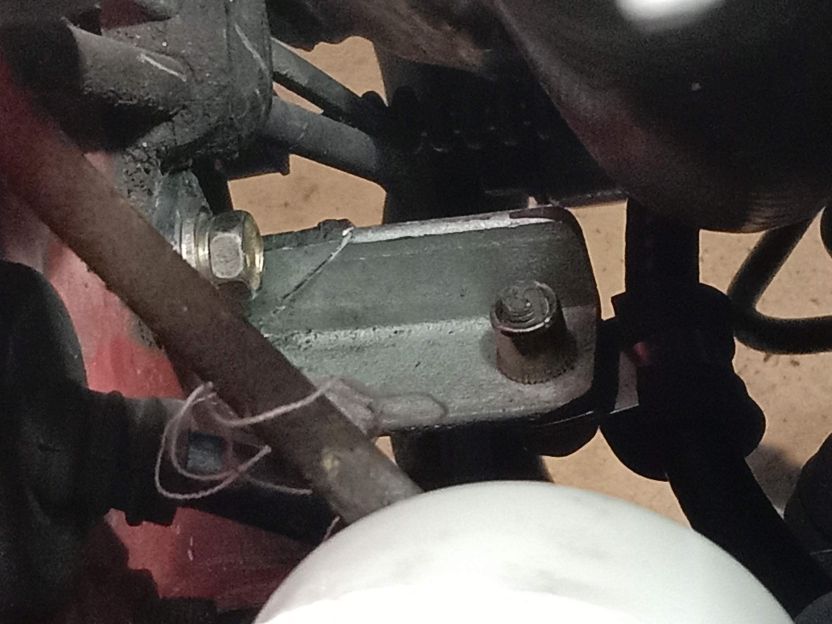
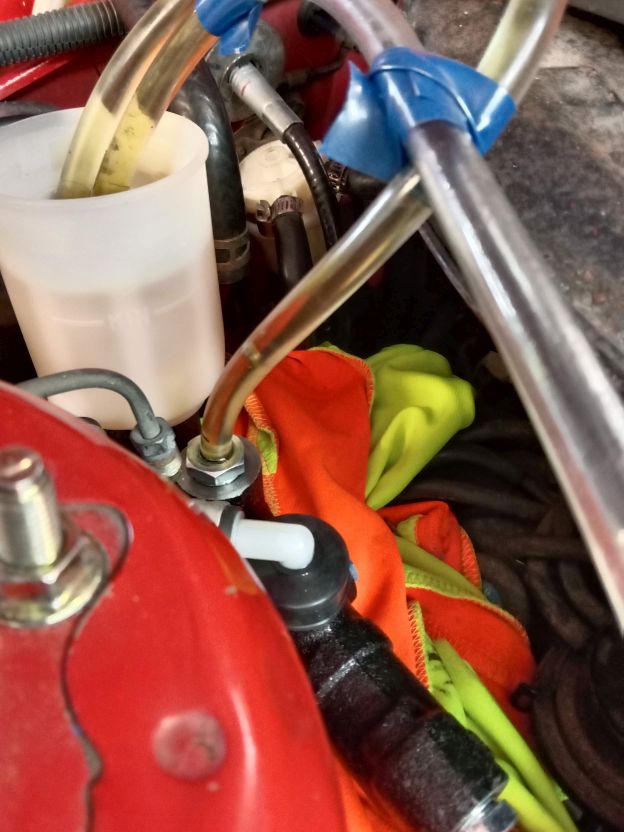
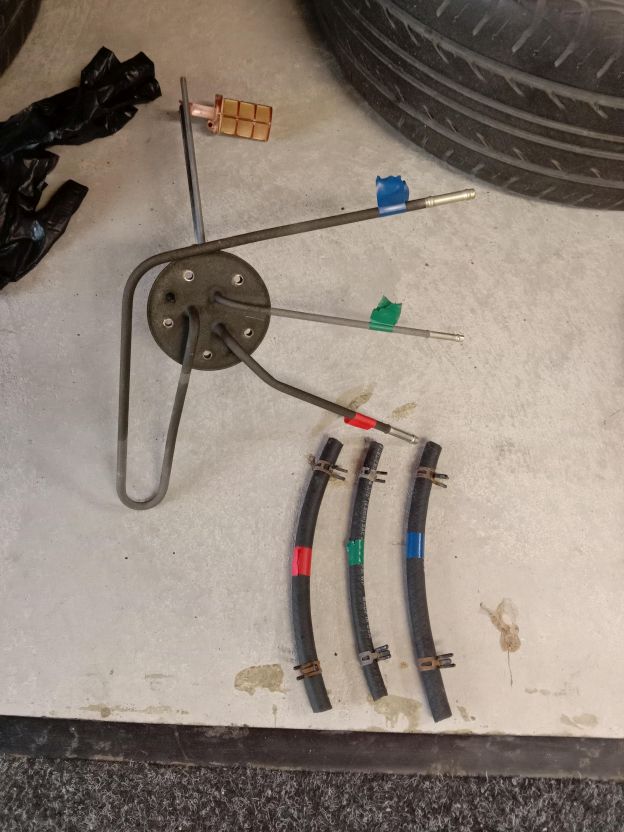
Still chipping away, have had a few jobs that held up other jobs, so progress hasn't been as quick as i'd like. Couldn't put brake master cylinder in till I sorted the clutch and couldn't put fuel tank back in till i'd sorted the brakes... Anyway, a quick run down below. Tried to start it the other week to make sure it still runs, it doesn't. Figured it was probably fuel as it will have been sitting for a while. So I dropped the fuel tank out to find the tube pretty blocked, so that hopefully answers that. Drained the fuel tank, turns out I put quite a bit more fuel in over time than I thought, fill the mower container and any lose containers I had. Took the worst to the dump eco area. Dropped the tank in to Hornby Radiators and they gave it a good clean inside. I grabbed some new hose while that was being done. Got fuel tank back and gave it a quick paint on the top half, only surface rust, but some was a bit pitted so worthwhile doing. Fuel tank. Hoses labelled for future reference, also labelled on car. After getting the insides cleaned. quick tickle up Then a coat of whatever rust paint was lying around. Was blowing a gale, can't beat a brush on product sometimes. Engine fuel supply pipe with some meths in it, sloshed it around a bit and left it overnight. Grabbed some pipe cleaners and it's good as now. Getting a new intank filter thing was too hard basket with my time frame, so I gave it a good clean and chucked it back on. Oh yeah and the new hose: While that was being done I went down to CBC in town and they made me a new clutch cable. The old one had been resting on the exhaust so the cover was pretty toast. No pics because I just wanted it installed. But it was a pretty sweet cable. I had it made 50mm shorter than the one I had, as I couldn't route the one in the car without it hitting exhaust and steering. So with the new cable made I made a bracket to hold it clear of everything. Factory they have a bracket, but it's NLA so I had to just guess it. Asked on a FB group dedicated to these cars but no one could be bothered taking a photo for me of how it's run factory, boo. Anyway, the bracket, which is part of a realtor sign I chopped up. Gave it another tweak with the rivnut tool after this photo and got it compressed a bit more, shes solid as fuck. Bolted to the firewall and installed a P-clip on it to hold the cable. Bolted two clips together to keep the clutch and speedo cable apart and keeps it off the fuel line on firewall from filter. No idea how much of this junk is legit, but none of it's under pressure, it's just done to keep things apart so nothing can rub through. Seems legit enough to me, guess i'll find out soon enough when it gets checked. Just need it together for now and worry about the details later. For those that don't frequent the spam tech thread, I asked about bleeding my new master cylinder and went with this solution. Which when installed worked like this. Didn't leak bugger all when being bled, and I just clamped the pipes with vice grips when done so brake fluid didn't go everywhere. So then I bled the rest of the car, gave up doing it by myself and installed someone in the car to pump for me. It was after I had done this, I realised I had fucked up... I pulled the pads out as I was getting a bit of fluid leaking while trying to bleed the nipples myself (no euphemism). So I thought rather than potentially fuck the pads i'll remove them. I'm sure you can work out the rest... thankfully the pistons are long enough for this rookie mistake to not be an issue. They pushed back in fine with a nipple released. Was going to rebleed the whole system again tomorrow anyway with new fluid. But that is a must now as i'll have air in one side of each caliper. No biggie. Next time I'll have brake pad shaped bits of wood to install. Quake safe on axle stands with enough junk underneath to stop it being able to fall on me. Next up will be work out why the dash sits too high to where the windscreen will struggle to fit on one side. Then book in a windscreen install. Then do my own alignment to the point I can get the brakes bed in a bit. Then book proper alignment. Then not sure... i'll worry about that another day, getting close.
11 points
-
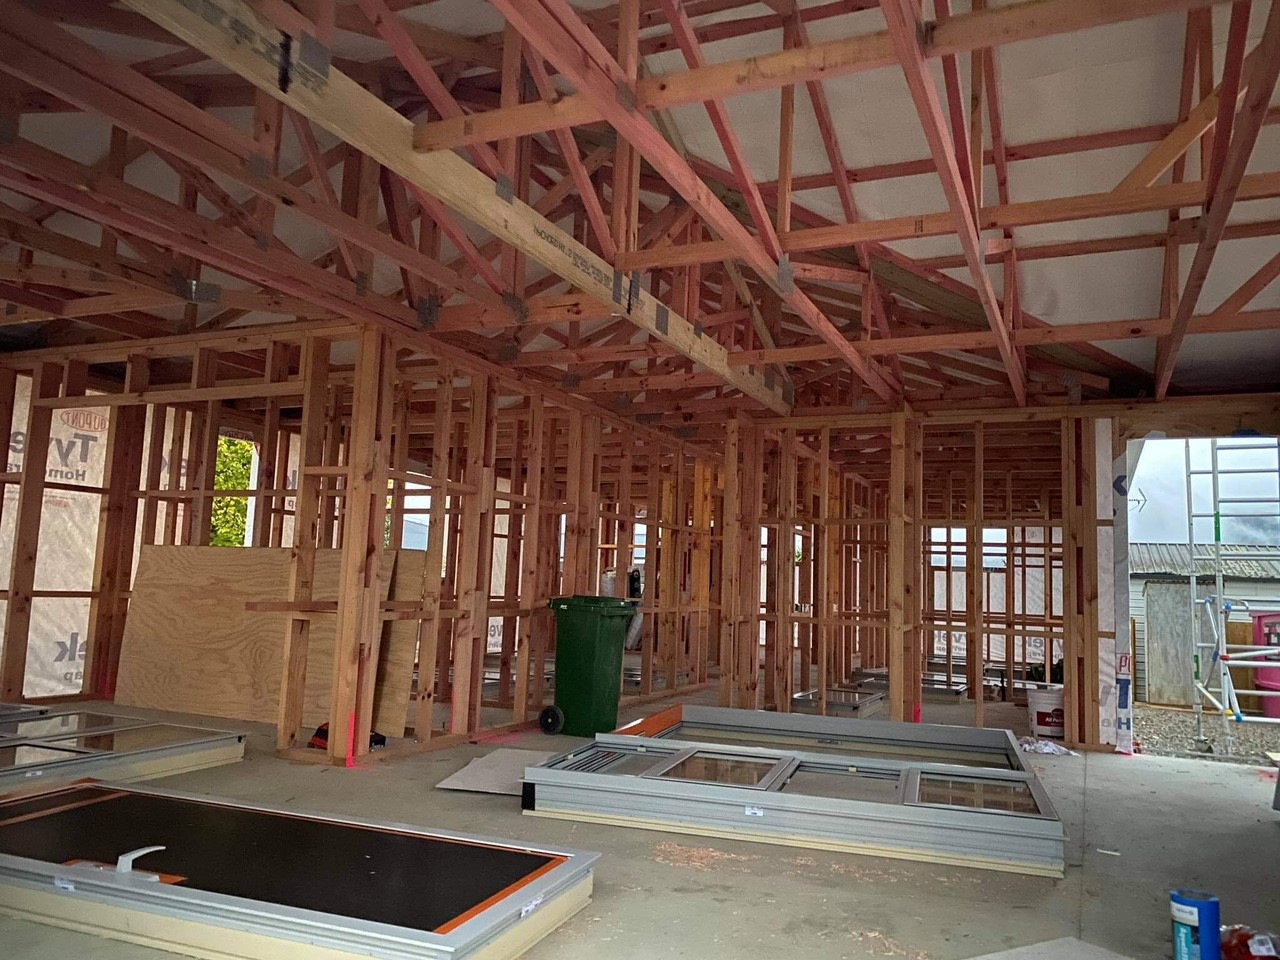
Looking more 'house-like' now, glad they have it covered in to store materials, there is minimal room left in my shed. Likely to pick an RE agent tomorrow, will post up my process to do so.
10 points
-
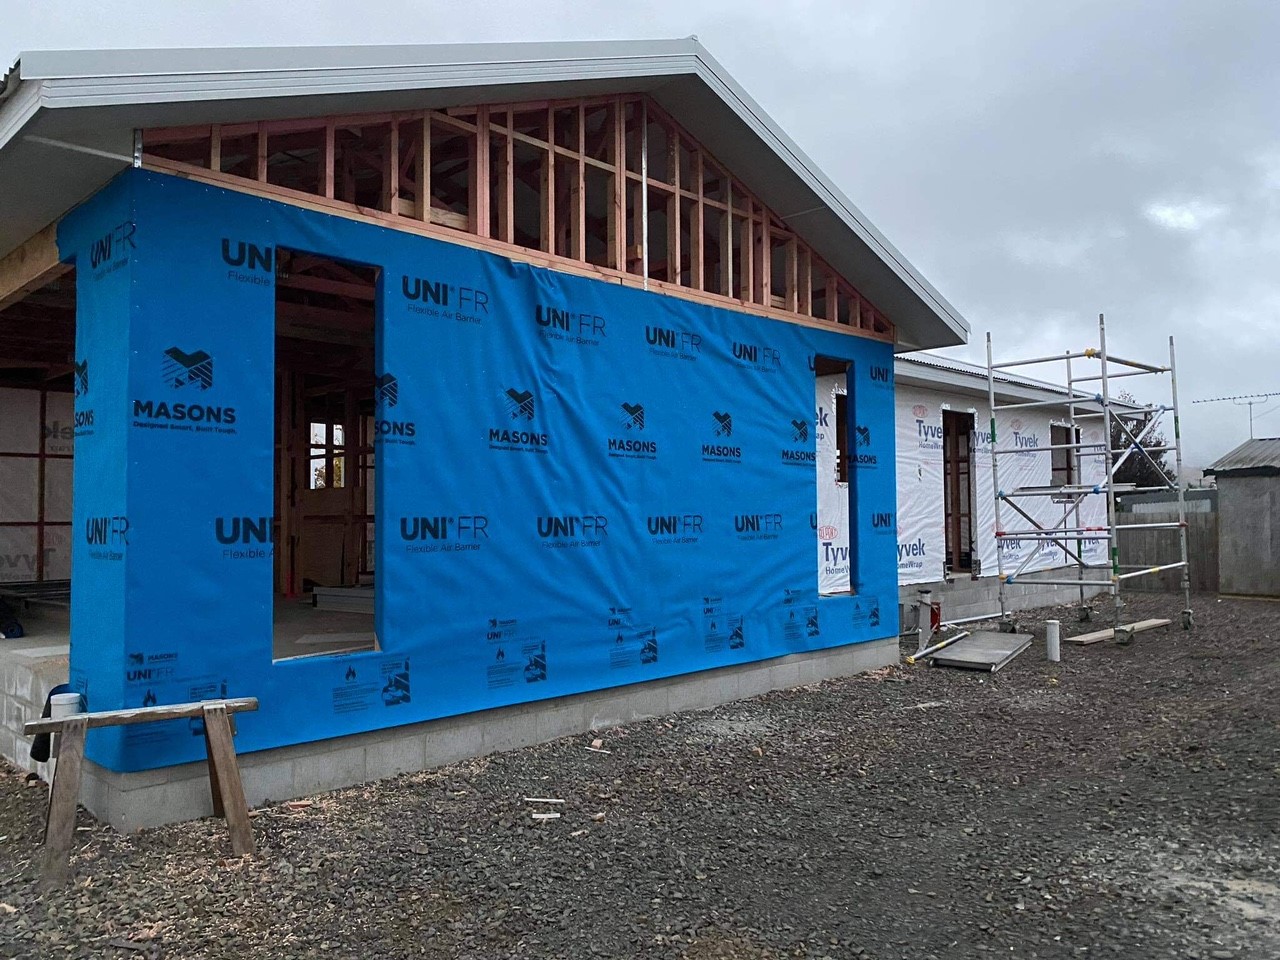
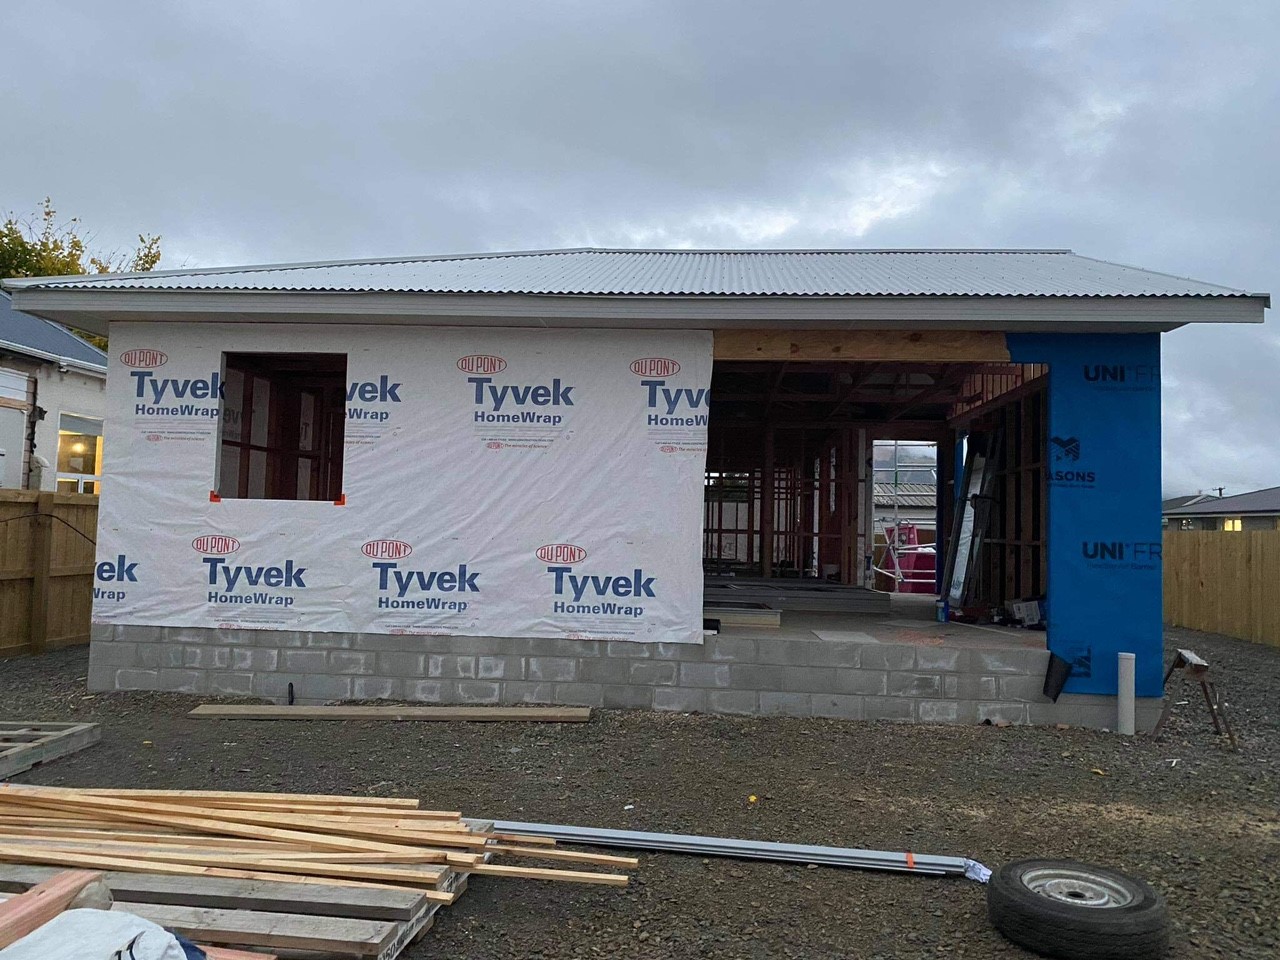
Little bit more done today. starting to take shape
7 points
-
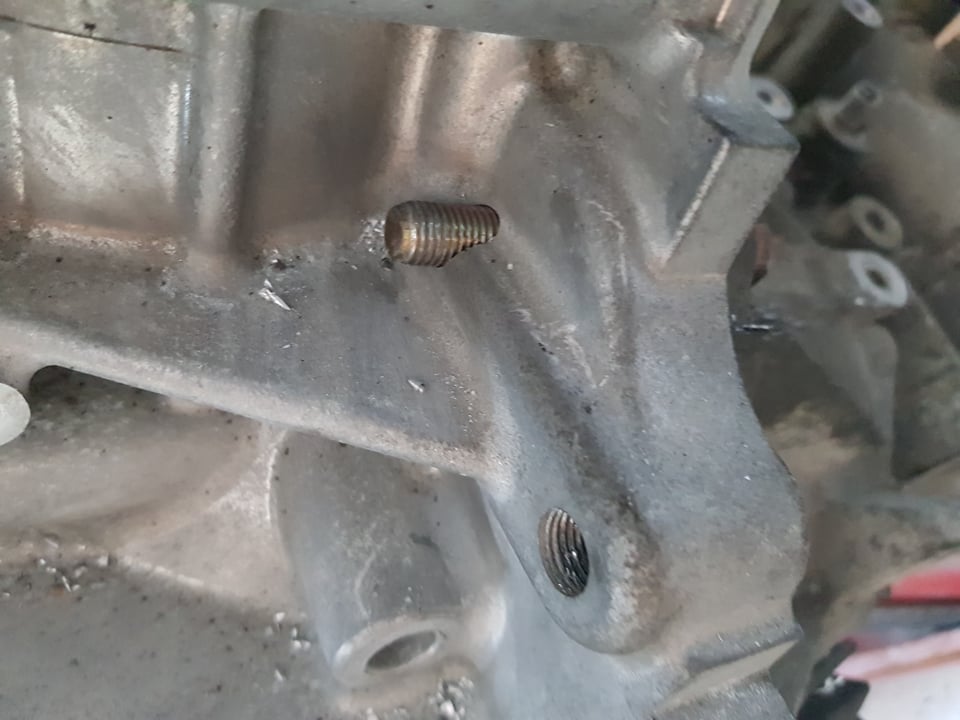
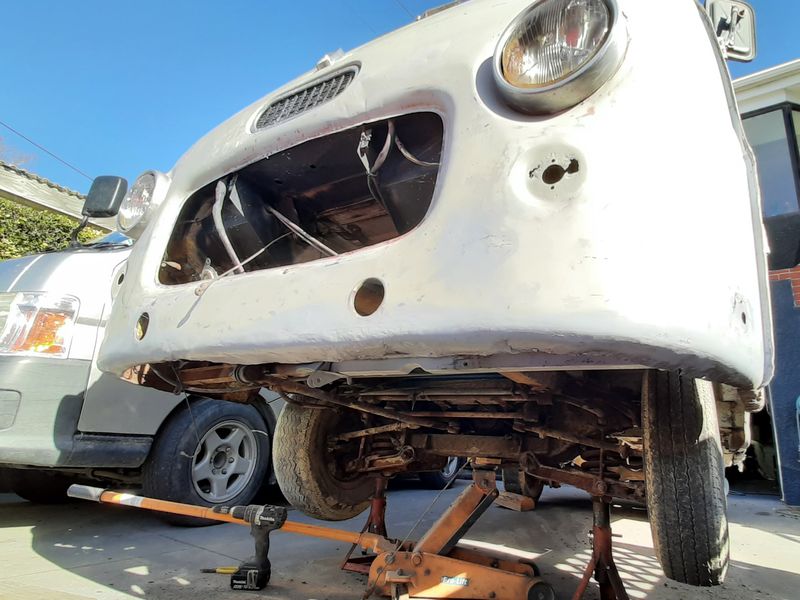
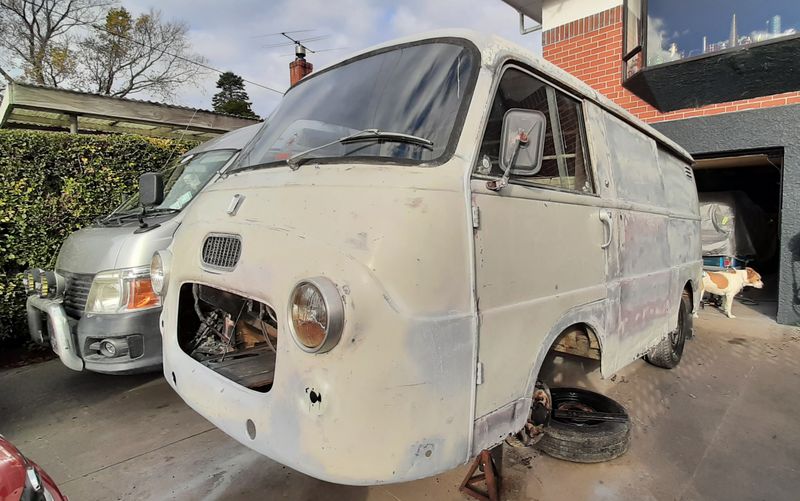
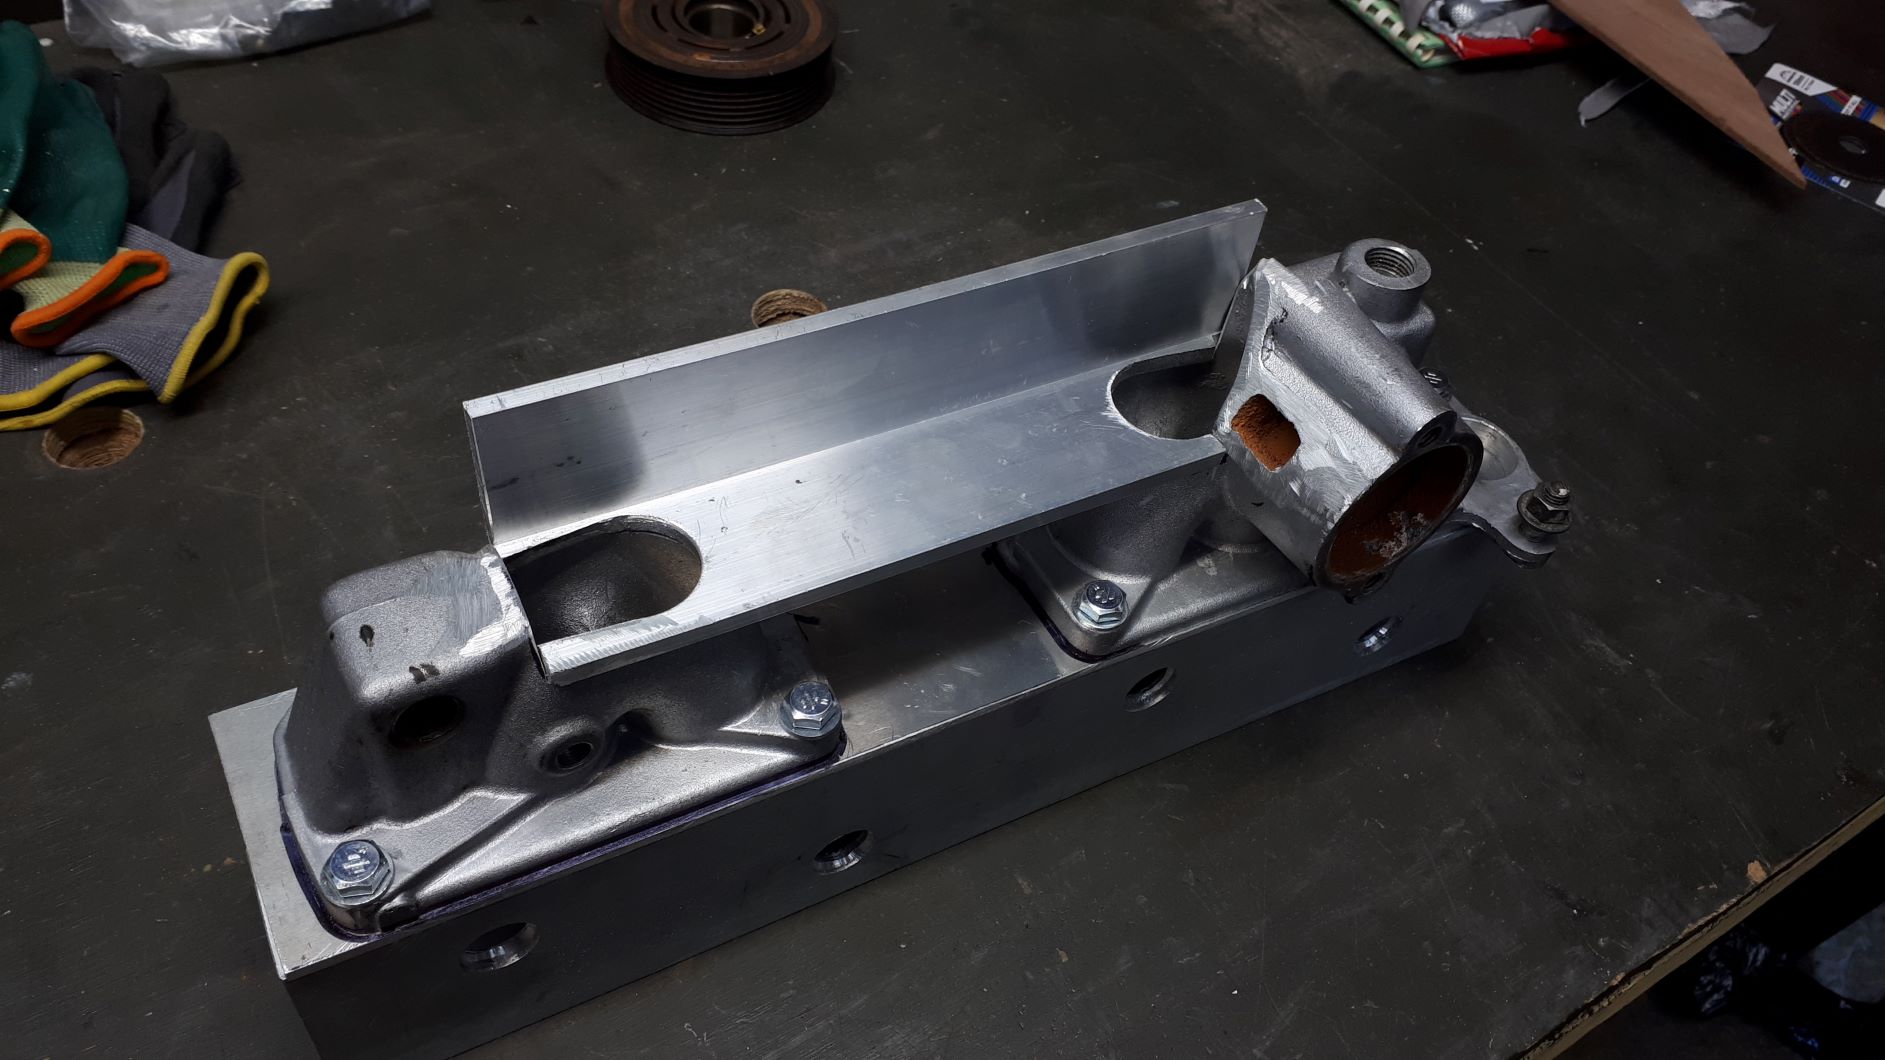
So more fails. My understanding was that if you swap the sump over, all of the bolt holes line up to the gearbox. But what it means is "At least the bottom half will line up" because literally nothing lines up to the engine block It looks like the best compromise is to drill the block. This means all of the bolts will work except for that center top one, which I guess is good enough. It's pretty meaty at the places I've drilled it. And yeah I literally just used a drill, thug life Ahhh well, still making progress I guess. Just need to file out one of the holes a little bigger then I'll have it all bolted up as good as it's ever going to get. Luckily the dowels that were in the motor came out super easily, it turns out that there is a position for dowels that's common to both the gearbox and motor. So that puts my mind at ease for making sure the clutch is aligned to the output shaft correctly, even if my bolts situation is yuck.
7 points
-
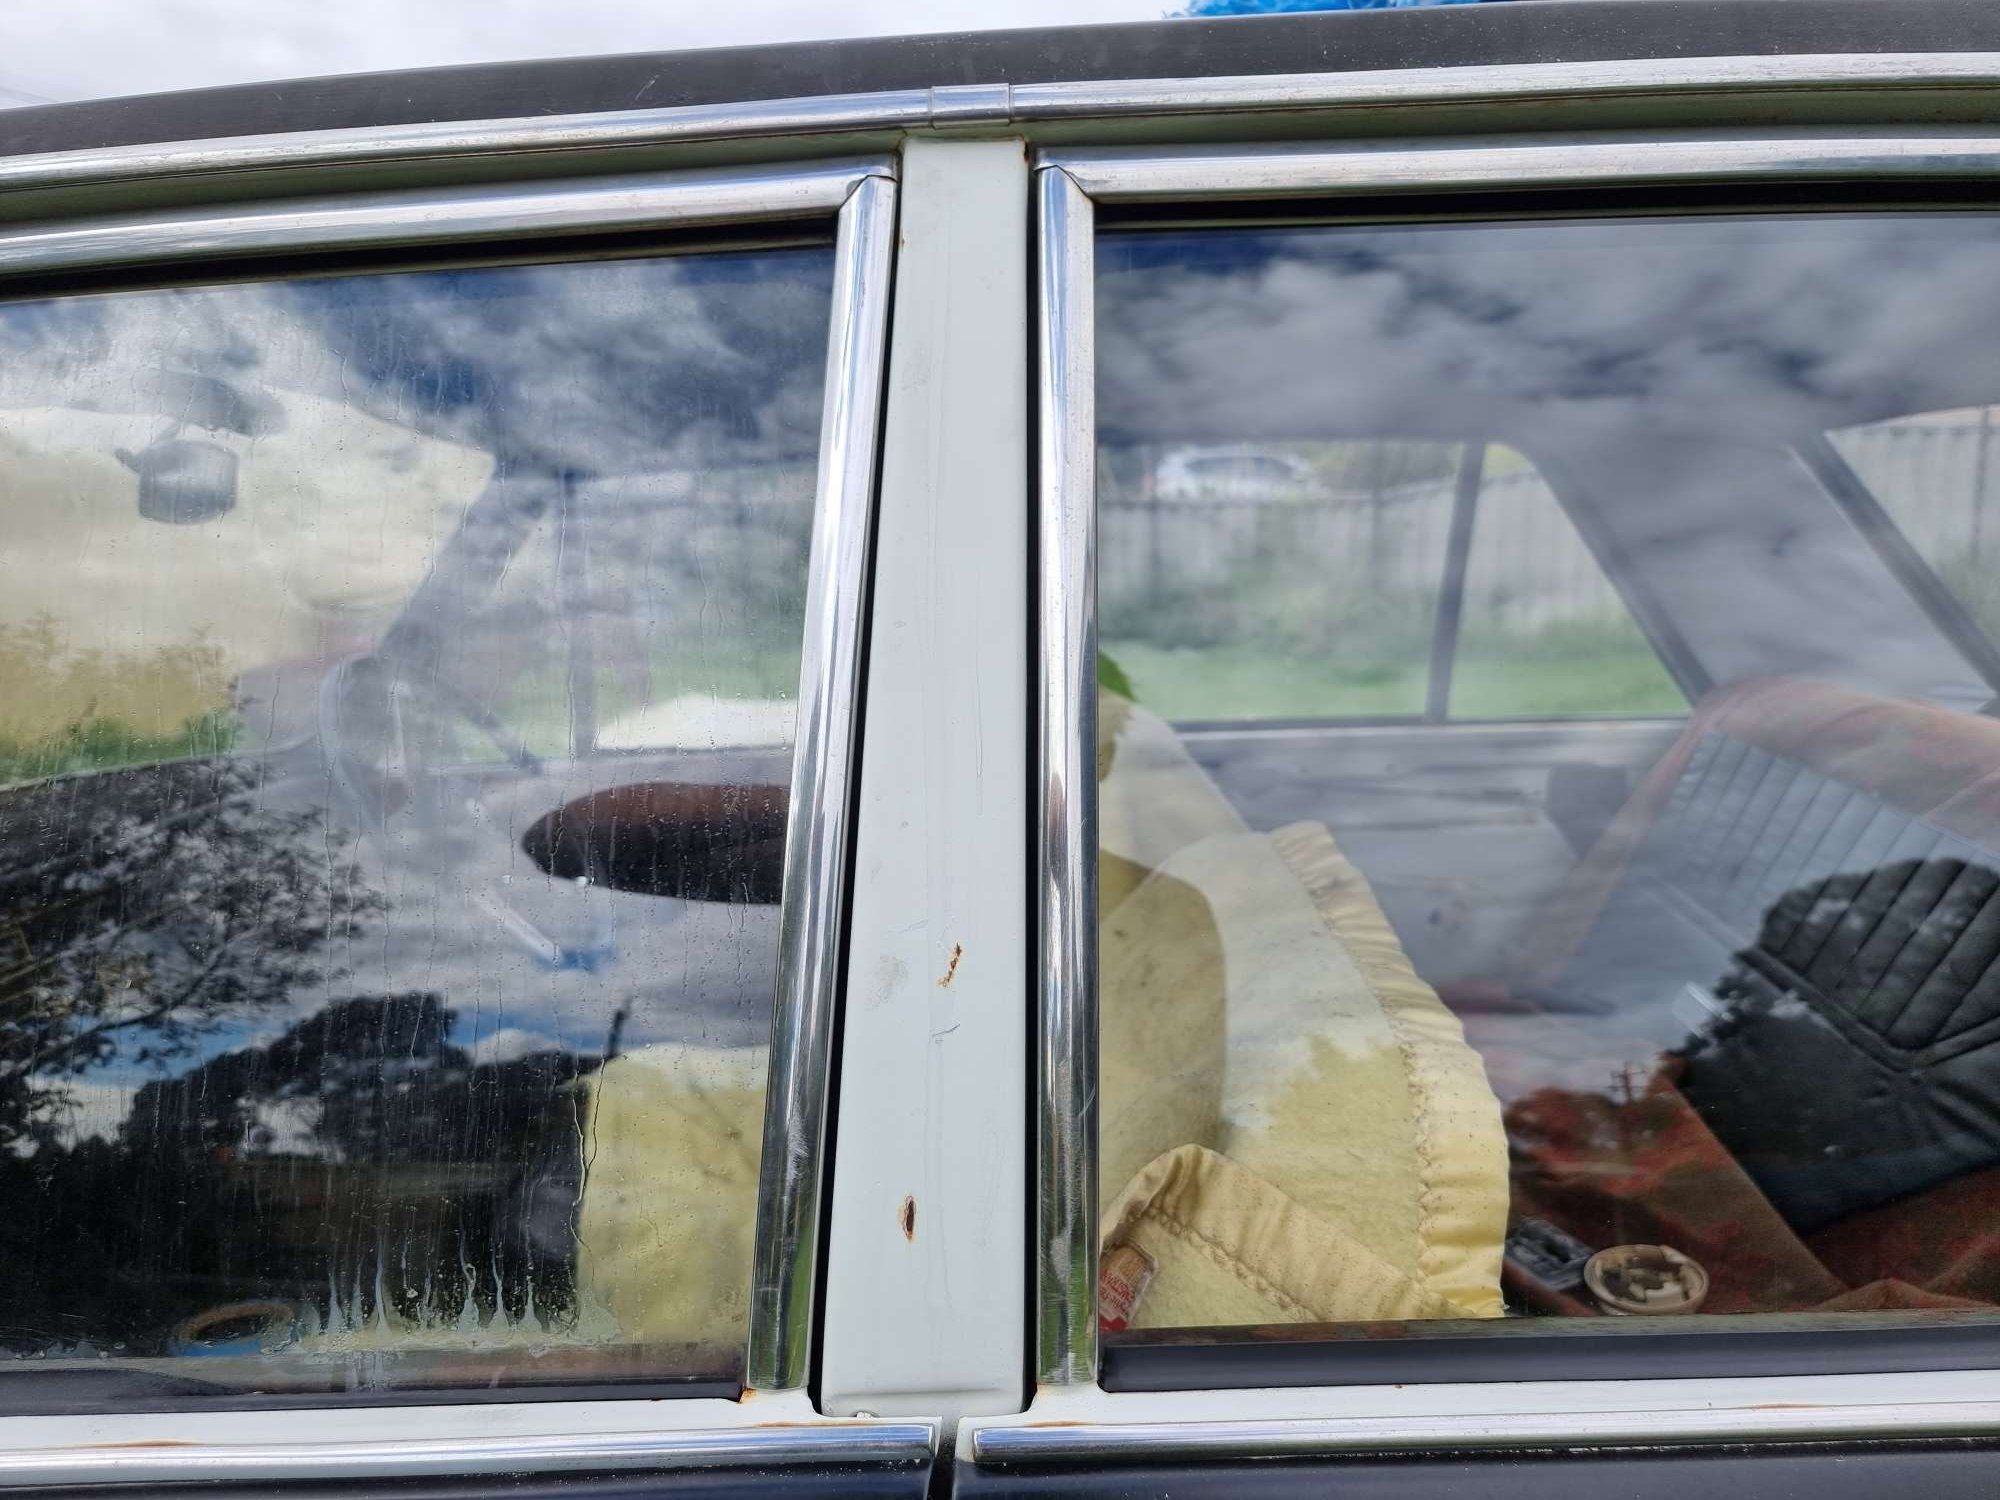
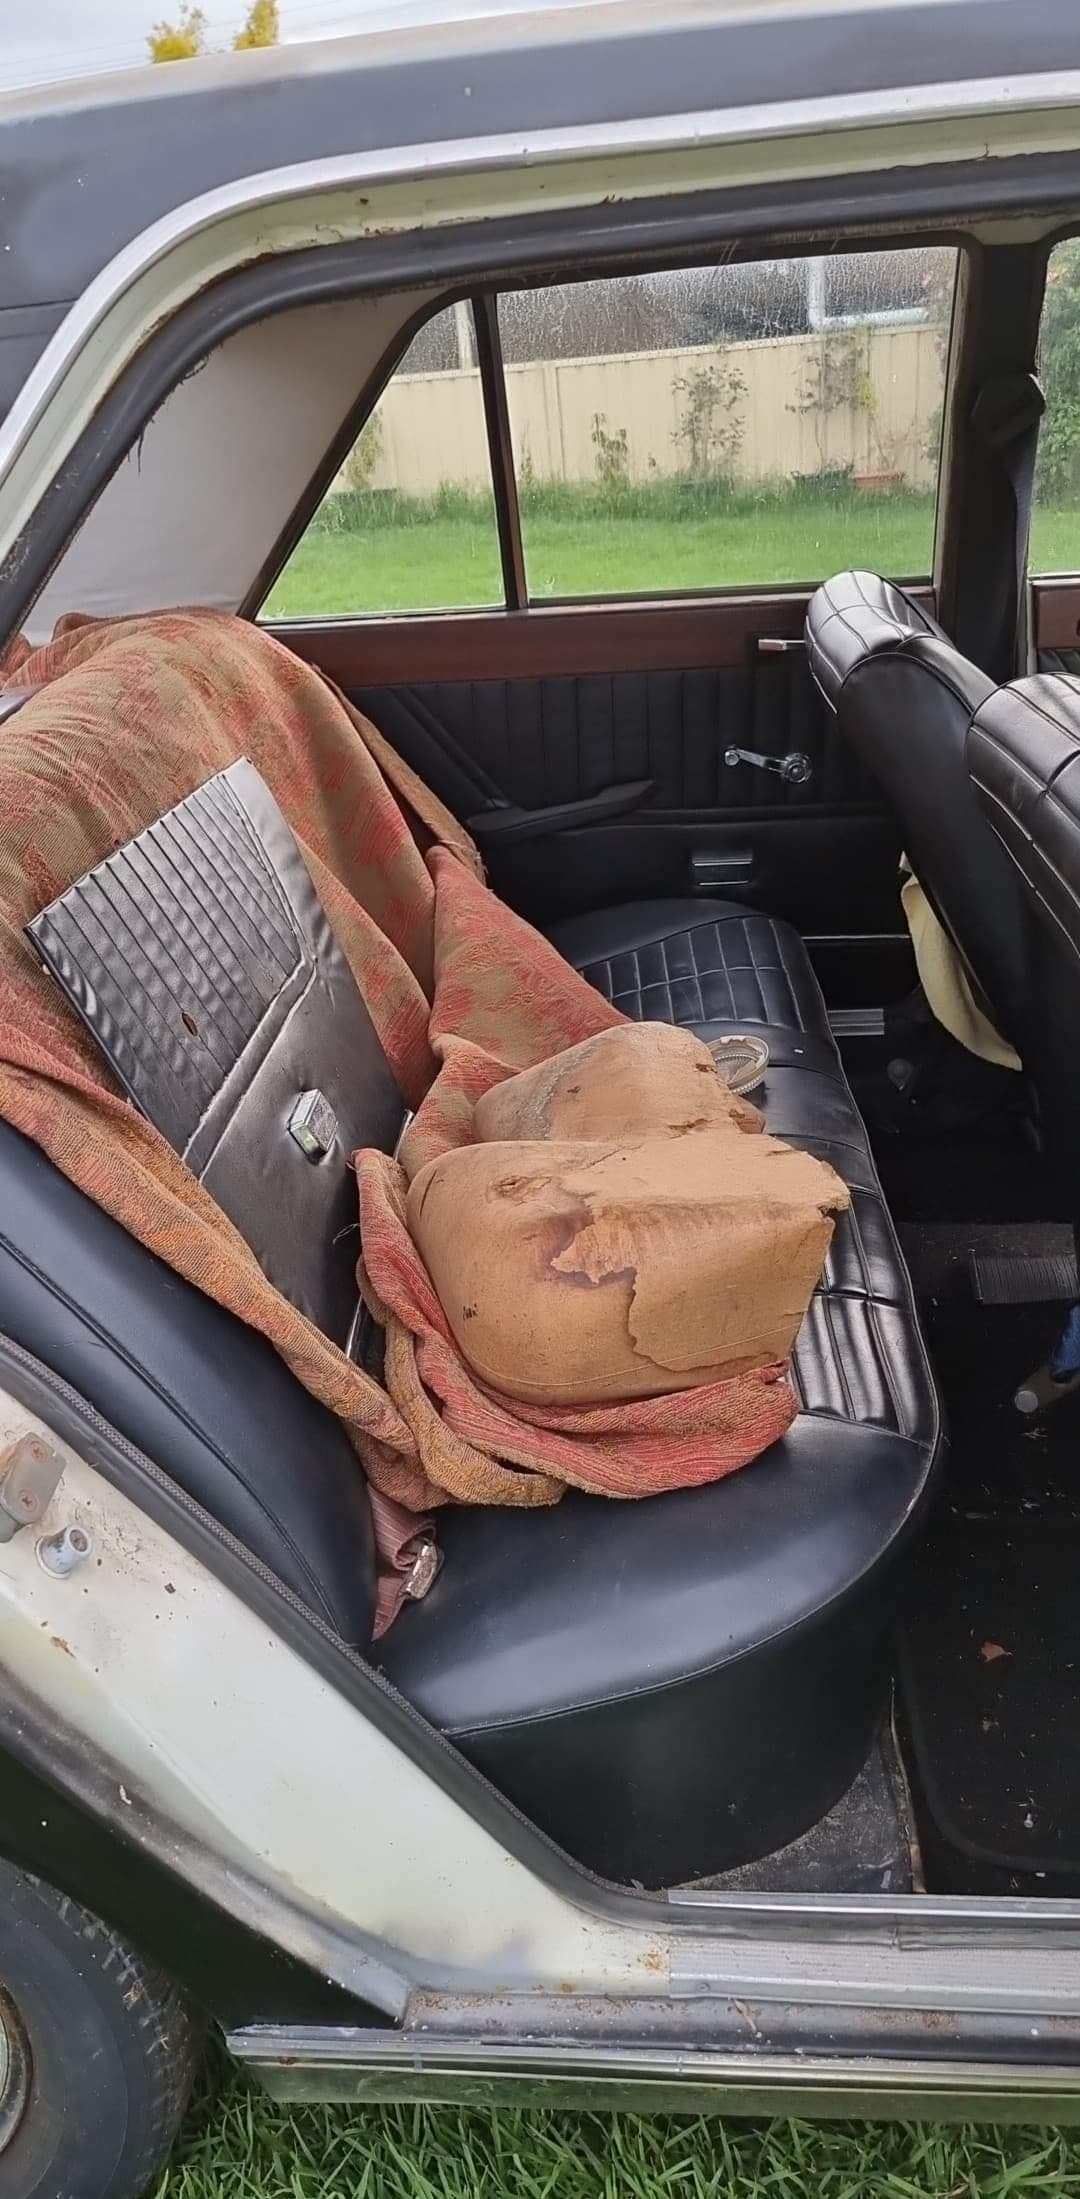
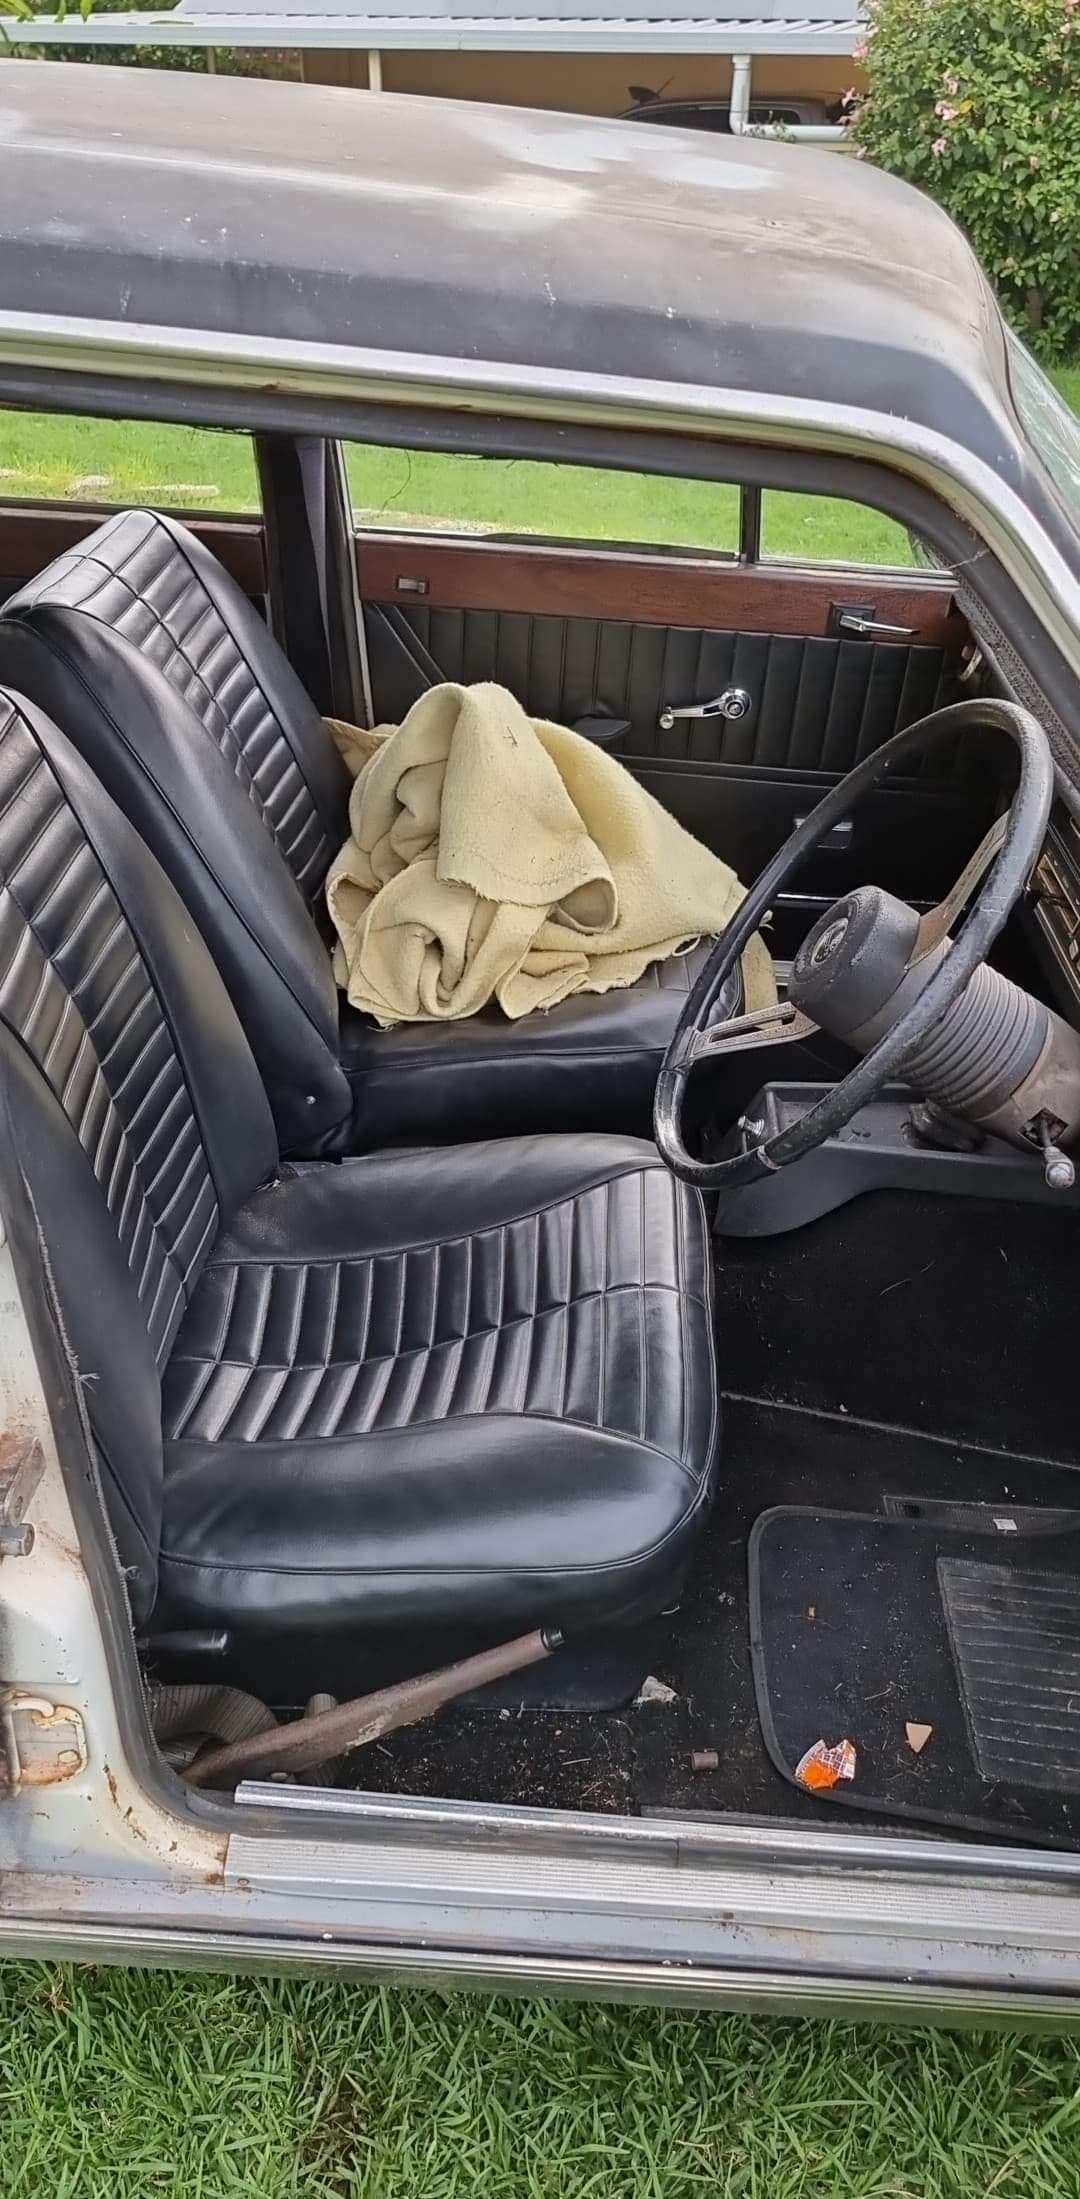
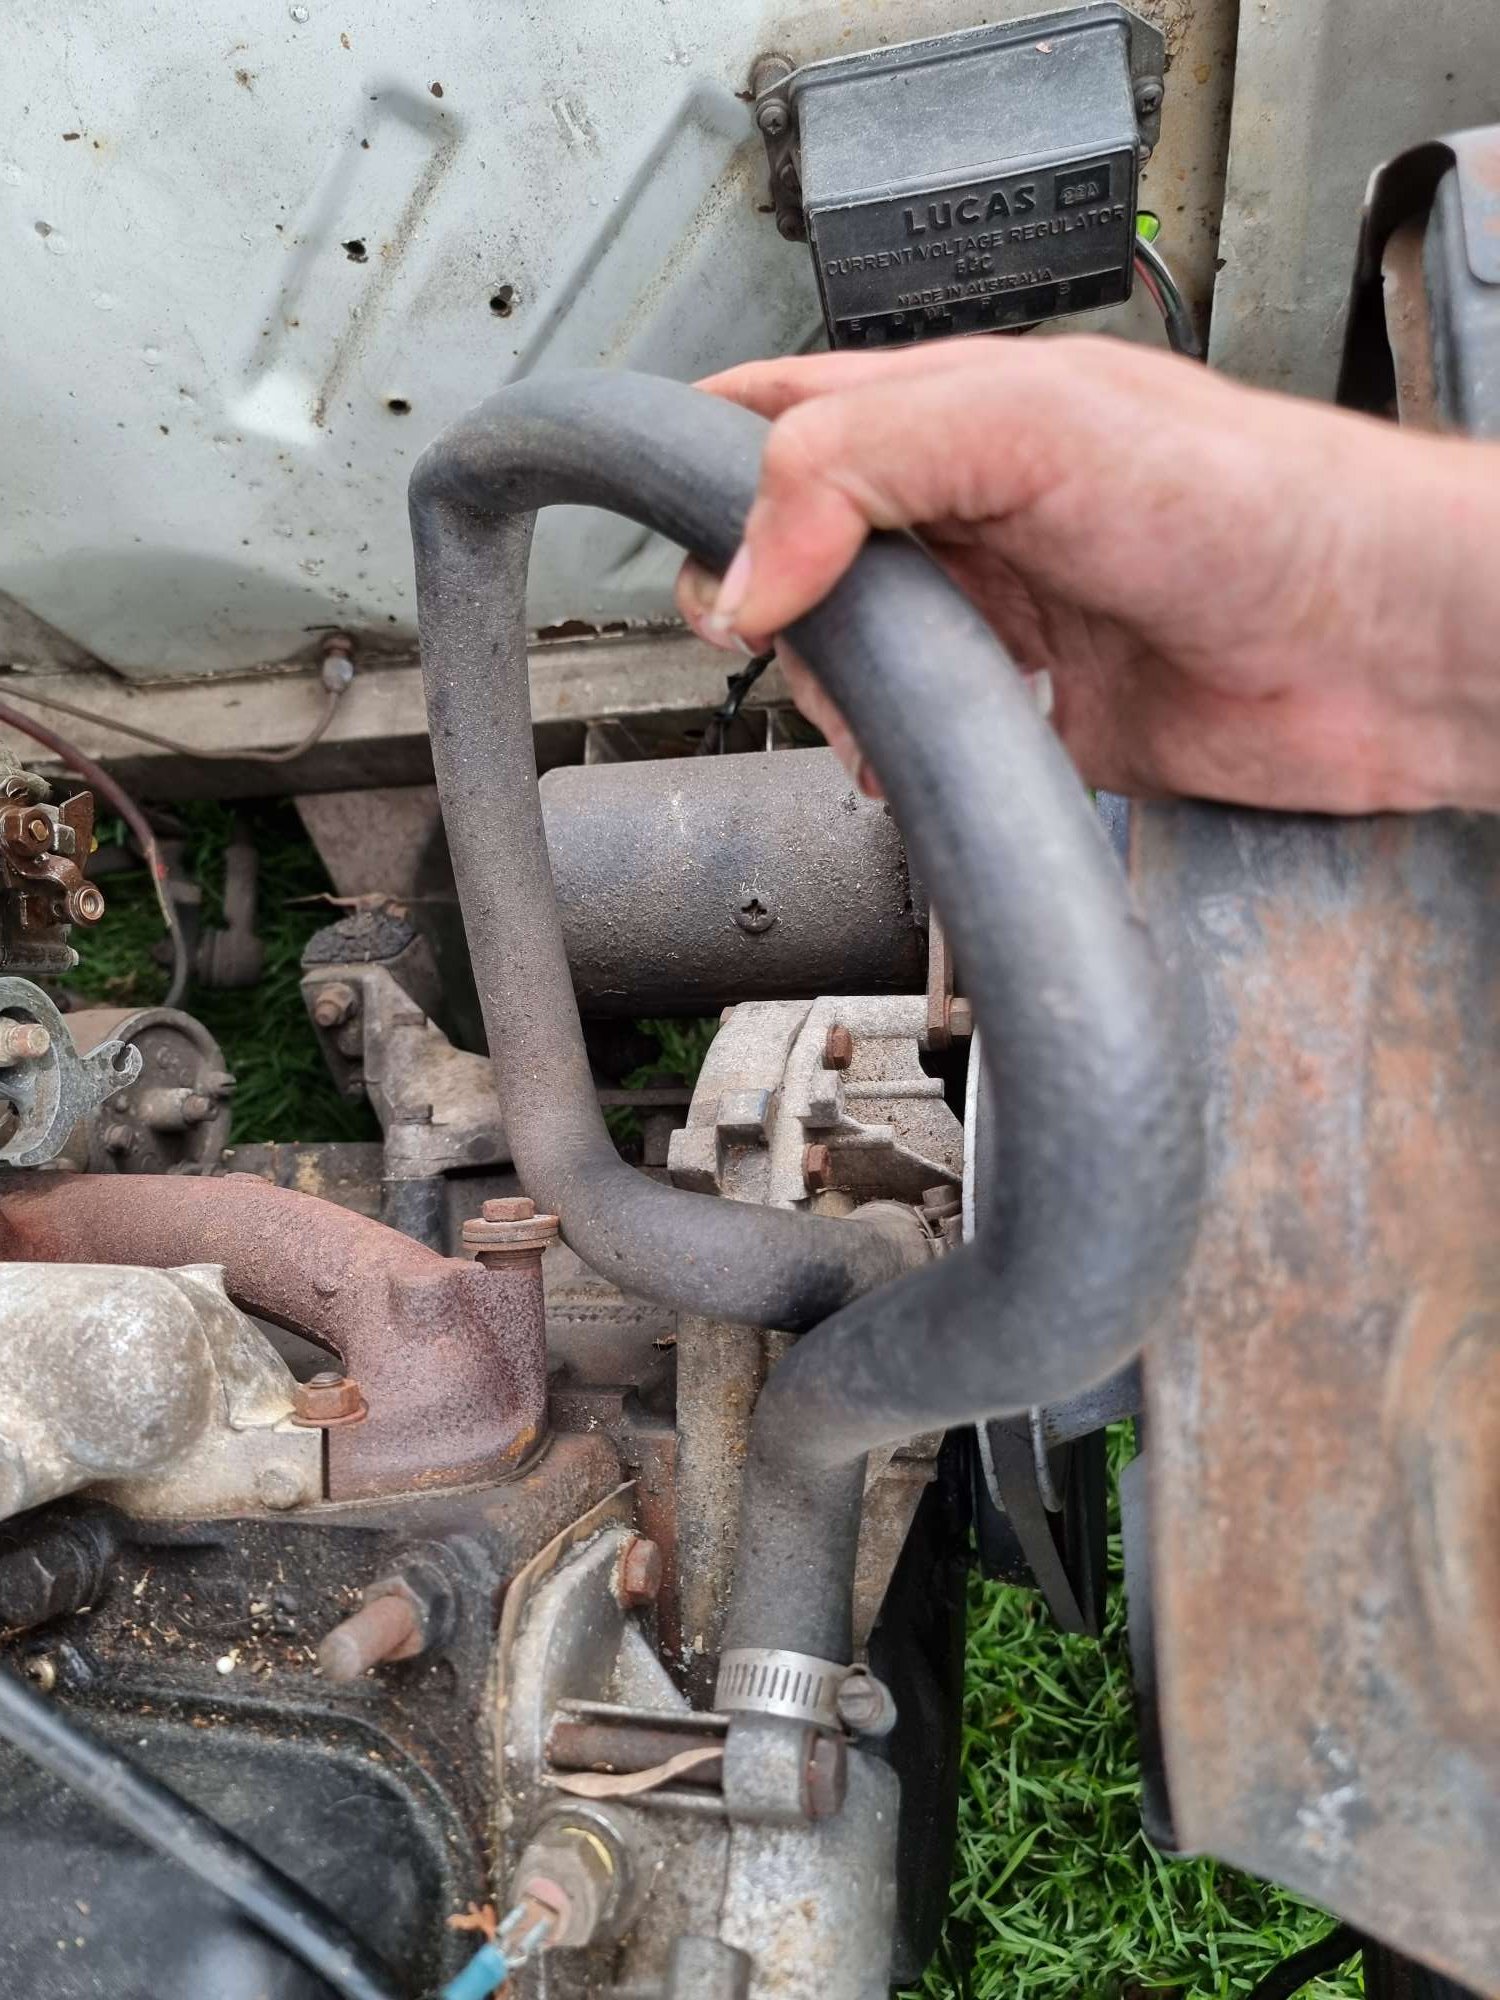
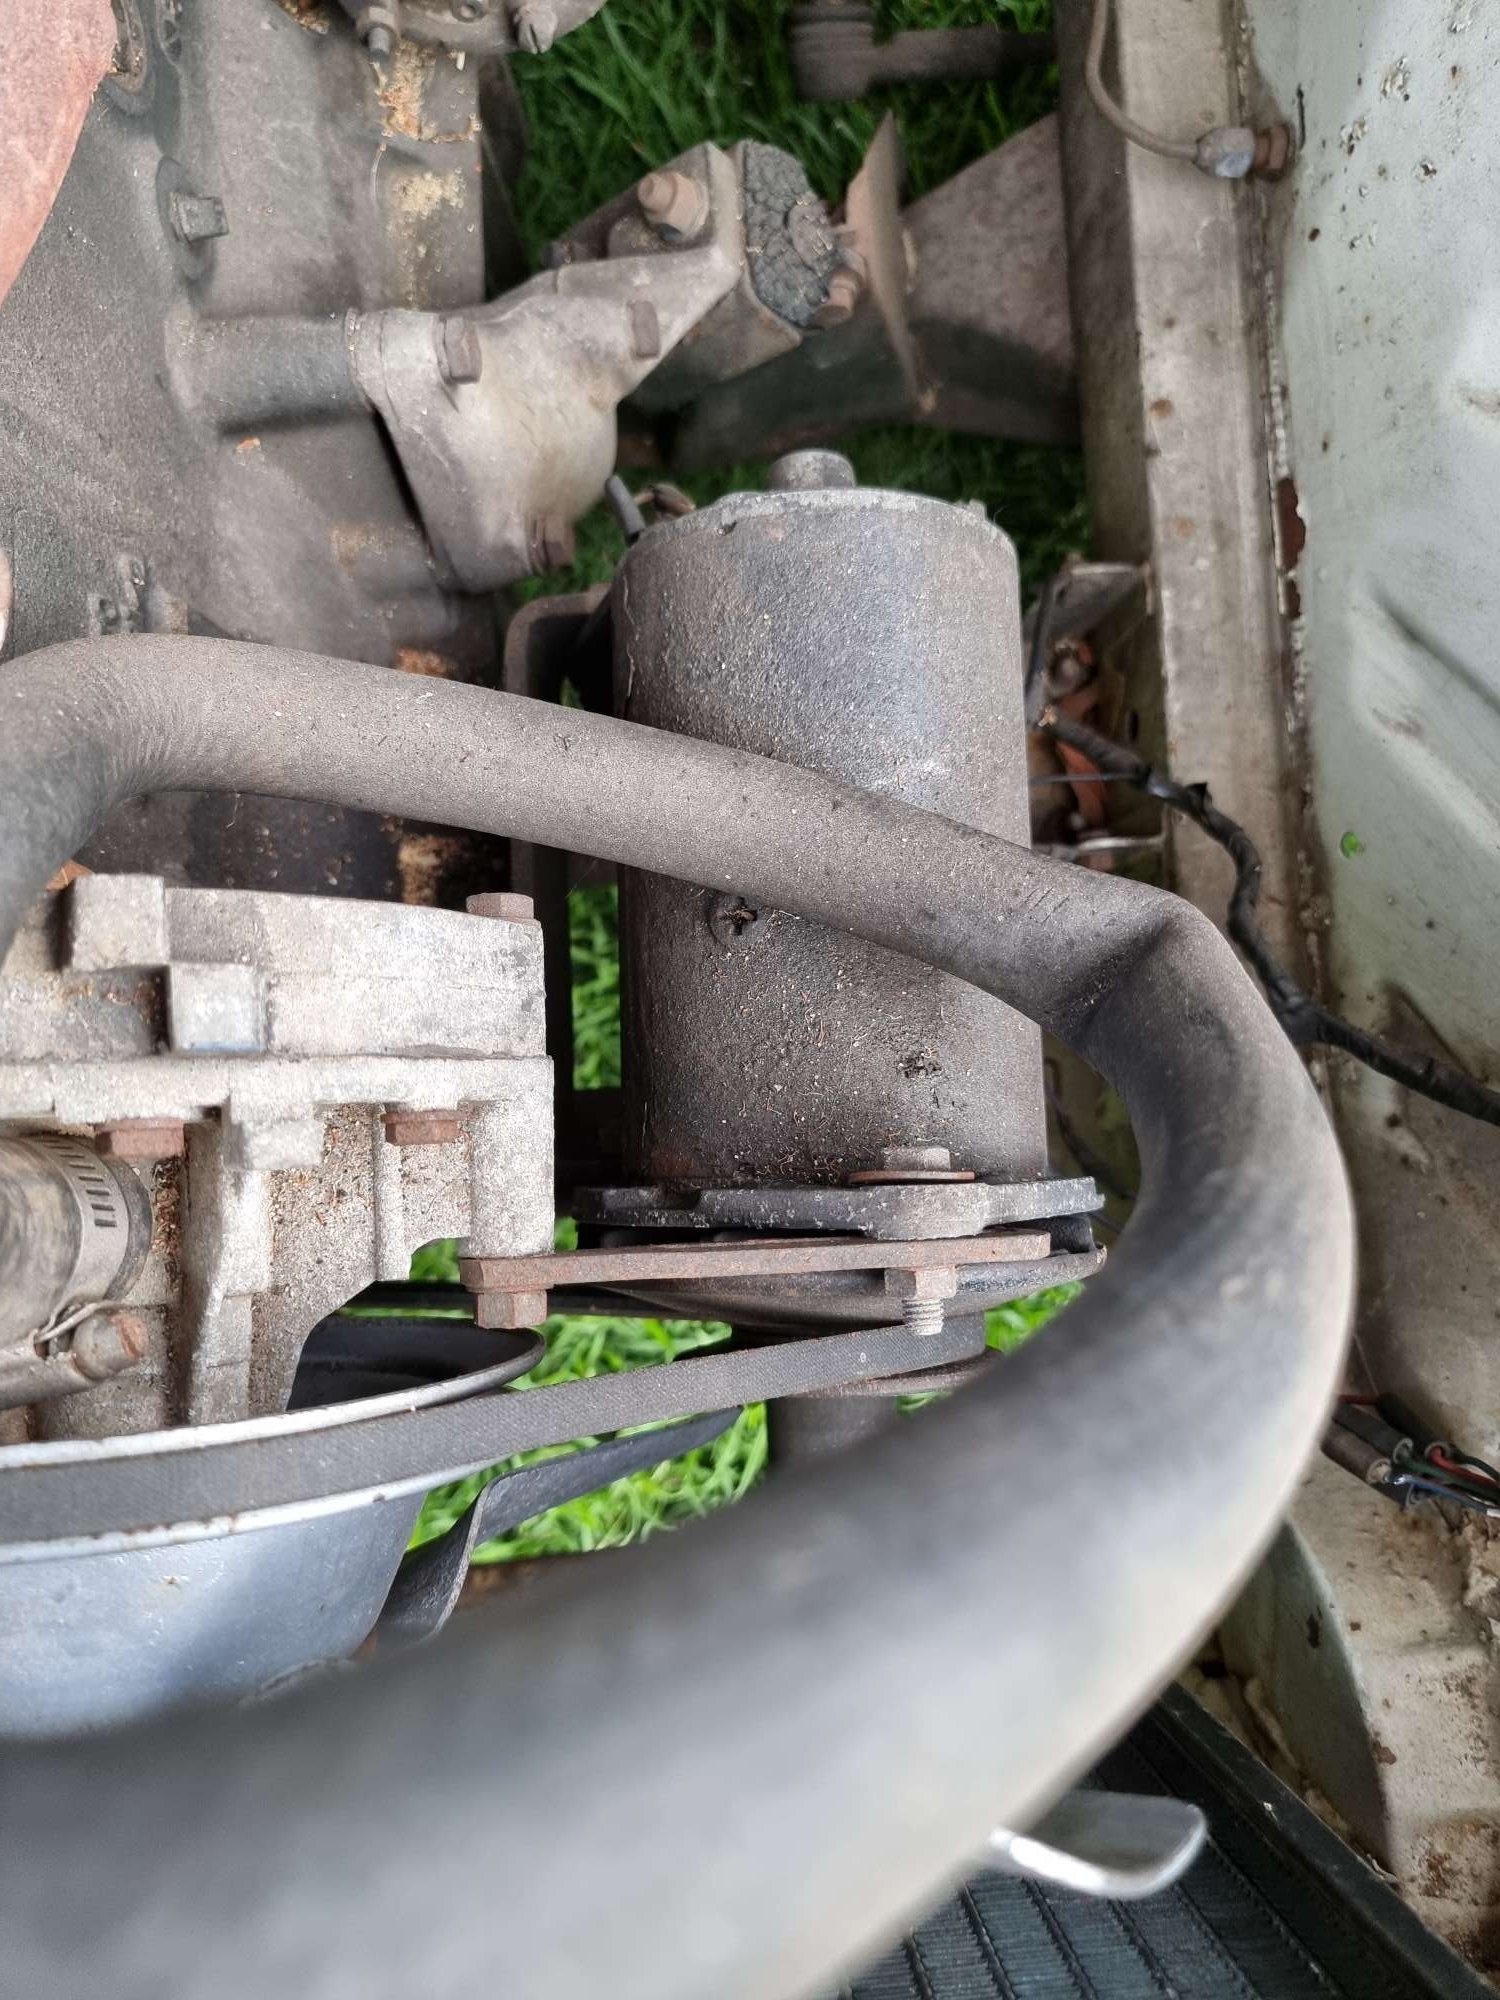
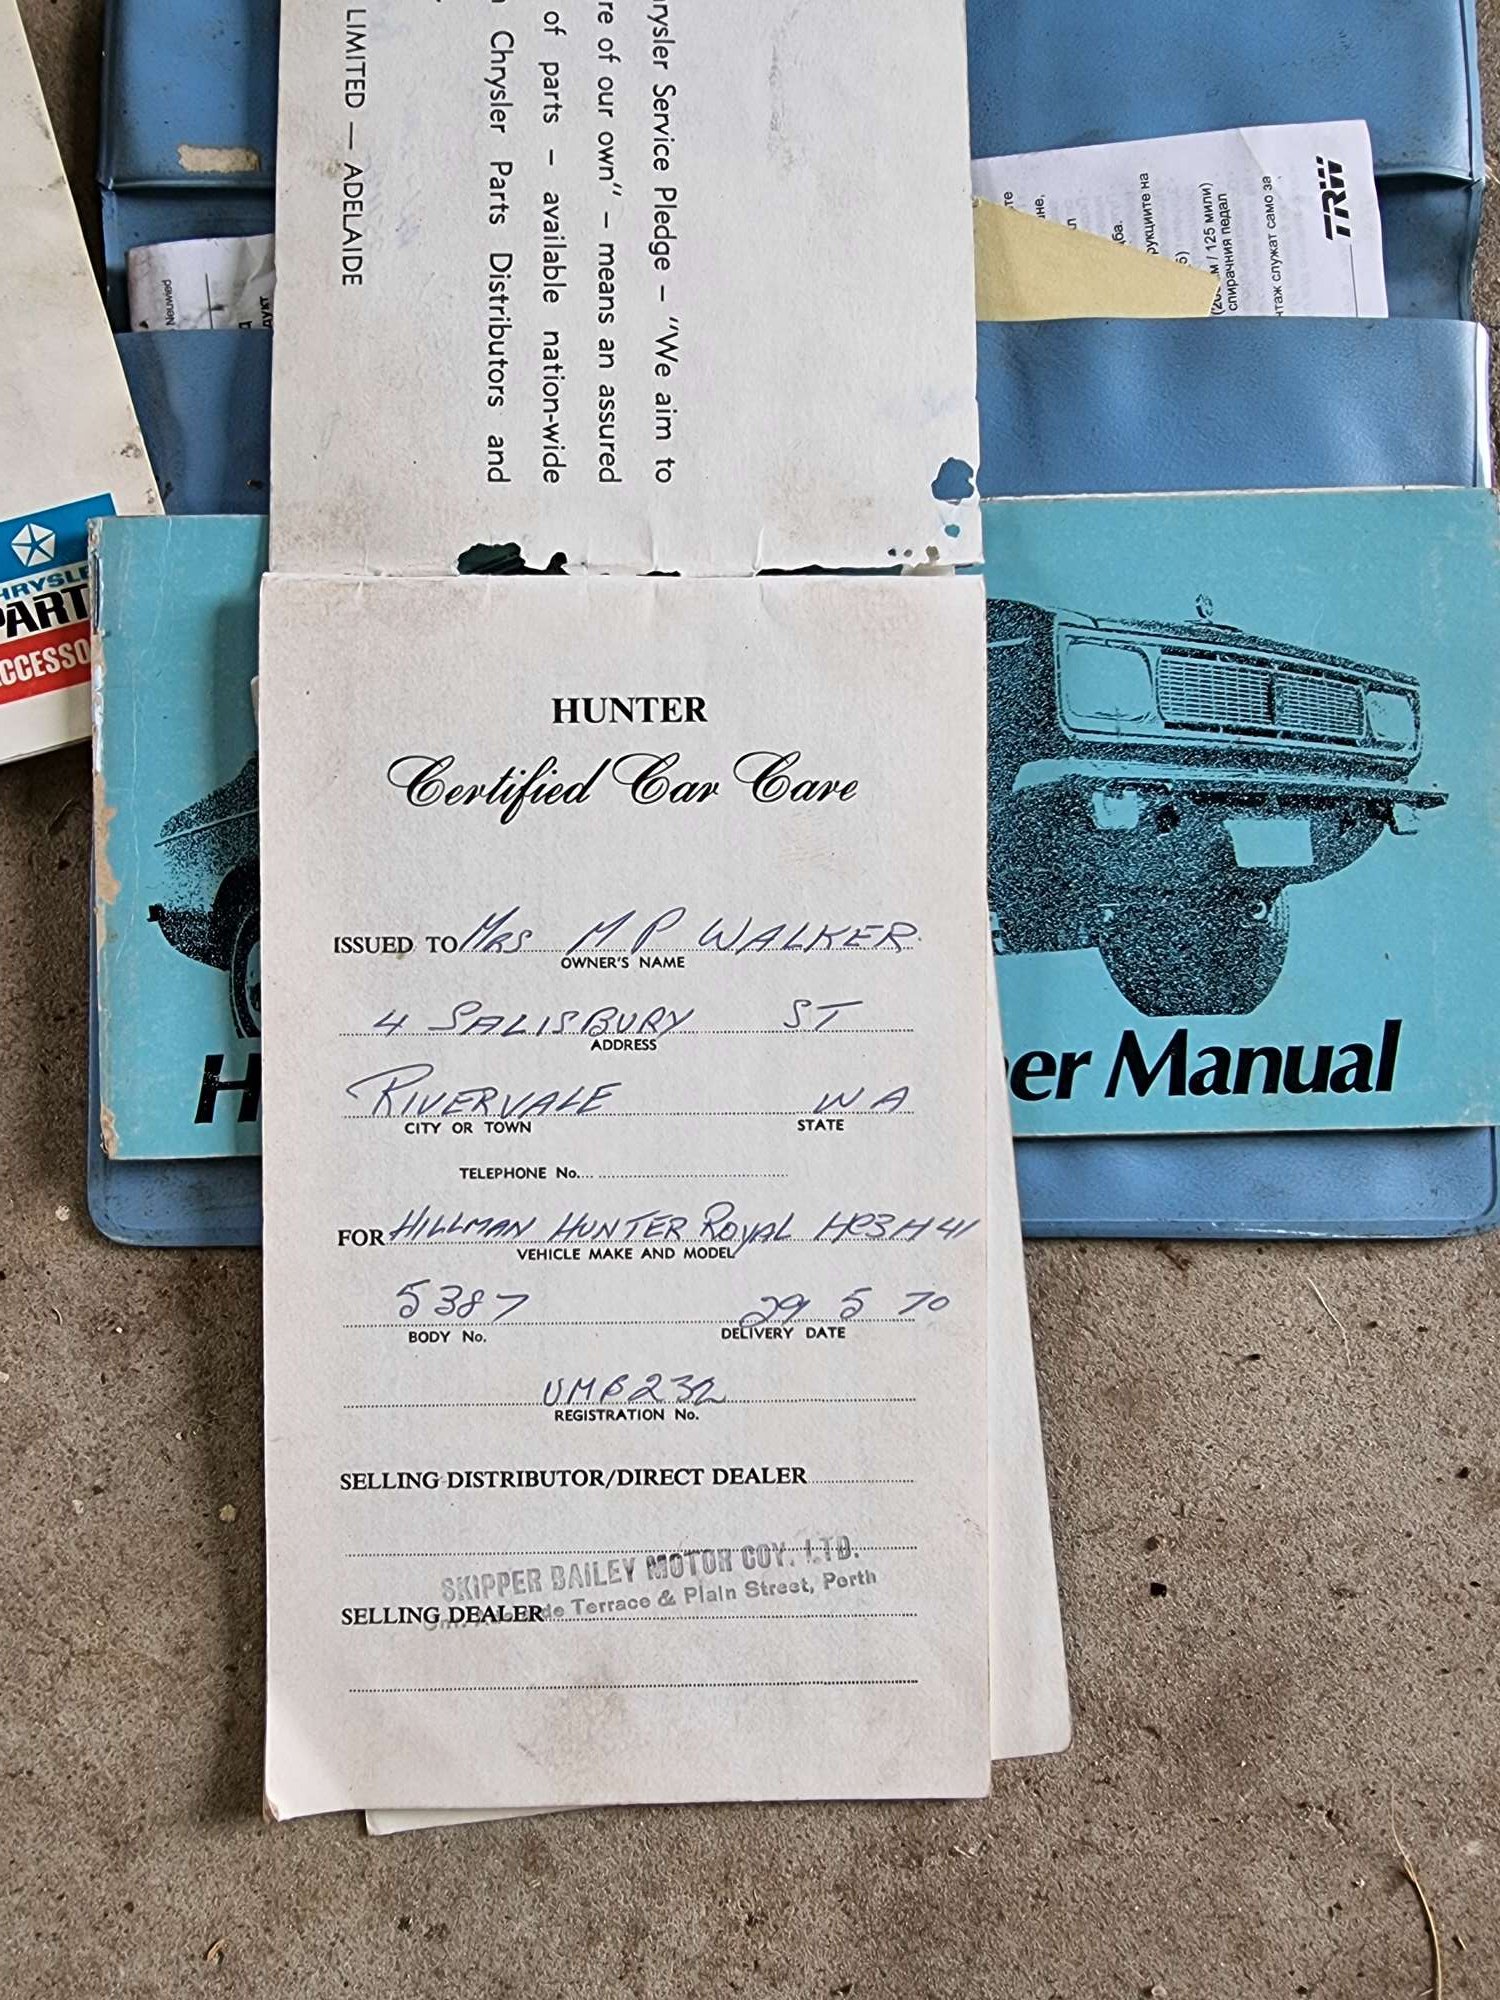
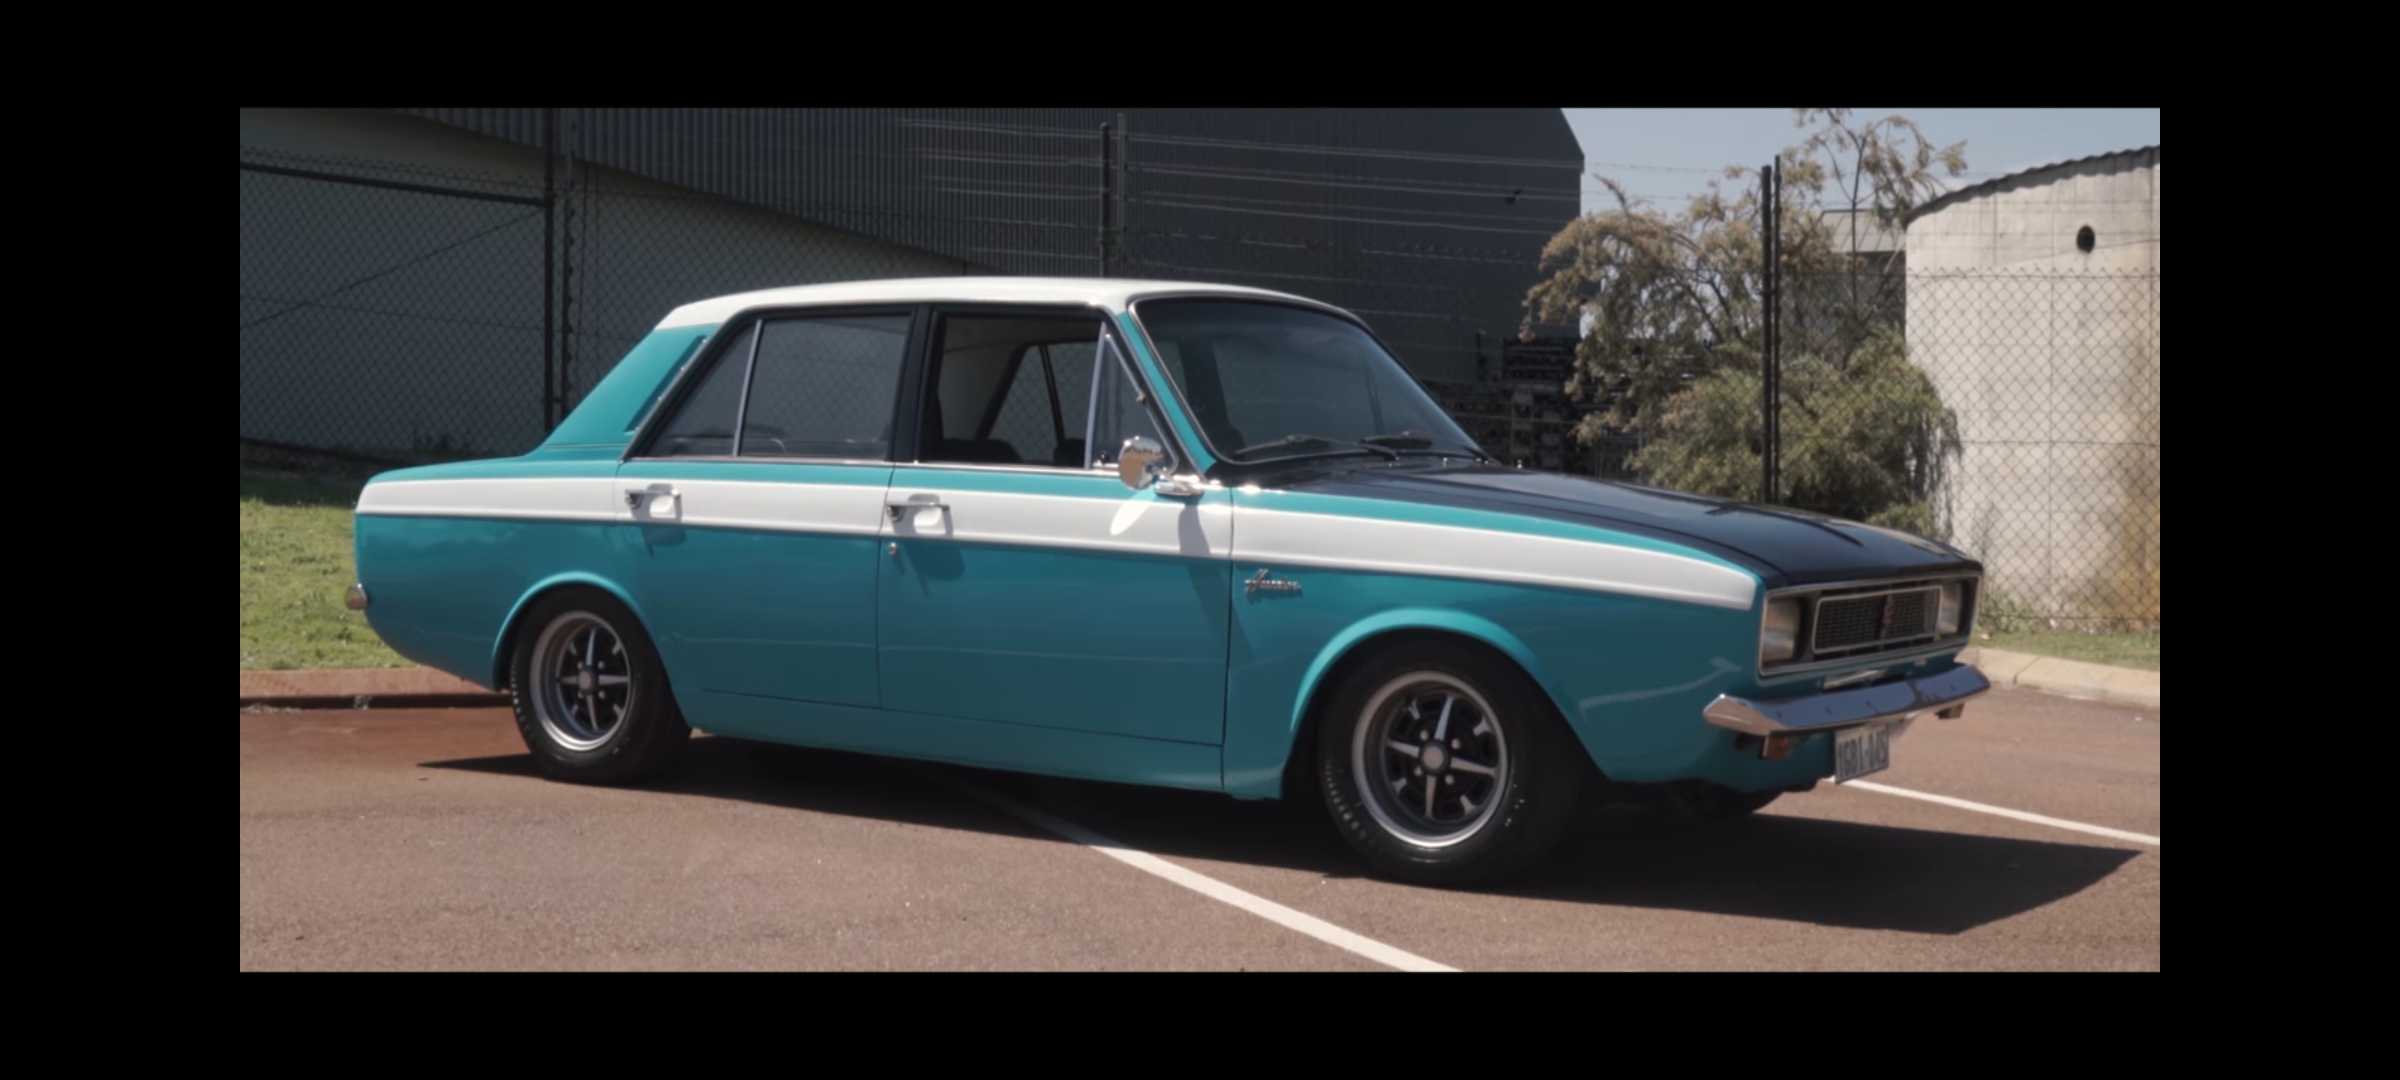
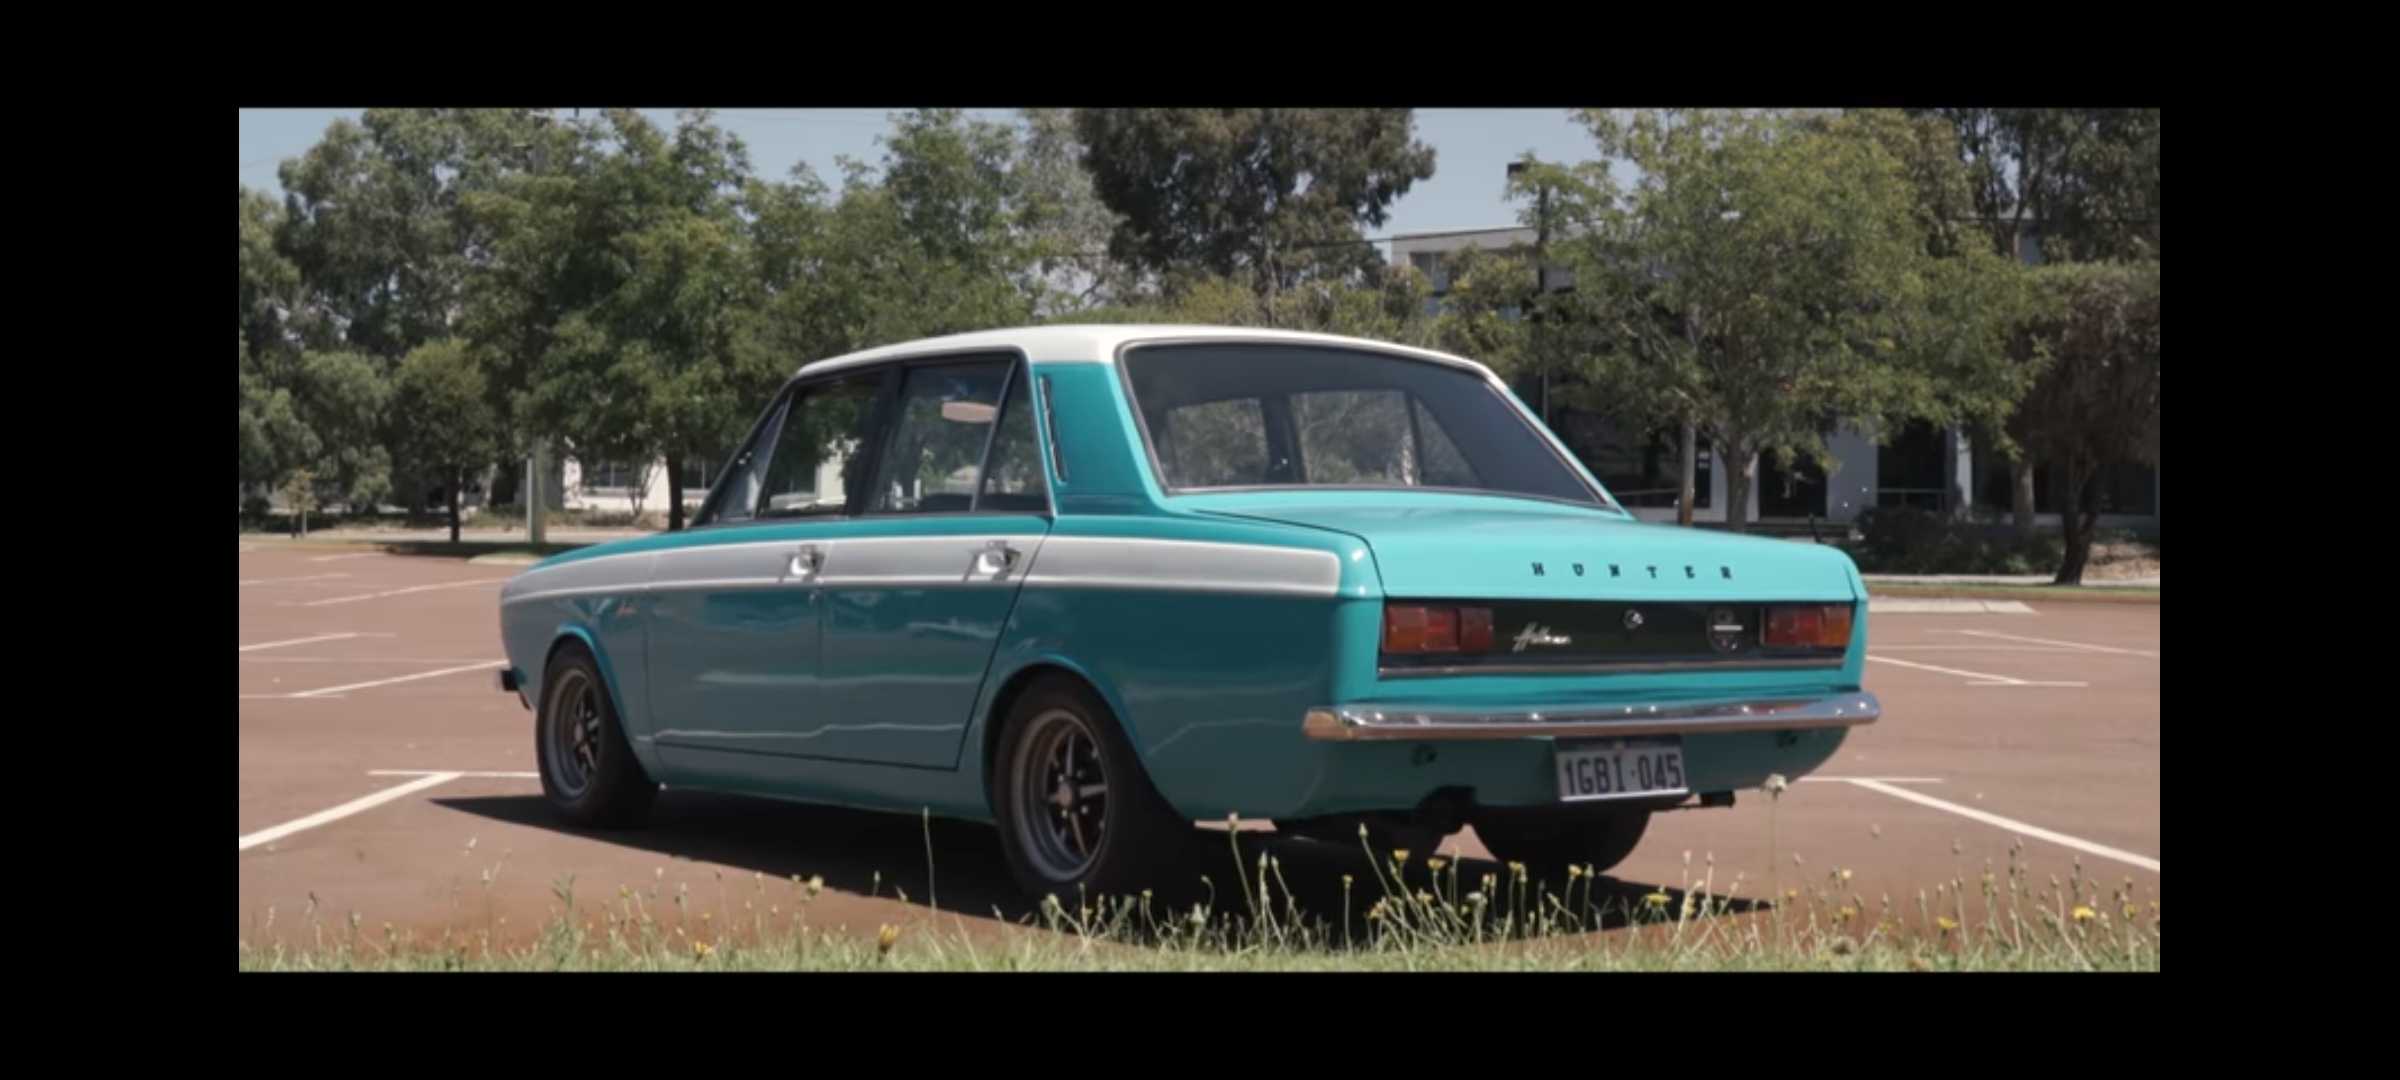
So another couple days of trying to get it running well... this time I actually got it started ran kinda rough as hell but it went. Untill i played with it more now I've gone backwards. Looking at a decent starter and maybe do away with the points. Also found out the guy I got it off didn't transfer the private plates 20 years ago so I've had to track down 2 deceased estates to see if I can keep the plates or just bite the bullet and get gross new ones Also gave it a bit of a clean looked like someone was hotboxing in it the windows were like tar sticky and so were the seats which are original I'm assuming no rips or tears so win. Basically meaningless cosmetic tidying so i didn't feel like i needed to shower by just looking at it. One of my mates is the local panel and paint guy so I've had him look at it. Without doing a showroom fancy job on it thats about maybe 5-6k if im lucky. Also heres a hose someone put on.... basically filled with cheese Also the original brochures and ownership stuff from when the dealer got the vehicle which is kind of cool Heres an idea forgot who has this one but its similar to how I wanted to do one of my escorts. Like a turquoise teal with white.
5 points
-
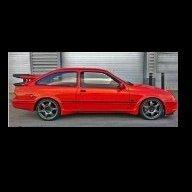
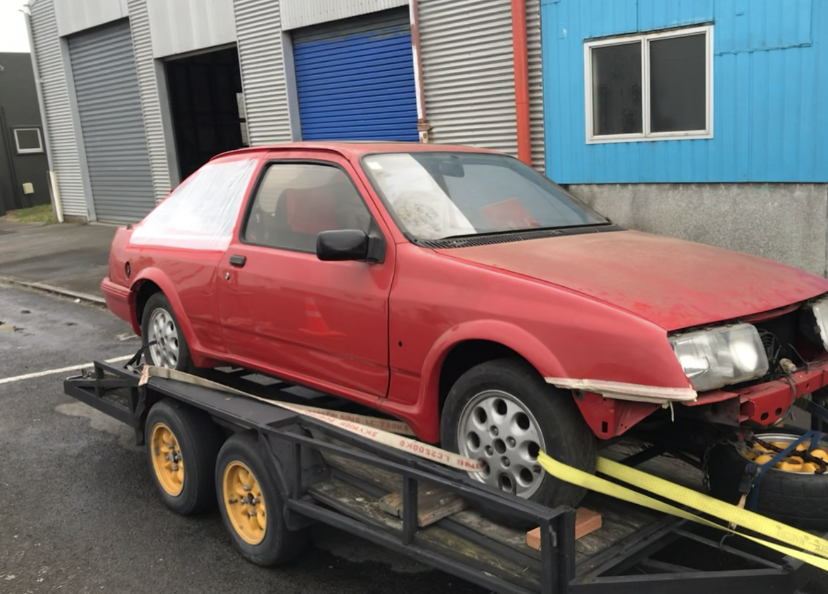
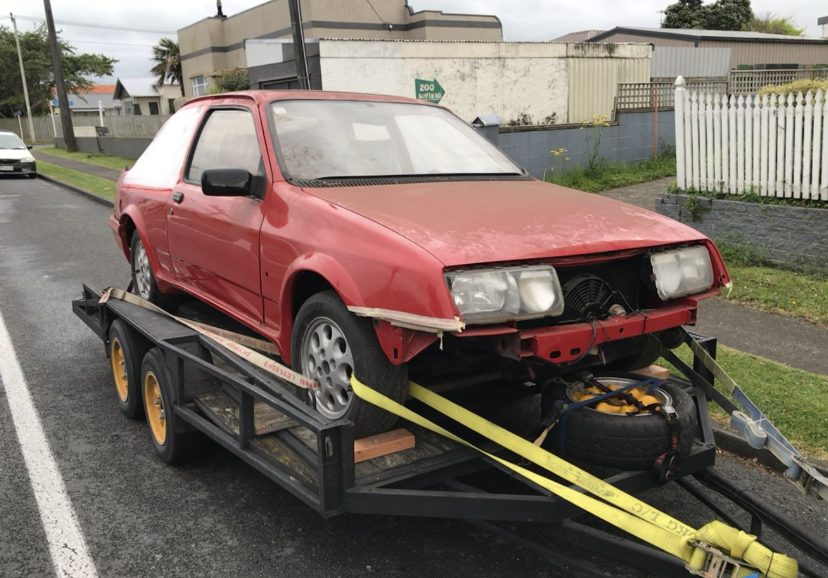
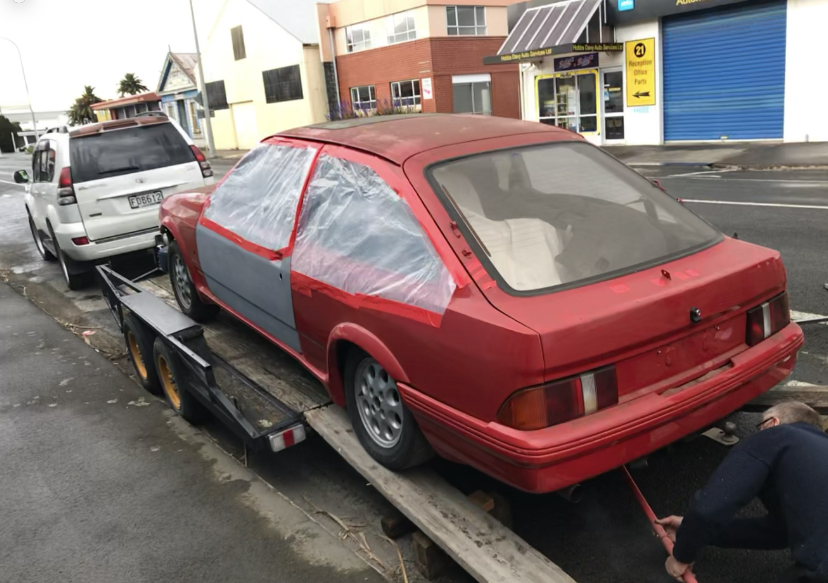
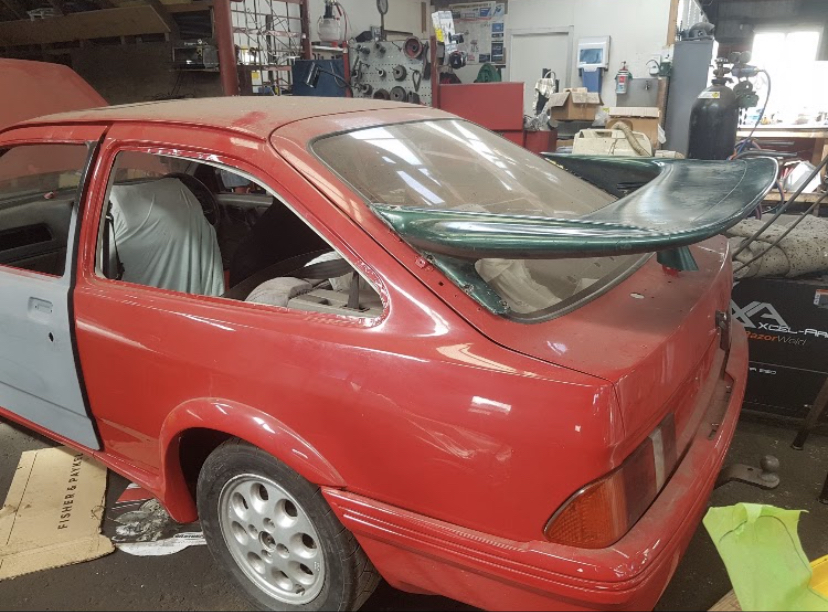
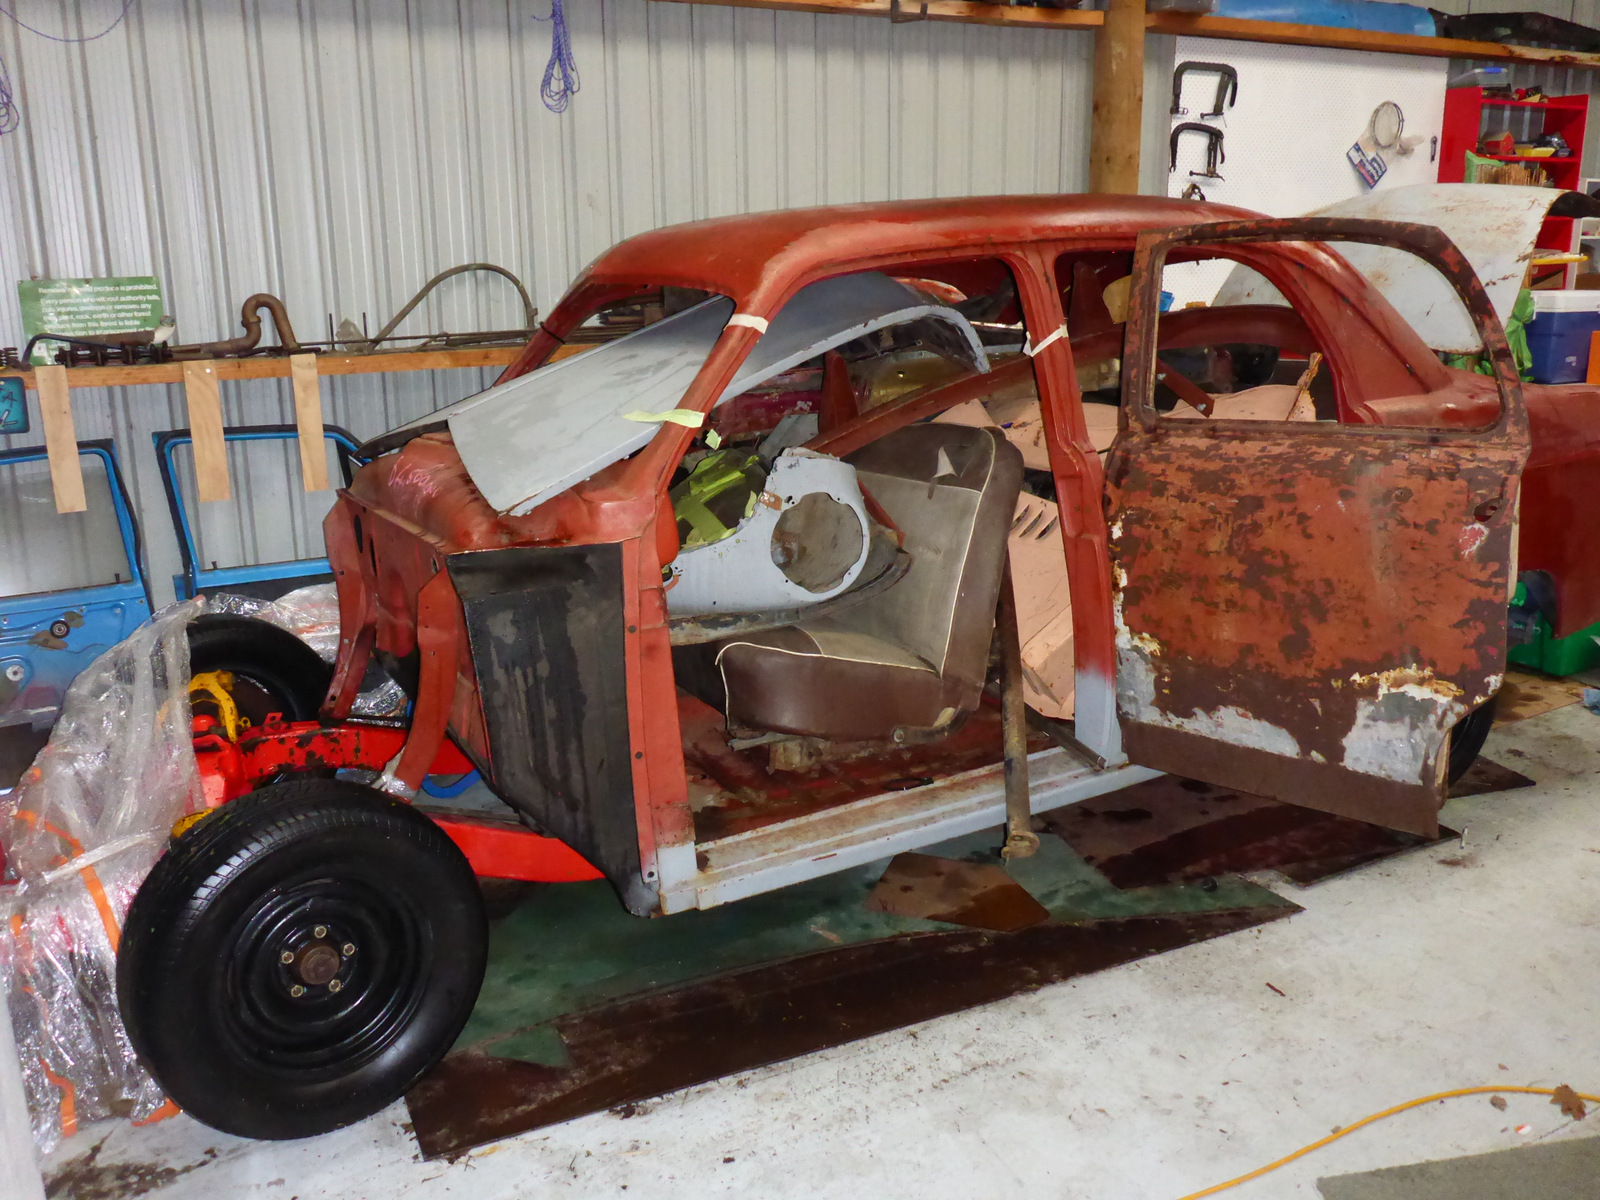
So a year and abit ago I was looking on trade me and someone was trying to sell a ford Sierra project and after looking and wondering I brought it next step was to get to the north island to get it ,so packed up the family and away we went and I got this!!! Its a Ford Sierra xr4i it has a 2.8V6 cologne engine the person I brought it off was going to make it into an RS replica so I’m going to continue with this theme
4 points
-
Bort Malcolm fucking Cooper Simpson.4 points
-
Hiding it and fixing it are not the same thing Bort, you menace. bartdat4 points
-
4 points
-
https://www.trademe.co.nz/a/motors/car-parts-accessories/performance/turbos/listing/3080040716?bof=AdygKDSk4 points
-
They made it to Te Anau yesterday. No problems yet. Apparently people like it but are still calling them foolish for even trying
4 points
-
And that's why you don't buy cars from Christchurch3 points
-
You didn't fix it, by the way.3 points
-
You've got lovely boobs. Not sure I like your girlfriends hairy chest though.3 points
-
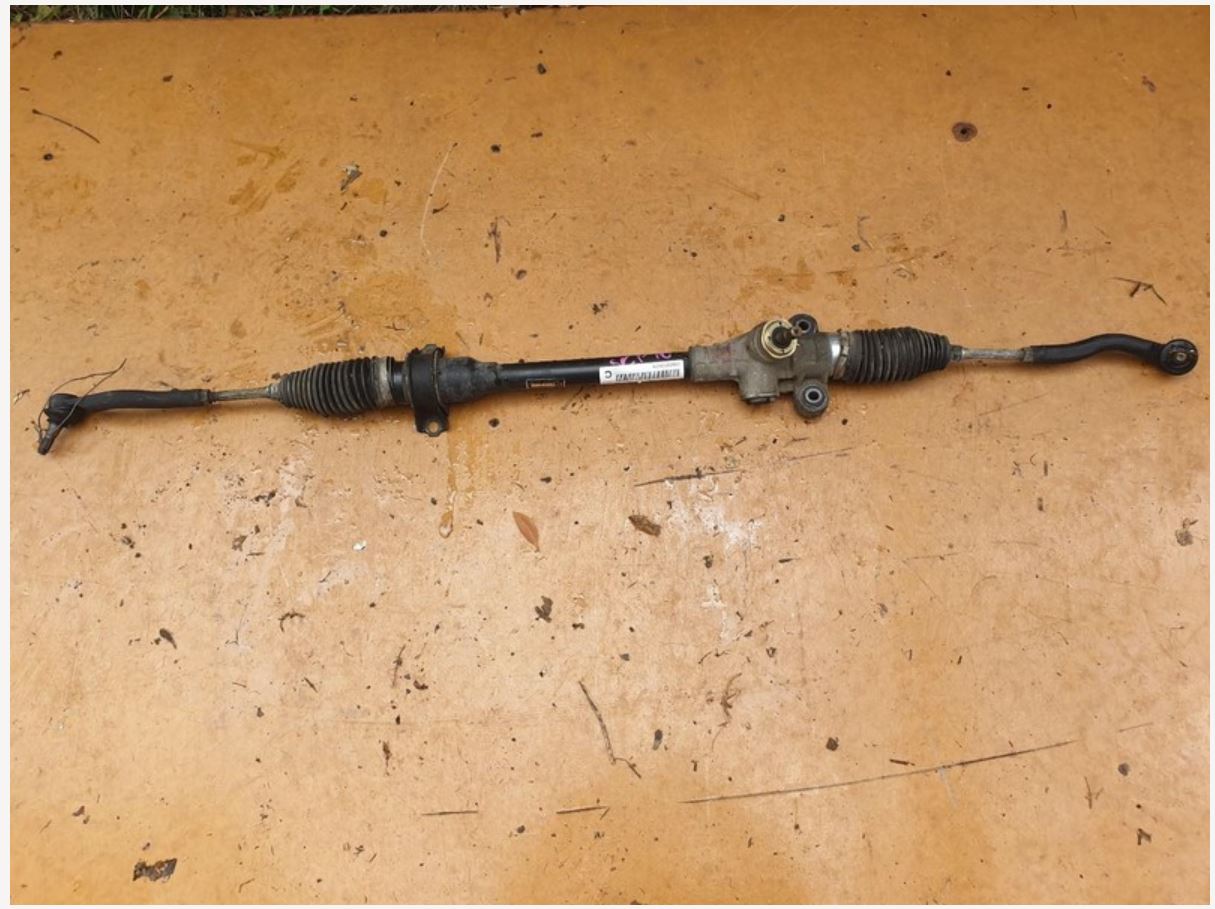
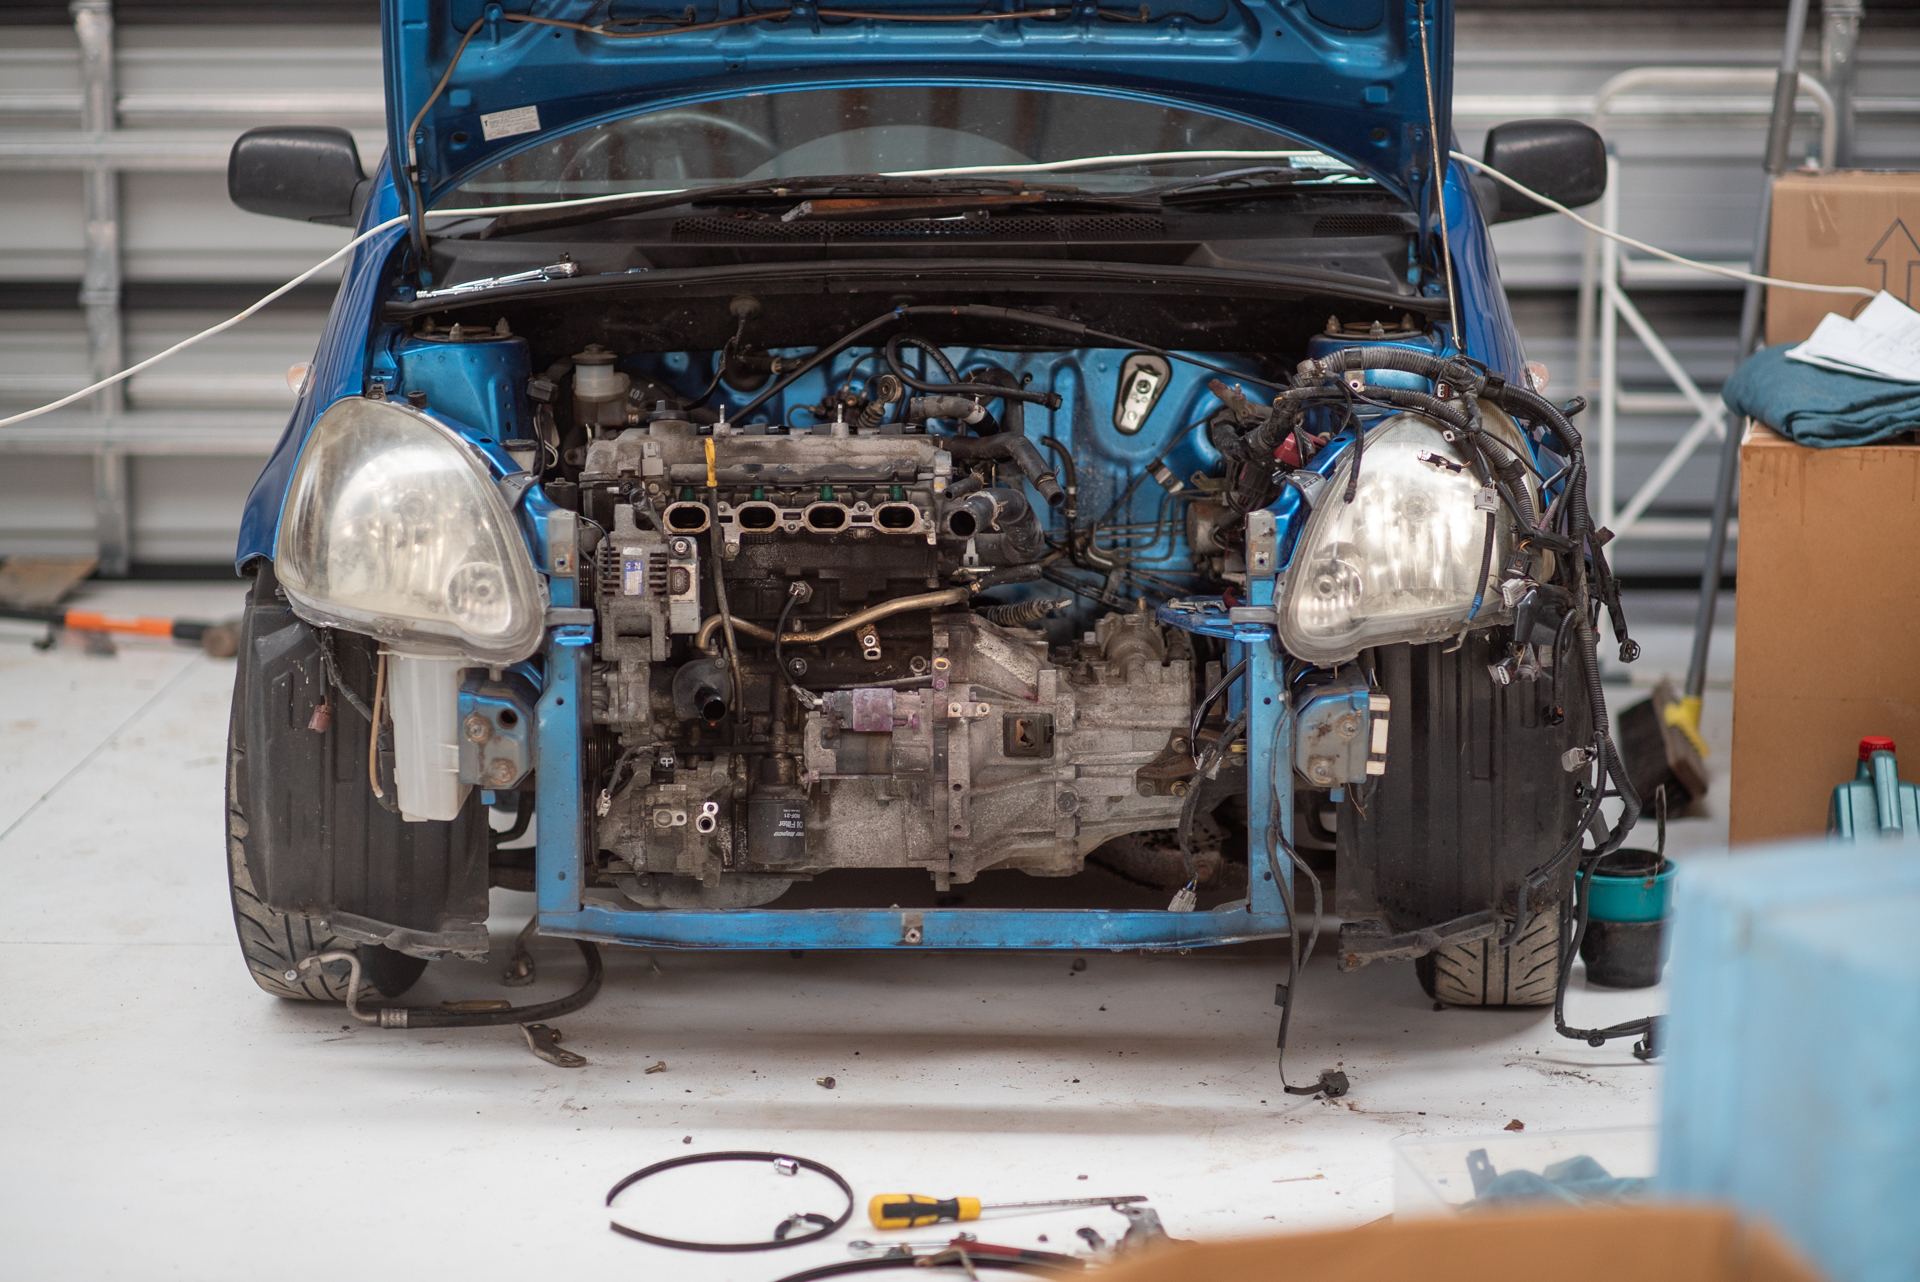
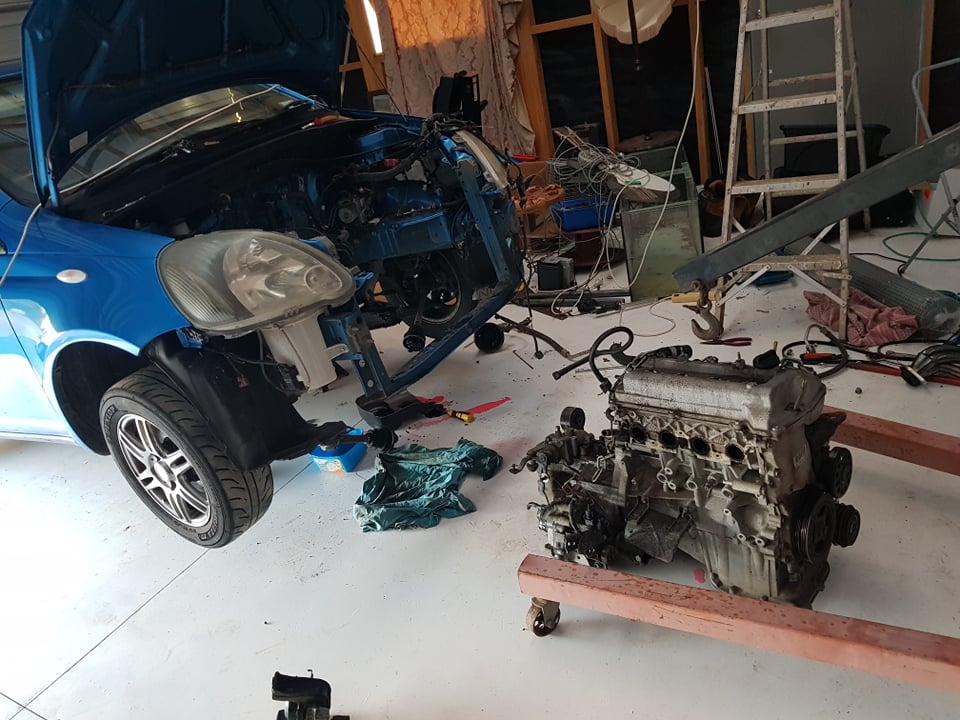
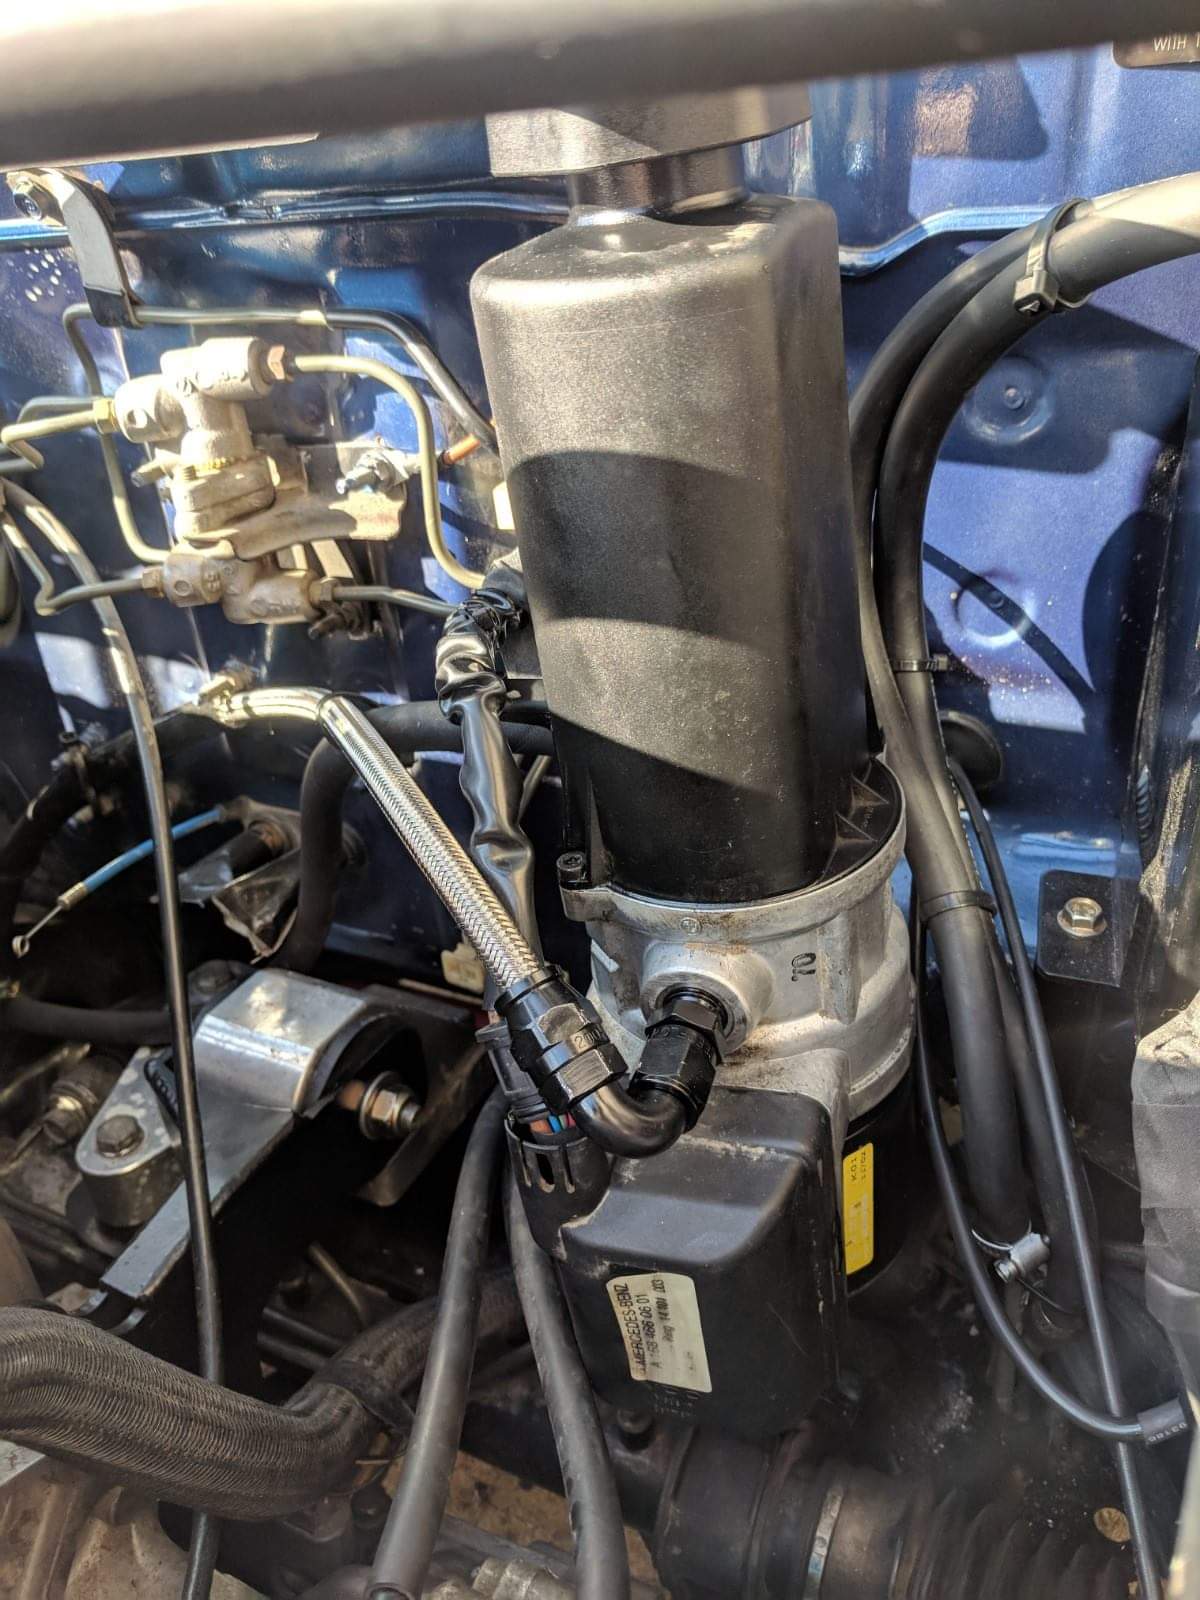
Big mission today to get old motor out and get the new motor/box/clutch/etc assembled. I was thinking it would likely be best/easiest to drop the motor out the bottom, like I've done with MR2 in the past. However once the axles are out it's pretty easy to turn the motor 90 deg and pull it straight out the front. Ended up spending about an hour and a half playing Dentist, when the new motor and new box both had the same alignment dowel stuck in them. Took a lot of heat and CRC and filing some flats into it before the bloody thing eventually came loose. Once that was sorted I tried aligning the box onto the motor but it was just too dark and too tired. So will get that sorted tomorrow after work. I CBF with the power steering so I've been keeping an eye out for a manual rack Echo at Pick a Part etc, but havent seen one yet. Then one just popped up on Trademe so bought it. hopefully it isnt missing a UJ or something specific to the manual rack (probably is, and I'm stupid for buying this) "
3 points
-
FYI Moondiscs are coming soon.
3 points
-
I usually tweak the handbrake so it drags, go for a thrash around the block a couple of times hard on the brakes then tweak again.2 points
-
id rather just weld it instead of a barry fix2 points
-
Yeah this flat sheet thing is hard!!2 points
-
2 points
-
2 points
-
So I skipped a few picture updates. After lots of cleaning, grinding, filing, and making up a seat stay I tripped this off at the paint shop for sand blasting and a coat of black. I picked it up today, really pleased with it. They used chassis black paint which looks spot on in my opinion. Not to bright not too dull. I got the rims done at the same time so next thing to do is rebuild the wheels.
2 points
-
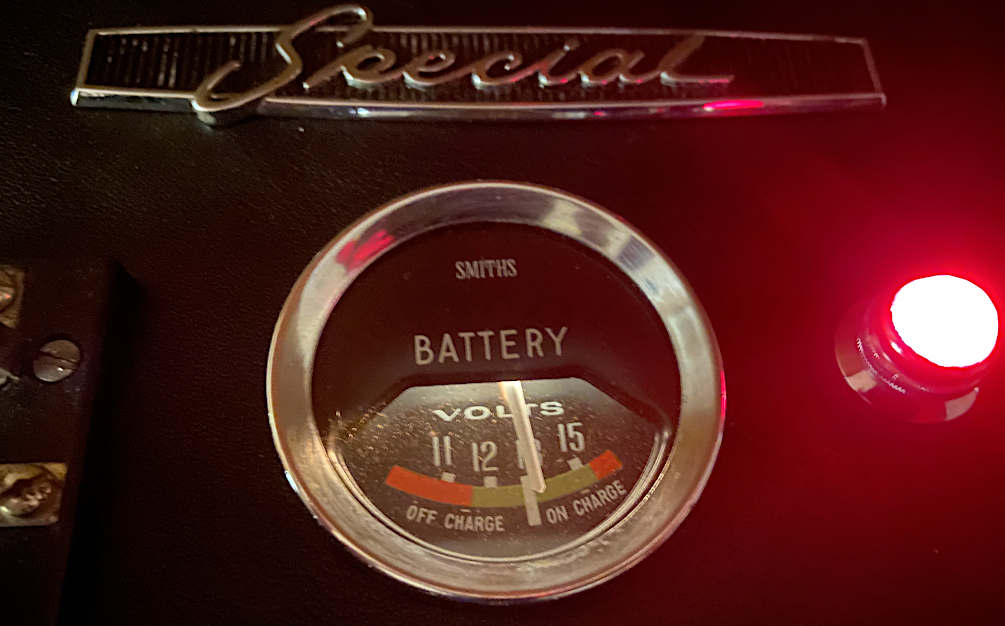
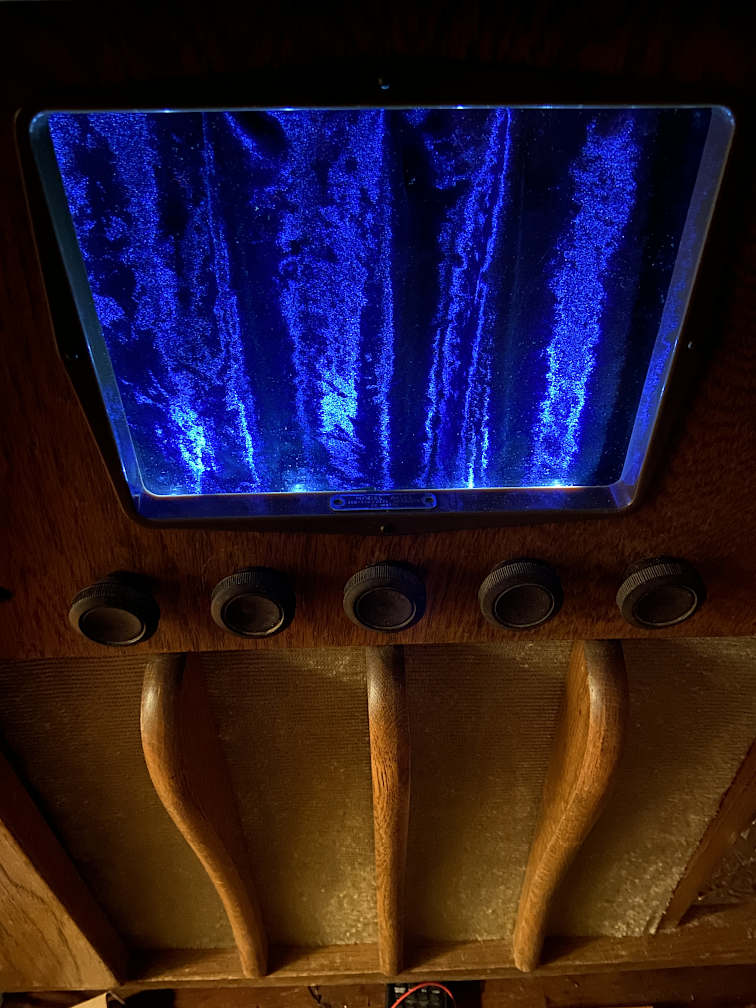
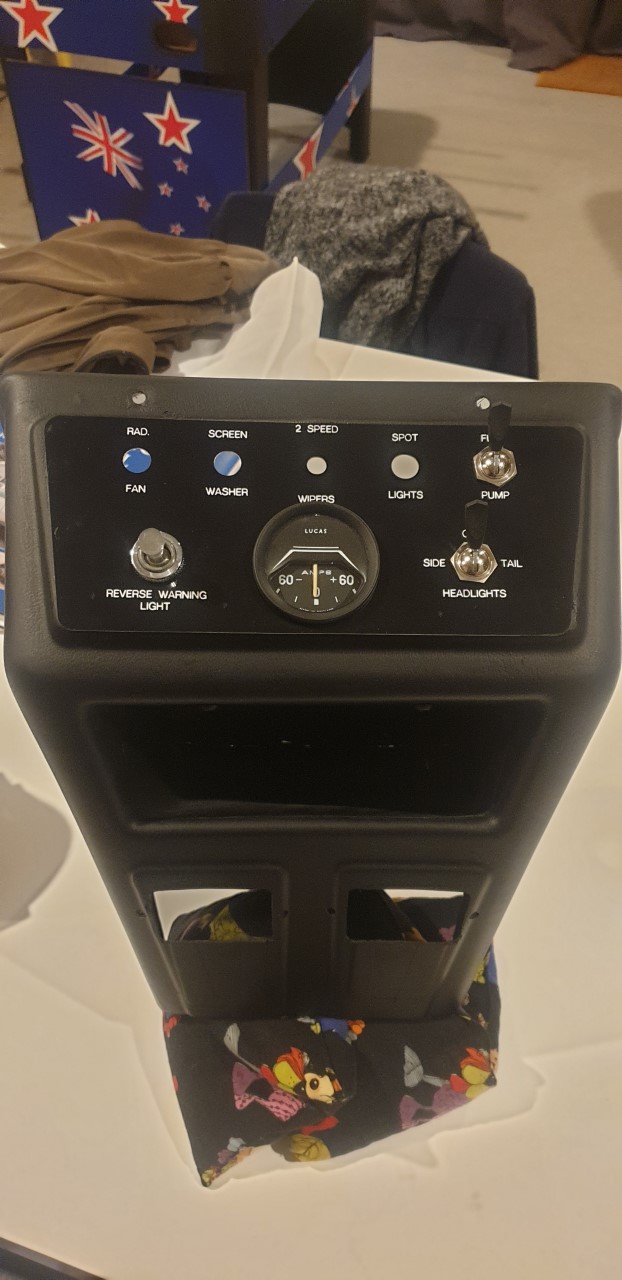
Making slow progress on this whenever I can be bothered. The control panel is covered in leather jacket, and we have volts! I bought a kitset of a motorised chain similar to a tank track, and used it to create a motorised curtain. The curtain grinds its way noisily open and closed, which adds to the cheese factor. It's lit by some Christmas lights: Hopefully the lights in front are sufficient to stop lights behind from being visible through the thin fabric. I discovered that my plasma globe causes my neon bulbs to glow dimly, which is kinda cool. I hope I don't have to ditch the plasma globe because it scrambles electronics in its vicinity. Next up on this project is puzzling out what the rest of the controls should do, and deciding how much effort to put in. I'd quite like a magic eye VU meter.
2 points
-
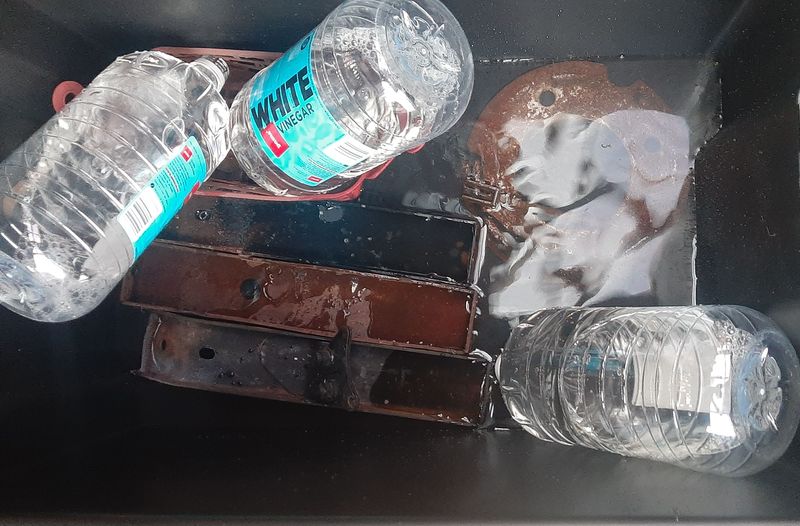
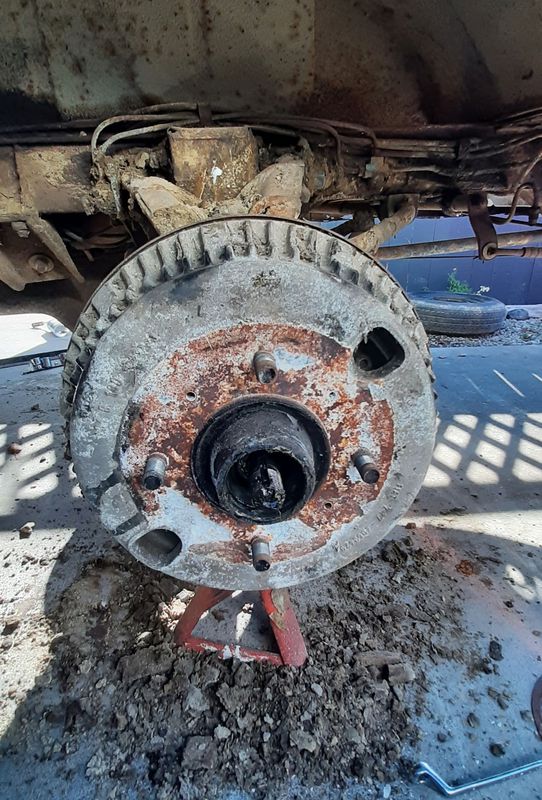
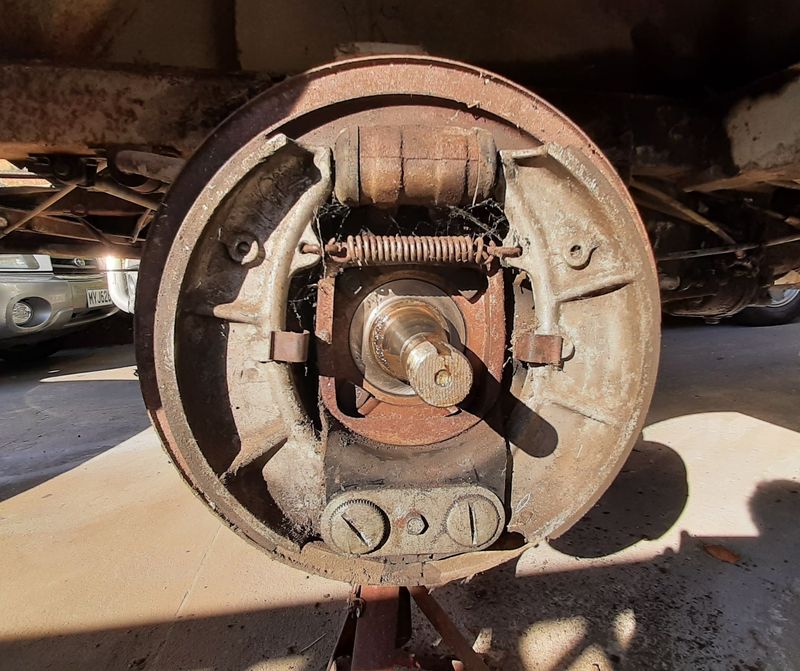
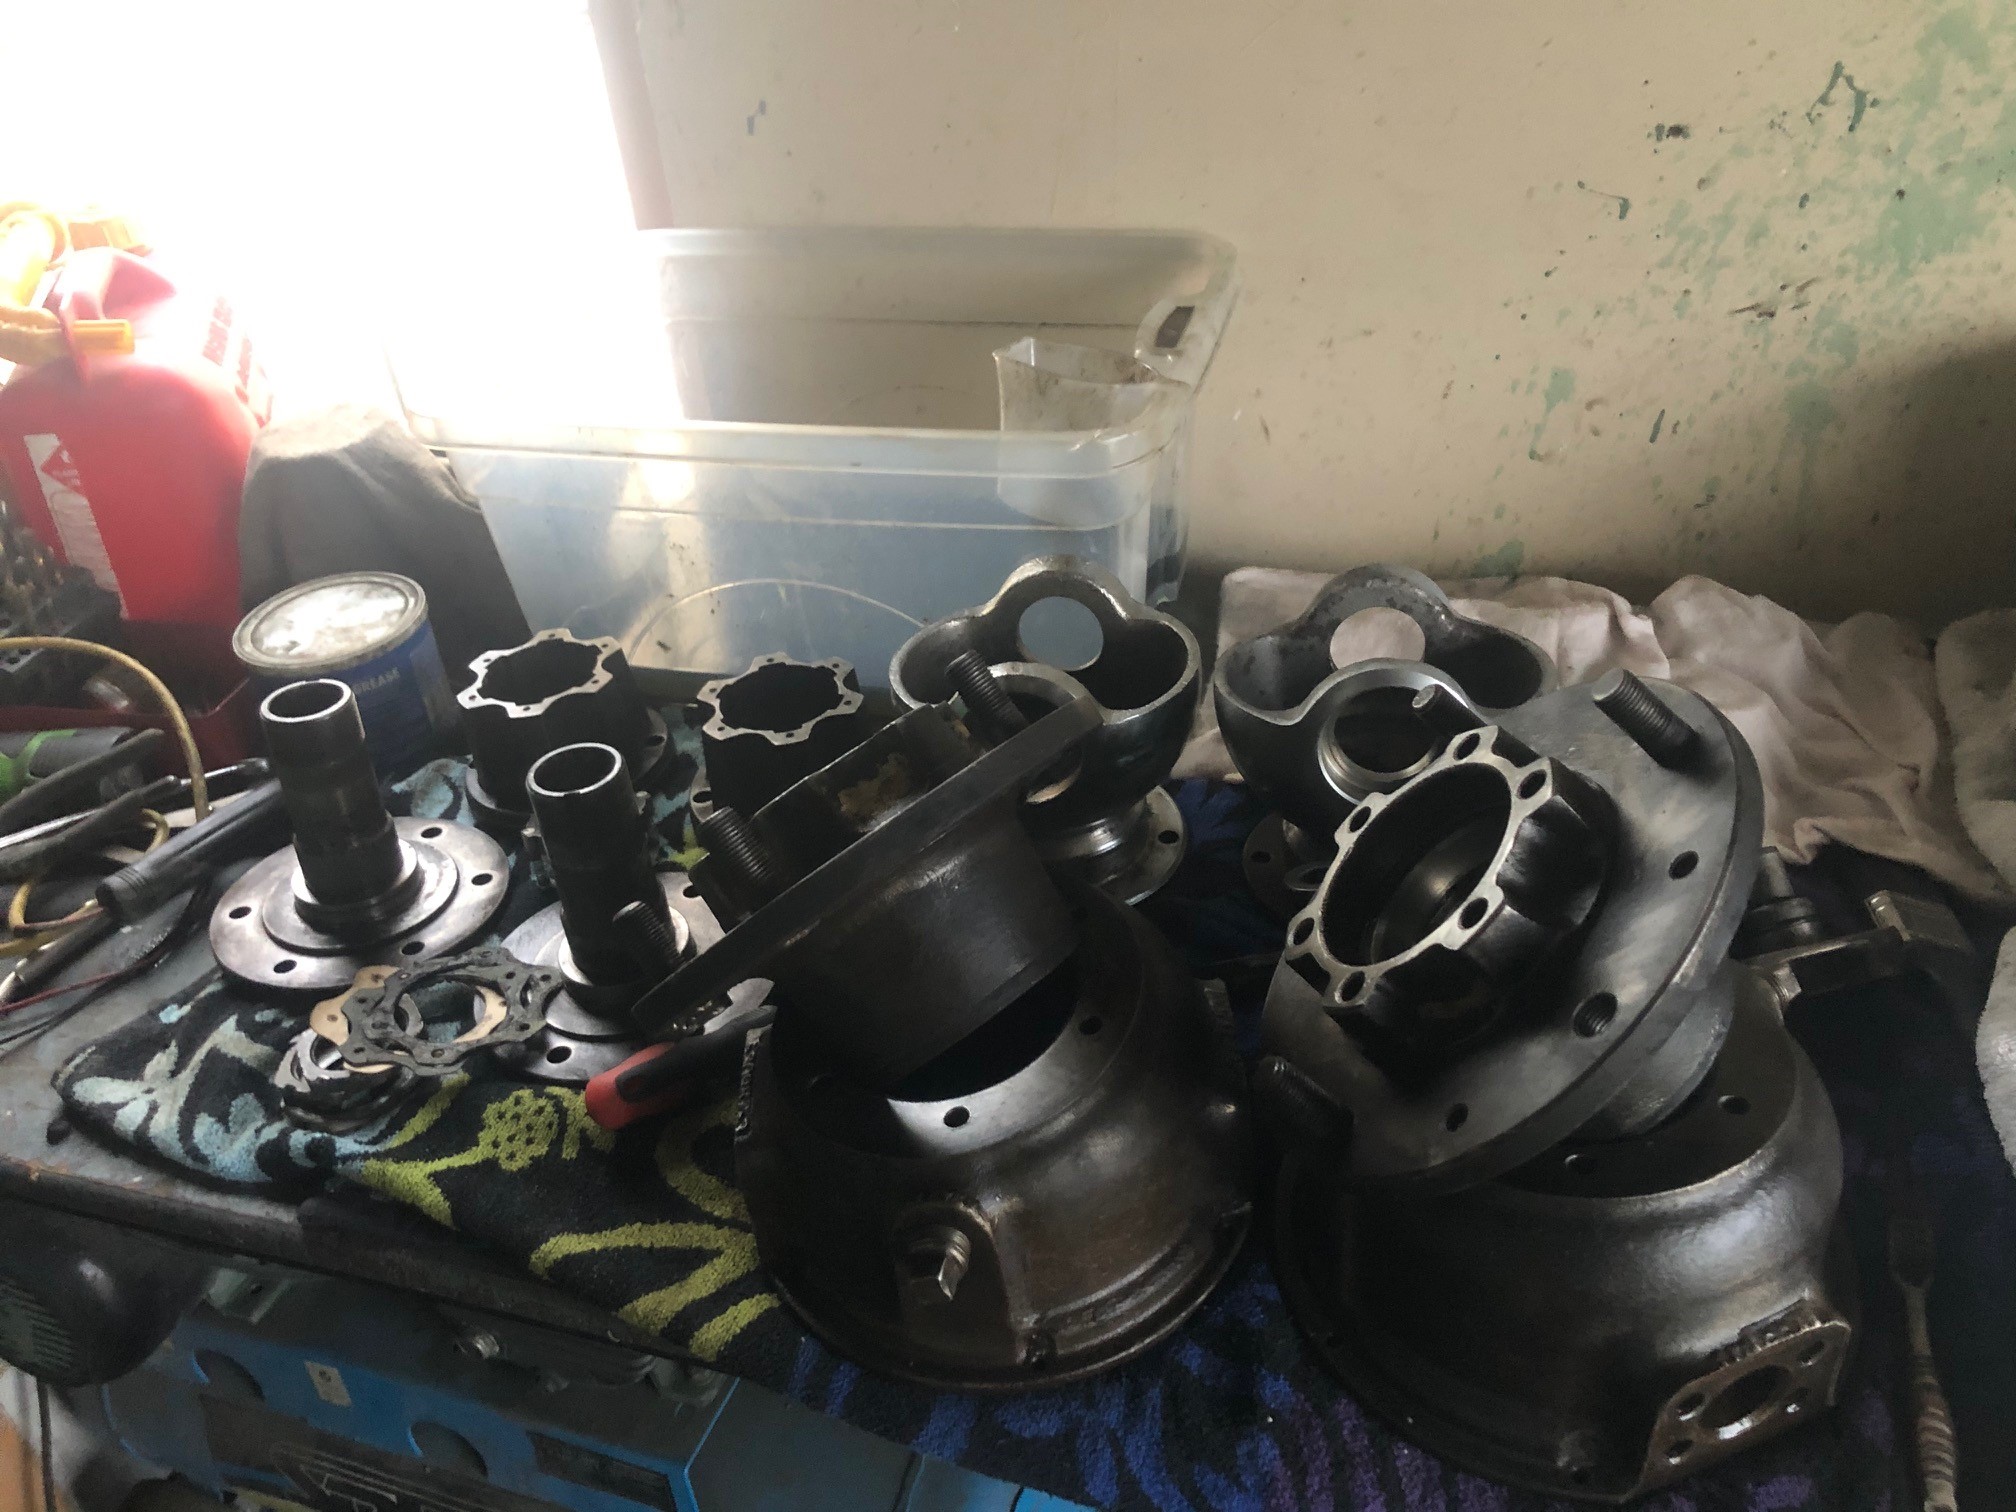
Bit more progress on this, Did some more panel beating of the front end, it had been chinned quite badly on the passenger side especially, and had a sharp bend just below the round bumper mount holes. Now its pretty even and roundedish, way better than before. Once the front bumper is on it will be hidden anyway. Again very finding very little rust holes, there is some, obviously, as well as surface rust, and there are a couple of tears as well, but its held up very well considering. Removed the handbrake mechanism so i could tidy up the handle, and the lower mechanism was scraping on the valance, so that all got removed for a clean paint and grease. its crossmember also got a light sand of the surface rust and a squirt of 'not quite body colour' spray paint as a test, pretty happy with that! Check out the factory cut out for the end of the mechanism, it as all chewed up around the tip of the pivot before Looked good, so did a bit more sanding Its starting to look way less shitty. Still shitty, just less I also got onto the brakes, i needed to pull the fronts to inspect and start parts hunting. 10" Aluminium drums front and rear. Check out the pile of dry dirt and grease i chipped off - its caking everything that pile is just off the backing plate. Ive only done the fronts so far, ended up having to pull the hub off, as the drum had differentially welded itself to the steel hub and the puny M6 spacer plate retainers that get moved to another set of holes were not going to shift it. Got it off in the end and its all clean and dry and no damage. Im glad the drums especially are ok they are simply NLA. Cylinders are rusted stuck tho but they are quite cheap, shoes less so (rears are cheap, fronts are $$$) I bought 16l of vinegar for about $24 and started chucking bits in after i water blasted them, ill check them in the morning. Someone had already taken one of the rear brakes apart already so i have those bits in a shopping cart already. The Brake and clutch master cylinders were already removed too, but praise be, they are not seized. The clutch master and slave is the same as my 2300 wagon, ie Lada stuff can work, so that's good. Im very very happy the brake master cylinder is ok. It is available but not cheap, because its a part that is shared with both Ferrari 330 and Lamborghini Espada, lol https://www.okp.de/xtc2/Ferrari/45-Brakes/Master-cylinders/Brake-master-cylinder-Ferrari-330-1-series-4-holes-flange::19478.html?language=en
2 points
-
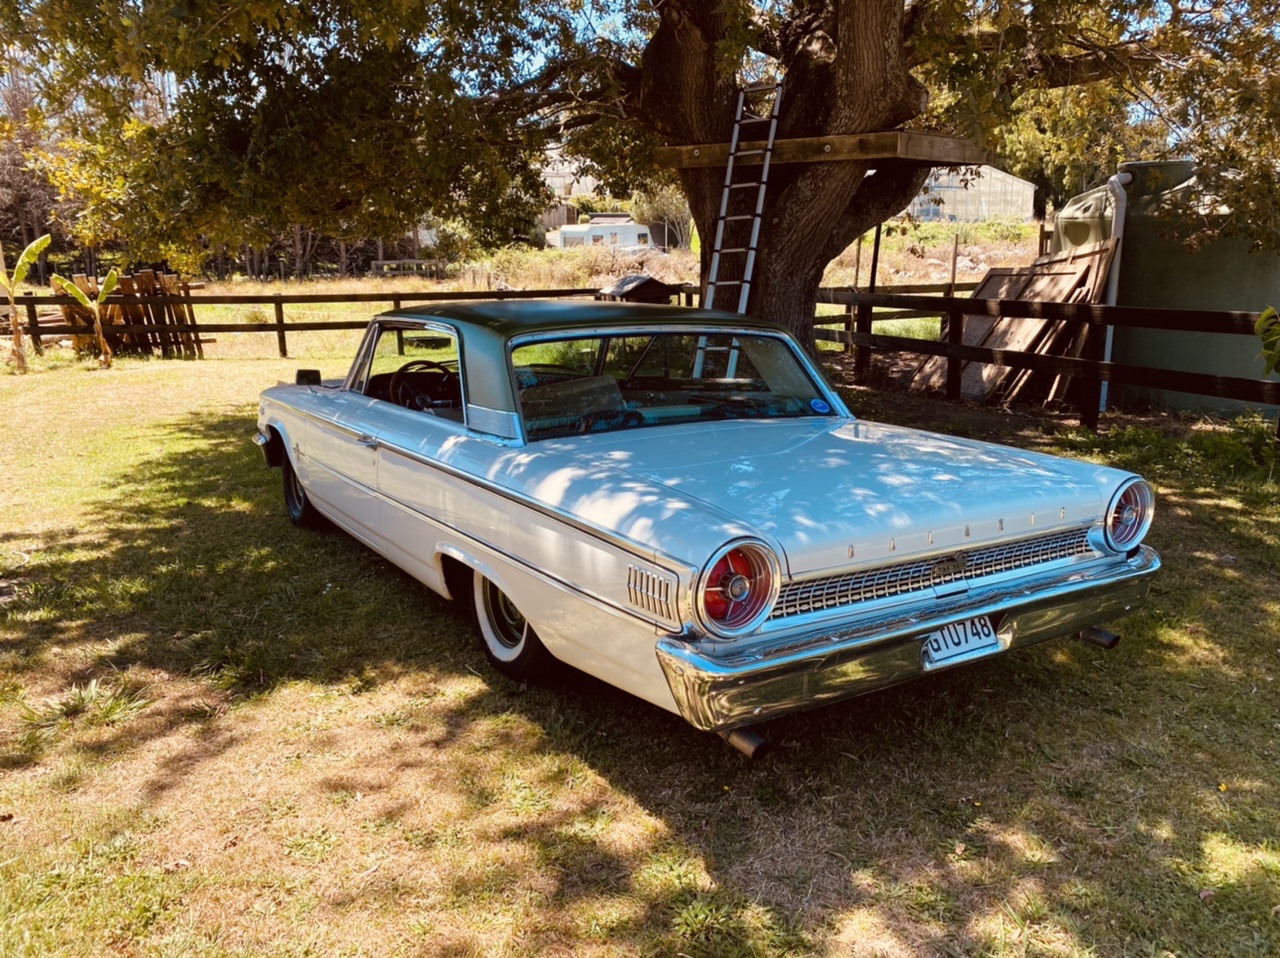
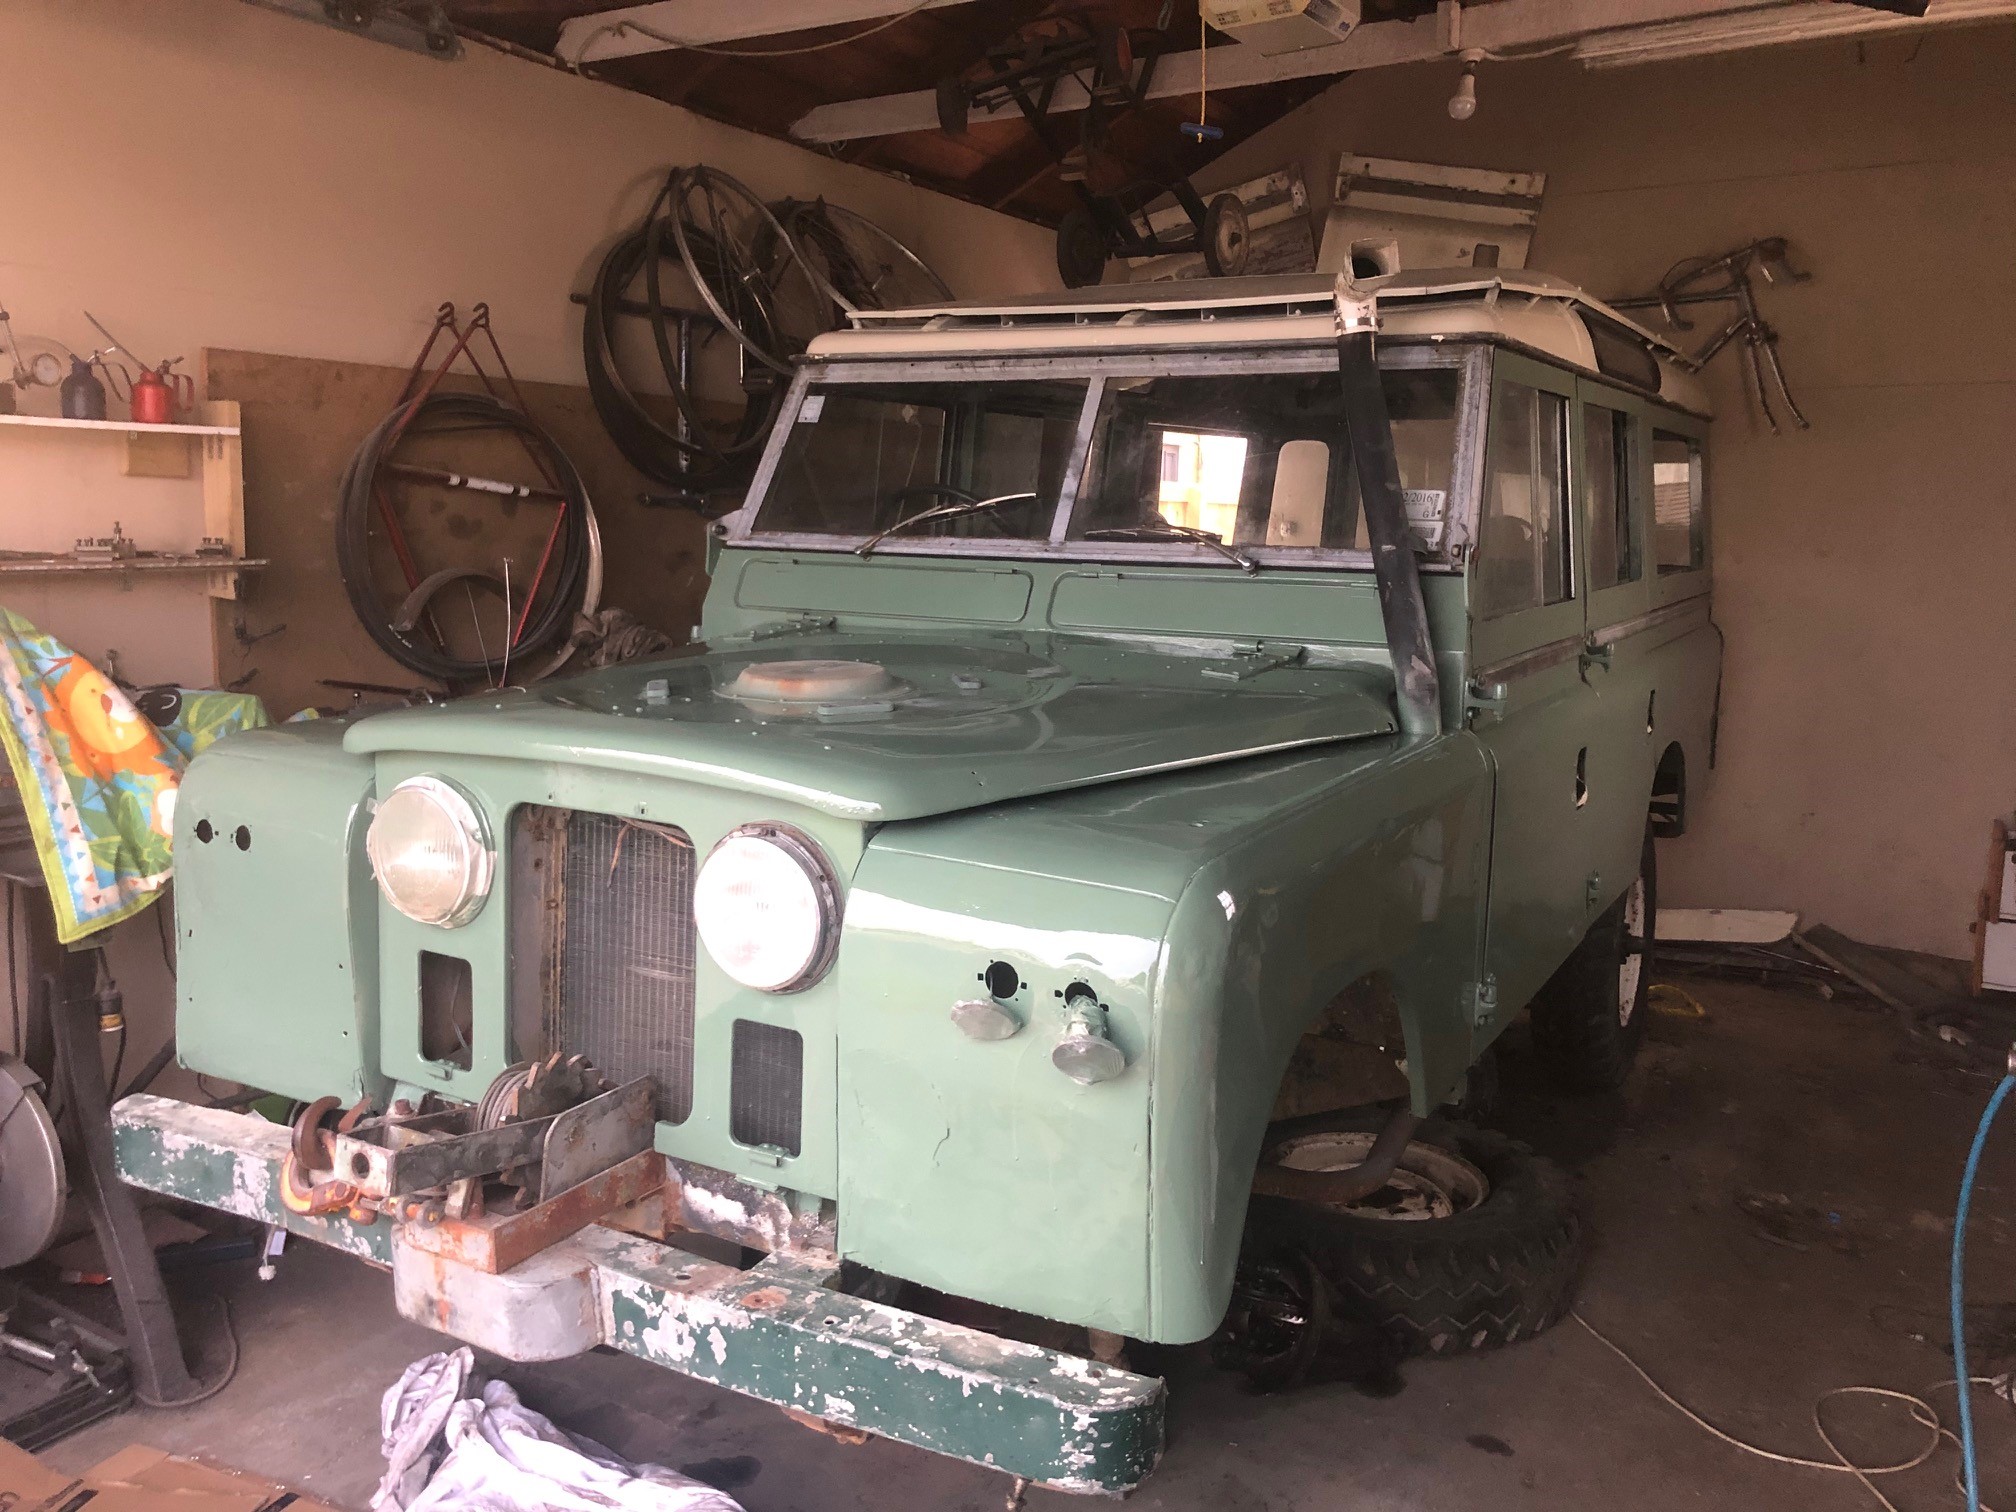
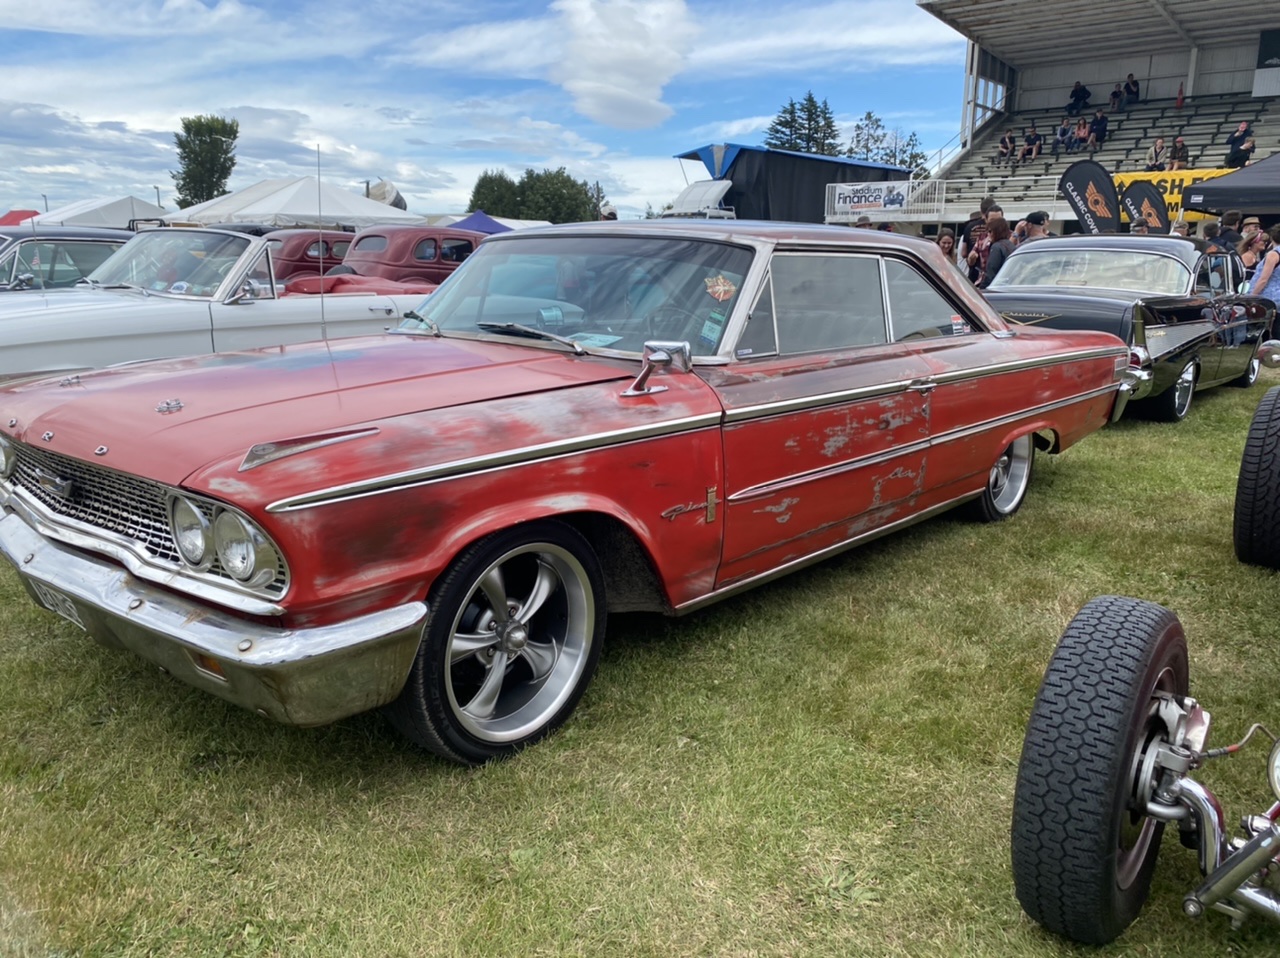
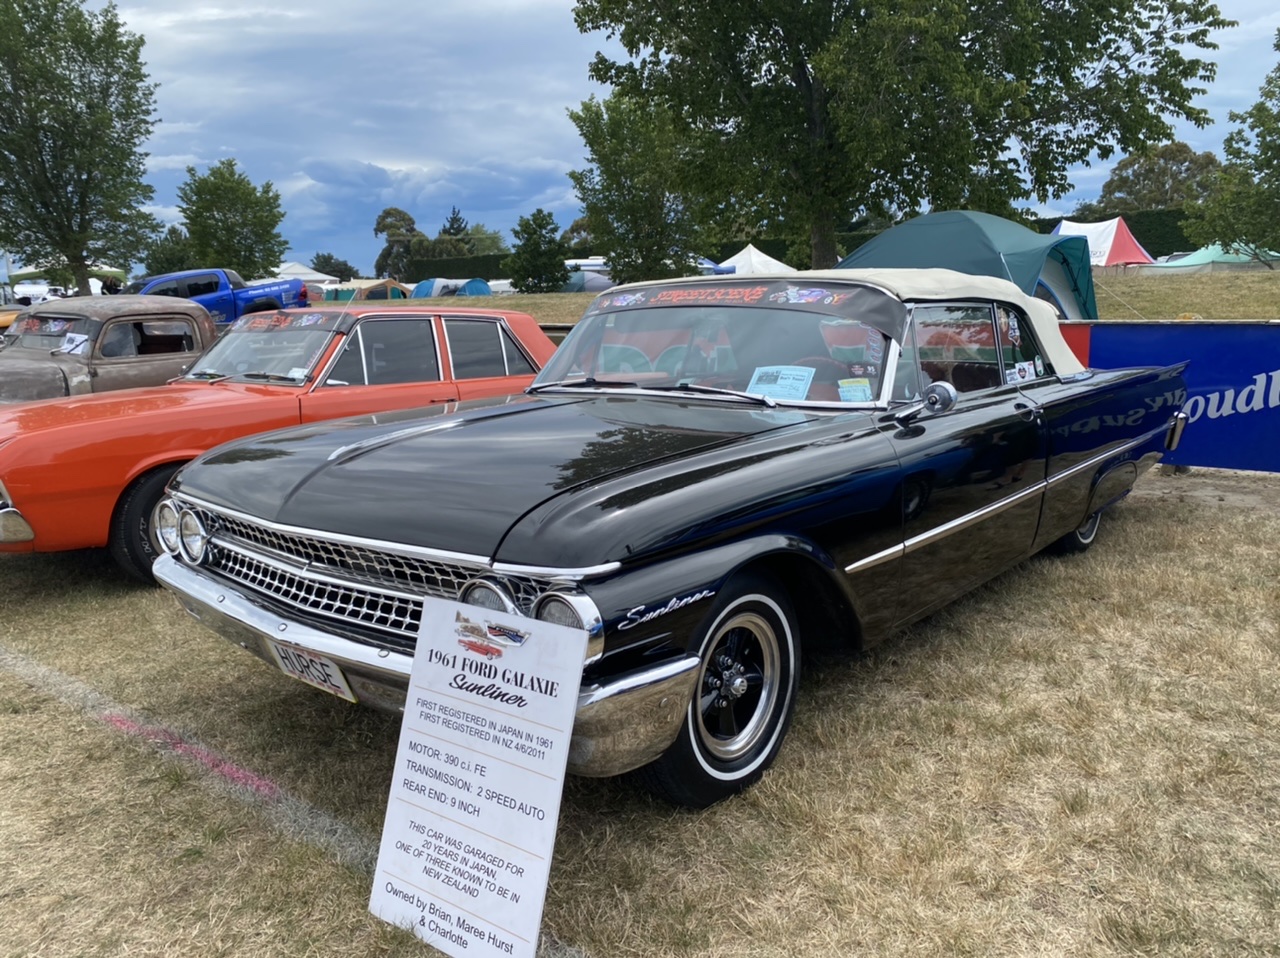
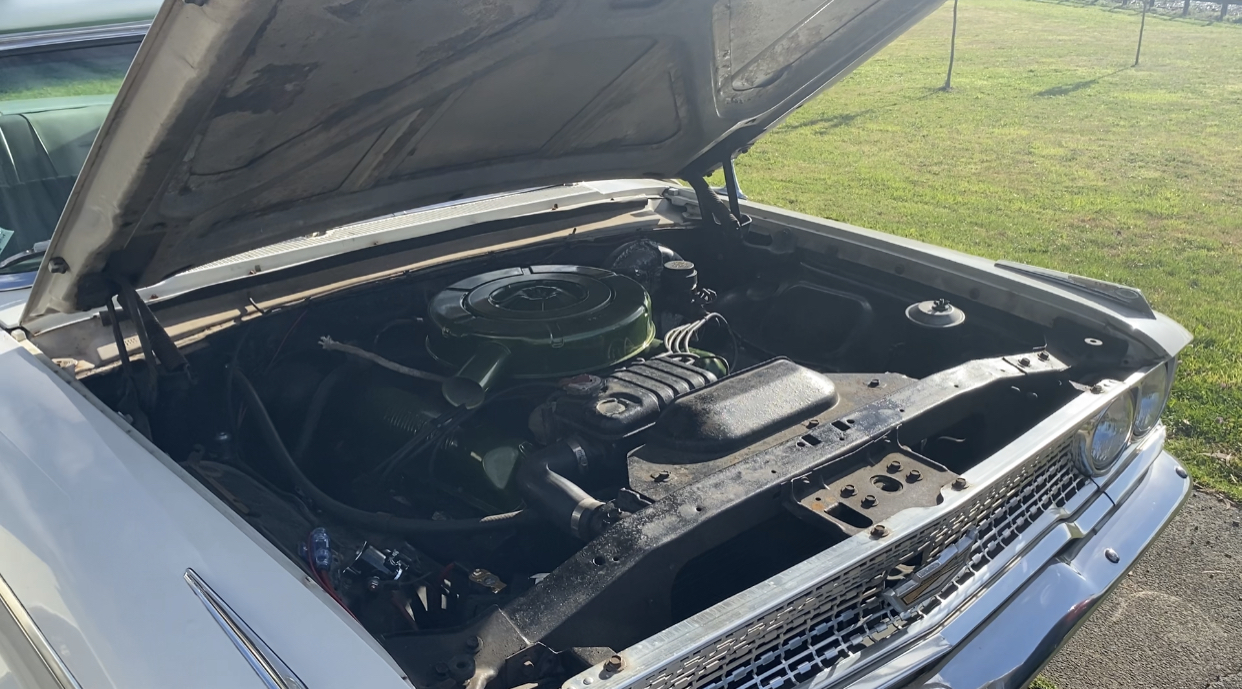
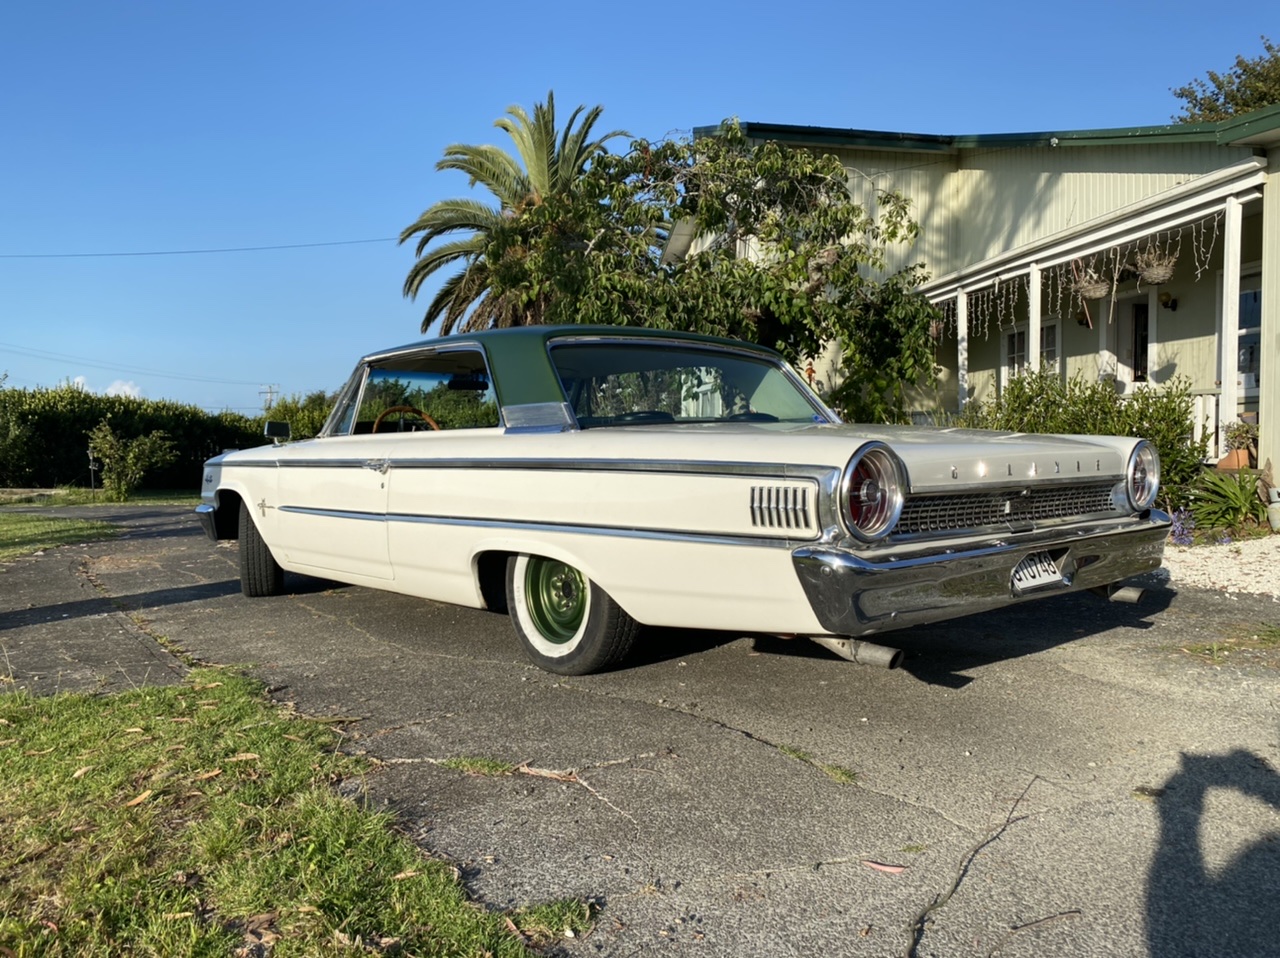
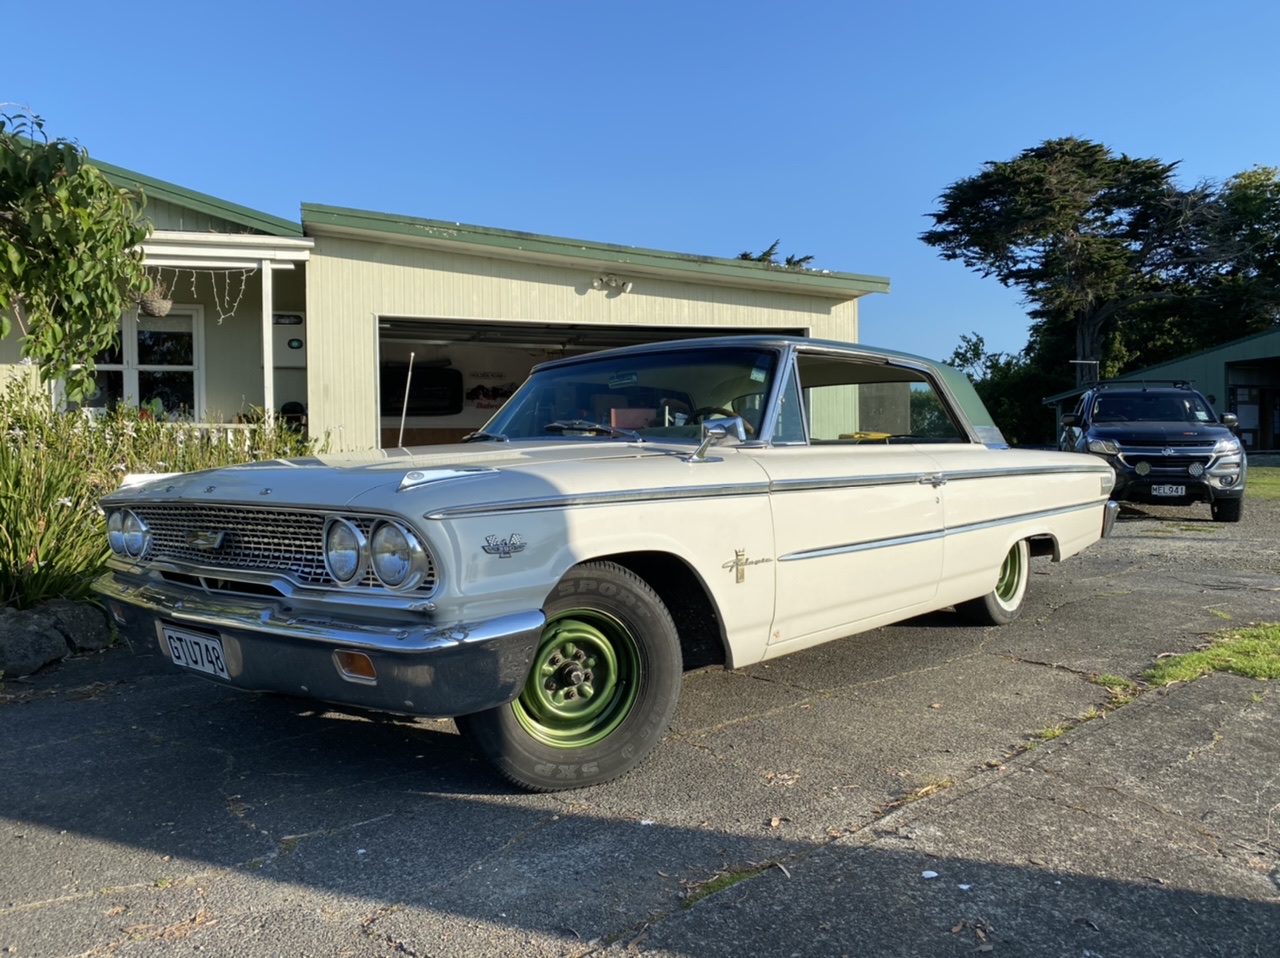
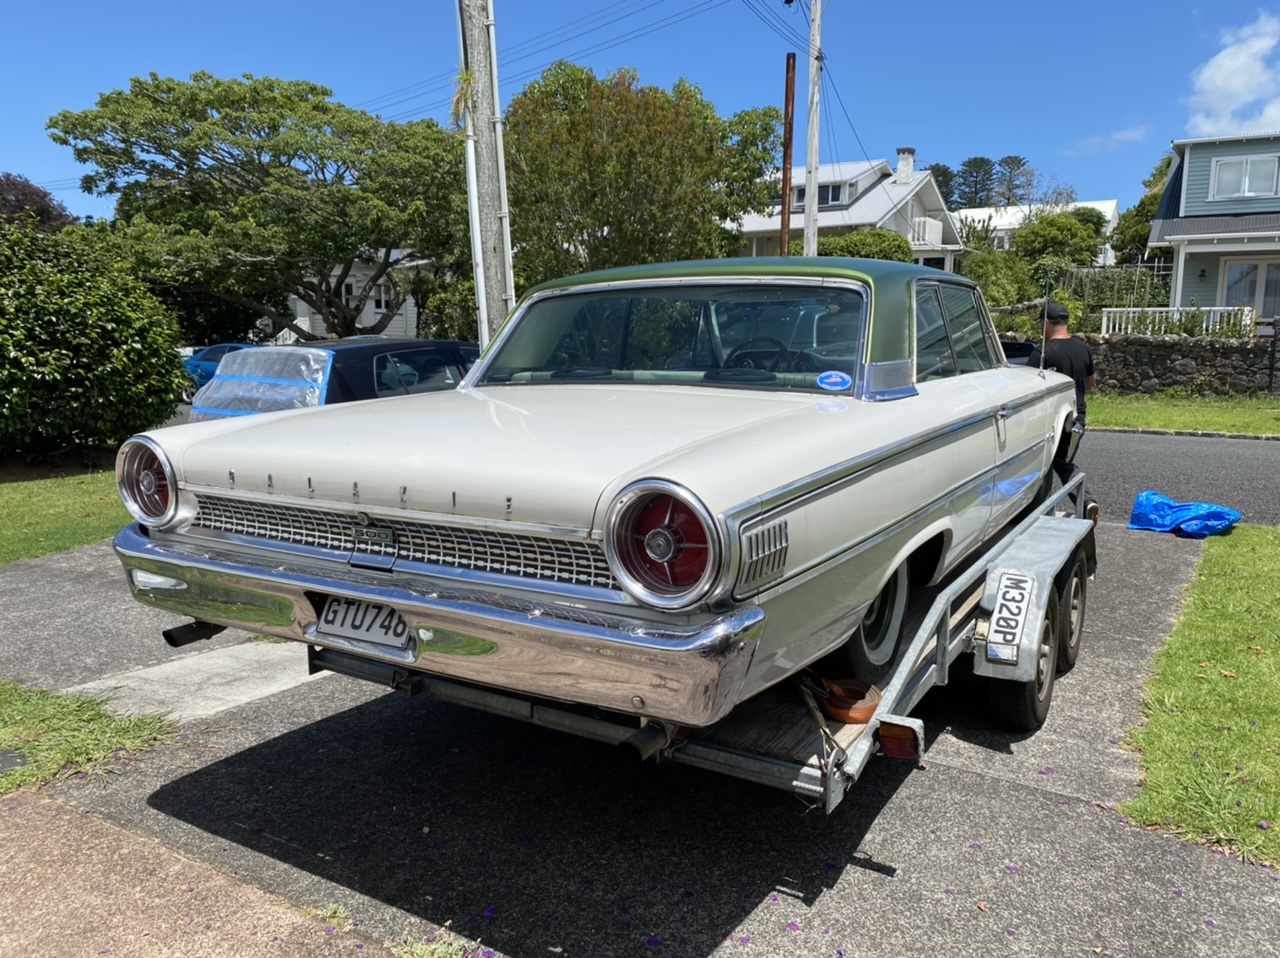
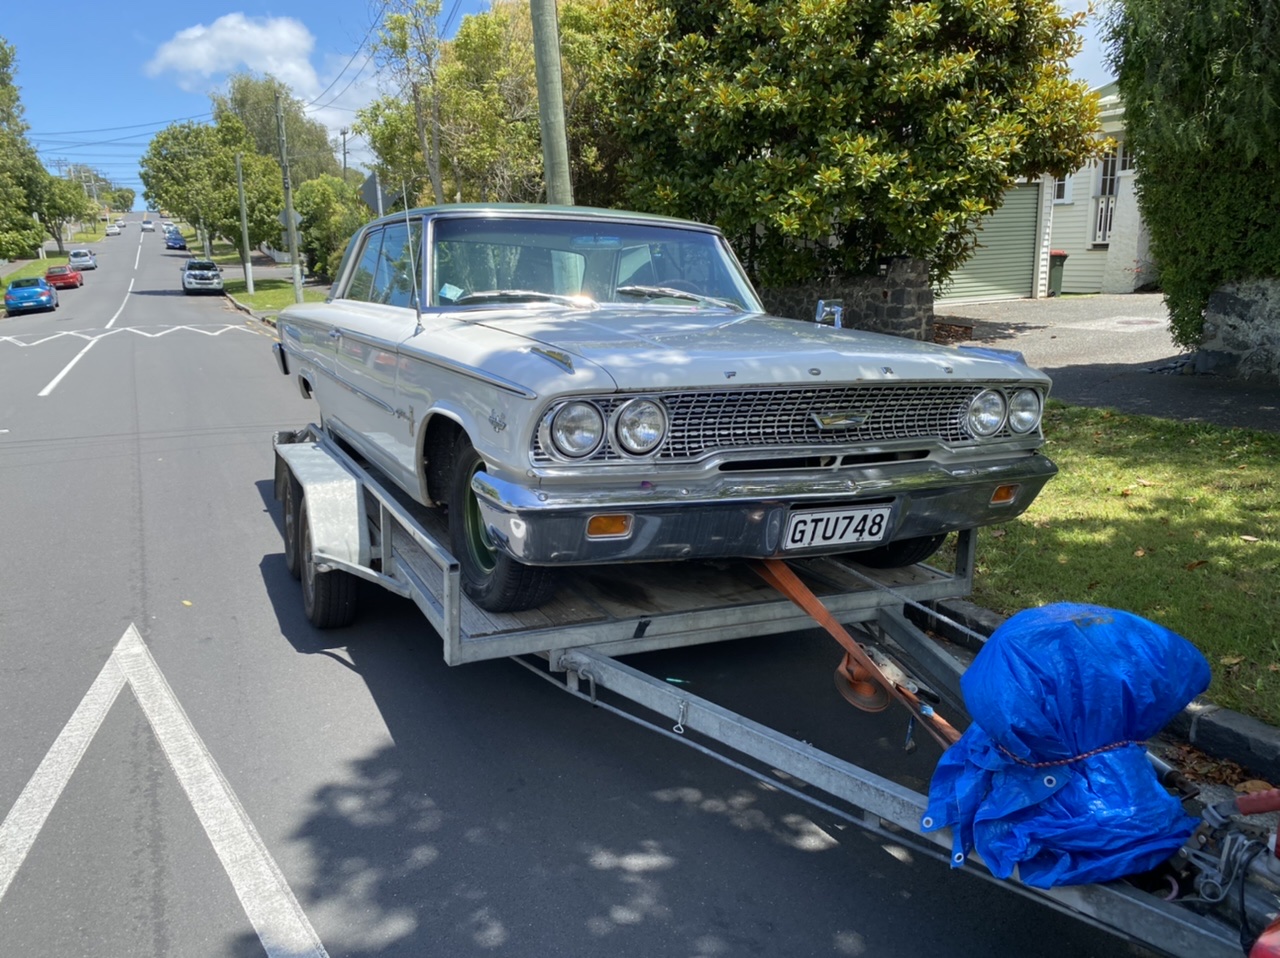
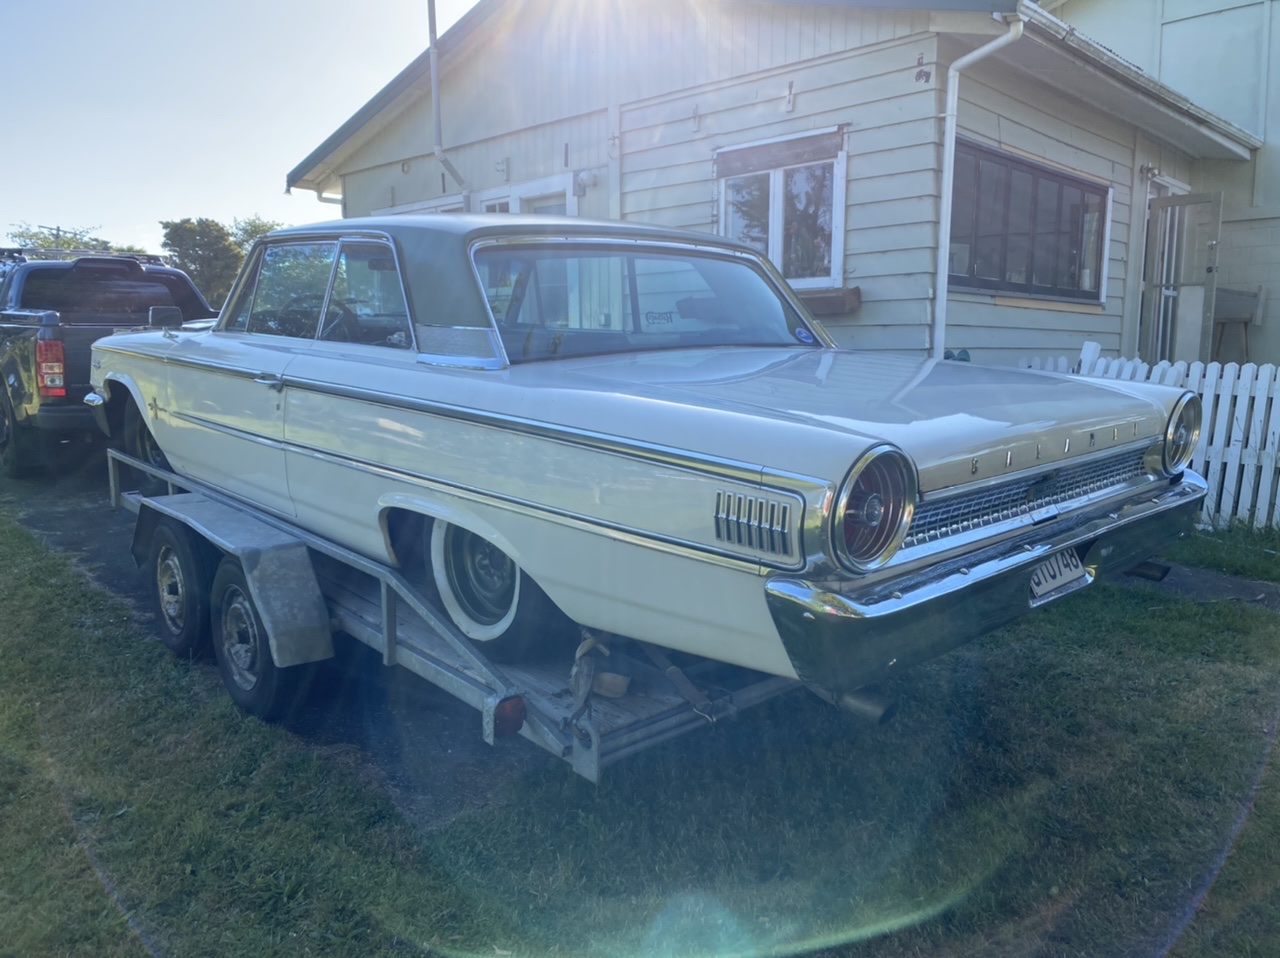
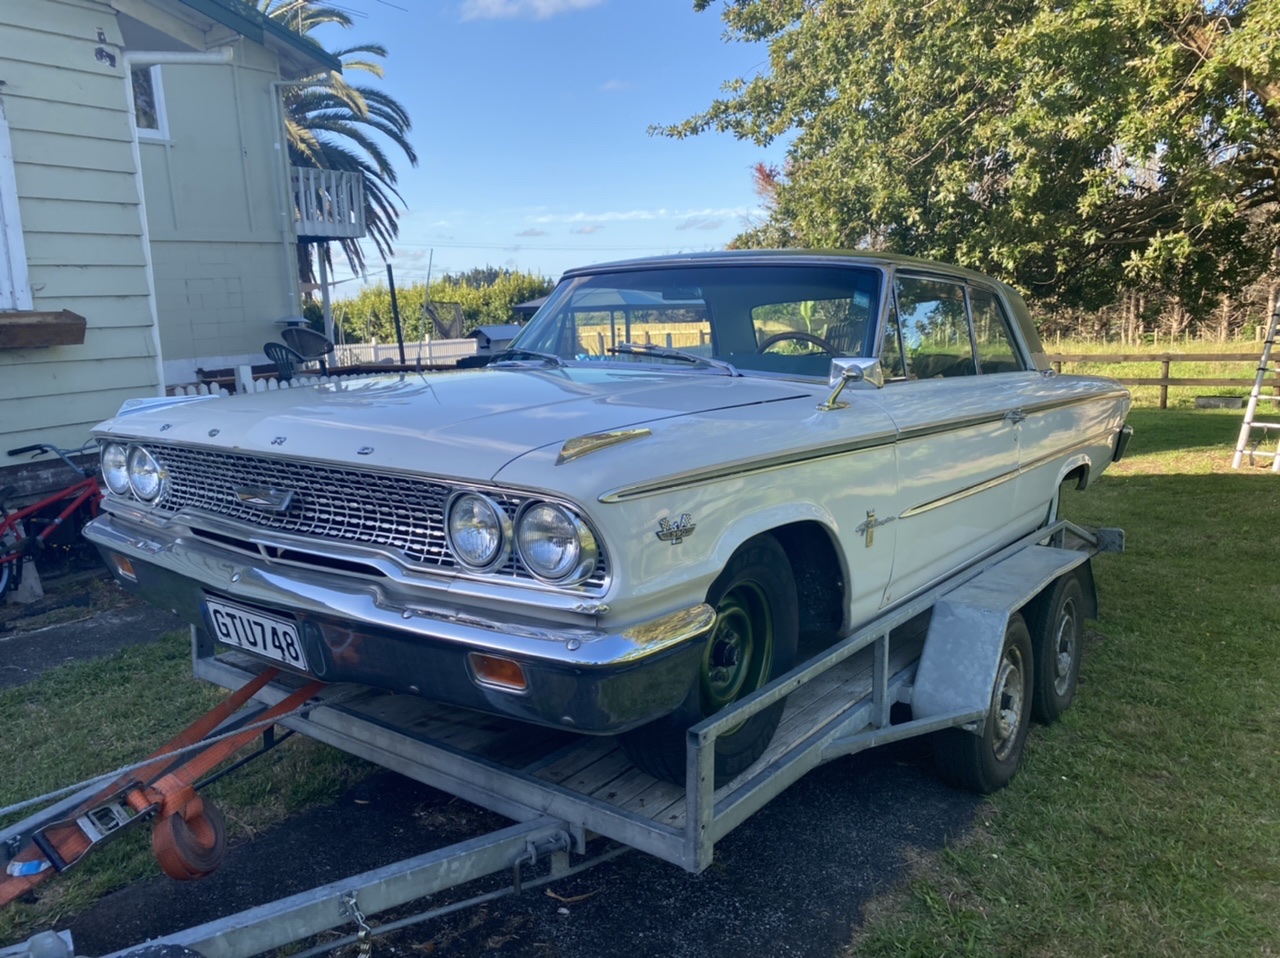
Well, here is my new old car.. so stoked!! I've had my eye on Mikes car for a couple of years now when he started to look at selling it, but never been in a position to pick it up off him.. until now! When he chucked up another post trying to sell it last year I knew I needed to make something happen.. so after a few back & forth conversations, I flicked off the Commodore and it all fell into place. To say I’m happy with it is an understatement.. it ticks all the boxes I had for what I wanted a car: US LHD, 50’s-60’s, bench seats, big block, 2 door... now this is more my kind of car. Here is a link to Mikes old thread, but I’ve decided to start my own to document my Galaxie journey..
1 point
-
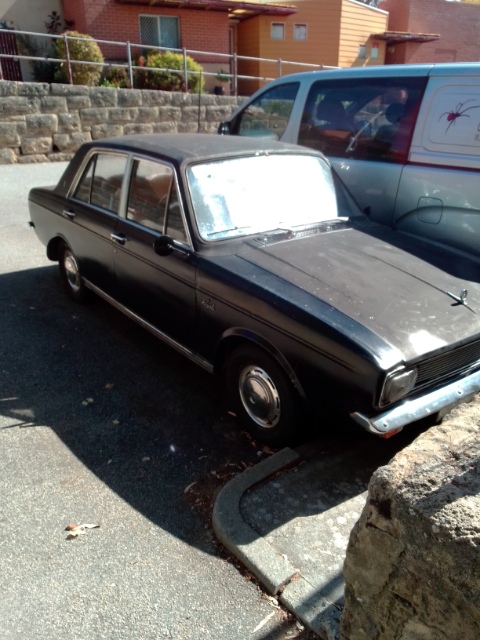
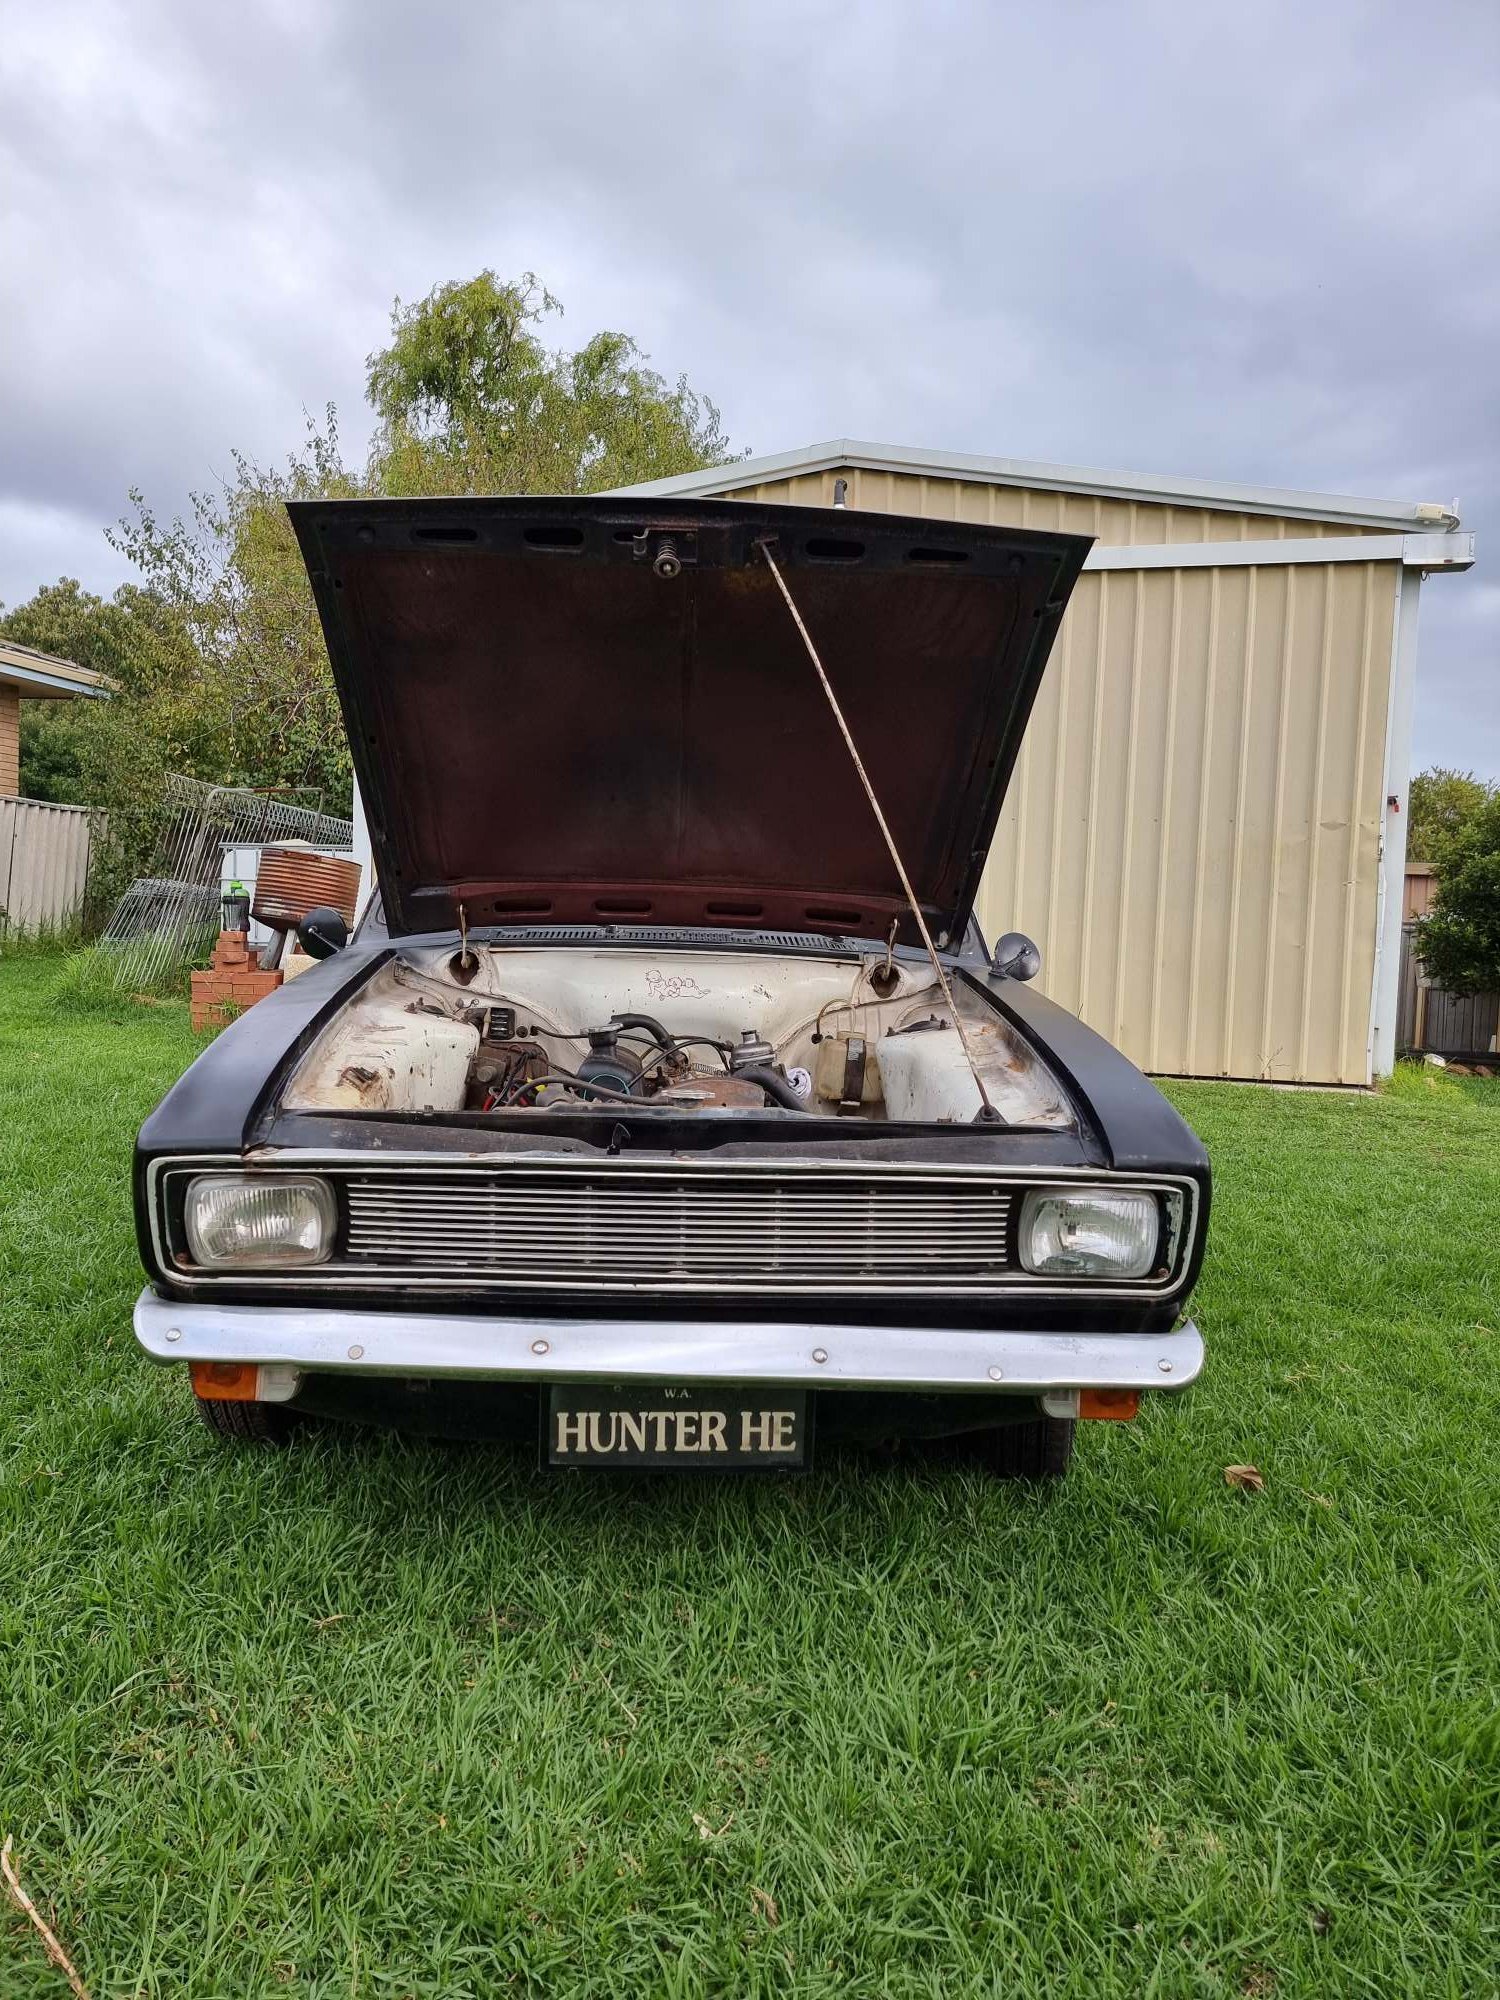
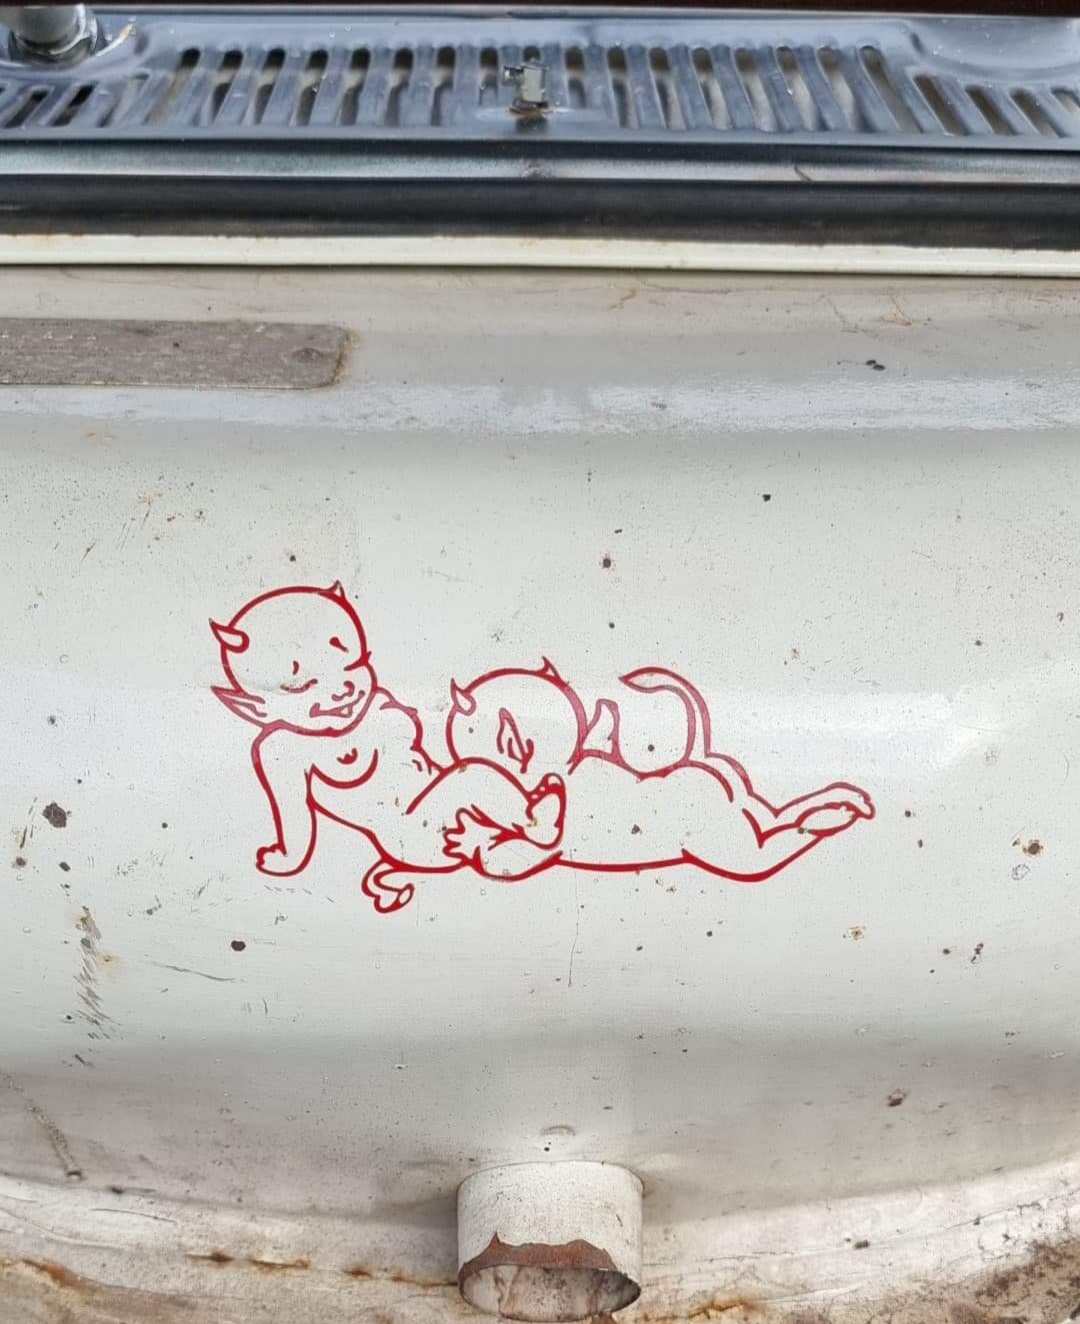
So its been awhile still in WA australia and sold both my escorts, bought a house with a good sized shed thats empty... thought you know what goes in here well. Junk. So I ended up getting this 1970 Hillman Hunter Royal HE of this guy up in perth thats had it for 20 years collecting bits and pieces but got cancer and needed it to move on to someone who will do it up. Its a matt black spray can jobber someones slapped a wing on it for god knows what reason. Came with all new doors, front end, bonnet, boot lid, engine, transmission, and boxes full of unused and used parts aswell as badges lots and lots of badges so if people need parts and dont mind it coming from over here might be able to help So here it is in all its glory and the amazing bit of engine bay art Heres the discussion Forgot how to post and dont have a computer to bare with me
1 point
-
Need a ute to carry moulds for the engine project. So I got a 67 El Camino. Picked it up in Tucson and drove it back to CA without too much stress. Has the original 327 with camel hump heads and a modern (/80s) 700r4 trans. Ton of things to sort to make it a daily. Like it doesnt run very well! Timing feels off or vac advance isnt working. Carb seems way too big. It looks good from a distance but dont let the fool you!1 point
-
1 point
-
I didn't even get it in garage before waterblasting the shit out of it! Less greasy its obviously had some love in past as it looks ok. Now to plan, do i pull the heads and clean the ports up fit studs and new head gaskets........ or just get it in hmmm.
1 point
-
New engine is home so finally got a chance to look it over...... its fucking filthy! Power steering hoses must of leaked forever and they just topped it up. Cool stuff though after a casual poke around. Billet mace engineering oil cap cheesy but cool, A mace modular blower pulley setup has been fitted so its a piece of cake to change sizes/boost Egr delete has been done on head fully gone! New looking water pump, belts and rear main seal have been done recently. It came with the pcm bcm and ignition key so i could potentially just slam it in if its compatible with my cars body loom. The Meh stuff. Doesn't have the flexplate as it was a manual. theyre balanced different to the ecotec I'll ask around i may be able to get my ecotec one balanced to suit i will be using an ecotec transmission anyway. Not end of world. Loom has some twist and tape joins on the trans section of loom easily reversed but the pcm will have to have had some reflash to allow the manual to work. The exhaust manifolds have lots of snapped bolts..... it obviously had headers which they kept.1 point
-
Yeah with the Carina, even swapping from a height adjustable column to one that isnt, absolutely bloody everything was different haha. It was also weird that my new gearbox had no speedo drive, just a blanking plate for it. But then thankfully it still had the nylon gear inside the box, so just plonked the other speedo drive in. It would have been a right bastard if that nylon inner gear wasnt there haha. It must run the speedo signal from the ABS unit on the NCP13 model. Maybe because with the big block 1500 motor you're doing too many hectic skids all of the time to rely on the front wheel speed as being accurate.1 point
-
Then this happened !
1 point
-
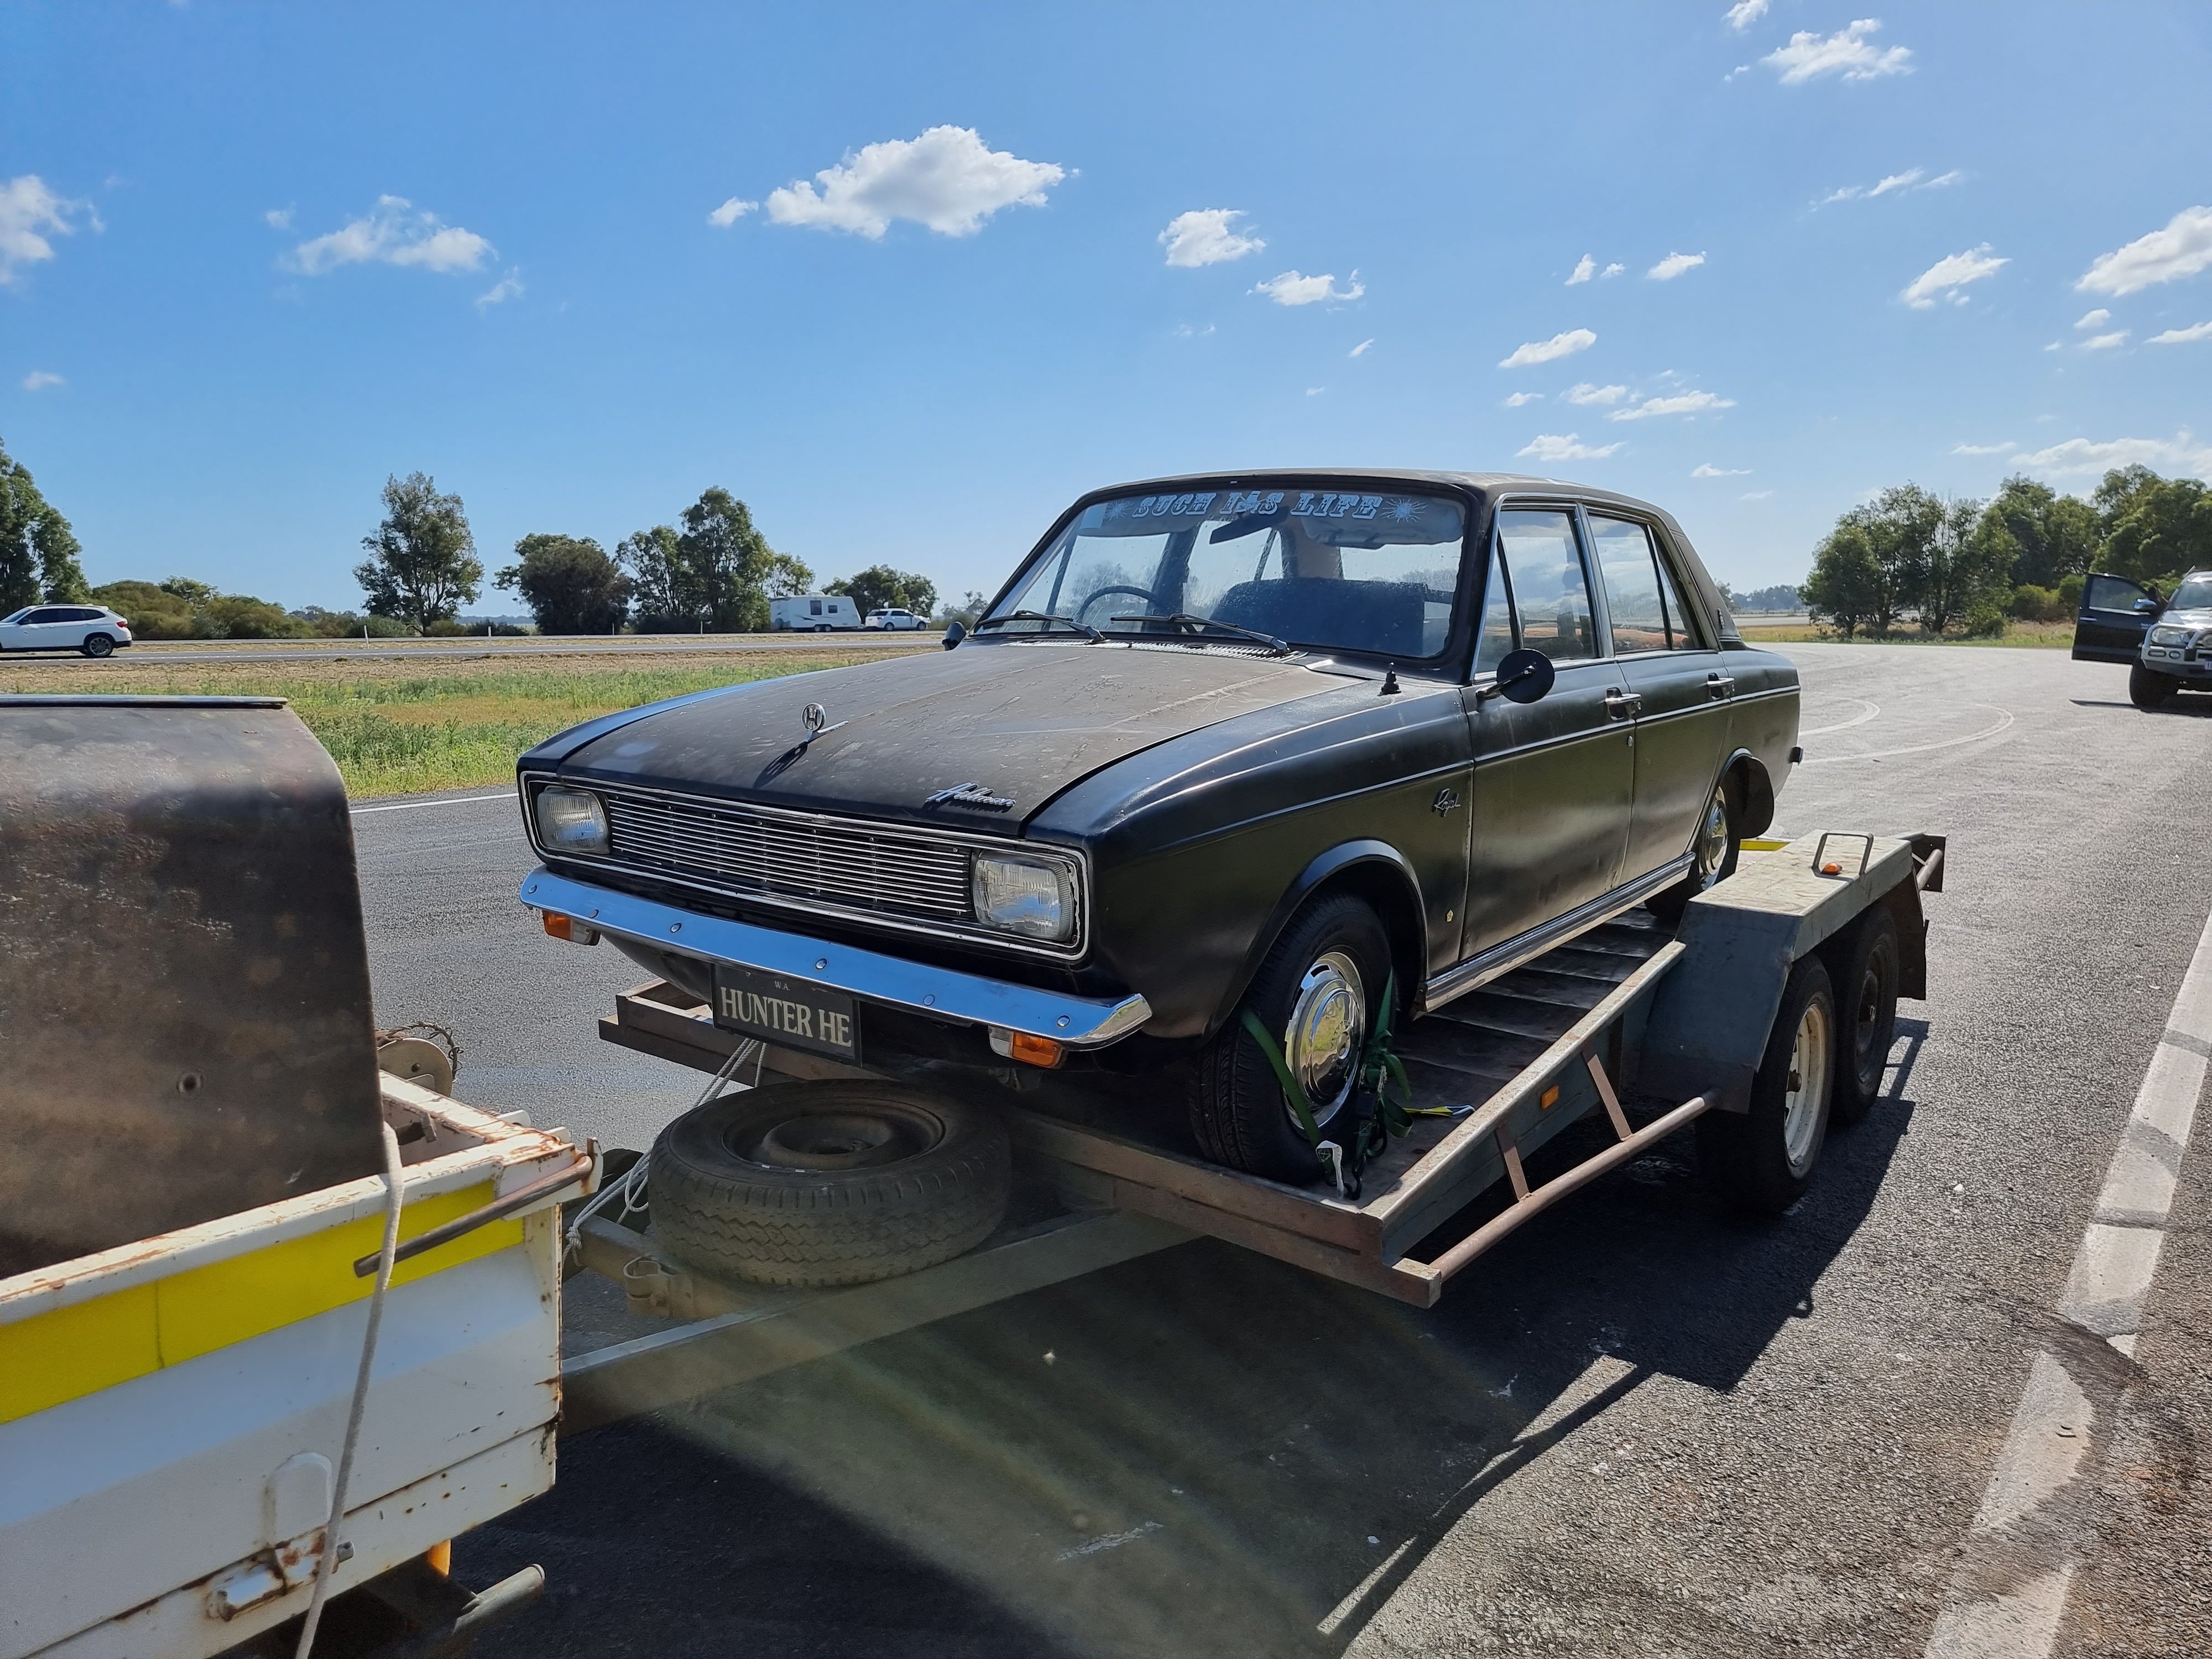
Also the sweet sweet number plate HUNTER HE So where all things start... seeing what doesnt work and what parts I have Bloke seems to think it was something to do with the dizzy and points so I have like 4 new ones to try out from his stockpile Also about 6-7 stromburg carbys aswell as being able to install two so who knows we will see how things pan out My partner doesn't want to keep the engine bay art either... she thinks her parents might not approve
1 point
-
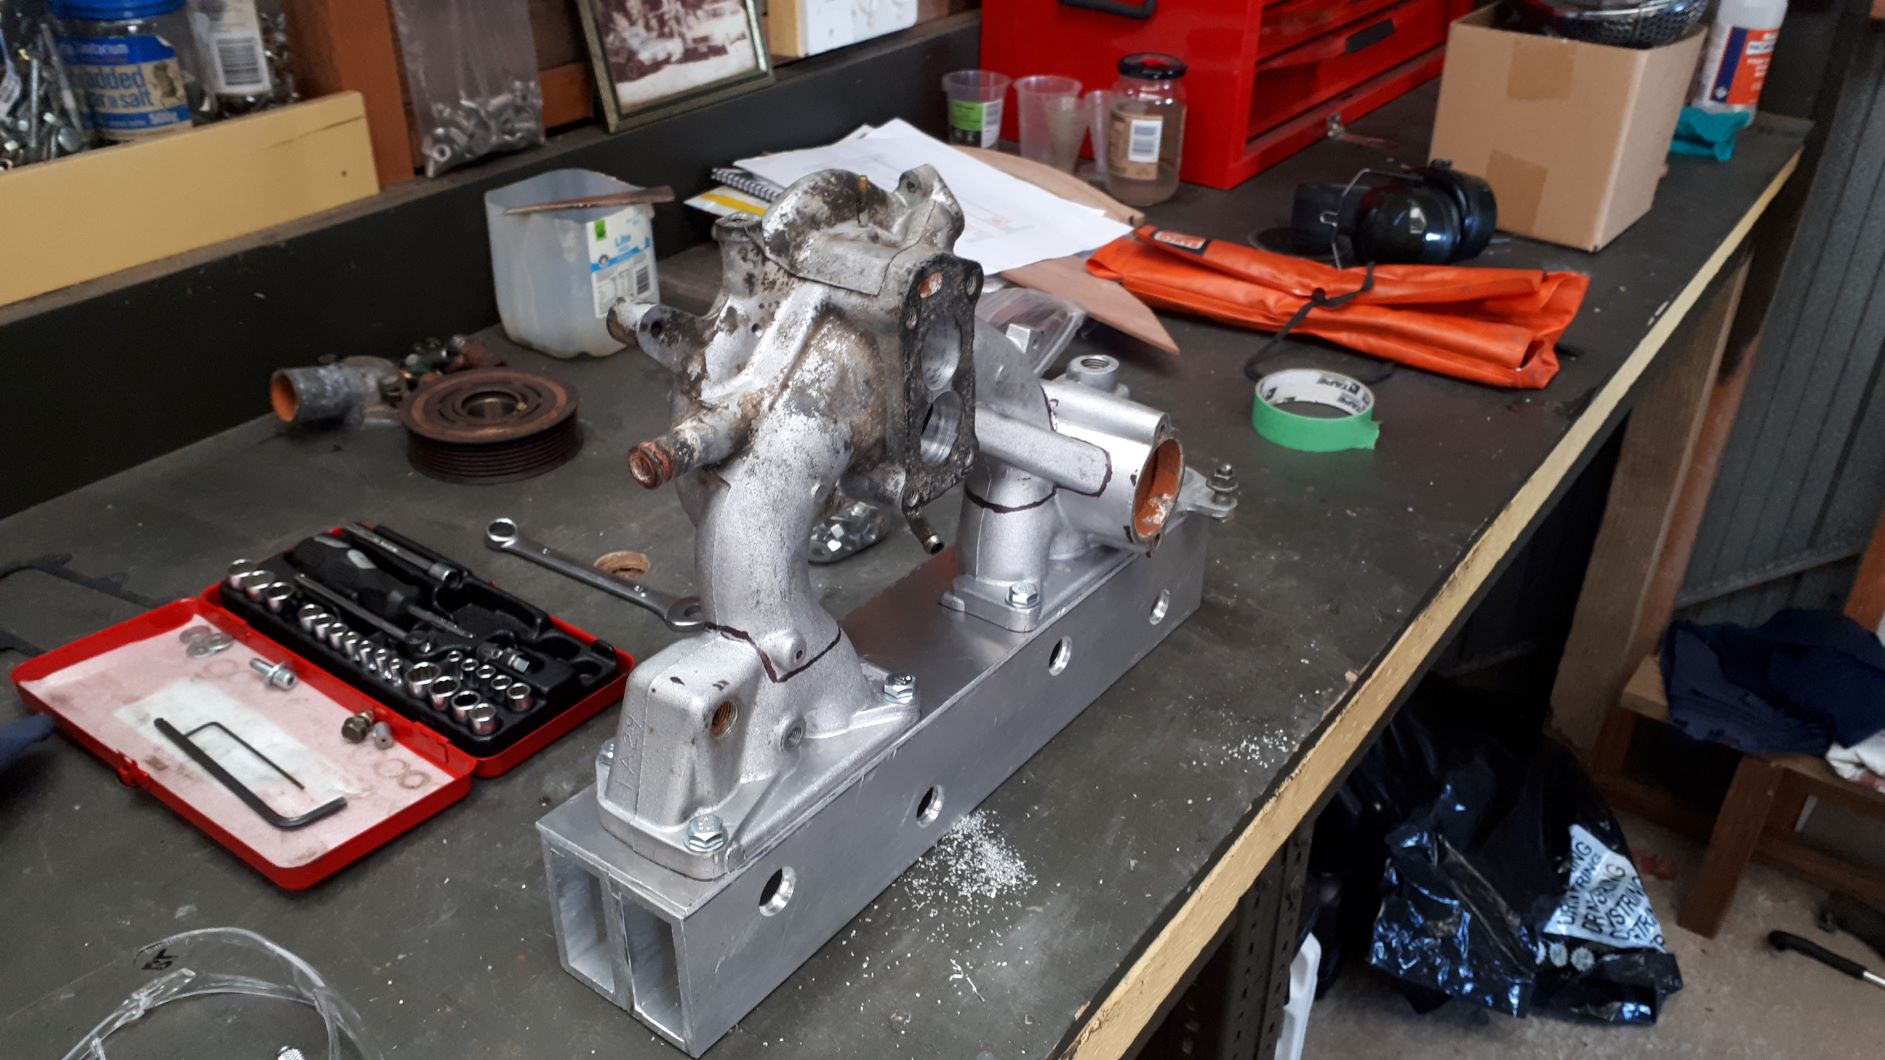
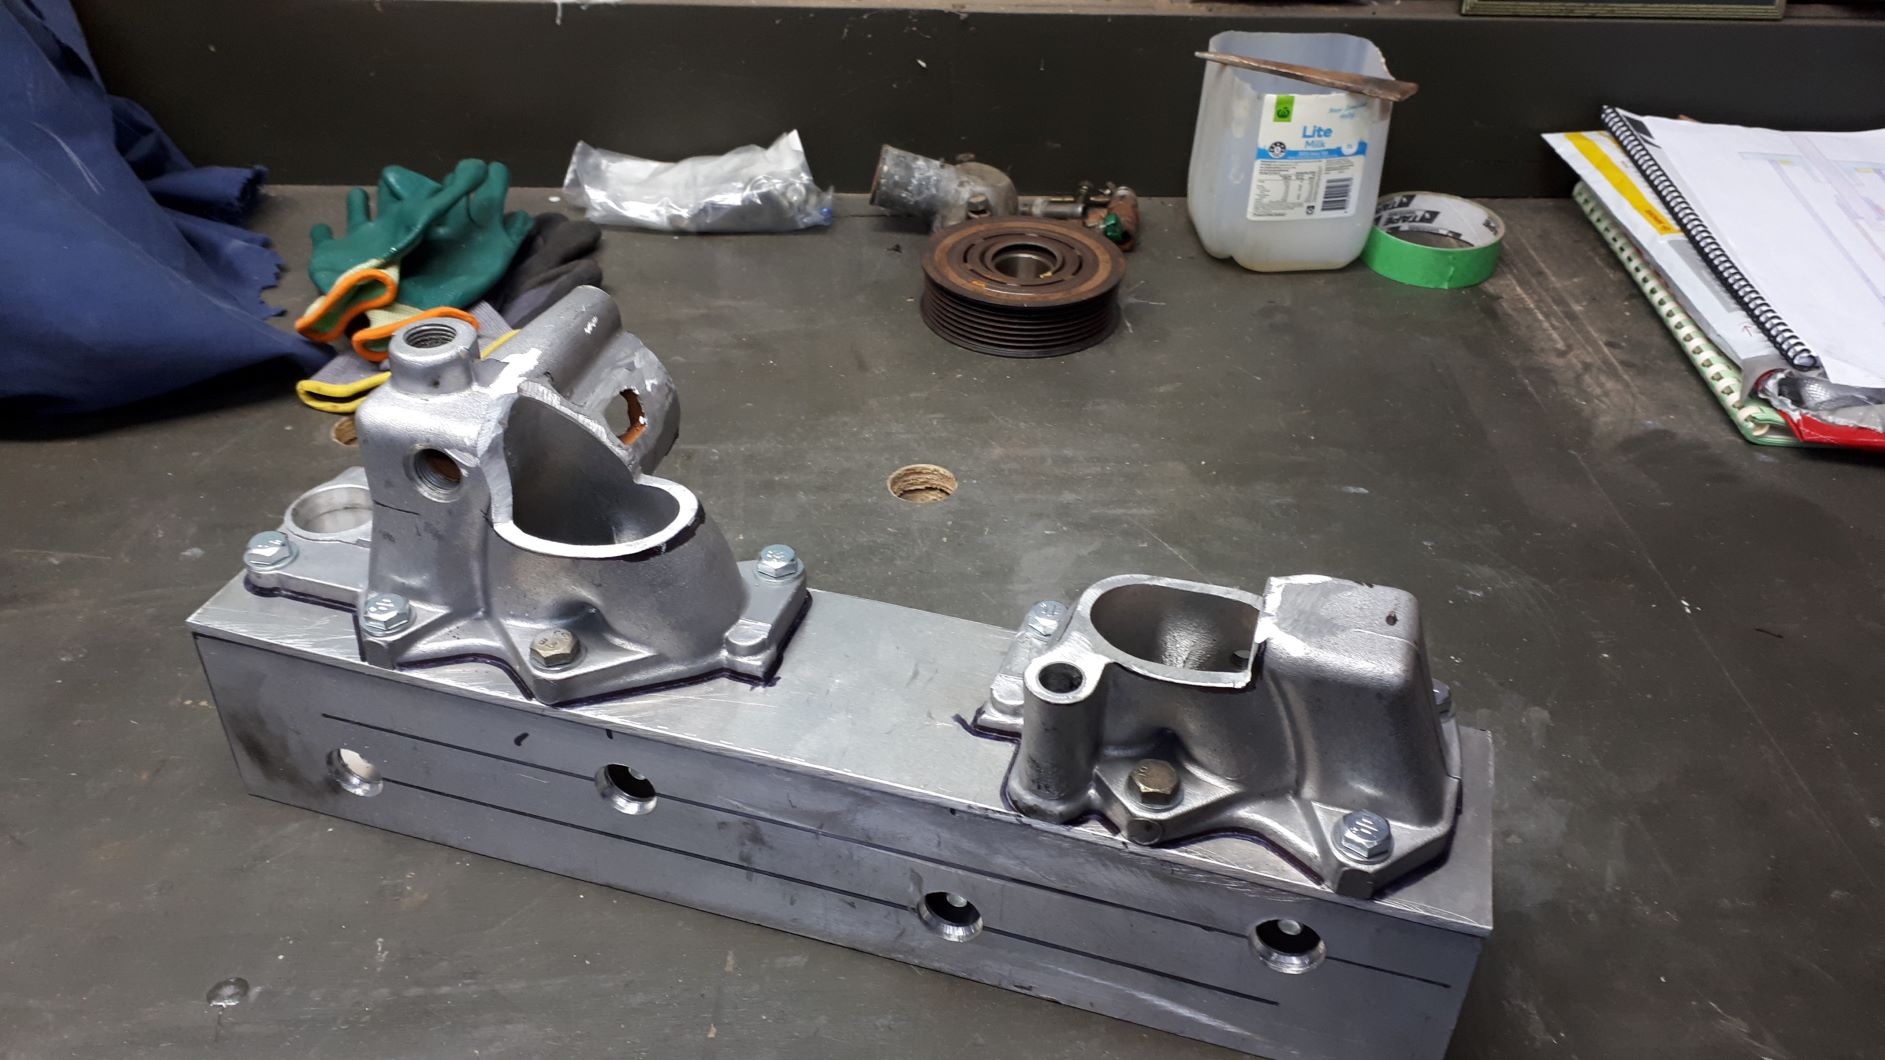
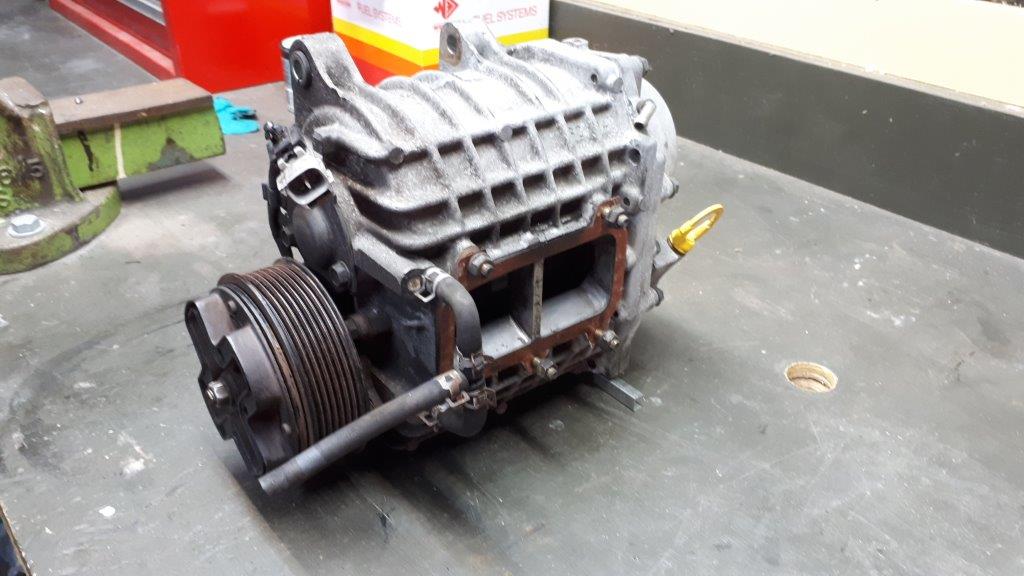
Big thanks to @MaxPower for helping out with a spare manifold from one of his vans. I checked online and for some reason you can buy a supercharger manifold for your Corvette or Mustang but there is no off the shelf option for your 1982 Mitsi Sigma. I will have to make one, what could possibly go wrong? I will post more pictures as the manifold comes together
1 point
-
Here is a pic of one of it's last events before i parked it up .
1 point
-
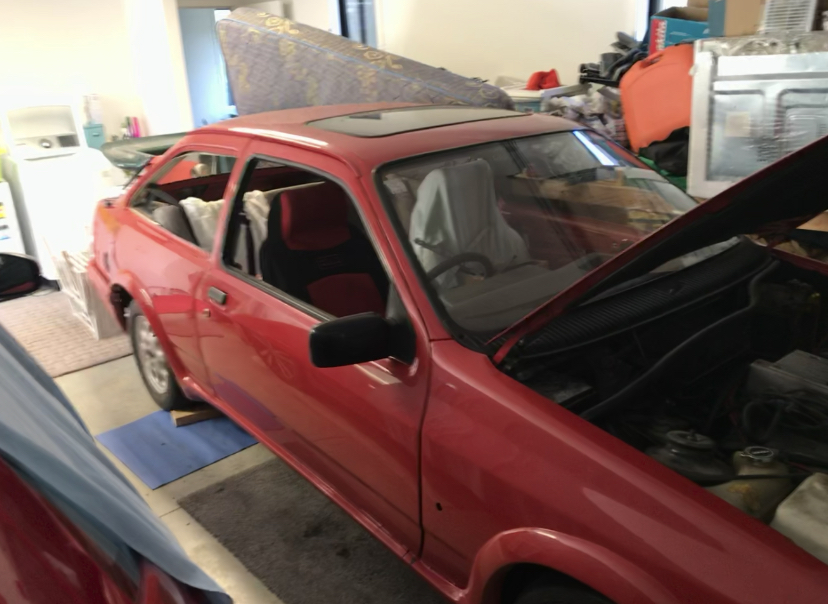
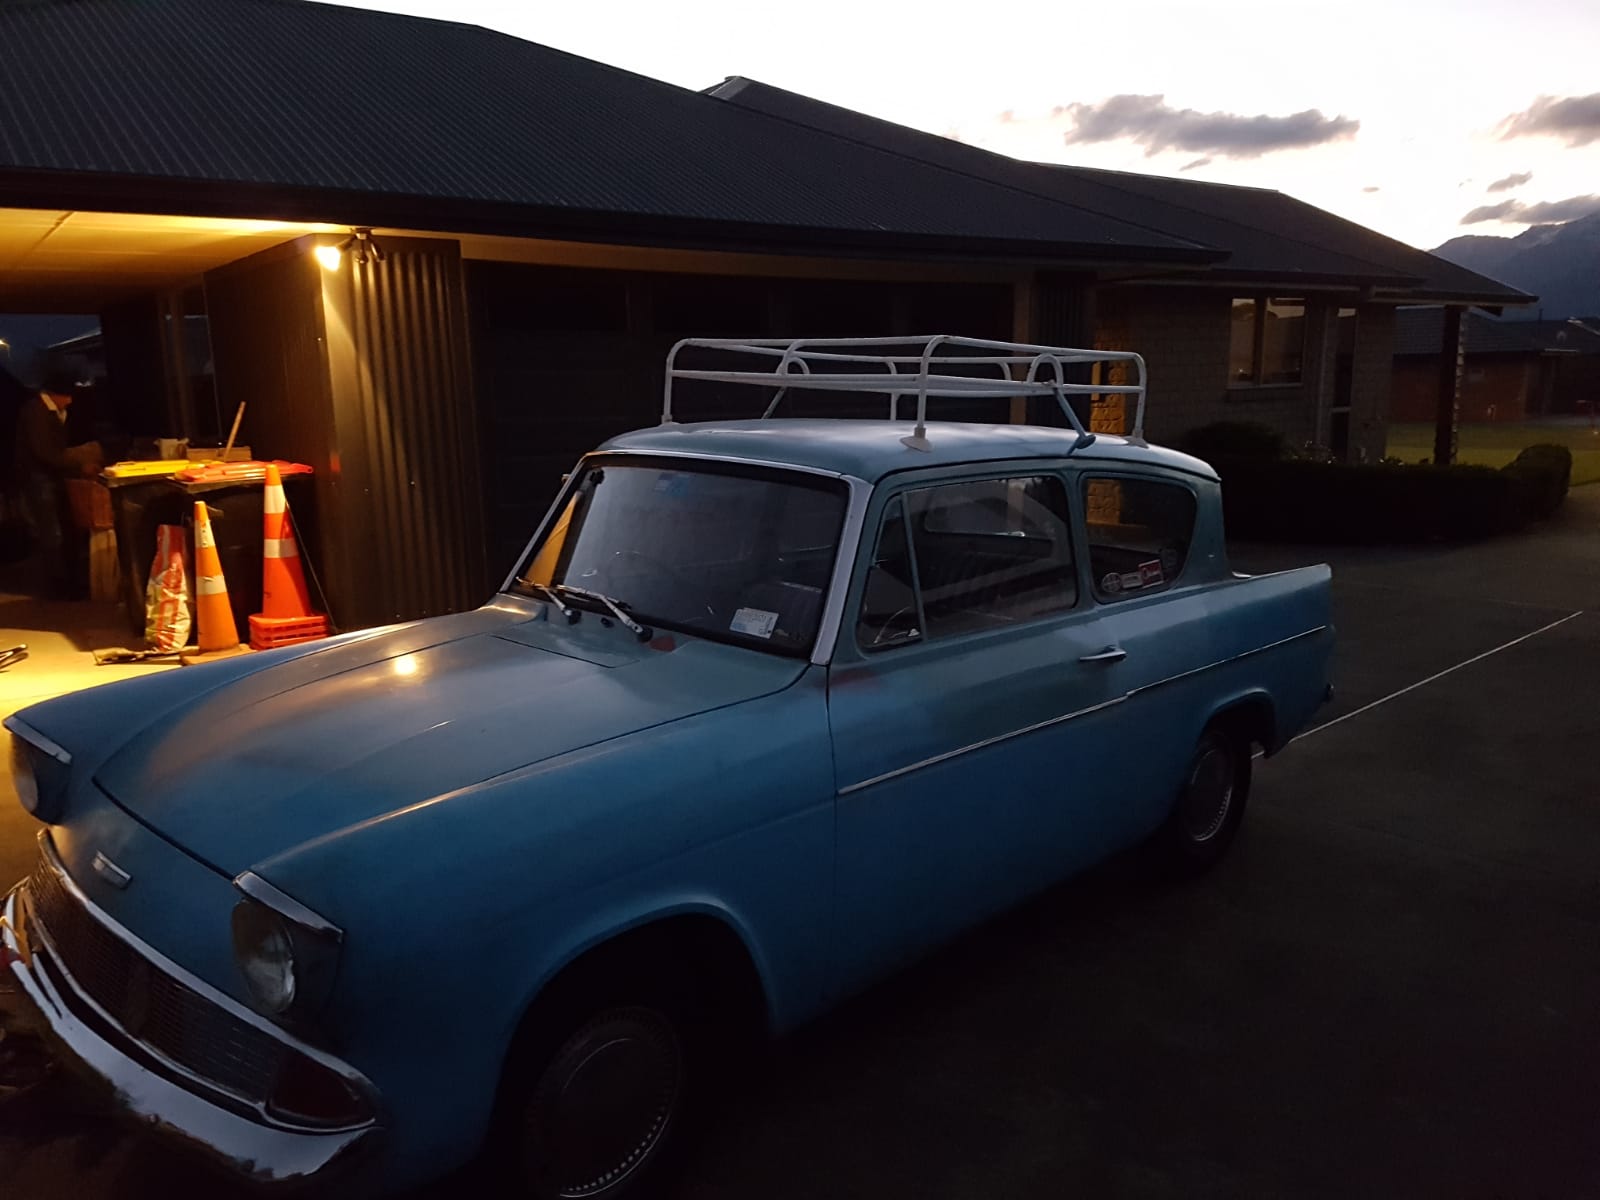
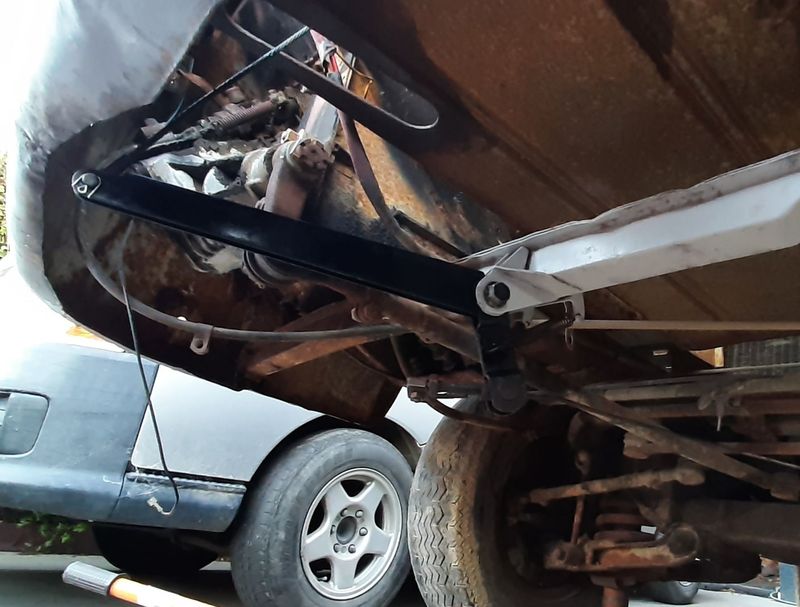
car went to the paint shop to get the runs out of it and get the final cut and polish. i went and picked it up last night and it looks amazing. anywho, today i wanted to fix the exhaust where the flex joint had worn through because its the lowest point and its had a fucking over judder bars and whatnot and subsequently has a hole it in. step 1 - jack up your car. this is where things went wrong. 2021-04-25_02-55-42 by sheepers, on Flickr car slid off the jack on the way up. given what could have happened i got off extremely lightly. it bent the radiator support up and bent the bottom of the radiator real bad. it also bent the bottom of the front bumper. however, the radiator isn't leaking and the crank pulley is unscathed which is a fucking miracle given what happened. i was able to bash the rad support back down and i got most of the bend out of the bumper so it looks fairly normal again. fuck it could have been WAY worse.................. so yea, after dealing with that i moved on to fixing the zorst. cut out the fucked bit, made a new bit, tacked it in place, remove zorst from car and fully weld, add 4mm thick bash plate and put zorst back in car. 2021-04-25_02-55-49 by sheepers, on Flickr 2021-04-25_02-55-55 by sheepers, on Flickr 2021-04-25_02-56-02 by sheepers, on Flickr 2021-04-25_02-56-09 by sheepers, on Flickr 2021-04-25_02-56-21 by sheepers, on Flickr then it was time to wax the newly polished paint. that went well. it looks pretty ace tbh and yea, i cant take a photo that justifies how good it looks. but it looks good. take my word for it. 2021-04-25_05-34-27 by sheepers, on Flickr 2021-04-25_06-18-48 by sheepers, on Flickr 2021-04-25_06-19-23 by sheepers, on Flickr 2021-04-25_06-32-09 by sheepers, on Flickr1 point
-
Being that I dont have too much time to keep my shed I went ahead and sprayed the front. I bashed out the main dents where there the best I could but realistically the whole front end needs alot of panel work at some point in the future - probably worthwhile to get a whole new clip. Ive got new bits on the way to rebuild the front axle so that's the next job on the list....
1 point
-
The Sigma has been sitting around a bit. I drive it every so often but it's kind of underpowered compared with my Aussie 6 cylinder stuff and I really wish it wasn't. I have been toying with the idea of repowering it but I thought I might try to liven up the stock engine first. A buddy of mine dropped this off over the weekend. I really have no idea what I am doing but that has never stopped me in the past. What could possibly go wrong?
1 point
-
spent all day fitting some door belt line seals. it goes without saying that i cant buy any seals for the crown so i had to make do with what i could find. i found some generic lengths of belt rubber on "better auto rubber" out of auz which were close enough and i coupled them with some generic felt bump things that are for american cars or something which i got at an american car importer out by the airport. so, now we have some rubber bits, we have to make them stay on the car. i recesses the screw heads into the felt bit by just cutting away the felt part where the screws are. works well and the glass cant touch the head of the screw. drill holes in the door, screw the two rubber bits and the stainless trim on to the door. WAY harder than it sounds but got there in the end. i also put some sound dead material onto the doors while its apart. might get some more tomorrow and chuck some more in the doors. 2021-04-02_04-06-33 by sheepers, on Flickr 2021-04-02_04-06-24 by sheepers, on Flickr 2021-04-02_04-06-16 by sheepers, on Flickr 2021-04-02_04-06-08 by sheepers, on Flickr 2021-04-02_04-06-01 by sheepers, on Flickr 2021-04-02_04-05-52 by sheepers, on Flickr1 point
-
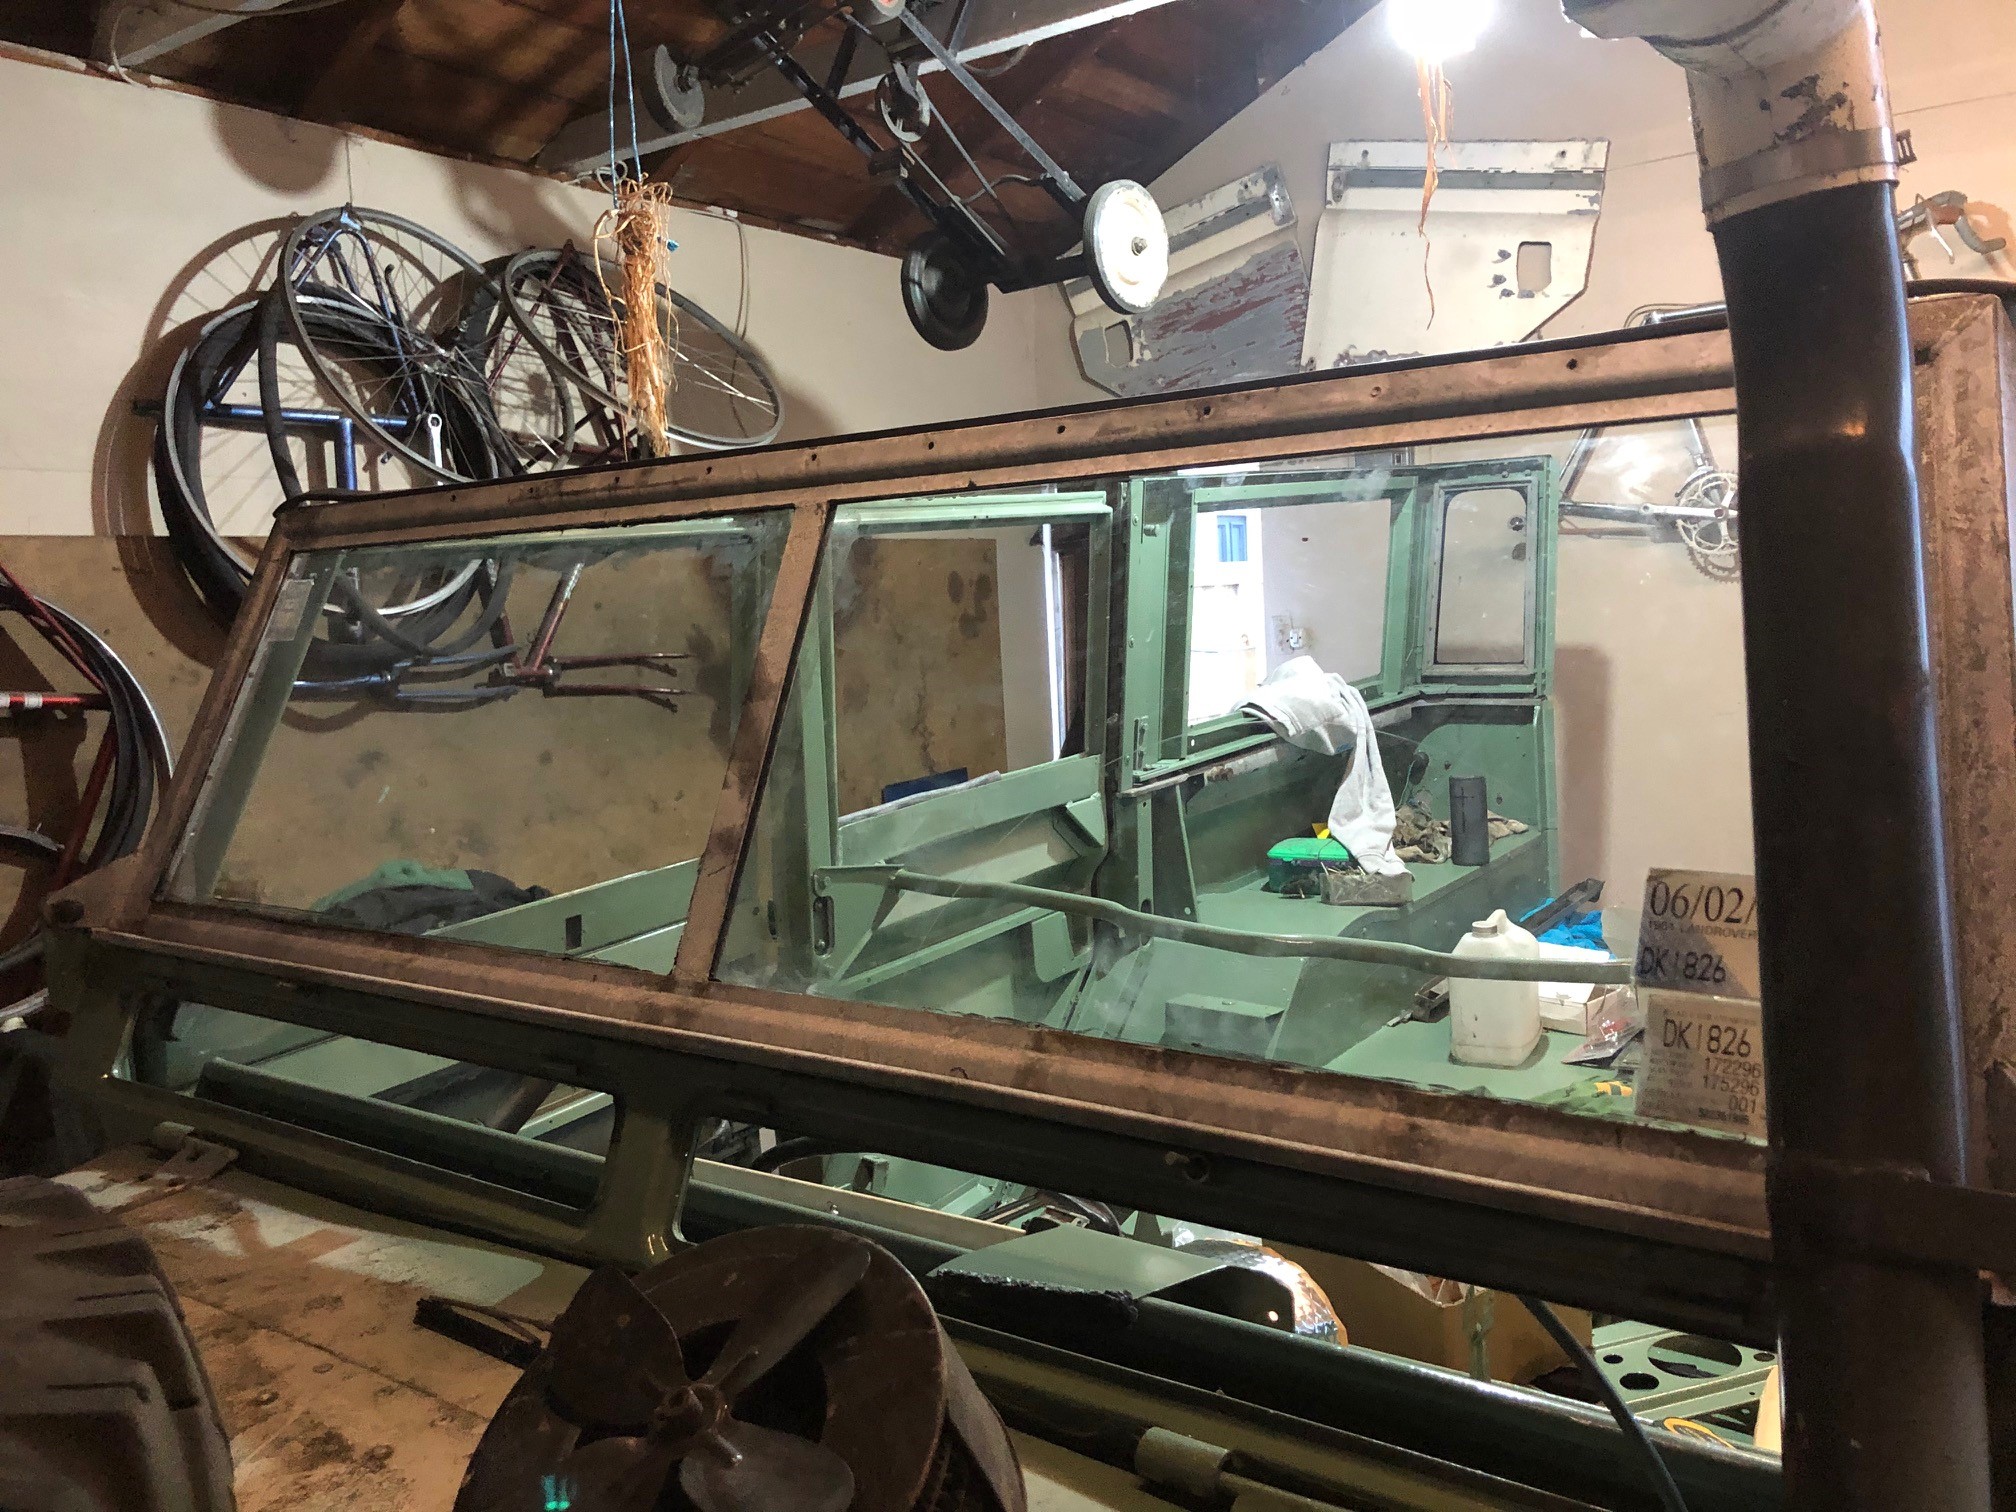
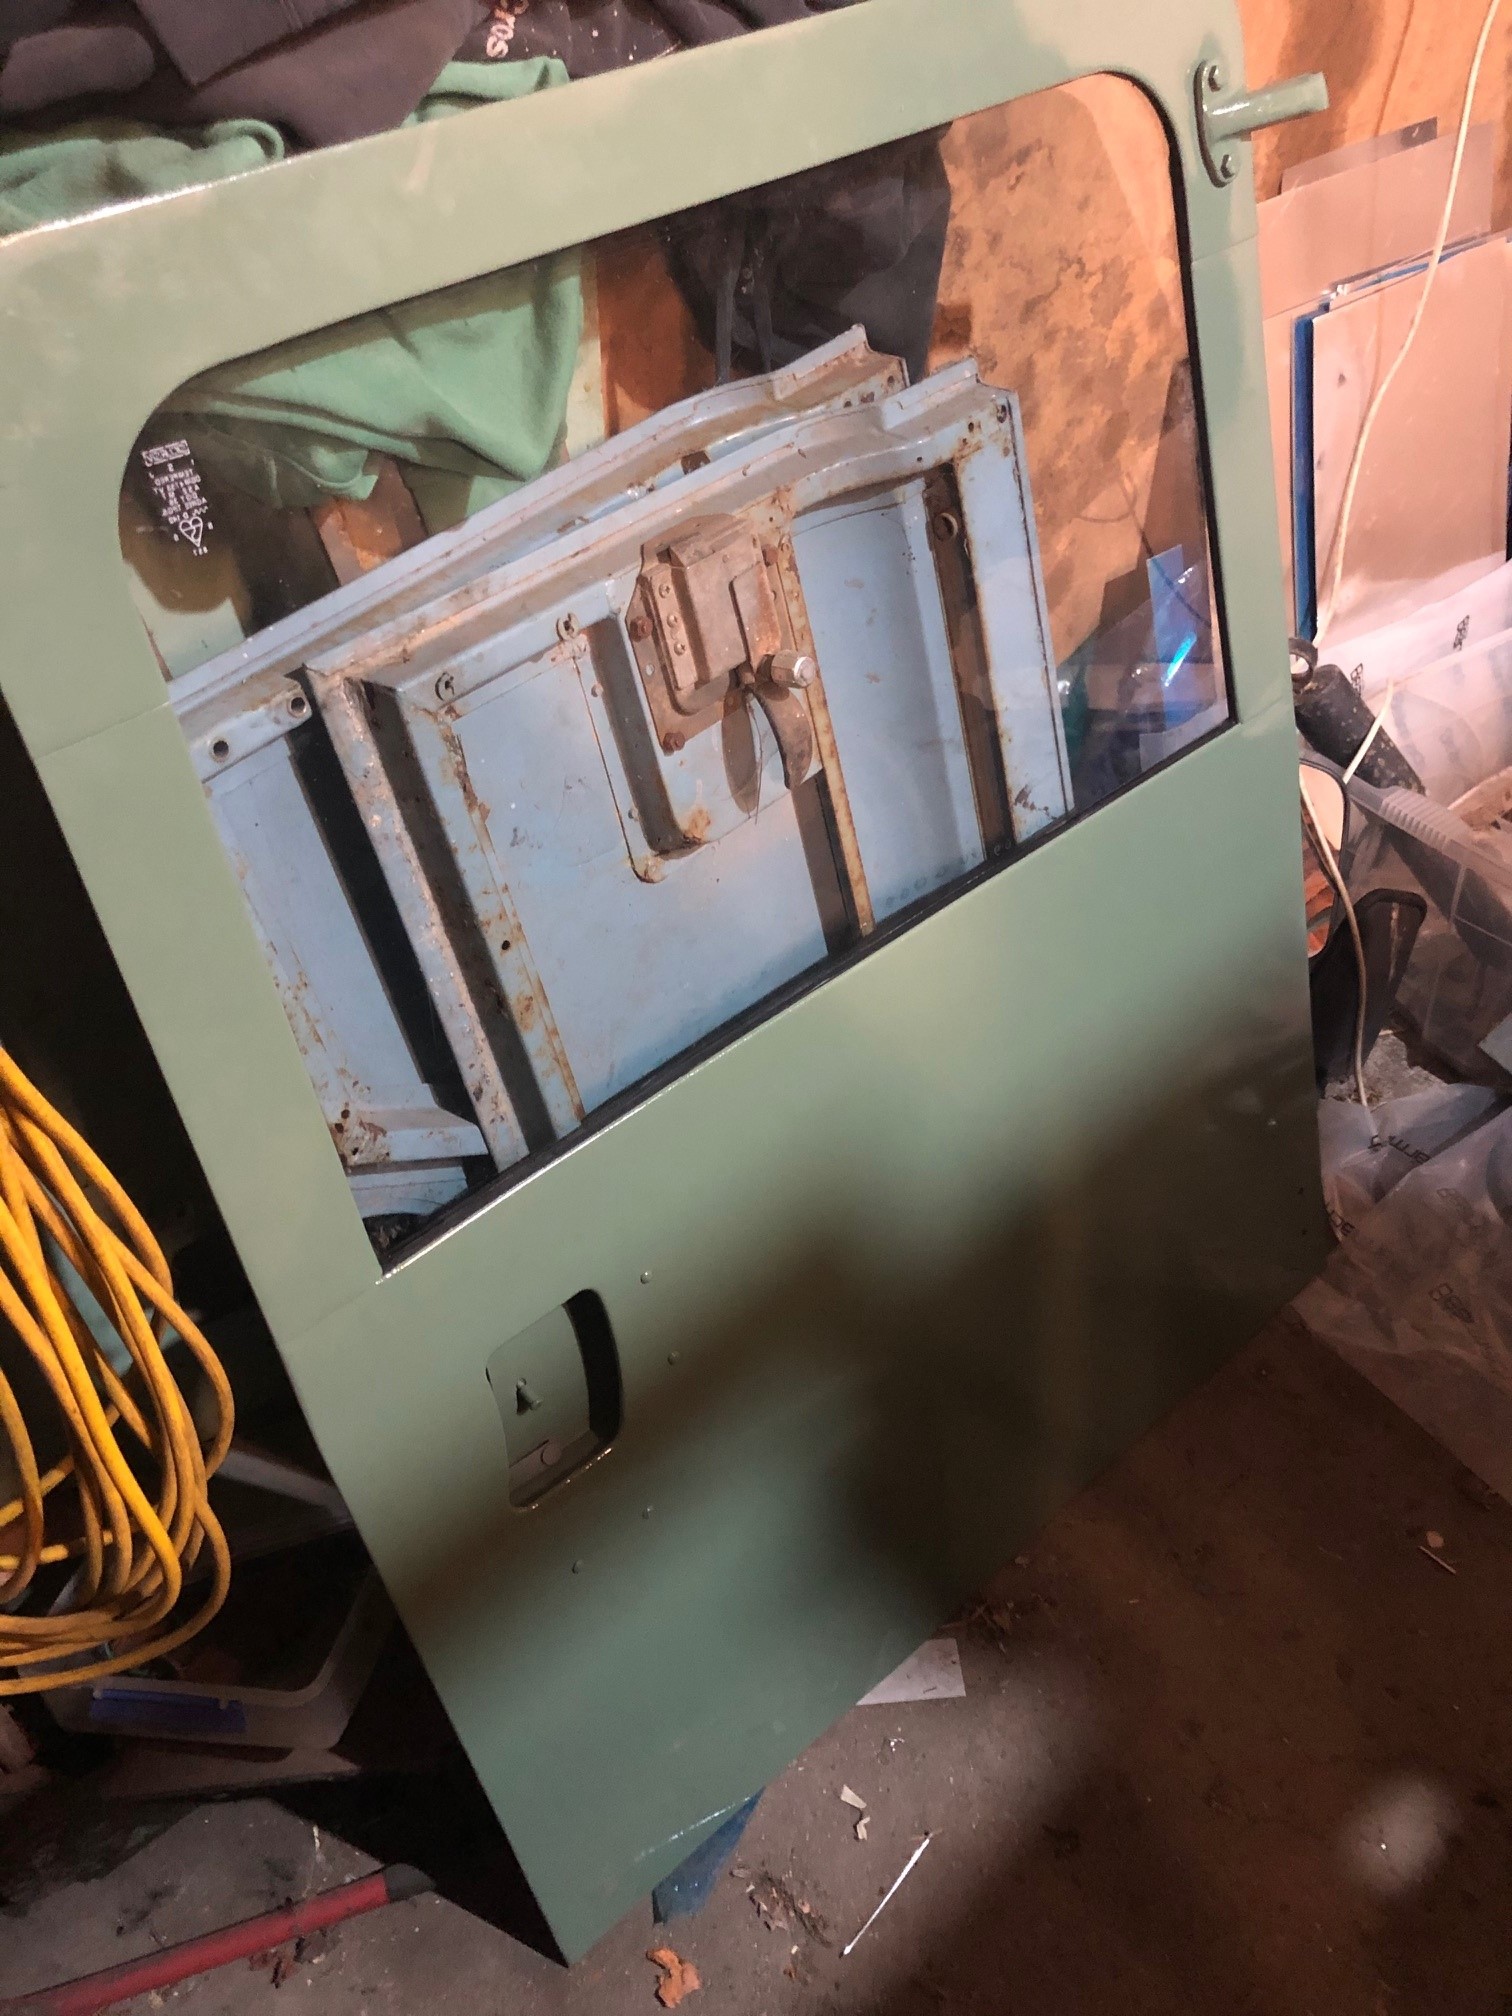
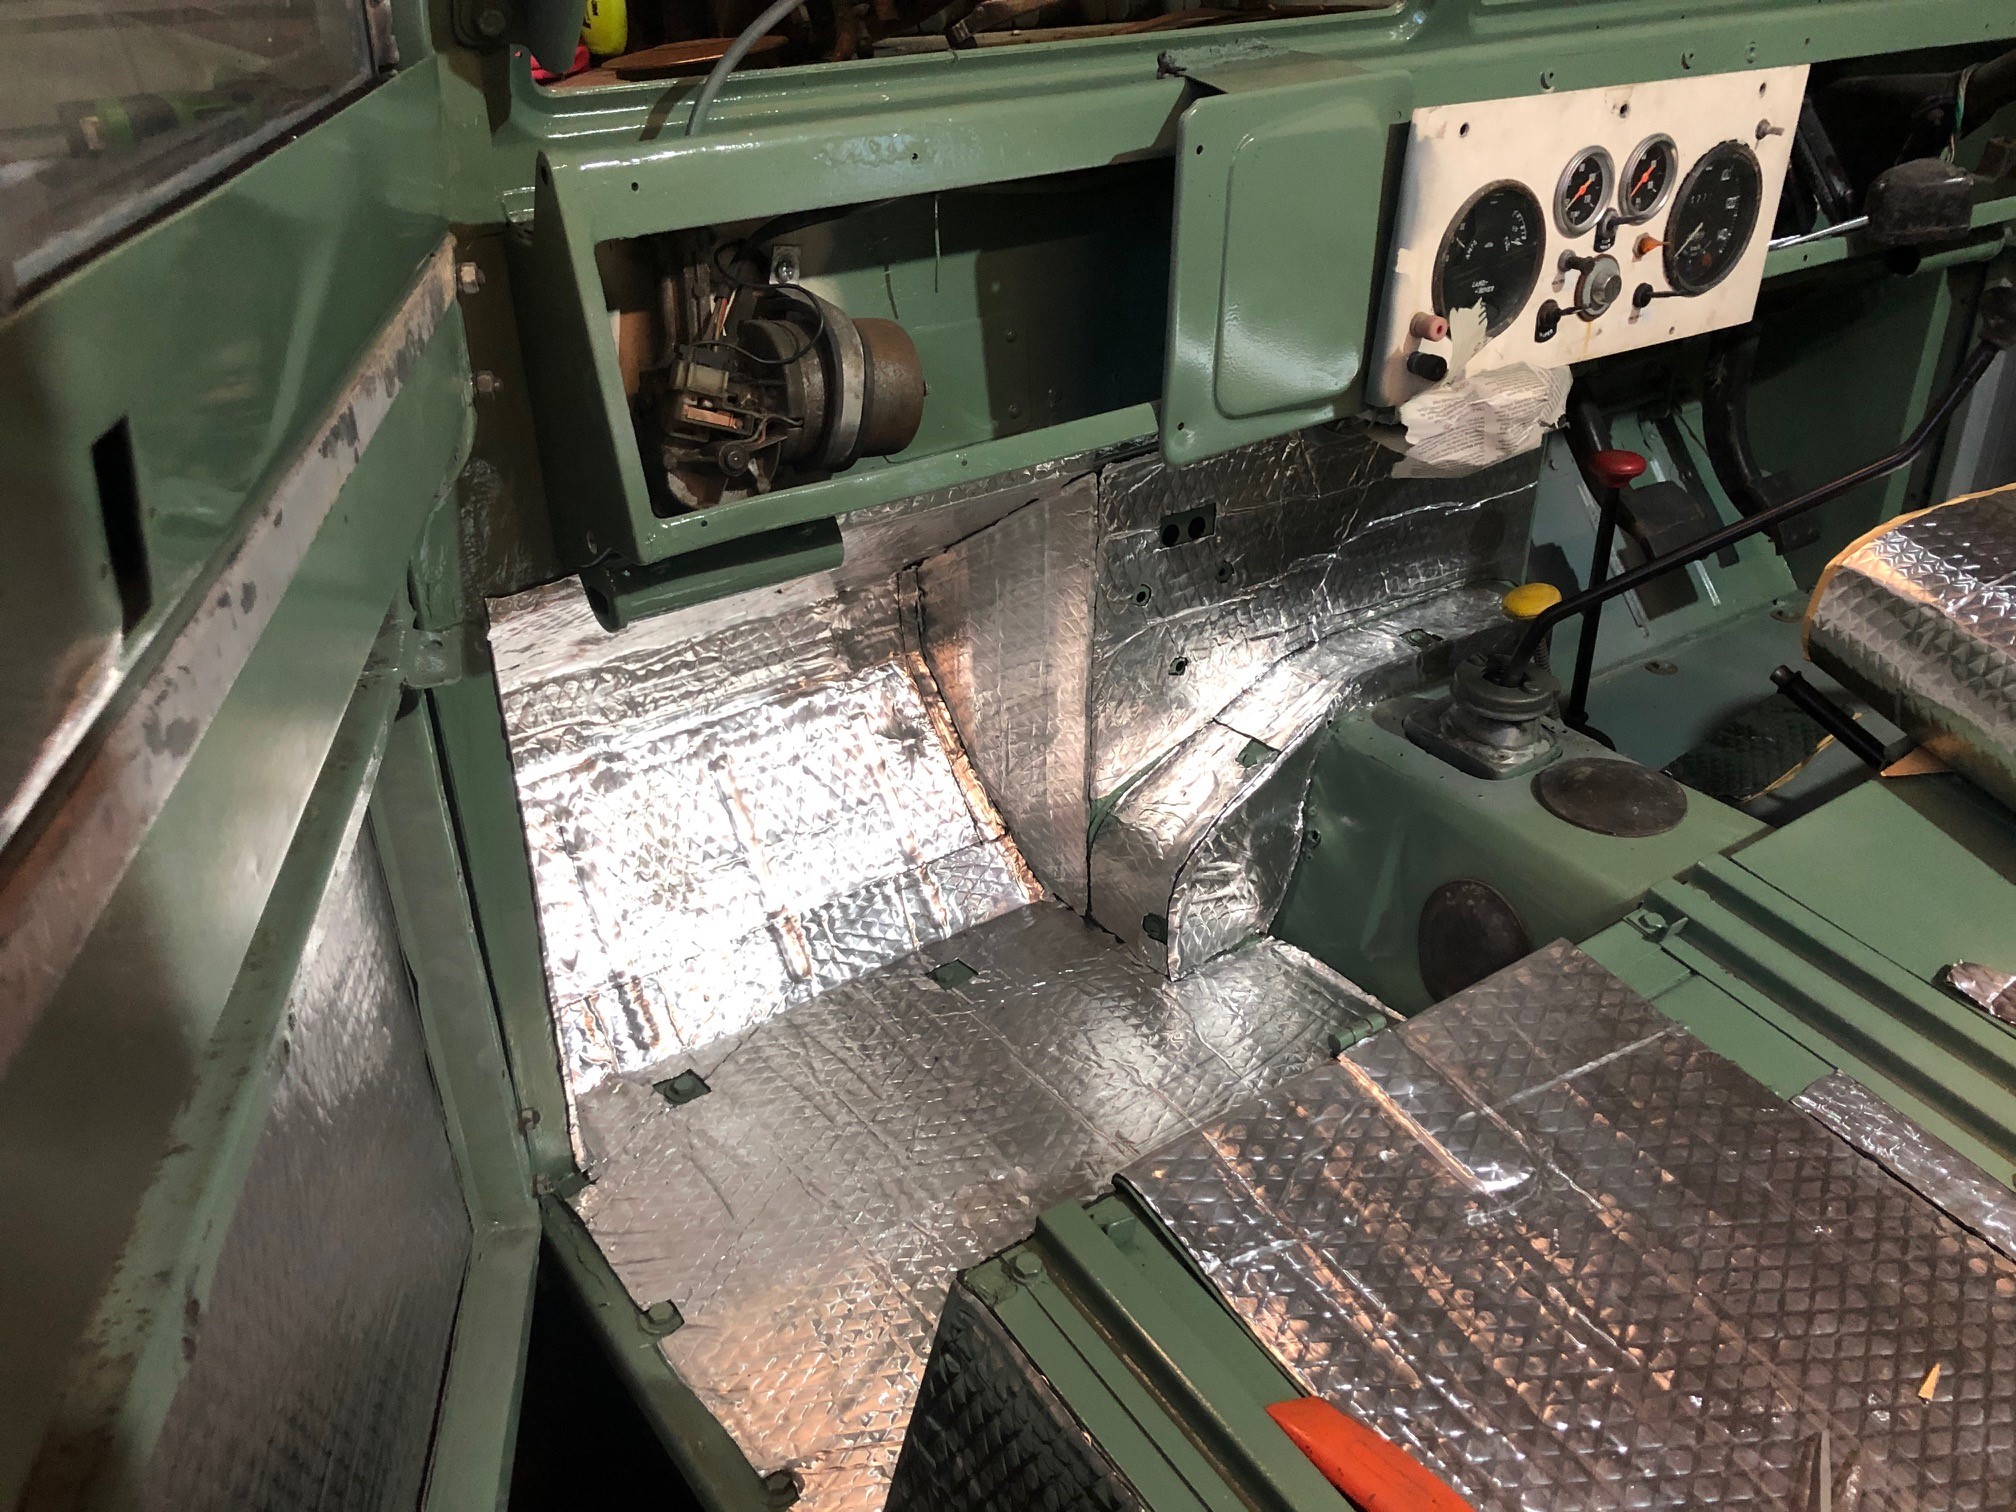
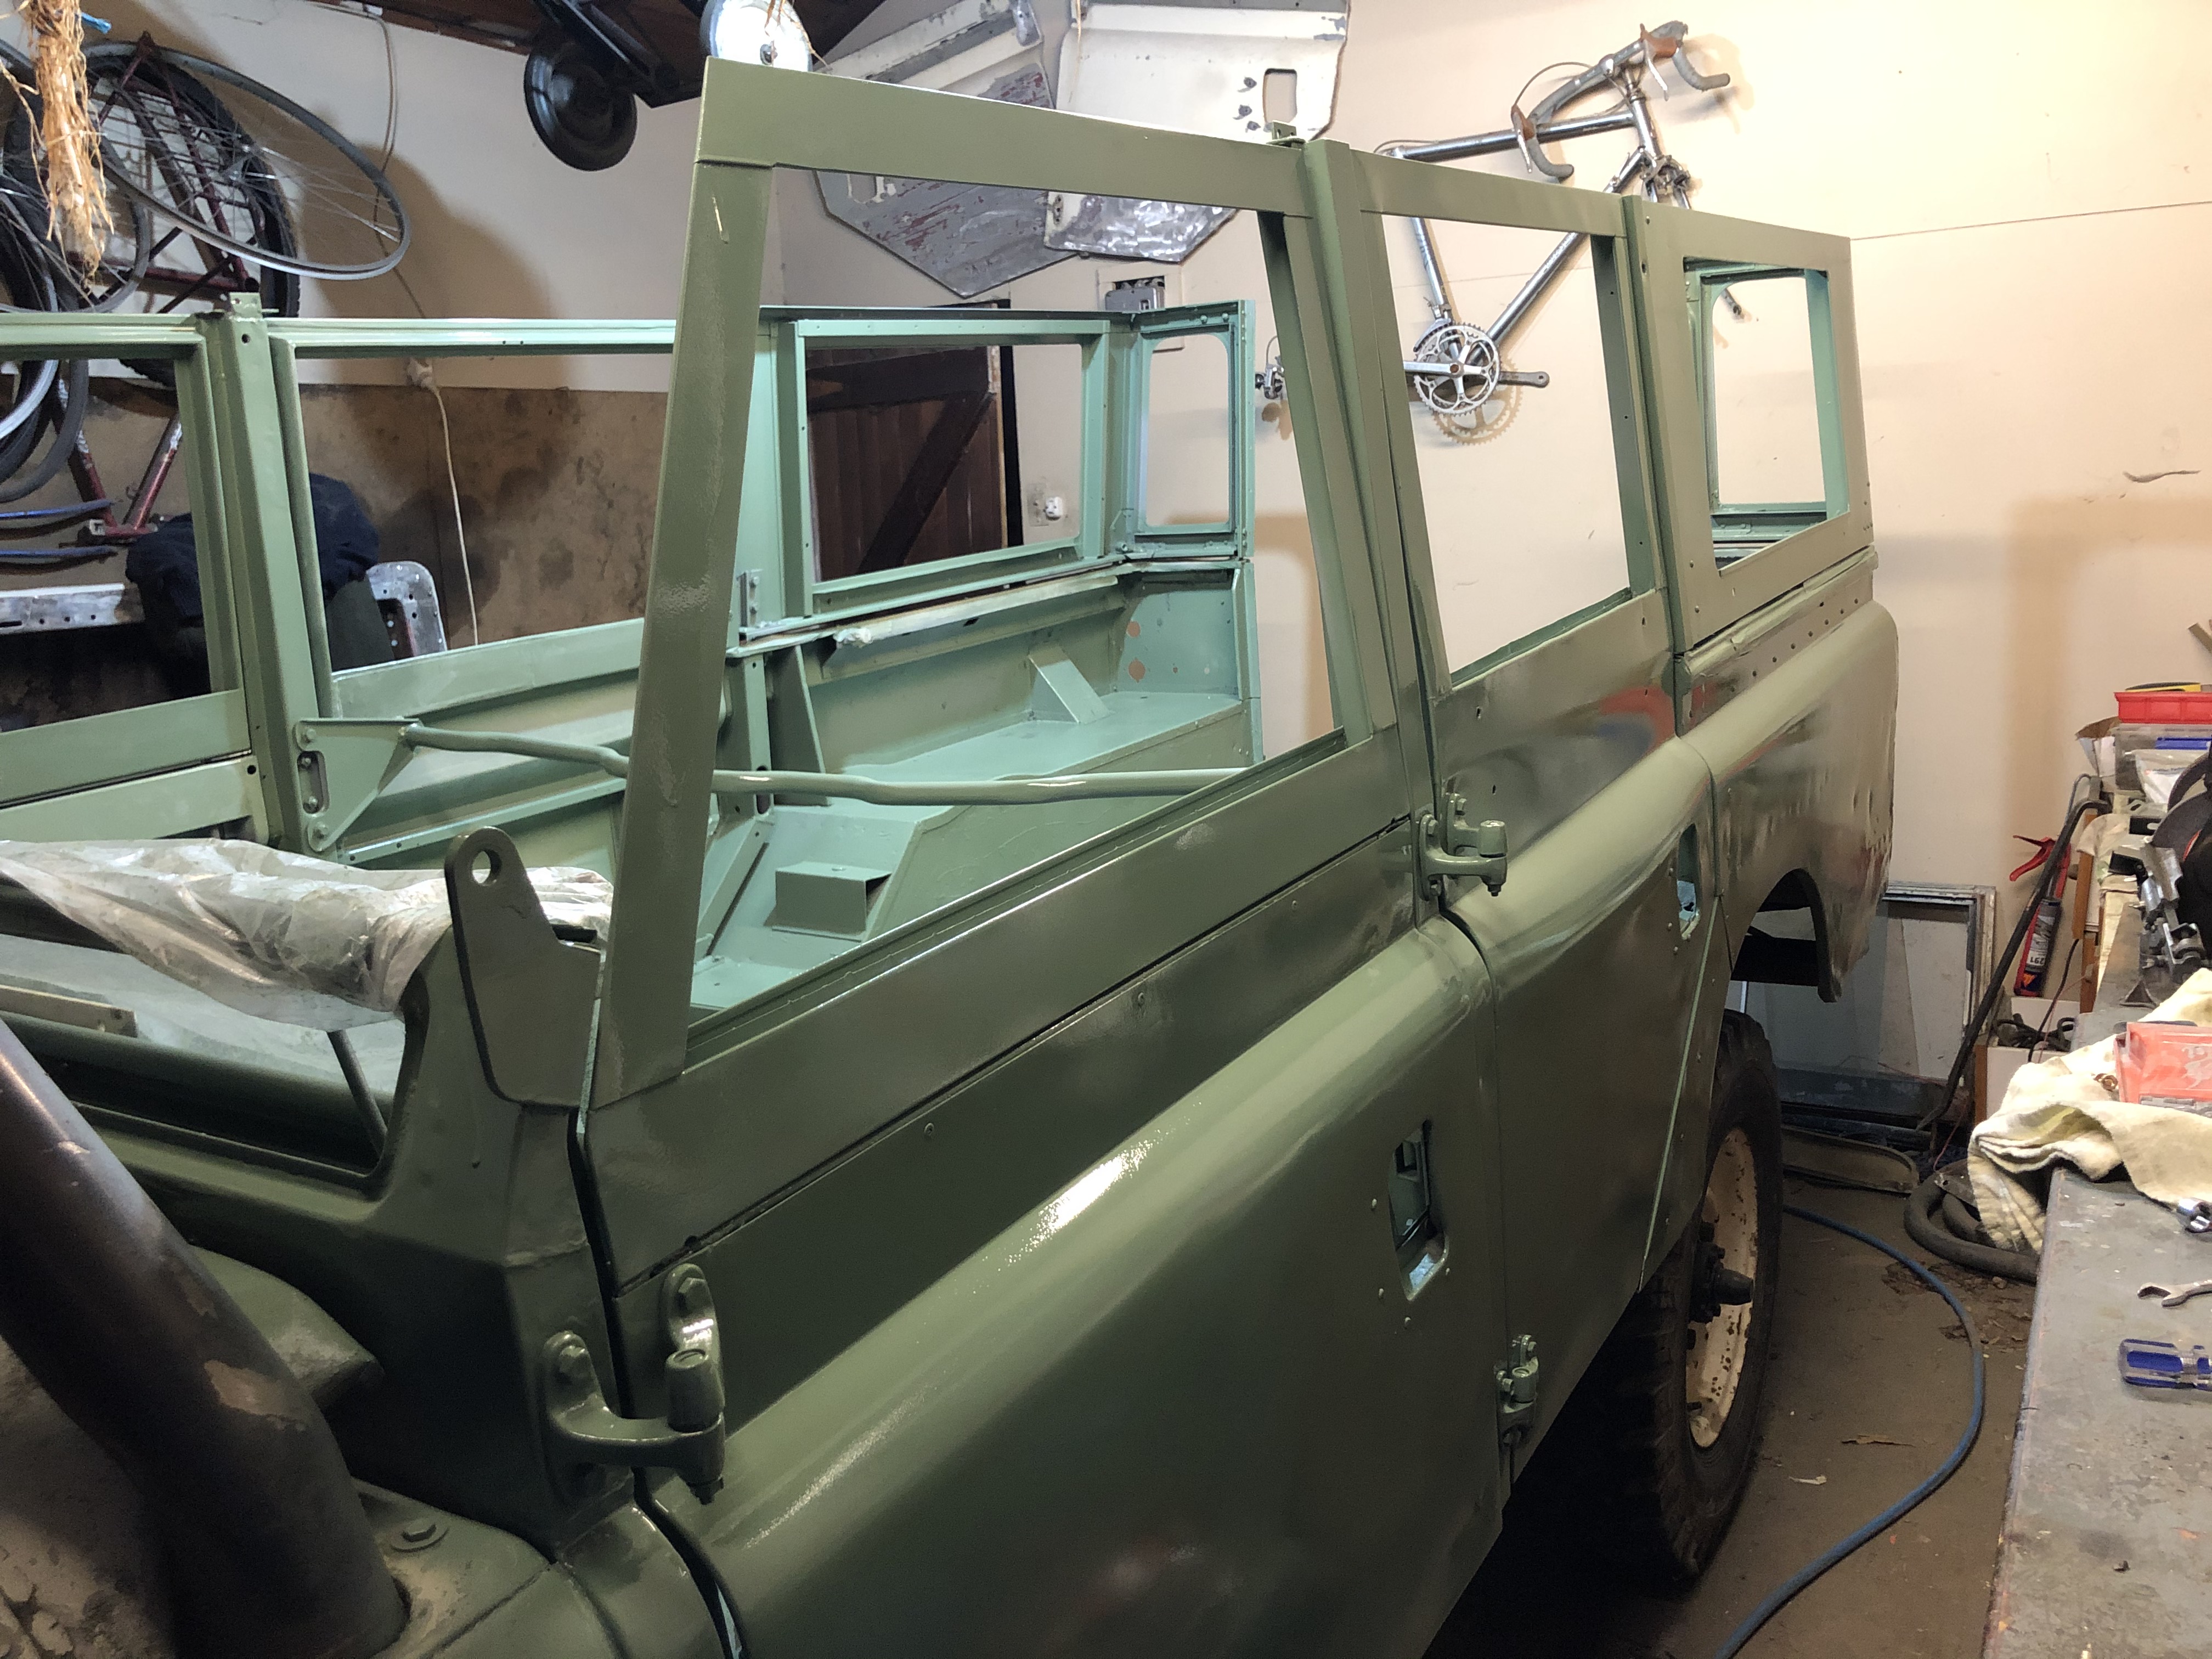
Not terribly interesting but making some progress.. A tube worth of sikaflex to seal up the roof join. Also replacing the rubber donuts for where the safari roof bolts on, hope to get this all in colour soon so I can mount it. Windscreen back in with new seals Going old school glazing with the butyl tape (which I actually like working with) Bought a roll of sound deadening off TM (cheapest option I found) and working through layering all the internal panels. The roll is better than the flat pack as have less wastage.
1 point
-
And the rest....
1 point
-
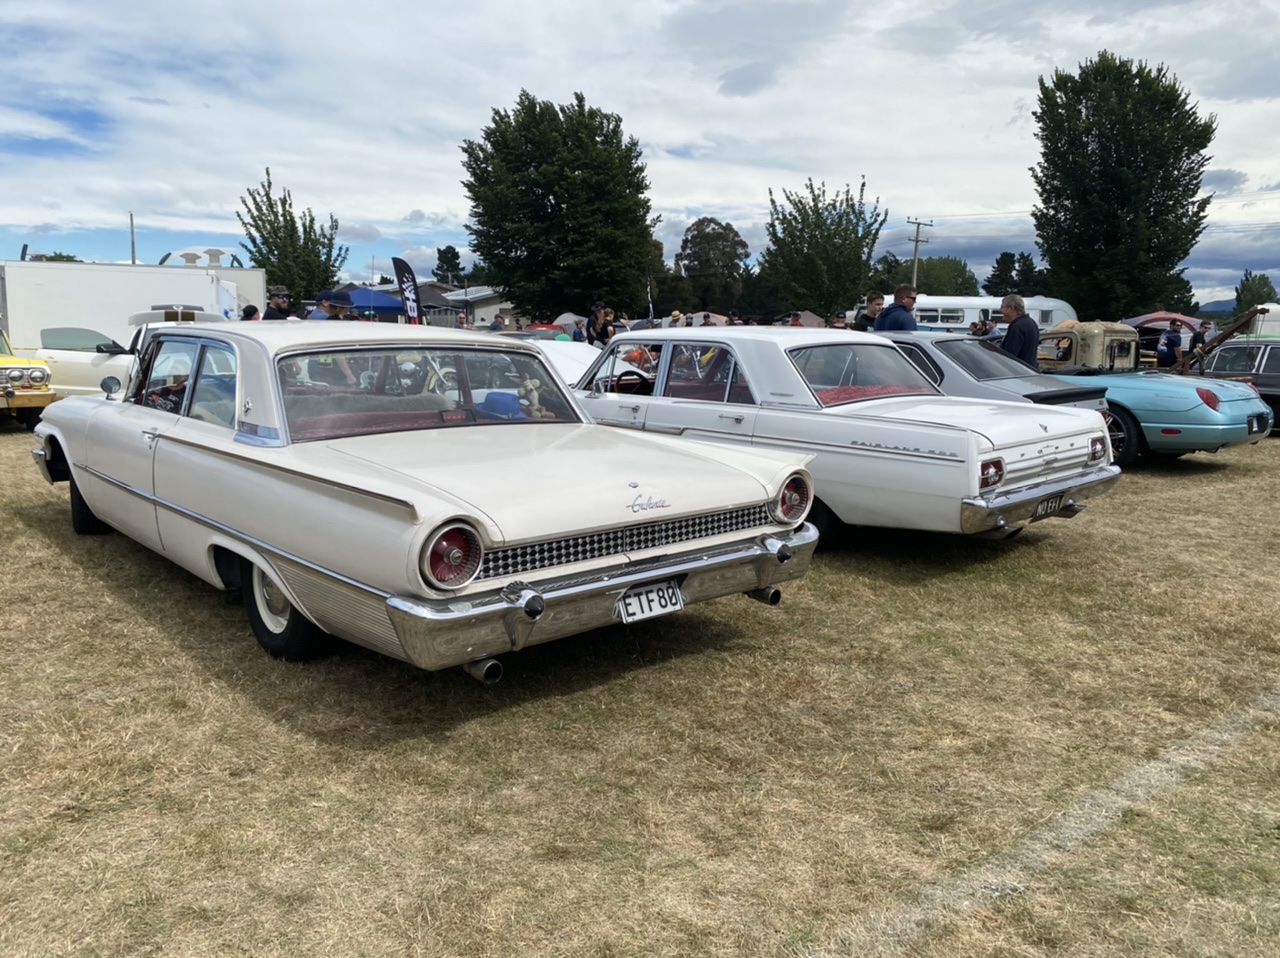
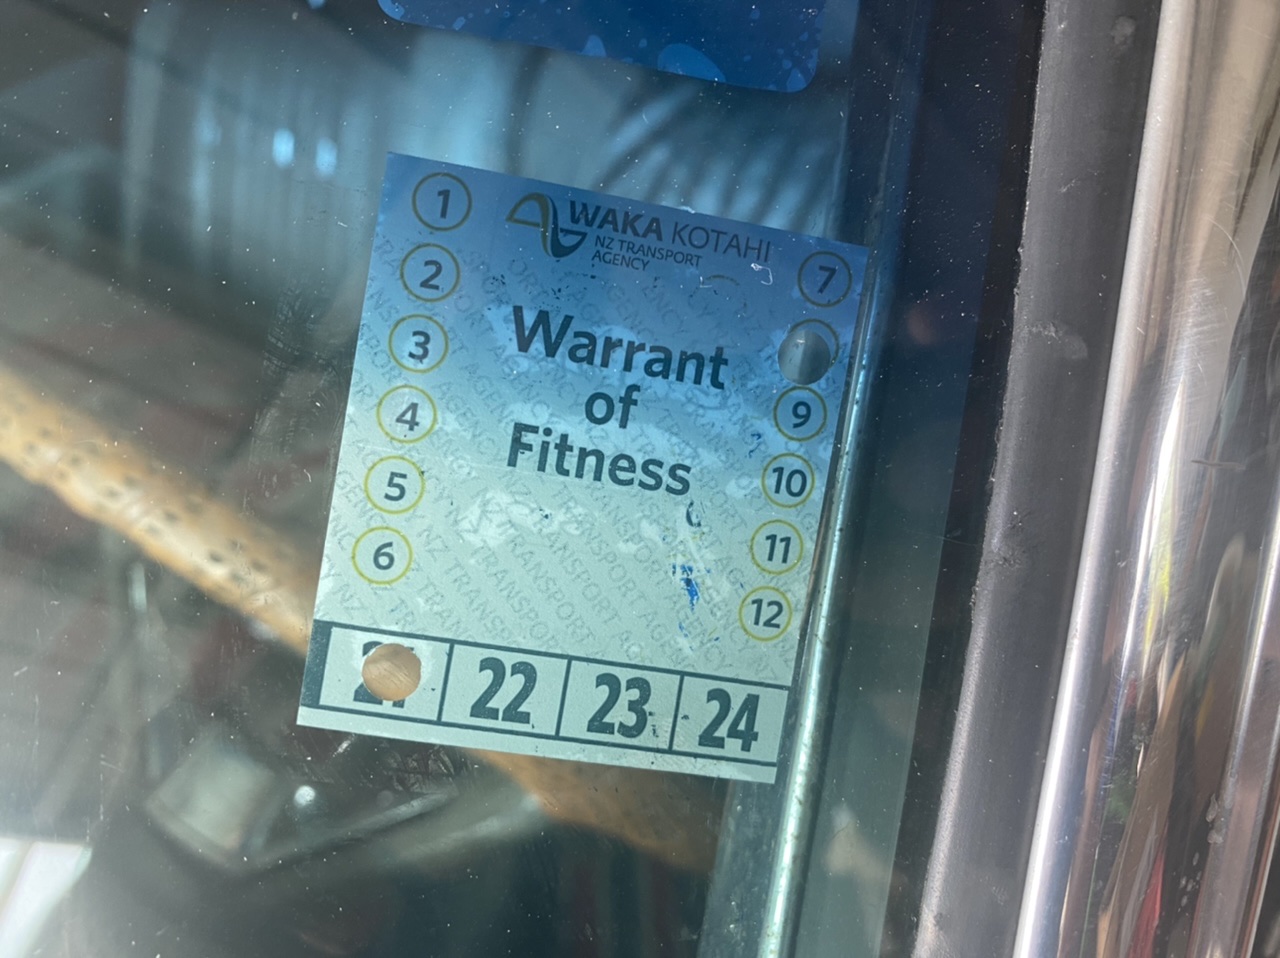
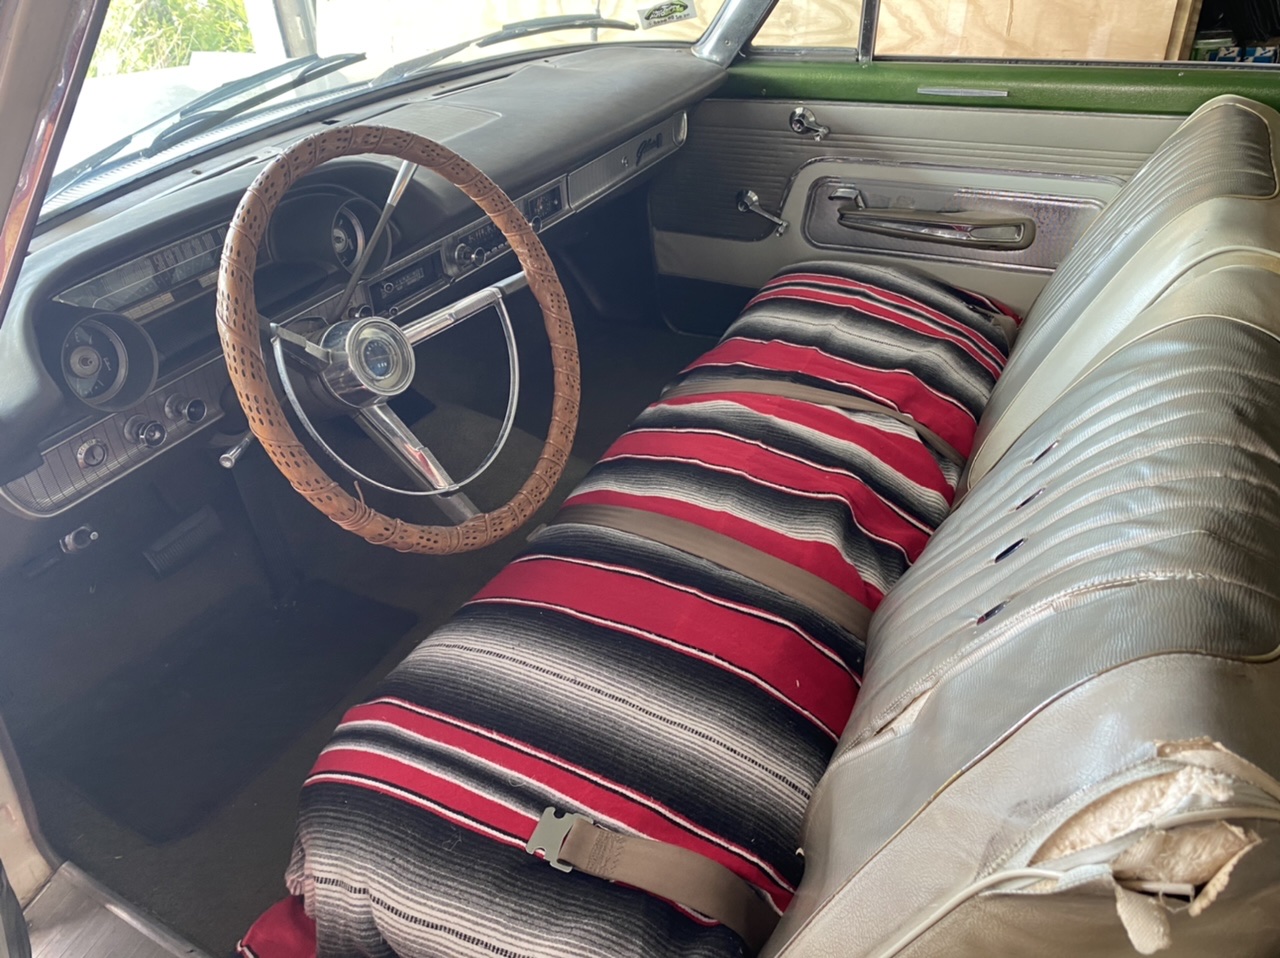
Not much has happened since Kumeu.. took the Mrs down to Christchurch the following weekend to have some time out, and wouldn’t ya know it, that was the same weekend as MCM.. honestly totally unaware I was when planning the trip but managed to convince the Mrs that we should go check it out... first time there for me and it was pretty cool.. well worth the visit and would definitely go again (with the Galaxie preferably). Galaxie pics for Galaxie thread: So I finally decided to drop my car round to my mechanic the other week as I was struggling to find the time to get those things done for the WOF before the 28 days ran out (still didn’t make it on time dammit).. did a rockauto order last month and got in new bearings, tie rod ends and 3 different sets of axle seals as I wasn’t sure which one fit (and they were so cheap). In the end all the tie rod needed was to be re-greased thru the grease nipple as it had water in it which was creating the play, replaced the leaking axle seal, and the reason for the play in the front bearing was because the bearing race was a fraction smaller than the housing so it was moving a little bit.. got a fitter turner guy to tack weld it in neatly and she was all good!.. I’ve been slowly accumulating the bits needed for a full front end rebuild as she’s a bit floaty, so that will or will not happen over winter, but in the meantime I’m just enjoying old car ownership and taking her on the odd trip into work. Mexican blanket pic for thread..
1 point
-
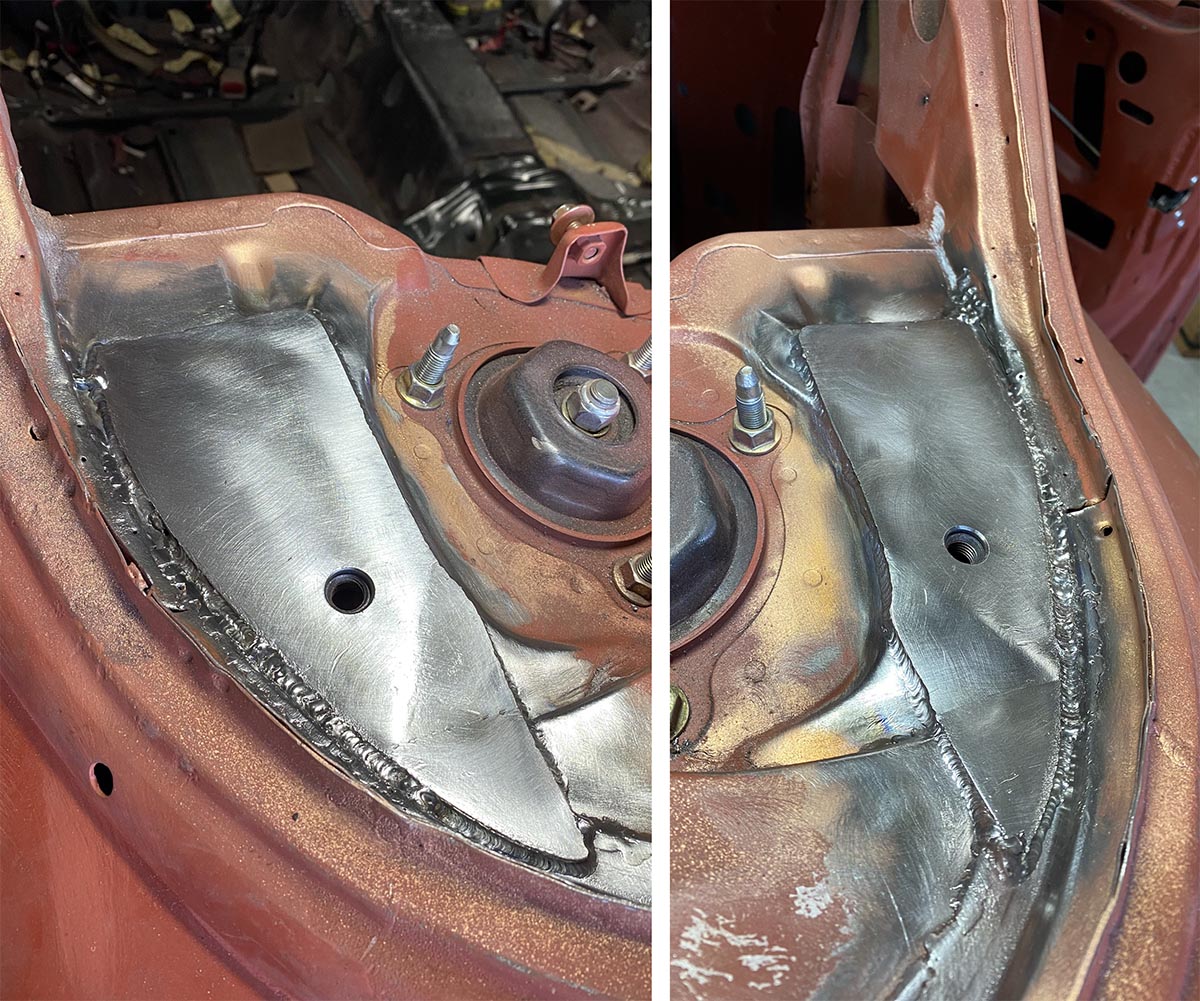
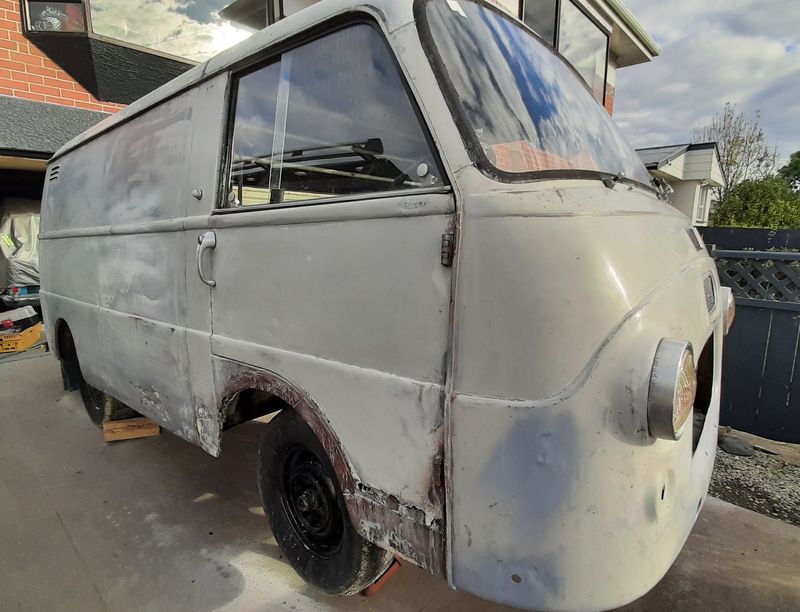
Tiny bit of rust on the firewall I fixed up Filled in all of the extra 'speed holes' And shot some epoxy, not super concerned on the finish for the interior, its all going to be covered by sound deadening and marine carpet. Got epoxy onto my dog leg repairs so I could fit these panels, rather happy with the result Bit of a tidy up and then we can get some colour going...
1 point
-
Started goin over the engine. Compression testing @ about 155-165 but cylinder 4 is at 145psi. So I gotta keep checking that and see if it is actually bad. Ignition was way off too. I had 35deg mechanical advance (excluding vac). So even with low static timing I was in the mid 40s which cant be good. So I got a new electronic dizzy and high power coil. Now running 16deg static and 38deg mechanical with 14deg vac. Works way better. It wasnt without its issues though. I didnt know the harness ran an internal ballast. So the coil was only getting 4volts and breaking up at higher revs. Then after I fixed that out the ignition key couldnt handle the higher current coil and started playing up after a while. Put a relay in and fixed that.1 point
-
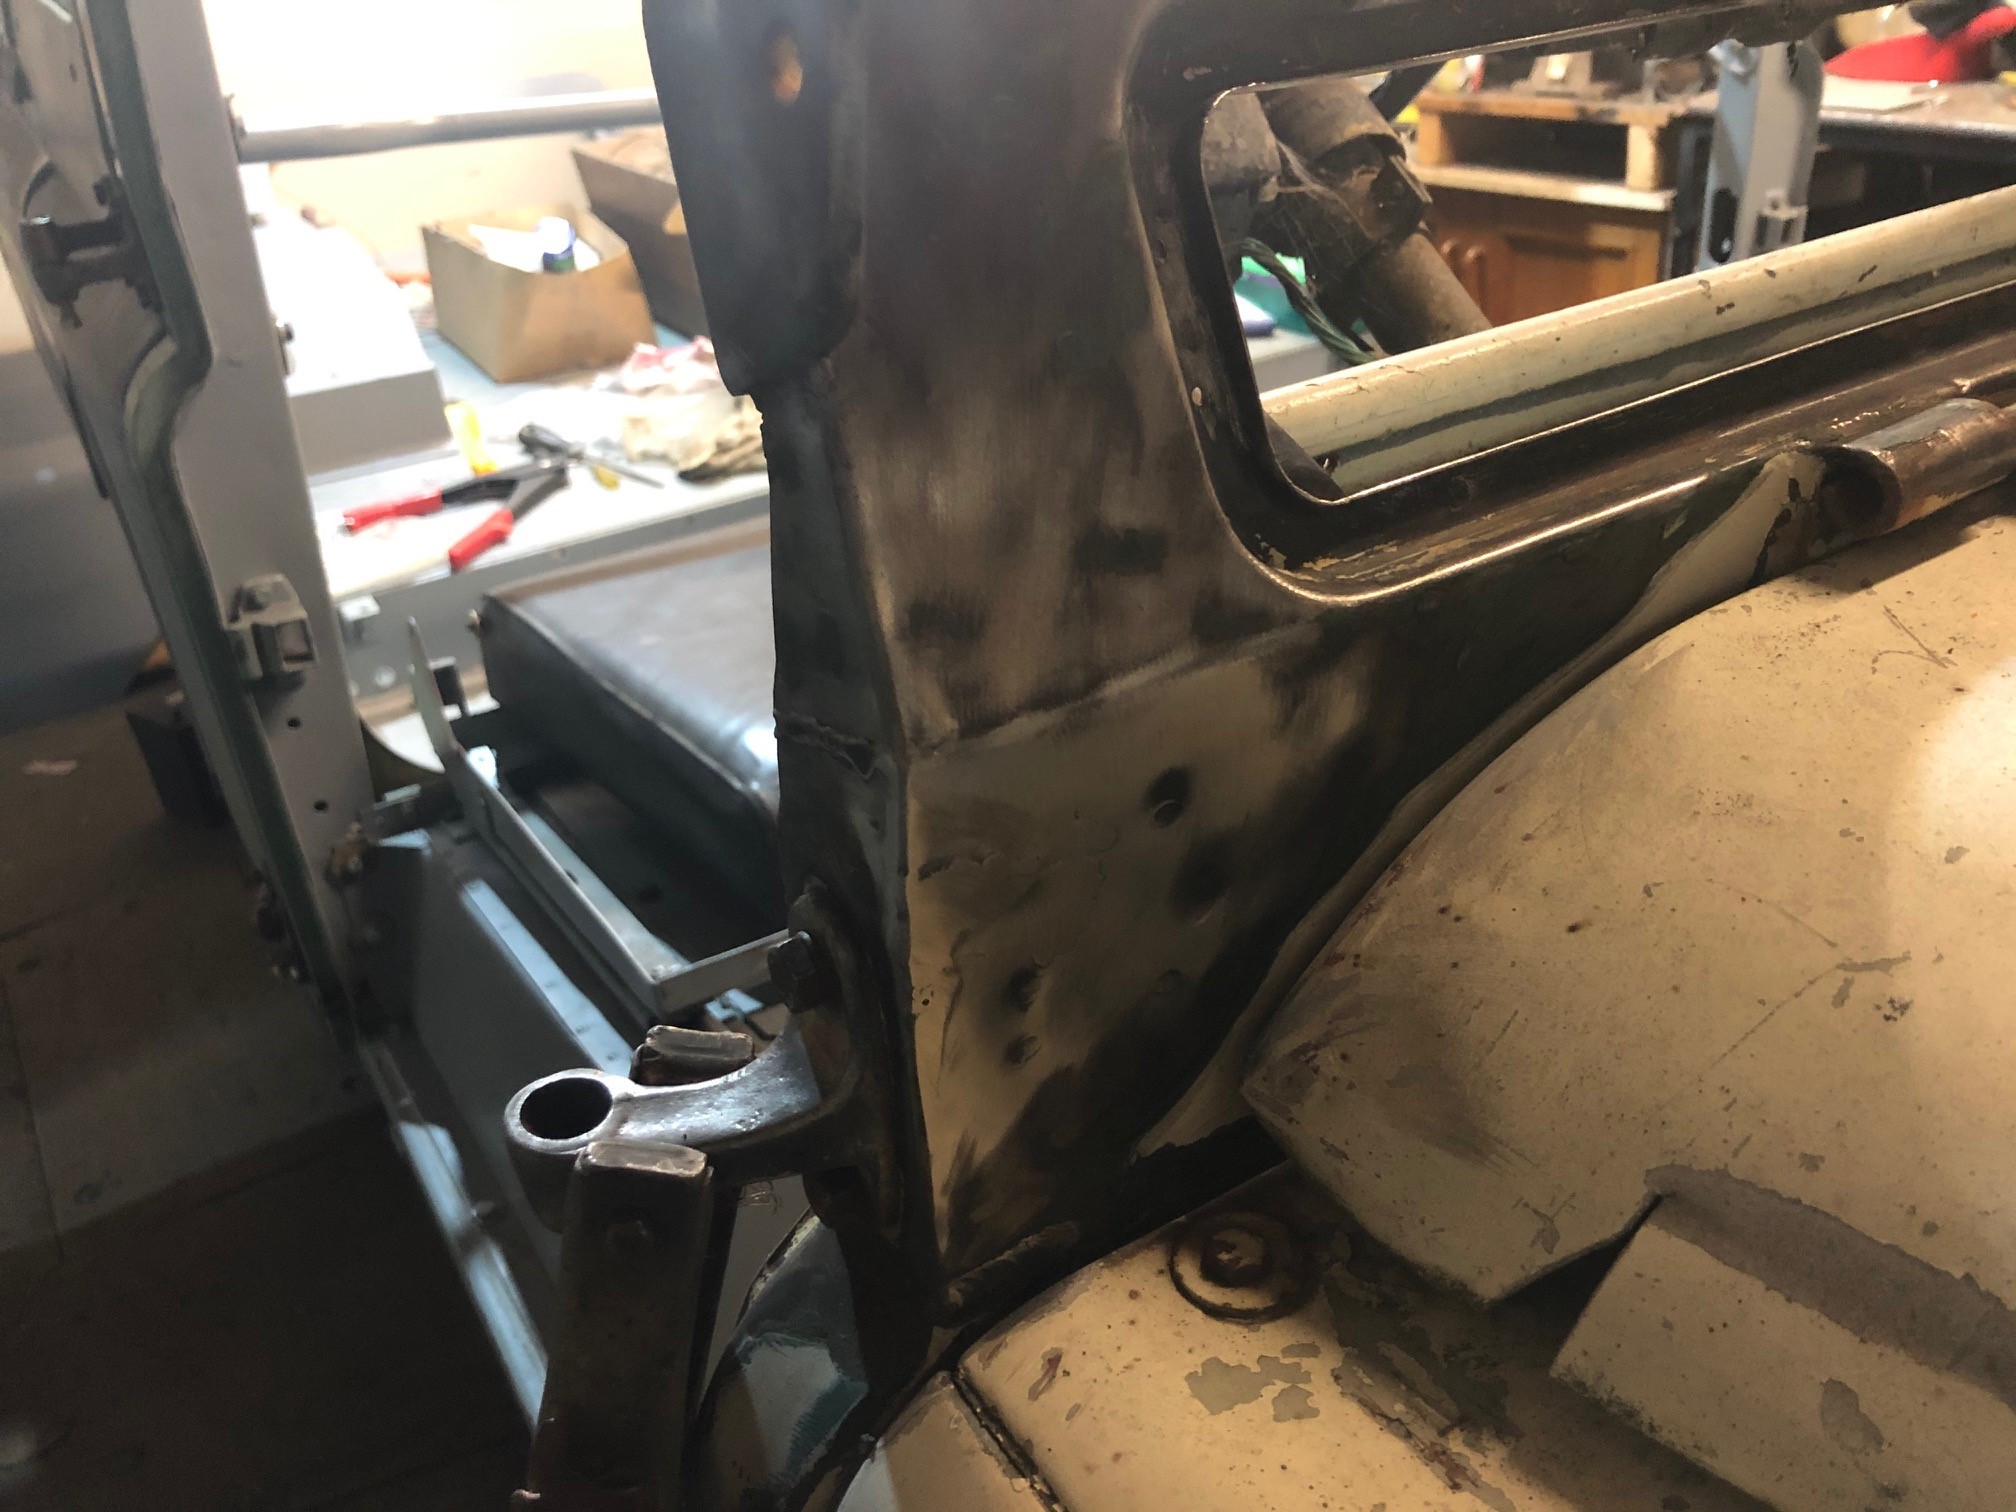
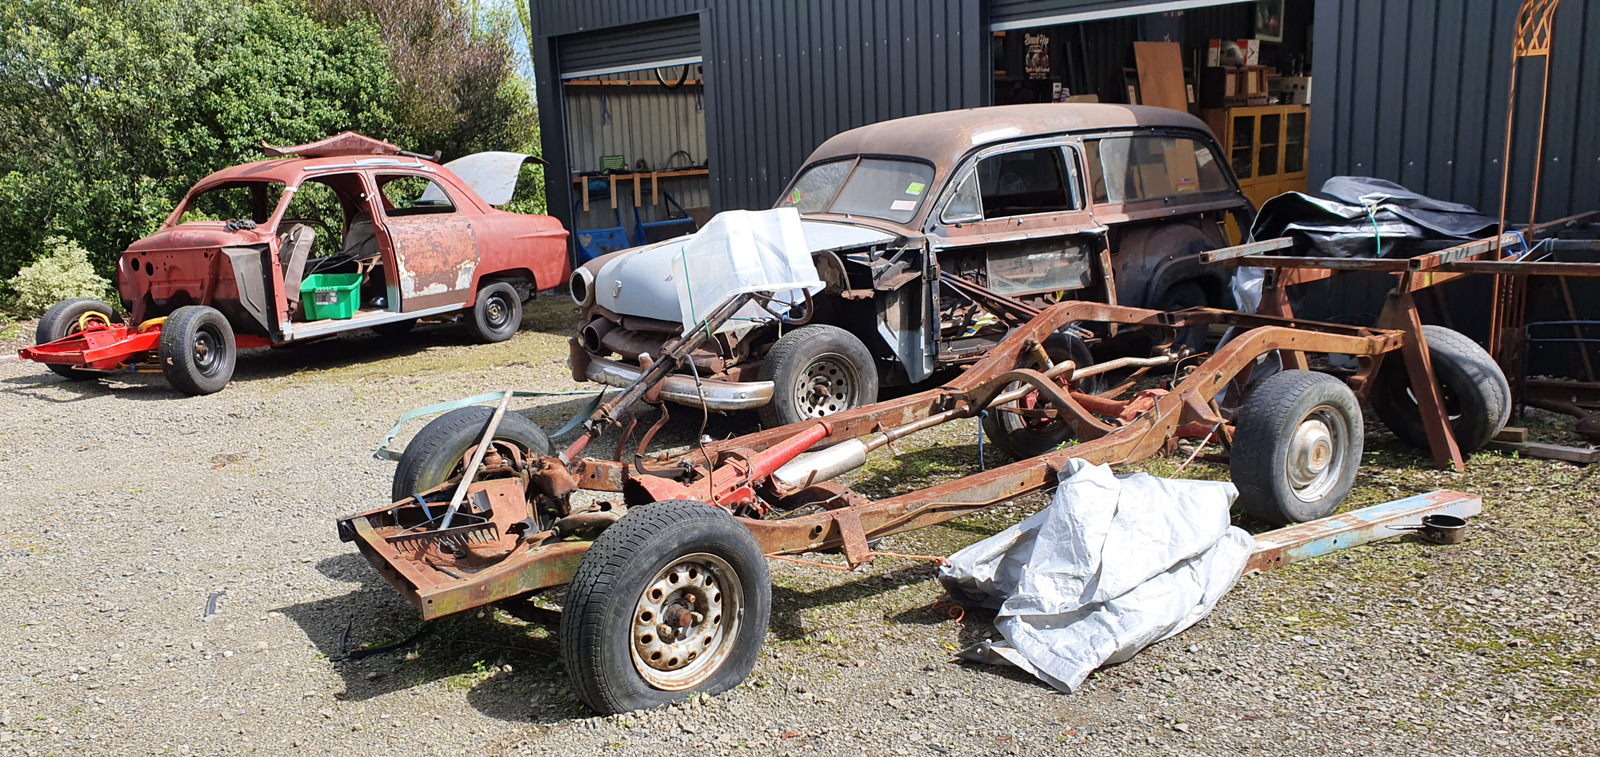
Two is better than one, right? Bought this 4-door project and had it shipped down from Hamilton. I was really after parts from it, particularly front end sheetmetal and things. Should be the same as the Woodie from the firewall forwards. A bit of a garage shuffle, 2.5 51 Fords. The 4-door has a valid NZ ID and will be for sale again soon, just waiting to get one of the guards back from the panel man.
1 point
-
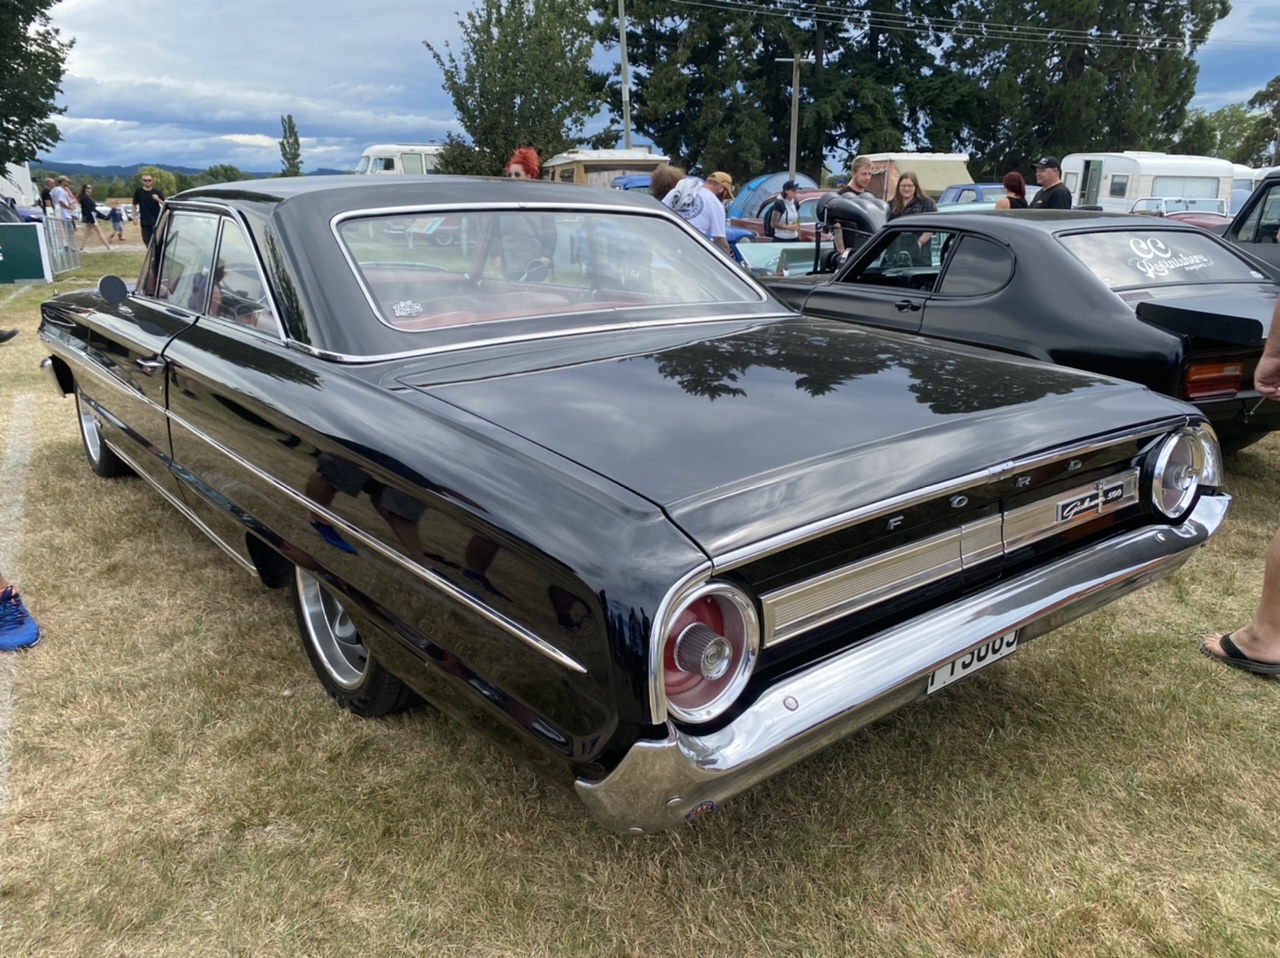
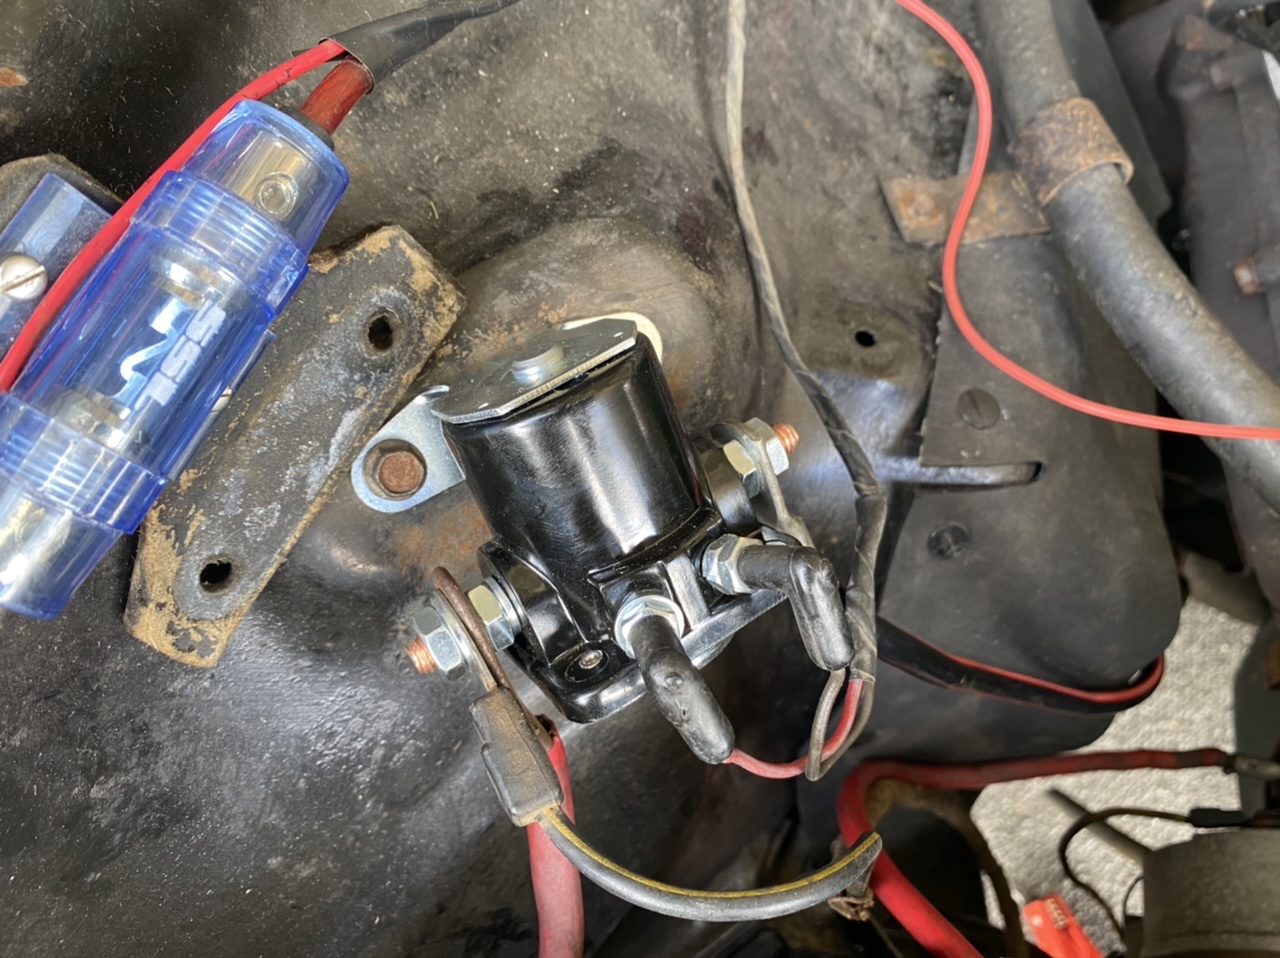
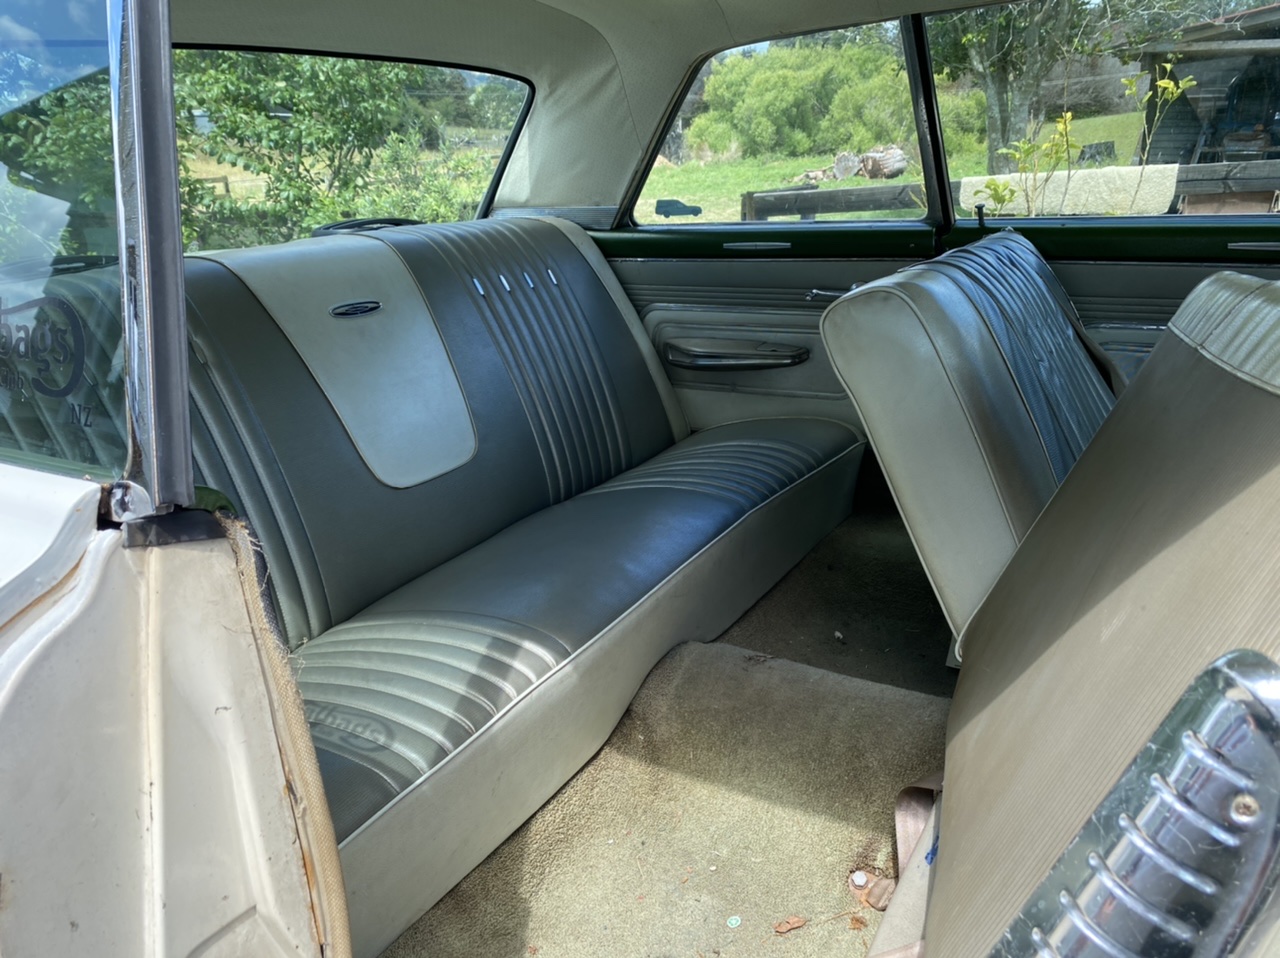
Back track to Day 2 & 3 of Galaxie ownership.. getting her running.. My best mate is a Ford know it all (knows more than me anyway) so he helped me out a lot with getting her running.. we went through all the basics.. Pertonics was fitted but I read that they can get stuffed if you bugger around with them so I erred on the side of caution and took it out and went back to points.. bought all the stuff for a full service including new points, plugs, oil, and all the stop leak options I could find cos she leaks a little here and there. I discovered the earth cable from the back of the engine to the firewall was quite loose so re-crimped that, replaced the points, got a newer battery, replaced the plugs, put in the new solenoid and she was all go! Took a couple of hours all up but was really enjoyable to get to know the car.. so much more fun to work on than the Commodore. Didn’t take many pics and I was having way to much fun, but here’s a pic of a new solenoid While she was outside I took a couple of pics of the interior.. front seat is pretty worn but the back is tidy Some pics of her on the ground and free of the trailer
1 point
-
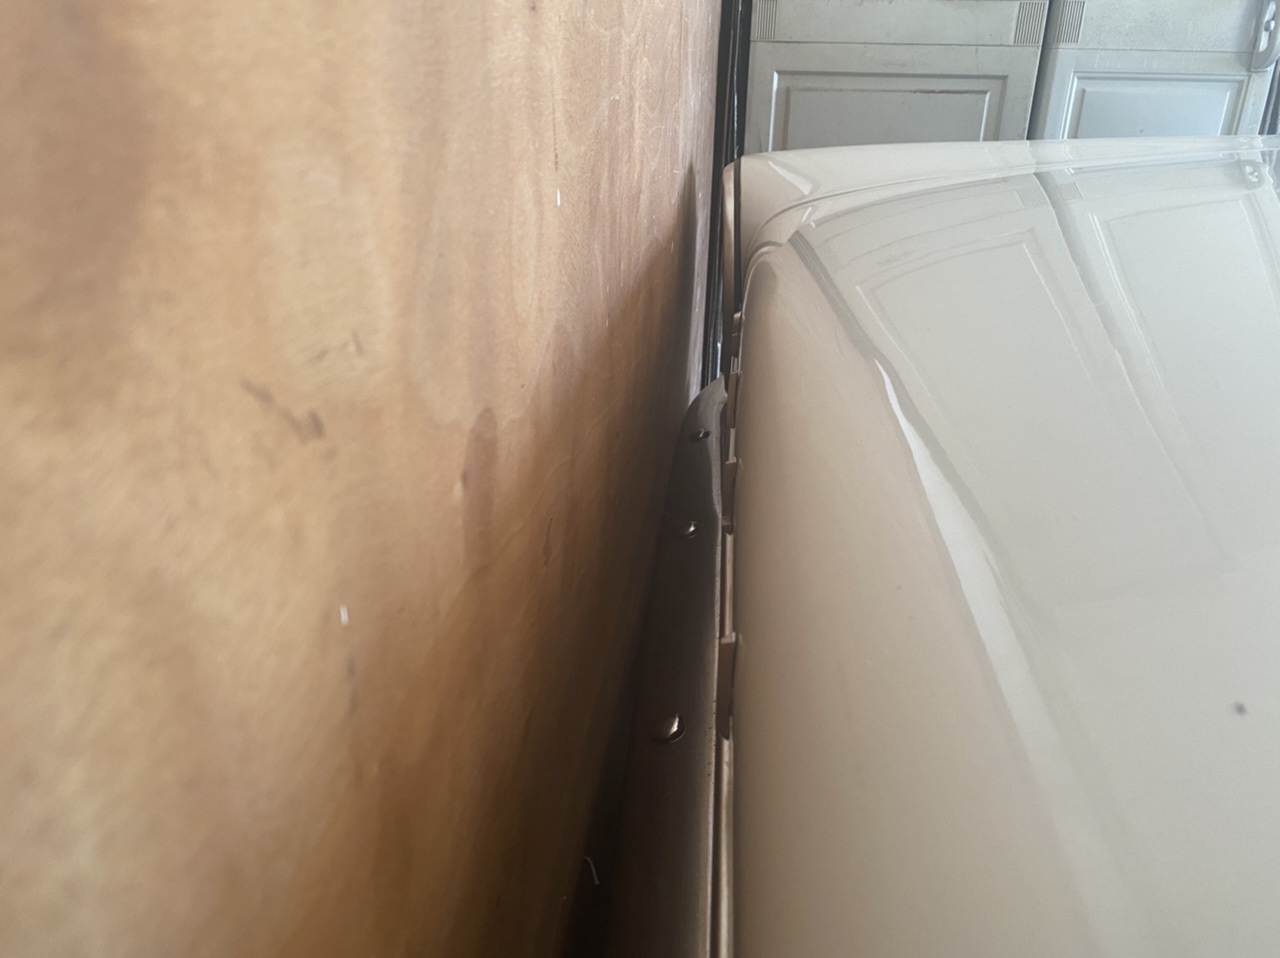
Back track to day 1 of official Galaxie ownership.. Mike got her going for a trip around the block the day before, but unfortunately on the morning of picking up she decided not to play ball.. thankfully my trailer has an electric winch, and with I bit of finesse we managed to squeeze her onto the trailer.. damn this thing is big! Here is where she stayed for a day or two while I cleared the garage out enough for her to (hopefully) fit.. decided to give her a wash at the same time and she came up nice.. a buff of the paint I reckon would make a huge difference but I’ve never done that before so that’ll have to wait for some other things to be done first. So I was worried (not worried) about how long my garage was and whether the Galaxie would fit. The garage measured 5315mm long, and google told me prior to picking the car up that the Galaxie was 5330mm long. Hmmm. I fully expected to have to cut in a “shelf” for the bumper to sit in (still might do this), but thankfully real world Galaxie length was about 5290mm so she juuust squeezed in. I touch park her against the back wall, apply the handbrake and it clears the garage door by about 5mm as it comes down and the bracket stops above the front bumper. Perfect fit!
1 point


.jpg.ae57da8783184aab564dd3323a1c4541.jpg)


This leaderboard is set to Auckland/GMT+12:00