
Leaderboard


Popular Content
Showing content with the highest reputation on 12/22/19 in all areas
-
21 points
-
13 points
-
Well shit, I put the body bolts in and took it for a skid or two up the driveway, it feels good. Only into third cos the drive isn't that long, but it does good skids on the gravel lolol. Doest feel bouncy or wallowy, steering is good seating position is good. It feels pretty lively too. Everything seems to be working as expected, brakes and clutch need another bleed but still. Fucking stoked, might need a crywank now. Neighbor took a vid, I will post when I can get it.13 points
-
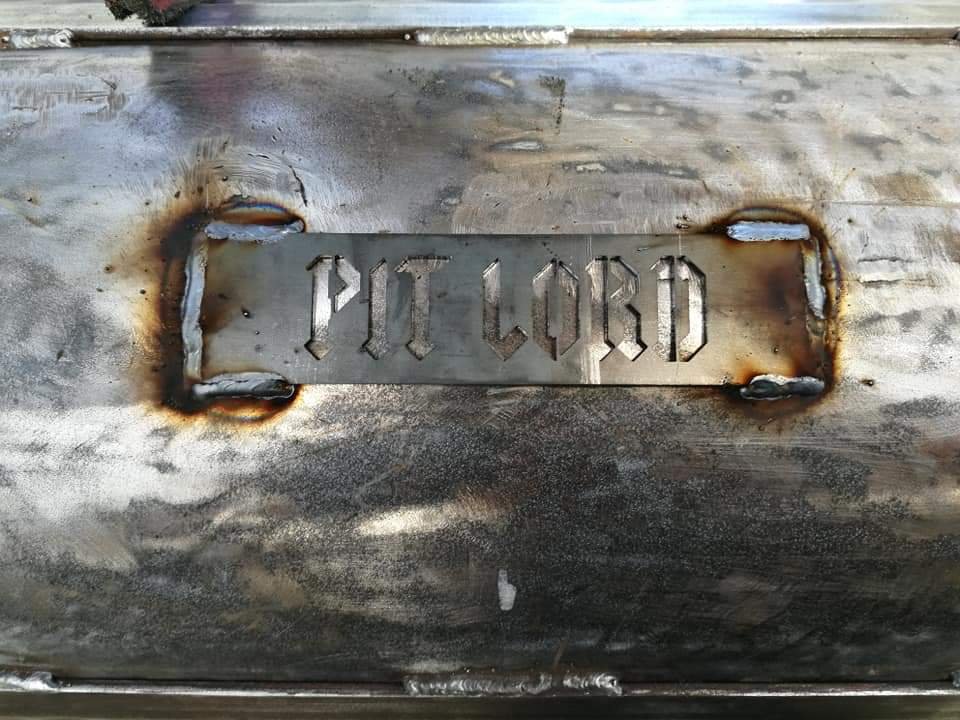
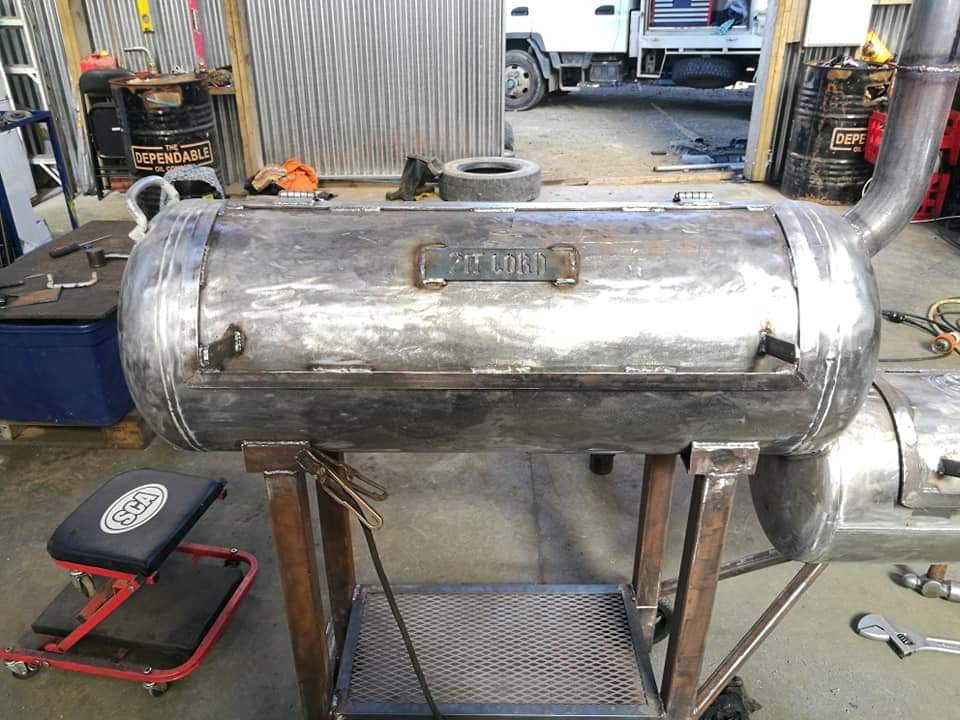
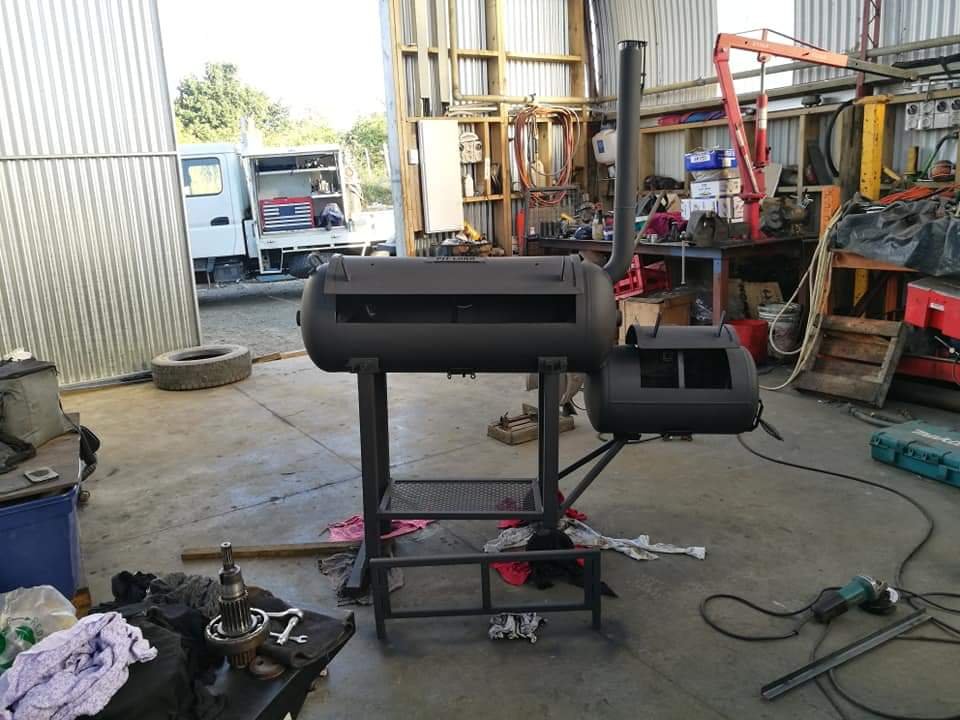
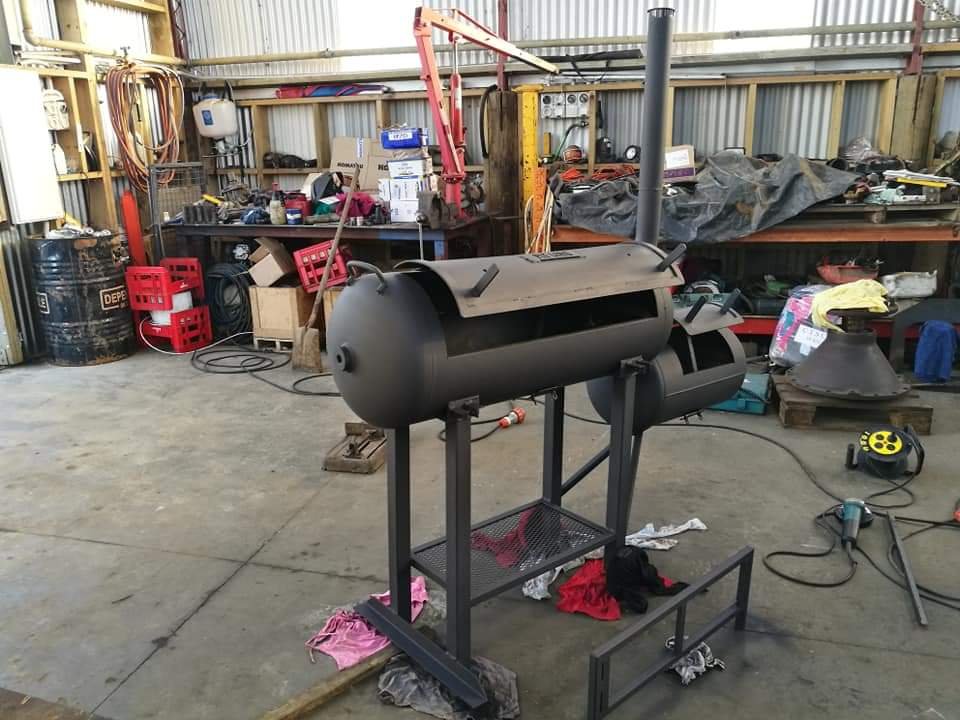
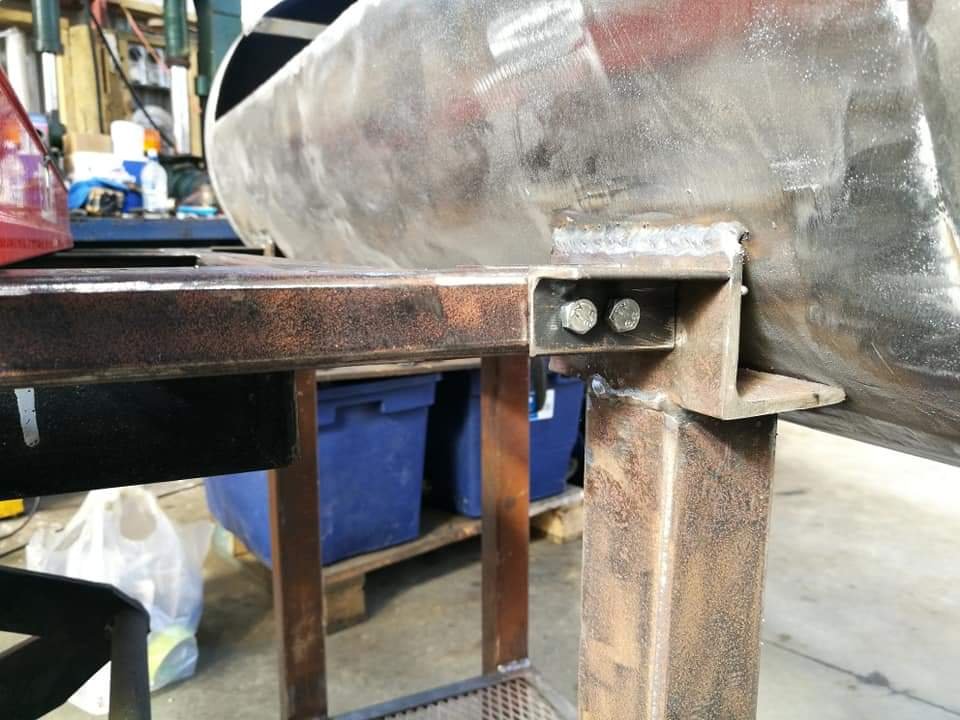
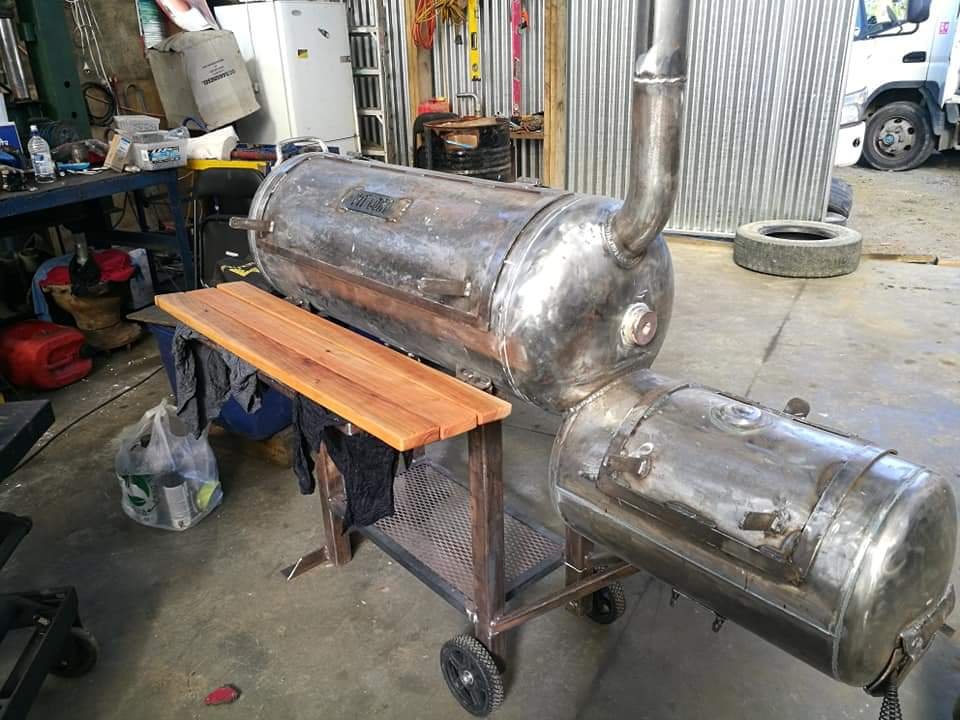
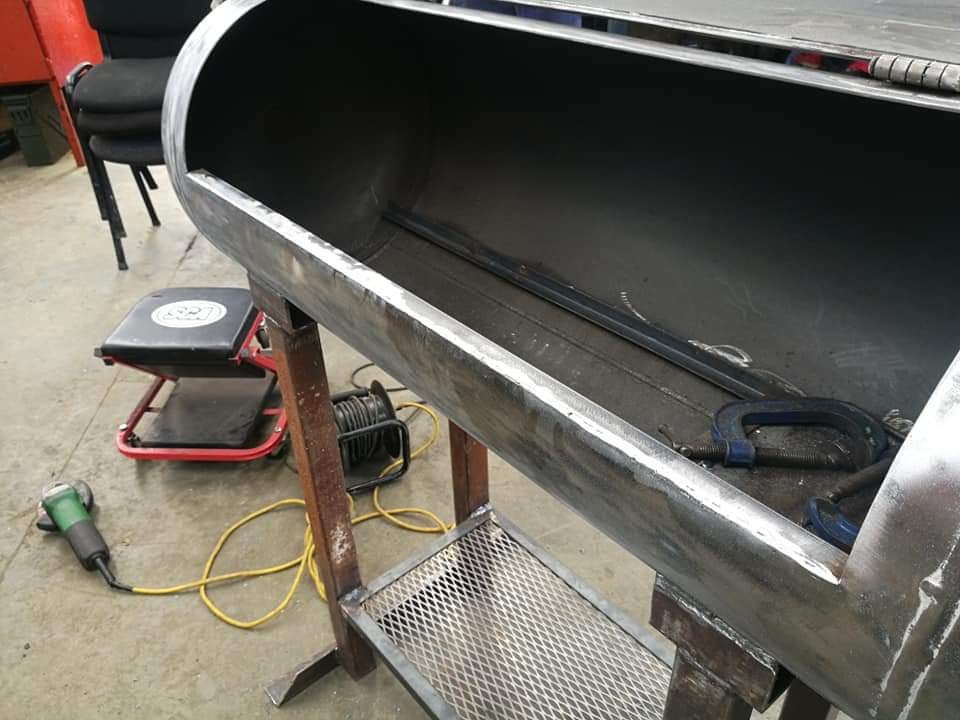
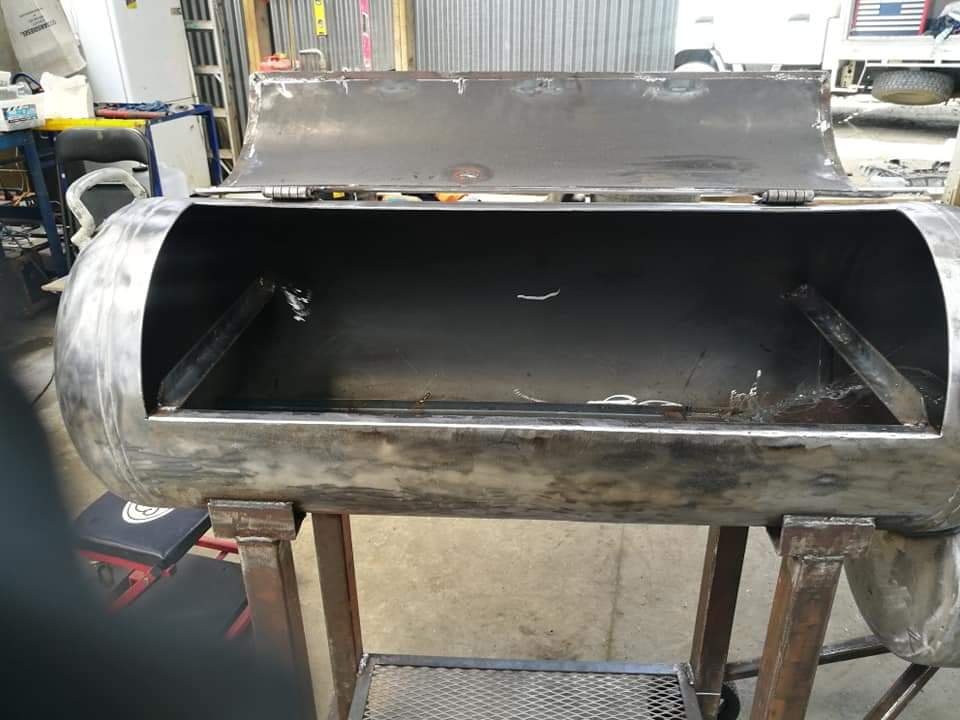
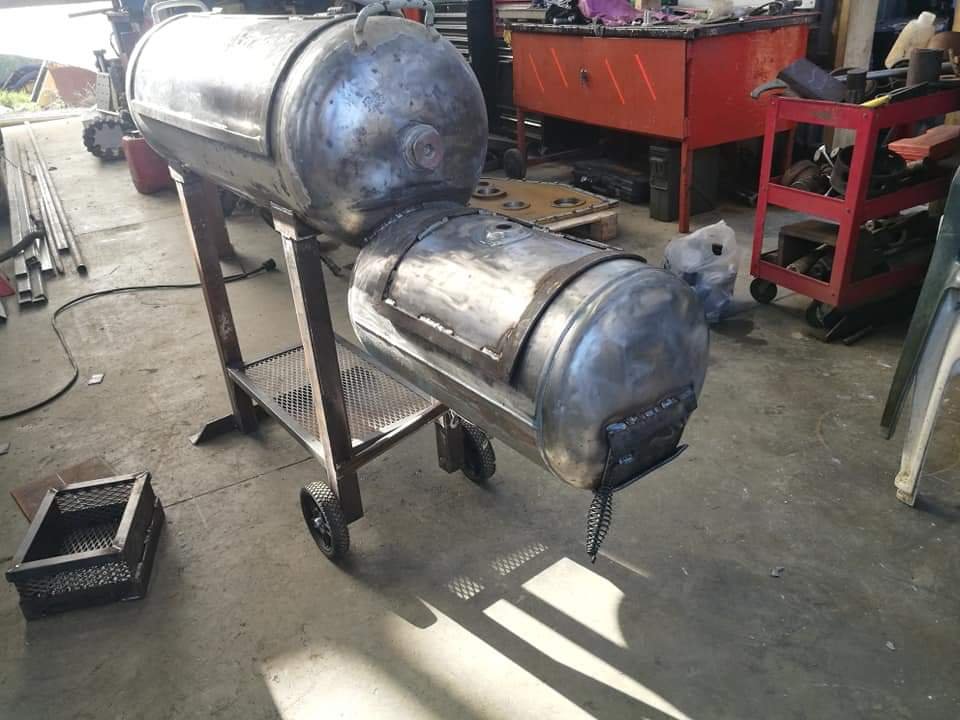
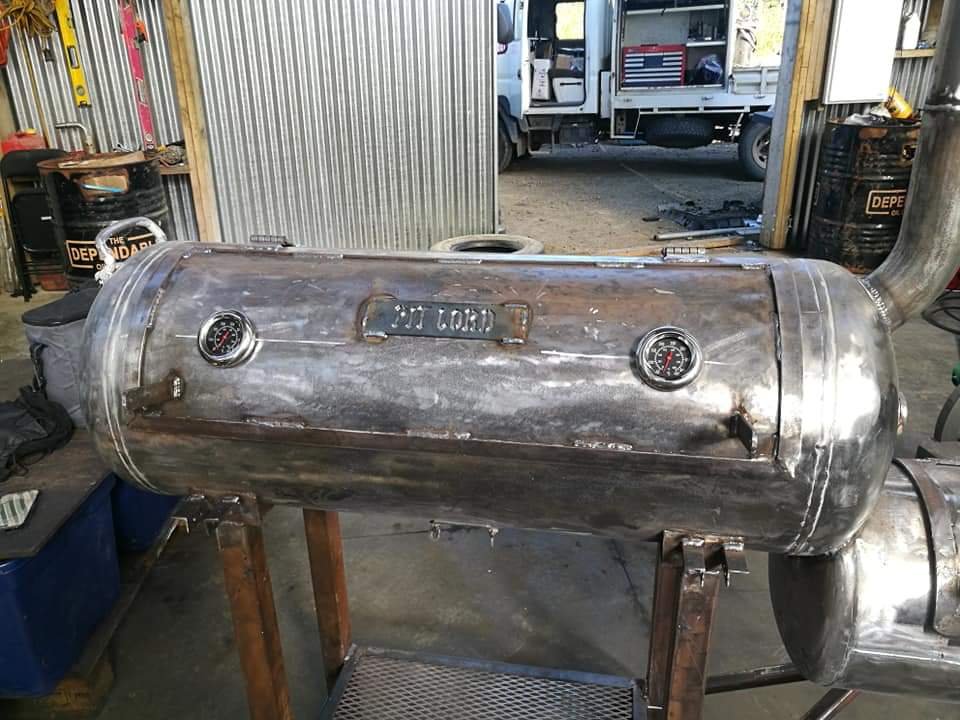
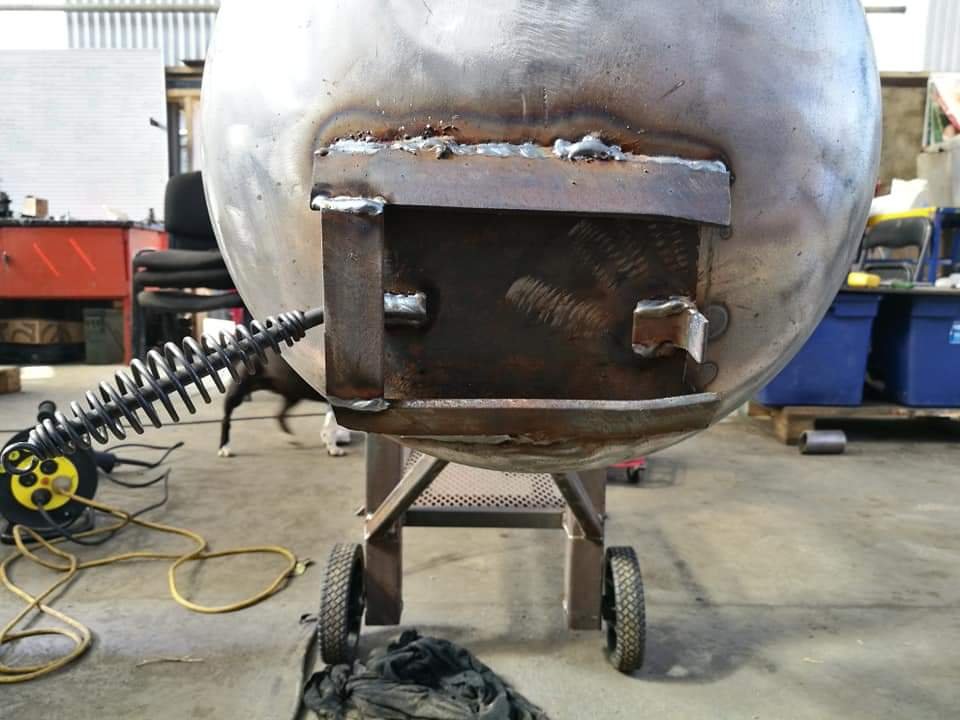
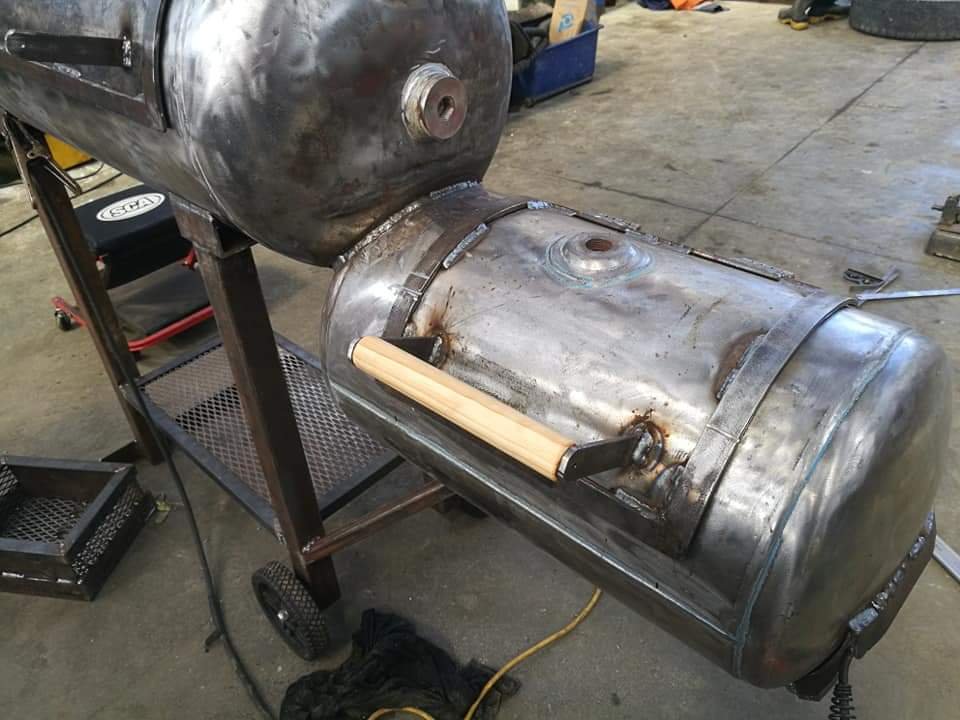
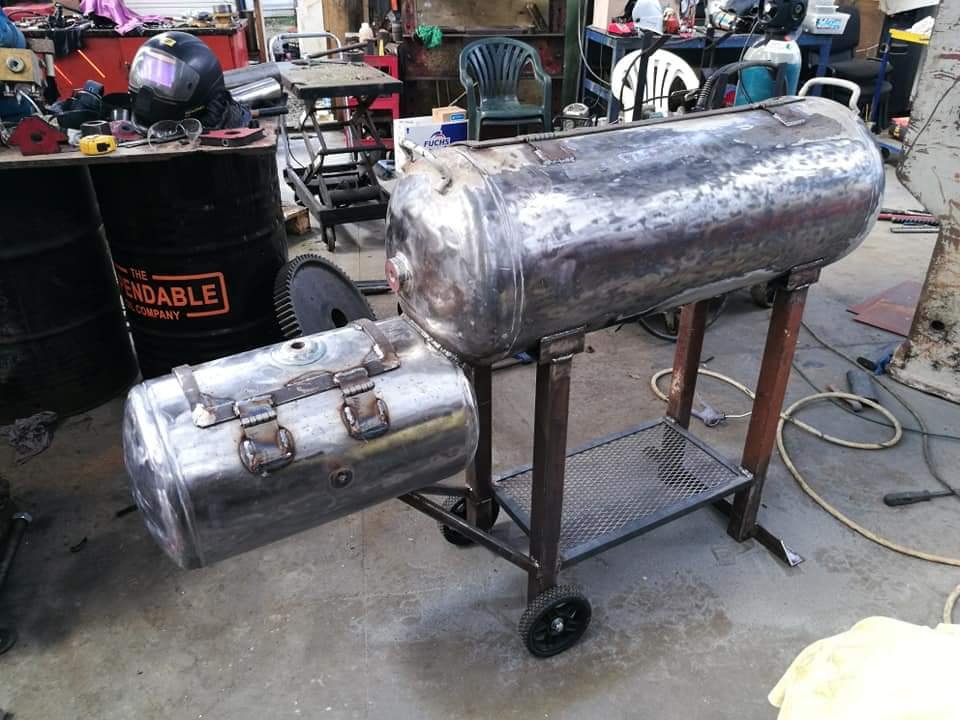
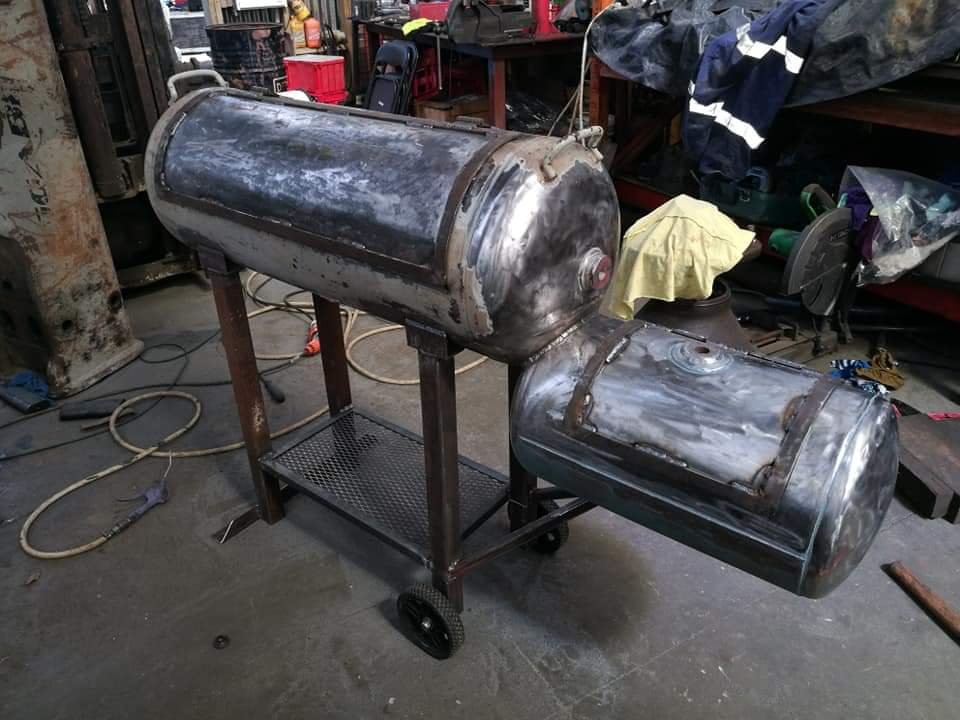
And the creme de la creme. Had a mate at one stop cutting shop sus this out. Did an awesome job and it adds that finishing touch. So happy with how it's looking now. Had also welded up the remaining holes and bent the firebox lid so it sits a bit better and tried to sand back the paint on the inside of the firebox. All that's left now is to sort the front bench, drill some mounts for the thermometers/temp gauges and paint! Home stretch! Chur
 12 points
 -
Goes again, everything seems to work a lot better so far. Main power feed from battery and fuse box now in passenger foot well. pretty much the only place it would fit Made catch can that fits where fuse box used to be. some fresh spraycan paint even10 points
-
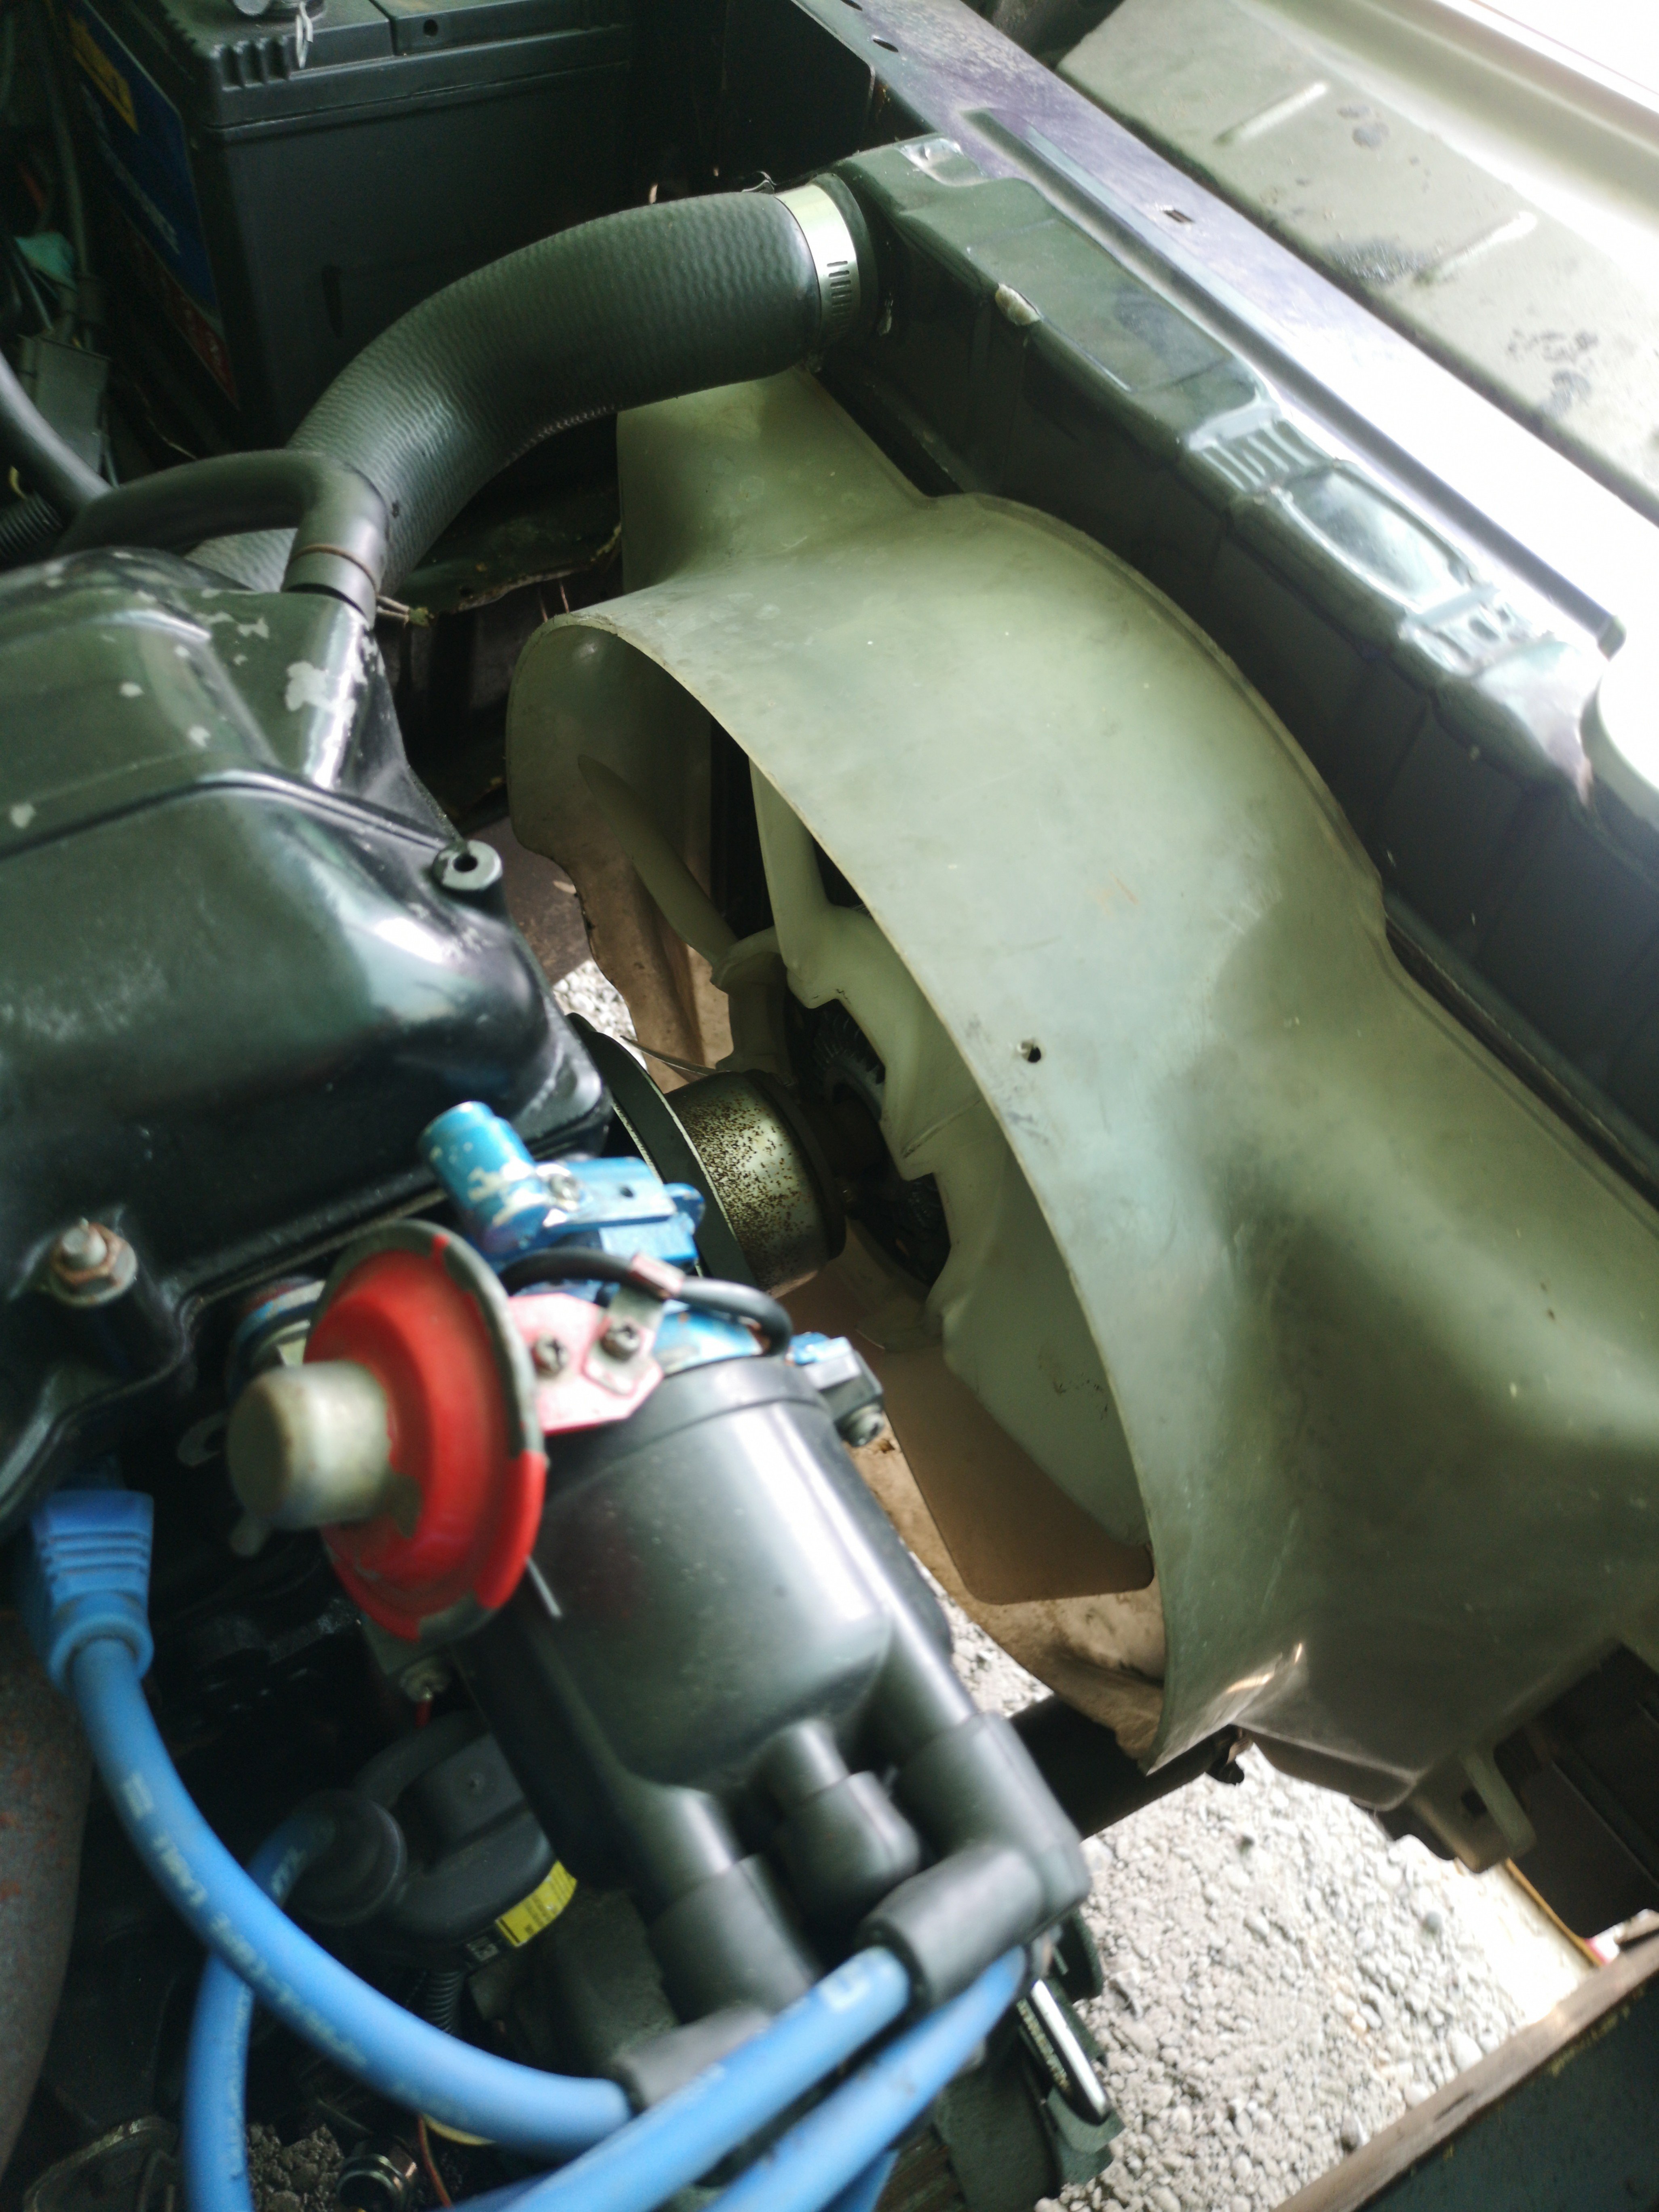
started cleaning/stripping the engine bay ready for paint. also started tidying up the wiring so its not in the engine bay. got a good chunk of it done, just need to extend the wires for the passengers side headlights etc and its done. ill probably start sanding today 2019-12-22_10-19-17 by sheepers, on Flickr9 points
-
Supercharger9 points
-
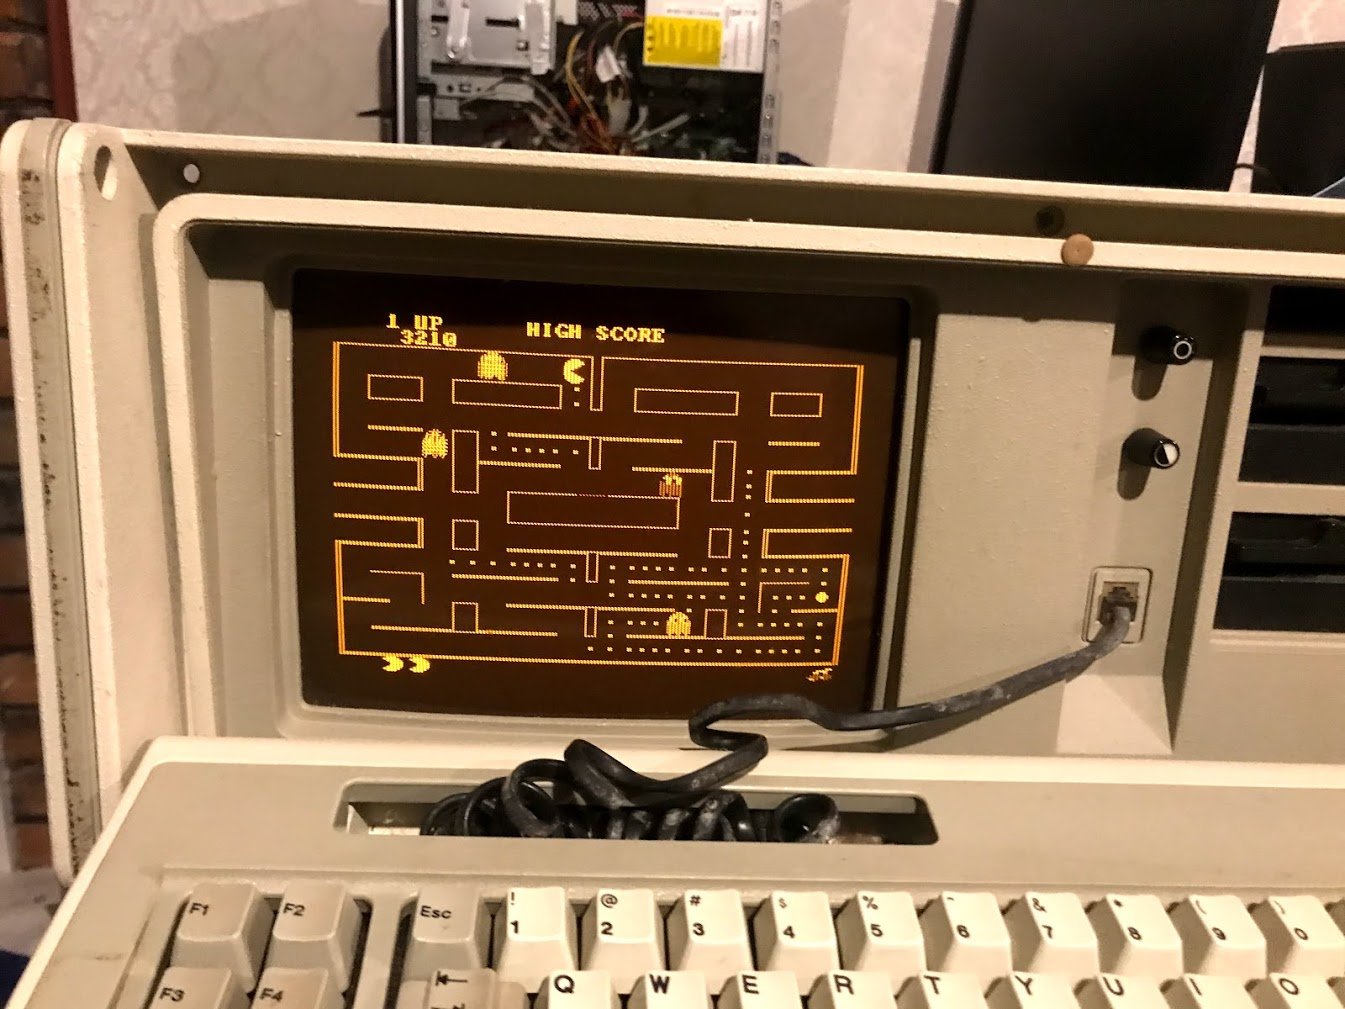
Oh yeah, pacman:
8 points
-
motors all back together and pretty much ready to go back in the car. got a couple of little things left to tidy up but nothing major. and with that i started stripping out the engine bay for repaint. 2019-12-20_04-33-06 by sheepers, on Flickr 2019-12-20_04-35-02 by sheepers, on Flickr4 points
-
Fuck does it do skids..3 points
-
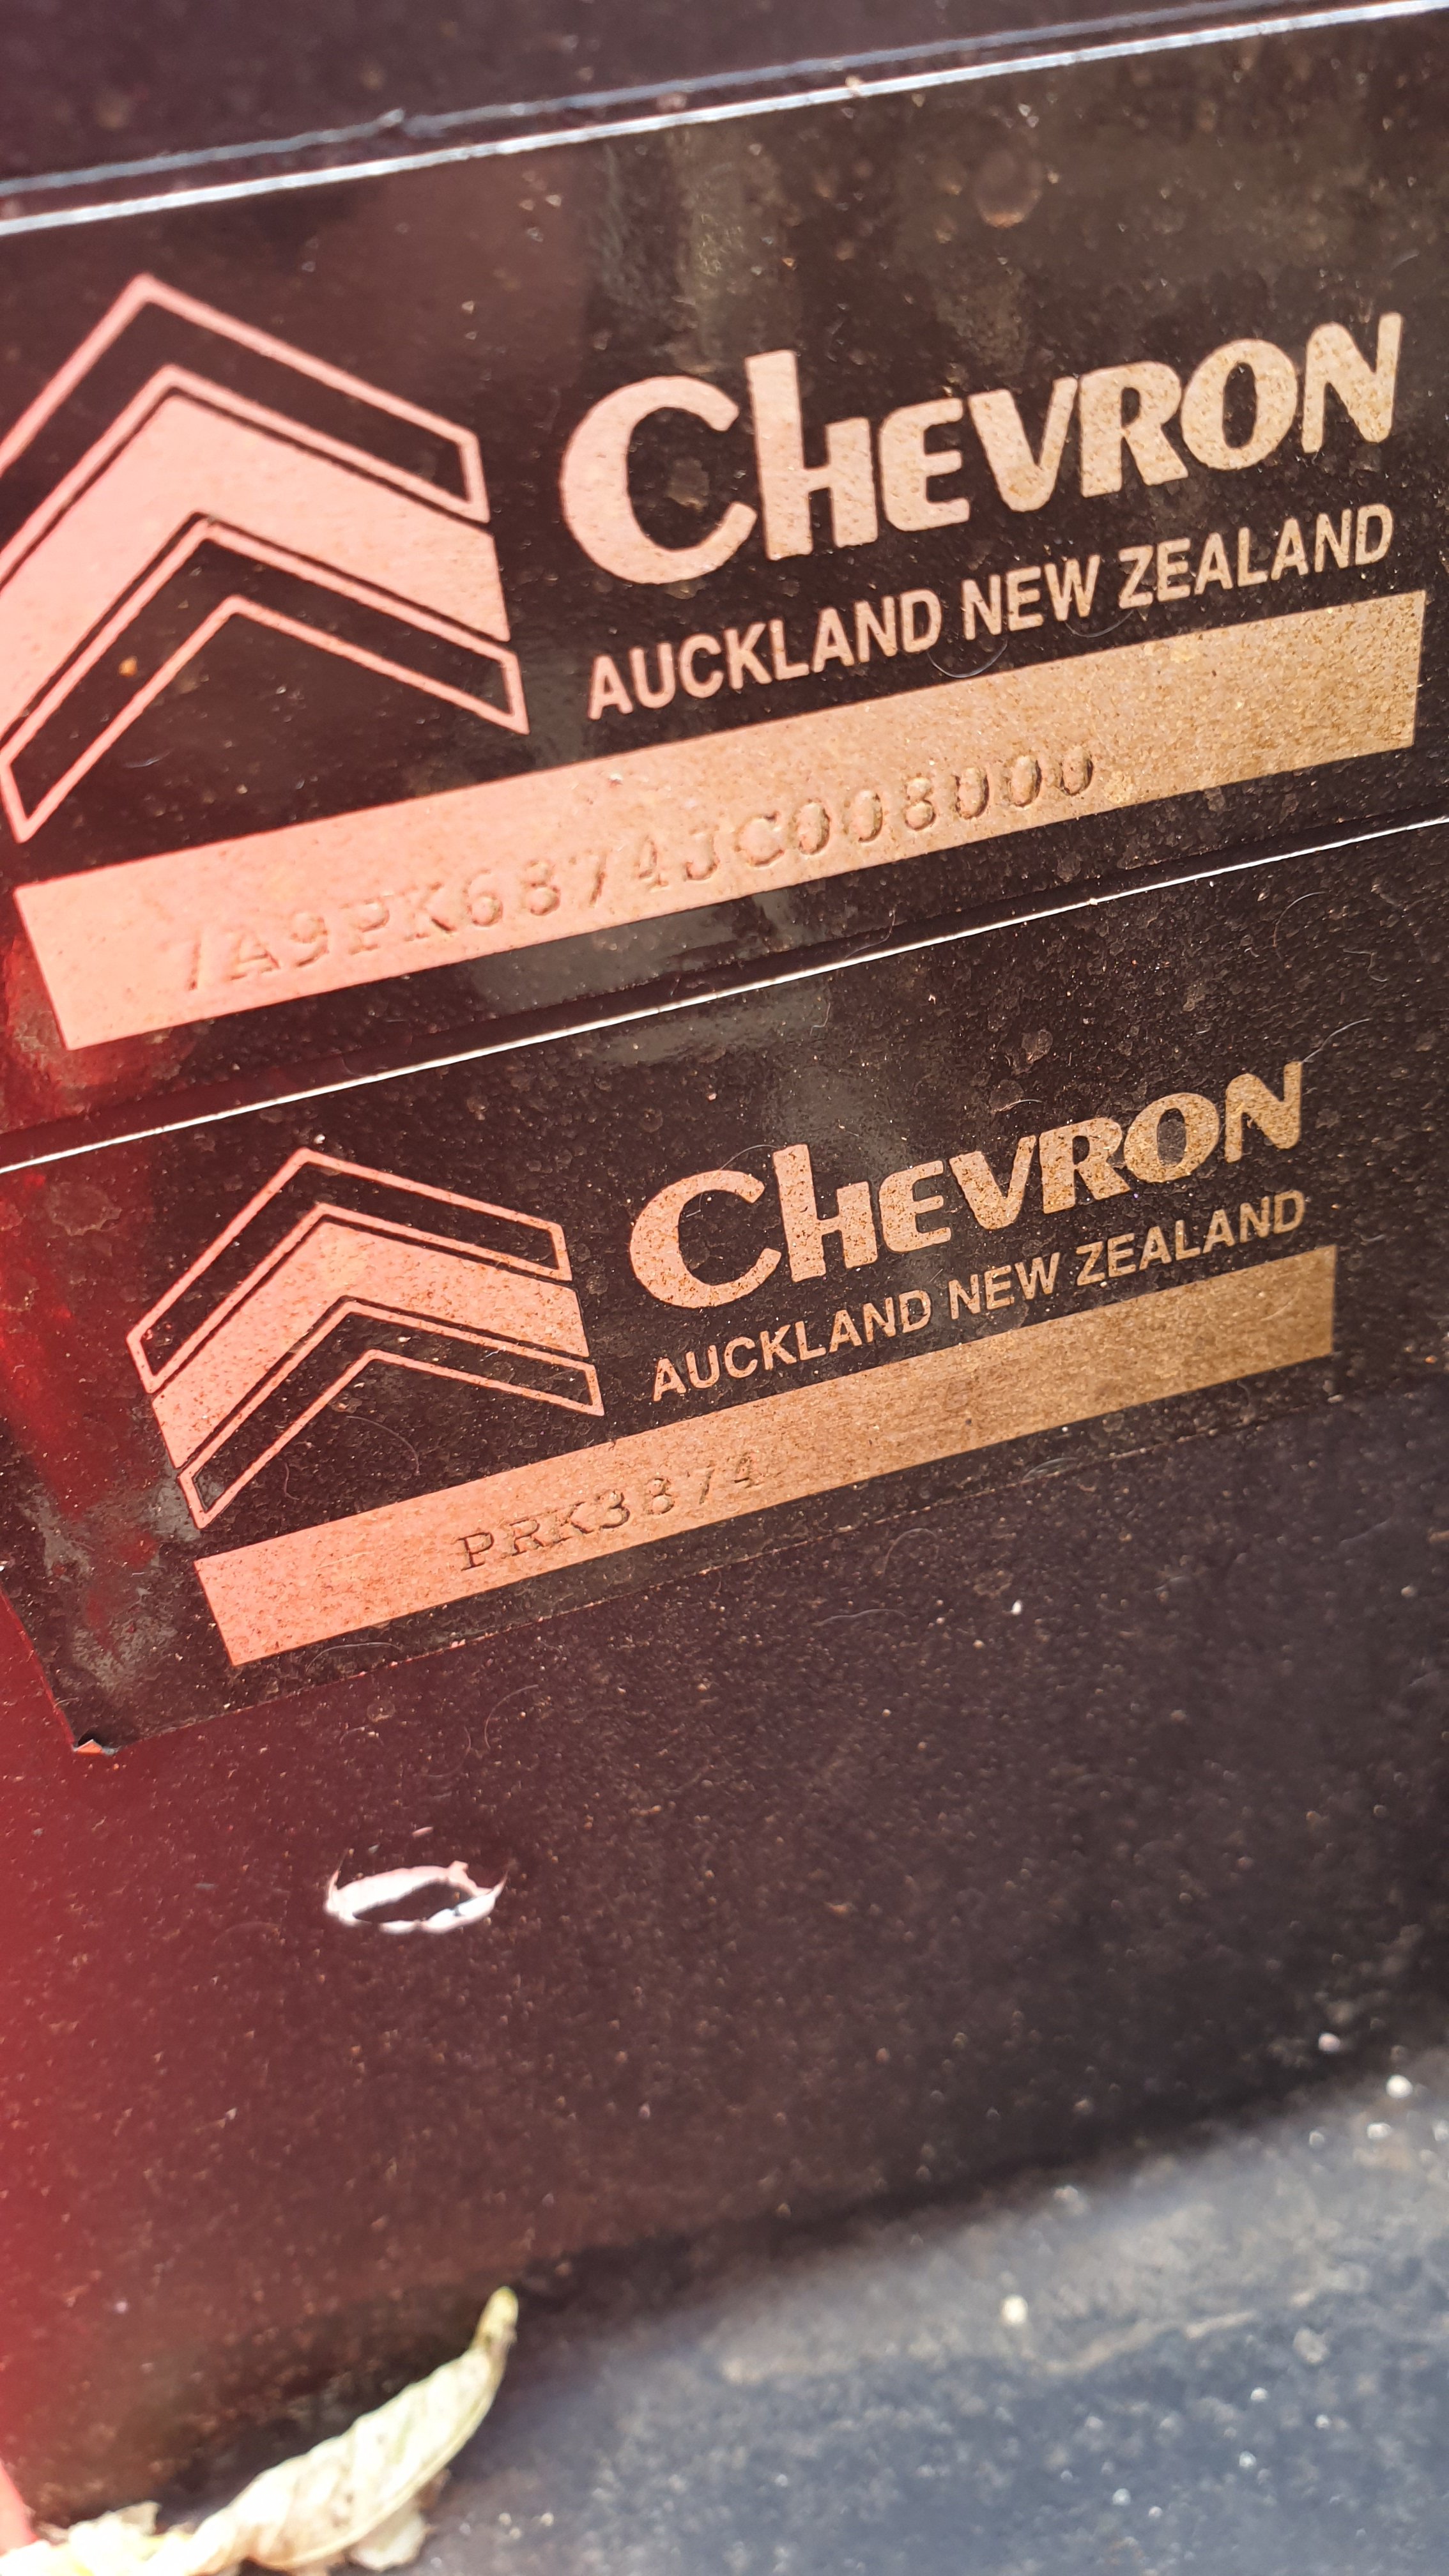
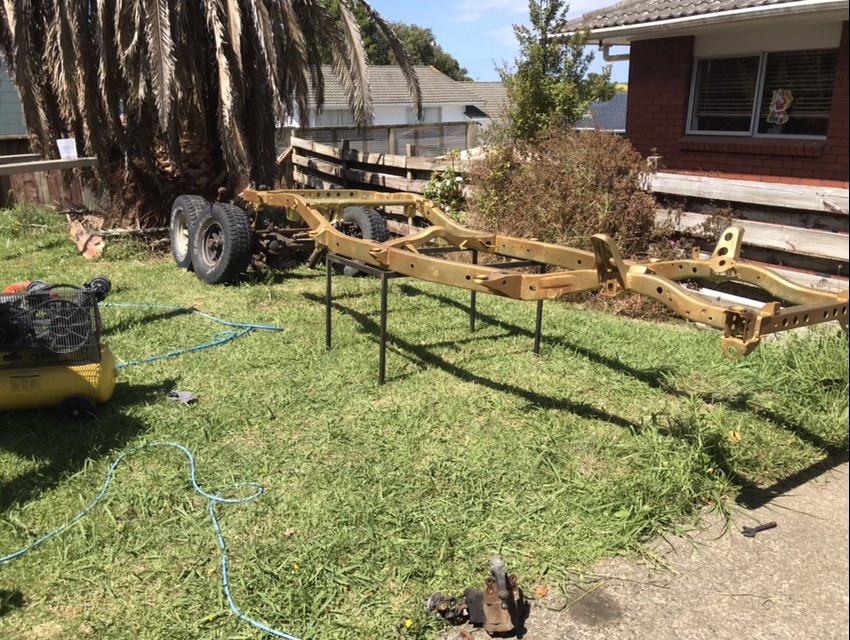
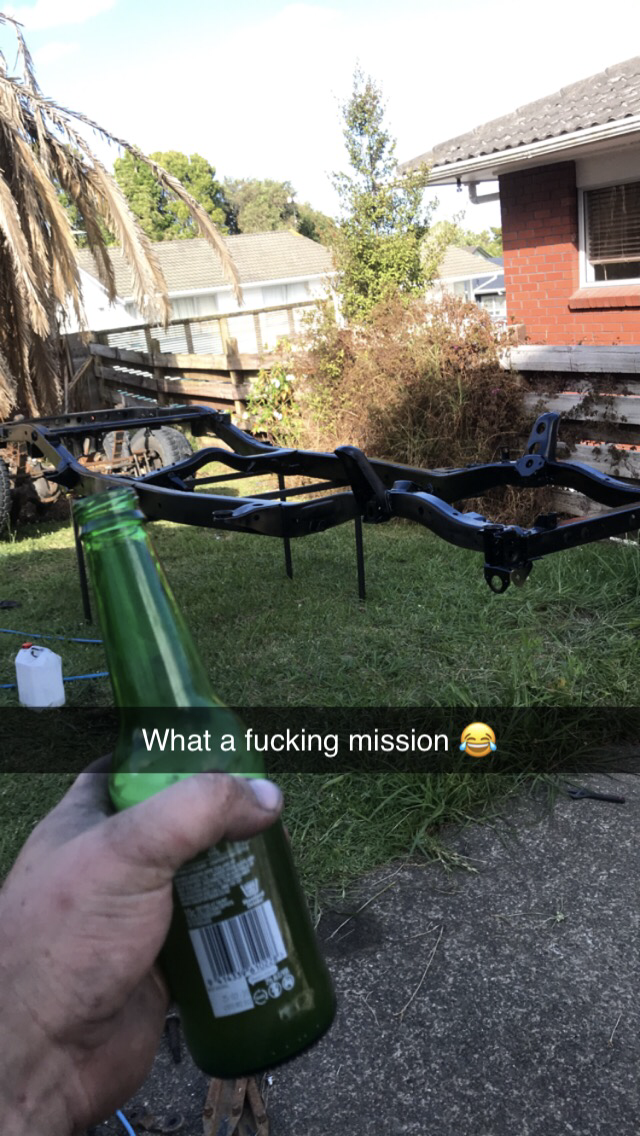
No cert plate either, or declaration papers, the way I understand it and the way the wof man did too is that's its not a modified vehicle. So would only have been complied by what ever means that was in the late 80s It does have a stamped serial number on a chevron branded plate and a land transport 7Axxxx... Vin number on another chevron branded plate.
3 points
-
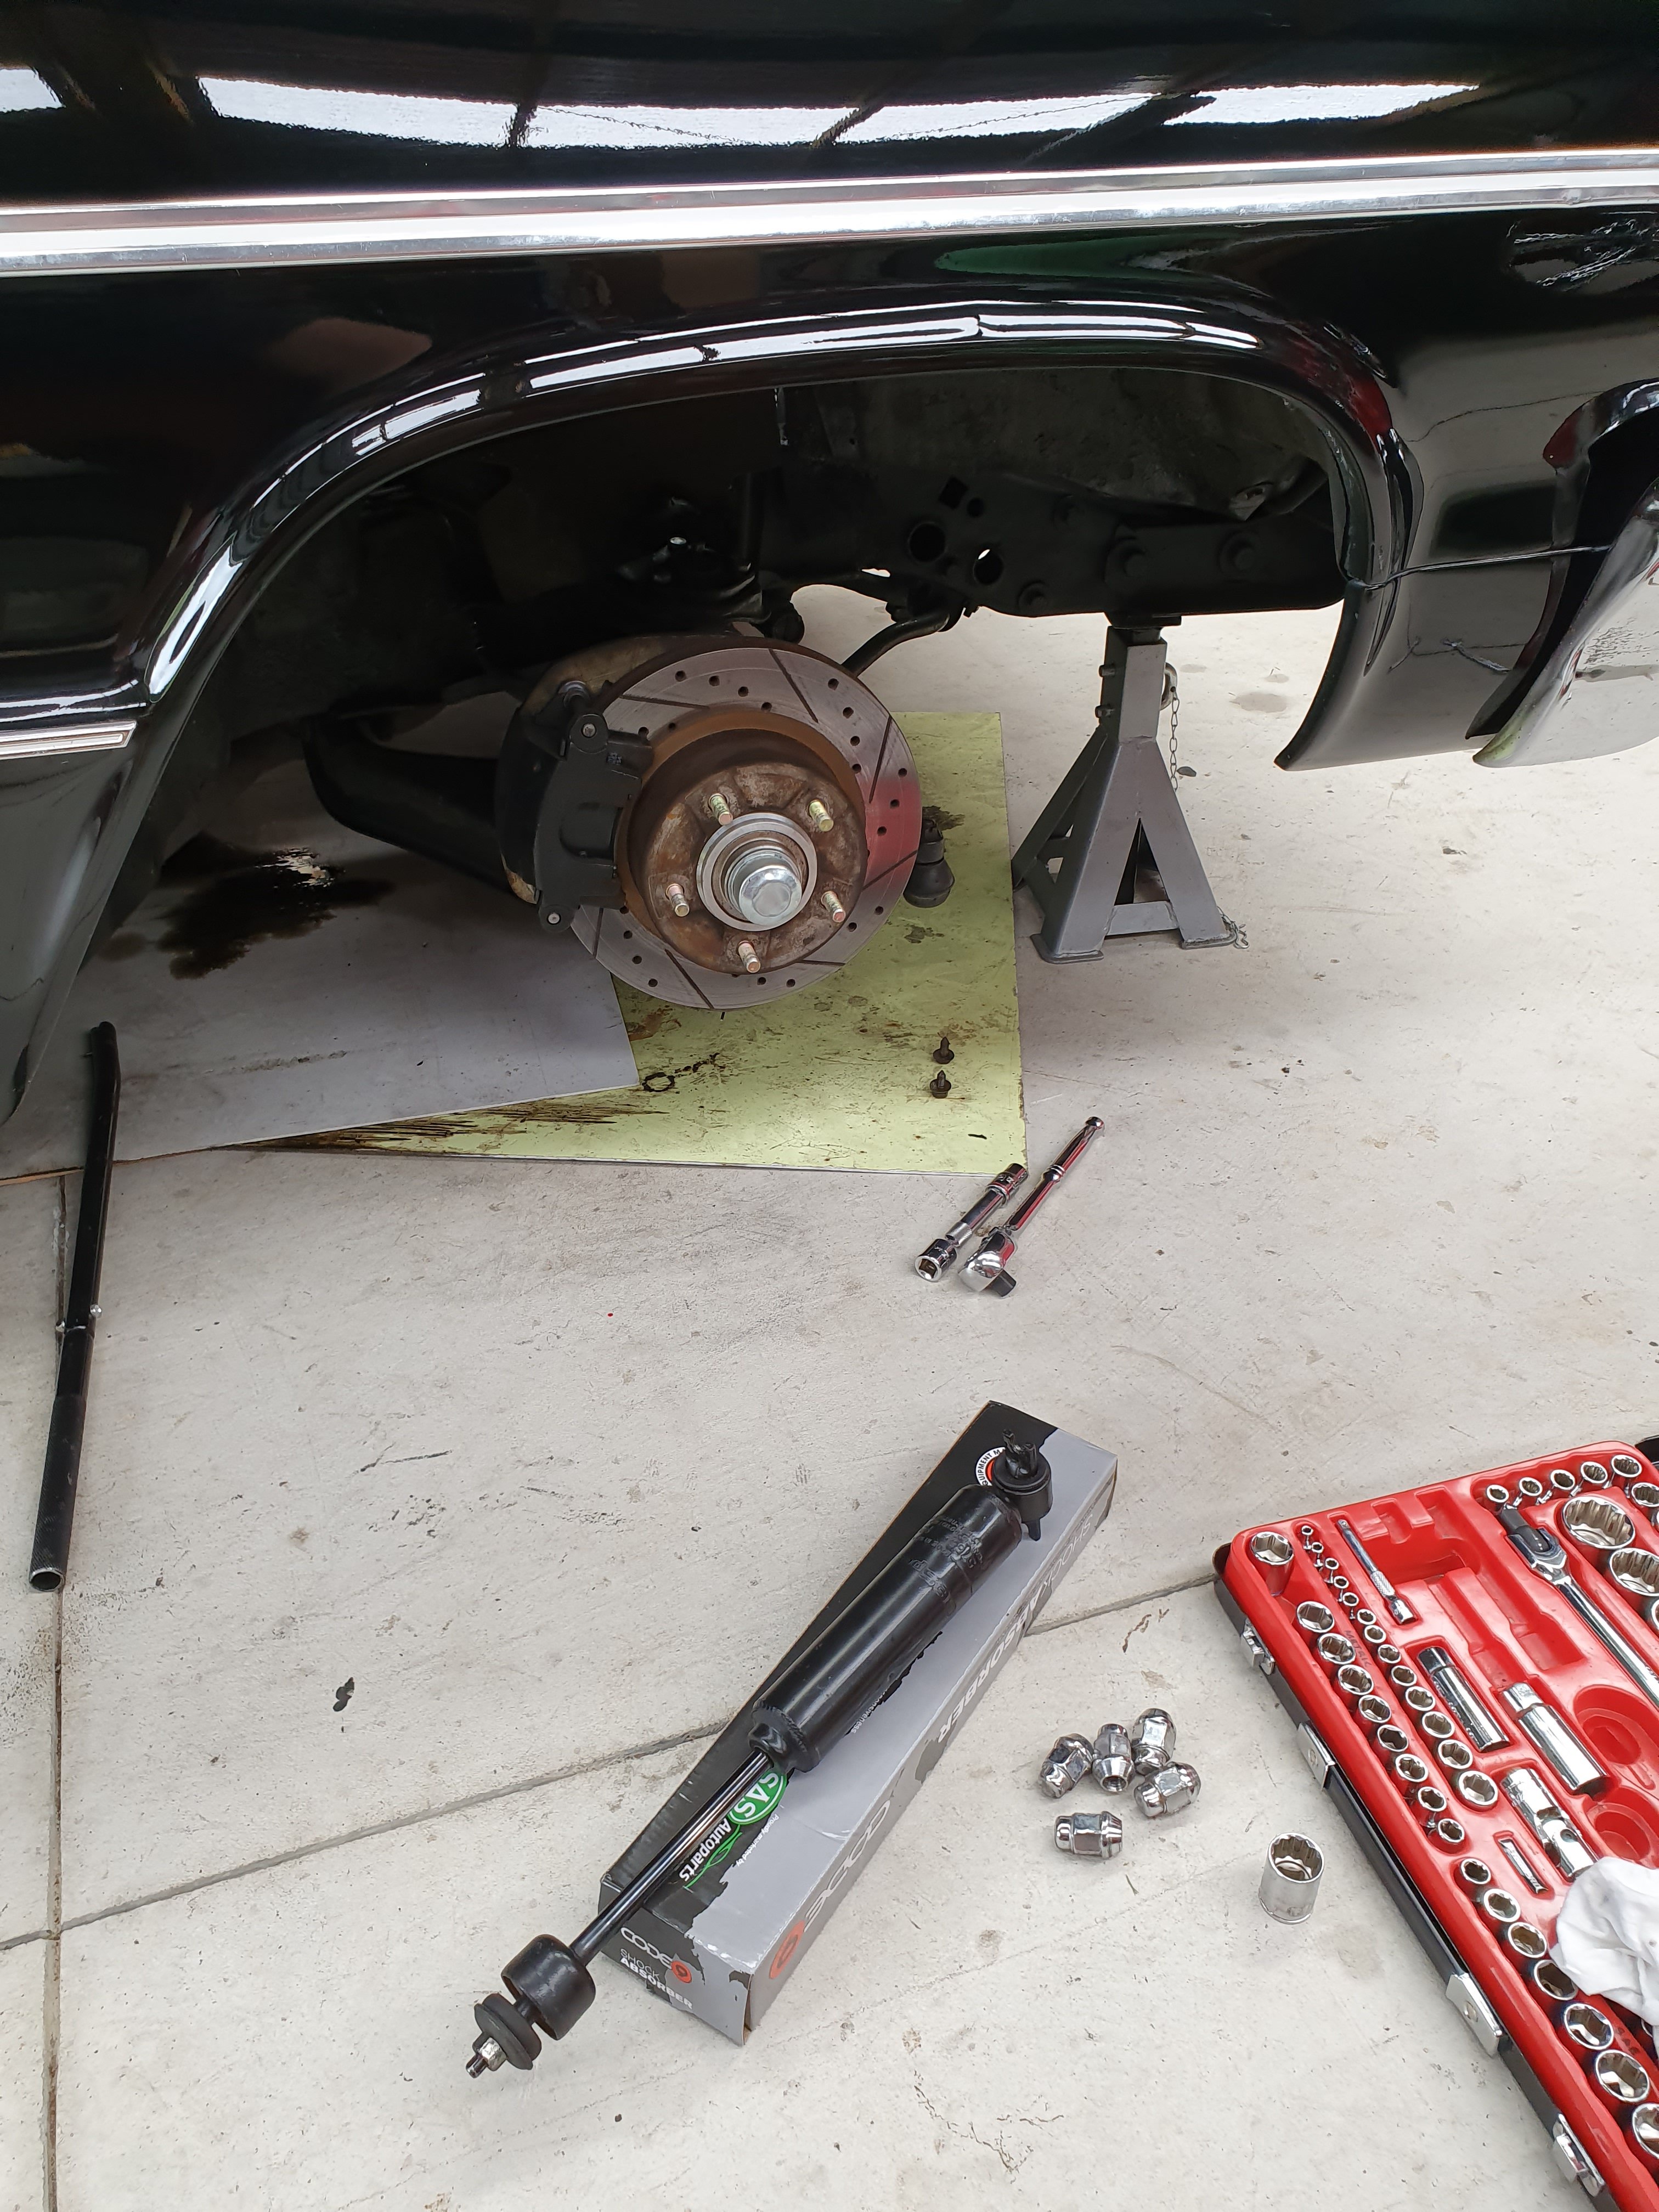
New shocks in front: Rides like a dream now on new shocks, plus all new ball joints and springs all done within the past 6 months. And legal as fuck! WOF/REG/CERT...fuck yeah!
3 points
-
Got a little bit more adventurous yesterday and went for a longer drive out on the 80k zone so I could open her up a bit. Goes so much better, who would've thunk that efi and an 60mm Tb would make this sort of change. Finally found some info on this particular iteration of the f/ma, came out 82 the 1982 luce 2000 sg-s and not the cosmo like I previously thought, no wonder I couldn't find anything.. Was pretty healthy too really, considering they "upgraded" to the fe, 120hp/167nm vs the 12v fe 120/178. I was always of the opinion that it was a total boat anchor at only 90hp, I've done bit of work to them in the past and they've gone pretty good but efi is hands down the best modification, shits all over the 45dcoe I had on my 626.. Just don't remember it being this quick sans turbo.. Anyway like I said took for a spin, got it up to about 5500rpm a few times.. Once it hits about 4k you can really feel the vibration through the pedal compared to the carb, think it comes down to the way the linkage is orientated so at wot the cable is sitting at almost right angles to the linkage (kinda hard to explain without a pic) might need to adjust it round a bit. All went good till (luckily) I got home and it started running like a bag of dicks again, but this time an electrical miss, down a cylinder. Checked leads and they were definitely firing, pulled off an injector plug.. ahhh. 4 and 2 not pulsing so inj pinout #1 and sure enough when I wobbled the cable it came back. Ended up being some dry solder joints on the main plug, resoldered them and bob's. Also managed to get a viscous hub of an fe, was pretty loose so I topped it up with some silicon oil. They work a bit different from the Asian hubs on the toyotas as they unbolt and come apart in half whereas these don't come apart at all, instead the of a bimetallic coil they have a strip that when hot bows out releasing a little plunger type pin underneath which in turn somehow activates a valve inside. To top it up you have to get the oil through that little hole whilst letting air out (it was a cunt) works anyway and is much quieter than the fixed fan that was previously on there. Got a new oil pressure sender as well, the old one was leaking like a mofo.. No wonder the bottom half of the engine is covered in shit.. Ended up getting an aem wideband. Reviews said it was the best but more expensive than the innovate, trademe disagreed and someone had them for about 60 bucks less. I'll weld the bung on in the new year and get about tuning it a bit. Here's a great pic to prove I actually did something and didn't just want to talk shit, I forgot to take pics of everything else..
2 points
-
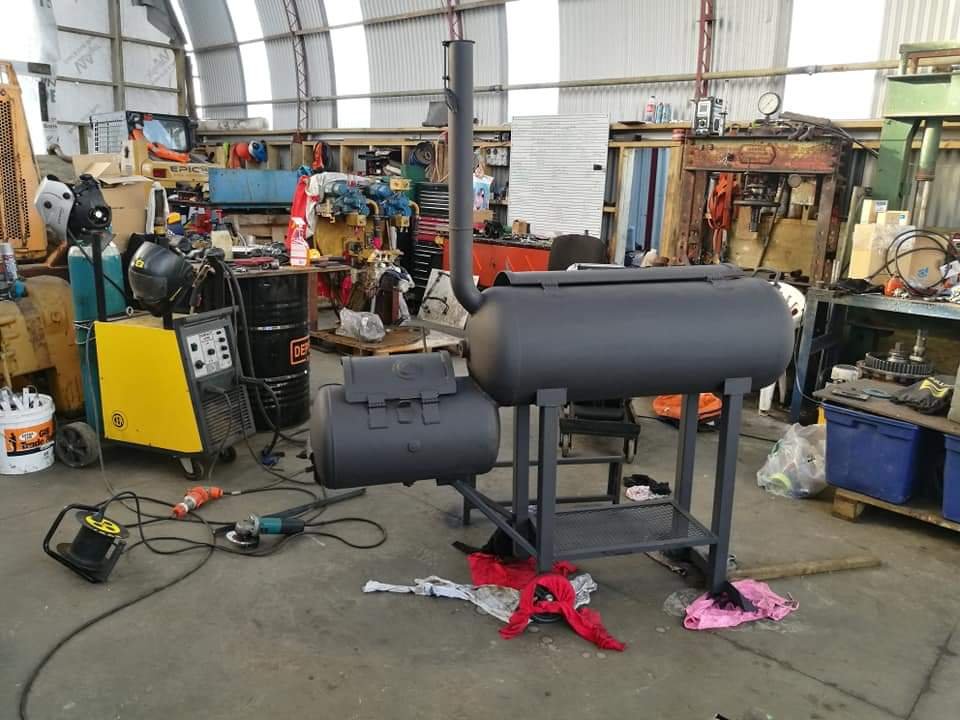
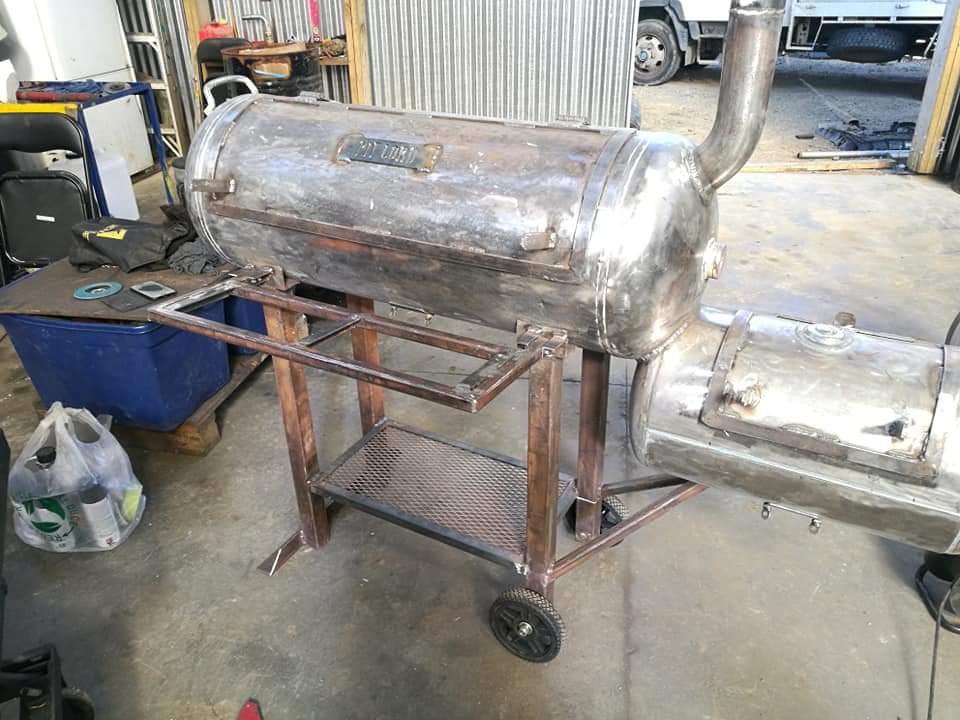
Couldn't stop there, went into overdrive and cleaned it with some simple green degreaser then a few go's with the wax and grease remover. Then finally got this in one colour, just used the rustoleum high temp paint from bunnings. It had a picture of a bbq on it so it must be legit. Looking pretty swish, almost like a brought one haha. I only had a few cans of paint and it didn't go very far so only got about 2.5 coats on it. It will be interesting to see if it lasts or not. All that remains is fitting the wood and making the grills. This will be tomorrow's job if all goes well. Chur
2 points
-
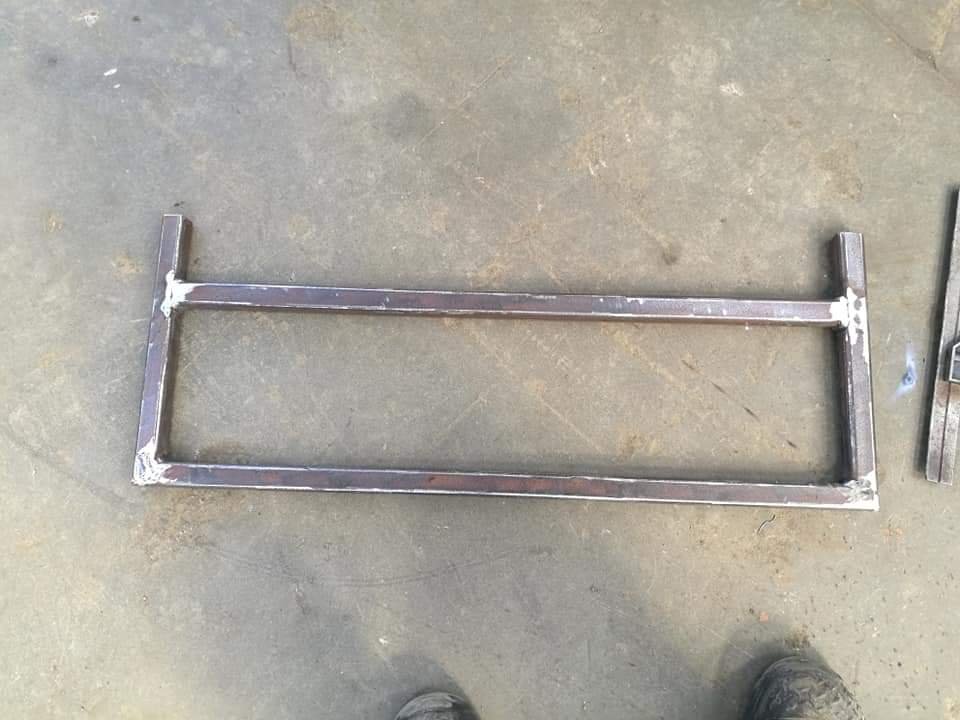
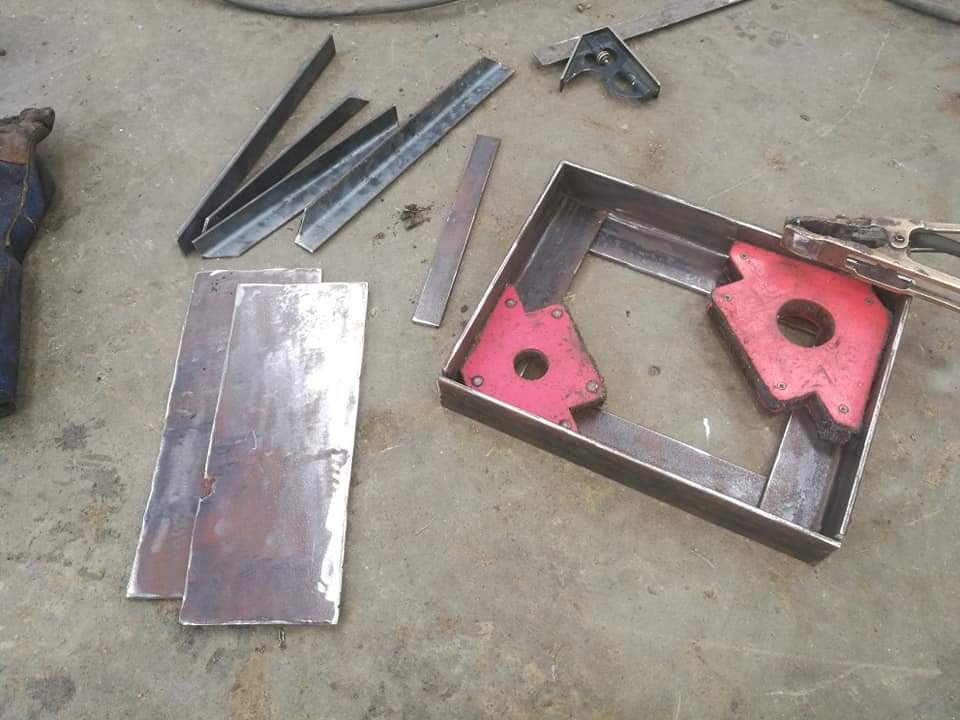
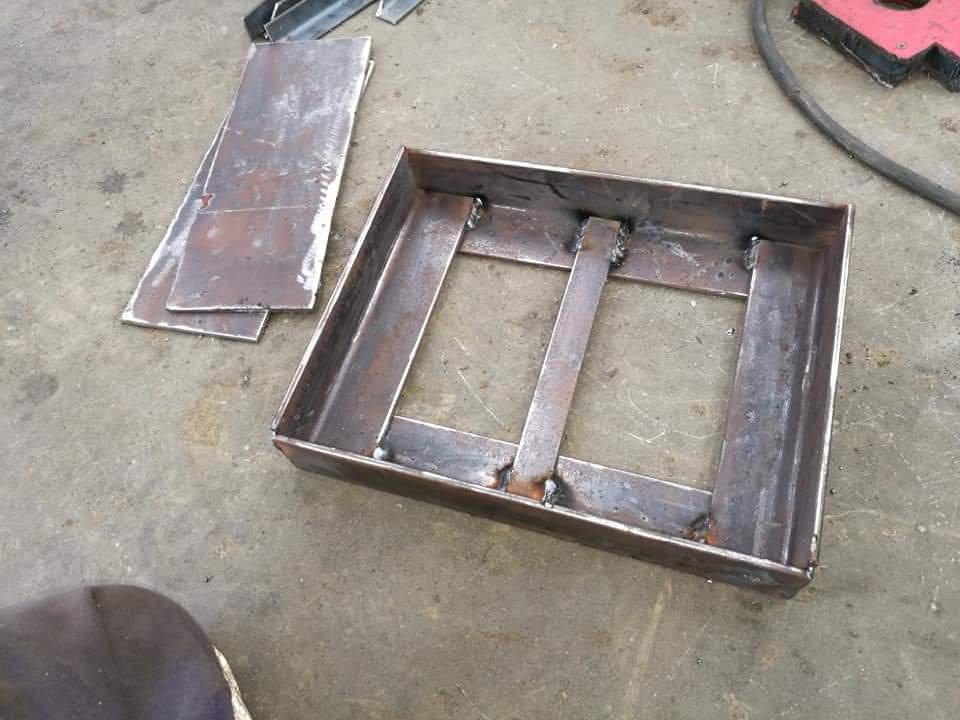
Sorted out the front bench. Cut up some 25x3 box and some 25x3 angle and welded up a frame (forgot to take a pic with the angle fitted). Drilled some holes and tested fitted with the mounts in place. Then placed the macrocarpa on top to have a skeeze.
2 points
-
Its just a 3 phase contactor no? any electrical wholesaler will have something of similar abilities2 points
-
It was produced as a commercial kit, but home built. Proving it was always a 4 point may be tricky, but not impossible. I'll swing past tomorrow morning and see what he thinks of the above posted rule, I'll also see if I can get ahold of some photos of my car back in the day.2 points
-
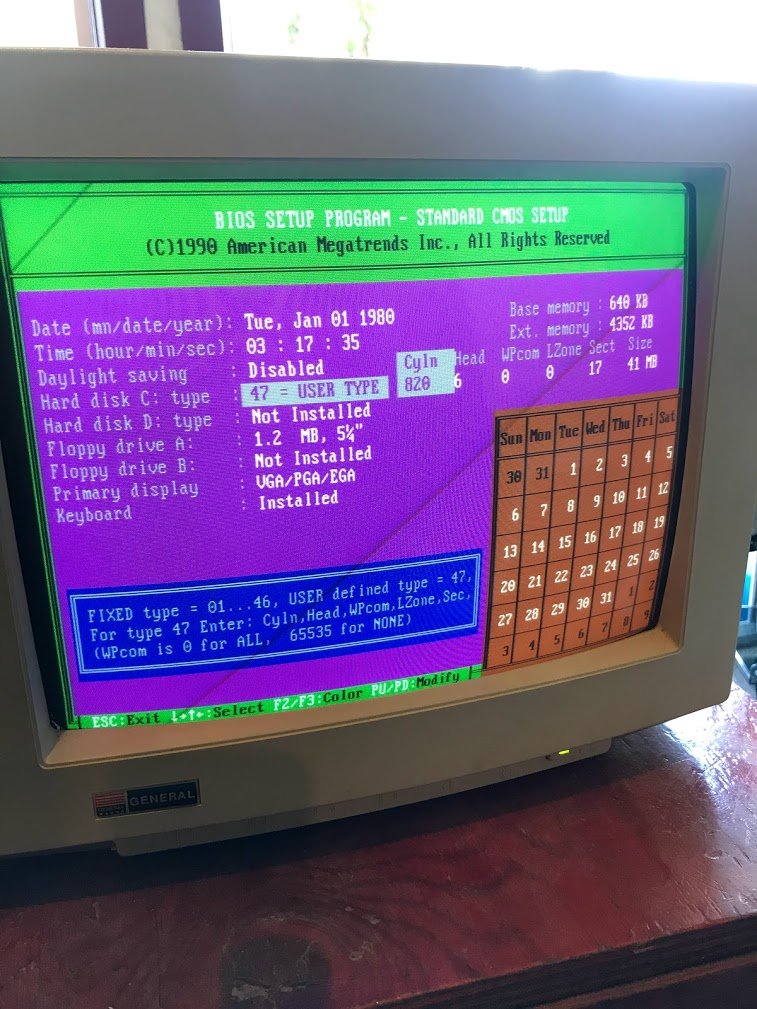
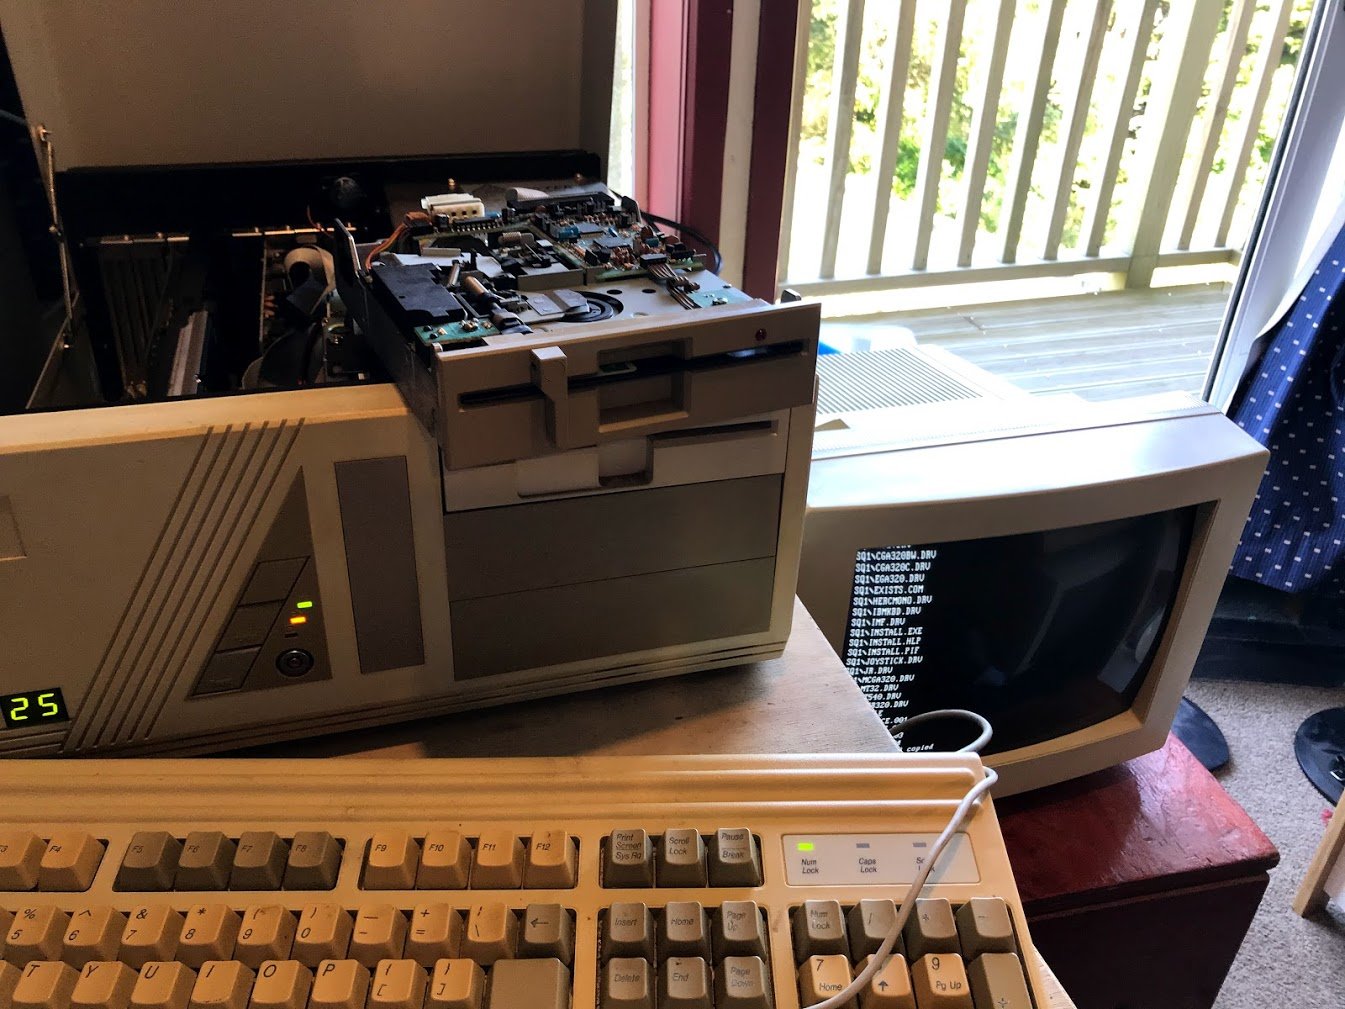
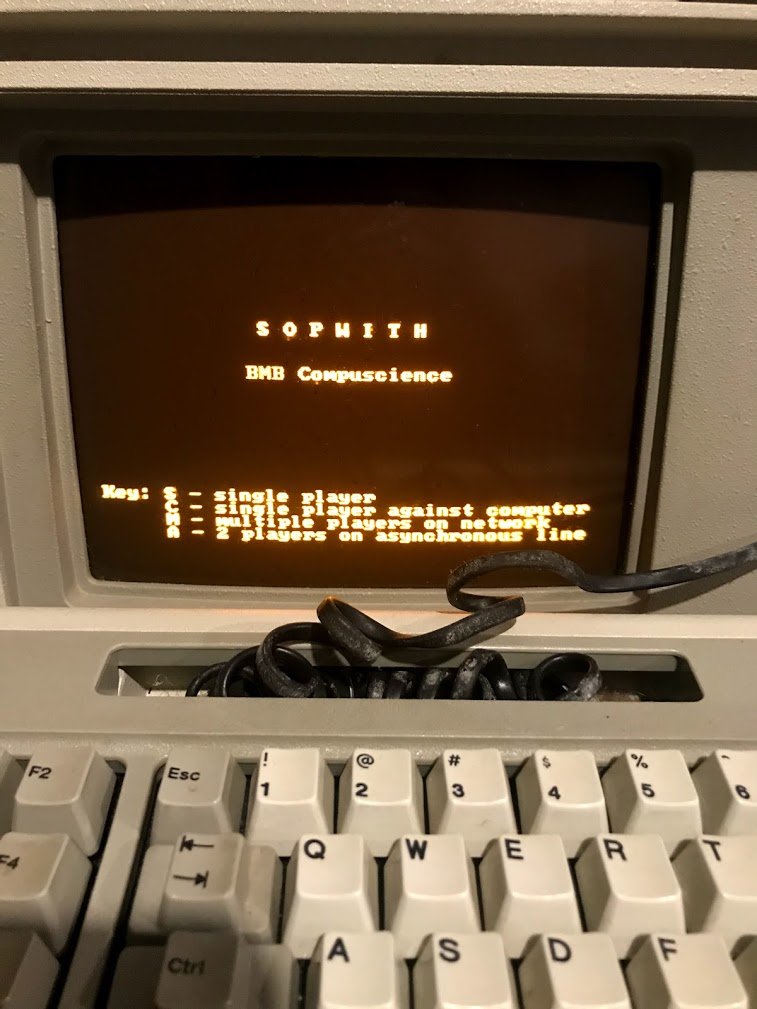
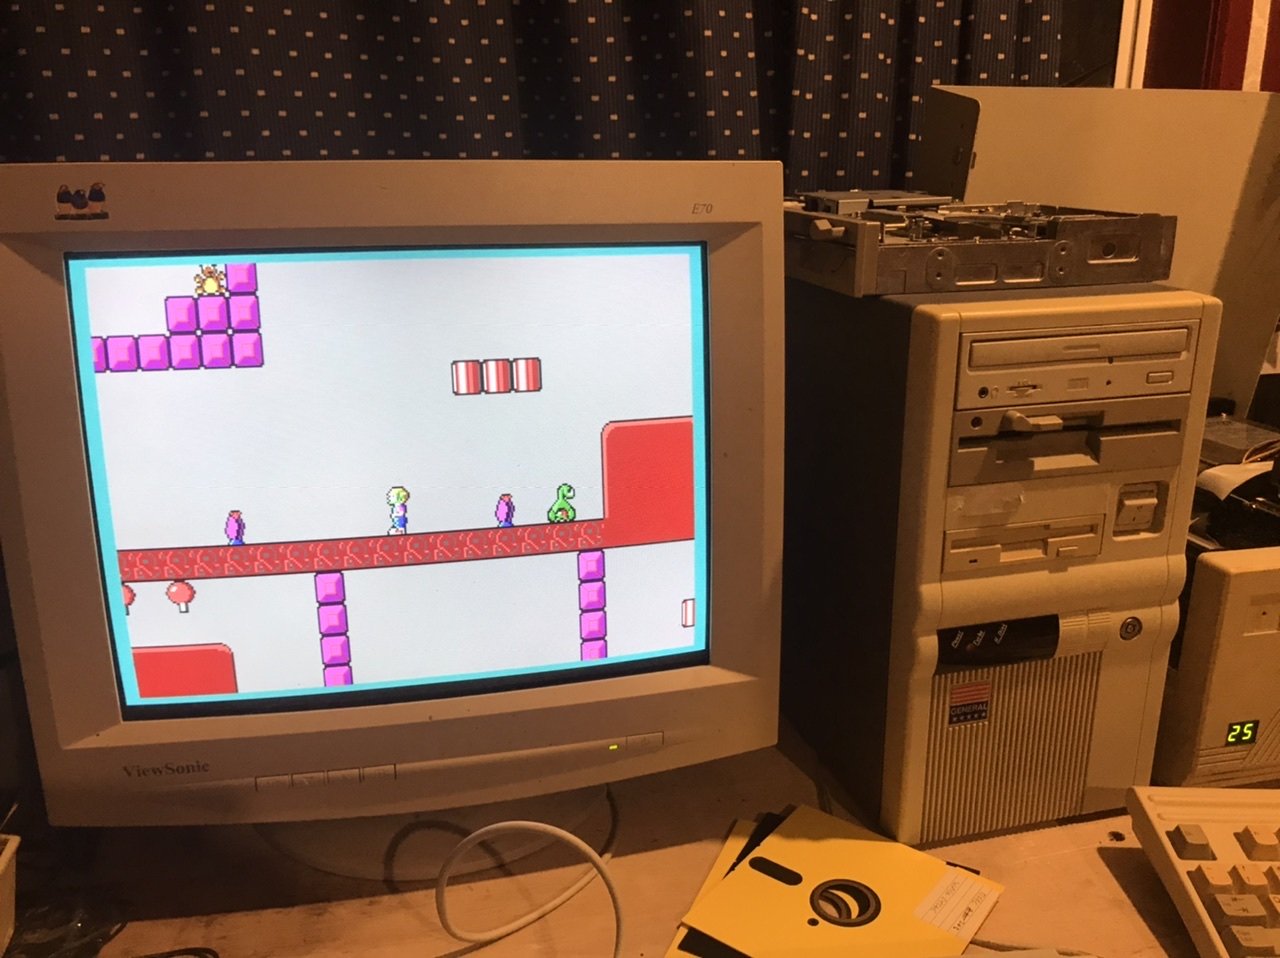
Spent some time on the IBM 5155 ‘pc portable’, if almost 14kg is portable lol. The 2nd floppy drive seems to be shorting the power supply now, hoping it’s just another capacitor like the motherboard was. Unplugged the power from the FDD and it starts up again. I’ll order some and try replace any I find, can’t hurt since they are 35 years old. But the HDD wouldn’t read again... so took it apart and found the head stuck again. This time I put a tiny bit of crc on the sliding part. It’s been reading fine since. I wanted to try put some other games on it but neither FDD works, they are supposed to be 360kb ones and I only have 1.2mb ones that work. Tried an few plugged in sitting loose on the top but it won’t recognise them at all. There is no bios just jumpers and I don’t think it was ever meant to work with 1.2mb drives. So I took the HDD out which sits on its own ISA card, the short 8bit type. Tried fitting it into the 386 which just has the long 16bit ISA slots. It fouls on the frame of the card but it does JUST make contact on the pins. And it works on the 386 board! But no matter what I do with the bios it won’t read the original HDD. So I resorted to writing to Floppy disks to transfer a few games from the 486 to the 386 to the IBM HDD. This bios menu is amazing, someone thought this colour scheme was the perfect combination: Testing FDD drives: SOPWITH 2 on a amber monochrome tiny 9"monitor running on 1984's best 4.7mhz cpu: Hard to get a close up photo it looks much more crisp than this but the photo looks washed out and too bright: Turned the monitor brightness down to try but it makes it look wrong too: It runs well until you blow up a building then it slows down a bit... 4.7mhz mtherfkcer. Also put PACMAN on, surprisingly it works well even though it meant to be a vga game. The 5155 outputs Monochrome and CGA at the same time, I don't have a cable to try the CGA output. Would be cool to try Space Quest on this with CGA output. I did put SQ1 on the HDD but it says 256kb ram is not enough. There is an memory expansion card but its also shorting the power, so maybe I'll buy bulk capacitors and try my luck fixing the memory expansion and both FDD's. Tantalum Capacitors seem to be the main failure on these old IBM's.
2 points
-
Made some rails out of 25x5 angle to sit the grills on. Also put some steel at the front to straighten it out and reinforce it.
2 points
-
Pretty keen on this one, the pc speaker sound effects are 1991 to me.
2 points
-
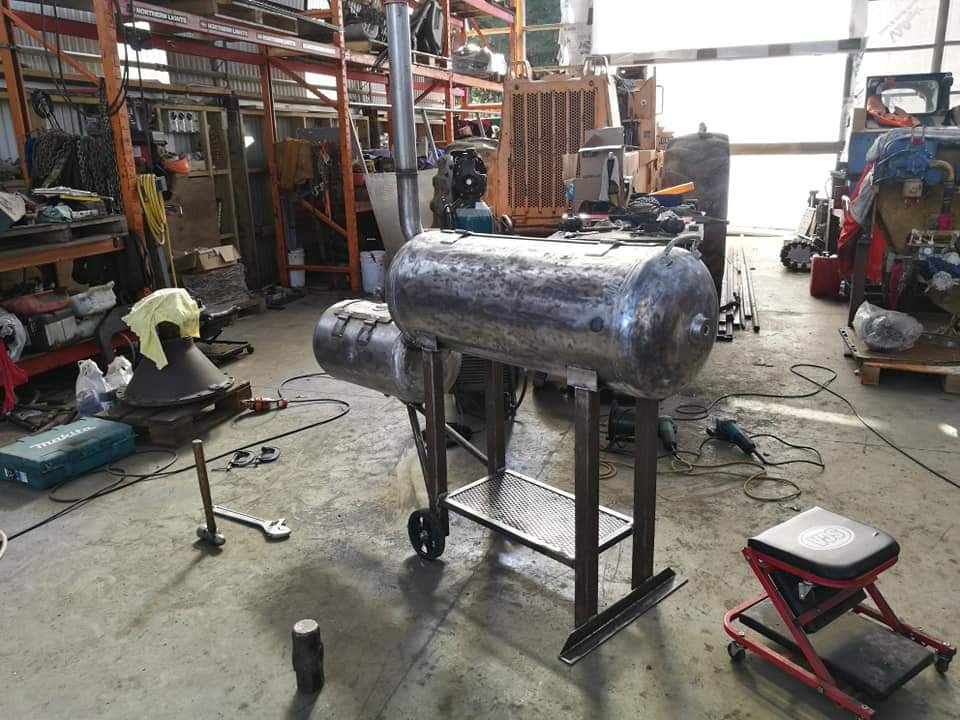
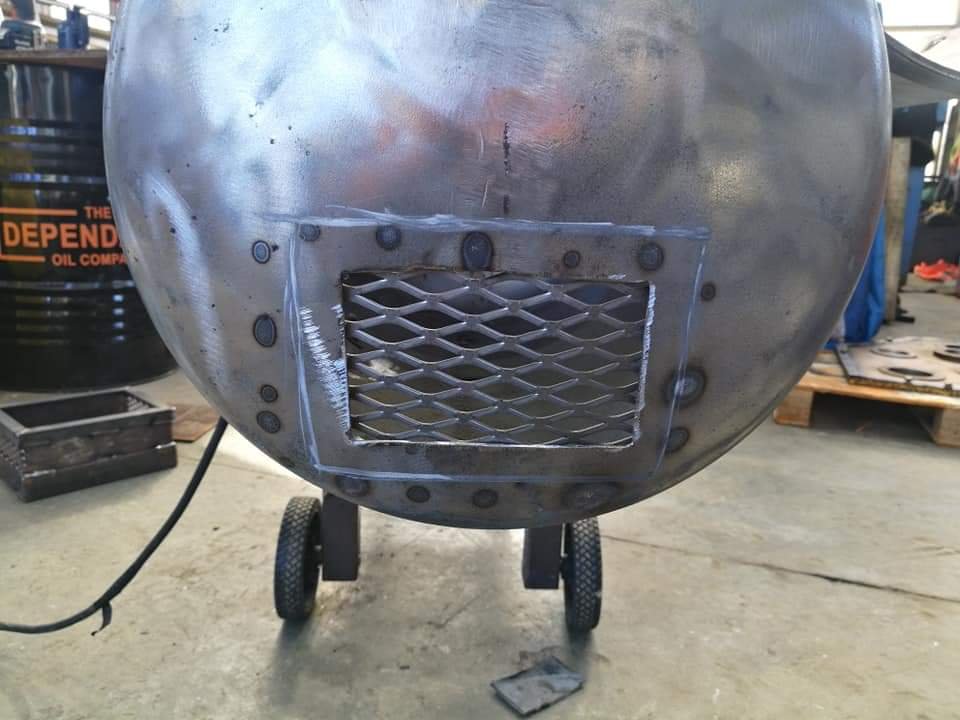
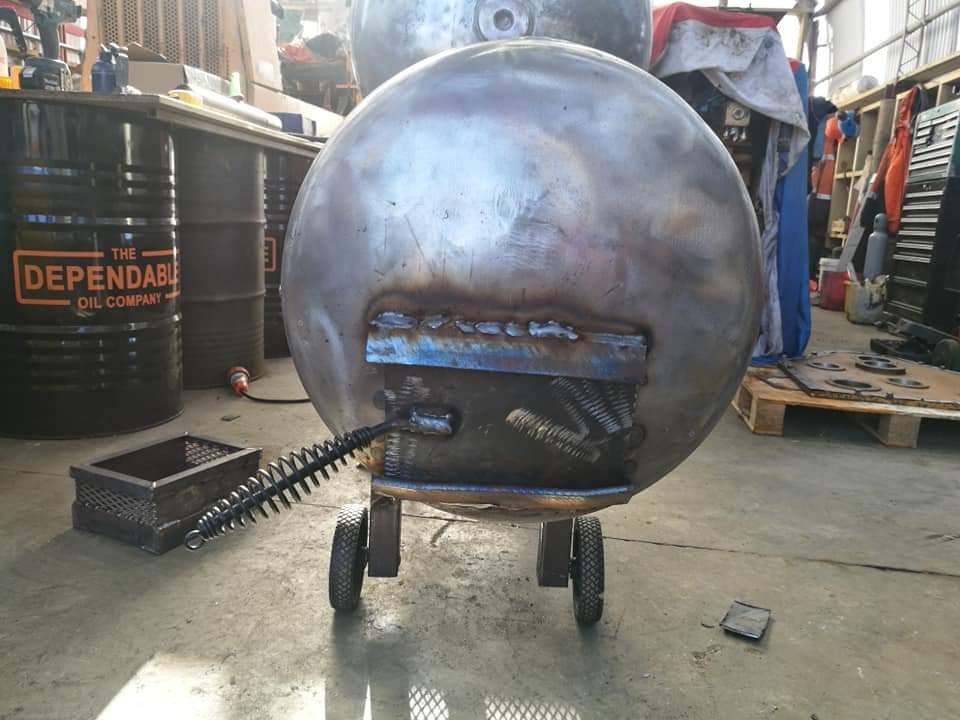
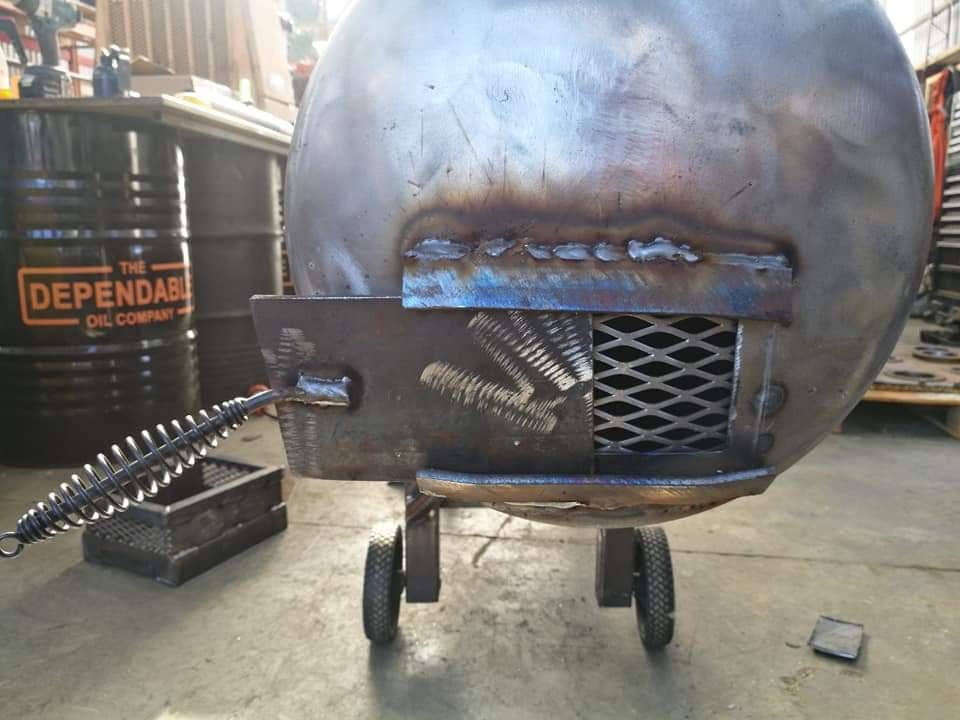
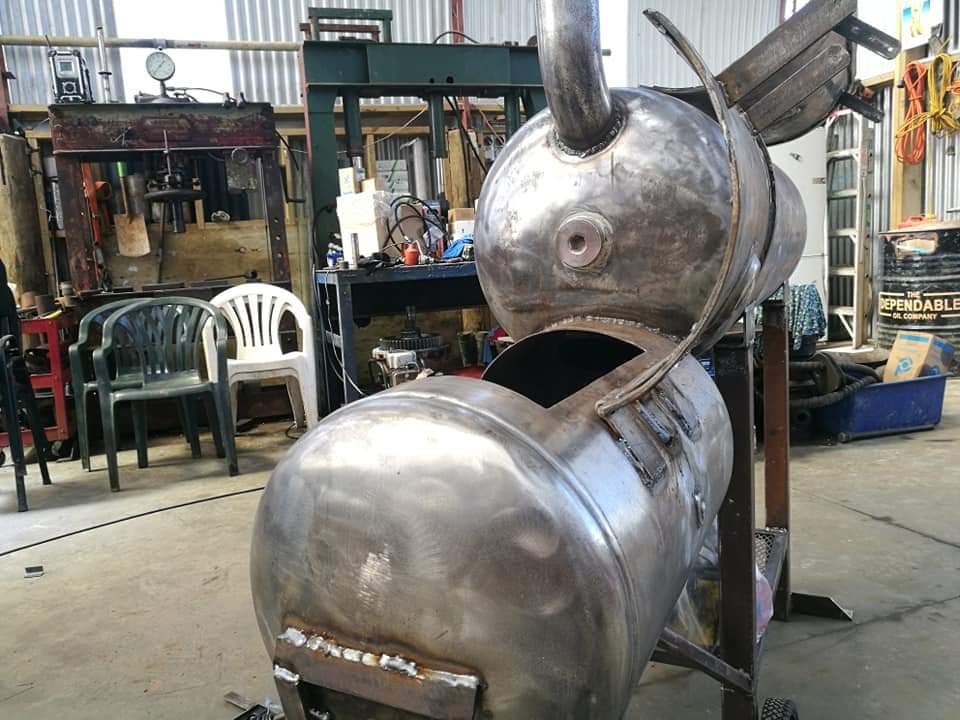
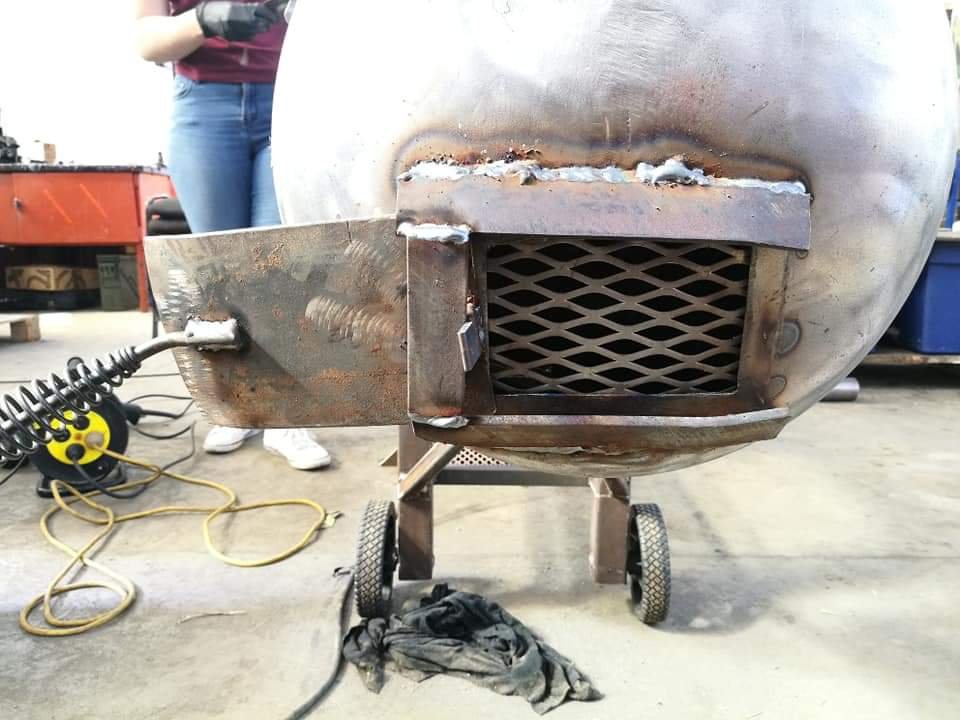
Also threw together a damper/lower vent. I was unsure on how to go about this as the tank has various curves. I initially cut out an opening then welded in some mesh behind it. I played around with bending some steel for rails and also bending the slide door. Stuffed around trying to get the rails to work and managed to get it functional. I brought a cheap chipping hammer for $6 to use the handle for the door. Not 100% with the damper overall, but it works. I'll add on a stopper as well and clean it up a bit. Hopefully get another hour or 2 in tomorrow.
2 points
-
painted engine bits. not sure if ive mentioned before but im going to repaint the RA28 to a modern mazda red. i have the paint code written done somewhere but its a 2017-18 mazda red that i really like. anywho, the silver/black combo of the engine is meant to work with that red, not the shit dirt black/purple it is now. now that the engine is getting close to finished ill start painting the engine bay. as always i want ot change a few things around and do a few things etter thatn before so ill be doing that soon. but first here's the engine in paint. 2019-12-19_05-31-21 by sheepers, on Flickr 2019-12-19_05-30-55 by sheepers, on Flickr 2019-12-19_05-30-46 by sheepers, on Flickr 2019-12-19_05-31-04 by sheepers, on Flickr2 points
-
Picked up some acid etch. $58 for a 2L kit. Sprays super thin. was hot today so just started with light coat from front to rear, then straight back to front again and kept doing that till it was all used up. Left it looking pretty blinging! started on the 2K black where the gun packed up. Only spraying like an air brush it took hours to get one coat. Then the needle seal gave out and started spraying paint out the top of the trigger covering me. Continued on as I was already to far gone. Had about 80% done where it then decided to work properly, did a couple strokes and let off the trigger and it stayed on full tit so I just kept going and did a whole pot in one go without the trigger coming unstuck. What a fucking disaster! Least it’s had a full coat. And my mate that’s an actual car painter said he’ll head over and sort it for me haha fuck my life
2 points
-
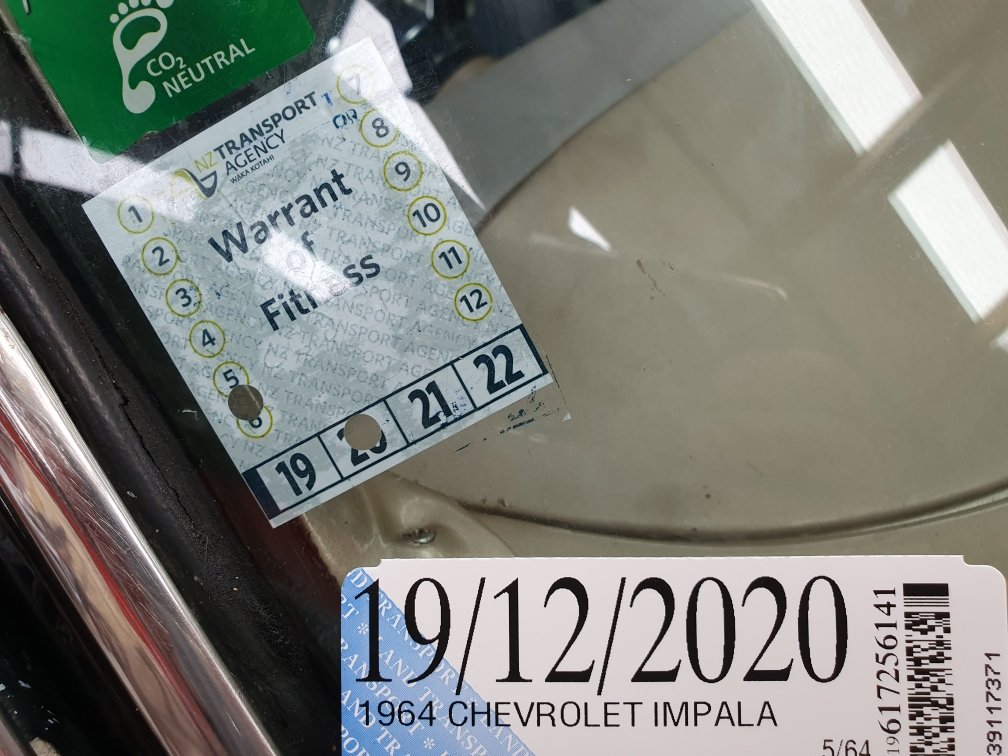
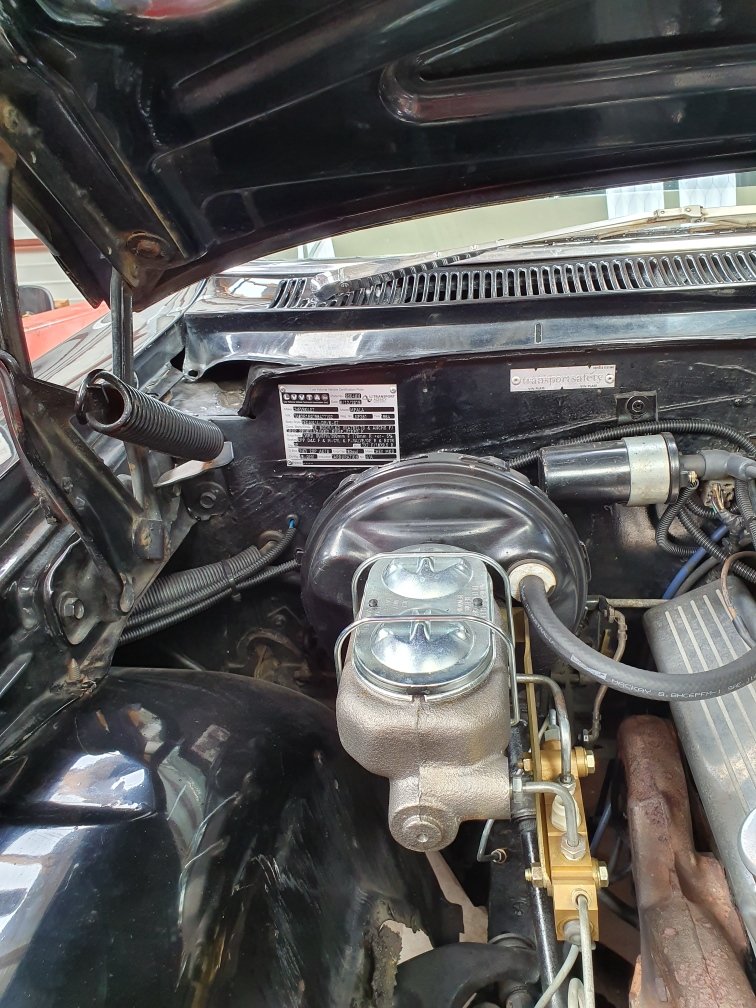
Yes!!!!! No reason why it shouldn't have, but I live with an irrational fear towards all things vehicle related that others have to approve... #wofphobia
2 points
-
the old "find the right length belt "dance. usually involves 7 trips to the parts store to get successively longer or shorter belts until you fluke the combo of one that the parts store actually has and one that actually fits. this time around i only had to buy 4 different belts before getting one that fits. this is the longest one available off the shelf in NZ, if this one didn't fit i would have had to rock auto some. anyway, it fits and thats the serpentine belt sorted. 2019-12-18_07-21-54 by sheepers, on Flickr2 points
-
Hello all. I now have some first hand experience in re-registering a motorcycle that has previously been registered in New Zealand. so I thought I would re-cap the process for those interested. Note: may vary for cars. the motorcycle in question is a 1979 Yamaha RX125. This particular bike had not been registered since 1986 and was not recorded in the NZTA data. The only proof of previous registration was it’s original plate and attached wof tag. a few months back I walked into the AA testing station in Napier and asked for everything I needed before taking it in. The helpful gentleman told me I required two things; proof of ownership and proof of previous registration in New Zealand. He stated as the bike was pre 1990 I did not require a brake declaration. for proof of ownership, AA provided me with a standard statutory declaration form which I filled out and had declared and signed by a notary public at the Napier District Court. This took all of two minutes to obtain. for proof of previous registration all I had was the wof tag and number plate which the inspector accepted. i rung them up yesterday morning and booked the bike in for the following day (today). Dropped bike off at 8am and by 11:30 they text to say it was finished. When I got there the inspector asked me to show all the lights and indicators etc worked. Then they ran it through what I assumed to be a standard wof check which it passed with no issues. the cost was $180 then registration for 12 months on top of that. they even re-used my original plate, even without having to get the authority myself from that lady at NZTA which was great. all in all a very easy process and the guys at AA Napier were extremely helpful and efficient. hope this helps for anyone who wanted up to date knowledge on how the process works.2 points
-
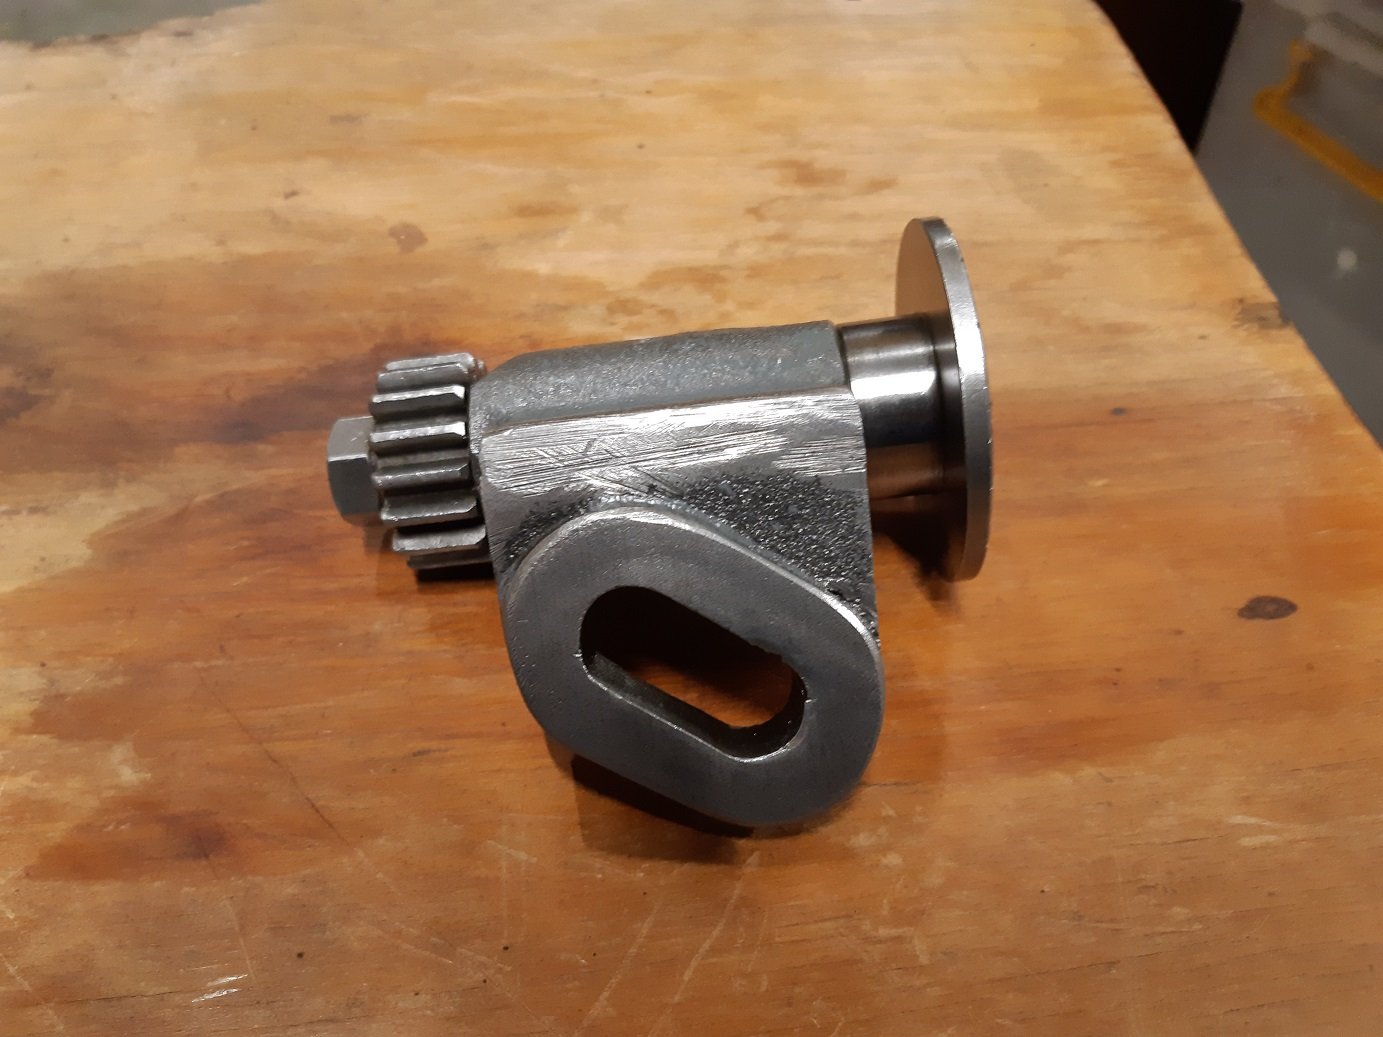
I lightly sanded some of the machined surfaces with 400 grit to get the rest of the black off. It opens and closes smooth as now. It had to force it in some spots when I took it apart.
2 points
-
Step 11 Wrap in waxed paper and write on a card tag what it is before popping on the shelf and never getting around to putting it back together Looks great. Please place the myford on the bed once it's all painted to show size2 points
-
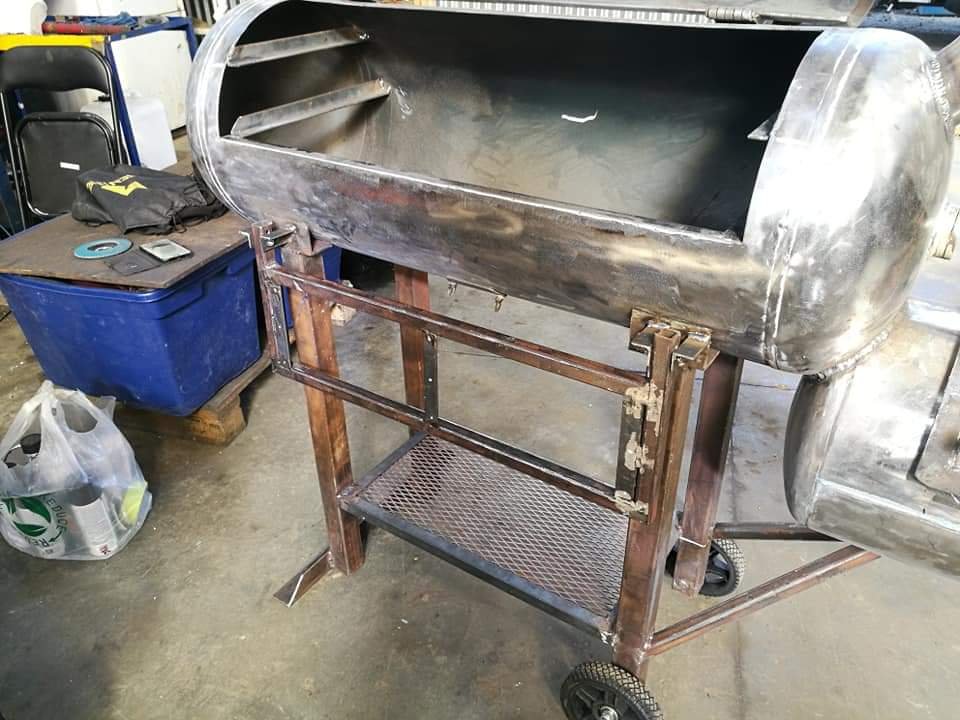
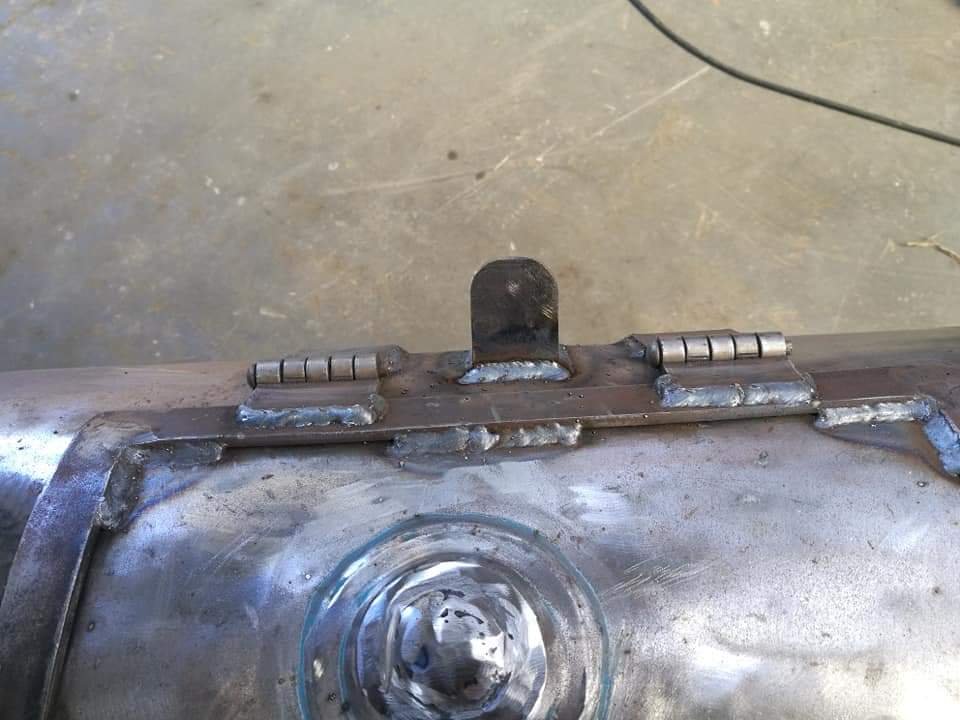
Been going hard at work leading up to xmas but also managed to squeeze in more time on this. Made a stopper for the Fire box door. Sits pretty nicely now. Also drilled some holes and mocked up the gauges. Wanted to put them higher but there would be clearance issues with the top rack. I also welded in a little rack thing for the firebox grill to sit on and cleaned up the damper but forgot to take a pic.
1 point
-
Possibly I imagine it will cost almost as much as a new china motor.1 point
-
Is there still shops that re-wind them?1 point
-
Just need that proof that they were factory fitted and should be good to go, yes? Are there original sales brochures that would say it had a harness?1 point
-
Is that ol Commander Keen?1 point
-
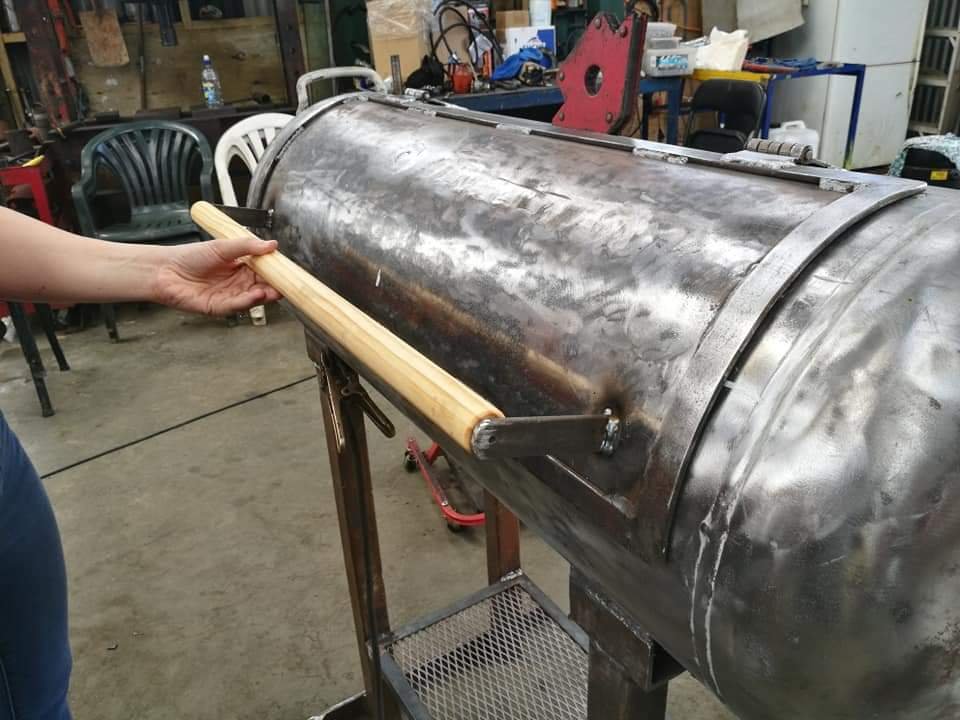
Added some more to the damper. Fitted a vertical bit of plate and some angle to act as a stopper. I'll dress it up a bit more so it looks a bit tidier before it's painted. Then made some handle mounts for the doors. Pretty straight forward. And fitted with the pine mocked up. And some 50x5 angle for stoppers for the charcoal basket. Also I welded in some angle at the front to increase rigidity and pull it a bit straighter. Have since cleaned up the welds so it's nice and flat.
1 point
-
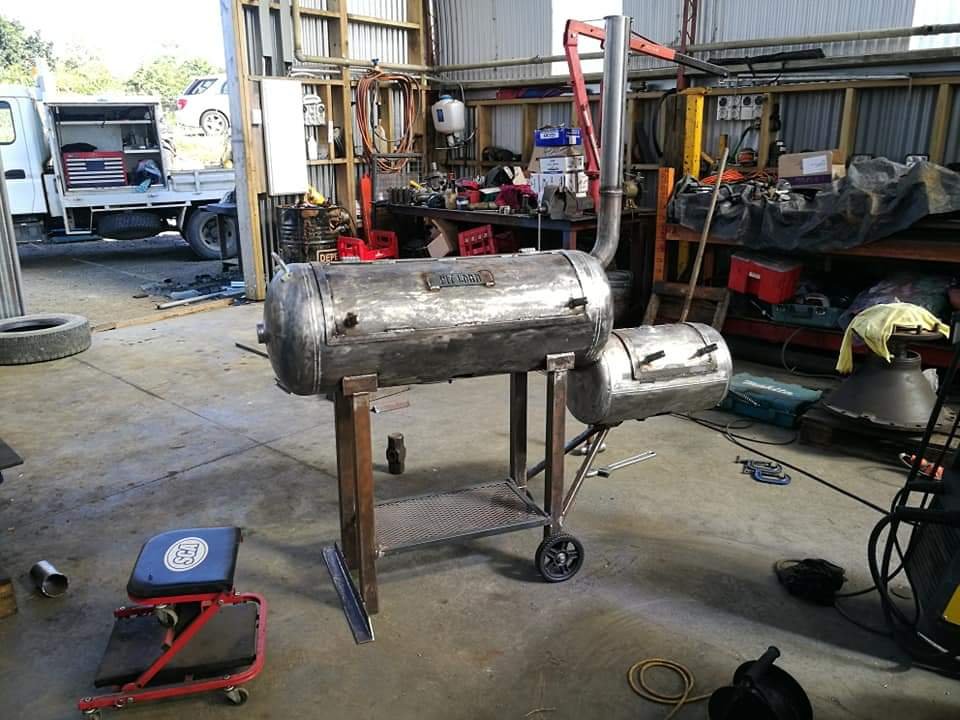
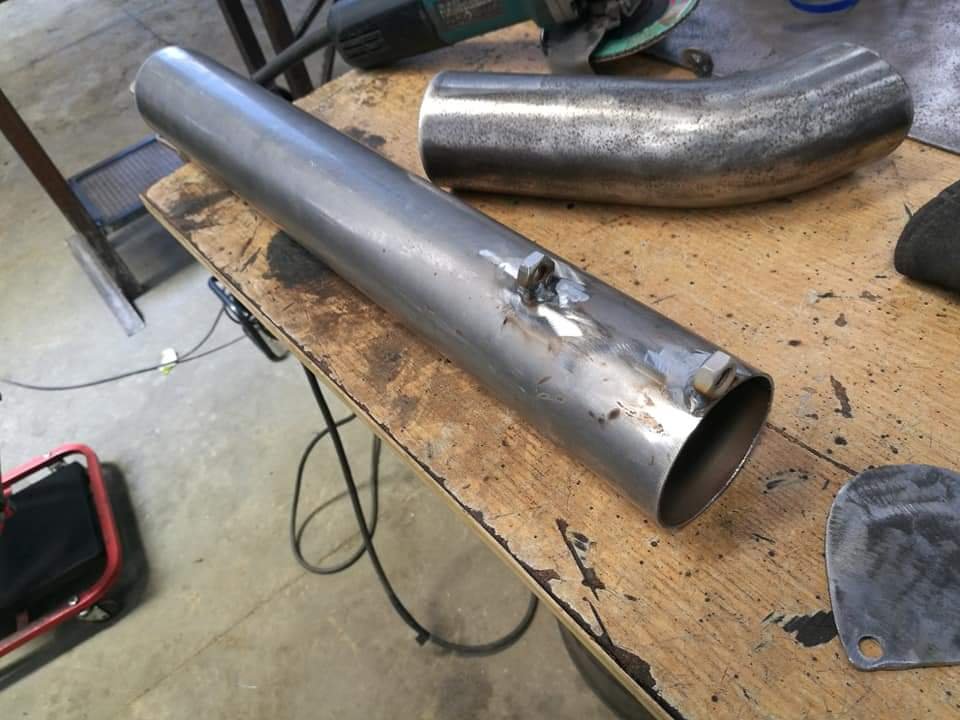
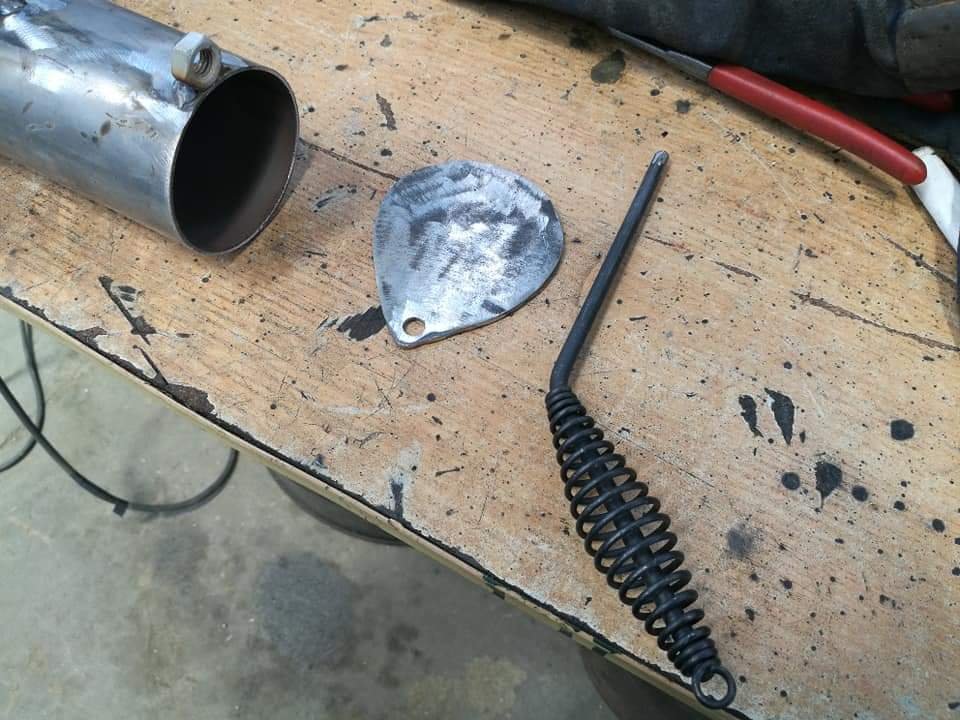
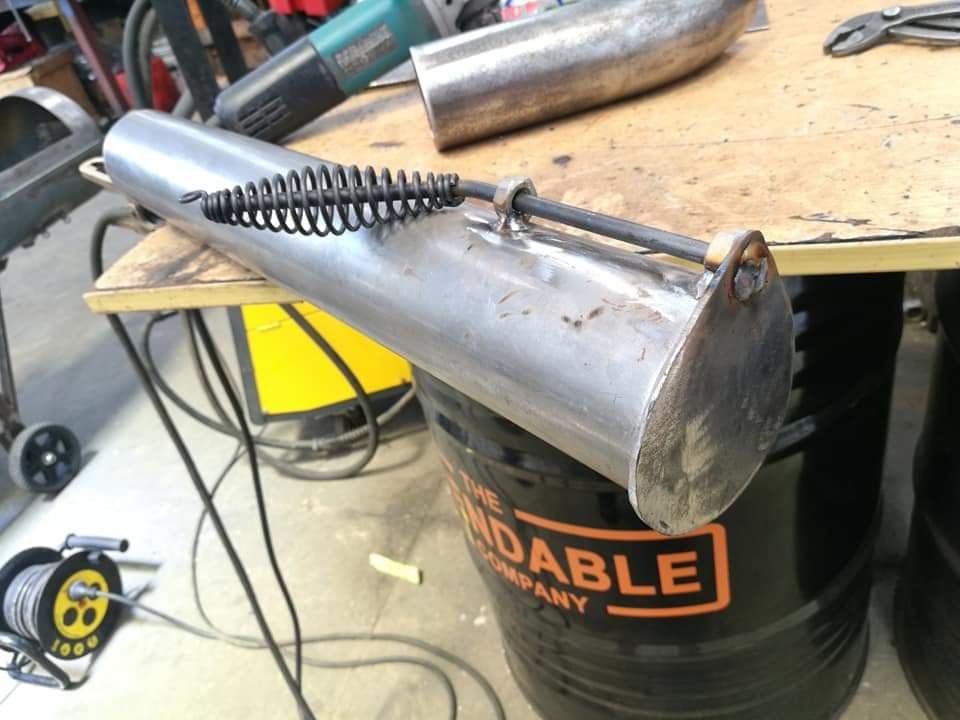
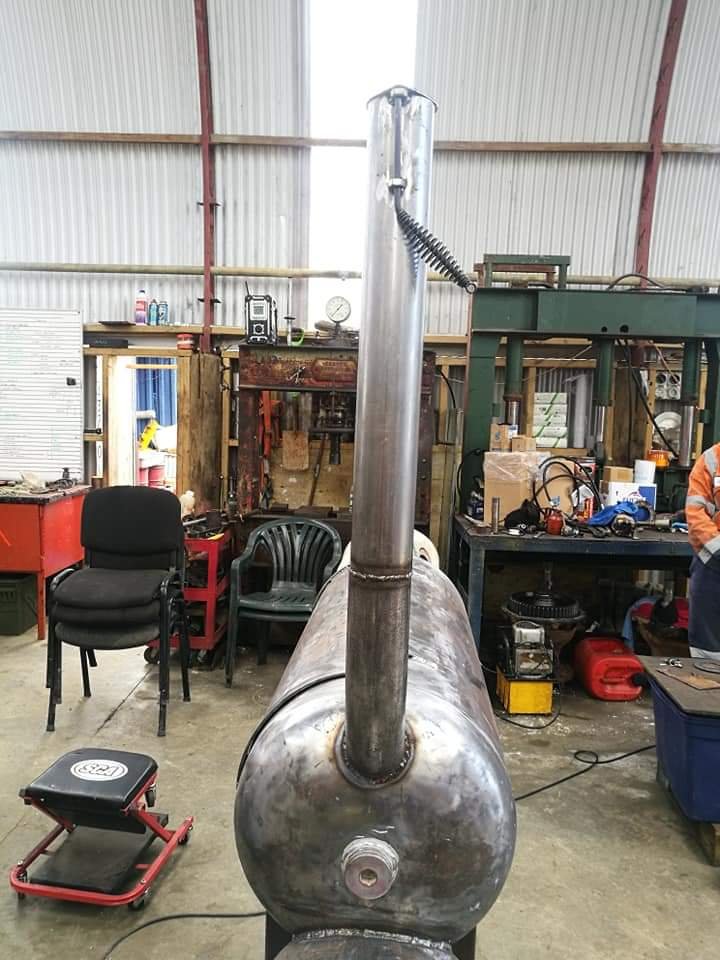
Alright, got a half day in on this today with the help of the mrs and I'm Fucking stoked with where I'm at. Can finally see the finish line. Started off with sorting the chimney and flue. Cut a length and a bend, welded in some locators for the adjuster and made a top hat that's fixed to a chipping hammer as the adjuster. I positioned the handle offset so the flue can be fully opened for max heat. Pretty tall stack, mounted it about 3 inches above the main grilling plate and high enough so people don't have to try and dodge smoke all day.
1 point
-
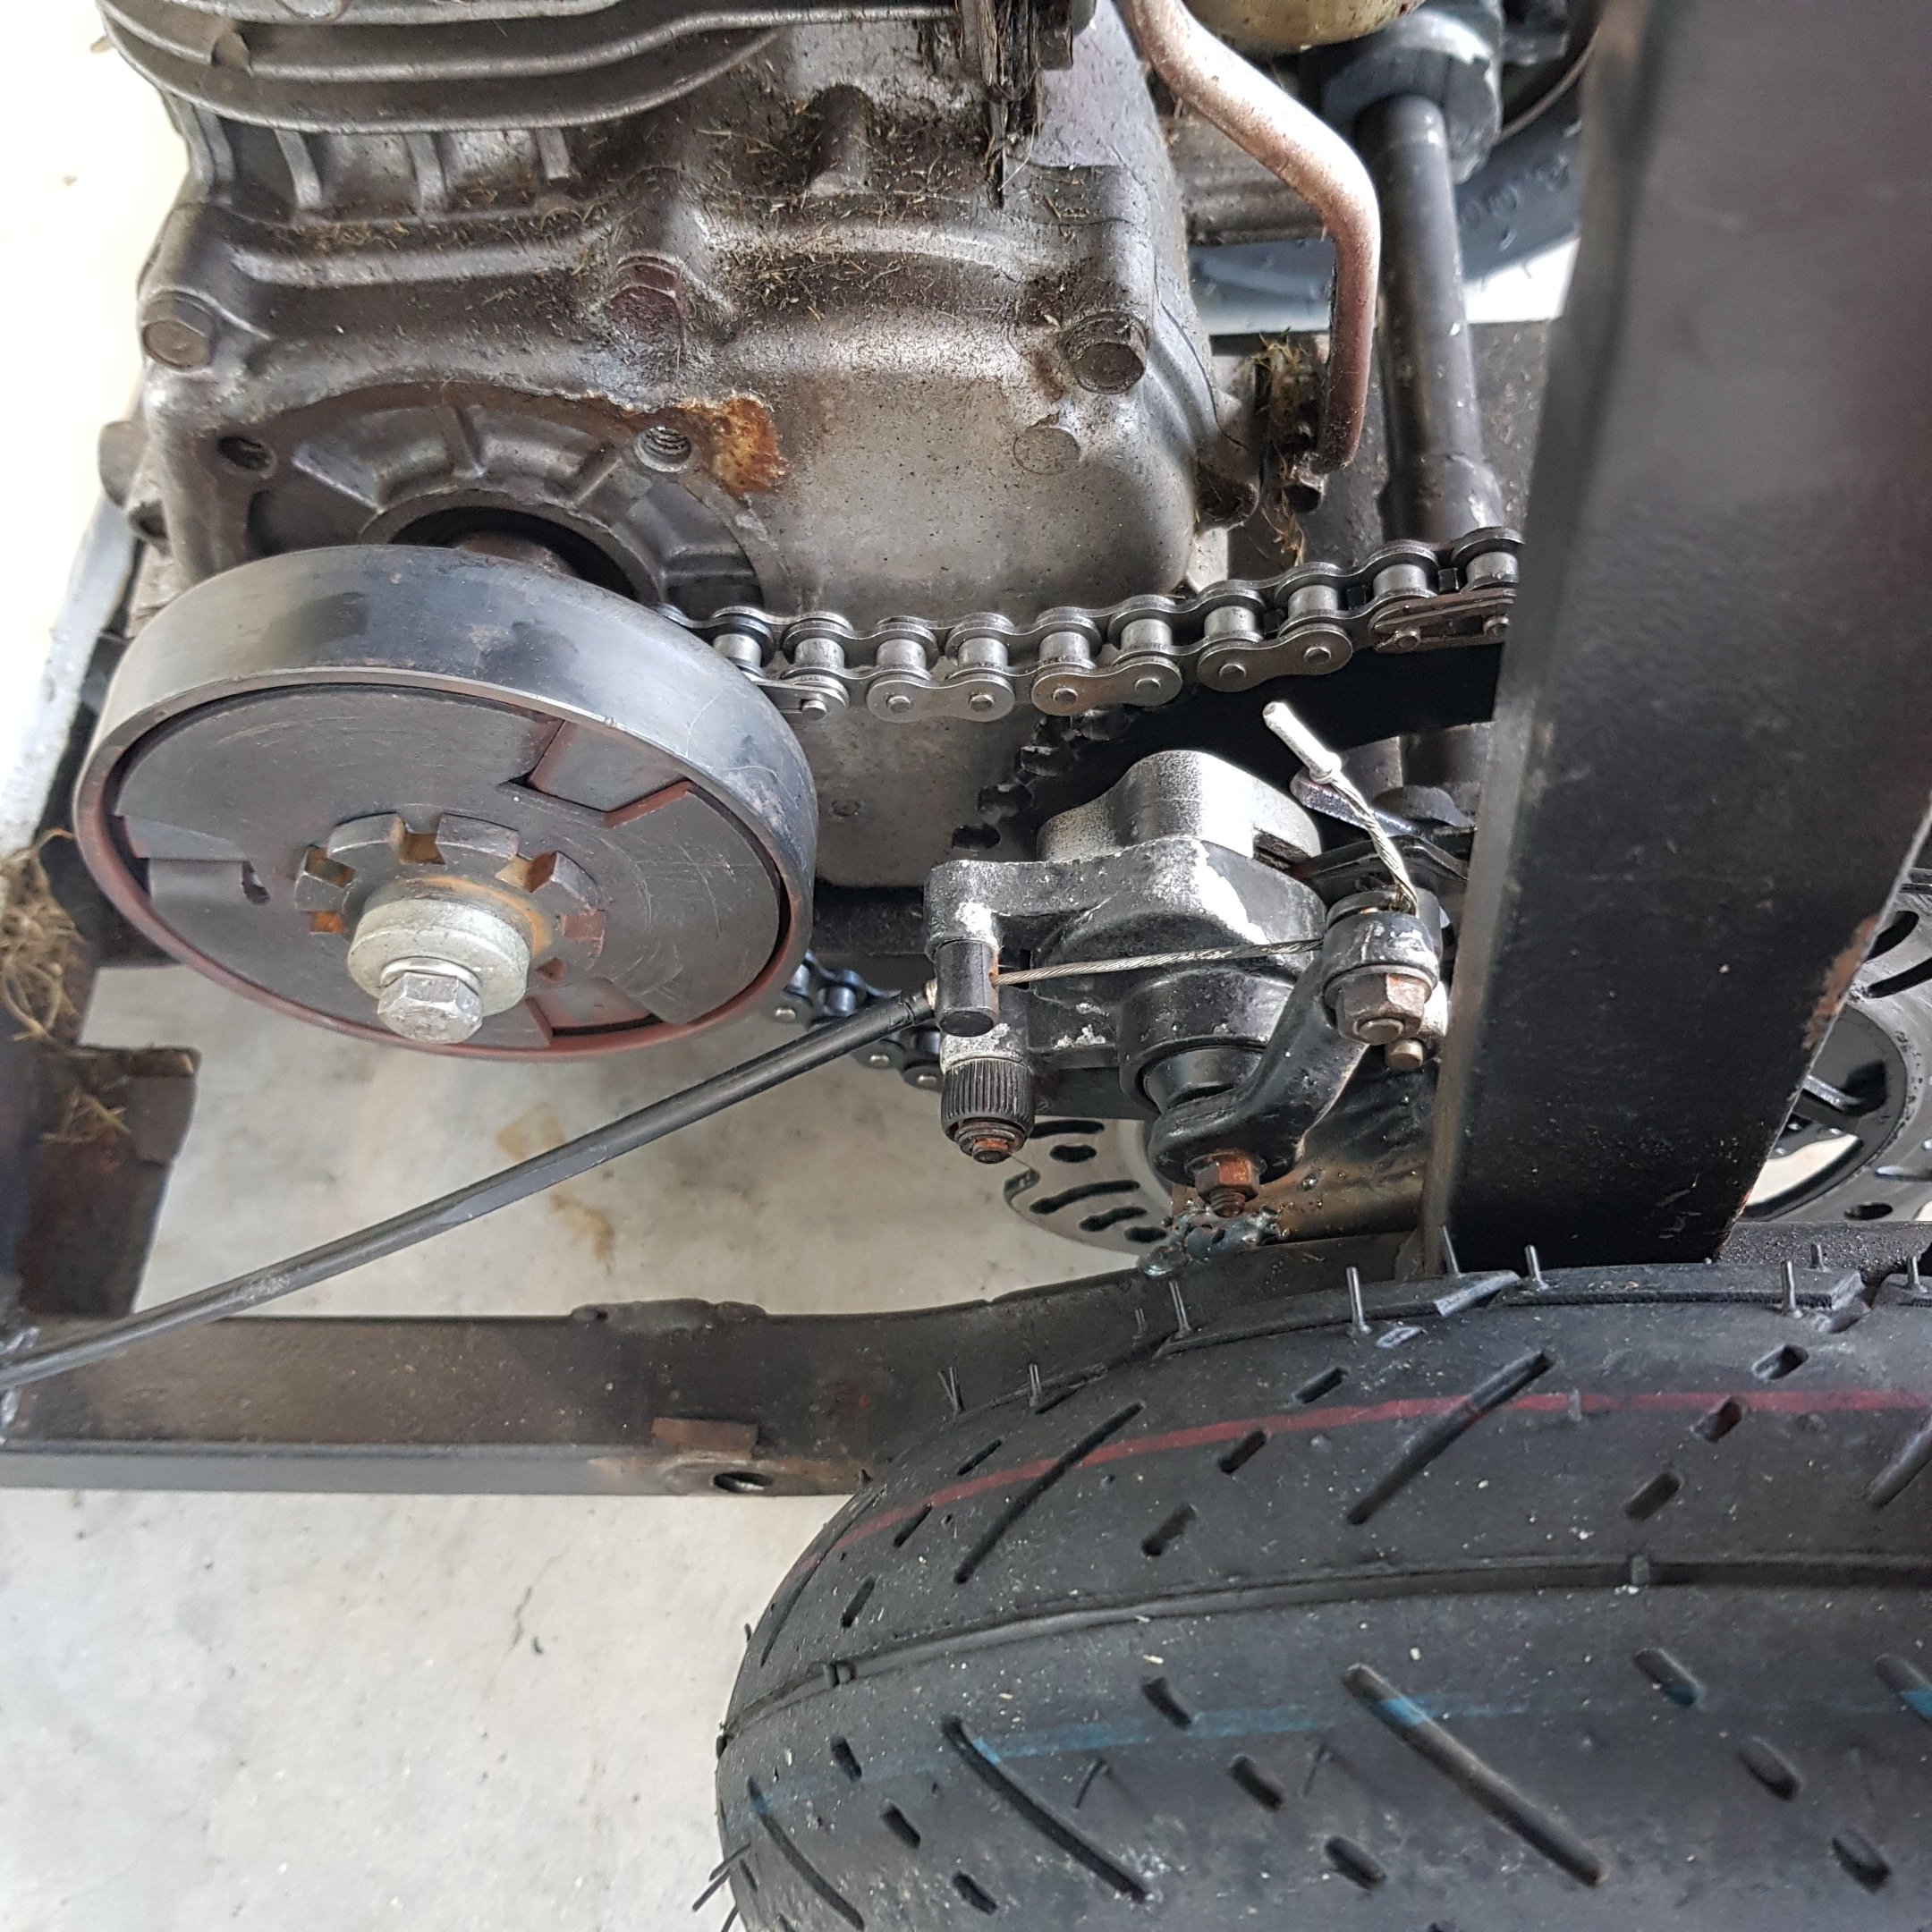
Im aware the chain is loose it has so many things on the move i just bloody sent it! let it settle then adjusted it after putting the milk and bread away. Yes i rode it to the shops.....1 point
-
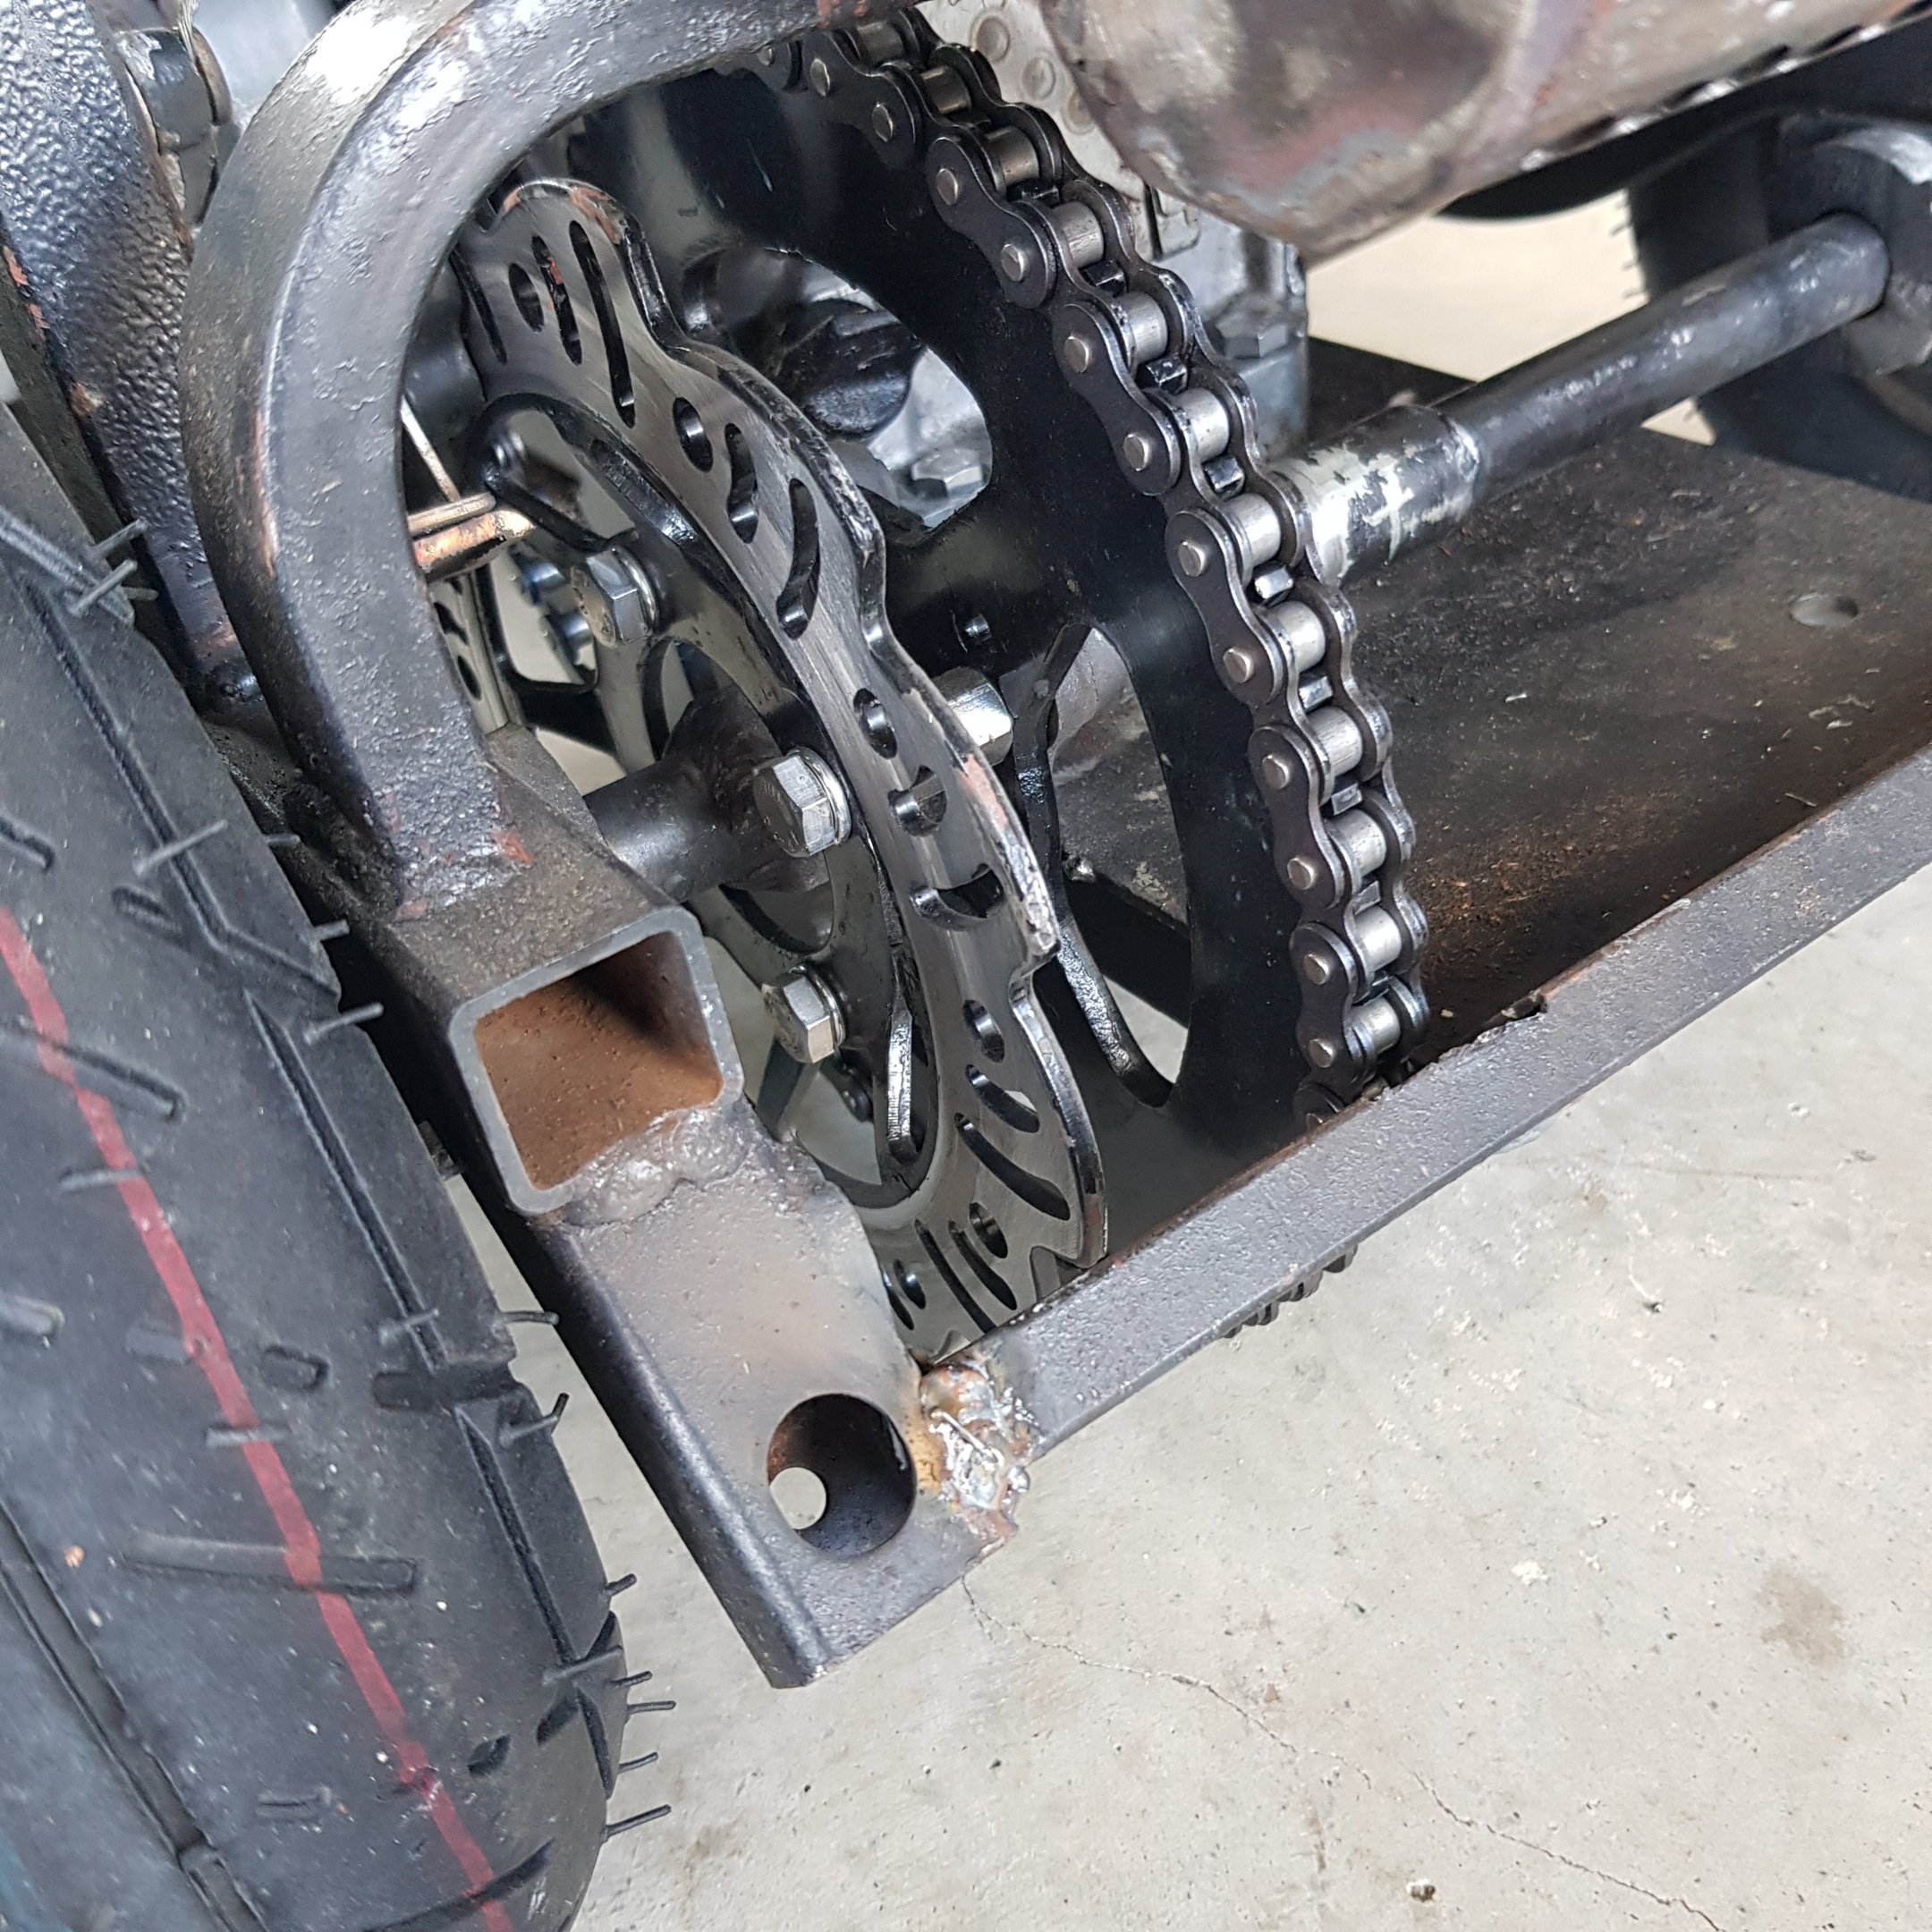
Finished this today test drove it up road. Goes hard! Like really stupidly hard with the 50 tooth sprocket it shouldn't struggle to get a wheel going now. Brakes are huge and pull it up really well. All absolutely wedged in there.
1 point
-
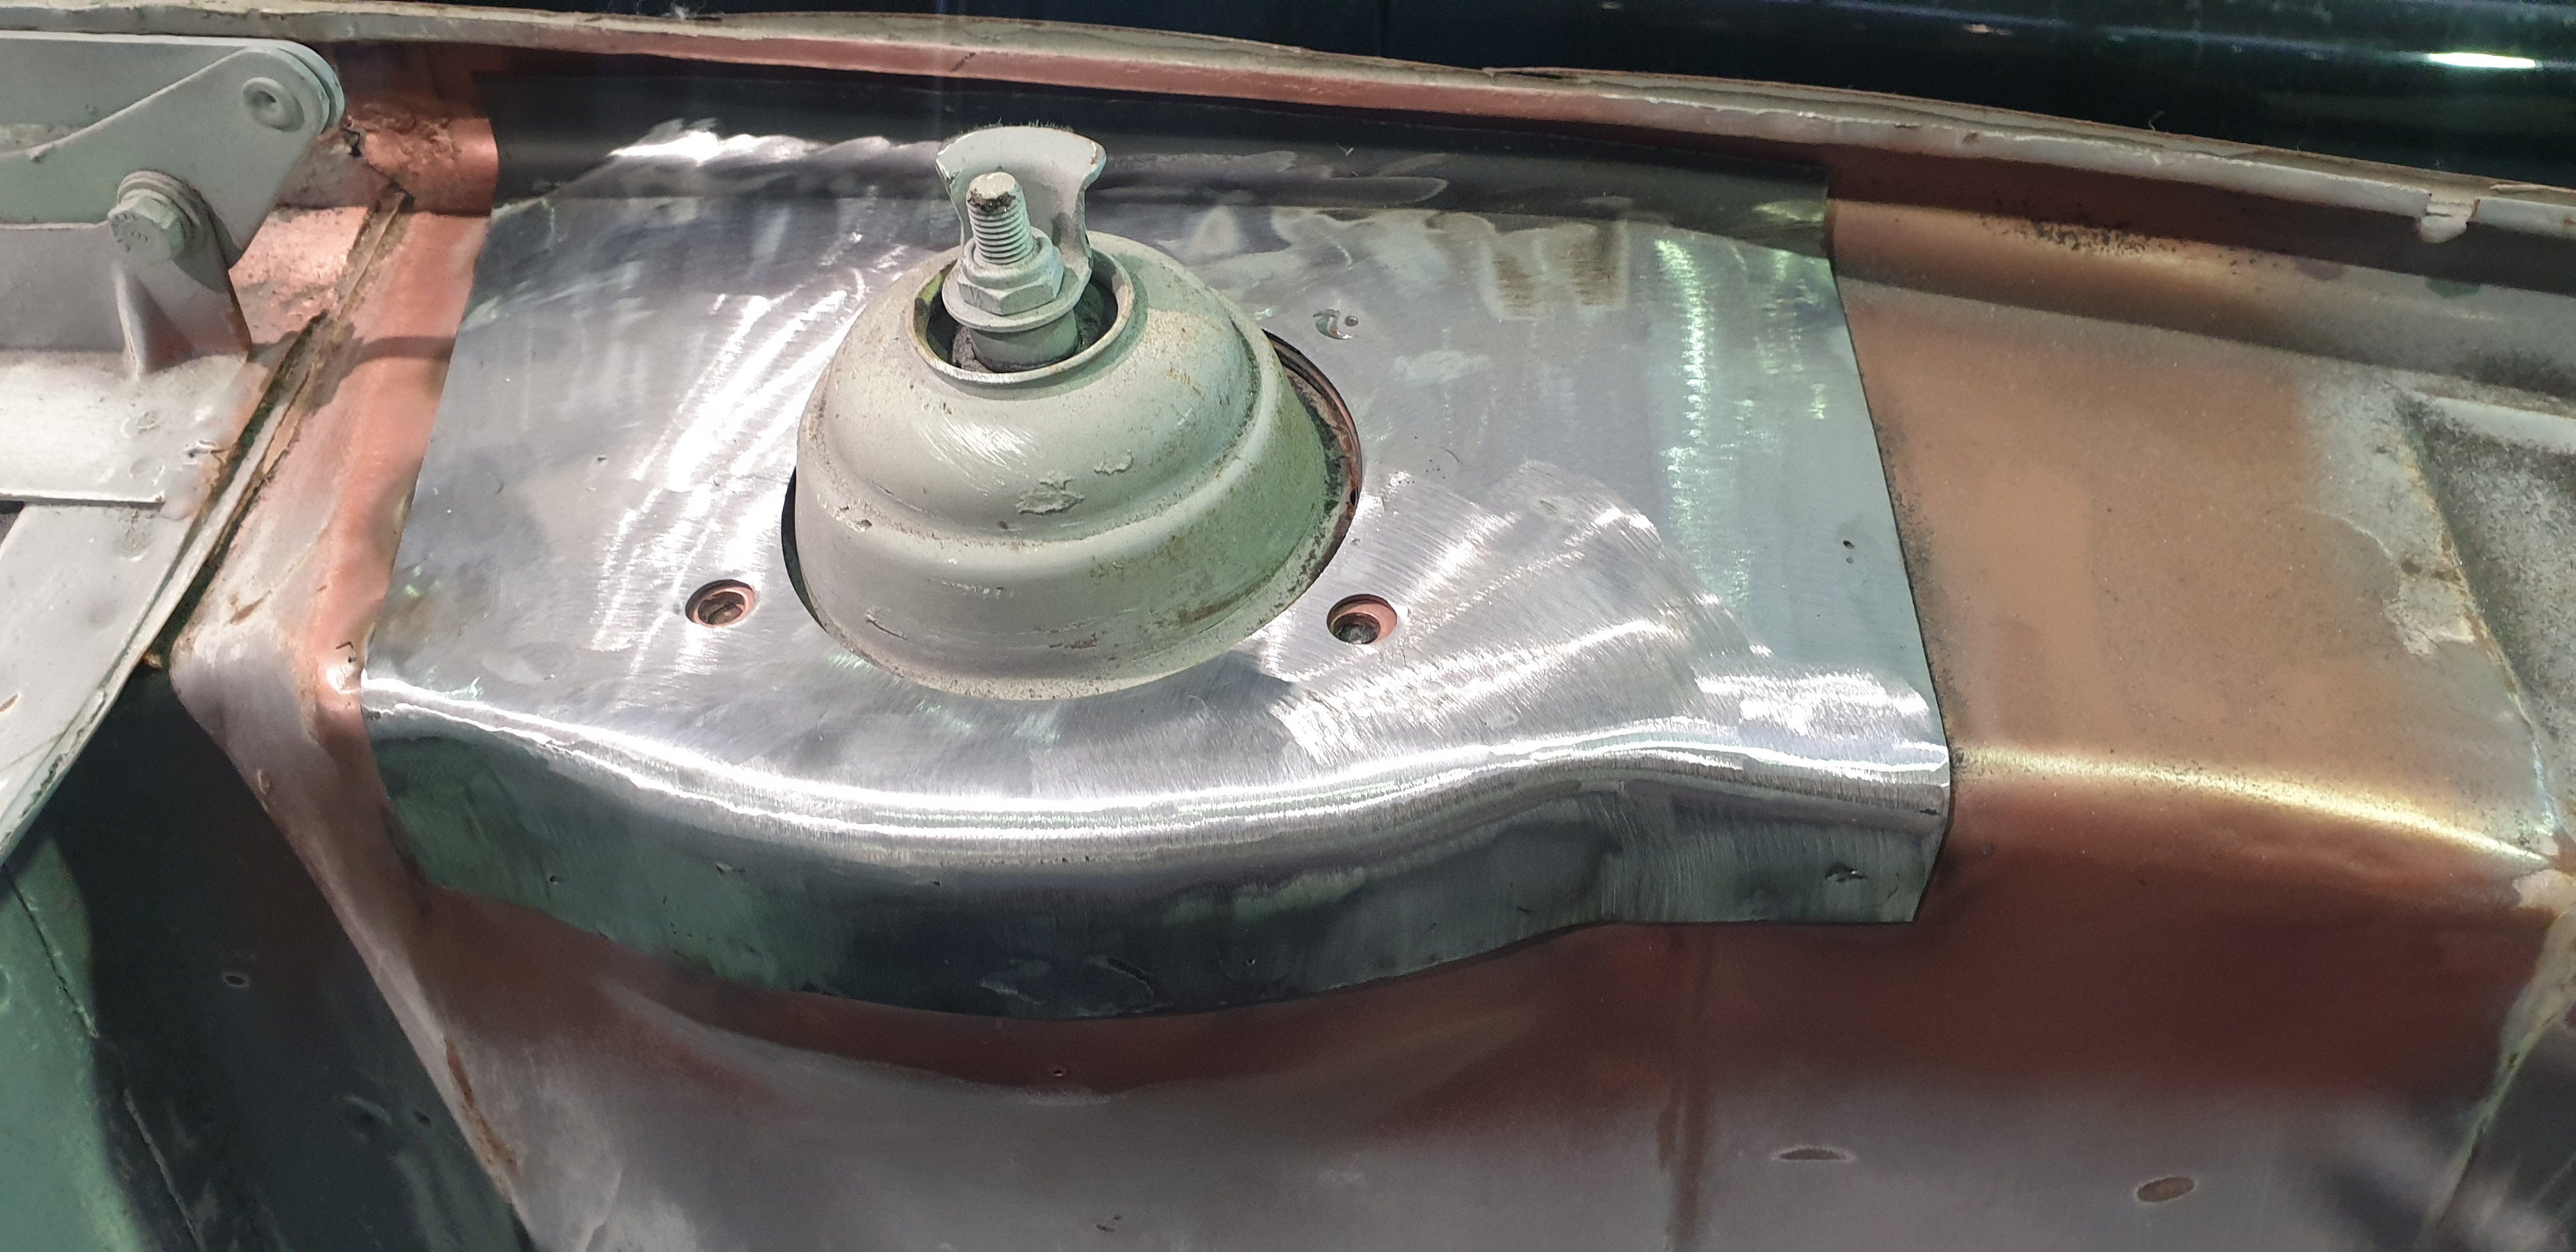
Some other mods have been happening too, I have fitted Type 49 style strut top reinforcement plates in the engine bay.
1 point
-
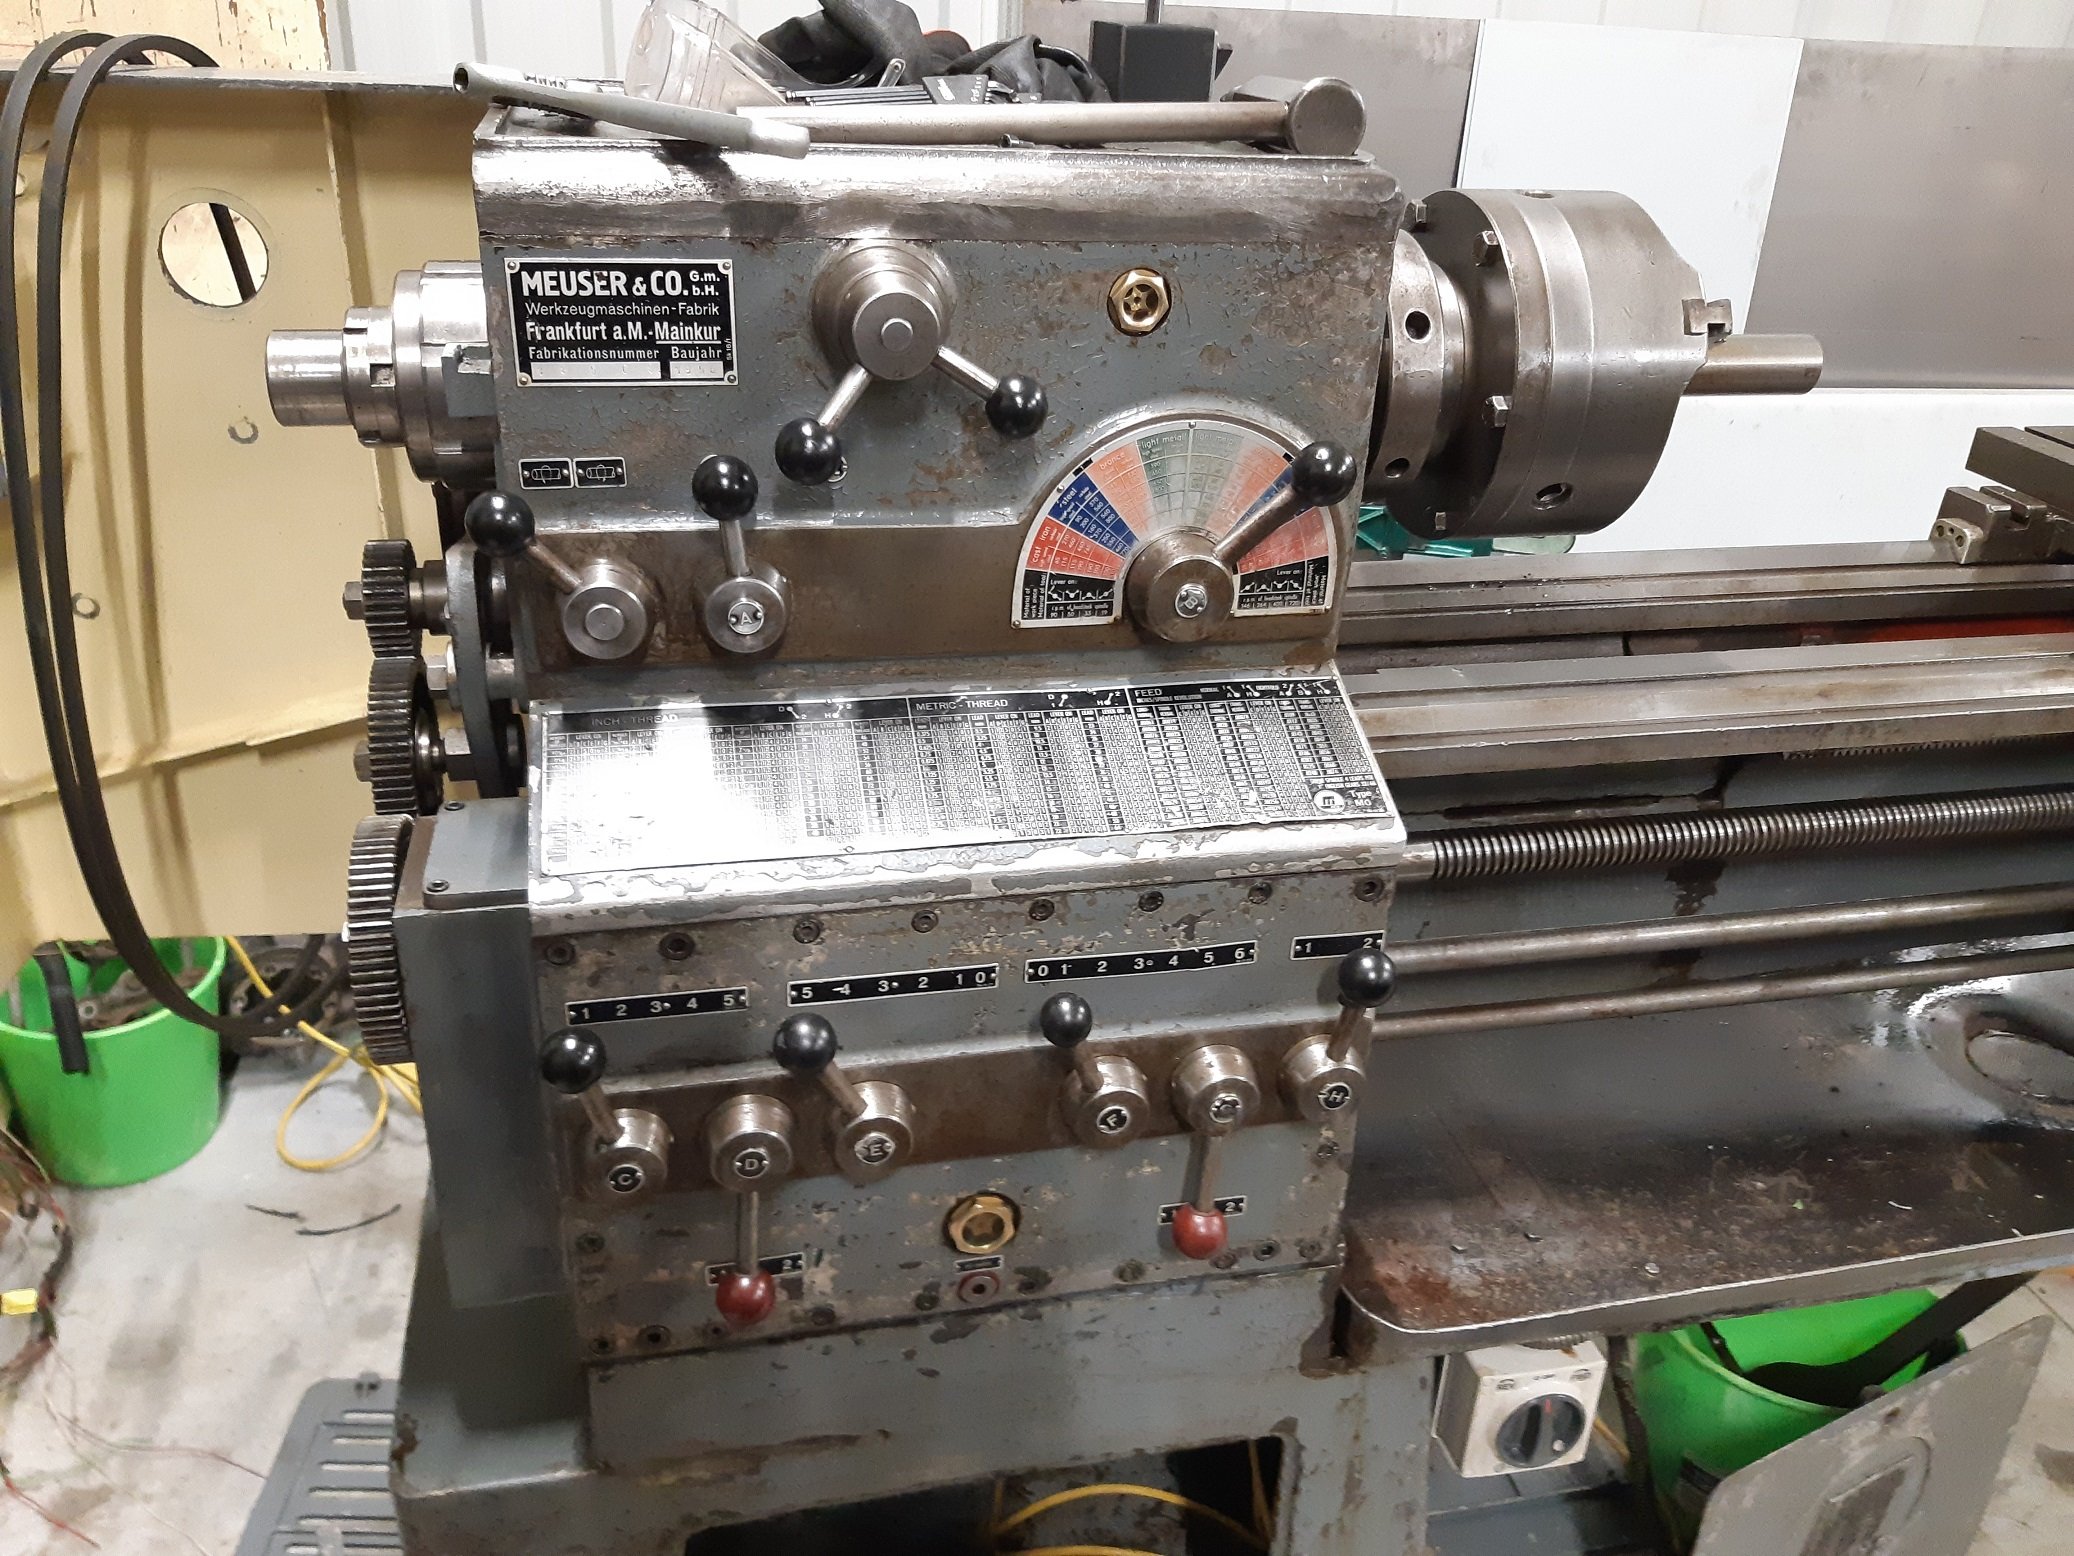
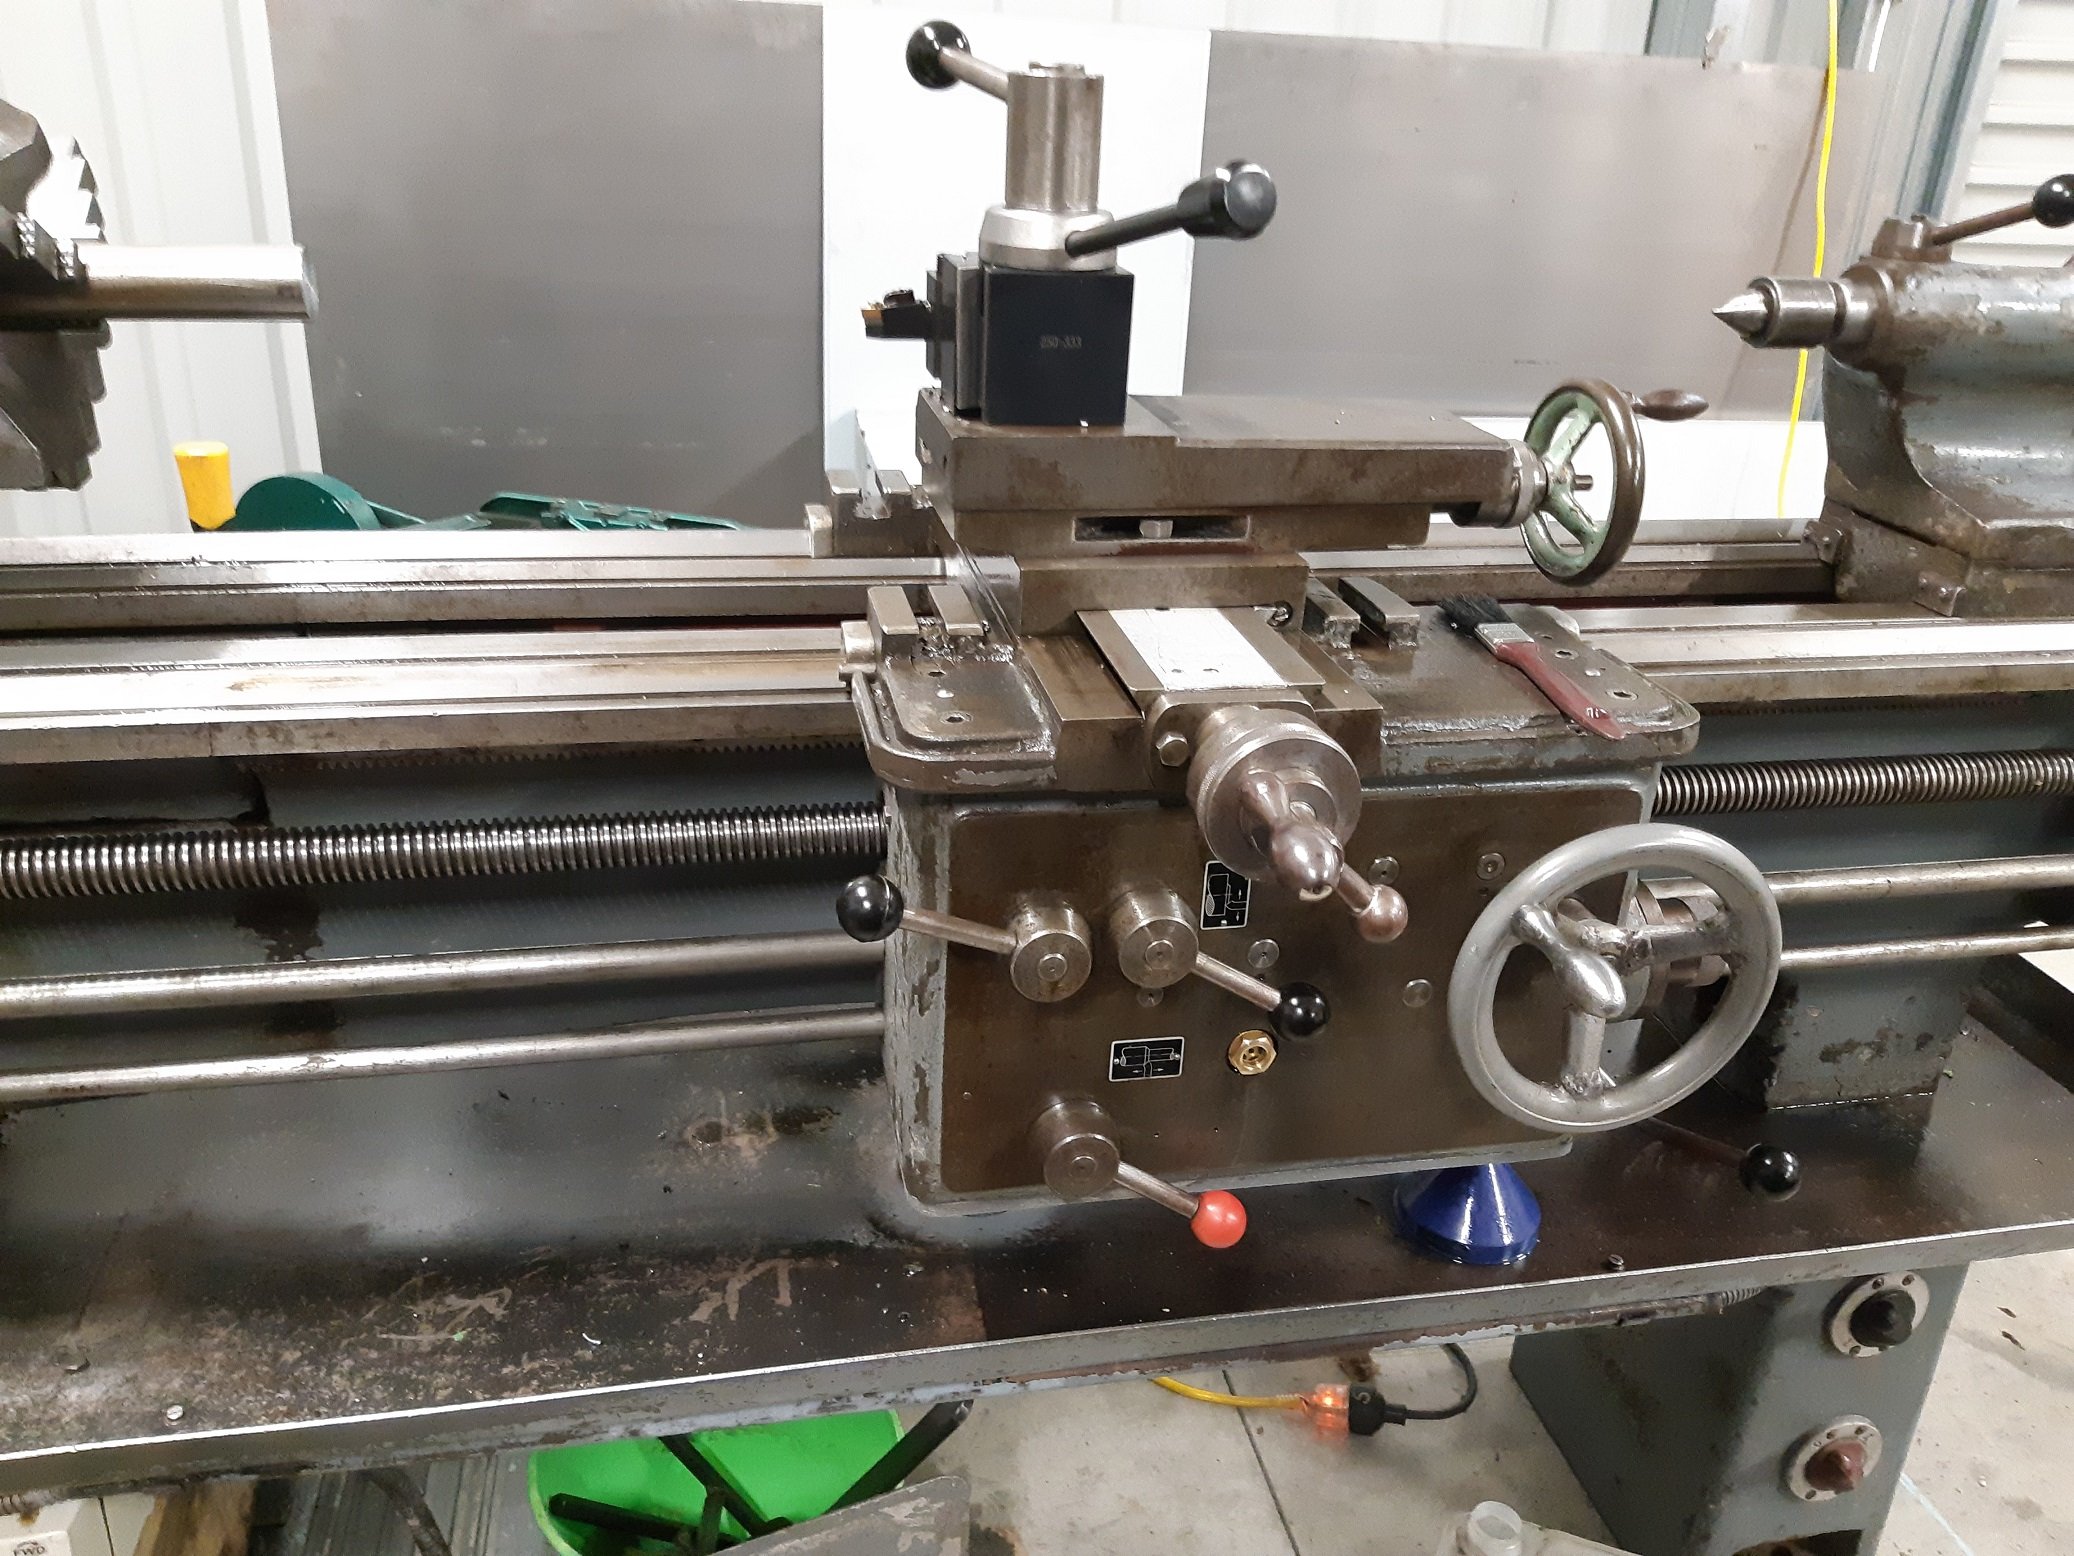
See my sight glasses.... I also got an Aloris style wedge type tool post from EBay USA. It came with 7 holders. I thought it was a lot of money.... then shipping and unspecified "duty and taxes" got added, which doubled the price. So I'd been trying to think of an excuse to buy a 3HP motor to upgrade the 2.2HP motor. The 2.2HP had a noisy centrifugal switch.... The 3HP motor arrived this afternoon. After removing the 2.2 and finding it really hot, I realised the centrifugal switch was stuck on.... so the starting capacitor was always connected. The 3HP is wired up now, it's much quieter. It was getting late...I still need to align the pulley and I want to see if I can find matching belts as they are slightly different lengths.
1 point
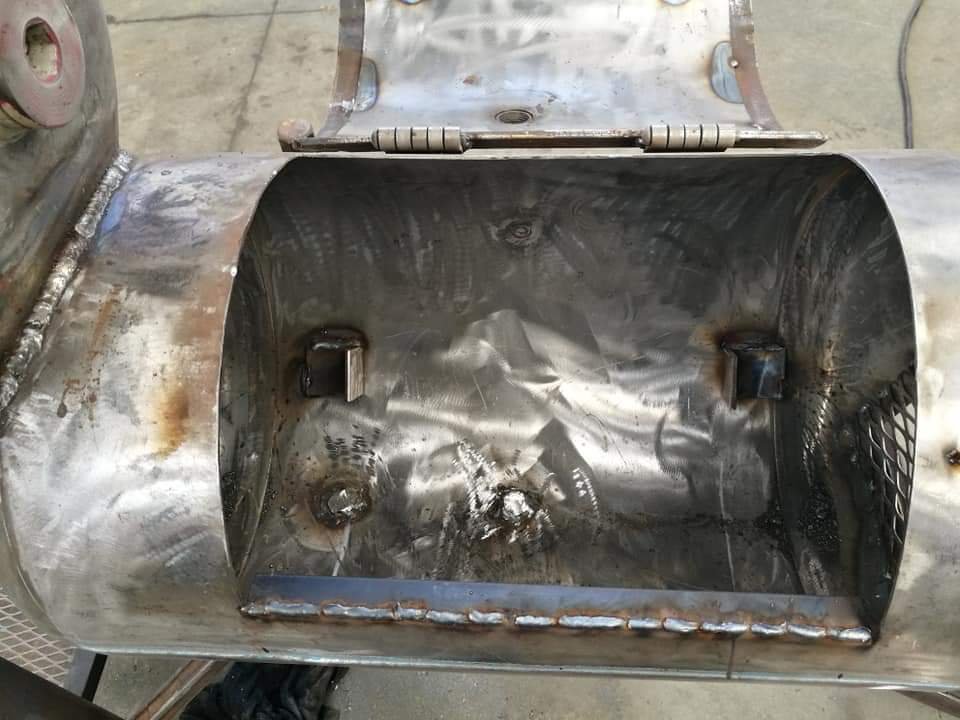
-
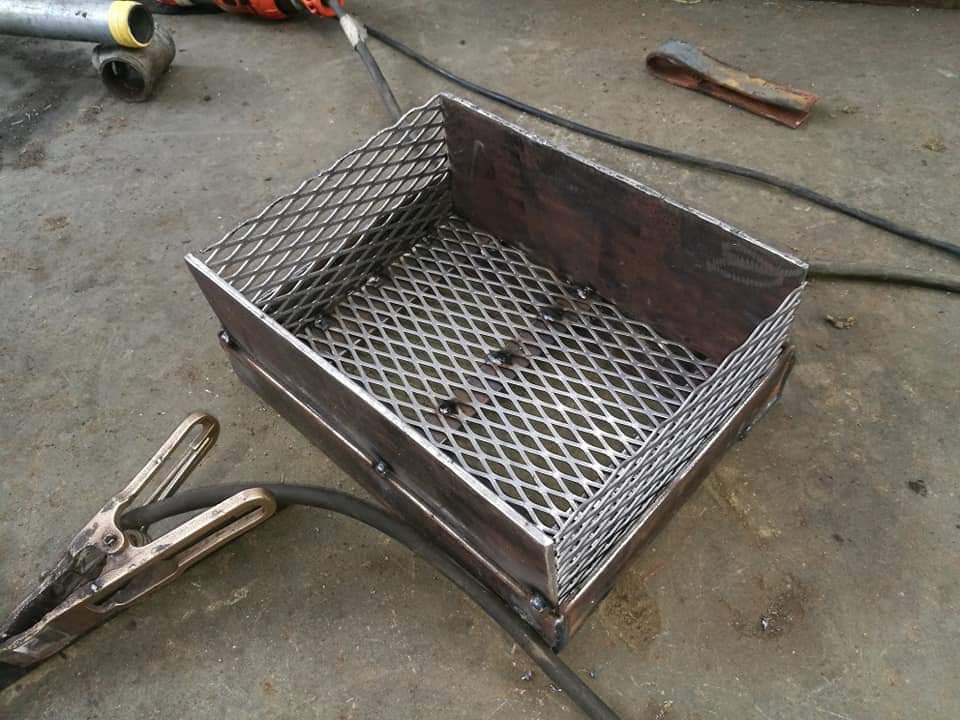
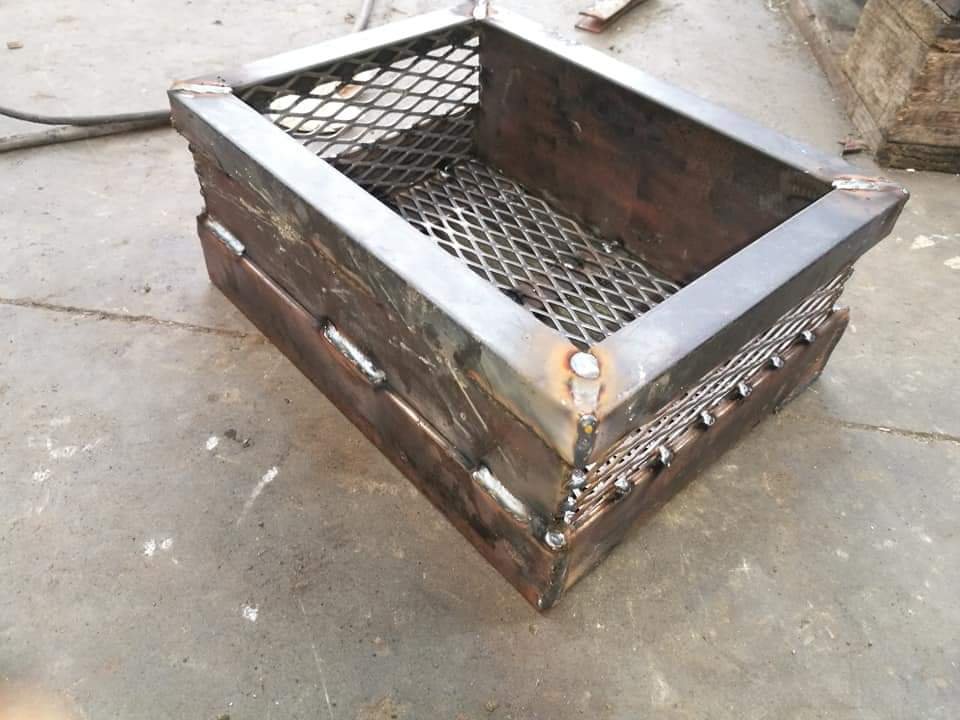
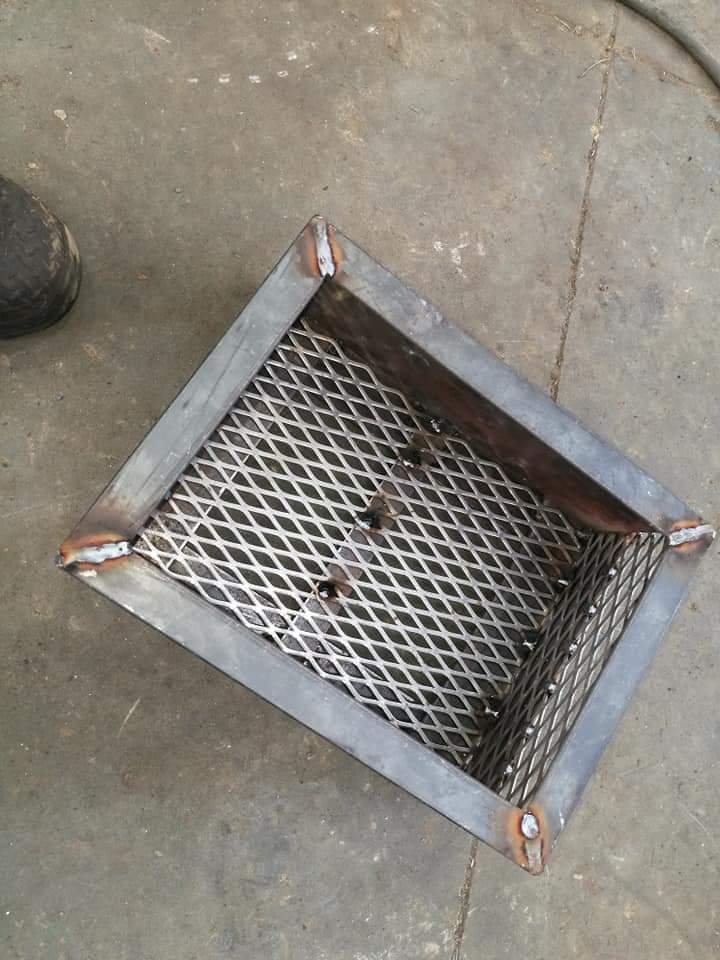
Missed the original deadline as the bros birthday was on Monday but it doubles up as an xmas present as well so he can wait. Did some more work yesterday and smashed out the inner firebox/coal cradle thingy. Cut some steel, mostly being 5mm angle and plate. Put it together with some of the expanded mesh. Then did a top frame thing with some left over 3mm angle. It actually looks pretty good once it's sitting in place. There's a decent amount of weight to this so it should help with heat retention and it's easily removable to help with cleaning out the old ashes. All that's left on the firebox now is the damper vent, a grill and the handle. Cheers
1 point
-
A couple months ago this got featured in the NZV8 magazine. @Snoozin did a wonderful job! Got sick of the doors not shutting correctly. Had my parent's bring back some Altman latches from the US on one of their trips over. Relatively simple to install, but modified a few things so they work a bit nicer and installed some electric solenoids. Need to sort some more door seals as these ones leave some large gaps in places. The final thing that needed doing to "finish" it off finally got done! Mark Dunn in Levin did an awesome job on the upholstery. We made new plywood seat bases and he built up foam for the seat. We made it thinner than the factory one, so I could sit a bit lower and further back. The seats are also way softer now! Some random pics from the past couple of months. At some stage I also swapped out the fog lights for the grill guard, as they weren't mounted that great and were cracking the bumper panel. Will modify them and put them back on one day. No.2 transmission is on it's way out. Can smell it burning the oil when going up large hills. Have changed the filter and flushed the oil and no difference. Took it up to drag day and it decided it only wanted to use third gear after the first run. Did a couple more 21-22 second runs and then parked up for the rest of the day. When we left it was back to normal. Unsure whats going on there. Had a suggestion it went into limp mode. Have another trans there that I could swap in and see what happens with that one, otherwise really considering manual swapping it!1 point
-
Some encouraging news, after my last outing I was too paranoid to drive it to the Christmas meet. Took it out this arvo for a spin round the block and it seems to be going good. Did have a massive flat spot of idle but I fiddled with some of the settings regarding low rev accel and injector wake and it looks to mostly have disappeared. Fuck does it go better than the carb, doesn't run out of puff at 4k like it did and actually pulled way harder than I was expecting, had to back off the gas as it just kept going.. Good Times. Just have to tidy up the plumbing for the fuel pump at the back and get myself an air filter (and a wideband) I also need to sort a fan but I think I'm just gonna get a viscous hub of an fe that way it'll flow more air and I won't have to worry about wiring up a fan and overloading my alternator, then she should be good to go.. Speaking of wide band, not really sure which one to get. Was looking at this one But I guess I should let the link do all the boat cut etc since all the functions are the and just use it solely for tuning in which case I should just get this one, Or go analogue and get this.. Maybe a little Xmas present to myself, then I can tune other things..
1 point
-
Now that I have broken the seal for vids on this thing, here is a quick walkaround. Just need a few more hours bolting things back together and all going well I will take it for a drive... The only shit moment was when the oil light did not go out when i got the cab on, this turned out to be the haynes manual wiring colours being wrong, once I swapped the gauge and warning light wires over then both worked properly. It is idling a bit high still, I need to mess with that linkage a bit more. But yea, sweet.1 point
-
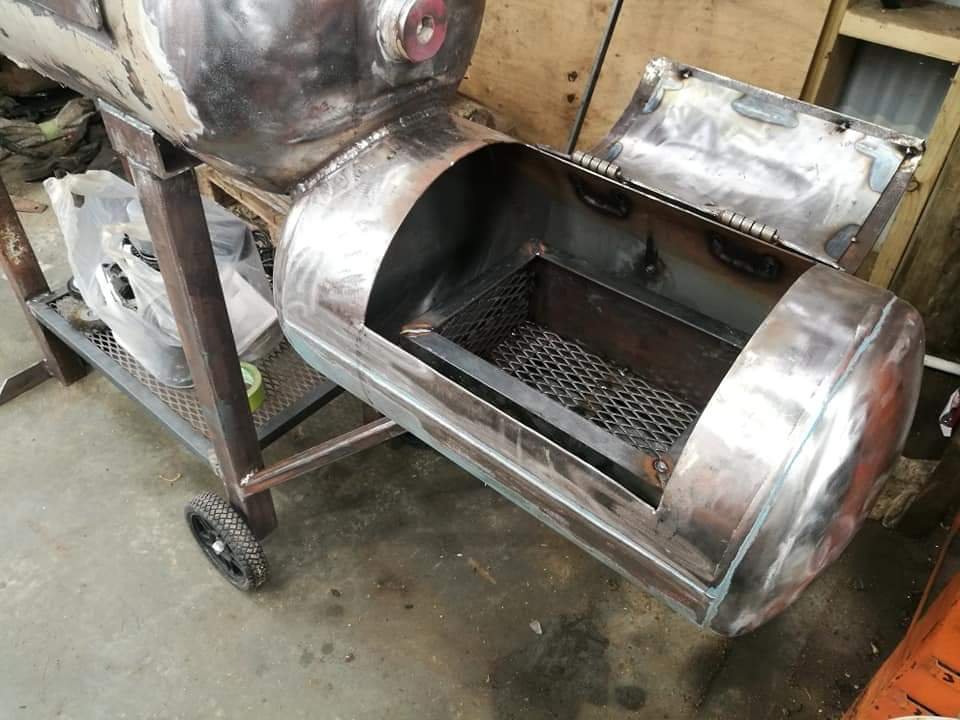
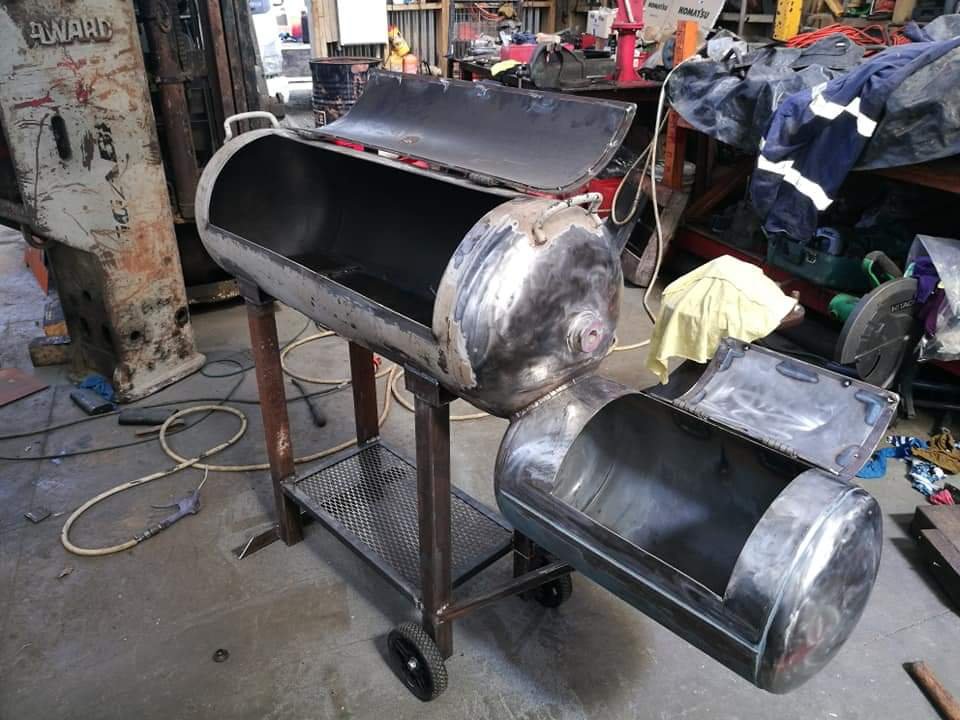
And lastly we got the firebox door sussed. I had a harder time getting this one kind of right, and the bends close enough to work. Forgot to take pics mid build but it was pretty much the same as the other. The main difference is that the door opens further back, this is to allow for more room for grilling/searing. Pretty happy with how it's all looking right now. List of things remaining are the mount for inner firebox, inner/removable fire box. Grill rails for both chambers, grills for both chambers, front bench frame, chimney with vent and firebox vent. These plus mounting up the gauges, doing the lid handles and paint. Also hopefully get this done throughout the week. Man this is a lot more work than expected haha. Ahh well. Chur
1 point
-
Some krispy guy narked on him from memory. But his presence is always felt in ya build threads1 point
-
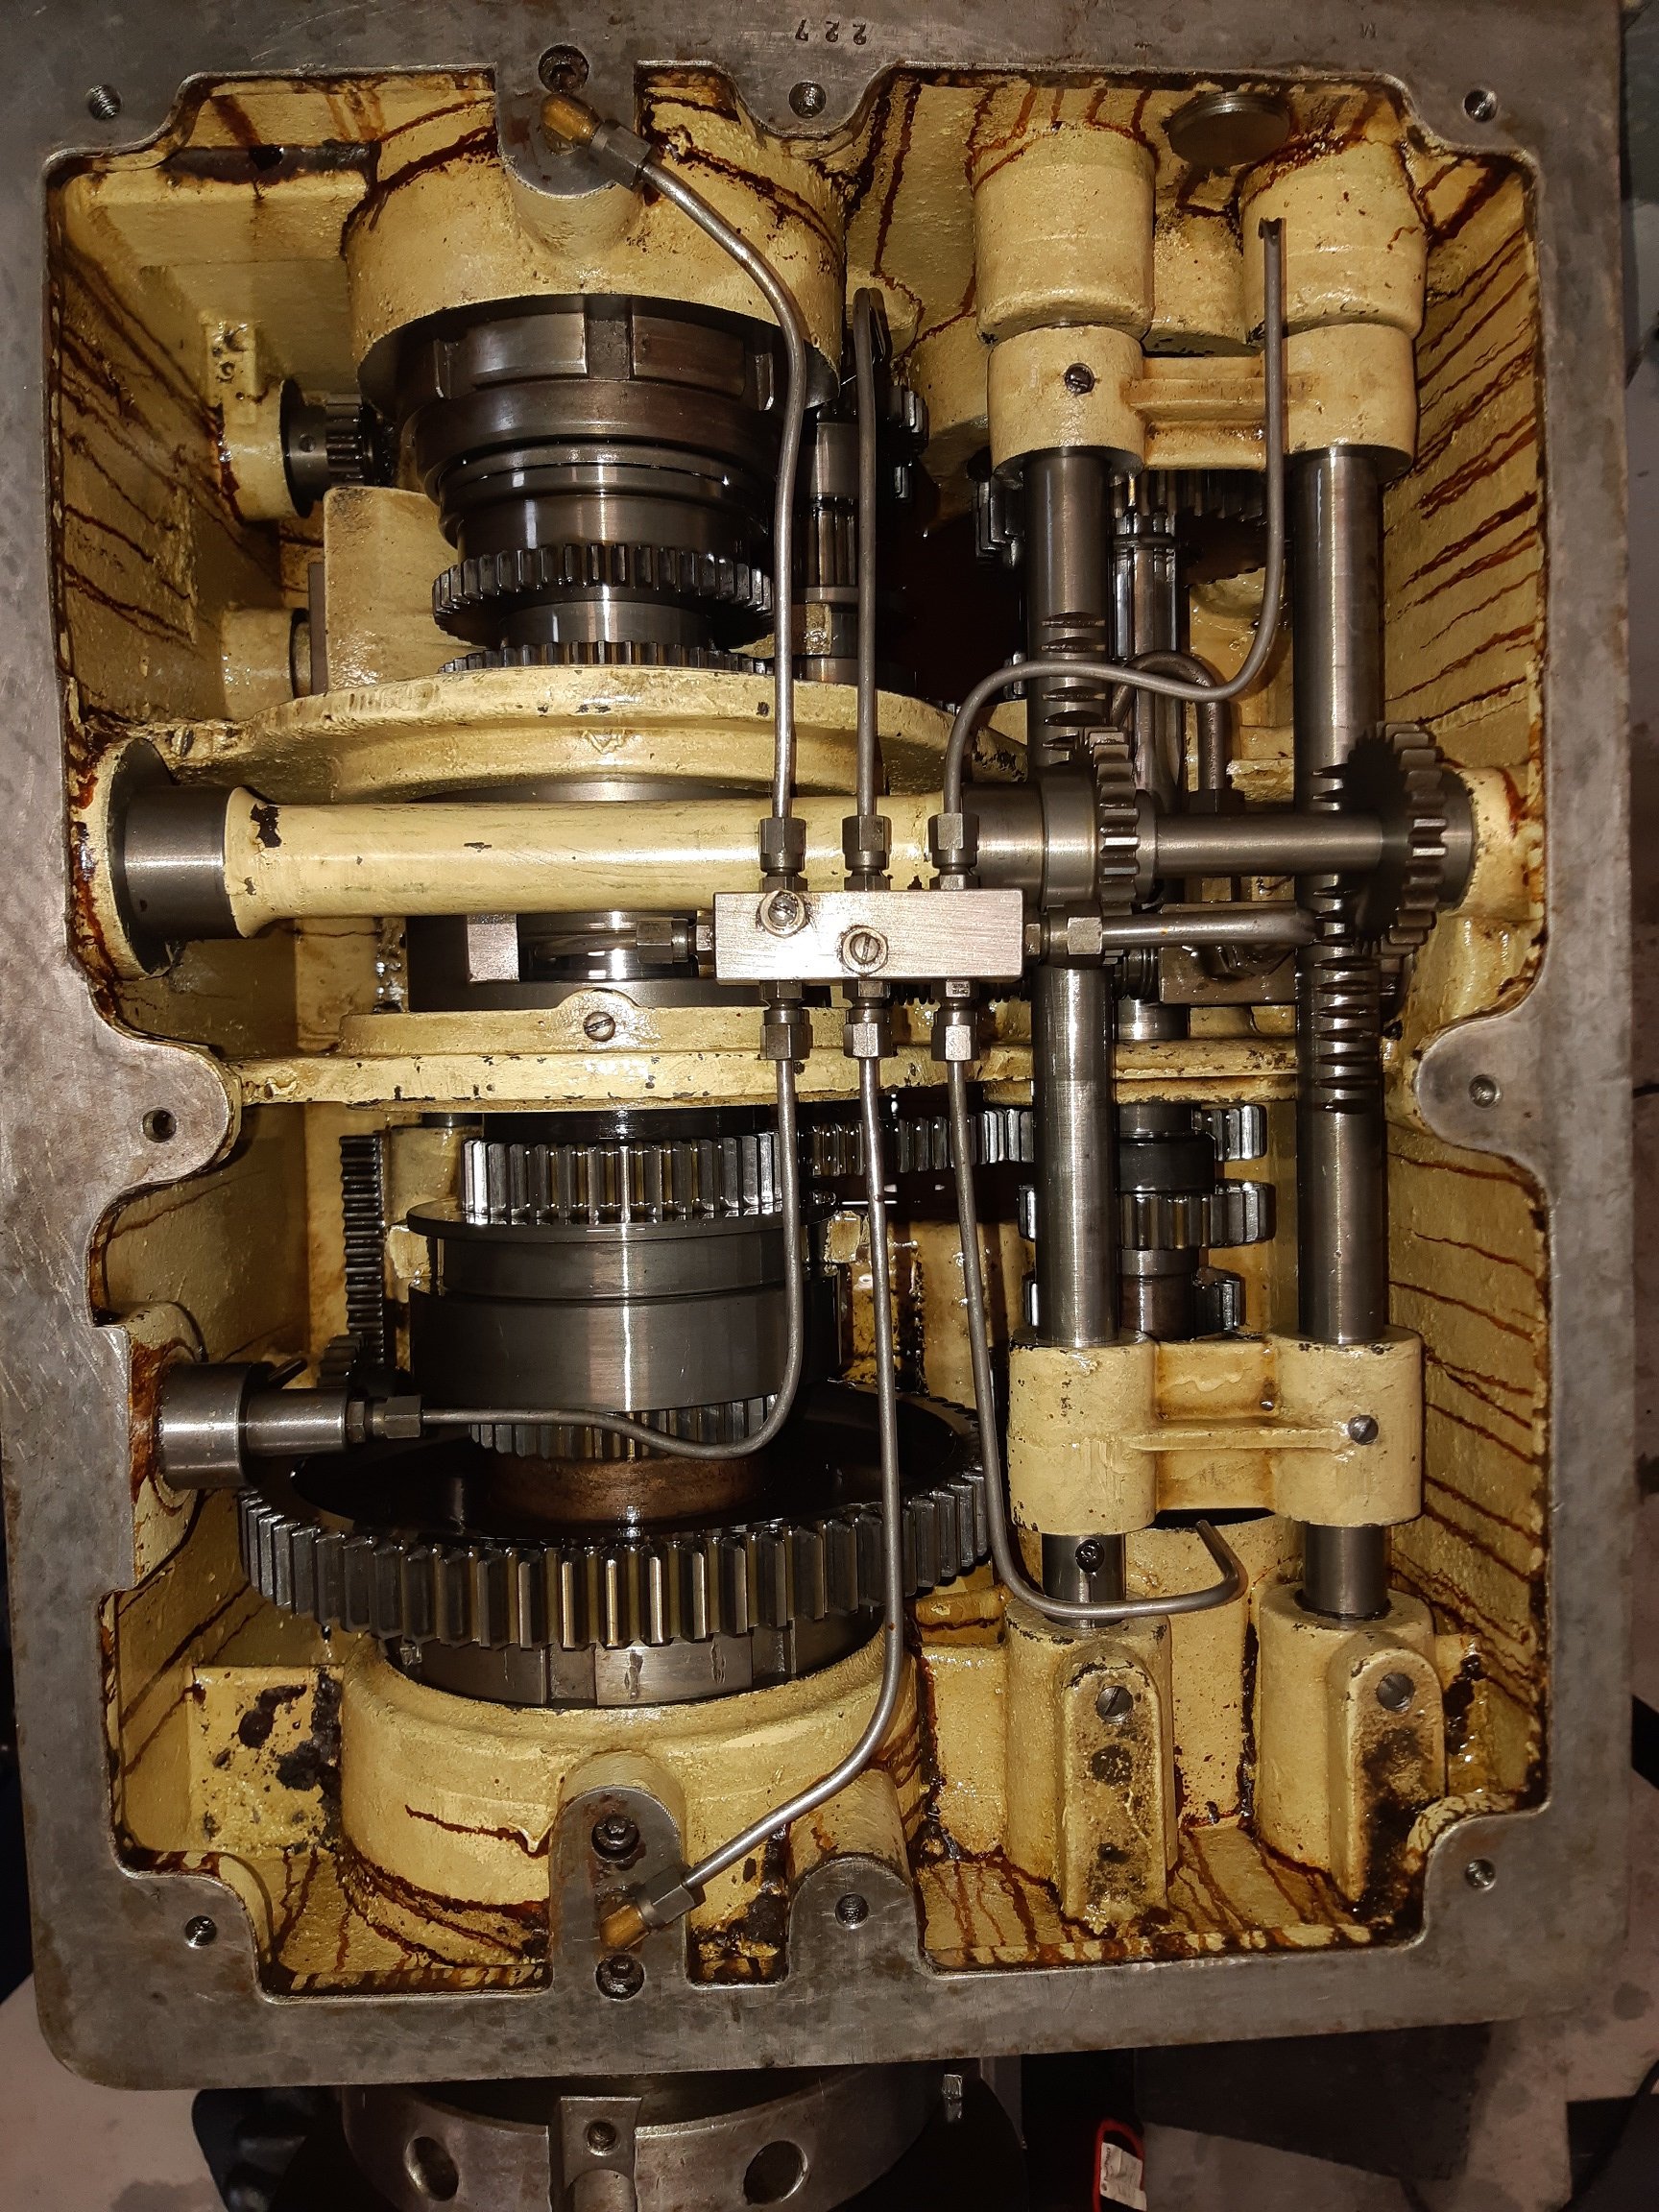
I took the lid off so I can de-rust it. Looks okay in there. Everything is oily. There's no obvious wear. The brown/orange streaks are not oil, it's almost like dried varnish. I suspect it's some kind of liquid gasket/sealer.
1 point
-
That would probably work. I got my Bicarbonate of soda from Mitre10. It's with the laundry powders. It's called laundry soda or washing soda or something like that. It looks like almost clear, big crystals.1 point
-
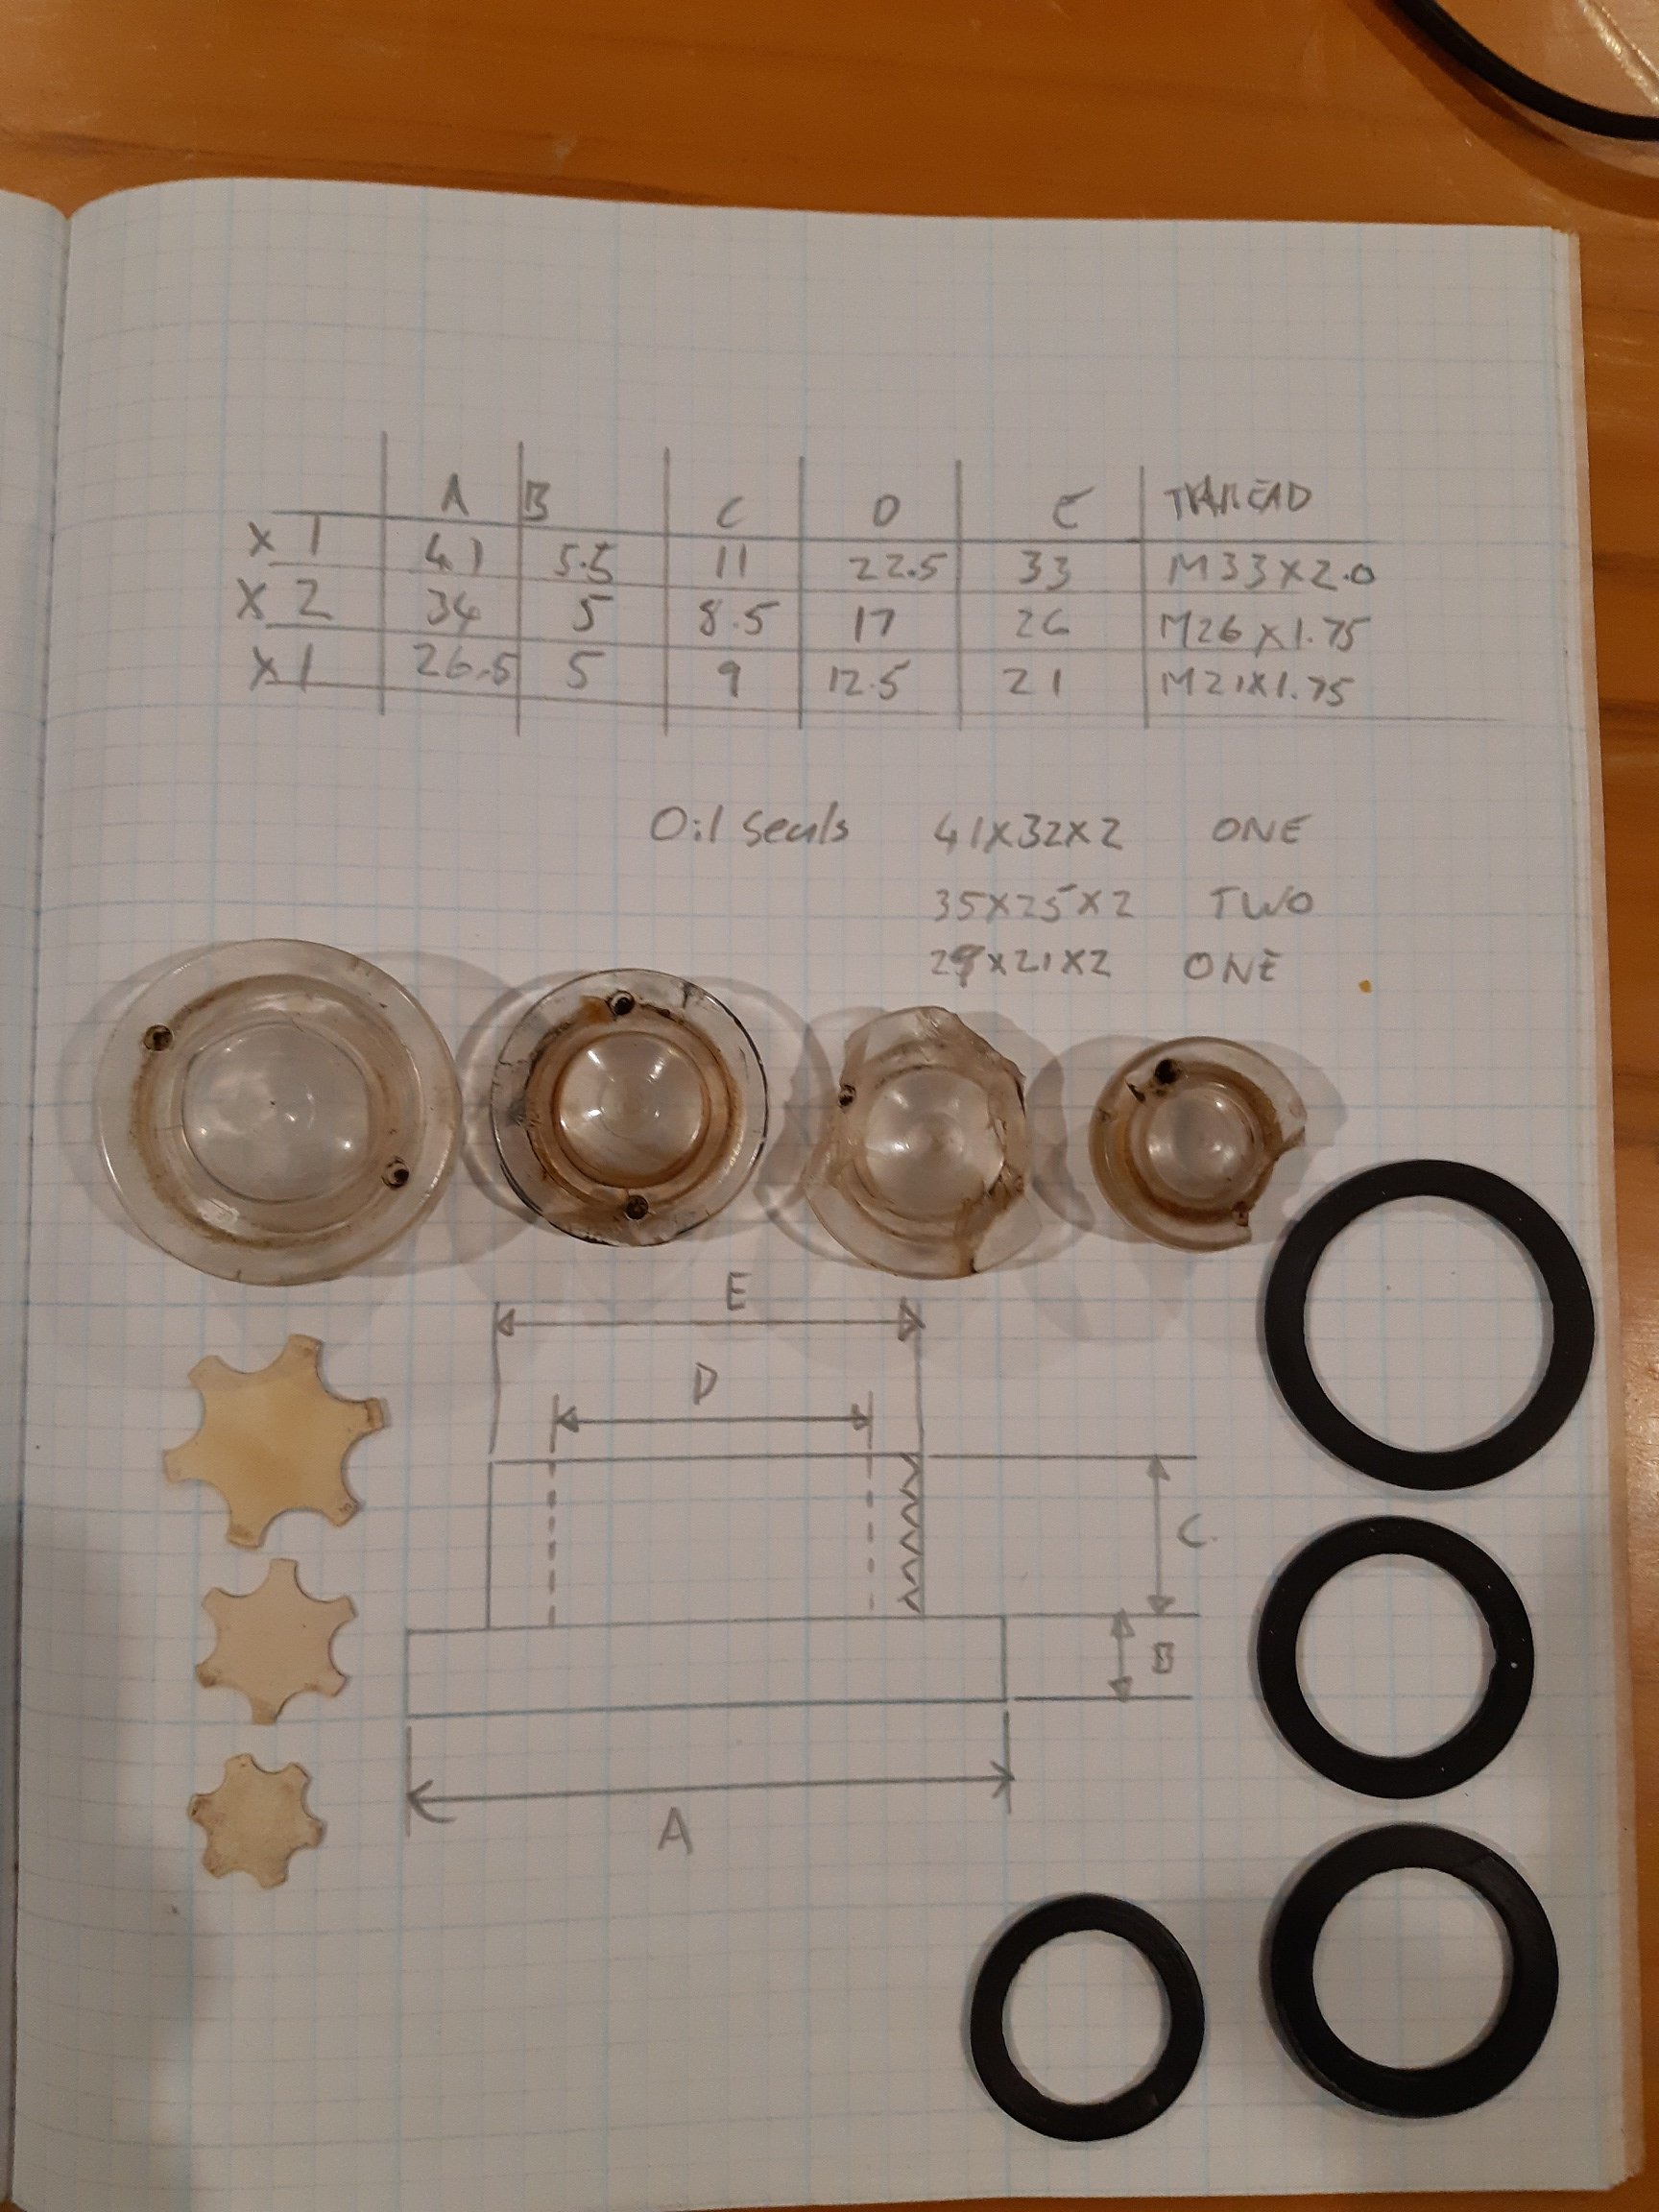
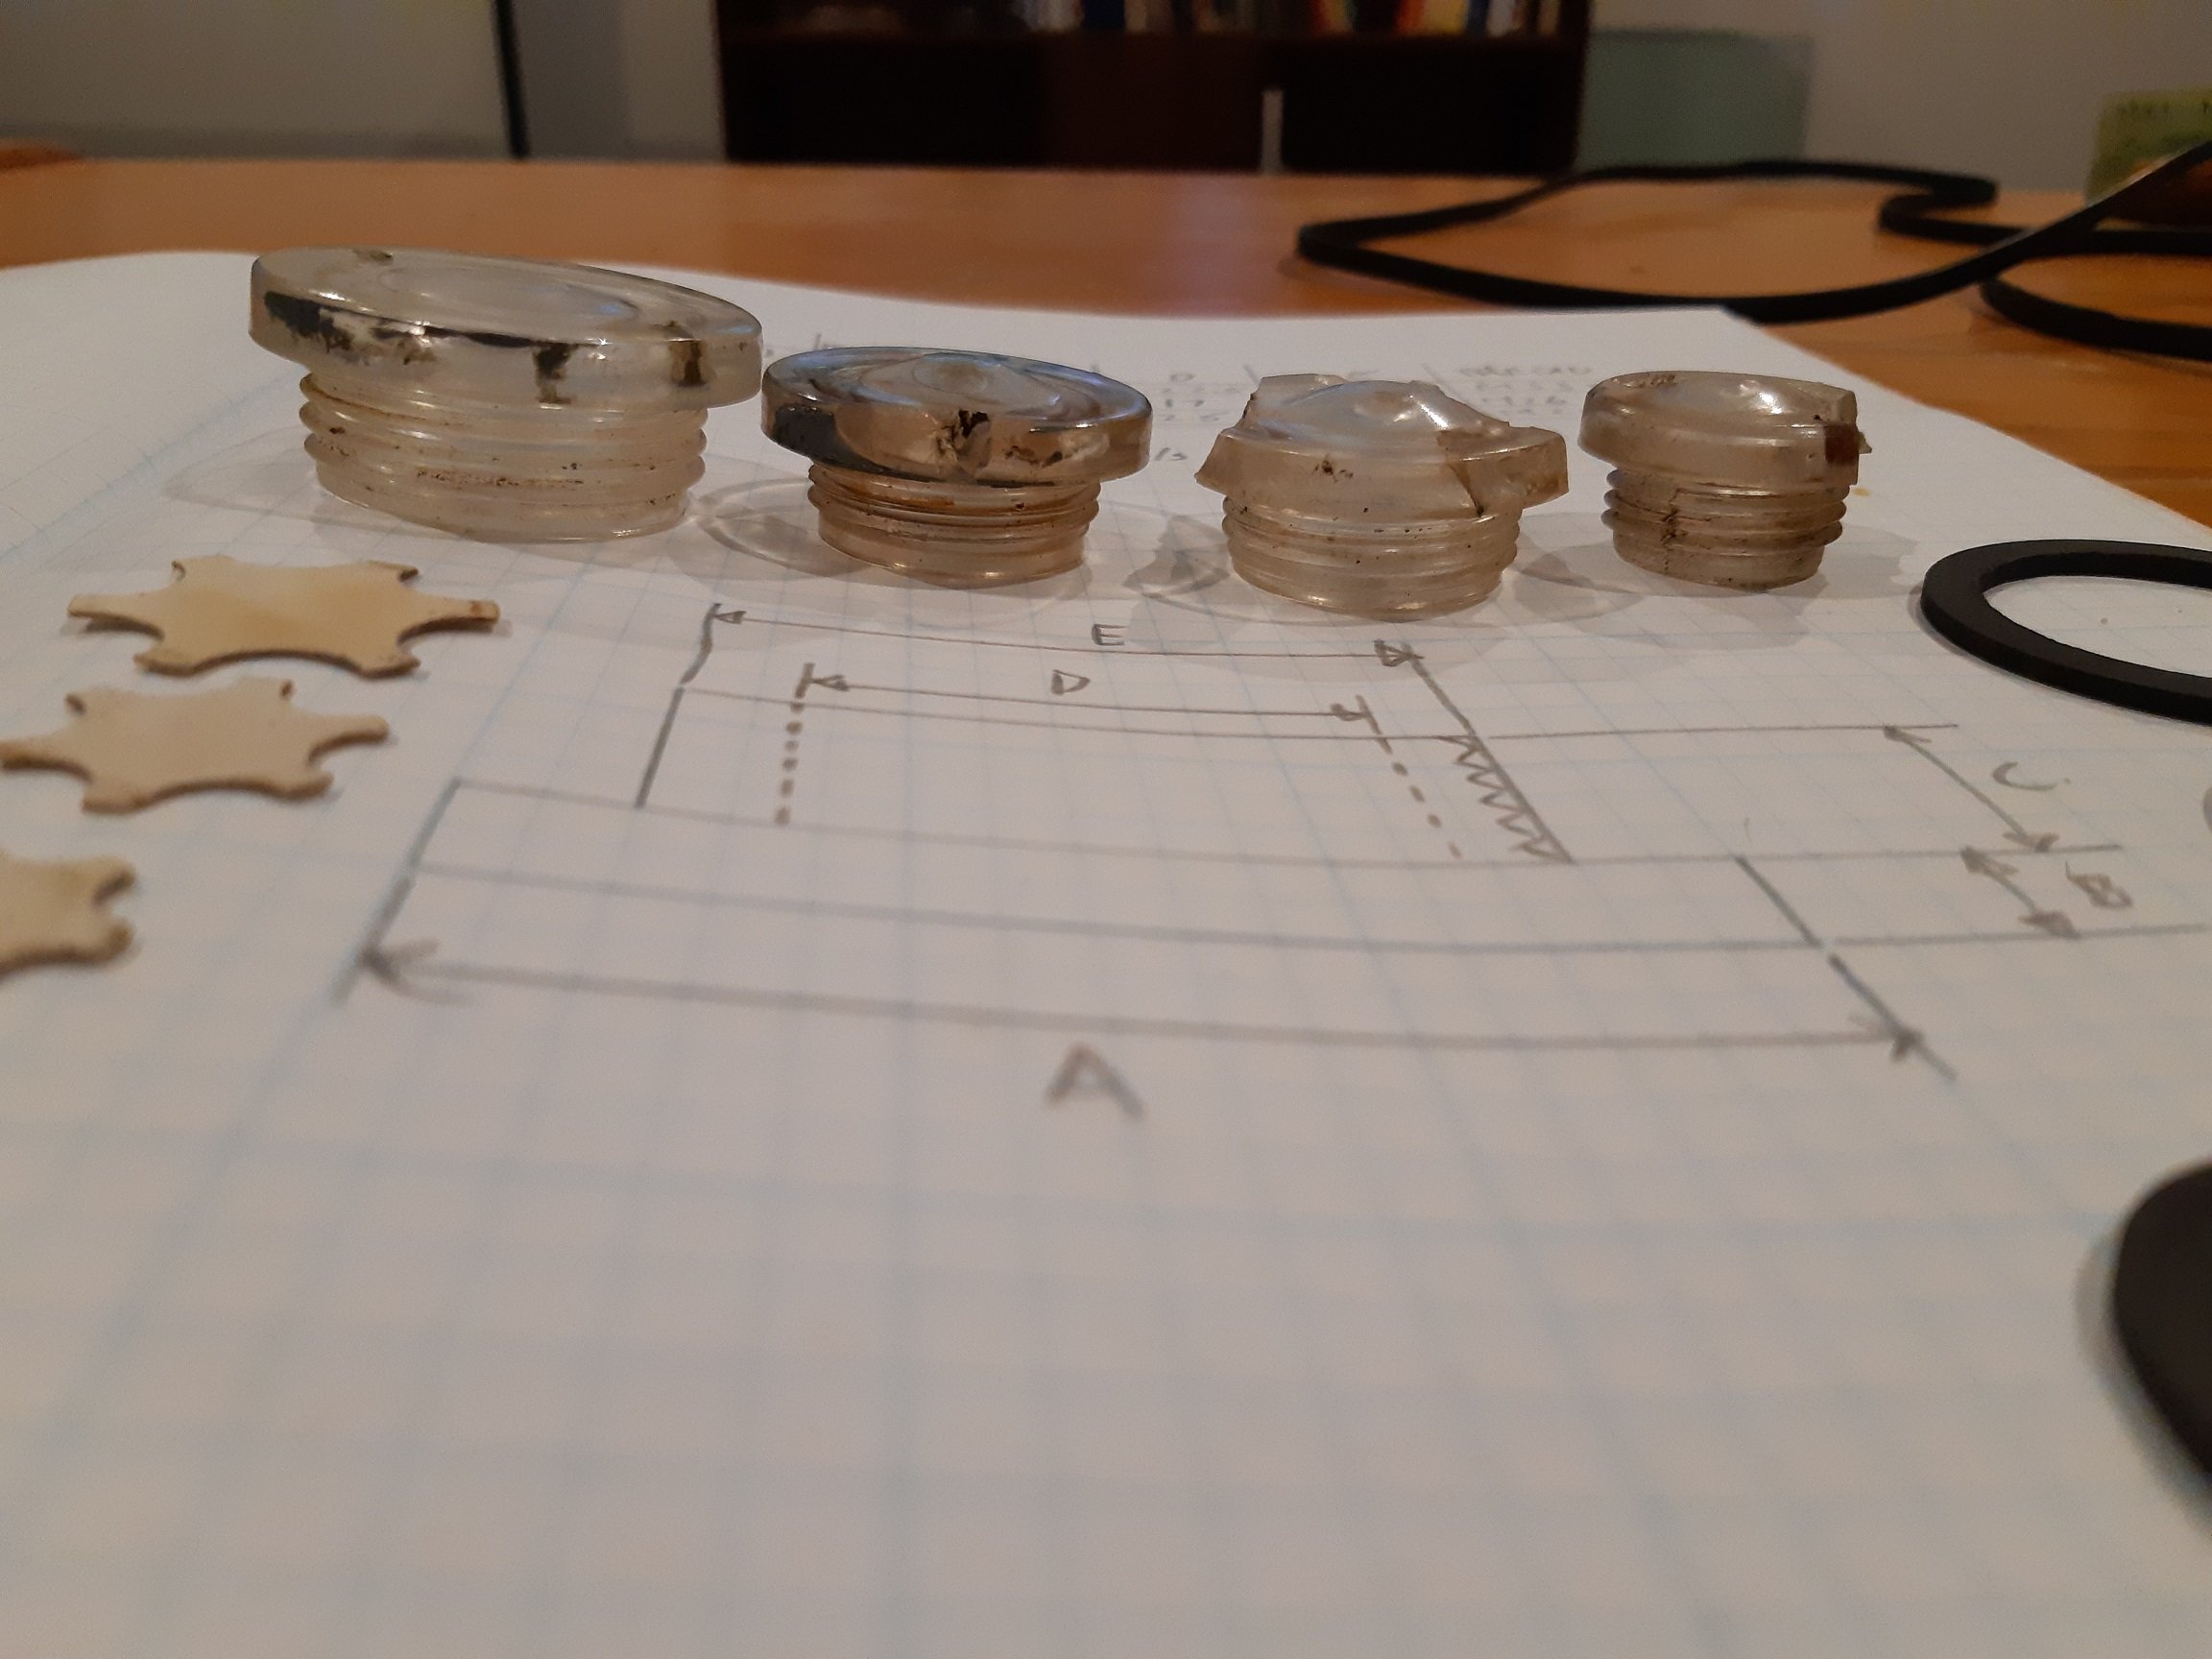
So these are the oil level sight glasses. They are plastic. They were too dirty to see through. The 3rd one, from the headstock, was leaking enough to need a bucket. It was broken and it wasn't pressing on the seal properly. Removing it made it much much more broken. The 4th one, from the carriage, was leaking a little bit because it was broken. It came out without more damage. The first one is from the threading gearbox. It could be reused. I managed to clean it enough to see through. The 2nd one is from the headstock, but it lets you see that oil is flowing and the oil pump is working. It's broken, but still seals. It's pretty hazy though. All the o-rings are hard. Those stars live inside the oil level sights so you can see the oil against a white background. They seem to be proprietary. Yay.... The threads are quite coarse. M33x2.0mm, M26x1.75mm and M21x1.75mm. All I've been able to find are 1.5mm pitch. I'm contemplating popping my thread cutting cherry and trying to make something that will take an inexpensive generic sight glass. I just had a thought.... I could ignore the thread and just silicone some perspex discs into the holes!
1 point
-
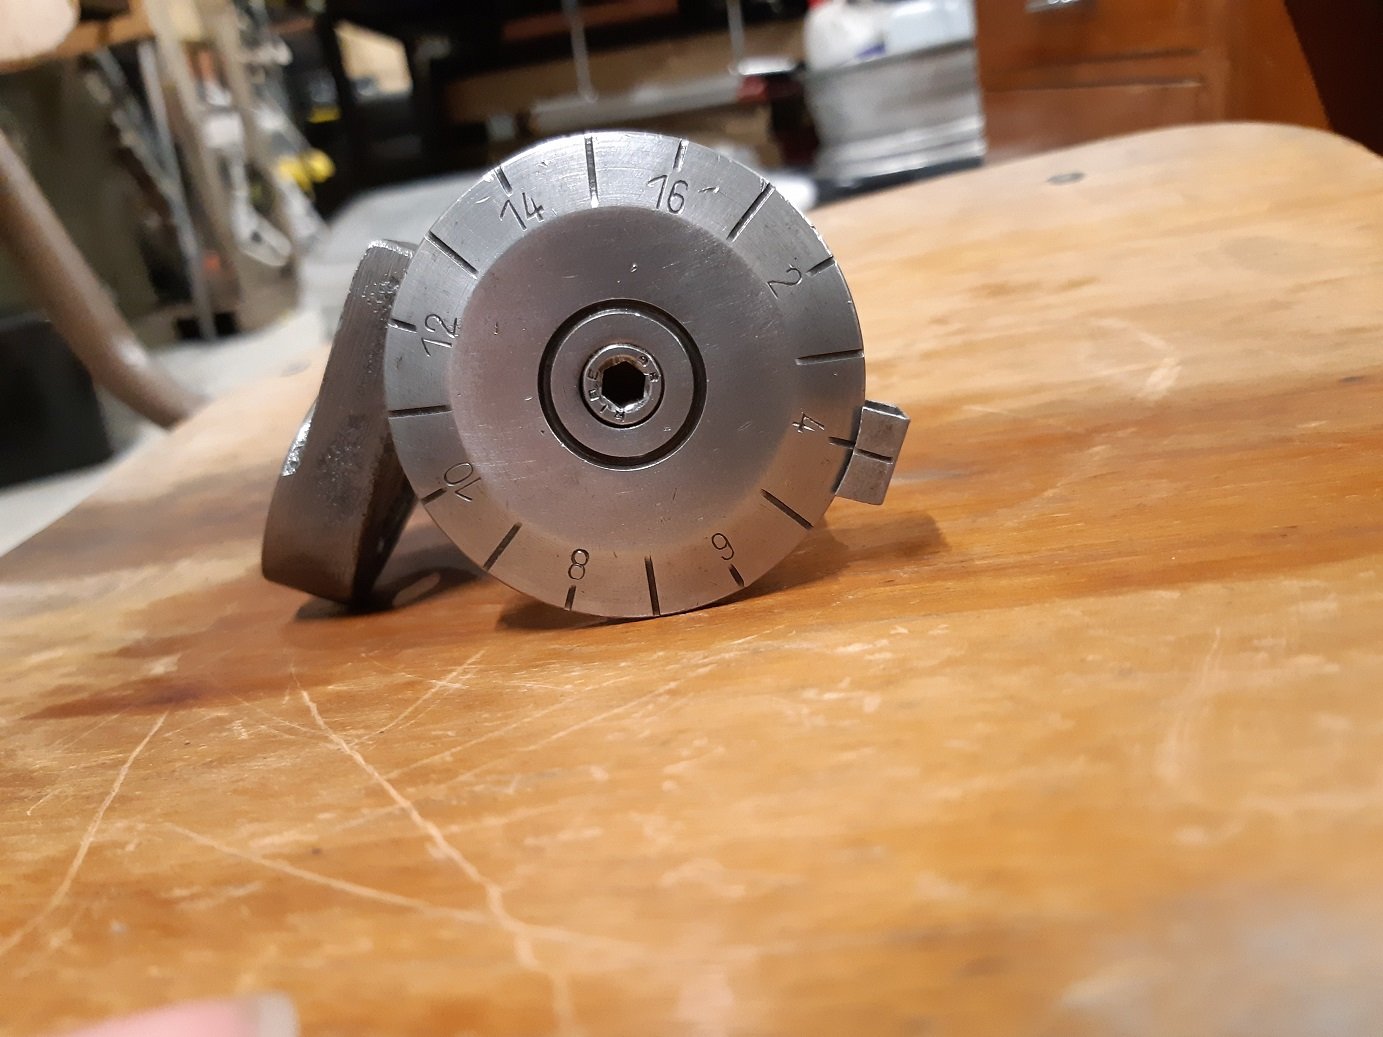
Clean. And I straightened the.... pointer bit. There's a little bit of paint still on it, but it's good enough.
1 point
-
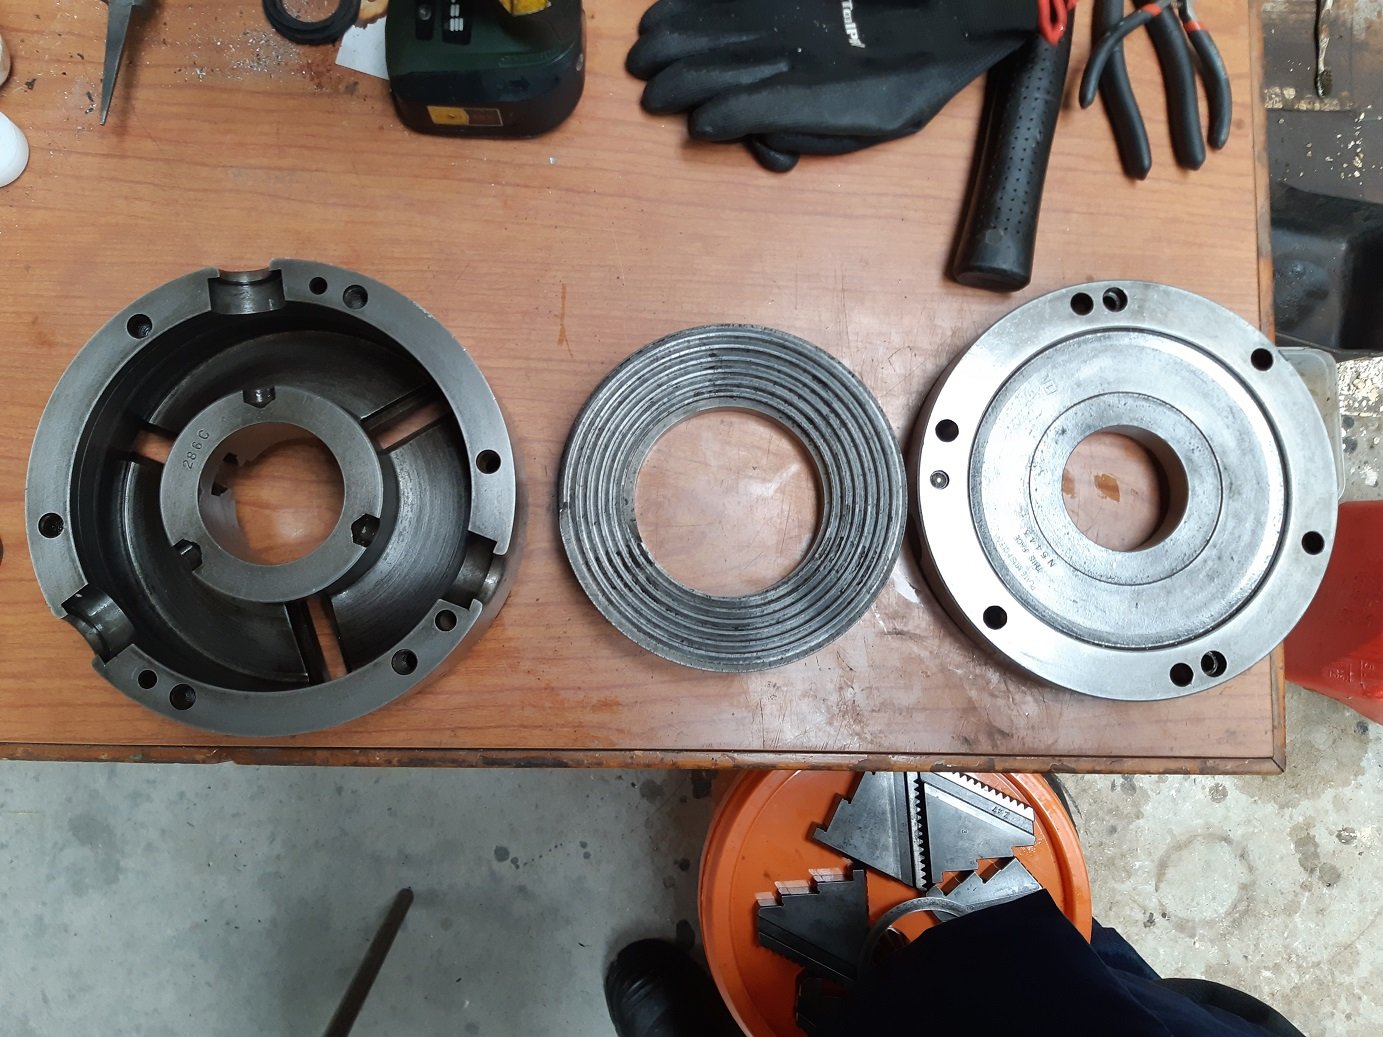
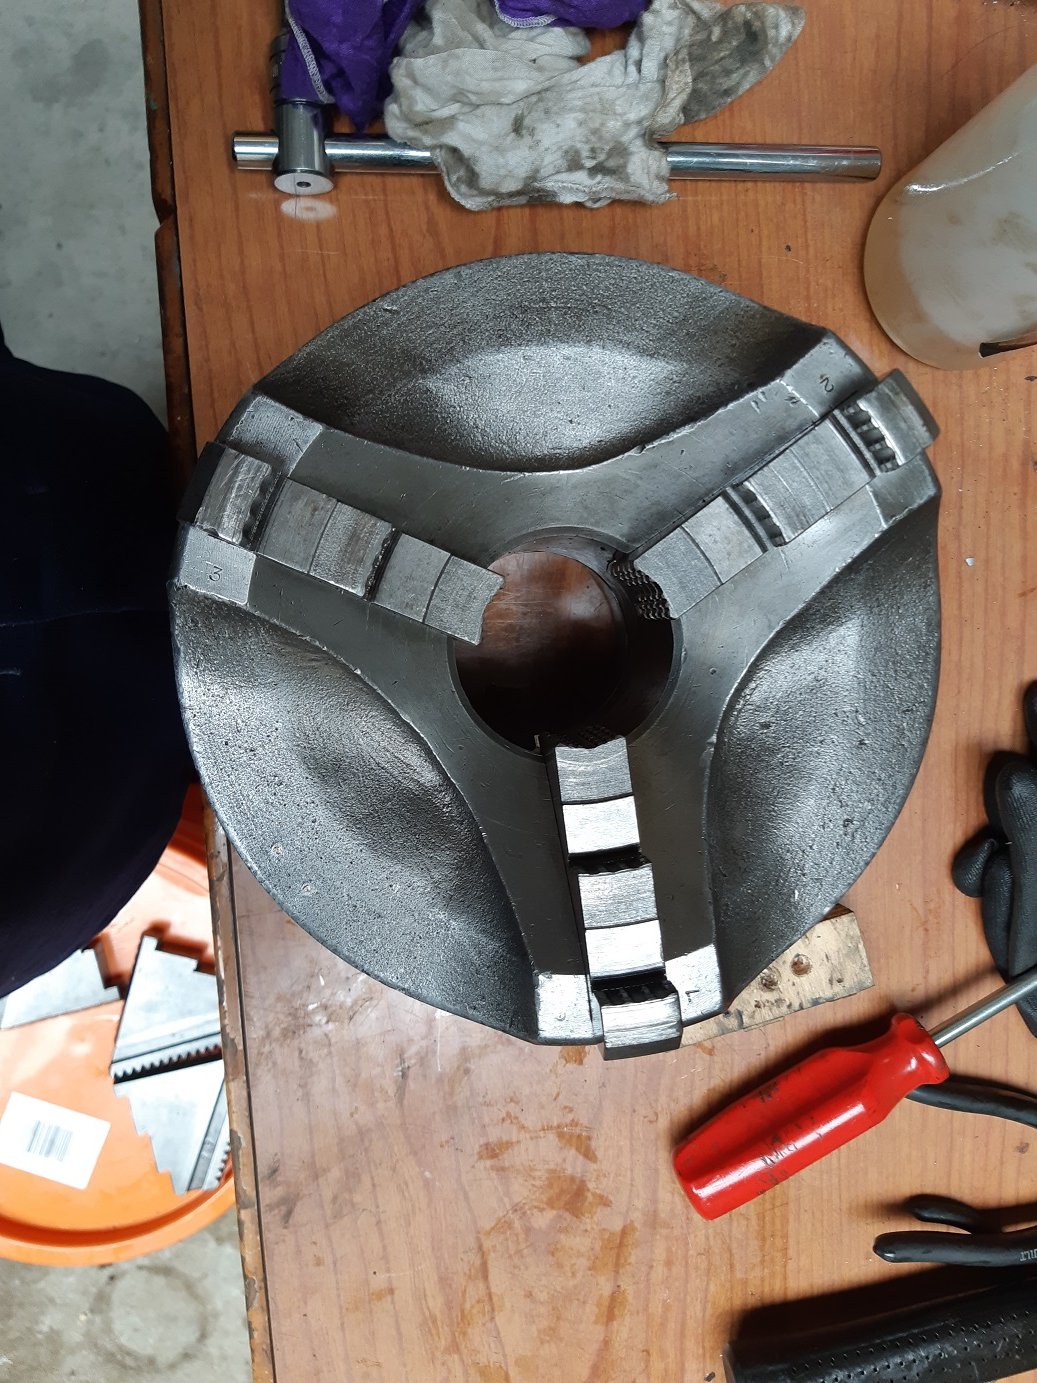
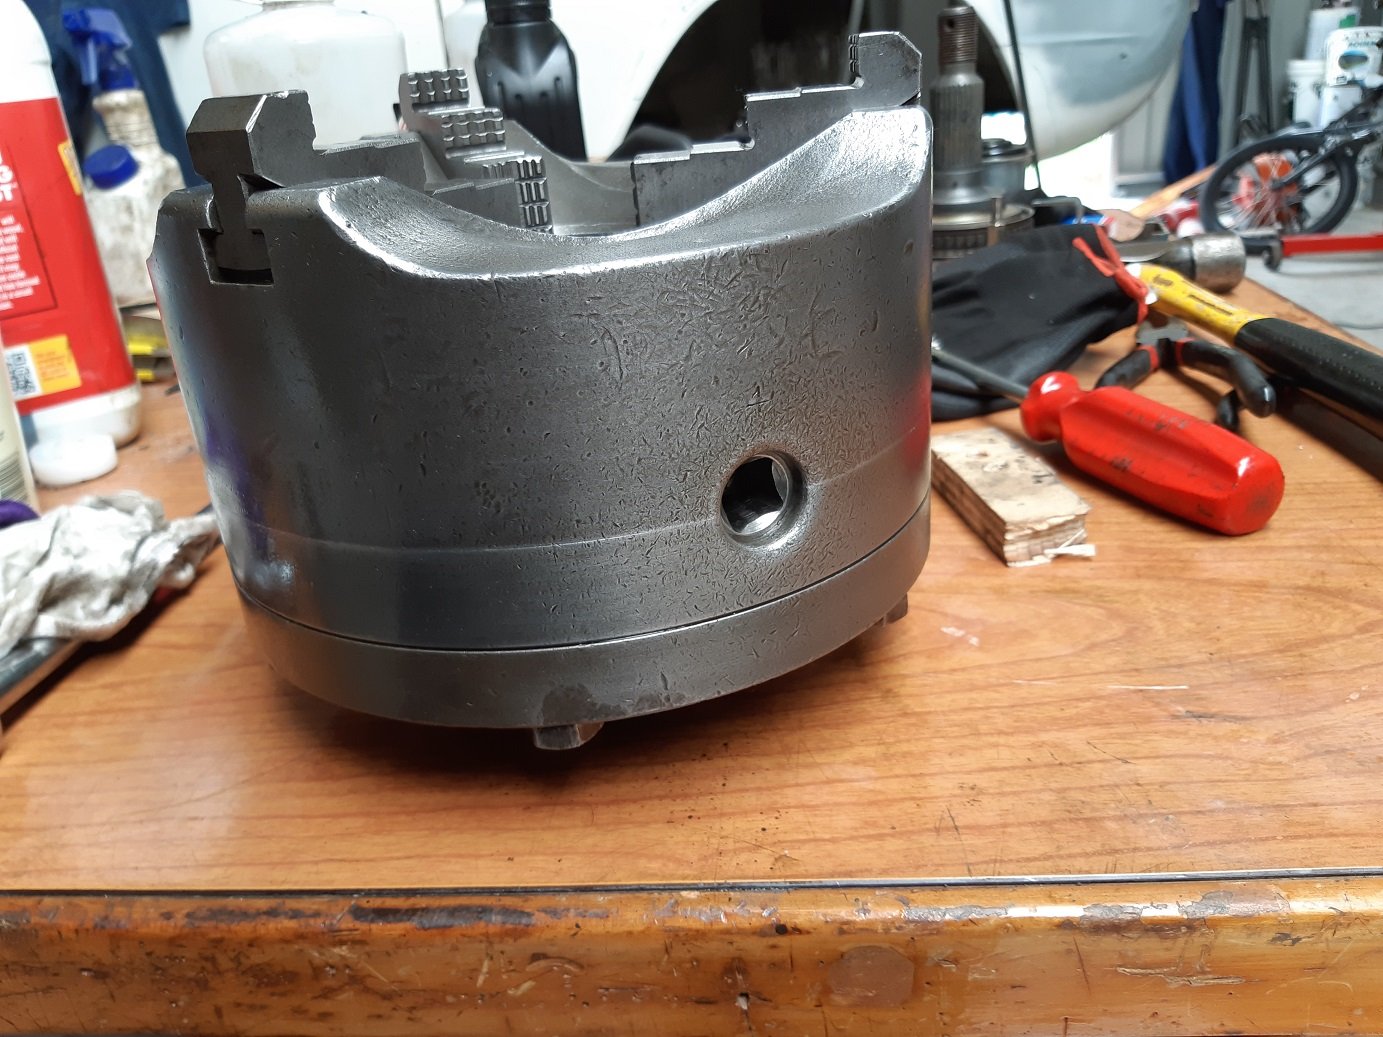
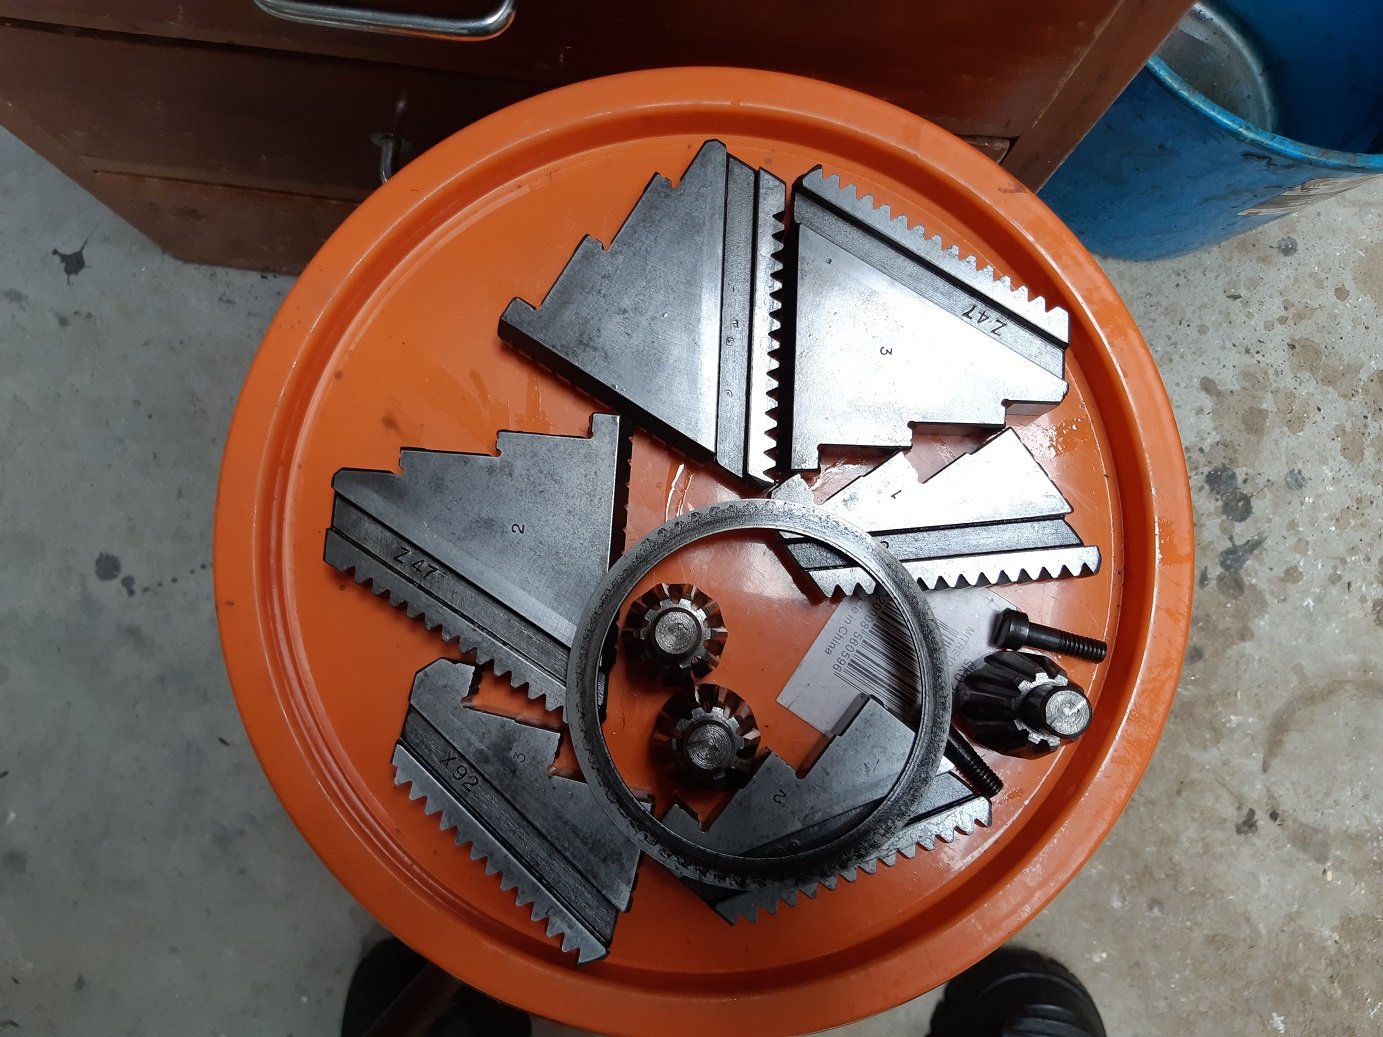
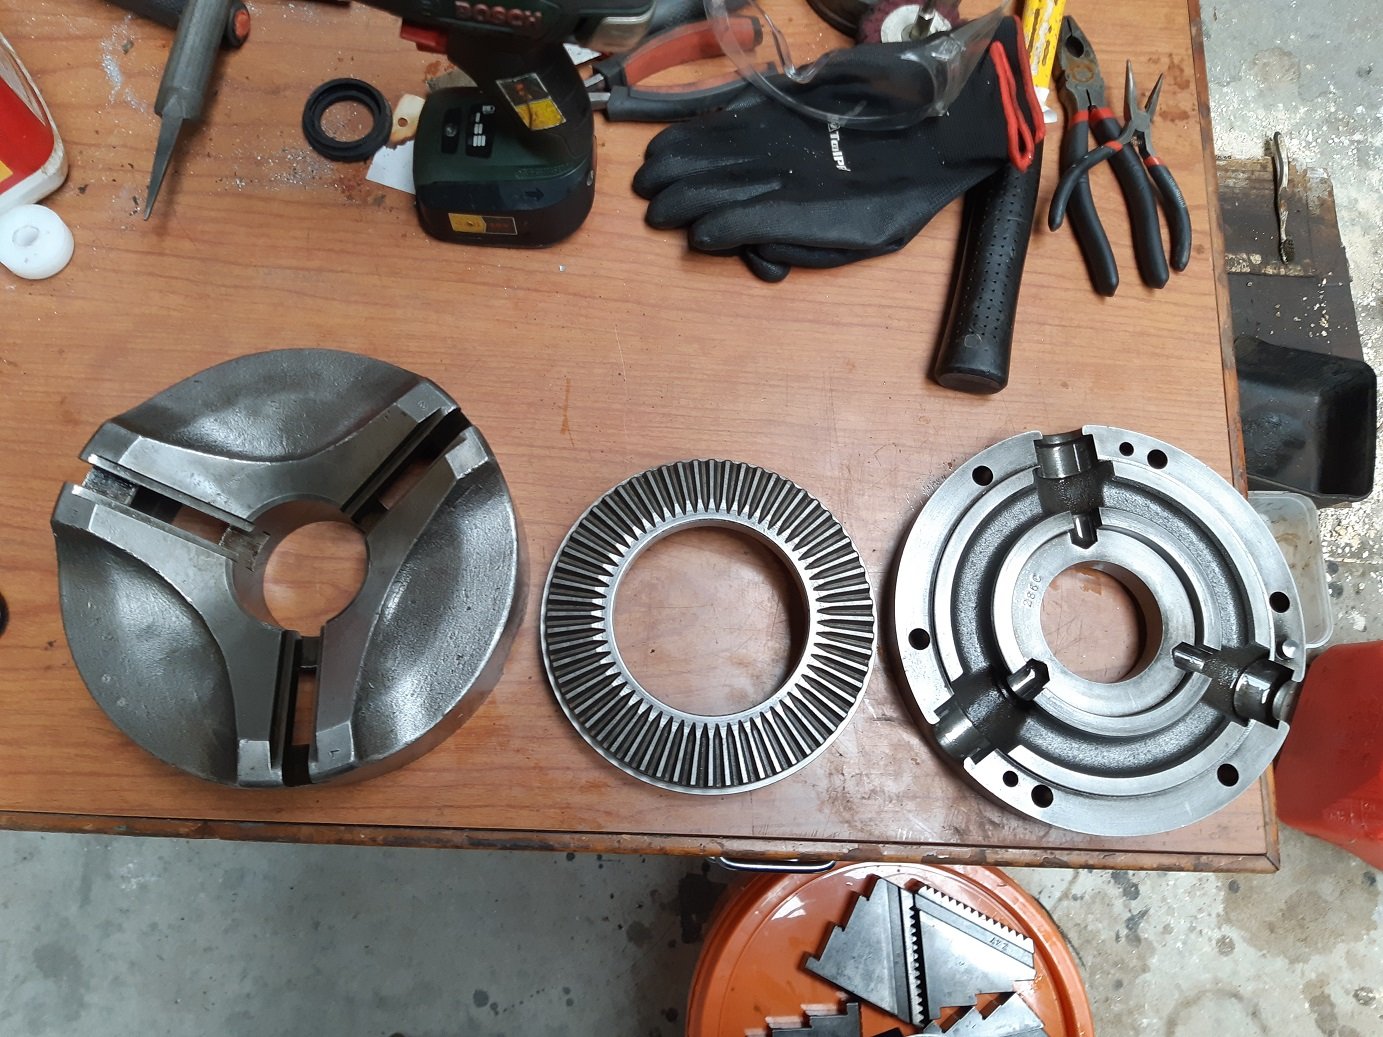
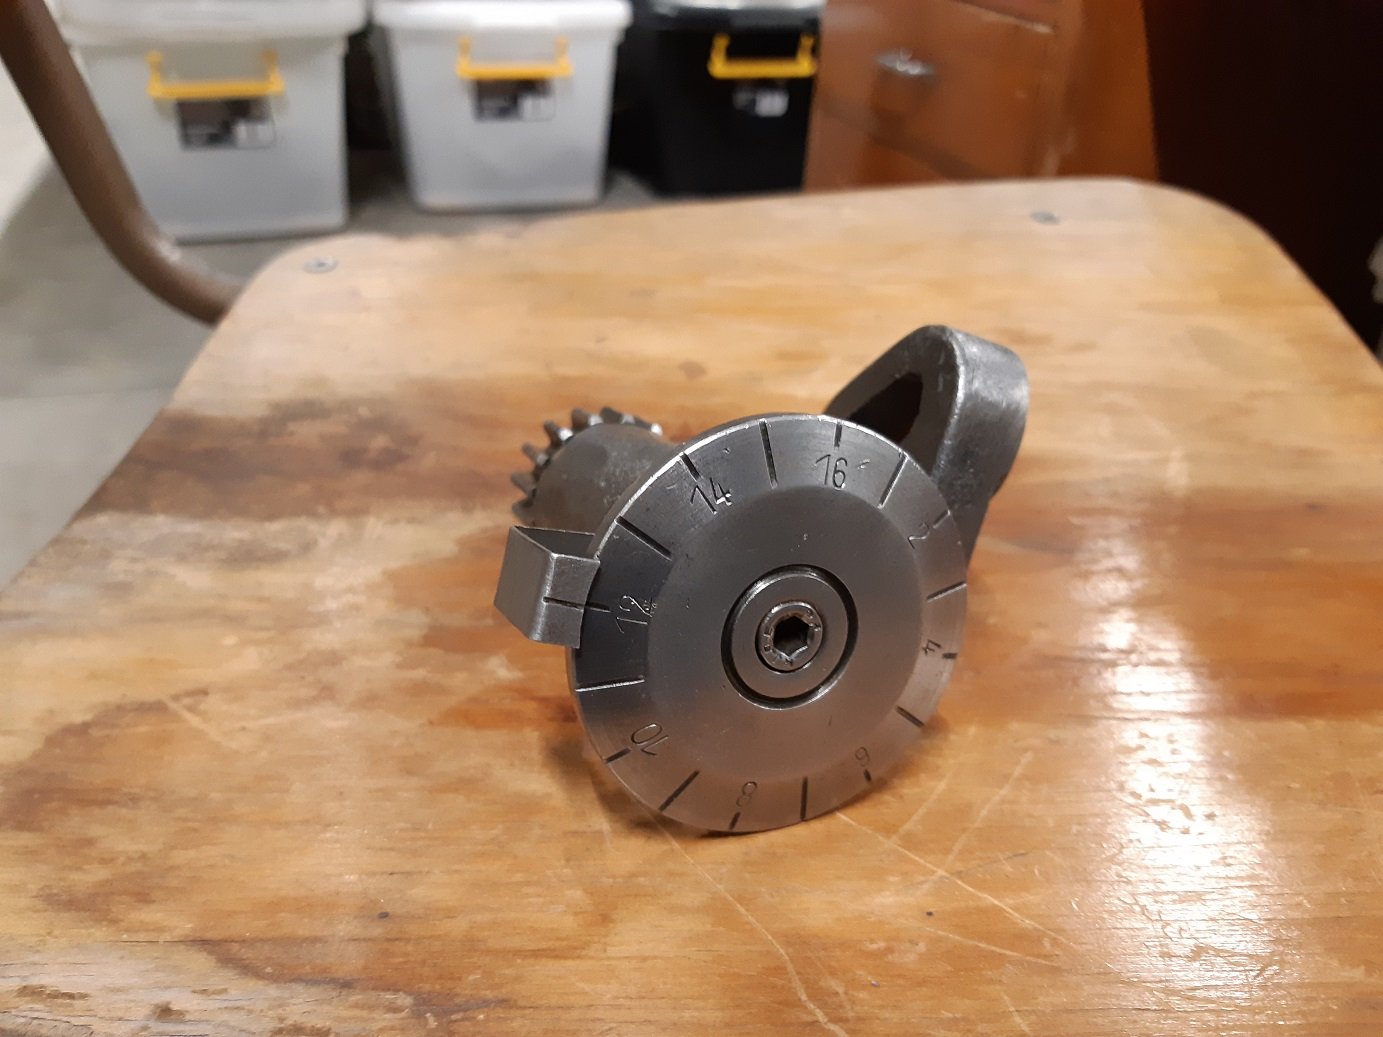
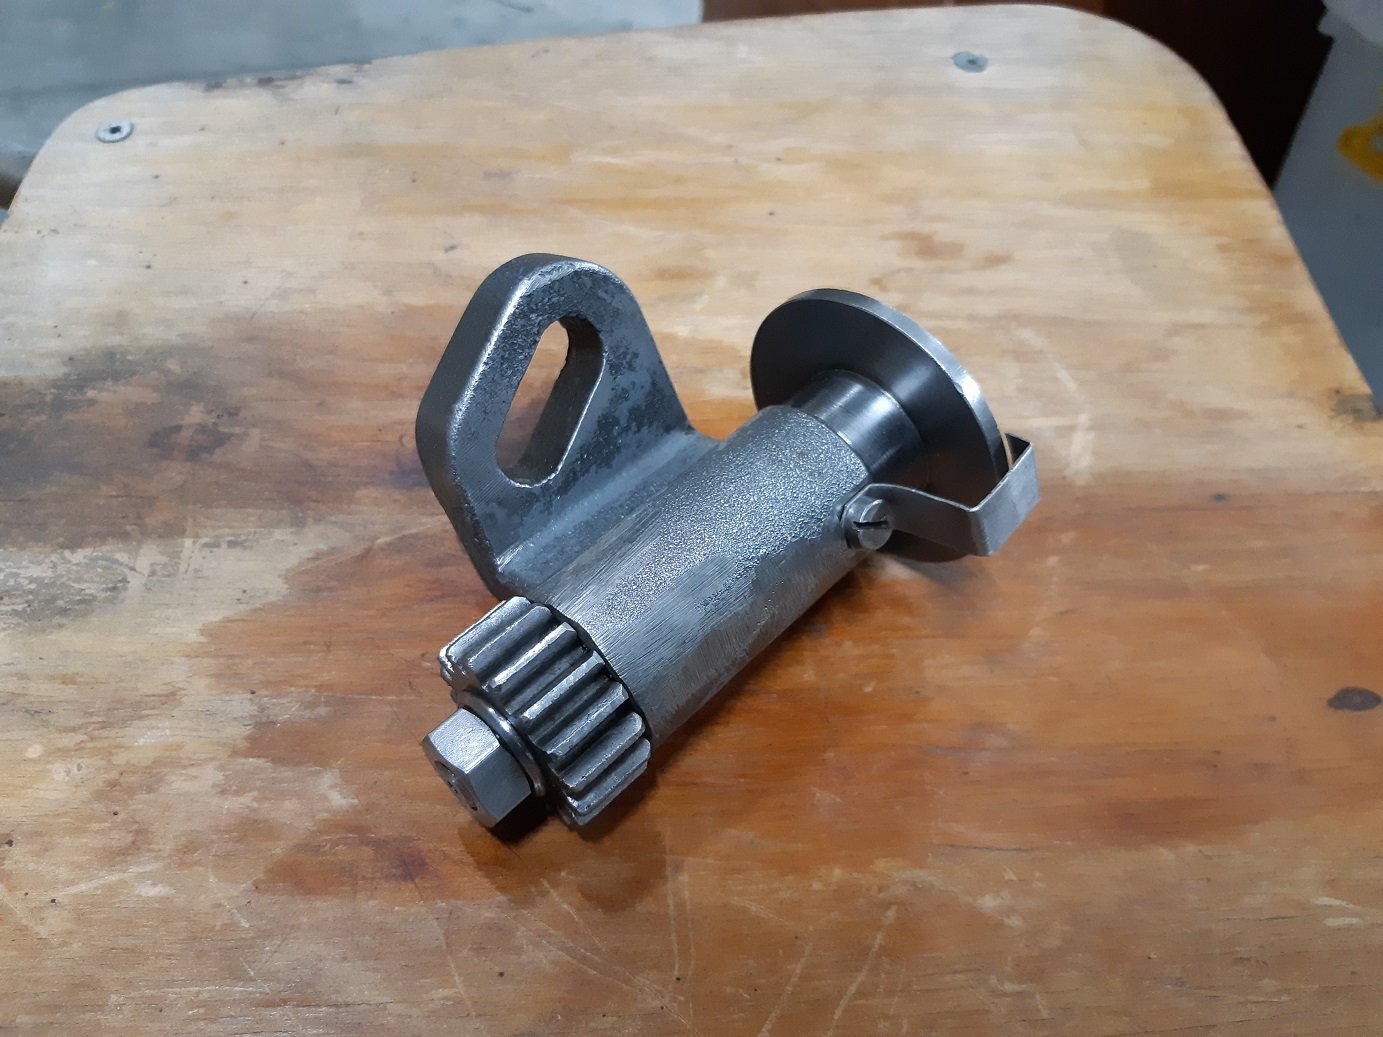
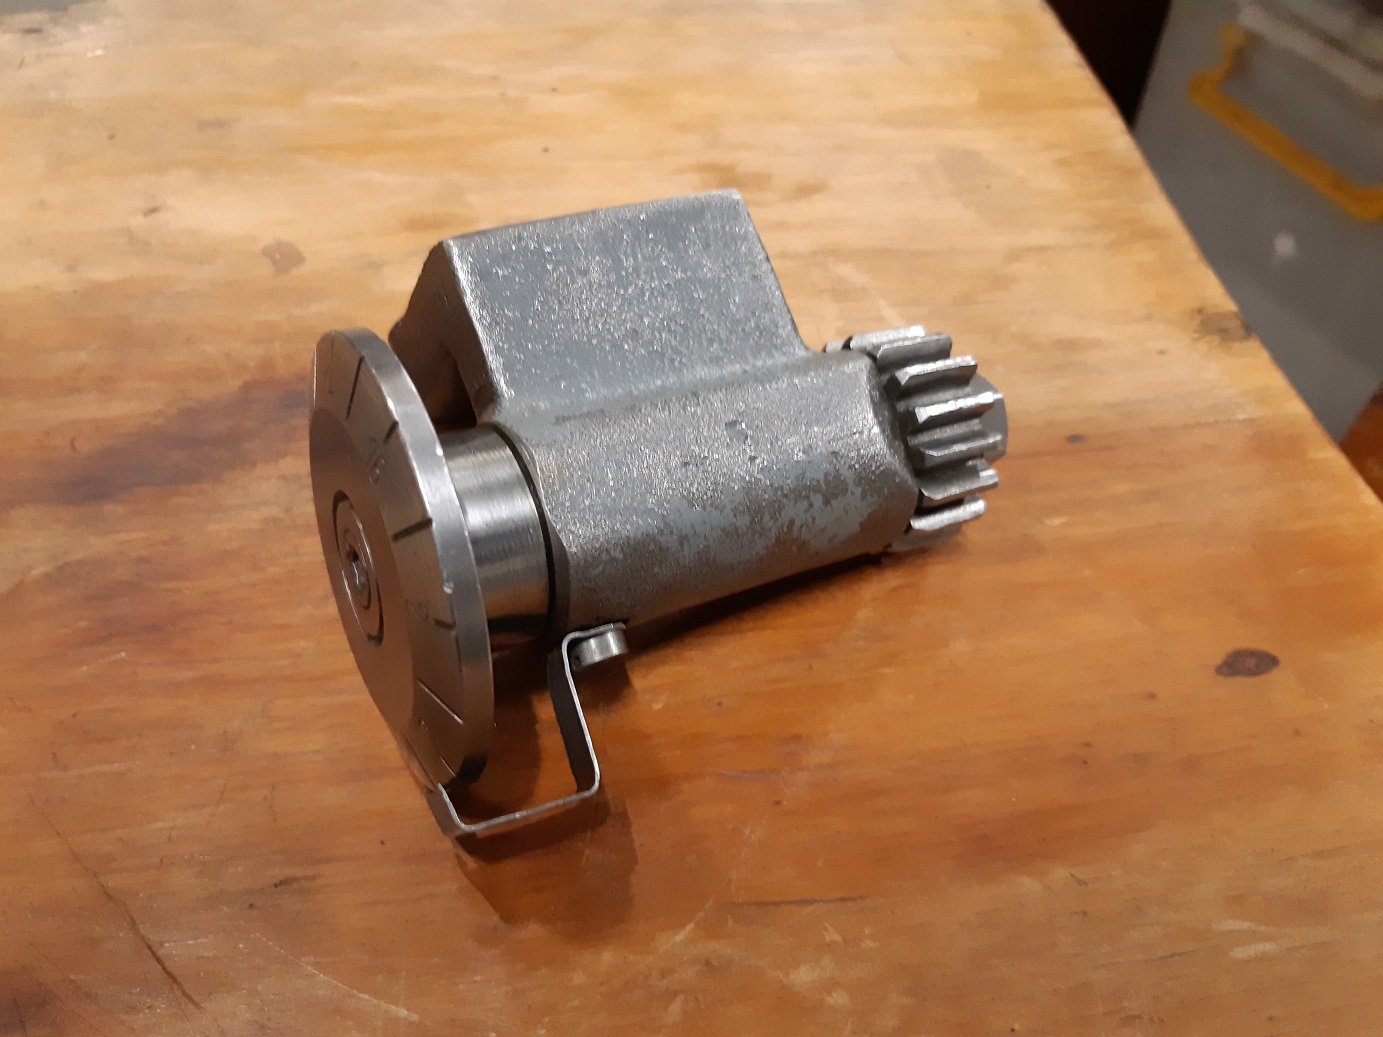
Interesting 3 jaw with the dished face. You are damn good at cleaning these parts up, many shops could take lessons!!1 point


This leaderboard is set to Auckland/GMT+12:00