
Leaderboard


Popular Content
Showing content with the highest reputation on 08/24/19 in all areas
-
Some goodies arrived during the week, so it was time to get under the Tasmin and rip out some hose. Since working under cars on stands sucks, I had another go at getting the car up on the Quickjacks. This time I was much more successful. I had to use the jacks sideways (an approved method, and the same as I used on Snicket) The reason I wasn't so keen on this initially was that the exhaust hangs so low I wasn't sure it would clear the frames. It did. Just. With the Tasmin in the air, it was much easier to roll around under it on my creeper. I started to rip the old fuel hose from the tanks out. No photos of this process because it was messy.... First I disconnected the feed to the pump. This is from both of the tanks, so I had a 10L fuel can ready. I managed to spill a fair bit, but got it into the can in the end. I filled up with 10L the other day, and about 9L or so came out. Some of that difference would be on the ground (and my arms), but it confirms that the tanks were bone dry when I got the car. The hose came out easy enough. It was worse than I thought though, every section of hose was seriously perished, with cracking all over it. The hose also smelt like fuel on the outside. There were some nasty splits in the ends of the hoses from each tank too Bend the hose, and it isn't pretty The new hose is Continental J30R7 5/8" fuel hose. This is a low-pressure suction feed, so didn't need to be a high-pressure hose, it just needed to be high quality. The hose walls are thicker than the old Aeroflow 400 series hose. The old Tee piece is made from a bunch of Aeroflow bits. In the interests of simplicity, I replaced it with a 5/8" solid brass Tee Old mate wasn't too hot on cutting ends straight, so a couple of clamps were hanging over the edge. Not best practice. The new Tee section And installed into the car. The two tank outlets are very easy to access And the Tee hangs above the drive shaft (and there is evidence that the old setup had been in contact with the driveshaft at some point!). The zip tie is there to hold it up and clear of the shaft. The hose was routed slightly differently to simplify the route, and then cut to length and connected to the pump. The hose was zip-tied to the chassis in a couple of places to secure it, making sure not to pinch the hose as it had been With the tanks connected I want to replace the fuel filter and inspect the accumulator. The whole lot (pump, filter and accumulator) are mounted on a plate above the chassis, in front of the LH side rear wheel. On the later 280i the filter is mounted in the engine bay. The black one is the accumulator, and the silver one is the filter. The pump is out of shot to the left (with hose removed). This is the other side. Let me illustrate the fuel setup with some coloured arrows. Fuel comes into the pump from the tanks (orange), out of the pump and into the accumulator (blue), out of the accumulator and into the filter (yellow) and finally, once filtered, out of the filter and along hard lines to the fuel distributor in the engine bay (green). These hoses weren't too bad visually, but no point in leaving them there. One quick check for seeing if your accumulator is stuffed or not is to disconnect the vent hose from the back of it, and see if fuel comes out. Mine was full of fuel. This vent hose should be dry, because it's only to help equalise the air inside the accumulator, and shouldn't have any fuel contact. The fuel is (usually) separated from that side of the accumulator by a diaphragm. If the diaphragm splits, it lets fuel through and back into the tank instead of holding pressure. My accumulator is stuffed. Thankfully I had planned to remove it completely and will be using new fuel hose to bypass it and route the pump straight into the filter. The fuel filter has banjo fittings on it. The inlet converts to rubber hose, whilst the outlet is to a hard line. Some of the hose clamps on the fuel hoses had been installed by a scumbag and weren't accessible from the underside. I'm not too sure how they were even done up, unless it was off as a complete assembly and clamped whilst on the bench before fitting. Since I wasn't using the hose again I chopped it off, unbolted the accumulator and pump and removed the lot. The accumulator looks very old and probably original to the car. The filter had been replaced, but it had a date of 2005 on it. The receipts say that the "recently replaced" filter was leaking back in 2011, so either it wasn't that recent, or it was old stock when fitted. I ordered a filter online based on the original filter numbers I had, and even with triple checking, it's wrong. Yeah, that's not gonna fit. It's possibly the correct filter for a later car with the filter in the engine bay. Working off the number on the filter, I need a Ryco Z399 instead. One has been ordered, along with a Z71 oil filter. Unfortunately that leaves me at a standstill now. Hopefully the new filter will be here this week and I can fit it after work one day. In the meantime I had ordered a new air filter, so went about fitting that. I had previously checked the filter and noted it was dirty, and the wrong filter. The old filter had rounded corners, so left an unfiltered gap at each corner. The correct one for the early airbox is a Ryco A1345. No gaps Parts bin special I'll probably lose some +6hp gains from closing up those gaps, but at least I know its right, and won't be sucking in unfiltered air anymore. Sigh. Sometimes I just wish some people wouldn't touch cars. A little knowledge is dangerous.8 points
-
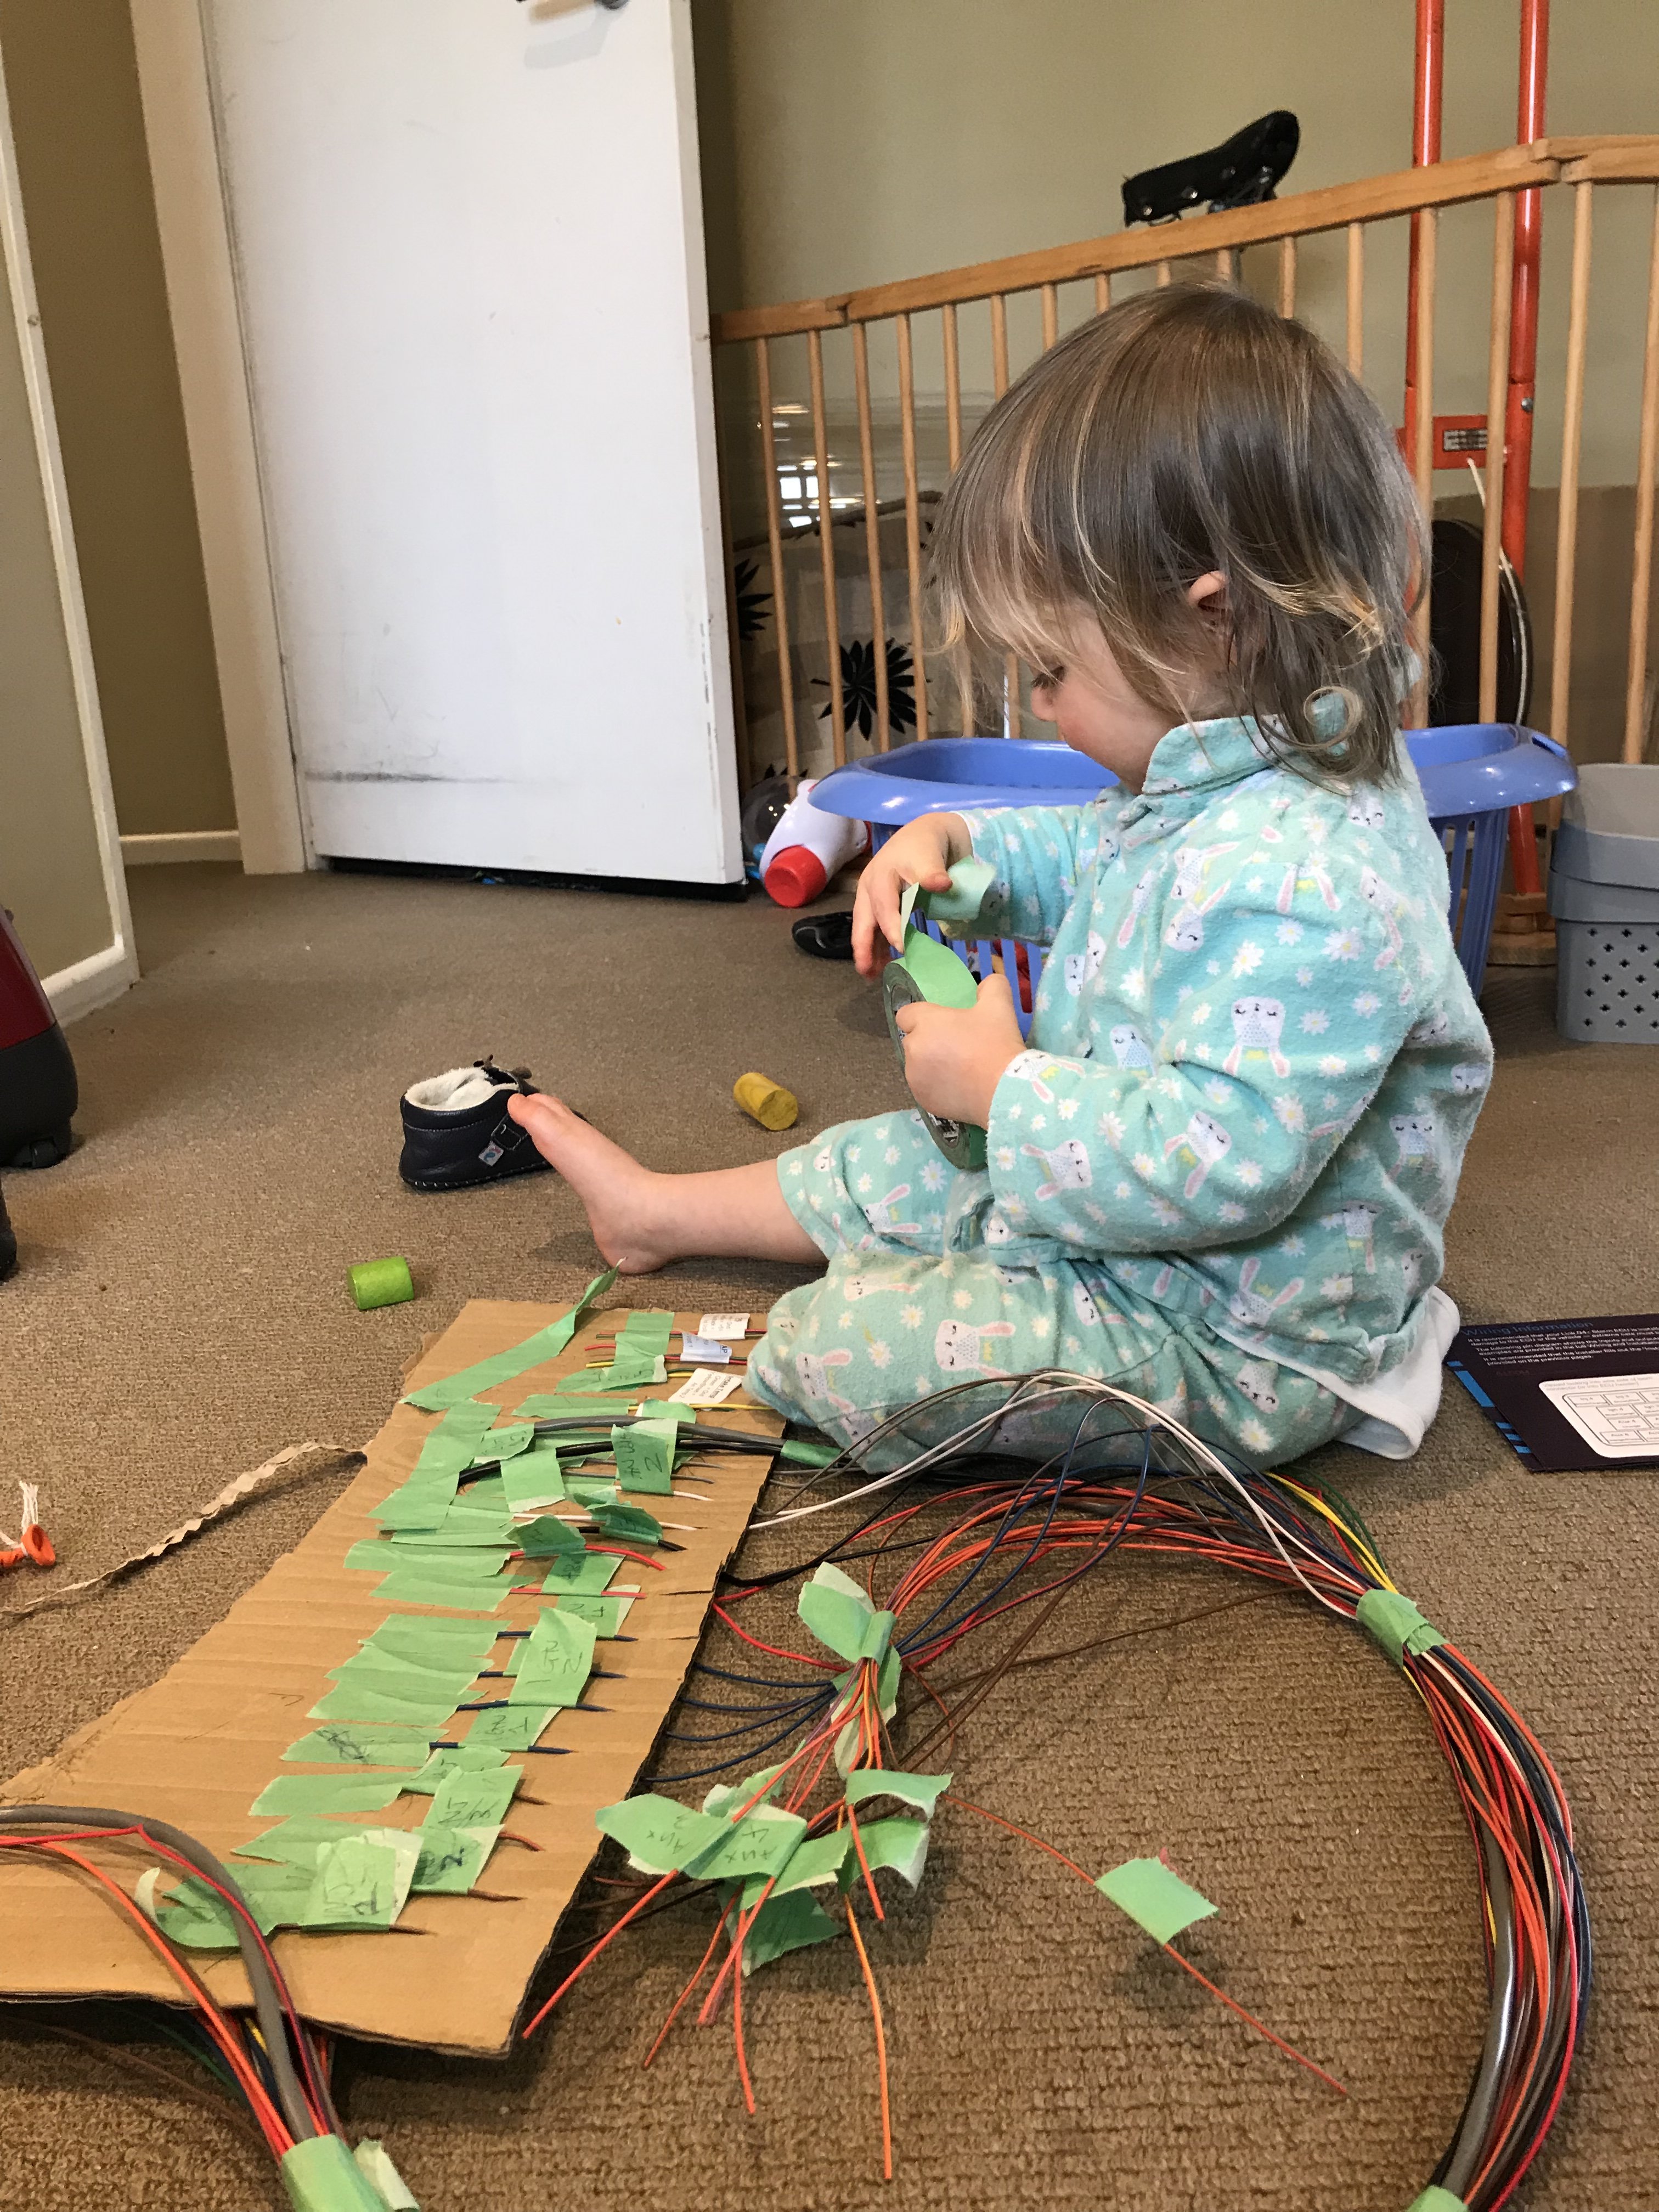
Alrighty ended up buying a Link G4+ storm and I am going to replace the engine loom. I’ve outsourced that job to my little girl so that’s under control:
 8 points
 -
Been distracting myself with some work on this. My Subaru was stolen on Monday sadly, and it has been a very eye opening experience in terms of the police, insurance companies and the shitty side of the world in general. While not an OS car, as some have mentioned- a classic regardless. Mine was a really tidy and original example, and I had some great restoration plans ahead. I am still hopeful I will get it back. Anyway, I decided to paint a few bits this week including the front bumper and the door tops- which are mostly made of rust now it seems. Surprisingly, Supercheap could mix me two cans of Spanish Olive without evening knowing the paint code. The lady commented on what an, "Interesting colour," it is. As you can see, my abilities to paint and retain a natural patina are astounding, and nothing to do with the fact that I am actually shit at painting... Finished bumper Sanded, then primed, then new colour Colour match is good, rest of the car is quite faded despite a polish earlier in the year. I think it will benefit from the wheels being powder coated black. Imagine it will be getting more attention now, and the Lotus isn't holding my attention much. Maybe things will change. I am going to daily this for awhile and see what happens.
6 points
-
HOW DO YOU WEIGH A BLOODY MILLENNIAL? IN INSTAGRAMS.6 points
-
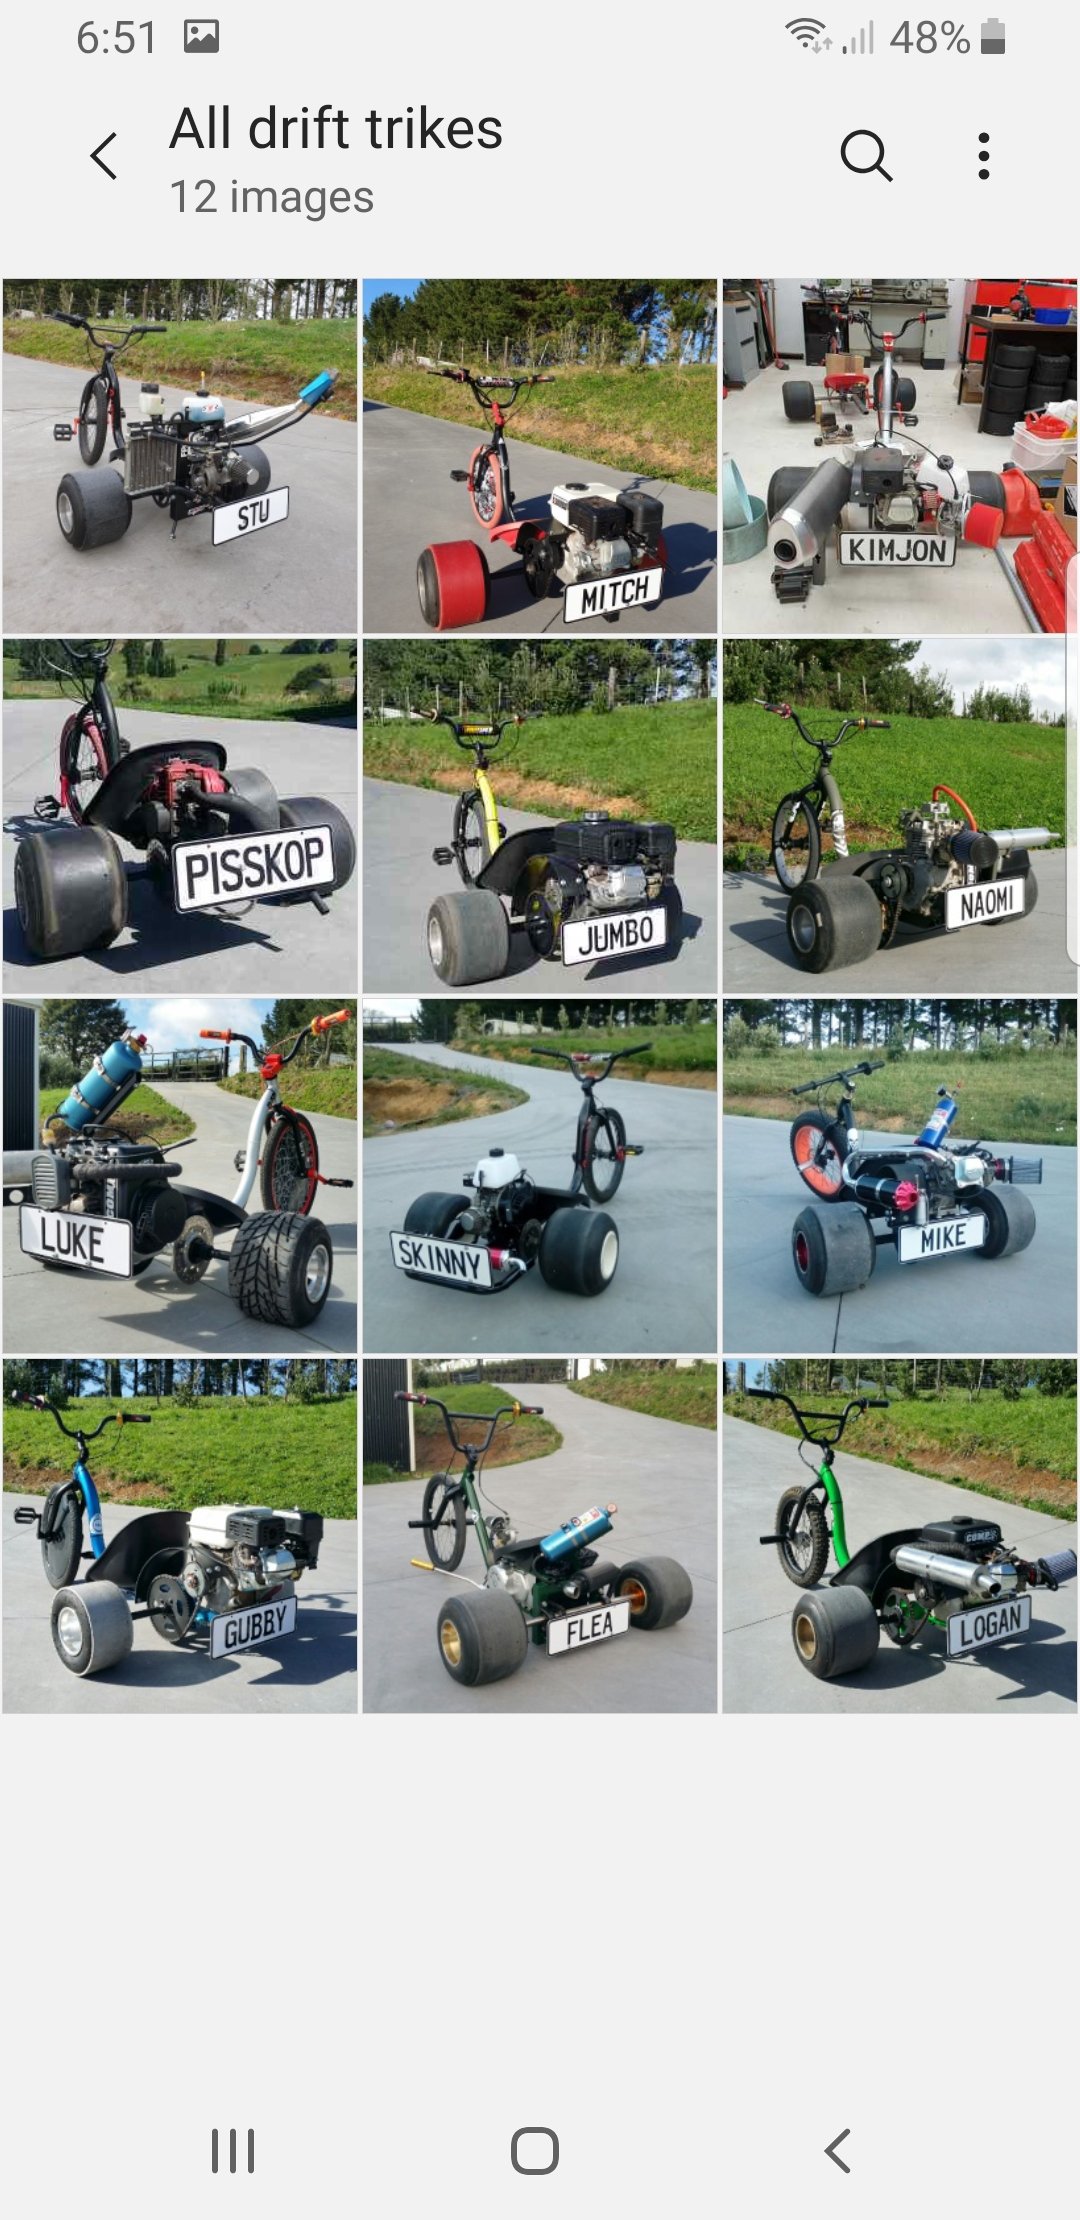
Well it was a great day. All but one trike went flawlessly all day long. About 5hrs of redlining these poor motors with governors removed...and they just took all the abuse. The one trike that didn't go the distance was the Stu-trike. Weirdly it was a good problem I created...too much power! It just tears chains up... so I'm going to look into if there's something European made for these race engines? As the Ebay (Chinese) chain isn't strong enough to take the power of this trike. Anyway here's a quick cellphone vid: I spent the day riding, not filming so apologies for the lack of photos and vids.5 points
-
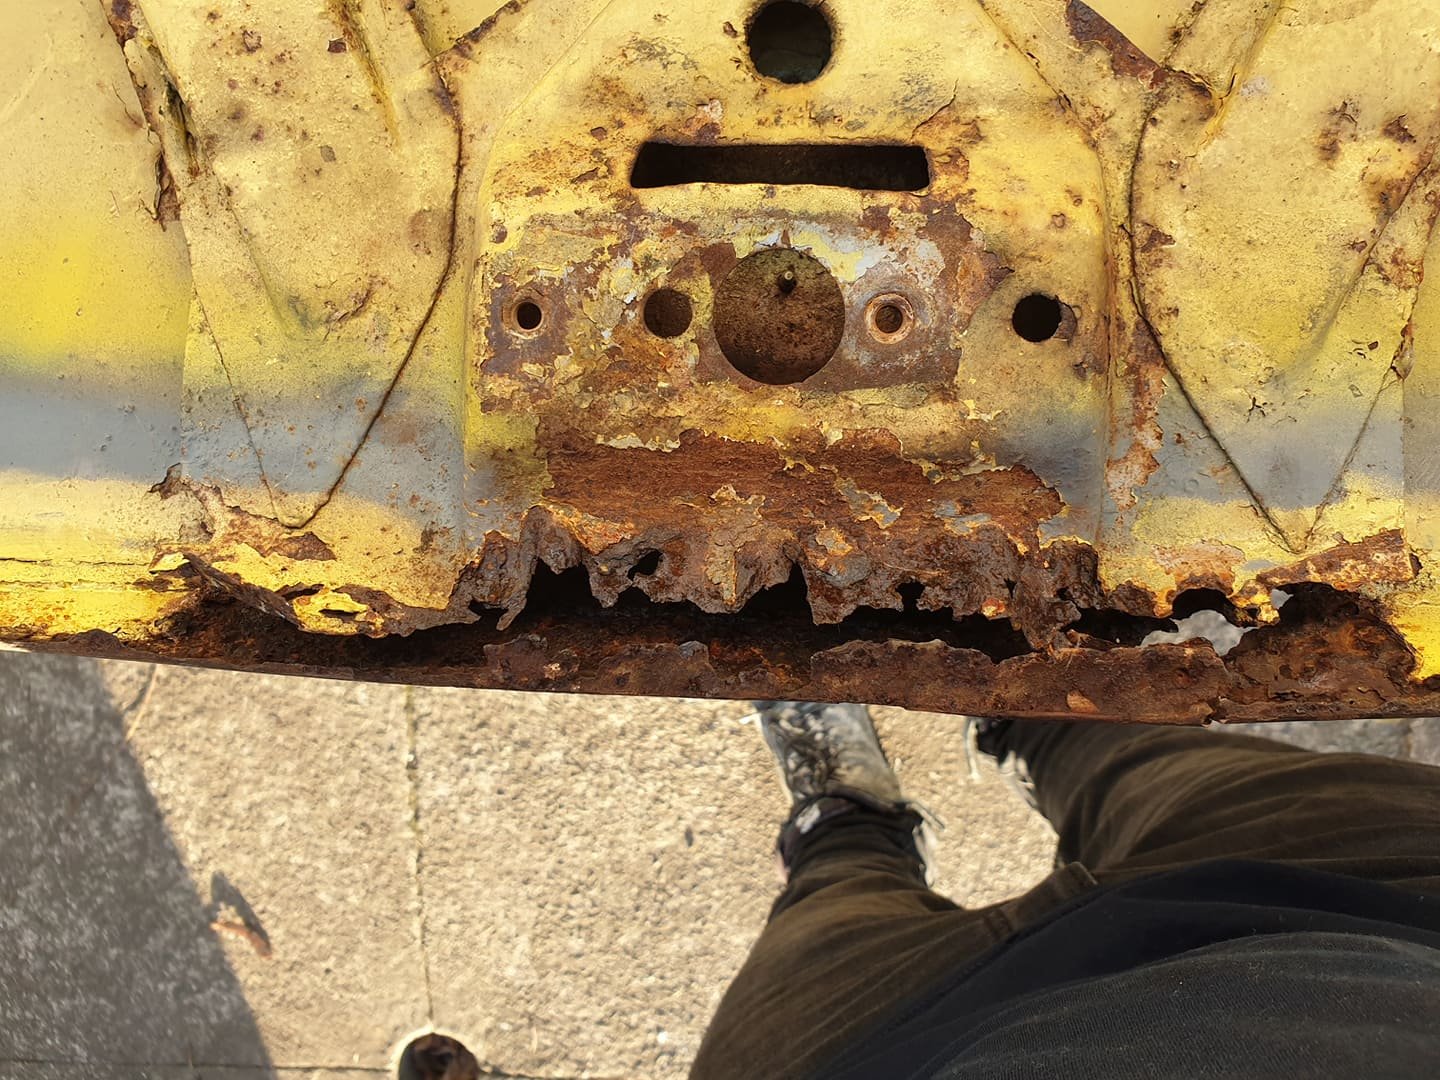
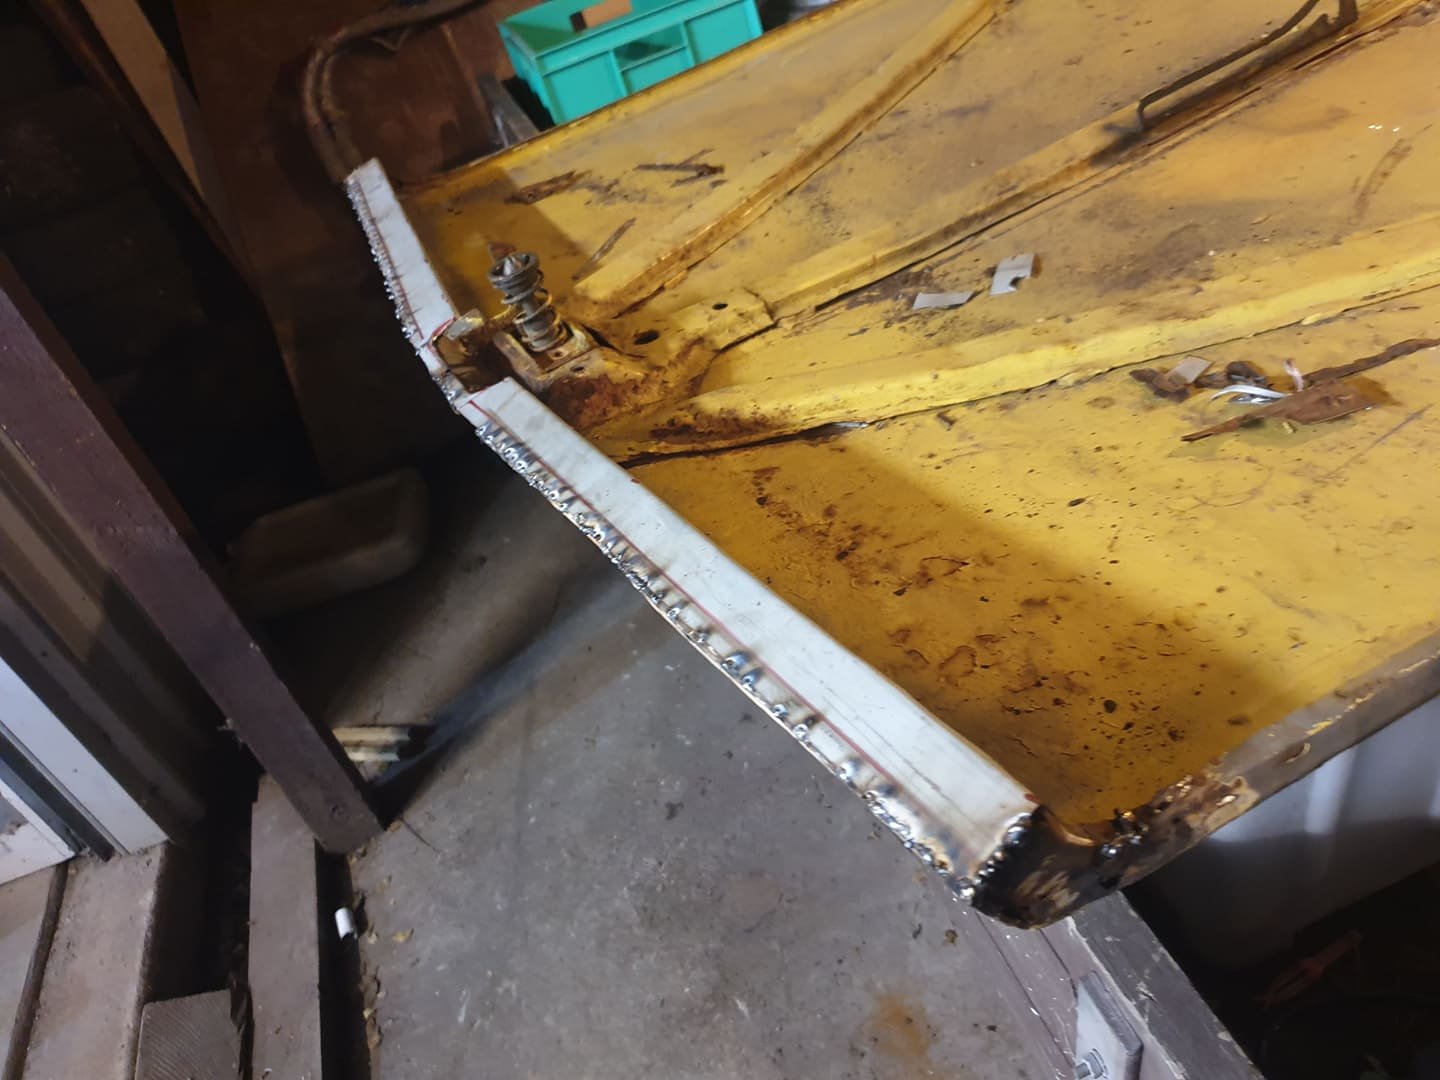
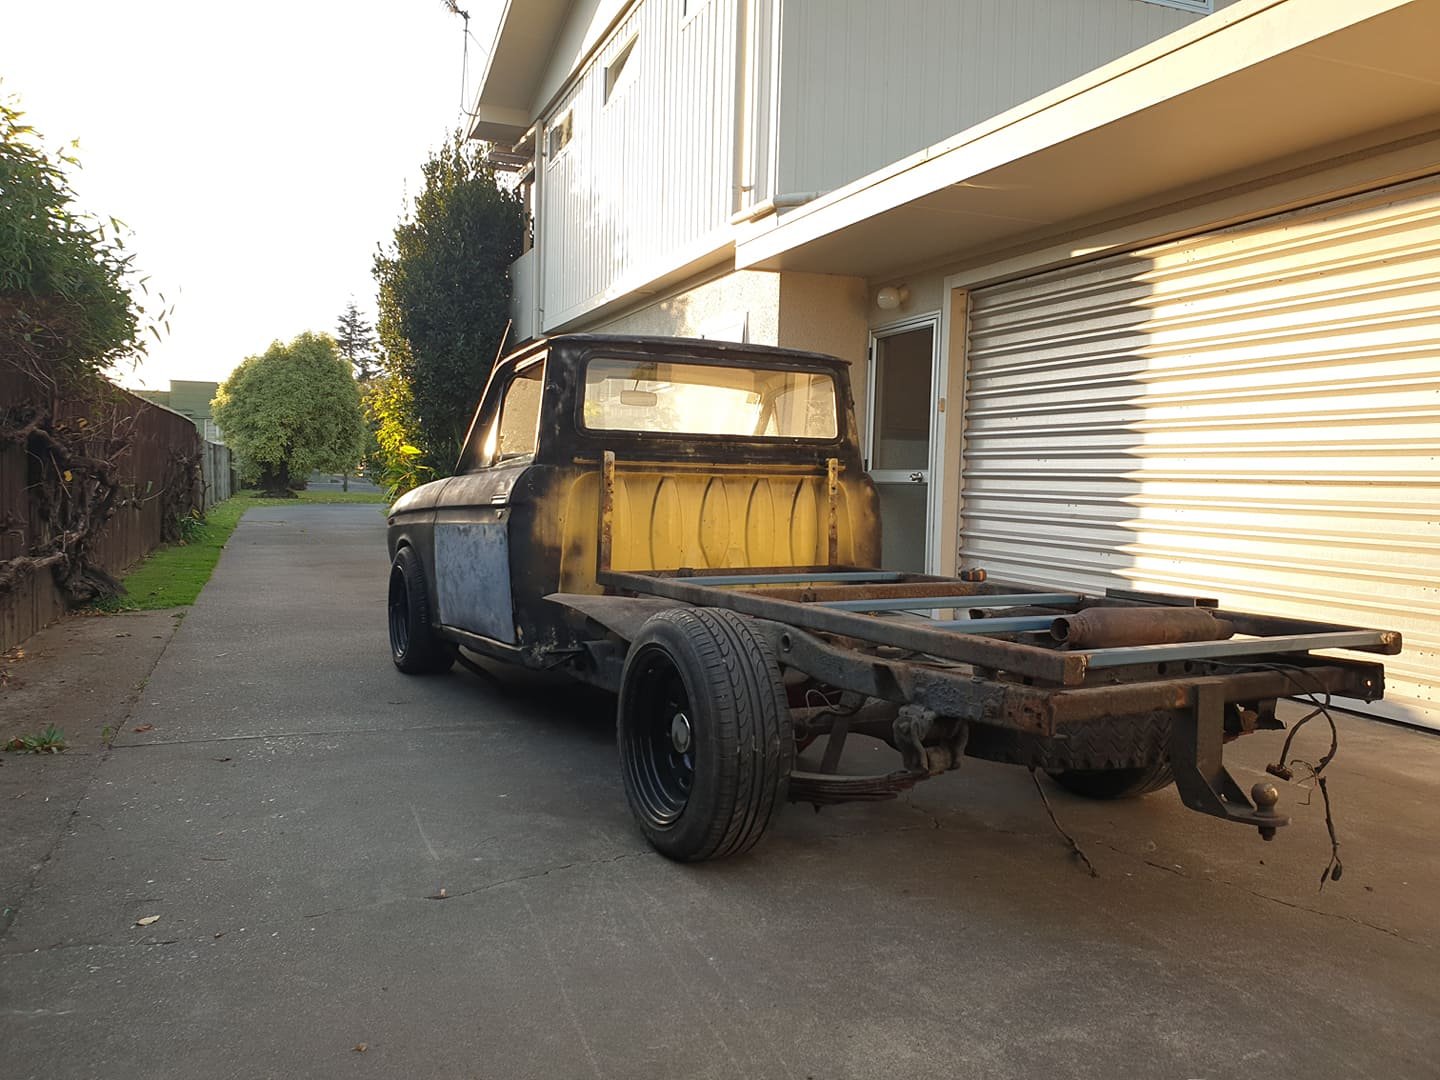
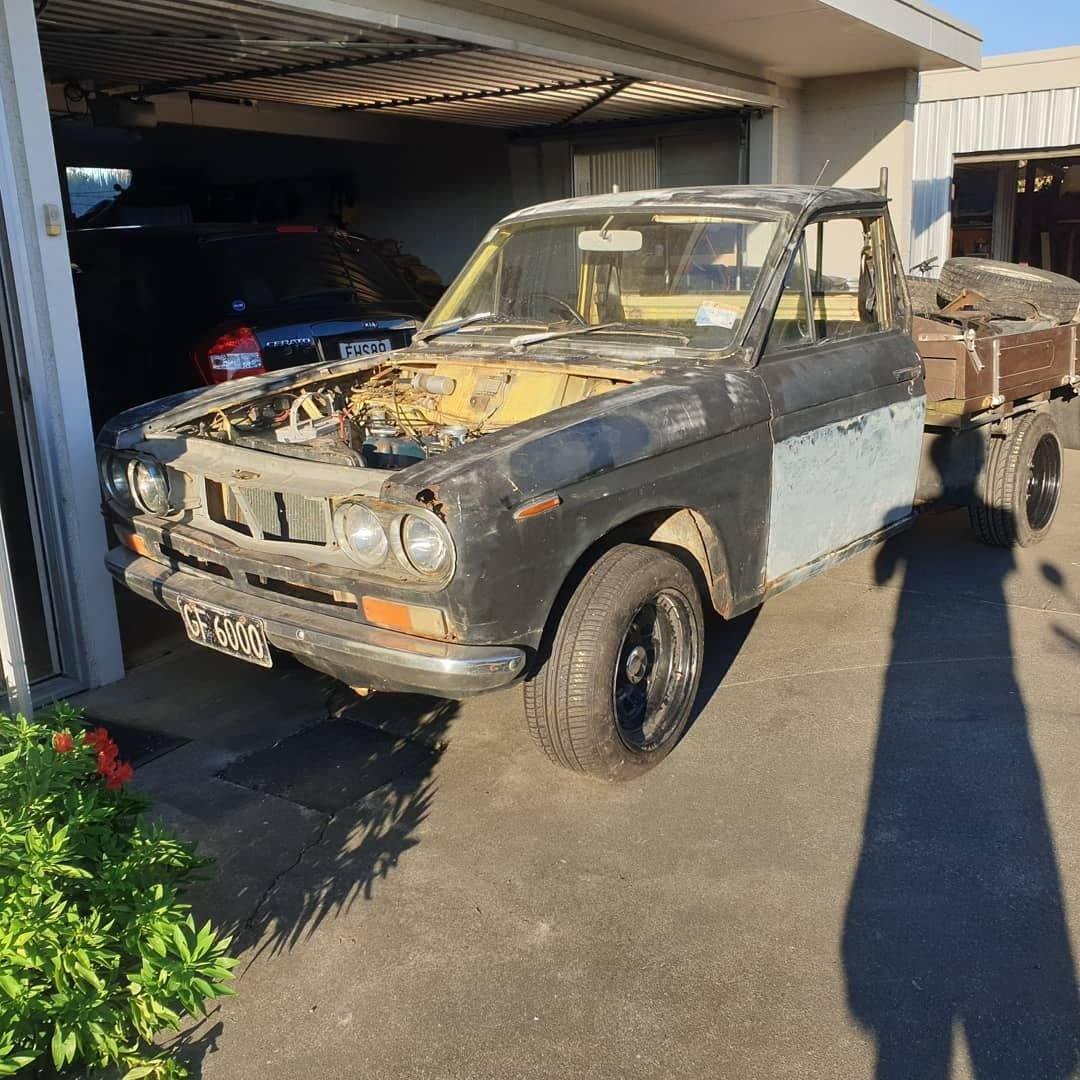
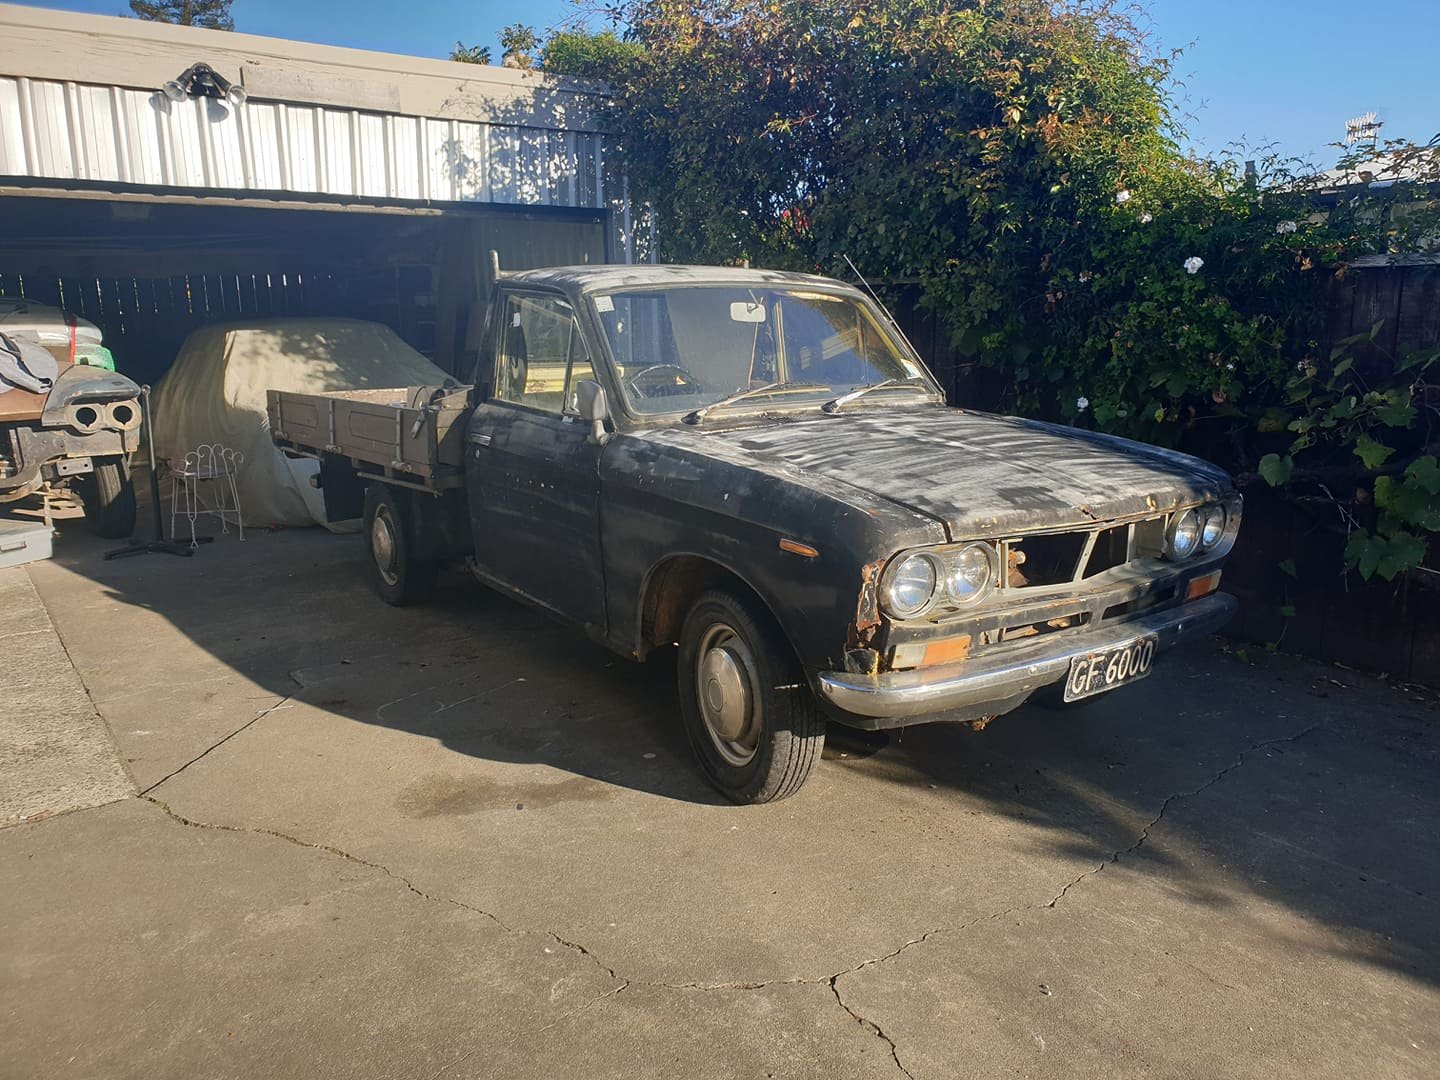
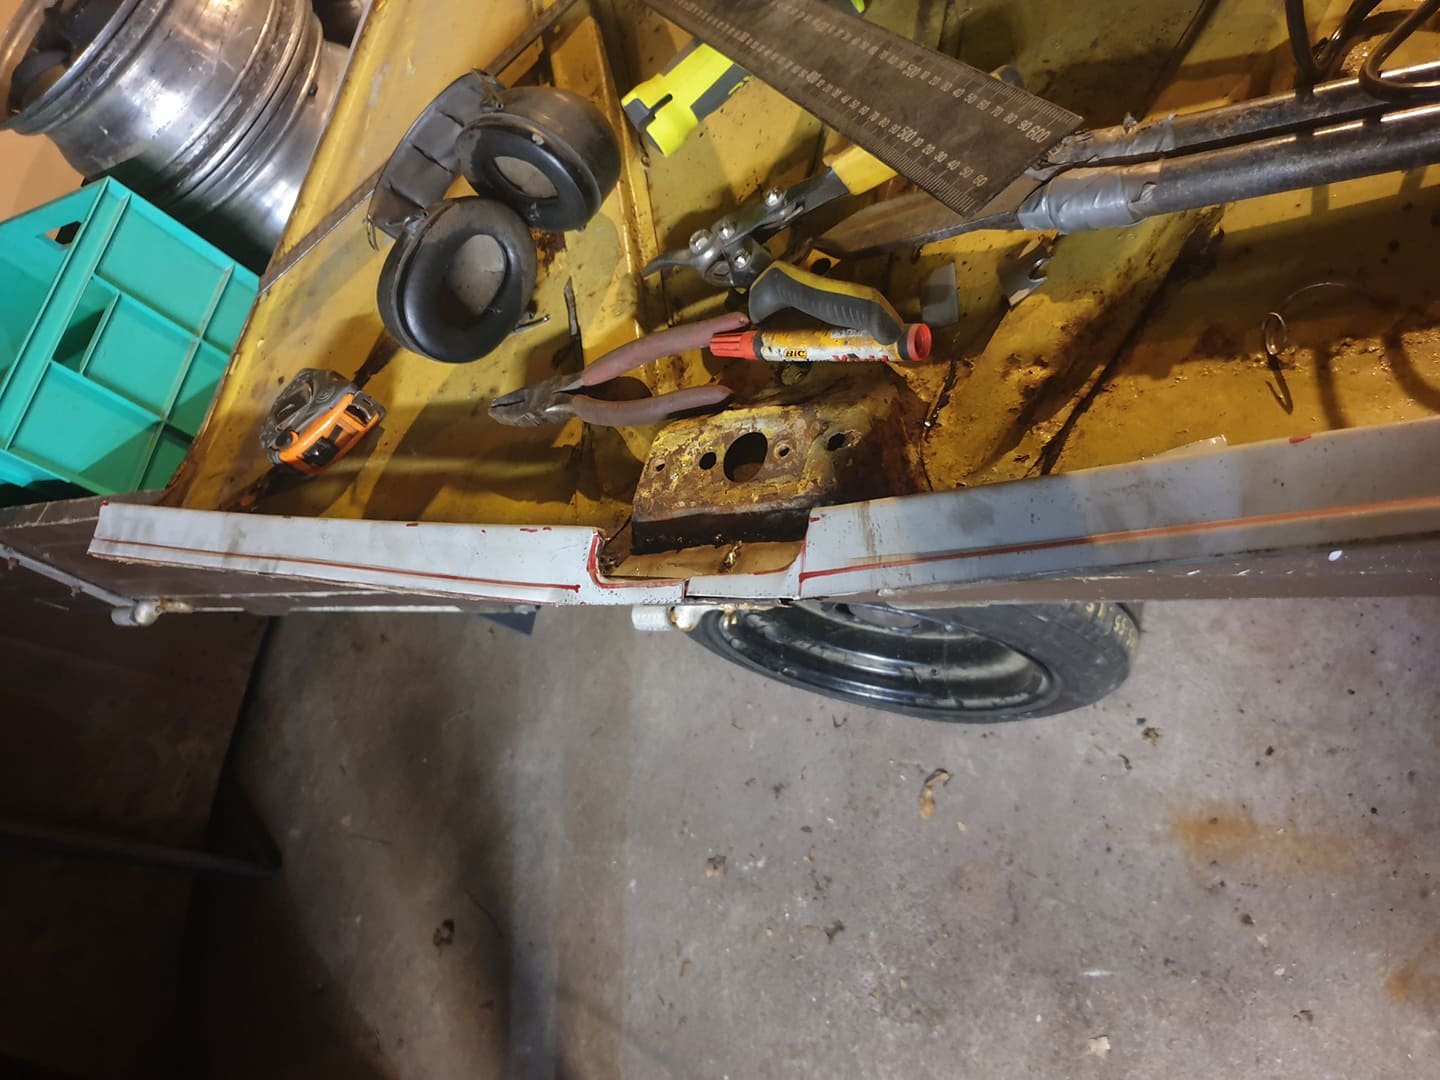
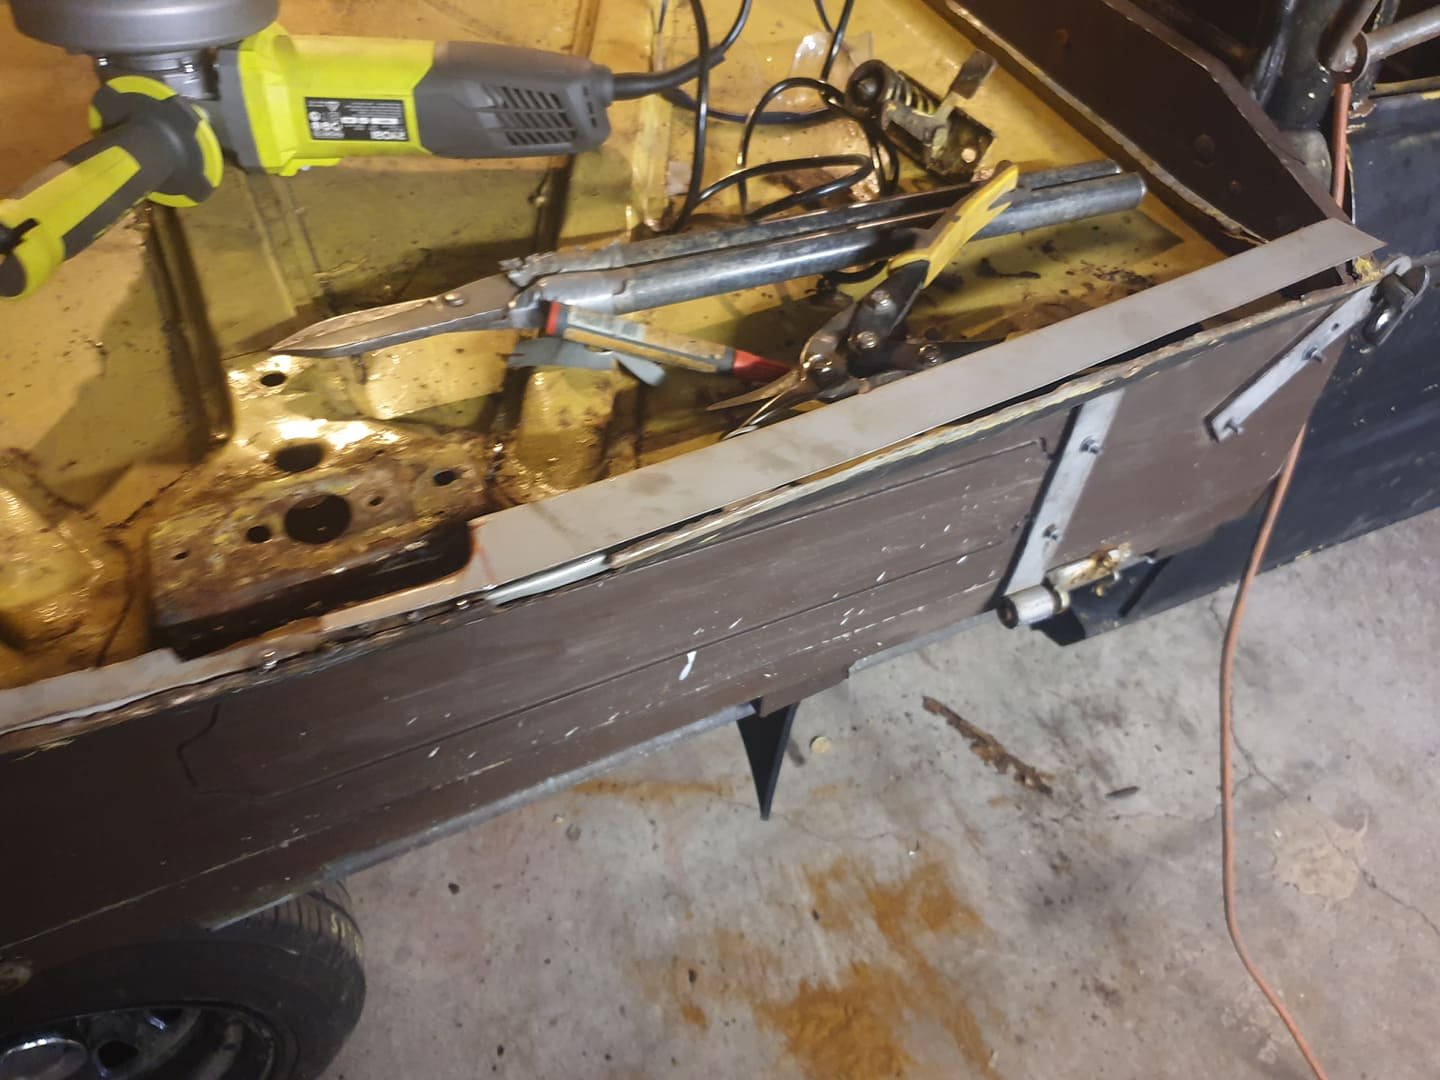
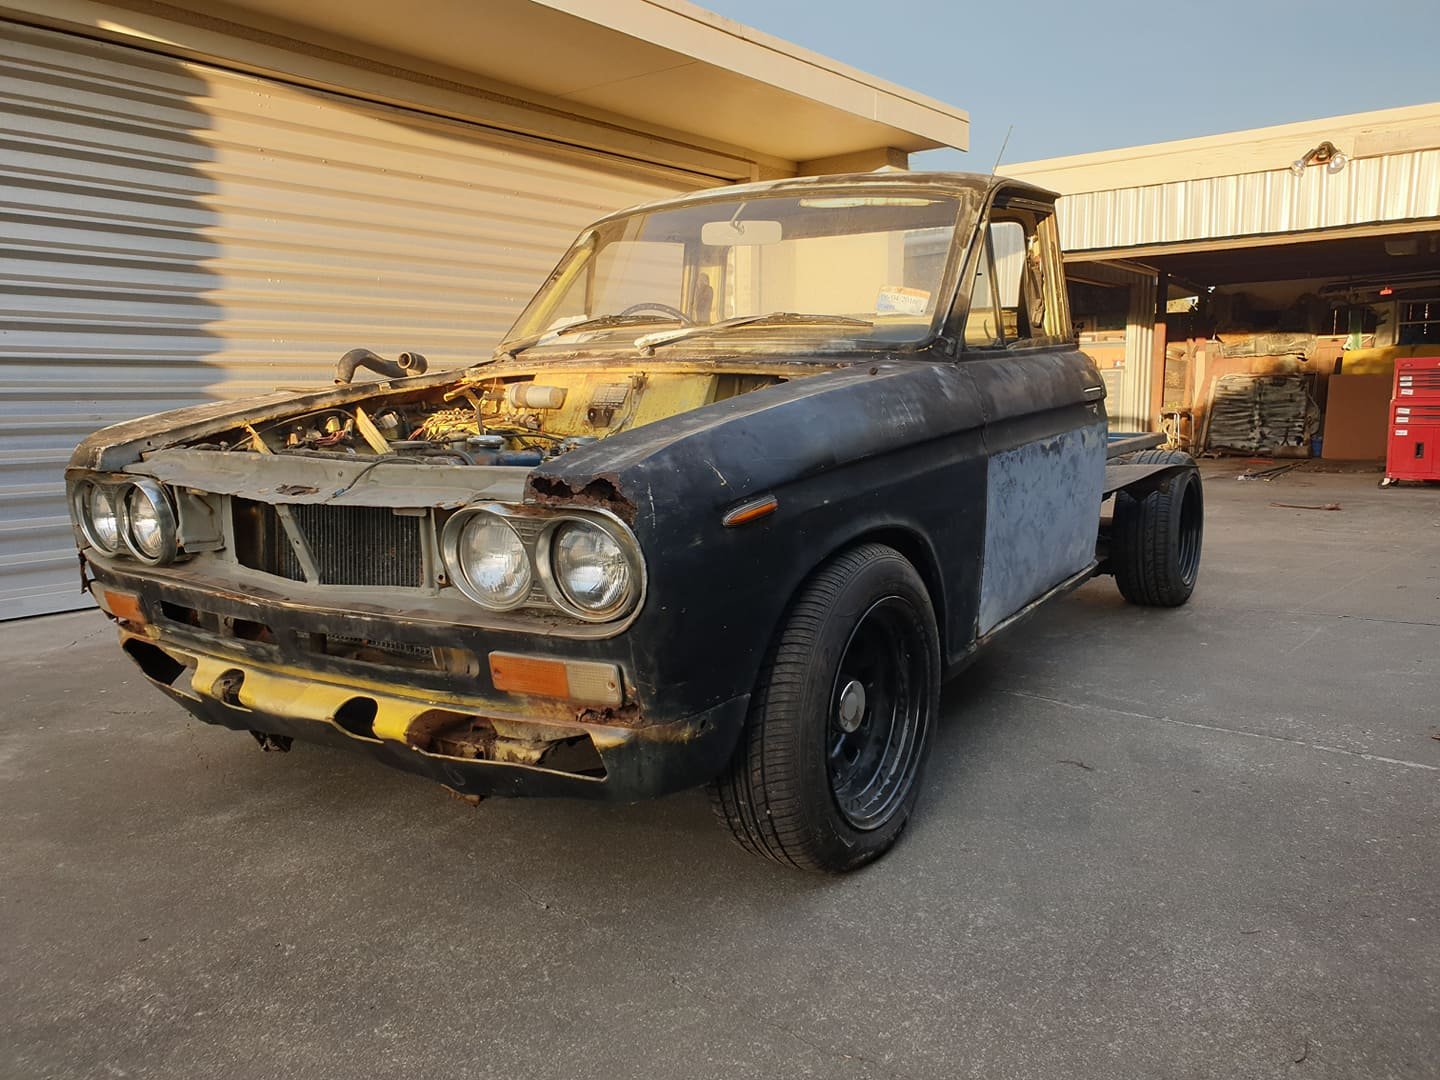
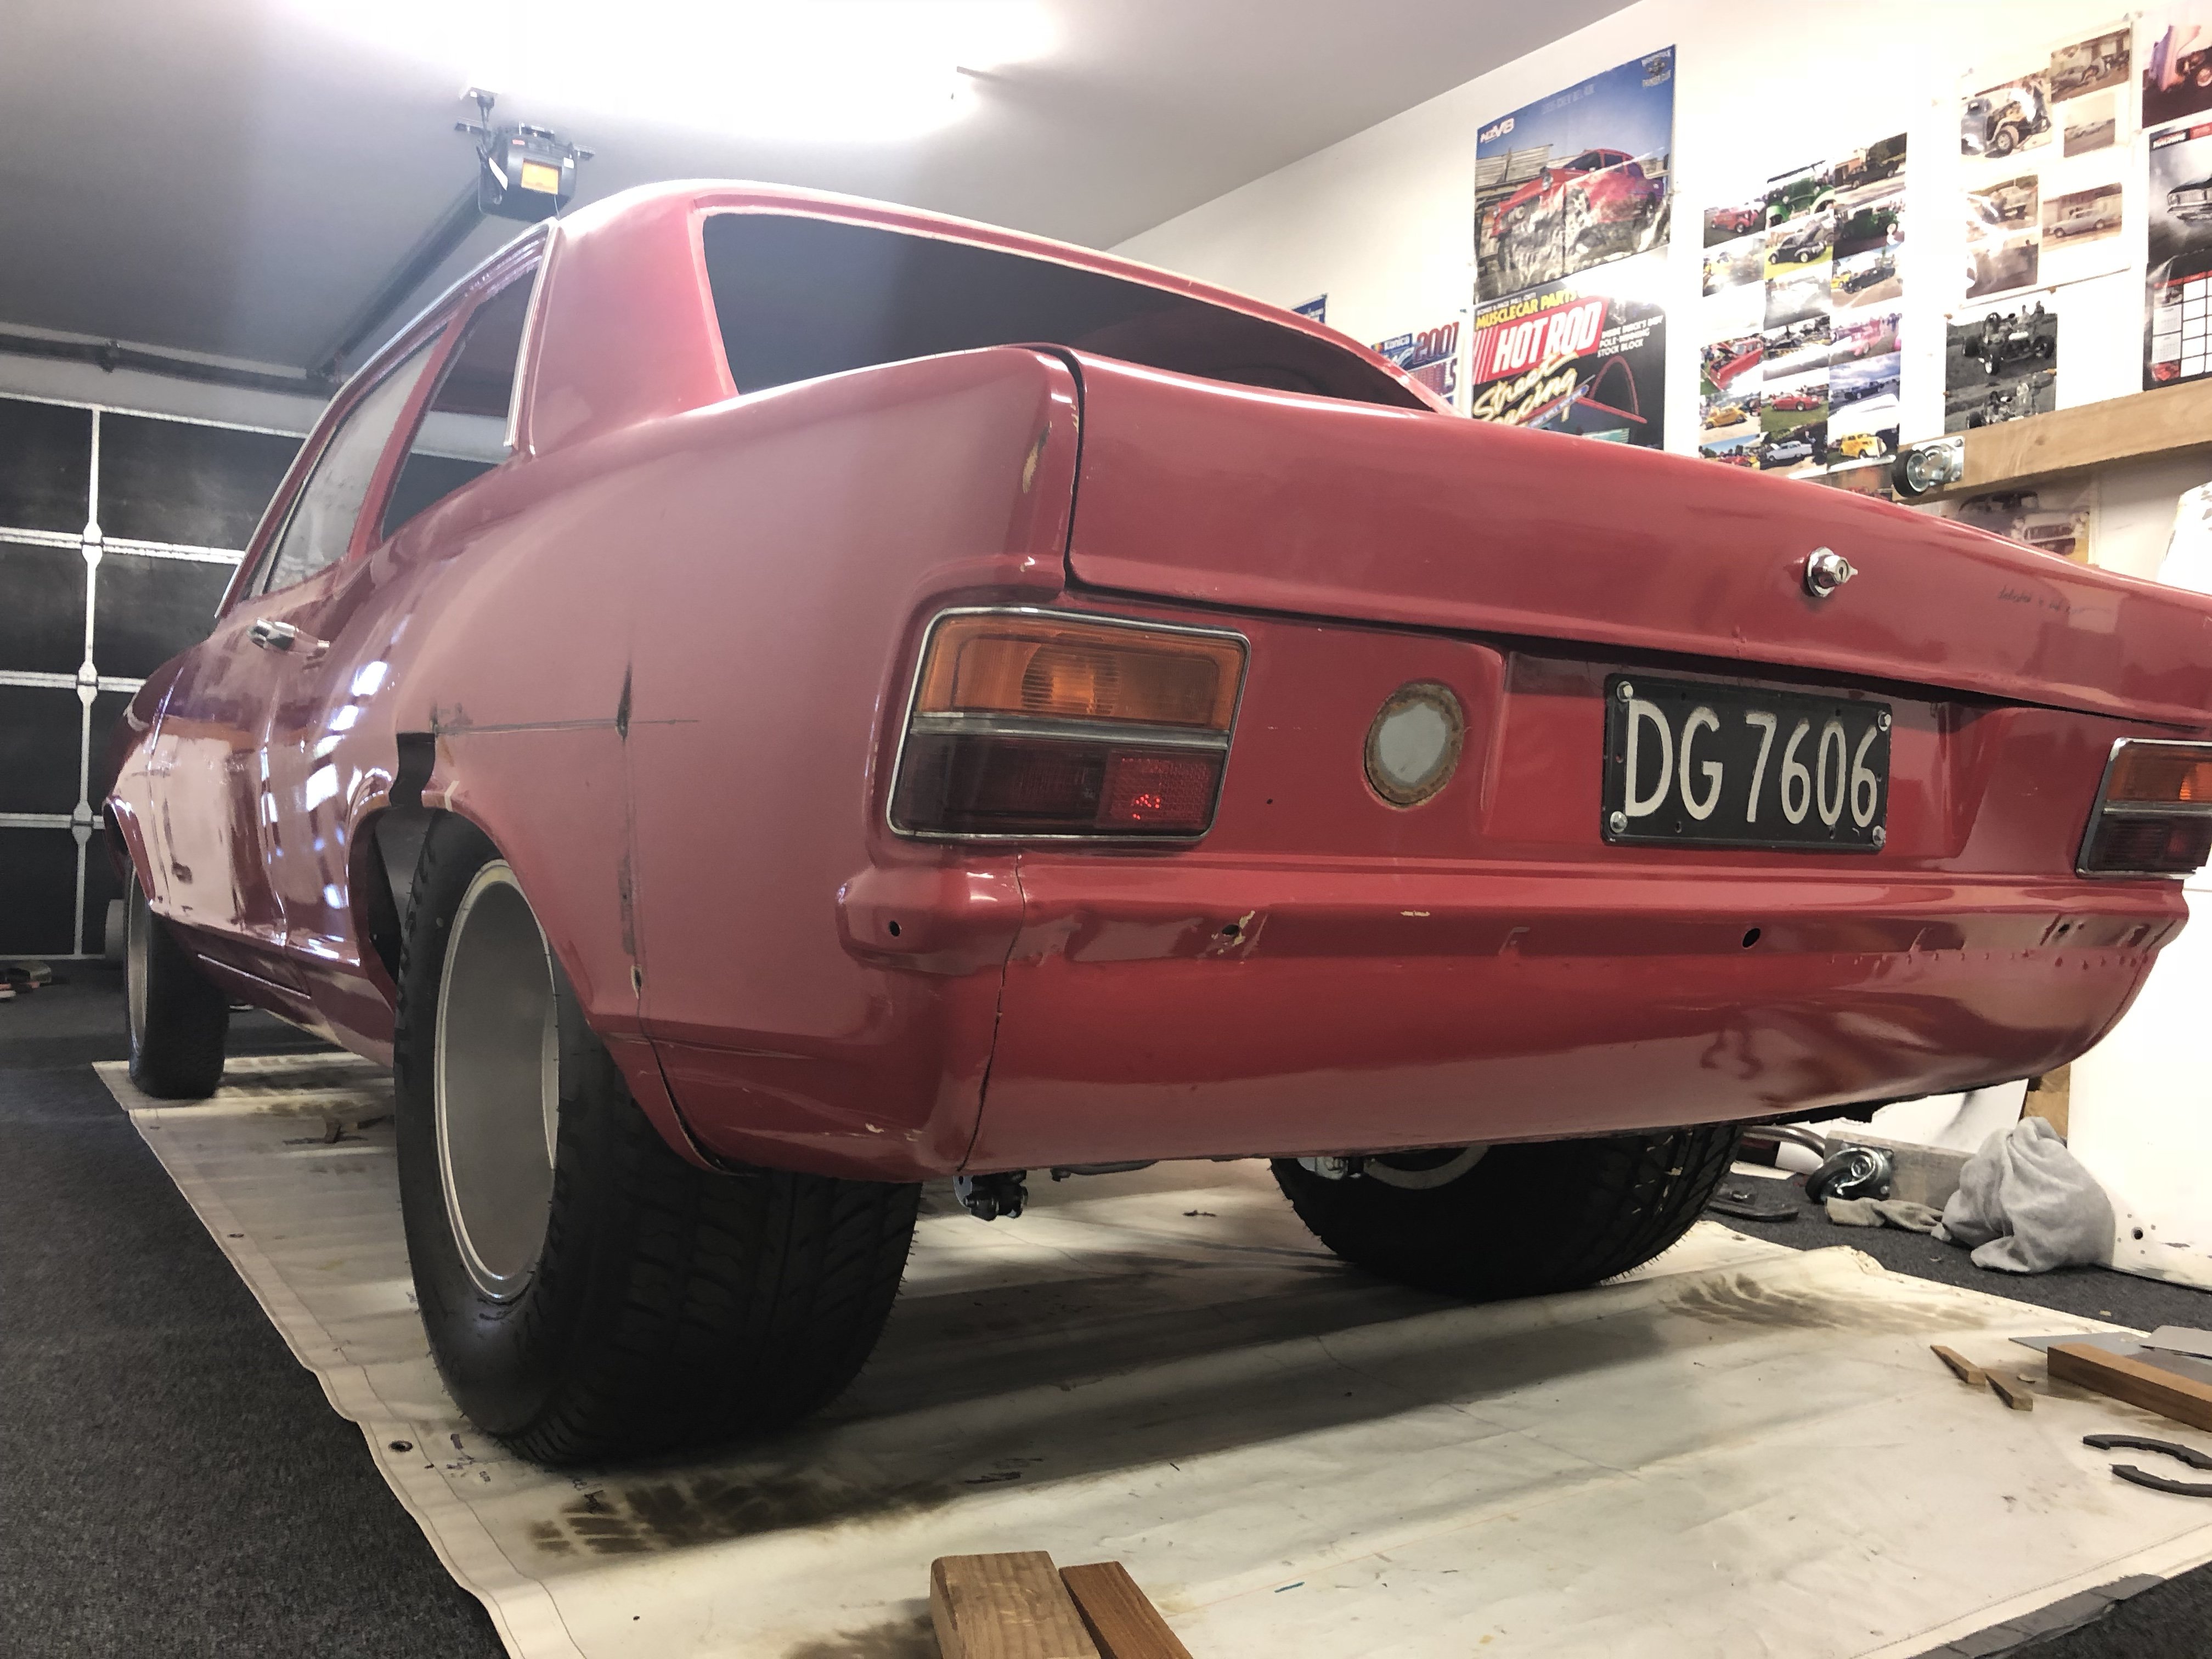
Brought this old girl earlier this year, done small things to it but she runs and has rego on hold. have lowered it and put new wheels on and currently making a new flat deck for her While waiting for my rear guards to be rolled been doing some rust on the bonnet with help from my old man
5 points
-
Not sure about other peoples opinions but I am taking my FR50 with a top speed of exactly 70.0kph. Would love to have some people to hang with haha. Figured at least if someone is doing scooter speeds its more open to newcomers.5 points
-
We had a testing session tonight - epic!!! The trikes there were all humming along, many with bigger carburetors off pit bikes now fitted and doing wonders for these motors. The latest trike is insane once it clicks into powerband! It's all on tomorrow!
4 points
-
3 points
-
Well, it happened again. Somehow awesome old British cars that need loving find me, and of course who am I to turn them down? This car has a bit of a weird story, but I guess it adds to the history of it all. It all started when I had the M328i listed on Trademe, back in March, and in amongst all the useless time-wasters asking me dumb questions, I got asked if I wanted to swap the black leather vaders for white leather seats from another M3. Of course this was a no, white leather is one of the worst wearing colours in the E36. The fellow wasn't done there though, he wanted my seats. The next question he asked on my listing immediately had my ears perk up, and suddenly I was intrigued. Yes, that's right, a TVR. After a bit of googling I worked out an 80s TVR would be a Wedge. Not the most loved TVR, but I like them, and any TVR is a good TVR in my books. It's 80s, it's British, how bad can it be? Of course I was interested, and let him know. Later that night I get a call and discuss the car. Its been off the road for a few years getting some work done at the "local" TVR specialist, in Auckland. Ok, no problem, except the owner is down in Christchurch (about 1000km and a large body of water away from each other, and I'm somewhere in the middle of that). It turns out that he wanted my car, because he was buying a convertible E36 M3, and wanted to swap my black leather into it. He also had thoughts of "Trevors last drive" by flying up to Auckland, picking up the TVR, driving it down to me, swapping to the M3 and for him to continue on his way down south. As I found out later, this would've been a big ask for the TVR. We discuss the ins and outs, and I'm recommended to contact the specialist and discuss the car. I give the specialist a call and discuss the car. Apparently it's all sorted, and basically ready to "fly through" a WOF and to hit the road. Its had various work done, including most of the hard work like suspension. He noted it does have an issue starting, which is possibly down to a failed fuel accumulator, but does run and could be driven onto a truck. His description of the car was that its a good solid, tidy car, but may need some carpets as they are a bit worn. I was very interested, but needed photos to see what condition it was in. Ok he said, he will try and sort some for me. To cut a long story short, I tried for months to get photos of the car, with every reason under the sun for not getting them from the specialist. On the other side of it, the seller of the TVR decided not to buy that M3, and couldn't find one he wanted, so no longer had a need or want for my car. I let him know I was still interested in outright purchasing the car but would need photos. Both him and myself followed up with the specialist, to no avail. Just before I went on holiday at the end of June, the BMW sold, but I still had no proof of life that the TVR even existed, so just left it hanging whilst I chilled out in the UK (more on that in a later post). When I returned, I already had a list of cars on Trademe I wanted to look at. I had basically given up on the TVR at this point, as during the month I was away, still no photos had been sent. I looked at a couple of cars, including an Evo 4 (which I came very close to buying, but the second viewing showed too many issues, and the unmistakable smell of weed inside) and a C55 AMG (nice car, if a bit dull). I wasn't quite set on them, but noticed that the TVR specialists website had been updated, with new photos, and what happened to be dead center in the photos, but a silver Wedge! Well, there was my proof of life I guess; the car did exist! I contacted the owner and confirmed the car was still for sale, and then did the stupid thing; making an offer for the car as it sits, without so much as a real photo. Offer was accepted, and a call was made to the specialist to make sure no money was owing, that the car could come with the spare parts, and that it would drive onto the truck.... oh wait, what's that, it suddenly doesn't run but you will "try to get it going"... I pushed forward anyway, sending my hard-earned money to the seller, and booking my preferred transport, letting him know that the car doesn't run but the specialist will "try" to get it running. After a long week of waiting, this showed up this morning. Yes, that's the proper good fella Brent from Classic Towing dropping off yet another project to me. Can't recommend him enough, as even when things go a bit pear shaped, he has it all under control, and he loves weird cars almost as much as I do. My first question to him was "did it run?" to which he replied with a no, and tightened the winch ready for laying the bed flat. Such a cool truck, it lowers the bed right off onto the ground. This is half way down Brent pushed the car whilst I jumped in and steered it carefully into the garage. This was harder than you would think, being that it was raining on the outside, and inside of the windscreen, and the wiper didn't work (well, it's not even fitted). We made it safely into the garage though. The brakes work, which is something. So, what is this weird little thing? A 1980 TVR Tasmin 280i It's more or less a Ford Capri in a fibreglass body with tube-frame chassis and some weird and bespoke parts. Powered by a 2.8l V6 Ford Cologne engine topped with Bosch K-Jetronic mechanical fuel injection, backed by the latest (for the 70s) in Ford 4 speed manual gearbox technology, and driven via the rear wheels through a Jaguar XJS diff with spiffy inboard disc brakes. The pinnacle of technology, and a real parts bin special. On the plus side it does get some pretty advanced gear for something that is the same age as my green Mini. Independent rear suspension, four wheel disc brakes, fuel injection, electric windows, bonded windscreen and a targa top convertible. It does have a lot of known quirks though, such as a multitude of wiring issues, a wiring loom that consists of only black wires (seriously), diabolical K-Jet fuel injection, and a dual fuel tank system that is no end of troubles. Anyway, this car is the 106th Tasmin off the line, and appears to be the 4th DHC (Drop Head Convertible) made (1st was a concept made from a chopped up FHC). Before the DHC was in production, the FHC (Fixed Head Coupe) was the TVR to have. The FHC was soon phased out though and only the DHC survived until the end of production, albeit with some big changes. Being a very early car, my one has some specific early only "features". The first, and most obvious, is that its a TVR Tasmin, not a TVR 280i. TVR dropped the Tasmin name later on and left the names to just be the displacement of the engine (280i - 2.8 V6, 350i - 3.5 V8 etc). A couple of other early features are the weird little mirrors hanging off the doors. Later cars changed to pods in front of the side windows, like a normal car. One of my favourite really early features though, has to be the gorgeous Stewart Warner gauges The later cars got boring, but arguably more readable (and probably reliable), VDO gauges. There is just something about the way the SW gauges are clocked, and the vertical odometer. So, now that the car has been delivered, how is it? Did i win the blind buying game, or get screwed? It's not as tidy as described, and it doesn't currently run. The battery was completely dead (to the point my ctek charger won't even detect it), but with a replacement battery the electrics are slowly coming to life again. Unfortunately, it leaks like a sieve and is full of water. I tried to dry as much as I could out, but the dehumidifer will have to do the rest. The roof seals will be the major contributor to this, as they are well buggered. The water ingress is what has ruined the carpet, it's literally rotting away. The boot, once I got it open, wasn't much better, with the lid being full of water and covered in condensation on the inside. The seats are in good condition, with no obvious rips or tears, as is the rest of the general interior. The wood grain has some cracks, but overall for a car I suspect spent a lot of time sitting outside, its in good shape. Apparently blue velour and vinyl stand the test of time. Bodywork is very good, with only some stone chips on the front. The rest of the paint appears to be good and will come up well with a polish. The top is also in good condition, with only some damage to the fabric on the removable section, and the rear window is very cloudy. Hopefully, I can polish that out, but it may need replacement. I don't know how the car is mechanically as it does not run. The previous owner advised (only after I had paid for it) that there is a strong fuel smell from the tanks when sitting, but it drove well otherwise. The fuel in the tanks smells like varnish, but cannot be smelt without opening one of the two fuel caps. I will need to drain this out and throw some new fuel in before trying to start. The starting issues could be a few things, but I will get to that in due course. One cool thing about TVRs is the convertible roof with a removable targa section. You can either have the roof up, down, or the rear section up but without the targa section, which fits into the boot (roof isn't locked in this photo, so looks a bit baggy) So that's the TVR. The plan is to get get it running, get a WOF on it and then take it to the British Car Day show in Feb. In between that, just take it out for some top-down Summer cruising. Oh, and keep fixing it. Can't forget that.2 points
-
2 points
-
$1500, that is a lwb safari chassis, plus a subframe, plus a 2.5m X 1.8m deck. It's a no brainer, shit will last forever, plus I truly hate the thought of things rusting after my no doubt shithouse efforts to paint it after all the work I have put in.2 points
-
Update on the open chequebook: It has been up North getting work done for compliance, and so far has 15mm to go until the chassis is completely straight, and the front inner guard has been cut off to straighten out any creases caused by the impact. The creases were a fair bit more than thought, up under the strut tower and the engine bay was pretty bent, but it's had a massive weight attached to it and pulled the creases out where possible, and then will be softly hammered with Billy Mavs back into place. But the headlight surround area is too smashed, so a new piece will be made and welded in. Coming along nicely, it's just a shame to not have any control of it as a project at the moment. Most of pics go to Instagram as I forget to update here so much. Feel free to follow along @theamyable.2 points
-
So I guess this is where we start then. The first port of call today after having the car delivered was to work out why we had no power. I popped the bonnet, and yes there was a battery. Ok, let's remove the battery and see if I can throw some charge into it. Ctek says NO. With the charger connected to the battery, nothing. No lights on the charger, and if anything, the charger started acting weird. Guess that's no bueno then. Hope my charger is OK. A quick trip to Supercheap sorted out a battery for me. There is very little space for a battery, so a bit of digging in the Century Batteries catalogue yielded the biggest battery that would fit the same footprint, an NS60LSMF Connecting this up showed that we finally had power. The dash warning lights come on with the key, the driver's electric window is working, albeit slowly, and the central locking works. Strangely the headlights did not respond to the switch, but some wiggling of the wires behind the switch sorted that out (yeah, I'll need to look into that). The next obvious step was to see what was up with the fuel tanks. Now that I had power I could see the fuel gauge was reading empty. I decided to take a risk and try dumping some of BPs finest 98 and injector cleaner into the tanks and see what happens. I split the fuel and cleaner between the two tanks as evenly as I could. Since I had been told it was possible the accumulator had failed, there is a trick to work around this and still have the car start and run normally. The accumulator works to hold fuel pressure in the lines when the engine is off, but when it fails the lines no longer have pressure, and the fuel pump only runs when the engine is turning, so it takes ages to build that pressure back up. The trick to work around this is to have the pump run when the key is turned to ON so it primes the lines. The simplest way on early cars like mine is to disconnect one connector from the side of the fuel distribution unit. This causes the pump to run when the key is on. Easy. Its the blue connector in the top photo, and the green plug goes onto it (strangely... why arent they matched colours?) I connected the battery and turned the key. Sure enough, I heard the familiar whine of a pump turning, and then the woosh of fuel heading down the lines into the fuel distributor. Now it was the moment of truth. I turned the key, and the engine turned smoothly over. It spluttered a couple of times, but wouldn't start. What a tease. Eventually, this happened. It was rough, but running, and even idling. I ran it for a while, and everything looked good. No obvious signs of leaks, but blimey does it make a noise! The longer I ran it, the smoother it was getting I checked and it seems to have gears, and a clutch, so that's a big win. It still hesitates a bit, but that's to be expected for an engine that has been sitting around. I'll take the plugs out and give them a clean (or replace), and check the cap and rotor condition. If everything looks OK, it may even be time for a quick run around the block. One must wonder though; if I can get it running with little effort, why couldn't the "specialist" have it running for the truck? Oh well, best not to dwell on it I guess.2 points
-
1 point
-
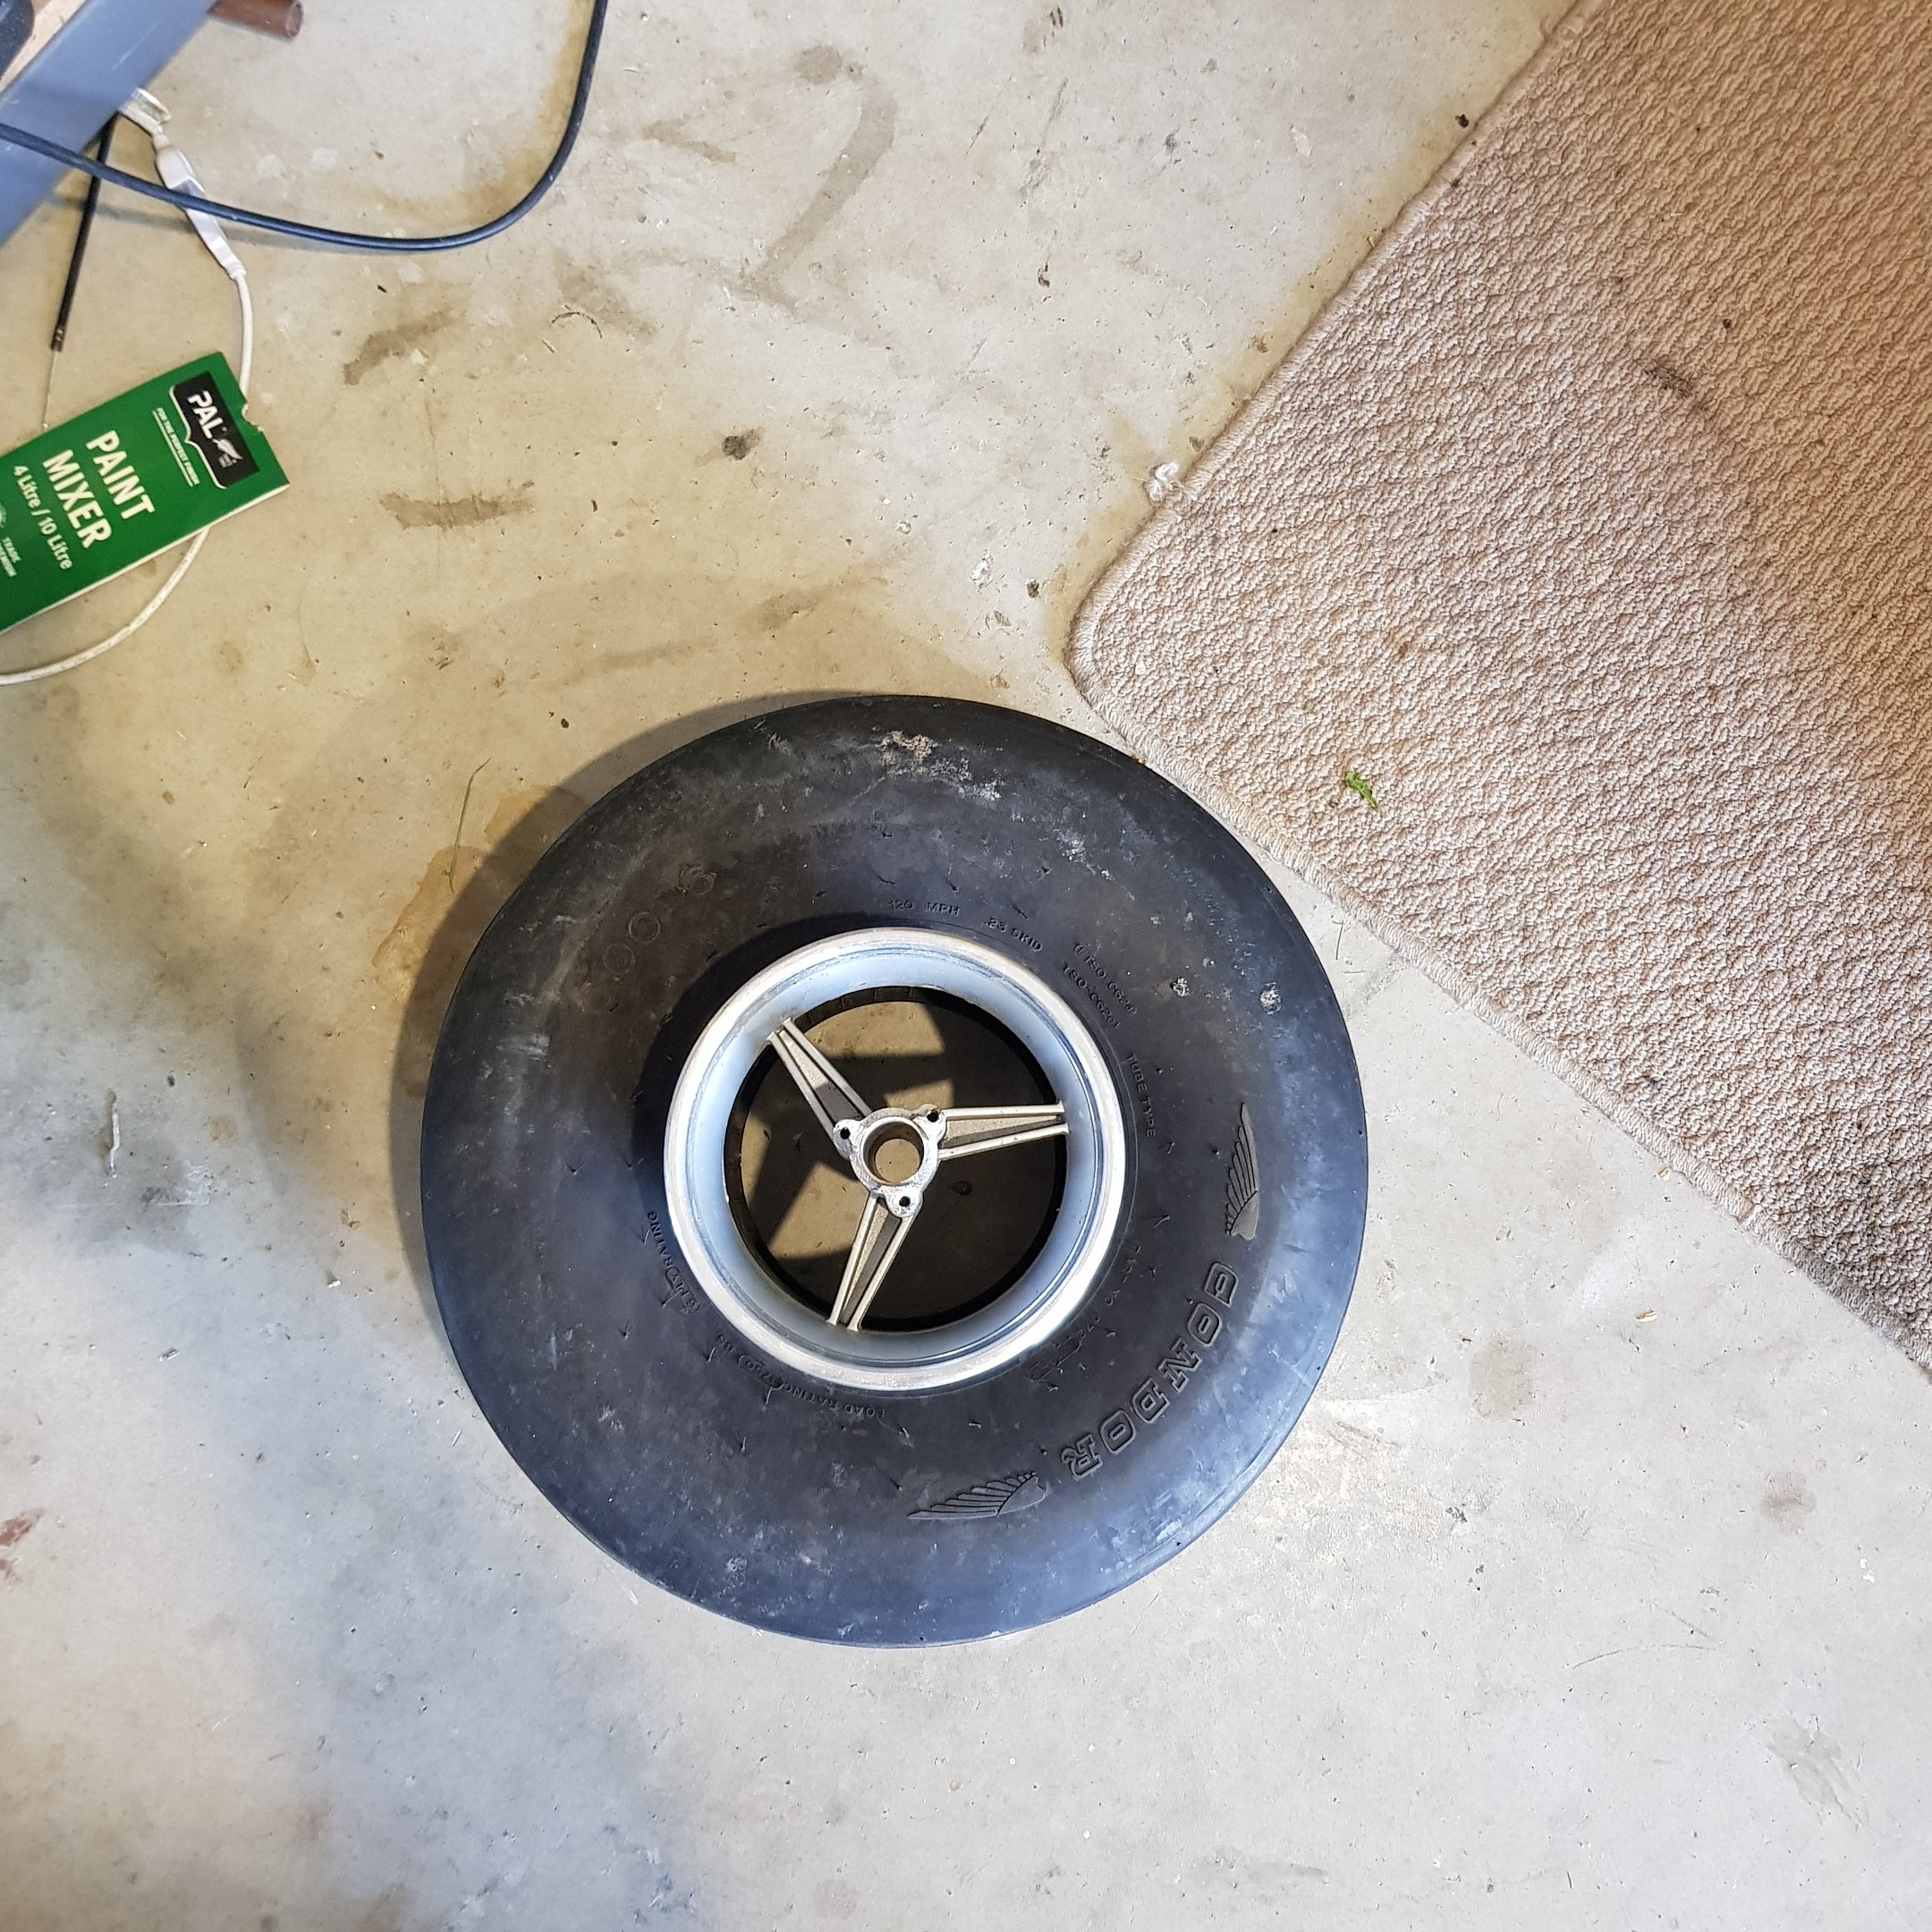
Yeah nah not this time i can't pop the tyre over the rim due to pocket bike wheels been made from some sort of aged cheese if i can find a split rim it will work The hub girdle thing will absolutely work too unfortunately the above chedder grade rim cracked trying to fit the pocket bike tyre to it so ive got another complete wheel on the way....... because i cant be fucked fitting tyres they really are a cunt to get on without damaging them or the rim.
1 point
-
1 point
-
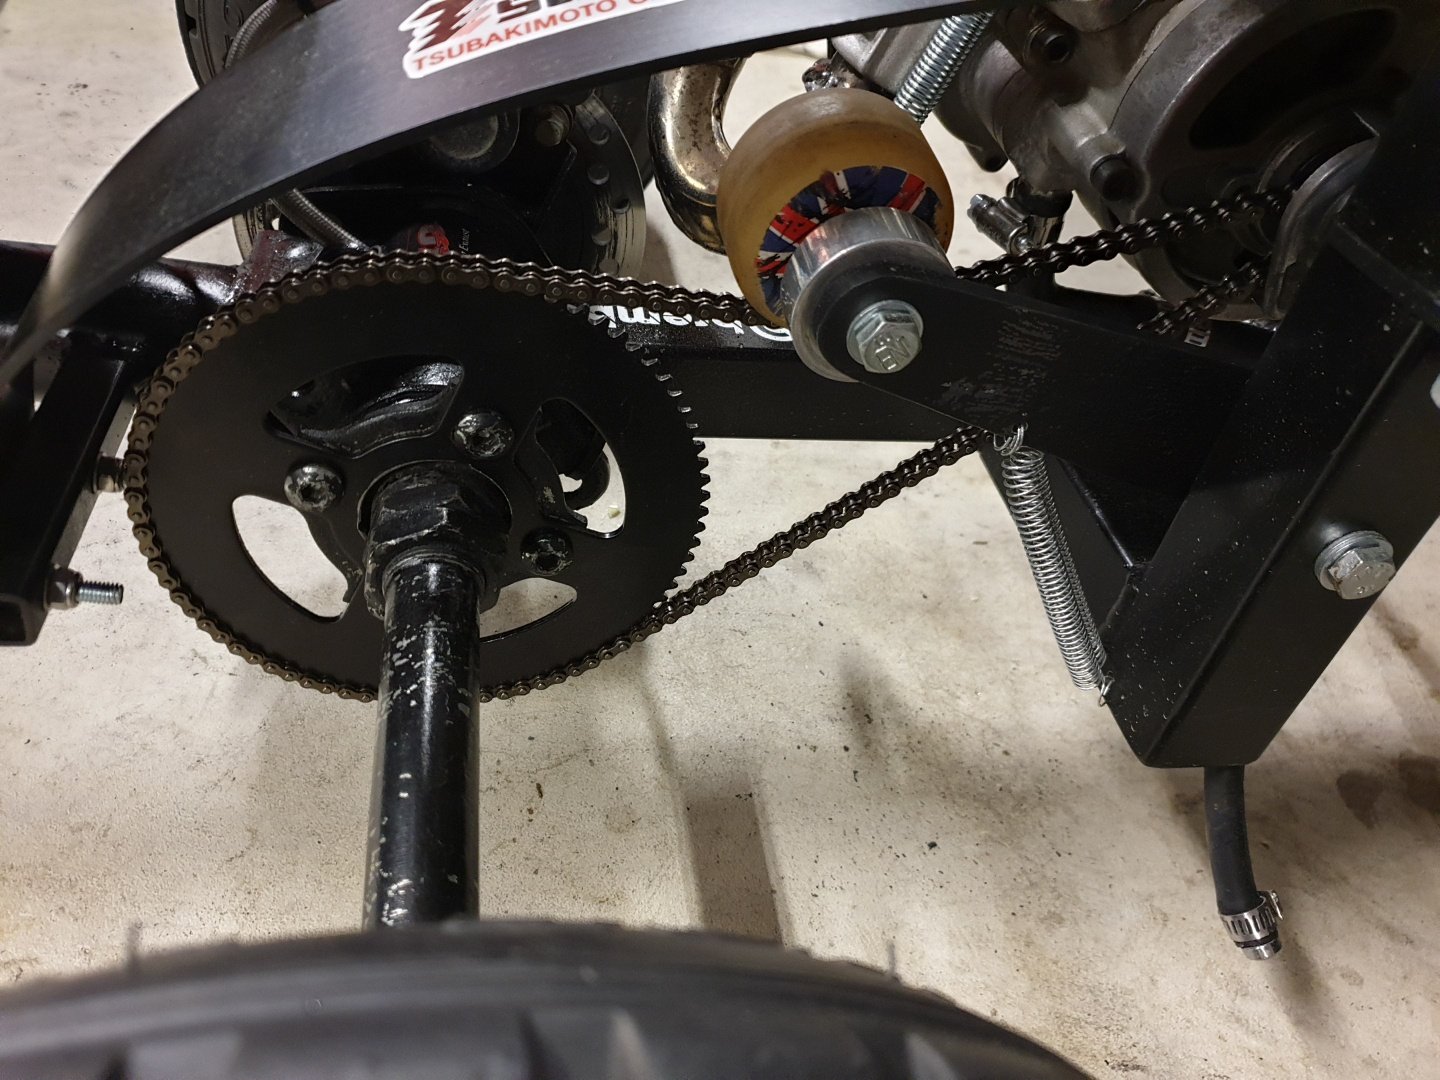
Holy-moly, if you look in the dictionary for the phrase "world of difference" you see a picture of this trike with it's new rear sprocket! Fucking hell this thing screams!!!! Fried the tyres/sleeves and revved to max just like that! So cool...1 point
-
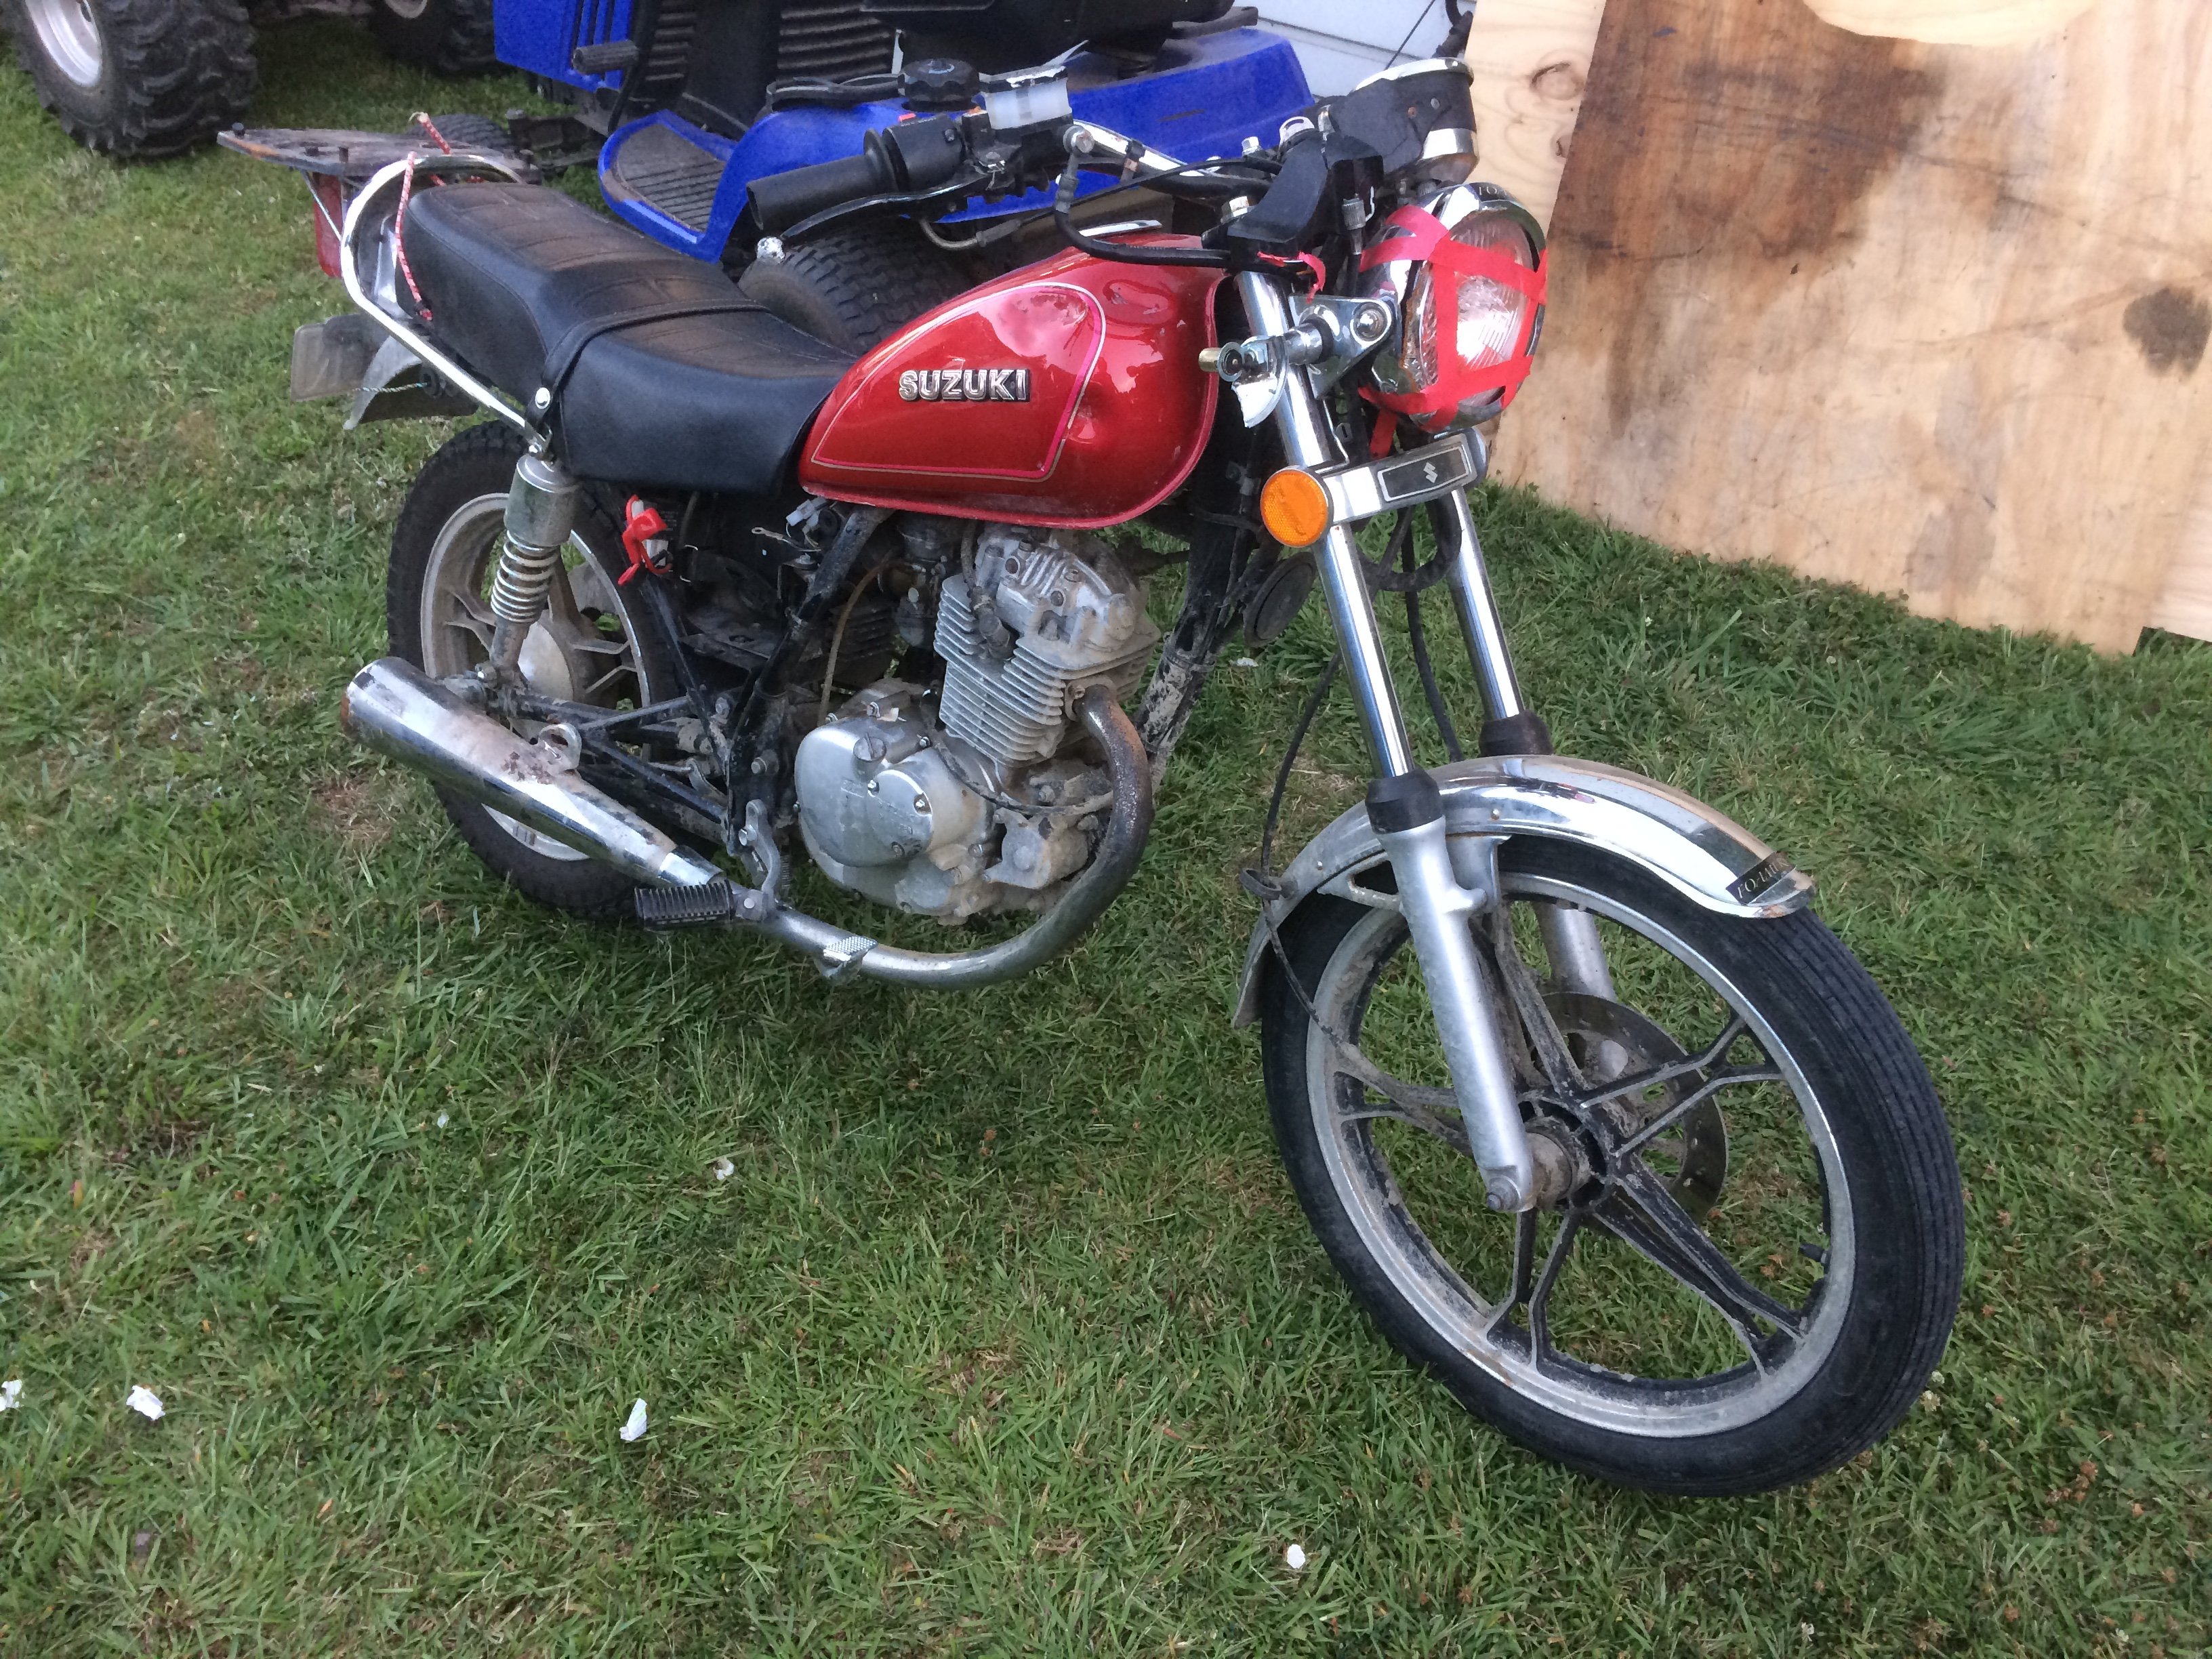
HI @Tumeke YES LOVELY OF YOU TO POP IN HERES MY RX125 WENT LIKE CLAPPERS BACK IN THE DAY YES IT CURRENTLY DOESNT RUN WELL AND IS NOT REGISTERED BUT SHOULD GO LIKE JACK THE BEAR ONCE I LET ER RIP. I LOOK FORWARD TO CATCHING UP OVER A BROWN TIN AND BURNING SOME VALVOLINE GARDEN 2T. SEND LOVE TO GLADYS AND CO. AND THE OTAHUHU RAILWAY BOWLS CLUB HOW DID THERE FUNDRAISER GO REGARDS BRYAN1 point
-
Got a little bit more done. Got an out of date unused 6 point harness, modified it to be 5 point, and fitted that. Just had to make a mounting bar for behind the seat. Then I got a small car battery (will have electric reverse + winch + lights in the future, so didn't use motorbike spec battery) and set about making a shitty mount for it. It used to be in the nose, but got the bash, so I've mounted it on the side. I might have to make a cover to stop it getting owned by debris in the future. I recycled a bit of seat belt and buckles, but couldn't get it tight, so changed it to good old fashioned rods N nuts. I also put a speed sensor on the front wheel for the trailtech dash. I just have to reroute some wiring and mount the magic electrical boxes, and it's ready for a gentle shake down run, hopefully this weekend weather permitting. If all goes well, I'll make a new front bash plate thing, as the old ones a bit rooted, Then paint all the bits that need painting (probably just rattle can it, as shit will keep getting modified) then start fitting all the alloy panels. I also have to make a dash that the bonnet will join up to. Hopefully the next post will have evidence of a successful test run. Regards, VG. XOXOX1 point
-
I've re geared the rear end, from 68 to 78 rear sprocket now. Too late at night to annoy my neighbors...so untested. But should be like once trying to start a car off in third gear...to now putting it in first. Hopefully this is the last step in making it awesome!
1 point
-
Hi everybody. I have just registered for the ride. My accommodation is sorted. I will be bringing Gemima which some of you will recognize.
1 point
-
Been helping a mate all weekend. RD28 in small sea faring vessel, Huge hollset and plenty of boost.
1 point
-
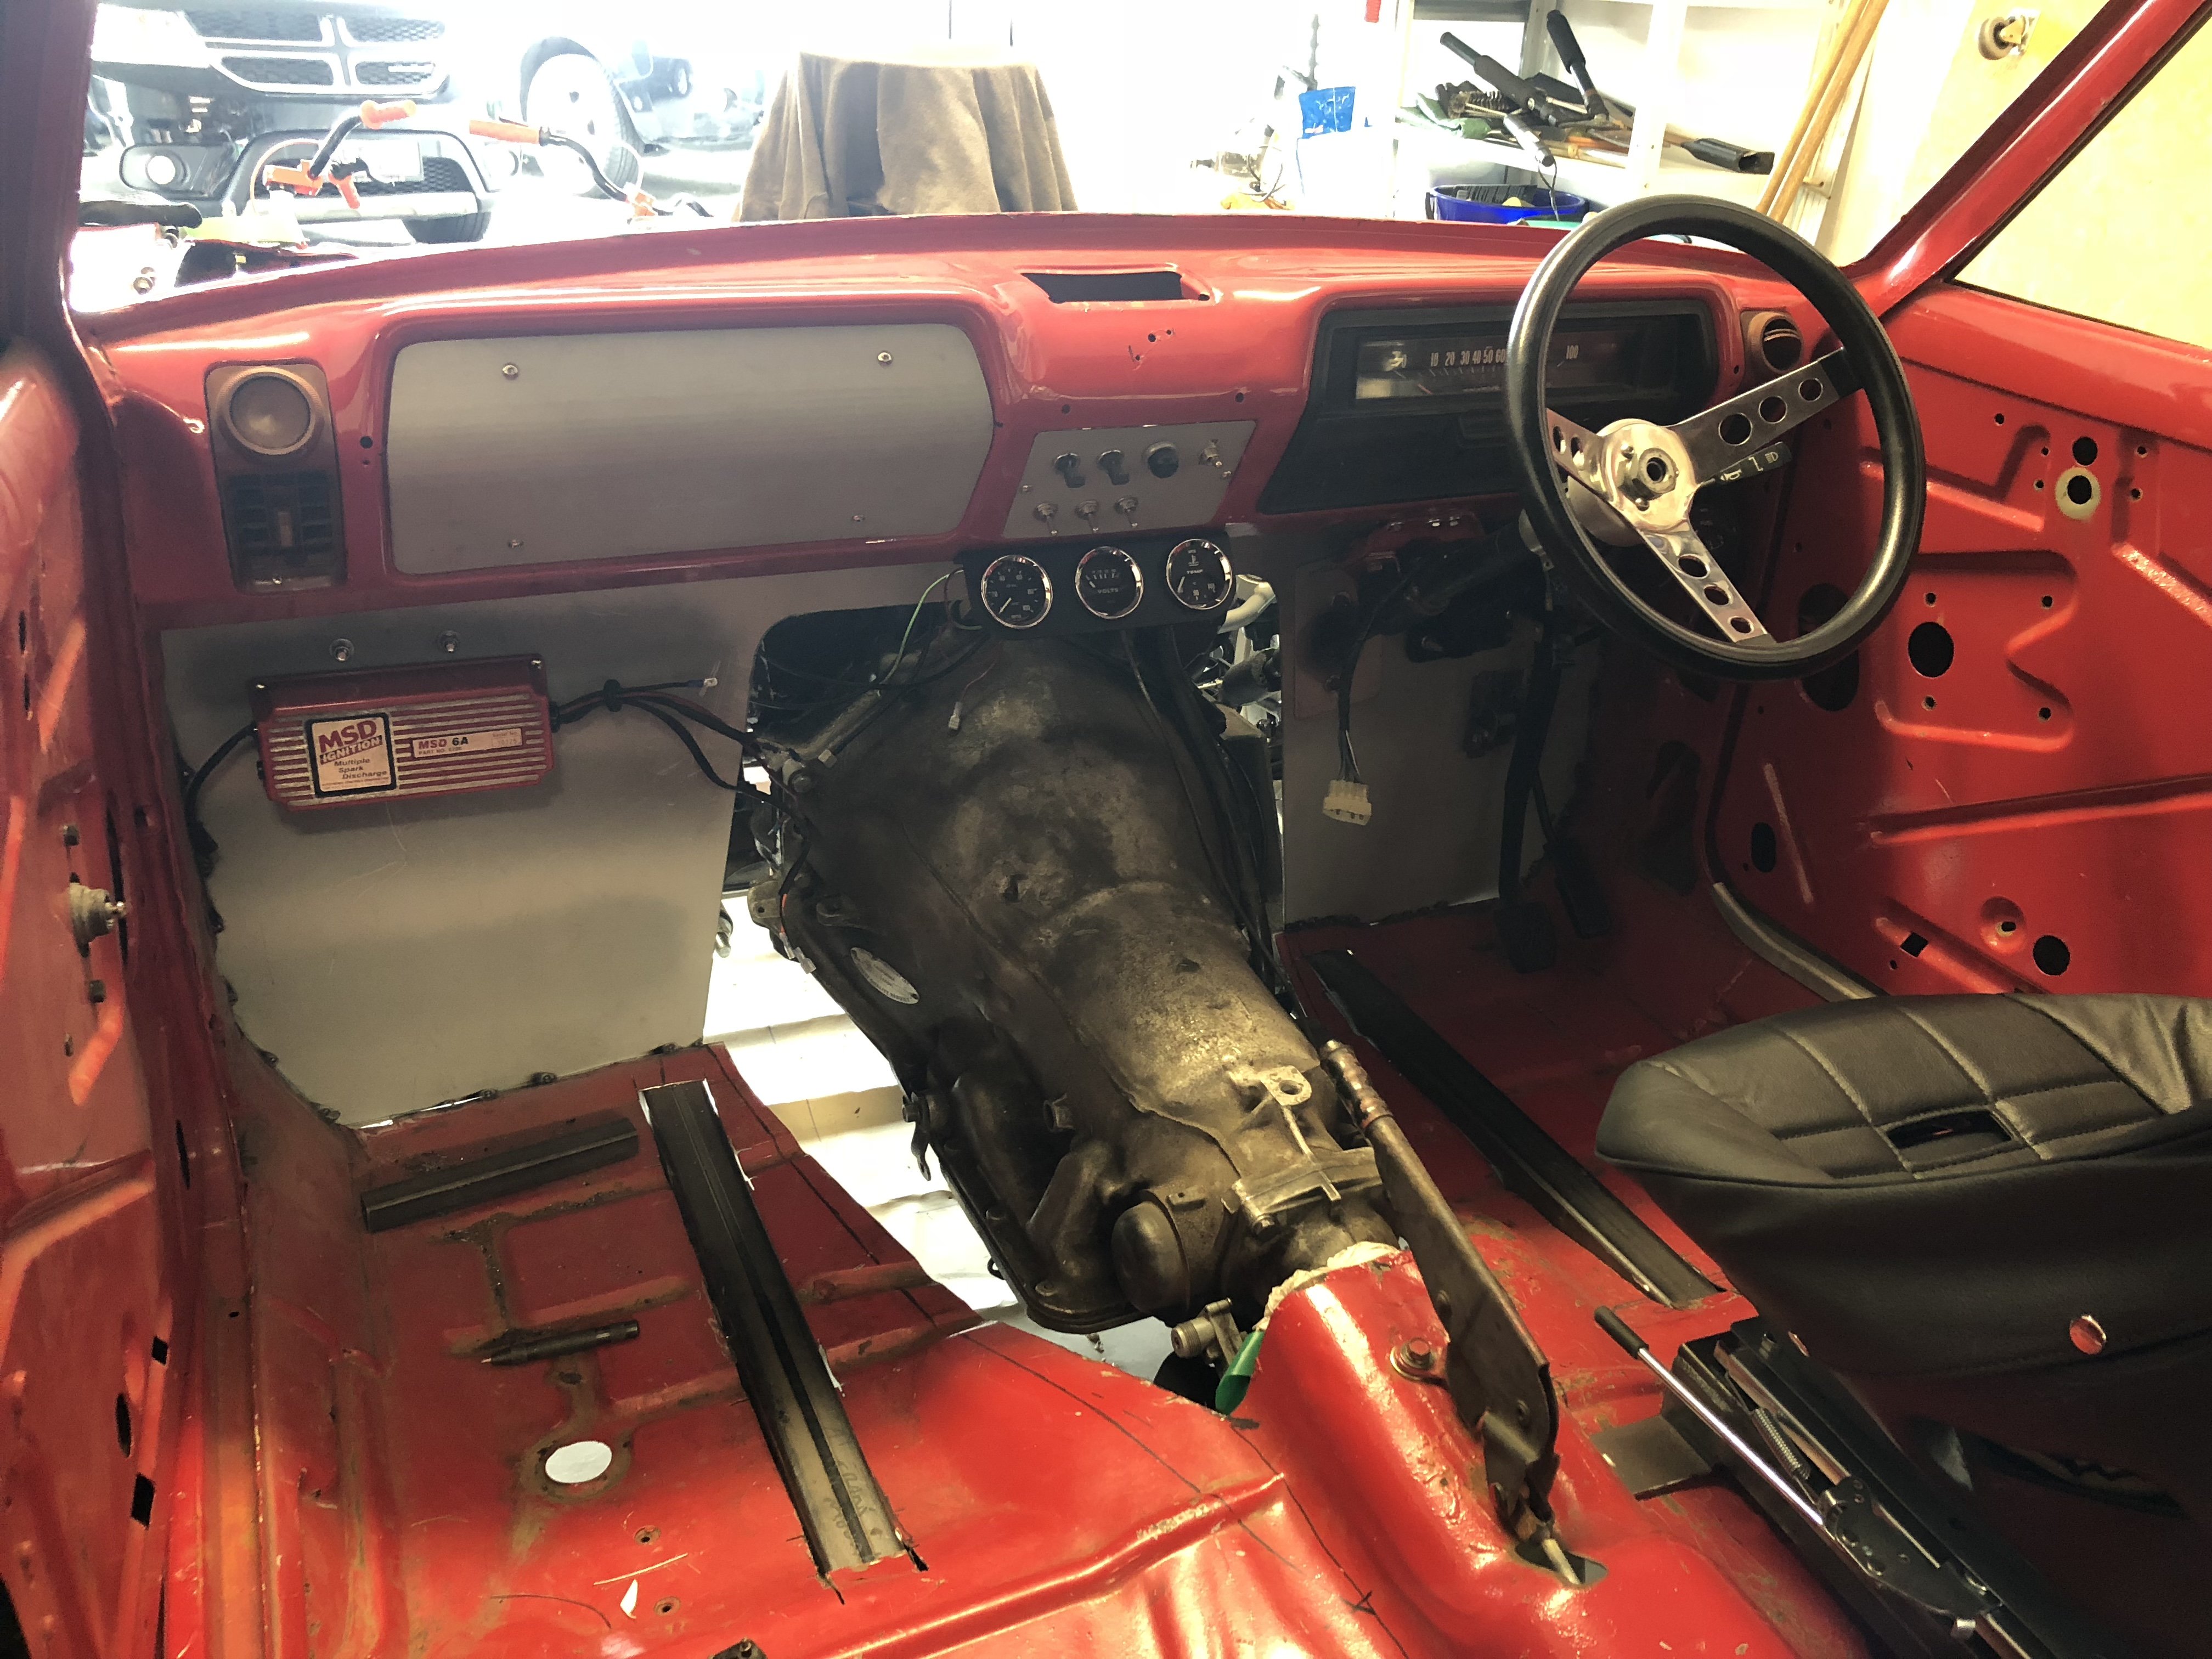
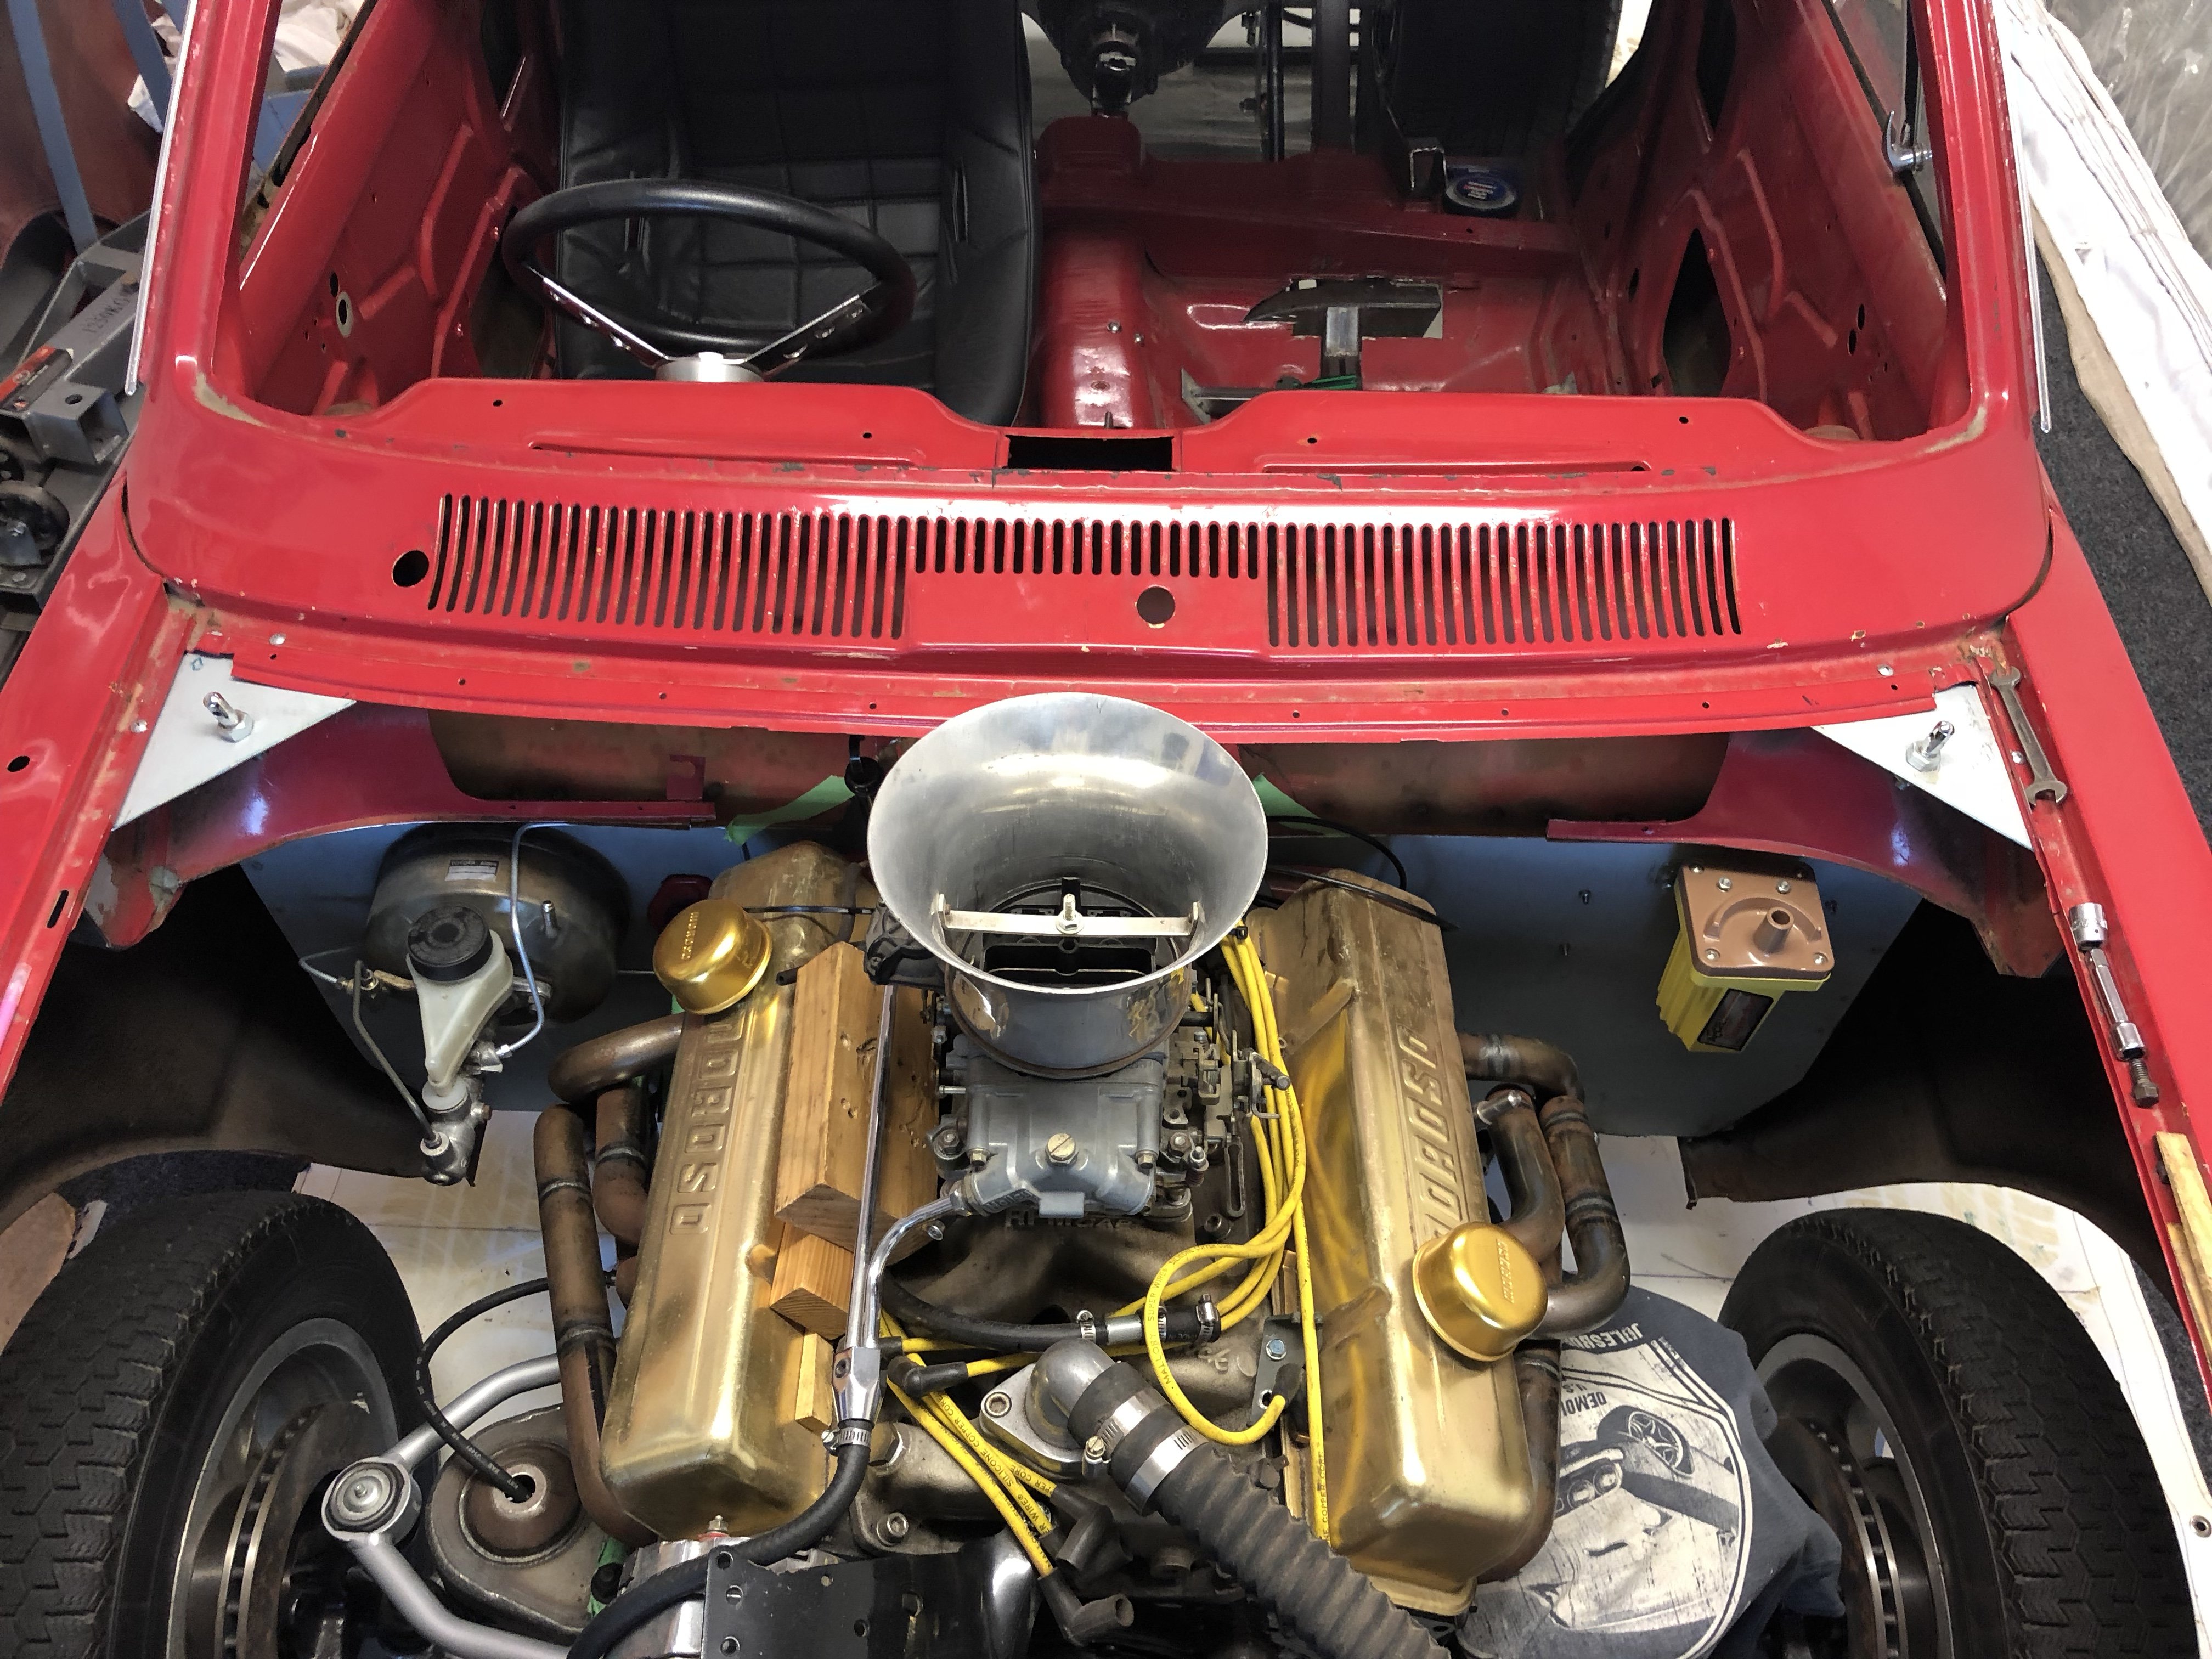
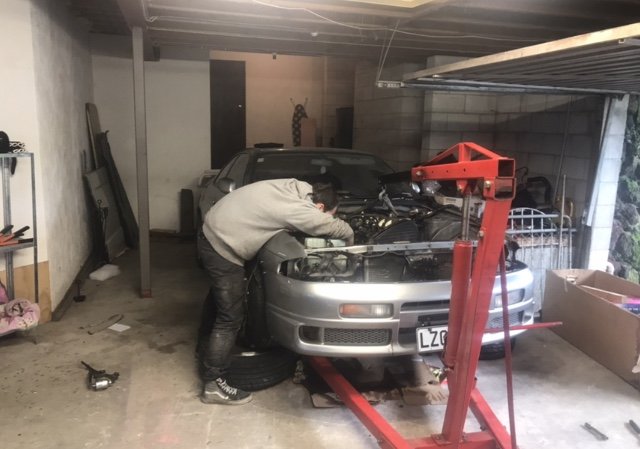
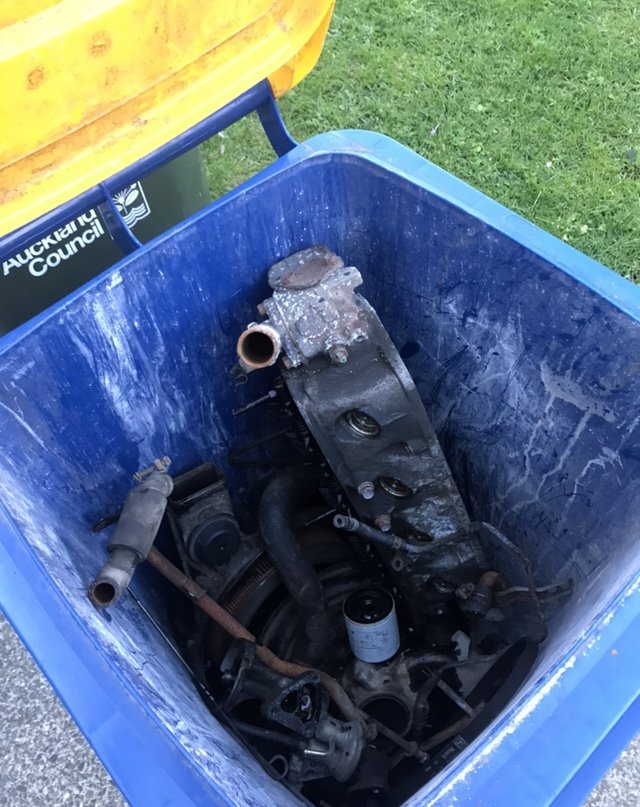
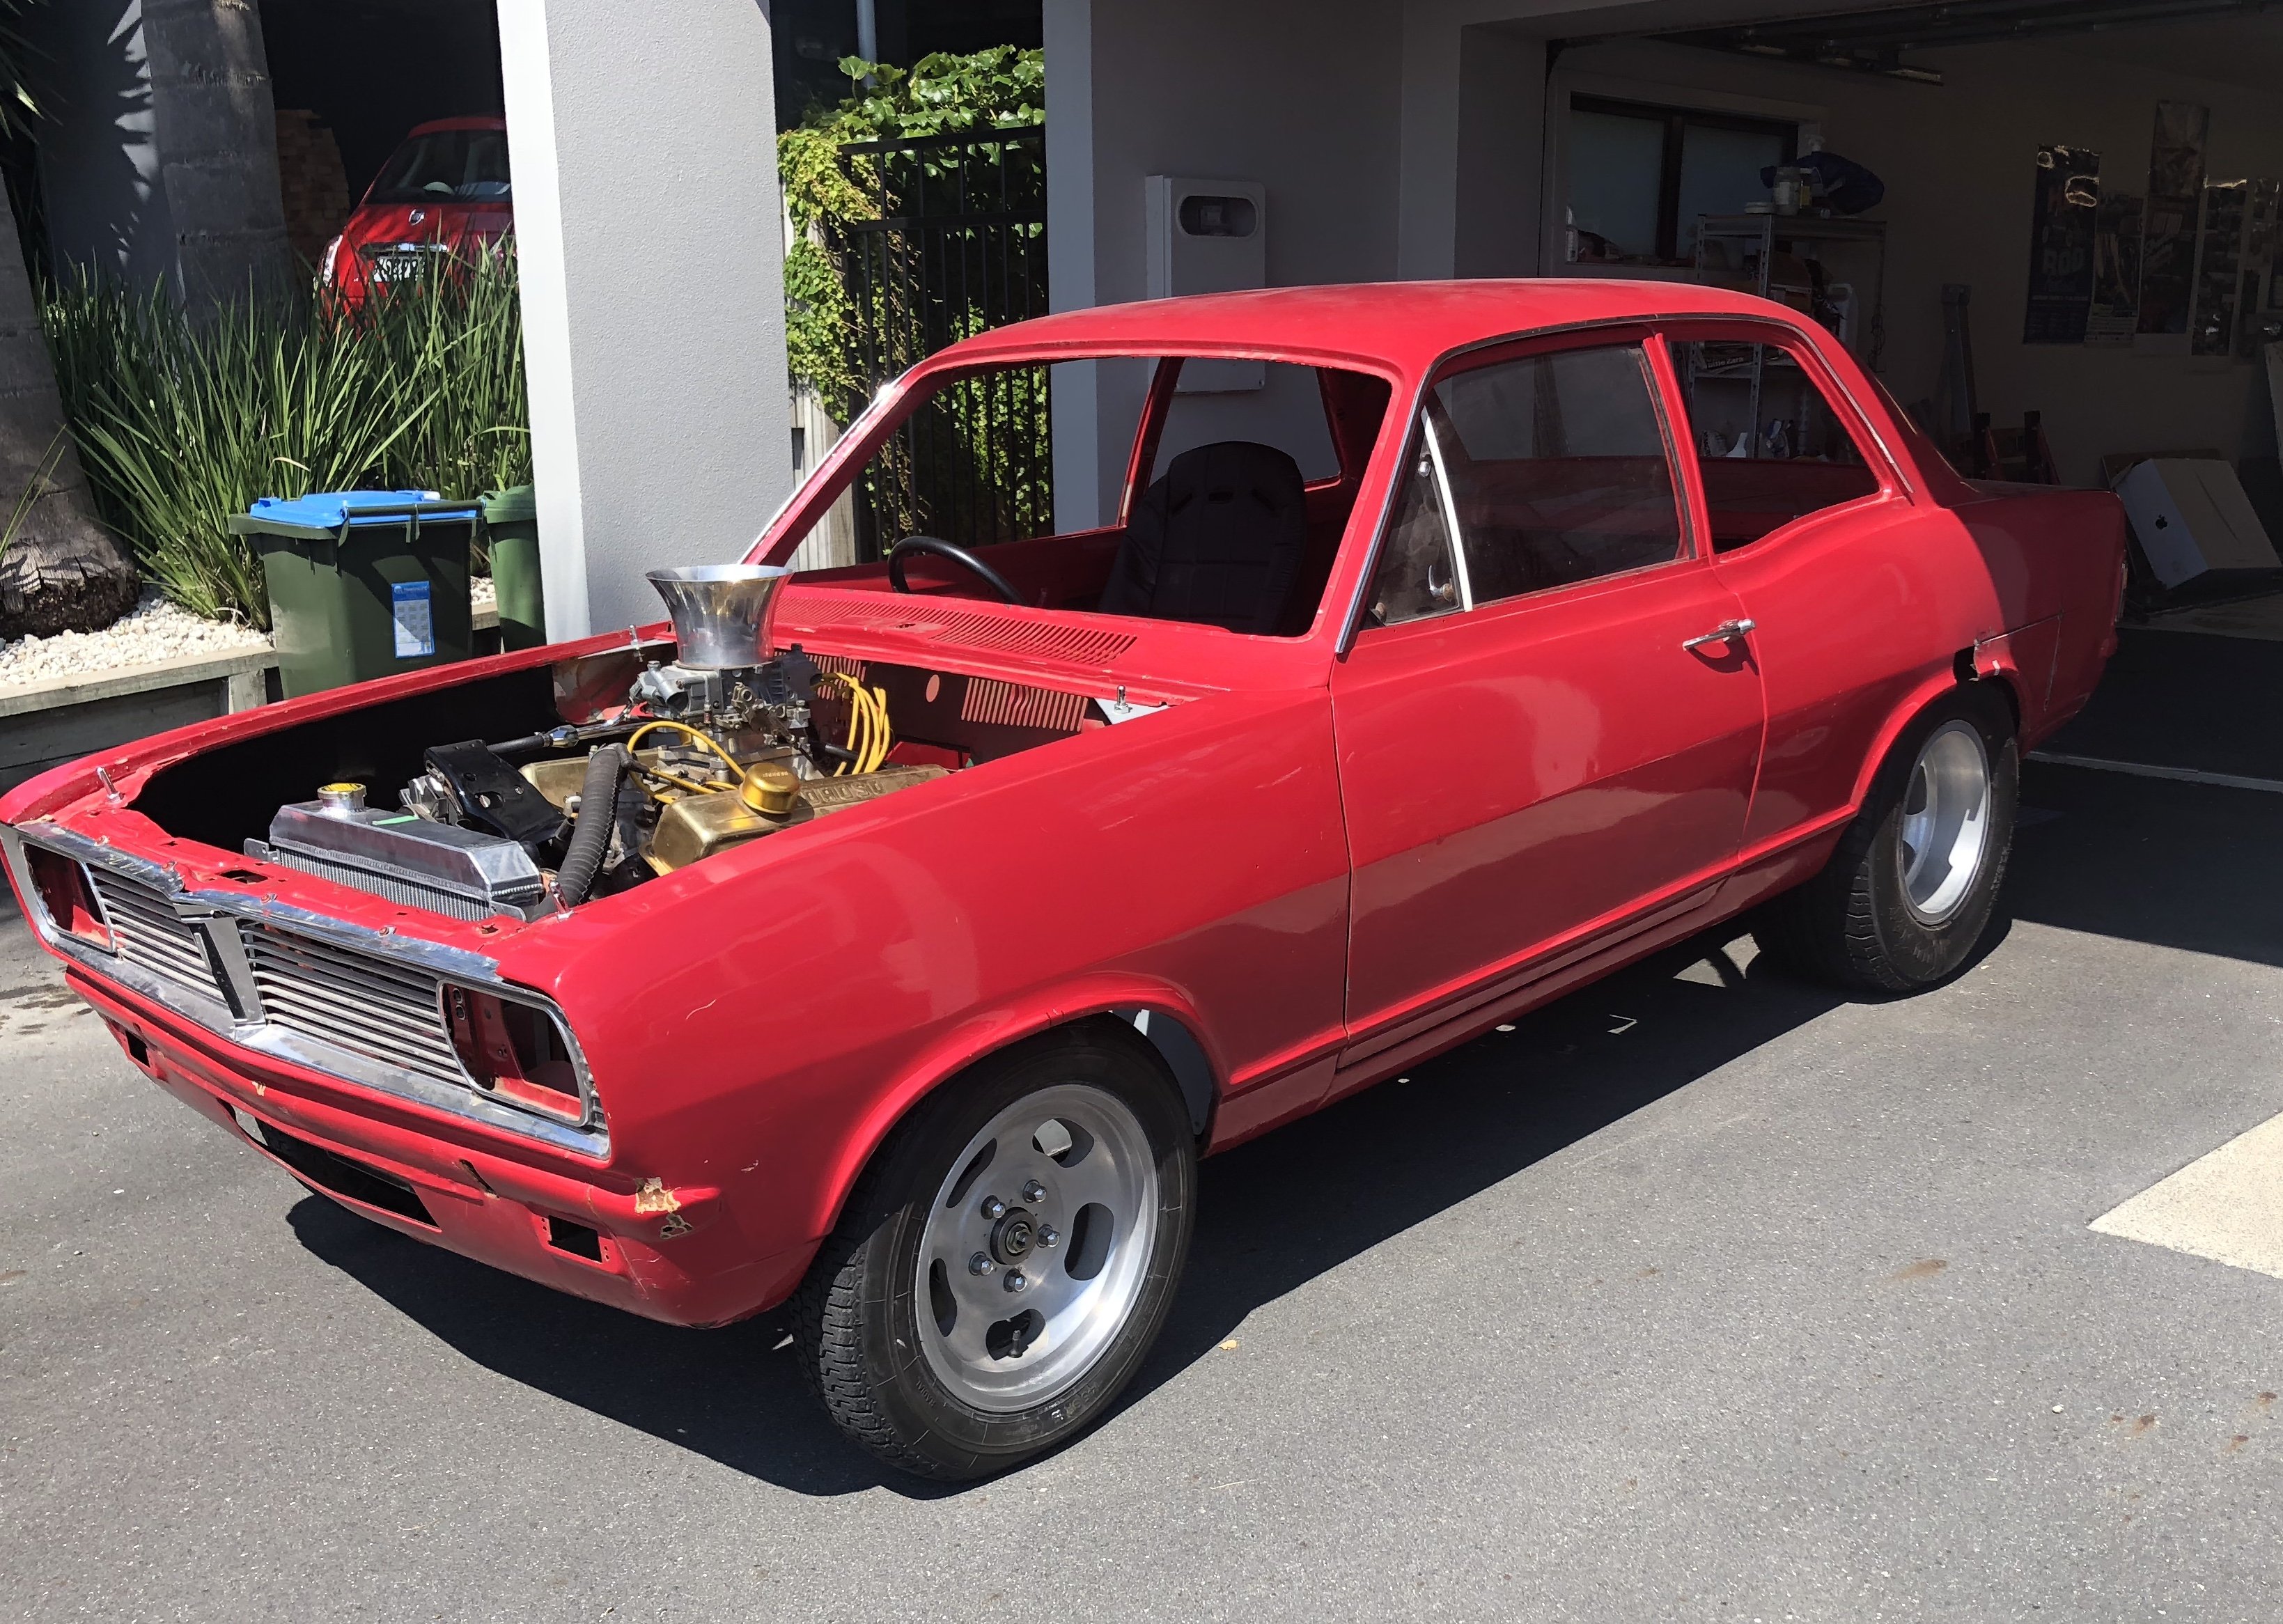
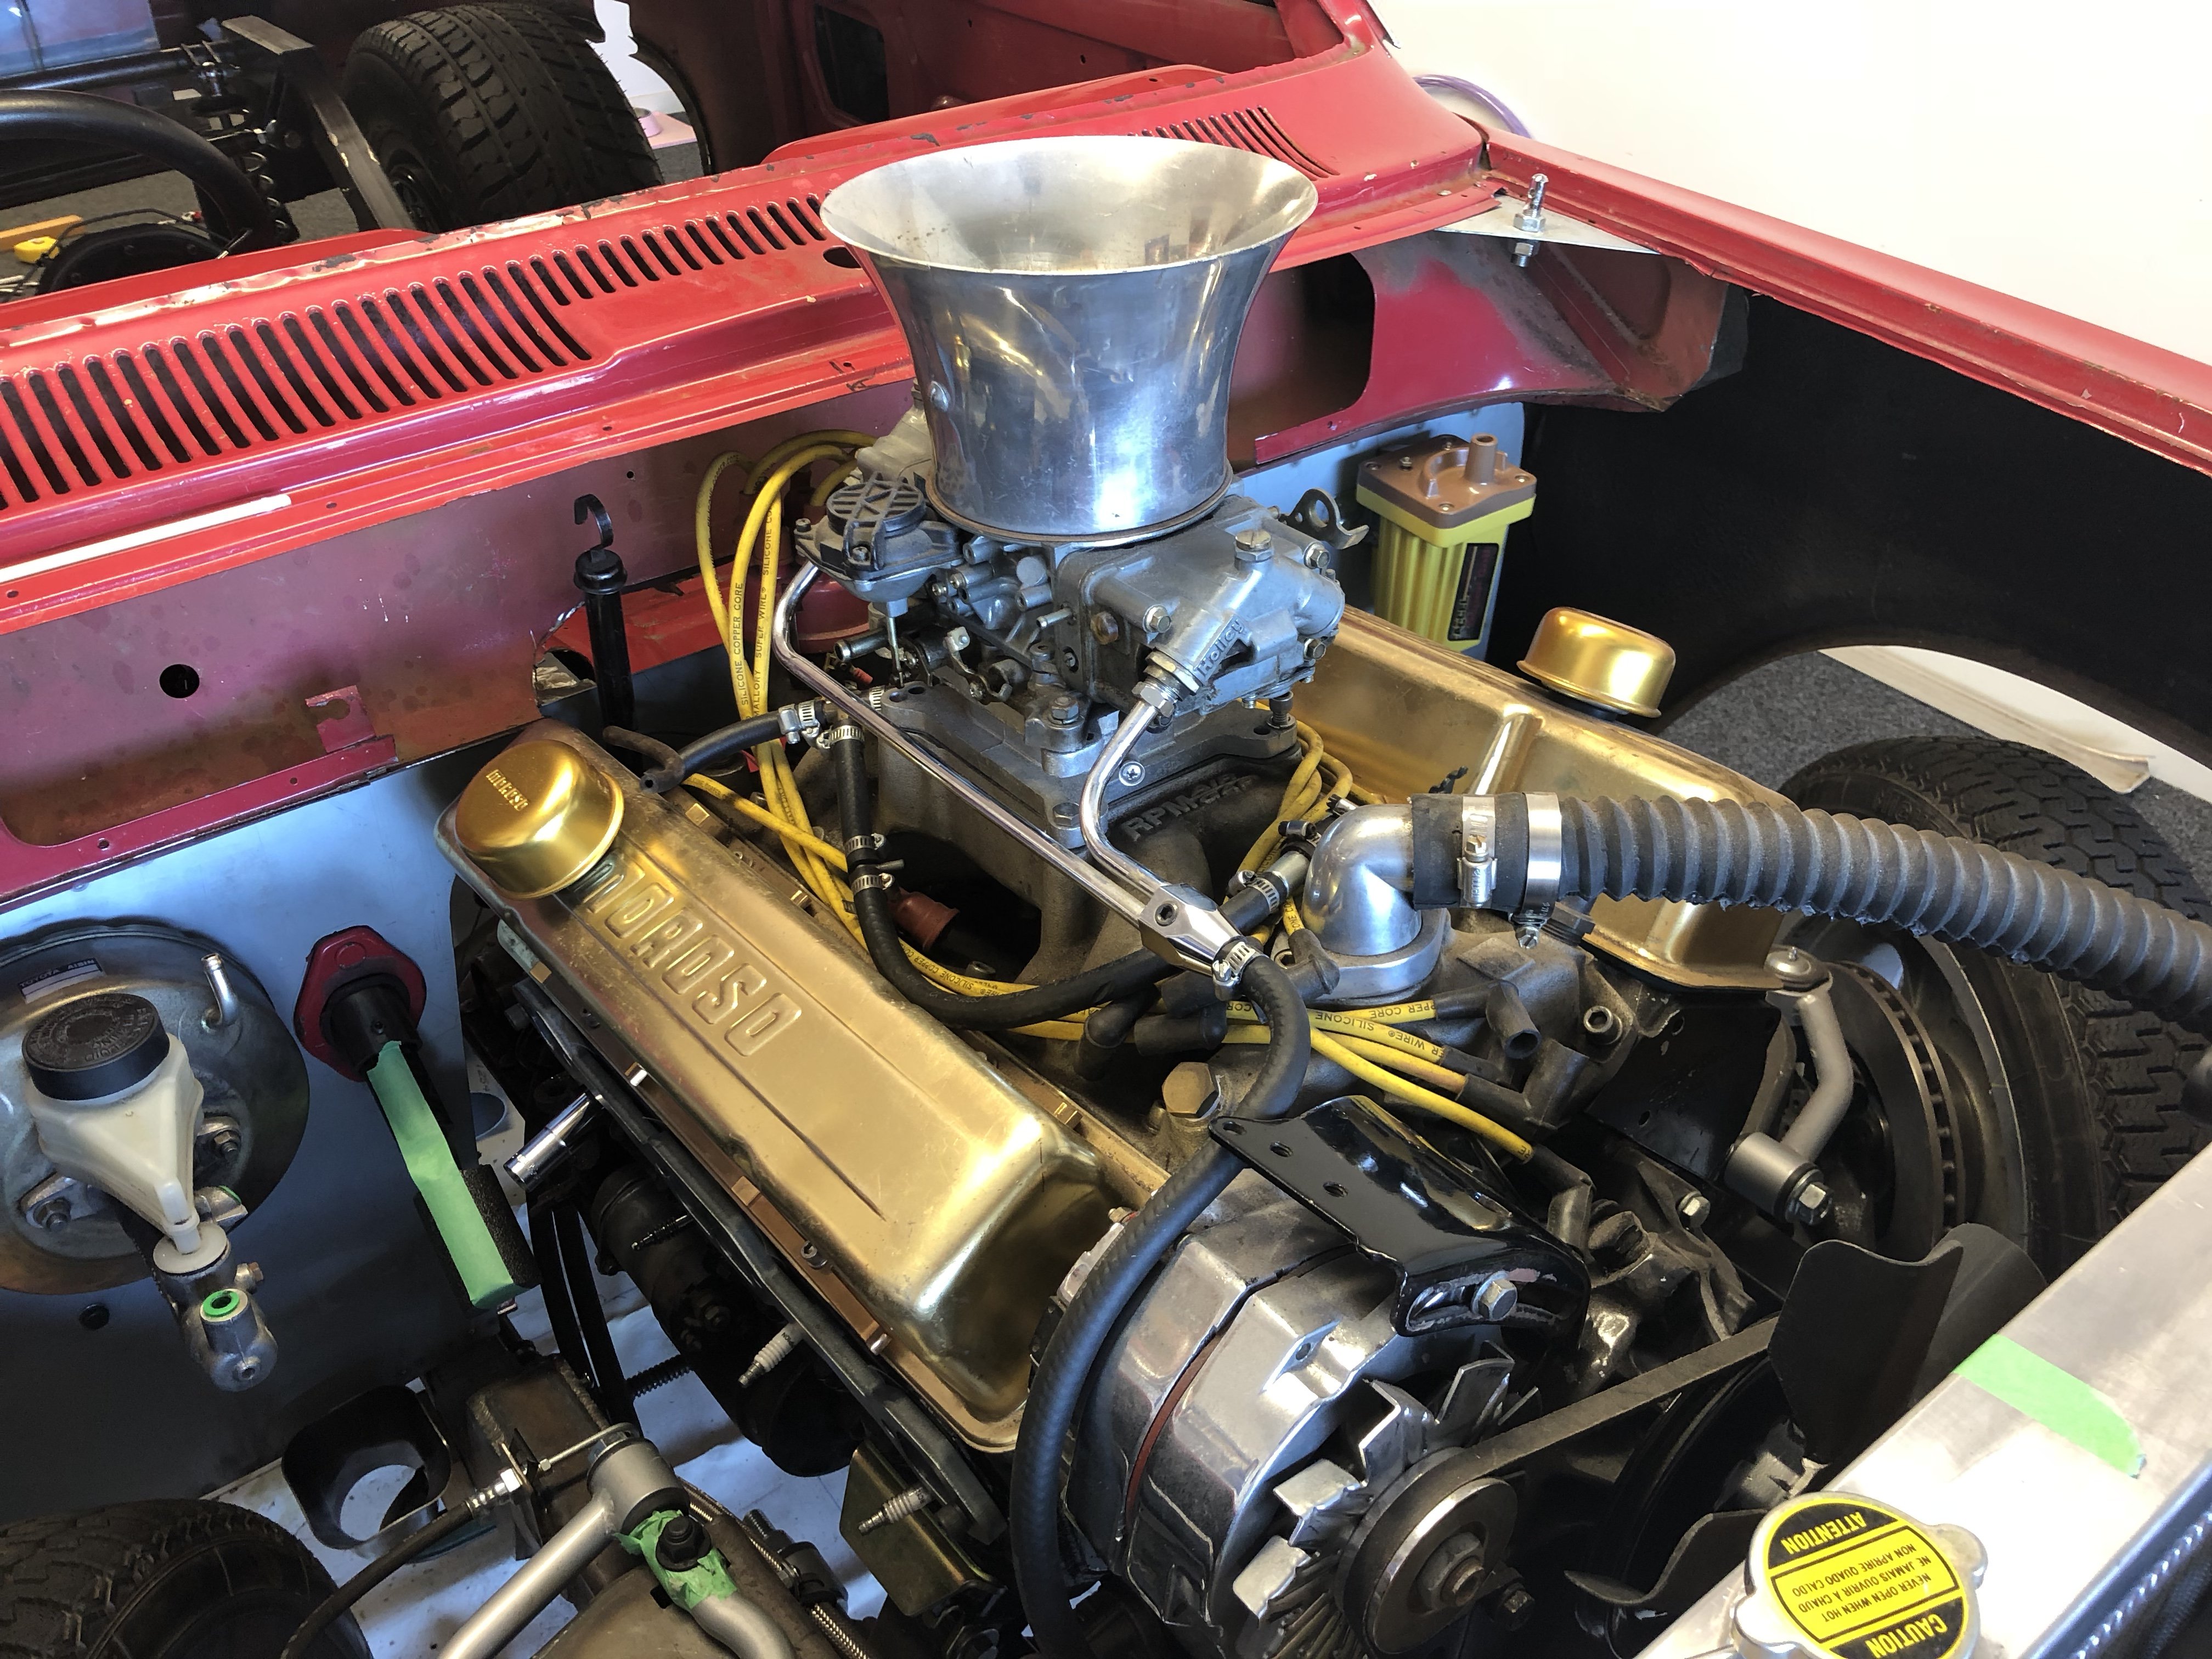
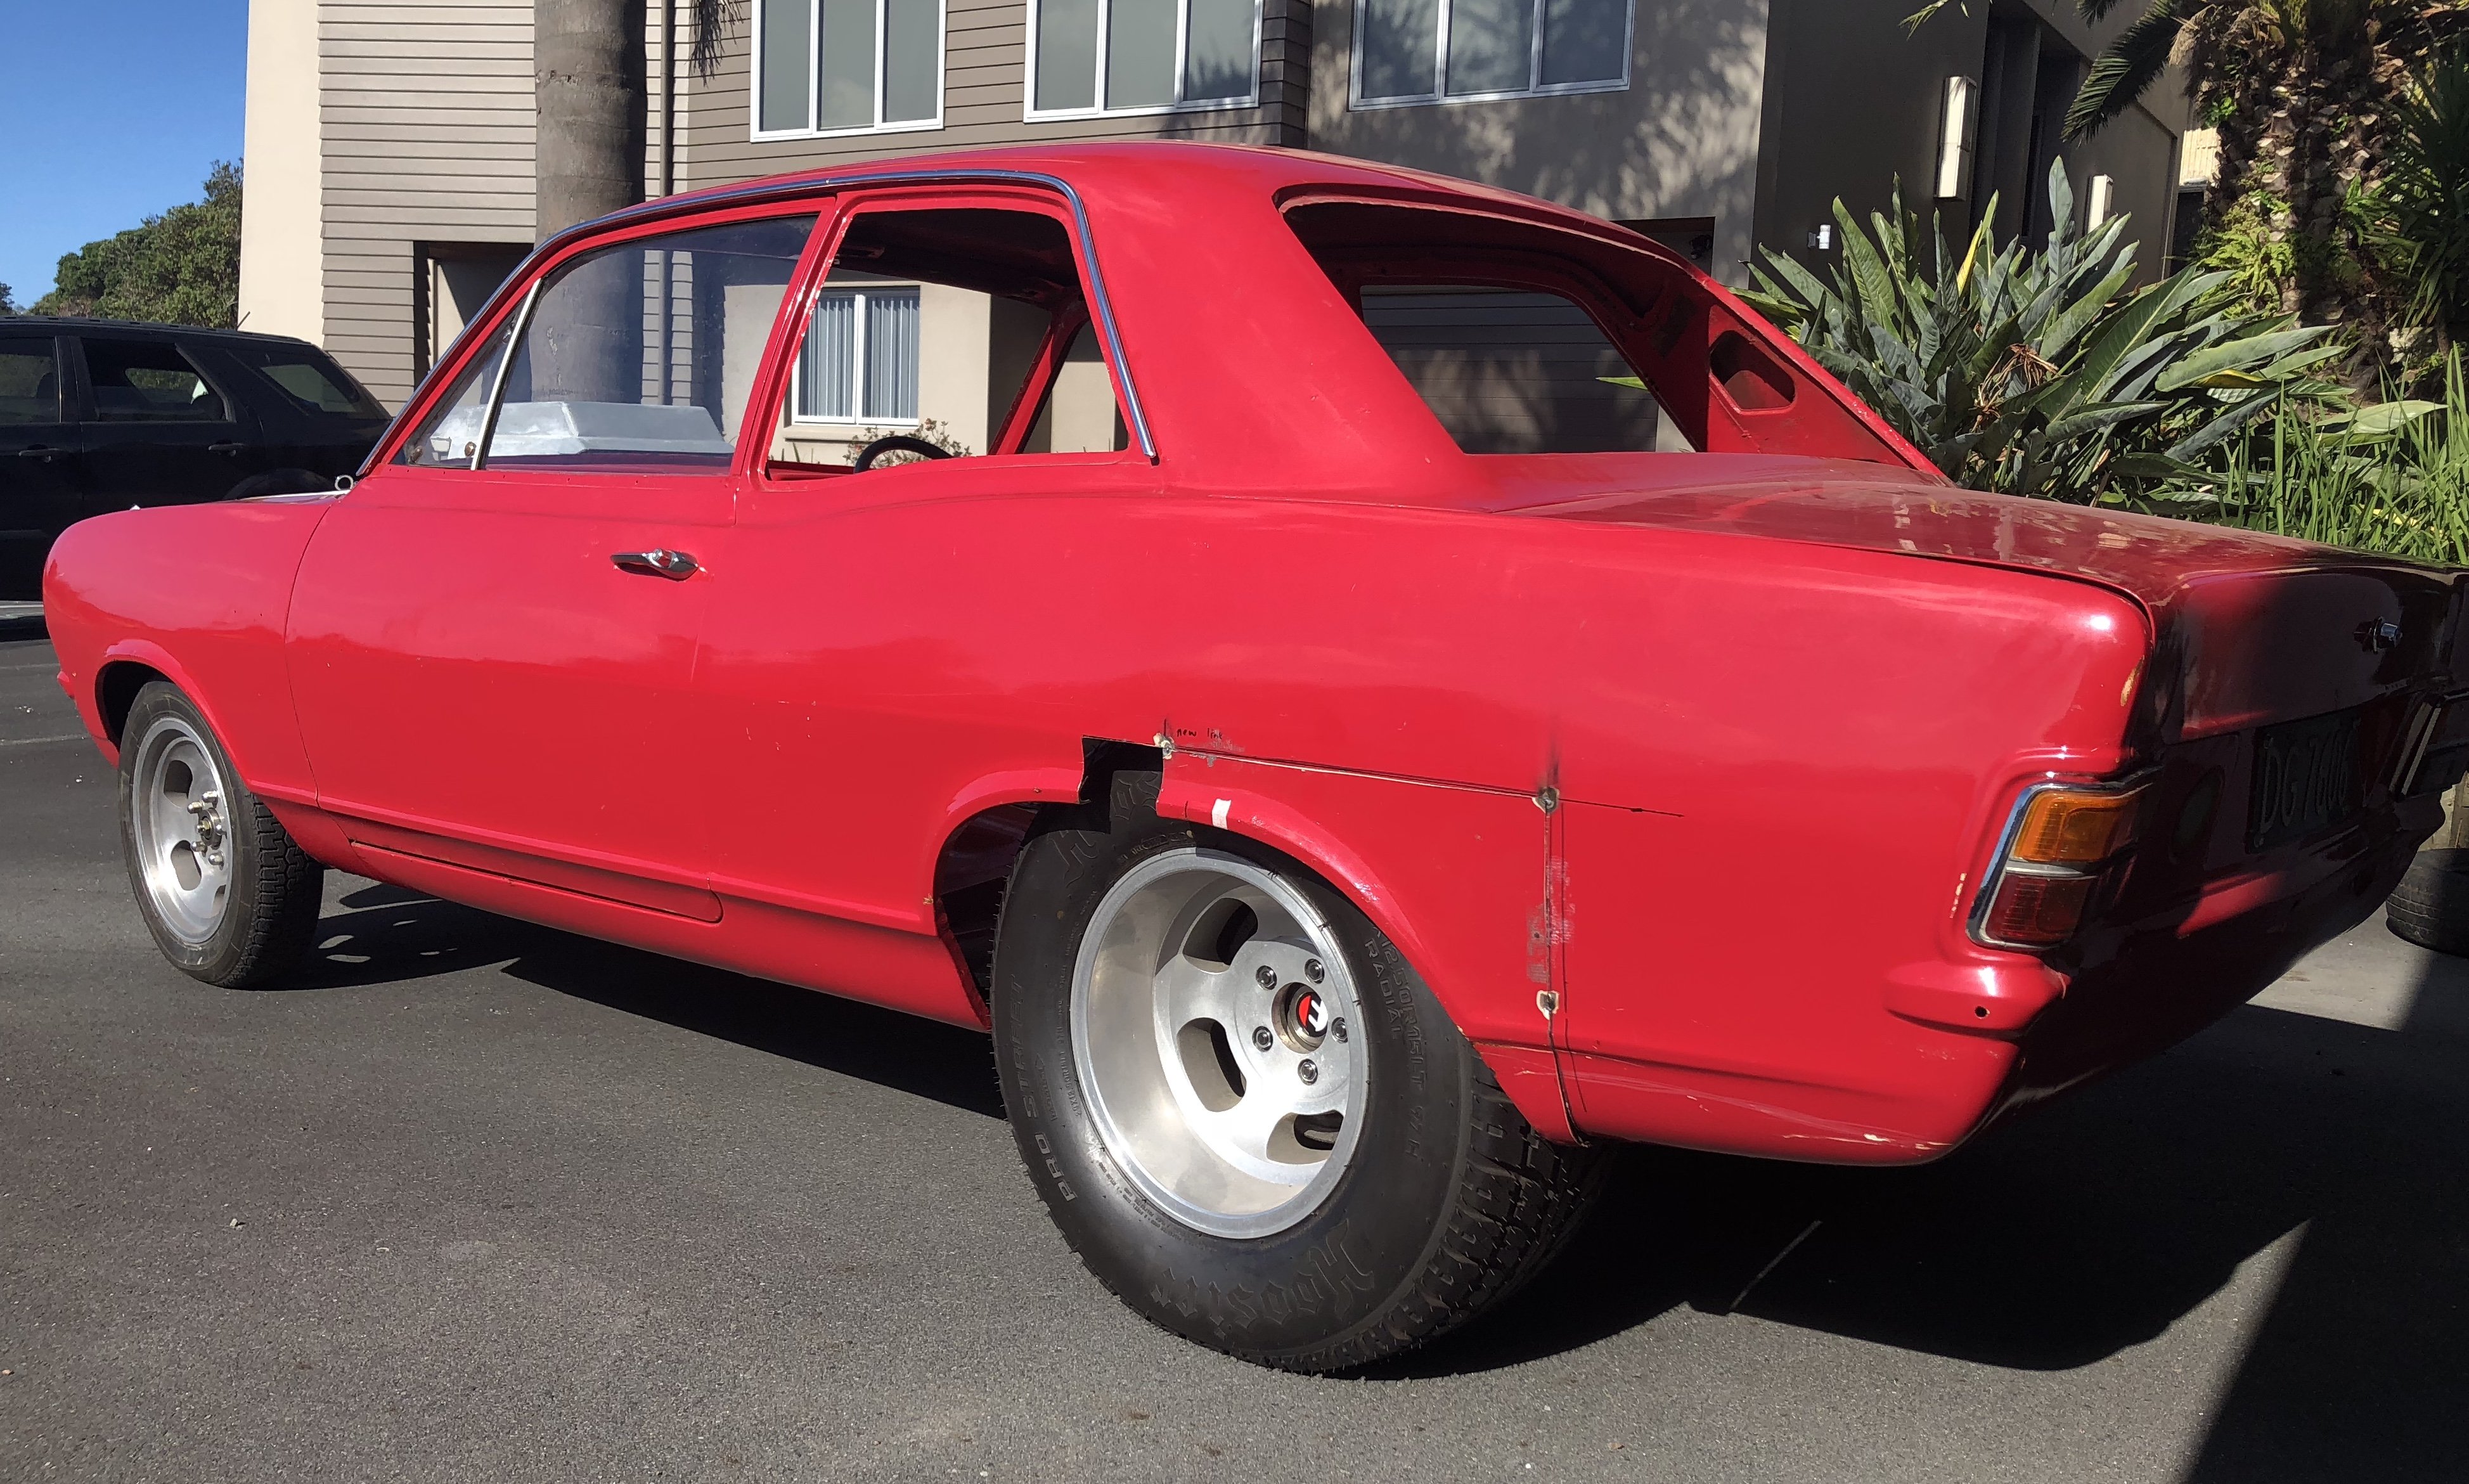
Tried another carb. No luck, given up and moving forward with motor swap. mate 4 doors down had a Crain so walked it up the rd with beers in hand this evening. 34 years and multiple beach missions the motor had pretty much welded it self to the gearbox. Couple screw drivers and a dog bar later she’s out. I’ll need to wait till next week to get rid of the block as the head and bolts ons have already filled the bin. plan.. bolt motor to box on garage floor to test clutch release before putting it in. finish engine loom and change body wiring to suit, then take it from there, hopefully get some better weather so I can deal to the frame and under body
1 point
-
If my calculations are correct it should go well, I still have to advance the exhaust port to get the full benefits, this is going to be horrible on the ears.
1 point
-
Whaddup OS! Foremost, it's been a while.. Since my last old(ish) car, I've been pretty absent from OSNZ due to new car life. Turns out that new car life is actually not what I had hoped and JZXs aren't really my thing. I'll skip the sentimental shit so tl;dr, I wanted an old car again for the last year or so. Two years of JZX ownership was cool, but I was fiending for a 1G-G again.. Well around a month ago, I began looking for a GX61 as thats what I've always wanted. It's a shame that I'm a picky bastard as limiting myself to factory twincam24 models (yikes) meant that I was unlikely to find what I wanted easily. I had a few leads to follow and quickly learnt that what I wanted in the GX61 scene was going to cost me quite a bit. Acknowledging that, a couple of weeks ago I opened up to this idea: What if, instead of getting something familiar and "dream car tier", I wing it and get something completely new. So putting this into practice, I decided to view a Y30 Gloria hardtop located in Dunedin. Some of you may know the car. It came up a week before the hand-in date for my thesis, so I chucked a deposit on it (oops) and booked flights for the day after uni finished for me. From pics and description, I thought I knew what to expect. Well Saturday morning came around and Zeb picked us up from Dunedin airport. The mini-tour of Dunedin was great and it was a pretty good way to fill in the morning before Y30 viewing. We drove past where the Y30 was located before viewing for a quick sneak peak.. Well it was apparent right then that it wasn't what I was expecting. For the money I was looking at paying, it was too much work to get it to a good 'base' type spot. It was this point when I realised that I'd be doing my South Island trip via bus or rental instead of in my own old car. Pretty sad, but I remembered I had a back up. An MS112 Crown hardtop in 033 white located in Nelson. To keep it short, it belonged to OS user: Slacker_Sam and from the pictures, it appeared just what I was after: Clean & Tidy; 80s; sedan body. To summarise, I managed to coordinate the trip to Nelson where I'd view and then buy if it was right. Turns out it was what I was after as I was heading to Picton in it later that evening. The trip back home wasn't completely without fault. A suspected dicky alternator killed the battery 45 mins before ferry boarding. Bluebridge moved us to the next ferry for free and a replacement battery had the Crown roaring again. In the North Island, Google Maps directed us through the Tararua Forrest Park via Akatarawa Road.. Holy shit, what a road.. The poor 5M felt it and developed that 'hot' smell that M series seem to produce. These fucking things have the thermal stability of an RBMK-1000 in heat... A coolant drip in two places which I was aware of in the South Island was likely the culprit, however I was loaded up with some extra water and i banged on a couple of extra clamps to put my mind at ease. I kept my eyes on the temp gauge like a hawk despite its potential inaccuracy. Thankfully the road didn't induce a 5-MRBMK meltdown and we made it back to nice open roads where the M could bask in cool fast moving air. Other notable moments include: The AC belt lunched itself on Desert Road, however, I brought tools with me including a socket set which allowed me to remove the belt in a minute and keep on our way; The trans began slipping from Taupo onward. I felt it earlier but its here where it became pretty clear. As of now, I'd say the trans needs attention. I'll flush it and see what that yields, but my sparse knowledge of torque converter automatics leads me to believe its likely lunched. Not an issue though as I'll later explain.. For now, here are some pics: Some things pertinent to the car which I really enjoy: It's untouched. No shitty headunit, no "mods", NOTHING. It has a towbar and some Bridgestone Texas alloys which I consider a cool bonus; Blue interior. 033 white and blue interior go together perfectly; OEM floor mats, need I say more; Dealer sticker and plate frame, a WOF sticker from 1997 and some ancient JAF sticker on the door; Blue glass all around. There is more, but I really don't want to ramble more than I am. I'll make a new post outlining my first impressions and initial "going over" of some bits. Discuss here: https://oldschool.co.nz/index.php?/topic/60957-michaels-ms112-crown-hardtop-discussion/1 point
-
Decided to sort the slipping A43D yesterday. Did a sump drain and fill. In the morning, I realised being lazy would prob fuck me over so went and bought a filter kit and an extra bottle of DEX III. I grabbed some new clamps and a top rad hose to sort the coolant leak too. 5Ms don't need coolant leaks and I doubt they tolerate them either. Swapped the hose, tightened the ho. A+ no leaks. I was pretty sure ol mate at Repco would give me the wrong filter kit. He was pretty certain A43DL kit will suit A43D, I didn't think it would and it appears I was right. Pretty sure valve bodies are a little different across most A series autos. Good lesson learnt! Oh well, means I have to go back and do the filter some time, but the sump I managed to clean out and then flush the trans. I cycled like 6 liters though it so I'm pretty confident it will love life a little more now. It pulled MUCH better tonight and I took it for a good wee drive. Success. Also, the sump had a magnet sitting in it. I take it this is a thing with autos? I've never done an A-T pan drop before so seeing an object in the pan took me by surprise lmao. (Yes there were axle stands before I went under it)1 point
-
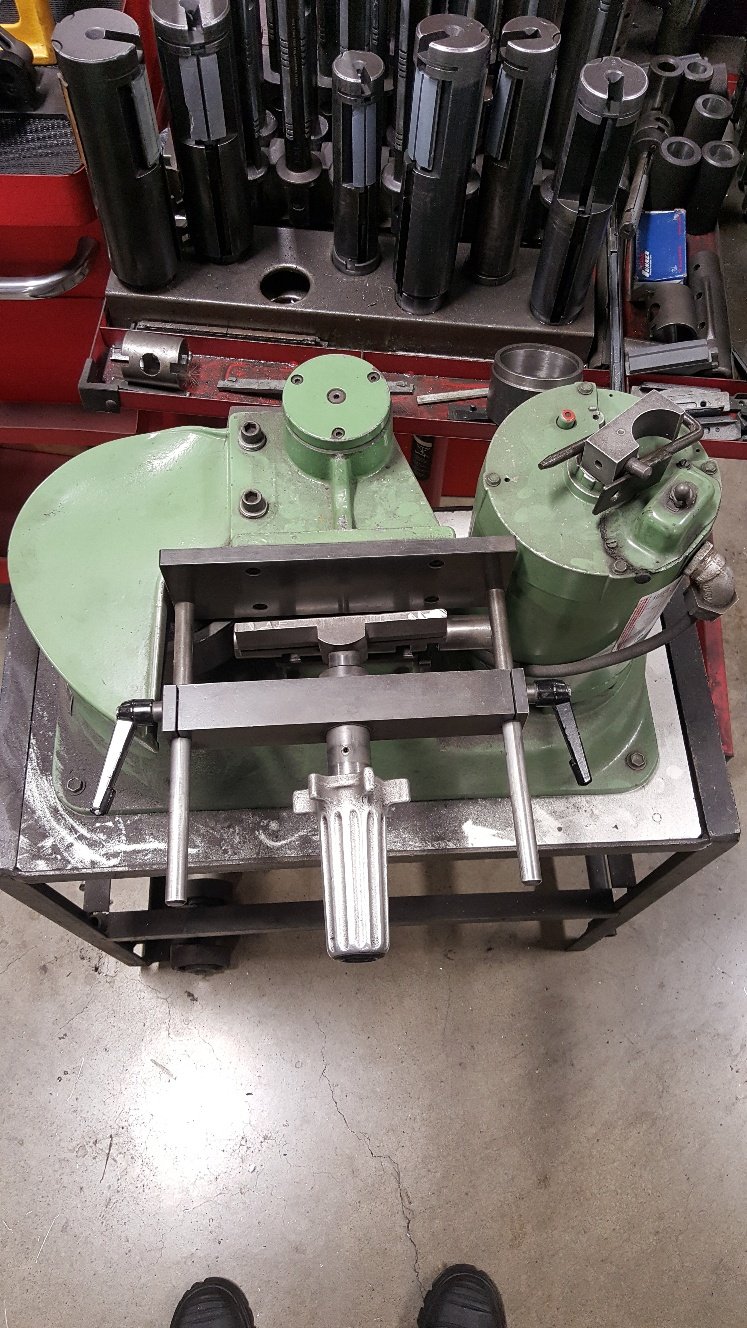
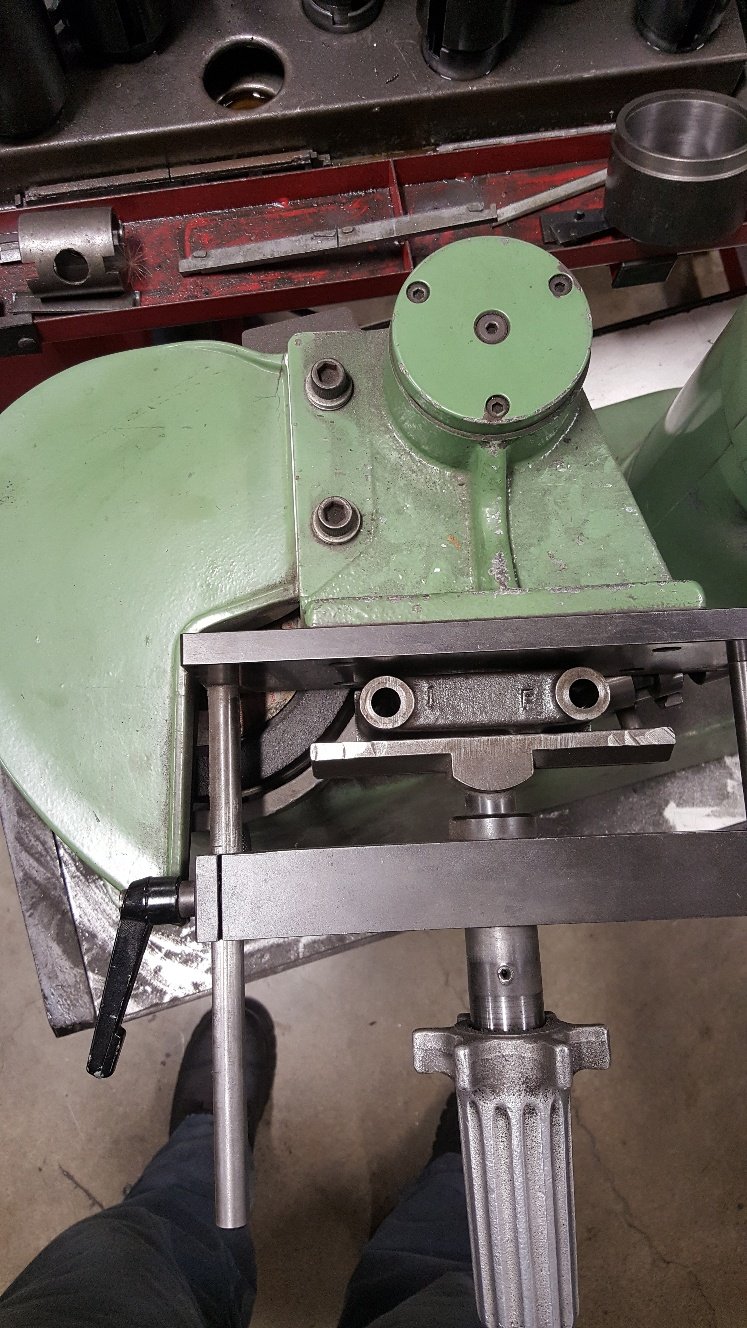
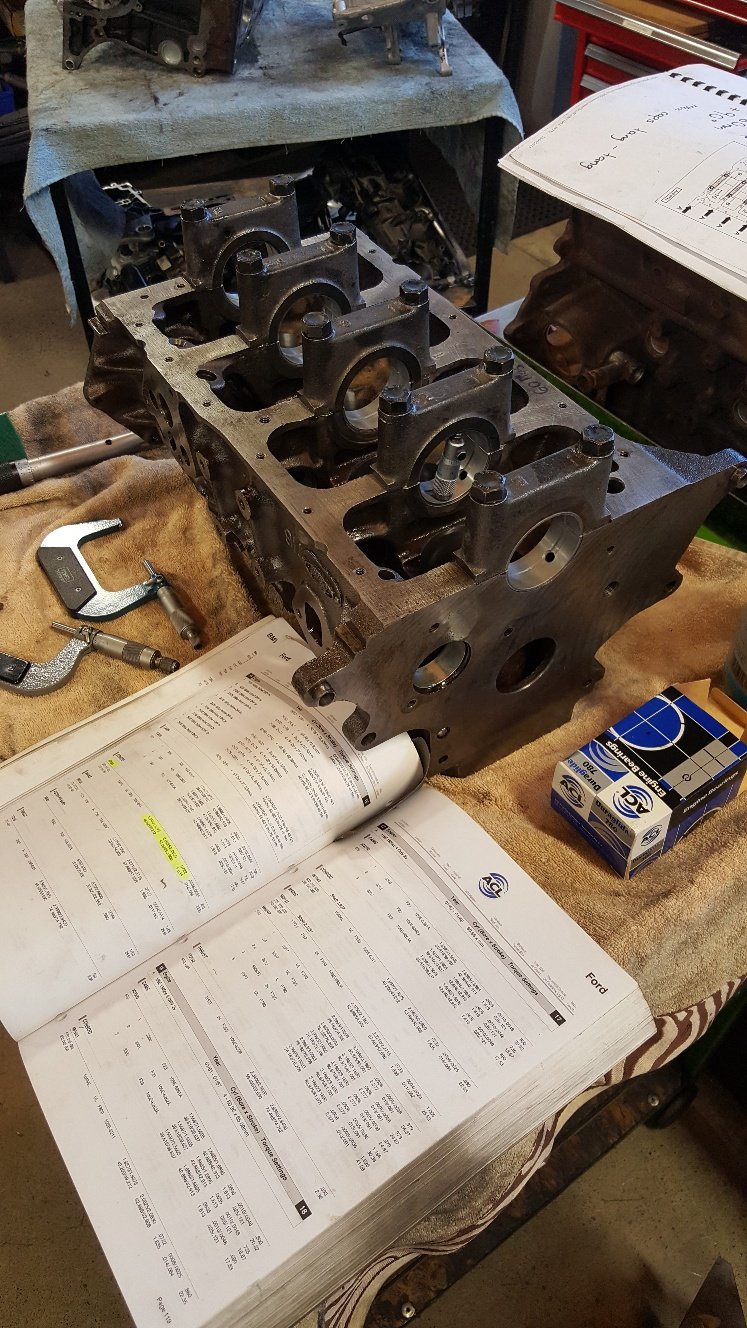
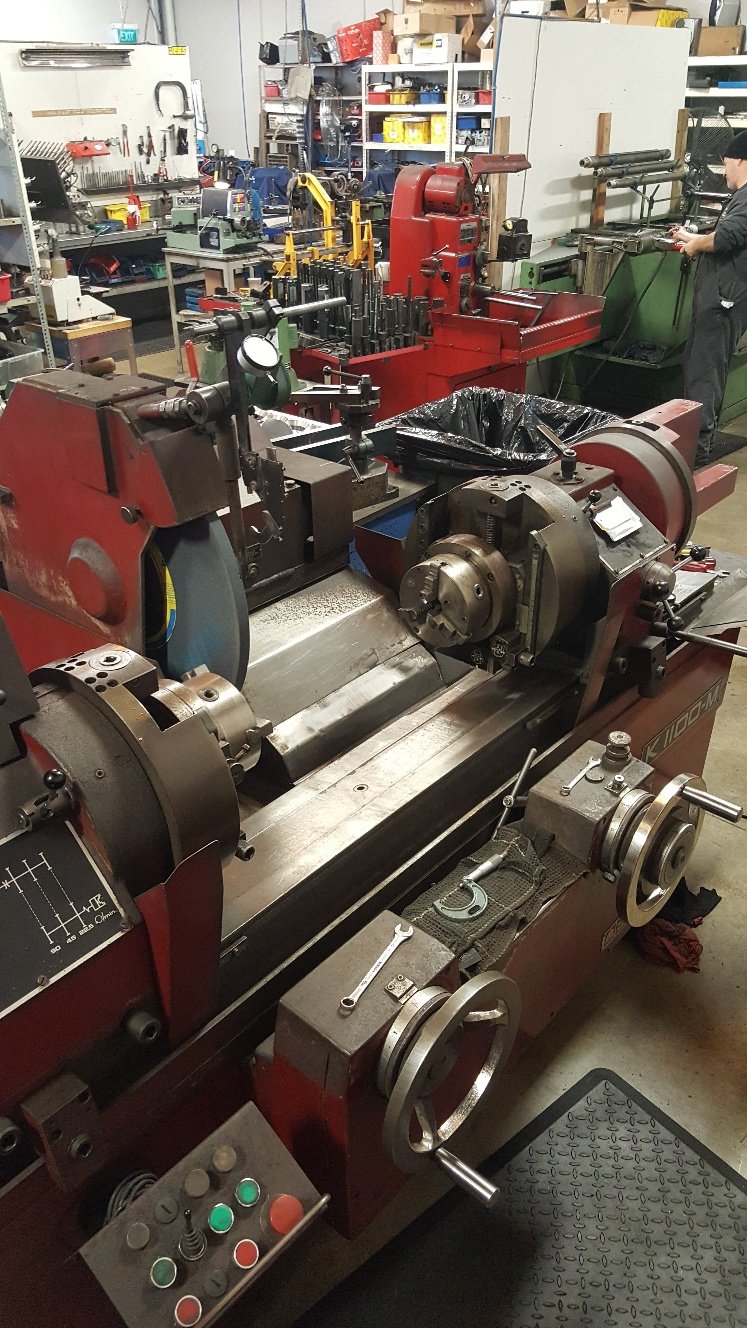
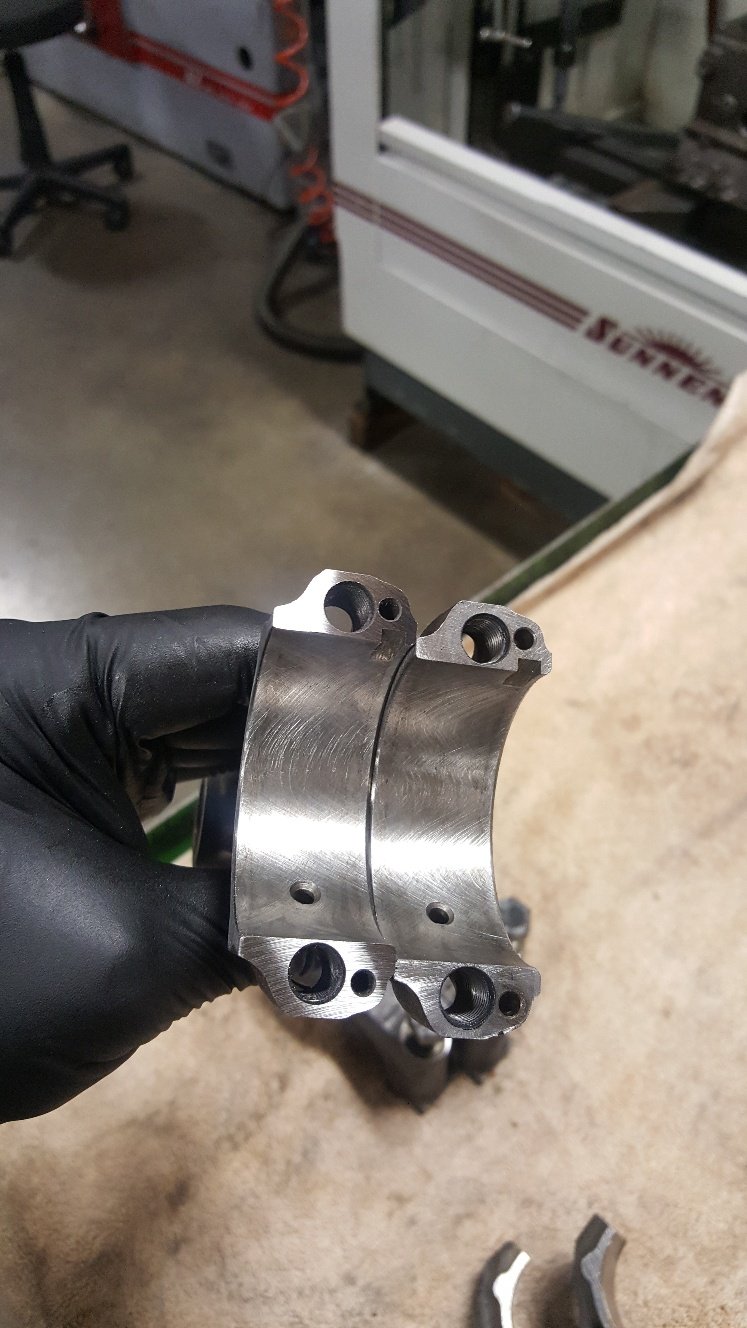
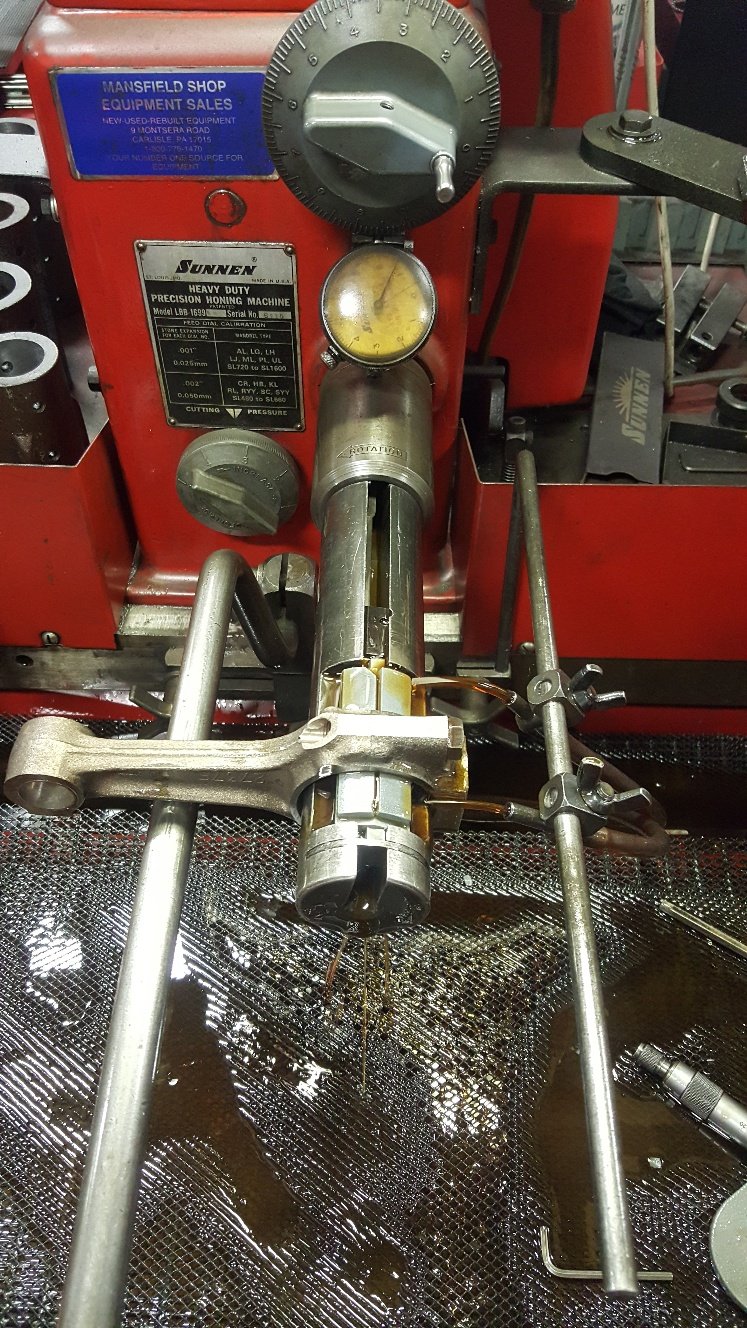
So I have the crank ground and ready to go. So I got started on the Align hone. This block didn't necessary need align honing It was within book spec in the mains. I haven't fitted aftermarket studs which is another reason for a tunnel hone, the studs normally tighten the tunnel up due to the extra torque you can apply to the stud giving better clamping load. Another reason is if you have run the main bearings this can also put the tunnel out of round and or put a bend through the tunnel. Here's a picture of the cap dresser. I used this to resize the rods earlier on. This is the main cap in it. It ground about 3 thou off each cap. First picture is the cap ground and ready to be torque up back onto the block. The next picture is with the block in the Sunnen Align hone. Sunnen is one of the industry leaders in honing. Our block hone is also a Sunnen Cv 616. So I just refitted the main bearings to check clearance. I've got 2 thou vertical oil clearance in the tunnel. Its nice and straight now. This isn't something we do to every block as some don't need any attention. But most old blocks either weren't that great from the start or have had a hard life.
1 point
-
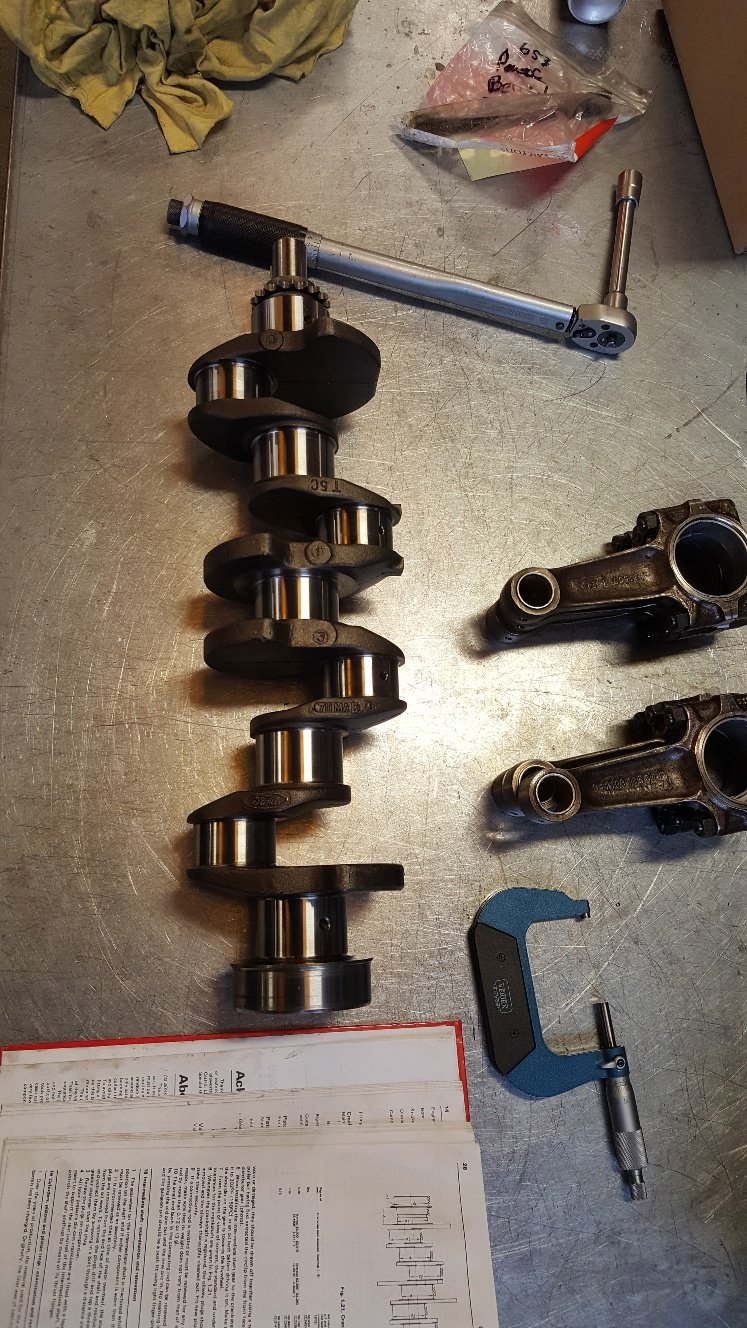
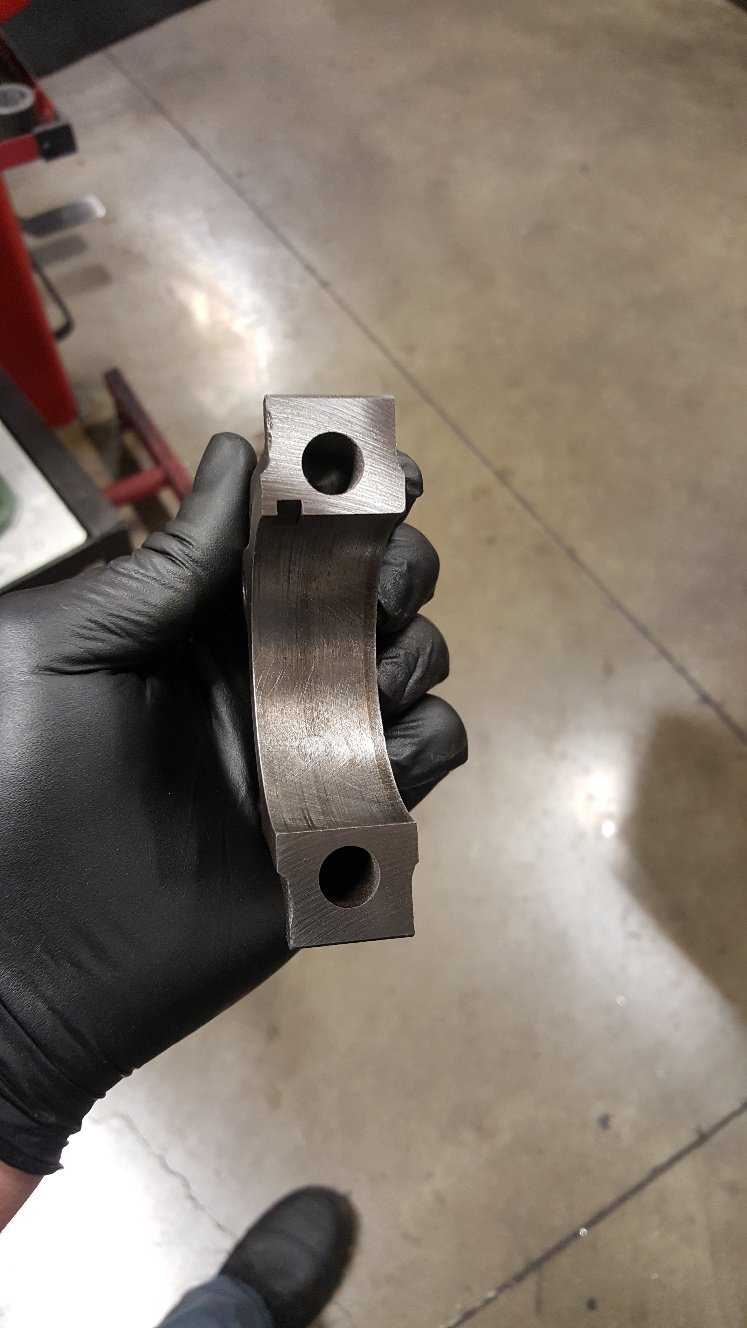
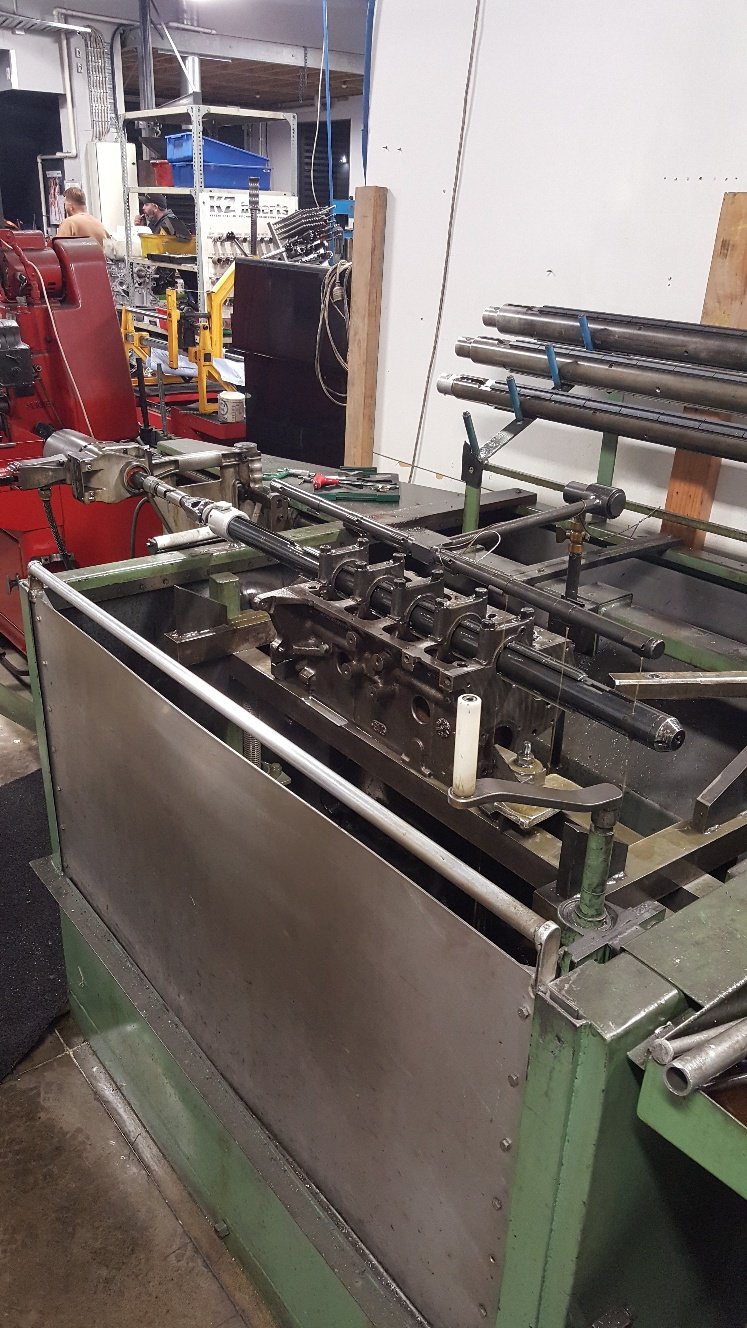
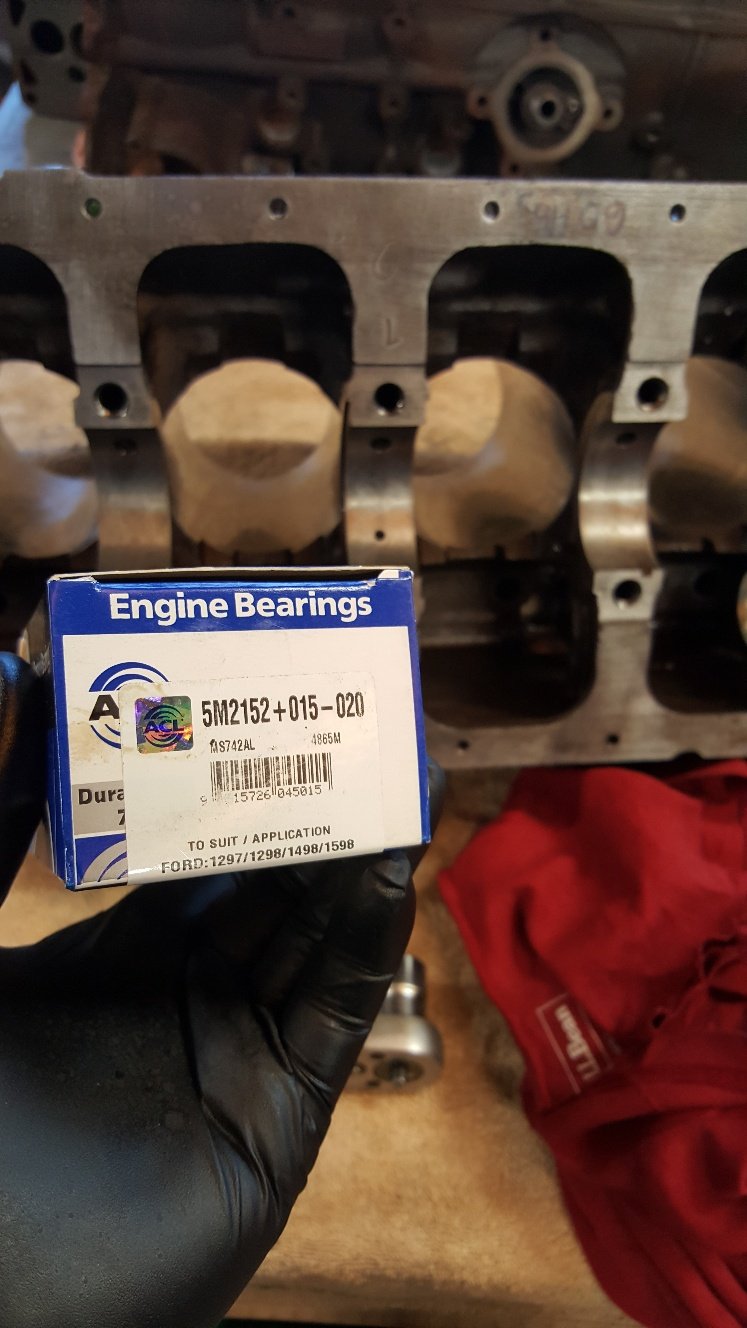
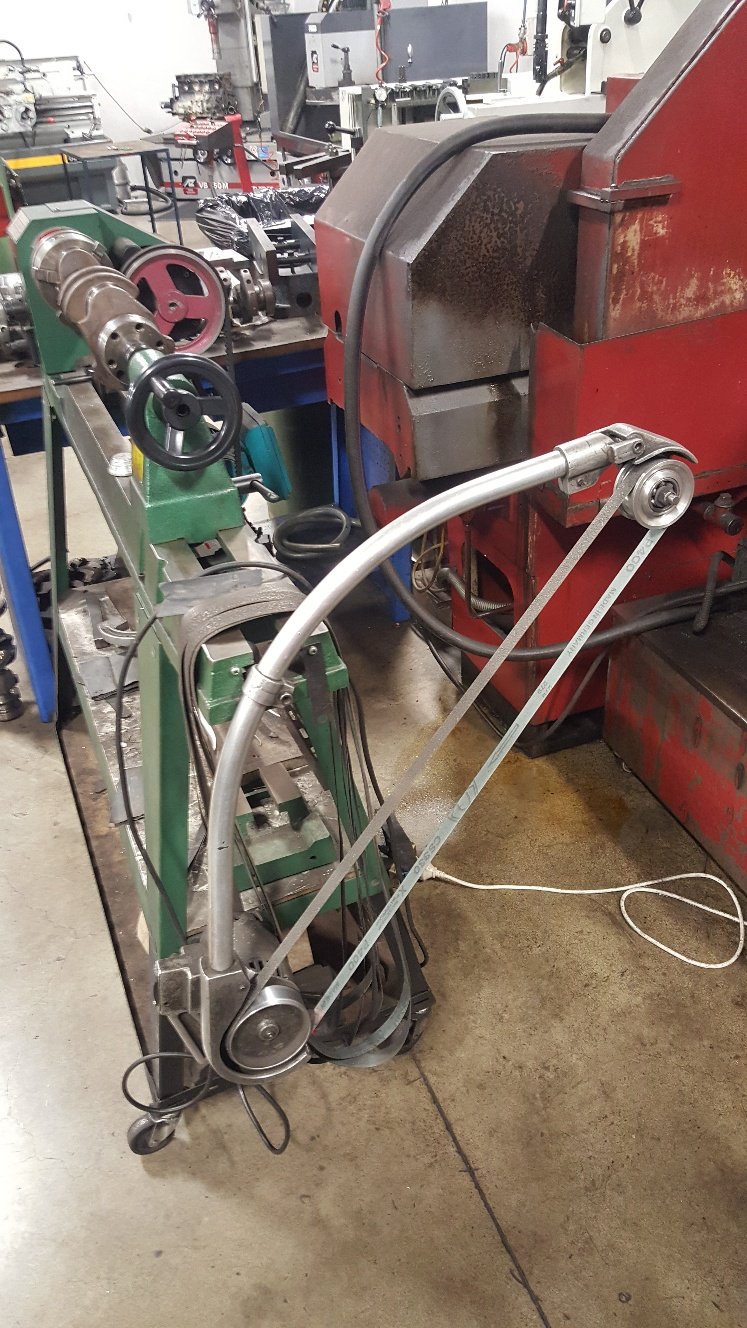
So i got my hands on some plus 15 back -20 main bearings. Thanks to Ford and their below average machining they mis machined the main tunnel on some of their blocks and had to come up with a solution of +15 back bearing to take up the slack. These can be challenging to get at times. So then I mount and measured them so I had a size to machine the crank too. Got the crank dialed in the crank grinder. Start to bring the wheel in and just touch the journal and you can see the .002 thou wear. The grinder has just started to clean up the left side and a bit in the middle. Once it's all ground we put it into this modified wood lathe we use for polishing.
1 point
-
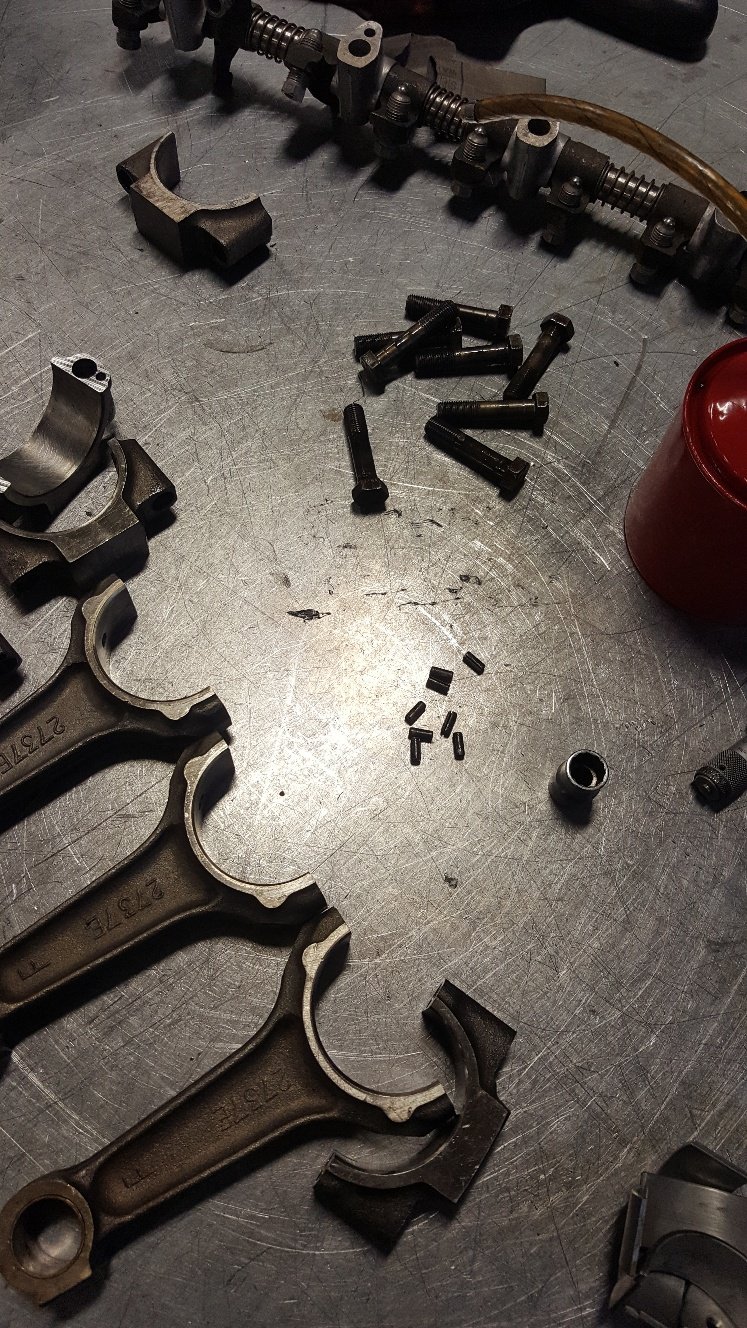
So I'm just trying to get the short block completed at this point. There's a fair bit of maching in the cylinder head, fitting valve inserts so I'm just concentrating on the bottom end. So I measured up my crank and found that the mains are worn about 1.5 thou. But the big ends are within book size. So I mount and measured the rods. I found that I had 2.5 thou vertical oil clearance. Which isn't a major issue but I'm building it for myself so I'll resize them to tighten them up. We would offer this to any customer but more often that not the budget comes into play. And budgets generally compromise most engine builds. My budget is definitely compromising this build mainly in the parts department. So I removed the dowels and grind the rod and cap parting faces. Unfortunately I didn't get a picture of the cap dresser. Note the rod thats been ground on the left. Now I reassemble the rods and hone them back to a tighter size than they were. I want them three quarters of a thou tighter. Now that they are all honed to the same size I will mount and measure with the bearings fitted to double check my clearance. This is just a picture of them apart showing them honed and ready for bearings.
1 point
-
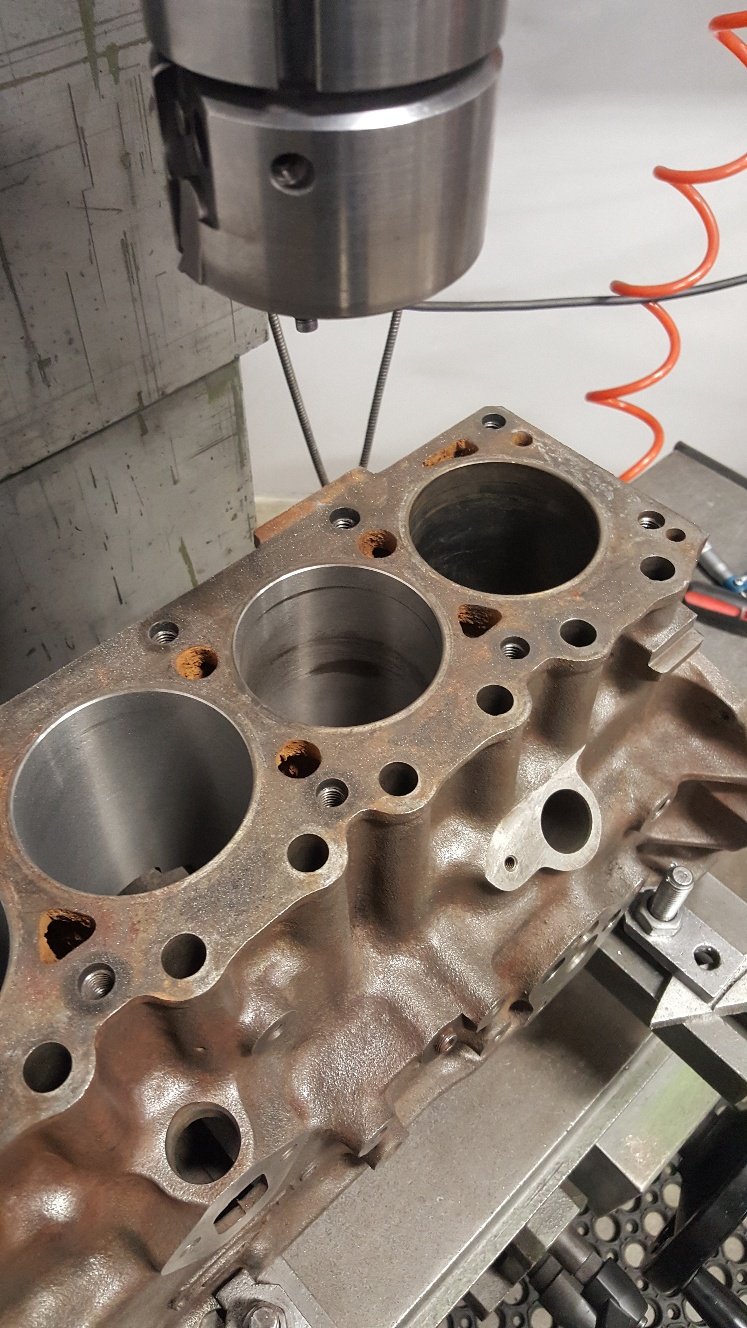
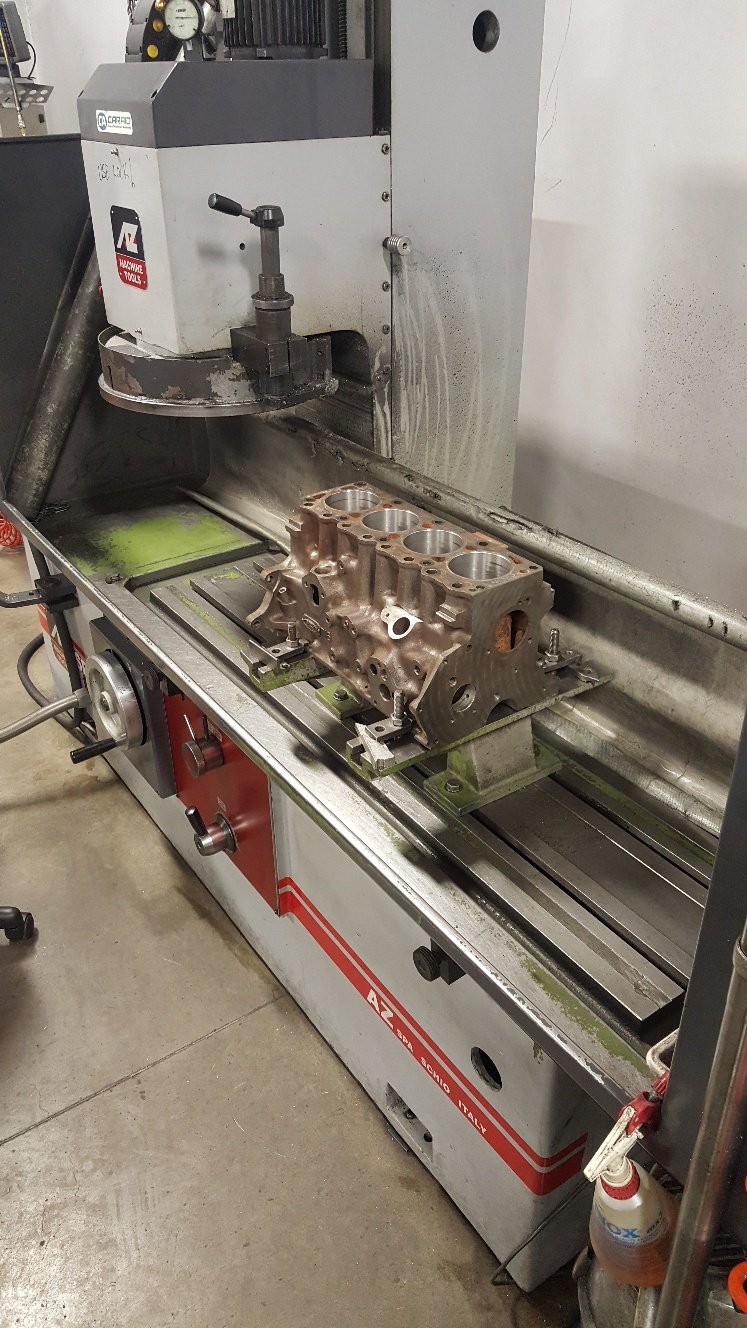
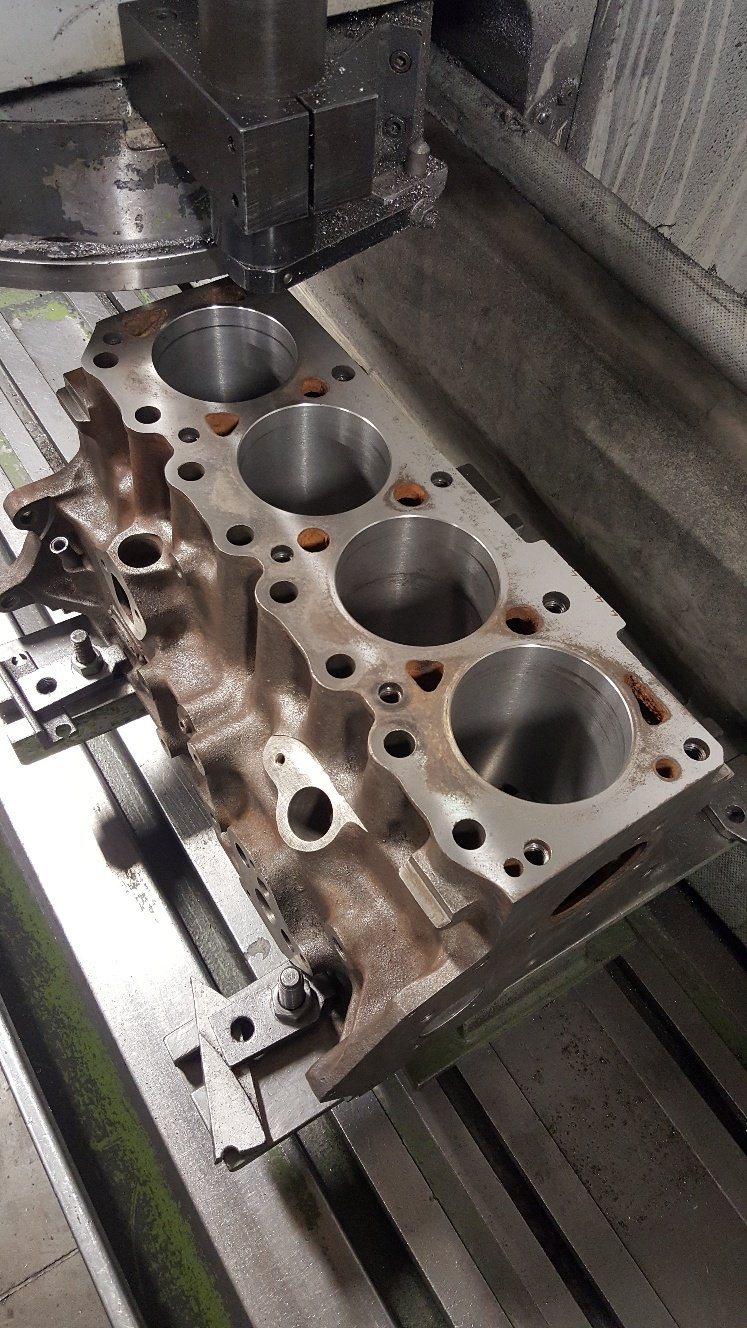
So I got the block into the boring bar. It's pretty straight forward boring a block. Doing a cylinder liner is a bit more involved as far as the boring bar is concerned. This block is at 30thou over or .75mm in metric. I have bought 40thou over or 1.mm pistons. It has a bit of wear. But hopefully it's should clean up once it's honed. This picture is of a test cut. So you dial the boring bar head into the bore. If you have a decent amount of wear it pays to slightly offset the bar towards the wear so you clean all going well at the next oversize. So in this picture you can see the boring bar hasn't totally cleaned with this size cut. I have only set the bar at 81.90mm. So I have .1mm or 4thou to hone out to get to our finished size of 82mm. We generally like to leave this amount to hone to achieve good rk rvk this is the depth of hone pattern. I'll go into that a bit more once we get to honing it. Once we've finished honing we normally go to the surface grinder. The top of the block is a little corroded so I'll probably take a few cuts to clean it up. So I've done a light cut to see how it looks You can see it still needs more off it. In this case it's not a issue to take more off the deck. When you are dealing with a late model diesel or performance engines that have been set up with good tight clearances it pays to watch how much your removing as you may have to detop your pistons as they may start getting to close to the head once assembled. Also valve reliefs can also need deepening. But this is more so a issue in extreme cases. This good old xflow should be fine. But i will be checking all this later once i can dumby the engine up
1 point
-
1 point
-
1 point
-
Ordered pipe bends yesterday to start working on the headers. looking more eighties everyday.
1 point
-
1 point
-
1 point
-
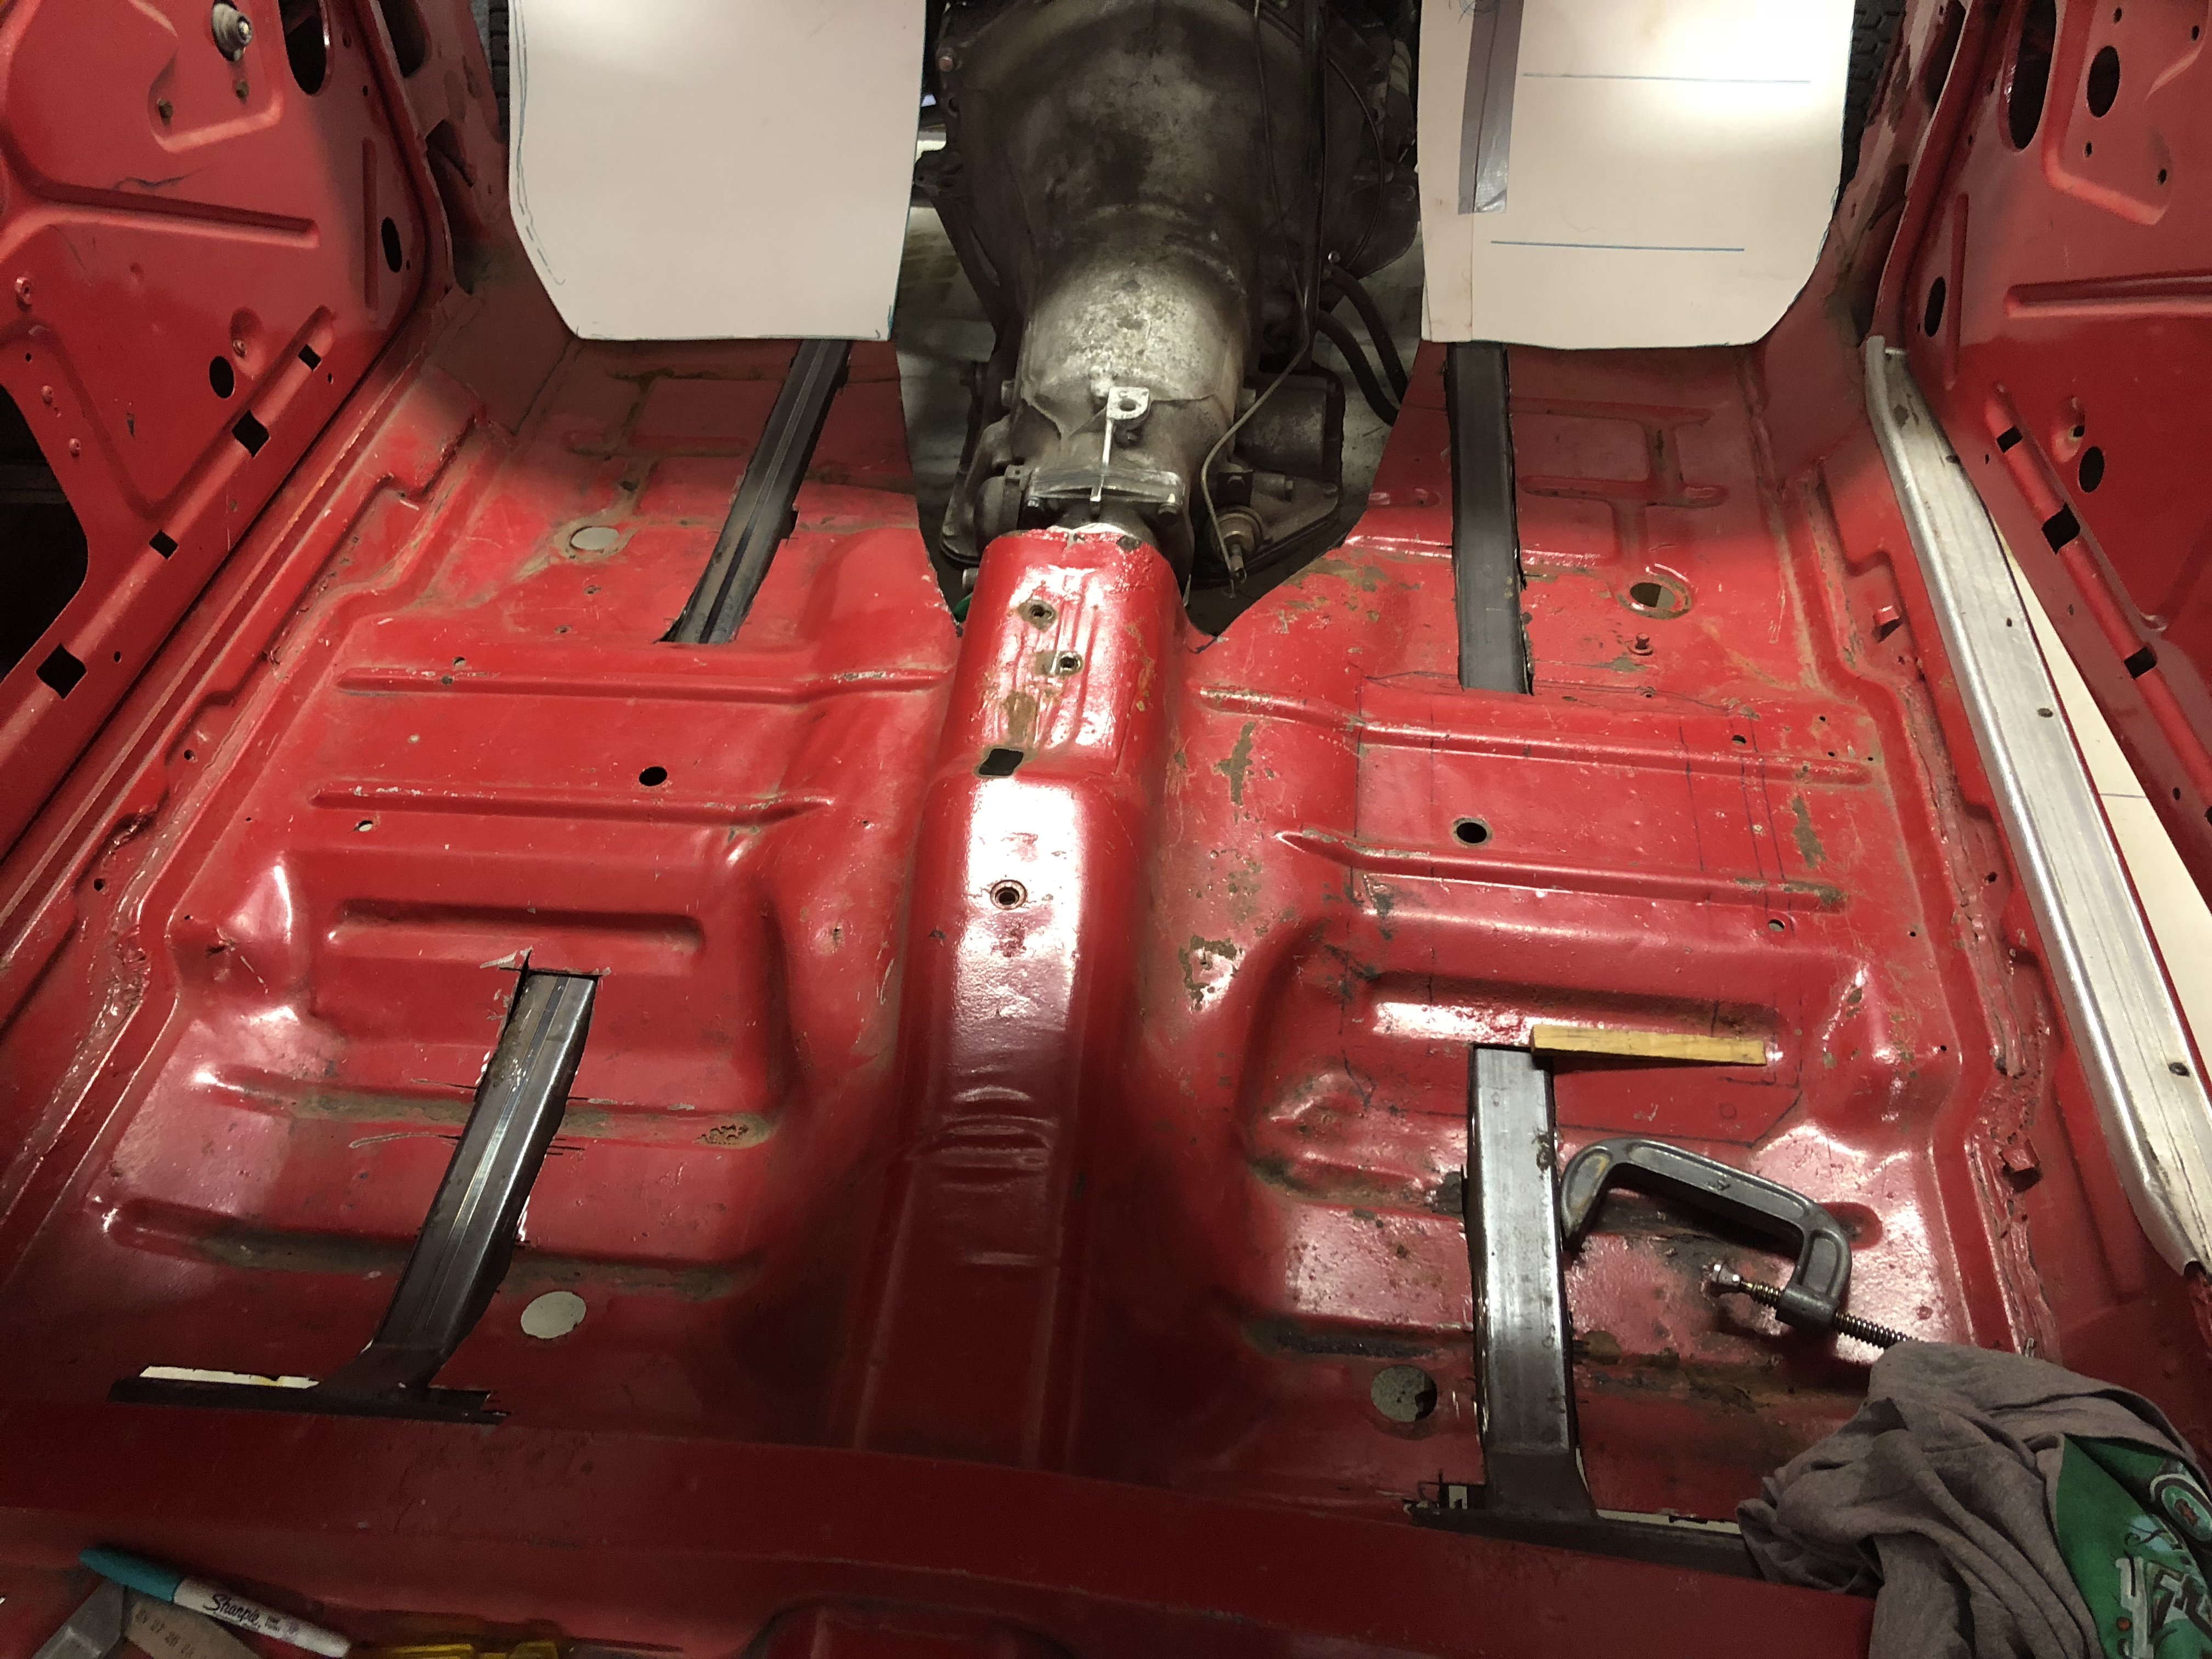
Finally got the body sitting where I want it to. starting work on the firewall.
1 point
-
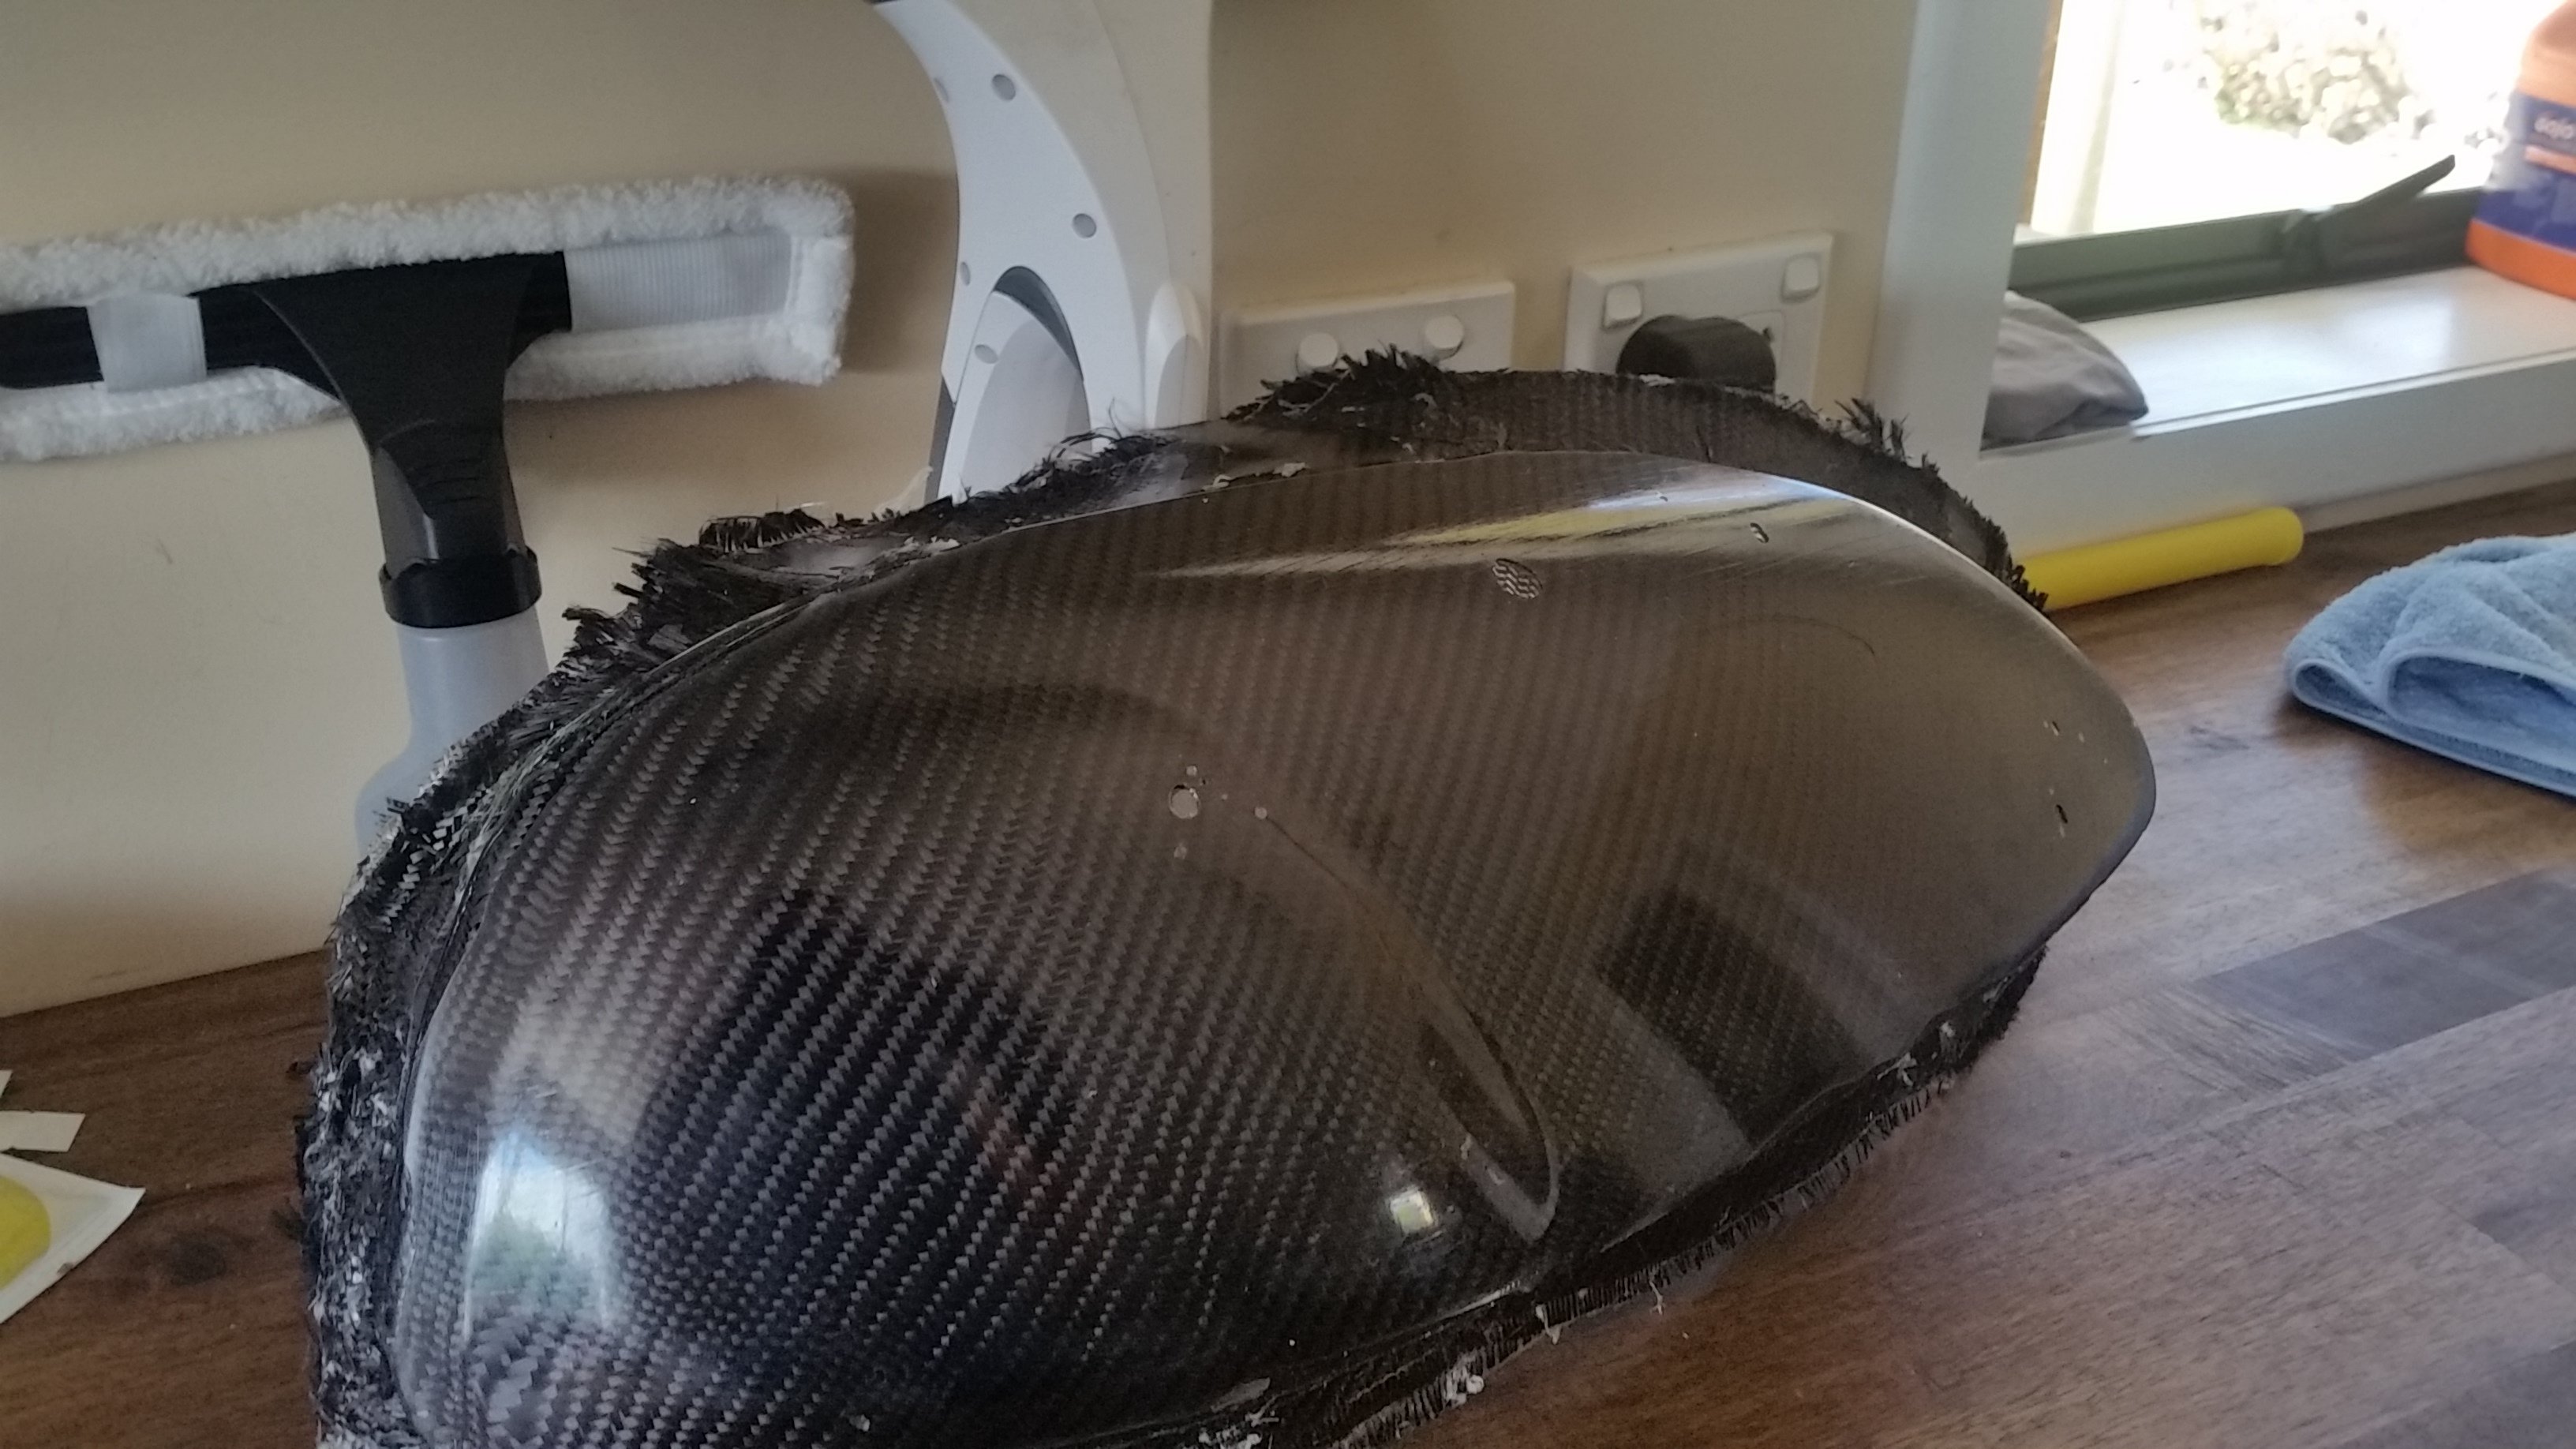
Not sure if I should get some epoxy or try to rangi up a vacuum system or just carry on as I am.. Did some reading about prepreg but seems like the cost skyrockets / is not really novice spec.
1 point
-
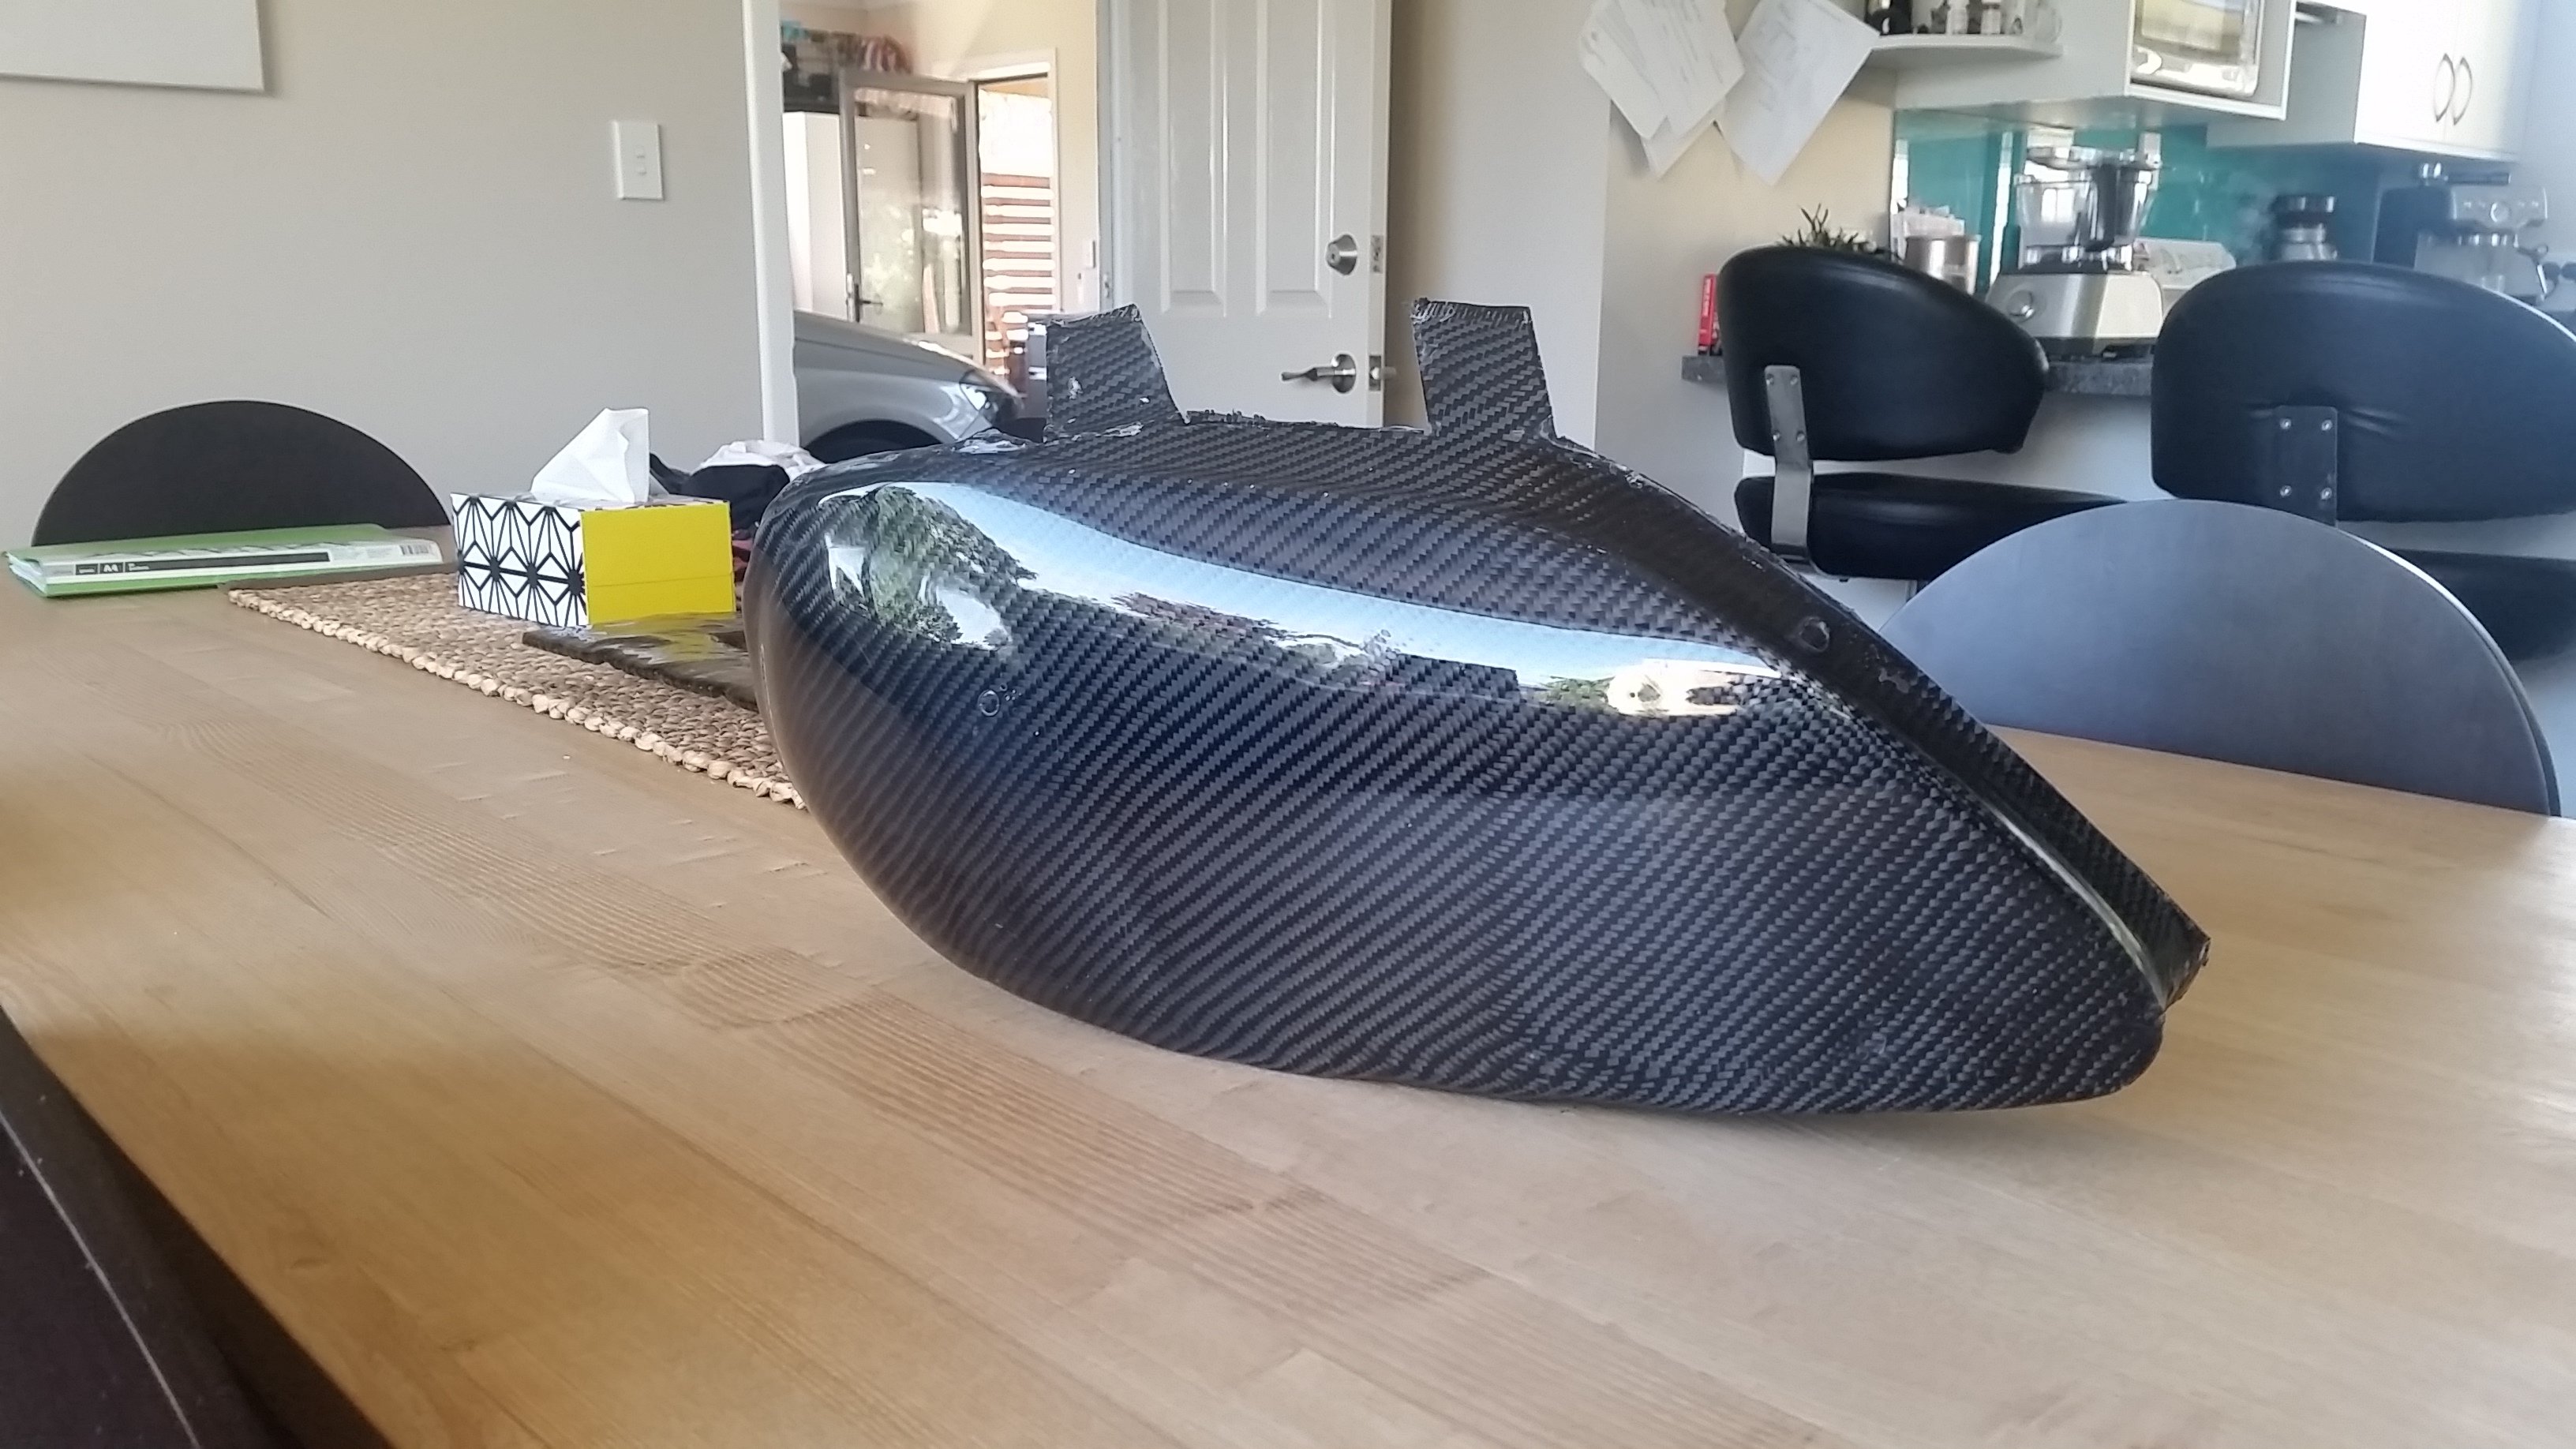
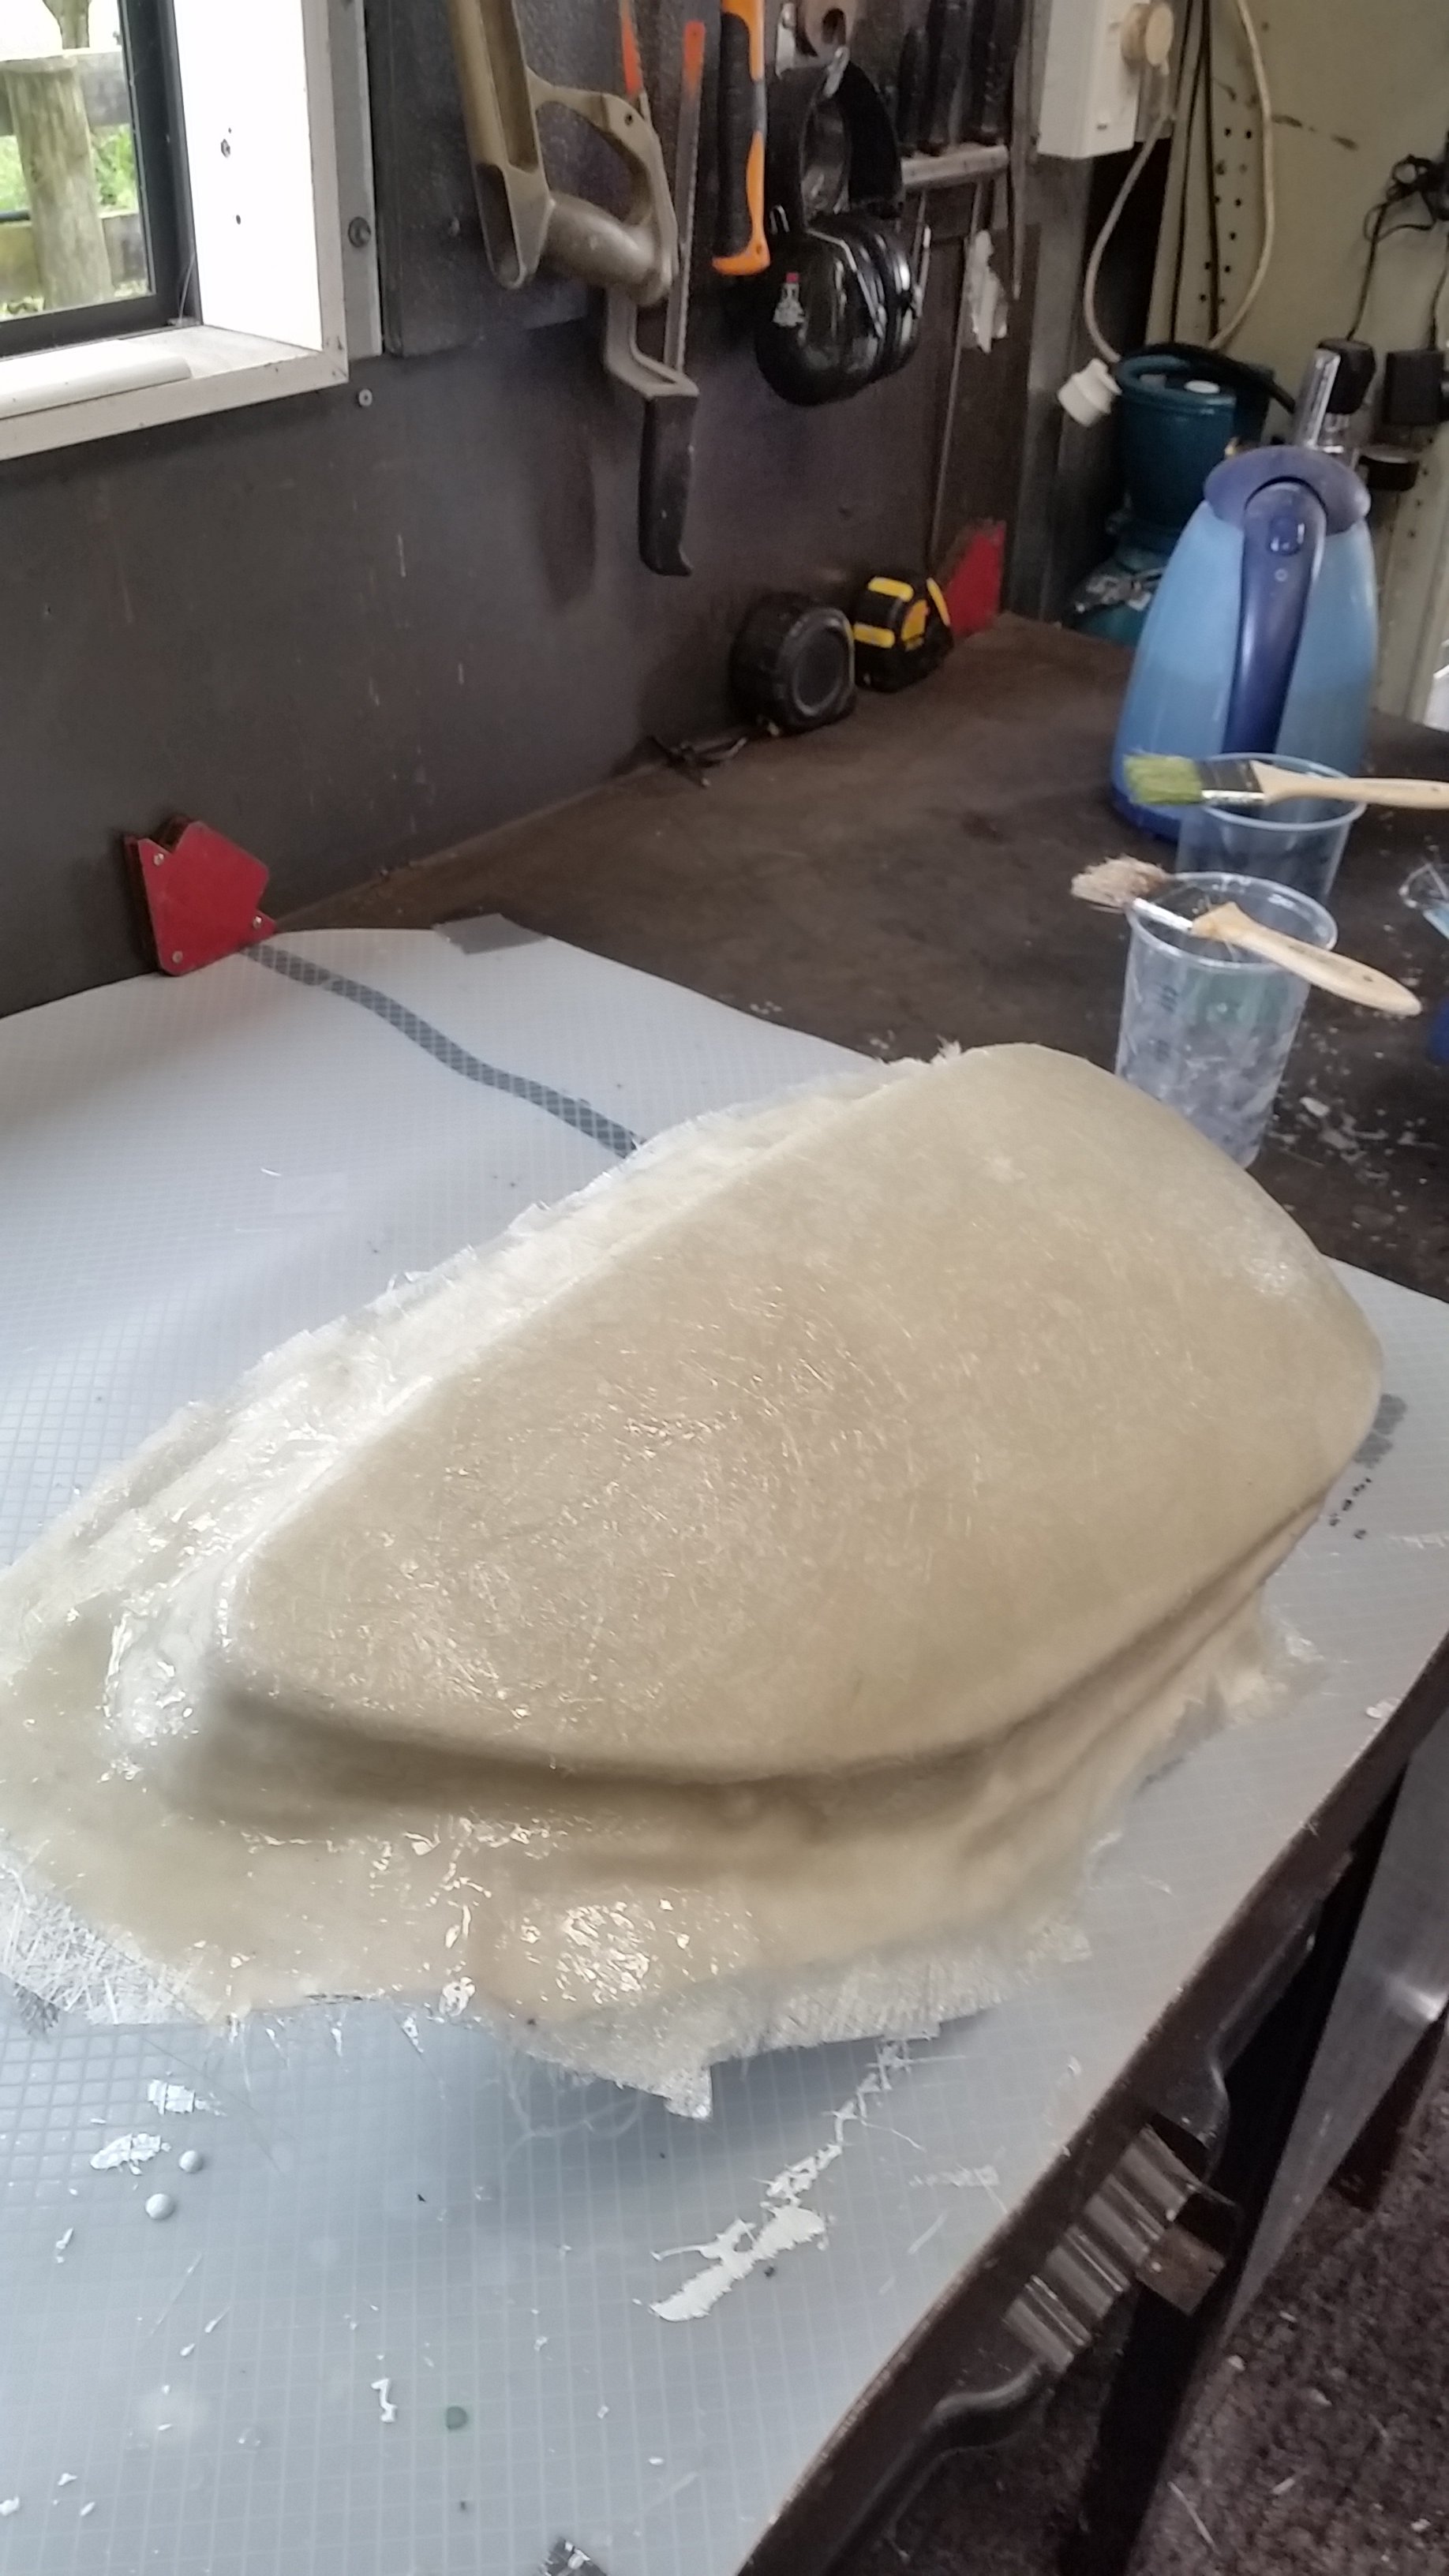
Certainly not perfect, a couple of bubbles on the surface, and spots at the edge where the resin didn't fill right out, but the weave underneath looks better than I anticipated.
1 point
-
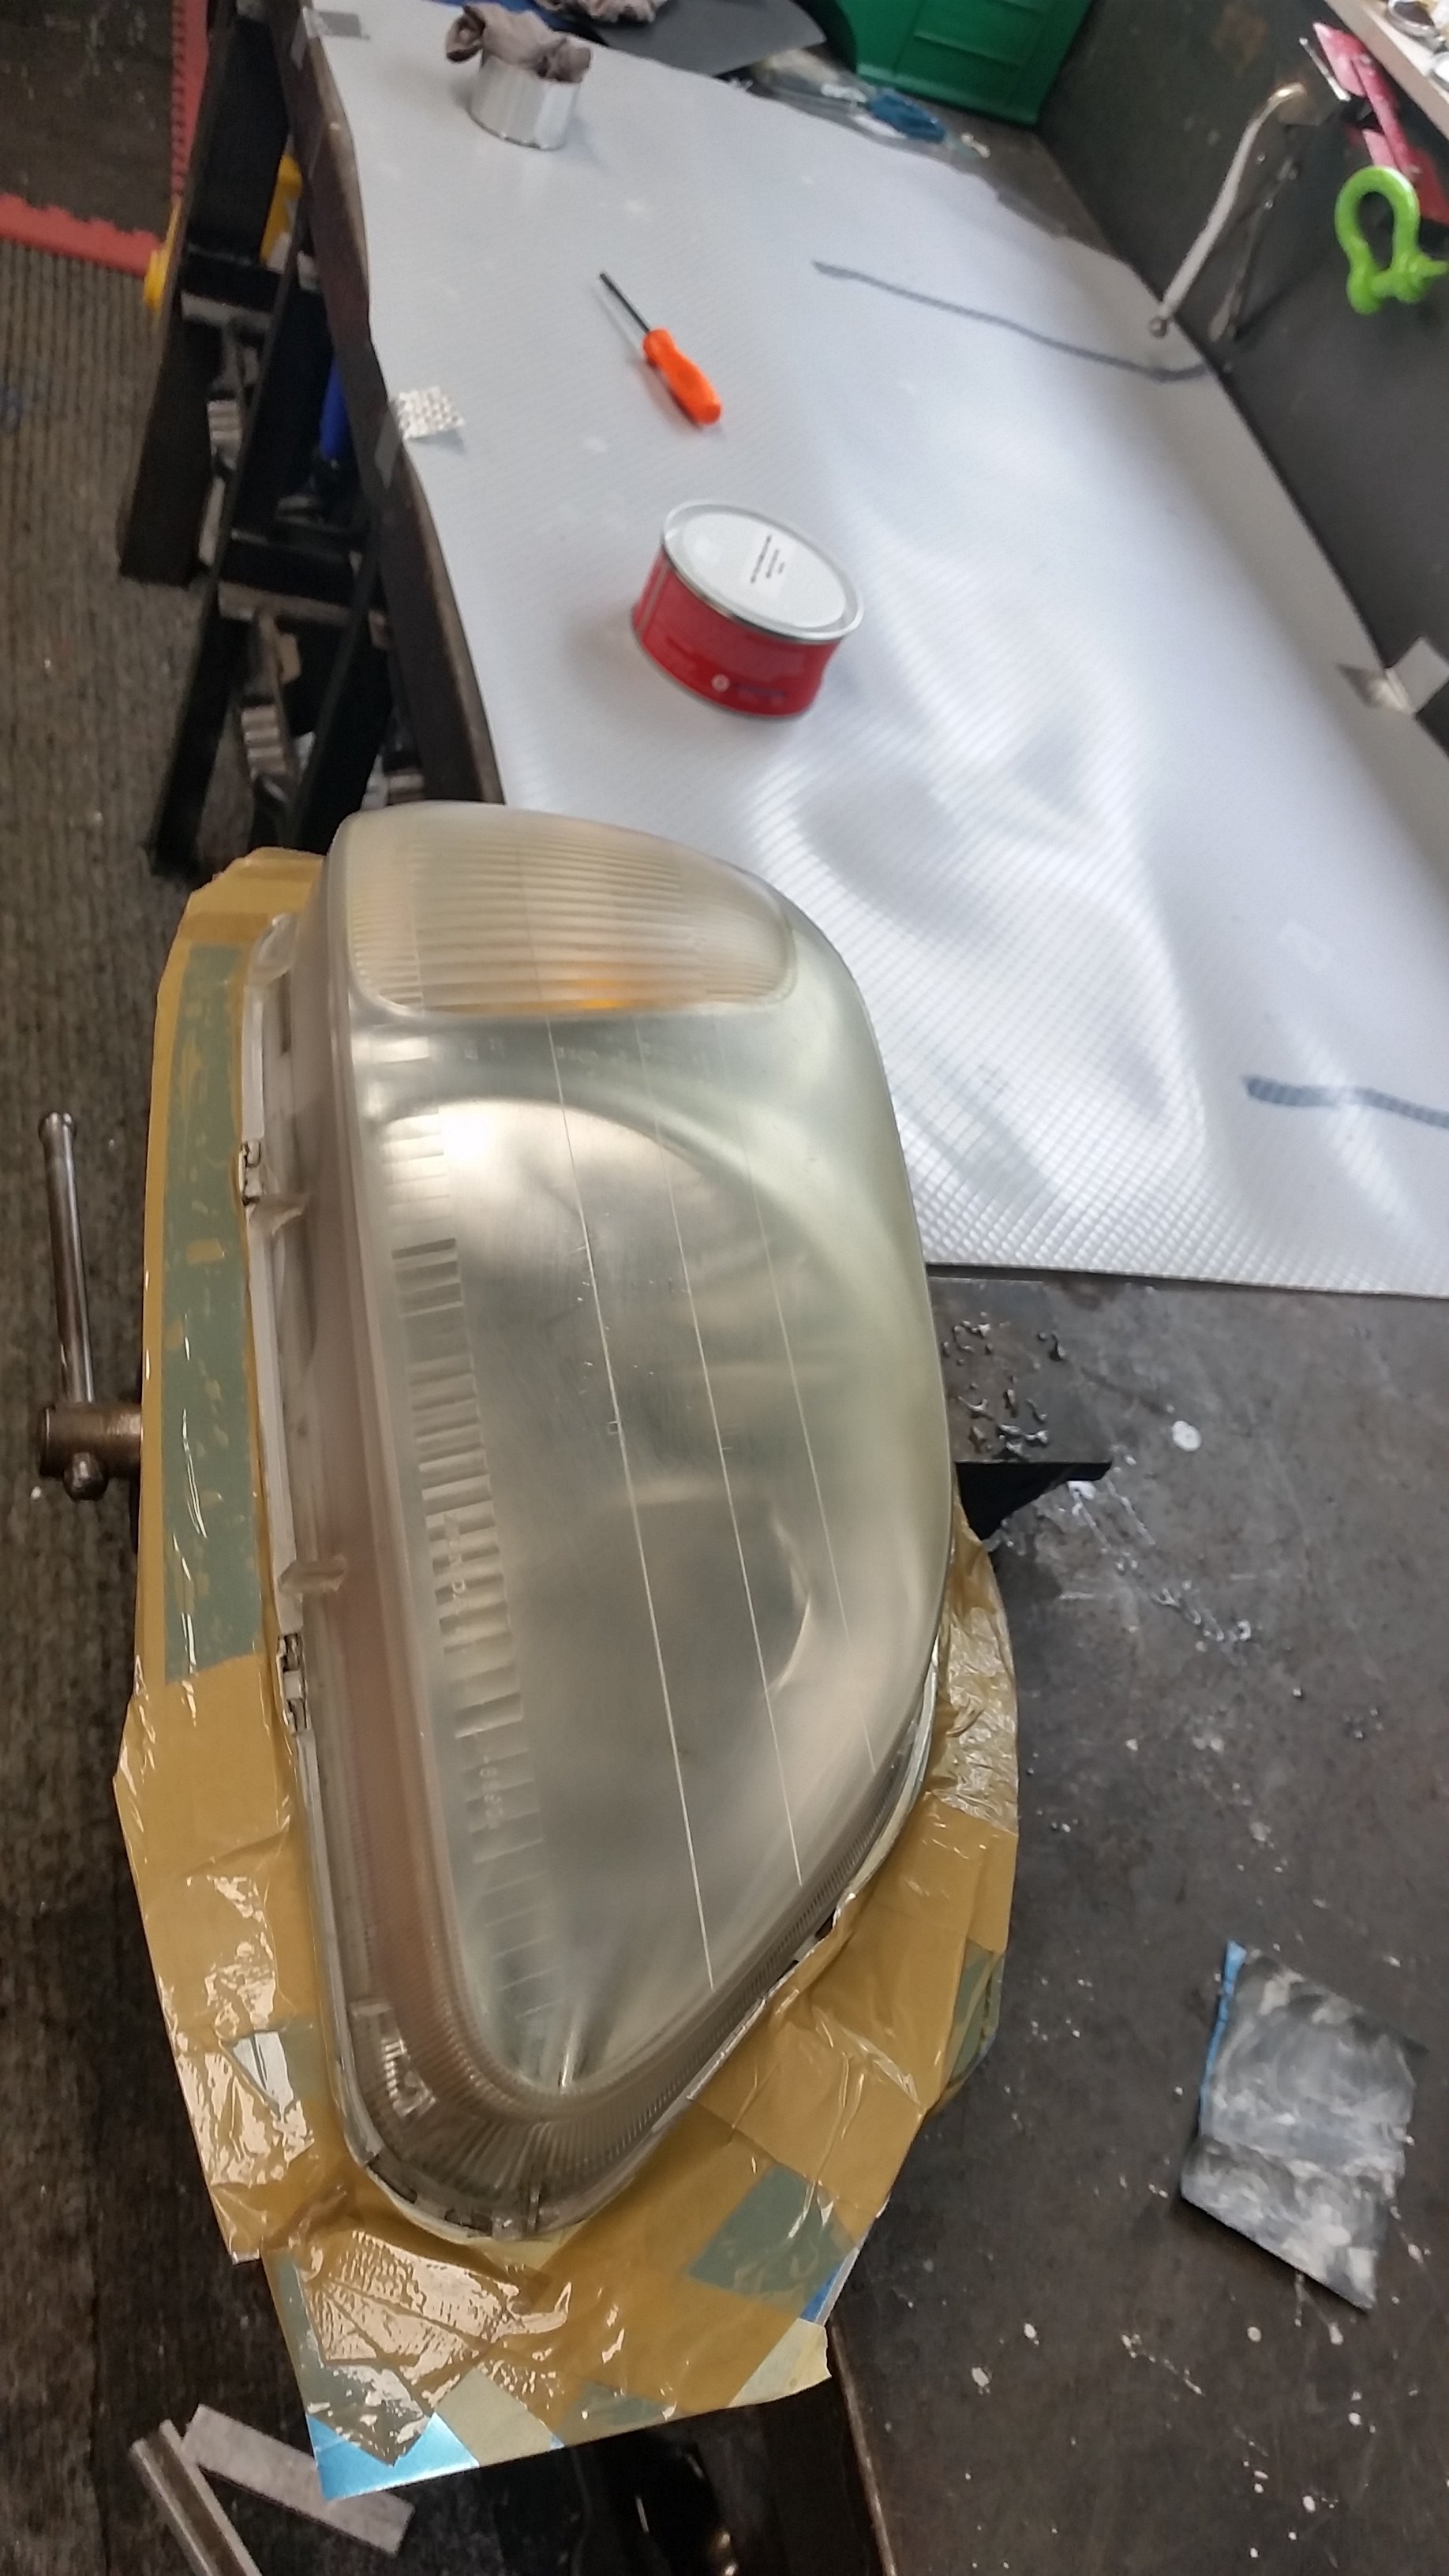
This thread has inspired me to dip my toe into the world of composites.. (please don't use any of the below as advise just observations from a noob) First attempt on a headlight mould to make more headlightly type things for my pos racecar.. no idea if I'm doing it right.. or if it will release properly.. if it does the next step will be to use the mould to produce a headlight blank. If it doesn't I'll need to figure out why and try again. . Made an edge barrier out of junk, cleaned sanded, cleaned etc.. Laid down 7 coats of wax -/ mould release. 2 coats of PVA. 1 coat of moulding Gel coat, next time I will use a bit less than 2% catalyst as even on a small thing like this I ended up in a hurry. 2 layers of 200g cloth. 2 layers of 225 chopped strand 1 layer 450g chopped strand. (No idea if that will be strong enough) What I noted is that working the cloth required scissors to get it to shape nicely whereas the chopped strand behaved better when pulled apart.. When the mat wasn't behaving more resin seemed to help. The little roller thing I purchased isn't much good dabbing with a brush was the successful method. Be prepared to go through a fair few brushes and mixing cups etc and set up a covered area on your workbench. And use disposable gloves etc... It's hard to tell if you are pushing the first layer of mat through the gel coat- I reckon the inside may have signs of this if I get to split the part open. If it turns to shit I will delete this post and deny having done any fibreglass work..
1 point
-
1 point
-
1 point
-
1 point
-
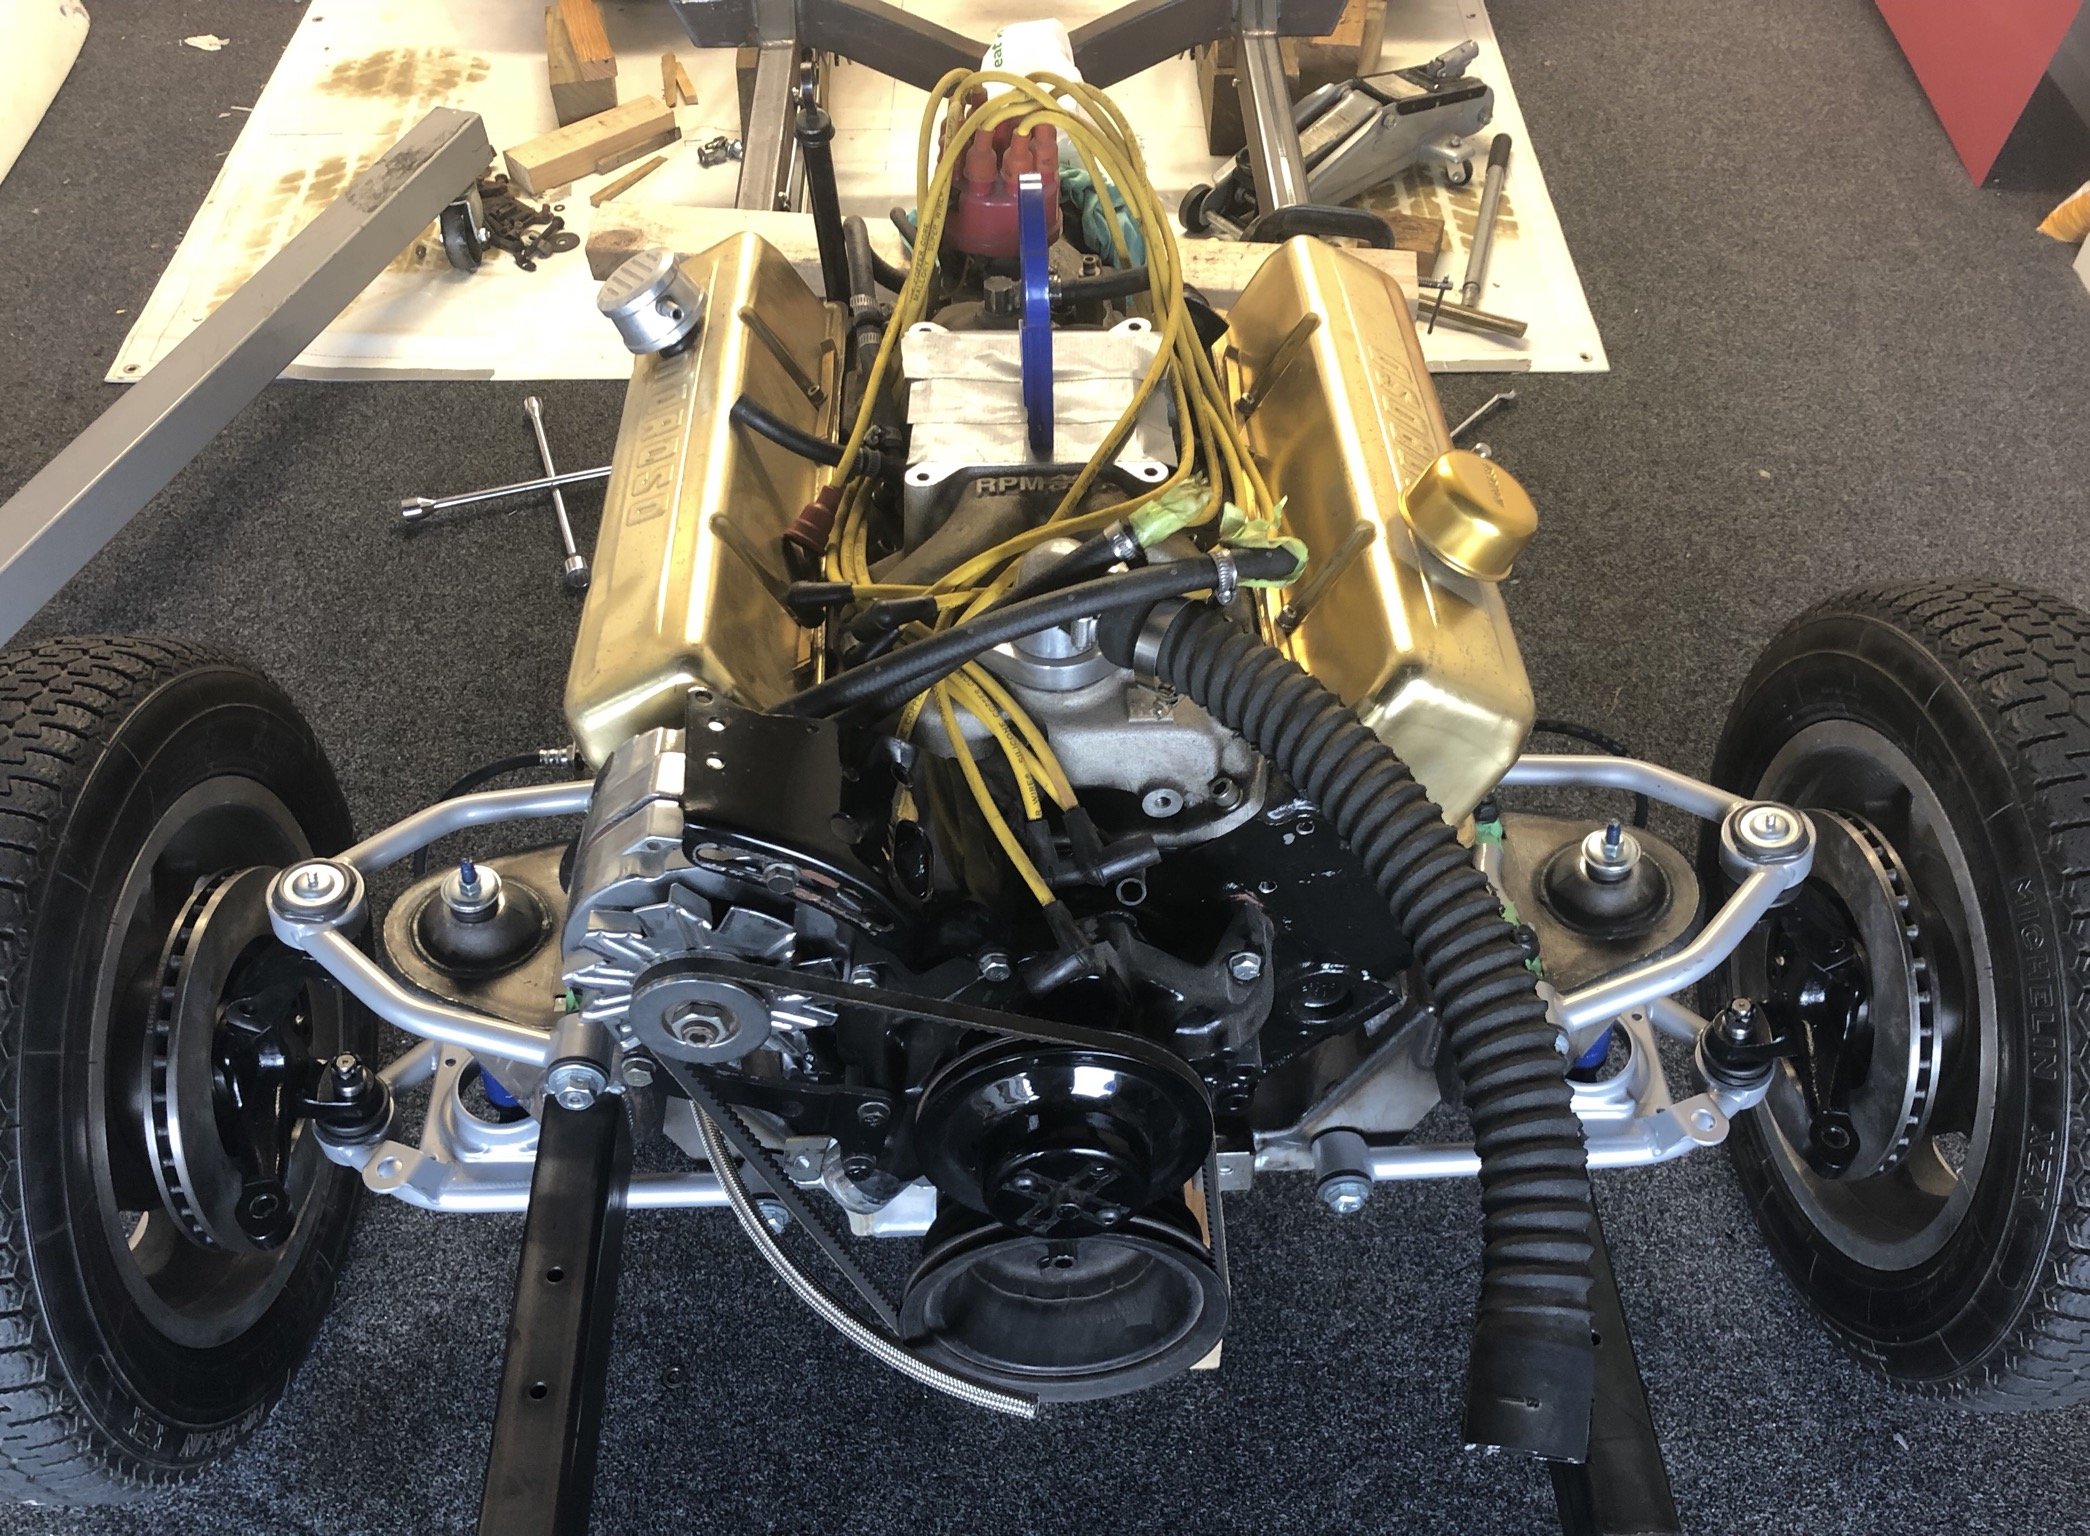
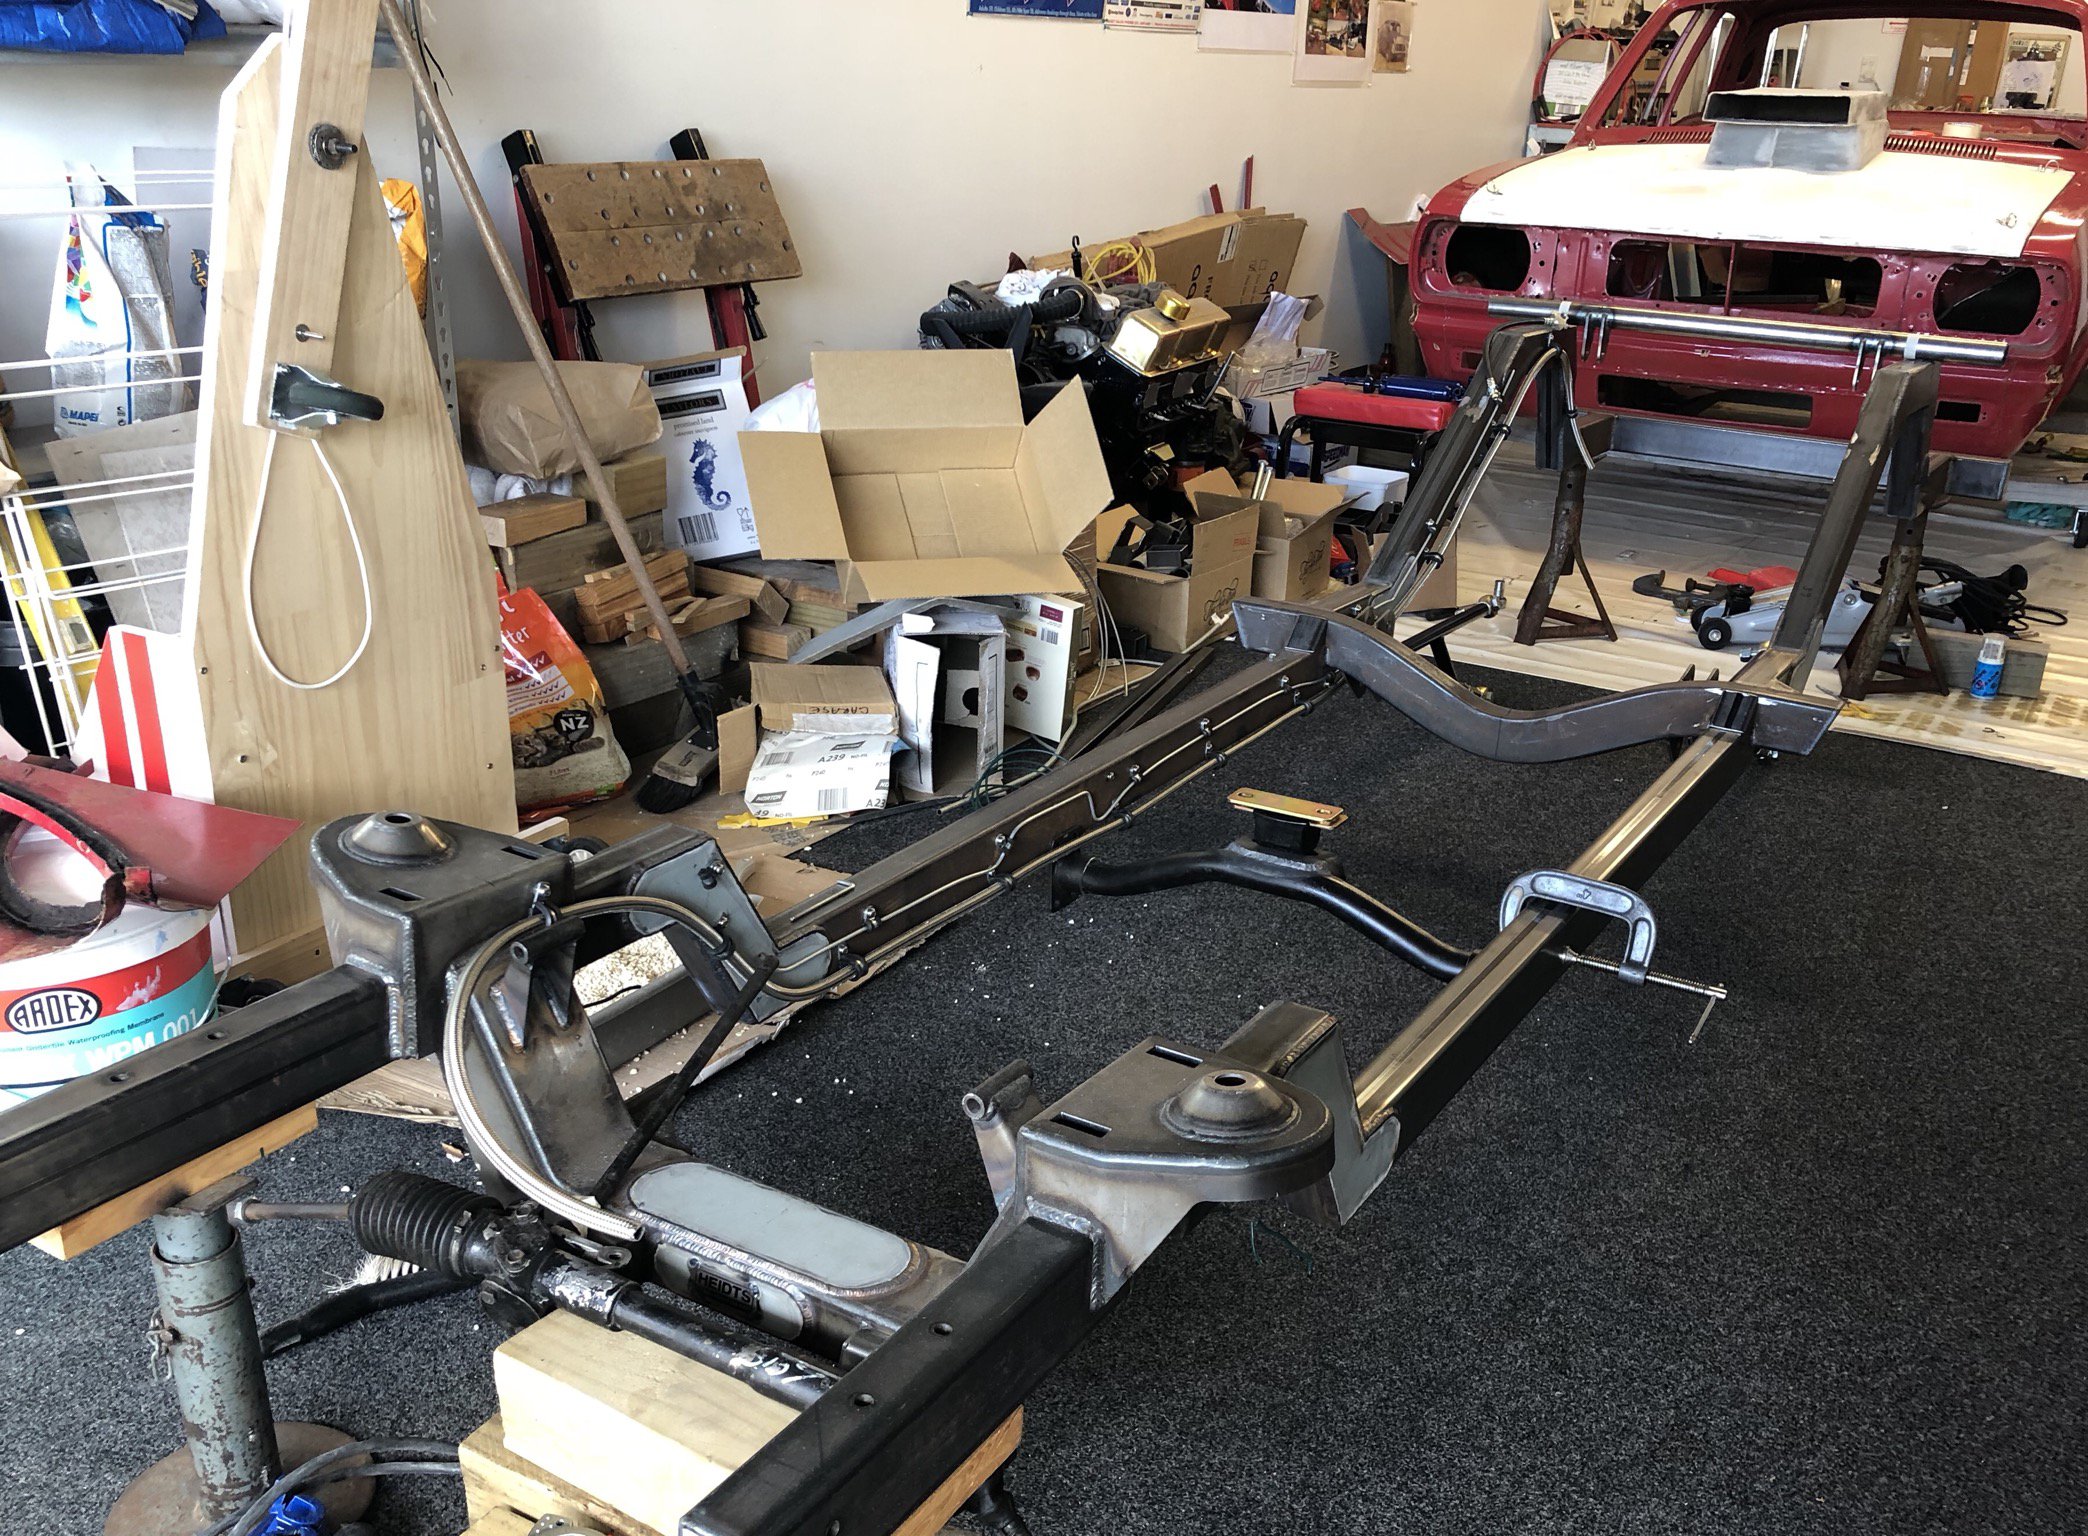
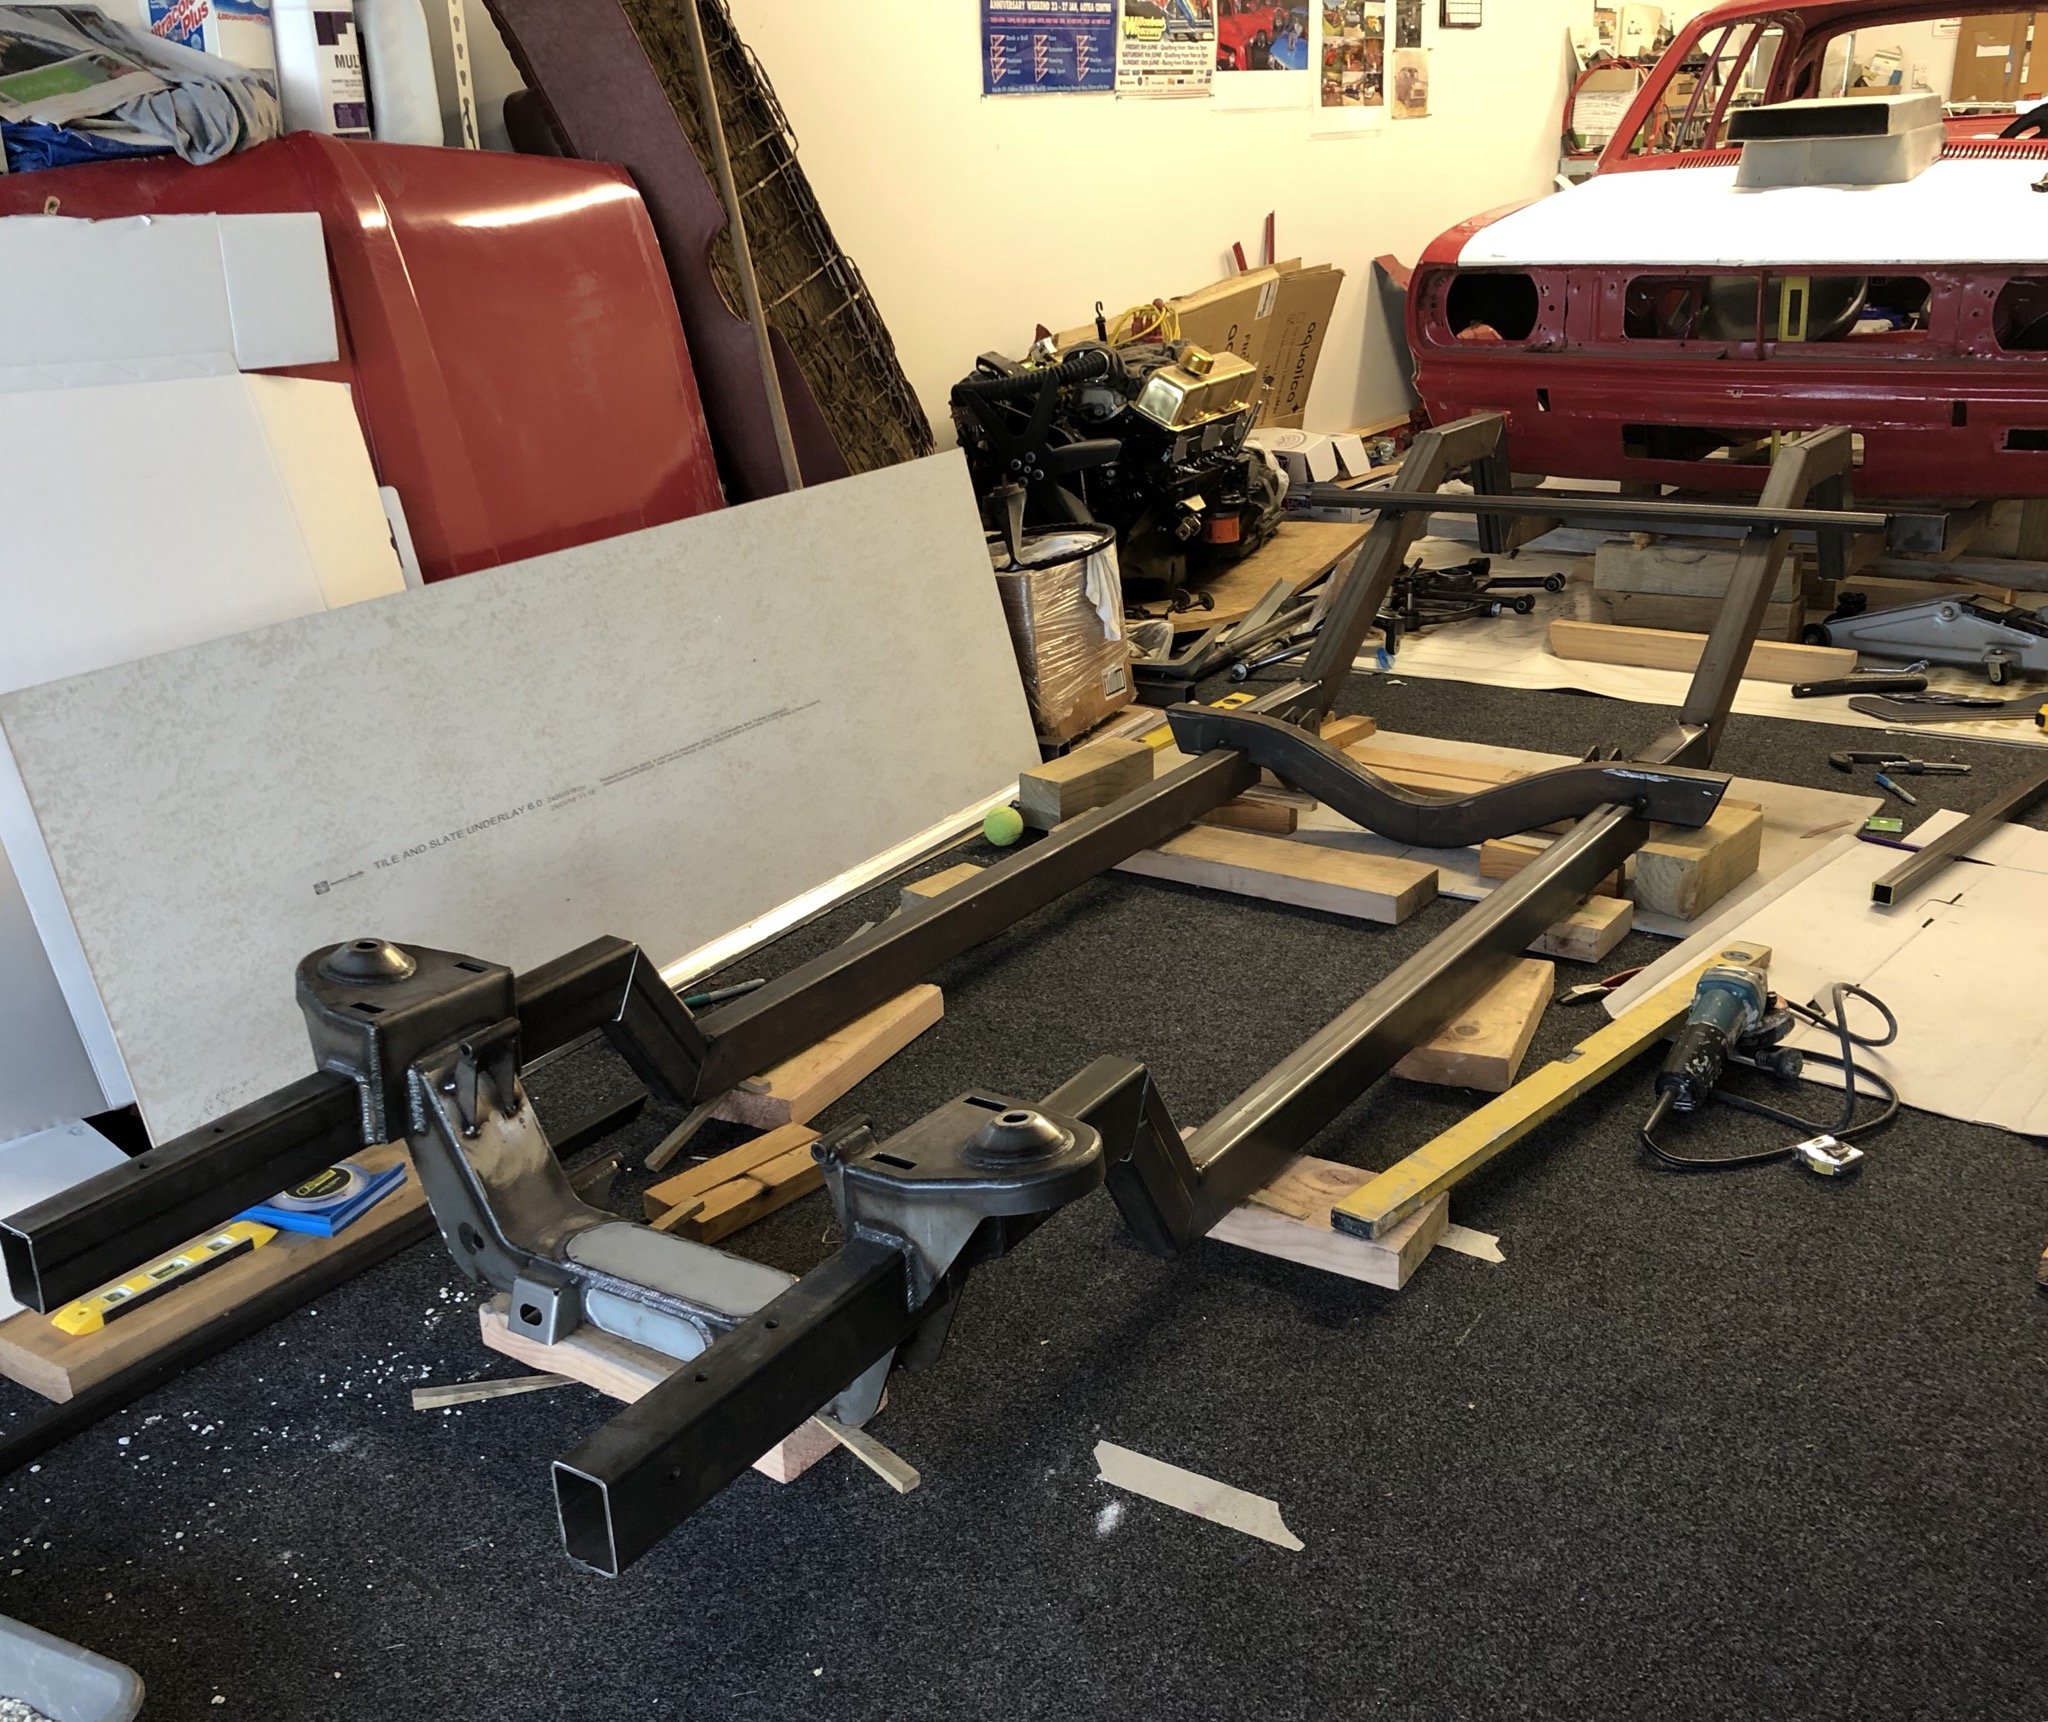
Chassis is slowly coming together..run the main brake line and fuel lines..just waiting on the rear end housing and A-arms to be back from the painter and can start installing all the suspension for mock up.
1 point
-
1 point
-
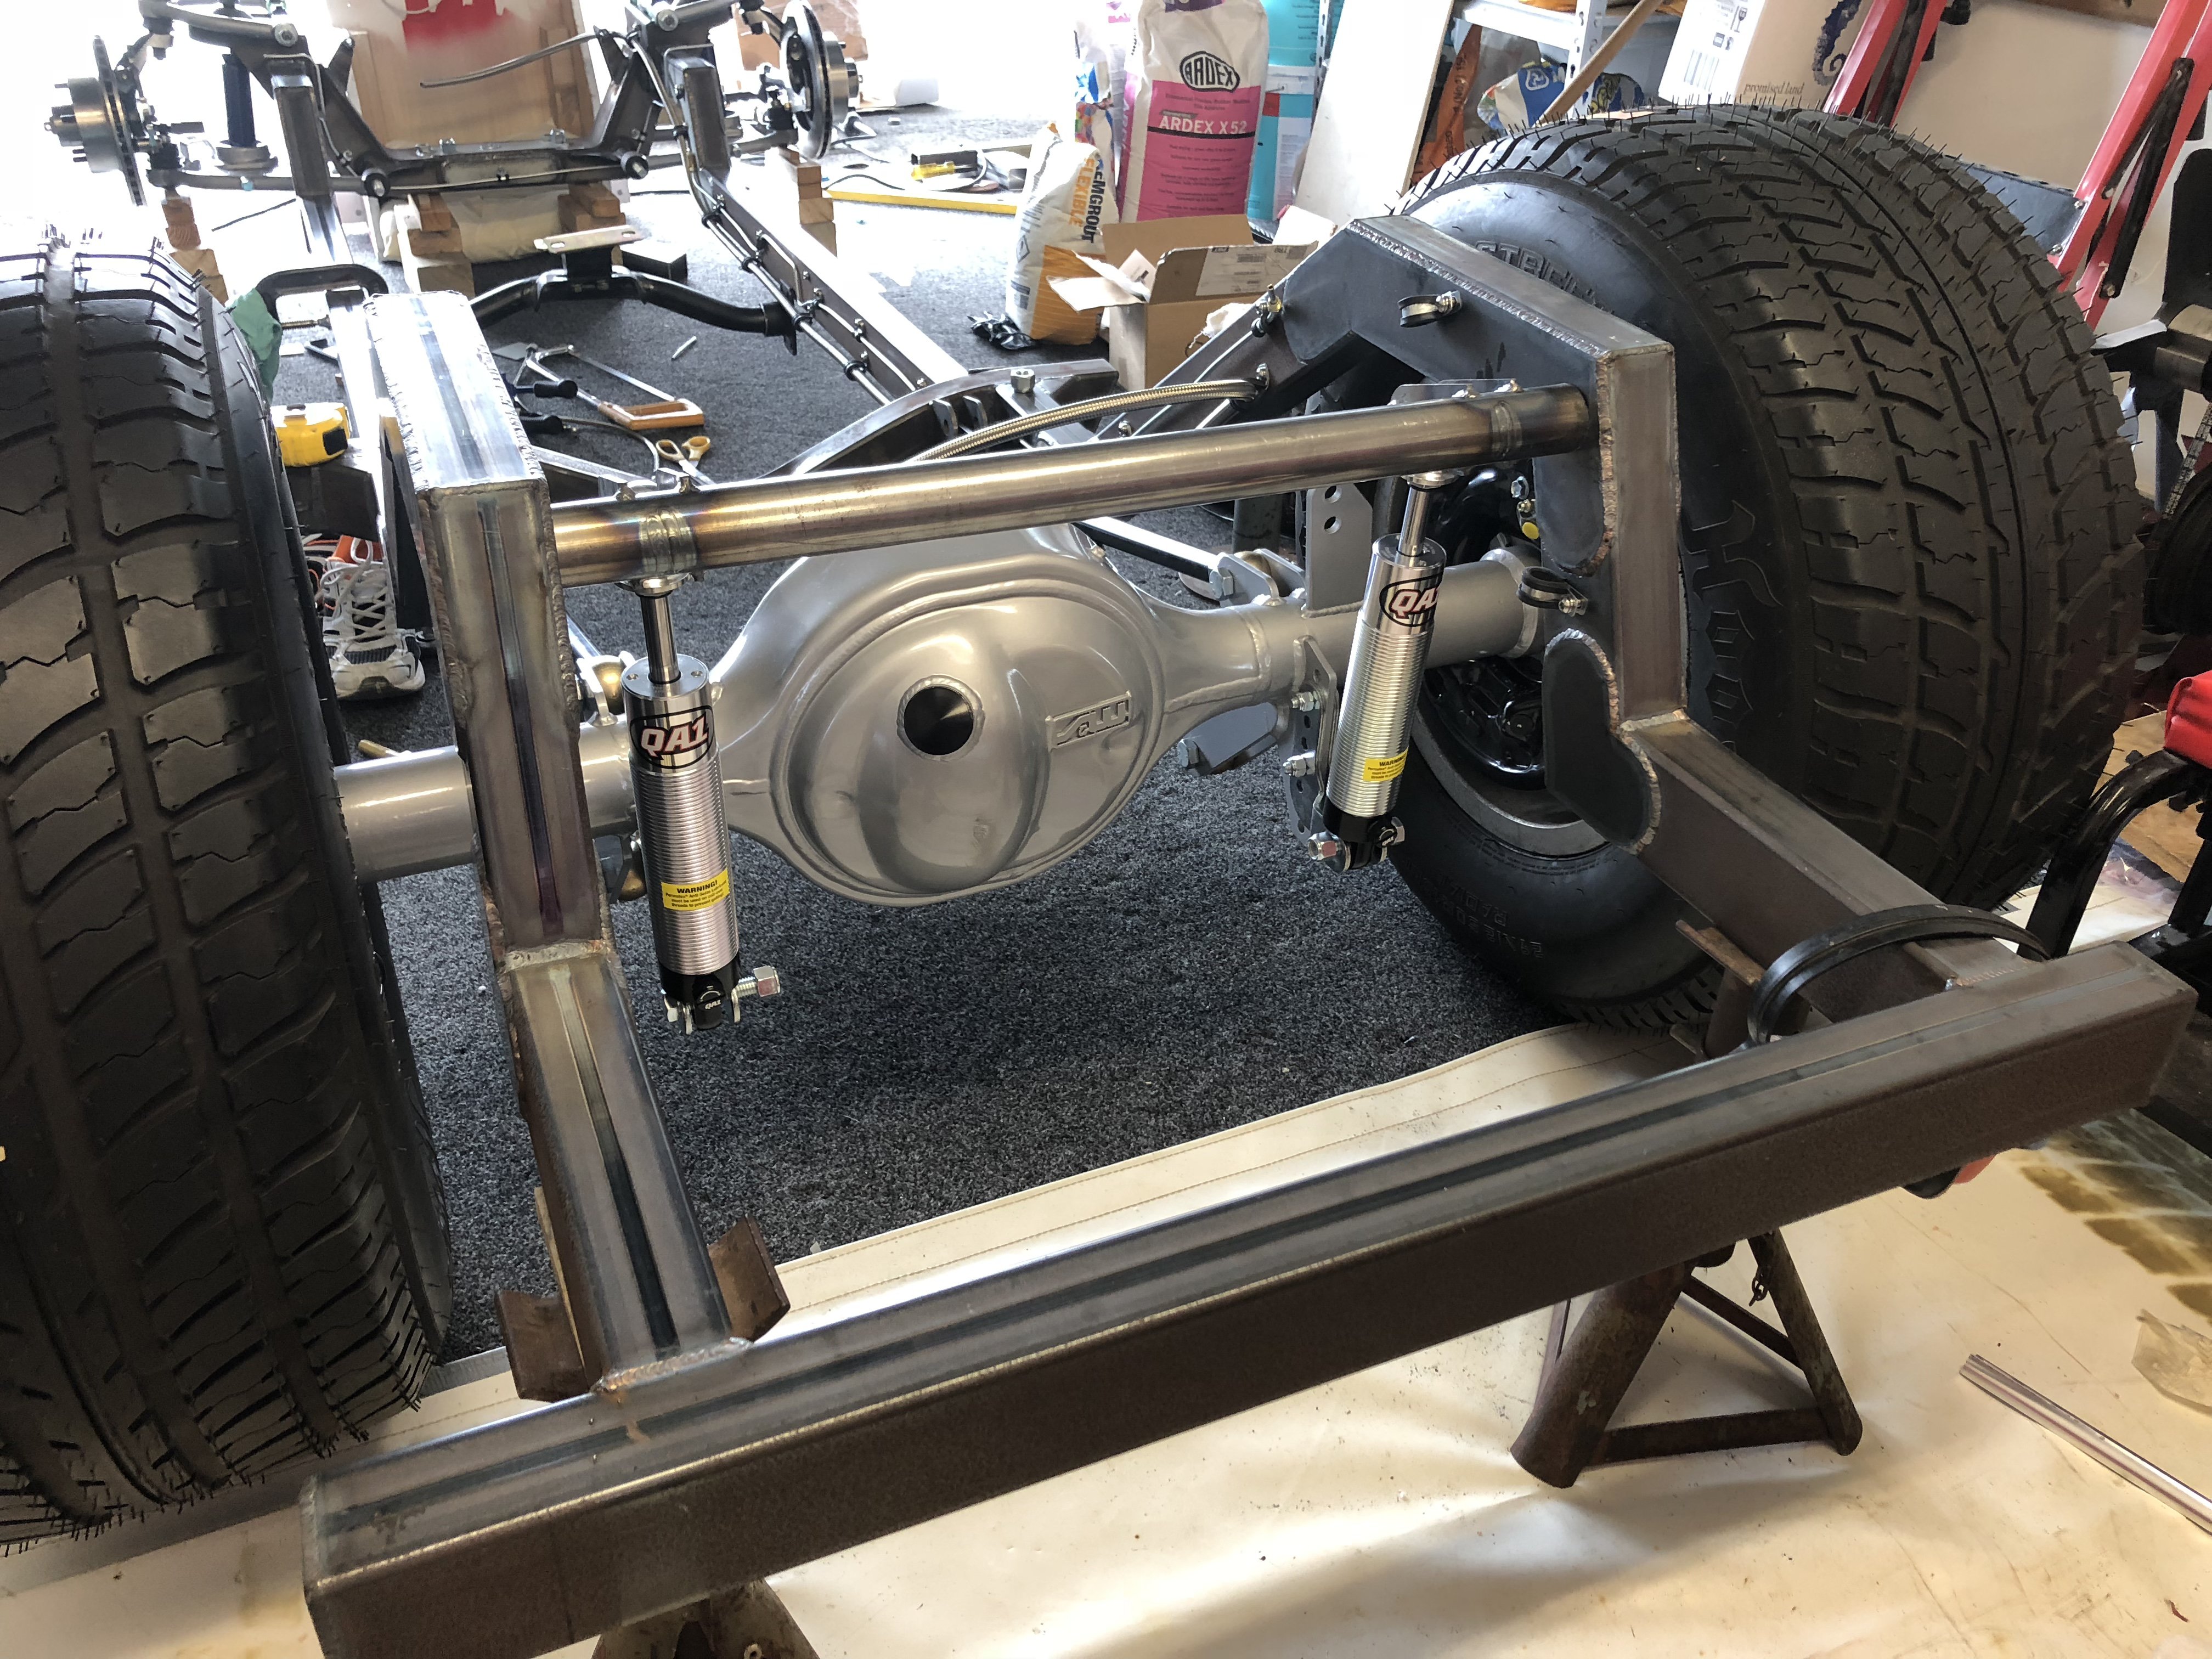
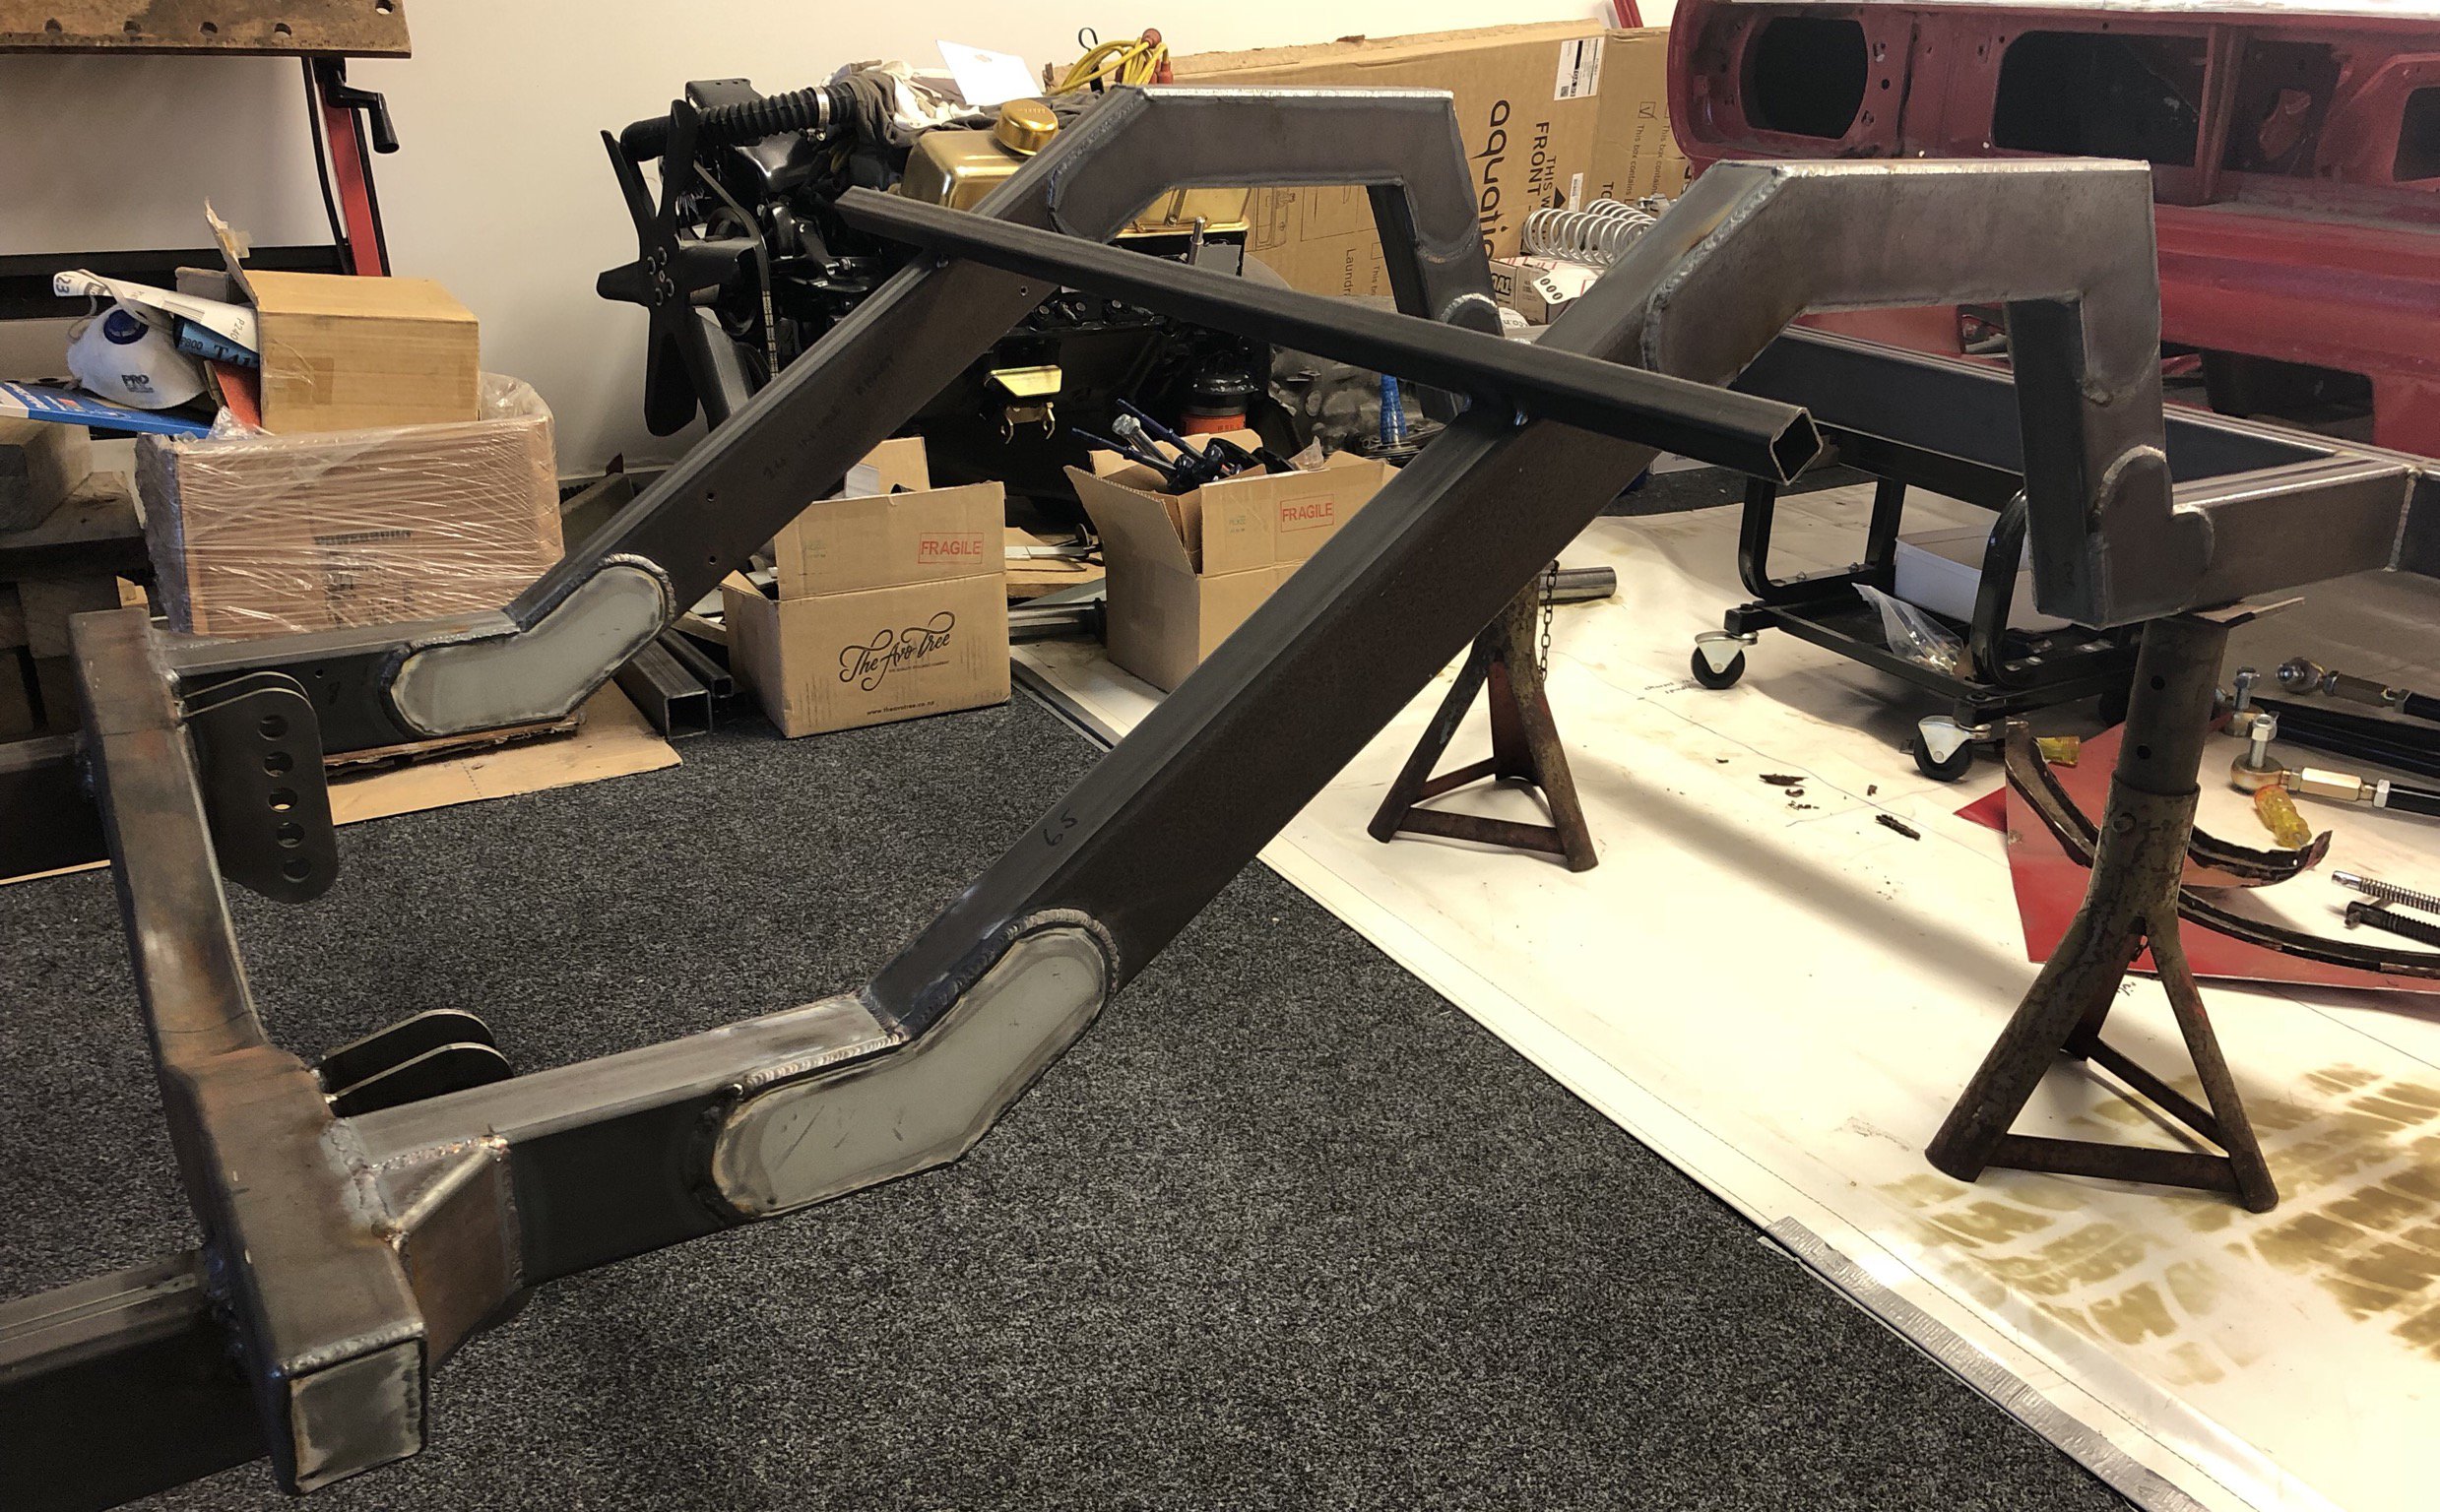
Chassis back from being tig welded and fish plated. just need to get the rear end back and locked in place, then can work out exactly we’re we want the shock mount crossmember to be welded in. after that it’s time to drop the motor and trans in place.
1 point
-
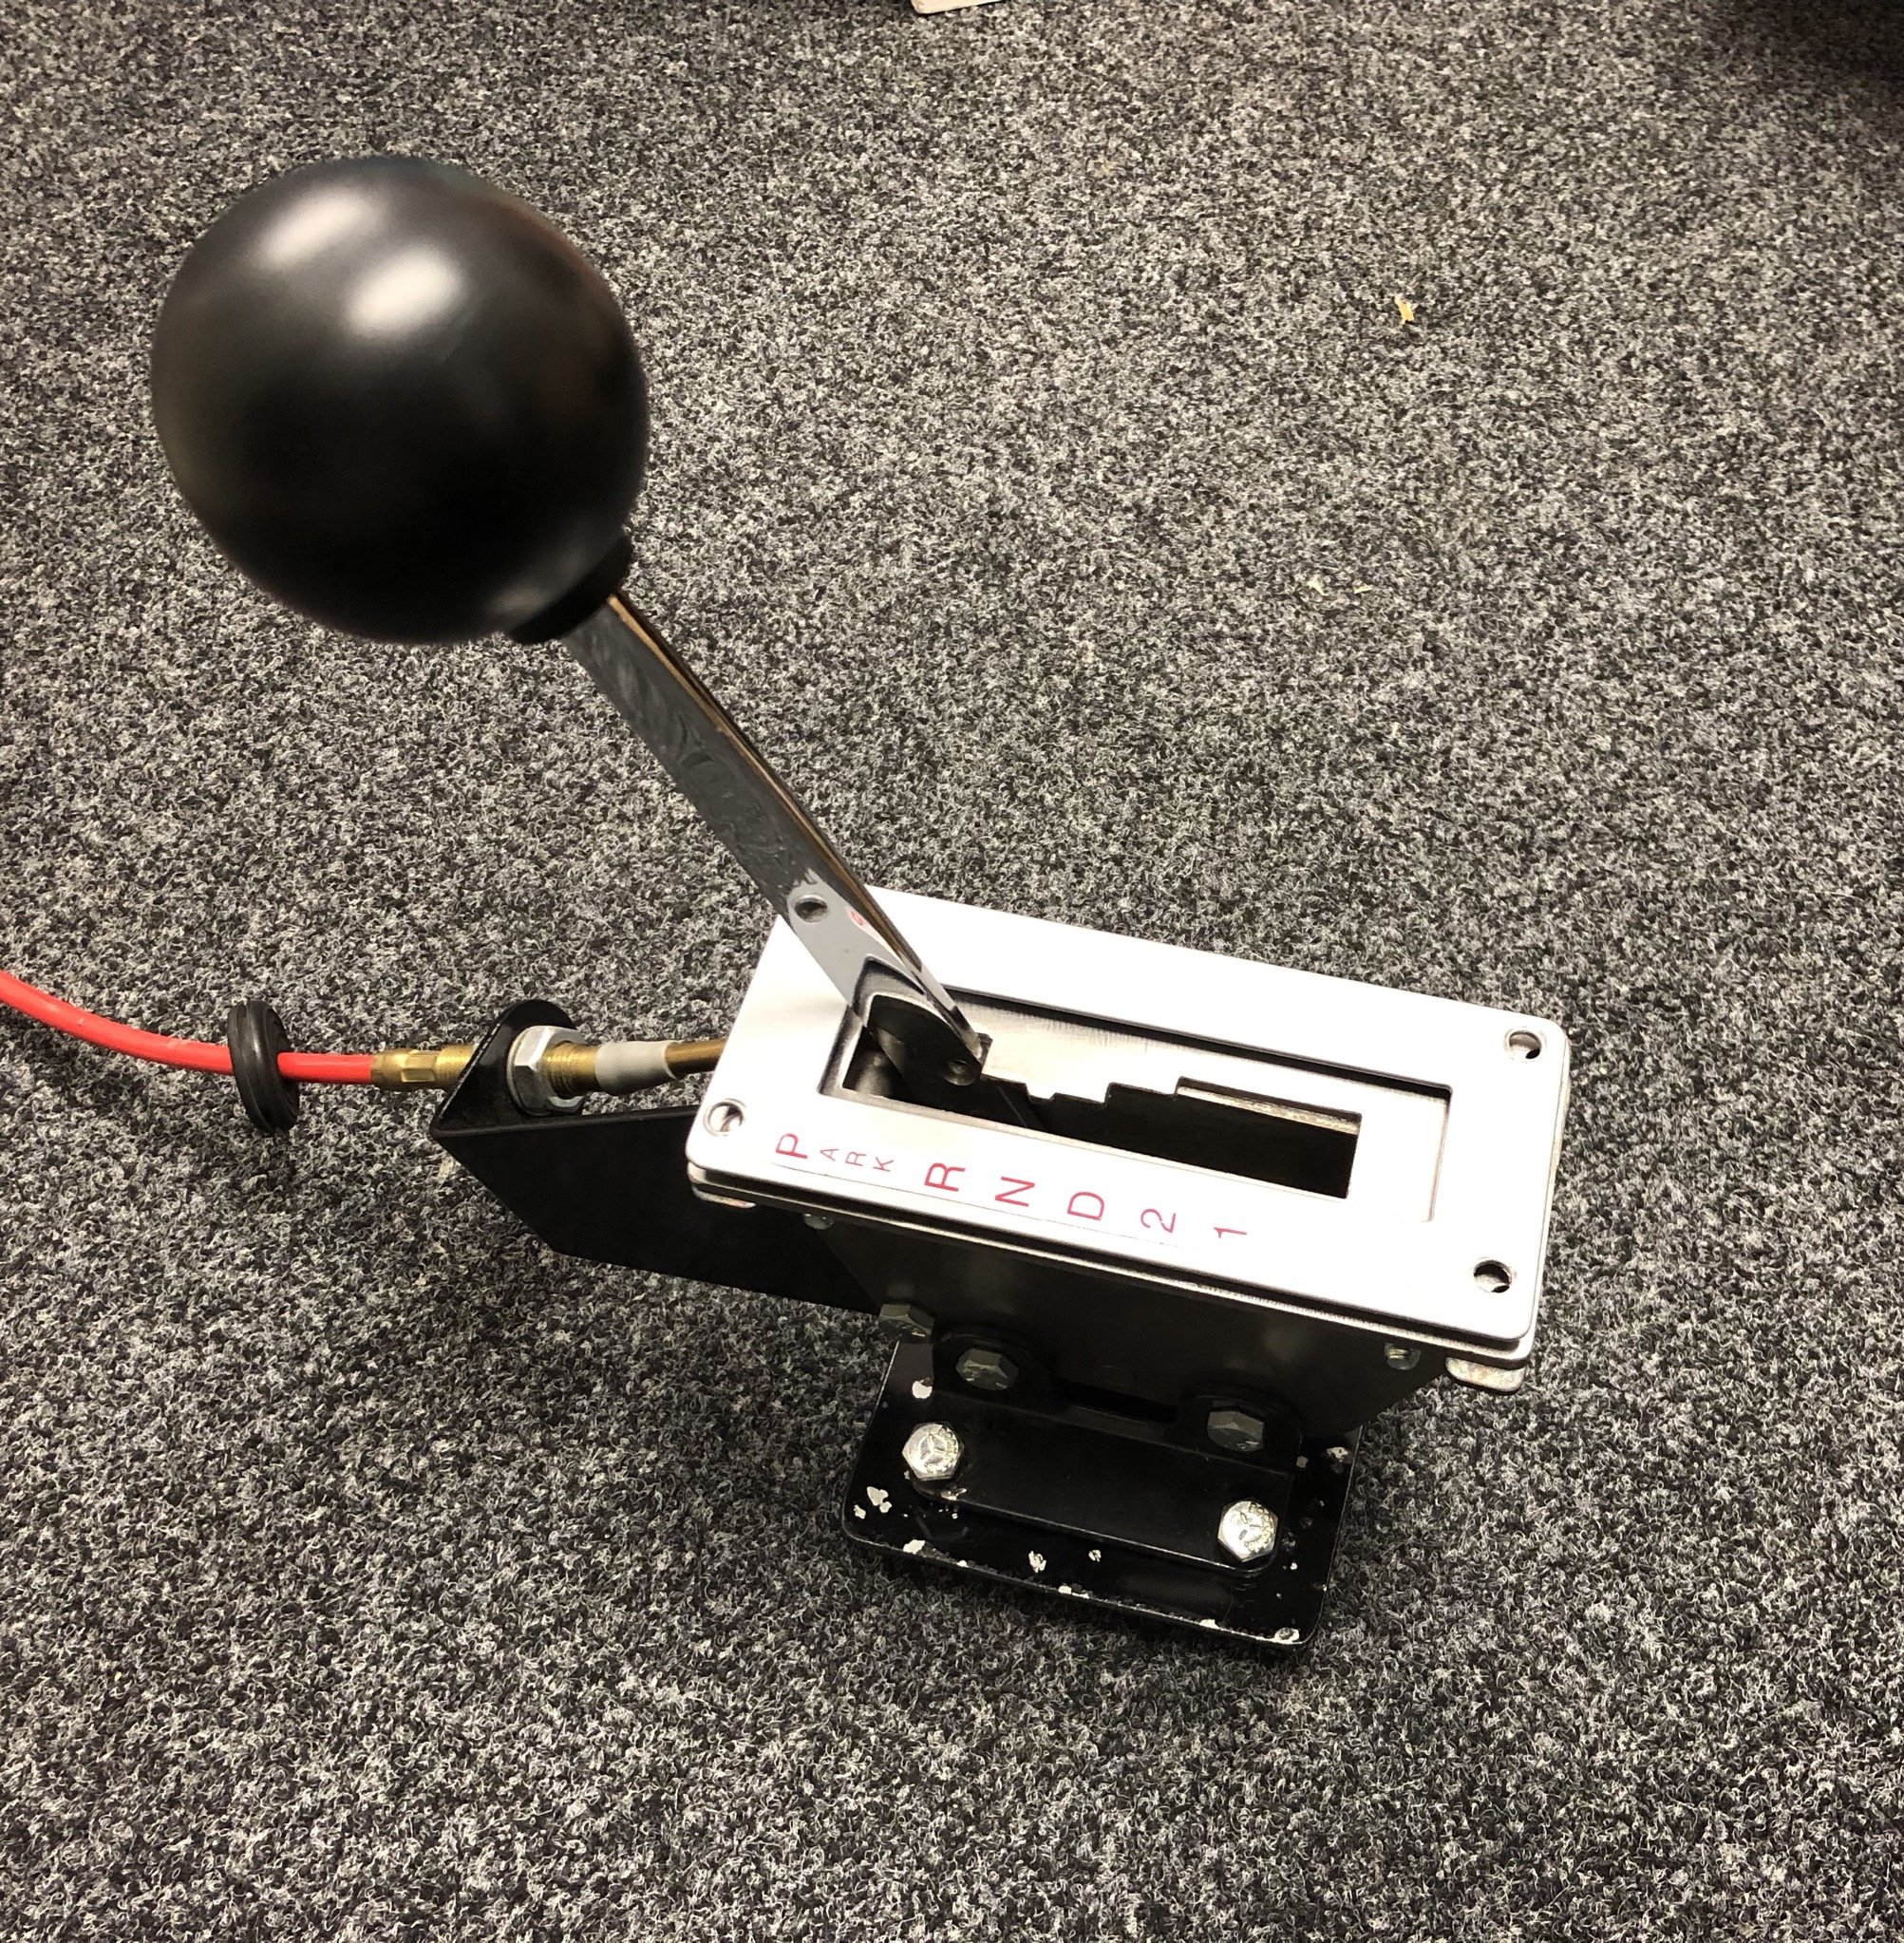
Here’s my shifter. its an early b&m 60 series. bought it off eBay for $90 us and restored it. these things are getting real expensive now because of the nostalgia gasser racing
1 point
-
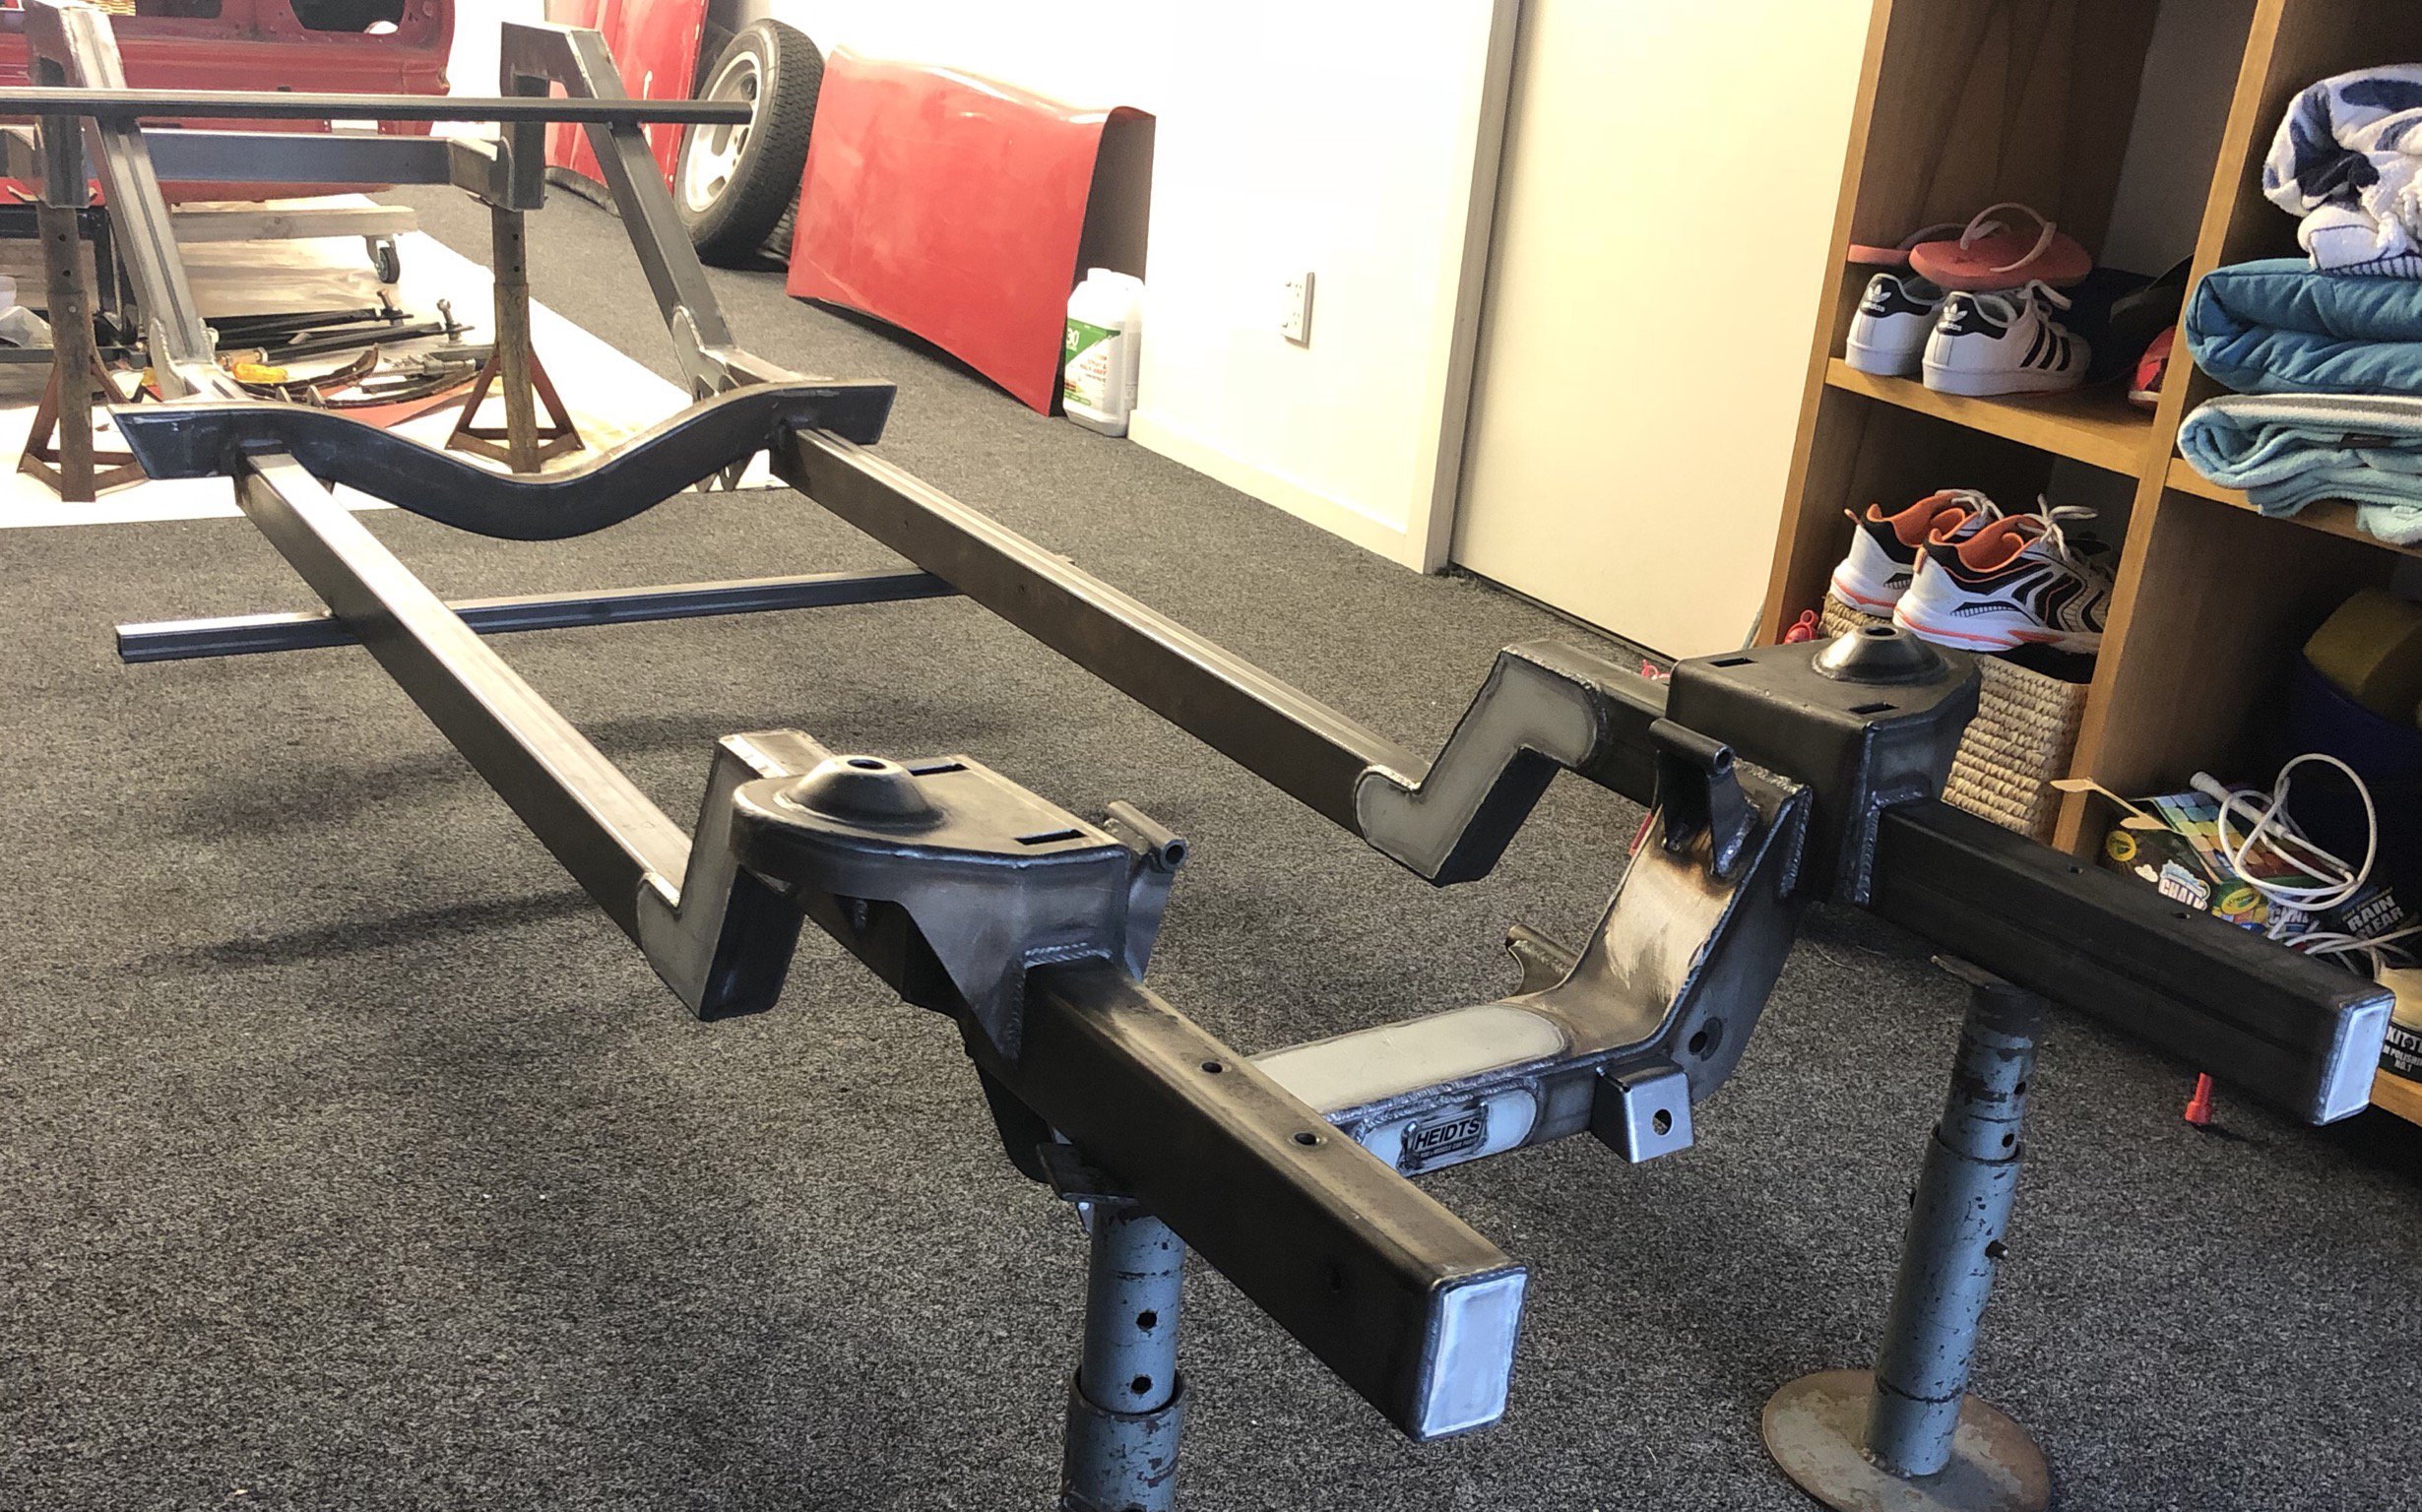
Chassis all tacked ready for tig welding and fish plates.
1 point
-
Me and Dad raced this one many moons ago wagon was Steve hildreds old drag car..we sold it and it got painted silver and black..if you look on YouTube under chris Wright meremere you will see it getting rolled about six times.
1 point


.jpg.6d24e7395eb5c4984910ccb2609b8c87.jpg)
.jpg.2d7c9b6be762da76ed612a5b26de80ba.jpg)
.jpg.8a16b41ae776d9da49059bf2fe653055.jpg)
.jpg.38942535ce397155764cd5b08d8241eb.jpg)


_sedan_(23230030334)(1).thumb.jpg.34d765361d66c78db614bae6ea2c156a.jpg)


.thumb.jpeg.384ff72c8d2b0ee0d34a7bdedb55bdcf.jpeg)


This leaderboard is set to Auckland/GMT+12:00