Leaderboard
Popular Content
Showing content with the highest reputation on 07/11/16 in all areas
-
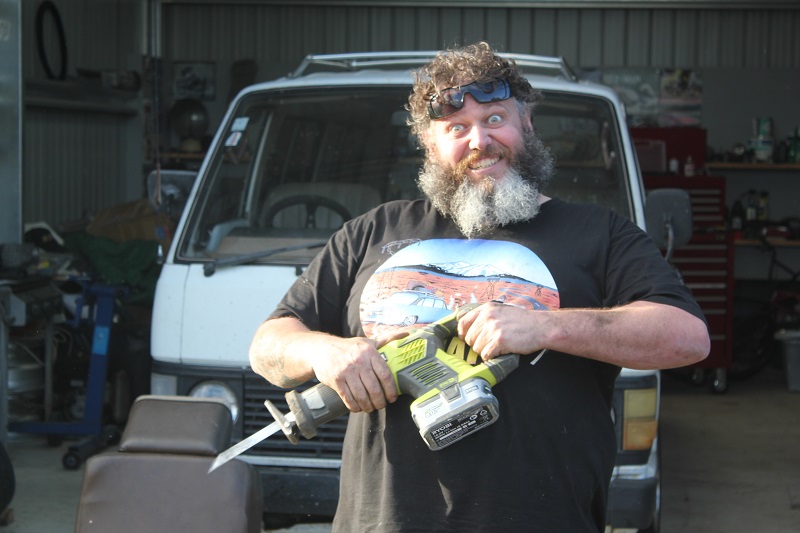
Went back to this possum palace place again, super muddy and slippery. Only one way to get around the place, max rpm. I also mowed their lawn, since im such a good cunt10 points
-
Im pretty slack at this updating business but ill try fill in the gaps from the last update. After the VIN it passed it WOF, as soon as dad could after that he lowered it. Gotta lower it a bit more in the front still. We made it to Hawkes Boes 2014 however had a few issues whilst out and about and ended up having to leave it at dads not even half way through the weekend. On the cruise out to Lake Tutira she over heated and started smoking. Had to drive her gently up the hill to dads, stopping a lot along the way, thank god dads house is on the way to Lake Tutira. With some investigation we found out that the smoke coming into the car was luckily just oil dripping out the breather straight onto the headers. We left it at that for the weekend and once dad had a spare few weeks they took the head off and got that planed and put on a new head gasket hoping this would help fix its issues. They also did other various things however i now cant remember what they were but I also ended up getting the radiator re-cored as it was all blocked up and creating the over heating issues. Hawkes Boes 2015 comes around so i tried again. Get her down to Lees no issues. Then as we get out to the old camp ground (still hadn't fixed the smoking issue) we thought we would give her a check over. Lucky we did this as it turns out she had chewed through all the oil, filled her up again thanks to Lauren and Bizzo. We made the call that she would be all good to continue to use just filling up the oil as we went as it was just overflowing out the breather. On the way to the Mohaka river cruise we ran into some issues. I was driving up the hill, slowly getting hotter however not enough to worry about it at this stage, when all of a sudden I couldn't accelerate up the hill, just lost all power to continue steadily up. Managed to coax her up the hill and have a look, at this stage we had used so much oil its not funny and she had over heated again. The call was made to let her cool down and turn around and take her home to dads, and continue on with the weekend in a reliable car (again). After Hawkes Boes 2015 we tested the compression which came at low in a couple of cylinders. We found out the oil issue was related to the crank case pressurizing and ejecting all its oil. Dad pulled the head off again and after inspection we made the call to rebuild the motor. Queens birthday just been we went up to dads to help take the motor out. Motor successfully removed, has now been acid dipped and is awaiting parts. //oldschool.co.nz/index.php?/topic/39707-baby-ks-1957-ford-prefect/page-26 points
-
4 points
-
Here's a notch taken out of the chassis rail/crossmember to assist with exhaust clearance. And a small amount of rust at the back of the r/h sill/inner rear wheel arch. And another small amount of rust in the spare wheel well. Picture of the stripped back under carriage. We will be plating up the rust, etch priming, seam seal, primer, underseal and throw on some satin black to tidy things up. Hopefully will have it all done by next weekend but will see how things go. Cheers Tai3 points
-
I'm taking this bloody car to Invercargill ...the scenic route via Northland.2 points
-
http://www.trademe.co.nz/Browse/CategoryAttributeSearchResults.aspx?search=1&cid=268&rptpath=1-268-&sidebar=0&5=&14=&18=0&18=0&24=0&24=0&searchregion=100&54=omaka&searchbar=1&generalSearch_keypresses=5&generalSearch_suggested=0&generalSearch_suggestedCategory= Not sure if this link sharing works - but if you use keyword as 'omaka' in Trademe you'll be away.2 points
-
.120" / 3mm is the 'normal' minimum bore wall thickness to aim for. You can go less but generally have deteriorating gains from increased blow-by. Grout filling the block, bottom end girdle and external bracing can all help if you want to push the limit. What size is the probe on your sonic tester? Should be able to find a tiny probe 2-3mm diameter that will have no issues doing cylinder walls. LD blocks with petrol heads is not common at all, it just isn't worth bothering with compared to running a petrol block. Most LD blocks are not able to be bored to take a stock L28 piston (86mm) as you have found. I assume you have a V07 block? You are better off getting a L28 and slugging it out to 89mm for the classic '3.1 Stroker'. The shorter rod & bigger bore will make more power and torque than an 86mm bore long rod LD block.2 points
-
Yay! Local wreckers had a recess front wagon with an intact bonnet and latch support. Now all I need is a new driver side fender and for everything to fit properly...2 points
-
Still accumulating a few things. -The matching bonnet is on the way (TE27 sprinter) -The grill support/radiator support panel is on the way. The sprinter version which varies from the Levin and Corolla range. Quite the steal. -TE27 levin boot (just in better condition than the one I have currently). Though I will try find a sprinter badge to match the front guards. The car will also be painted this blue/turquoise colour. It is an original Toyota colour but will have to somehow find the paint code for it. We also have a small port 4A-GE which I have been kitting out with my RWD specific partrs today. I will either be putting it in this KE25 or my KE20, still undecided. Discussion: //oldschool.co.nz/index.php?/topic/52401-pbaines-1971-toyota-corolla-ke25/2 points
-
Well it's been a busy couple of days, had cert booked for Thursday and before that I took the 1" blocks out of the back to raise it up a little, it doesn't look as good but now I can actually get it out of the drive without scraping the crap out of the exhaust. So Thursday morning I drove it out to get a warrant then the garage let me borrow a hoist for the inspection. That all went pretty good, there were a couple of things but nothing major, then we went to do the road test and the car wouldn't start, stupid thing!! anyway I think what happened is the fuel pressure was too high and was overflowing the float bowl and flooding the carb, anyway I eventually got it going but only on one rotor and just couldn't get it to clear. So the certifier left to have a look at another car and I went off and got some new plugs chucked them in and wound back the fuel pressure and it was good to go. Here's the car on the hoist (kind of boring pic but I haven't posted any for a while) Then it was off for the bump steer test which it passed and I went home to fix some of the small issues that had come up on the inspection. The certifier came back at about 10pm so we could do the road test which unfortunately didn't go so well, the car goes good, handles good but wasn't so flash on the stopping so it failed the brake test. There was no fade or anything it just wouldn't pull up properly anyway I was a bit surprised by this as I had researched it pretty thoroughly but what can you do, so we headed for home and on the way back started talking about master cylinders and sizing etc. Then this morning I had a thought and went to check the cylinders and found that I had the front and rear cylinders swapped, so I had a bigger cylinder on the front which meant it was much harder to push the pedal and explains why it wasn't stopping as it should. So yeah my bad, what a dumbass. Still it's good to know what the problem is, I have swapped them over now so hopefully they will be sorted. There are a couple of other things as well, the coilover platforms sit quite close to the tyre so I will put some shorter springs in and wind the platforms up to get some more clearance, and I need to get some documentation for the driveshaft mods. So assuming that the brakes will now be ok it is pretty much sorted, unfortunately the certifier only comes to Nelson once every 4-6 weeks so I have a bit of a wait but hey it's taken years to get to this point so another month won't hurt, it's not exactly a practical winter car anyway..... There are a couple of other things that I will do while I wait like replace the 3.9 diff with a 4.1 and look at adding some interior (specifically some sound deadening, I reckon it's louder in the car then out.....) So yeah I guess that's a win2 points
-
1 point
-
For all sorts of Rootes Group shit I have had much joy at Speedy Spares. All mail order stuff at pretty good prices. Saved me a few times. Check them out here http://www.speedyspares.co.uk/ They answer emails pretty quick too, and stuff seems to arrive in a week or two without any drama. I've got a series IV. Also got a workshop manual if you need anything scanned your way.1 point
-
1 point
-
Hey thanks too MOF, great venue. Flushing turlet, in the middle of nowhere! Win!1 point
-
1 point
-
Hey, thanks guys, esp Felixx for organising. Enjoyed catching up for a chill time. Did we food it up or what? For onlookers:1 point
-
1 point
-
Gah, a quick google search turns up this http://www.fitaudio.com/?View=entry&EntryID=162 I didn't think finding the info would be that easy! Thanks all1 point
-
Personally I'd just be stoked to have a fezza in the first instance.1 point
-
My plate arrived I also replaced rear wheel bearing today as the L/R was getting noisy as hell. It was surprisingly pain free for a Sunday morning job using the bare minimum tools which was nice. The difference it has made is fantastic!1 point
-
It was a quiet meet but still enjoyable as always. Belgrove Tavern's outside area is really quite surprising and cool. The wedges were delicious and well priced but they do need to up their coffee game. Thepog took me for a quick fang in his father's XKR which went well, felt great on the road and sounded amazing! But I do wonder how many engineers/hours it took to get that note just right. Not oldschool but tolerated because supercharger I actually missed Alex's post that he wasn't coming and we waited around in case any other Motueka people arrived. Then the e30 Alpina (one of 2 in the country), the lancer and the shitty e30 took off for a lovely cruise through the countryside. This quickly turned into e30 vs e30 countryside hooning,which was just awesome. Although the Alpina was winning the whole time... Pics! Chur!1 point
-
1 point
-
back part sounds fine, for the front could you make the angle bracket bolt to the original anchorages somehow? bolting to original anchorages makes it a lot easier from a cert point of view1 point
-
1 point
-
More progress on the 1300... It's now sitting in etch primer and awaiting seam sealer, filler primer and then top coats. Sorry about spamming up with boring pics but everyone loves pics haha.1 point
-
Time to revive this thread. Plans changed. So i was going to re-power this with the 110cc outa the mini dirt bike, but it's physically too big. Next was put in a 49cc from a pocket bike, but to line everything up properly would've had the motor too far off centre. Then the plan was to make it a "proper" bicycle by welding a crank-case into it. Finally i decided on a plan. Awhile ago i bought a chopped up NSU Quickly from Manu (well it very briefly passed through his hands lol) that came with a motor that had a "gearbox issue" but had a load of "parts". I thought 'why not combine the two'. So i bit the bullet and cut the Gadabout frame up to mount the NSU motor mount. Trial fit. Yep, that'll do. Welded and checking alignment. Pulled motor apart, and..................Well there's ya problem. Unfortunately the wayward bits of ring & piston took out a large chunk of 3 out of 4 ports on there way past. BUT, i do happen to have a good barrel & piston that were in the parts that came with the NSU mini bike. Monday mornings mission is to get new bearings and seals (readily available locally) then slap motor back together.1 point
-
Been busy organizing things and trying to keep progress happening with this on the side of preparing the rally car for tauranga rally and all the other hectic life tasks. I drew up the heights for the shocks so it sits at the current ride height. Want to allow plenty of adjustment as I'll run it higher for road events. I'll have to invest in some pretty tough underbody protection also I think! Haven't got a delivery date for the shocks yet but I'm getting pretty excited. Engine is back in the hole also. After the rally I'll put some money towards urethane-ing engine mounts so I can bolt it up properly and start making exhaust manifolds etc. This is currently my biggest issue now that I'm actually in a position where I need to confront the bonnet clearance issues. I know the rocker cover clears the bonnet so looks might be a bit deceiving. Going to go for a curved set of fibreglass trumpets from Glen I think. Either that or try 3D print some of these.. Pretty cool huh?1 point
-
Have been tinkering away on small things here and there. Purchased this pretty cool Italian made grant steering wheel off trademe and had my friend Barnaby spin up an adapter to fit the nardi 6 bolt boss kit. i think it matches the interior a bit better than the shiny gold peyton which has been retired to my daily, I quite like the off centre stitching join I then found a piece ive been looking for for quite some time, the illusive centre console hinge intact!! This has always bugged me as the lid always flies off mid drift and it looks too ugly with the lid just taken off. Very stoked! I I then Bought a 180sx strut brace from a friend who was stripping a fresh import, unbolted the ends and fixed them to the strut towers for a measure up I then dropped off the cross bar for the steel surgeon to shorten along with my pair of cross fevers to split, i think i went around 5mm shorter eye-eye as the ends have an adjustment thread. Managed to keep the Fet Sports sticker intact for maximum steeze points The ends will receive the same black engine enamel as the intake manifold. There is around 10mm clearance to the intake, i guess ill just have to see if the engine hits next time i hit the track. Hopefully this offers a bit of rigidity to the 301,000kms chassis Next mission- Mounting these bloody seats. I spent a lot more time on this than i would have liked to but got there in the end Basically the generic nzkw L brackets wont allow a direct fitment onto my standard rails/sliders without an adapter plate which i then attempted to make from some 6mm flat bar like so: I went to move onto the next step of mounting the brackets to the cross bars when i figured out, the sliding mechanism is directly in the way of where my bolts need to go and is protruding above the 6mm plate not allowing the bracket to sit flat without spacing. This lead to doing what i should have initially done and ditching the sliders. I drilled all the rivet? type things holding the sliders to the mounting points and bolted the 6mm flat bar directly to them like so repeated the process for all 8 mounting points and then fitted the L brackets For all of these i have used m8 bolts with nylock nuts and washers but there is a total of 12 per seat to go wrong, am I better to now weld these in place and ditch these bolts? The end result is a slightly more social environment,next i would like to get the cassete deck up and running with some speakers! Check out the matching helmets i scored from trademe as well! Thanks for viewing. Here is the discussion link to let me know if these m8 bolts will result in death m8s //oldschool.co.nz/index.php?/topic/50005-jesses-1981-corona-mark-ii-grande-discussion/?hl=gx61#entry16281911 point
-
1 point
-
Basically the plug from my alternator is the same as the left one in the picture that joe posted, and then joins into a plug like on the right. Which is where I was getting confused. But basically. White is the sense wire, and gas constant 12v. Black and yellow is the igition feed. And yellow is the lamp wire. After figuring this out, I have no idea how I ever got my wagon to charge. And that I probably didn't need to spend 130 replacing my diode pack as the problem I had there was that I had connected the ignition wire to the b+ terminal on the alternator and this would have constantly kept my alternator on. Herp a derp. Will post a more descriptive post with pictures later on in case someone else needs to know this info.1 point
-
A small update this time. I am swapping my tail lights for facelift ones. One of the issues associated with this is that the boot release lock is located behind the tail lights. Due to the different design of the lights the original lock is not usable if you install the newer facelift lights. Of course you can simply put in a facelift lock but then your original key won't work obviously. I thought I would try to re-pin the facelift lock using the pins/wafers from my original lock. To do this I went to a junk yard and found a facelift boot lock. Here are two pics showing the lock with facelift and pre-facelift lights. Pre-facelift: Facelift (Note that the lock now needs to protude much further because the light is now over it): Old lock on left, facelight on right (Tail piece actuator has already been removed from old lock in this pic): In order to remove the barrel the front cover must be removed: C clip holding actuator must also be removed: Now the barrel can be removed, to do so insert the key and pull it out (doesn't have to be the exact key for the lock): Original lock has a cover which was too difficult to remove with damaging, perhaps replacement cover can be found but I wont be using this lock anymore: Original on left, facelift on right (Note: facelift lock uses 7 pins while original uses 6 but still have the slot for 7th, at least on mine): Key in original lock, notice that all the pins are pulled down into the core (flush) allowing it to spin in the barrel: Alternatively the same key placed in the facelift lock, see how one pin is not pulled down all the way. This prevents the core form rotating in the barrel: Pic showing how key is inserted in pins/wafers: Pins/wafers and springs removed from both locks, as mentioned before the original lock had 6 pins while facelift has 7: Here are the pins/wafers from my original lock fitted to the facelift lock, make sure to remove the spring from any slot that is not being used or else it could come loose and jam everything. Cleaned everything up too. It works! Oh and why all this effort? Here are the original pre-facelift tail lights (sorry for shitty pics): And now the facelift ones:1 point
-
1 point
-
1 point
-
Cant find any challenging 4wd tracks? put some near bald road tyres on.. featuring nosy ginger cows:1 point
-
1 point
-
1 point
-
Went on another run with a few mates yesterday, truck went all good. Seems to have plenty of grip with low tyre pressures. Have been running roughly (need a low psi gauge) 4psi front and 3psi rear last few runs, with no drama. Fixing tune and changing turbo has made it a bit easier to drive, Poser shot by Stu, at top of the palace Some vids mate took. skip to 3:30ish if you're impatient and just want to see a skid1 point
-
Brought a new smaller turbo. casting on these are pretty average But whats inside matters right? Its a GTX2863r. slightly bigger than a "disco potato" and has the later billet wheel, so good for bit more power. uses the same exhaust side as what was on there (GT2876r). So it bolted into my existing exhaust housing, only needed to adapt the intercooler pipe and airbox Before and after says it comes on boost about 400rpm earlier. and seems to run a touch more boost. afr bang on same other then where its on boost earlier, pink lines old turbo: So If you bothered looking at log above and got keen eye. you'll see its running 2 degrees advance. because of -15degrees transient trim.. I put the trim in after i took it out for the first trip, to try stop it going bunny hop spec over bumps. basically making it gutless when stabbing the throttle. Which worked ok, but i obviously didn't check what happened when mashing the throttle for some boost or just generally driving, then likely left it in the shed for months before driving it. Next drive just thinking its normal for a heavy pig with 4age. Anyway in the runs above it would pull 15degree when stabbing the throttle around 2500rpm and ramp the timing back in at around 5000rpm. after messing with the settings and getting it to work how it should, fells like lost about 500kg haha. goes so much better down low with same top end. This is after fixing the ignition timing. can see how the timing effects how it comes on boost. 400rpm later than with retarded timing, since its not firing half the charge out the exhaust.1 point
This leaderboard is set to Auckland/GMT+12:00




_sedan_(23230030334)(1).thumb.jpg.34d765361d66c78db614bae6ea2c156a.jpg)


