
Leaderboard


Popular Content
Showing content with the highest reputation on 07/01/16 in all areas
-
Fixed until the next thing breaks Big thank you list for all the work I 'appear' to have done to this car to date My Brother Kyle & his Partner Lisa for delivering the car in 2012 J A Davison Motor Engineer for gearbox assistance & oem part (previous owner once removed) Richard for hosting www.Avenger.co.nz Wier's for parts & spare cars Chris, Amanda, Lea, Kyle & Lucy Berkahn for painting / prepping / sanding & polishing the car over New Years Scrimy as well for lending a hand Nick @ ProTune Automotive for getting it on the road (more than once & sorting this head job out) Car & Boz for the emergency Headgasket 2 night's before Leadfoot Festival A&D Radiator Services for the re-cored Radiator Allan @ Agnew's Autos for the tappet reset on the fly on the way there Warwick for electrical Graham aka avengerparts on here for the Gaskets & assistance (10-5's Dad) Geoff aka sunbeam on here for parts, Gearbox & heater Hoses My workers for putting up with a car in a Wood-work shop once or twice over the last few years and my partner Amy who puts up with it all & I beleive enjoys the adventures and of course oldschool.co.nz for being lush6 points
-
4 points
-
Before... During...3 points
-
quarter as much backlash as a 5" angle grinder3 points
-
Check the contact pattern to confirm its close enoughness2 points
-
Use blues for more time2 points
-
use ciggy papers for that extra fine tolerance.2 points
-
2 points
-
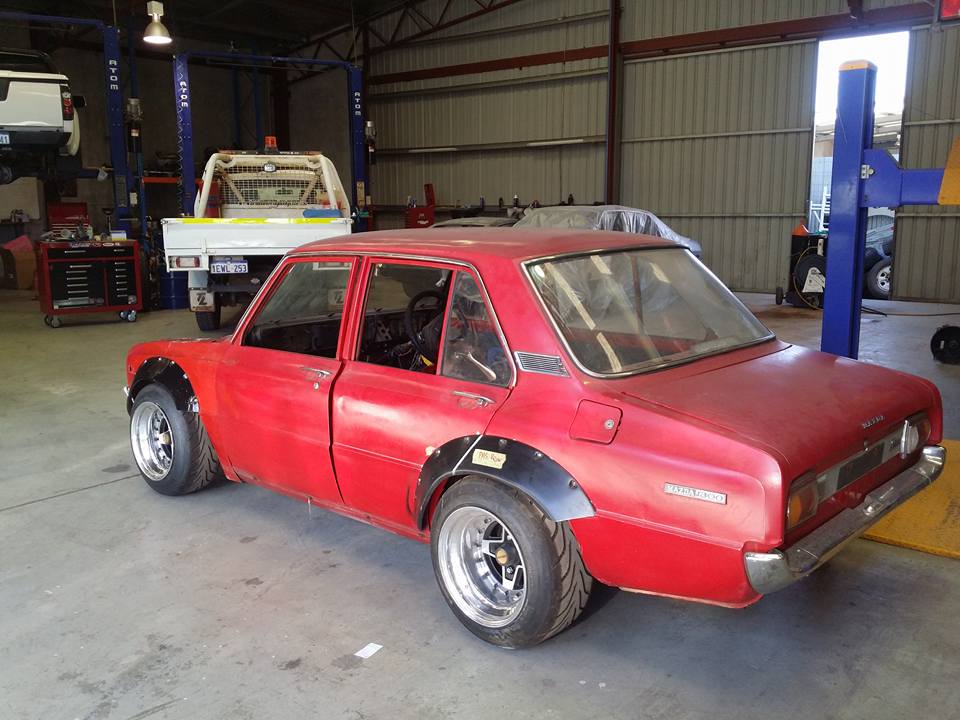
OK so it's about time I update this thing. There was very slow progress over the xmas/nye period but now things have got a back on track. Onc again we have had more fucking around issues with the guards but it looks like it's all going to work out. Going from the previous post we could only adapt the rear flares to suit as the fronts were too askew to fit up half decent. I was able to sort out another set of flares for a very good price from GC Stephen (hooked me up with the first set) however even though they were based off the same Group C Mazda RX3, these ones had come from a different company (fibremaster in Aus), whereas the first set were out of Japan. If you look closely at the picture (sorry shit picture) you will see that the dont have the little lip at the bottom, they are also of much poorer quality and are a bit more warped. When we first tried to match them up to the car we were thinking about getting rid of them and getting a full custom set moulded up by a local fibreglass champ but after umming and ahhing and some more stuffing around we were able to trim them back and get them mounted. As they are slightly smaller in profile they have been fitted to the front and the originals have been changed to the rear.
 2 points
 -
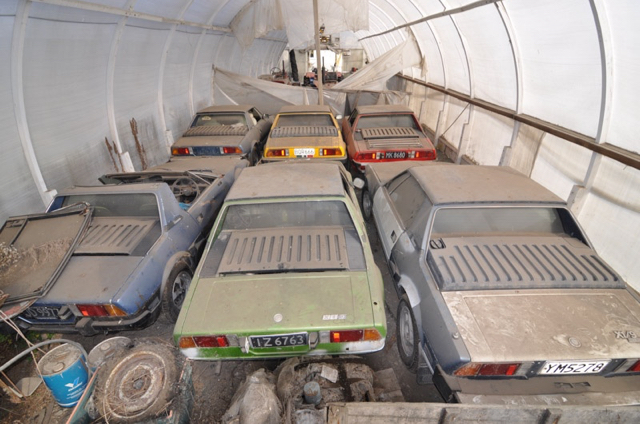
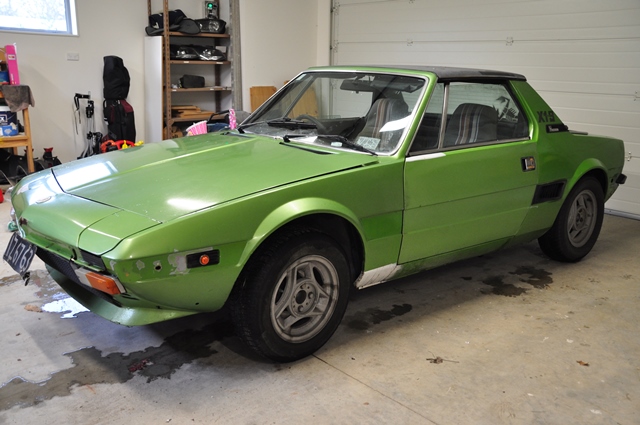
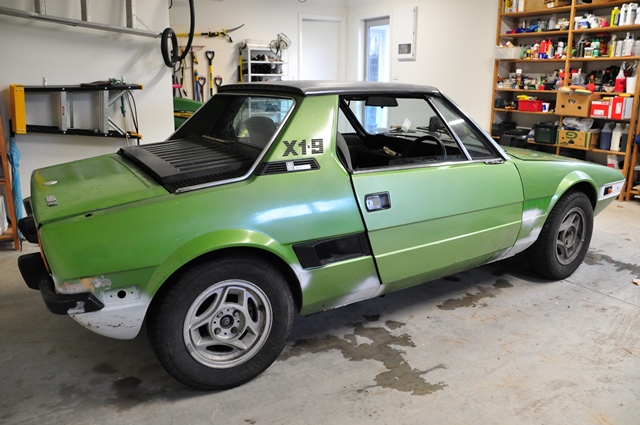
After many years of not owning an X, it looks like I'll be rejoining the faithful few. A 78 serie speciale was my first car about 18 years ago, and I've had a couple since then. I kept in touch with the guy who bought my last X and recently caught up with him. He agreed to sell me the green on e in the middle - but freight between our north and south islands pretty much doubles the price. Maybe it's a sentimental buy - but I wanted a serie speciale again, and a project - and it's definitely a project! Been sitting for at least 5yrs it's it's current location - and another 5yrs prior to that. So, its been a few weeks since I negotiated to buy the car, and we managed to pick it up over the weekend...it was a great 800km trip! We managed to get it running after a few hours, got the brakes and clutch bled, and away she went... The only issue (thus far), is that the battery light comes on and the battery doesn't get any charge. We spent about 4hours trouble-shooting the issue (power going in to the alternator, but not out), and took the alternator out, apart, and put it back in - with no success. Then we had an epiphany that we would try bypassing the voltage regulator, which worked and the battery gets full charge now. So a new voltage regulator is in order I feel. Anyway, she's parked up in the garage now - and I'm deciding what to tackle first. I need to stop the spread of any rust fairly quickly (although overall it looks not too bad), and then will probably move to getting the doors/windows adjusted so they open/close properly, then move on to some interior items to get the seats moving properly. I'm thinking I'll keep it running for now, and just tidy it up for a wof. Then slowly start stripping it back down for a proper restore... DISCUSSION THREAD:
1 point
-
Starting a slow and steady build of a early 70's CB100 running full CR 85 suspension.... Will be running a smaller 17in wheel on the front and shortening the forks a little. Maybe someone wants to swap for my 19? Also if anyone is after any cb 100 parts let me know as I'm only really keeping whats in the last picture.1 point
-
I guess you'd wanna be half baked to deal with British shit1 point
-
Sounds like a shitty earth. Double check / clean them all and go from there1 point
-
Have you checked all wiring back to the ecu with a multimeter? Could be a broken wire somewhere1 point
-
Racking my brain trying to remember which vehicle I had with the external drive units.. I'm sure it was my Nissan Safari. Had motors that protruded into the cabin and just fitted over the shaft that would otherwise take a crank handle. I always looked at them and thought they'd be ideal for a conversion.1 point
-
just universal. the russian bloke had 3 or 4 designs the one i got is a knock off of the old compagnolo design which was most popular in history just measure the angle of your chainstays and go from there. Pick a track end with lots of meat around the tabs if the angle is wrong, so you can just shape it to fit (this is what any bike builder does wehn they build a new one anyway) OR make your own, although these were cheaper than me scabbing a bit of scrap steel and buying a new blade1 point
-
i think the problem with using a motor with a manual unit is that the gear ratios end up less than ideal1 point
-
Good luck Dangeruzz ! Looking forward to the shitty stories from mancamp1 point
-
Have managed to source a new fuse holder, from a Celeste, to replace the melted one but don't have it yet. The car is currently with the auto sparky, hopefully I will hear from him tomorrow and the issues will all be simple ones. While the car has been going nowhere i decided to whip the side vents off and give them a bit of a tart up. They were in okay condition but look to have been repainted at some stage with some less than perfect masking and there were a couple of peely bits. after a quick sand on the worst bits: masked up: painted: back on the car I ended up getting impatient waiting for the right conditions and went ahead and painted them when it was a bit too cold, like a dick. So it took ages in front of a heater for the paint to go off and it has ended up a bit stipply (doesn't look quite as bad as the photo above IRL) and shinier than I wanted — it's a satin, should've maybe gone for full matte. Anyway, a bit of a cock up (especially after the ballache of masking them) but not the worst cock up ever. They look better than they did plus nice and clean and crisp. I can easily enough redo them when the weather is warmer with a flatter paint if they bother me.1 point
-
I had many things laser cut and picked them up today; Shoulder mounts for the seatbelts, 8mm plate, should be enough. Being the geek I am (and having the 20k version of Solidworks with all the bells and whistles) I did some FEA to make sure they were ok, they are. I removed some windows so i could get a bit more weld on there, this was piss easy, about 6 screws each... There is a bit of surface scab in there, this will get rust killed before replacing the window. Bits like this I have expected to be way worse than they actually are. Then there is the 2x sets of these; That got made into these; Still the other one to do, but a bit of weldy weldy and I had this situation, which pleased me. Good.1 point
-
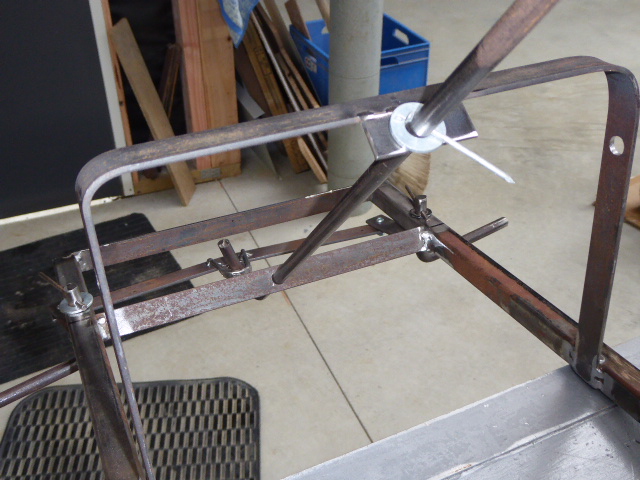
Im building a pedal car fron scratch this time,mainly so I can get good at fabricating and welding for big boy cars.Welding 3 mm steel is definitely much easier than 0.8 mm steel .The steering rack and column look good and work great the rear axle was difficult to heat and bend up ive only got a gutless torch at present so will need a bigger one if I keep on this track.
1 point
-
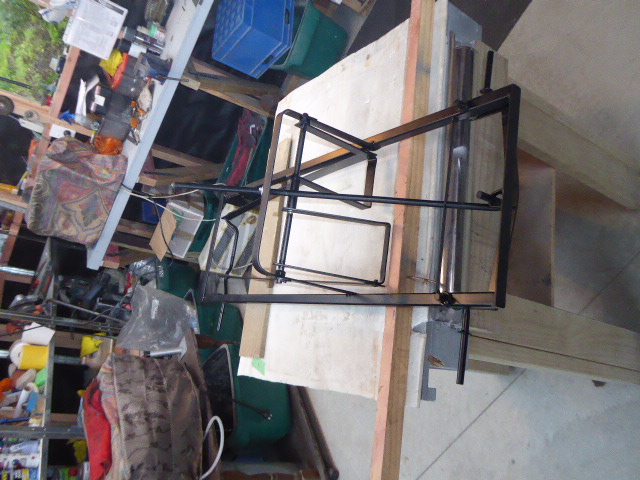
Assembled , painted frame ,wheels still to go on and seat to be made.
1 point
-
//oldschool.co.nz/index.php?/topic/22836-ladaspeeds-fiat-x19/?hl=ladaspeed%26%2339%3Bs1 point
-
I would have to say, yes. The engineering behind placement and fixing of intrusion bars is unlikely random and incorrectly affixed and spec'd bars could prove more dangerous in an accident than none at all. That's just a guess based on logic though.1 point
-
I finally got this back after my own laziness and tbh money stuffs. (visas are expensive) But i painted my ute, triumph is chugging along nicely as a daily for the missus so i free'd up enough plastic to get these parts home Surely would've been easier to stick a 4age or CA18 or, even an RB but feck it. i love the sound of these little motors on carbies and its got a bench seat and a column 4 speed manual for epic cruising times so no fucks given fun times ahead, after another few parts are sourced. Note the size difference in the rocker gear. The Valves are 2mm bigger than stock as far as i can make out ( they're a bit difficult to measure with the verniers once installed.) inlet 38.4 exh. 32.5 Cam specs Power Band: 3000-7000rpm Valve Lift: 0.349" Duration: 286° Timing Figures: 35/71/71/35 Inlet Timing: 108° ATDC Inlet lift at TDC: 0.077" Valve Clearances: .020" inlet/.022" exhaust +60 oversize pistons. 82mm. rods are original but have been checked, balanced and 'weighted' together. dunno the proper term. this is the only thing limiting the redline really, the cam will run out of steam at about 7000 but if i wanted to stick a wilder cam in it in the future, with proper rods and the rest of the work its set for the racetrack. The difference between the old main caps Vs the new. held in with arp studs and nuts. Electronic dizzy with expensive coil (because chrome) mapped with the right curve for my cam. and a boring cover plate, but its been balanced right through with the flywheel and crank. And i got these bad boys today. Chur to Shaneo for putting me onto them. These are exaclty what i wa after Quattros 13x7. 4x10⁸PCD. Not an easy wheel to find it turns out. but man i'm chufed to bits with 'em. all i need is nuts to bolt them on too they're ready to go. bonus. She's gone from whitewall grandads car to bogan staple in 15 seconds im still shopping but that is the bulk done. thank fuck. the missus would actualy kill me is i had anymore bills to pay like these! haha (nervously laughs whilst sweating) Discussion. //oldschool.co.nz/index.php?/topic/46071-mighty-joes-english-duo-cortina-67-triumph-74/ I\l update this a bit more regularly now. i'm hoping to get the car home this weekend if i can get the trailer and work on it at home instead of having it in the workshop.1 point
-
Yoo, So I sold ol Bluey a fair while ago, but I wasn't really set on selling it. Anyway, one popped up on Trademe a while ago and I finally went and had a look at it yesterday. I was pretty happy with it and brought it! Have a few tidying up jobs but it's pretty sound and clean. Gearbox is making some nasty noises so I'm on the hunt for another, and maybe another engine, current motor burns loads of oil if you get up it. Today I gave the interior a good huck out and it came out really nice. Dash and door cards are all mint, headlining and seats are a wee bit discoloured but no rips. It's missing carpet so I'll sort that out asap. It looks like it's had a gbox change sometime because the shifter if a bit further back than factory. I tidied up that today and made a blank for the old hole. Anyway, jobs; -Gearbox change -Slam -Get some 165 55s for a set of 14x7 Hayashi mesh I have and pop em on. -Roof racks -Carpet After that's done I'm keen to put on some different carbs and some headers. Apparently manifolds off B series MGB fit, but I'm not sure if I want to stick with the J series or not. The head design looks fairly terrible. But we'll see. I'll take some better photos once this poo Auckland weather clears up. I'm using the same threads as I can't be bothered making new ones..1 point
-
Been away for work for a week, and when I got back there was a list of things to do that were apparently much higher priority than working in the shed. Good thing is some bits arrived while I was gone, shelled out for some spark plug lead routing looms, will be interesting to see how they go with the new leads I also received... And did get into it for an hr or so this arvo, fitted the starter motor I had cleaned and painted months ago... And pleased to see no drips underneath, cleaned up the trans cooling tubes and fitted them at the trans end... Unfortunately have forgotten how all the clips etc go for these, so will look thru my pics and get back into it later this week...1 point
-
So i have another bike Its Terrible Mustang Sports. Was a 3speed An 8ft tall person had tried to stretch the frame to fit them i guess it wasnt good Im going against week before bike summit rules and am shrinking it and turning it back to normal, so I can sledge into some crowds First, the yuckness. it was covered with red tape not even any tubing to cover it And tidied up a little. I think that bottom headtube lug is bent, the tubing is nearly spot on straight going into it. Maybe its an illusion because I need to clean it up some more. Threw some bits at it to see what it looks like. Not too bad Almost have enough spares to have it ridable, don't have a bottom bracket tool because I only ever deal with cup and cone, or the phil wood one on my touring bike. So waiting till then. Will bomb around as is for a while. The ultimate beater, just to see how well my joints hold. I silver brazed them. If it falls to bits then whatever because I only really paid for the fork. If it doesn't fall to bits - then gloss black High flange flip flop hub for fixed/single speed blacked out everything else1 point
-
So I have heaps of rusty parts for the ute and have found that there is lots of surface rust/light pitting in my floor SO my interest in rust removal has tripled in the past few days. Why don't more people use electrolysis! I have a bath with brake disc bubbling away outside and I honestly can't believe how quickly it's happening! Cost isn't an issue- you need about 50c worth of Washing Soda (super easy to find eg bin-in) and that's about it! I was using a charger but that was 1a max- now using a 19v 3.5a laptop power supply (cheap) with some alligator terminals. The disc is simply to satisfy my curiosity though. I REALLY want to know if electrolysis can be effective if you don't have a bath of solution.. I'm thinking wet towels soaked with electrolyte sitting in my floorpan with the anode laid on top. I guess it depends on if the electrolyte needs to be free to circulate. What if I made an electrolyte jelly or paste? Yes grinding would work but this is so much cooler.1 point
-
romandave took some lovely pics too, thanks dave1 point
-
1 point
-
I got the bargain of the century of a bolt in hilux diff, shortened, discs and lsd.1 point
-
OK yeah.. so I have ended up getting a touch carried away with this little wagon and sort of going against my original mission statement of 'keeping it all manky looking and just scrape it through a wof'. The reason for the slight change of heart is because when I started cleaning out the engine bay and really noticed how deep and yucky the surface rust and crusty bits were I soon knew I would have to paint it. Then I pulled the last of the wiring out so I could clean it out and I thought to myself as I was feeding the wires through the bulkhead 'well that's an ugly bit of cable routing..I don’t really want to see that again’. Before I knew it I had Hannah inside watching for fires while I welded discs of steel into all the bulkhead holes from the outside. Rewinding back a couple of weeks, because this project has become glacial in its progress. First thing.. those wheels. I fitted them and rolled the car out the back while I used the hoist for a customers car. It looks great on the Turbos. They certainly do suit this car better than on Viva one. I had also noted that the Viva wagon is exactly the same colour as the water tank... I had been umming and erring about removing the battery tray from the engine bay. I knew if I did that I would have to fabricate a box down the back under the floor due to the wagon needing to be clear floored for max usefulness in earning its keep. I also knew the tray was hiding things. Bad things possibly. I removed it. Not easily either. It seem that the fella who spot welded it in place was either drunk, had too much coffee or was suffering from MS. There was no order to the spots and I couldn’t find them. I couldn’t just chisel it off because doing so would dent and wreak the inner wing. Took ages. Off with it and look at that. Yuck. Glad it was gone because no way would that stuff had rested from its metal eating duty. With it gone I looked over the general mankyness of the whole bay and realised it needed to be done properly. I removed the heart. It was only being held in place by two exhaust nuts and the two mounts. So tiny. With it out I whipped up a simple engine cradle/wheelie tray thingee to put it on so it can be moved about the workshop easily. Hannah is going to get paid in kind words, cups of tea and biscuits to clean the engine for me. I noticed that the frost plug on the back of the head looks very dodgy indeed so lucky it was out anyway. It could have spoiled the party later on… I filled up holes, cut our more rusty patches and generally cleared it all out for a nice clean bay look. I cut off all brackets to do with the ugly factory throttle linkage. I have instead been given a later Viva HC throttle pedal like I have fitted to Viva one. Big thanks to Andre yet again for having one in his stash of bits. Hannah laughs at my idea that if I have the same pedals then when jumping from car to car for daily driving they will feel the same to drive. I don’t think she realises the power of the mighty 1159cc Viva. I also dealt to the rust that was in the drivers side A pillar… Welded up the cut in the hinge bracket that had refused to let go of the pin ages ago at the very beginning. After welding up all the holes in the bulkhead leaving only the clutch cable and speedo cable holes I ground them all smooth. I then removed the now very scratched and sad looking screen. I think it might be the original. With it gone I was pleasantly surprised at the lack of rot in the well. Only one corner had succumbed and it was not bad at all. I cut it out, welded it up and moved around to the back where it was rotten in the pillar. With the screen out one can easily marvel at the beauty of such a mint dash top.. Now fixed and strong again I stepped back into the engine bay and continued grinding, sanding and smoothing the bay. To earn this episodes title of ‘getting carried away’ I even removed the fuse box and welded up the hole. I might have to do this mod to Viva one some day. Finally I applied some Brunox epoxy rust neutraliser. This is now where I am at with the bay… I had popped into Nelson last week for welding gas etc so while there I went to an automotive paint shop and bought some epoxy primer plus three cans of colour matched spray paint. Well they were colour matched at the time. I had forgotten to take in my little bit of steel which had un-faded paint on it. So instead me and the fella behind the till tried to match the colour off a internet photo of a Cactus green Viva off the nerdnet on my phone. Never easy. Once home I sprayed some on the car. Whoops. It’s a bit brighter. But its still nice and looks 60s so it’ll do. Anyway- any engine bay painted in one neat clean colour always looks better. So that is where I am at now. I have heaps of paid work on right now so Hannah having finished her current work in one days time will get some cleaning and painting jobs. This way she shall earn the privilege to hold up traffic in the mighty Viva wagon (hatch..) on the hills around us. I have been having many thoughts about engine swaps or sneaky turbos and simple injection systems don’t you worry. But really I have strayed far enough already. I will however be re-wiring the bay so to allow for really easy engine swap/changes in management etc for the future. Keeping all the lights/horn/starter/alternator etc separate to the engine loom. Ha..the current engine loom. All of 3 wires? Temp, oil, ignition feed. Old cars eh? Giggle1 point
-
And chucked the lifters in, gave them a good coat of assembly lube. This stuff is sticky, got strings of red goo everywhere. That plus oily fingers gives these pics the soft focus look... And inserted pushrods/rocker arms with a dollop of goo on each end, and loosely fitted polylocks... And liked this ex-t shirt I pulled out of the rag bag, had to look it up but Dimmit is in Florida... And all done. Just used the EOIC method, and went through each bank in order, giving the nut a half turn after resistance was felt, and locking it down... Then went through each cylinder/valve in firing order and checked each rocker felt the same. Pretty sure it's all good, tis easy to set hydraulics as they are quite forgiving. Would have carried on but I'm going to use studs on the intake and Hardware store was shut today. Still, a good bit of progress, only let down by my rush job painting engine parts, got a few drips so will have to sort that out over the week...1 point
-
BEER plate1 point
-
Replaced a dodgy area...1 point
-
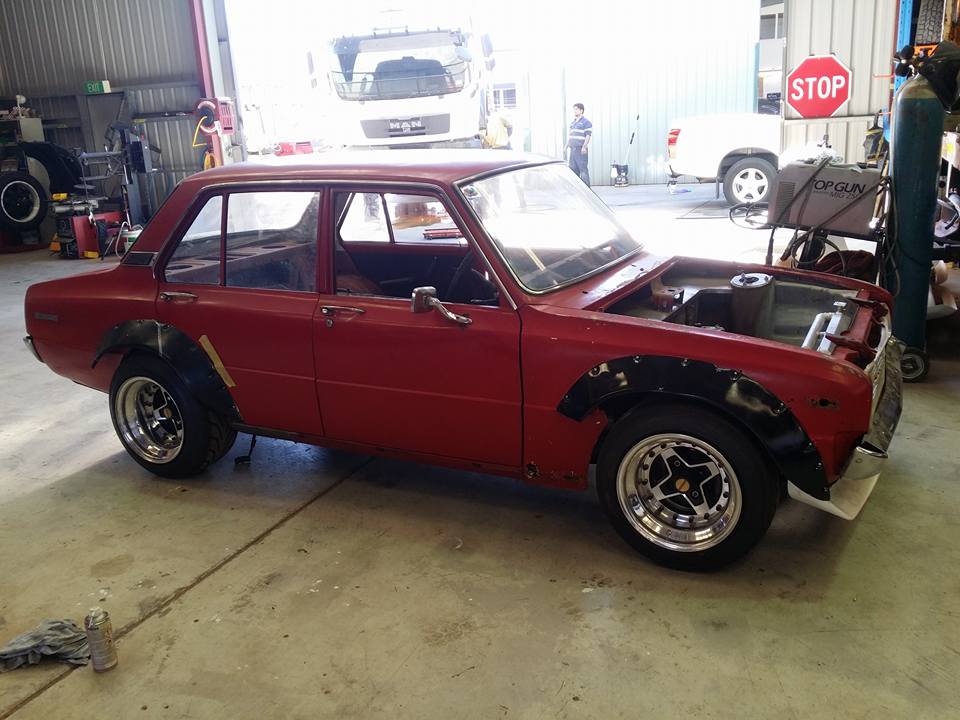
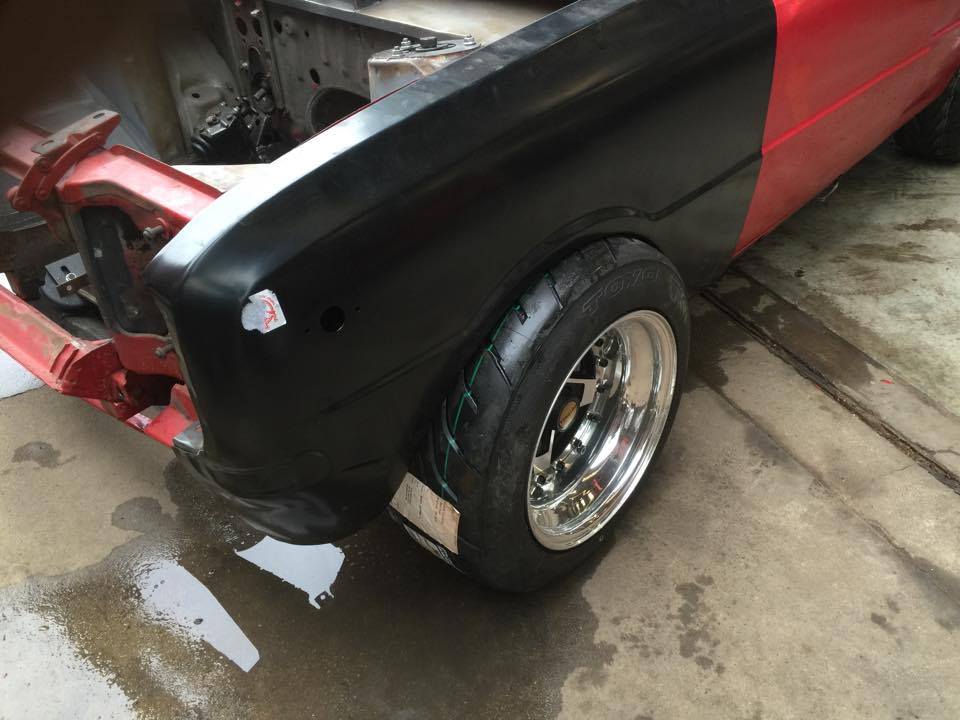
As you can see there is still a bit of trimming required and the section on the rear doors that needs to be split. We are going to add a bit off the fibreglass on the ends to cap them off and also fix some steel to brace the up for a bit more strength and also to avoid flexing with heat and wind and what not. You will probably notice the the bottom of the front passengers guard has been trimmed and rolled inwards to help with full lock clearance. Wasnt the initial look I was going for but it is growing on me, makes it more racecar spec haha.
1 point
-
Started making the exhaust...1 point
-
OK well now that I have some time between paying jobs (which have almost all been other old rusty cars and general rot removal) I have sneaked the Viva up on the hoist and got cracking with its rear end. But first here's a pic of the rust I have removed so far. We did a run to the metal scrap place so I had a clean out. This lot had to go. There will be more.... Now this rear valance panel looks a bit thin on it.. Which it certainly was. Not quite as bad all the way across as my other Viva when I repaired that one. Again just like the other Viva its weird that only the rear panel rots but the inside shaped vertical panel stays solid?. Not that Im complaining. Anyway. I cut it open and then cleaned out all the rust flakes, wire brushed it and then neutralised it all. I discovered that the new can of Brunox I had bought happens to accept the extension lance that comes with my cavity wax cans. Sweet- I was able to spray it right into the Lh corner. Then I painted the interior to help the car last another 40 years. Then a local mate wanted to use my hoist so the Viva came down and I cleaned up the front panel. Its been repaired before and had been done neatly enough but then covered in bog. The corners near the rails were gone again so that will be attended to once back up in the air and Ive finished the rear. Back to the bum. I carefully cut and shaped new steel to fit in with only butt welds. Vivas have quite a tricky multiple compound curved rear end but I was able to work it out using two pieces of steel and lots of hand shaping after getting the main curve set with the folder. I tidied up the bits that were under the reverse lights, which wont be going back on, then one more vacuum out. For the final fit of butt welded close fit panels it helps to use a butter knife to line the edges up.. I grind off the lowest weld which could hold road muck but otherwise I will leave all the welds untouched. Grinding welds down sucks. The exposed welds are sort of part of the overall patchwork car I'm after for now... Then I moved round the side and this bit looks a bit dodgy. This has had a previous decent enough looking repair but sadly was covered in filler straight onto bare metal- as was the way in the good old days eh. So the bog absorbed moisture and rotted steel. Bugger. I cut it out and treated the inside with luckily only a few bits that need to be cut out. Then while the Brunox epoxy spray was setting I moved over onto the opposite side. This time its the very bottom corner of the arch that looks a touch rotten... So I cut it out. It was pretty frilly after all.. The arch corner in pieces. Note my ever evolving welding table. I recently added the uprights to hang my angle grinder, Dremel machine and other bits that were always getting in the way, falling off or never at hand. Its then once opened up to day light that I discovered a little seam sealer Jabba the Hut!!! Wow. * I then had to carefully shape a new corner and arch bottom out of several bits of steel. It was all so rotten I wasn't quite sure what the shape was meant to be like. It didn't really have to be factory original looking, just neat. So I have sort of just made it up as I went along.. Once this arch repair is done I'll go back to the other side and finish that. Then I will drop the car down and turn it around so I can having it facing the sunny end of the shed. Then I can work through the engine bay rust with nicer light with better access to the coffee machine/biscuits/sunshine/music. * that is actually a lump of factory seam sealer. I might have added the eyes..1 point
-
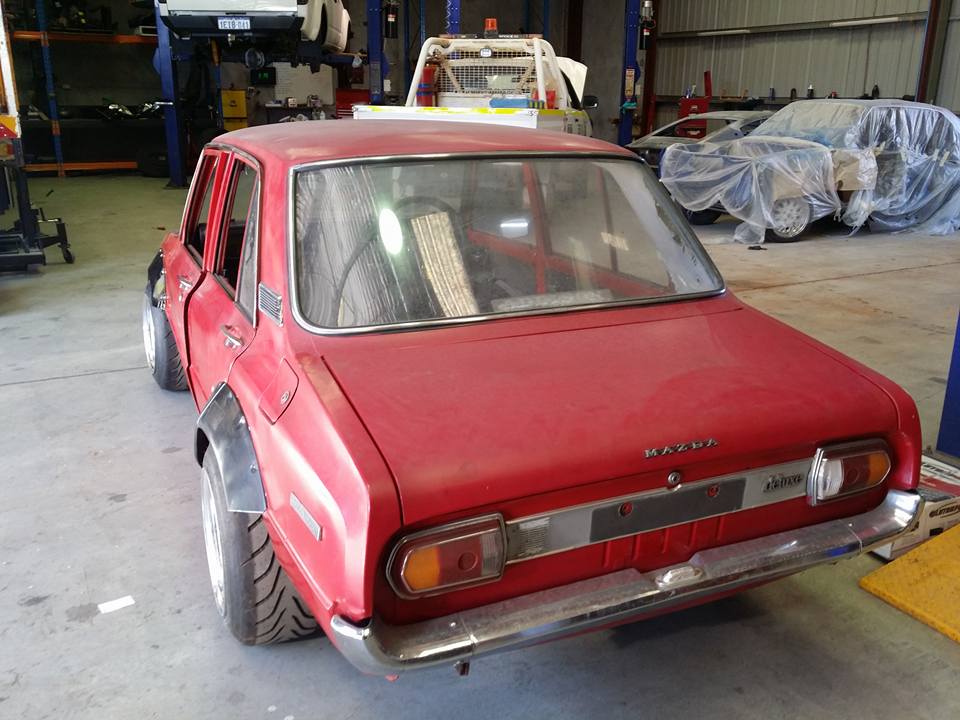
Side and rear view
1 point
-
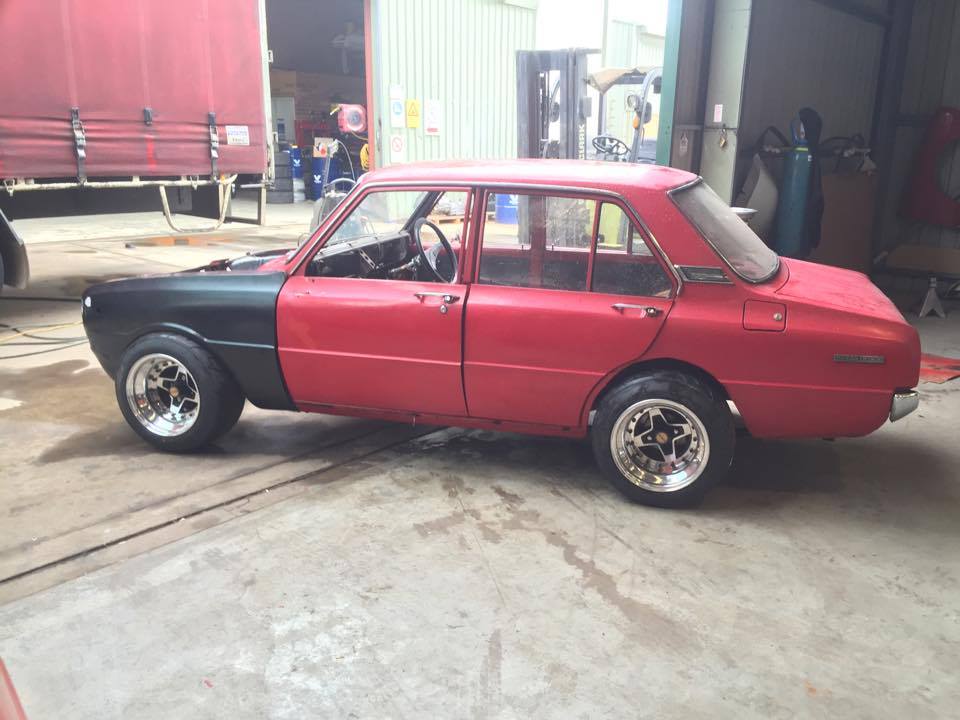
Hey everyone, Finally managed to scrounge up some tyres for this. Not many options being 14"! Ended up getting 205 55's for the rear (225s are discontinued now) and have 185 60's for the front on order. I was pretty worried at first as thought the stretch would be hard case but it actually sits nicely. Here's the old girl with the 205's mocked up on the 9" on the front and 10" on the rear. You will notice we have been mocking up the replacement/incorrect front guards as well and have taken out a section from the rear guards.
1 point
-
Exciting news! Little Viva wagon runs! It sounds quite sweet too. I had a go at getting it to start ages ago but the points and condensor were shot so I gave up. Today I had to move the car from the hoist to make room for an E21 Bimmer that’s in for rust work. With the wagon down on the ground and parked up near the bench I thought I’d get it going and strip out the engine bay while Im there to make better access for the repairs needed. I had been given another dizzy since the last time so I ripped the points and condenser from that, set it up and got sparks. Set up a fuel can and as soon as the carb had fuel it started. Awesome. It revs nice, idles nice and sounds really good. Time will tell once its running and driving as to how good/knackered/tired/gutless it is. Also today whilst between mucking with the ignition and helping a friend with his Saab I pulled the brake servo off, threw away the single circuit master cylinder, pulled the heater out, bonnet hinges off and some other bits in the search for any more rot. Luckily the usual points behind the hinges were solid as was the heater plenum/channel. I will remove the radiator for a tidy up in front of its mountings. I’ll take off the dynamo and throw that in the bin as planning an alternator upgrade. Pictures from this today.. It was raining to start with so perfect excuse to spend day in shed with Hannah and Rowan and tinker with our respective cars.. This next one.. look at that for some lovely hose locating bracketary.. Engine bay cleared out for a looksie.. Tidy heater/ventilation plenum thingee.. Rust hole.. Another hole.. So over the last few weeks, or since the last update, I have been whittling away at a few bits on it while it was up on the hoist. I finished the chassis rail repairs. As suspected the passenger side rail was solid but for a few little holes and around the jacking point/gearbox mount. Its all strong now. Next time its up I’ll clean up and paint it all. Then some decent cavity wax inside. I’ve swapped the alloys over for some old wheels I had kicking about and had the tyres removed so I can weld up/clean up two of the alloys that the have been curbed. It looks horrible on old skinny steels. I look forward to some new tyres and get them Turbos back where they belong! I am planning on getting 175/70 13 so it retains an element of comfort and that slightly older look rather than the more racy 60 series tyres I have on Viva 1. Next rust repairs will be either the engine bay bits whilst its off the hoist or sort the rotten rear valance out when its back up in the air. Luckily for my wallet I have a few jobs coming in. Unluckily for Viva it waits in the queue as its doesn’t pay me money. Im getting quite excited at the prospect of cruising down to the beach/into town with my ropey looking wagon so I think I see a few evenings spent on it now. Its gonna be perfect for mtb trips too J I will have to get a shopping list together now. Things like brake cylinders, seat belts etc. I will be keen on some Chevette front seats too if anyone can help- I hate driving with out headrests plus Chevette seats are really comfy. Im sure this list will grow. Those with Chevettes... expect some requests soon..... Tim, Chris...1 point
-
I made more progress on this today. No interruptions. Just me, music, coffee, welder, grinder. First off. I spotted this little fella making a go at life in the side window seal. I like it there and will try to nurture it along. Back to rust. This looks a slight iffy.. Yep. Im loving this perfectly shaped wing. I shall keep that as is. Someone has put a lot of effort into creating that. So I cut out the sill and this was inside... I have kept it all and can sell it on to someone who needs an original sill for a future build.. Luckily the front end of the outer sill was solid so that stayed in place so keeping a nice datum point to weld to. Inside the sill it was all really pretty good. Just needed a wirebrush and some paint. Again, much like the other side, it was foolish to attempt to use the very bottom of the inner sill so I chopped it off and welded in fresh steel. I also had to re-make two sections along the top of the sill structure that were just a bit too iffy to use. I then folded up two more sill sections to suit. Painted the inside and then welded them in place. I then chopped out the rear end rot areas. Much better condition at the very end on this side. Good Just two patches but I ended up doing the larger one right back to the bottom edge because it took no longer and means the whole sill bottom along there is new. Pinted and welded up. Its now looking like a proper patch work quilt I finished tonights effort by welding up the last section in the floor. There was an area that was a touch too thin.. I think there will be little hedgehogs sticking out out through the underside.. Then I swept up and moved the car onto the hoist. Next area is the bottom of the a post/sill end which luckily is not too bad. Once that is done I can attack the rotten chassi rail/rails. So far it seems to be that only the drivers side is rotten but I will find out soon. I need to buy more sheet steel though and will get some good thick stuff for the rails while I am at it.1 point
-
Slowly been getting the interior back together — new carpet is all in, seats are back in, looking great. I have finished restoring the dash and centre console and started to put them back in. I managed to source some 3M Di-Noc from an Architectural finishes place to replace all the faded old 'woodgrain'. It came out pretty well, if I do say so myself. I prefer the straight grain texture to the swirly walnut style that was in there before and the colour match with the steering wheel is spot on, which is nice. Old: New:1 point
-
Cracking Into some more panel work1 point
-
Rebuilt struts with KYB shocks... Temporary primer on the guard... Redid the number plate...1 point
-
Not much been going on with this lately, just lots of little bits and pieces. Installed an alarm/remote central locking, new stereo. I think the stereo looks pretty good (better than the silver Kenwood tape player that was in there anyway), suits the style of the car well. You can see where I put the LED for the alarm at the bottom of the second pic Managed to get a new indicator lens to replace a cracked one. Apparently near impossible to find, after months I eventually got one by fluke — PartsWorld in Timaru had one that the label had fallen off, so they didn't know what model it was for but the part number on the lens matched the old catalogue number and it's a perfect fit. Not flawless condition, has a couple of scratches but no cracks and it polished up nicely. Before: After: I've had a few more bits and pieces arrive lately. Top rubbers and brush seal strips for the side windows and then this little NOS item from the States: My rubber steering wheel is a bit rooted, the rubber is soft and collapsing, so I was pretty pleased to find this proper leather replacement for less than the cost of getting my one re-wrapped. Also, while the car was clean I took it out for some night photos.1 point
-
So engine is toast. No surprises there really. was nearly using as much oil as petrol. So out it comes. going to pull it down and decide where to go from there. Unsure if i want to go forged pistons yet. and may go DOHC but have not decided on that either. Dirty arse engine bay. May have had a leak or 10 So Developing a list of things to do: firstly clean engine bay. If i stay SOHC i will modify plenum and add a bigger throttle body out of a commodore or something. tidy wiring and replace plugs with something not shit. Make alloy intercooler piping. make nice stainless heat sheild. Cut shit out so radiator gets more airflow. Udgrade fuel pump and lines and add a surge tank. sick of loosing power around corners. Find a good lsd and get new drive shaft made up. Sort out some decent suspension Im sure i will find more to do aswell. then once engine built and back in will tune it for 20+psi and do skids Family pic... just cos1 point


_sedan_(23230030334)(1).thumb.jpg.34d765361d66c78db614bae6ea2c156a.jpg)


This leaderboard is set to Auckland/GMT+12:00