wildcat_lgf
-
Posts
53 -
Joined
-
Last visited


wildcat_lgf's Achievements
Advanced Member (3/5)
51
Reputation
-
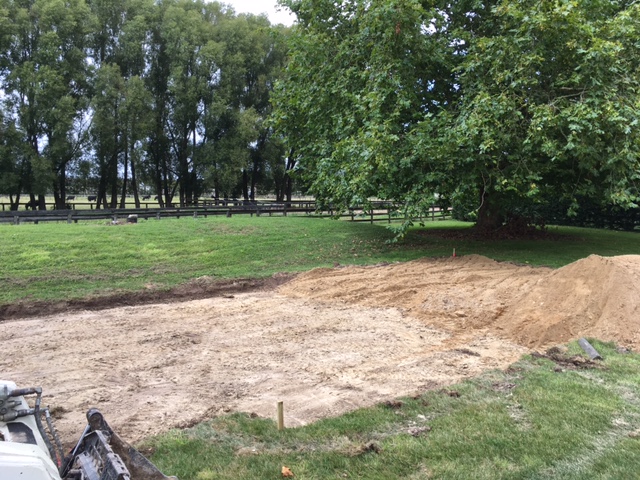
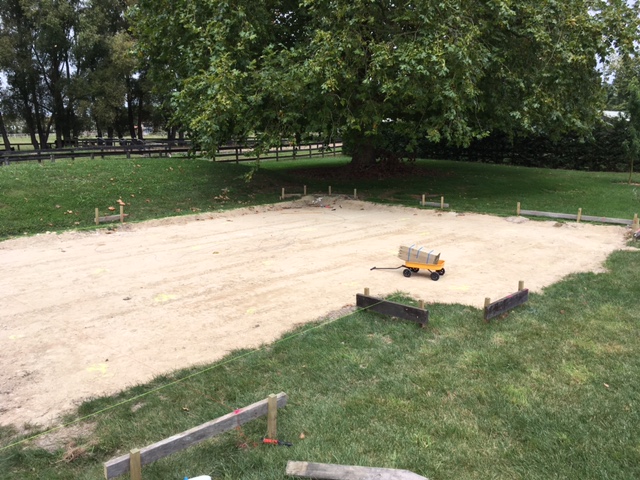
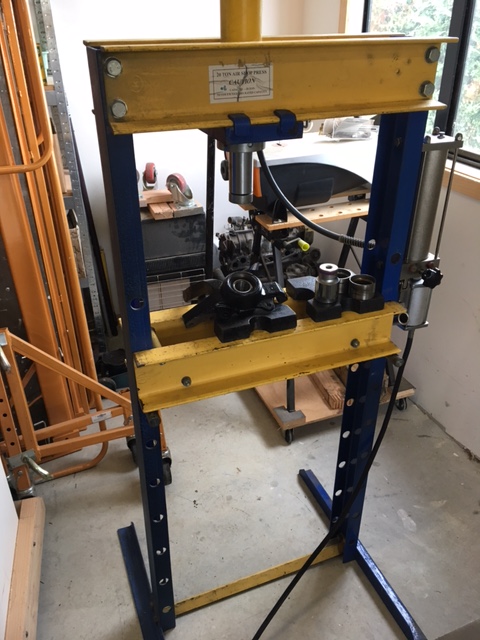
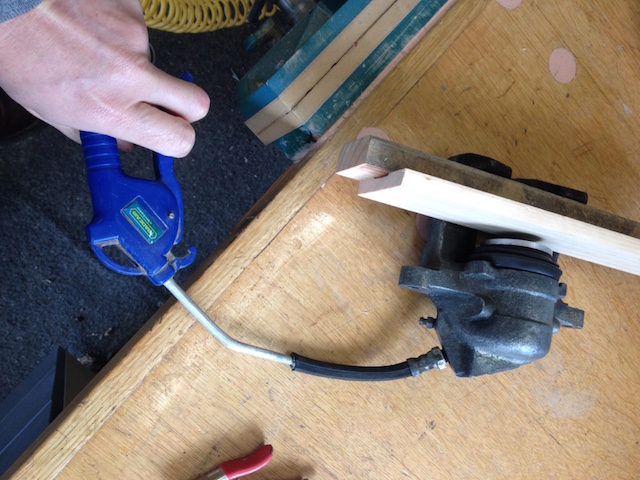
Oh - and nearly forgot to mention - we got building consent for the new shed, so I'll have a bit of extra space for the projects without cluttering the garage and tracking dirt through the house. I'll be done piece-meal as we can afford it, but I just want to the get the concrete pad down before winter...progress so far: Sand pad getting cut out...basically a double garage plus a single garage going the other way (kinda an "L" shape) and then Lisa's art room and a bathroom behind. Sandpad cut and roughly levelled...profiles put up and strings run...just waiting on some sunny weekend weather to box it up for the slab. It will be a ribraft slab - hence the pad is level and string heights quite high. In the meantime I bought a new tool for the shed - and had to store it over at Dad's place for now. 20T press. Its pretty good and has the added bonus of being local so pick-up was easy, and also having the connection for the air hose so I don't have to manually operate the jack. It works really well, and I used it put the front wheel bearings in....more about that later.

-
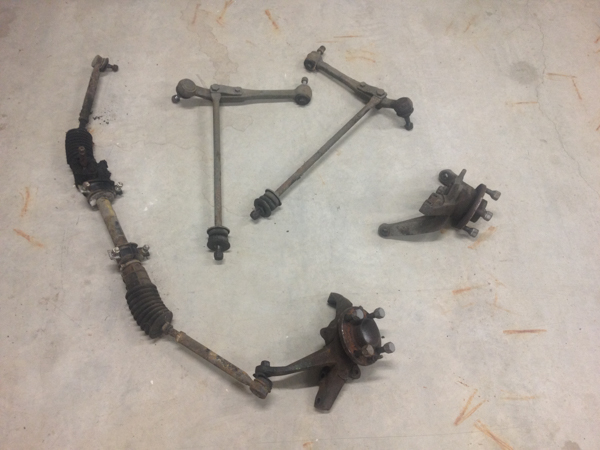
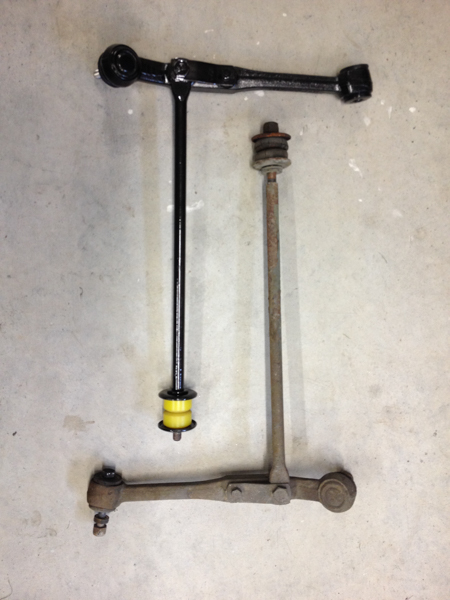
Took the front control arms out and tidied them up - replaced the trailing arm worn rubber with poly bushes - should be much less sloppy. The rubber bushes were completely worn out. A bit of time with a stripping disc on the angle grinder - plus a coat of KBS Chassis Coat. Looking much better now, and should withstand all the road grime and muck. I opted to just replace the control arm rather than get the ball-joint rebuilt. It was a bit over $100 for the ball-joint to be rebuilt in Chch, and only US$30 for a whole new control arm...easy decision. Totally impressed with the KBS product...the kit comes with heaps of product and seems to work really well, with a good finish. Way better than the Hammerite I tried before.
-
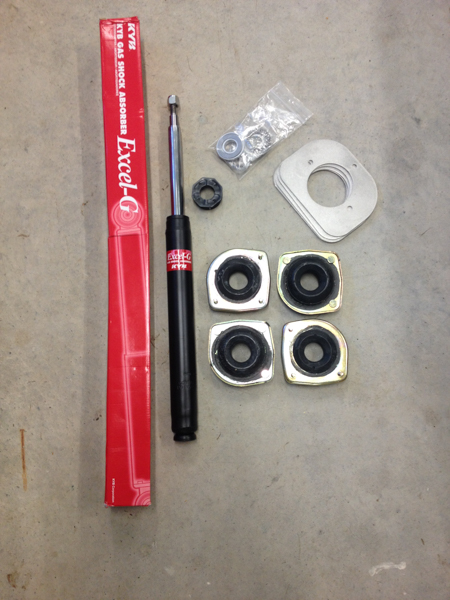
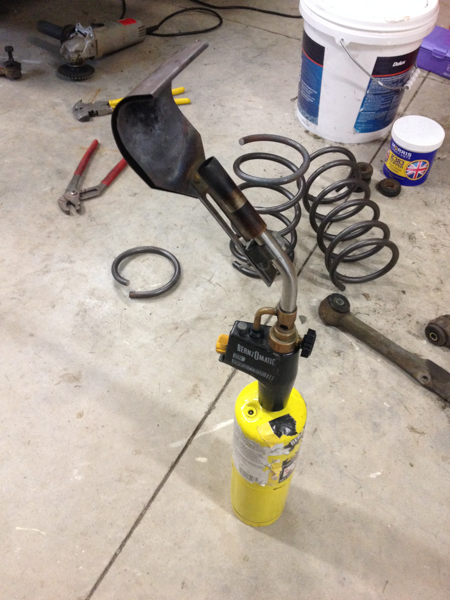
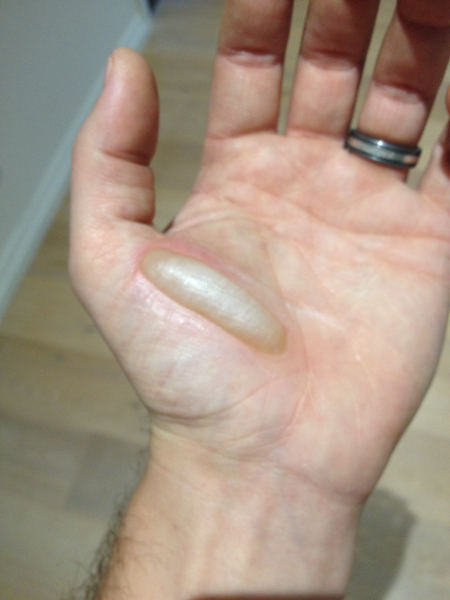
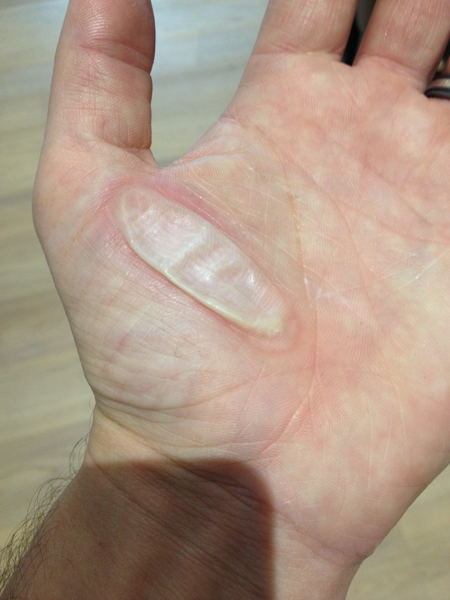
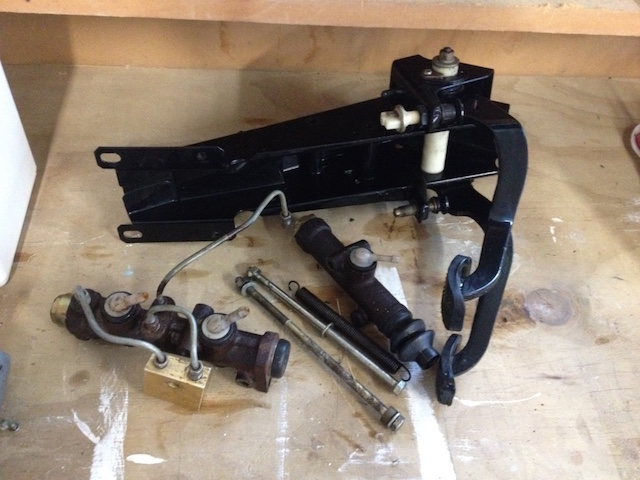
Then I got distracted and thought I might as well pull the suspension and steering box out and clean them up. Decided to shorten the springs and bought new struts which I will shorten to suit as well. I was a bit dubious at first, but quite a few Fiat guys have done it with good success - the key being to keep the spring captive. Luckily there is a set of proven dimensions and steps to follow online. New goodies - new struts, new uprated topmounts, and reinforcement plates for the suspension struts - known as "Plaia" plates for the guy (Mark Plaia) who designed them and first made them available for the X. Also visible at the top are new roller bearing pivot mounts (also known as Plaia Pivots)... So out came the hacksaw and the gas torch...works really well with the heat shield! Then in a moment of inattention - I picked up the wrong end of the spring...and this happened! Major blister
-
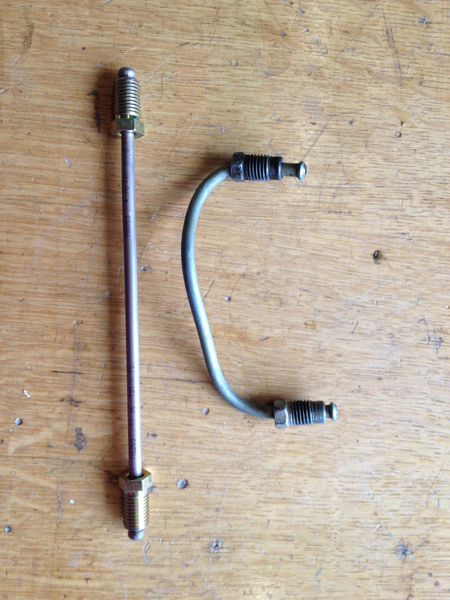
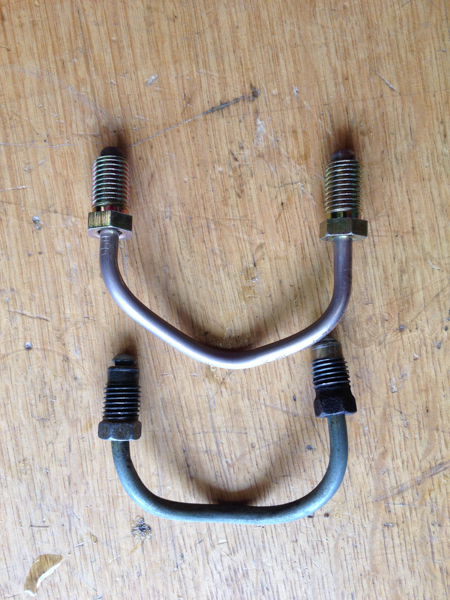
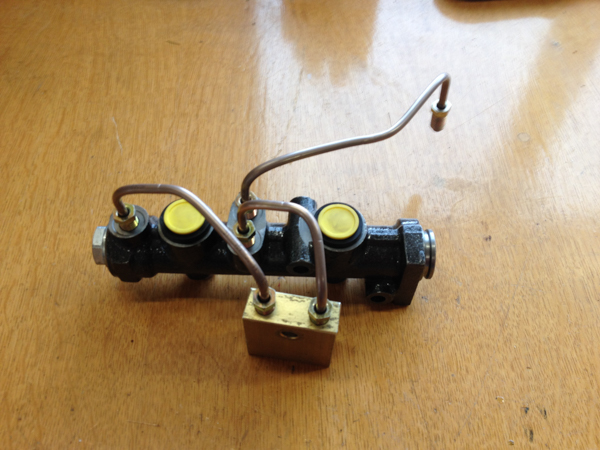
Overall they look pretty good - but the tube pliers I bought leave a few marks in the pipe which is annoying. But the lines fit ok. The real test will come when I put it back together I suppose. New versus old (new pipe on the left before I bent it up). And new line shown on top versus old underneath. Brake MC back together and looks like it will bolt up fine.
-
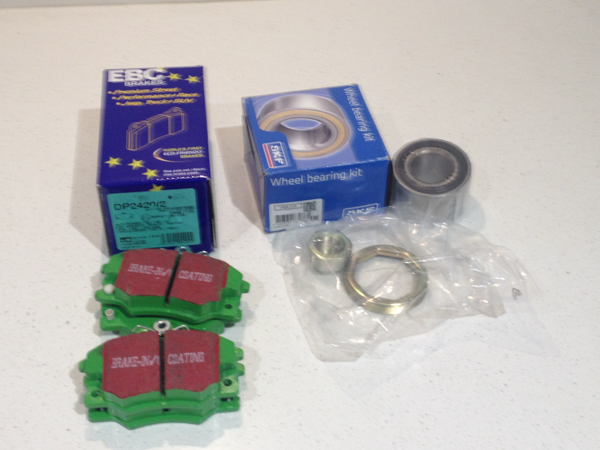
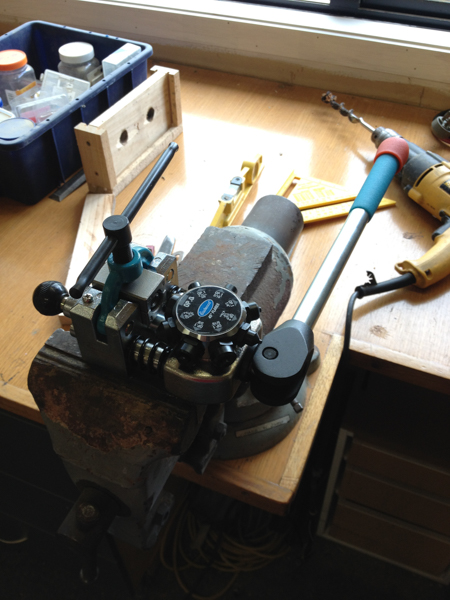
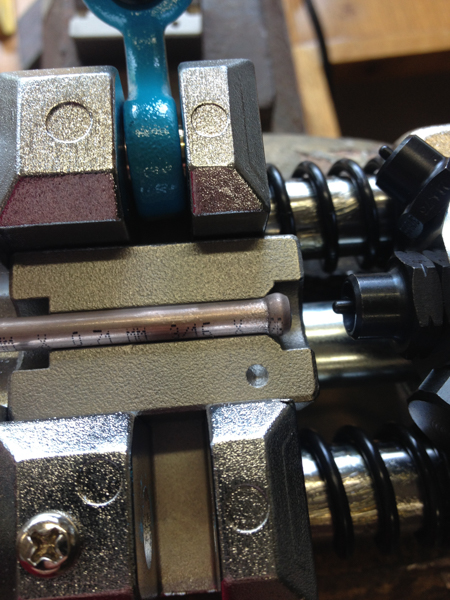
So it's been a while between posts - but I have been working on the X I swear! Slowly slowly... Bought a few goodies - EBC brakes from the UK, and got a good price on some SKF wheel bearings from Amazon The brake flaring tool arrived from Eastwood - very pleased with it, and takes out the "user error" that would probably occur if I was using something simpler. Does a pretty good job by the look of it, and can do single flares, double flares, bubble flares (as per the photo), etc So I made up a few brake lines so I could put the pedal box back together...
-

wildcat_lgf's 1978 Fiat X1/9 - Discussion
wildcat_lgf replied to wildcat_lgf's topic in Project Discussion
yeah, it didn't flatten as much as I thought...maybe if I had thinned it a bit - but it might've just gone streaky. Overall looks ok - probably good enough until they need another re-build... -
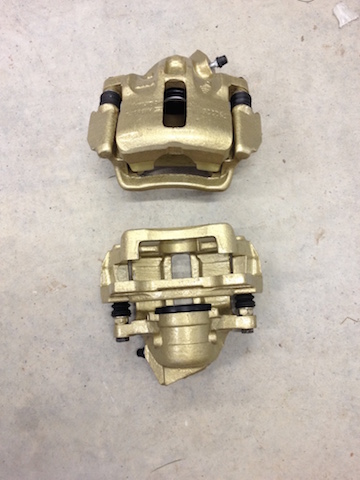
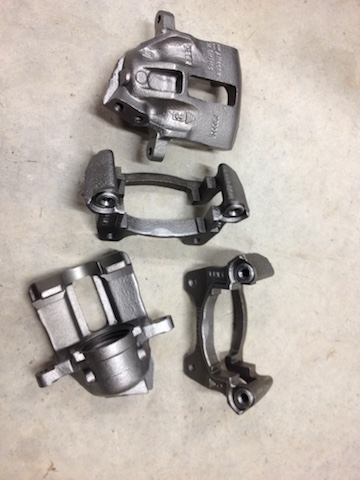
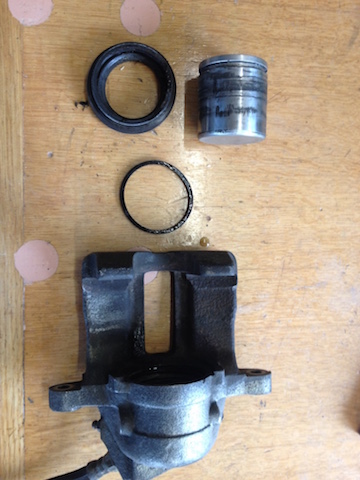
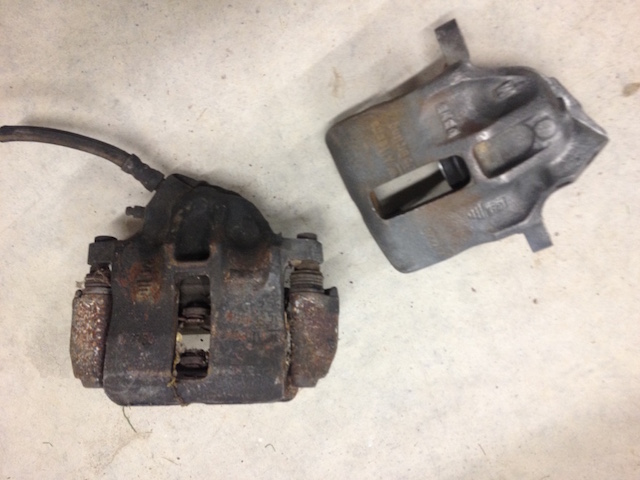
Re-built the fronts with new seals - luckily the pistons are in good condition, and put them back together...with a slight change in colour. I used gold Hammerite paint as the advice I read suggested it was as good as any specific caliper paint - and way cheaper. I was a bit disappointed in the finish of the paint - it supposedly flattens down, but brush strokes are still evident even on the rough casting finish. If I were doing it again, I'd buy the spray can instead and spray them...although this would be more expensive. So now, I'm just waiting on the brake flaring tool to arrive - then I can re-do the brake lines and re-install the pedal box with the new cylinders...
-
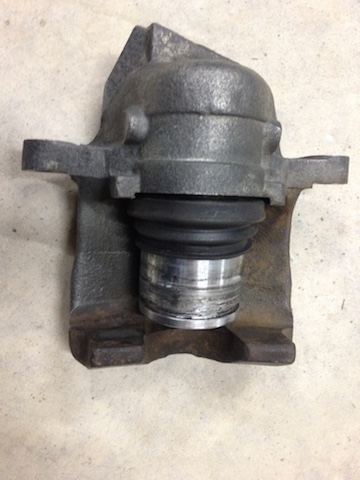
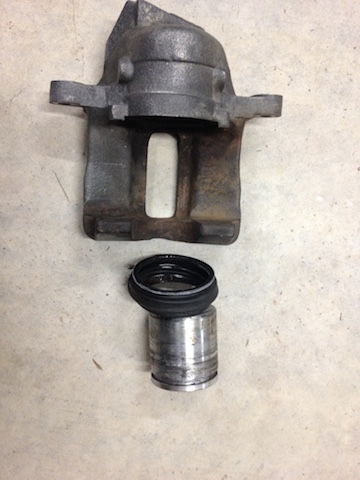
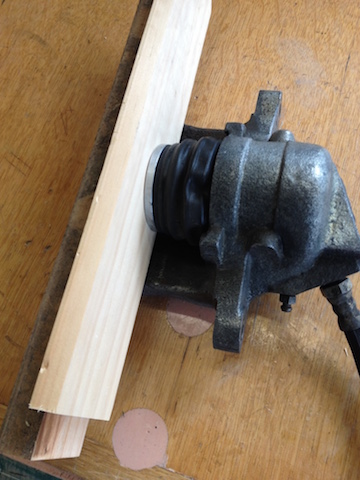
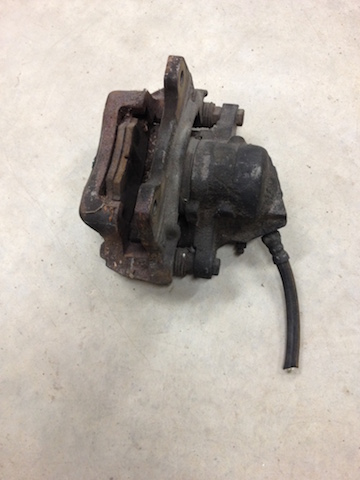
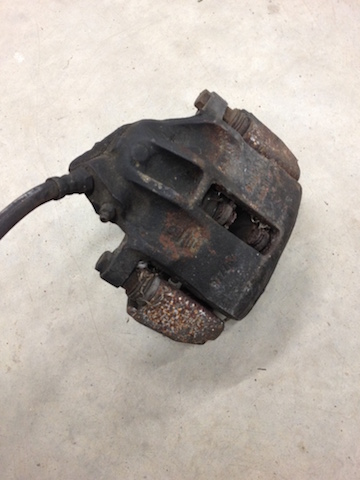
Stripped the brakes down - wire brush and patience! I thought I'd done a pretty good job - but decided I'd get them blasted just to be sure I'd got all the oil/rust etc - wow! what a difference! Don't waste your time scrubbing with a wire brush, just get them bead blasted - came up mint! I used the air compressor to pop out the piston - and put a block of timber in the caliper to make sure I didn't damage the piston. A word of caution - don't get your fingers in the way! The piston comes out fast and hard!
-
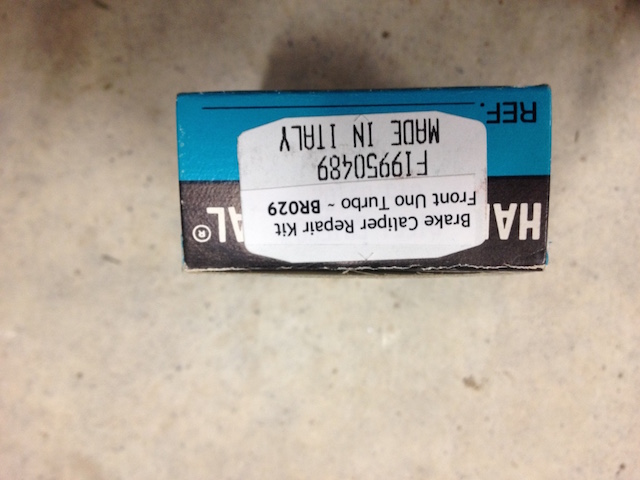
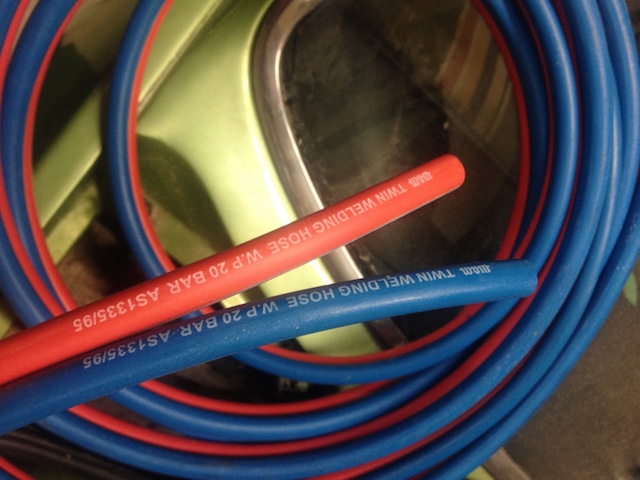
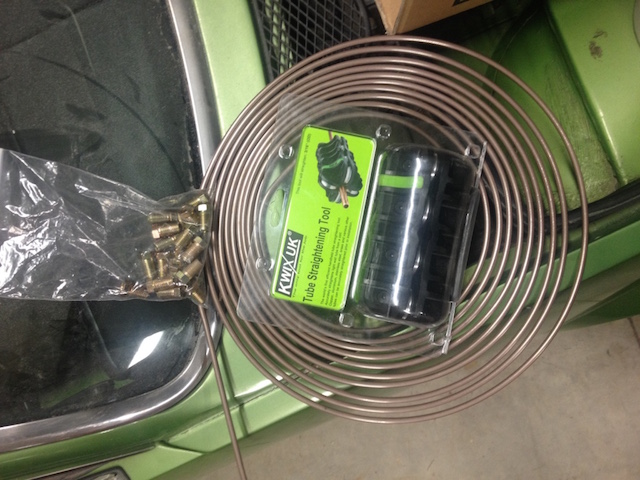
So over the last month or so I've been gathering parts and tools for a few jobs - mainly concentrating on the brakes... The master cylinder (or so we thought) was leaking, and slowly ended up with a puddle of brake fluid on the drivers floor. On 2nd thoughts it might actually be the reservoir hose - as it looked a bit perished and worn. Removed the pedal box and master cylinders from under the dash - luckily I'm still small enough and flexible enough to wriggle under and get the box out...a bit of a nuisance job, but finally its out and on the bench. I ordered new master cylinders (brake and clutch) as well as a new clutch slave cylinder - fairly cheap from the USA. Re-sleeving was going to be ~$150 - considerably more than $34USD for a new one. So while I wait for those to arrive - I have been sourcing new reservoir hose...the pedal box uses both 1/4" and 5/16" (6mm & 8mm) hose. 6mm seems easy enough to get, but 8mm was a pain. I really wanted red coloured hose to keep it similar to the original (red fabric braided hose) - what a mission that turned out to be. Gates don't supply red hose or 5/16" hose here in NZ (and AUS weren't interested in discussing anything, or helping out). I could get 6mm black hose, but no 8mm... As the hose is being used for brake fluid it needs to be SBR or EPDM (not Nitrile). In the end I found I can use acetylene hose - but had to buy it in the "twin hose" configuration. Still a bit cheaper than buying specific Gates hose separately (unavailable). So fingers-crossed it works ok. The twin hose is easy enough to pull apart - and should look fine...its mostly hidden anyway. Next I've bought some Kunifer Nickel-copper brake line (3/16) and will re-do all the brake lines...for some reason we had no rear brakes, and they wouldn't bleed through at all. Possibly something stuck in the distribution block or somewhere in the lines - so I might as well learn a new skill and make some brake lines...a few goodies starting to arrive: Kunifer hose So while I wait for the flaring tool to arrive I saw some Uno Turbo front brakes for sale on TradeMe. These are a bolt-on upgrade which allow me to use the vented front discs from an Uno Turbo - a much better option...then low-and-behold a Fiat 125 shell was listed and I bought the rear brakes from that - so I get an upgraded braking system front and rear for not too much $$$. Had to outbid a couple other Fiat guys for the Uno Turbo brakes (sorry Maurice)
-
wildcat_lgf's 1978 Fiat X1/9 - Discussion
wildcat_lgf replied to wildcat_lgf's topic in Project Discussion
A great thought! definitely keen on doing something like that in the long-term... -
wildcat_lgf's 1978 Fiat X1/9 - Discussion
wildcat_lgf replied to wildcat_lgf's topic in Project Discussion
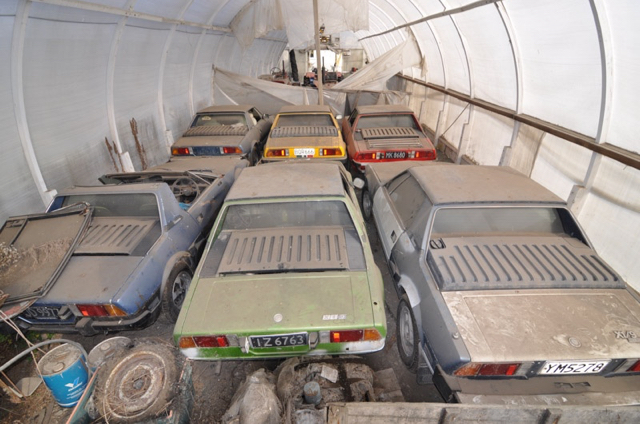
sorry guys - i haven't had much time lately... The shed is on a farm in Nelson - it's his brothers farm I believe...most of the other X's are de-registered, but if I lived any closer I'd be at risk of buying them for parts. I had to twist his arm to sell me the green one (luckily rego still on hold)...but he might be persuaded on selling another - he's notoriously busy and un-reliable at replying (either email or phone). He's got my old X1/9 - which I sold him about 8-10 years ago. It has an unfinished dallara kit, Uno Turbo engine with a few nice mods, and was very rust free. Unfortunately he's had it sitting outside under a tarp and I hate to think about its condition now! -
Fiat X1/9 discussion: PROJECT BUILD UP:
-
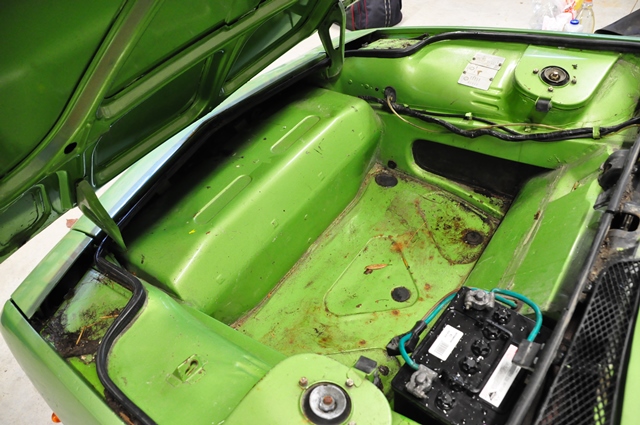
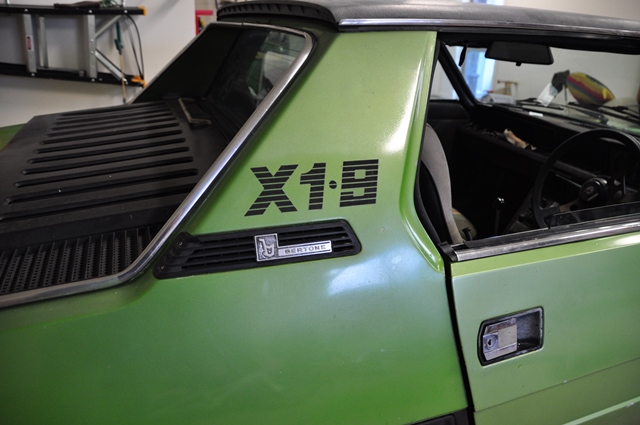
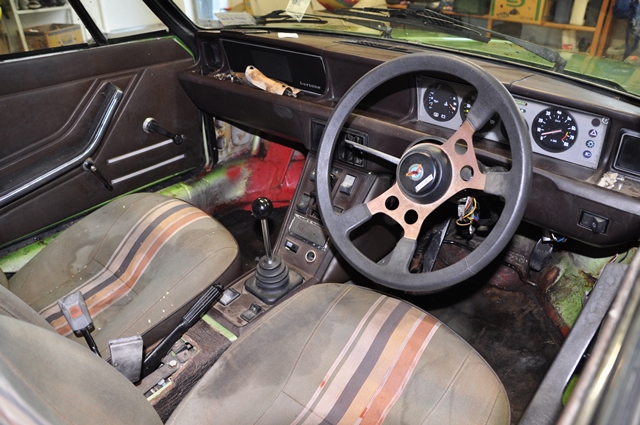
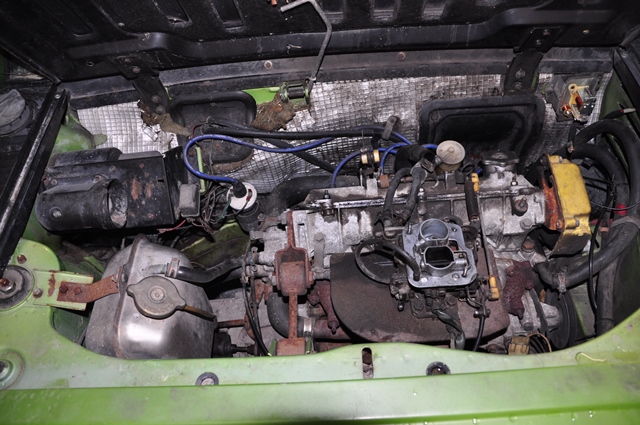
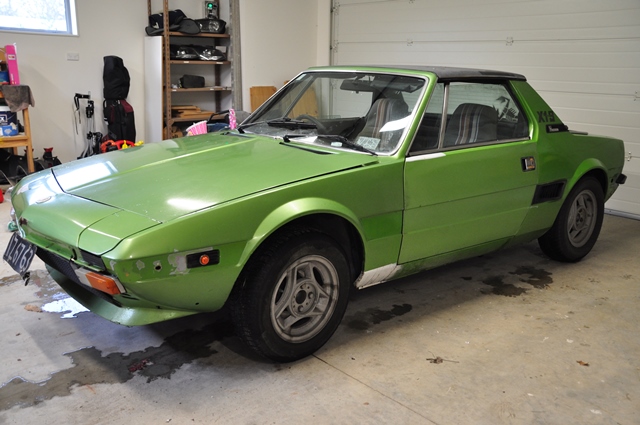
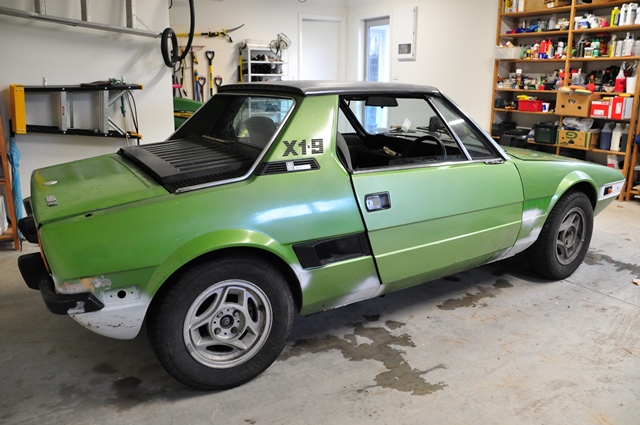
Here's a coupe more pics as she currently sits.
-
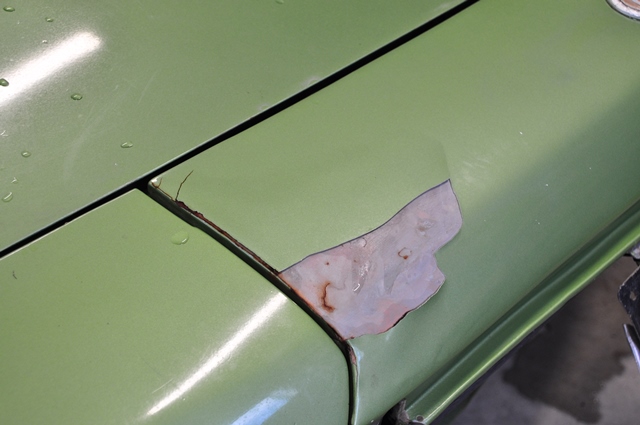
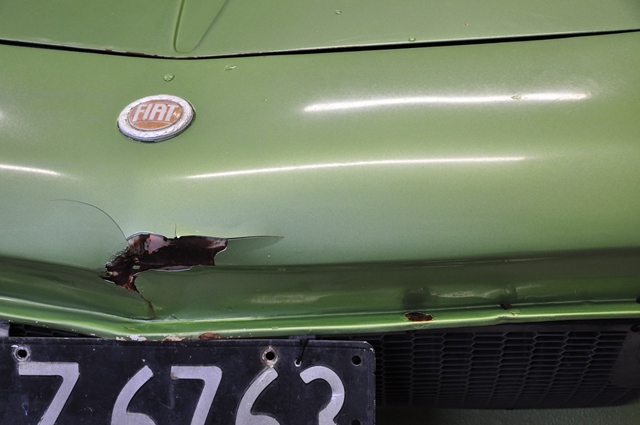
After many years of not owning an X, it looks like I'll be rejoining the faithful few. A 78 serie speciale was my first car about 18 years ago, and I've had a couple since then. I kept in touch with the guy who bought my last X and recently caught up with him. He agreed to sell me the green on e in the middle - but freight between our north and south islands pretty much doubles the price. Maybe it's a sentimental buy - but I wanted a serie speciale again, and a project - and it's definitely a project! Been sitting for at least 5yrs it's it's current location - and another 5yrs prior to that. So, its been a few weeks since I negotiated to buy the car, and we managed to pick it up over the weekend...it was a great 800km trip! We managed to get it running after a few hours, got the brakes and clutch bled, and away she went... The only issue (thus far), is that the battery light comes on and the battery doesn't get any charge. We spent about 4hours trouble-shooting the issue (power going in to the alternator, but not out), and took the alternator out, apart, and put it back in - with no success. Then we had an epiphany that we would try bypassing the voltage regulator, which worked and the battery gets full charge now. So a new voltage regulator is in order I feel. Anyway, she's parked up in the garage now - and I'm deciding what to tackle first. I need to stop the spread of any rust fairly quickly (although overall it looks not too bad), and then will probably move to getting the doors/windows adjusted so they open/close properly, then move on to some interior items to get the seats moving properly. I'm thinking I'll keep it running for now, and just tidy it up for a wof. Then slowly start stripping it back down for a proper restore... DISCUSSION THREAD:
- 12 replies
-
- 13
-