
Leaderboard


Popular Content
Showing content with the highest reputation on 03/04/16 in all areas
-
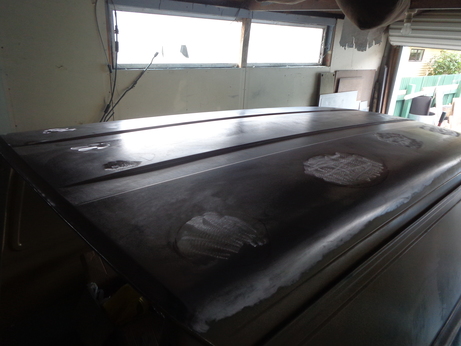
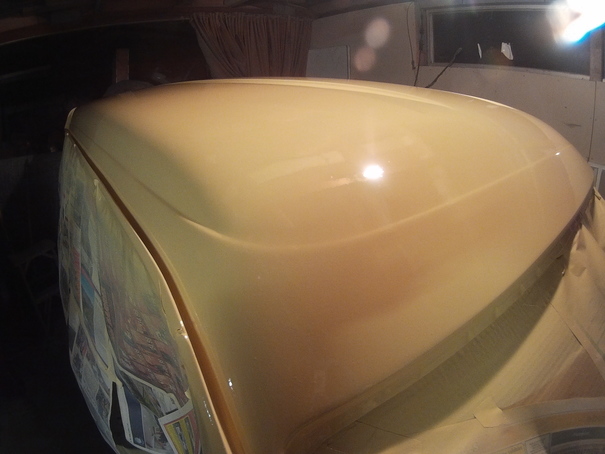
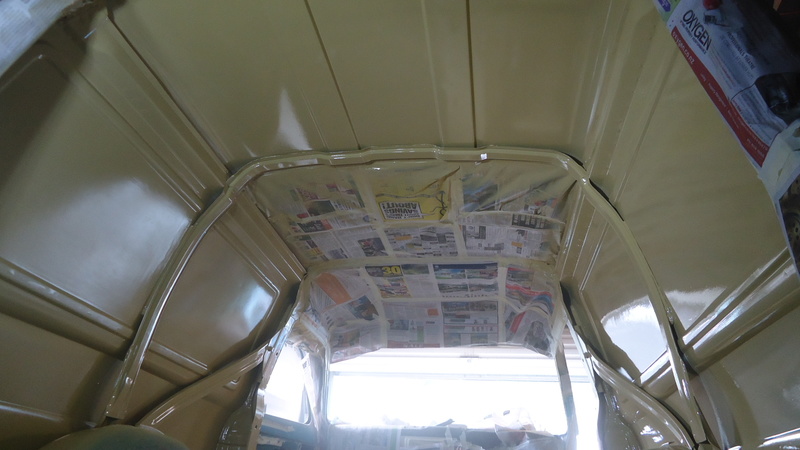
After the holidays and getting the blue van up and running, I got back into this one. Started with the long job of bare metalling the roof. For a little van it has a big roof!! Got it down to bare metal and scratched up the areas needing nuetec. Brush painted on the 2k primer. Bit of nuetec, skim of bog and then it was all long boarded down. Pretty simple doing a mainly flat roof. Tonight it was prepared and had 5 coats of high build primer applied. Came out really nice, too bad it'll be sanded back.
 9 points
 -
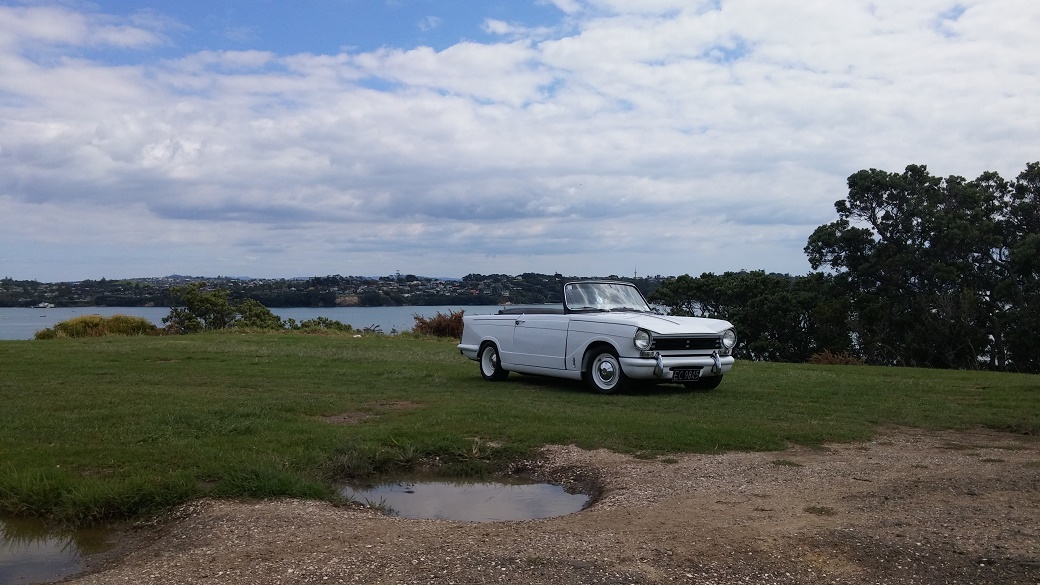
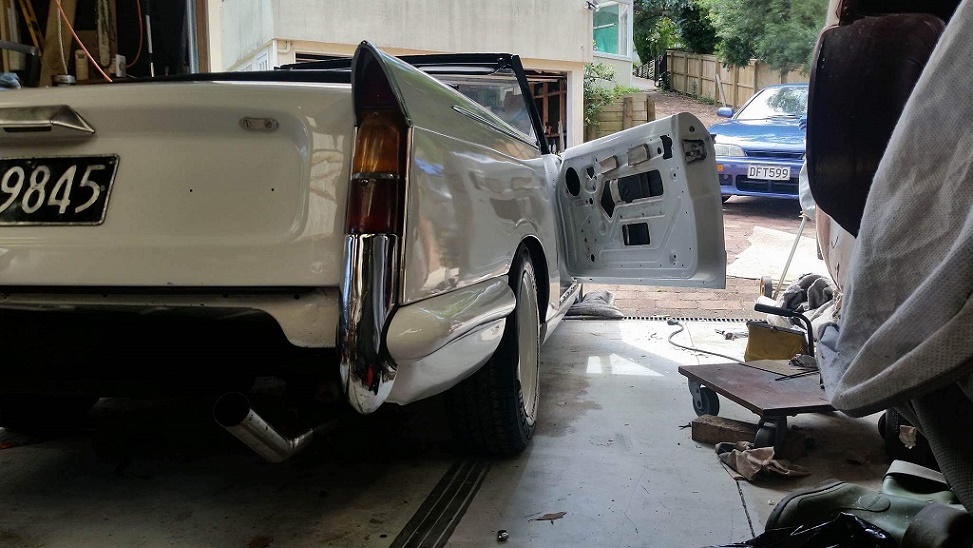
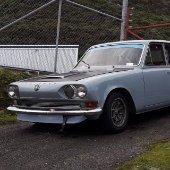
Harold is finally done!!!!!!! Well sort of.... I have finally got everything back from paint and i decided to bung the hinges on the doors and get it wofed. So for the first time in 8 years the car has wof, rego and insurance! Im so happy i can call it 'done', and just in time for my 21st birthday. And to mark the occasion, a garage burnout was in order The car was looking badass in this shot! So ill need to properly reassemble the doors and sort out some other little gremlins but for now i think ill just drive and enjoy it
5 points
-
Because the cardboard box looked hardly damaged, if you had no luck with the post you could ask the seller for another cam as it fell in half . I have a 1949 BSA 350 with a 409cc kit in it3 points
-
Decided to give the wheels a little tidy up, not going for a mirror finish or anything as they have to look/be used, also the centre caps can't really be tidied up. Managed two wheels this afternoon, They're a bit of a bugger as they aren't clear coated from factory - they appear to be anodized, making for a lot of elbow grease.... Hopefully by this time tomorrow I should be rollin' on dubs. Also resprayed the driver's side front guard the other day. I'll put up a picture once I have polished it a bit.2 points
-
I was sorely tempted to abandon the Twinscrew path of enlightenment once I stumbled on these in UpGarage Gifu I do want to retain my idle pulse however which I understand is caused by the factory intake mani with big (but not too big!) cams I took a heap of photos after asking the chap at the counter if it was cool. After taking my time (and photos of most things) some workshop looking guy comes rushing up to me "no photo, no photo!!" Oh man but that guy... Shit!! He's gone from the counter Apologies and awkwardness later this guy was still good enough to give me a discount on the tsurikawa rings and wheel nuts I bought
2 points
-
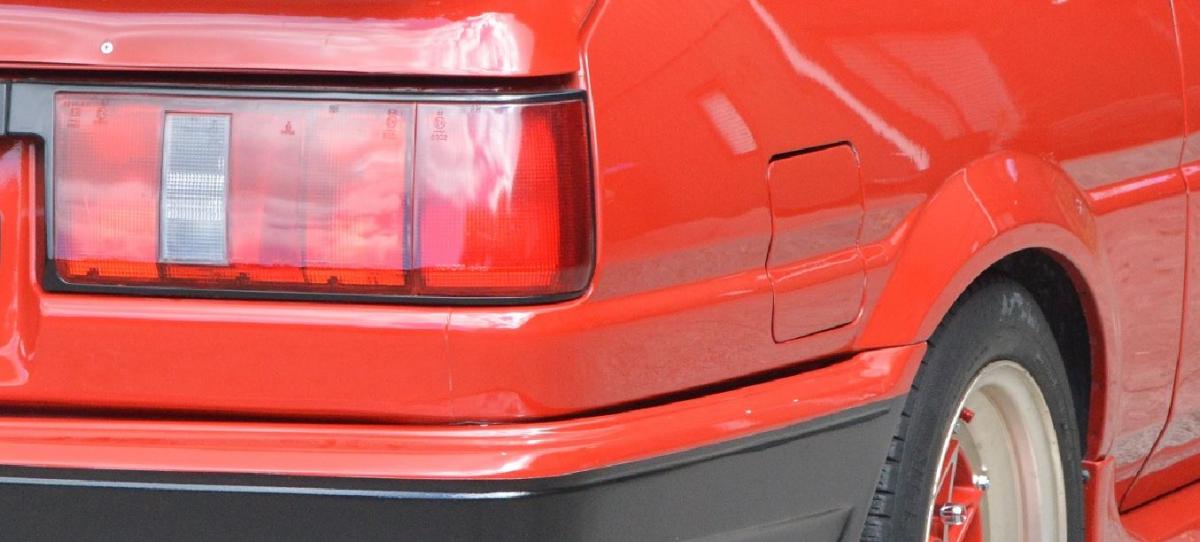
While I hunt for Whiteline Tail lights I decided to go "US spec" with my full face lights The spray looks so damn close to the factory red plastic I also slapped some LED bulbs in my corner lights and tinted them black & blue You can also see my bumper indicator lenses looking matt - Plastidip Smoke spray blends them into the Plastidipped bumper nicely.. Note the cheeky blue "eyelid" on the headlight - I did go full blue but too obviously illegit
2 points
-
a few of you noticed them in the previous picture already , black Pin stripes are all on now
2 points
-
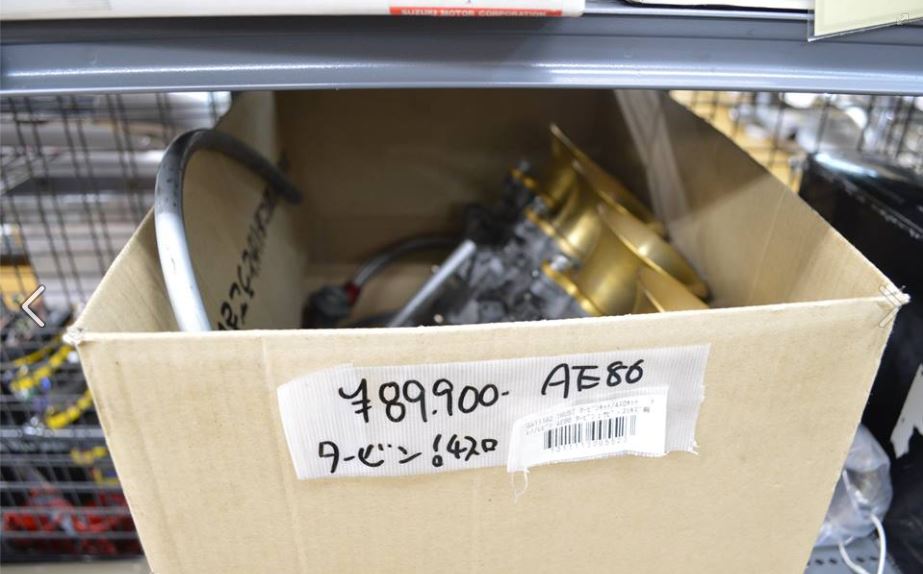
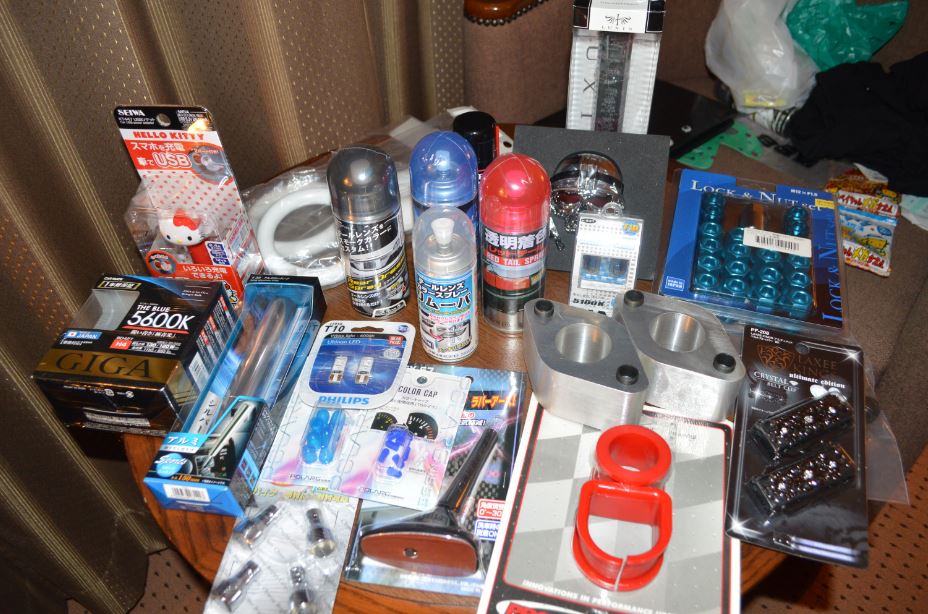
Well here's some more loot I brought back from Japan for my car. Specifically the 45mm RCAs from MotorFIX. Supposedly the biggest that will fit inside 14" rims - I can attest to that even though I had to remove the grease nipple that had replaced the bolt under by LCA balljoints. I decided to use buttonhead capscrews for ultra clearance but probably not necessary I heard NCRCAs can't be certed (? discussion://oldschool.co.nz/index.php?/topic/51964-jsnapsnzs-1985-ae86-levin/ ) so I've put my Techno Pro Spirits goodness on my shelf to look pretty... my LCAs do look pretty flat now but I do want as much low as possible (poor exhaust) I also plan to have some fun with the Tinting sprays - note also the tint removal spray! (spray can with clear cap) pics to follow....
2 points
-
So the black plates are on. Not too sure what I think about them, I quite liked the look with the white plates. Will see how it goes for a while. Looks almost as if I made the writing a little big2 points
-
Was talking with the boss last night and we stumbled upon the idea of a casual weekend camp or even just a day bbq for those of us that have rugrats or are also at a stage of growth in their lives. Like a normal get to gether but with family stuff instead of grass skids. Yeah or nah?1 point
-
ballast needs to be installed or bypassed (wire accross where ballast would be) matches your symptoms and easy fix , long term make sure you have the coil that best suits your ballast/non-ballast set up1 point
-
Some where with bbq facilities and flushing loos. Im thinking wenderholm just north of orewa but thats coz its local and im lazy. Any other suggestions?1 point
-
This IS the bigger carb! Stock was 12mm, this is 17.5mm, to go any bigger would require a custom manifold, the 17.5 should be big enough for my engine though. I've got it pretty much dialled in today too, need to get a few bigger main jets to play with to get the most from WOT, but the low-mid range is pretty much spot on now, soo much torque compared to the 49cc cylinder!!! Made a solid as fuck bracket for the airbox Managed to get the elbow to seal both on the carb and into the box Then added probably the most important extra mod so far haha No more having my phone going flat cranking music + GPS etc when on a long ride! Also started wiring my AC to DC wiring for my LED lightbar1 point
-
That's what I'm telling myself, better finding it like this than it lunching itself in the engine... Haven't opened it so no idea if there's any metallurgical clues at the break. And yeah, tis a nice old chuffer, one of my favourites - 32 Blue Star, 350 hand change thumper...1 point
-
shit how does that even happen wouldn't have thought a camshaft would be that easy to snap in half1 point
-
Shocked and gutted about the broken cam. I support you - you didn't pay the courier company to deliver it, you paid NZ Post (YouShop). Good luck.1 point
-
FUCK, That's not spost to happen till it's in the engine! gutted mate.1 point
-
Cammy goodness has arrived, Joy... Confusion... Despair... Currently fighting with nz post regards redress. They are insisting it is a courier issue and I (after speaking to a disinterested foreign lady on the courier post help line) see it as me taking a contract with Youshop to deliver my goods undamaged. Gah. Could do without this. Biggest fear is any replacement incurring customs charges...1 point
-
Wanaka is nice this time of year.1 point
-
My XC wags has air shocks. I'm assuming they were fitted to prevent or at least limit arse dragging when towing as the guy I got it from used it tow his race car transporter. Took me years to even notice the valve for them. Without knowing a whole lot about them I'd be inclined to agree with Speeno and go for harder springs.1 point
-
IMO air shocks are shit, usually have shit valving that doesn't work well (bouncy) and they put weight through the shock mounts which they aren't designed for. For your question they just have lines that run to a valve, just pump them up and see what happens. They should always have some air in them to stop the bag sagging and wearing itself out, usually like 10-15psi. Just play with them and figure it out, they may not even hold air any-more, max pressure is usually in the 40-50PSI range (google the brand for instructions). You really just need some harder springs and a decent shock combo, if you need something for variable load then the bags that go inside springs work much better.1 point
-
Had 5 minutes spare for the first time this week, gave her the degreaser/hose treatment. Still a decent way to go, but much better than before: Hoping to find some time on Sunday to get stuck into mocking up with the fs50 before hitting the engine head on.1 point
-
Looks dope dude. Love it!1 point
-
Getting closer, still not there yet though! Can't believe how much fuel this engine seems to demand!!1 point
-
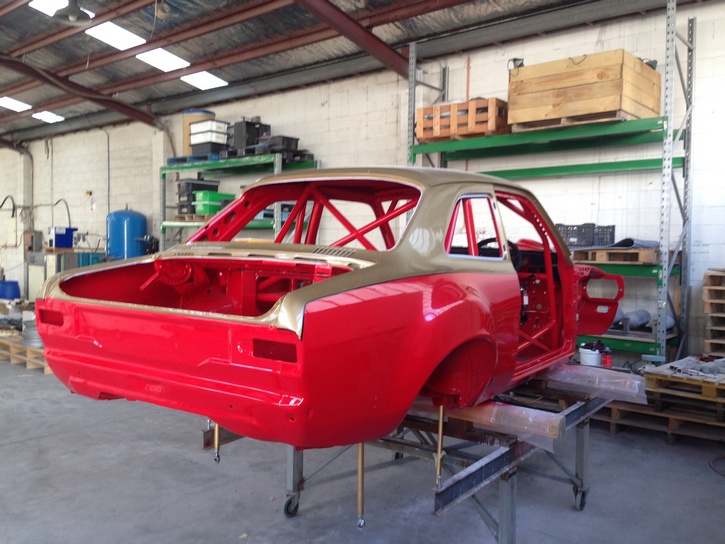
Whilst the chassis awaits it's marriage to the body, I thought I'd start with the axle narrowing. Cut through the lower arms and removed 160mm of material.The point of no return........ So having chewed through the lower arms I thought I'd better sort out a way of getting them back together, and came up with this tool: Which has a solid boss at one end, and a sliding sleeve at the other end, both machined to fit the holes at the ends of the arm. When bolted together looks like this: The ends will be set up level on the bench before I weld them together, but this will hold them solid and at the correct length whilst I weld.1 point
-
still fucking around with the rocket cover. i welded it back up and its ready for paint i just got side tracked by the dizzy. so i took the dizzy cap off for probably the first time since ive owned it and it was a disaster area inside. like it had been full of sea water for the last 10 years. I took the dizzy out and attempted to take it apart. every screw broke the head off when i tried to undo them and the vacuum advance plate was locked solid. I eventually got the thing apart and to my surprise the mechanical advance mechanism seemed to be working fine. it was a but rusty on the mounting plate but ok apart from that. so anywho it took me ages to clean all the shit and rust out of the vacuum advance plate and get it free again. then i had to drill all the broken screws out and re-tap it all. thankfully both the diaphragms on the vacuum advance module were working fine and had no leaks. then i packed it all with grease, set the air gap and put it back together. I put it back in the motor and tried to get it to run and the timing (which I had marked and then put back in the same place) was out by miles. When I eventually got it to run it was advanced by about 50 degrees. Im really surprised it ran at all like that but it did. Had to go back two teeth on the drive cam to get the dizzy into a spot where it was close and had adjustment to move the housing around. Once I got it close and started trying to set the timing properly it behaved really erratically. It would be sweet at idle, then Id give it a little rev and the timing would wander around all over the place. It kept doing this and I got pissed off with it and revved the shit out of it. after id done that it settled down and worked as it should. Turned out id put so much grease into the mechanical advance mechanism that the weights weren’t returning properly. After id revved it and flung all the grease out a bit the weights could move freely and it worked perfectly. All good. So it was time for a road test, got to the end of my road and pulled half way out into the main road and it died. Turns out the fuel pump had shit itself. So, push it back in to the garage, figure out what had happened, chuck another pump in it and drive it round the block. HEAPS better. So after all the kerfuffle the dizzy is now good as new but I still haven’t painted the rocket cover.1 point
-
It may not seem like it from my day to day attire, but my wardrobe has hidden depths. Like Shanes mum.1 point
-
M M gave me a hand to yank the engine back out this evening. 1 hour from start to finish wasnt too bad we thought. https://youtu.be/JVyQWR-C_vE made a silly timelapse to go with it engine is back out to sort a few niggles and improve the downpipe design, and paint the engine bay to match the rest of the car now! also looking at a Turbo and injector upgrade kit that would hopefully net around 280hp when tuned, (double the current 140hp the car is running right now. fingers crossed my new contact comes thru)1 point
-
I don't know if he is Peugeot savy, but for tranny work I use Zane in Plimmerton. https://whitepages.co.nz/w/automatic-transmission-repairs-plimmerton/1 point
-
One replicated wiring loom which cost a lot more than I had in mind or thought it could but it is done and is movement in the right direction. Next is to have manifold cleaned up and to reassemble that, I have all the genuine seals and injector kits already but I'm sure there will be stuff I haven't thought of that will slow things down.1 point
-
Wife's father passed away and most of his tools "disappeared" what was left was pretty naffed and my wife isn't really the DIY type so I bought one of these for 12 from Kmart stripped it cut it in half And put an old hand drill to good use (missing handle and the chuck was naffed)1 point
-
There's a section in the bible somewhere with crossflow ford and holden 6 tuning tips. Moses bought them down from that hill a while back written on slate.1 point
-
Rush Automotive headers arrived today, so nice! The swap might potentially happen next weekend or the week after.1 point
-
Enjoying your build thread. I've got a good mate who has a 302 XY fairmont that's been in his family since new, great to see them still out there! Re the spray gun issue; I use a small, inexpensive touch-up gun for painting car parts. They use very little air, have far less overspray than a full sized gun, with a small 125cc pot there's less wastage and best of all I can clean the gun with only 1/3 of a cup of thinners.1 point
-
attached black things to car. i think it looks a million times better than it did. 2016-02-27_04-52-33 by sheepers, on Flickr then the fucking cam cover cracked when i was doing up the bolts so now i have to take it off and do the whole fucking thing again. 2016-02-27_04-52-25 by sheepers, on Flickr1 point
-
I now have the wheels. Rears are 15x15 Weld Pro-Stars, and fronts are skinny Centerlines. Tyres are OK for set-up, but will need changing when/if the car gets on the road.1 point
-
Although this isn't a new idea, I thought I'd flip it round from the way it is usually mounted on solid rear axles, and put the adjustable bits on the chassis. The mount is made from 3mm steel with 3mm gusset and a 3mm box section internally to give support where the bolt-holes are. So there are 6mm thick side panels with effectively two 3mm vertical blades either side of the hole-line. 'Moveable' brackets are in 5mm steel. These give 75mm of total adjustment in 15mm increments from this: To this: Welded on to the chassis: I'm only using one pair of coil-overs which will be mounted in front of the axle.1 point
-
If anyone goes along to truck show go check out my company I work for stand if I'm around ill hit you up some free shit like royal purple t shirts or something. We are the iveco truck withe the fuck off big v16 on the back for Lolz1 point
-
Took the car down to Milford Sound/Bluff over the last two days. 1700 km in 36 hours and the only issue was yesterday morning when the carburetor iced up when leaving Milford, switched to "Winter Mode" and the engine started back up. Averaged 6.4 L/100 km with two people, equipment and open windows, going the speed limit the majority of the time. This cheeky little bugger had a go at eating my car:1 point
-
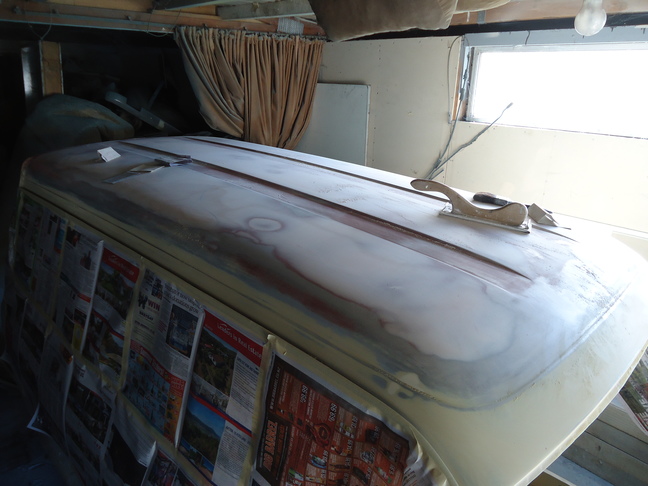
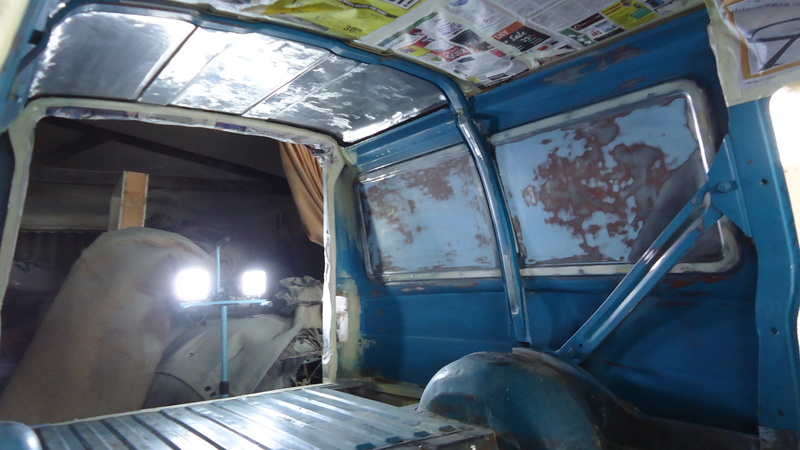
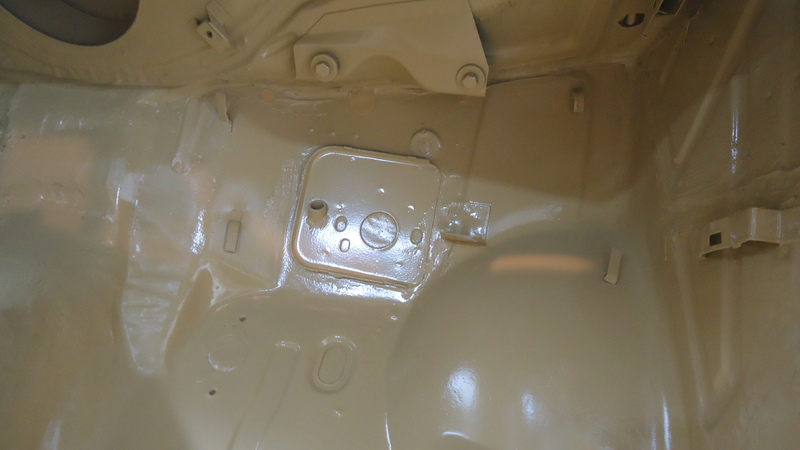
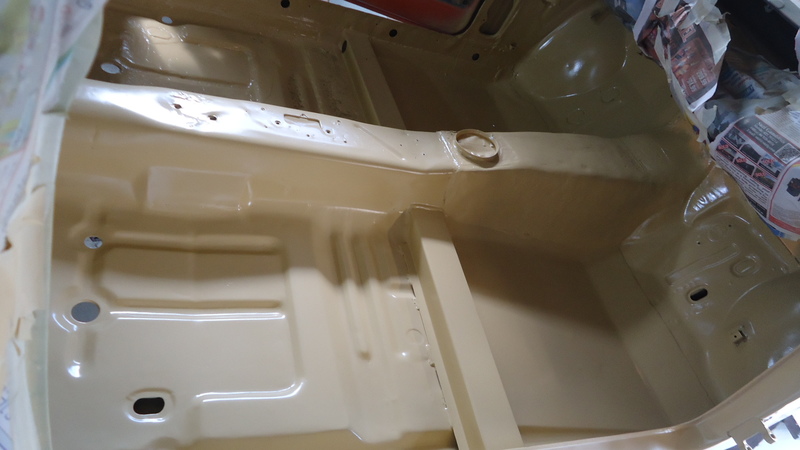
Another long week spent sanding and prepping the inside. This time round did the remainder of the roof, the rear sides, the front floor pan, firewall and under the dash etc. Before After Under the dash looking clean. Went on real nice, couple runs but thankfully not in any obvious places, will sand these out later on. Have started bare metalling the floor in the back and will hopefully be able to prime it this weekend.
1 point
-
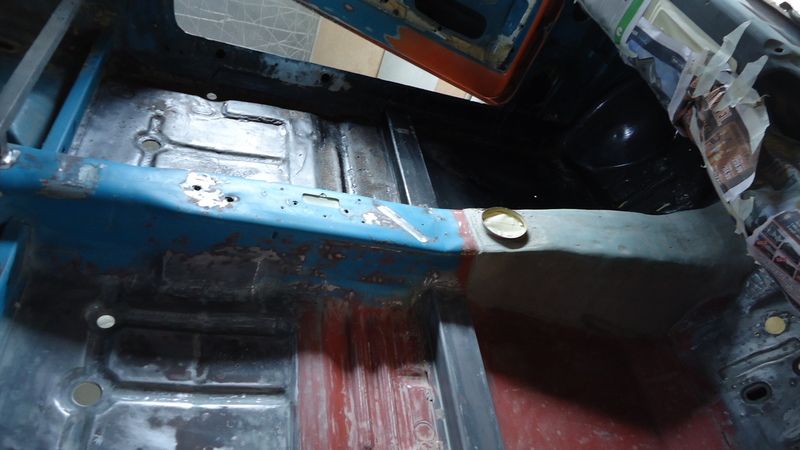
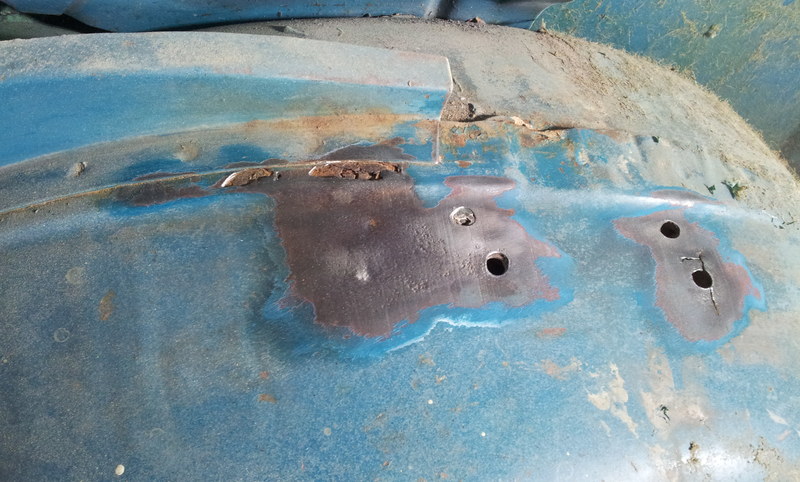
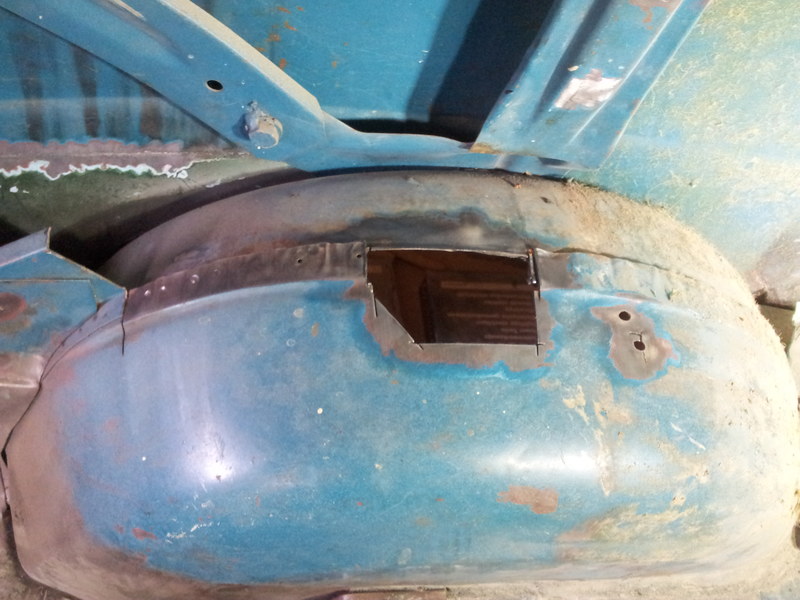
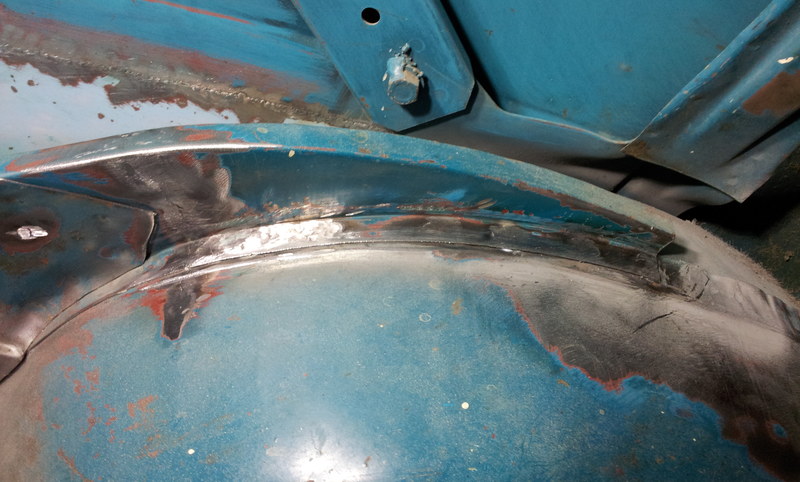
...Fuck. So dug a little deeper and got to this point before finding good steal. This is directly above the rear wheel. Effectivetly its 3 layers. The bottom two fold over each other to create a seam over the wheel arch, all spot welded together. The rust was between these two layers. Not sure how it started because it was covered in underseal and doesnt seem like a prone area. Anyway, i made up patches for these two, primed and welded the top piece back on which was rust free. The holes on the right were patched up too. These were for the poorly made back seat bracing which i'll remake later on. Decided to check the other side, same story, rust between the 2 bottom layers. Cant work out why. So i gave it the same treatment. This knocked me back a bit. Before the day was done we were able to blow the whole van down, prep it and spray 2k epoxy metal sealer through the seams, chassis, sides, anywhere paint cant be sprayed. Finds its way into every seam and hole throughout, messy job chasing the drips. This stuff is great, similar idea to cavity wax or fish oil but this stuff sets and can be sanded and then painted. Busy 3 days. //oldschool.co.nz/index.php?/topic/43995-bmxnz11s-mk2-escort-van/
1 point
-
I've been doing a little hoarding recently.... I reckon I have enough slant front brochures to see me through to the new year now. I also got around to sorting out the annoying 'ting' in my front suspension, turns out that the insert retaining nut was a little loose on the drivers side. Seems good now.1 point
-
Ran into a wild Malarky today1 point
-
Just got back from Auckland after two weeks working. Car started fine, runs mint. Took it for a quick blat out to the Port Hills No snow unfortunately1 point
-
Drove down to Christchurch from Auckland yesterday. Car went well, stopped off and visited the GCs at Olds Cool Autos in Palmy North. Used ~6.1 L/100 km of fuel and absolutely no oil on the trip. I call that a win Always fun when you are driving along at 2 AM and a cop car comes up behind you with lights flashing and all and then just over takes you. And the boat guys were playing with the lifeboats1 point
-
Everyone always hassled me about the silver grille/headlight surrounds... So today I decided to get the silver off and make it look more factory. 1. Turns out I put that paint on quite well so it was quite a bastard to get it off 2. I now remember exactly why I put the paint on. One of the headlight surrounds was covered in chromey stuff and had been painted black to match the factory parts. The black had come off a little in places and it was looking manky. Anywho here it is now: (I will probably get some dark grey paint and make it look better in the very near future)1 point
-
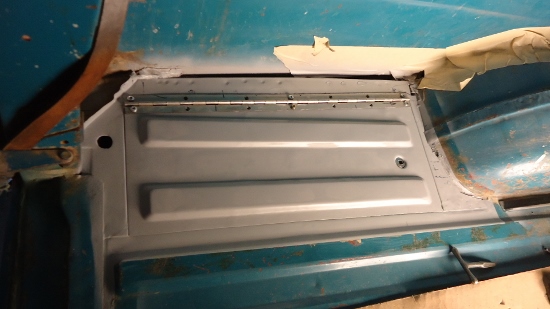
Countersunk the hole for the lock because its a simple push and turn lock with a key. This is how it sits when its locked in place. This way i can lock things in there and open it using the key, save adding a handle or strap Cleaned it all up and put it together. All this did take the better part of a month. Will clean up the hinge and put in countersunk screws The box that sits in it. Sits parallel to the sill so its not seen from the side or behind. All this is screwed into the van can be taken out in a couple of minutes for ease of changing bushes and leafs This was the original floor before i cut into it
1 point
-
Adventure wagon..1 point
-
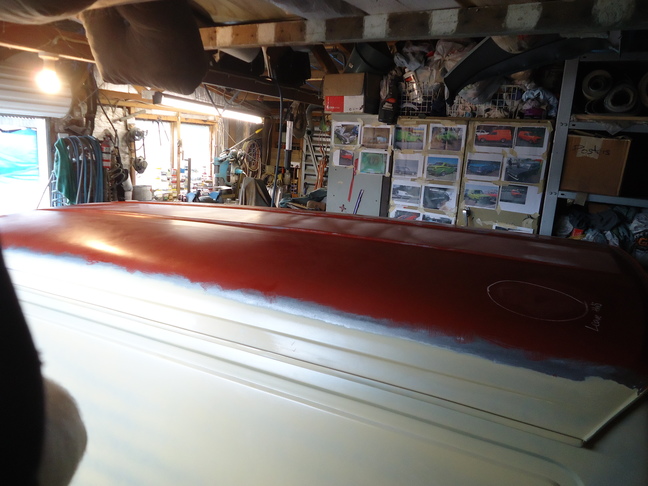
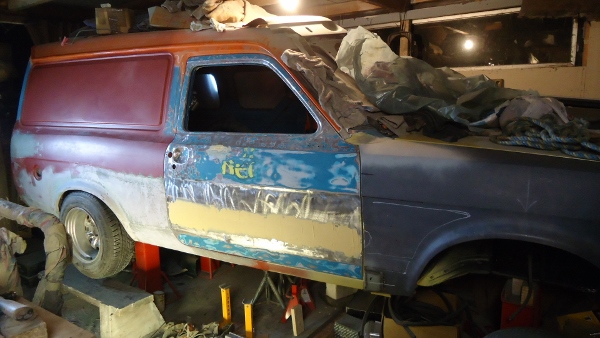
Skim of filler and 2k primer Just been cleaning up the little bits on the drivers side. lining up the door and guard. Took the guard off to do rust repairs earlier, will be bolting this back on instead of welding. Soon to start work on the passenger side with the flare and replacing the side windows
1 point
-
Also, when I went to pick up the car the previous owner was like "oh yeah, it came with some wheels too, they're in the boot." Wasn't expecting much but they are actually kind of cool oldschool jap 2 piece wheels (3 piece, welded?). 6-J 13 from 1977 according to the sticker on the inside by 'Uni-Pex Parts Division' Never heard of Uni-Pex before, does anyone have any info on this brand? Couldn't decide if I liked them or not so I decided to refurb them and see how they look, split them, clean up the centres, polish the lips and replace all the bolts. Here is a before and after of the first wheel: I think I like them, so will get some tyres on and get them on the car at some stage, any recommendations for tyre size? Chur. Also, discussion here: //oldschool.co.nz/index.php?/topic/38426-sr-rollas-1974-mitsi-colt-gto/1 point


This leaderboard is set to Auckland/GMT+12:00