
Leaderboard


Popular Content
Showing content with the highest reputation on 12/19/15 in all areas
-
2015-12-18_06-53-10 by sheepers, on Flickr 2015-12-19_02-41-37 by sheepers, on Flickr 2015-12-19_02-41-49 by sheepers, on Flickr 2015-12-19_02-42-06 by sheepers, on Flickr 2015-12-19_03-17-20 by sheepers, on Flickr10 points
-
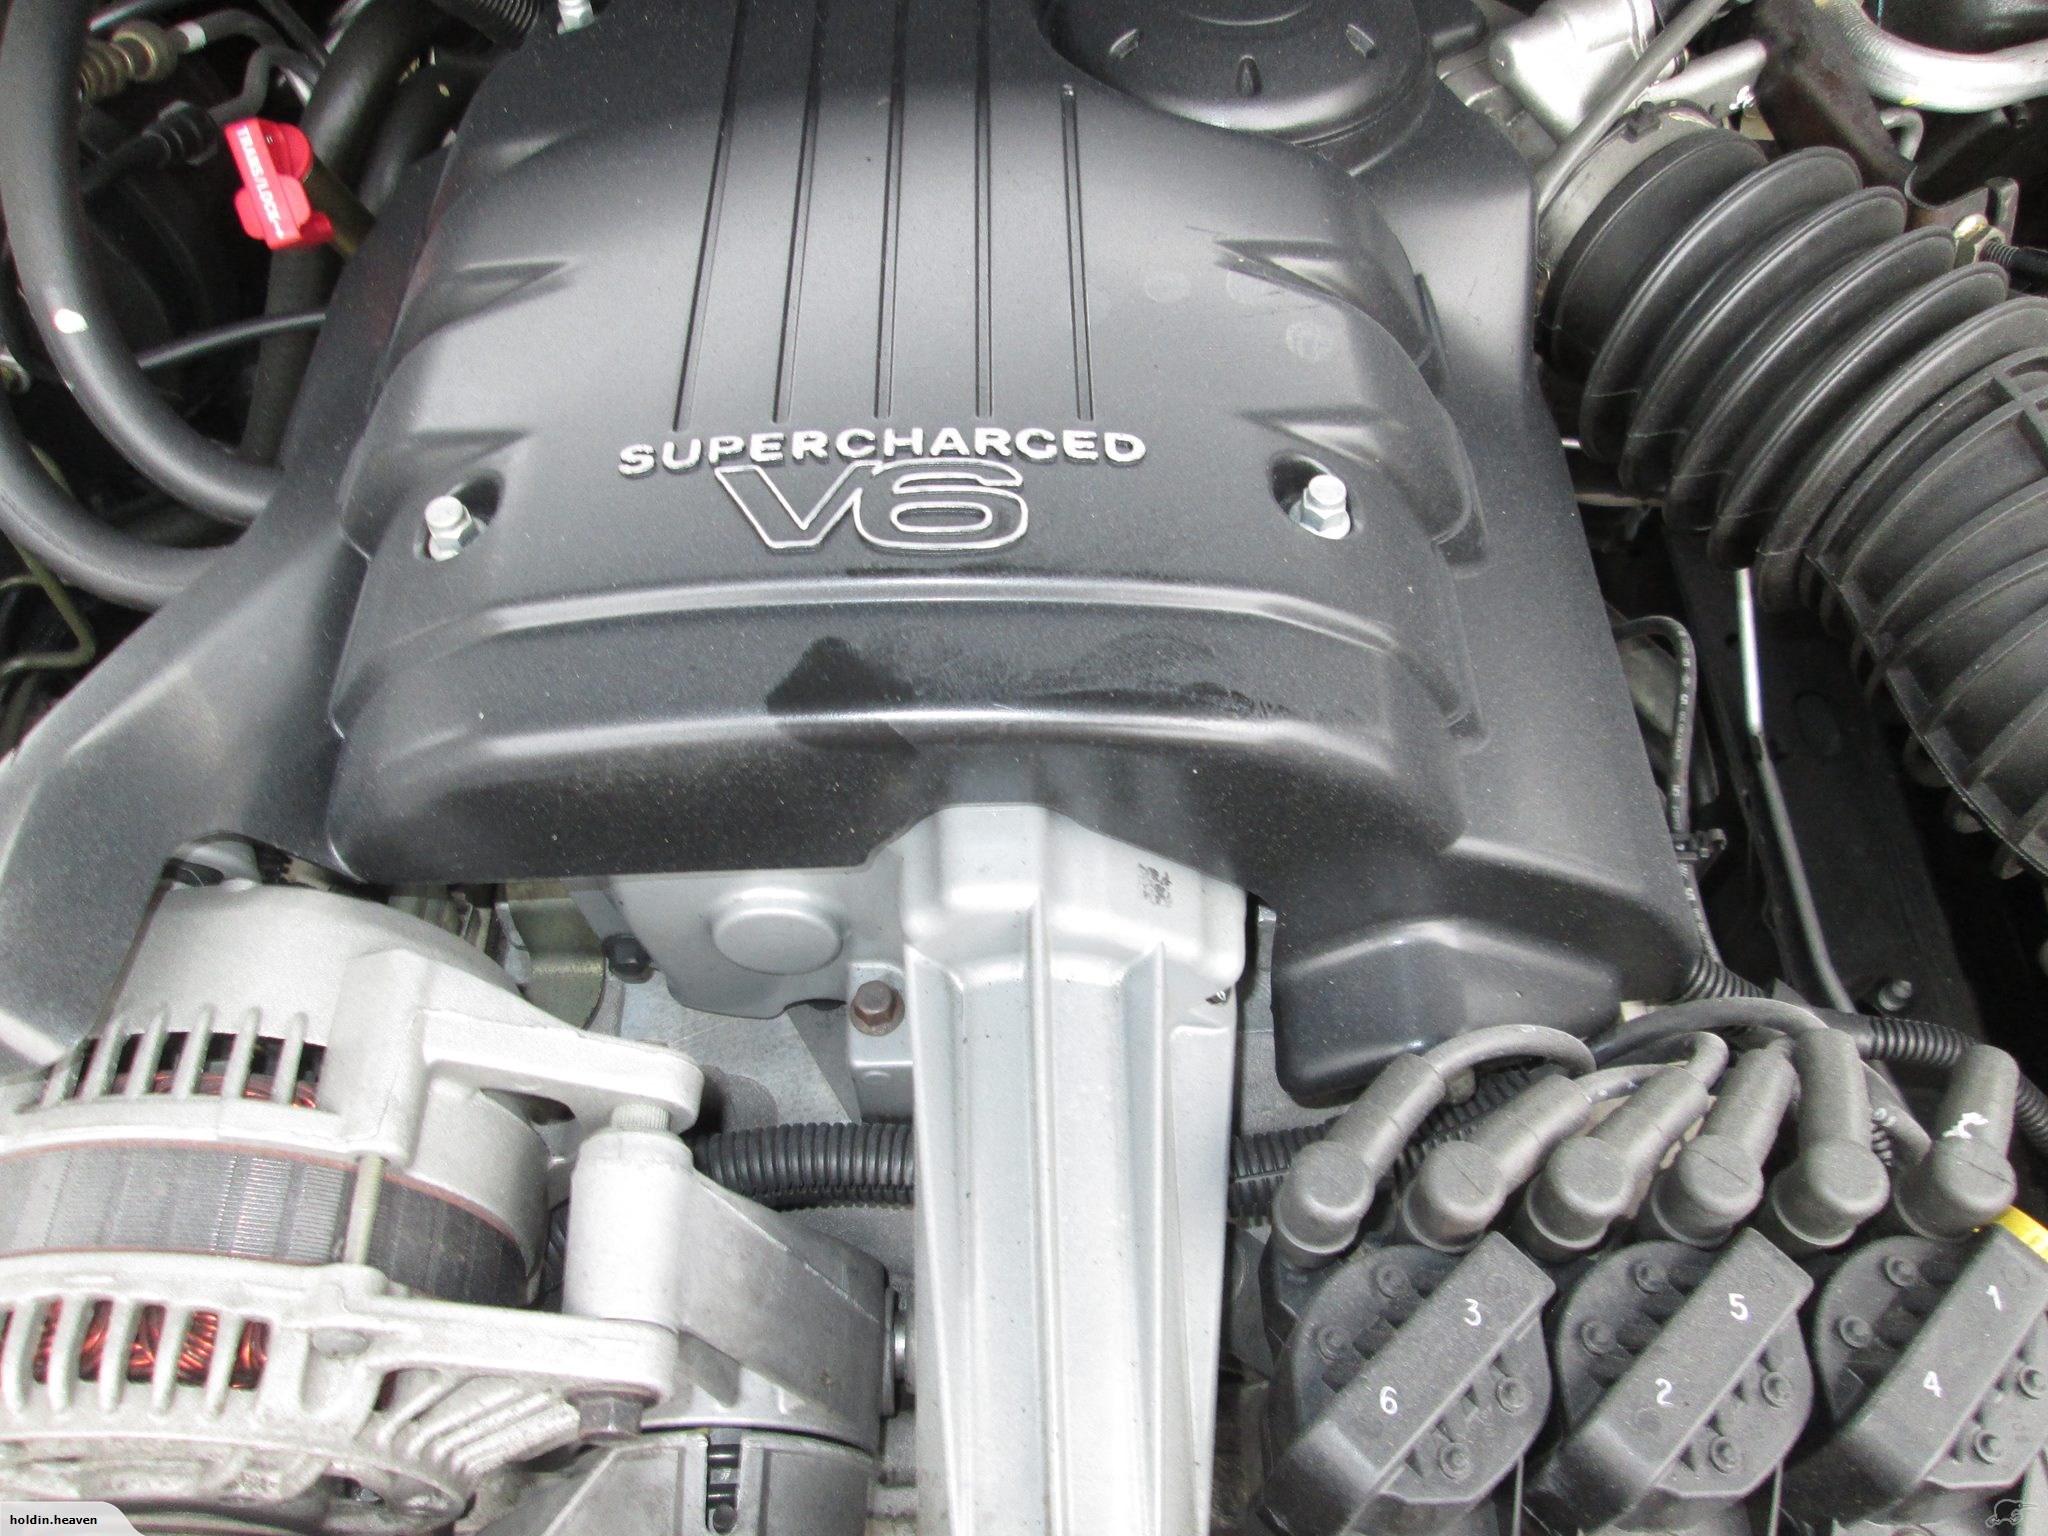
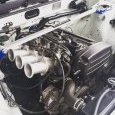
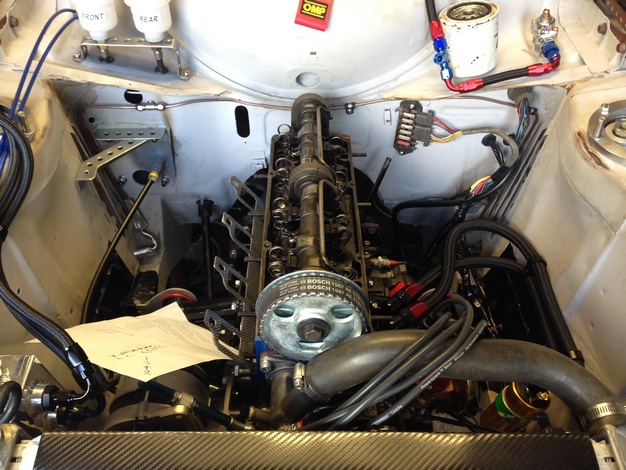
just bought another engine for SV2. Very similar to the one already fitted, but has an extra pulley on top
 6 points
 -
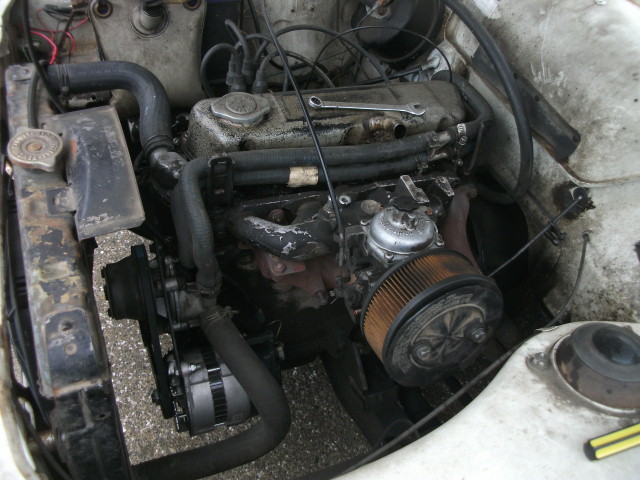
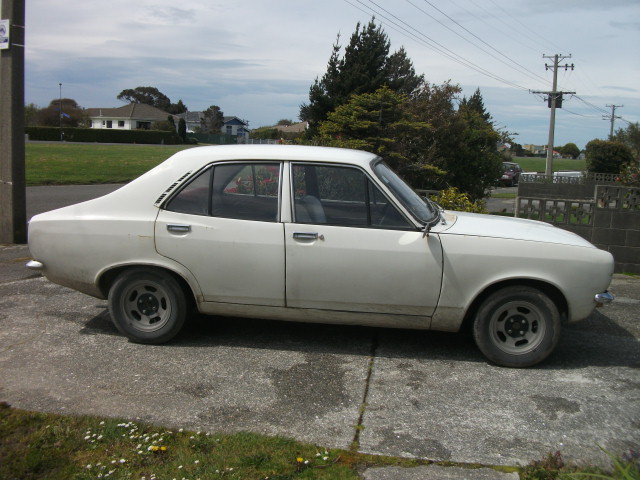
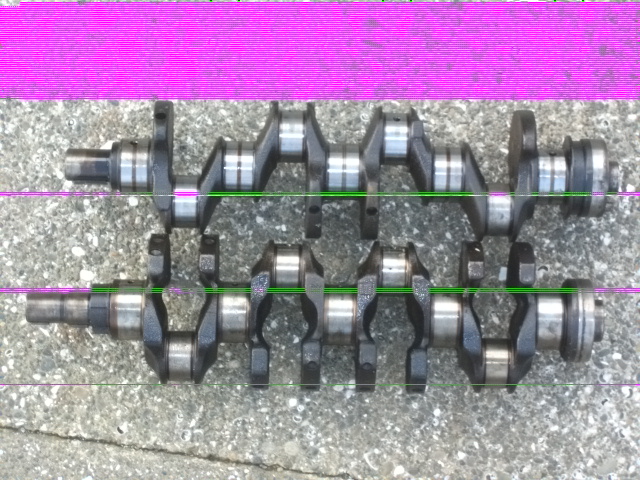
Hi, figured i better get some pics up of the daily hack, (to brokenarse poor to get something 'respectable).Spending most of the time & money driving & fixing it- + buying random shit i may not end up using in it. A pic of the weedy little slug that motivates it, a rousing 45 ponies @ 5000 revs when it was on the rollers a while ago, has a wee bit more coz i've been fiddling @ a pic of what we want to stuff inside it, top crank is avenger bottom is........ toyota. Why? why not i like the idea of it looking relatively standard, AND its a 20mm stroke increase- 1500 out to @ 2L is the plan Discussion Thread
2 points
-
Had a bit of time to play on this today. Still smells like rat piss, but now it goes. And like a fucken gem too. clutch was stuck, but nothing a crash start couldn't fix. So stoked with how smooth it runs. In it's new home.2 points
-
Progress has been slow. I gave the chassis to a good mate who is a pro welder for him to weld the more important parts that I just tacked together. Sounds like he is grinding out most of my bird shit welds and re-welding it. I finally bit the bullet and shelled out the cash for some epoxy resin and cloth. So some time after Christmas I should be putting some sweet pictures up of a first time fiberglasser covered in resin/dust/feathers making a hash of things. I spent the last couple of nights getting it ready for the fiberglassing. The front 2/3rds will be glassed and painted while for the tail I am going to order some epoxy that dries clear as water apparently. I am undecided if I will put a layer of cloth on the tail or not. I will see how easy the cloth is to work with first, I will only do it if I am confident that I can get a clear finish. Does anyone know an apprentice painter (or a qualified one who is cheap) in Christchurch that would be keen for a cashy to paint this thing? I will have it prepared ready to paint and bring it to them on a trailer? It won't be for a couple of months I'd say. Cheers.2 points
-
Sorted.. ended up my 3 way switch had a wiring diagram inside the cover with instructions for single and 3 phase.2 points
-
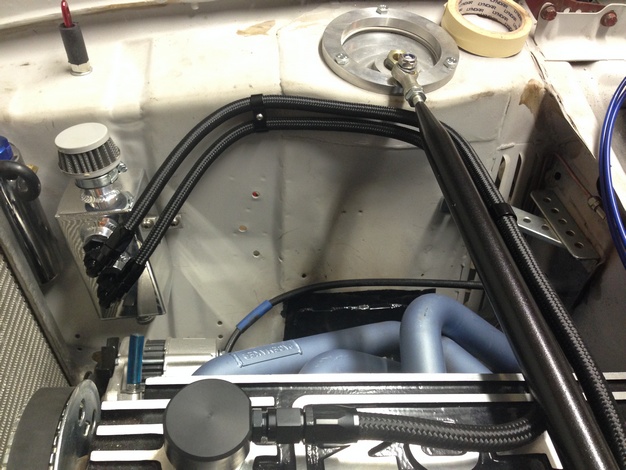
I guess it's easy to tell whether it's the friction/heat etc just from pumping the fuel around that causes a temp increase, turn the pump on while the motor is off. So I did this, with a thermometer sitting in a hole in the fuel rail. With the engine not running, it took a long friggen time for the temperature to go up by even 1 degree. (keeping in mind that the car has a full gas tank currently) However turn the engine on, and fuel rail temp increased by about 1.5 degrees per minute. It's possible that ambient air temp was increasing as well and biasing the results, but, it seems pretty clear that pumping the fuel around just on its own generates a negligable amount of heat increase. In my opinion I think it's radiant heat from the engine, and heat coming directly through the rail bolts causing the temp increases. So heat proofing the rail somehow and insulating the bolts looks as though it might make the best difference.2 points
-
But on topic. Toyo R888s. Fantastic in the Dry and Wet. Even when they are almost worn out. 1200 KG FWD No LSD. I'll run Max 30 psi on a hot winters day, after 6 laps. But I'm still gathering data, rained every time I've been out in the last 12 months.2 points
-
Motor came out after work like a boss. Loom is still in car tho, not looking forward to that shit at all Might just have to cut some relay wires and make sure I label them Anyway. Hole 2JZ No SHIT! And this is the cunty bit of chassis I cut out to try fit the hemi..... Thankfully I was smart enough to leave the cut out piece of steel just hanging out in the chassis rail, so I still have it. Will try steal the welder from work Monday maybe and weld it back in, then clean it up and paint it with iron oxide and some matt black to try hide the fact I'm an idiot Also, went to plastic welder today with my tail light. they kindly informed me they don't do tail lights anymore as the glue takes to long to set and people kept complainging shit took to long. then procecceded to go out the back and bring me the pottle of glue paint stuff they used, which he added a bit of thinners and said to let it soften up for a day then fill the holes, and will probably take a day fit it to set. I was all like, fuck yeah thanks heaps! I have time for this to get sorted so pretty happy there. Also have new front brake hoses on there way, will go over rear brakes etc tomorrow and figure out if I need cylinders as I suspect something might be up there.....2 points
-
Hi, here you all can discuss my 'efforts' to turn an old mans only car into something respectable. Plans are to make it move faster than a lethargic snail & look good doing it. Engines under way slowly, bored & stroked avenger motor is the plan- yea could've gone jap, lots of options there but thats easy, like the idea of it all looking period to confuse people when they want to know how it goes so fast1 point
-
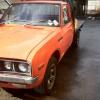
Right. not sure if this should be in here or in other projects. I'm sure the mods will move it if it doesn't belong here. After the sale of the family farm in Kaikoura , I managed to get the farm ute . So last weekend my good lady and I shot up on Sunday and picked it up . It's a 1985 L200 , Grandad was the second owner from about 88, and it has a massive 75,000 kms . Thats the only 2 good points, as rust and rats have moved in, and fuck me does it stink inside. Not sure on the plans for it at the moment. A big part of me is thinking about trying to find a wellside for it and slamming it. not sure how well that would work with it being 4wd. Or fully restore it as a bit of a dedication to my grandad . //oldschool.co.nz/index.php?/topic/51221-wldrx2s-85-l200/1 point
-
Starting a slow and steady build of a early 70's CB100 running full CR 85 suspension.... Will be running a smaller 17in wheel on the front and shortening the forks a little. Maybe someone wants to swap for my 19? Also if anyone is after any cb 100 parts let me know as I'm only really keeping whats in the last picture.1 point
-
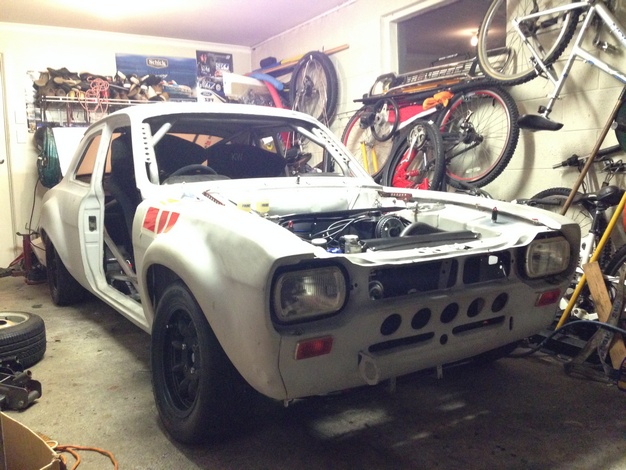
Finally made some decent progress that included the shell!! Everything I have been doing has been shit that I do at work like suspension, engine, interior etc. But today I needed the car, after properly removing 90% of crap from the engine bay I measured up the cross member bolt holes, slotted the new cross member to suit and bolt that in. Then I forgot to get an engine crane so invested some assistance and worked the engine into the bay and then fiddled it onto the mounts. All lines up nicely. It's pretty close to the fire wall but it does clear. Next is to fit the bellhousing and make sure that cleaRS in its current position. Once that's confirmed I'll fit the coilovers assemblies, see what the steering system wants to do then drop i let off of the axles stands. I'll need to tidy a few small spots of rust and dents in the bay then I'll take it out to get blasted. While that's happening I'll try sort something out for the brake and clutch system. Master cylinder doesn't clear intake so I am thinking of making some that I can mount off of the pedal box. While I'm trying that I will also change the accelerator pedal. At te moment that's mounted from the floor which always feels kind of shit. This should keep me busy for a while so will update in the new year.1 point
-
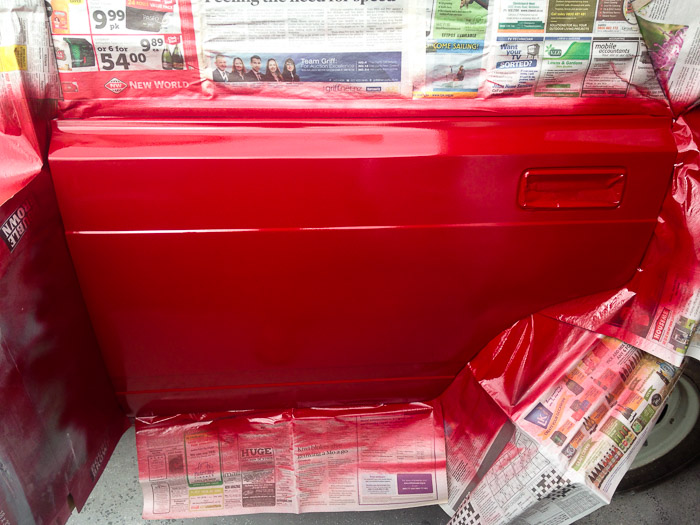
Bit of a milestone, managed to get all of the panel bashing work done last week (minus the welding) so with the wind dying off this arvo I took the chance and threw a layer of red on to se if I liked the colour, much nicer! Waiting on a package from the Ukraine with much needed parts for the wof (And some treats ) so once they arrive its game on! Pic of shineyness: Also the bonnet is back on as there is nothing left to fiddle with in the engine bay and I swapped the sports steering wheel from the niva over.
1 point
-
Oh man I'm loving your use of the vernier there.. What a bloody good idea! Also, the Vfd is suuuch good idea on mills and lathes. I hear some bike computers can be configured to give a cheap rpm display too.1 point
-
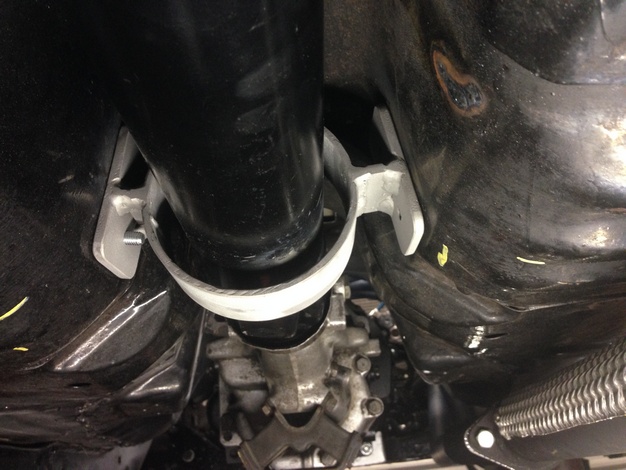
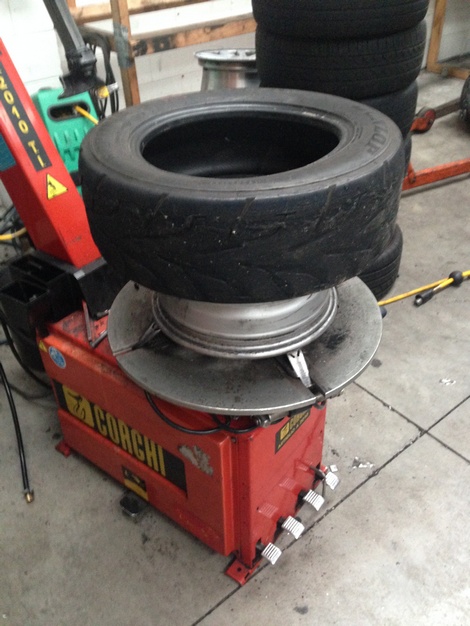
I had some tyres that needed to be removed from the car because they had cracks all through them, surprised they hadn't blown out! Luckily I had some already from other wheels. All different brands/models because I like to live dangerously. Also the sizes slightly different (two 175, two 185) so put the 185's on the rear, naturally. While I was under the car I had a look at the rust and repair places that will need to be fixed up. Some really awesome Japanese typical body panel repair jobs involving urethane, silicone, cardboard (or plastic) and metal tape. Just the usual. The good thing (but maybe expensive) is that inner/outer sills are available as well as a couple other common failure points as repair parts. Not genuine Nissan of course but a couple restore companies are reproducing them which is excellent. They were all like this, and also had cracking inside the tread too. New (old) tyres on.. I think there are some from China and some from Korea, quality. So much room for activities. Bit of a shitty look at the stainless exhaust. It's loud. Hmm those could be a problem. I had a feeling it was on cut springs after driving it. The rear actually is captive so that should be OK, but the front is no bueno, will look at upgrade options because the shocks look pretty average too. Looks like a bolt missing from there... and interesting exhaust hanger situation. Talk: //oldschool.co.nz/index.php?/topic/49704-mlracings-hakosuka/page-6#entry16314961 point
-
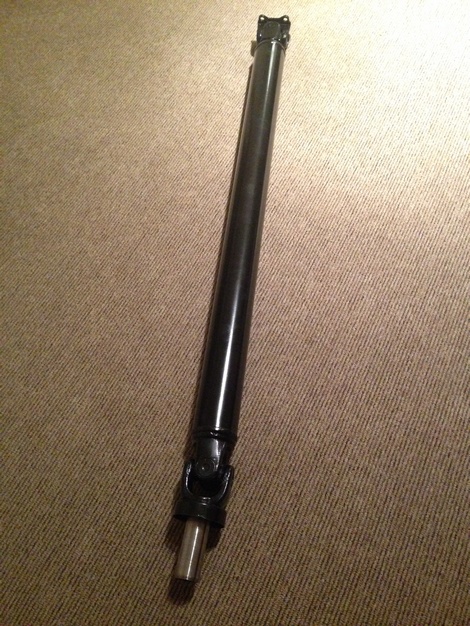
More progress! Picked up all required parts for the Diff rebuild, the only thing I didnt buy was the pinion crush tube as I will get a solid pinion spacer made up while the LSD gets swapped in and setup. Axle bearings, seals and wheel studs. Diff bearings and seal with new flange nut. Next step for the rear end is to get the centre etc up to Steely Gears to be setup, in the meantime Ill press the bearings and studs onto the axles. Also on a positive note, test fitted the MA45 front driveshaft and it appears that the length is pretty much bang on! I need to jack up the car and double check the distance it is engaging the rear output spline but it feels like its around an inch from the end. So happy days, I may not need to get a driveshaft shortened and I amy be able to piece a good one together from the bits I have on hand. Tomorrow we start mapping out the wiring and measure up for gearbox crossmember - its looking positive that 2016 is going to be the year this thing is going.1 point
-
For example I usually run 1-2 psi lower and run extra neg camber on the L/H front to compensate for the additional loading at Hampton Downs. Geometry, Weight, Set Up and Driving Style all need to be compensated for. And what the guy in the garage next to yours did to his car in the 70s is completely irrelevant to your unique situation...1 point
-
Hah, I had almost considered rolling in to the house this thing had been parked outside on Nelson St a few times to ask to buy it. My first car was an Avenger. I've driven past this and seen it around several times. Do you have a grill for it? Part of me likes the rough and ready look without one but another part of me wishes it still had one. It looks good though man, keep up the good work.1 point
-
is this to run a hoist on single phase ? if so, a colleague has just done this and had a huge failure1 point
-
Sorry, I never really answered the question about how it is done. The answer is data logging. Lap times at this point are kind of irrelevant, you need to be monitoring g loads, tyre temps, and cornering speed, driver inputs (that one is crucial), etc, once you have got all that under control, then you need to start working towards getting the car setup for driving style. Then you can start creeping up on lap times once you have used all the data to maximise g loads and cornering speed and your driving is consistent enough to make it meaningful. So yes it kind of is above most OSers, but only because we struggle to make our cars run consistently hahaha1 point
-
Quite easy best thing about them is they will control your whole car programable relay and fuse box run one heavy batt cable to it and then run power feeds out. cooling fans fuel pumps water pumps ect no extra relays or fuses required. fitted the last one to Curran brothers racing 26b quad turbo rx2 and it runs everything nitros line lock trans brake 3 cooling pumps 4 o2 sensors 2 step ect and can be all controlled so this will only work when this does that sort of thing so the ecu only needs to control spark and fuel everything is can bus back to the ecu temperatures and so on1 point
-
Yes, but what Keegan was saying that if you are serious about it you will have a bunch of settings for the car for taupo, and a bunch of settings for hampton. If you don't you are leaving lap time on the table. If you are wearing the one side of the car more than the other then you aren't getting the maximum amount of grip available and you should change settings until you get it a good as possible. I know that is a whole bunch easier said than done, but the fact it is correct holds true.1 point
-
Interesting - configuring the inputs should be a sweet option for start, stop reverse. I knew the unit would do backwards but assumed youd be going in to a menu to make it happen. Thanks!!1 point
-
So to hijack how would one wire (switches?) a single phase motor to run fwd stop and reverse1 point
-
Question, I'm going for a revin soon with a car I own, The rego lapsed 2005, before I owned it. The guy I bought it off I don't think was the last registered owner, so, is there a generic decleration form I can fill out and get signed by a Justic of the peace? this is what I did last time with spencers old crown, but the AA gave me the form to fill out, I have not seen a form the same from Vinz where we take our cars now..... Ideas?1 point
-
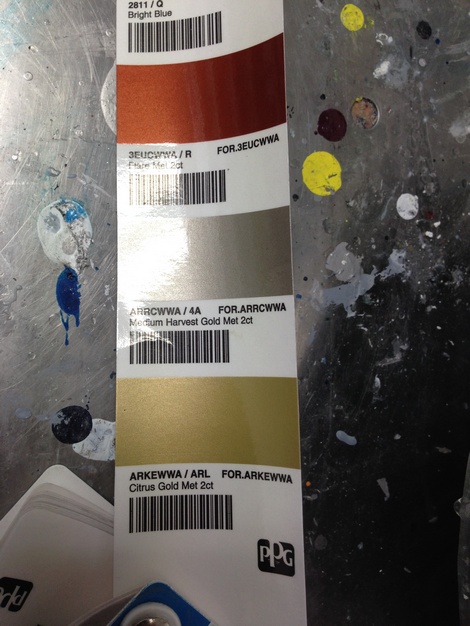
so i tried again. step one - remove all the red and all the fucked up primer and what not. sounds easy, not so much. ended up needing to attack with 80 gritt and remove everything, even the paint underneath. 2015-12-18_05-20-00 by sheepers, on Flickr step two - re-prime. 2015-12-18_06-48-16 by sheepers, on Flickr however, i was unhappy with the surface and what it would look like if i just 420blazed it over the top of this rough as guts surface so I've decided to just let it dry and ill give it a fix up tomorrow and then colour as normal. and in other news this is what a grand gets you in the paint world. 2015-12-18_06-52-30 by sheepers, on Flickr this is essentially the paint for the outside of the car. 4L of colour, 5L of reducer for the colour, 5L of clear and its hander. which should be more than enough. I've got another 4L of colour for the insides and whatnot which should be heaps. oh, and about 3L of clear. and 4L of primer should i need it. i think that makes my third tin of primer for this car?1 point
-
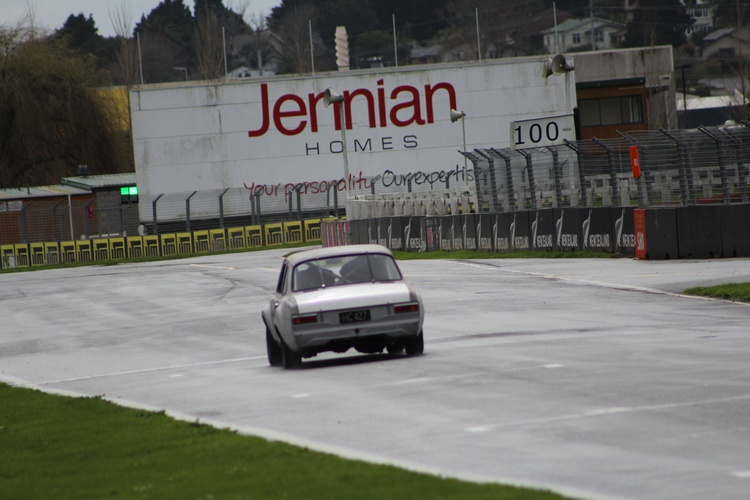
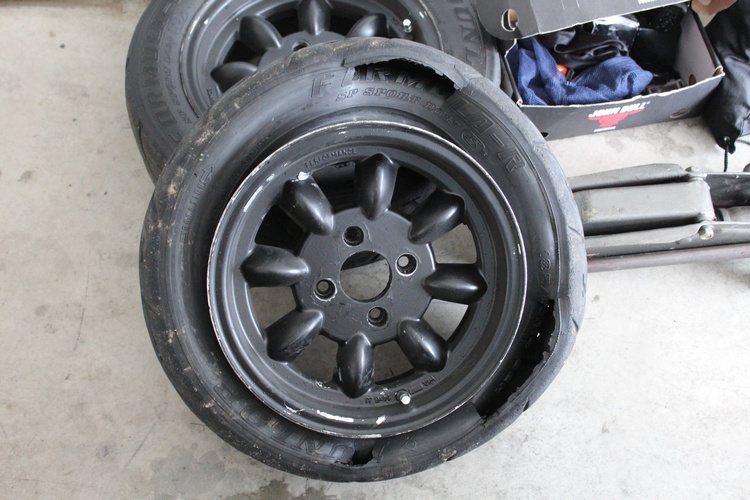
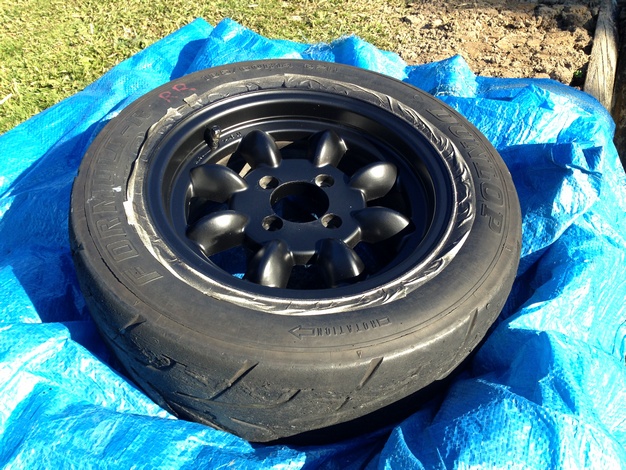
Photo from the drag day (thanks Mrs OnTheTree): Finished the wheels earlier this week. Got some tyres and put them on. As a side note, does anybody else see a face in the drivers window on the first photo? Excuse the bit rubbish photos. I'm going to lower the rear by a notch later and take some better ones with a real camera.1 point
-
Nice work at the drag strip. RS-X represent! Strange about your turbo though.1 point
-
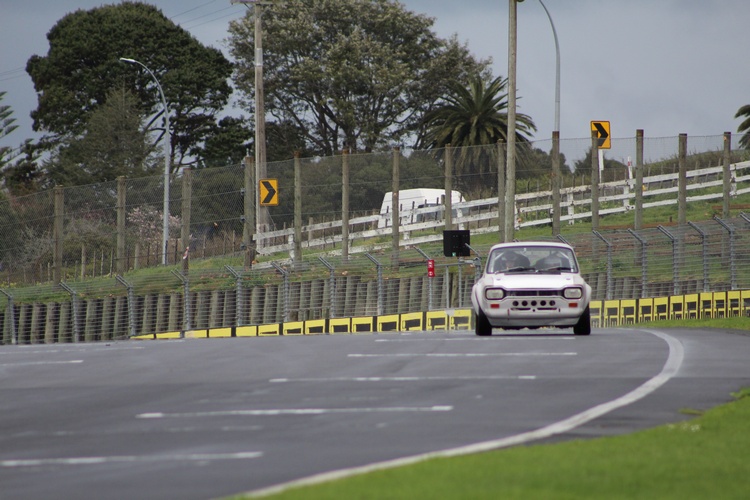
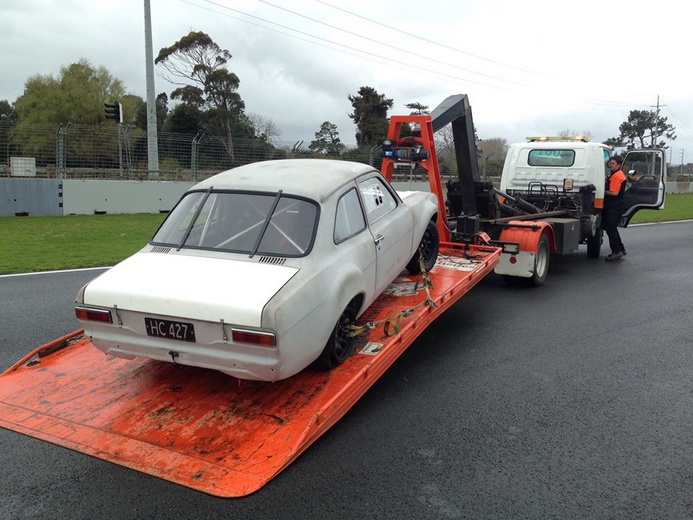
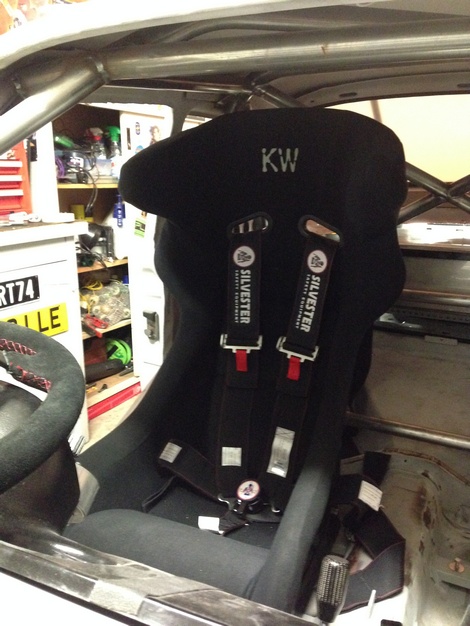
Too Much fun Until this happened Great first outing in the car , a few setup issues with the pedal box and then tyres that didnt want to stay on , but overall very happy
1 point
-
Howdy Pard'ner A few more bits and pieces of progress: Powder Coated goodness. It's a nice feeling looking underneath and not thinking damn son, you nasty. Also replaced the front wheel bearings because yuck Had the front rotors skimmed. Looked like the pads have worn down at some point, I wonder what song they would play on an old record player. Also found an old WOF in the sun visor. Might be good proof for the plates? And the ones I know you're probably here for... All complete and ready for re-reg just waiting to hear from LTSA about the plates. Hasta la Vista, BABY Hoping to be ready to potentially take her to Nats if time off is approved1 point
-
The initial cert inspection went well , I have a list of 30 things to rectify. I've got myself a fair few jobs to get through now , nothing major though so Im very happy Last minute jobs before the first event Motorsport scrutineer has signed off the log book so we are good to go
1 point
-
Oh hi there...1 point
-
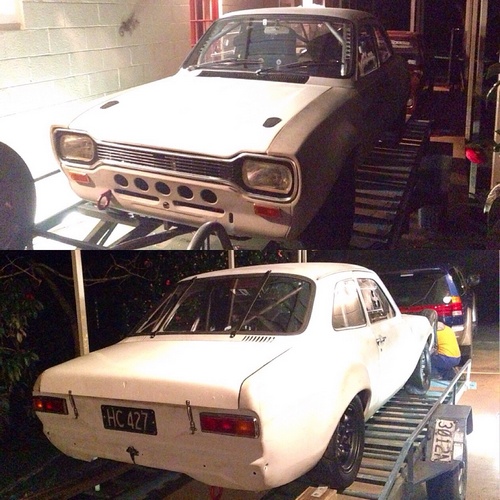
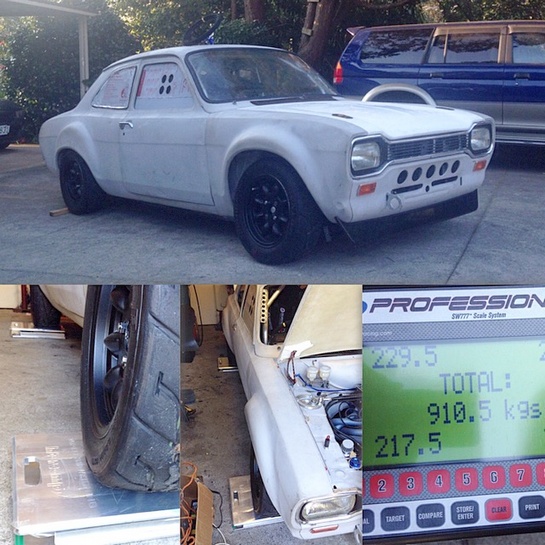
Weigh in time Loaded on the trailer ready for part 1 inspection for the cert
1 point
-
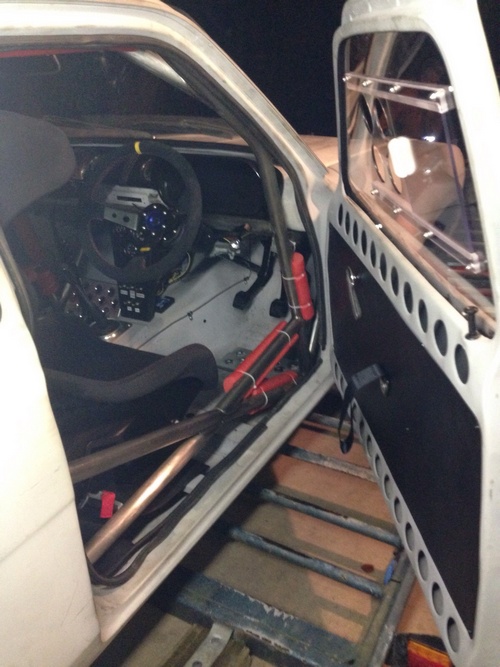
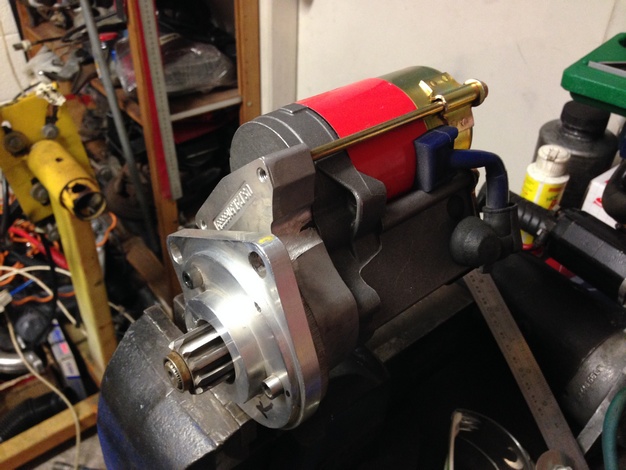
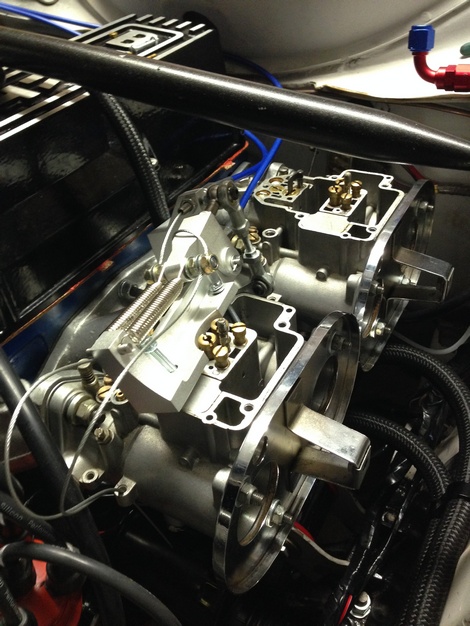
Found the reason the car wont turn over Lack of clearance between teeth on flywheel to starter motor causing it to bind Made some mods to the starter gear Turns over but but wont start properly checking over the carbs and found the accelerator pump assembly had come apart Back together again First start up....finally http://www.youtube.com/watch?v=94XKnQGsmwM]
1 point
-
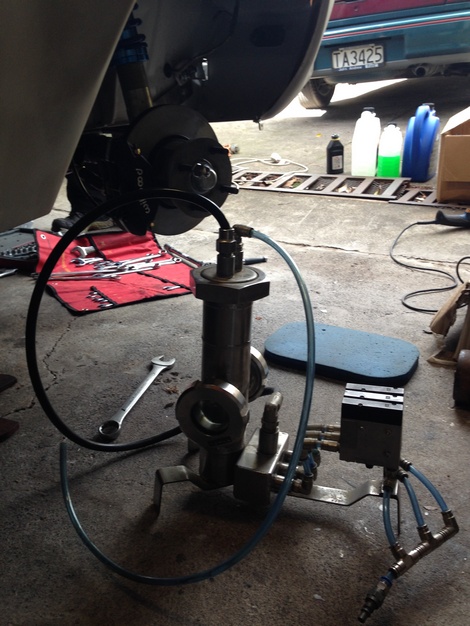
Brake pads in , fluid topped up Bled the brakes Set the tappets , filled with oil and water almost time to start it
1 point
-
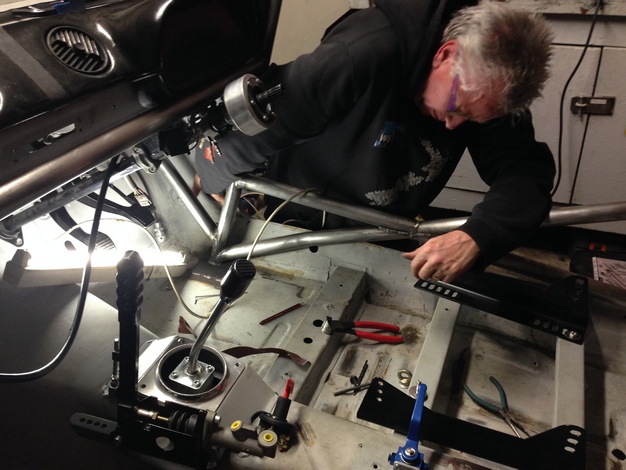
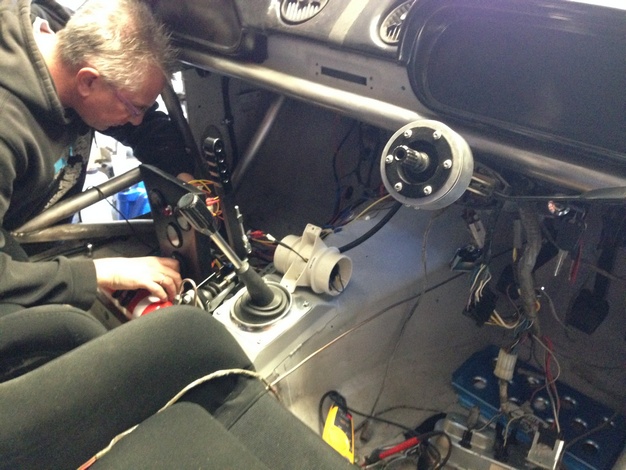
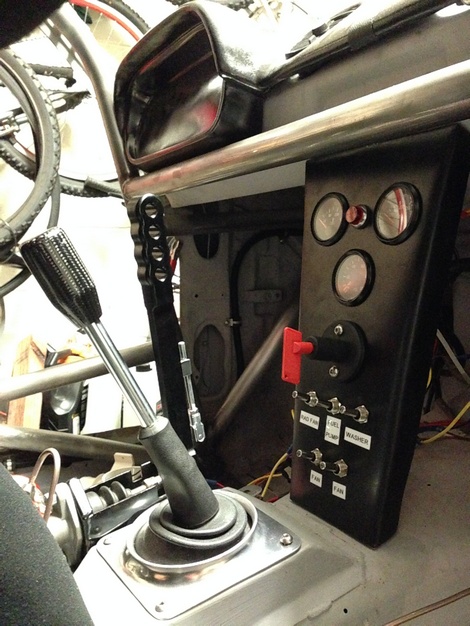
Wiring Time with help from my trusty electrician "dad" Also made up a temporary centre console for the essential gauges
1 point
-
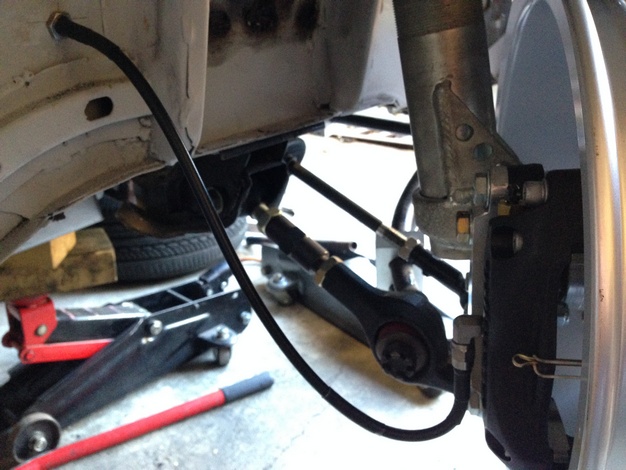
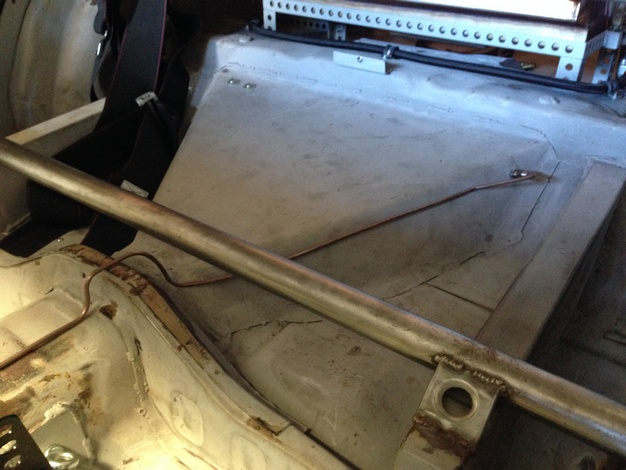
Brake lines installed with help from GSS
1 point
-
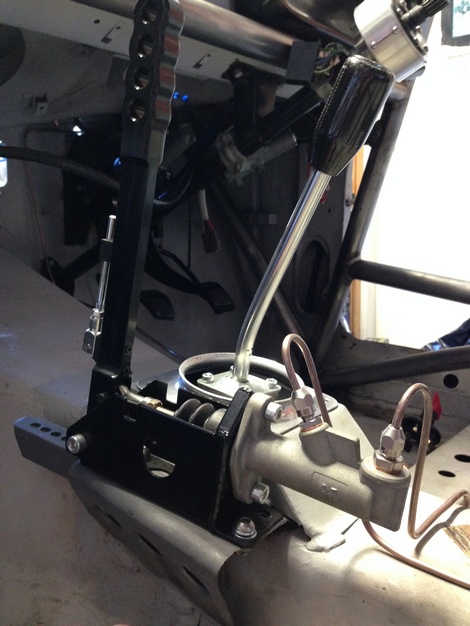
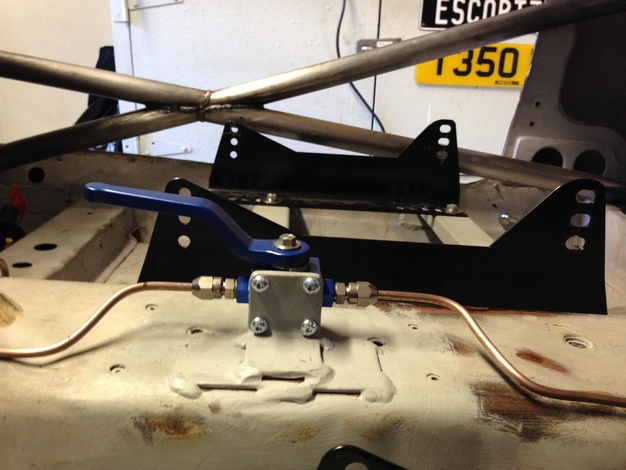
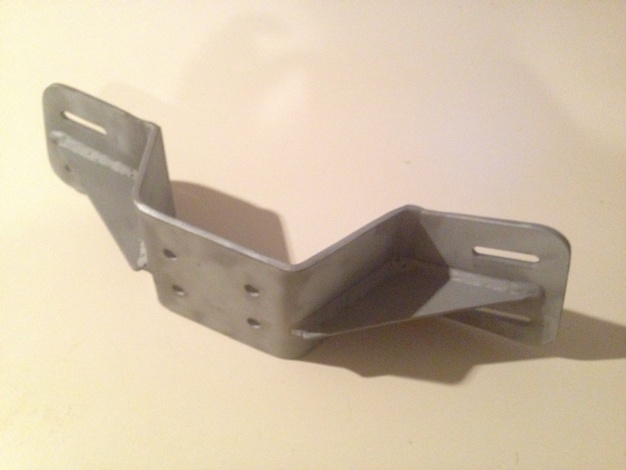
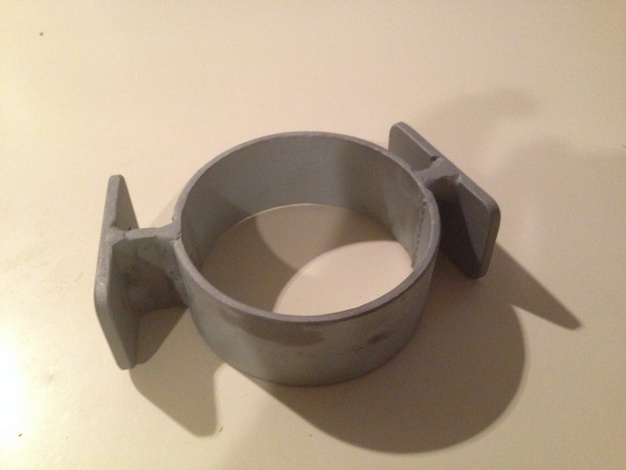
gusseted the g/box crossmember made a driveshaft loop arranging some secondhand tyres and wheels for the track
1 point
-
harnesses been fitted Driveshaft been made up breather tank and lines plumbed in
1 point
-
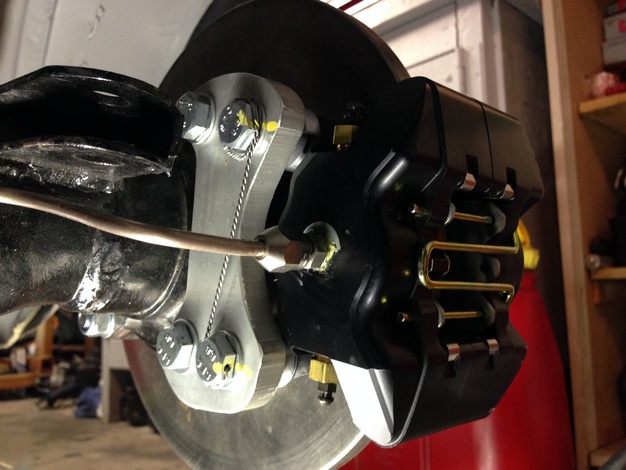
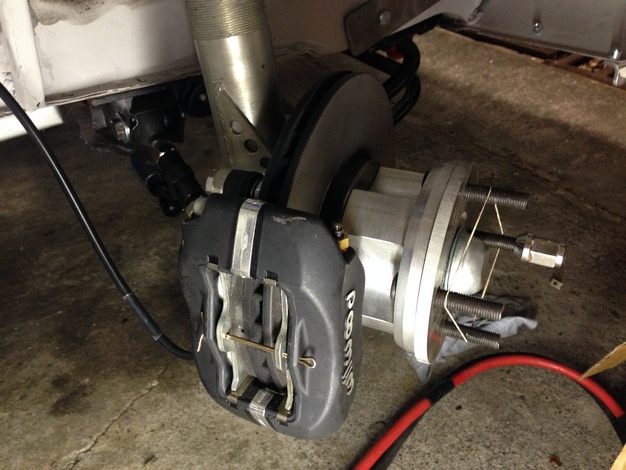
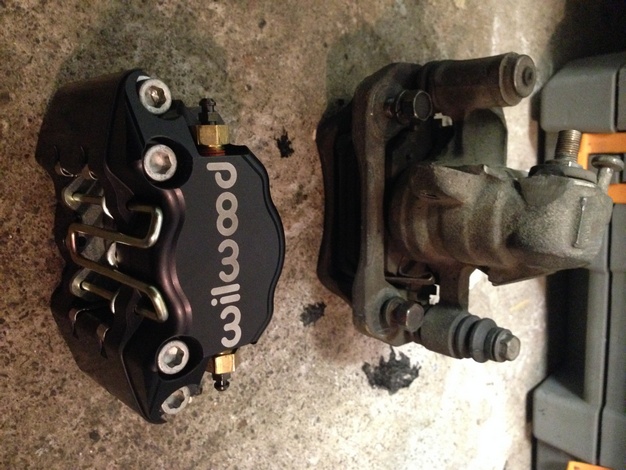
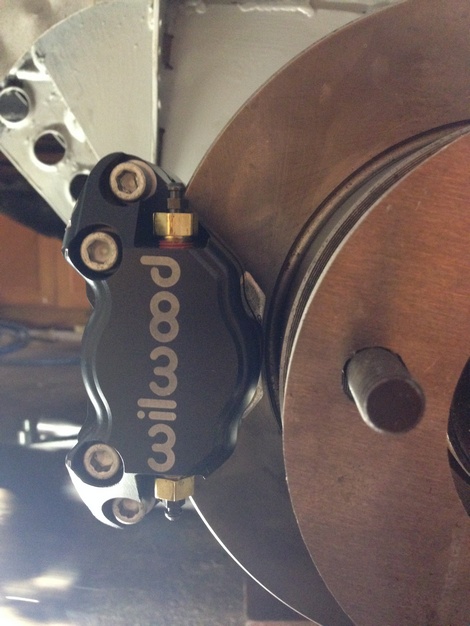
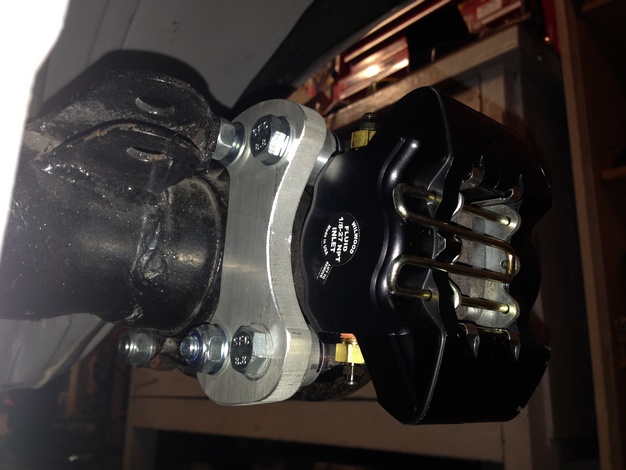
upgraded the starter motor with a road runner item ditched the old Nissan single pots for wildwood 2 pots
1 point
-
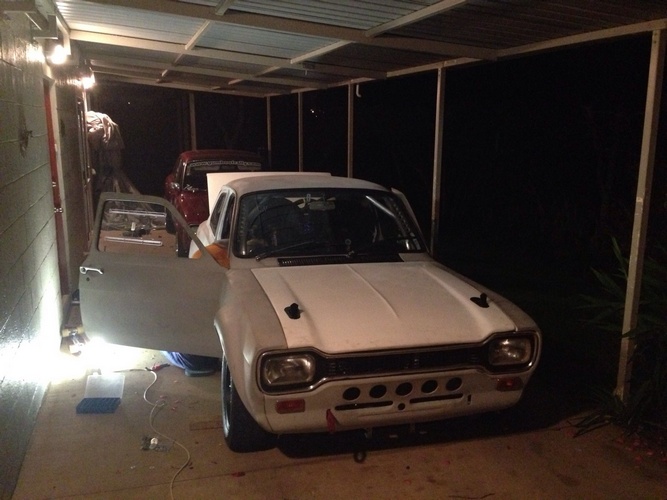
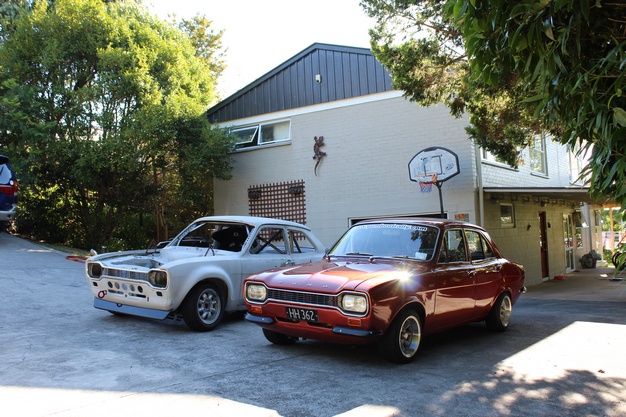
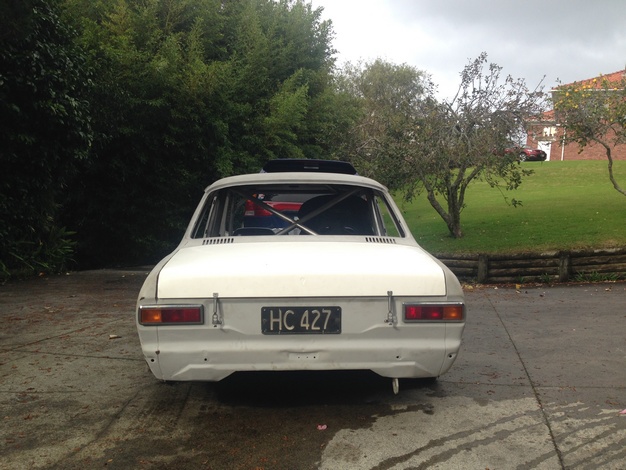
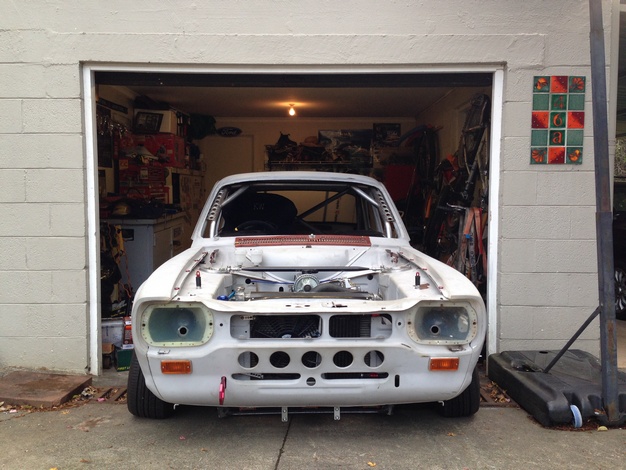
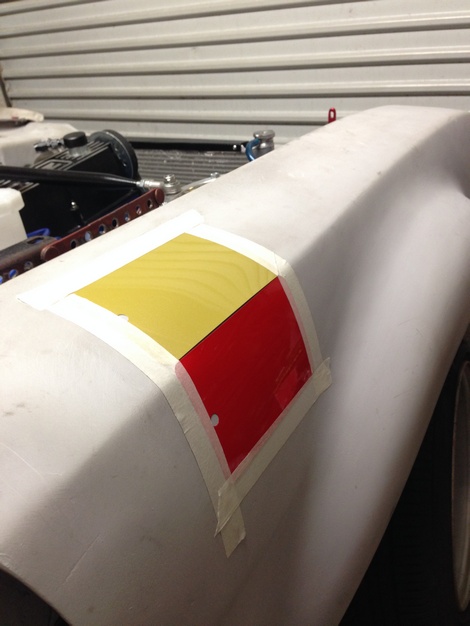
A few photos before it goes back into the garage playing with Some test colours for the alan mann paint scheme
1 point
-
Some more new tings. Got some wheels off Cul8r (yes, I got all 4 before someone asks): Stripped the paint: Now I'm sanding: The plan is to polish the spoke faces and lips and paint the center bits around the bolt holes and the spokes sides black. Also put in my Wolfsburg steering wheel. And check my new radio, how's that for period correct? I've got my ticket to the twilight session at Hampton on Wednesday which should be good fun. However the car has had a bit of an idle issue for a while and in an attempt to diagnose it the other day I started unplugging and replugging things and now it's worse. Haha. Let's hope a throttle body calibration at least puts it back to how it was, as that was what I unplugged when it when worse. Bloody new school electrics, I do miss a throttle cable. I'll be going regardless but would be nice if it's running ok.1 point
-
And last weekend i took a trip to wellington to check out a 2300 sedan parts car for rust cut purposes. The car is owned by well known wellington 2300 nut Mark, and he has a really nice '65 wagon, the parts car i went to check out, another 'good' parts sedan and a '65 sedan in the body shop. 65 Wagon 'my' Parts sedan I also managed to get a few bits off him to take home including - spare indicator/park lights (for the terminals) - spare dash - column indicator/lights switch (which i broke when i got it home!) - tail light lens - fuse box cover - and some other small bits and bobs unfortunately the parts car is pretty poked in much the same places as mine but may be useful for quite a few random bits. Mark is hanging onto it in case he needs any bits for the sedan in the shop, when it comes out early next year, and i cant use it or collect it at the mo anyway, so it worked out well. Nice to have a good contact anyway. I also picked up some 130 rims from another guy on the way back, so will tidy them up and chuck them on soon. heres a pic of a 2300 sedan with some on (and a 16V Turbo engine)1 point
-
It's ALIVE! After sending the Z to Speedwell in Hamilton to get the carbs looked at, she's purring like a kitten. The old boy said all the needles were gunked up from stale fuel and the slides were stuck. Looking all snazzy in the fresh air. Also gave the radiator a proper flush and got a nice tray of gunk out. Might have been helpful to jack her up to get the tray under a bit more... Tinkle time! I really like this photo haha a little accident. To do list: -Shocks -Windscreen rubber -Exhaust and muffler -High stop light? -Sort out slow voltage discharge1 point
-
And something rather special I found at Upick (it's a genuine one):1 point
-
pedal box is super illegal mostly because welded pedal, also the pedal box material is thinner than OEM so should not pass either http://www.lvvta.org.nz/documents/newsletters_pub/LVVTA_Newsletter_2014_Jan-July.pdf page 8 refers specifically to escort pedals being bought in from the UK1 point
-
4) Future Plans My plans for her for this year/coming years is to give her a fresh new coat of the factory creme colour, polished chrome and factory interior followed promptly by a lush set of wheels. Next is to fit the engine and gearbox followed with the fuel and management system Followed by refreshing the front end with new adjustable TCA's, anti dive kit and urethane bushes all round. Oh and looooow LUSH J-W-G1 point
-
3) New engine I settled on the engine conversion i wanted to do start of last year after being in awe of Low n Slow's FE3T escort since seeing it on the tarmac at the 2011 nats. Accept i really wanted the dooort sound of ITB's or carbs... Next was to find a gearbox to suit. Mx5 to the rescue, i found a really cheap rebuilt box with not even a drop of oil. I then had to get a Courier/B2000 box to change the bellhousing to suit the FE3. With decent carbs these days demanding top dollar i went with a set of silvertop itb's to hang off the side of the head. Next was to assemble a mix n match of mazda bits to make a hybrid BP/B6/FE3 Crank angle sensor. It runs the BP/B6 cas body with the FE3 guts and top cap. In my giddy excitism i promptly put every thing together to test bolt holes etc After doing some research on the engine i found Kia had used it in their first gen sportage. I liked the look of the cam cover so had a go at making my own BDA inspired cam cover. All im waiting on now is for a Courier/B2000 FE Flywheel, engine mounts, sump + pick up, spigot bearing and new clutch J-W-G1 point
-
Not much been going on with this lately, just lots of little bits and pieces. Installed an alarm/remote central locking, new stereo. I think the stereo looks pretty good (better than the silver Kenwood tape player that was in there anyway), suits the style of the car well. You can see where I put the LED for the alarm at the bottom of the second pic Managed to get a new indicator lens to replace a cracked one. Apparently near impossible to find, after months I eventually got one by fluke — PartsWorld in Timaru had one that the label had fallen off, so they didn't know what model it was for but the part number on the lens matched the old catalogue number and it's a perfect fit. Not flawless condition, has a couple of scratches but no cracks and it polished up nicely. Before: After: I've had a few more bits and pieces arrive lately. Top rubbers and brush seal strips for the side windows and then this little NOS item from the States: My rubber steering wheel is a bit rooted, the rubber is soft and collapsing, so I was pretty pleased to find this proper leather replacement for less than the cost of getting my one re-wrapped. Also, while the car was clean I took it out for some night photos.1 point


This leaderboard is set to Auckland/GMT+12:00