
Leaderboard


Popular Content
Showing content with the highest reputation on 07/18/15 in all areas
-
7 points
-
Not very much progress has happened in the past months; Gave the Jag front end a good clean, cut off a few bits and decided how to mount it. Goes low enough with out cutting chunks out of the chassis or front end, which is good. Bought an engine this week as well. A lot of people won't be too happy with the choice but it was really cheap and already has been rewired to suit a project like this. It's a Nissan VH41. Gave it a steam clean today and come out much better. Was covered in dust. Test fitted it and it seems to fit quite nicely, except the inner guards might need some work. Keen to get rid of that ugly spider looking thing and get some ITB's on there. Tell me how I should have bought a LS and spent ~10x as much to get it going: //oldschool.co.nz/index.php?/topic/47317-matts-1951-chevy-pickup-discussion/7 points
-
4 points
-
So, I bought a New rig (truck pun intended) Its a 1987 Suzuki ST90v Truck Been pining one for many a year, and they have always been a bit spendy and a bit to far away for my liking This one however was local (2min from work) and cheap enough to justify buying. Was cheap due to not running, as the guy had had a few issues and not much luck fixing them. Already been fitted with the 1000cc 4 cylinder and 5 speed, so might actually drive good also So I towed it back to work, and then after a few days managed to get some time to have a look at. had been told it was driving, but would stutter up hills, old owner had taken to a mechanic and fit a bunch of electronic parts but still did it. So they tried to rebuild the carb with a new kit from America, and since then it hadn't run, expecpt once when it ran very briefly. Oh and a new fuel pump. So pulled the spark plugs, figured that would would be the first stop just in case they are fowld. Nup, they looked fine. So put some fuel in it. Fist check, oh yip, it leaks fuel out the drain bung, which was a bolt with a spring washer on it. Hmmm, no surprise there I guess. Checked the fuel filter and drained it, oh yip, bit of shit in there, might need a new filter. So turned the key, fuel primed up, checked carb, oooooooh yes, there is fuel dripping out of carb. Time to pull carb off and check this rebuild. Long story short found a unwound jet and a fucked rubber gasket, After a few phone calls and trade me questions I found I couldn't find a second hand one, and a rebuild kit would be $120 After a look on Aliepxress, boom, brand new china direct replacement carb on its way. for $120 This took a few weeks to turn up, so towed to my garage where it sat for a while. Until Today! Checked carb when it turned up, looked good, but was filled with machine oil, so blew it out, and replaced the ill fitting choke plate. So with the assist of Goat and Beaver who casually swung by the lock up, we fitted carb, put some gas in it, and found that the bolt I had fit in the fuel tank bung was also not going to work. But besides that, Primed up fuel system, no leaks, good shit. Turned key. It Runs!, For like half a second..... Hmmm....... goat picked it up straight away, Seems the coils not staying powered once the key is taken off crank. Beaver eyed the coil and found the pesky wire that had come off, and with some creative wiring got it back on. Turn key again, purrrsssss like a pussy. So fucken happy. Then we wnet out, got a proper fuel bung, and went for a drive round the compound, Shit it runs good, and is super peppy. Even peppy enough to do a sneaky skid. Then beaver took it for a drive and found that gumboots is a shit choice for trying to get in and out of the cab. So mission accomplished it runs. Next was the brakes, it had been hard to push since I bought it, and suspected the brakes were fucked from sitting around. So parked it back up, jacked it and spun the wheels. Both left sides bindy. So Pulled all the drums off. To my very pleasant surprise, new brake shoes front and rear, some new cylinders in the front along with some rebuilt ones. However the rear ones were shot. One seized, and one just starting to leak. Quick drive down to the local repco, and to my luck, of all the places that had any brake cylinders to suit nation wide, was 20min away. Boom drove up and collected, made sure they are correct, and payed a woping $25 for the pair. And that's about as far as the day got, But everything is coming up Milhouse so far, well, almost anyway. So now I just need to fit the cylinders, refit drums and redjust the brakes all round, and should be ready for a wof, hopefully for Tuesday, or atleast at the earliest. Rad, thanks for reading about my turd. Its so tiny!3 points
-
So I bought myself an old Kitchenaid stand food mixer from Trademe, and thought I may as well share on here. Winning bid was $84.50, which is pretty good value considering you can buy them new in Harvey Norman for $1000-$1100ish. It's an older model (a bit of researching says this model was made between 1944 & 1962) but fortunately many of the parts are interchangeable with the new ones, and they are pretty good quality and last well. It's covered in the residue of many a past cake, and the paint has worn thin in a few spots, there is a ding on the rear cover etc, but nothing that a basic refurbishment can't handle. The plan is to pull it apart, clean and repaint the outside, restore/replace some parts, repack with grease, then realise I forgot how to put it back together. Here's some photos of it so far: ^As it was when I bought it ^ The underside - the feet have squashed right down over time, as it's quite heavy ^ It's a bit gross and could do with a decent clean. Also the grease has separated/oozed out (which can be caused by sitting still too long). ^Planetary gear inside the mixer head. The grease is a bit old and hard. ^Grease inside the gearbox ^And after a clean up ^Case full of old grease before ^and after emptying out. More photos to come once I've done some more on it.3 points
-
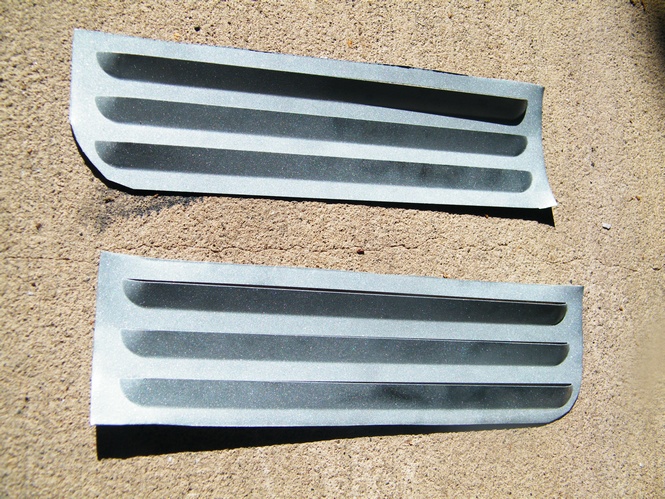
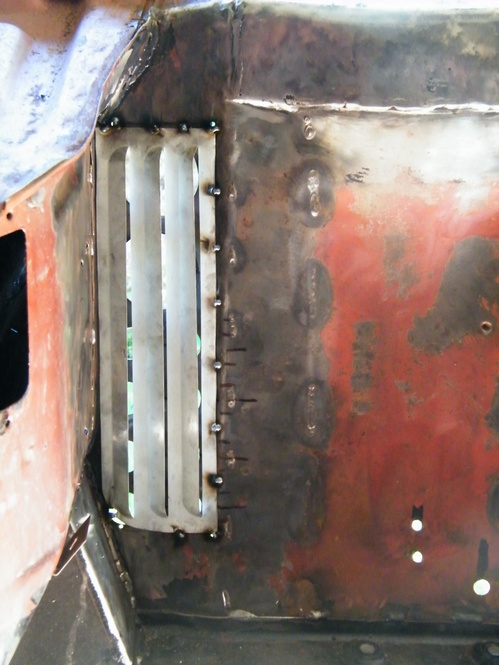
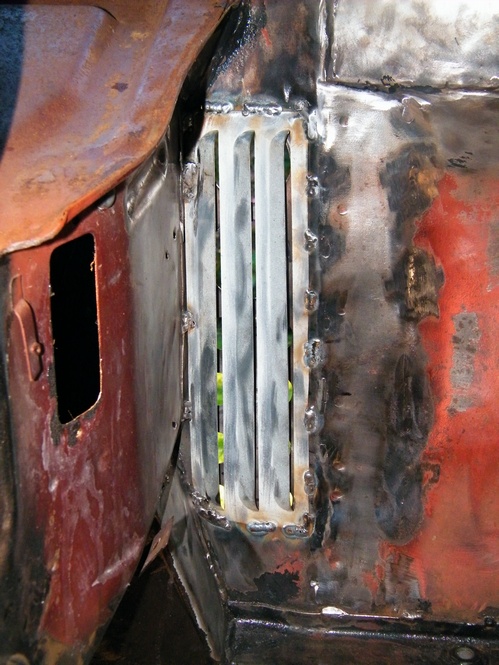
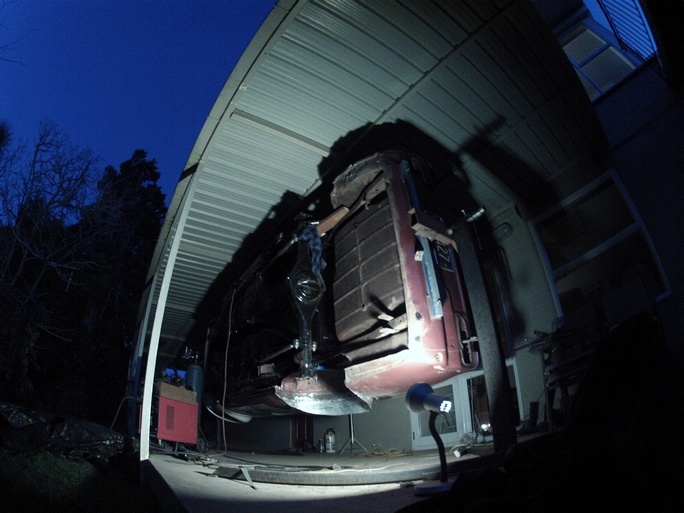
Vents to remove hot air from the engine bay
 3 points
 -
3 points
-
I have ridden it in its rustic-pre stripped down stage a few times. Getting off the line isn't easy but maintaining a constant and hilarious trottle round is doable.3 points
-
Made them a bit taller as per request also.3 points
-
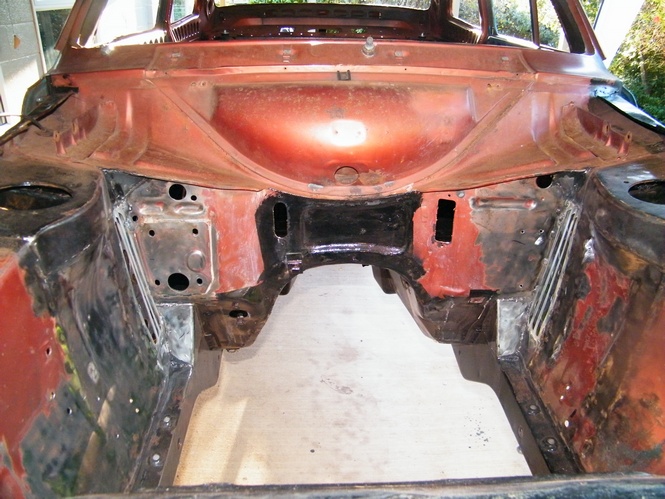
Hey all. Well its been a couple of months since my last post and as it always seems to go in the car resto business I have failed to keep my dead line. I have done nothing to get my car in to the paint shop as of yet but im comin down the home stretch of the panel work. I had about a month off the cortina doing some home renovations instead, which has given me a renewed vigor. So im pushing hard again and finally got the dreaded surface rust under the dash done. I did not like that job and intend to add it to the list of things to pay someone else to do if I ever do another one. But enough of my jibber jabber heres a couple of photos for you all.3 points
-
Knuckle Draggers pic by Richard Opie, on Flickr Thomas (aka The Knuckle Draggers) did this for me. I giggle every time I look at it. It's arriving in it's original, A3 format soon.3 points
-
I post this from the 2:30am ferry sailing, on the way home to ChCh from Wellington, because to be honest, I've had worse results from a night away from home:
2 points
-
So I have finally decided to document my twin rotor Wankel engine project. Years ago I saw the video below of the twin O.S. Wankel engined R/C tractor pull car and thought that was the coolest thing since sliced bread. Fast forward a few years and I saw a twin rotor O.S. Wankel based engine in the YouTube thread, which has been the crux of this project. The engine build by ‘20B’ combined two O.S. Wankel PI’s together with a custom machined centre and rear housing, in addition to an oil hardened 4140 eccentric shaft. Unfortunately the only video of it running is the one below and the project thread stagnated years ago due to a crushed bearing. It wasn’t the only twin rotor project, as avid model engine collector Miguel de Rancougne had another O.S. Wankel PI based engine in his possession as seen below in a Christies auction handbook. http://www.christies.com/lotfinder/lot/a-twin-rotor-wankel-engine-4223480-details.aspx?intObjectID=4223480 Both 20B’s and Miguel de Rancougne’s twin rotor miniature Wankel engines provided enough reason for me to attempt to make one myself. So in March 2014 I purchased a brand new O.S. Wankel PII with the aim to build a two rotor with my friend Ben who happened to purchase a used PII from rotary mad Puerto Rico. The idea was that we would test run both engines then pull apart his engine and CAD model it. The parts required would be additively manufactured on the universities recently acquired selective laser melting machine prior to sanding smooth. To test this theory a single rotor and eccentric shaft were manufactured from a CAD model off GrabCad in AlSi10Mg aluminium alloy. With the surface finish of the parts worse than predicted and lack of a ferrous metal powder for the machine I decided to focus on building the test table for the engines.2 points
-
Oh and wheels, I had been trying to find some 13s to suit, managed to get my hands on these street fins, which will be actually getting in my hands on Tuesday 13x6 and 13x6.5 I actually already own some 7 inch wide fins, so they will be going on the back, picked up some new 175/60's for $150 the pair, not the 50's I wanted but im not made of money lol. Aim is to try fit the 6.5;s on front, but Goat and beaver thing I'm dreaming haha, we will see. Only problem is tires. I really need 145 / 65 r13's Thought I had tracked some second hand ones down through A tire shop that had a bunch of different sizes listed, and when asked by two different people said they have a few pairs, Only to arrange mitch.w to go in and get me some, to be told they don't, or atleast not in shop. so are going to check storage. Glad I didn't drive all the way to parmy to be told that. Fuck wits. So will see what happens next few days. Ok. anyway, so many typing.2 points
-
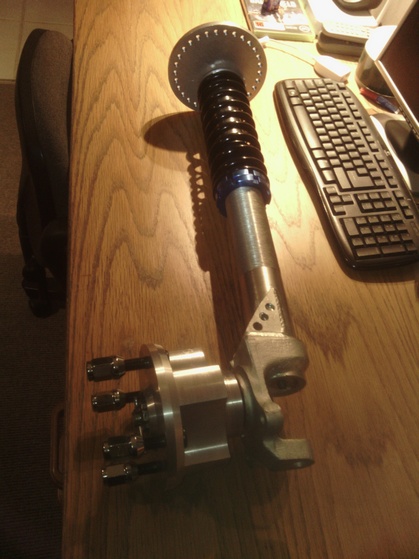
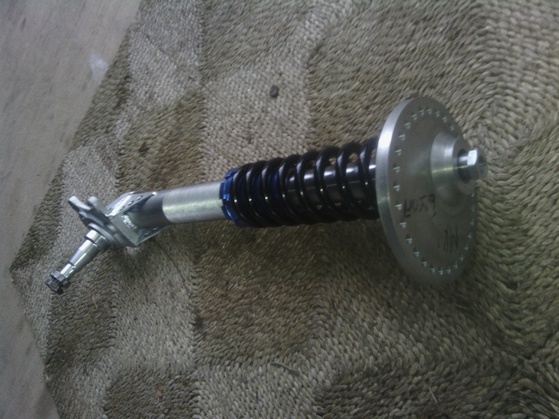
front struts assembled
2 points
-
Got it back together. Not sure I've fixed anything other than replacing the carpet but still progress is progress. Here's a video just for a change. Its running on the choke hence why its filing the garage with smoke. https://youtu.be/84gIGYihwiQ2 points
-
Some progress....2 points
-
And they work! I've also finished wiring the fans in properly with a real switch so I don't have to lift the bonnet when I get stuck in traffic.2 points
-
New bars have been made. Just gotta remove the old ones from the " triple trees" and install new.2 points
-
http://www.machineofmayhem.com/box-house-part-4/2 points
-
Soooooo with my airbox intake thingy. All is well and good, but when the motor gets to 6000rpm, datalogs show that there is a 3kpa pressure drop at the inlet manifold all the way to 8000rpm. How much is 3kpa? About 0.4psi which doesnt sound huge, but when you're working with 14.7psi atmospheric pressure that's about 3% of air (and power?) being lost before it can even get a chance to get to the throttle body. 3% of 200hp is 6hp so wouldnt complain about a 'free' gain of half that much if I could halve the pressure drop. So my first thought was, why not go from the current 3" pipe to maybe 4". But then I thought, since I no longer have a MAF, why have any pipe size at all? I could have a bellmouth straight on the throttle body for max flow. Then have a big enclosure to feed it filtered air with minimal pressure drop. This would take up a lot more space than a normal intake though, So the first things first is see if it seems feasible for space. I took a photo of the motor as straight on as I could (If wanting to do this, stand back far and zoom in, to minimise perspective distortion) and drew a rough sketch in Cad to see if theres' about enough space for a bellmouth, some space around it and a panel filter. Seemed okay so I plonked the motor back in and started on some CAD (Cardboard Aided Design) to see how much space I've got: Then roughed something together in cardboard, this is the Rapid Brototyping stage: Then copied the dimensions to CAD: Then made version 2.0: Back to CAD, made it more roundy looking: Then started working on the second half of the airbox. So now I've got a pretty good idea of the maximum available area I can work with to make it any size smaller than this. (It's pretty big and gumby at the moment) At this point, I've got two options - I can keep the intake getting air from the big hole through the wheel well area and down to the front as per previous. Orrrr, there's a 91mm dia hole behind the headlight, I could get air from here and/or here: So time to head to Solidworks and try some stuff in the flow bench thingy. TWO INTAKE ENTER. ONE INTAKE LEAVE. I've set the airbox opening to be a source of atmospheric pressure air. And the throttle body area drawing in 170 grams/sec of air (As per datalogging from a few pages ago...) When I keep the airbox diameter really large, even with shitty bends. It keeps the pressure at 101kpa right to the bellmouth. (This graph shows velocity instead of pressure, but you will just have to take my word for it.) When I try a different (simpler/smaller) design that sucks are through the 91mm entrance hole in the front panel of the car... I lose 0.2kpa straight away. Which isnt much, but it just points towards the idea that bigger is better for everything pre throttle body. (Red is good, yellow is not so good, green is less good, and so on. Read the scale damnit) For experiment's sake I thought I'd see what happens when I run the "Big" airbox entrance on an airbox that's 10 meters long. Despite what you'd think it still stays 101kpa across the whole thing, right to the bellmouth. So it seems to indicate that the length of intake means bugger all compared to diameter. Even throwing some harsh 90 degree bends in there, the cross sectional area is so huge compared to the throttle body that there's effectively zero pressure drop. Aaannnnnnnnnddddd that's as far as I've gotten. But the plan from here is to make a cardboard model of the exact shape that I'd expect to build it. Then put it into CAD, then I've got the options of getting bits lasercut or whatever, to minimise the odds of cutting a finger off trying to build something properly. This whole thing might be a big waste of time and acheive nothing at all, but it's helping keep me sane through winter so that's always a good thing. But, I'm pretty confident in my ability to quantify a change for better or worse now. So even if it's a failure it's a win, because Coupe Life2 points
-
Hey guys, So I picked up this MK2 Diesel several months ago. The specs. - 3 Door, no sunroof. - 1.6 Litre Diesel manual - 240,000km on the body. - The body itself is pretty mint, but the paint is shit The existing motor is pretty well shot now. It looks as thou someone has rolled paint on the roof and bonnet at some point in its life. So the crux of this little fix up is Make her a bit tidier, faster etc. Low Milage 1.9TDI Engine from a 2003 Golf TDI 5 Speed Transmission Quaife Limited Slip Differential. Wide track suspension with 5 Stud conversion Bigger brakes Coilovers etc Work starts tomorrow. Although today I did strip the gearbox down this afternoon and install the LSD so that worked out good. The engine bay as it is currently.1 point
-
Ill never forget that night. Pizza fresh from the stone oven under the beaming halogen light. Me in stubbies, you in crotchless pants. Magic.1 point
-
Especially a spit roast with you. Big boy xoxo. (your meat has a special place in my heart, Hemm Dog)1 point
-
Cool its confirmed that next shipment leaves in 4 months and there will be a well side for a 620 that needs it (mine). i'm happy about this1 point
-
Have you got the parts apart from the rubber? If so I should be able to pour urethane into them to make up the mounts.1 point
-
http://spunbyhutty.com/ get one made.1 point
-
Old alternator is back on and seems to be working, I think the oil pressure sender wire had no insulation and was shorting with the wire witch switches the alternator on, they both had no insulation for about 2 feet inside the conduit witch was full of oil. they are now inside a peace of garden hose1 point
-
Hey mate, I'm new here, first time reading a project and only chose it because it has 3sge in the title which my 91 MR2 has - second gen though. I assume your car originally had a 4age, and that your 3sge is a 5th gen out of an Altezza? Why did you go with the beams over say the Caldina 3sgte? I'm not asking disrespectfully just when my 2nd gen 3sge dies I'll probably upgrade to the Caldina's 3sgte. Re the dirt in your guards I'd give it a good waterblasting and then dry with a rag later. I'm a part of the mr2 forum, some of the AW11 owners I believe have removed panels or sections with removal of a bolt to dump out all that nasty dirt. Any sections could be filled with filler too.1 point
-
Is that so you can still ride it...?1 point
-
Been a while between drinks, I am on a course atm and the commy progress has slowed. Had it up on trademe and got mucked around by two buyers so now i am thinking of keeping her and progressing with the project. She now has a cert and I have been using it as my daily for the past 3 to 4 months. Running sweet......has 1000hp in the wet! Have almost all the parts I need for the manual conversion. I have a 5 speed Borg Warner, shifter, flywheel, old clutch,(may bite the bullet and buy a new one), a clutch cable, pedal box, speedo drive gear and a front driveshaft yolk. Am i missing anythig? I know I still need a boot for the shifter but that is a nice to have atm. Will get the box droped off by Leebo at the swapmeet (bloody Legend!). Then ill drop it off at a shop to get a once over as I dont no much about boxes. The motor will come out again for the manual conversion....so will toss the fan in the bin and go electric at the same time.1 point
-
After a night in the Acid bath - all the crap gone, bare metal... nice! On went caliper red. Spent a hour splitting out the various parts of the loom that I will need.1 point
-
I got home around 30 minutes ago. Holy crap I'm buggered. SLEEEEEEP.1 point
-
SO MUCH DAVE SCIENCE1 point
-
Only one person I know might have acess to one of those and that will be Scotty from A+W Autospares Takanini. He's a good dude, give him a call and tell him the Pom sent ya. otherwise you'll need to get a custom one made.1 point
-
I'll get a 4age if Sentra Dave gets a 3SGTE.1 point
-
Just a few little things after work today. Started to weed thru the Sticky cluster fuck of Modern car loom, thankfully only about 1/10th of that will remain after I am done with it Also degreased the replacement subframes and sprayed over with some engine enamel for a quick tidy up. Stripped the brakes off and dropped them in a tub of Phosphoric acid so that they can be painted tomorrow. - Also ordered my Adjustable Coil-overs today - 22mm Master Cylinder. - New headlights. - New handbrake cables.1 point
-
I was going to steam some strips of pine to bend around the cockpit cut out for reinforcment but on a test piece the MDF turned to soup when the wet wood went near it. (Im hoping the fiberglass will weather proof it enough.) So I just cut it up into a bazilion bits to follow the contour, It added a suprising amount of rigidity. I cut the bonnet out and added a bit more stiffness to this too. I started making the pedal box today, it goes beside the engine.1 point
-
If you haven't got the hose connected properly, the air will take the path of least resistance which means the hole where you've not got the hose mounted correctly. This means unfiltered air, detritus, water and other crap could enter your engine.1 point
-
The new 1.9TDI Unit Injector engine. Got my discs back from being Slotted also. Today after work the front came off & the engine, subframe and suspension all came out. That was that for the night. - Next job get the new suspension up and mounted and the body rolling again. - Strip out dash and shitty factory wiring and begin the splicing and re-looming of the car.1 point
-
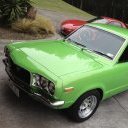
This is the look I'm going for I think
1 point
-
Re shimmed and re assembled the transmission and did a few odd jobs on the donor engine today. 1. Clocked around the turbo for Engine mount clearance. The turbo itself is very small but it will do for now. 2. installed the rear engine mount to suit the MK2 Platform 3. Deleted EGR and started eliminating some of the unneeded functions (anti shudder valve etc) Also yesterday I got my new Brake discs back from being Slotted1 point
-
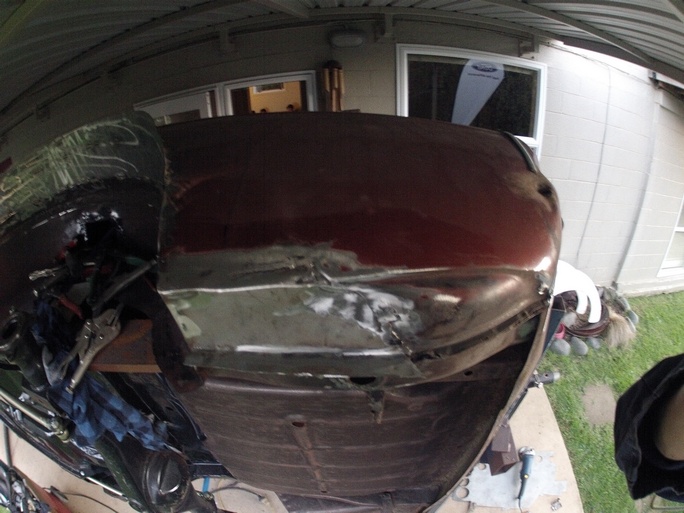
Rust repairs
1 point
-
Coupe Echo life! Do you even lift, bro? Oooohhhh, yep that'll do it... Centrifugal clutch conversion! haha. Flywheel still looks good and shold skim up fine! stoked. No idea why engine oil came out of the flywheel bolt holes though! Do they block off a gallery in the crank or something? Bizarre as there were no signs of oil leaking into the bell housing at all.1 point
-
Fun in the cockpit.1 point
-
More progress! Got the top fully welded on now, chassis cut out and the bottom partially tacked. We are thinking of putting the airbags on the outside of the chassis, since they would be pretty close together if they're on the inside. Like the pic below, except the top bag mount will be about an inch or so lower.1 point
-
I got the c-notch semi welded up. It's welded on the inside to the chassis and plug welded on the outer sides. Also has some reinforcing plate in the middle. Just need to fully weld around the top now, then cut out the original chassis and bend up the bottom piece. Also found a use for the rear bumper.1 point
-
Finally got the c-notch pieces laser cut. So we pulled off the tray and started stripping it back.1 point
-
1 point
-
Detroit Diesel 6V71 pls1 point


This leaderboard is set to Auckland/GMT+12:00