
Leaderboard


Popular Content
Showing content with the highest reputation on 06/11/15 in all areas
-
GA70 supra map sensor type? I has one of them4 points
-
With the board unsolder-ed from the transformers, I can now start the re-capping process. First up will be the black "Hunts" capacitors as I have suitable replacements in stock. I'm lucky to have a good stock of old "mullard "capacitors to replace them with, they hardly ever fail and are hard to get, also quite desirable to guitar amp builders. They are also can be named "Mustard " capacitors because of their colour. I'm using them as they don't look out of place unlike the new yellow ones either side of them. last one for tonight, Here's the "Hunts" capacitors removed. You can see from the picture that some look a bit worse for wear, they also fail testing on my ESR meter.3 points
-
well thats nearly 2 more months evaporated. im sure ive made more progress but not alot to show for it mostly boggling over how to do various things and planning what needs to be done to meet project deadlines which this in now on. of course this means the 124 had to fail a wof yesterday too of course, but i digress. tonights work, foot plates for drivers side seat mount rails. of course where they need to go is right where there are compound curves in the trans tunnel. a couple of hours of bashing steel on steel and blocks of wood and thinking what was that bussiness sheepers goes on about stretching this or shrinking that then more bashing and fits ok then I decided to have a wire wheel party2 points
-
Oh. Yeah. So we got a door on sat. This is what arriving home looks like now. Whoot.2 points
-
door. can you guess where the dent is that i need an adult to fix for me. Untitled by sheepers, on Flickr2 points
-
Been a month and all I've done is chang the oil and put a shiny air filter housing on it, Oh and new rocker cover gaskets. I've ordered a calibration kit for the carb and will attempt to fix the exhaust and trans leaks .2 points
-
I redid some of the piping today and did a bit of a general tidy up and fixed a few small things. Just have to change the heater core now and put the dash all back together. Also here you can see my new look-faster coils.2 points
-
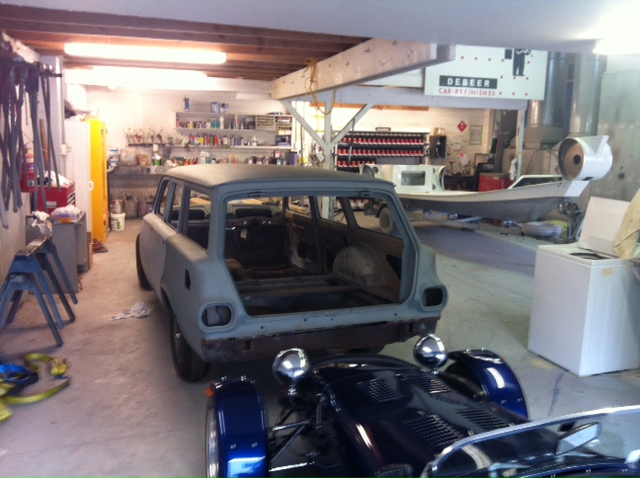
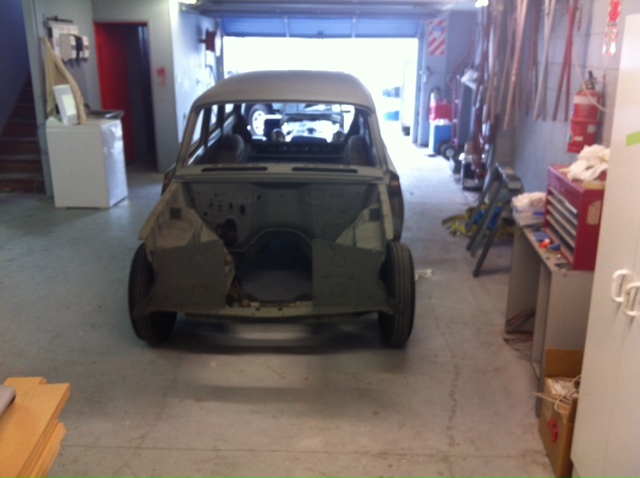
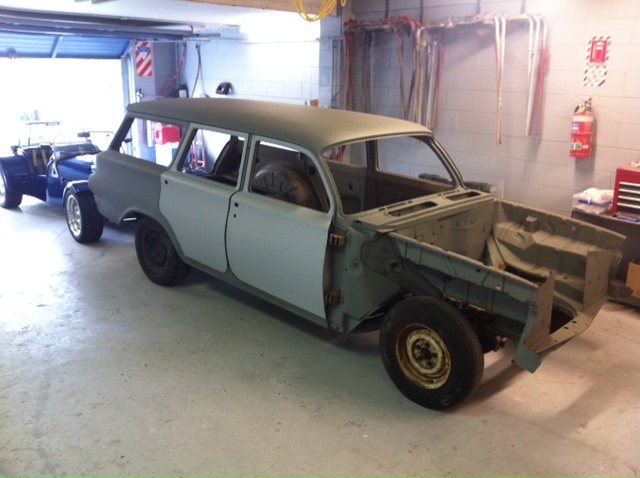
I swung by the Panel Shop to get a couple of photos to prove that the car has moved. Time to get the bonnet and front panels stripped of the should be shiny bits and off to be blasted. I keep forgetting how small these cars really are, especially now there is some space around it. Lastly I have bought a modified chip for the VT 5litre I have to go in from a Guy named Tony off trademe. The big thing is the chip has the VATS disabled. The tune should take the motor close to HSV specs. This should be fun, 190 Kw in a car that weighs 1200 kg with 215 tyres on the back..
 2 points
 -
So, been driving past this example for the past 3 years on my way home, got turned around once, and was under covers for most of the time, but one day the cover blew up, spied the corner showing the 16v Badging, so naturally I burned that into my brain. Fast forward another year and the cover disappeared. Been trying off and on for the last 6 months when time allows to get this.. South African Assembled, GTI 16v - thats the twincam rather than Povo spec 8v GTI - just that little more special. 105,000km Full leather interior. Comes with a small selection of spare parts - Including spare flares. Rego on hold so no tough compliance this time! Has already had the bumpers swapped out for the "Big Bumpers" Small amount of rust on one inner guard which I need to attend to. Plans? - See how well it goes and how reliably, but if its any good I have had thoughts of weekend/motorkhana car. Lower + 15" wheels (BBS or similar) and sticky tyres..1 point
-
Hey guys im moderating the thread for my dad. Here we have a 1964 Ford XP falcon that my dad has had for 20+ years. He has had a fully reconditioned heads and motor blocks and he has had a single carb supercharger. About a year ago we started peicing it together and this is how it went: Disscusion: //oldschool.co.nz/index.php?/topic/48719-1964-ford-xp-falcon-noel-supercharged-disscusion/ My Anglia: //oldschool.co.nz/index.php?/topic/48706-1963-ford-anglia-first-car-shannon/ Anglia Disscusion: //oldschool.co.nz/index.php?/topic/48716-1963-ford-anglia-first-car-shannon-disscusion/ Brothers Anglia: //oldschool.co.nz/index.php?/topic/42275-jordens-1967-ford-anglia-105e/?hl=jordens Dads Anglia: //oldschool.co.nz/index.php?/topic/45036-noels-1963-ford-anglia/?hl=anglia So this is how it started out as Yellow and just sitting in weeds with flat tires: This is the super charger: And the motor on the stand: First step was to take the old shot motor out: Which looks like this: Next was to put the motor together first to give it the signature Ford Blue paint: And then we put it fully together and it looked like this: Next we started the long process of putting the motor in: And that ended up looking like this: Side veiw, but we wernt happy with how high it was sitting so a future project is to make a spacer to make it as high as the top window line: But we diddnt have time to make one before the formal so we just went with it. After checking everything and fitting a dummy fuel can to feed it fuel we started her up for the first time: https://youtu.be/brKckiFJRjQ Next we had to cut the hole in the bonnet, although we did not want to as they are hard to come by: And finally came the paint: And this is how it turned out, pretty well i think for no body work except a small bit of sanding: But now this is how it sits waiting for us to get her going as she blew a head gasket. The plan is to pull her out this weekend and start getting it ready properly rust and all for the Kaikoura Hop. Here it has the recently purchased shotgun scoop which gives it a mean feel. Will update soon!1 point
-
Come on you pansies with cool garages who are ashamed of them cos you think they're messy - we won't judge you.1 point
-
Sw20 mr2 power steering pump.? It's 12v and compact1 point
-
thats good to know. they are as common as mud, might even have one stashed in a box in the bowels of my shed quote name="Dolan" post="1534719" timestamp="1433981131"] are you wanting it to be tipping just so you can have a spot to chuck ya spare wheel that's not on the deck itself? that's how i read your post? if so, perhaps a low profile roofrack to chuck it up on would be the go? not ideal if you get a puncture and have a load that you need to tip off the deck to get at the spare want a tipping deck for ease of unloading, as well as access to best available space for spare wheel and keeping weight low roof rack idea would have merits, but will get in the way when the soft-top is rolled back for spotlighting rabbits,possums etc1 point
-
25de manual converted. took me a while to find a tidy cefiro, everyday on trademe waiting for the right one to pop up ! 4 stud is best Cant wait to get these refurbished and moar low after cert !! When are your wheels arriving in NZ?1 point
-
Most aftermarket ones tend to be coated in some kind of plastic? I have not seen spring paint specifically but some paint systems have a elasicicsing (sp) agent that will add some extra flexibility. Exopy and Urethane paint are based of the same chemical/plastic technology as the names imply. So you let some epoxy or urethane dry in the pot after mixing and it turns into a flexible plastic wad of shit, the paint coating is therefore pretty dam flexible as it is. I am not expert here but my buick springs are painted in 2k black as per everything else under the car and they look fine after probably 5-10,000 miles.1 point
-
So two methods, sand blast lightly then paint. Or if you don't have access use paint stripper then a rust converter, spray on and rub in with a scotch brite pad and see how it converts (will take ages). I just did my diff liek this and while it takes patience and several nights work the end result is great, I'll chuck up some pics. Old style prings were just coated in a enamel and real thin so it could move. I would probably just use a black epoxy primer and call it a day? probably could coat it in 2k single stage black. So yea if you just want it clean and one colour, black epoxy primer and finshed. If you want gloss spray it with 2k black (or any colour). I would do this wet on wet and thin coats of both using a 1.4mm top coat gun. So epoxy and urethane as usual. I think a good single stage water cured urethane would work well straight on the steel also (por-15 stz but not por-15 if that makes sense)1 point
-
Could be a 100 or a 125 Definitely an early GP tho, nice round clocks (if you get rid of them, I have a home for them1 point
-
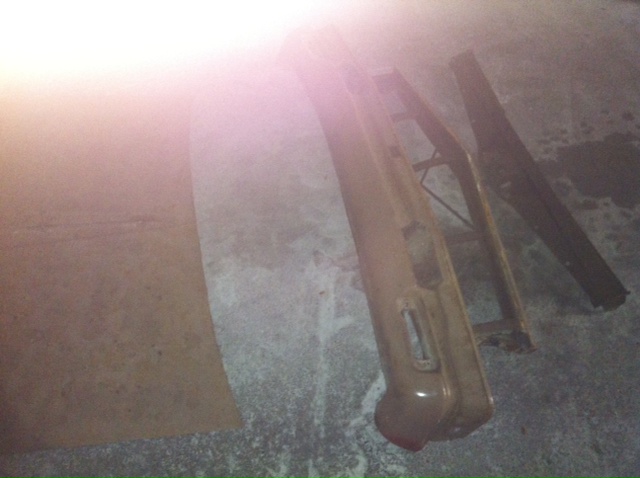
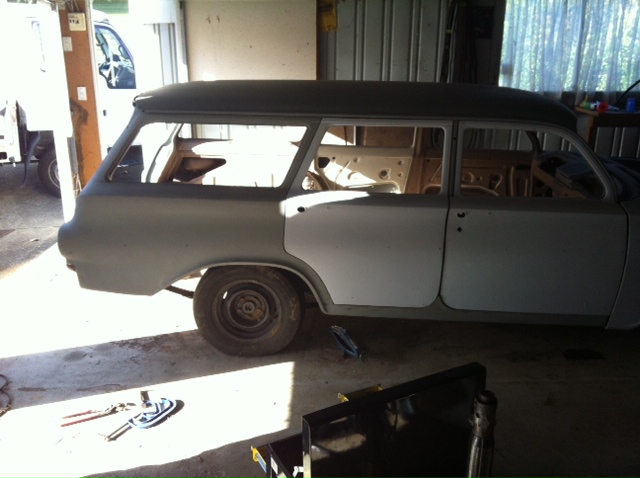
A bit of progress. I picked up the last panels off the car from the shed in Glen Innes and brought them home. The trim has been stripped off the bonnet and front panel and will be going to the blasters tomorrow. I'm hoping not too many holes come back. Some very crappy photos from my geriatric iPhone
1 point
-
I'm keen to come along. What is the plan for the day, my wife and youngest son are overseas and I have to take the other son to his soccer game. Mike1 point
-
this car is being parted out.. offaz1 point
-
now that ive finished working on the brown glitter turd i can get back into this car. Untitled by sheepers, on Flickr front guards all ready for epoxy primer. no dents and no rust. bonus. Untitled by sheepers, on Flickr also the total good cunt Edz (MrMcdoll) gave me another drivers door which is mint. its got a small dent in it and a bit of surface rust on the bottom and that's it! i got the rust off it last night and began removing the dent so its almost ready for primer too! (put a picture of the door here you idiot) stoked because that will take a bit of time and cost out of what Peter has to do. in other news i got all the glass guides and door hardware re-passivated while its apart. Untitled by sheepers, on Flickr progress!1 point
-
Just checked back through my thread and realized I've done a bit more than what my updates show. Will have to get some more pics to show some of the work I did on it last year. I scored a complete, rust free, bare chassis off a friend and grafted in a Jaguar XJS front crossmember. I'm nowhere near finished, at the moment it's just tacked in place. Planning to run bags all round so I've set it up so when they're fully deflated the running boards are about an inch off the ground.1 point
-
Reassembled and ready to go in Took the old engine out... There is always one bolt/nut that will essentially double the removal time! If you have never used a hot water-blaster i very much recommend using one if you have a greasy engine bay with 30+ years of shit crusted to it. Cuts through it like butter! Also im after a decent rust free bonnet and a drivers tail light if anyone has anything??1 point
-
Photo shoot. Now to find another pair of 225/40s for the front.1 point
-
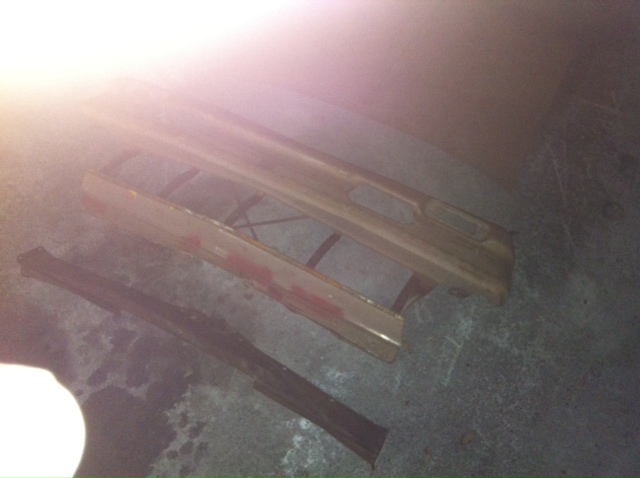
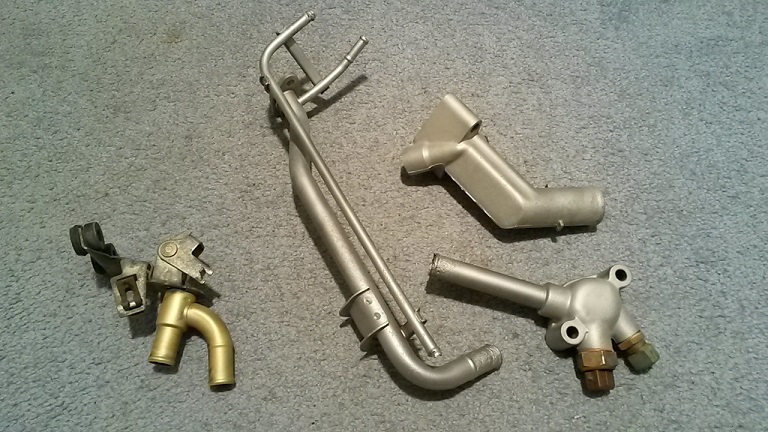
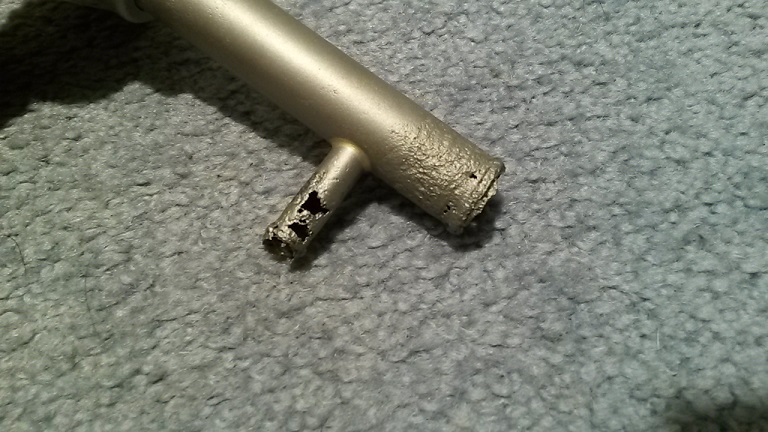
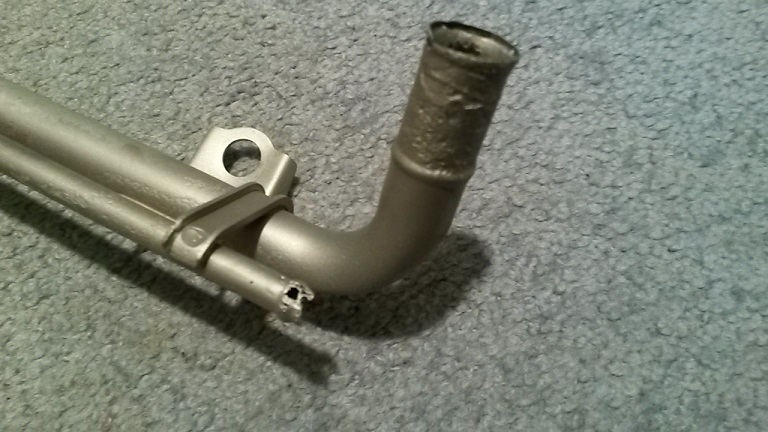
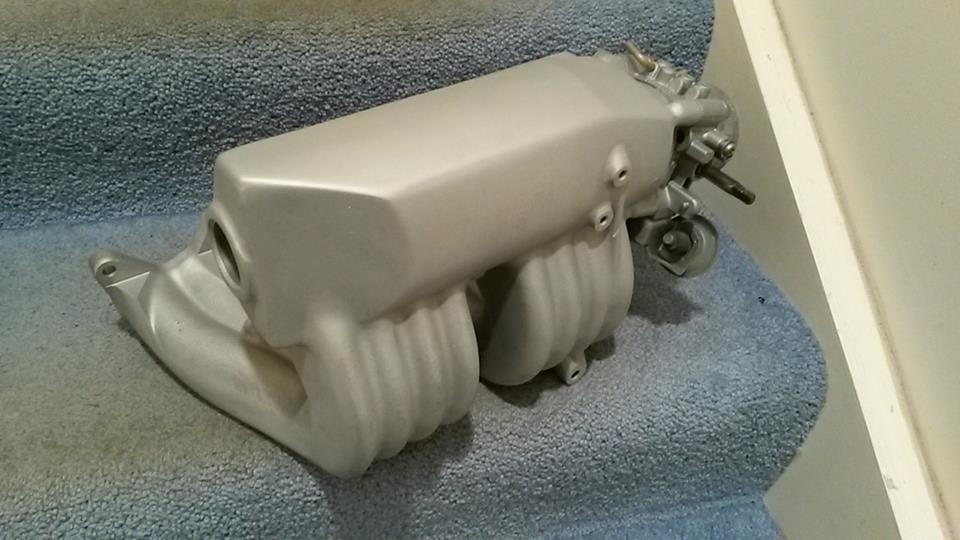
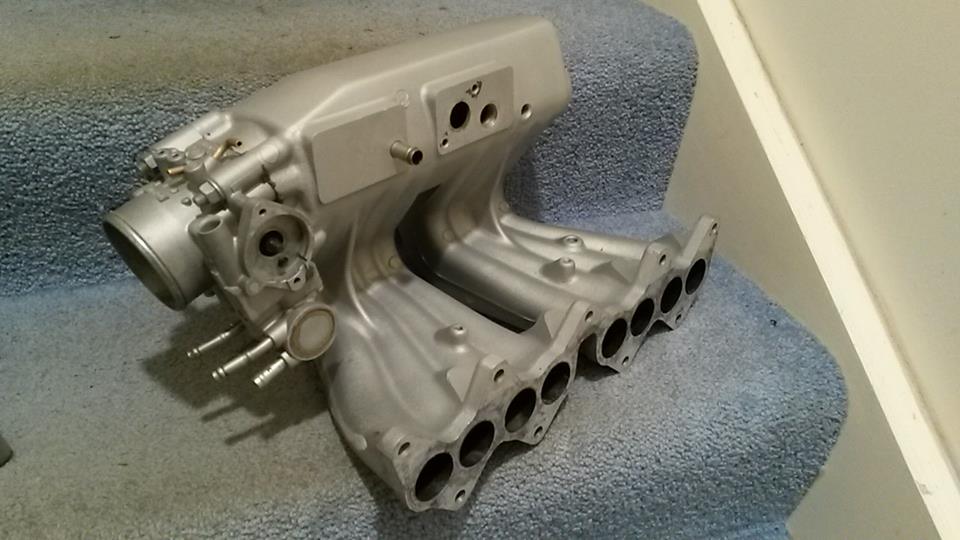
All the rust and corrosion cleaned off, a bit of fixing to do on the water/coolant pipes
1 point
-
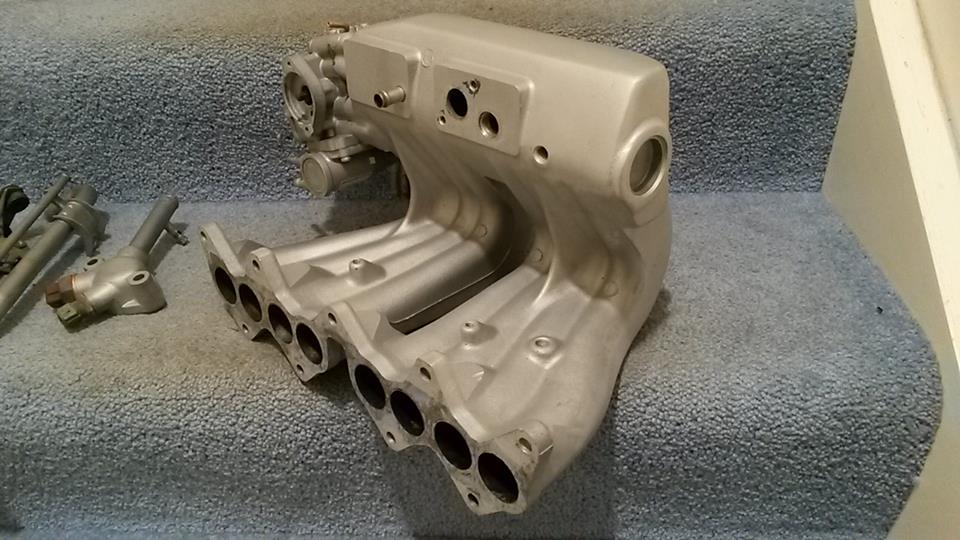
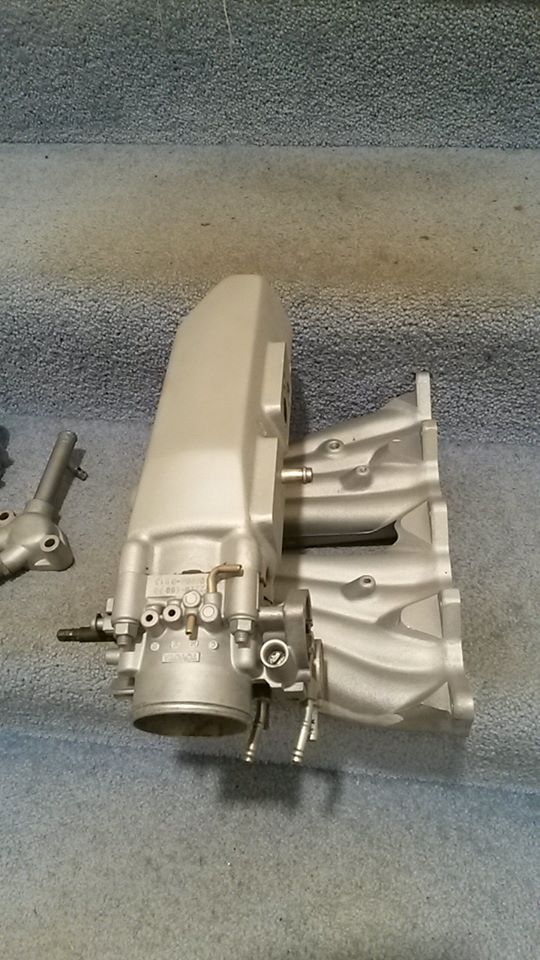
Manifold all cleaned up
1 point
-
BDA780 that would be great. The workshop sounds like an awesome place. Sheepers you should definitely come. There will be pies...1 point
-
Untitled by sheepers, on Flickr1 point
-
Ok ok. I'll attend the tour. I shall check if a tour of the workshop is all sweet and get back to you.1 point
-
1 point
-
I went down to the Panel Shop yesterday to have a look at progress. They have started with the rotten rear section, all the cavities that Holden never painted from new. Some nice work being done, I did have to remind Phil, the guy actually doing the work this is not a show car and the underside will get a nice thick coat of underseal. Has to be functional, not beautiful. It makes a huge difference being able to walk around under the car on a hoist, much better than on your back while is on jack stands. The ETA for finishing is a couple of months, this is their fill in job to keep the costs down for me. I promise photos next time I go for a look.1 point
-
spotted I'm hugely proud of this. The same issue as the immaculate ZERO3 as well, A++1 point
-
Just a placement sketch of gear, may be able to reduce the electronics oval tube down in size significantly yet. no allowances for tubes and wires yet, just pencil on paper so far.1 point
-
Should be a bit of fun, lots of noise and a bit of straight line speed once it gets going, will definitely still need the pedals for hills and starts. I'd like to make it "bolt on and go" and leave the bike as original as I can apart from new tyres , bearings and some brakes. And a new seat, its a bit lumpy. Initial thoughts are tubing sub frame, same colour as the bike while trying to keep it looking minimalist. Kero (jet a1) fuel tank parallel to the seat stalk, perhaps 4"alloy tube with a false bottom to hide the fuel pump. It drinks a lot for a tiny engine (350mls/min) so I wont be going for long distance records. Another oval or round tube to hide the ECU and battery and possibly the mini propane bottle (for starting) and run all wiring and tubing inside the engine sub frame, I hate seeing wires and crap everywhere. A quick release clamp around the seat and steering stalk to hold it all on, if that's what you call it. Will need to put controls somewhere. Open to suggestions on all of it, will do a couple of shoddy sketches and post them up.1 point
-
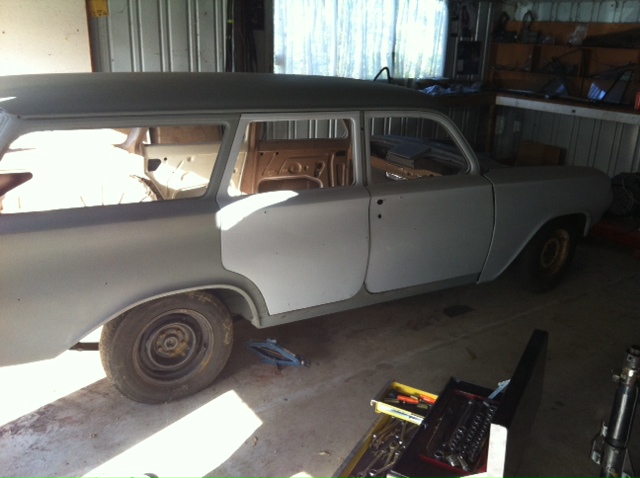
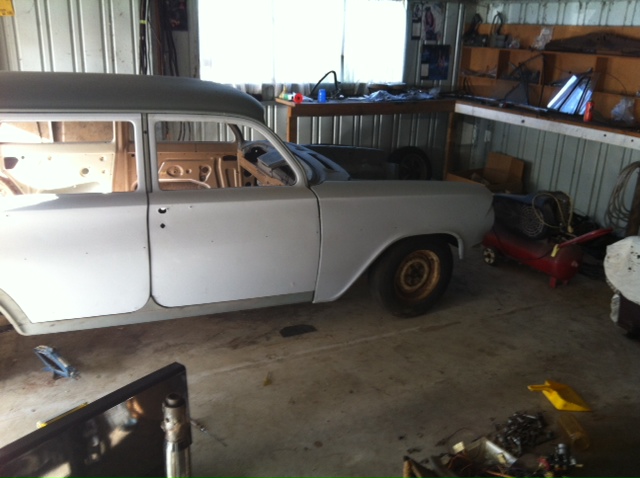
Today I played Hookey from work and got the car over to the panel shop. Managed to dodge the rain showers and only get a little bit of rain on it. My wife came and helped with the pushing around and winding the winch on the trailer. With the stress of the weather I forgot to take any photos. I will go down to the panel shop tomorrow if I get a chance and take a couple. Heres a couple of photos from the other day when I go the doors on and the threaded rod in to hold the front suspension up. It's got the 70's nose down thing going on big time.
1 point
-
locking in GP1251 point
-
Looks like a GP1251 point
-
I have a limited supply of 8 track blank tapes if any OS'ers have an 8 track machine in their car and want some music they can actually listen to.1 point
-
8 track machines I picked up 4 machines recently, 3 that can record and one that is play only, in addition to this there were several boxes of tapes including some still in box new tapes. 2 of the machines were working, but again they were a mess and covered in nicotine residue. Internally they are all pretty good and most of the work required was just cleaning, lube, removing labels that had come of tapes and munched up in the mechanism and a couple of dodgy capacitors The exterior of all 4 were sticky Buttons needed a good scrubbing with Jif All clean and ready to go. One is an older version and still needs a bit of work, the bottom 2 are going sweet.1 point
-
I'll just leave this here1 point
-
yeah, brb instant finance. hahah1 point
-
Got the 12" ROH Contessas powdercoated and slapped some new tires on them. Powdercoating colour was supposed to be silver, but came out a light grey. Very happy with the result. Went with Linglong Greenmax in the end. Nice and cheap. Will have to see how they perform in the wet.1 point
-
I forgot to paint the chain guard. I only have a front guard, thats getting a dose of white killrust.1 point


This leaderboard is set to Auckland/GMT+12:00