Leaderboard
Popular Content
Showing content with the highest reputation on 27/10/24 in all areas
-
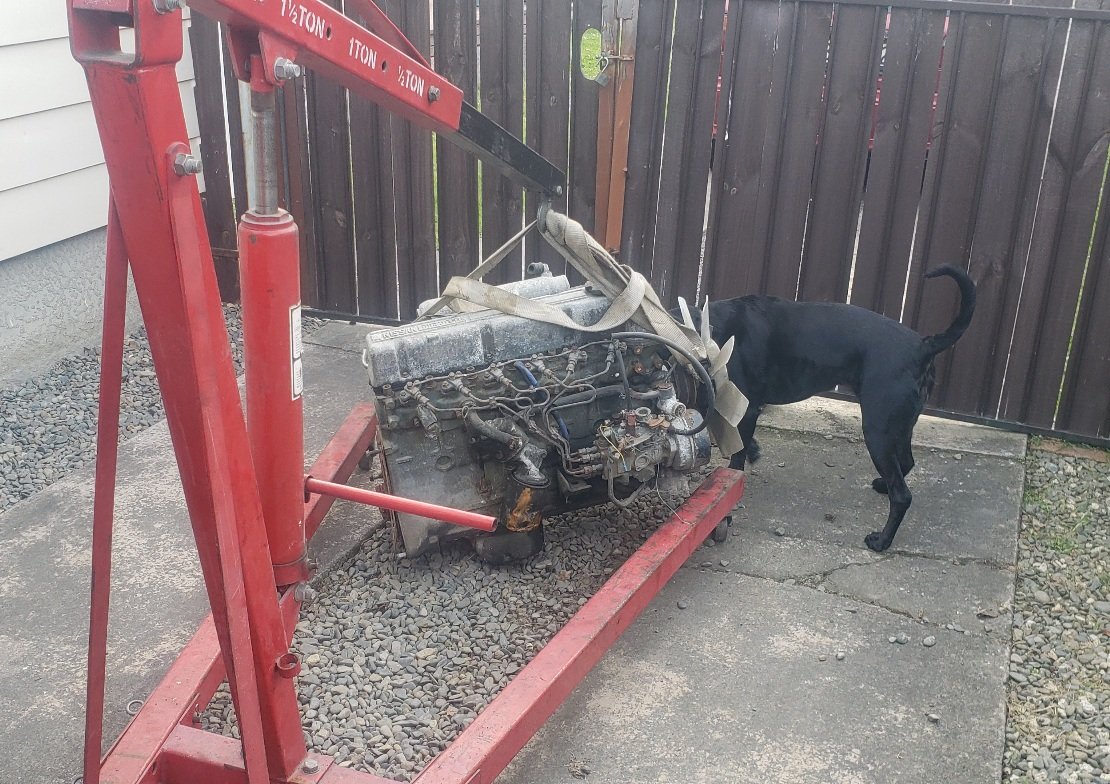
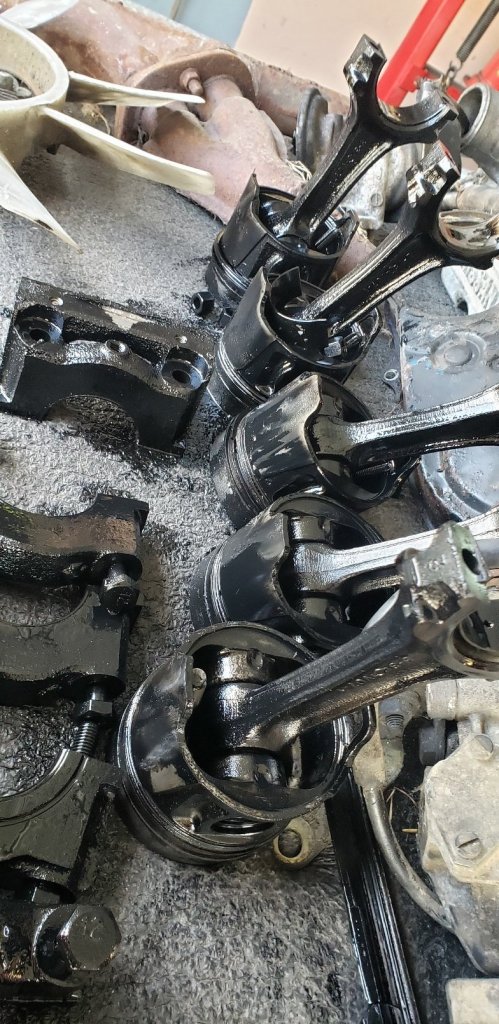
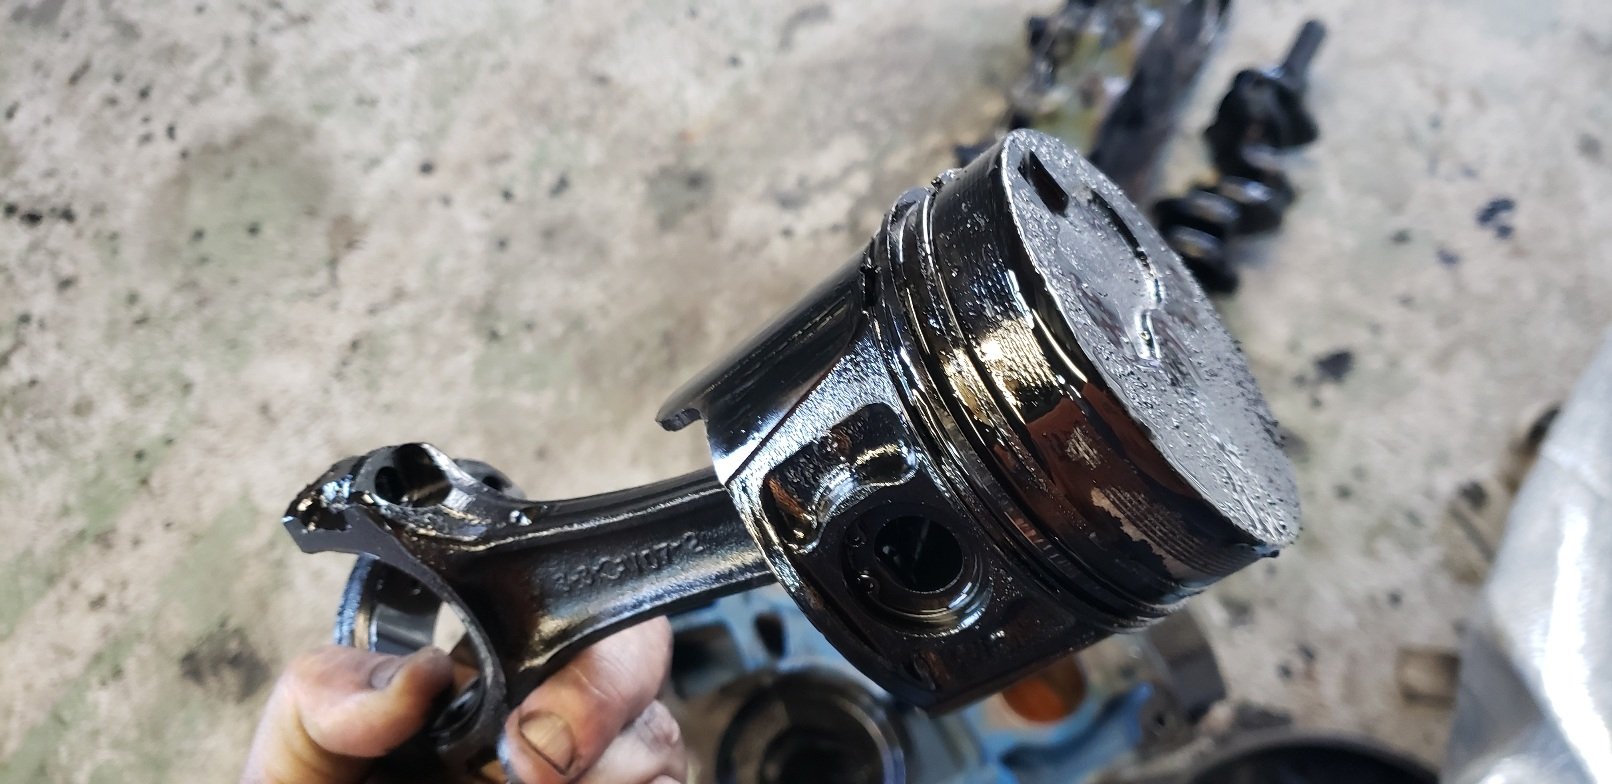
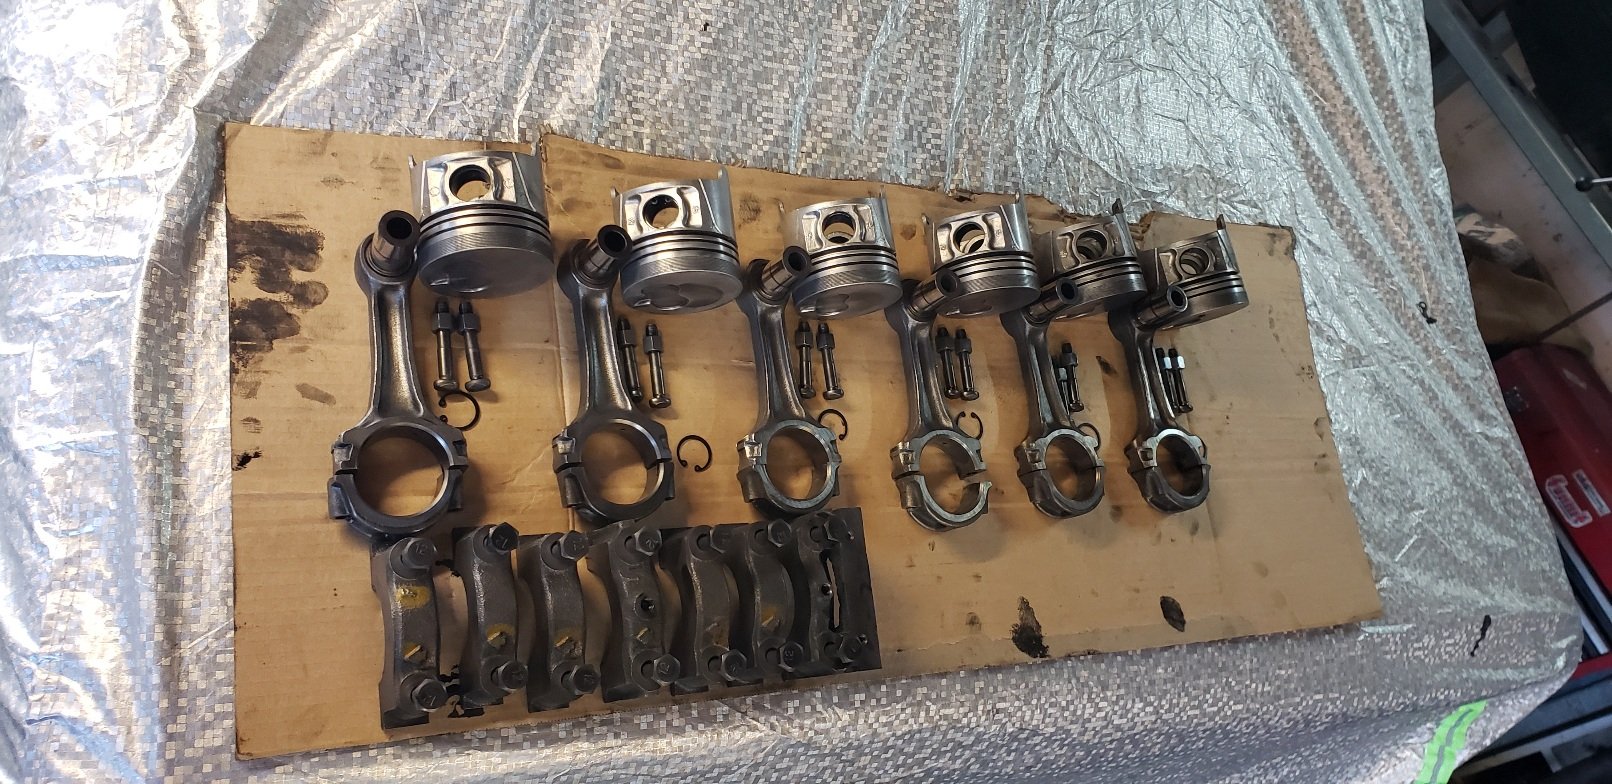
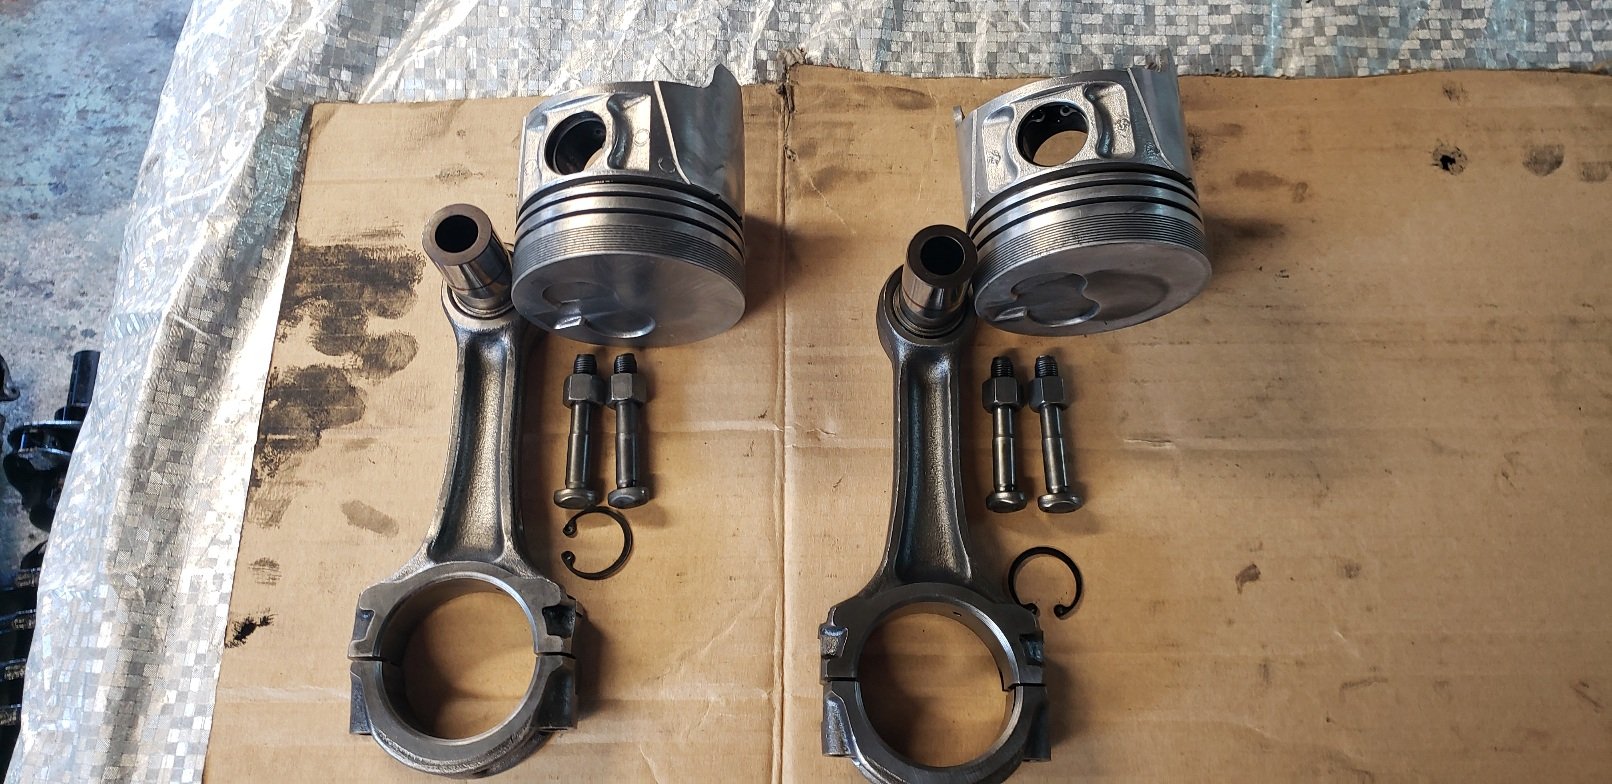
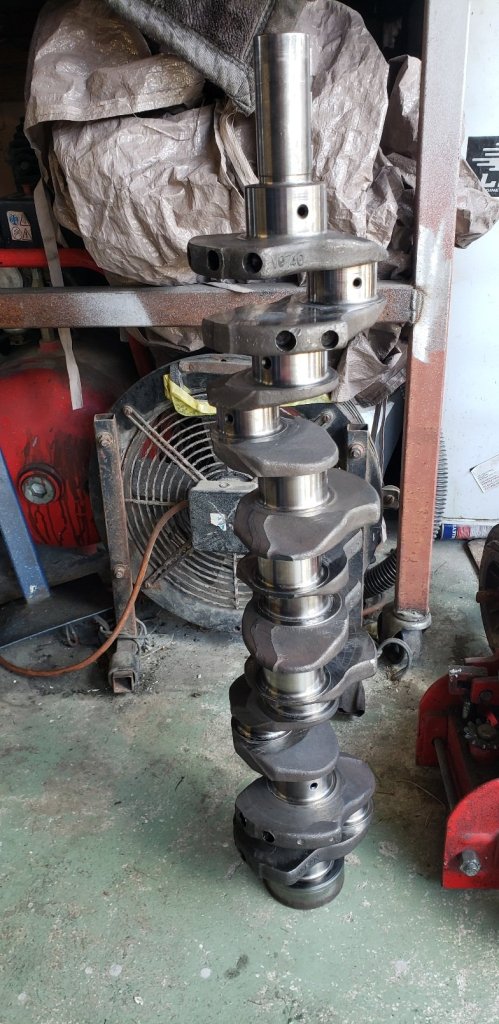
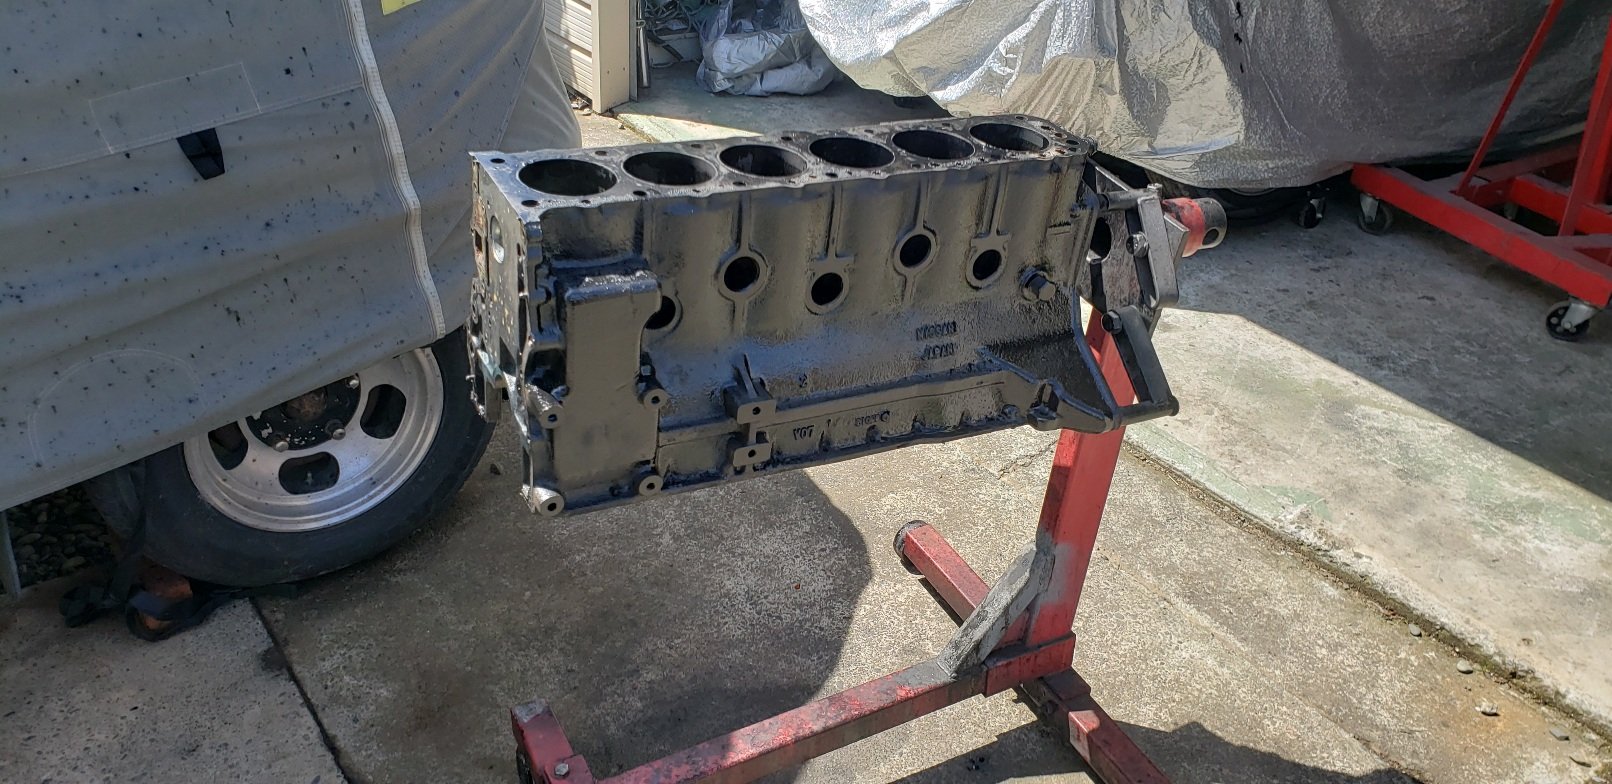
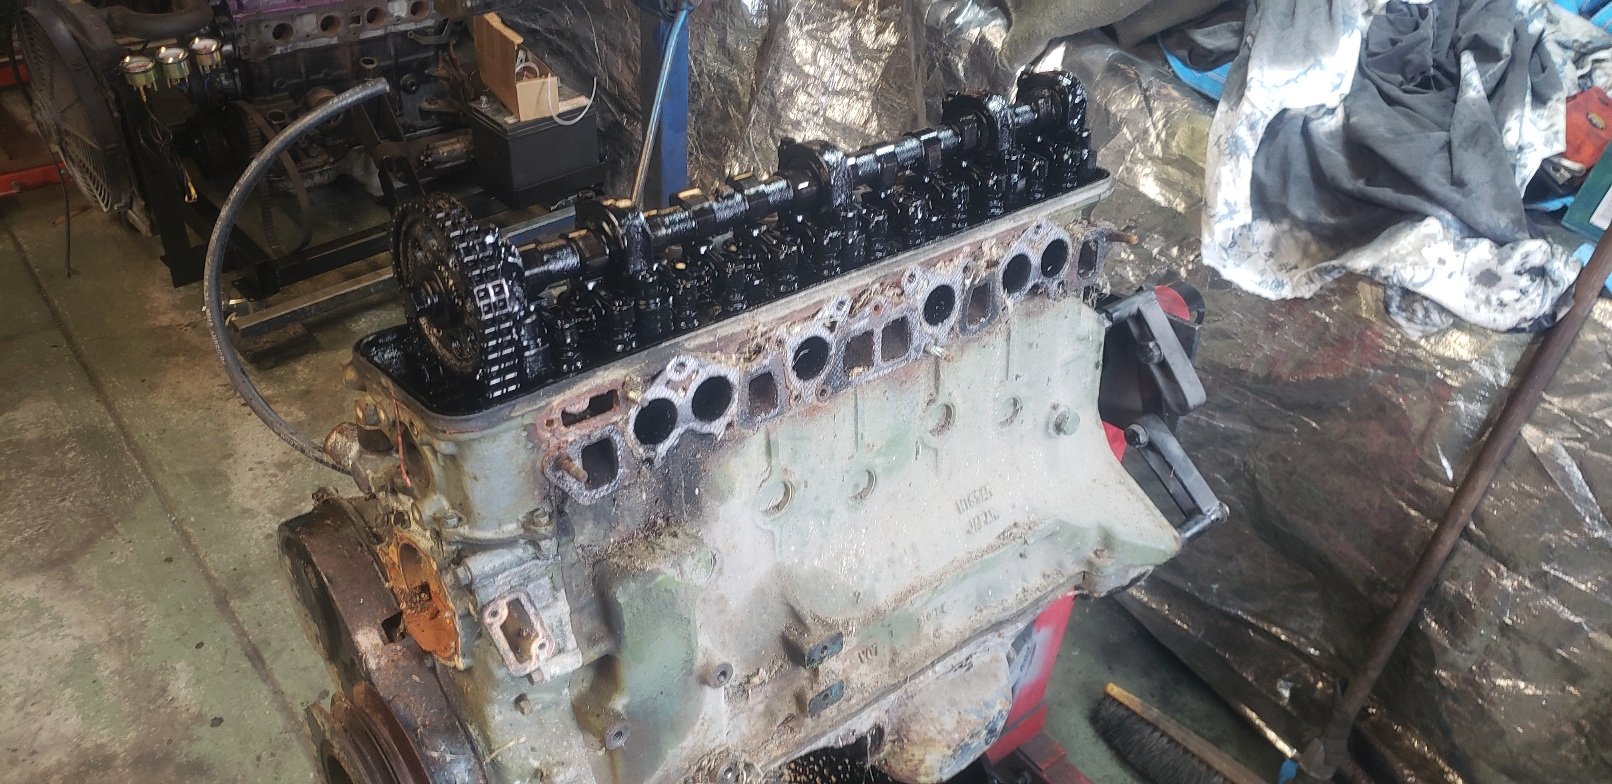
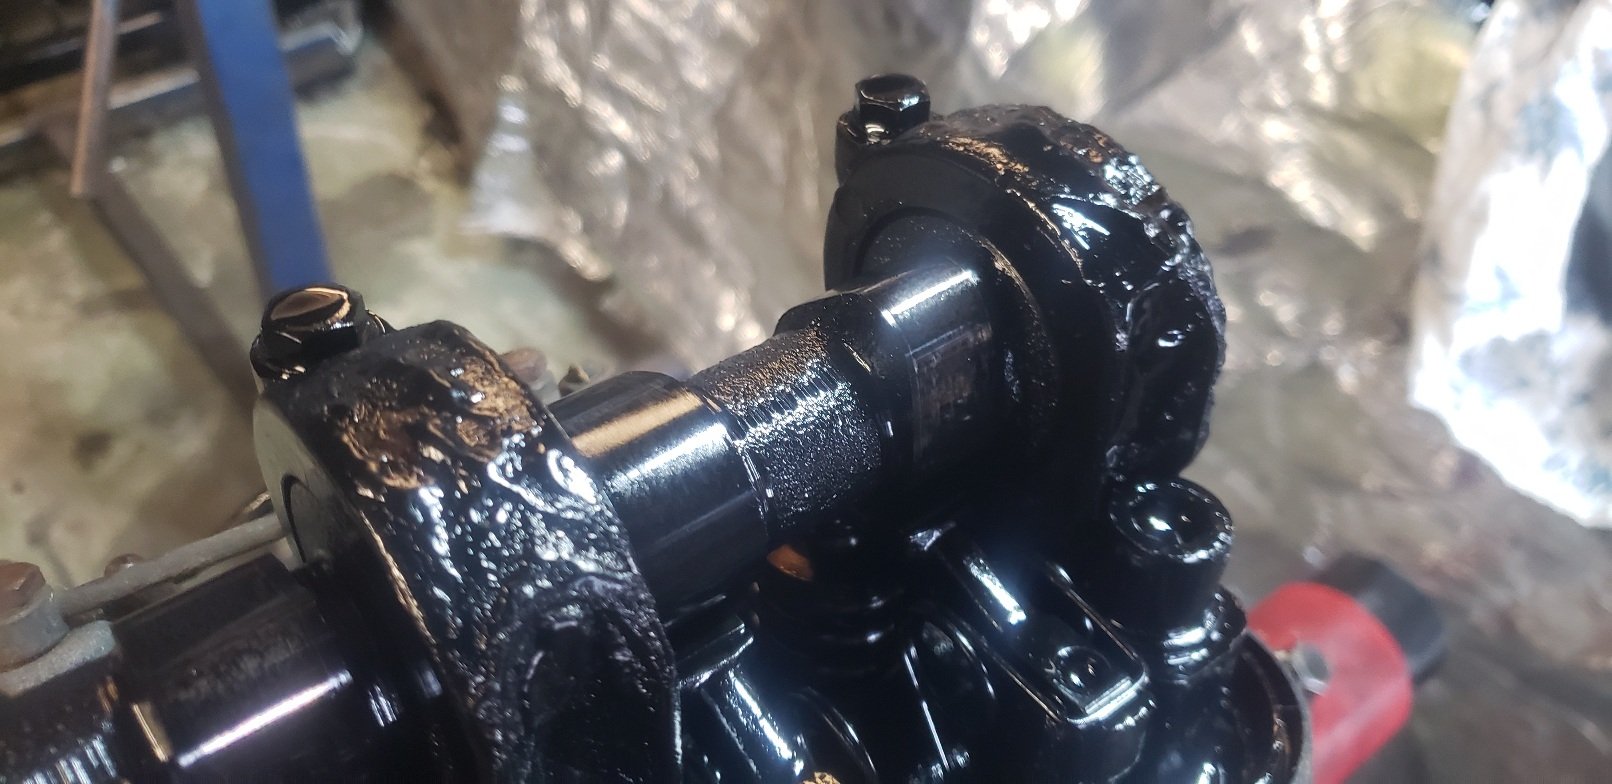
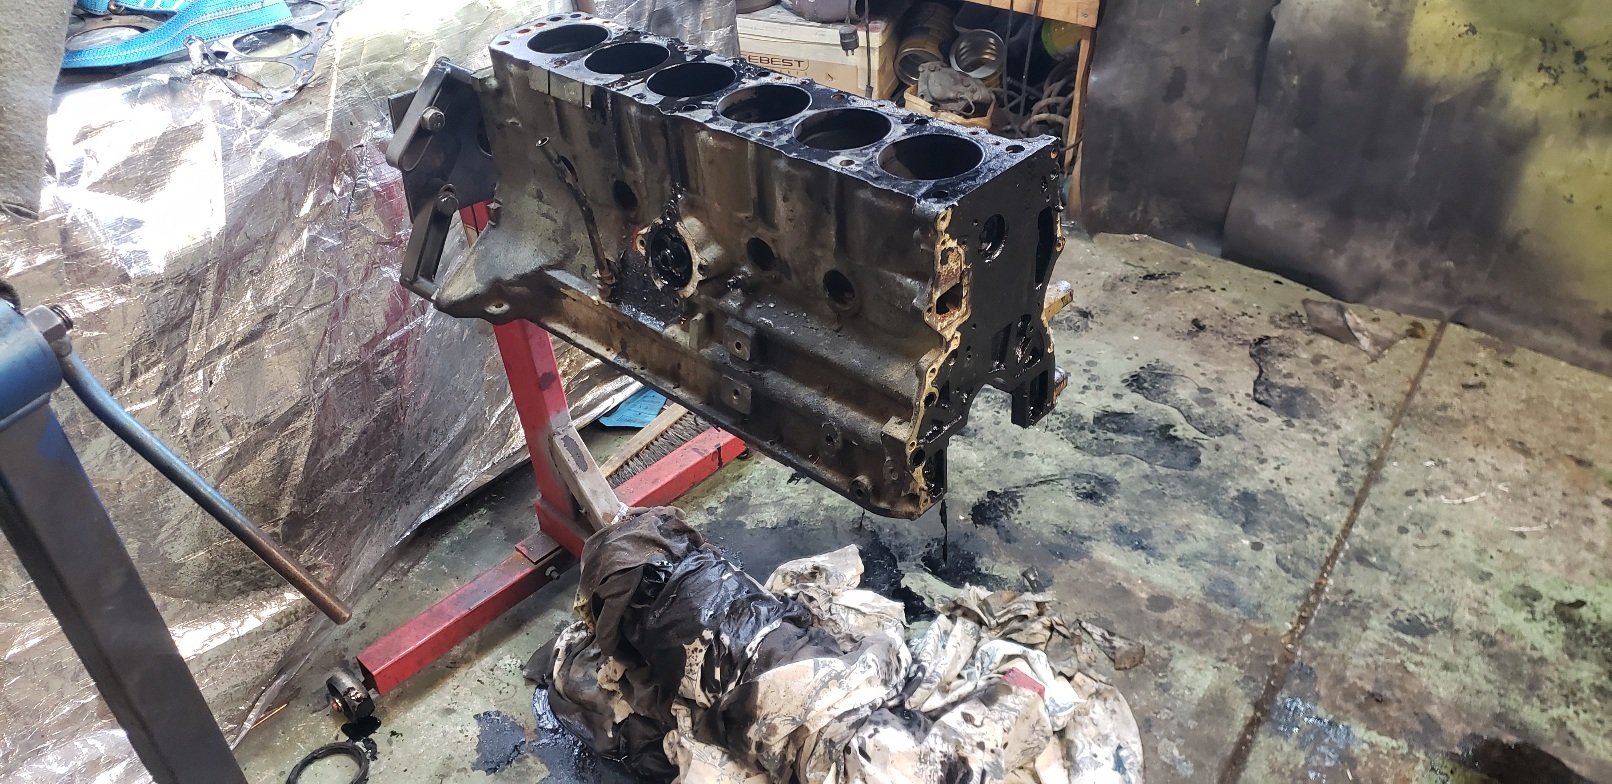
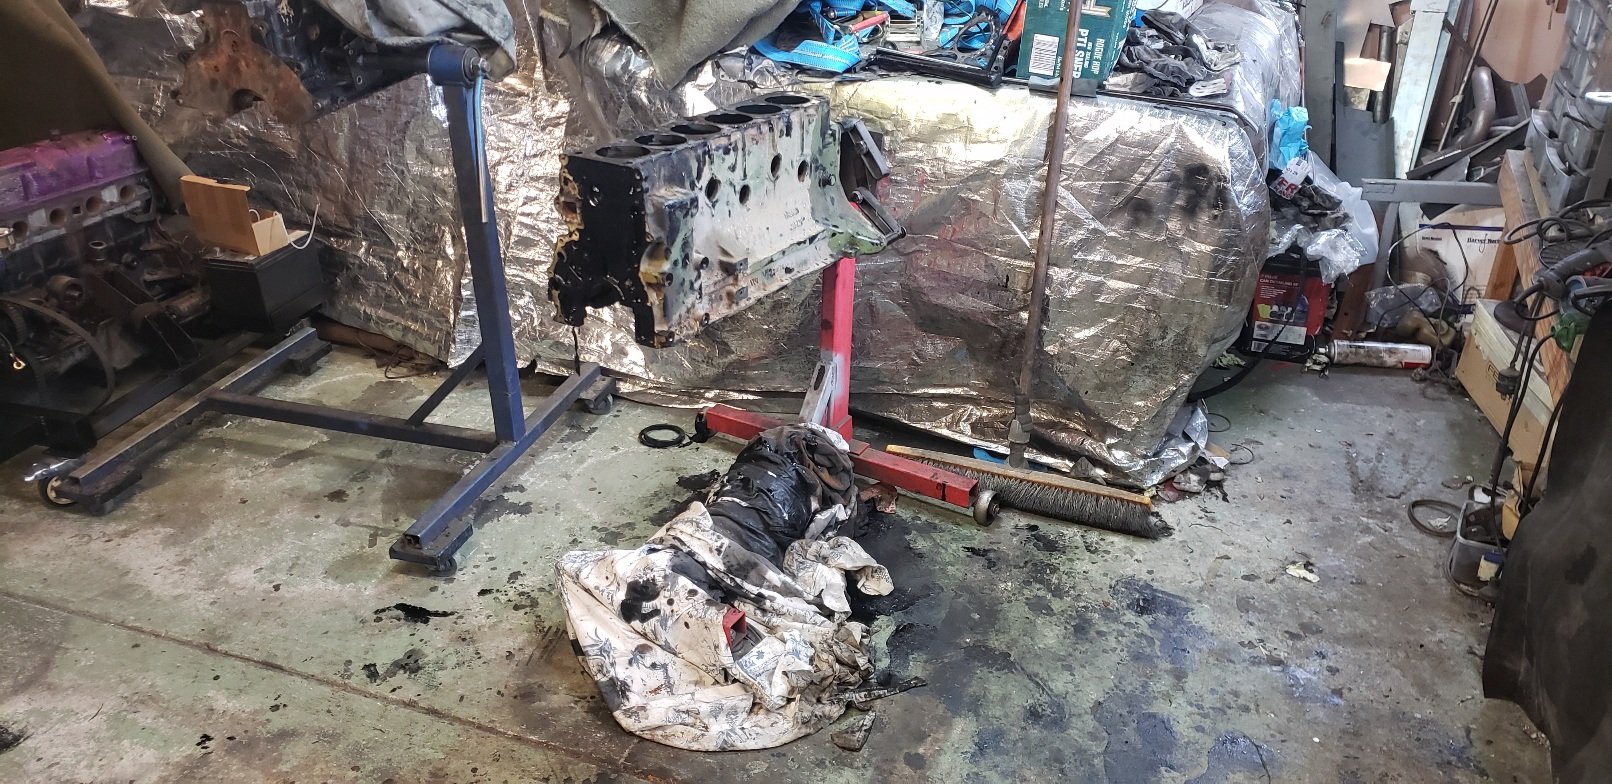
So the #2 motor is STD bore STD rings and bearings . The 1st motor is over sized pistons and .25 on the bearings. The bore in the 2nd motor seems perfectly fine and will be good with a hone. But this means I aming to have go use the dirty shitty black fucking pistons and rods so i stripped them all down, checked them all and gave them a clean and the main caps I'm going to use the crank from the 1st motor as it looks like its had a recent grind and is good condition. The block from the 2nd also seems in good condition and cleaned up well....no cracks found just yet !! A quick paint with some black and ill sort the surfaces out at a later date.. So just need some STD rings and .25 main and rod caps and ill be able to rebuild the block. As for heads the head from the 1st motor is in great condition and even the stem seals look new ..so ill not strip it ...I'll just bolt it on as is. Cheers14 points
-
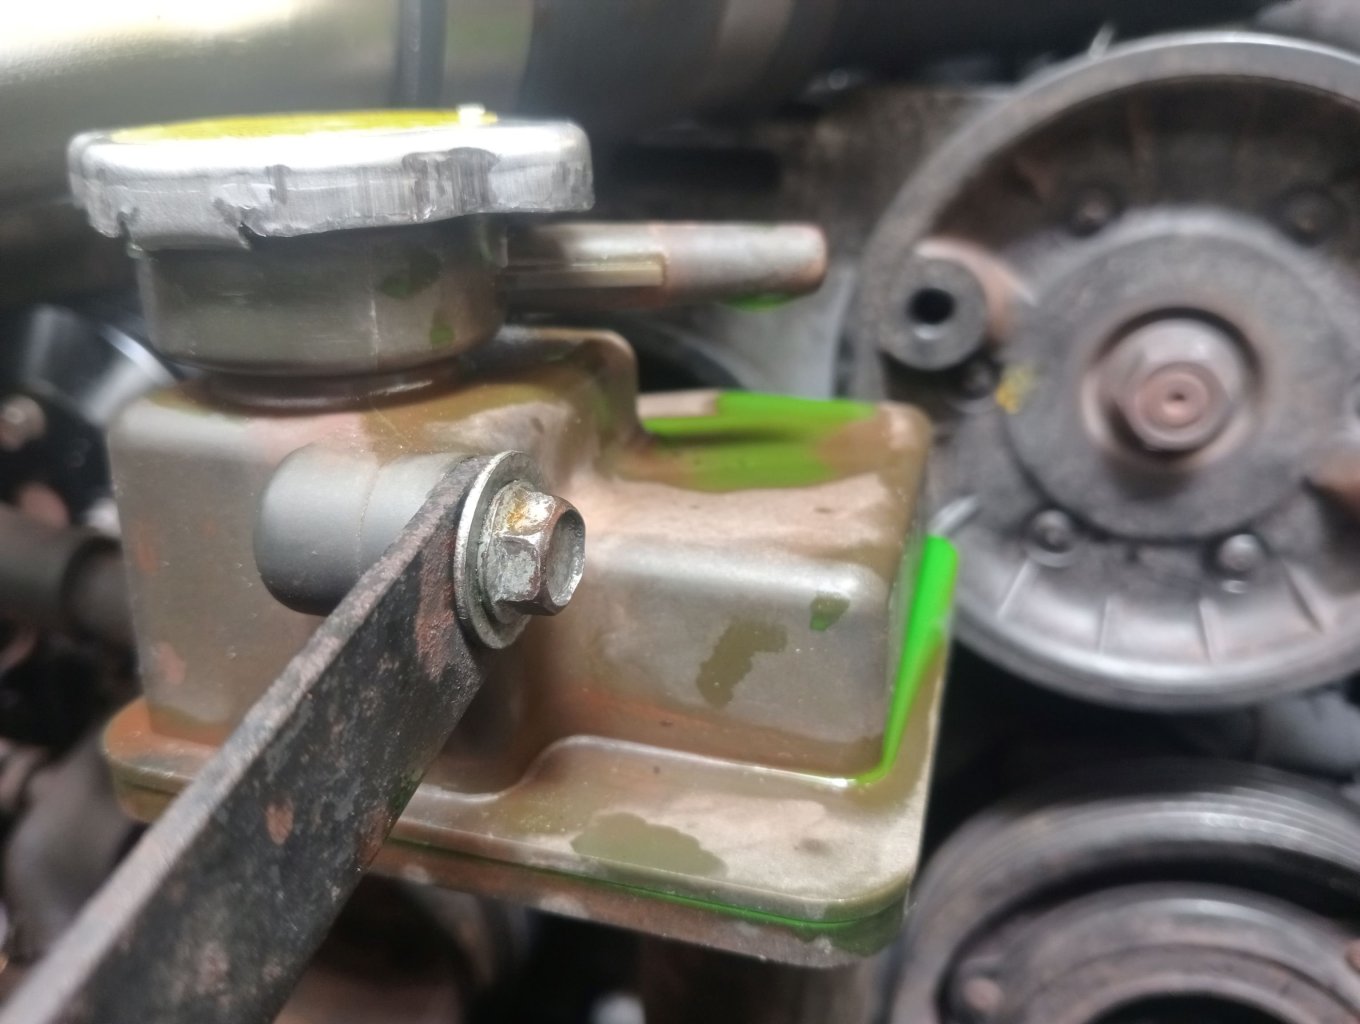
The rusty shit is definitely concentrated around the coolant filler cap, someone's taken it off when the engine was hot for sure, but that could've been anytime really, it was a bitch to clean it off off Finally bought it home and after seeing it the wife has come around, big time. In her words "I just assumed you'd bought another absolute piece of shit"10 points
-
Earlier this week, I adjusted the rear brakes up, and adjusted the handbrake. I'm still not 100% happy with the pedal feel. But I'll give the cunt another bleed once the engine runs/there's vacuum on the booster. Moved on the the kick panels. They were more or less intact. The passengers side had a wee bit broken off. I reinforced it with 3m aluminium foil tape, (I have done some unbelievably whorey shit with that stuff in the past) and glued the join with arelditie. The driver's side in particular was pretty worn from year of the driver getting in and out. I cut some whole where the speaker pockets are forward of the A pillar. Then bought some self adhesive vinyl off ali. Unfortunately the "don't care, no responsibility" approach of China post saw is creased. And the lines are still visible. I scuffed up what remained of the original paint. And decreased it with prepsol. Traced a larger outline and cut it out. And it turned out okay. Is it perfect? Hell no. Do I care? Also hell no. I think this stuff is meant for doing furniture repairs. It's quite stretchy. And while I dunno how UV stable it is, I think you could easily use it on a motorbike seat. Pics.9 points
-
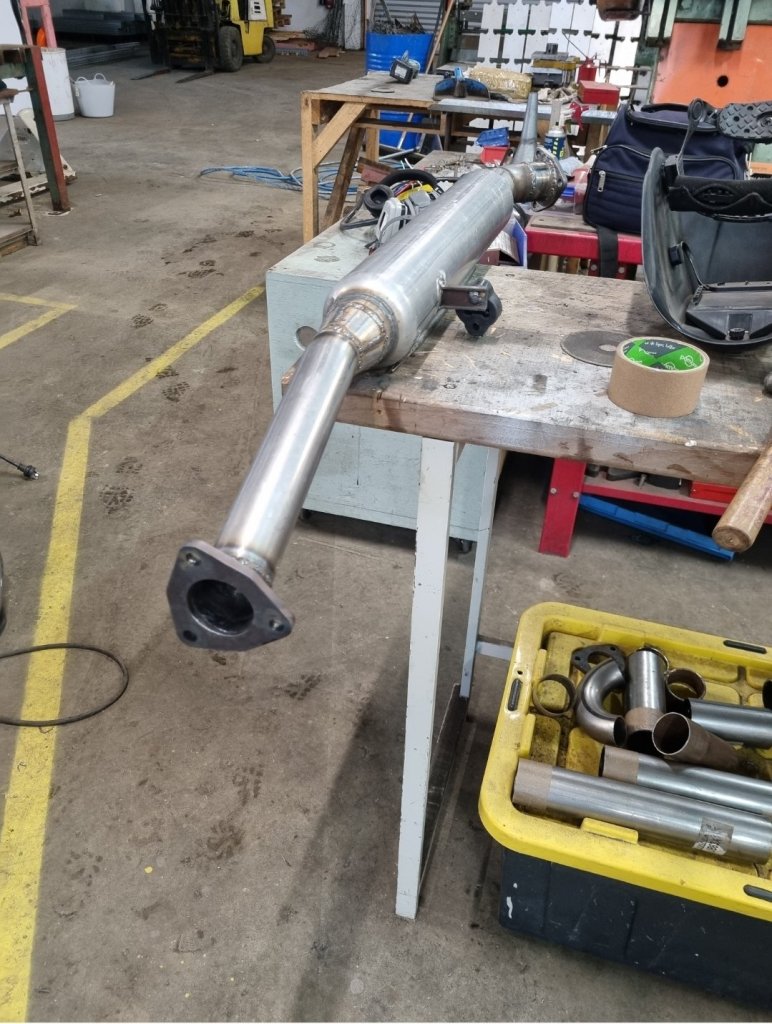
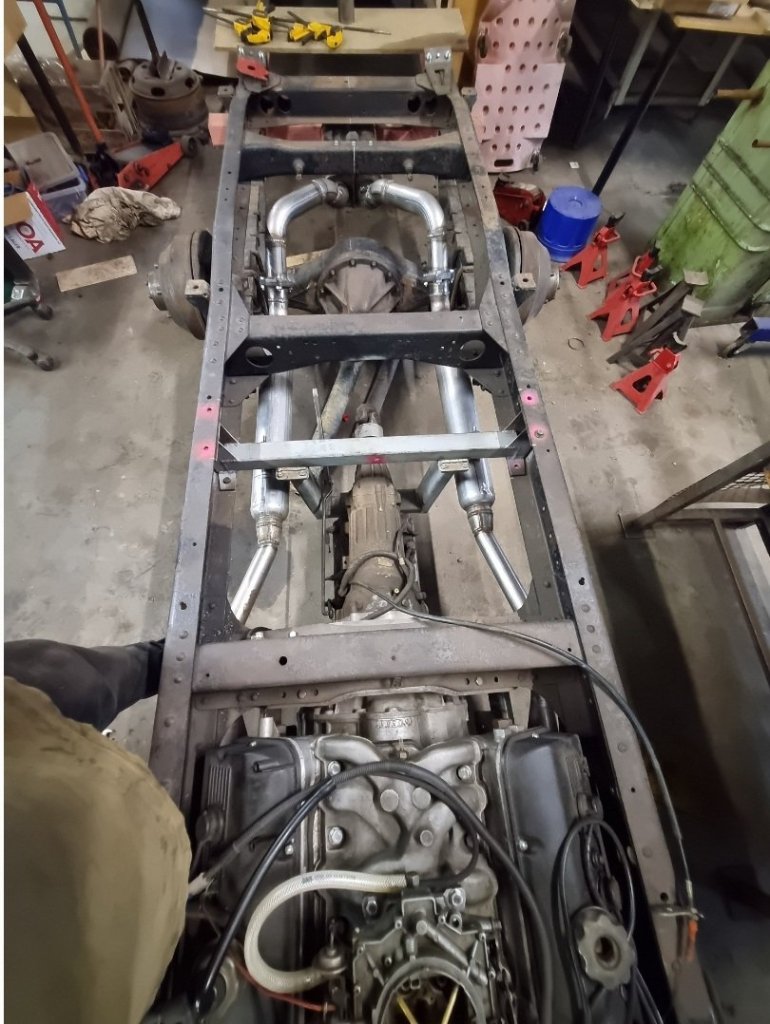
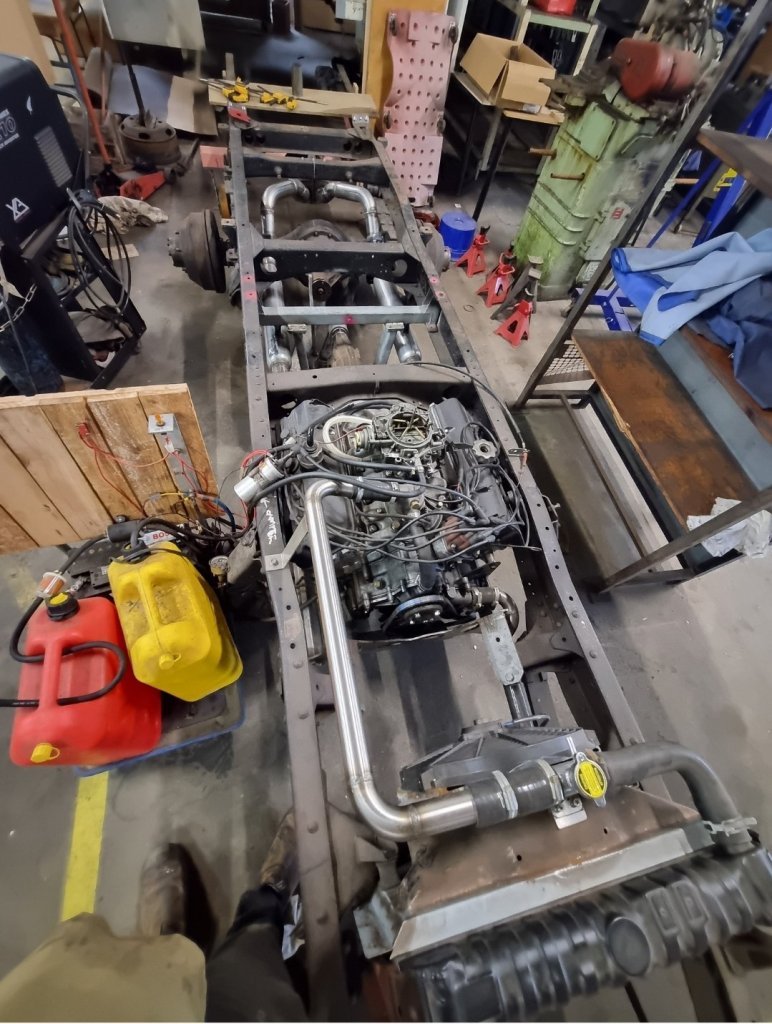
Finished joining the dots. It sounds perfect, not too loud, doesn't get raspy with a rev. I'll post a video some time. I'll put a tail pipe on once it's all together and I figure where it's going to run. It had a slightly noisy lifter sound this time which seemed to dissipate with time and I noticed some fan belt squeal too. Perhaps I couldn't hear those things prior when it was uncorked. Will investigate. Stoked to get to this point. It's no show pony but good enough. Final engineering tasks on/around chassis are to mount spare wheel hanger a bit further back, as the muffler occupies the position where that was. Build the handbrake caliper mounting. Finish gear shifter things. I got an auto column shifter from an early Previa at pickapart which have a similar 4 speed auto. It also has an overdrive button. I need to check out lever linkage ratios but have a pretty good idea how that's all going to go, half of it's already built. Probably only other things are to build an additional fresh water tank which will occupy void above the trans or down low in front of radiator above front axle to push a bit of weight forward to counter the engine setback and spare wheel shift. Also think about mounting a trans cooler - I'm not sure if I should do this now or just wait till it's on the road and measure trans oil temp to get a feel for size of cooler needed?9 points
-
Yes, but the CCM says that Rotarys are only allowed to use missile switches for everything and the switch panel has to be covered in camo material.8 points
-
I got the fuel tank back from being cleaned out. Three days sitting filled with some caustic solution. And a day and a half after that filled with citric acid. (Apparently the citric acid neutralizes the caustic) It's a fuckton cleaner inside than it was. Unfortunately looking inside I've spotted two small holes. The galv coating on the outside has been fretted off by the tank strap. This combined with probably some road dust accumulation has resulted in a bit of corrosion. It's likely fume free now, so won't be too hard to fizz up. I'm also going to change the fuel pick up. But I'll do a more in-depth post about that another time. Here's a shitty photo. (Just in case you have a burning desire to know what a valiant fuel tank looks like)8 points
-
There are no photos to accompany this post, so you'll have to use your imagination. I'm sitting knee deep in dirty water with the boat pitching all over the place. I tried bailing the water into the sink but the sink wouldn't drain. So I'd bail it into the toilet, then flush the toilet when the bowl got full. Then spew into the toilet, then it would all slosh out when we got a wave, them bail it all back into the toilet, flush and repeat. Water was coming out of the shower drain pump and seemed to be siphoning in from the sea. I guess the level of the hose was below the water line with the boat leaned over. So I shut off the drain valve through the hull. Eventually got rid of all the water and went back up on deck for another spew. Dad was soaked through having had a load of spray come over the boat. The wind was up to 28 knots, we were on the edge of control and needed a sail change and another reef in the main. Slipper island was only half hour away so we decided to drop sails and motor there to check on our leak and recover a bit. While motoring towards slipper island, dad went down below to change and found the carpets soaked, his bedding damp and with shit weather forecast for the next few days - nothing was going to dry out. The Whitianga race was a DNF, the Mercs were still at least 5 hours away and we would be motoring head first into the wind and chop making 5knots at best. So we turned around, pointed the boat back at Mt Maunganui and put the mainsail up. With 25knots of wind behind us, we spent most of the ride home blasting along at 8-10 knots with bursts up to 14knots surfing down the swell. Made it back home in 4 hours and had a great time doing it.6 points
-
5 points
-
Had another lift out and drained a gallon of milkshake out of the sail drive. Filled it with new oil since the seals I need are on backorder and the oil is cheap. I temporarily added a header tank to the gear case (using a Mondeo clutch reservoir from pickapart) so the oil level will be above the waterline hopefully slowing/stopping the ingress of seawater. It's working so far and should get me through till the new bits arrive. The new jib also arrived and looks good. Haven't tried it in anger yet but it flew nicely on a trial sail up the harbour in light winds. The autopilot is also working great! All set for the mega exciting Legends regatta on labour weekend.5 points
-
😀 That made me chuckle. It could be as fast as the original, go 4 times as far on a tank of fuel and upset so many people. Obviously it would sound and smell completely wrong….,5 points
-
Would have been easier to start with a BMW, no need for indicators at all then.4 points
-
4 points
-
4 points
-
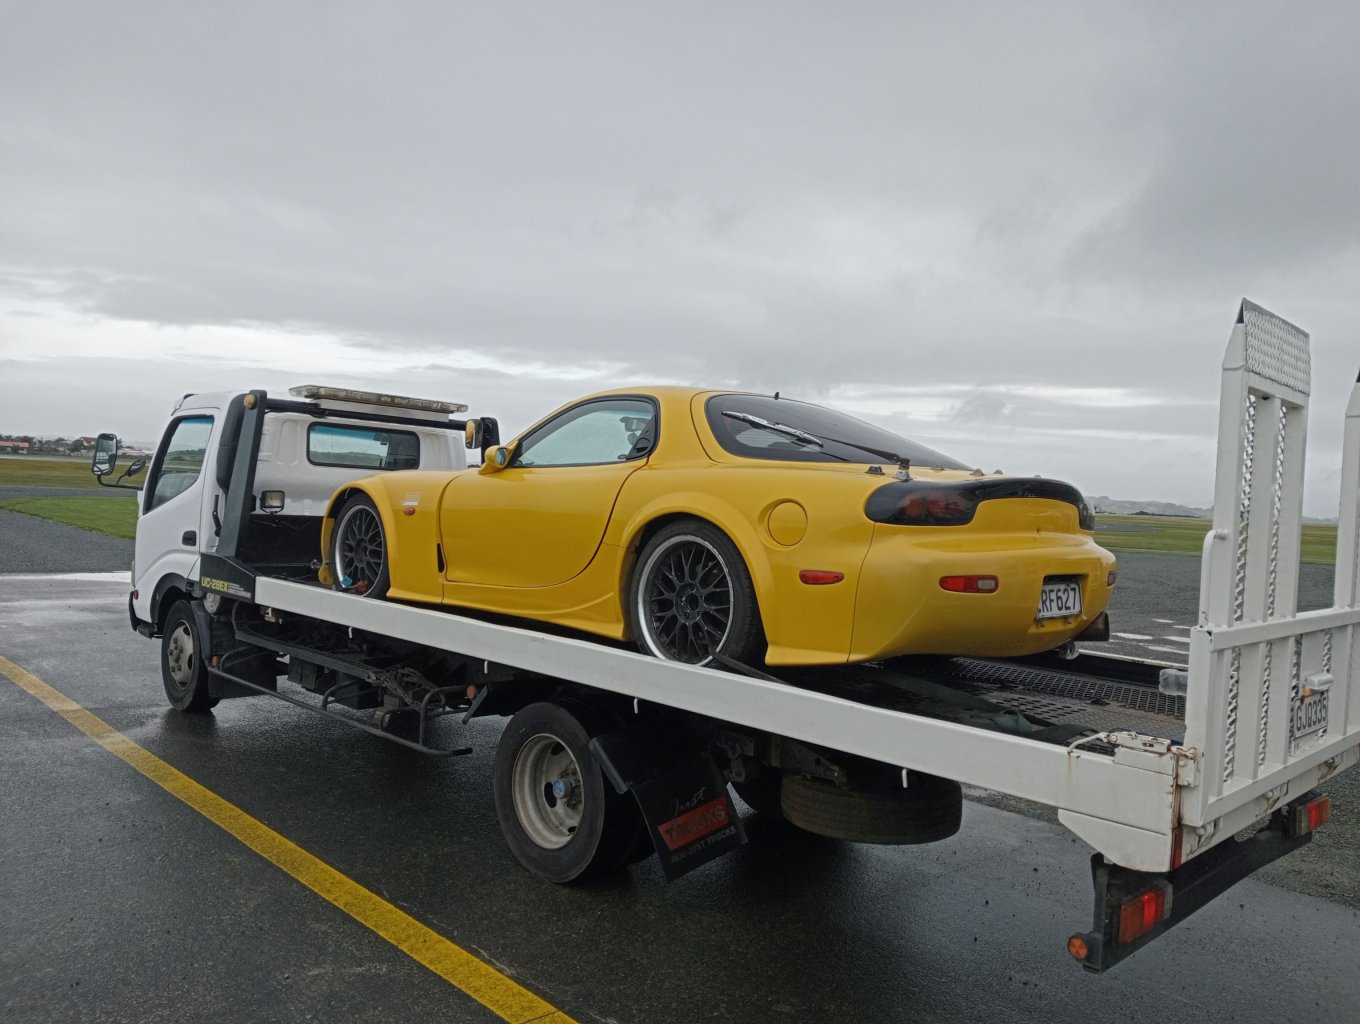
I can't quite remember the exact moment that I suddenly became aware that I needed an FD RX7, but it became a full blown itch over the next few weeks, checking trademe and FB marketplace pretty much daily - but also noting that the price of these cars was starting to tick down, and a lot of stuff wasn't selling. So the third time the price dropped on this one particular machine that was already in the cheaper category happened to coincide with half a dozen beers in my gut and before I knew it, I was the proud owner of a 1997 FD3S so it arrived on the back of a truck, which I am told is how these vehicles generally prefer to travel from A to B It was a quiet day so I anticipated this wonderful opportunity to dig around the thing and see where and how I'd been hoodwinked, but instead the towie turned up at exactly closing time so all I could do was roll it into the shop and bugger off for the weekend.3 points
-
3 points
-
Lessons learned: Sail changes are a lot harder in choppy seas. Do them early. I knew beating into the wind is hard work but underestimated how miserable it gets on a long trip. Fix that shower drain pump and sink drain and make sure the same thing can't happen to the toilet outlet. If lots of smart people leave the day before, they might be on to something.3 points
-
3 points
-
3 points
-
Last thing today I took it for a drive around the airport which was interrupted by a BZZZZZZZZZZZZZZZZZZZZZZZZZ which was pretty fucking obviously trying to tell me something was up. the "add coolant" buzzer and light was on and the temp was definitely higher than it should be. I had drained and flushed the coolant a week or so ago and thought I was pretty diligent in bleeding the air out, so I topped it up (and it wanted quite a bit), gave it another run, and... coolant all over the floor, under the overflow bottle. I had admittedly seen a little bit of coolant on the floor after driving it in but to be honest I filed it under "I don't want to see that". So again, another "ohhh that's why it was cheap" moment. bad water seals? is the engine pressurizing the coolant and blowing the water out of the separation chamber? nope, just a bad pressure cap on the chamber. topping up the filler, it was running straight out of here and into the expansion tank. with a bit of heat in it it would've been fair pumping out. a $37 fix, and everything's back to normal Suppose I should talk about how it actually drives? so yes it starts hot and cold (and very hot!) so I think the engine is, actually, pretty good. It's got 78k on the clock which is probably still young enough, certainly for what I paid. If it craps out at 100k that'd probably take me decades to run that figure up. with standard porting and turbos it probably doesn't set the rx7 world on fire, power wise - frankly that suits me. my other cars are a pajero and a triumph, and this is the fastest thing I've driven in quite some time. And it's harsh as well, it's loud and smells like two stroke and the suspension is hard as hell. a million years ago I had two series 1 rx7's, one was bog stock and the other one was more extreme than this. 9 times out of 10 if I was going somewhere I'd jump in the standard one. So I'm super glad that this has a comfortable interior, I guess I just wish it were a little more tame. maybe I'm getting old? Only real plans to come are to hunt down the last bits of interior and get it wof'd ........."shouldnt take much" says the previous owner.........3 points
-
Because you can get brand new parts for "drift chassis" nissans really easy, I opted to use silvia gearshift grommets etc. However the removable panel on the floor didn't have a big enough footprint to bolt the hold down plate to. I sourced some 3mm plate off a mate, and made a rough (emphasis on ROUGH here) facsimile of the hold down plate to weld to the cover plate. It's good from afar. But up close far from good. The knee-sans use bolts into captive nuts to hold the plate down. I would have used rivnuts, but again the floor cover didn't suit that. So I grabbed some m6 threaded rod, and fizzed the zinc off with some pretty nasty acid. Then being 3mm, I tapped the holes M6, and would them most of the way in. The hardest part was making the big holes. My only holesaws are ones that @peteretep left at my house. They're fine for wet cardboard. But they really baulk at steel. Buy the time I'd bashed my way through the 1mm floor cover plate, the saw was almost done. (It may have also been the one Peter and I munched a hole in the floor of his transit camper with) after bashing away untill the saw just made smoke and noise. Then I finished the hole by drilling eleventy billion holes around the outside and making the hole round with a carbide burr. A mate then tig'd the two pieces together, and welded the back of the studs I gave it a splash of black zinc, and slapped her together. Mr datsun used self tappers to hold the floor plate on. I elected to use rivnuts with caps crews. Pics for Fred.3 points
-
CCM has recently been updated to allow polished checker plate2 points
-
Many classic cars have this set up. Knows and switches on the dash. I have the indicators, headlight on/off, and wiper switch on the dash area to the left of the wheel in my l200 The only requirements are That they are accessible and not a interior hazard2 points
-
Had the next round of the short handed series on the day I picked up the new sail. I was really looking forward to flying it as I was expecting 15-20knot winds but the sailmaker (who was also in the race) suggested I might want to use something smaller as it was going to get exciting. Taking his advice, we double reefed the main and put up our #4 jib, the smallest in the collection. The wind built through the race until it was howling over 30 knots and the harbour was getting rowdy. The boat was ok with those conditions, but with maximum heel on - I managed to fall down the cockpit and mildly injure myself. So we withdrew from the race with a DNF.2 points
-
Thank you, I obviously wasn't searching for the right thing. I've done a couple of sealed wheel bearings as an assembly and they have been stiff but not rough like this, so presumed it was bad. Will leave it for now and put some ks on it and check again.2 points
-
https://brakeperformance.com/rough-feeling-hubs.php?srsltid=AfmBOorpByE41niF0yOxuzYkahRlSIGU9xF3sxIYrcUg6RJ2UbXKYXv8 Tldr. They come with "gritty" feeling grease, Let it bed in for a few thousand revolutions2 points
-
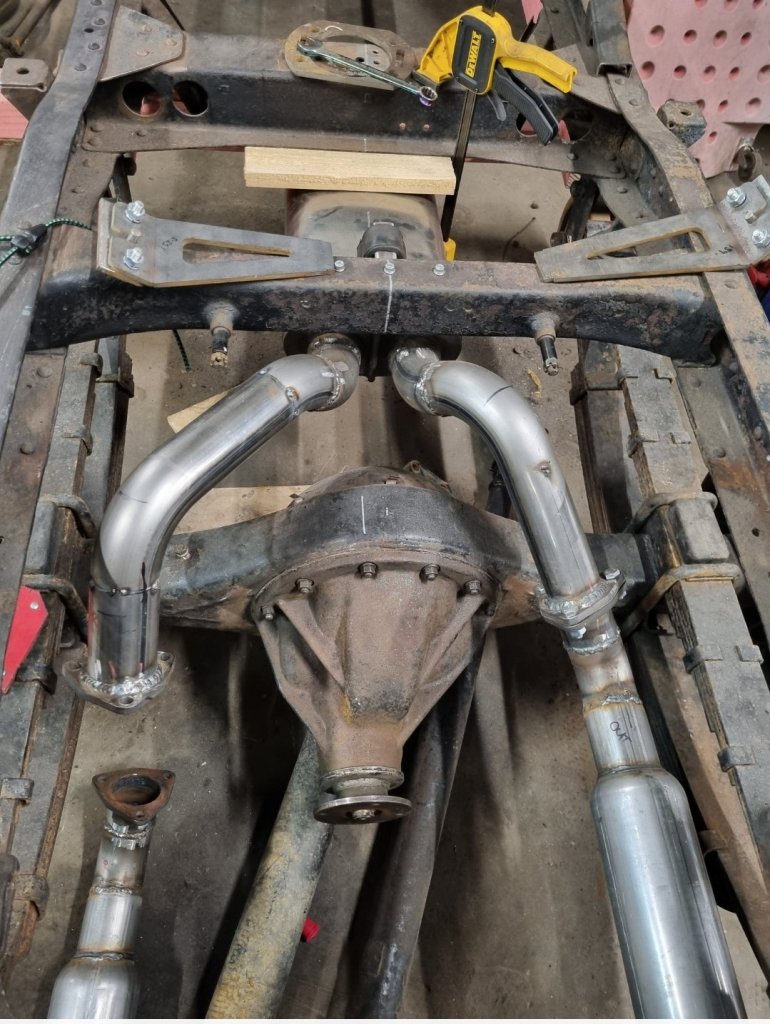
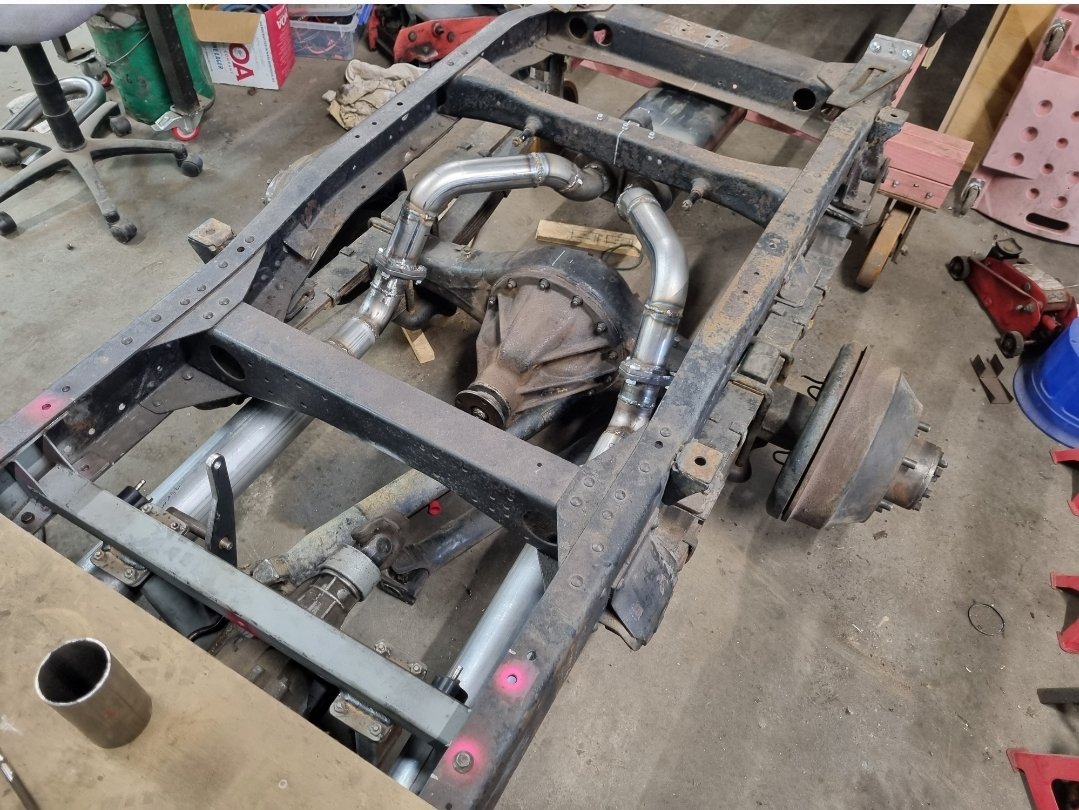
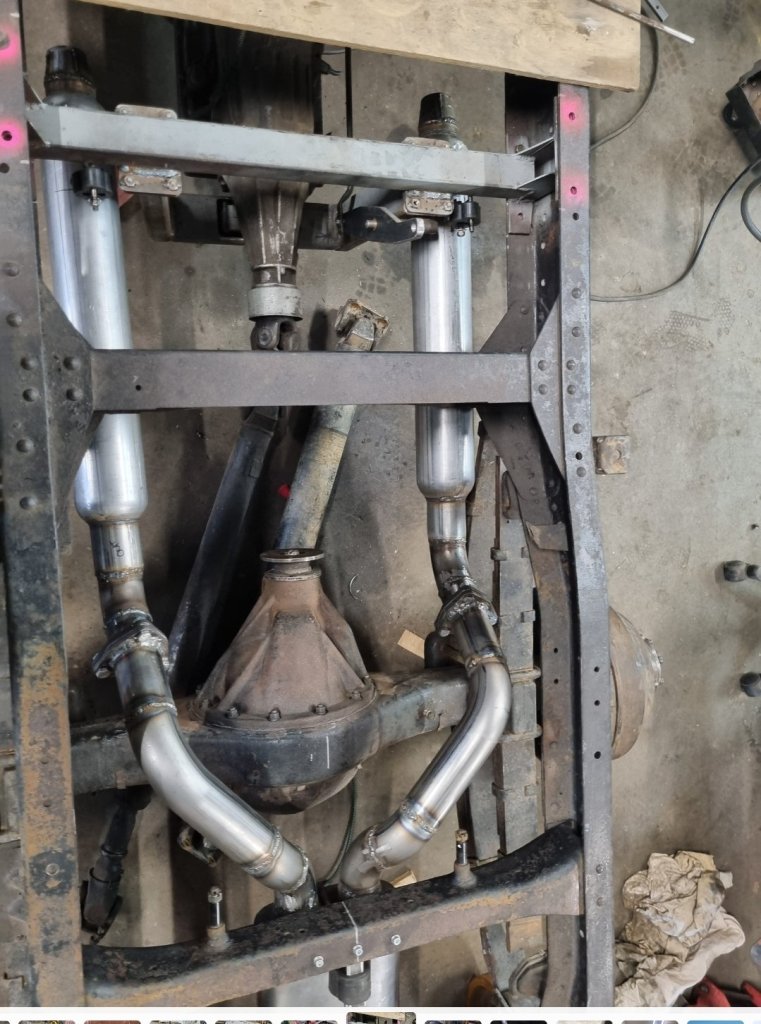
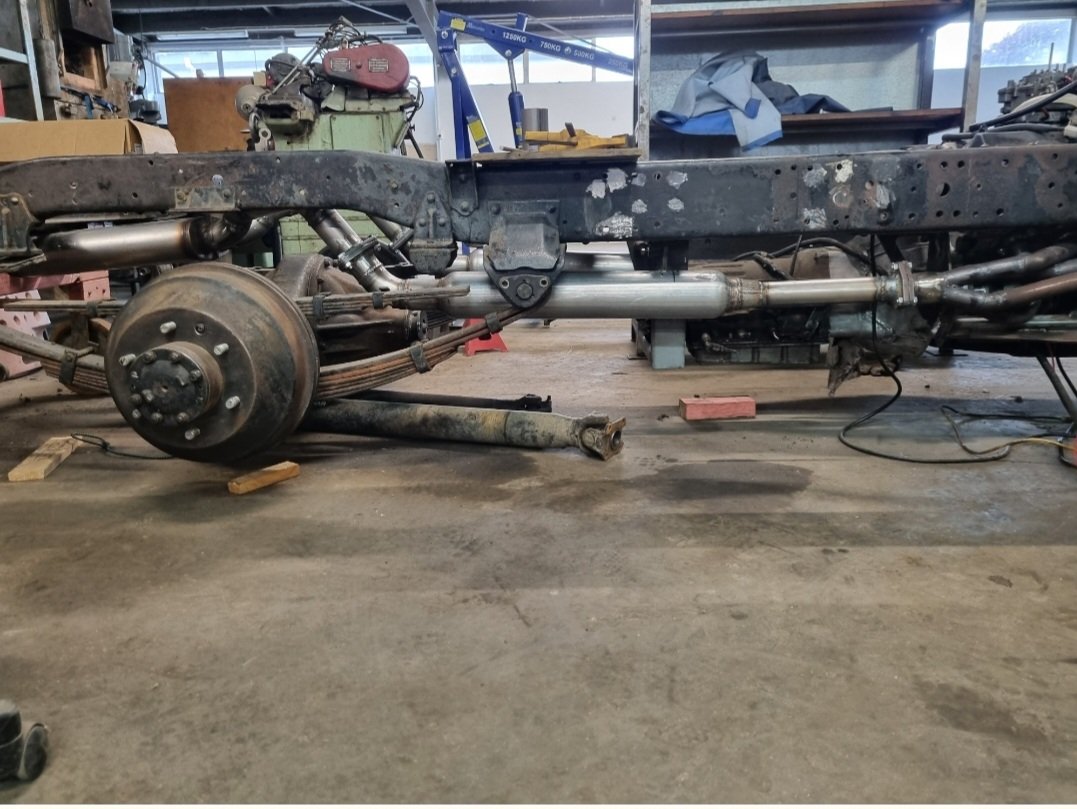
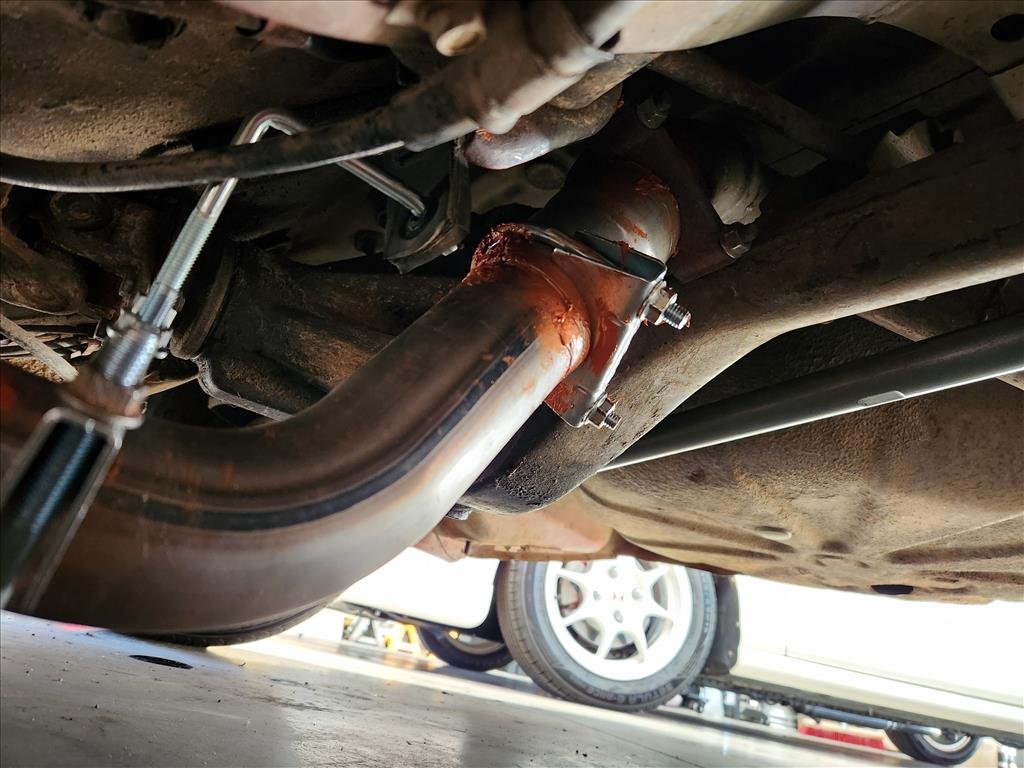
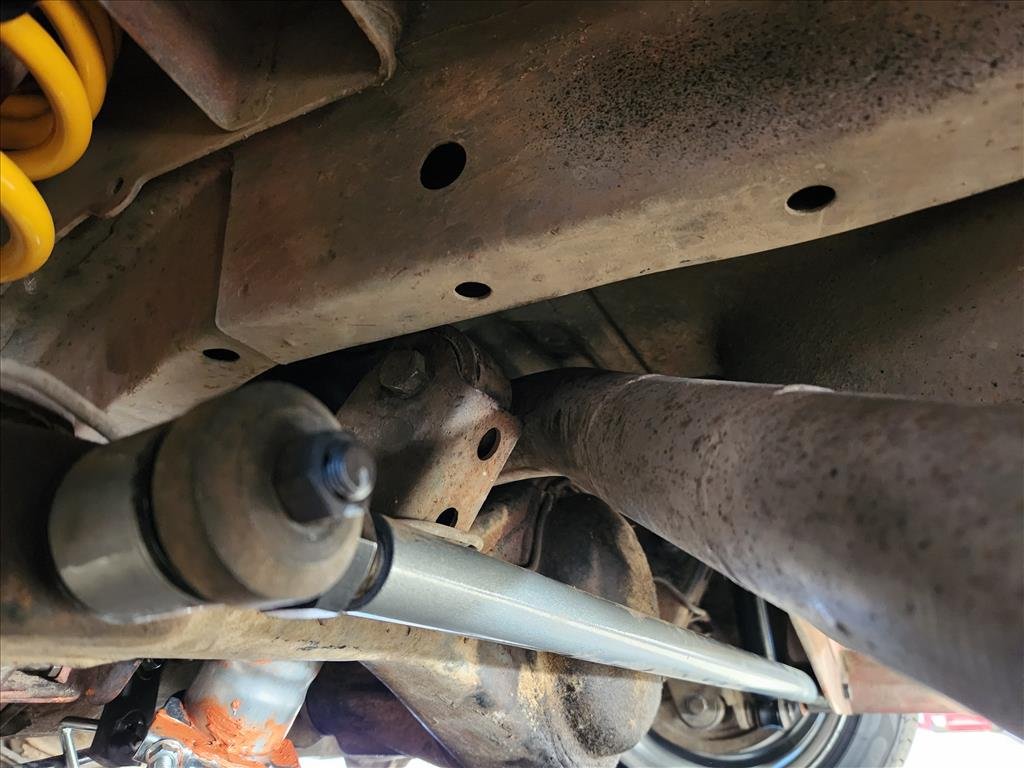
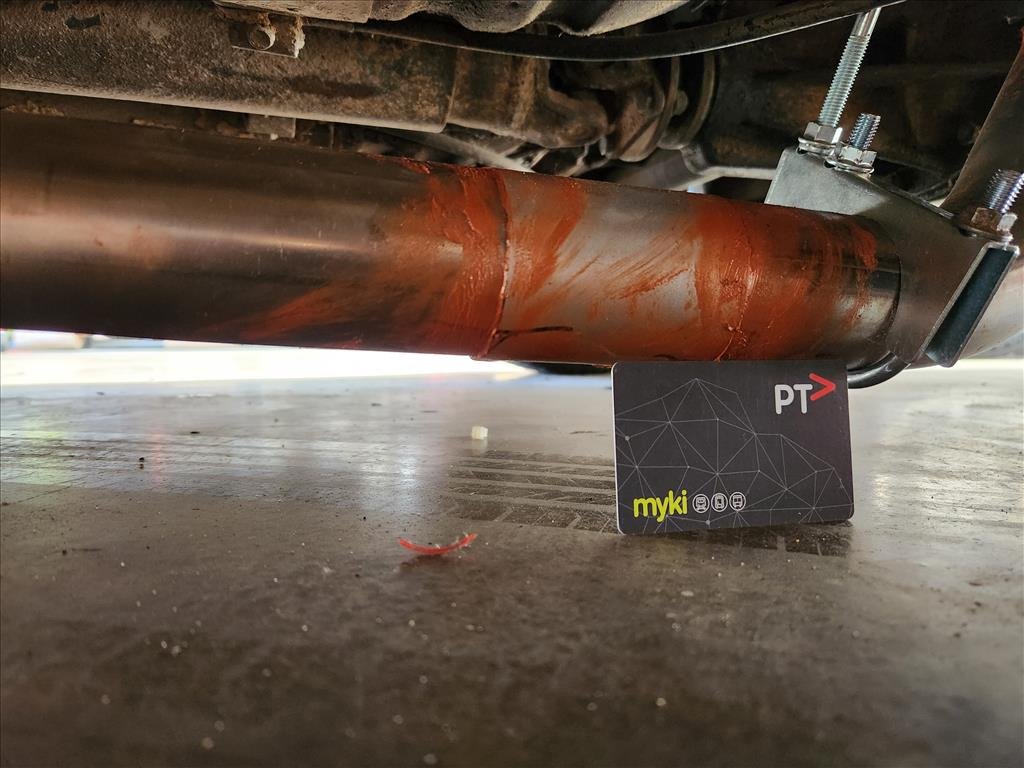
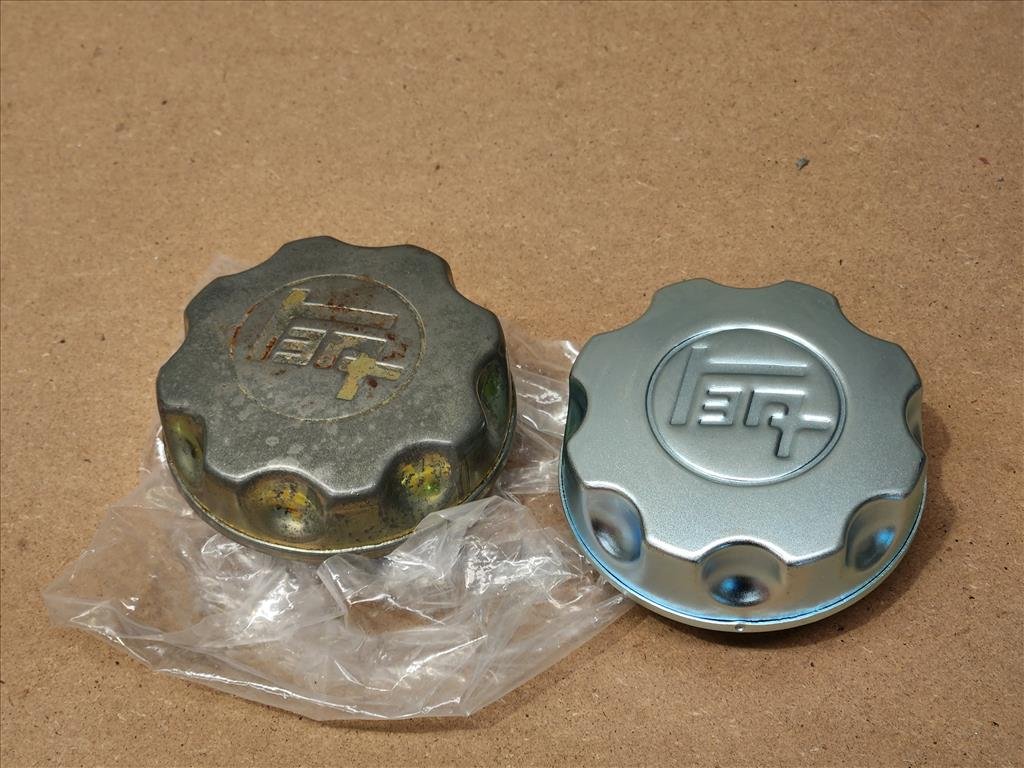
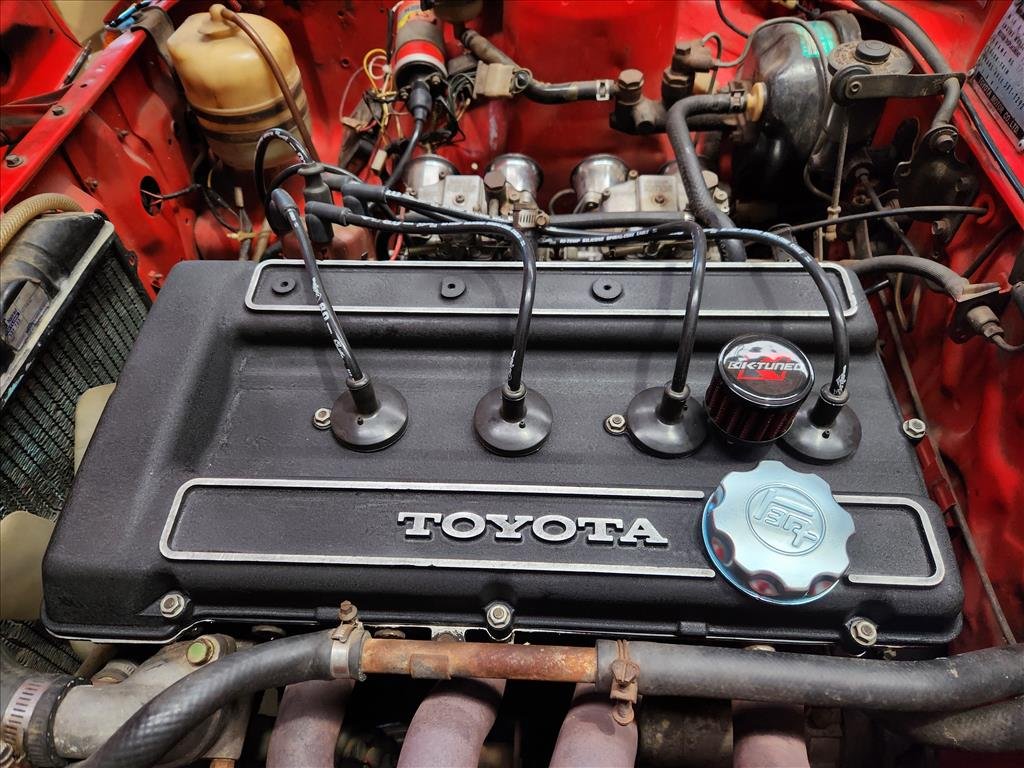
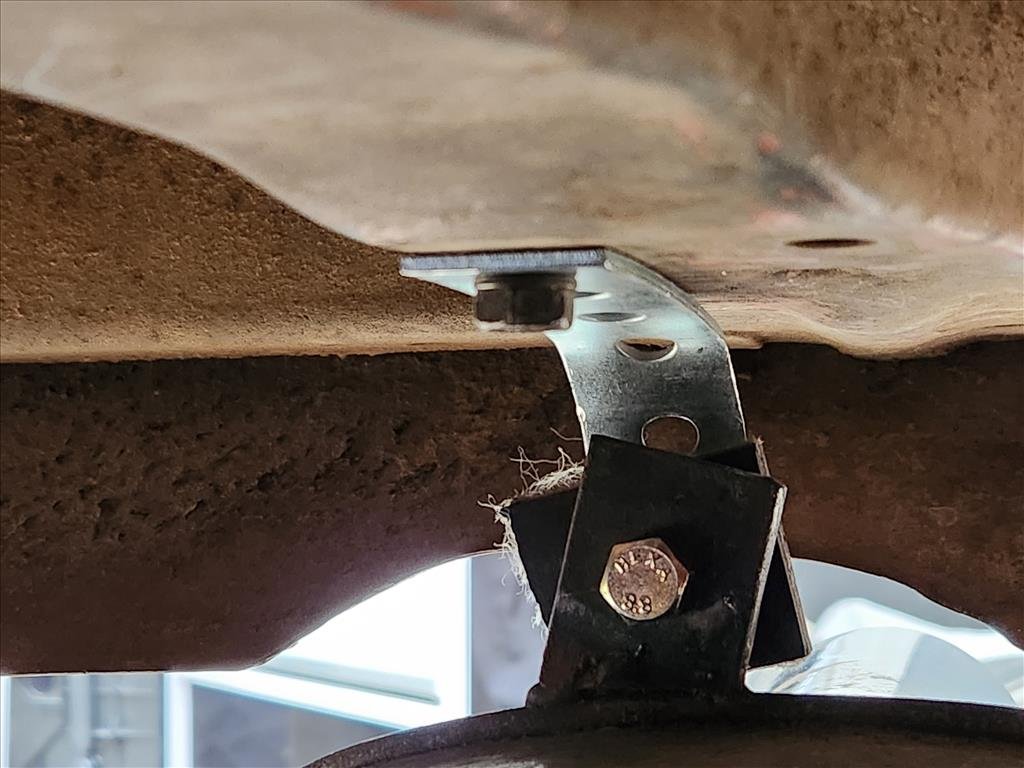
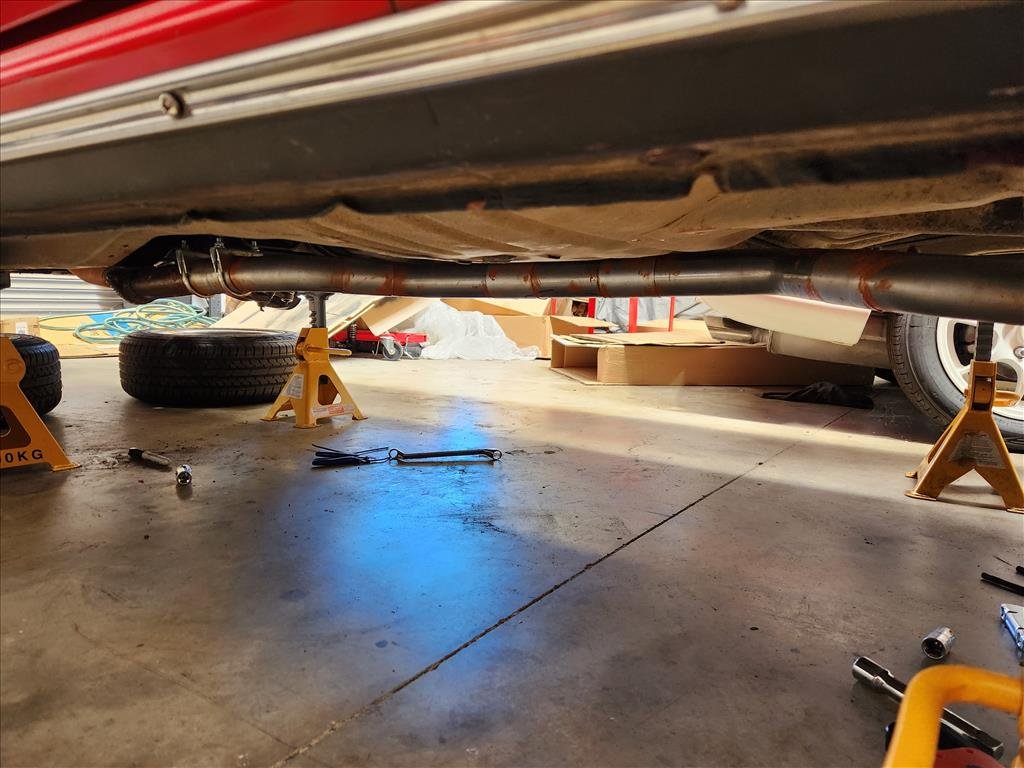
Well my exhaust making lesson comes to an end, but not the way I'd hoped. So after last time's episode about the pipe hitting the floor I decided to get some more bends and put it out the way in the path that the other exhaust took, just without the giant mufflers. So far so good. I also used Australia's entire supply of copper goop which generally worked ok except for the parts where it linked from the old and the new, seemed to leak most there. Turns out the solution was just add more goop. Then I ran the car a bit more on the stands after putting together a slightly better muffler hanging system. All was well so far; even got it to idle a bit better. Once I dropped the car down and.. well not so good. The portion that goes over the diff no longer goes over the diff but now into the diff, and as a result snapped the bolt holding my muffler on so it went on the piss. Additionally the car does not go low on the passenger side because it's stuck on the exhaust. I did also notice when looking at other people's exhausts that mine was routed weirdly over the diff so it's just a disaster all around. I did have an inkling that would happen but I wanted to use that route for two reasons. 1) Had that muffler so tried to reuse it and 2) research suggested people were not keen on the under diff due to the potential difficulty when jacking the car up. It just occurred to me I'm putting the exhaust together with the car already jacked up which means it's already at max droop so point 2 basically moot. There was some legality issue about it as well but clearly that's not really something I'm worried about. So after all this fucking about did I get anything out of it? Maybe 10mm more ground clearance and a lot of noise. I think what I'll do is just pull off that muffler and basically end it at the diff for the time being, just so I can move it around for some sweet instagram photos and then park it forever. I was going to try get this ready for a classic meet in early December but I'm actually going to be in Japan so no need to rush on it. Oh, one good thing though I found a brand new oil cap, so that's nice. Now that crusty water pipe and the K-Tuned filter does my nut in.2 points
-
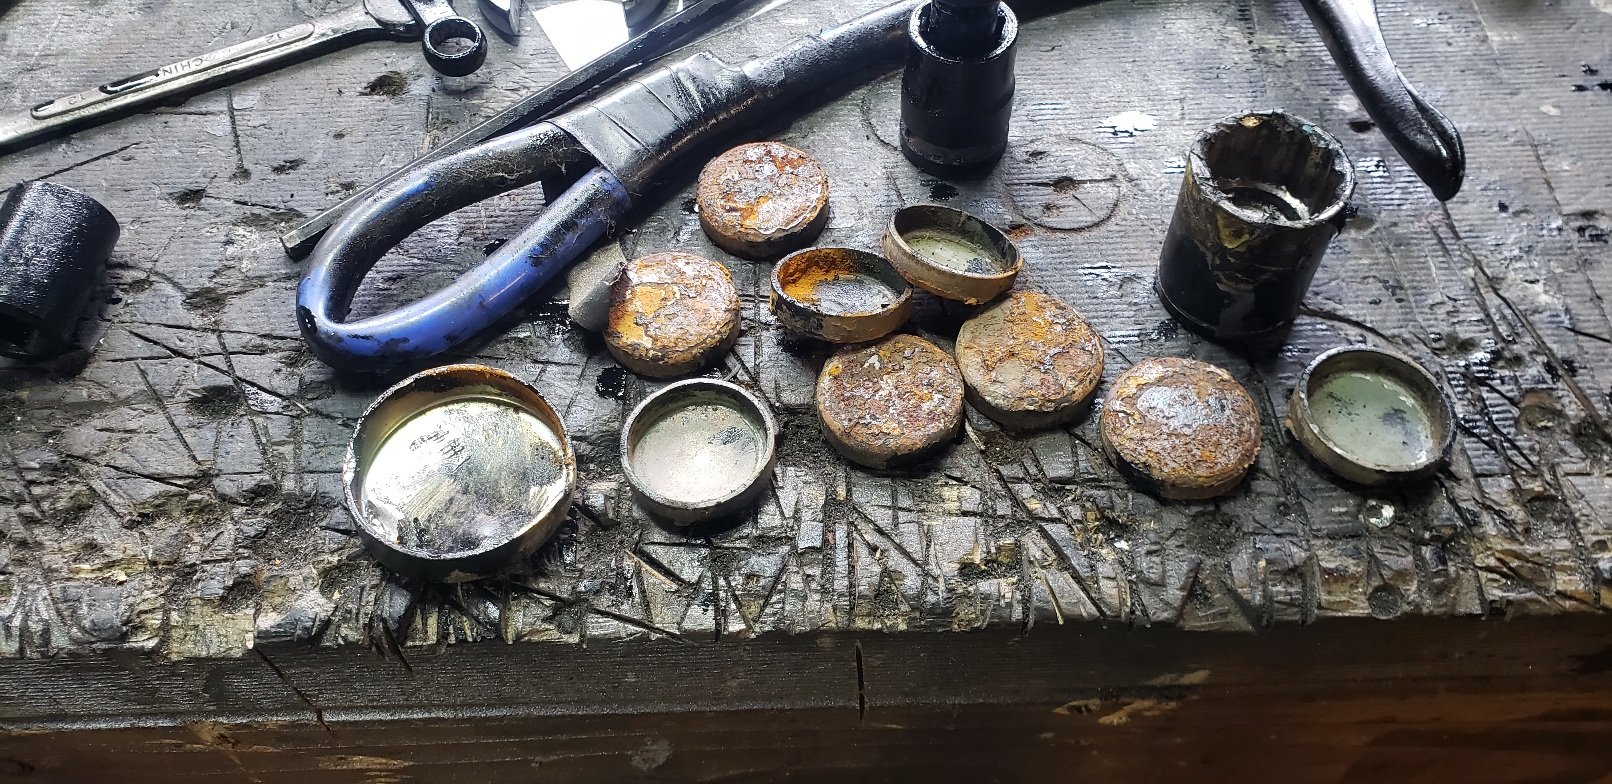
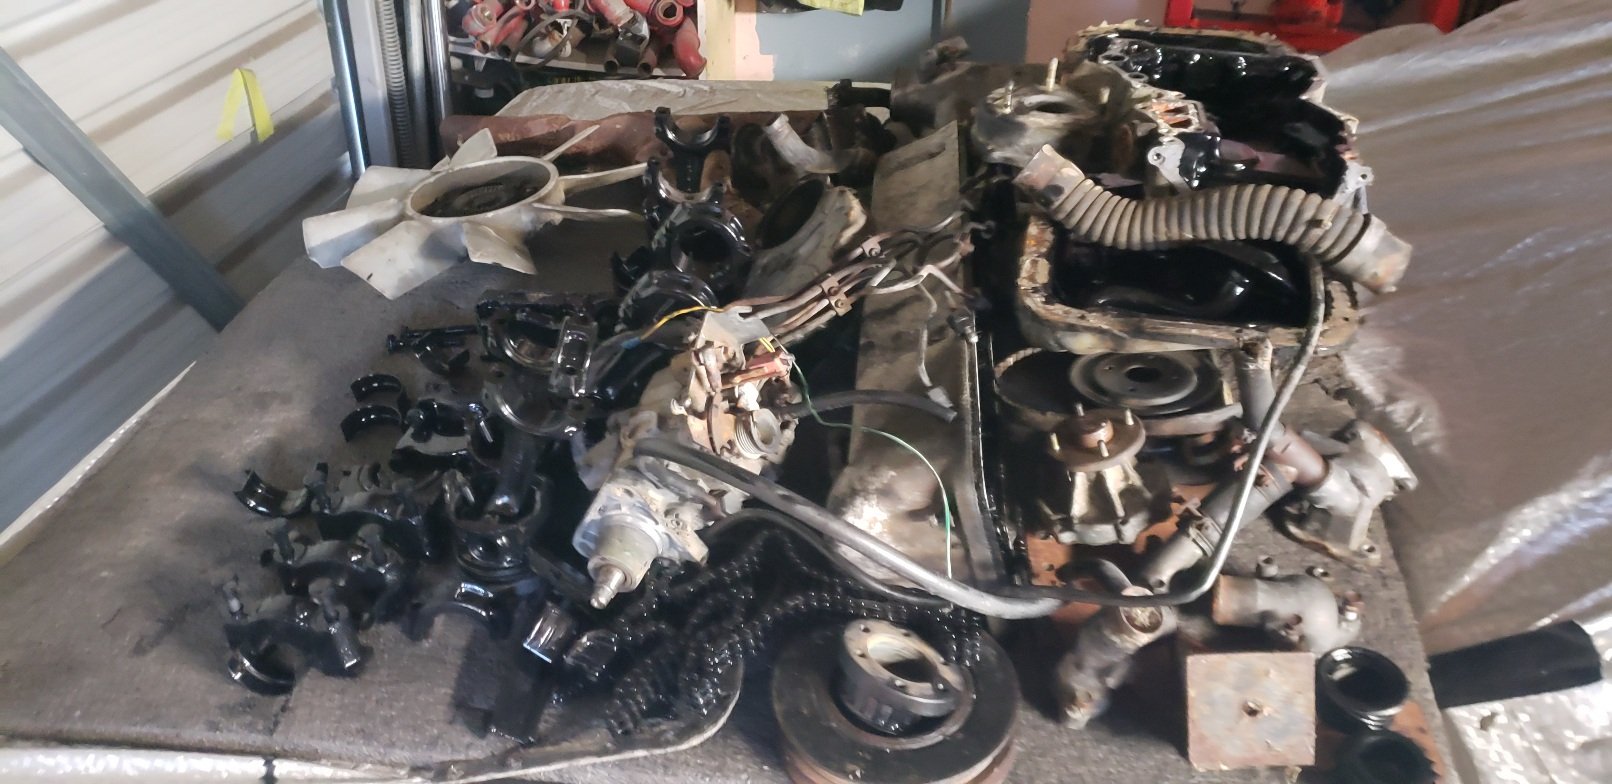
Dirty shitty fucking black mess .. thats how I would describe this motor. But original And well worn... the chain tensioner was almost all the way out and the chain just slipped off Motor is full of rust but no way ner as bad as the last bloody and the frost plugs hadn't rusted through....thats a good thing But shitty fucking black mess every where.. Will give it a good clean tomorrow maybe and check for cracks.2 points
-
What possibly could go wrong did go wrong. The MC needs new seals. I thought it might and should have had it done earlier. Anyway I found a reasonable replacement rear rubber spring seat as one of the ones I had was a bit nackerd. I fitted that and now the car sits level. So I lowered it down and dragged it out for a wash and to see how it sits. The ground outside is not level but it’s the best I can do for now.2 points
-
I probably need to have an engine hold its guts in for more than 3 minutes at a time first. haha. Hopefully I'm past the worst of it and can start getting to the good part... (drawing graphs and posting them on the internet) He's got very different objectives to me, so I dont think a collaboration video would make much sense. As he's running a business and looking for the cost/benefit point of making parts and so on. So ultimately his videos are promotional material for his business which is cool. I think it's awesome he's able to do that as a full time gig. I dont really add any value to that equation. One thing that I'm keen to test though, that he's pointed out as a flaw with factory cams. Is that he says there is a bank to bank imbalance because of the way the rockers work. I am thinking that this imbalance likely completely goes away once you have one bank's home position advanced slightly ahead of the other. Rather than assuming that the zero degree "hard stop" is each cams zero point in relation to each other. However that's just my theory and he's done a lot more testing than I have, so I could be totally wrong on that one.2 points
-
So in all of my froth I neglected to take account of my handbrake shenanigans. The exhaust route was a but tight (see comparitive pic 1 below) and whilst would have been fine if no handbrake stuff was going on the diff, I realized I was blindly ploughing on without considering that. Luckily I hadn't finished the exhaust, so I spent a night chopping it up and rerouting with more space around the diff head, it's much better. Just gotta connect the headers now, hopefully tonight's mish. I'm excited to hear it.2 points
-
You haven't mentioned what it's like to sleep in? Or is the wife ok2 points
-
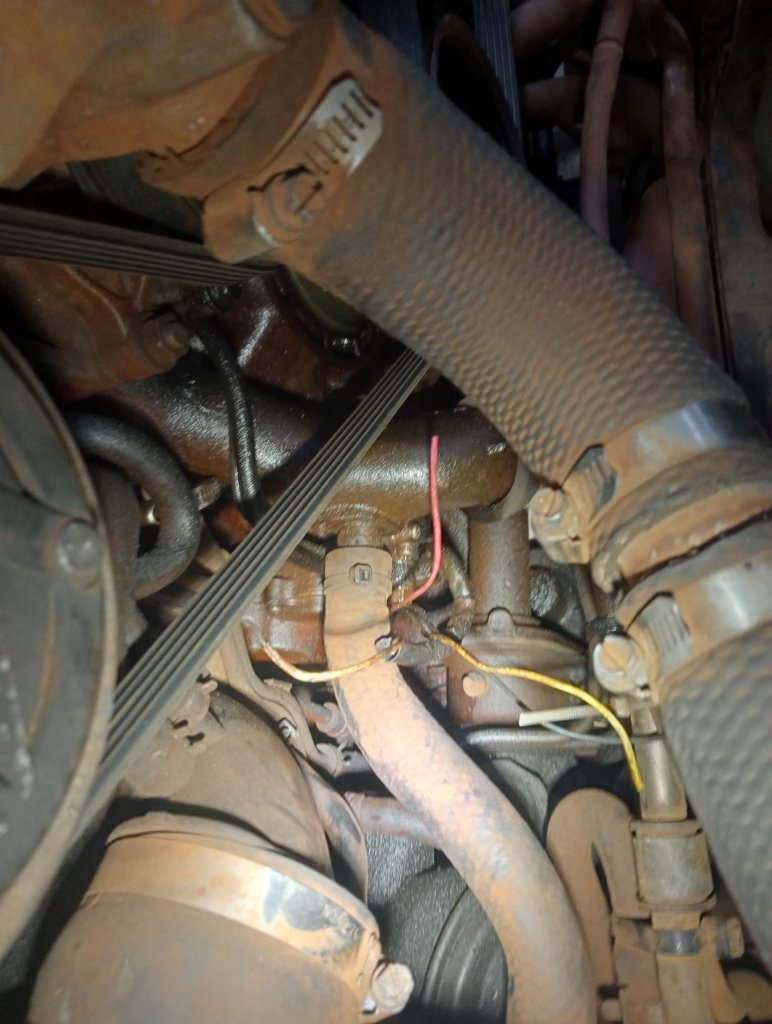
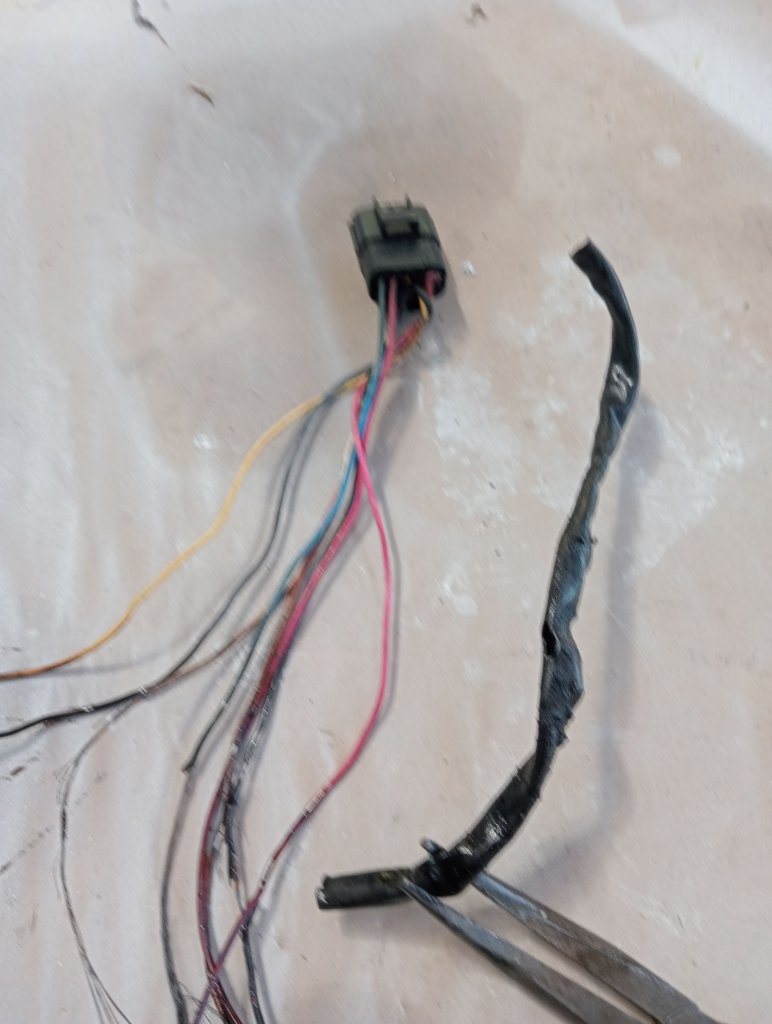
Then I hit the first major red flag - I'd been expecting an "ohh, THAT'S why it was cheap!" moment, and perhaps here it was: Excuse me what the fuck is going on down here? I do not appreciate busted wires and shit. At first I thought a rat might've gotten into the engine bay and chewed through the loom, but I found the rest of the wiring wrapped around the crank pulley shit, I hope it isn't anything importa-aaaand it's the oil metering pump so just to tell you guys how to suck eggs, that's the pump that feeds a wee bit of oil into the chambers to lubricate the seals. Now I did a bit of reading and discovered that the pump on the FD is a stepper motor controlled one, so presumably that means when the wiring got torn out of it, it just failed at whatever flow rate it was allowing at the time, as opposed to stopping working altogether. Hopefully that position was full tit max flow. SO, how long had the pump been fucked? Normally this would throw a fault code, but this thing has an aftermarket ECU so no dice I very politely contacted the previous owner and he said that he'd never seen the busted wires, and frankly knew nothing about it. One interesting tidbit was that he said he had had some boosting problems with the (notoriously finicky) sequential controls on the turbo, had replaced a solenoid, but the problem had come back shortly afterwards, and that that was when he decided to sell the car. Why is this topical? Because when the metering pump loom was torn to bits, it pulled a hose off the vacuum chamber for one of the solenoids! So there's every chance that this occurred pretty much the last time this car was driven. Needless to say it's on premix now.2 points
-
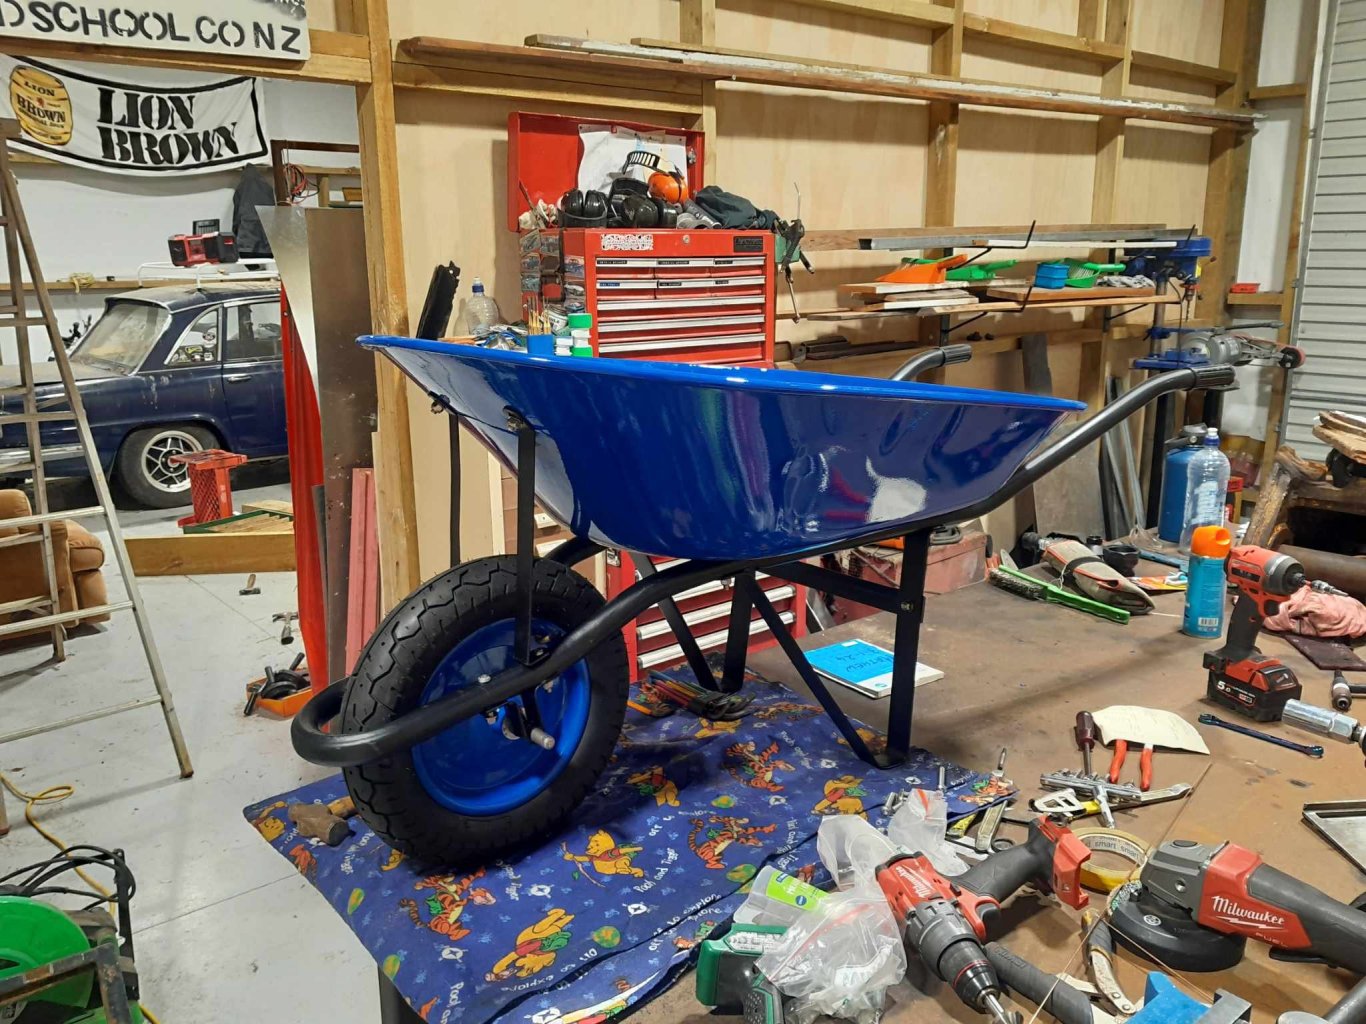
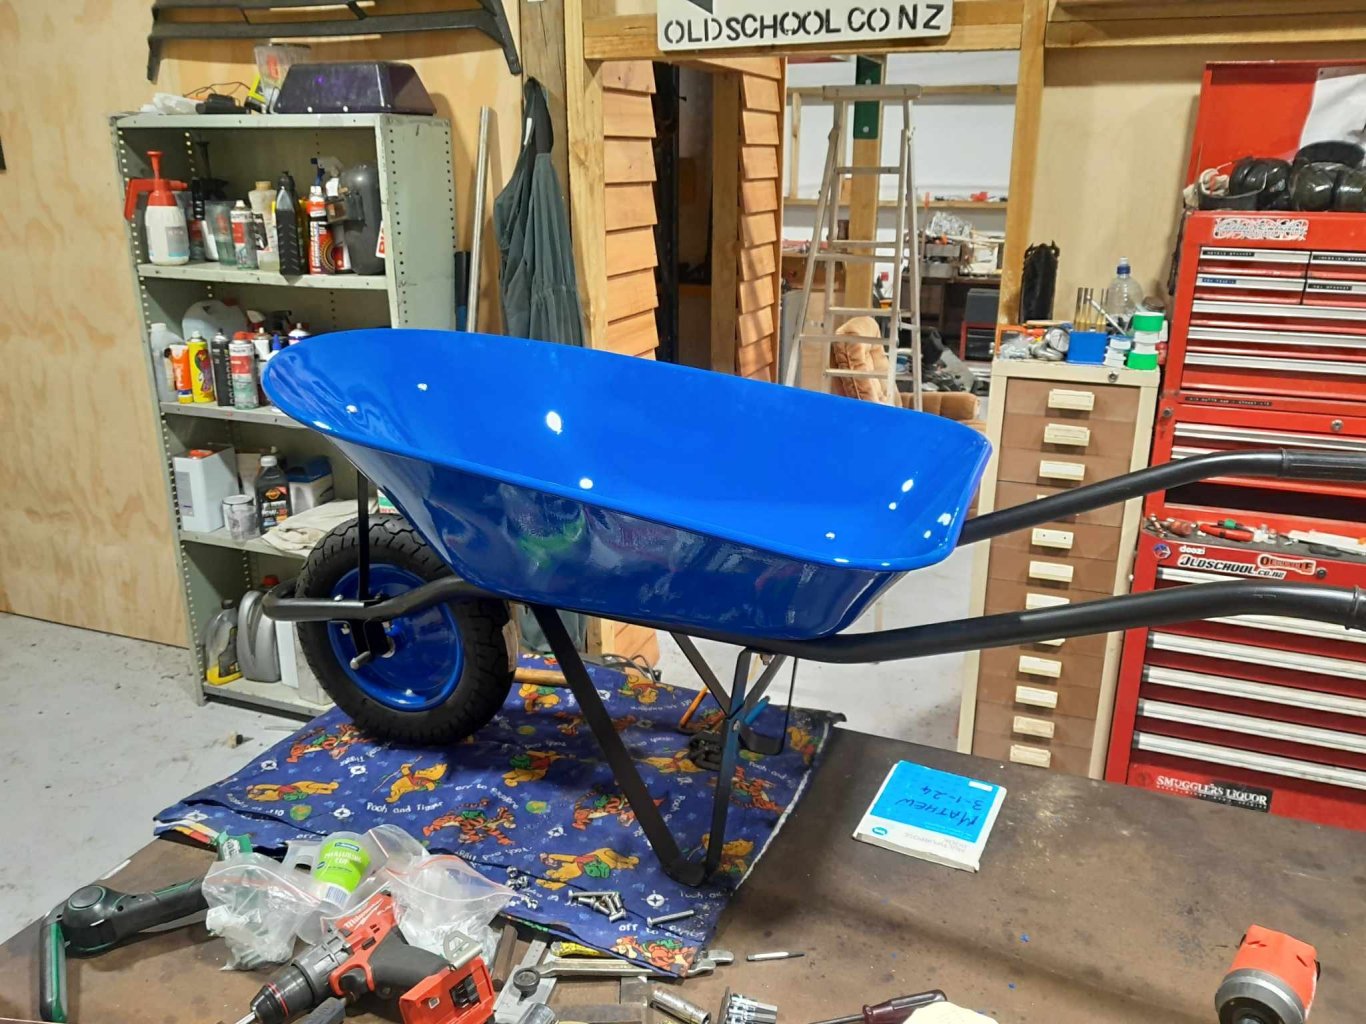
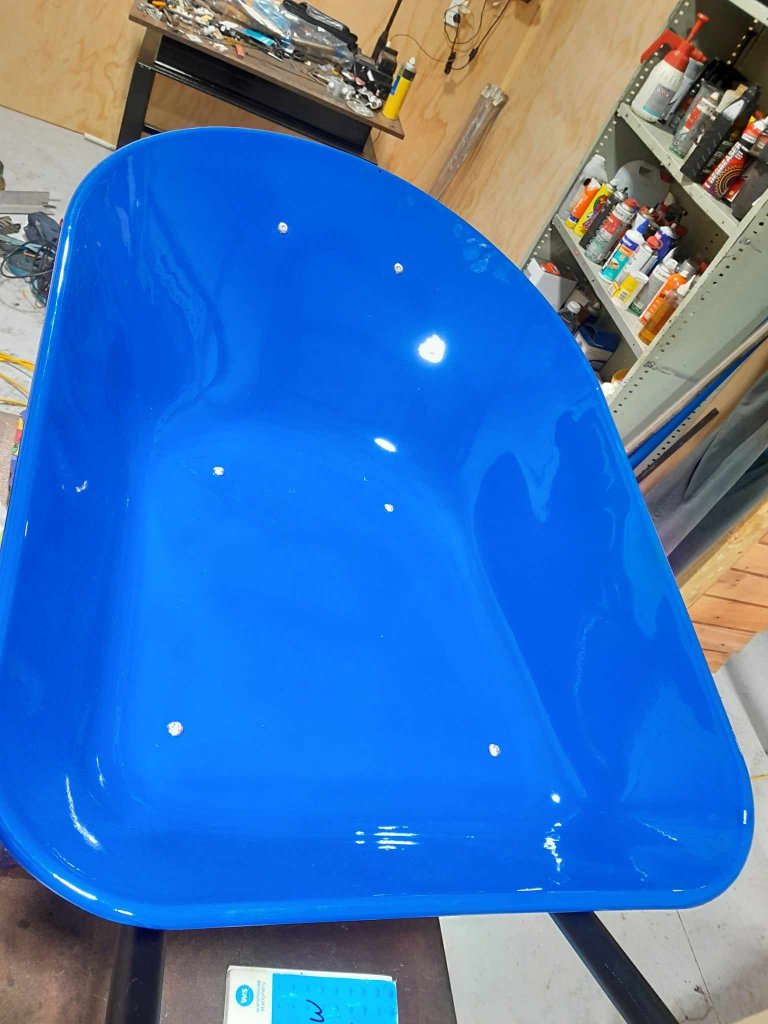
My grandads wheelbarrow. Was a man that did everything by hand on a hilly property with the wheelbarrow. Had mixed up many cubes of concrete until he got too soft at 87 then he brought a concrete mixer. Was a little worse for wear and tyre was toast so disassembled for a blast and paint down the line, factory colour tub and frame in chassis black. Spent $10 more then a garbage tyre from M10 on a 3.00x8 Shinko scooter tyre, was a bitch to get on but now have a tyre even when flat that has a stiff enough carcass to be pushed around. Good for 100kg at over 80kph so good enough for home. Button head stainless cap screws because im shallow and like stuff like that Is going down to my sister in Gisborne so good to see it get another life.2 points
-
2 points
-
1 point
-
1 point
-
Thats very cool, even with the NFS Underground bodykit on it. Love a good FD, one of the most beautiful cars ever designed IMO. Hopefully the dorito spinner keeps working well. Do you know the origin of all the rusty shit everywhere, hopefully just the coolant tank?1 point
-
1 point
-
1 point
-
1 point
-
And started building a motor for it. Check list was it must do the following: Make 2T nang noises Smoke little of that sweet smelling oil fuel mix Be a manual with a clutch Shift gears on the clutch lever Be force air cooled as its mounted under a seat. So that kinda narrowed it down. Sticking with what I know, I took a blown up vespa 150cc 2T motor and replaced the bare minimum of the fucked parts for unfucked parts. Hopefully I can kick it in the guts this week?1 point
-
Thread dredge. I ignored this thing for most of the year but recently got a bit of spare time so ticked a few jobs off. DaveScienceTM @Roman kindly printed me some trumpets to replace all of the airbox - this may make it slower but it will look better! The more I looked at it the more I didnt like how the engine was wired - infact how the whole car was wired. Engine wise things were a bit "interesting" and rather than using the factory fuse box that Mr Toyota had kindly fitted with charge circult controls and relays for the coils and ignitor etc, they decided to ignore all that and use a NZEFI easywire board which wasn't so bad, but then they decided to use really random shit like having a completely seperate circuit open relay just sitting on the gearbox. So, out it all came. This is just the engine loom... Due to all the fuckery I also ripped out all the body wiring and swapped in all the factory wiring from the Si Limited mentioned earlier which was much neater and added a few body features not normally had. The original dash had a few bonus holes in it so that got changed over, and also fitted the facelift dash cluster. The facelift dash cluster had one of those super awesome ding dong speed warnings so I've modified the 12v feed to this so its on a switch if I want to drive myself insane while fanging around a track. Anyway engine wise I got rid of the NZEFI board and reverted back to using all the stock relays for injector power, coil power, radiator fan and the normal circuit open relay for the fuel pump etc. I didnt really take any photos of this but it became a straight plug and play deal nicely wrapped and out of the way. I wired in the extra dash gauges for oil pressure, water temp and volts, and also had some scope creep care of DaveScience and fitted some 1NZ coils for sequential ignition. Plugged it all in and it started first pop. Fitted a cheapy android head unit and upgraded the front speakers, plus ran wiring through to the back for some parcel tray sounds. Bought a few small items to tidy things up like a interior light cover etc The radiator didnt have a fan on it previously so made some mounts and front mounted it as there isn't enough space behind. It has 4 mounts, just didnt take a photo of it finished. My brother blasted the cam cover for me and I welded on a dash fitting for a decent catch can setup I will sort sometime in the future Also made up a front strut brace, a radiator overflow bottle bracket, and painted a few bits and pieces. Still needs heaps of tidying but its getting closer to being good enough. So with it driving again I towed it to @kpr to blow the cobwebs out knowing how much he loves 20v's and fwd's It made good noises but this happened: Which was actually just a loose radiator hose so easily fixed. Then injector duty cycle went through the roof and the fuel pump left the chat. I had a spare EFI tank so swapped in a new pump just in case then returned to kpr's to fit it. This is what was found when I opened up the original tank after swapping it over... The original builders had jammed an EFI pump onto the end of the carby pickup line and left it dangling loose in the bottom of the tank. The hose had split which was causing the lacklustre fuel pressure. After swapping to the new pump the idle AFR dropped into the 10s! So it works now and Ive left the car with kpr for a thrash when he gets a chance, but it makes good noise now even if it makes less than 100kw haha. Thats it for now, will likely update in another year.1 point
-
1 point
-
Could always just prop up the one side so the oil isn't there1 point
-
1 point
-
1 point
-
I got the carpet into blue. It makes it marginally quieter and adds a certain scent that I am not sure is an improvement. The drivers side is way worse than that but its fine. I went at the green meanie today, I have collected lots of incredibly useful parts; That dash isnt mint but is significantly tidier than mine, i might chuck it in. It now looks pretty sad tho. If anyone wants this Sportline steering wheel let me know. Its pretty dirty but sound enough. It also comes with what I assume is an OEM Fiat boss kit;1 point
-
Been robbing bits off the green meanie, mostly things that will improve the overall experience of the blue. Like this little bit of plastic that goes over the throttle mech under the pedals; This is kindof important as @yoeddynz found out when he drove it, because it is surprisingly easy to accidentally wide open the throttle by pushing down on what you think is the floor as you enter the car, but is actually the throttle rod that runs under the pedals. I had to grab his trousers and forcibly lift his leg up, and he immediately got a totally inappropriate erection. So here is me trying to prevent that shit happening. I really didnt want to drill out the broken off screws in the floor, plus all the plastic had broken off where the holes were meant to be anyway so I glued it in place and held down with what was to hand. While I was grovelling in that area I also grabbed the footrest to replace the fudge one I had made, here it is getting some rust treatment and paint. Obviously i was doing all this while I removed the filthy rat piss and oil soaked carpet. Getting this out wasnt a good time. I waterblasted it then soaked it in toilet cleaner and blasted it again. Better. Good enough actually given the state of the rest of the car. I also grabbed the uno turbo front brakes, these looked ok. I'll rebuild the calipers and see if I can find discs, they might get slipped on but someone in Canada wants them really badly. I might see how badly they want them, I need some cash right now. Also GC @shizzl picked up a TM gearbox for me from some old dude in Manakau. I popped over to Picton to grab it as he was on the way through, but when I got home I had a decent look and it wasn't an X gearbox at all. I gently enquired of the old boy if he was trying to fuck me, but he tells me it was a genuine mistake. Unfortunately he is now in Prague or somewhere for a few weeks but assures me he will ship the right one free of charge when he is back. Sigh. Also we fixed the black bitches brake lights that failed as the inevitable result of touching the loom when he removed the heater box. This turned out to be a sweet twist n tape join in the brake wire under the dash that despite using a tried and true method had somehow parted company. Elliot ended a happy boy and I got a bottle of nice beer, so totally worth the grovelling.1 point
This leaderboard is set to Auckland/GMT+12:00


.thumb.jpeg.b39a639a8ff8a614681c3c9dca730a70.jpeg)











.thumb.jpg.570970b401ac8d26ce9af7c1bf2bd8cd.jpg)


