
Leaderboard


Popular Content
Showing content with the highest reputation on 04/06/24 in all areas
-
incoming old man sharn, in about 1998 a mate of mine was working for urgent couriers in AK and for some fucked up reason that only coke filled courier company execs can answer urgent couriers bought a GTIR and gave it to my mate as his courier car. it was branded and all that but he drove it all day every day. it took me for quite a few rips in it and fuck me was that thing fast. when your bench mark was a 4M powered shitbox the gtir was light years faster. why did they think that was a good idea? fuck knows but it gave a bunch of mid 20s jokers a new understanding of what a turbo car was.11 points
-
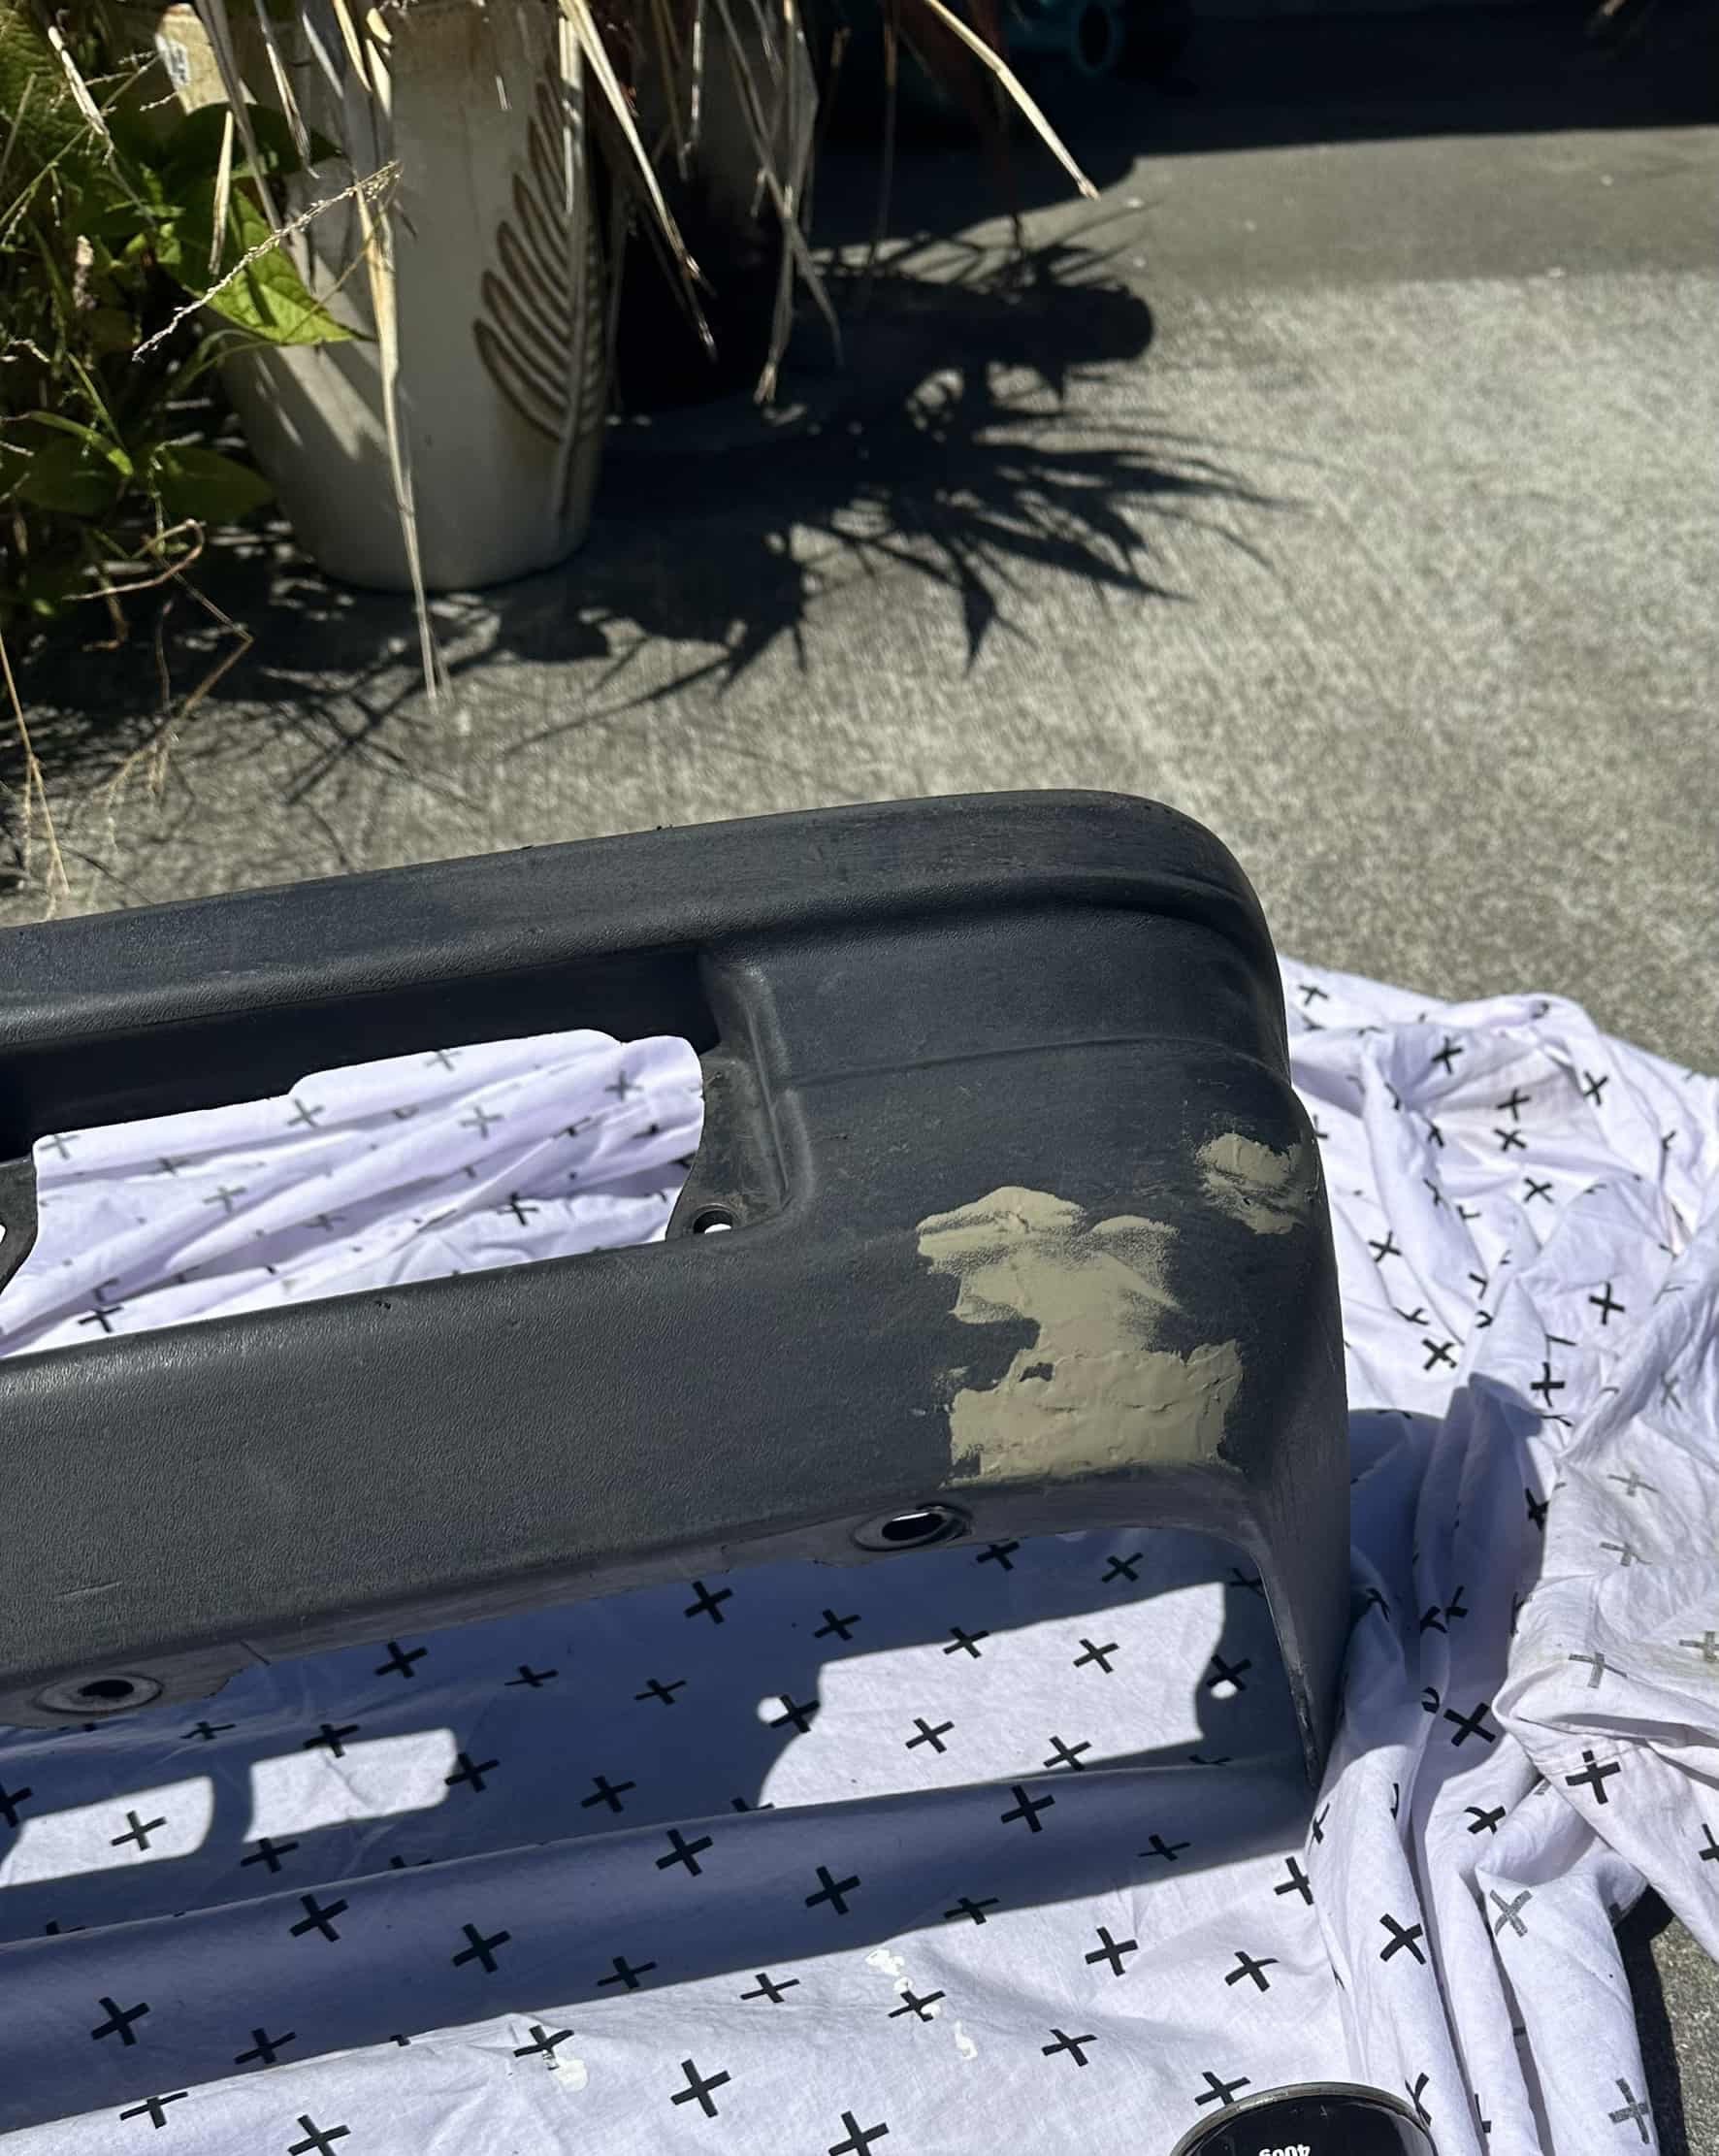
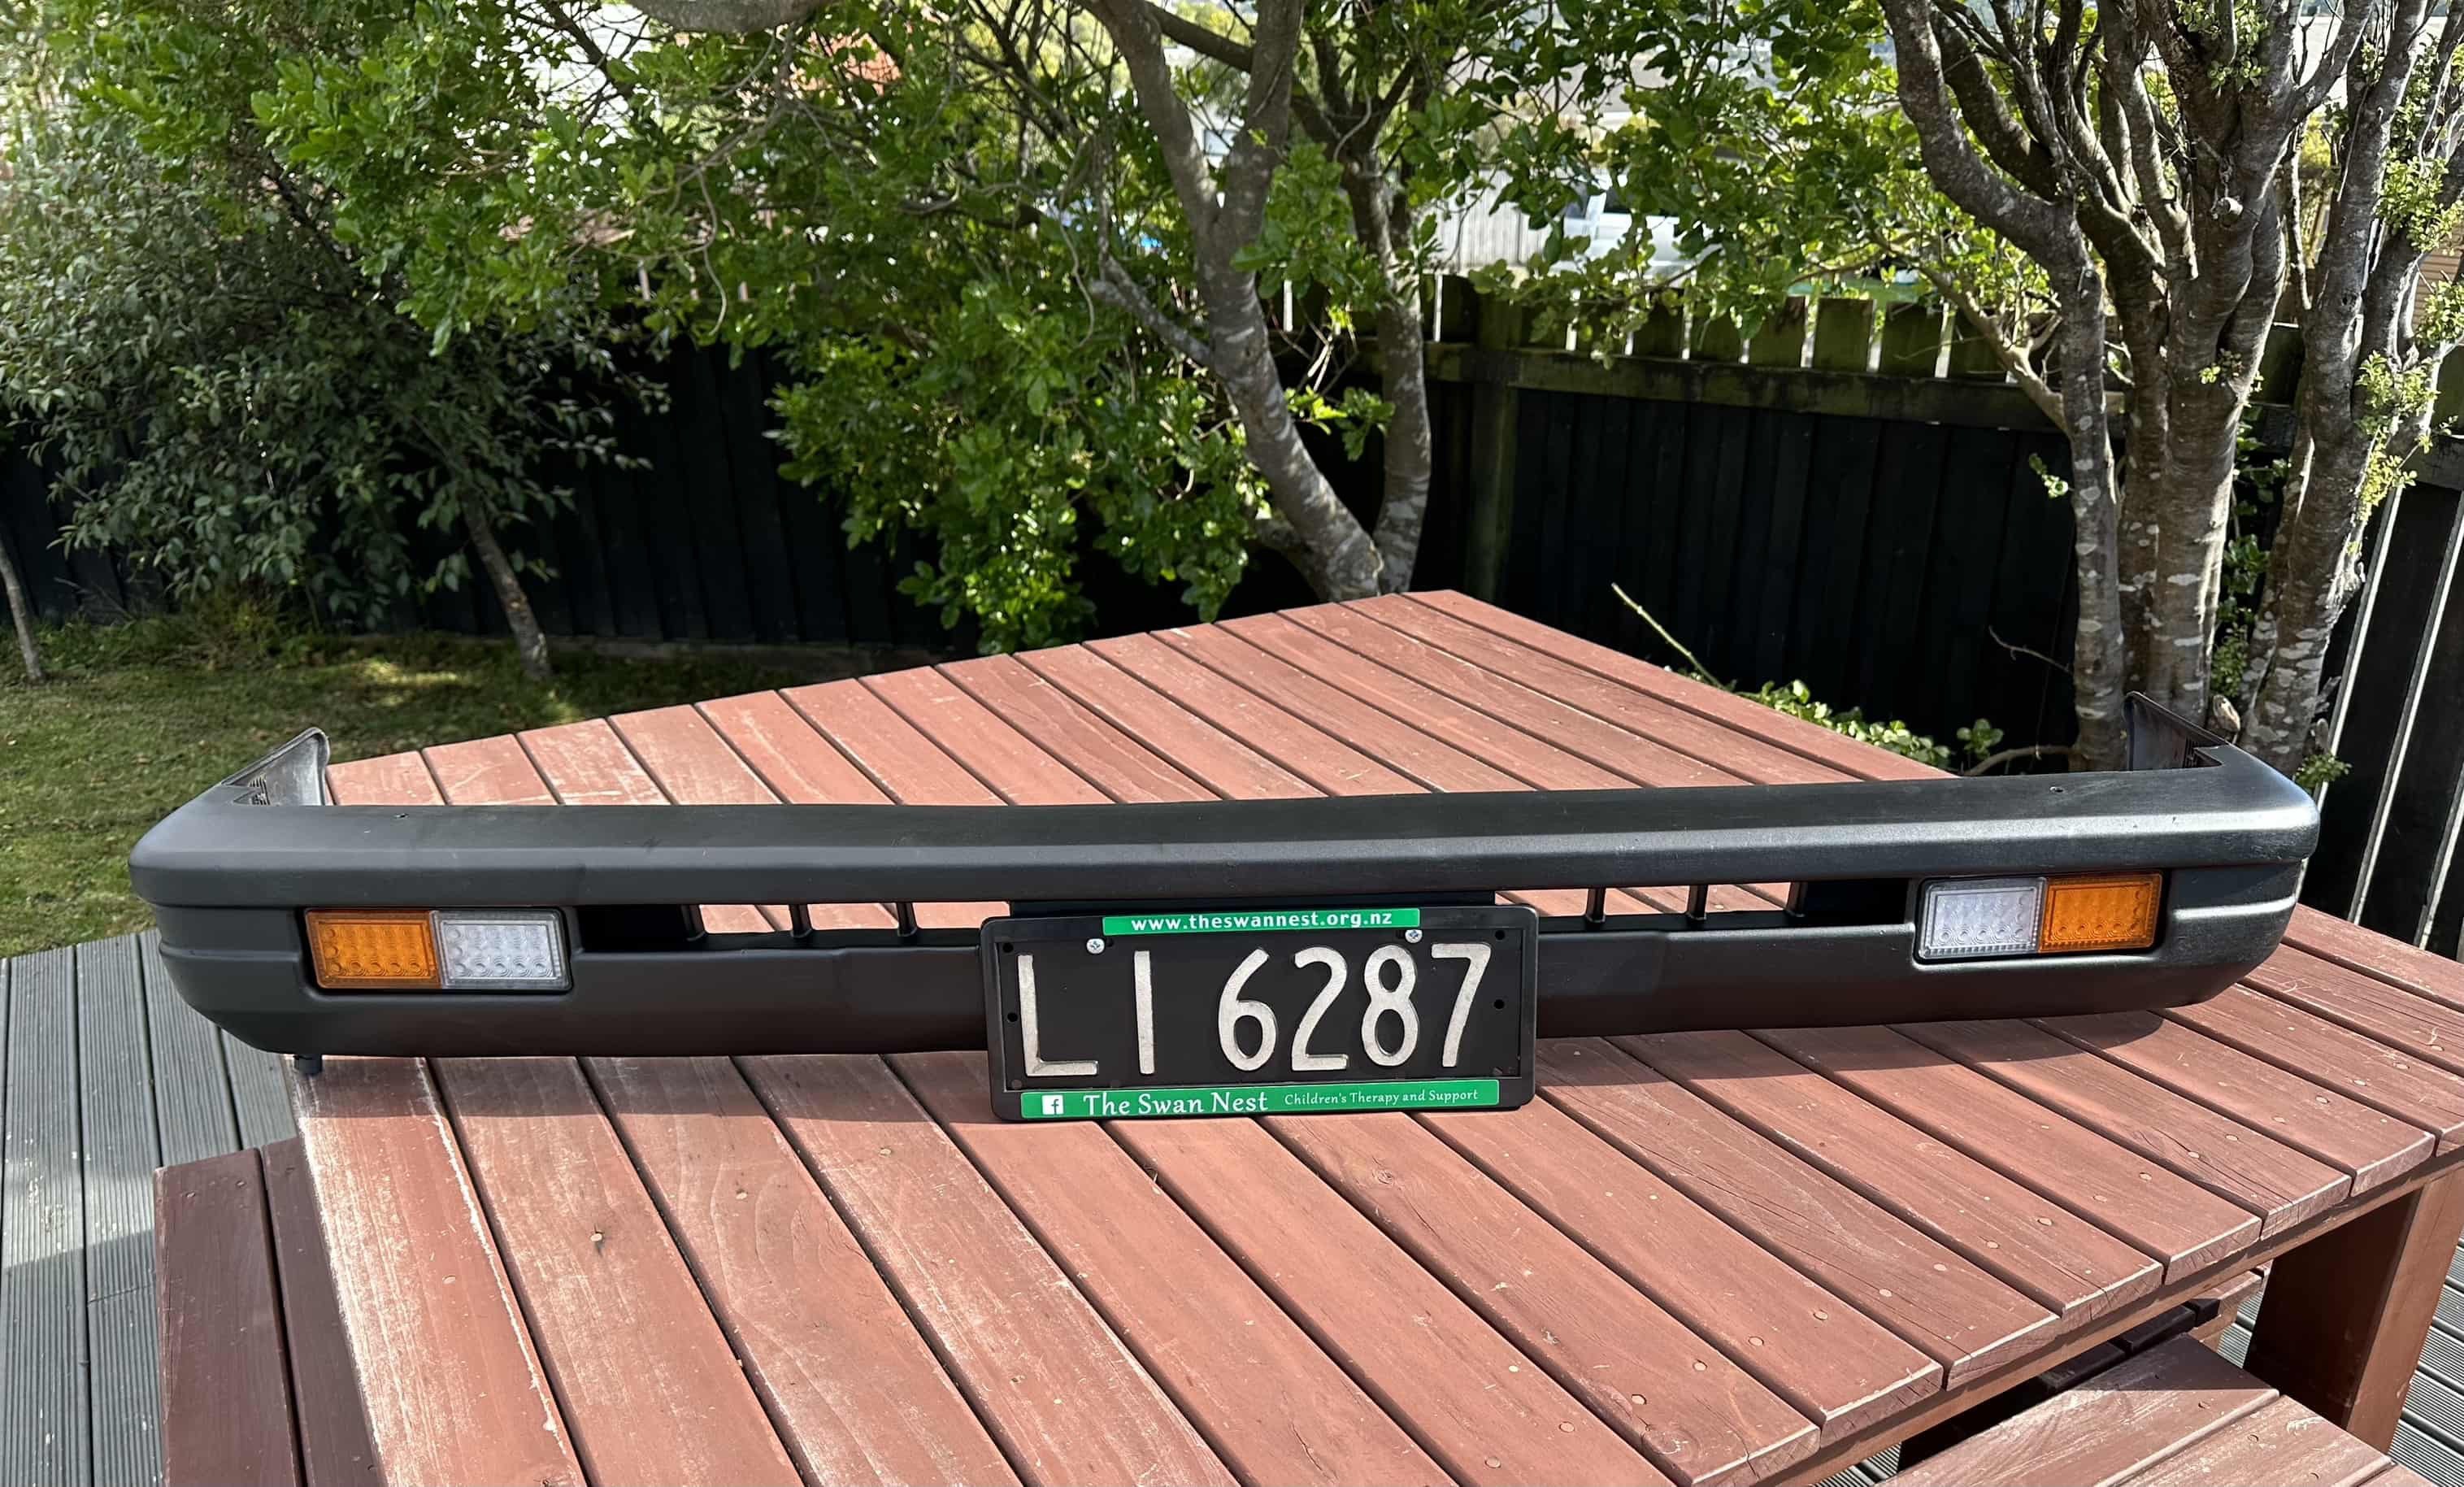
Front bumper restoration complete. After giving the bumper a good clean, firstly with a water blaster then scrubbing with a brush and some warm soapy water, I needed to fill in some of the larger scraps and scratches left by the previous owners touch parking attempts. After some sanding and a quick clean with grease and wax remover it was time for a spray with bumper paint, 4 coats later and it was looking pretty good. I also took the time to paint the headlight surrounds, grill, number plate lights and grill. Now all reassembled with freshly painted number plates and LED indicators and DRLs The finished product
 8 points
 -
Dads finished up a radiator shell. Looking great. The original cores are made from hex flared tube to make a honey comb bundle which is all soldered together. There are about 5000 tubes! The plan is to make a false tube core /front but use a custom aluminium multi pass radiator to work as the real radiator. It will be nickel plated once the core brackets are figured out and any other tweaks.7 points
-
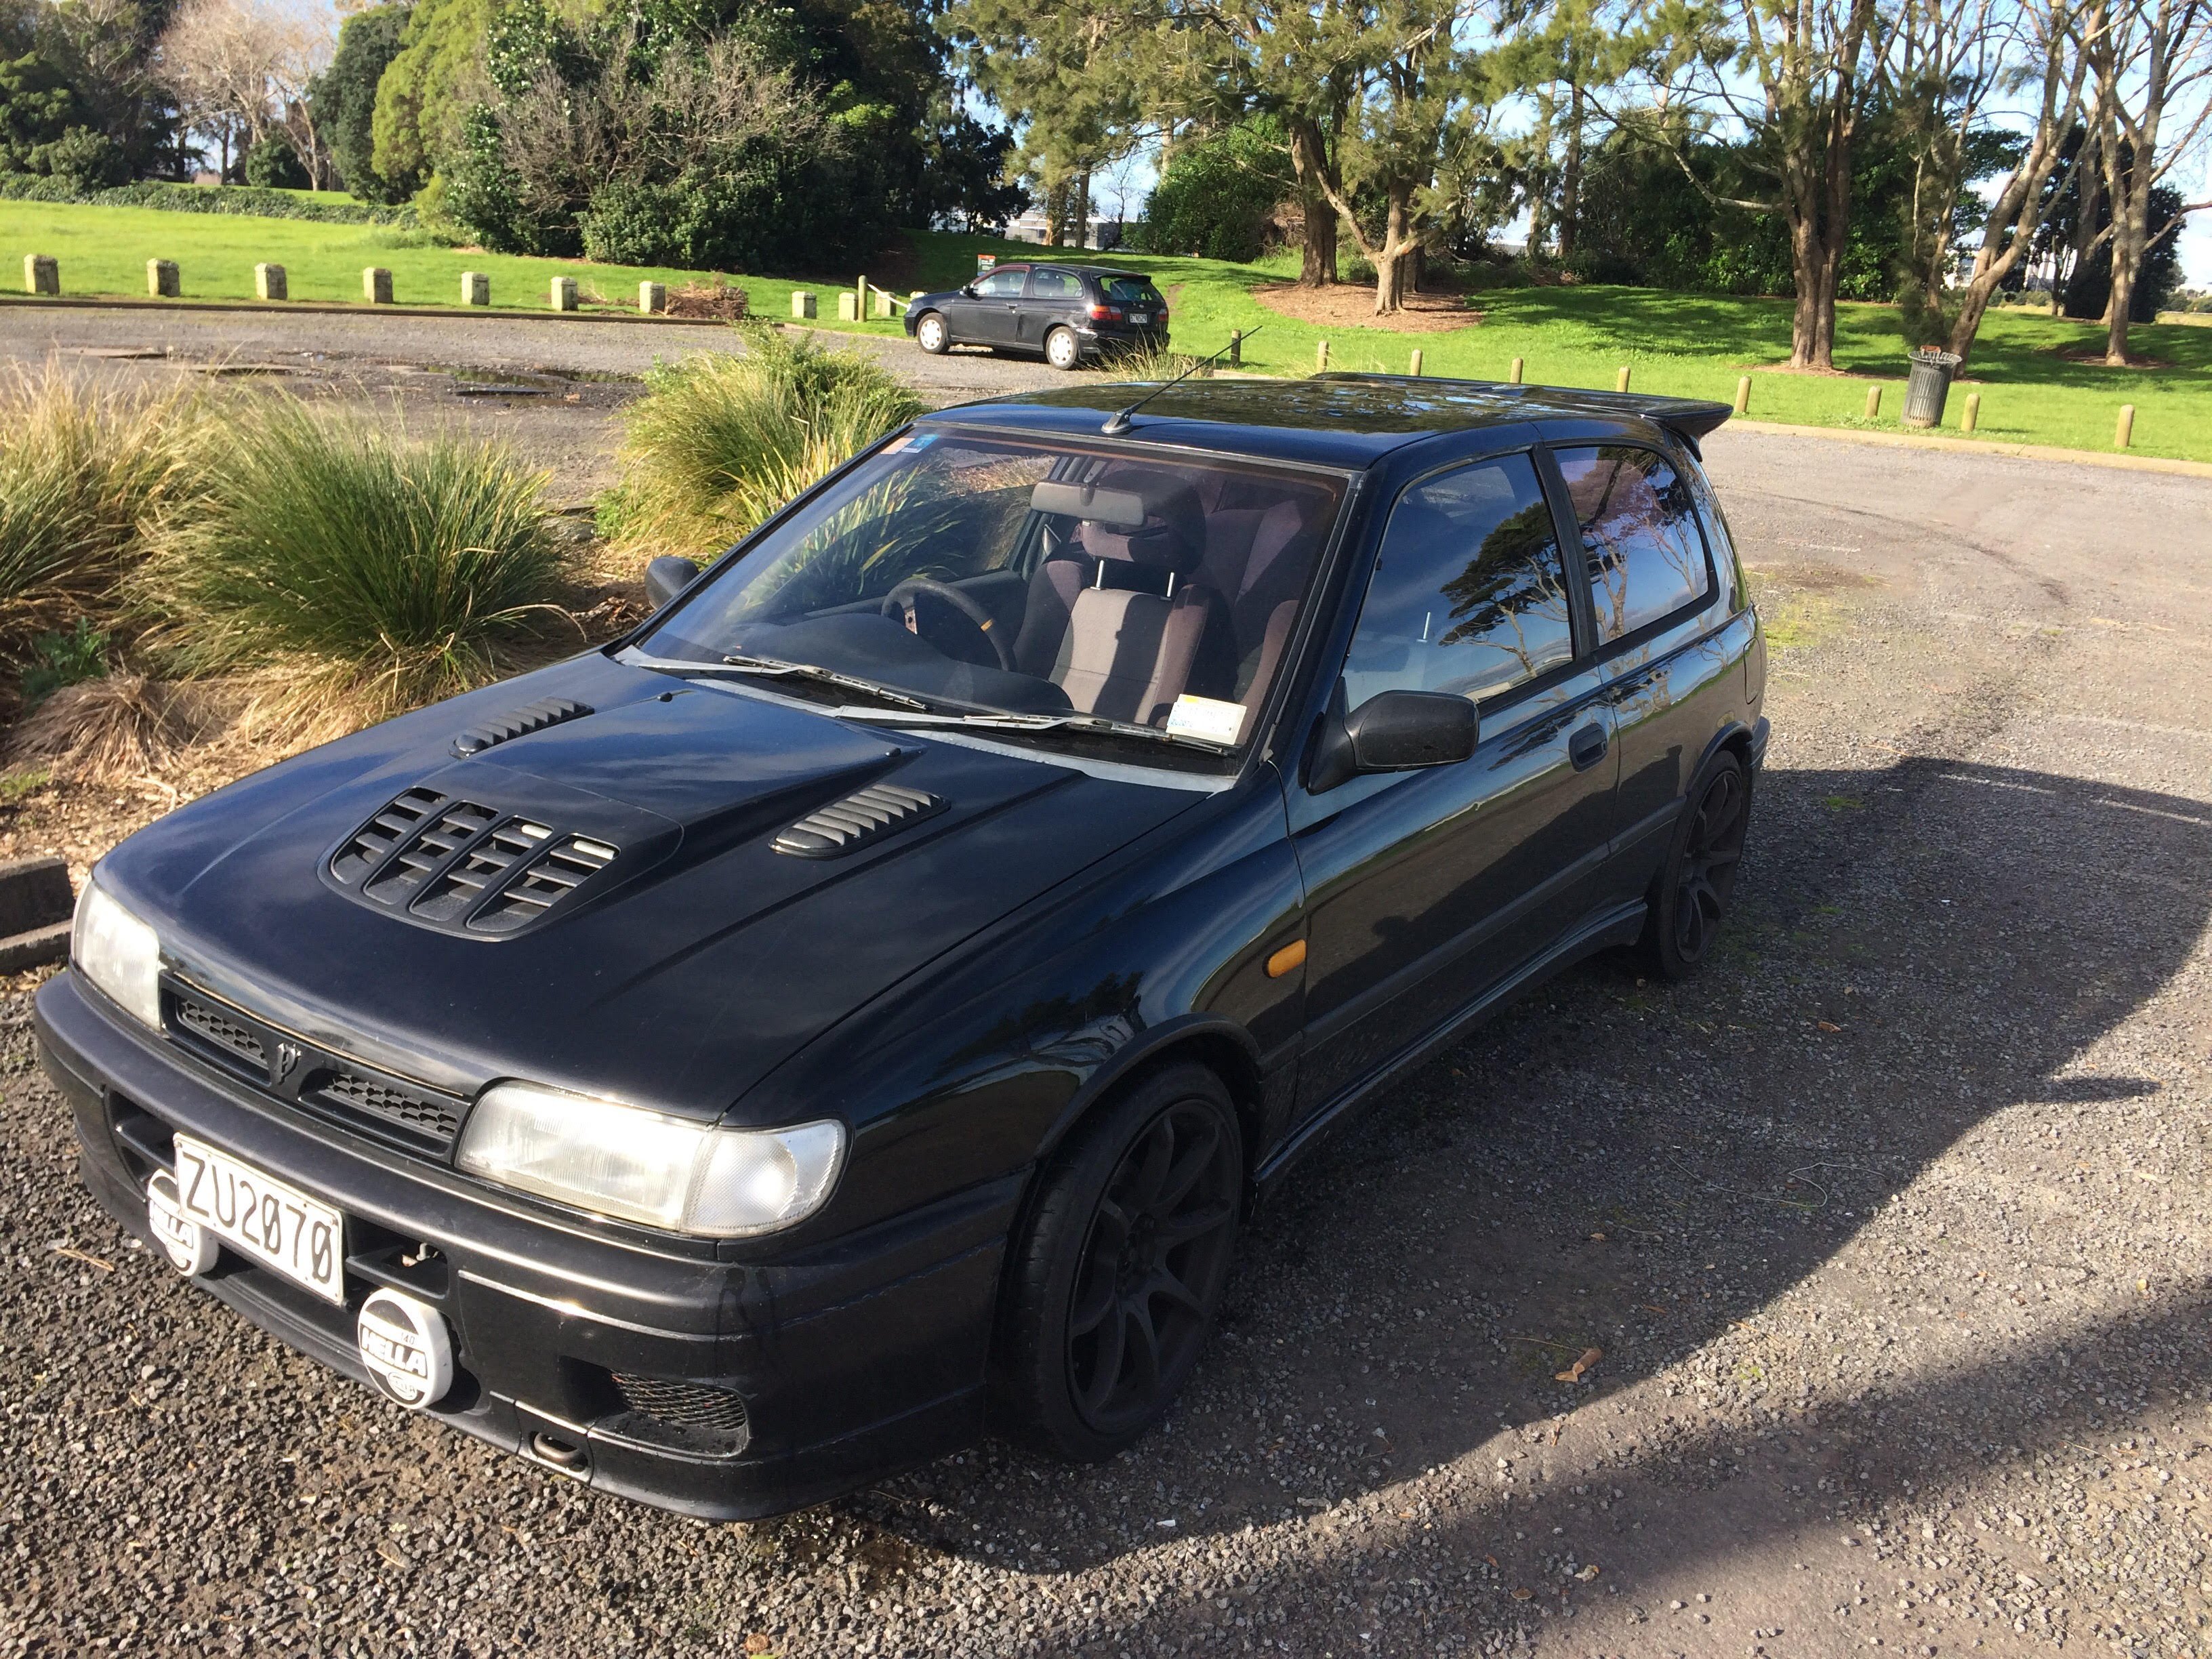
This was my one. Sold it in 2017 for what seemed like bugger all. Then Covid hit in 2020, and the reality set in that I was never going to justify spending the money they were now commanding on another. Gutted I sold it, as I loved the heck out of it. Shouldn't have listened to the now wife. Great to see another still alive and kicking, with a bit of love given to it.
5 points
-
Back on track again everything that needs to go back in engine bay is there wiring has been started everything accounted for. A v6 engine bay is normally quite empty looking this one's bloody packed! Bonnet shuts exhaust now misses the air-conditioning components phew taken long enough. Hotside needs to come out again for some welding after re jigging the up pipe but that's a 5 minute job now.
3 points
-
Put me down for x23 points
-
Yea I'm in, either drive or if there are rides going, I'll fly to Chch easy3 points
-
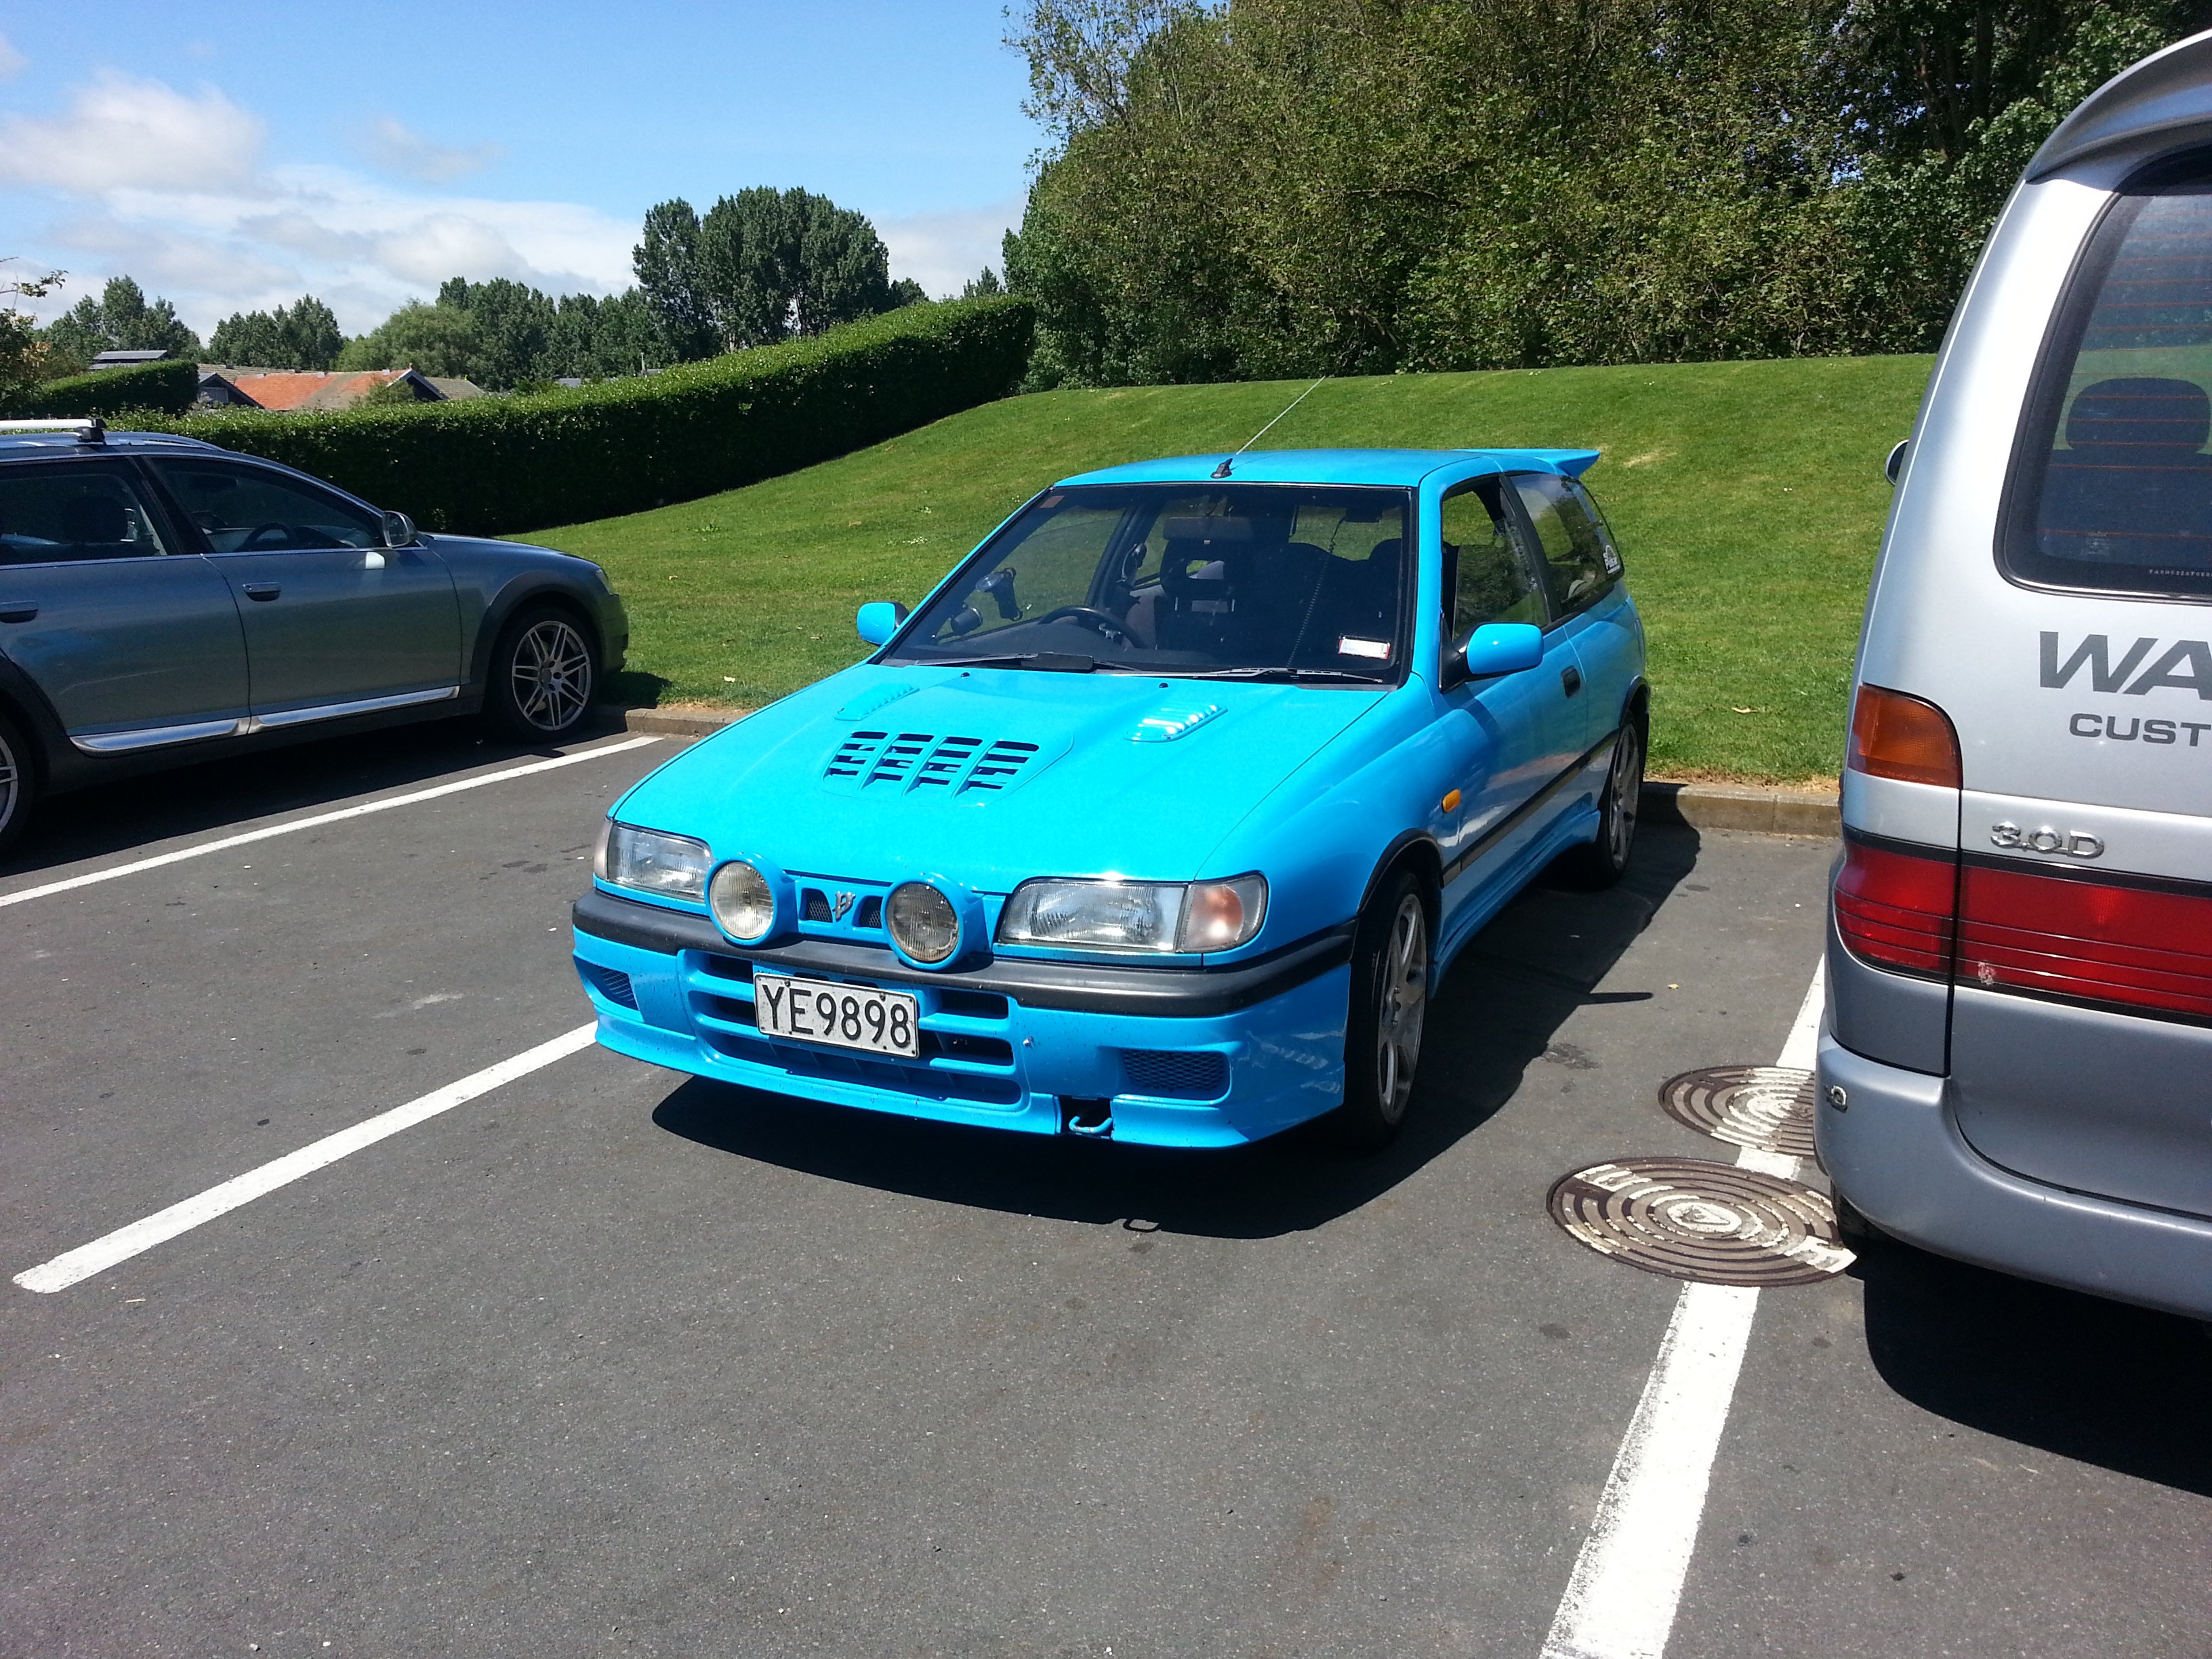
This was the only full GTIR ive owned, bought for 650, sold for 6800. Had the umbrella too..... Dont think it lasted long after i sold it to some bogan down Whanganui way, according to carjam.
3 points
-
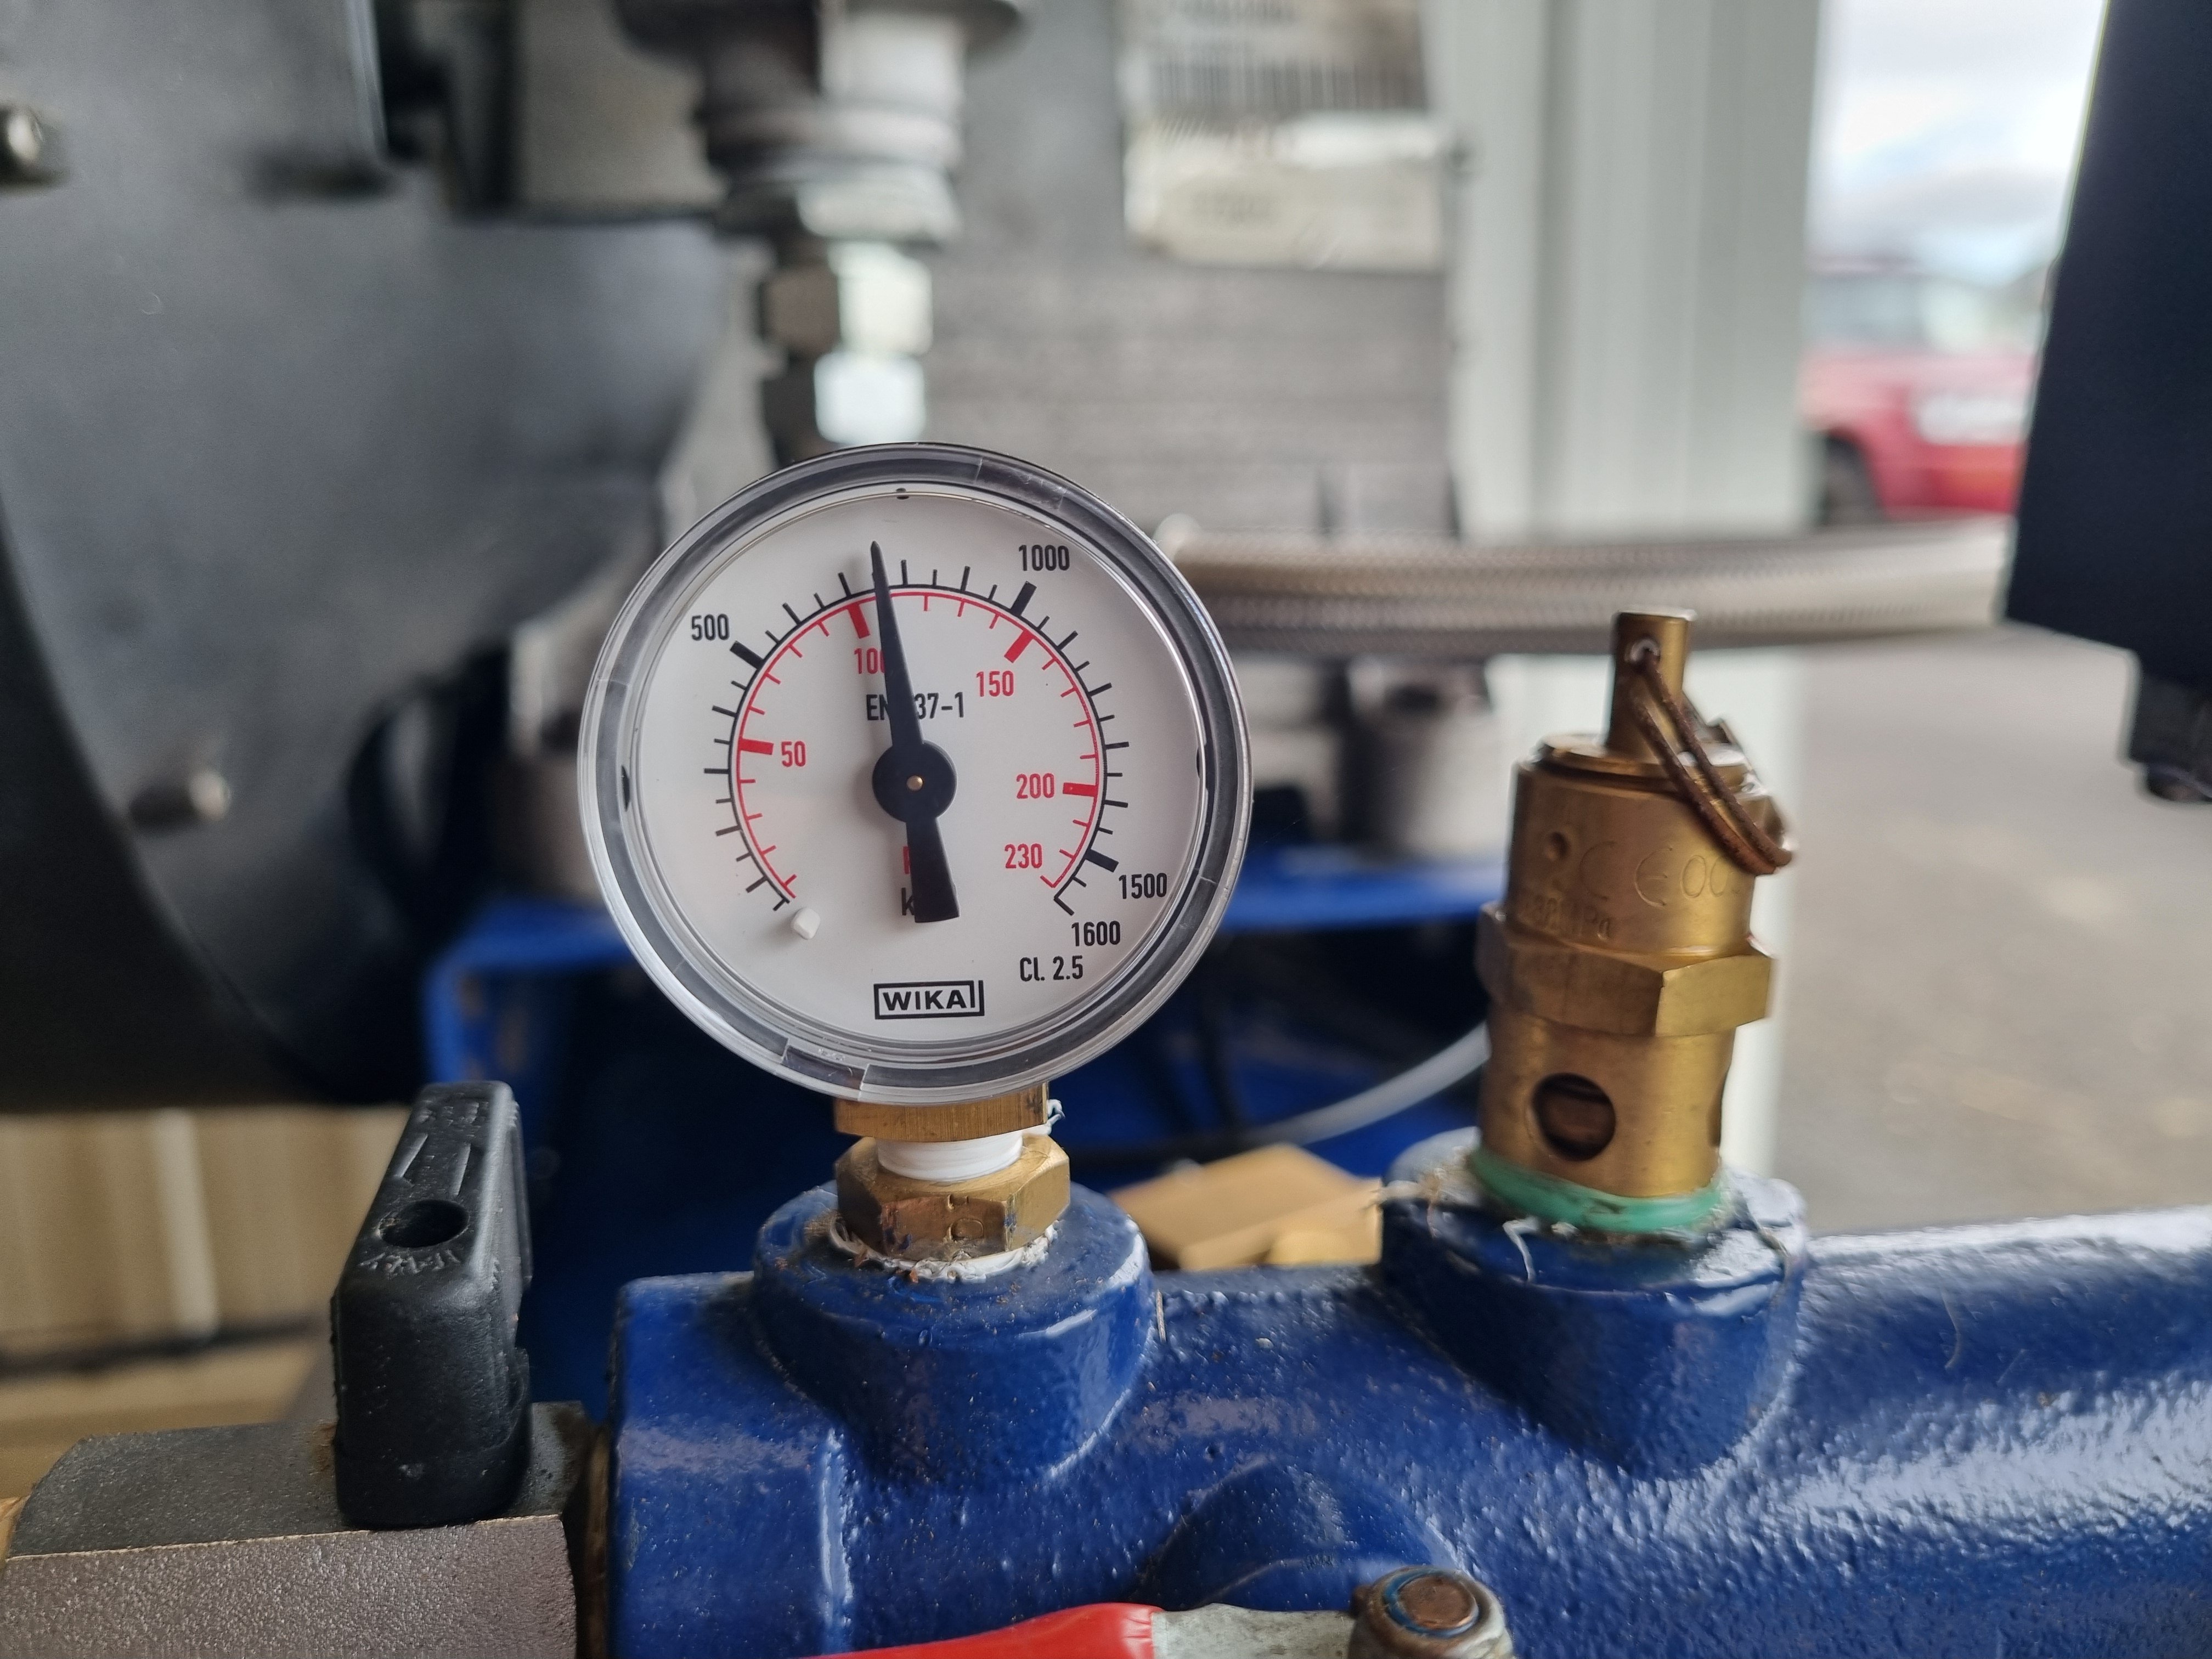
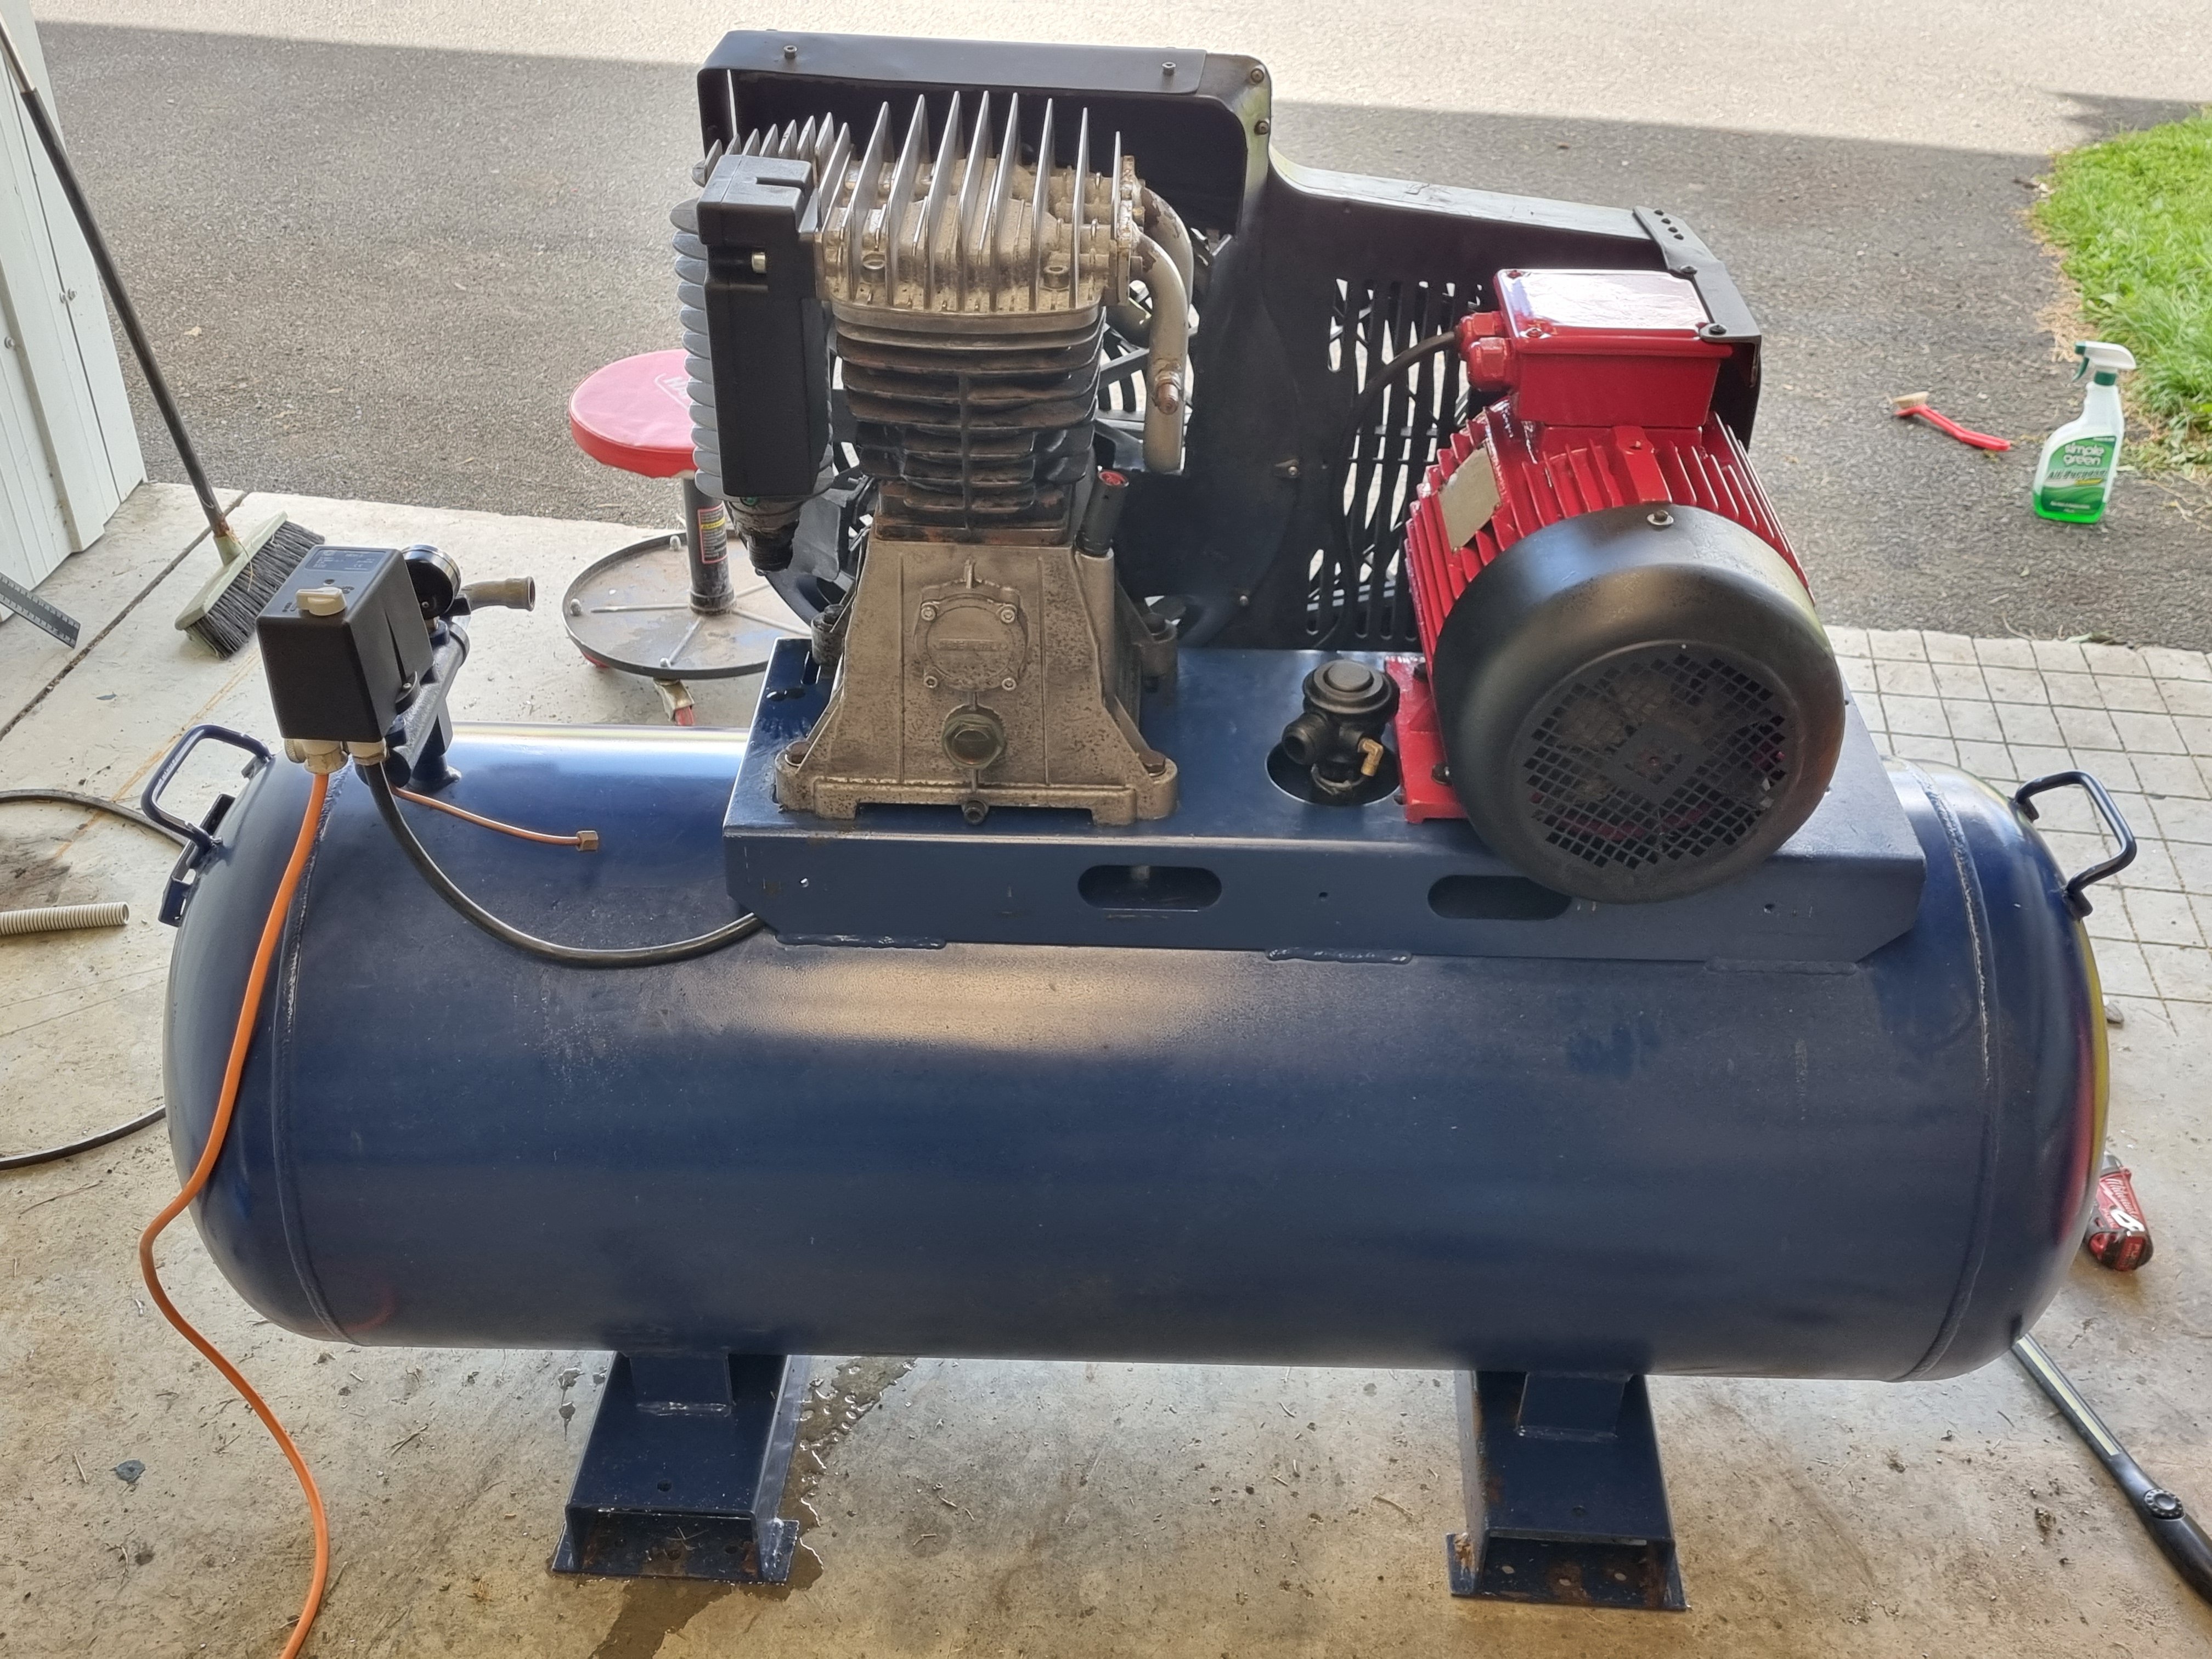
I got a Teflon lined hose and plumbed everything up. It works. The switch turns it off at 110 psi so I'm going to up that a bit because why have something explode at 110psi when your could have it explode at 140psi. The thing I haven't finished yet is the purge valve. I have a bracket for it I just need to wire it in, I'll probably do that now. Anywho, it works.
3 points
-
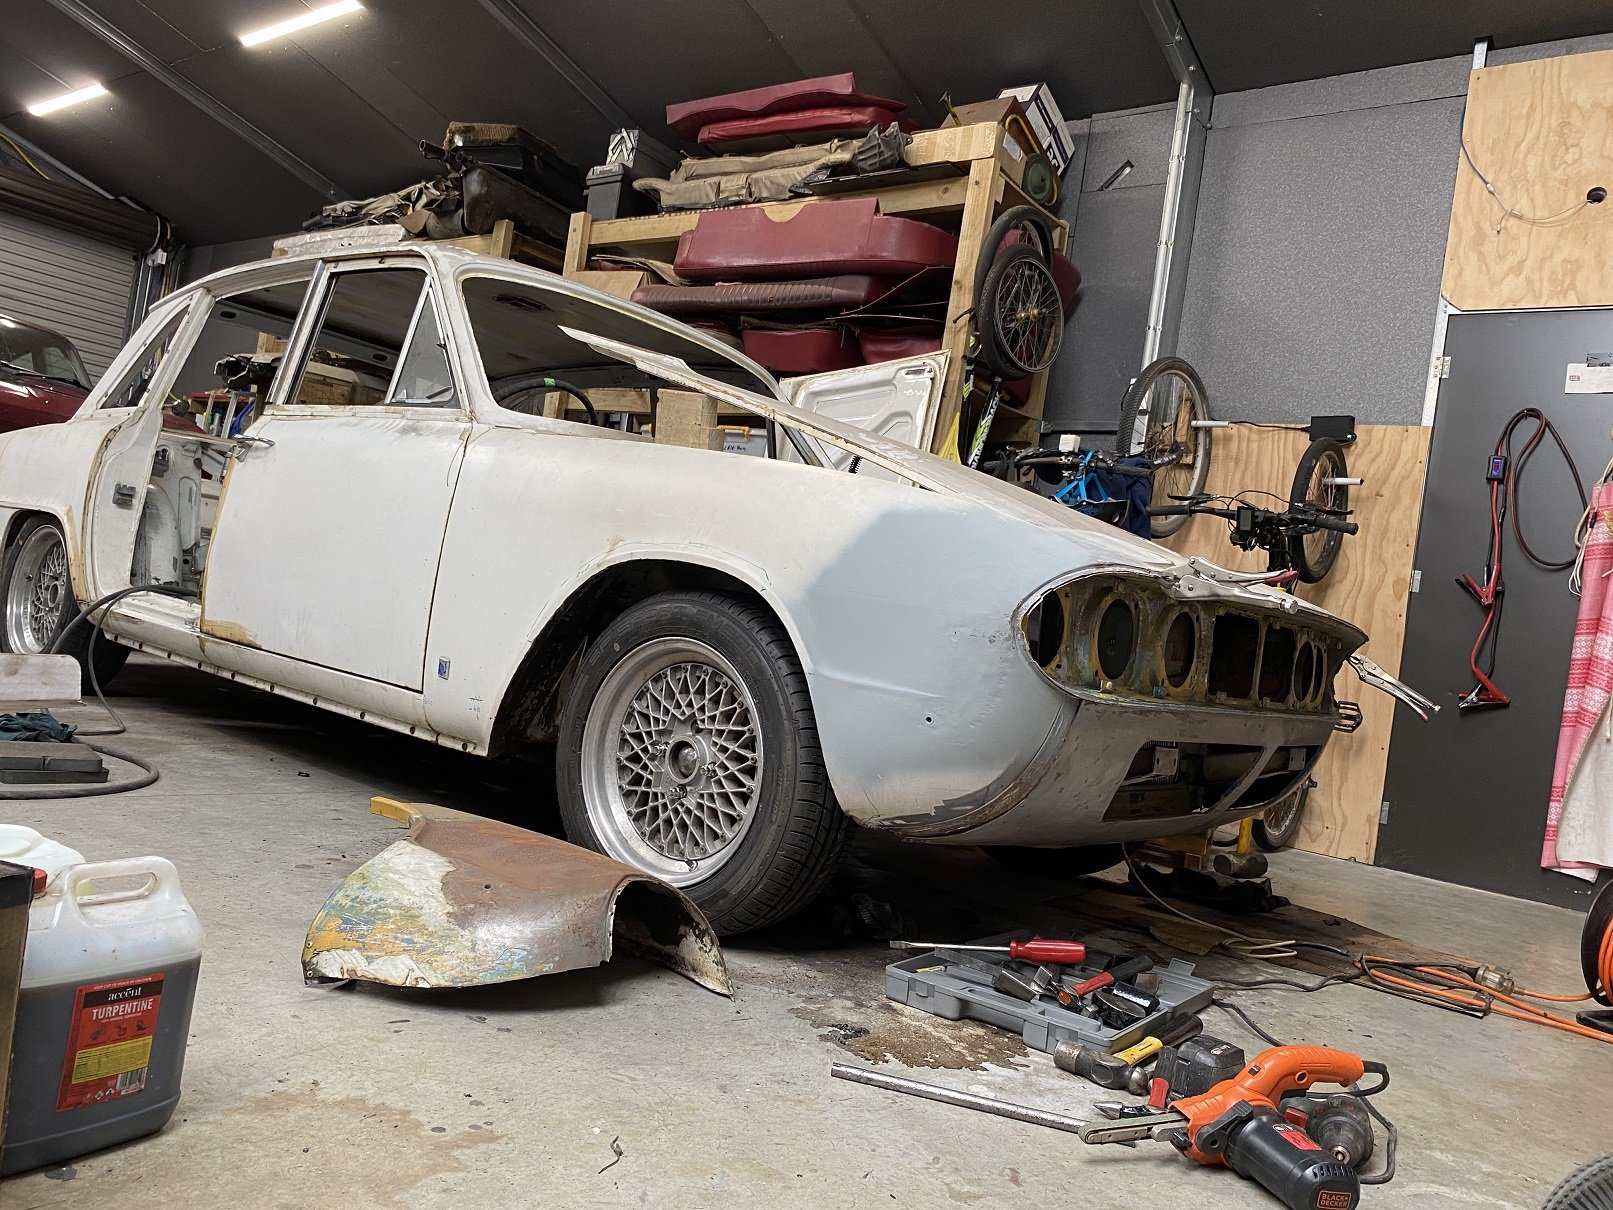
But....... cos I'd hate myself & & I'm a pedantic fucking perfectionist I'm chopping the arse off it. Rust in the seams has to be dealt to, then I guess sand/beadblast the damage
2 points
-
I increased the pressure a bit then left it over night It has lost exactly 0 psi which I'm quite happy about. Now the next thing I need to set up is a drier type thing and some decent air feeds in the shed but I think I'll wait to plumb it into the new workshop when it gets built
2 points
-
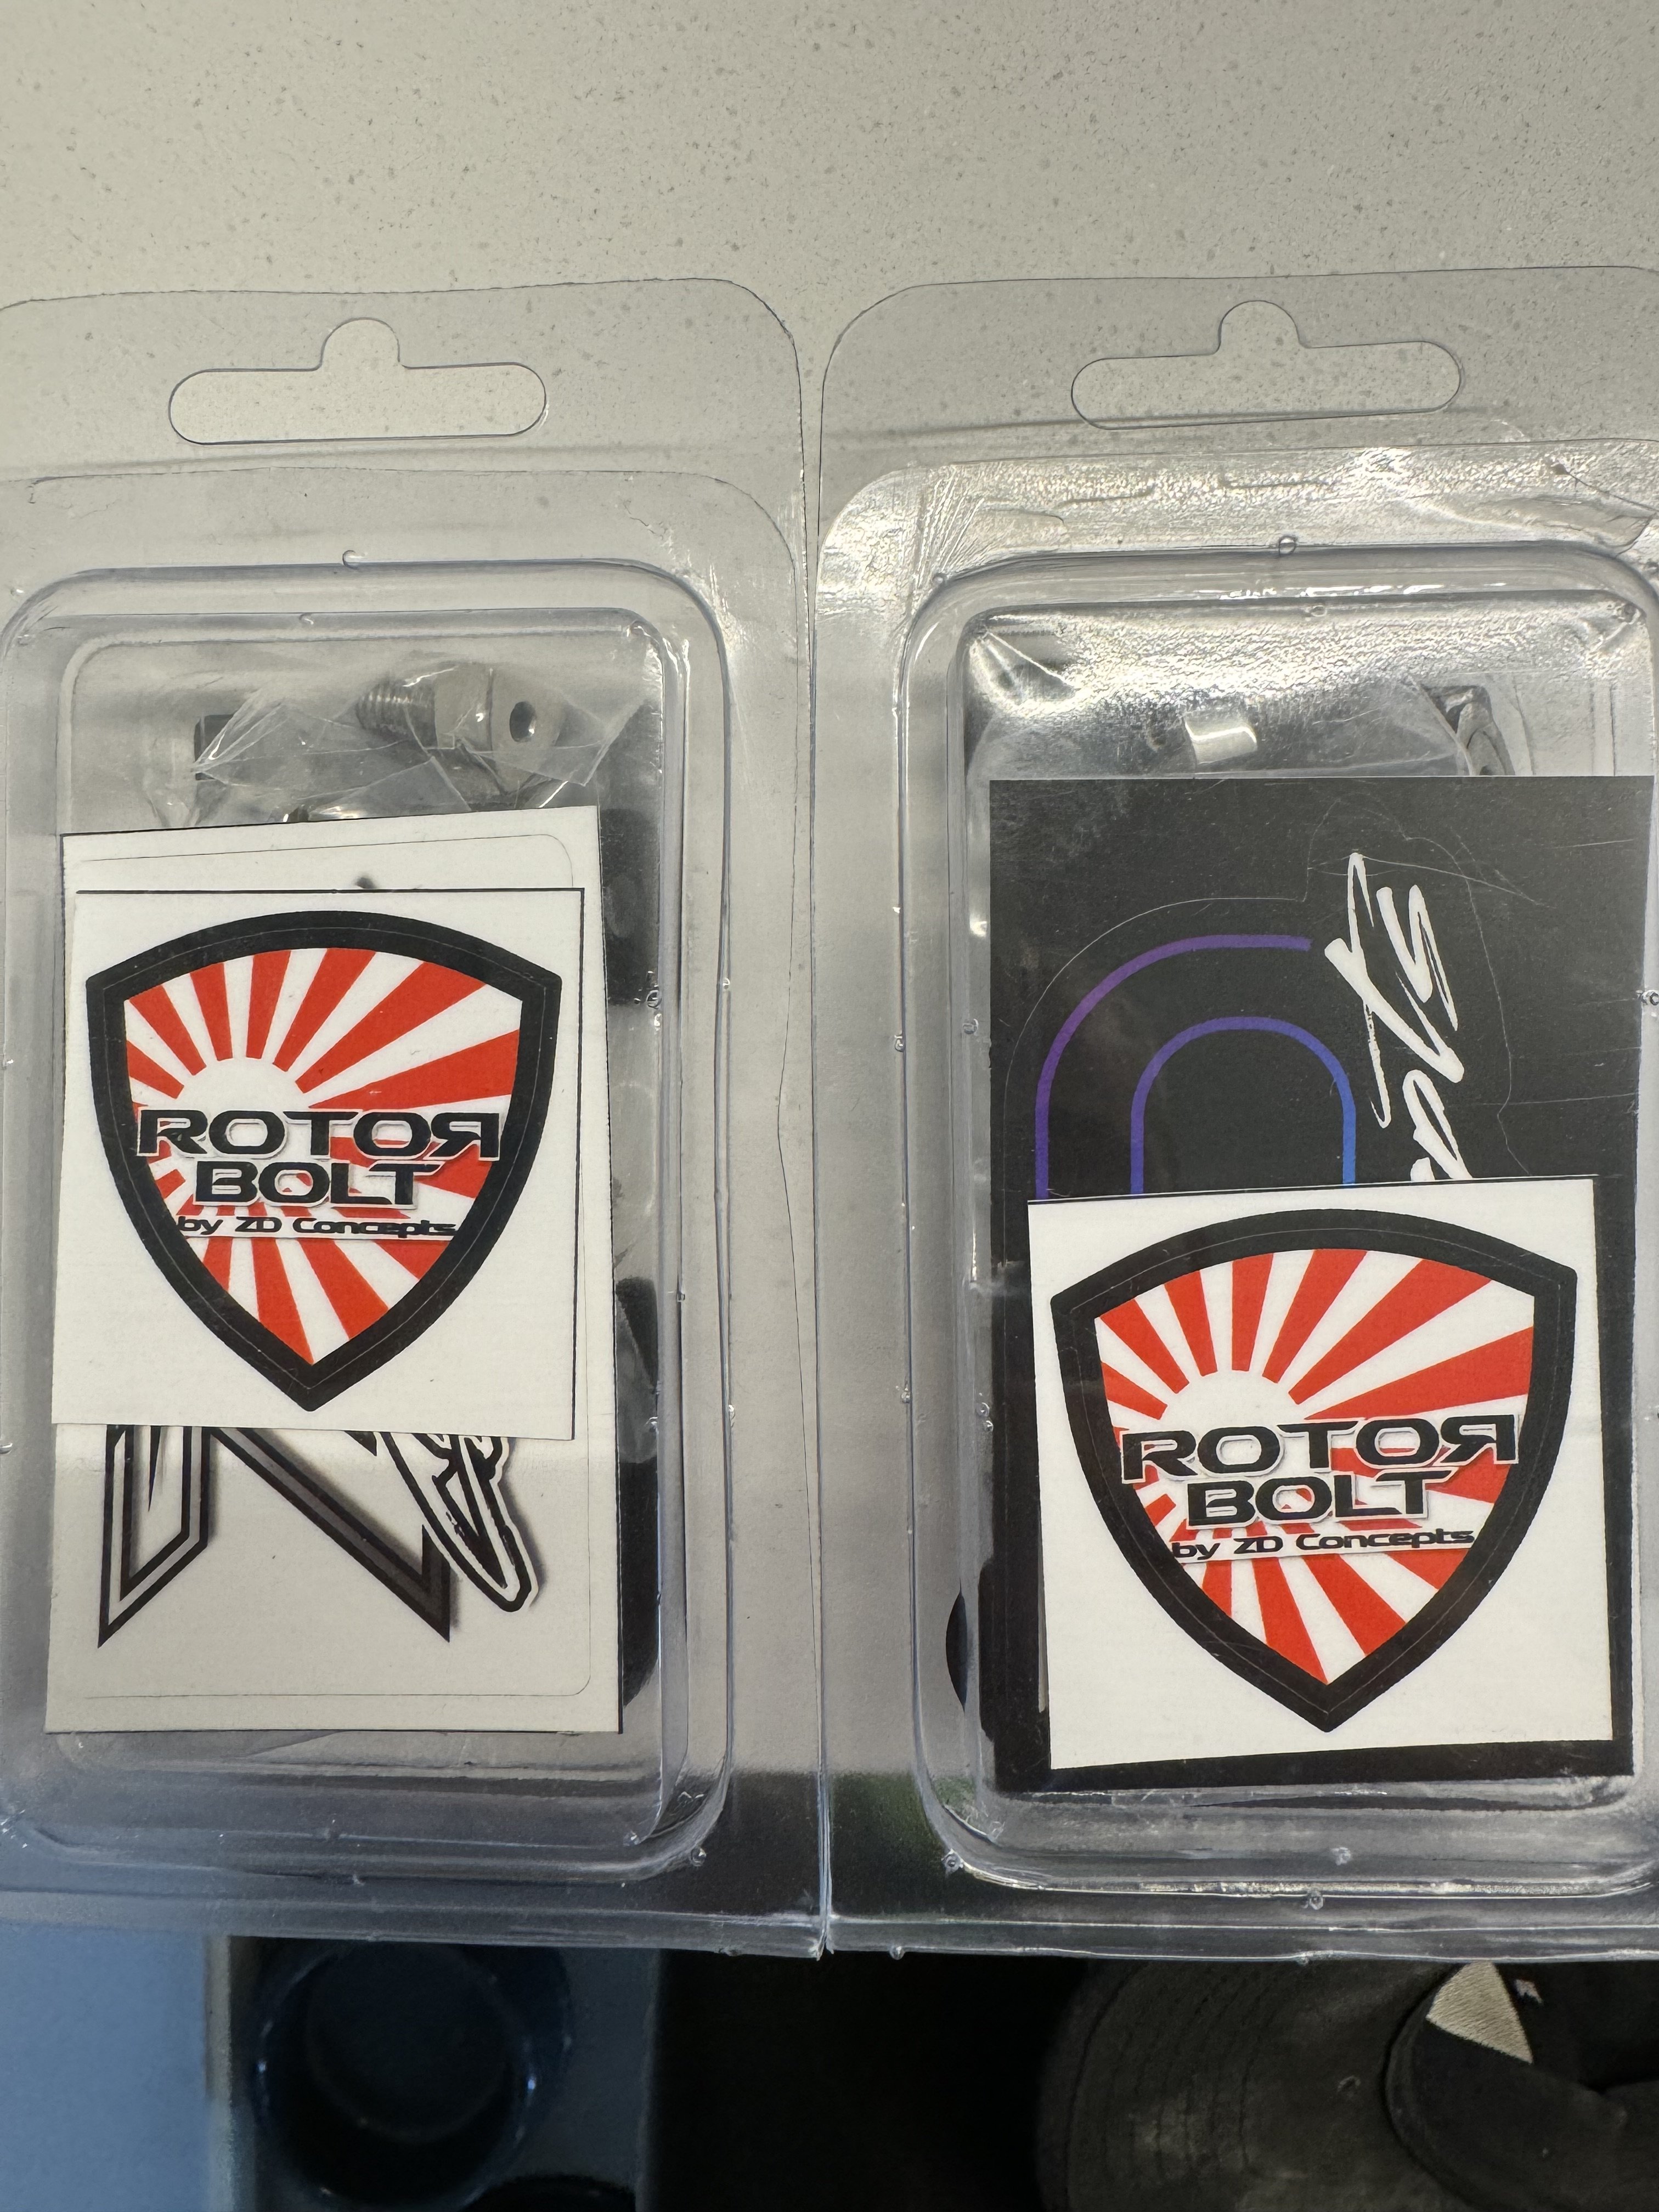
Some goodies arrived from across the ditch. thought I’d give them a looksy
2 points
-
More photos before it's stripped - just for reference. I find trawling through historic build logs really fun over the years to see how far you come I sent mum out to take photos. combined with someone who can't DSLR, and one who can press a few buttons on Lightroom. we come back with this. _MG_1118 by phillipbaines, on Flickr _MG_1086 by phillipbaines, on Flickr _MG_1092 by phillipbaines, on Flickr _MG_1094 by phillipbaines, on Flickr _MG_1099 by phillipbaines, on Flickr _MG_1100 by phillipbaines, on Flickr _MG_1102 by phillipbaines, on Flickr _MG_1104 by phillipbaines, on Flickr _MG_1106 by phillipbaines, on Flickr _MG_1111 by phillipbaines, on Flickr _MG_1113 by phillipbaines, on Flickr _MG_1122 by phillipbaines, on Flickr _MG_1127 by phillipbaines, on Flickr _MG_1129 by phillipbaines, on Flickr _MG_1131 by phillipbaines, on Flickr _MG_1133 by phillipbaines, on Flickr _MG_1171 by phillipbaines, on Flickr Getting picked up this weekend to be stripped. Car will be entirely media blasted to bare metal Car will be off for full panel work resto in July. Will see what the blasting yields!2 points
-
The wof this week is off the cards. I thought I had better check why the handbrake was so pathetic and discovered that both rear calipers were basically seized. I thought the brakes were not as good, now I know why. I may as well rebuild all the calipers and if my visa can take the punishment I might get new discs and pads as well, I might have to sell some shit So I to feel like I had achieved something I messed with wiring of the fuel sensing relay to try to make it work. @h4nd had given me a dose of RTFM so I reworked the wiring to suit, but now it doesn't work at all. I checked many things but no go. There is a good chance I toasted it when I wired it up wrong. I might just wire a normal relay up to and use the alternator as the signal wire. I also poo'd up the washer tank some more as it was still leaking, tomorrow morning may tell me some things; Then I decided to move the afr meter to somewhere where I could actually see it when driving. Basically lots of tinkering with shit and avoiding jobs around the house that I should be doing. Oh and yesterday I tuned/balanced the carbs a bit, hopefully it will run a little better. And also I noticed the gearbox drain plug was leaking.... Cool cool2 points
-
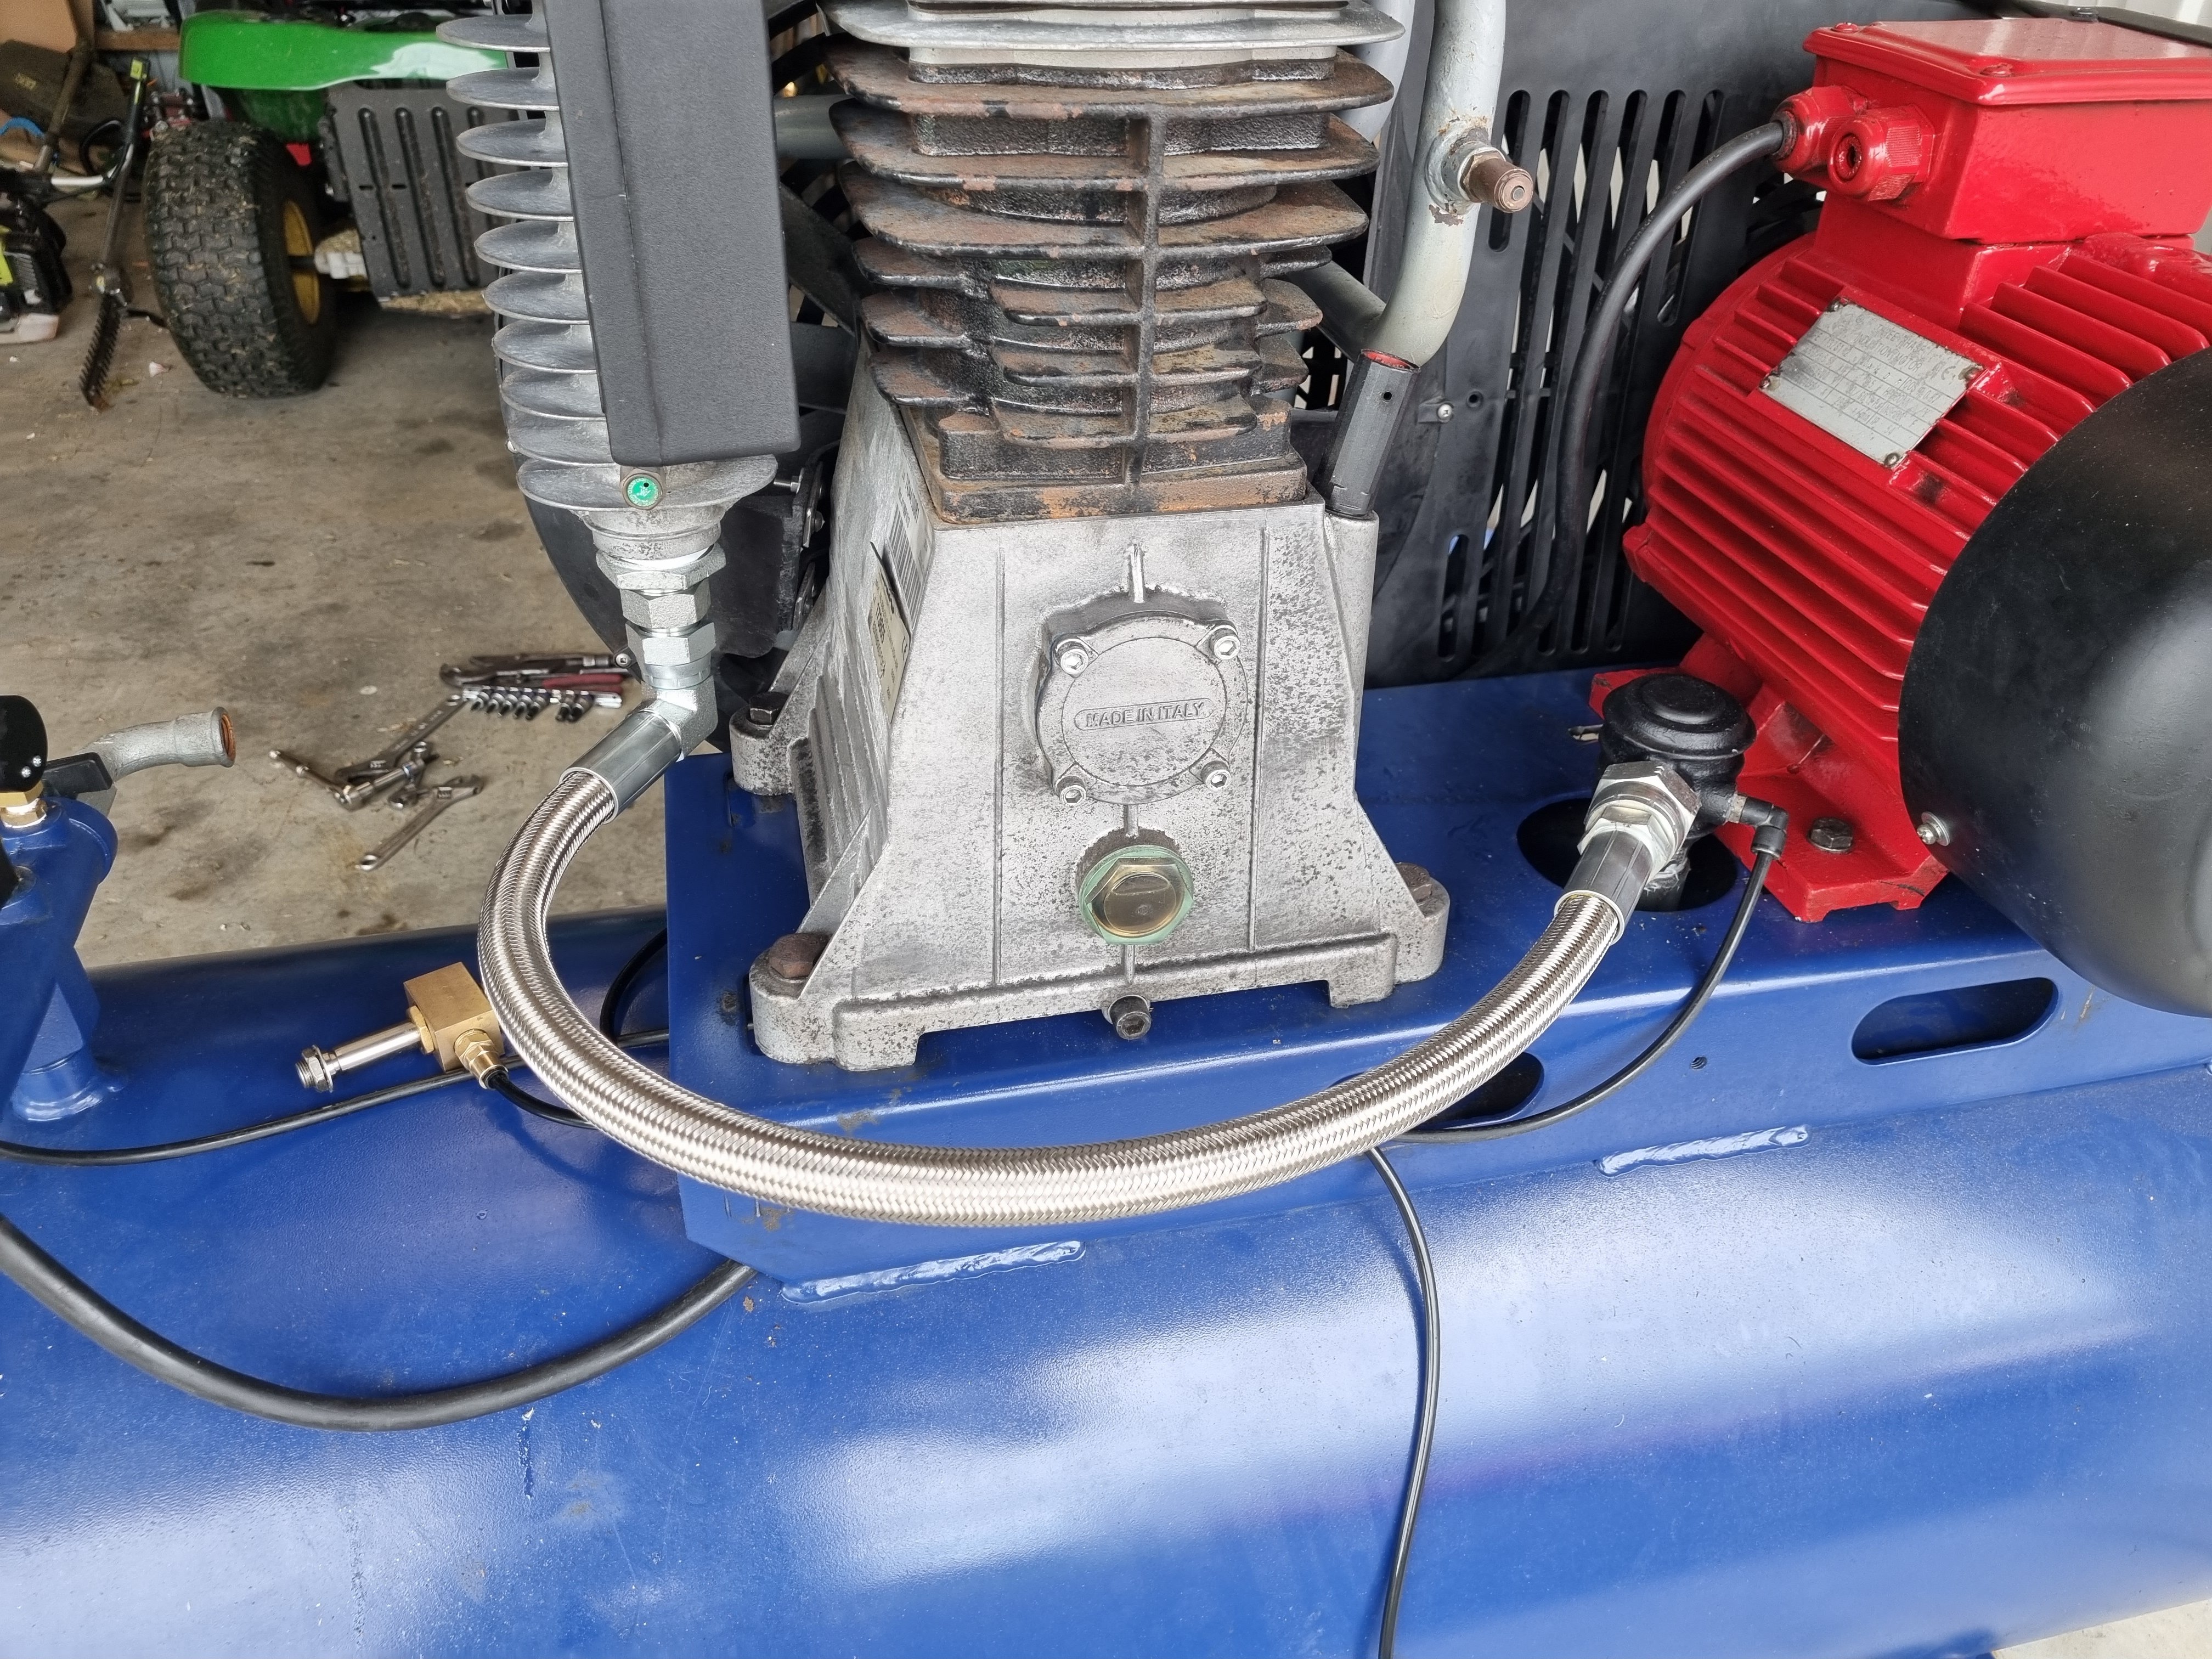
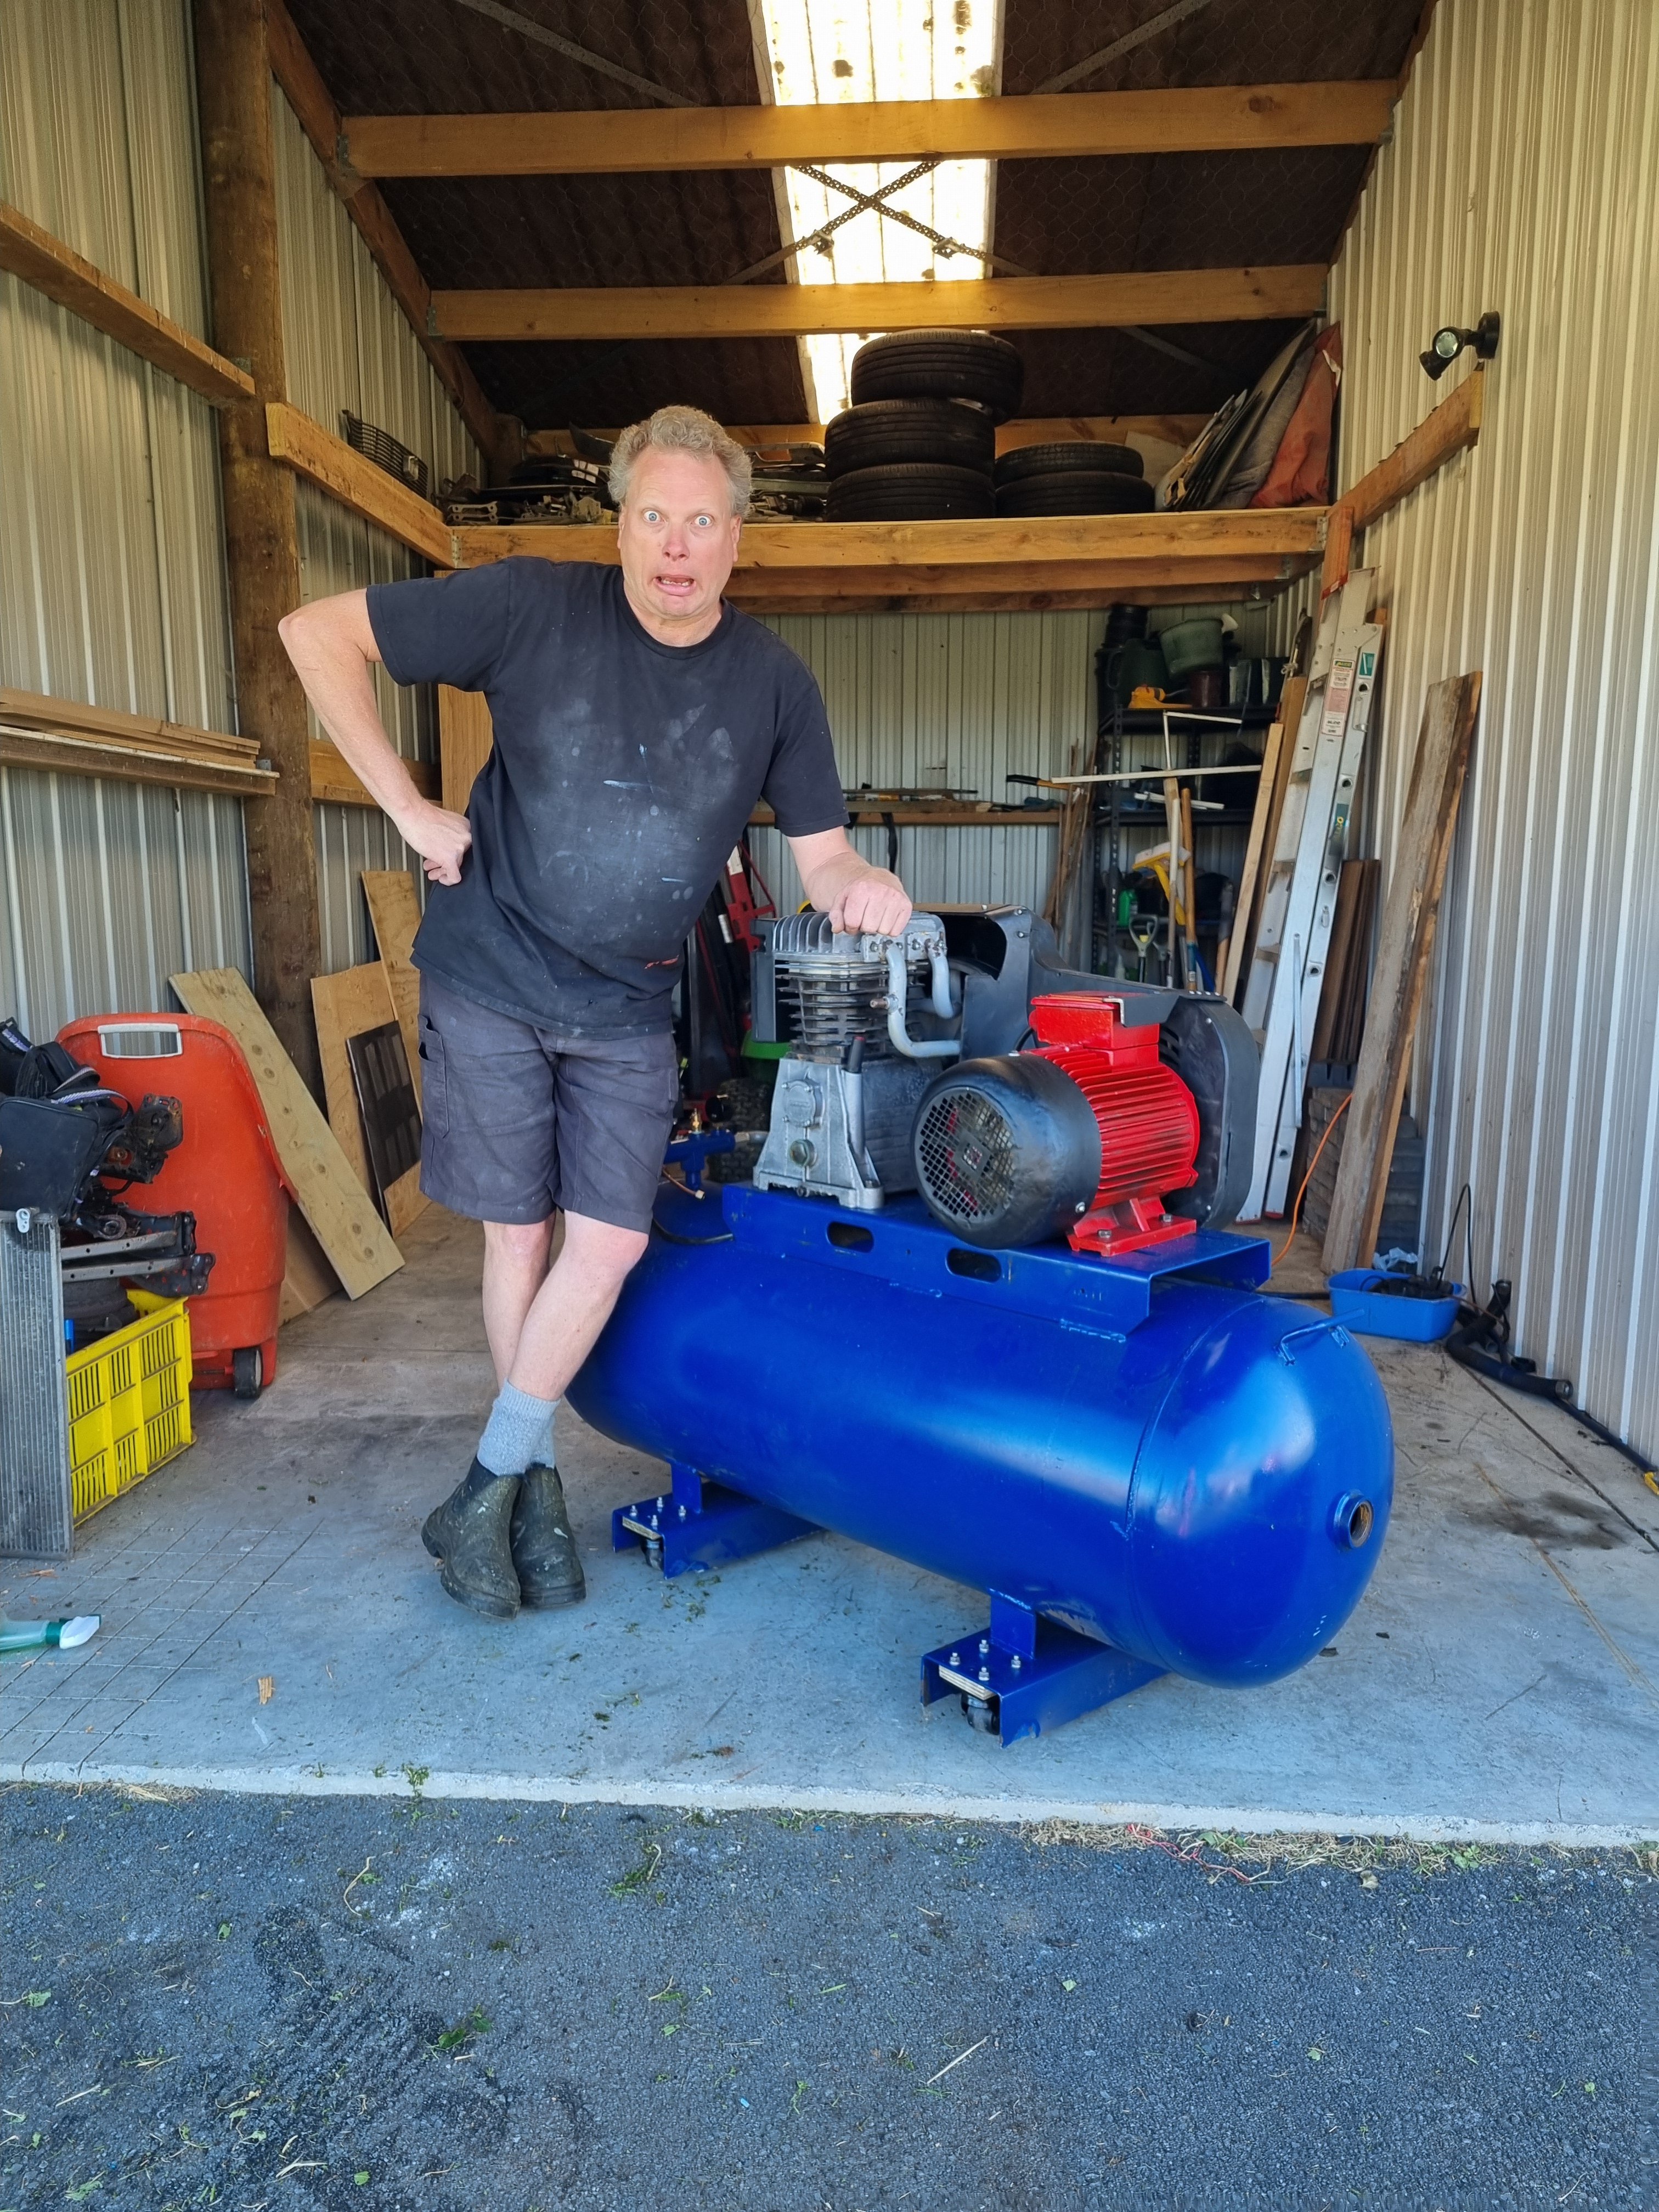
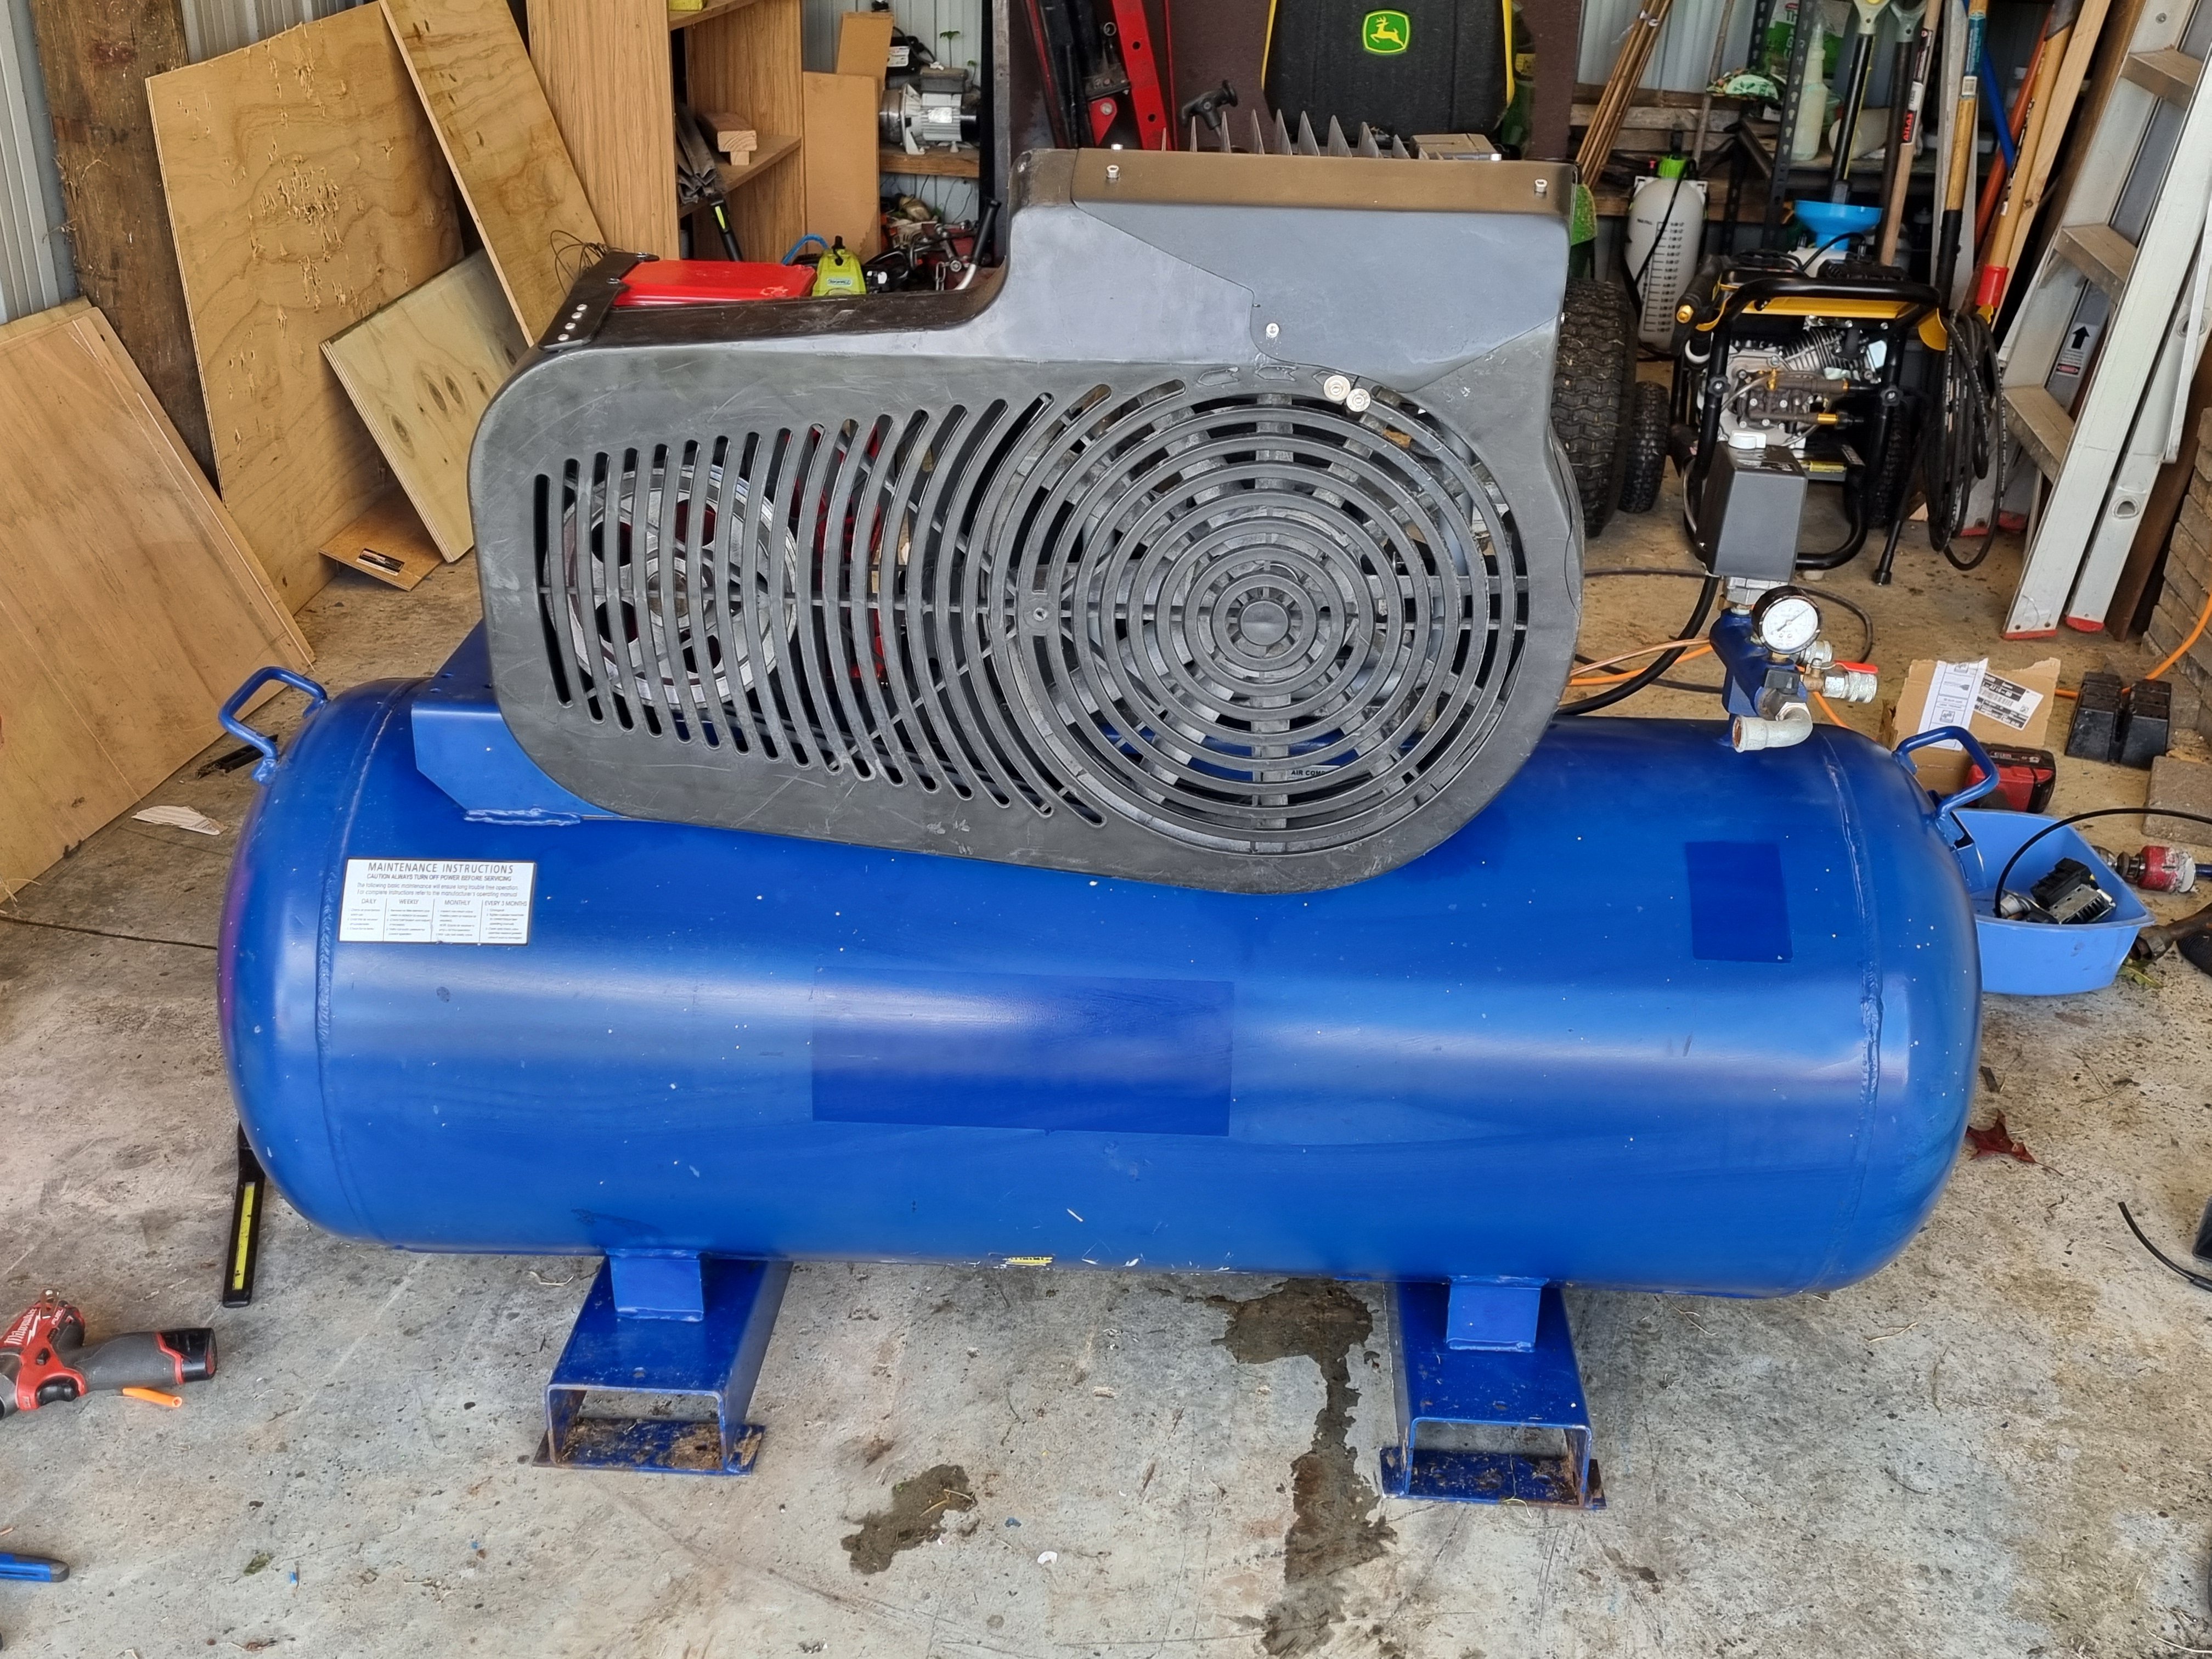
@cletus came over yesterday for a visit and remarked how the compressor looked bigger in real life than on the Internet so I commissioned this portrait with the hope of conveying the size of the compressor accurately.
2 points
-
After a couple of failed race car projects over the last decade decided it was time for a more simple road car project. Being of that age where you start to reminisce your youth I decided a 90s turbo car would be the ticket. And had always wanted a gtir as a young fella I just so happened to know of an abandoned Gtir project in a paddock and after a quick phone call a deal was done It had been sitting in the paddock approx 7 years. It ran but had a blown gearbox (of course) some rust and dents and every rubber part was perished and dash cracked etc. I immediately brought up on parts blew it to bits fixed the dents and rust and was ready to send it off to the paint shop, then……. I bought another one its about that point things escalated
1 point
-
Sick of looking at it & shoving it from corner to corner. Bog the bitch & shut the naysayers up & drive it is what i need to do.............1 point
-
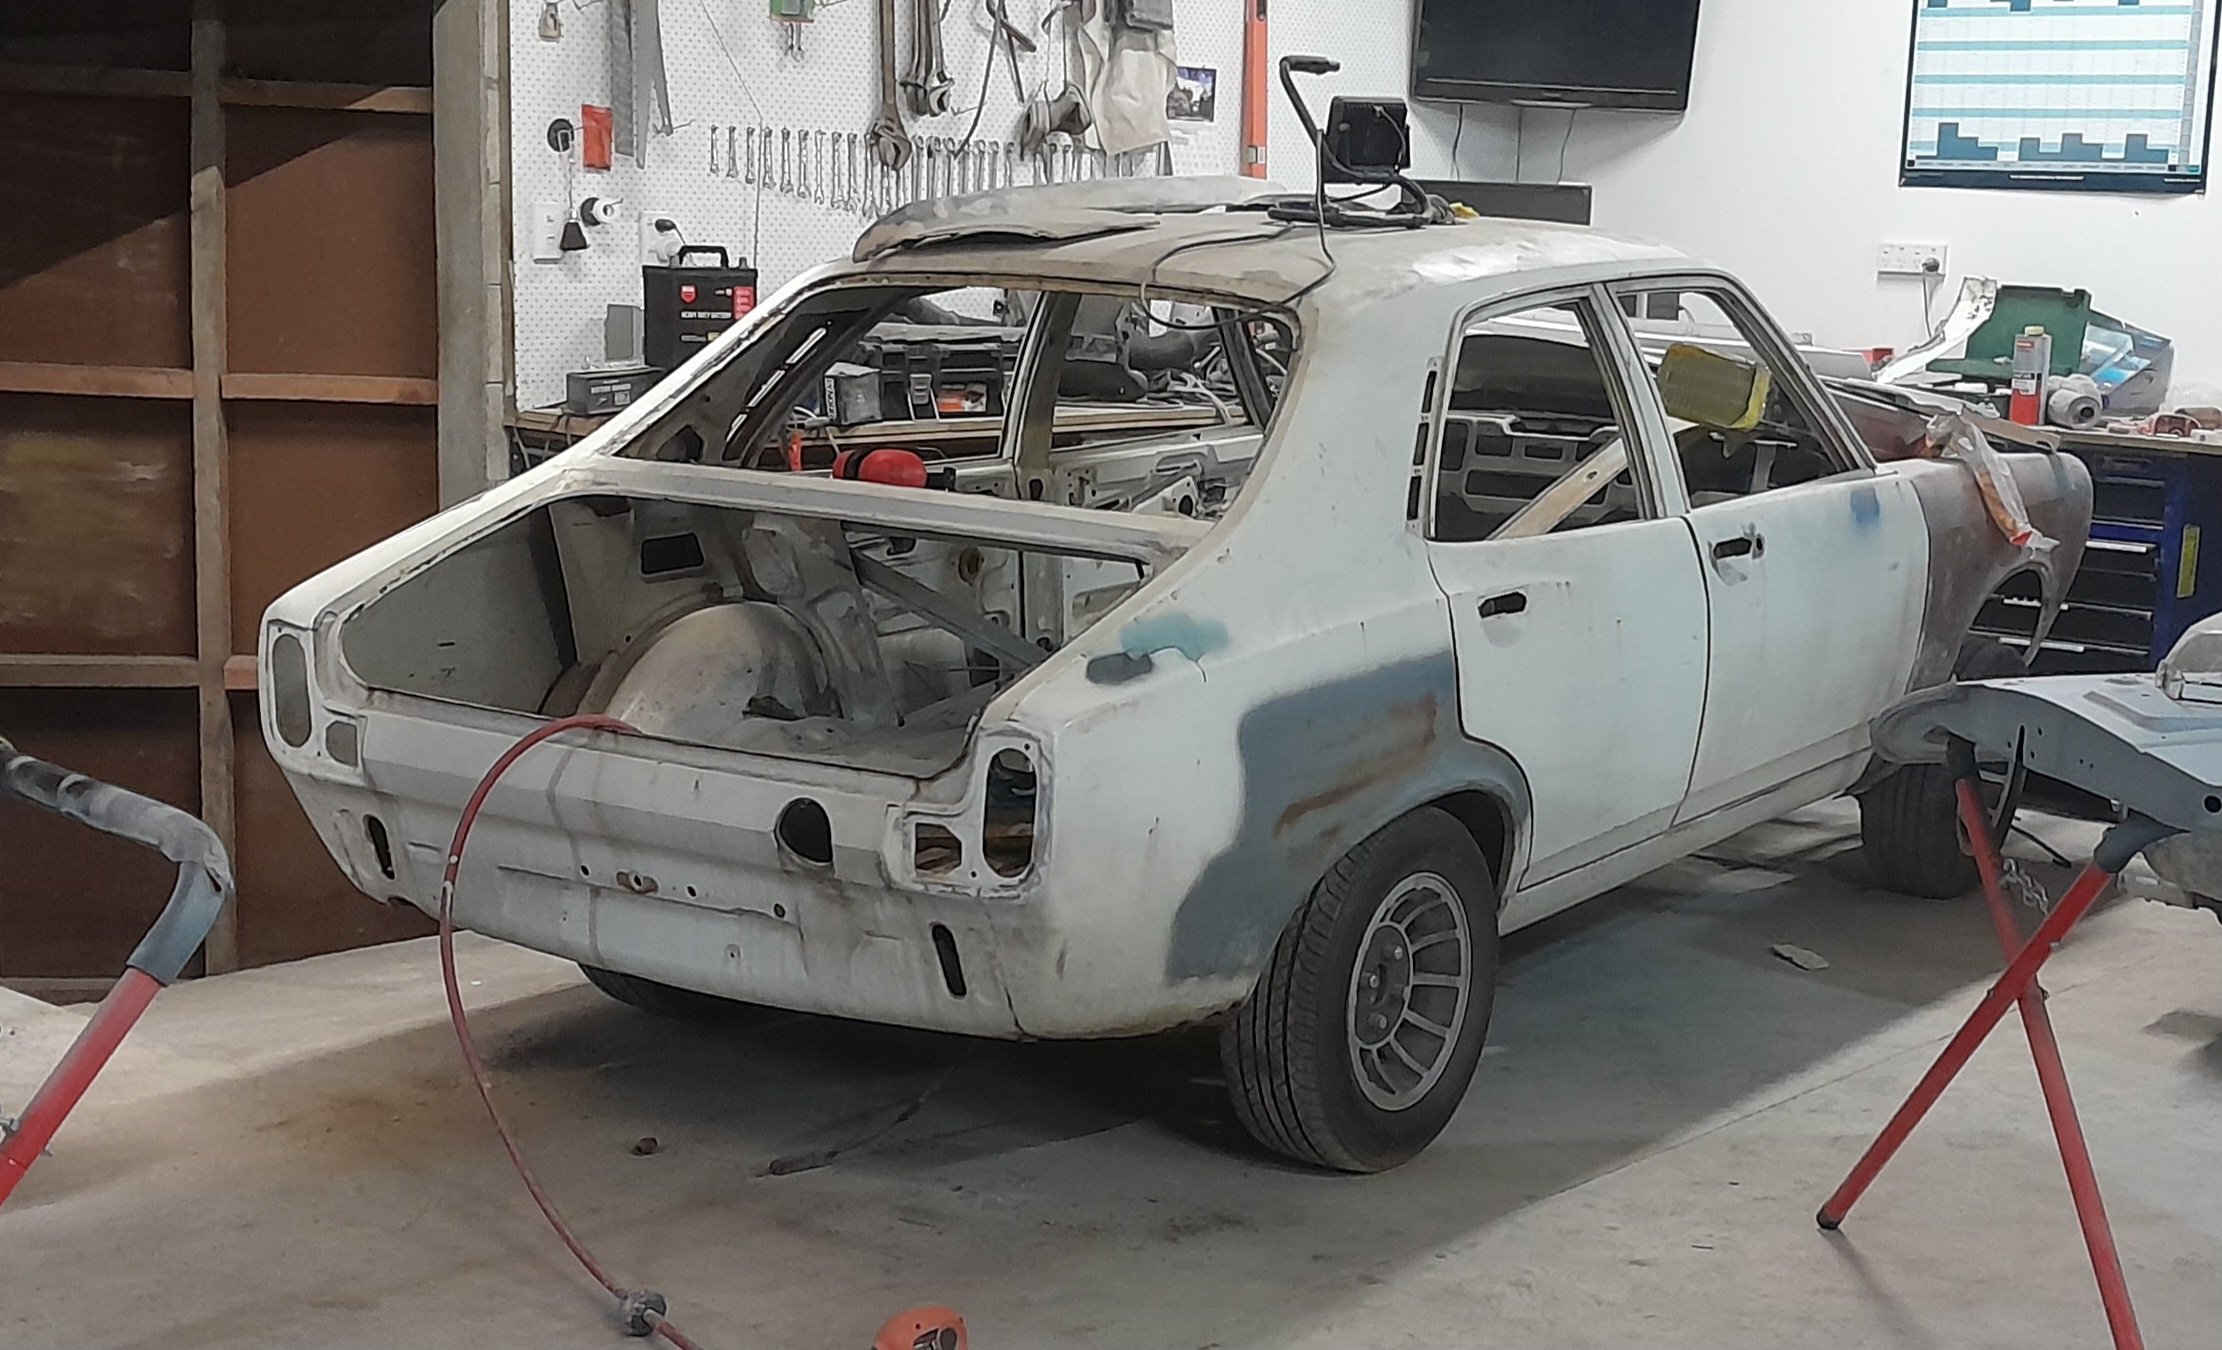
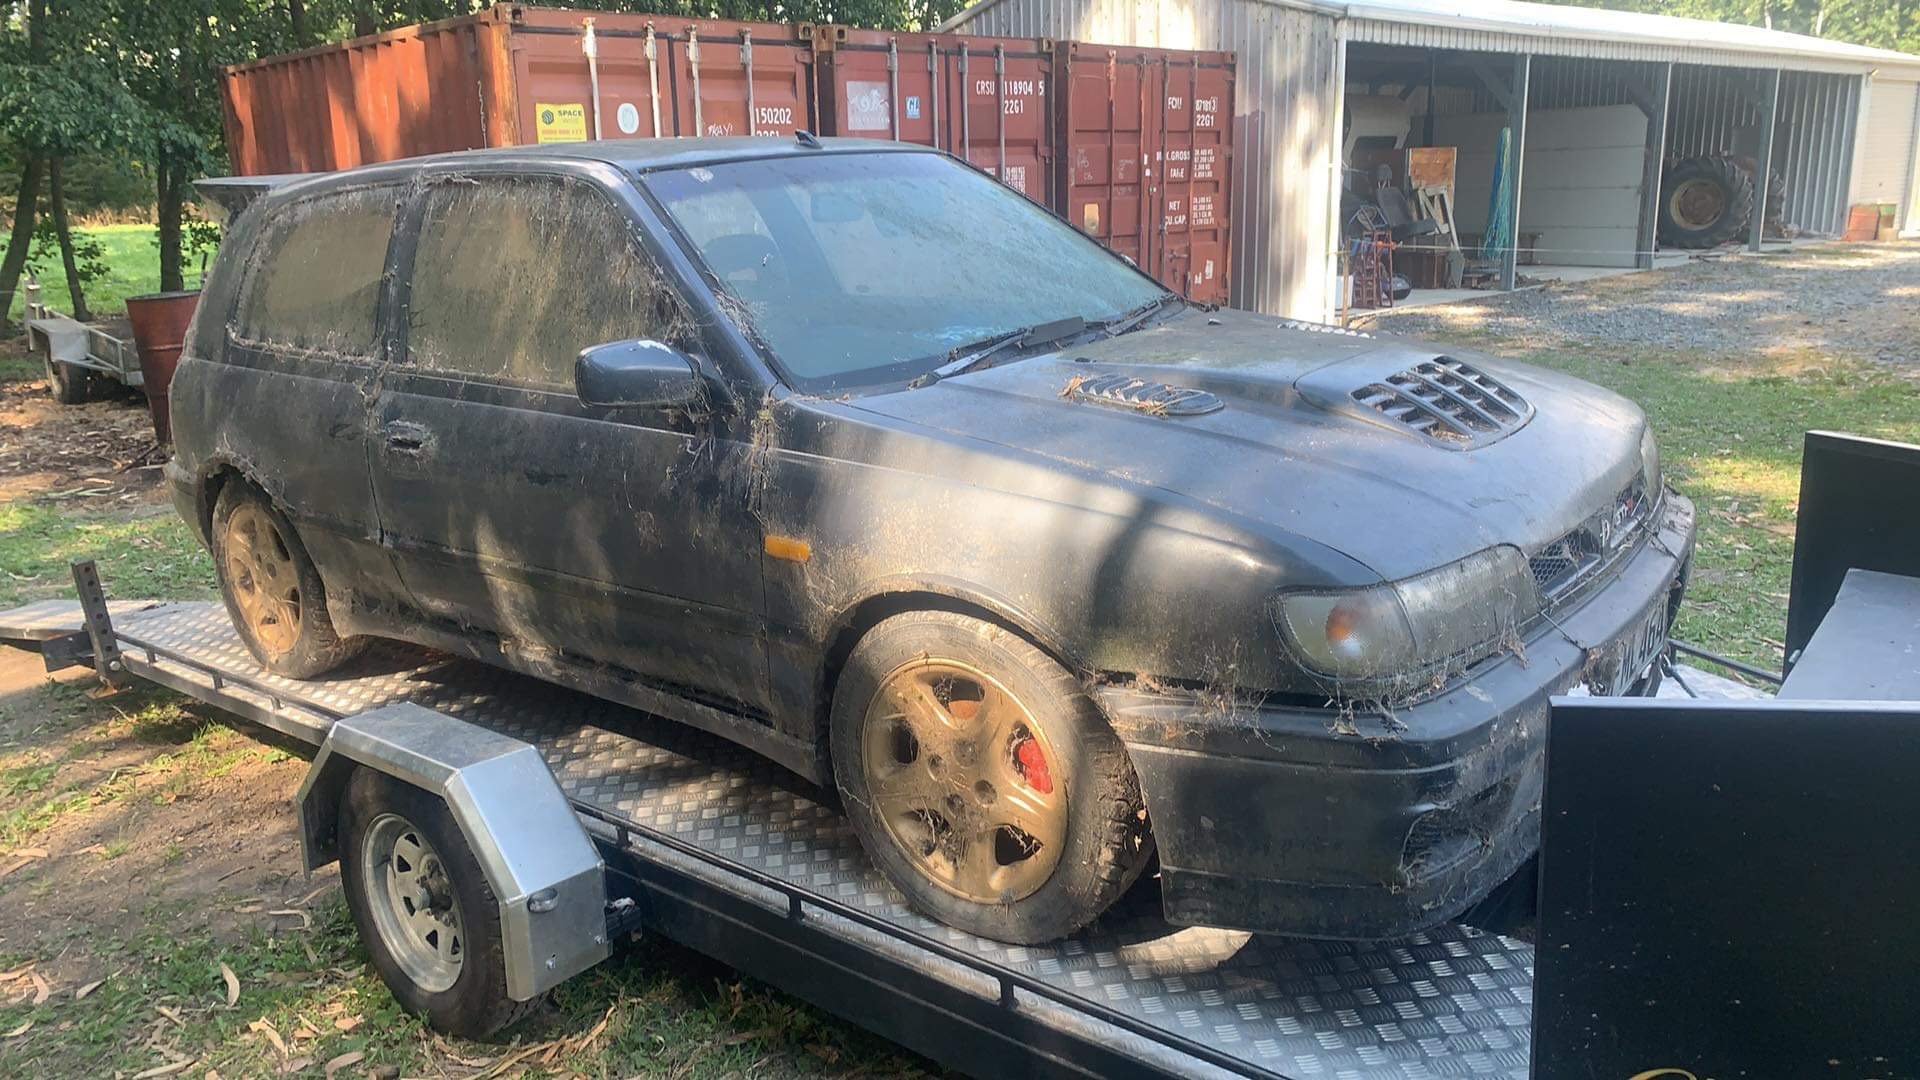
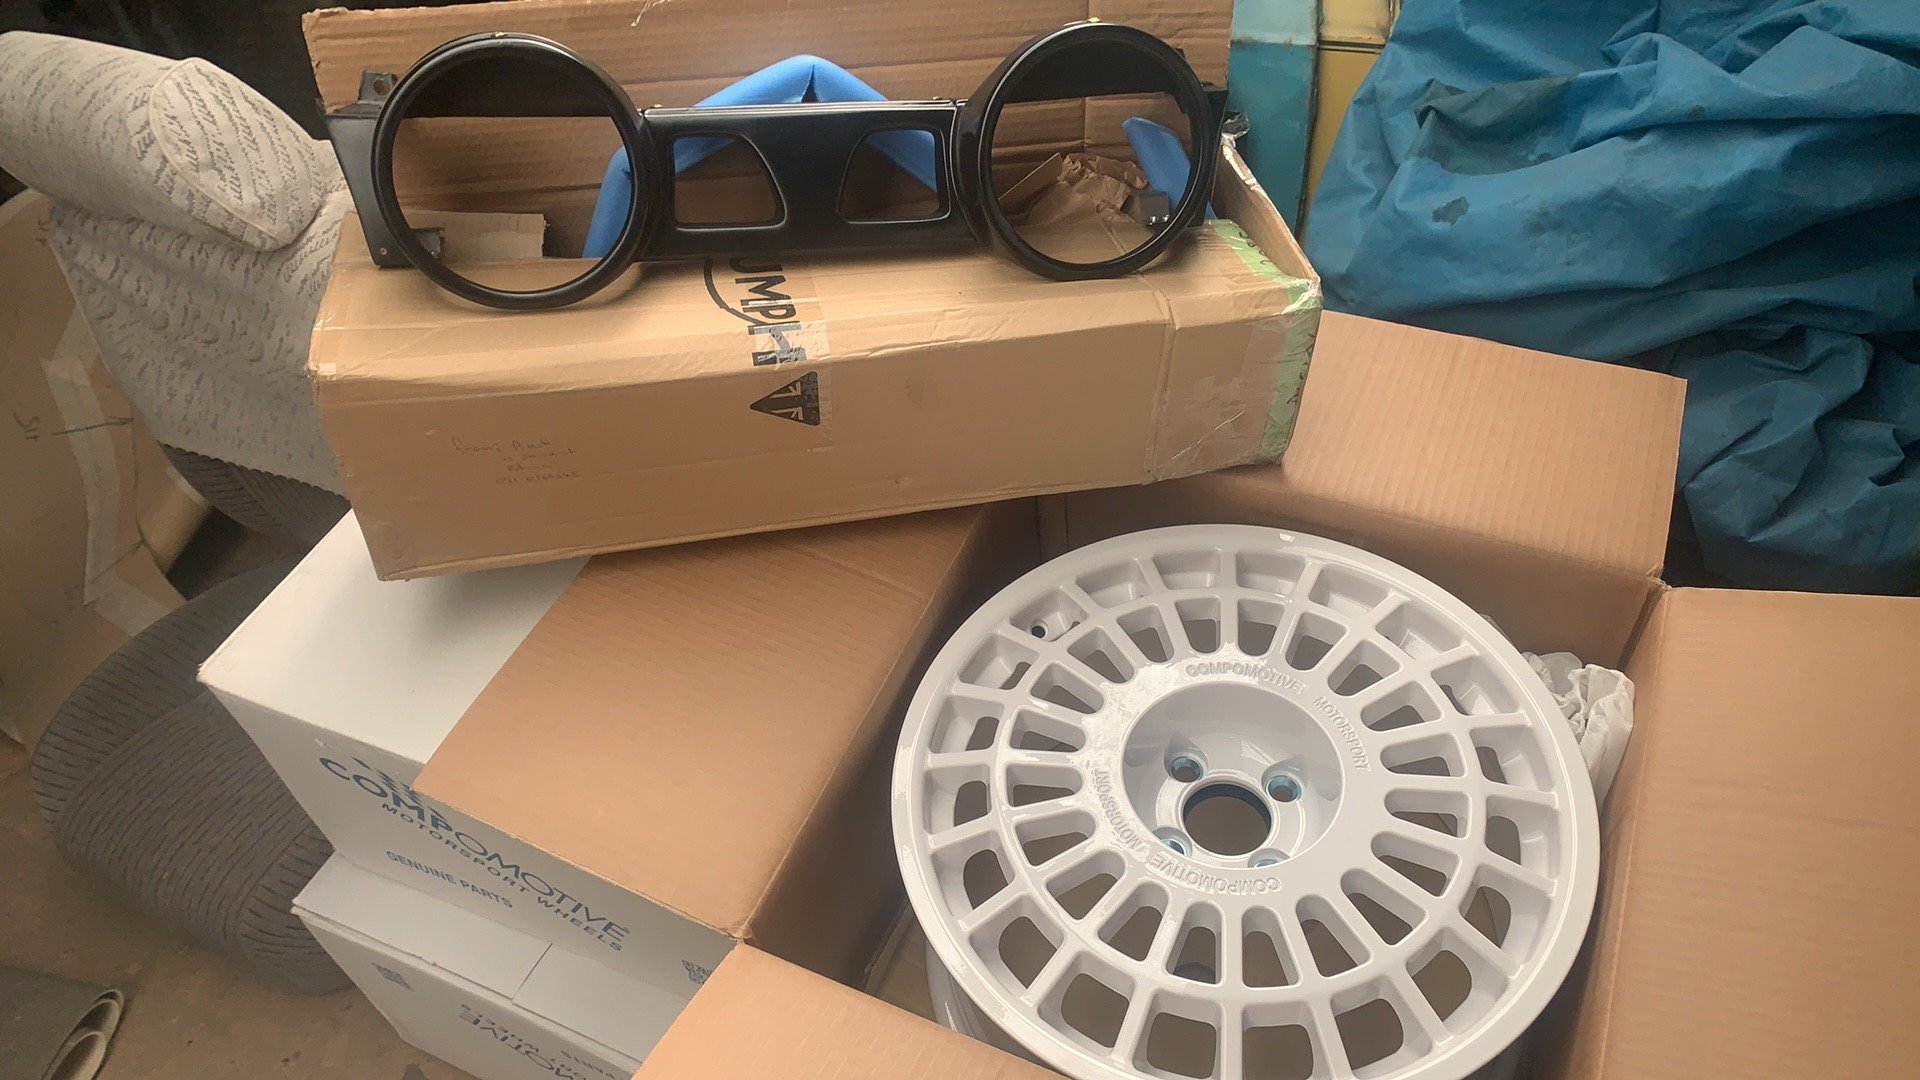
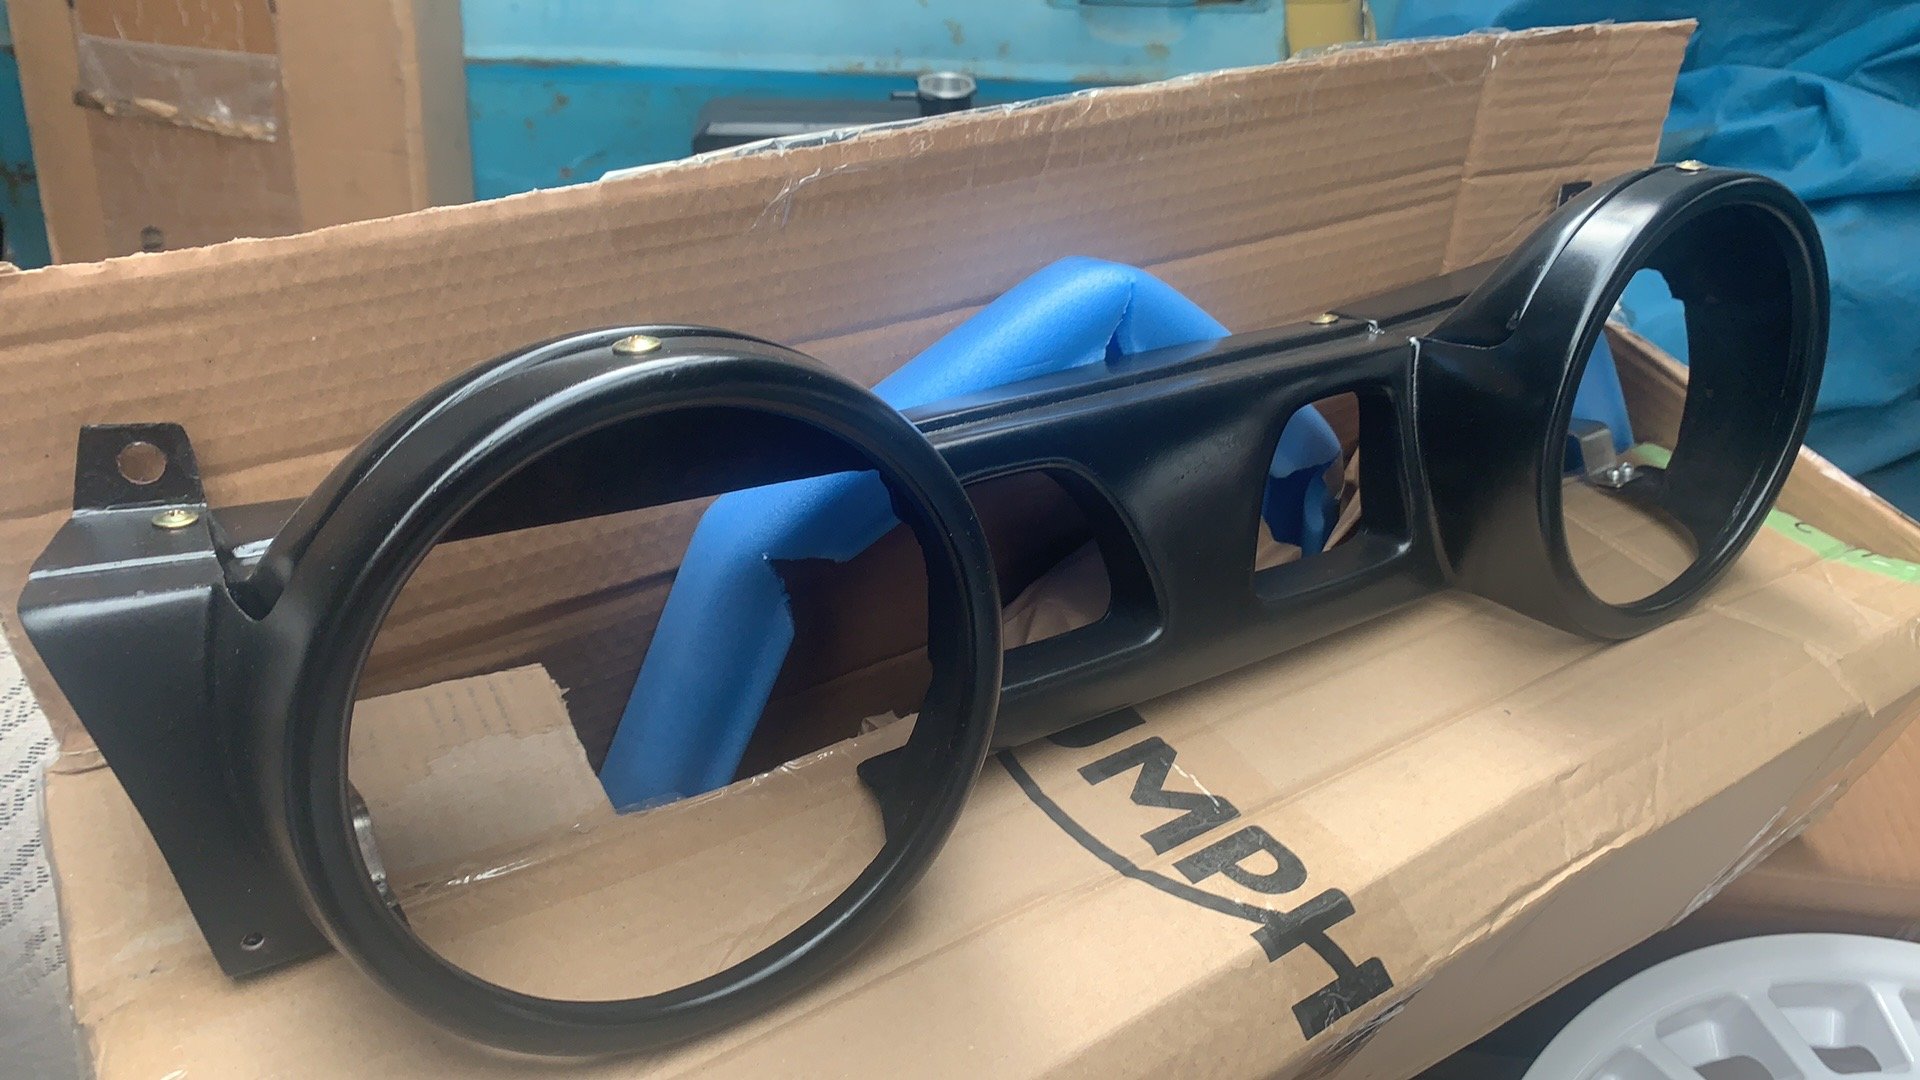
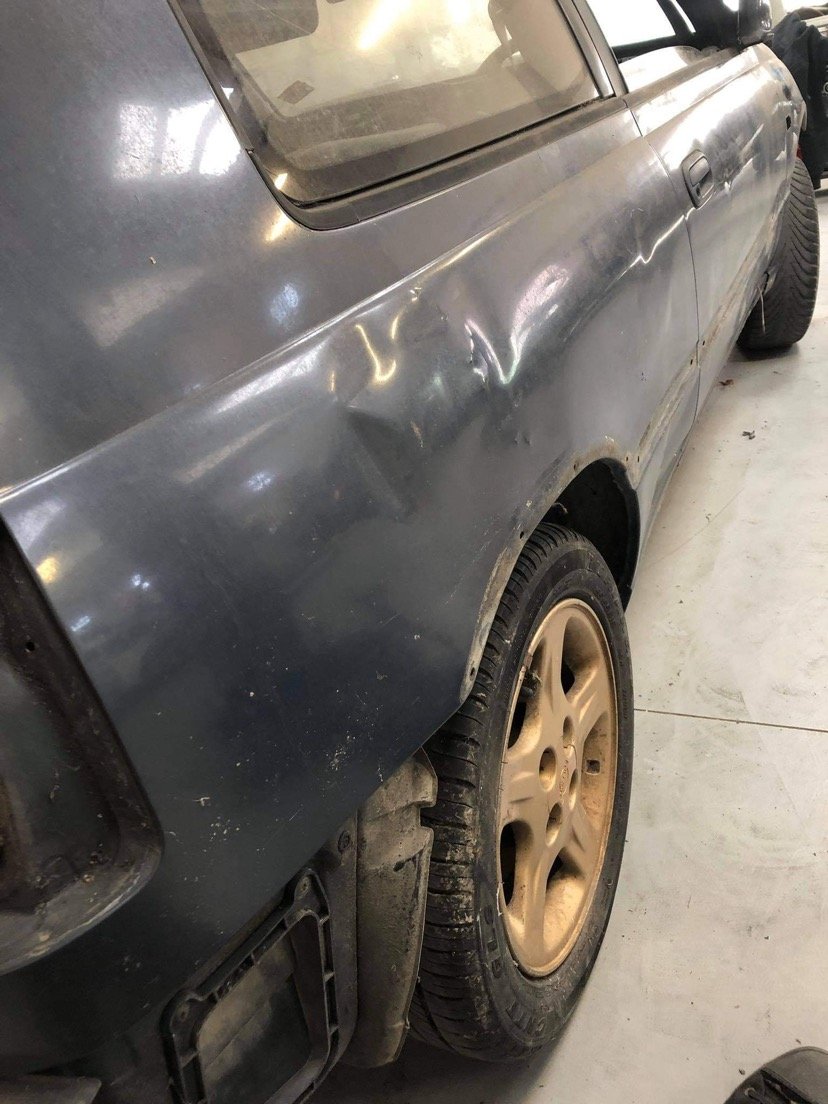
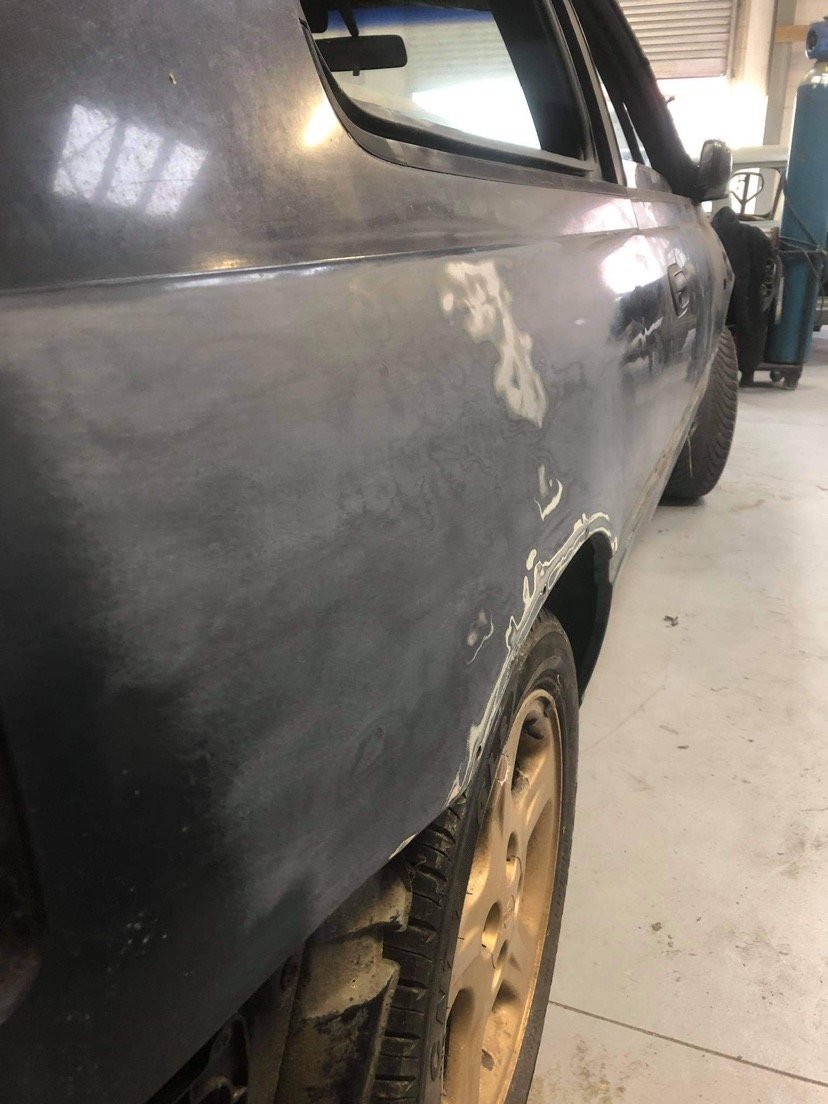
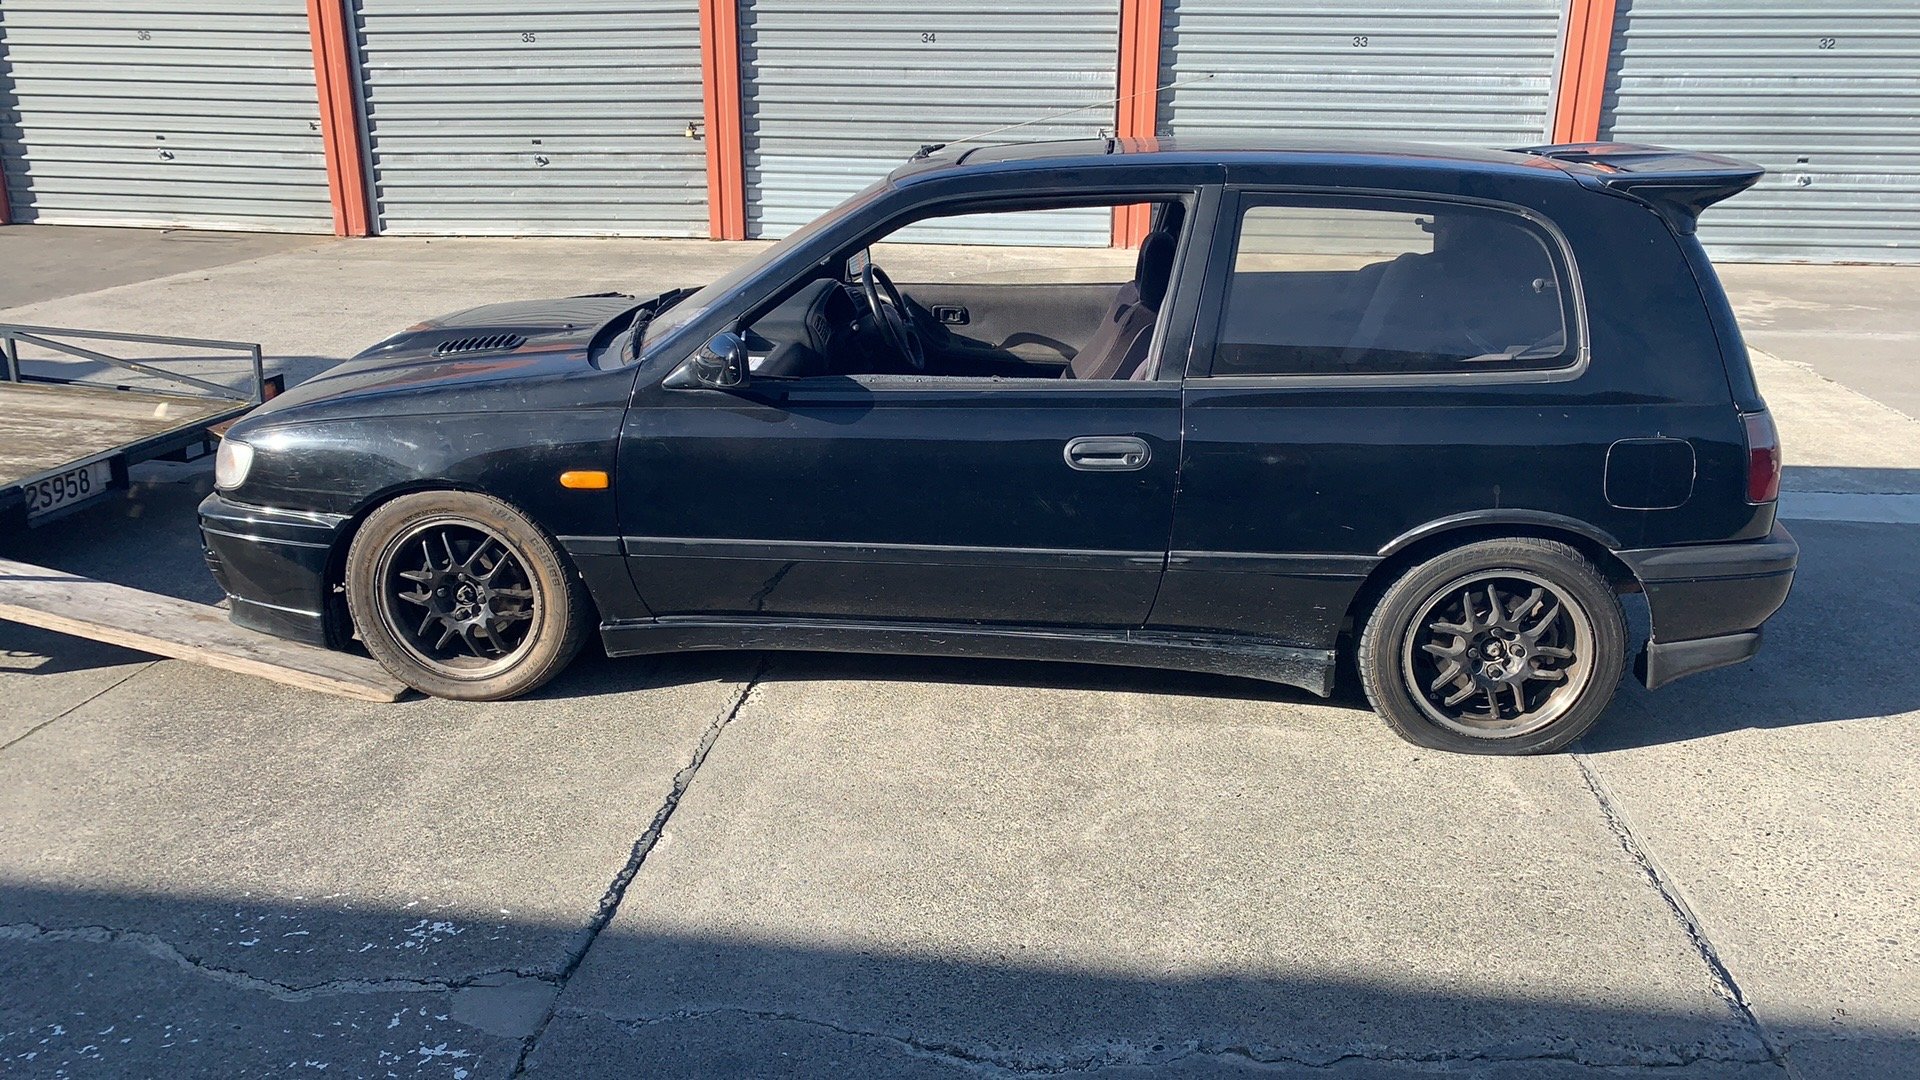
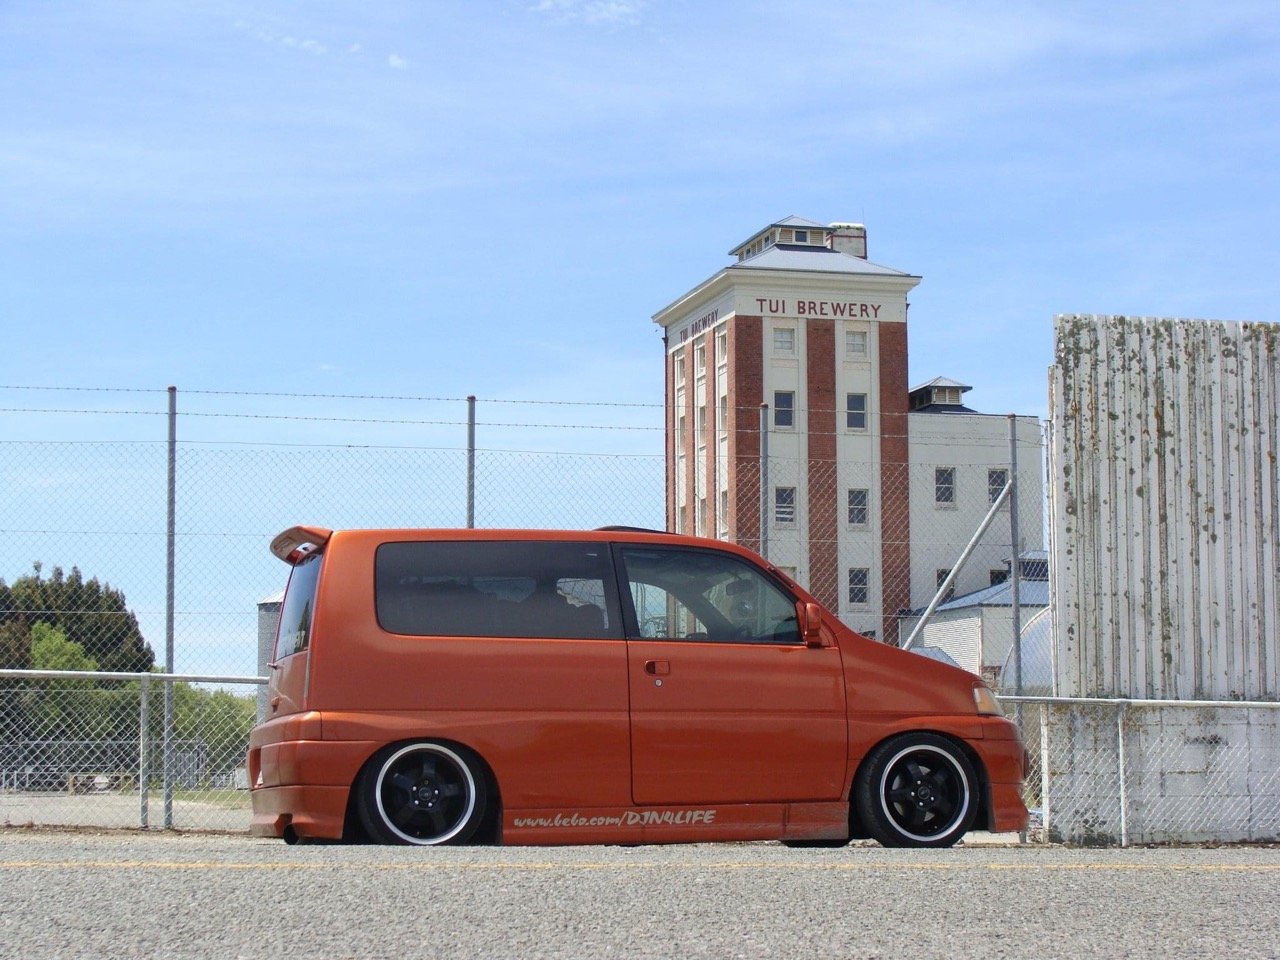
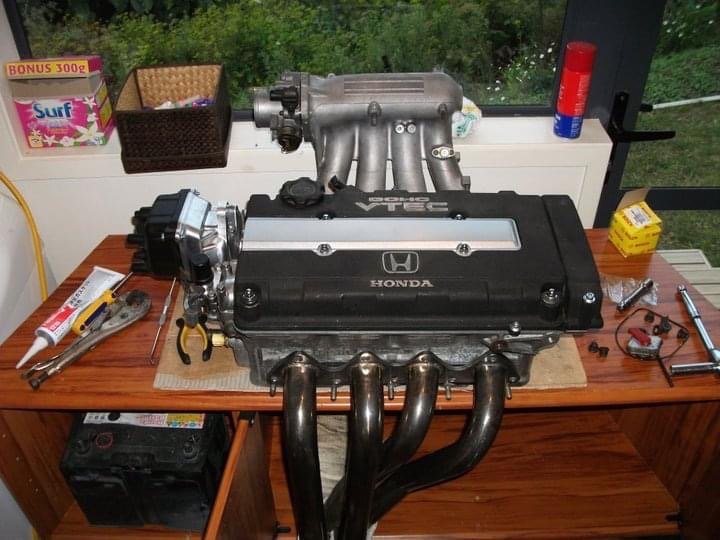
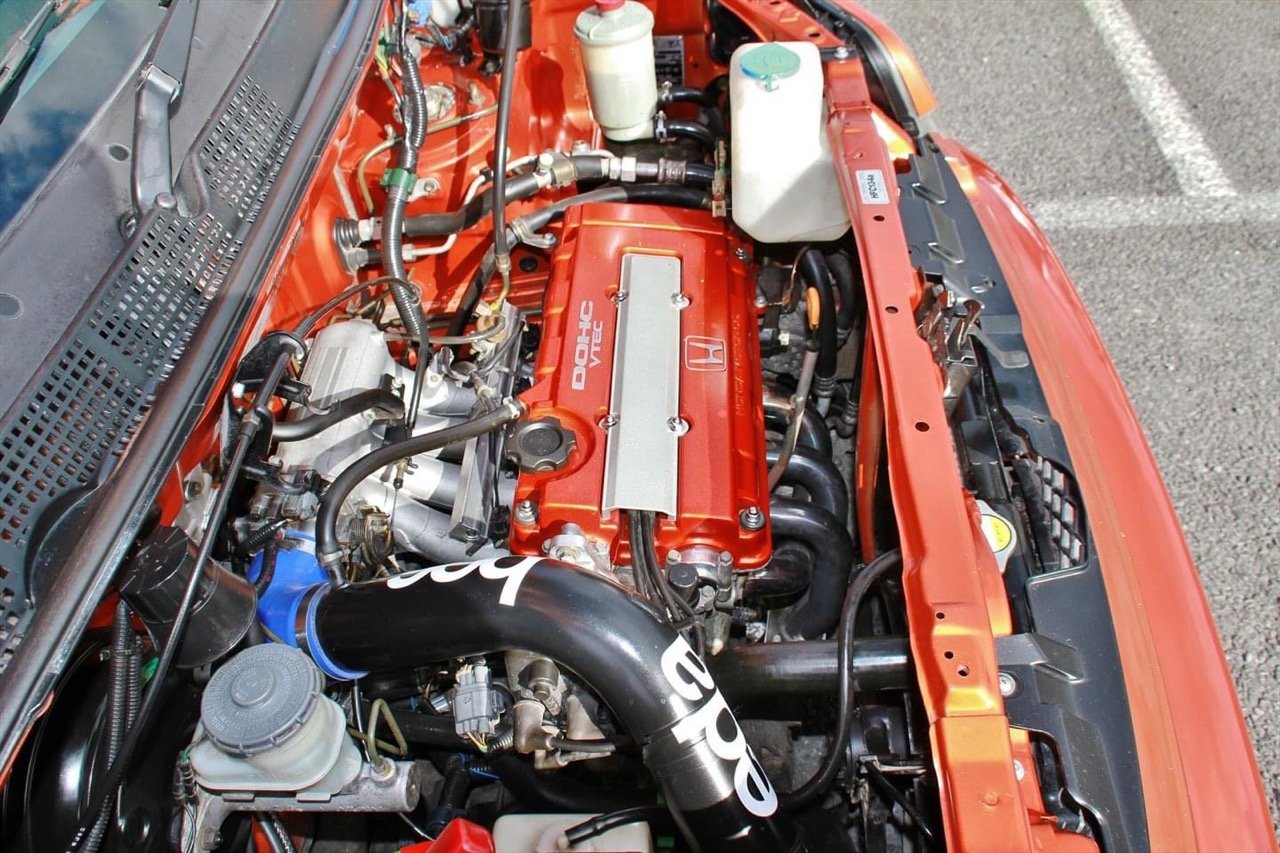
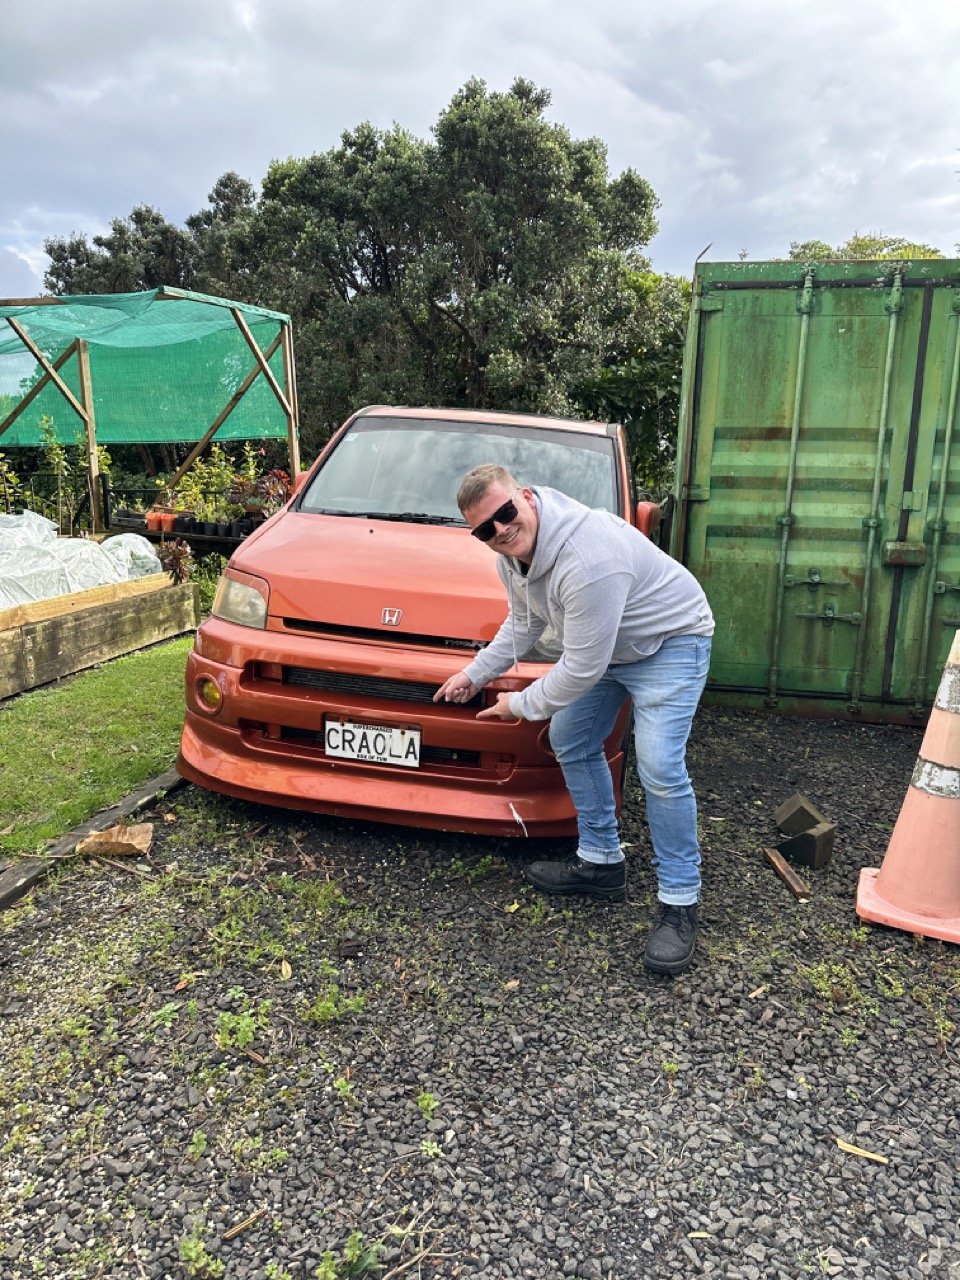
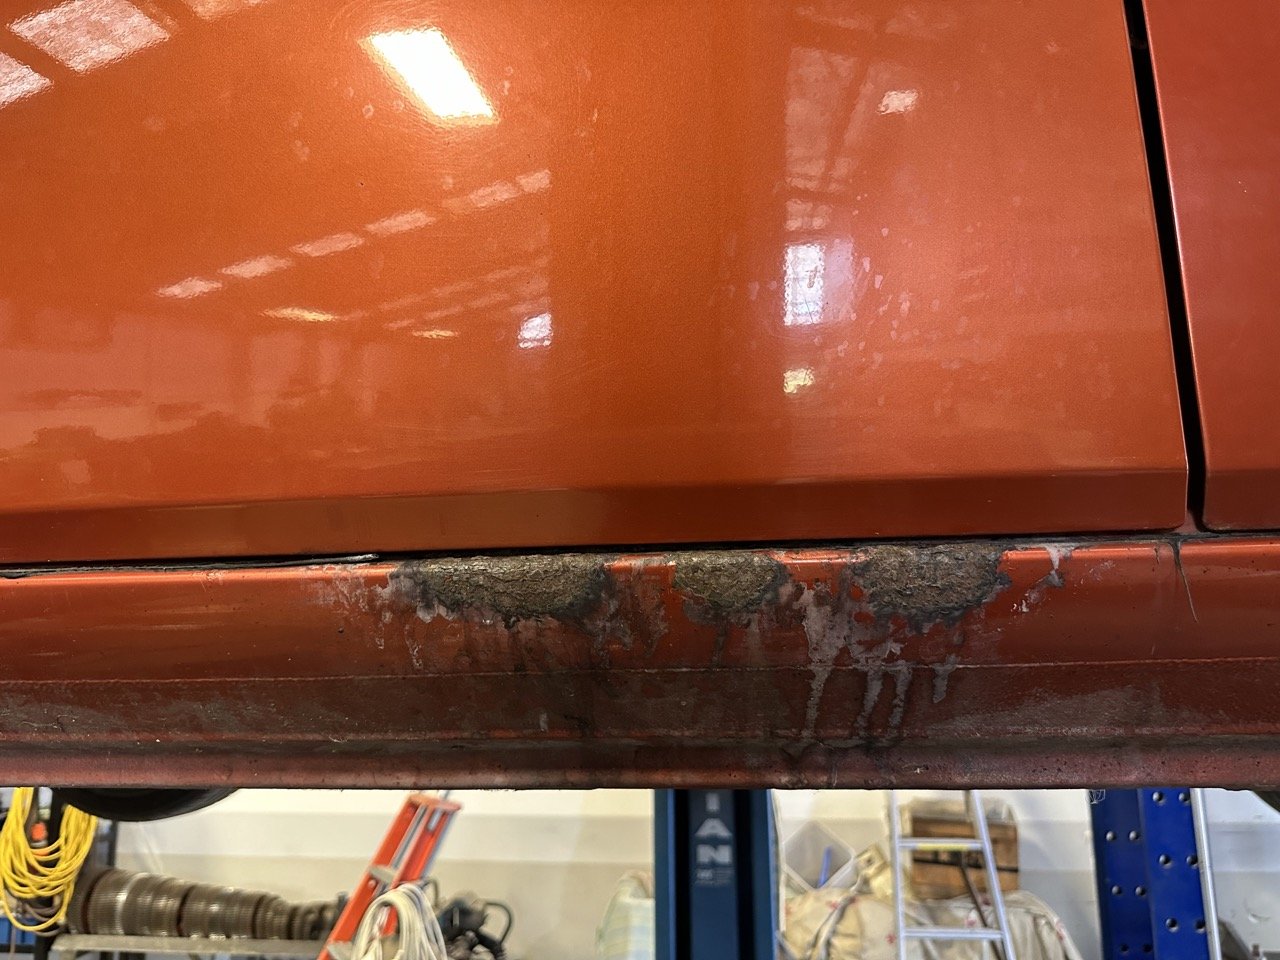
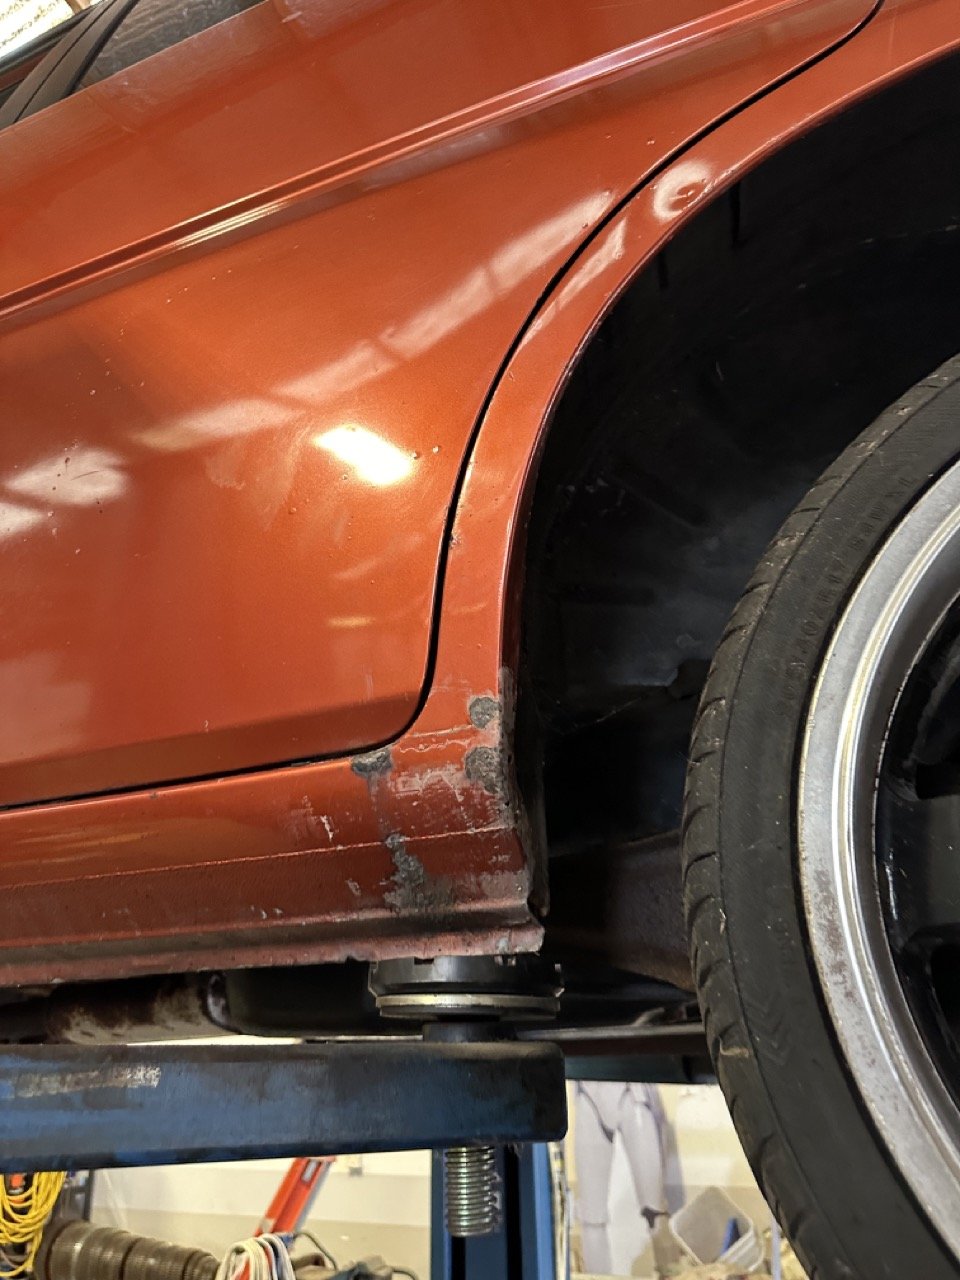
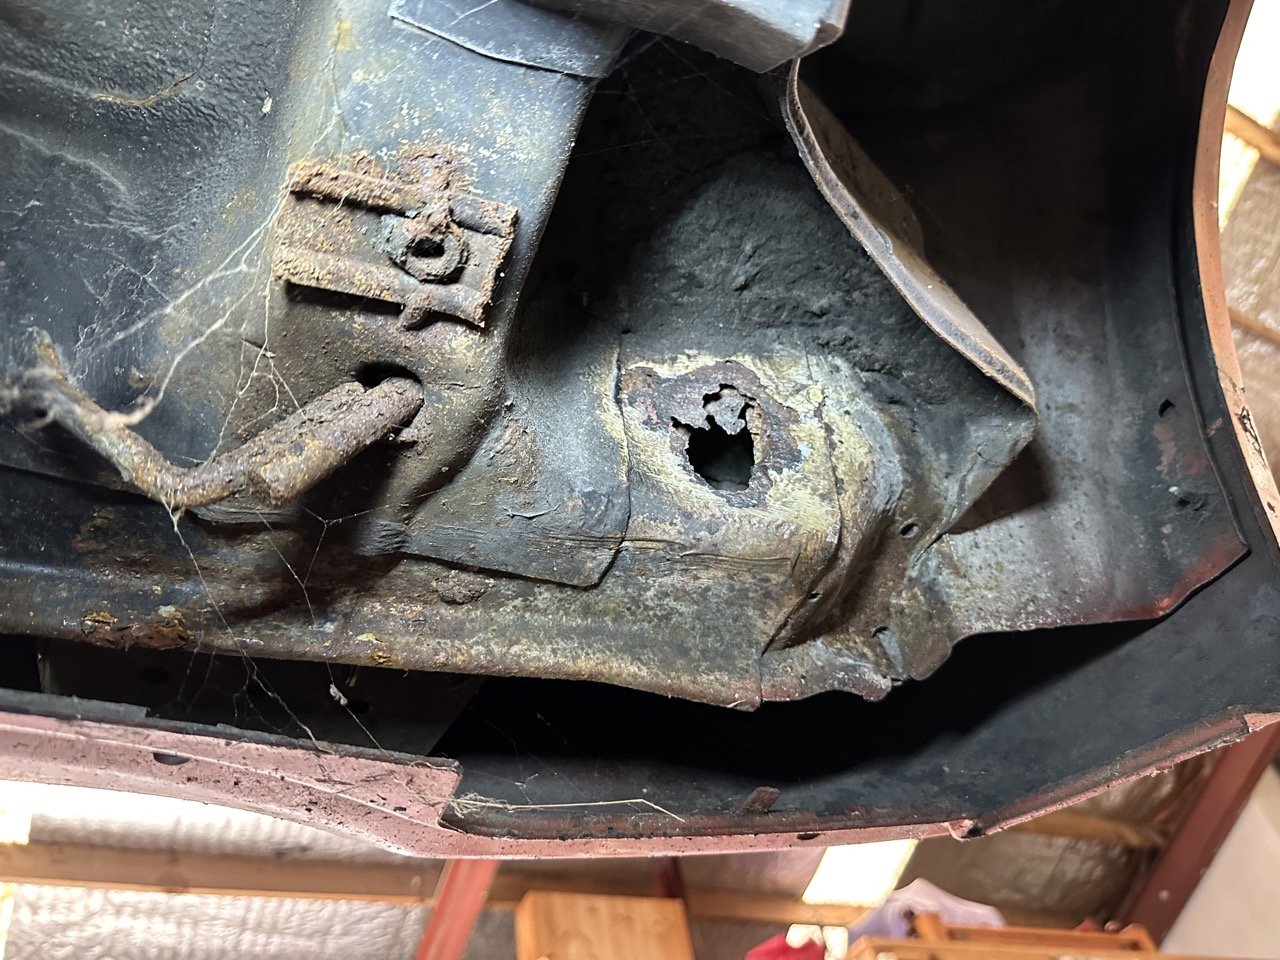
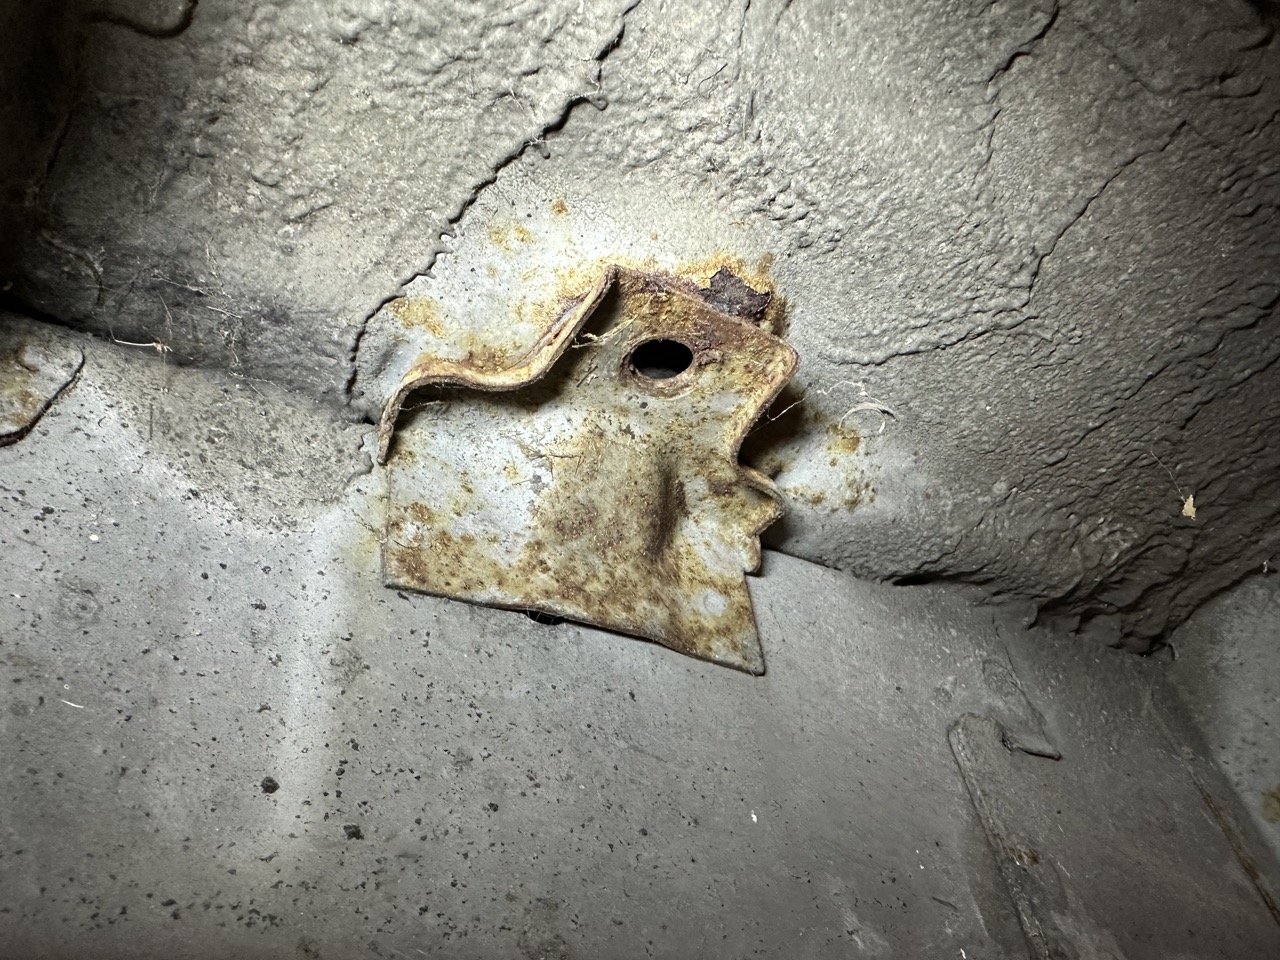
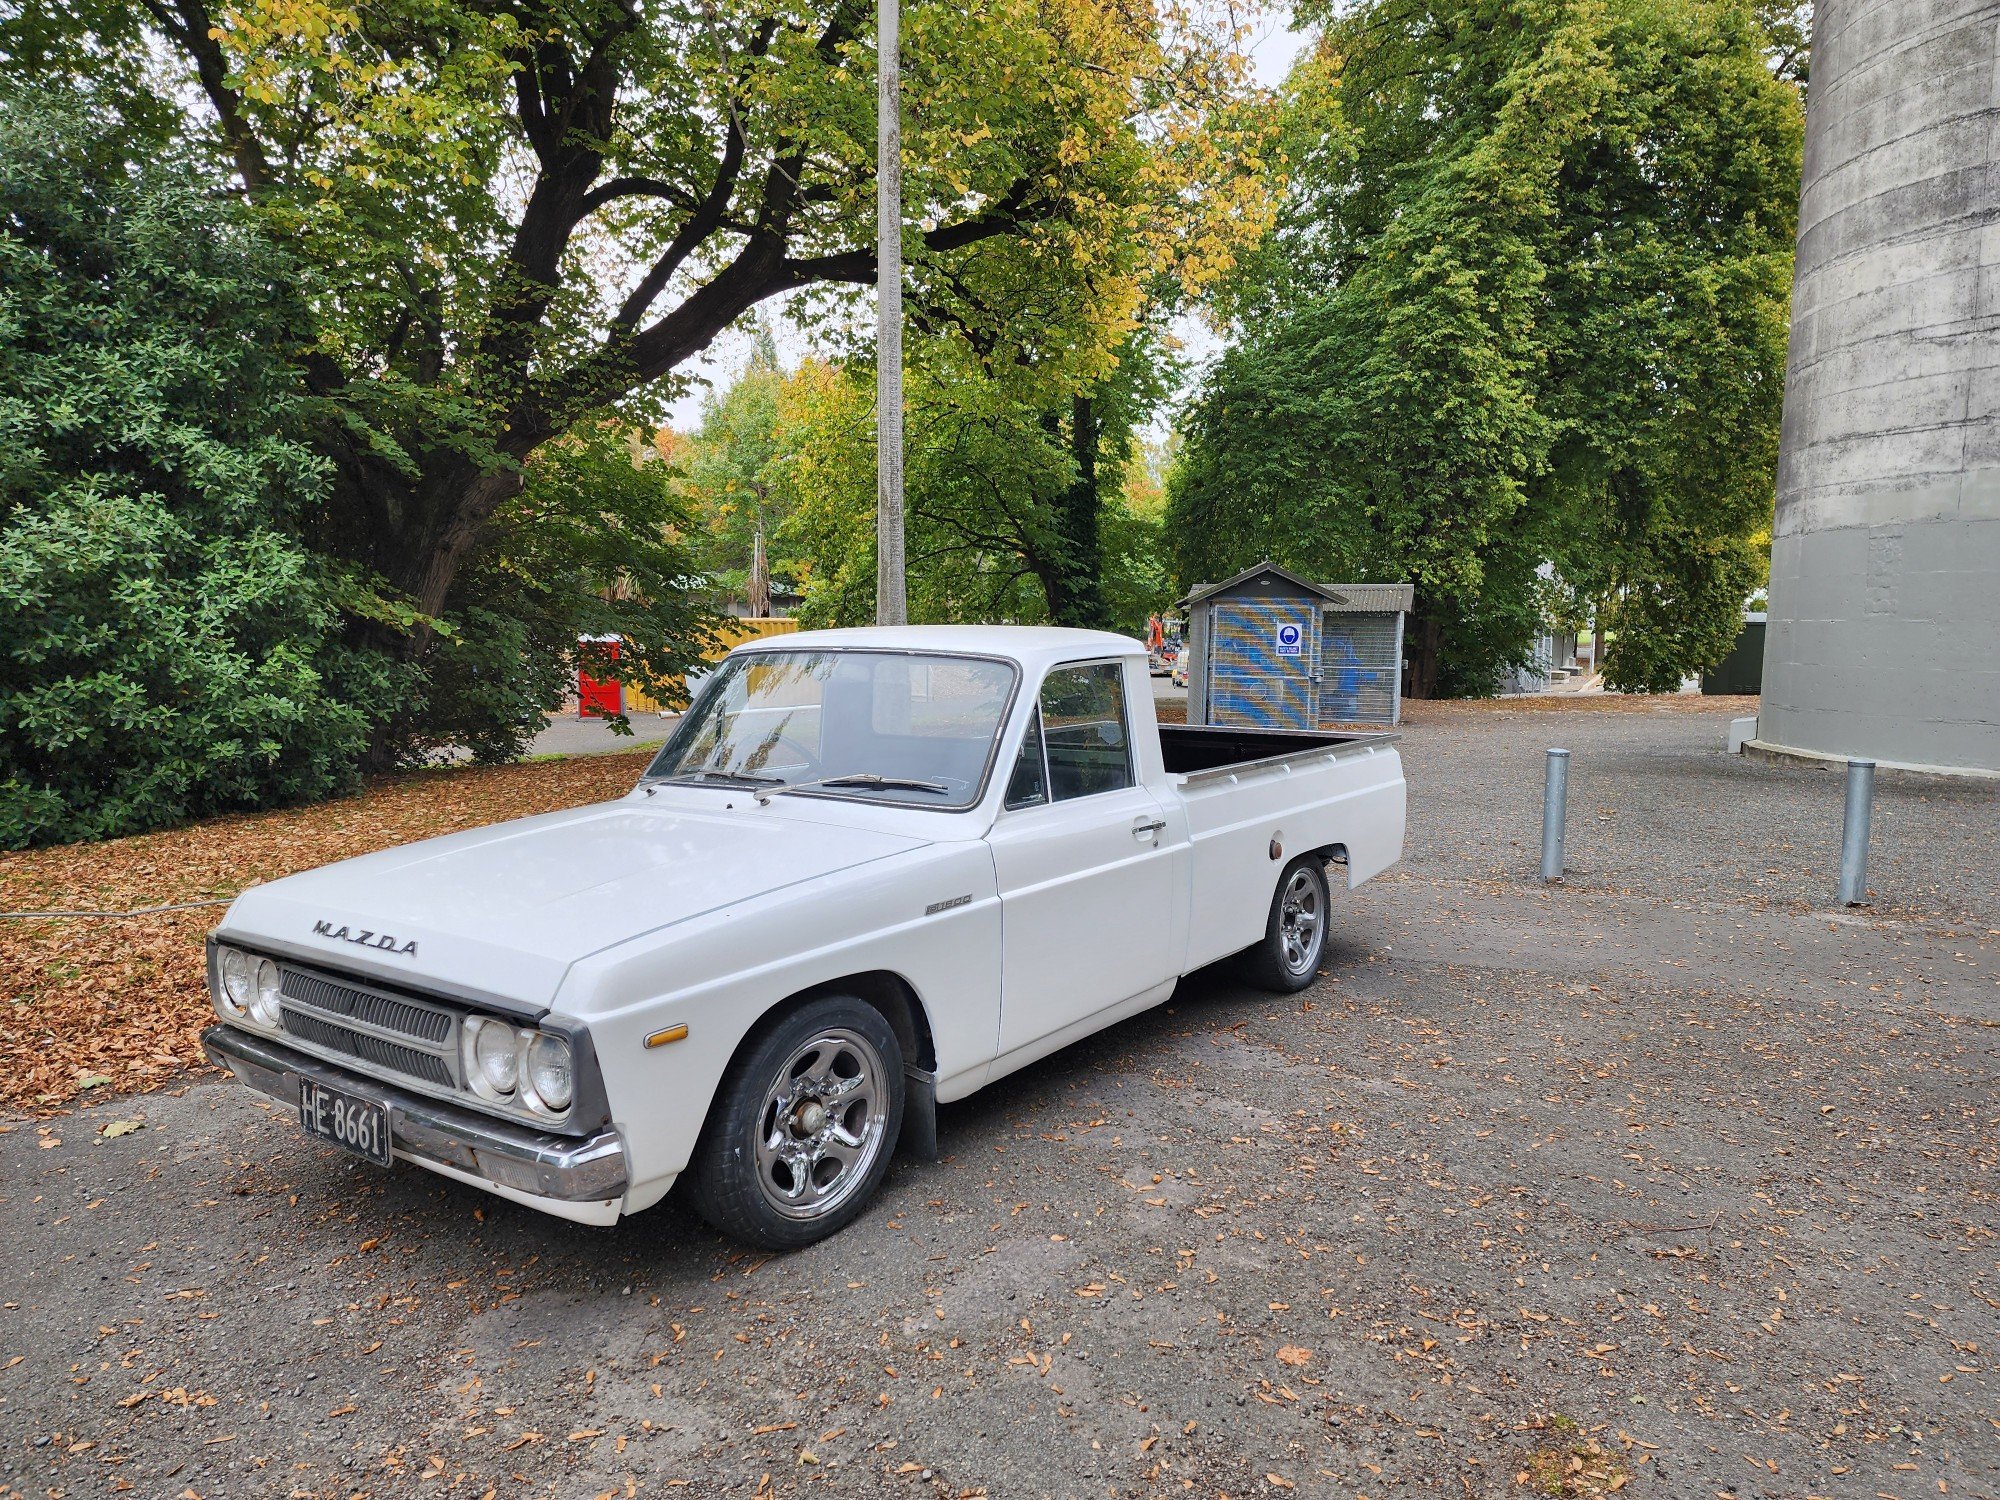
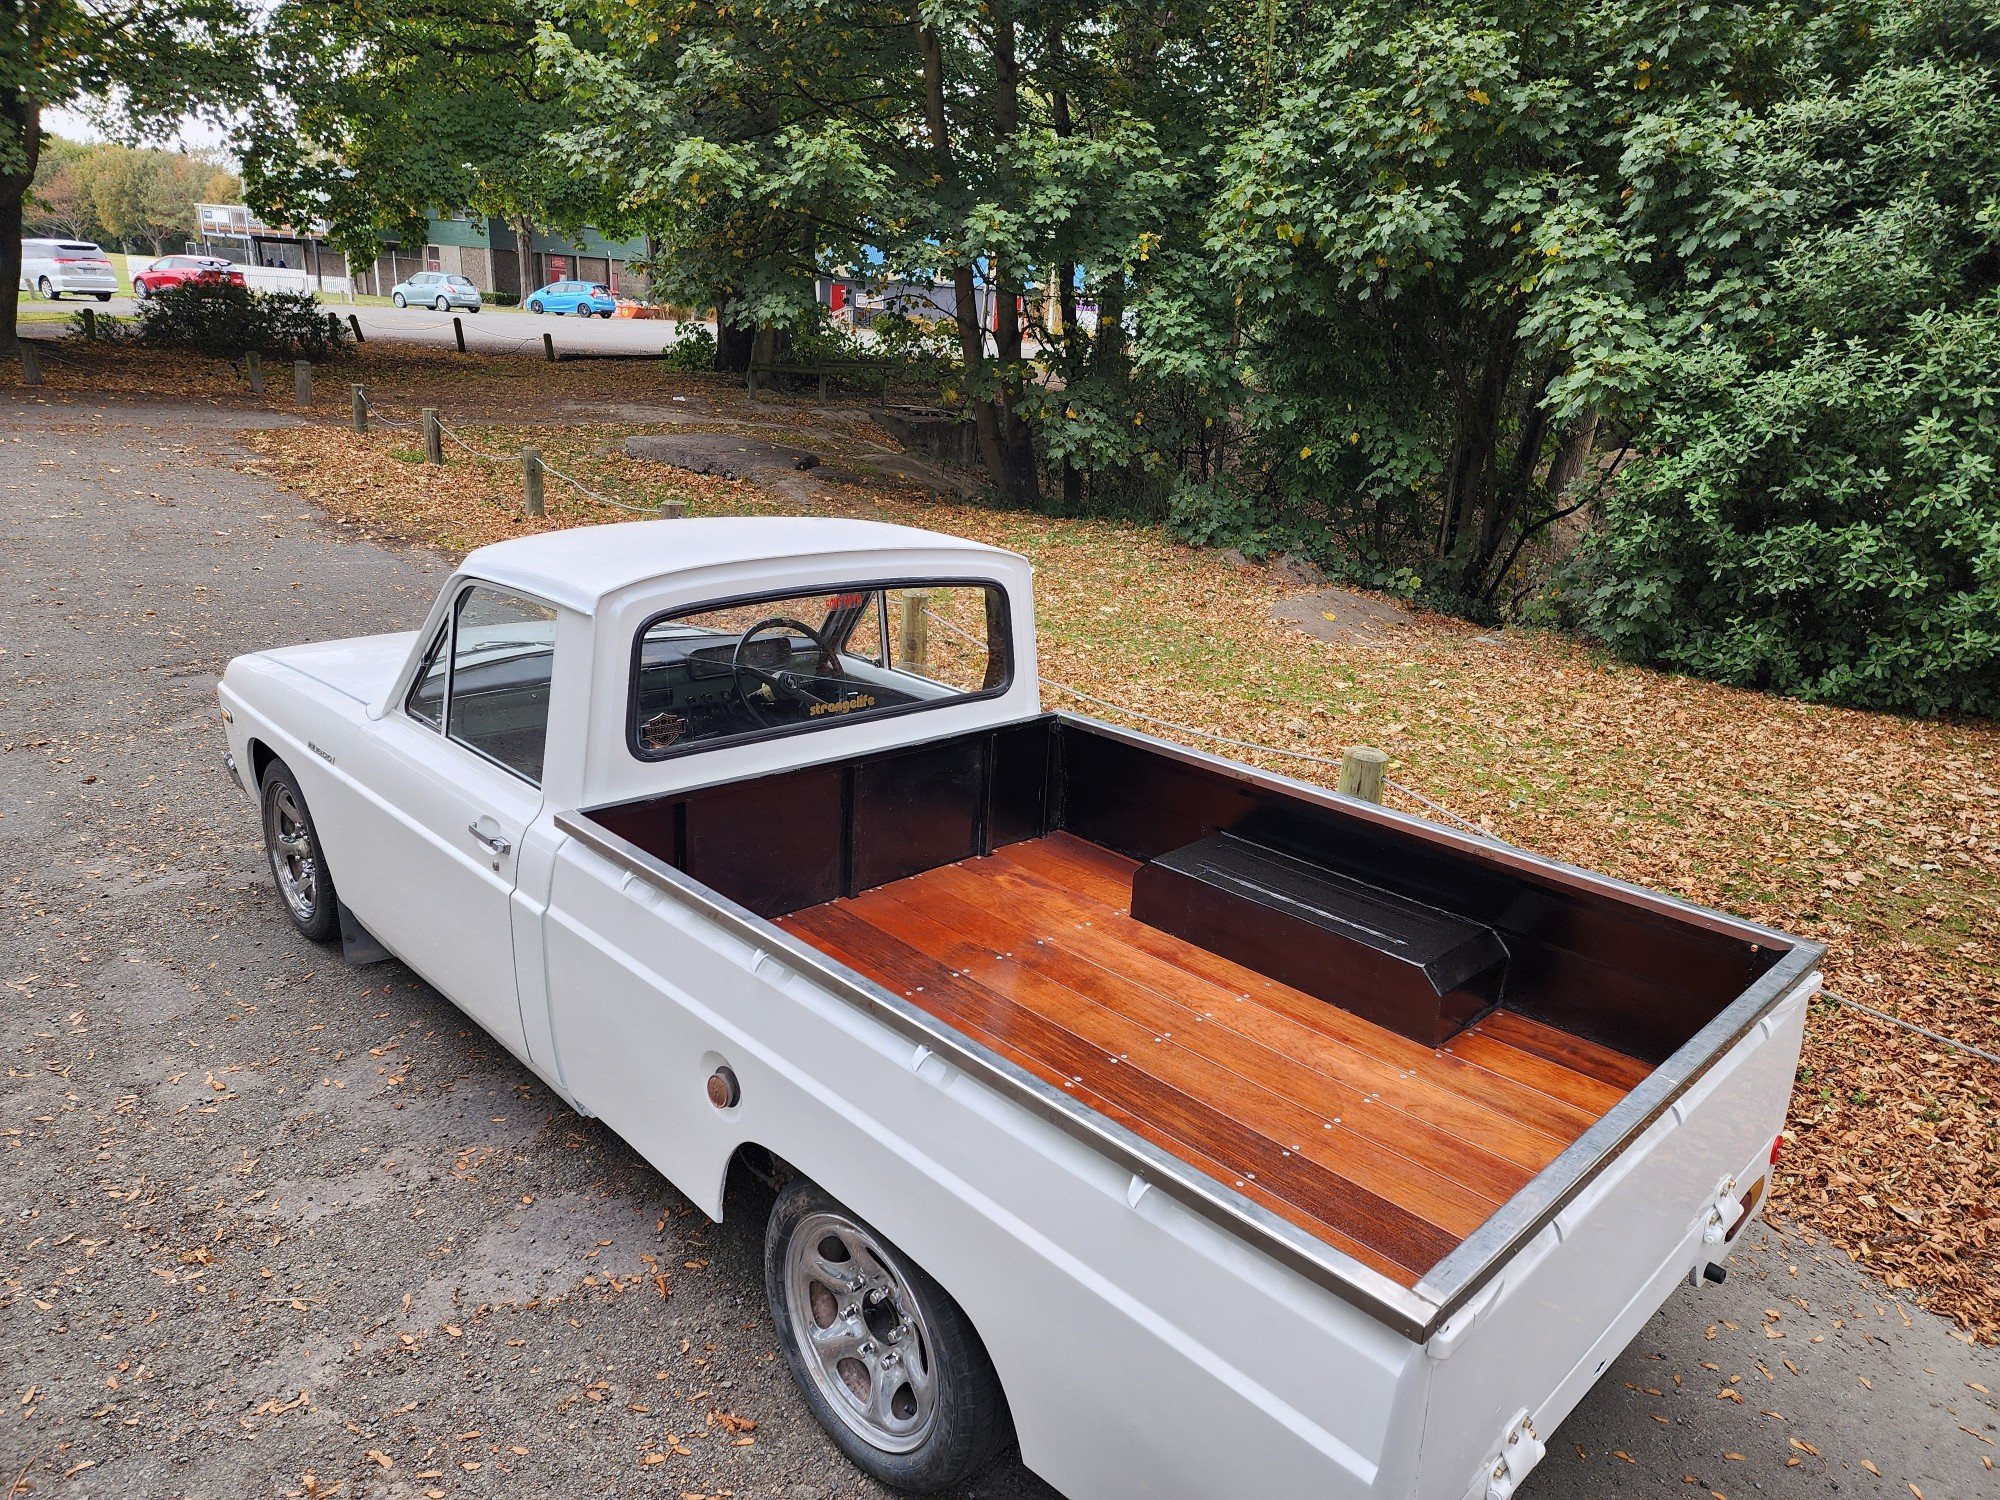
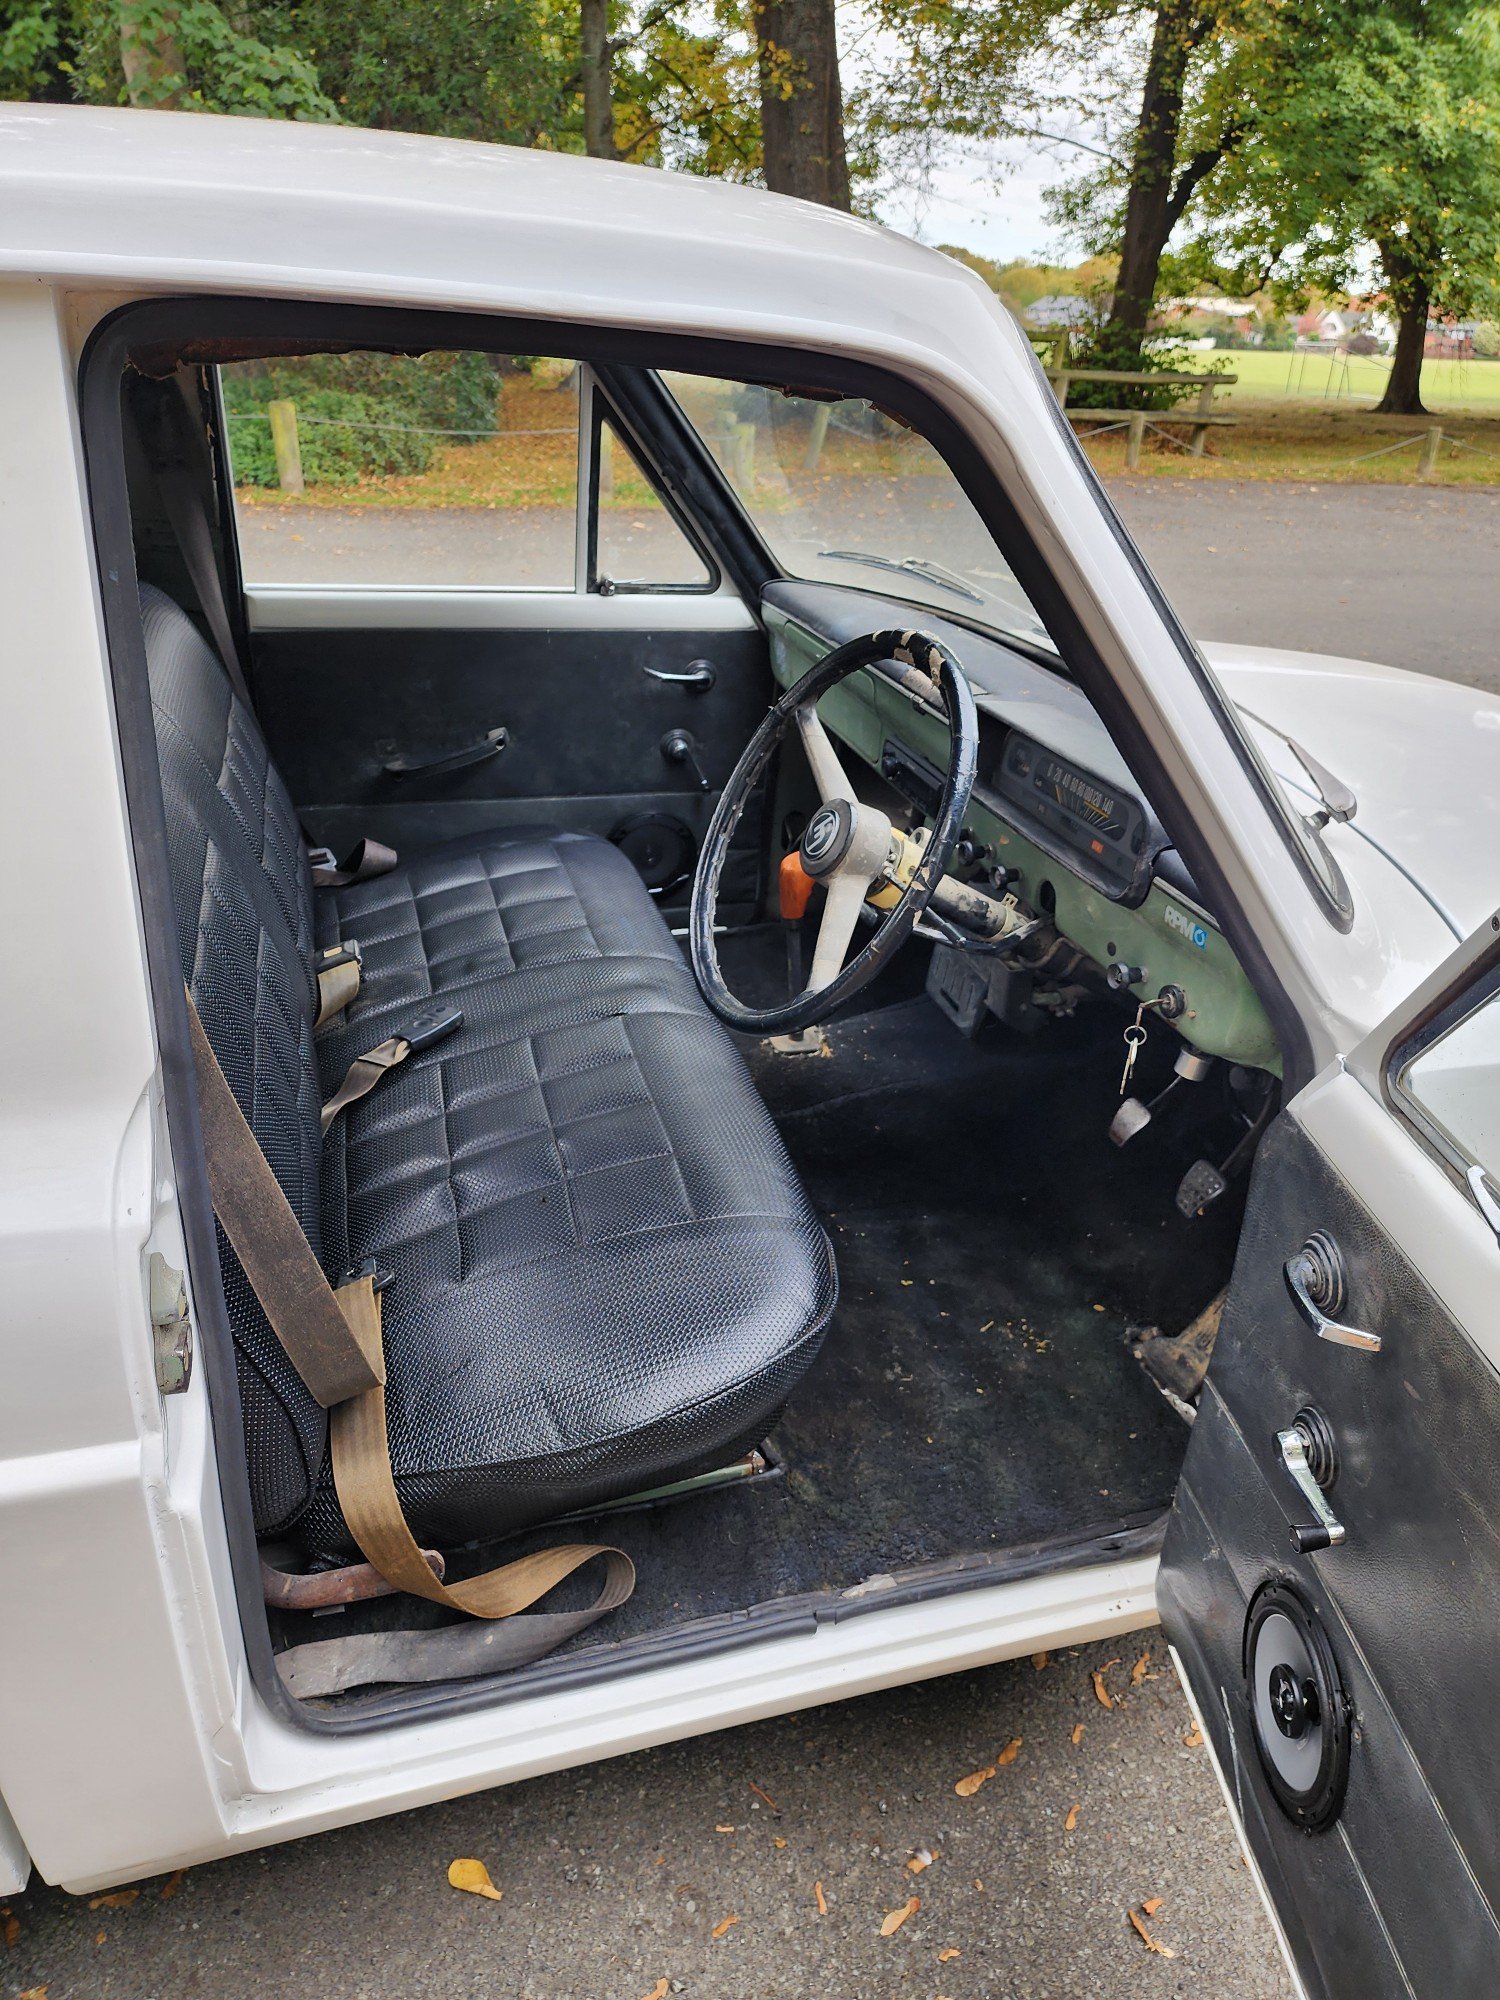
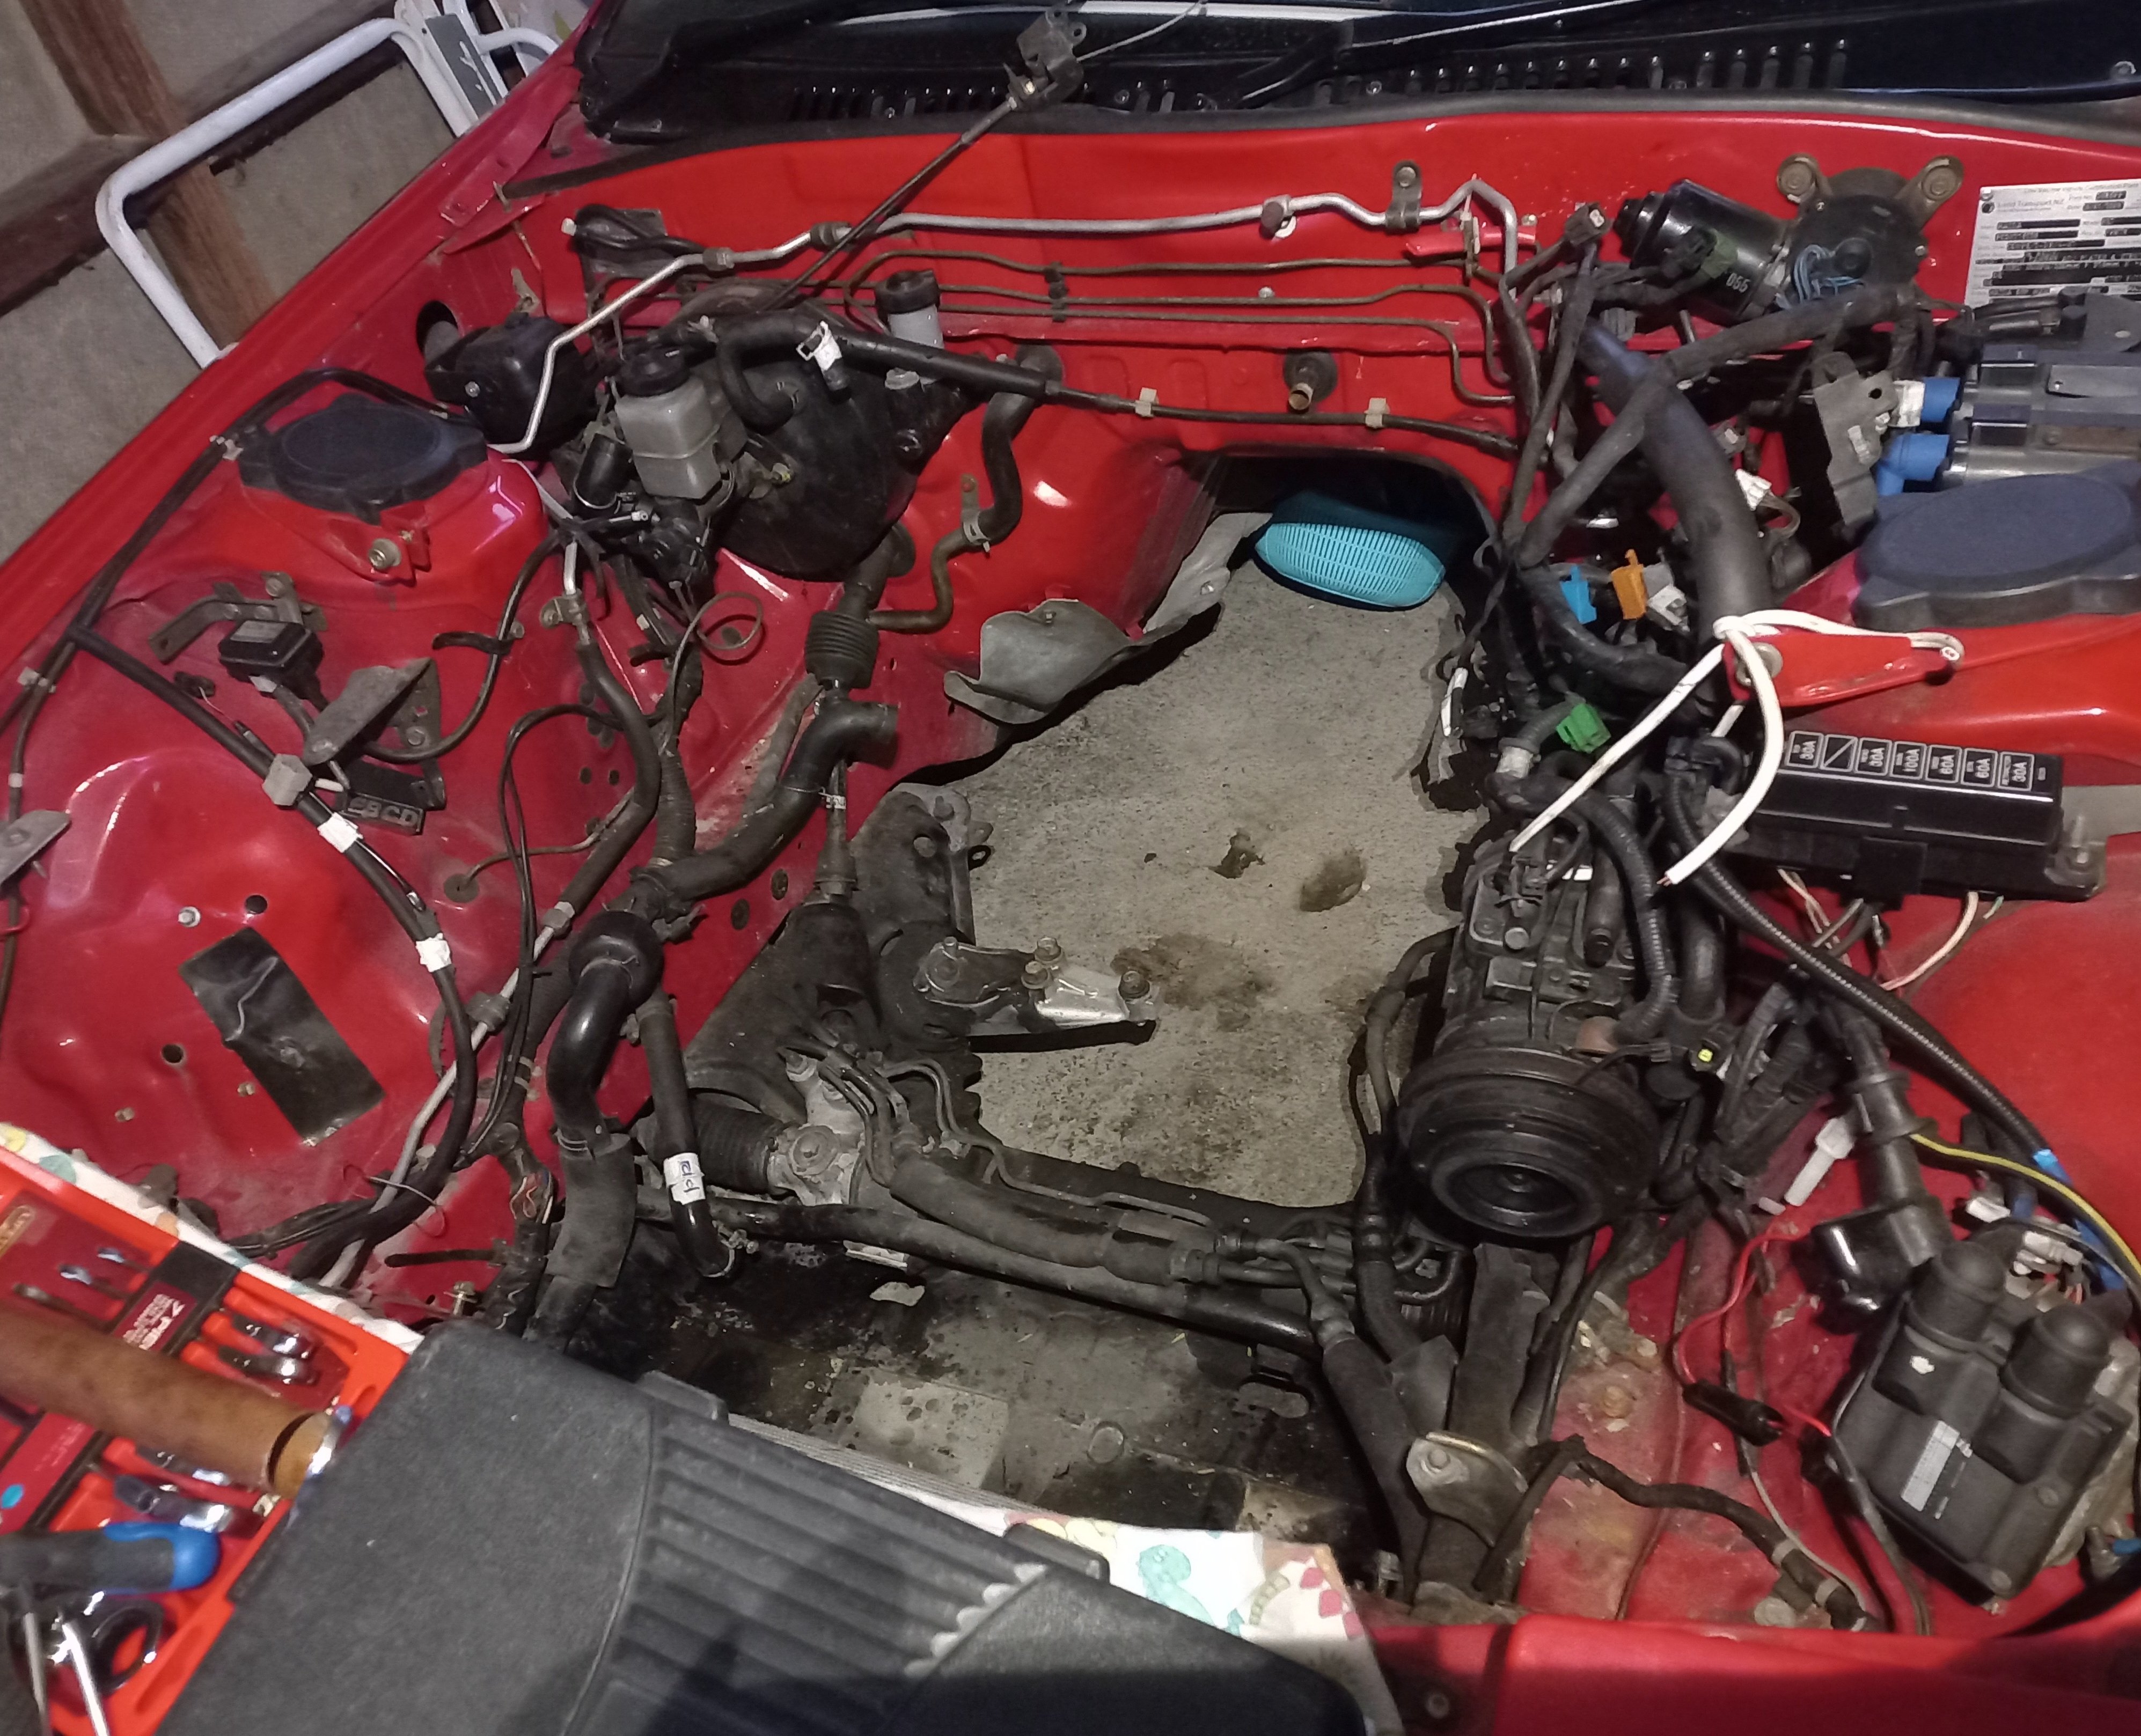
When I had finished school, was studying Radio broadcasting and volunteering at a local radio station - this car was the coolest thing around and was owned by a local DJ. Fast Forward to 2023 and I'm still in touch with that person, he's lived overseas for a decade and it turns out the car needs to be rescued from its existing resting spot. I got the opportunity to do such a thing and it's now in my posession. Also what a pest image hosting is these days. Imgur wouldn't let me login no matter what and everything else sucks so I shall try uploading here (for the second time after initially creating this whole thing in the project discussion thread before realising last minute and throwing it here) So why am I excited about a sex toaster? Because it used to look like this: bebo.com represent! Before it was parked up owner did some schmancy engine work. Standard, these come with a B20B. Non vtec, non exciting. But that can be rectified, and rectified it was: Supposedly a B18C top end. I say supposedly because I'll elaborate further soon. That ended up in the car, and this was how it looked when it was done: So it's now a 2.0 Vtec. Still a column change automatic but that suits me fine as it's got my favourite seating arrangement - front bench seating. Anyway - After talking for about 6 months I finally got the opportunity to pick it up and see it in person for the first time in 10 years. Turns out it had been sitting almost entirely outside for the last decade. RIP. But I was still excited. Upon arrival with @Threeonthetree closely in tow we discovered the fuel pump was dead, tank smelt horrible and the alarm wanted to go off almost non stop. We winched it onto a trailer and I made the long trek home. Nice wet Neal. So it's been in my posession for over half a year. Fuel tank came out and the pump was replaced. Spark plugs swapped out - and it ran mint. All the drive belts are old and need replacing. The tyres are cooked and thanks to it's nearly full decade outside, of which 3-4 years were in wave hearing distance of a west Auckland beach we have the dreaded R word come into play. I knew it might have a bit of rust when I got it. When we picked it up I ignored nearly everything in that respect because I didn't want dreams dashed right there and then. I did get under it and find a few spots while it was in the shed. Mainly under the front end where the rad sits and the rear end in behind the bumper - plus anywhere the bodykit was tek screwed in place has caused rust to appear and spread. Here's a few snaps: So there is an idea of it's exciting rust problem. There is more than I've shown above but it's all similar spec patches so to save time and photo bombardment I've just shared the above. I'm currently blasting and refinishing the wheels for some new rubber. Then I'll do basic fluids so I can get it off this hoist I have temporary access too. Then it's time to make a decision about what next. Thankfully I have next to nothing invested into this. The unique shape plus the unique engine makes me want to continue the battle and see it through to a happy driving state. It's certed for all current mods which are wheels, adjustables, bodykit, engine and the rego is on hold - so the fire is still burning in me bright enough to give it a good hot go. My skills only go so far and the main issue is the one that will eat $$$. Basic mechanical stuff just takes time and knuckle skin so with that I'm happy to persevere. Oh - about the supposedly B18C top end thing. I've yarned with 4 or 5 proper Honda nuts and each one has said different things. Some agree that the owners recollection is right. One swore up and down it's a B16. Either way it reminded me of lifan top speed arguments from the small bike world so I've bowed out of that yarn and now have a stamping on the head to locate which will determine what it really is. It was built by Lin Chen supposedly who used to be one of the dudes at Speed Factor down here. I should really track him down and have a yarn to find out more. Oh, before I forget: here's that fancy engine bay after sitting for so many years Feel free to add opinions and comments below. I've got a lot of bits for it that came with the car such as a mint rear subframe, new radiator, even got full monsoon kit for the windows. It'll need new rotors and a brake refurb - which is okay but all the parts for these seem to have been hoarded or produced by one guy in the UK so I'll need to figure out everything required and order bulk in one go. Anyway thats my first 4 wheel post on OS after many years of membership. Stay tuned, I may eventually update this but progress will be slow.
1 point
-
He sure is - check this out. https://www.facebook.com/media/set/?set=a.158857780849694&type=3 Haven't been in touch yet but I will soon.1 point
-
Nice! It's about time you had a car for yourself again. 90s cars are pretty oldschool now eh?1 point
-
Rad. Good to see a few others had them and I’m not the only one with problems haha Really looking forward to getting this one on the road. Last WOF was 2009. It turned into one of those projects where you spent twice as much and three times as long in it as you intended. Will be a cool little weekend car1 point
-
I'm pretty sure Lin is still tuning in Mt Maunganui. His business is called CDM and he's the go to guy for lots of Honda owners.1 point
-
Fingers crossed it doesn't end up sounding like every Altezza in Palmy.....1 point
-
Load rating must be within 2 numbers. Speed rating doesn’t matter because they are all more the 100kph1 point
-
I am pretty sure I drilled the ones that are in there and still have the drills and chuck somewhere. i kindof need to find out what is in there first anyway, then make a call on the sizes I will go for...1 point
-
I can’t vote because there’s no option for Sh*t Cun*s to say yes.1 point
-
Even in 2014 it was hard to find some parts, this car came with no rear interior, had top mount but no surround which is crucial to make top mount work. Factory airbox for a GTIR is like rocking horse poo as they all had pod filters fitted and are bespoke for GTIR. Got the spot light grill on tardme for $150, was another GTIR collector planning on bidding but forgot, he said he would have paid up to 1k for it at the time. Then I sold the car with the grill on it. Last rego and wof was 2014 so no idea what became of it. Didnt get another wof after i sold it.1 point
-
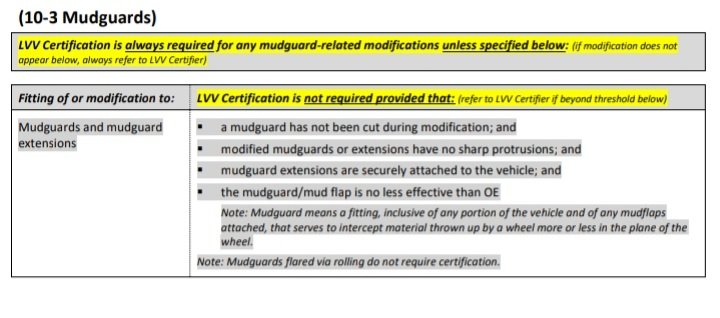
Modification threshold specifies guard rolling as not needing cert. That fb lvv unofficial questions page is full of misinformation and people who will do anything but read what the rules are
1 point
-
Measured from top of arch as far as I know. Won't be many arches that don't curve inward. This part of the PDF covers bolt on flares, but if if you just have unmodified body, then measure the same way and should be good. I'm sure Clint will confirm yeah / nah. https://www.lvvta.org.nz/documents/infosheets/LVVTA_Info_05-2020_Tyre_Track_Protrusion.pdf this one shows factory body better vs tyre tread, only shows front/back profile with top of arch used as reference https://vehicleinspection.nzta.govt.nz/virms/in-service-wof-and-cof/general/tyres,-wheels-and-hubs/tyres-and-wheels#tab2 Unless it was posted by someone you know isn't an idiot... then take with salt. Front guards for example tend to just bolt on, so I can't see how they would link that to being structural. That said, people will probably ruin guard rolling too, by taking the piss and they will have to bring in rules. Had to flare mine to get enough clearance through full suspension travel for my cert. Didn't even come up as a mention when I explained how I got the clearance. Double skin in rear of mine so fold it over doesn't really change much. Front couldn't do much as bolt on single skin so weak as fuck arch.1 point
-
I have only just now realised what's going to happen the streets of Chch when Bort's old man pops his clogs....
1 point
-
@peteretep @Tumeke @sentra @slacker.cam @Mr Vapour @manlymanman @Thphantum @HighLUX @Thousand Dollar Supercar @Sungai Sungai @cletus @CUL8R @yetchh @oldrx7 @rusty360 @Alfashark @datlow @Leone @Hemi @Snoozin @Sparkle @Bistro @kyteler @fletch @Ja1lb8 @Beaver @Mourning Cupcake @Big Value Buddy @Shaz @Goat @kicker @shavenYak @Steelies @AllTorque @KKtrips @shizzl @chasinthemirage @ajg193 @NickJ @LowTech @Cullen @Horse25 @mint16 @johnnyfive @Raizer @Lord Gruntfuttock @danger @Transom @BlownCorona @nismo.capri @Mr.Mk1 @Geophy @64valiant @Dogwatch @mutiny (bring your mountain bike too!) @a.craw4d @xsinclairx @Marsh @Toddy415 @GuyWithAviators1 point
-
While this meet is an OS.co.ng meet (because new cars are shit) its 100% about the OSGCs too. So if its beyond your means to travel a day and a half each way in your old school whip, (which has been on blocks so long itll probably never see the road again, stop kidding yourself) theres a perfectly good plane station down the road in quakechurch, so dont be shy about piping up, and im sure the local crowd can arrange pick up/ a ride to Hanmer. The people running the camp atm have it on the market too. So this could be the very last one. (Karl and i spent ages sharning up a storm getting to know the present people over a few visits)1 point
-
Thought I’d have a go at showing off the shiny cam gears. Added clear plastic cambelt cover. nice, then cover it up with the silly intake pipe. Hmm, must rethink the filter set up
1 point
-
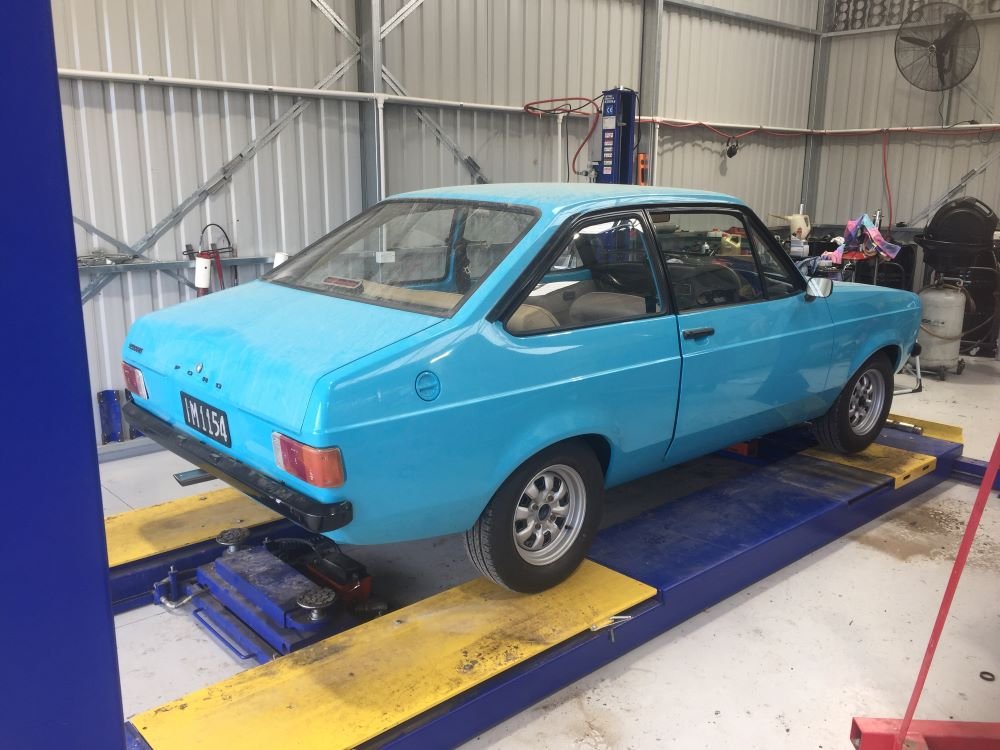
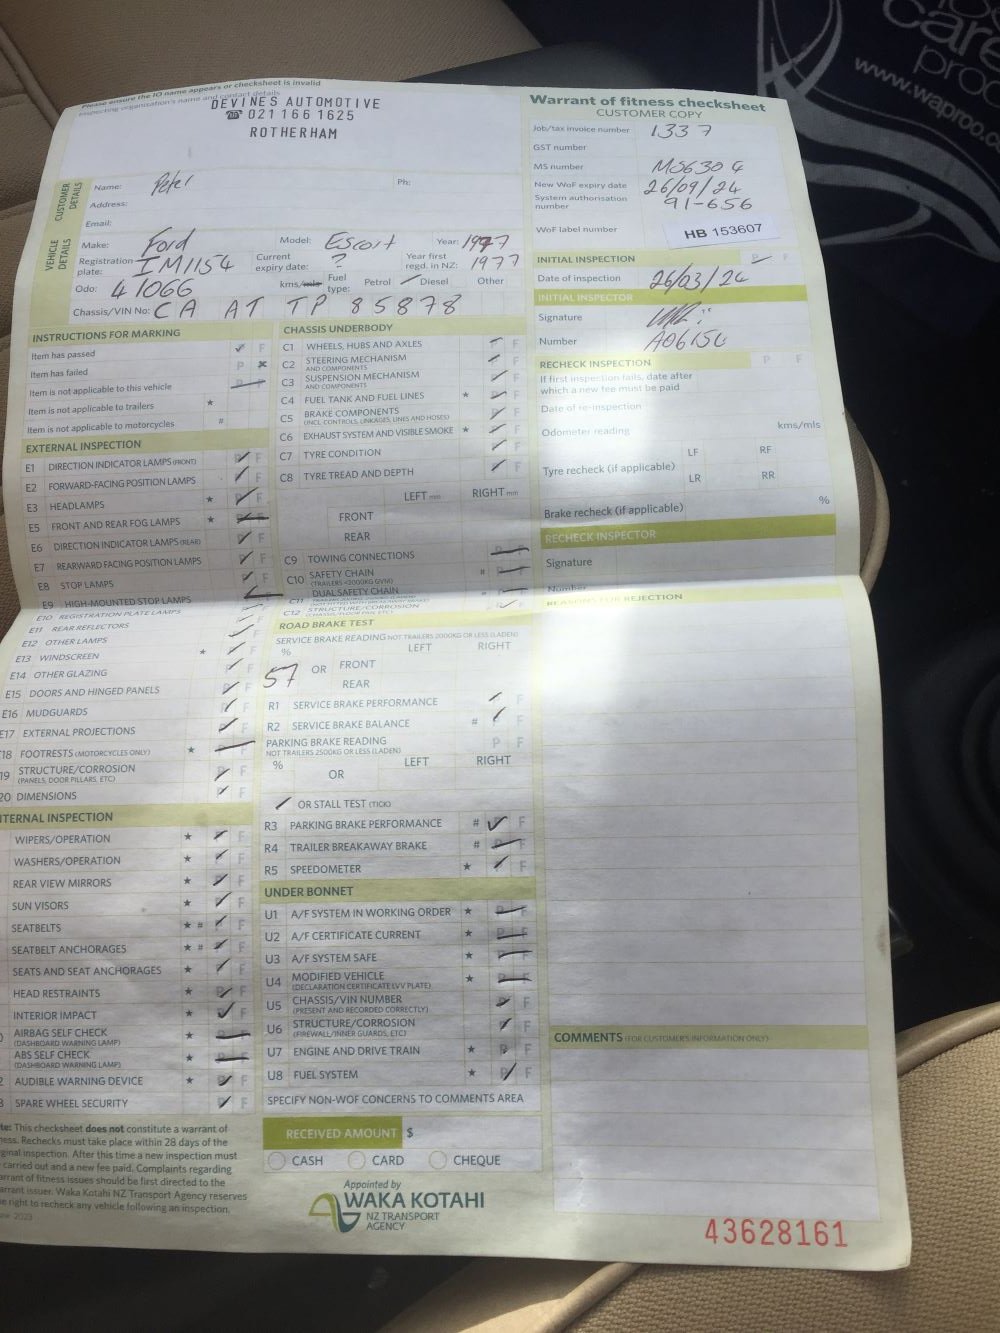
Escort back on the hoist again for its first WOF in approximately 18yrs. Have gone over everything and hope it will pass first time. Well, that went really well. Paperwork completed and sticker on windscreen. Quick trip home and now cars registartion done. Will feel more at ease driving around now. Tune is the next next thing to get sorted Project Discussion https://oldschool.co.nz/index.php?/topic/84912-petes-mk2-escort-1600-sports/page/3/#comment-2628128
1 point
-
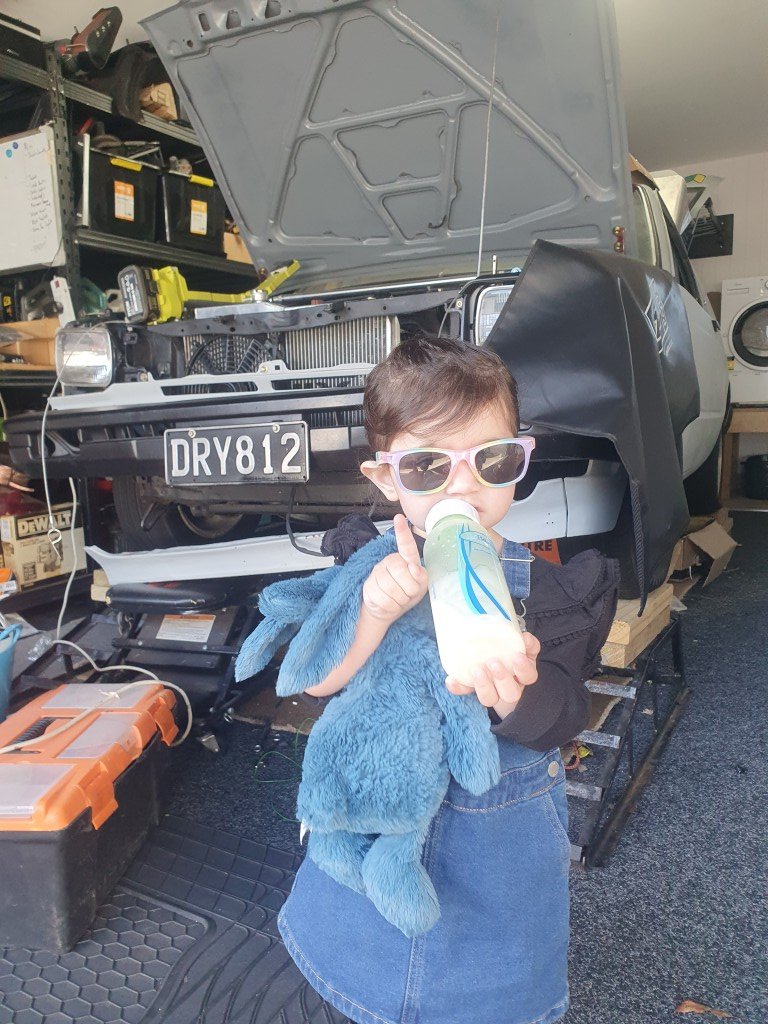
Home on its blanky..
1 point
-
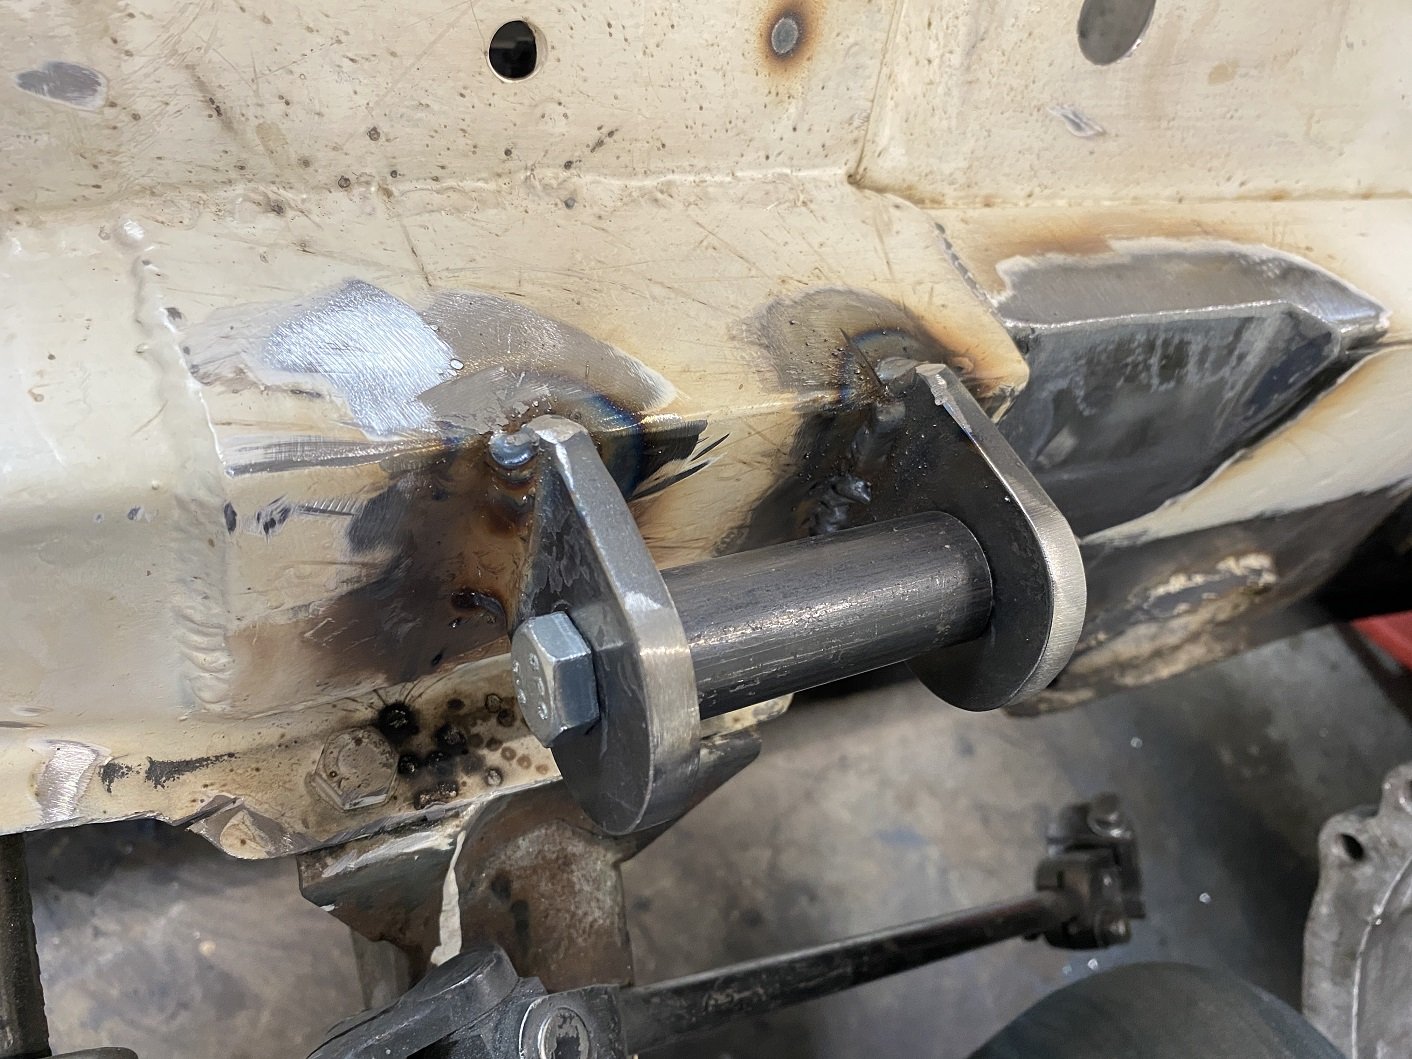
Engine mounts redone in thicker material as advised by the man. 8mm should do it. I machined up a spacer and did half at a time so I could use the original half to keep the alignment. But I also added a 4mm spacer when welding on the first new half to shift the engine back a tiny bit and give me just a little more clearance between the cross member and the sump. I hope that doesn't come back to bit me in the arse later. When welding in the second half of each mount I replaced the 4mm spacer with a fibre washer as a shim so it's not such an uber tight fit to get the bush/sleeve in there.
1 point
-
Systems check.....Dad you forgot to tighten up all the fuel fittings so now the garage smells of fuel. Managed to get the front straightened out a little bit, requires some metal hot glue gun action
1 point
-
Easter Keg..Bunny might have trouble fitting in his basket.
1 point
-
The radiator situation is proving to be a bit of a headache as the available space is minimal thanks to the S/C electroclutch pulley taking up alot of space. where you would ususally plonk a nice thick rad for plenty of cooling. Did a bit of mocking up today with a couple of radiators I had kicking round its looking like a unit from a GA61 Supra will juuuust fit with a pusher fan on the front of the radiator. This one is pretty beat up and manky so will see if I can find an alloy option1 point
-
Beem working on this thing pretty flat out. Done a bunch of interior work and just rebuilt all the steering components. Everything feels a lot tighter now . Not too far away being ready for a warrant
1 point
-
It works.
1 point
-
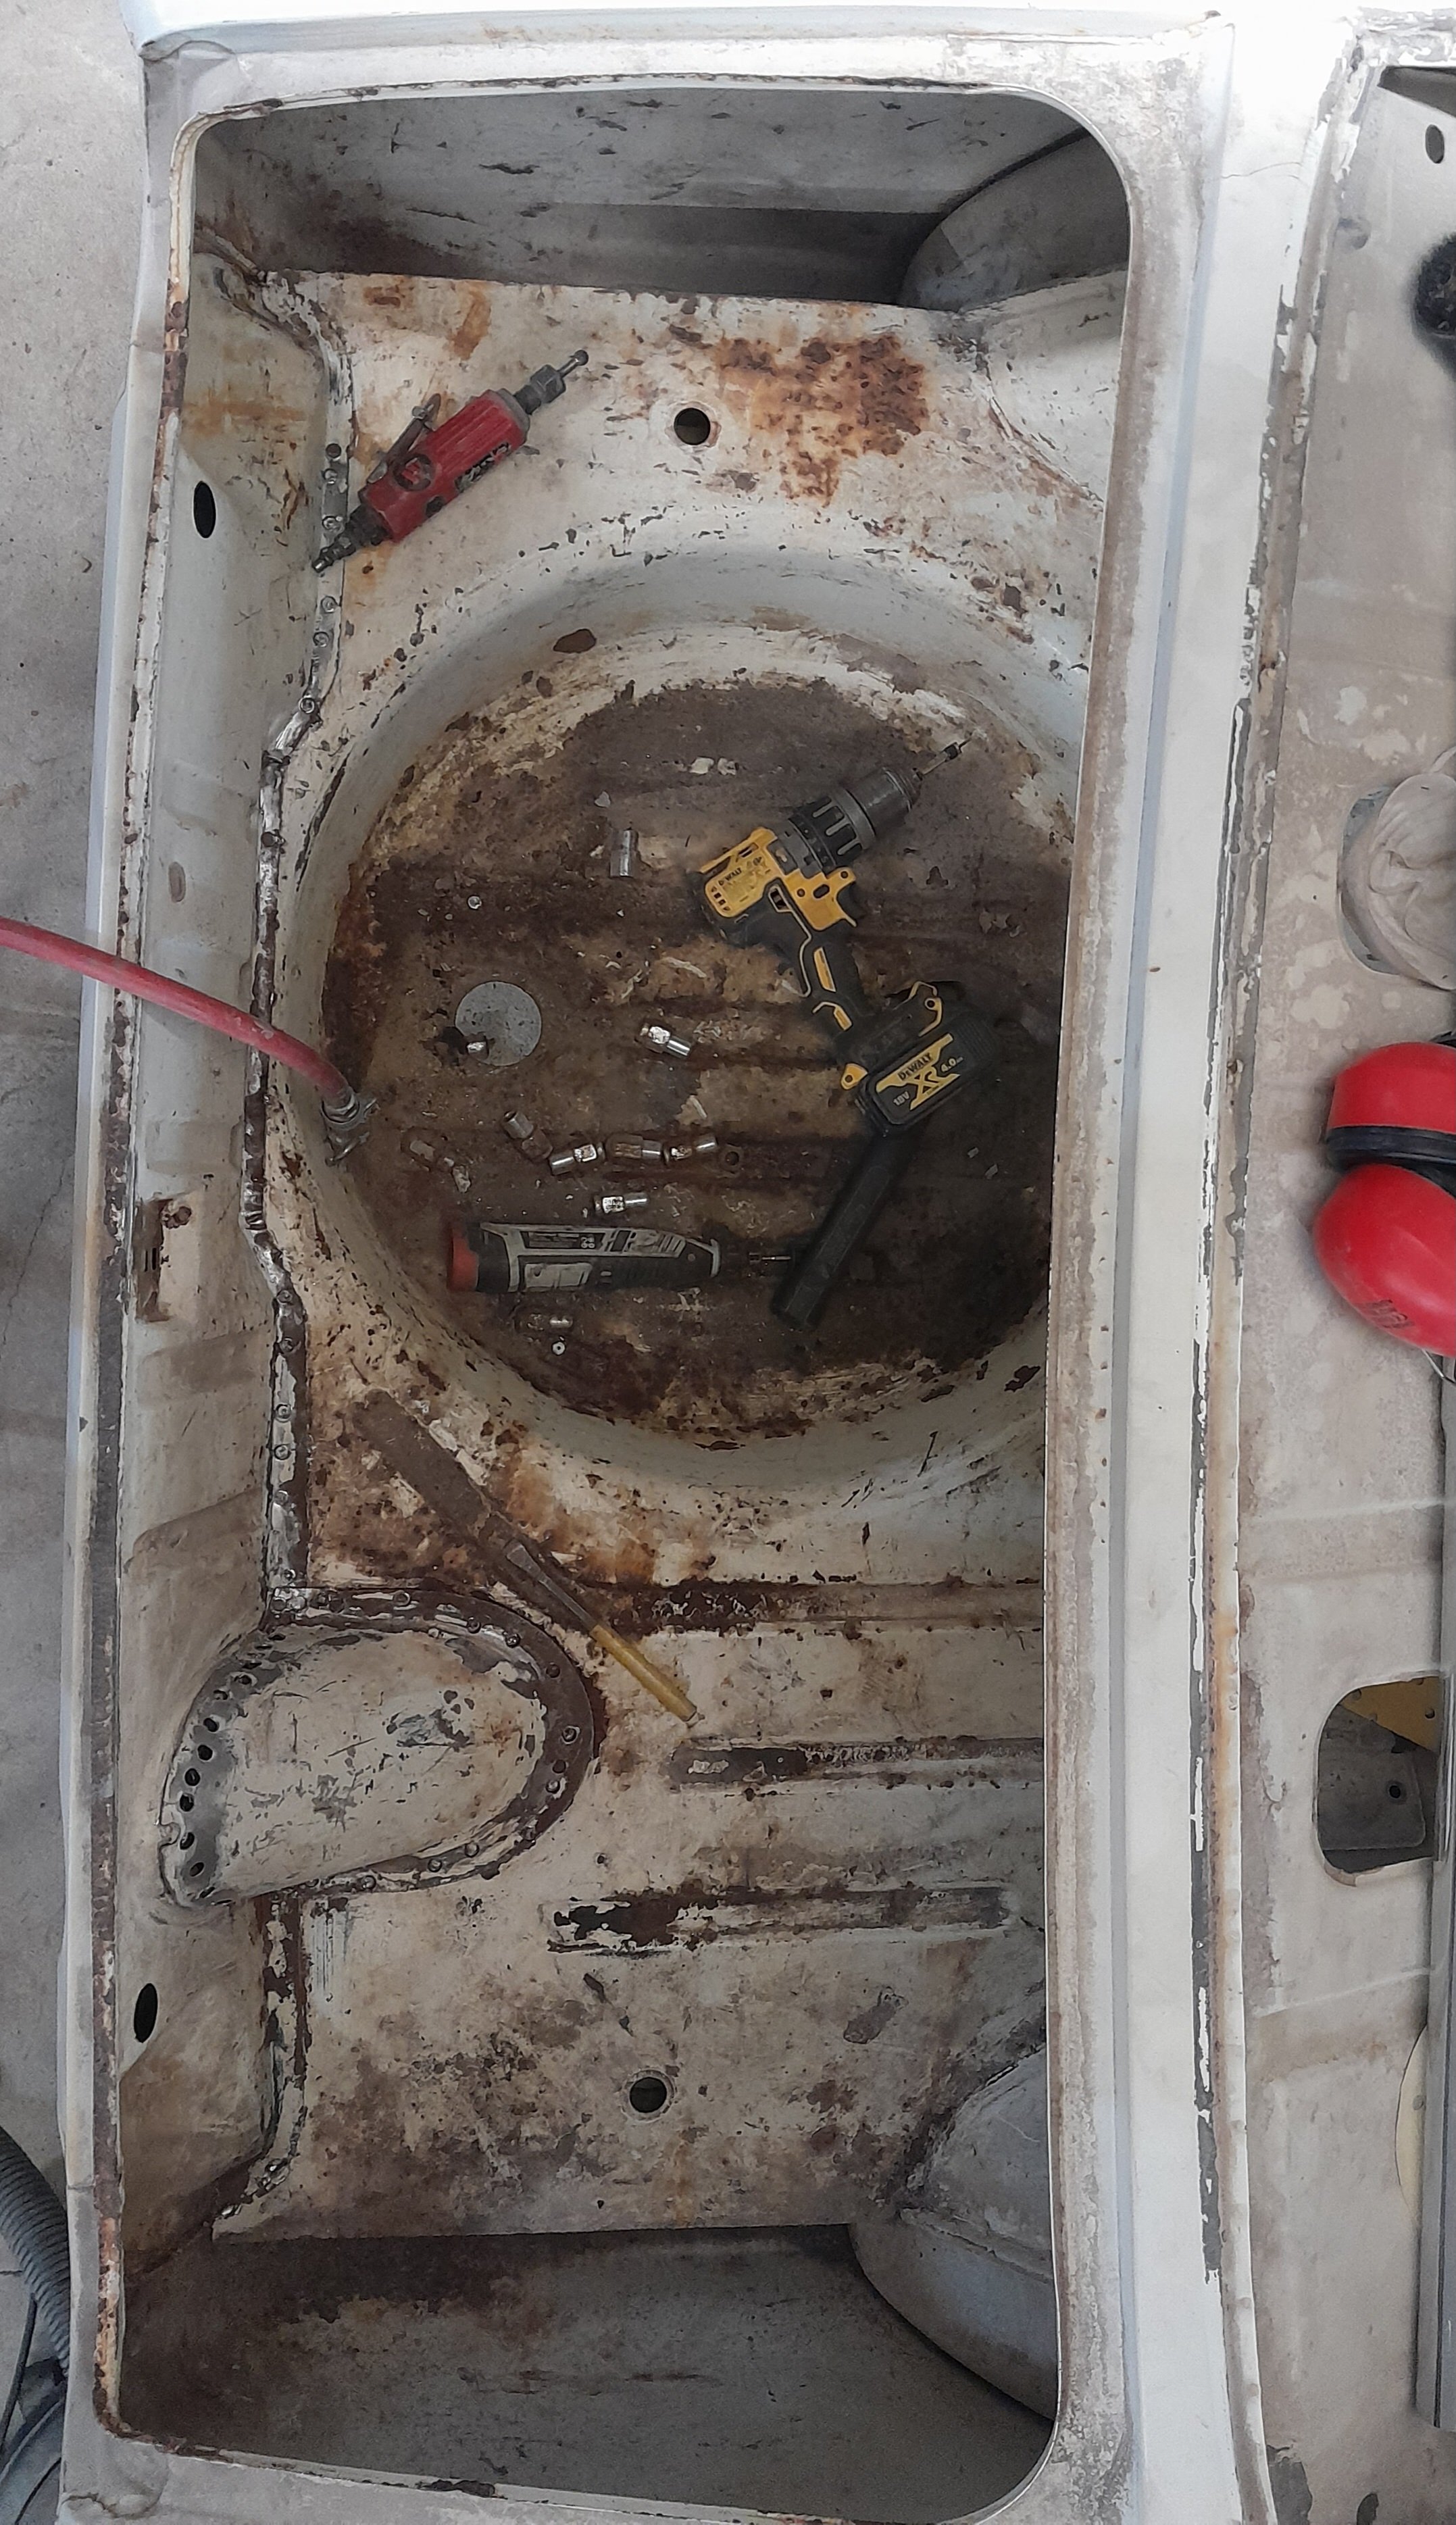
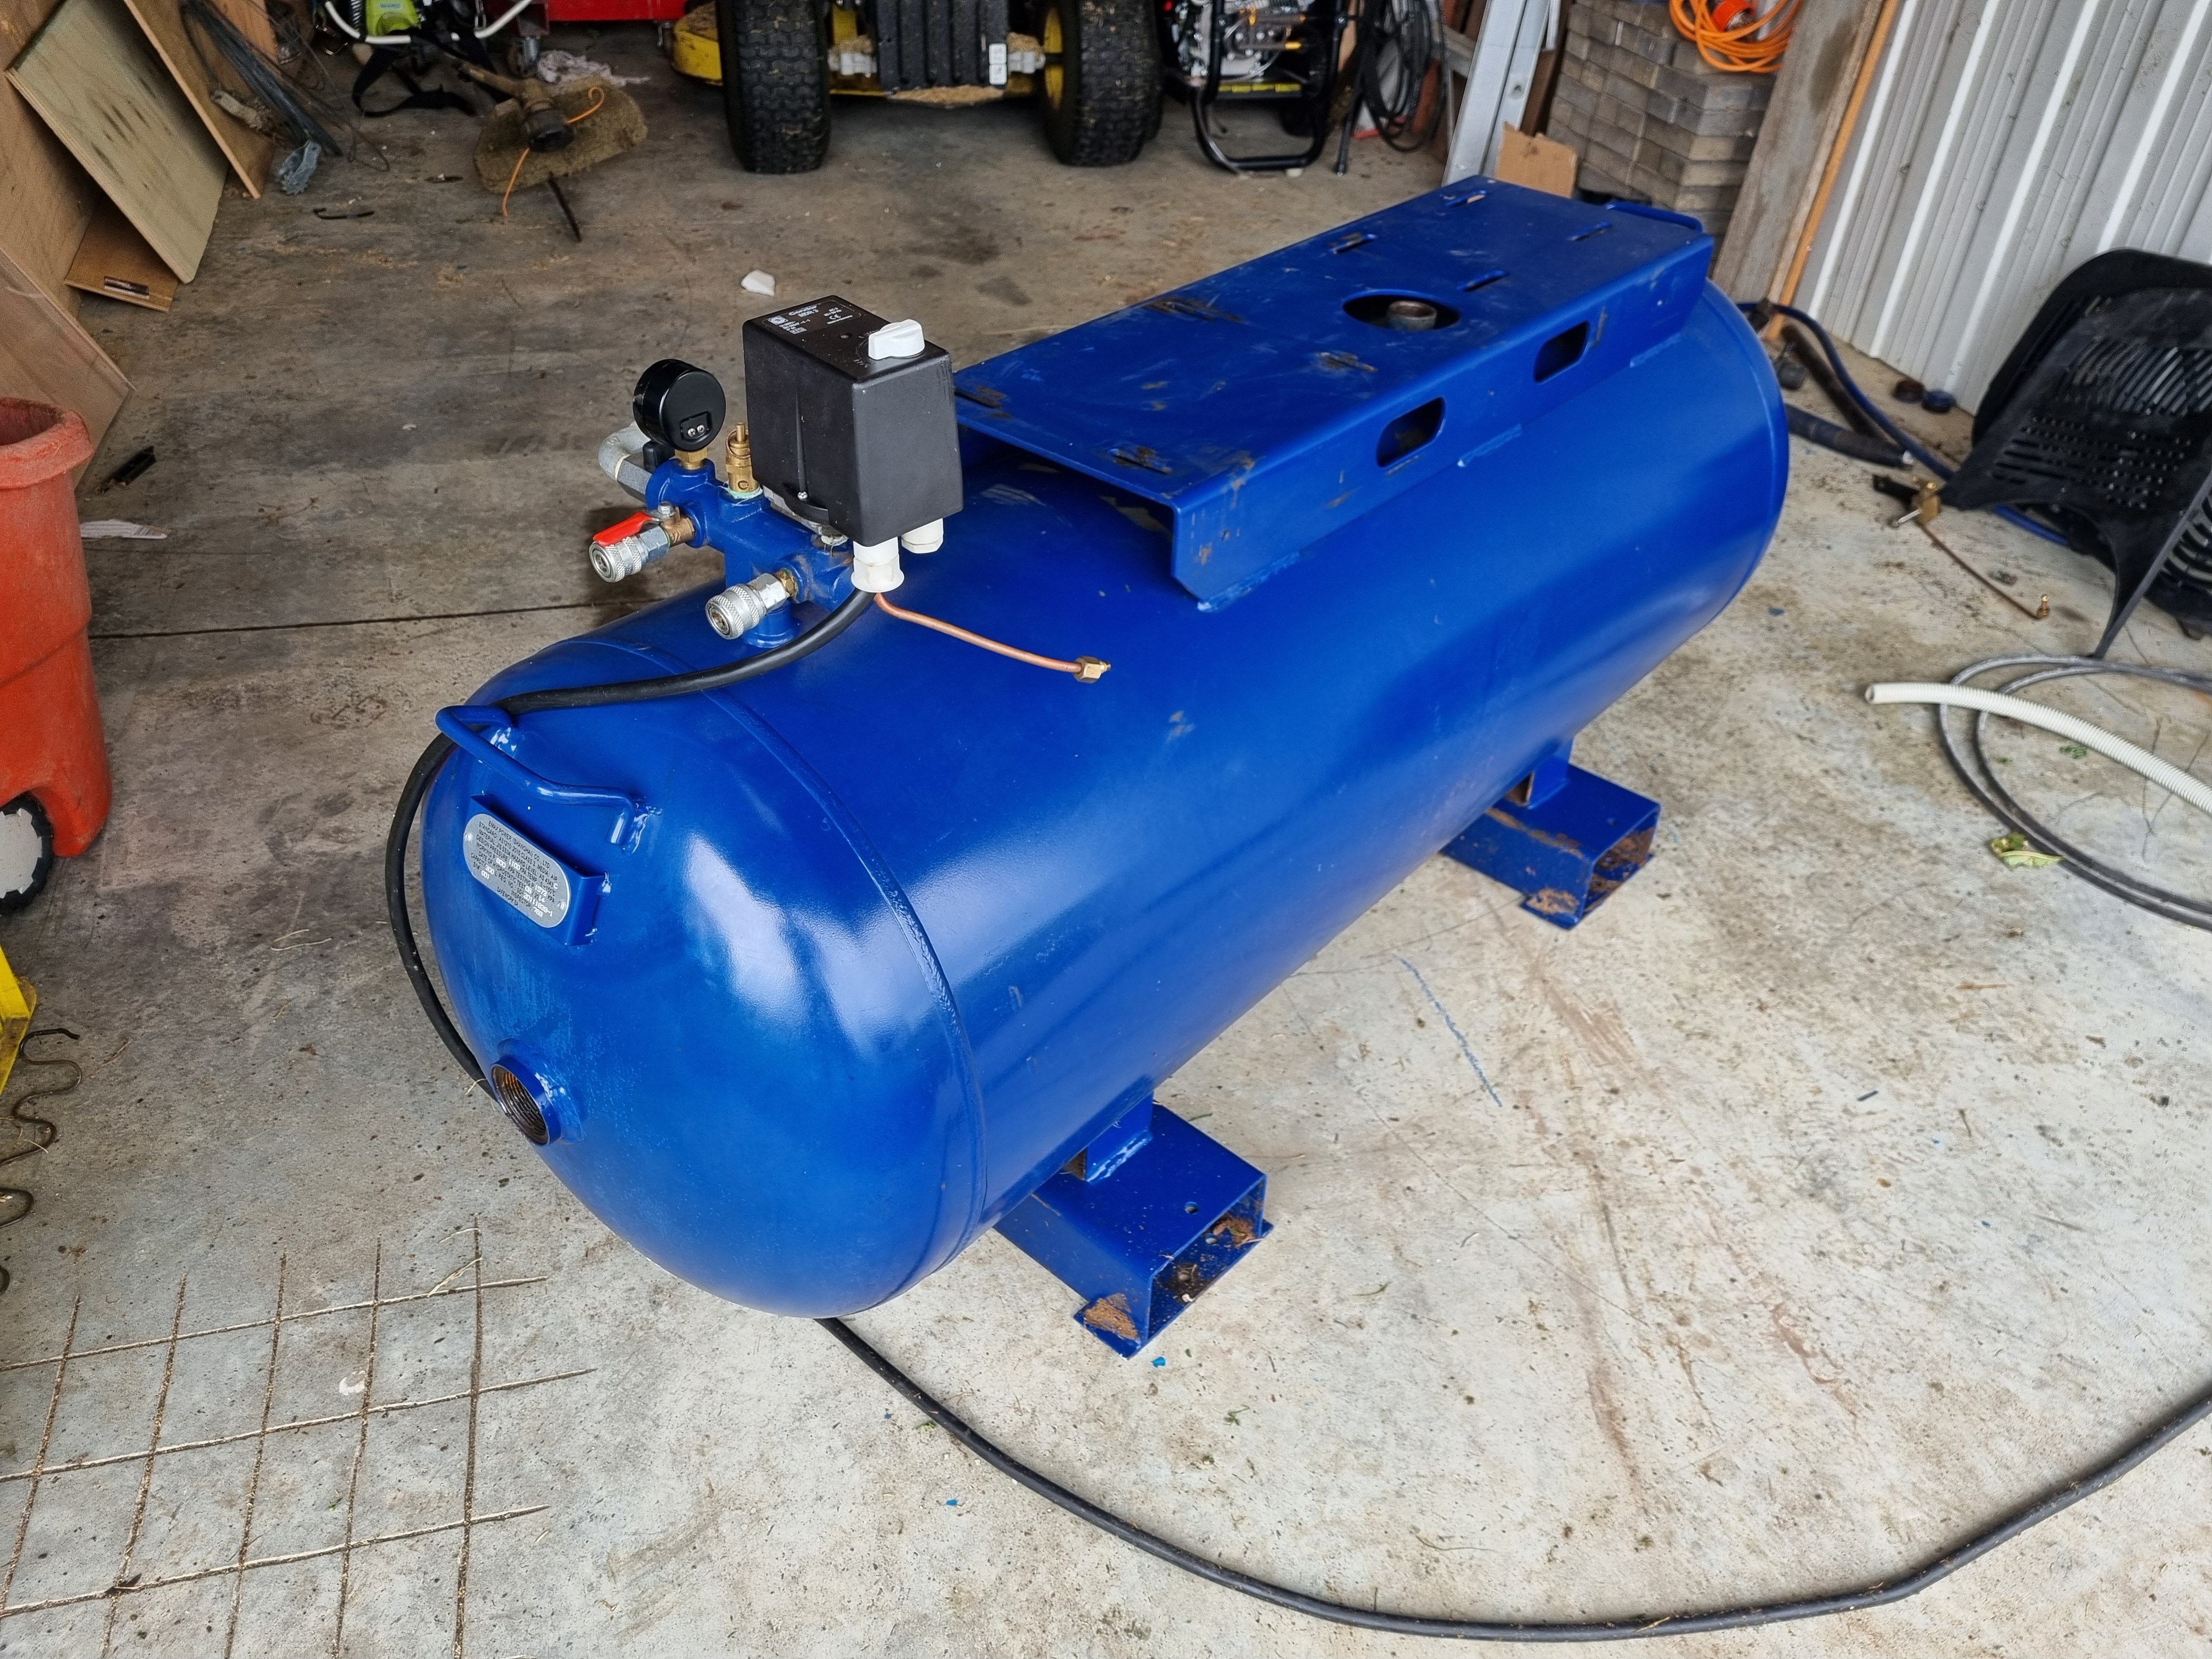
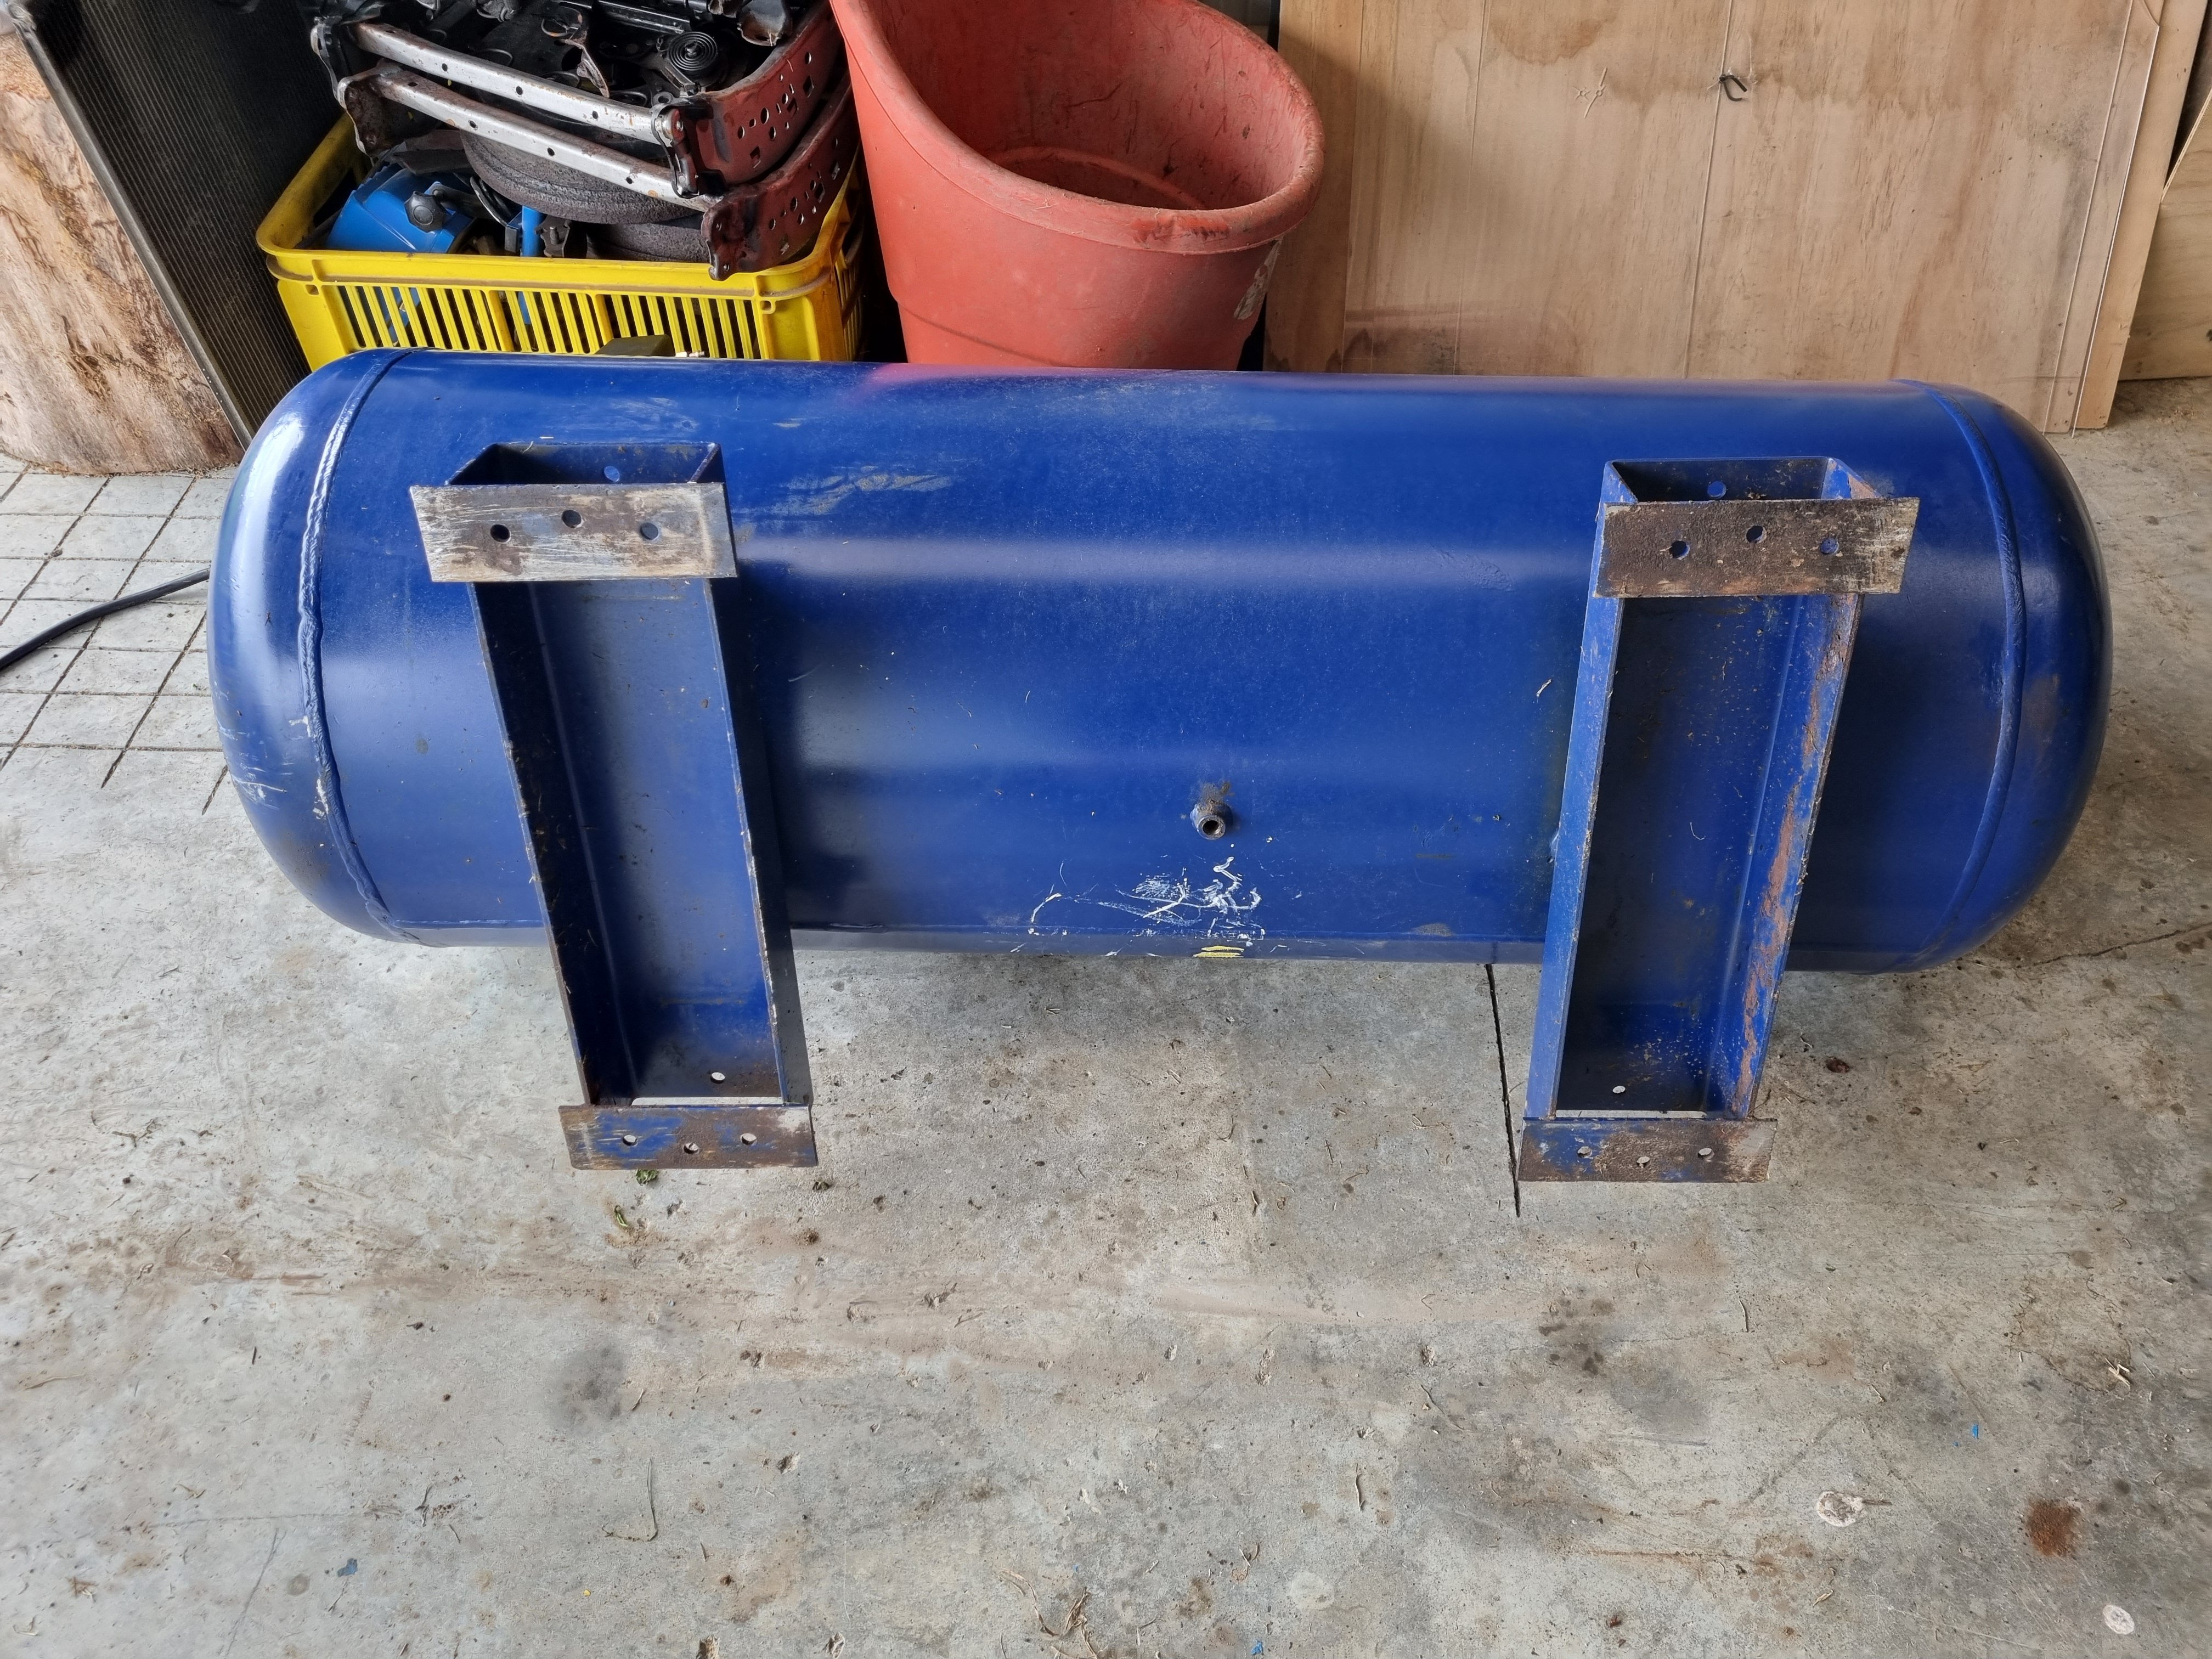
So I took the tank to get pressure tested and it had a crack where the motor plate is welded on. I decided to see what was available on the tard and a perfect (almost) tank was for sale for a price less than another pressure test and paint so I bought it. Is 300L, made in 2014 and comes with a pressure switch and some fittings I don't have. The only problem is the inlet port from the compressor to the tank is in the middle. I don't have a pipe long enough to plumb it. I need a new pipe for that, probably about 900 long. I'll try to mount everything into the tank today and get it running without the pipe. Let's see how far I get.
1 point
-
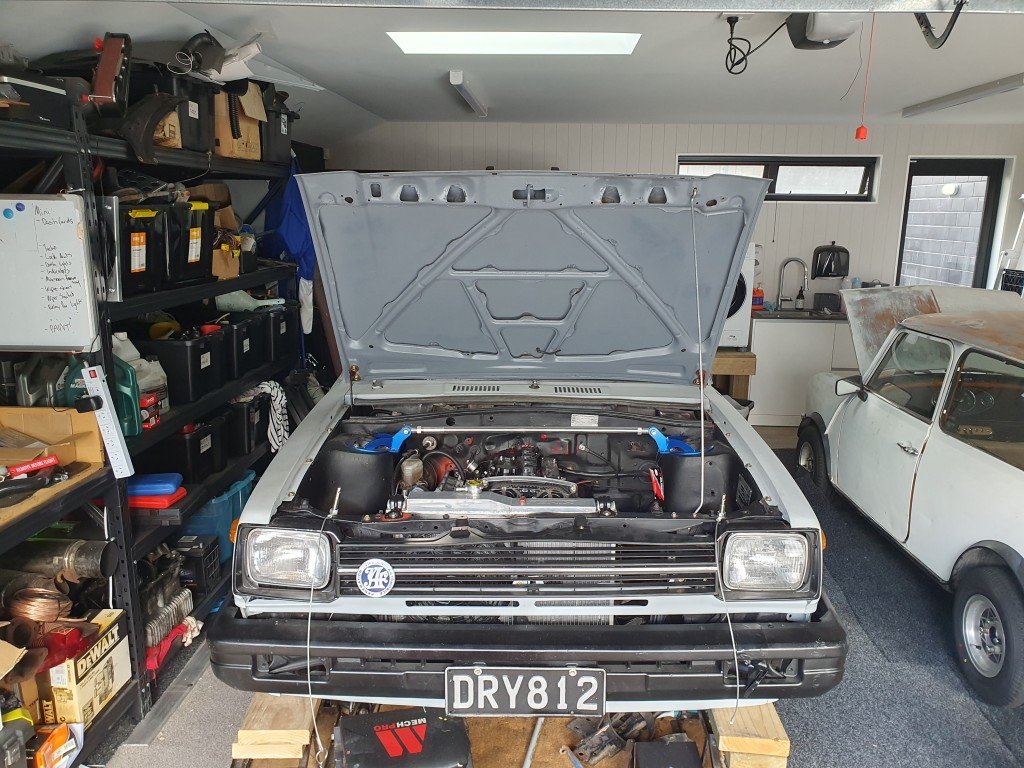
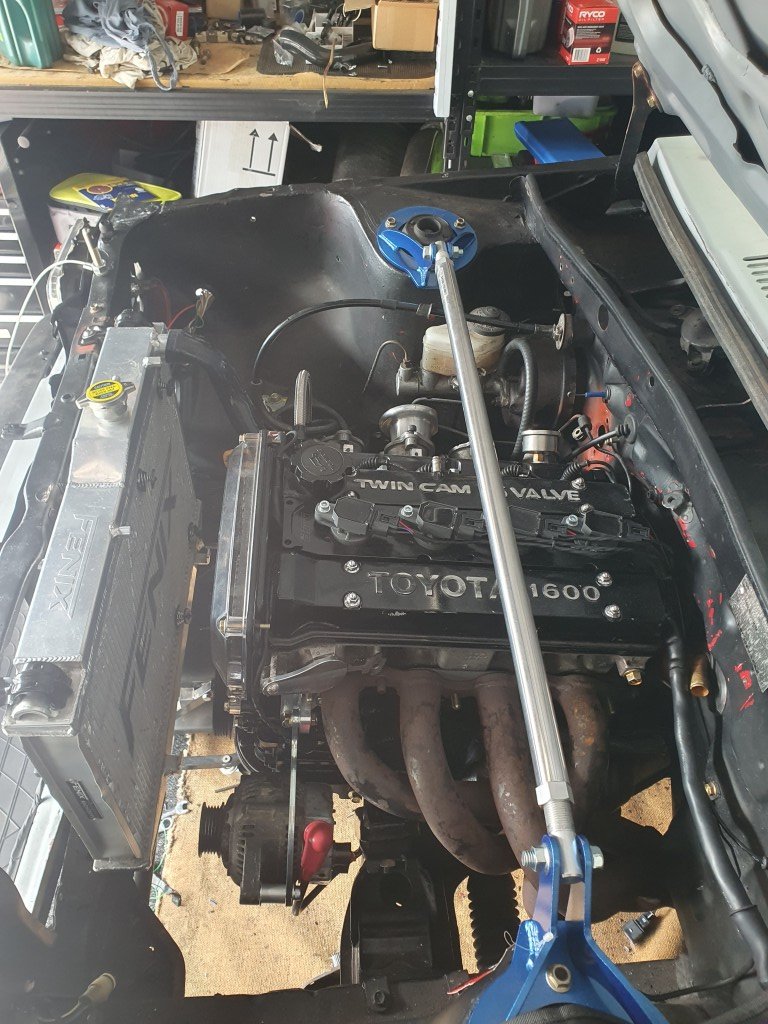
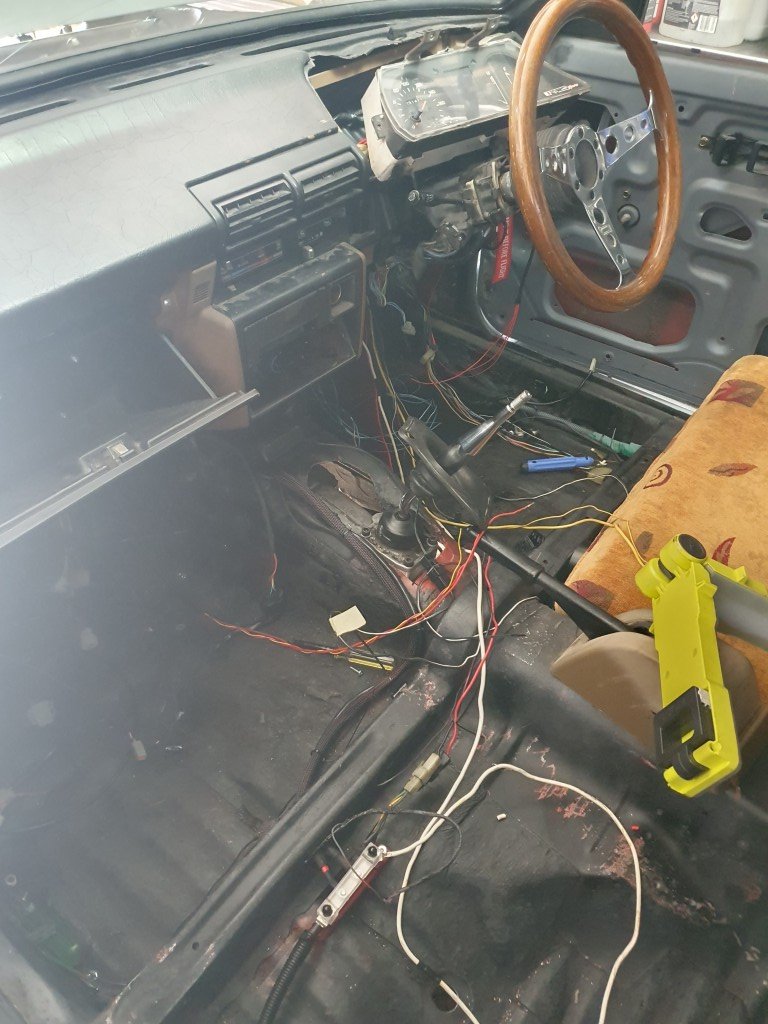
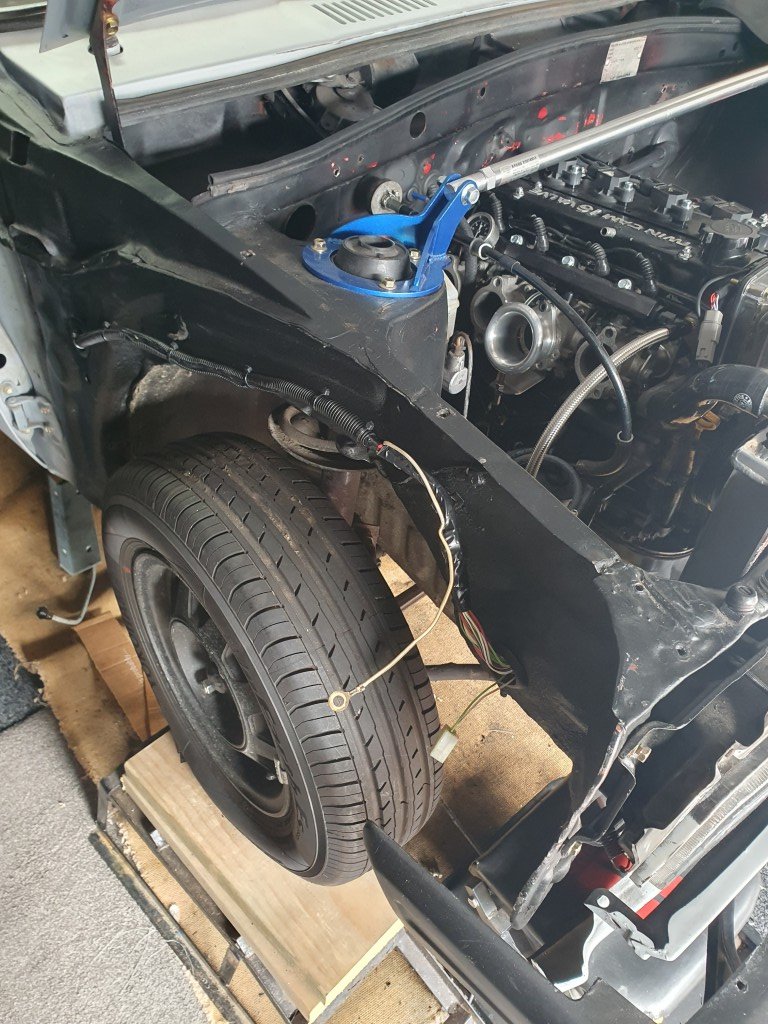
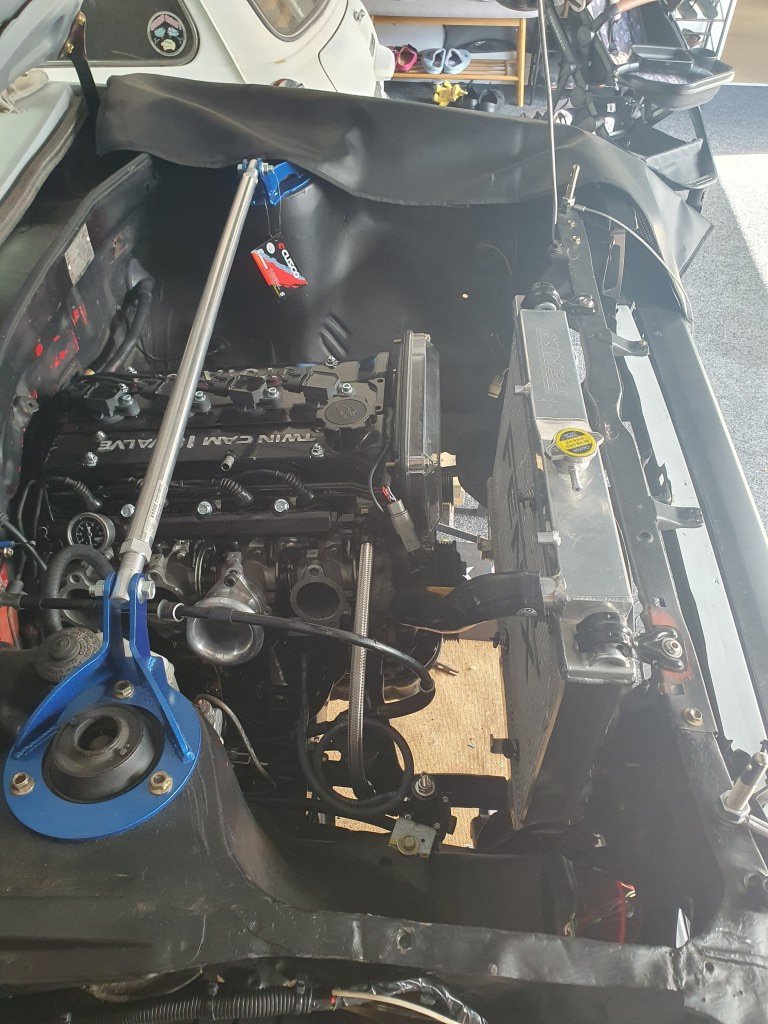
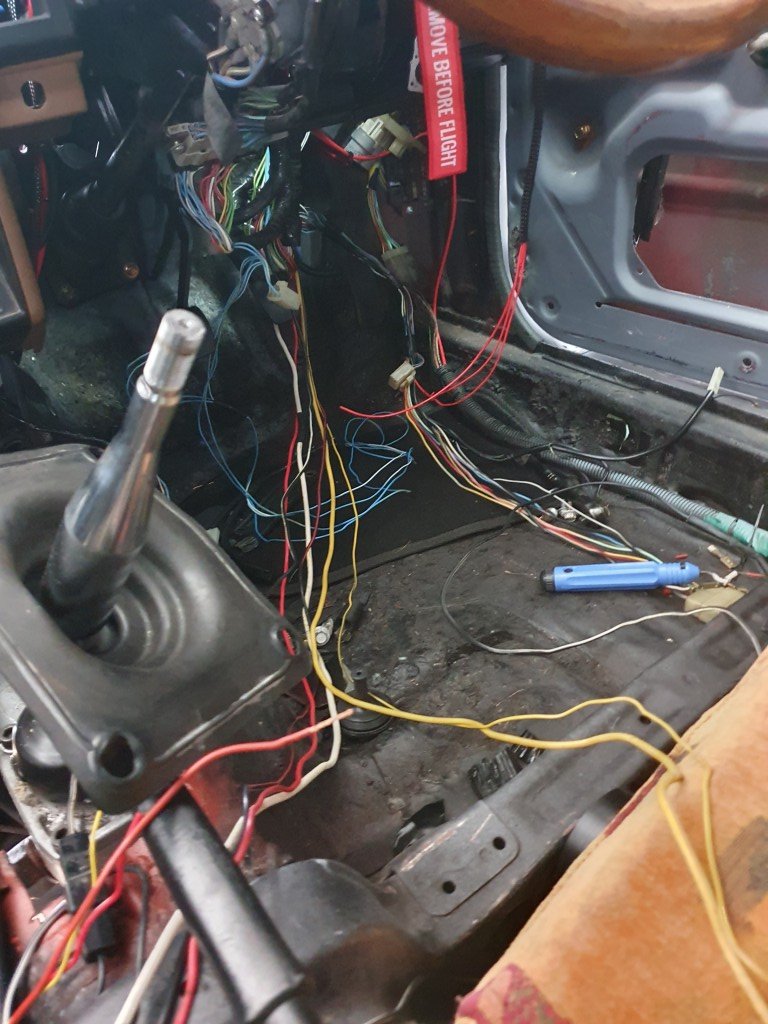
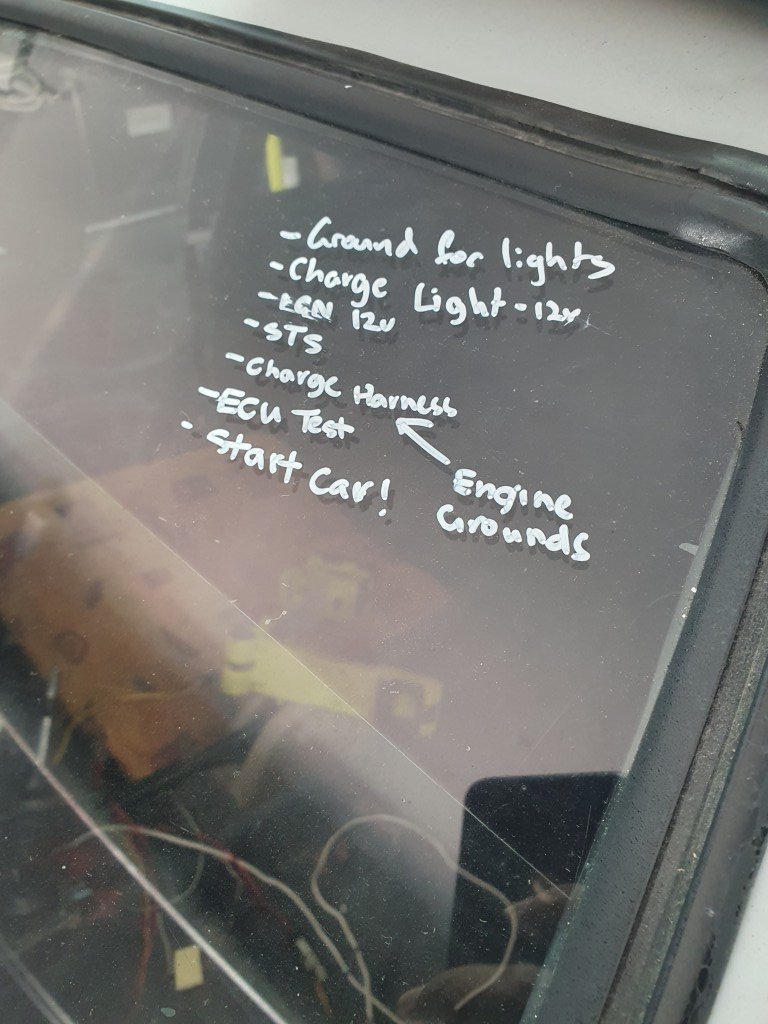
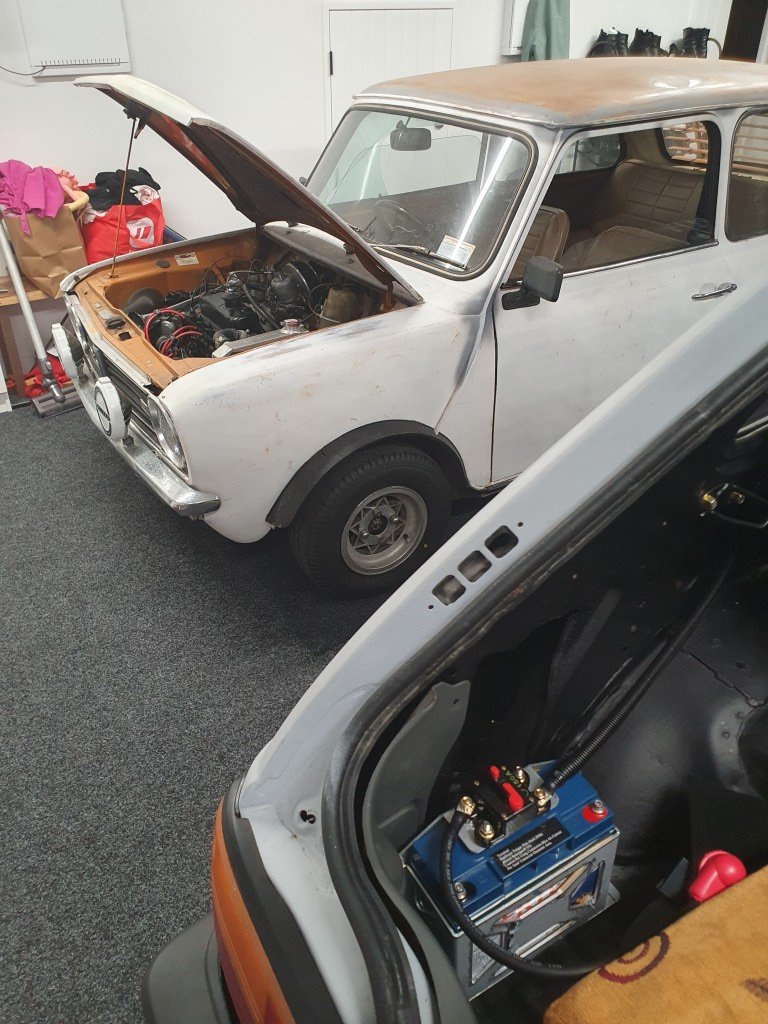
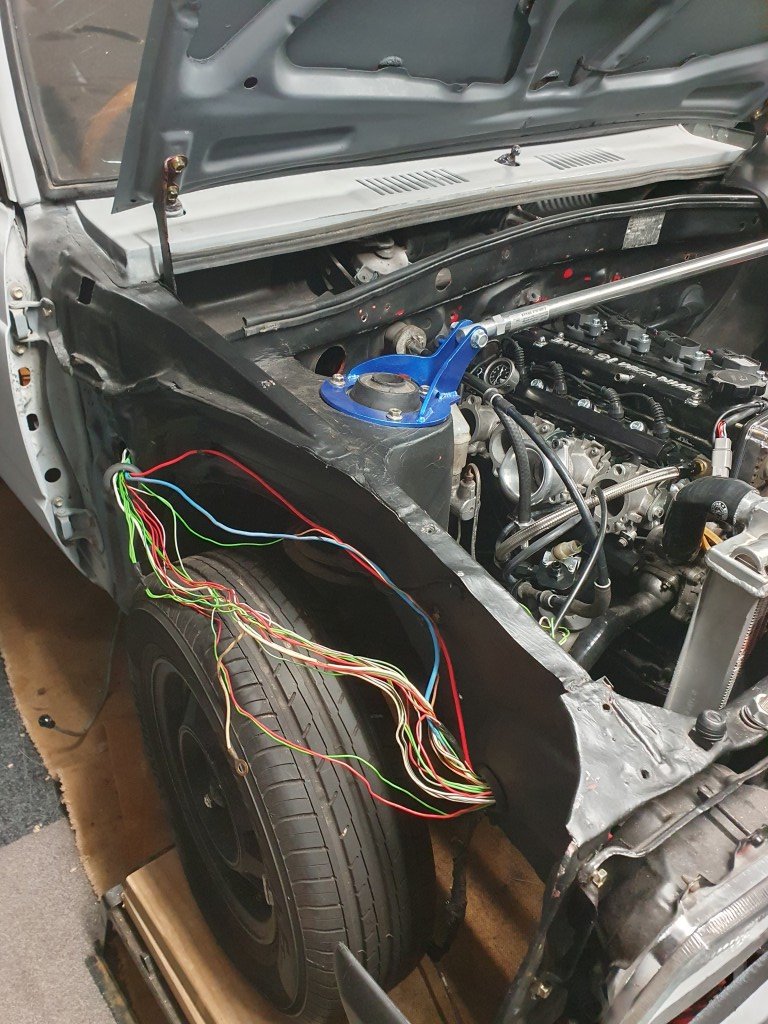
Decent update: ECU basically all wired in, just the wideband to go and a few bits to go. We've turned the car over which is huge! Will go for a start shortly. Semi wire tuck has gone well, just a few bits to tidy up. I've learned a thing or two for next time. Theres not many good wiring diagrams out there for KPs. I thought being around as long as they have been with numerous 4AGE swaps that there would be more accessible information out there. Before and after: Just some small amount of body loom that will be showing in the engine bay. Itll be hidden by the coolant tank anyways. The Mini is back in the garage, after a once over and some new tyres she runs mint! @mk2marty and I had a good night hoon. Really need to get onto paint prep, but time is scarce.
1 point
-
I had planned to have to weld in the front portion of the yellow guard because I deemed the panel damage beyond my skill to repair. The step thing on the corner had been totally flattened by someone else's previous attempt. I had a go at it myself maybe a year or so ago. But then the other day, I thought I'd have one more go, if I fucked it up I could still weld in the other panel. So I just hit it much harder... I think it's acceptable now, I reshaped the step and didn't fuck up the two... ridge line things. Should only need minimal filler. I also trimmed the doner front panels so I could trial fit them. This car had run into something and pushed in the front panels, folding over the lower front seam. I was unable to get the panels the budge with a slide hammer, so I decided I'd use the front panels from the yellow one, which were surprisingly rust free, unlike the rest of the yellow car. Front panels look like there will be no issues fitting them. I'm not ready to weld the panel back in, I still need to prep behind it for epoxy.
1 point
-
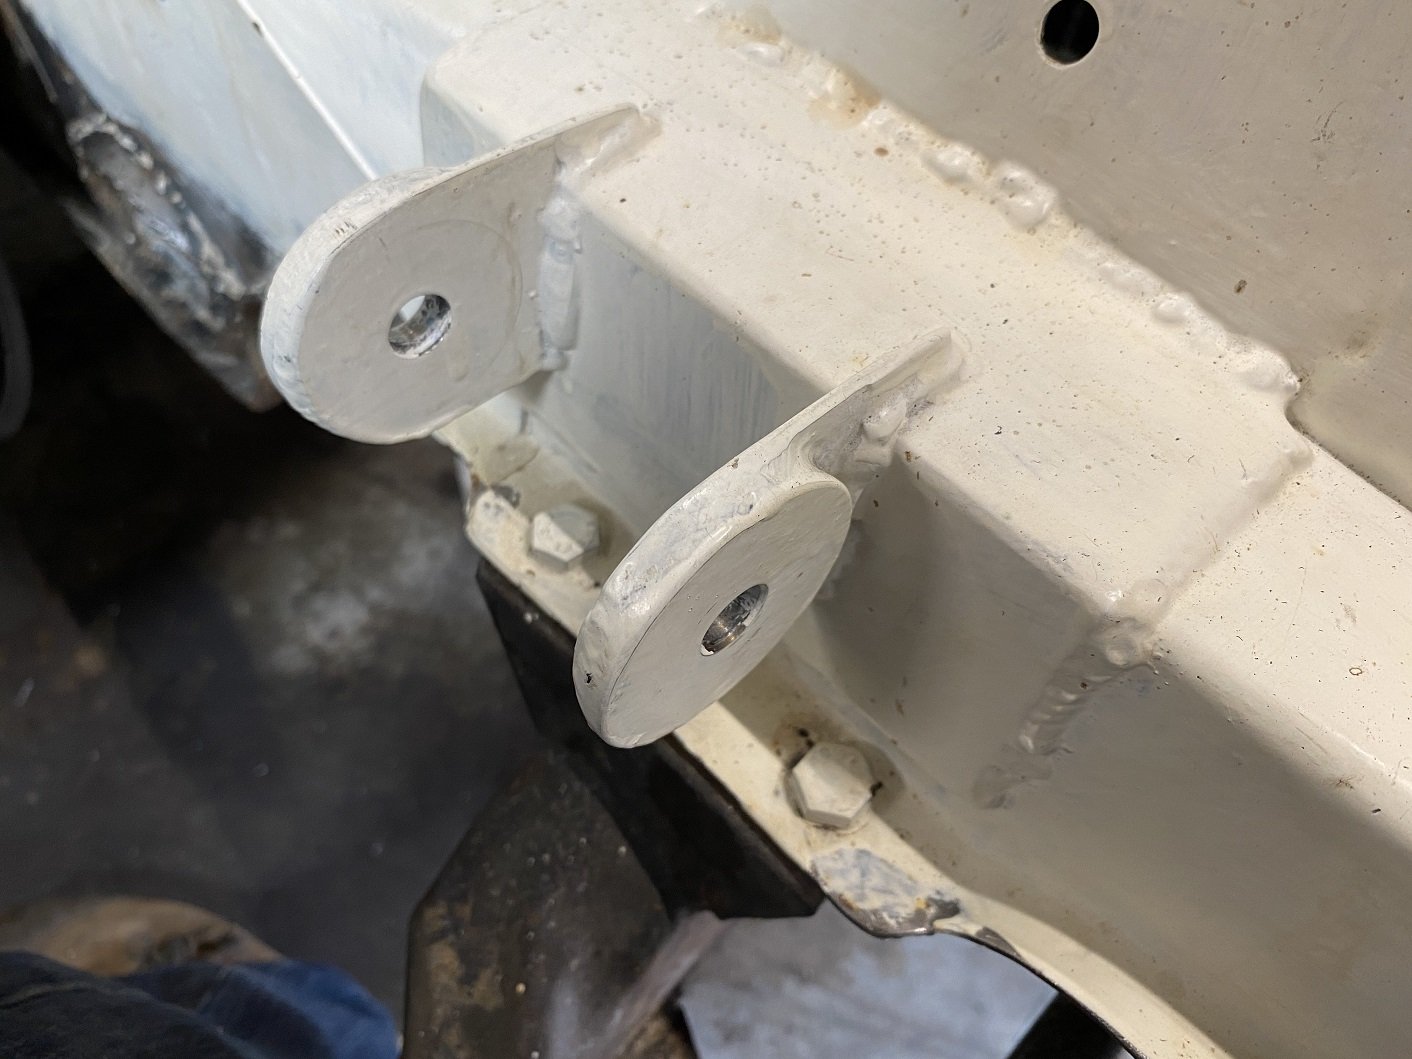
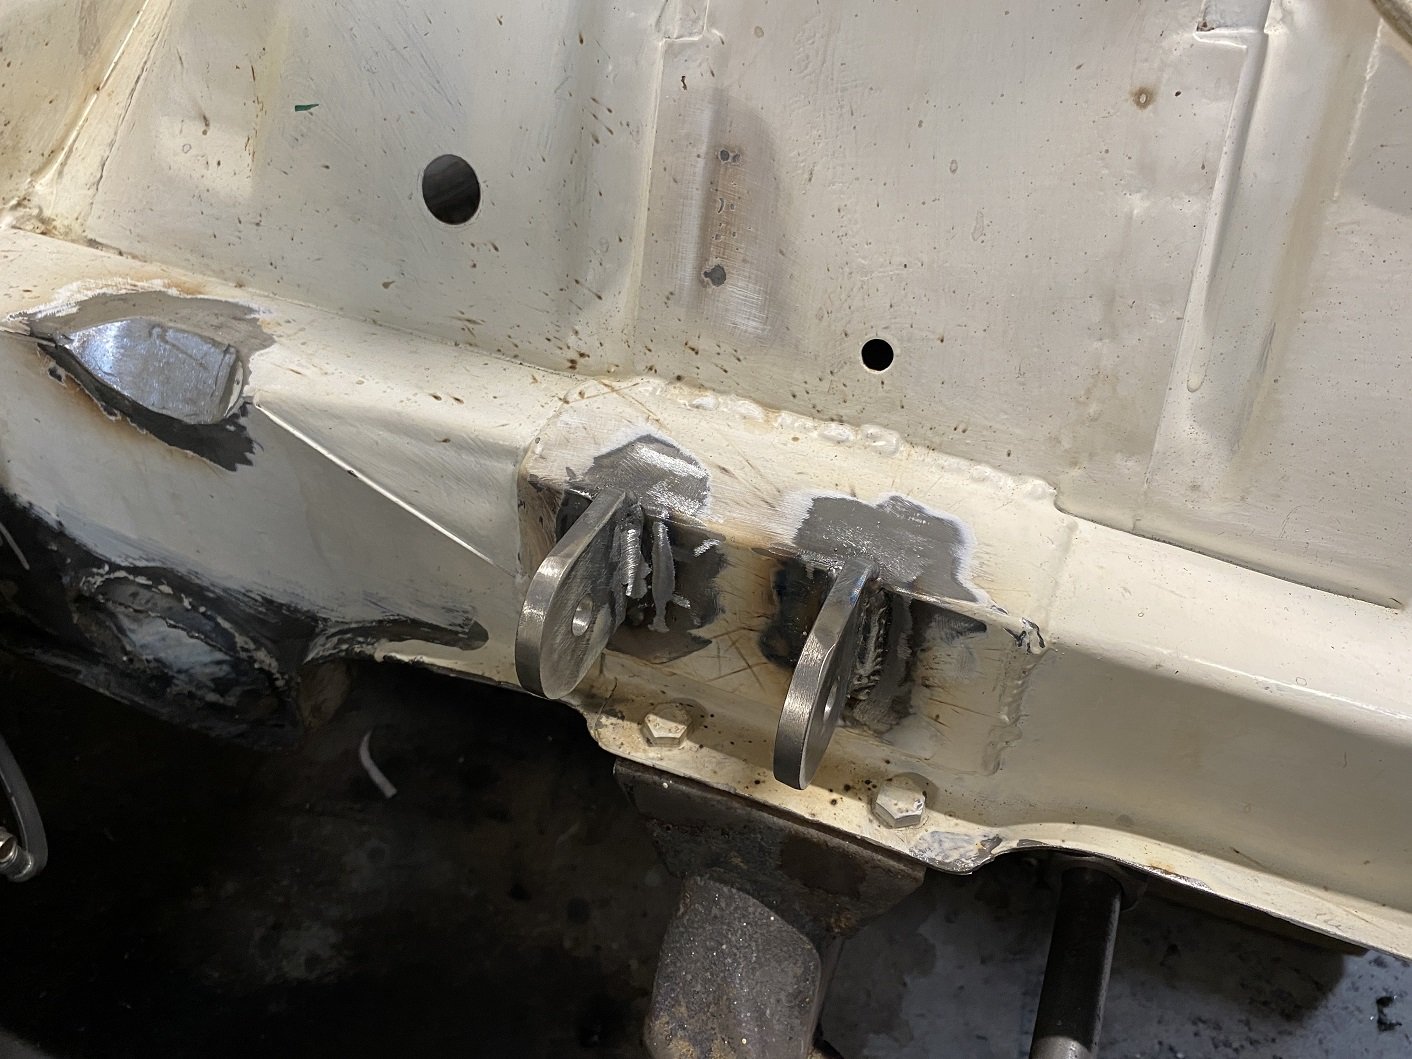
Albert the NDT man in Wingate has tested the welded struts for cracks. Took 10 minutes. He has an electromagnet and a solvent containing iron particles dyed with a flourescent dye so they glow in a UV light. He puts the magnet across the weld and sprays it with the fluid. The magnetic field aligns the iron particles which you can see under a UV lamp because of the dye. Any cracks will cause misalignment because the field goes around them. So I've got a certificate that says it's passed. YAY!1 point
-
so i done some digging and some searching around with the rims. wasn't having any luck with finding one so the next step was to look at different swing arms to either modify or try fit in the rear of the bike. a Suzuki gs1200ss swing arm popped up for sale in tga. i have a mate local to me that has one, so i shot around to his house with my stock swing arm and got some rough measurements to see if it would work to modify and the common consensus was that its probably going to be the best option to make a swing arm work. so i hit the buy now and had @Mop Head pick it up for me. had a few people concerned that it wasn't going to work and that it was going to be a rather large thing to undertake but i didn't really have many other options if i wanted to fit this 5.5 rear wheel in. and after some comparisons and some measurements the 1200ss swing arm is rather larger and stronger. factory swing arm is 60.2mm tall and 3.2mm thick the suzuki gs1200ss swing arm is 74.9mm and it is 5.2mm thick time to chop it up. gotta trim it down a little bit on the width as well and removed the twin shock mounts off time to get more precise with the measurements chucked them in the mill and @Kimjon showed me how to do some things then we needed to cut some space for the rear shock like the stock swing arm. got it looking like this and i took them home to get them welded up and to do some more measurements cleaned my work bench and got busy again. worked out where the center of the swing arm is and done some basic math and made some brackets. factory mounts trace some out and draw them a bit of grinding and a stepped drill bit later and thats one side all sorted. the bottom side now, kim had already cut these out while i was doing other stuff at his house one day. i trimmed them to shape and chucked them in the bender (vice) and got to shaping them up and making them fit kind of a before and an after well during that time i did go to @flyingbricks house and steel this lathe to re make those peaces that go in the top of the mounts. we some how made the center hole to big. i reached out to josh to see if he could weld these up for me but some times he replies way to slow and often has stuff going on in his own life. so i also reached out to @Rhyscar to see if he wouldn't mind doing some welding for me. he said to pop over and we could run through it see if it was possible. next images can tell if you if it was or wasn't so happy with it. back out at kims again while i adulted with my daughter at my toes. time to try make this fit in. hey thats close enough, lets put the seats and plastics on before i go to see how it looks blue tooth chain but we still got a fair few things to do. daughter loves granddad garys motorcycle so she wanted to sit on her seat. and we are now up to speed a bit more. huge thanks to those who have helped out so much so far and kim for letting me keep it in his shed and use all his tools1 point
-
Type59 Engine. Its a little different to the T57. Not as tall. The crankcase and sump seem a bit easier to make.1 point
-
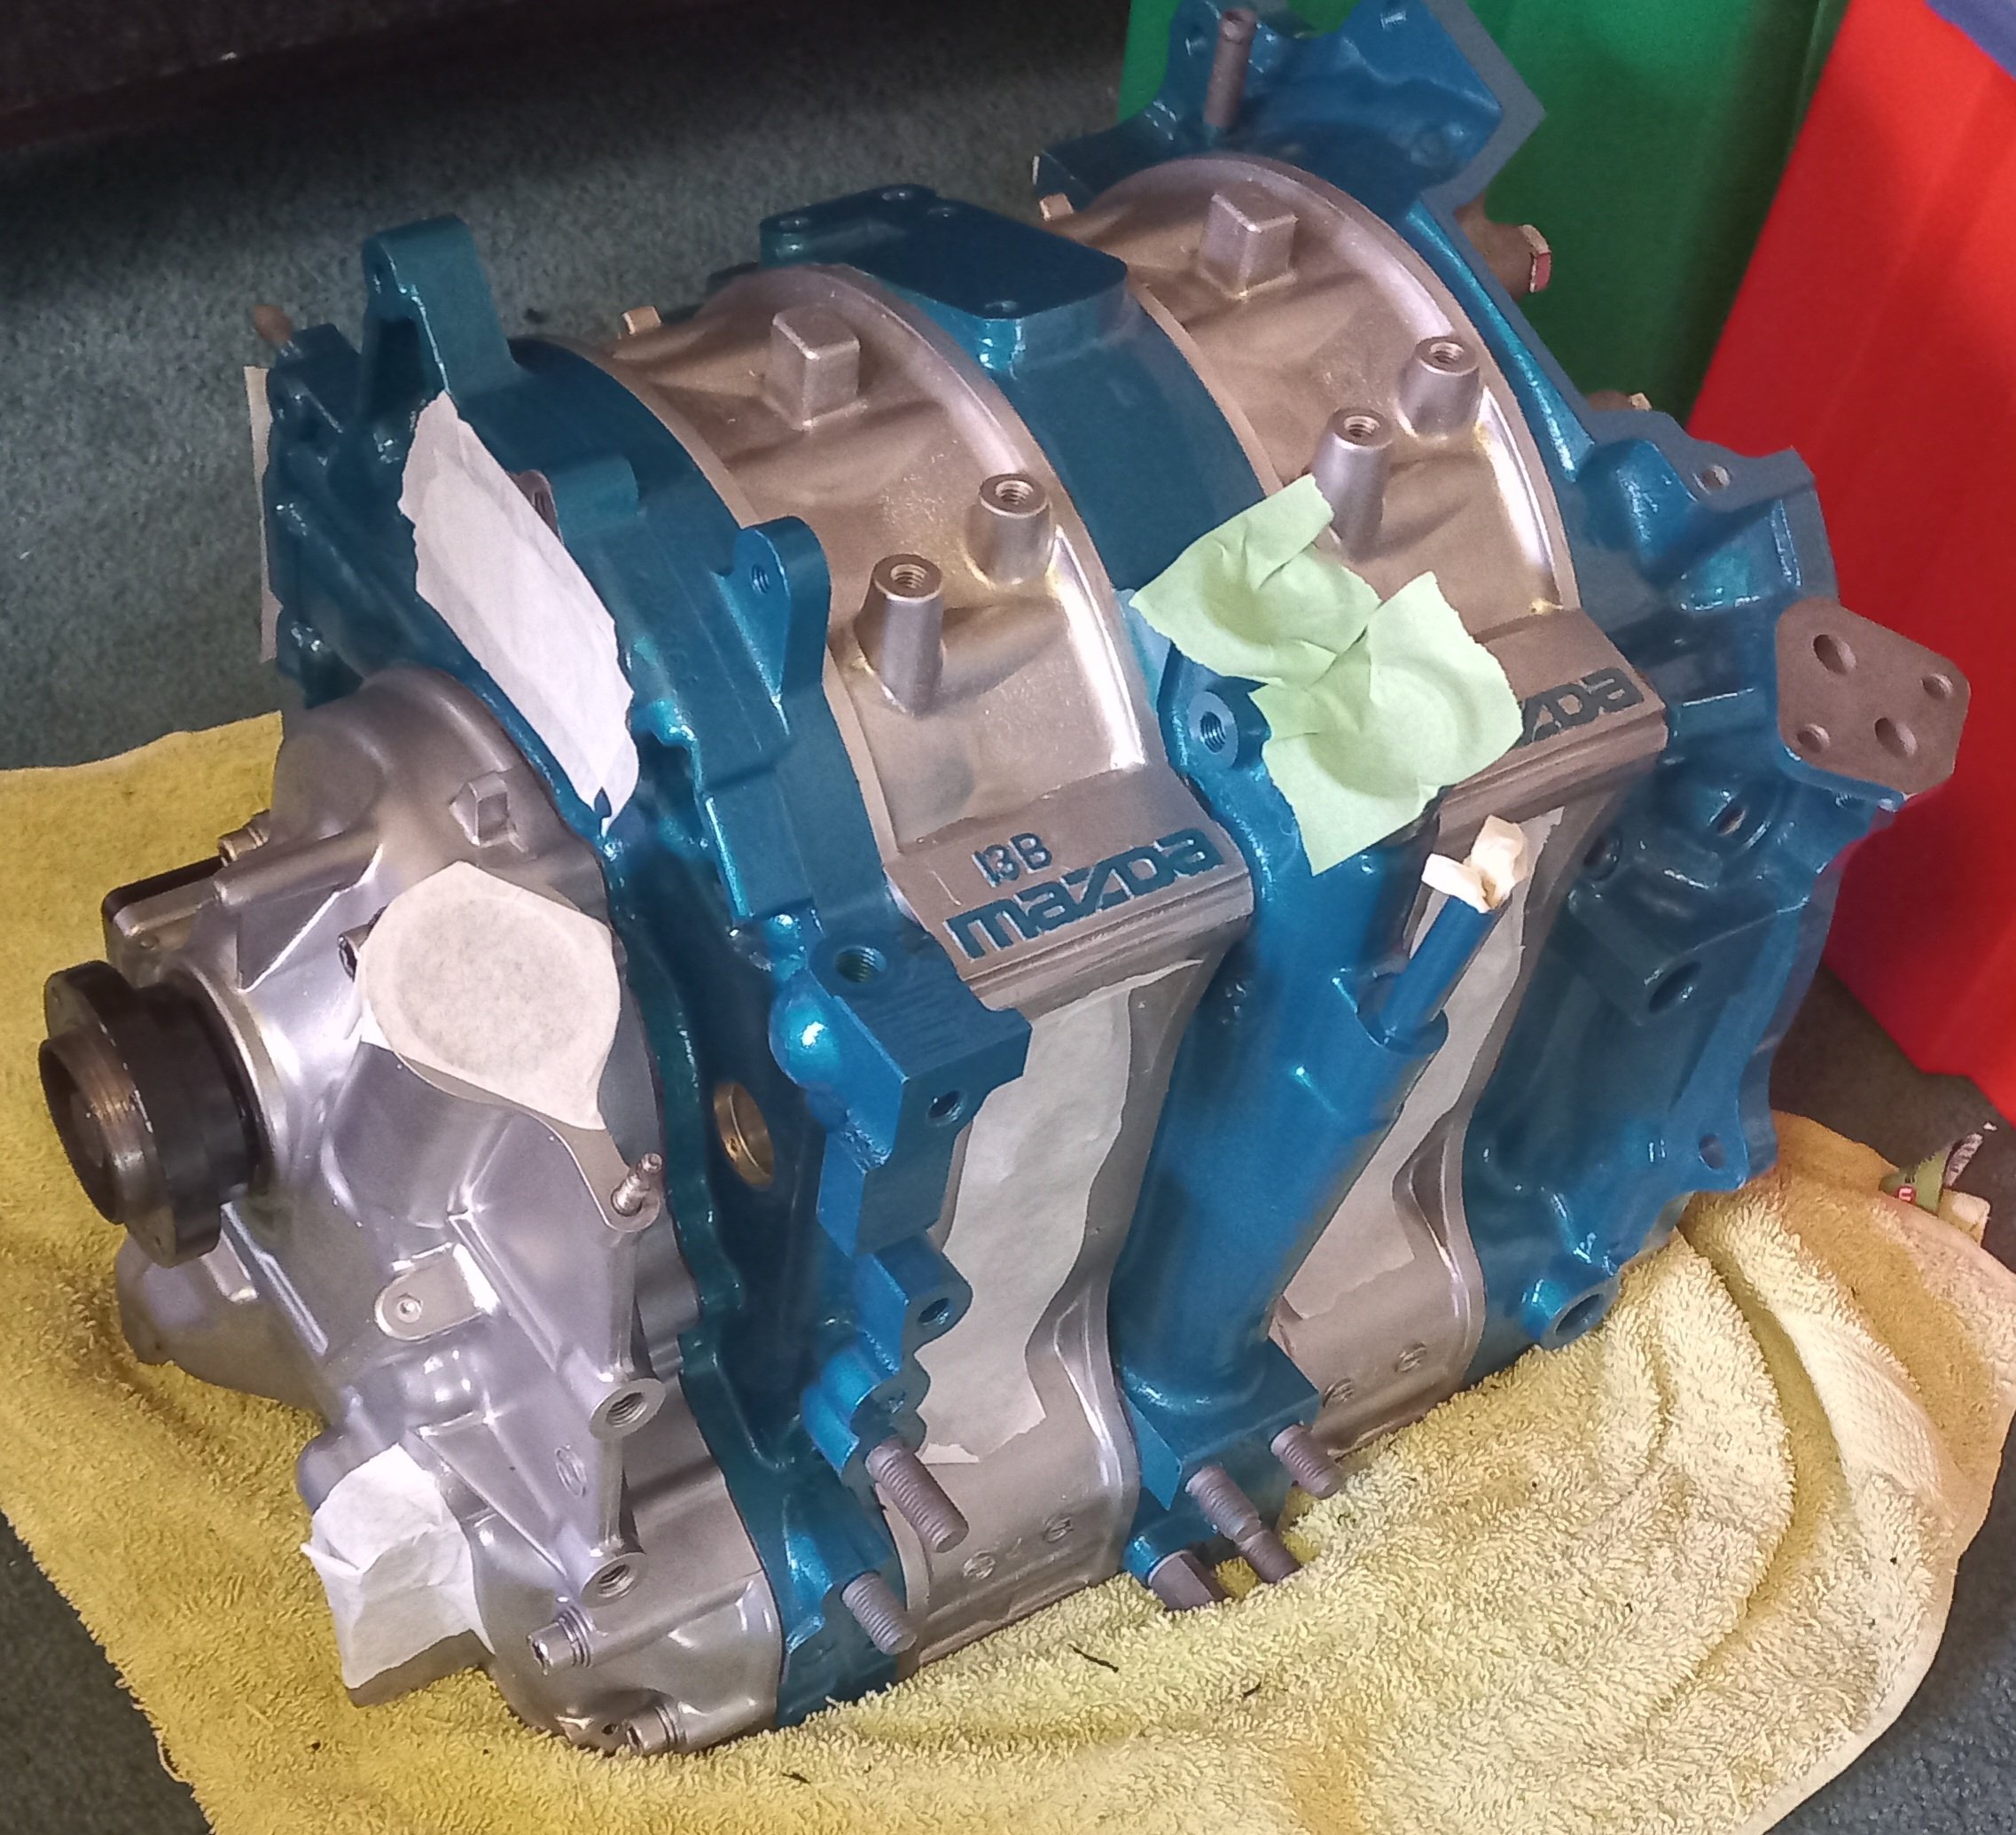
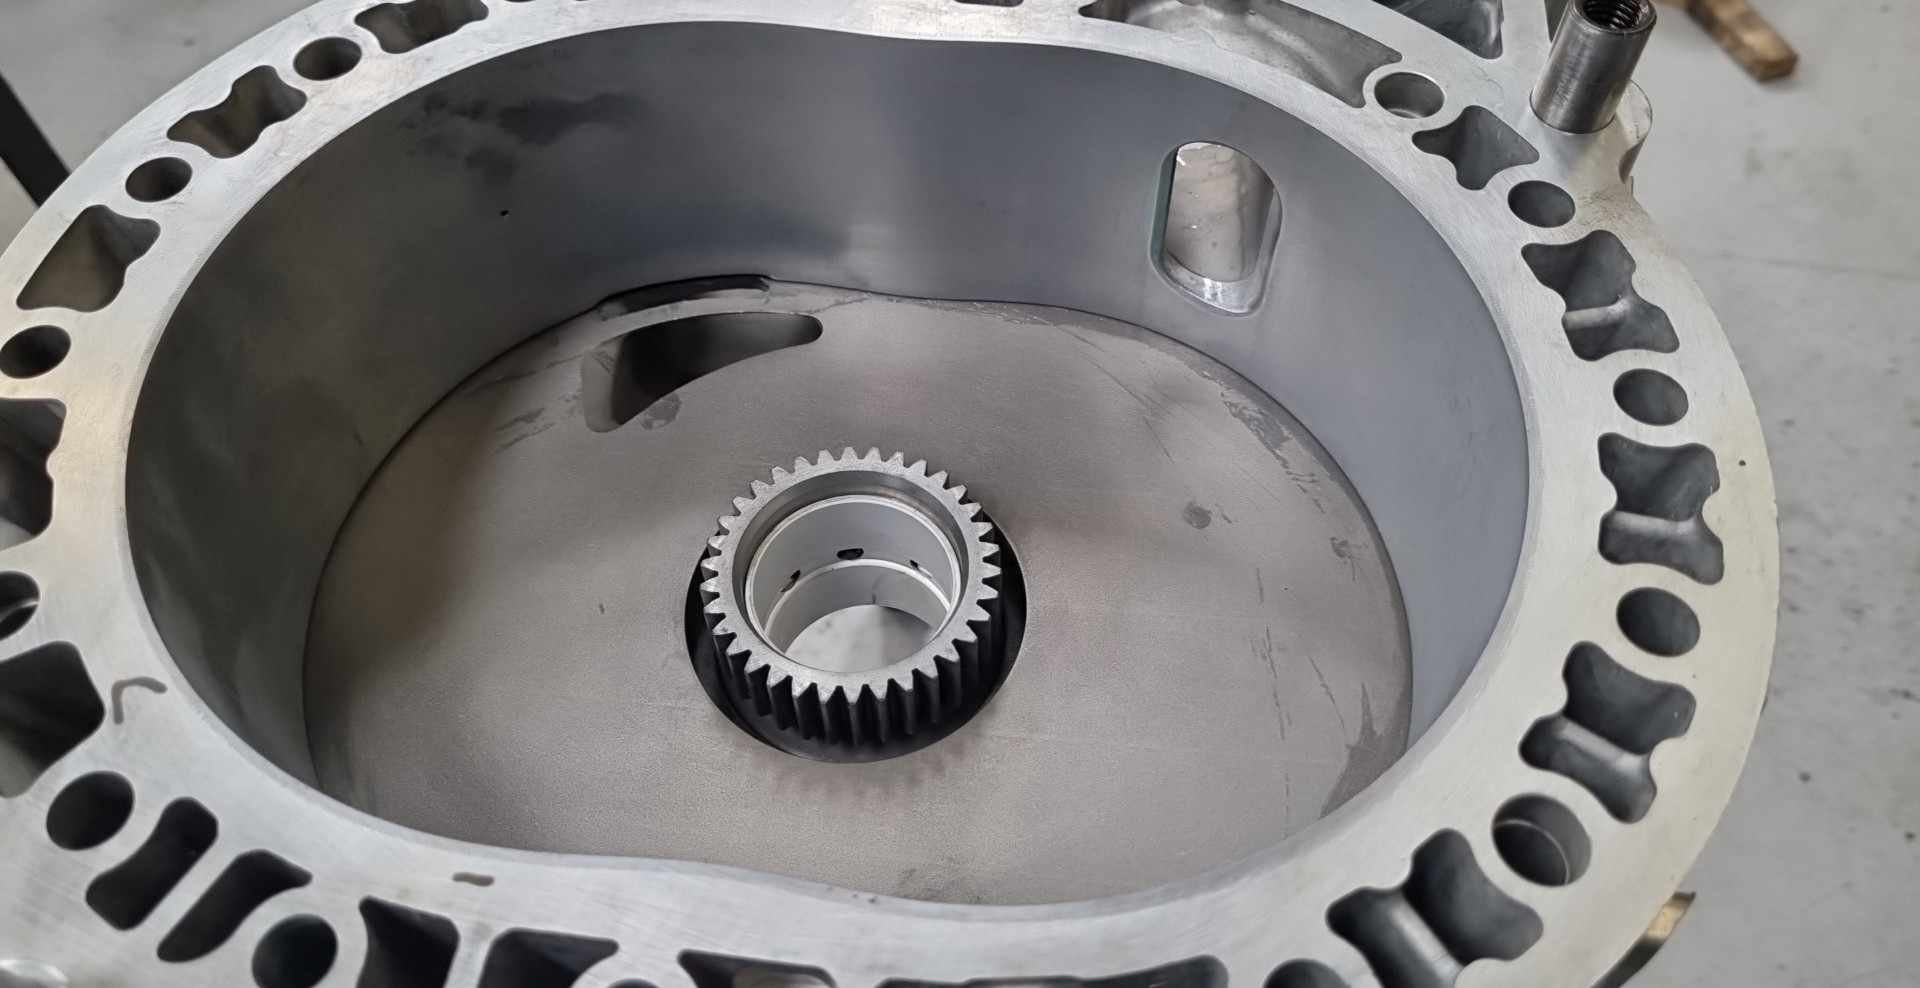
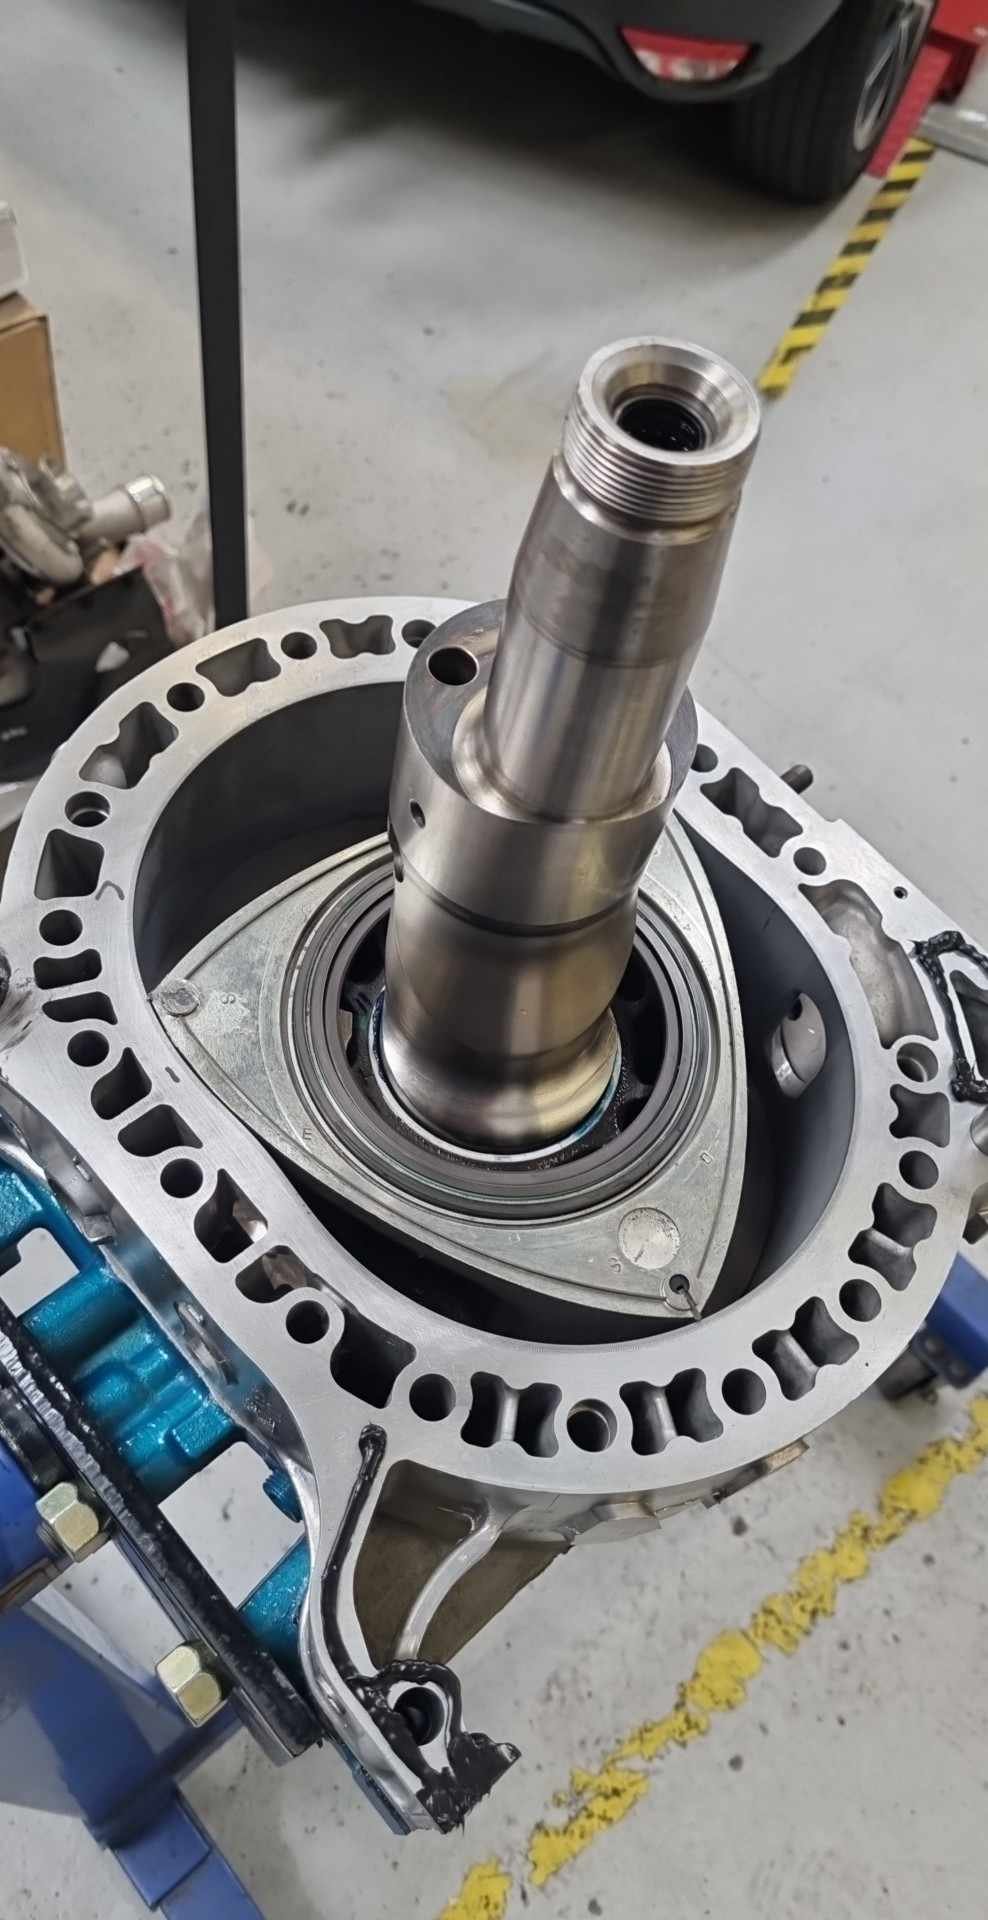
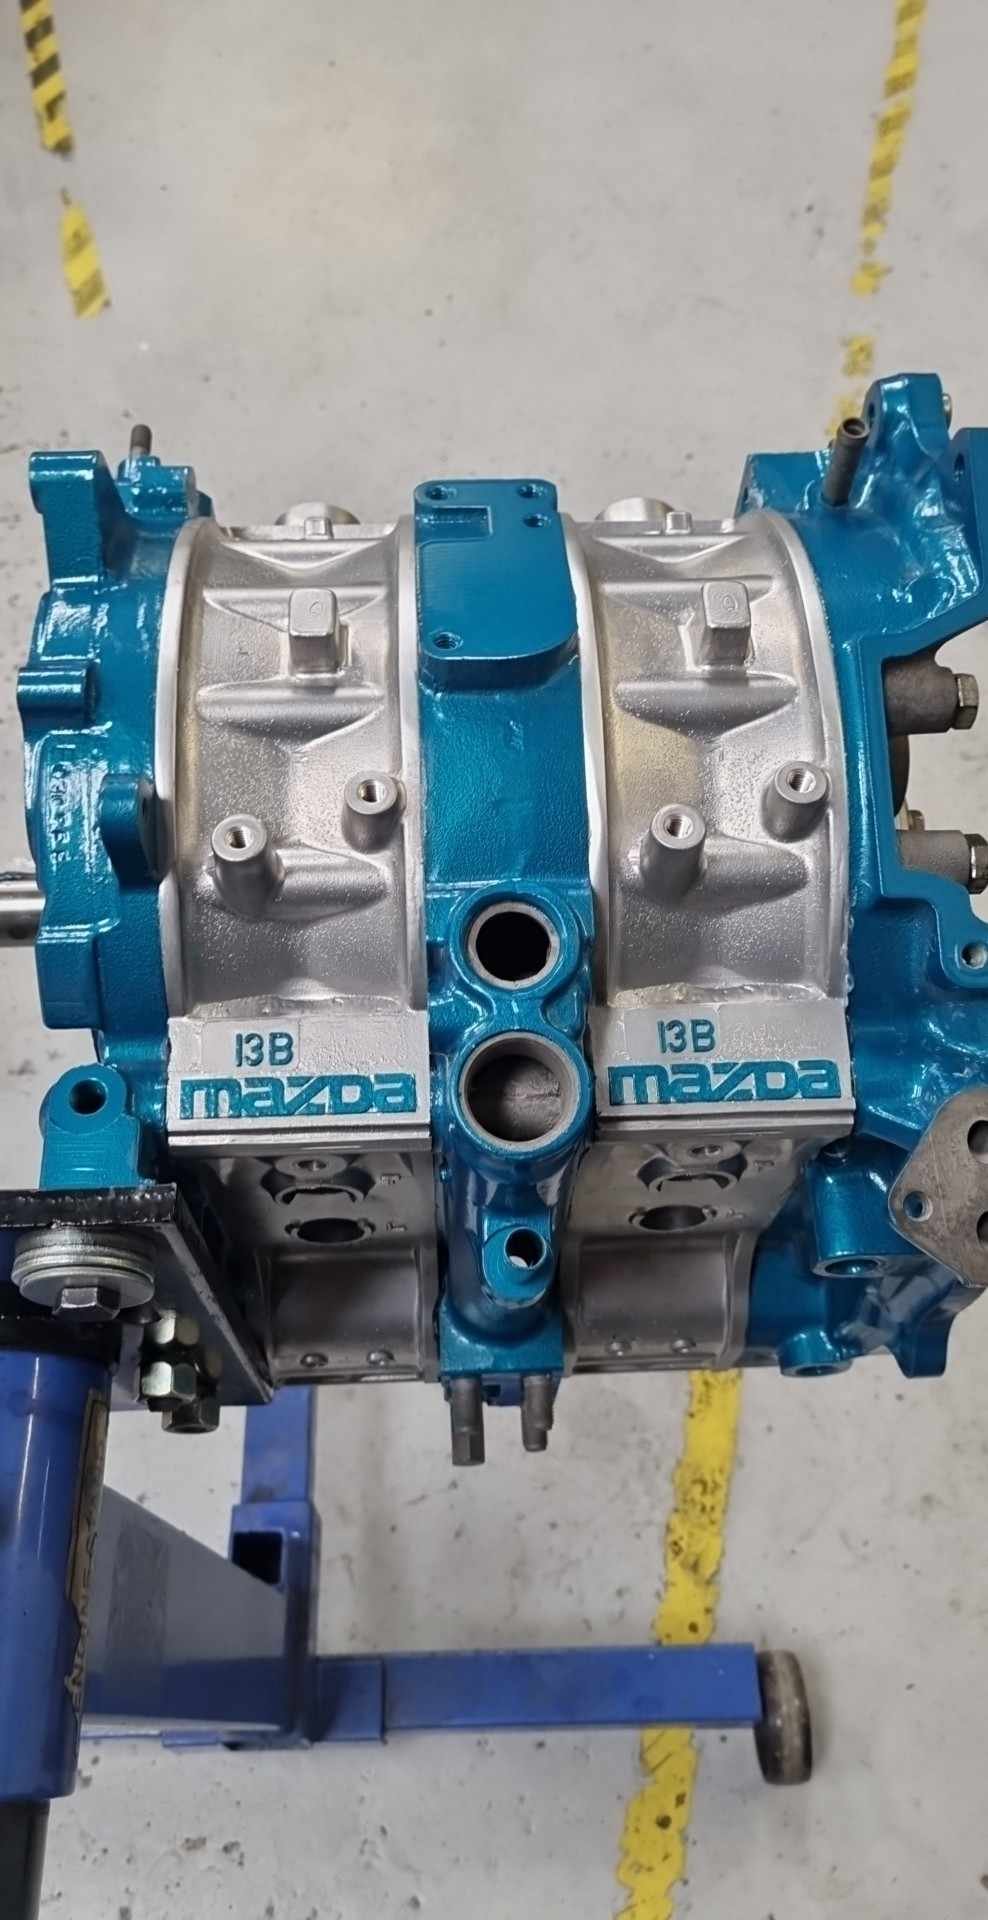
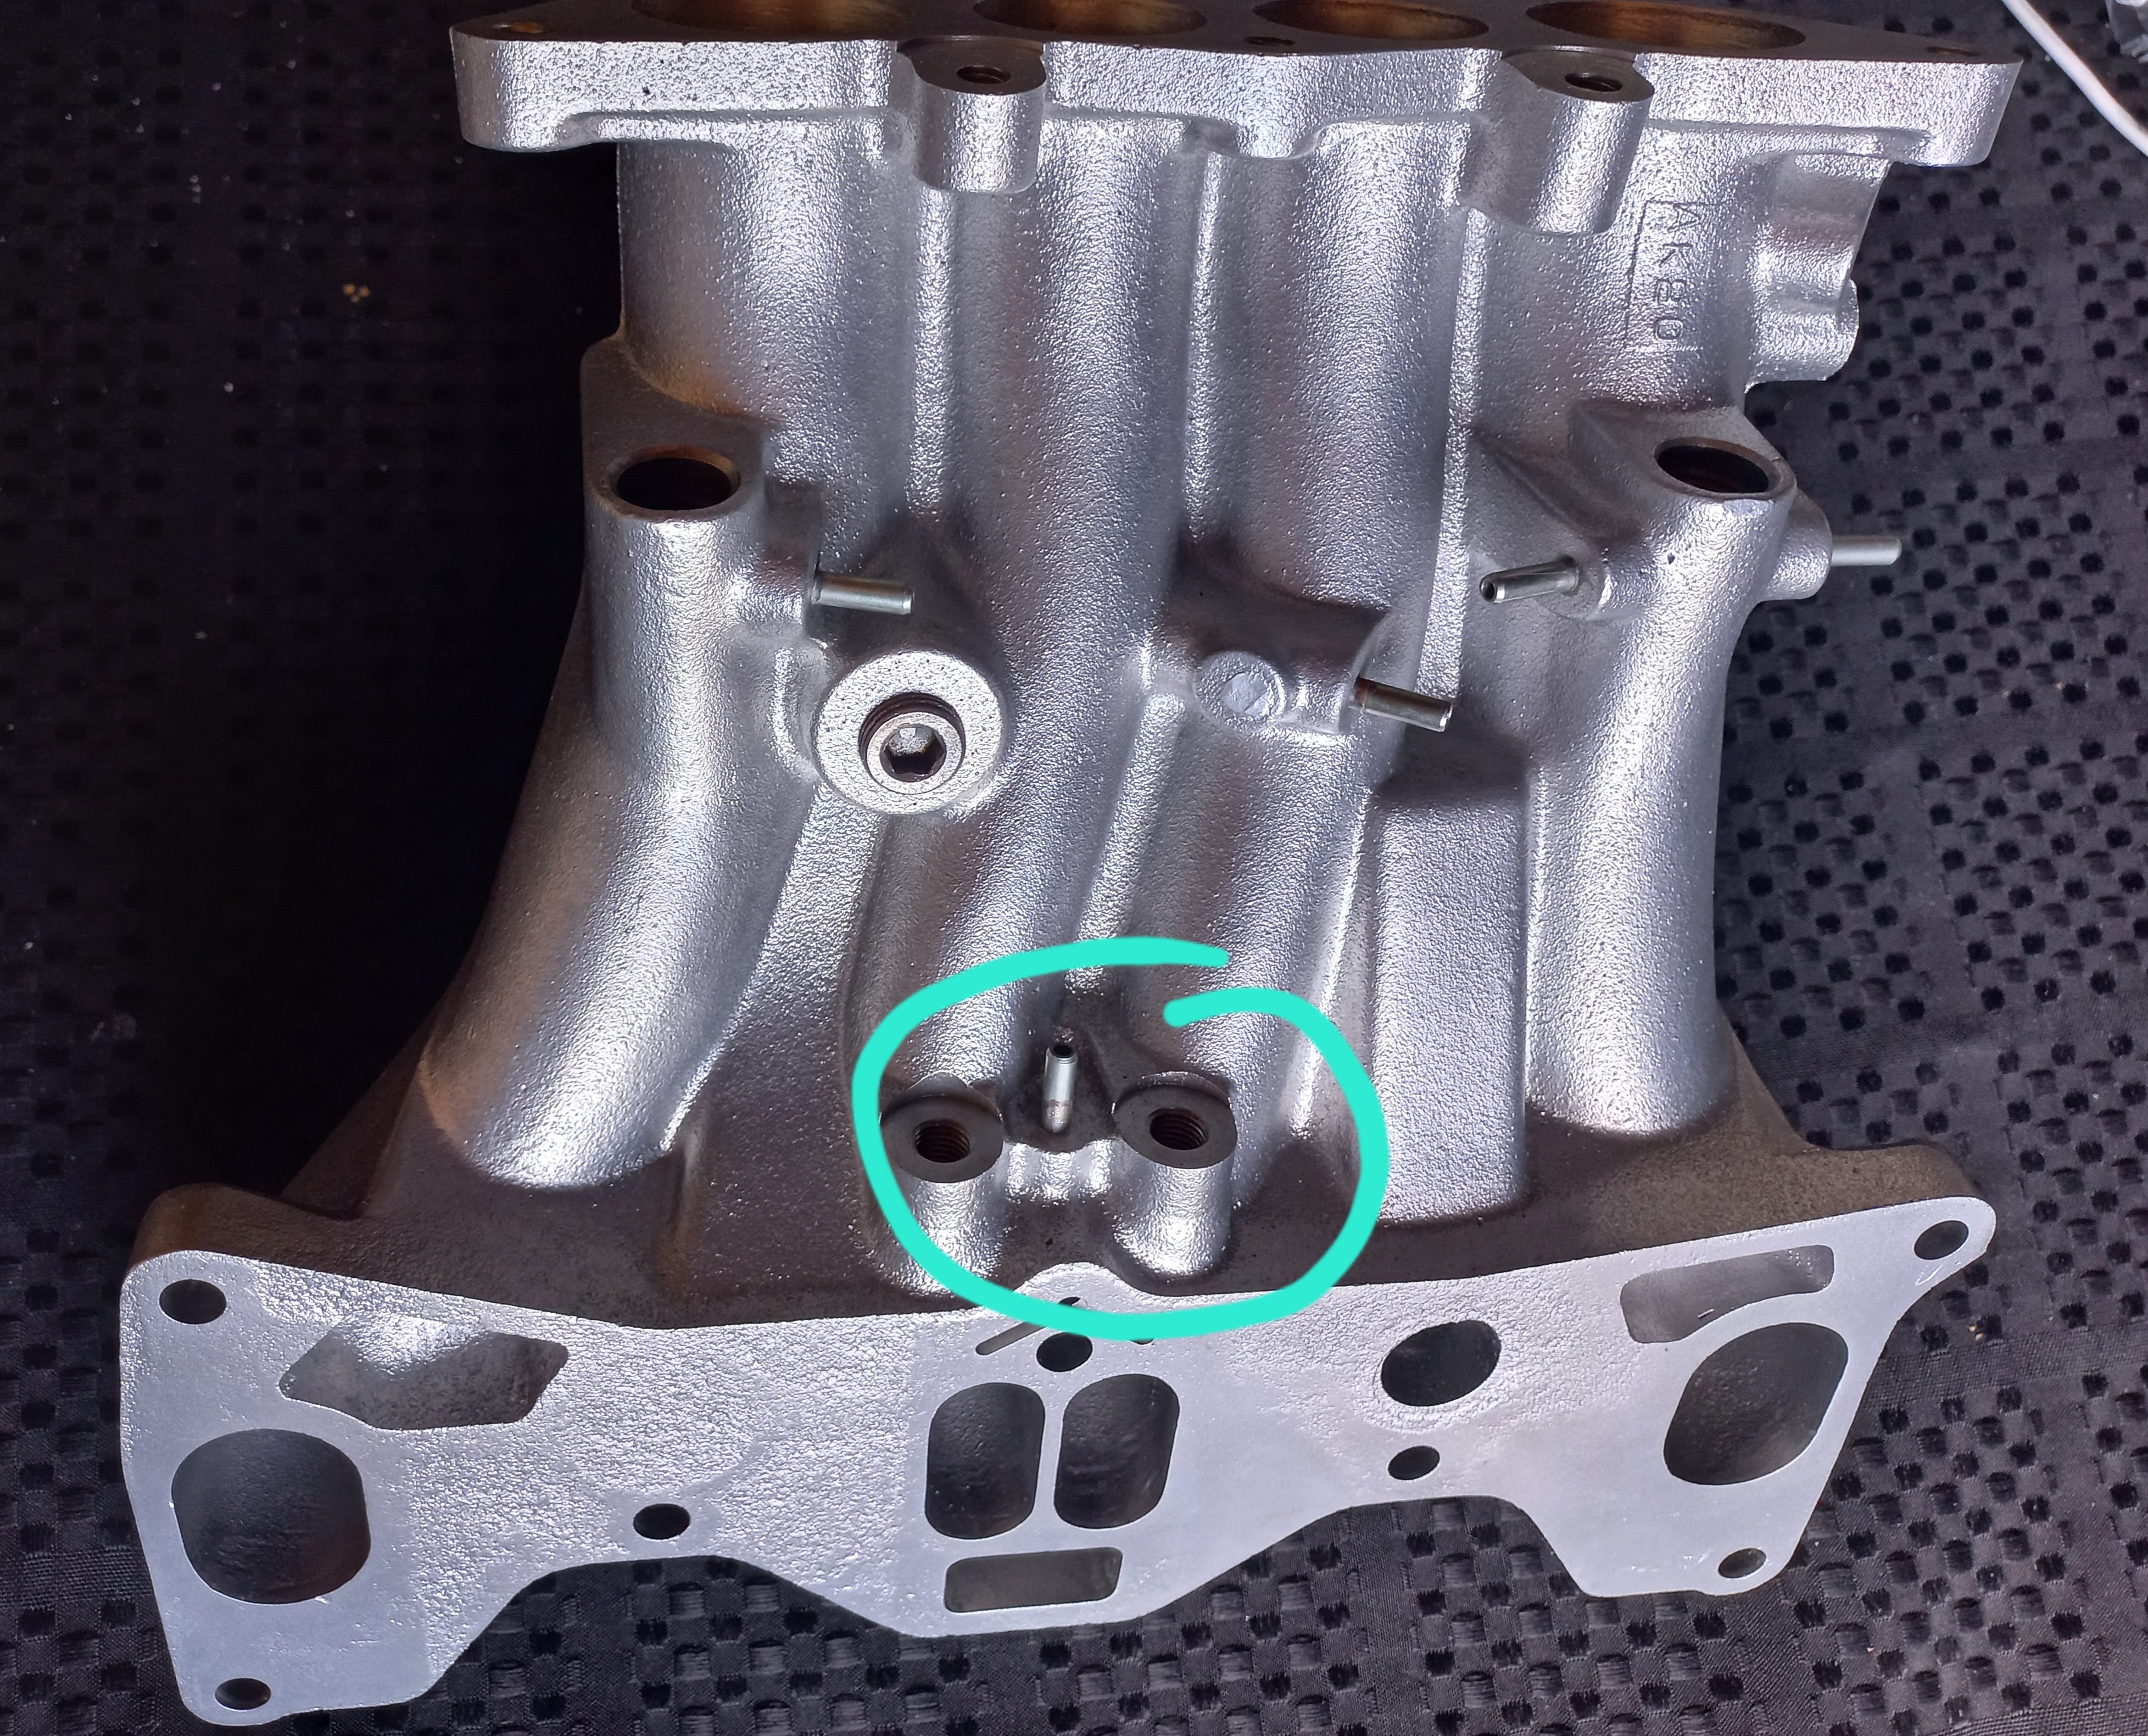
Rethinking a few things. Turned down FD housings over FC due to cost. Been playing on my mind a bit cos inside chroming better finish hence longitivity. Lucky my FC ones not notch yet for bridgeport but oniy vapour blasted. So will bag up and put in their boxes for the day that NLA and worth heaps. Also rethink throttle body. SCR has a much better AM flowing product which bolts onto the lower FC intake. So all the bother vapour, modding throttle and expansion pipe for nout now hahaha. Its only money, todays effort pulling out plugs/loom and other deleted AC, emmision and factory turbo bits..happy cos only have coolant lines for engine block and heater core moving on..much nicer, cleaner and no risk of leaks. Boring pics.. old post engine pulled and current look.
1 point
-
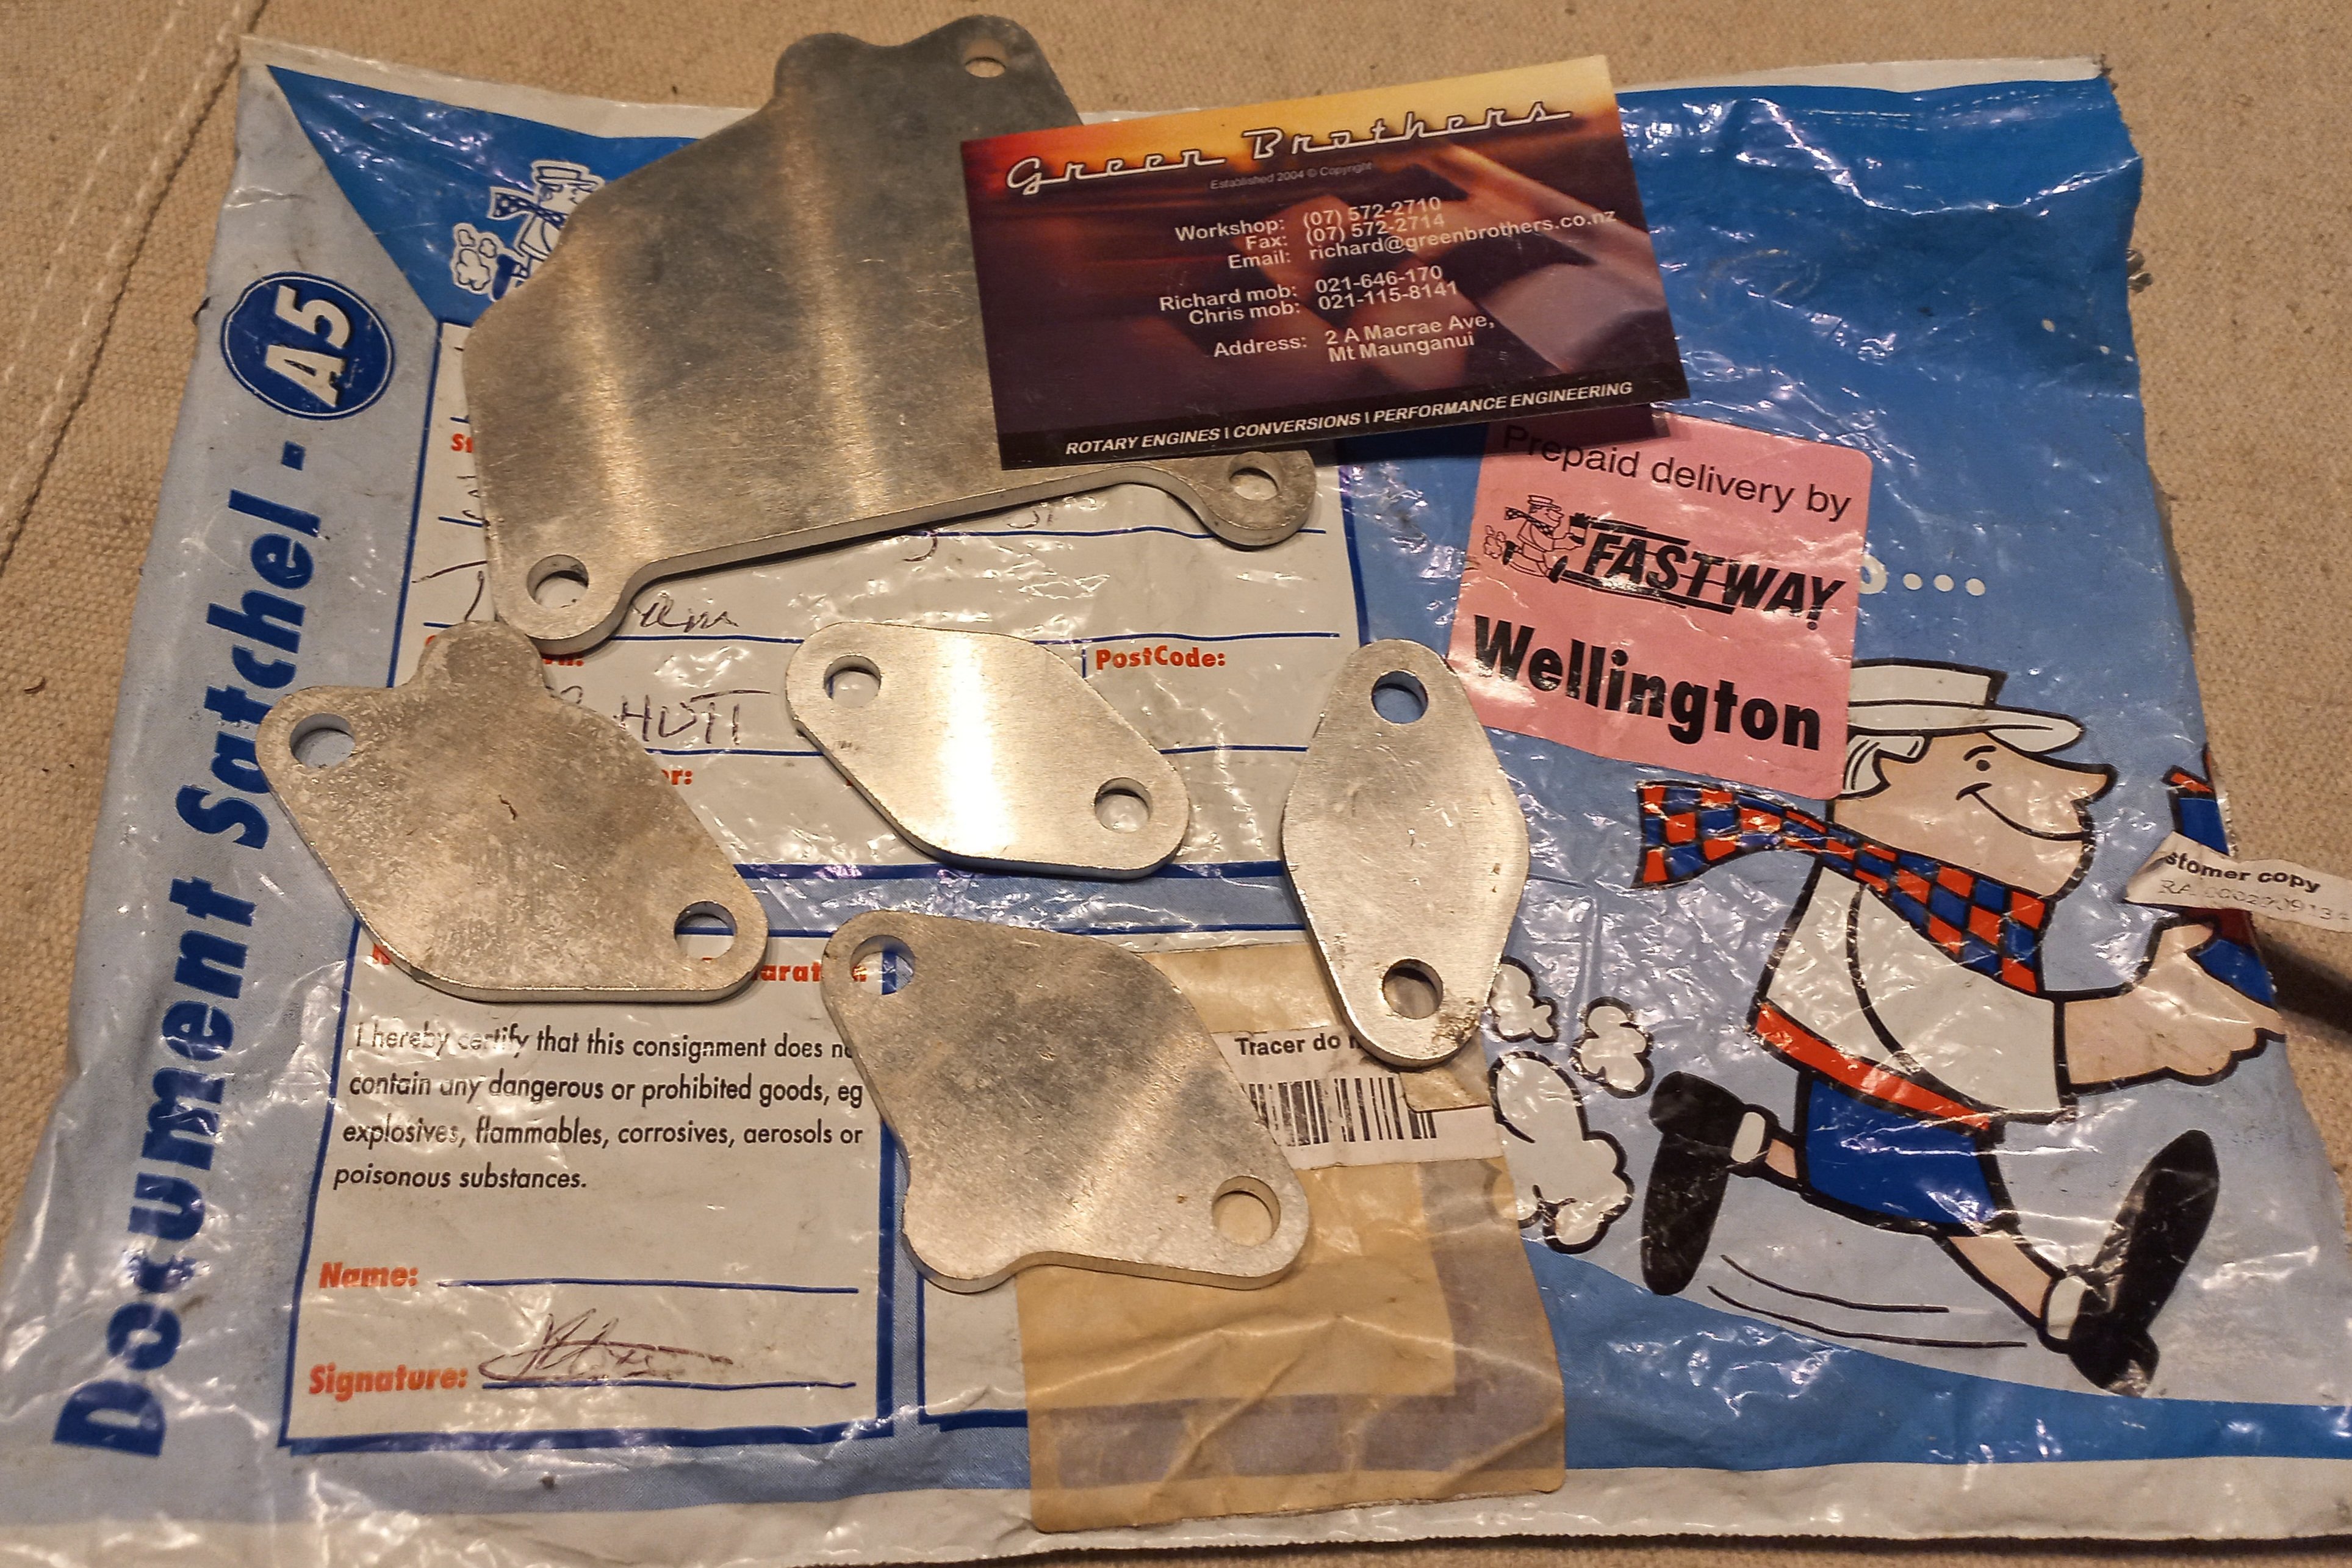
Then I discovered the blank plates I bought over a decade ago from green brothers when I swapped over exhaust ffs. Thicker but the EGR follows the cast base better, I'll prob get it blasted and replace it when i get my diff castings vapour blasted. Builder currently rebuilding one of his previous builds on a car he sold over 15yr ago. This car https://youtu.be/LdL2i7DrhtE?si=H5QInxKzqZSzLgL0 Dropped HT lead apparently so blew a carbon seal so no iron/housing damage, my keg is next in line..
1 point
-
1 point


.thumb.png.b2aee08688778d18bdc7b3e3c1852d9c.png)


This leaderboard is set to Auckland/GMT+12:00